


![Alternative Trench Crusade Miniatures? Trench Missionaries Review | Wargames Atlantic [7 Days Early Access]](https://images.beastsofwar.com/2026/03/unboxing-wargames-atlantic-trench-missionaries-coverimage-225-127.jpg)


The Project Project


Recommendations: 317
About the Project
A hobby log to track the year of The Project Project. Trying to break my habit of leaving projects half finished in my wake... can this old dog teach itself a new trick?
Related Genre: General
This Project is Active
January Project - TMNT Part 6
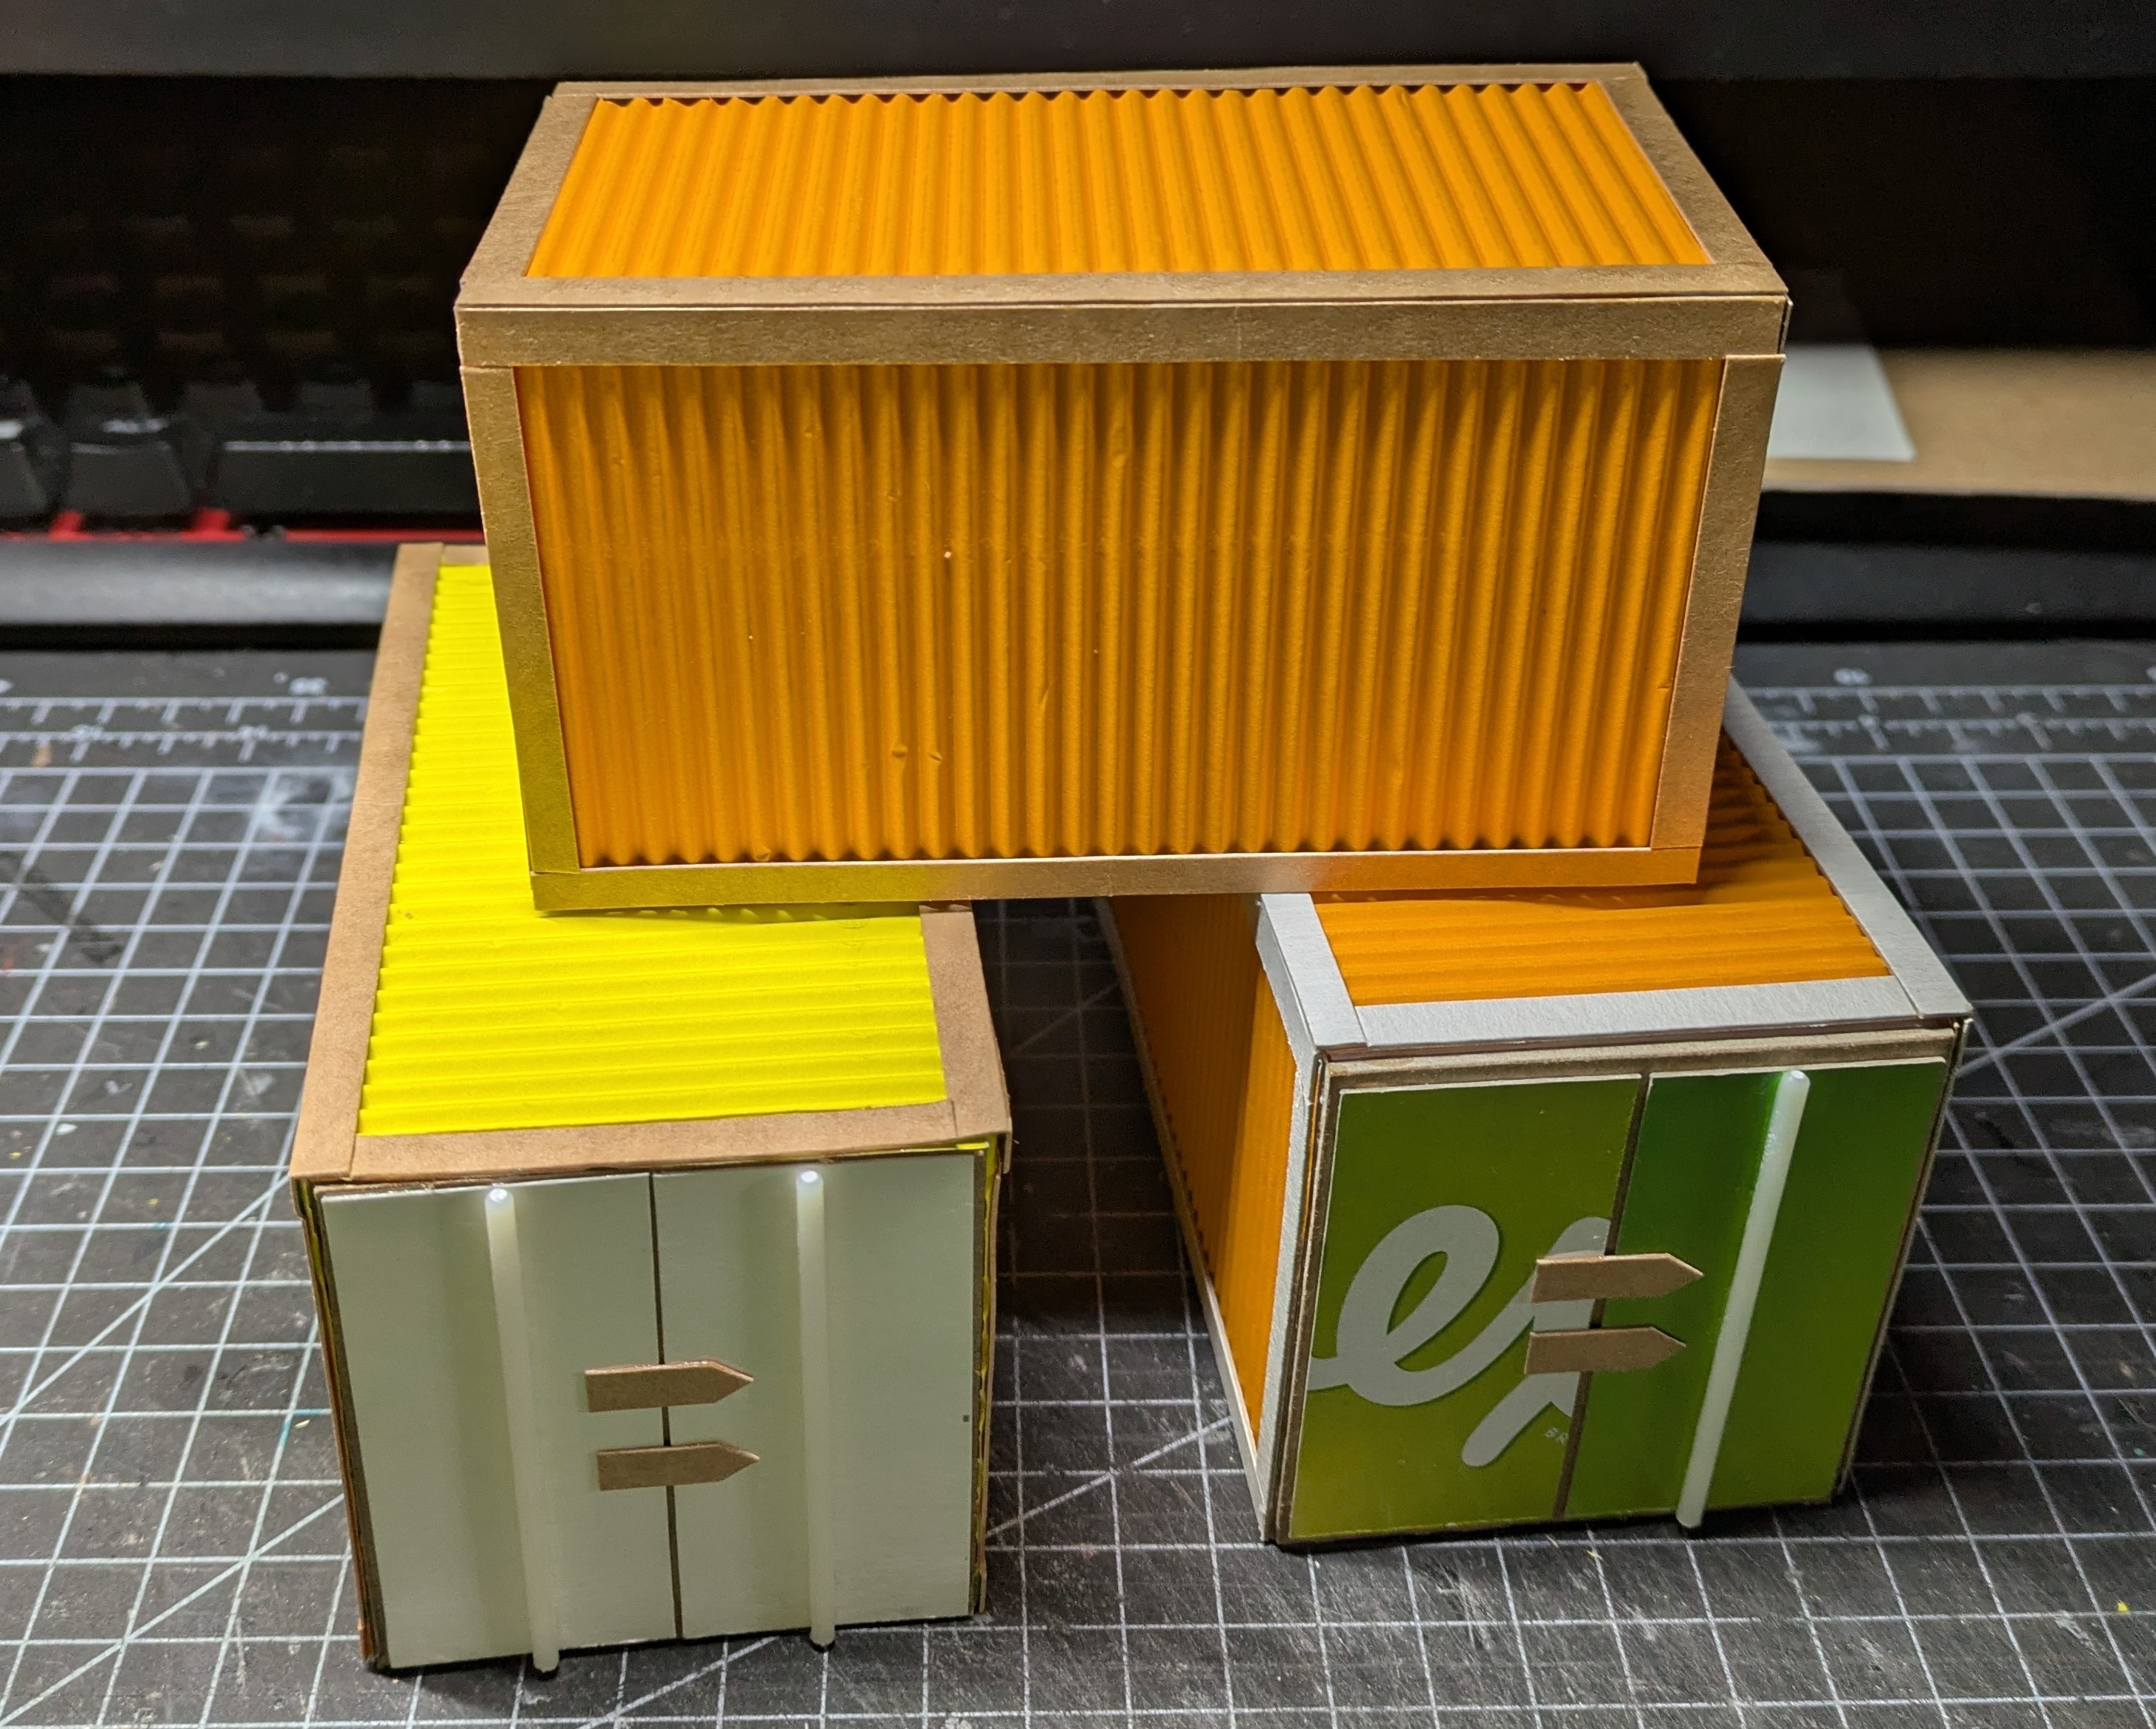
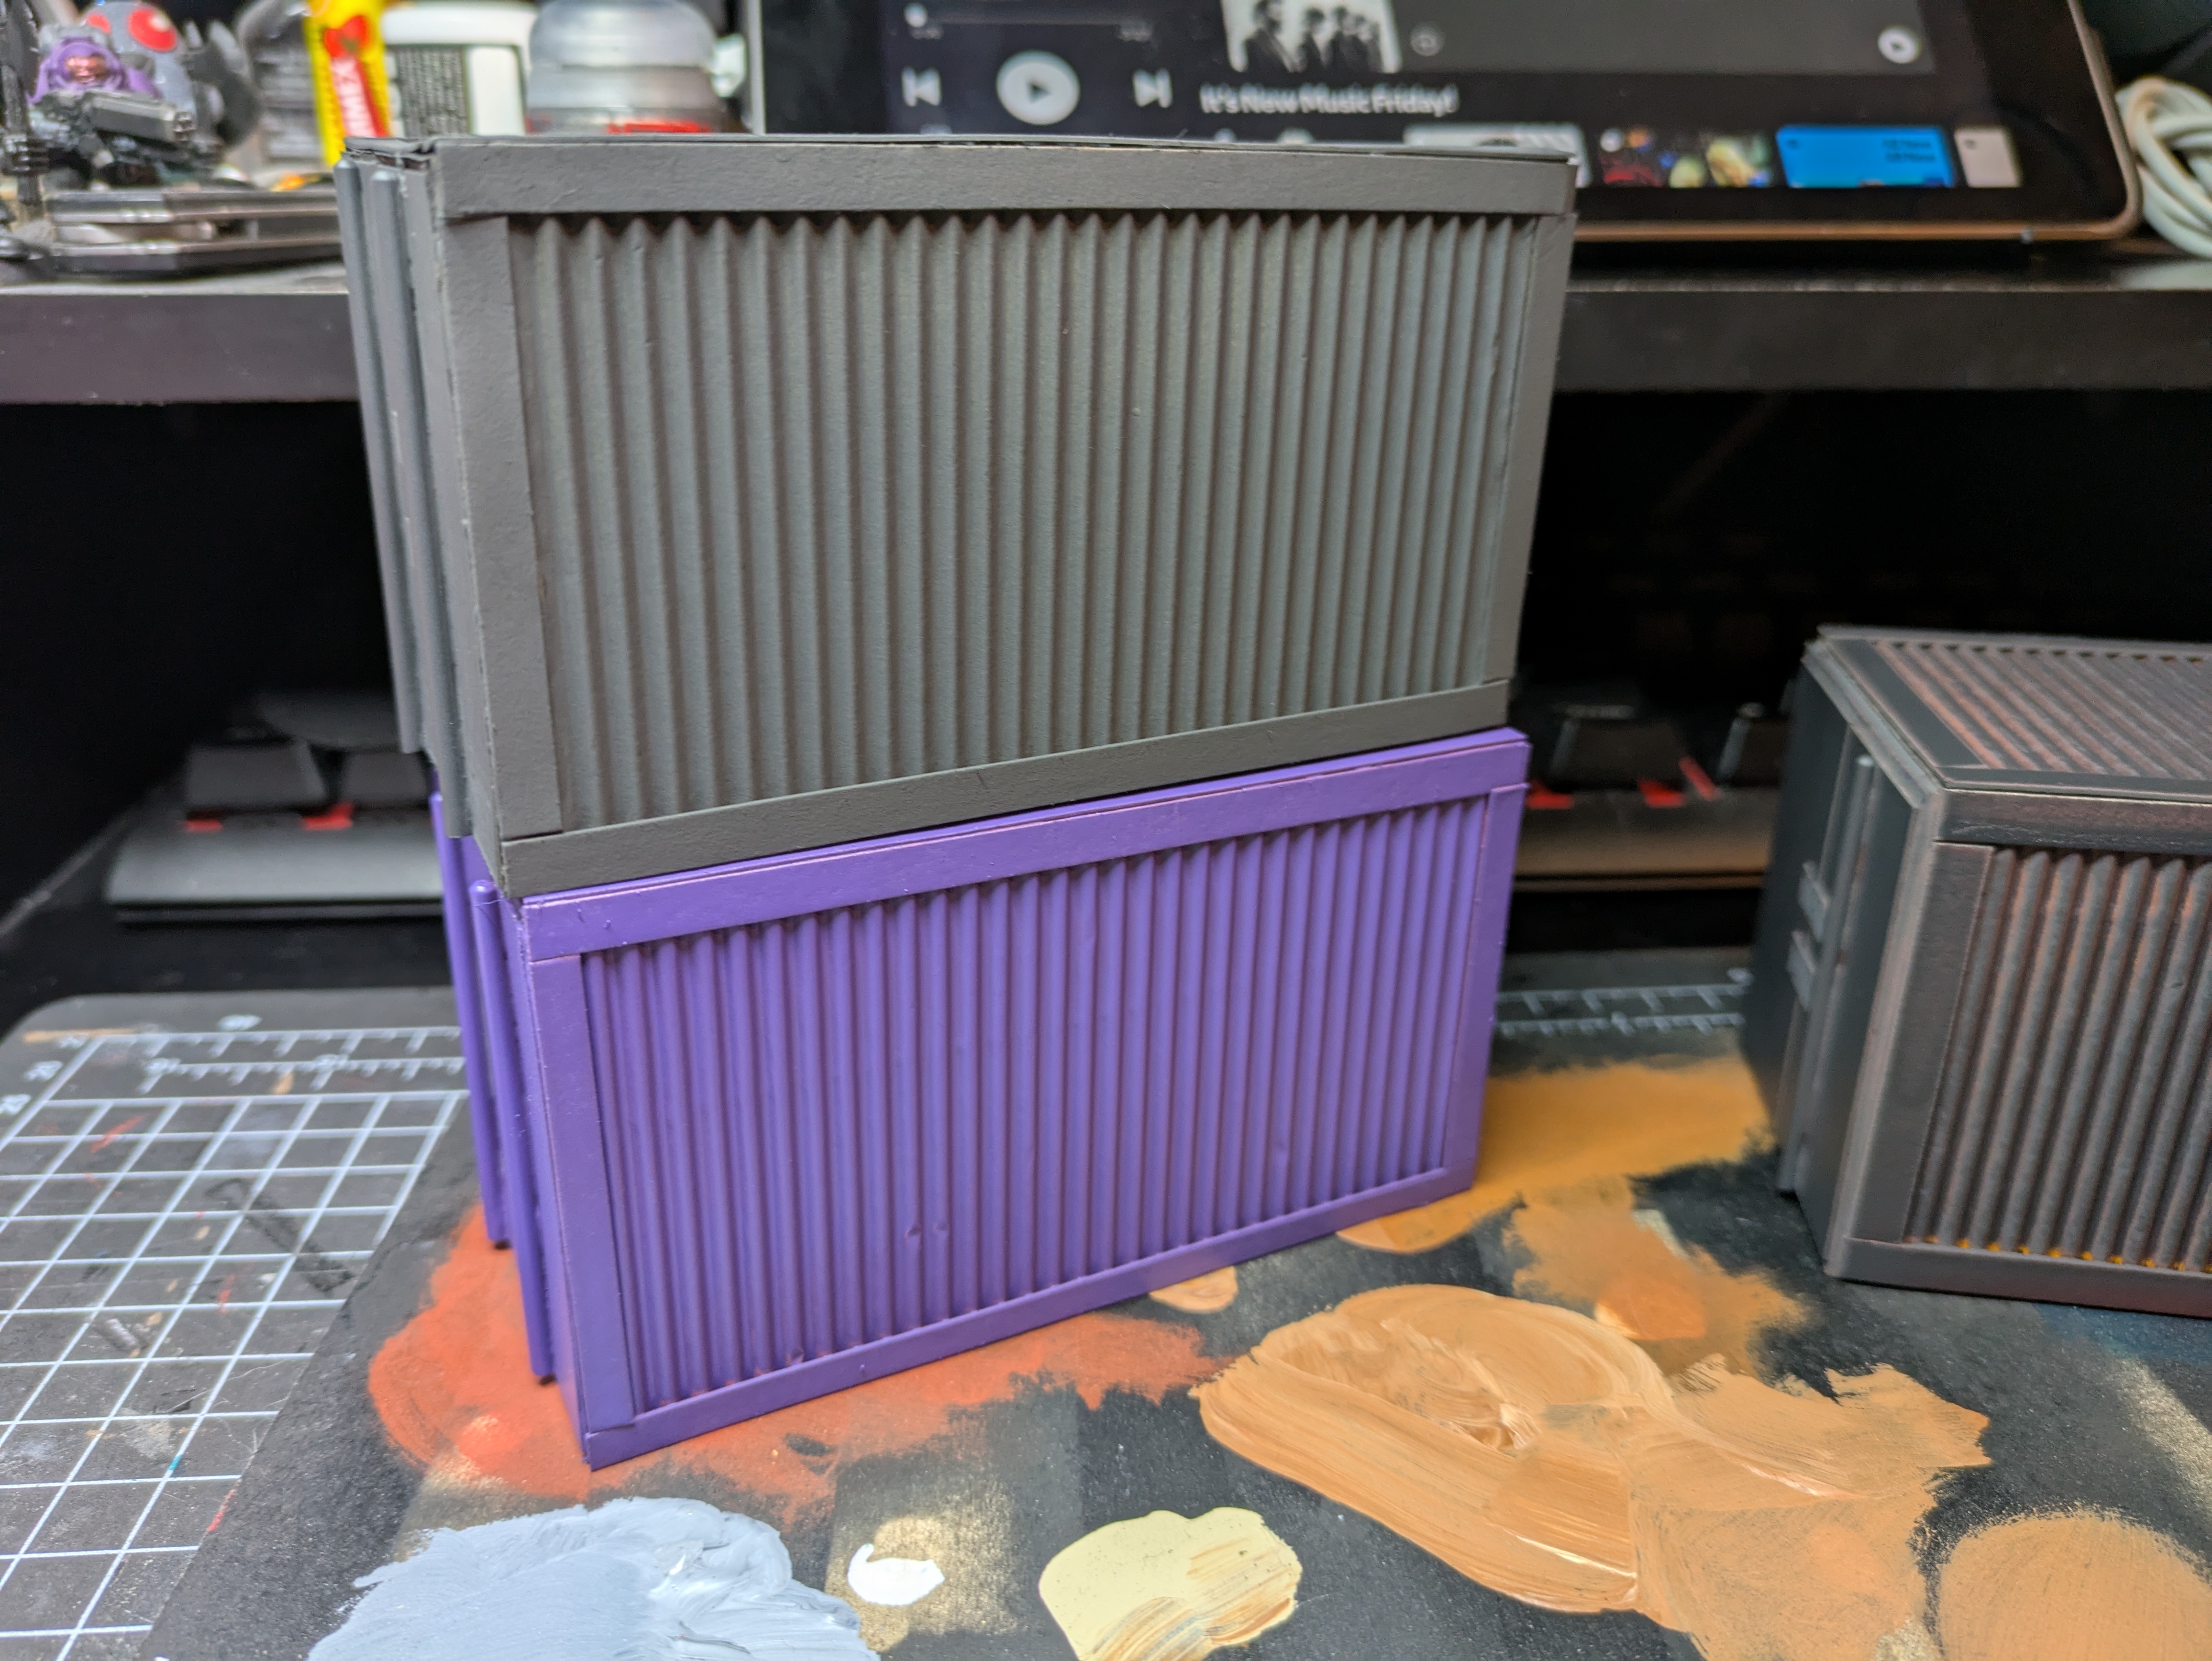
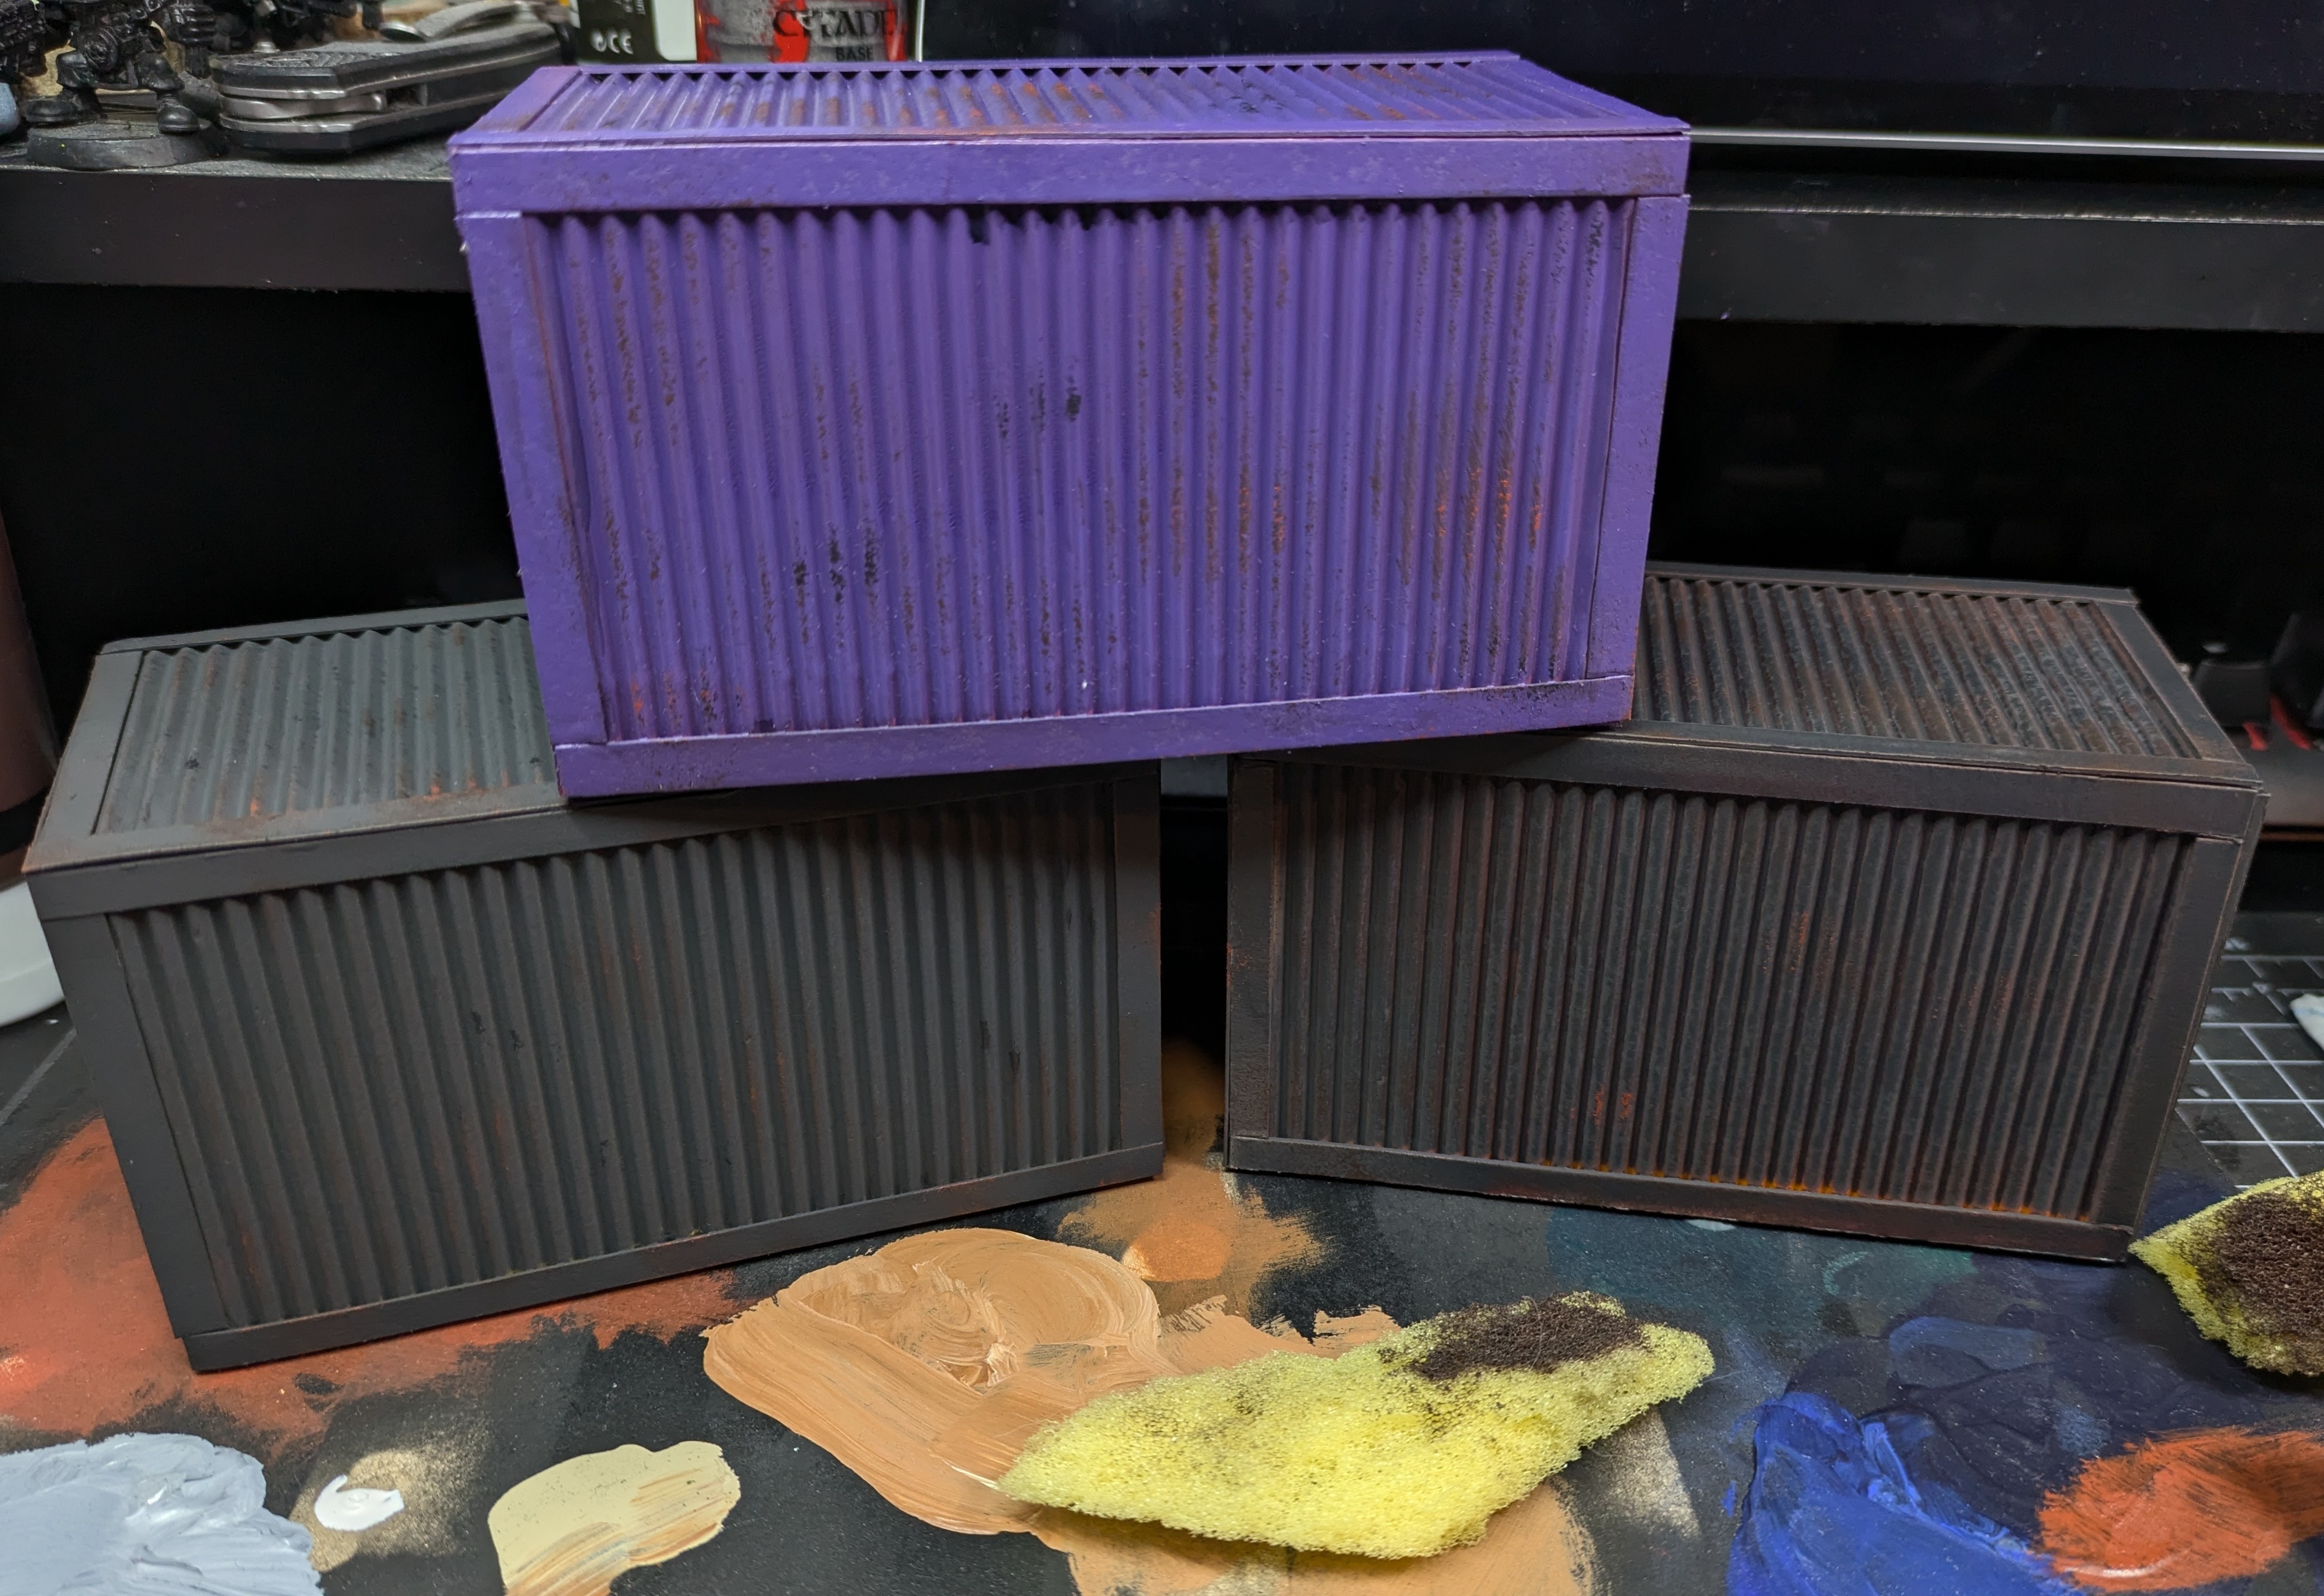
I have several of the 40K shipping containers in my collection but I wanted something a little more generic for modern games and less gothic sci fi. These were made the same way The Terrain Tutor showed in his video but I thought the dimensions were too chunky so I trimmed 5mm off the initial width. By the time all the card is added, the final container is back to his starting size.
So far this is the only place I’ve spent money on this project as I didn’t have any corrugated card. Thankfully Hobbycraft do a good sized bag for £3 so I have plenty for future projects. I’ll probably make more of the containers at some point too but they were pretty time intensive and I’d rather move on to the next thing right now.
January Project - TMNT Part 5
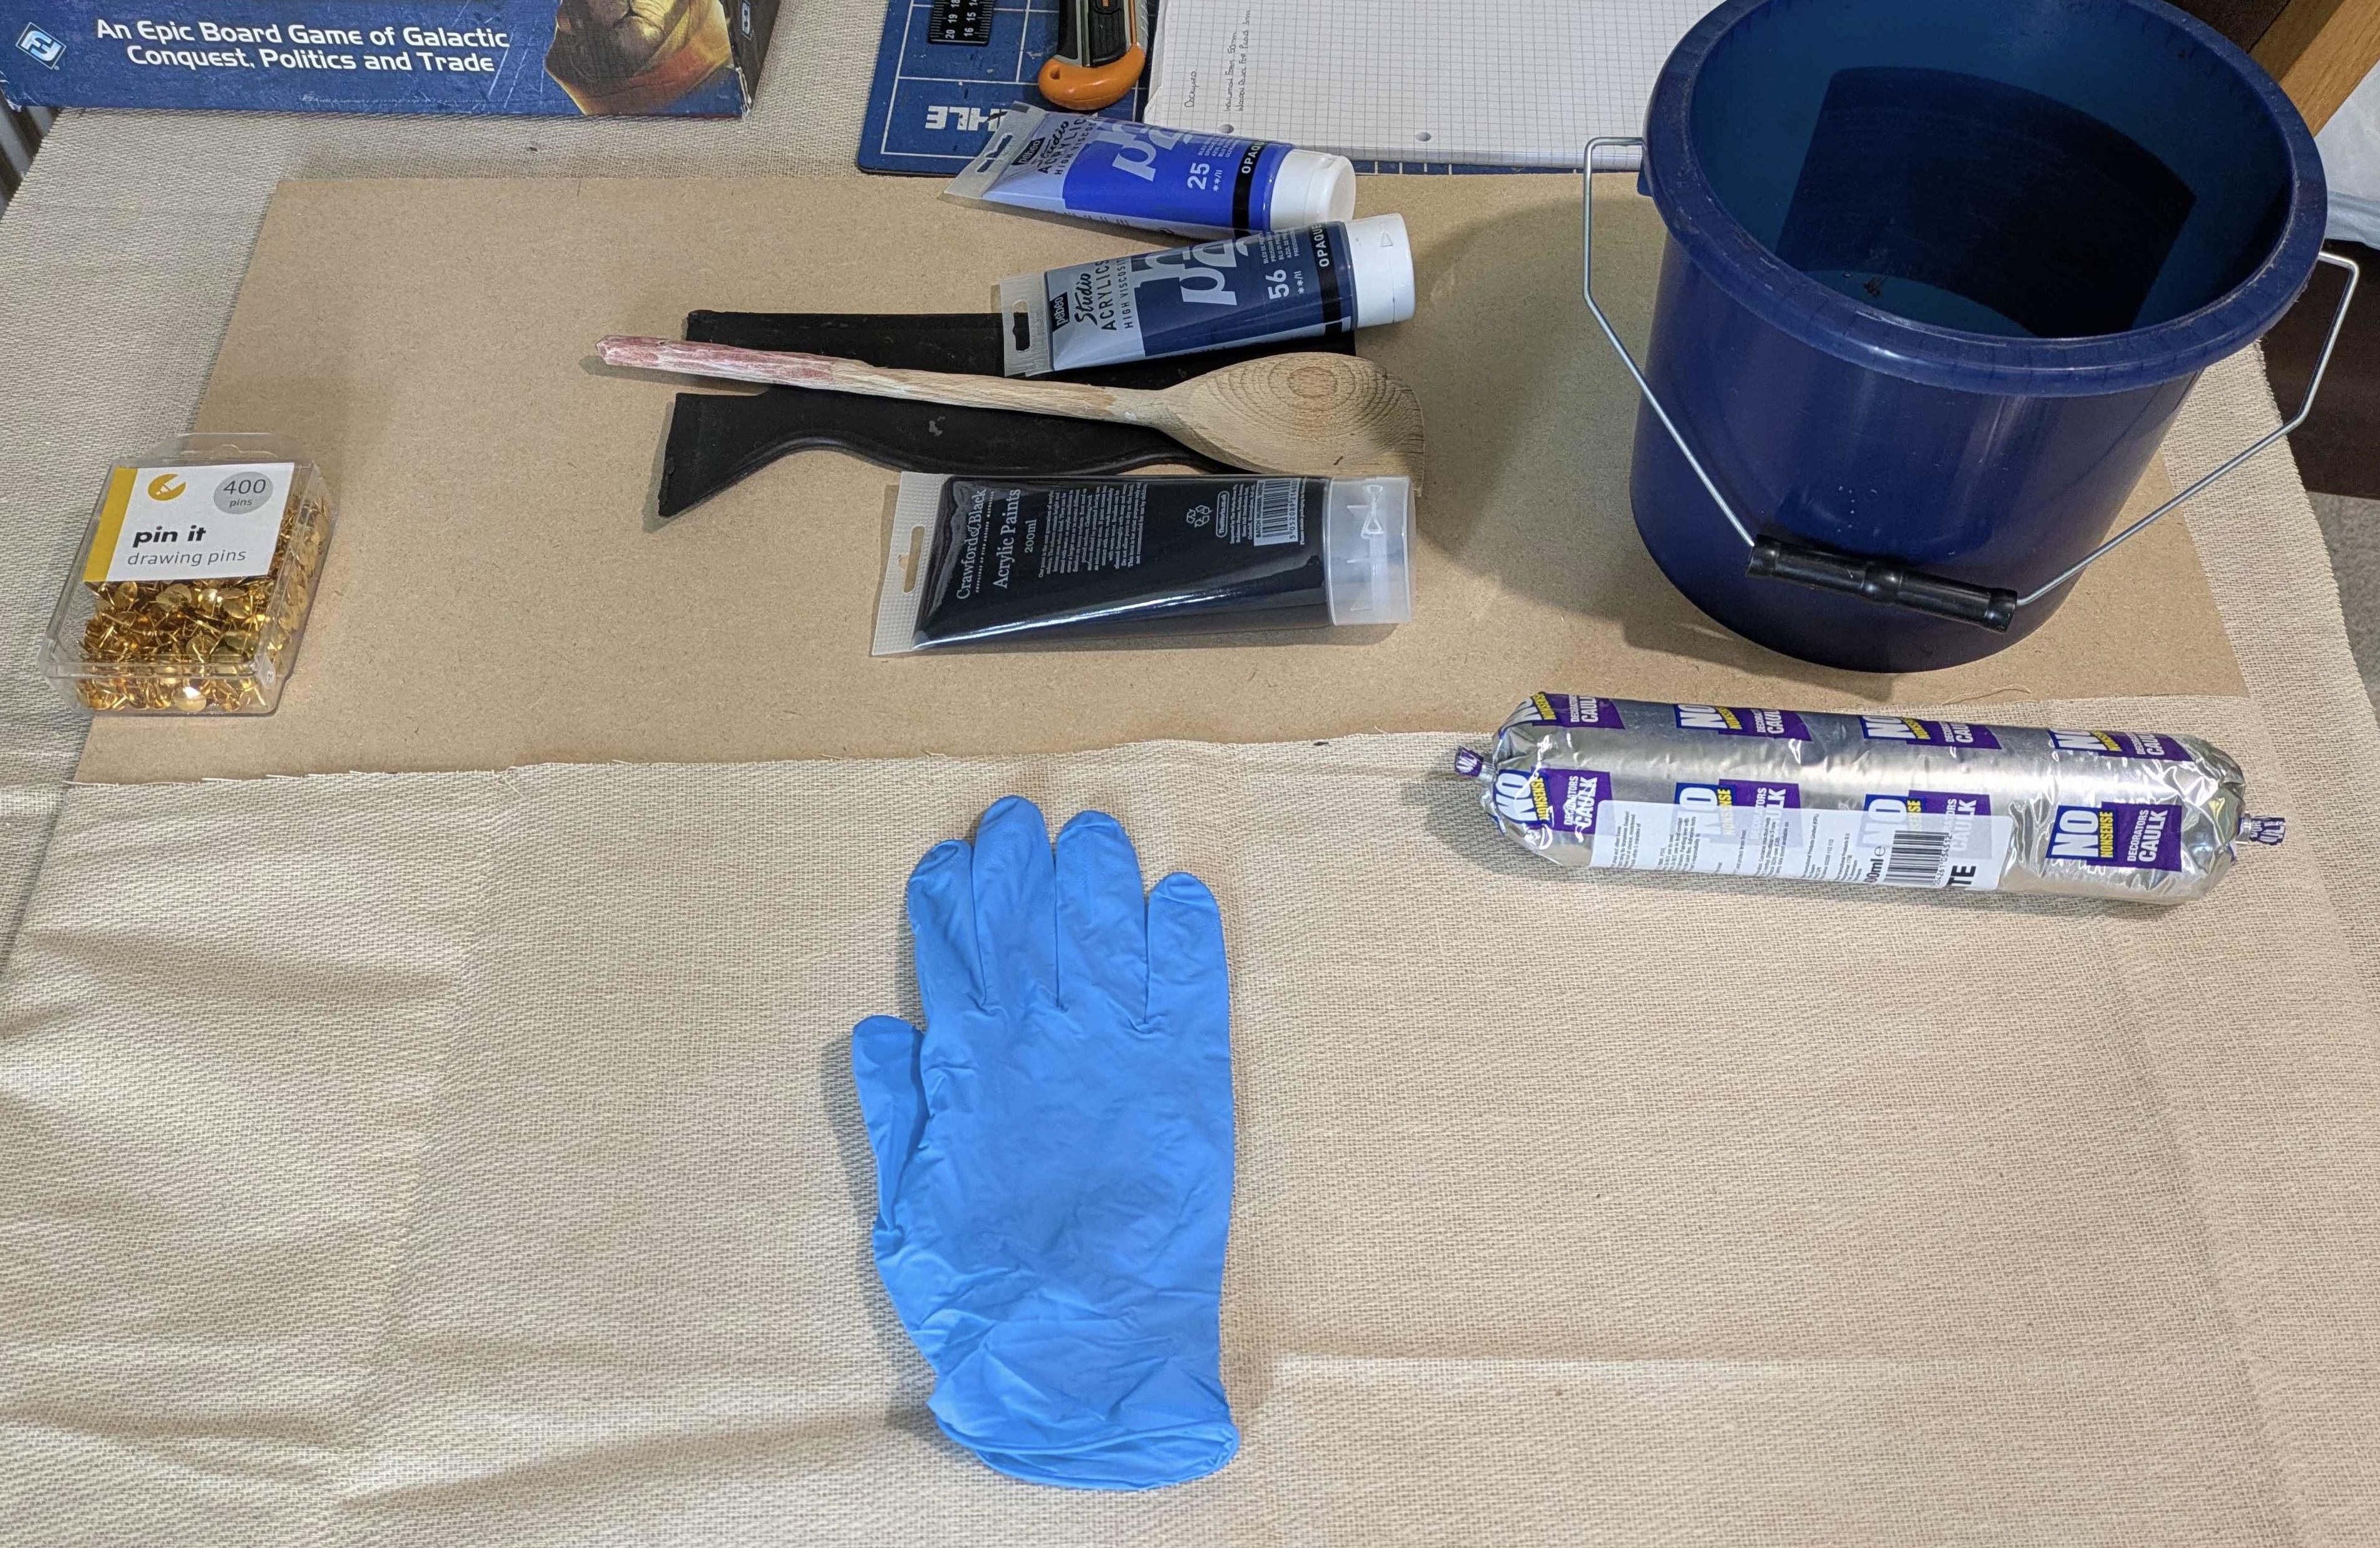
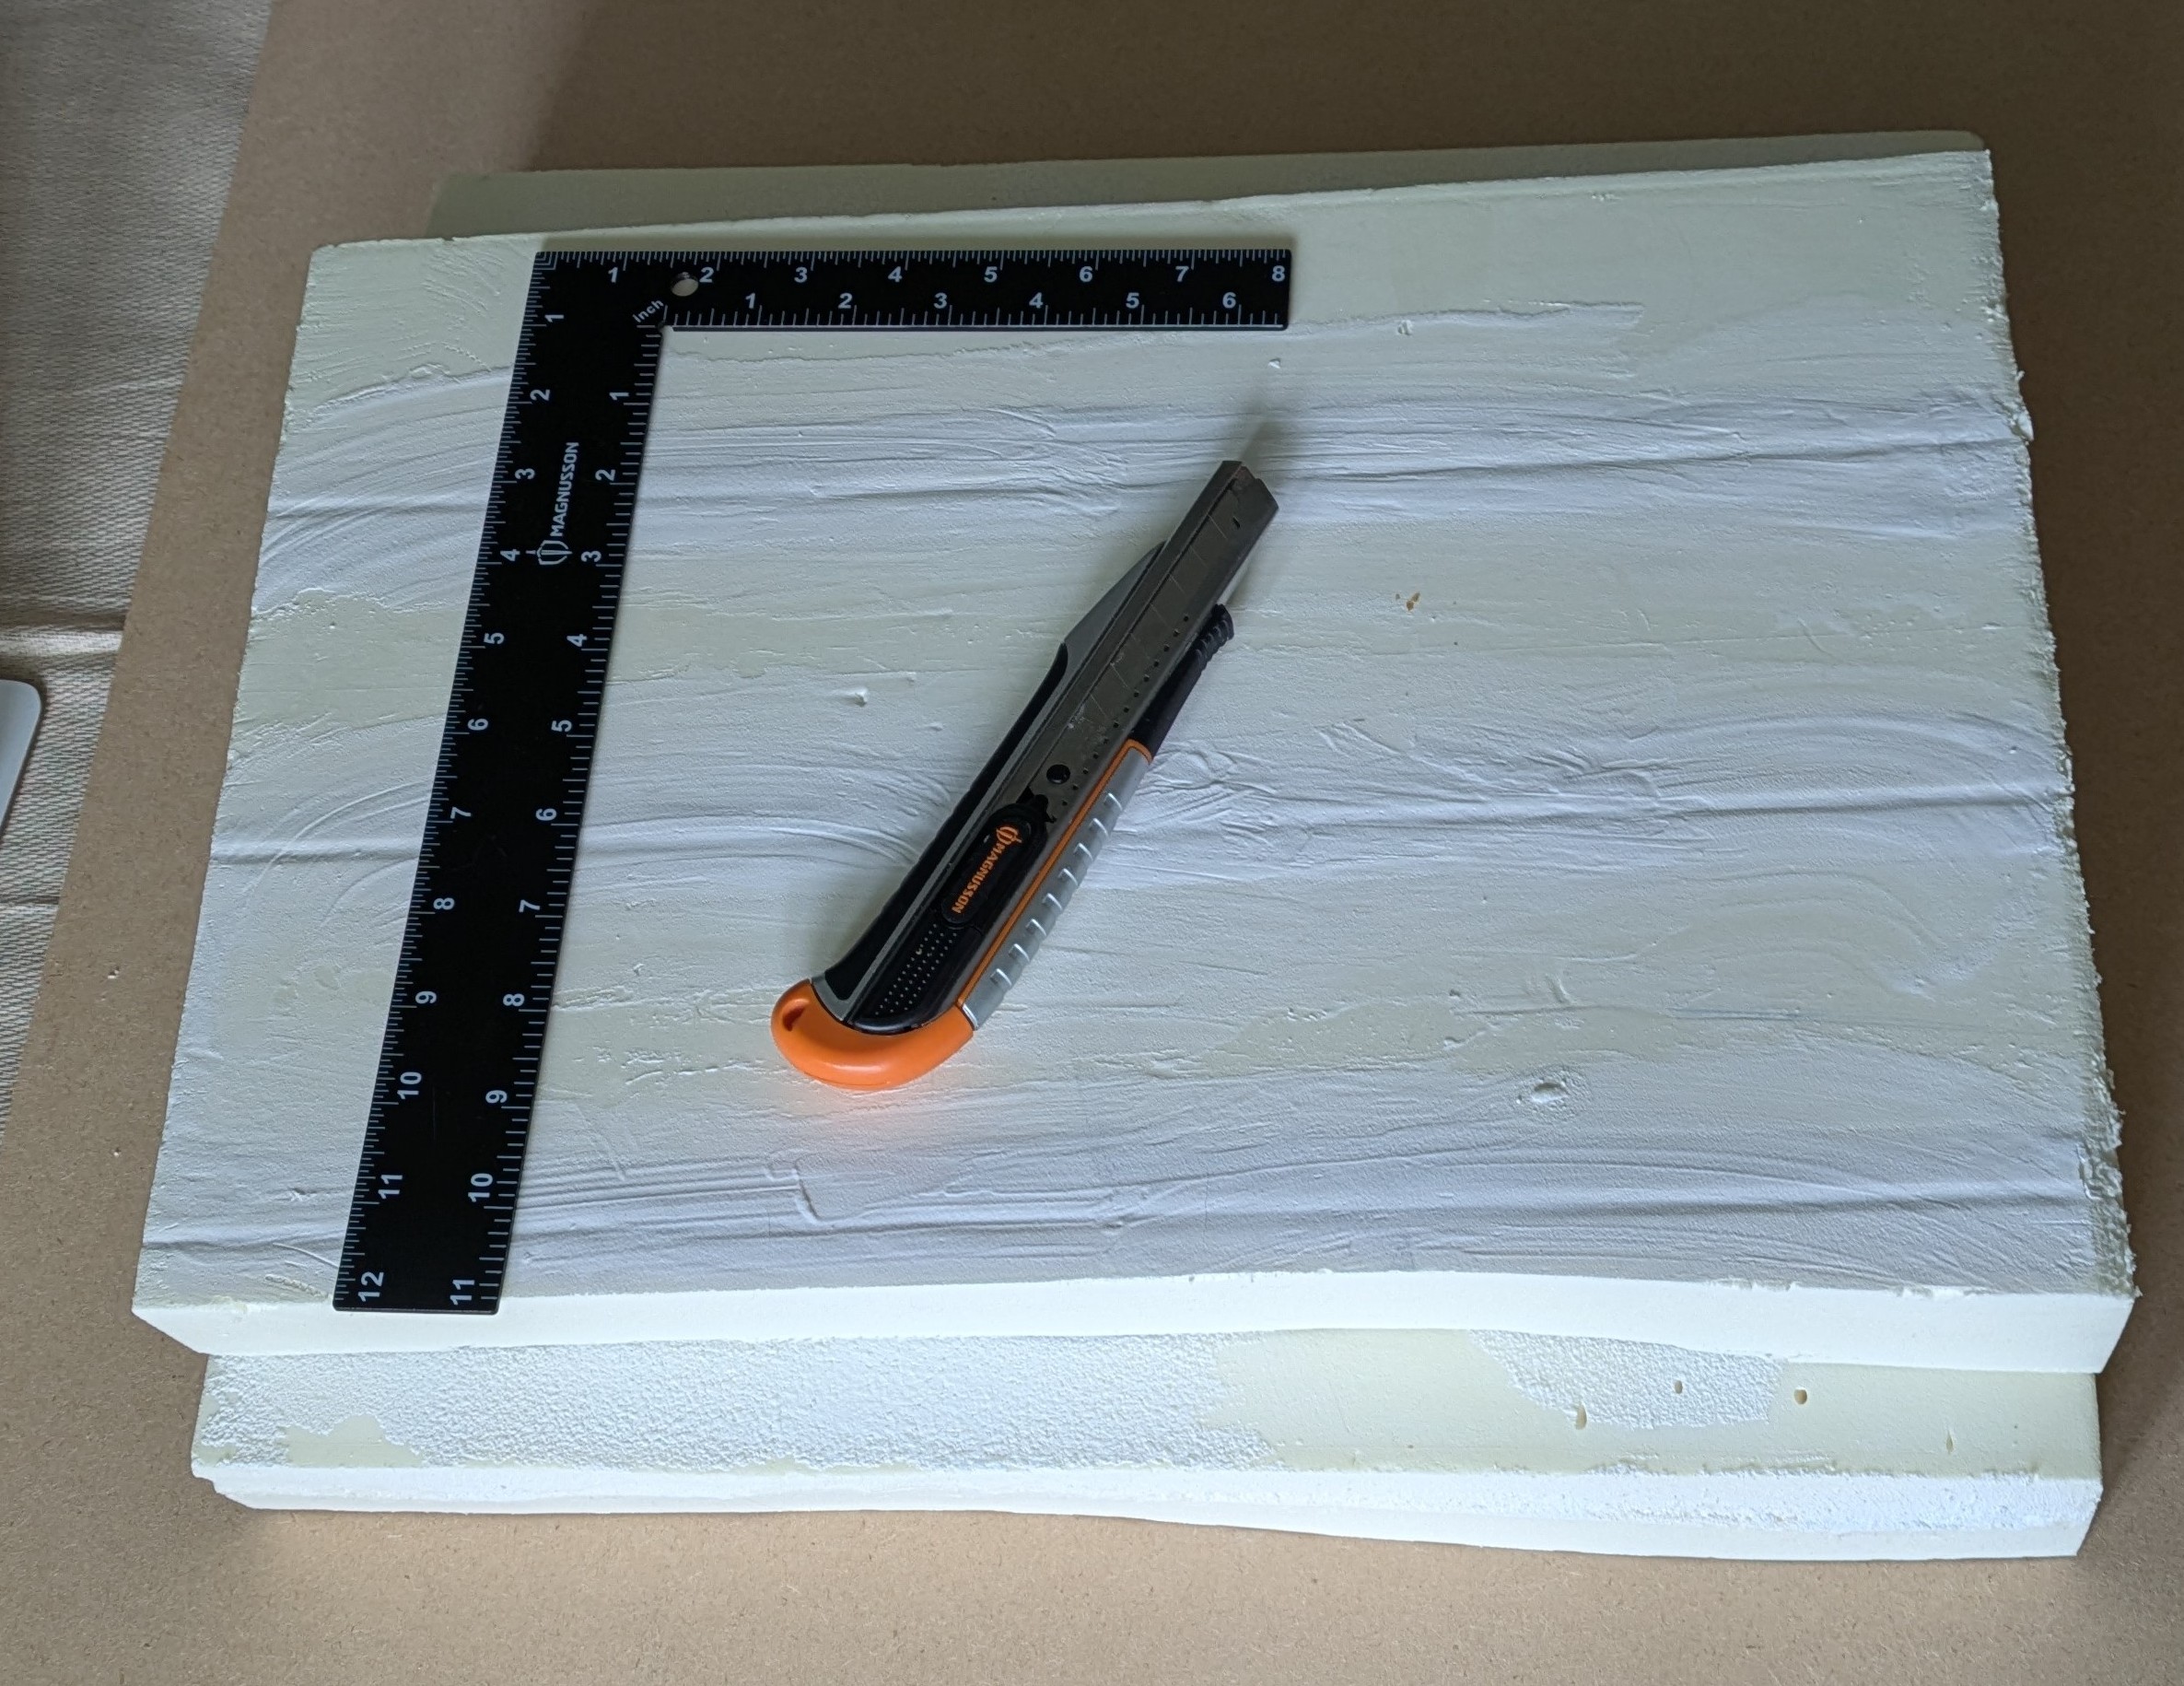
Now that I had a dock platform, I needed some water. I have a water mat for Armada but it way to big for this. However, I also have a lot of bits of plastic-backed dust sheet and six of seven packets of decorator’s caulk to make my own mats. Rather than make a full size mat, I figured I’d use one packet of caulk and make a mat big enough for this specific table.
I pinned an off cut of dust sheet to the table topper so I knew what size to do and had something solid and flat to work on. I used craft paint to colour the caulk before I slathered it on; mostly black with a bit of blue. I would have made the water browner but truthfully I had very little brown paint left so I’d rather use it later than use it now when the outcome was uncertain.
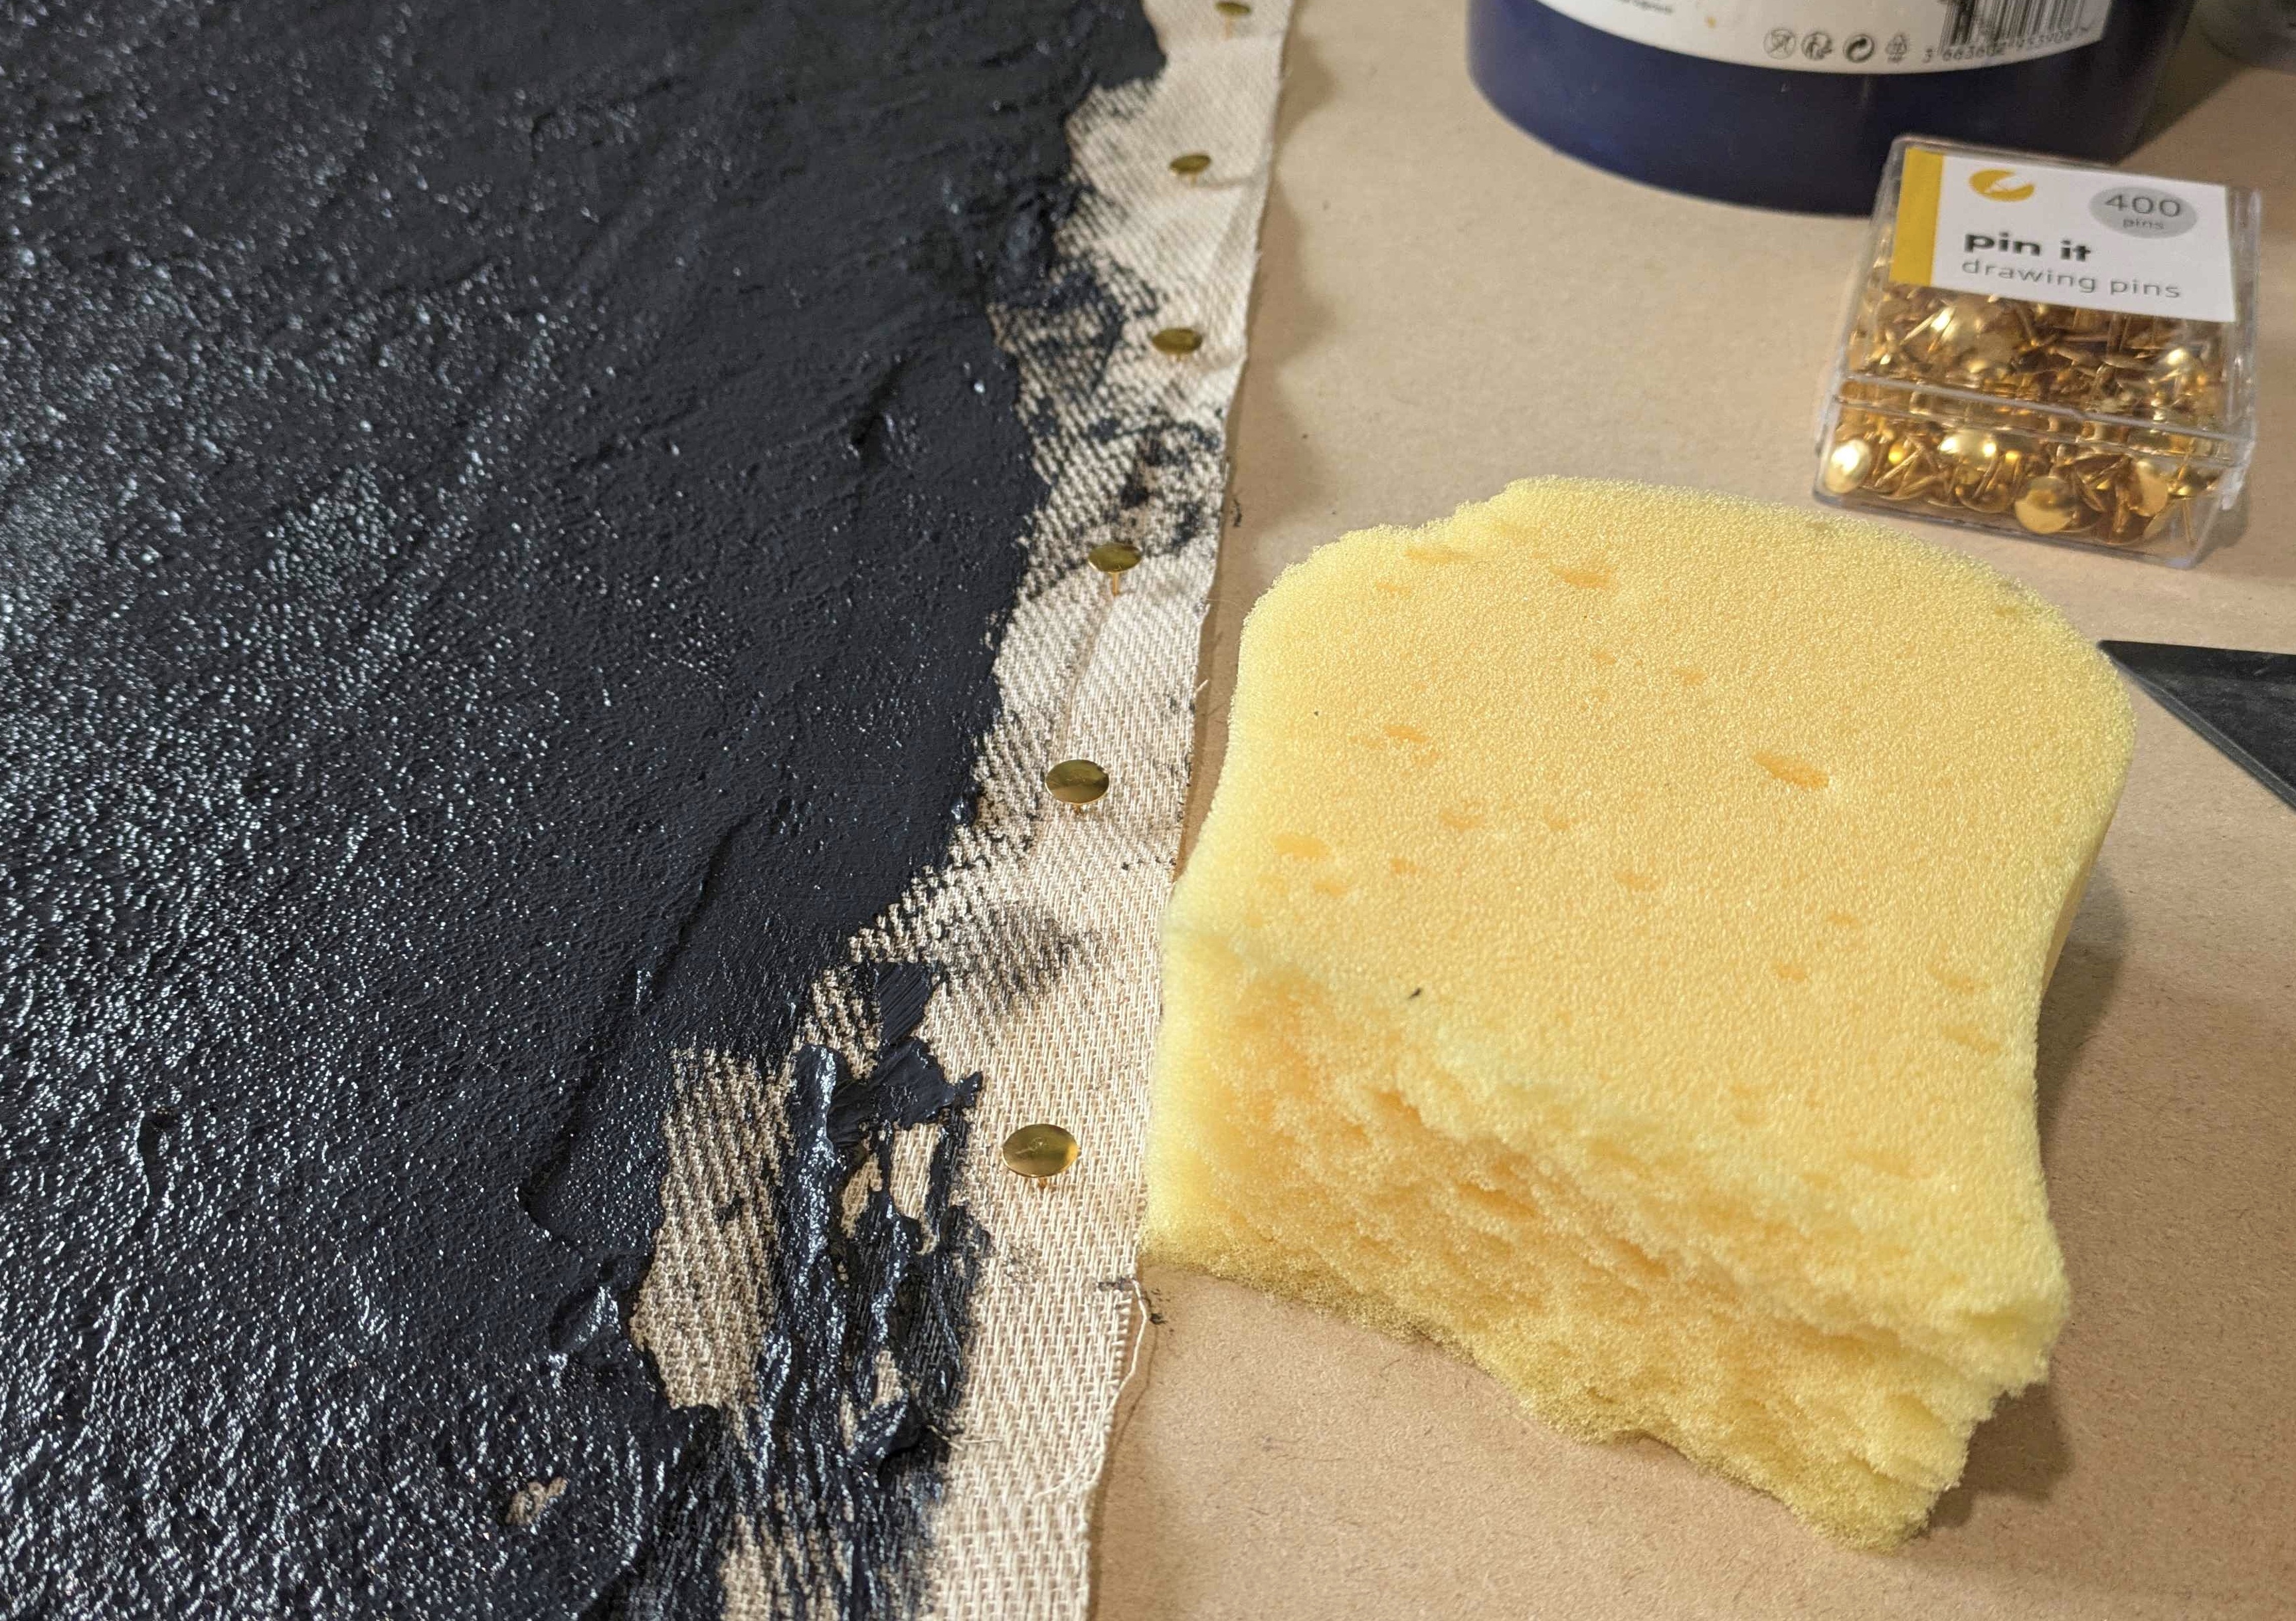
These mats are delightful to make, not as messy as they seem. Once the caulk is down (accomplished by a combination of latex gloved hands and a spreader), I used a piece of car sponge to lightly texture the caulk. I’m not aiming for realistic water here, just something that doesn’t look like it has been smeared on with gloved hands and a paint spreader! The main issue I have is finding somewhere cat-proof to put mats to dry. This one being small fit inside the shower cubicle on the mdf board.
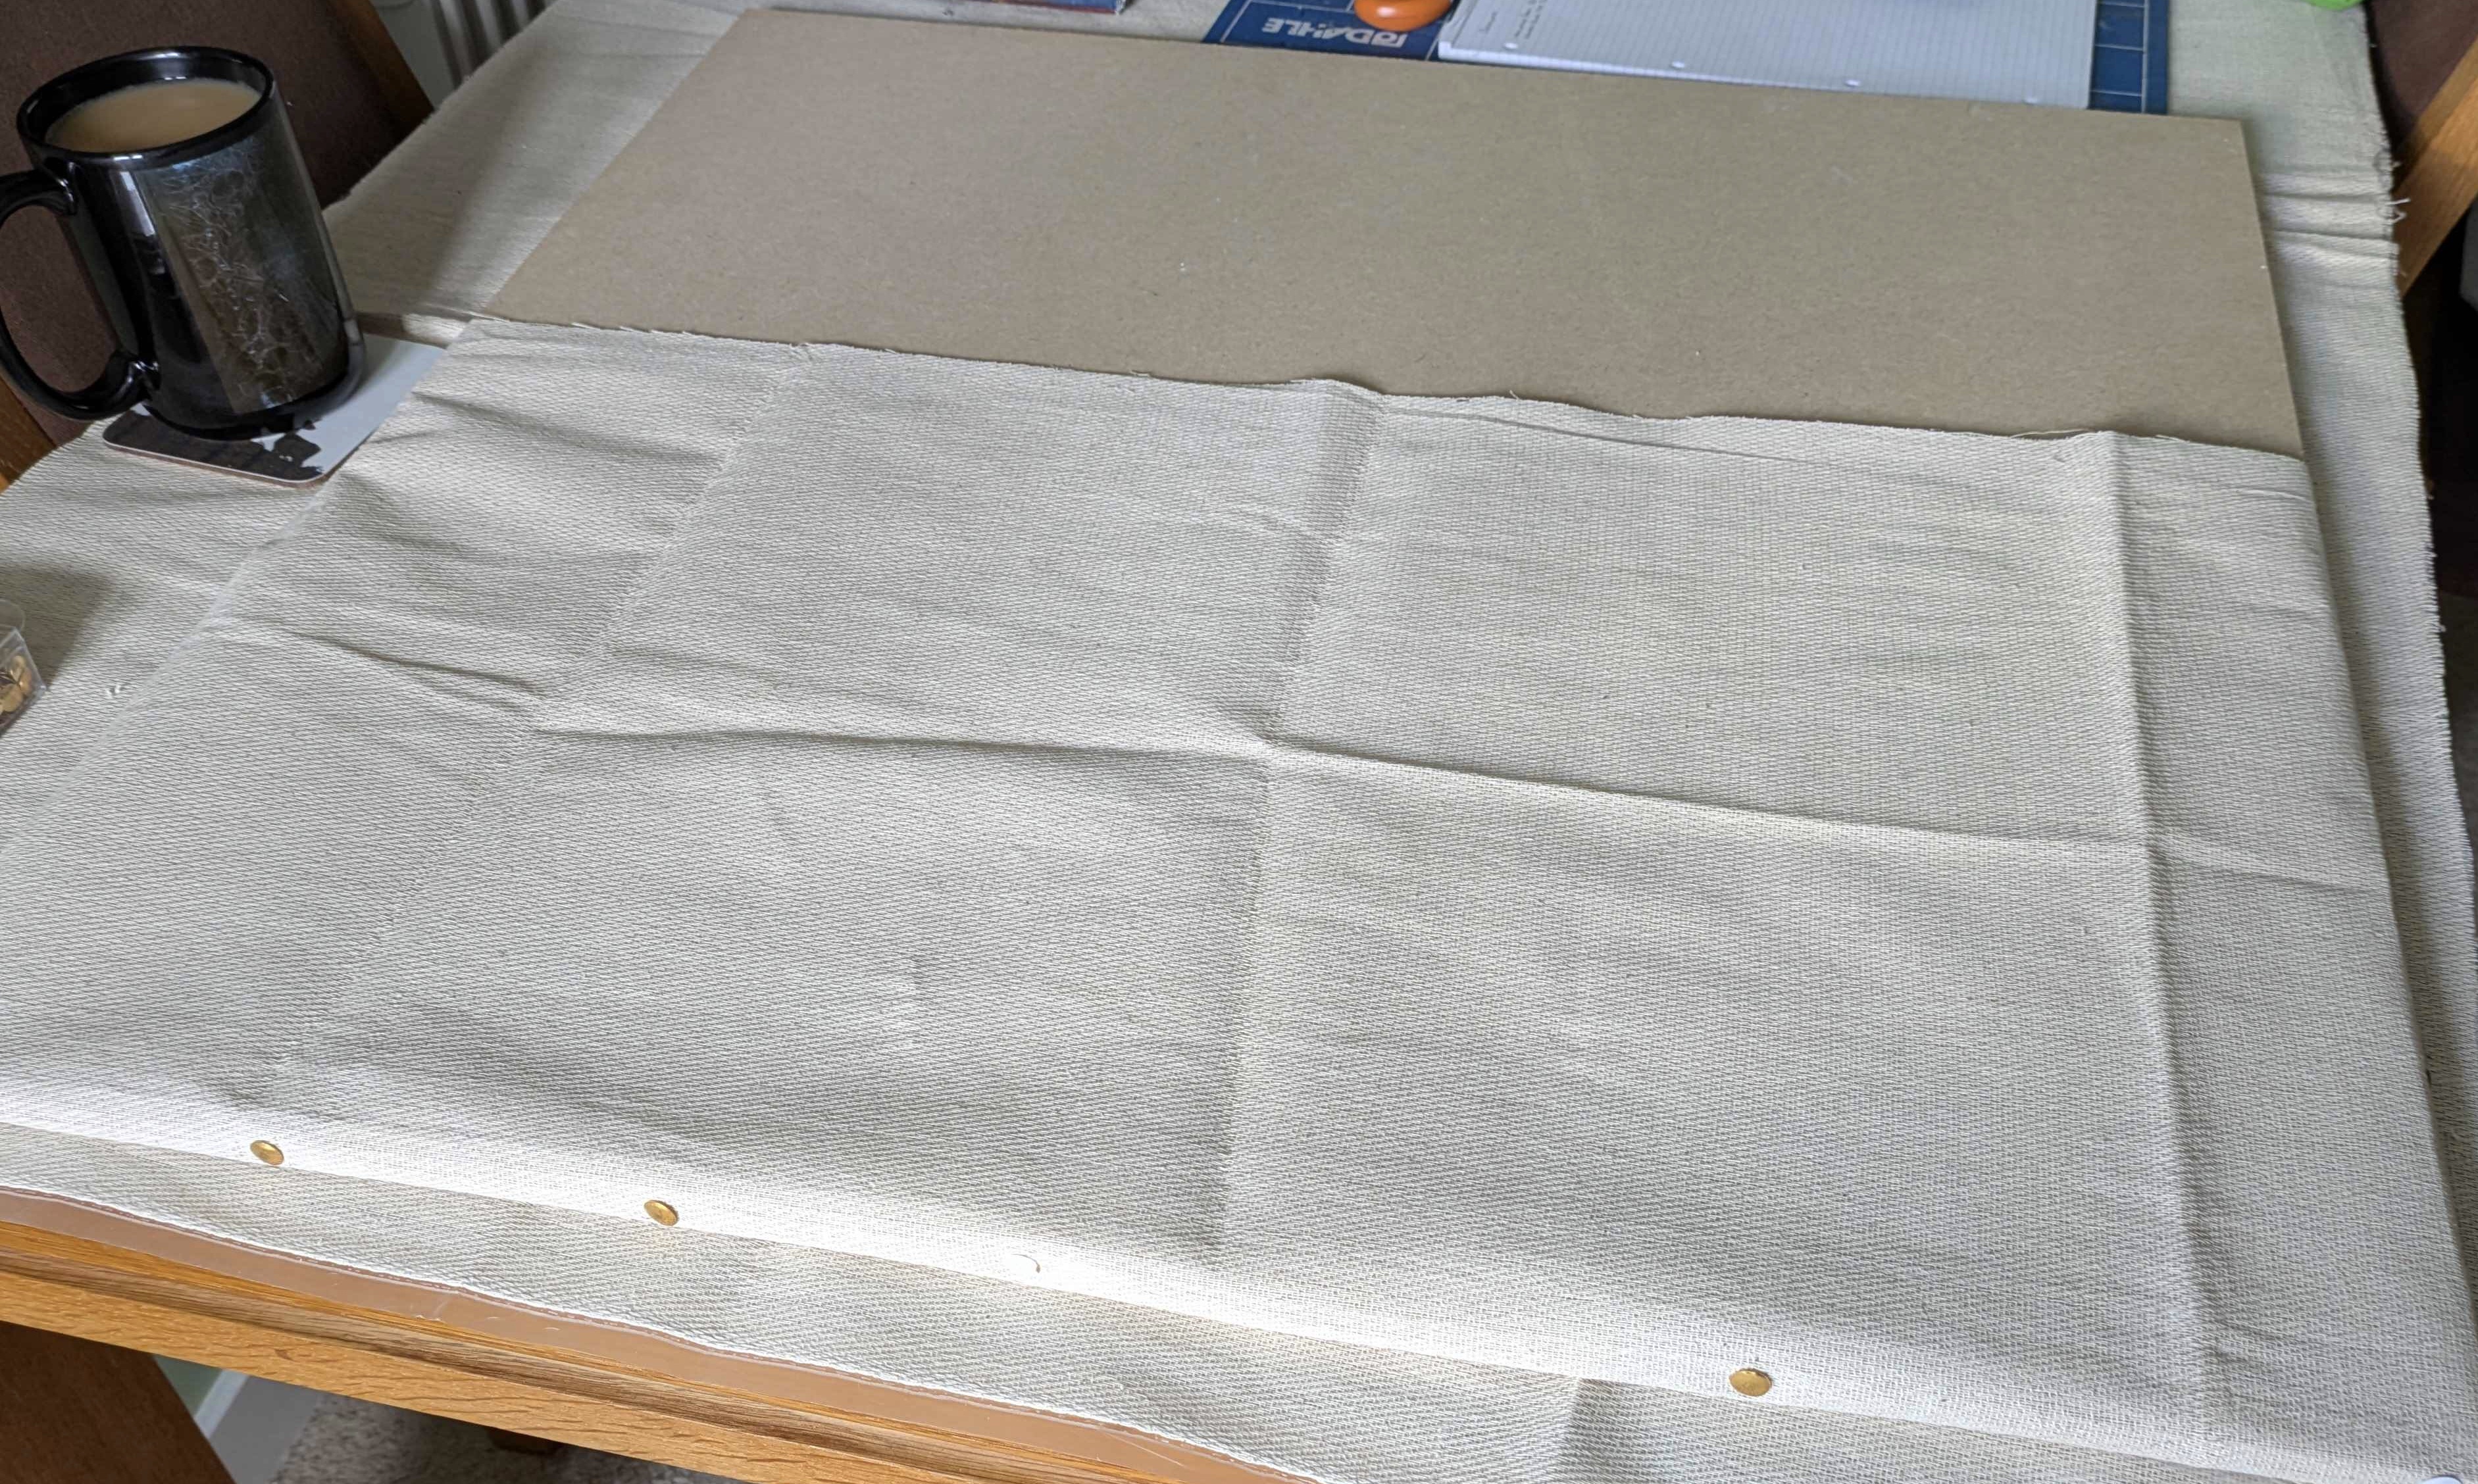
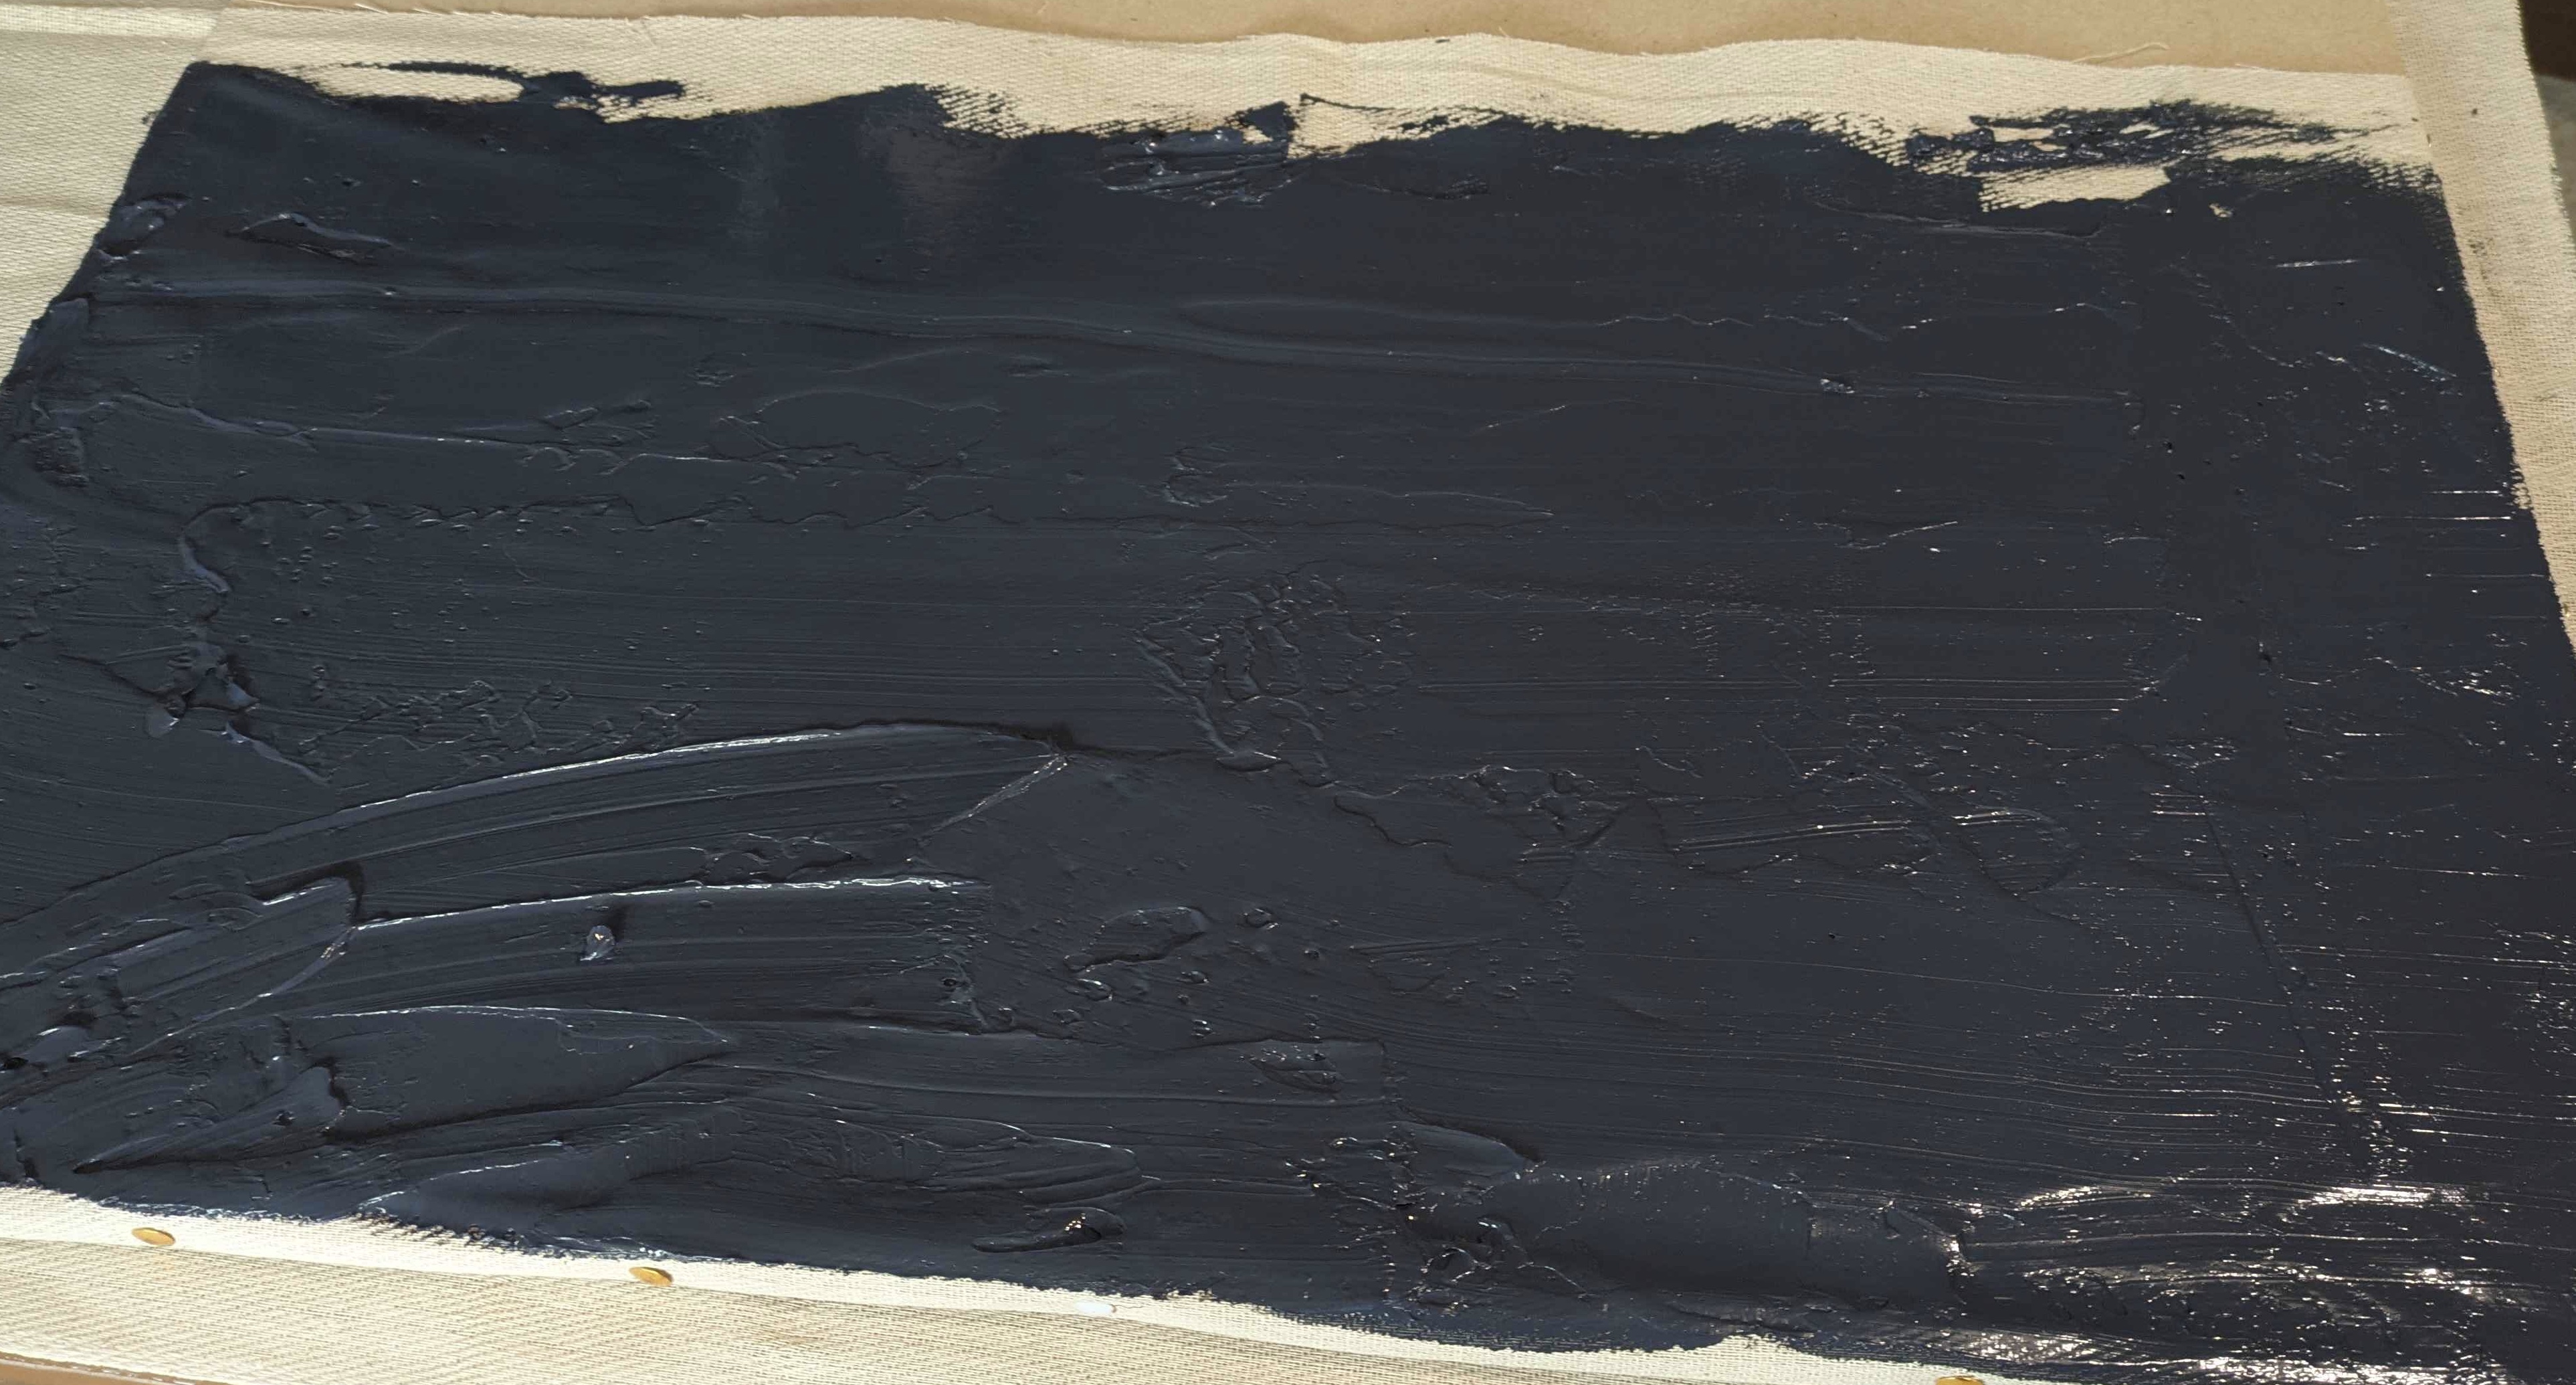
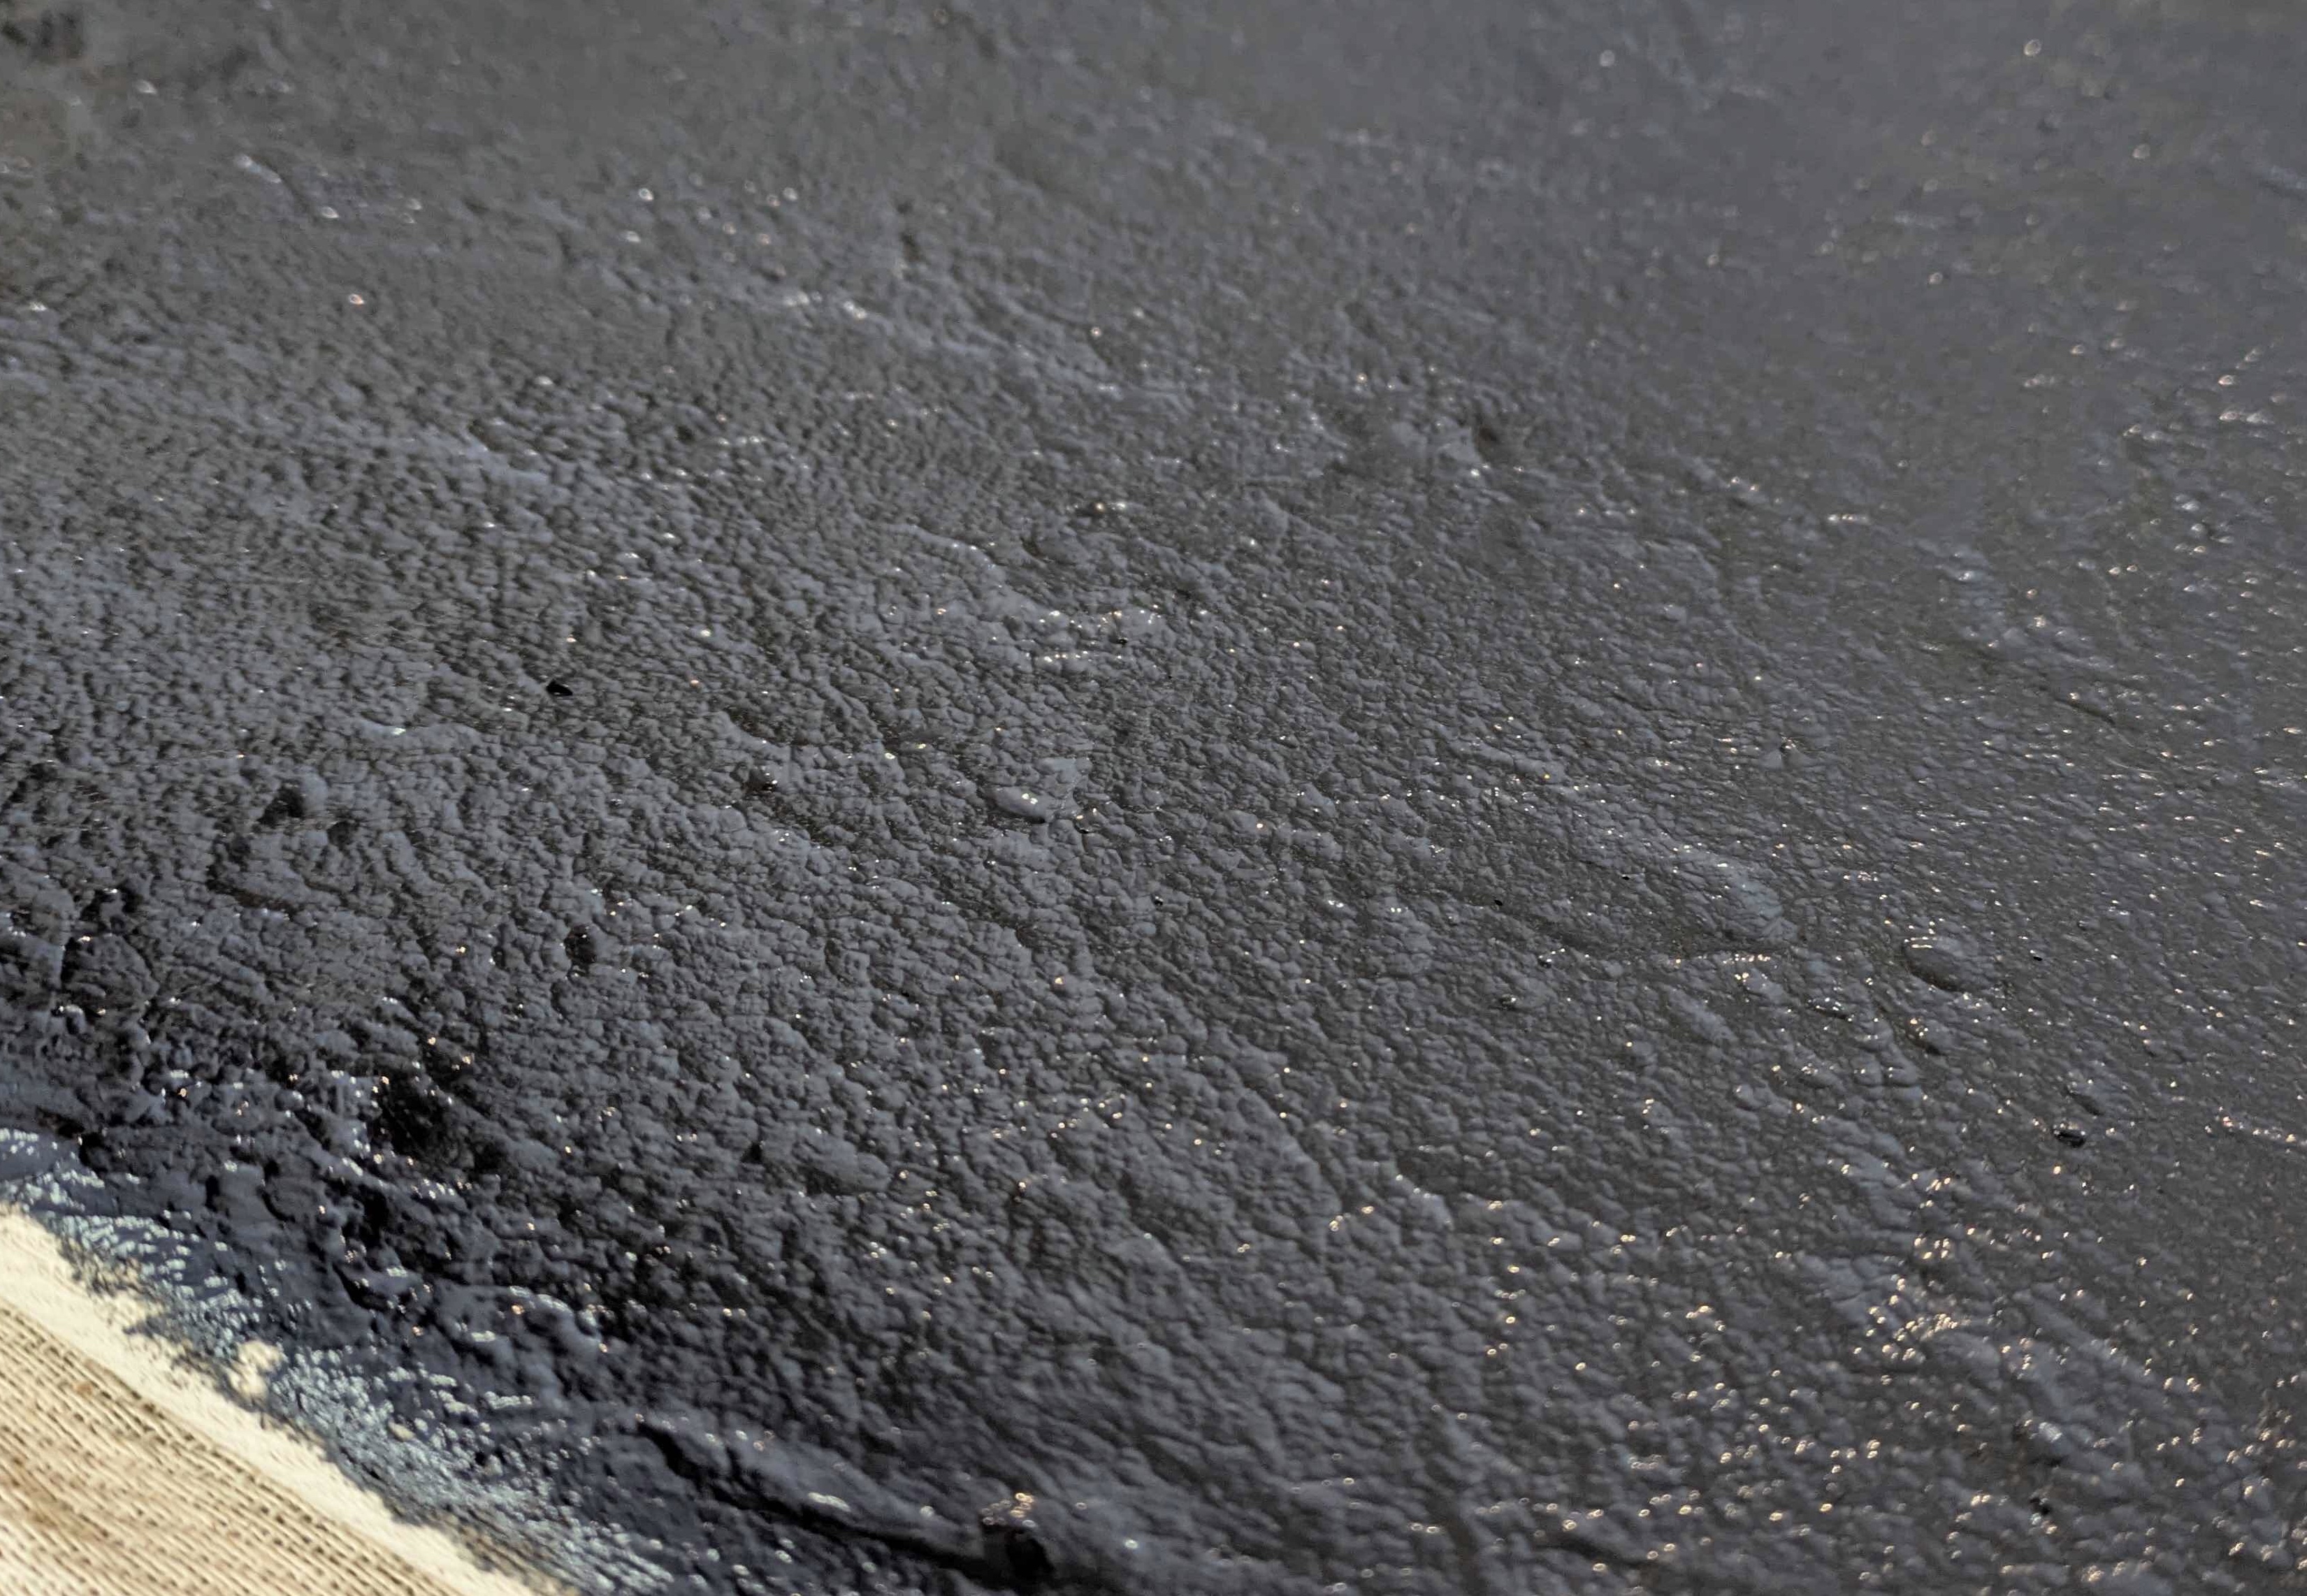
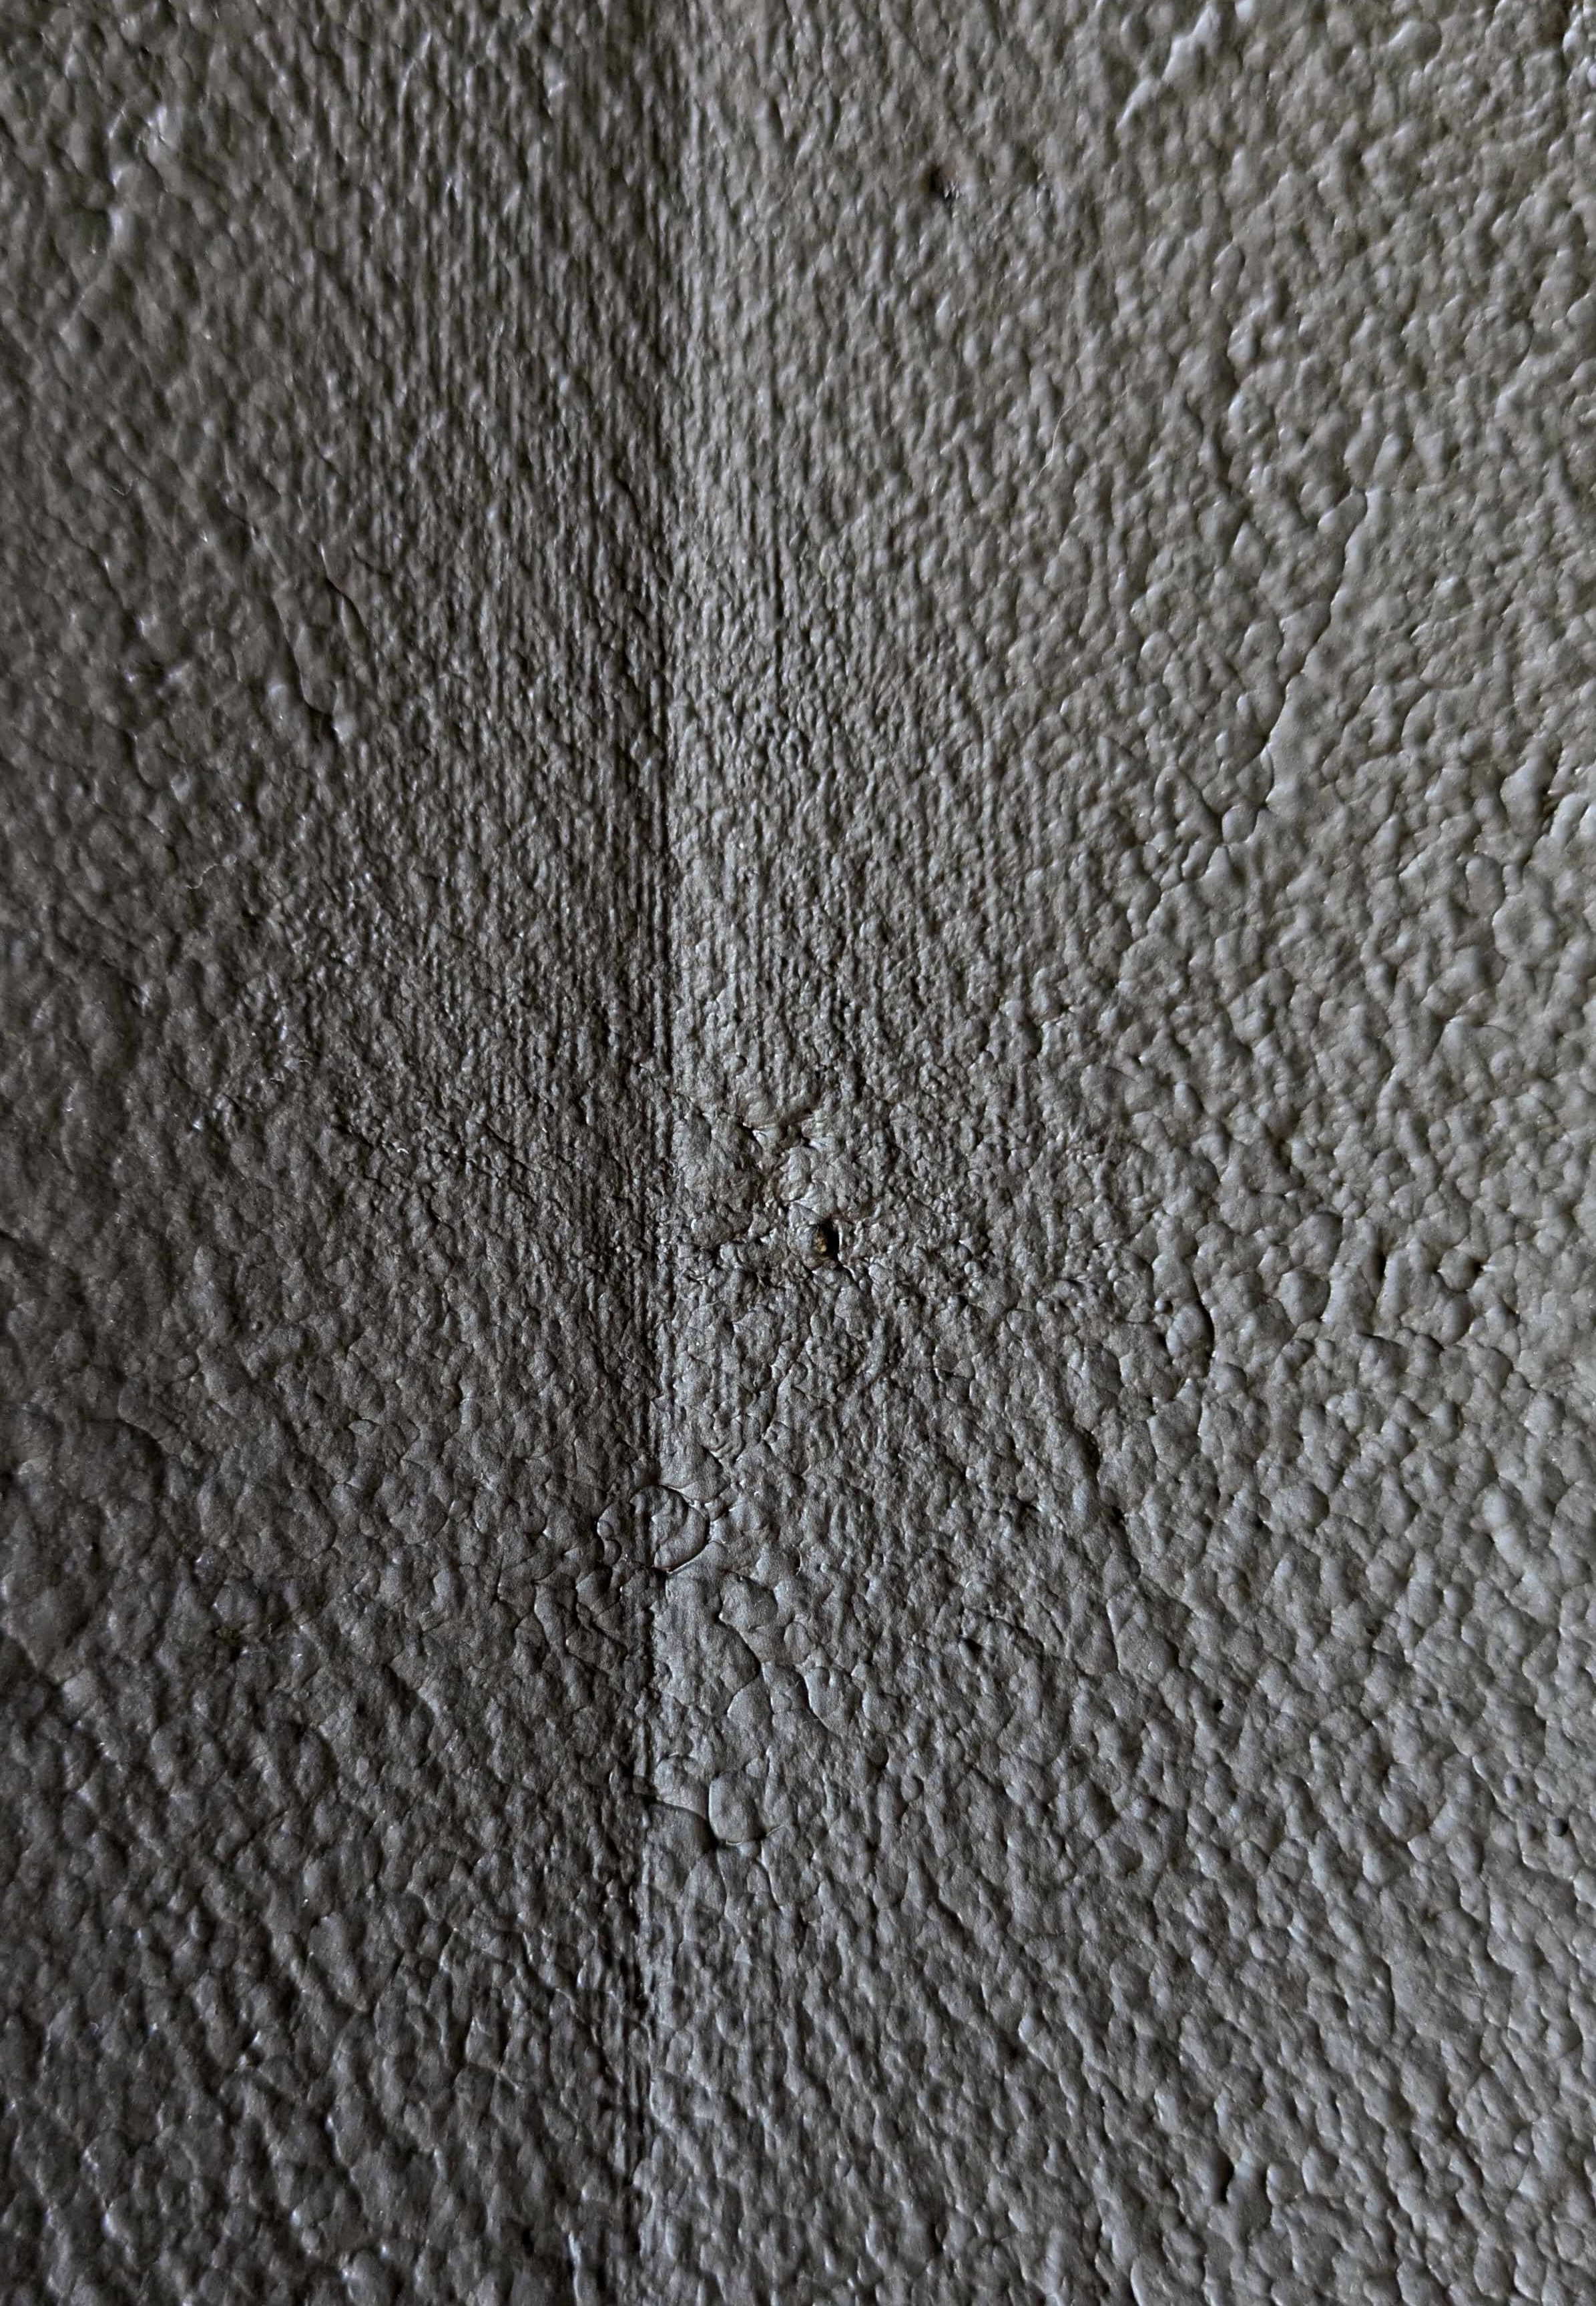
It took a couple of days to dry completely but this is the state of it. It dried nice and dark, just slightly off black. I imagine that most games on this table will be taking place at night – no one gets up to mischief at the docks during the day! It would be easy enough to add paint over the top of this if you wanted to though.
There was a patch where I didn’t get the caulk quite thick enough and the texture underneath shows through however the ship that will be going over top should cover it without any issues. Next thing is to cut it down to size and the job is done.
January Project - TMNT Part 4
I had planned on just fudging terrain for the game from whatever I had to hand, painted or not. However the first scenario is set on a dock which reminded me that I have had an MDF cargo ship in my stash. Warren talked about it years and years ago so I bought one and never got round to doing anything with it. Maybe a wee table build was doable…
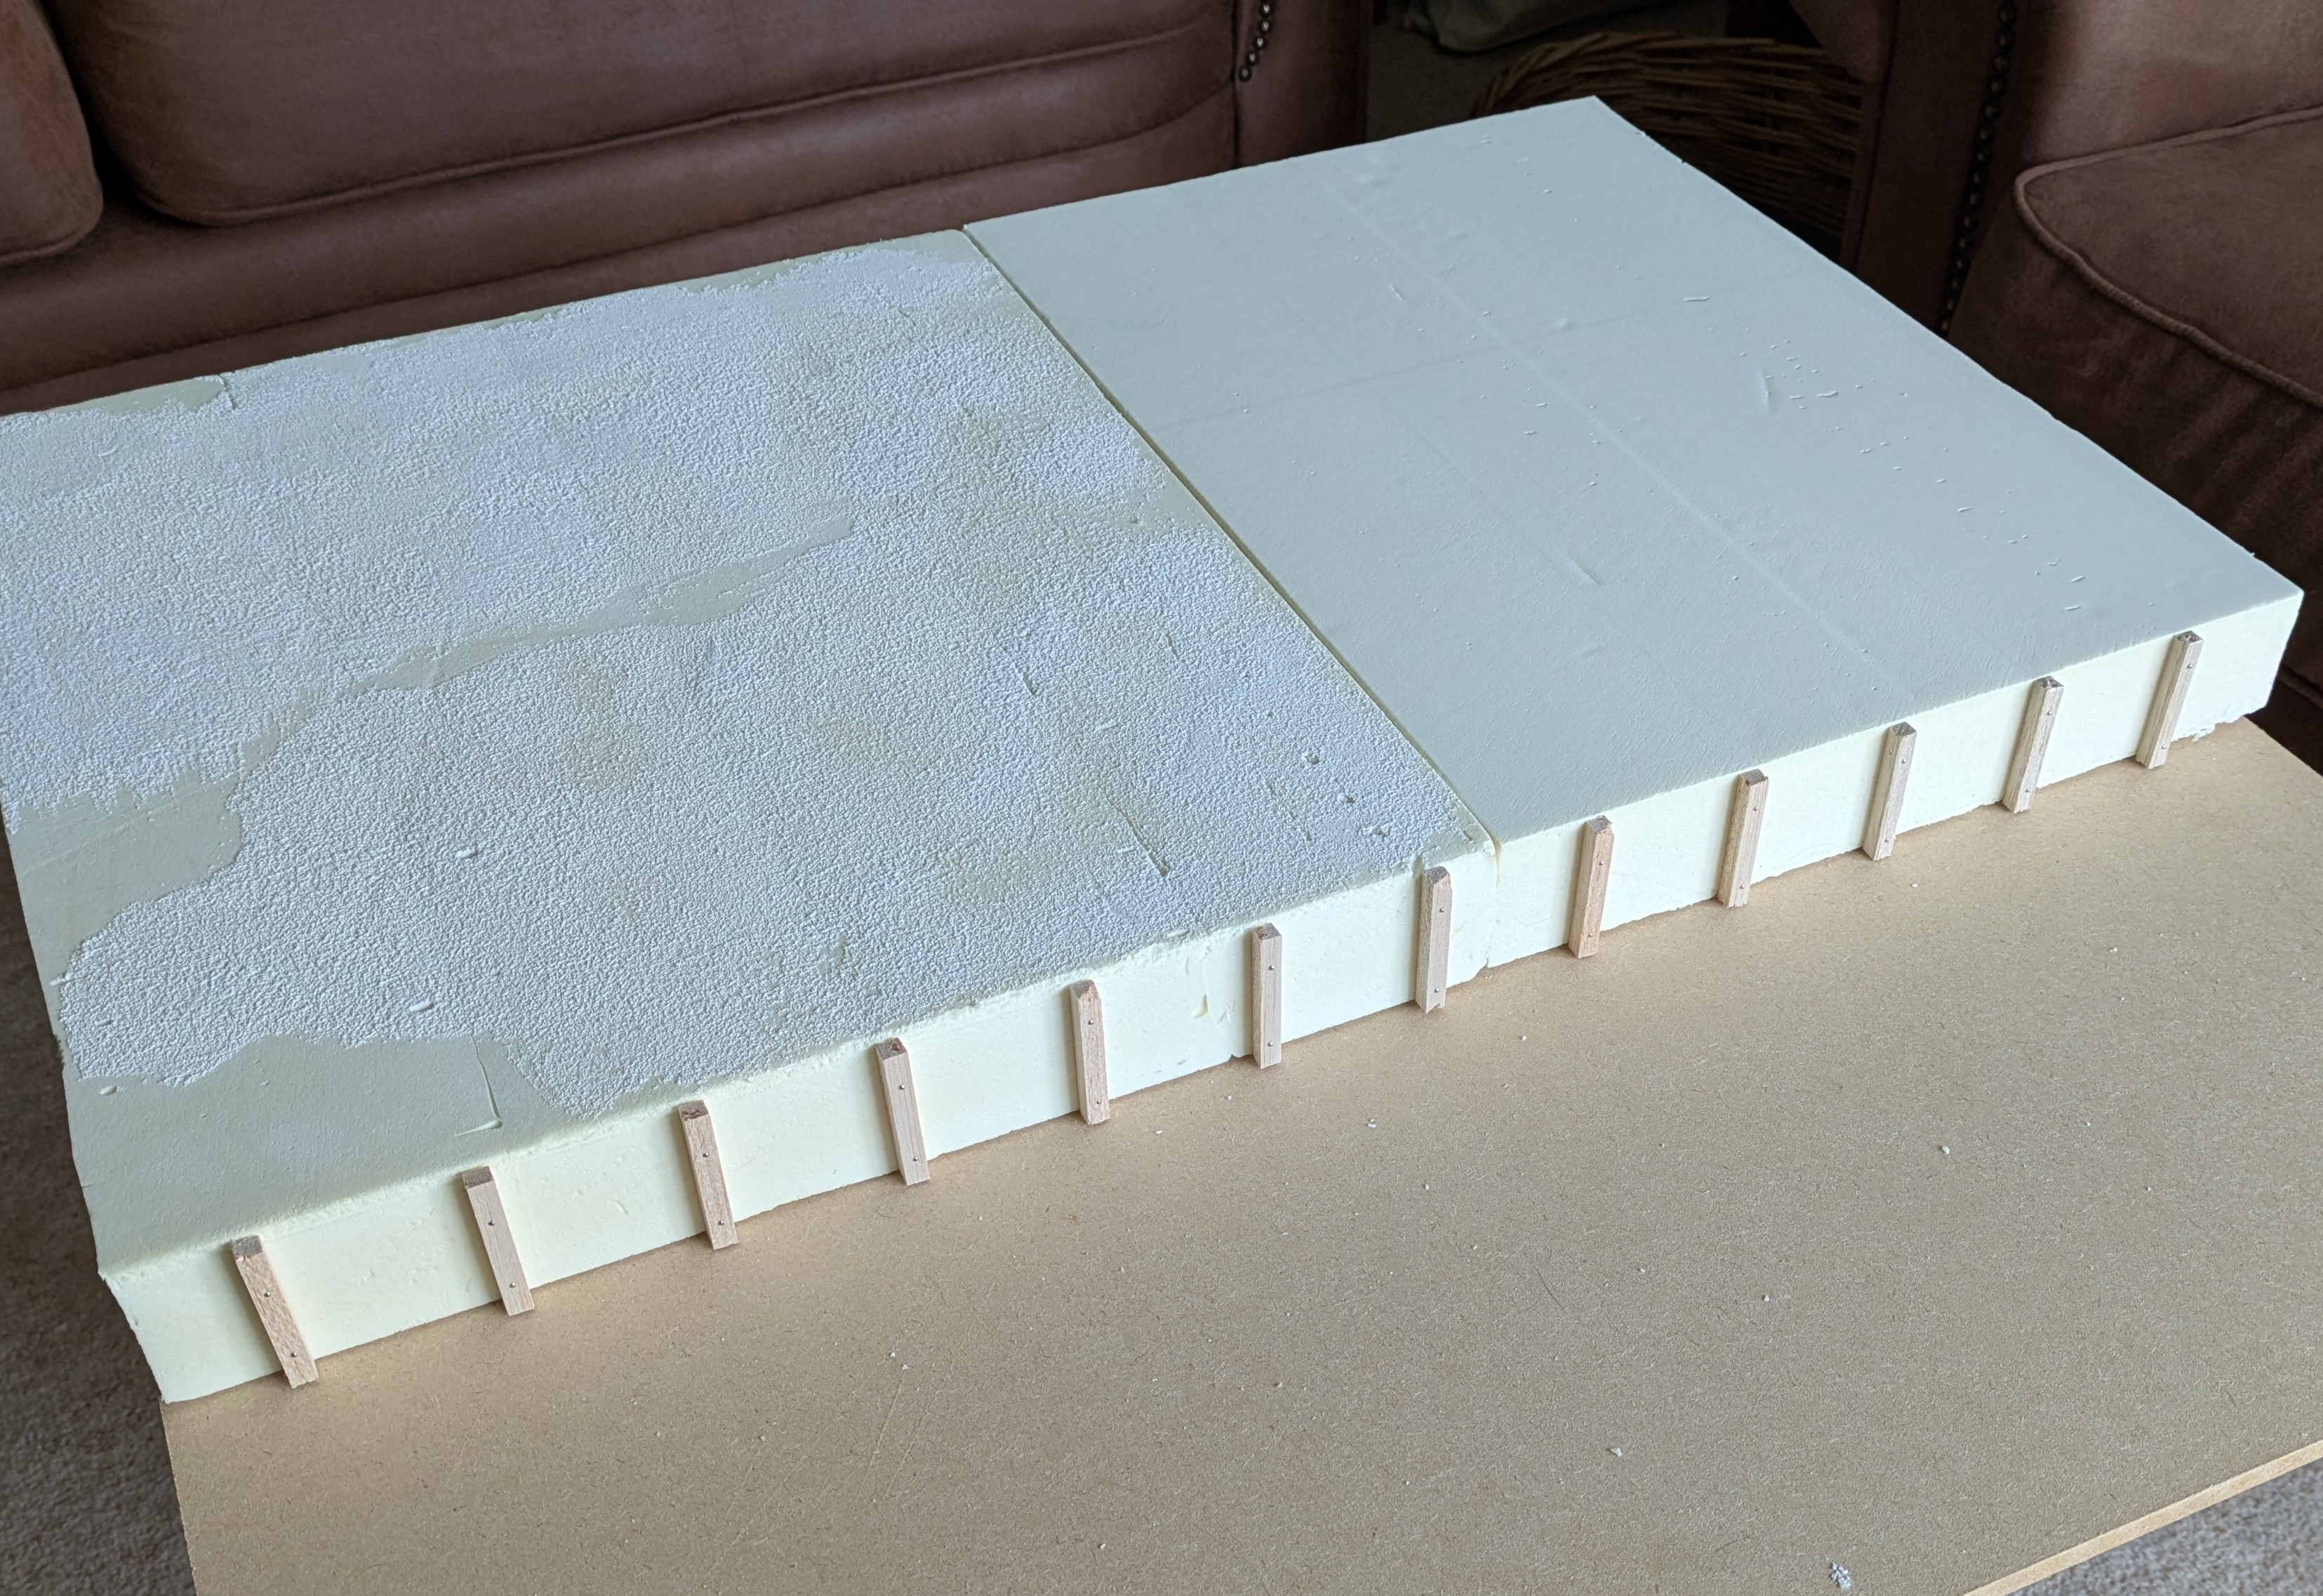
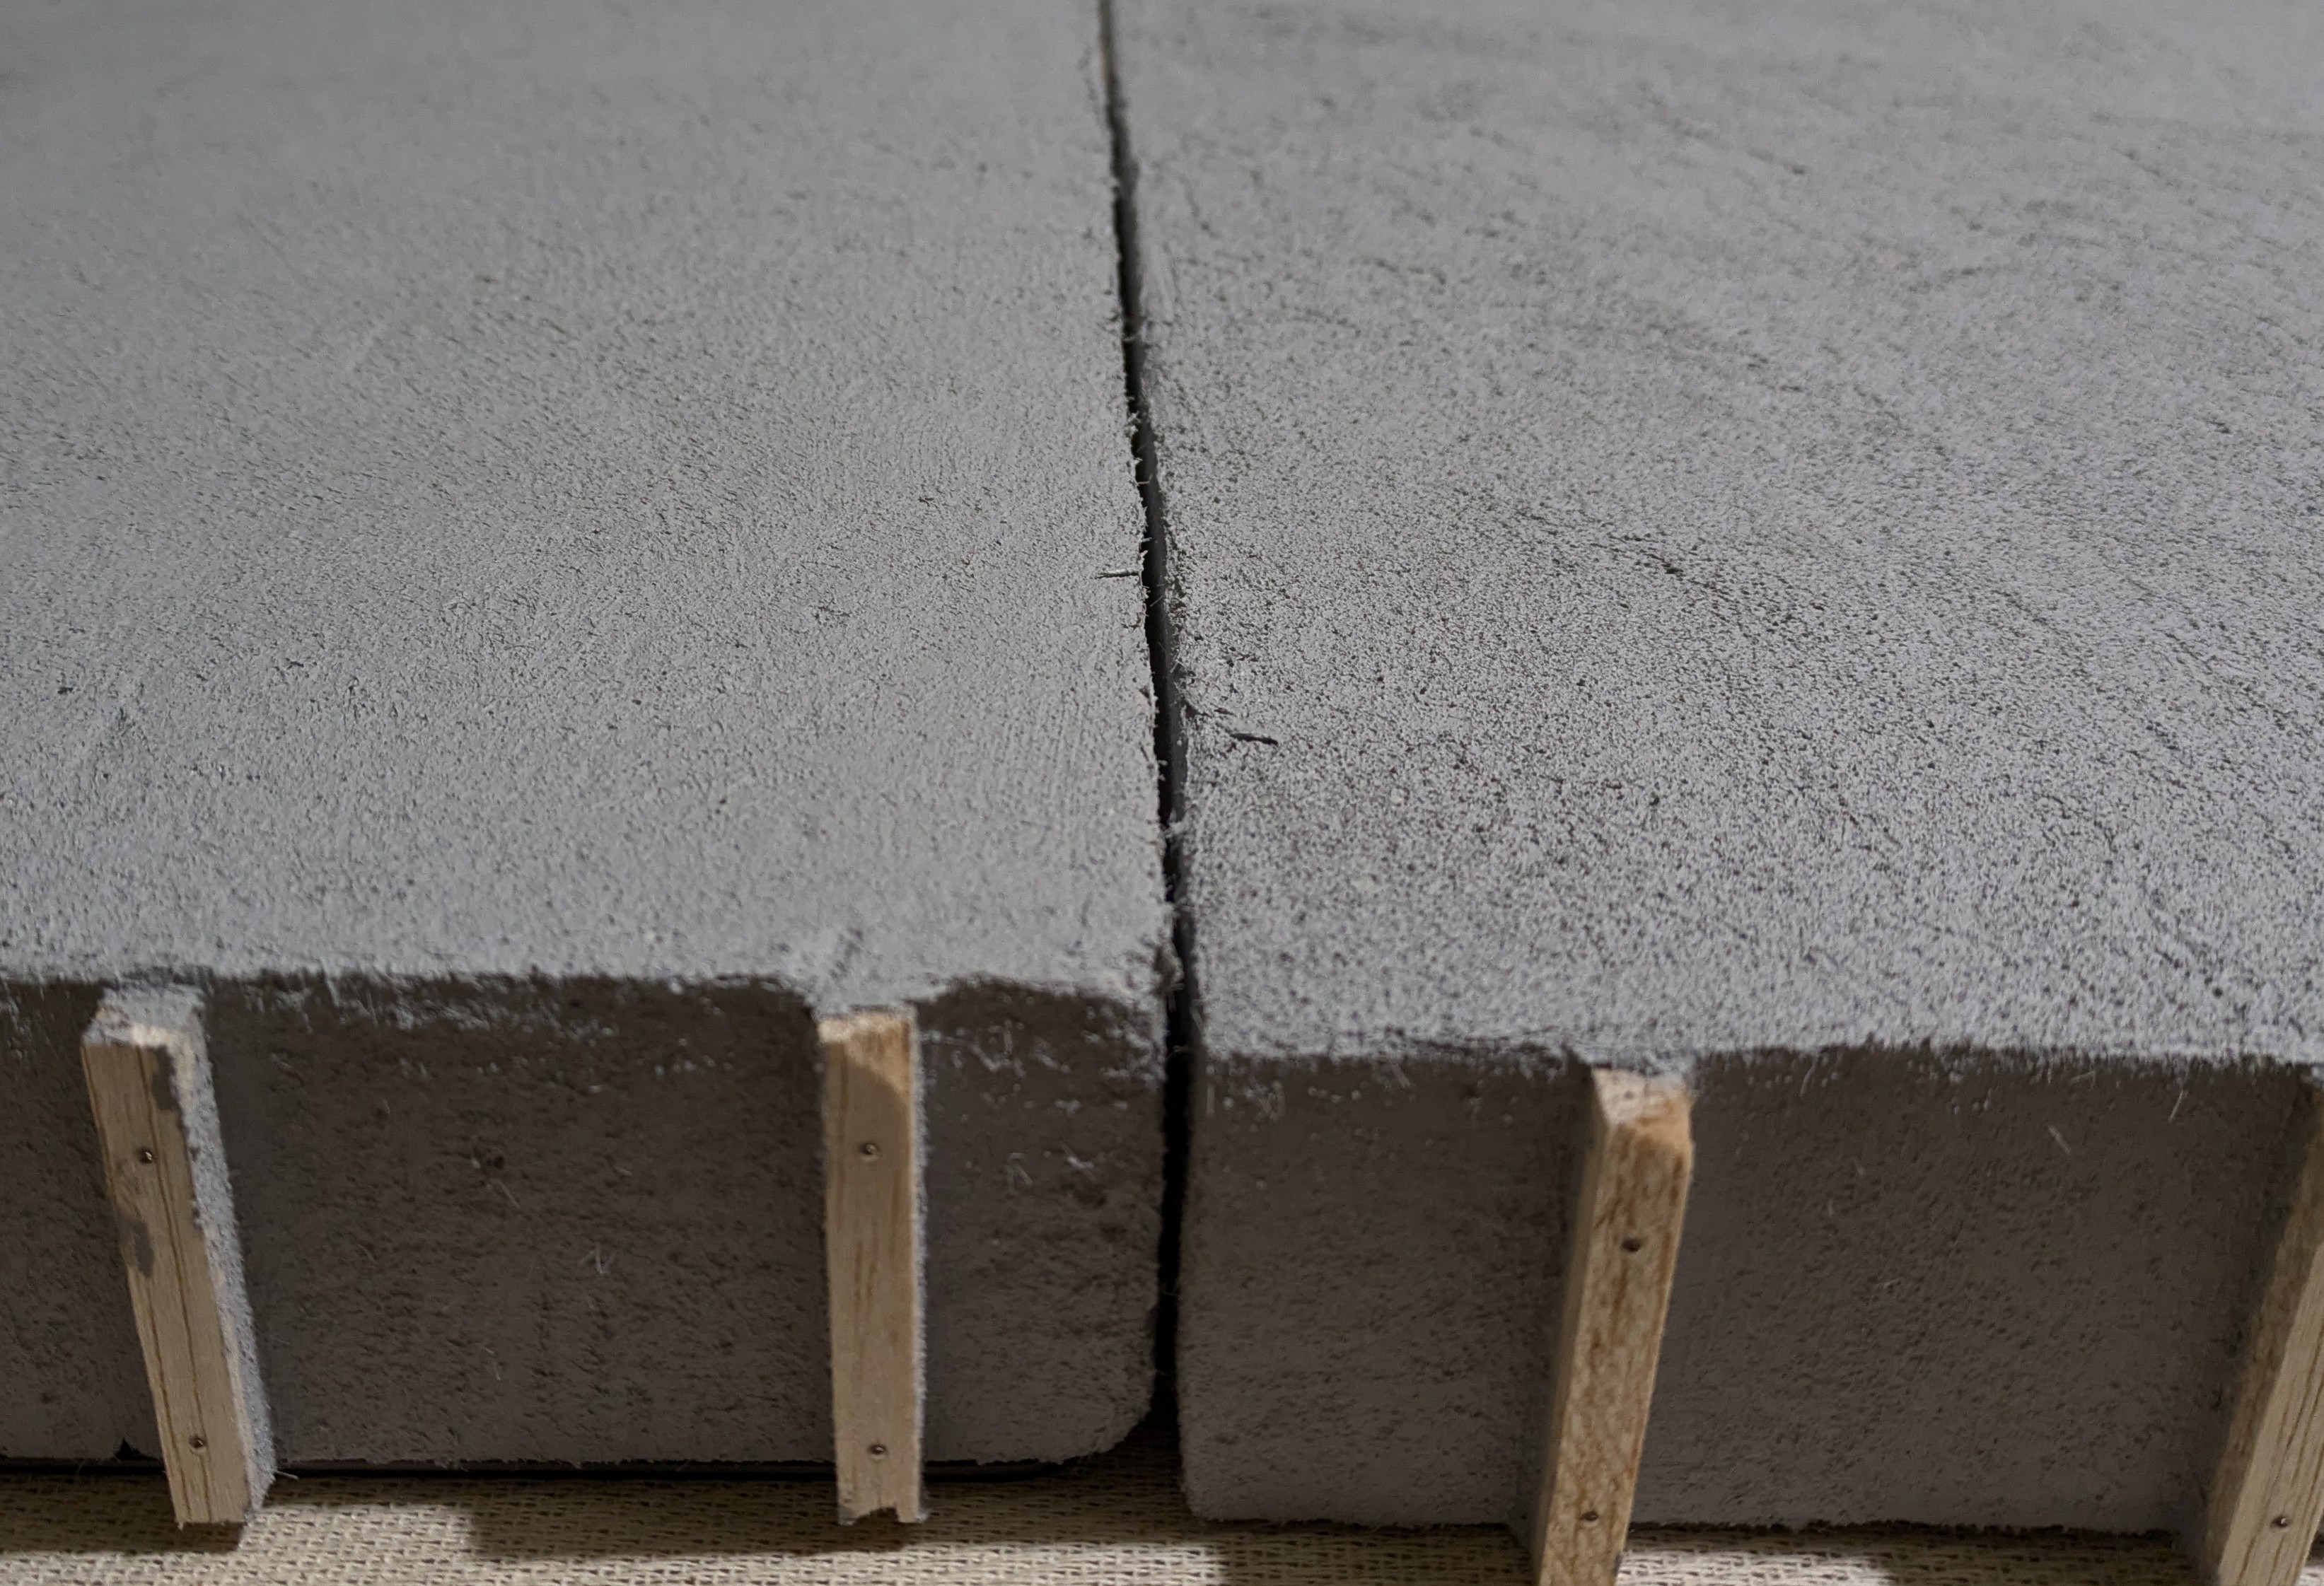
First I needed a raised platform for the docks. I have three pieces of 50mm thick insulation foam. Two pieces are 450mm wide; one is 300mm and the other 420mm on their other sides. Easy enough to cut down (almost straight) to fit my 700mm wide board. I have no idea how much play this will see so for ease of storage I’m not going to attach them to each other.
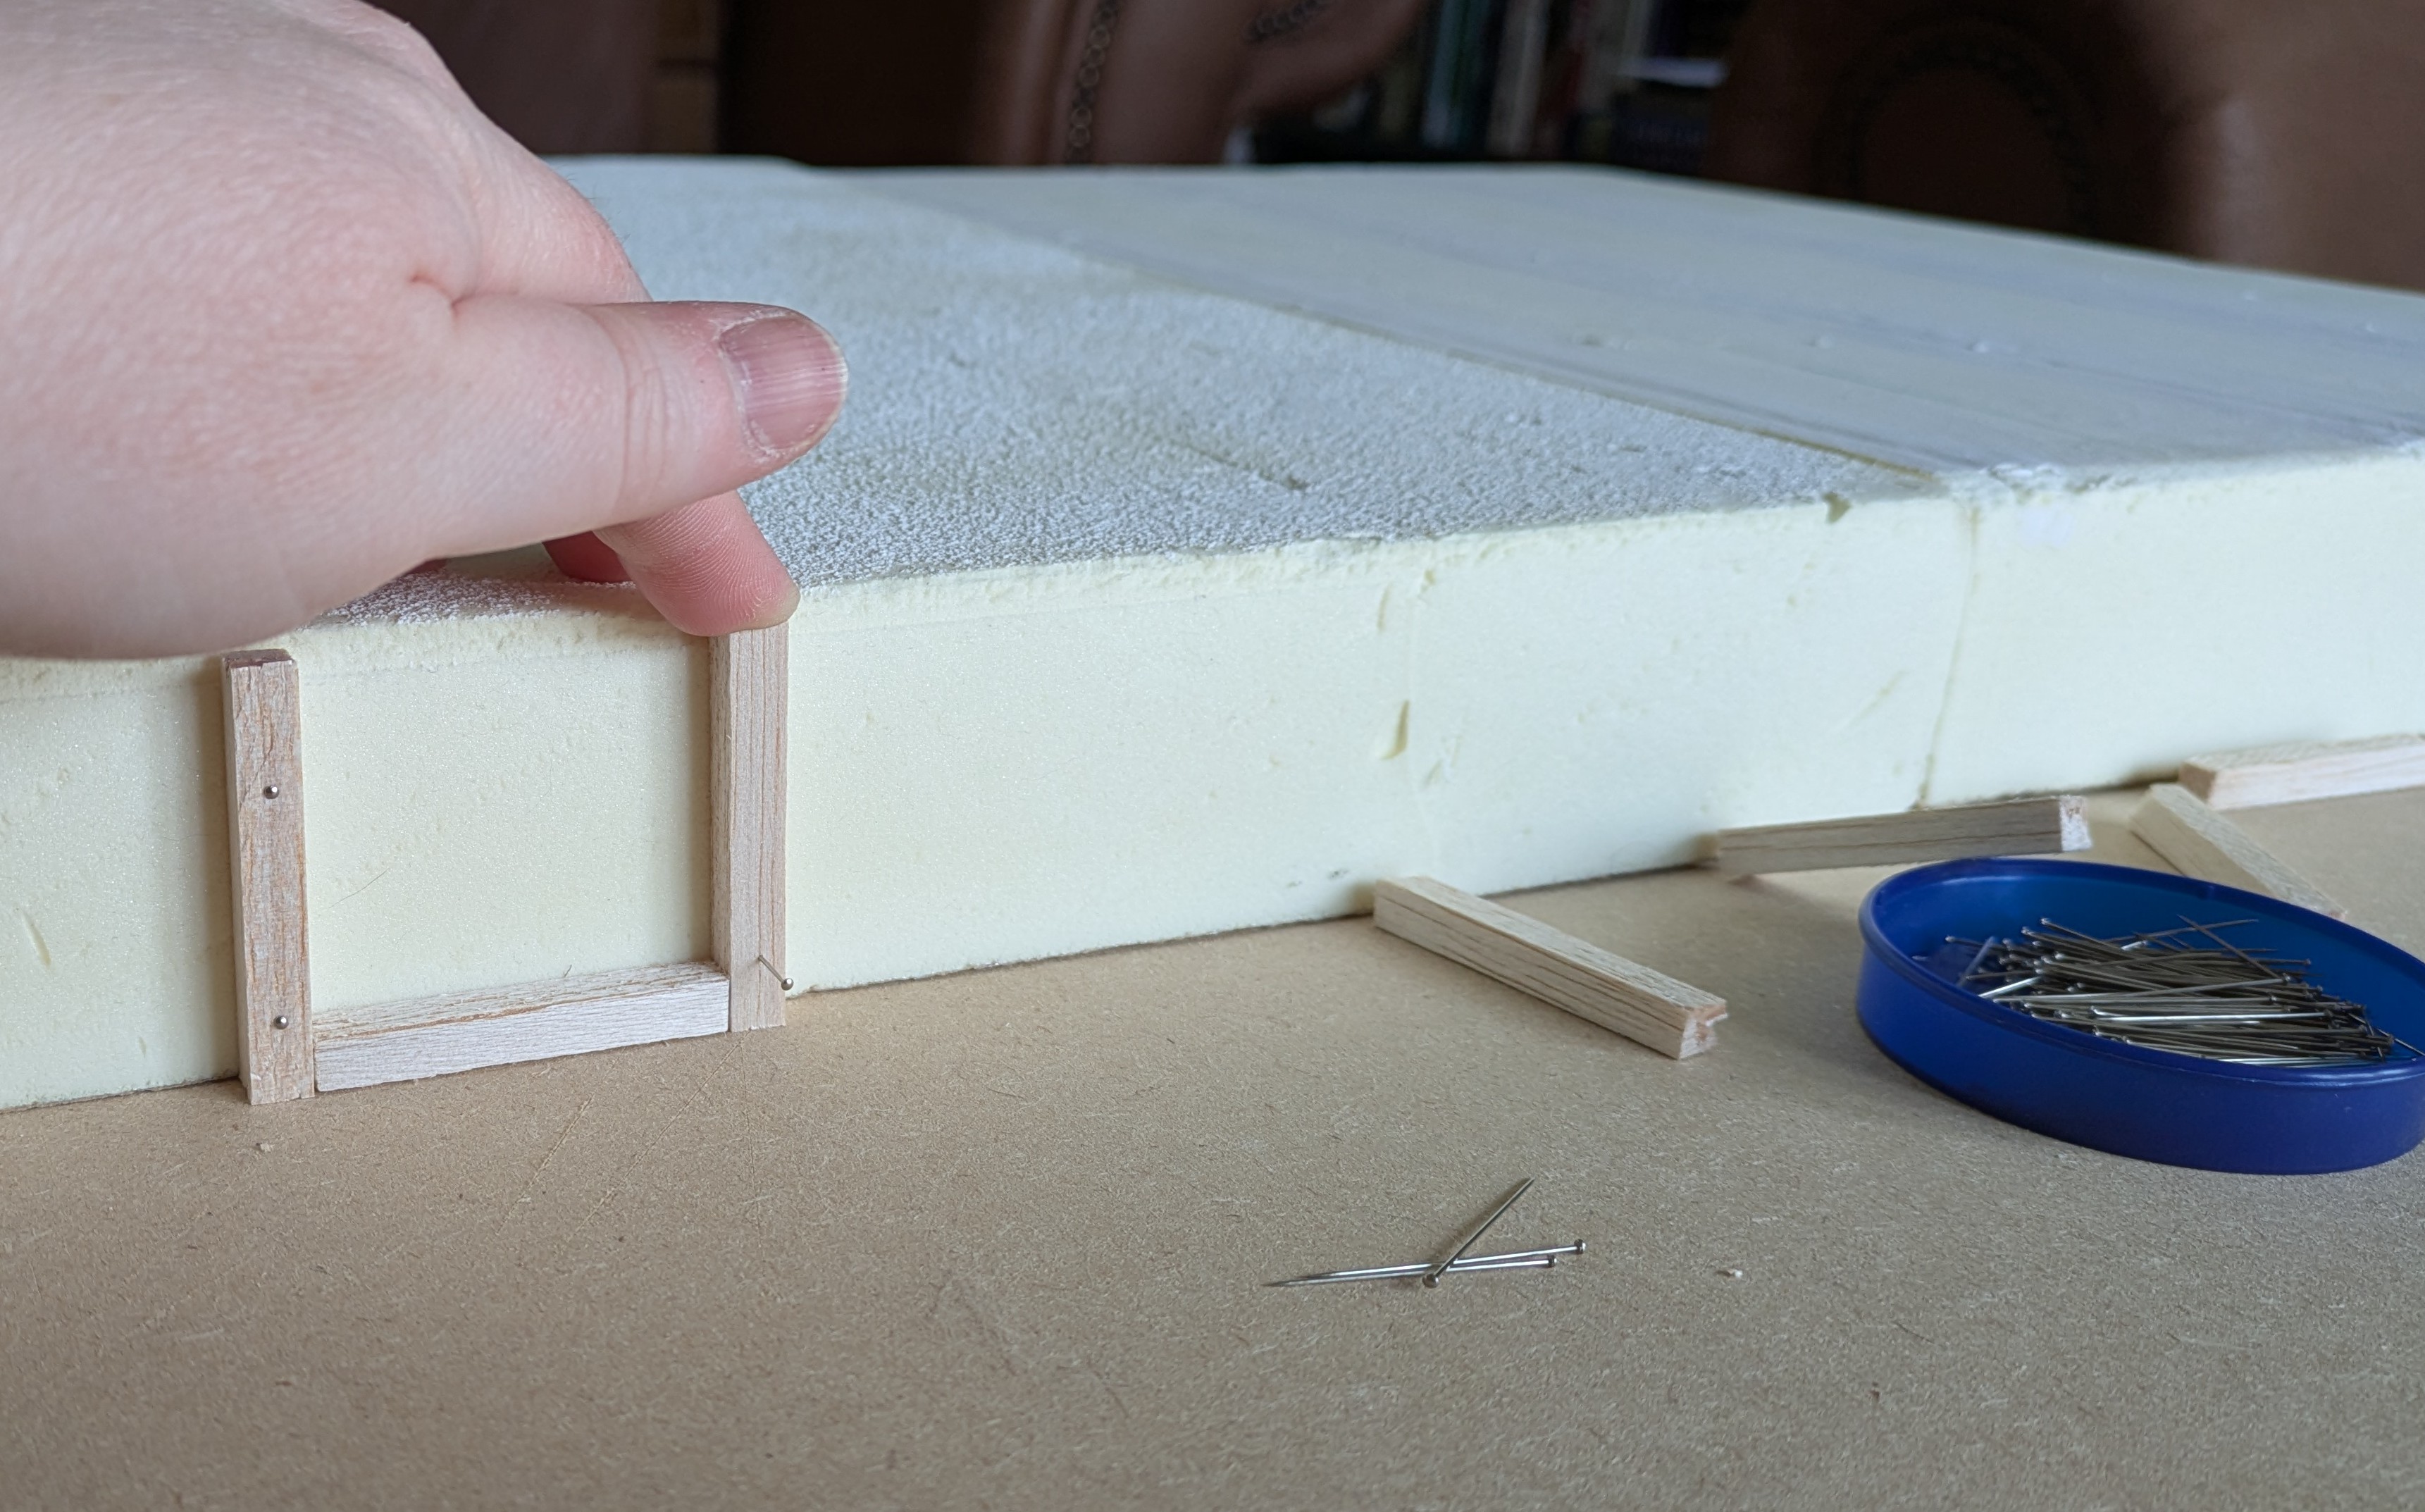
To hide the join line I came up with various plans but in the end I decided that it was more hassle than it needed to be. To make the dockside a bit more interesting I added some 3mm balsa wood pylons pinned in place with dressmaker’s pins which kind of look like massive bolts.
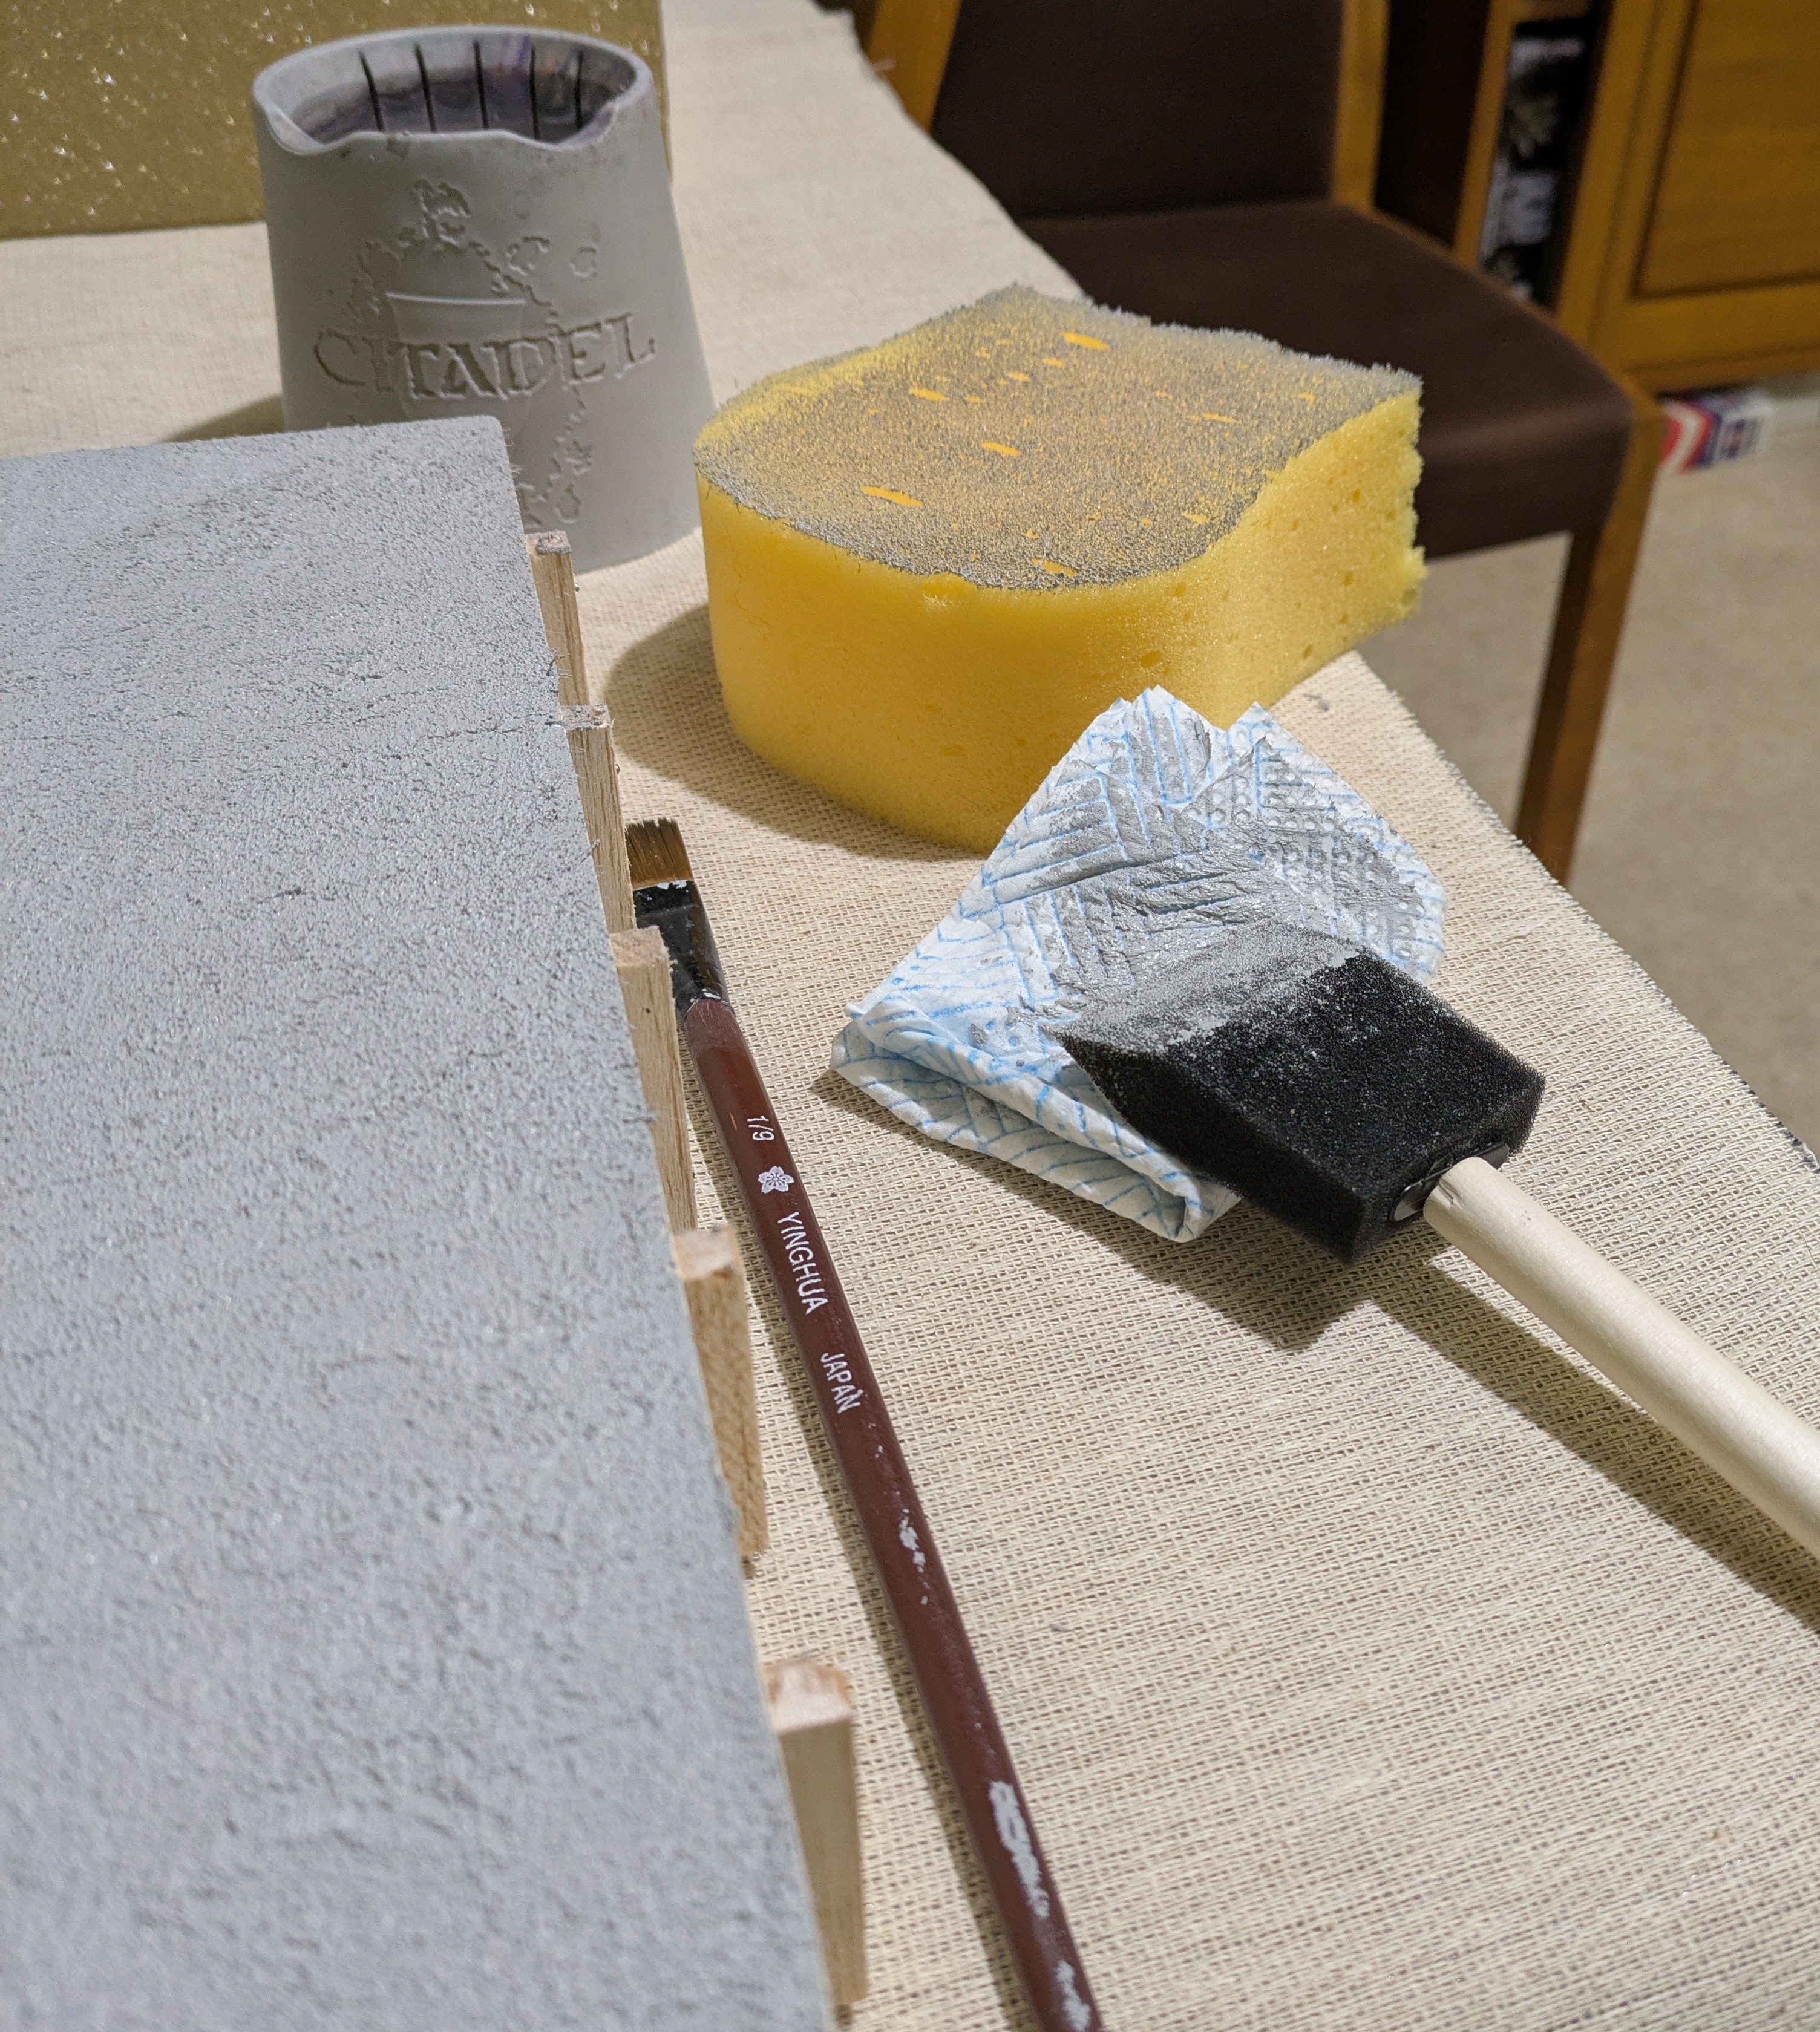
For the dock texture I decided to use a tub of Hobbycraft Concrete Paste which I have had sitting around for more than a year, just waiting for a project to use it on. The instructions say to apply it thinly with a brush or knife. I brushed it on and waited until it had started to set before going over it with a painting sponge, then a larger car sponge to try to minimise the sign of brush strokes. I was originally going to go over the pylons too but decided last minute that the wood would be more visually interesting and made more sense for boats to be bumping up against. I ran out of paste so one side of each platform is bare at the moment – I’ll add something to them to strengthen them if nothing else before the project is done.
This all got done over a few hours while staving off the Sunday Sads. Leaving it to dry overnight, it turned out pretty pale and one platform has a slightly different texture. One of the platforms had some left over grout and glue on it and the poster took to that surface better than the flat one. Next up is going to be washes but that’s for another day.
January Project – TMNT Part 3
The tail end of a week off brings with it the edge of anxiety of returning to work. It’s not an earned response but it is how I feel so I needed something to distract my brain a bit. I put on some white noise and set about reading through a TMNT fan supplement I found online for Pulp Alley. I can’t link directly to it as I’ve deleted my Facebook account now but if you look around on Pulp Alley fan groups, you’ll be able to find it. It is written by Niels Jochems. The book is a campaign, running to 40 pages with multiple scenarios included.
In it there are stat blocks for the turtles, April and most of the baddies I want to run. Sadly I don’t have any Mouser models. Crooked Dice do some but for now I’ll sub in more Foot Clan. There’s no Splinter or Casey Jones included but I’m sure it won’t be hard to make them up. Pulp Alley looks like a very easy game to make characters in but I wanted to run some stat blocks that had been play tested by people who know the game better than I do for starters.
I don’t want to spoil myself for the campaign especially as I’ll be playing solo so I’m only reading up to the first scenario to find out what I need. The campaign is designed for two players and includes a mechanic for sewer tokens which I’m not sure will work in solo but seemed like a fun little thing to try and scratch build.
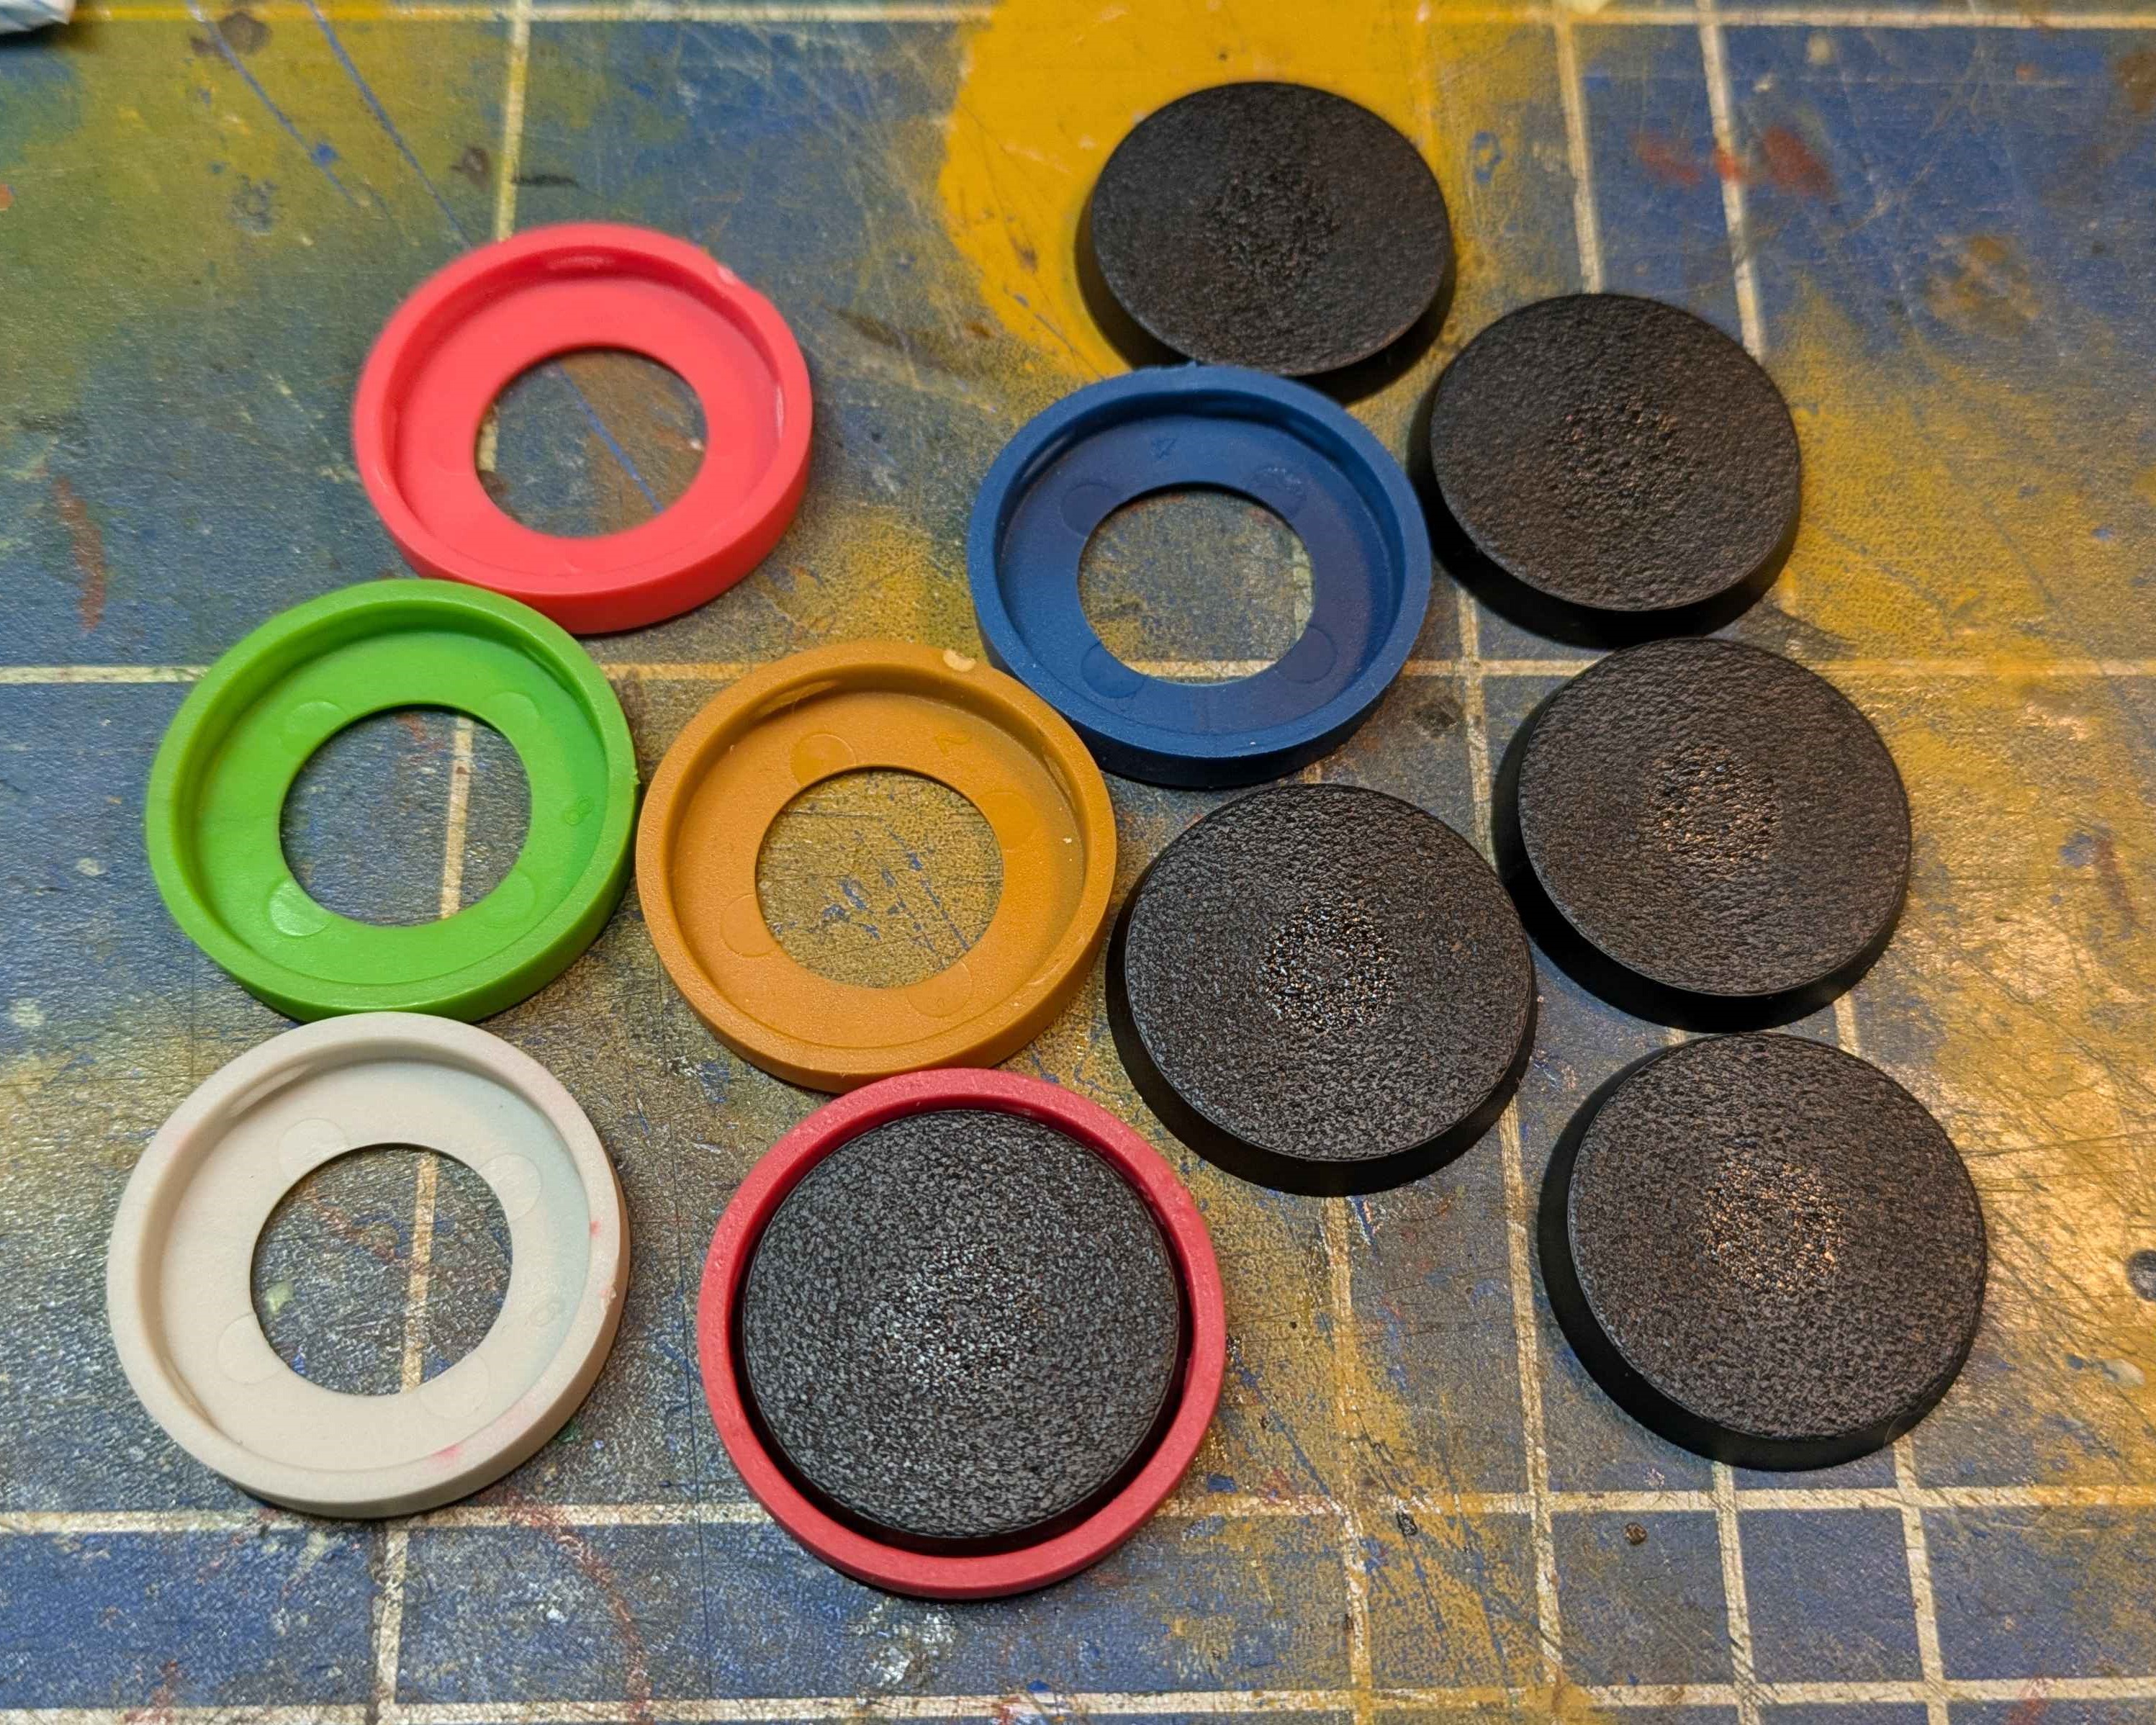
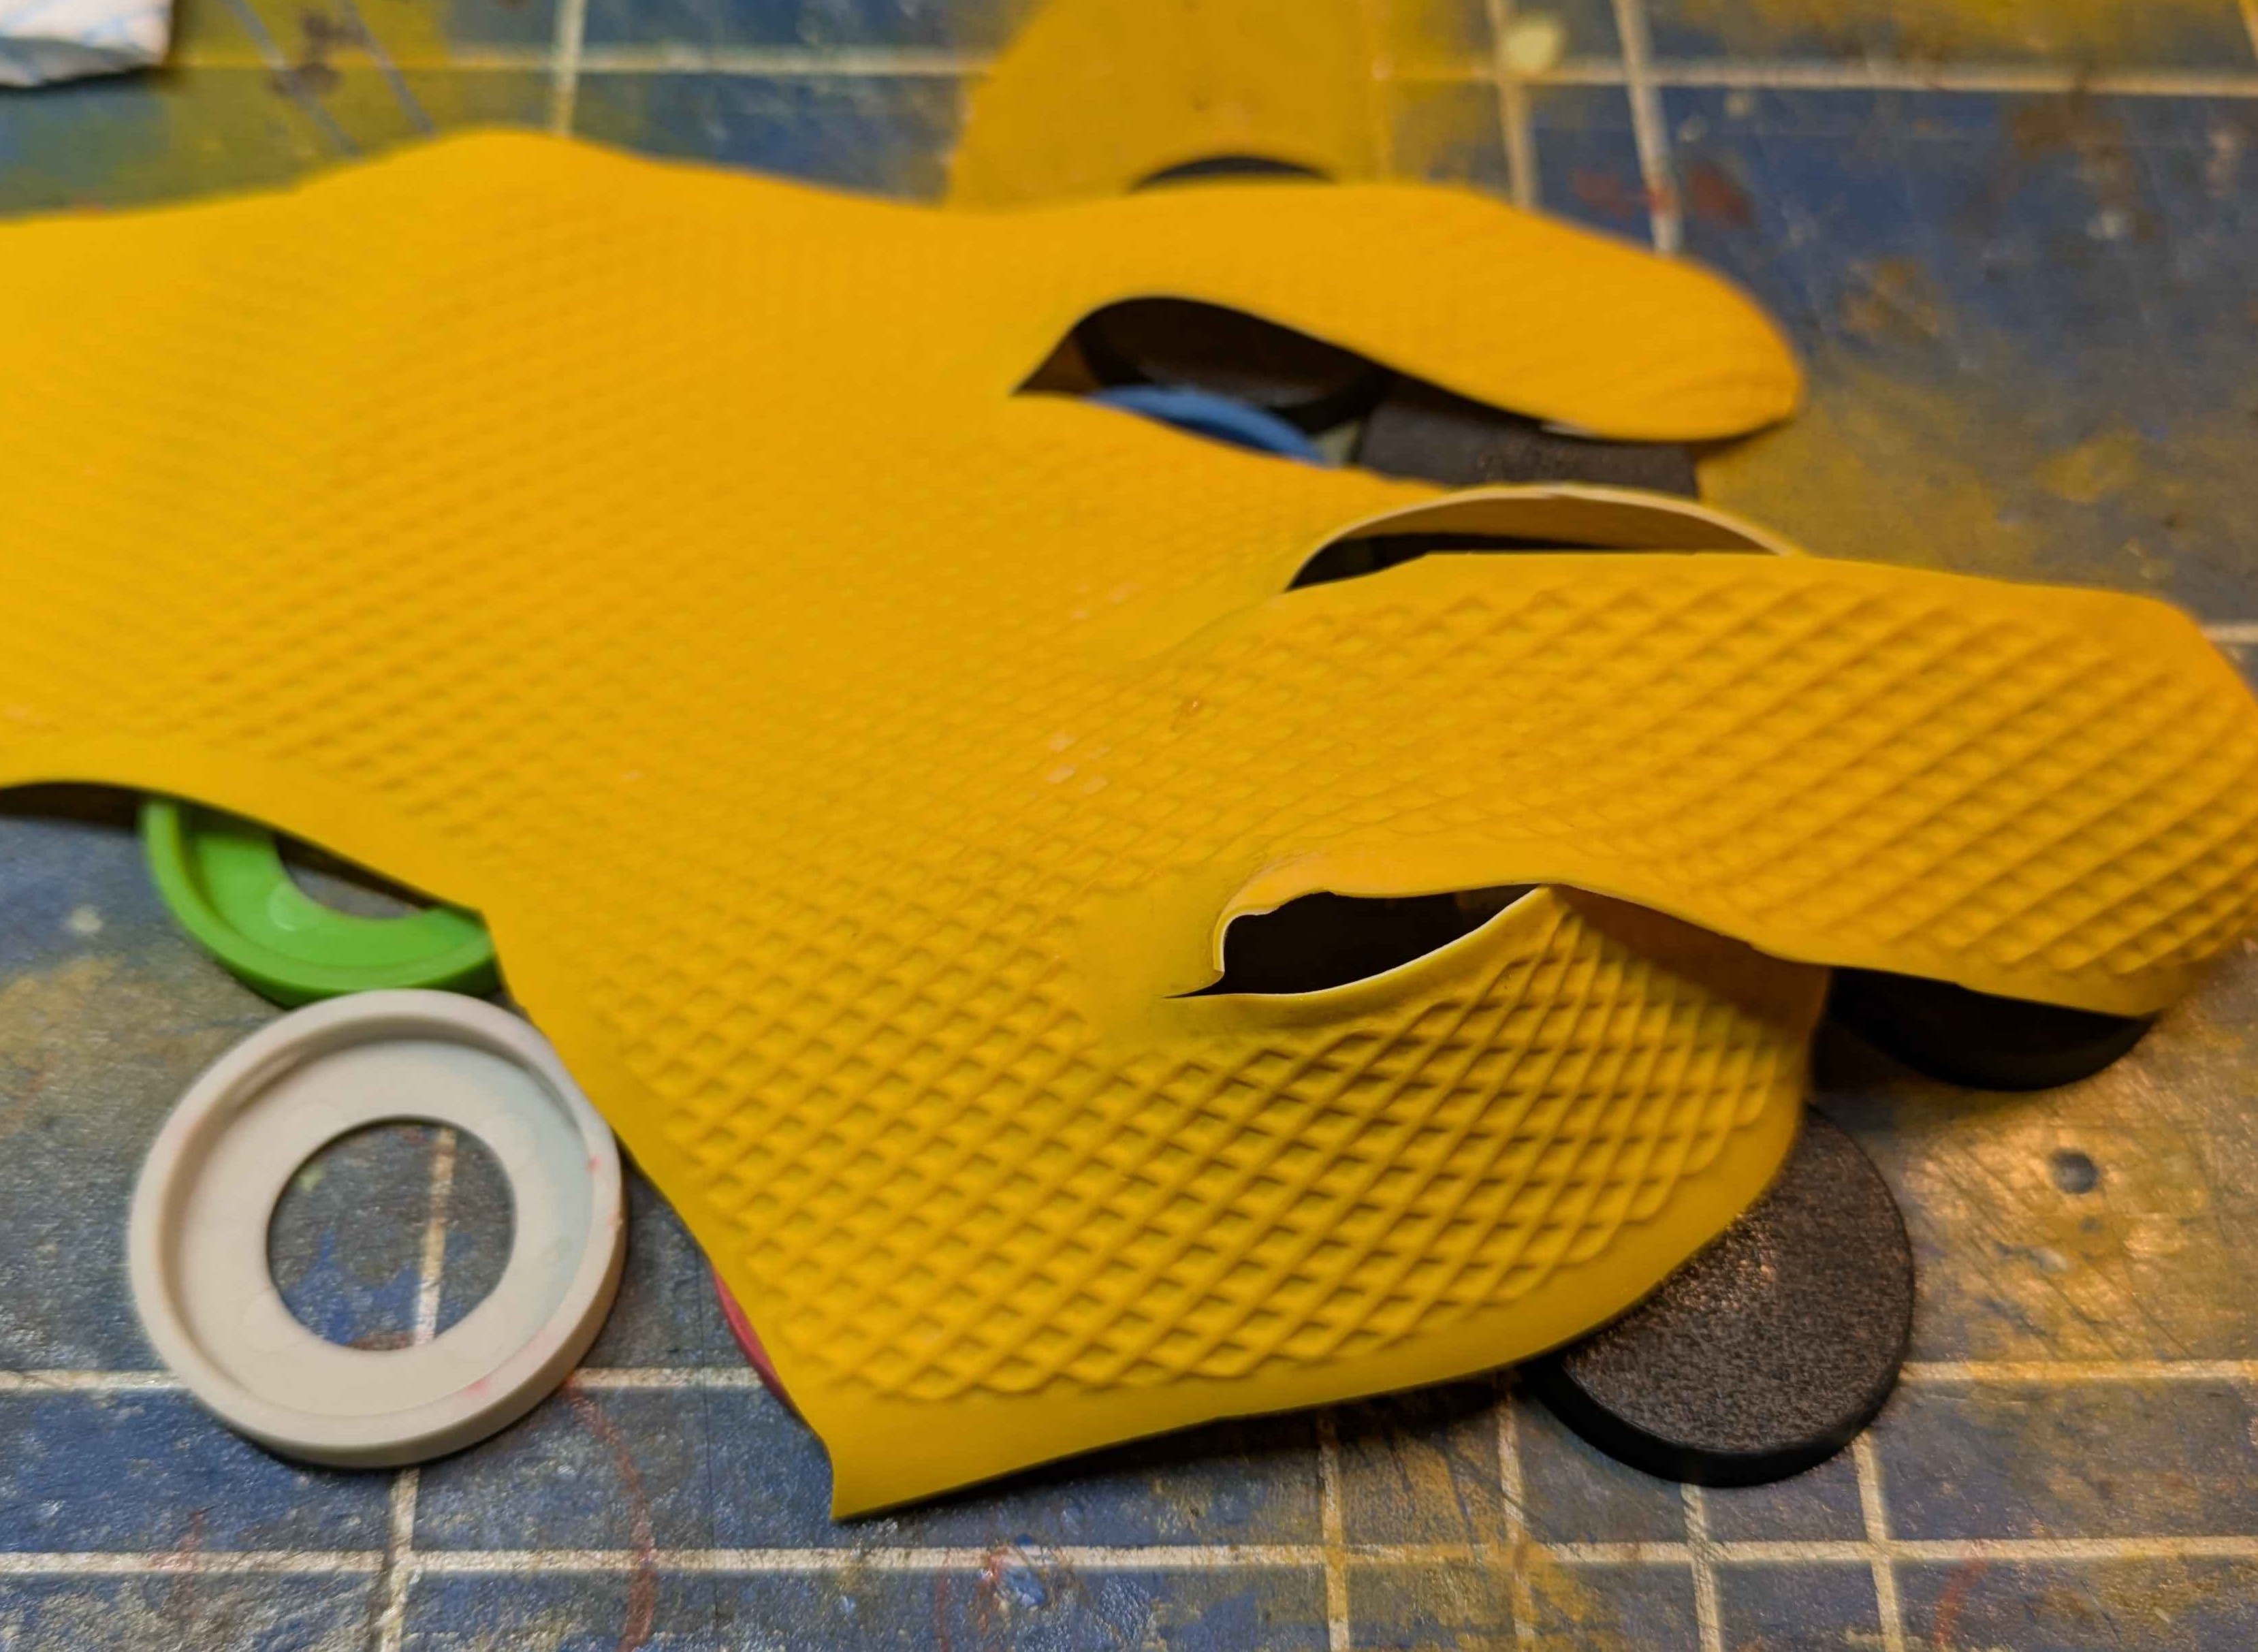
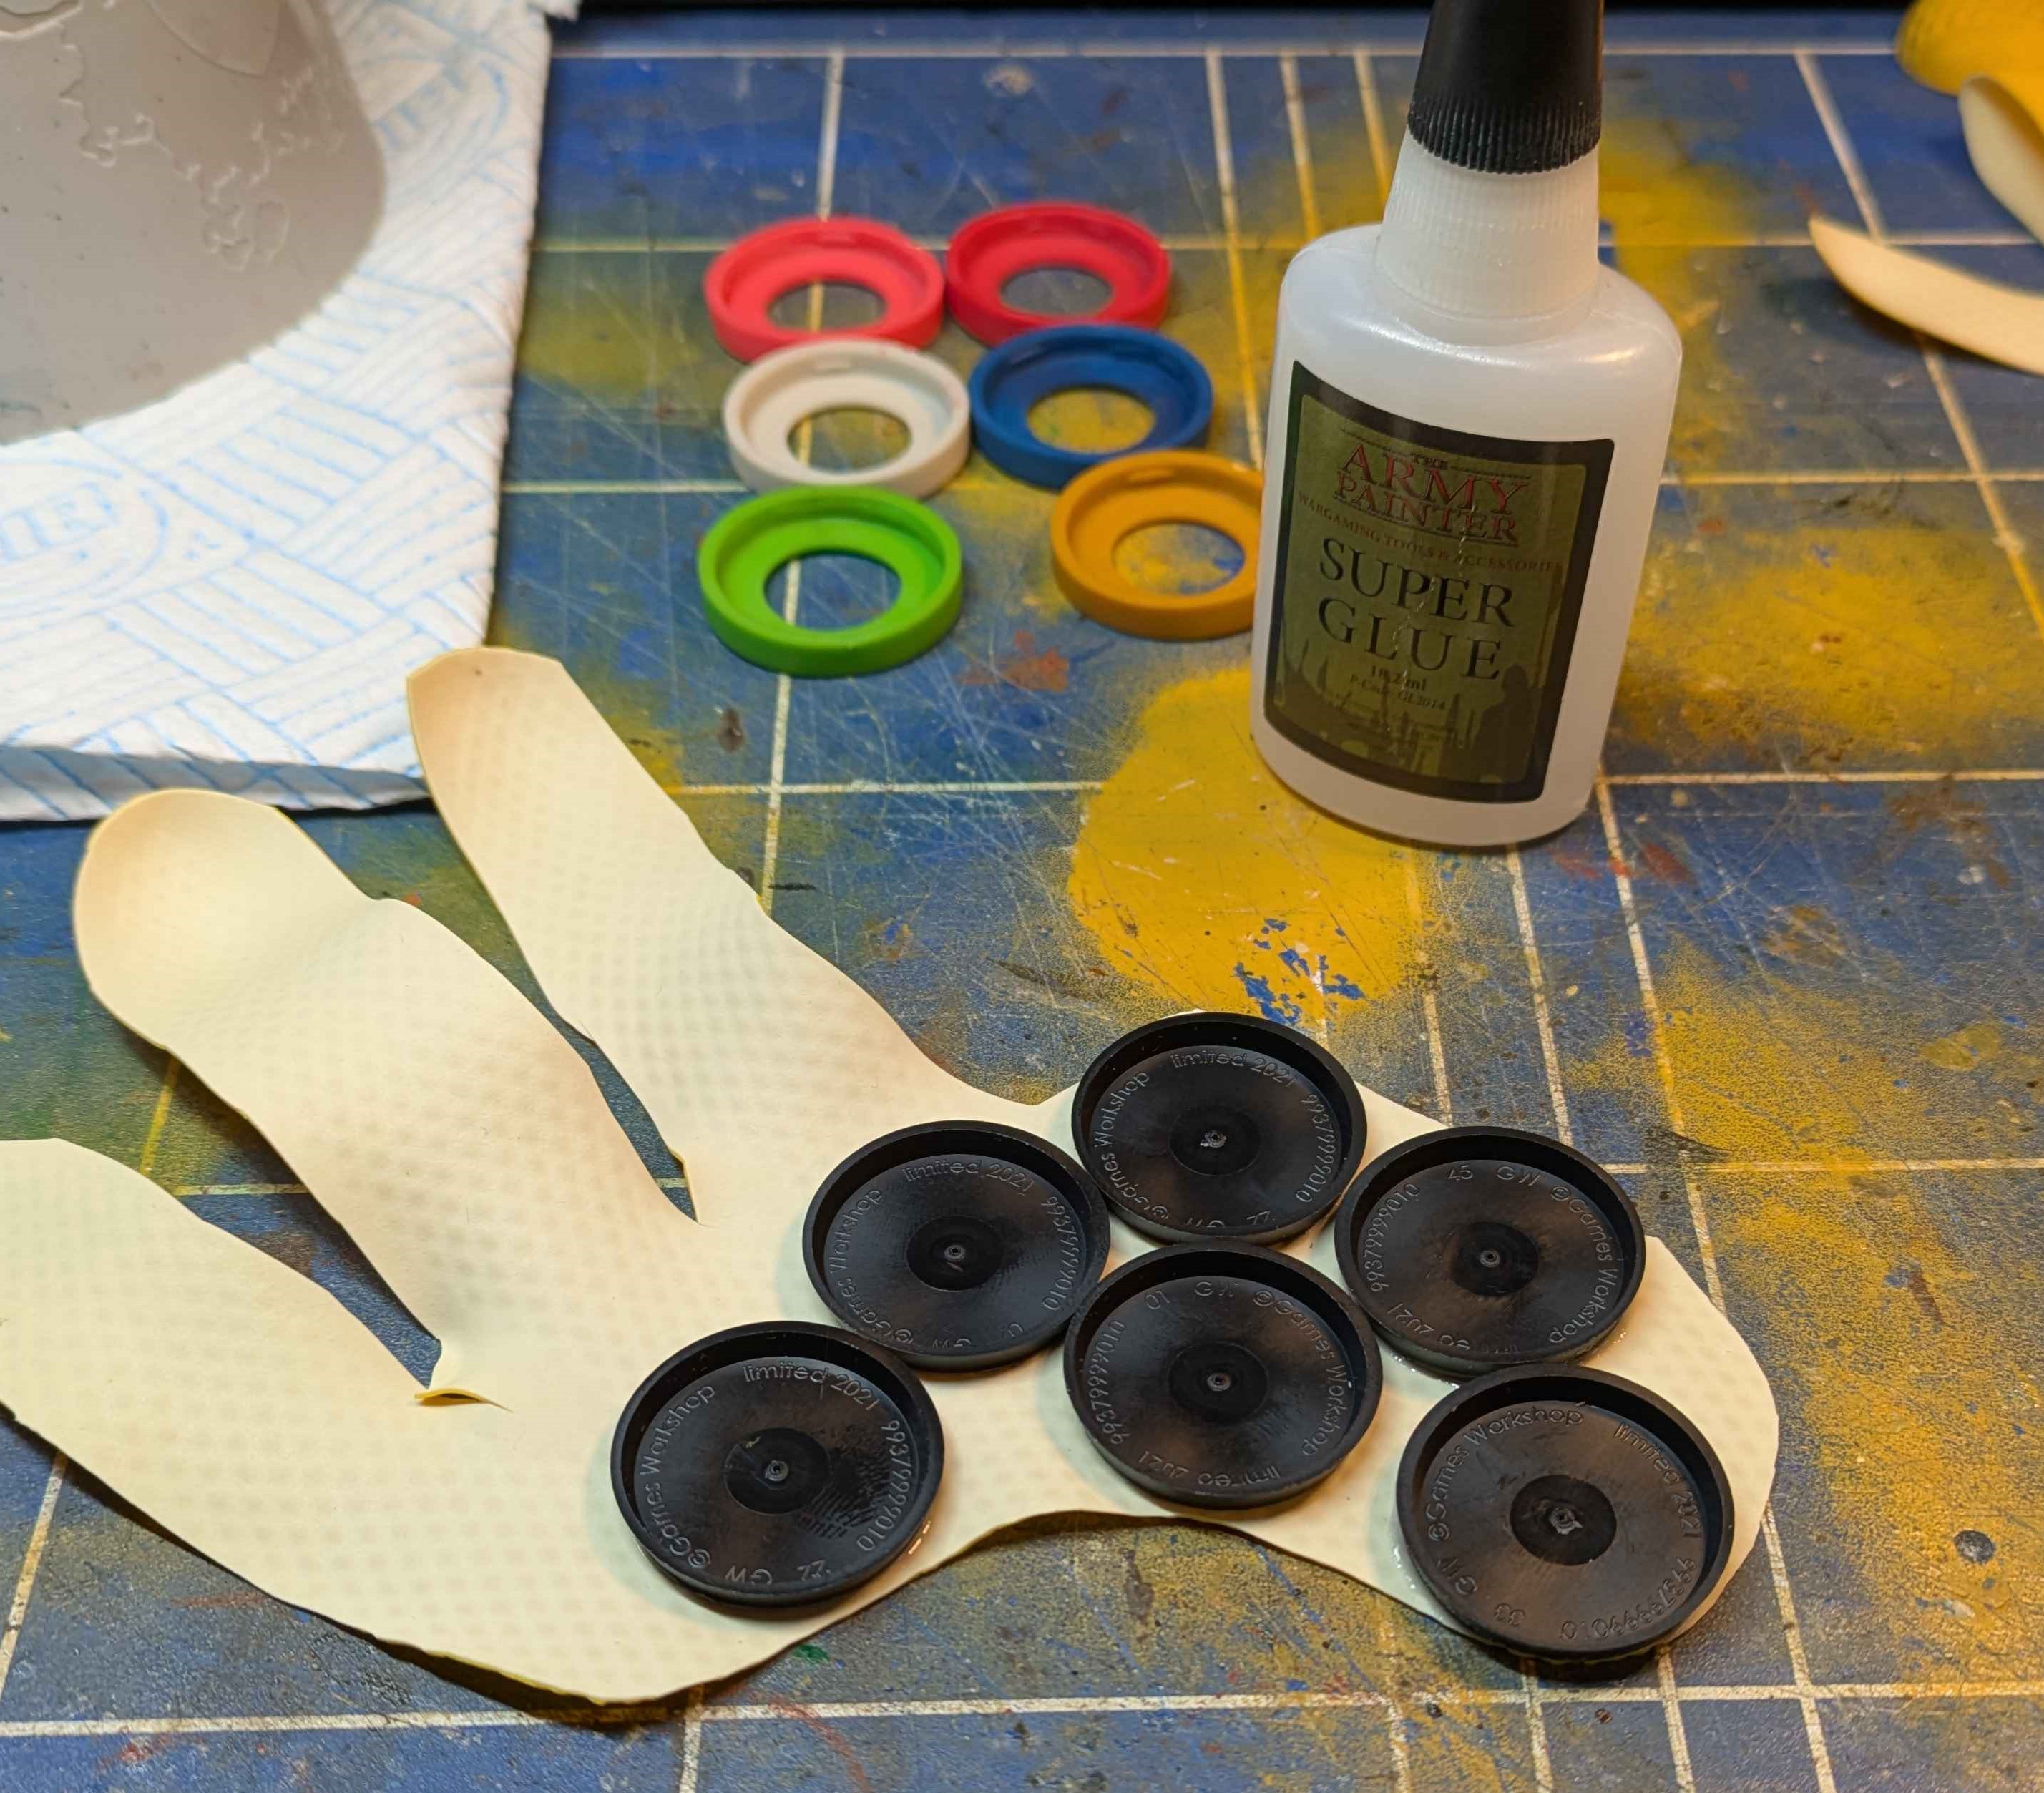
Digging through my box of random things with shapes or textures, I found some cut up rubber glove, the inner texture of which I’ve used for space ship flooring in the past and will work perfectly as the main bit of my sewer cover. I also found some coloured rubber rings from a board game (Zombicide I think) which are used to mark players or conditions… I don’t actually know. I do know that they fit a 25mm round base with a bit of effort.
- Super glue the bases to the underside of the rubber glove to make sure that the full base had texture on it. I placed a weight on top to keep the contact firm while the glue dried.
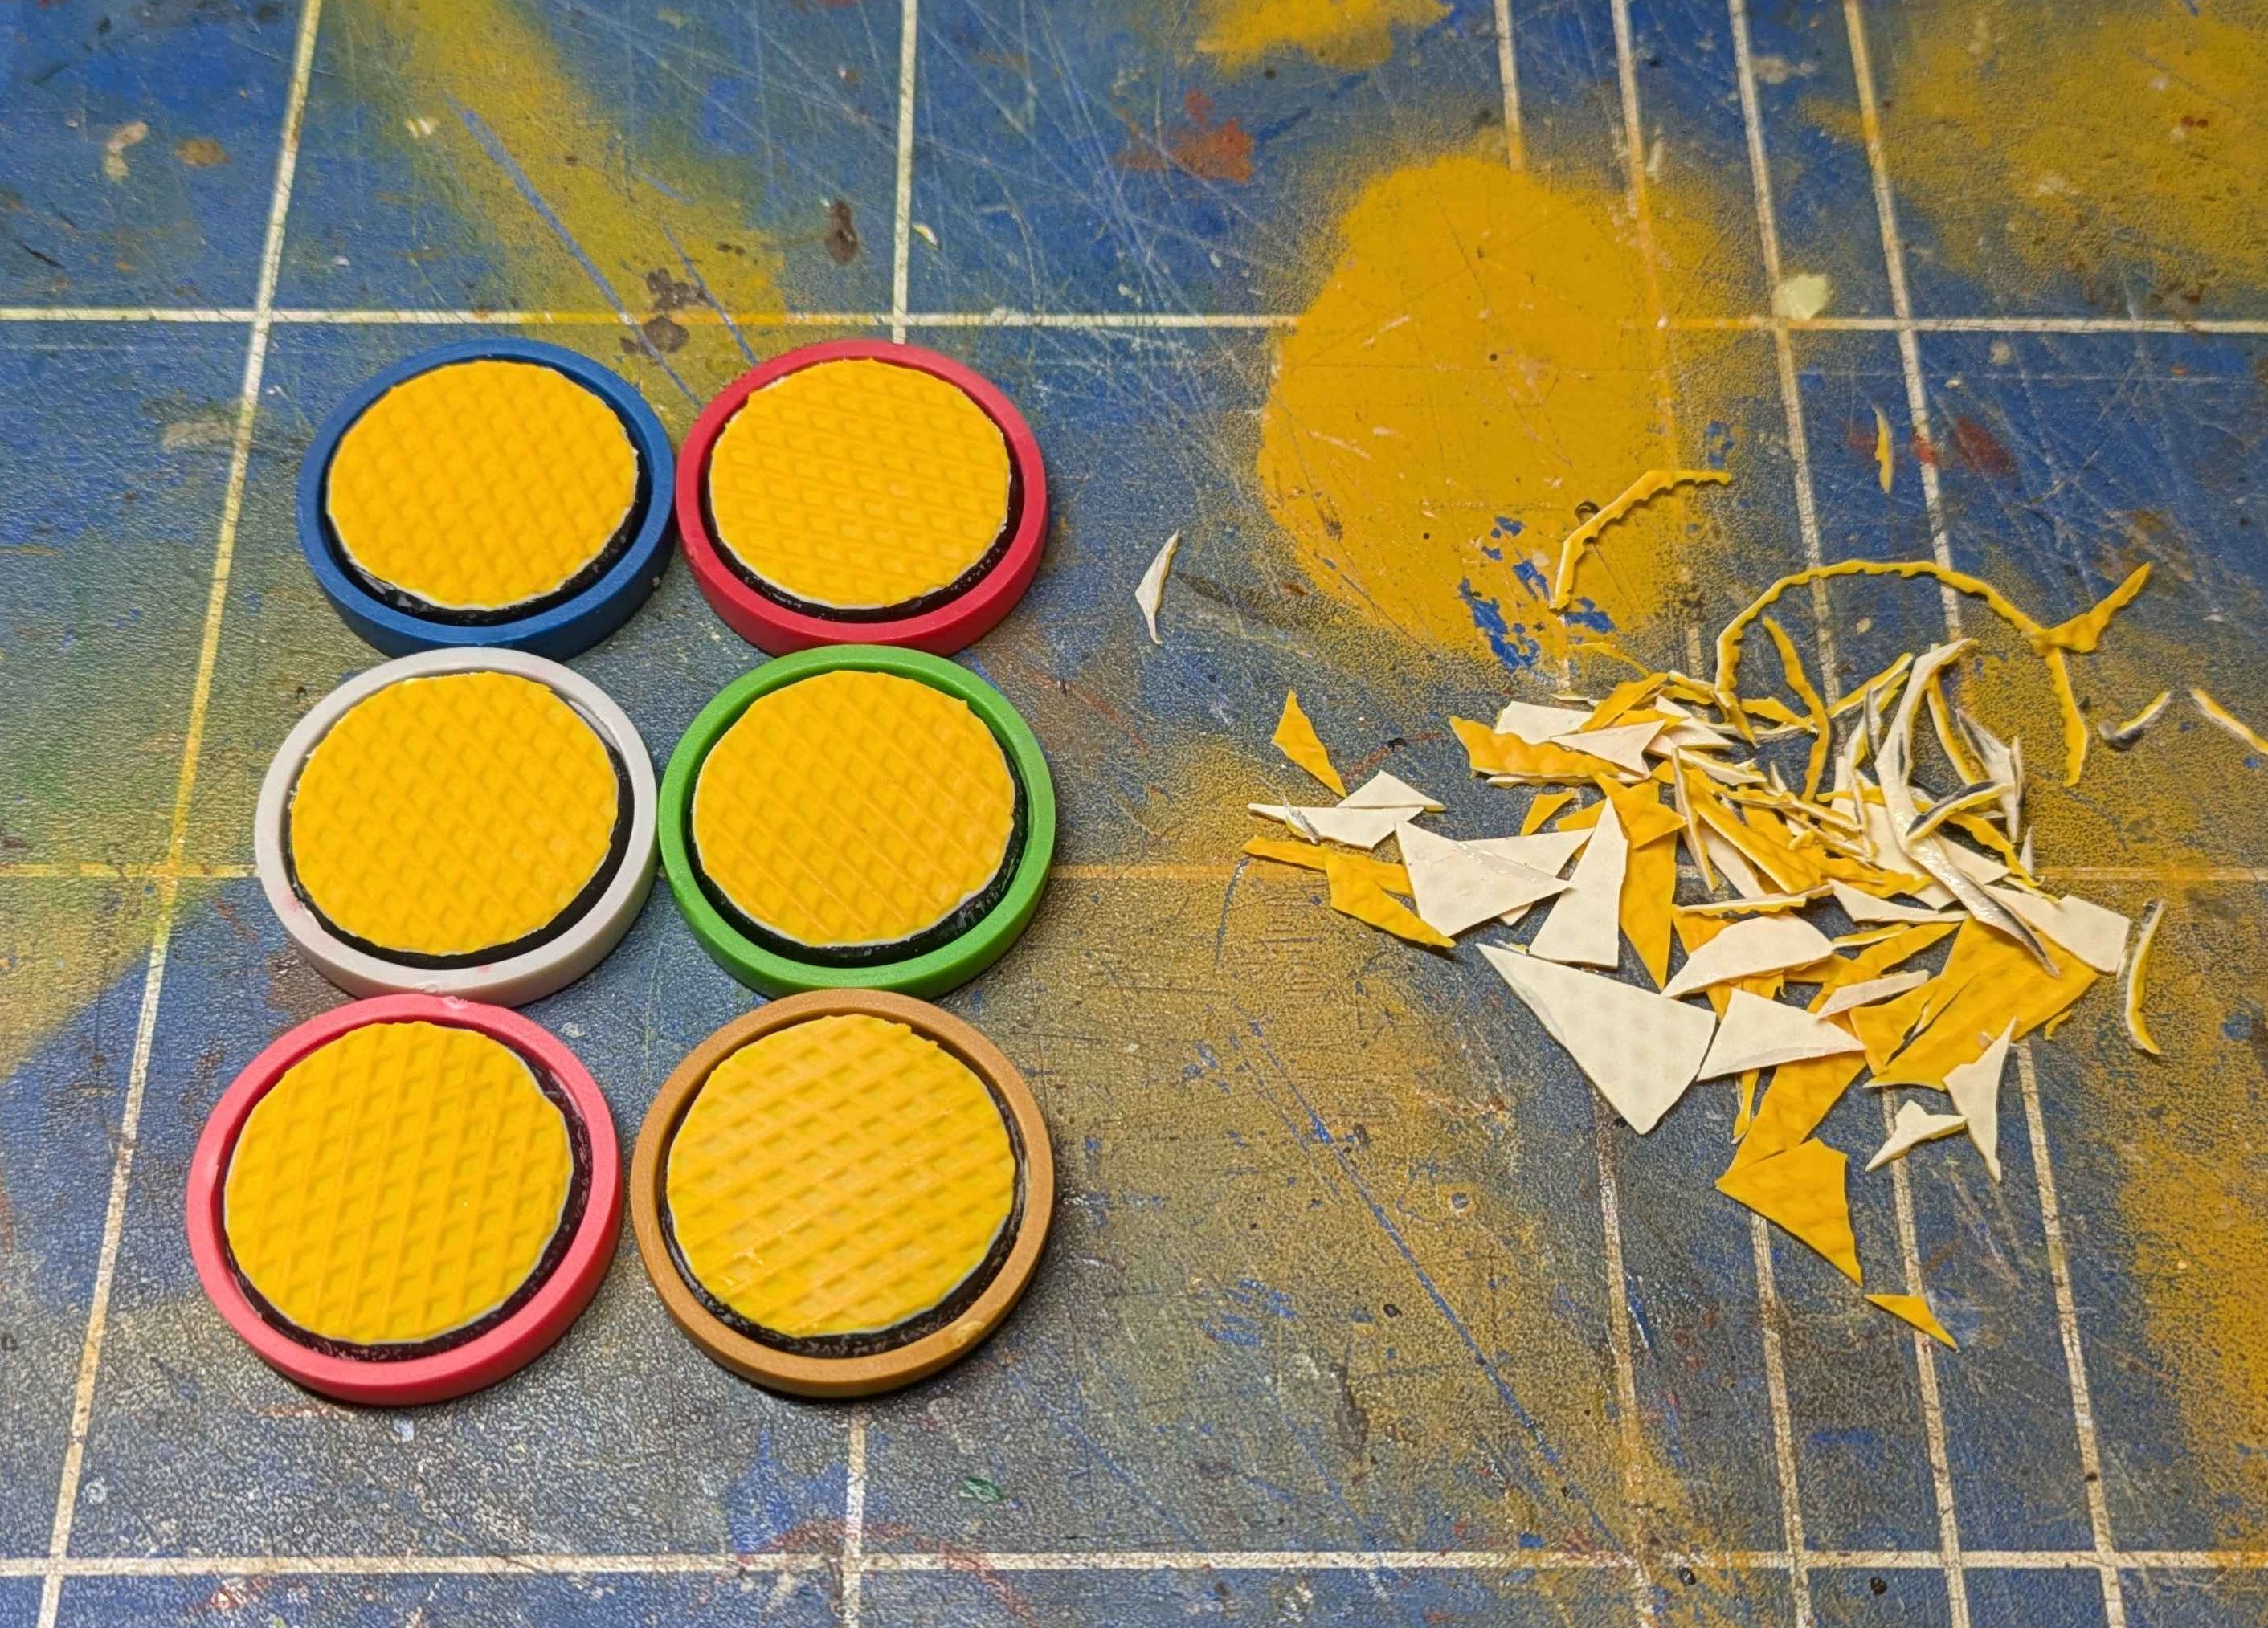
- Cut round the bases with a very sharp knife to get a good clean edge
- Put rubber rings on the bases, didn’t bother to glue them
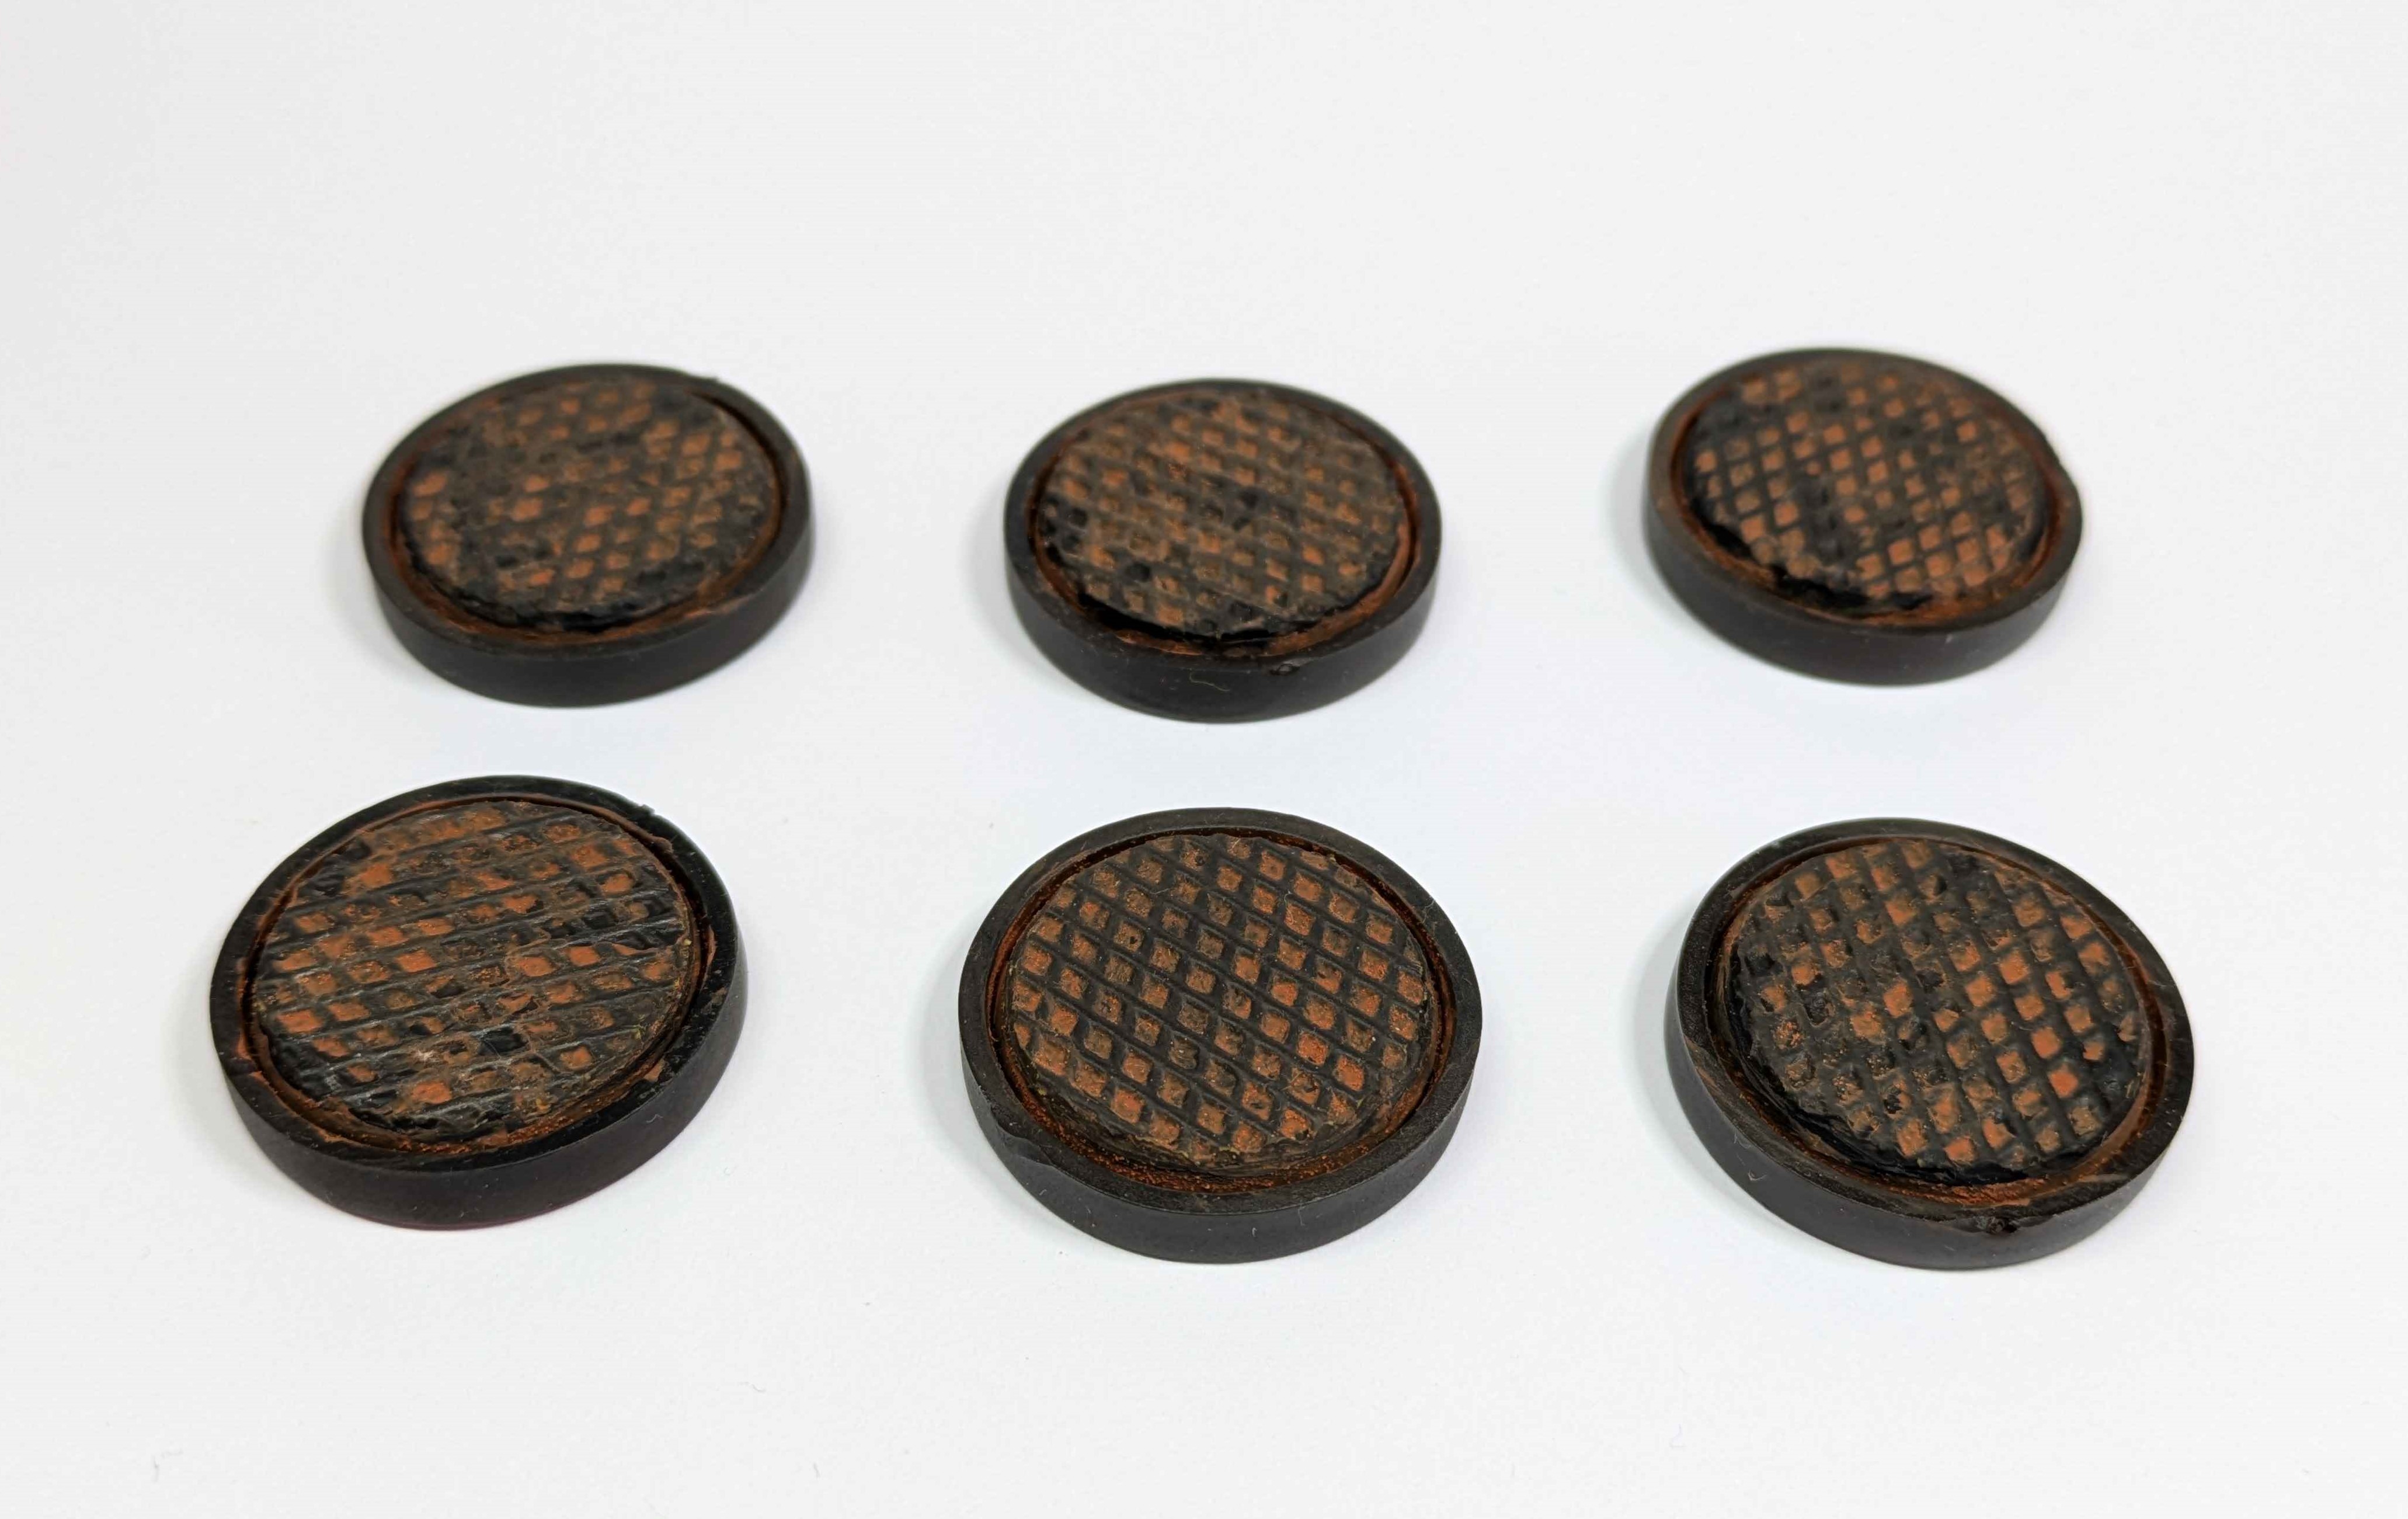
- Prime dark brown
- Drybrush with black
- Add a bit of rust effect (Warpaint Fanatic Fresh Rust) and then wipe off with a paper towel
January Project - TMNT Part 2
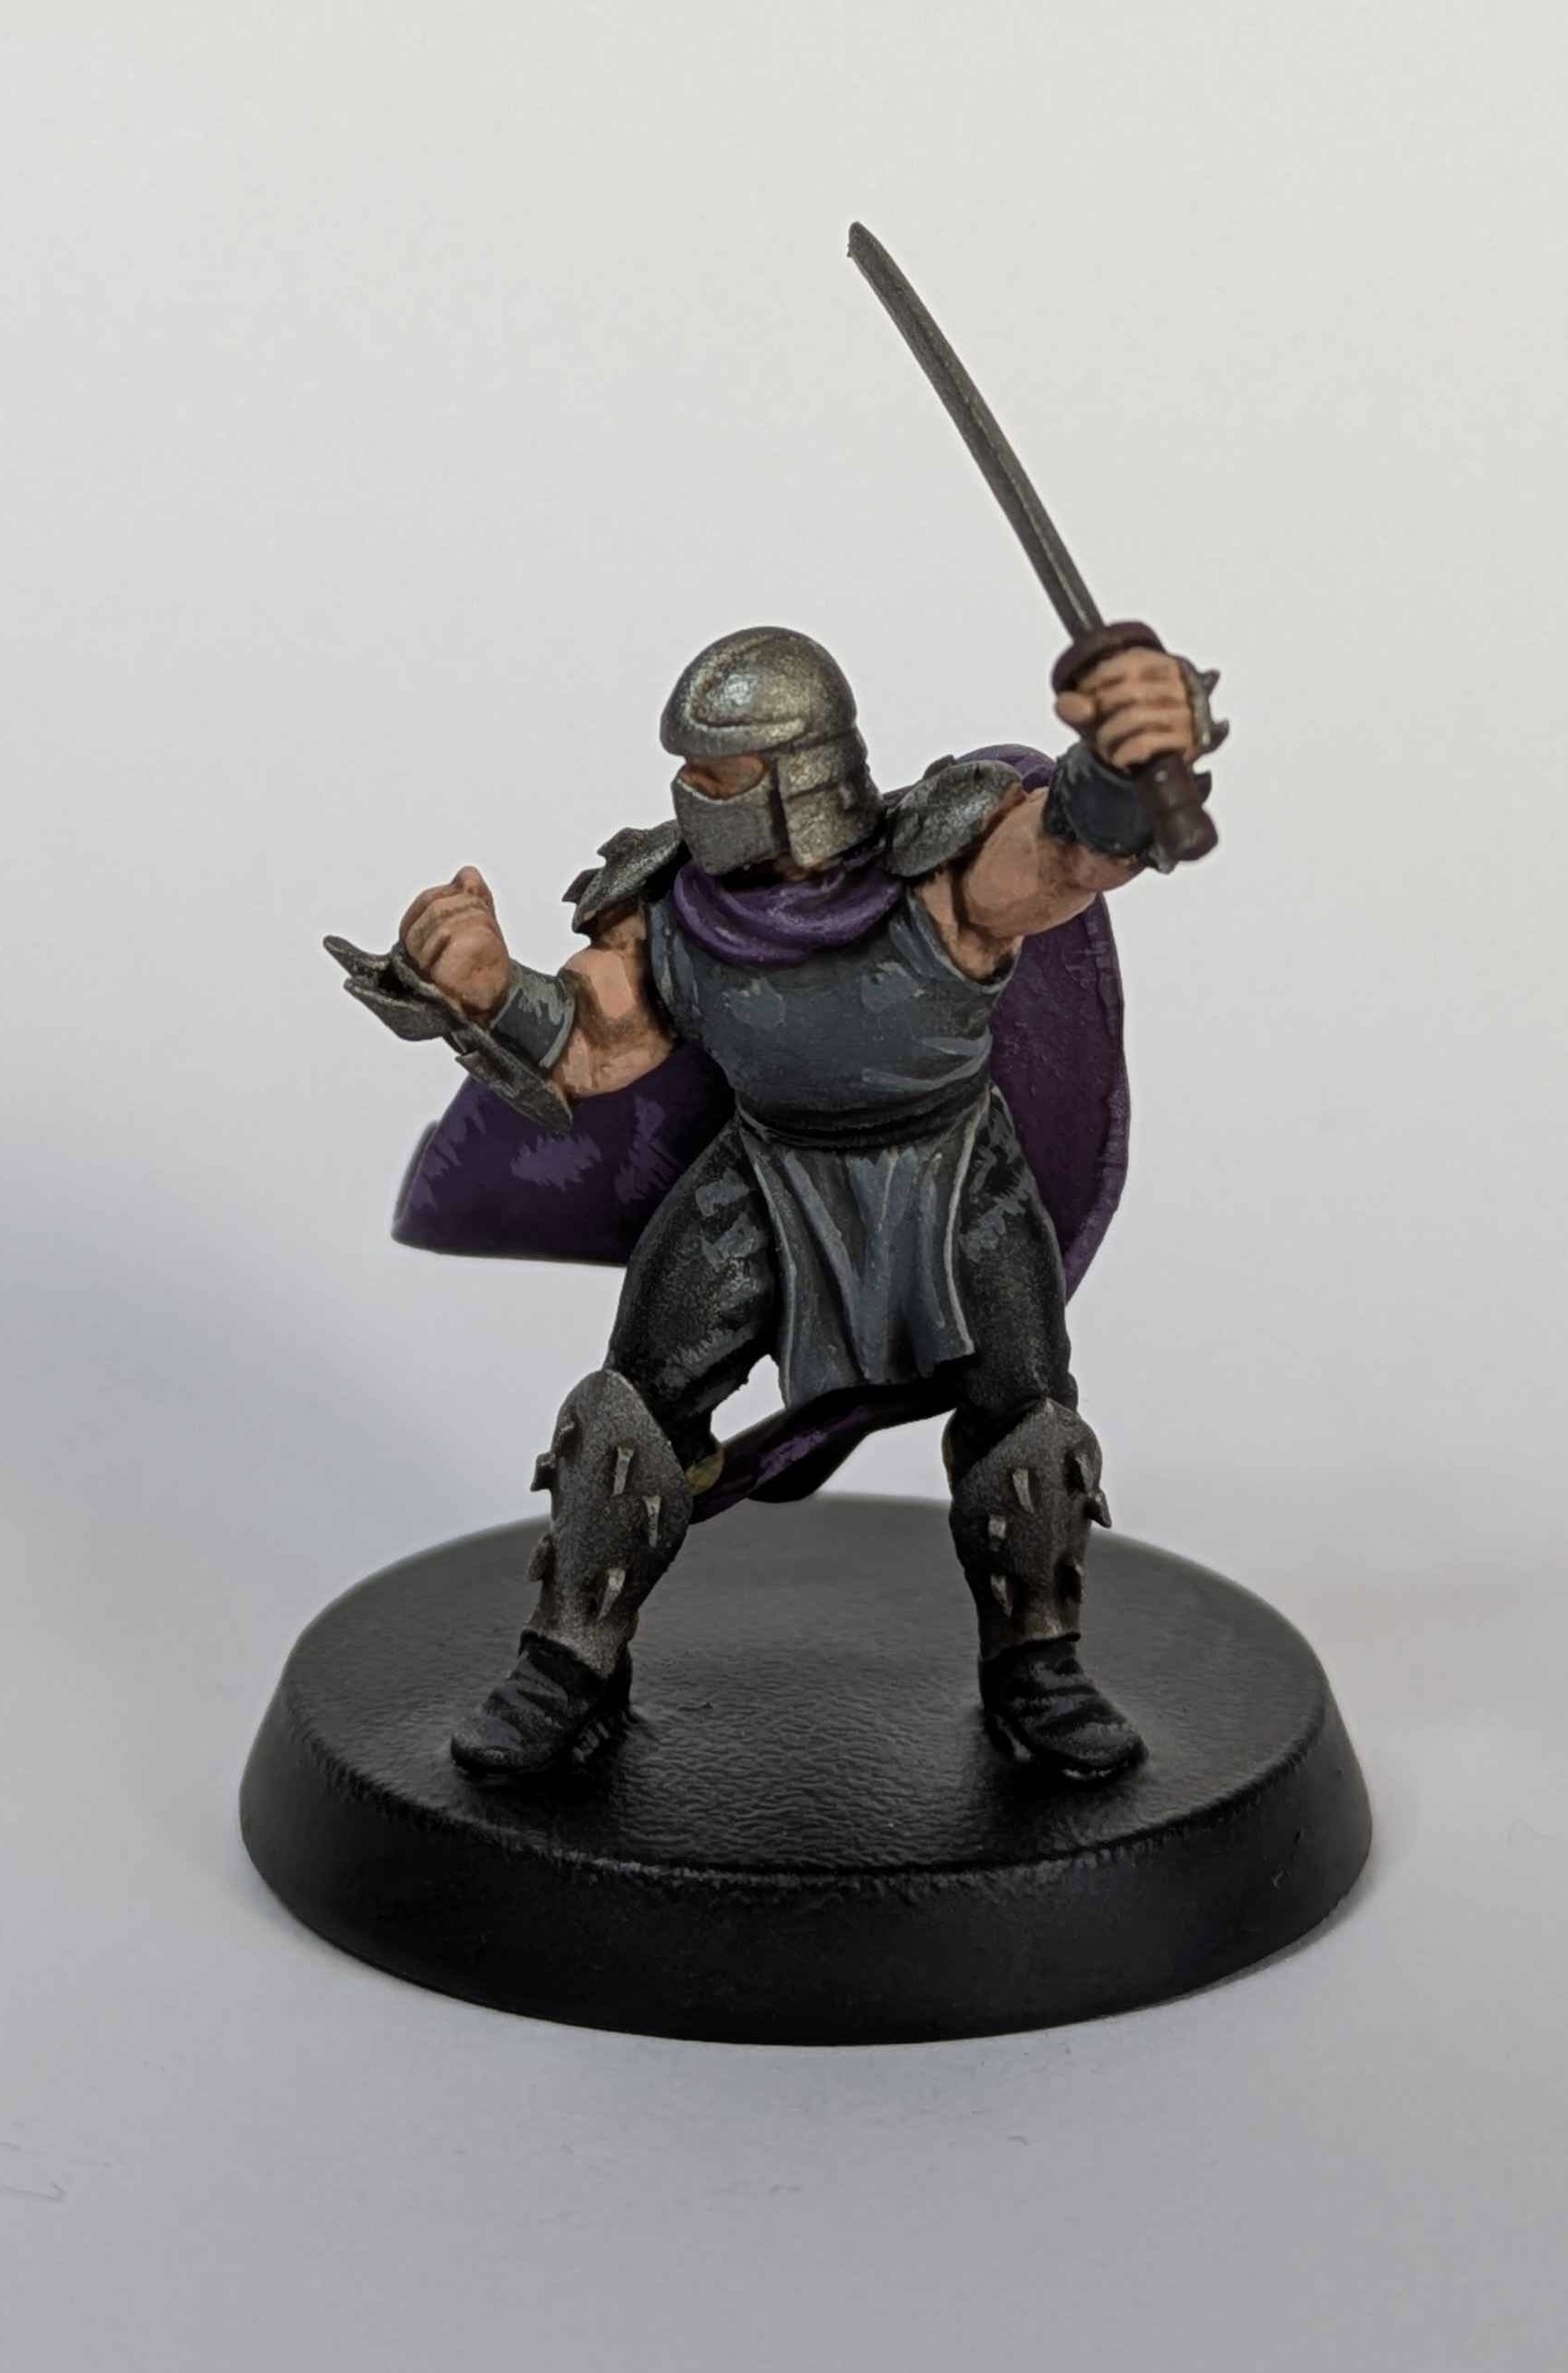
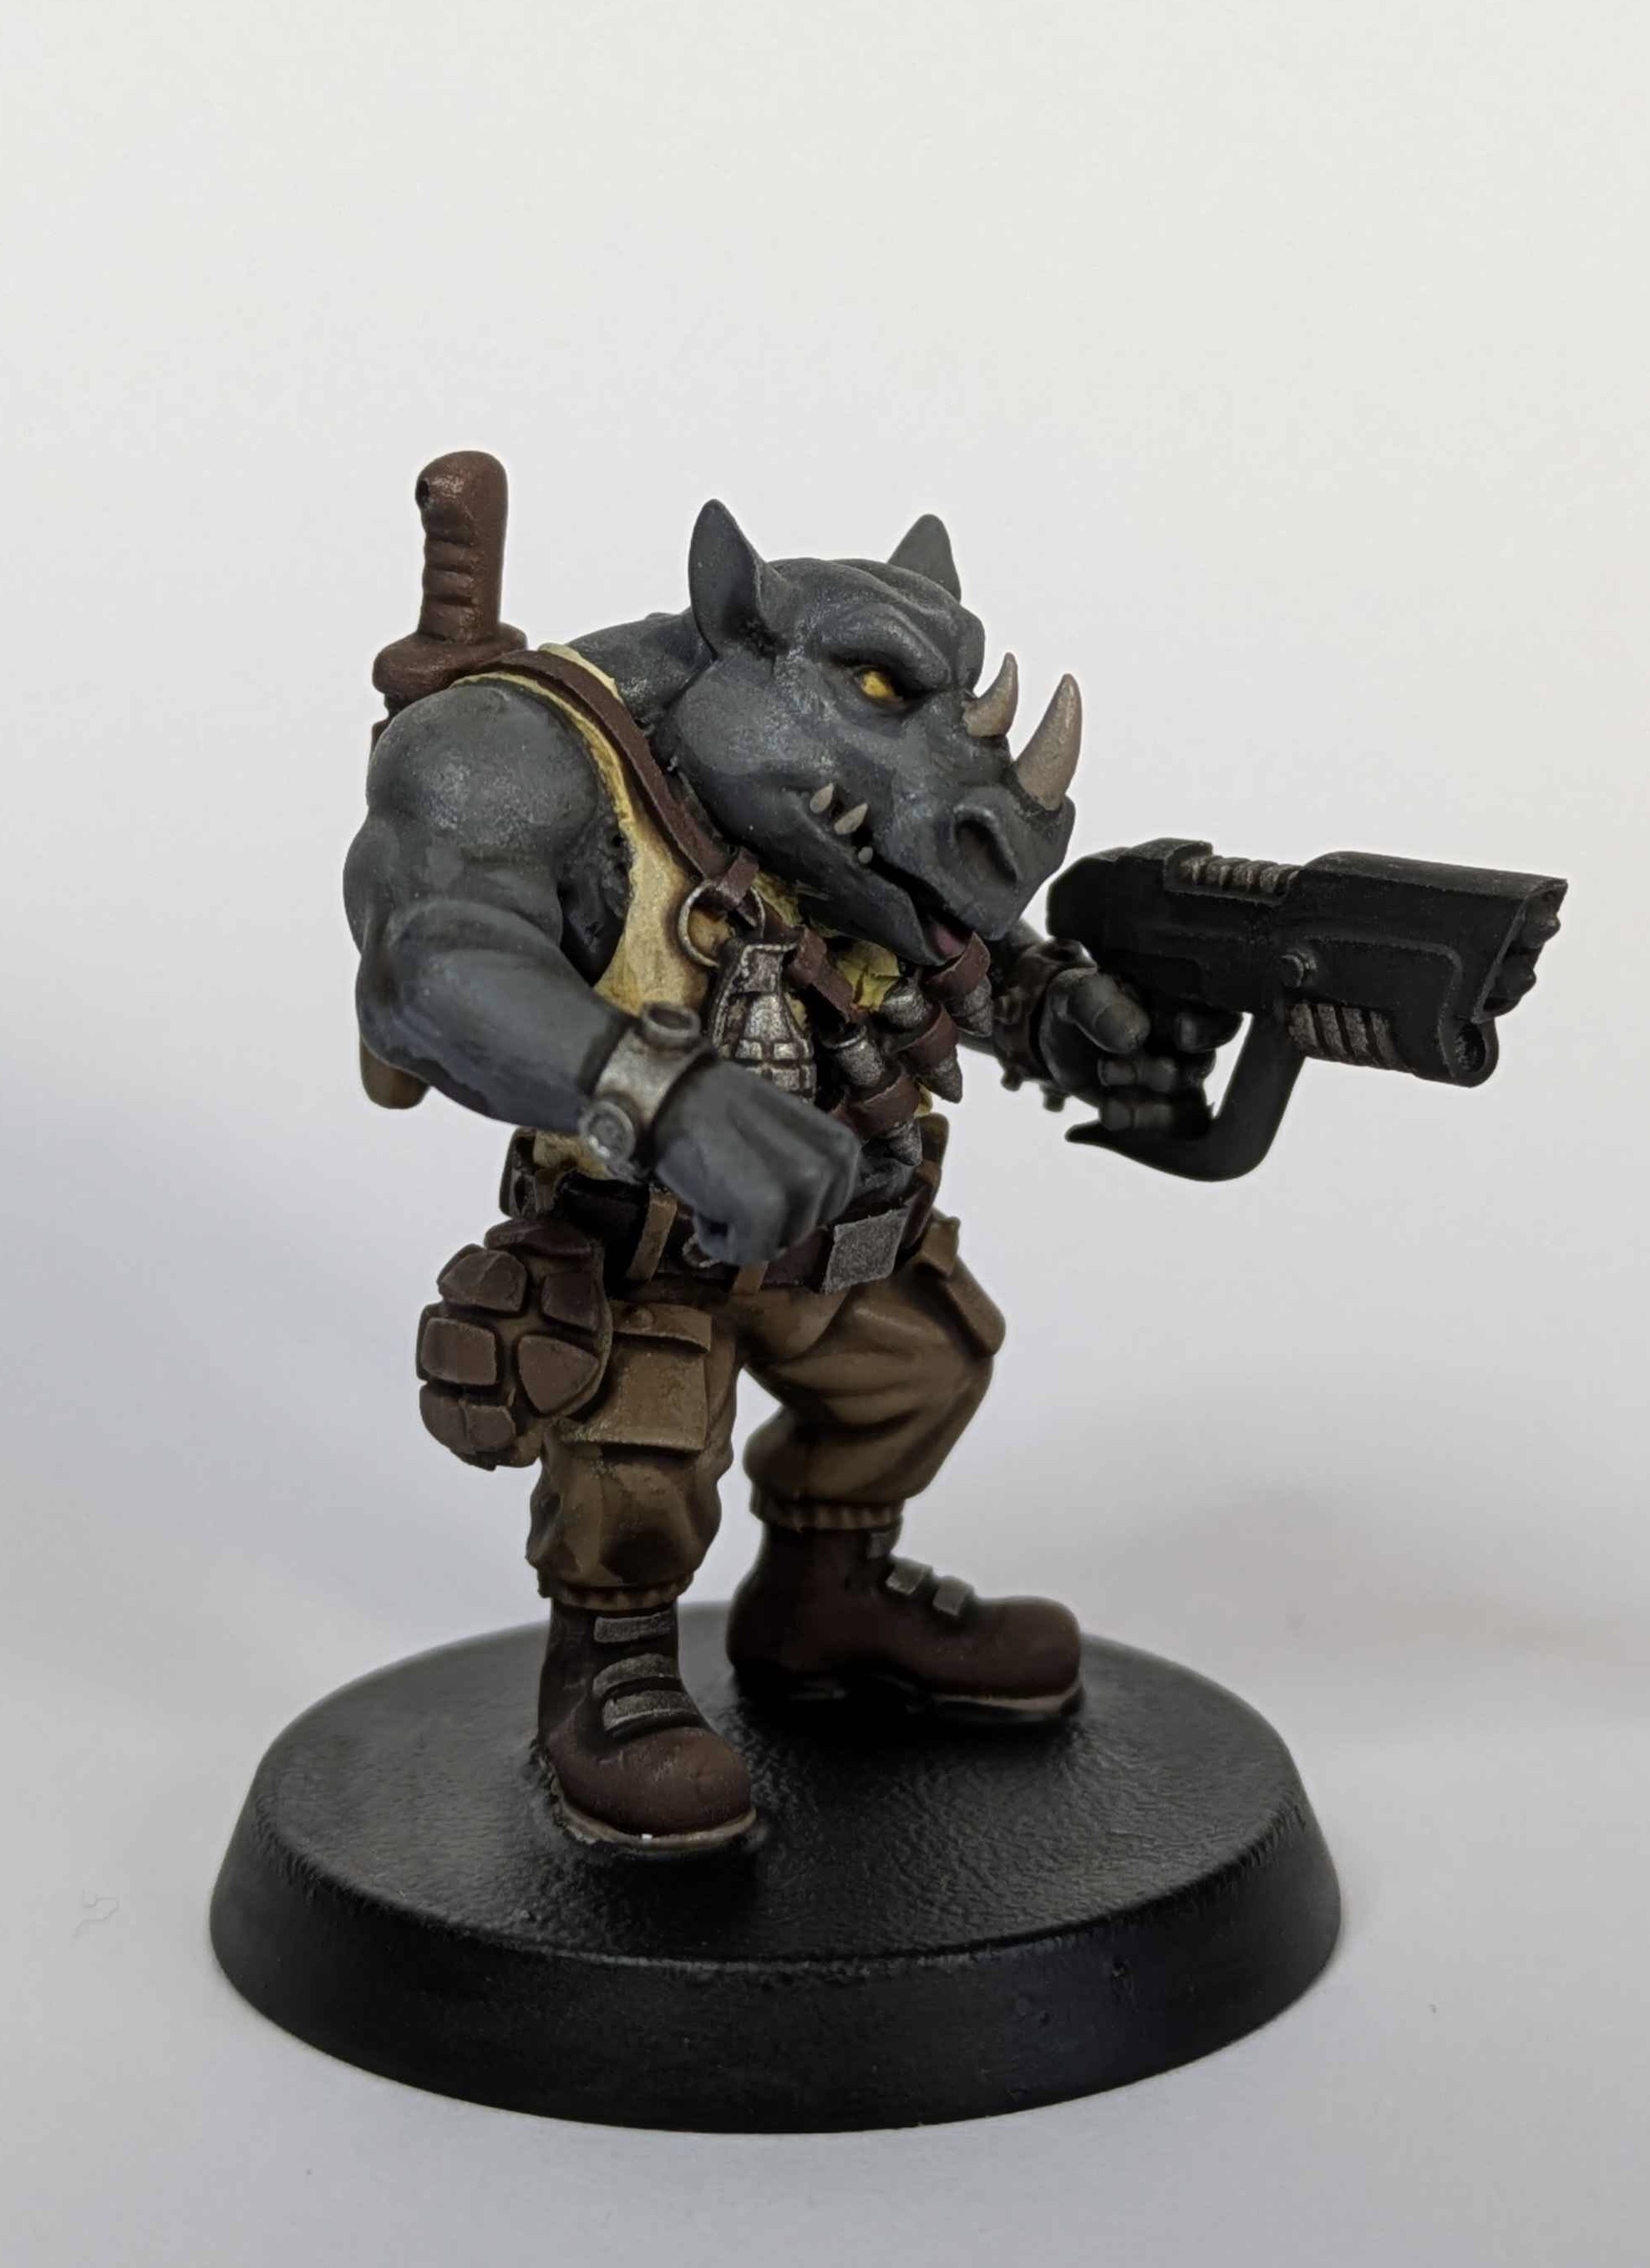
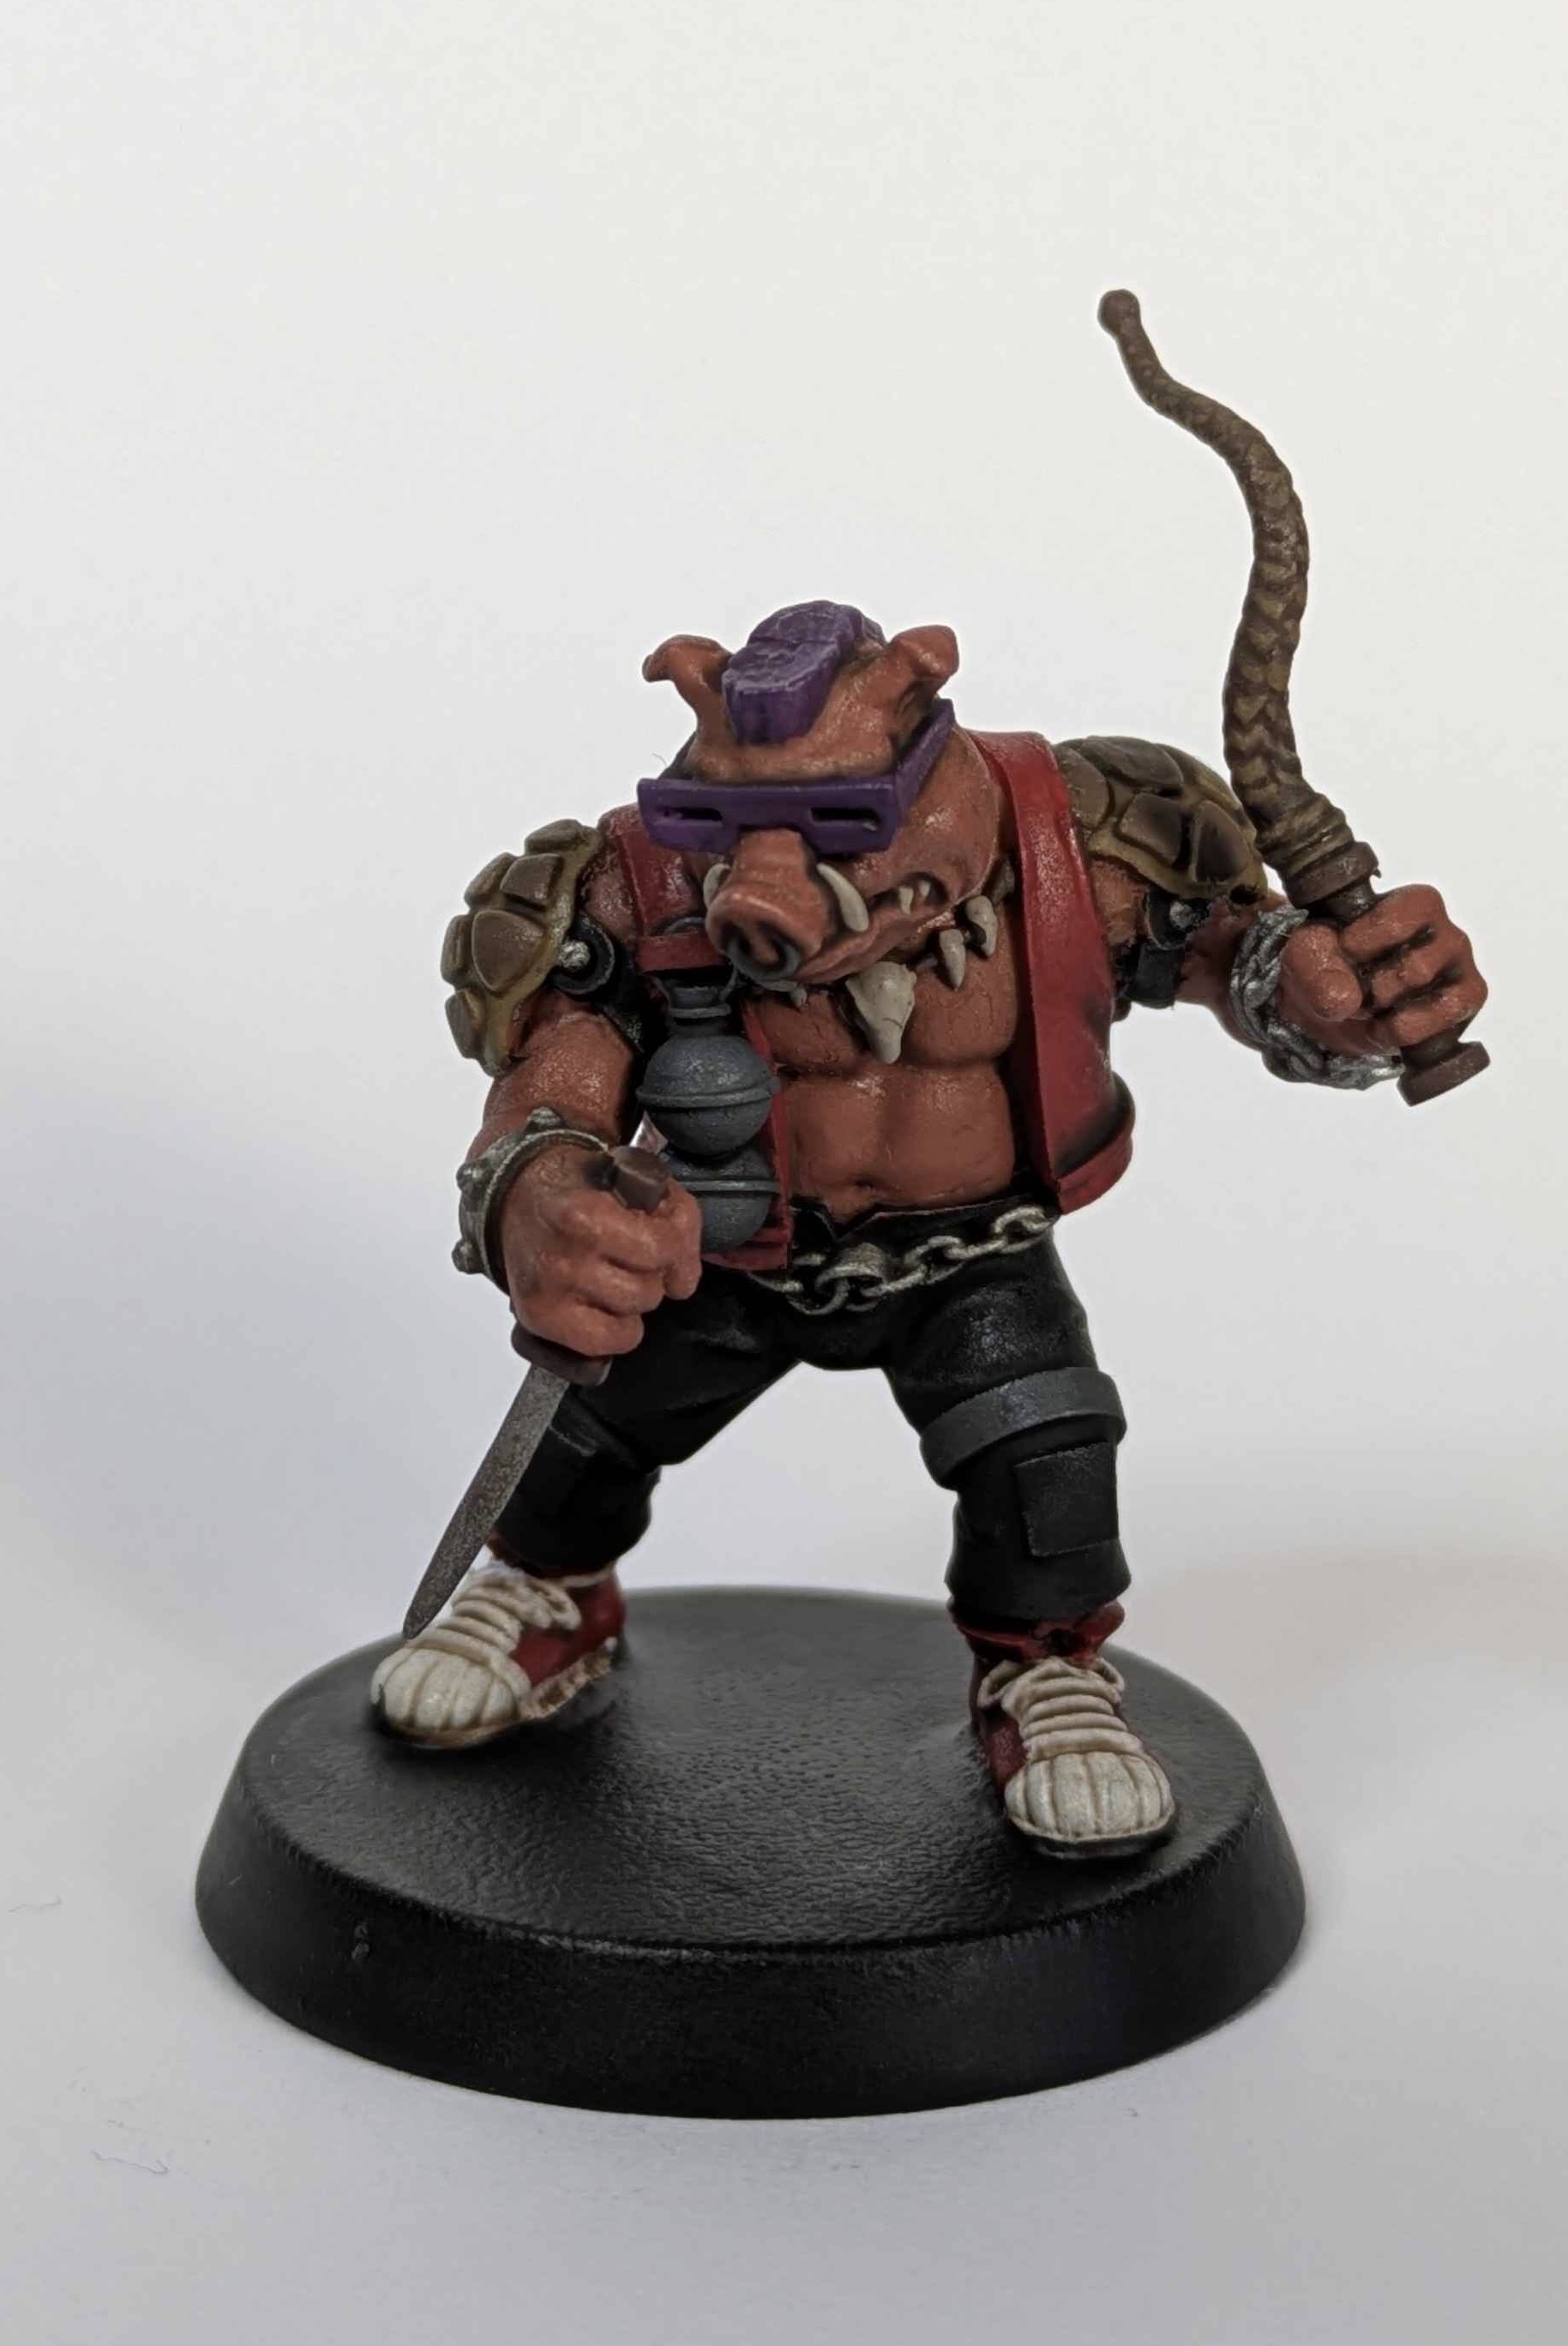
Continuing to enjoy my week off, I painted up the rest of the baddies. It struck me part way through that animators must pick colours similarly to hobbyists – pretty much all the models used paints I already had on the palette. Krang was horrible to paint (mostly cos it’s just gross) but getting all of them done to tabletop standard for a game is the point of this project. Done, not perfect.

January Project – TMNT Part 1
So the first set of minis I’m working on this year don’t have their own project log on the site but there was always an intention that they would. I’ve had the Brother Vinni Mutant Turtles (https://brother-vinni.com/products/copy-of-vigilante-miniature-brother-vinni) for a while and the intention of playing them in Pulp Alley 2nd edition. That means painting up the minis, working on some terrain and learning the rules… let’s aim for a month turn around shall we?
The Minis:
I try to take a week’s holiday in January as we don’t close over Christmas except the public holidays. One of the benefits of taking time off after everyone else has gone back to work is you don’t need to come up with lame excuses for staying home and painting toys. Here’s what I’ve got to work on this week then:
Good guys – all four turtles, Splinter, April and Casey Jones
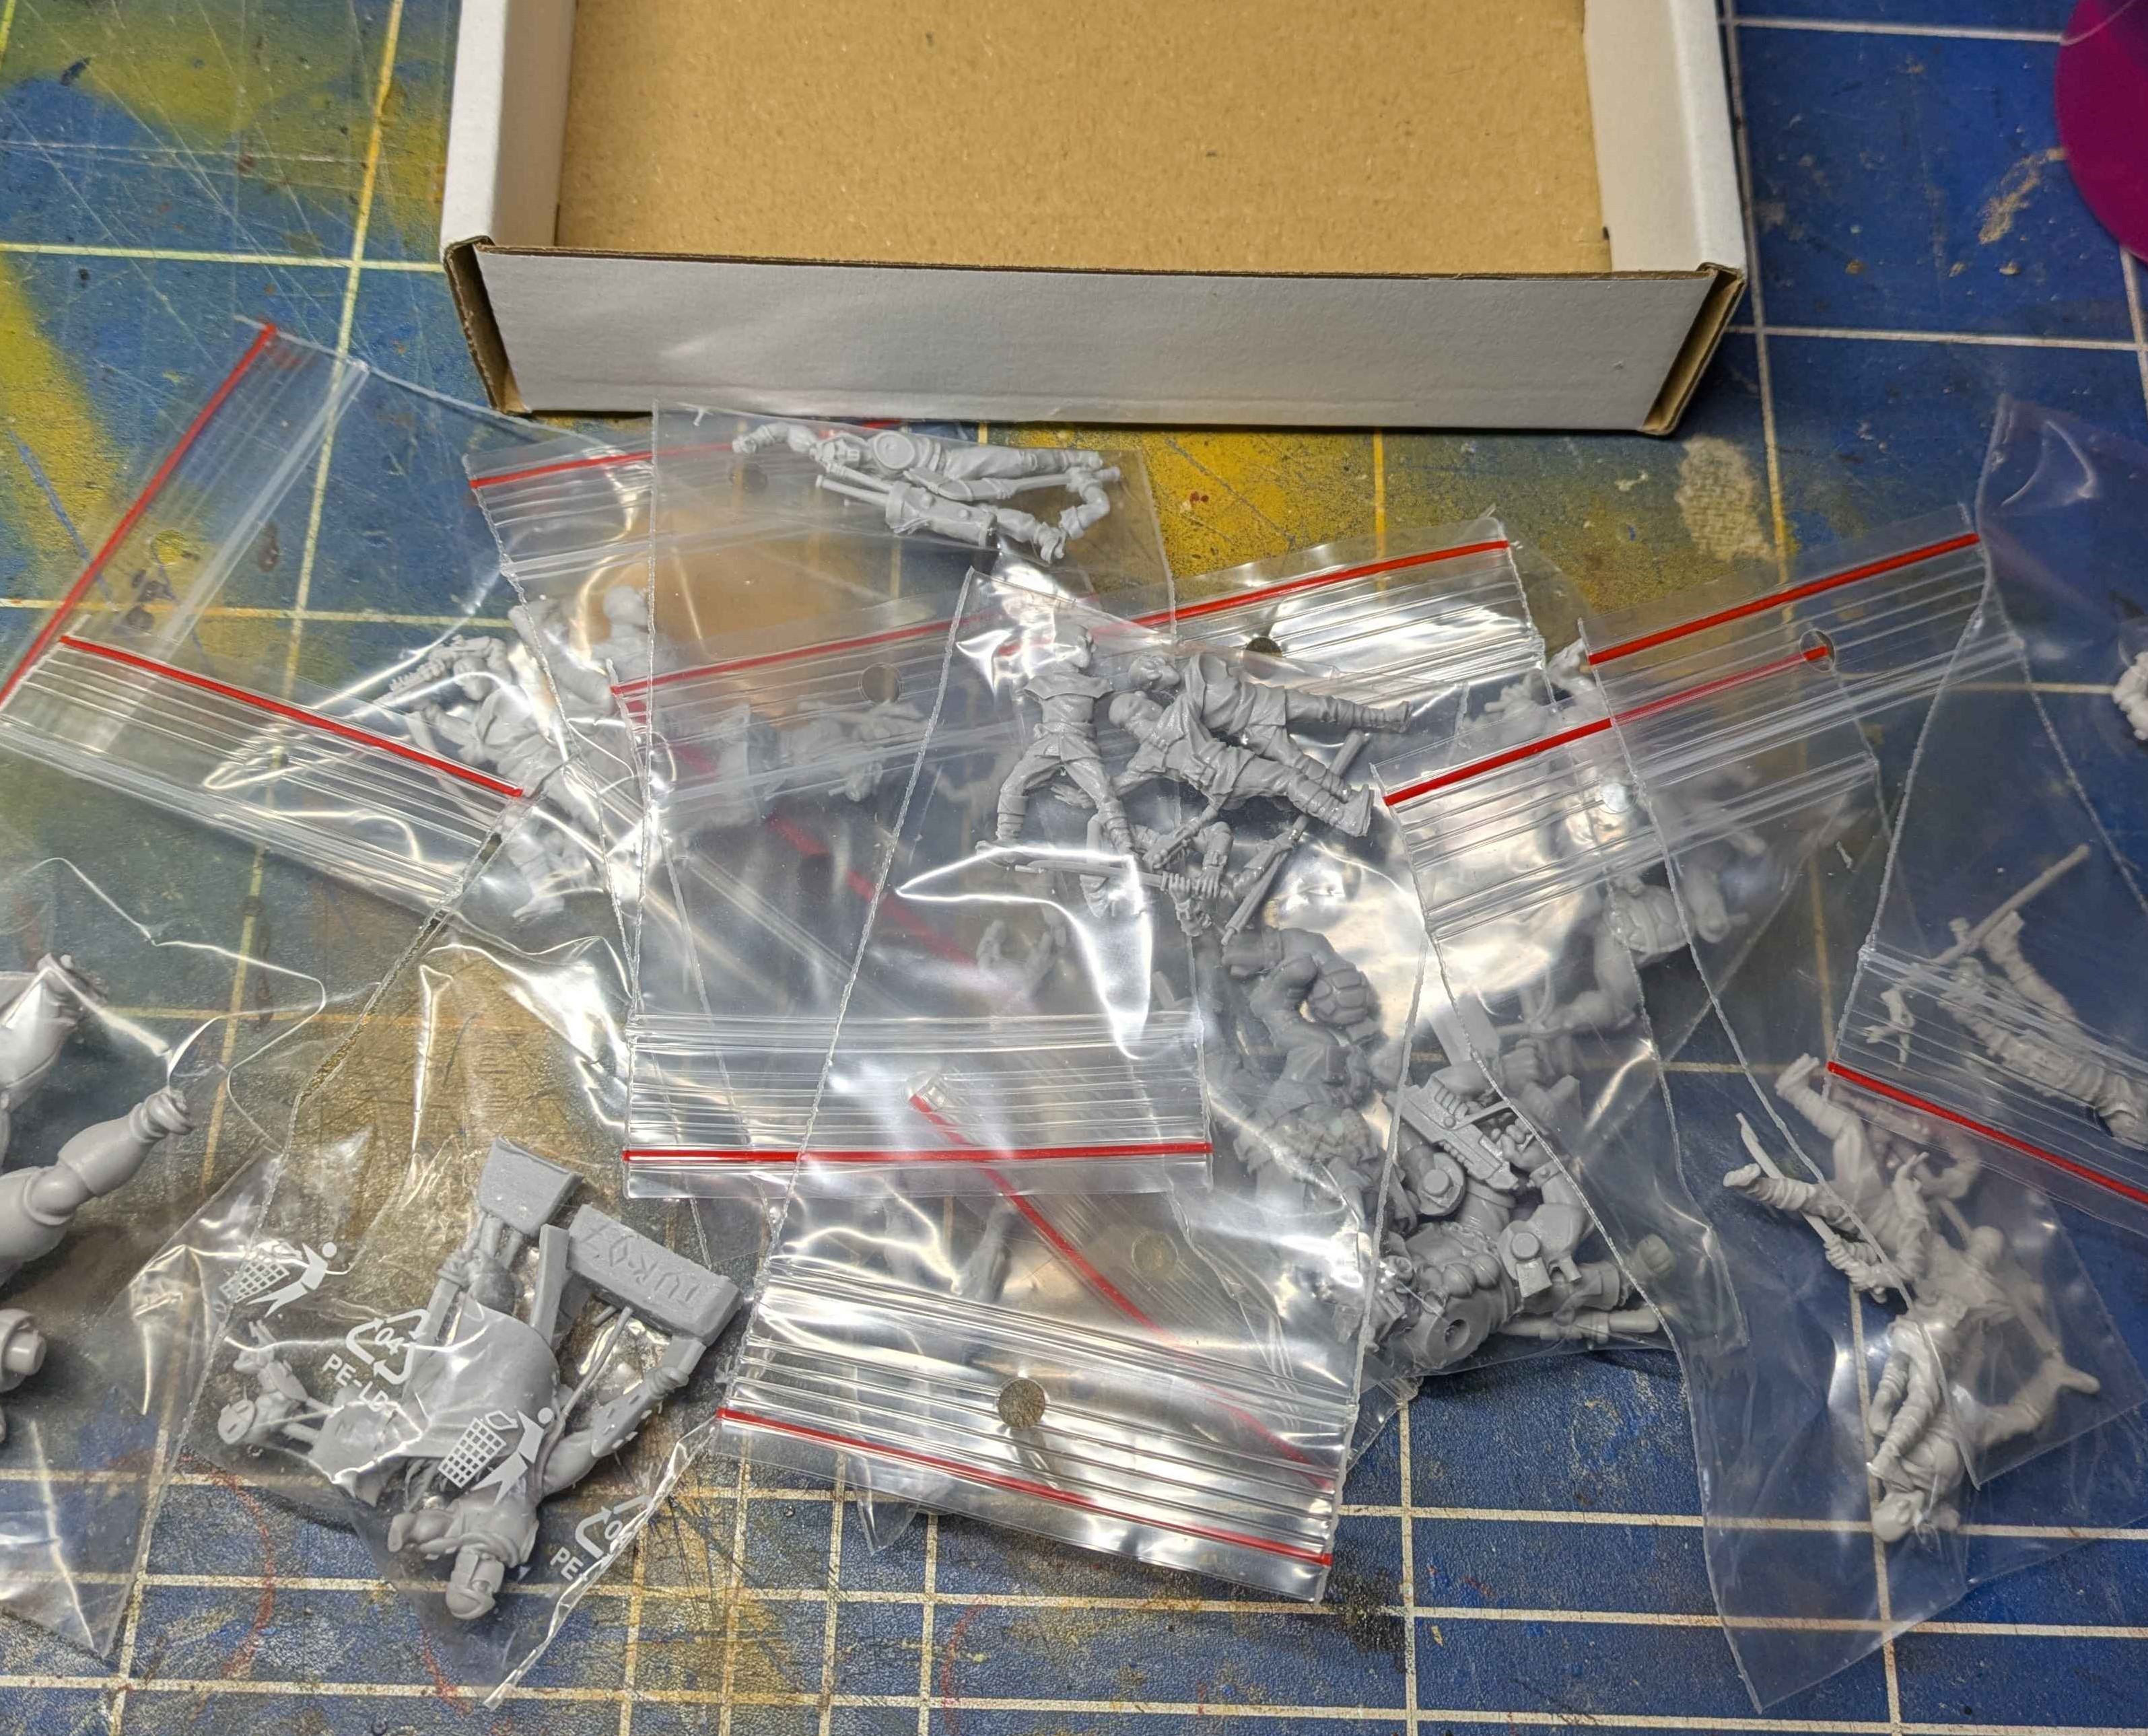
Bad guys – Shredder, Krang, Bebop, Rocksteady, and 9 Foot Clan (3 each of pistol, katana and bo staff)
So 20 in total. Obviously the least fun ones to paint are going to be the foot clan so that’s where I started.
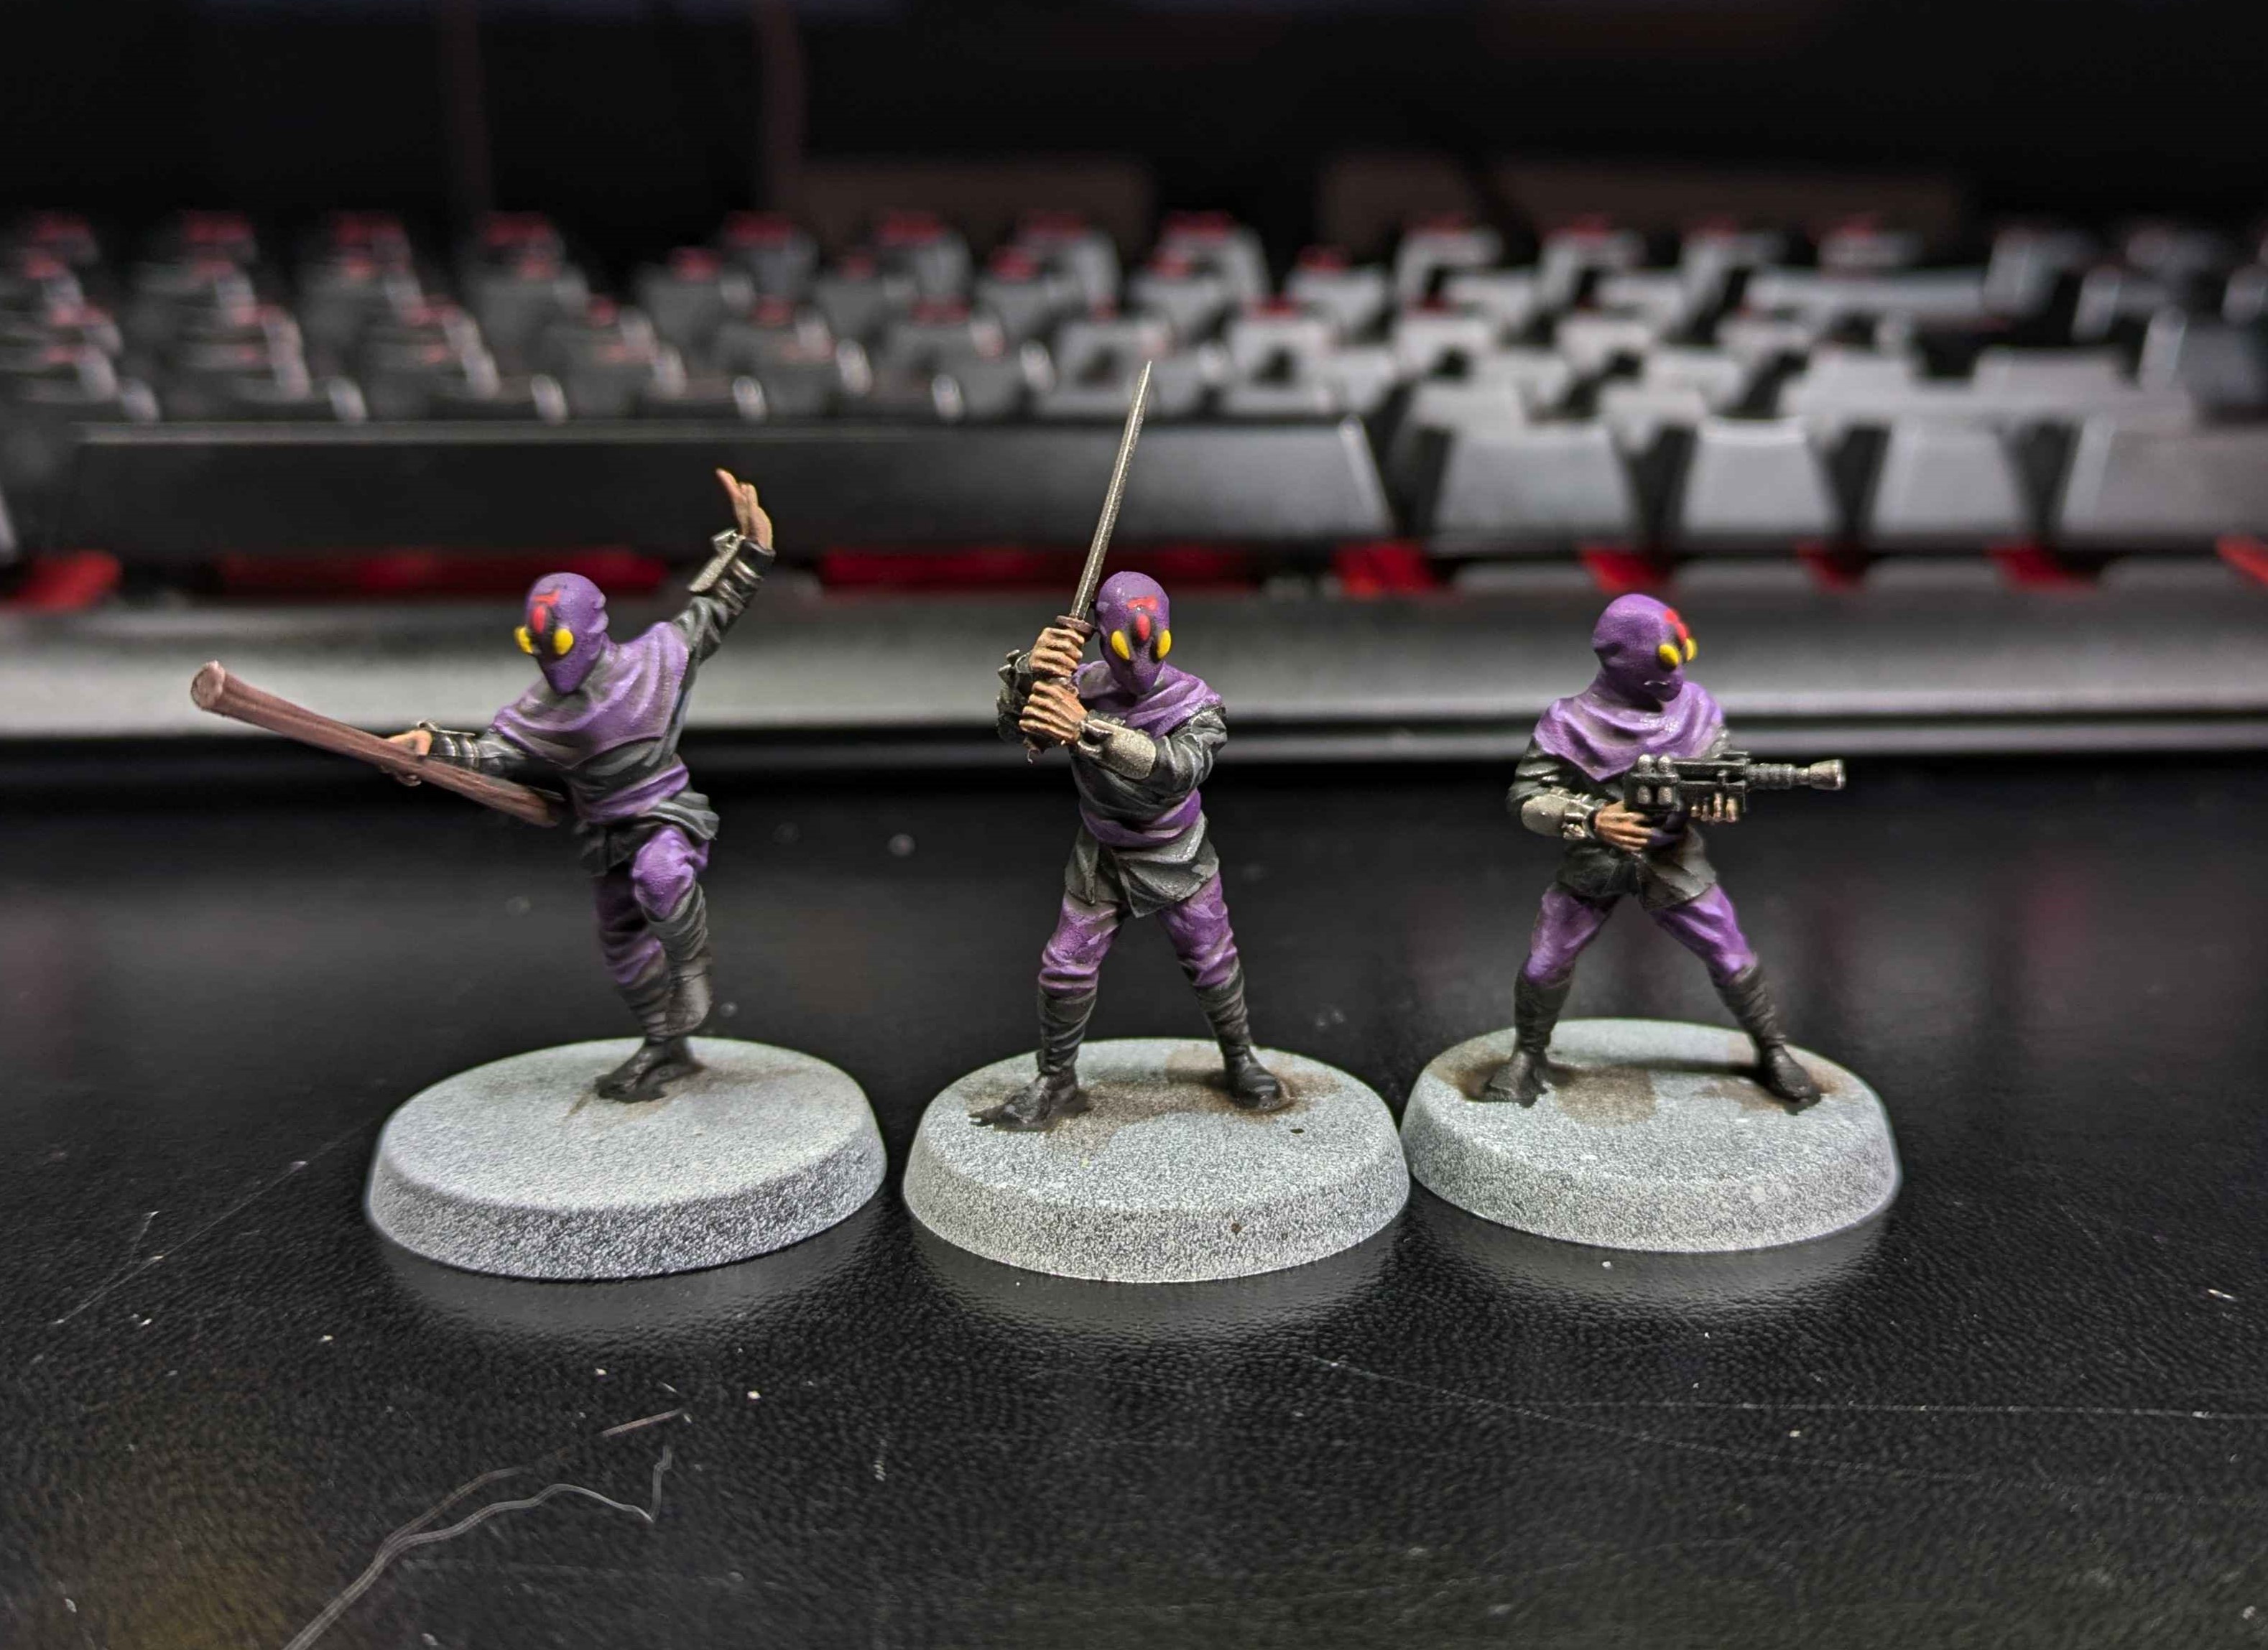
Paints used:
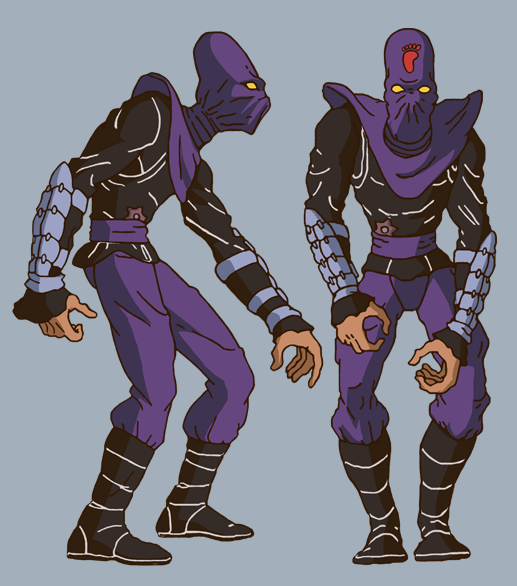
- Cloth
- GW Contrast Black Legion, highlighted with Warpaint Fanatics Deep Grey
- Vallejo Royal purple, highlighted with Warpaint Fanatics Alien Purple
- Wood Warpaint Fanatics Oak Brown
- Skin Warpaint Fanatics Barbarian Flesh
- Eyes Warpaint Fanatics Daemonic Yellow
- Foot logo Warpaint Fanatics Pure Red
- Metallics GW Leadbelcher
- Pouches on rear of models Warpaint Fanatics Desert Yellow
- All over wash with Marine Juice. This is a wash made up from different products that I have multiple bottles of. Originally it was one bottle each of Nuln Oil, Reikland Fleshshade and Lahmian Medium. The products have changed over the last few years so the newer version that I’ll have to switch to eventually is found here https://youtu.be/kDOkiEcNcik?si=xOQnURCY72VE9dRS
Finishing what I’ve started
3. Finish projects. I have a swathe of unfinished projects in my wake this year and I don’t feel great about it. The projects I have finished (or got to defined break points) feel really good. So in 2025 I’d like more of the latter feelings and fewer of the former. [From the last post in my 2024 Hobby Log here on the site.]
It’s not unusual for people in our hobby to have a mountain of unfinished (or bought but never started) projects. In fact, it’s probably the norm. It annoys me about myself though.
Just on this project system I have (across two profiles) 40 something projects. Only 11 of them are completed. I have no problems leaving projects behind that I’m not interested in any more, I have limited space and so things get sold or given away if they don’t generate excitement. There are 7 projects that have been straight up cancelled and won’t be coming back. For this project, I’m talking here about the projects I still want to get to at some point.
The plan then is simple; amongst all the current things I’m working on, pick out older projects and finish them. Easy said, easy done?

![StarCraft Tabletop Miniatures Game Pre-Orders Live Now [Updated]](https://images.beastsofwar.com/2026/03/starcraft-tmg-news-cover-600-338.jpg)


![Mounted US Cavalry On Kickstarter For Dead Man’s Hand! [Updated]](https://images.beastsofwar.com/2026/03/us-cavalry-main-600-338.jpg)


![Play WW2 Commando Operations With Butcher & Bolt [Updated]](https://images.beastsofwar.com/2026/03/relaunch-600-338.jpg)


