


![NO Weekender Or Cult Of Games XLBS This Weekend [Updated]](https://images.beastsofwar.com/2026/03/No_Weekender_and_XLBS_this_Weekend-225-127.jpg)


The Zoidyssey – Adventures with Warriors of Athena


Recommendations: 143
About the Project
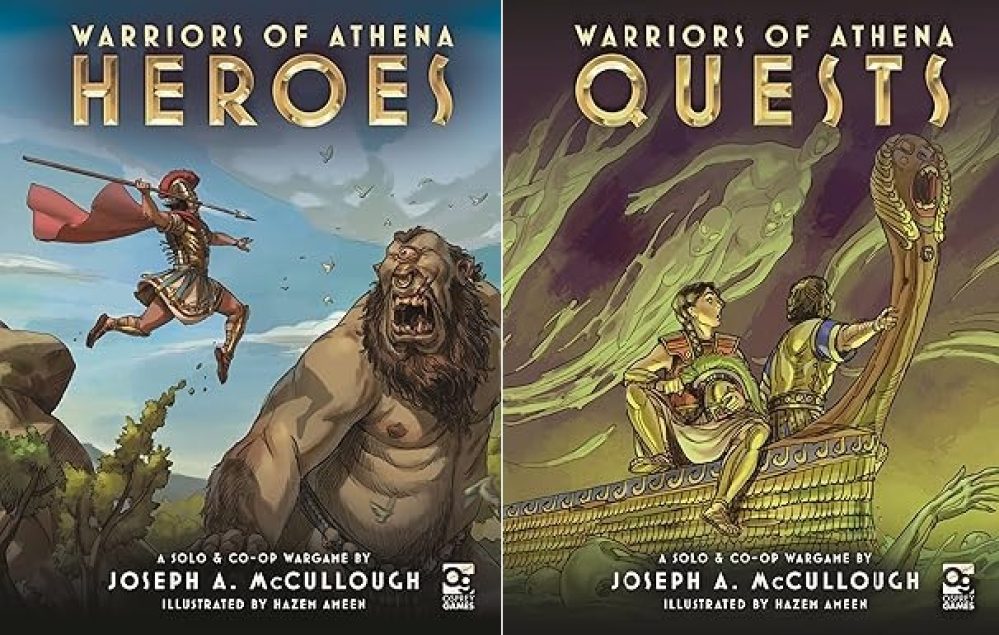
The new McCullough game has a Greek mythology setting. Not out yet, but you create a hero, form a crew and then adventure against the monsters and mysteries of the ancient Greek world. Bee keeping Cyclopses are the first and hopefully least unusual opponents.
Related Game: Warriors of Athena
Related Company: Osprey Games
Related Genre: Fantasy
This Project is Active
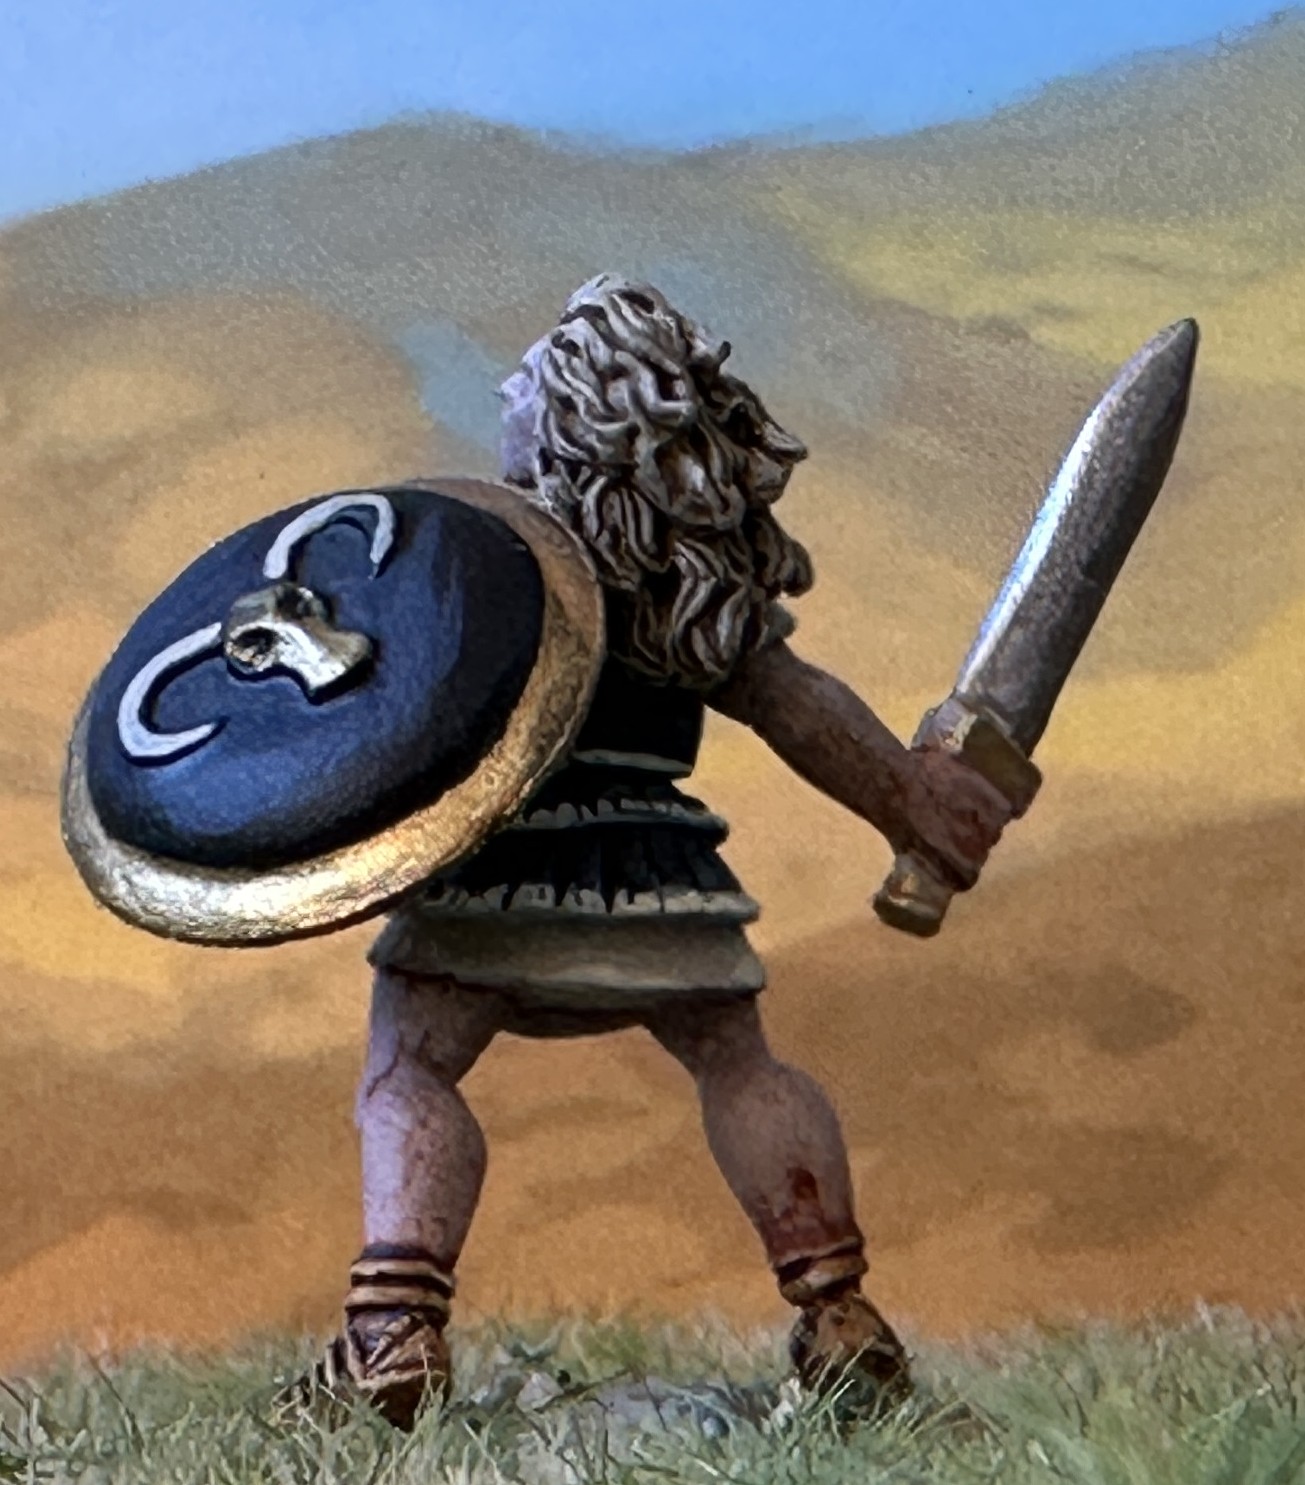
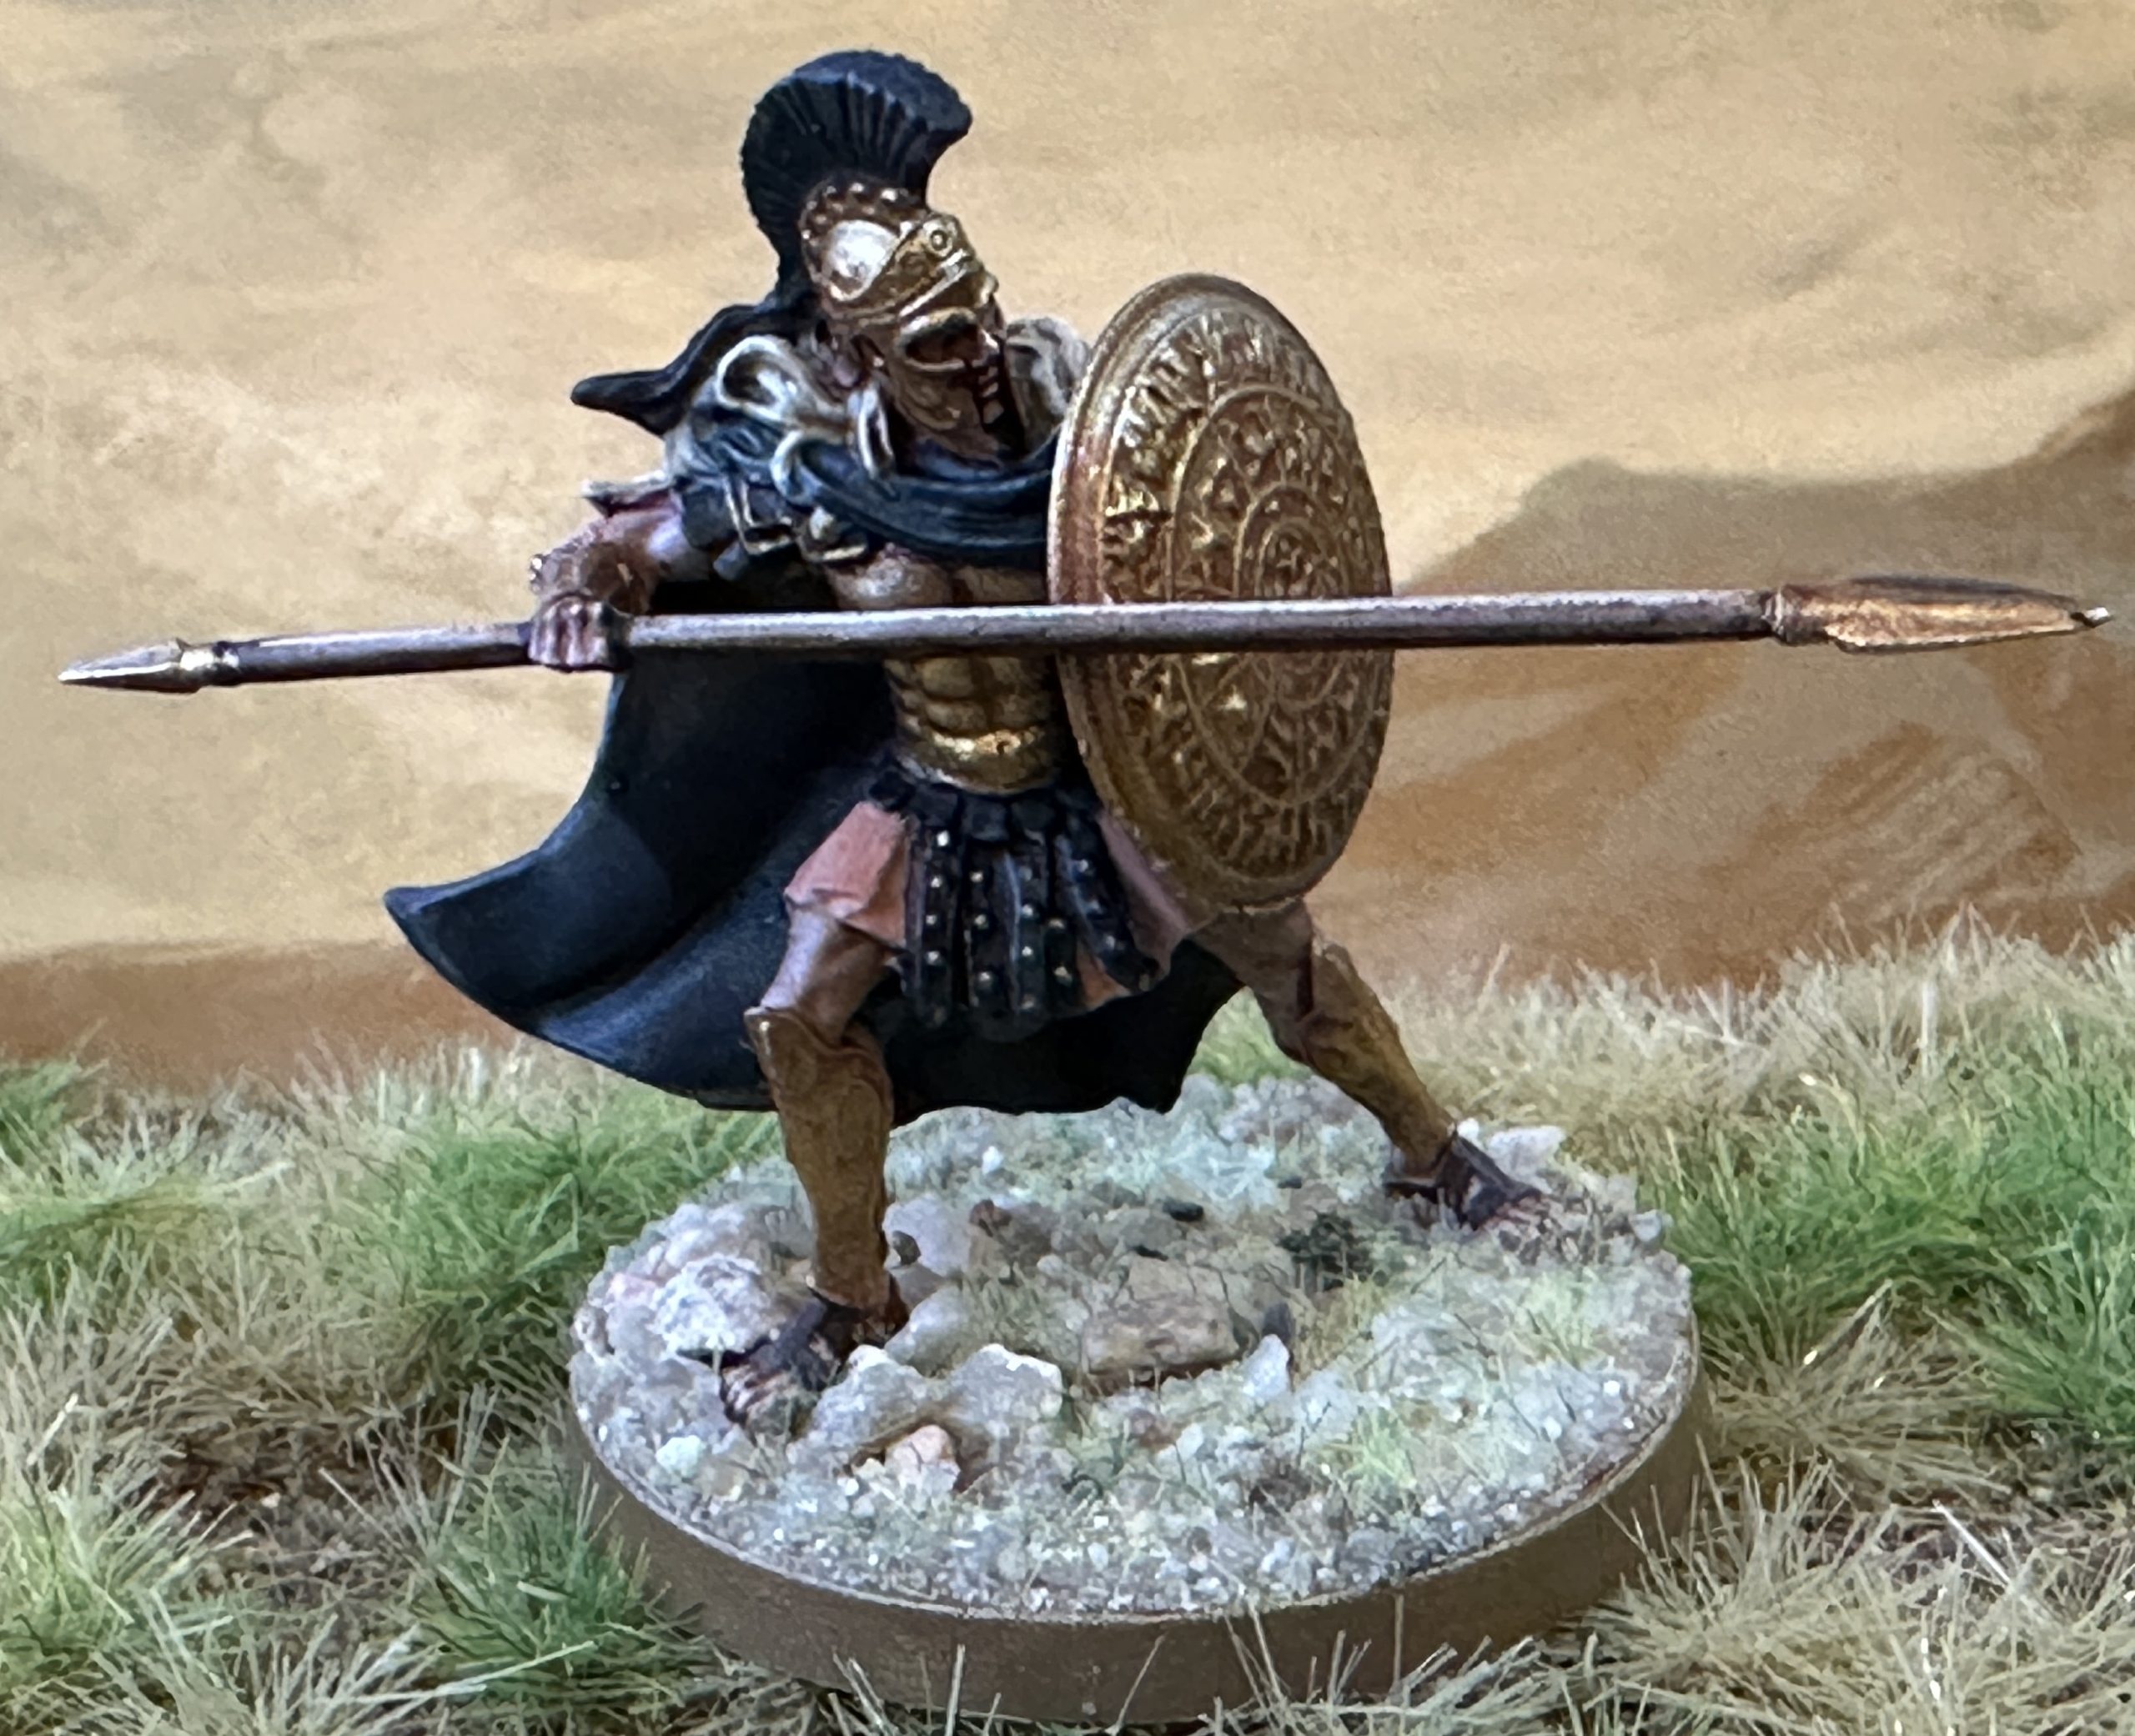
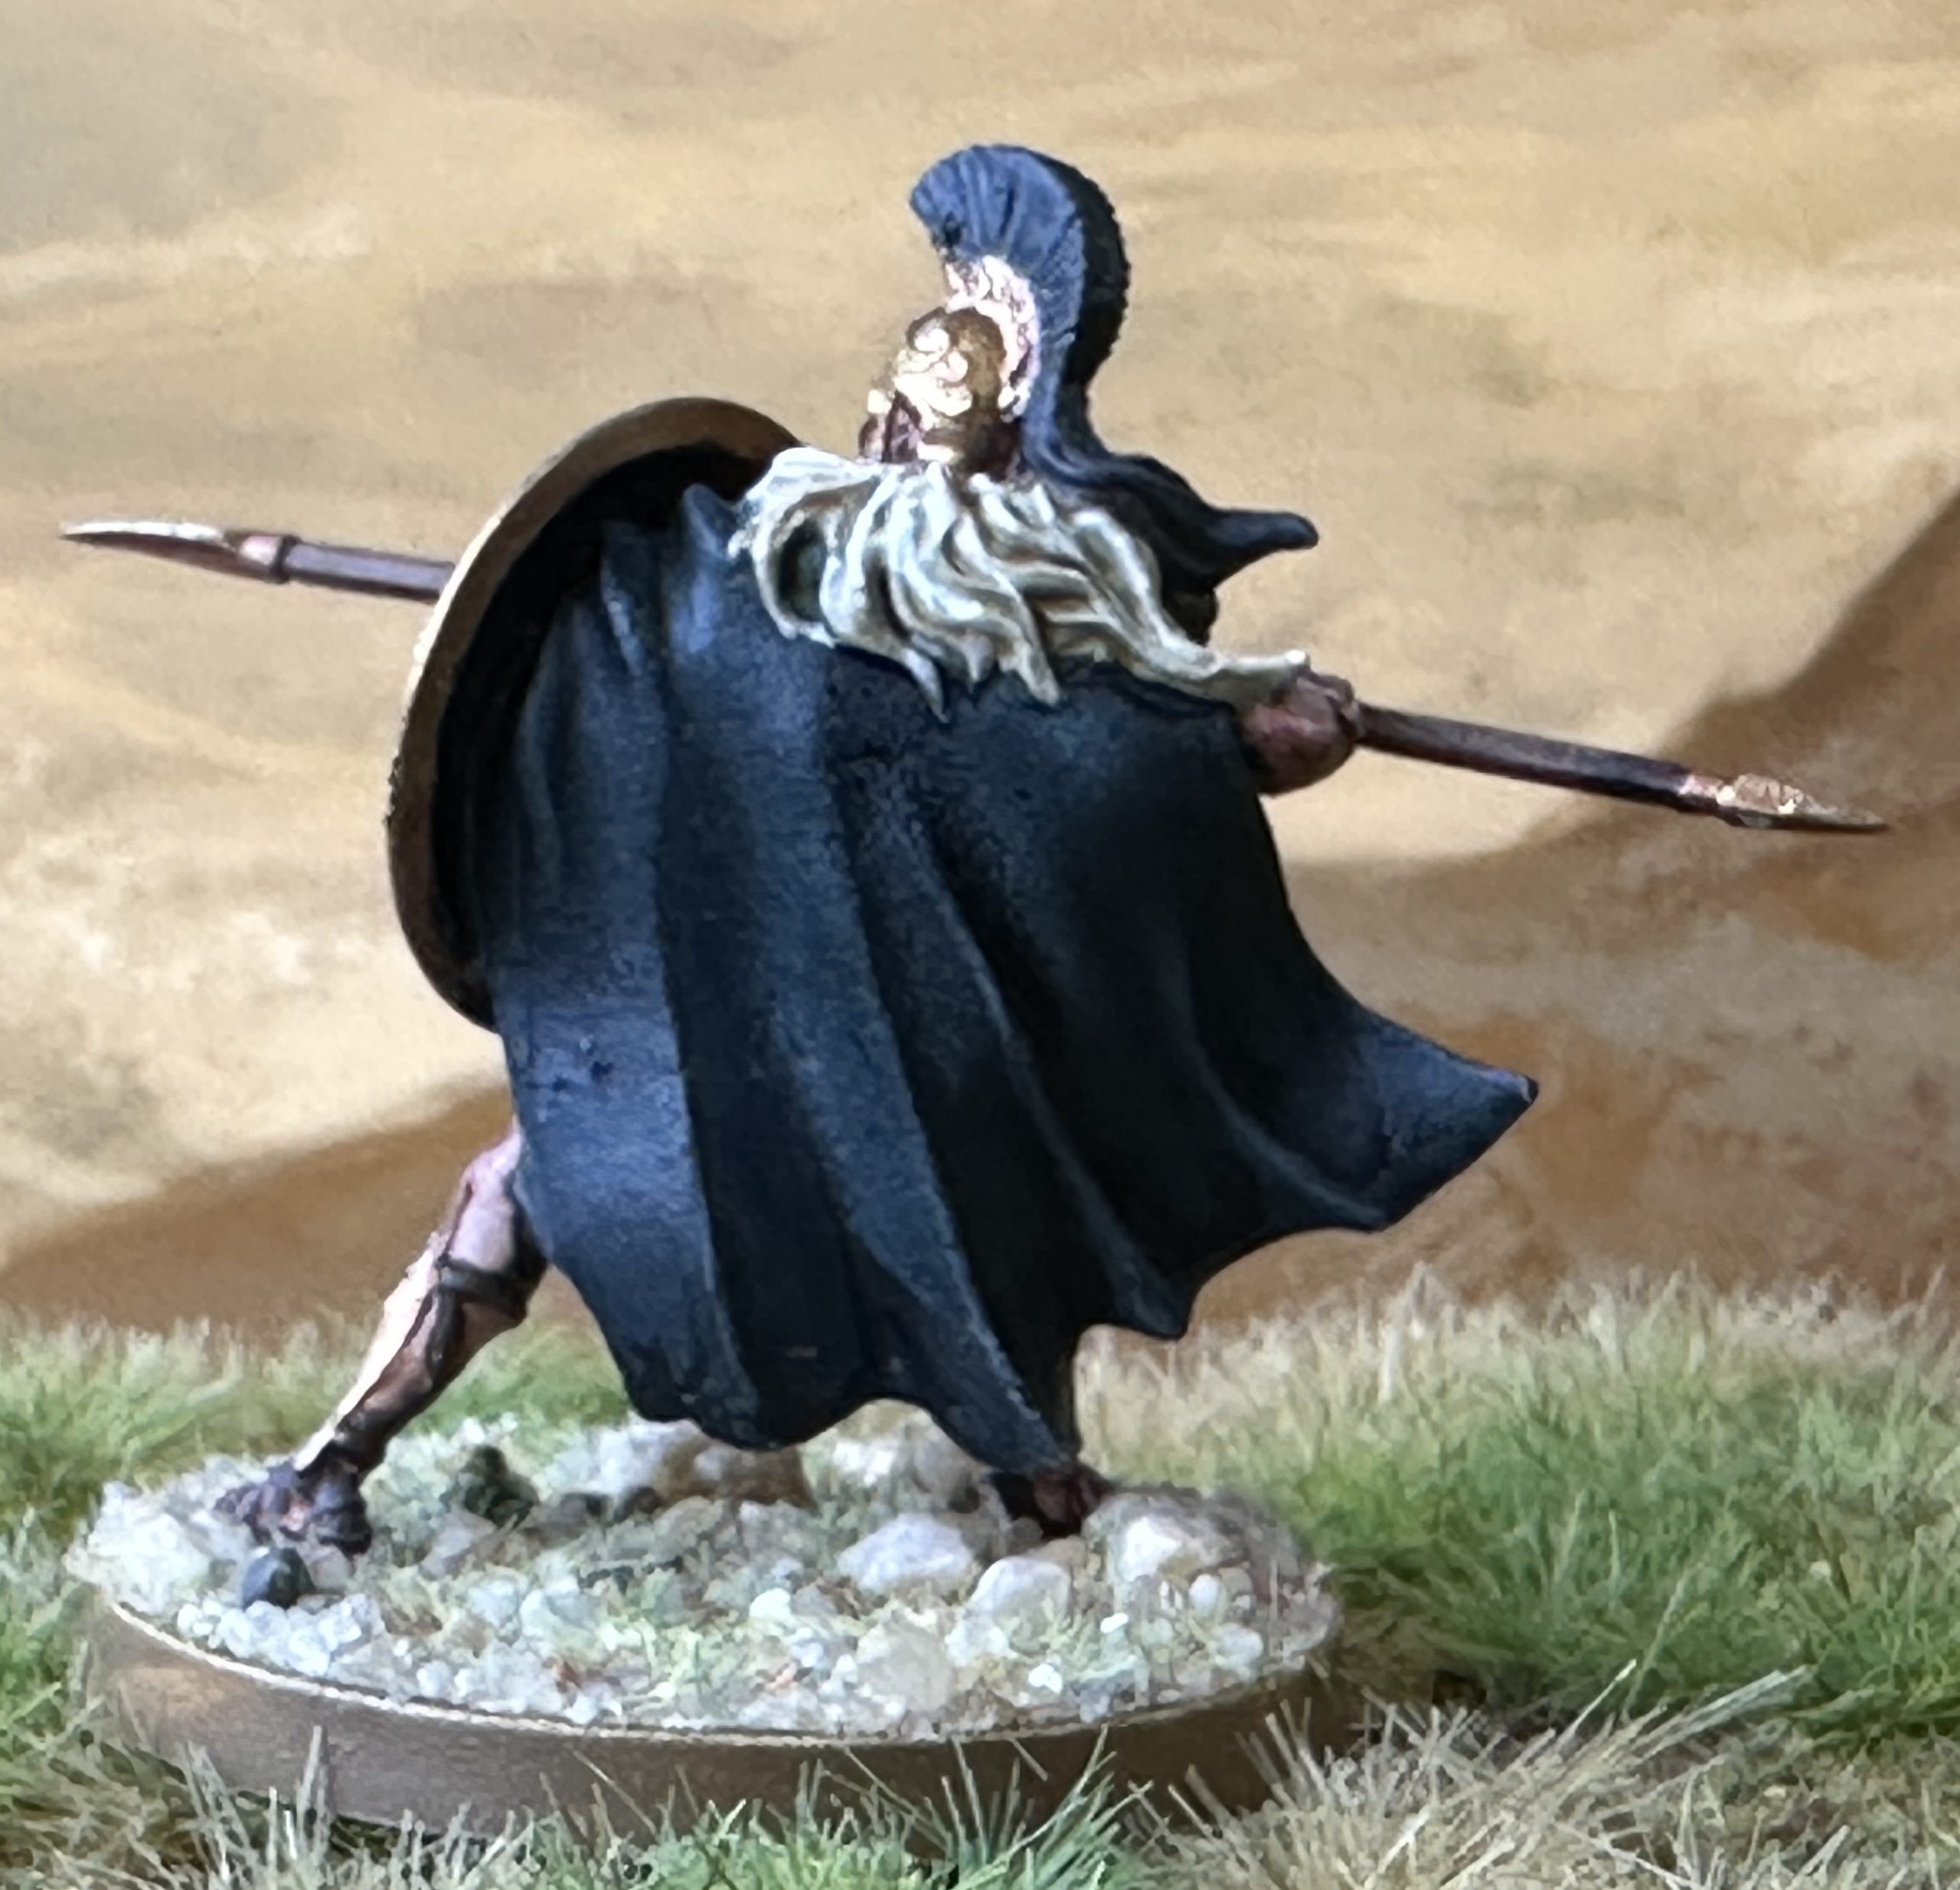
Jason and the Argonauts finished and treasure token
The last of the Argonauts except for Mopsus the Seer who is coming soon.
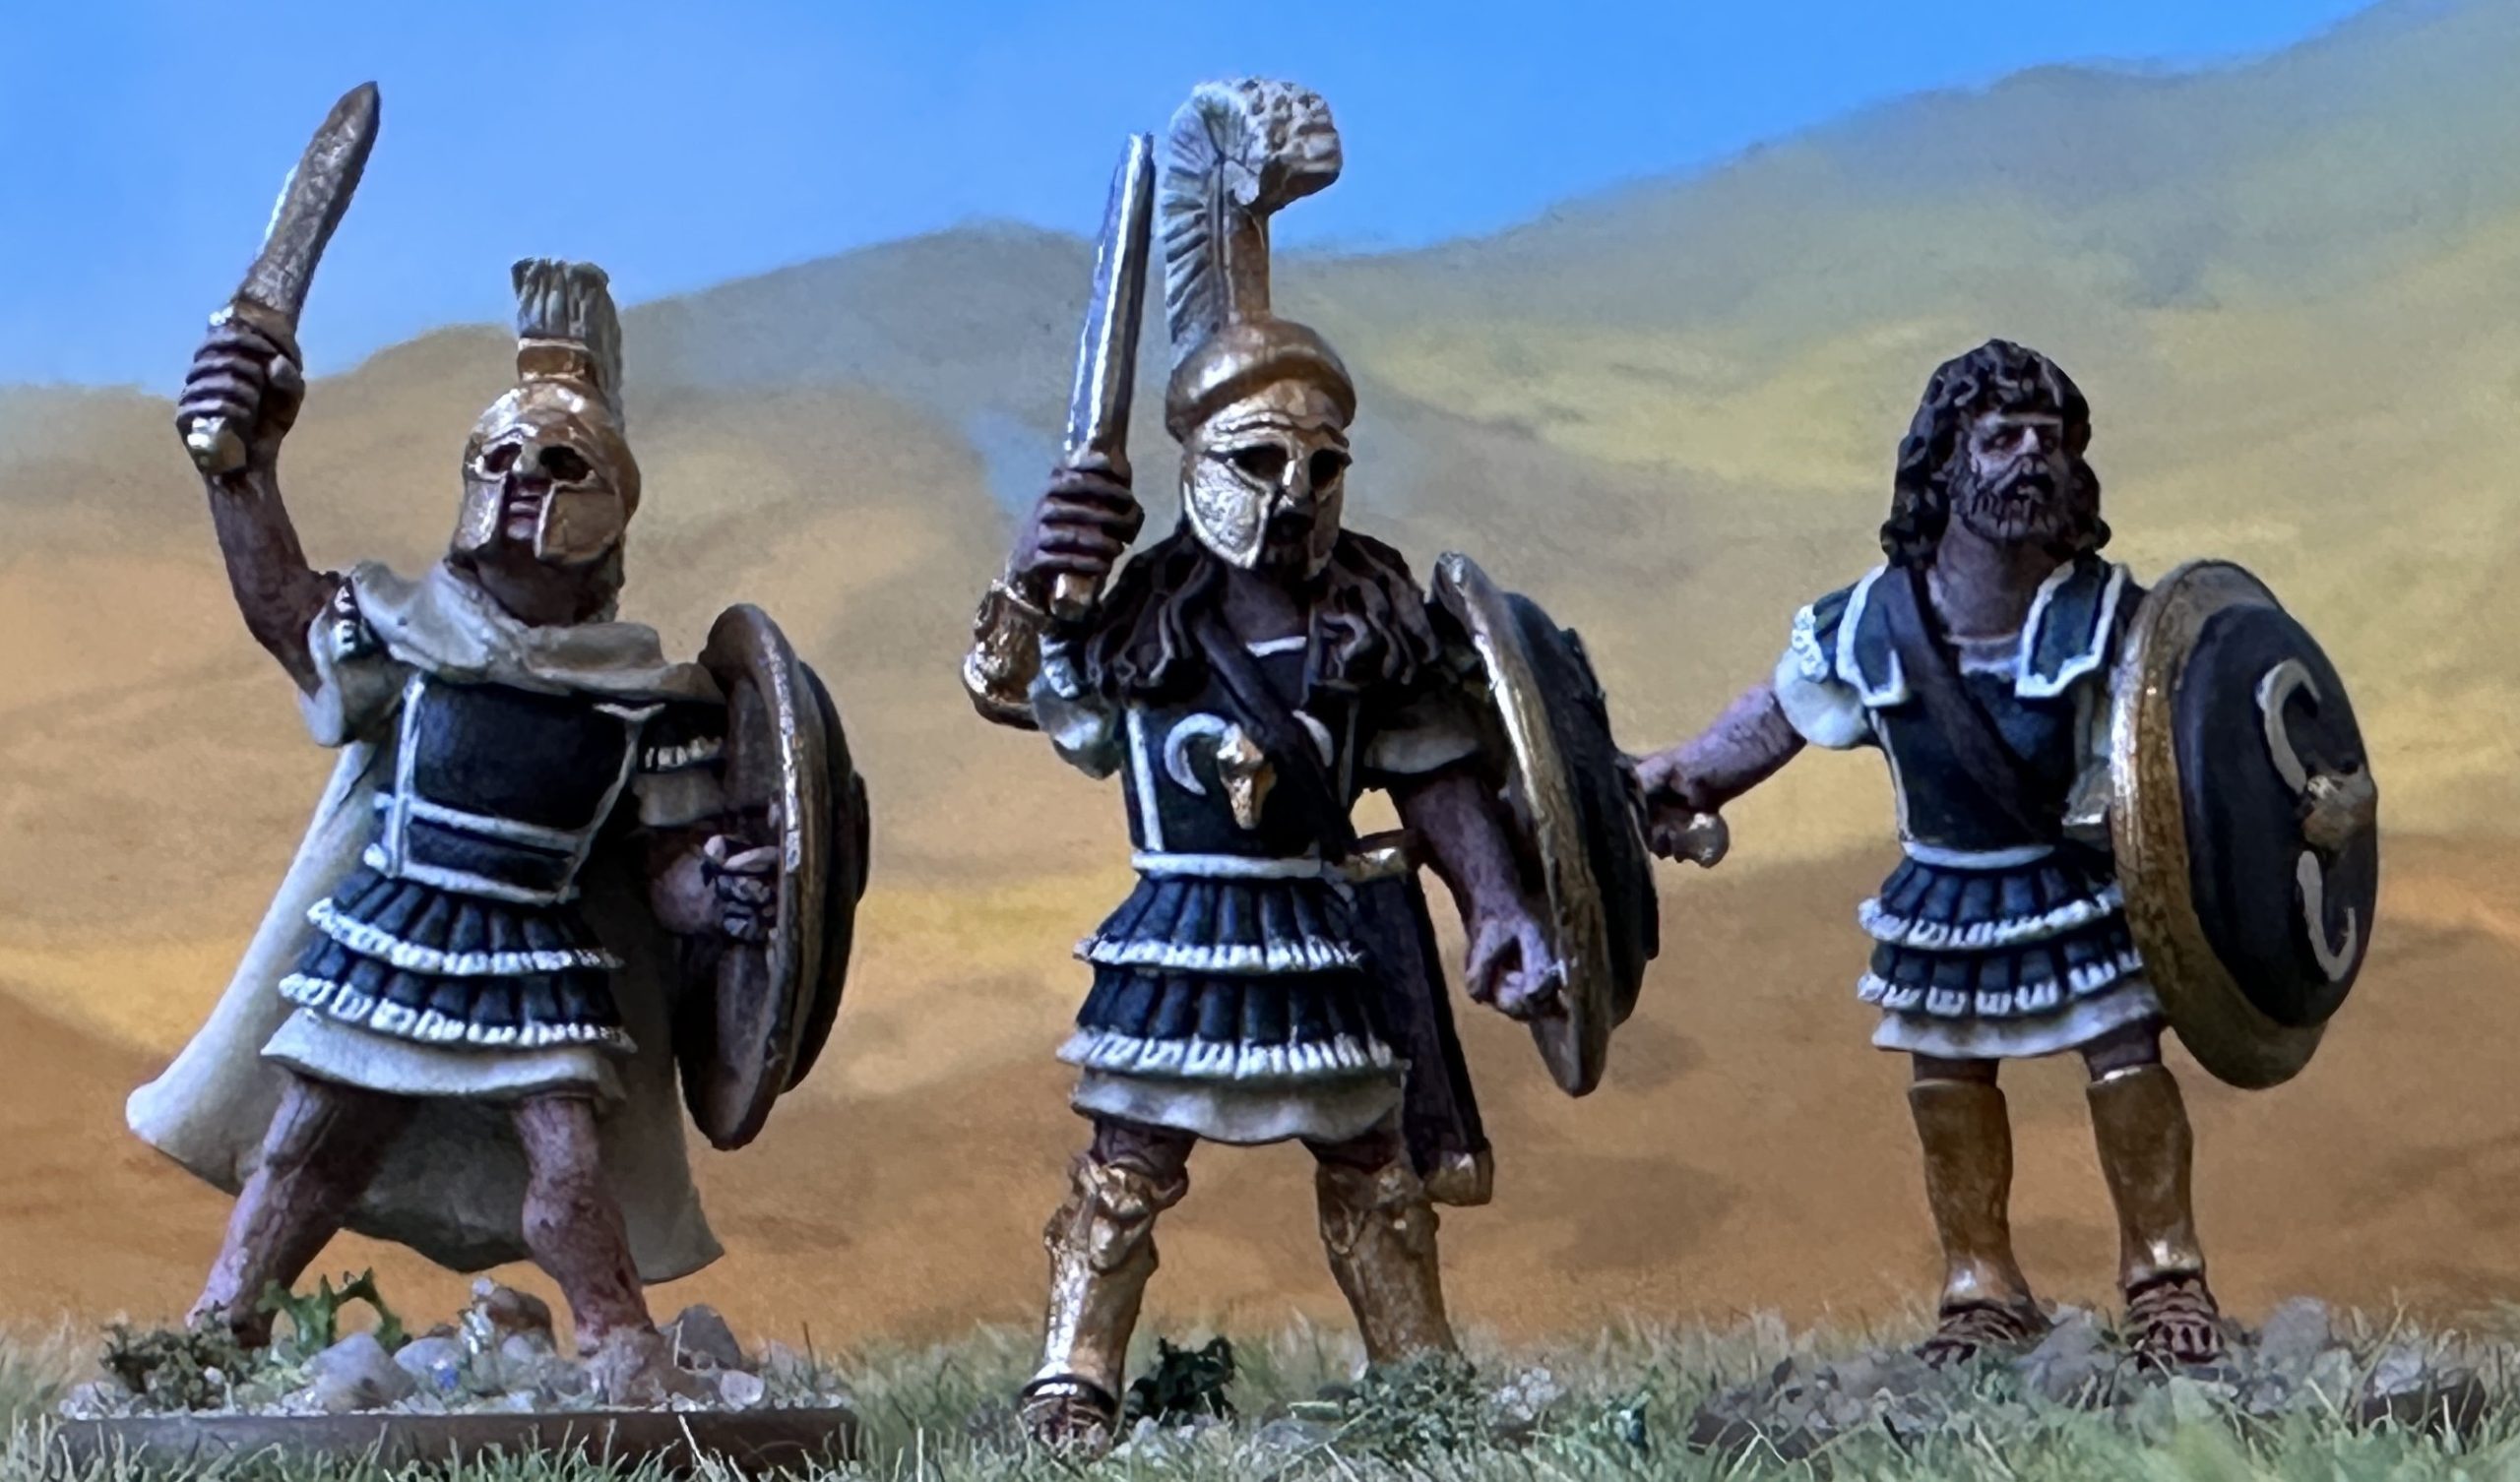
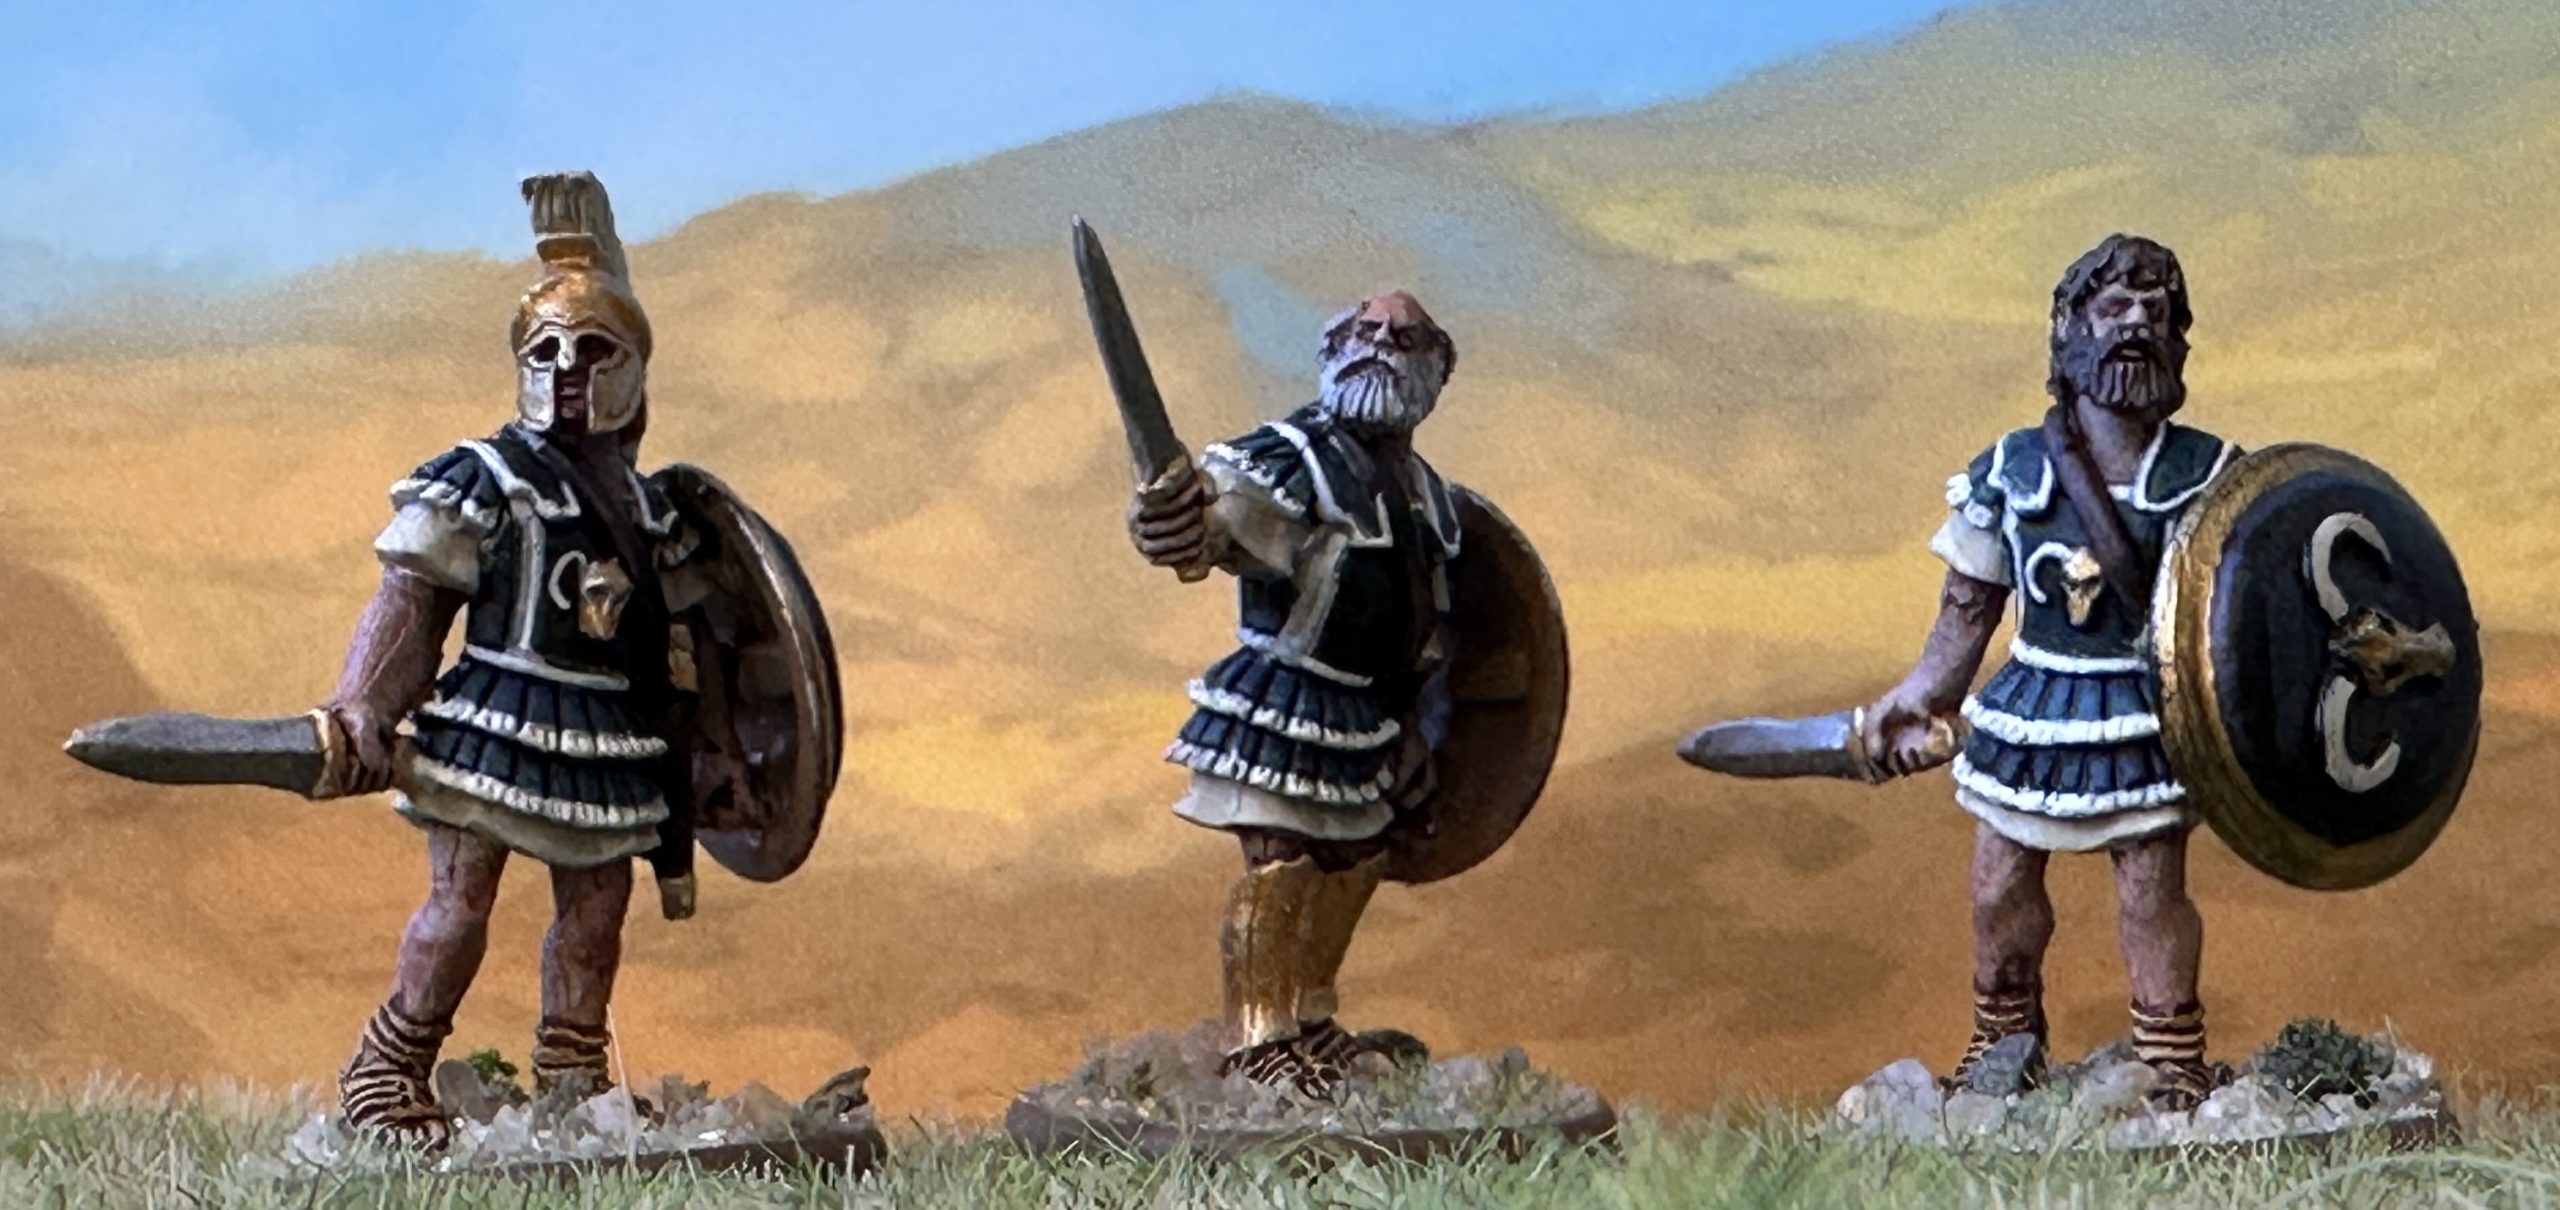
Jason son of Aeson. Favourite of Hera. Leader of the Argonauts.

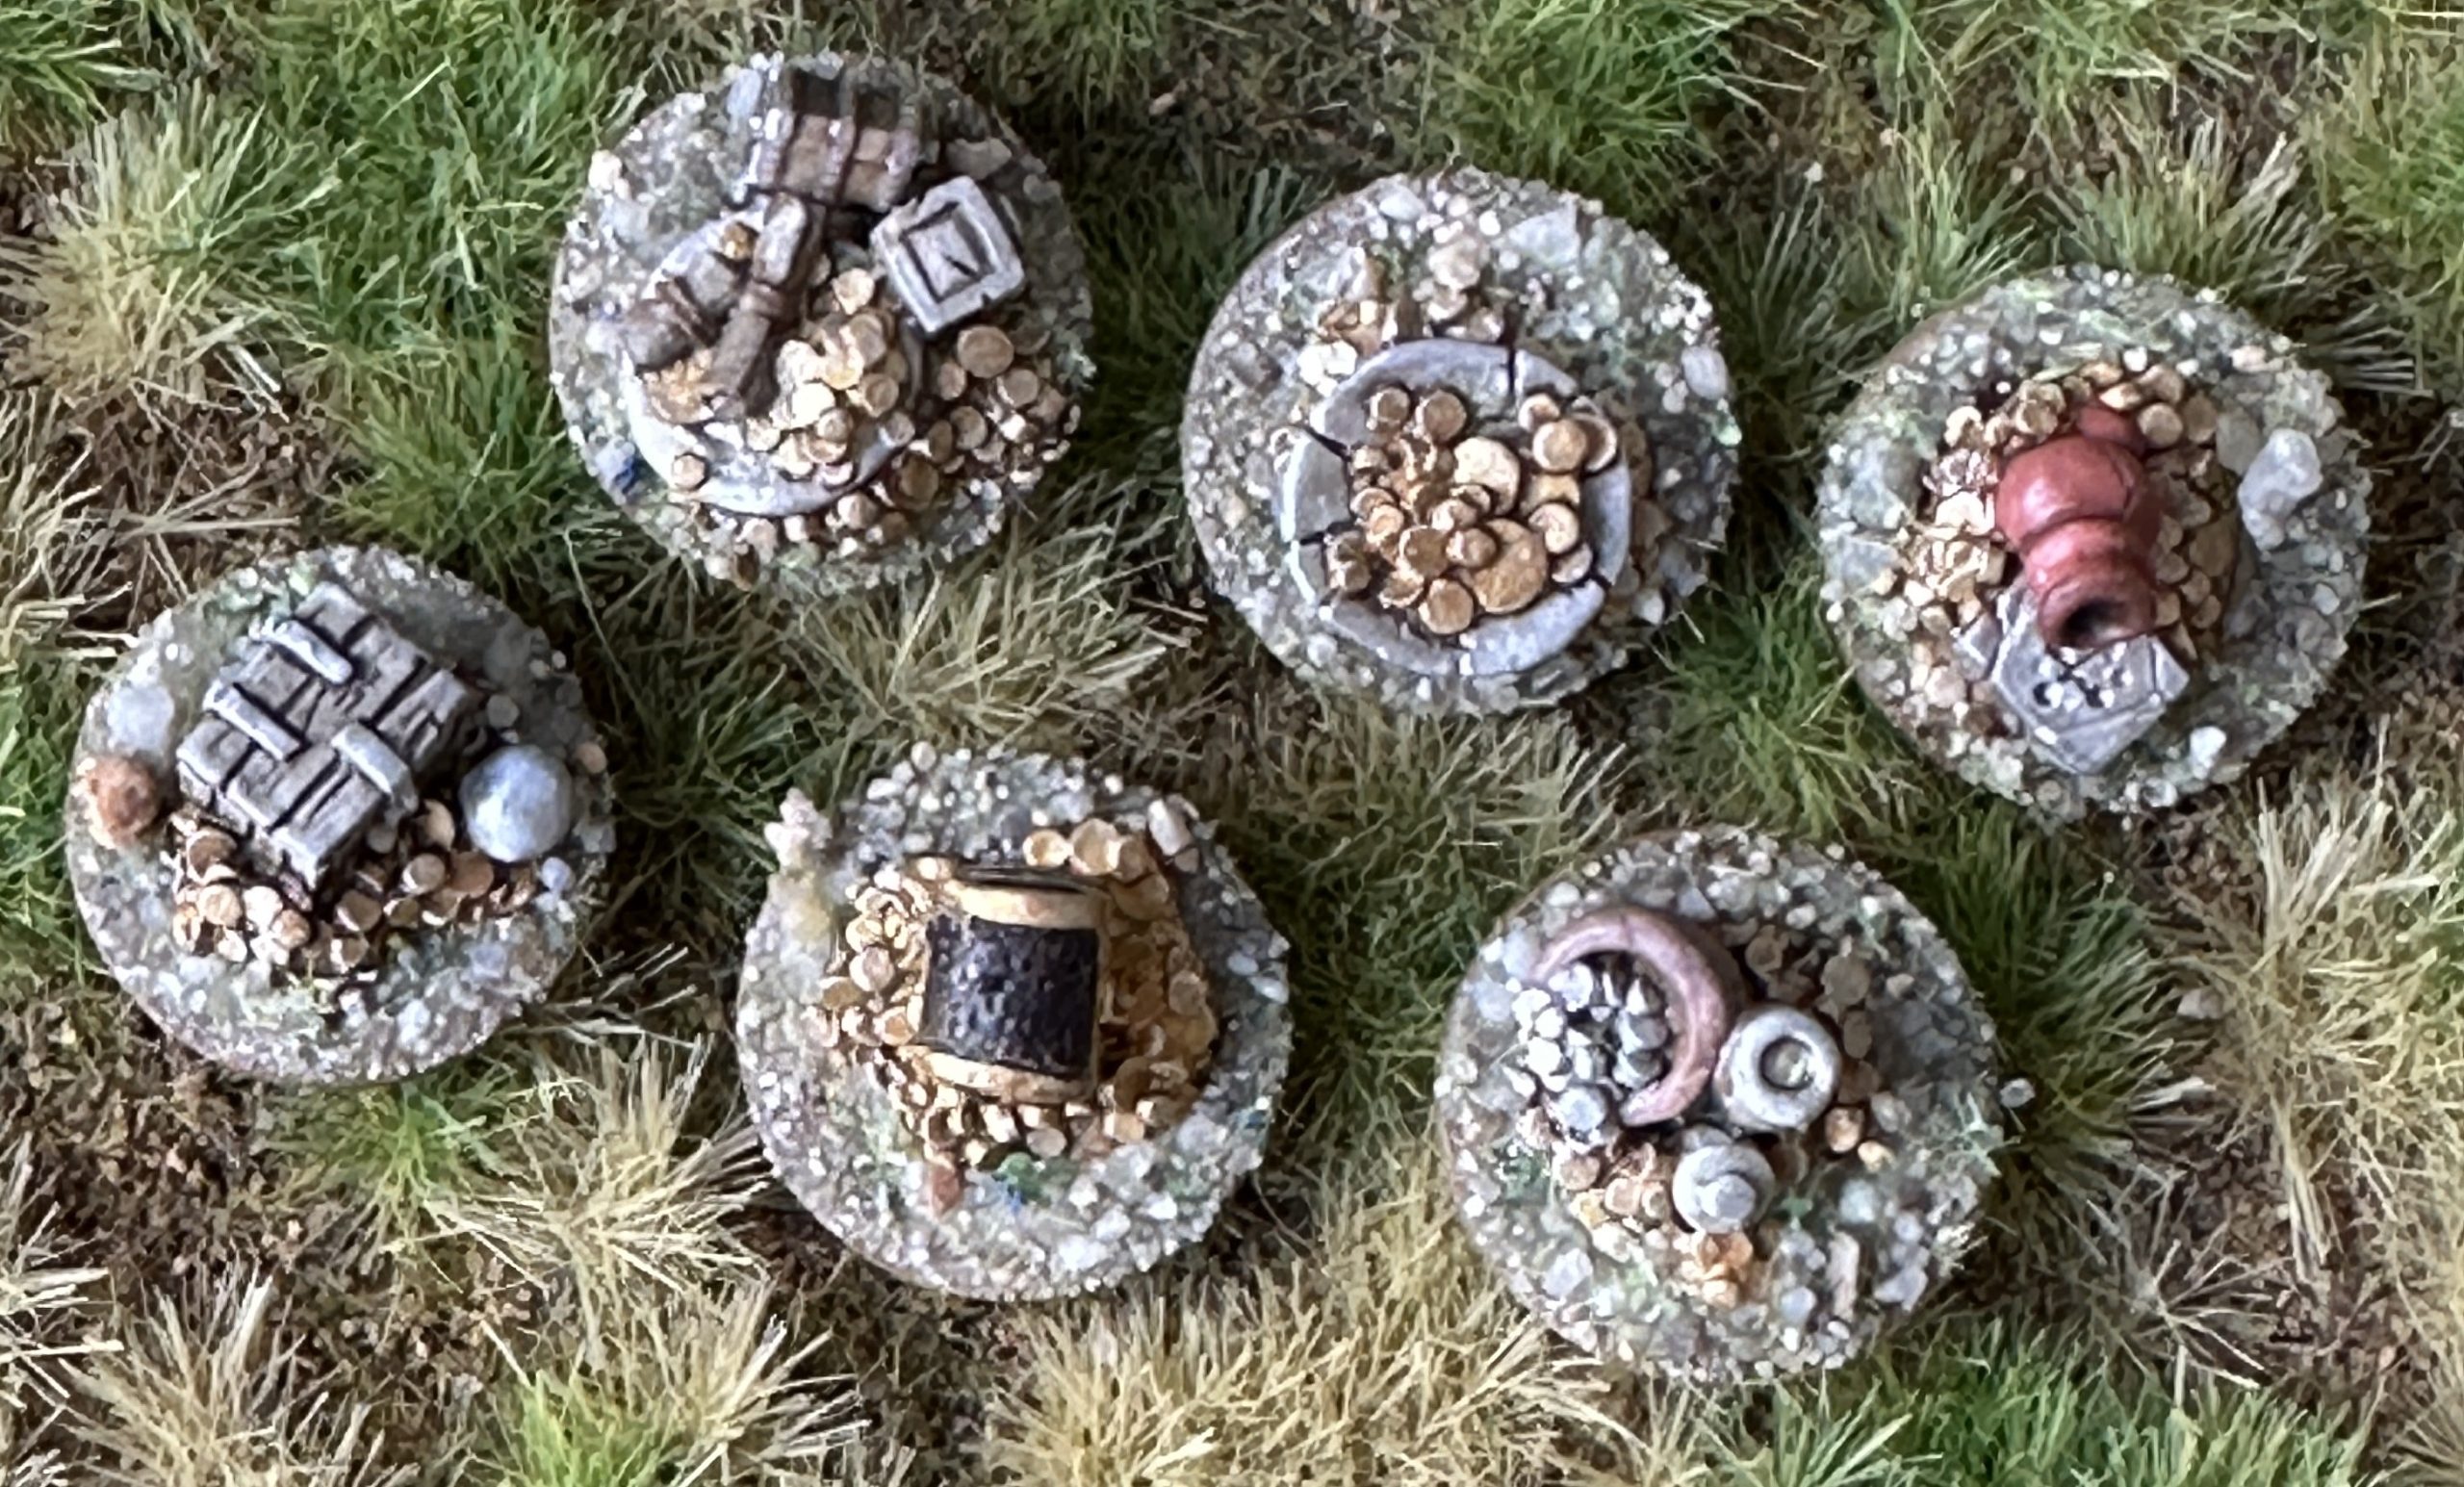
The game makes extensive use of treasure tokens. Some are quite specific, like the Cyclops skull I have already finished. Most are generic so I went with these six which come from Crooked Dice range of objective markers. I’m hoping I won’t need more than six generic ones for any single scenario. I’ve got more to act as specific objectives which could fill in if needed.
Speedpaints for the wood and parchment. The pottery was done with acrylics in a terracotta shade and then with a little white blended in for a lighter finish. Gold was done in the muli-layered approach used on the Argonauts armour. Silver was Darkstar Bright Steel highlighted with Vallejo Metal Pale Burnt Metal.
Argonauts Part 3
3/4 of the way through the Argonauts now.

This group includes one of the sons of Boreas, the North Wind. This one I’ve decided is Zetes. The classical description of them is that (like many Greek gods and heroes who could fly) their wings are on their heels. Let’s not let that stand in the way of a good sculpt though. Also potentially controversially I’ve included Atalanta. In many versions she isn’t included in the group but I think that plays too much to classical misogyny and have included her, the only woman on the crew.

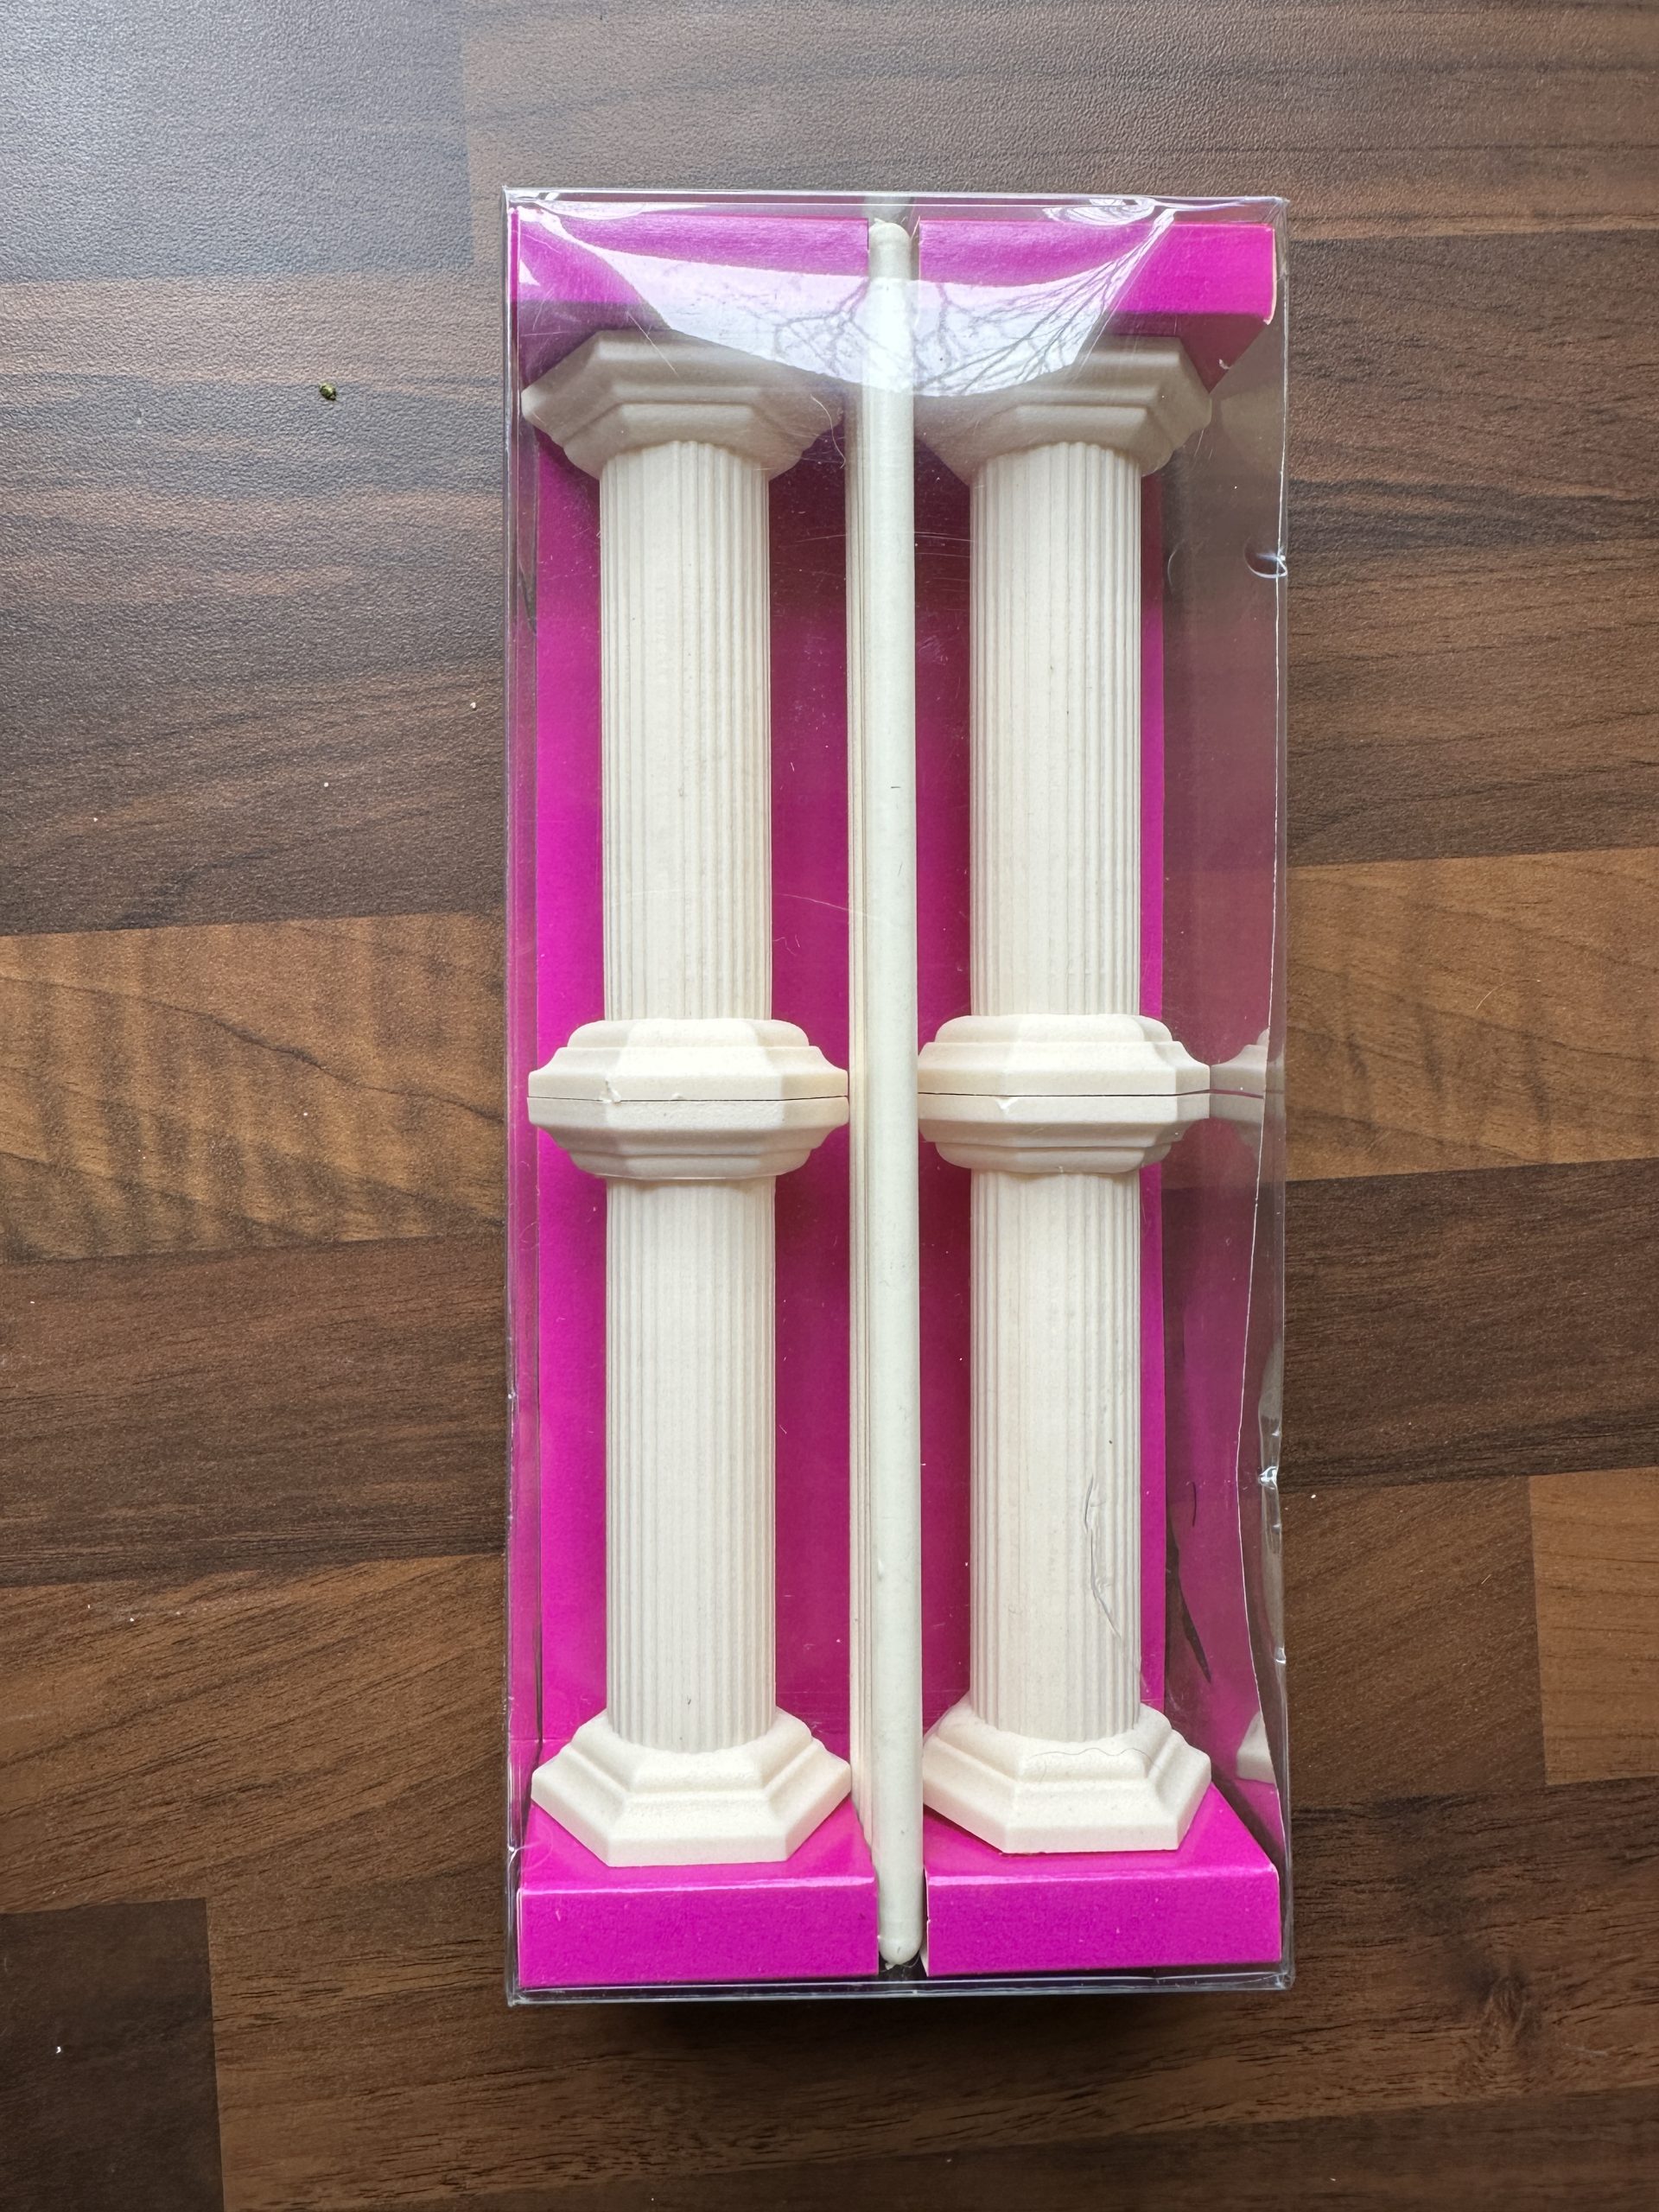
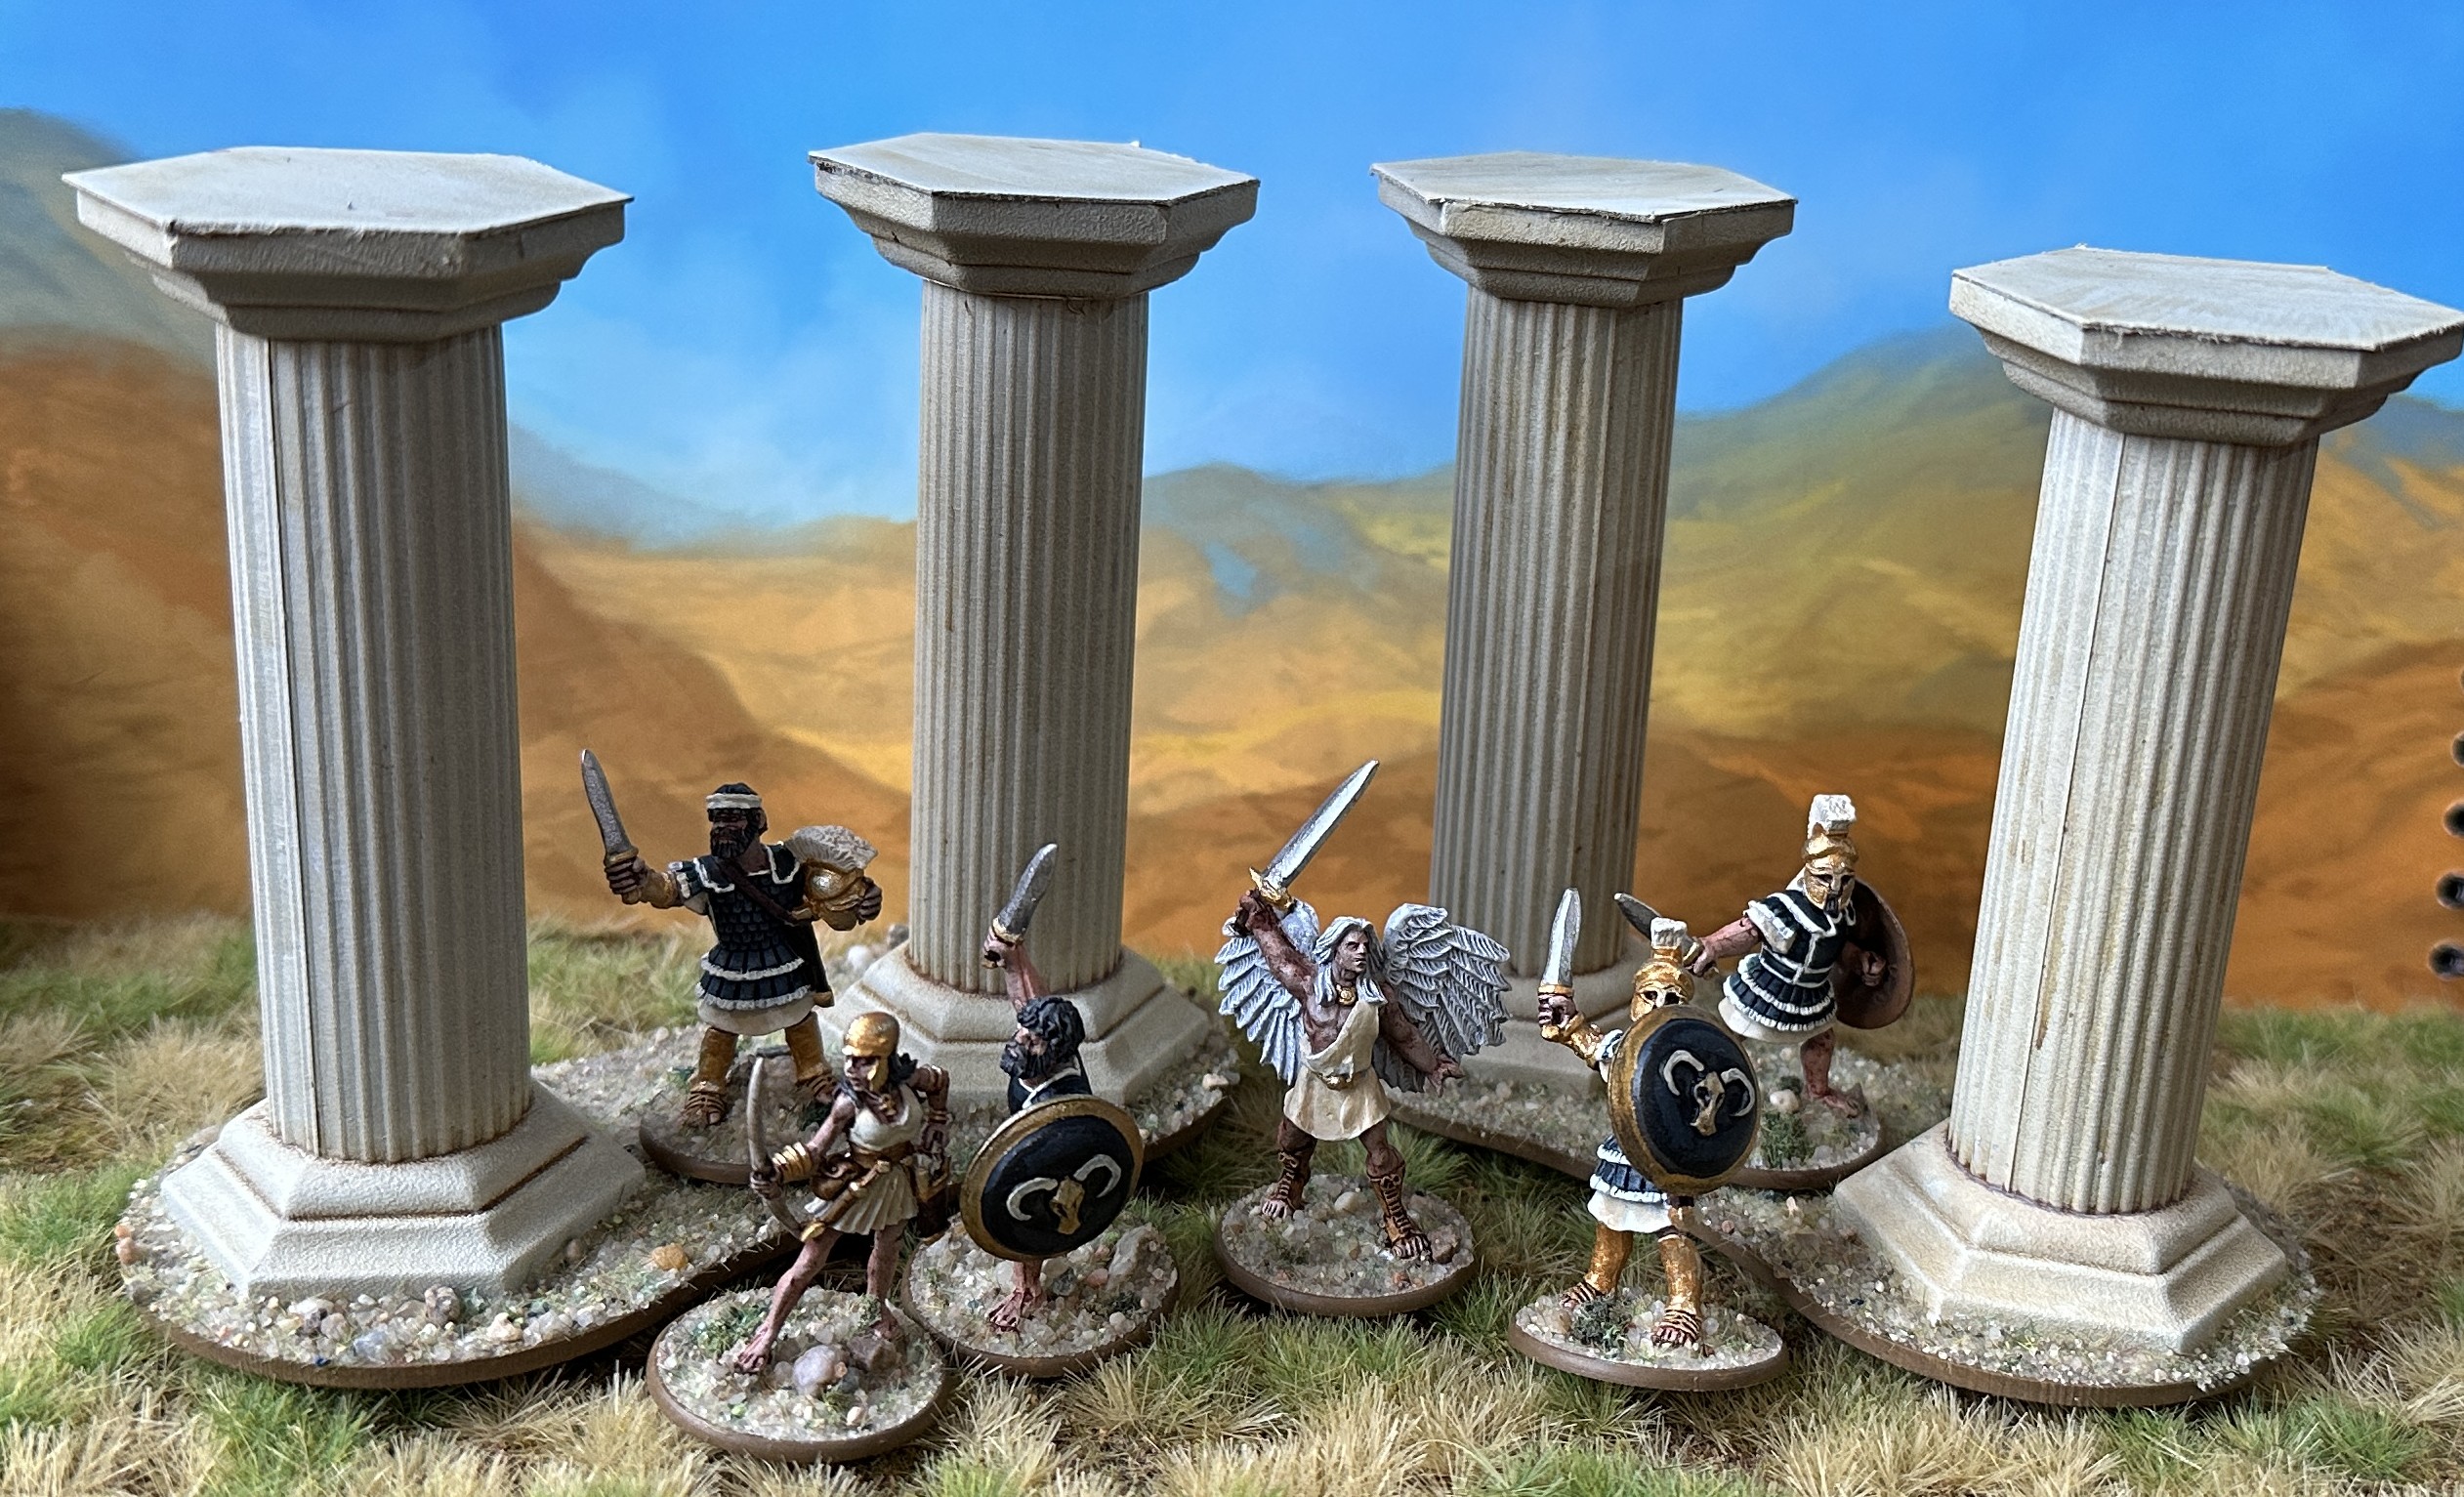
I started on some scenery and ordered some cake pillars which seems to be the common approach that many players have judging by the Facepage group. I got a box of four on eBay for around a fiver including postage, cheaper than Amazon.
A lot of players have gone for ruined temples or pillars and that’s fine but I think a new looking set are fine too.
After the usual zenithed primer I went over everything with some thinned Pallid Bone Speedpaint and then drybrushed on some Bonewhite acrylic. Finished and ready for the heroes to explore.
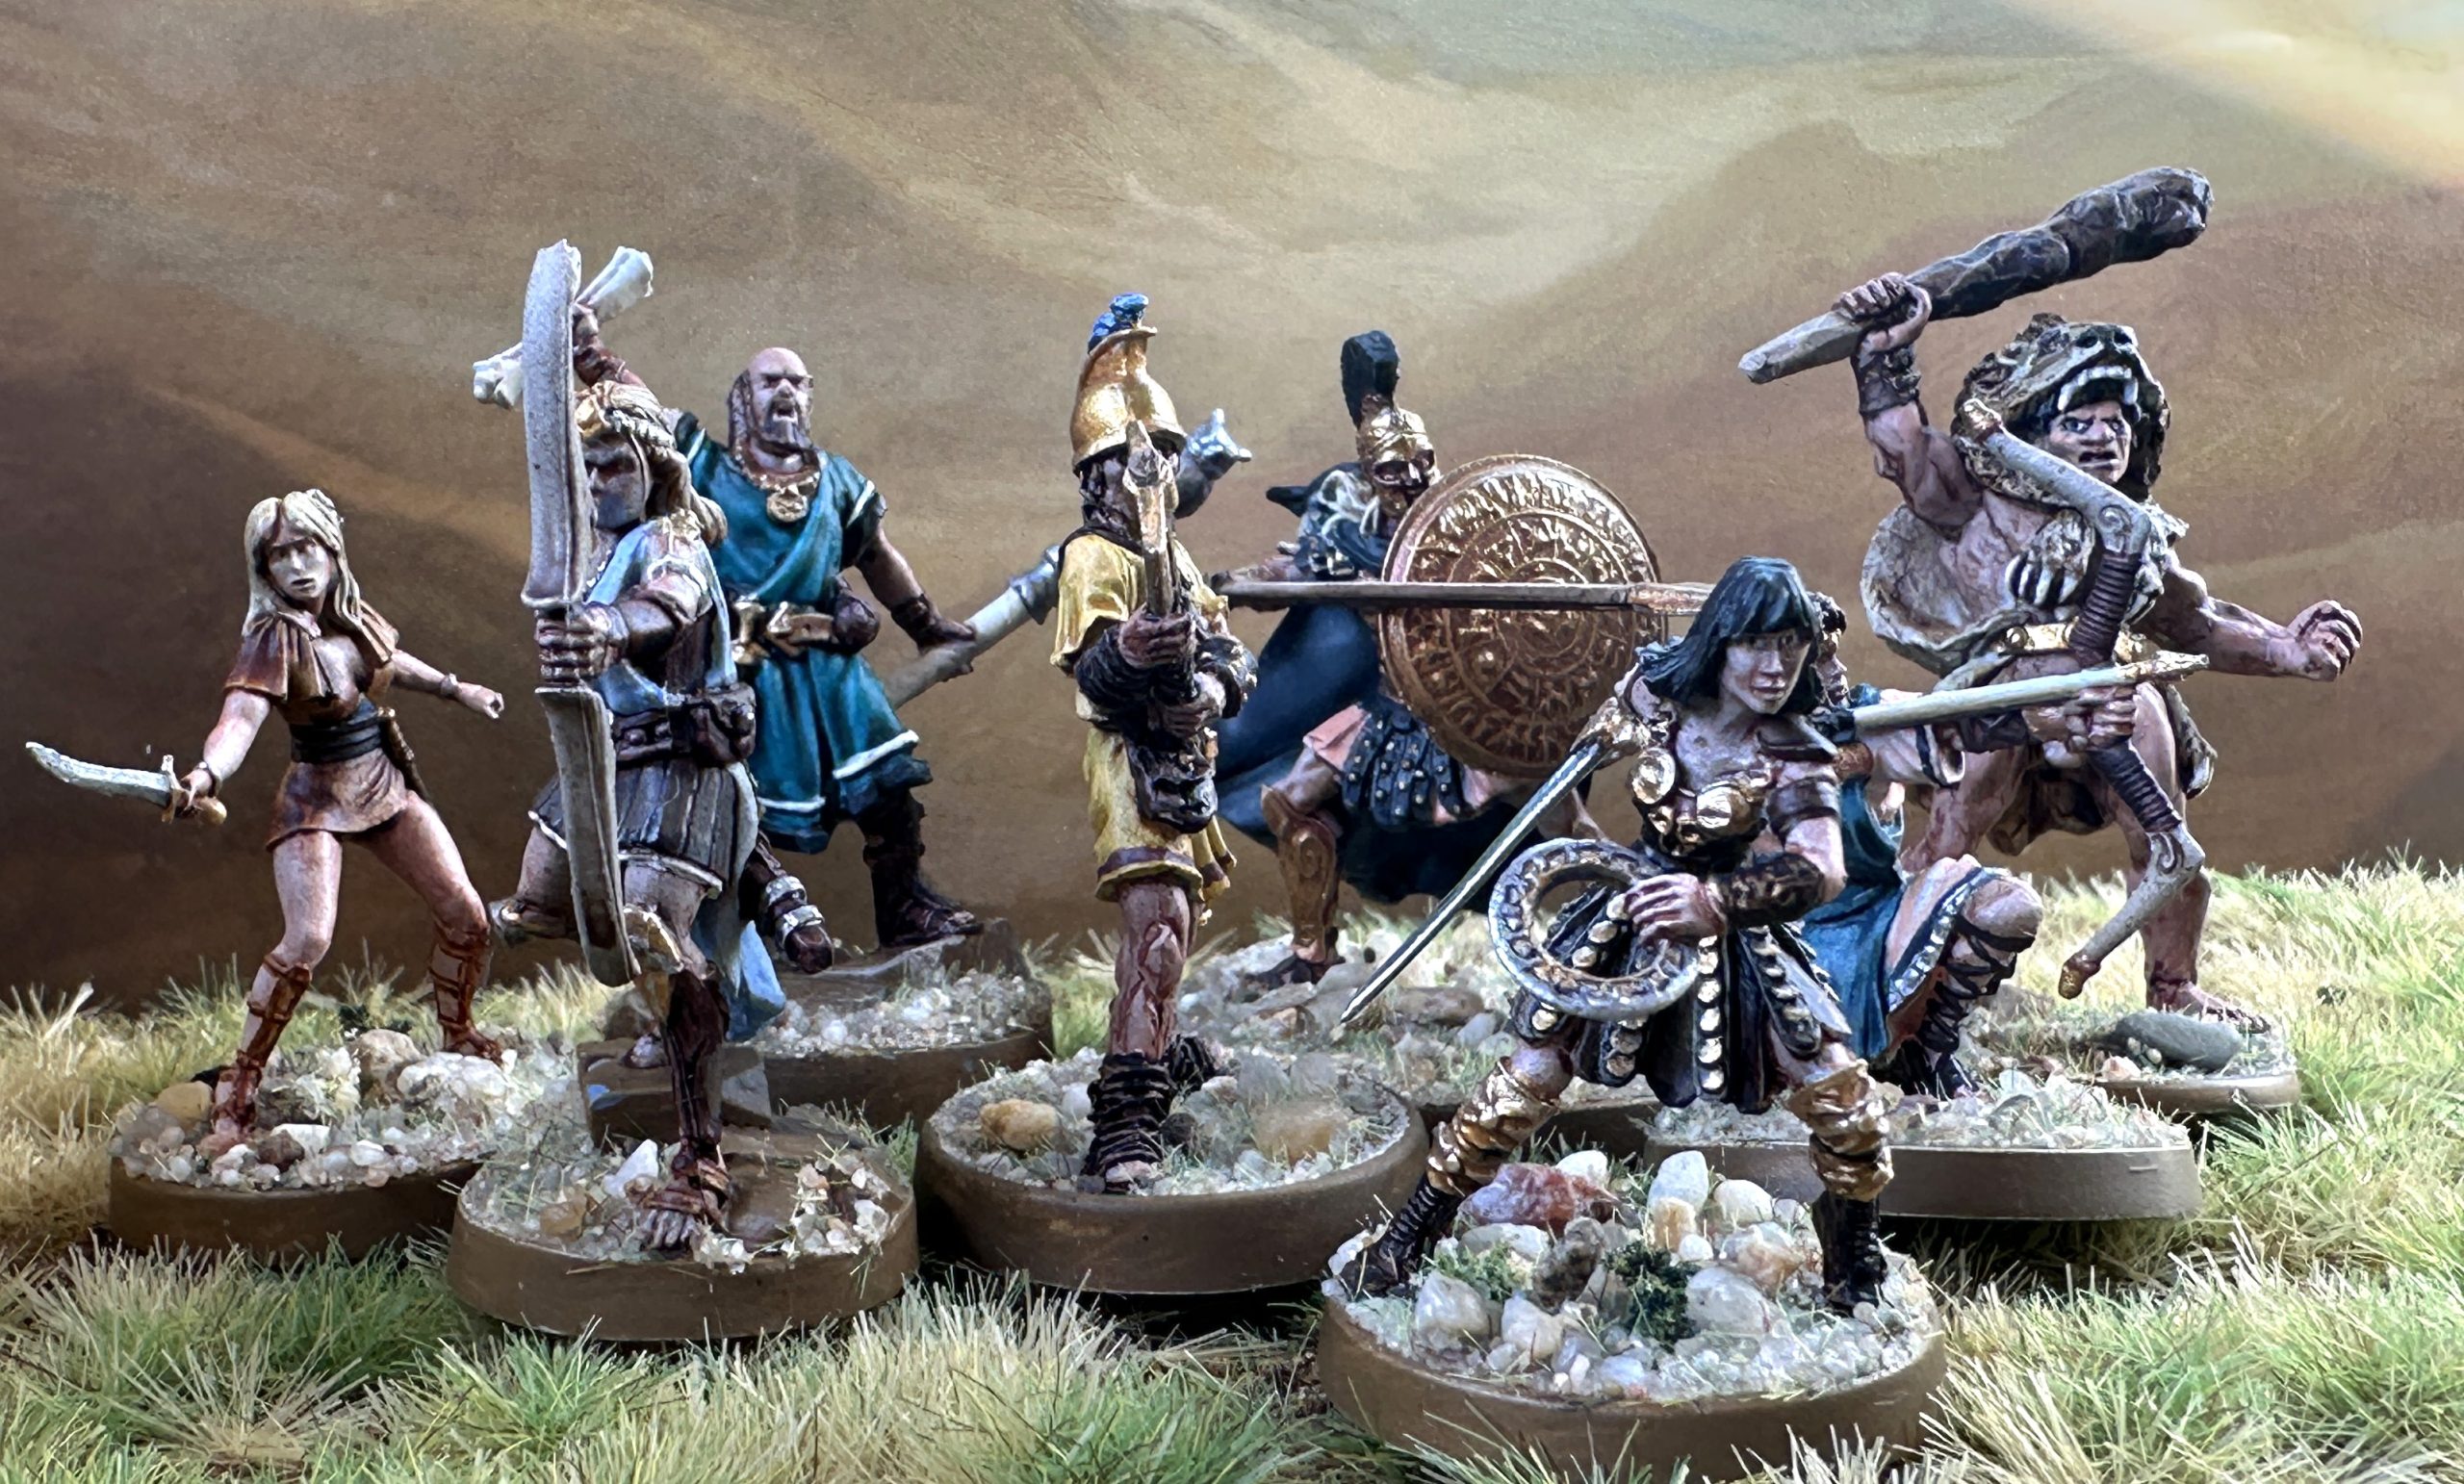
Heroes Complete.
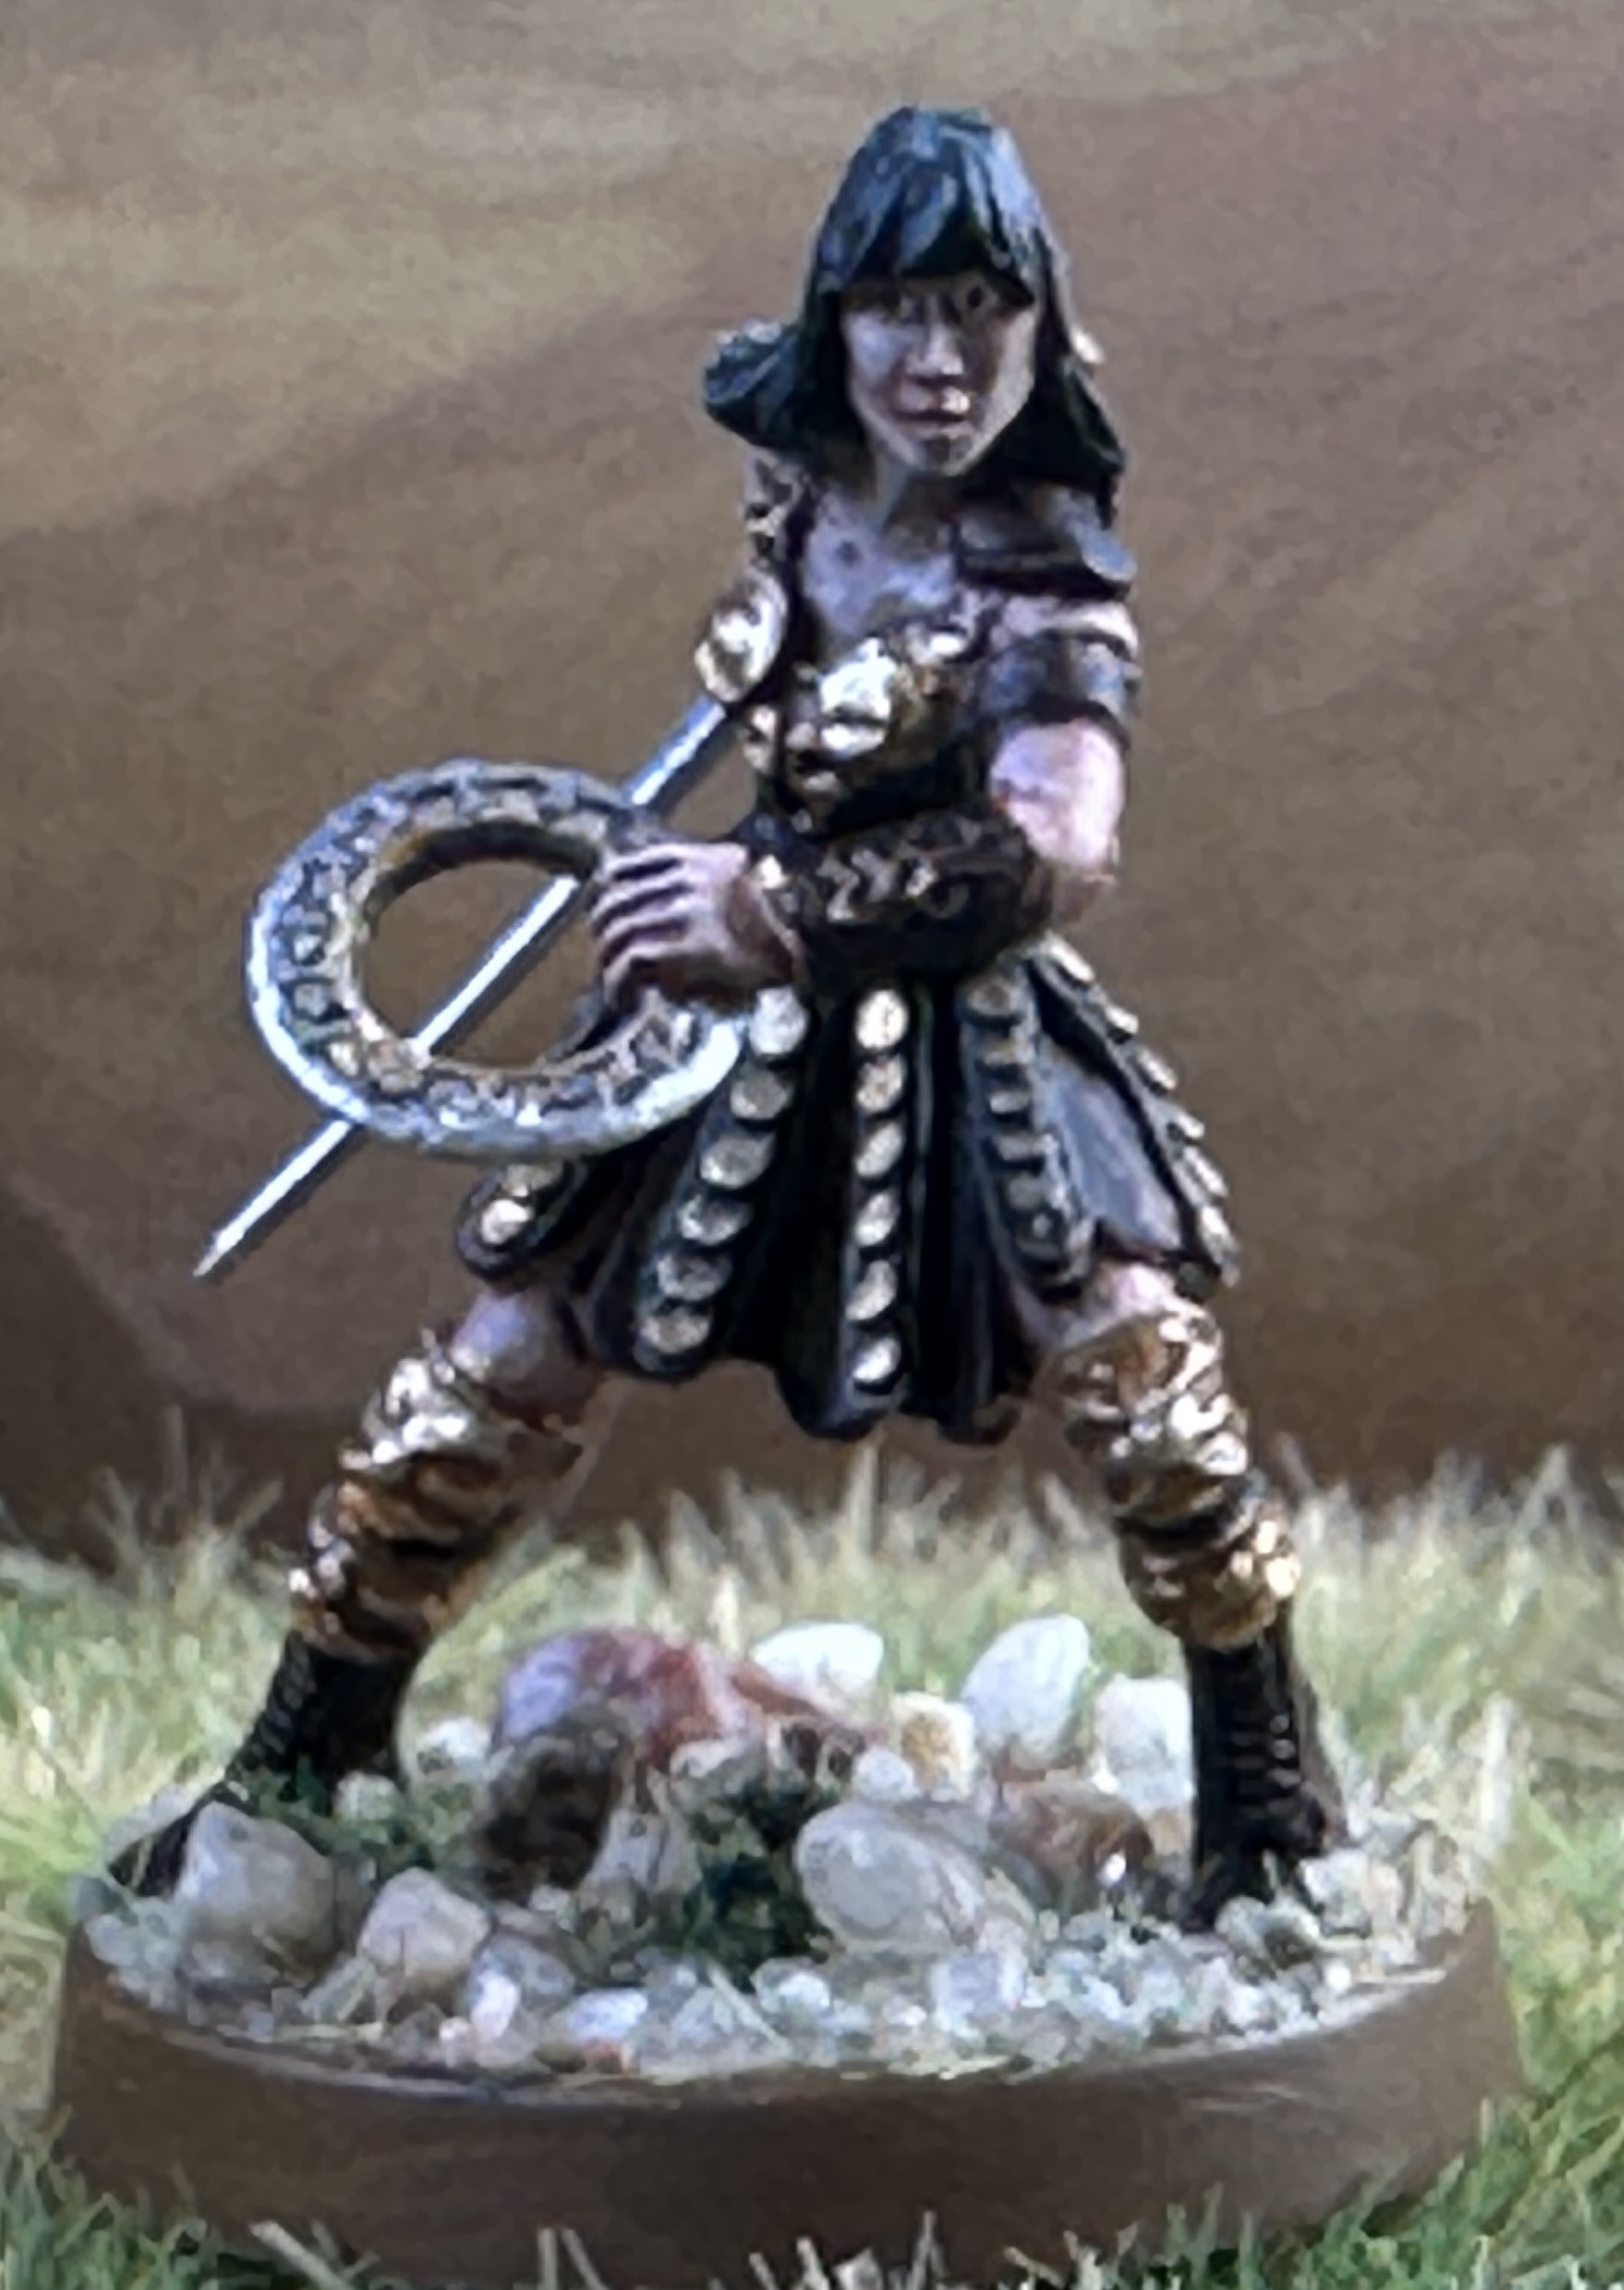
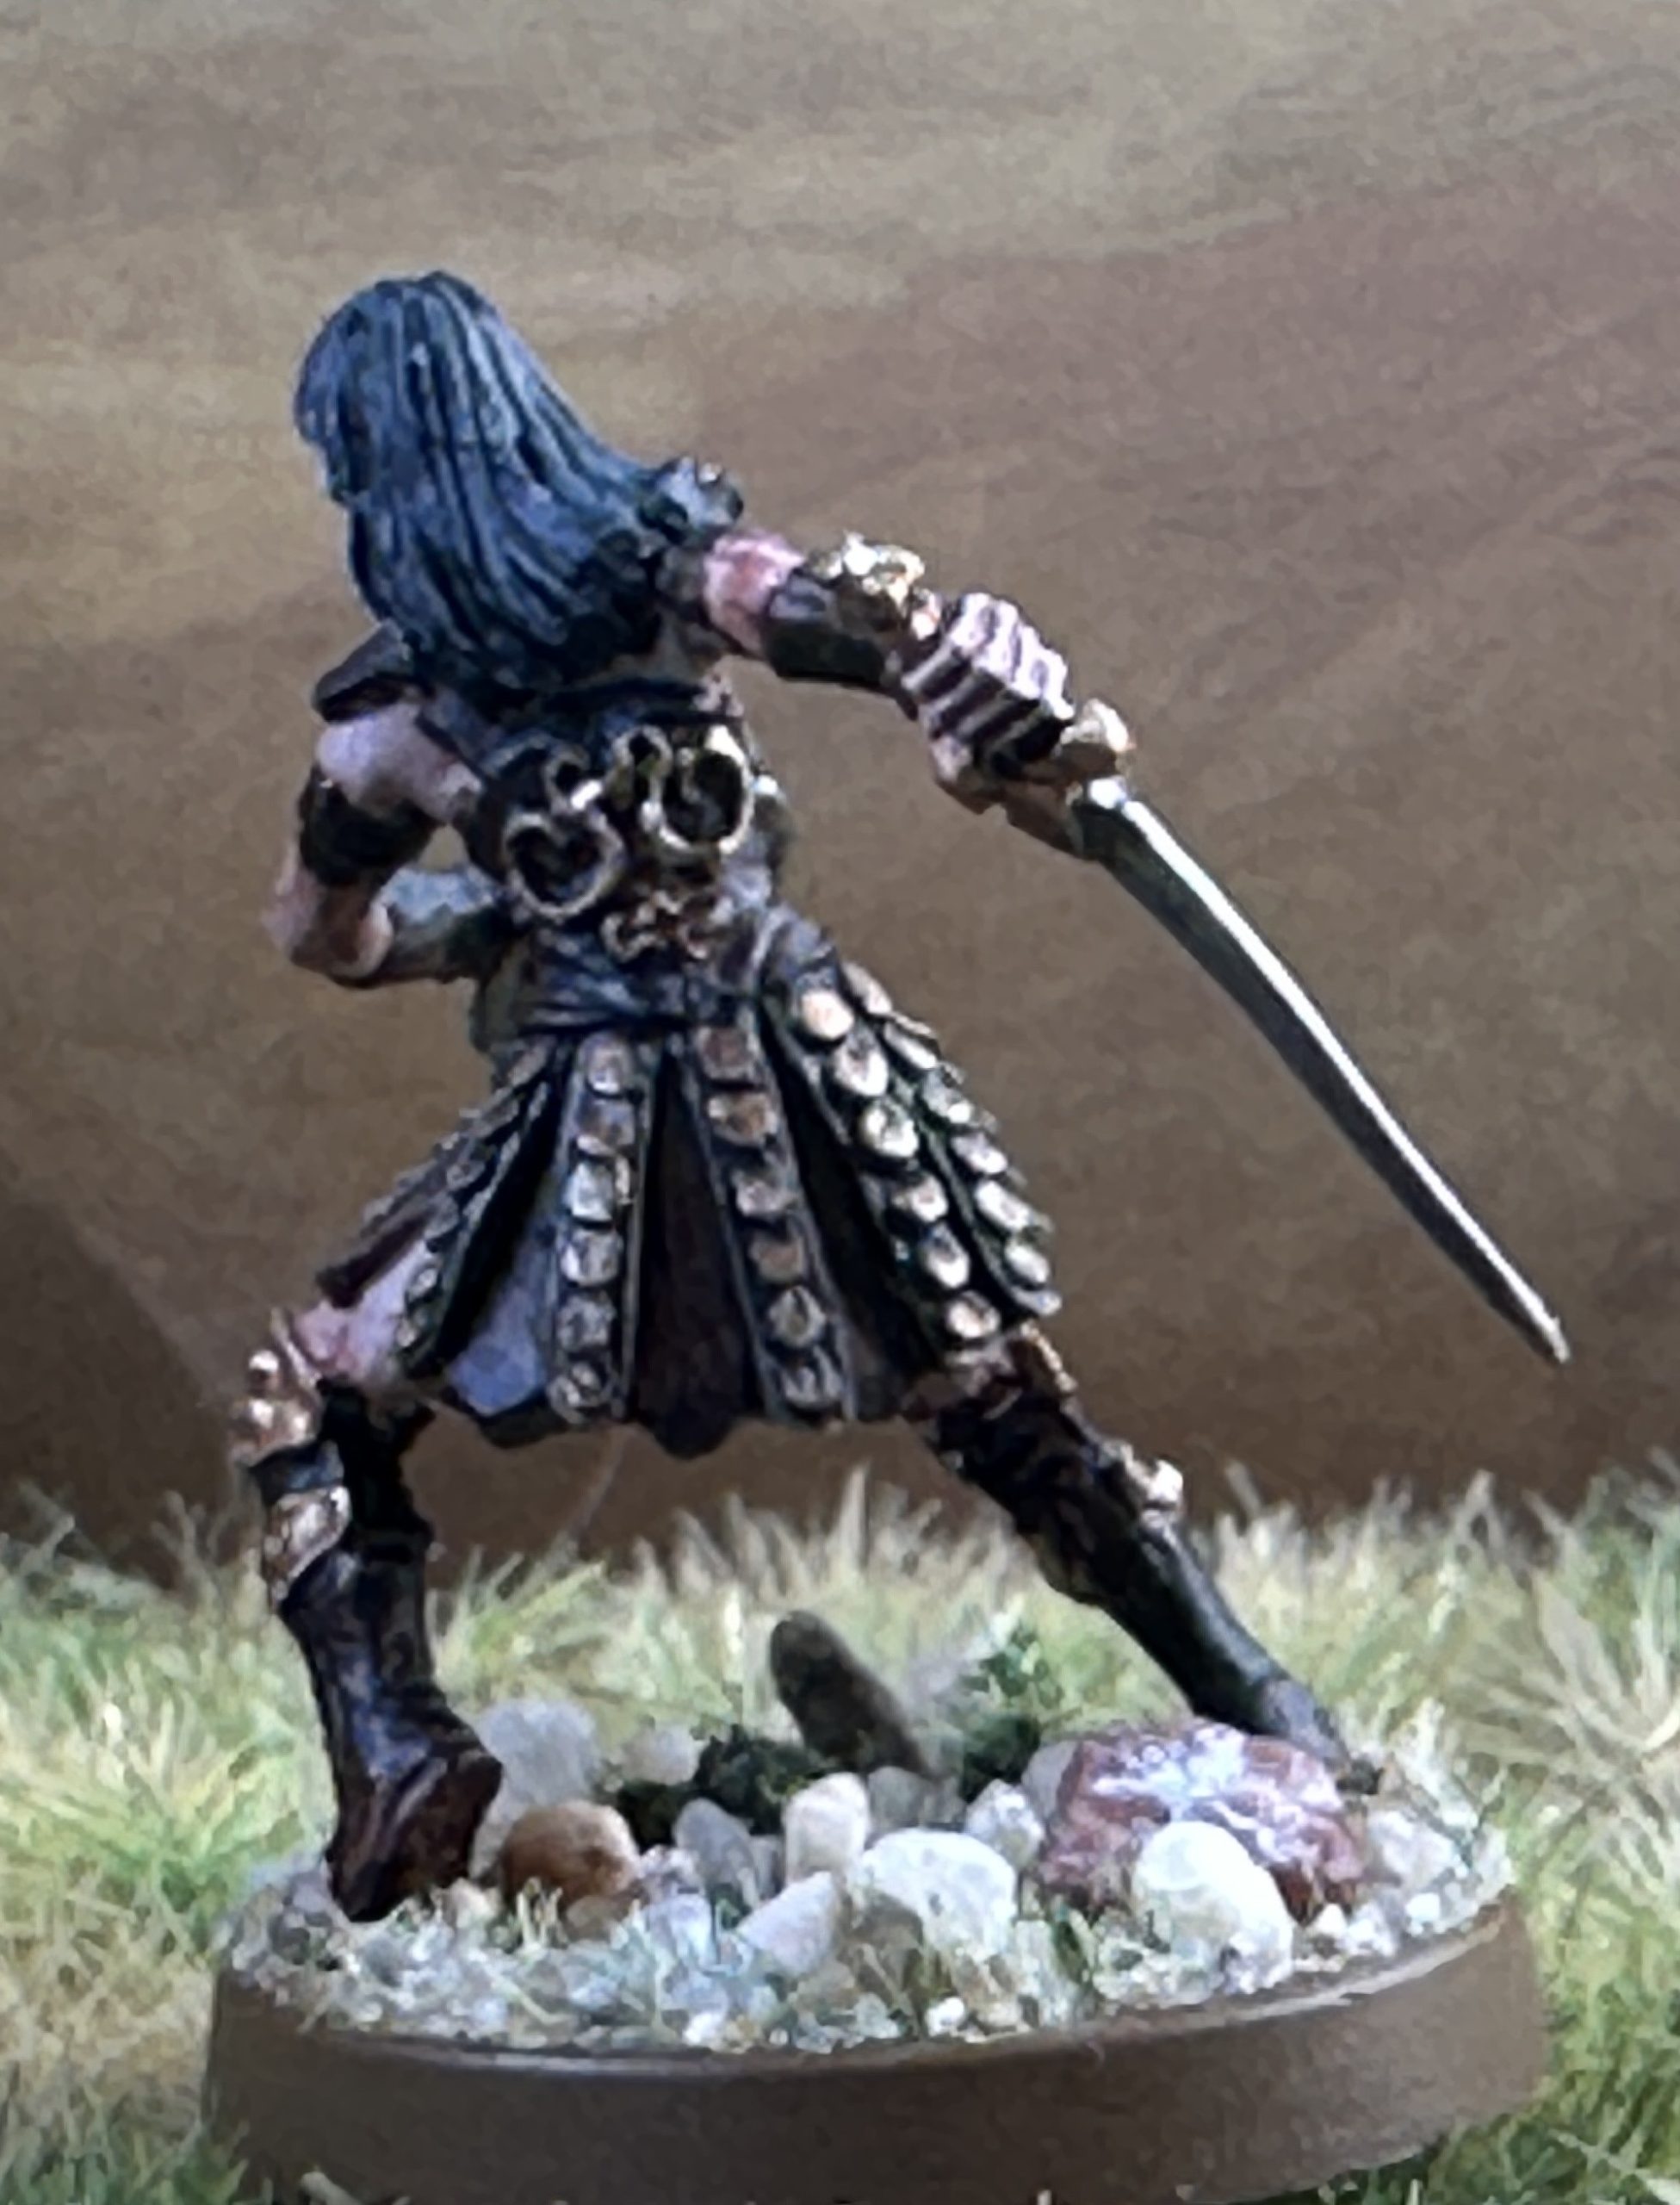
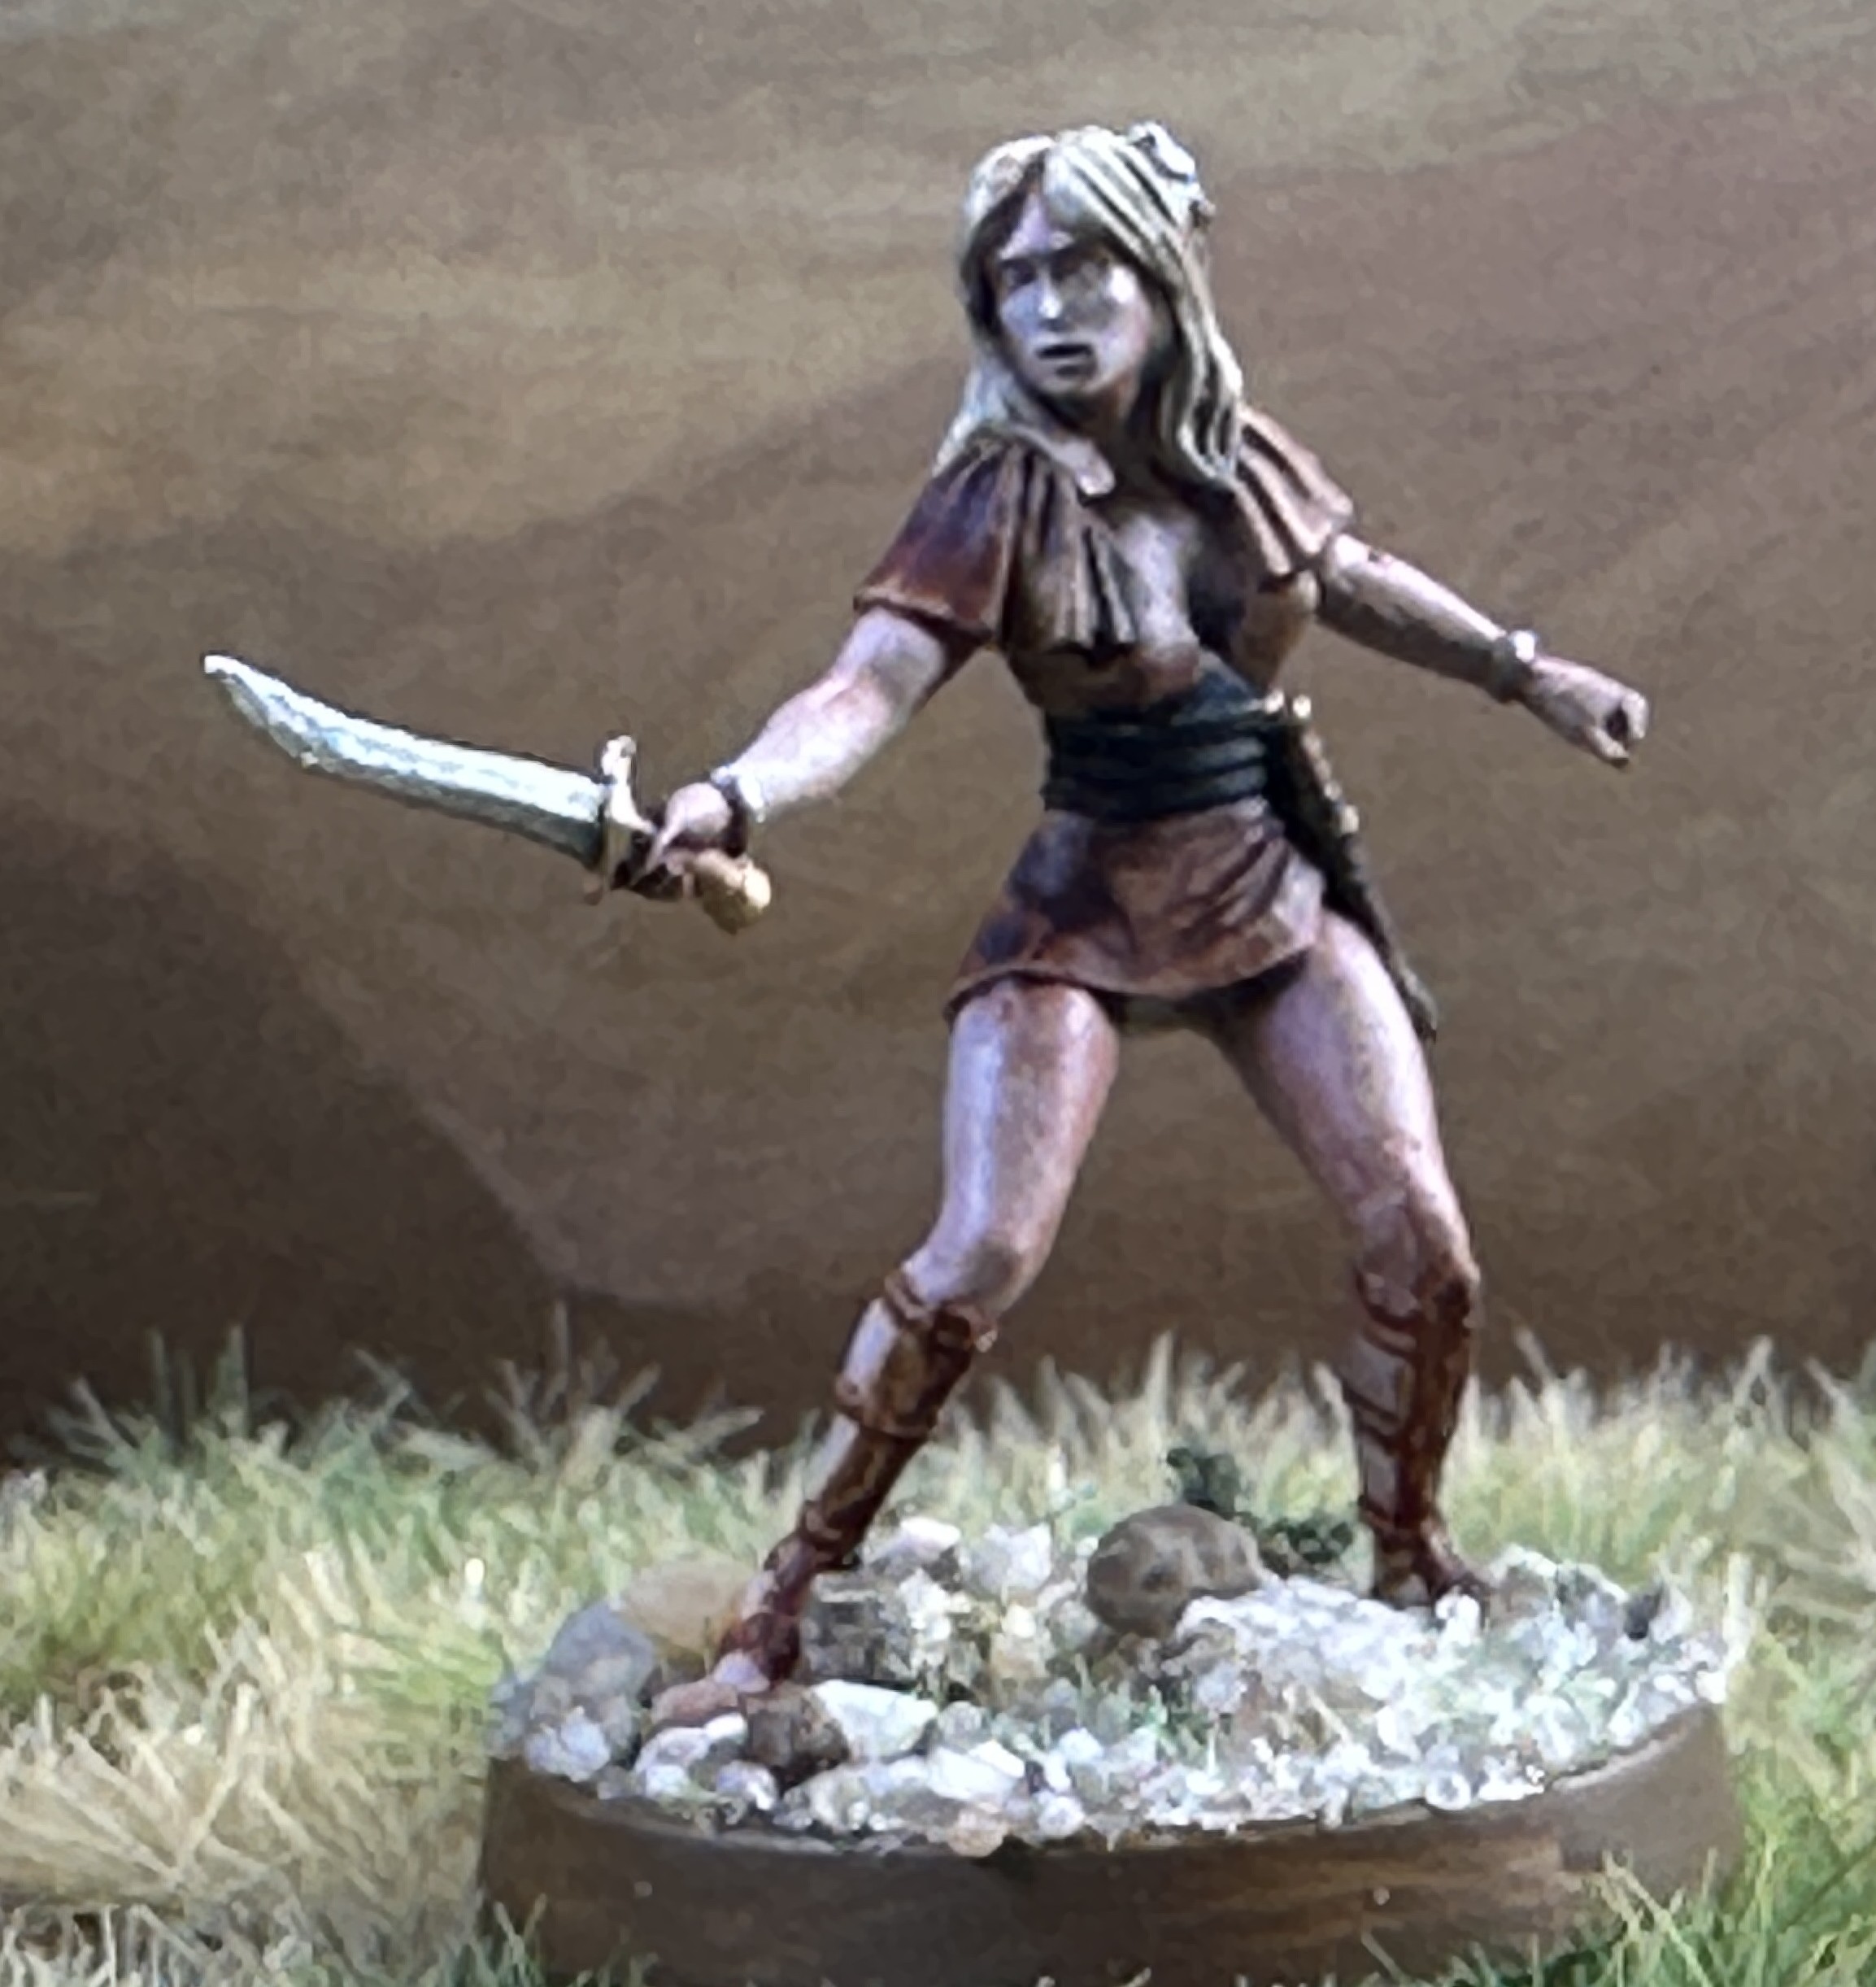
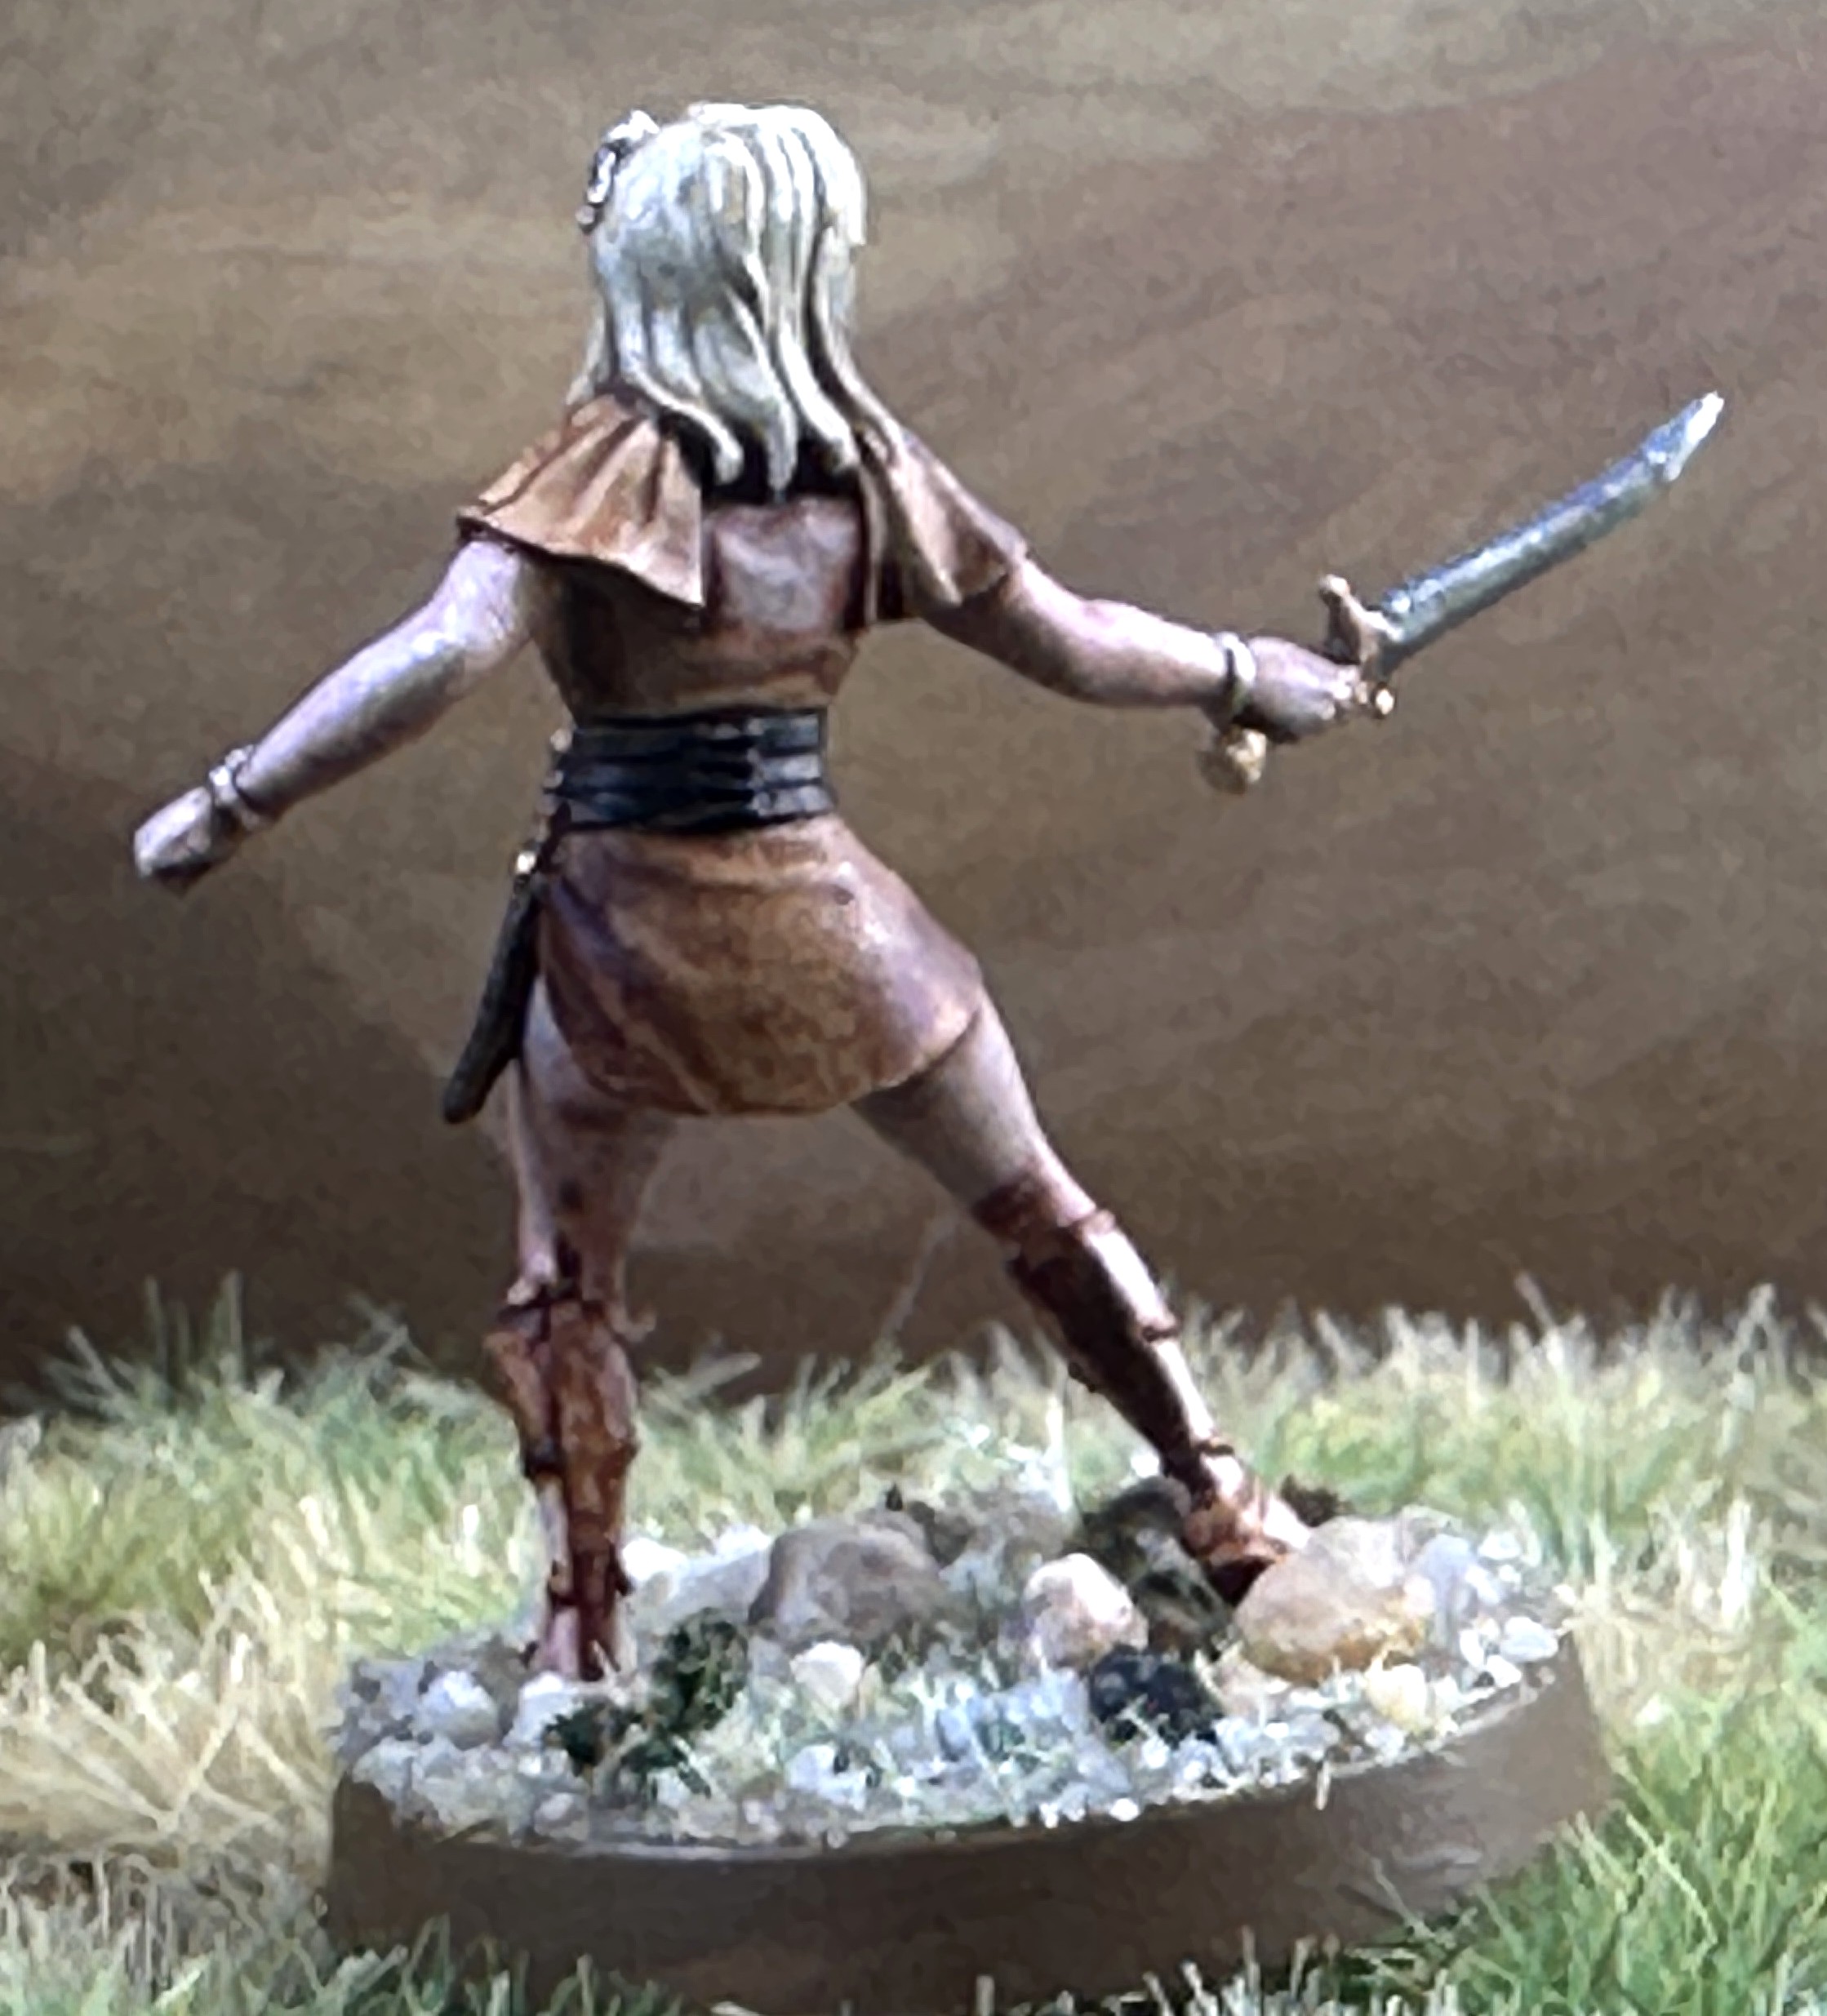
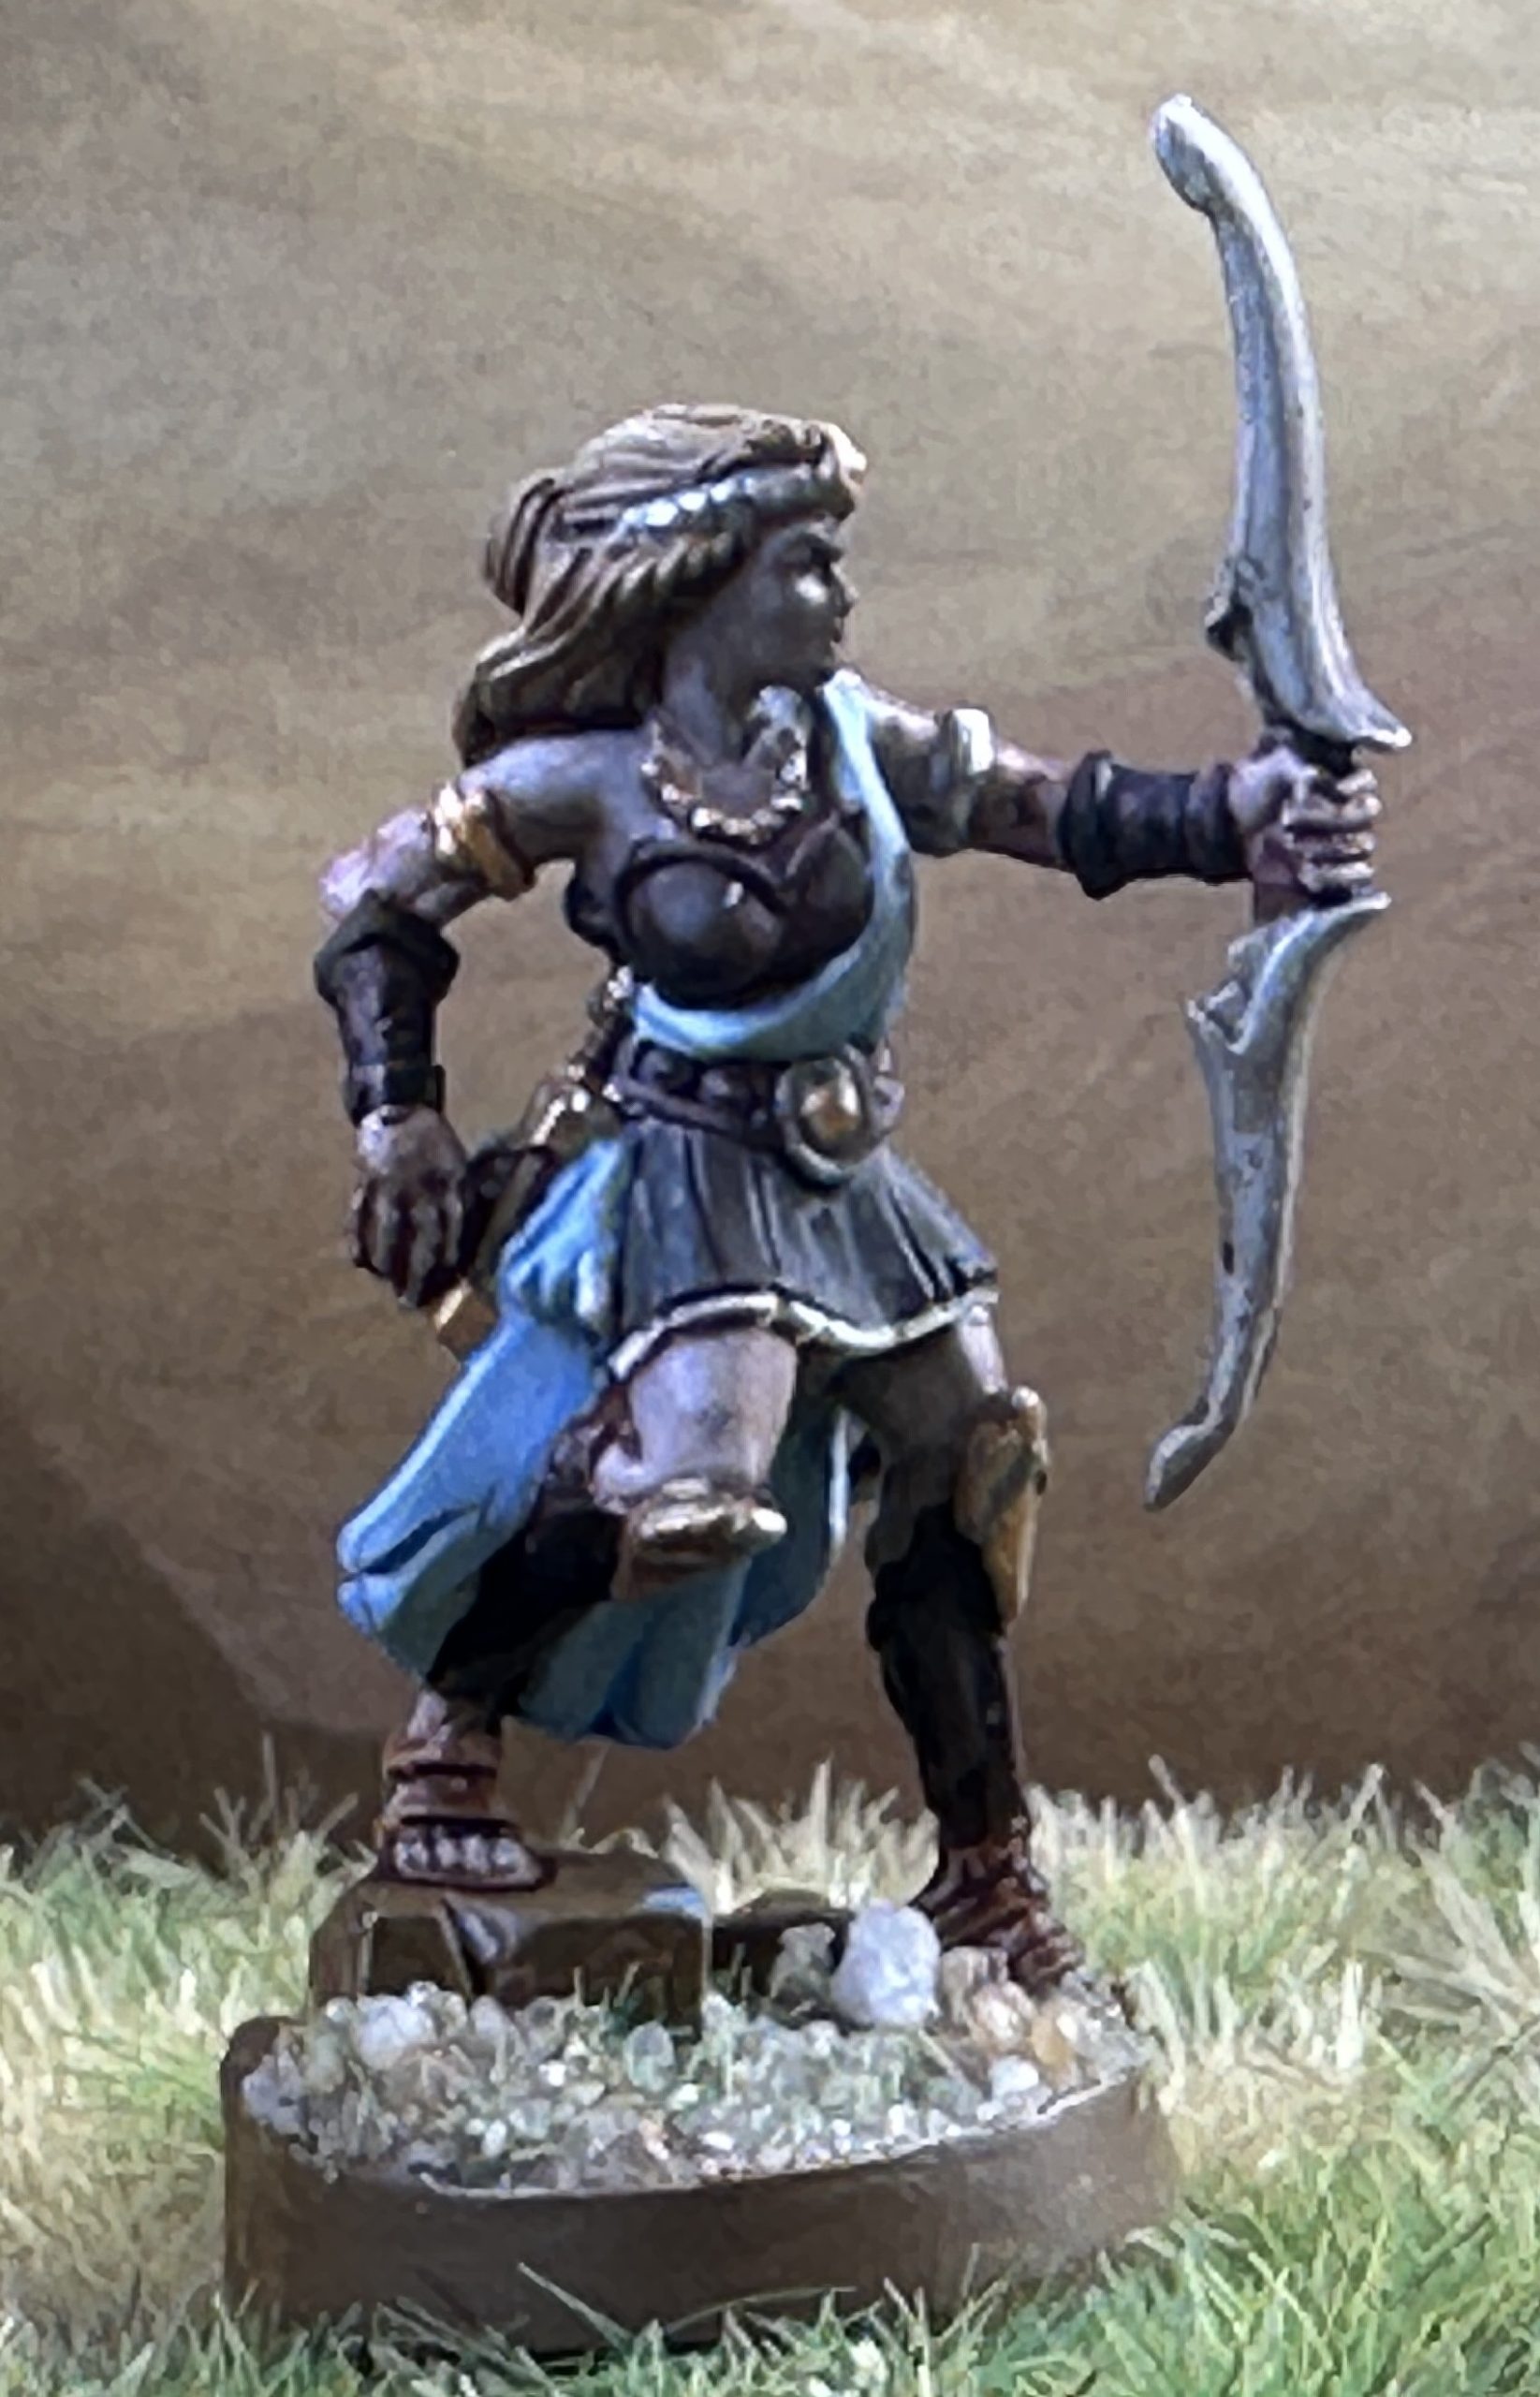
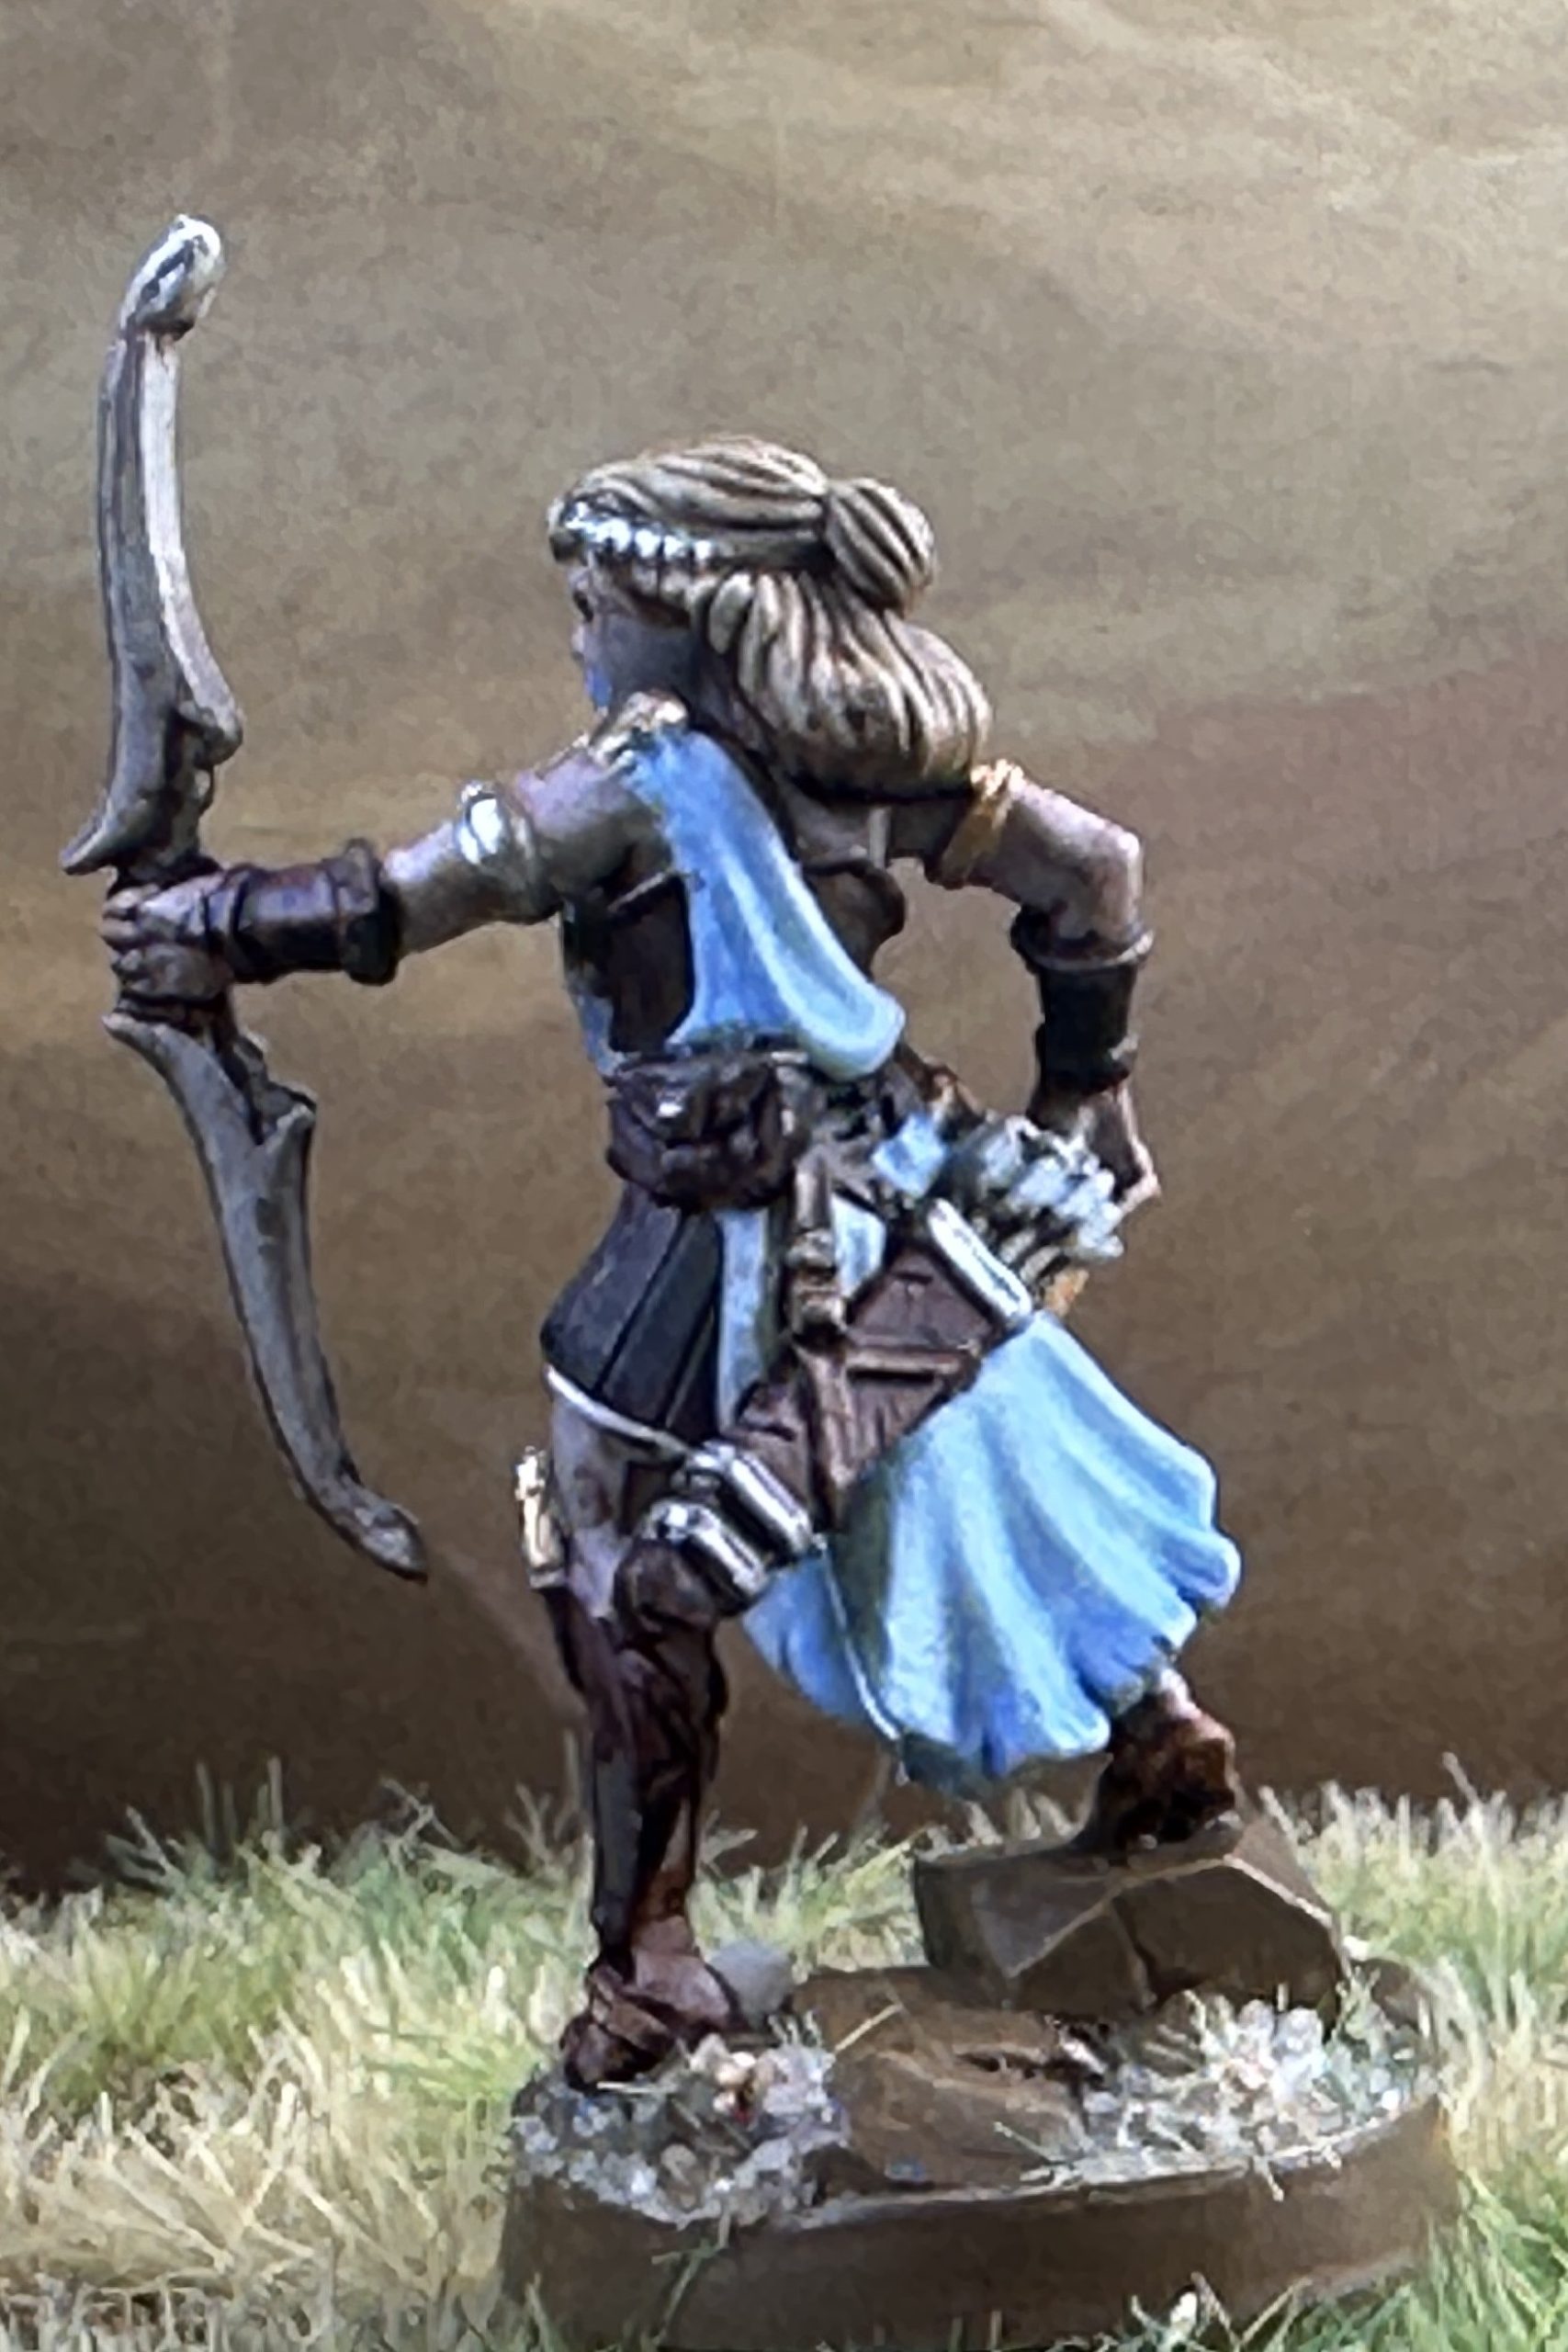
Crooked Dice order arrived and my heroes are completed with the addition of three women. My character, Zena Warrior Princess, Gabrielle the Thief and Atalanta the Huntress.
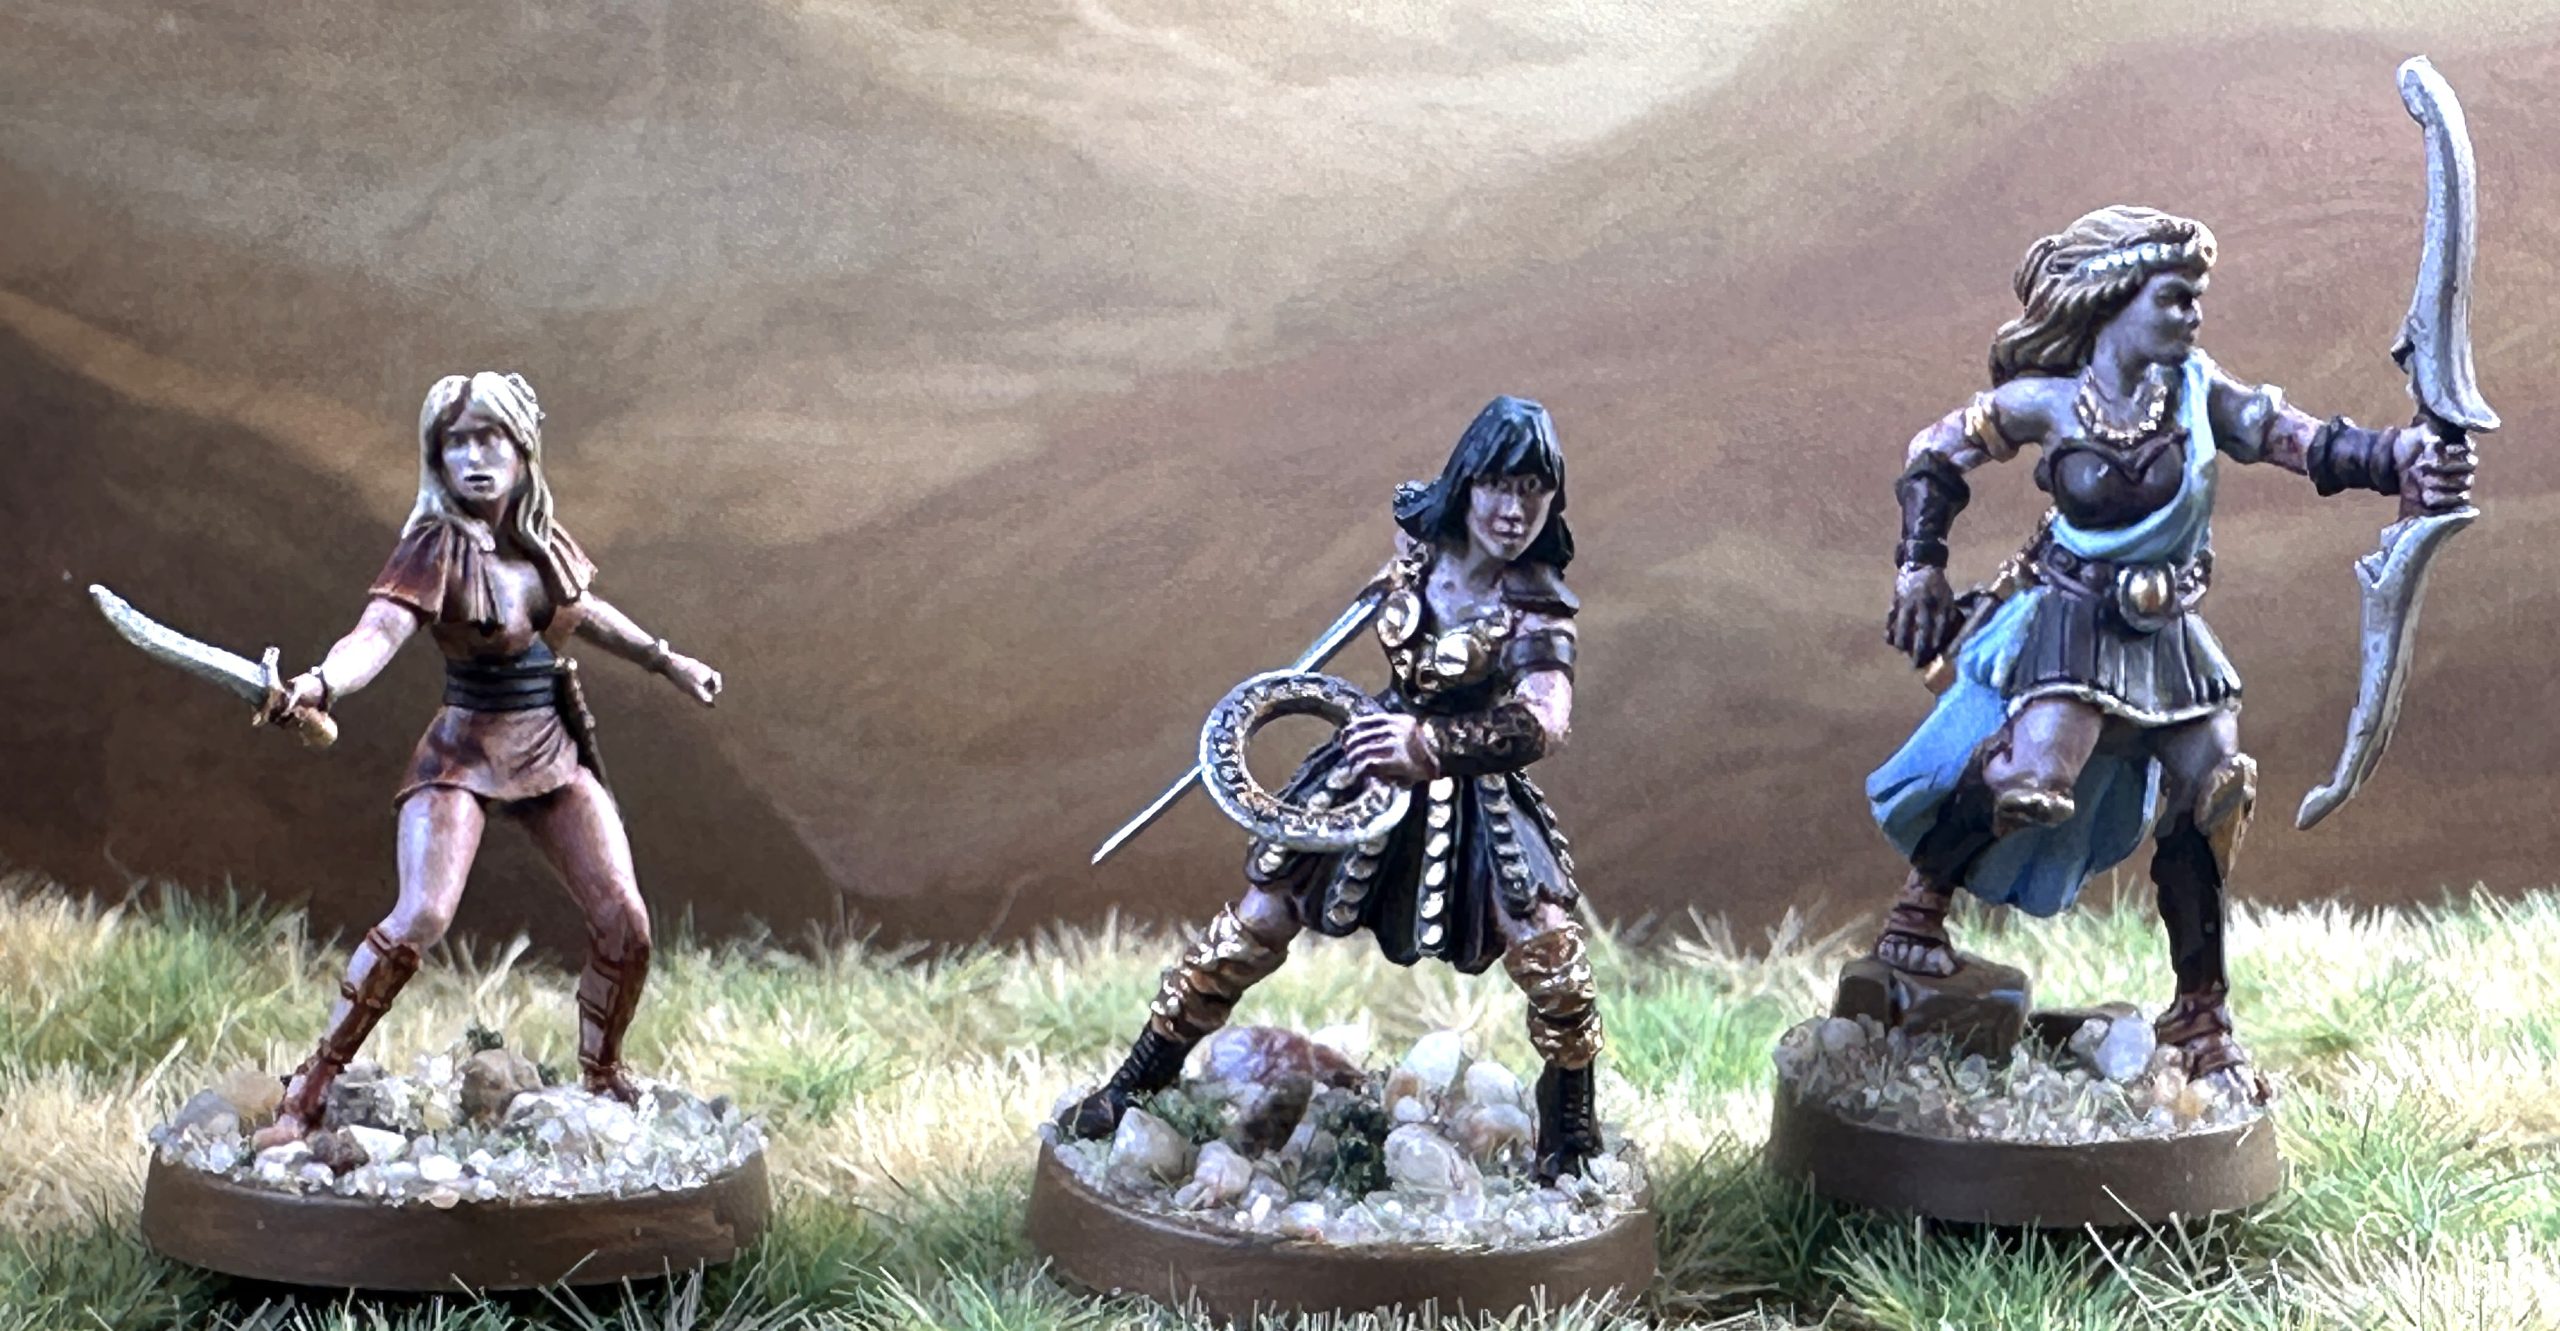
Firstly there is the main hero of the party, and my character, Zena the warrior princess. Zena has chosen the life of adventure and with her friend Gabrielle has gathered a small band of warriors to follow the will of Athena and take on the challenges that threaten the rule of order in the world.
Zena is the Divine Mortal miniature by Crooked Dice. She has been painted in Speedpaints with her skin and armour overlaid in acrylics in the same manner as the Argonauts form earlier in this project. She is equipped with a hand weapon and a throwing weapon called a chakram which I’ve represented in the rules as a javelin. She has light armour and although not represented on the model I paid for a shield as well.
Zena’s best friend in Gabrielle and she has been given the Thief profile. She was also painted in Speedpaints with the leather dress done in Hardened Leather and the rest of the model as per the Argonauts. She gets a hand weapon and not much else in terms of physical equipment although she has several abilities.
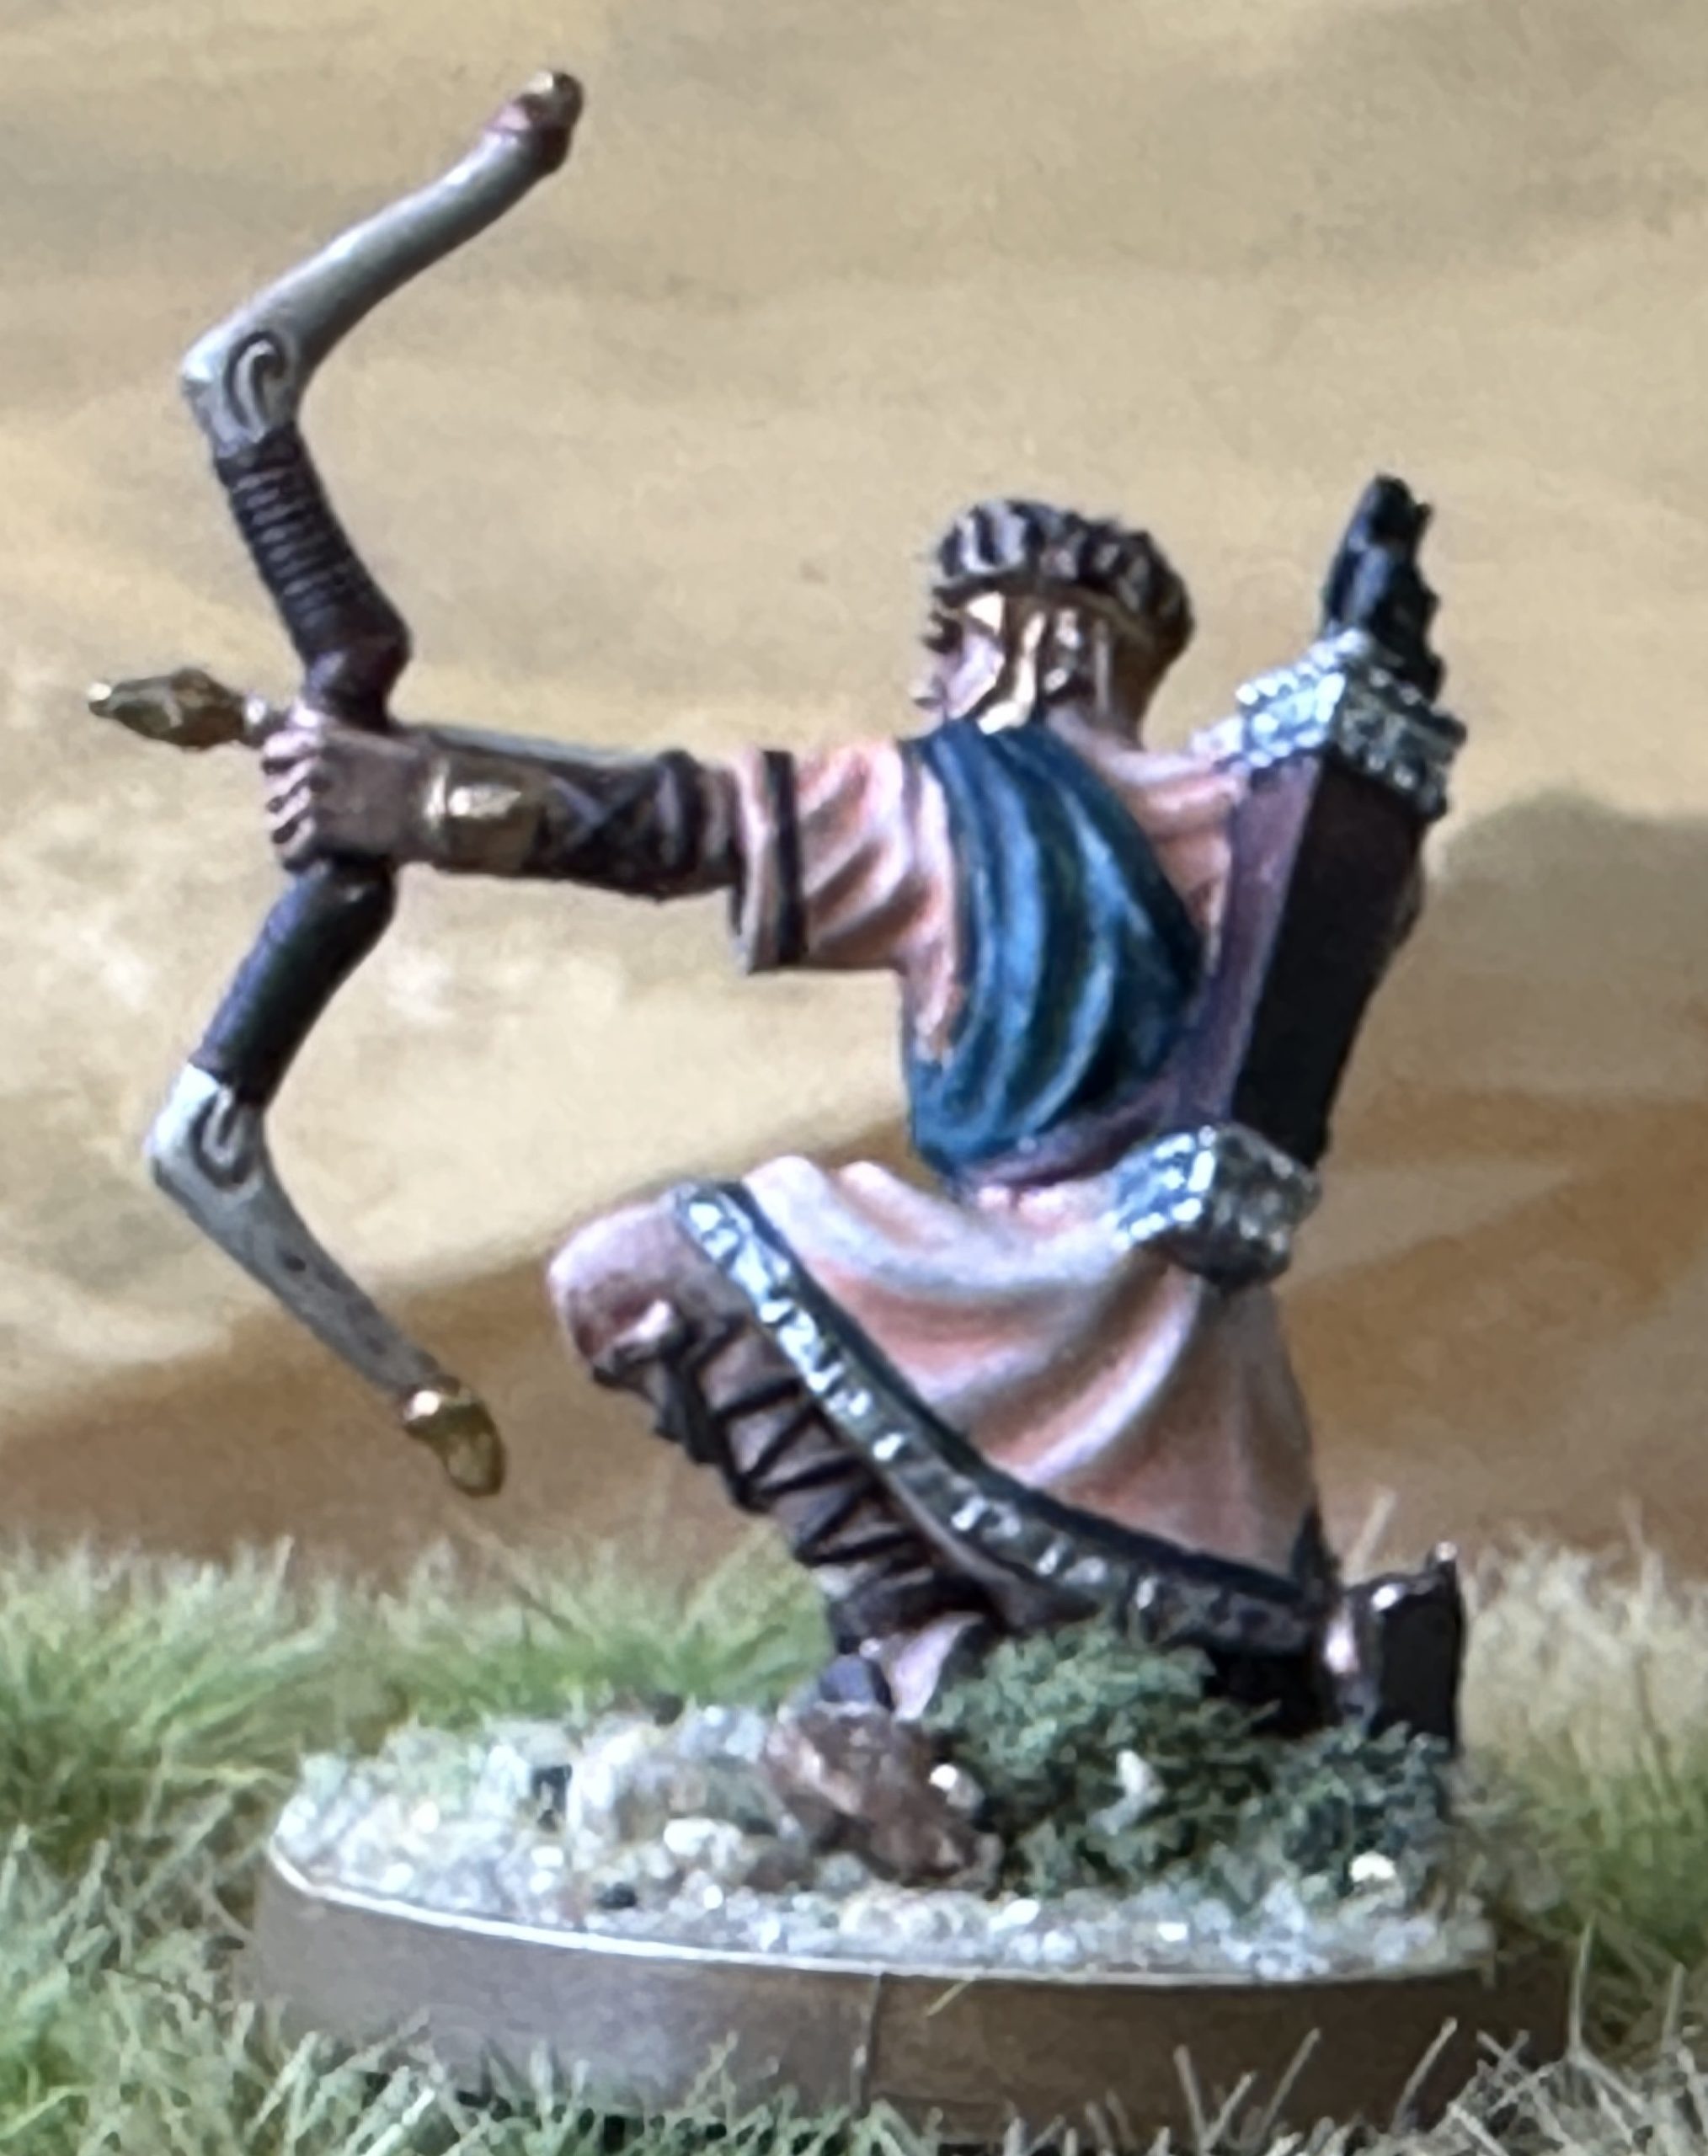
The final member of the party is Atalanta the Hunter. She has a bow and hand weapons. She was painted in a pastel Speedpaint and then everything else as per previous miniatures.
Nearly ready for the off now. A bit of scenery and terrain to put together and I still need a harpy and a couple of satyr warriors for the first few scenarios. Here is the whole party together.
Cyclopses and objective markers
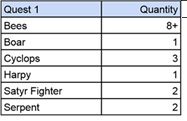
The first quest needs 3 cyclopses as the main opponents for the warriors. I’m in the group for the game on facepage and another member there, Wojciech Walichnowski has created lists of the opponents needed for each quest.
I have the animals already. I’ll work on the satyrs and harpies next as they are present in other quests. Here are the 3 cyclopses:
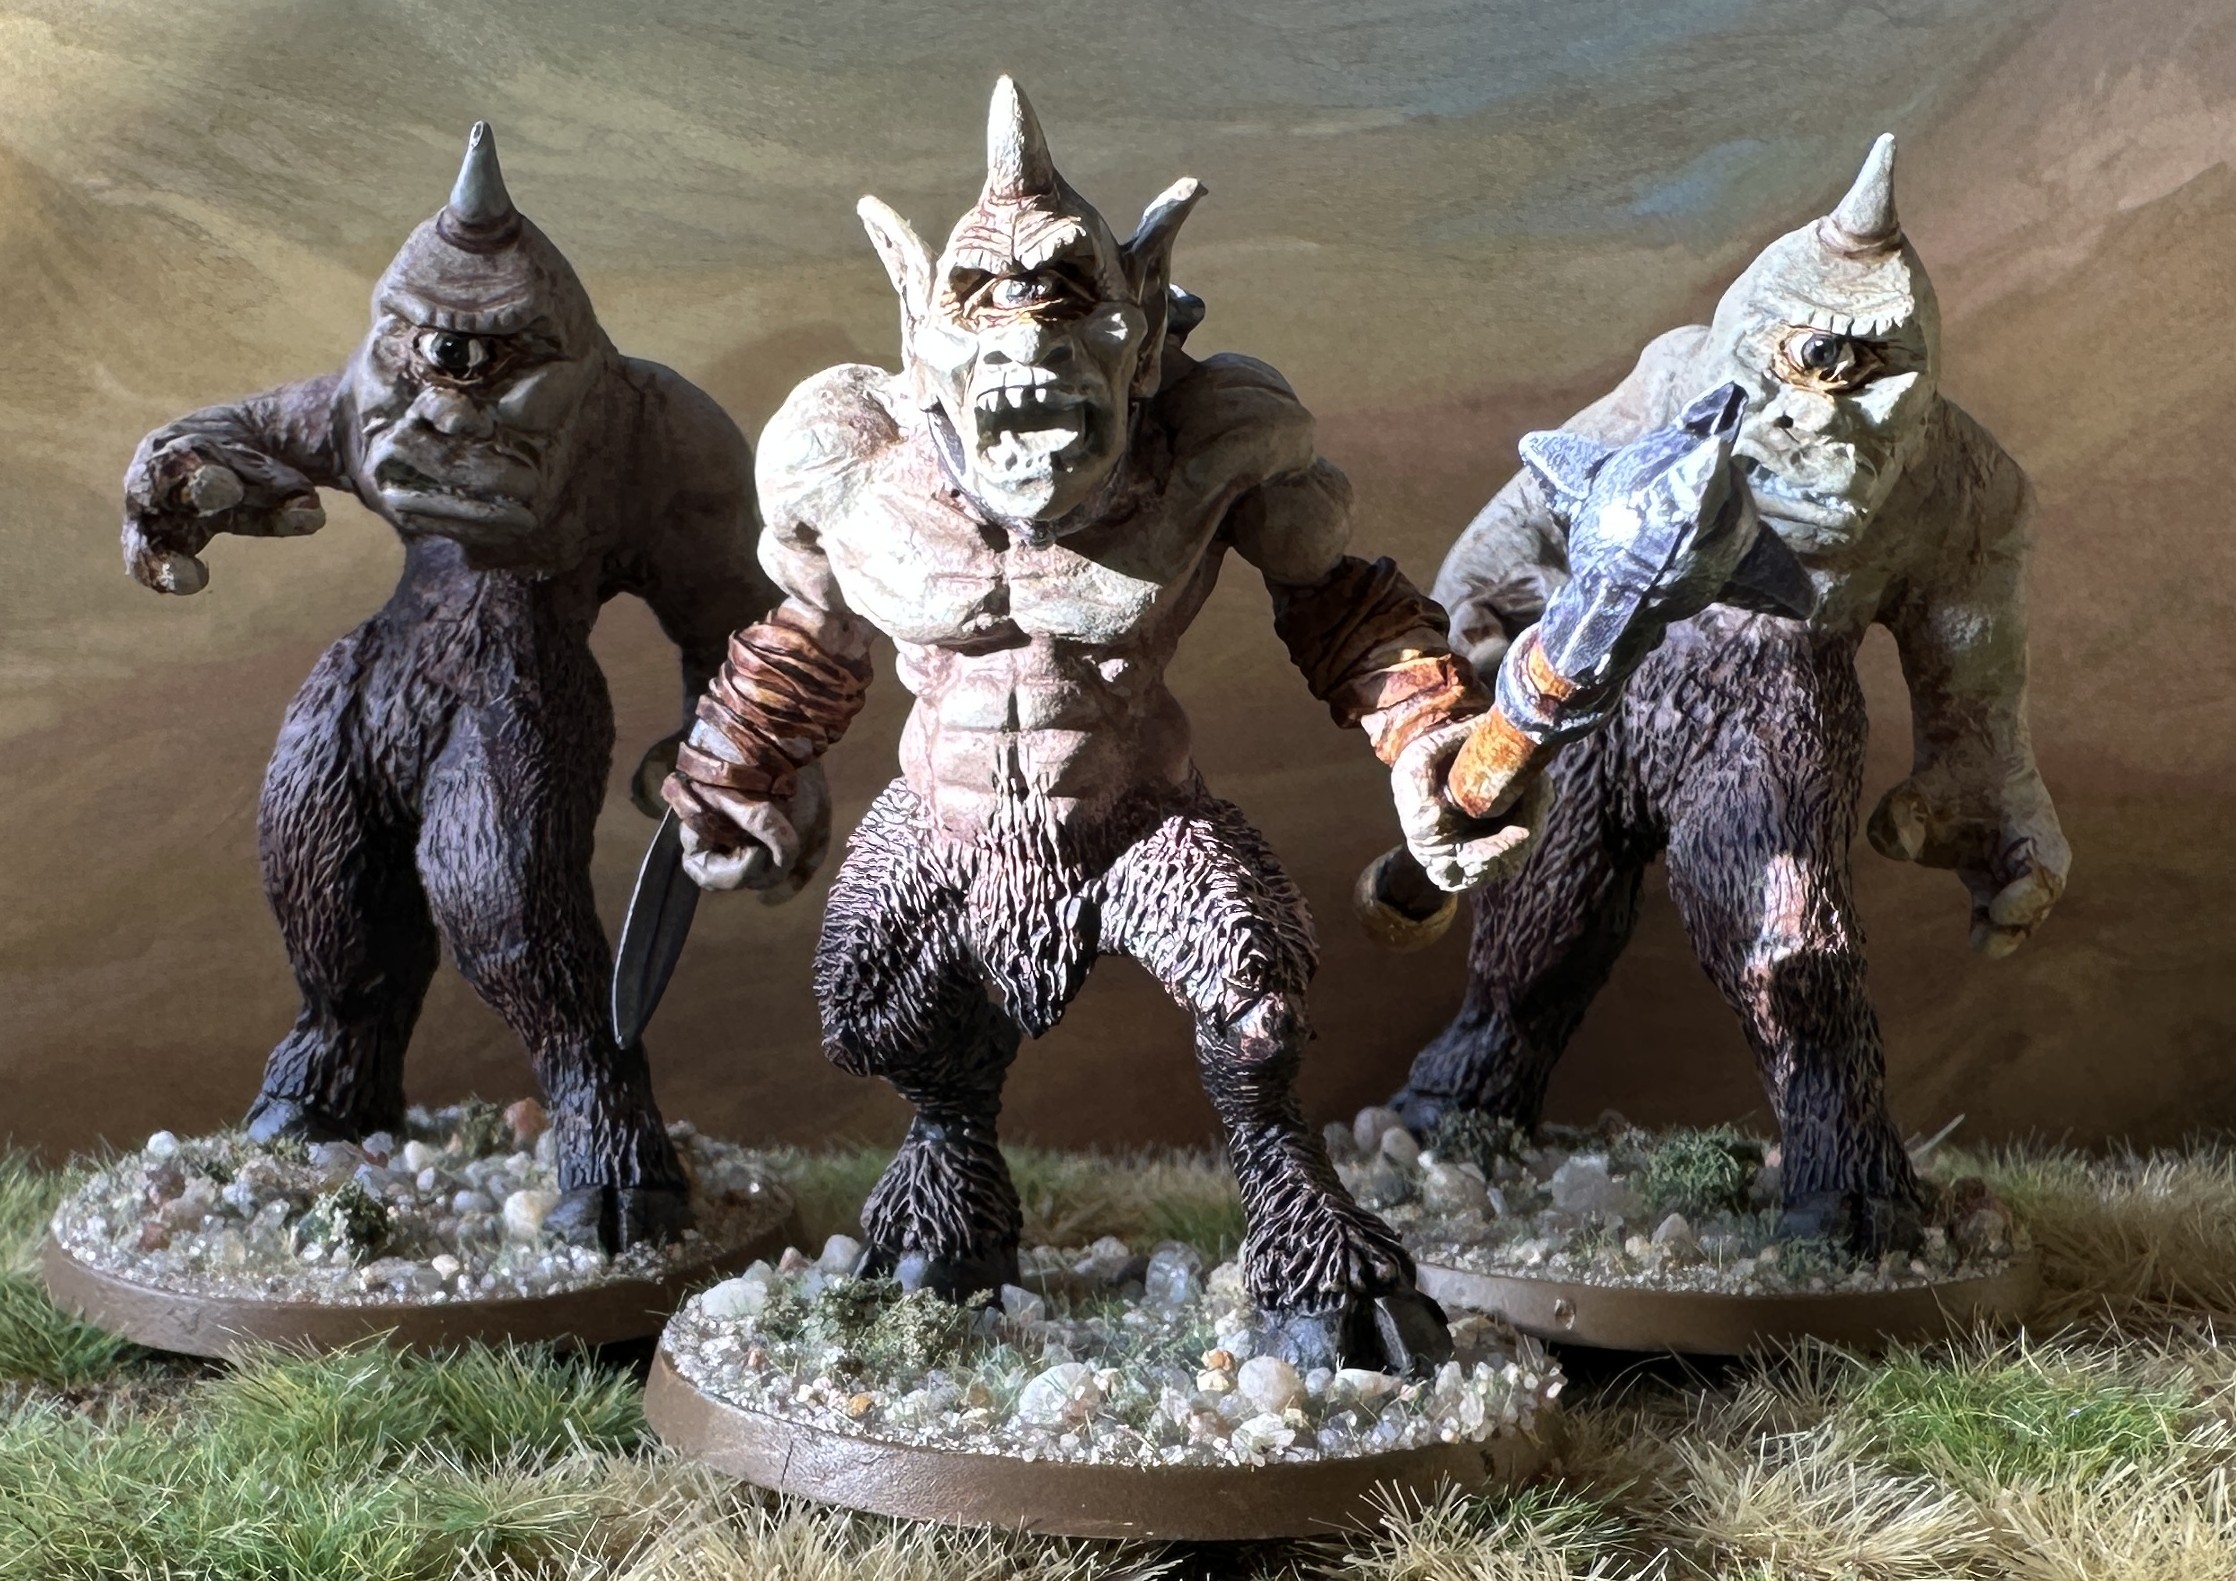
The one in the middle is a Reaper miniature and is listed as a giant goblin who comes in a pack with a goblin shaman rider. The other two are by Alternative Armies and are resin casts, not the most detailed but very inexpensive. I converted one by changing his right arm position and covered it up with some shonky greenstuff work to rebuild his shoulder which isn’t particularly noticeable in the finished miniature. Painting was the same as the giant cyclops.
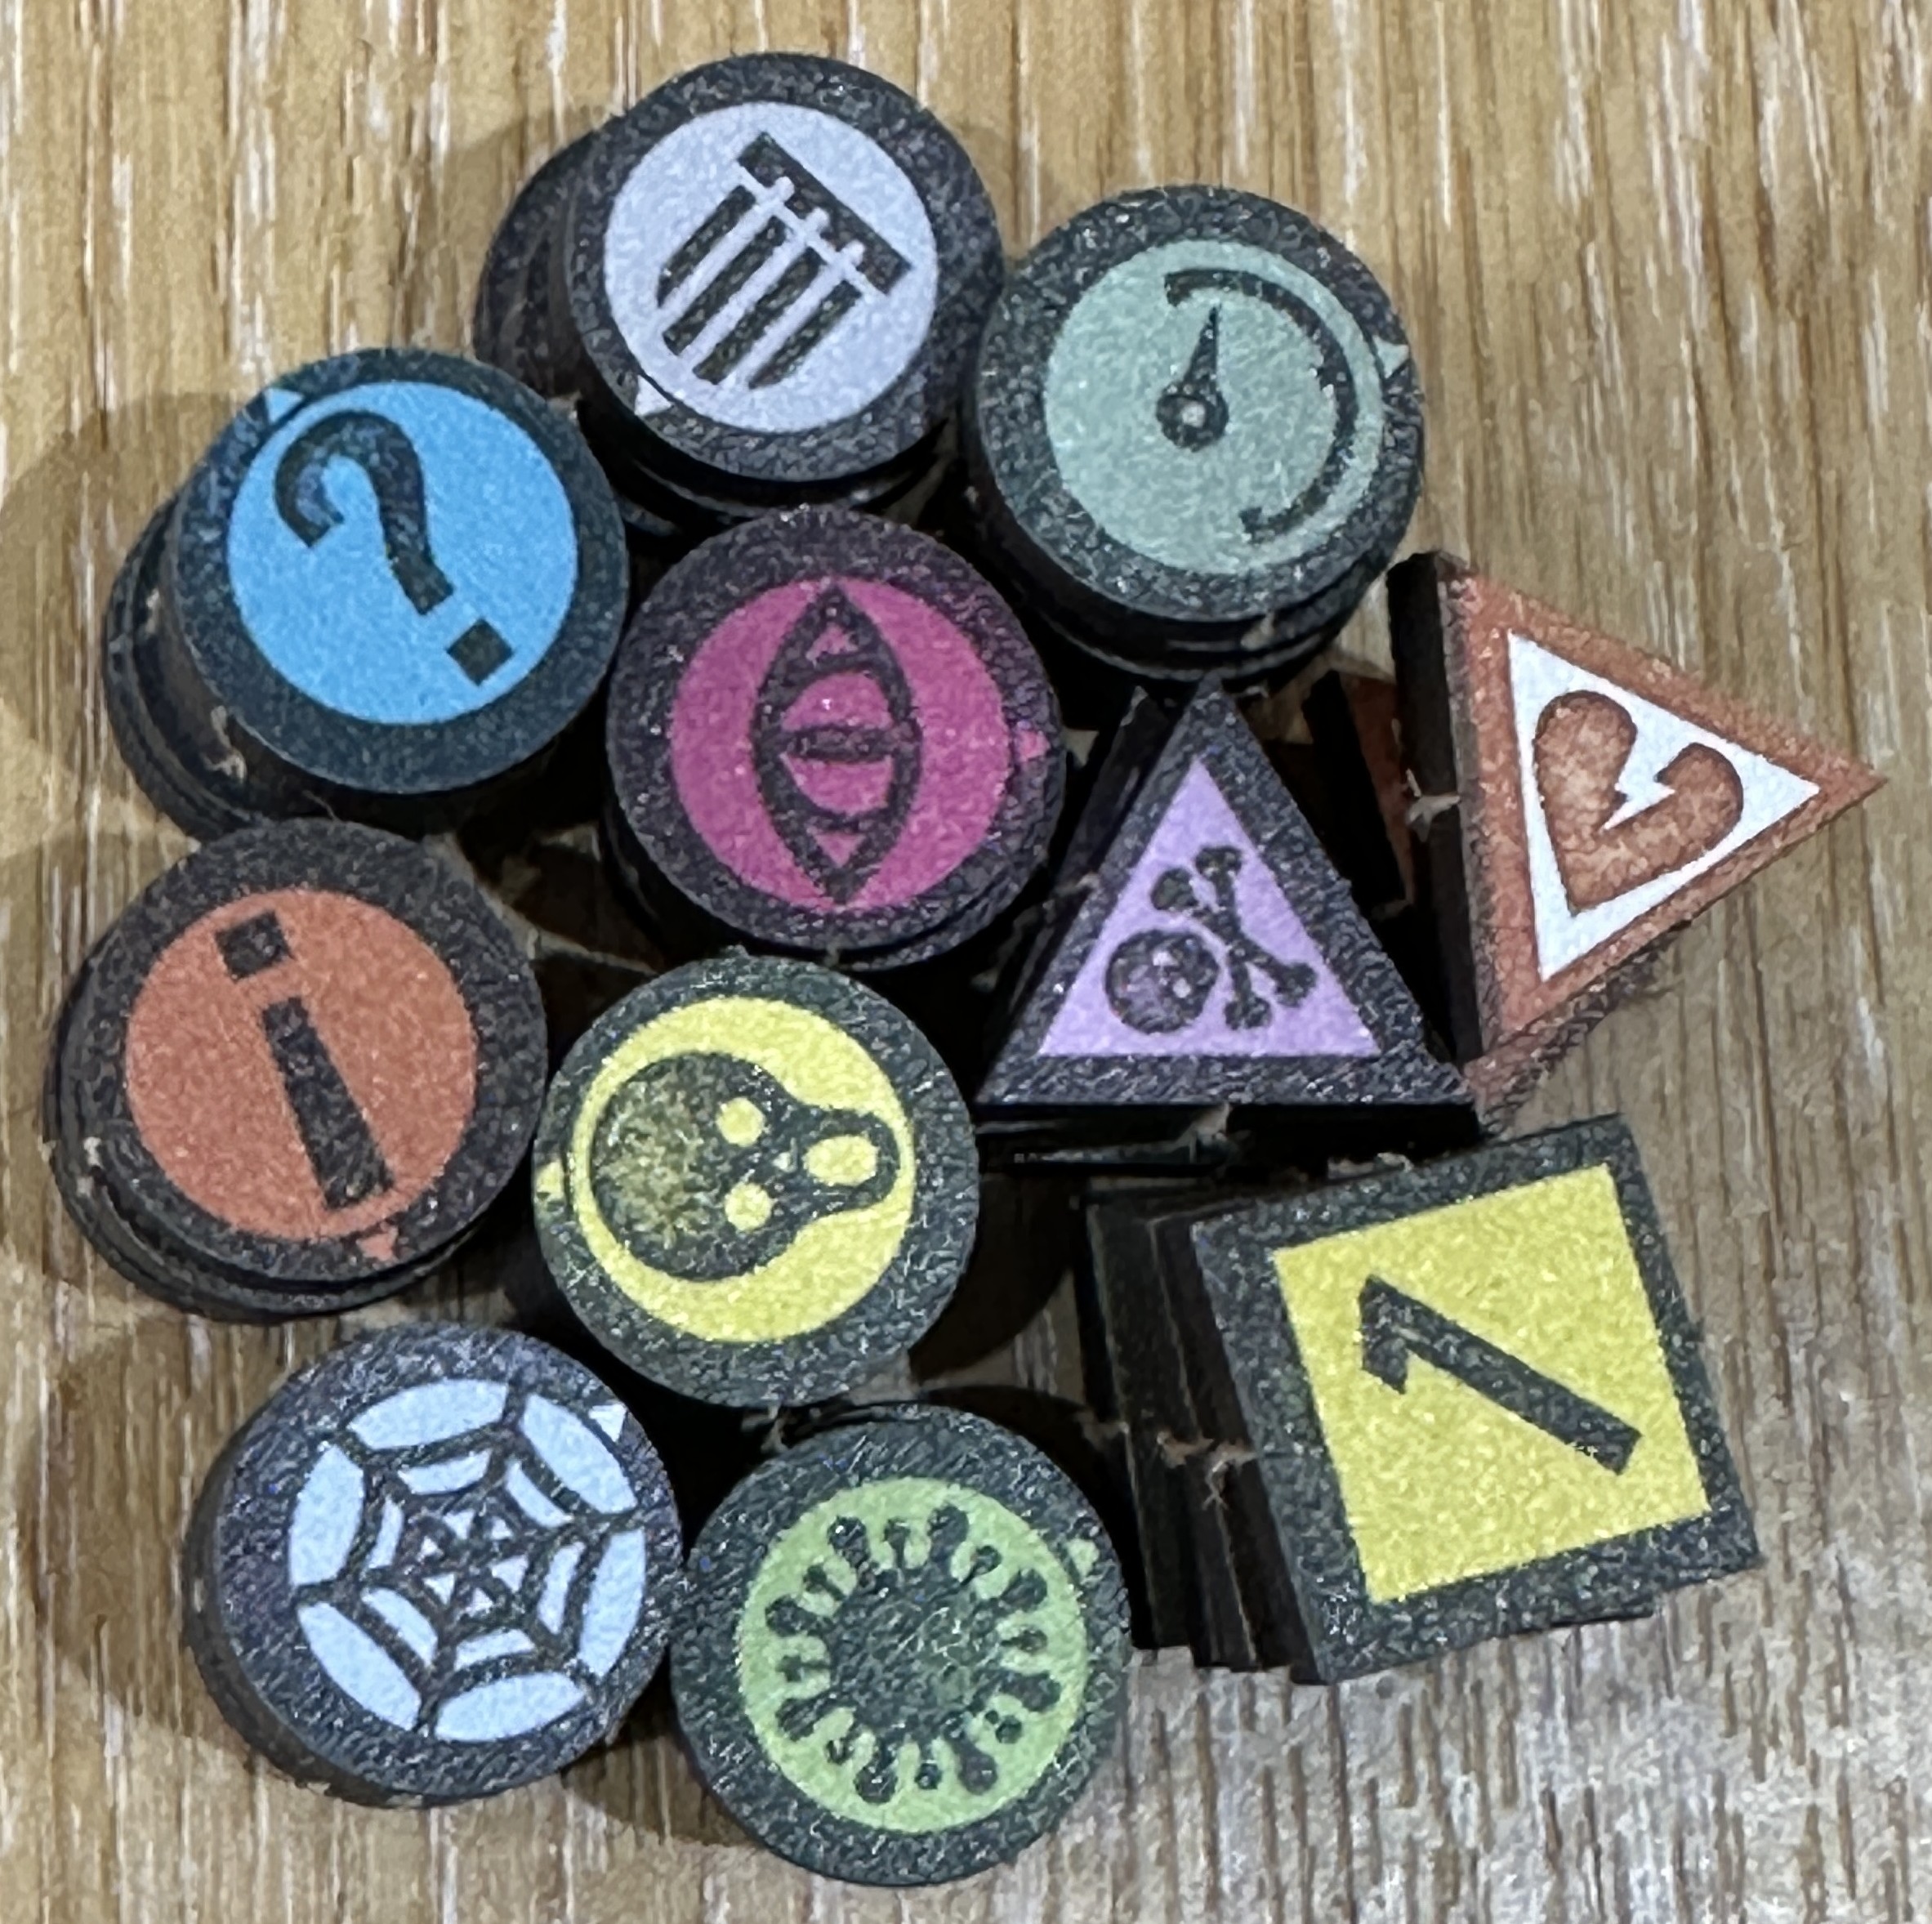
The game uses objective markers and tokens but none are provided officially. Clues are marked onto the board and the warriors then test by drawing playing cards to see what they have discovered. As there are a few other things which might need tokens (like marking temporary status injuries like poisoning) I have bought a generic set. I chose the 7TV markers by Crooked Dice. These are pre-coloured MDF and are small and unobtrusive as well as having a good selection of generic symbols on them. Great price too, only £7. The blue ? ones will be used to mark clue locations.
The first scenario of this quest calls for some specific objective markers which may or may not be found by the warriors. For those who don’t want spoilers look away now.
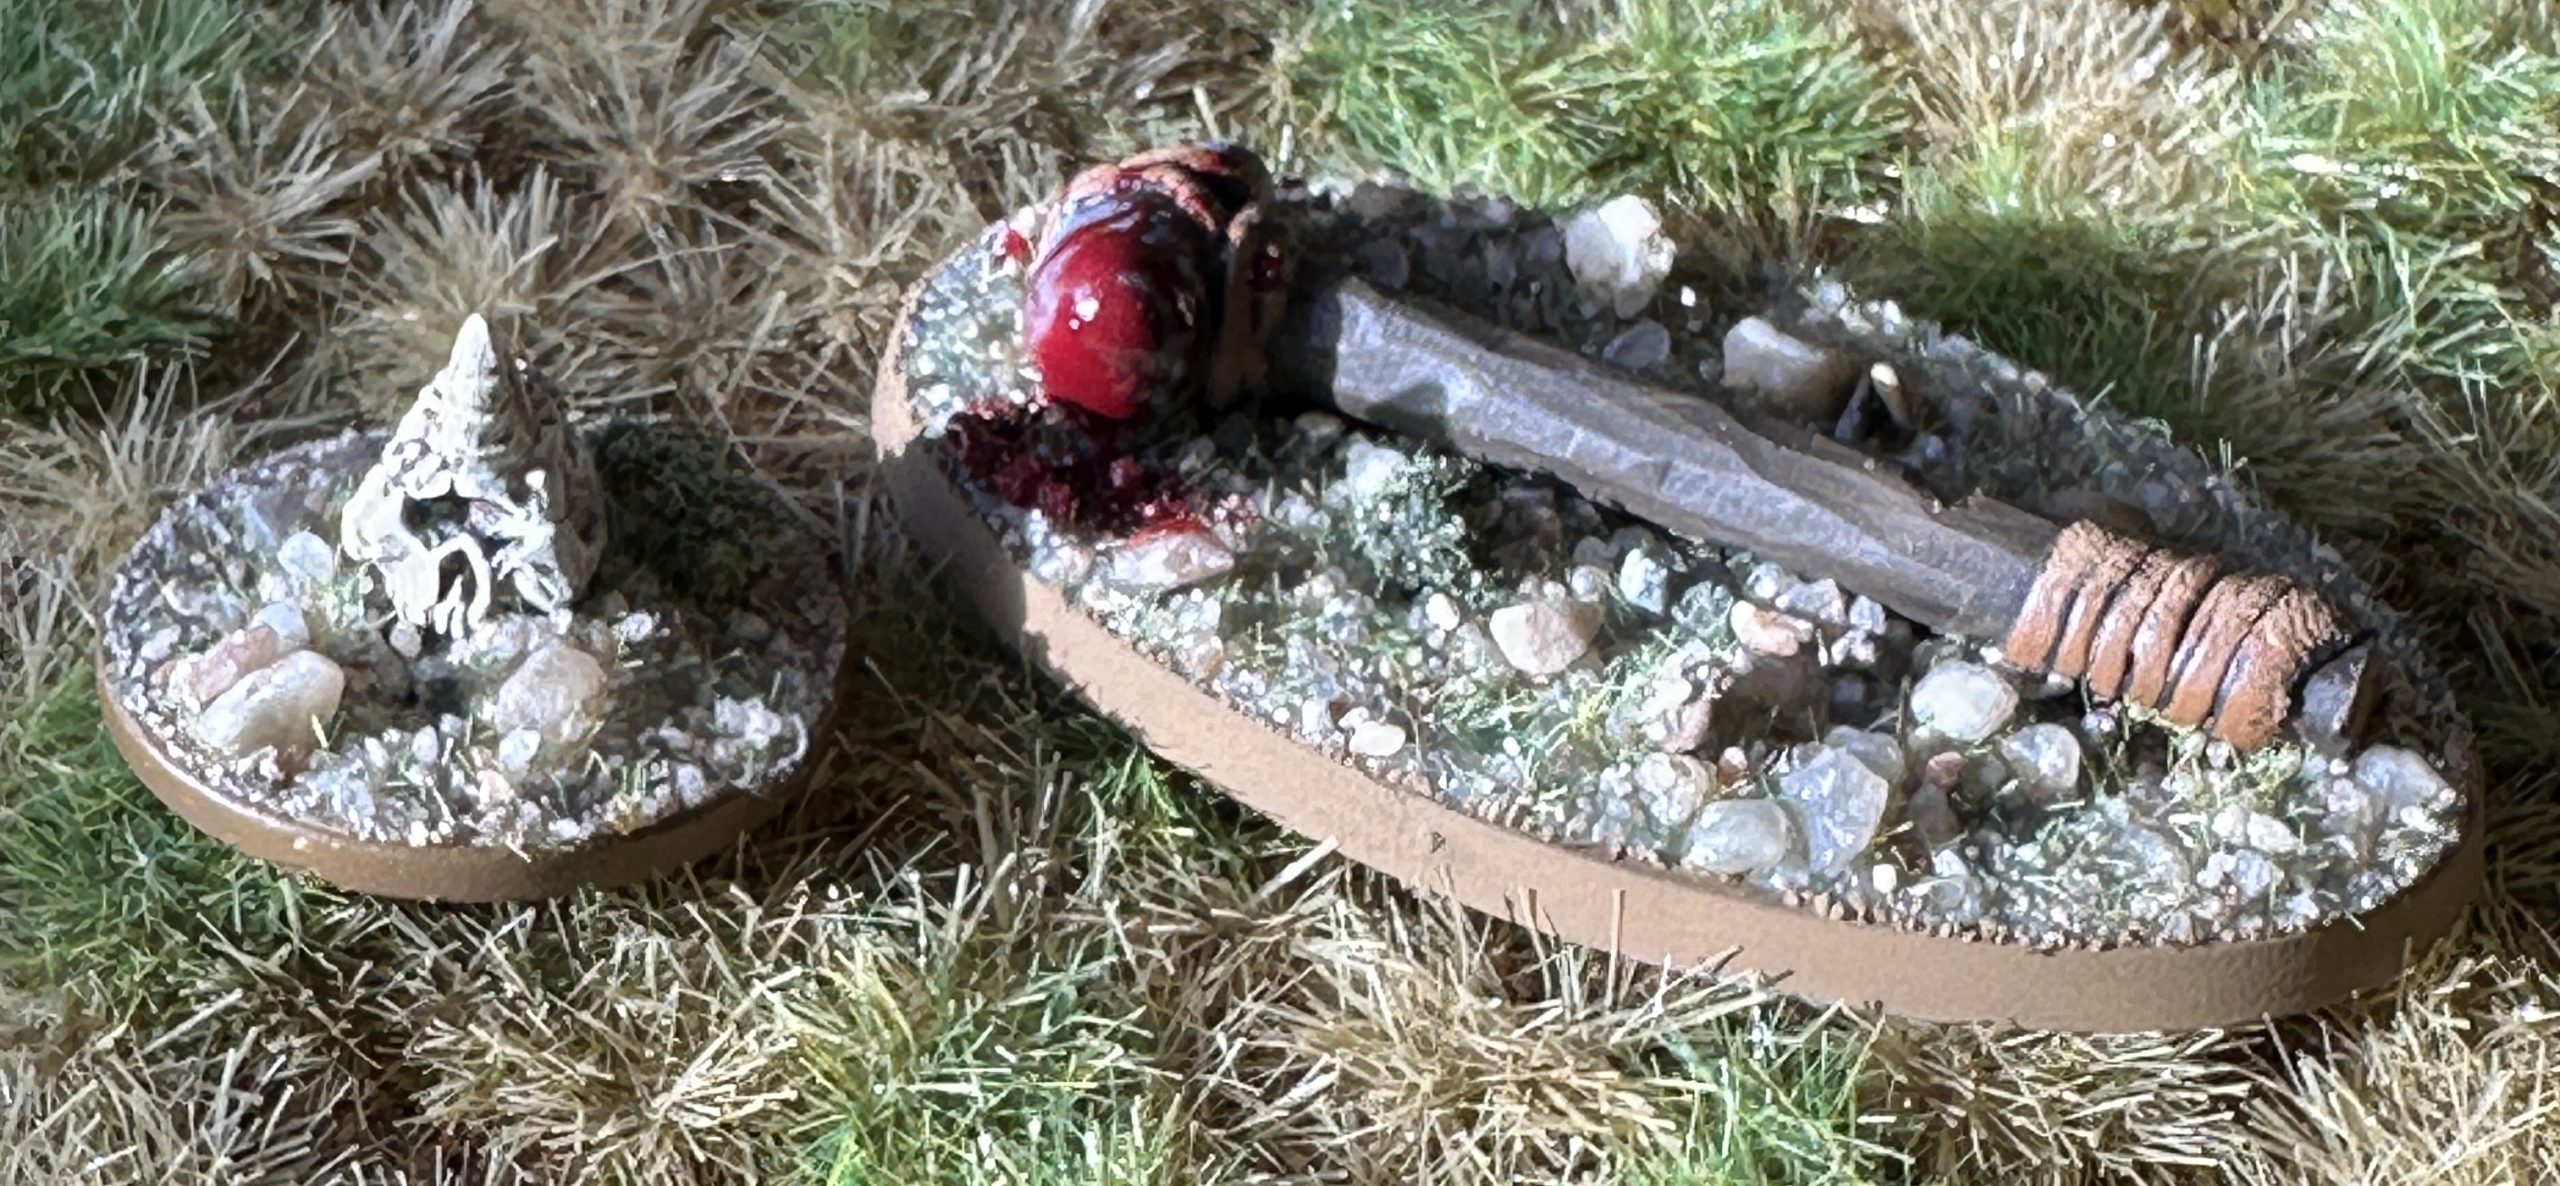
The cyclops skull is from Crooked Dice. They do a fantastic range of objective markers, more of these later. Bony Matter Speedpaint highlighted with Bonewhite acrylic.
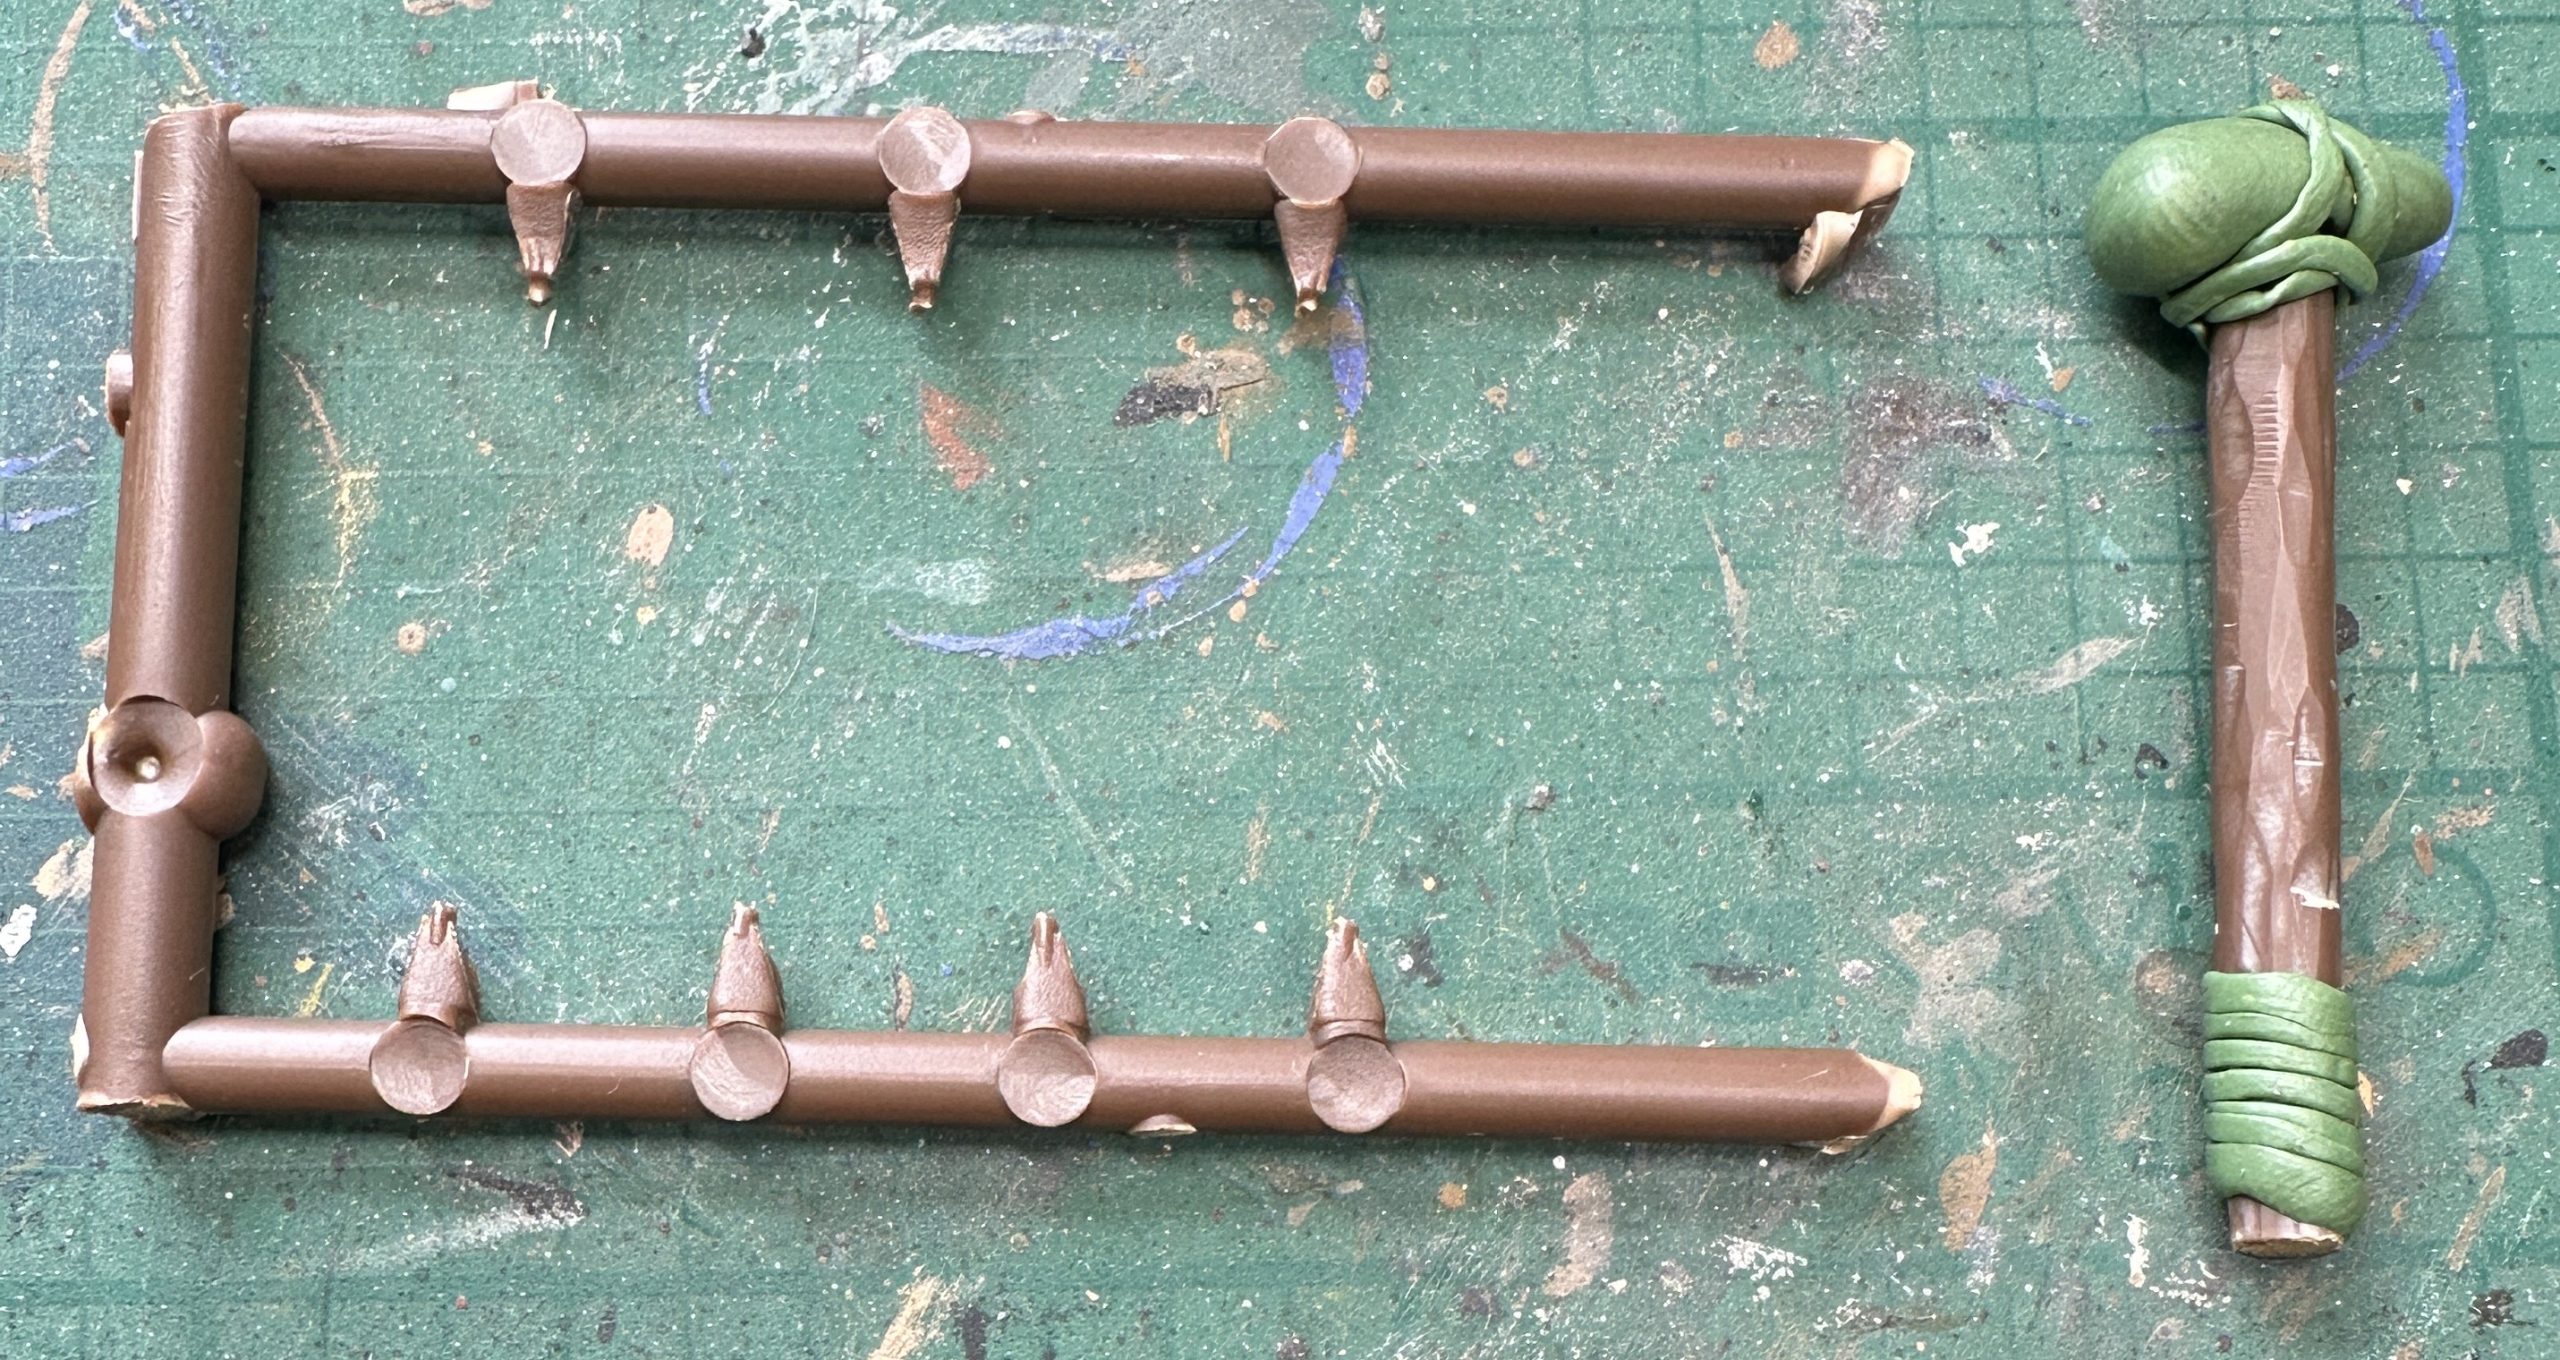
The large bloody stone hammer I had to make myself as there isn’t something this specific available to buy. It is easy enough. I took a piece of sprue from the giant cyclops kit. Clipped out the section I wanted. I carved the surface with a craft knife to give a rough-hewn look. The stone head and strappings were made out of greenstuff. I find it easier to make a long thin snake which is then wound round into position and flattened to give the look of leather strapping. Painted with acrylics and some Blood for the Blood God effects paint after it was varnished.
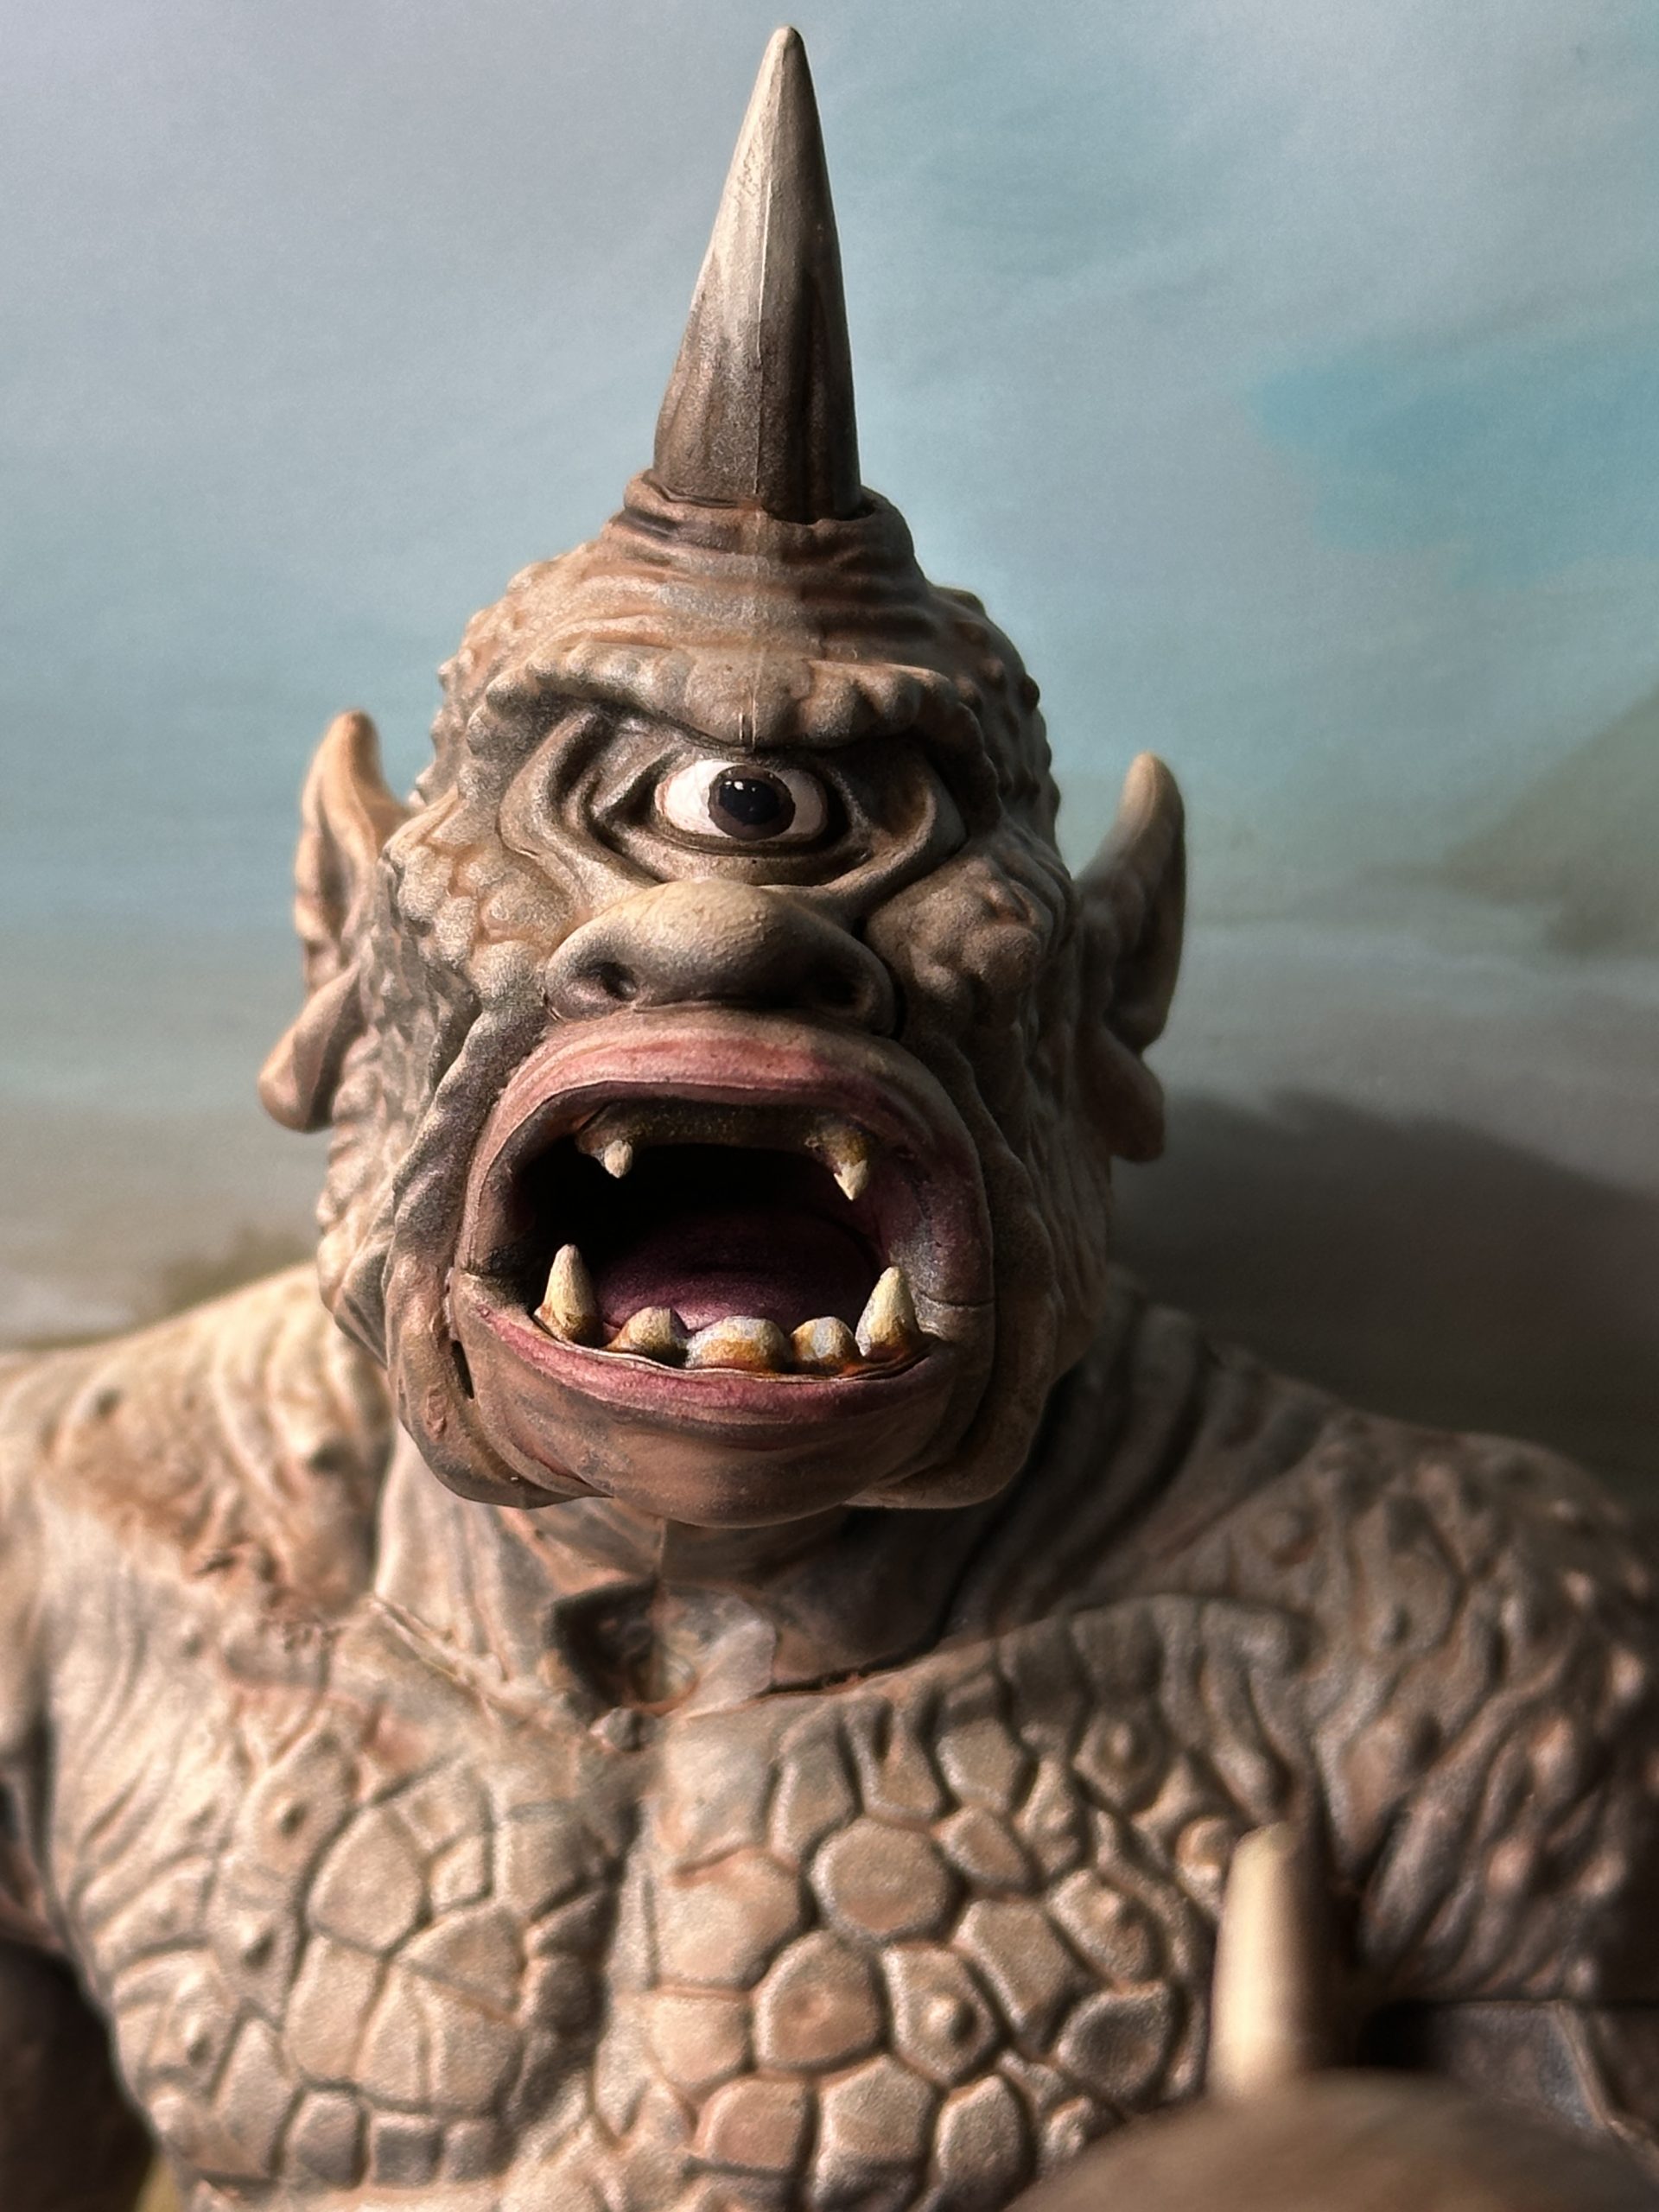
A Giant Cyclops. Run!
The game needs three cyclopses for the first quest. I prefer the style of the Harryhausen cyclops from the Sinbad movie and found some from Alternative Armies and Reaper. They will have to wait though. Today I have painted a “chonky” miniature for the March PaintComp on the forums here. I was aware that X-Plus does an occasional run of 1/35th scale Harryhausen plastic kits. Last week an ad appeared on my Insta telling me that there is a new run available and they were cheap, less than £50 including postage. I ordered it immediately and this is what I got:
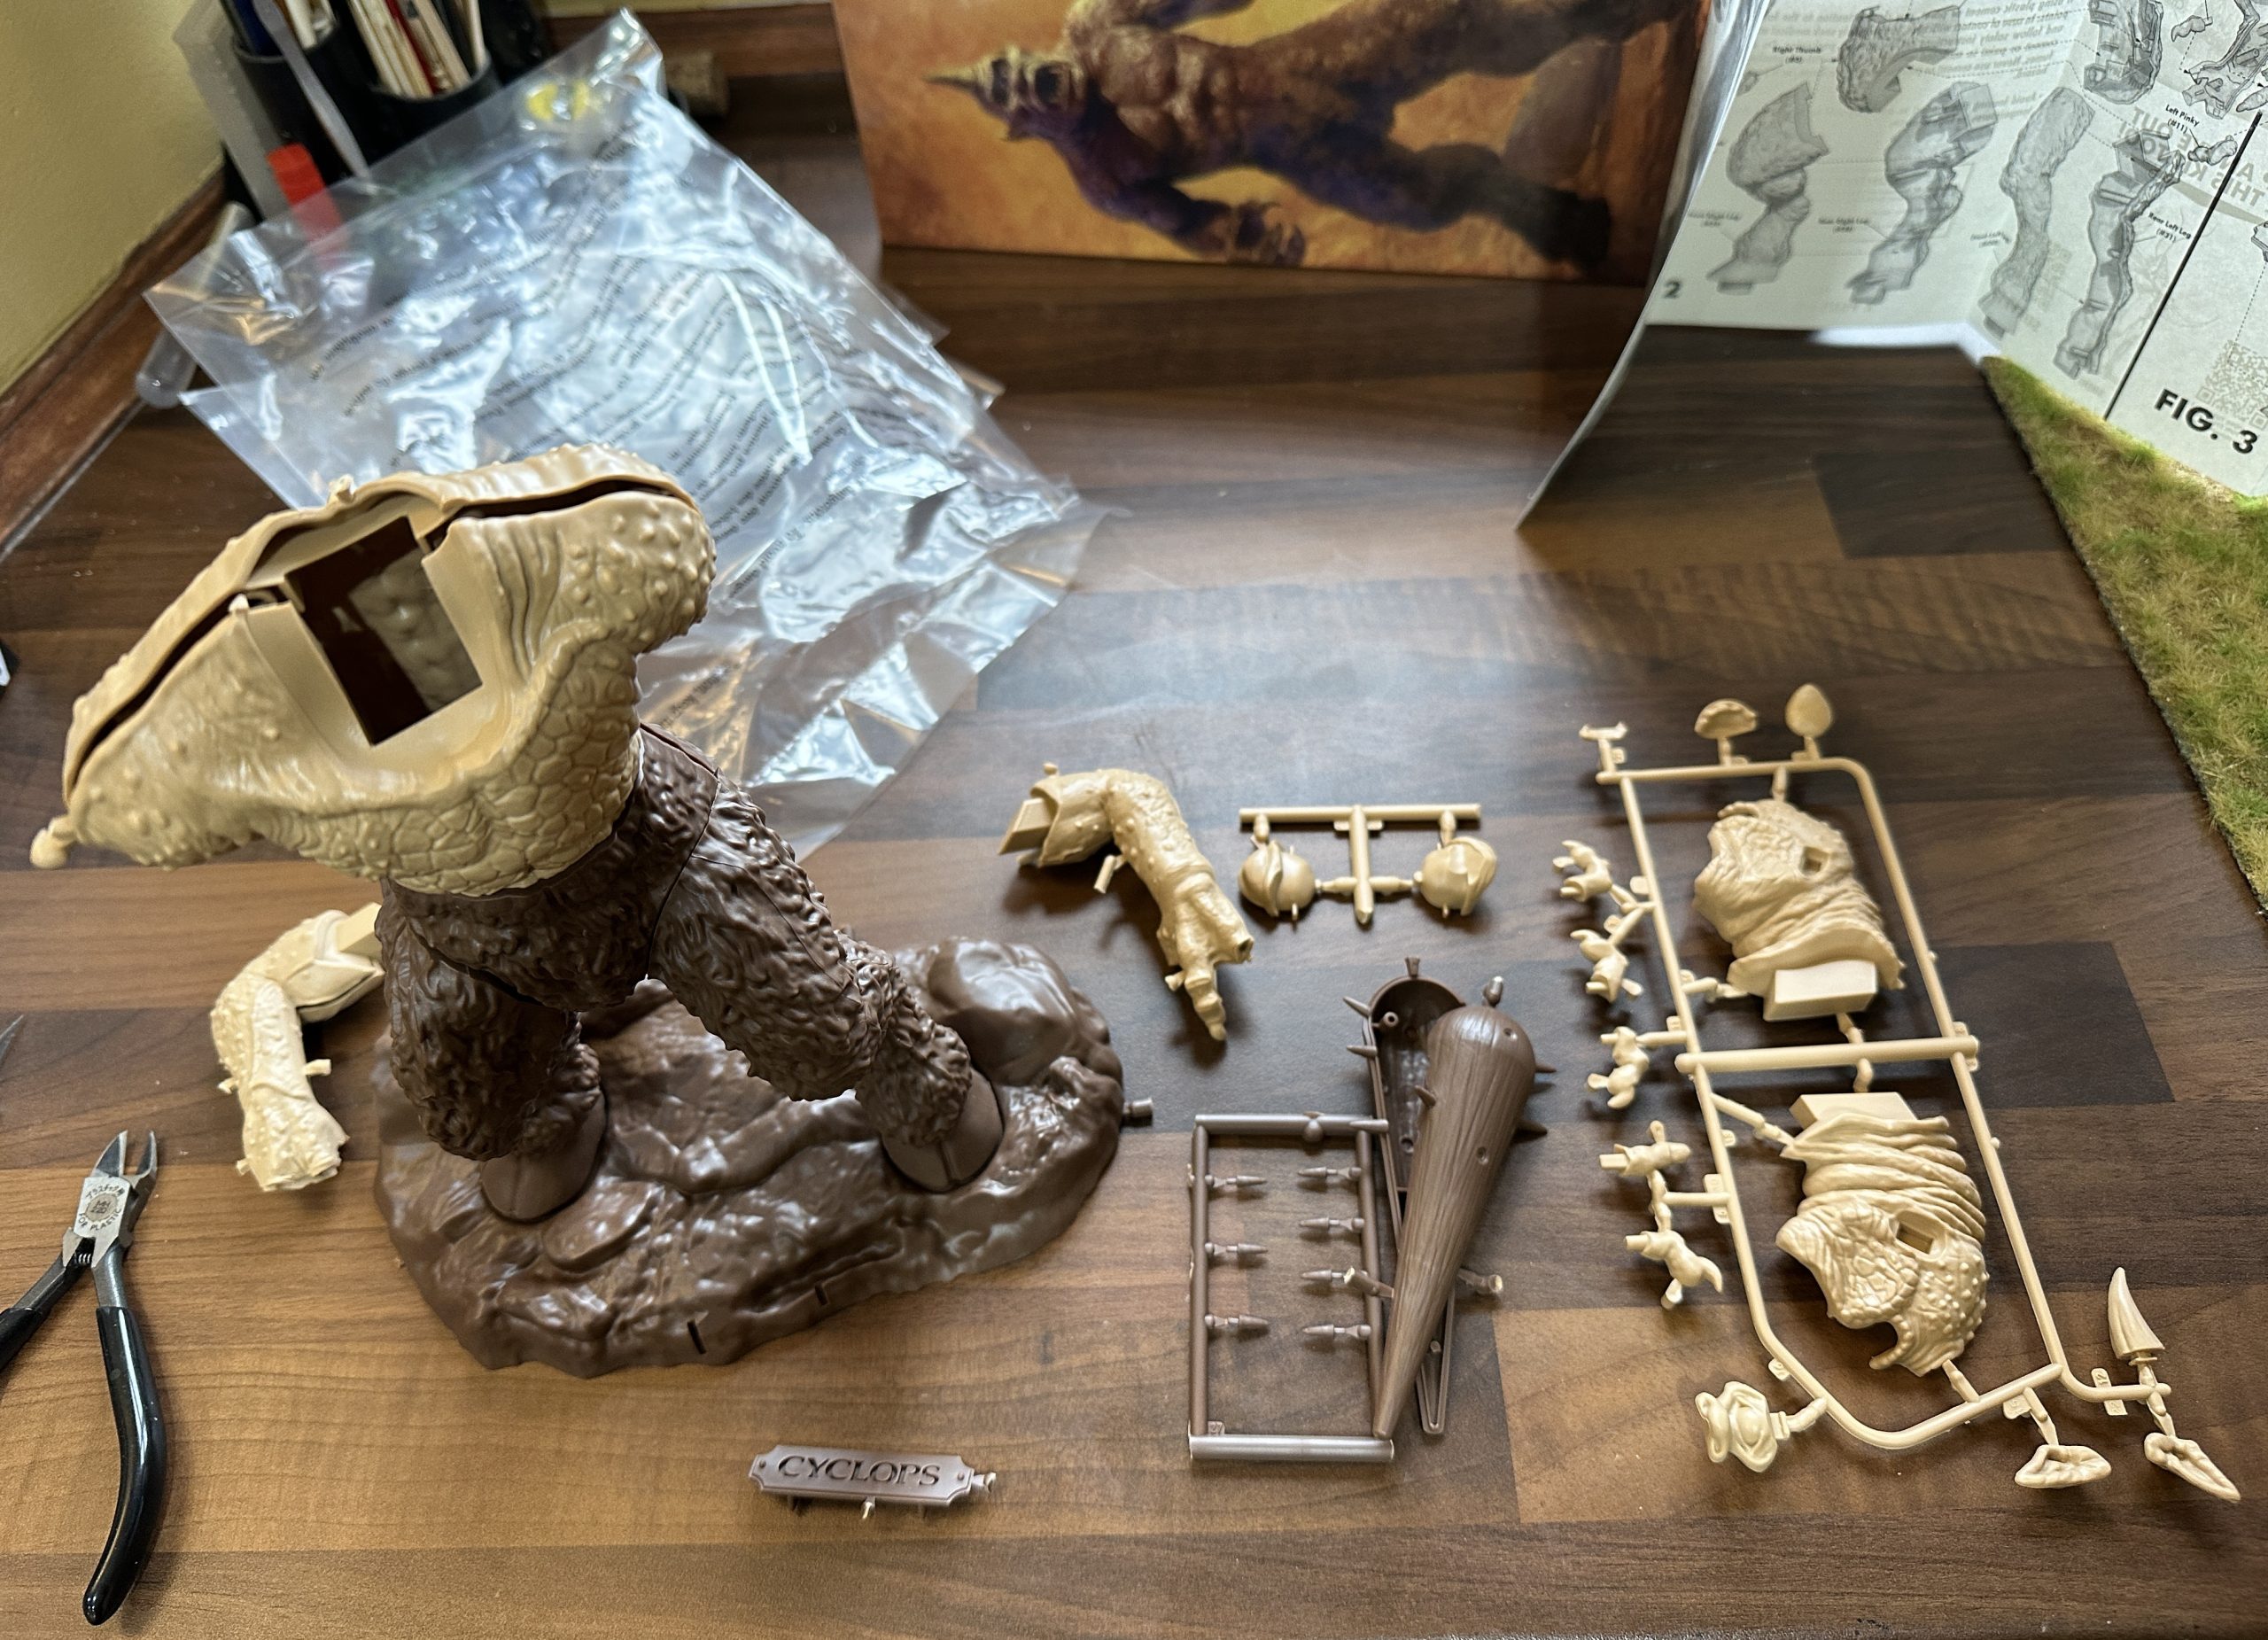
As you can see assembly was pretty straightforward. The only thing to watch is the legs fitting onto the groin piece – I found it was better to do the back half of the leg first then slide the front of the leg on afterwards.
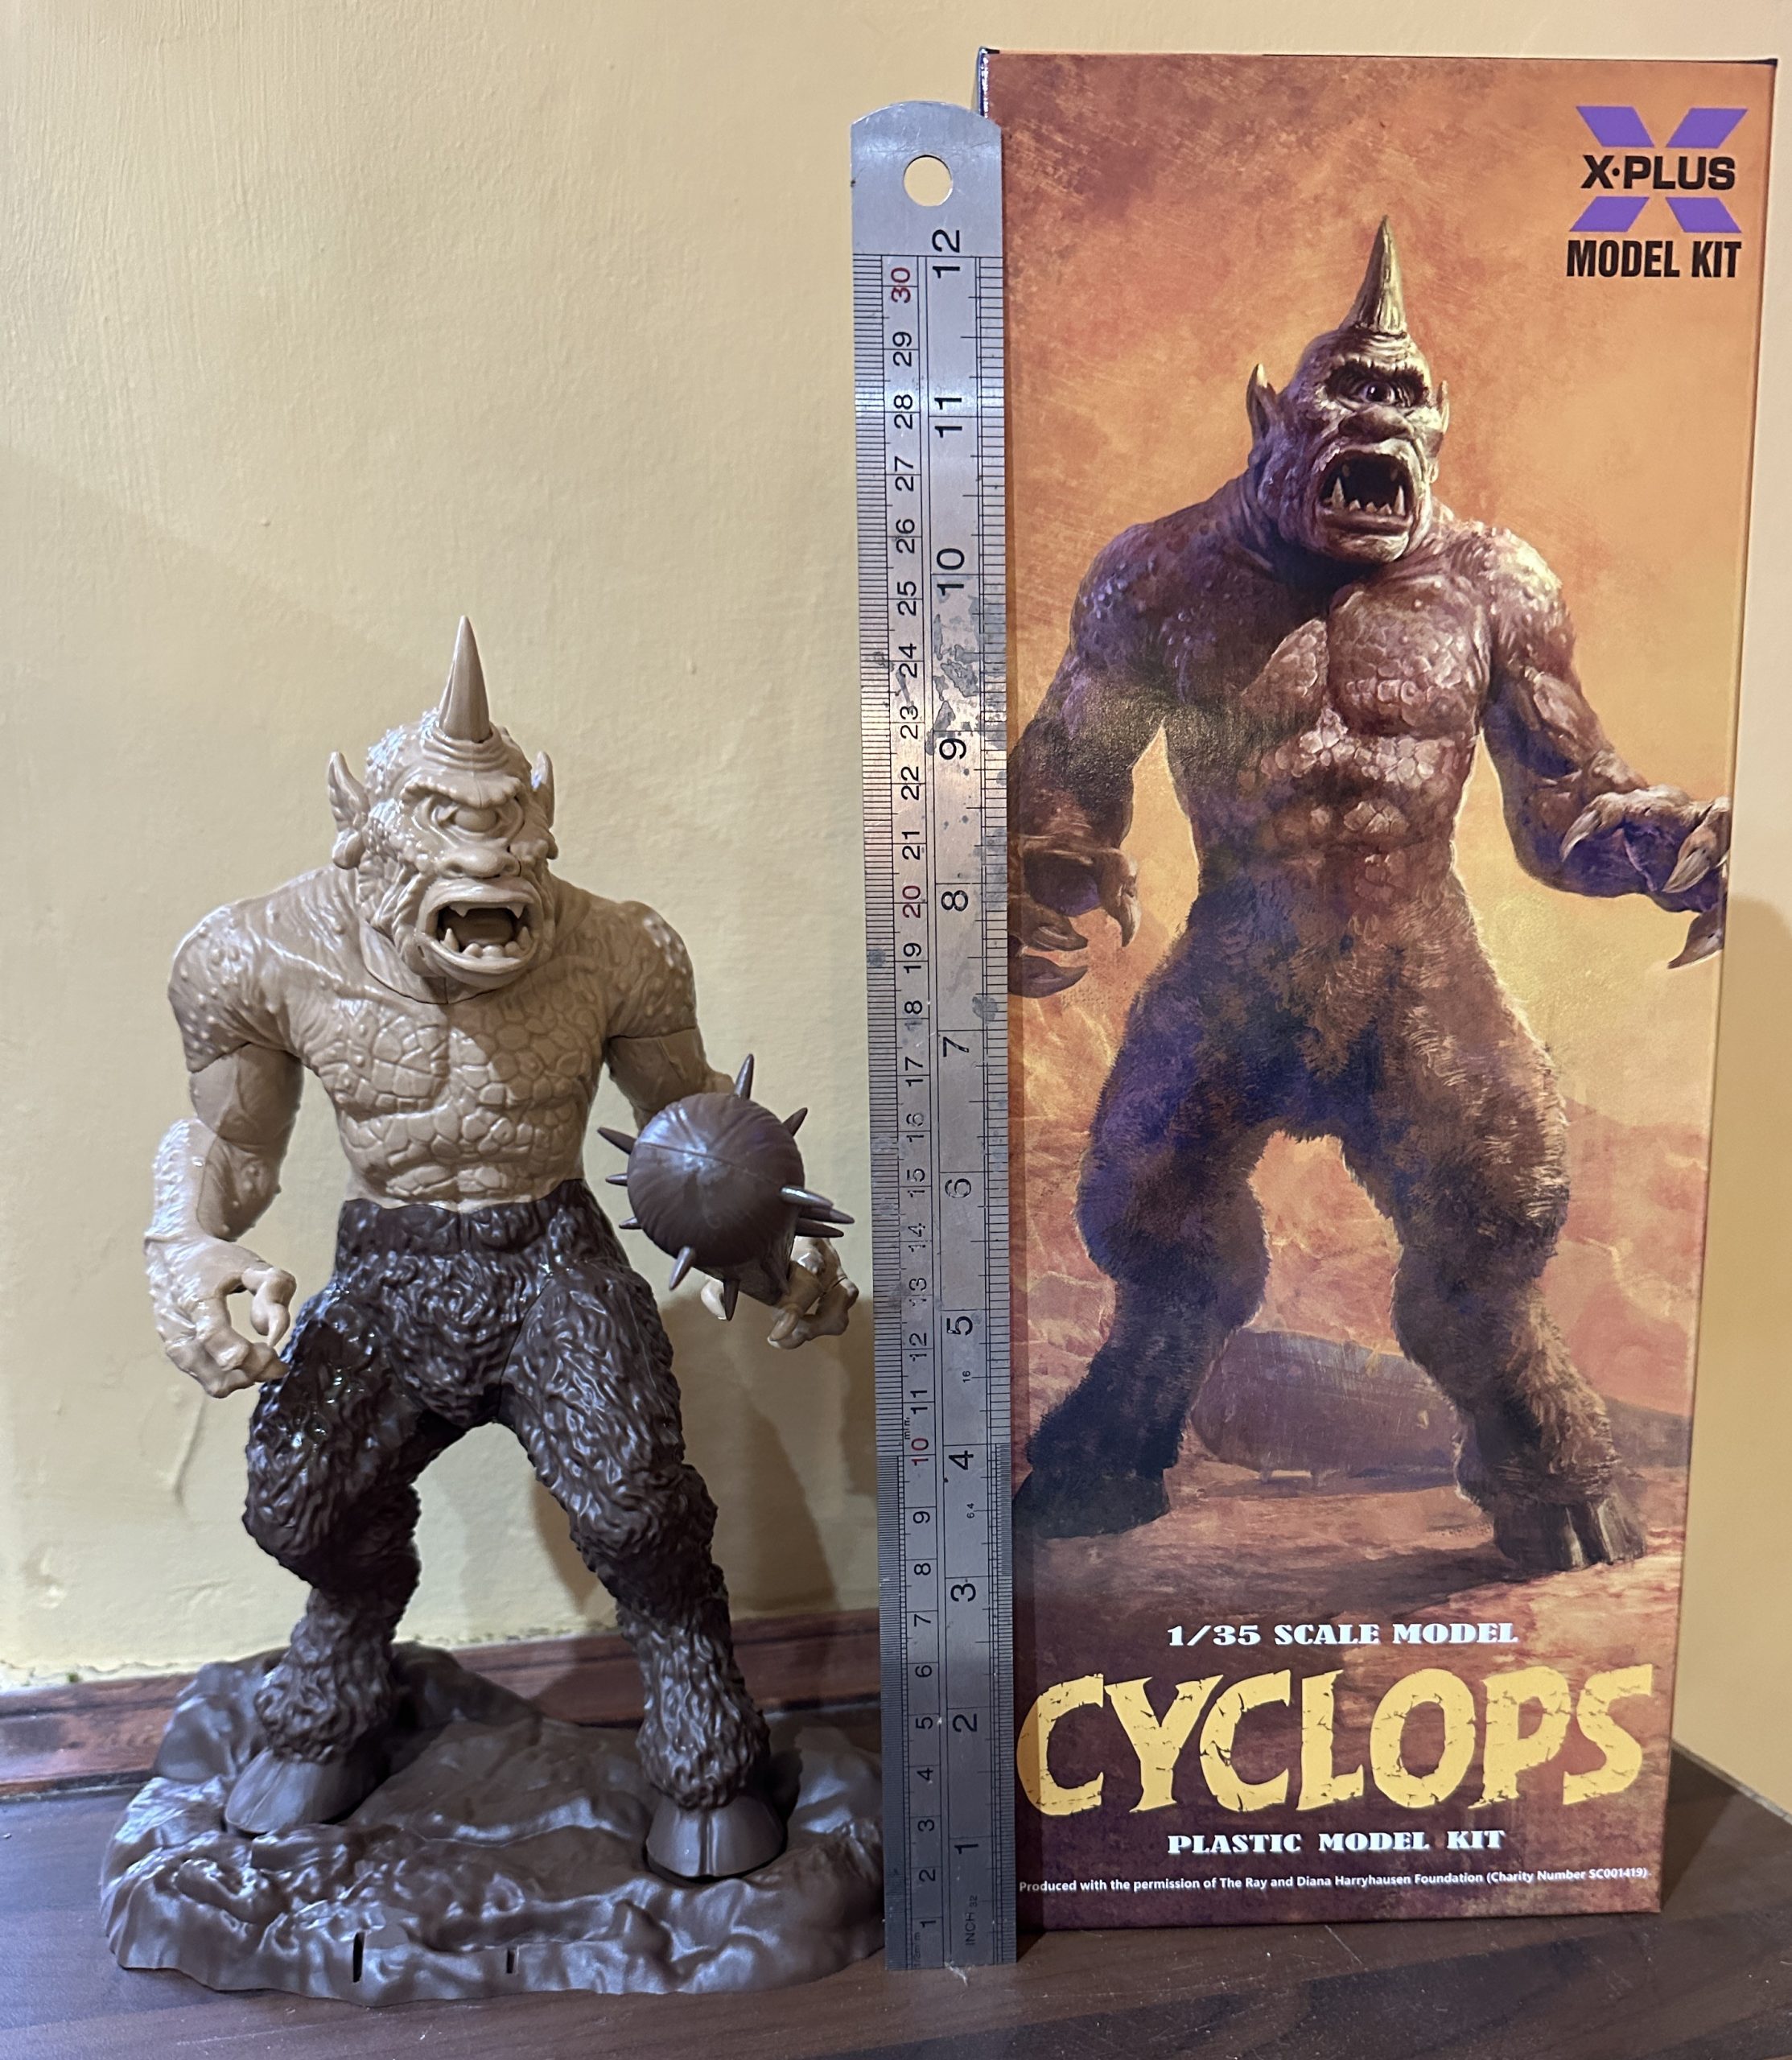
It comes with a plastic scenic base. I won’t use that and when we take it away the model is 240mm tall foot to top of horn. That definitely qualifies as “chonky” as far as I’m concerned as it’s the biggest miniature I’ve made for a wargame. I was a bit concerned he might be too big but I looked up the giants that GW sell and they are 180mm tall. They also cost £135. You can buy three of these kits for the same money.
I painted it using a fairly loose technique of wet blended speedpaints over a zenithed undercoat. The primer was applied which helped highlight any mould lines or gaps from the build. These were addressed with green stuff and then the model re-primed.
Technique
I work from the darkest part of the miniature to the lightest. On this model that means starting with his hooves and then working up his legs before blending into his skintone at his midriff and probably using a couple of skintones, one for the darker areas and one for the lighter.
The mixes were made up in advance in plastic blisters as follows:
- Darkest tone – For the hooves and then the very bottom of the legs and up the inside of the lower legs. I started with neat Noble Skin on the hooves and then added Dark Wood for the deepest fur tone.
- Lower fur tone – for the front of the lower legs and inside of the upper legs and in the creases in the groin. A drop of Dark Wood and then 60/40 Sachel Brown and Burnished Red.
- Midtone fur – Front of upper legs except the areas hit by the highest zenith. About 2/3 Ruddy Fur with the other 1/3 made from the previous mix.
- Highlight areas and along the transition to the upper torso – Straight Ruddy Fur with a drop or two of medium in.
Skintone
- Darker tone – undersides of arms and in shaded areas of zenith. A 50/50 mix of Goddess Glow and Howling Sand. The transition between fur and skin was wet blended with this as well.
- Lighter tone – 75:25 Howling Sand to Goddess Glow which goes over everything else. Some small patches of the darker tone were dabbed onto some of the lighter areas, where the tone looked a bit plain or samey and blended as looked best.
The wet blend is great for use with Speedpaint because of its longer drying time compared to regular acrylics. The key is not to work too much between the different colours or you will lose the distinction and worse might deepen the tone enough to cover up the zenith underneath. Coats of paint need to be thin enough to allow the zenith to continue to show through.
Finally the club was Dark Wood underneath and Bony Matter on top and then again blended along the transition.
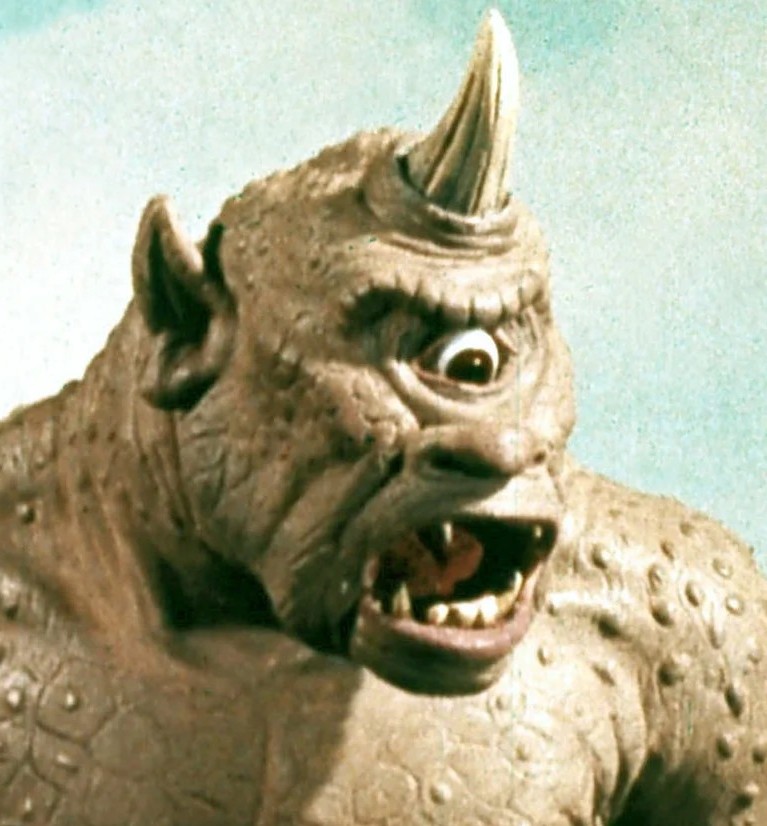
As I was going along I was comparing with a still from the film. The skintone on mine is lighter and gives a more lizardlike look which I was happy with so decided to keep. If I’d wanted it to look screen exact I would have added some Pastel Salmon to the light tone mix.

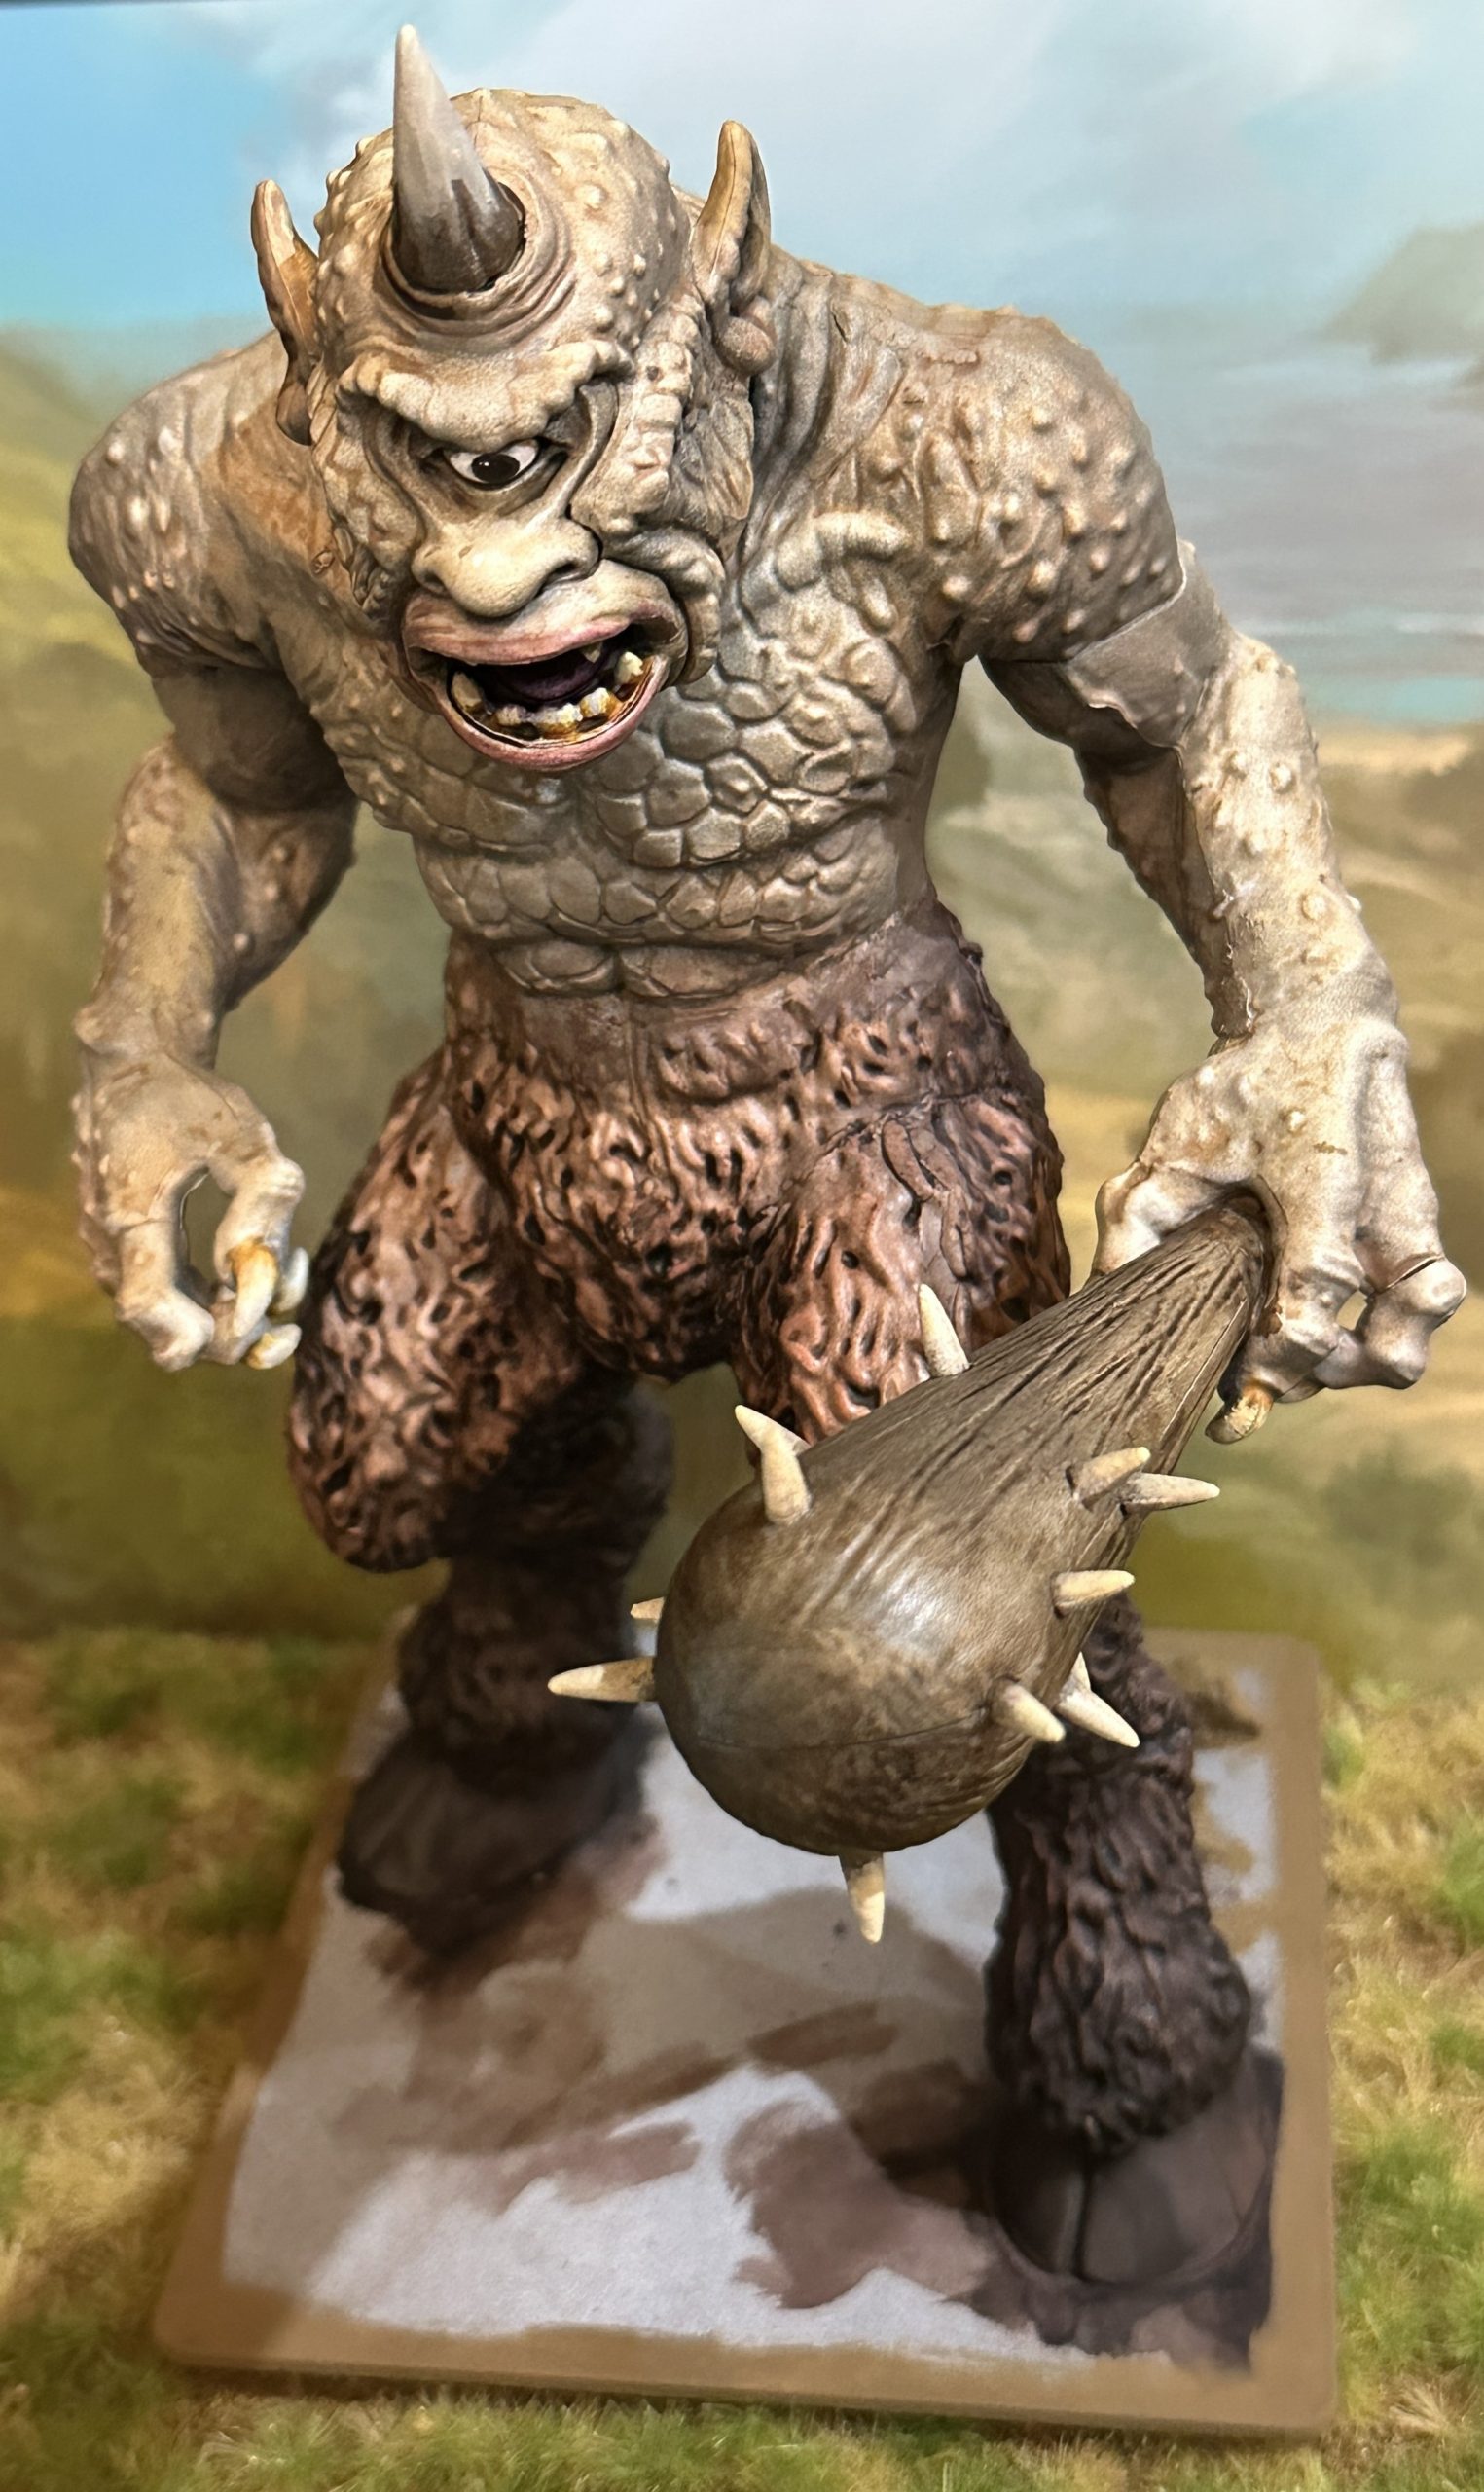
Details were enhanced with some Strong Tone wash into the creases of the neck, face and eye. Nails painted with Sand Golem and then Bonewhite acrylic over that and I sketched the eyeball in with some white. The horn was neat Bony Matter with Bonewhite highlights. As you can see I had a go to see if it could be photographed against my background book. It can, just, if I tweak my shot angle up a bit 😀
The next day I came back to it having given the Speedpaint plenty of time to dry. It can rub off if you aren’t careful with a plastic model and work on it too soon. You always see some spots that got missed. I’m not sure why this happens but I see it regularly on large areas that have been speedpainted. Retouched with the appropriate blend.
Spent some time detailing the face. Murder Scene Speedpaint inside the mouth and very heavily thinned with water for the lips. The eyeball was repainted white, keeping an outer edge with the darker wash. Then a circle of dark brown acrylic for the iris and inside that the pupil was painted black. When this dried a couple of tiny white reflection dots went at the top. Teeth were blended highlights from the base colour up to an ivory white.
Quick check against the screen close-up. Happy, so done 🙂
I based the model on a 120mm fronted mdf base. It will also be used as a monstrosity in Midgard. Soil of Sparta Krautcover enhanced with some cork rocks and tufts.
Finally posed with the current completed adventuring party. It feels like I might need to roll-up some new companions shortly 😀

As a final point I counted this model as the equivalent of 8 regular 28mm miniatures for my tally of painted things. I am definitely not in the Gimli school of “that still only counts as one” when keeping the count of my annual output. That reasoning is also why one 6mm/10mm/15mm man does not count as ‘one’ for the tally Ben 😀
First scenario creatures
The main focus of the Quests book is a series of linked scenarios for your hero to play through.
SPOILER WARNING
I’m going to play through the book scenarios in order and prepare all of the miniatures required in advance. If you are playing the game and don’t want the surprise of what you are going to face to be spoiled then please stop reading now.
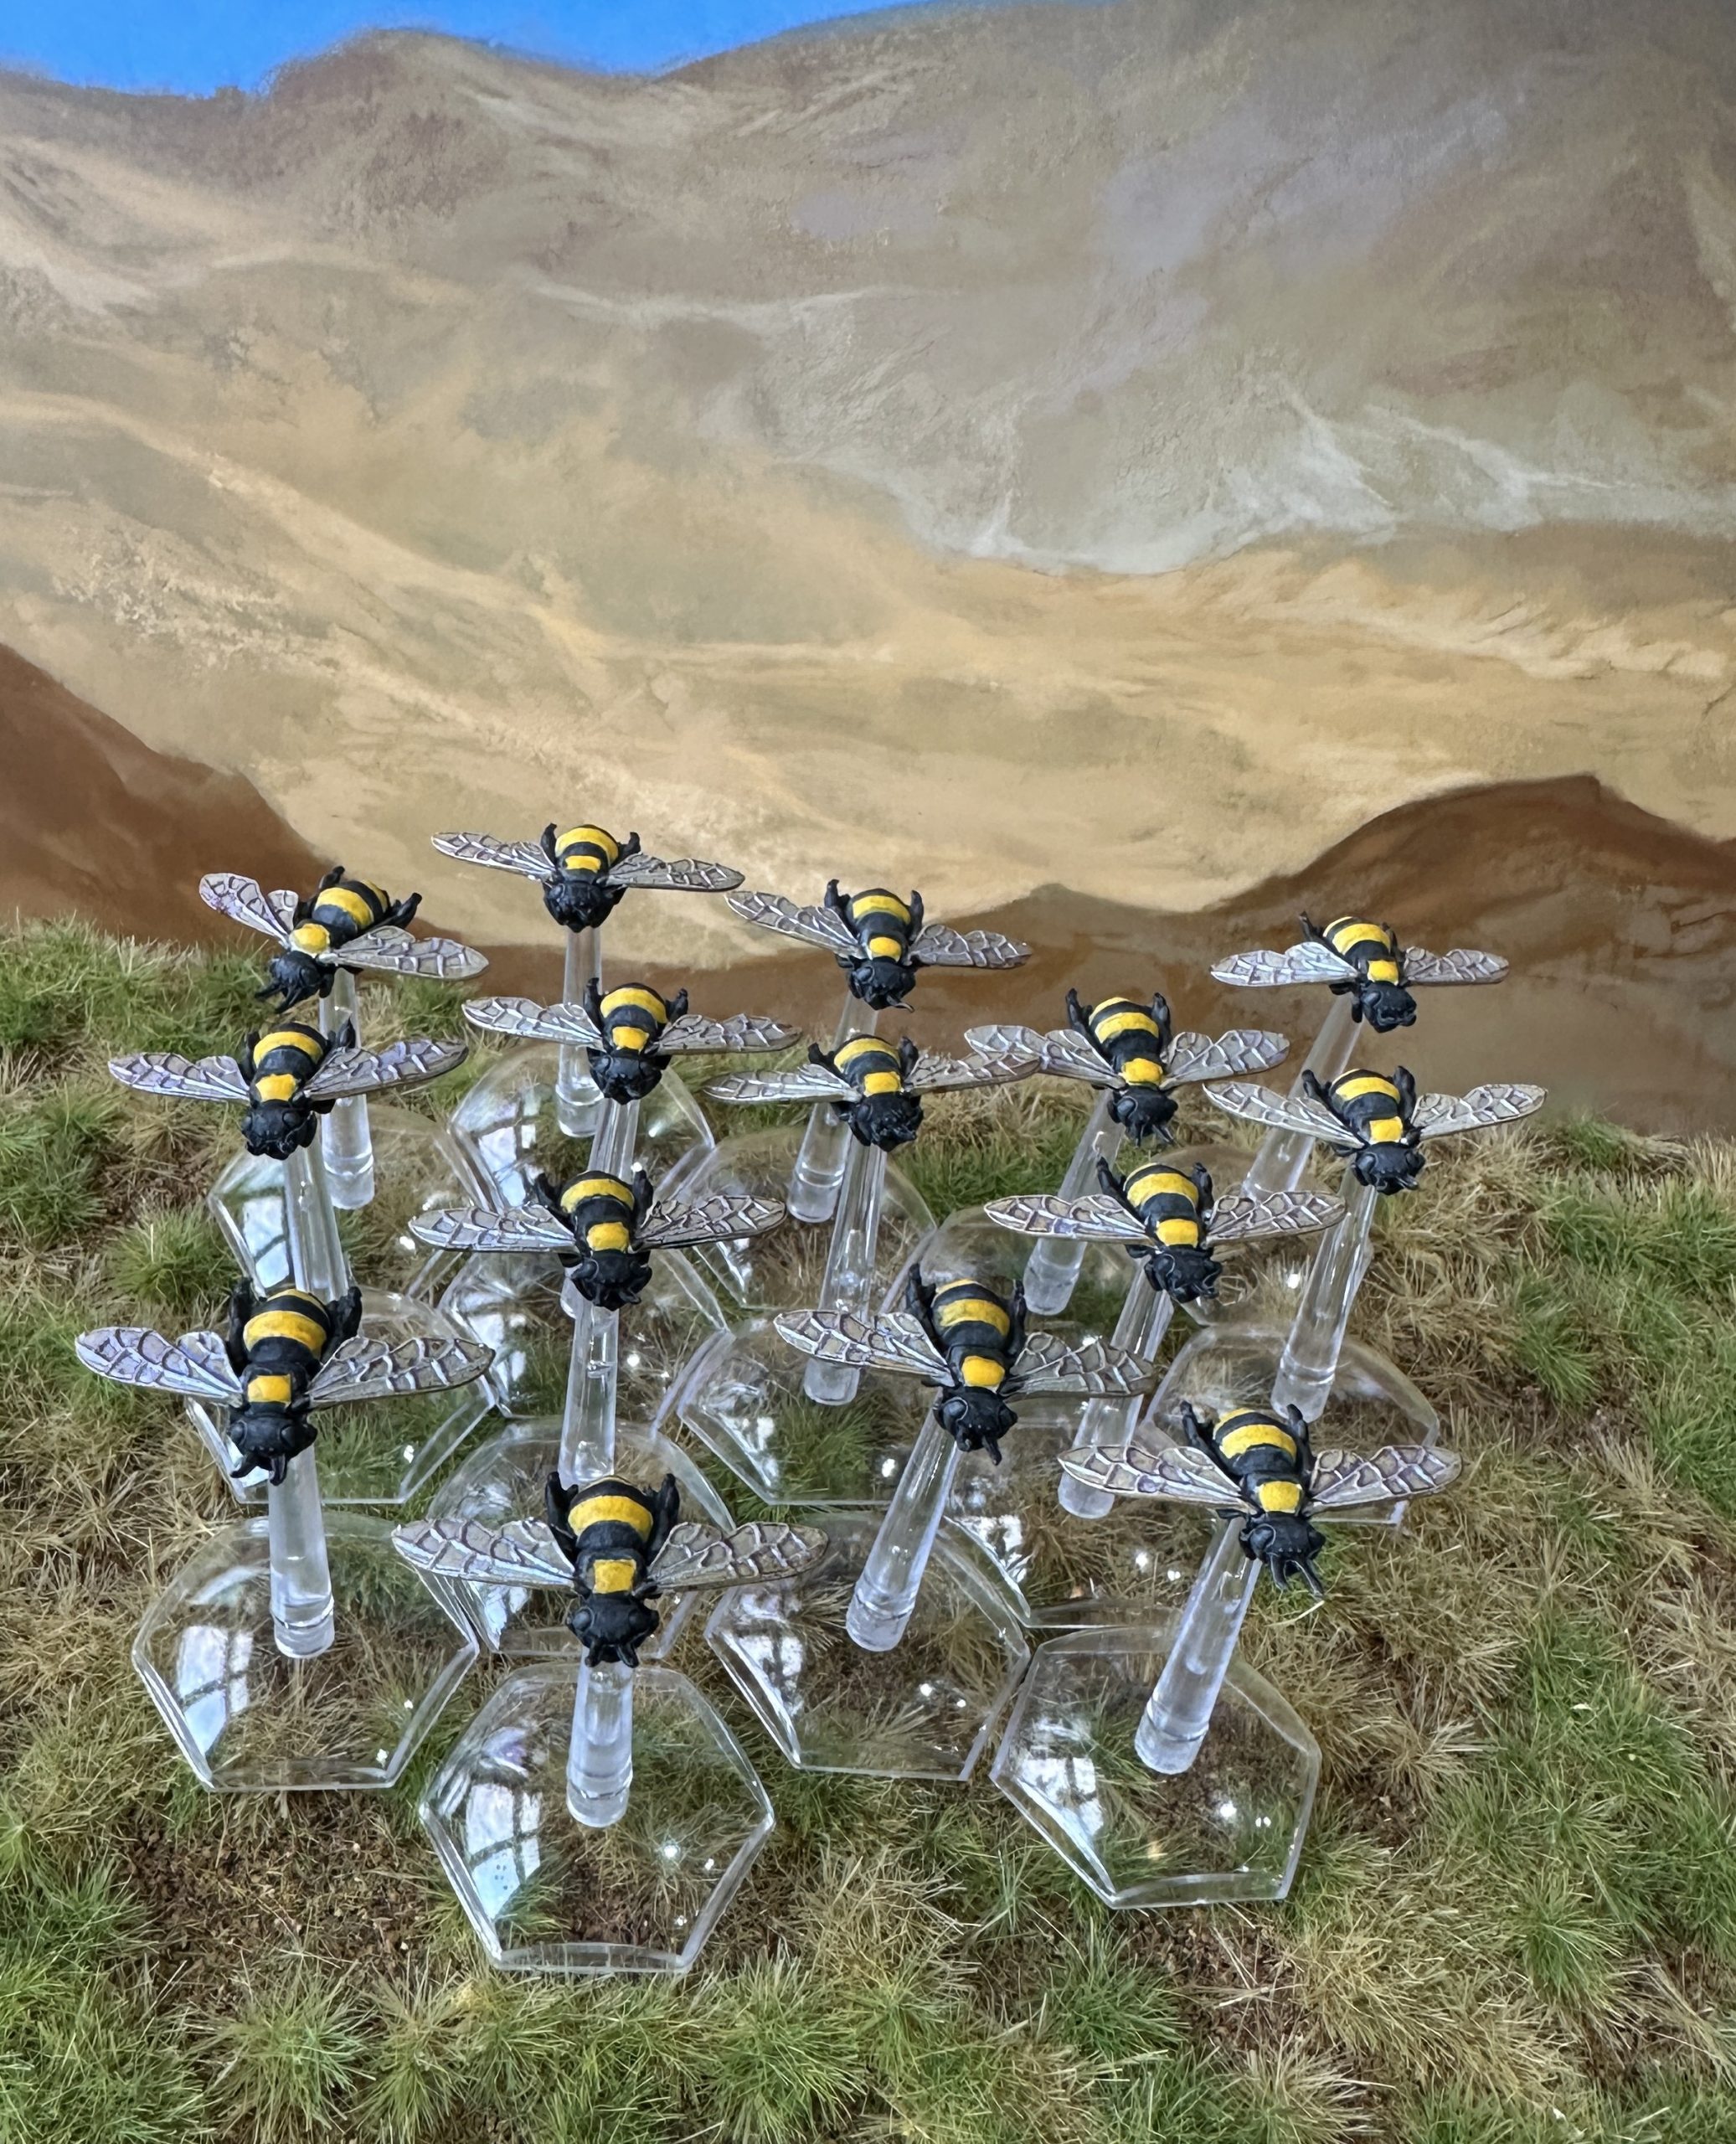
Quest 1 is divided into 3 linked scenarios. The first involves traveling across a field populated by very large and aggressive mythic bees. The party is looking for the 3 clues that are on the table. There are 8 bees to start off and there can be up to an additional 7 bees arrive due to event cards. So 15 bees in total.
I can’t imagine anyone’s miniatures collection already has 15 giant bees in it, mine certainly didn’t so these were ordered from North Star.
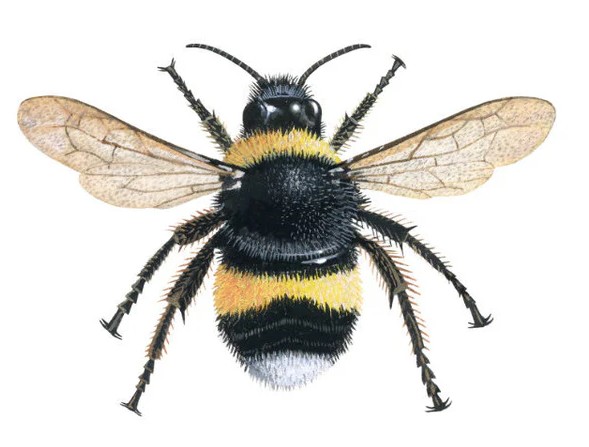
I looked online and chose a bee to copy. This one is a white-tailed bumblebee. It is hard to find pictures of the underside of a bee. The one I found showed it as all black which makes life easier. Bee stings are usually orange, who knew?
They were undercoated grey on the underside and white on top and then glued onto the stands so I had something to hold while painting. Wings were tackled first. I went with Pallid Bone Speedpaint for the off-white look they have in the photo. The top surface was then covered in Celestial Azure Colorshift from GSW to give a more ‘mythic’ look. For the bodies Grim Black Speedpaint is doing most of the heavy lifting but this went on last after I painted the white tail in acrylic, sting in orange fluro acrylic and yellow in Maize Yellow Speedpaint. The yellow was a bit dull and the black went over some edges so I tidied up with one of the Blanche acrylics, Moonbeam Yellow which is well pigmented and provides strong coverage.
As always the colorshift doesn’t really show up in the photo.
Companions (NSFW)
I’ve painted most of the Companions whilst waiting for my Hero to get here. For those concerned about tiny metal man wiener display, a model lower down this post has his out, hence this post is Not Safe From Wieners.
This is the Hoplite. It is Achilles from Wargames Illustrated’s Heroes in Miniature range. He meets the requirements of the rules having heavy armour, spear and shield. His cloak was painted with Turnbull Turquoise Speedpaint to give us that ‘black in bright sunshine’ look. Armour and shield had an extra step compared to the Argonauts as I started from a base of Talos Bronze Speedpaint before the many layers of Dark Star metallics. This gives the armour a richer look and works well with this model who has lots of embossed details on his shield, helmet and greaves. Chiton was Salmon Pink Speedpaint and then some layered build up with Vallejo Beige Red.
Next we have Achilles erstwhile friend Patroclus. He is also from WI’s Heroes in Miniature and comes as a paired set with Achilles. Painting very similar. More chiton visible here so more of the salmon colour on display. I went for a lighter shade of dull turquoise to complement Achilles’ cloak, this one is Lizardfolk Cyan. The sliver fringe on the chiton and collar and base of the quiver were layered Vallejo Chrome and Pale Burnt Metal over Broadsword Silver Speedpaint.

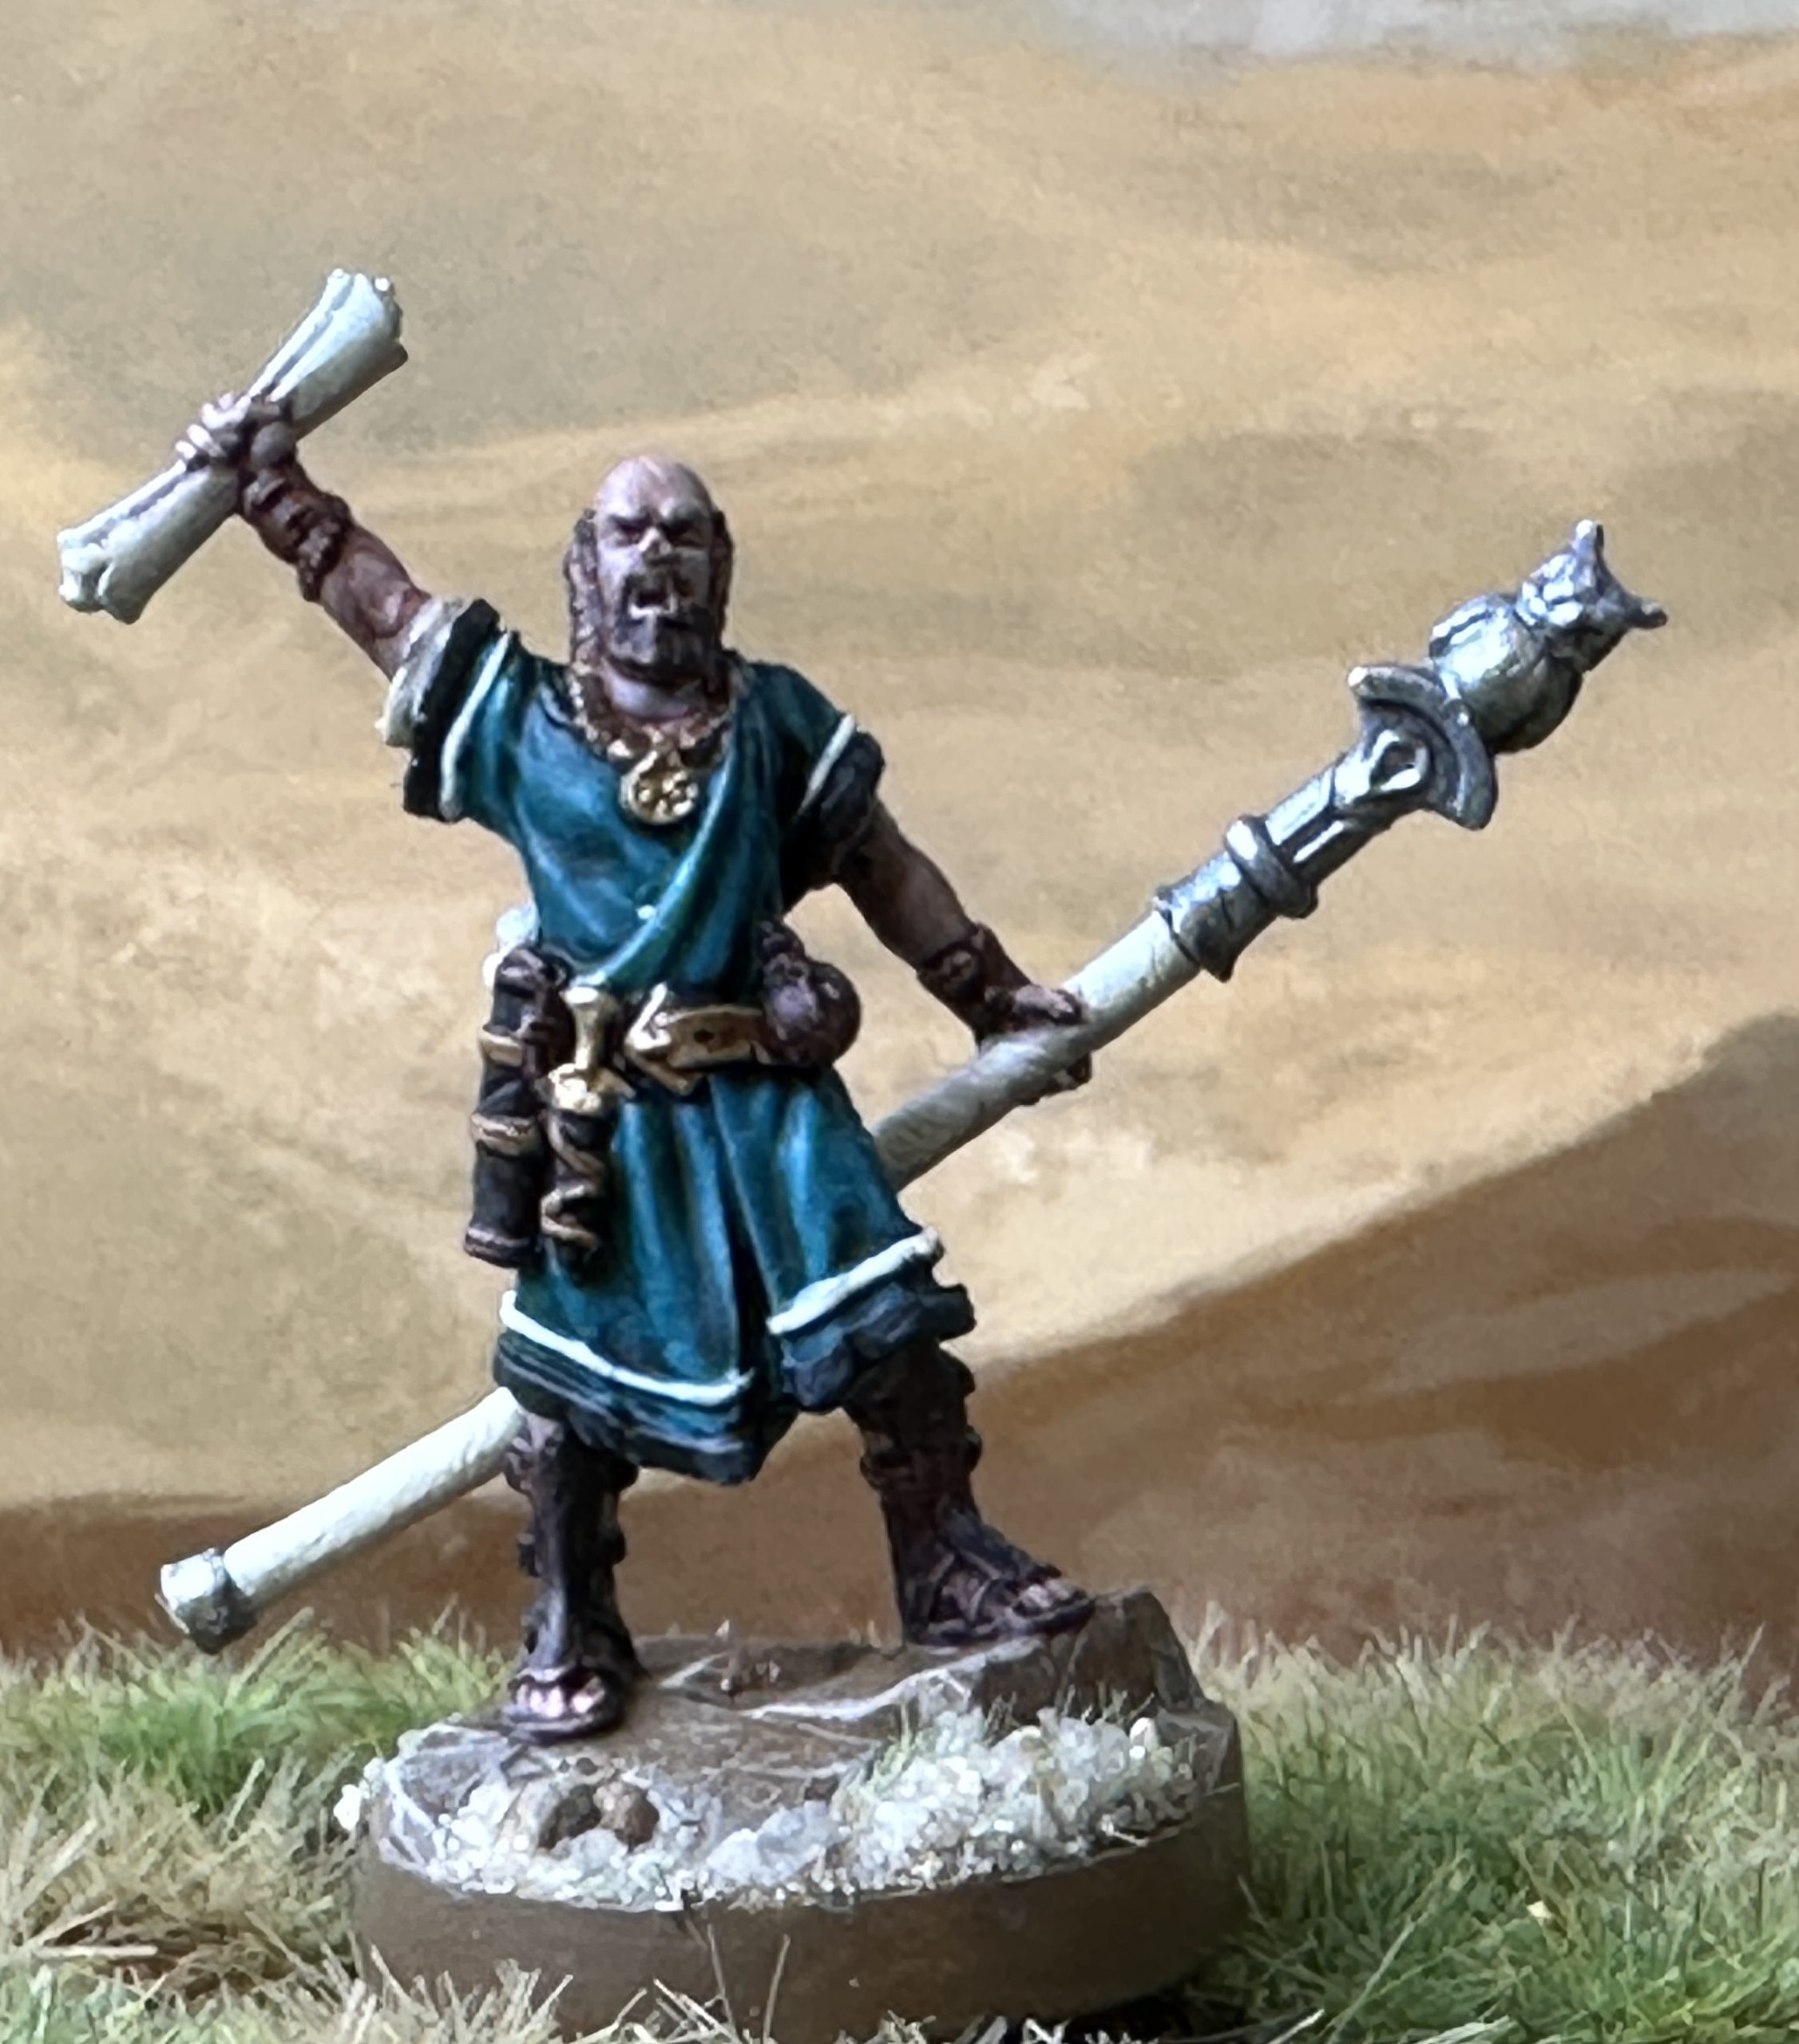
The Songmaster. This is a Greek Mage miniature by Reaper Bones and he towers over most normal 28mm miniatures due to his heroic basing with additional foot on rock-ism. The chiton is Raging Sea Speedpaint, two layers to give a deeper tone. I liked this miniature ans athough there aren’t any magic users the Songmaster fits him well as they carry a staff.
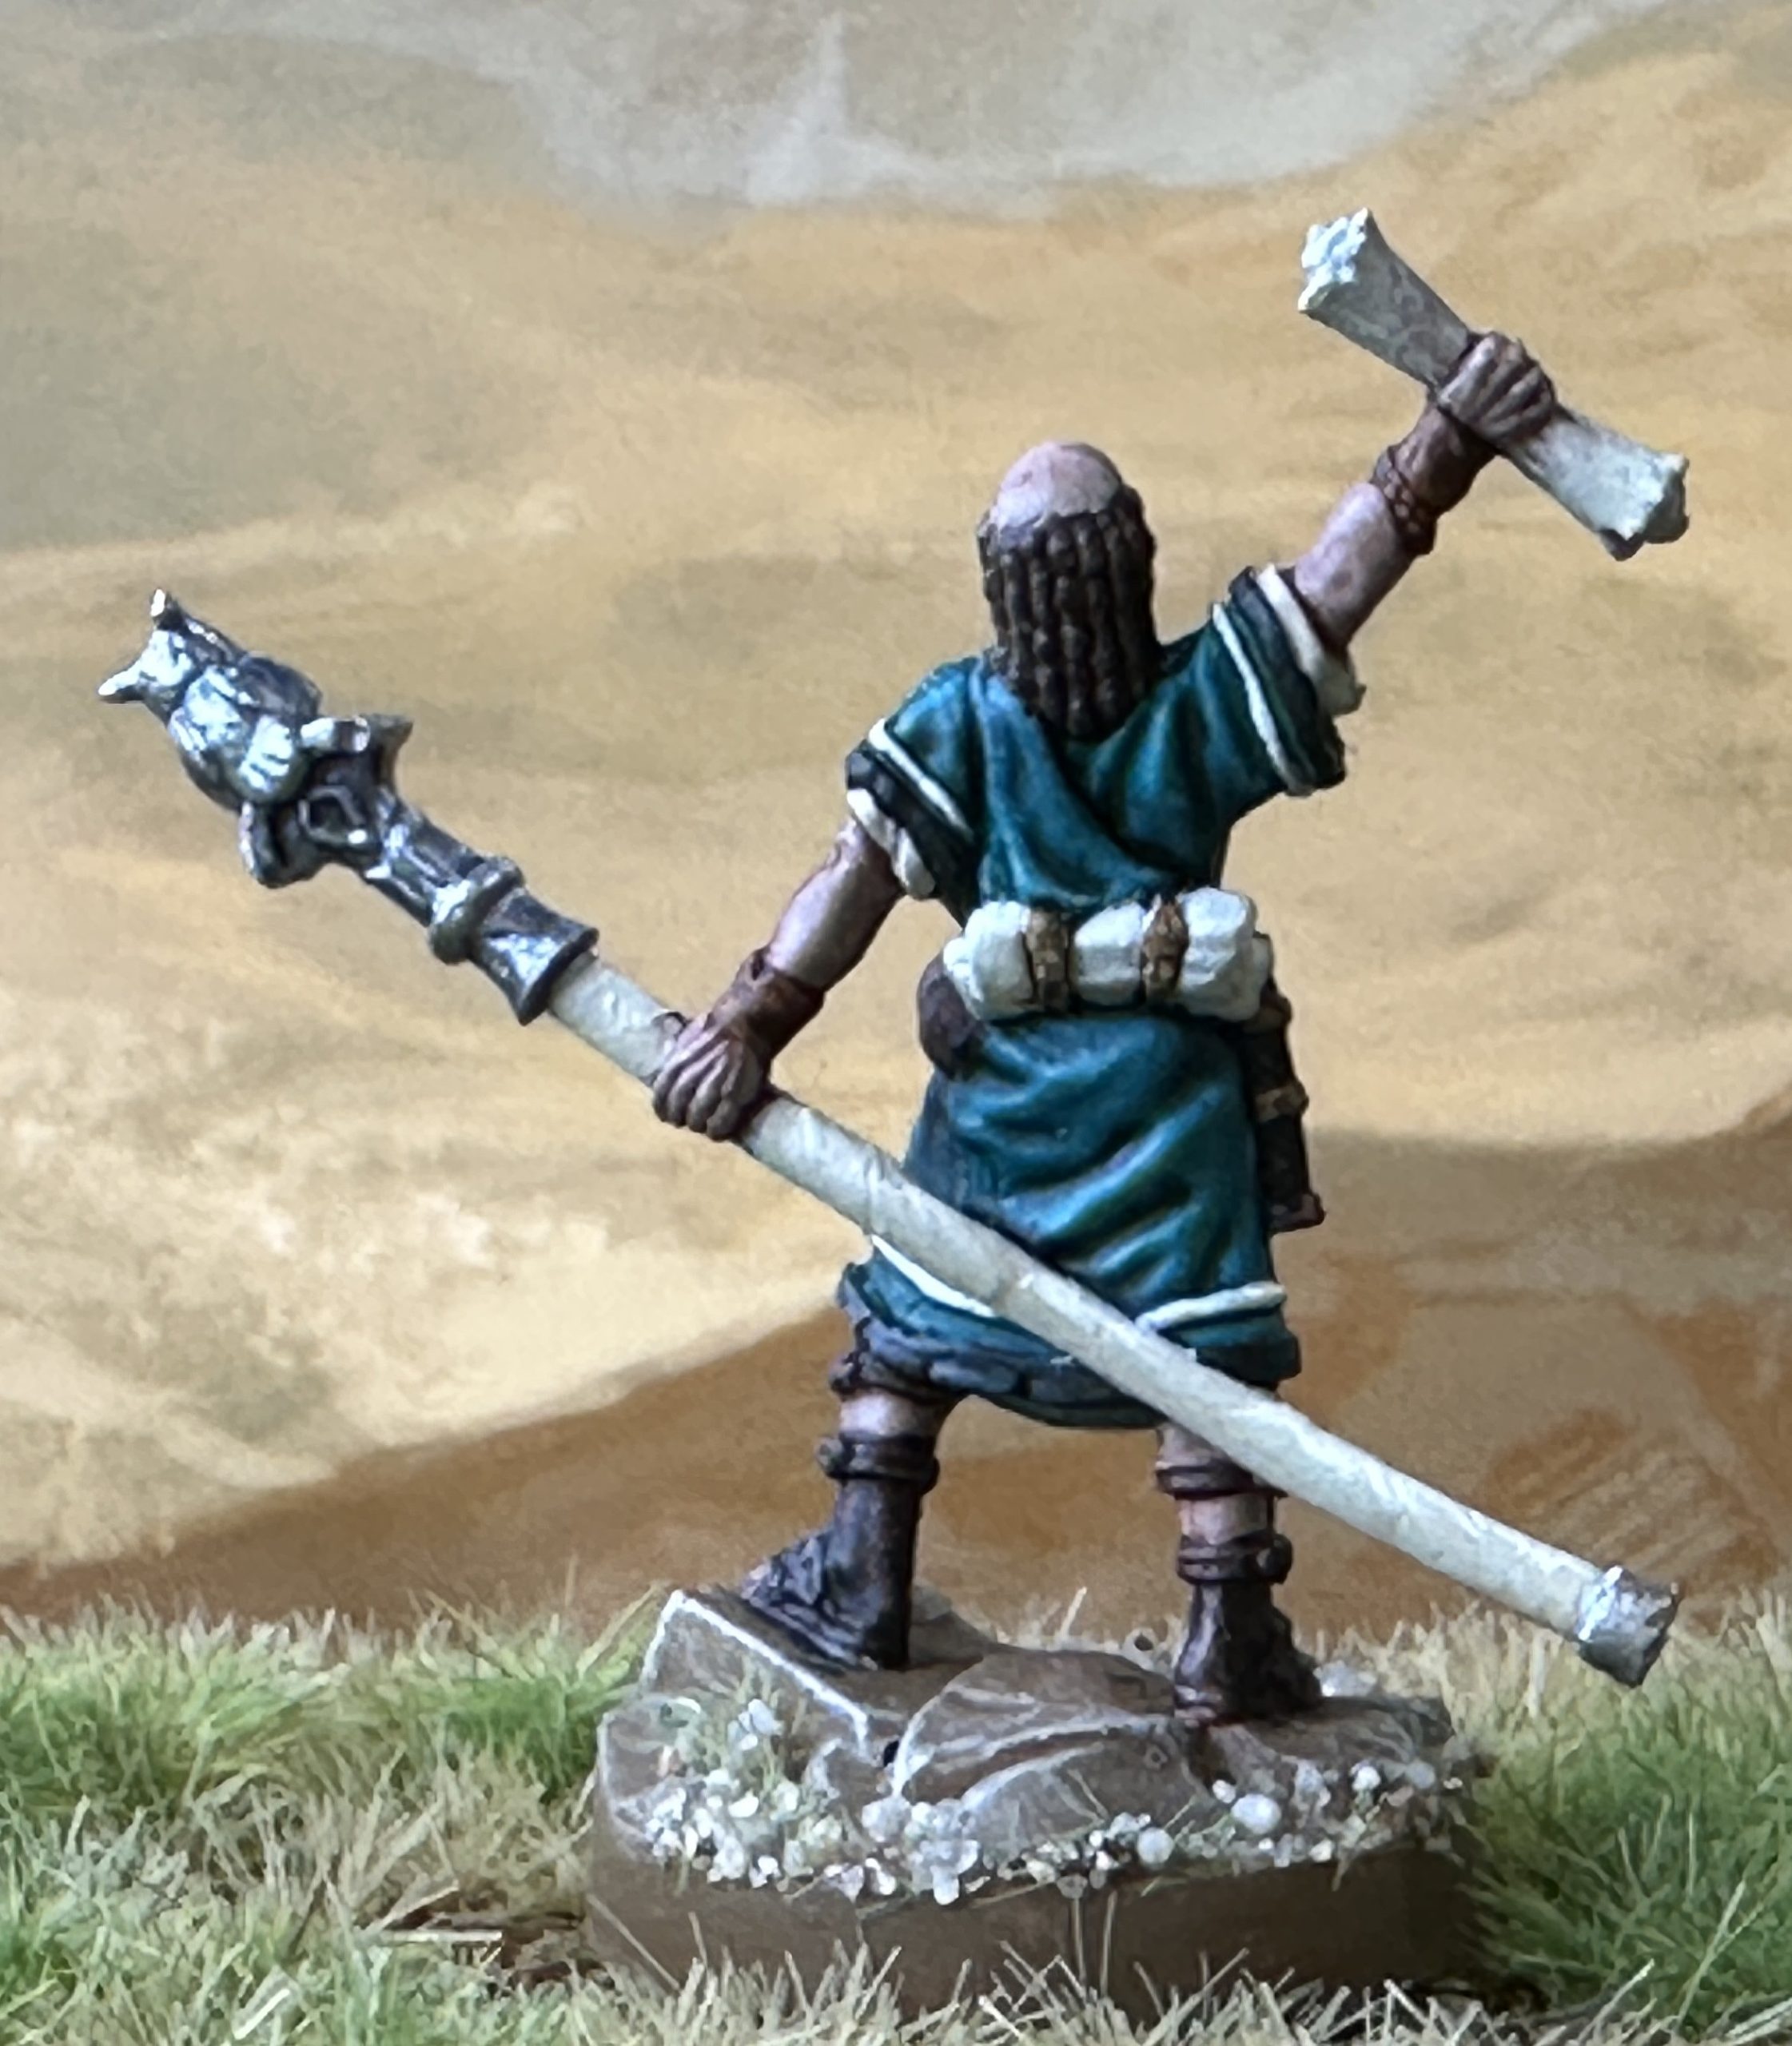
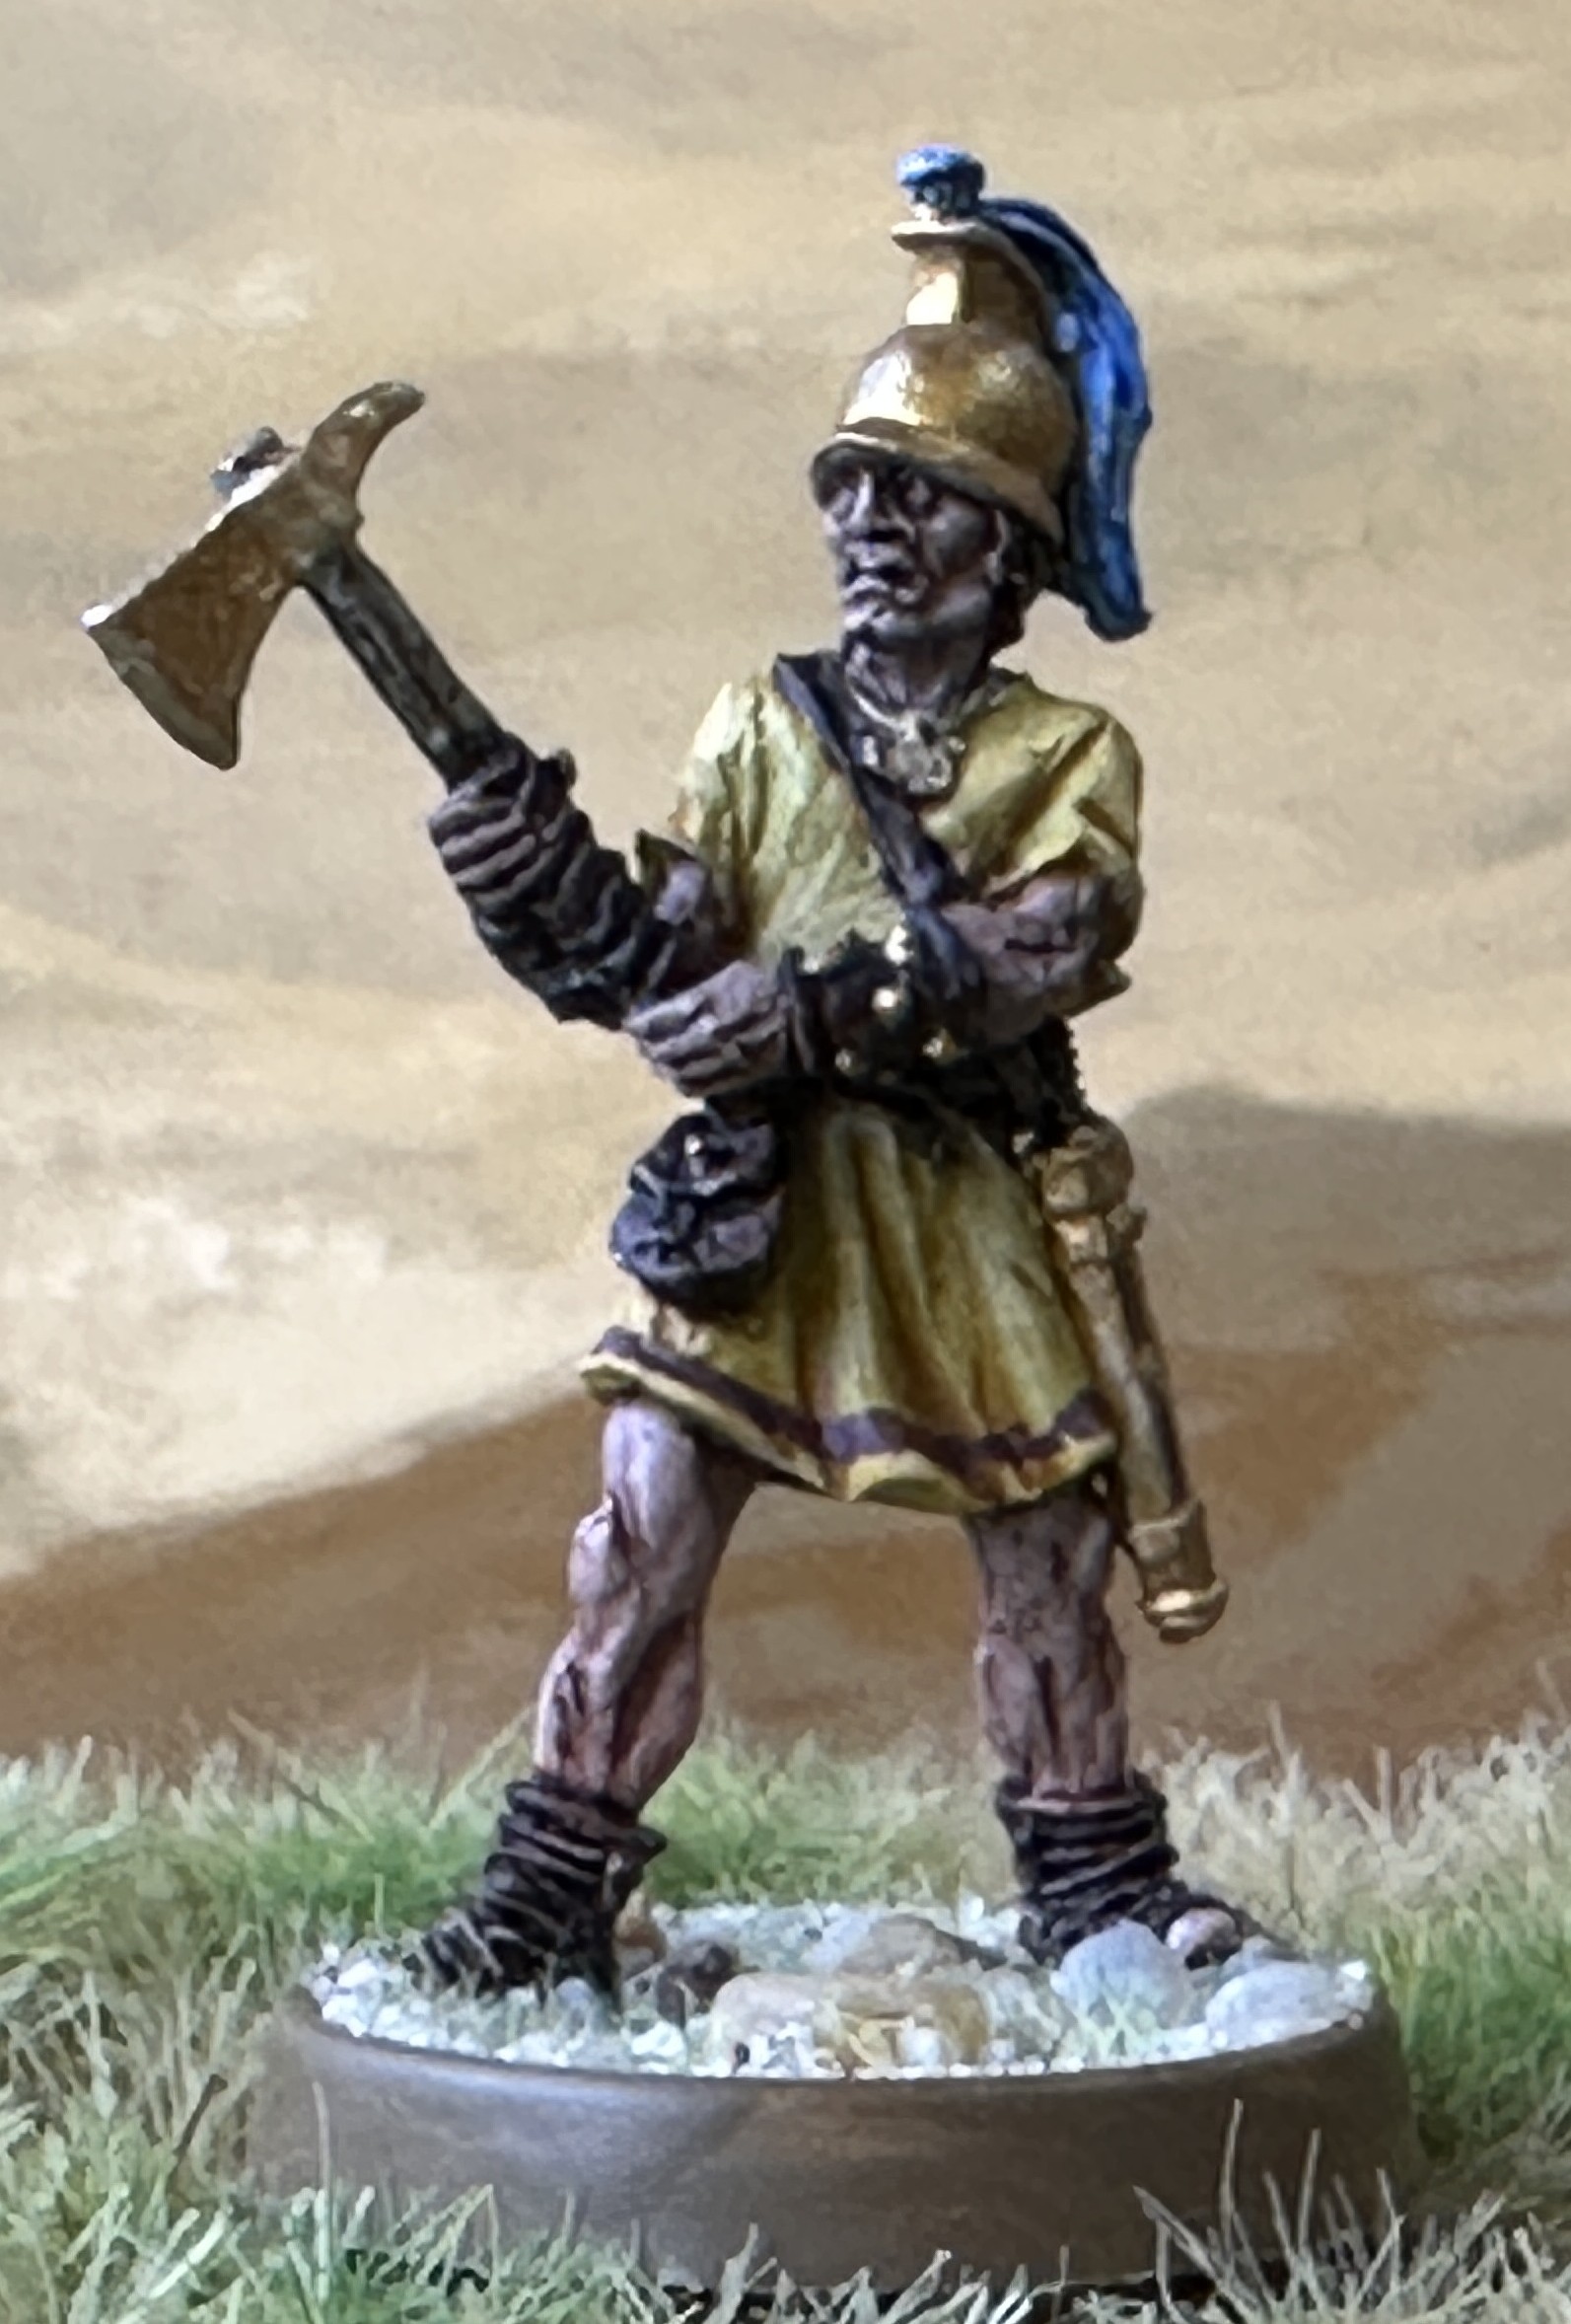
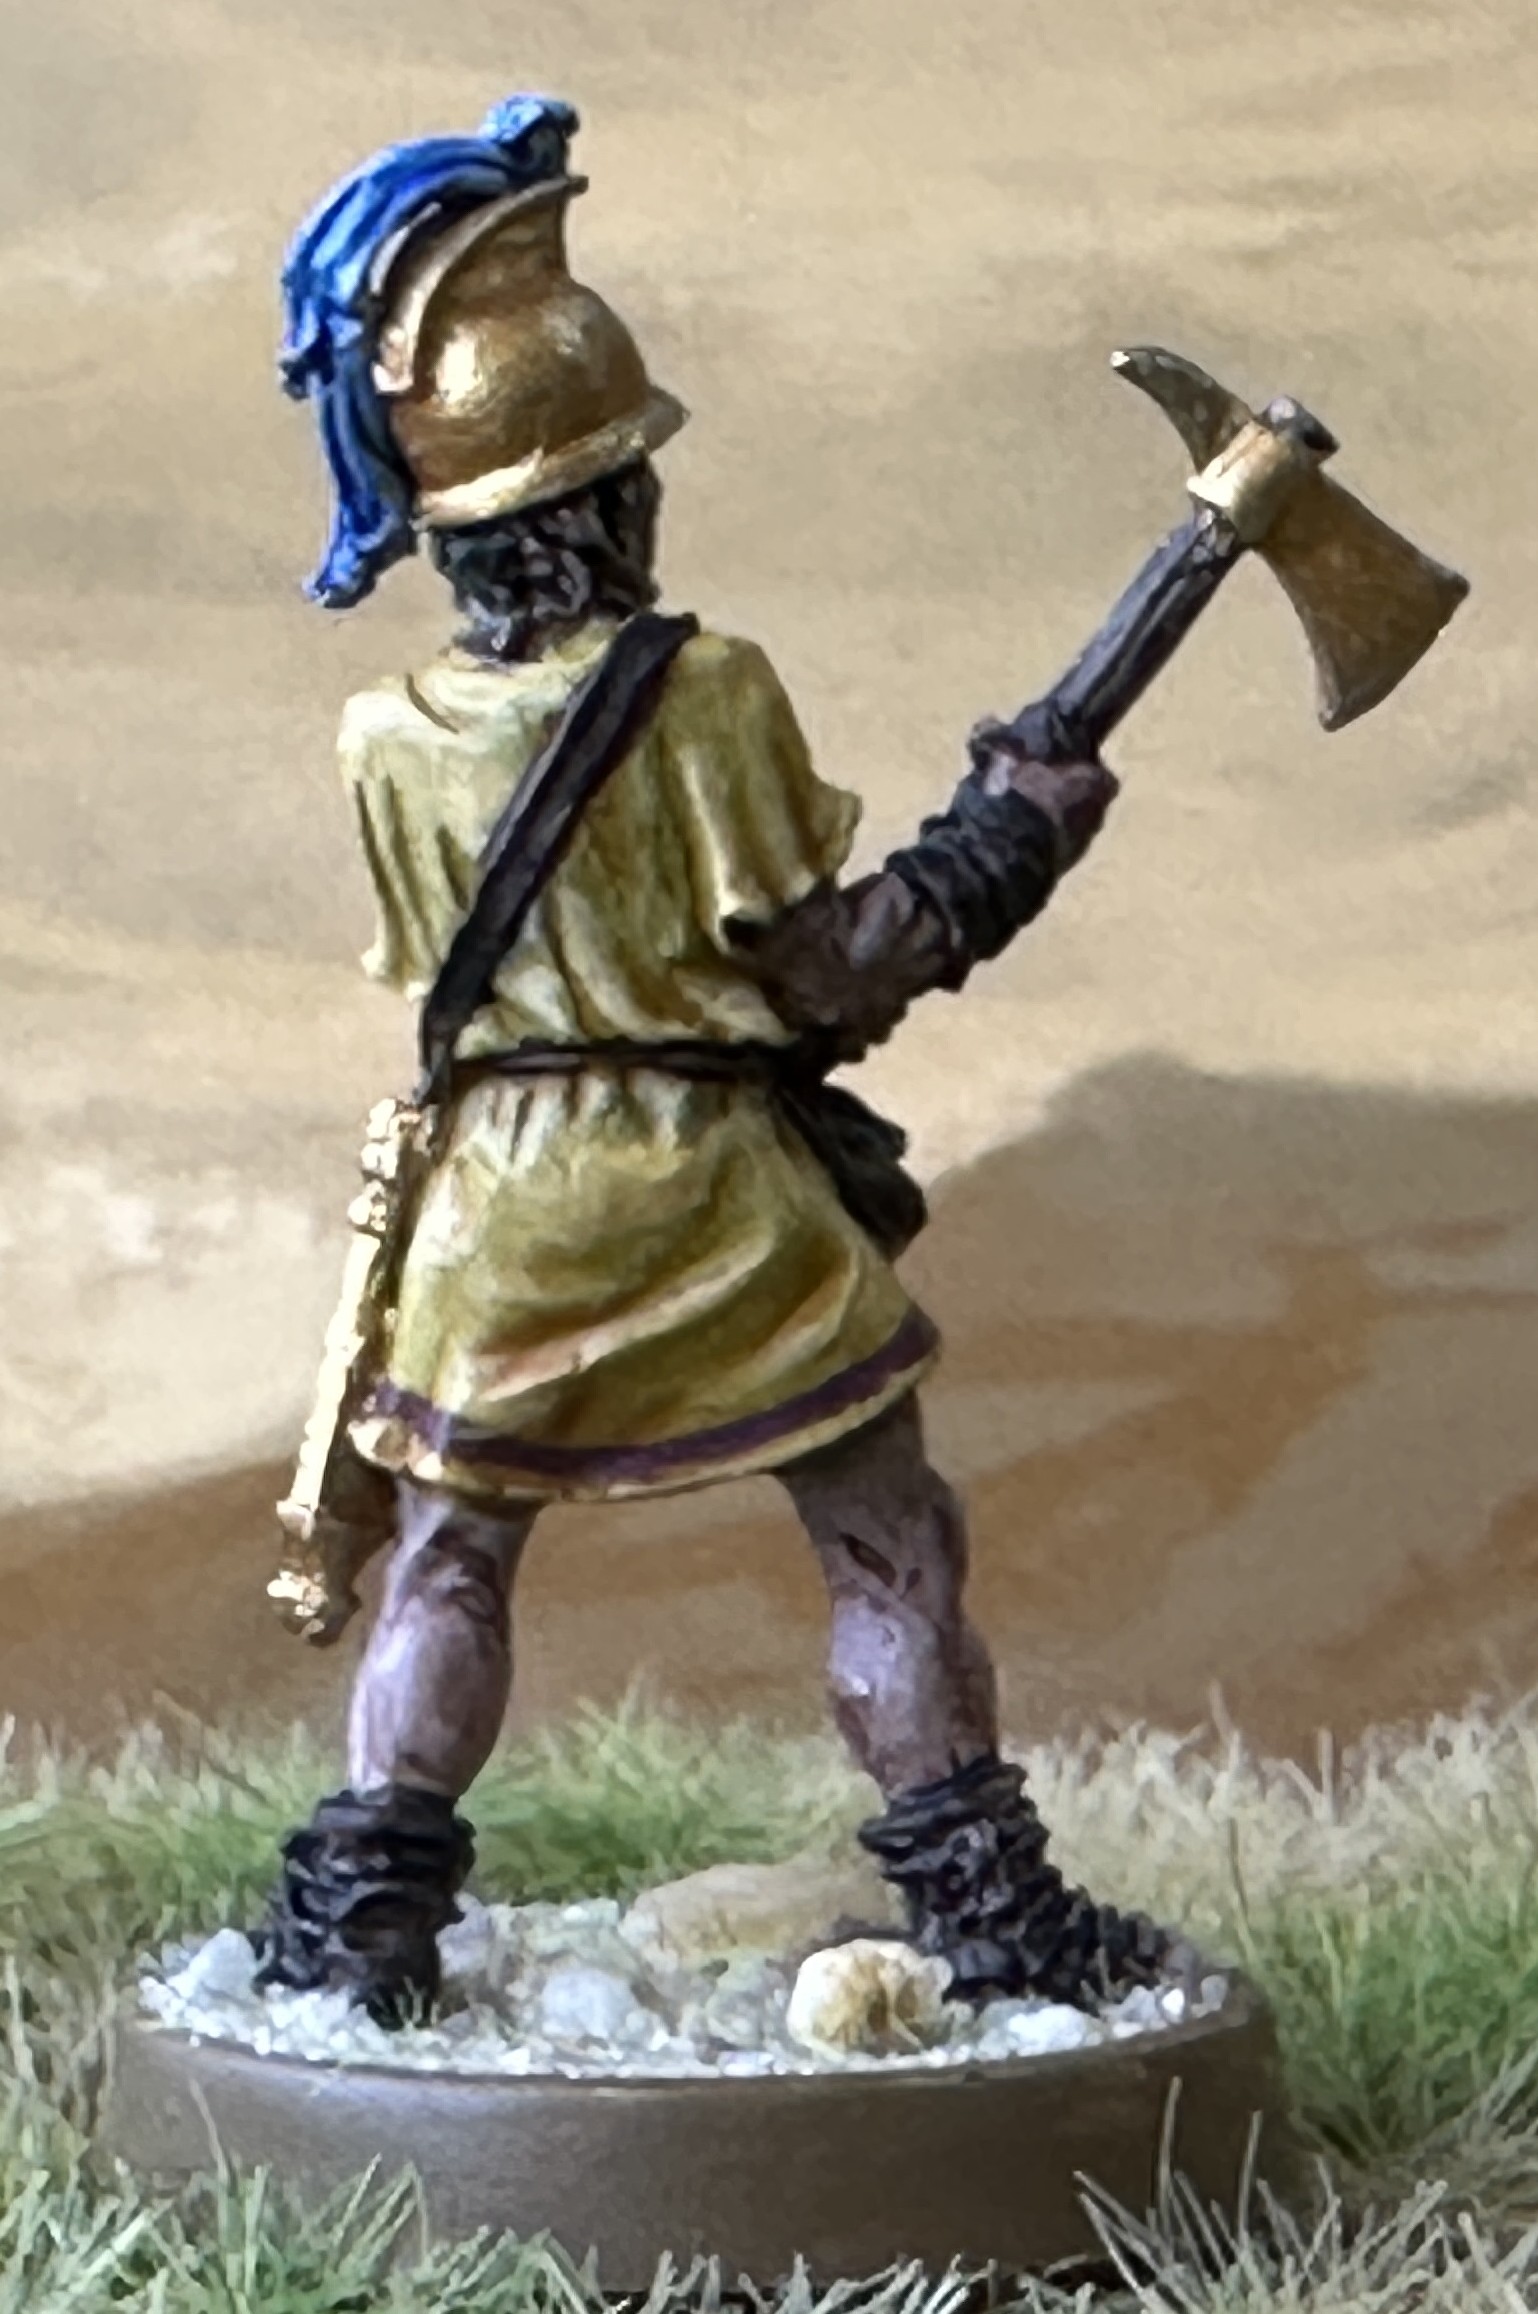
The Guardsman is by Dark Fable, part of the Ptolemaic Adventurers set. Ancient Honey coloured chiton with a burgundy edge stripe. The Guardsman gets a 2-handed weapon so this chaps axe is perfect for that.
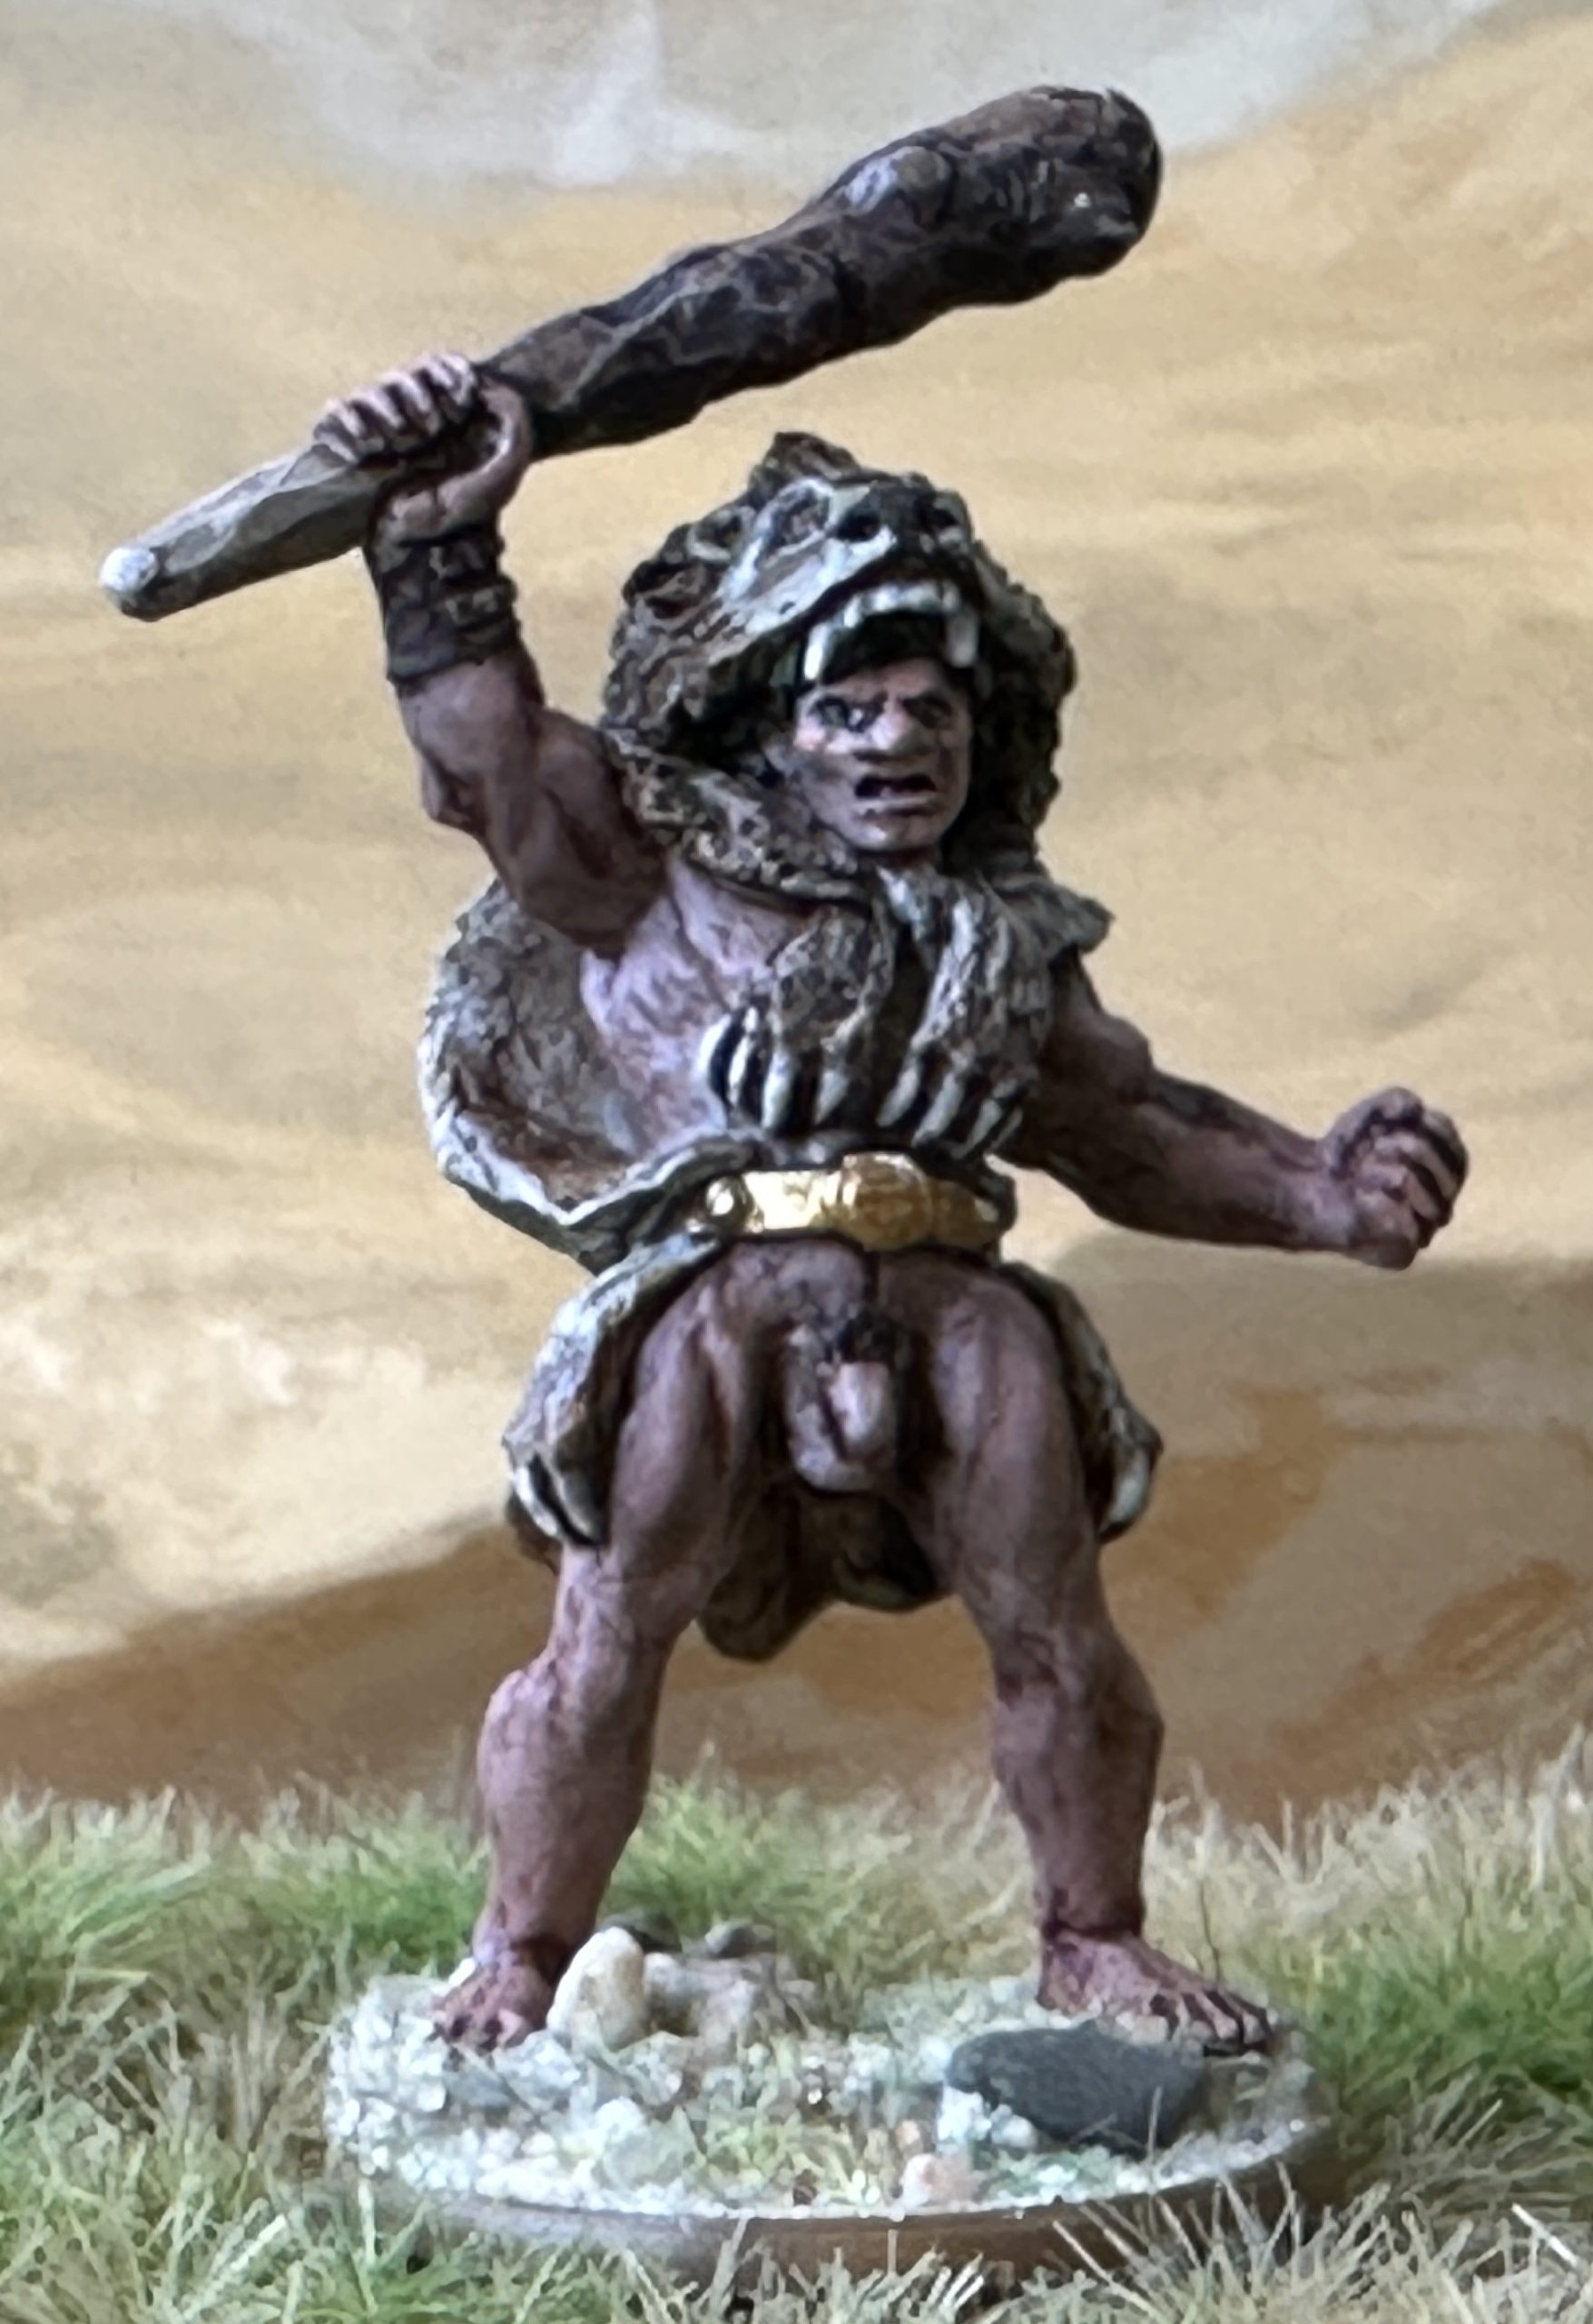
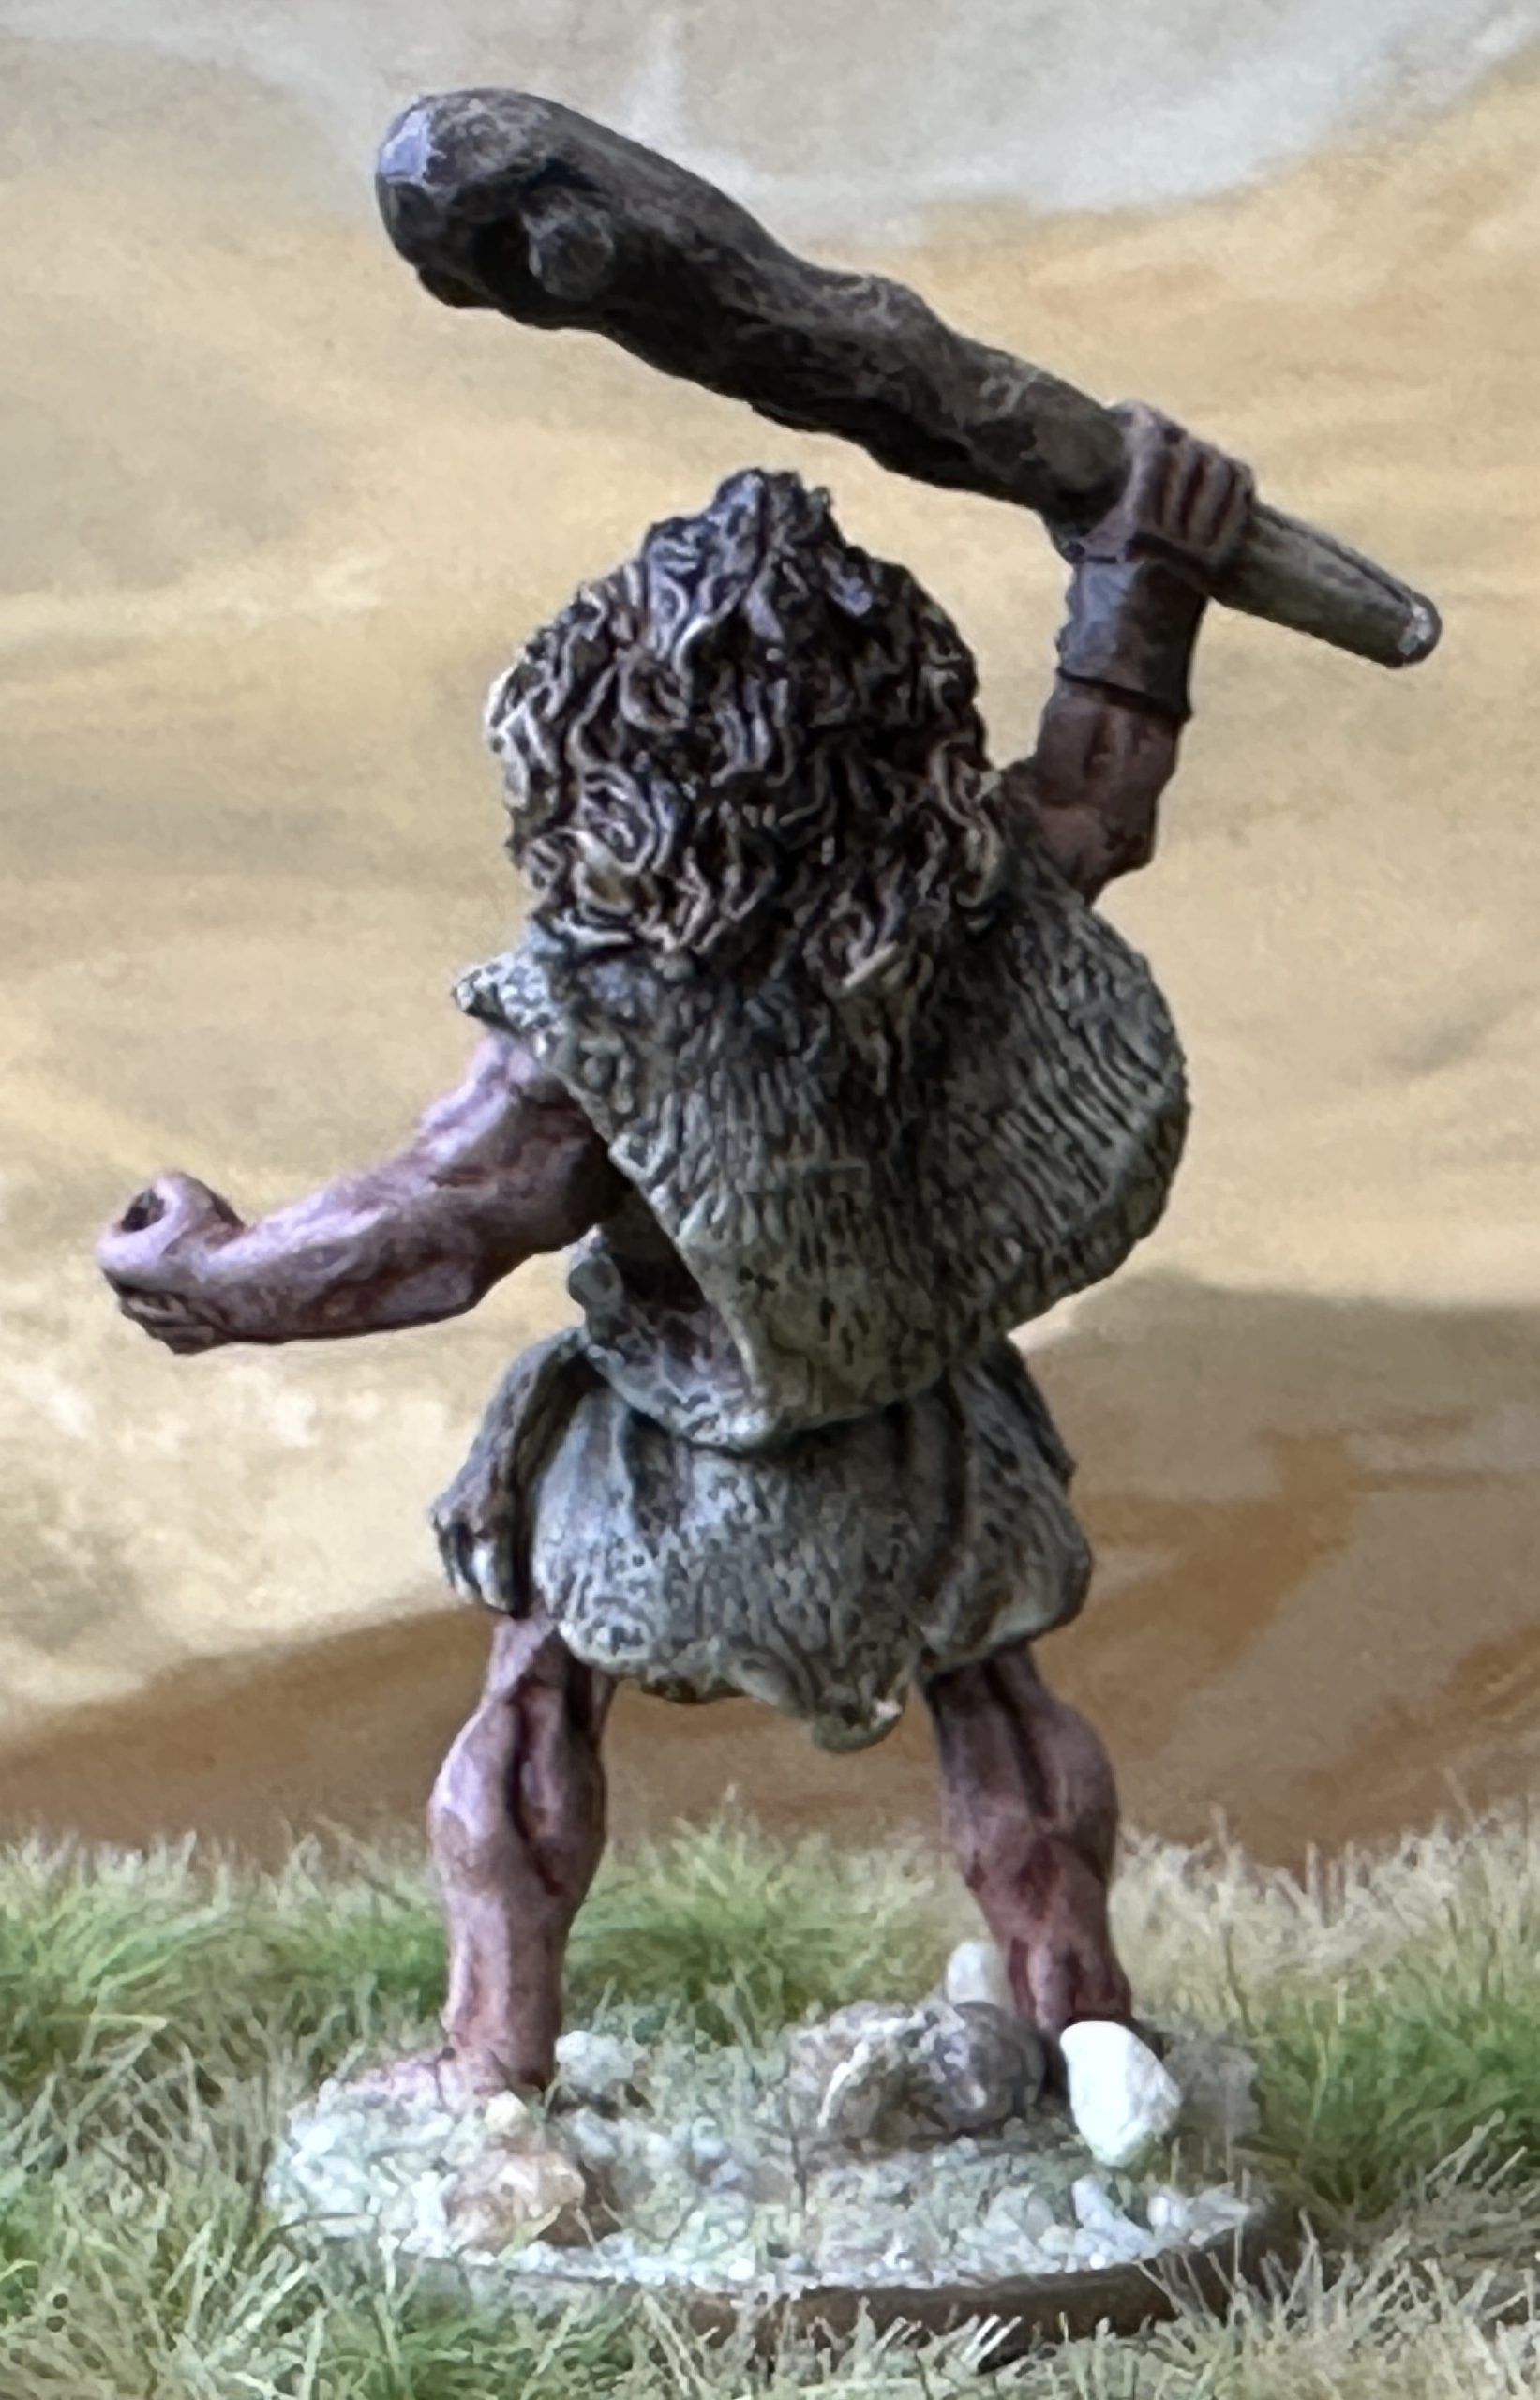
The Savage is being portrayed by Hercules by North Star, part of the Of Gods and Mortals range. He is carrying his iconic club and in the rules this is a 2-handed weapon. He also wears his Nemean Lion skin, in proper classical style with nothing left to the imagination. I spent some extra time on his skin trying to get some smoother gradients with washes and glazes. I enjoyed painting the lion’s head which I did by trying to copy an image online. There is a lot of detail to go at. He’s huge, nearly 40mm tall so even amongst these ‘epic 28s’ he is tall which is fitting, he is Hercules after all.
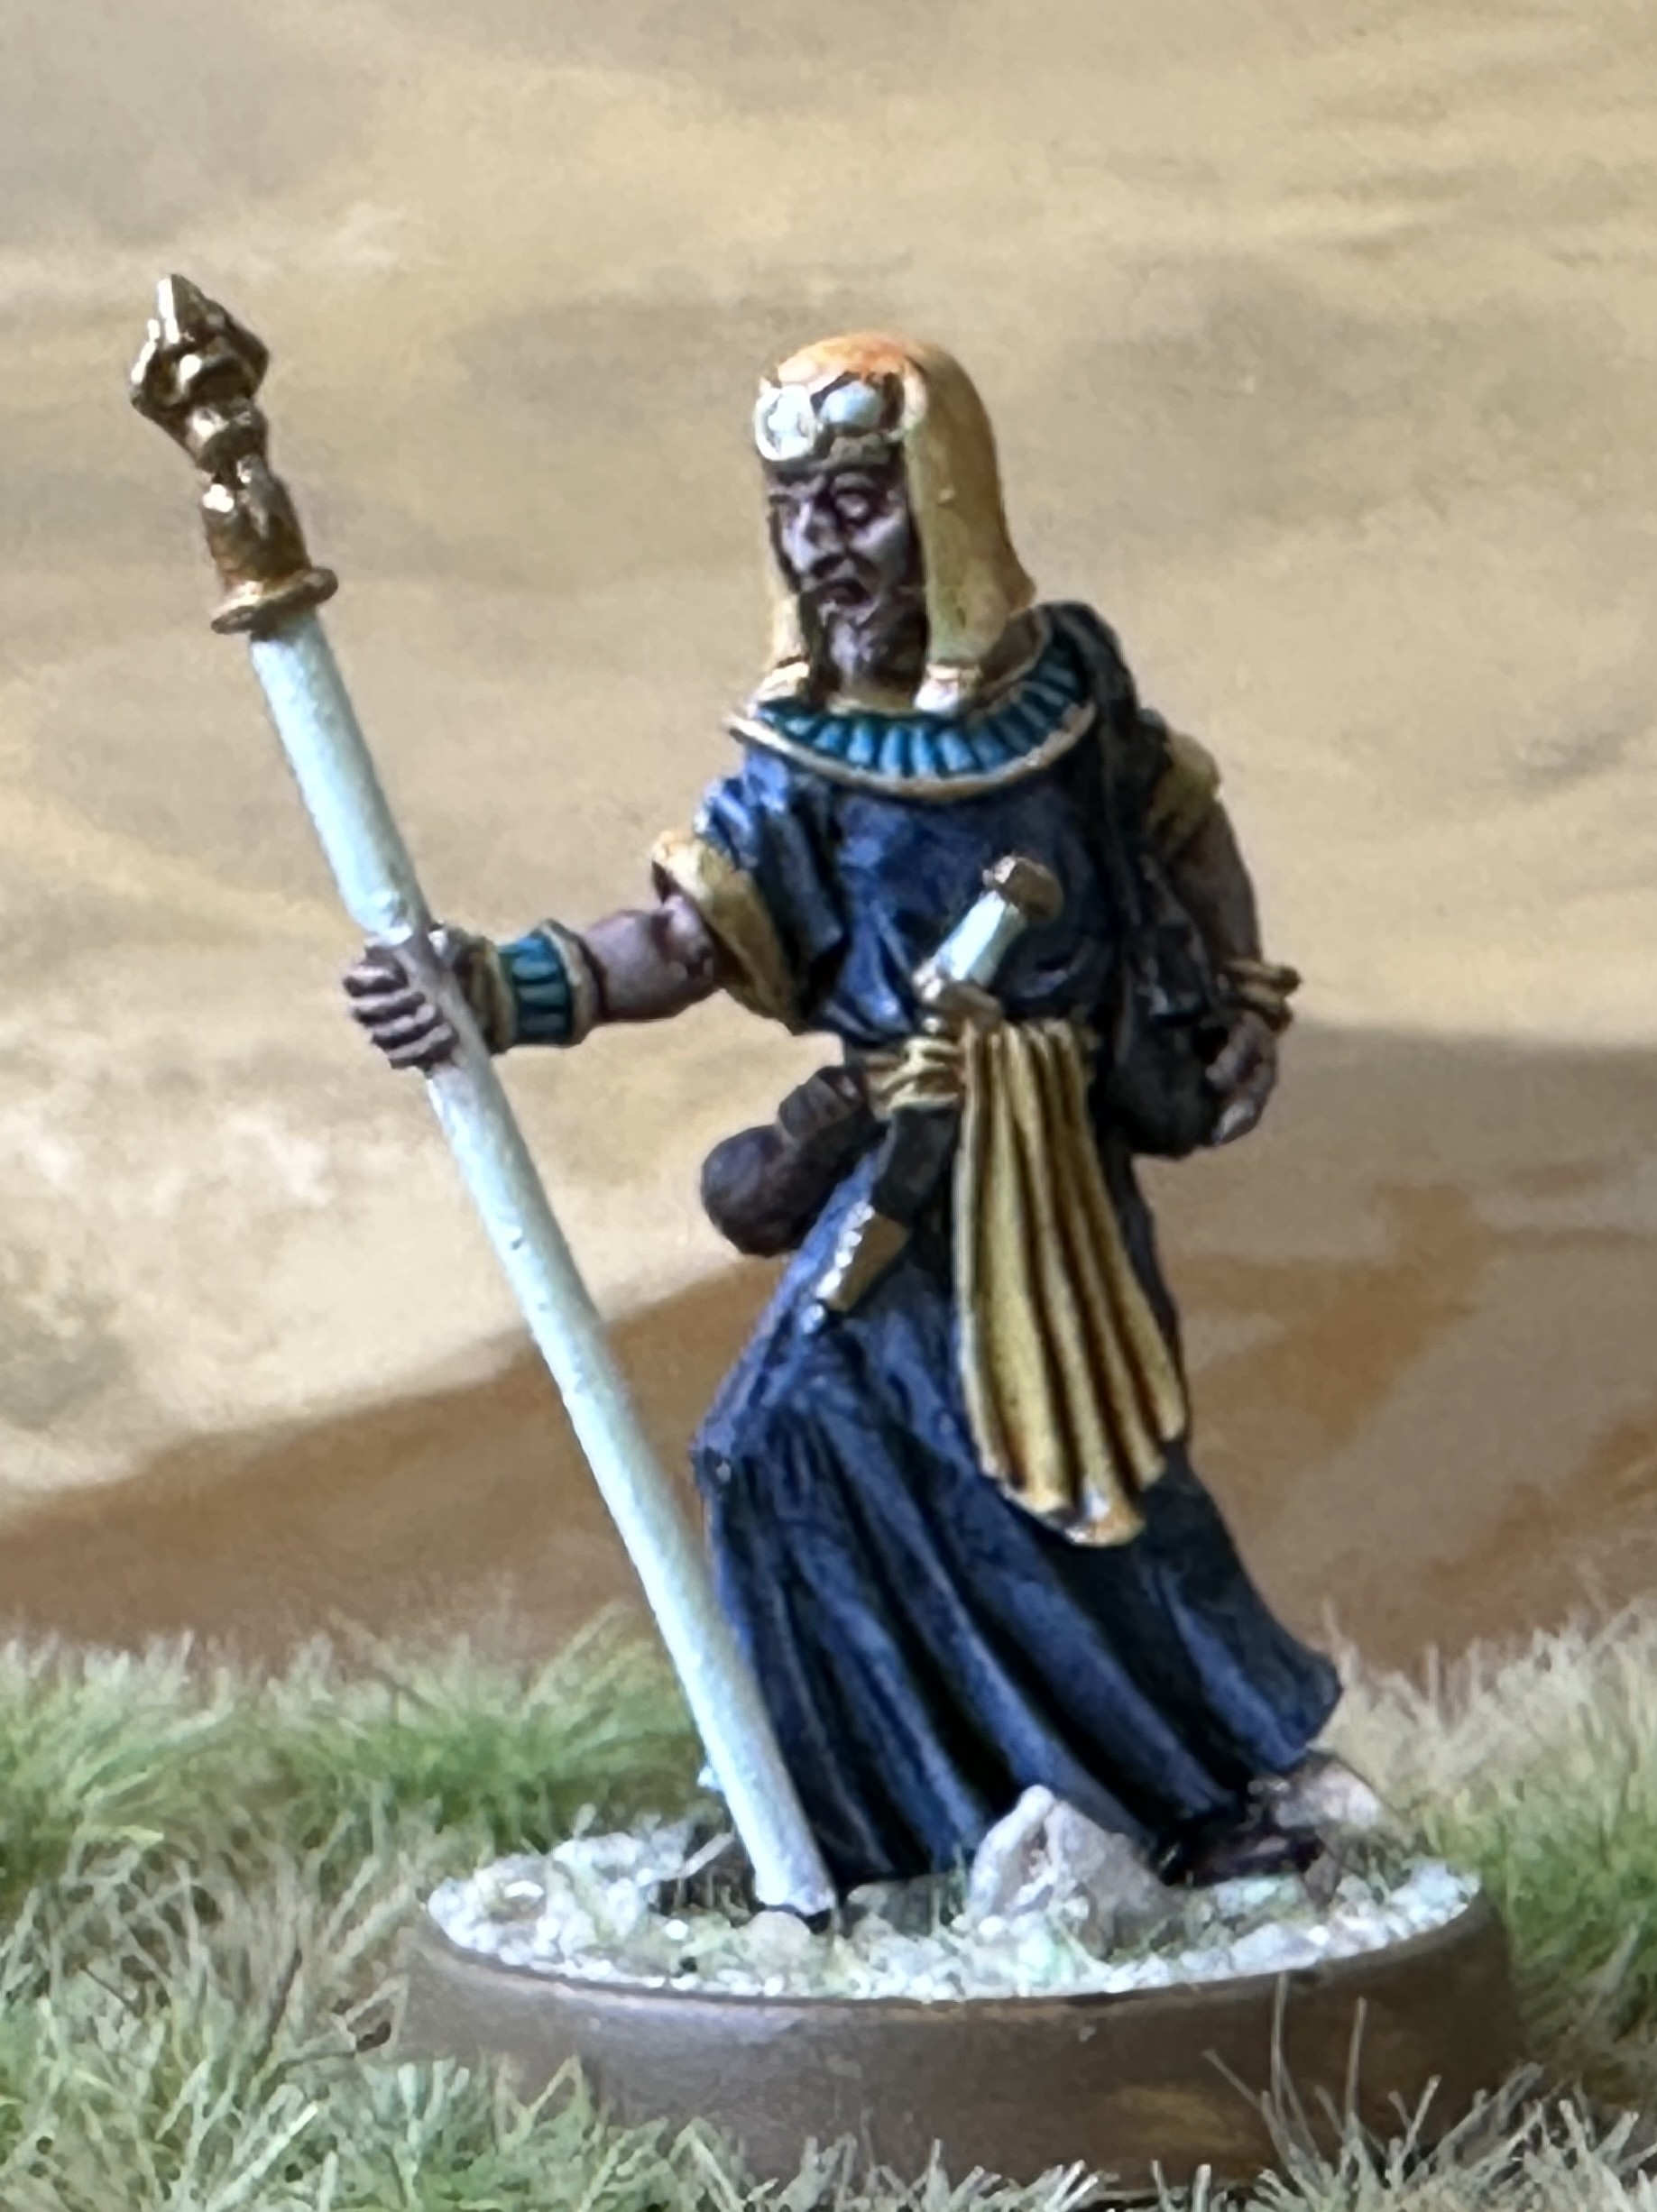
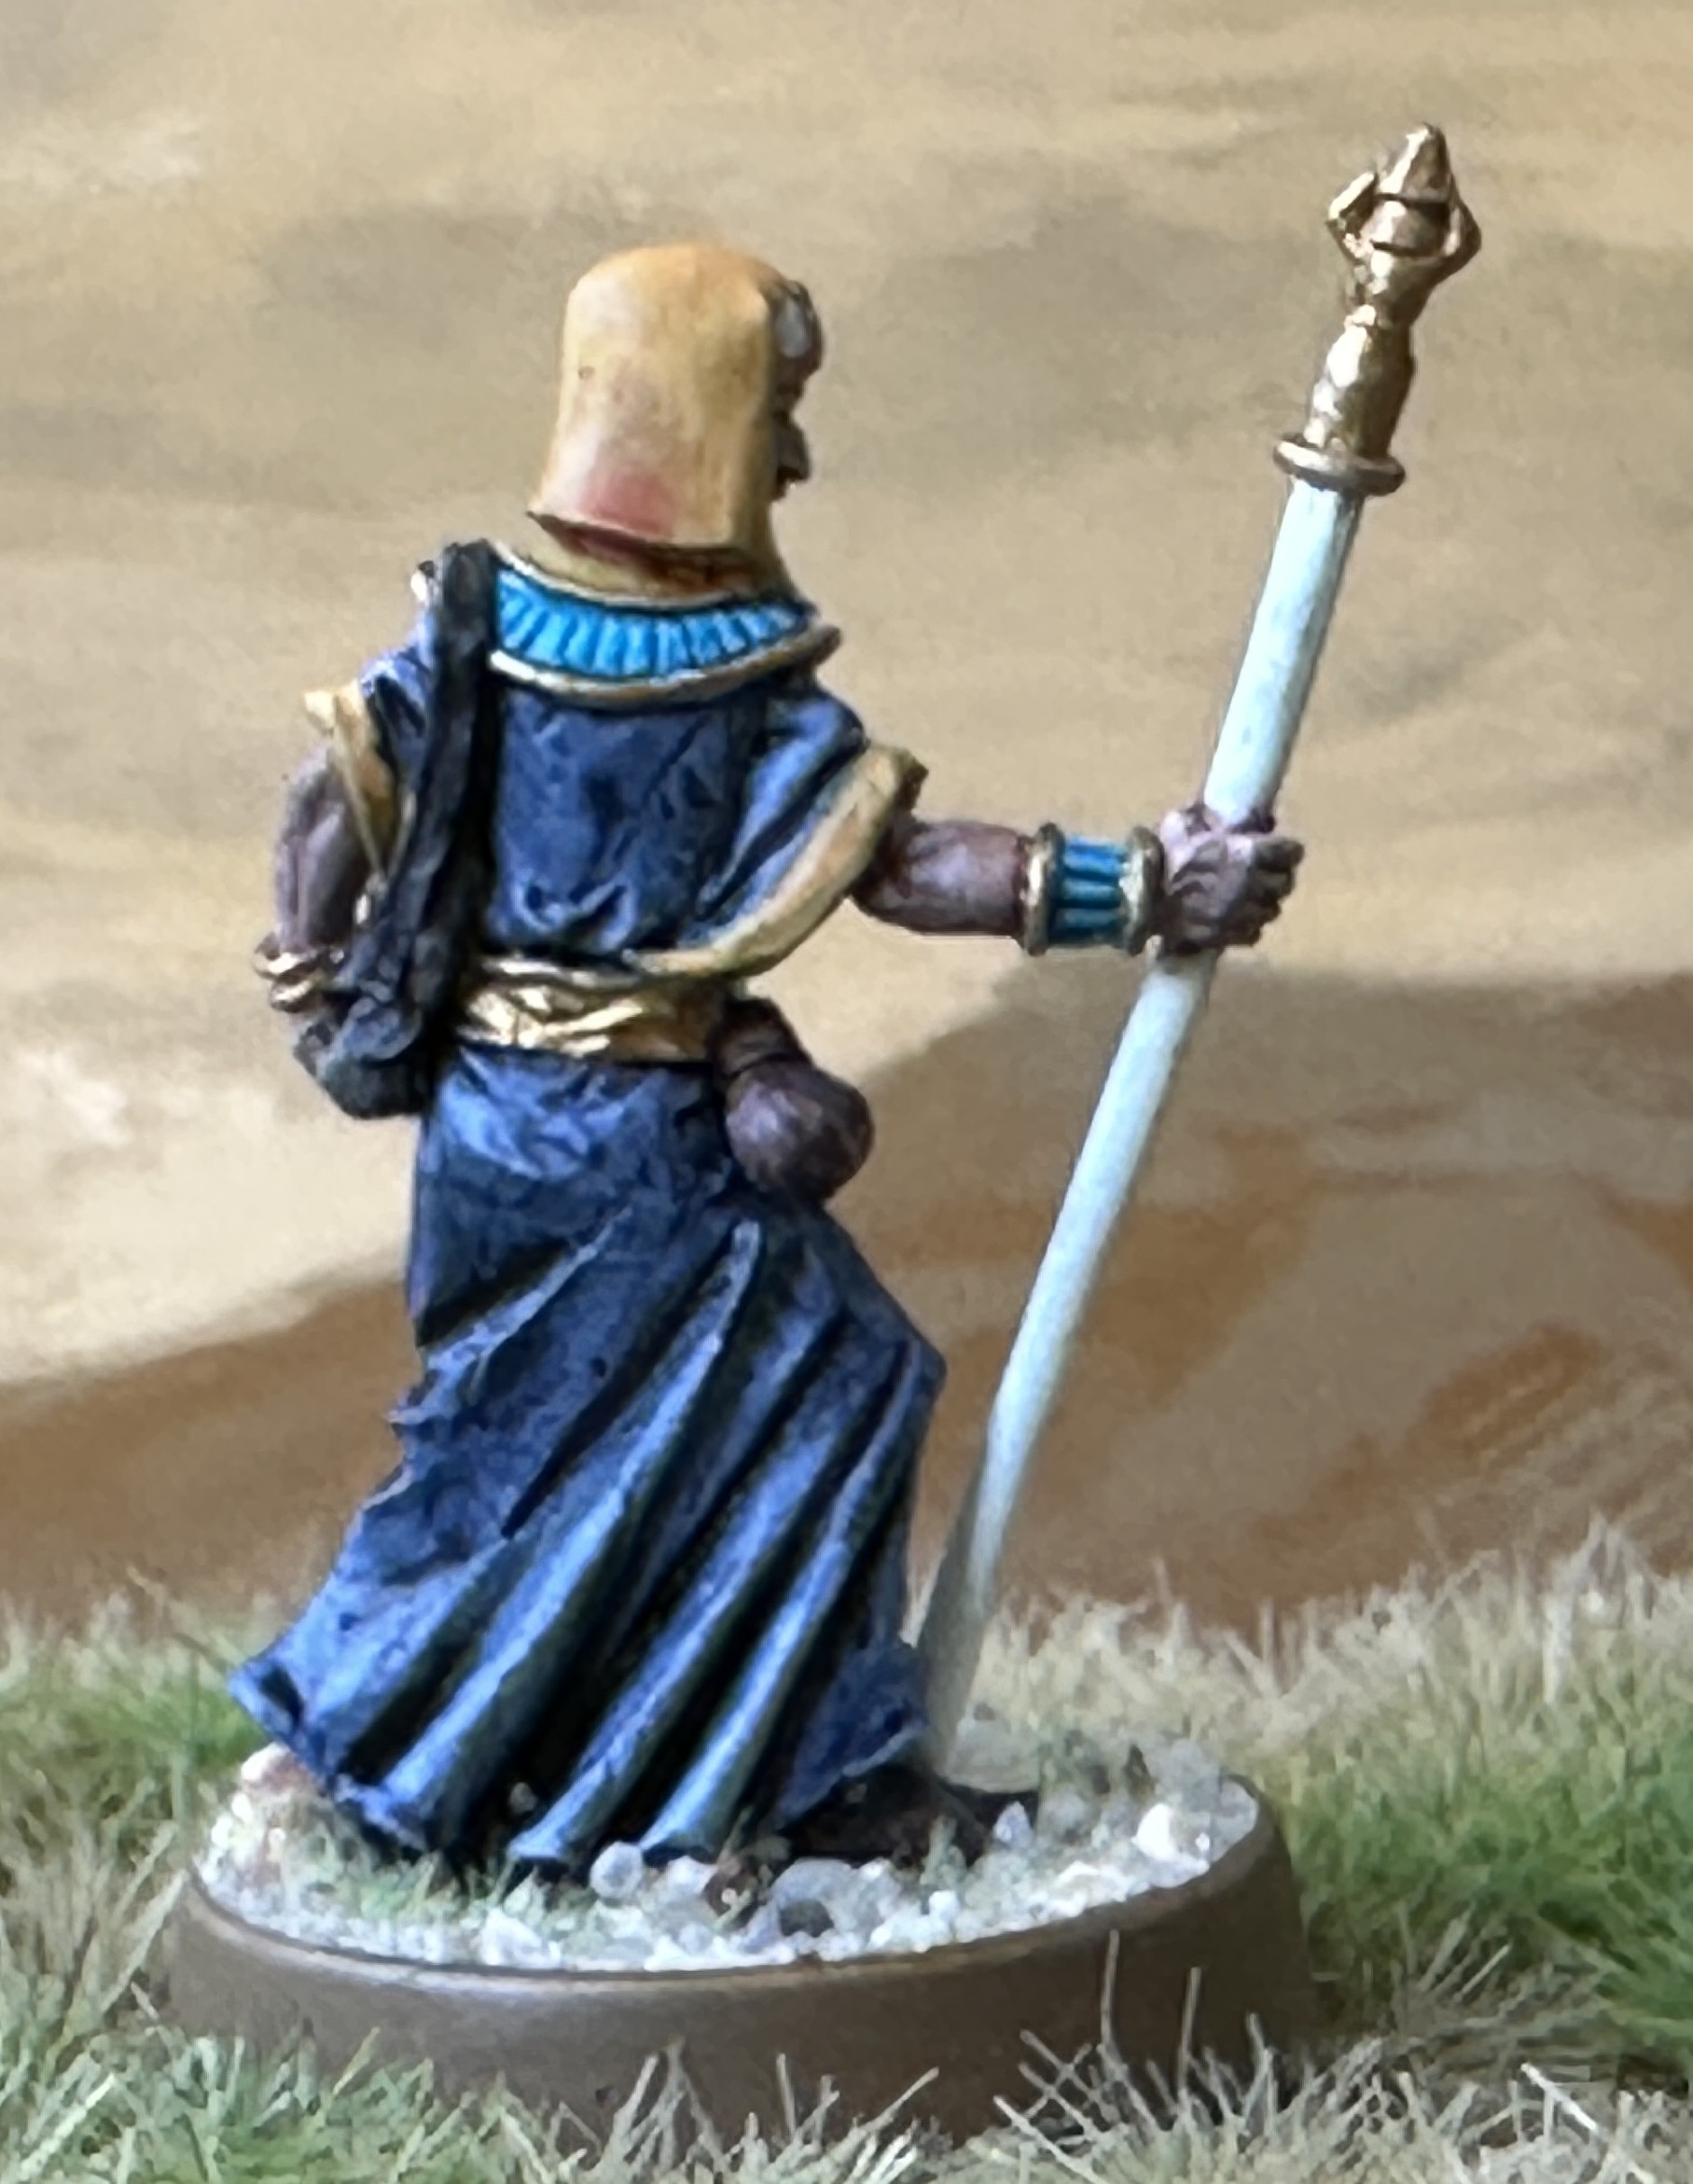
Finally we have an Egyptian savant also from the Dark Fable Ptolemaic Adventurers pack. I won’t be able to use him at the moment as he doesn’t fit any of the Companion types we’ve been given in the initial rules. I’m assuming we’ll get more types as the game develops so I’m sure his time will come. Maybe if the Songmaster gets it in an early scenario he might be a suitable substitute. Cloudburst Blue Speedpaint robes with a range of yellows to make the headdress and other yellow material elements.
Gathering the Heroes - Putting the party together
My North Star order arrived last week and I’ve been busy reading through the books. I’m tackling this solo to start off with so I’m happy to read ahead through the Quests book to start thinking about putting my miniatures requirements together. Before I can get too far with that I need my party of adventurers, called Warriors in the game.
The Heroes book takes us through putting our main hero and their accompanying companions together.
This morning on the WoA facepage there was a link to an app someone has written to do the generation process for you. I had a go and it seems to be working and certainly is well detailed.
Hero
You roll up for your hero using the tables provided to find out some basic information like their parent and what skills and weaknesses this confers. There are baseline stats for the core characteristics that can then be enhanced using the allocation given and then a set of skills are selected.
Finally starting equipment is selected and paid for from a budget of 100 wealth and you won’t be able to buy all the best gear straight away. Given the miniature I have in mind I’ve picked a hand weapon, 2x javelins, light armour and a shield.
All of this is recorded onto your Hero sheet and at the moment mine is done in rough. Once I’ve got it written out neatly then I’ll post a photo.
Companions
Next we move on to Companions. As a solo player my hero gets 160 base recruitment points to spend and can have up to 7 companions. There can be a mixture of human and animal Companions. There are some interesting choices available and I decided to stick to humans to start off with.
I’m partly working around the available miniatures I have or have just bought. Some are larger than the majority of my standard 28mm minis, being more of the epic 28, 30-32mm foot to eye size. I’ll try to use these as the characters as they stand out more easily. The companions come with specified equipment so I’ll have to try to match as close as possible to the miniatures I’ve got. I selected the following:
An Archer 20RP, a Guardsman with 2 handed axe 20RP, a Songmaster with staff 13RP, a Hoplite 35RP, a Hunter 30RP, a Savage with 2 handed weapon 30RP and a Thief 10RP =158RP Total and all 7 available spaces used. Again there is a template sheet for recording these and when I’ve got a neat one I’ll take a photo.
Some miniatures are still on order but I’ll paint the ones I’ve got next.


