


![10mm Medieval Miniatures! Azincourt English Army Review | Wargames Atlantic [7 Days Early Access]](https://images.beastsofwar.com/2026/03/unboxing-wargames-atlantic-azincourt-english-army-coverimage-225-127.jpg)


Looted Primaris Redemptor Dreadnought


Recommendations: 128
About the Project
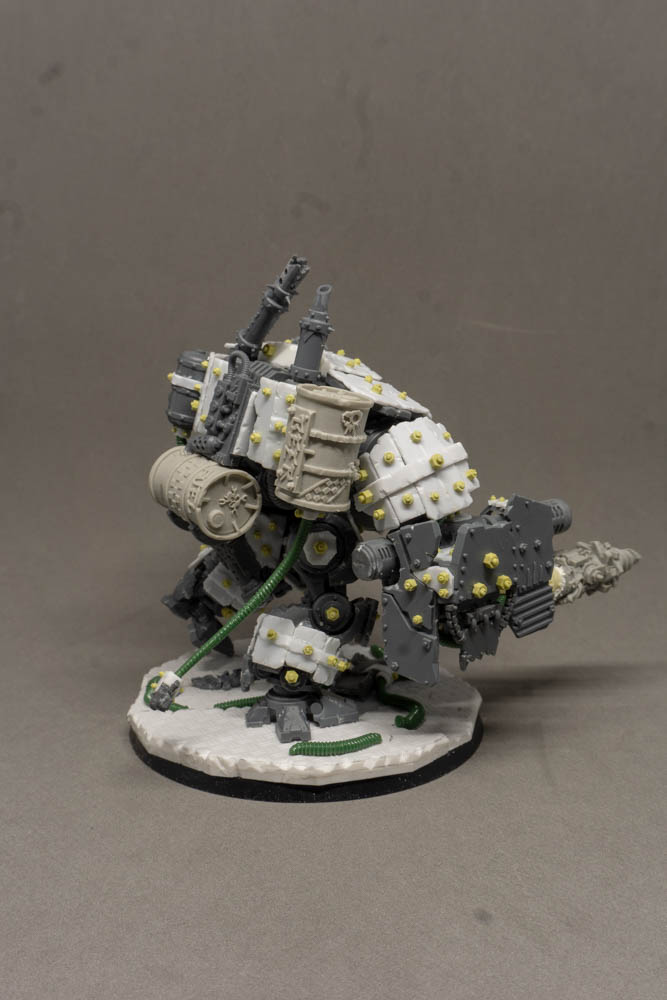
Looted Primaris Contemptor Dreadnought
Related Game: Warhammer 40,000
Related Company: Games Workshop
Related Genre: Science Fiction
This Project is Completed
First entry
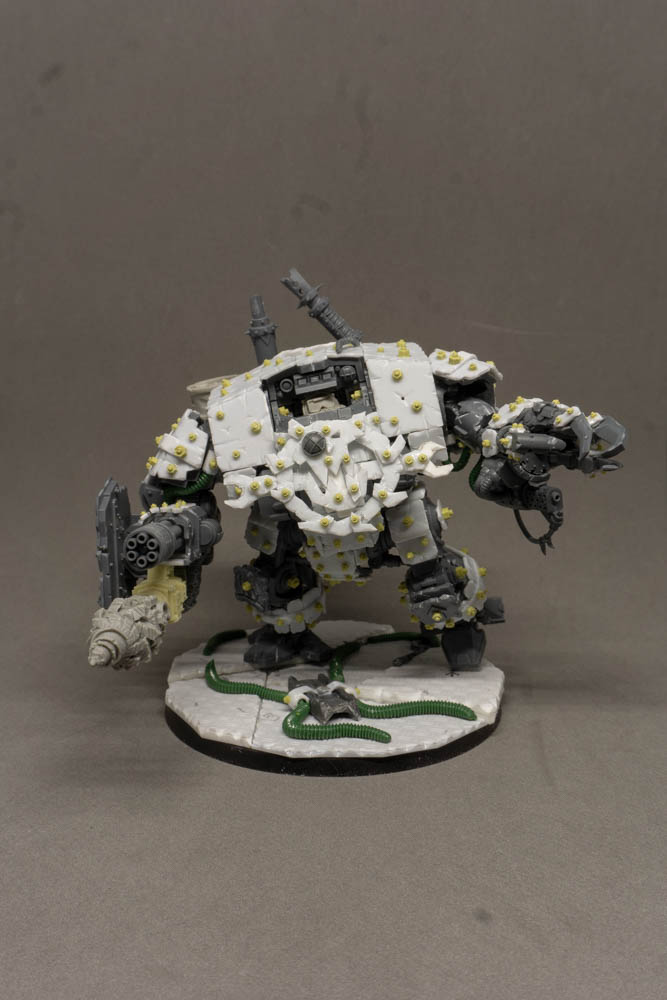
Ok then I’ve not really posted much up until now but in an effort to embrace the new and updated site I thought I would take a few pics and share what I’m working on. I haven’t played 40k in an age but a few friends are getting back into it and with the new Ork codex on the horizon I thought it was time to give a bit of love to my green skins. Although in this case there won’t be much skin and it should end up being red and blue so that it’s fast and lucky.
I’ve had the idea for this for some time now as I really like the look of the Primaris Contemptor dread but I can’t bring myself to paint marines at the moment. So why not loot it. The plan is to keep the basic form but give it a couple of weapons on each are so that it works with the current rules. It also needs to have lots of armour so that it can soak up any damage and keep going. Beyond that I’m making it up as I go along.
It was only when I was watching the Weekender this morning that I decided to add the project to the site so the pictures start part way through but I’d only built one arm at that time so it should cover most of the build. The magnetised bits are mainly there to make it easier to paint and will probably get glued in place once everything is finished.
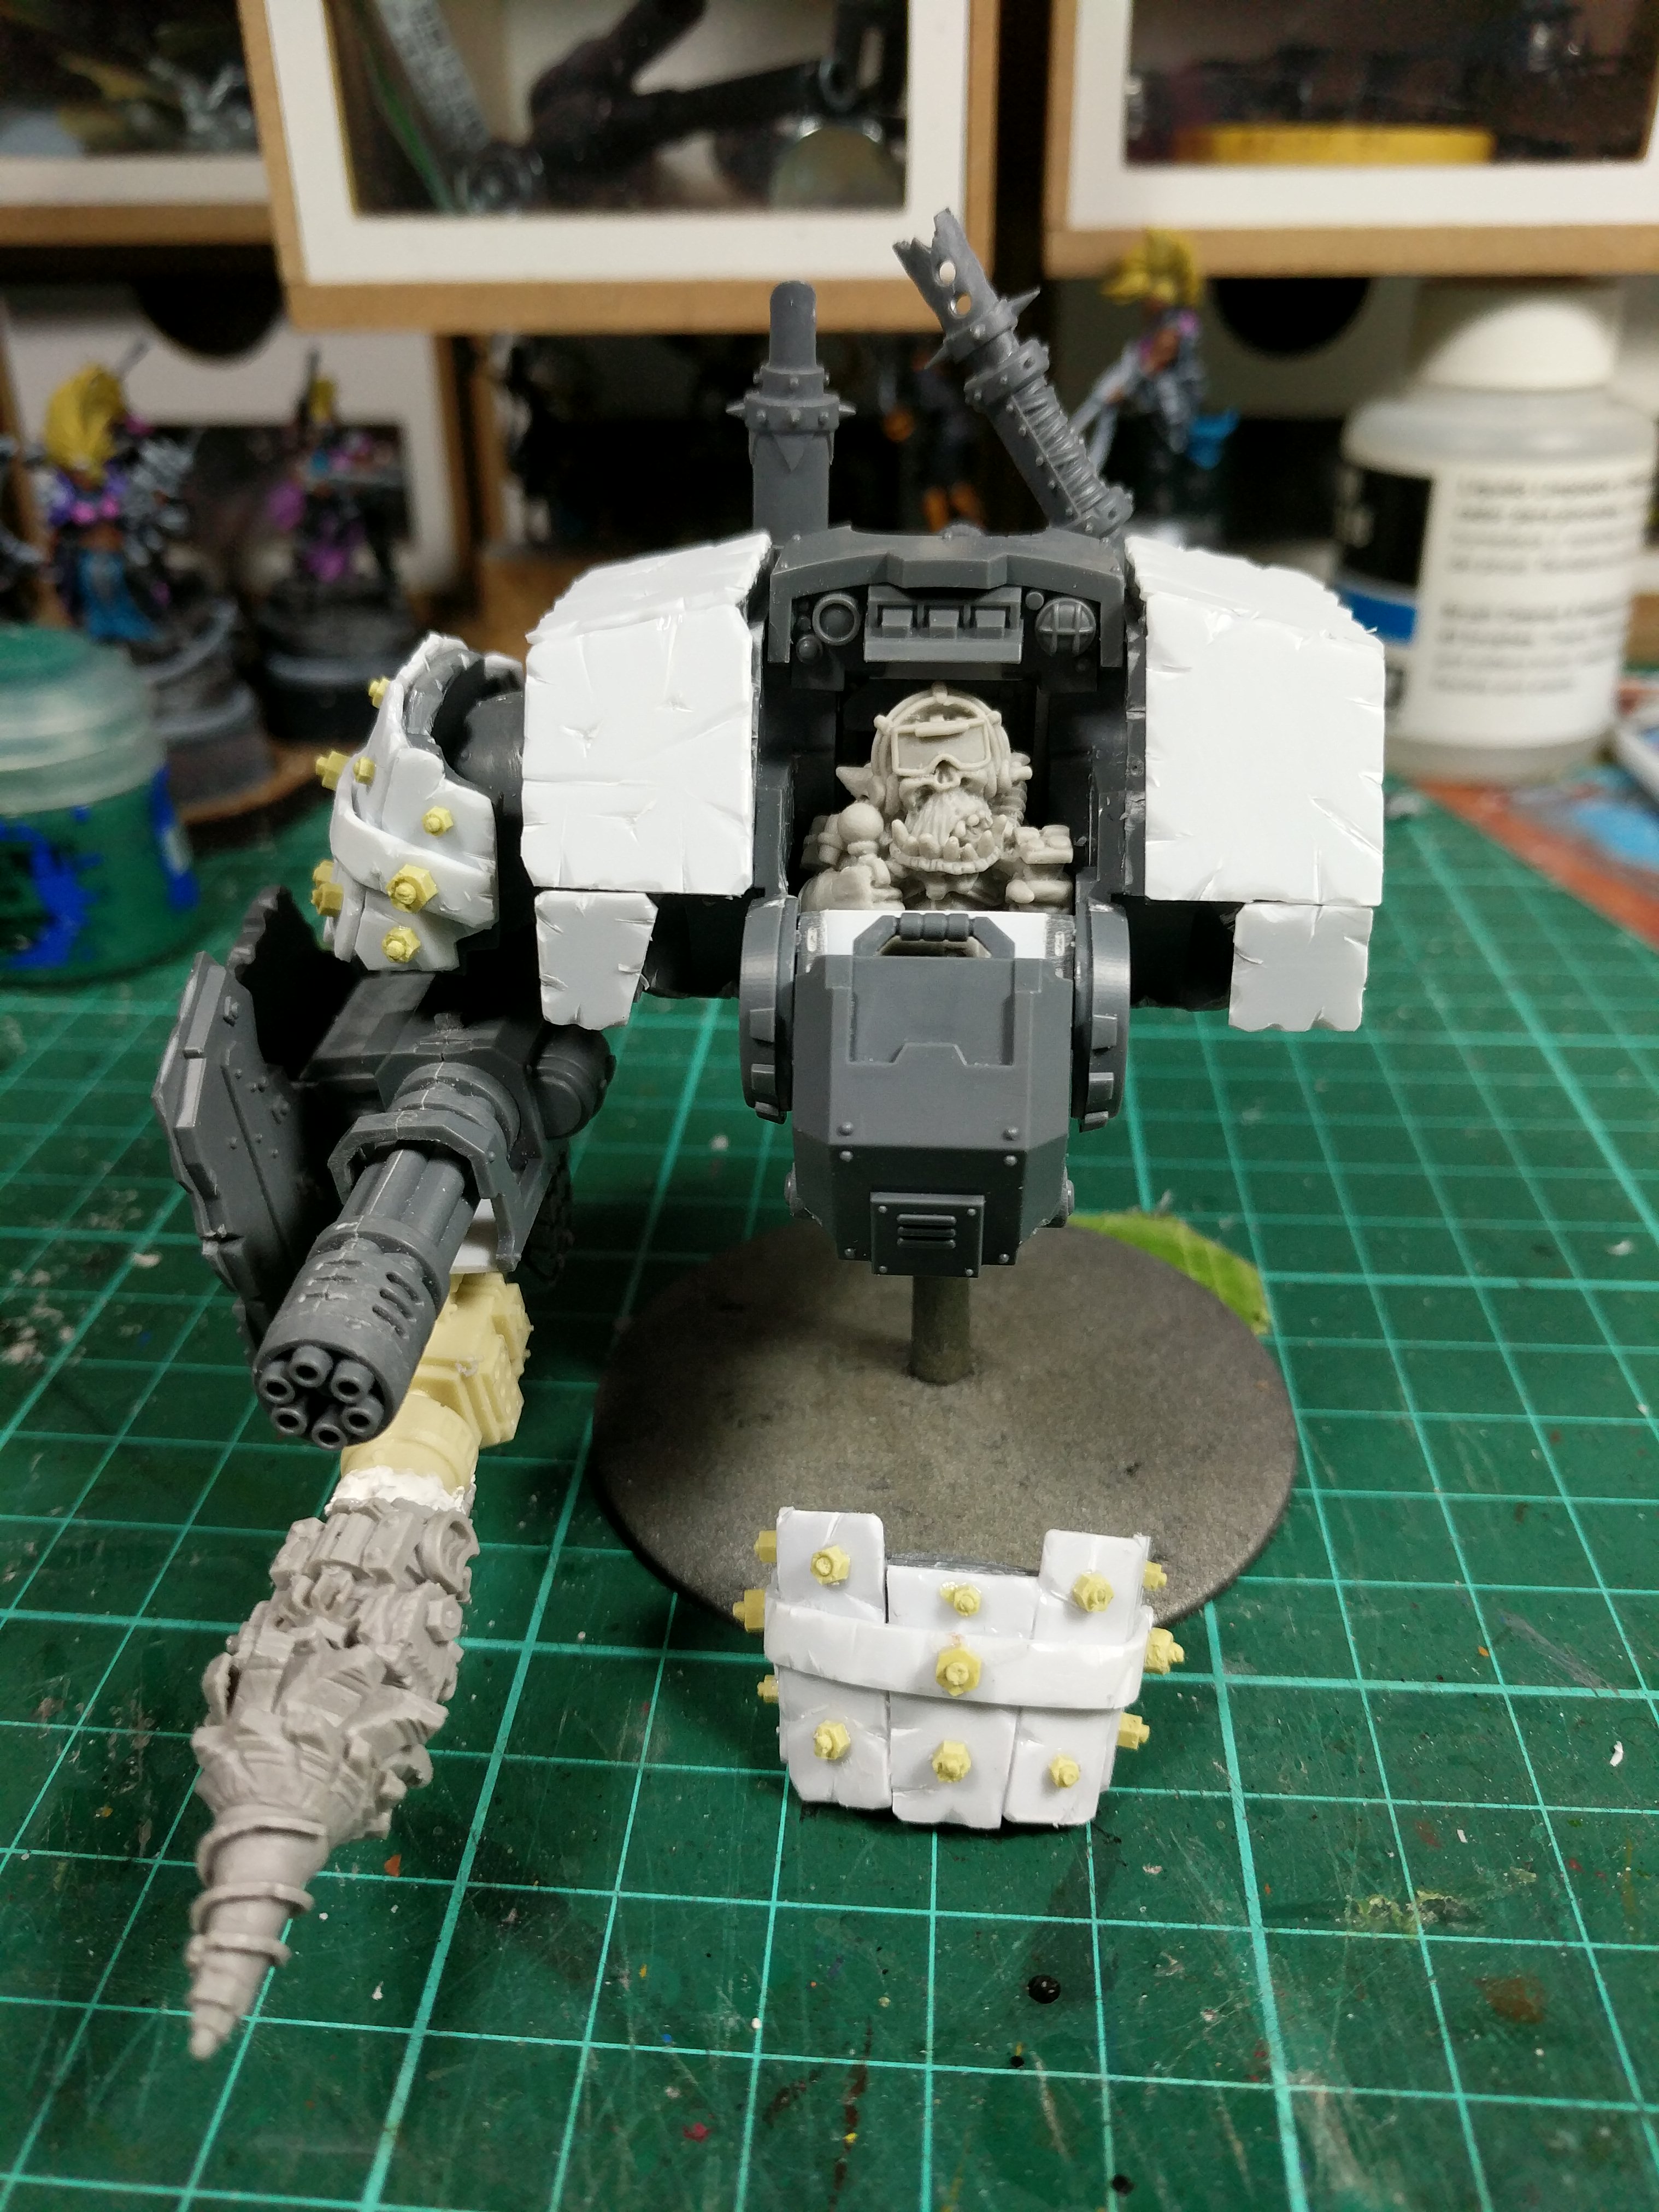
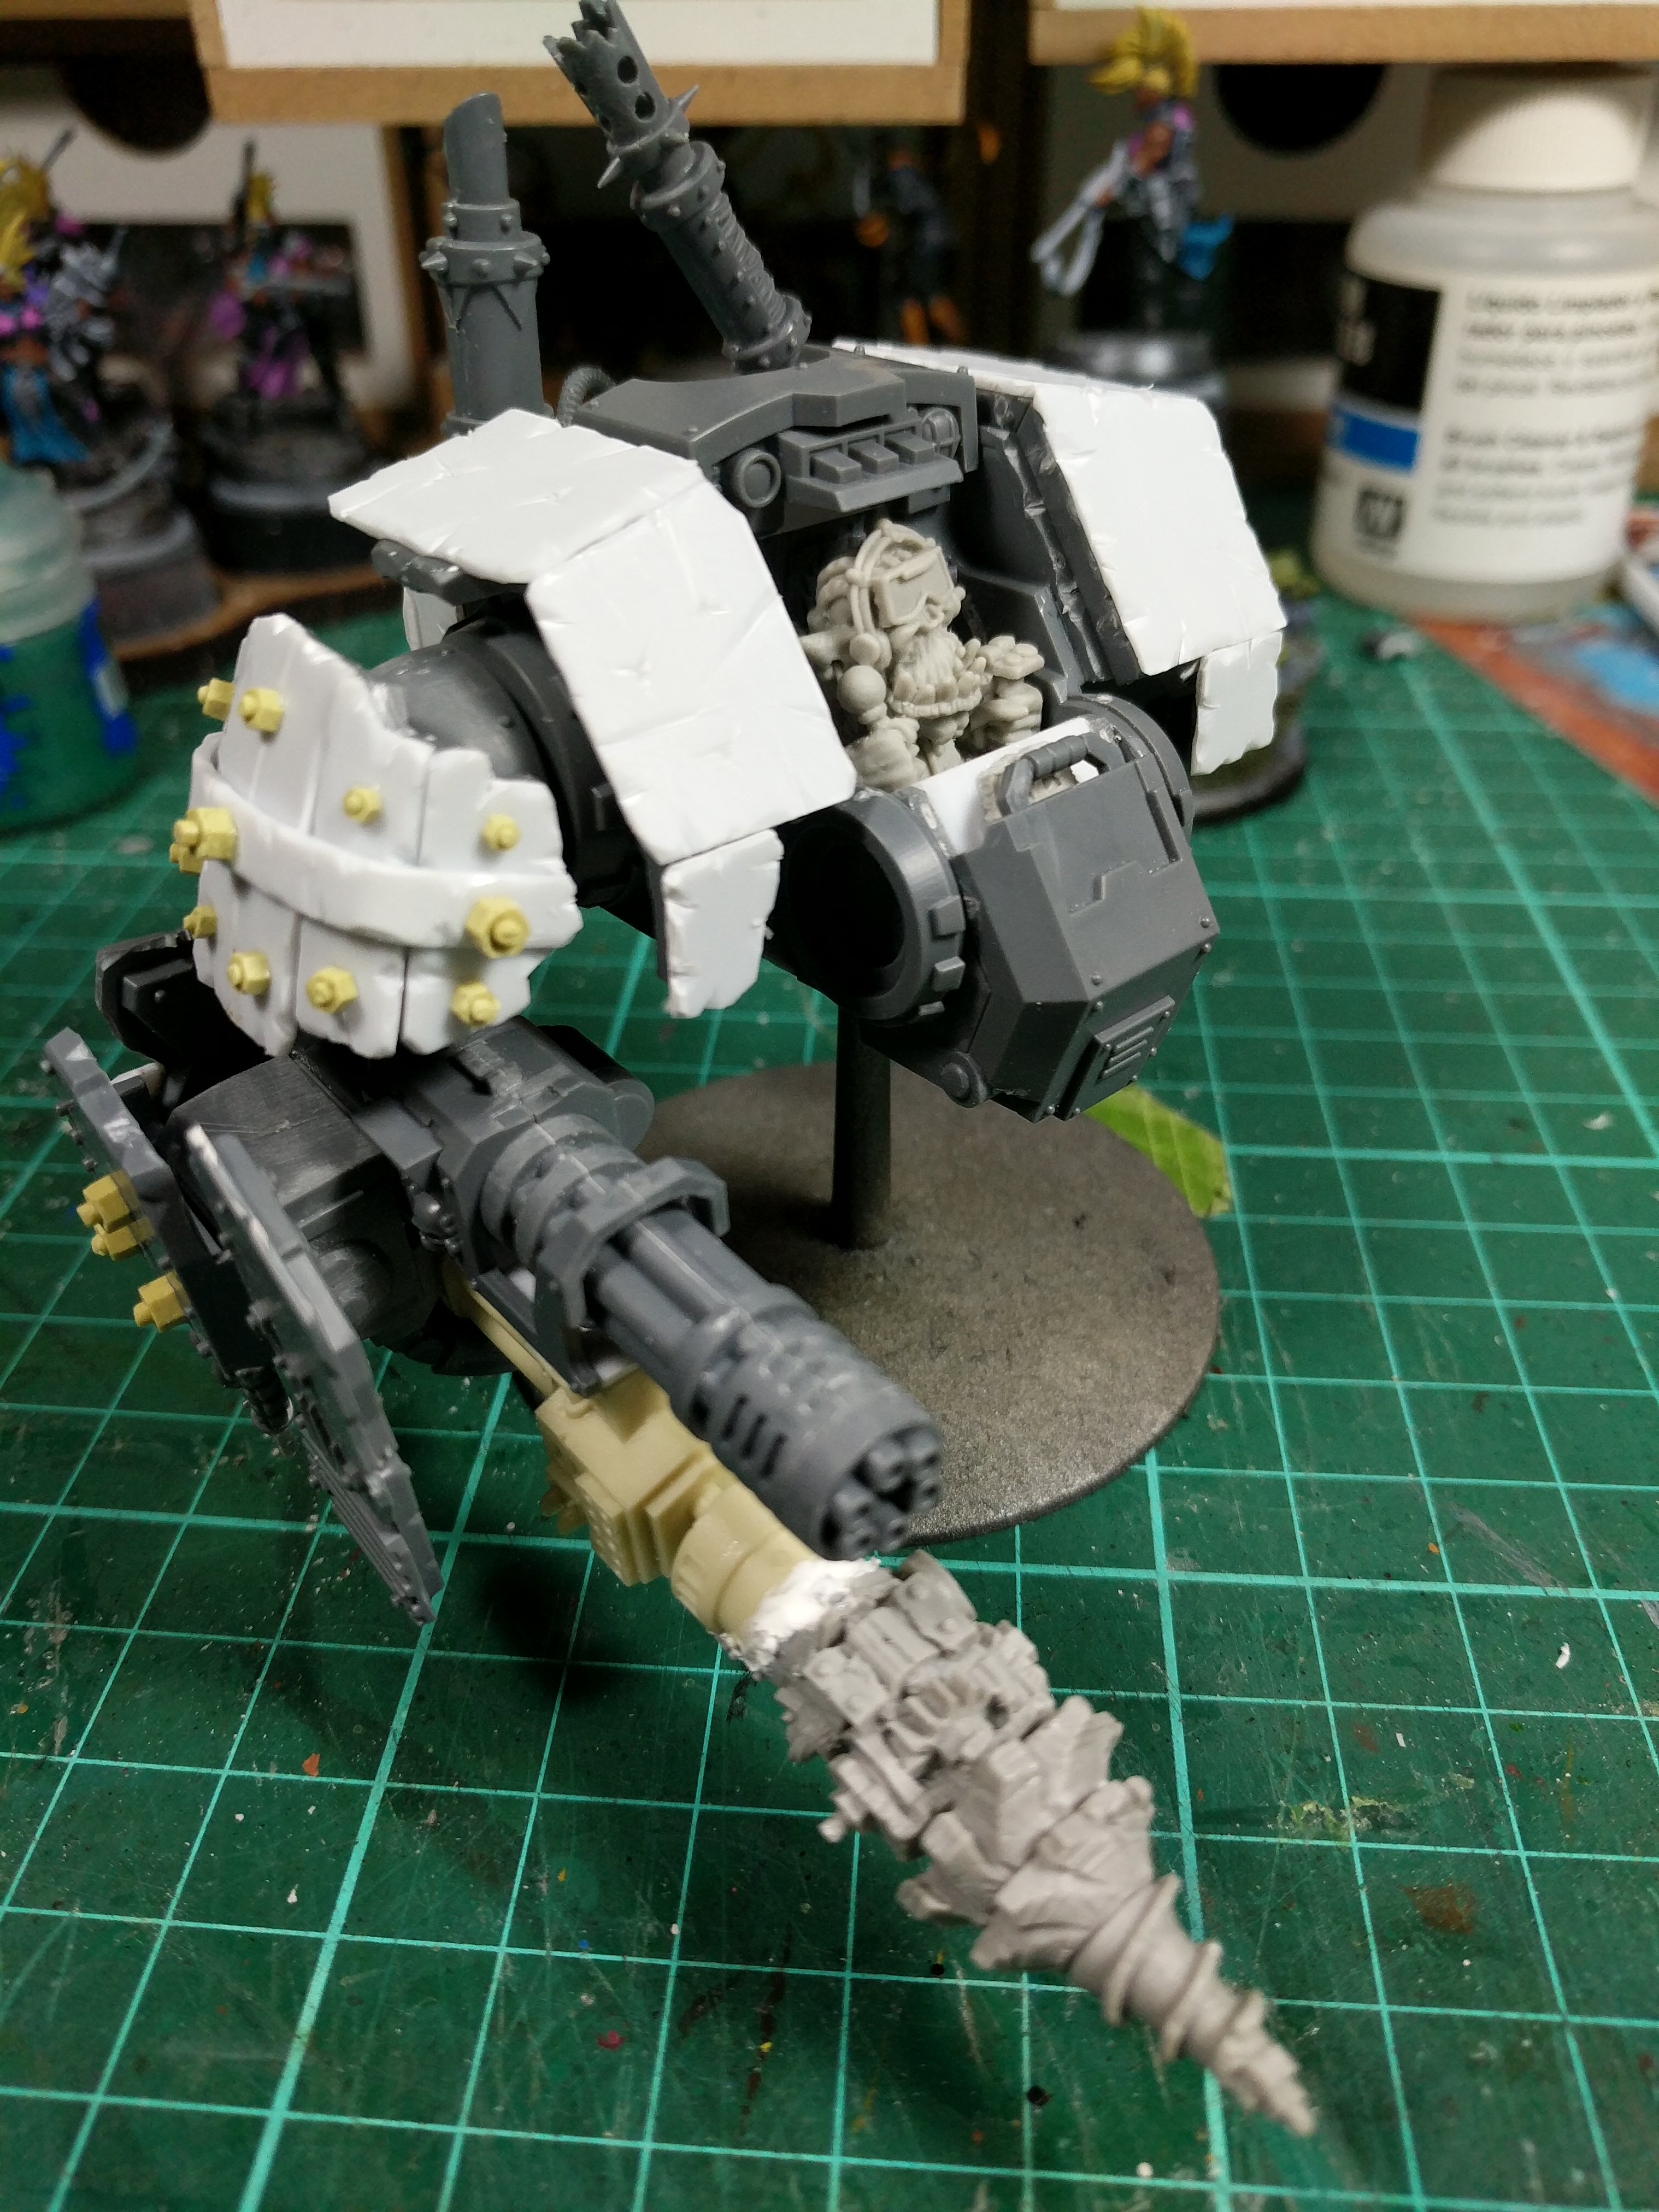
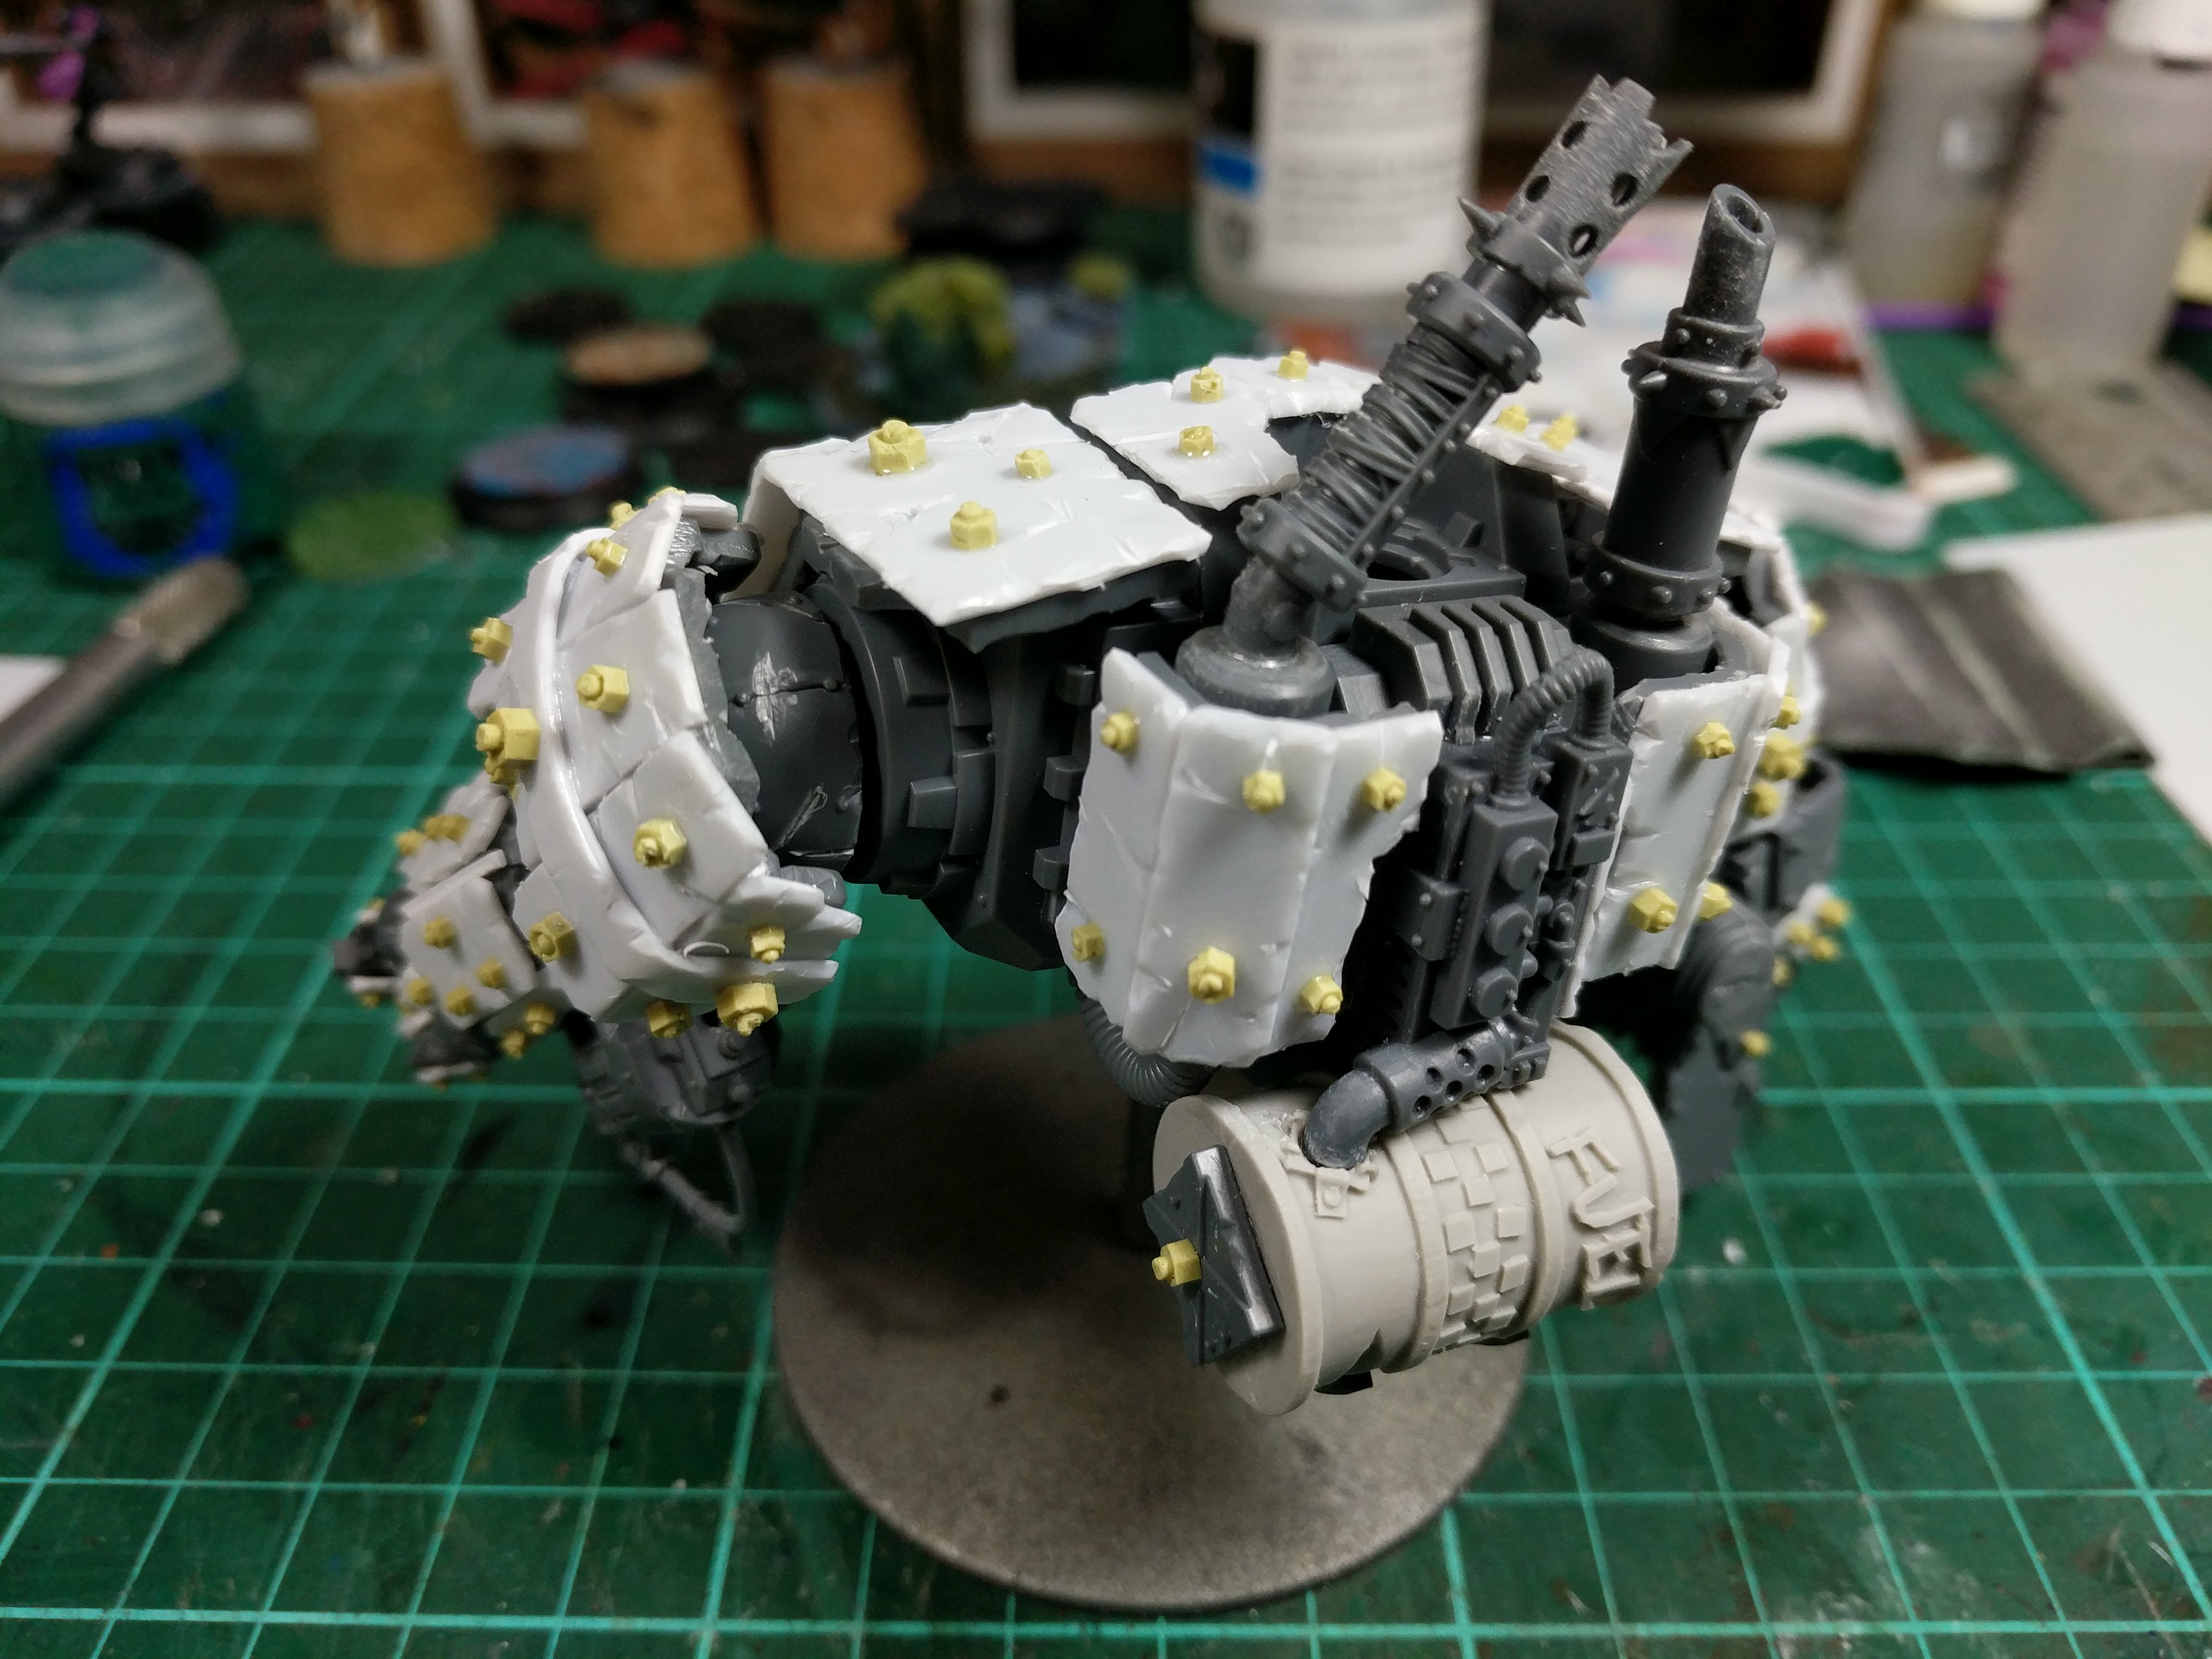
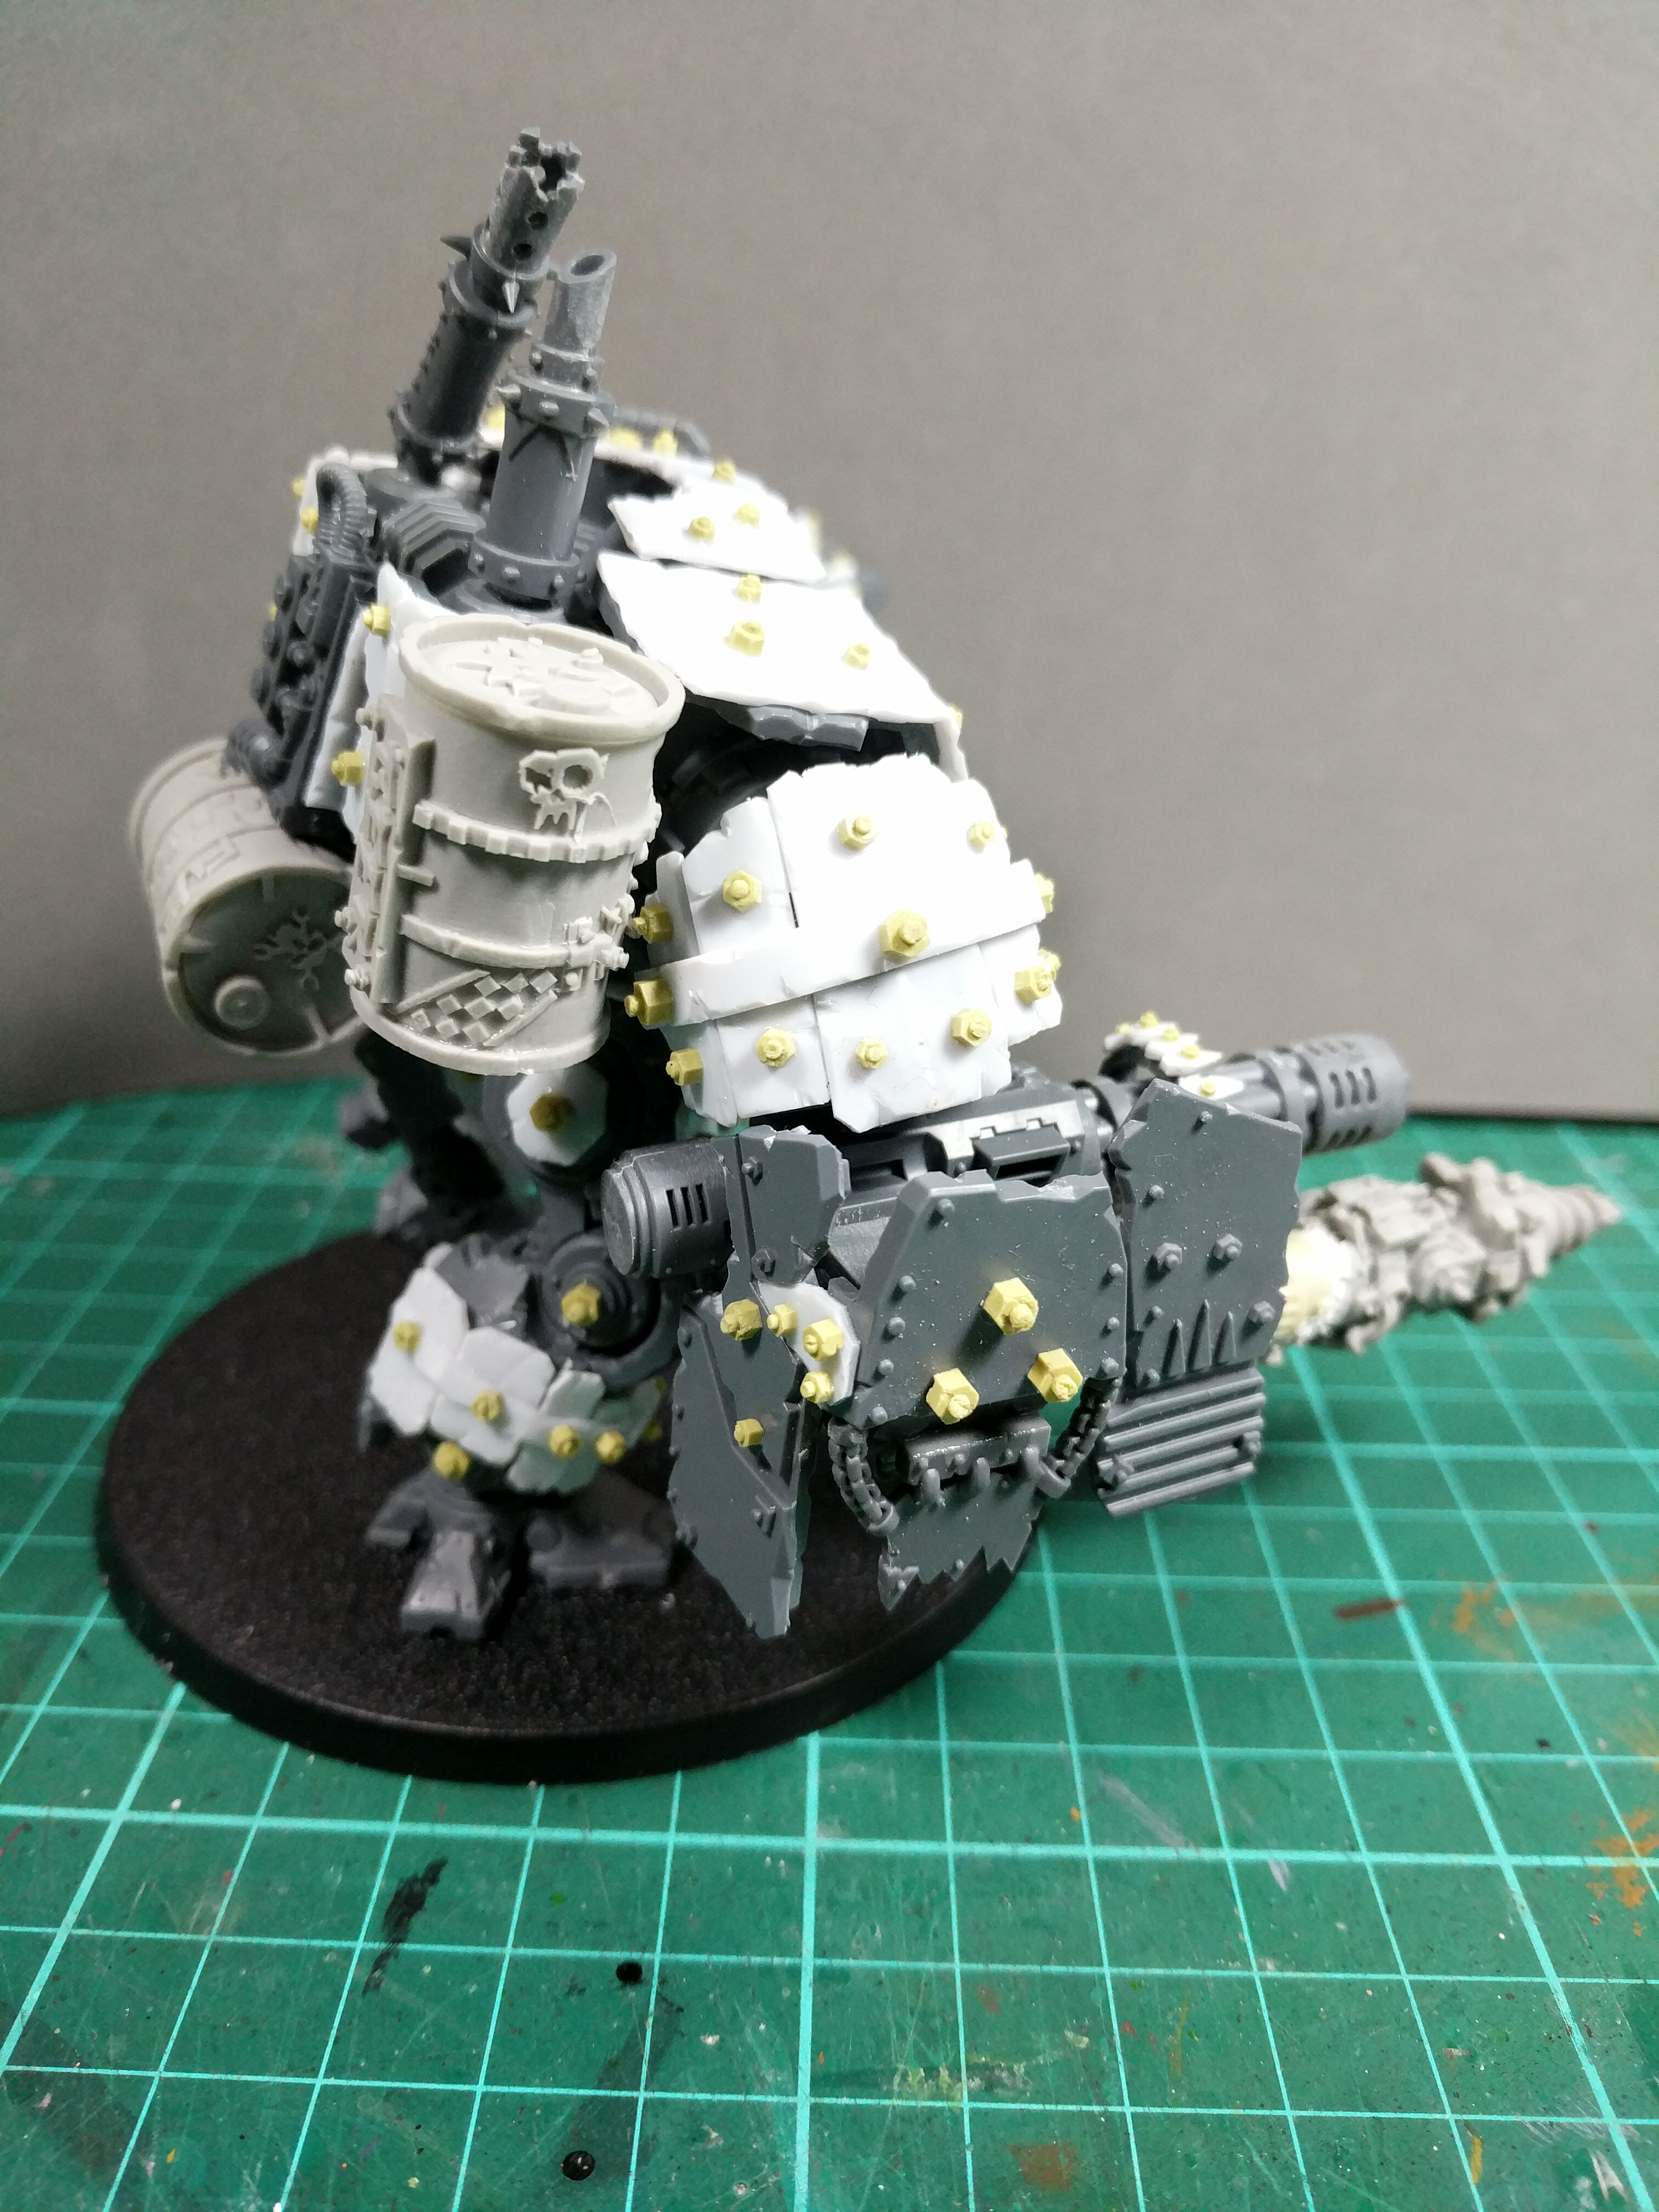
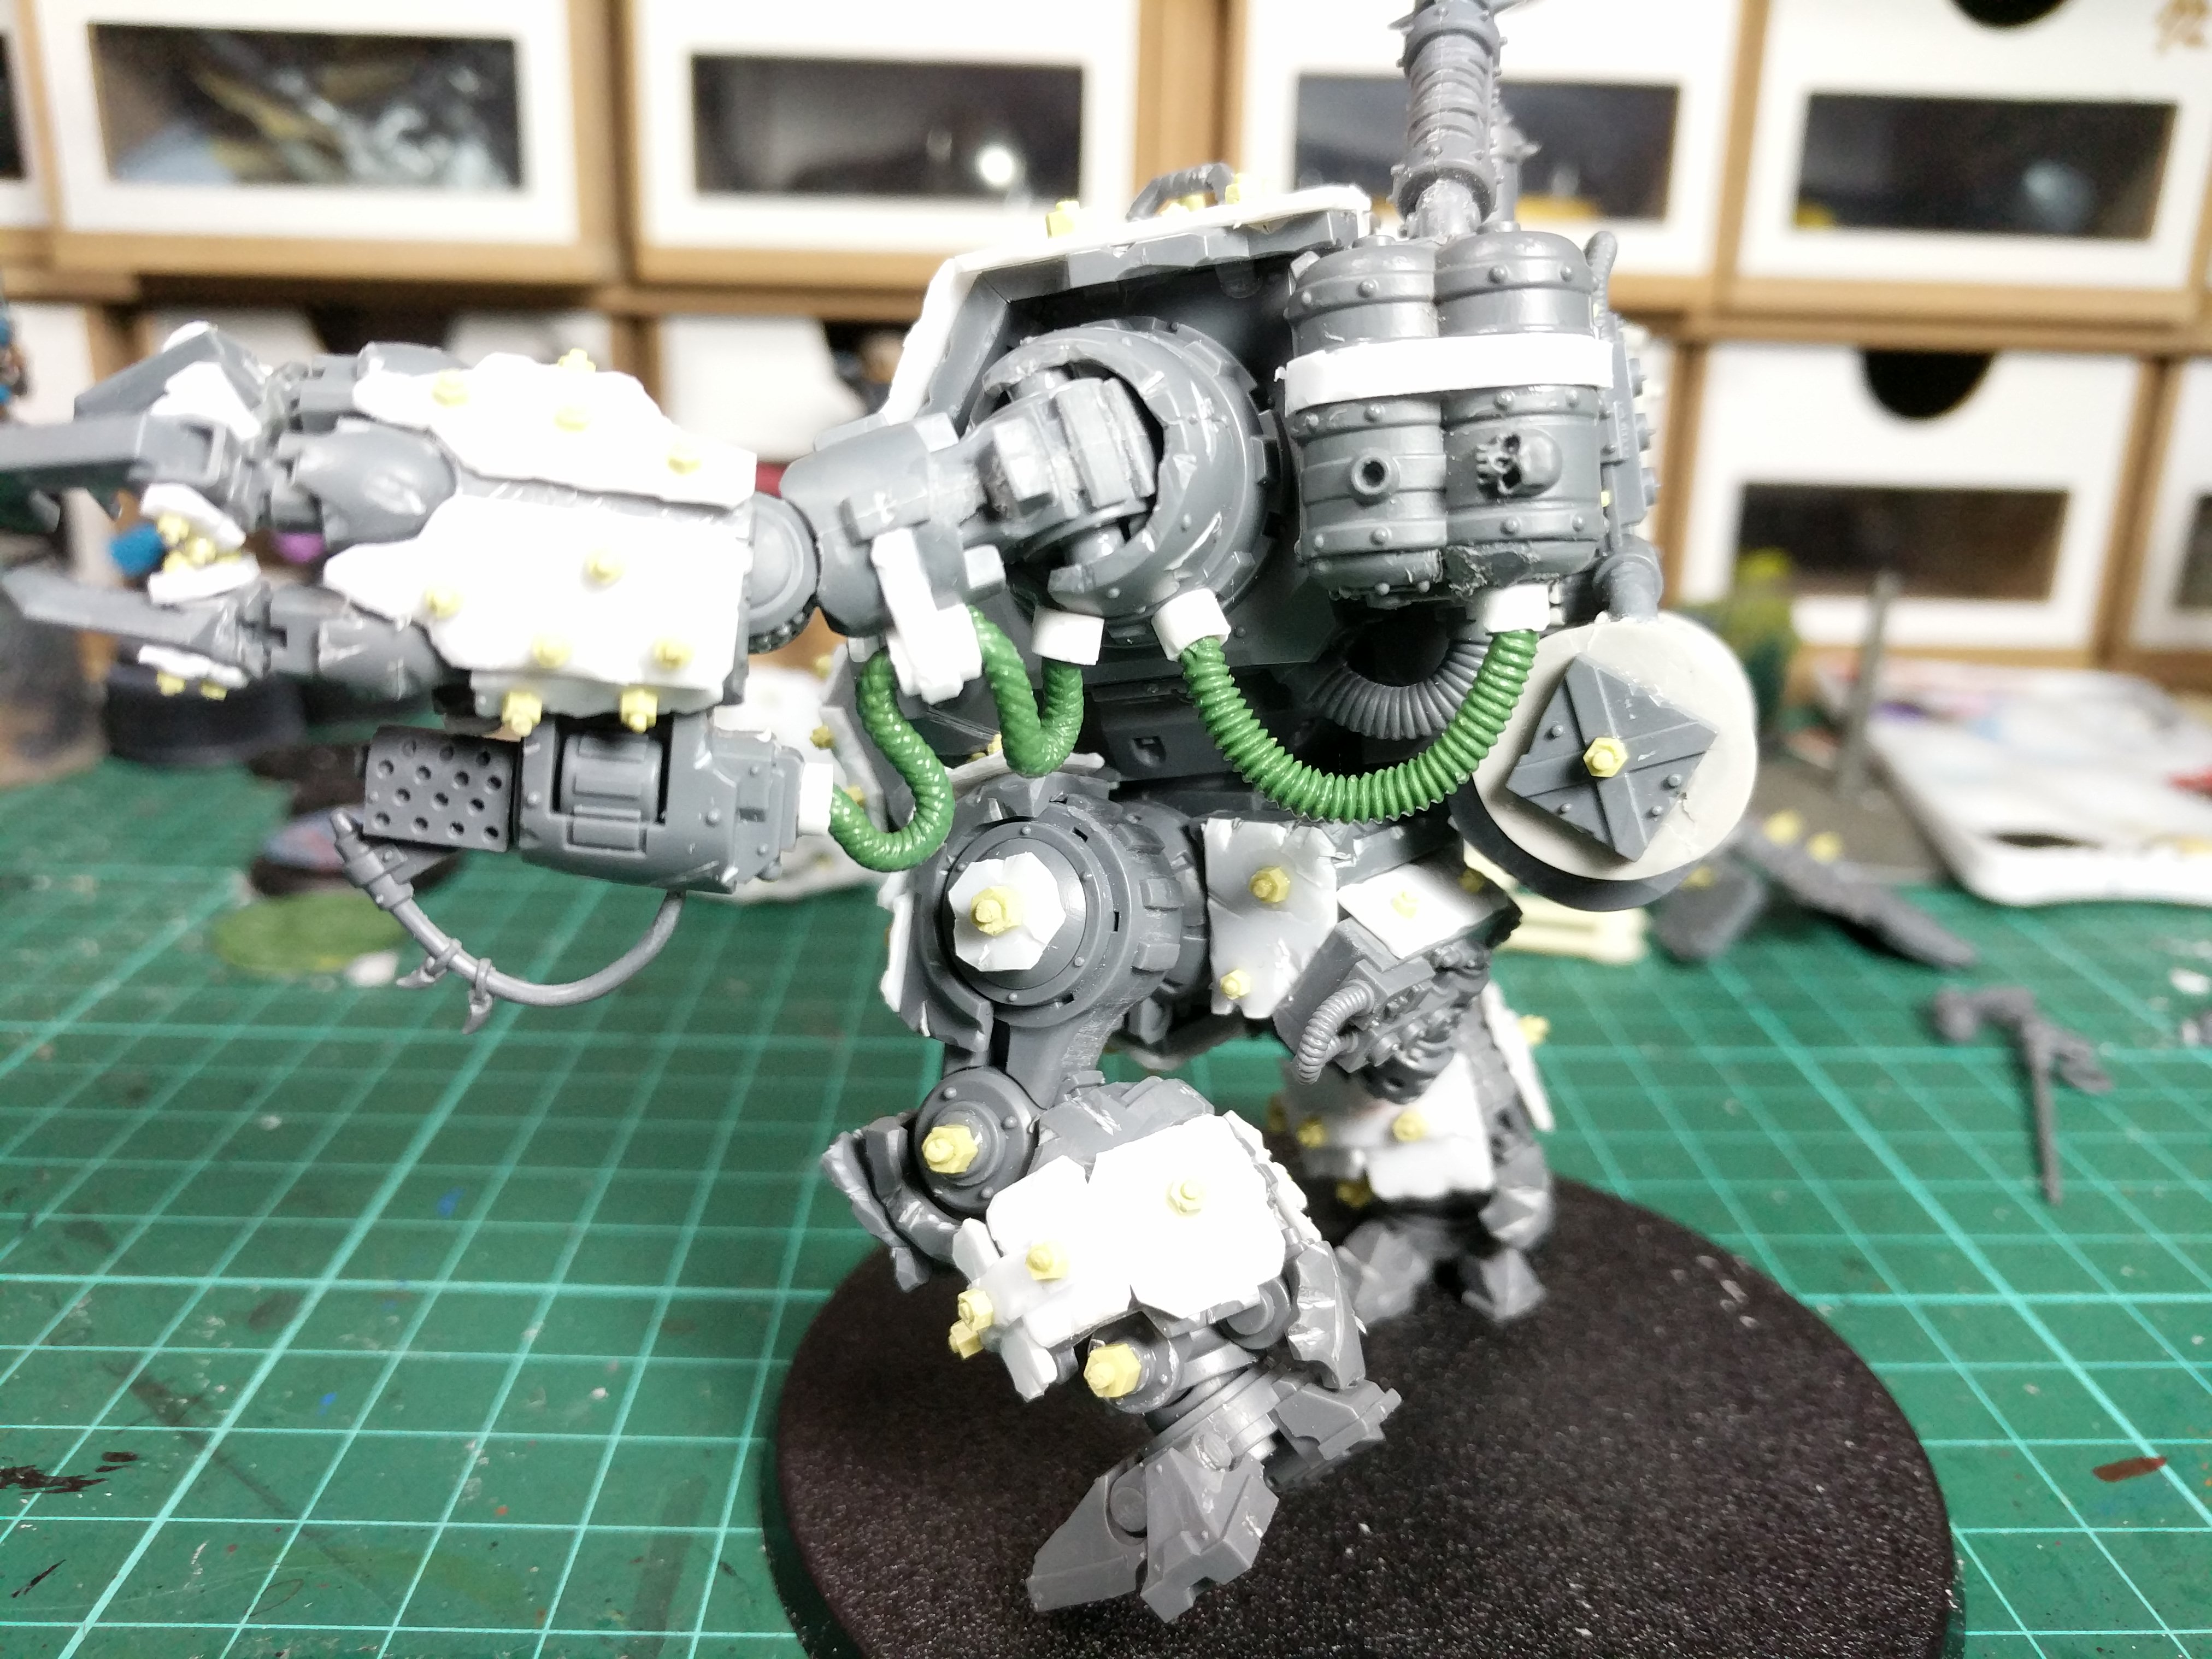
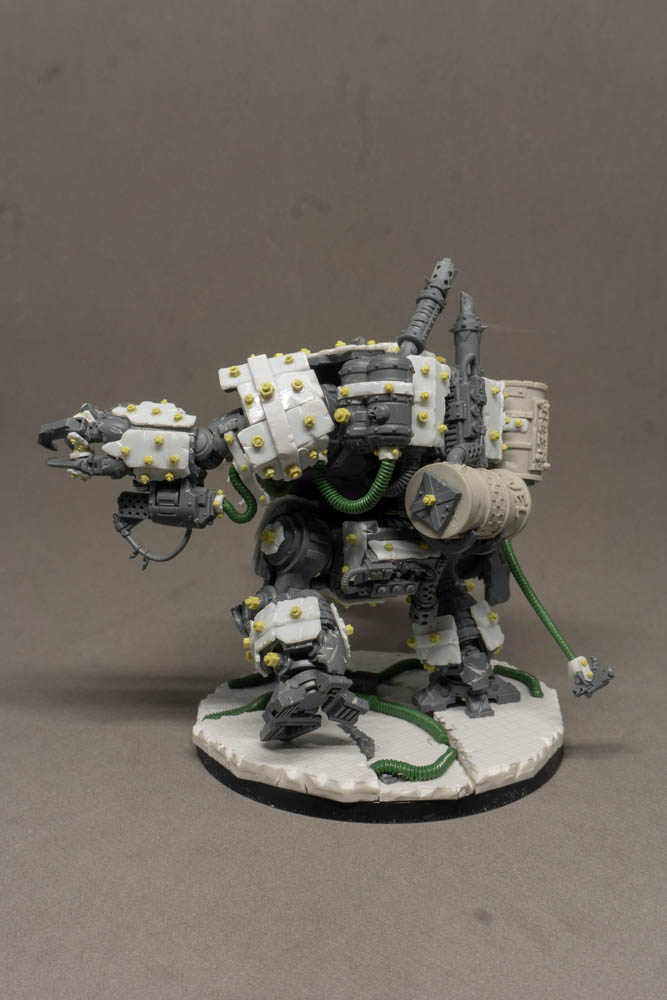
So here we have the first pictures with the gun arm just about finished and some additional plates added to the body.


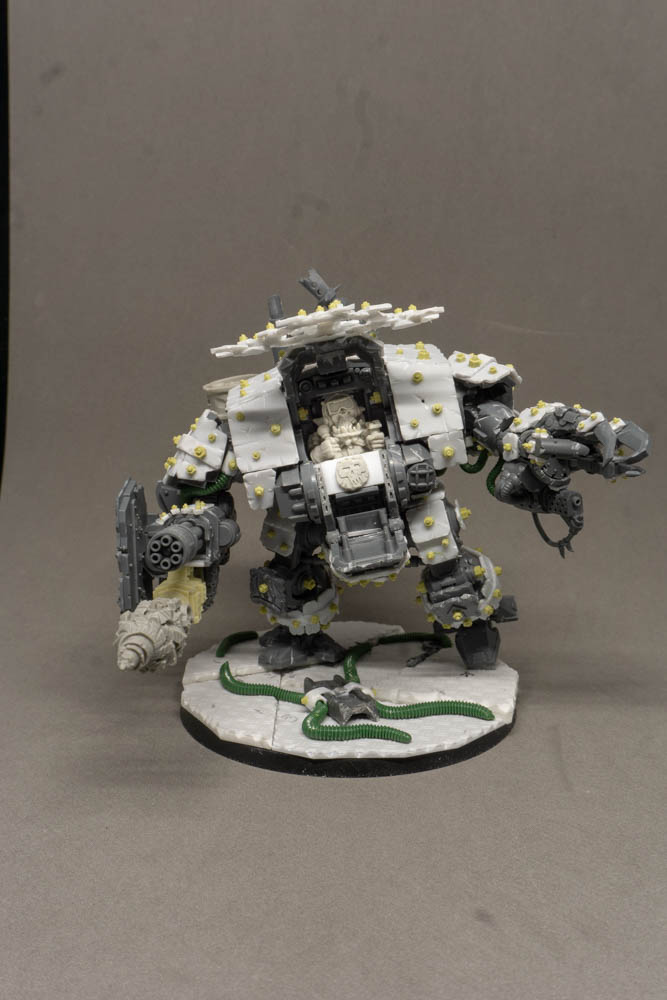
Day 2 Upper body
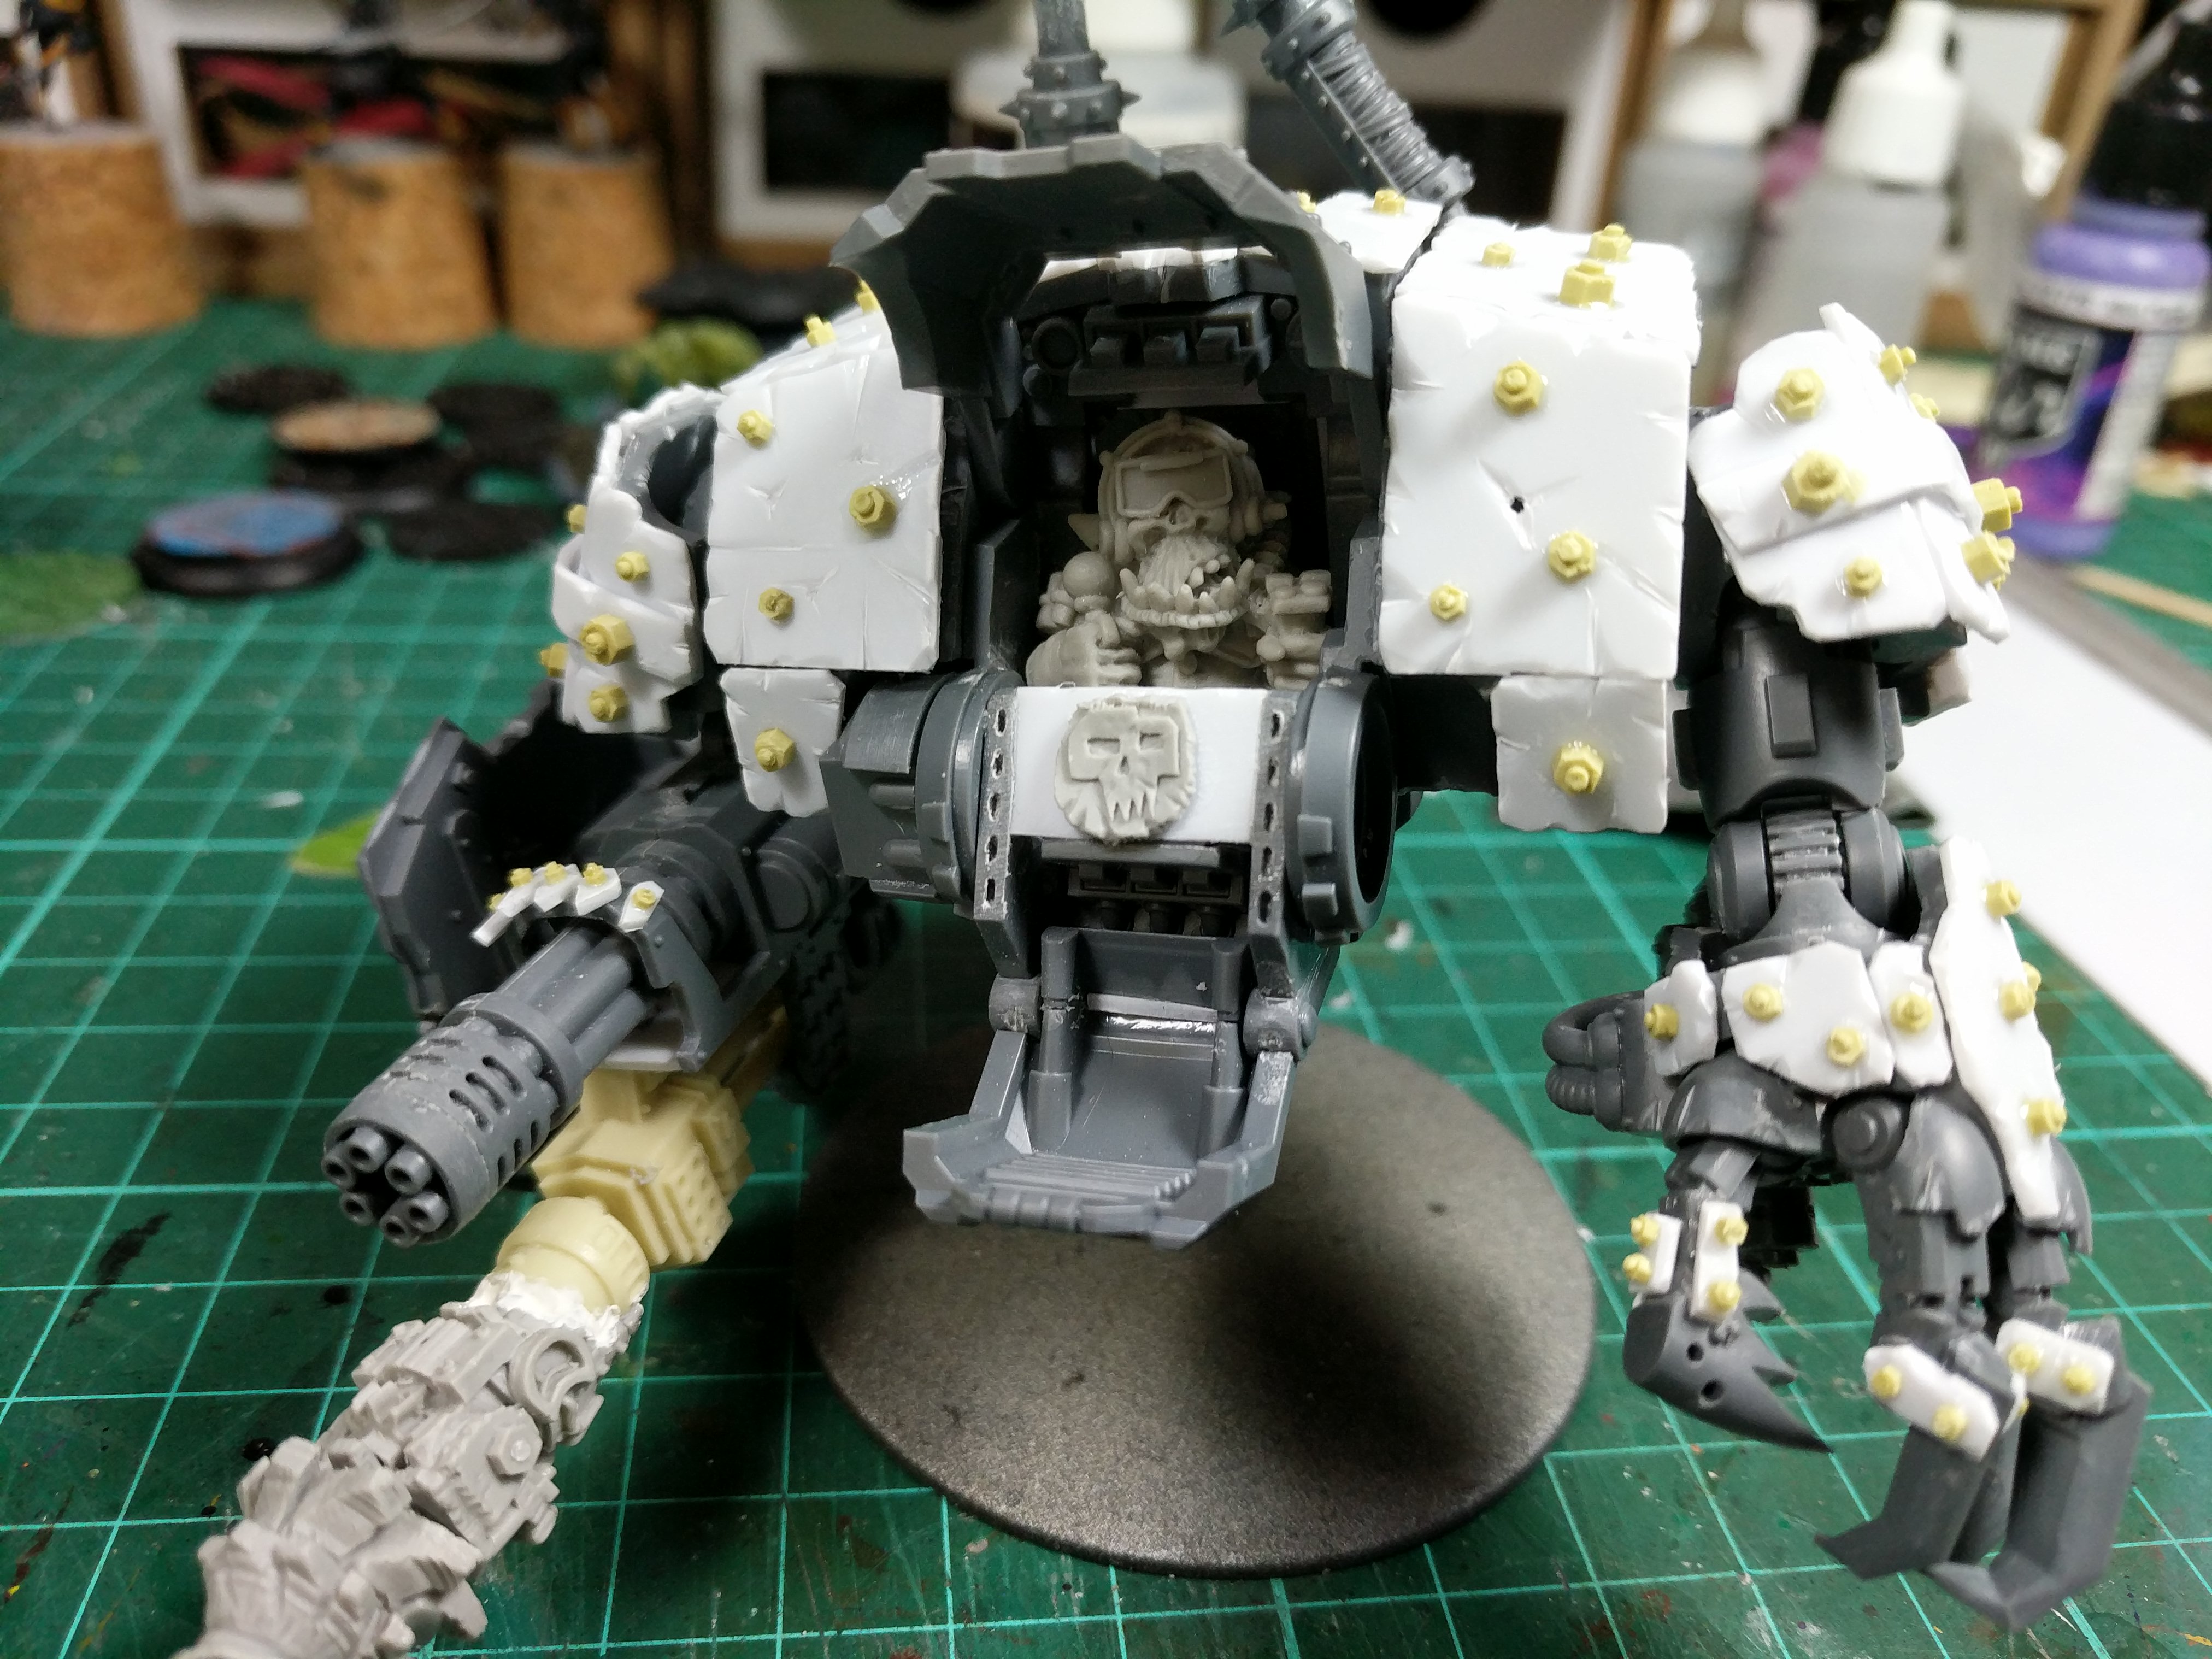
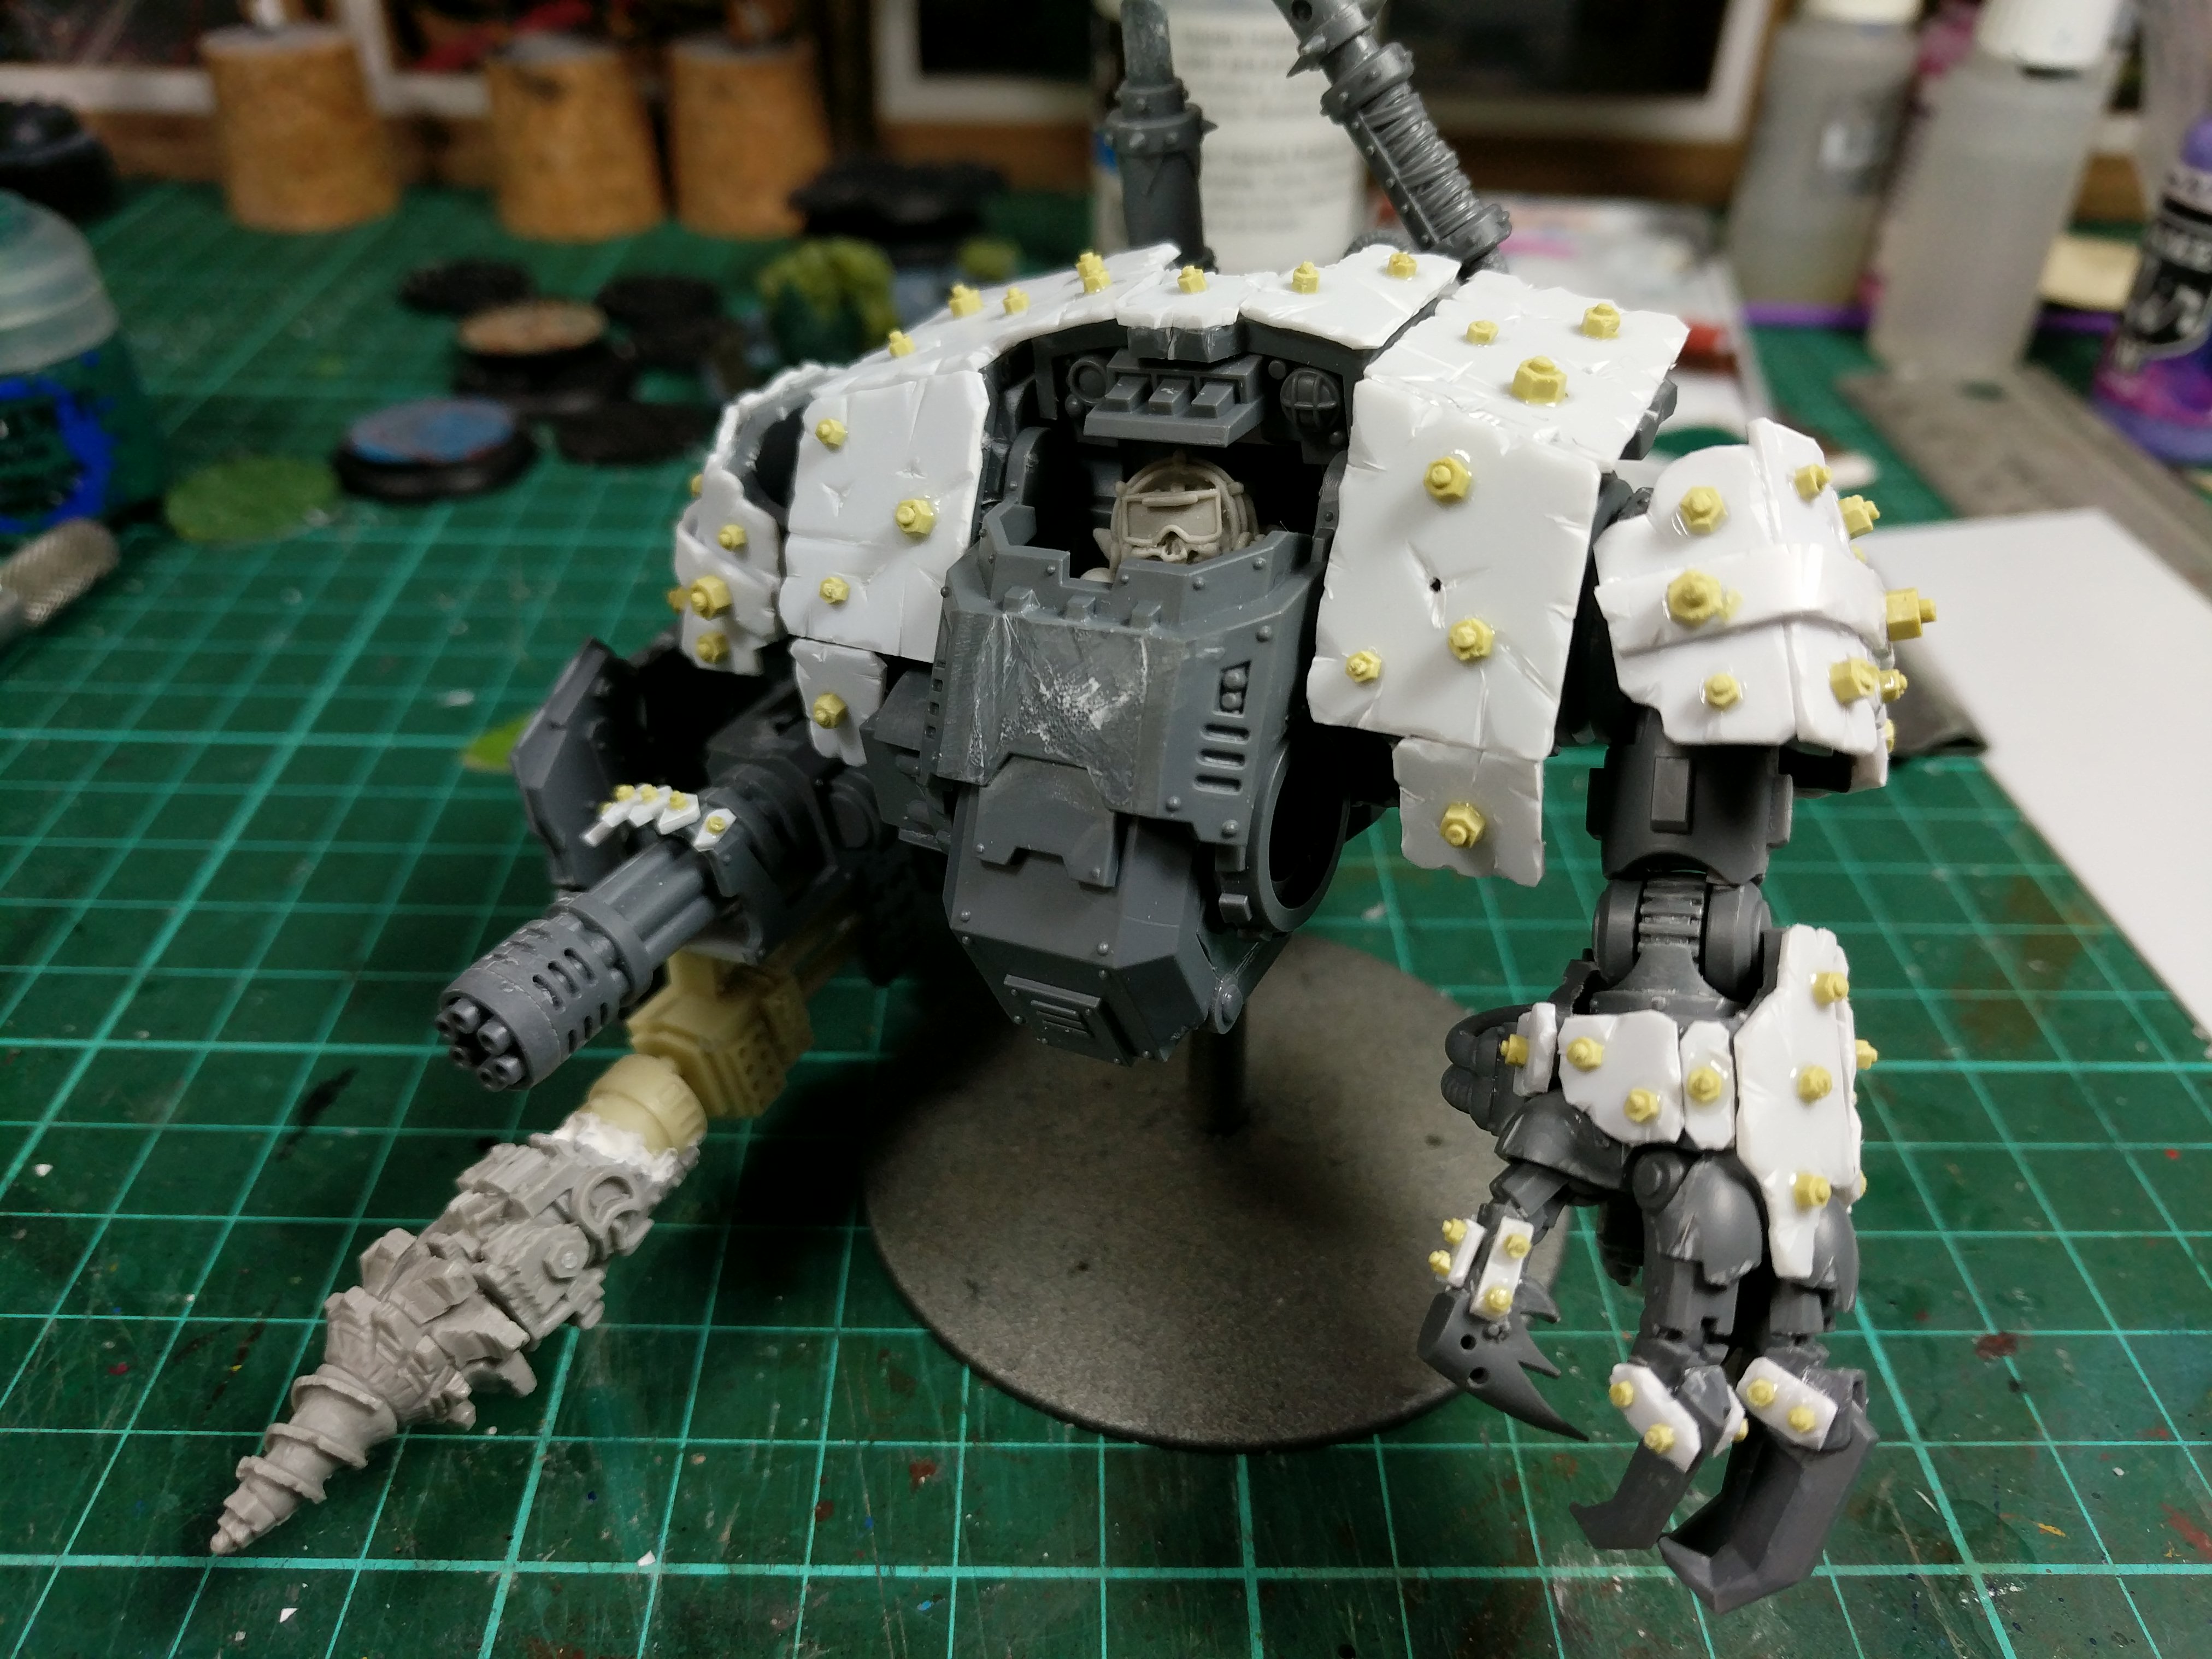
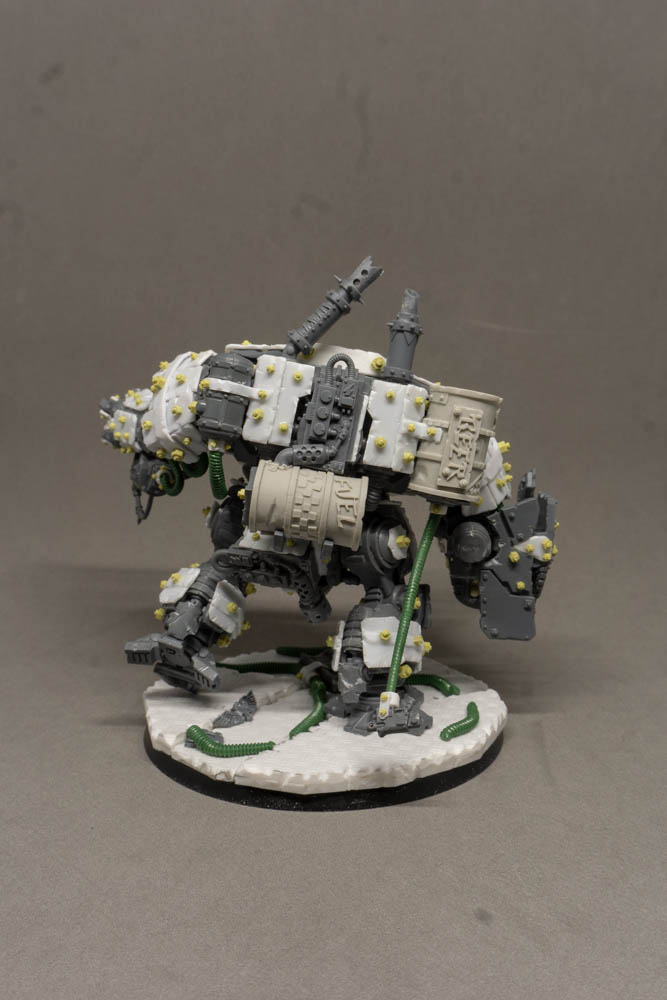
Then we have the close combat arm completed along with the engine. I’ve also got most of the bolts added at this stage so most of the upper body is complete. I still need to think of what to do with the front as it’s not got enough armour yet but I haven’t decided if I’m going plane or fancy yet.

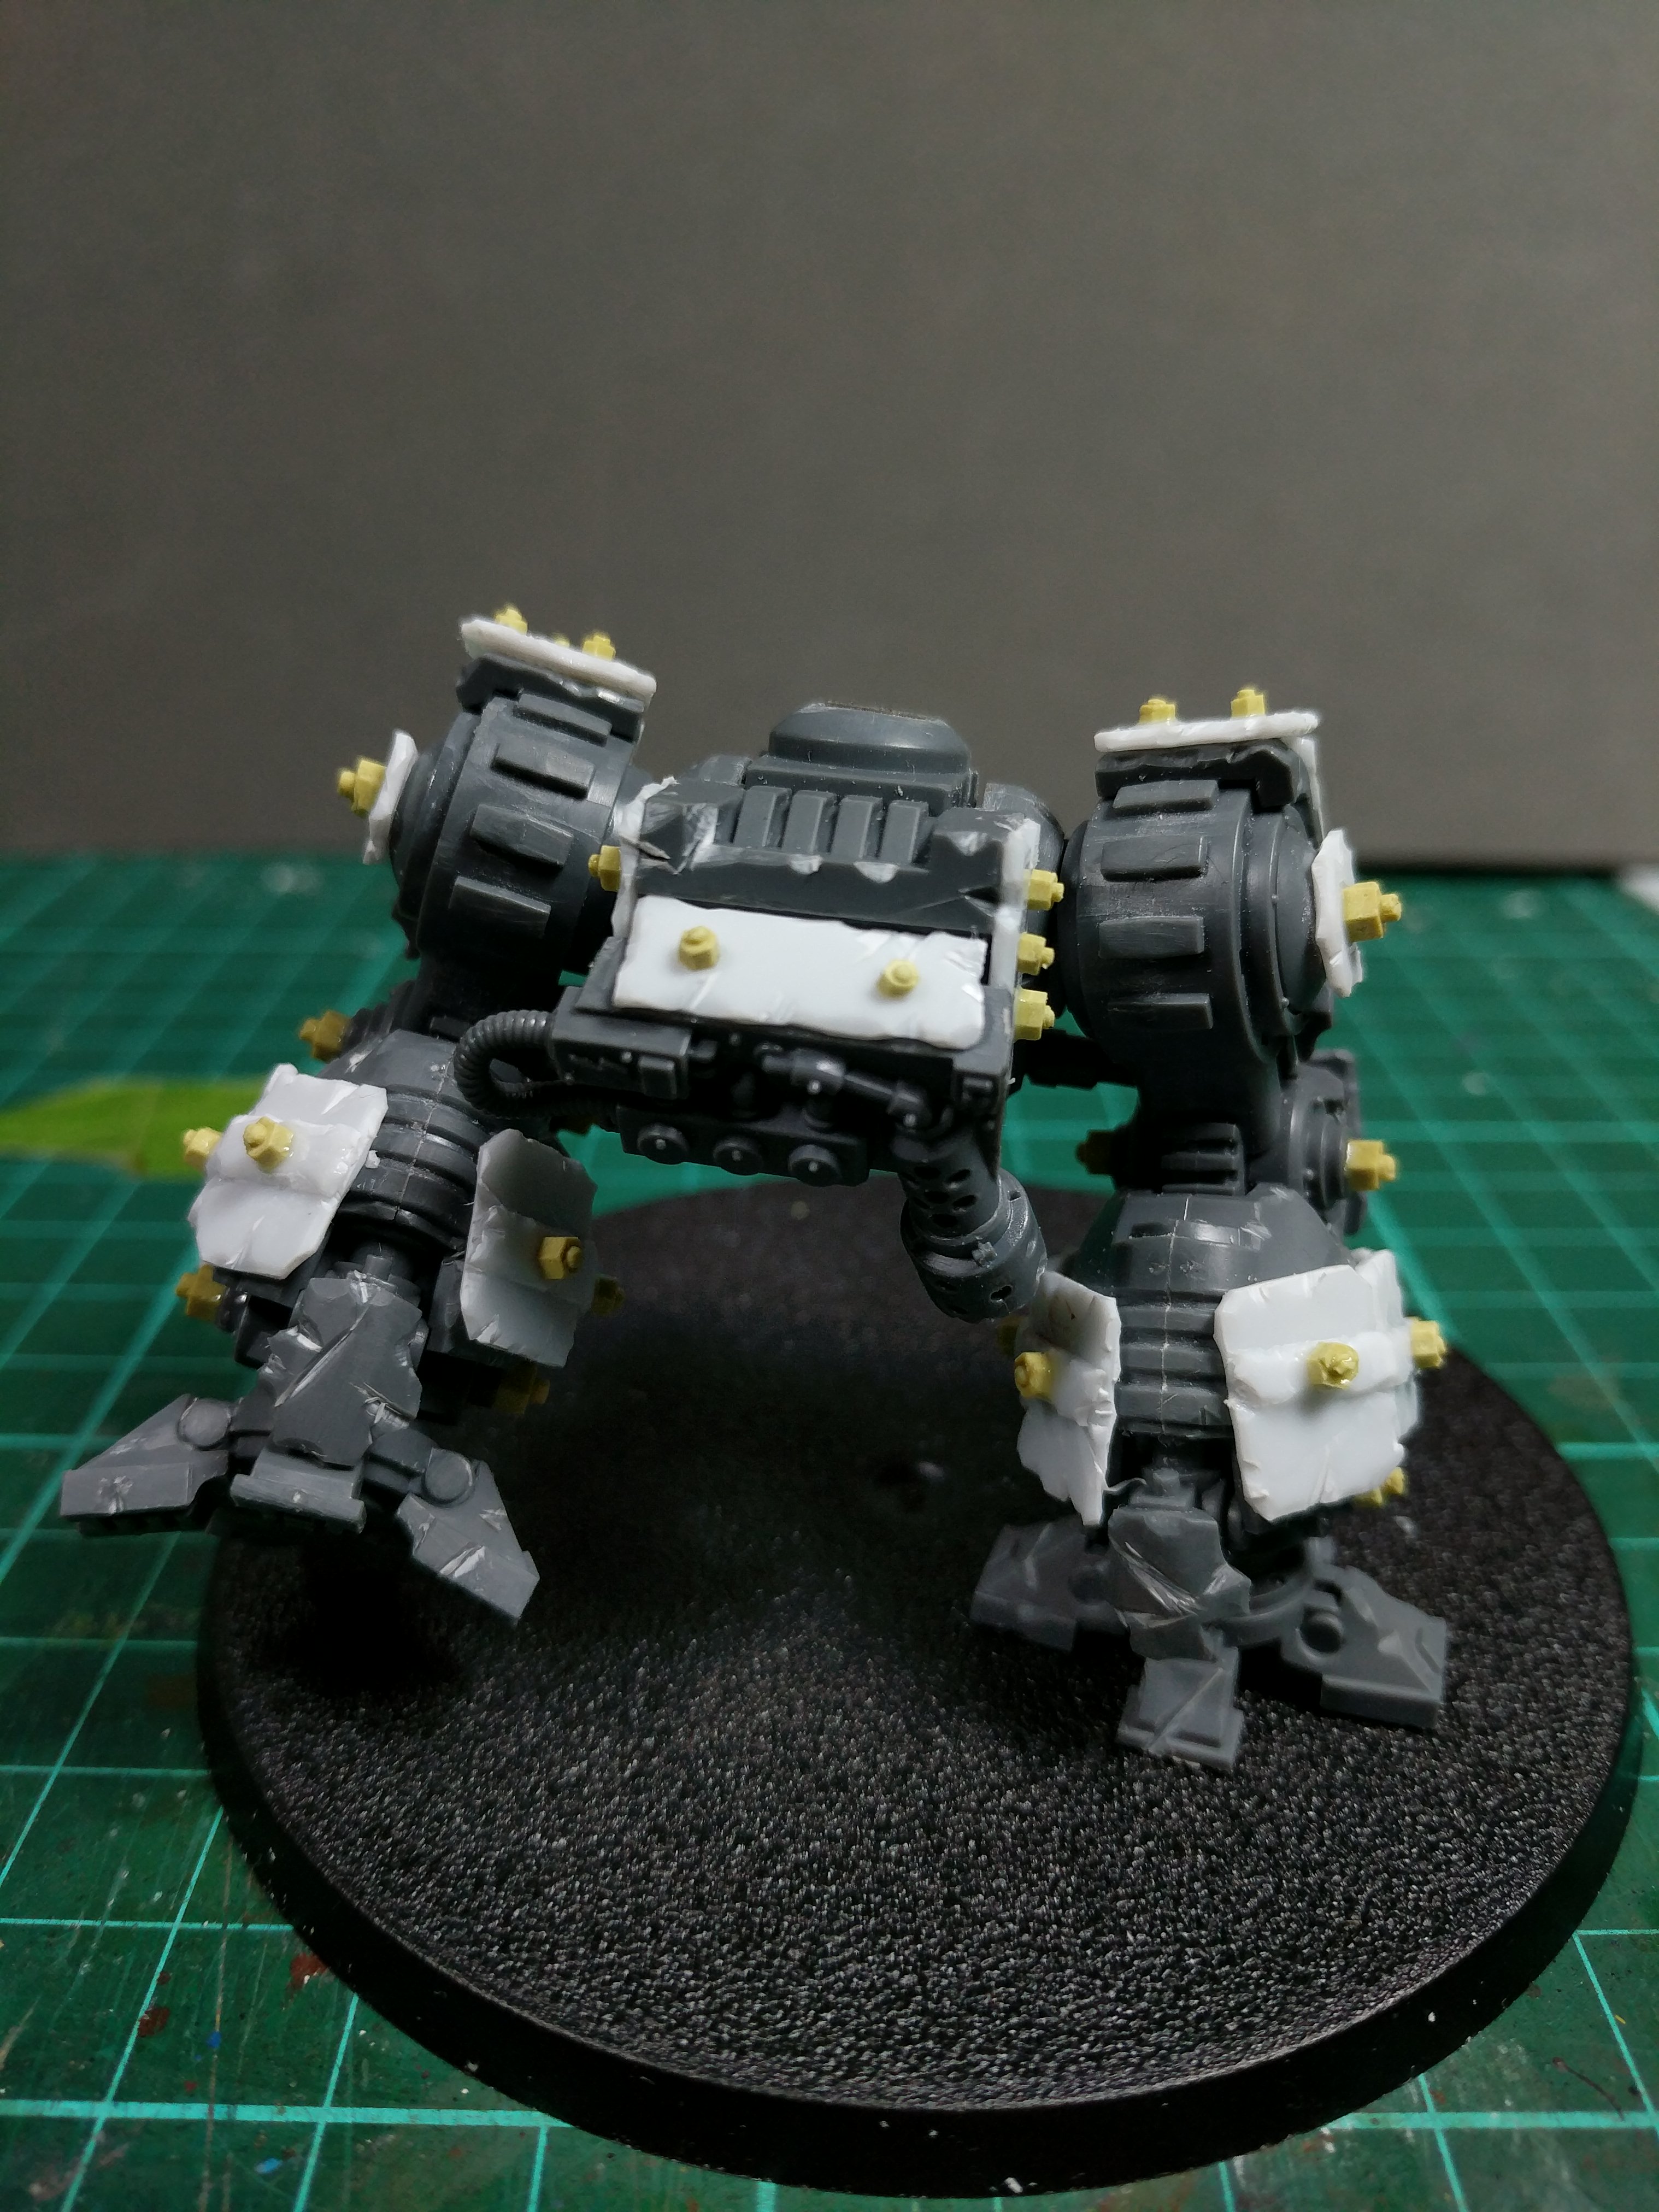
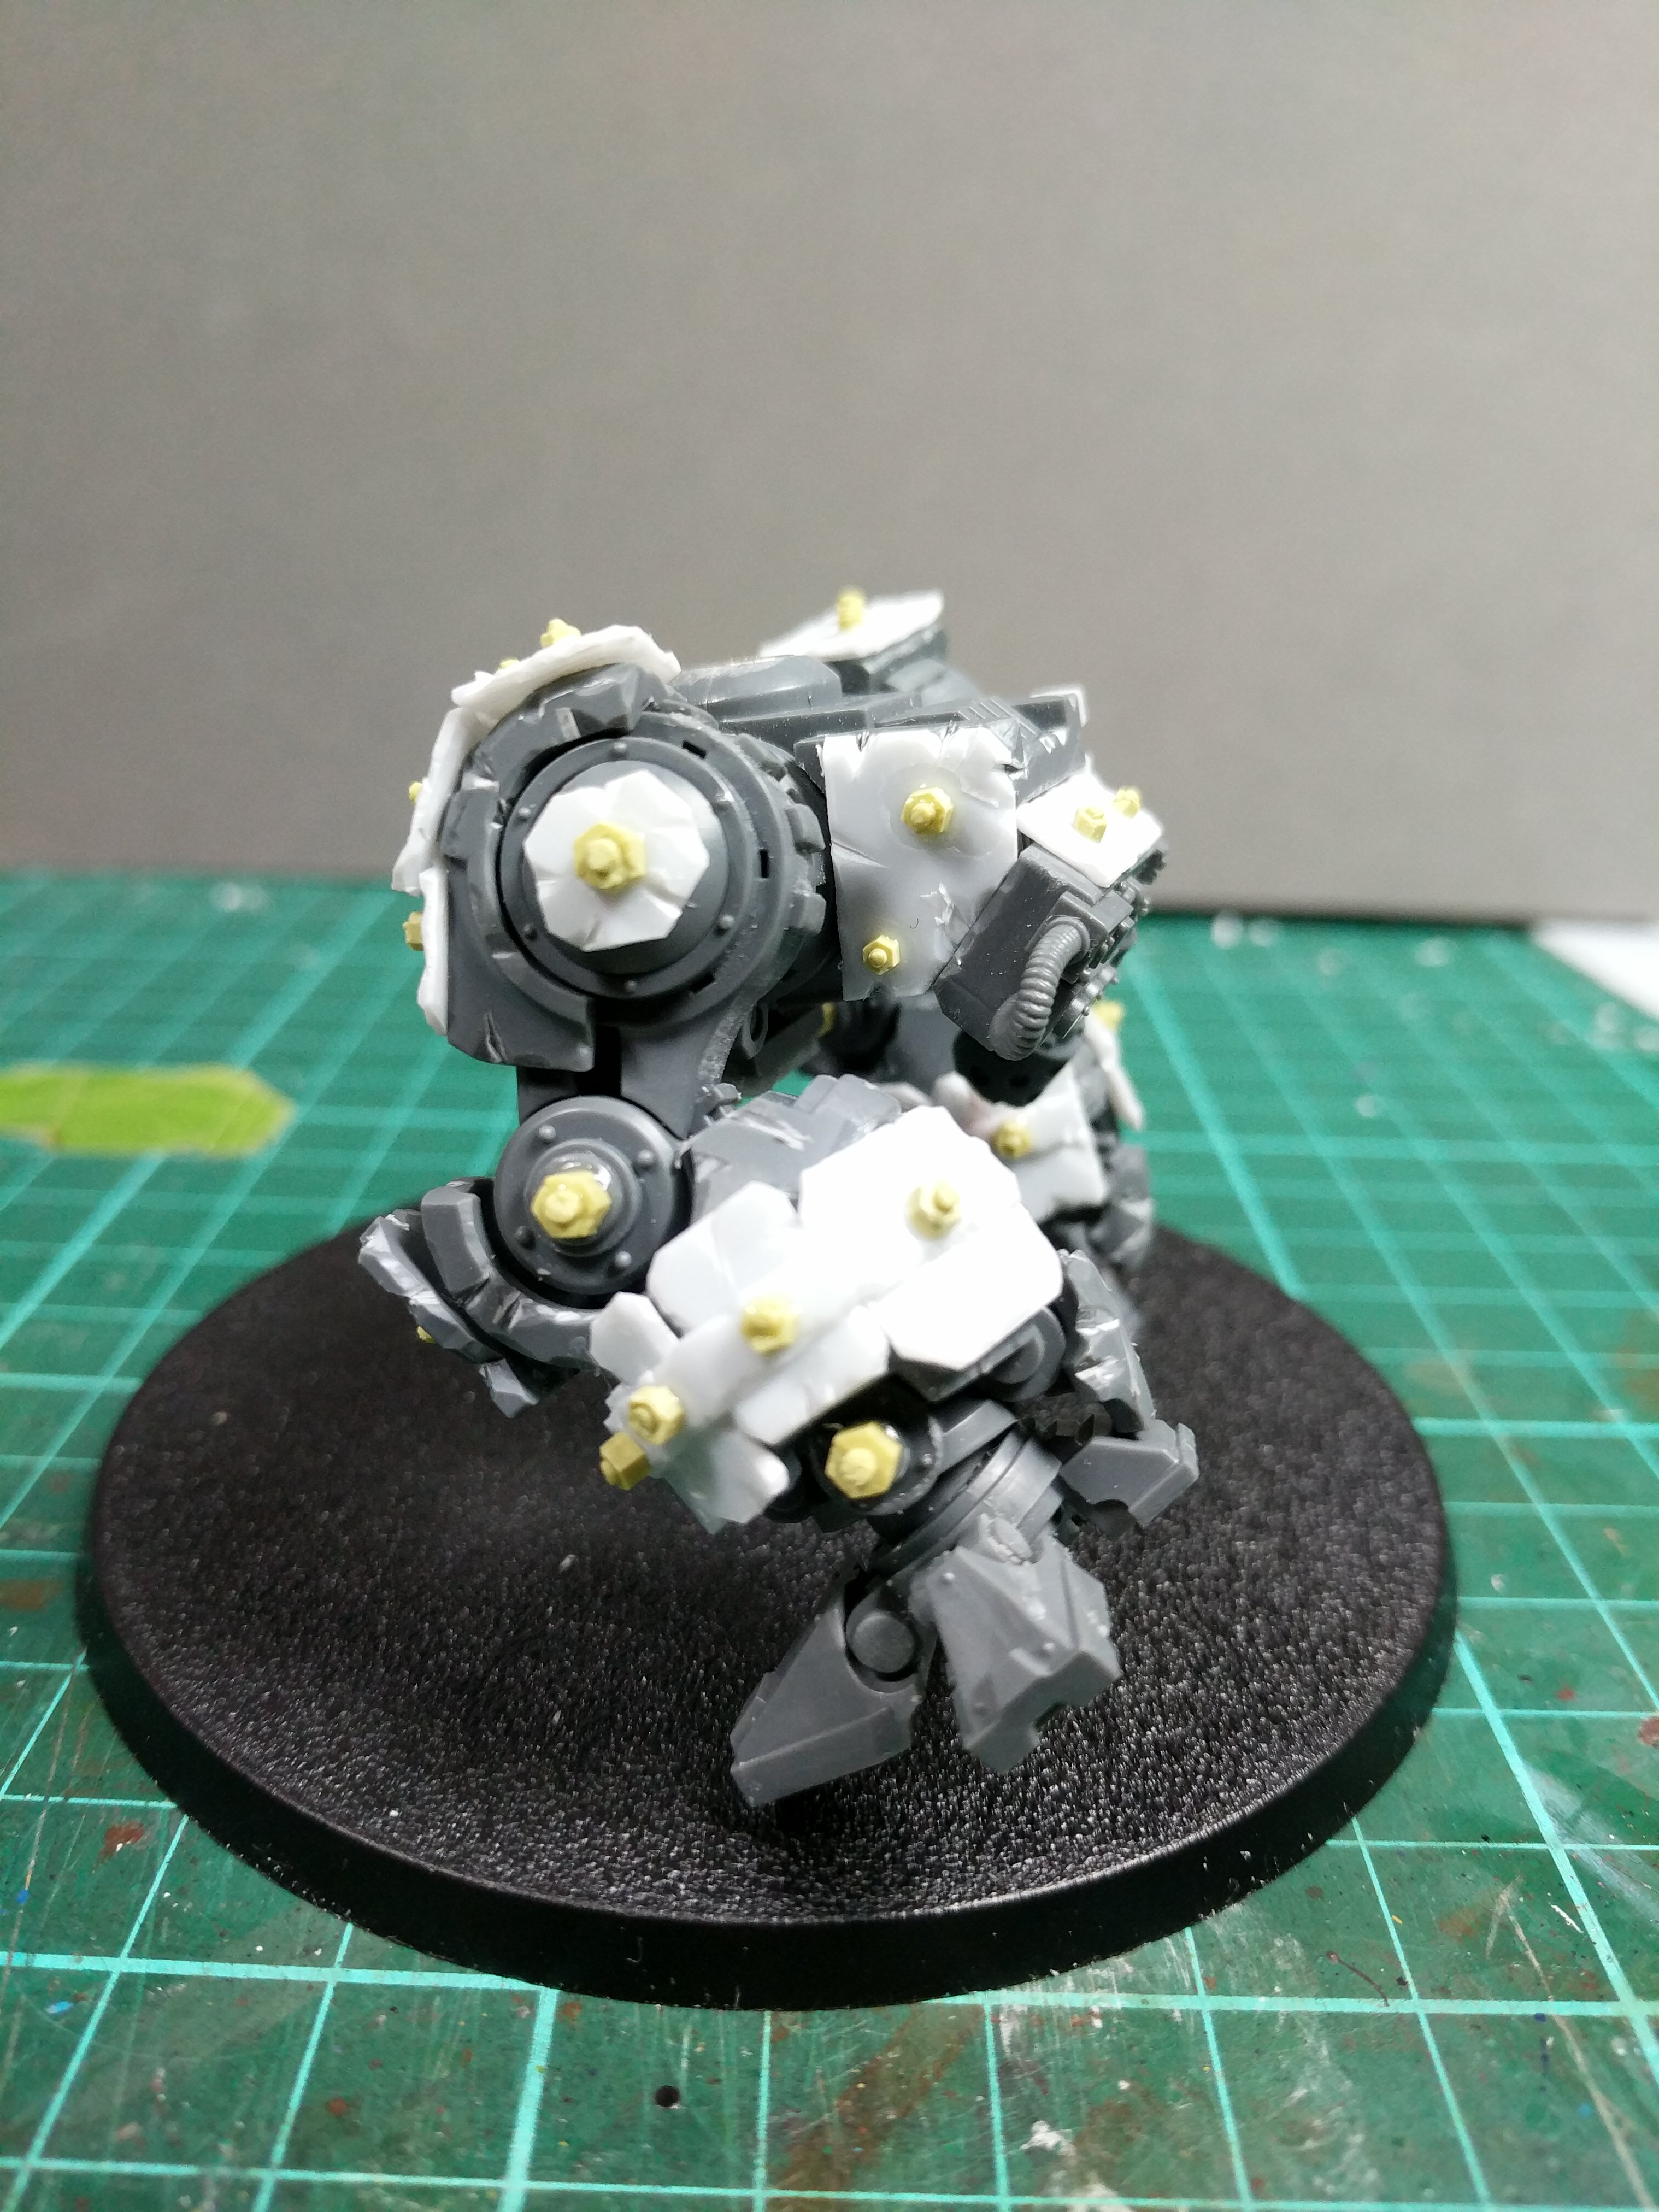
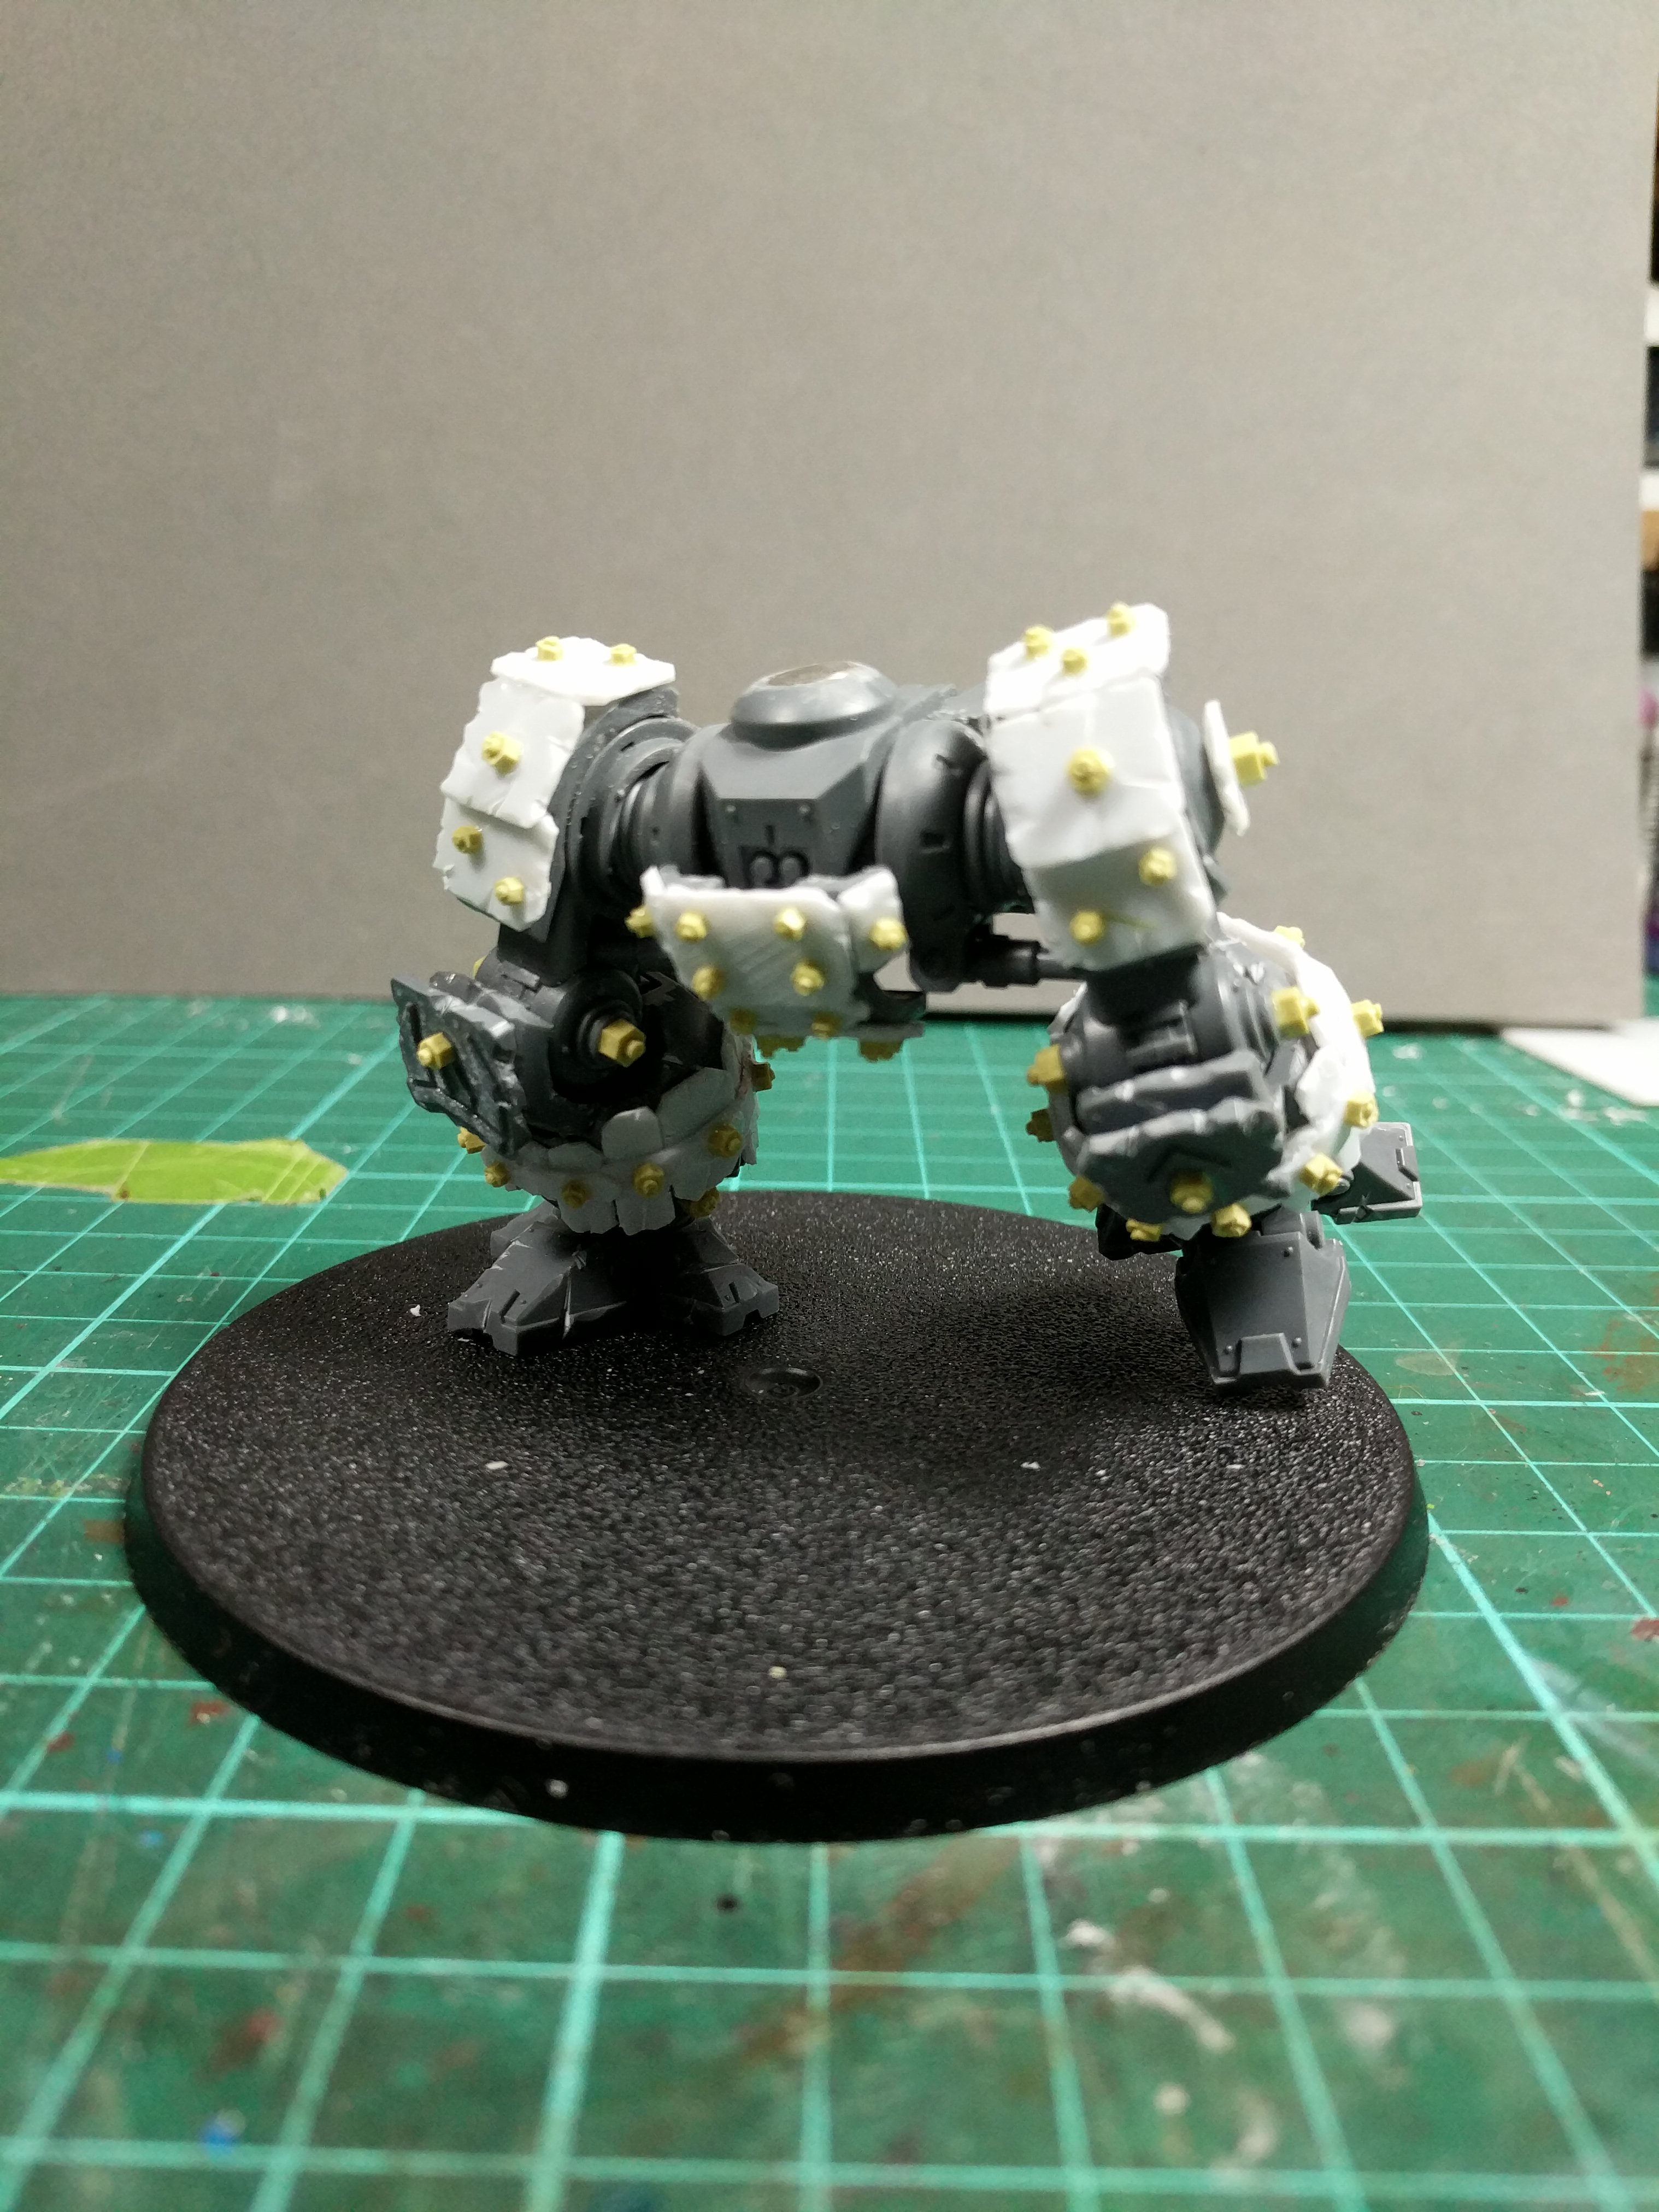
Day 3 Legs
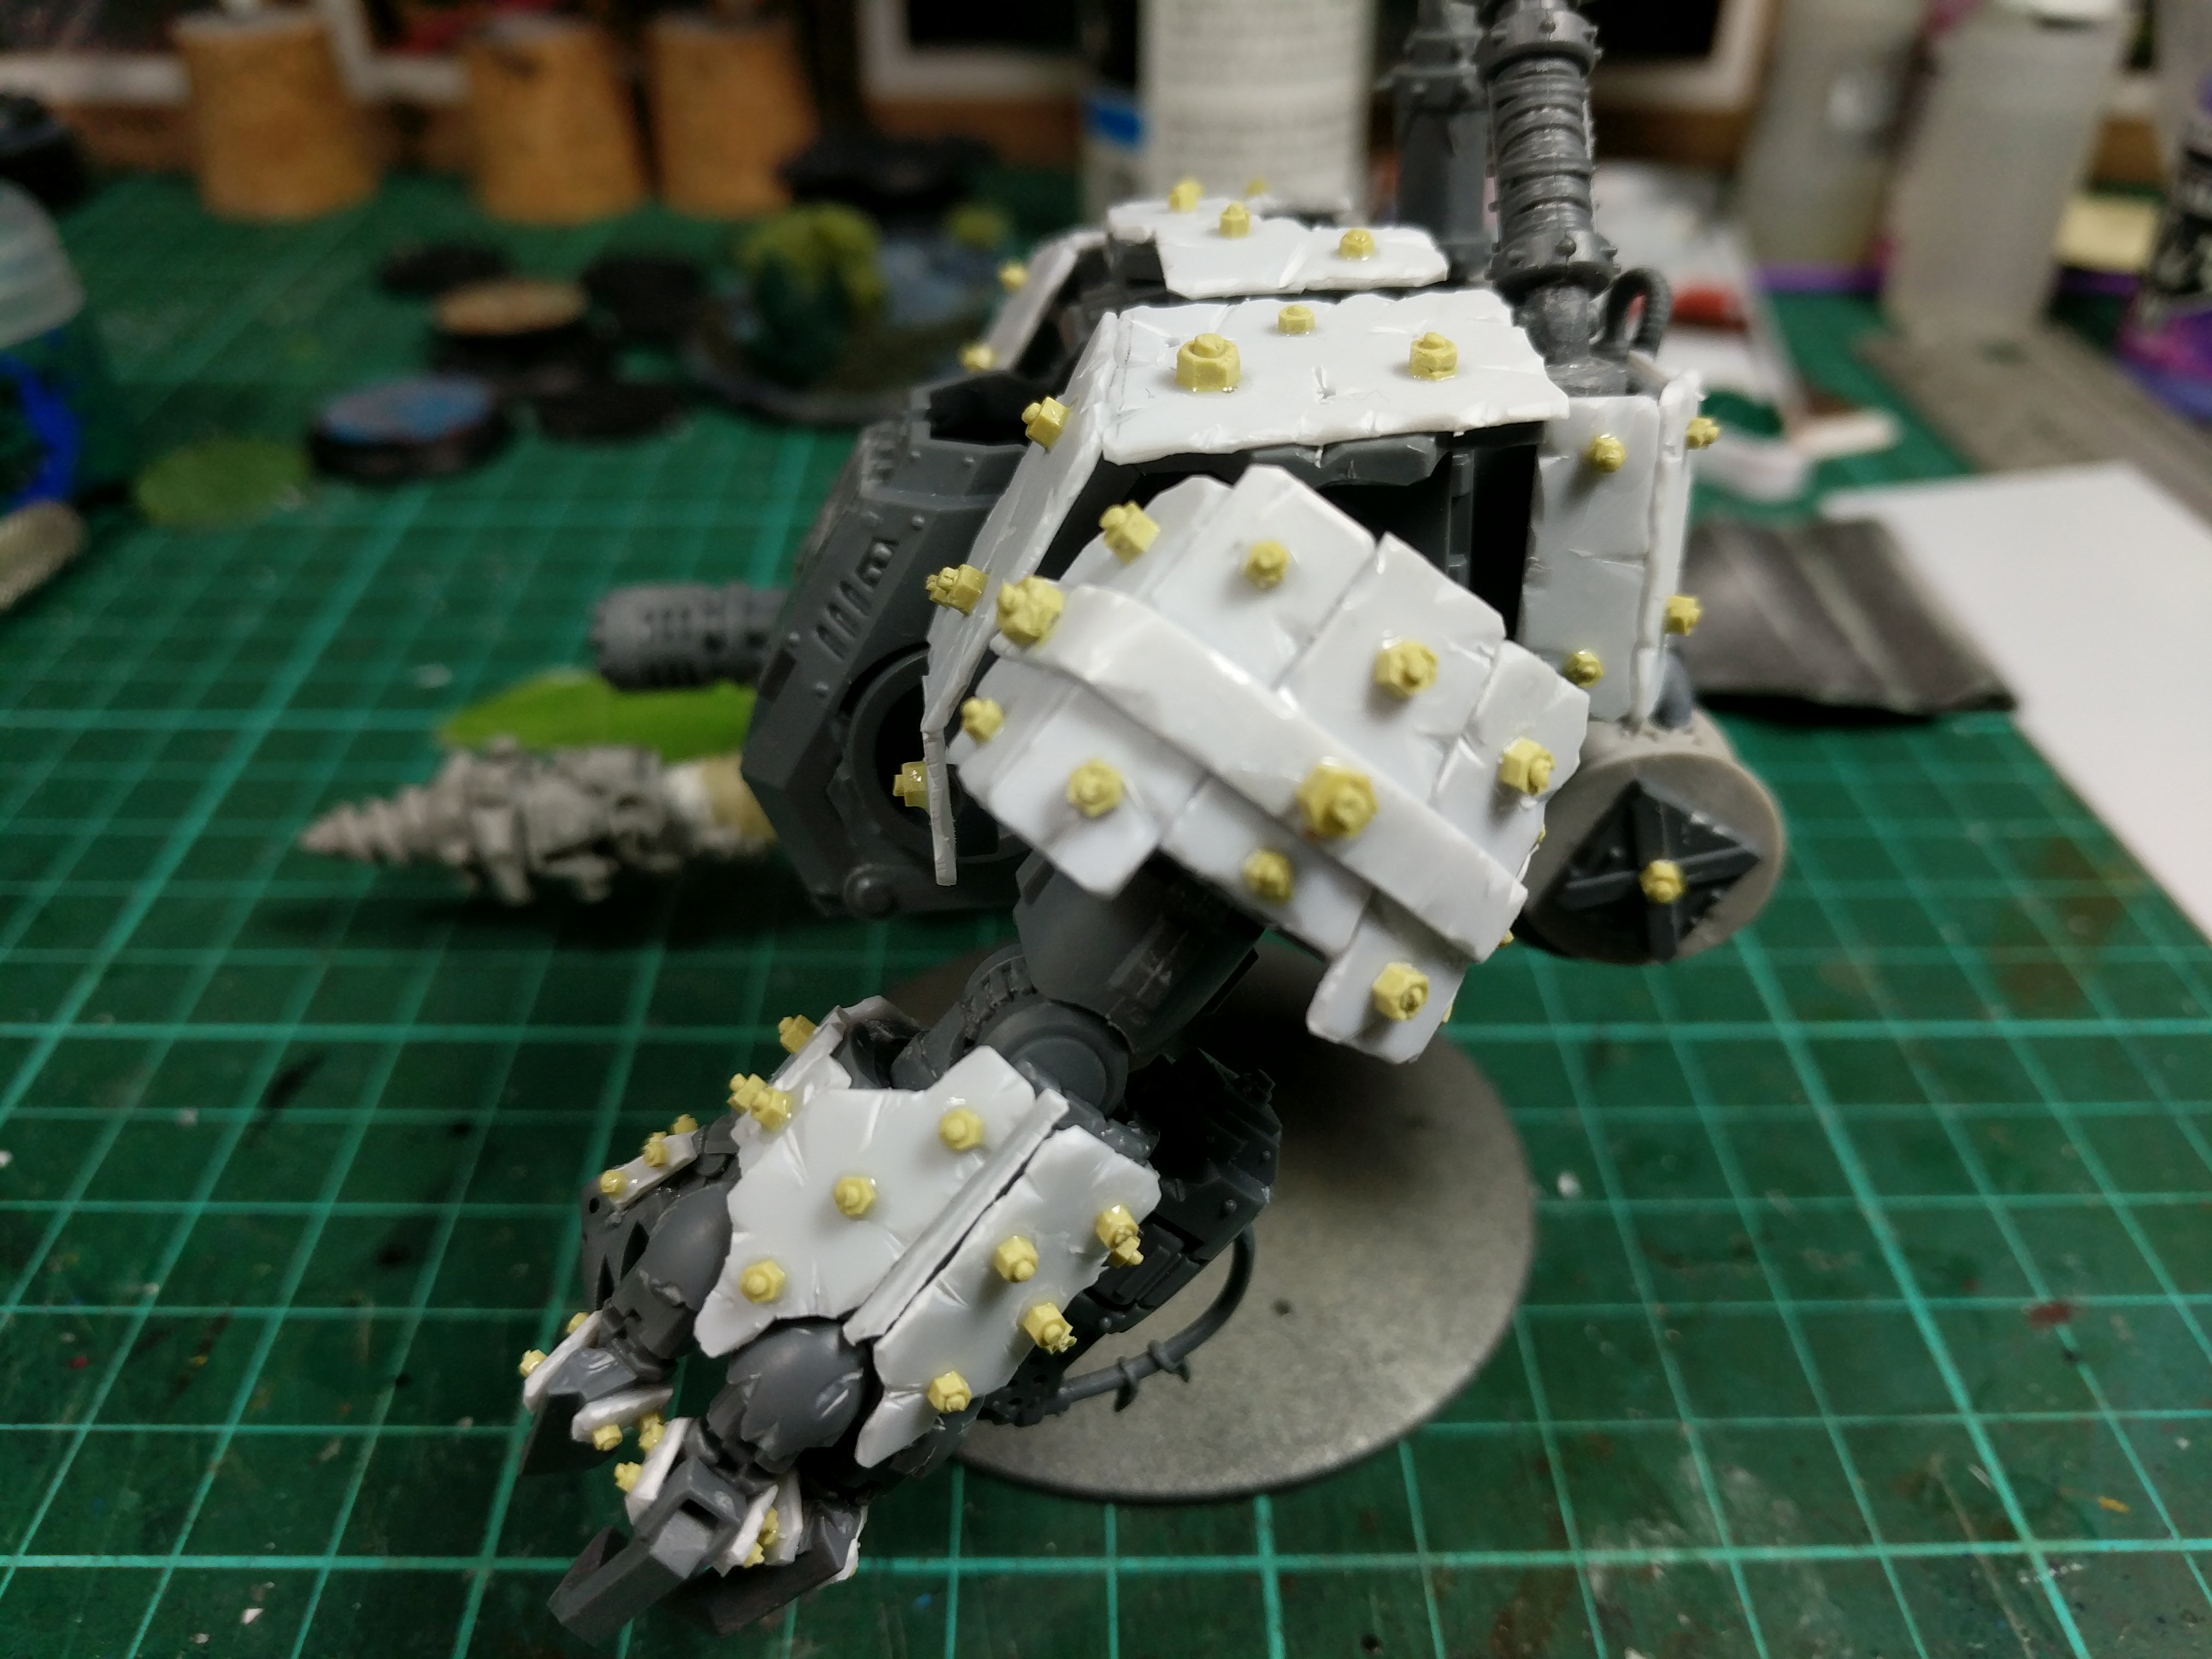
Day three of this project and I’ve mainly been working on the legs so that I can work out how it will stand on the base. Nothing special with the legs just adding lots of extra armour and chipping up the bits that weren’t covered by the extra armour. Each of the plats has just been made from plasticard but before I stick them to the model I use a model knife to chip up the edges and give them some battle damage. By doing each one before I add it to the model it makes things a bit random which I think fits with the Ork feel. The nuts are all made from miliput using a mould, I think it came from Green Stuff world but I’ll check that for a later update. I think I’m about 90% complete on the build now with all the major parts done, although the base still needs to be sorted. Back to work tomorrow so progress will slow down for a bit but I’m going to try and keep things going during the week.
I’ve got a few more pictures but I’m having problems uploading them so will go with the legs for now and try again later with the others.

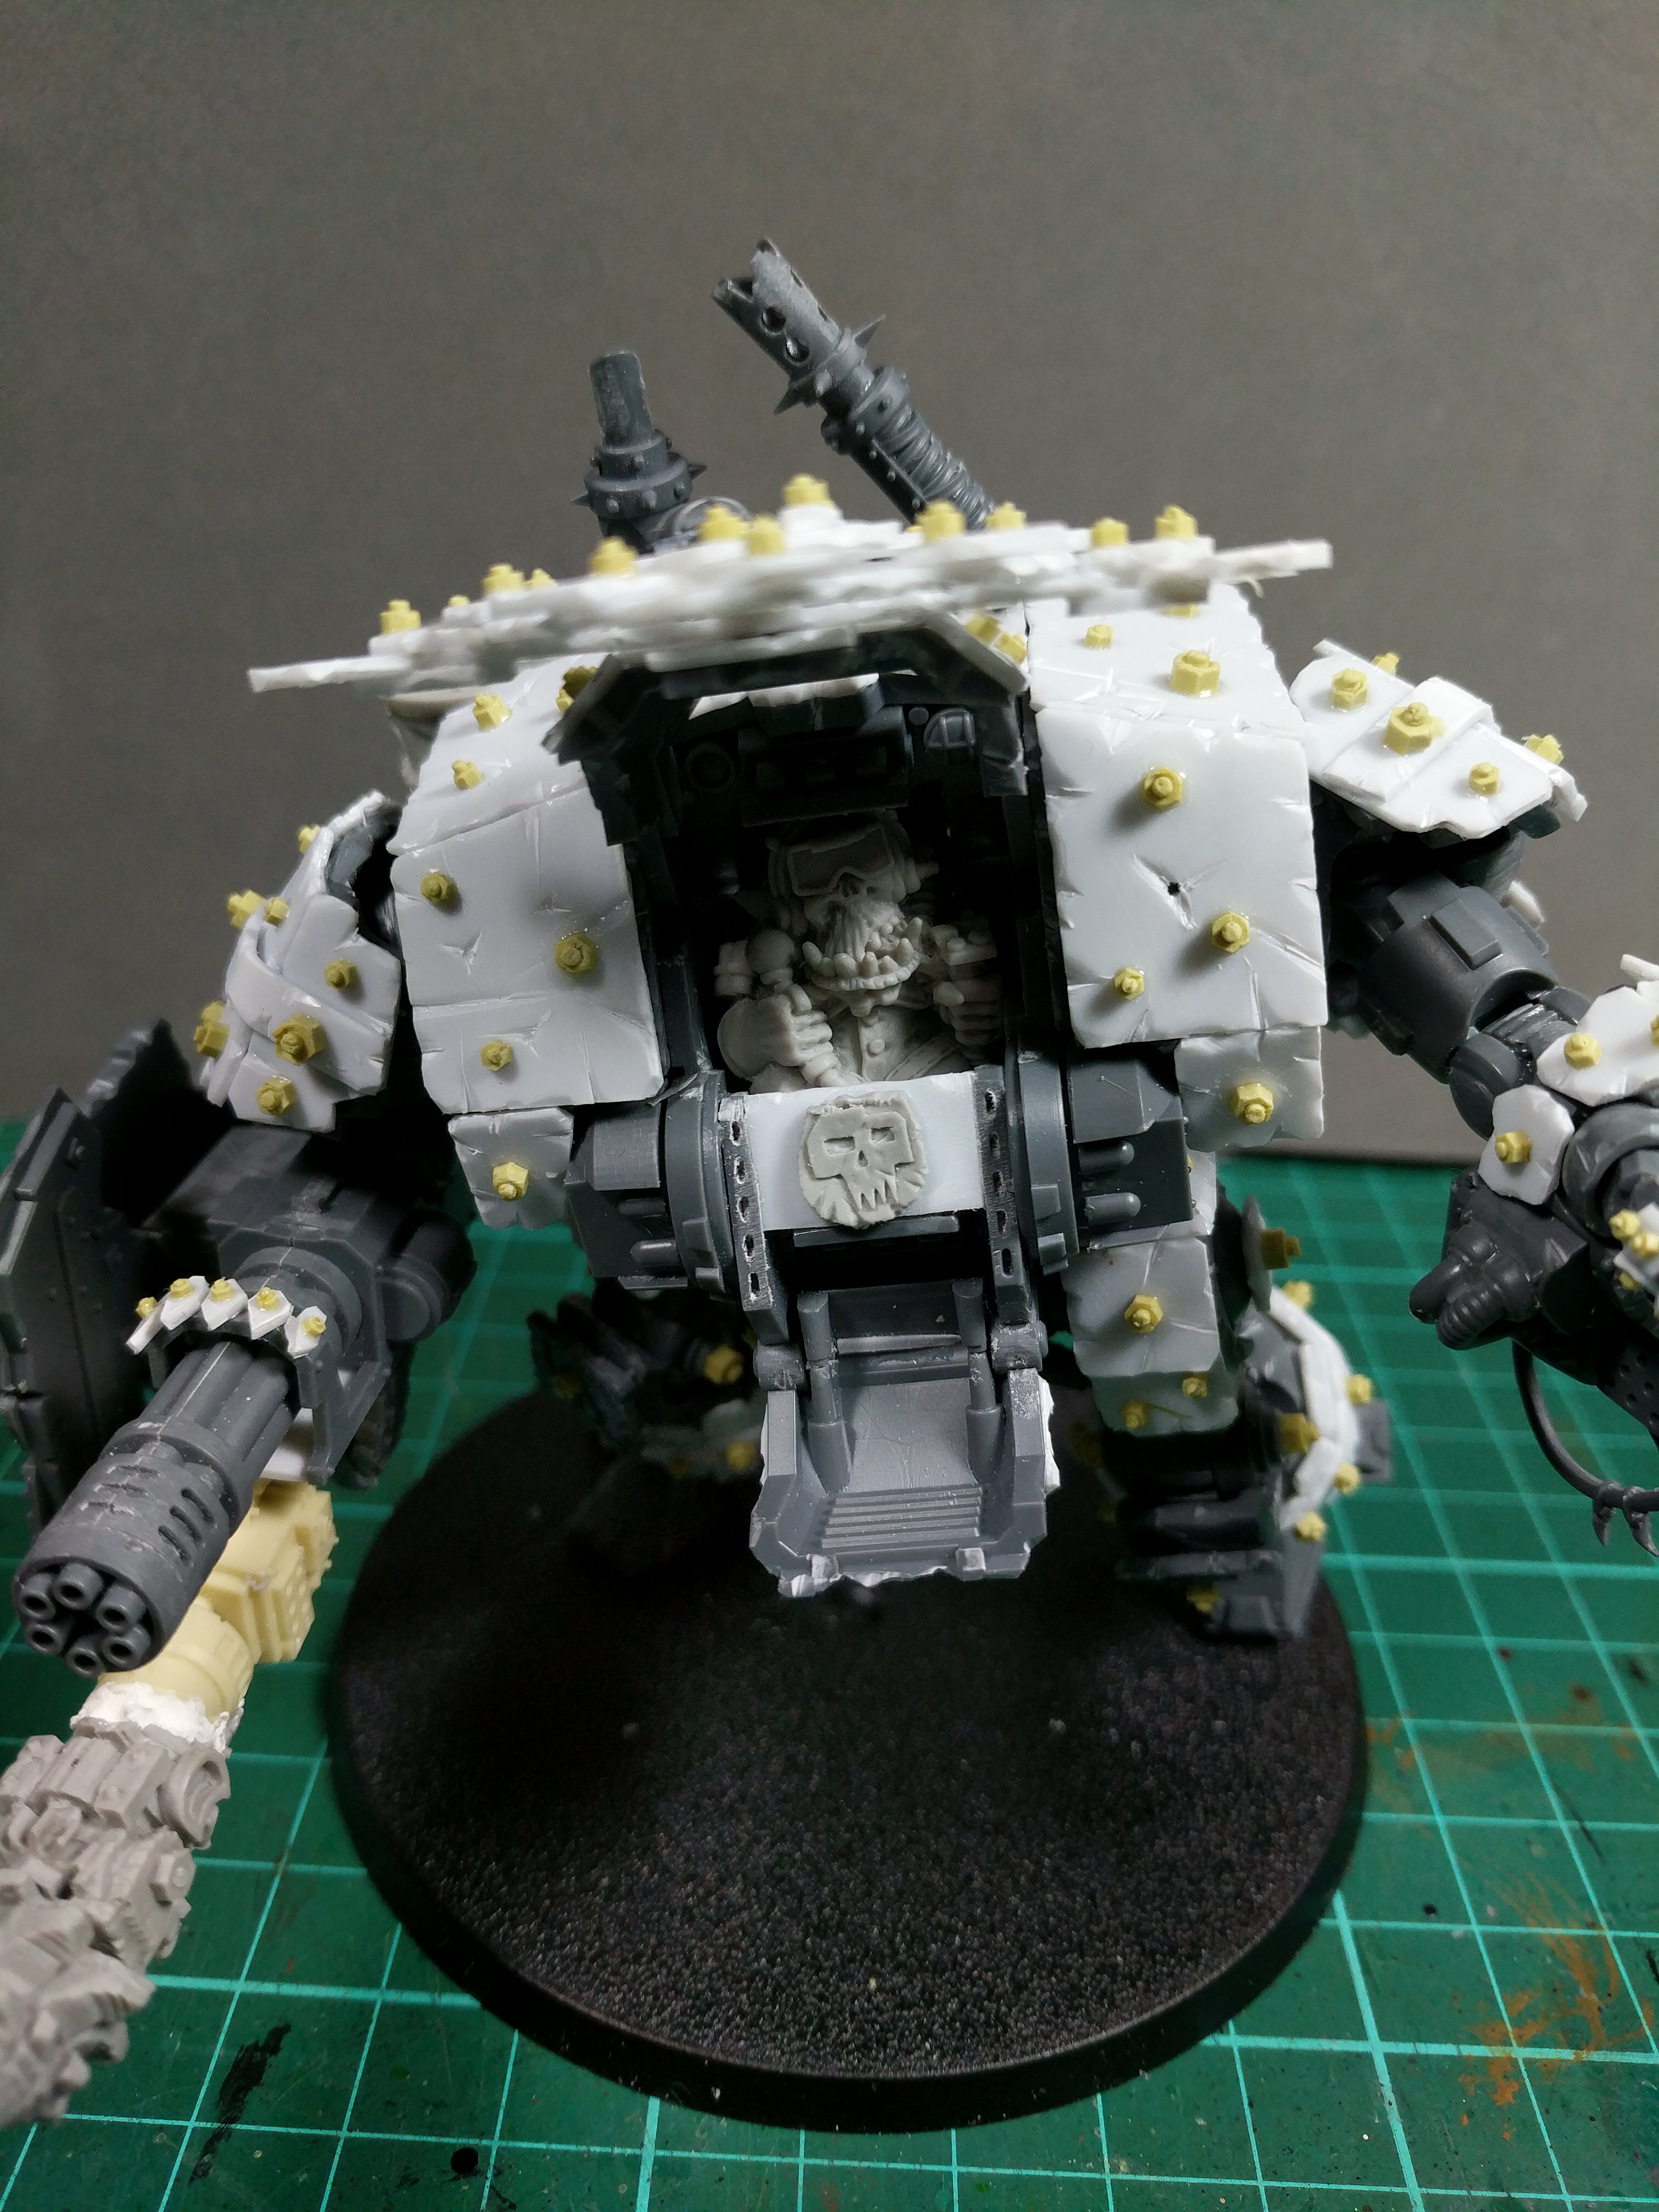
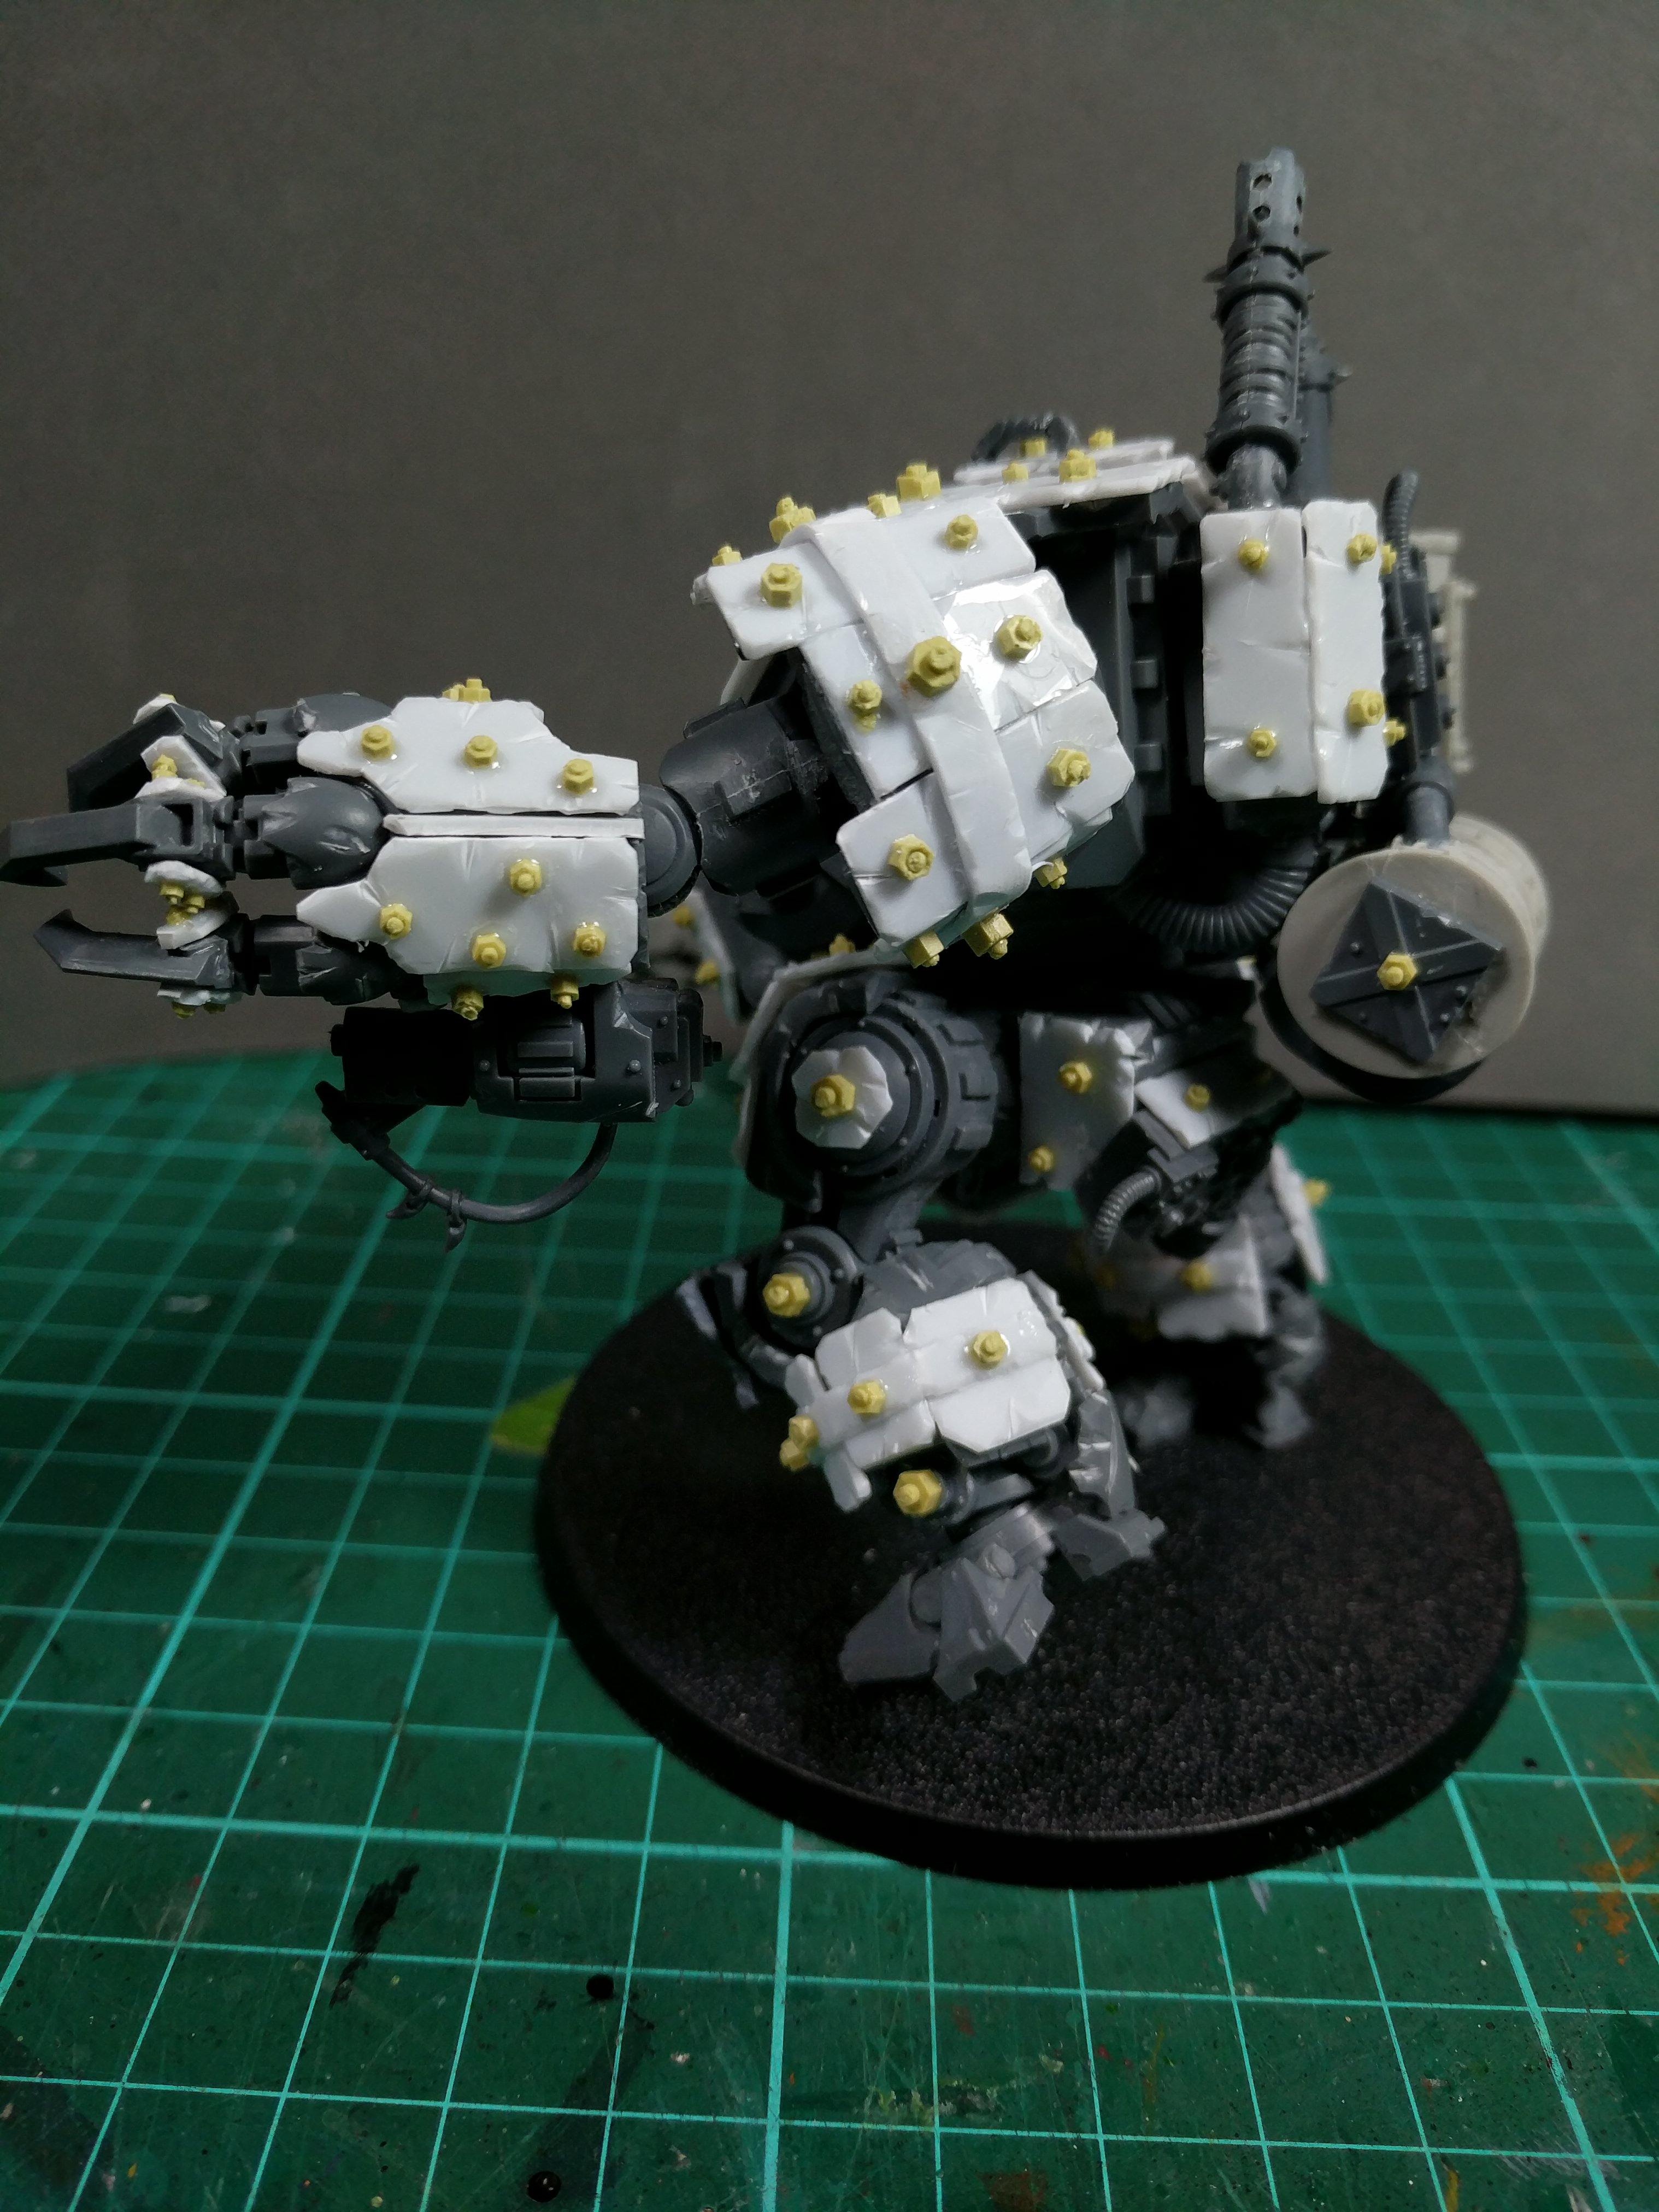

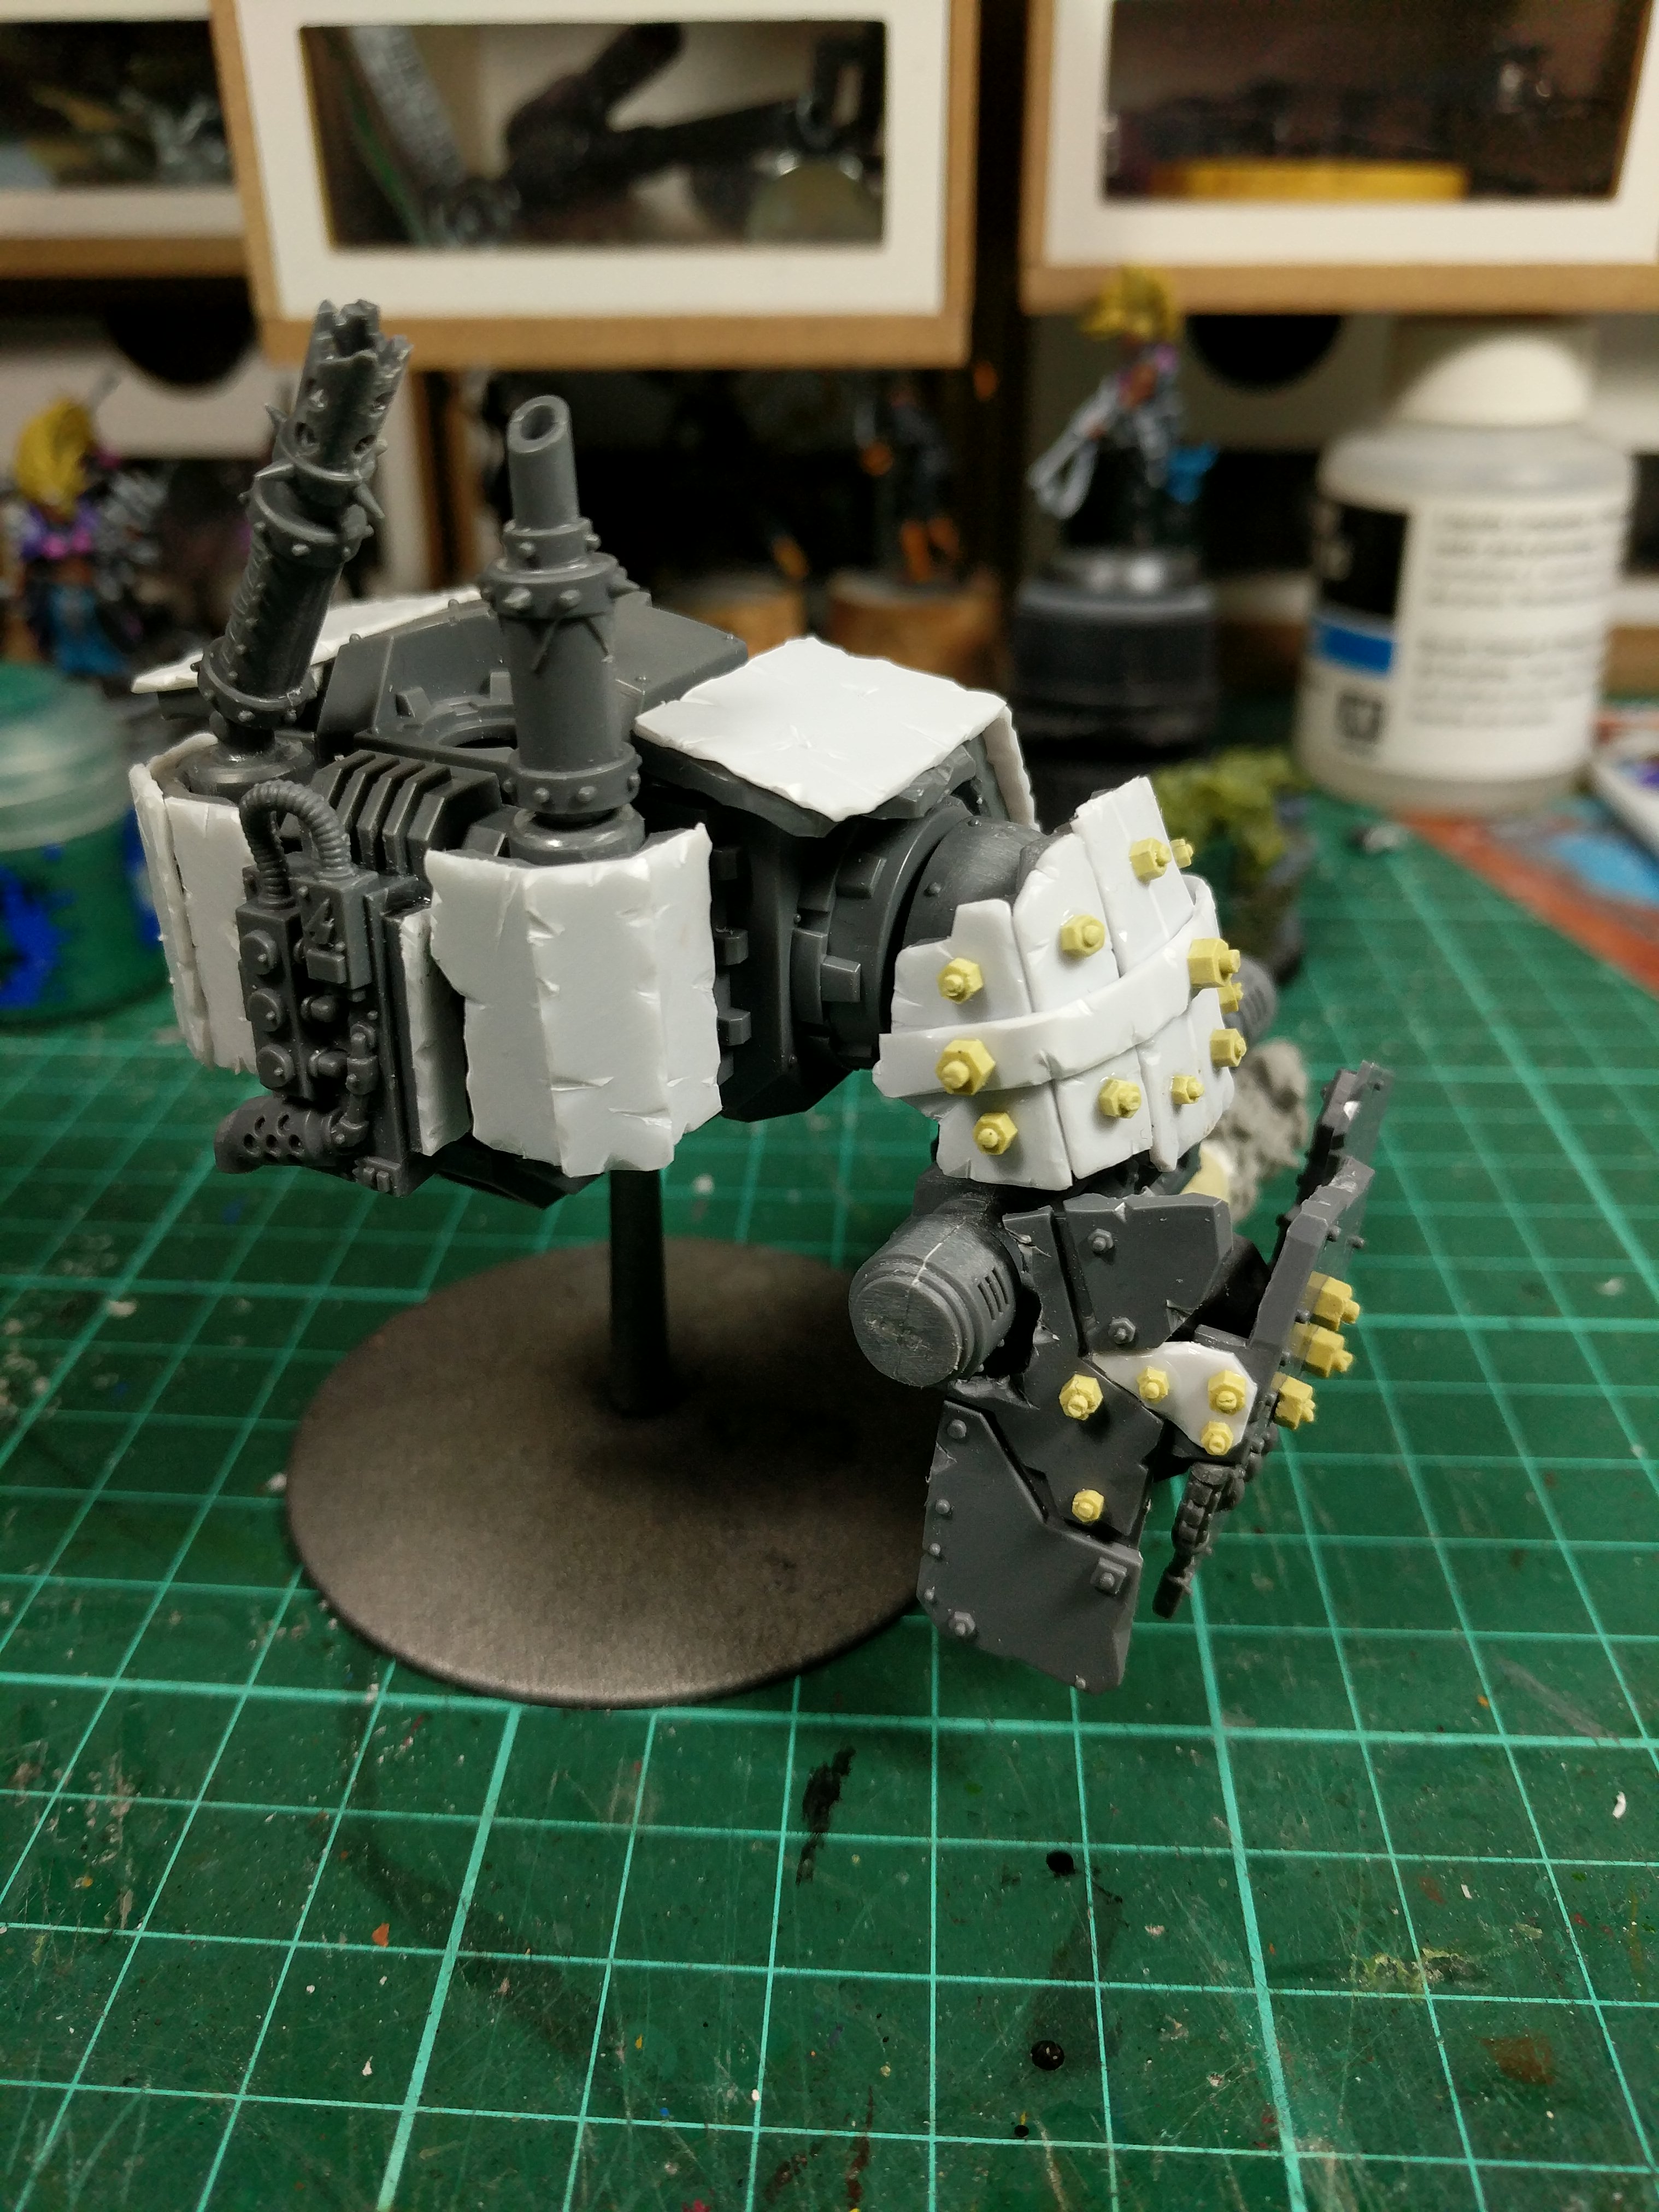
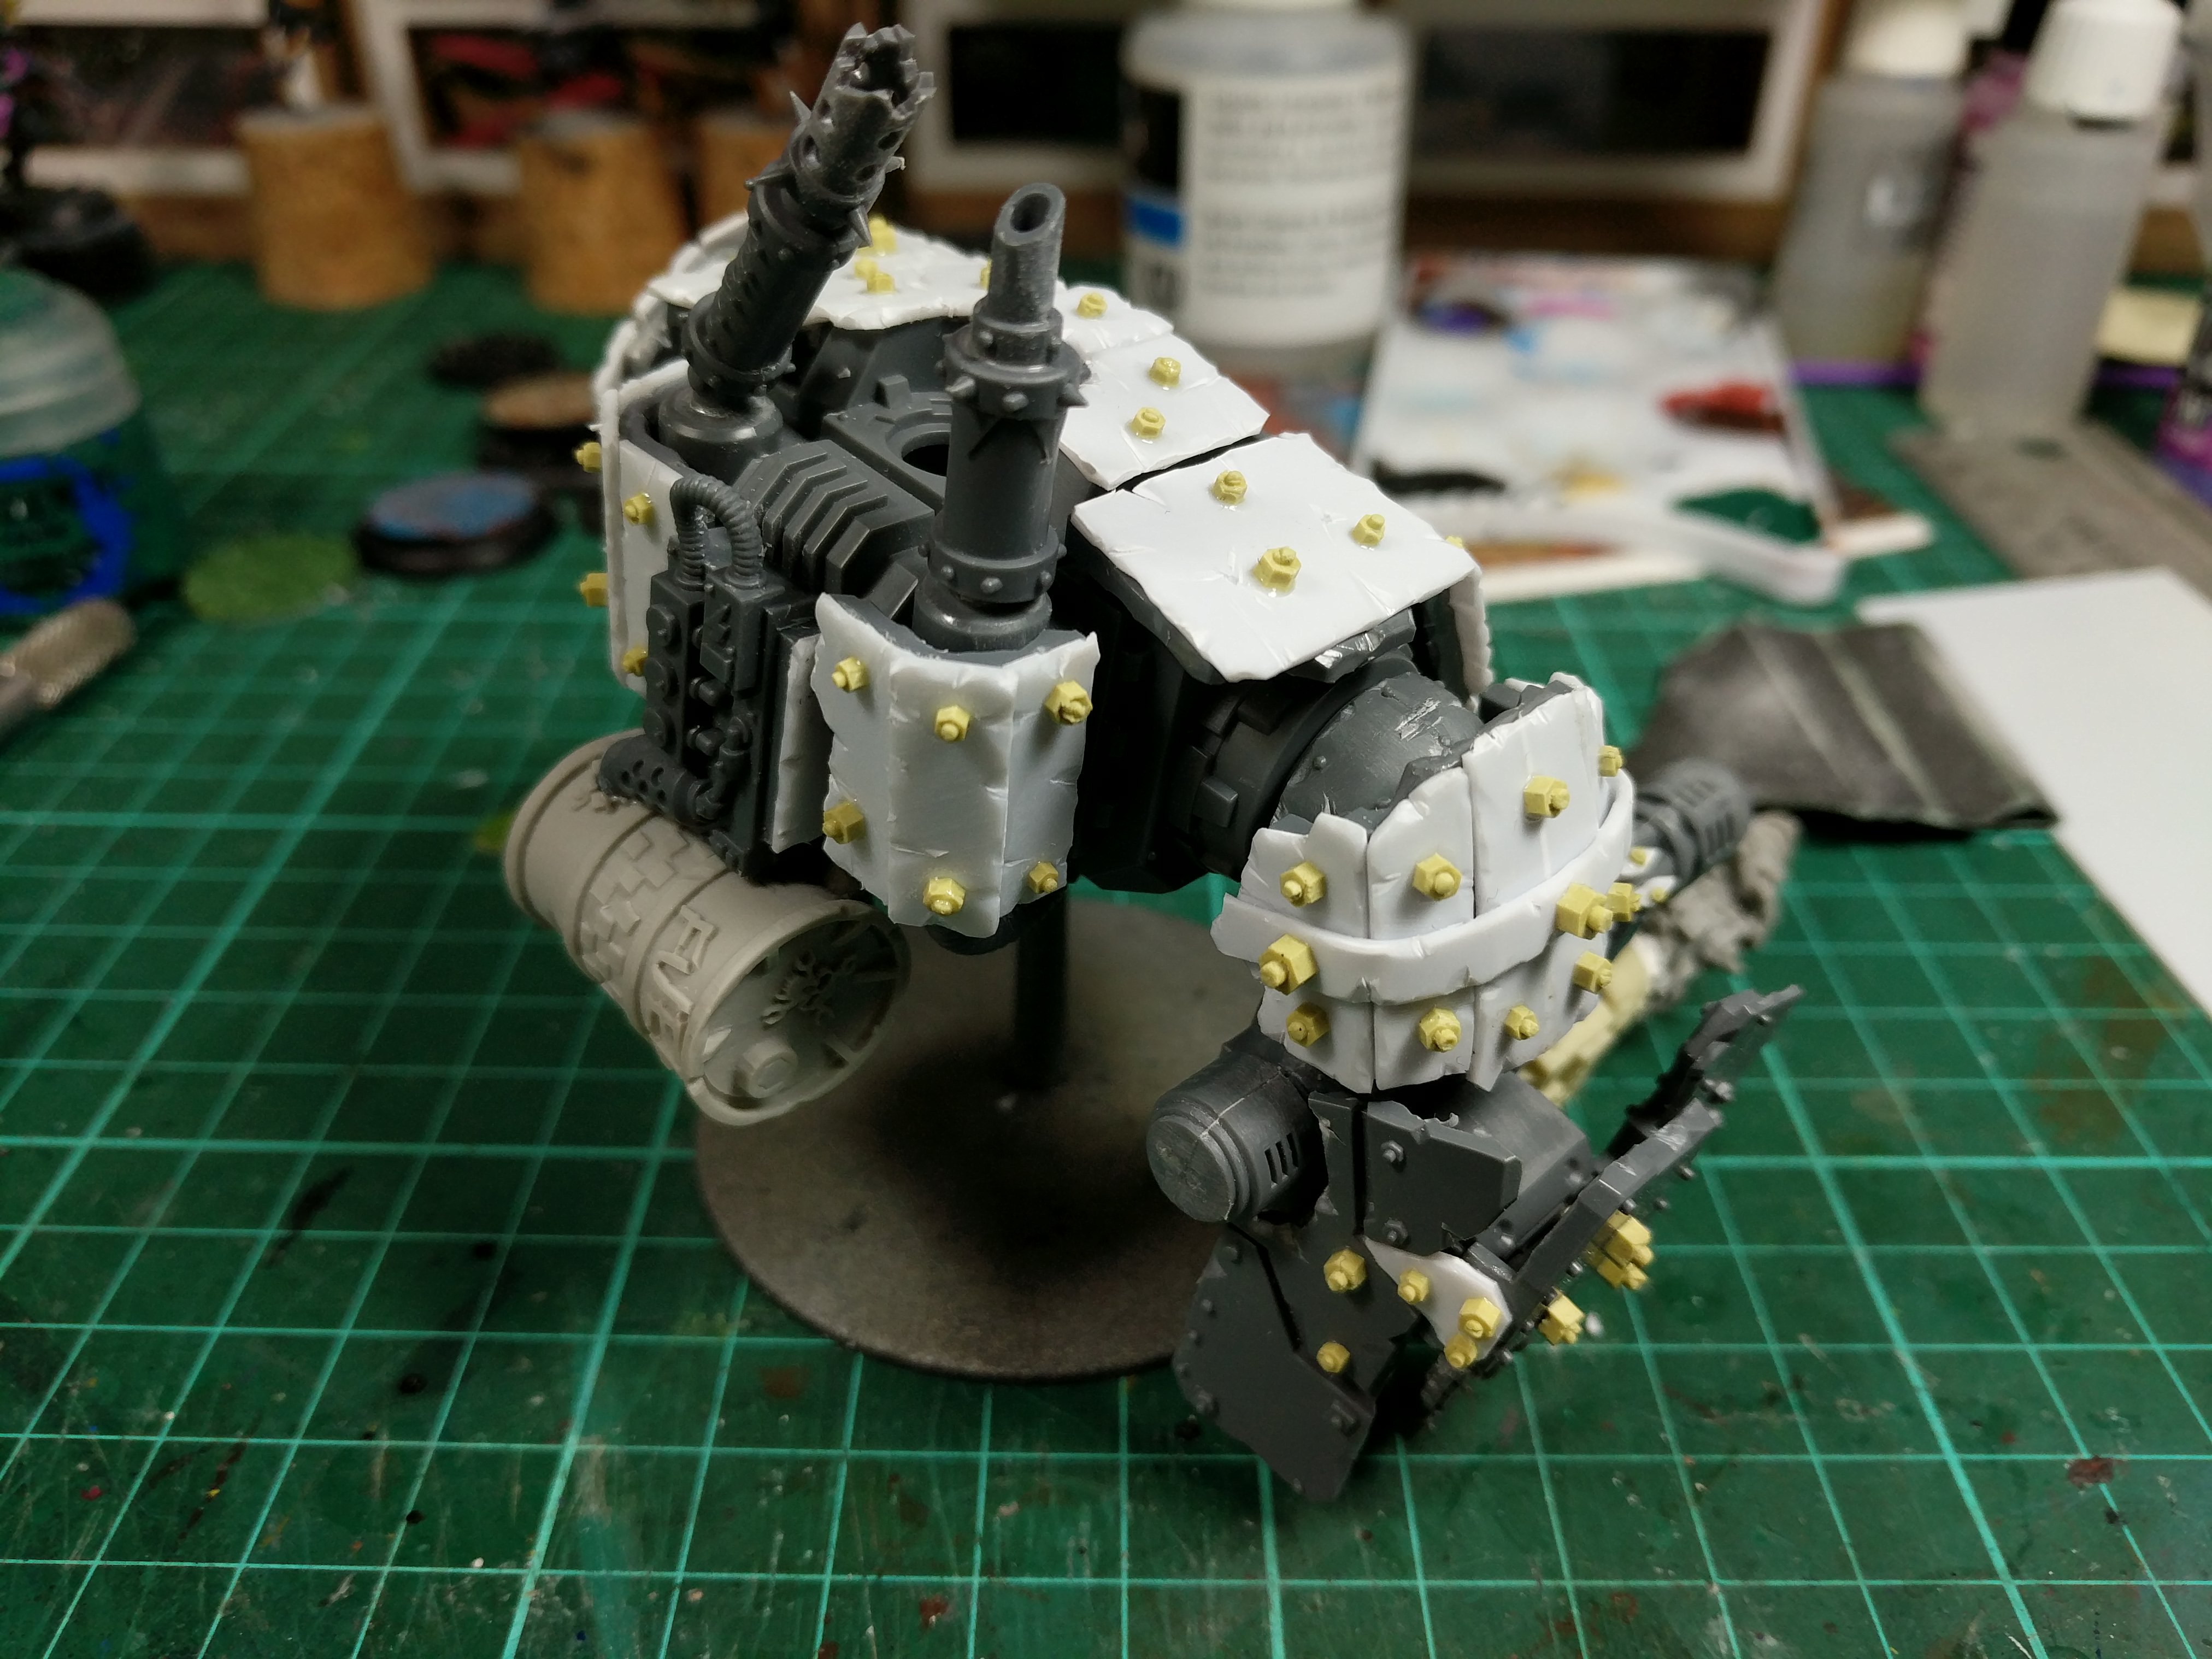
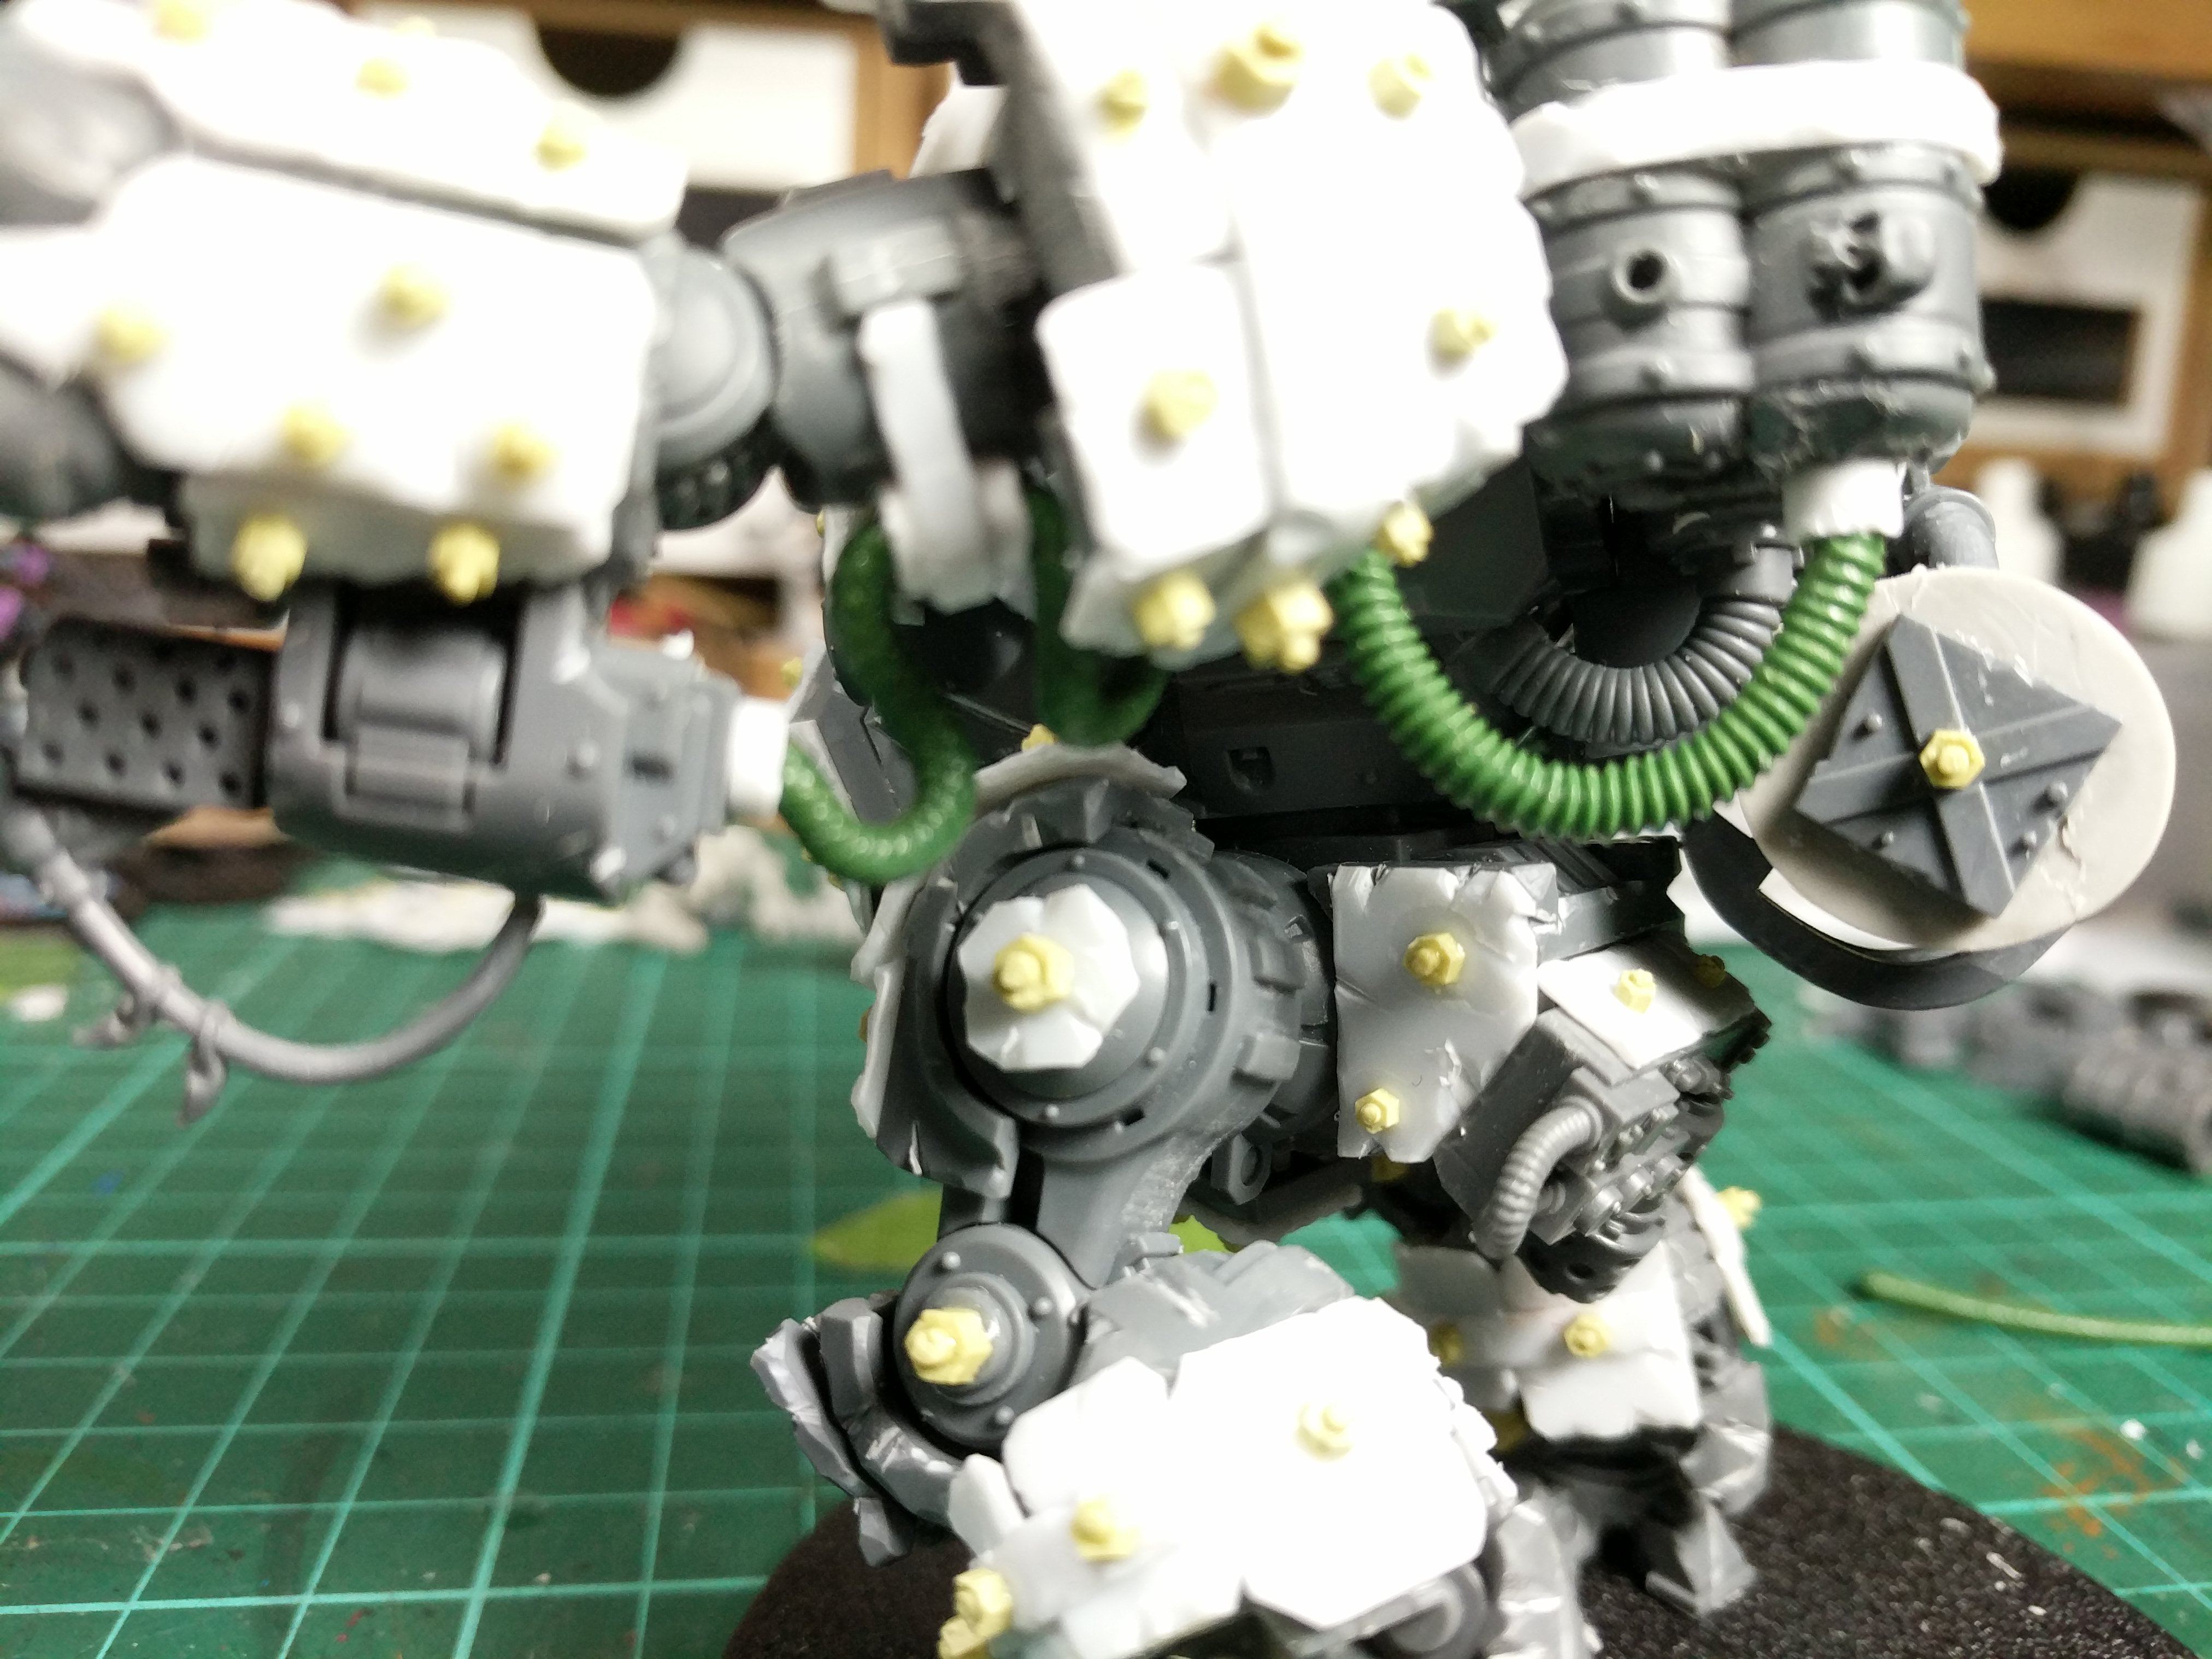
Day 4 Close Combat Arm details
Back to work today so I’ve not had much time to work on the dread but I’ve added some fuel tanks for the flamer on the close combat arms along with some cables to link it to the flamer. It’s only a small detail and it’s easy to do but I think it makes a big difference. Still need to add a few bolts to the fixing points but I’m off to the gym tonight, trying to trim down a bit of gamer build.


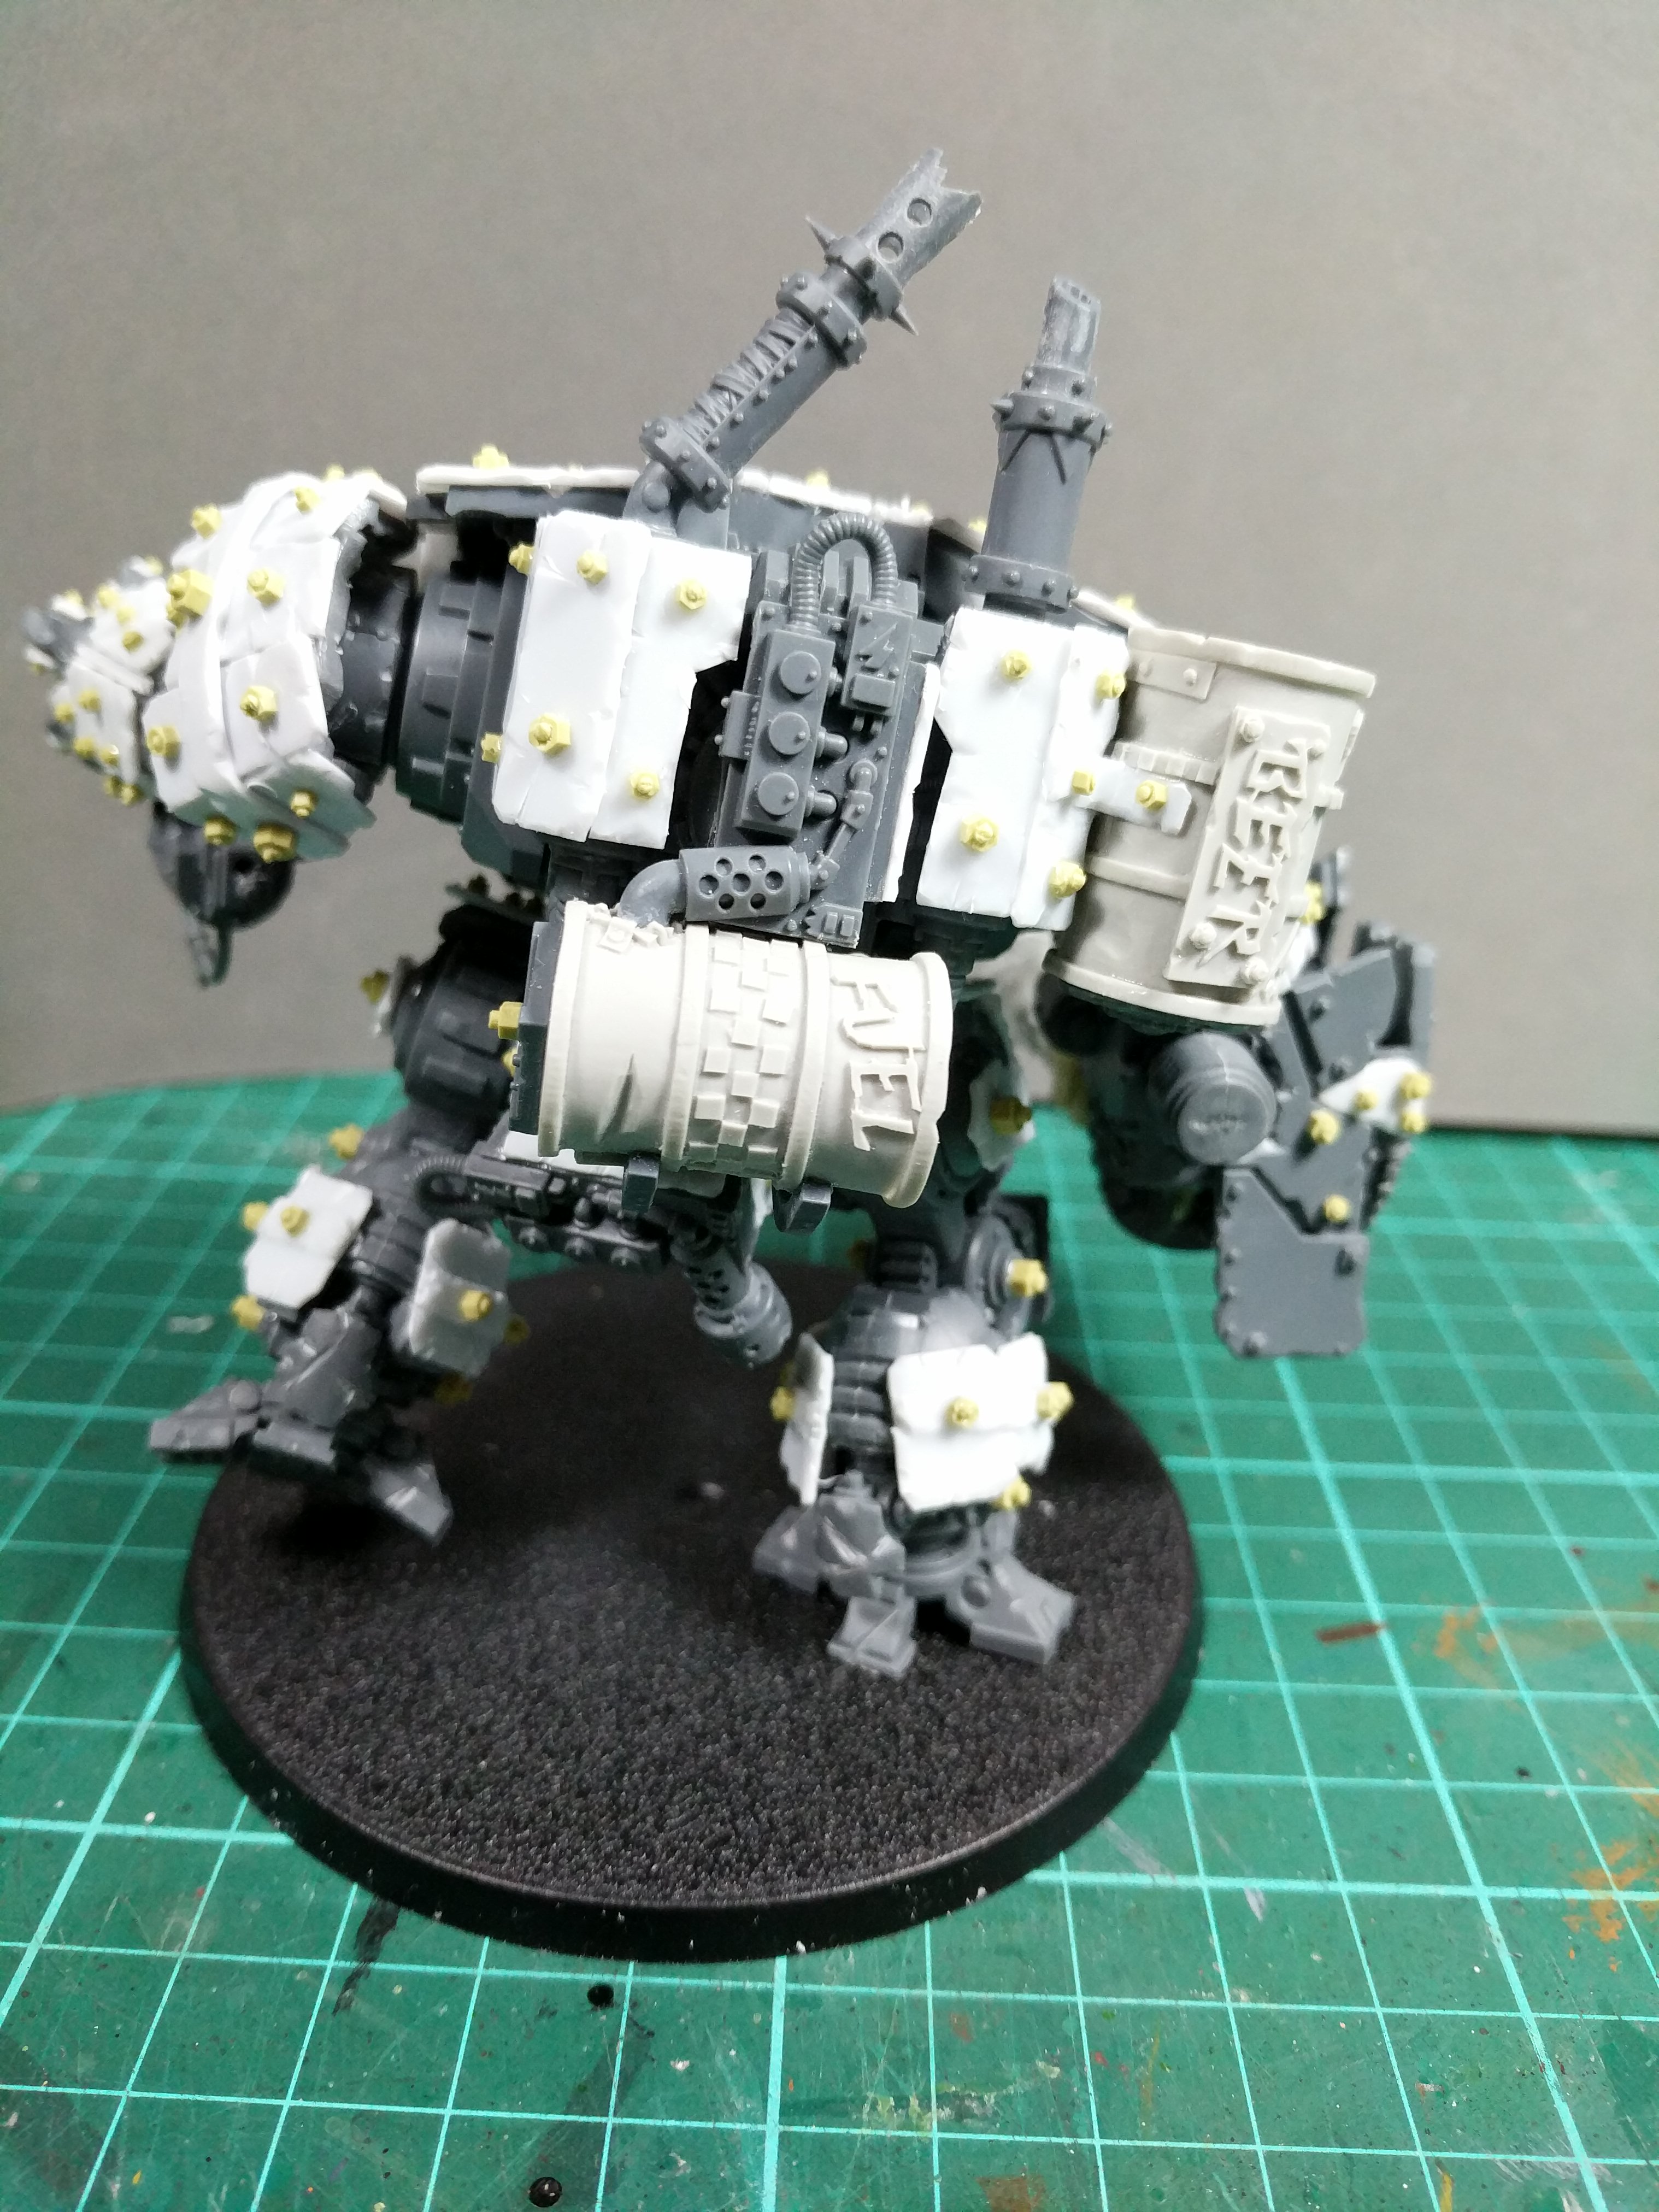
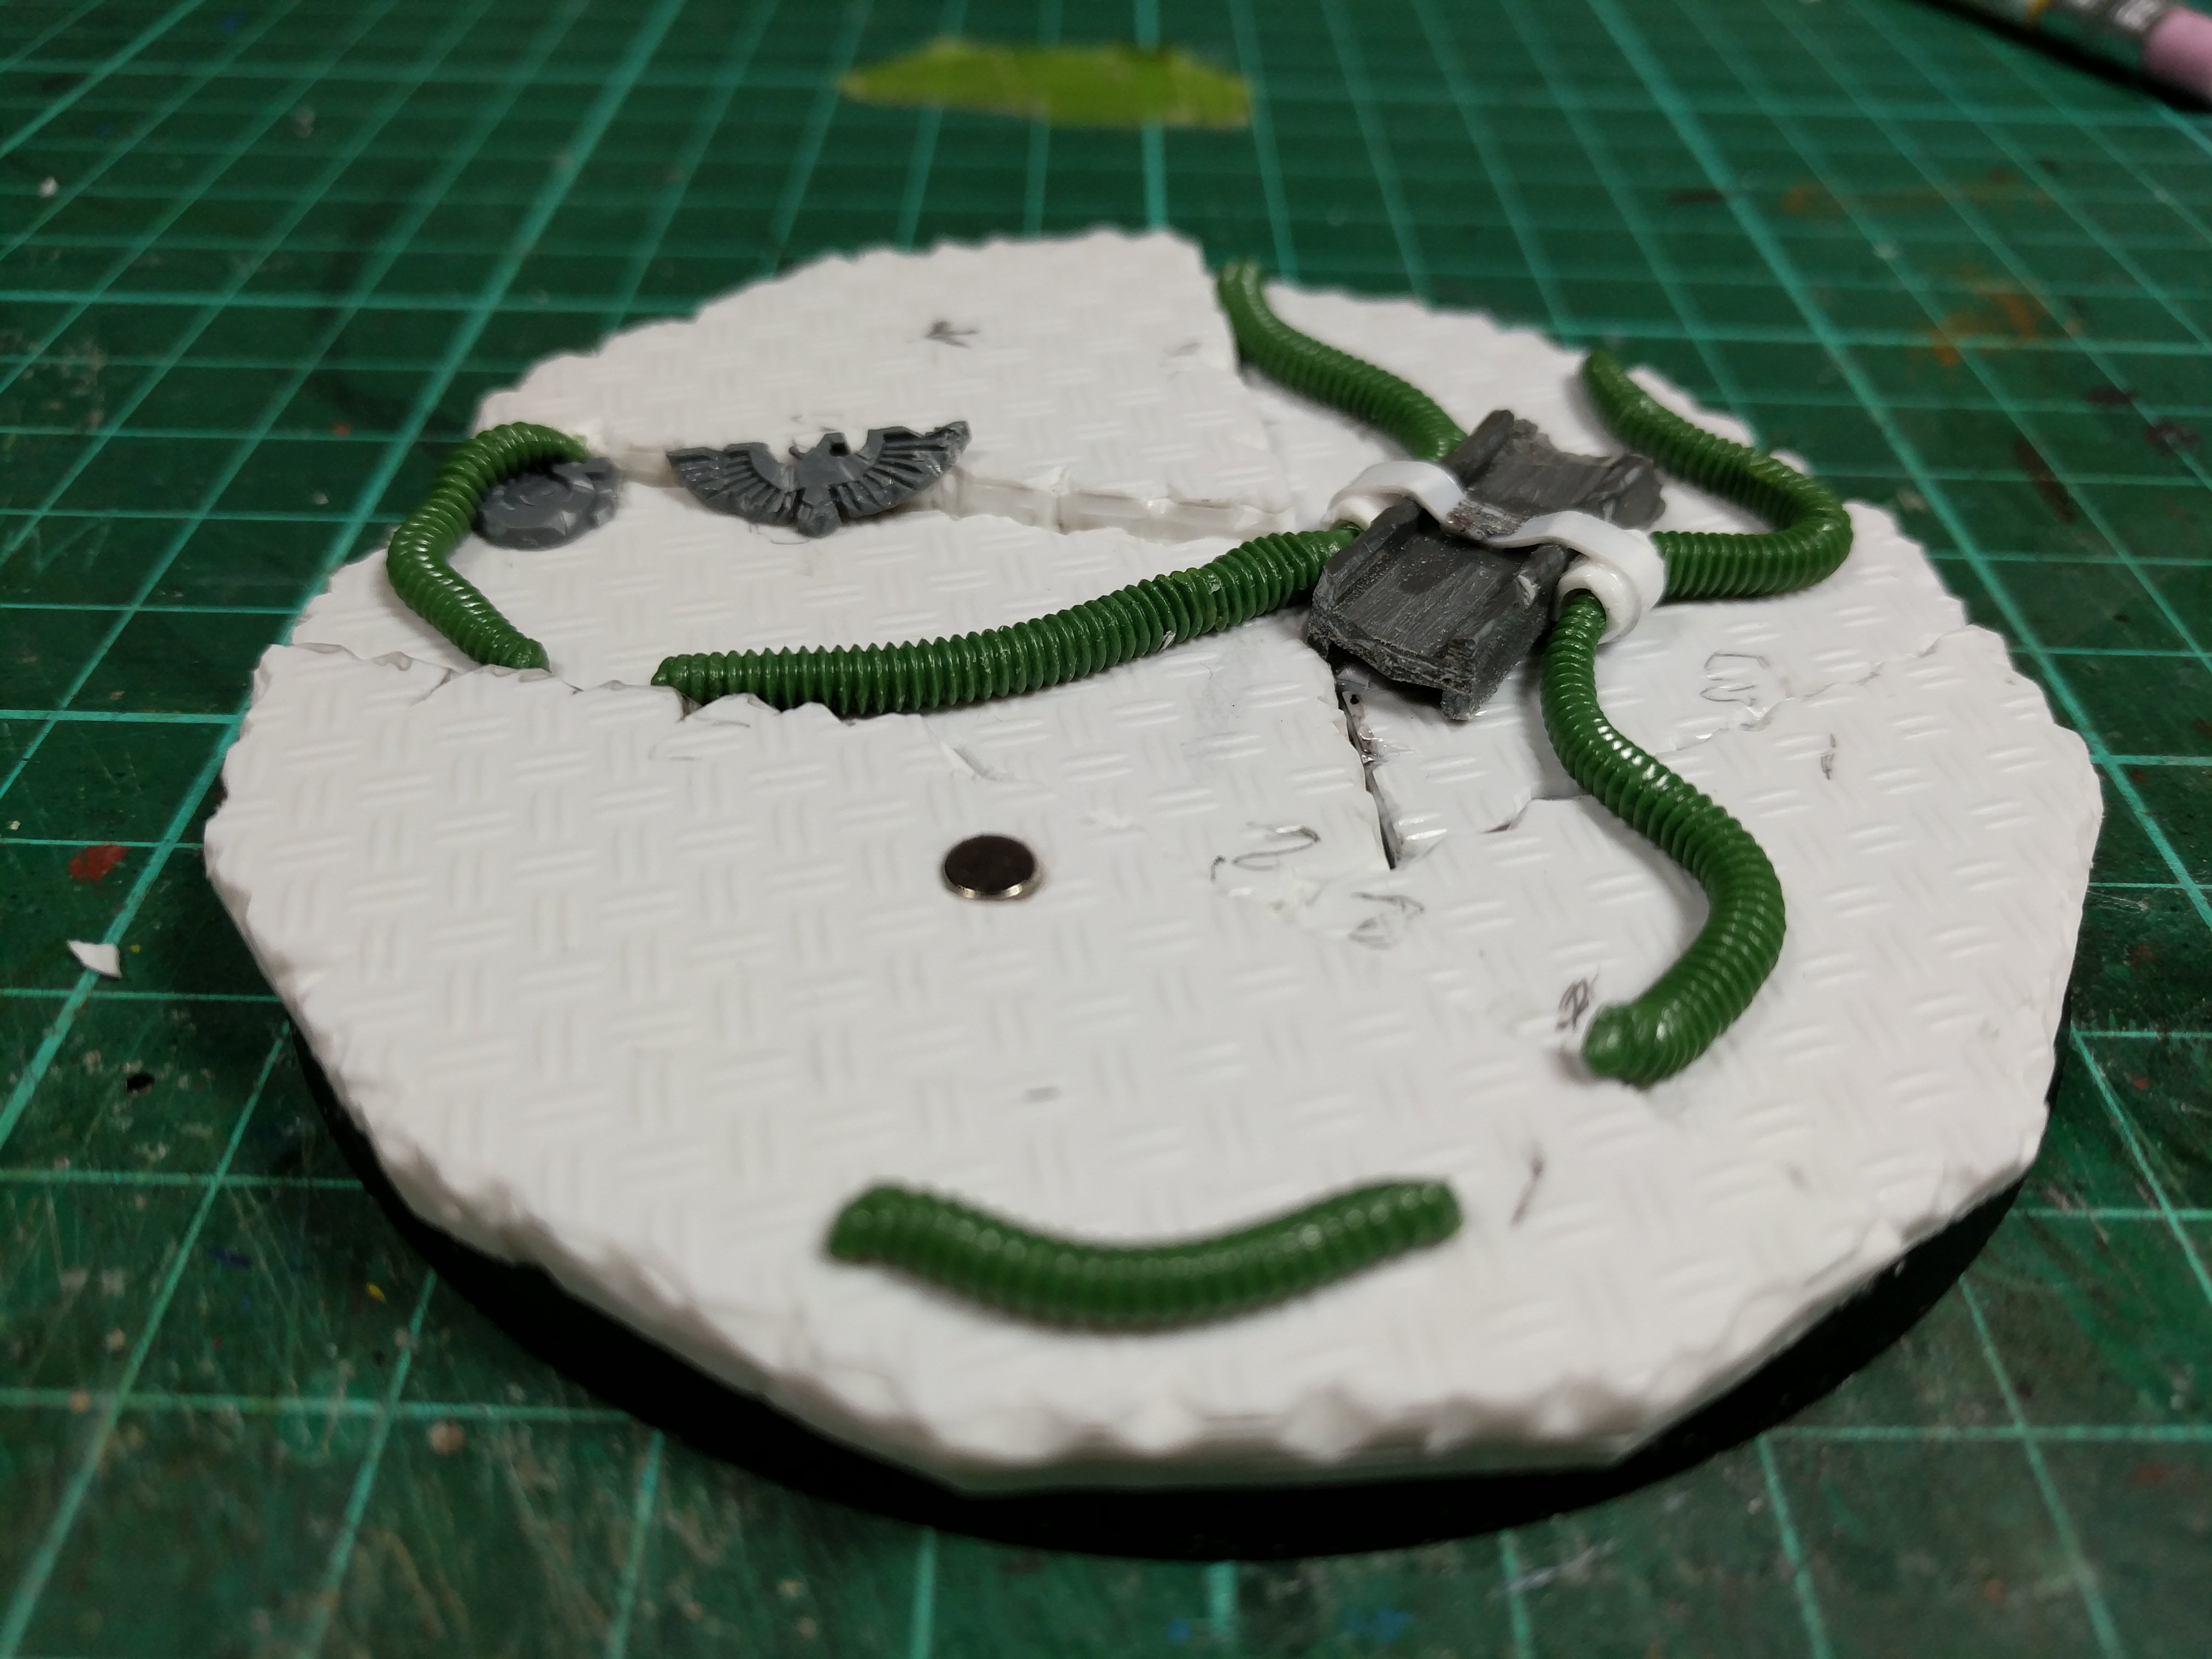
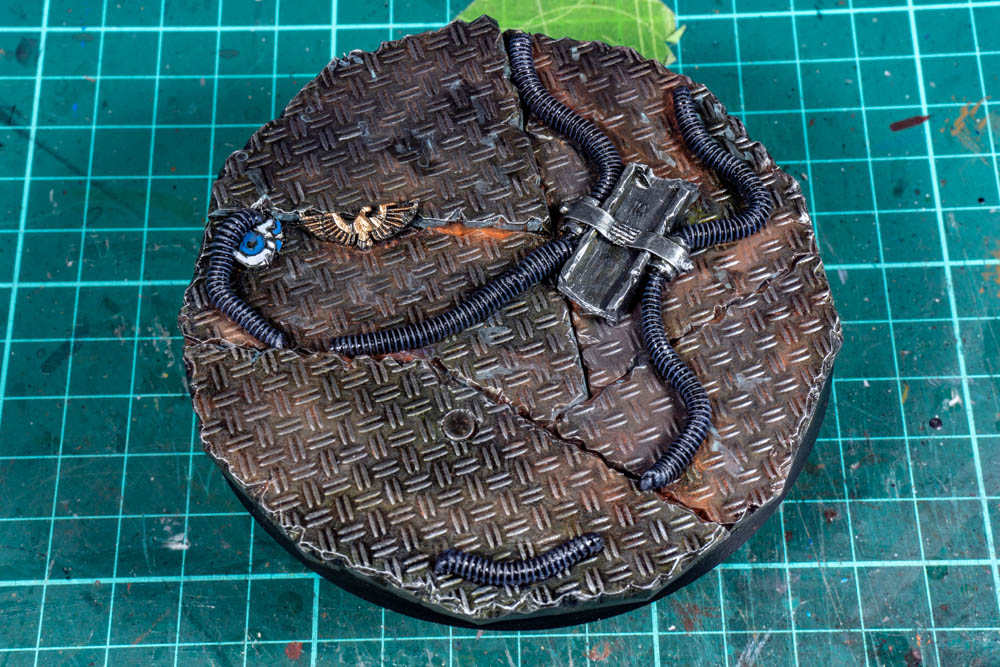
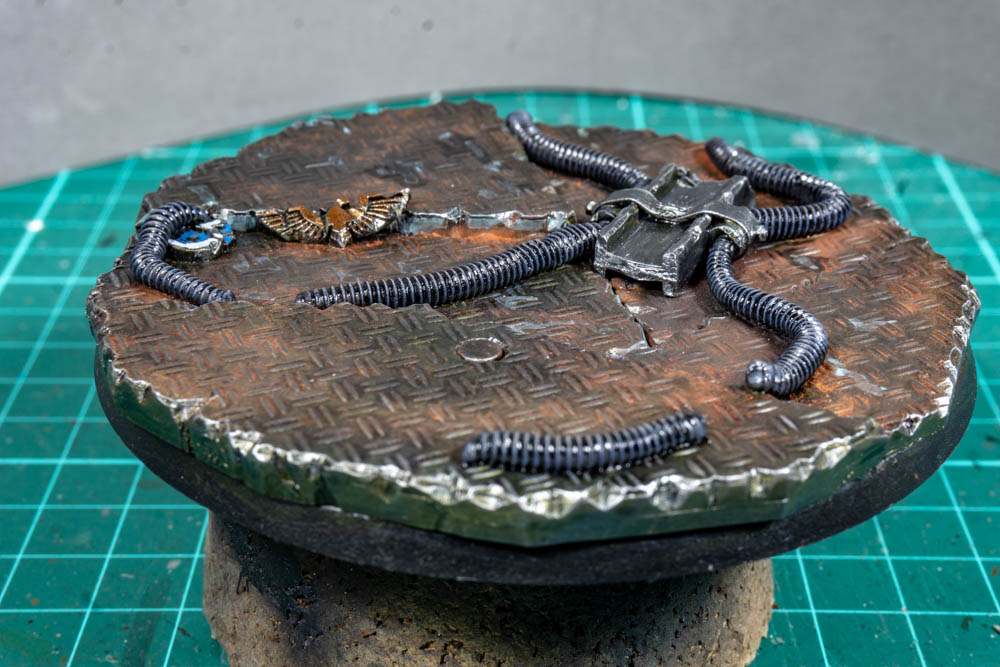
Day 5 The Base
Something a bit boring but essential to a model and that is the base. I wanted something that worked with the feel of the model but that was reasonably easy to do. So it’s just some textured plasticard that is set at different heights to give a bit of interest and then I’ve added what I’m hoping looks like a girder that has fallen off a wall or ceiling. The dread will get glued to this eventually but for now I’ve added a magnet so that I take things apart for painting.
I’ve only got a few detail bits to finish off now so I’m hoping to have that finished for Friday and then I can start painting this weekend. Fingers crossed.


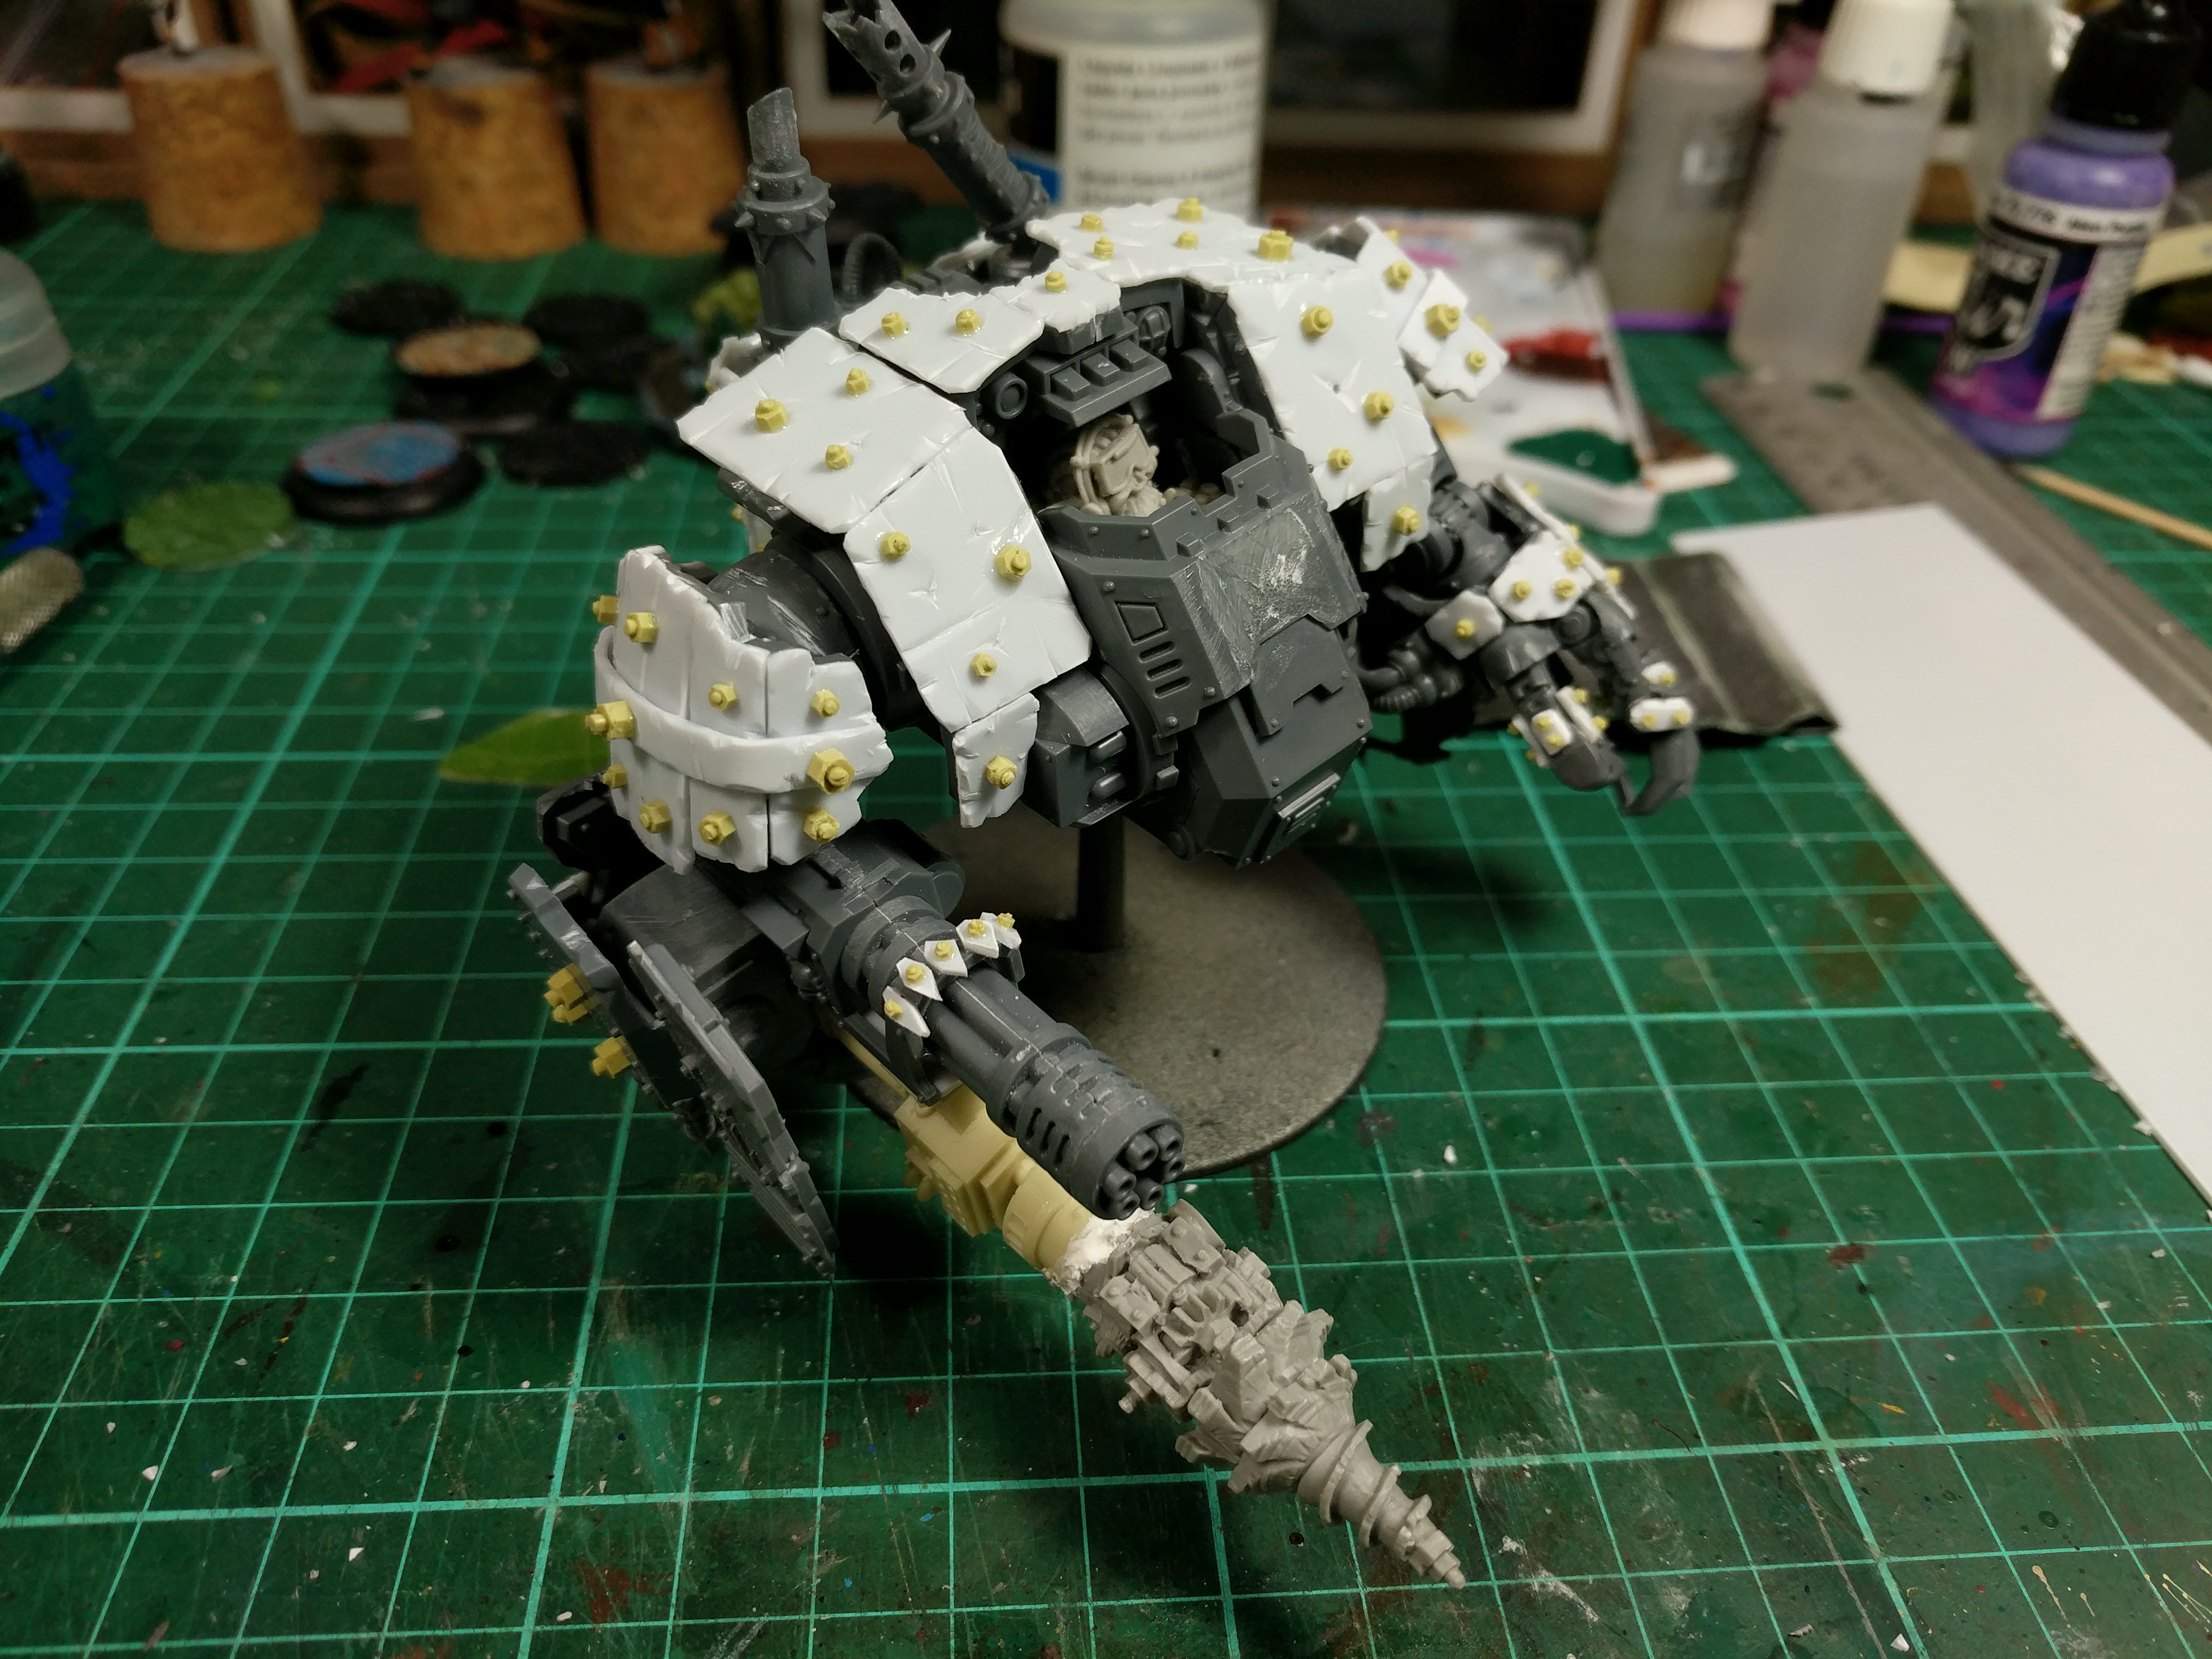
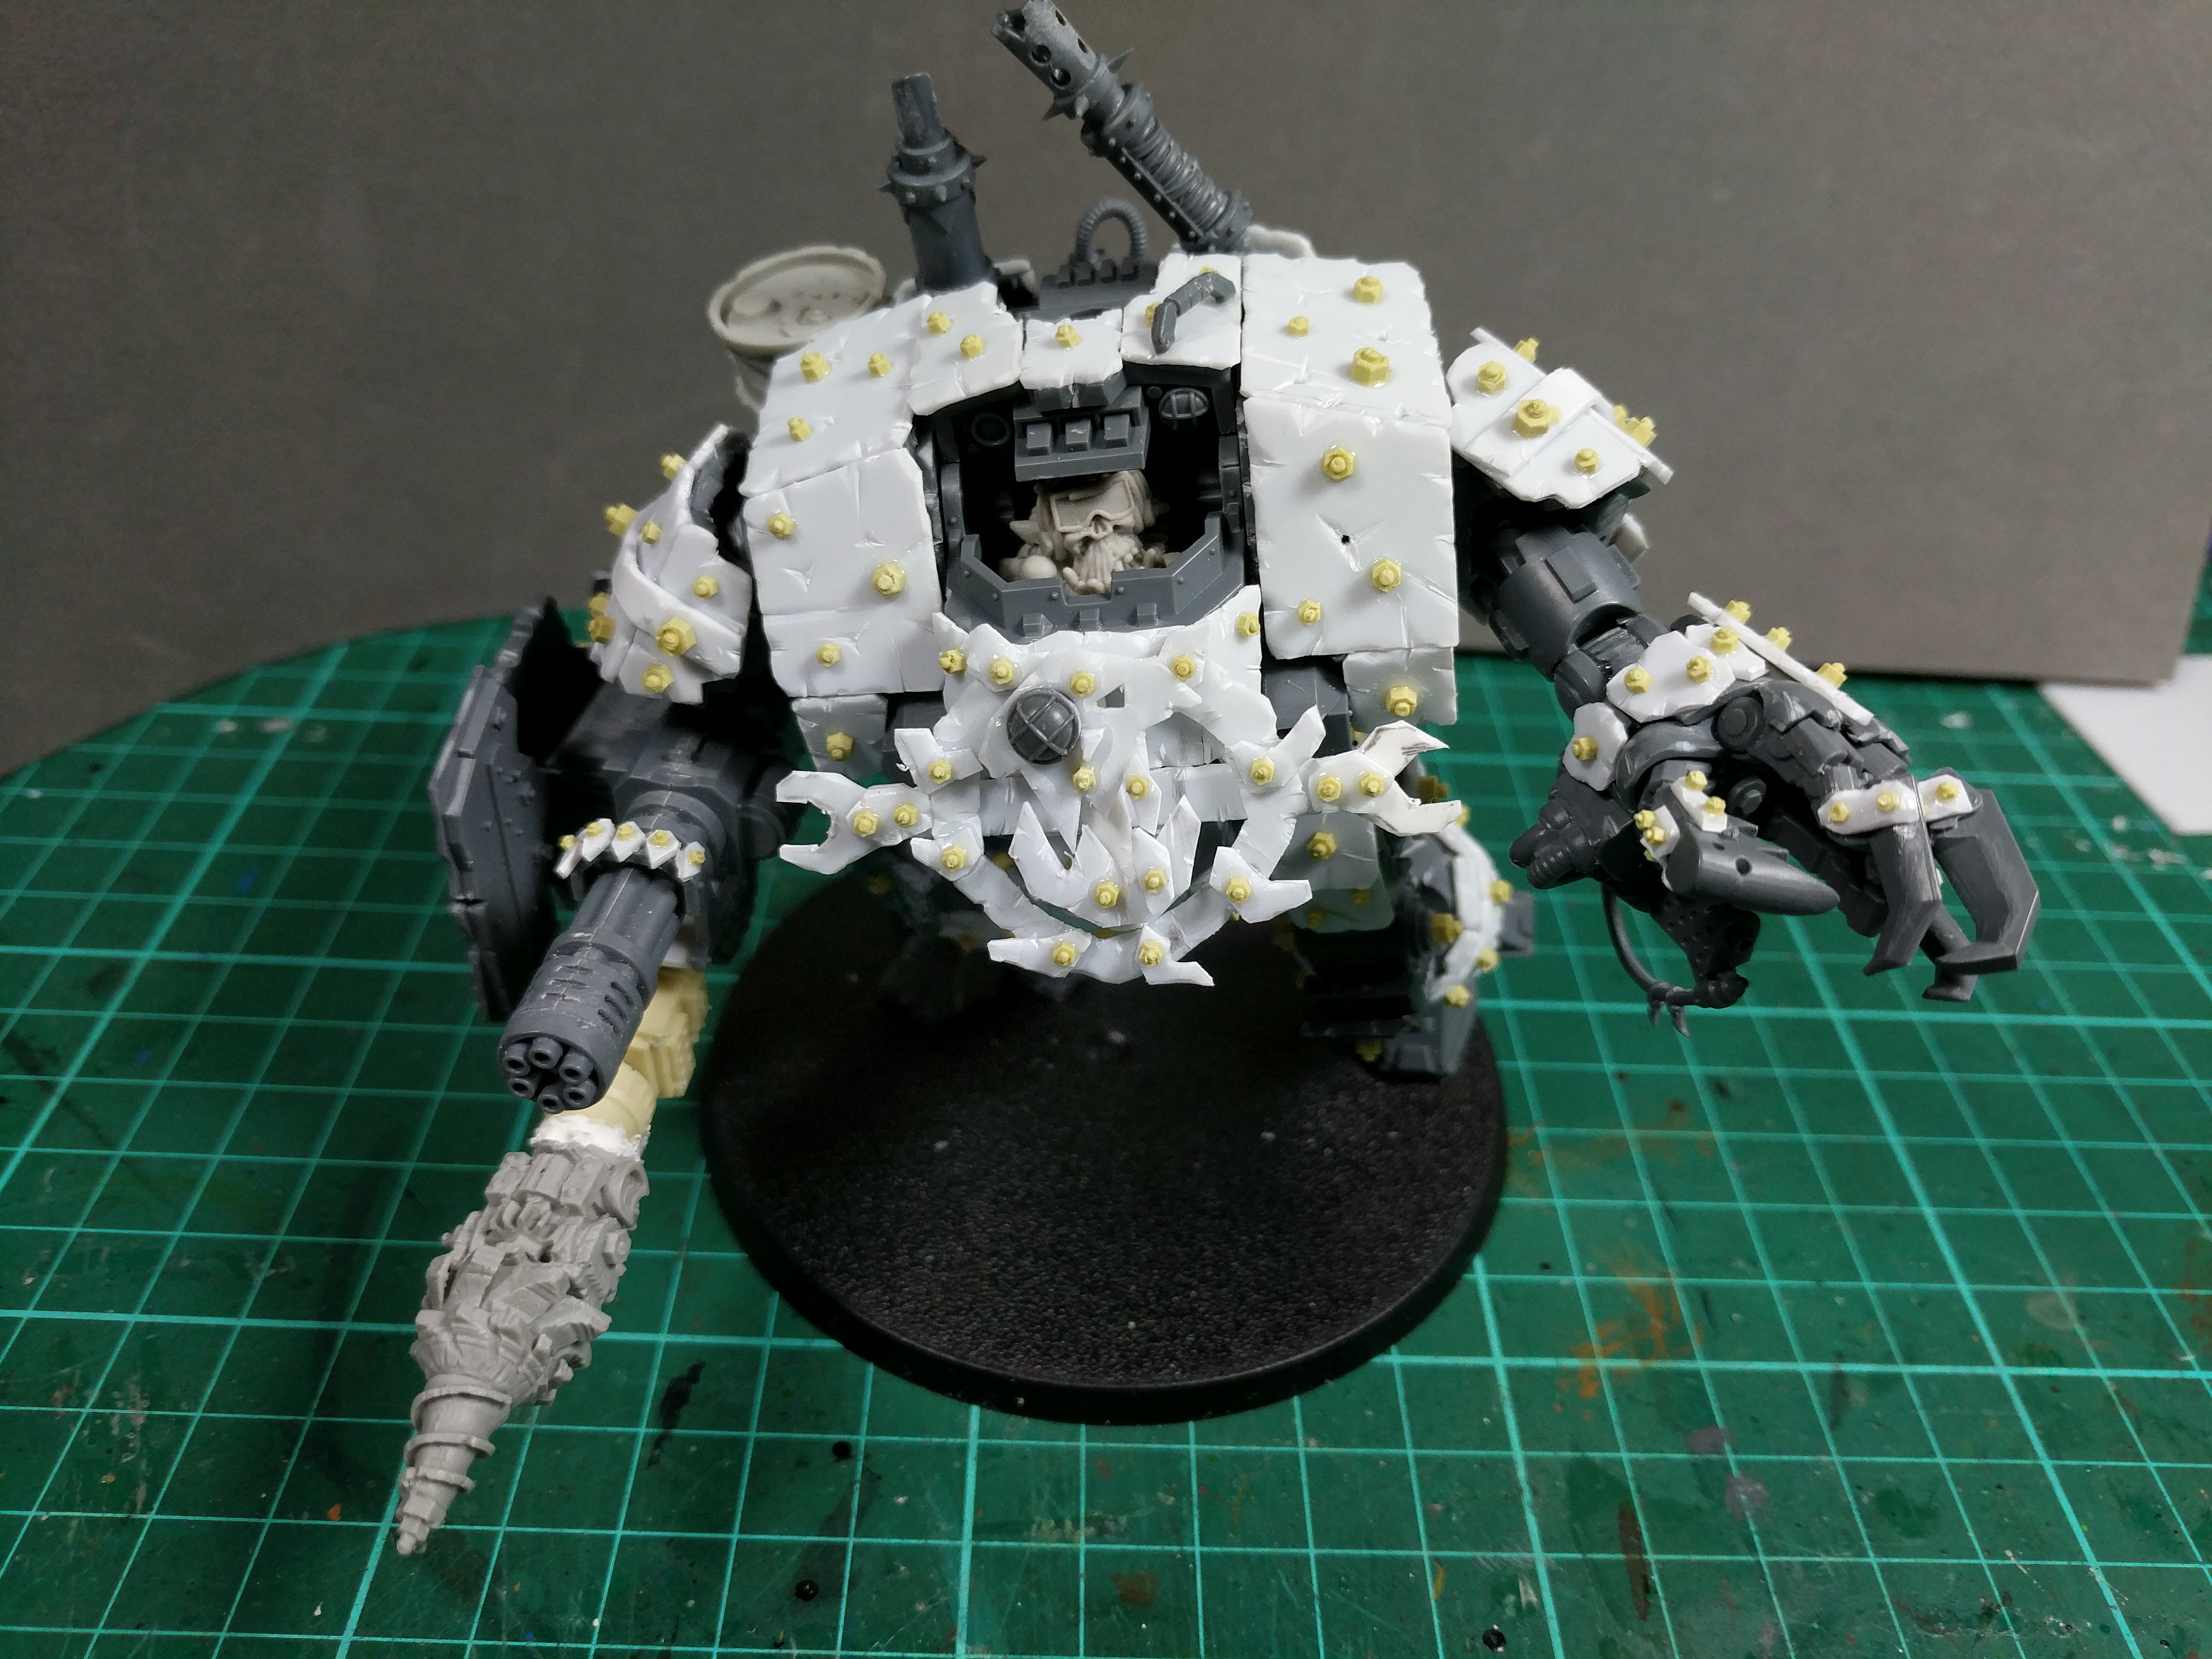
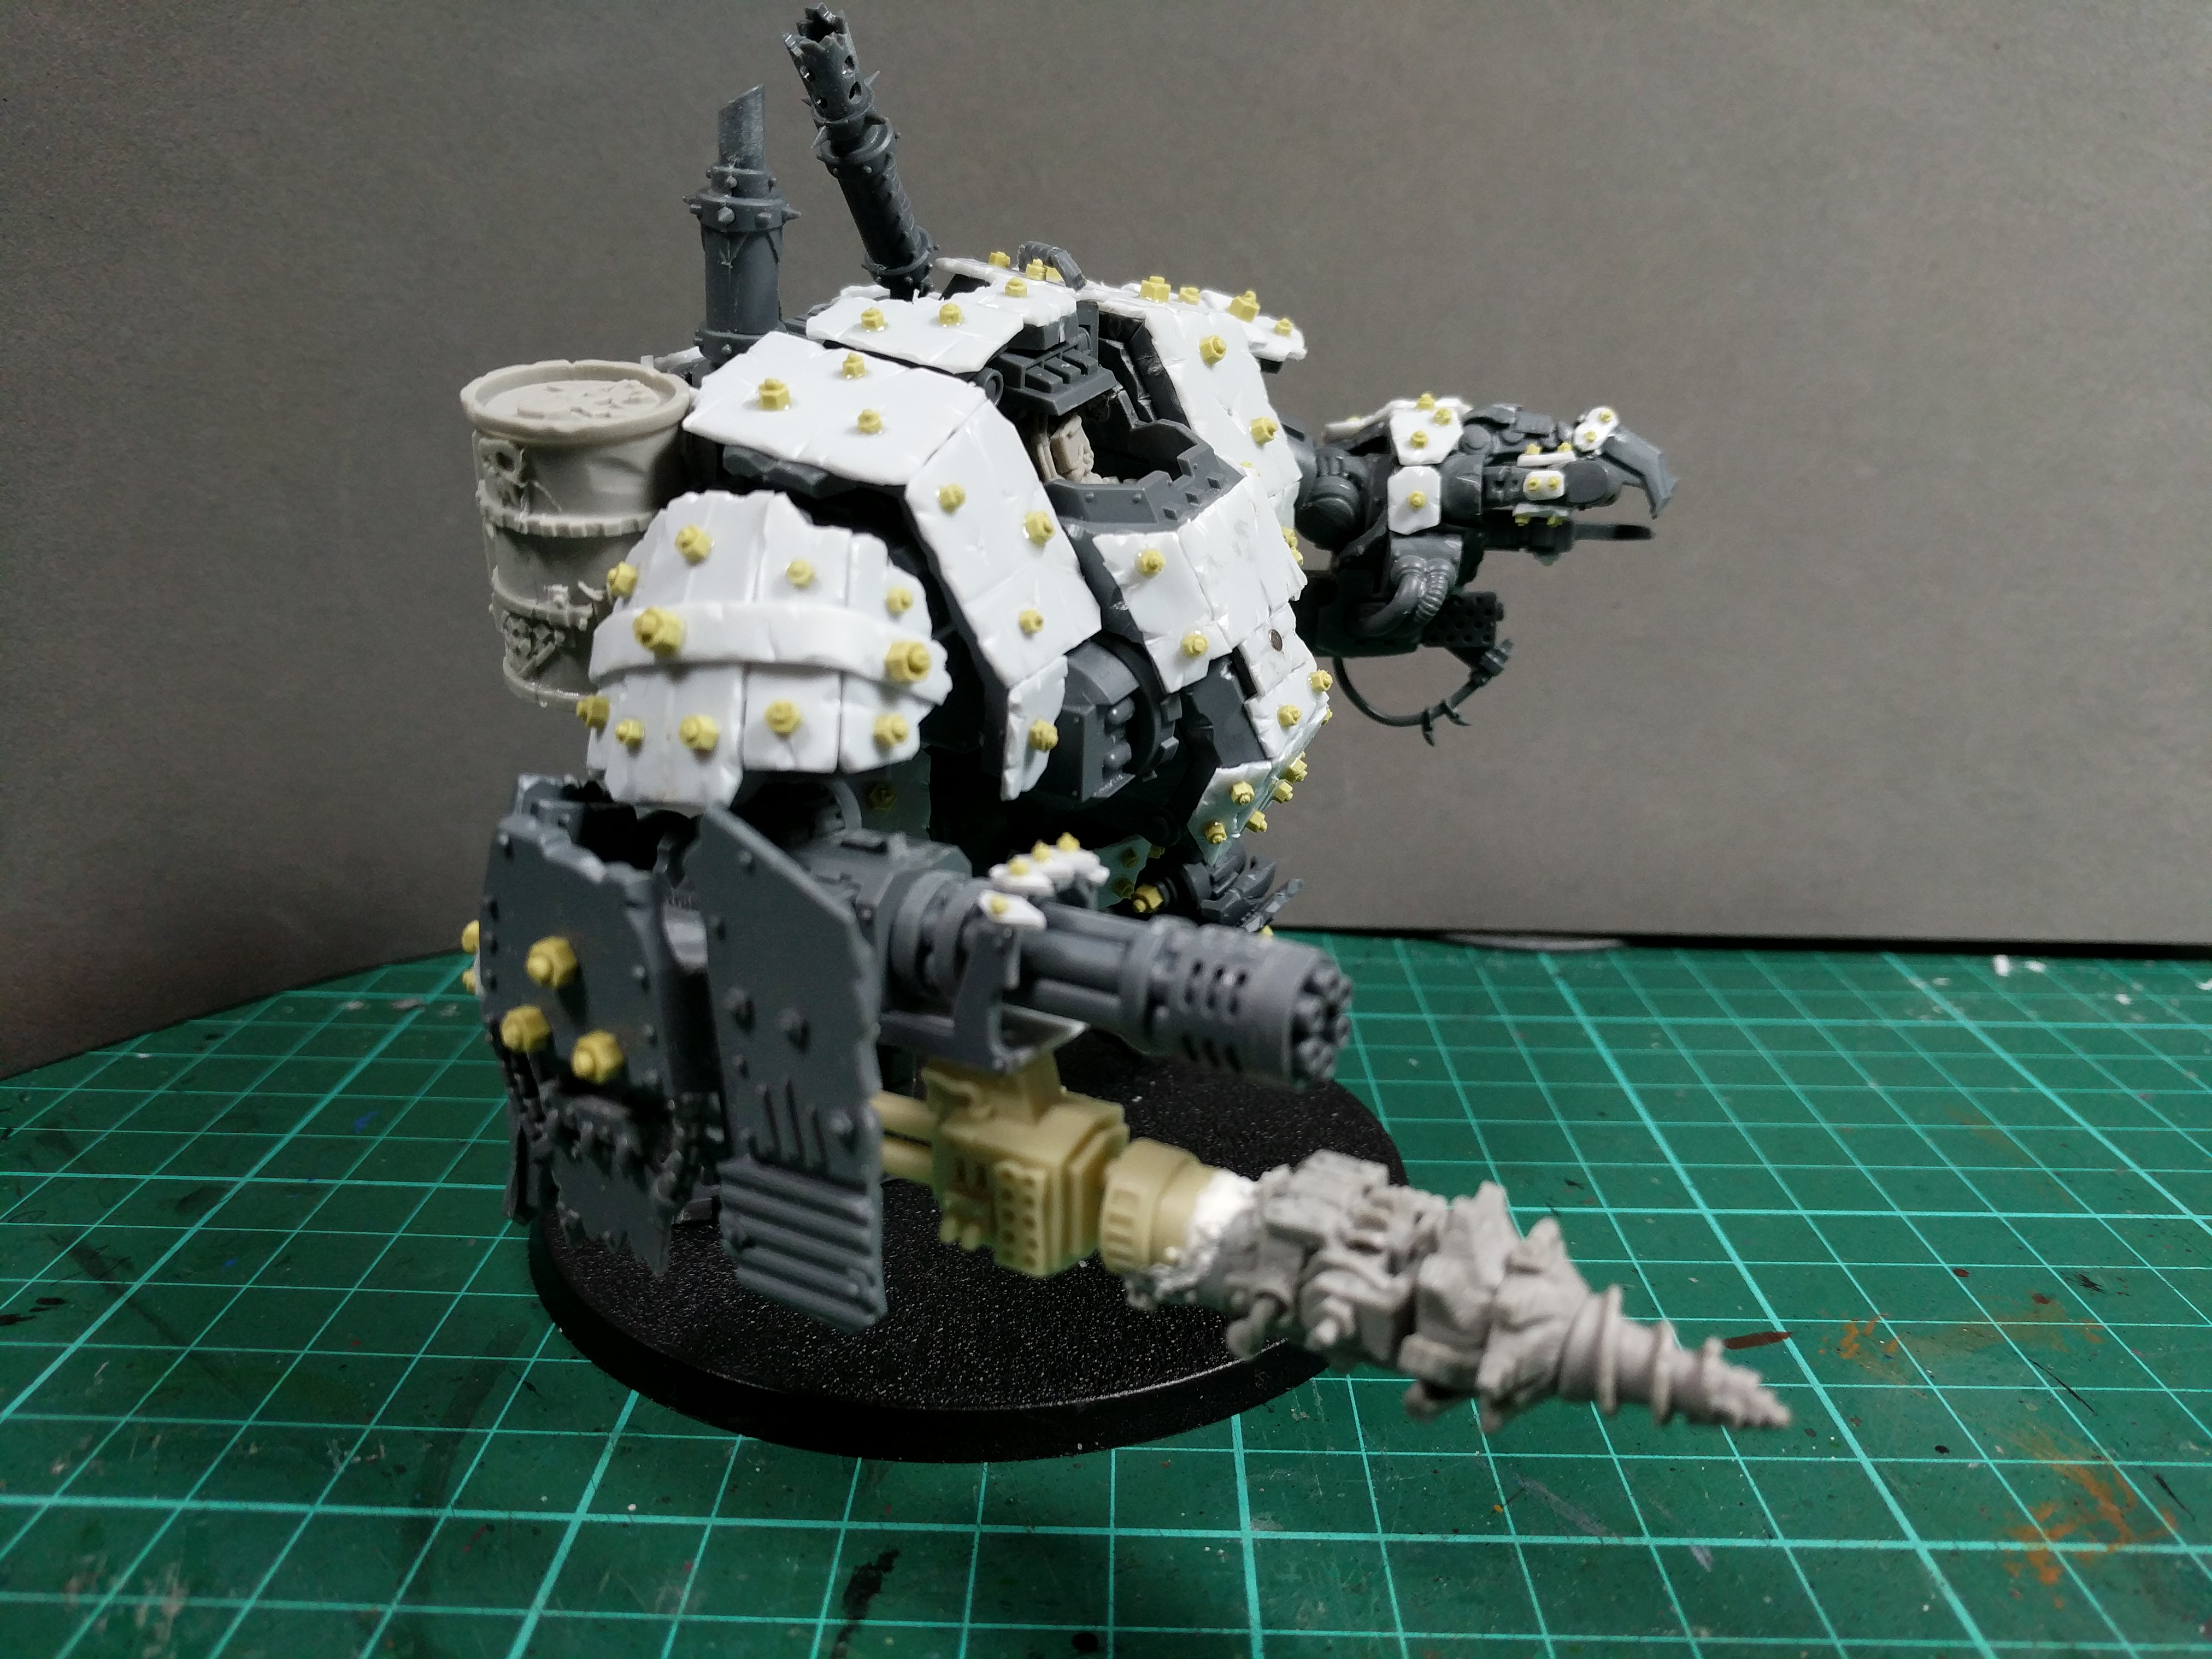
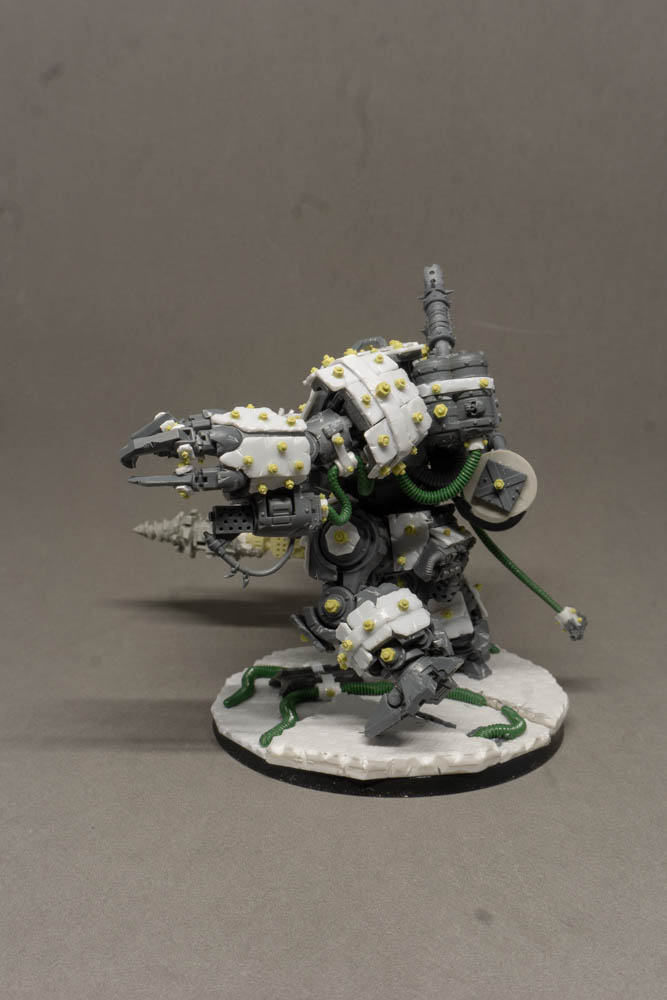
Day 6 Build Complete
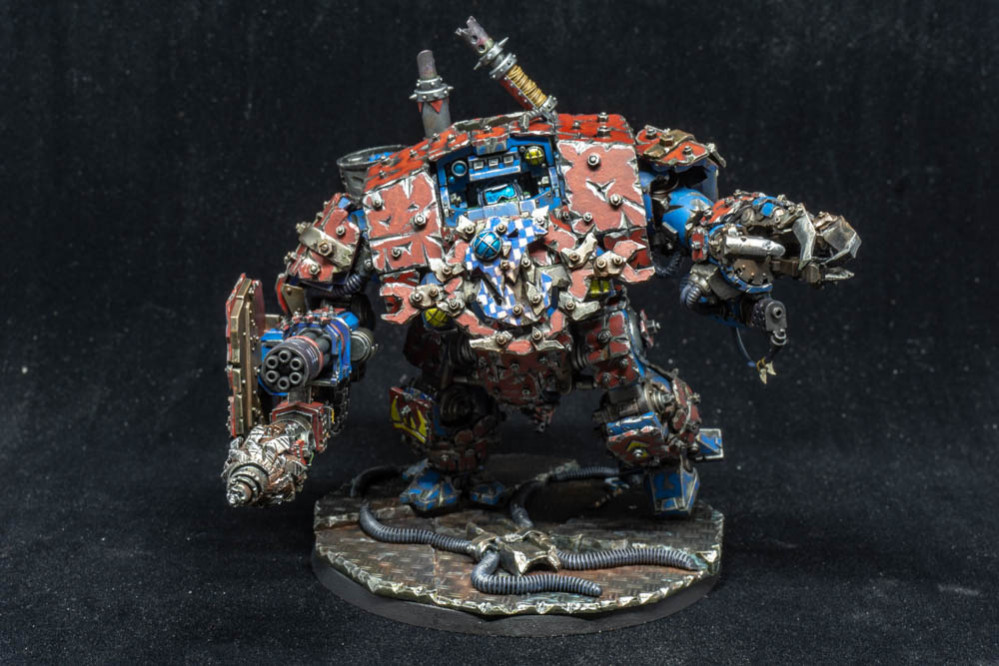
Ok then ladies and gentlemen I’ve decided to call it a day for the build now. I could go on adding gubbins forever but if I do that I will never get round to painting it. So it’s time for it to head off to the paint shop for a lick of paint. That might take a while as the more I look at it the more I keep finding to paint but to give you and idea of what I’m looking at doing is going for a red and blue (fast and lucky) colour scheme that will fit in with my existing orks. The original redemptor parts will be blue, as to my orky mind that was the original colour of the dread the grots disabled so they could create this creation. The red is just because I like it and I want it to go faster.
I plan to keep updating the project with the painting as I go along and will probably try to get an update out each day, assuming I make any progress.

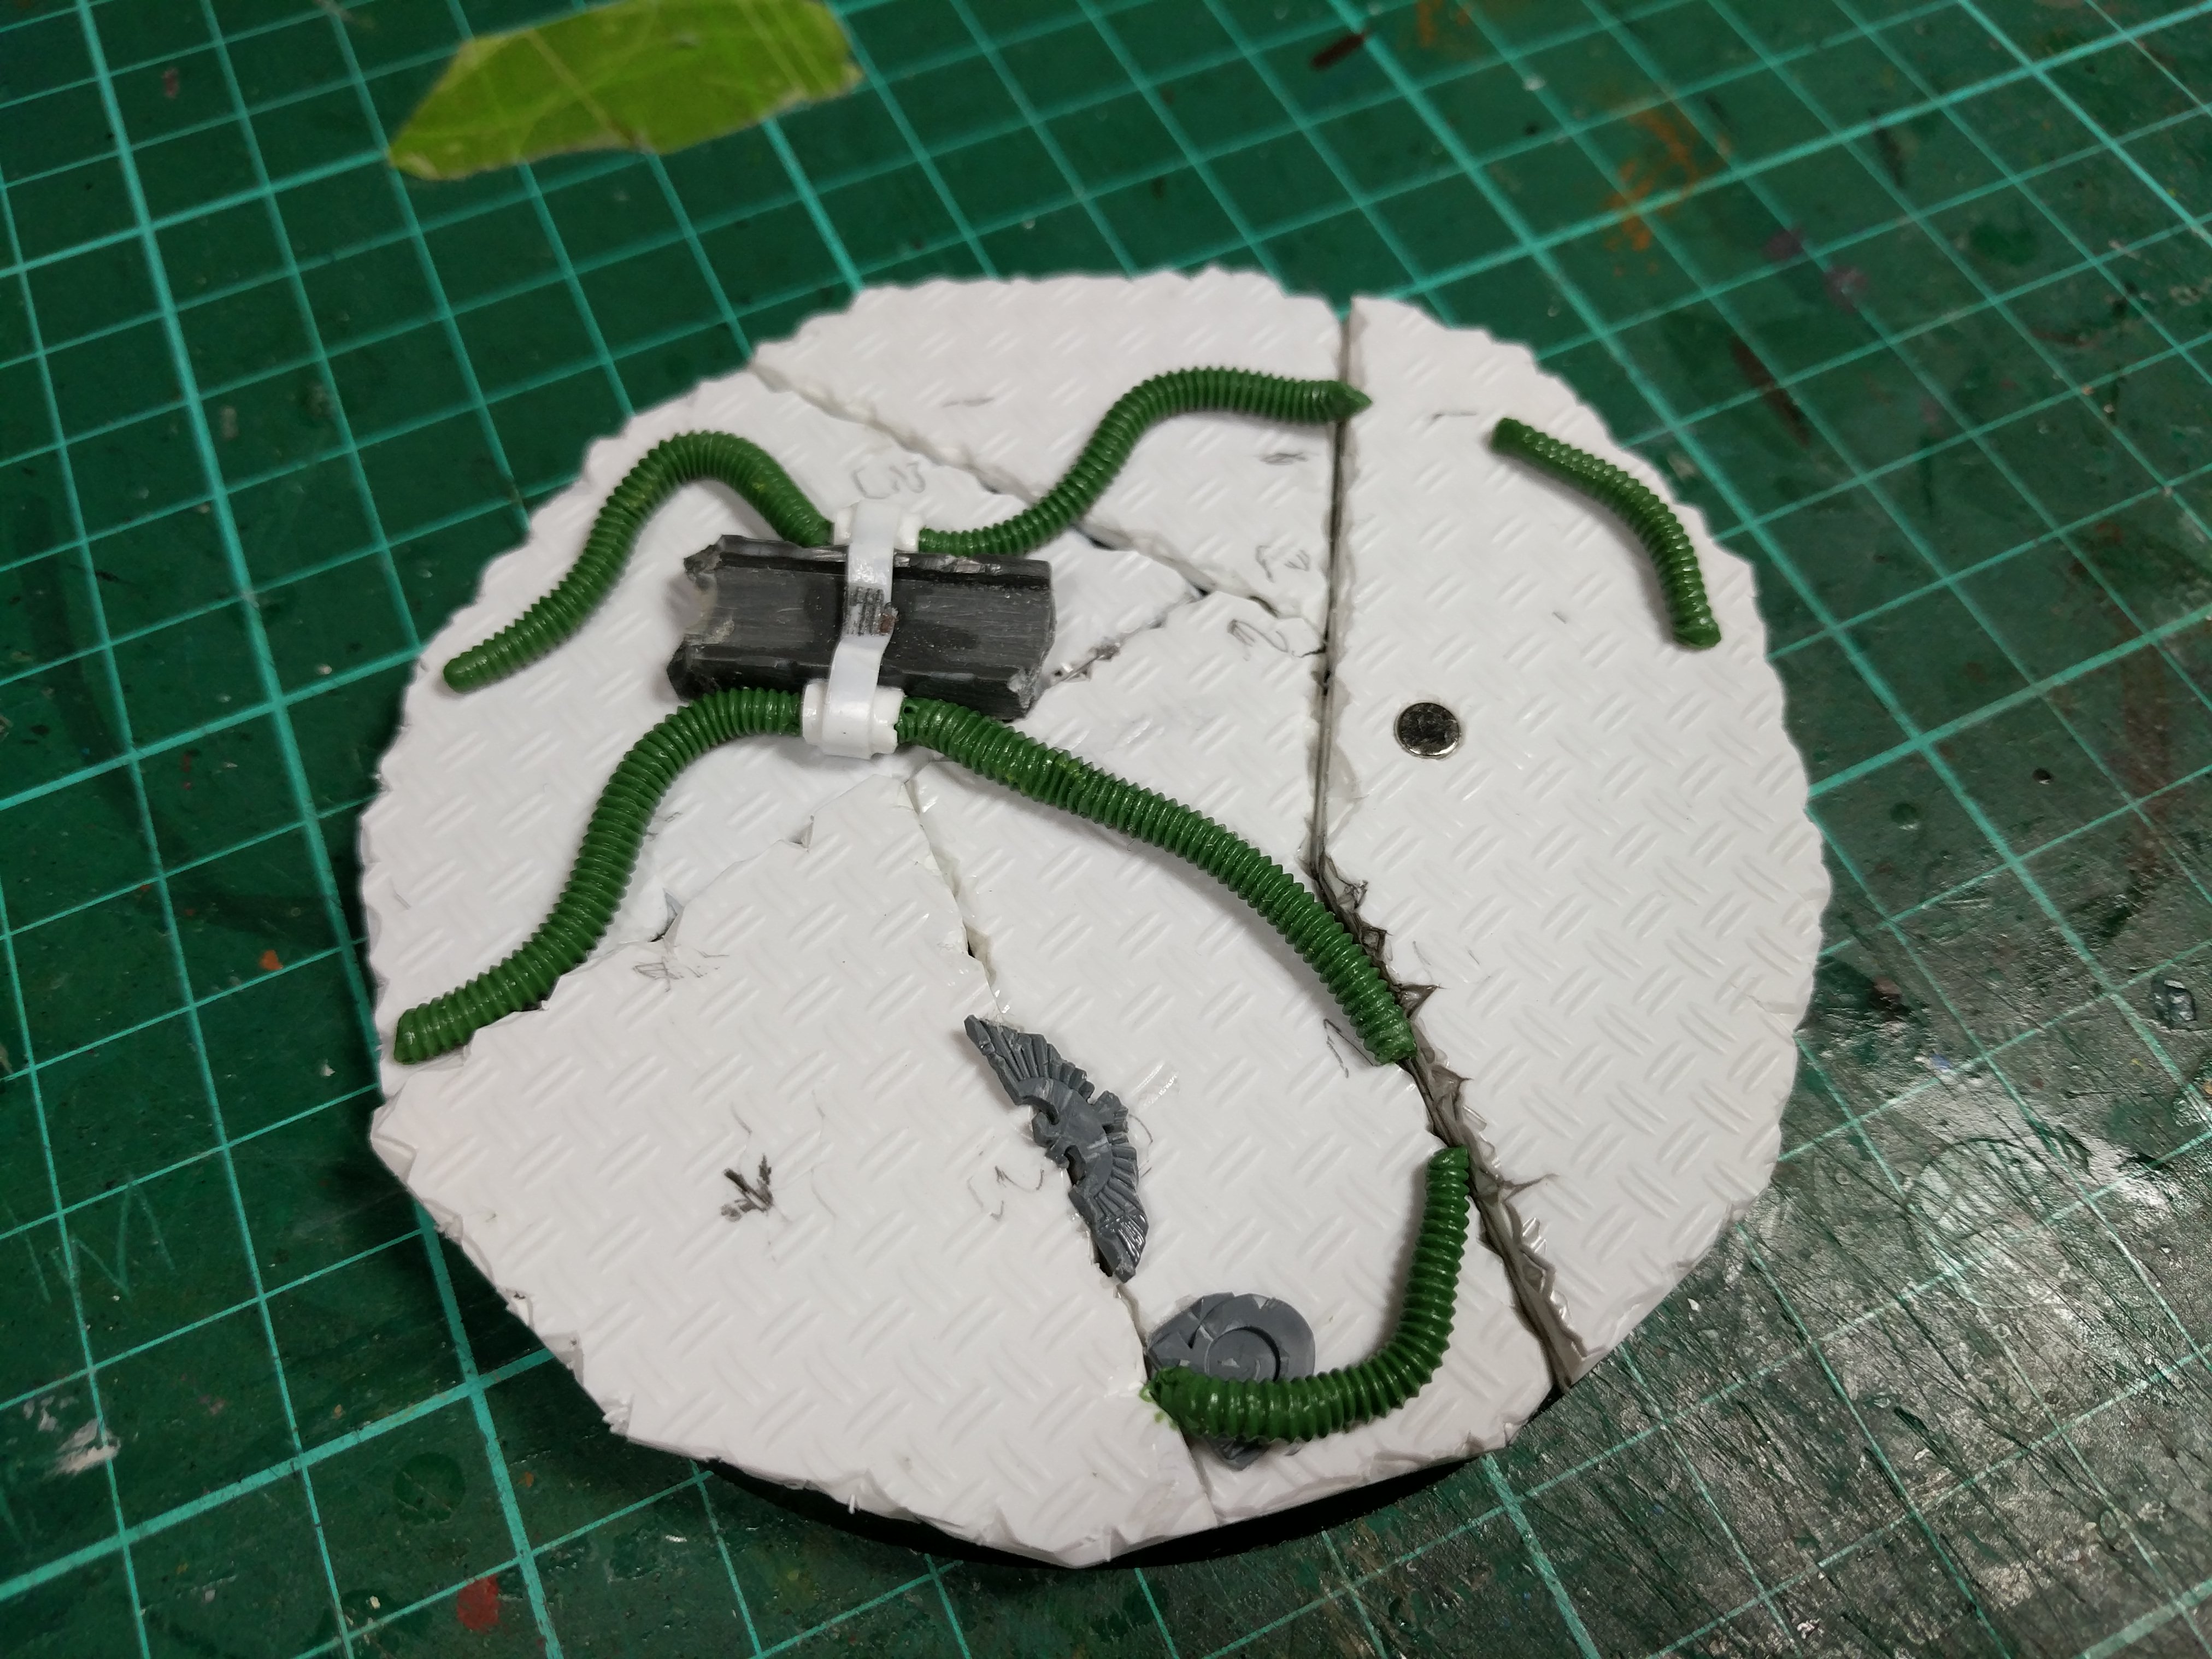
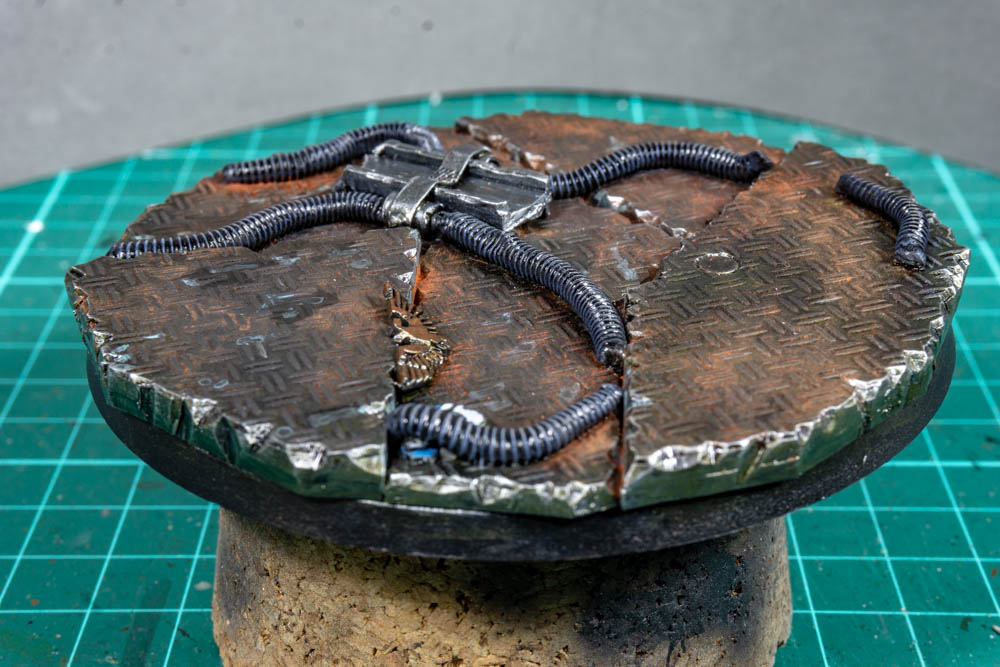
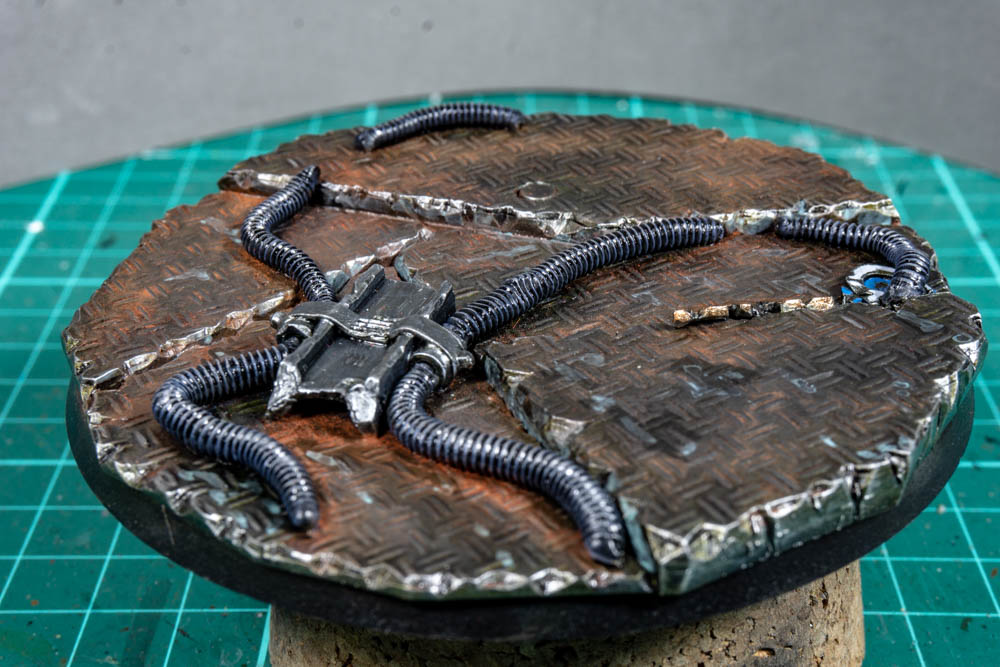
Day 7 The base has been to the paint shop.
I didn’t think that I would get the painting started until tomorrow (Saturday) but managed to fit in enough time to get about 90% of the base completed. I’m not planning on going to grungy and wanted to sneak in a couple of little bits to tie in with the Imperial theme of the Redemptor and this is what I’ve decided on. I’ll do some final highlights and a bit more weathering once the model is actually on the base but I don’t think there will be many changes. Plus starting with the base keeps the mojo flowing so I’m hoping to make some progress on the legs tomorrow. Fingers crossed I’ll have another update for you tomorrow and if things go well and I remember I’ll try and do a couple showing the different steps along the way.


![Mounted US Cavalry On Kickstarter For Dead Man’s Hand! [Updated]](https://images.beastsofwar.com/2026/03/us-cavalry-main-600-338.jpg)


![Play WW2 Commando Operations With Butcher & Bolt [Updated]](https://images.beastsofwar.com/2026/03/relaunch-600-338.jpg)


