


![Alternative Trench Crusade Miniatures? Trench Missionaries Review | Wargames Atlantic [7 Days Early Access]](https://images.beastsofwar.com/2026/03/unboxing-wargames-atlantic-trench-missionaries-coverimage-225-127.jpg)


Civil War Campaign: Union


Recommendations: 103
About the Project
Welcome to the Union Side of my Sharp Practice Campaign! Here we'll follow the exploits of two New York Officers as they lead their men in an attempt to slow down the Rebel forces pursuing the Union army after the Battle of Bull Run (That's Manassas to you dirty Reb's sneaking around in here). Without further ado I take you to Virginia, The United States of America, Late July 1861.
Related Game: Sharp Practice
Related Company: Too Fat Lardies
Related Genre: Historical
This Project is Cancelled
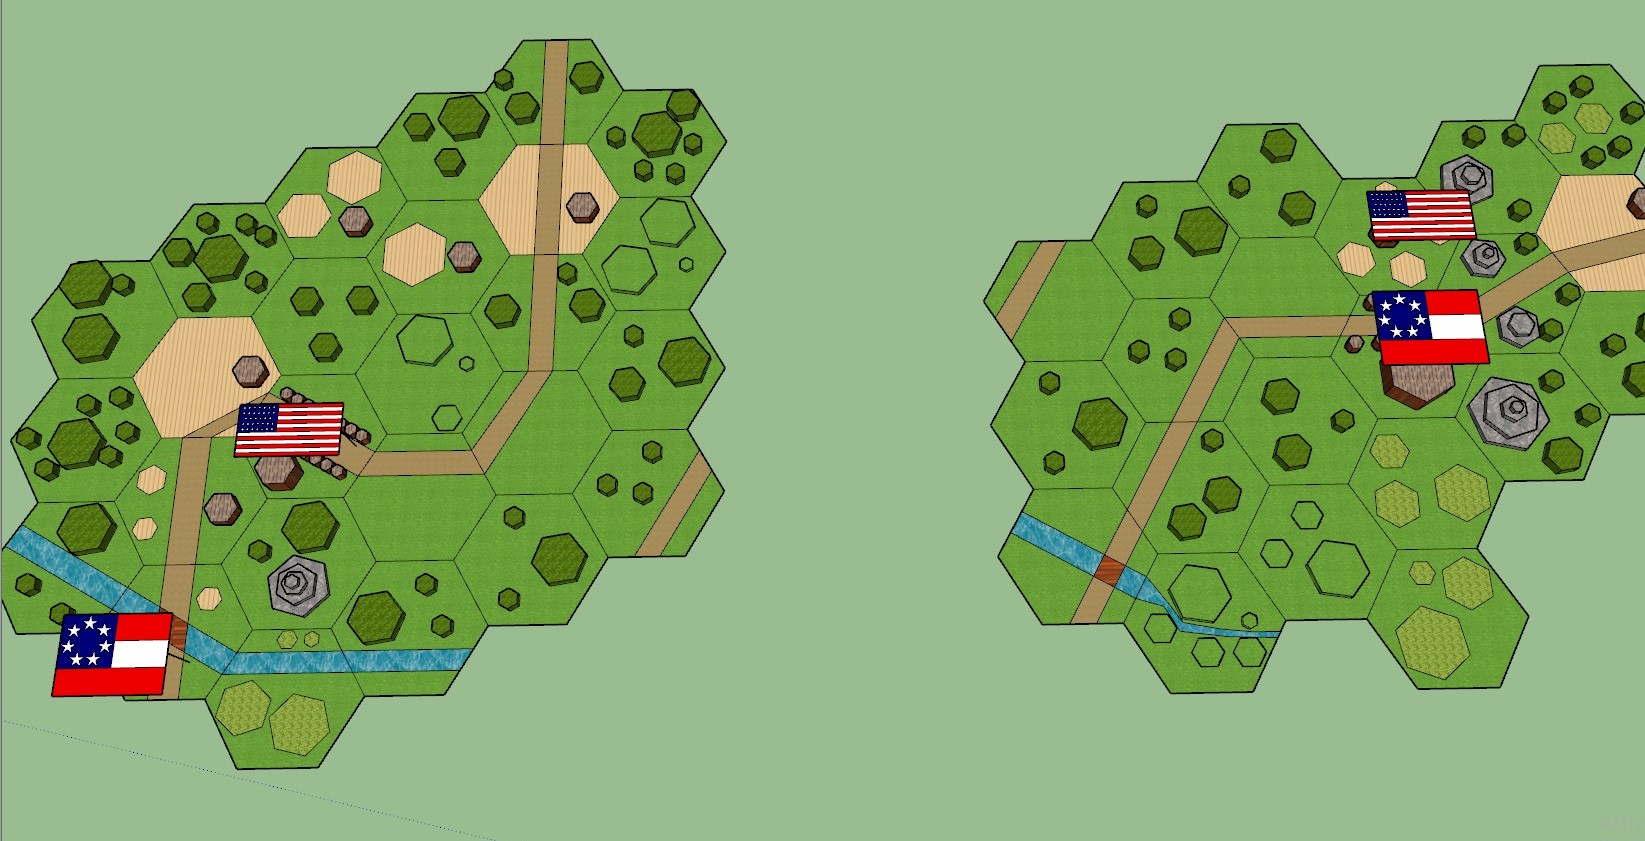
Prelude to Burn's Farm
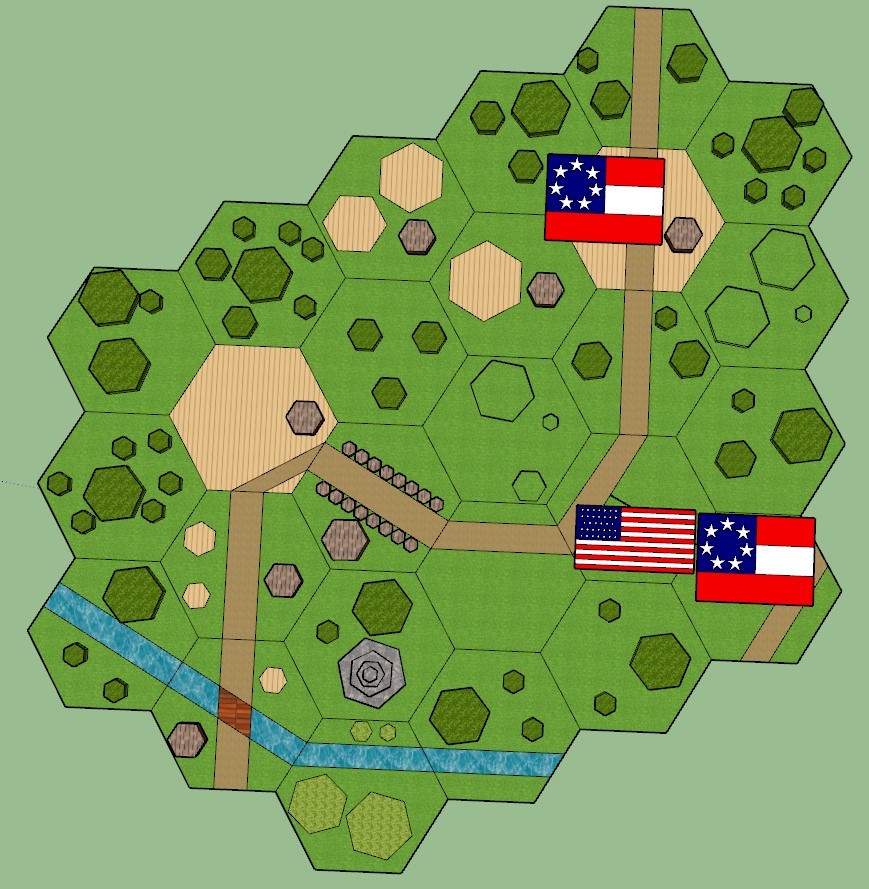 Marshall on the Left
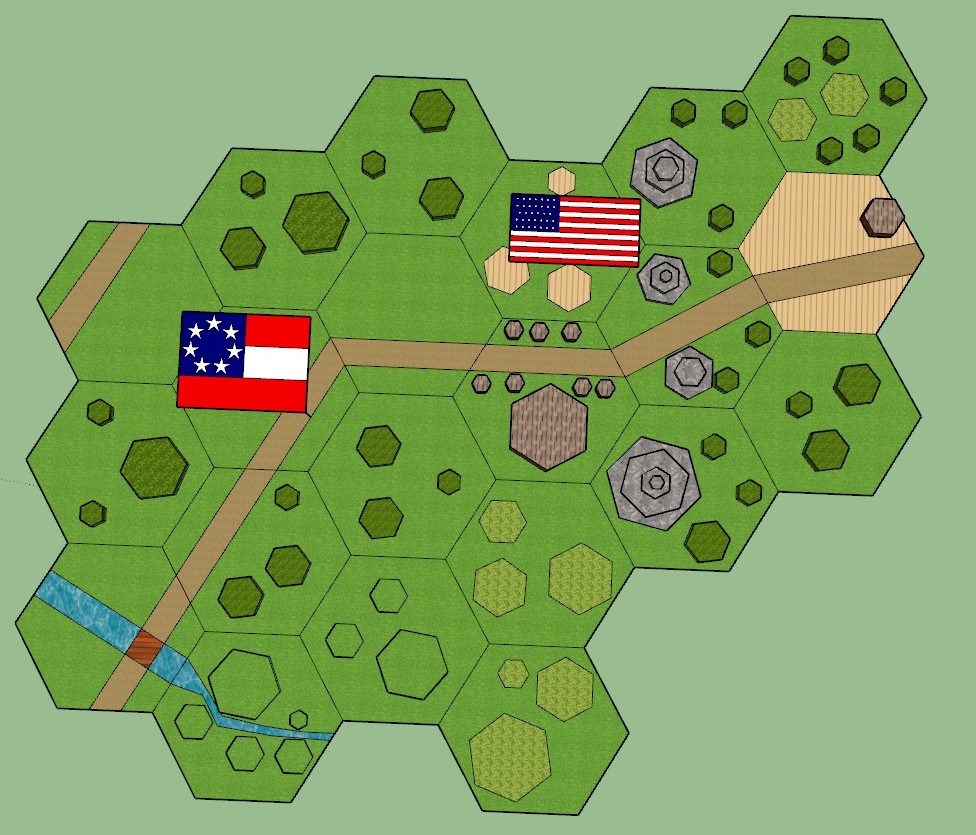 Marshall on the Left
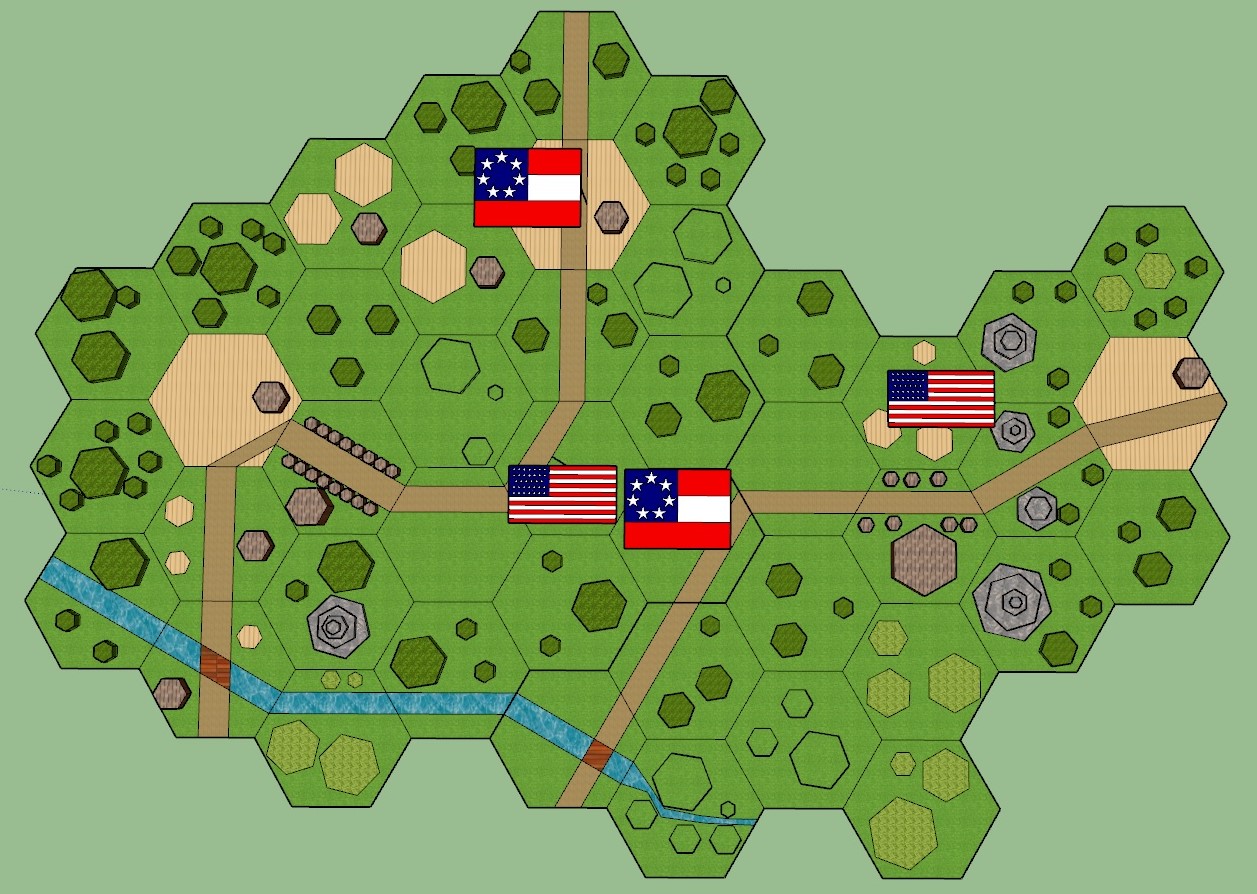 The Two Maps were then Merged
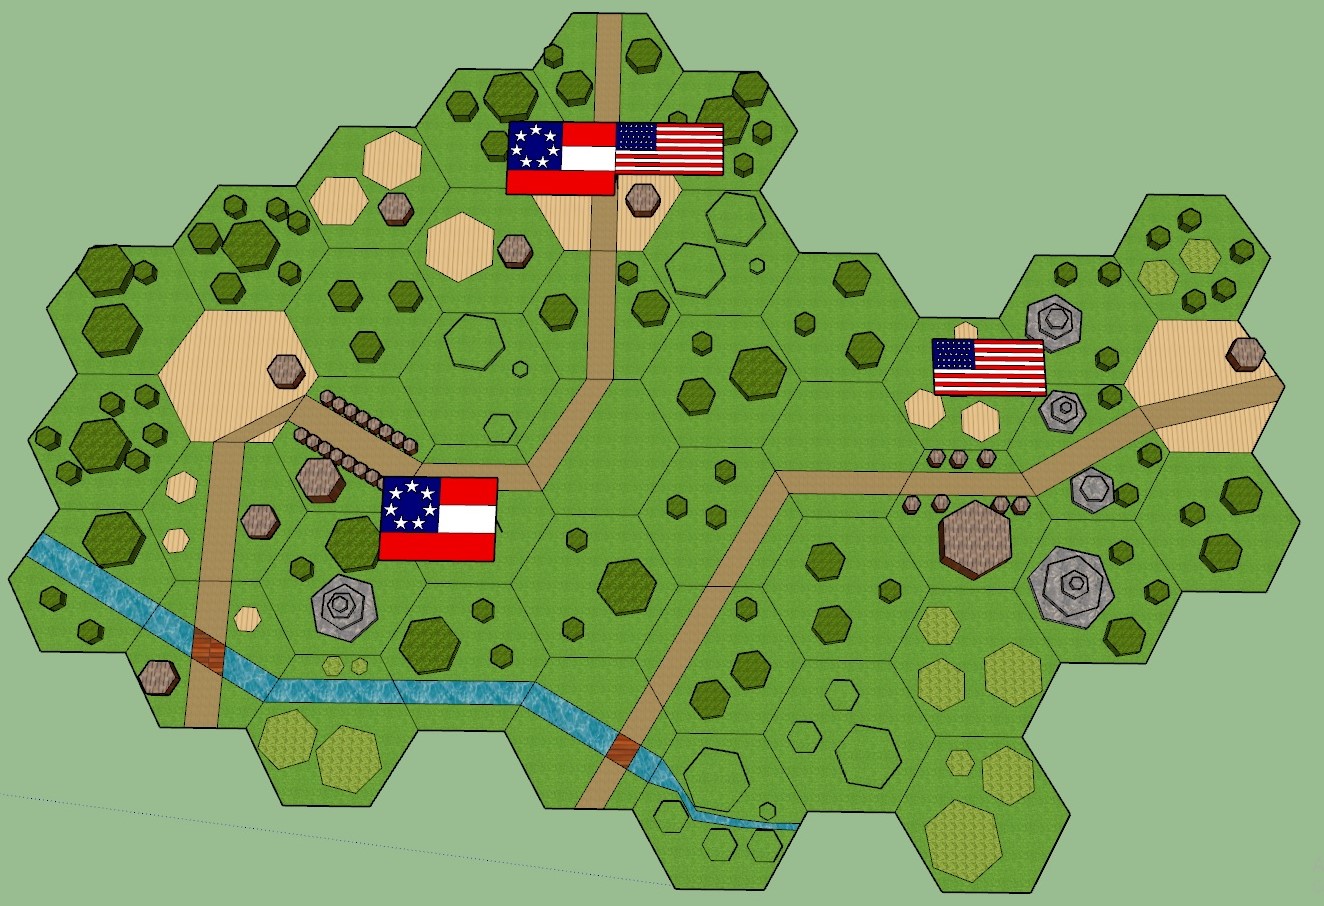 Here we can see Captain Marshall Attacking the Rebels at a Farm that would Later become known as "Burns Farm" as we will soon see
As the Union troops approached the Farm no one could tell them who owned the farm. It was apparently the property of a man now living in Texas who simply allowed tenants to live on it for rent and was a very distant landlord.
As the following report will show the farm became known by both sides as “Burns Farm”…..
The Next Day
 Marshall on the Left
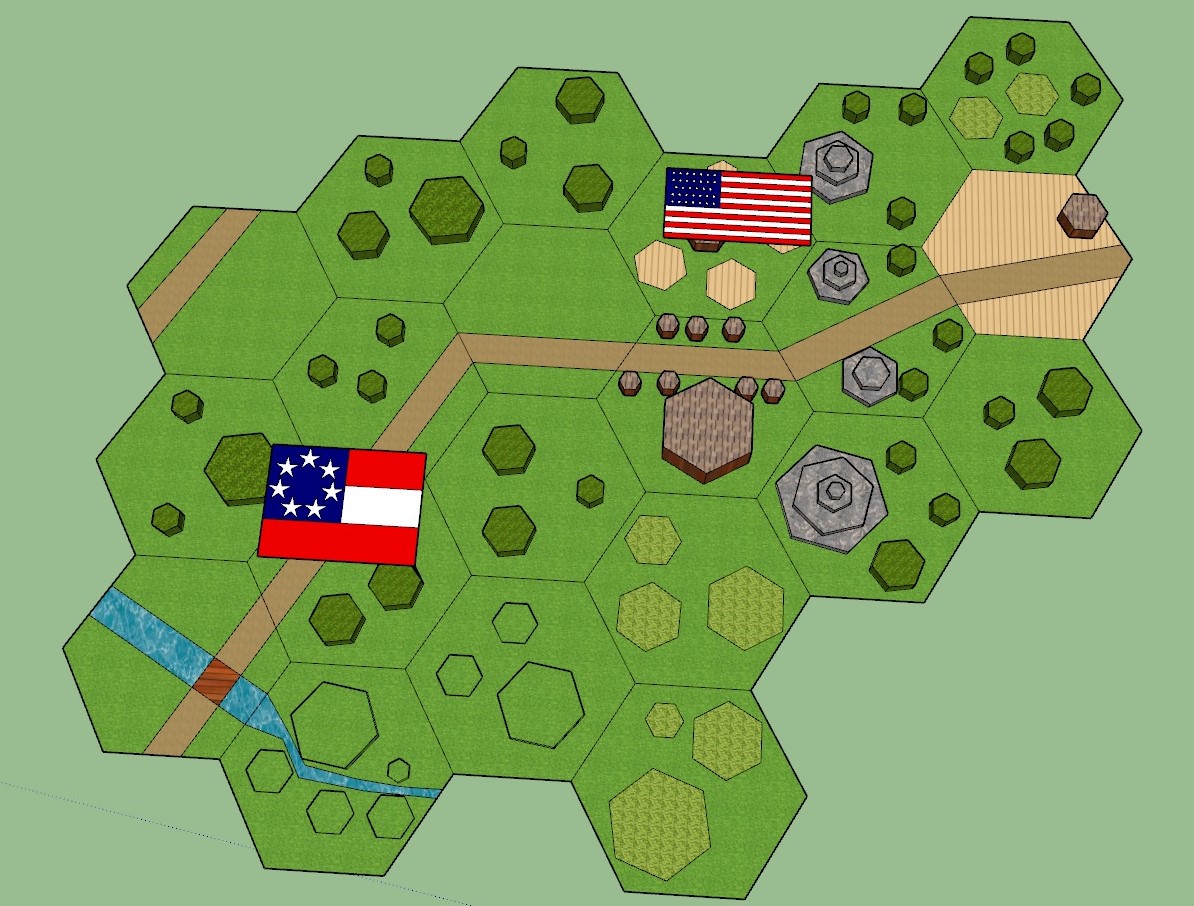 Marshall on the Left
Captain Marshall Refuses to Move from the Town and Captain Lewis’ Men try to Recover some of their Losses at the Freemantle Farm
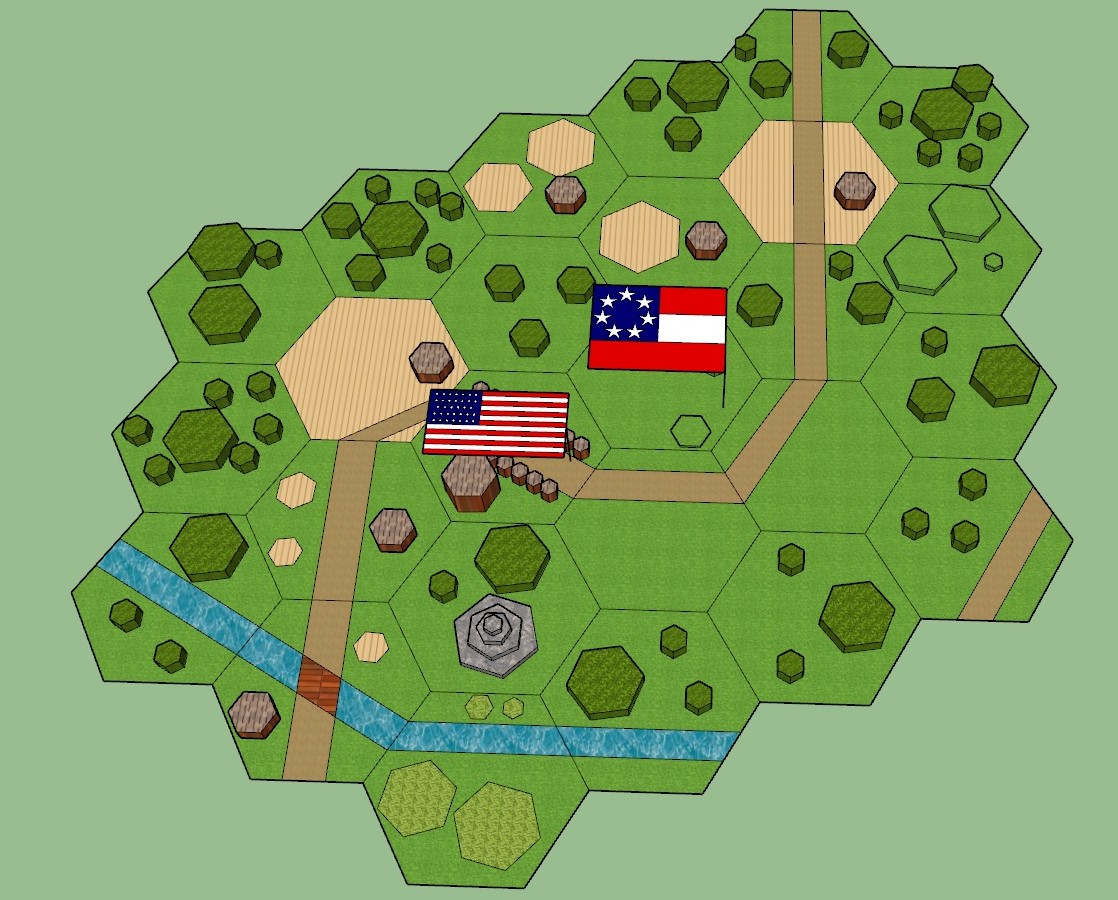
Freemantle Farm Part II
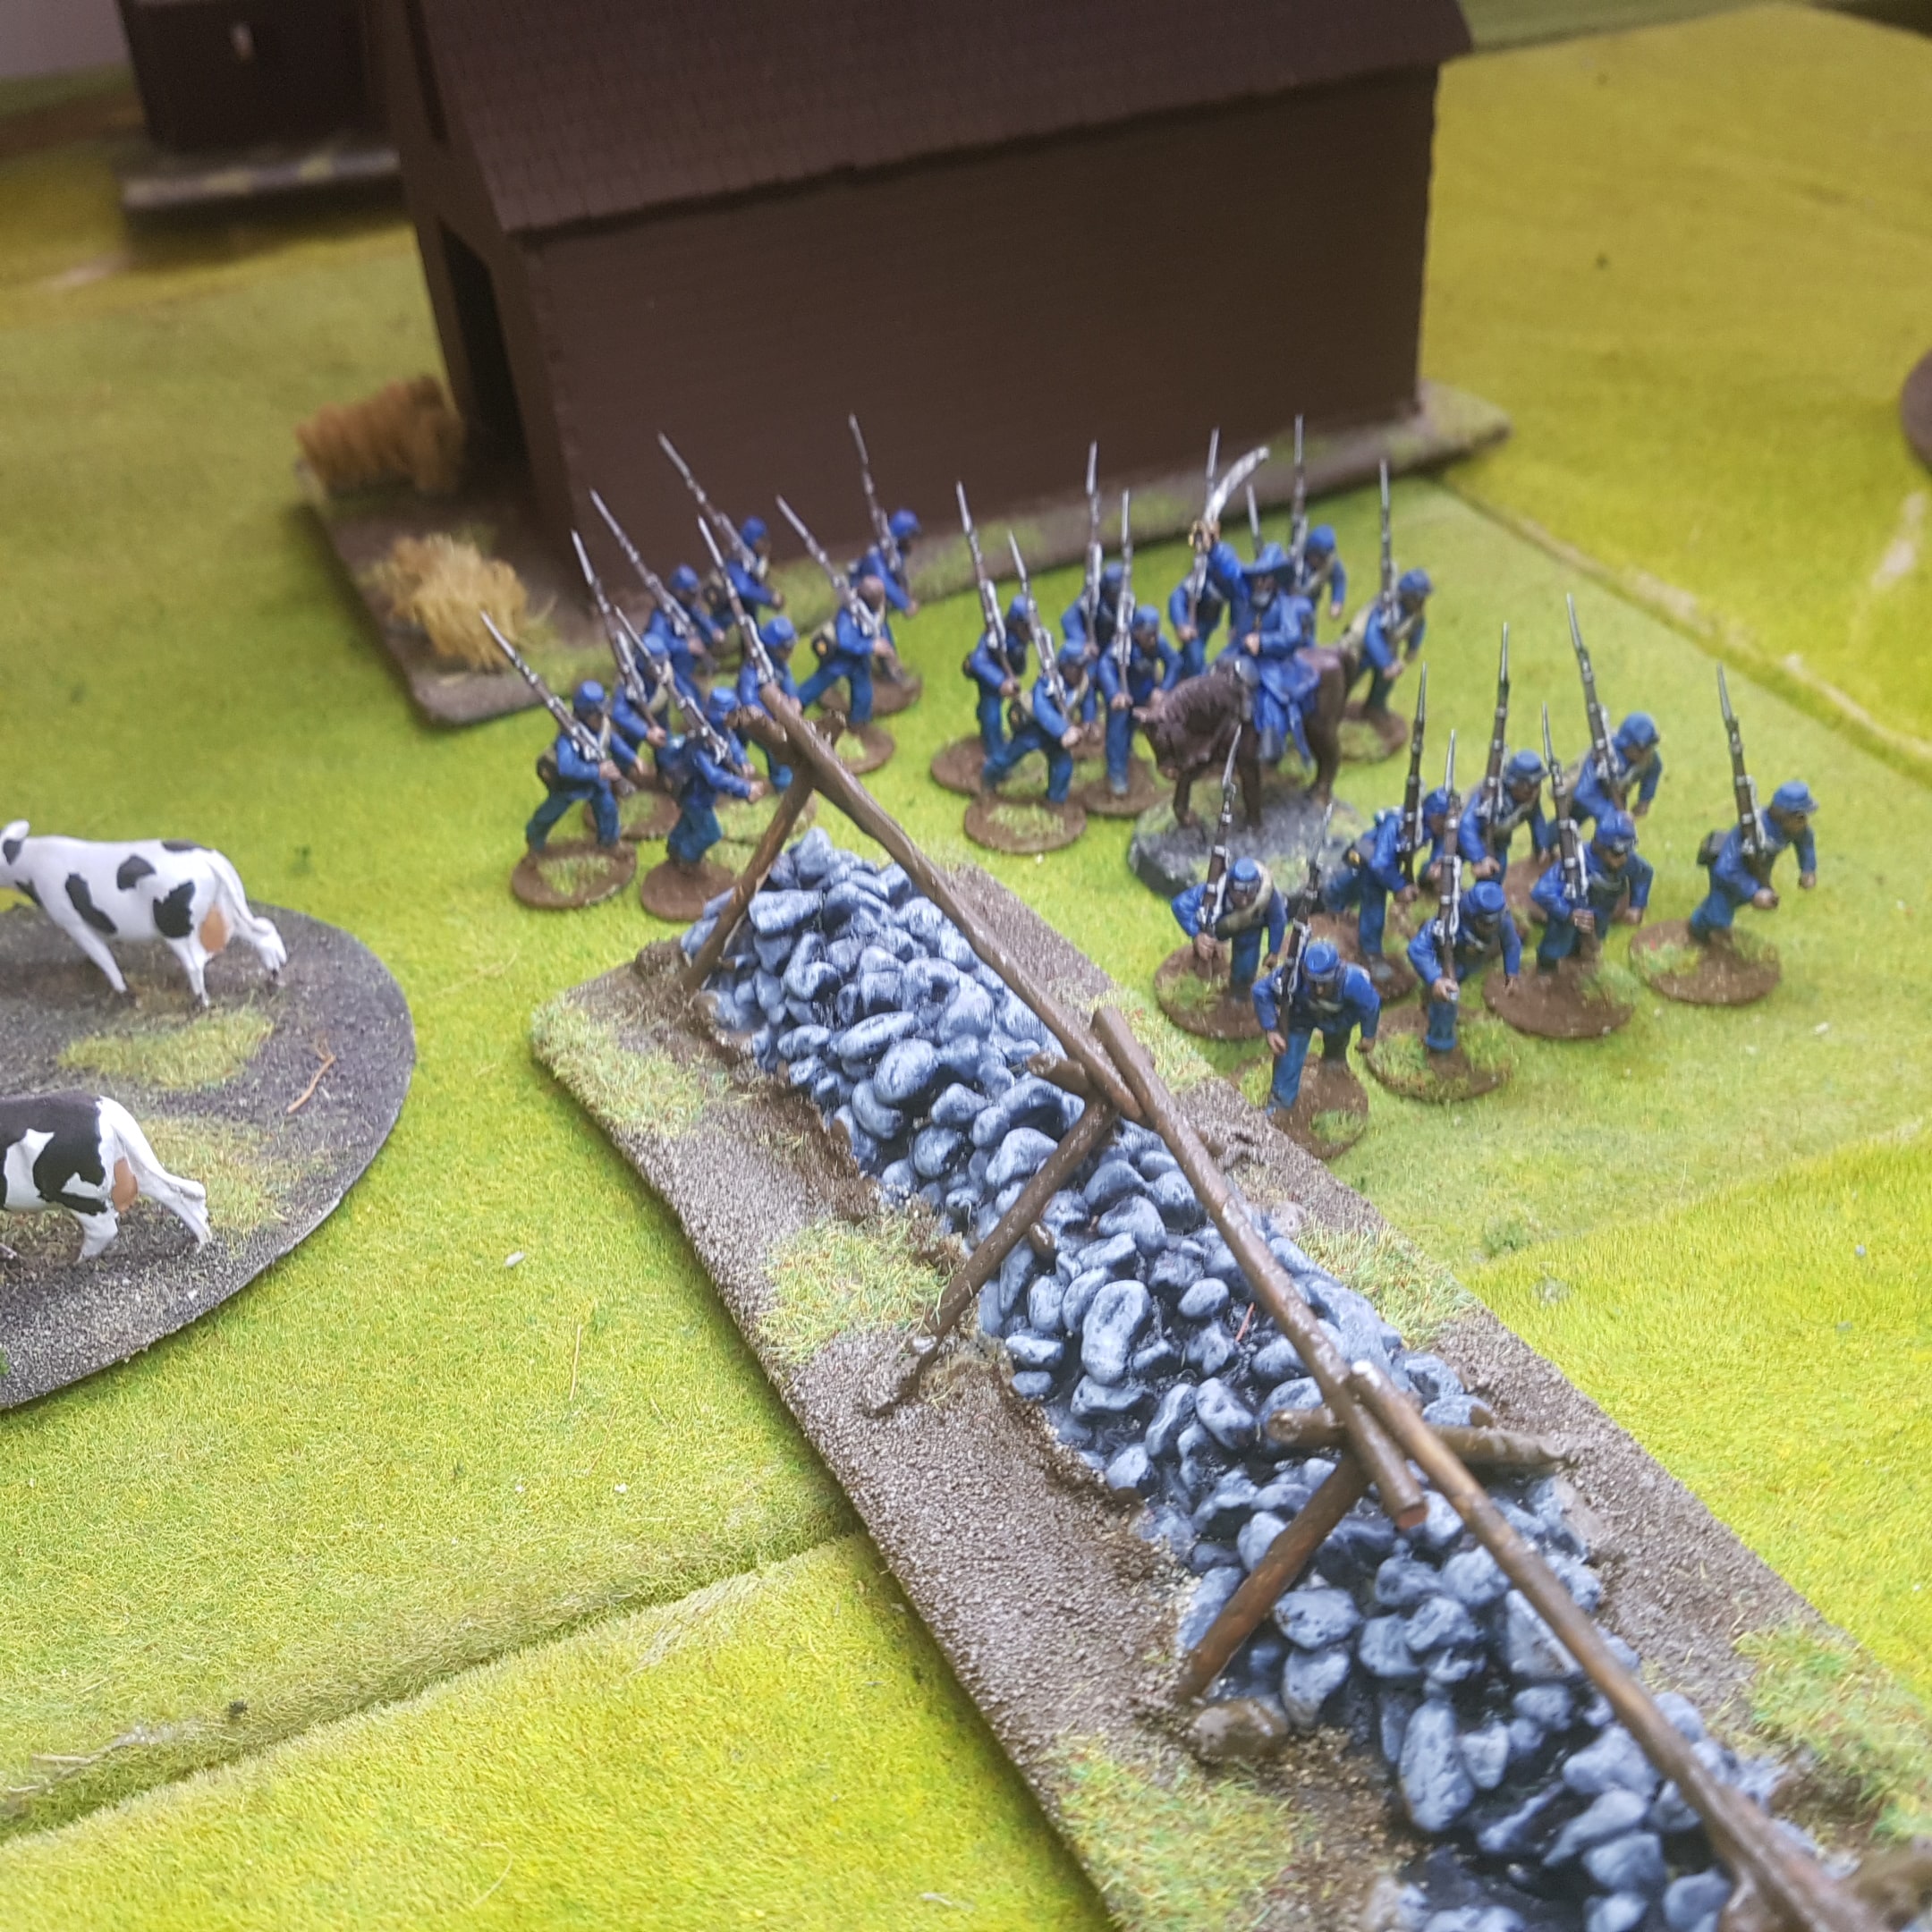
 As Our Federal Boys Charge Across the Cabin's Lawn Rebel Militia Arrive in Their Flank and Deliver a Very Lackluster Volley.
 Lieutenant Hungerford's Men are Slaughtered in the Field with the Combined Firepower of the Rebel Line and Skirmishers
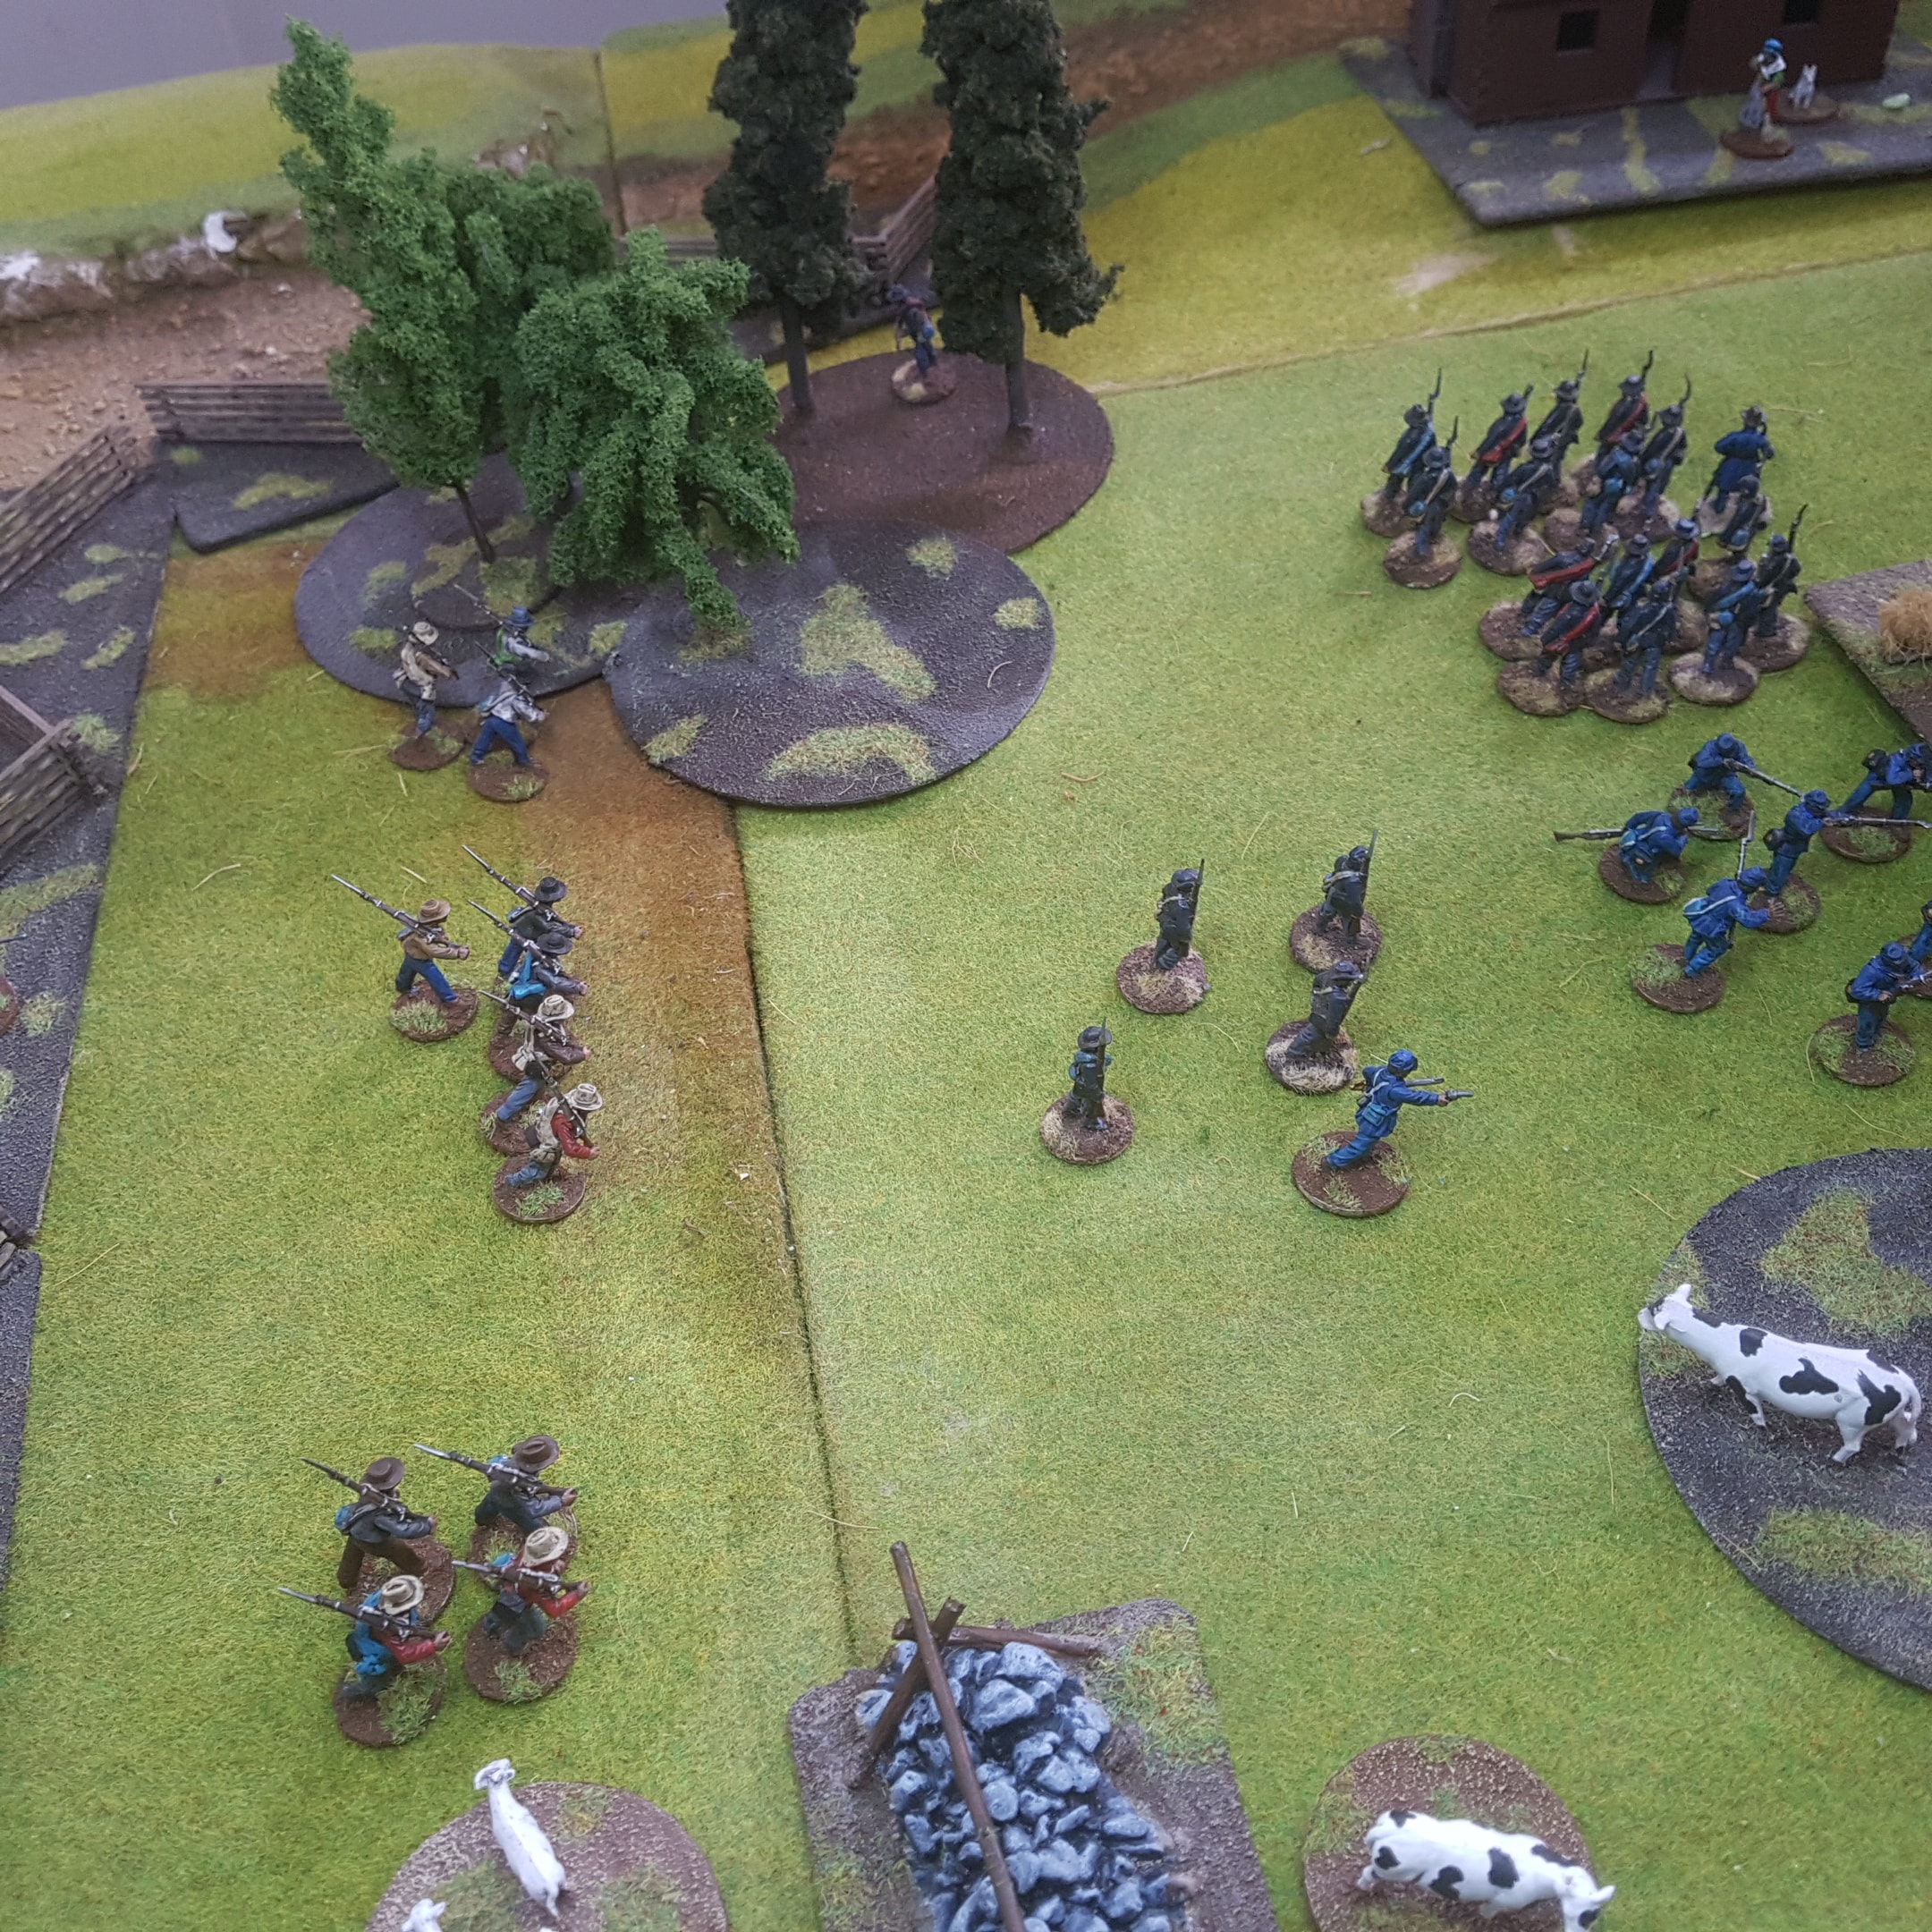 After a Devastating Volley from O'Reilly's Skirmishers the Remains of Lieutenant Hungerford's Men charge the Rebels. After their Charge O'Reilly Leads his Men into an Assault Which Leaves both Sides in Tatters.
 The Remains of the Union Centre near the "Union Barn"
 Captain Lewis' Men Charge the Disorganised Rebels and drive them from the "Freeman Cabin" and Sweep the Survivors from the Field.
 With the Main Rebel Line in Tatters, the Rebel's Around the Freeman Cabin Driven off and Only a Formation of Militia Left to Guard their Retreat the Rebels flee the Field.
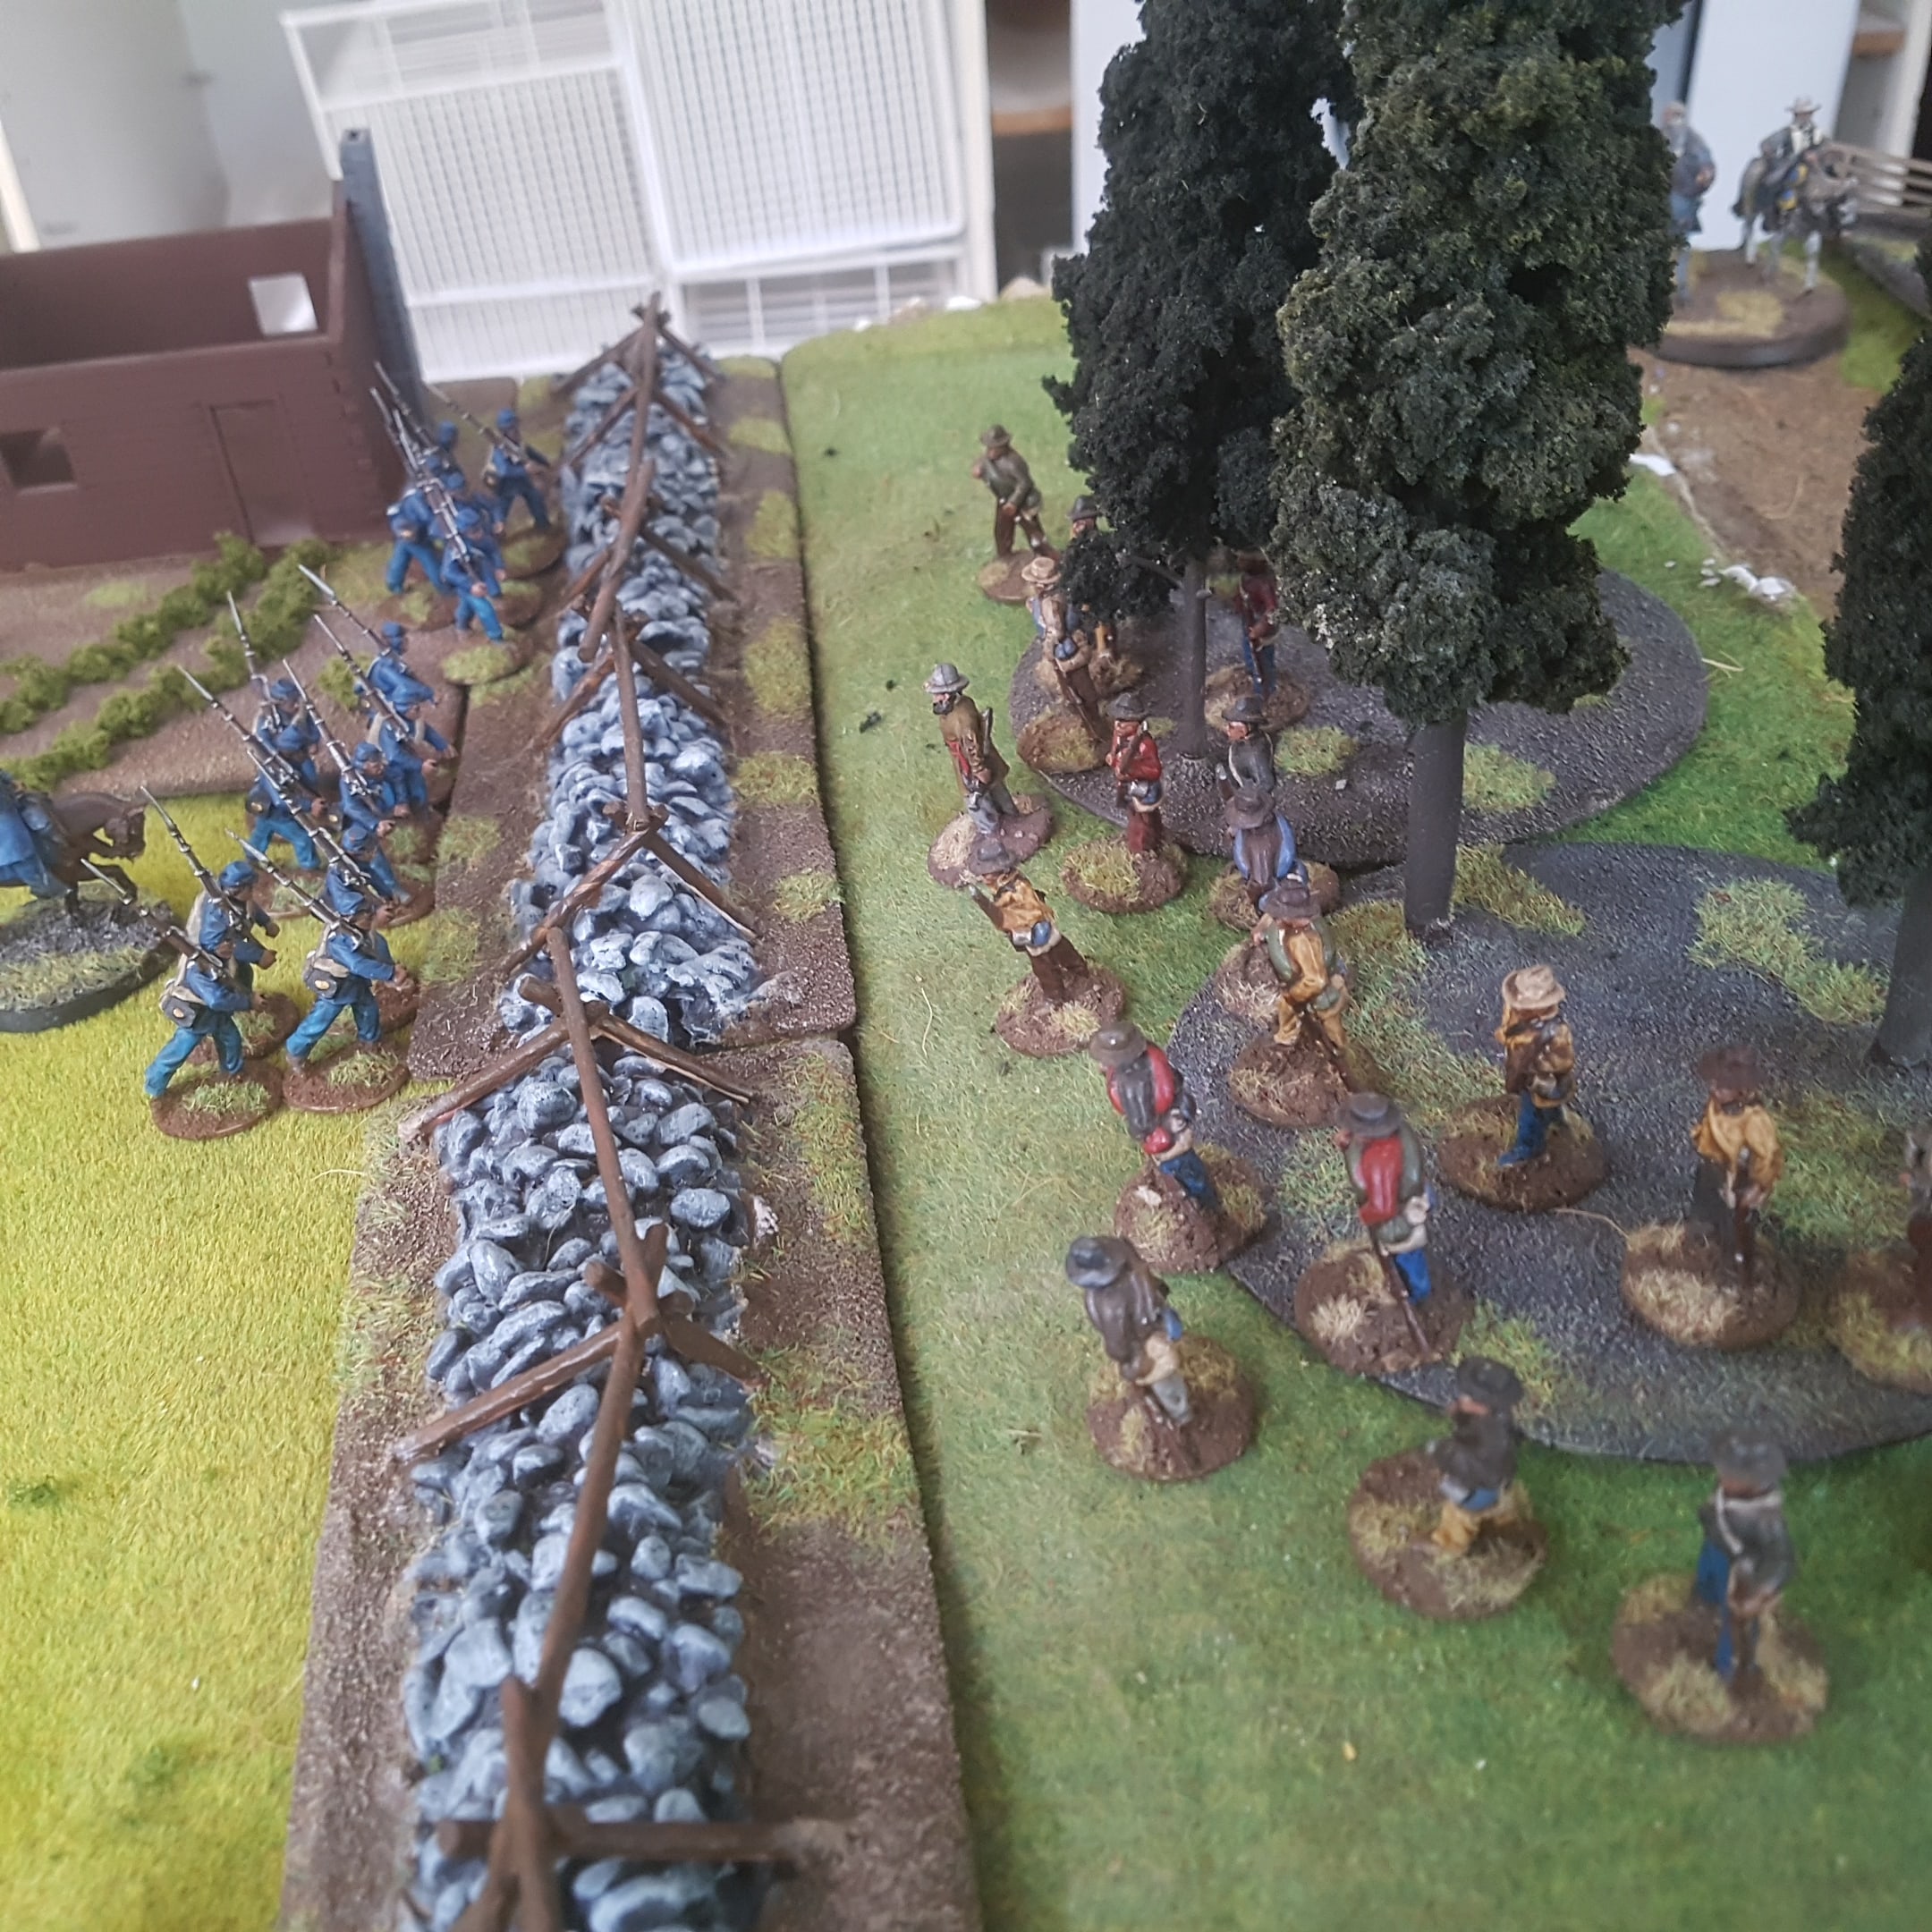 Our Federal Boys Line up to Pursue but The Rebels Manage to Slip Away.
With the Rebels Driven form the Freemantle Farm Captain Lewis Gathers his Men in the Union Barn and Discovers his Losses. As Daylight Fades Mr. Freeman Offers Food and Comfort to the Union Wounded and Offers his Home as a Casualty Collection Point. Any Casualties Taken to the Freemantle Farm Recover on a 6 at the Start of Each Day.
Officers: Captain Lewis - Alive. Lieutenant Bellamy - Alive. Lieutenant Hungerford - Alive Sergeant O'Reilly - Alive
Captain Lewi's Men: Four Dead - Two Wounded - Three Fit for Duty
Lieutenant Hungerford's Men: Five Dead - One Wounded - Six Fit for Duty
Sergeant O'Reilly's Men: Two Dead - One Wounded - Two Fit for Duty
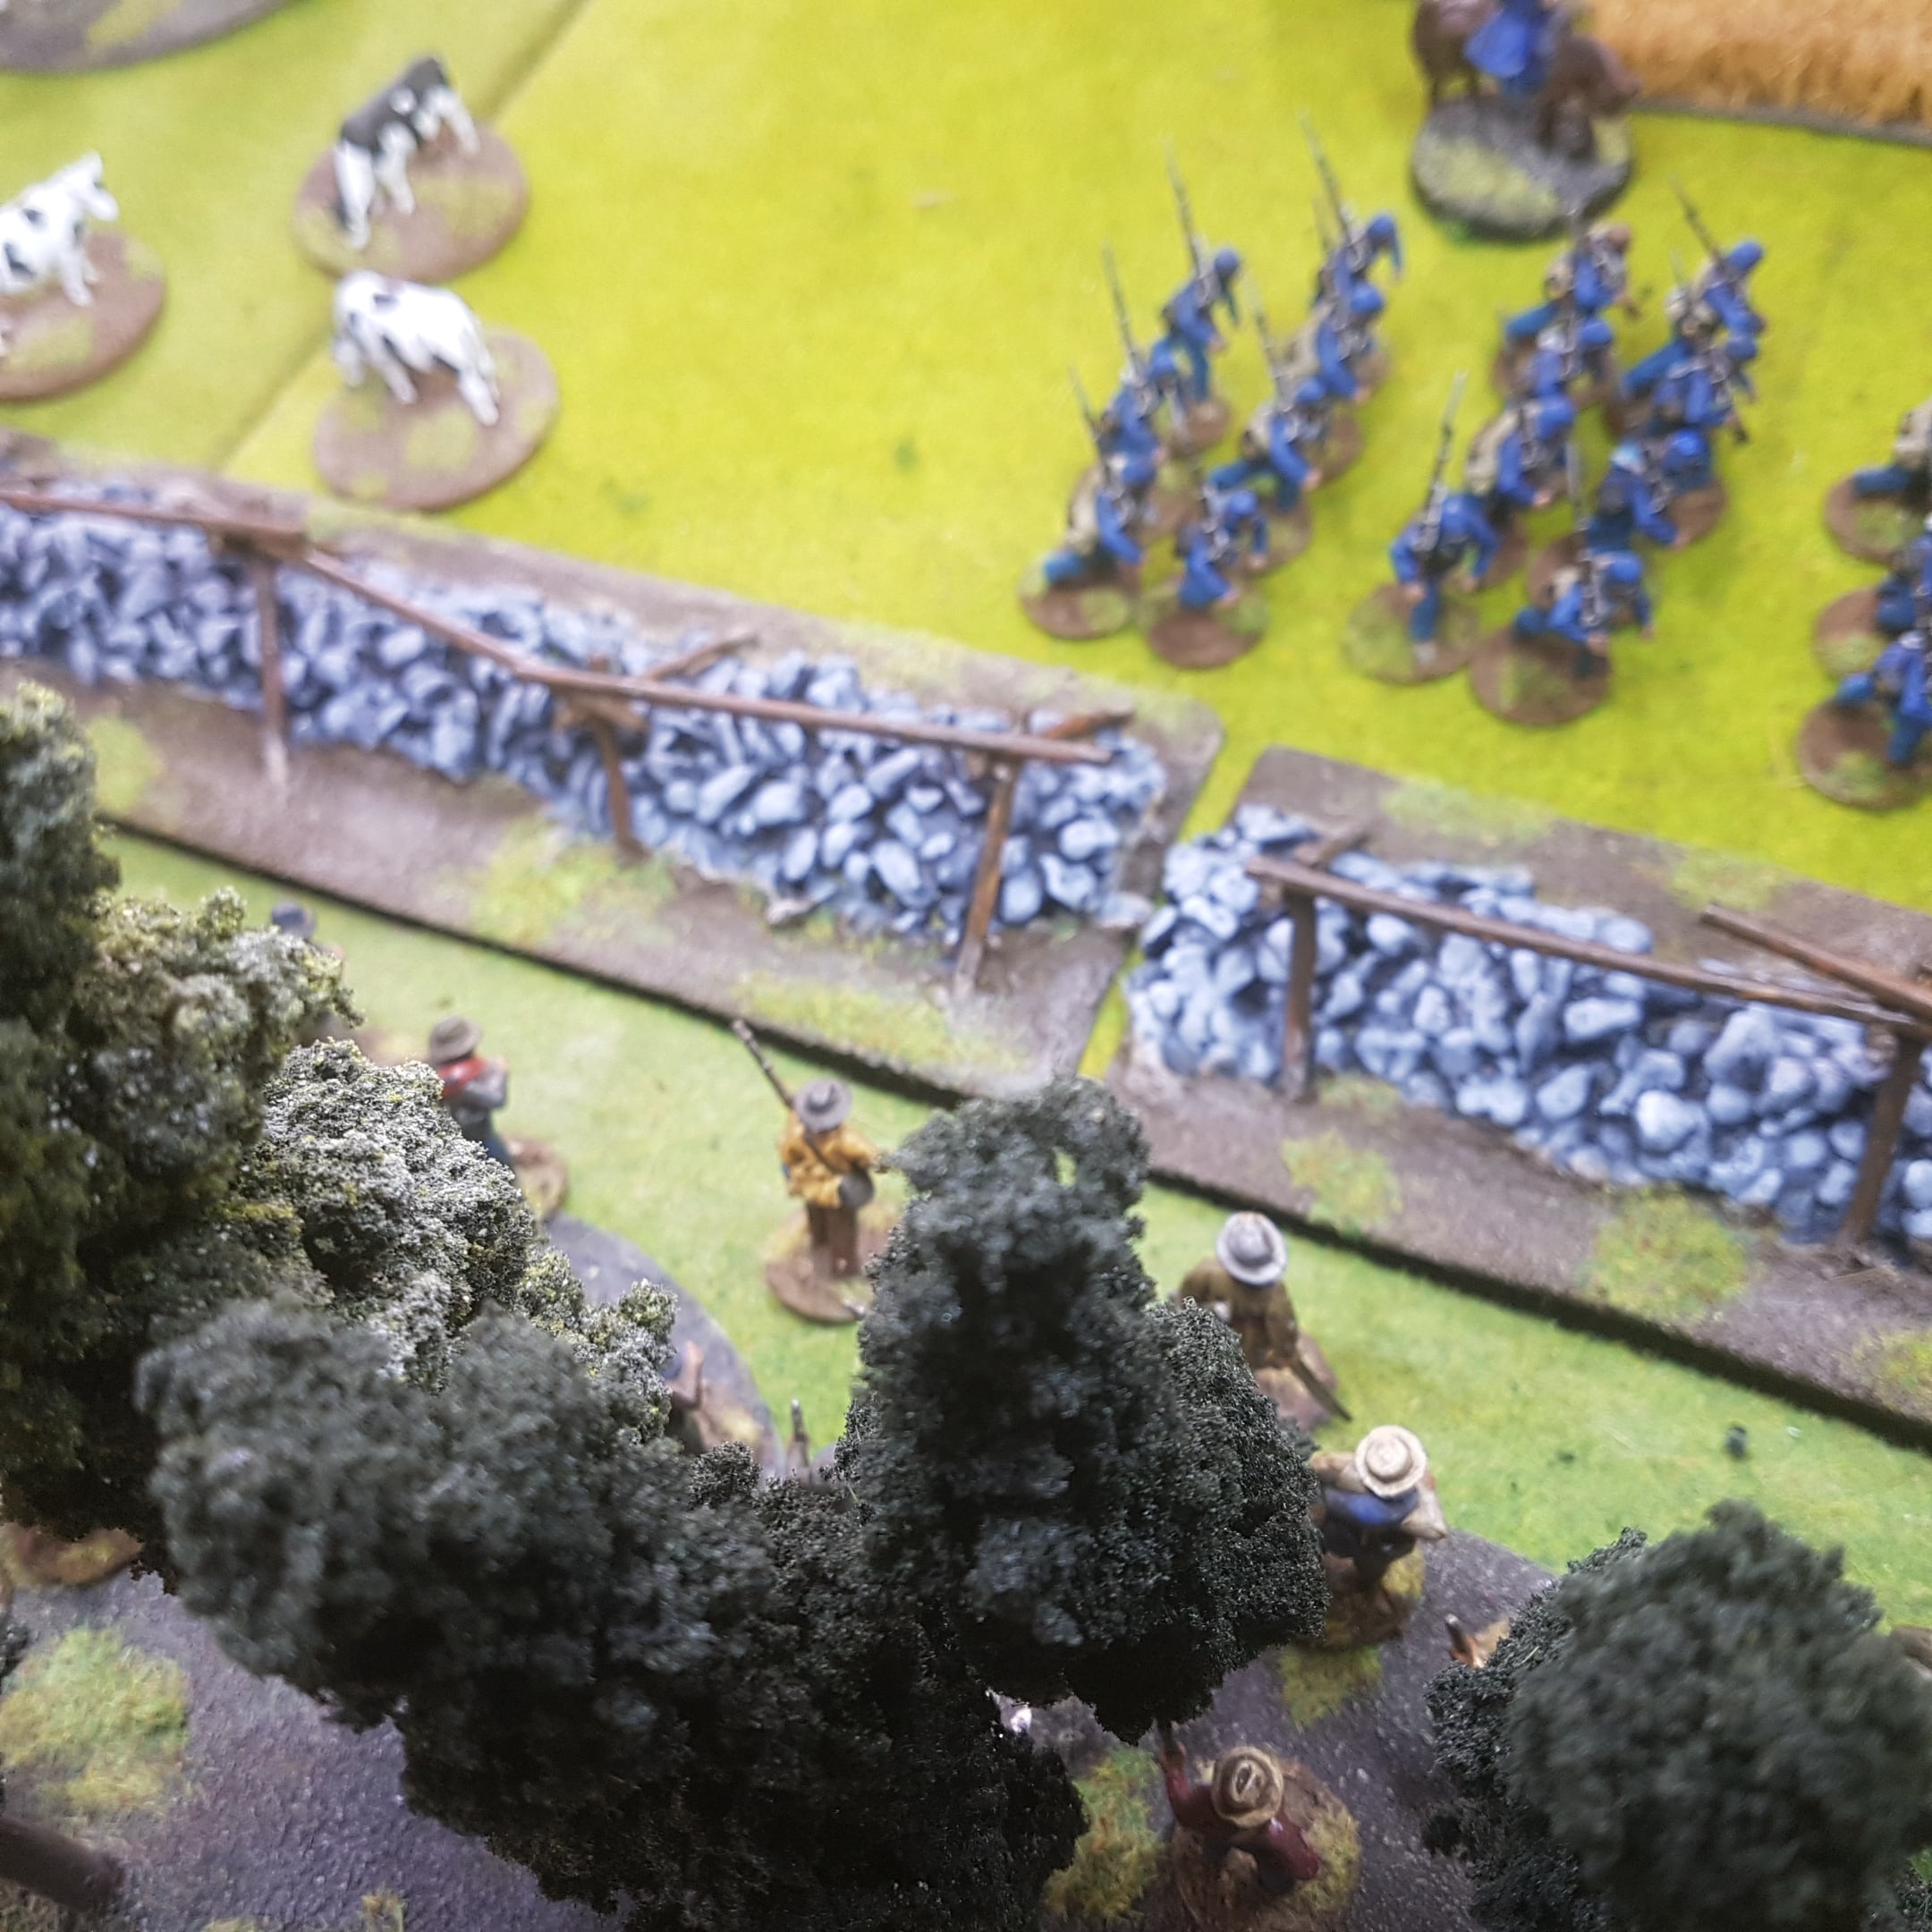
Freemantle Farm
After a Night of Solid Rainfall the Federal Troops Gather in the Barn and Prepare for the Rebel Attack
Apologies for the photo quality but I just couldn’t wait any longer and had to do this without lighting other than a handheld light.
There was a Special Rule for this scenario.
When you fire you must roll a d6 and add the number of turns since you last reloaded, you lose this many shots per group. So if you load and fire in the same turn you only lose d6 shots but if you load and spend two turns marching then you lose d6+2 shots per company.
2.
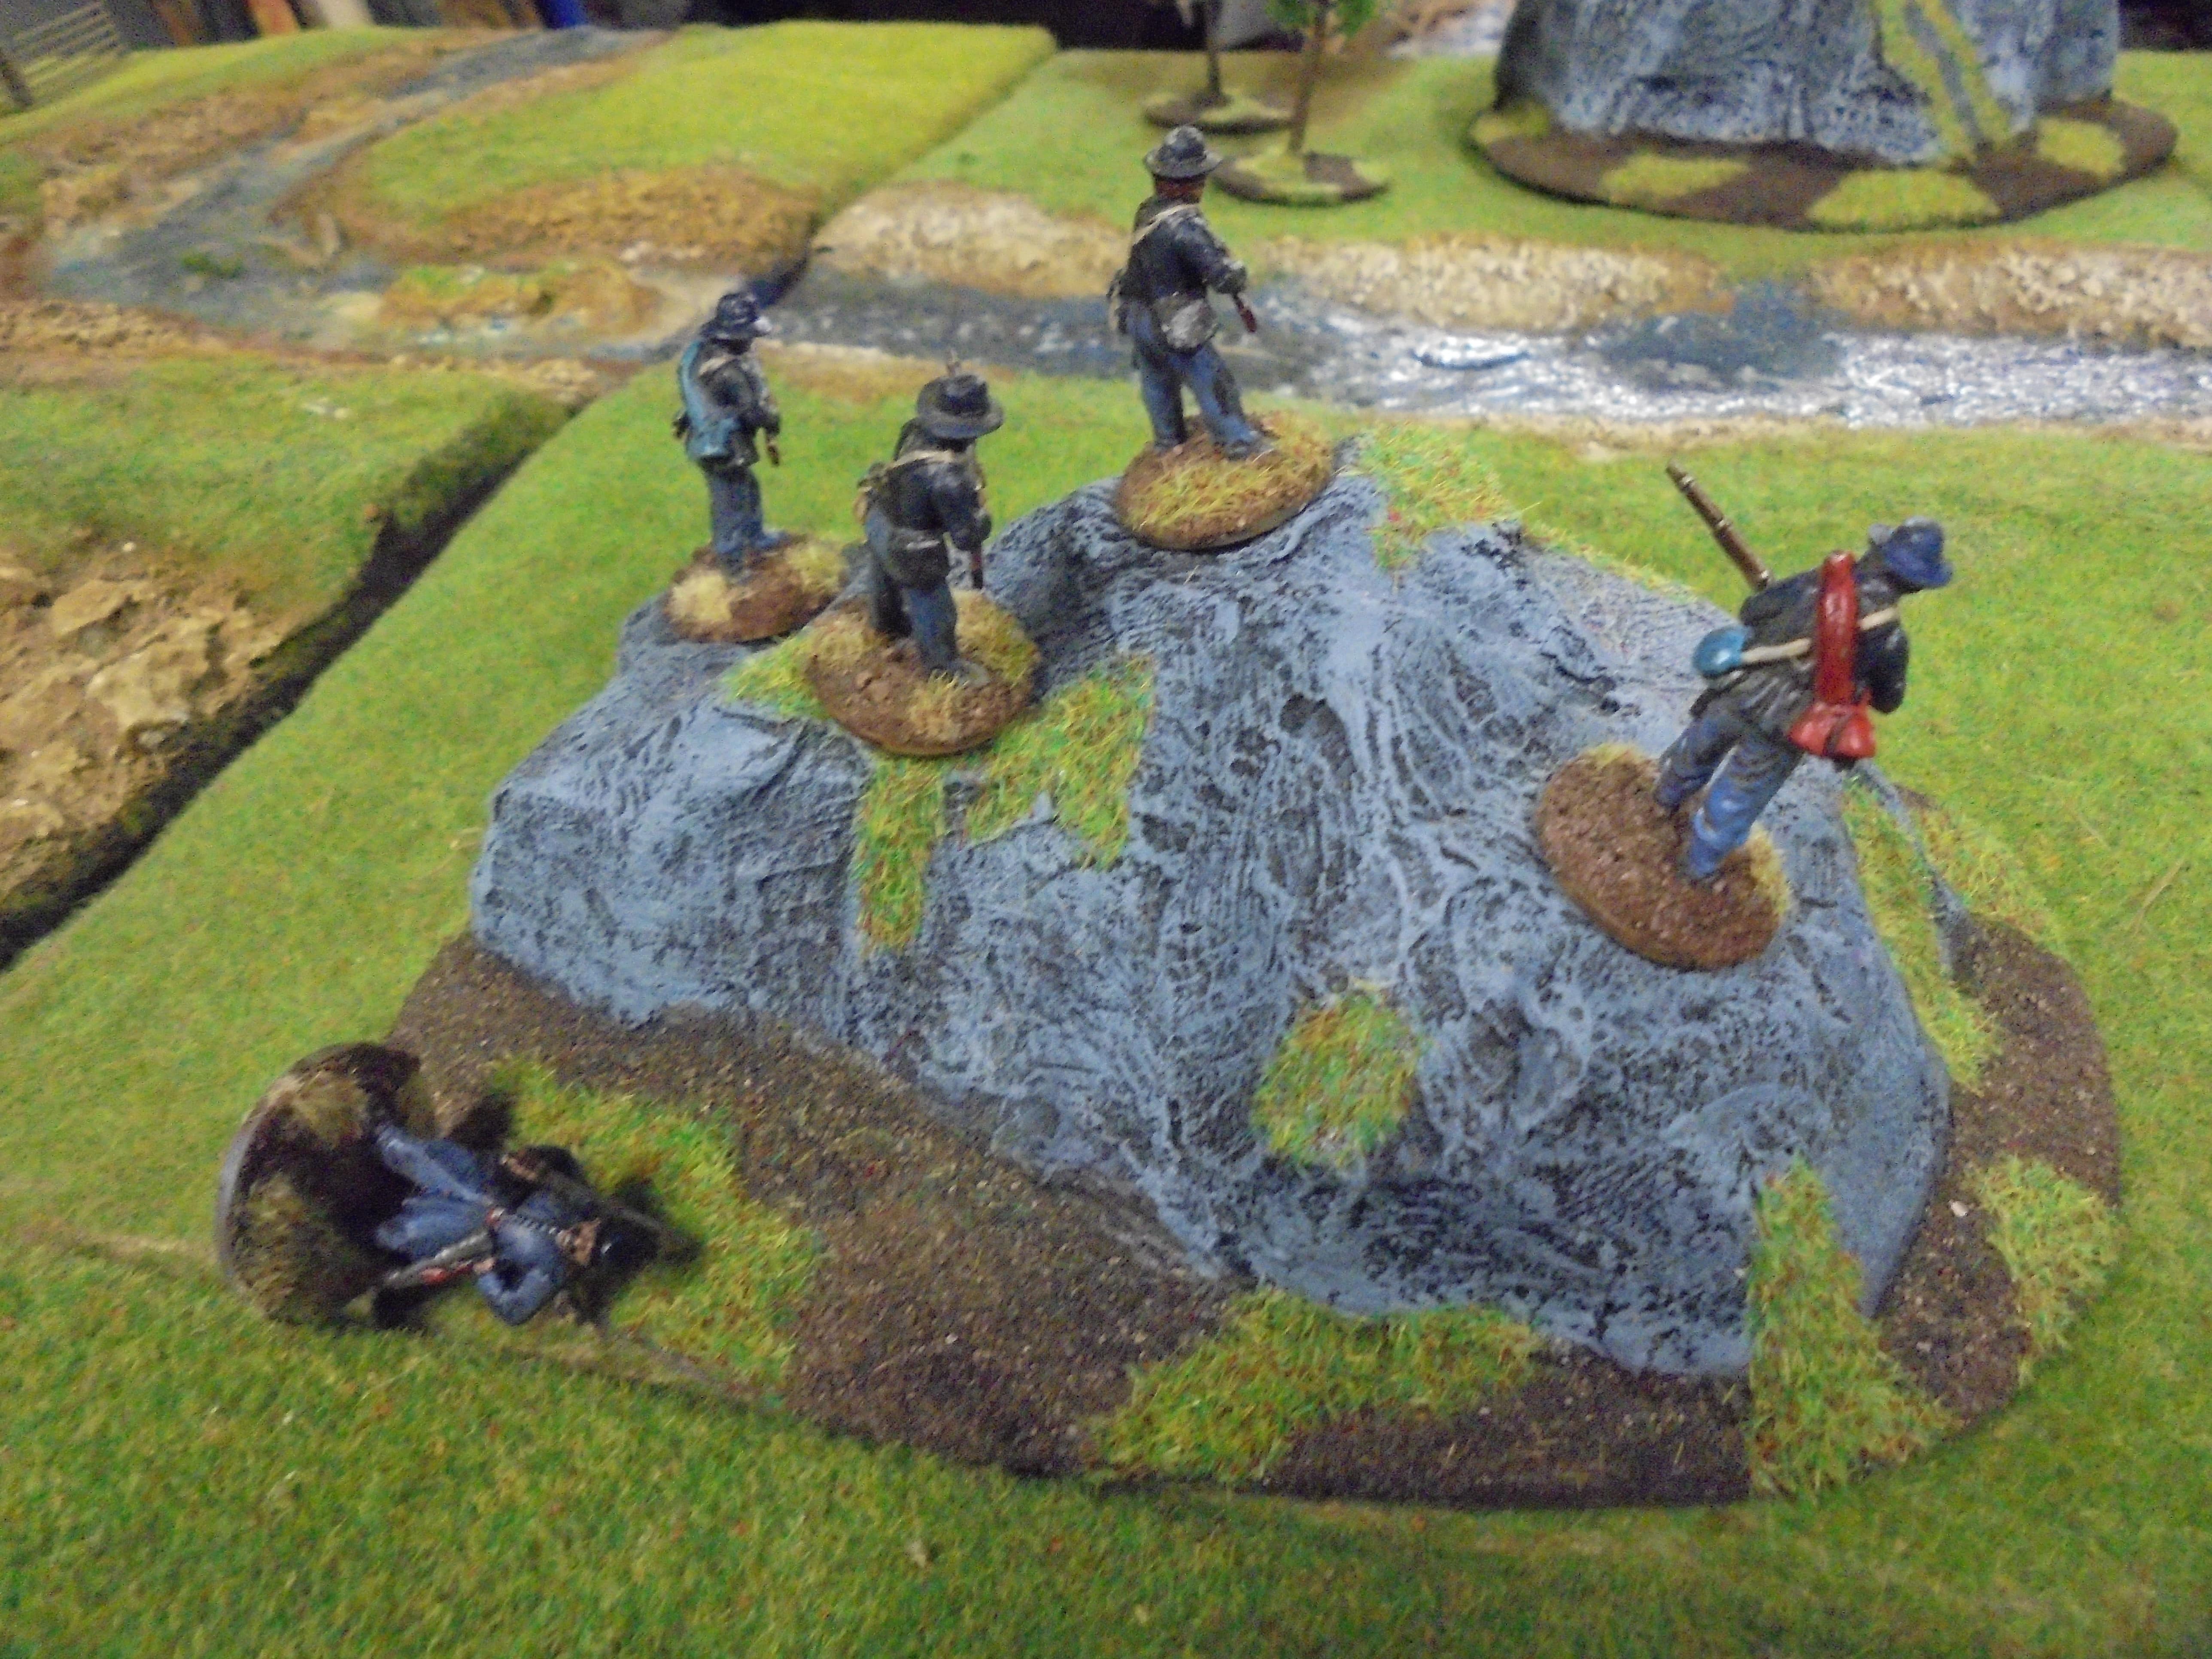
 Captain Lewis Leads his Men Along the Stone Wall While Sergeant O'Reilly Leads the Skirmishers into the Trees
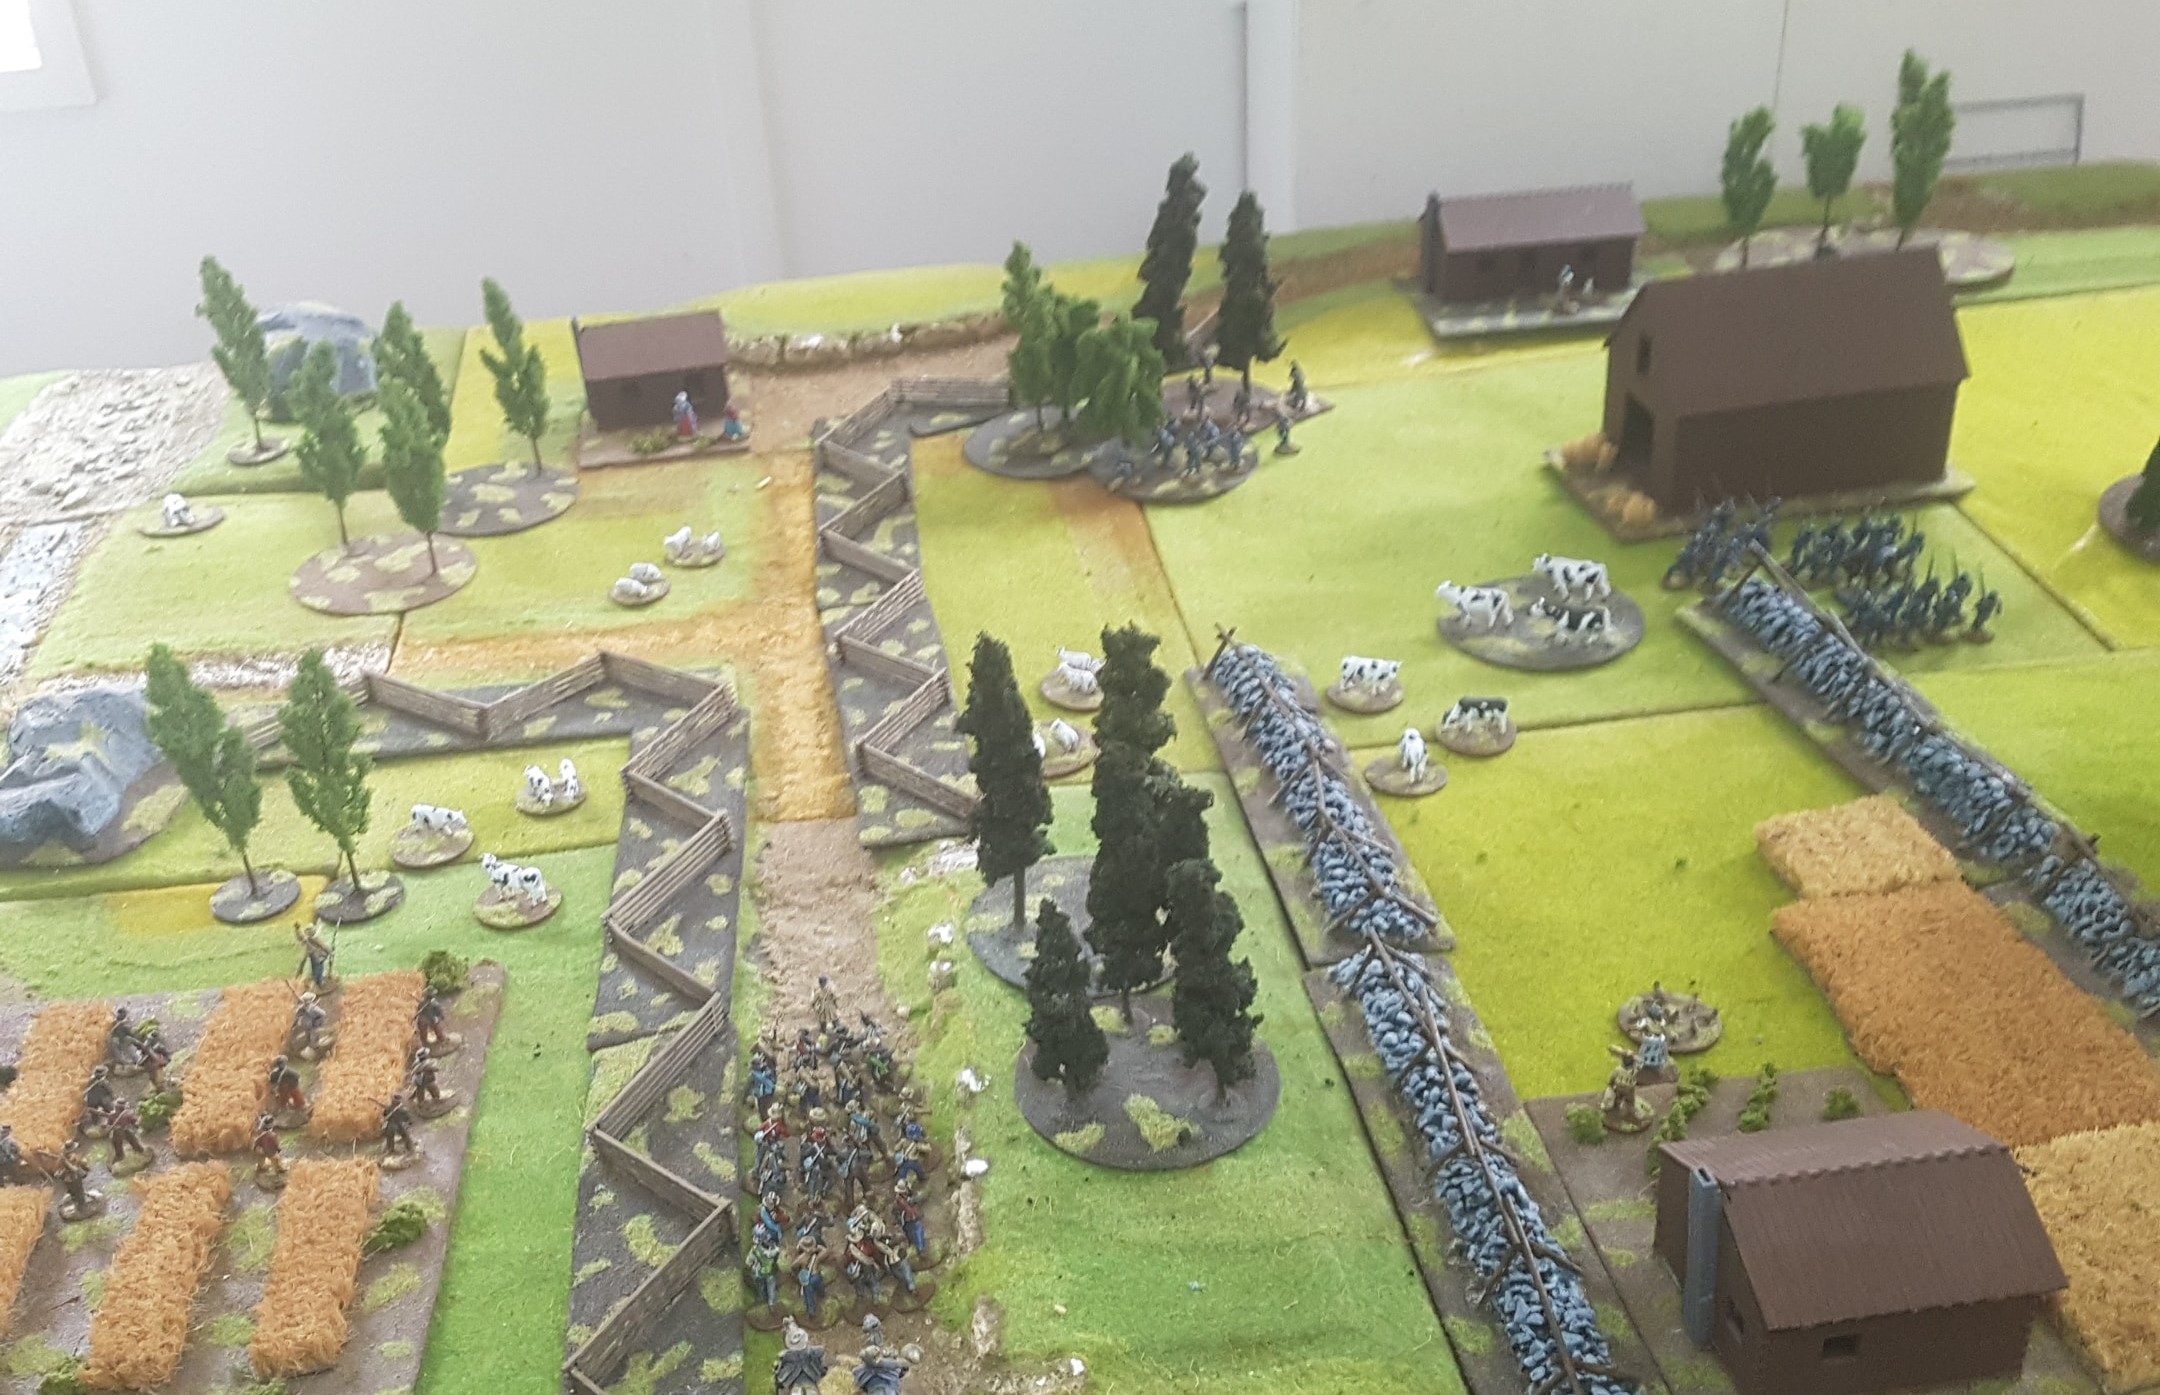 The Rebels Advance Along the Sunken Road.
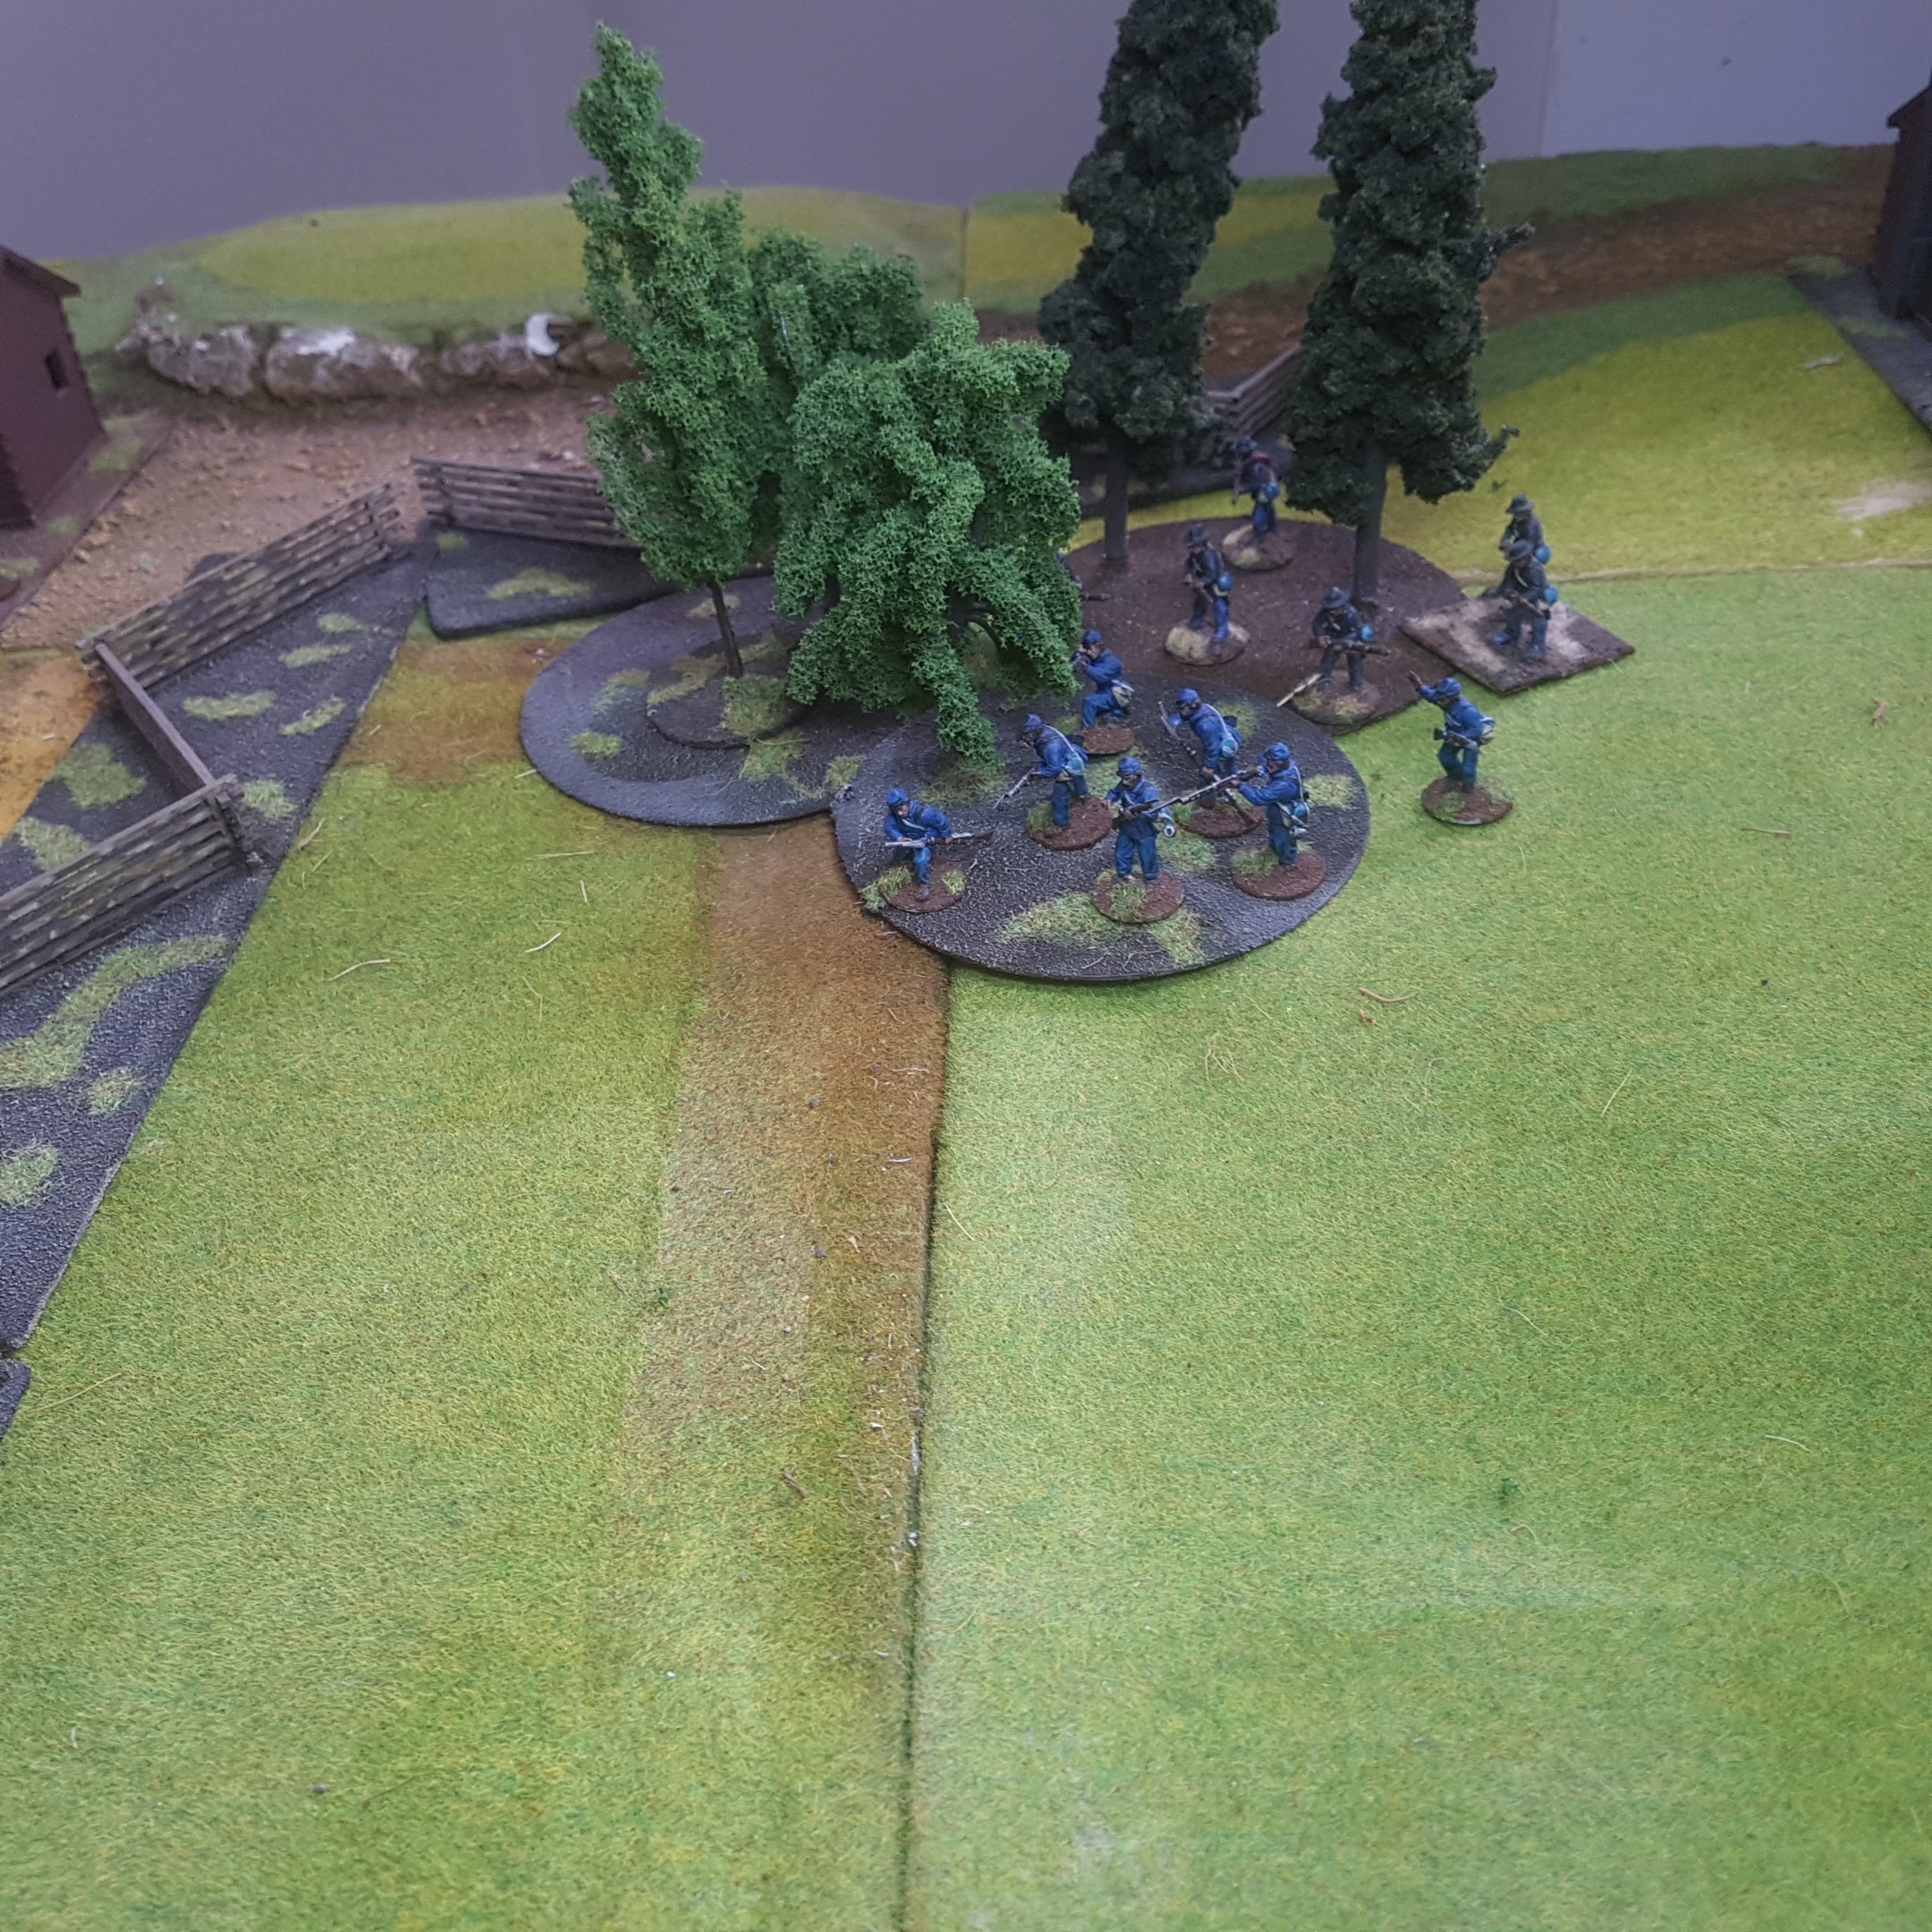 Sergeant O'Reilly and his Skirmishers Get a -1 on the d6 Roll to see How Many Shots are Lost to Represent them Being More Careful
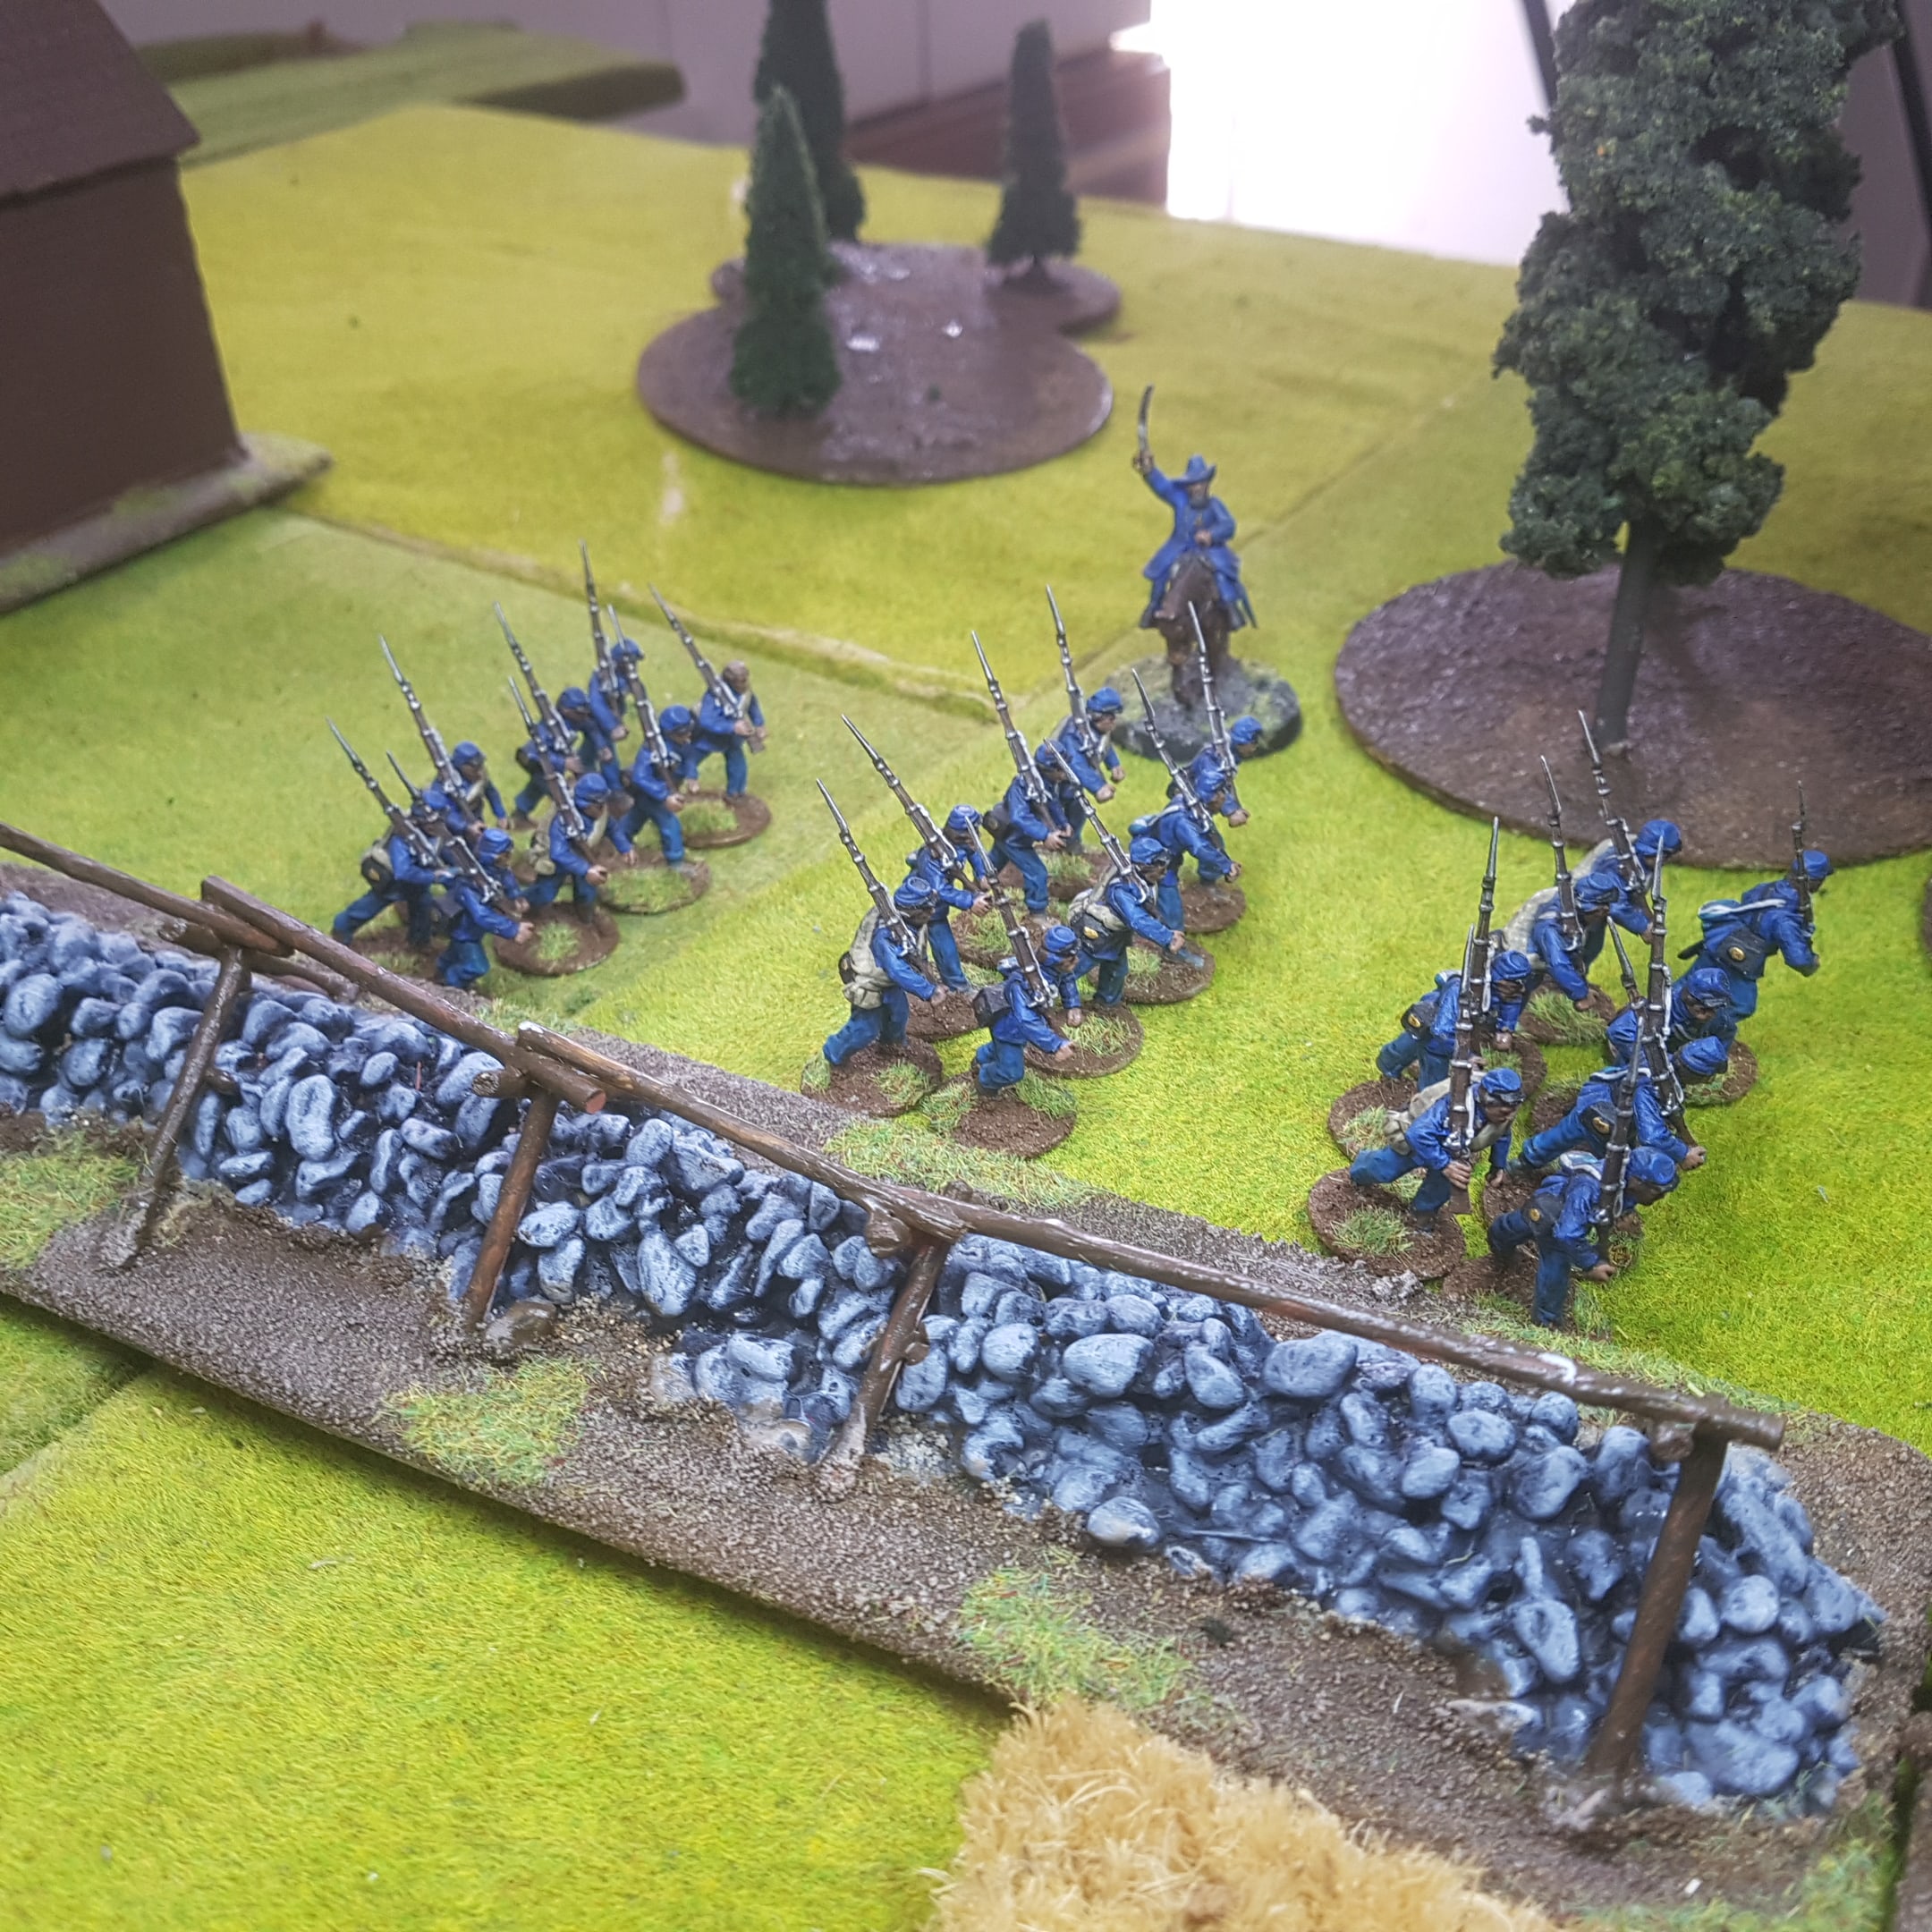 Captain Lewis' Men Advance Down the Stone Wall Hoping to Attack Across the Cabin's Lawn and use their Superior Numbers to Take the Confederate Deployment Point
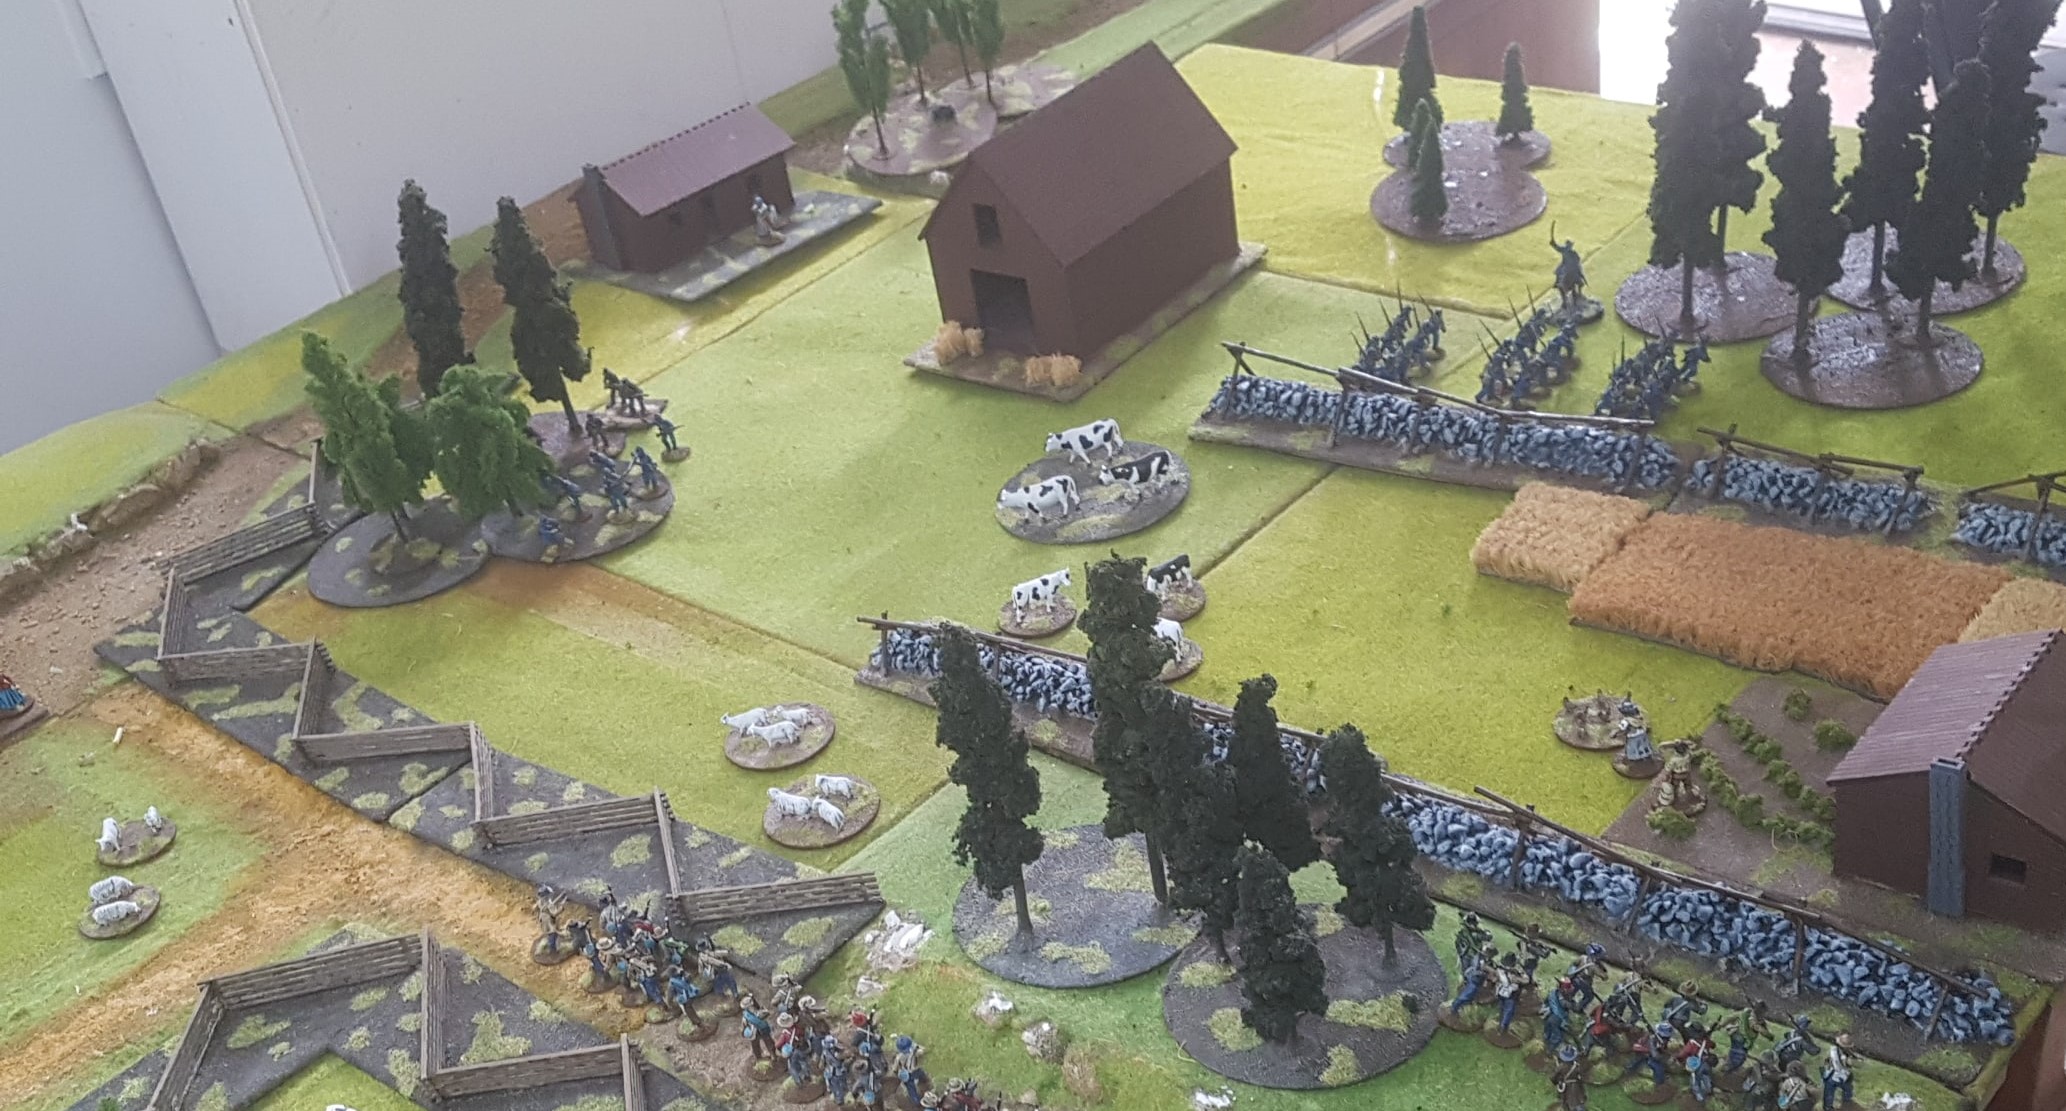 "Freeman's Cabin" Cabin on the Right. In-between the Two Stone Walls is the "Cabin's Lawn"
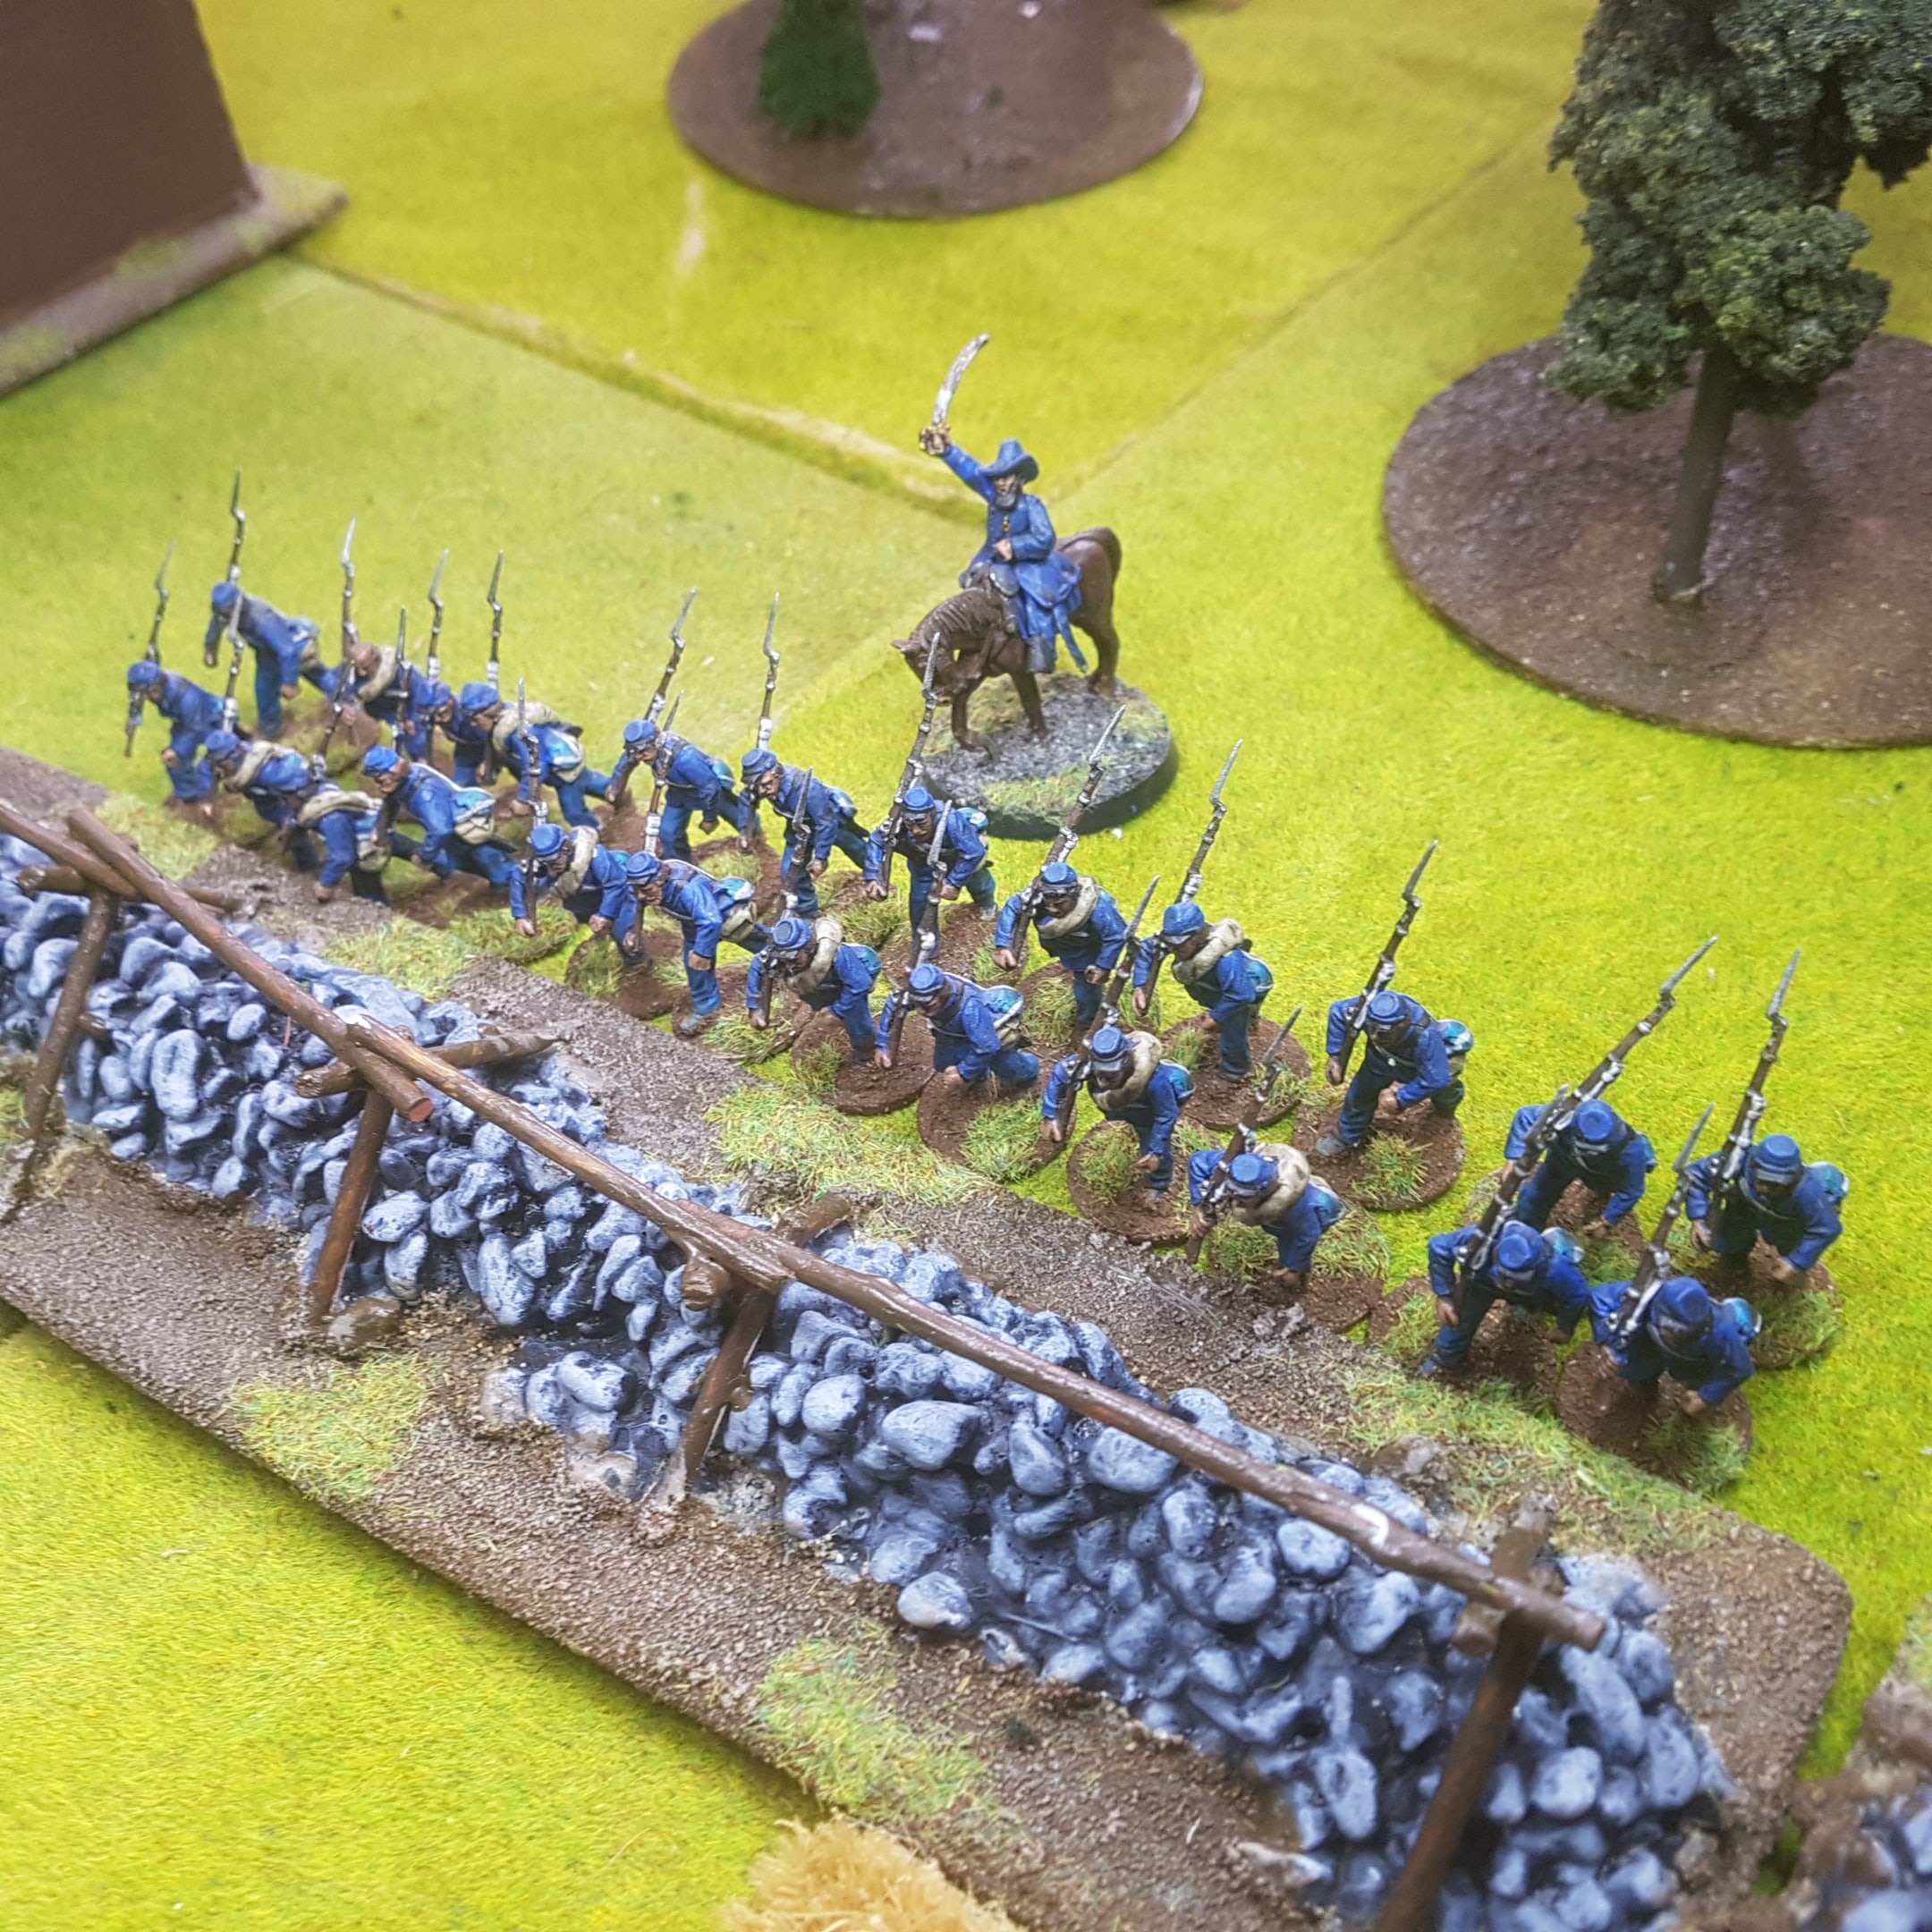 "Up Boys to the Wall and Give them Steel"
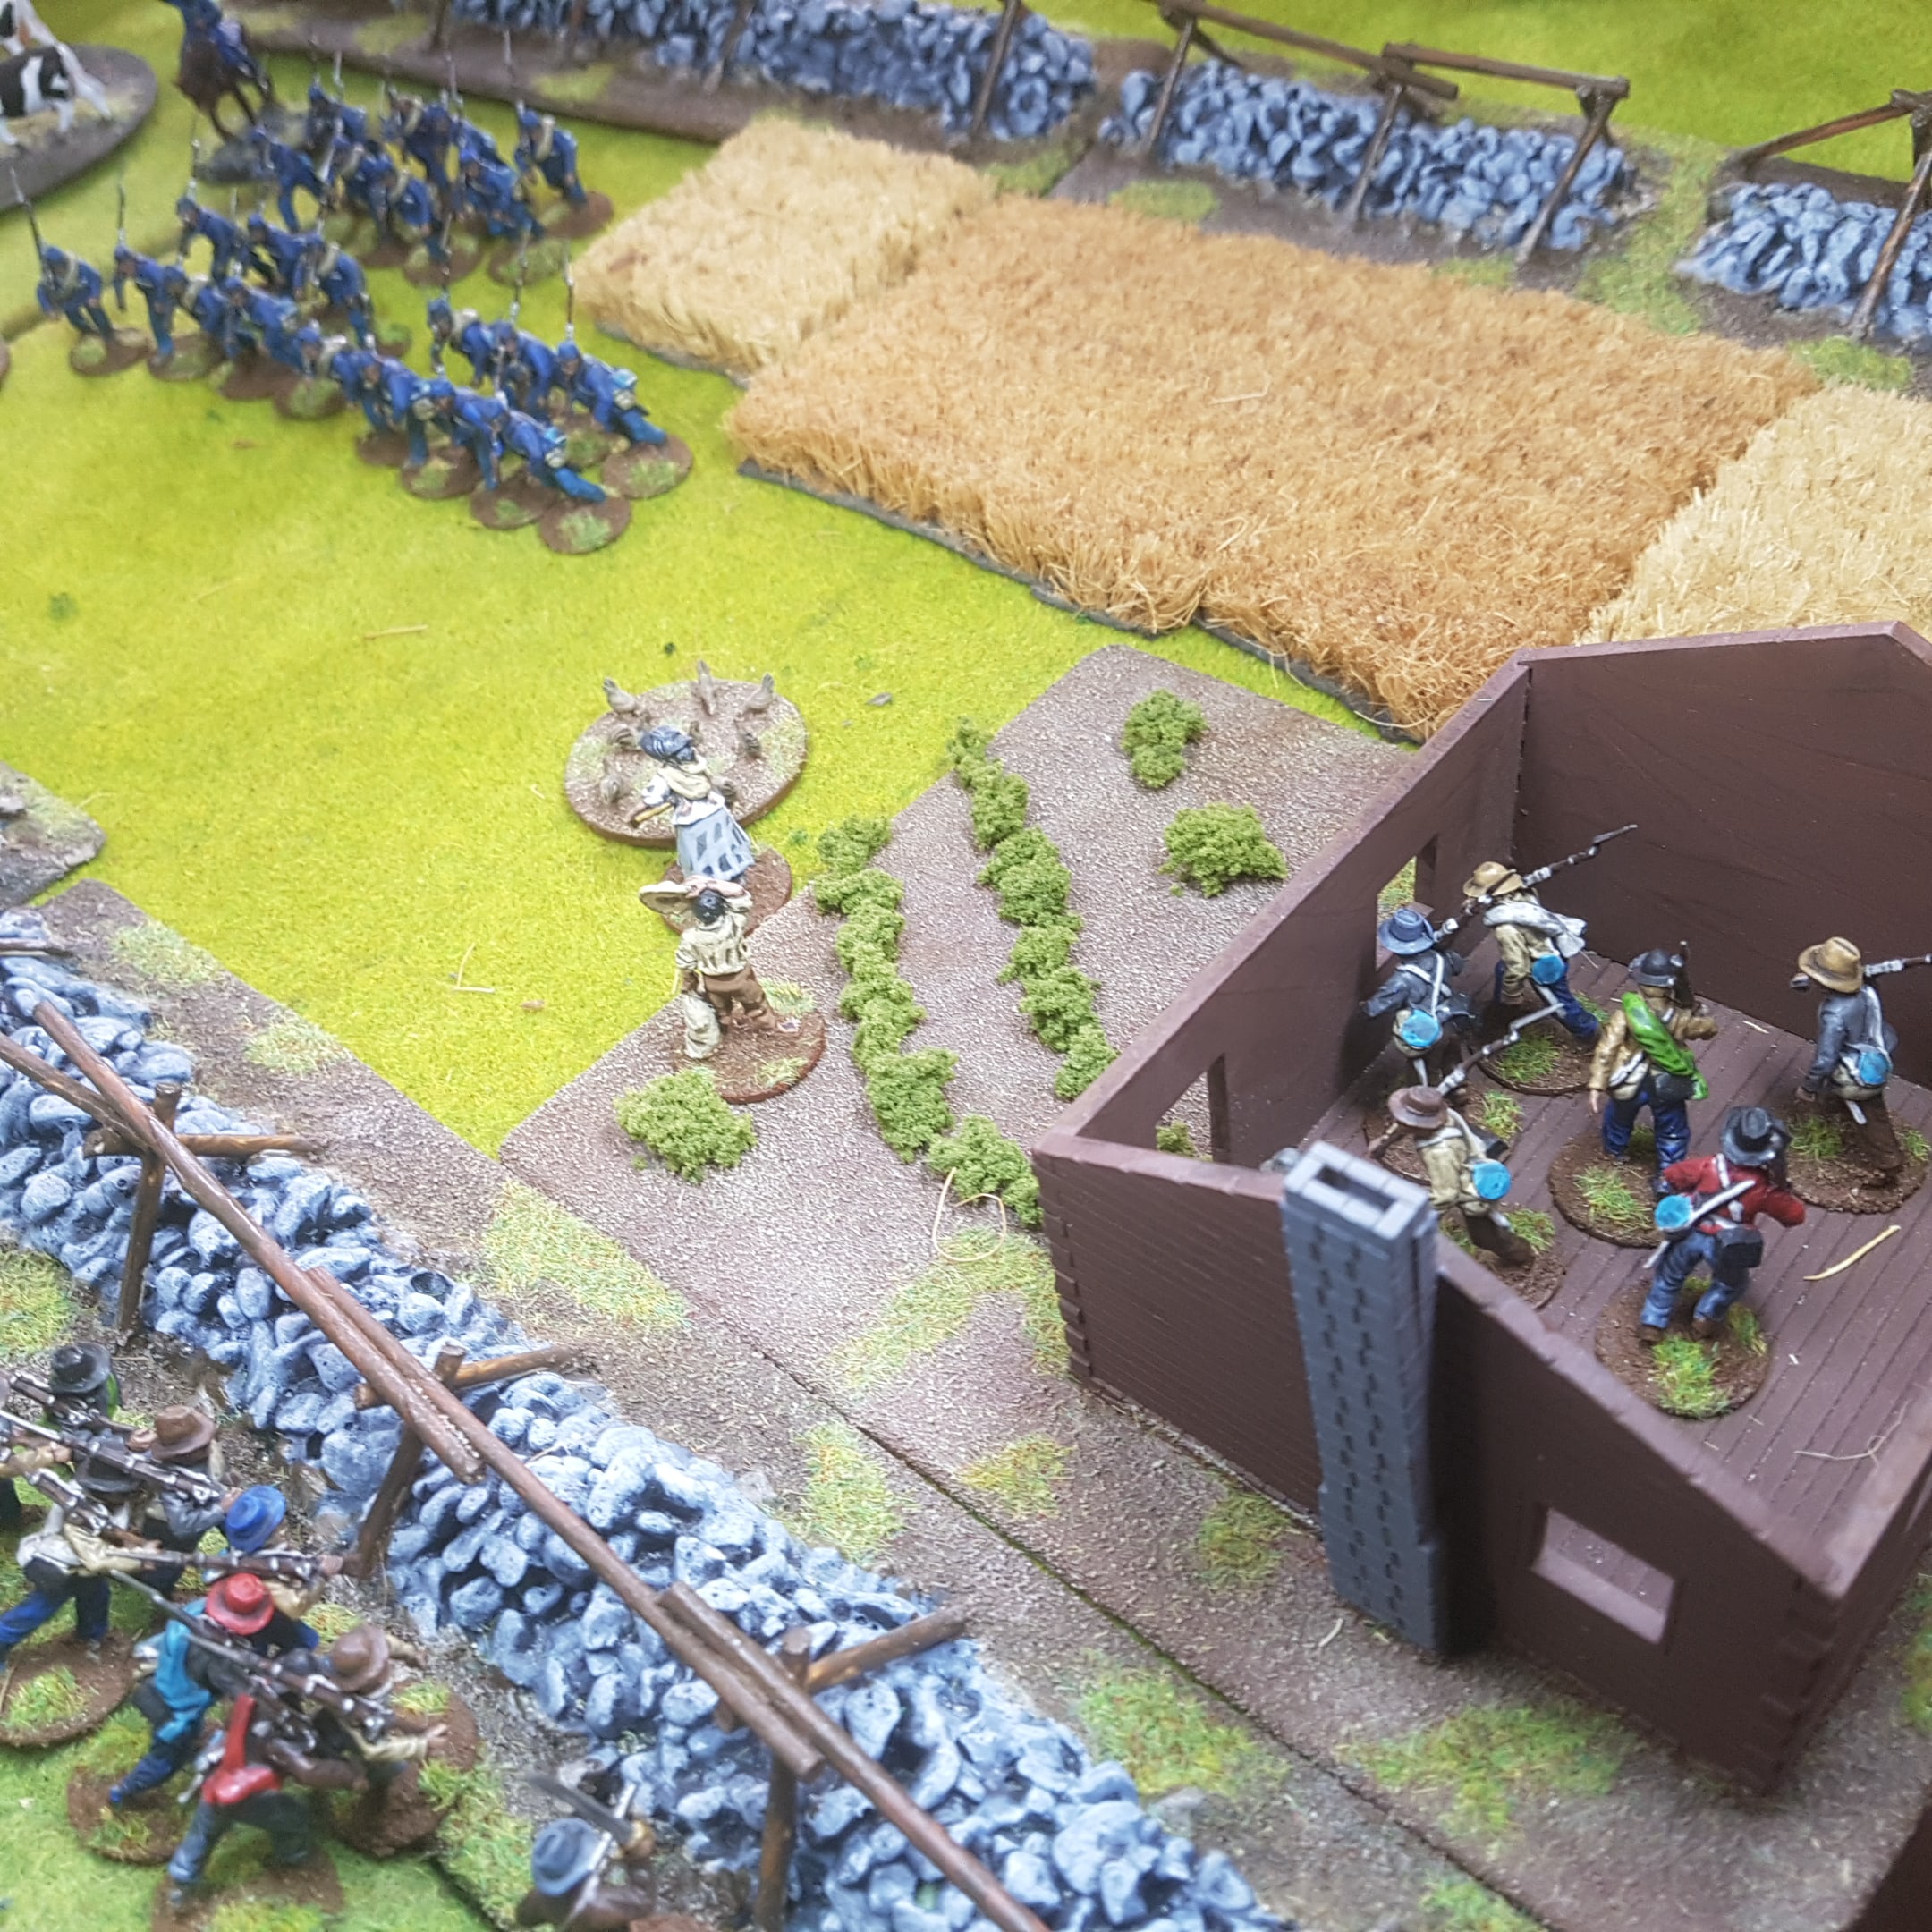 Rebels Occupy the Freeman Cabin Which Means They Don't Have to Roll for Shots Lost Due to Rain.
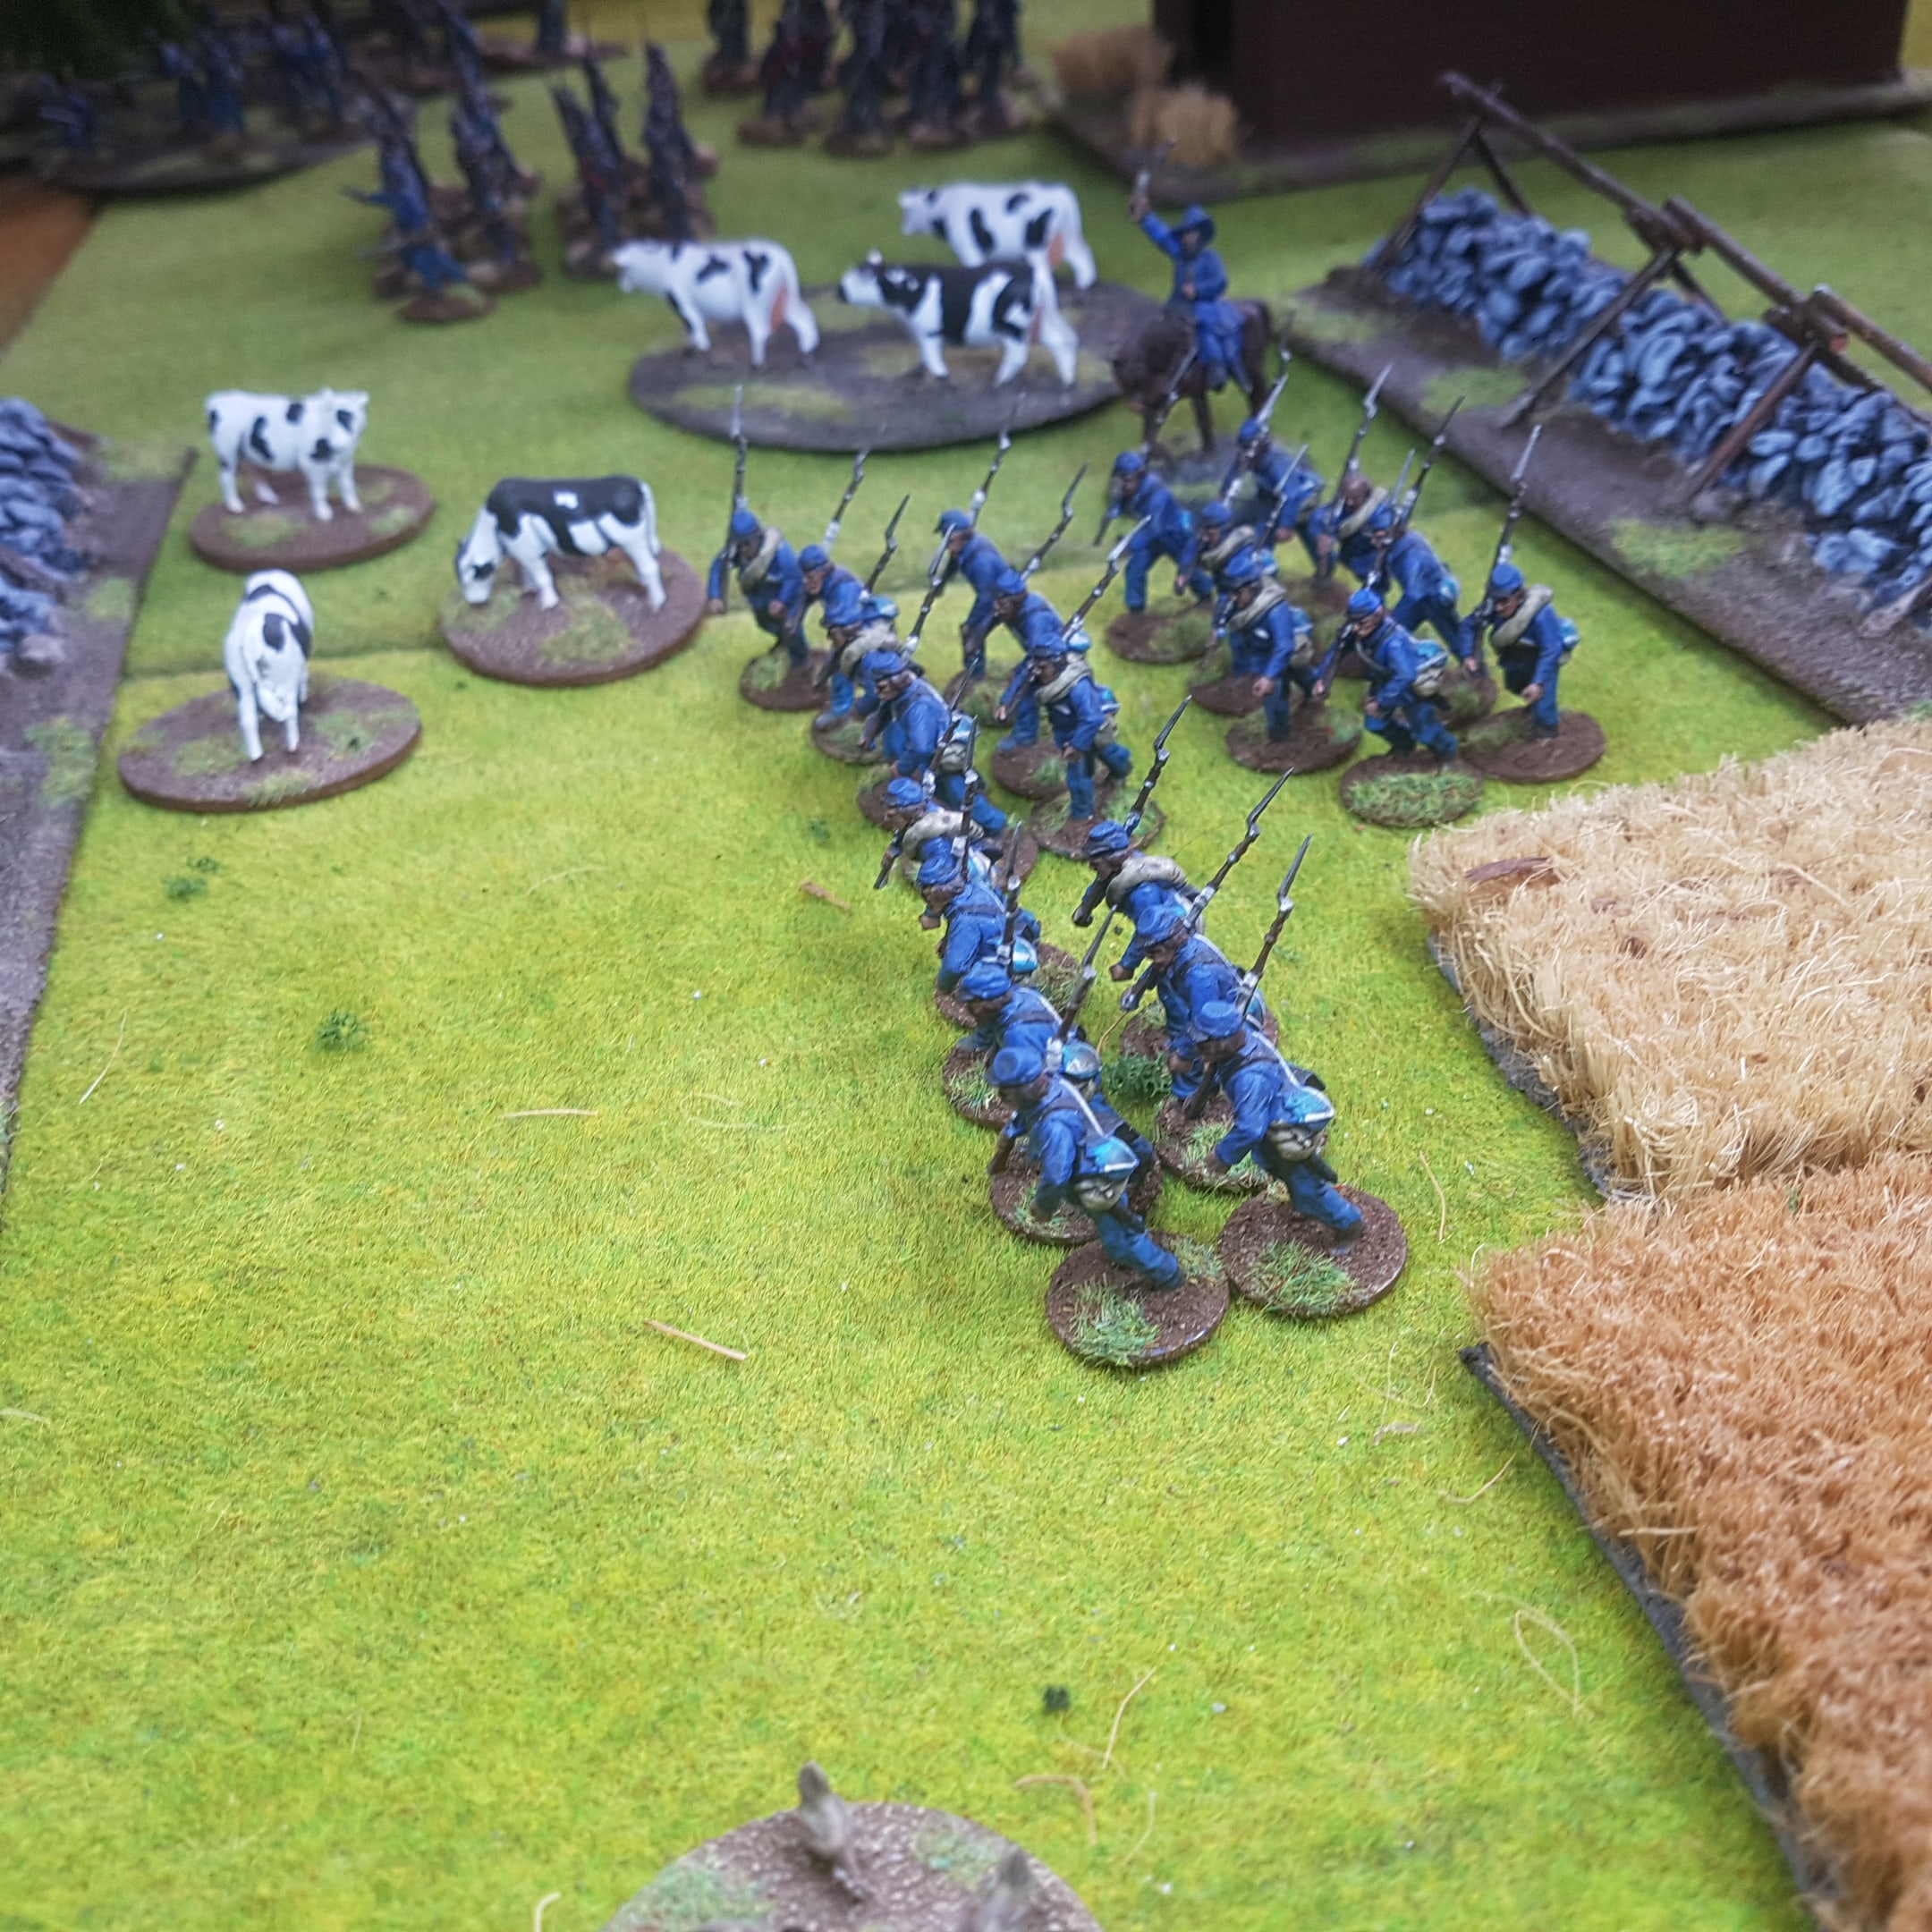 Lewis Leads his Men Across the Cabin's Lawn under Enfilading Fire from the Freeman's Cabin. They Take a Few Losses but Hope to Charge before the Rebels can Bring up their Militia
 As Captain Lewis Charges Across the Cabin's Lawn Lieutenant's Bellamy and Hungerford Leads the Rest of the Company to Charge and Outflank the Rebels Main Line
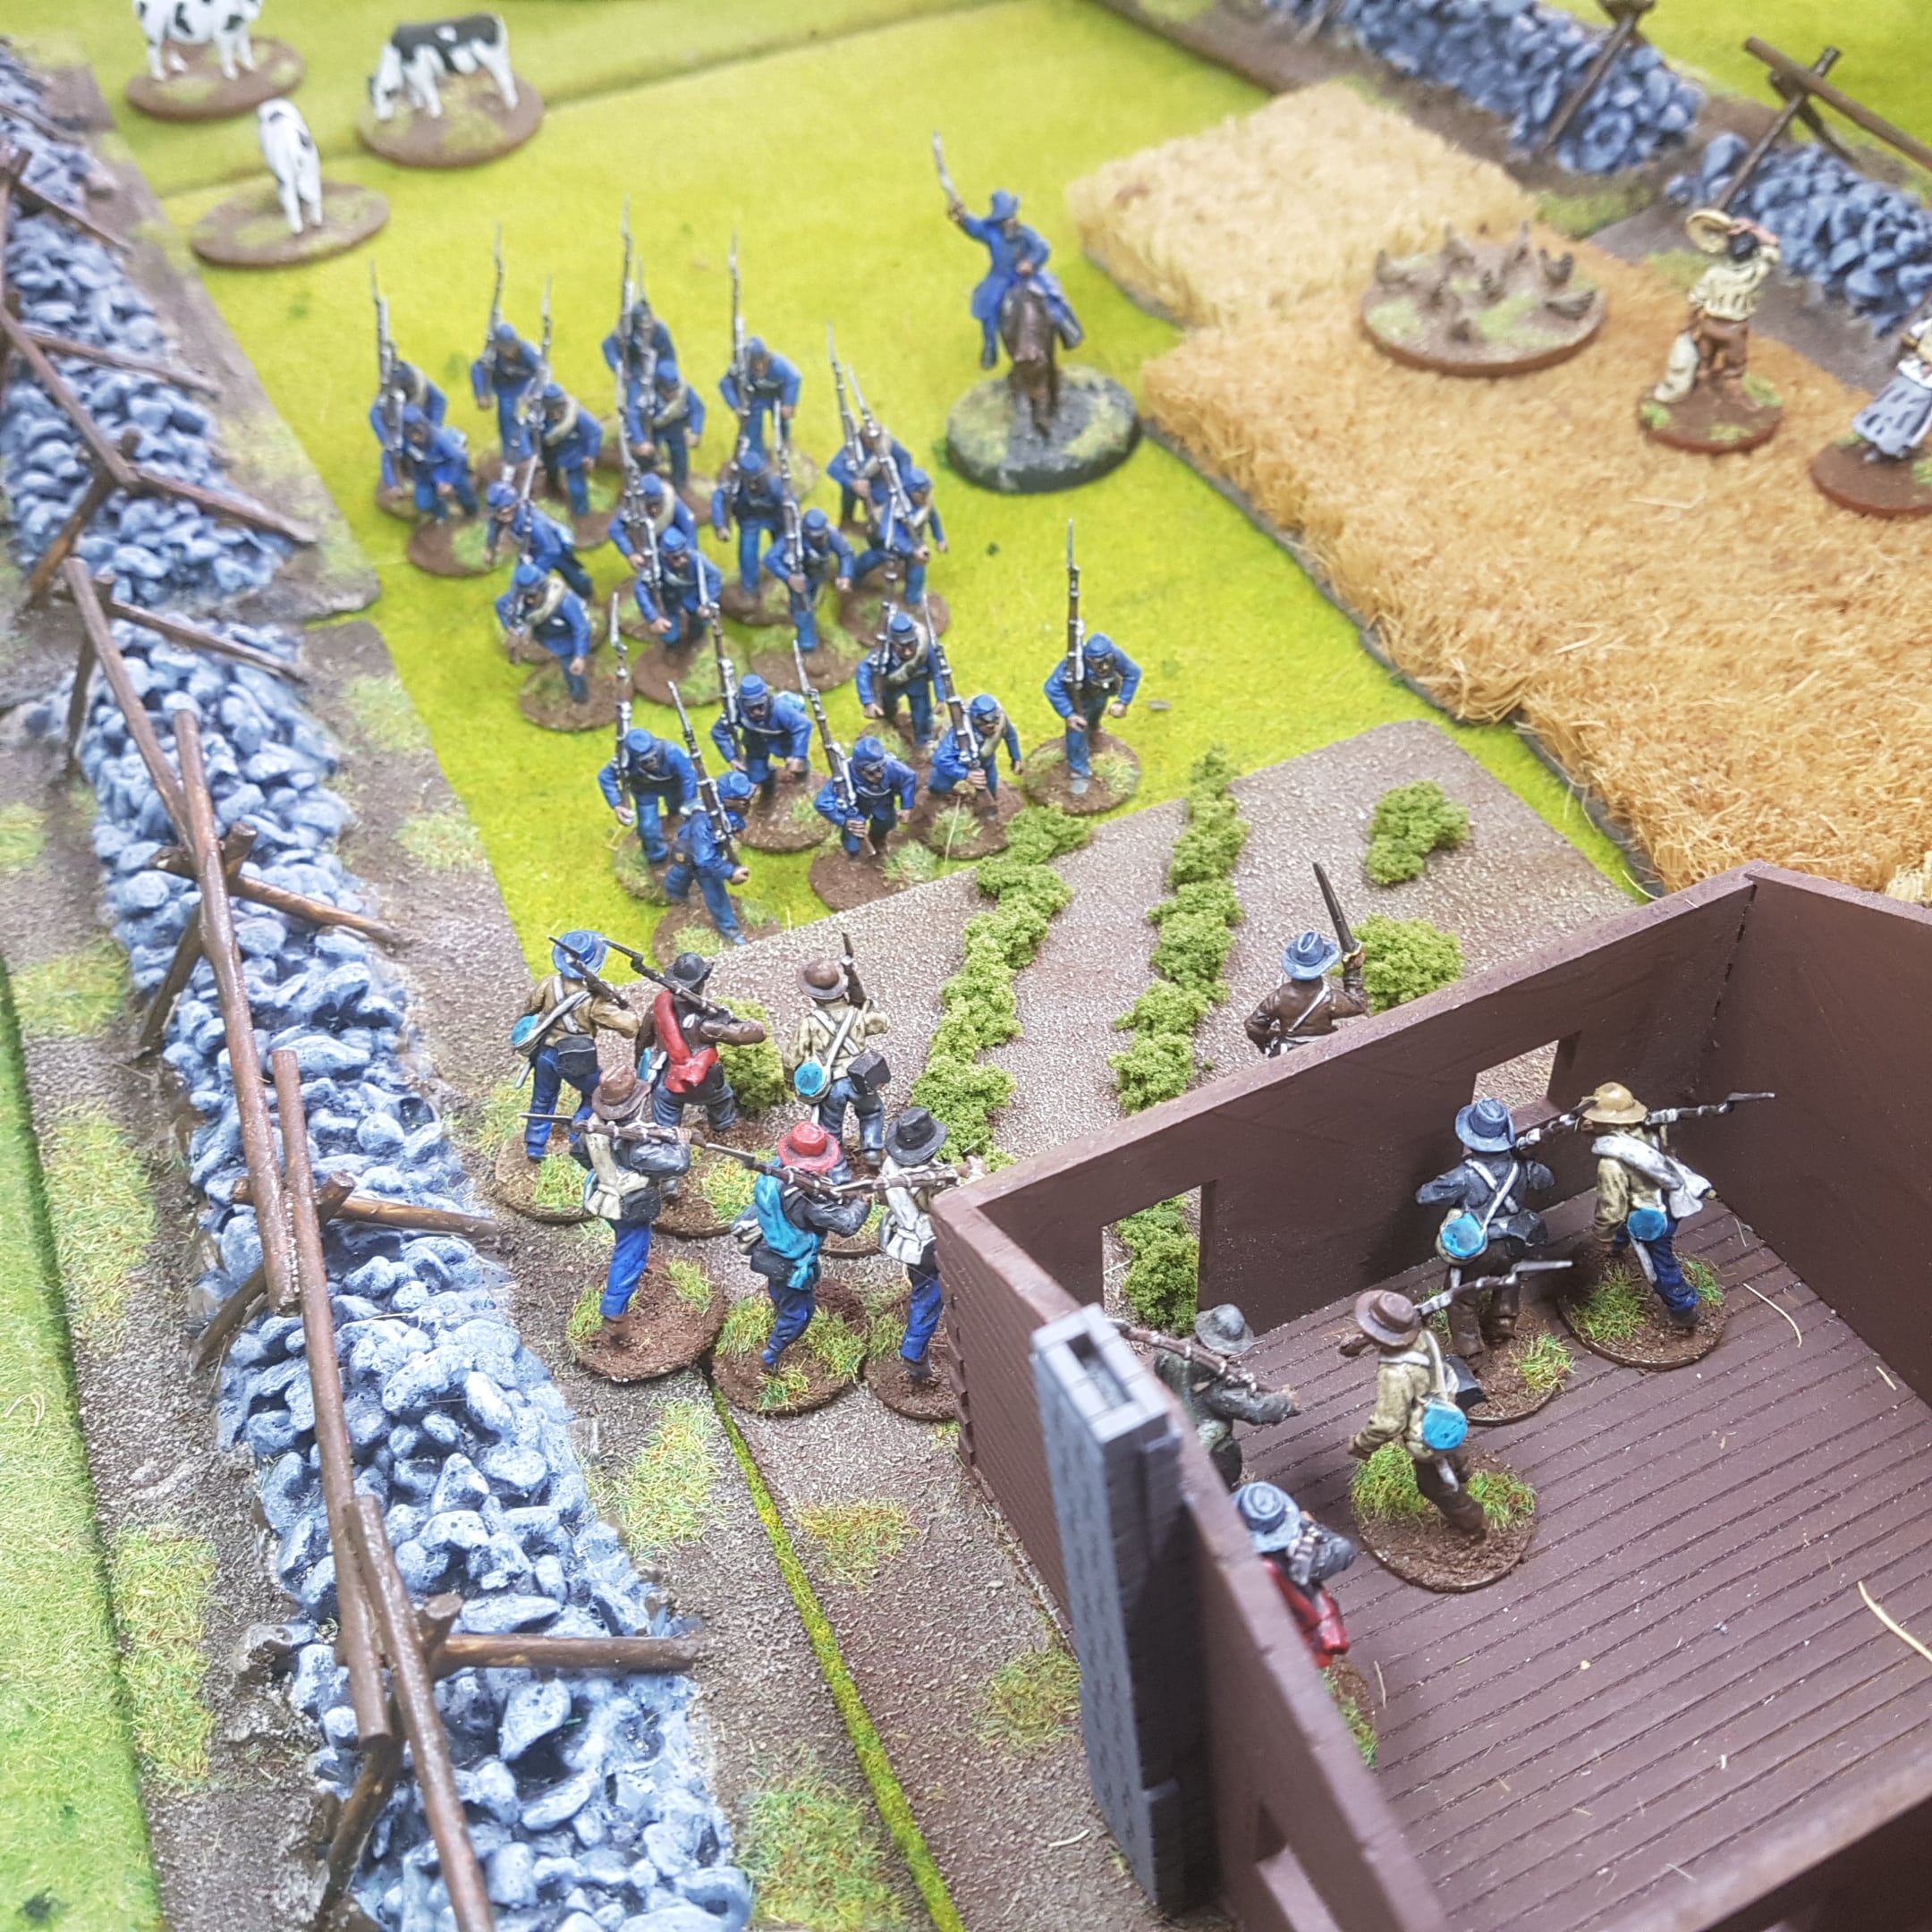 Can Our Federal Soldiers Close the Gap Before Jonny Reb gets Reformed? How Will the Lieutenant's Fare Charging a Rain Soaked Confederate Line?
 Apologies for the Delay
Apologies for the lack of content but I’m currently moving and it’s thrown everything out of whack.
Here’s a few pics of the set up so far and some of the latest minis I’ve painted up for the rest of the Campaign.
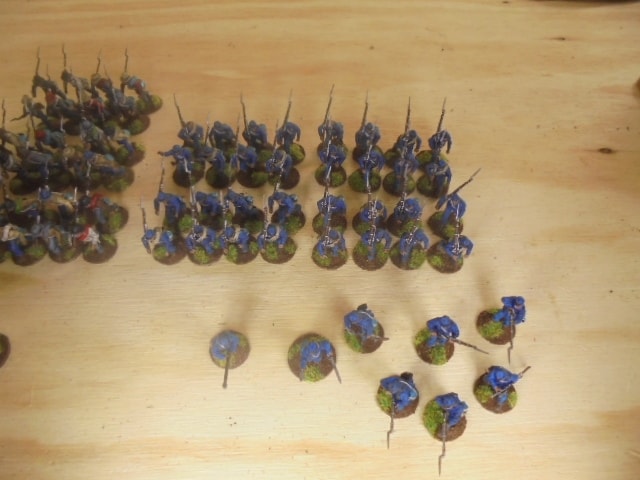 Some Volunteers for the Union
 Some Livestock
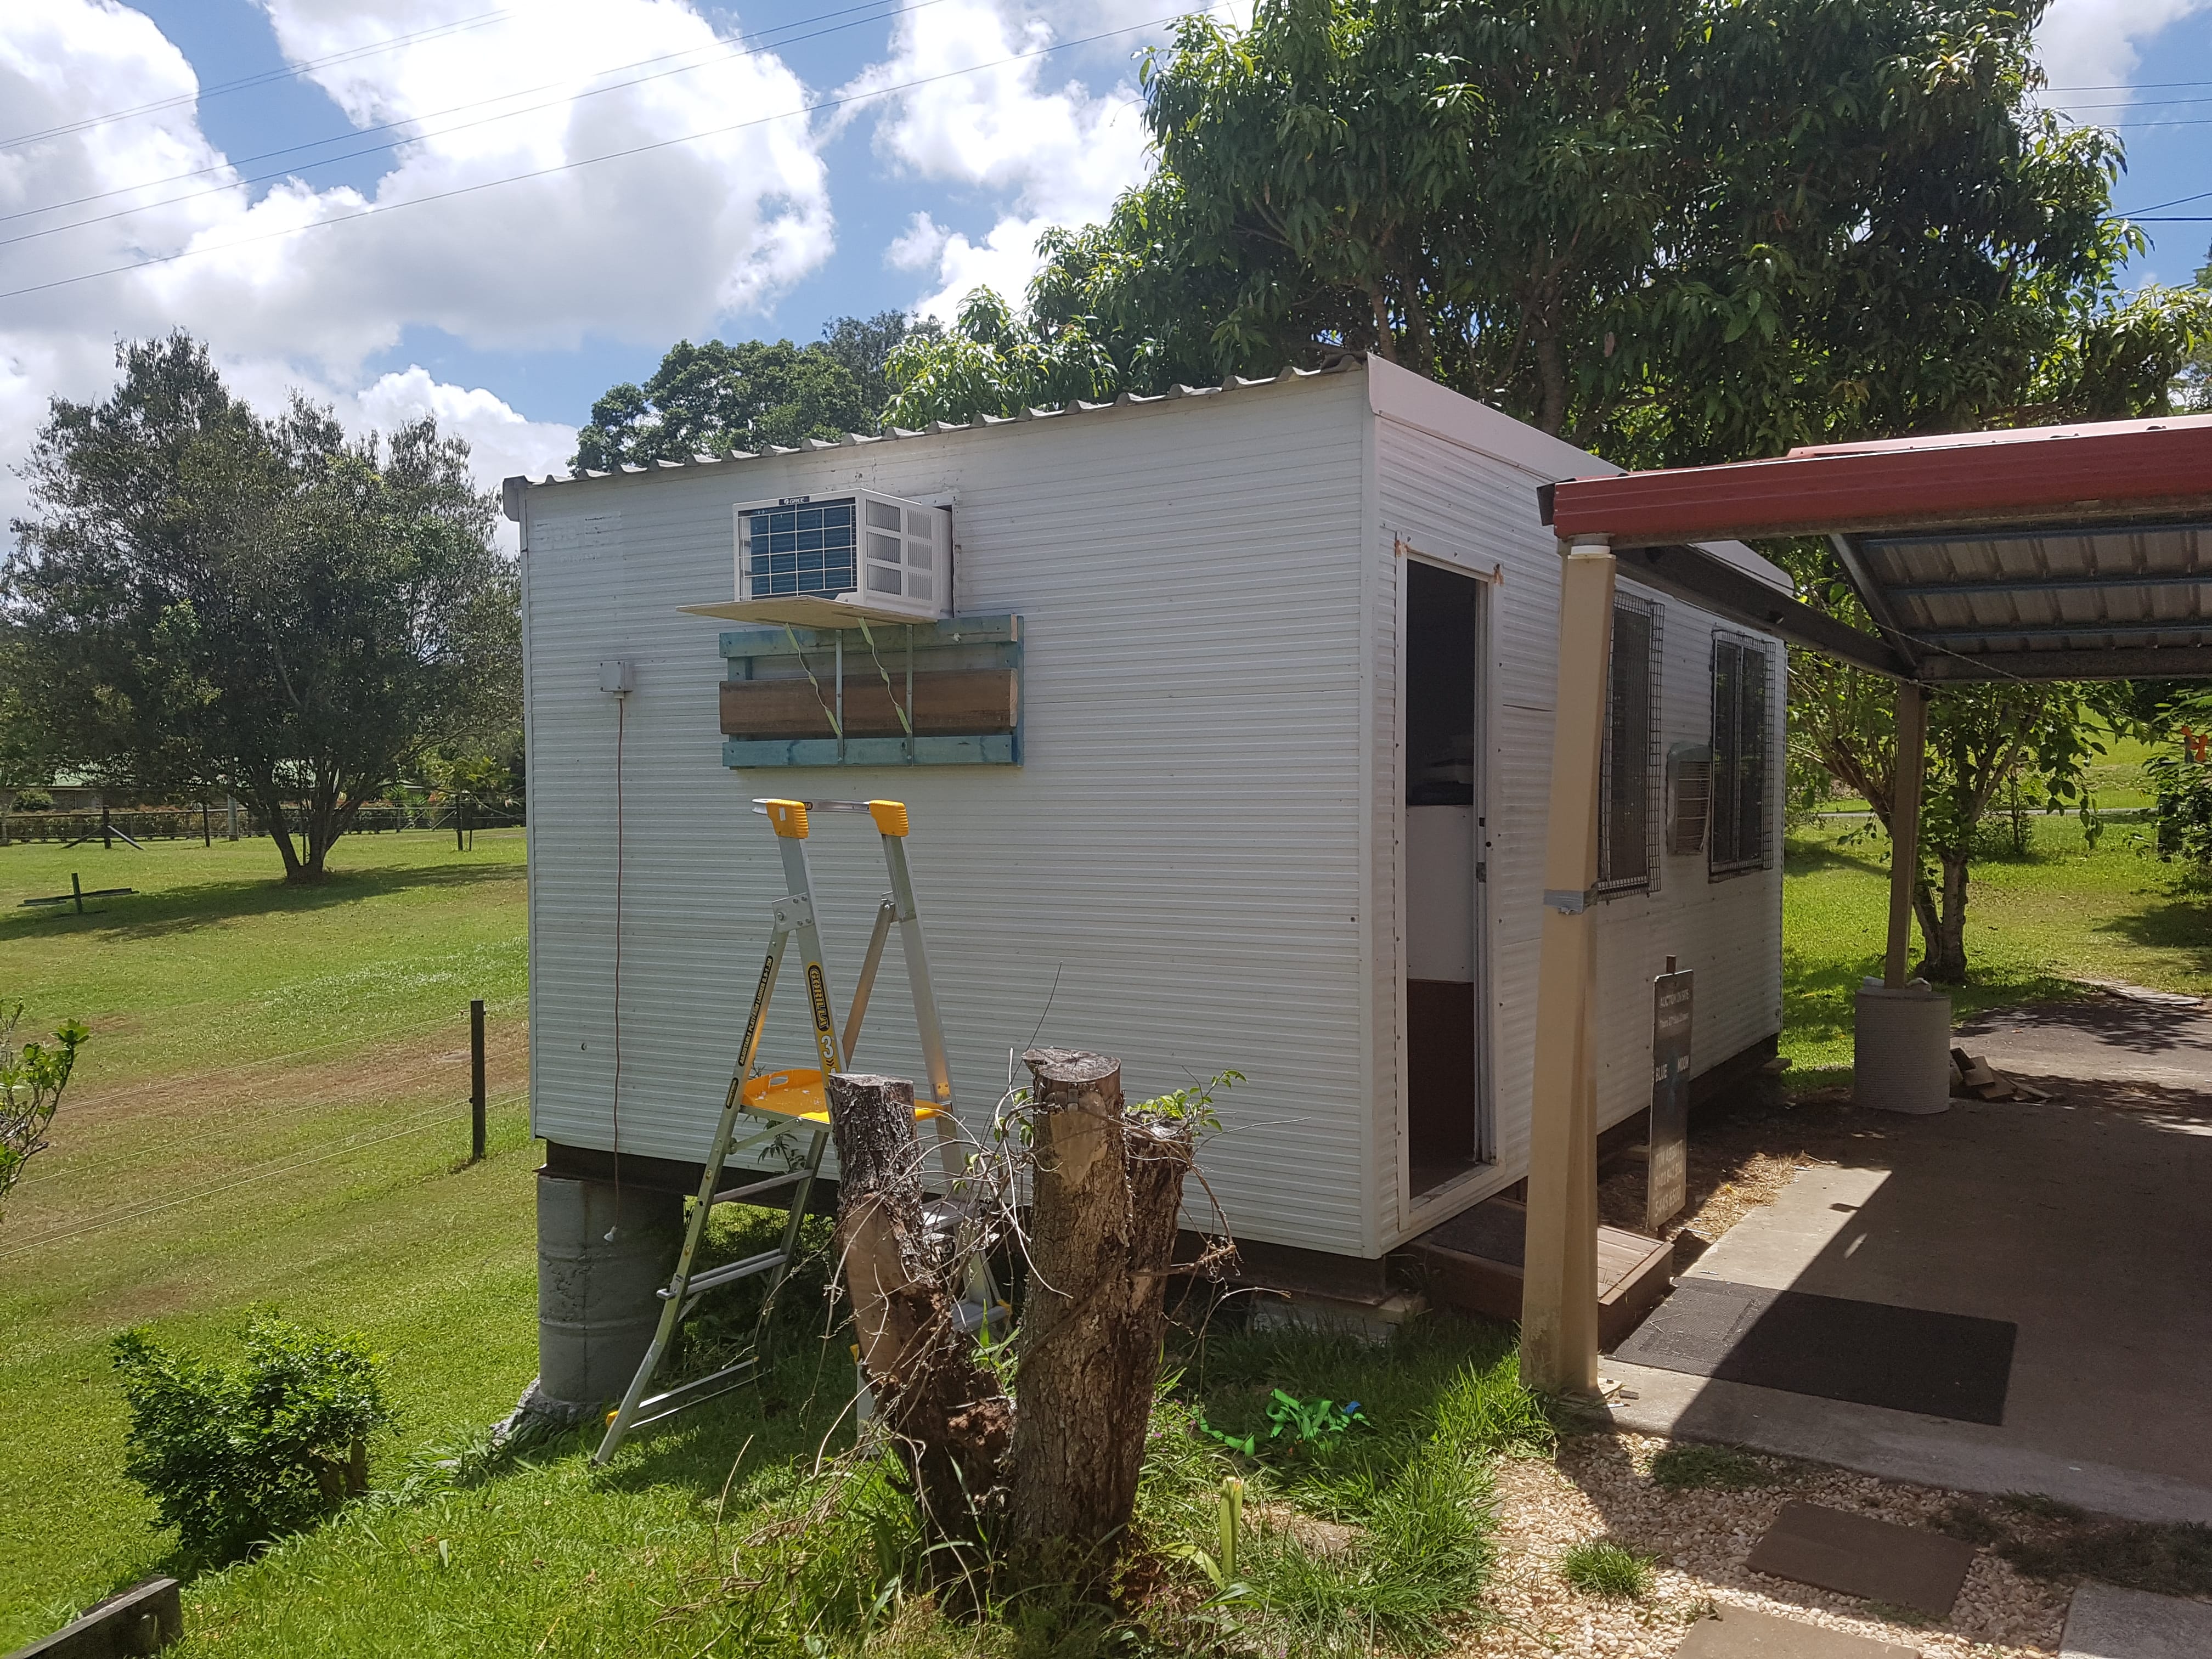 The Work in Progress of the Outside. In Australia this type of Building is Called a DONGA
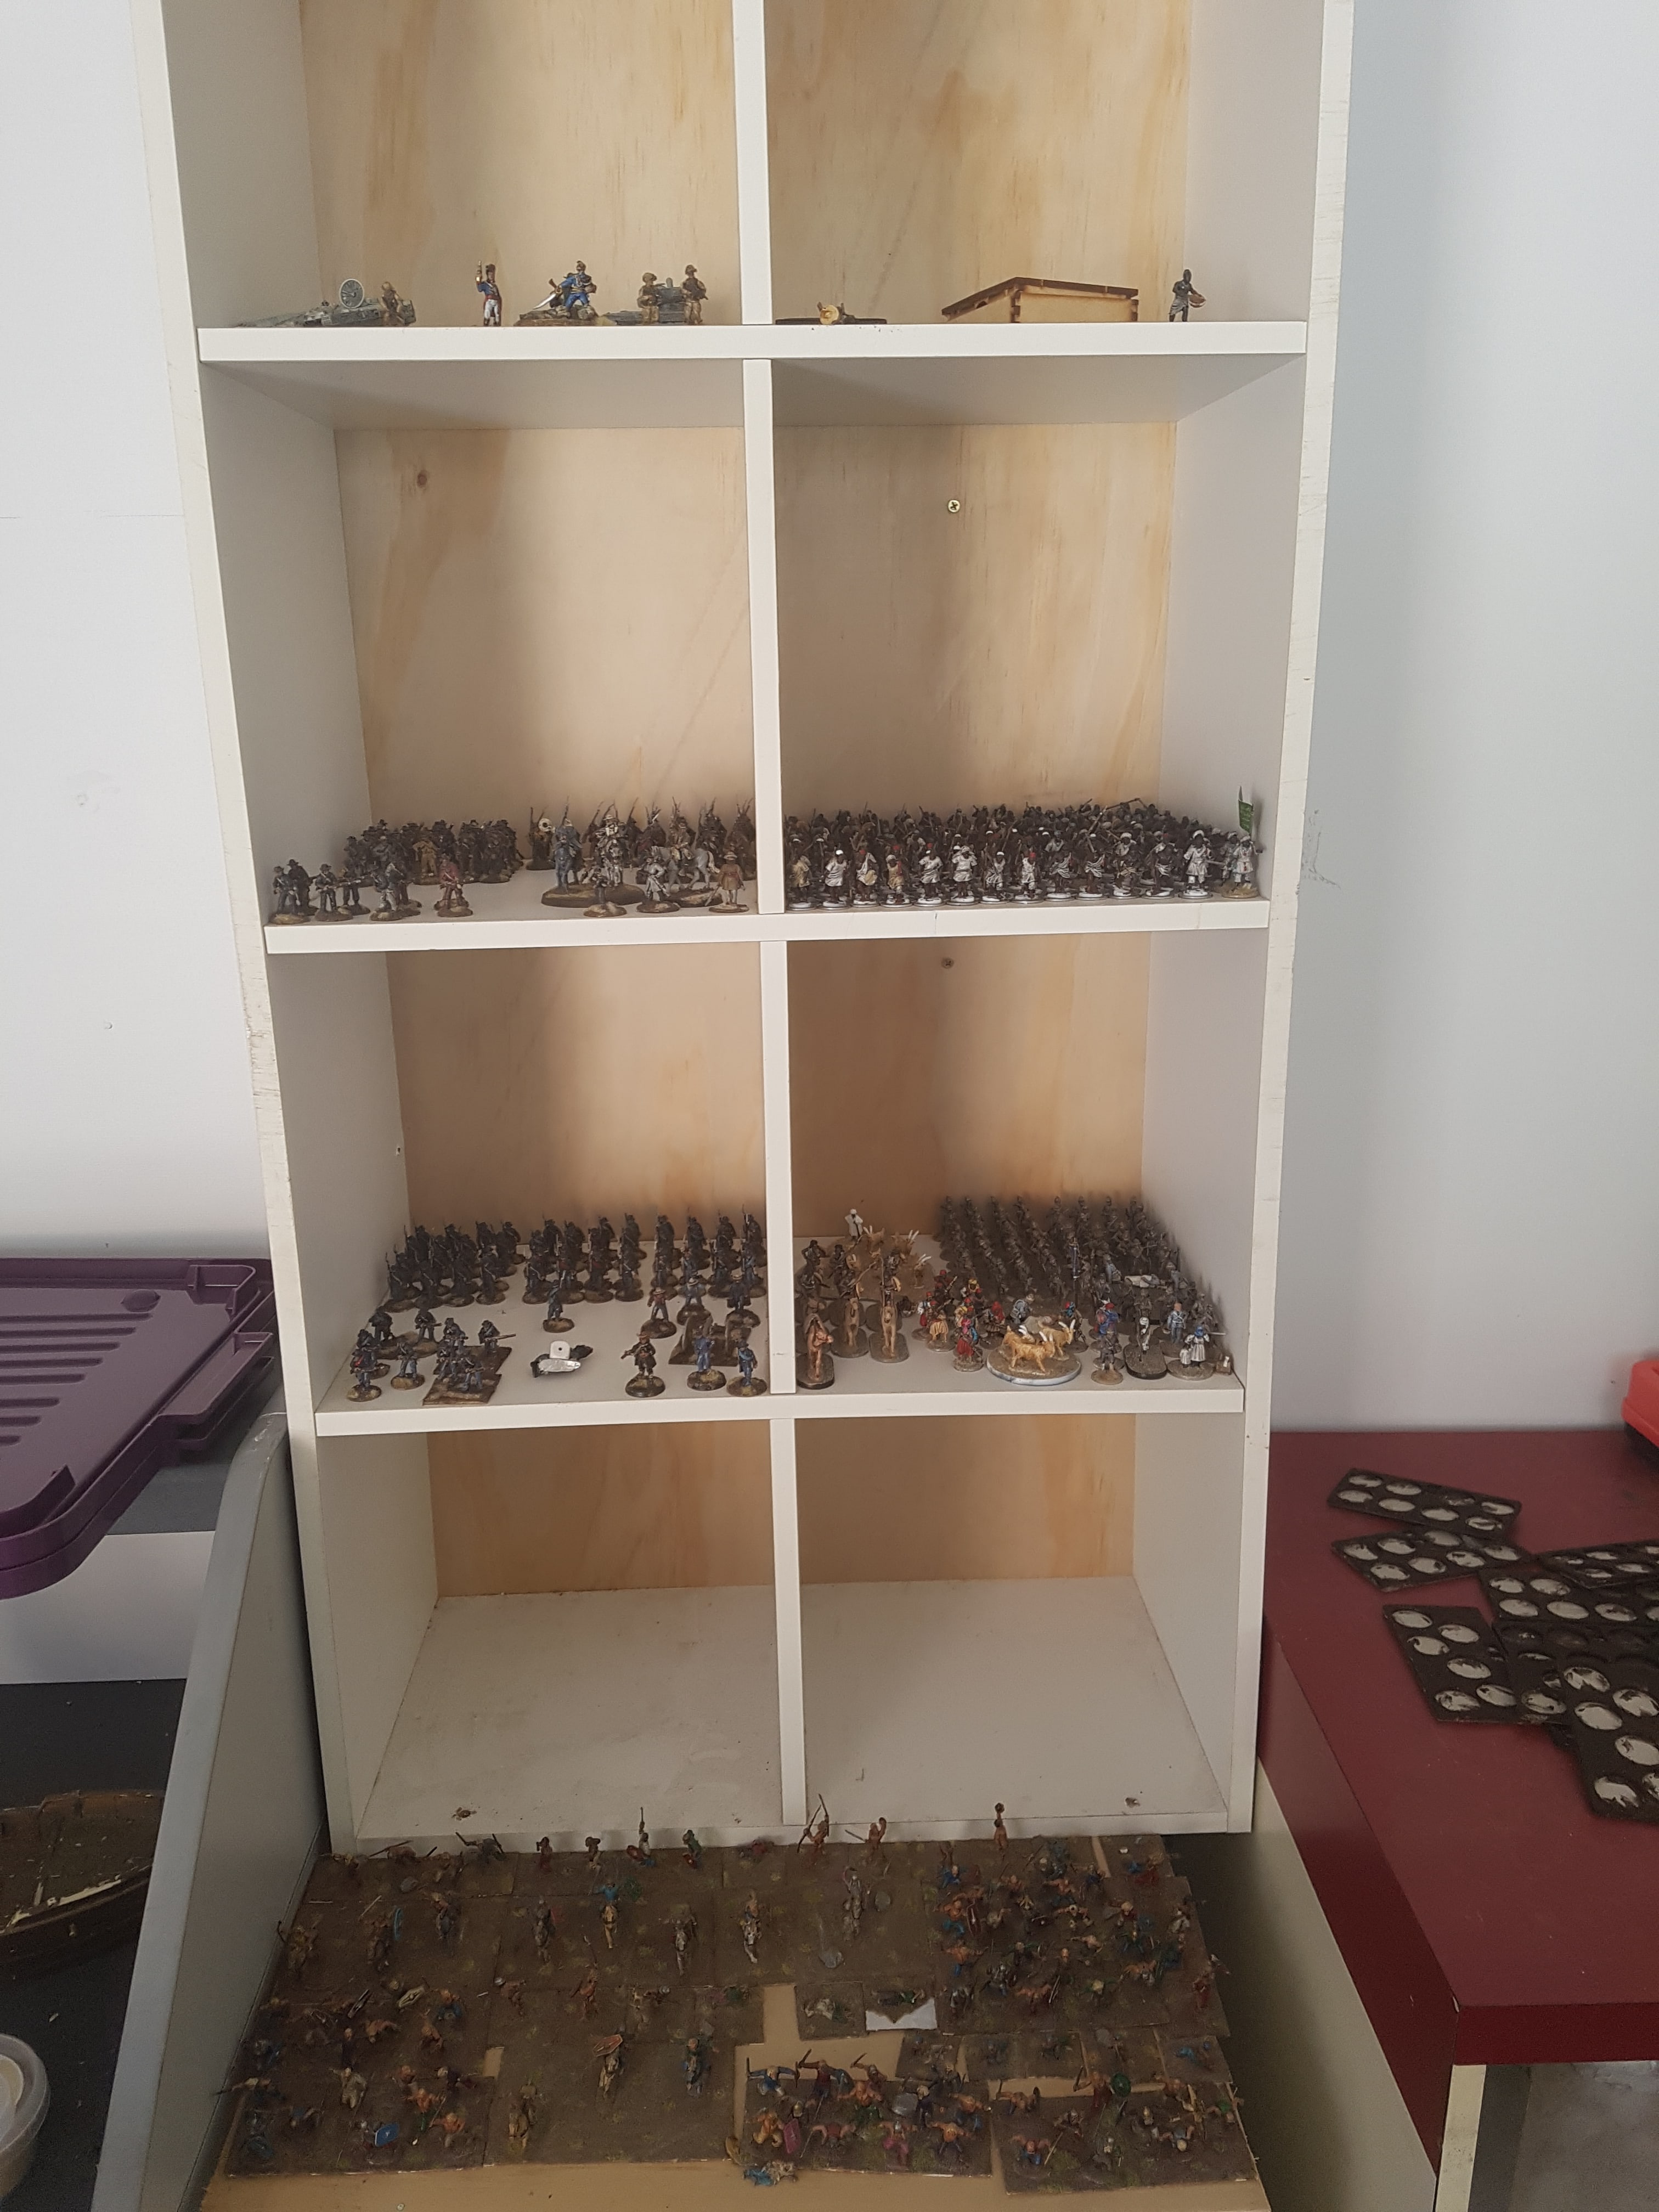 Easy Access for the Things I use the Most. ACW on the Left and Sudan on the Right. With over 200 Sudanese Mahdists they Just fit in the Shelf.
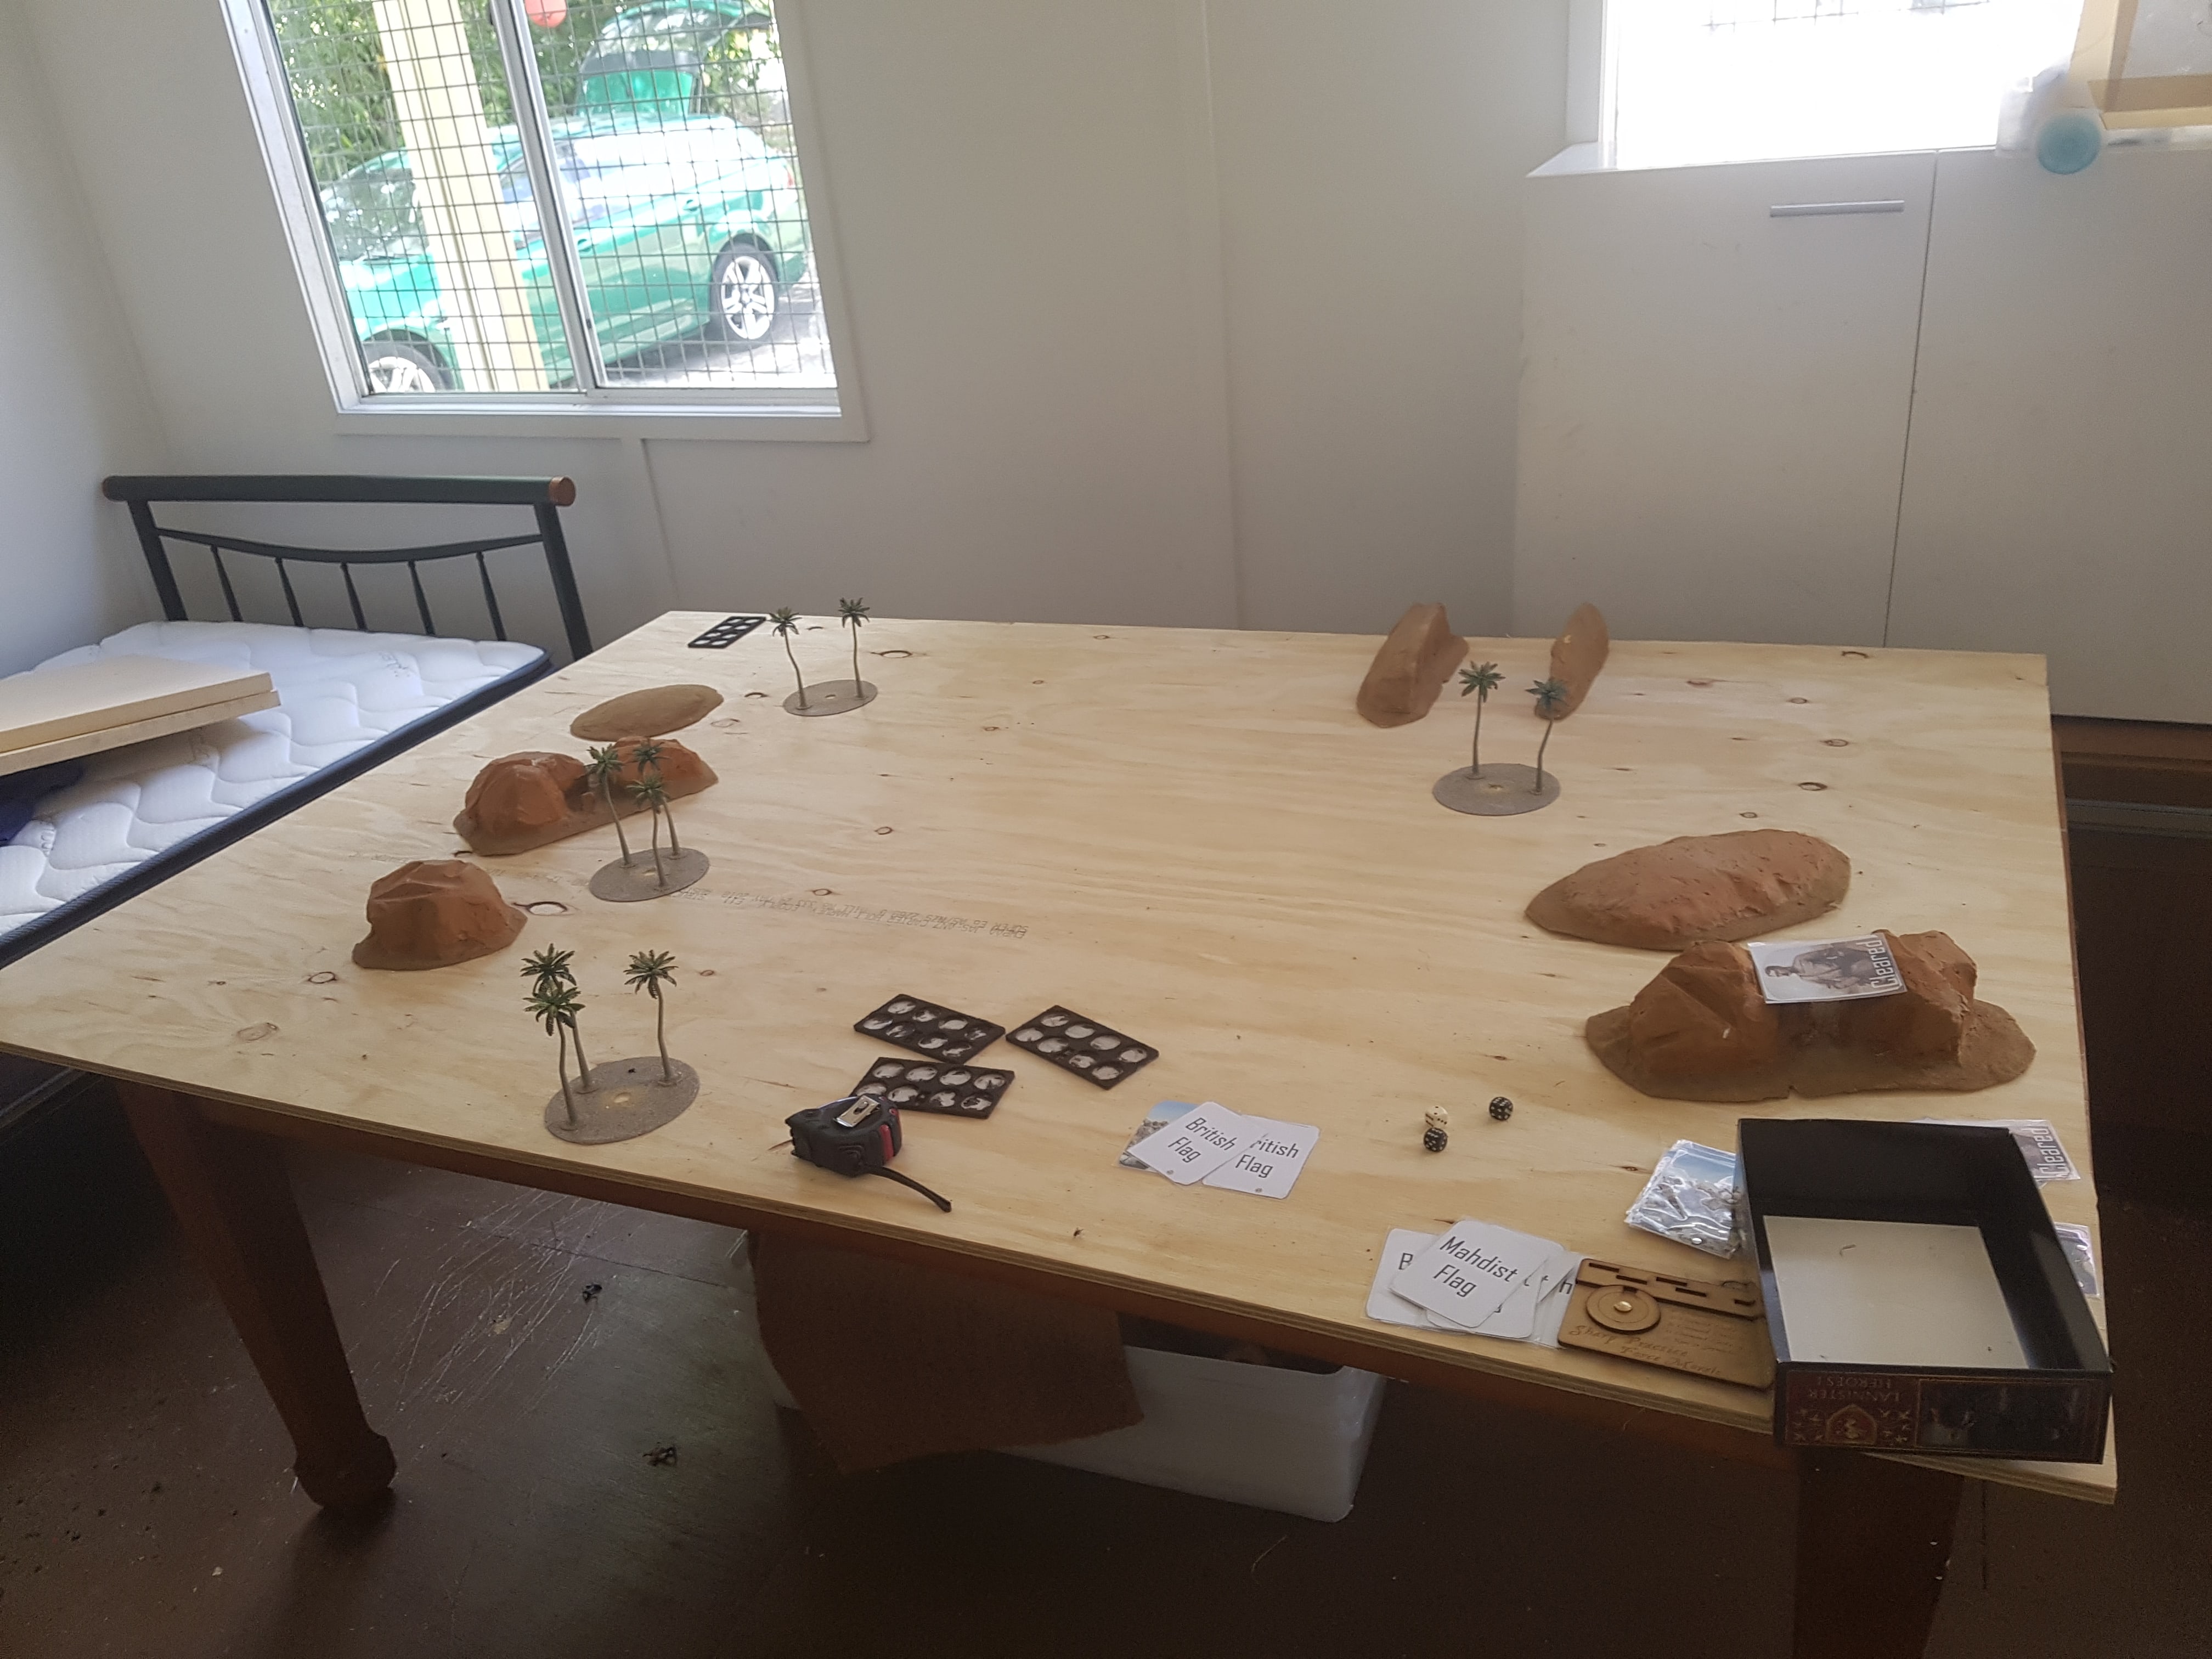 A 6x4 Board that can be moved. I've got my normal tiles and you can just see some Foam that I'll be using to make a Desert Board
Recovering from the Setback
One of our forces has suffered a minor setback but this is far from over.
Marshall’s men fell back into the town and began constructing defences hoping to deter rather than defeat the Confederates.
On the other Flank Lewis pulls back into a small farm where he prepares his men to receive the Confederate attack.
As he arrived at the farm dark clouds came over the horizon and all through the night the downpour continued.
As the first Confederates came into view the rain hadn’t slowed at all and both sides knew this battle would come down to cold steel rather than hot lead.
 Marshall on the Left
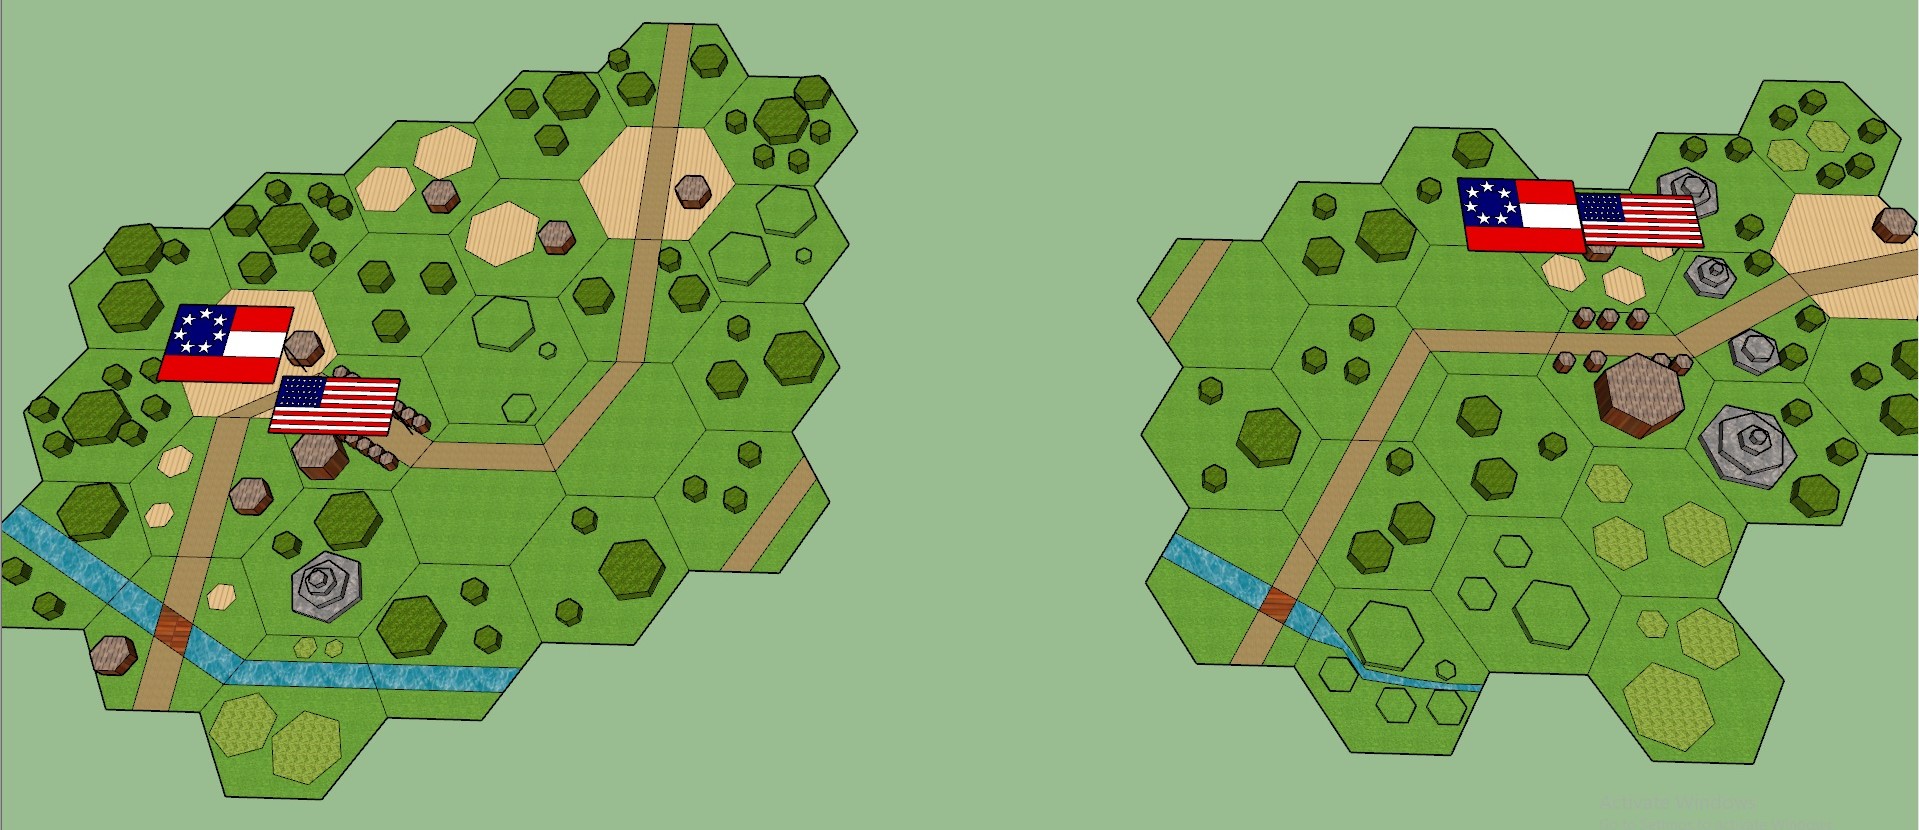 Marshall on the Left
The Waiting Game: Part Two
Full disclosure I'll have to split these reports in half due to the 12 component limit on Projects, I'm not trying to farm up votes or keep anyone in suspense. :)
marshall’s men are in full retreat, Allen’s skirmishers are holding the Confederate line and the threat of flanking fire is keeping the Rebels where they are for the moment.
Marshall now gives the order for Burnett to move his men forward and hit the Confederate’s in the flank while he rallied his own men for a frontal attack of his own.
What could go wrong?
 DISASTER. This was one round of shooting! 8 men killed plus Lieutenant Allen and a pile of shock.
The Confederate’s on the flank suddenly launched their attack. Leaping over the fence they delivered a crashing volley into Allen’s Skirmishers taking out two thirds of the men, wounding Allen and sending the rest in a total rout which, thanks to some help from the Confederate Skirmishers, sent them straight into Burnett’s men who took a giant pile of excess shock (units who are moved through by fleeing friendly units take any excess shock) leaving them essentially useless to their commander.
 Turning Point
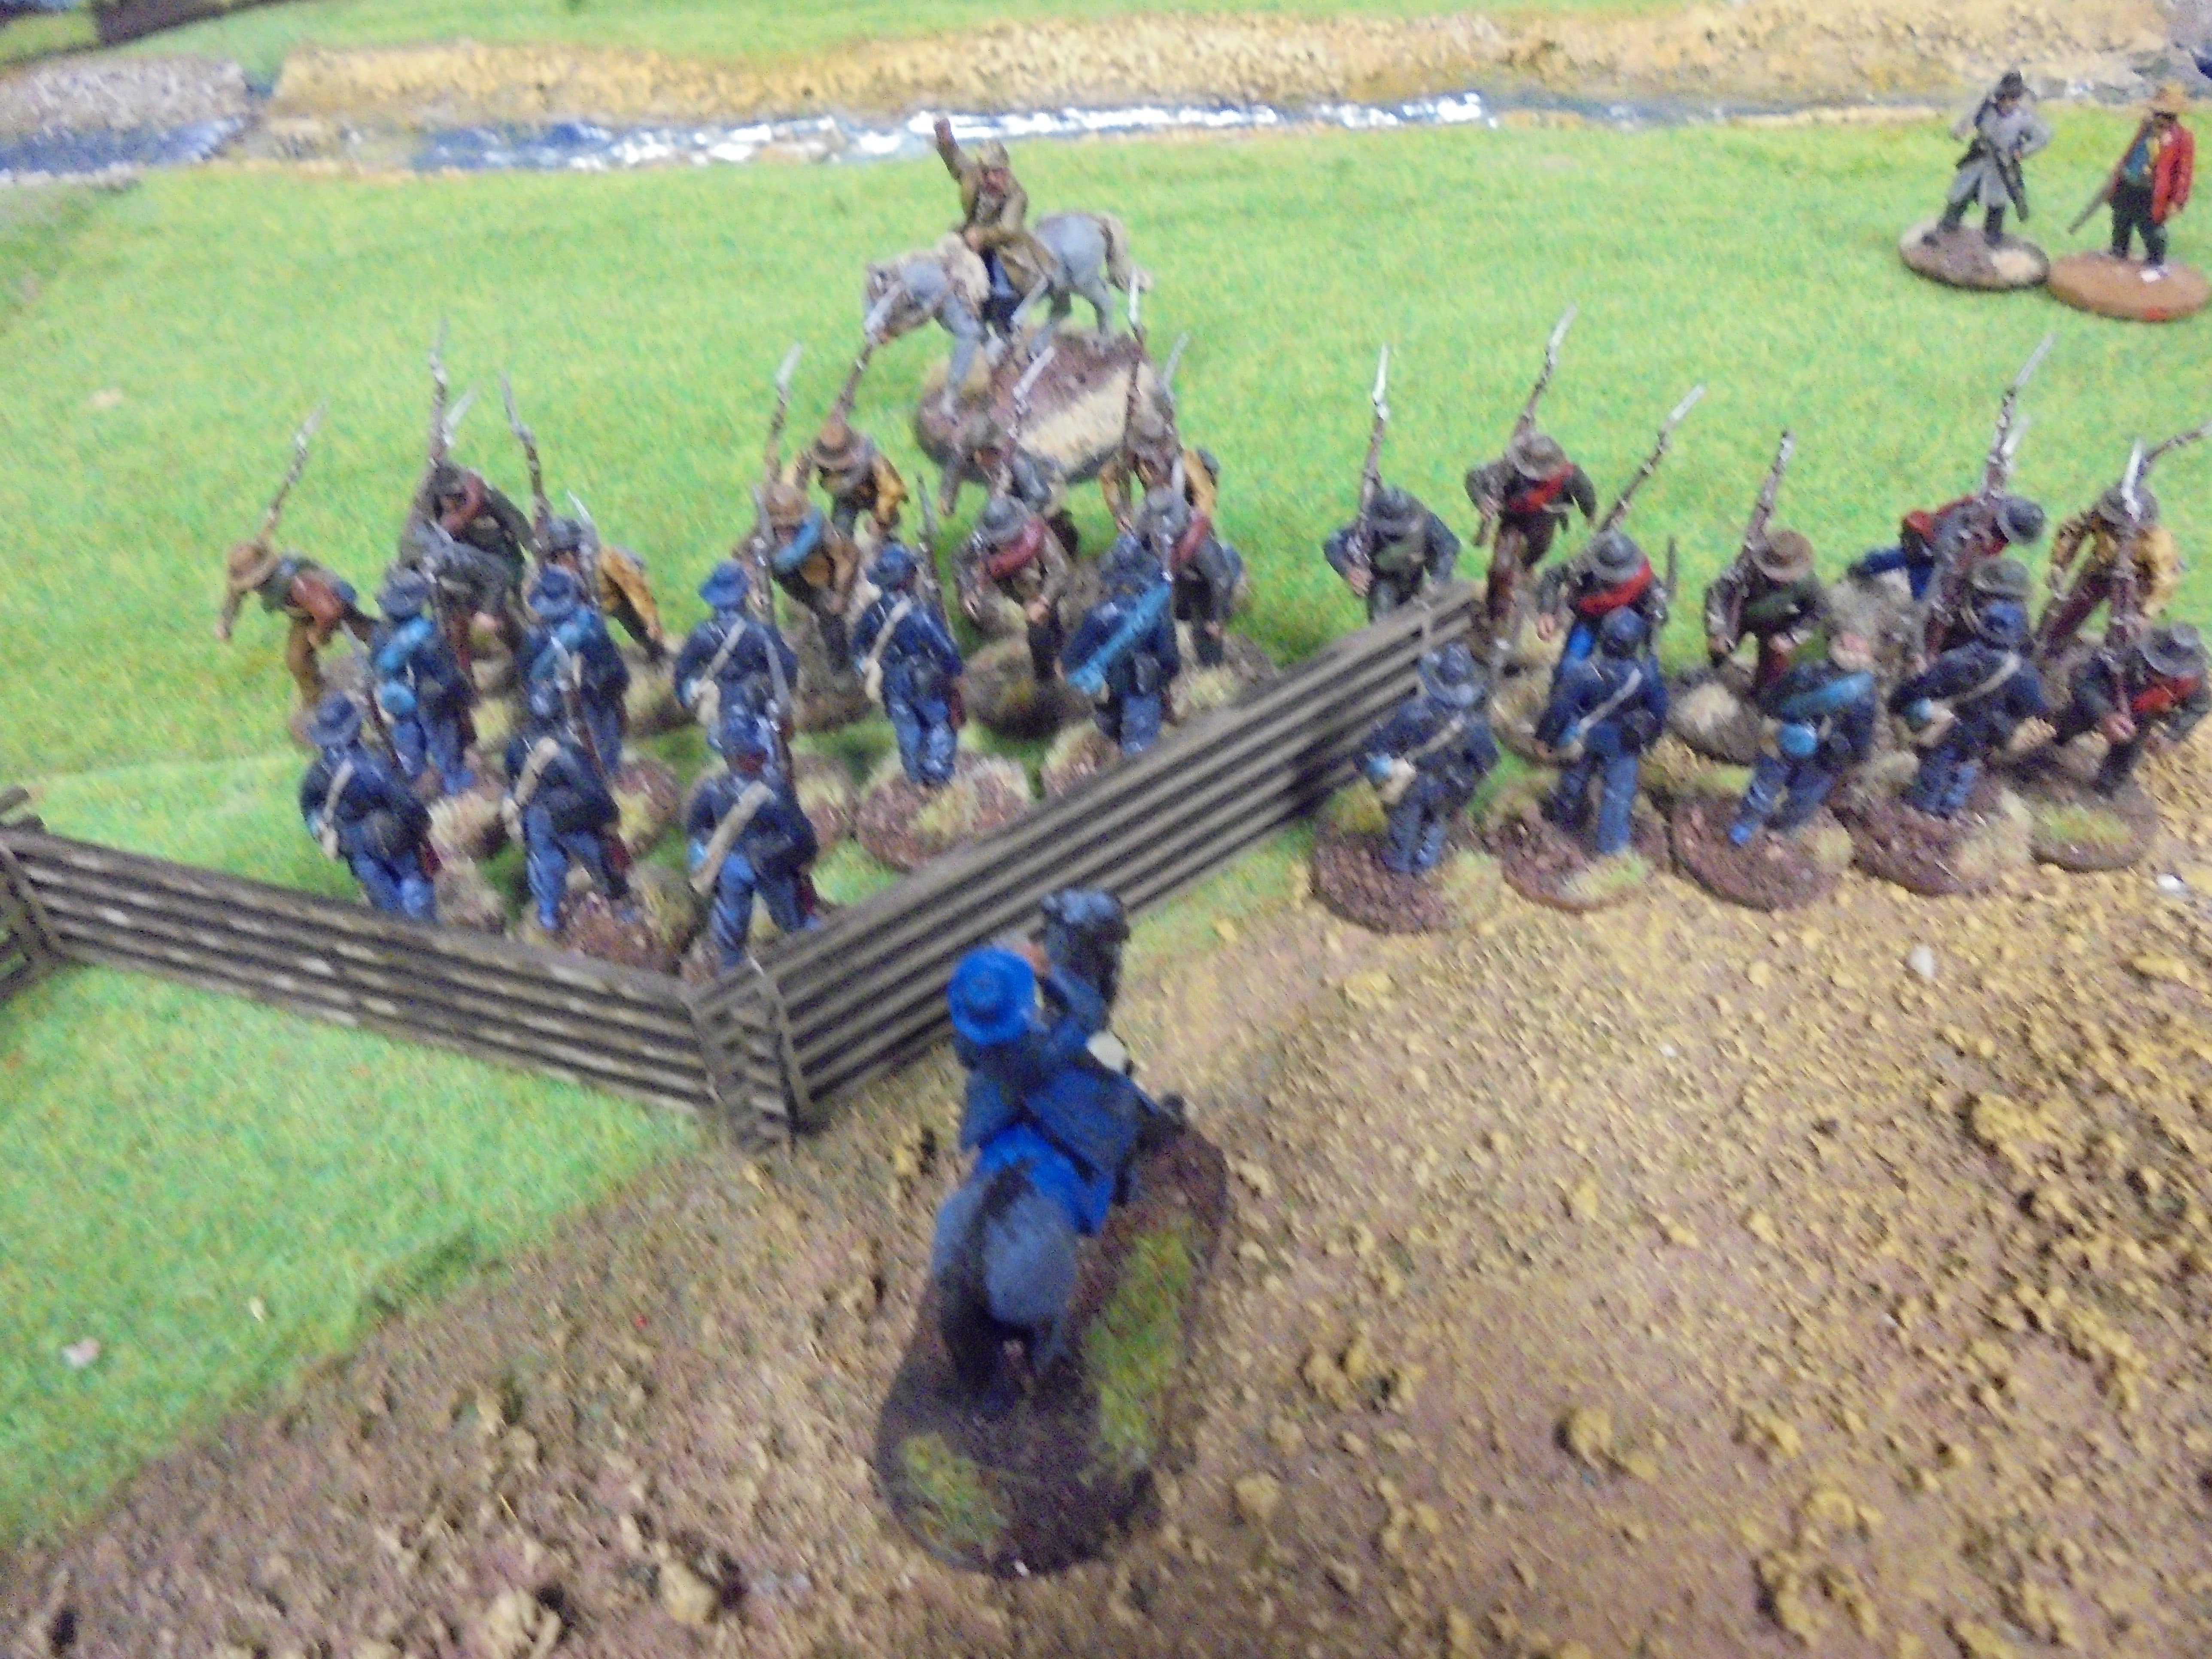 No longer fearing enfilading fire the Confederates surge forward and send Marshall's men into a rout, the Skirmishers were particularly agile this game.
Seeing no hope of victory Burnett ordered his men to retreat. The Confederate’s allowed the Union troops to slink away content with the damage they’d already inflicted and not wanting to take further unnecessary casualties.
So the battle ended with:.
6 Union Skirmishers Fit for Duty
1 Union Skirmisher wounded
1 Union Skirmisher Dead
6 Union Men from Marshall’s Formation Fit for Duty
8 Union Men from Marshall’s Formation Wounded
4 Union Men from Marshall’s Formation Dead
Lieutenant Allen Wounded and Captured. His wounds were not life threatening
So that’s the Game play portion of the Campaign now we move on to the Role Playing Section.
Marshall is furious at Burnett. His men quit the field without firing a shot and Marshall blames Burnett for both his own and Allen’s losses.
As a consequence Burnett may not influence any men besides his own. He can’t take off shock, give orders or take over command. This ceases if Marshall is ever taken out of action during a Battle.
Also Burnett’s men are eager to prove that they aren’t cowards. If they are stationary for an activation and within line of sight of the enemy then they have to make a “Treasure Roll”. In Sharp Practice if a unit is near a pay chest, wagon of loot or some other “temptations” they have to make a “Treasure Roll” which represents the men’s propensity for looting. The better the men’s training the less likely they are to loot.
Burnett’s men will fail the test on a 1-3 and if they fail they must make a move 1d6 forwards. Burnett’s men also do not take the shock penalty to their movement when moving towards the an enemy. If they have 5 shock and roll a 6 for their movement they will move 6 inches rather than 1 inch like a normally unit would.
The Union troops fell back to the nearby town. Will the Confederate’s root them out of the town or attempt to bypass them and cut them off from the rest of the Union forces?
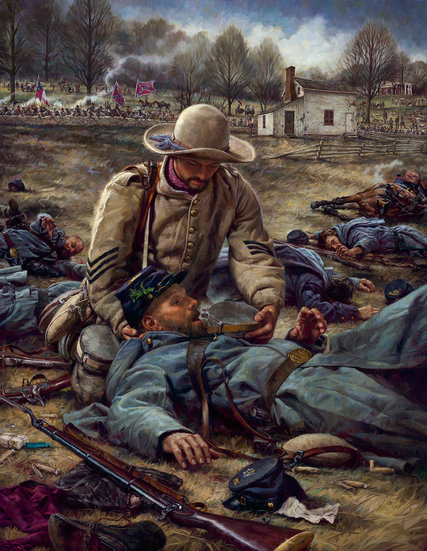
Competition Time
Let’s have a little fun. At the end of every Battle Report I’m gojng to include a little Trivia section. The first person to answer the question correctly will earn a point, who ever has the most points at the end of the campaign wins a certificate of accomplishment. Put it on your resume or something no one ever checks those things anyway. 🙂
First up a two part question. Two points up for grabs.
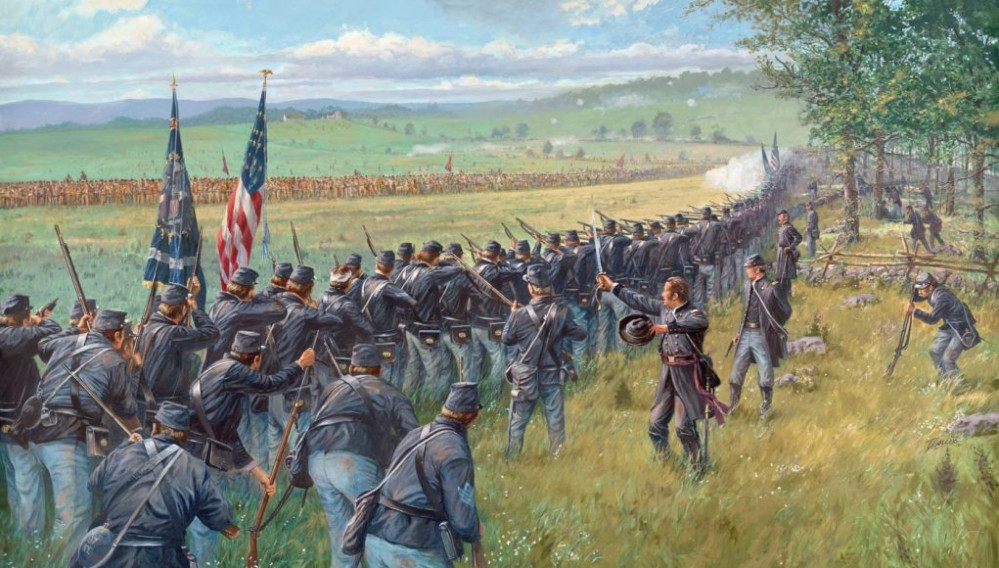
Who is the Confederate in this picture? Nickname/AKA/Real Name are all viable.
Which Battle is this picture depicting?
Hint: The actual event pictured here happened at night but the artist has depicted it during the day for artistic reasons.
Stone Wall, Confederate carrying multiple canteens, what’s that in the union soldier’s kepi?
Good Luck, and thanks for reading.
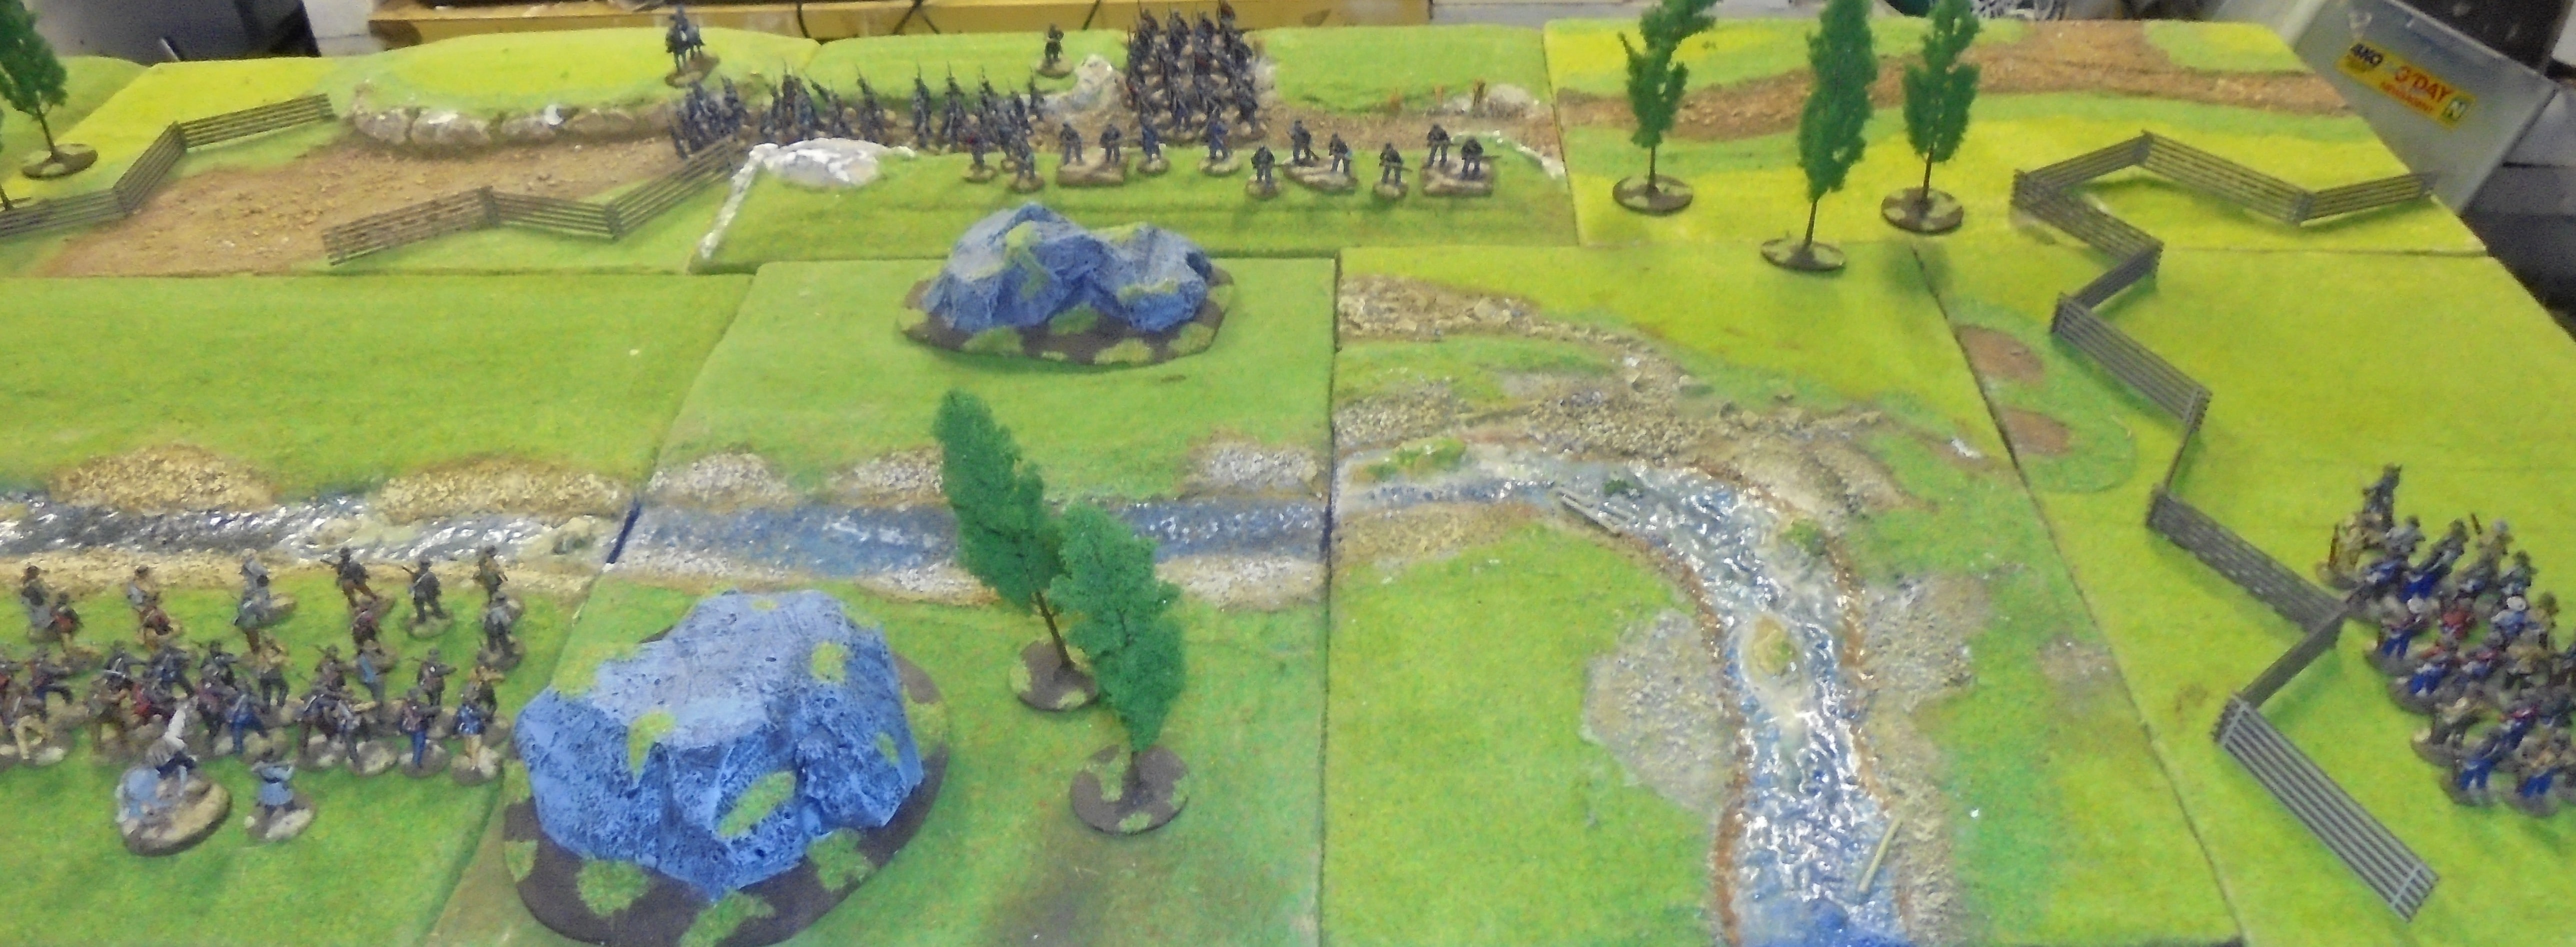
The Waiting Game: Part One
The Skirmish at the Bridge?
As Union troops filed into the three house village that lay on their side of the river they observed the Confederate positions. The Confederates were hastily searching for a viable ford by which they could cross the river, the bridge that was marked on their maps had been destroyed.
Captain Marshall observed their activity for the better part of the afternoon until at 4pm the Confederates abandoned their search for a crossing position elsewhere and opted to wade through the river and take his brave Union boys head on.
 The battle after a few turns of maneuvering, the union got a raw deal and were forced to use flags for most of the activation's in the first four or so turns.
 Two things.
First these photo’s are staged but nothing in them is staged. I only had the idea to do this Campaign as a project in the last few turns and so we hadn’t taken any real pictures. These battles happened as you see them, luckily deaths, moments of bravery/cowardice and other meaningful events were all meticulously recorded for the campaign anyway so this isn’t a huge hurdle.
Secondly the table shown is only half the table, there was an extra two feet behind the Union players with fields and houses but it played no part in the game so was omitted for obvious reasons.
The Confederate Player had to cross the river but didn’t want to take on the Union troops dug into their positions in daylight. So I decided to give the Union player a choice, fight a defensive night battle or take the fight to the enemy by moving their deployment point forward the the sunken road. Wanting to get stuck in as soon as possible the Union player opted to make the crossing well and truly opposed.
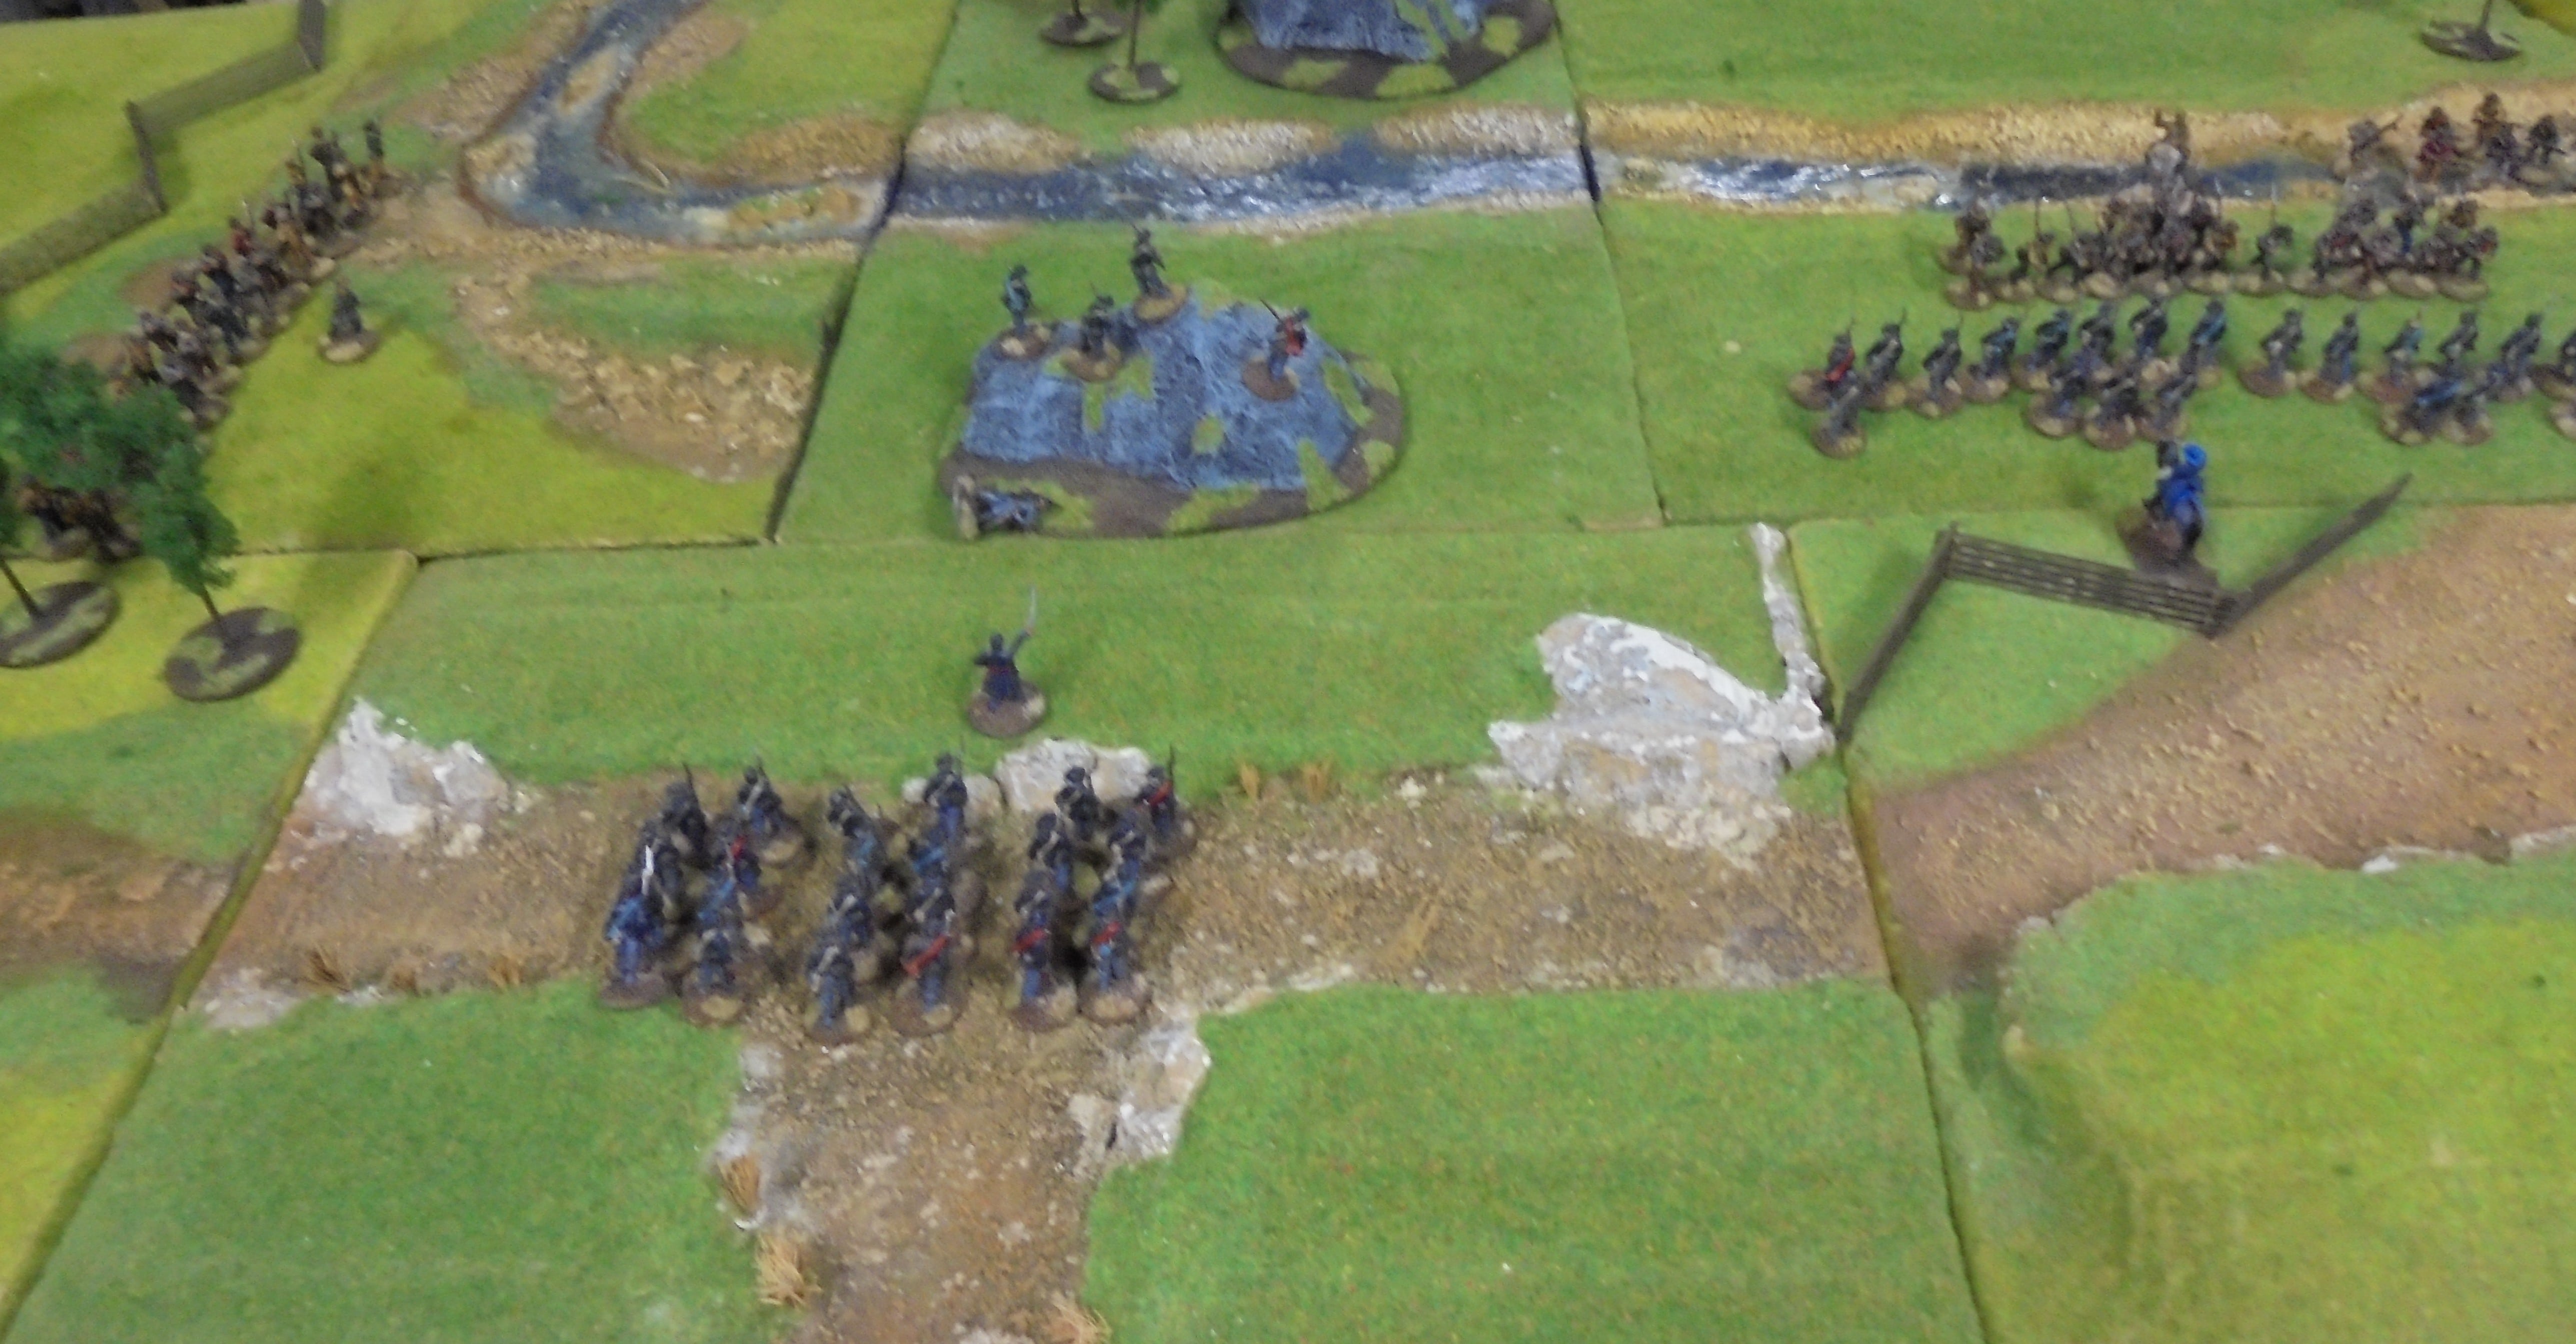
 The view that Captain Marshall had.
 The Union skirmishers clambered up the sunken road and screened the rest of the company as Captain Marshall lead a force to oppose the main landing while Lieutenant Bernett held the second formation in reserve behind the sunken road and out of line of sight of the enemy. Bernett was ready to either oppose the Confederate Flankers or reinforce Marshall’s men if things turned sour.
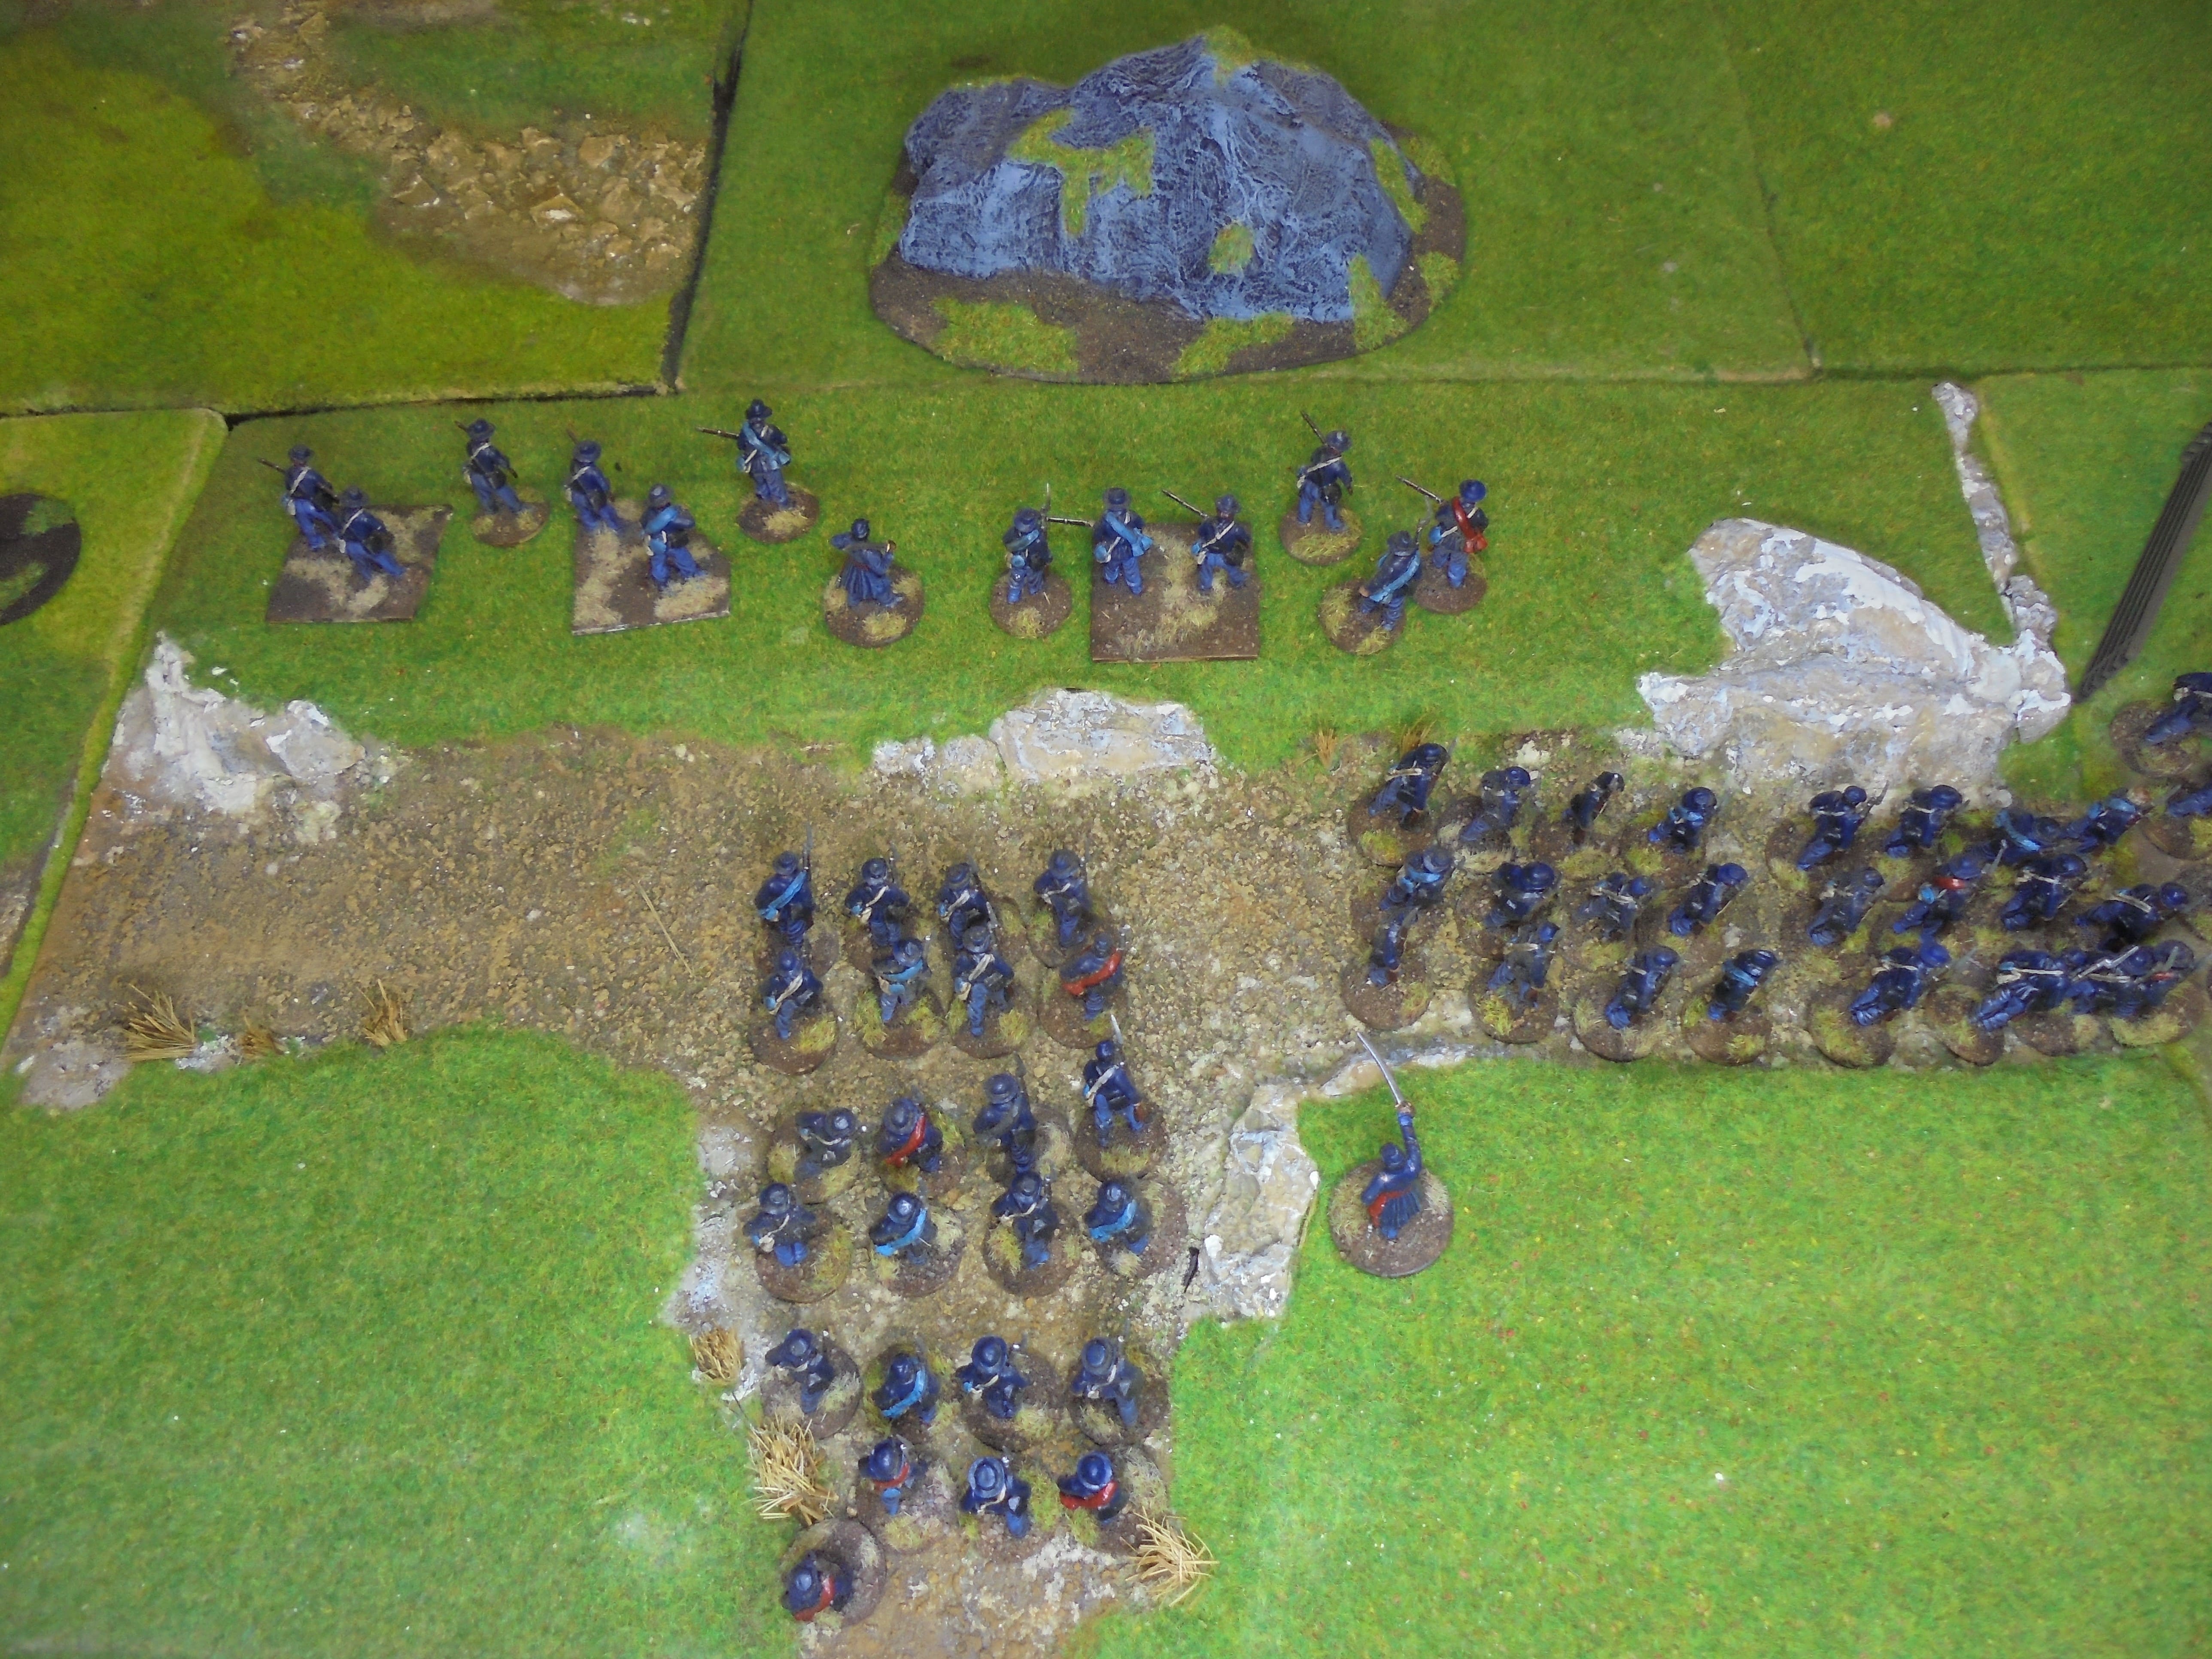 Marshall's men on the Right, Burnett in the Centre while Allen took the Skirmishers forward. The Engineers were not used in this battle.
Allen’s men took up position on the “Rocky Knoll” and traded fire with the Confederate Skirmishers. Marshall’s men moved to take up position in front of the fence hoping to screen their flank with the rocky knoll and prevent the Confederate flankers from hitting them with enfilading fire.
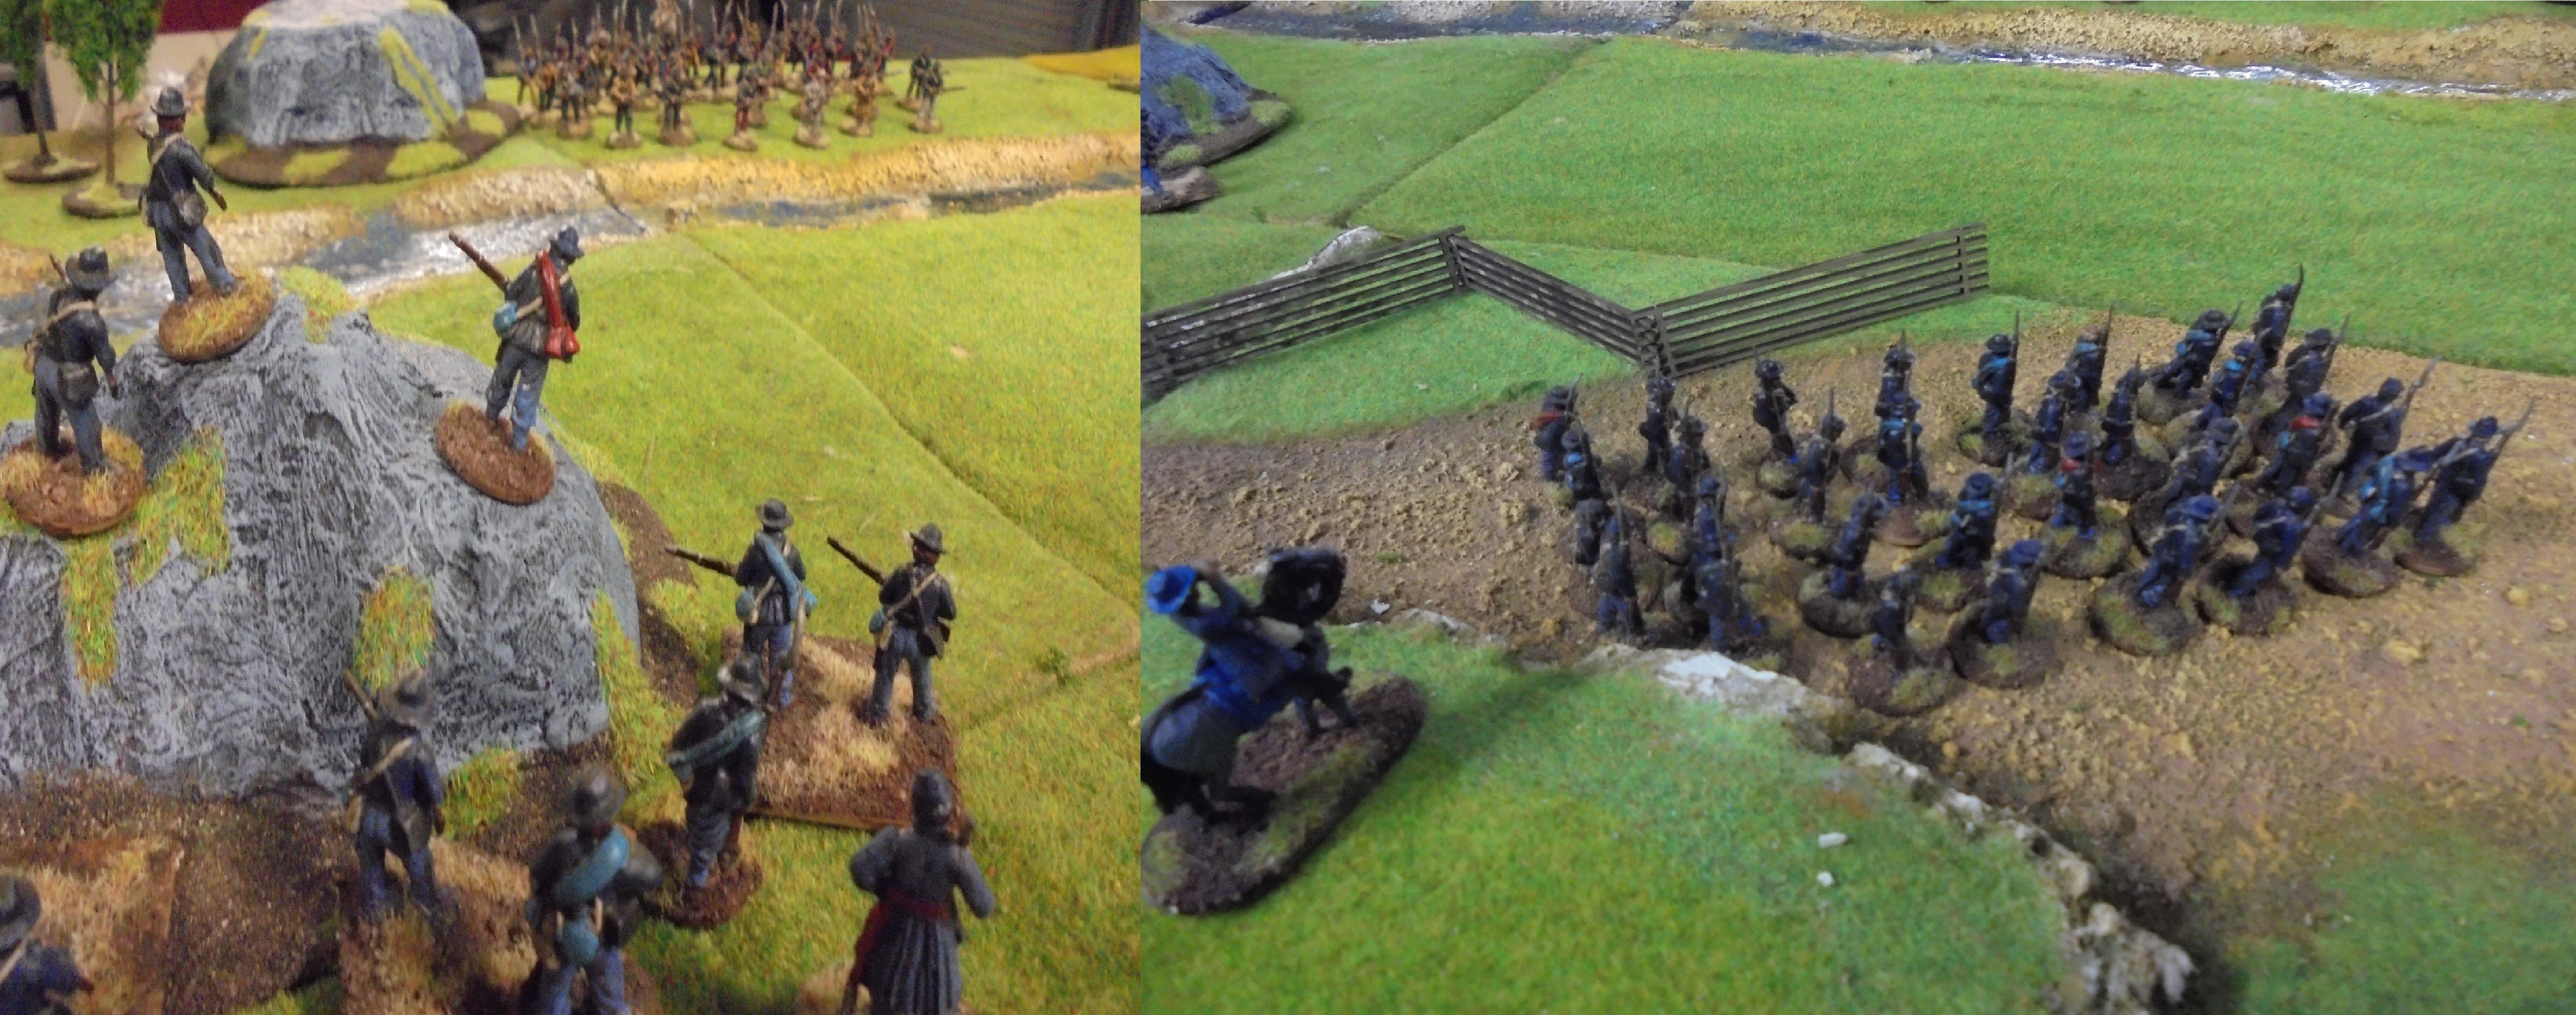 Riflemen on the Knoll and Marshall's men on the march
As the Confederate’s started to cross the river Marshall began to deploy his men into a line. His men were not fast enough and a Confederate Volley inflicted both kills and shock on their unit.
Marshall rallied his men into a line and they fired their own volley at the Confederate’s who proceeded to charge them. With fewer numbers, lower moral and unloaded muskets Marshall’s men were thrown back.
Only Burnett could save the union now.
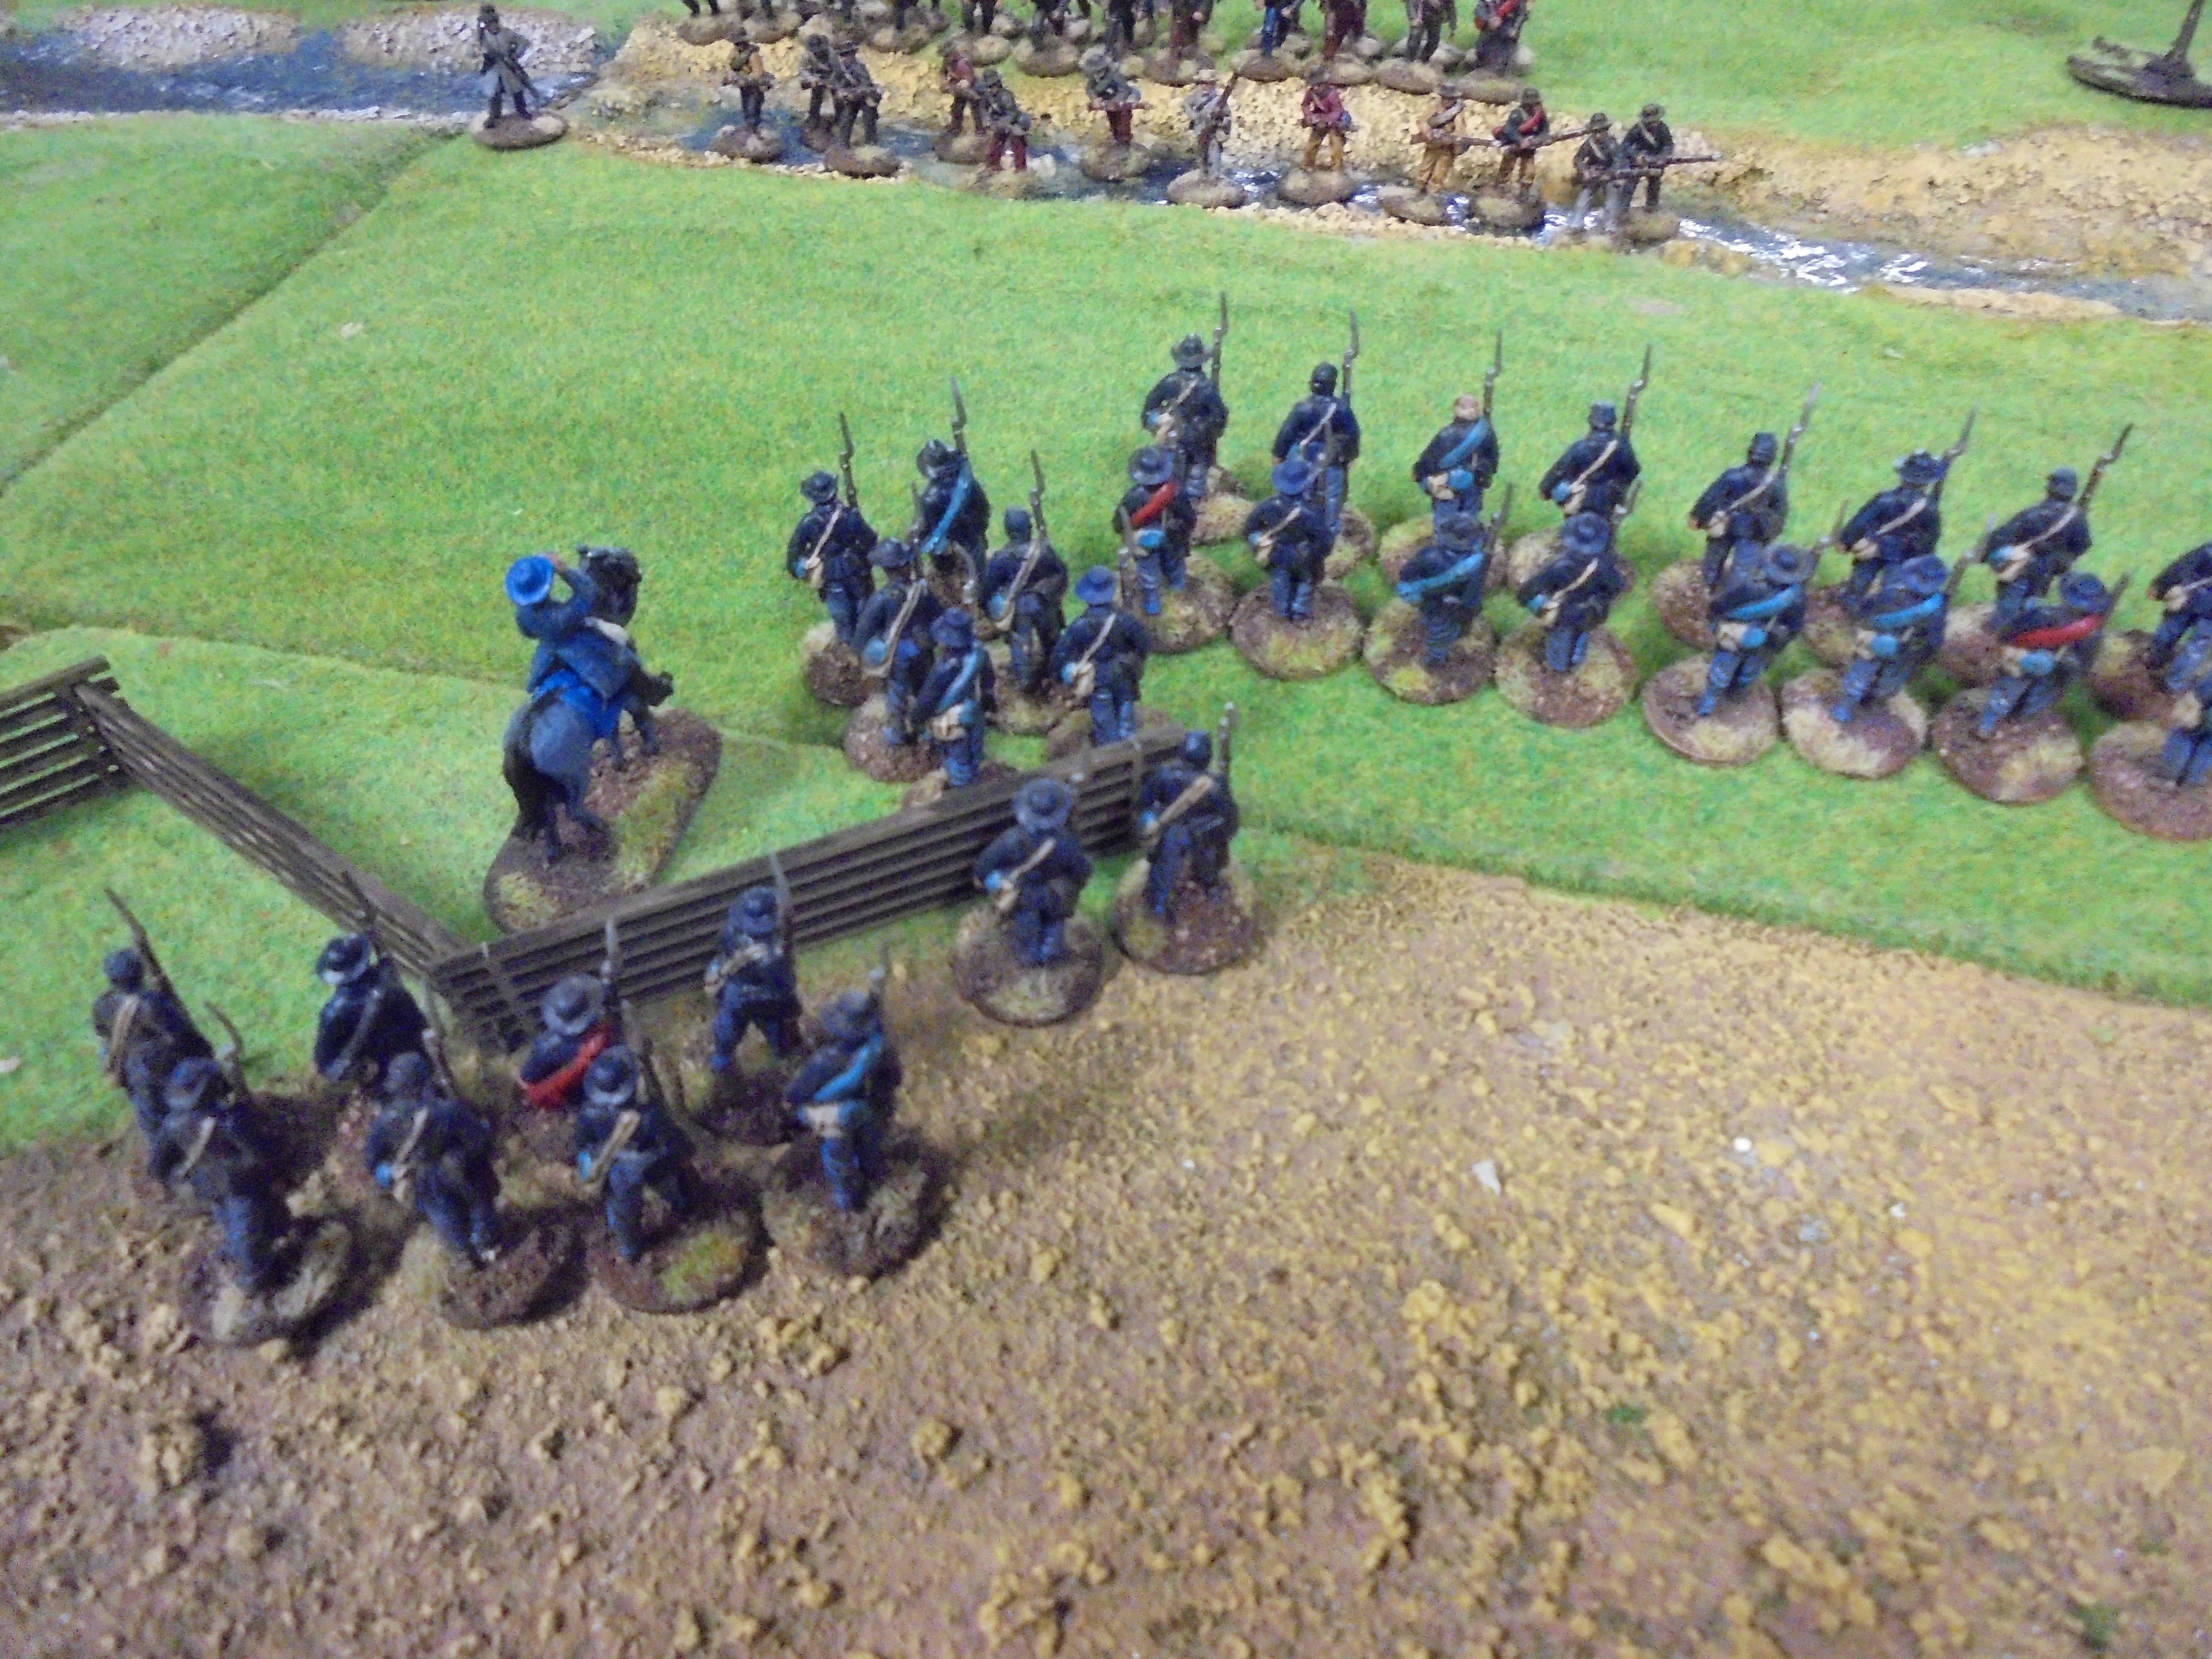 The Confederates then stormed the river with surprising speed and caught Marshall's men with a murderous volley
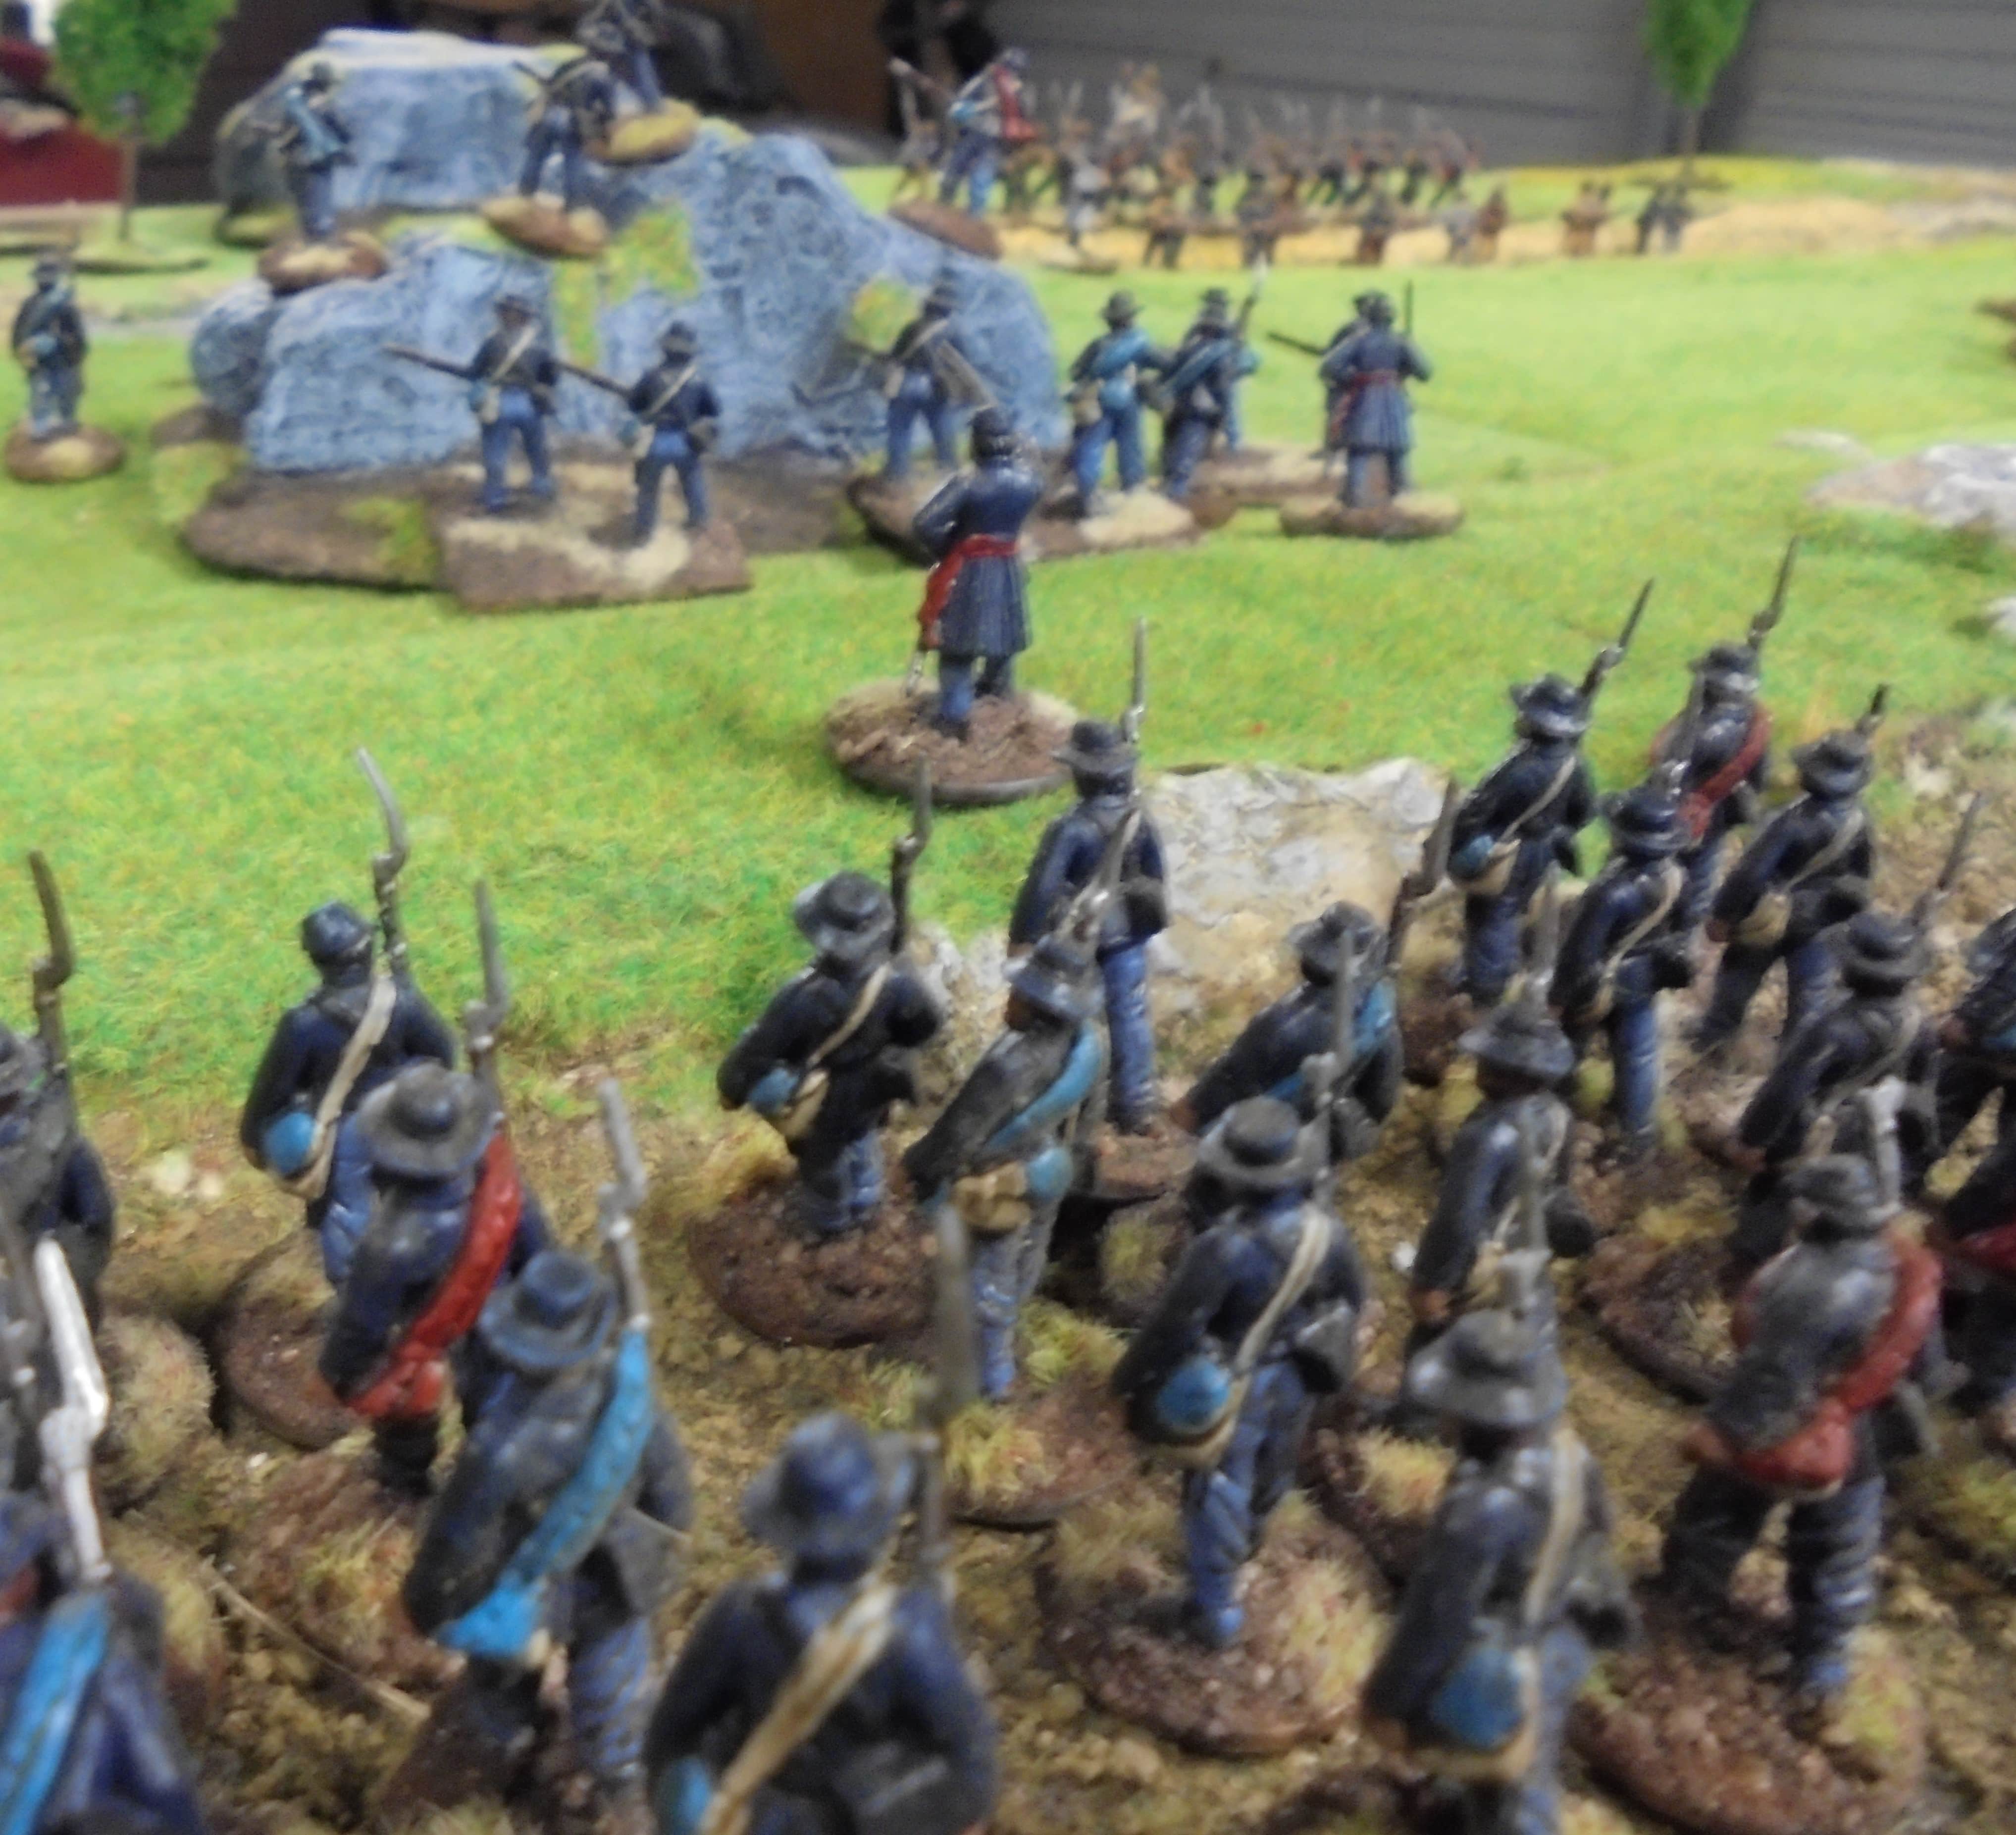 Burnett's men in the formation they spent most of the battle in. To their Right Marshall leads his men forward.
![StarCraft Tabletop Miniatures Game Pre-Orders Live Now [Updated]](https://images.beastsofwar.com/2026/03/starcraft-tmg-news-cover-600-338.jpg)


![Mounted US Cavalry On Kickstarter For Dead Man’s Hand! [Updated]](https://images.beastsofwar.com/2026/03/us-cavalry-main-600-338.jpg)


![Play WW2 Commando Operations With Butcher & Bolt [Updated]](https://images.beastsofwar.com/2026/03/relaunch-600-338.jpg)


