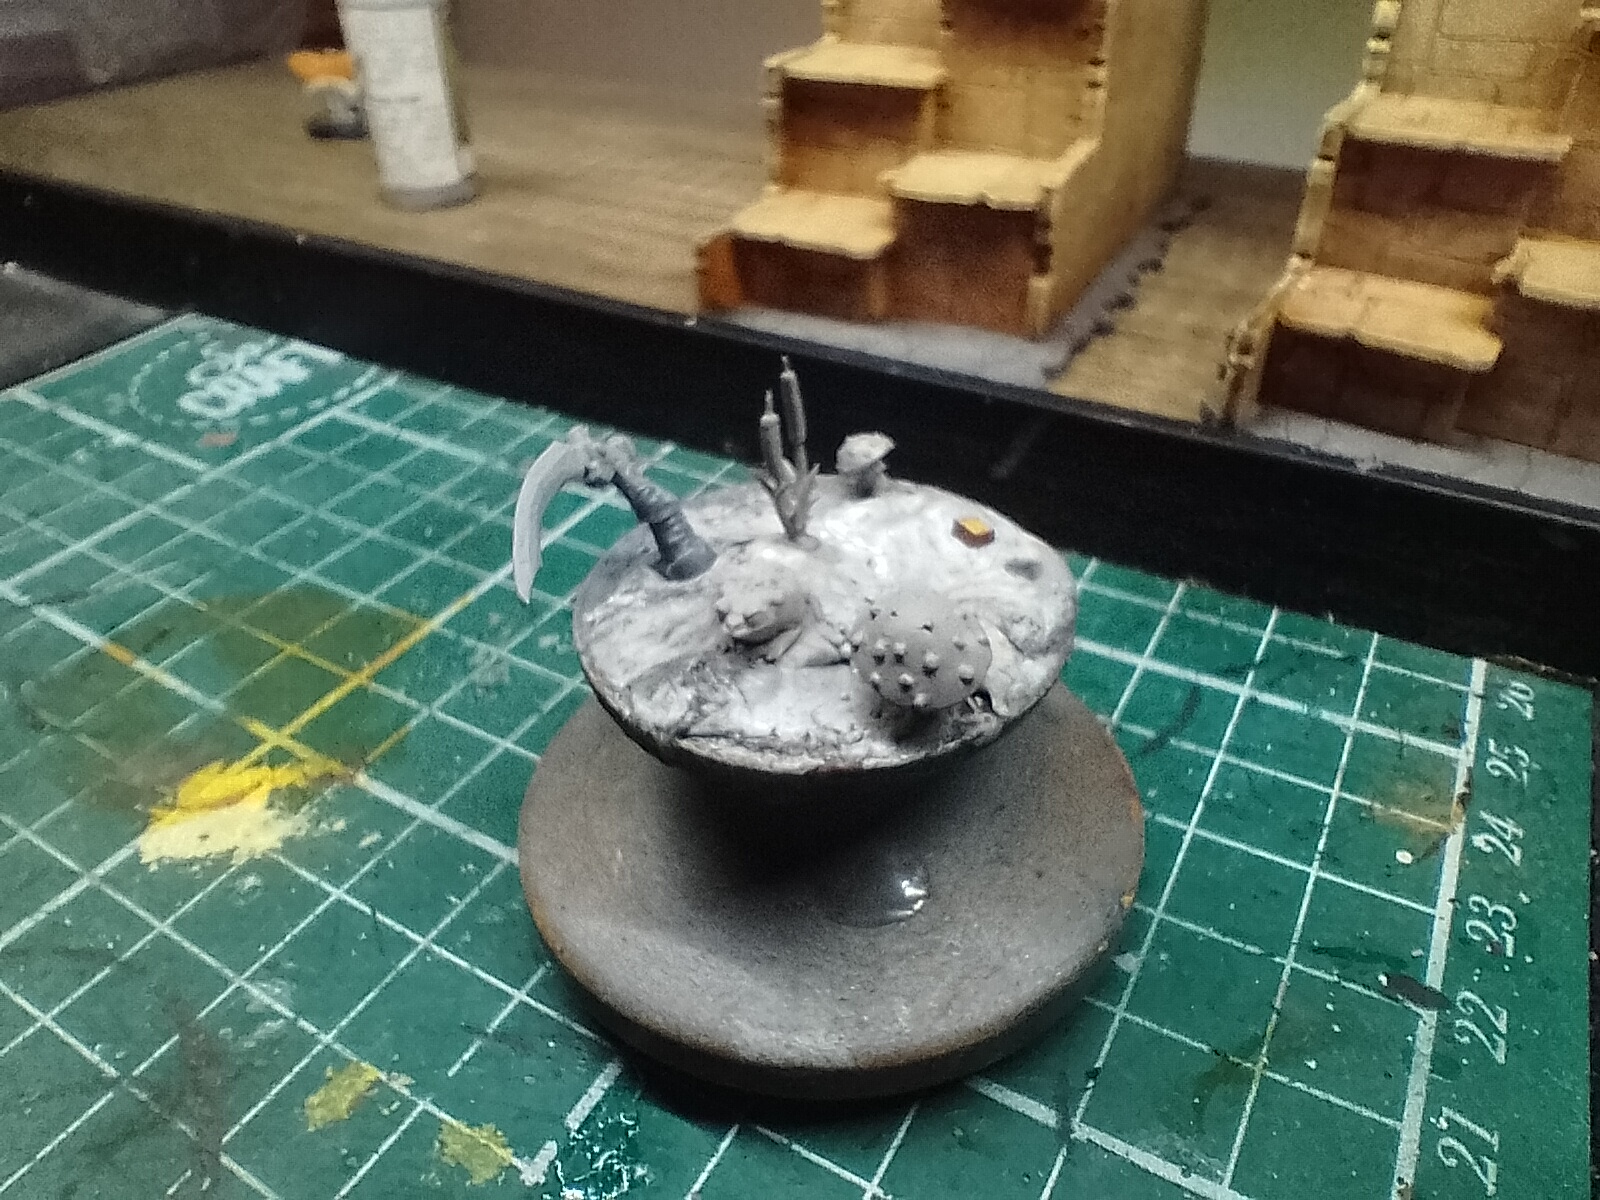
Frostgrave terrain for local club campaign April 2026


Recommendations: 141
About the Project
I am trying to stoke the flames of My small local club by increasing participation. I have been working on for six months plenty of miniatures for the frostgrave campaign I've pencilled in for April 2026 using the blood legacy supplement and a few house rules. I came across this competition so it's going to give me motivation to build up the table to a satisfactory level. I'm hoping for roughly 12 players across 3 tables (hence house rules because frostgrave is meant to be played 1v1) For the Terrain I'm going to be using mostly official kromlech stuff simply because I have been collecting a tonne of official north star miniatures, so id like to keep to the same theme. With the new frostgrave ten year anniversary book also I am going to paint the terrain like the artwork (almost a ruddy red brick) rather than what has been used on the painted blue stone for the stock sale art (as lovely as it is). The only exception is the pathways and ground as I think icy blue flagstones look exceptional. I'll update with pictures along the way but please wish me luck on this journey 🙏 Enjoy my walrus until I actually upload some terrain for this project for a thumbnail 😂
Related Game: Frostgrave
Related Company: North Star Military Figures
Related Genre: Fantasy
Related Contest: TerrainFest 2025
This Project is Completed
Some items came in the mail + other information
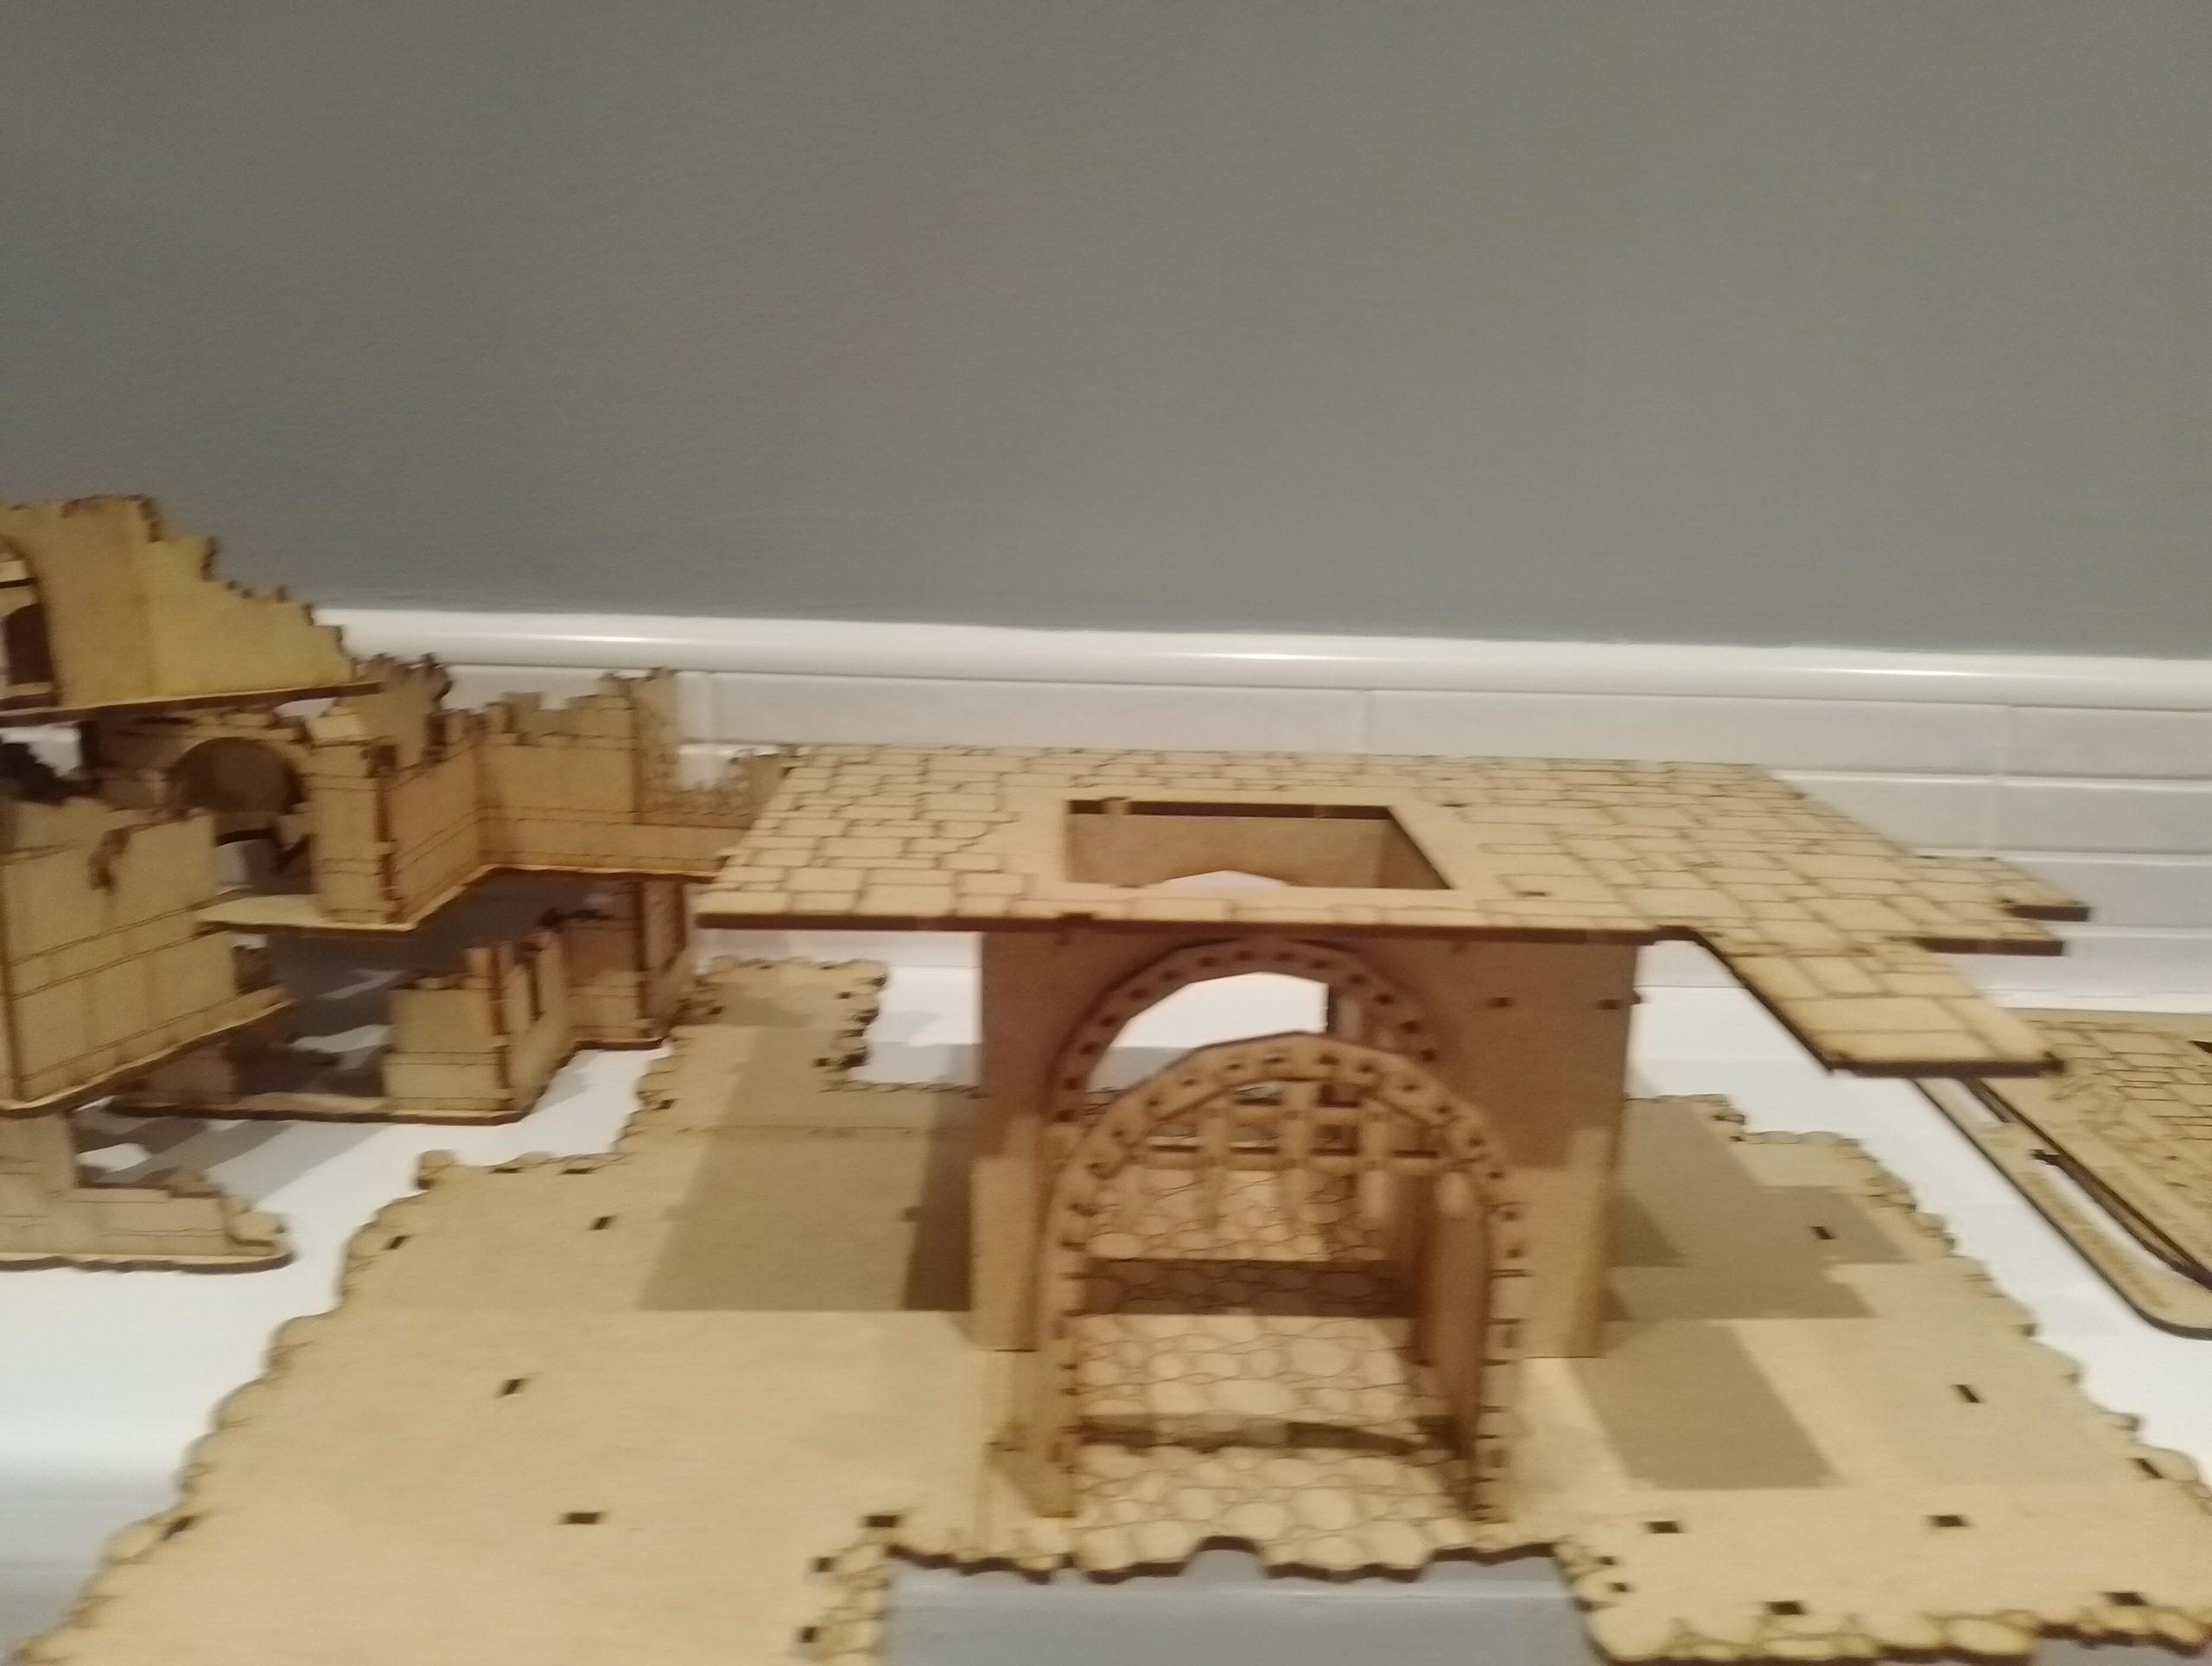
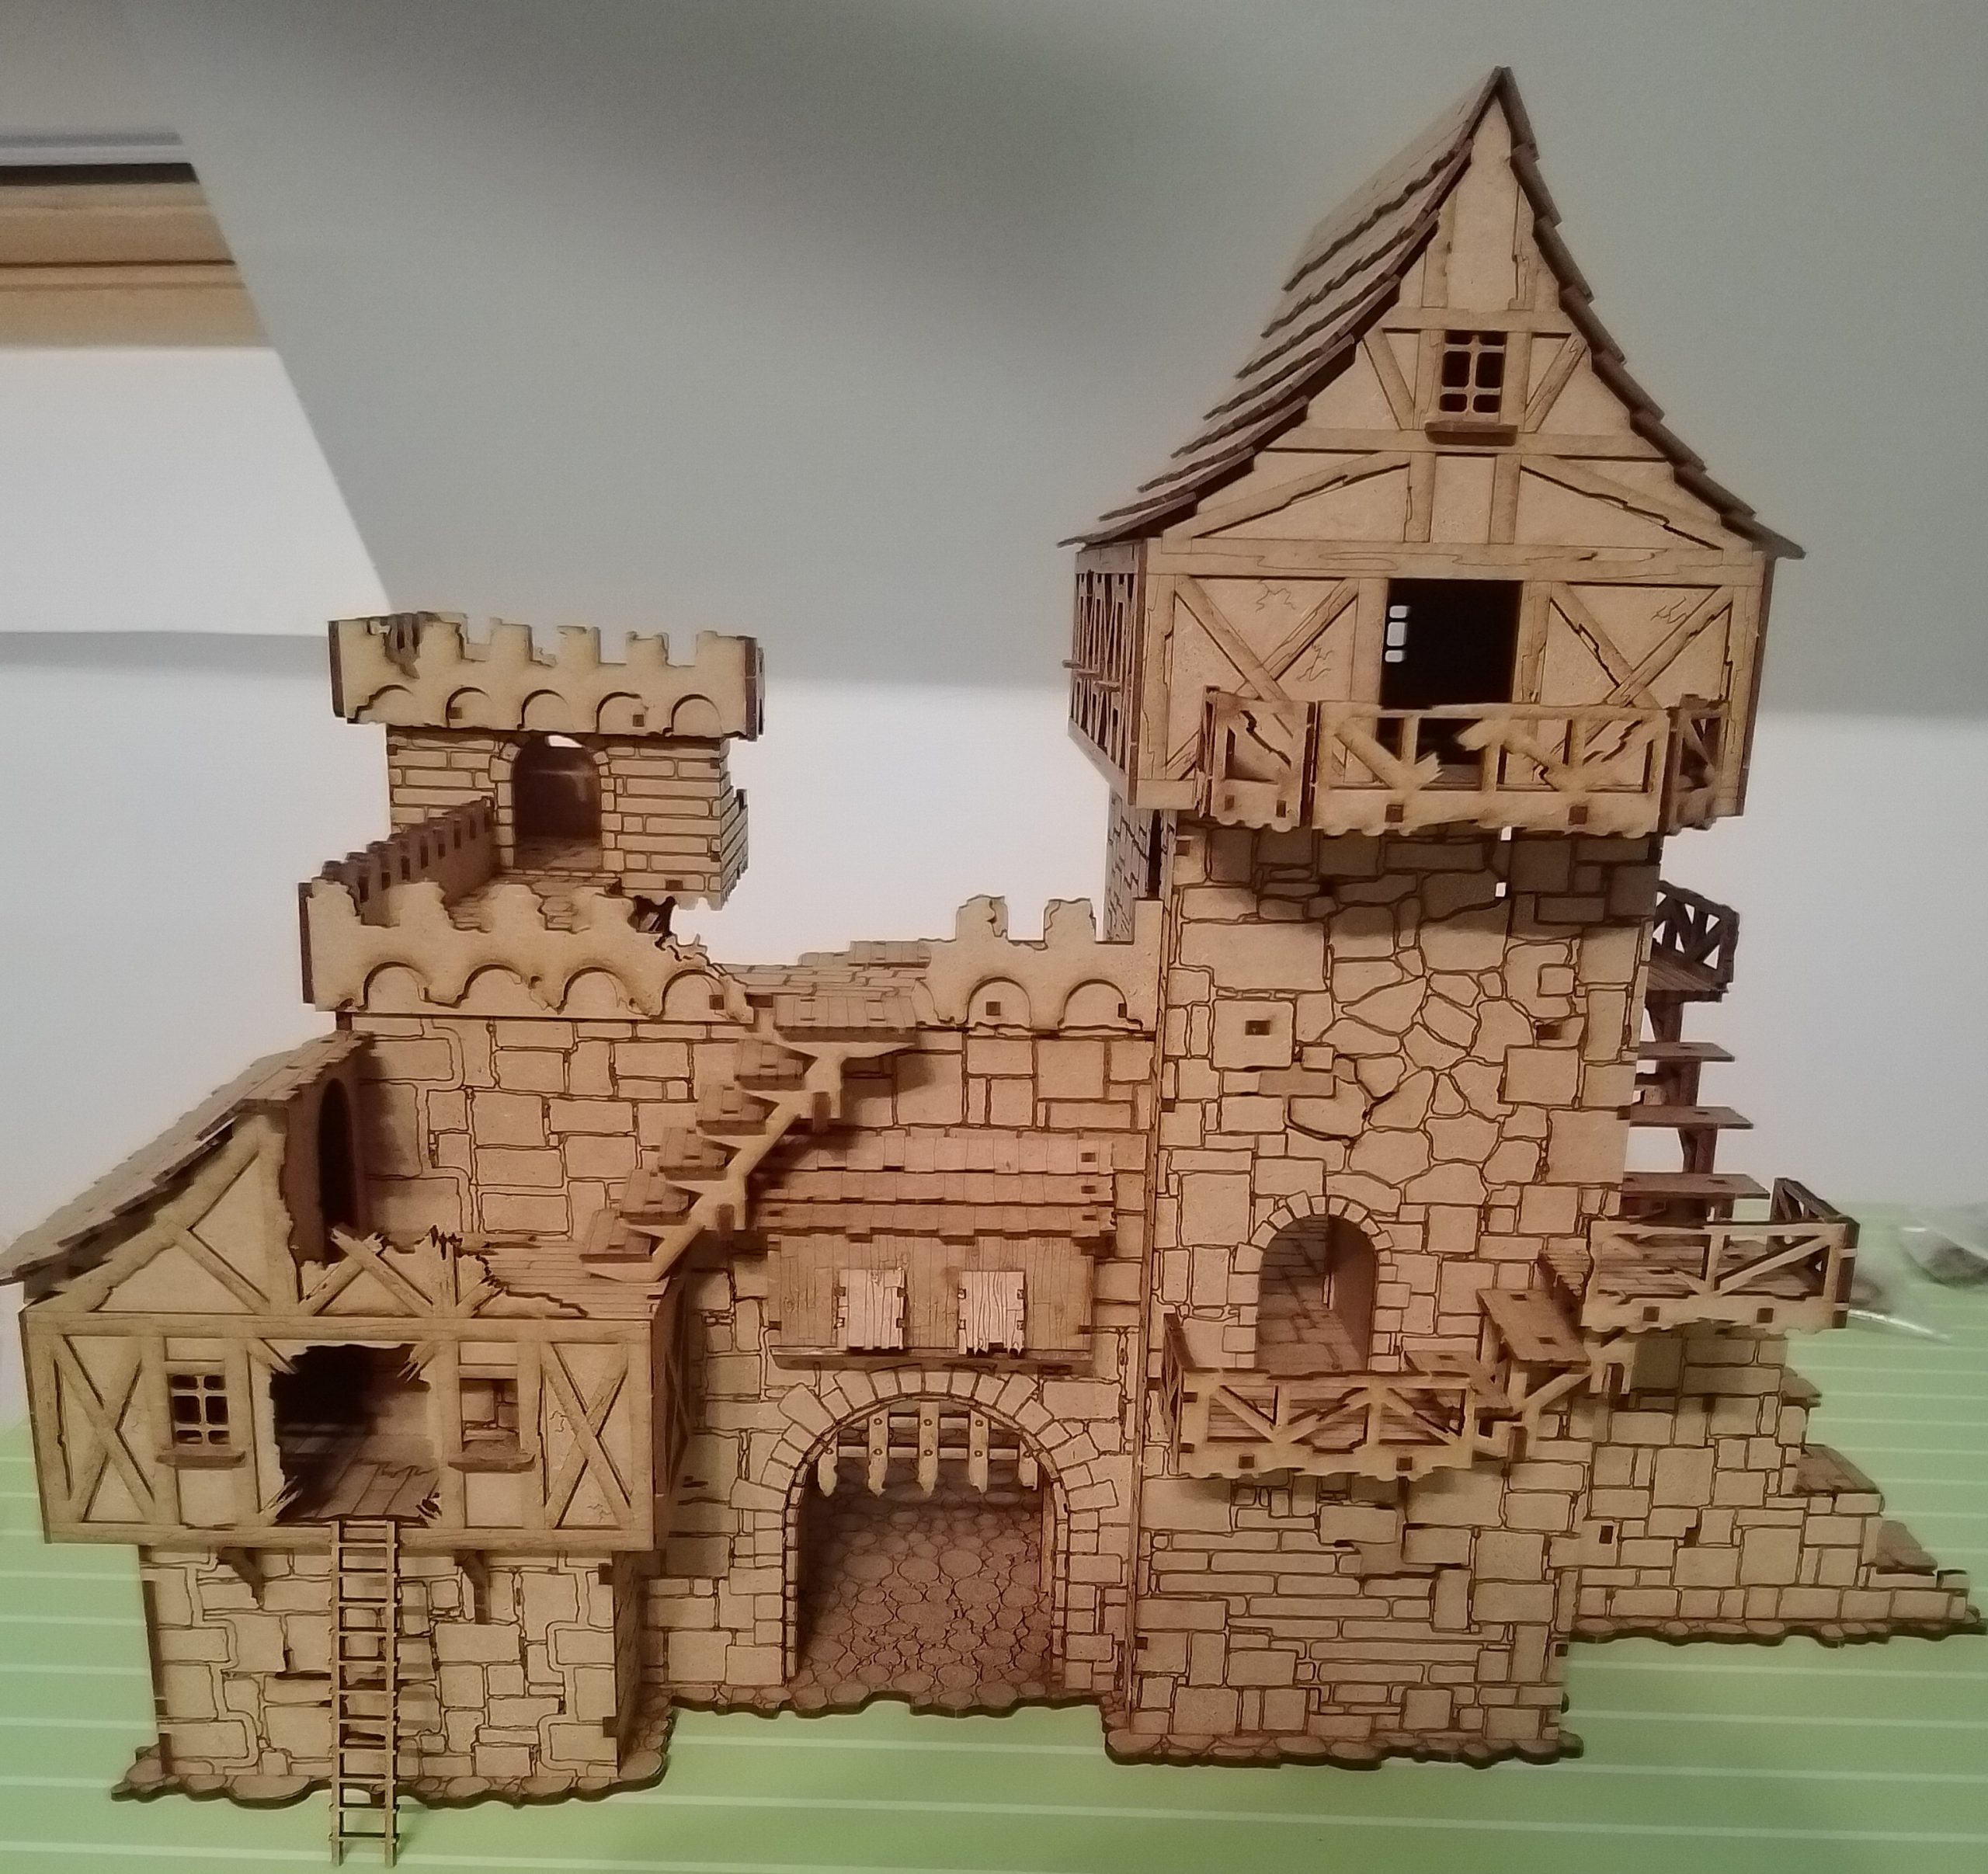
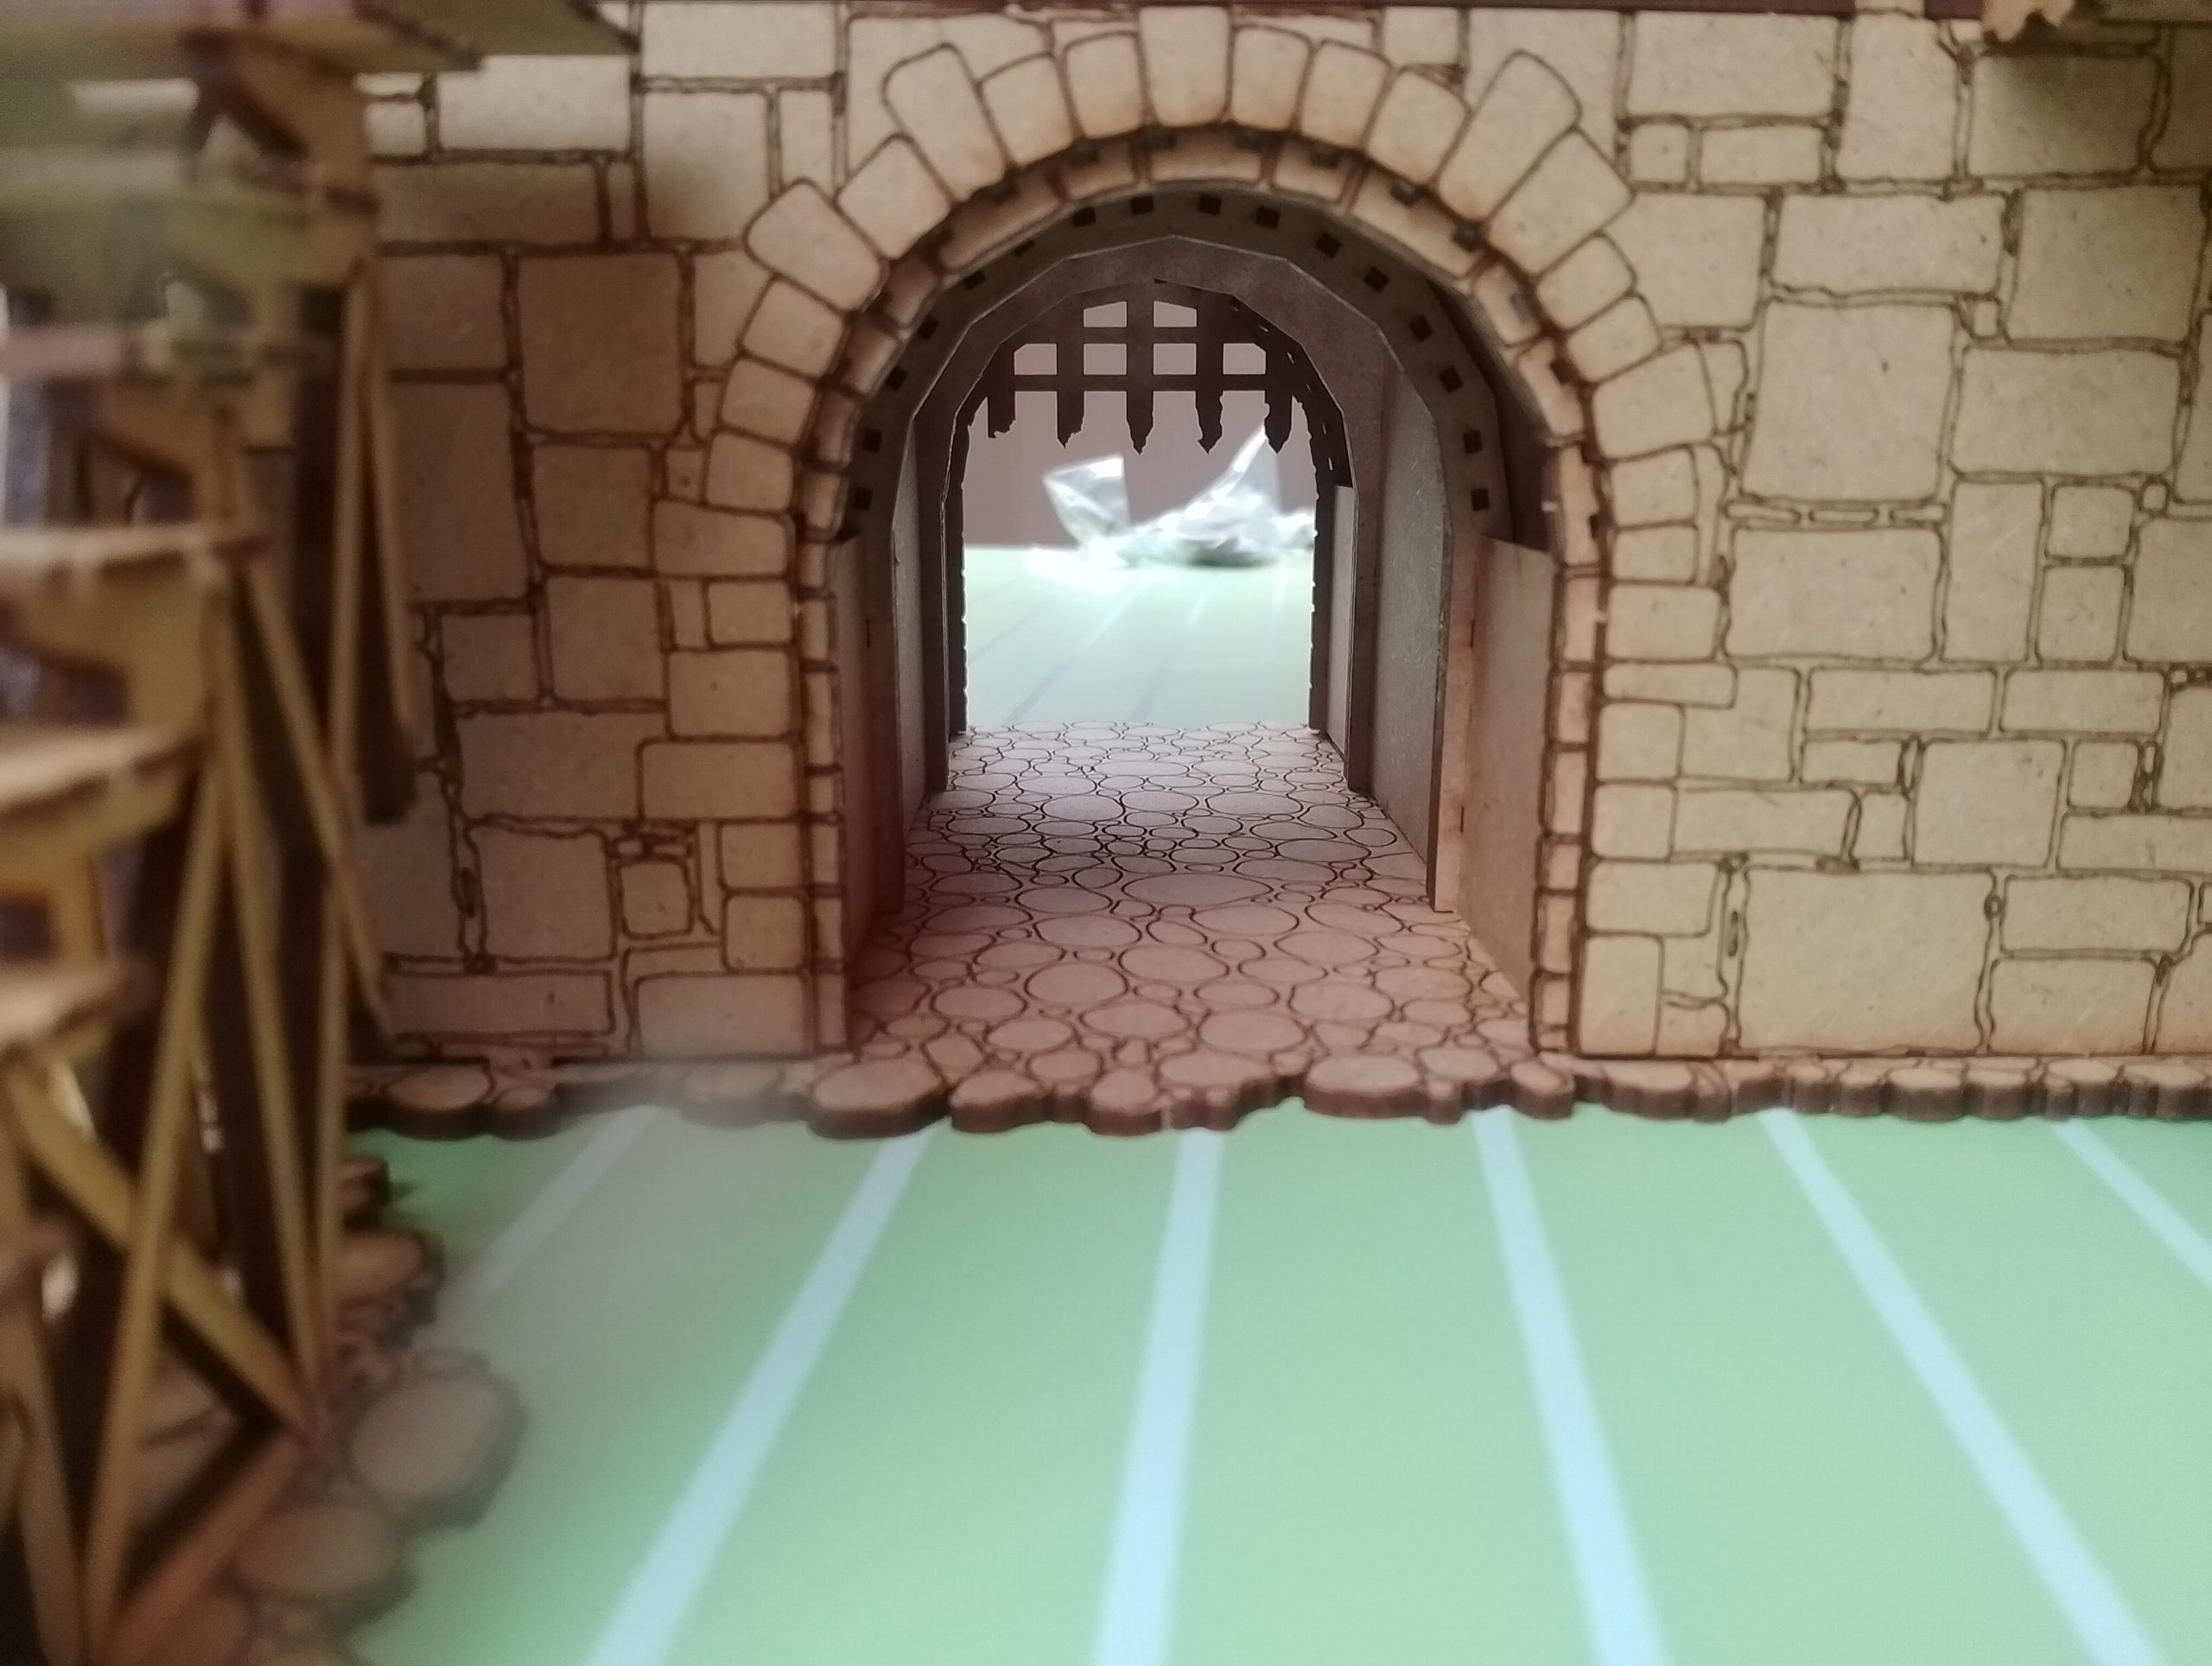
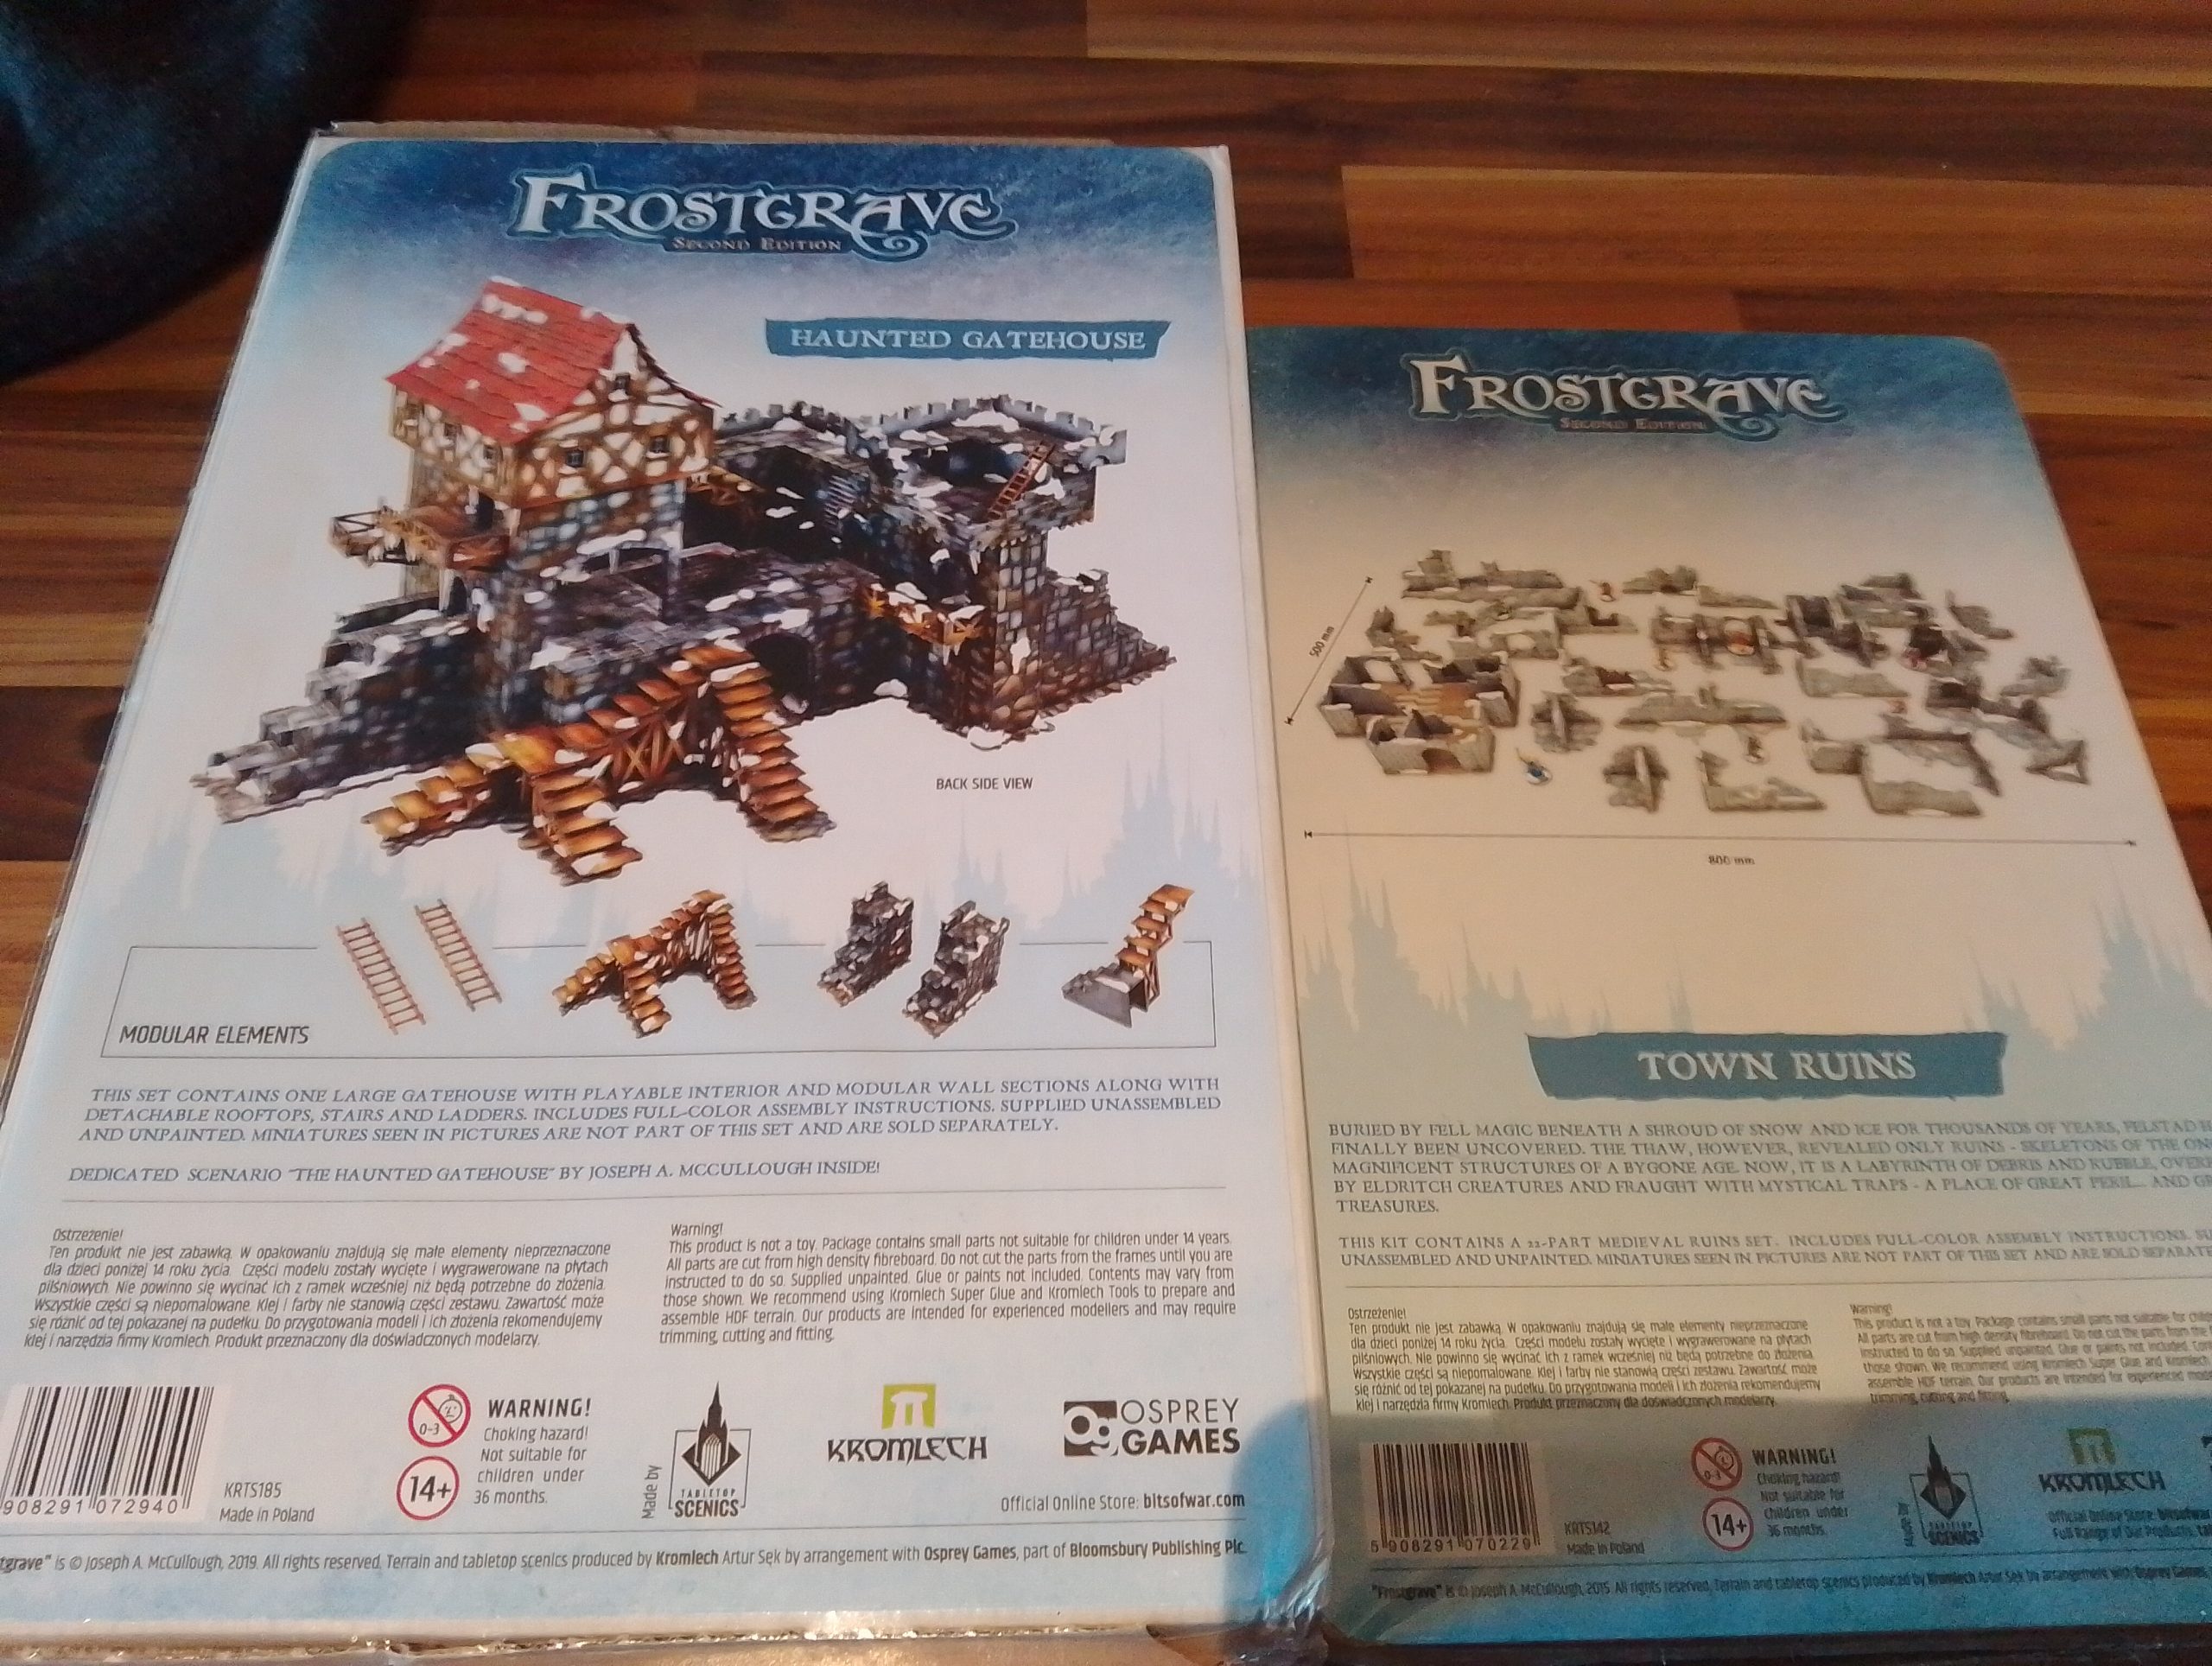 Kromlechs official line. Gatehouse+ ruins
 Lately I’ve been working on a couple of smaller terrain scatter pieces while these two bad boys pictured have come in the mail.
Until I have made complete the step-by-step process I will keep for a later post as I make considerable progress.
I have also been doing frostgrave miniatures and laminating spell cards
(A LOT of cards!) As well as designing the framework for the campaign missions for next year which will help assist in the choice of terrain pieces.
As I continue to produce content for the tabletop and this blog.
One of these being the wargames illustrated magazine mission this month that has several form of obelisks on the table.
Many thanks for reading, this is just really to say this is not a dead project!
Project Update 26/11/2025
Time for another entry; This times I have been doing steady research and learning like a sponge (thanks terrain tutor).
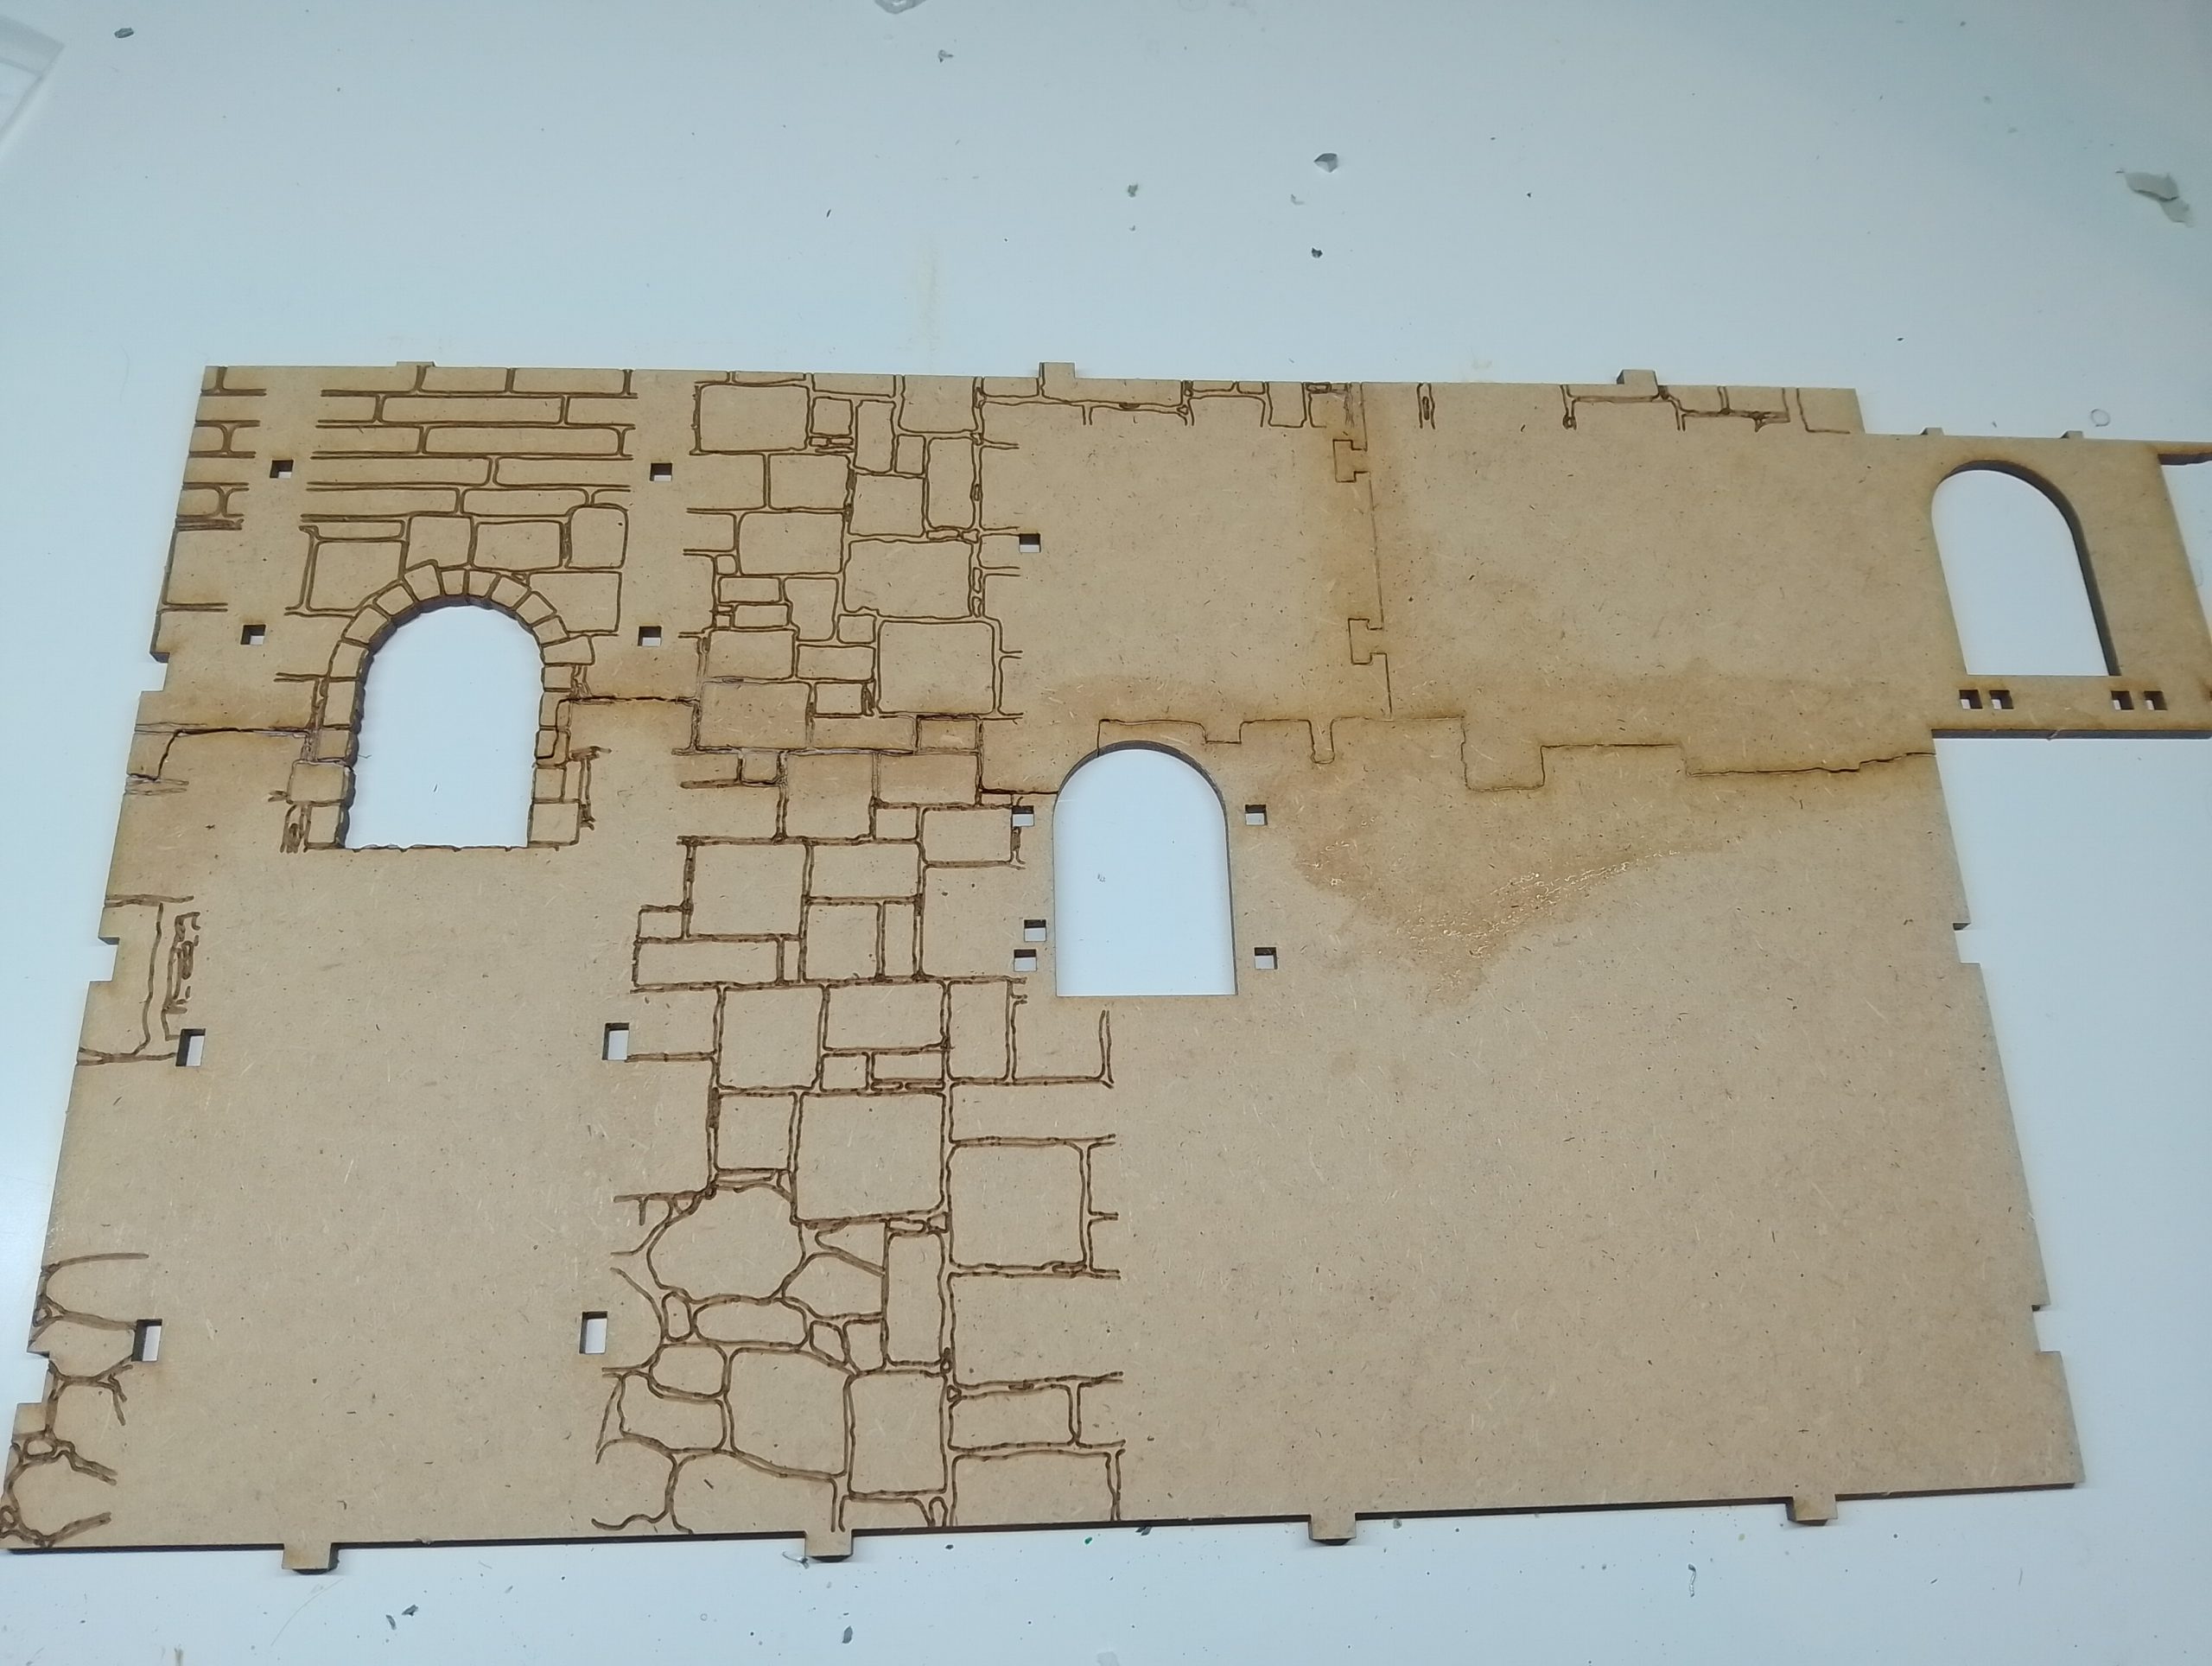
First off, I have wiped all the frames of MDF. Honestly I did not even know this was a thing, I expected maybe the odd sawdust but the residue left on the frames from the laser cutting is prevalent as pictured. I am actually amazed how much came off, and this image is just from only the ruins not the gatehouse.
I am really taking my time on this, letting thing properly dry. Letting things like the glue dry on certain places.
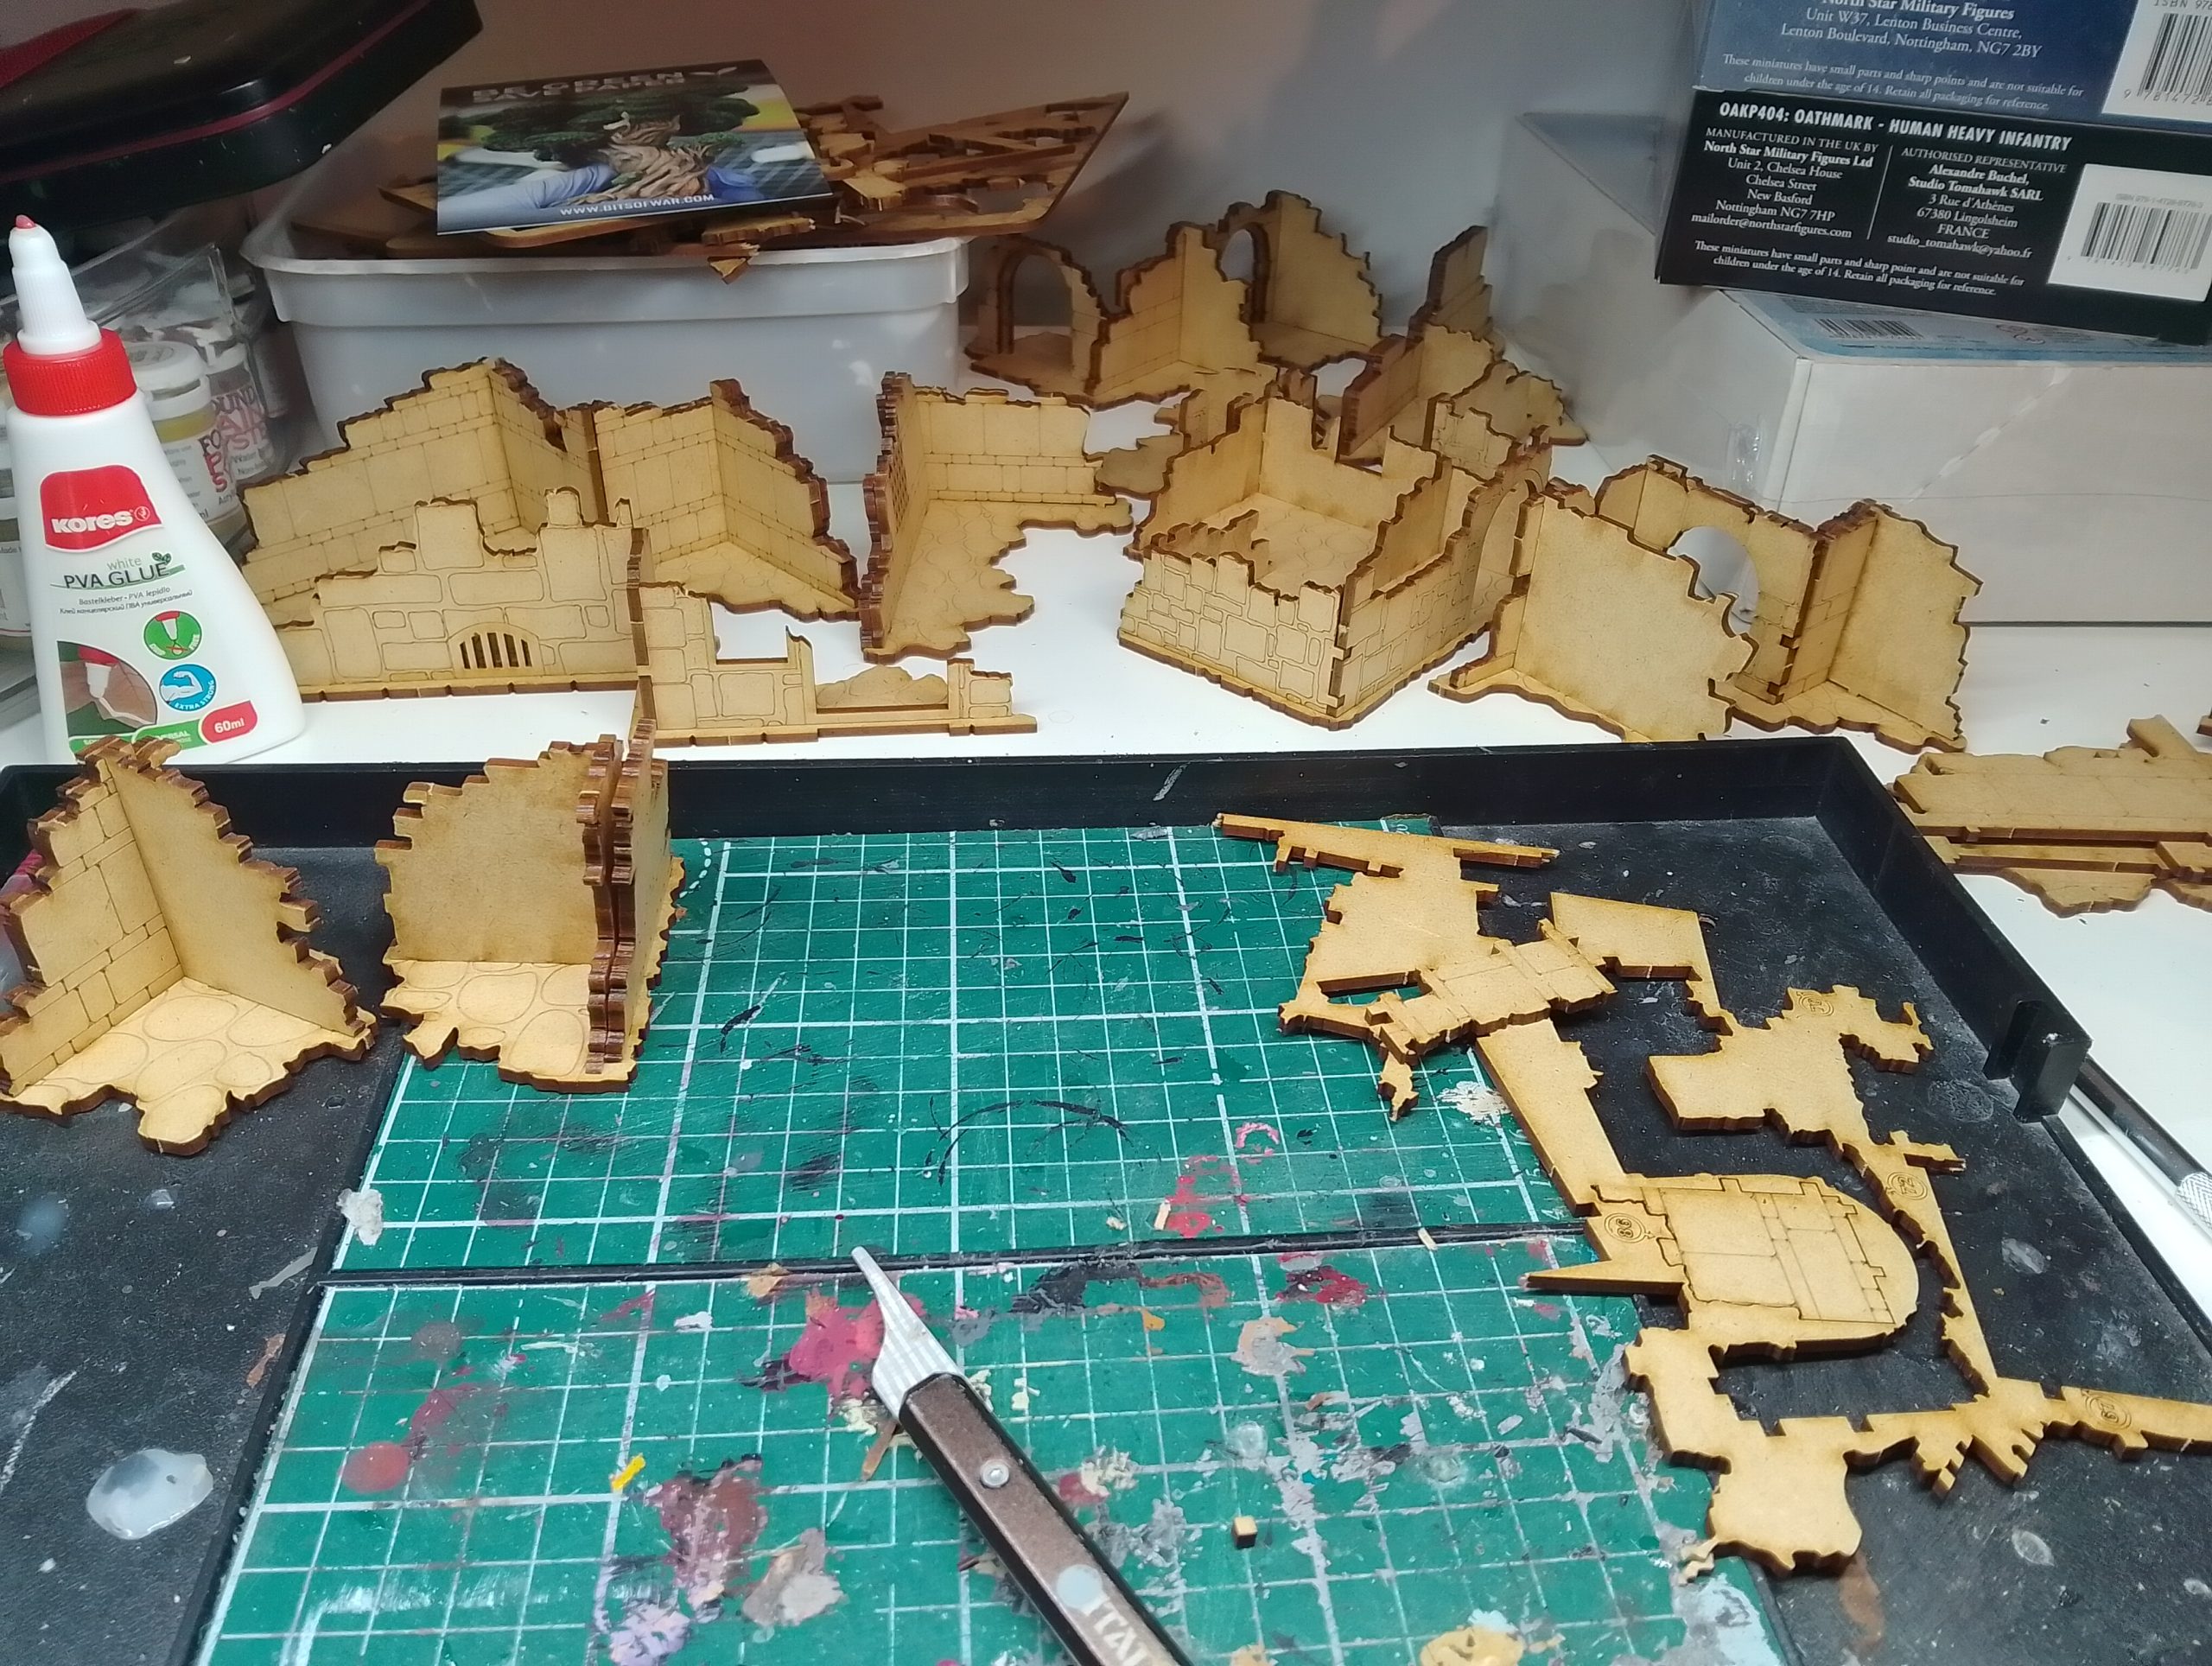
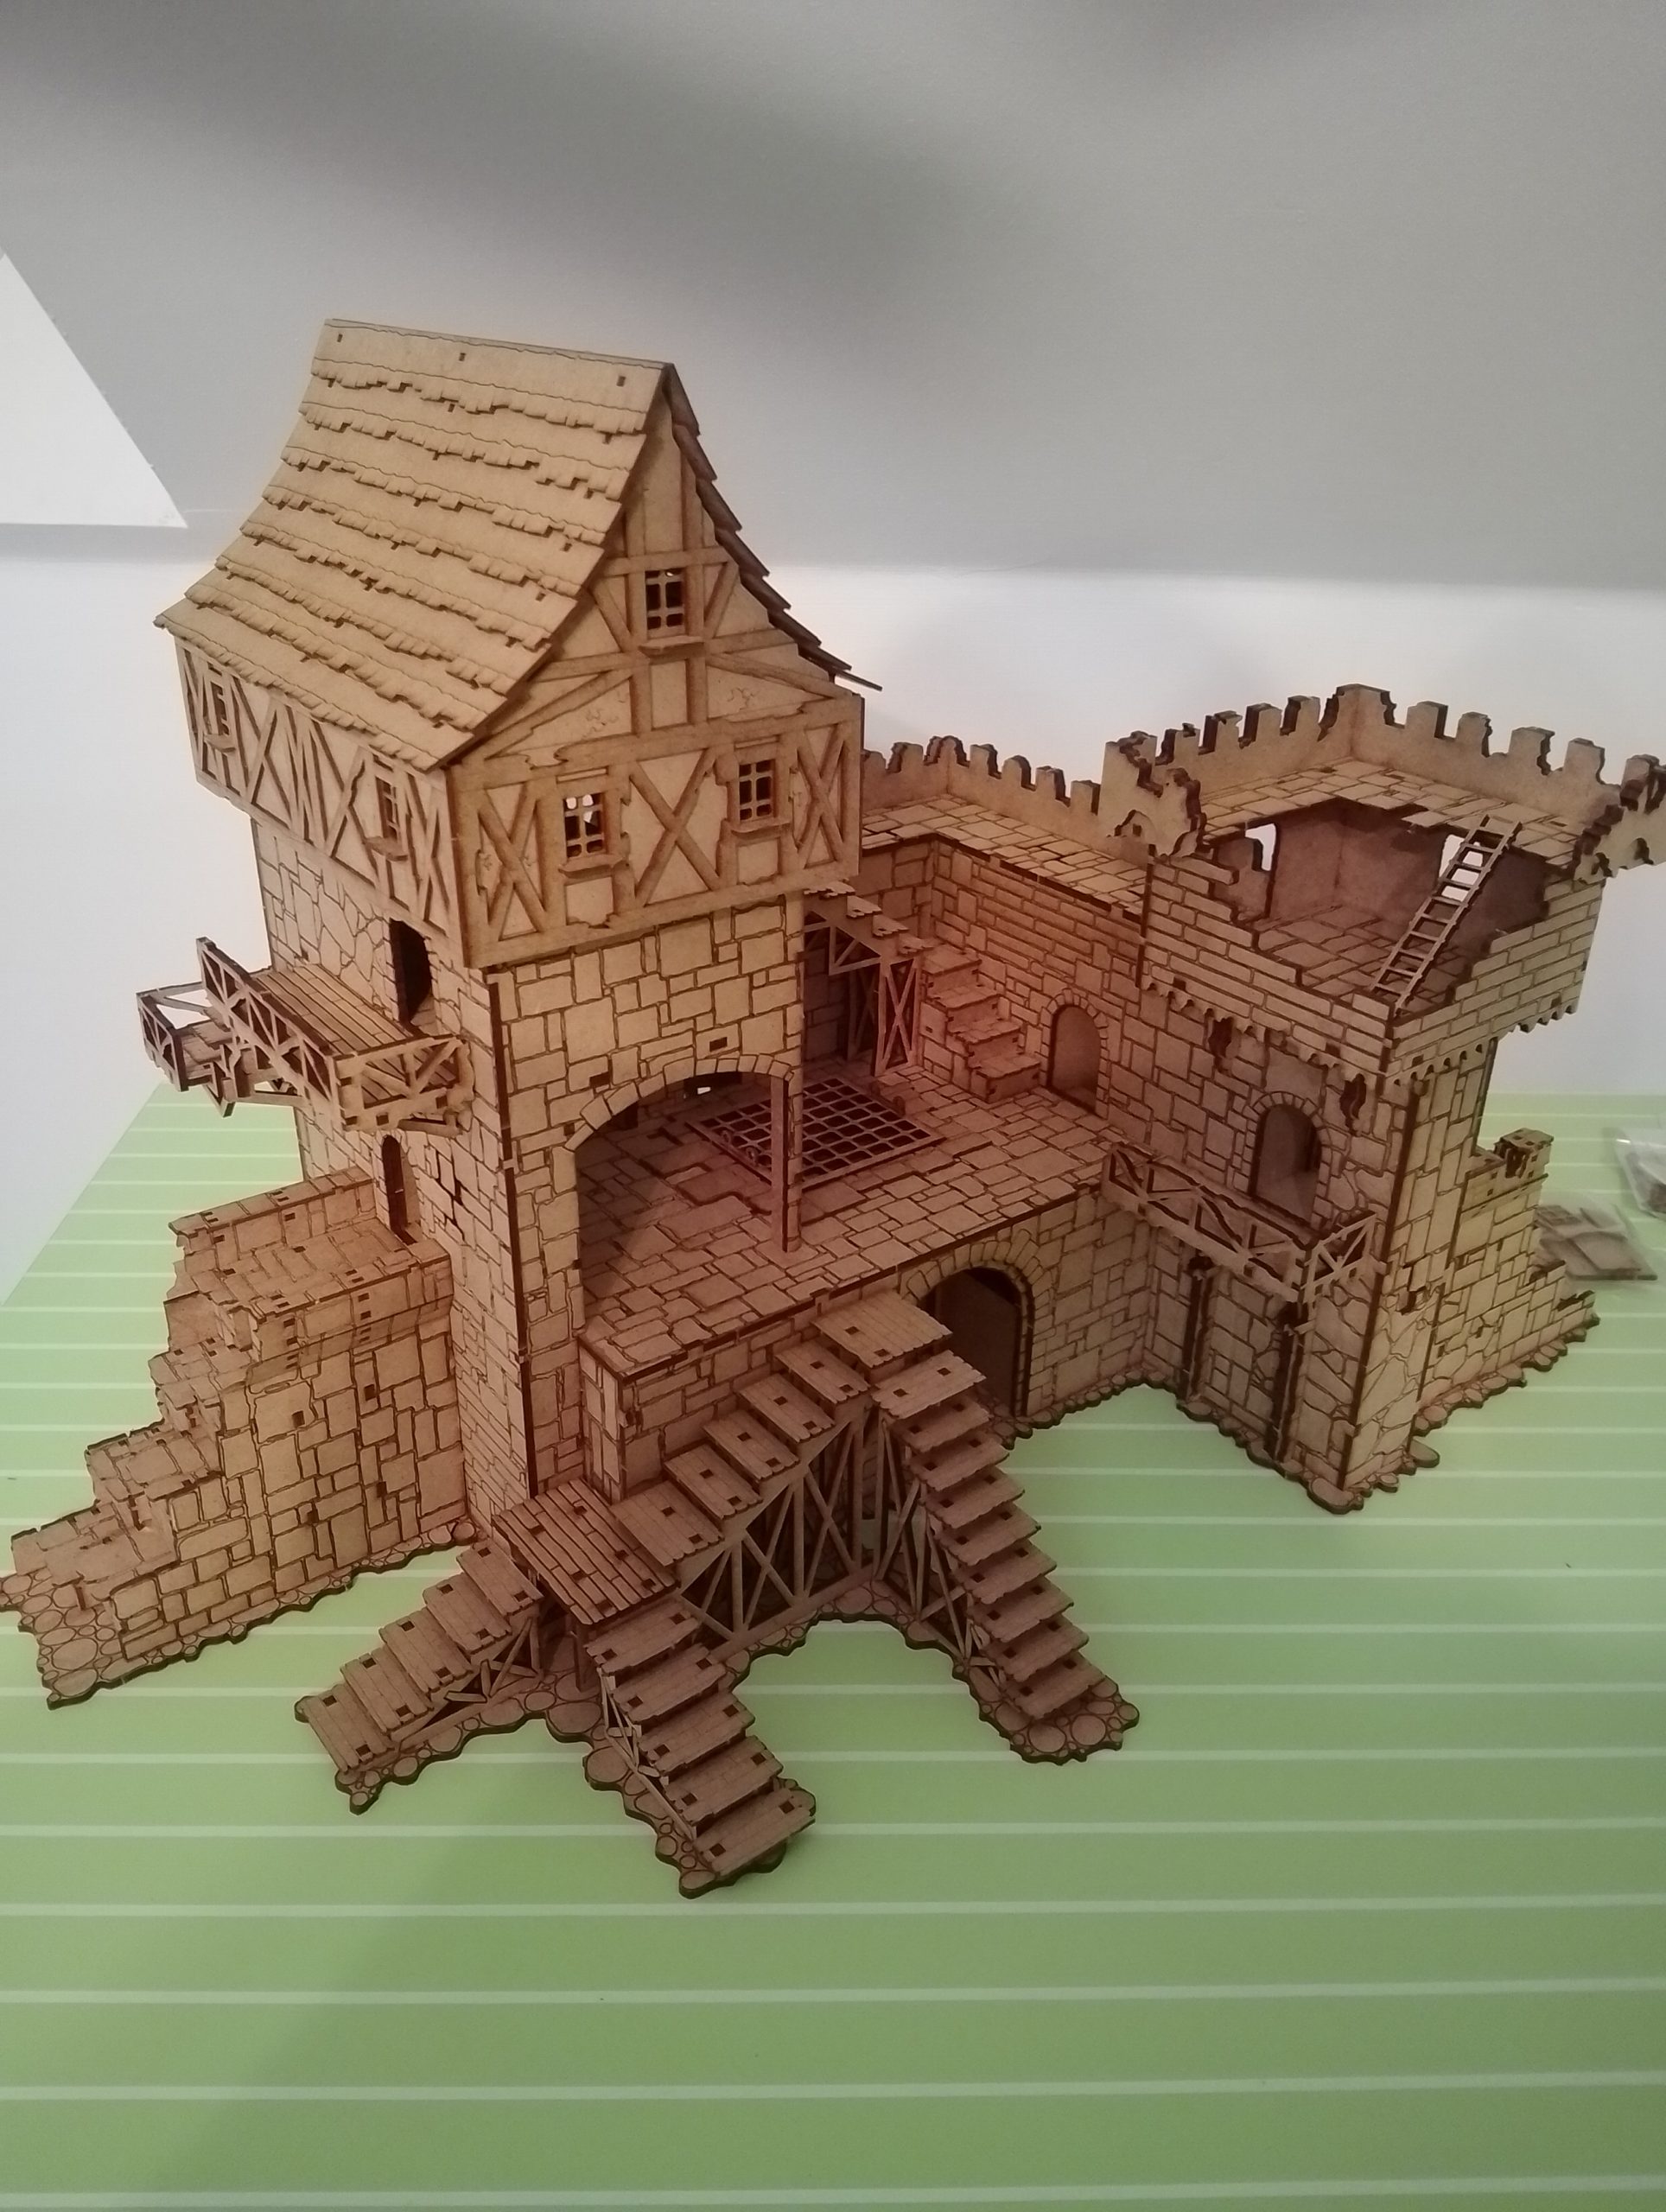
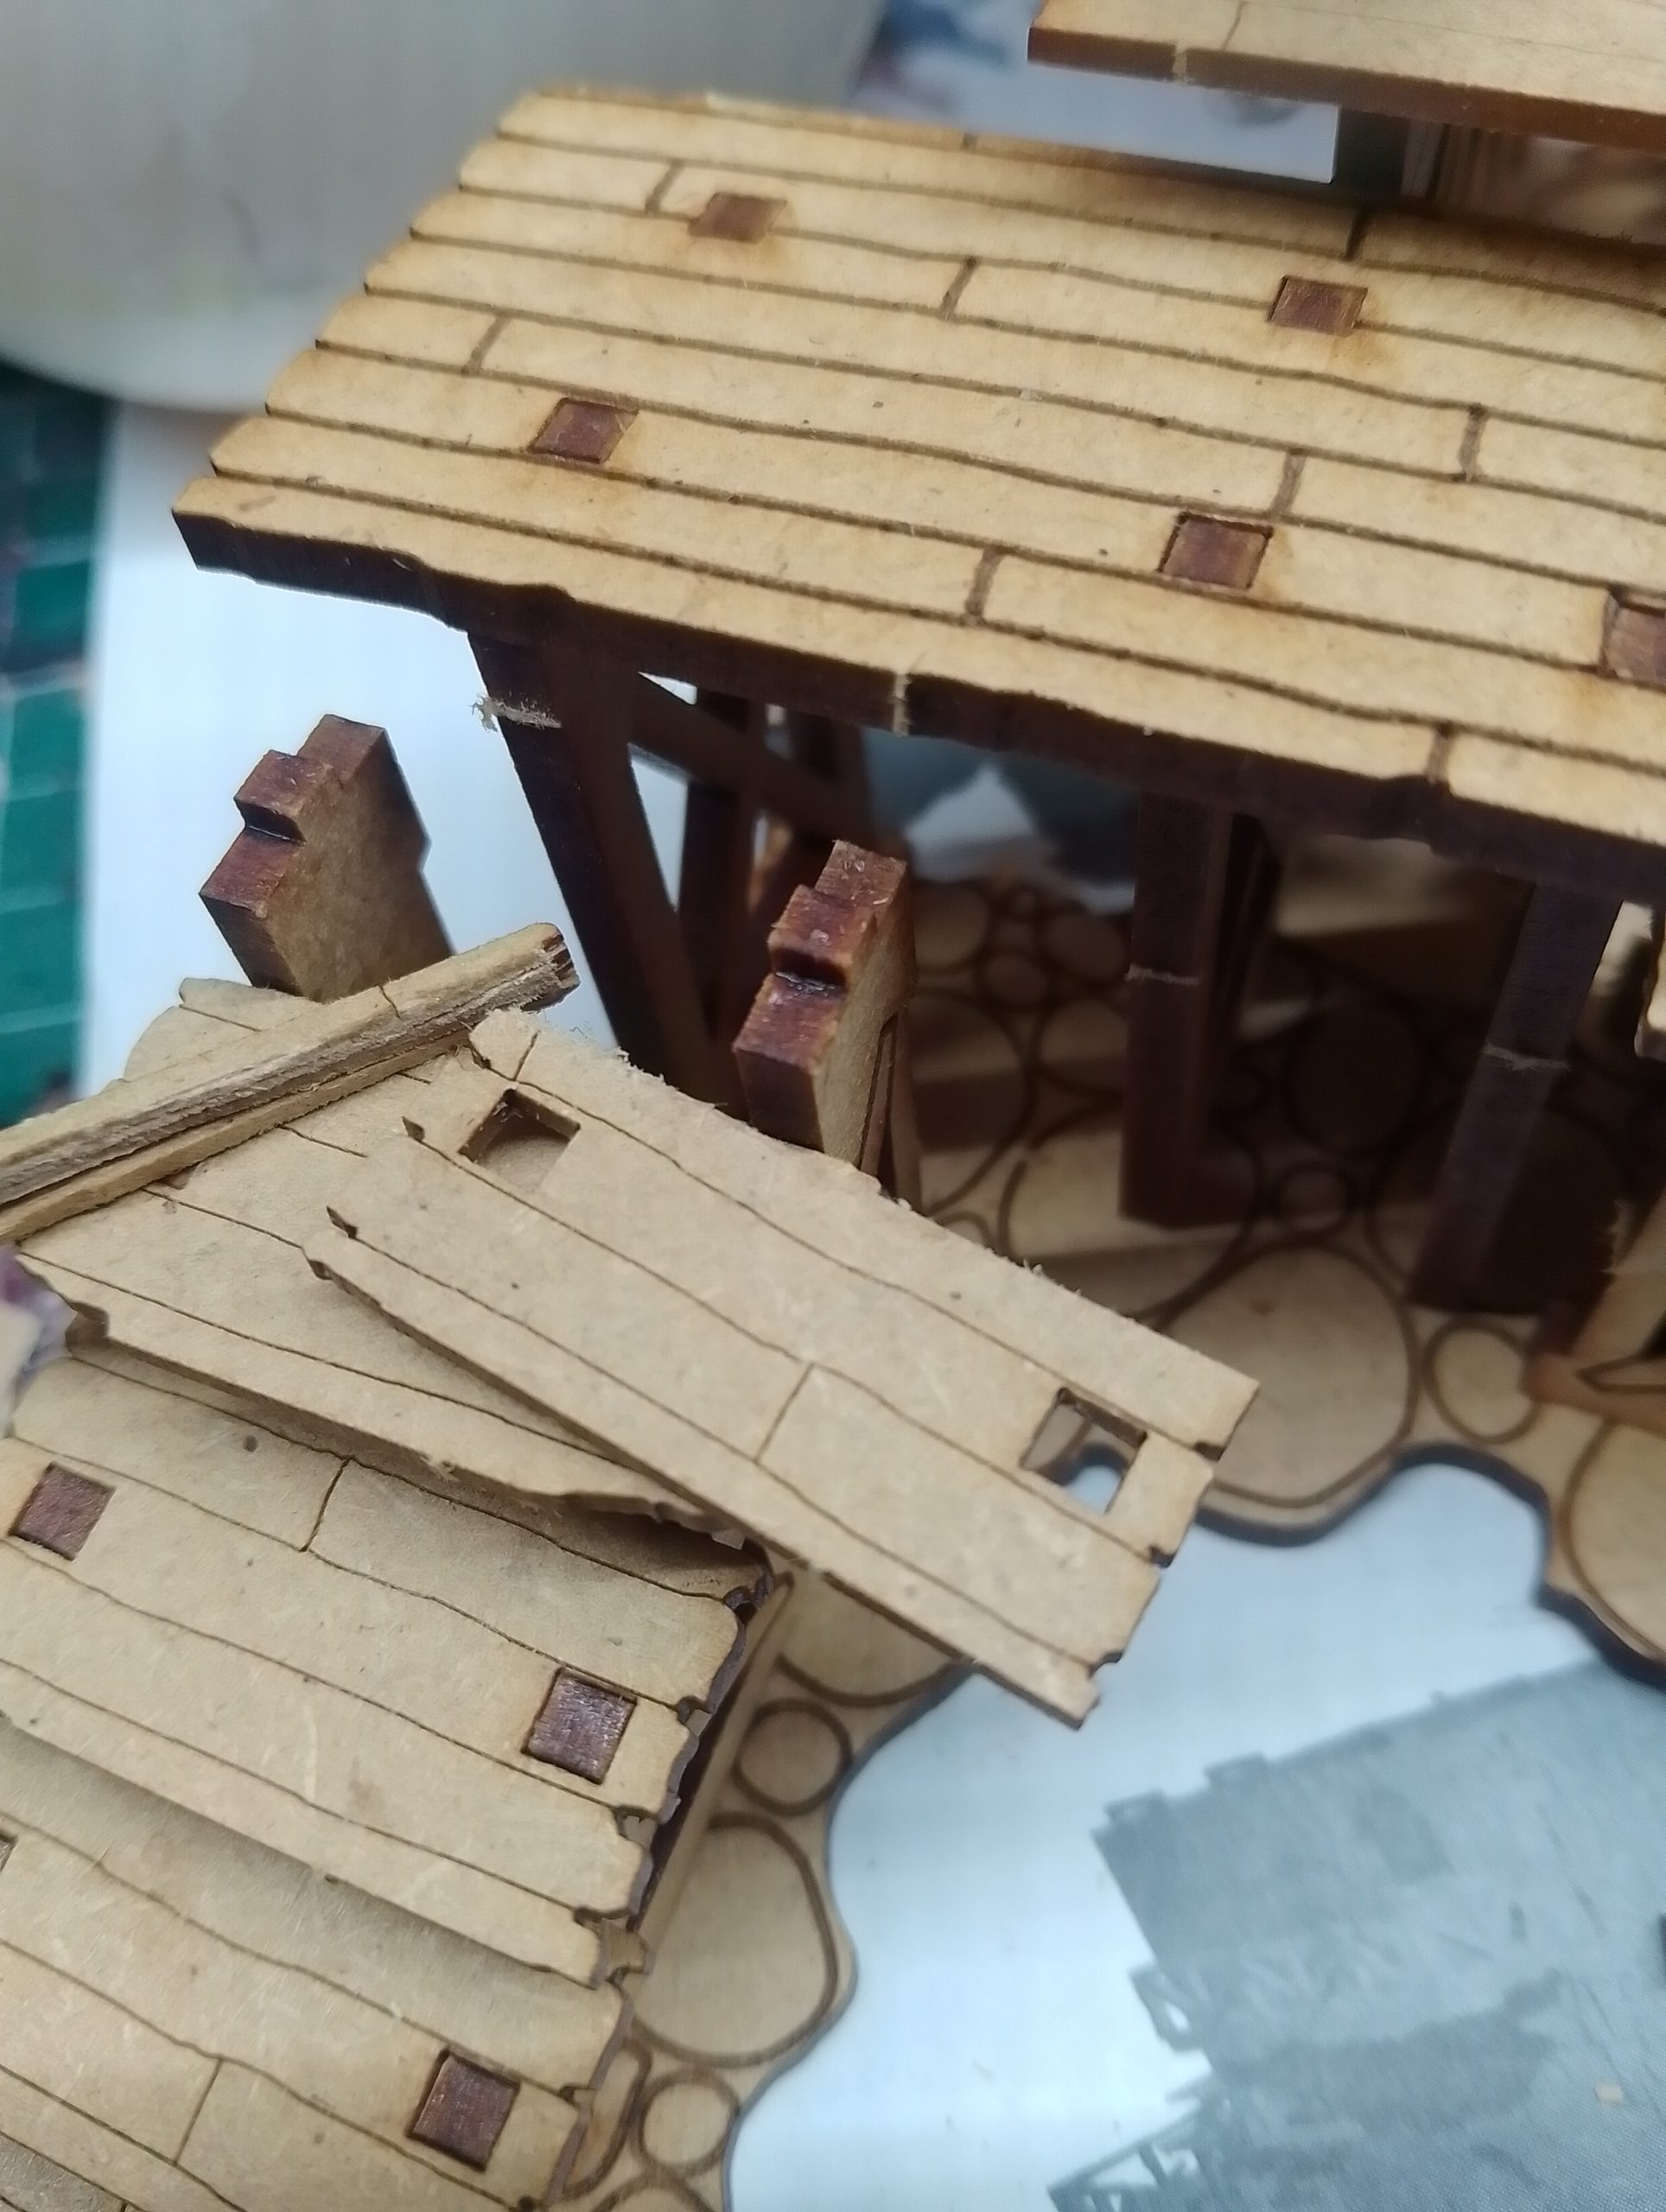
Speaking of, has anyone ever seen a three part wall frame? This is so new to me. I glued it all with pva and put it flat with pressure to make sure it was level when erected onto the main frame of the gatehouse.
For the gatehouse itself. It is a very big and special kit. I do not have the luxury of time as a parent to saw foam boards ect; So these pre-purchased kits are a blessing. The town ruins kit were easy to assemble, but the gatehouse is quite an advanced piece of kit in my opinion.
It has three layers and will require sub-assembly. Such as the doors have archways if assembled will block my painting. Putting the frames for these inside a bag labelled for later is absolute key.
There is also two more factors that will need to be addressed. Some of the mdf parts are actually two levels of the building but I wish to be able to detach all three parts. So what I have done is glue the parts that are not directly connected to each level, and dry fit the other large wall frames. When I eventually get to finish the structure.
I will carefully detach, mark out and cut the pieces. Re-attach and glue the structure. So then it will be easy to take three square levels out from the gatehouse.
The second issue is false doors. I do not like these, so what I intend to do is get some dolls house door hinges and make them actually open. This will be a final job once the structure is finished.
I understand I have not spoken about the actual painting of this structure yet. All I can say is that this is a centrepiece quality structure and I will be investing a lot of hours into this one piece. It may be these pieces only I get done. Until I’m happy with it.
Far too often as hobbyist we move onto projects rather than investing actual proper time into them. As in, that extra extra effort. I deem this piece worthy of such an undertaking.
As for the enormous stack of wooden frames left, they will be used, including for a base for my wrecked boats I was working on prior to the deliver of my terrain. I also think the little square bits that come off the portcullis for example make excellent brick rubble, that I will add to the ruins. I also had this whacky idea to use a used pizza cutter like a trap from Indiana jones, the last crusade but then realised it was way too sharp and probably cause bleeding all over my lovely paintjob when finished (who cares about my rival wargamers hands :D)
Hopefully by the time I post next time, the gatehouse will be completely built and I will be starting to put some paint on them!
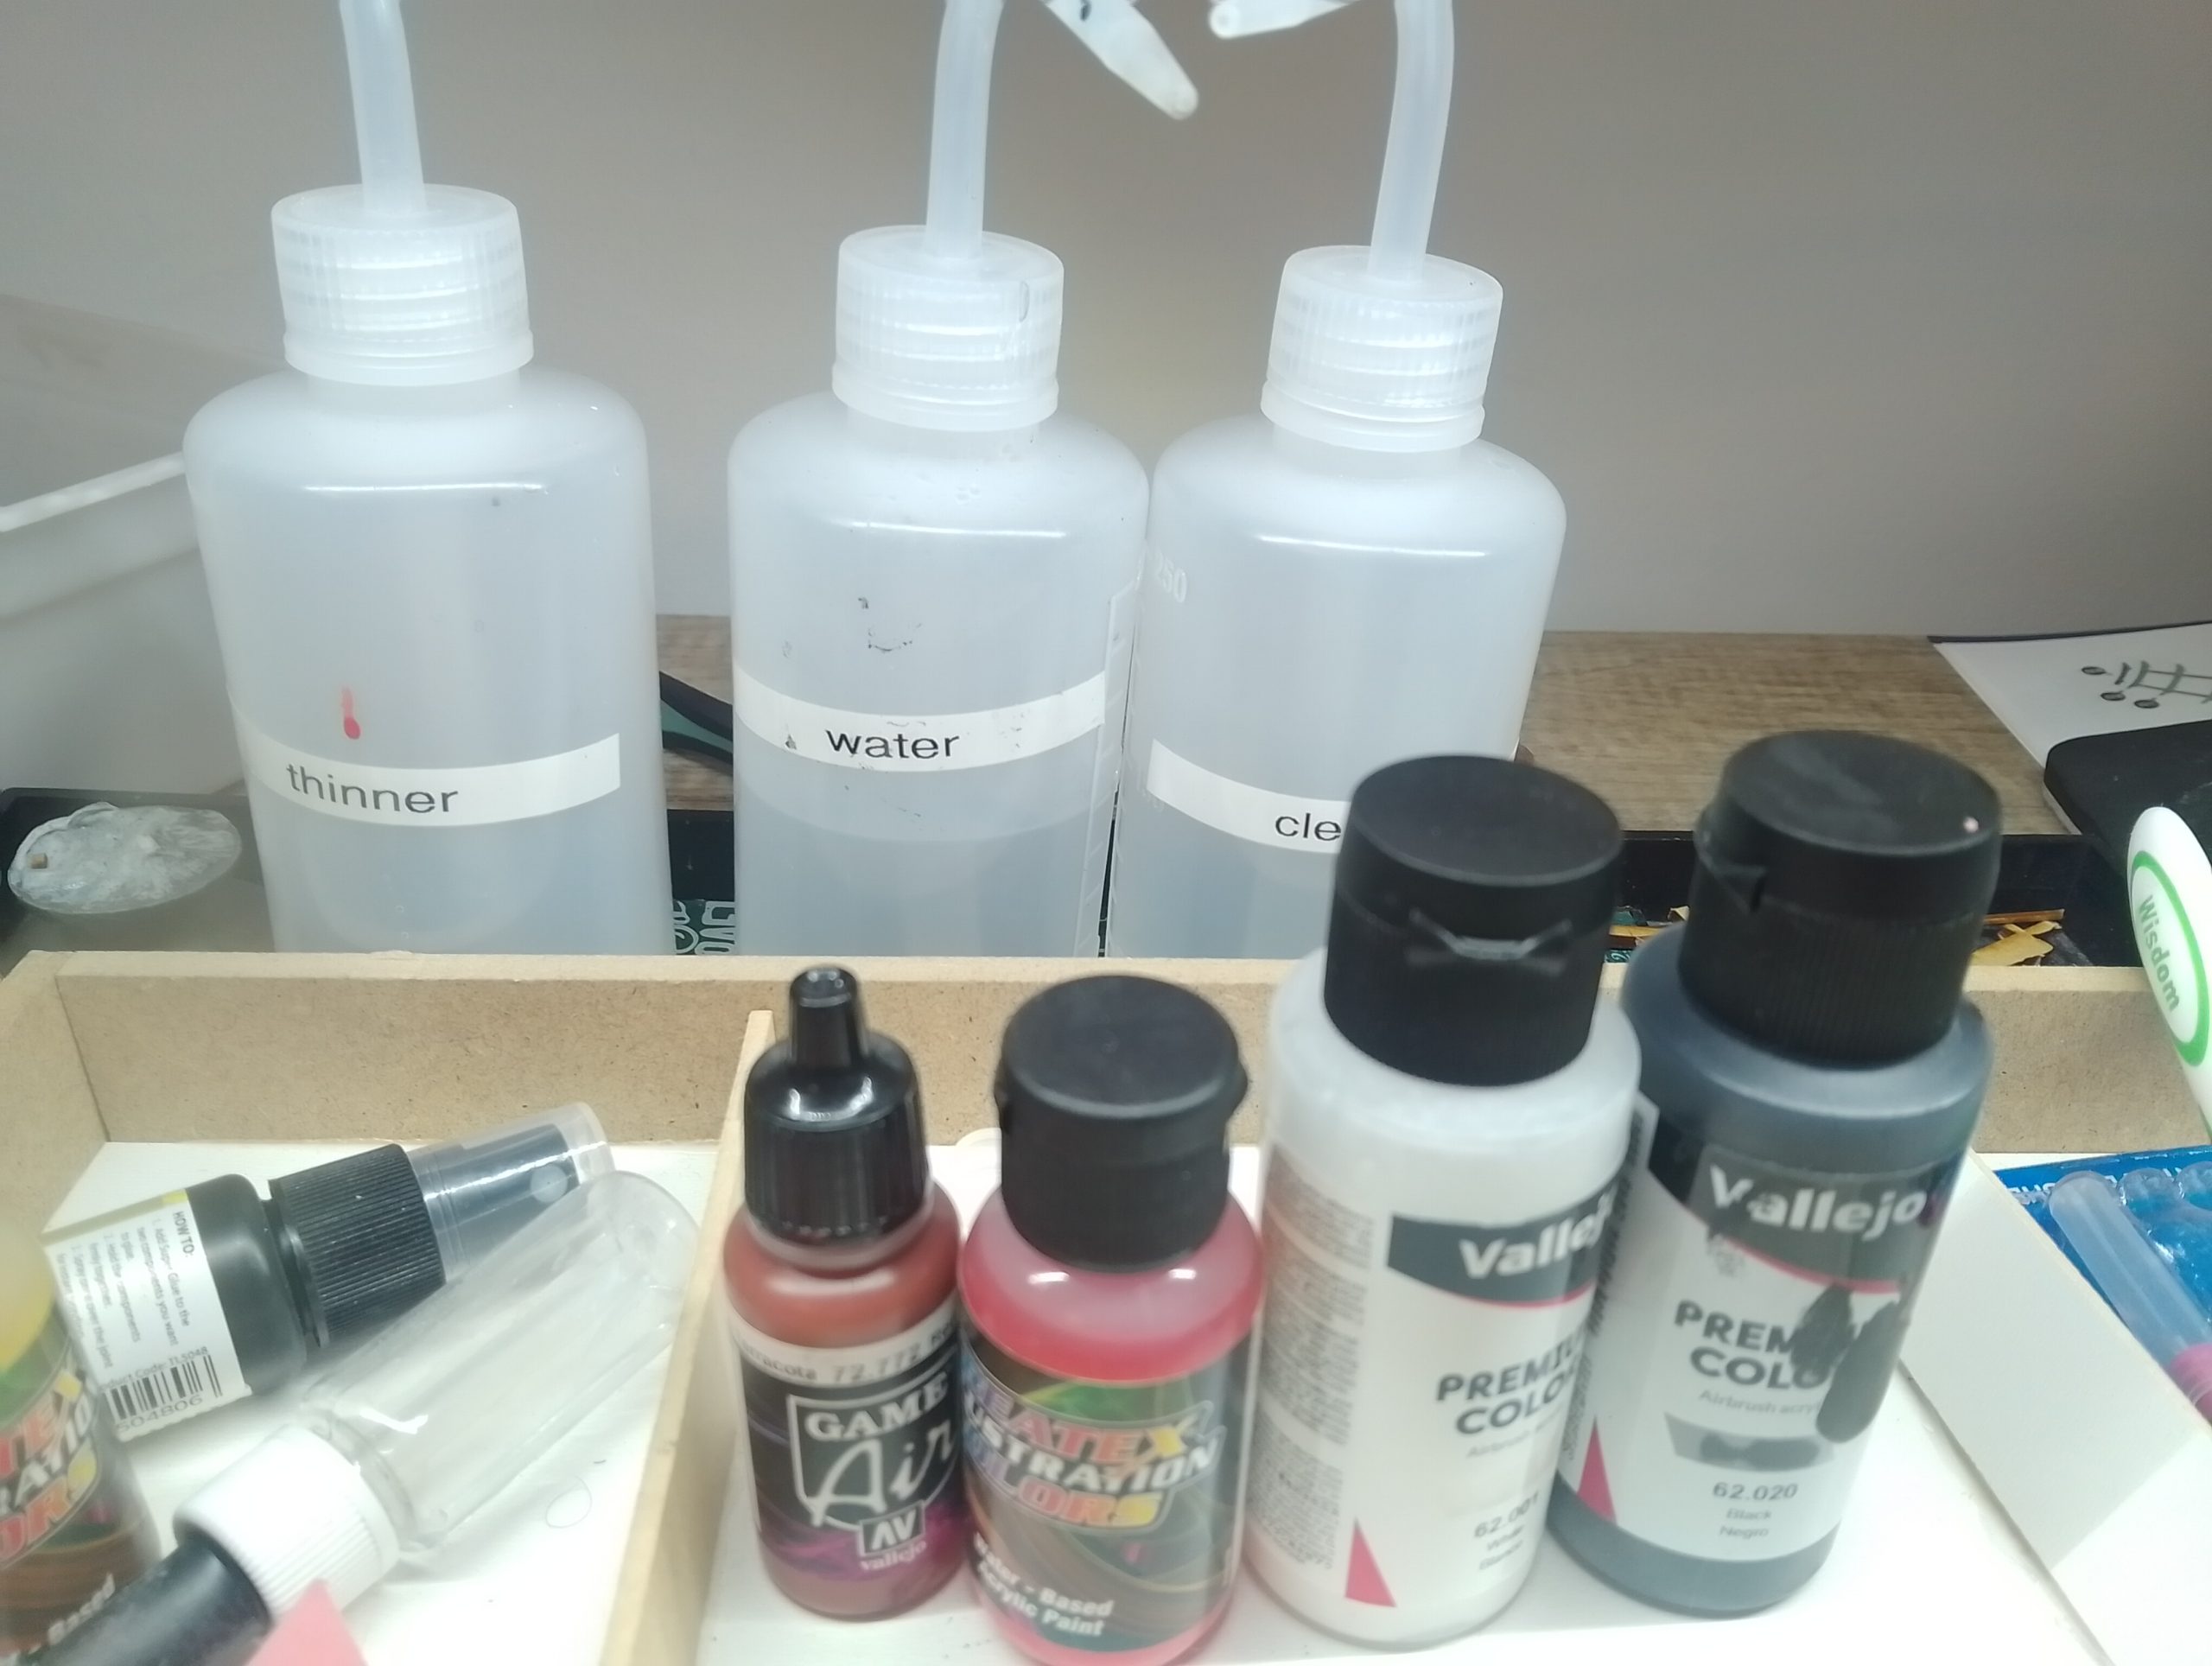
Just a quick list of what tools I have been using (I am no expert, there is plenty out experts out there, im treating this more like a blog)
- PVA Glue for most of it + Superglue (for the dovetail joins)
- Clothes pegs + rubber bands to hold into place
- Emery Boards to file the sides for a solid glue
- scalpel knife to cut the tougher pieces out
- a container/bag to put all the used frames in and bits. Keep desk tidy!
P.S I HAD TO RE-WRITE EVERYTHING BECAUSE THE WEBSITE CRASHED AND WAS NOT POSTED SOONER 🙁
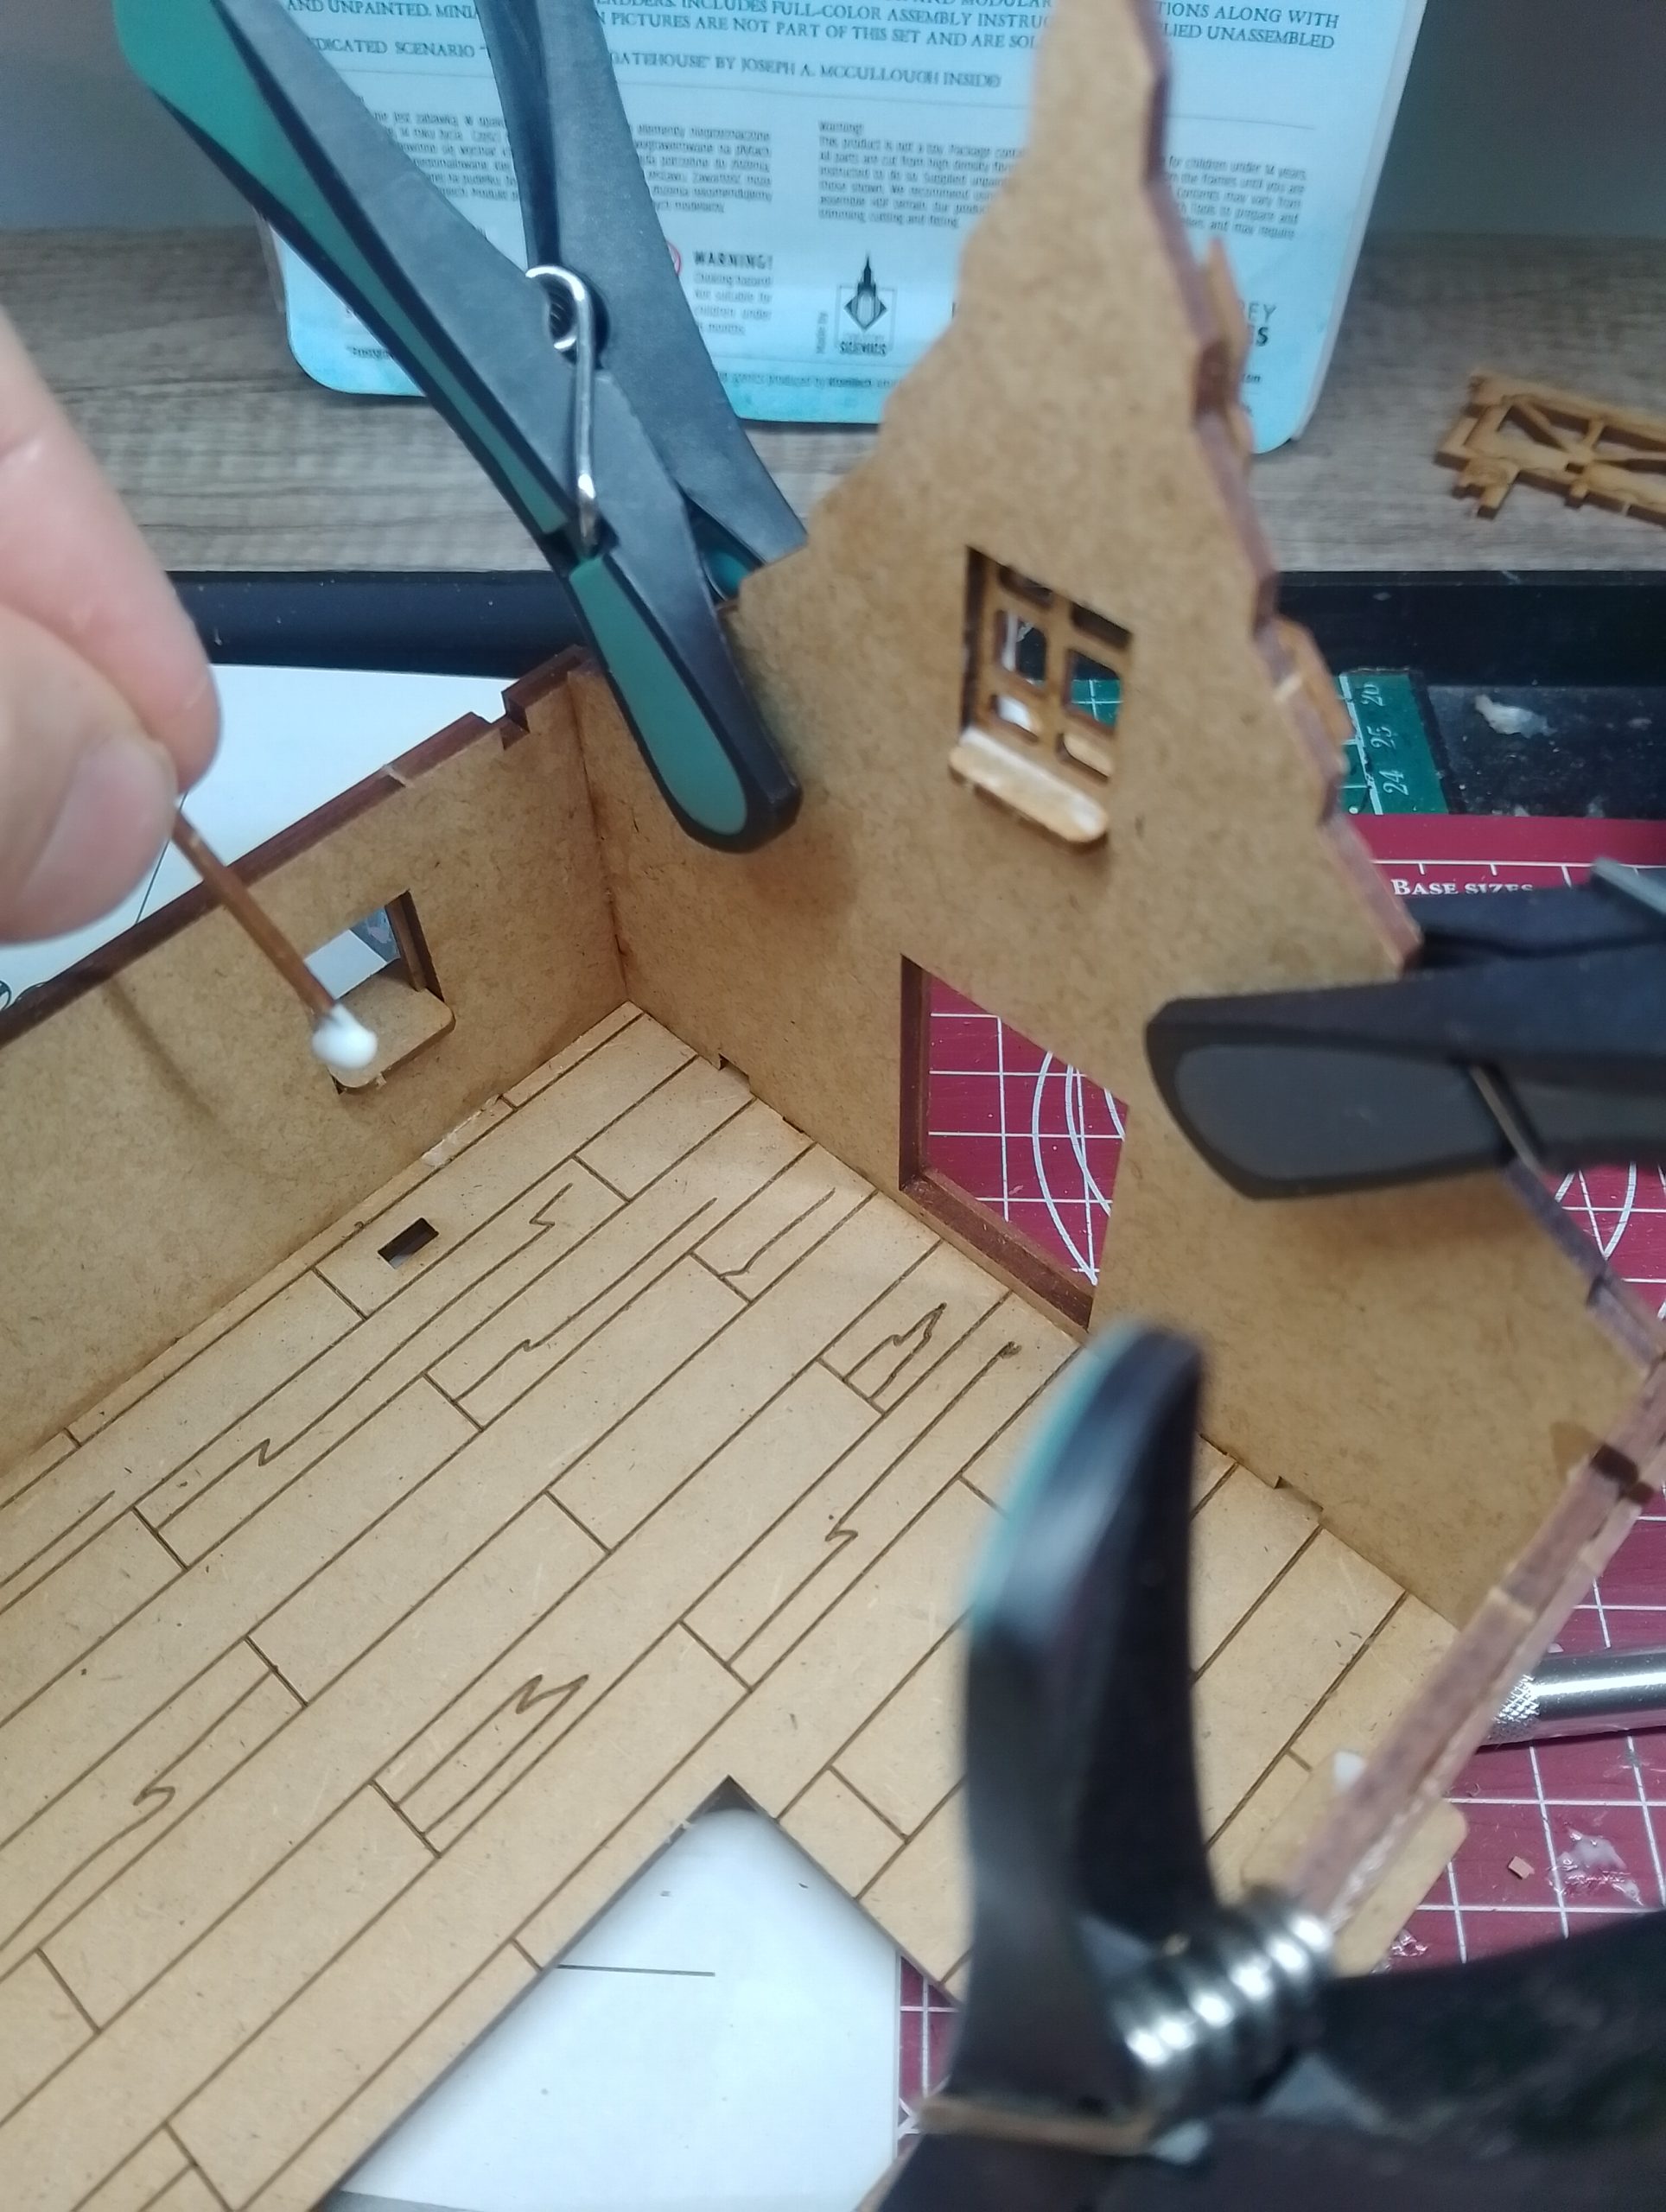
Project Update 4/12/2025
As I finish the final build of the gatehouse there is few things to post prior.
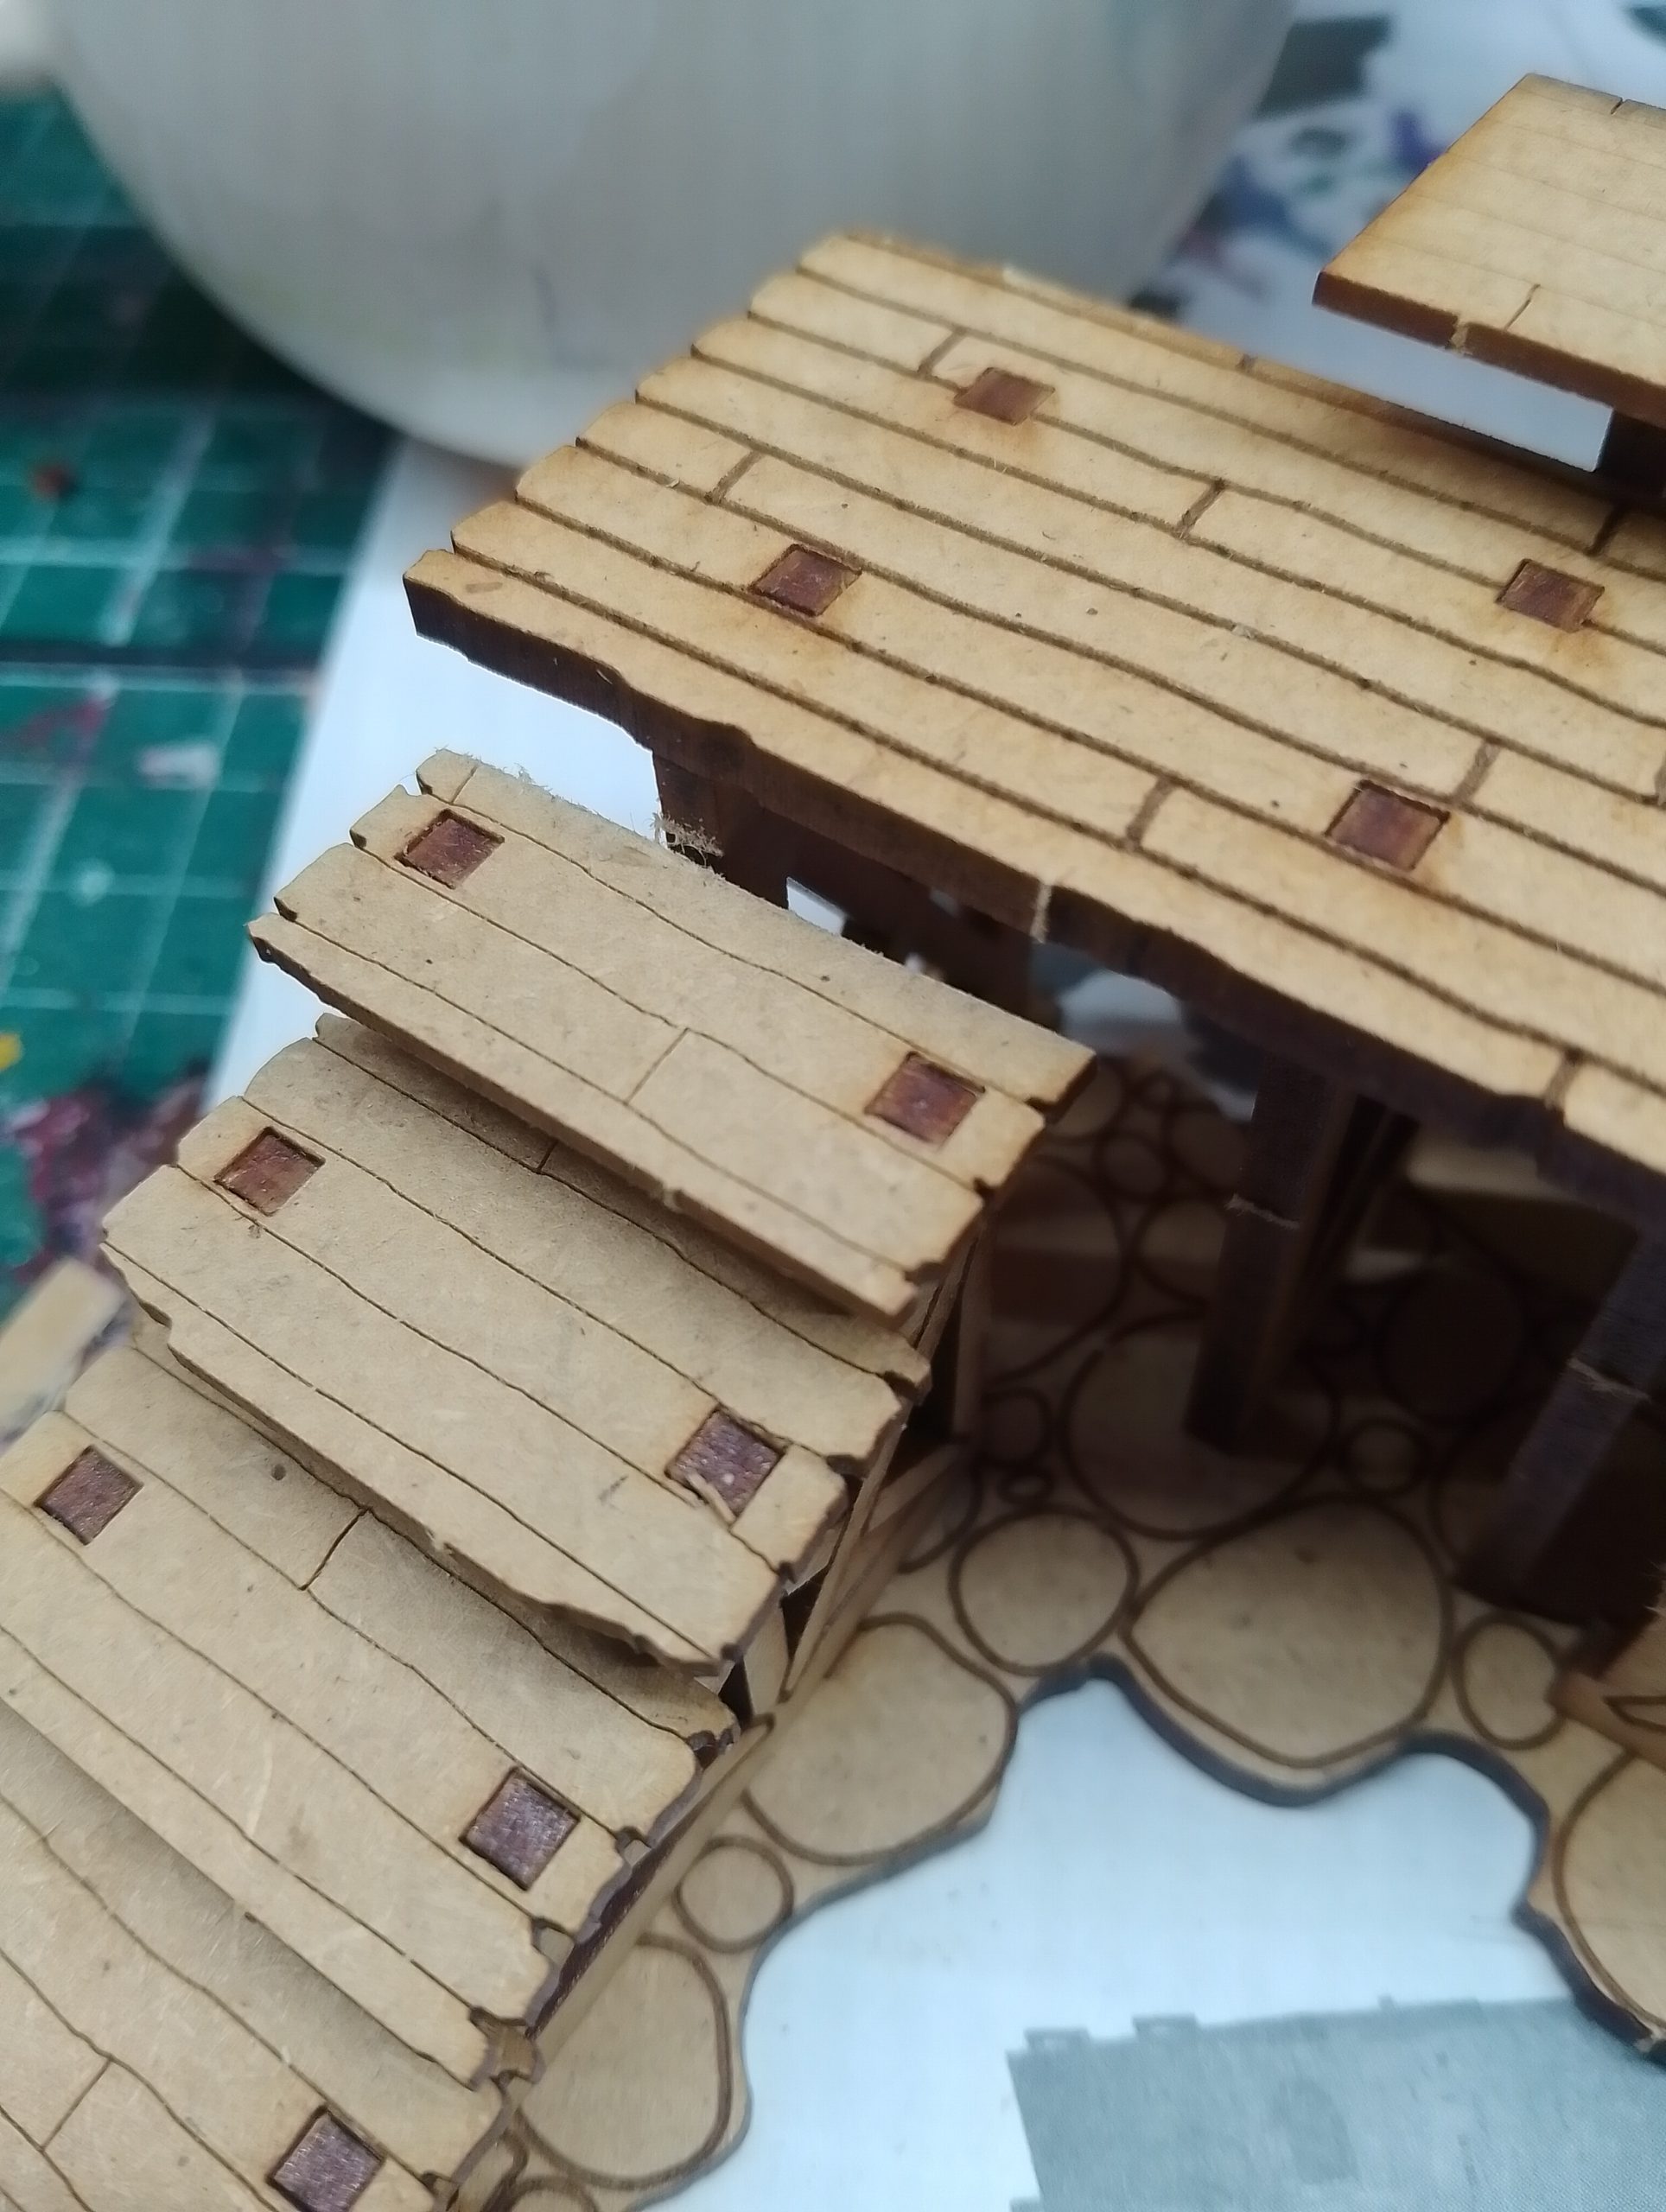
 Its as simple as this, then press the piece in.
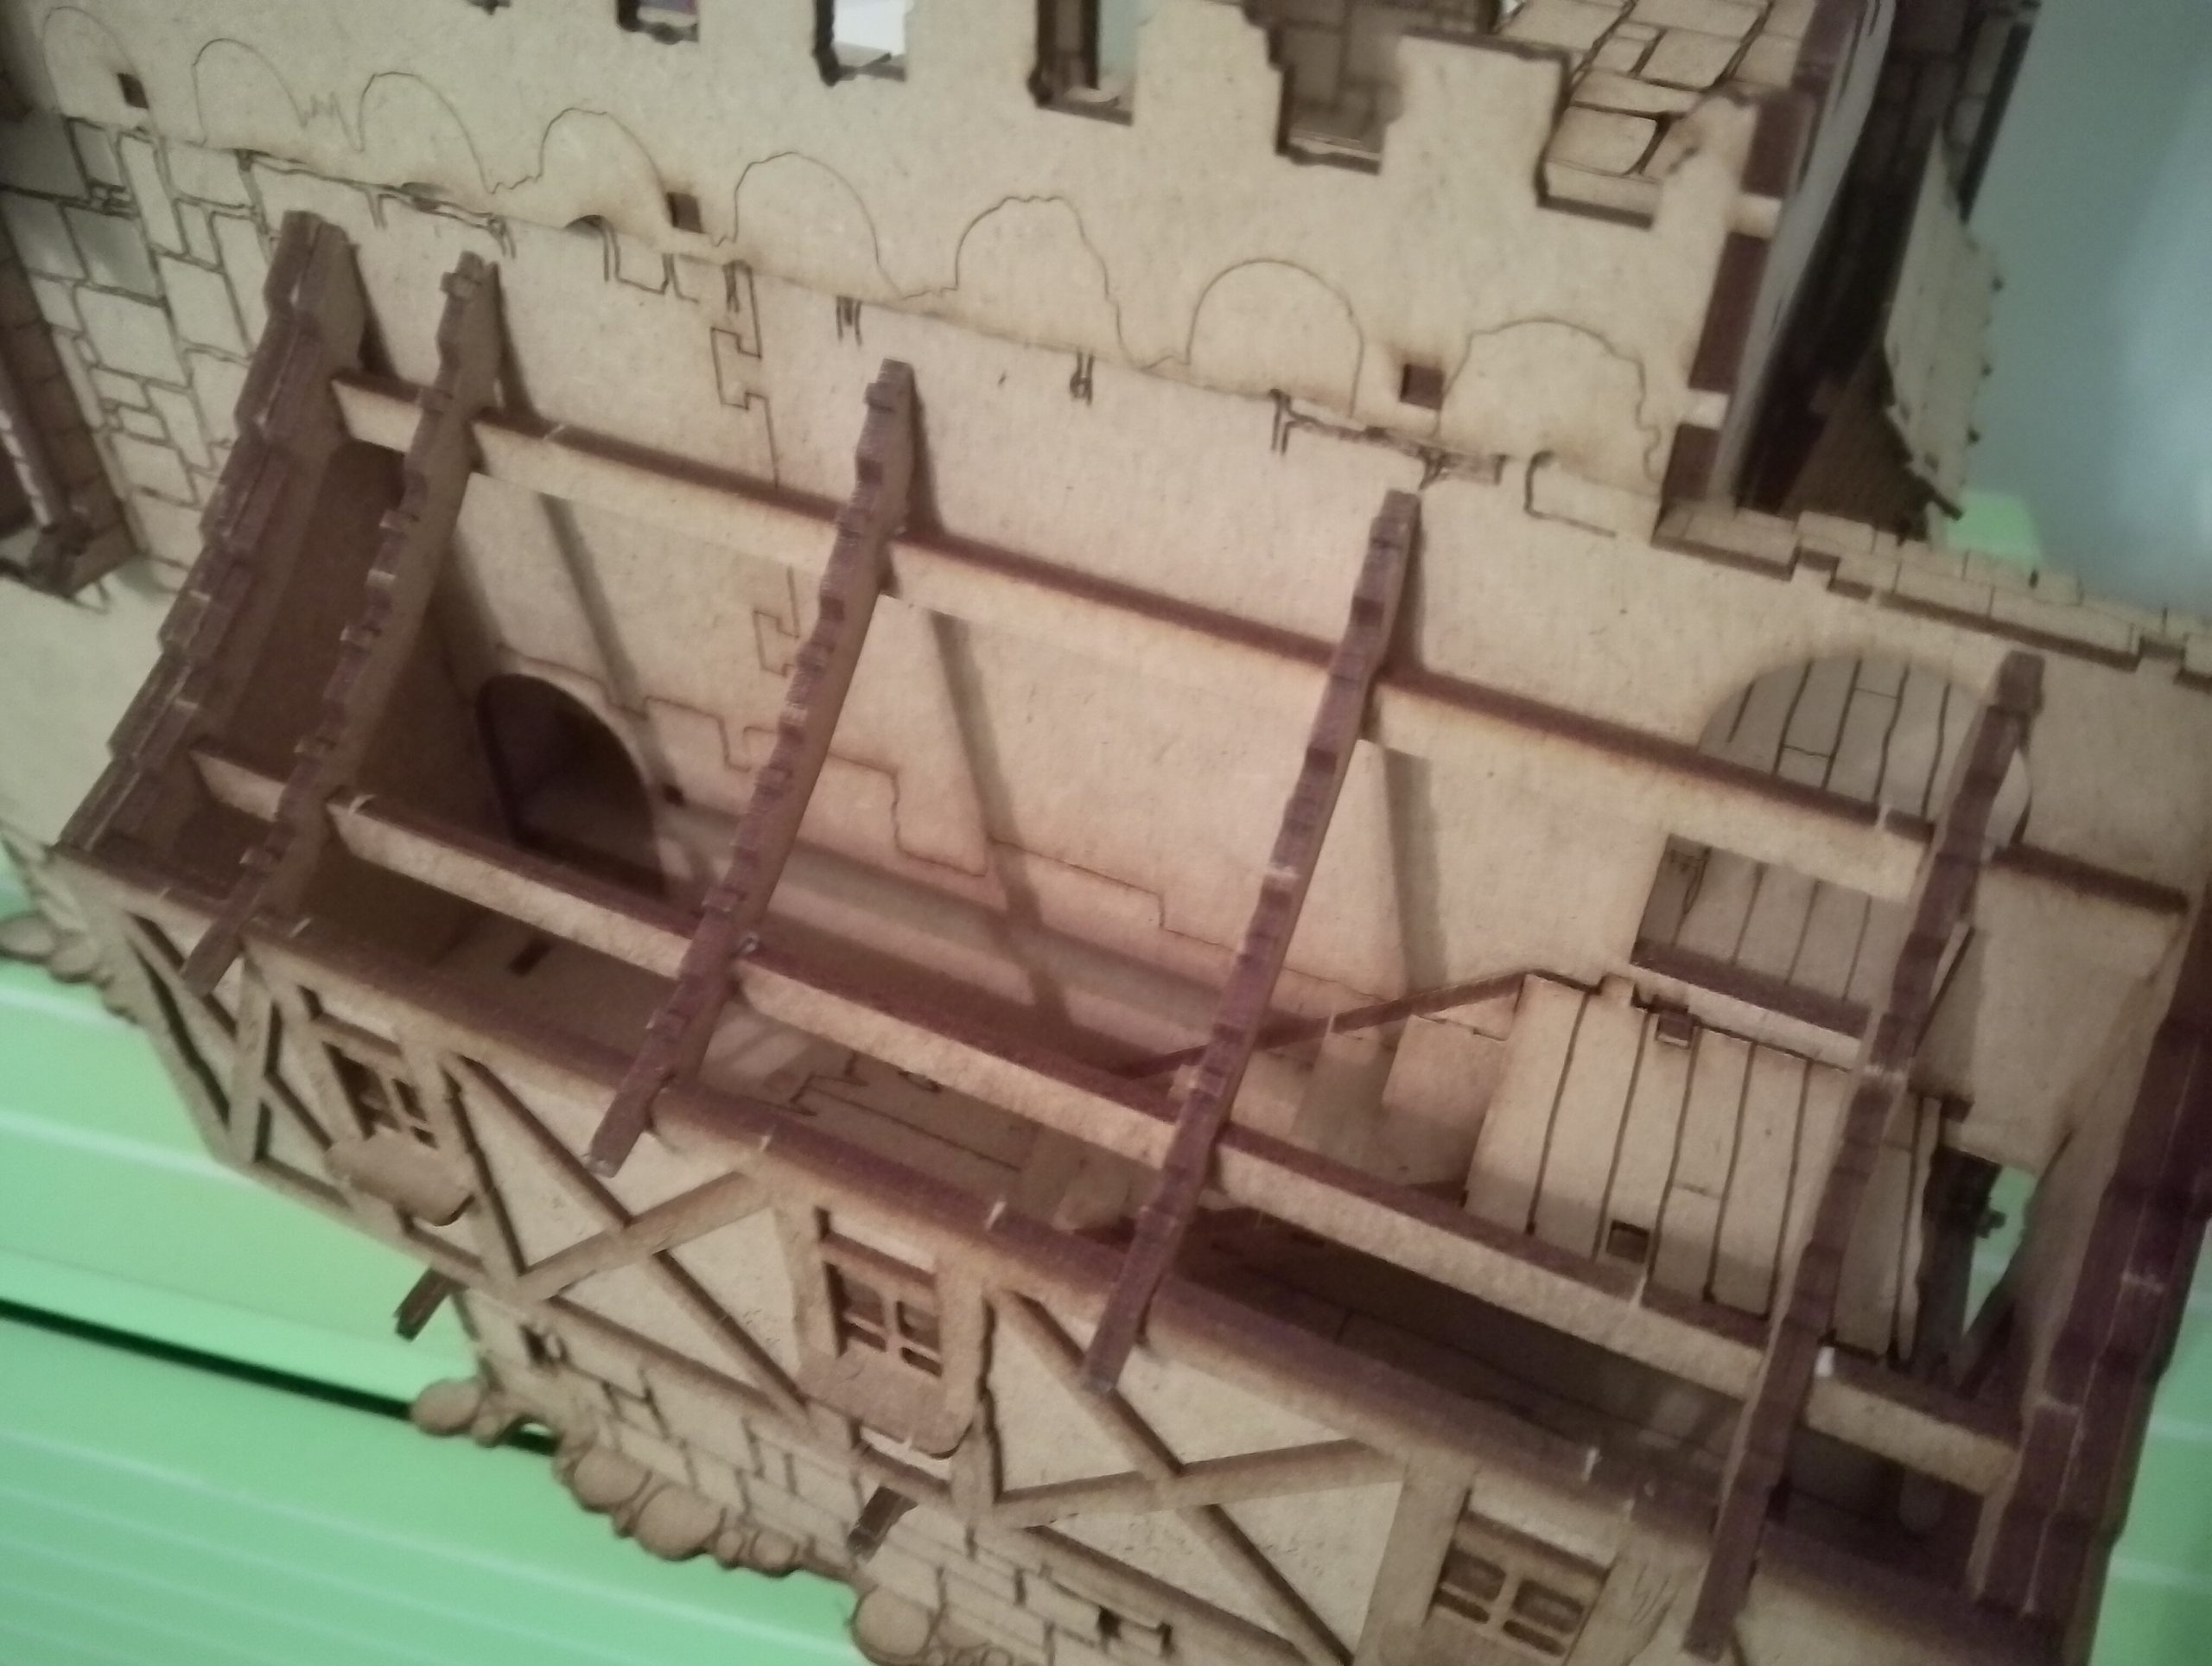
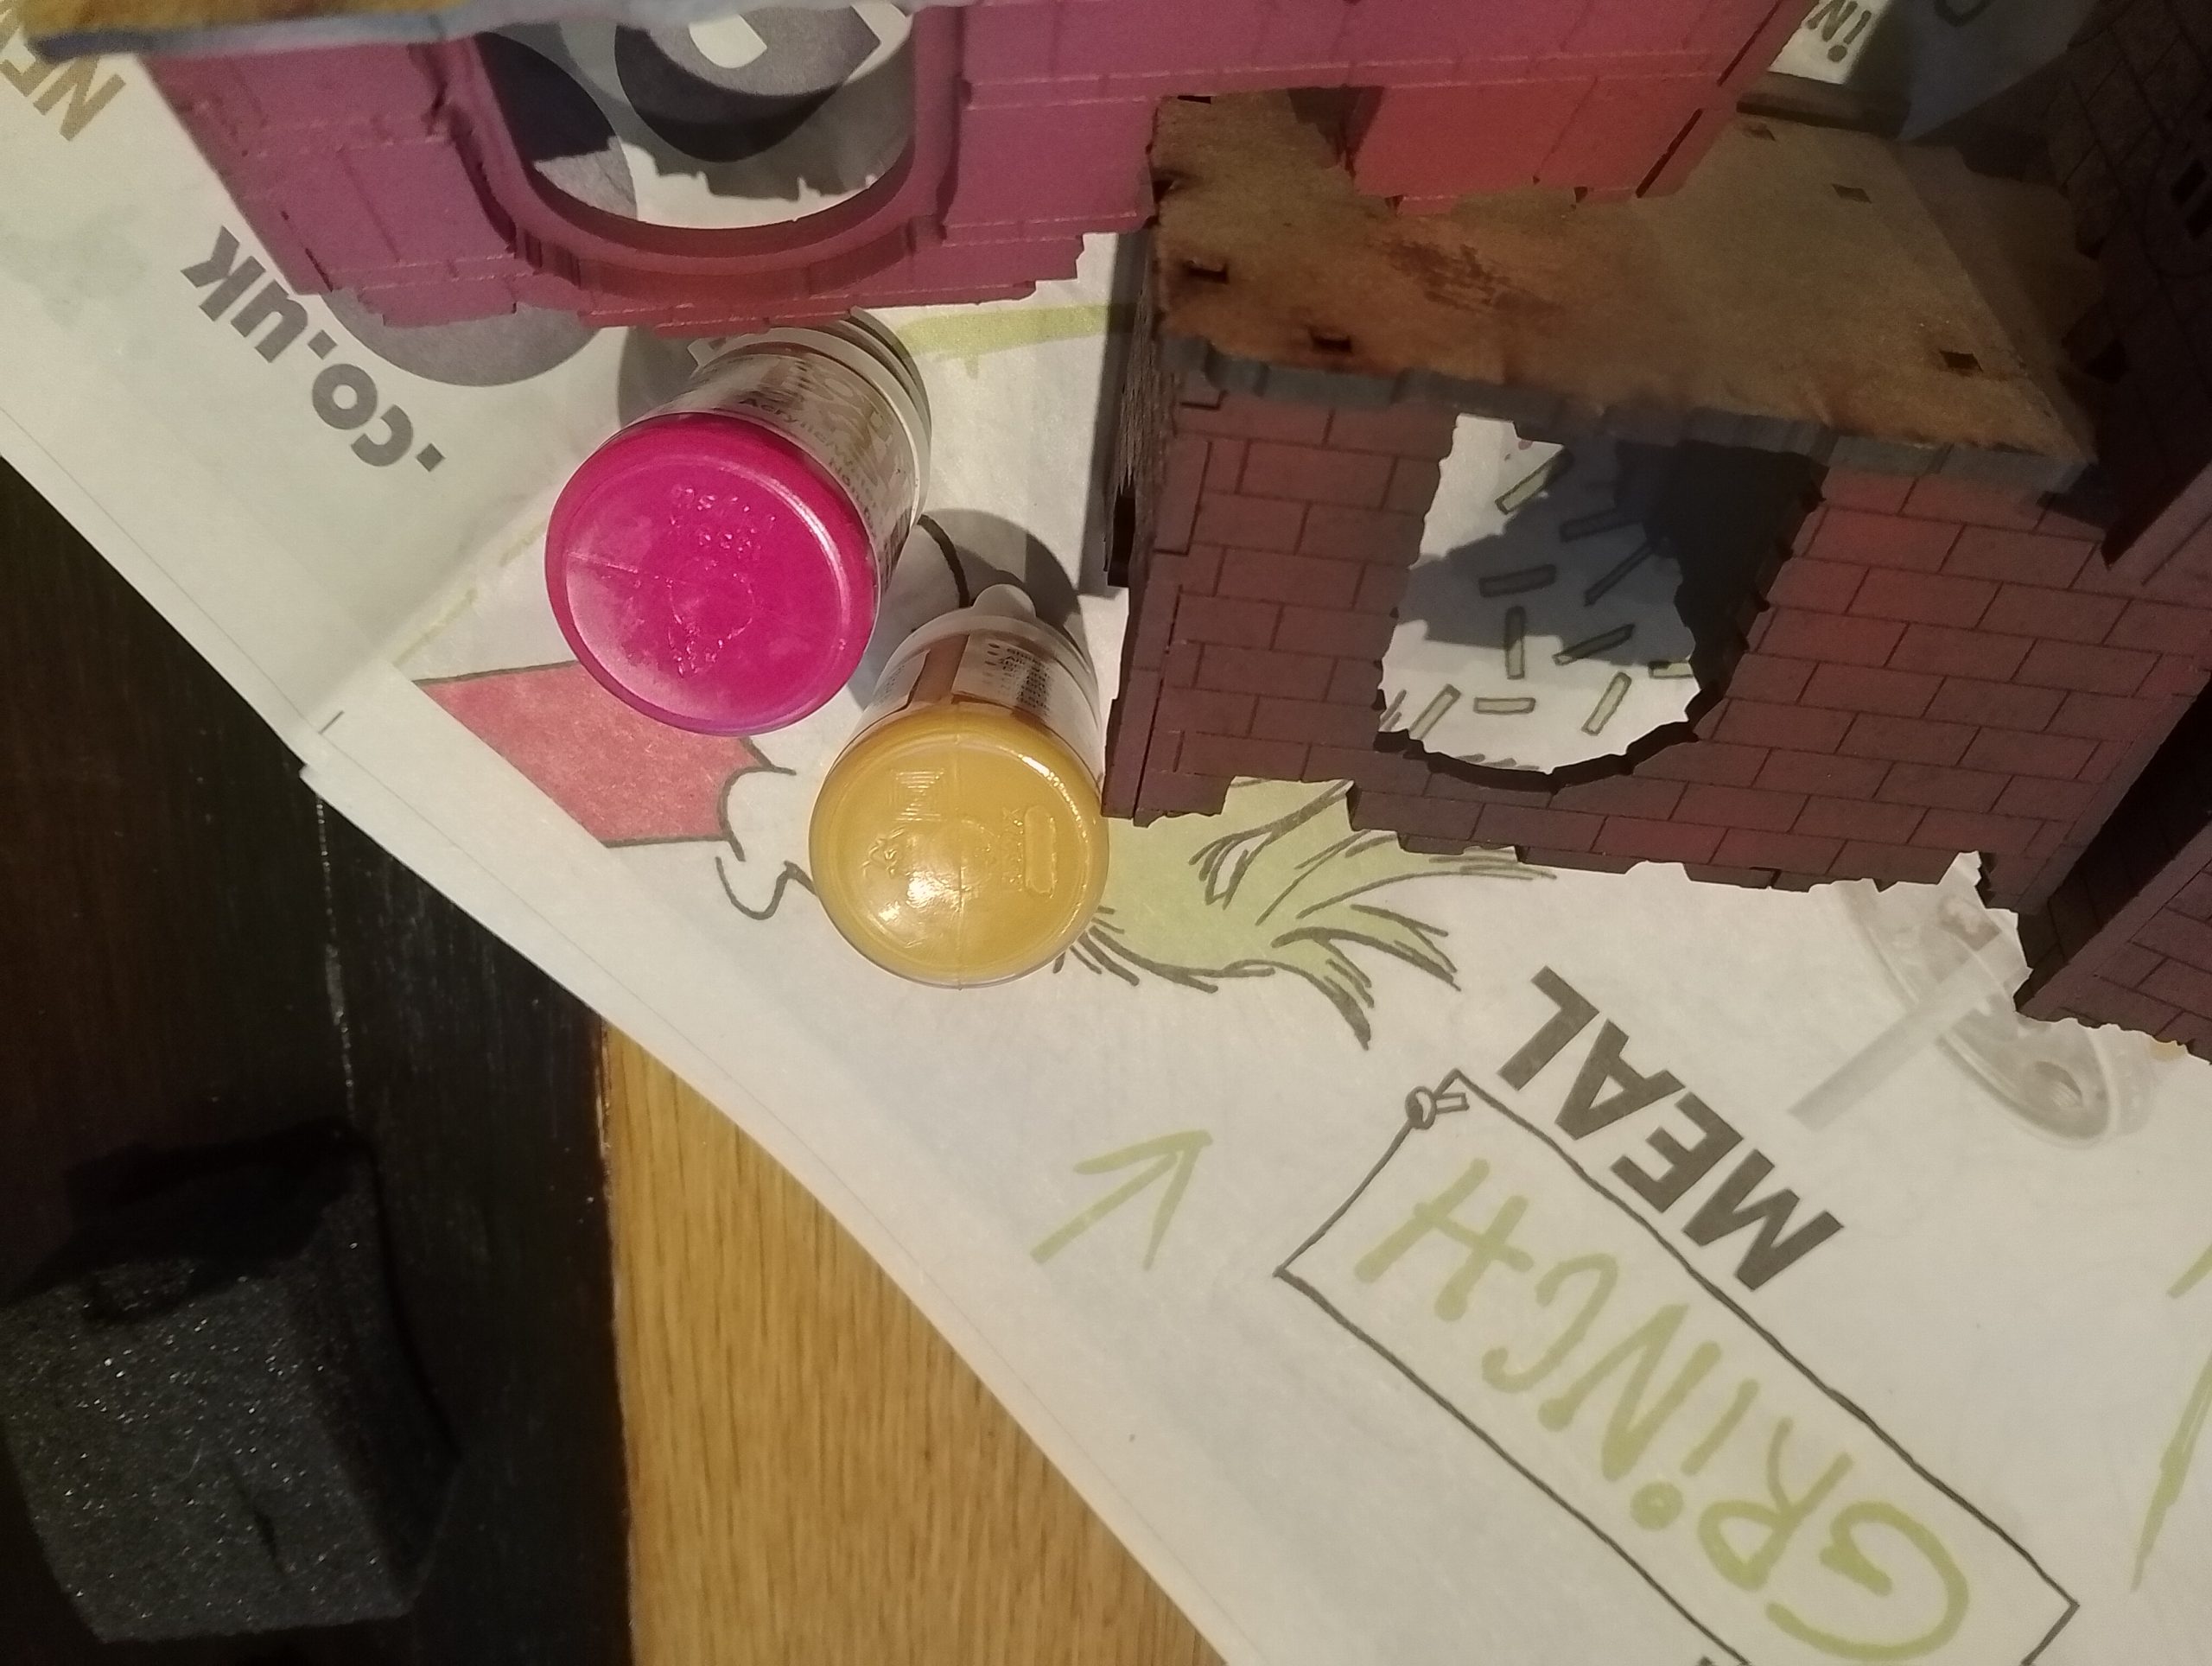
 they are as bright as they are shown here!
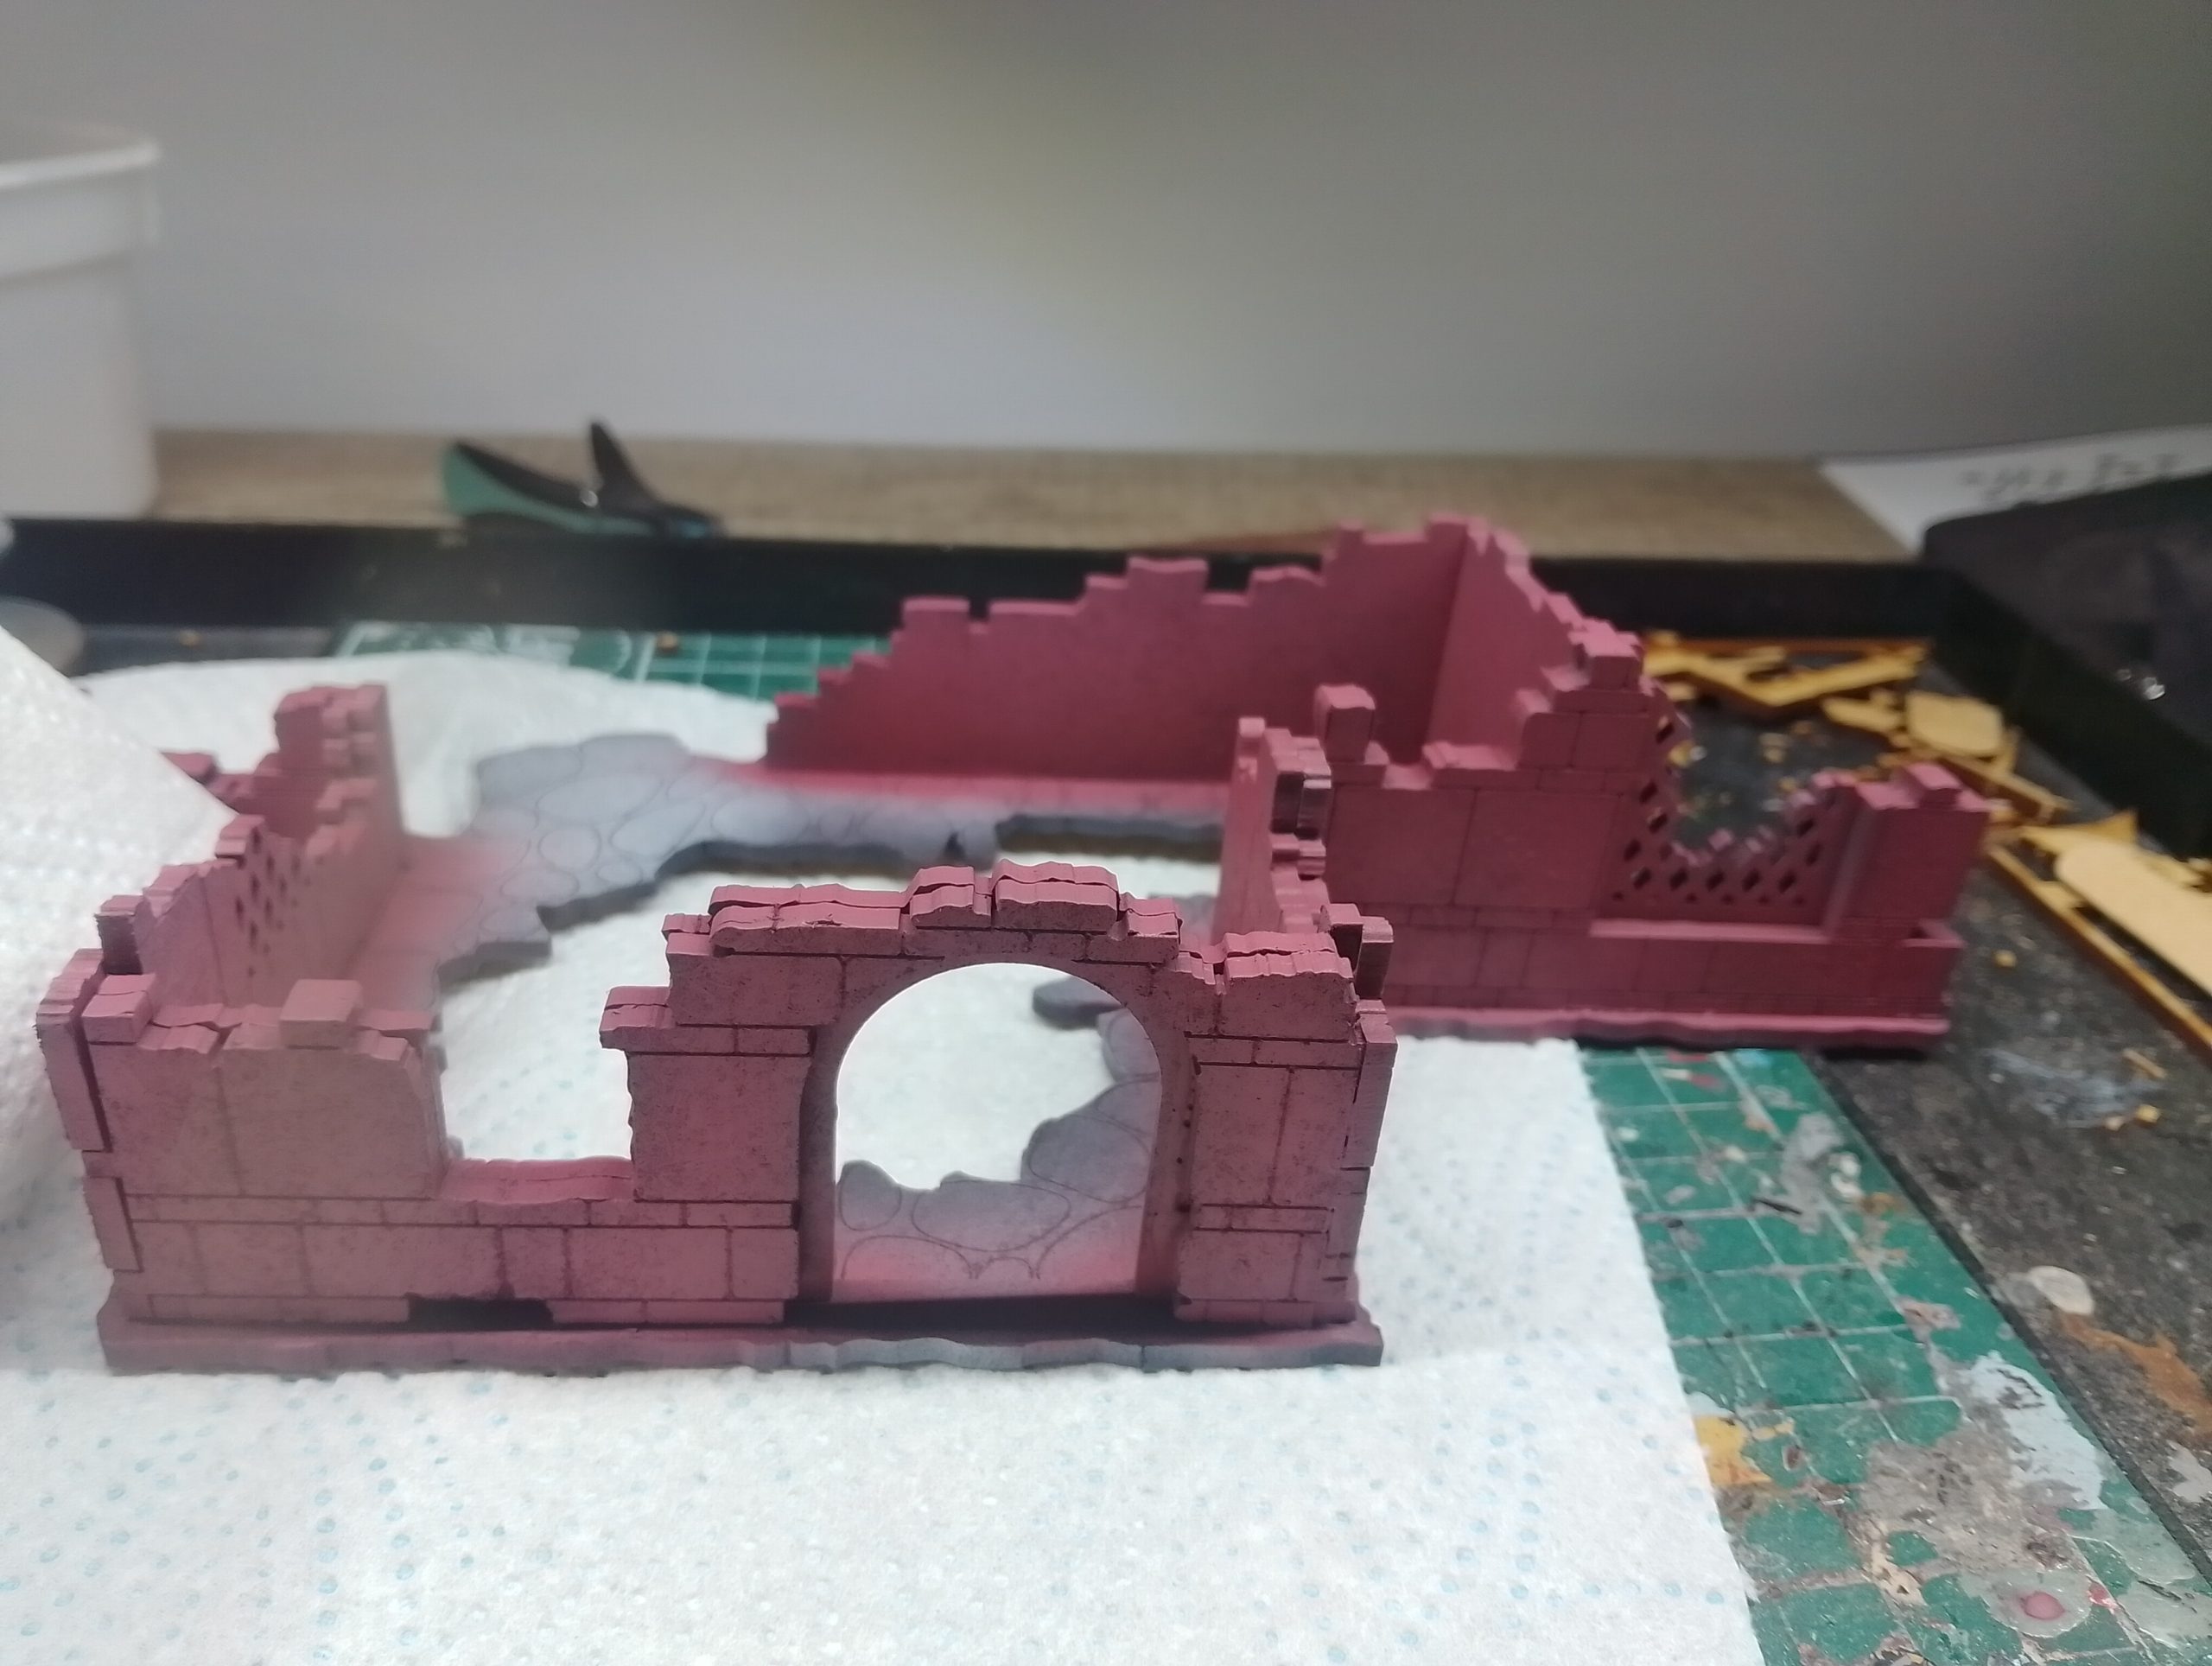
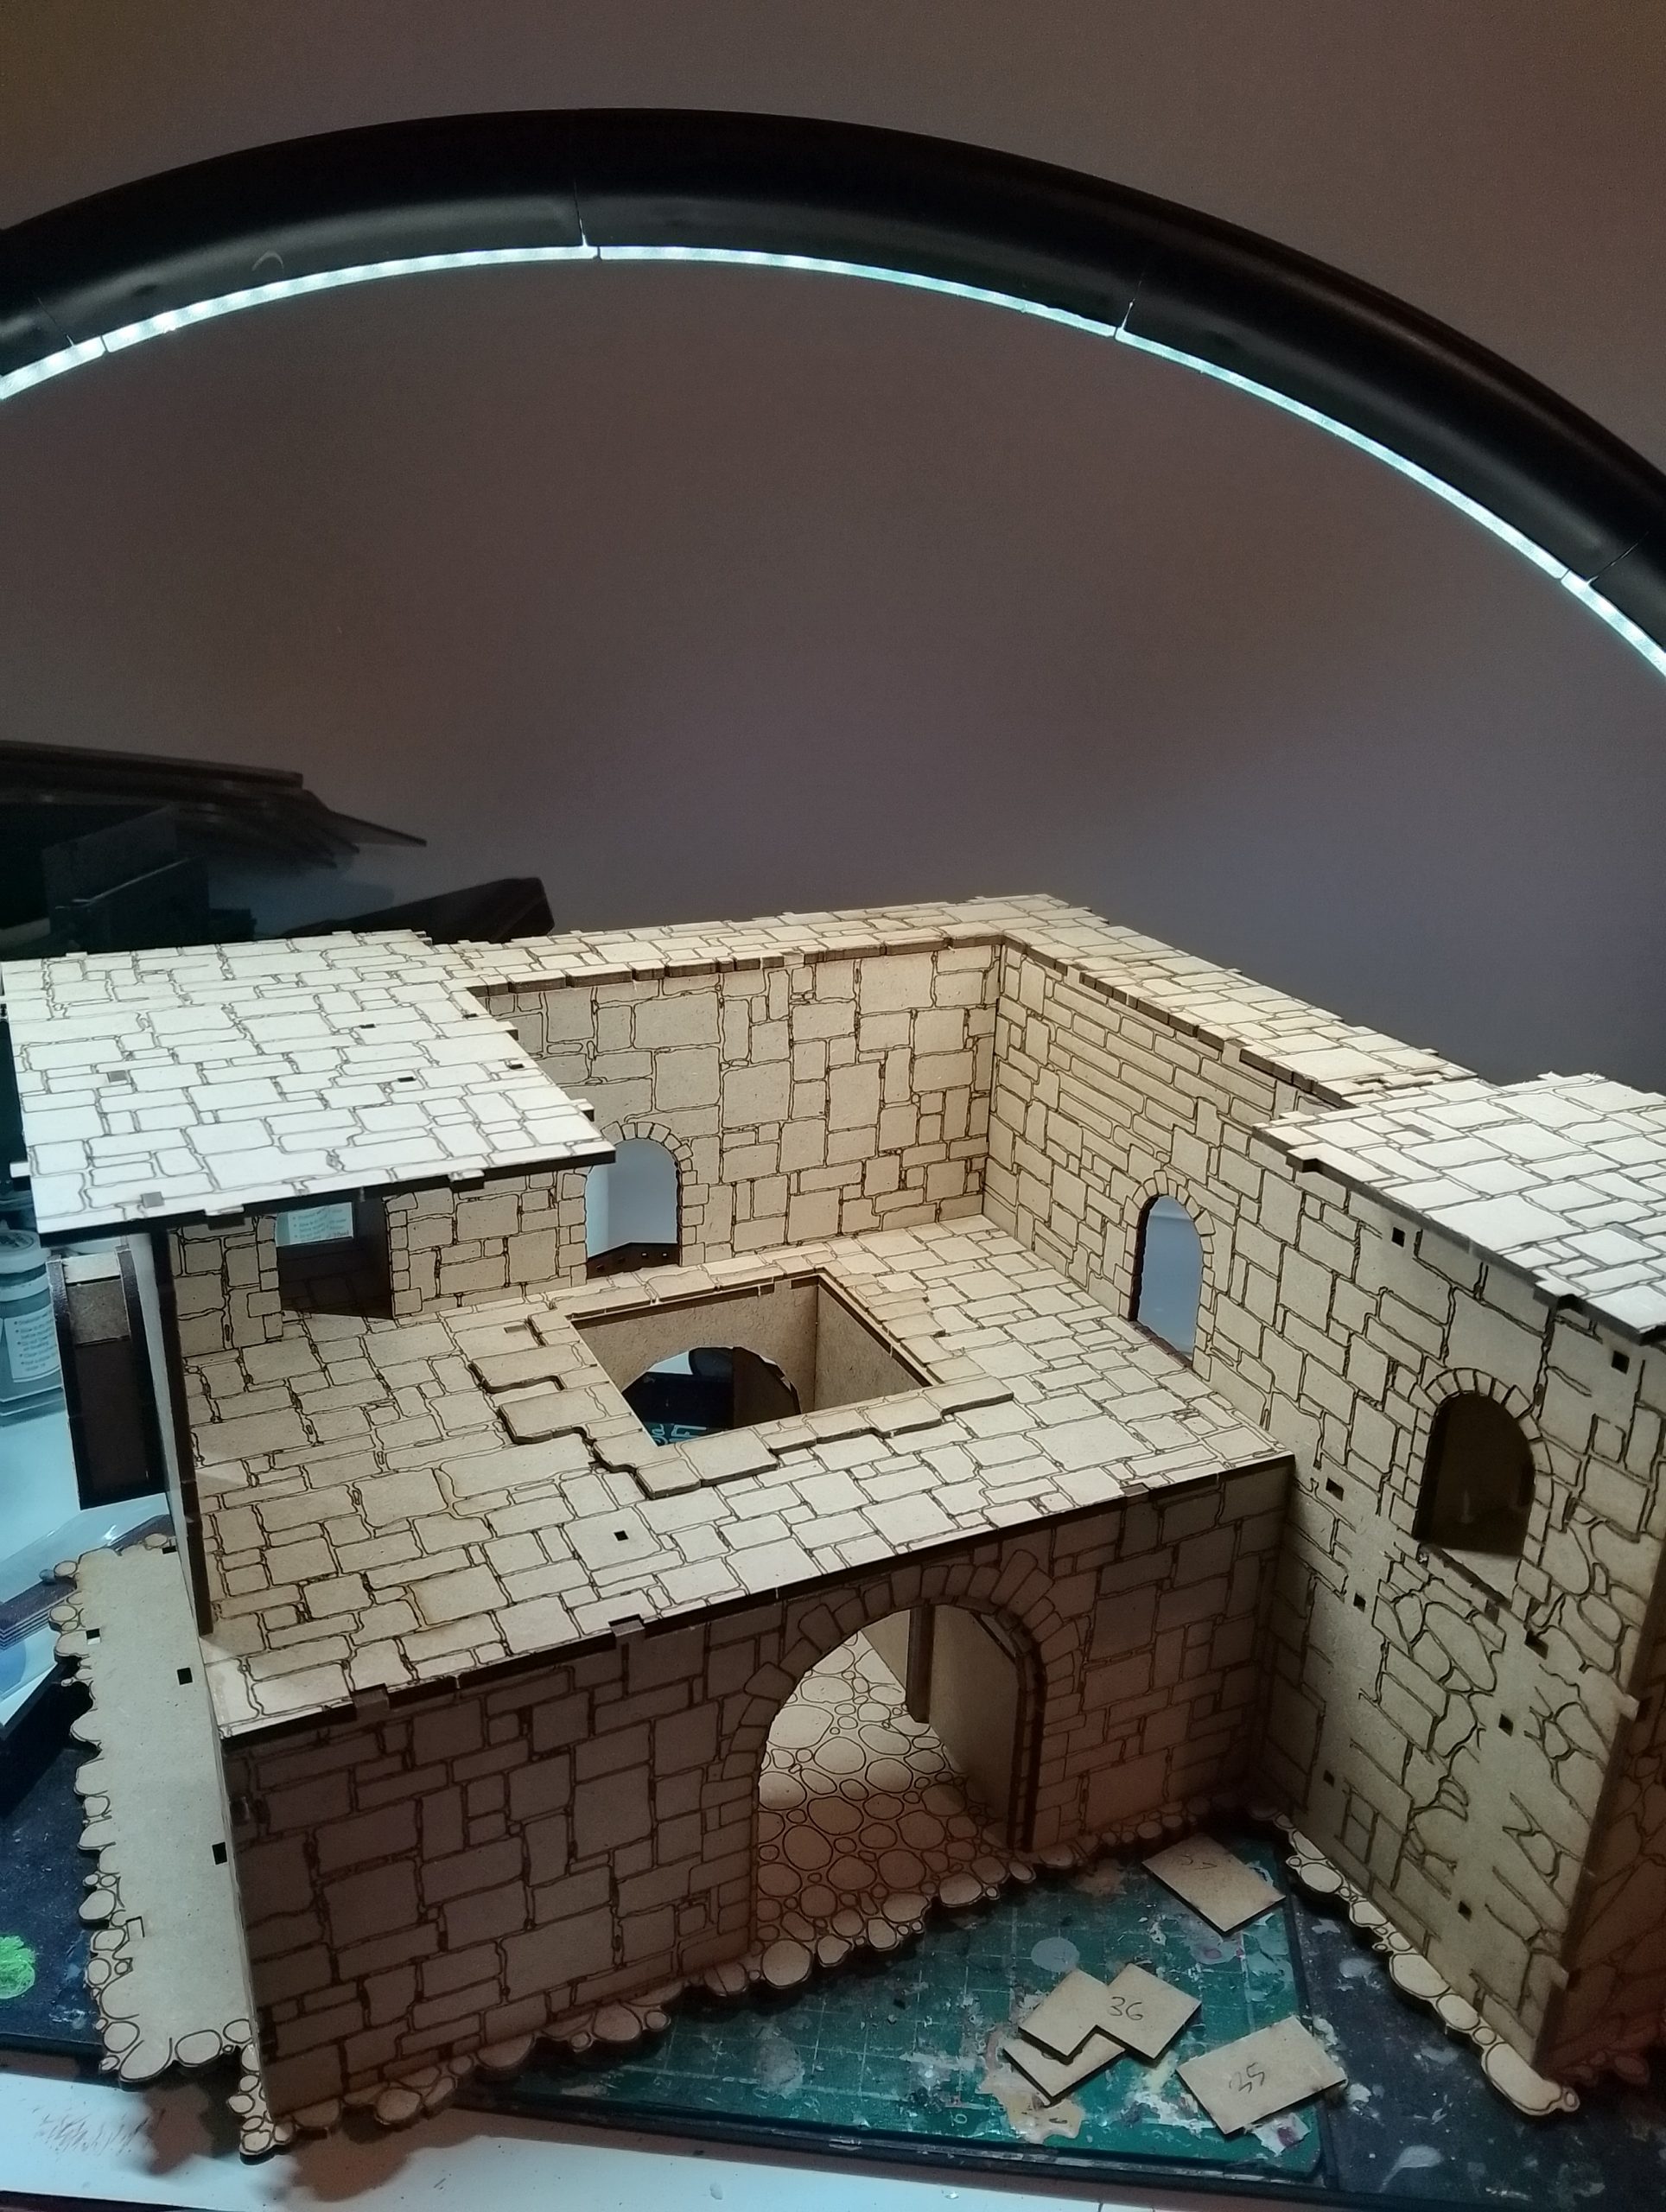
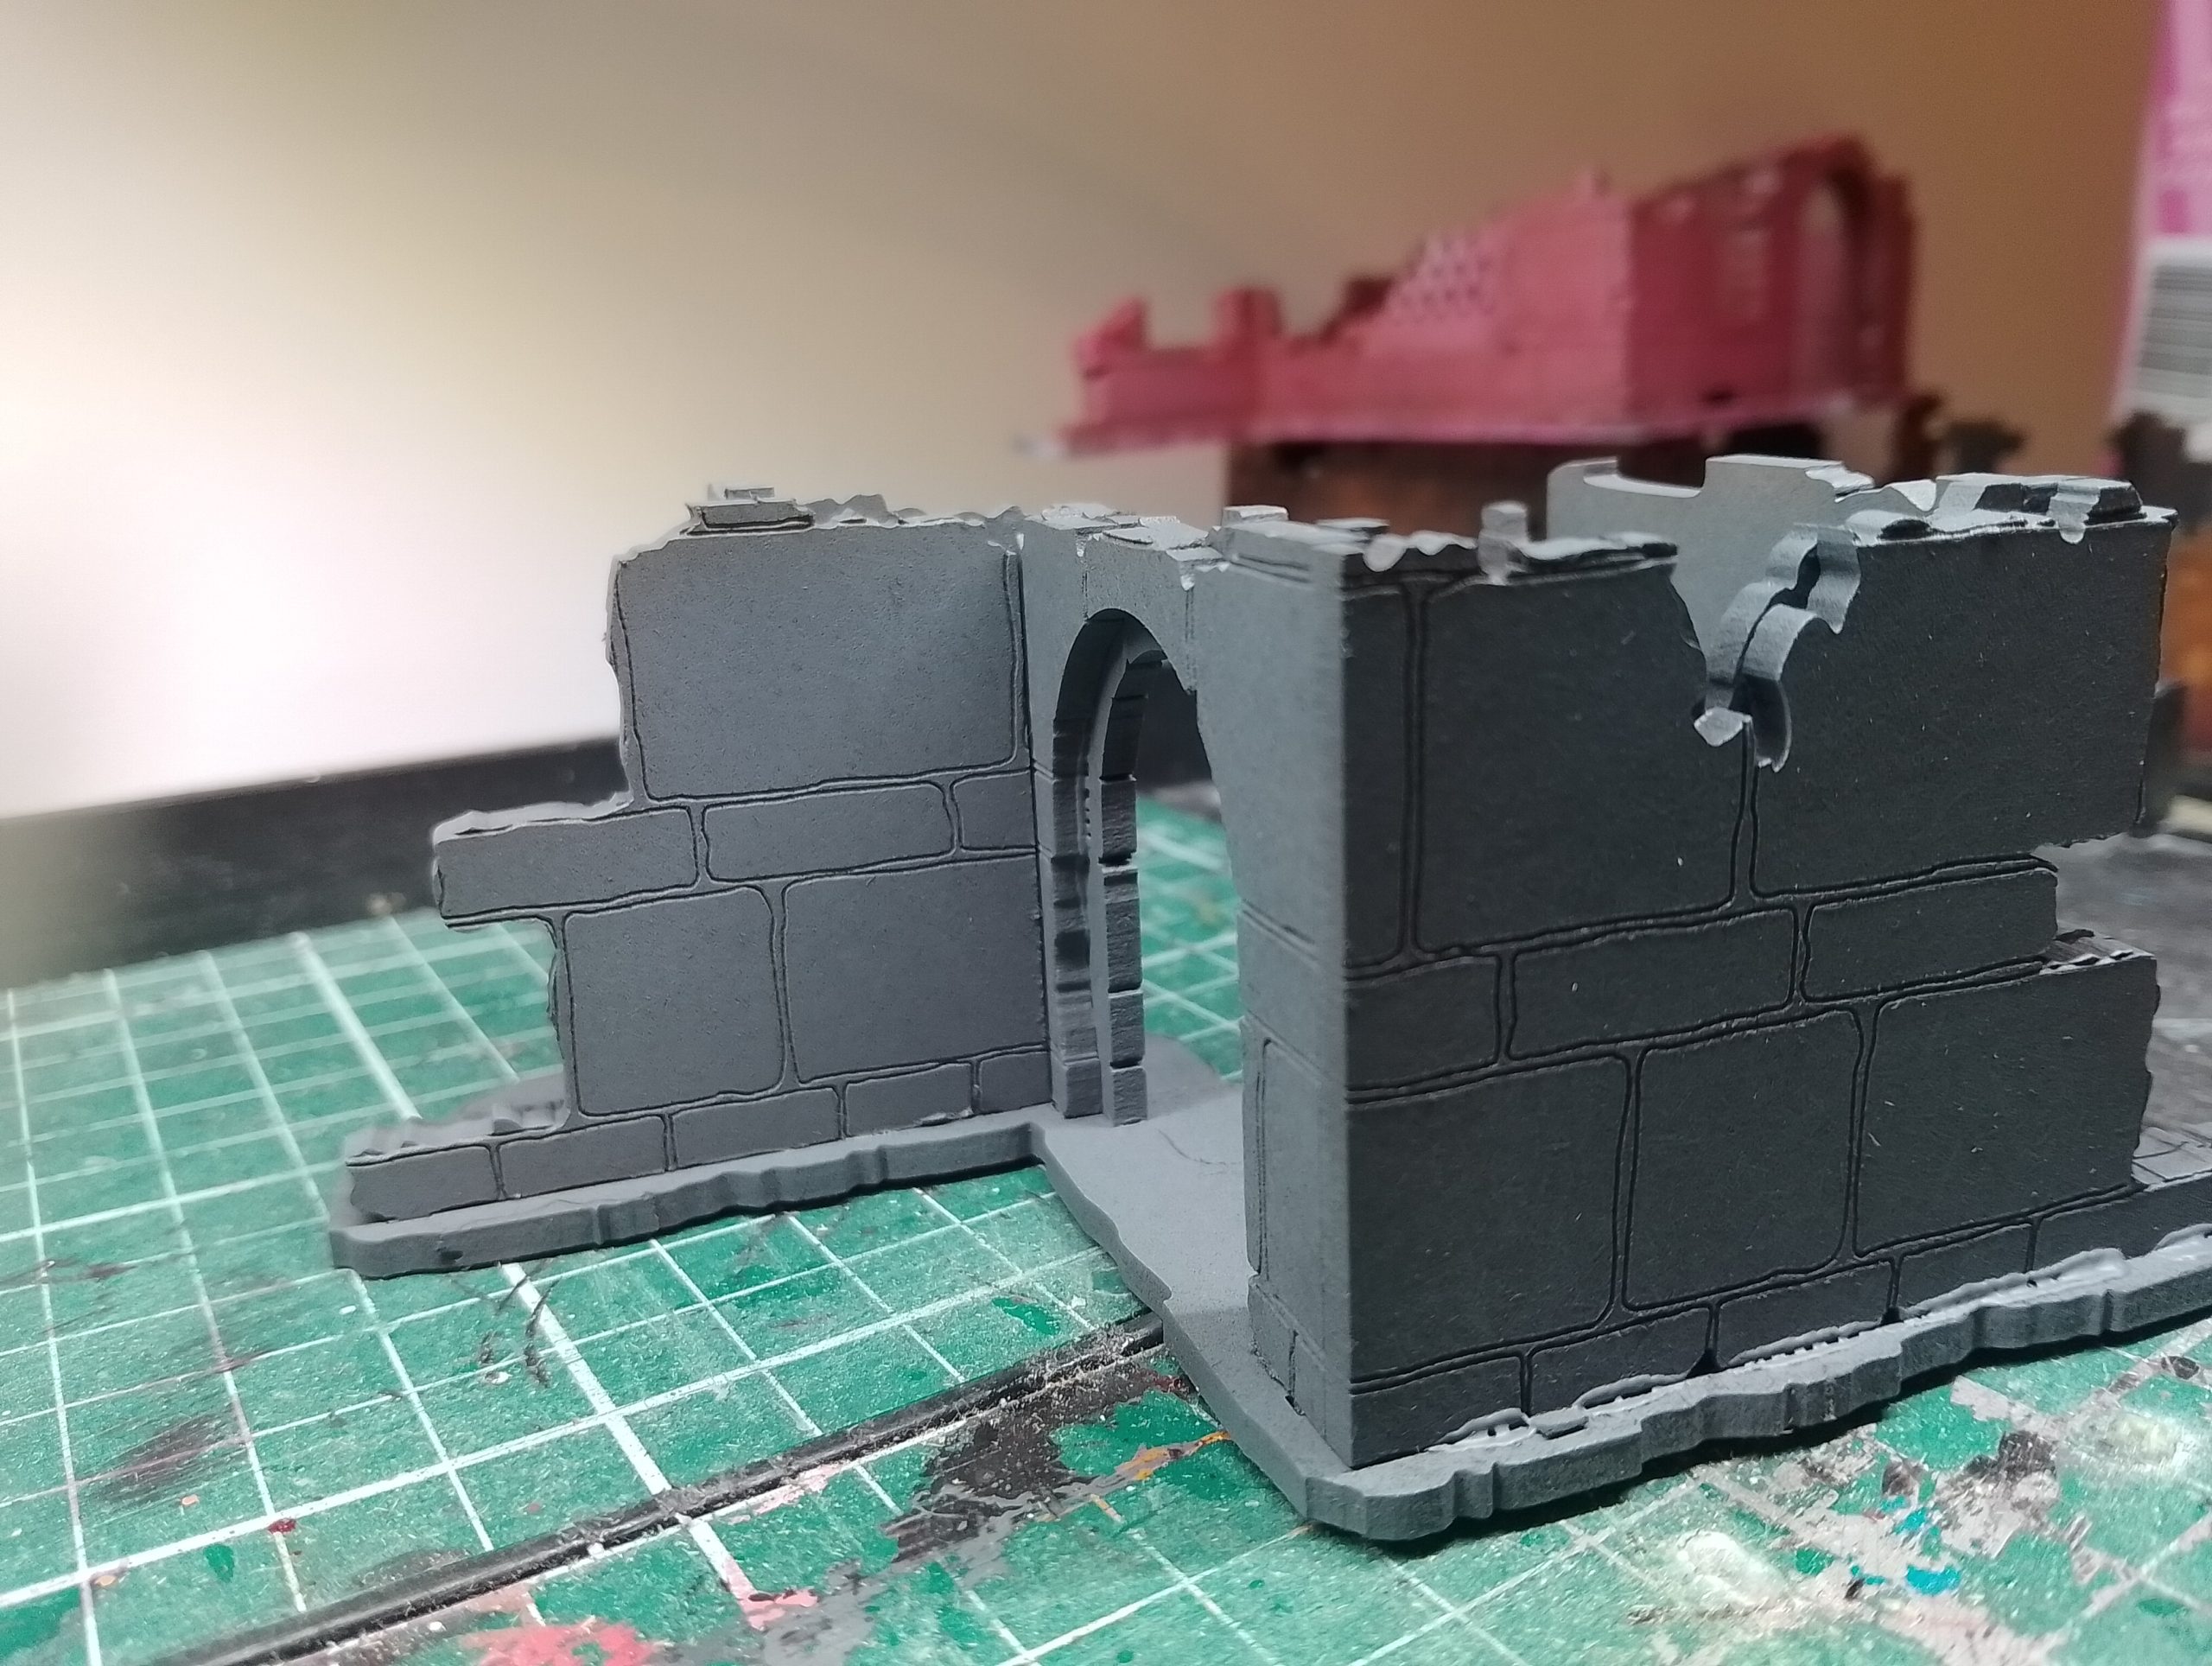
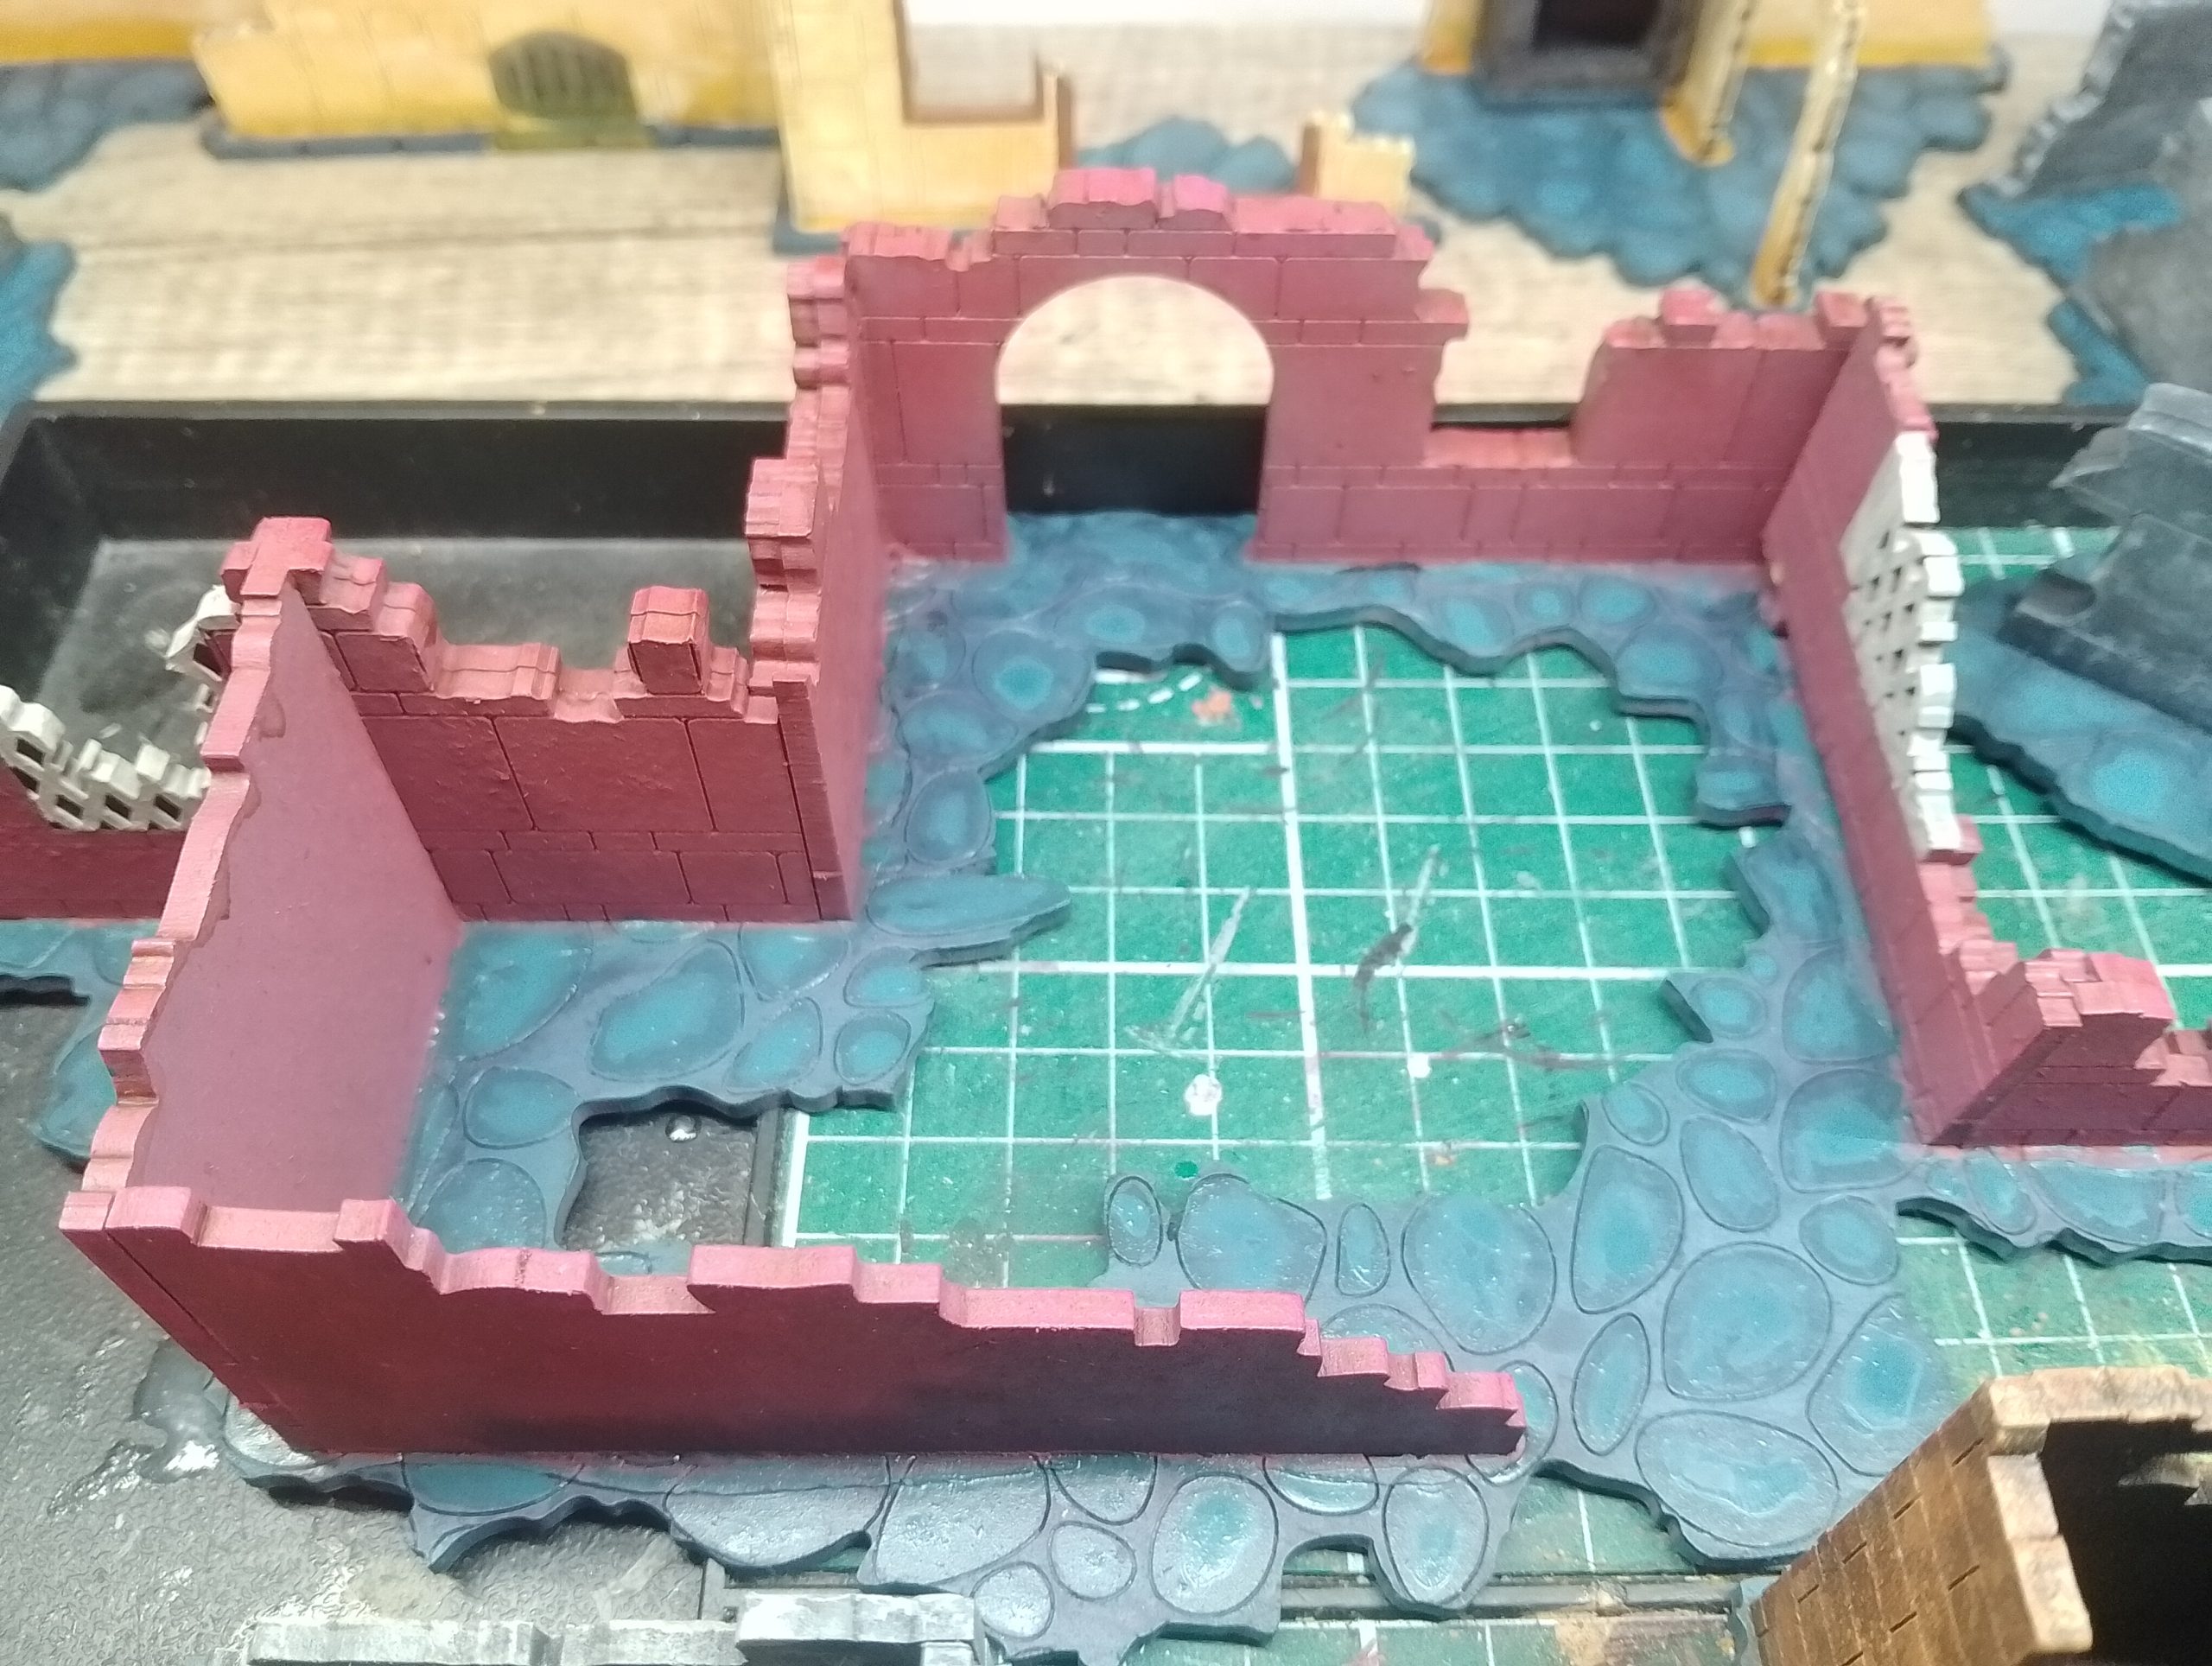
Haunted Gatehouse update 10/12/2025
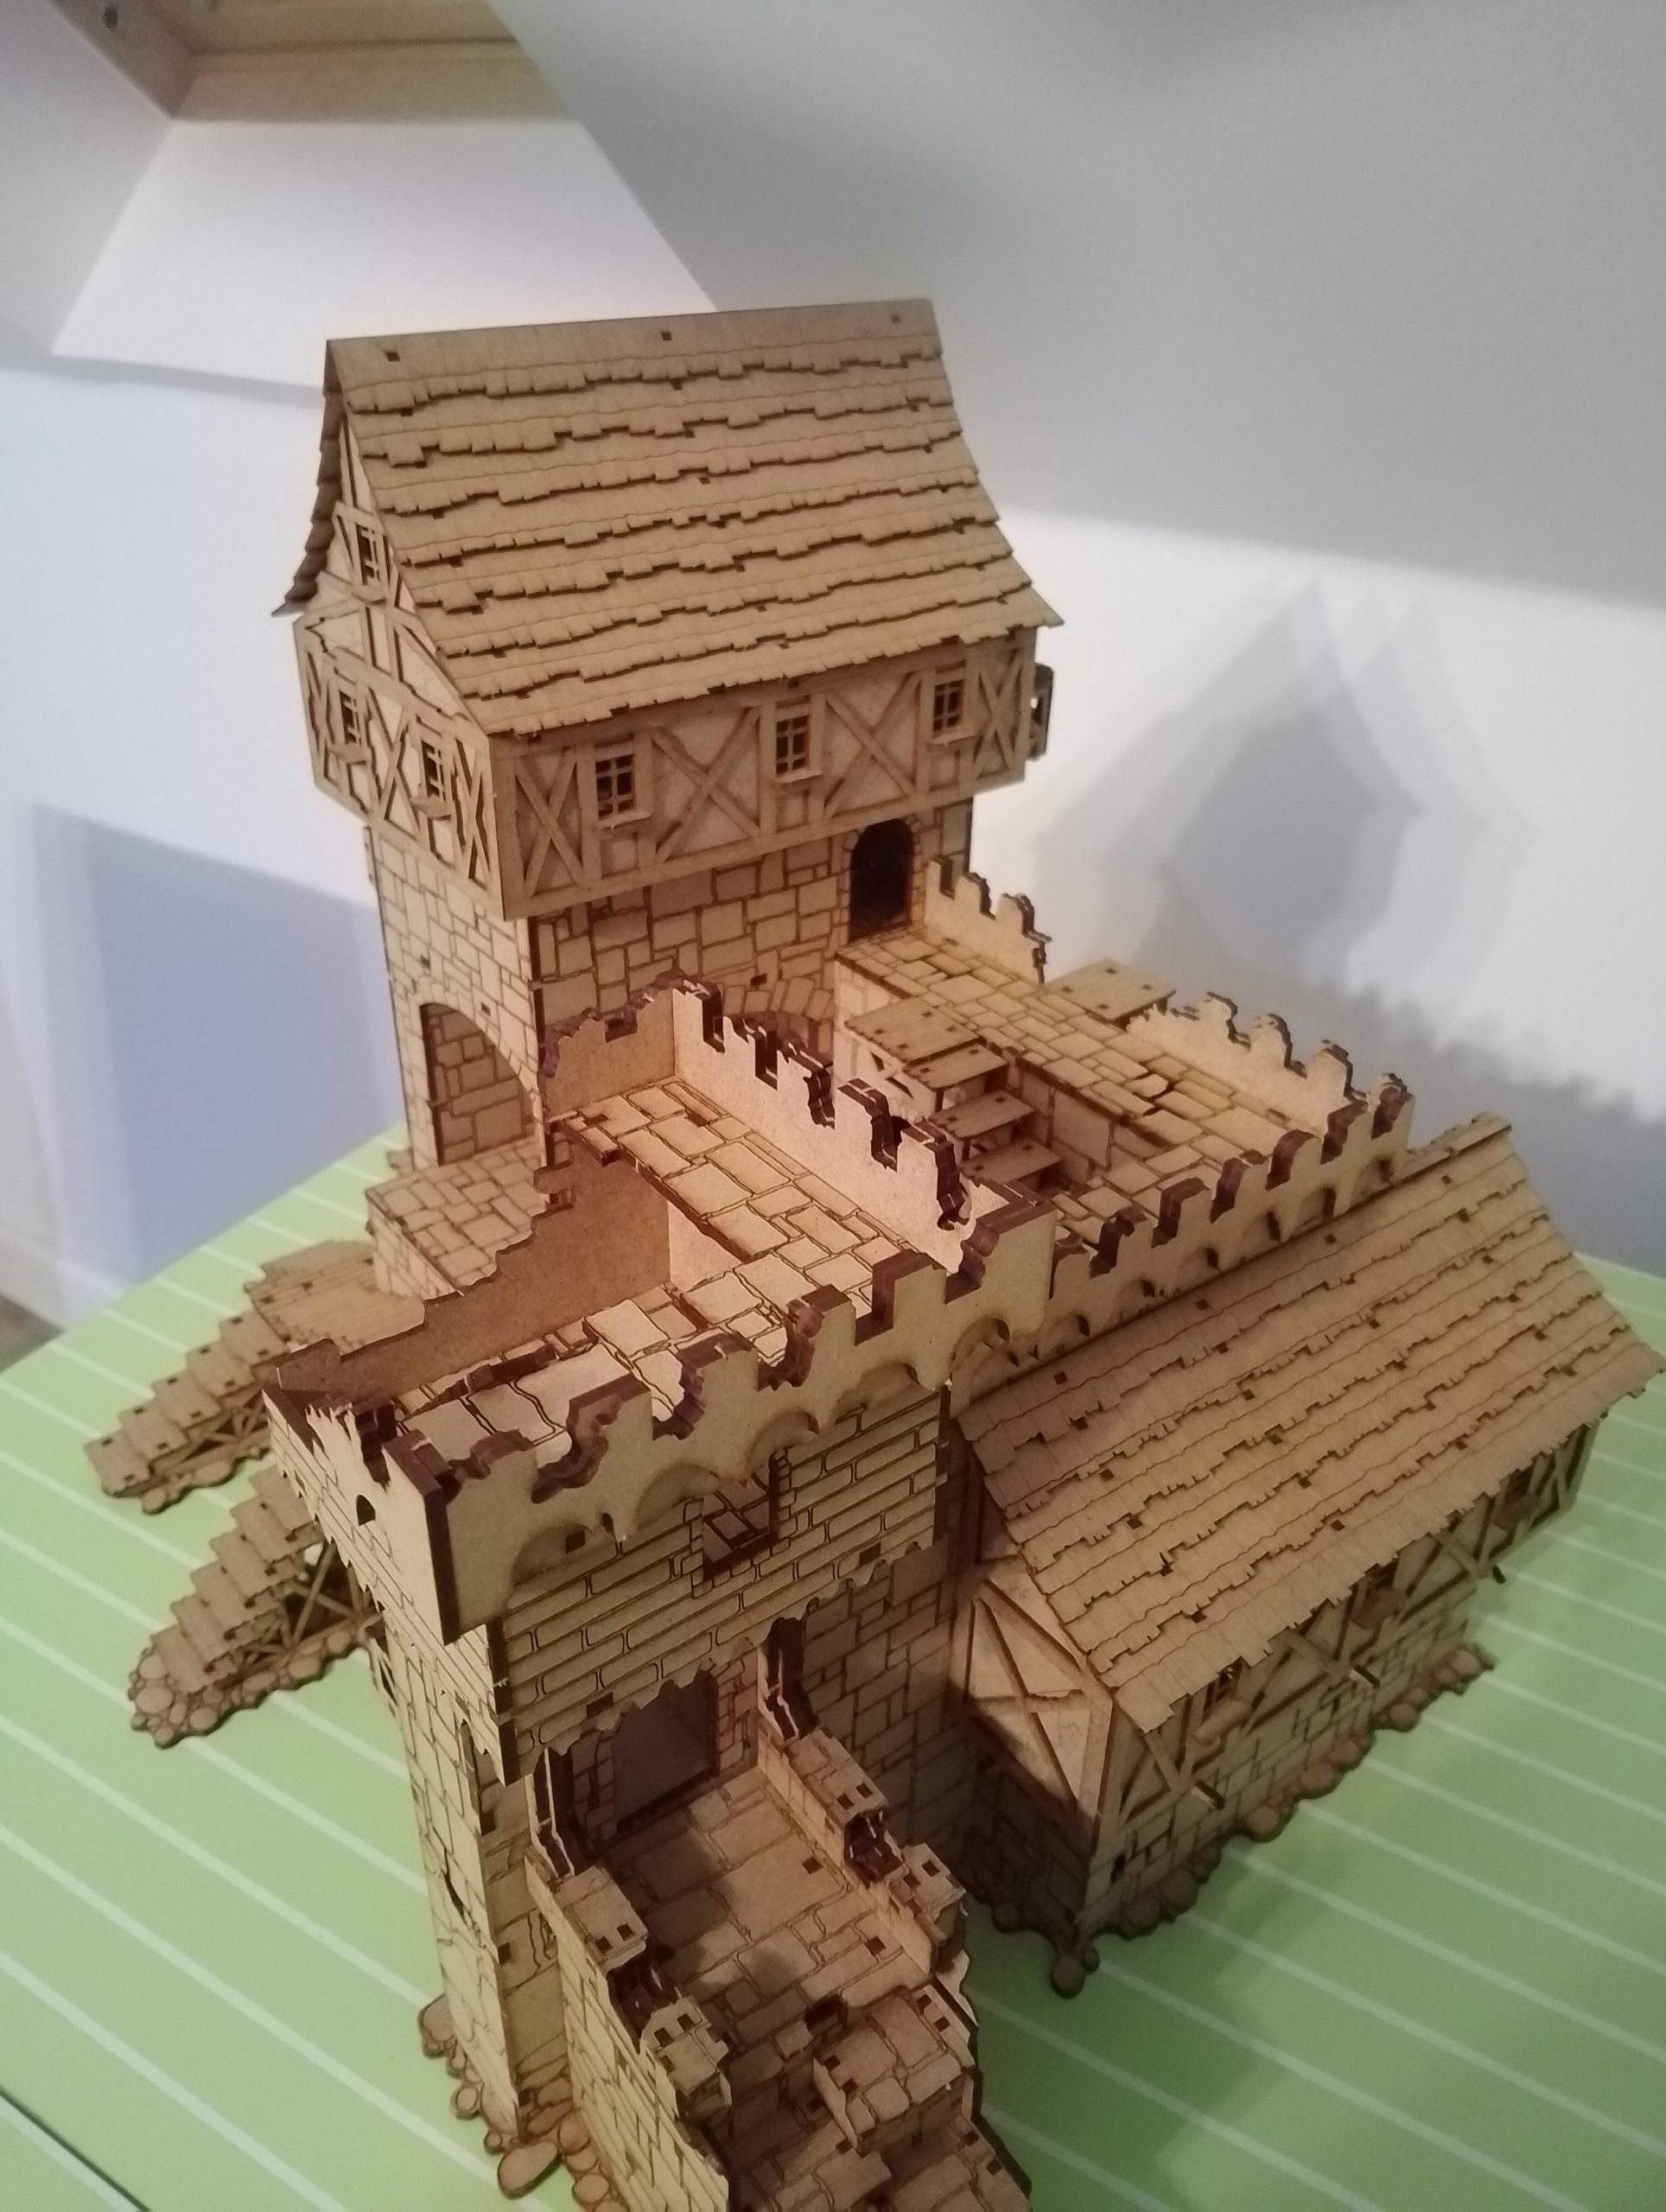
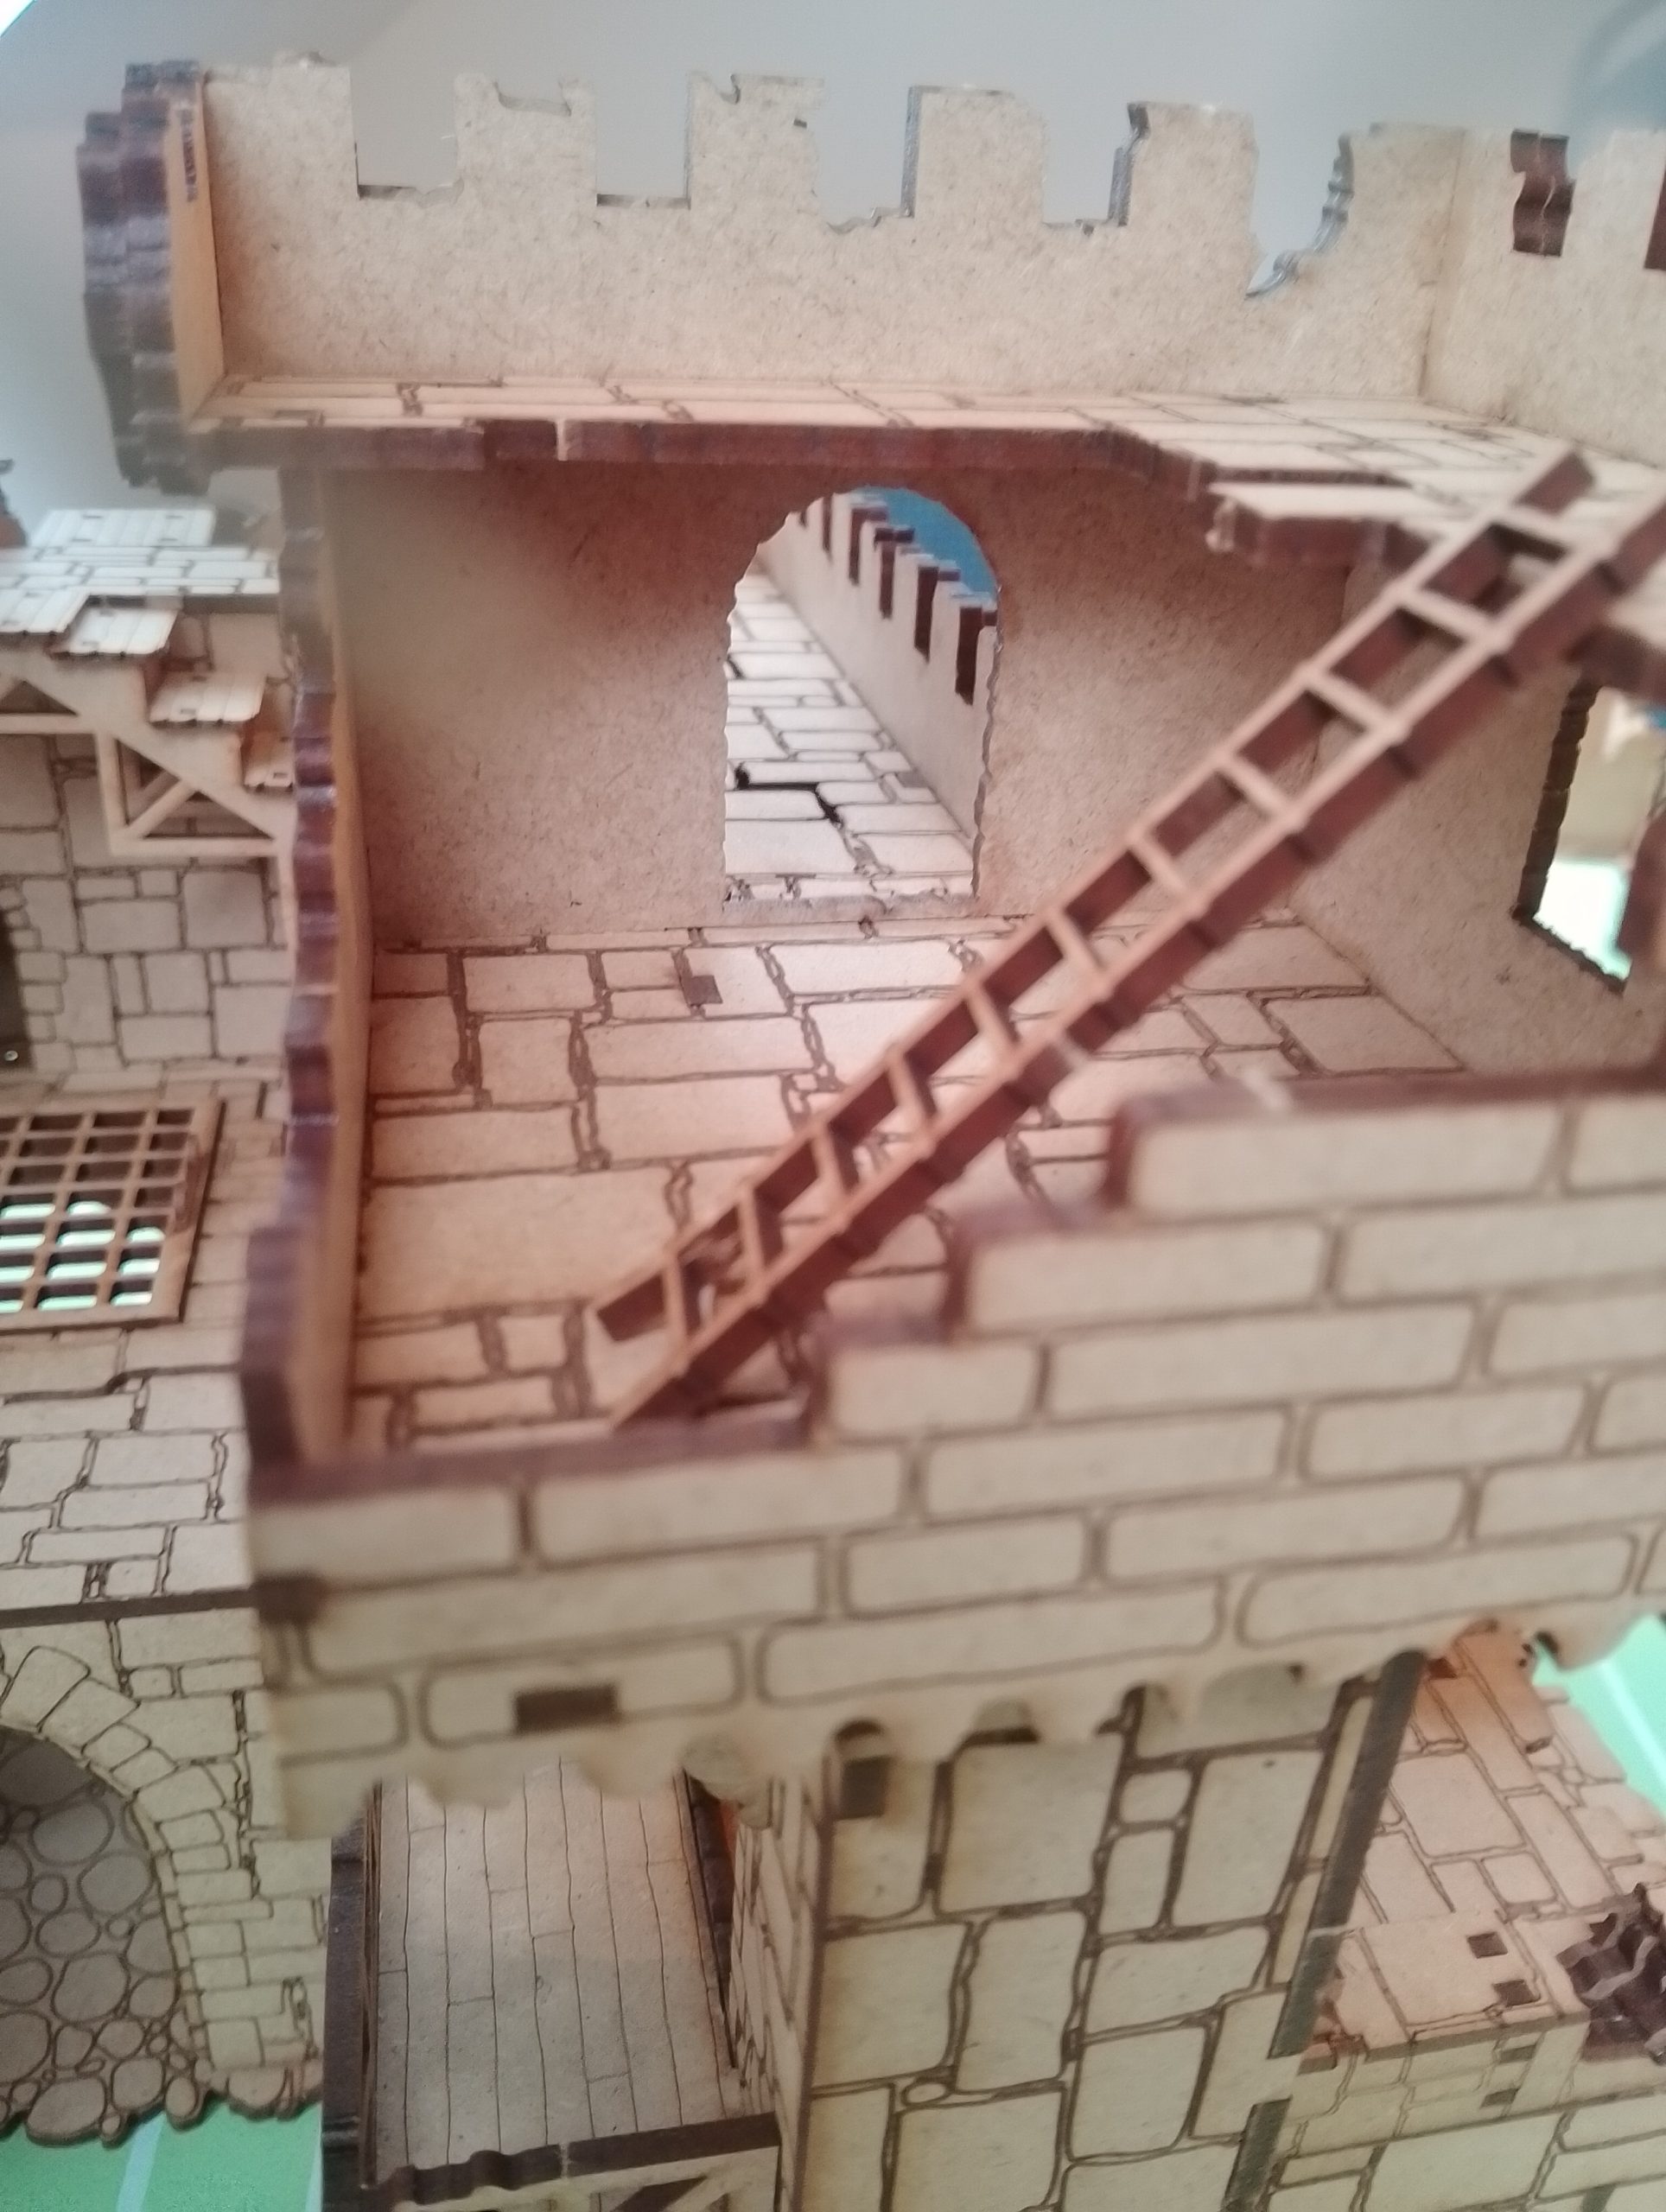
So I figured it was easier shown than talking about what I have done above!
Honestly this thing is so lovely and I cannot wait to get it painted.
I have decided to do somewhat a mini review right here in case anyone reading this wants to get this kit.
First off- The instructions were about a 6/10. It felt like kromlech could have done a better job by giving a key to their colour coded assembling.
With purple being optional (I left some off from the rampart walkway for instance where there are cracks on the path you glue panels onto. Now makes it look like a huge drop as its entirely black. I found out that green is first, then red and then purple.
However they mix up between primary and secondary in their diagrams. whether it be just a simple right angled wall join OR combining three seperate pieces to form a supporting piece.
I found this incredibly frustrating and pva glue being long time to set was perfect for fixing issues even after the pre-dry fit.
There are few if any other reference material online from people using this kit, so a huge drawback to see where certain pieces go. Sure you can ask forums but I would rather not wait weeks for a ‘good’ reply.
Regarding references such as letters and numbers to what pieces to punch out this was not an issue. I had no problems simply punching out the mdf components one at a time. If I had a team I would probably punch, sand and do all the preparation beforehand but it is a lot easier keeping them in the frame.
In terms of customisation, I think its medium difficulty for the hobbyist. There are things to consider such as game pieces moving, flanking ect.
There honestly is not a lot of room to play around with for example the staircases, placing rubble on the large stone steps could make it uneven for bases to sit. It is something when I am up to priming this piece I will consider adding. I will address all of these in a later post in January. Including the original ideas posted.
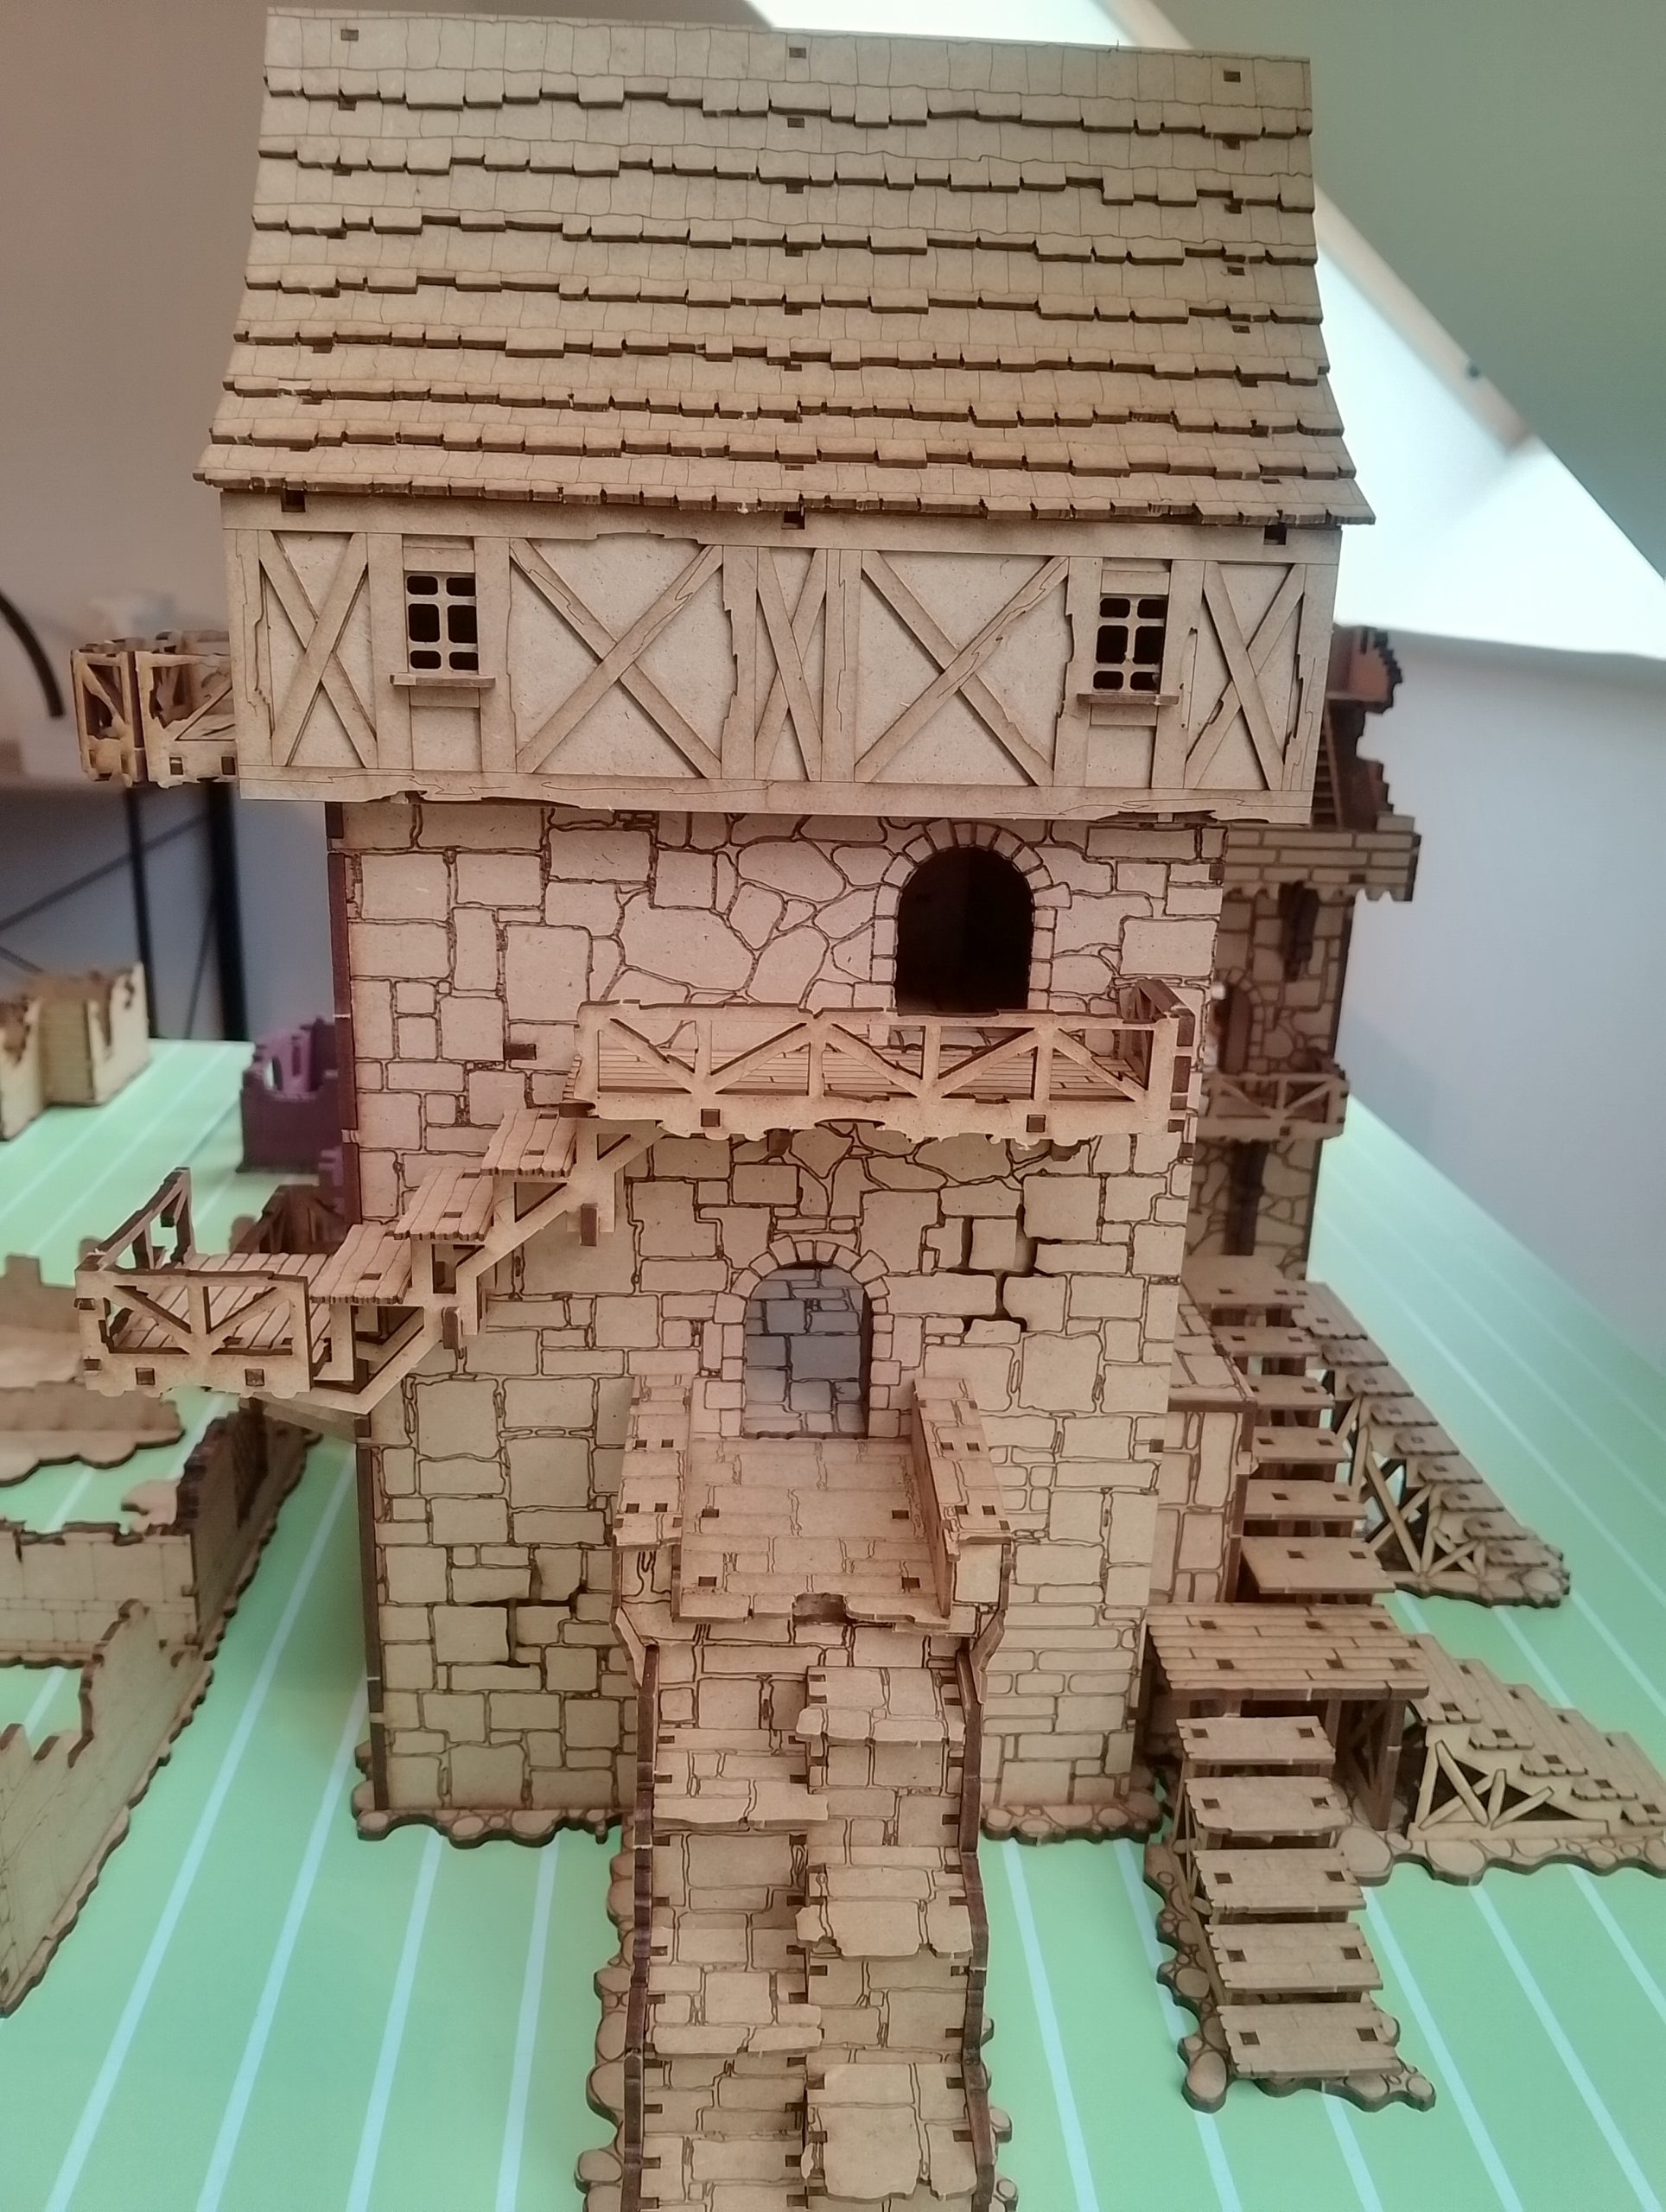
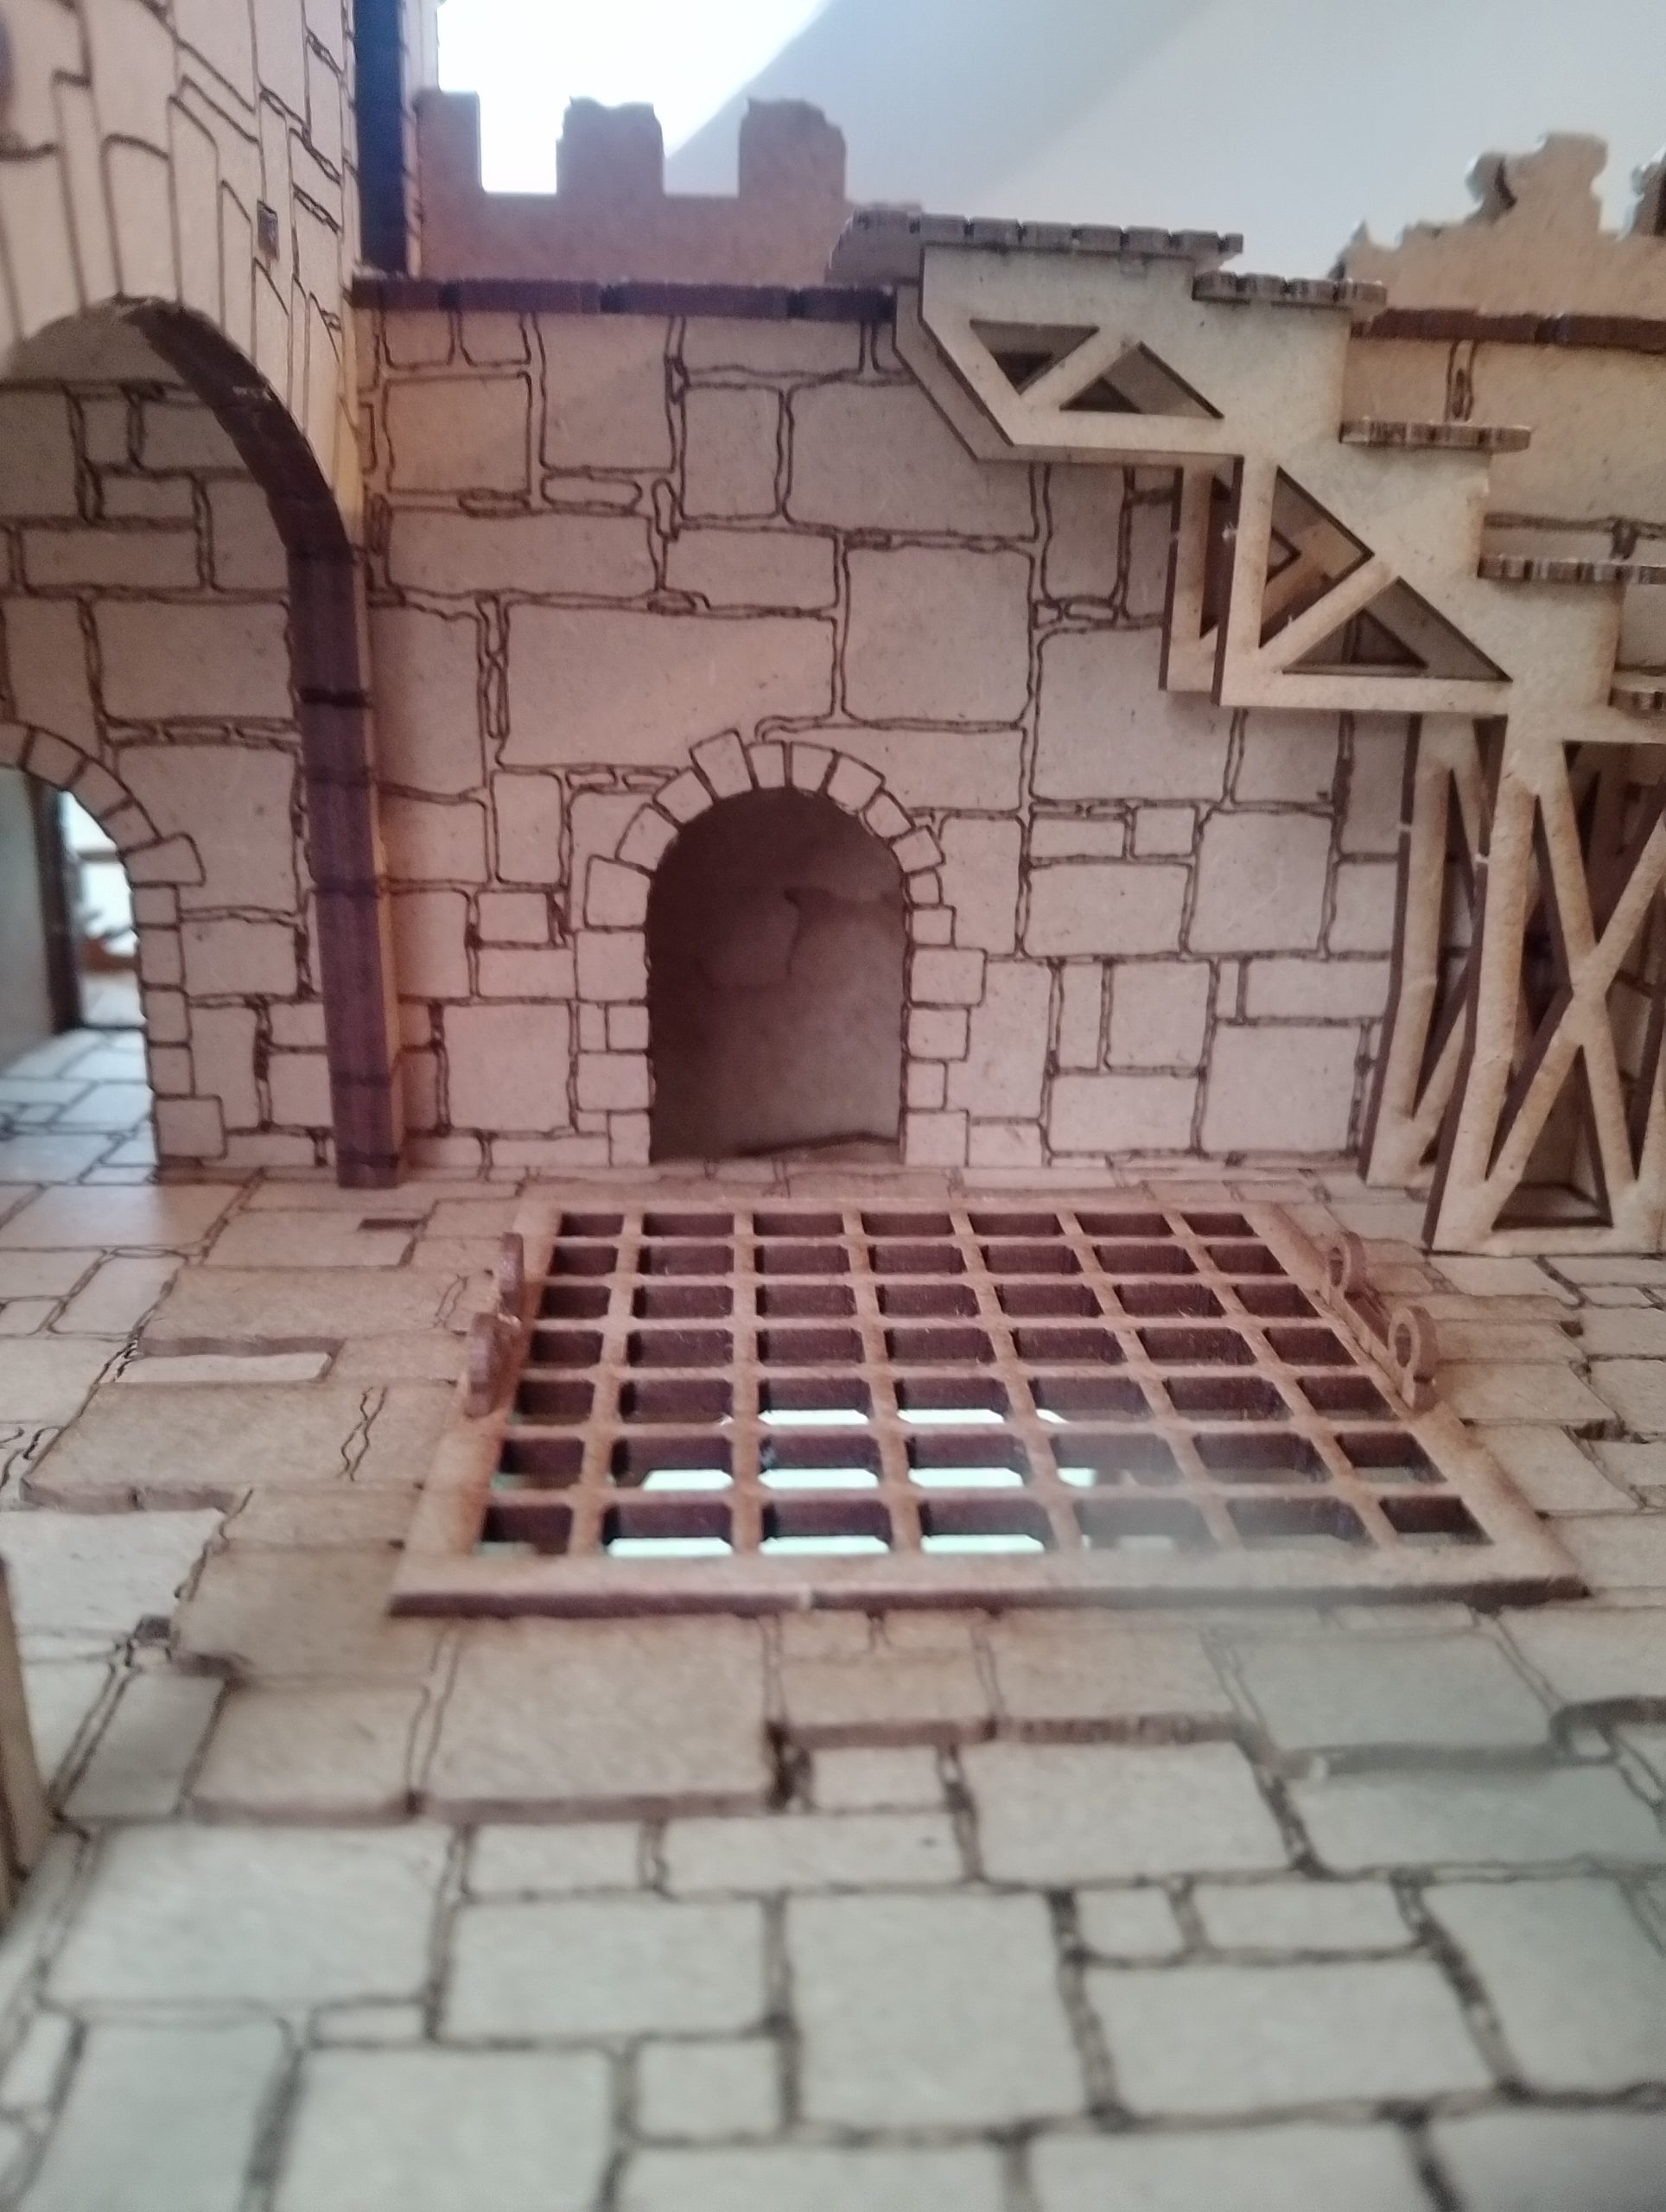
As for let downs. I would say the biggest let down is the gatehouse fortification at the front. This is where I intend to put the hinged door behind and make it walkable (if I get time). This is a big job, not only is the pathway meant to be blocked but the fortification base is slanted and hollow. It will need to be filled (I intend to use the scrap mdf and wood glue with a cut out flat piece on top.
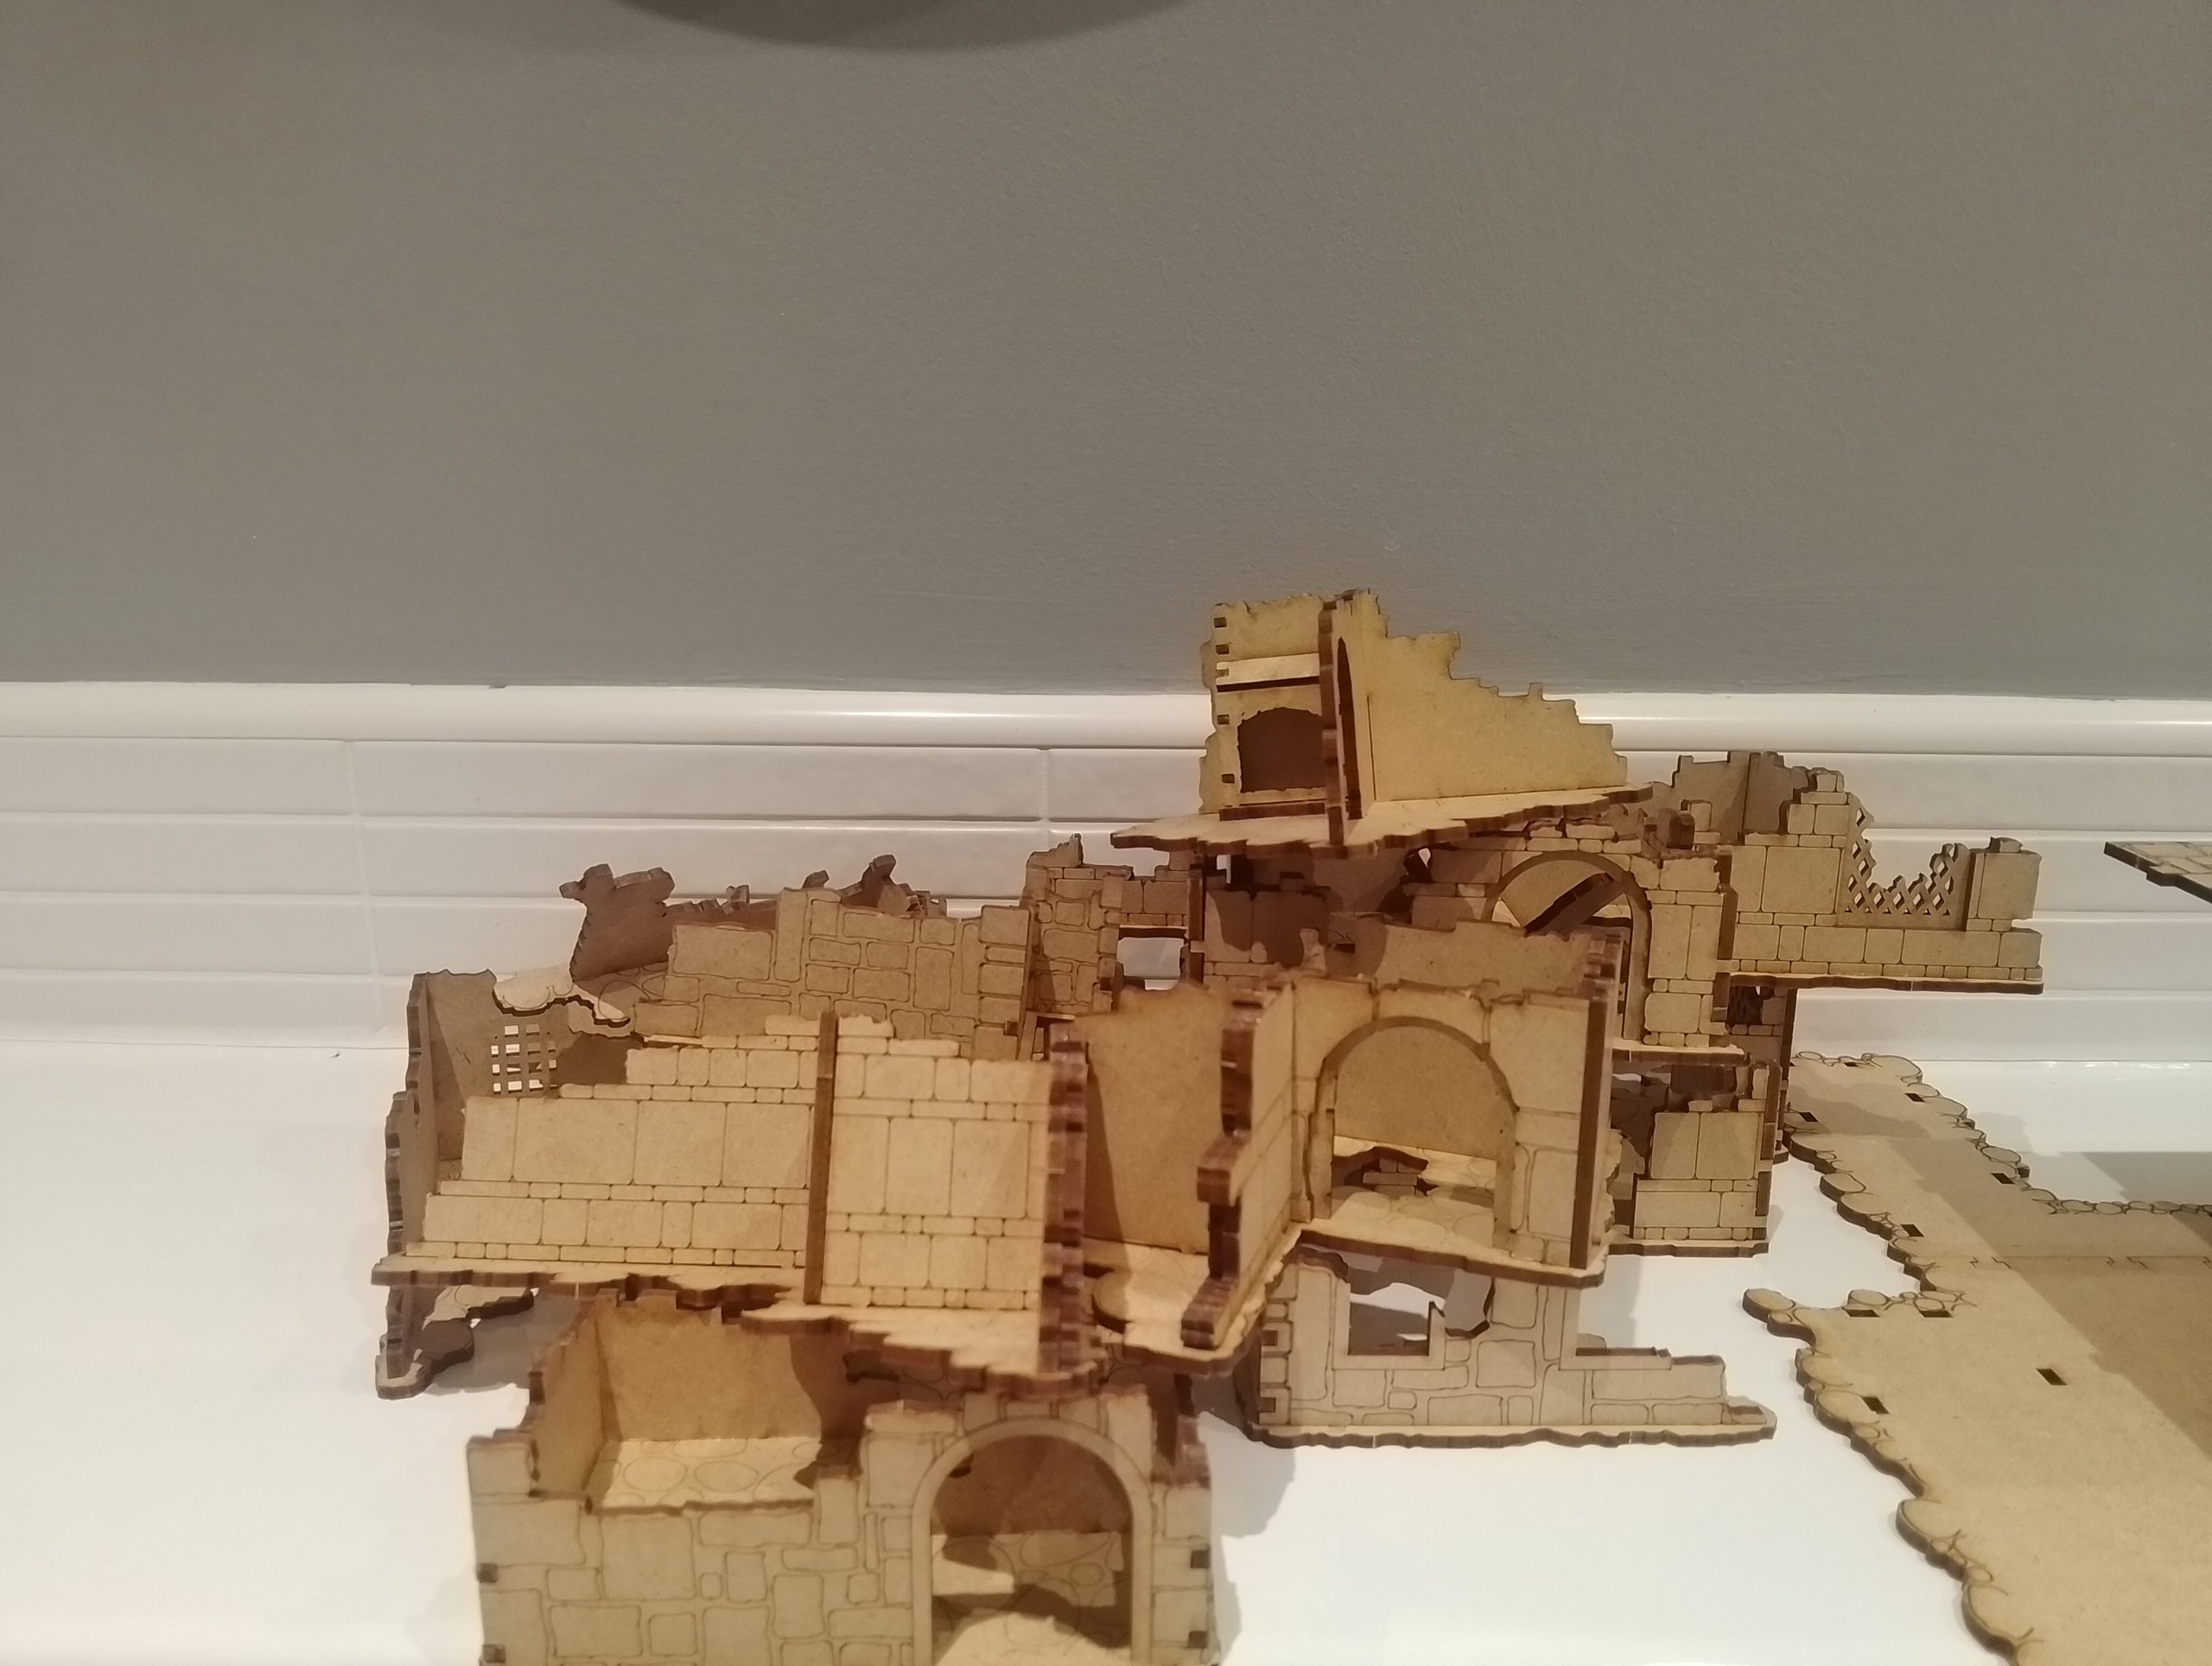
 Inside of the front gatehouse fortification. The left is the roof and the right side an angled floor
I understand it is probably done because it is a prime position to put archers on the wall. I would argue that with magic spells such as Fog, Blind, Leap and the amount of ruins around it would make little difference. Since this was a specifically made for the game Frostgrave 2nd edition. I believe it was not taken into account properly.
A big bonus for me also was the exclusive custom scenario in the box, which I was incorporate into my campaign.
There was also only one piece that did not fit properly (it was assembled correctly) however was easily fixed with a scalpel knife.
Finally I would like to add. They need to rehire and get a new person for Kromlechs stock photo terrain pieces. They look so tiny in scale to the real item. The perfect example was the Eventide Fireplace, go have a look at the stock image and then look it up on youtube. (Its roughly a 12” High fireplace.)
Overall the terrain is far more positive than negative and I would be buying more in the future once I get this stuff painted. In the meantime There is a lot of sub assembly and I will be focusing my efforts on the ruins first and then spend most of January getting this piece complete.
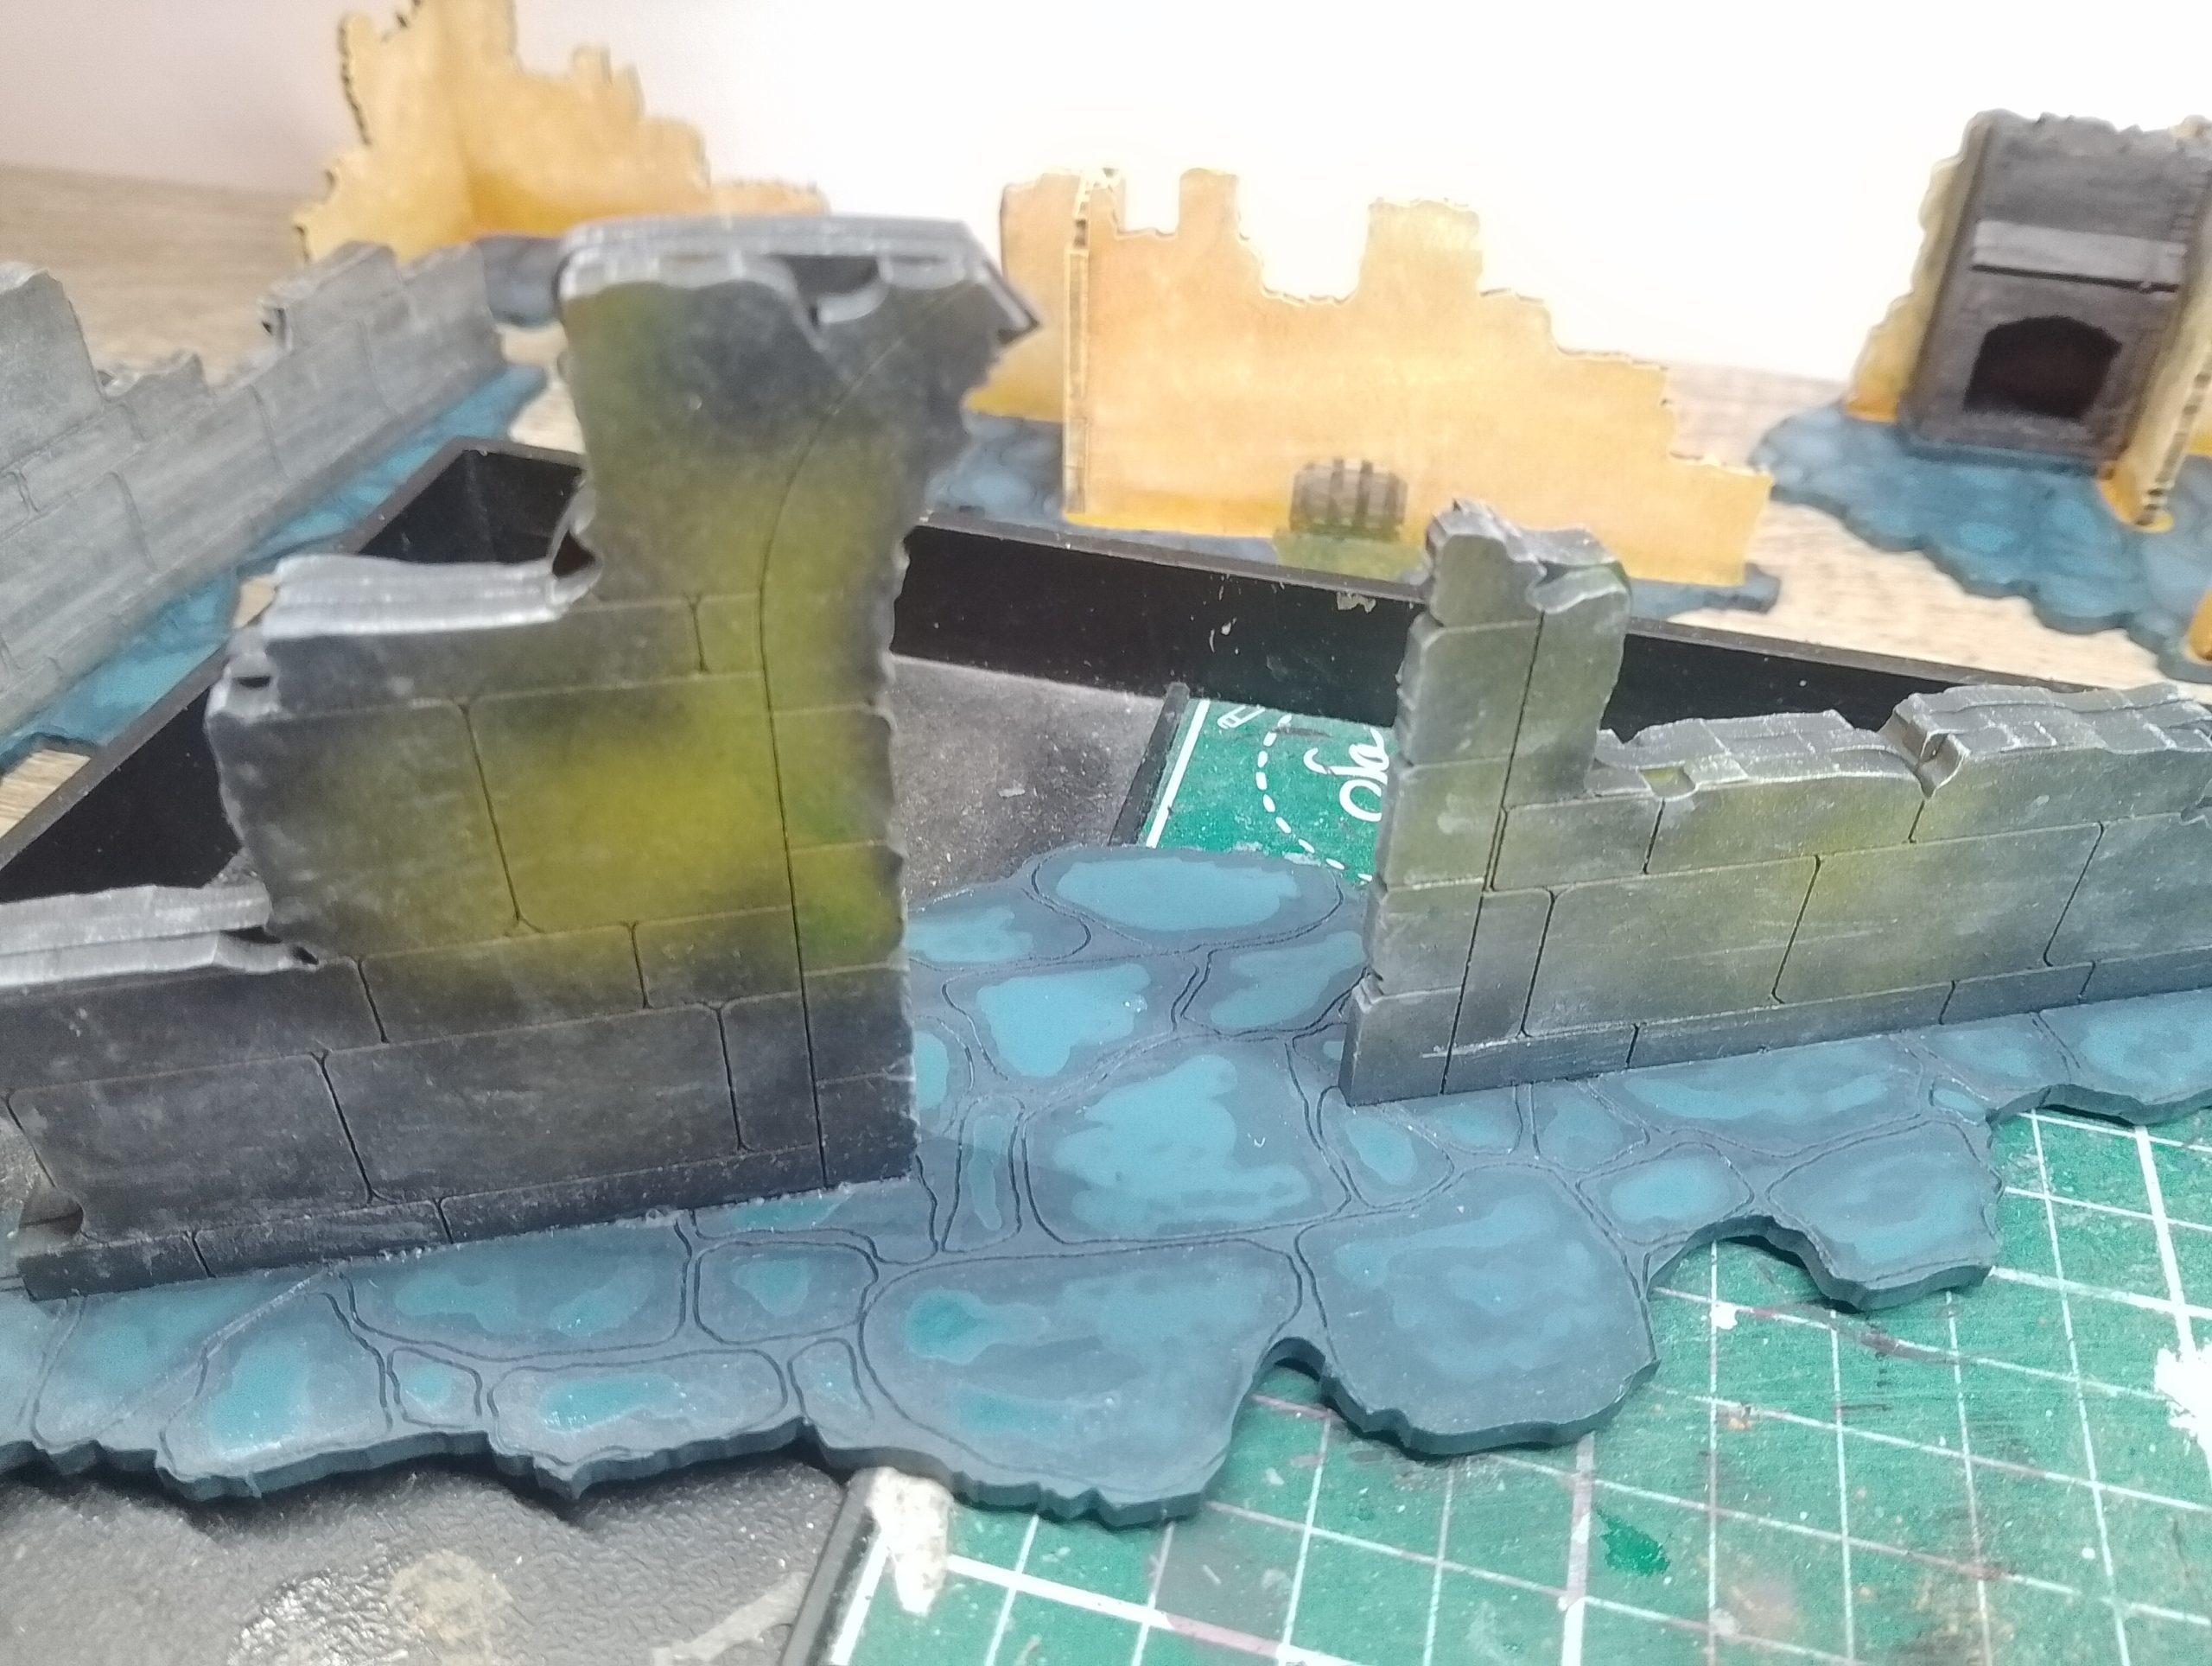
Town Ruins 10/12/2025
With the Gatehouse set aside, I turn my attention to the ruins.
Previously the pink ruins were primed. I also have airbrushed a dark orange building as well as the greys.
Using a simple wargame foam sponge technique (I am using acrylics Wargames Foundry Ochre A and Wine Stain Red B) I create contrast and depth where there are flat walls.
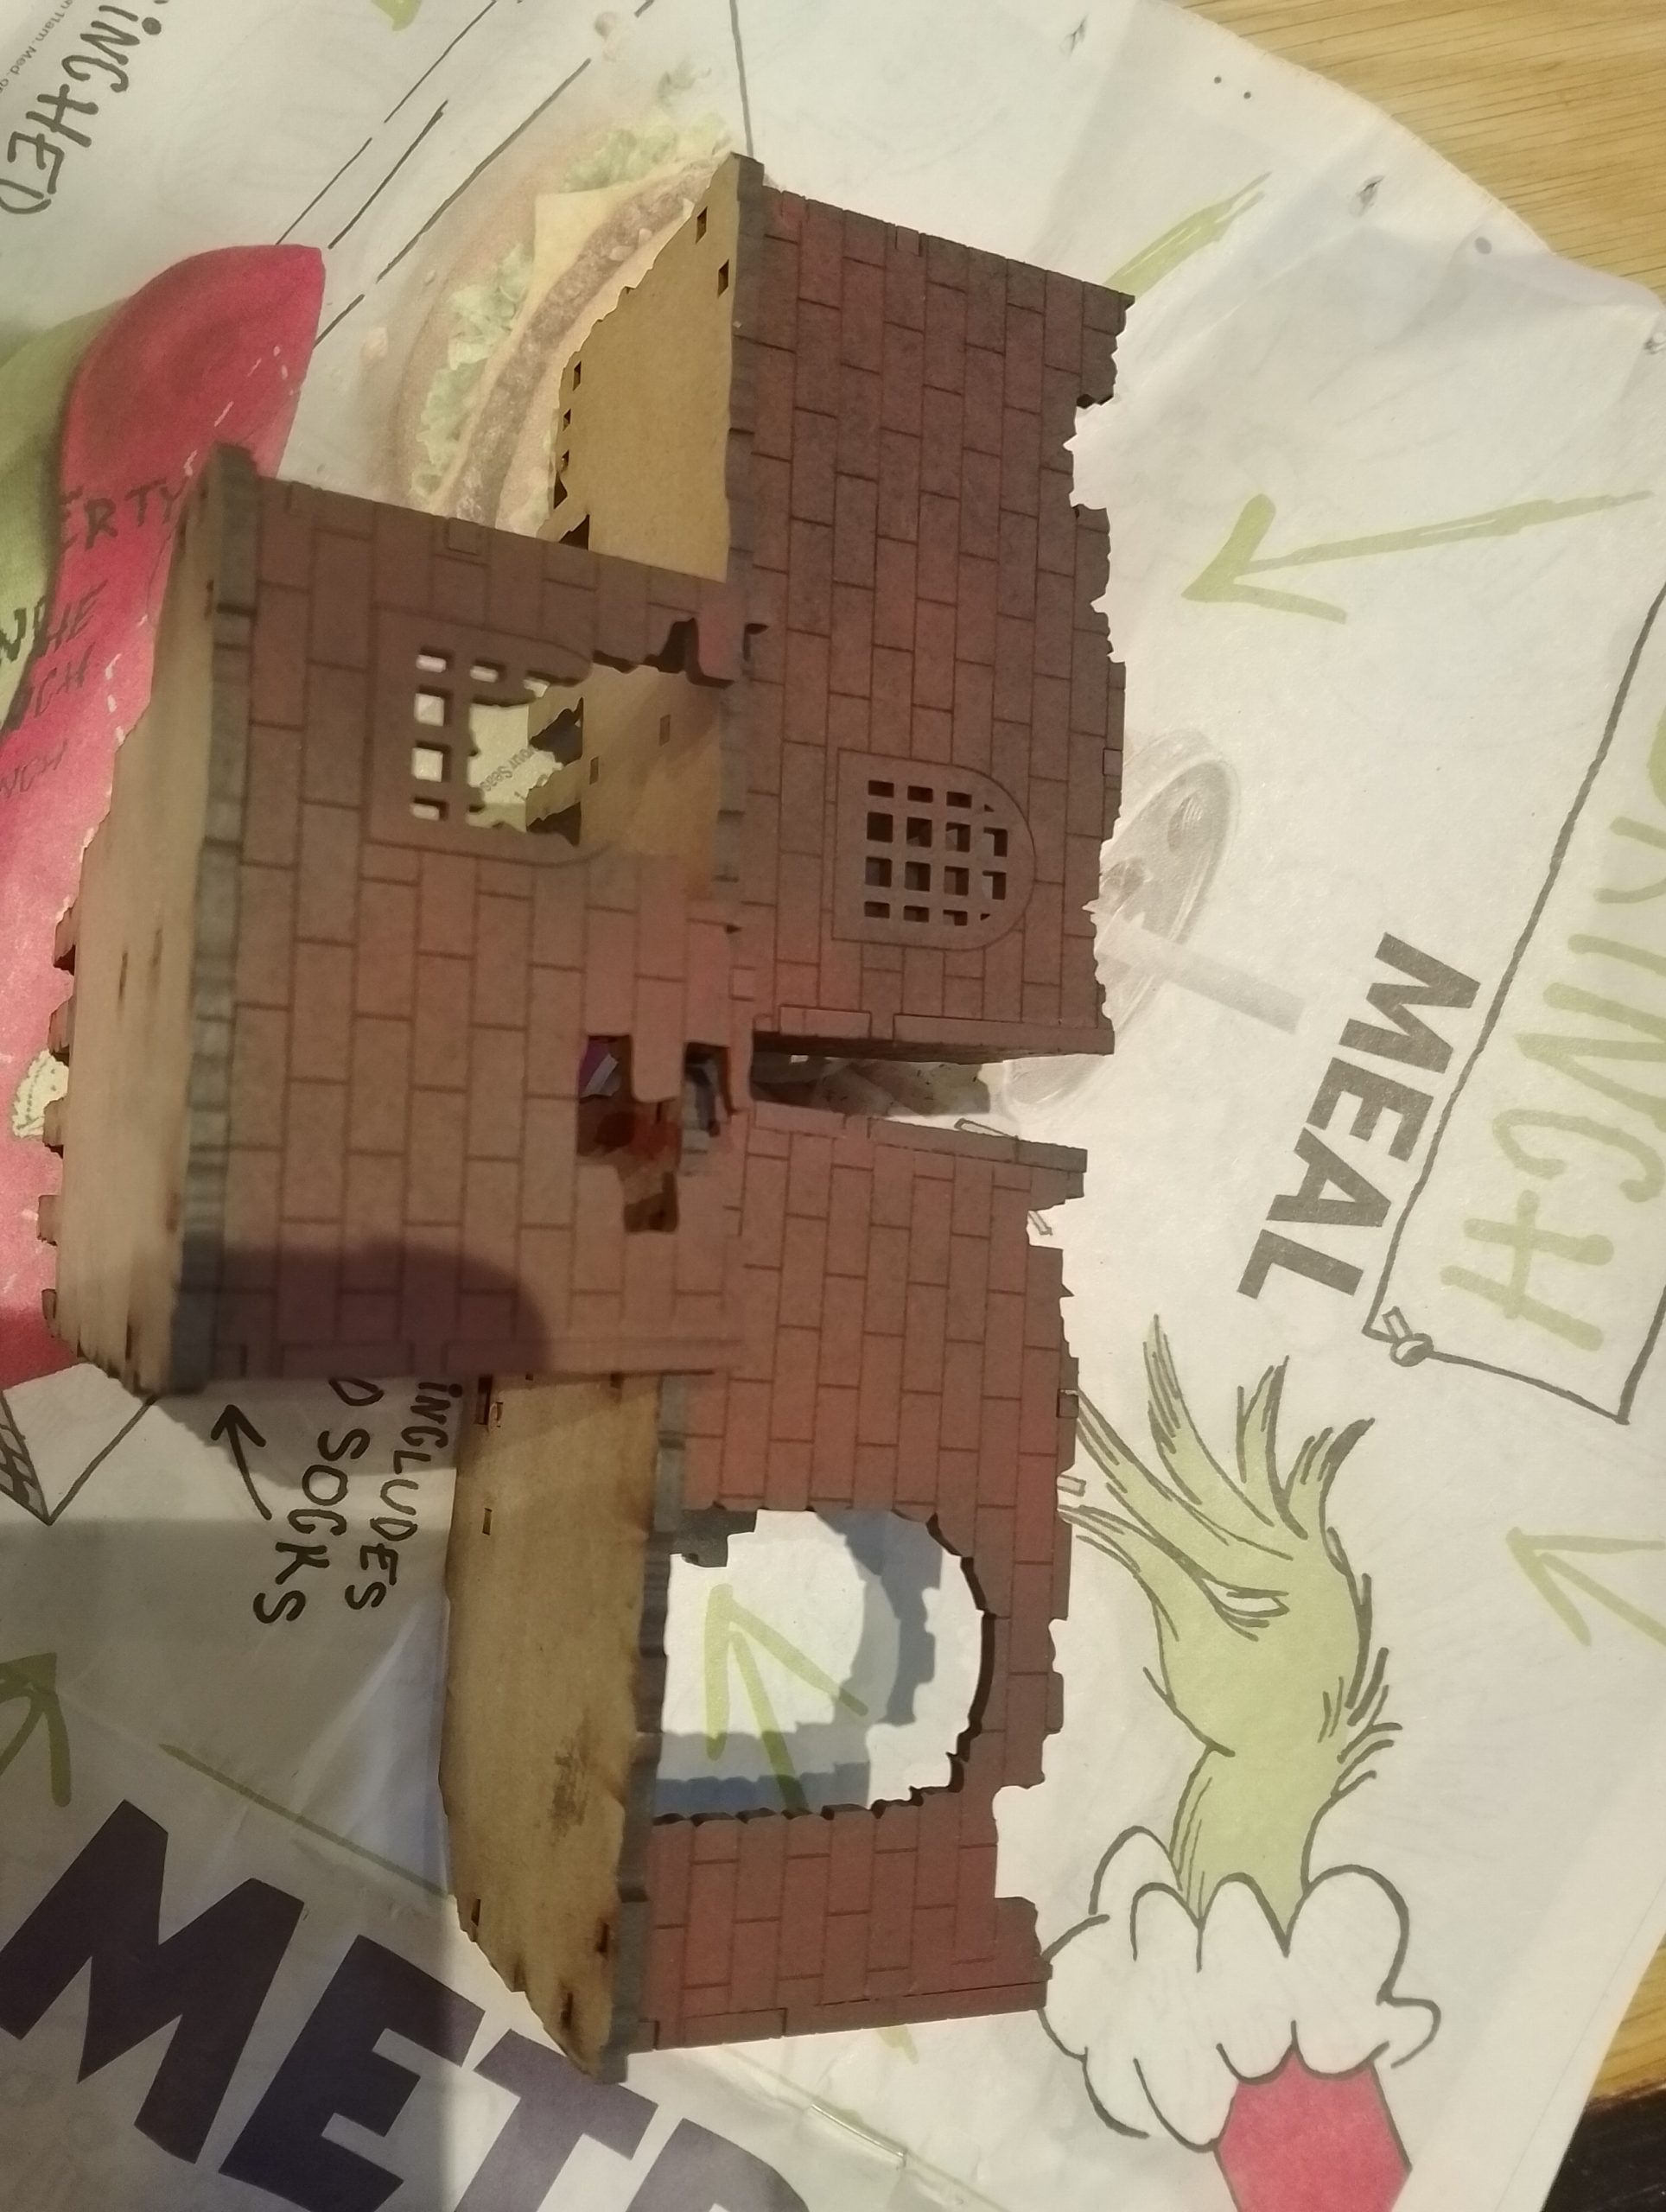
This was then washed with Reikland fleshshade for the pink building and Fungeon Orange with the Orange building. I did consider using sepia but I wanted it to retain its colour rather than dull it down.
Expensive though these washes are for terrain, I wanted to nail down that pink colour properly rather than fix it.
I also keep all my paint recipe’s written down that I experiment on (ruins are fantastic for this). So then I can go back to projects or add to existing armies the same paints used. Something I highly recommend any painter gets into the habit of.
 Felstad is only filled with undead because they keep trying to steal my painting grimoire
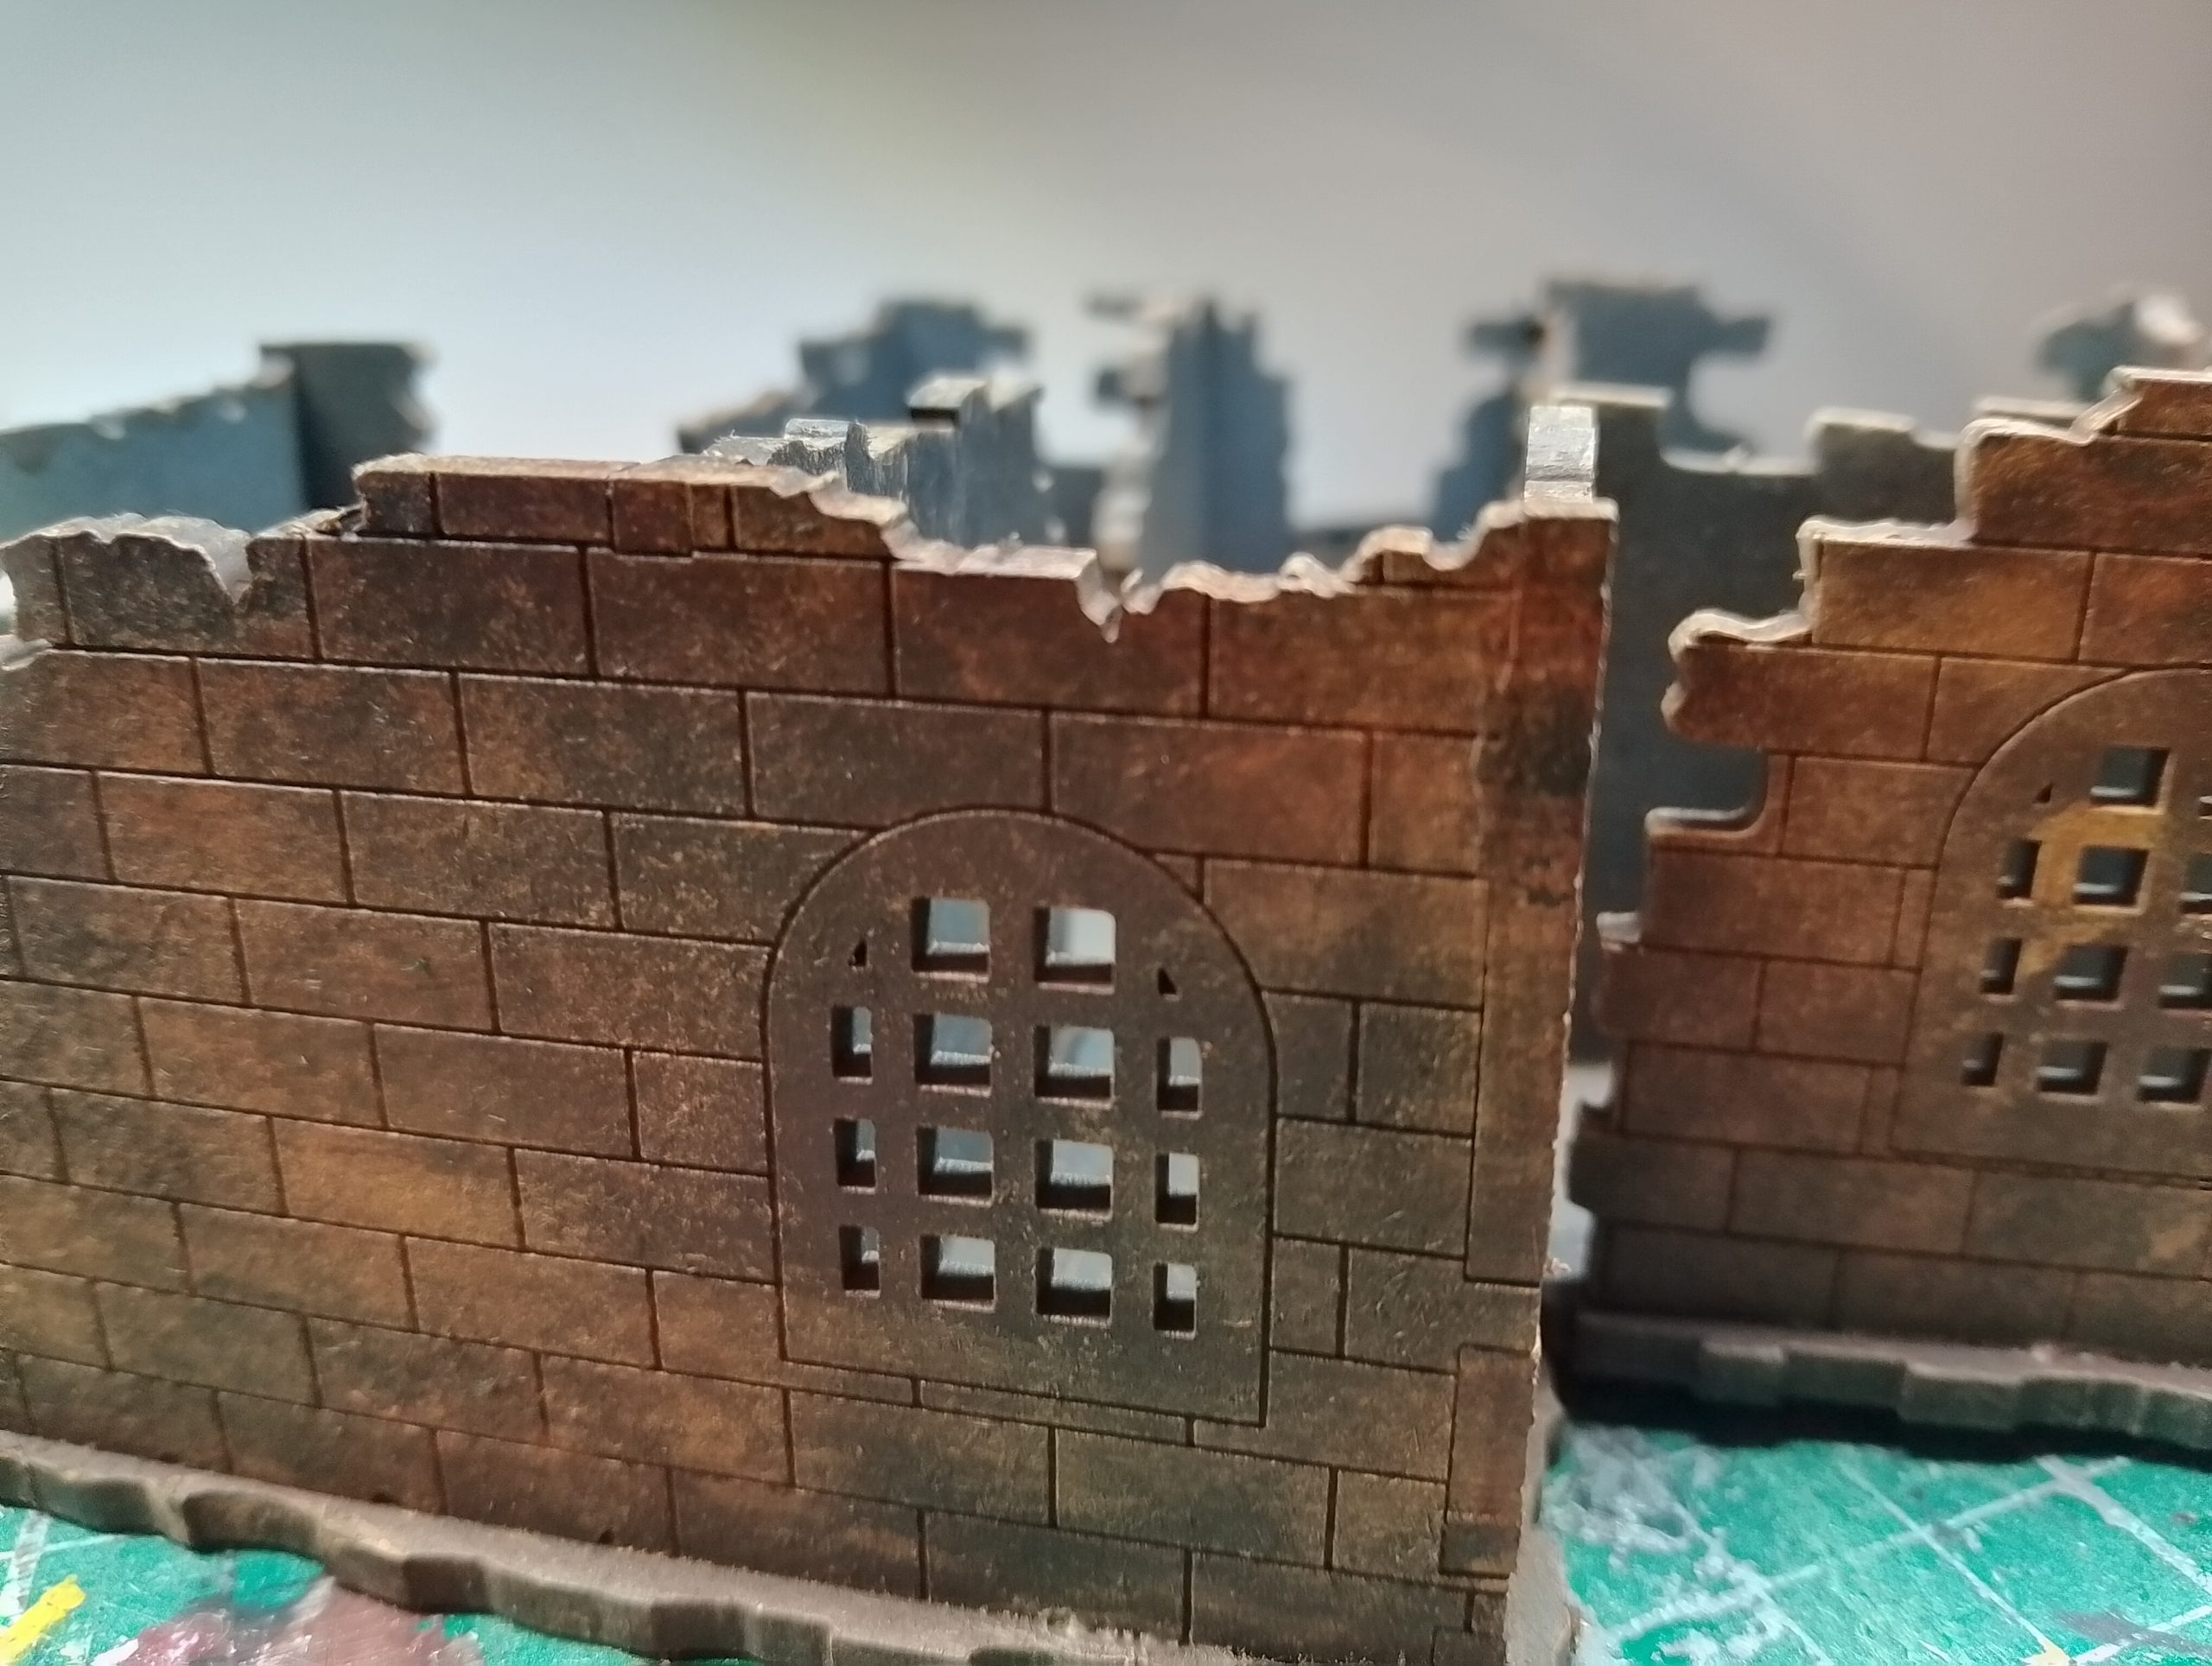

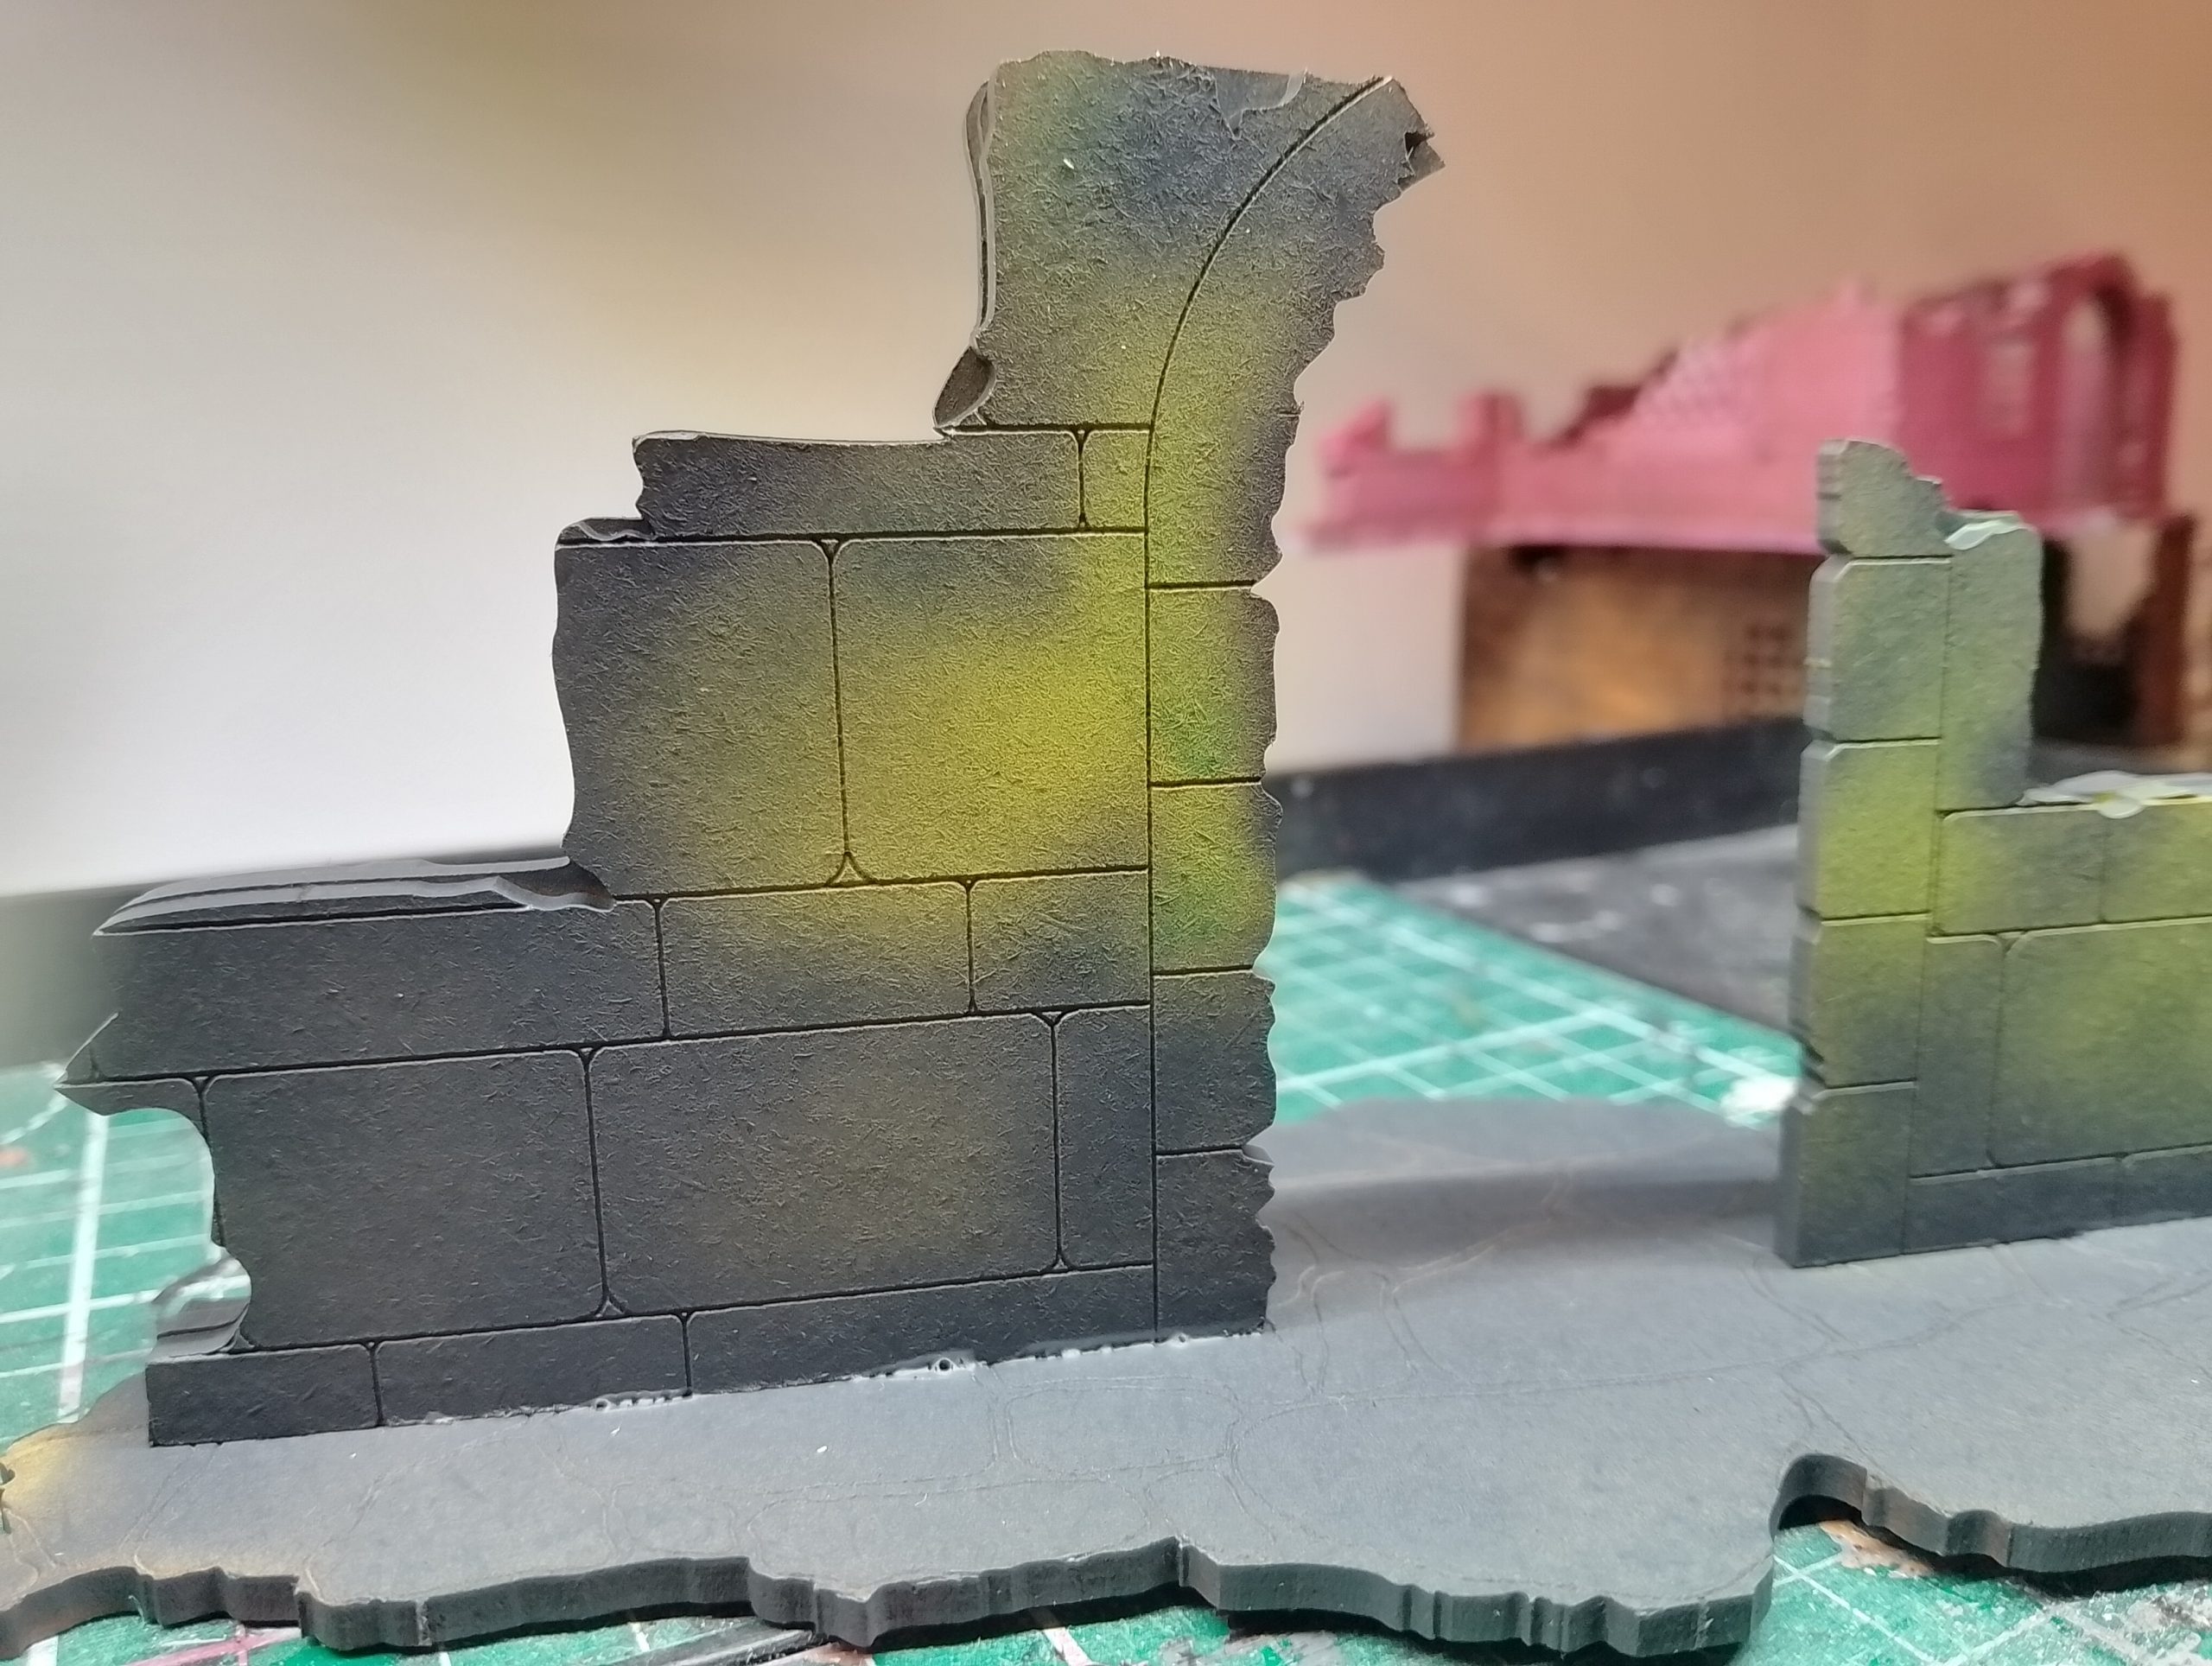
I need to finish priming the rest of the buildings and sponging . The greys will get more of a whitish granite, which I intend to use a black oil wash for them after.
I had a bit of a funky colour I disliked with the yellow, instead of wasting I used it to prime this single ruin piece of terrain and will use it as a background to add some vines and foliage later. Bit of a Bob Ross happy accident moment.
I will turn my attention to the floors, the walls and then a light airbrush dusting of white for snow (that will be the highlight and tie all the buildings together).
Then the proper snowy weathering.
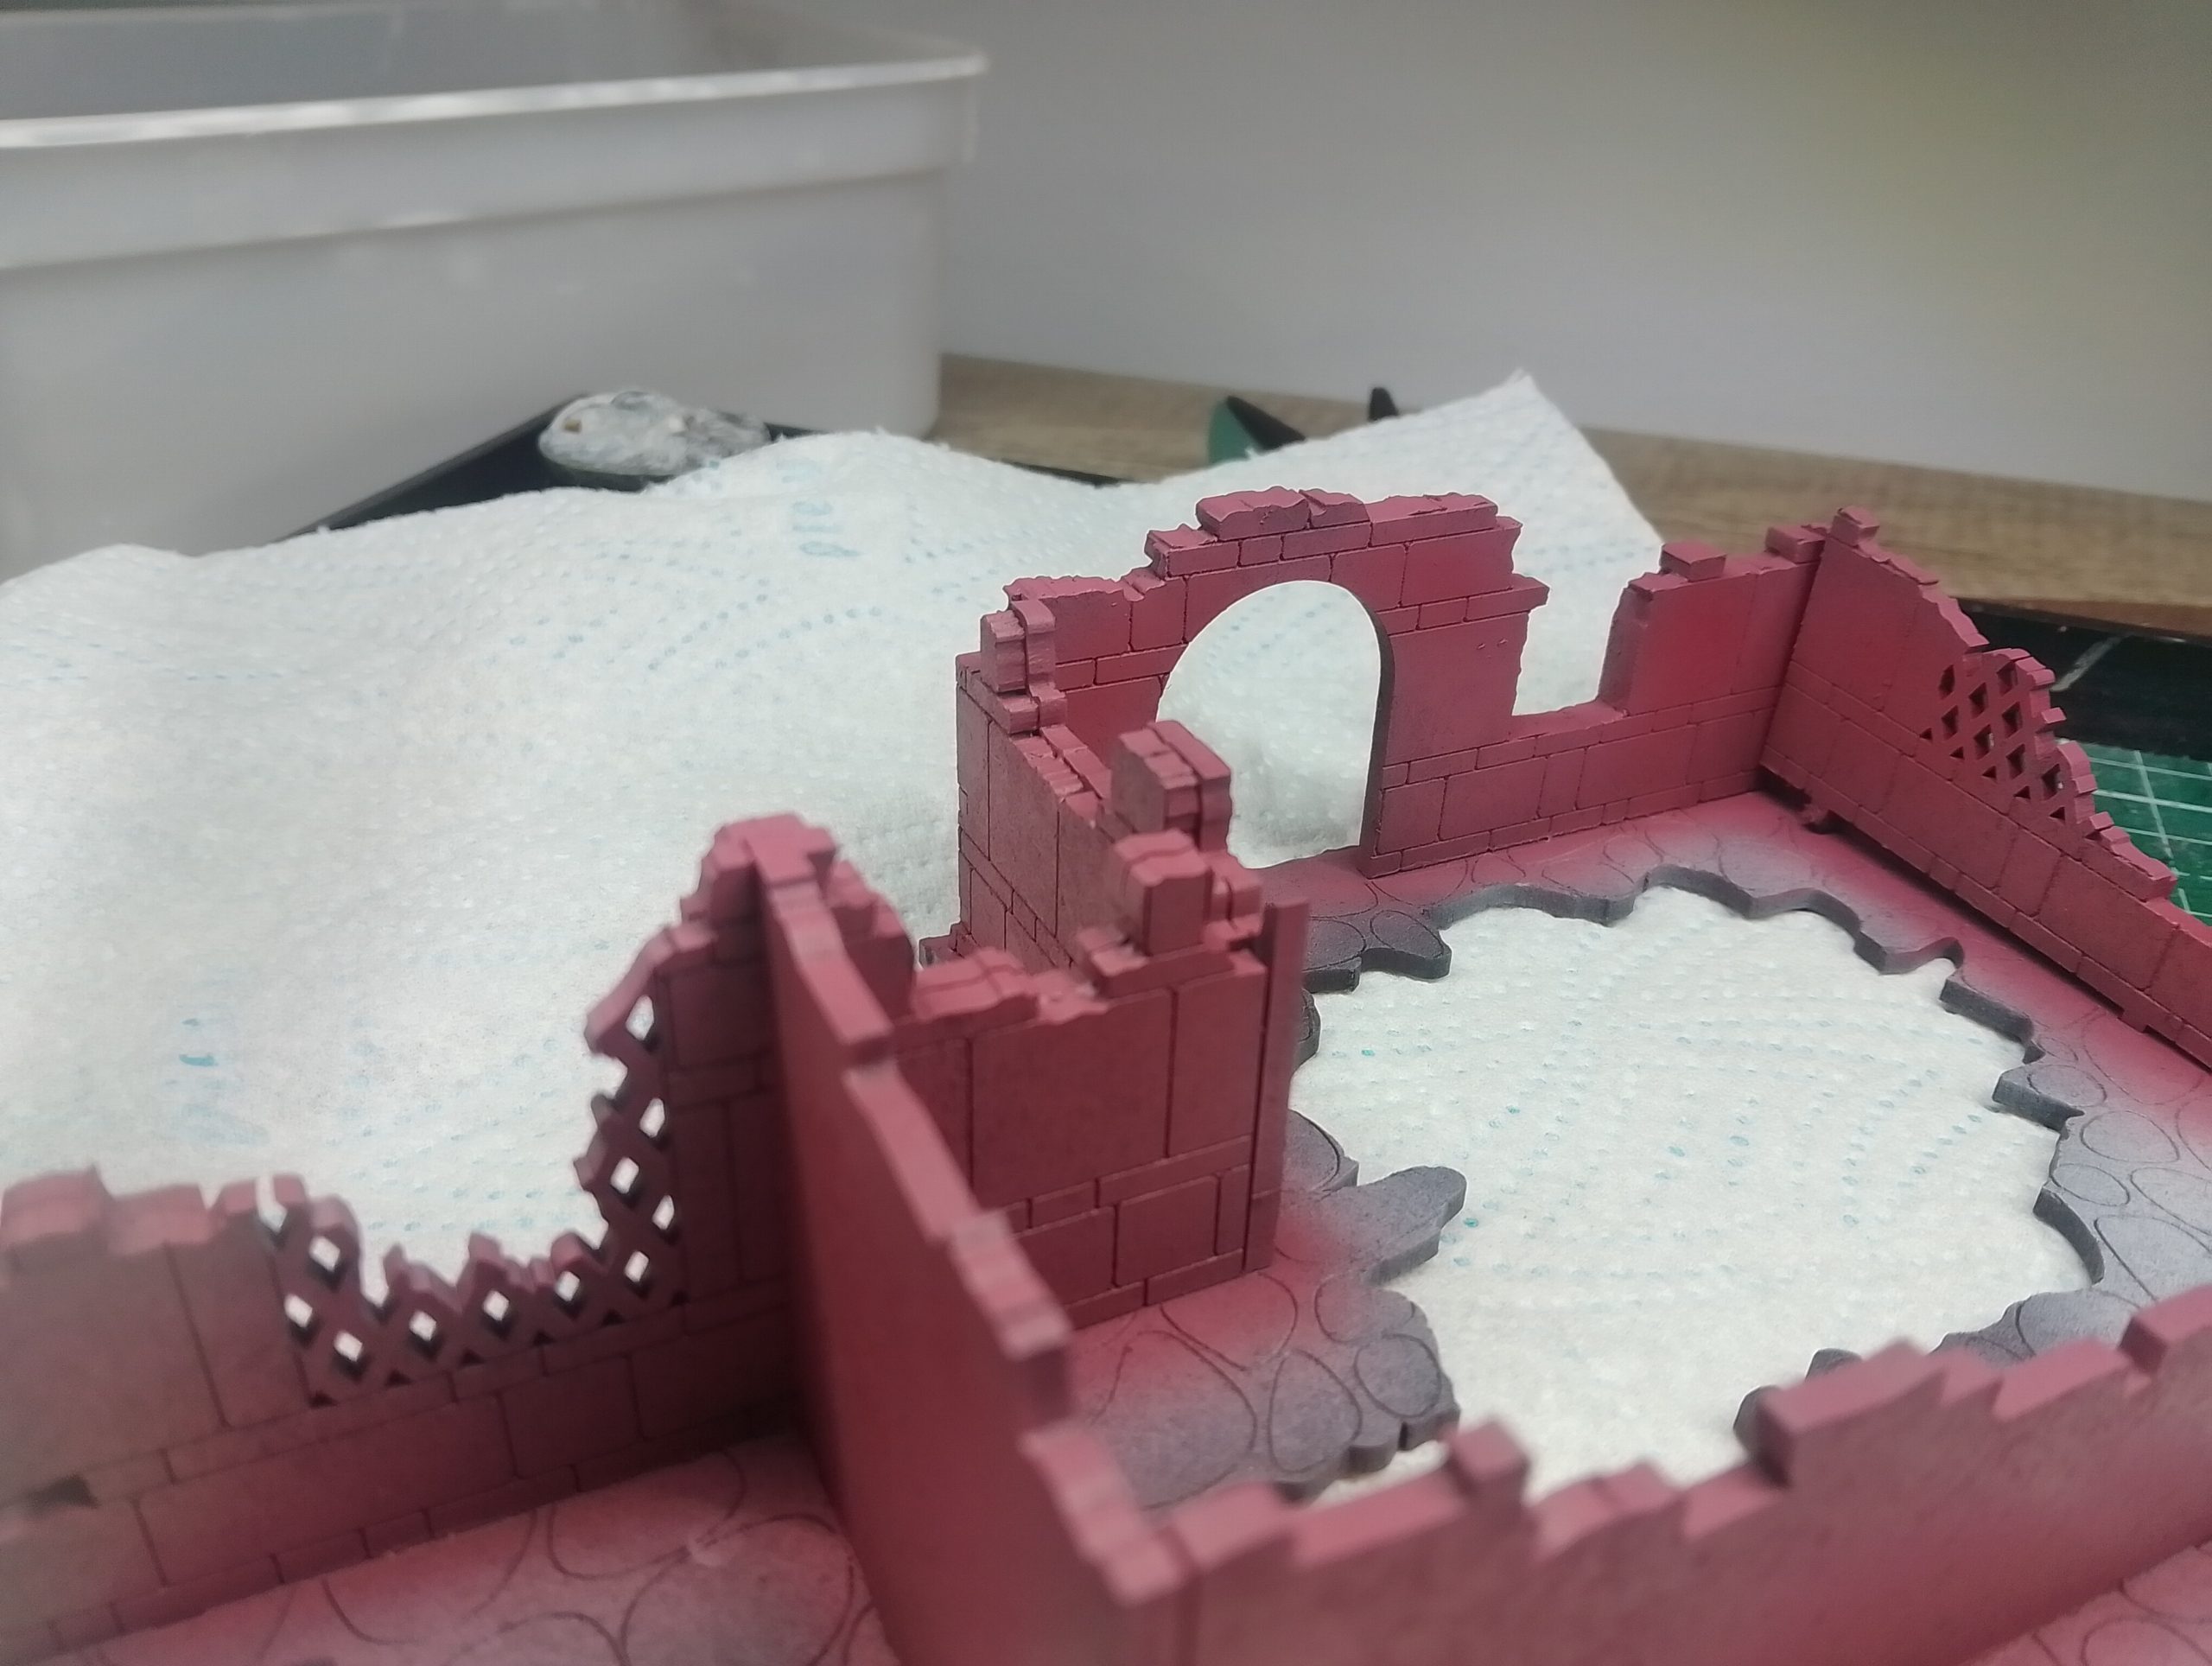
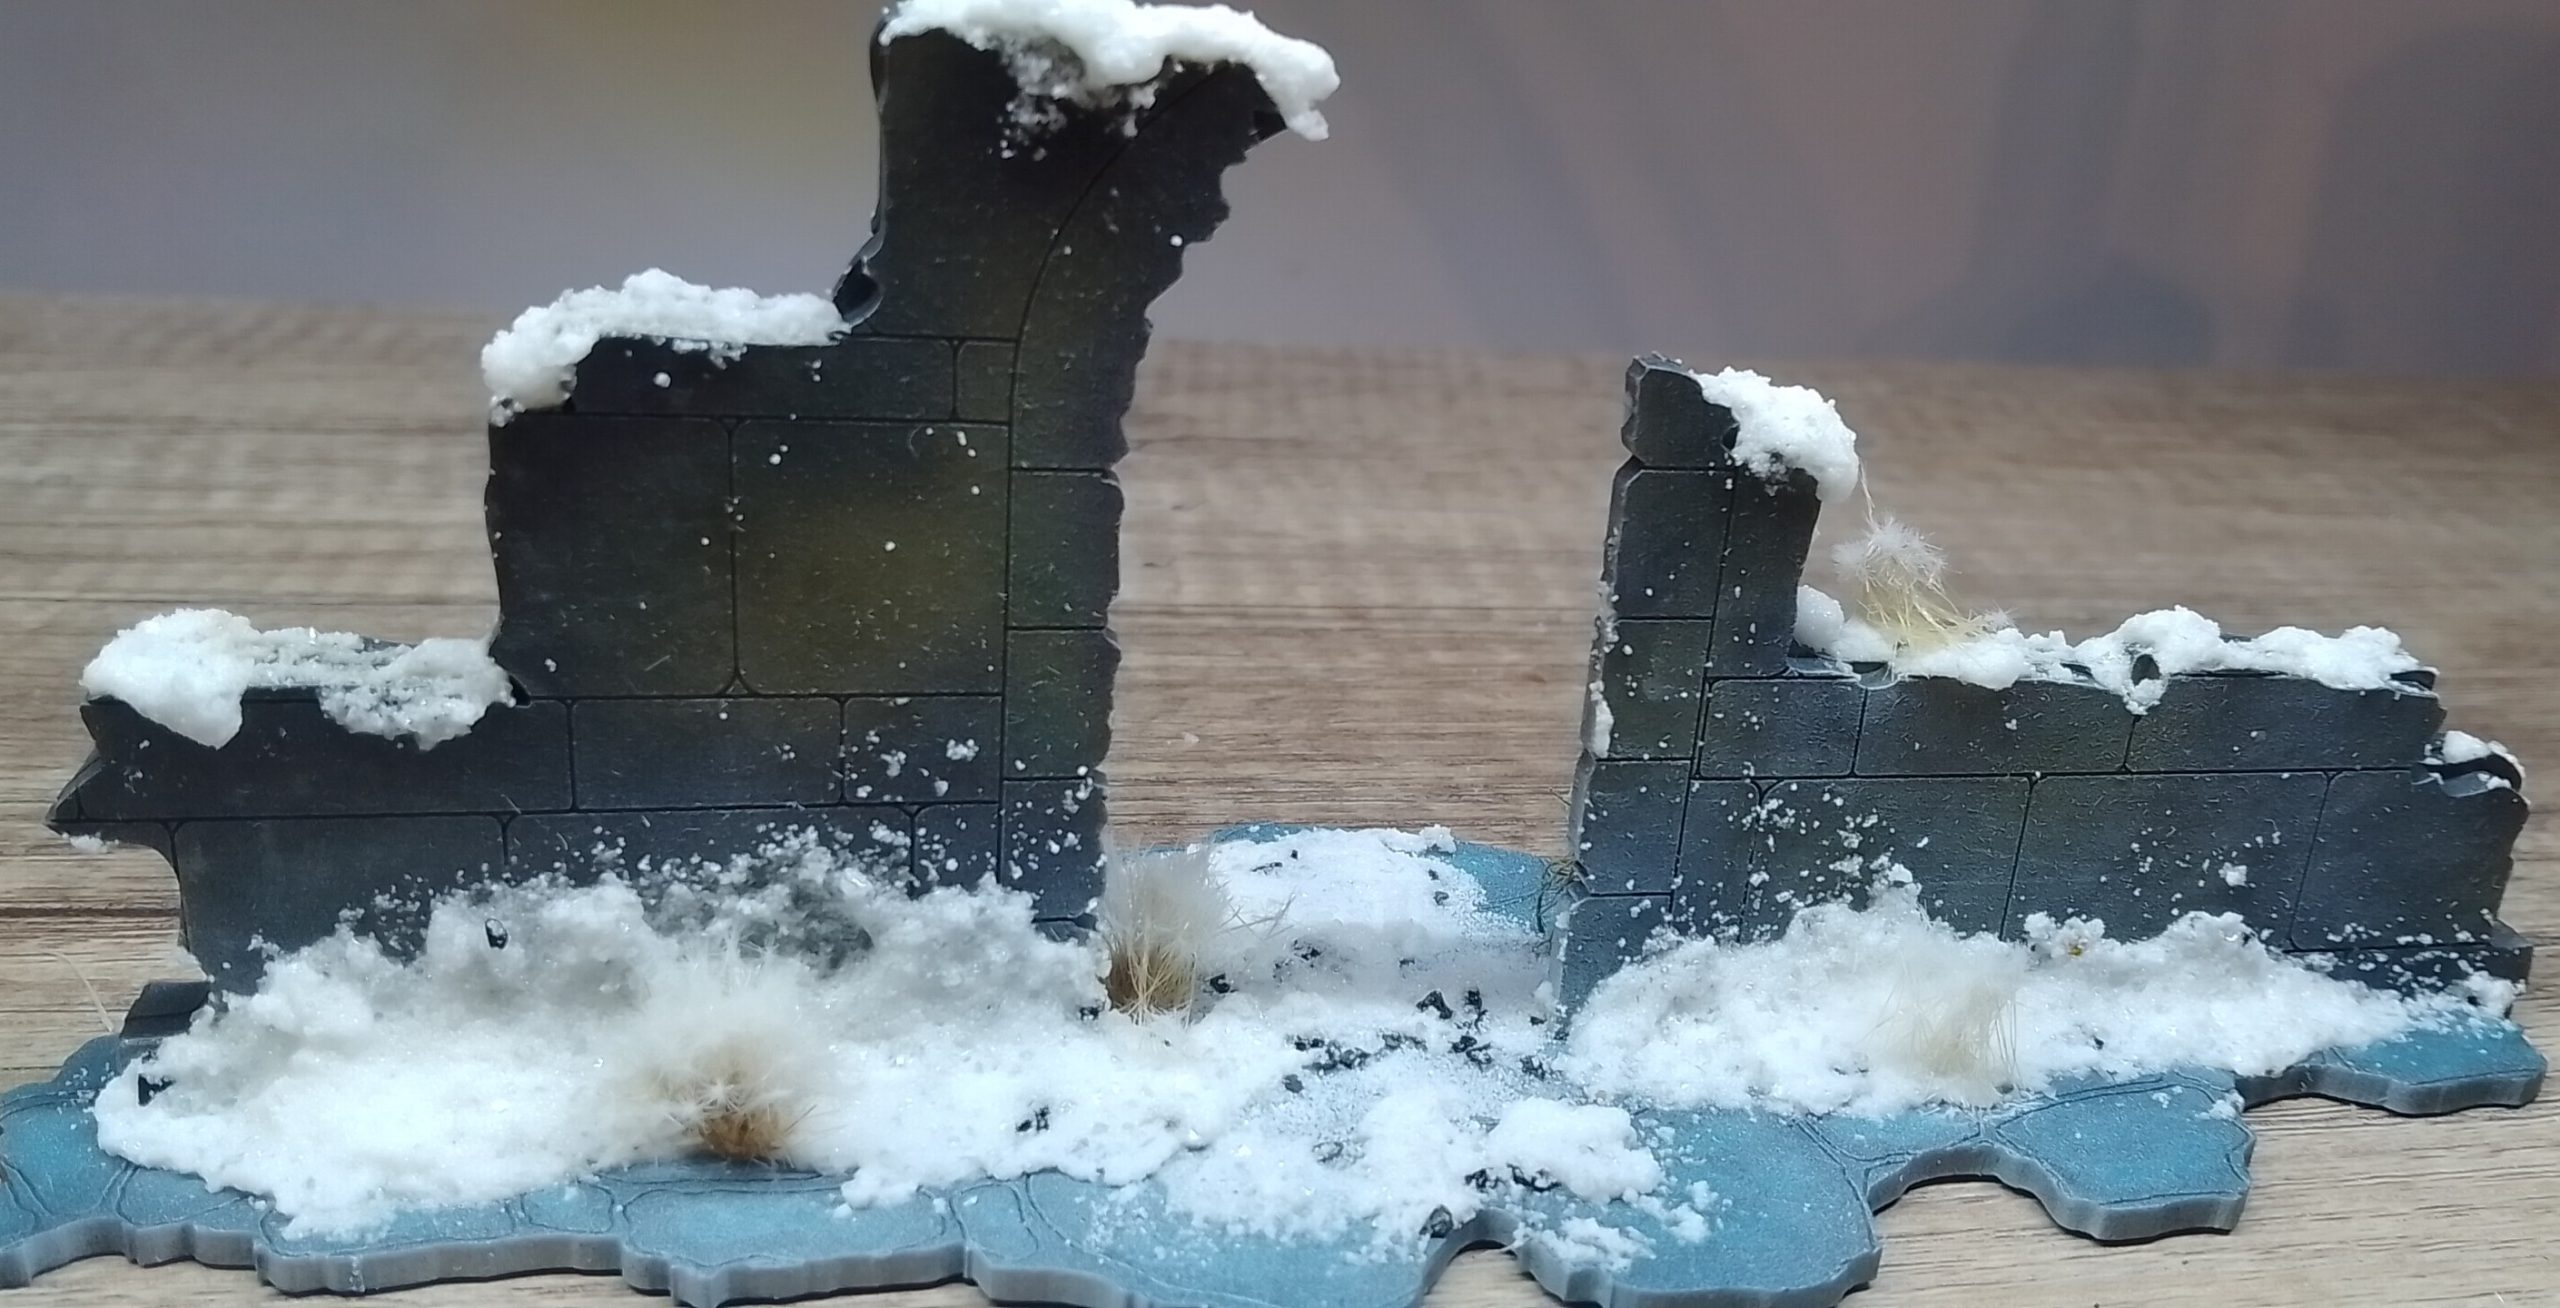
Project update Ruined Archway 14/01/2026

So after a long Christmas and New Years, I have been steadily working away hour by hour on the project. I apologise for the lack of update, it has just been simply painting all of the terrain and very little in terms of different methods, which does not make for good content.
Due to the amount of different ruins I am going to break it down into different posts for the standout ruins and then finalize with a wide shot when it is complete.
Starting with the Archway that was previously posted. I have added snow effects (thanks terrain tutor) and some moss that I collected on forest walks with my family. I have also added a few highland tufts around. Increasing the levels of snow on one side to give that feel of directional snow, while the other side has more plants protected by the ‘winds’.
You will see this concept in all of my other posts, that I will be able to position during gameplay the pieces in a way that looks like it was built naturally to block the stronger elements from one direction.
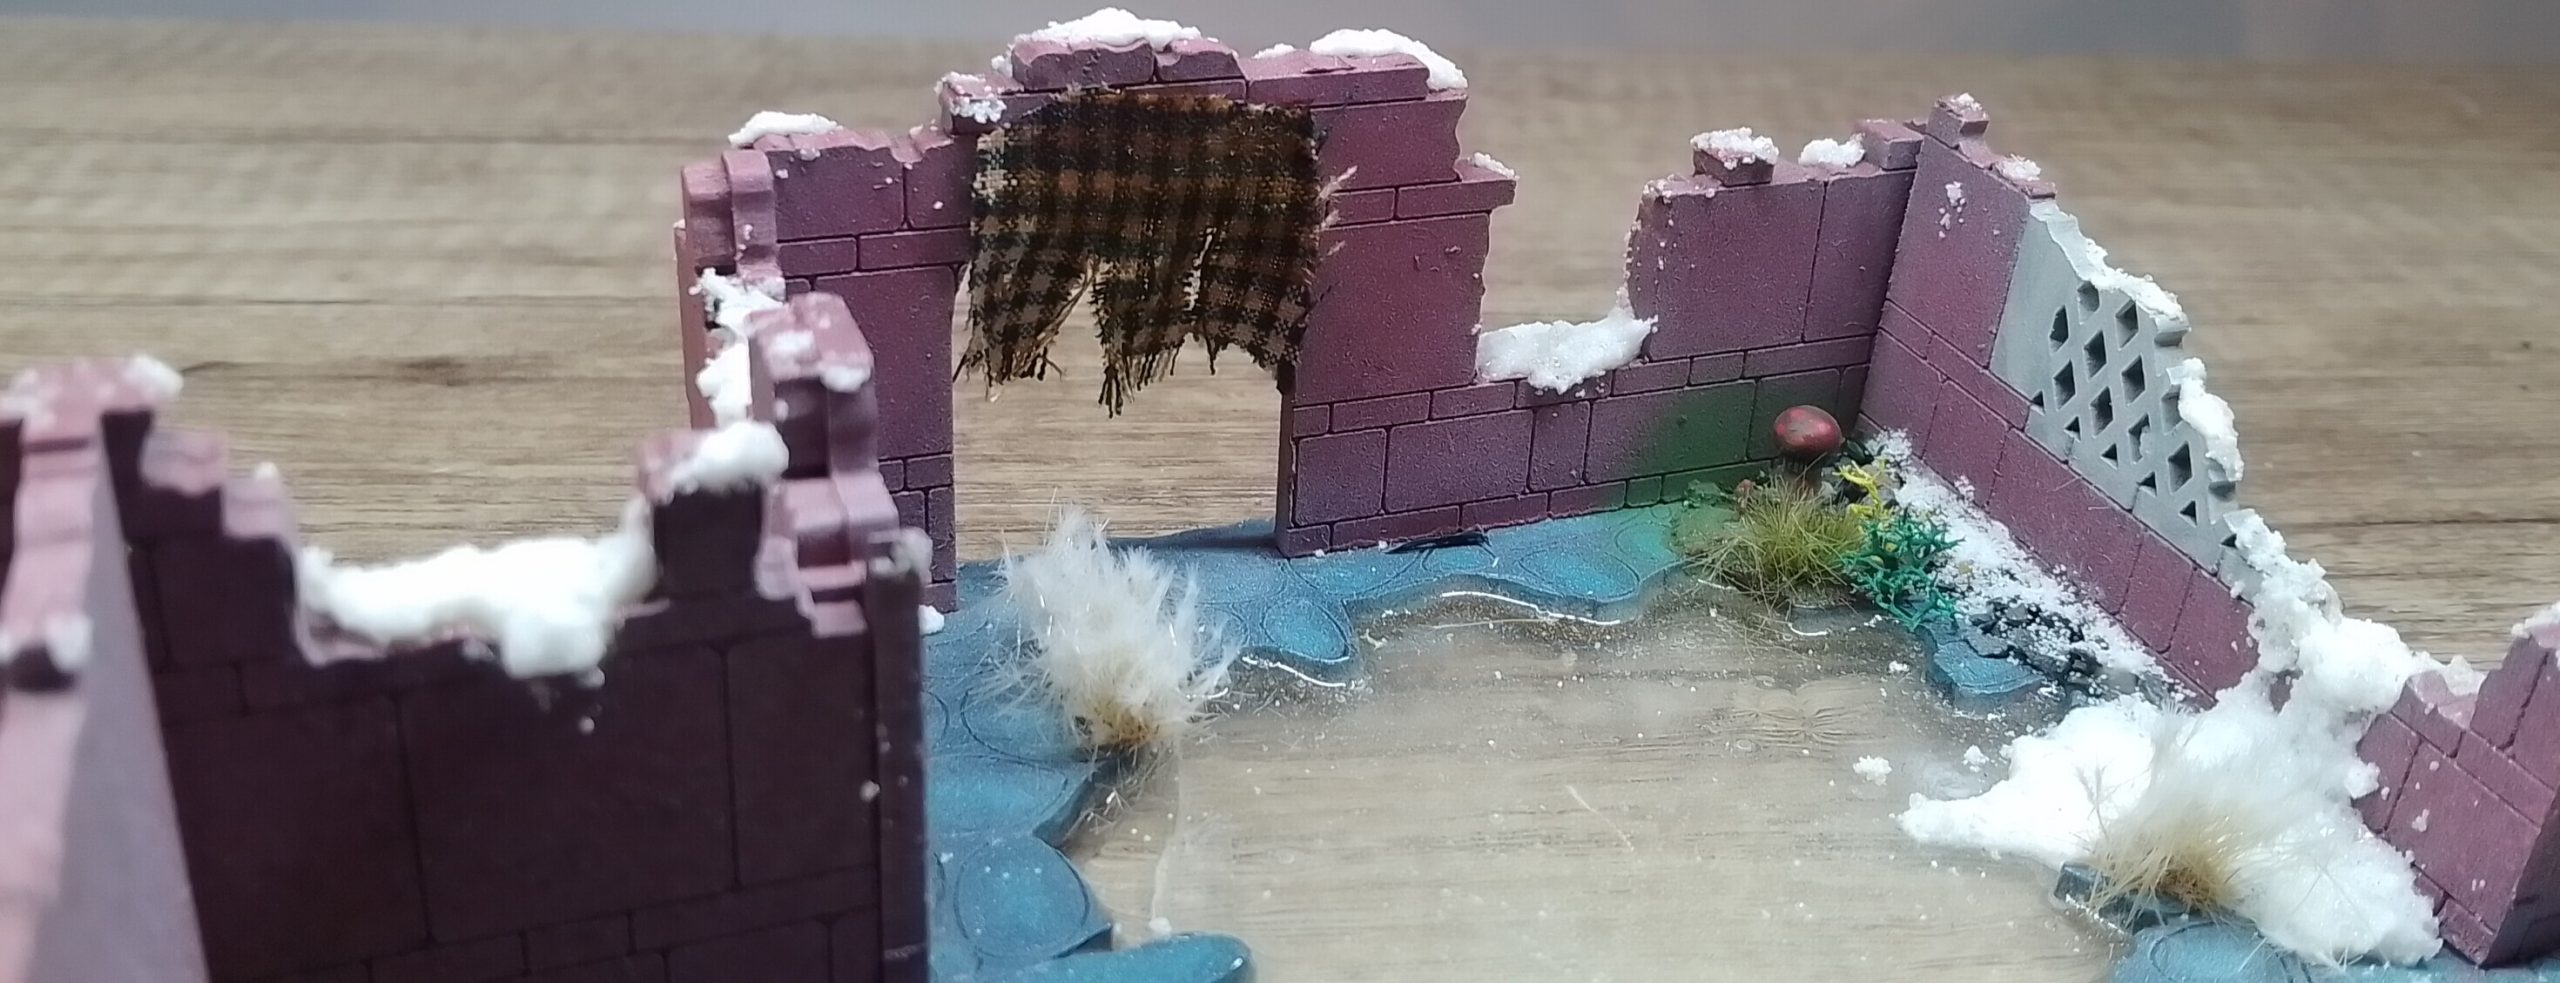
Project update Tapestry Ruins 14/01/2026
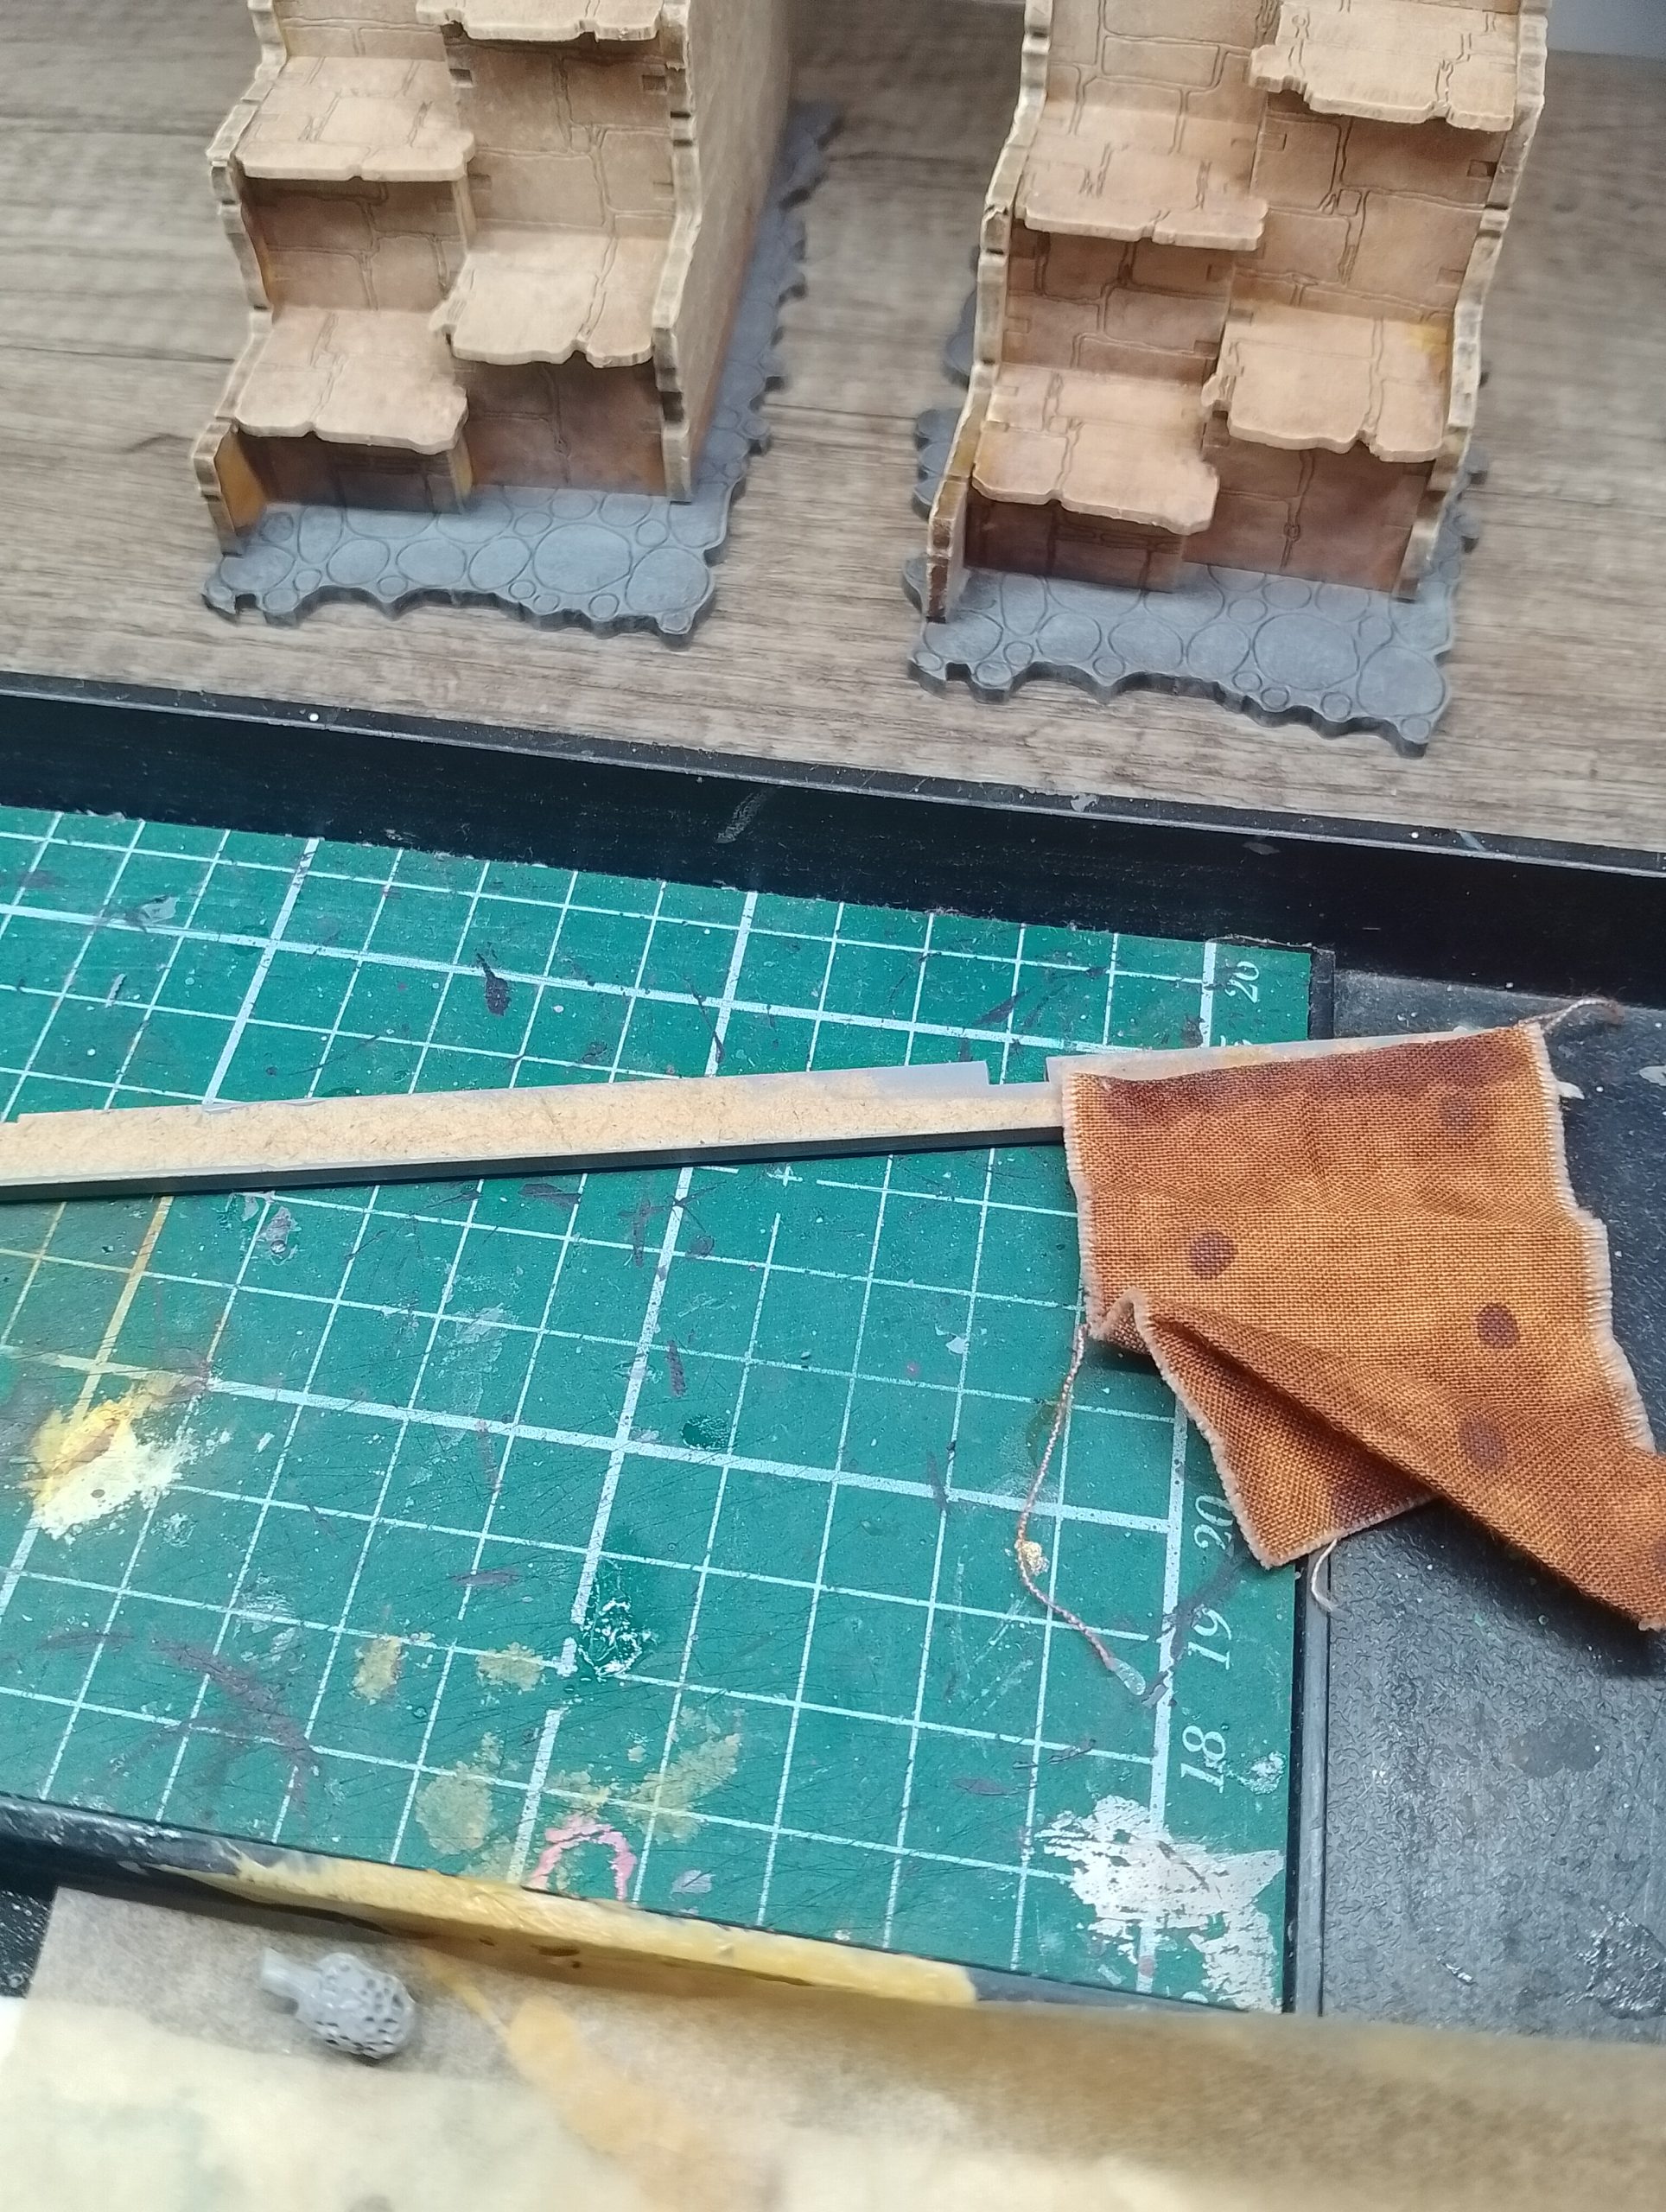
As I wanted not to block players by obstacles protruding on the walls and areas that are for cover. Tapestries are a good way to have some hassle free elements.
Simply using a bit of primed mdf sprue leftover that was long like a curtain beam.
I then cut some fabric that was of suitable style, superglued and wrapped around the stick twice and then glued again to form a tight bond. This was then measured and cut to the right size for placement.
I then used a sharp knife to make cuts and damage to the fabric. Then glued it to the wall and for a final touch added some brown ink to create stains.
while it sticks up, it will naturally go down with usage. It could also be glued on the wall if desired.
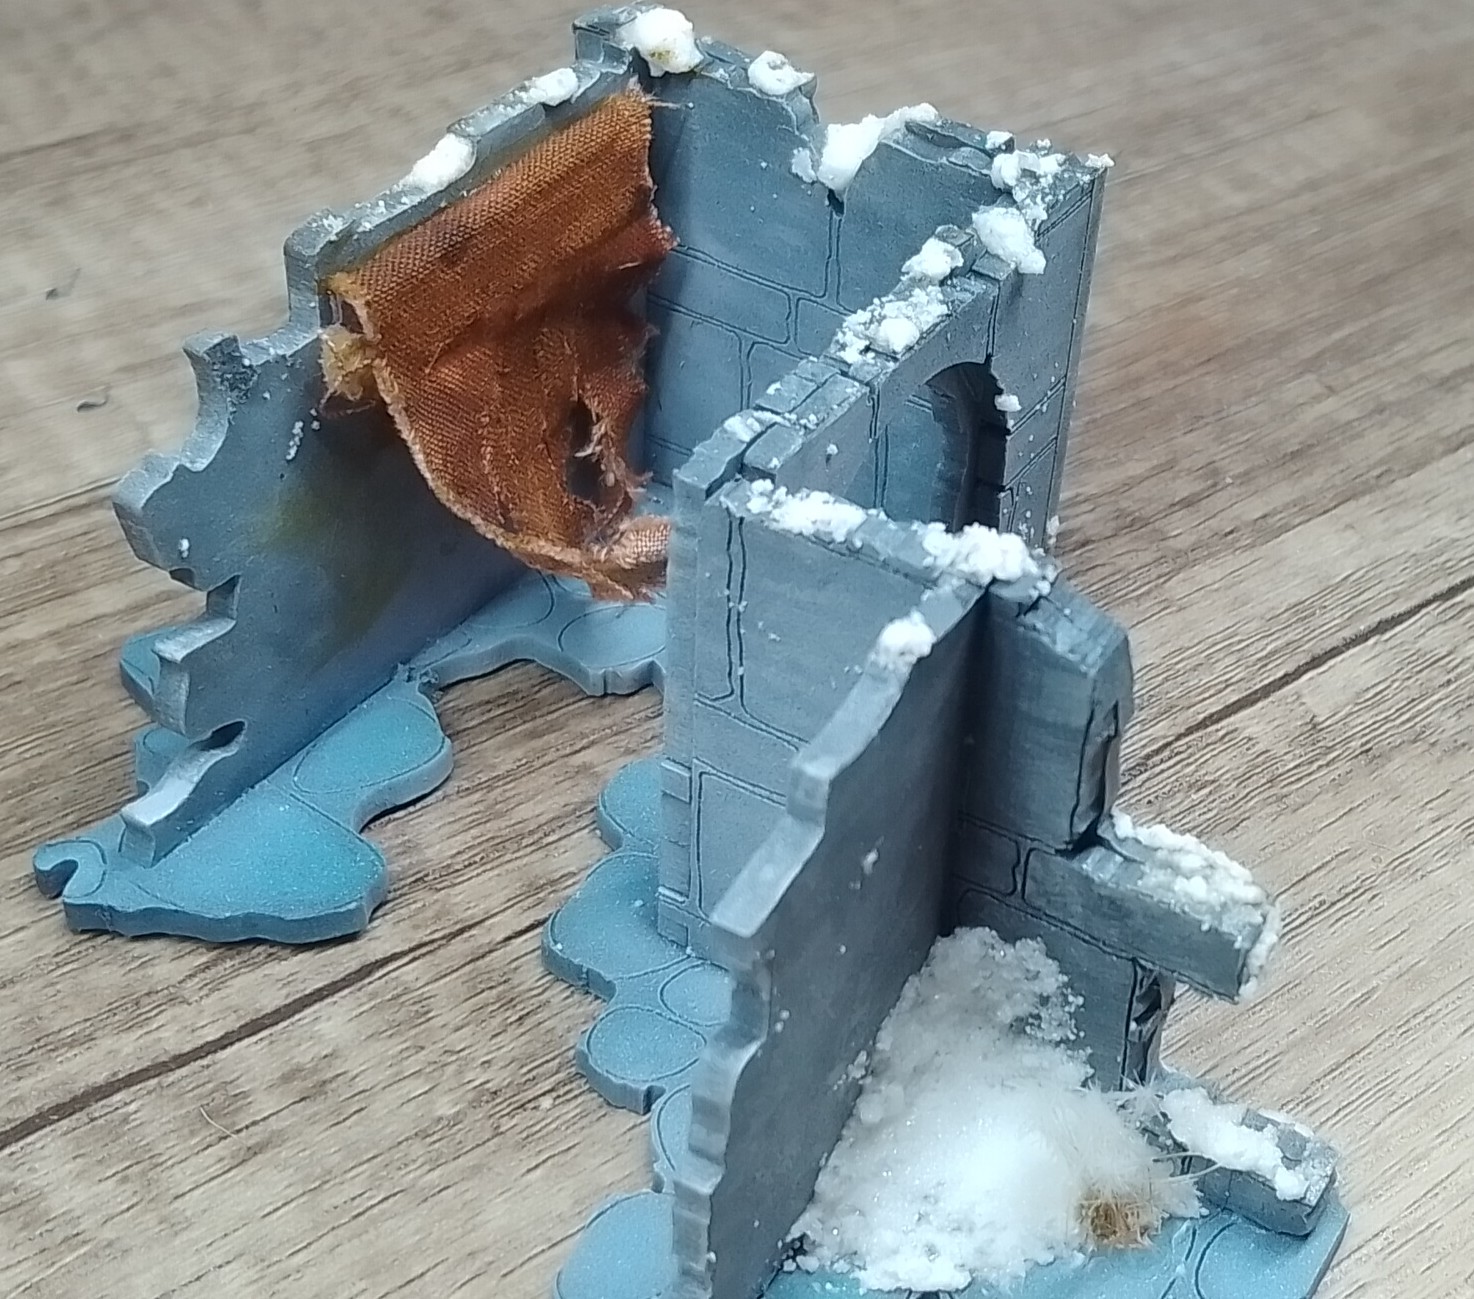 Also added snow, and usual elements to this ruin.
Project update Circle Ruin 14/01/2026
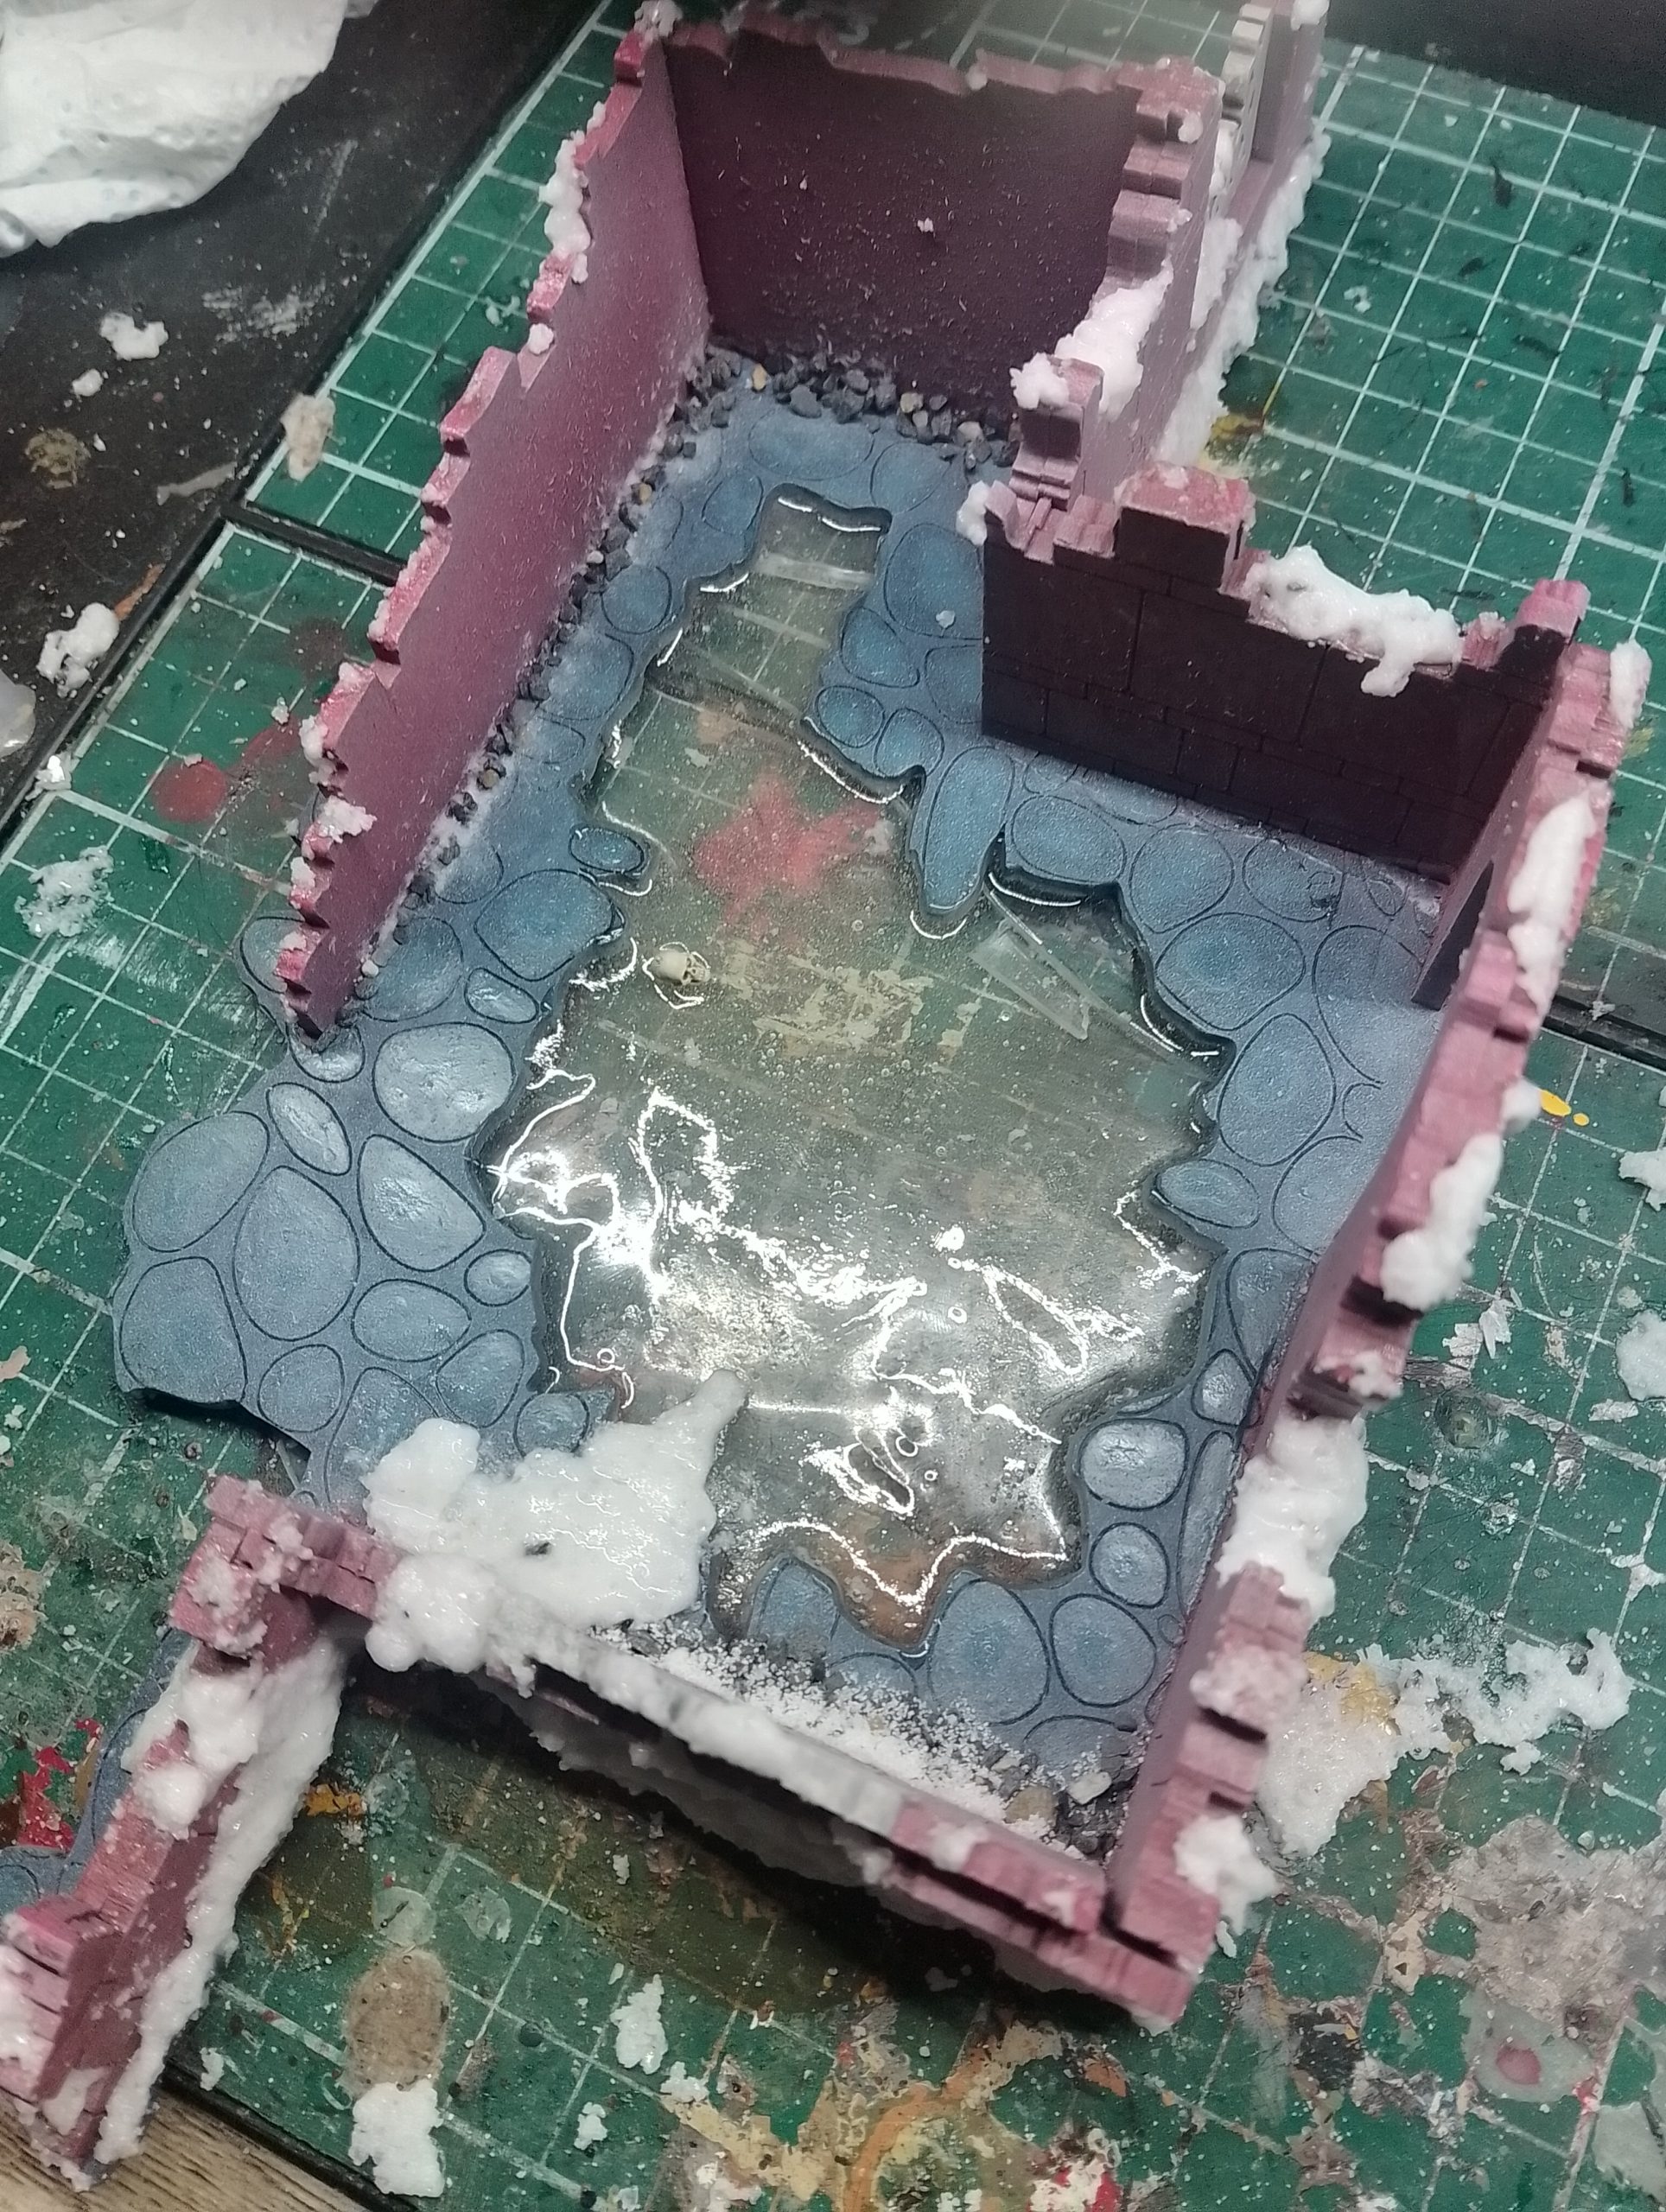
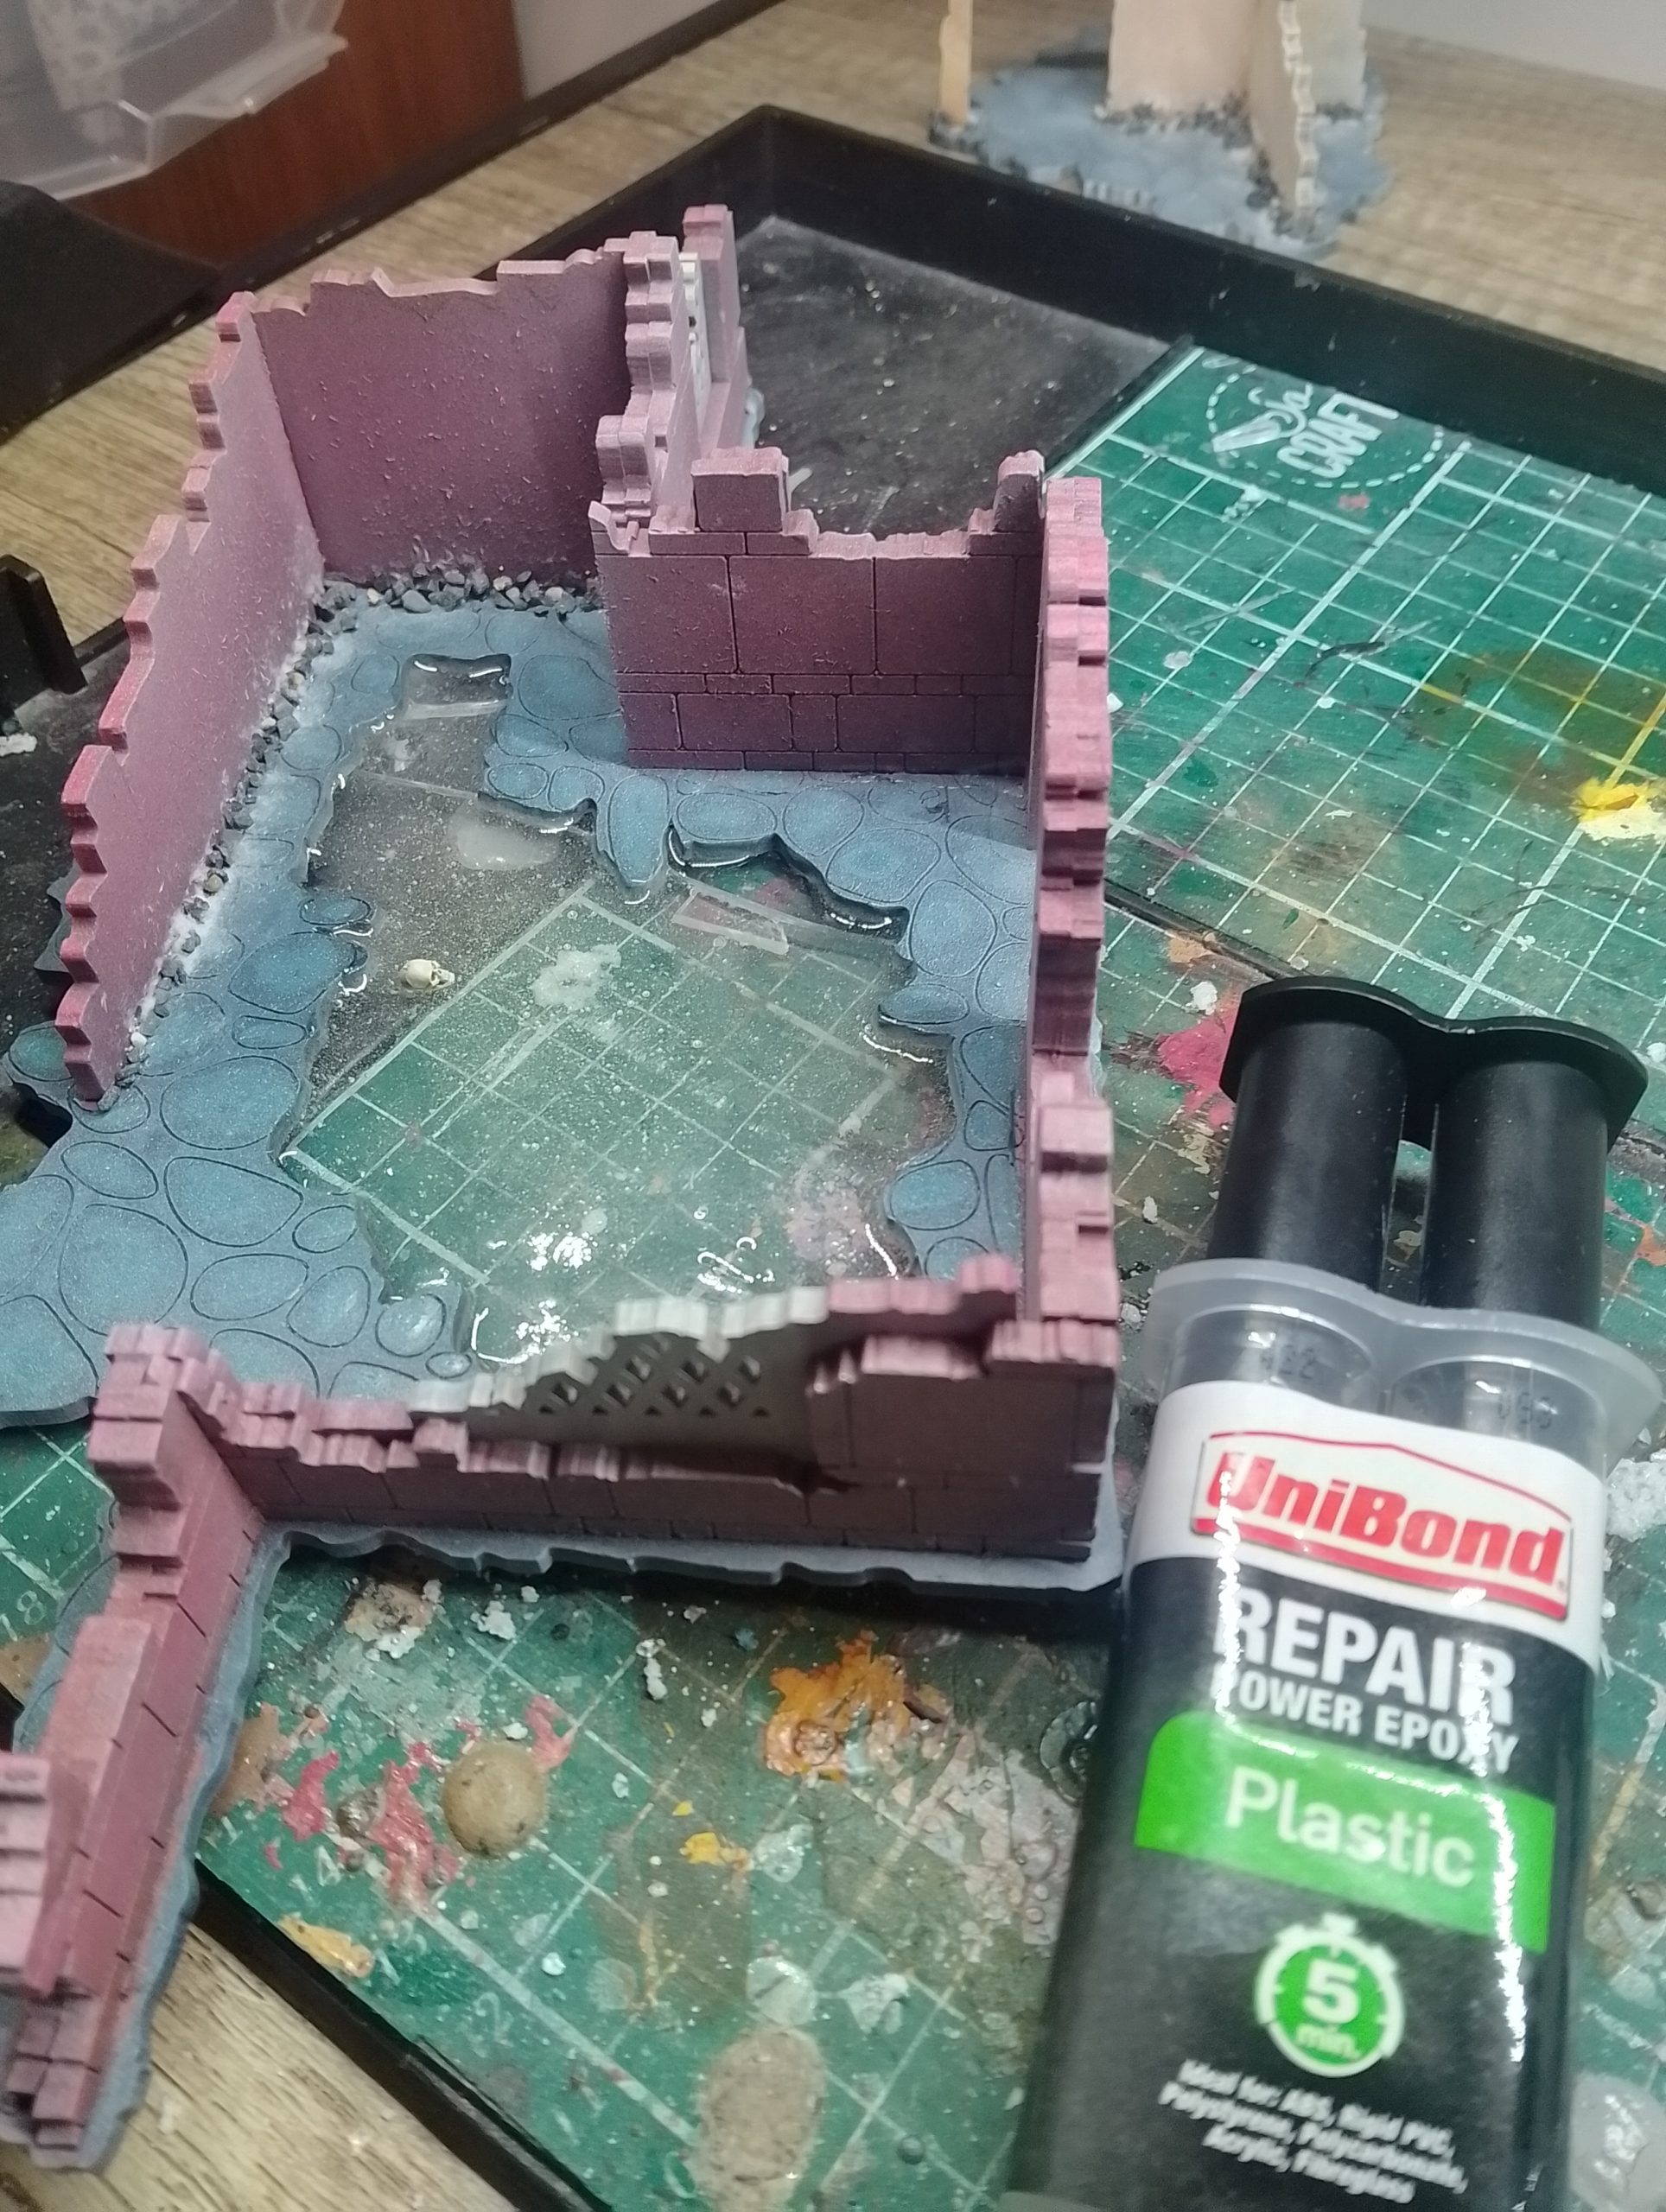
This ruin is one of the bigger pieces in the set. It came with a large hole which Ive decided would be great to add an ice feature to also make use with the games rules.
To begin with, I simply measure out and cut out a bit of Perspex (an old toy that was going to be thrown) and super glued it to the underside of the ruin. I also glued as you can see pictured several hidden bits under the terrain to give it balance. Natural cracks in the material will also give this the look of the ice being damaged.
Turning the piece over upwards again. Wearing the correct safety equipment, I then added the epoxy glue to the Ruin to form the ice layer. Adding a skull for good measure (you could add more but I wanted to keep it clear so players could fight on it).
I then added the surrounding snow, as well as some swampy mud textures and moss coloured pigment drybrushed on the brown areas.
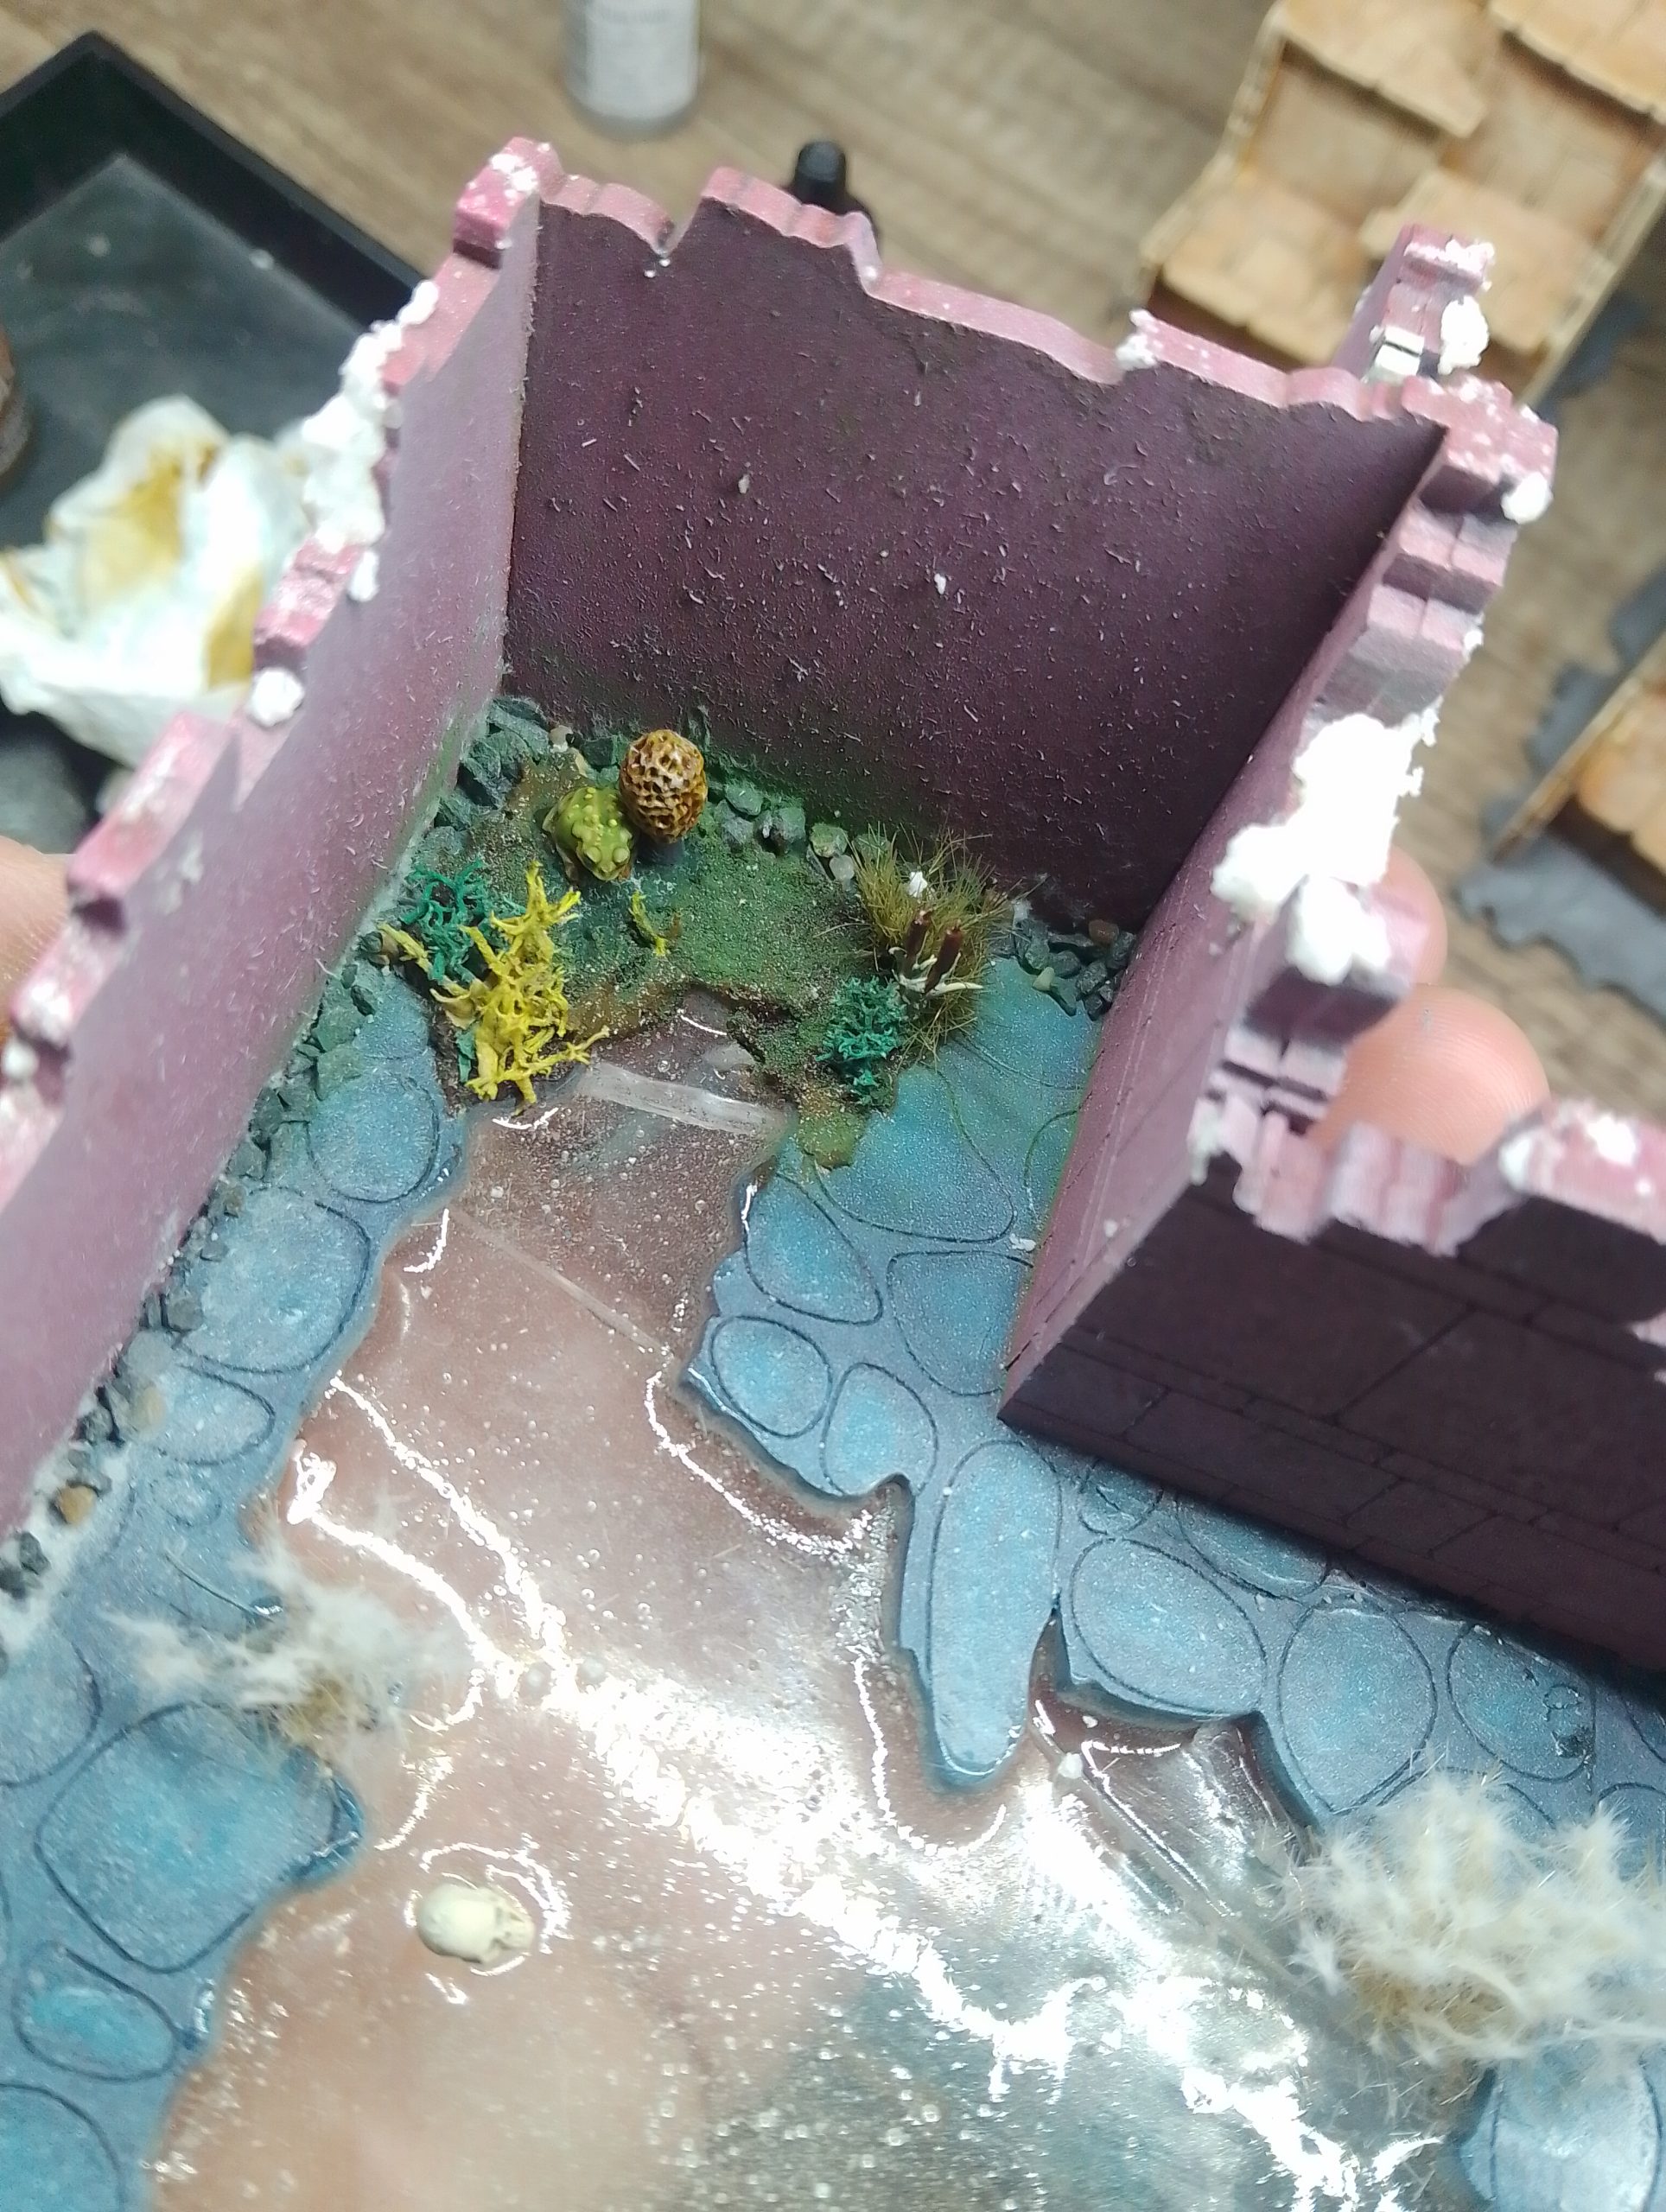
I had this kit already from greenstuffworld I was intending to use for my kings of war trident realms frog army that wont get its fullest use even after basing that army, so it was a good idea to not only use it up, but also to give more colour than simply a frozen wasteland.
 I also painted up some critters and swampy mushrooms (spellcrow + gsw products)
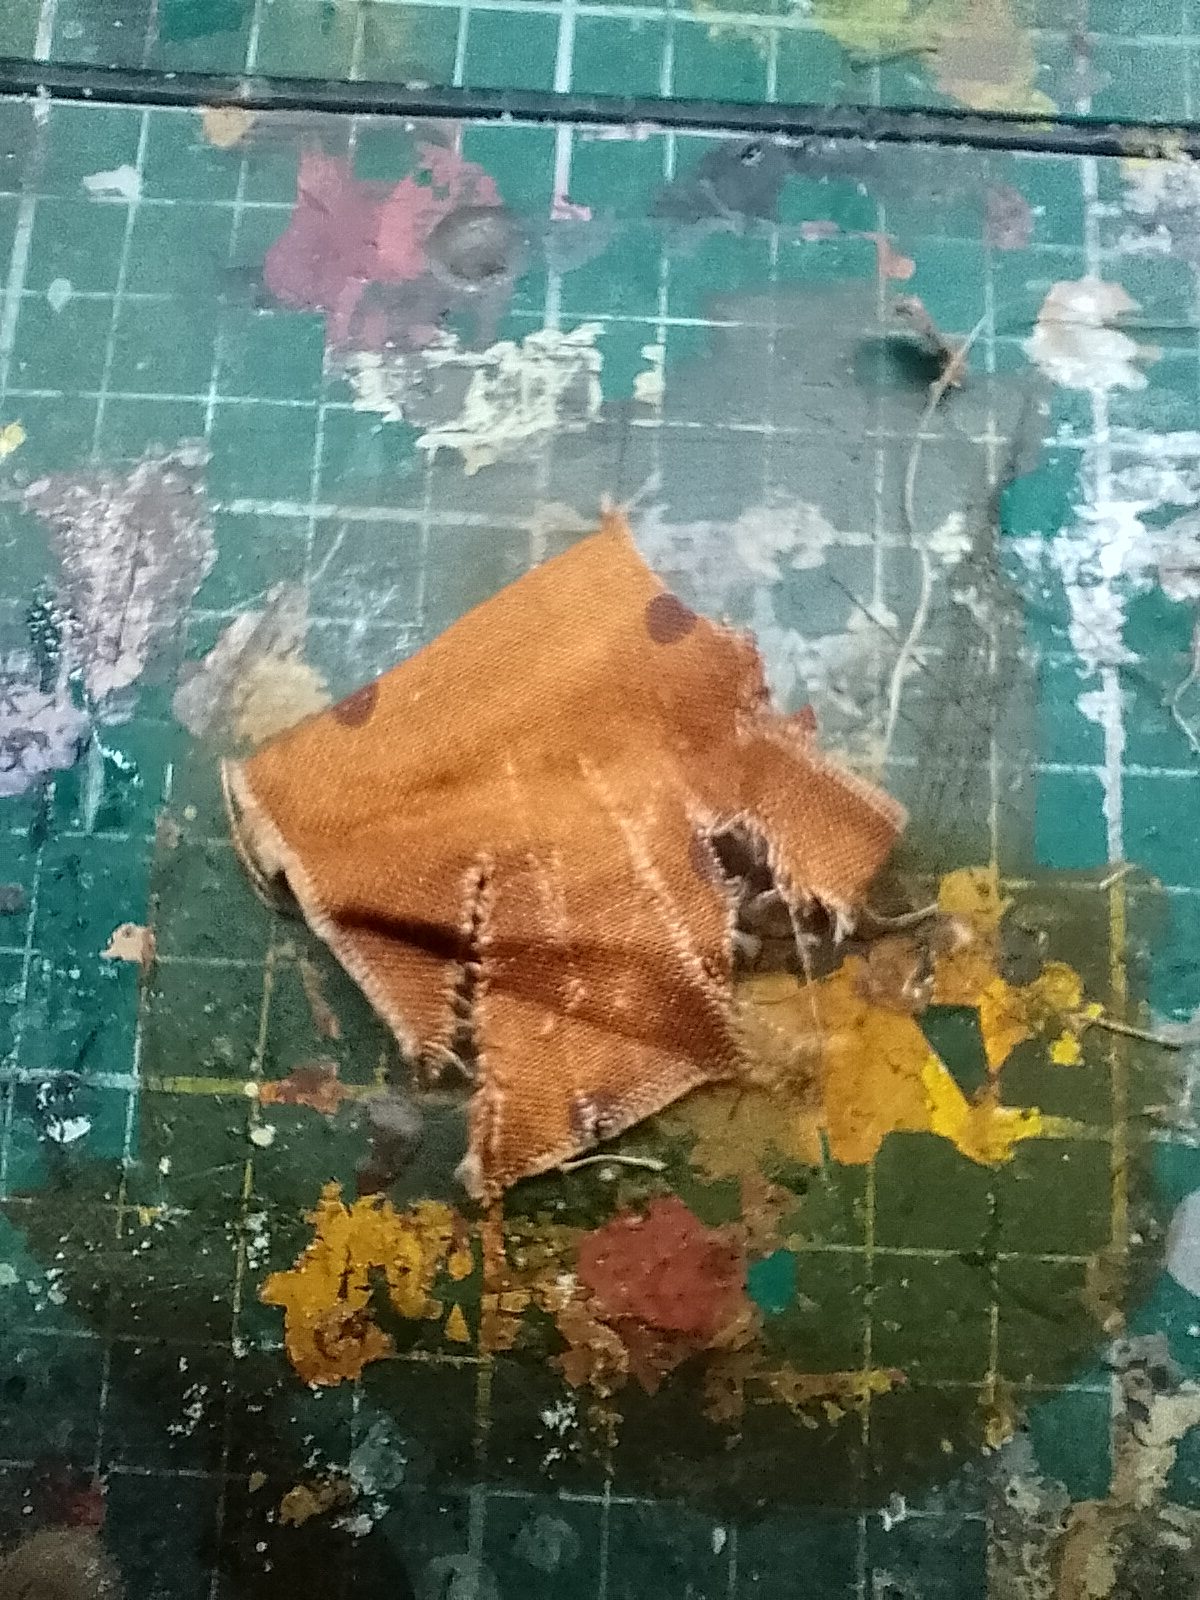
Then I added it all together with the snow, the critters and a ripped door fabric just for good measure.