Speedpaint Pens vs The Pile


Recommendations: 144
About the Project
The new Speedpaint pens have arrived. I'm going to try and use them to their maximum and paint an entire army, only using the pens. I've chosen a big army of Wargames Factory Caesarian Romans. Let's see how it goes...
Related Game: To The Strongest
Related Genre: Historical
This Project is Completed
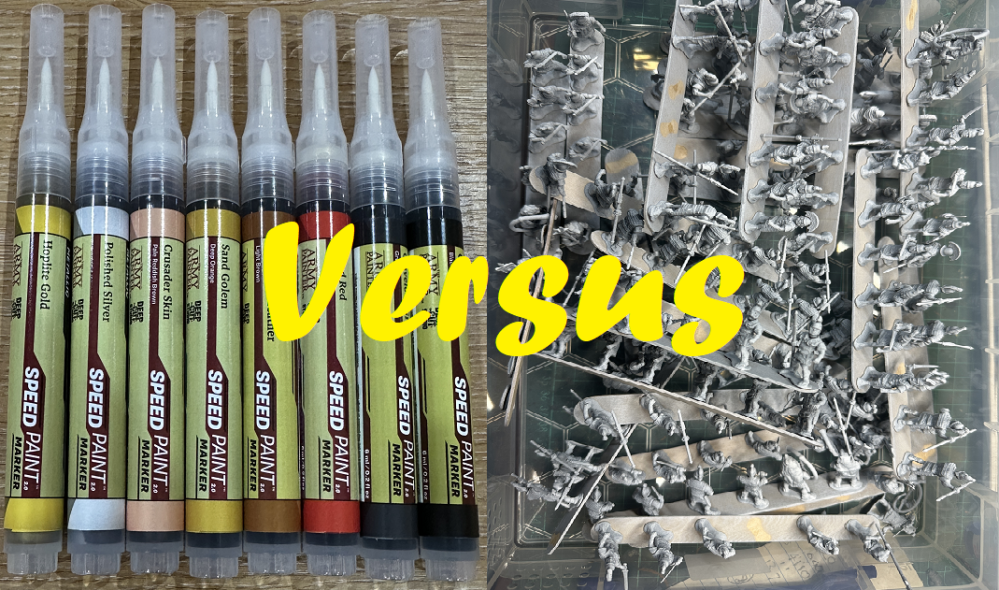
The pens are here :)
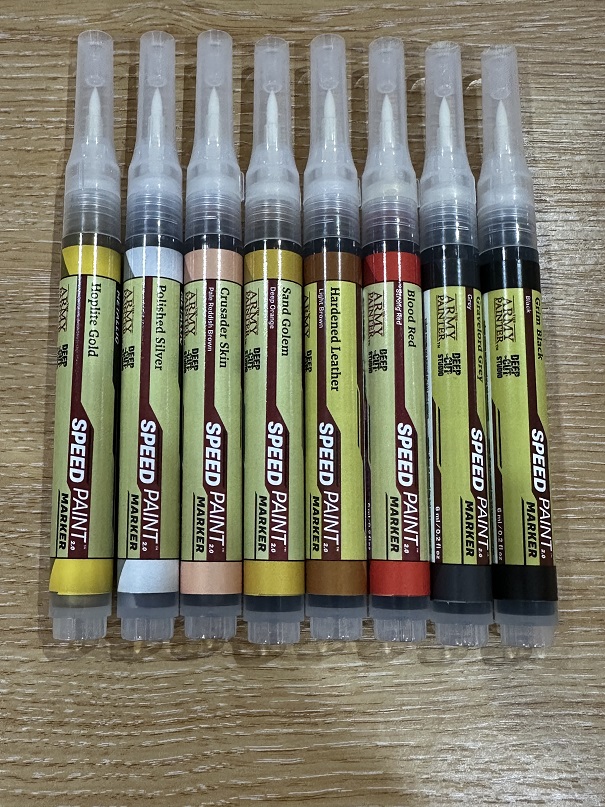
Give credit to Army Painter, this range was well heralded and hyped. I know they are called “Markers” but they are paint pens as far as I’m concerned. I had a long time to get my ideas together and, after a careful think, decided to go large and do an entire army with just these pens. I was pleased with the review that Gerry did as this showed that they delivered a result similar to using Speedpaint with a brush, which is a process I’m very familiar with.
I preordered 8 from Wayland, using my winnings from the Spring Clean Challenge. I’ve painted Roman armies before so know the scheme that I’m going for. The Gravelord Grey is a great NMM steel but I’m likely to highlight with the silver for a more conventional historical miniatures finish.
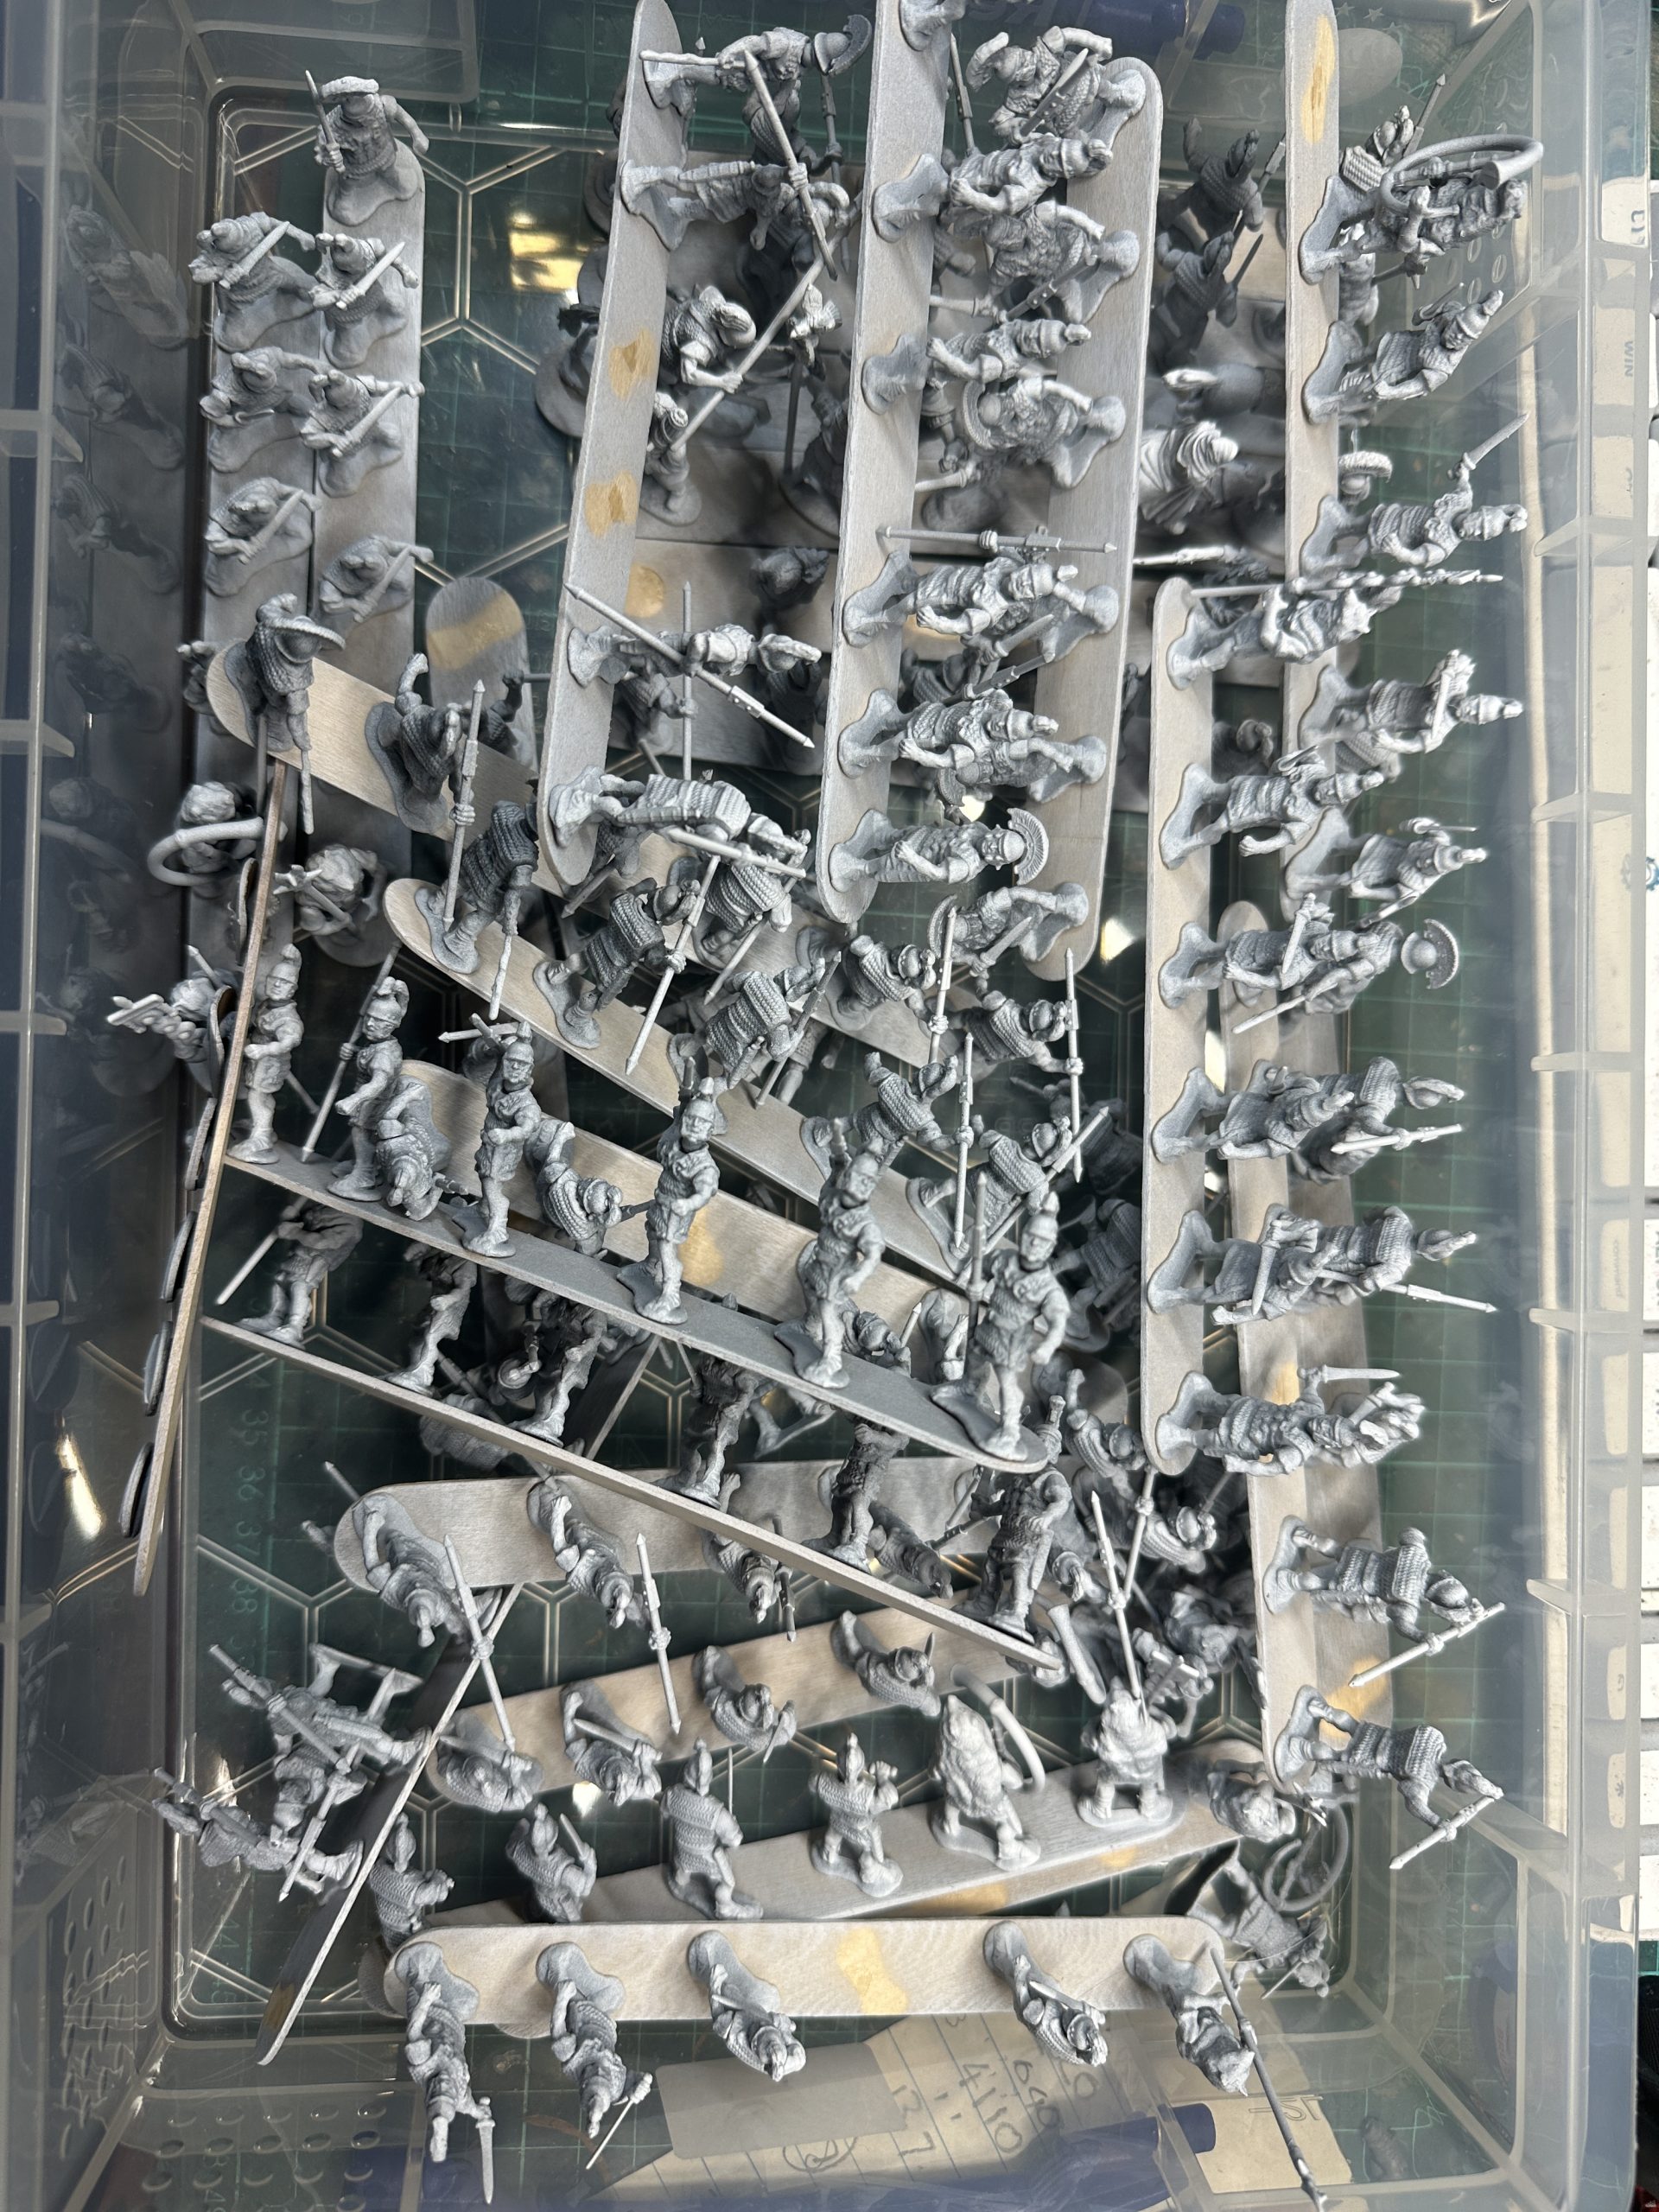
This is what I’ve got so far. I’ve mounted the minis on wooden spatulas with a tiny dot of superglue so they can be dismounted easily. Mounting on these spatulas is a compromise here between ease of use and accessibility for the pen tips. Hopefully I’ve spaced them out enough. It did make doing the zenith undercoat (Halfords White over Halfords Grey) much easier.
They have been sorted into sections for basing with a unit being made up of 6x 40mm squares with 4 models per base, 24 models per unit. There are a few metals from other companies to make some character bases and if this goes well I’ll be doing them with the pens as well.
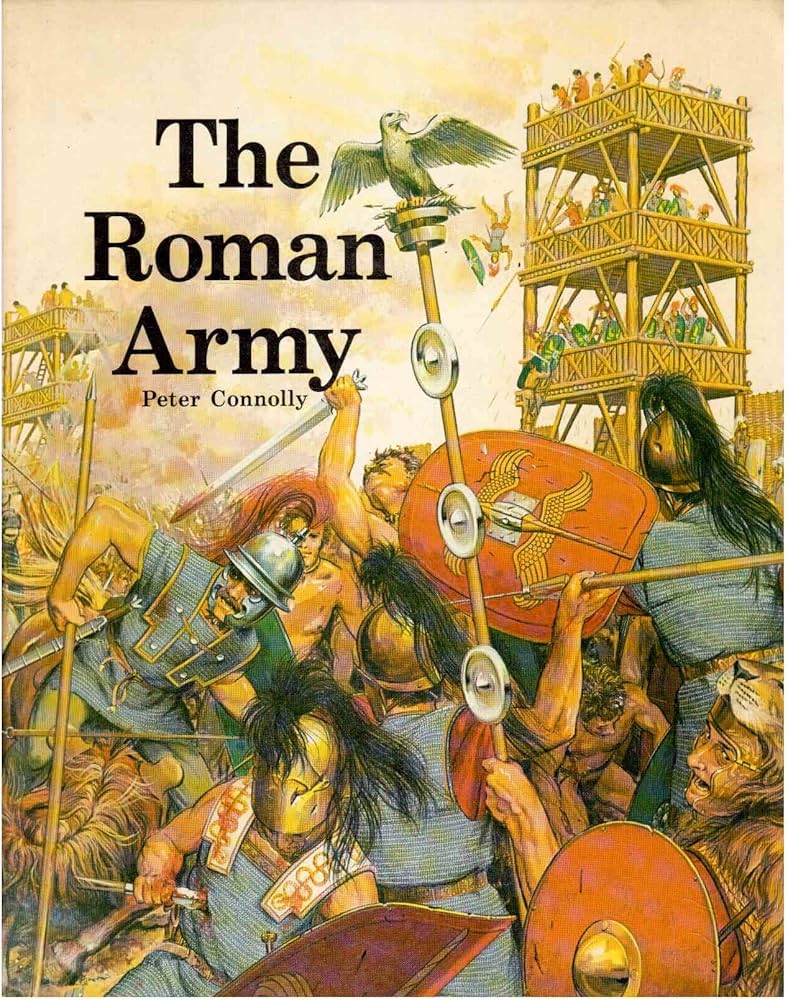
This classic piece of art by Peter Connolly shows what I’m going for:
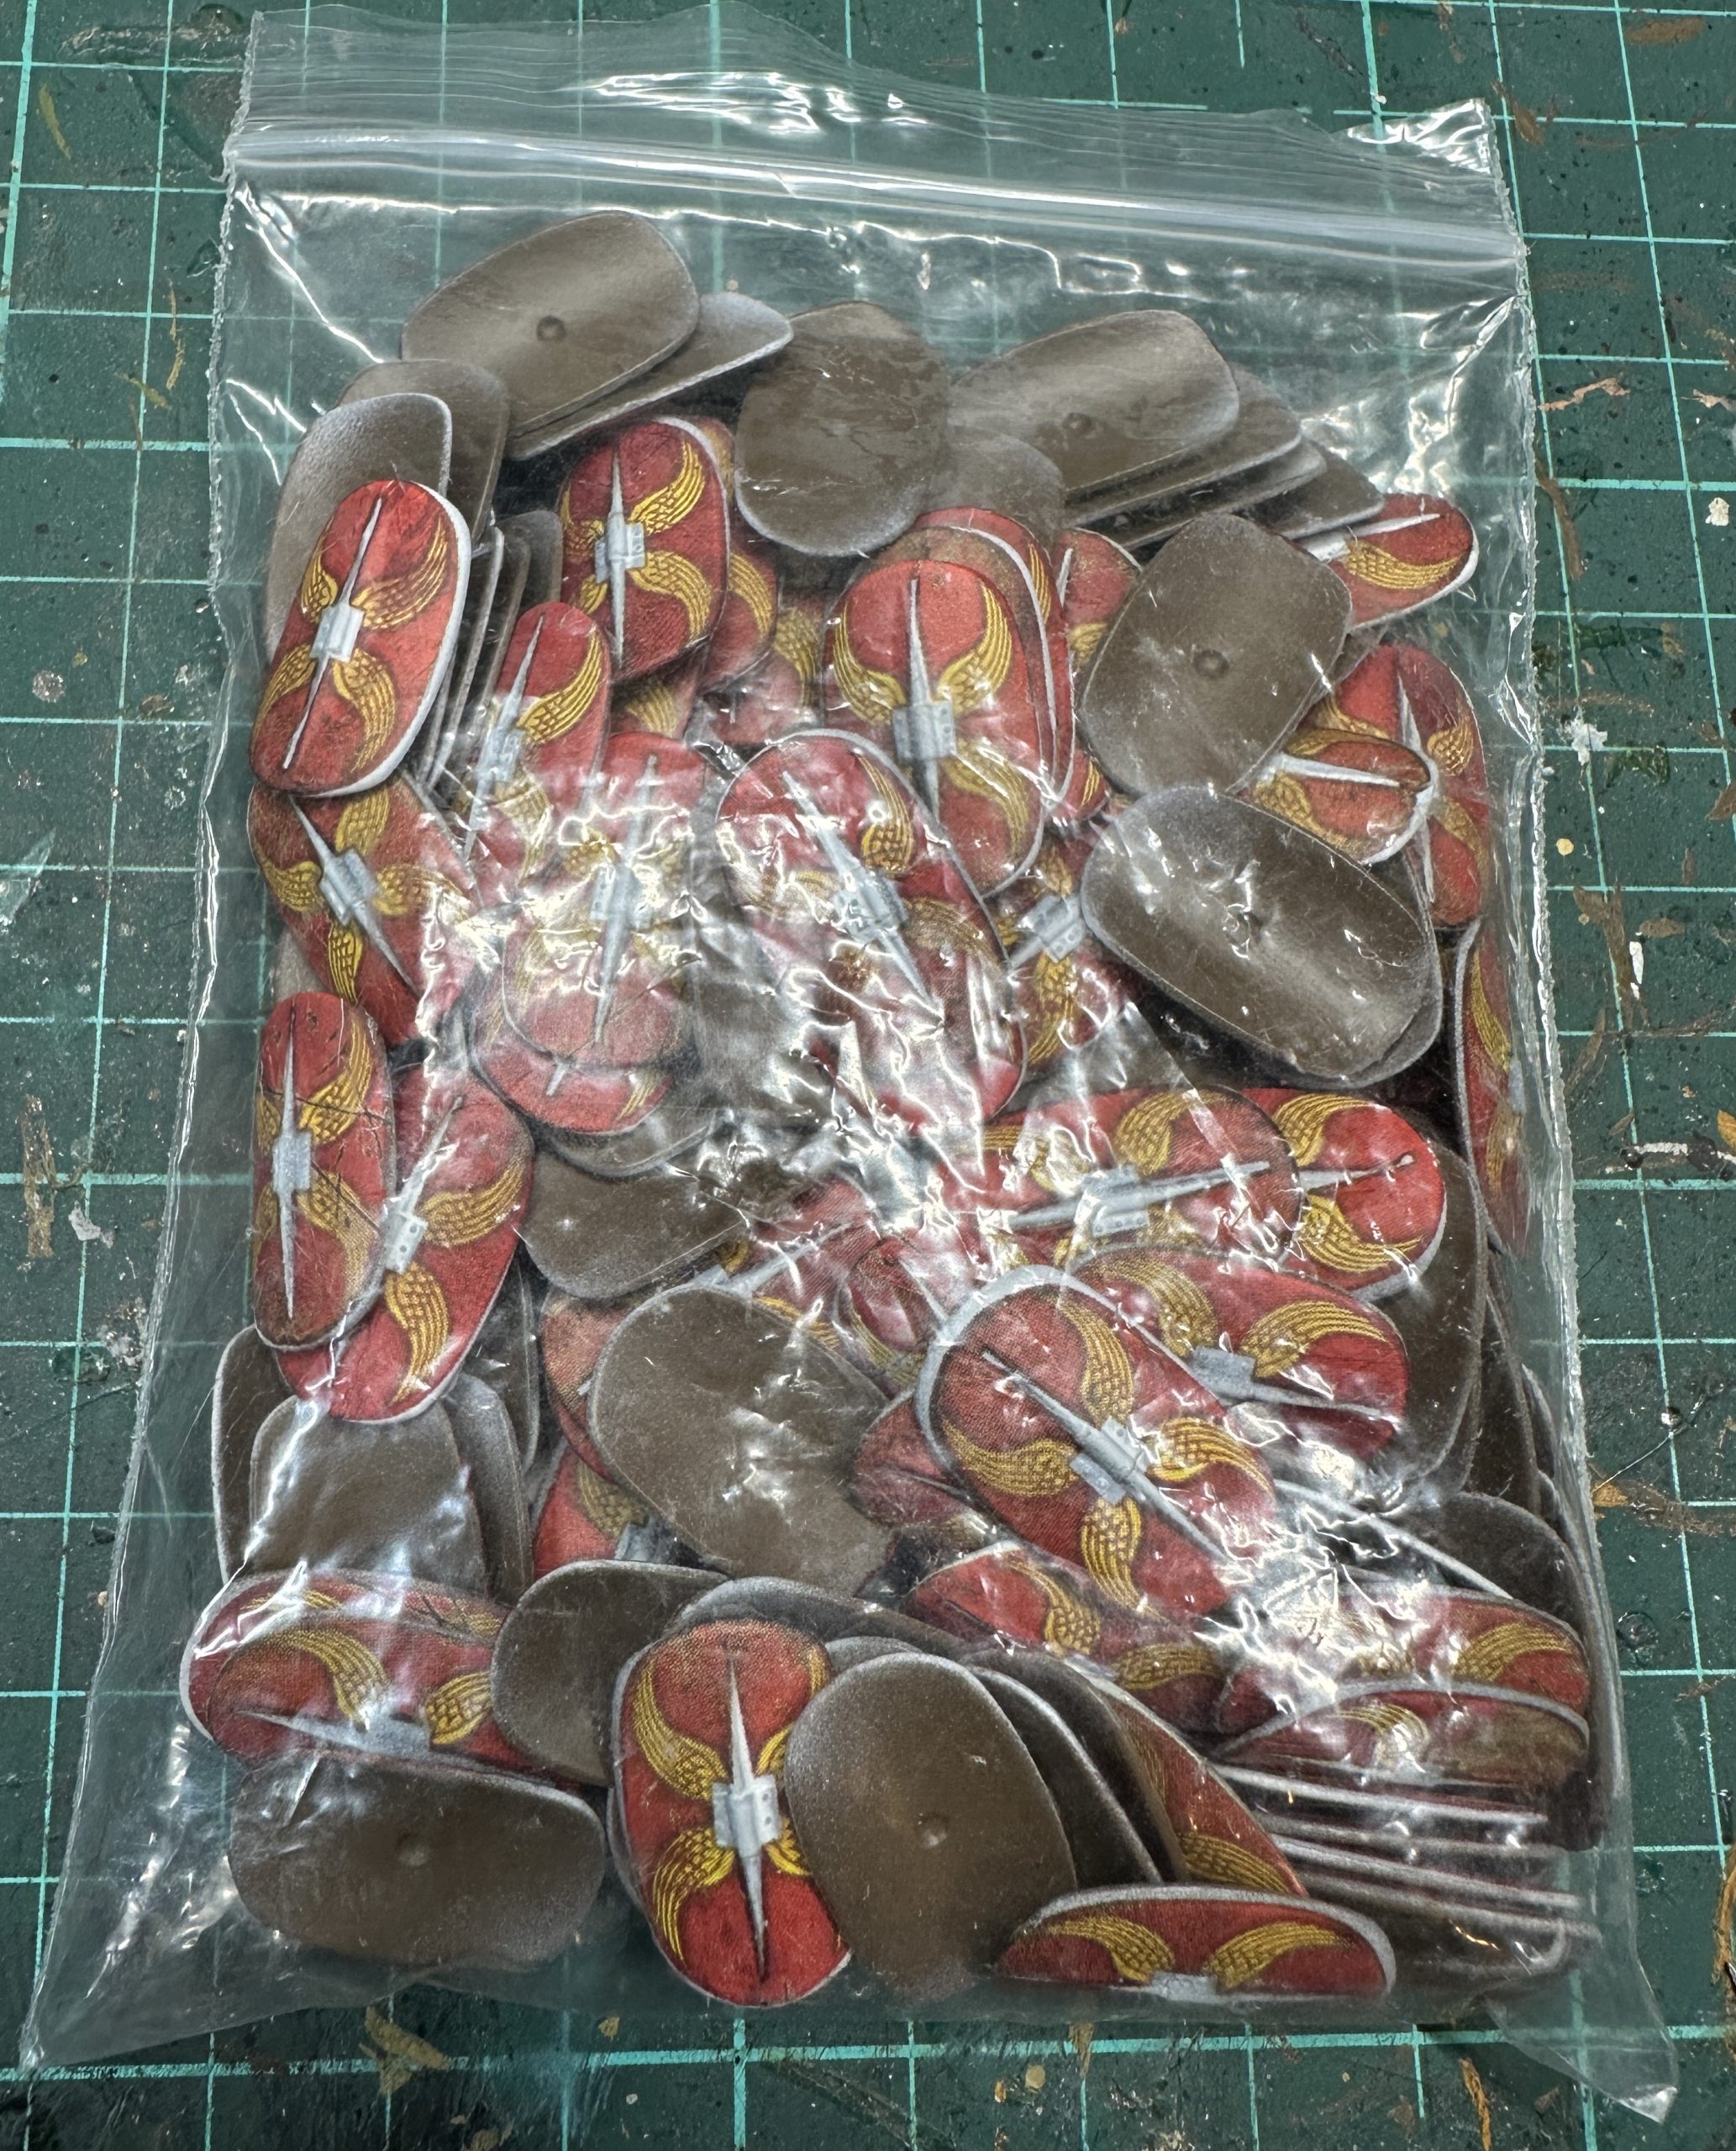
Prepping the shields
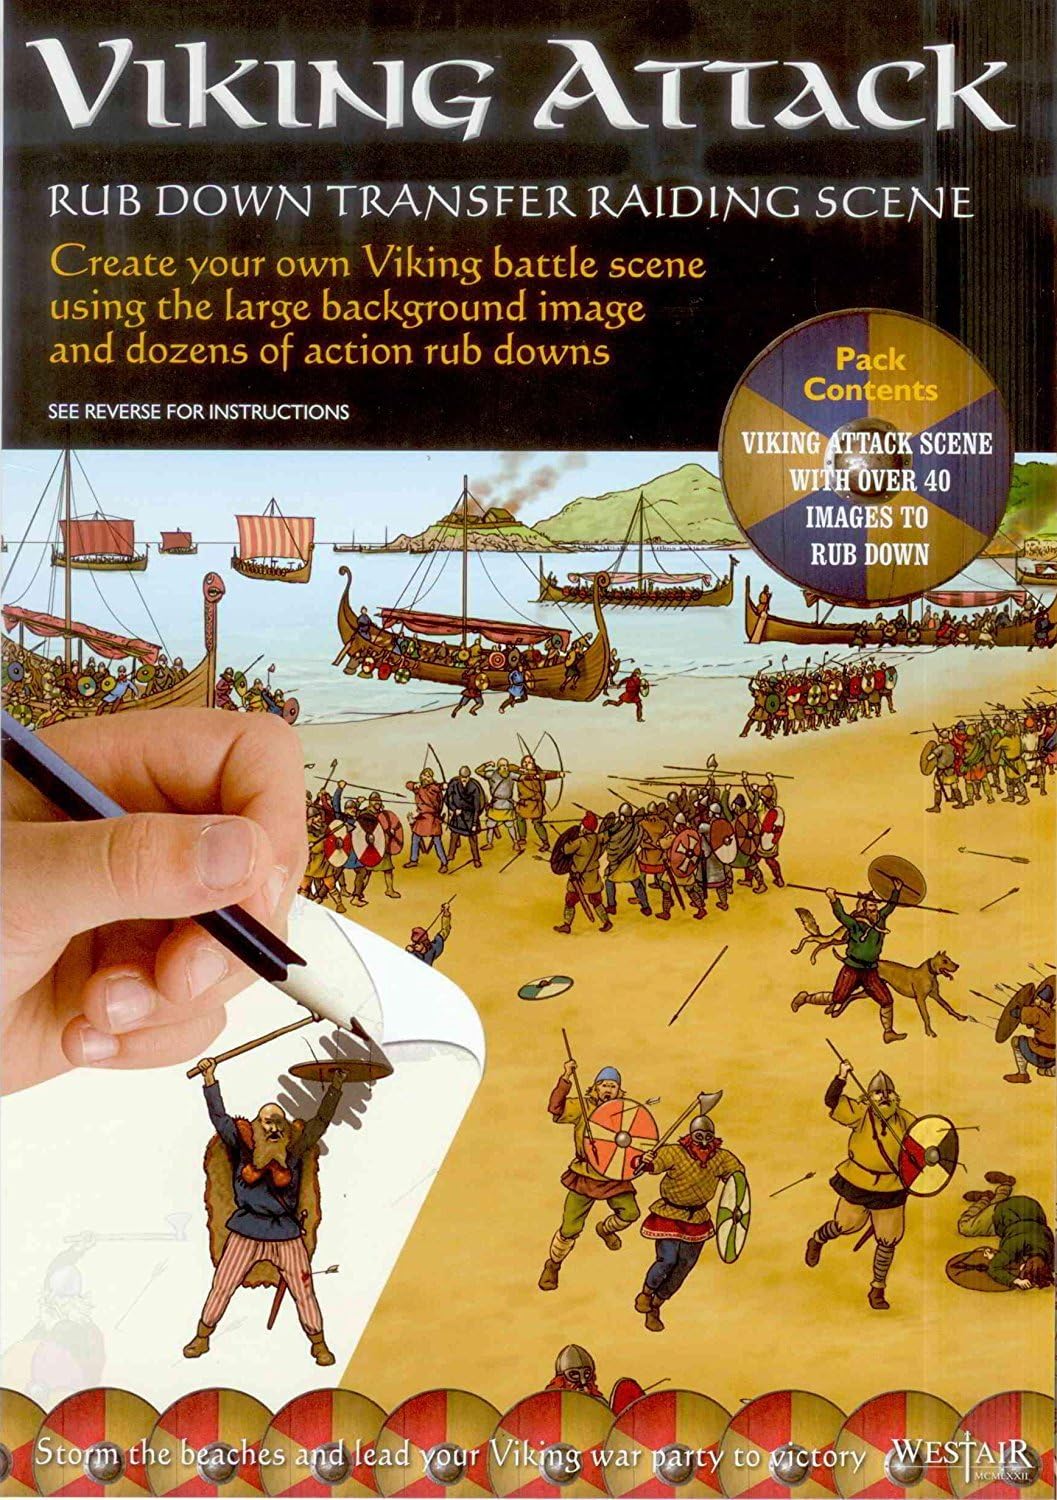
There are lots of shields. I had three boxes of 48 so thats 144 miniatures and as many shields. They came with one of the first LBMS transfer sheets. Great artwork for sure but they are the original transfer type which have a dry “rub down” delivery system. This is like the old ‘make your own scene’ cards I used to get as a kid. Much to my surprise you can still get them:
 One for the teenagers
First though some painting. I cheated slightly as I happen to have a leather brown spraycan so did the undercoat on the back with that:
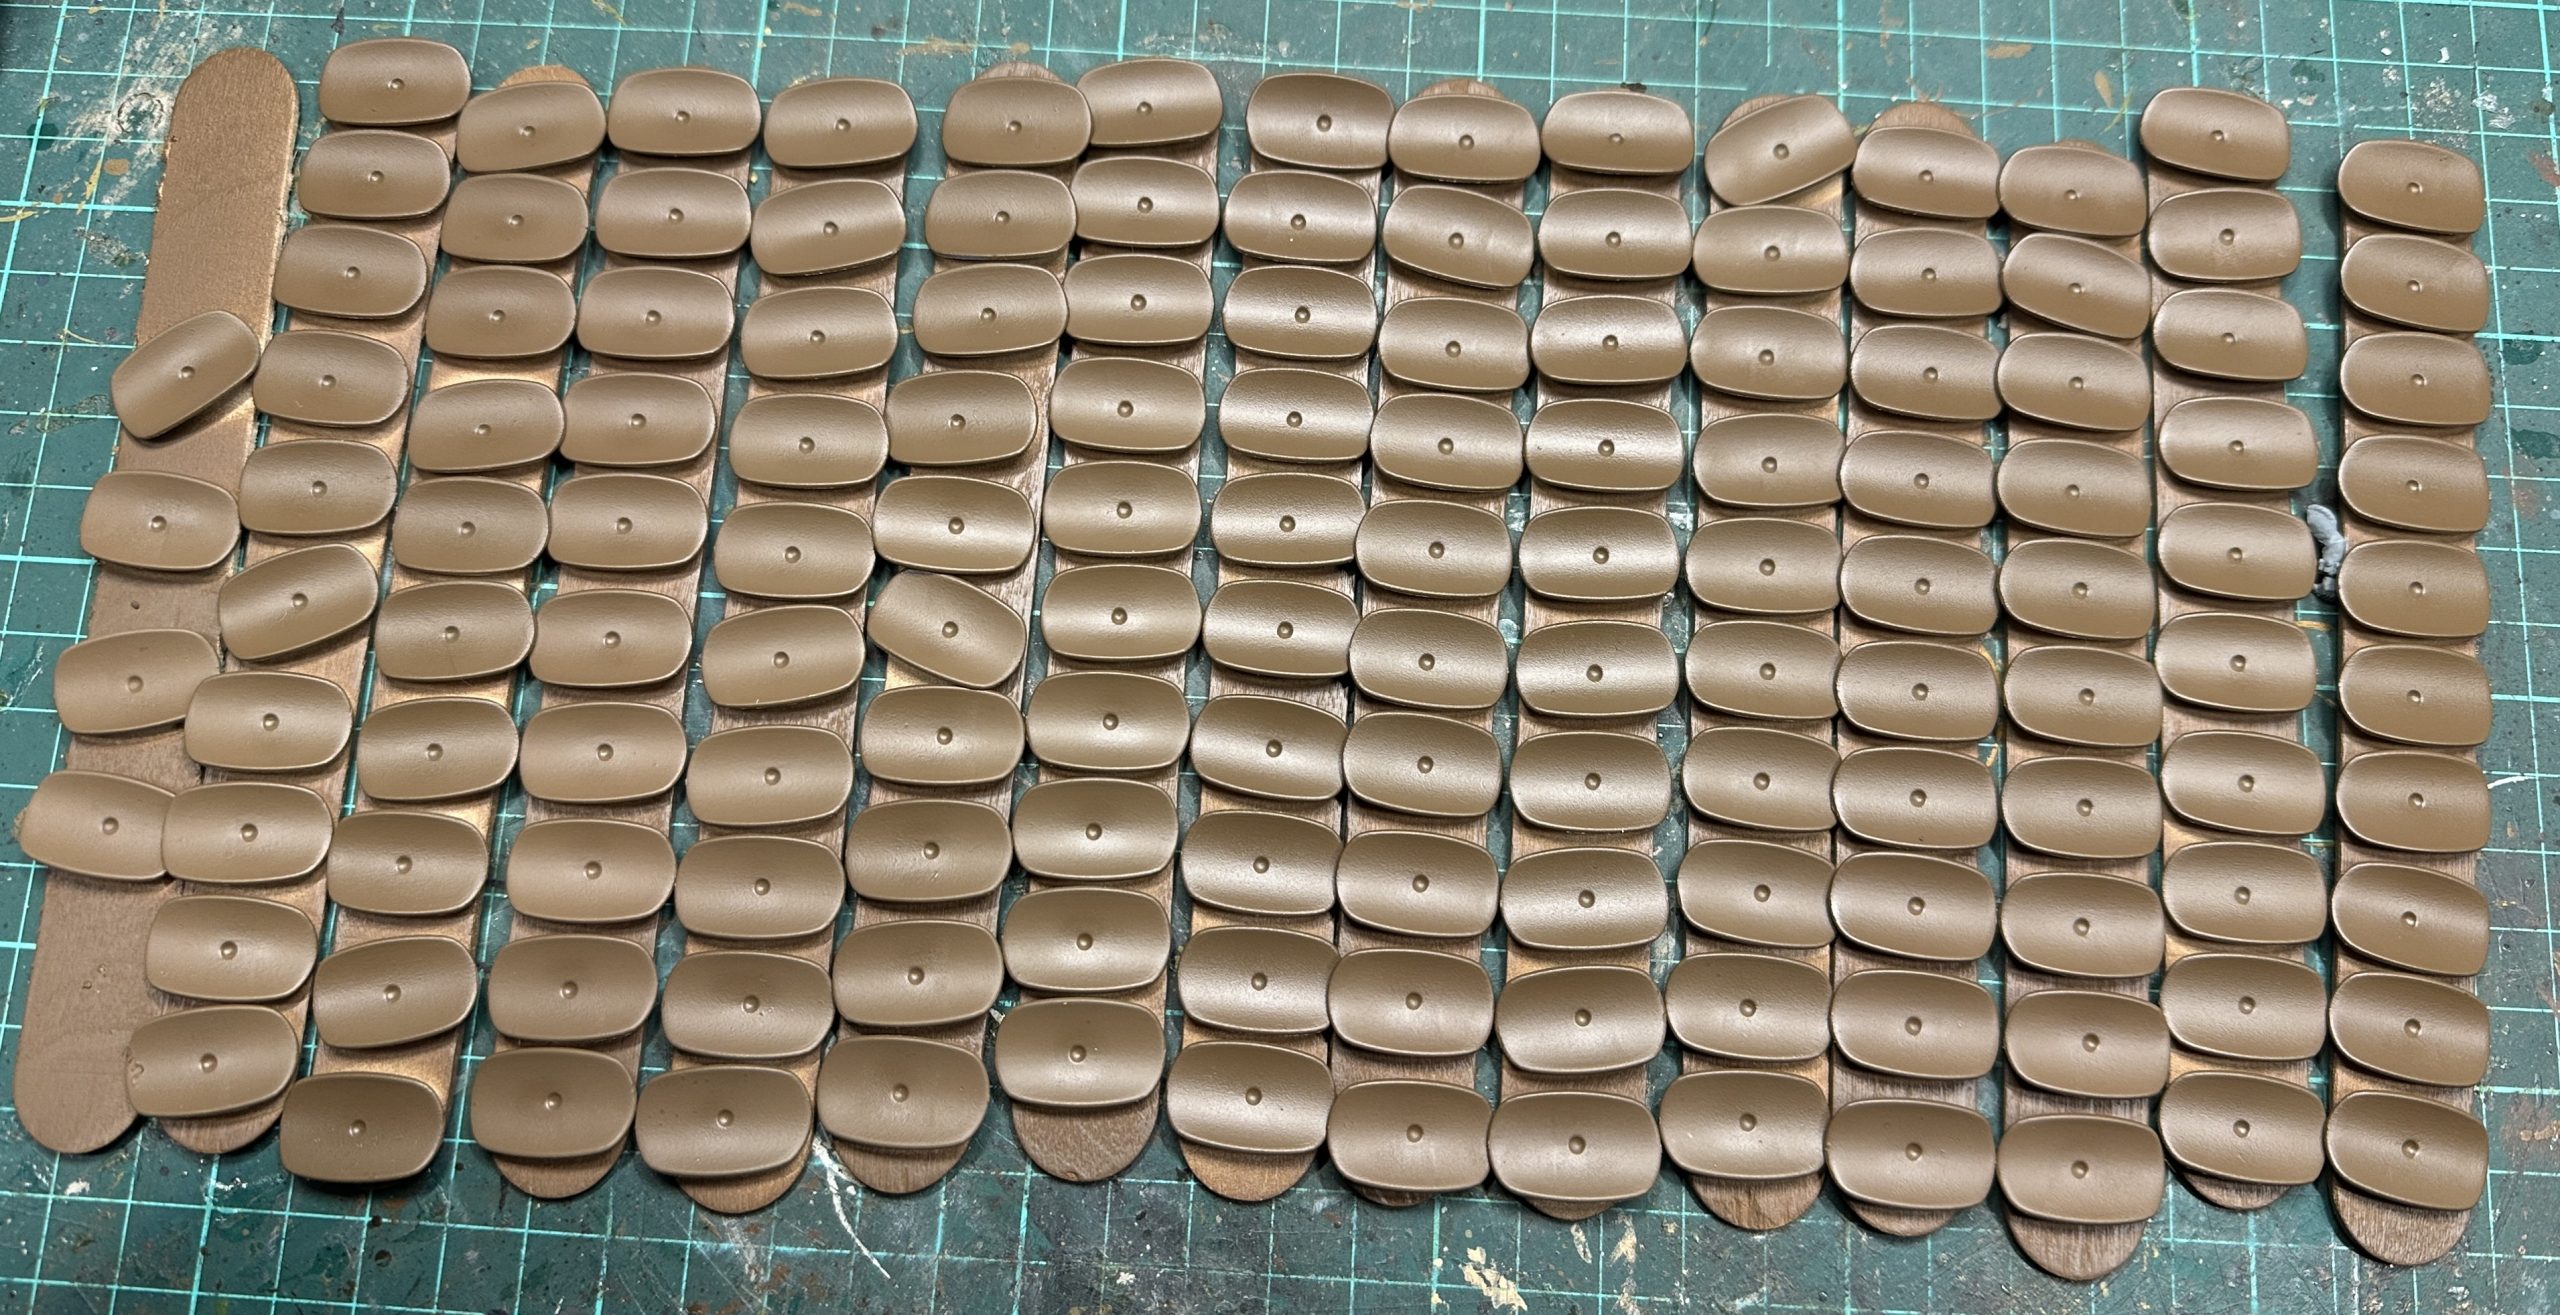
As you can see they went onto the spatulas first. This time with a blob of Blu Tack as I needed to turn them over for the white Halfords primer onto the front so the transfers have a nice bright base coat underneath them.
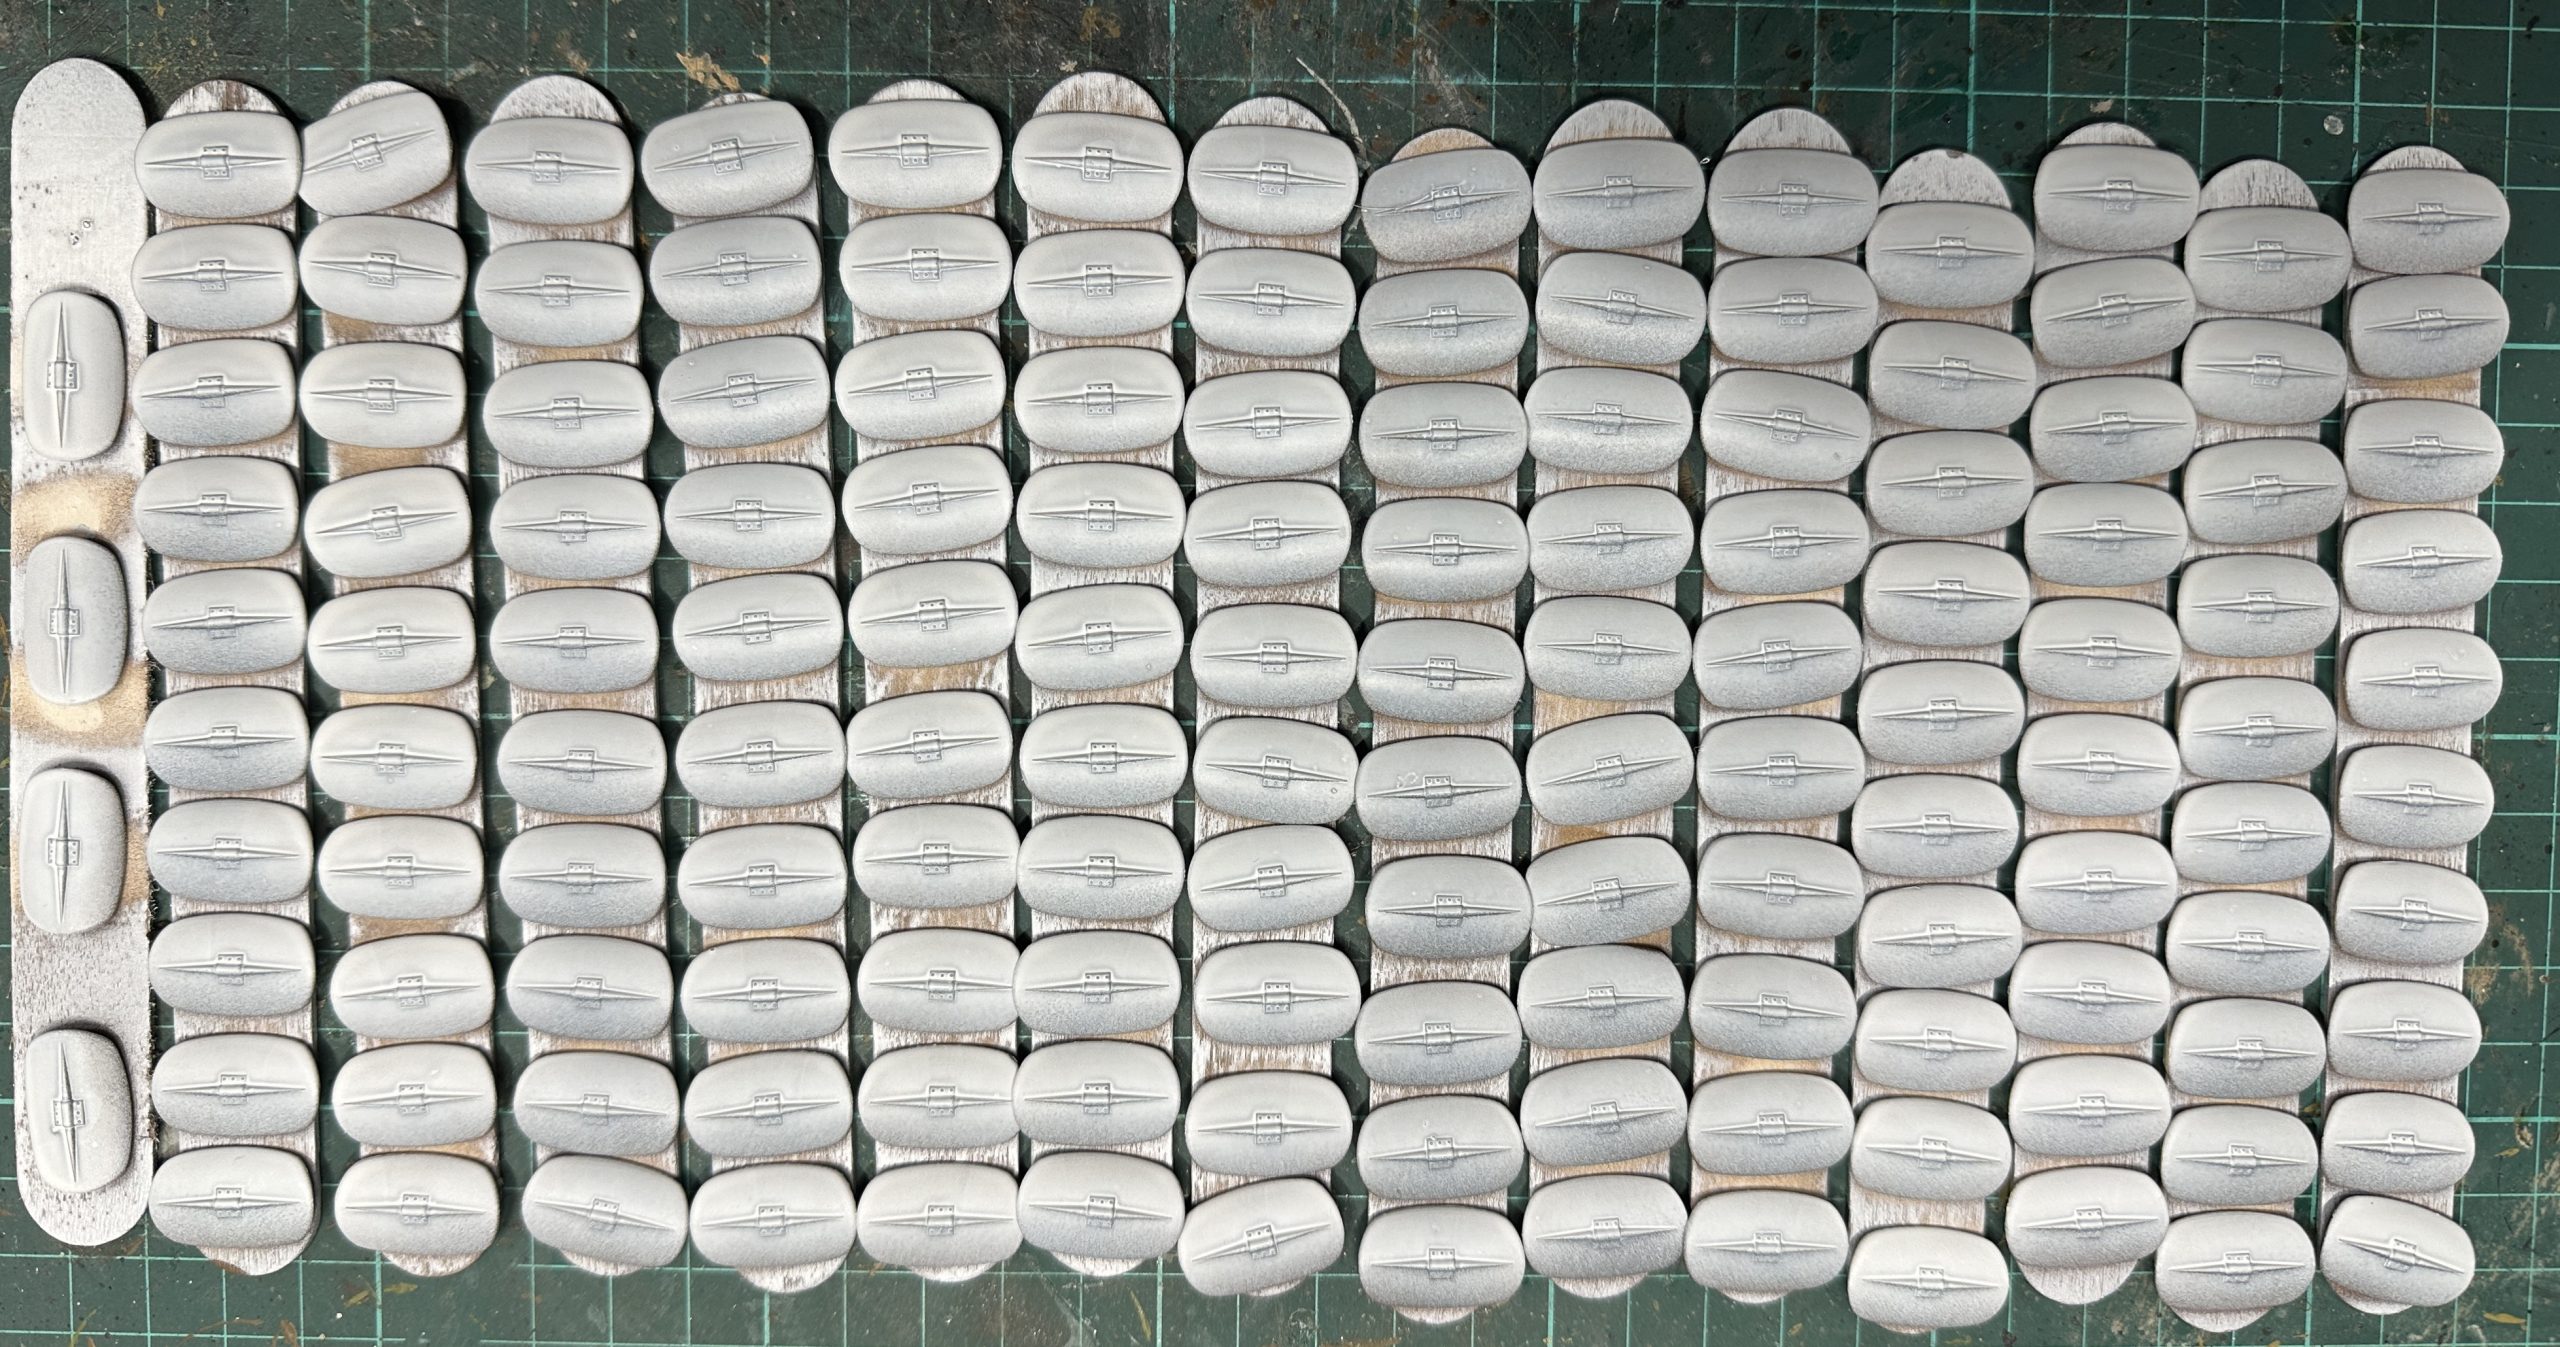
Then a few hours rubbing the transfers on. Nothing like as much fun as making my own Viking attack scene. The issue with these is they are difficult to get on straight and they can tear more easily than the modern ones. I’m an experienced modeller and I’ve used them before but I still struggled. I’ll have to tidy up some missed edges and covered central spines in painting. I’ll do that when they go onto the miniatures, I find too many batch processes a bit demotivating but I’ll want to do these as the minis will be finished once they are on.
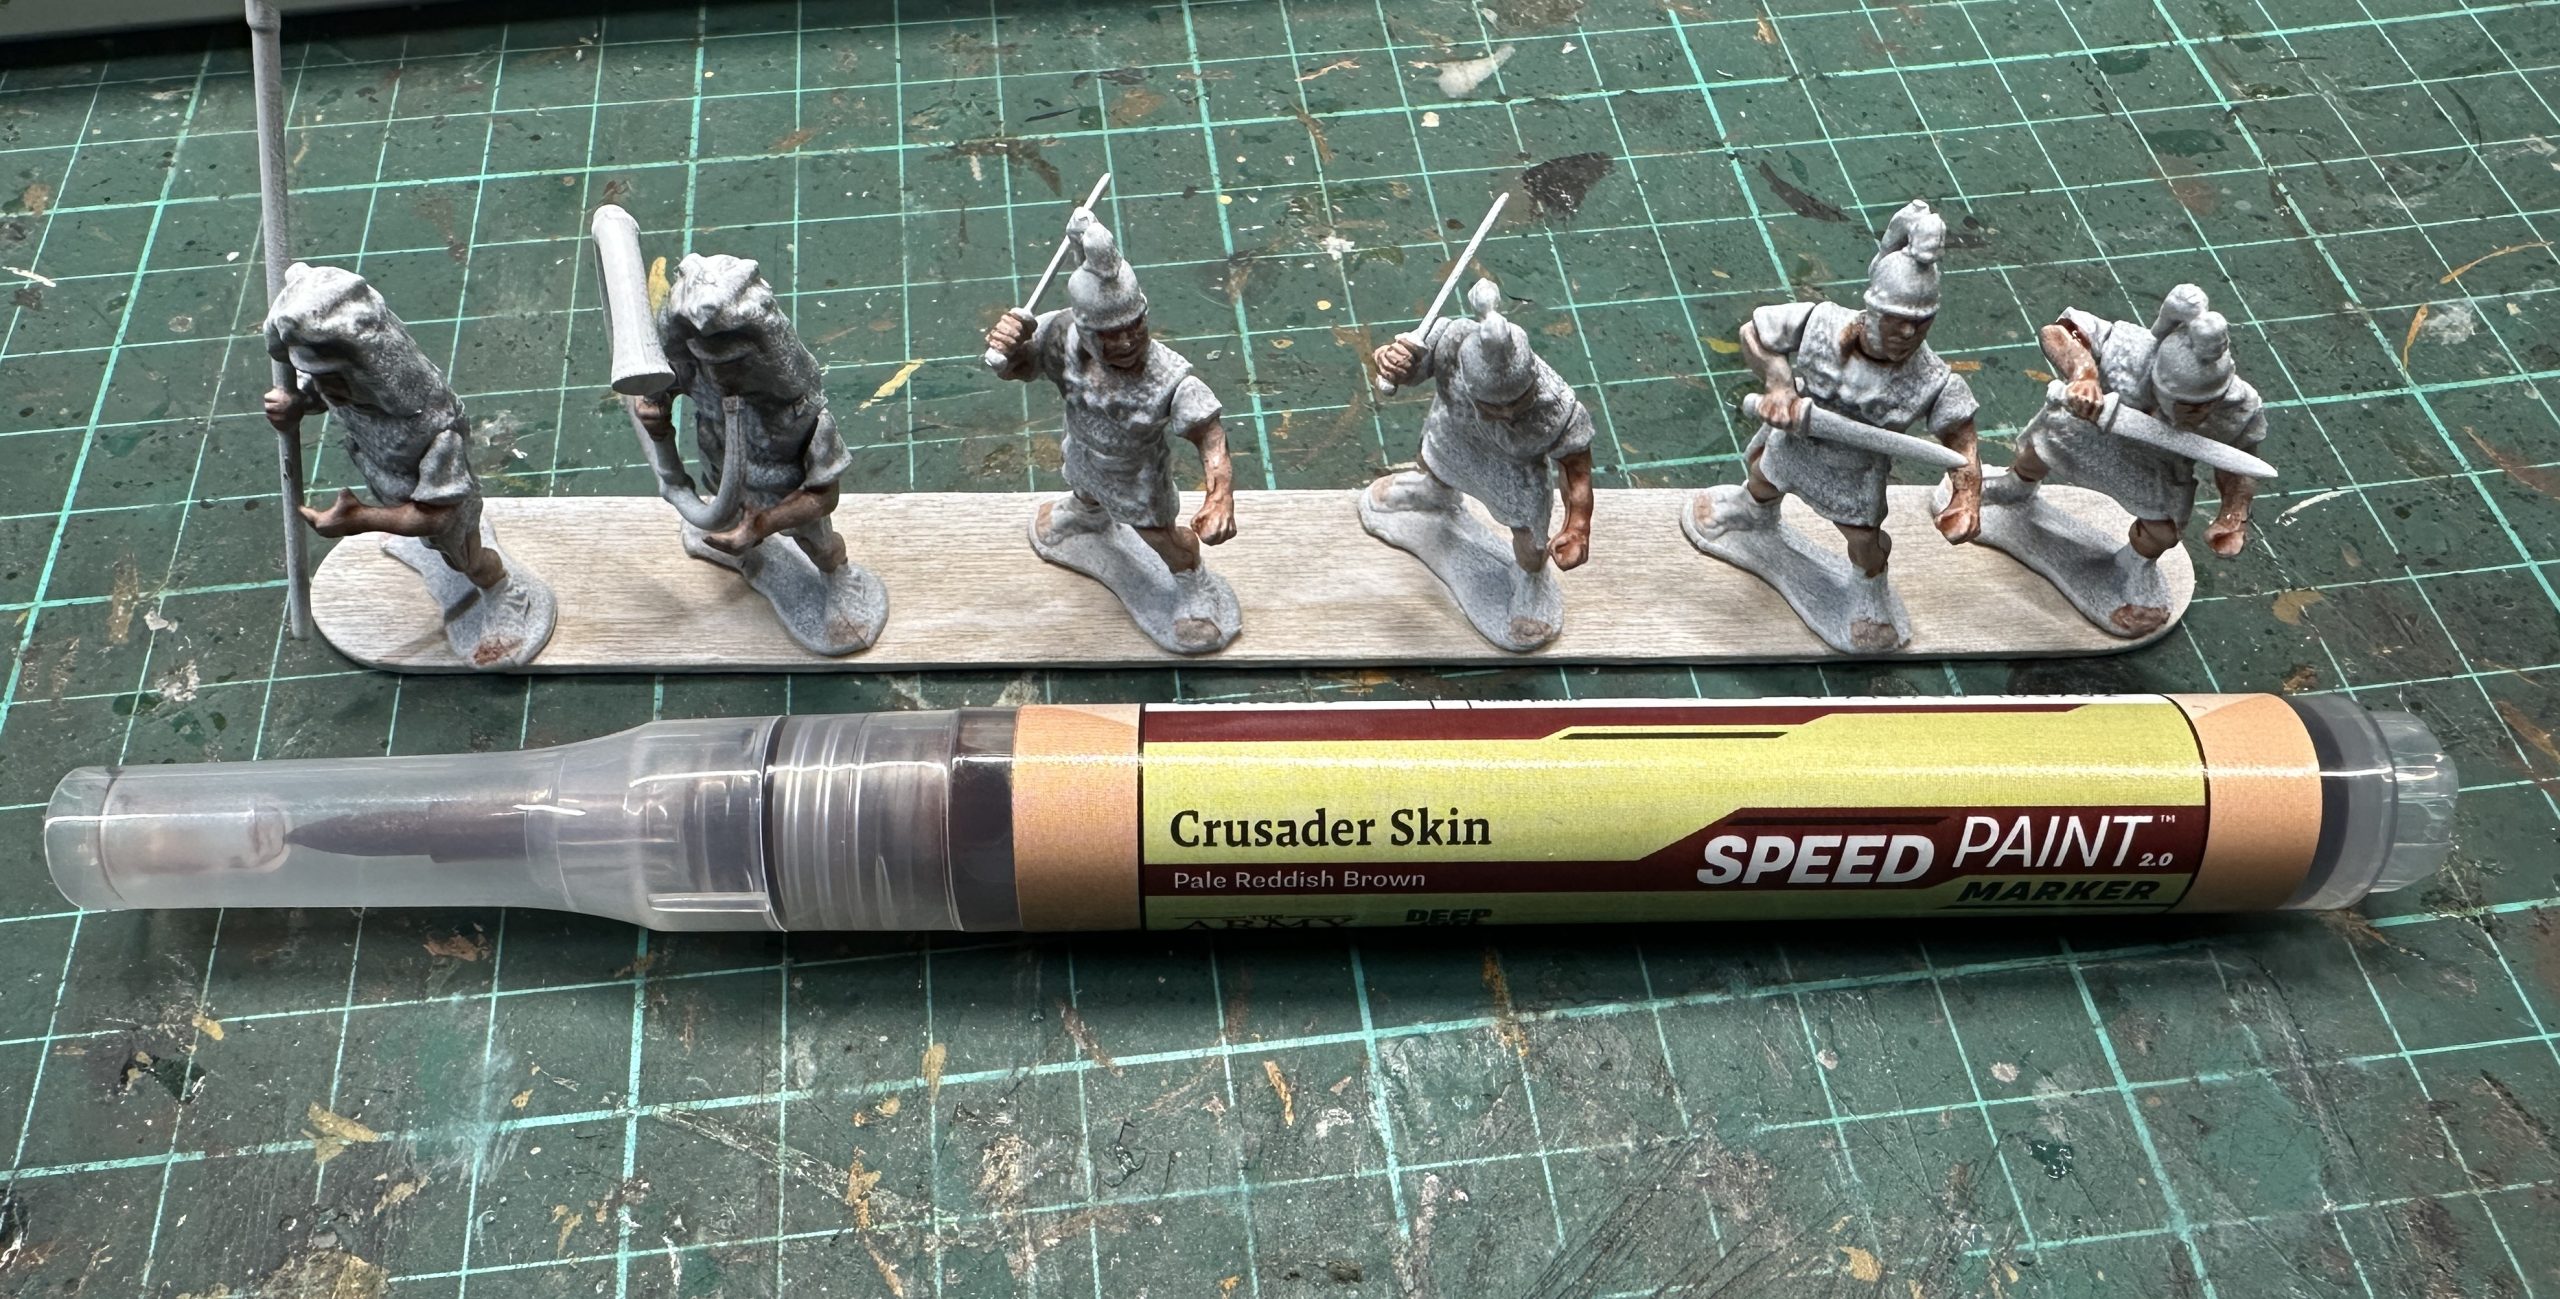
Stages of painting Part 1
This is a classic batch process. I’m trying out a single spatula’s worth with the stages to see how we go. First up is Crusader Skin. Faces, necks, arms, legs and toes.
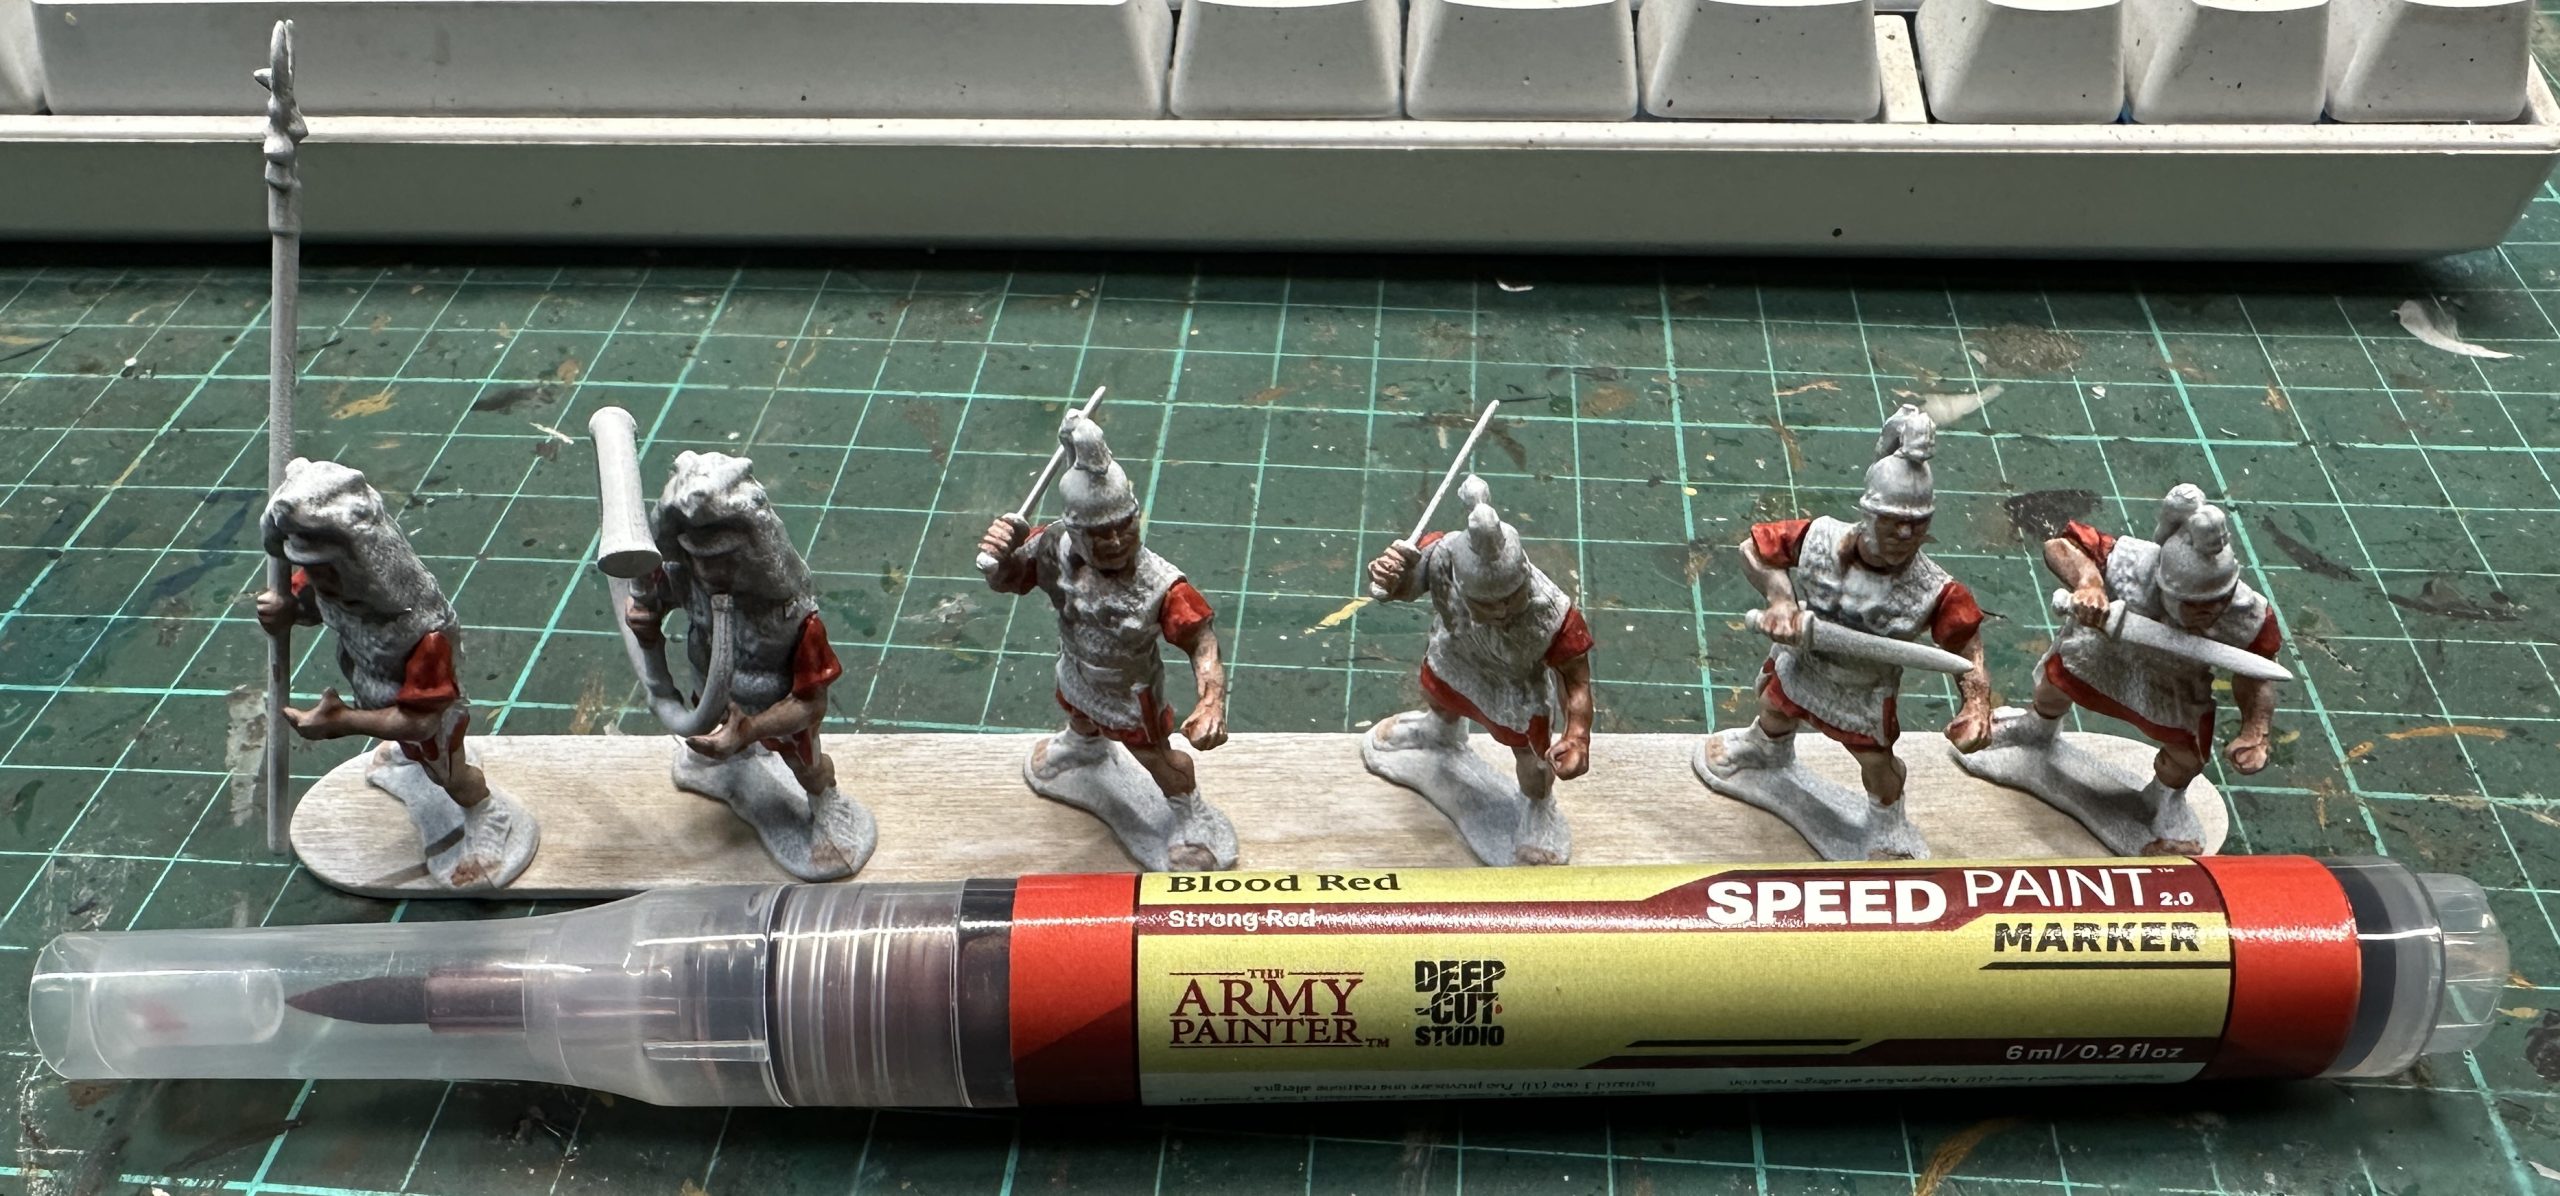
2 – Blood Red next. Sleeves and the bottom edge of the tunic.
3 – Hardened Leather. Sandals (caligae) and belt with sword straps where they are obviously moulded.

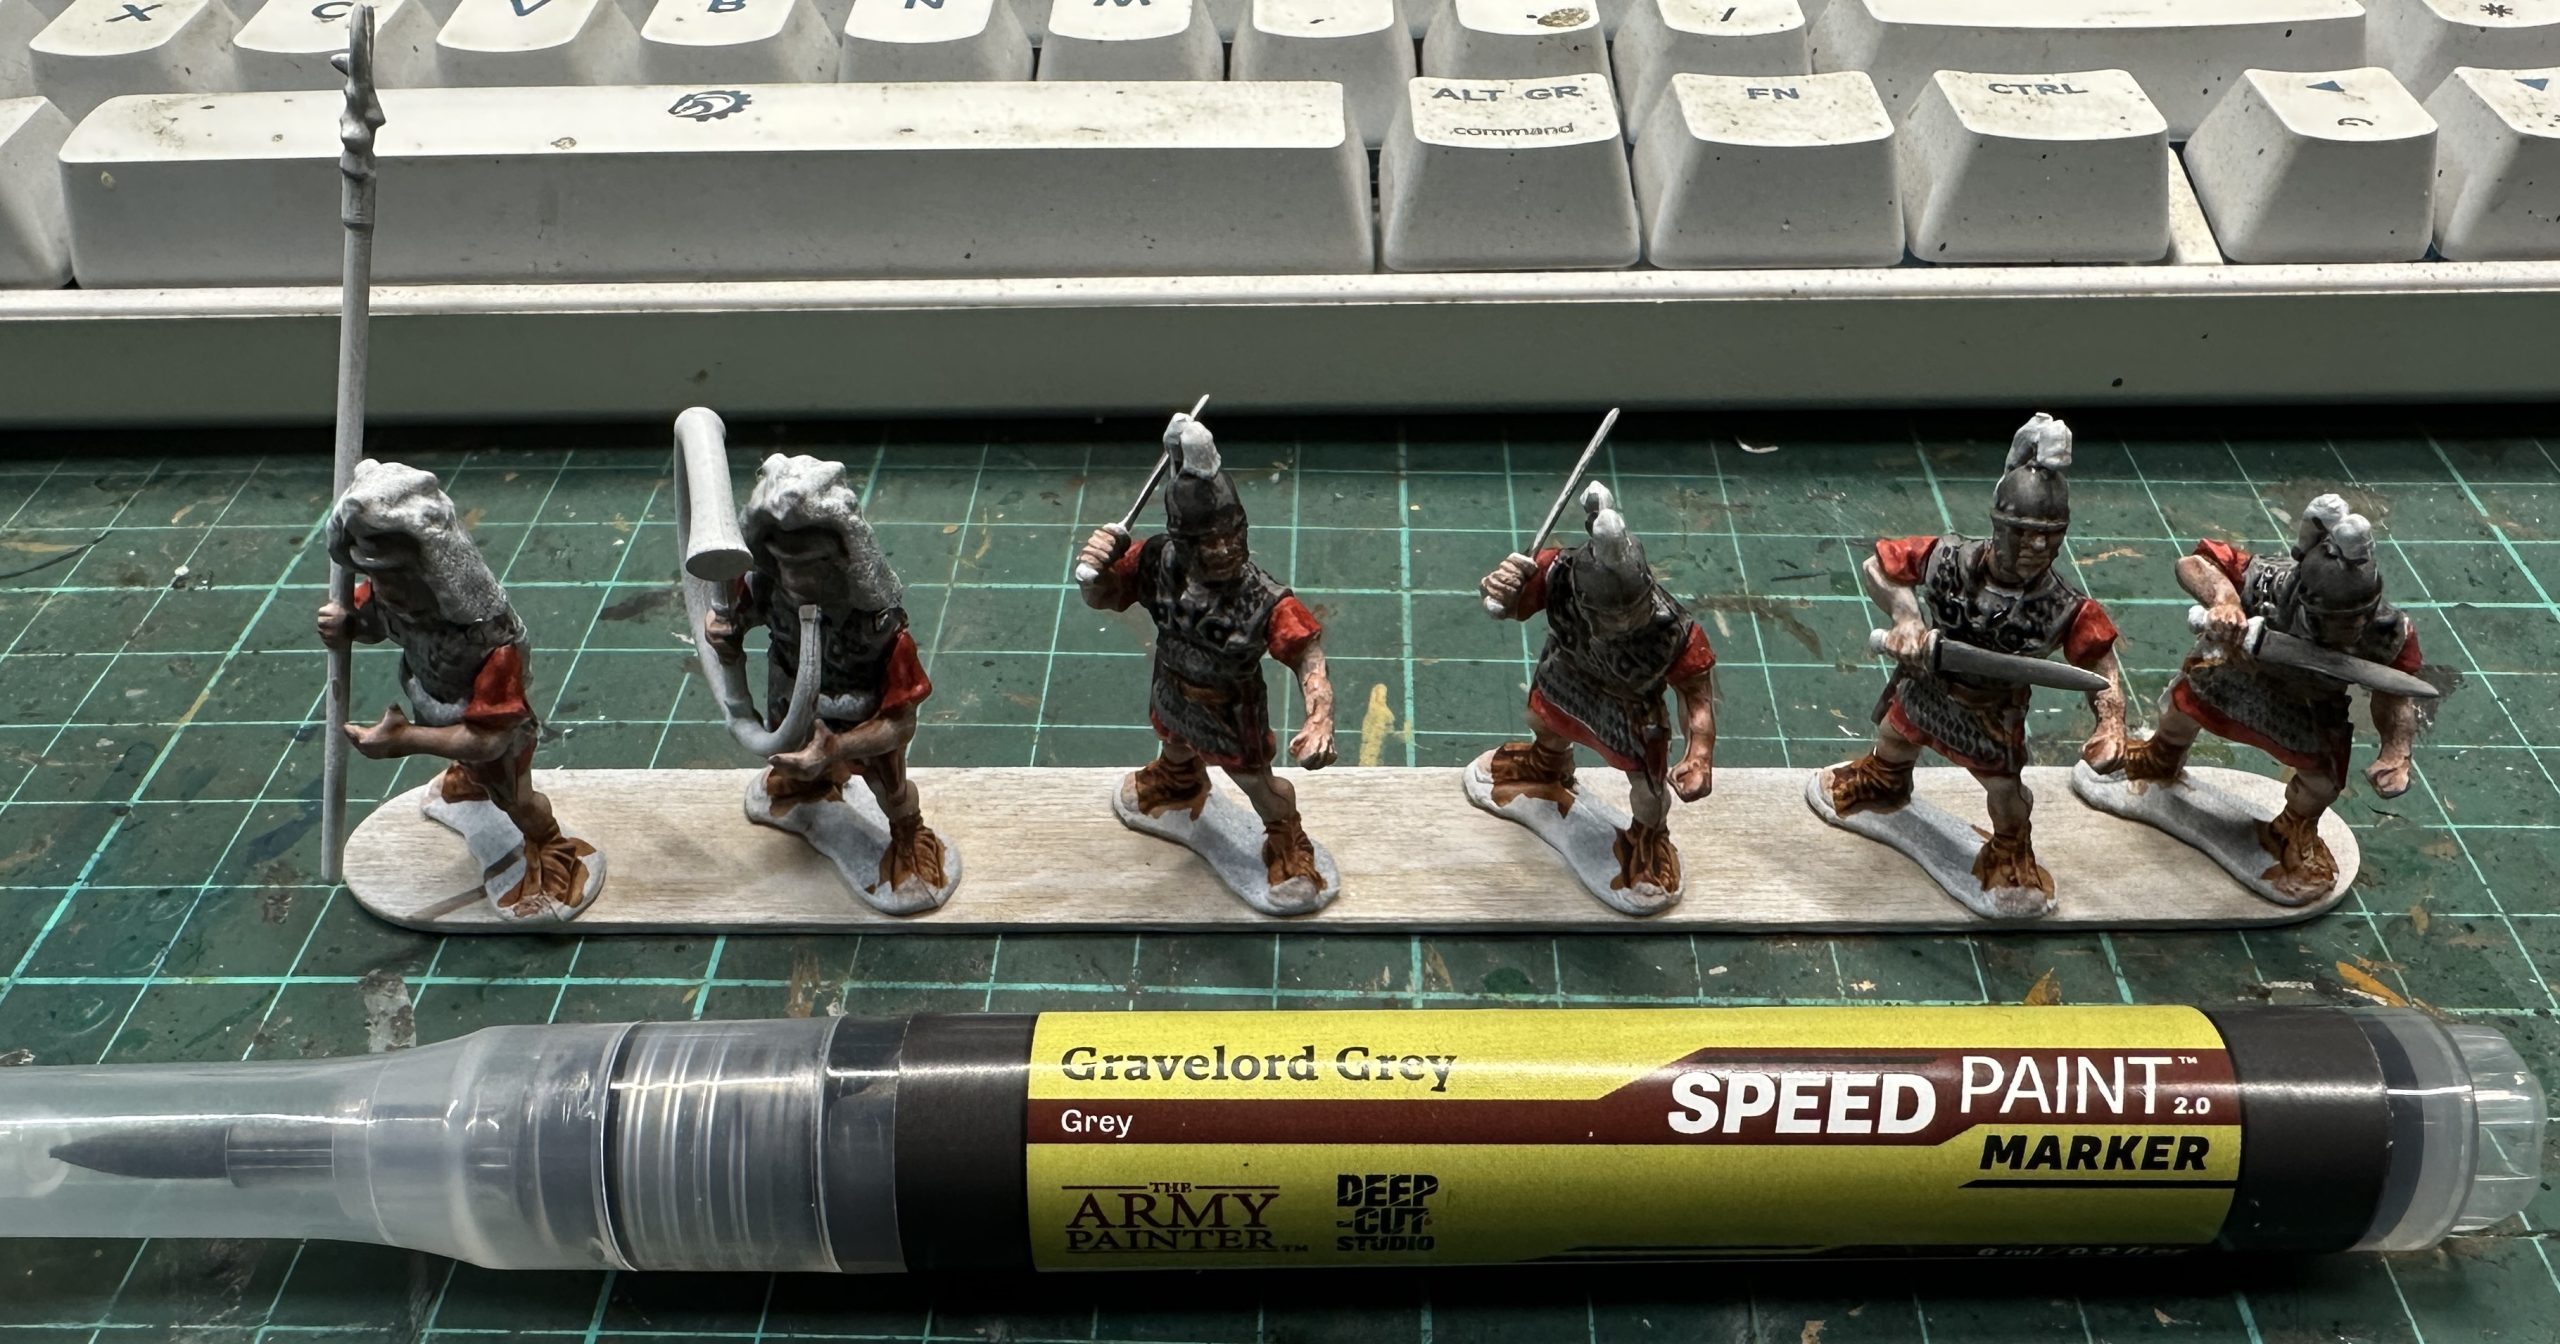
4 – Gravelord Grey. The base coat for the mail shirts, sword blades and helmets. This was the only colour I used a bit of an extra, simple technique on. I use my finger to wipe back the Speedpaint along the top or exposed edges of the swords. This takes the edge back to white. This will show as a sharpened edge when they are highlighted with silver.
5 – Grim Black. Plumes and the noses of the animal pelt headdresses.
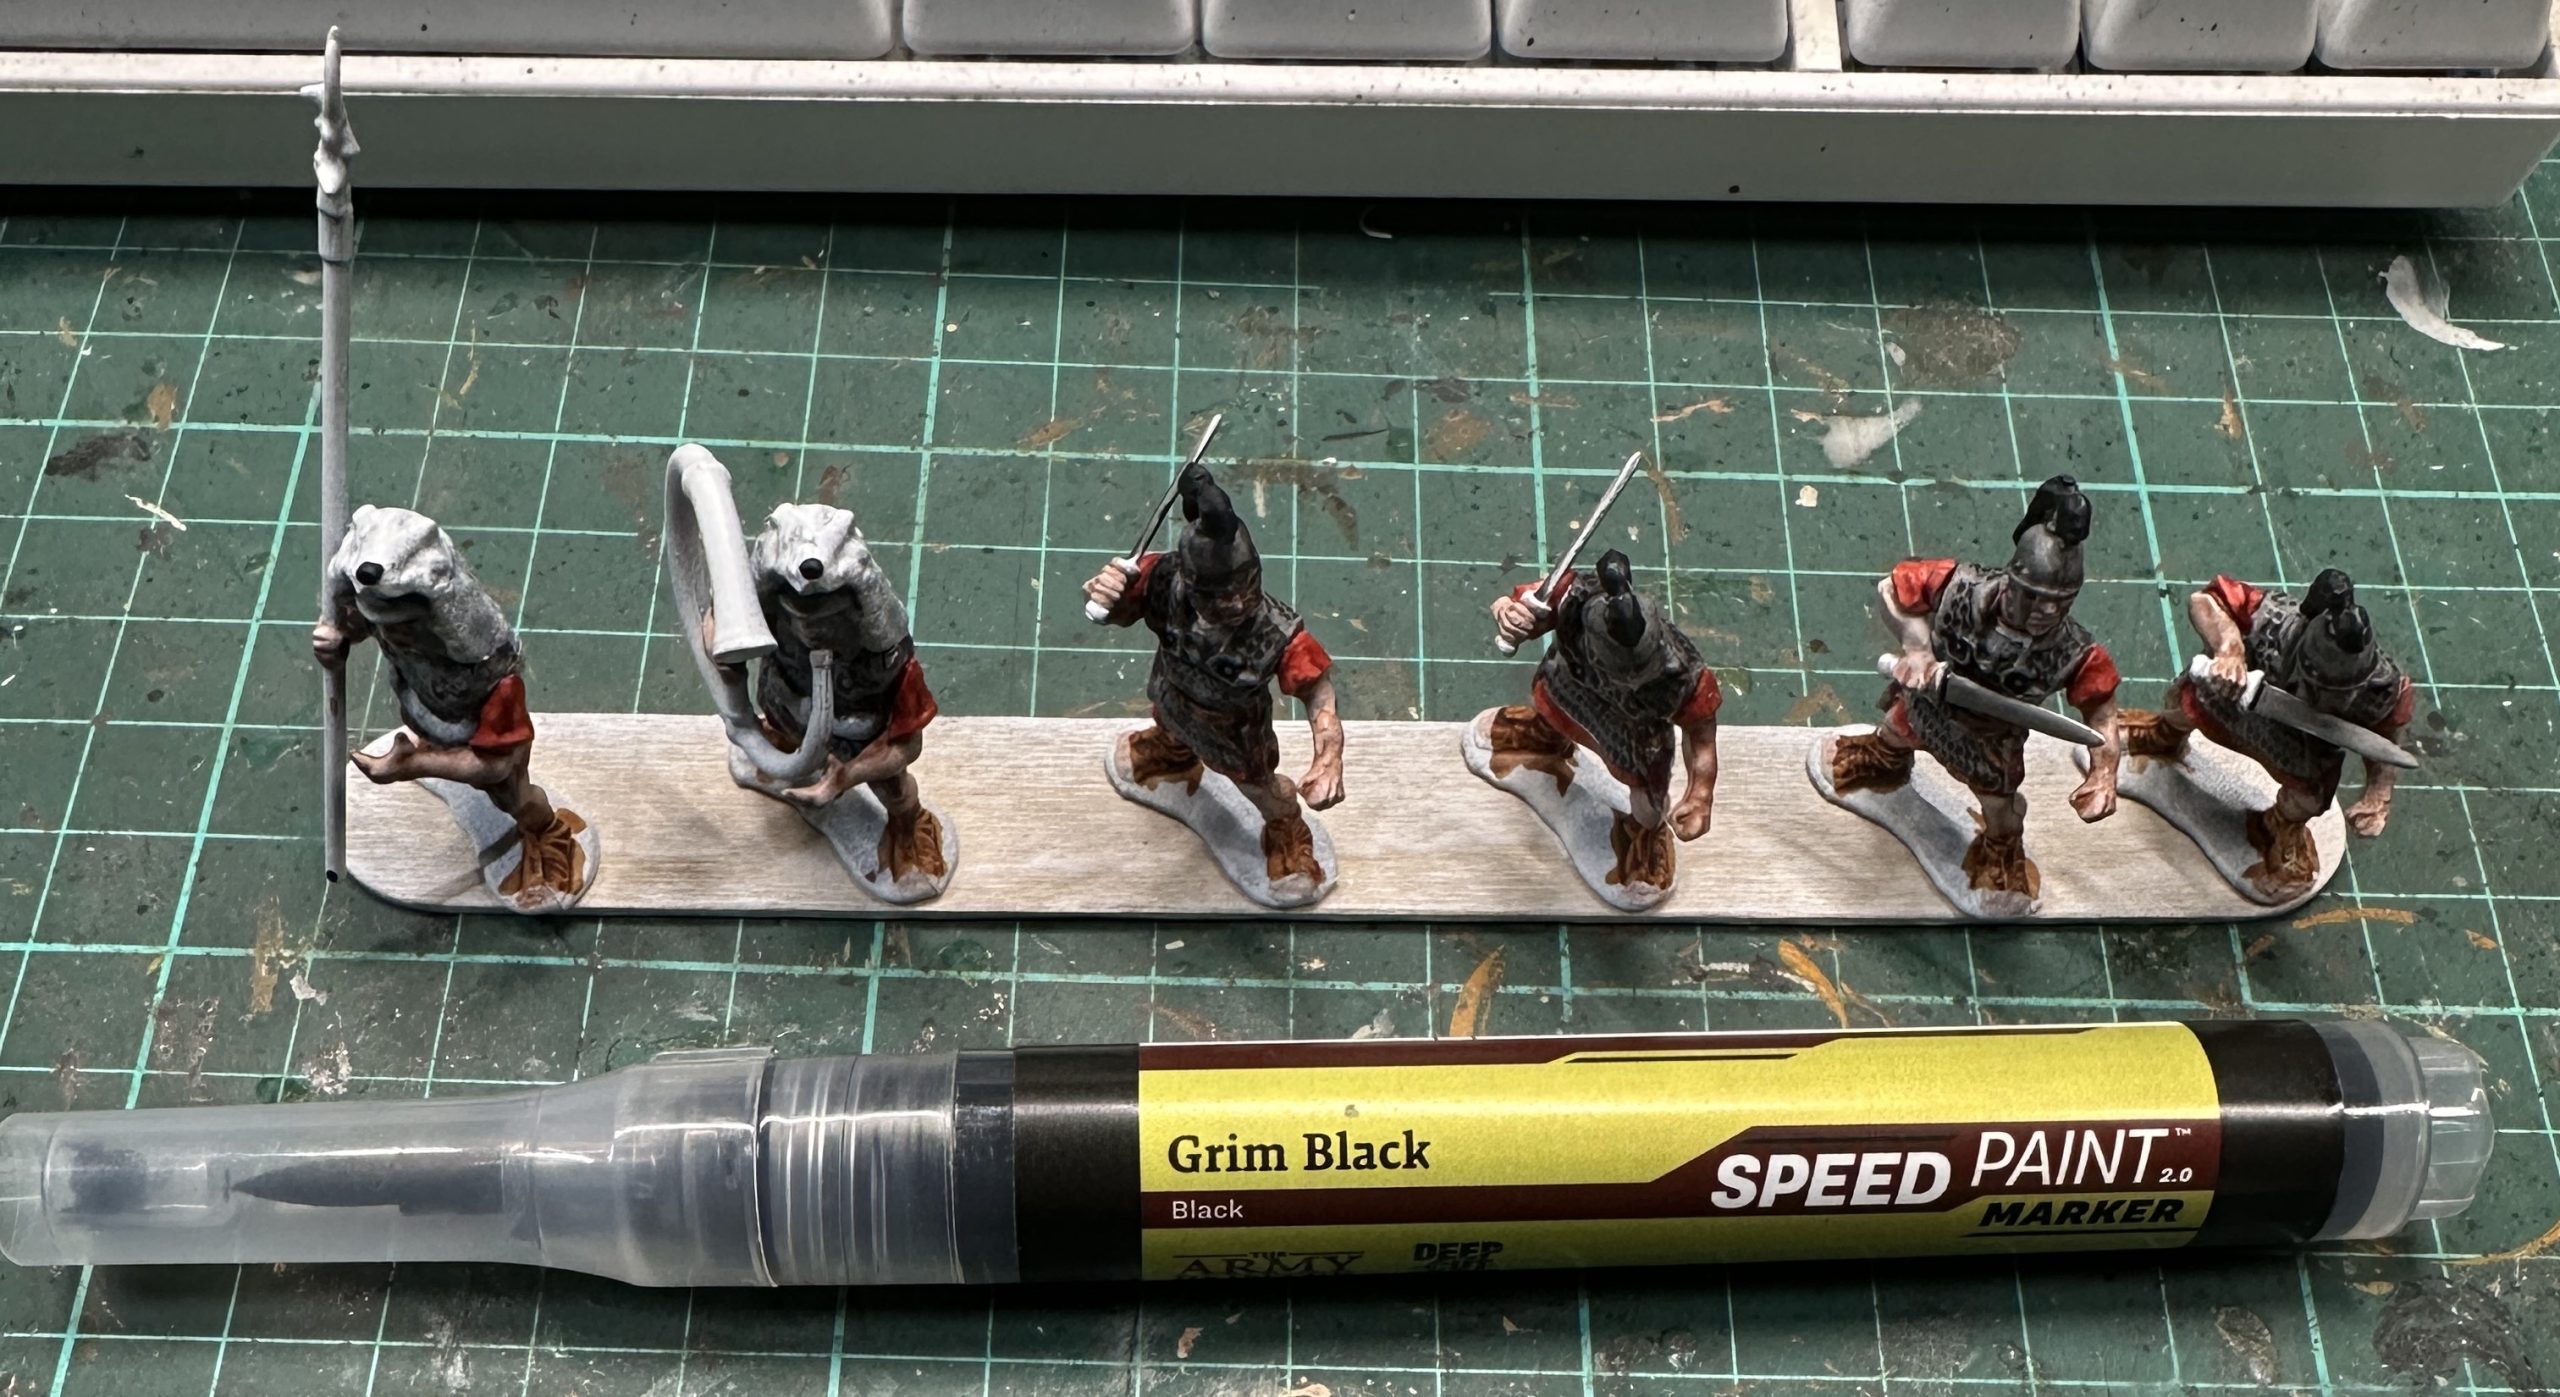
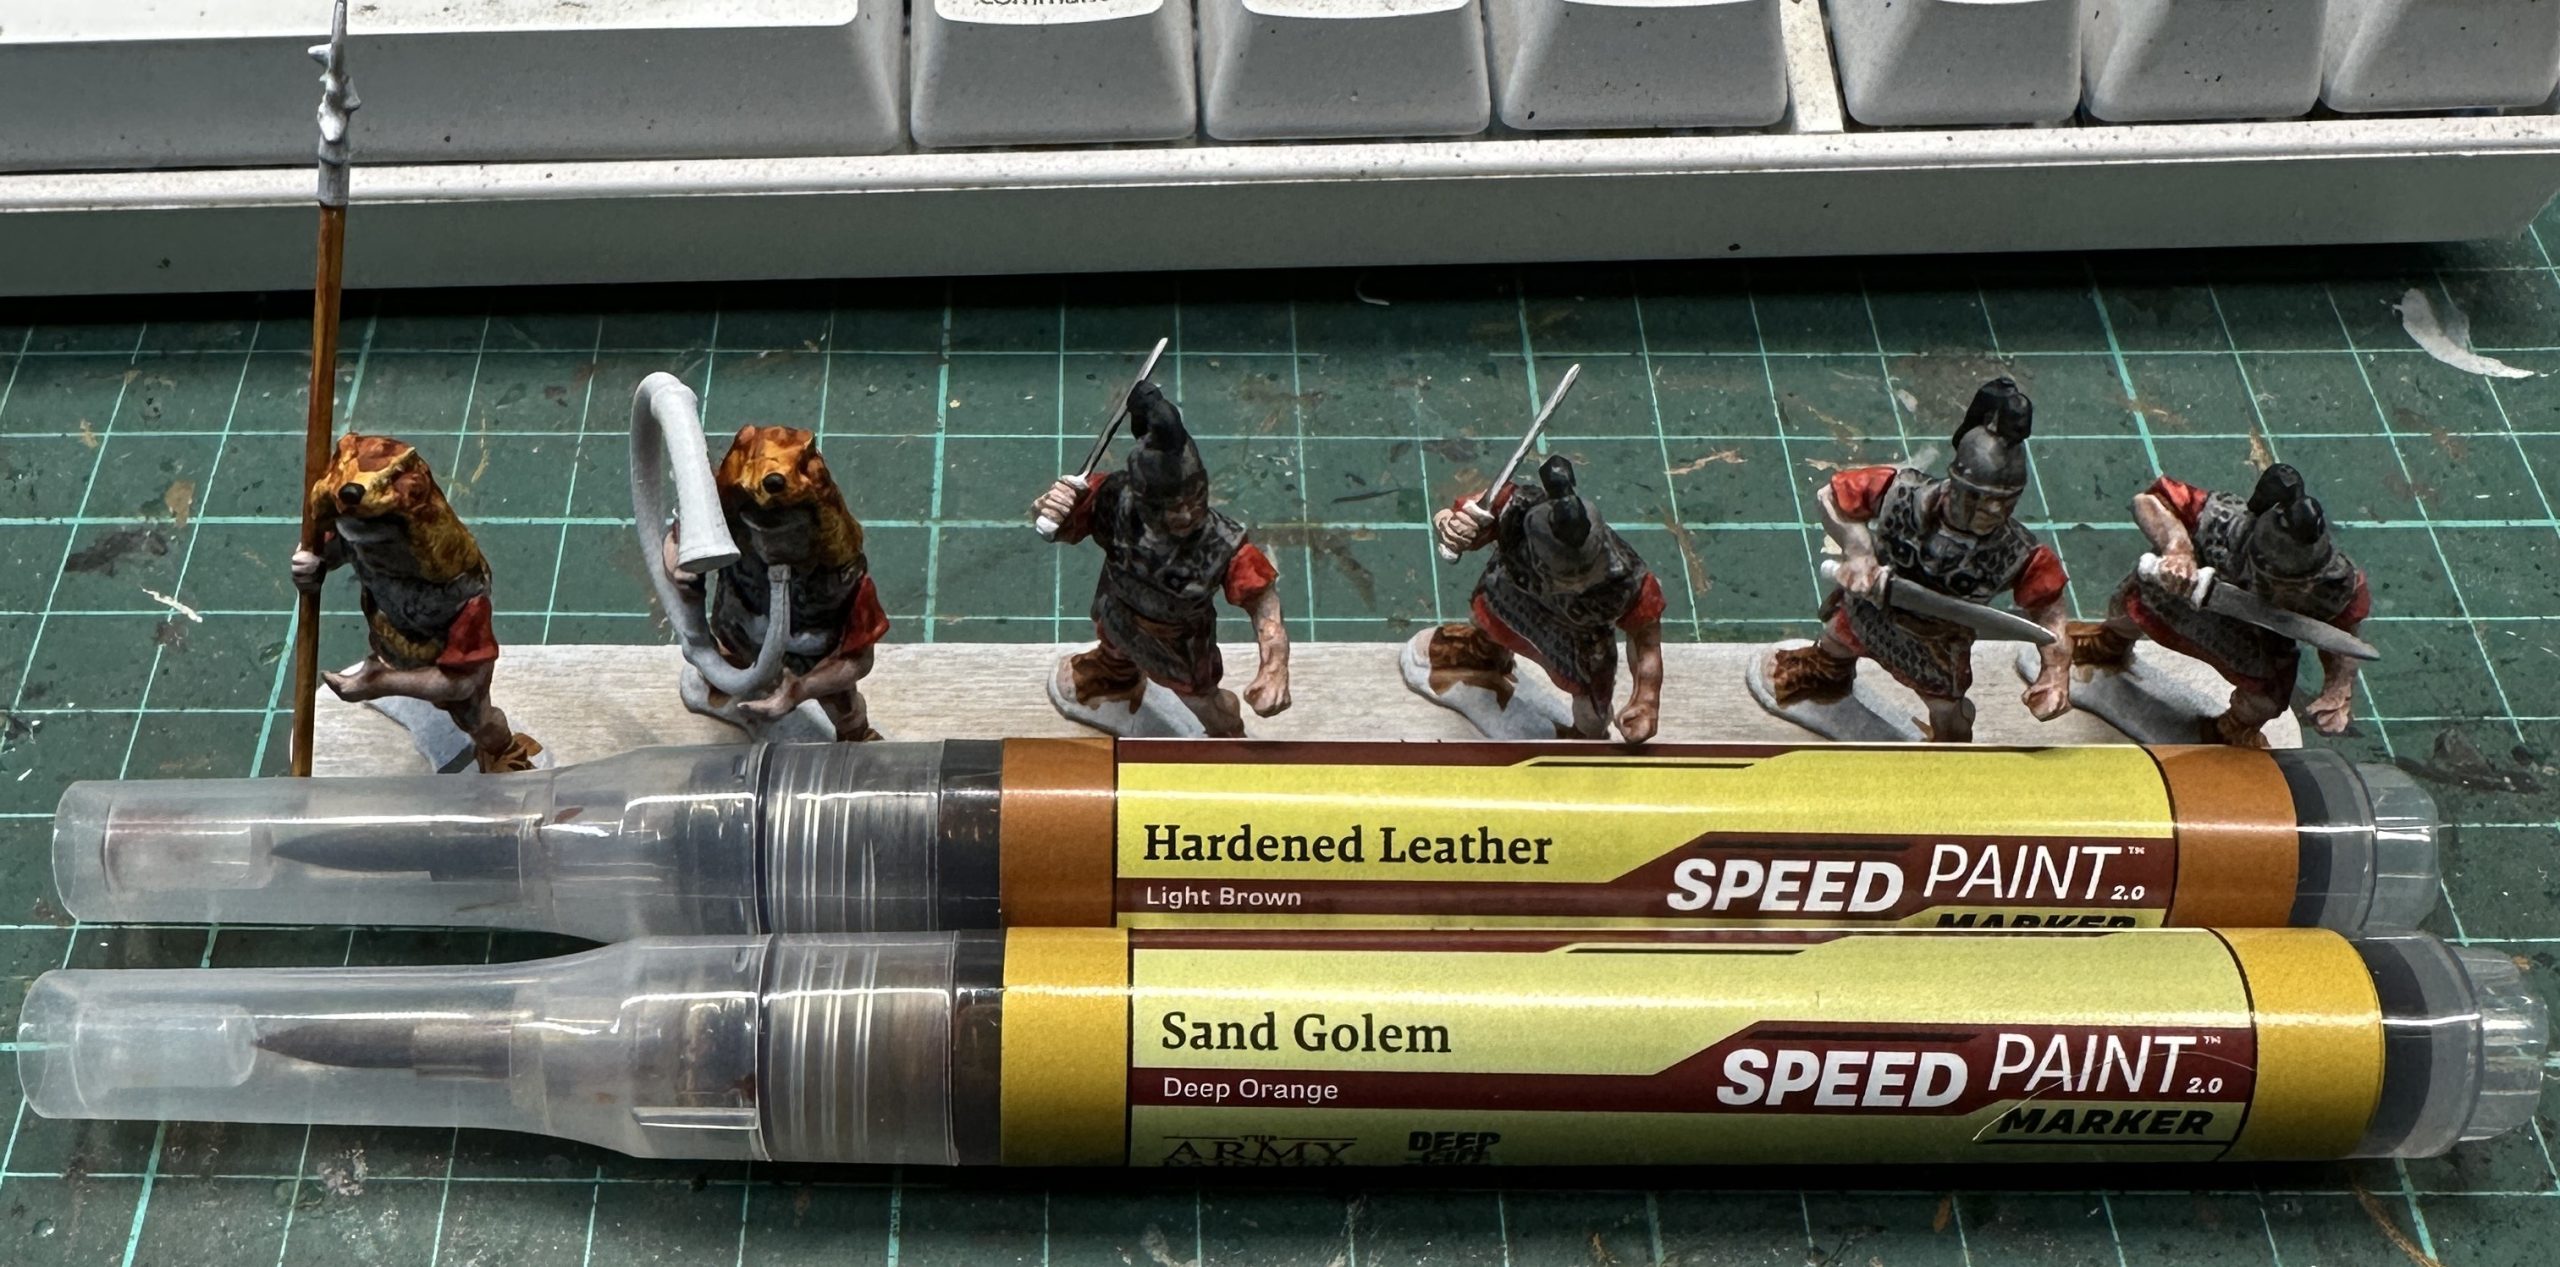
6 – Sand Golem. Banner/pilum shafts.
6a – Sand Golem and Hardened Leather. The lion pelt headdresses got a coat of Sand Golem and then an accent of Hardened Leather around the area of the mane.
Although it looks okay, I’m not crazy about this result and I’d prefer to have a bit of a darker brown to add in as well. I’ll have to go with this for now. I guess this is what makes it a challenge, having to put up with something less than perfect 🙂
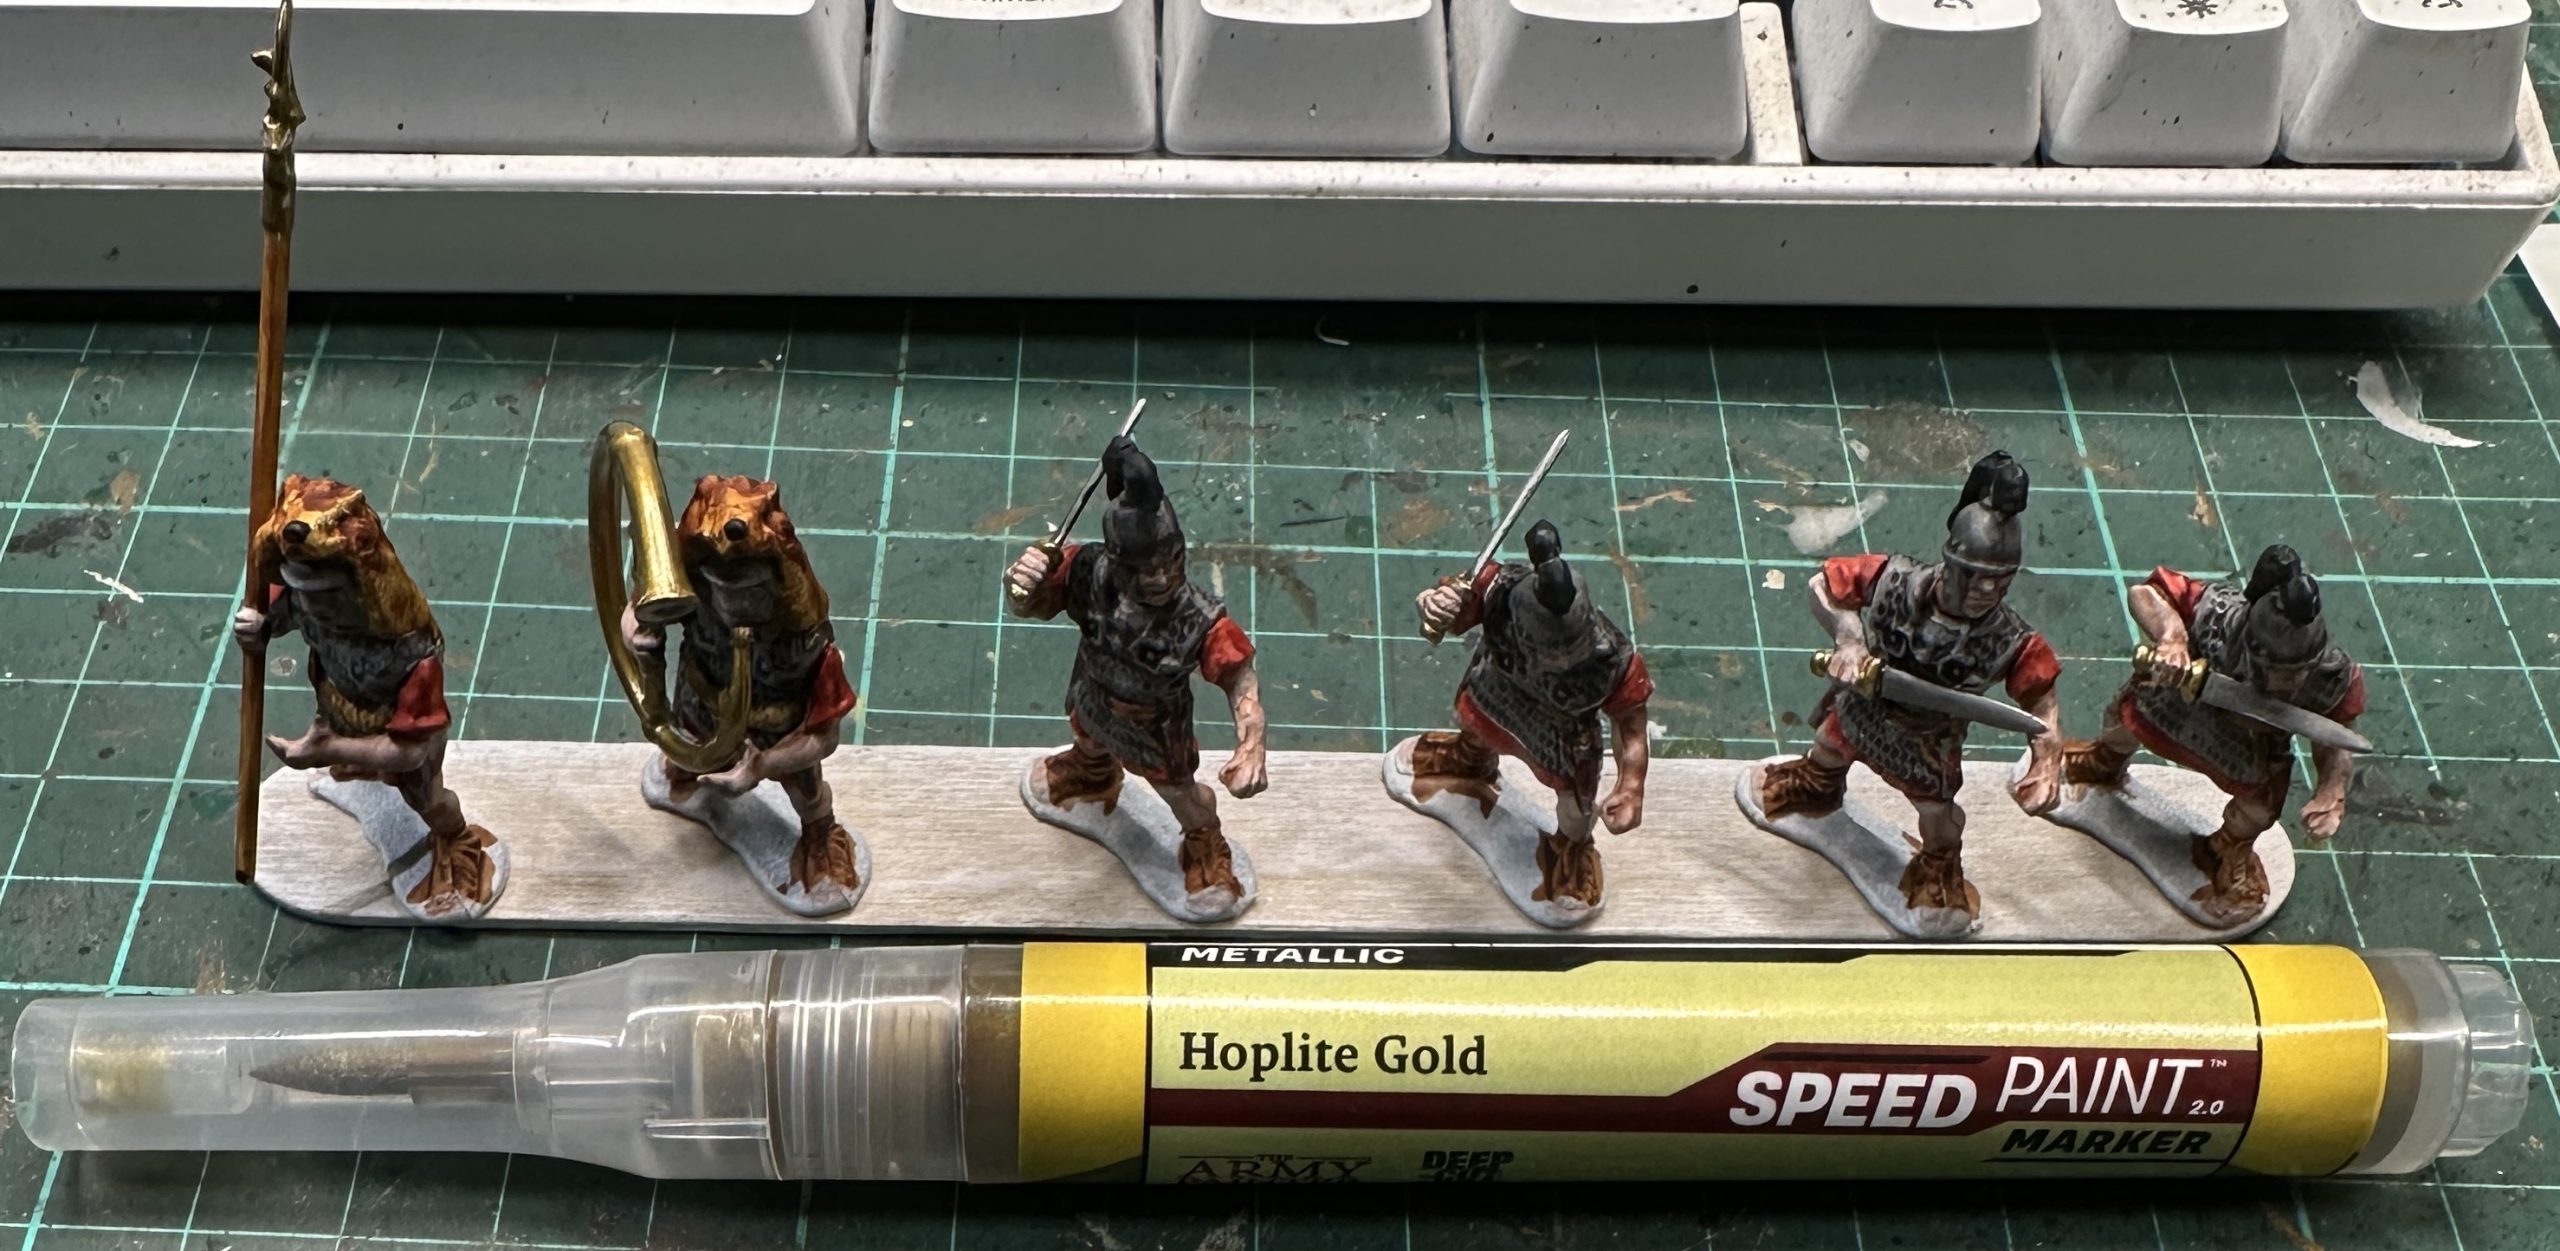
Stages of painting Part 2
With the base colours done I moved on to the metallics. First up Hoplite Gold (Step 7). The sword pommels and guards, the musician’s cornu and the signifer’s eagle.
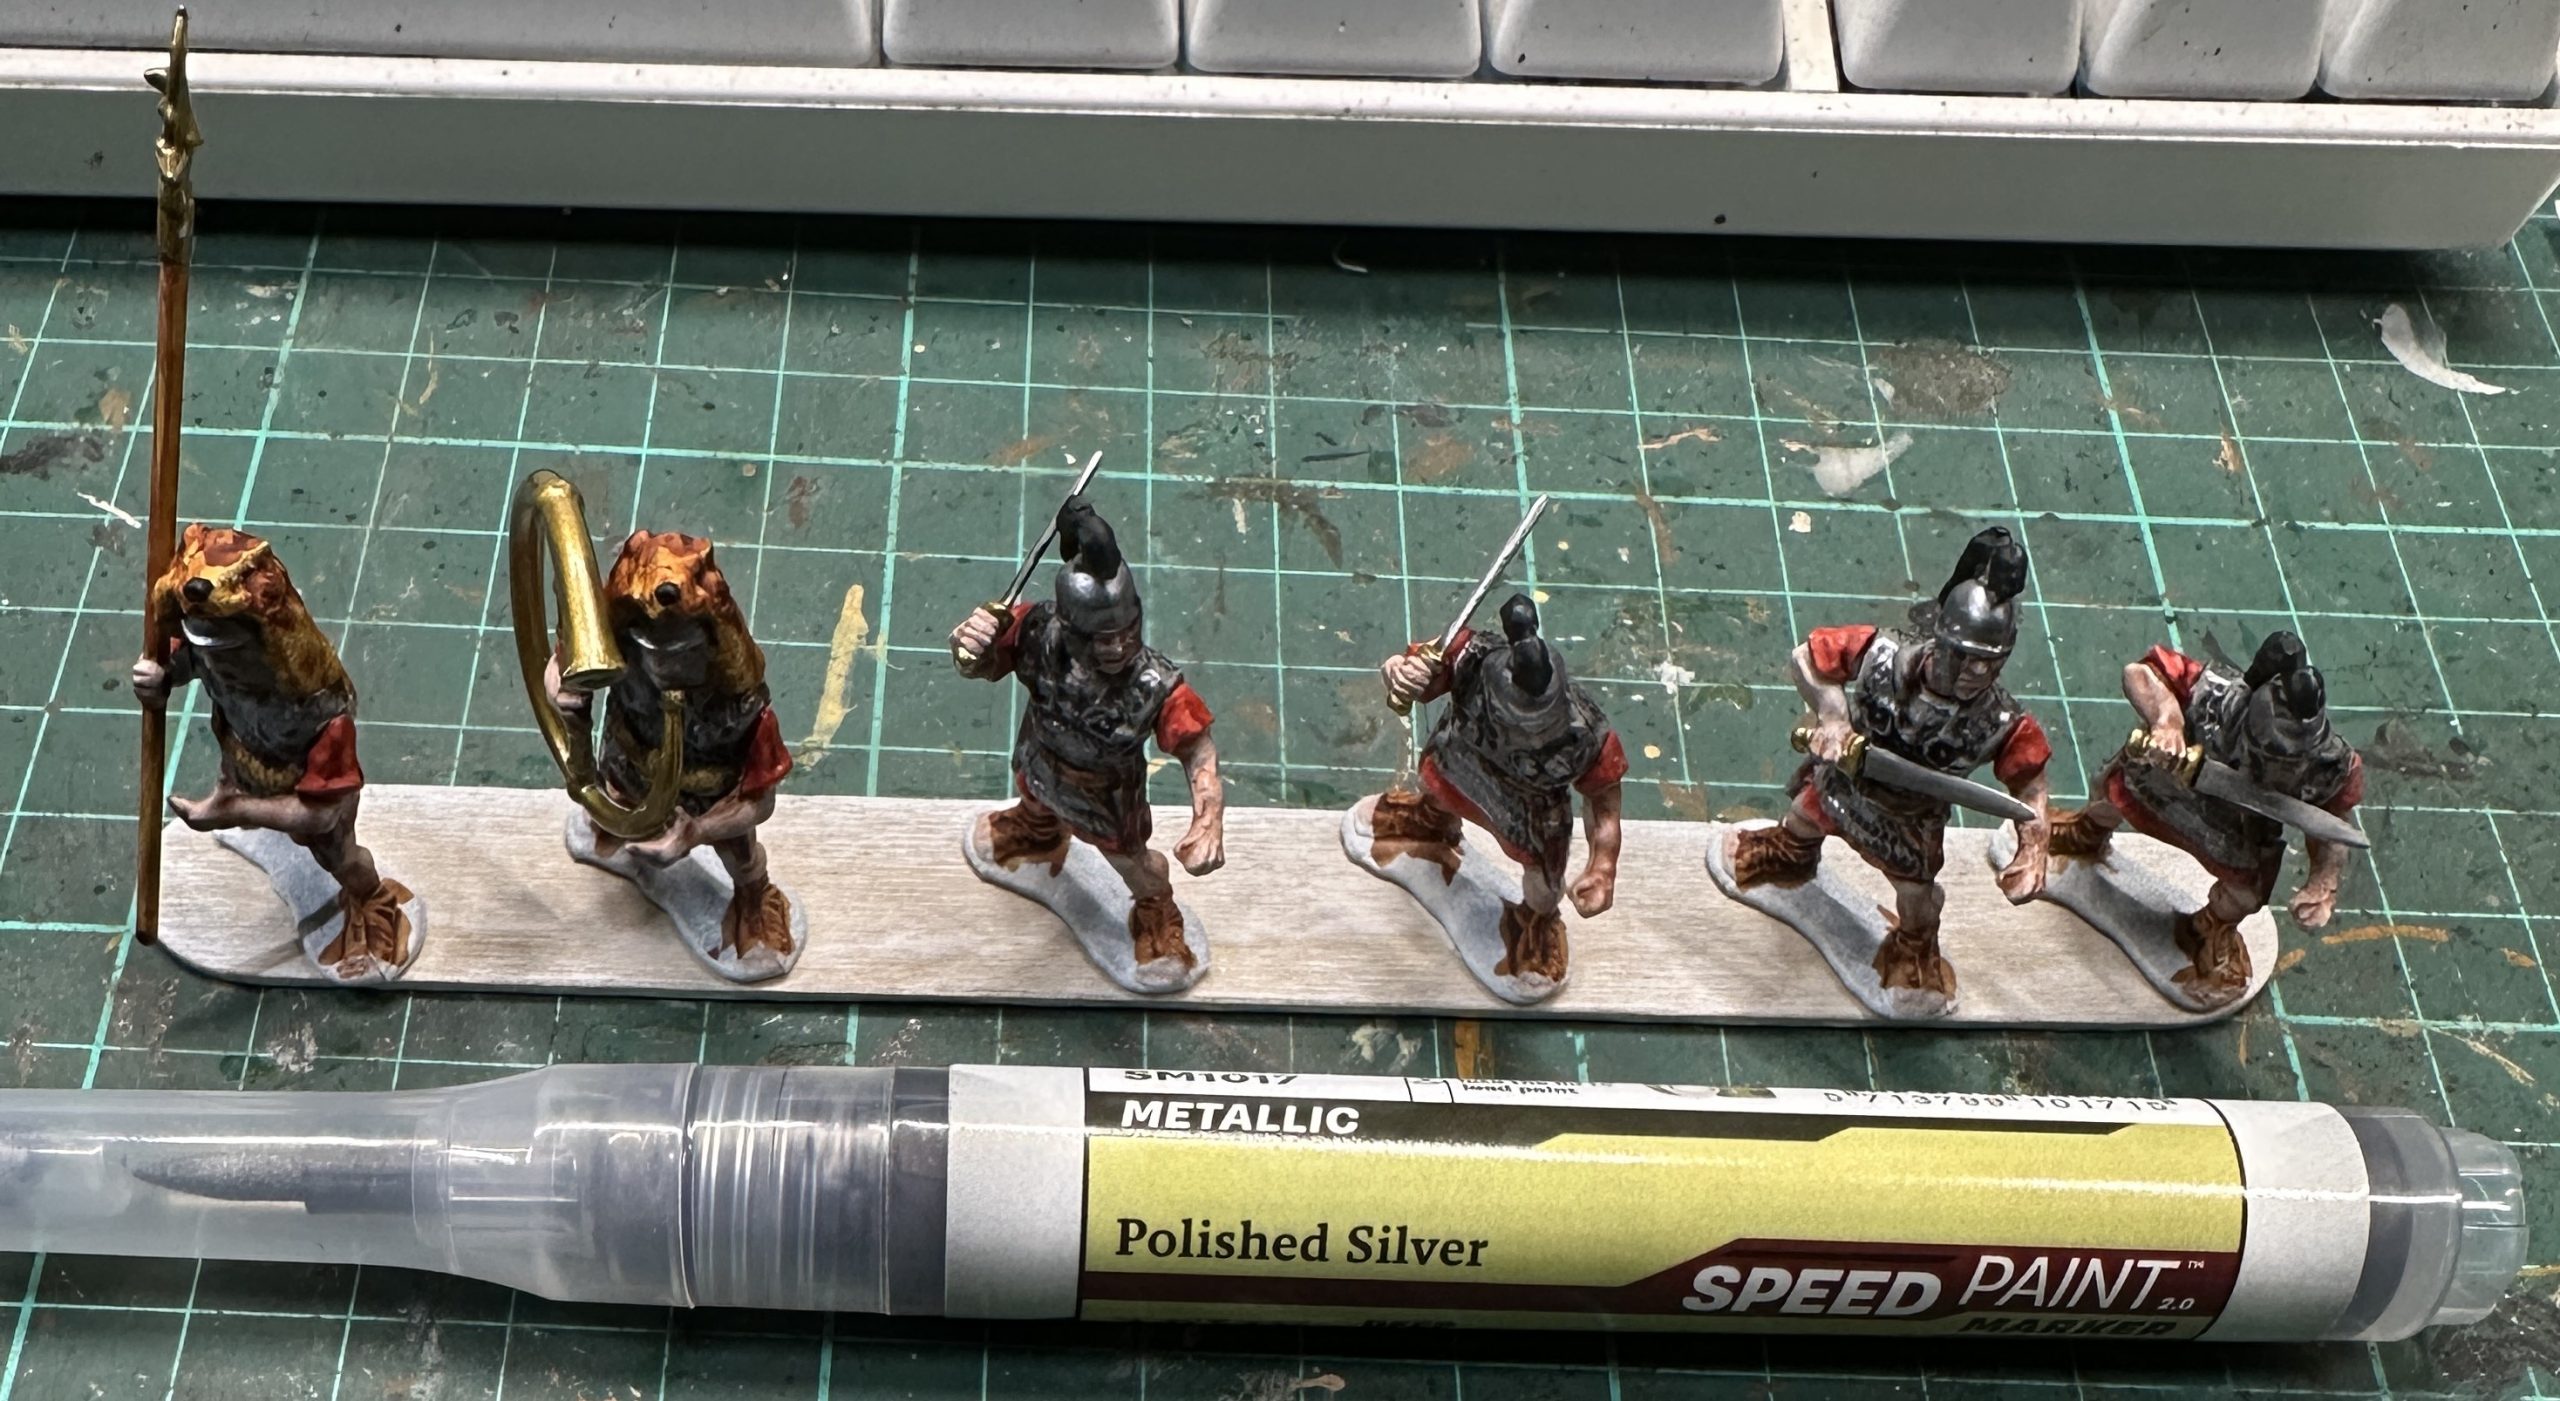
8 – Polished Silver. I didn’t want to completely cover the grey so there would be some deeper tones and the silver would provide a highlight. Therefore I went for some sketchy strokes across the most prominent parts of the mail and the main surfaces of the helmet, particularly the front and brow rim. On the swords a highlight was places on the top/front surface, trying not to lose the edge wipeback highlight.
I was most pleased with this step. The silver is nice and shiny and the highlight approach works very well, despite being limited by the size of the pen tip and high flow rate of the pen. See what you think:
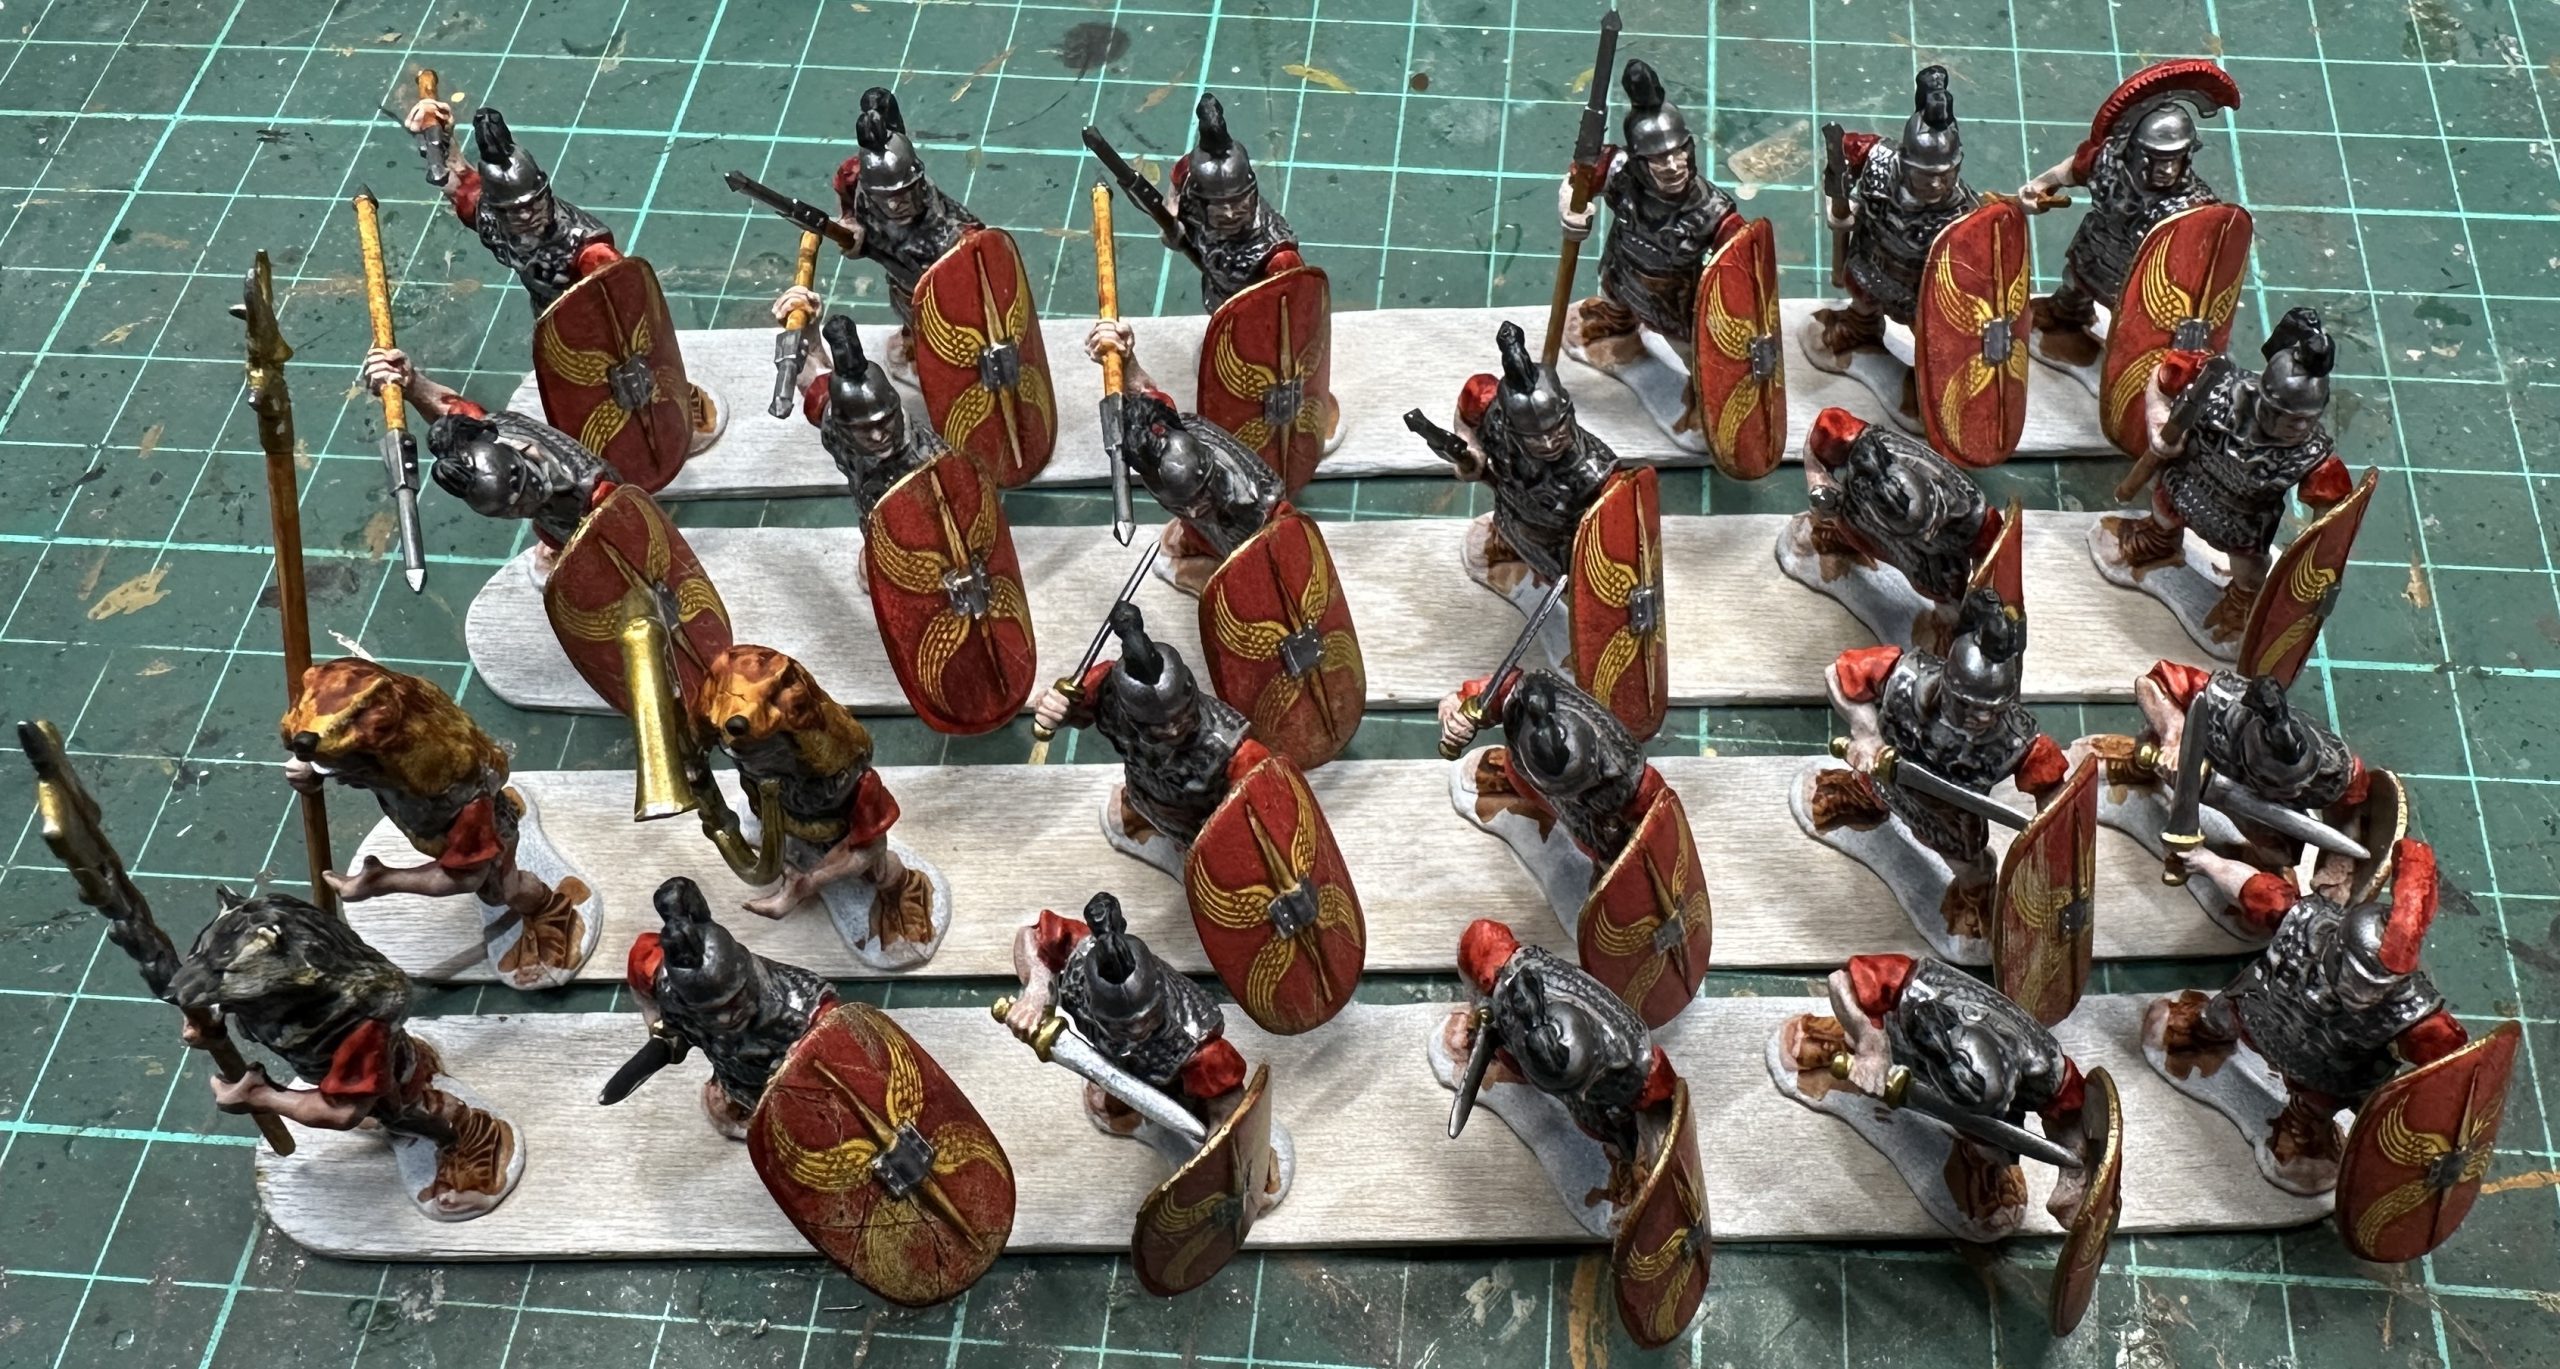
Complete set after the batch stages:
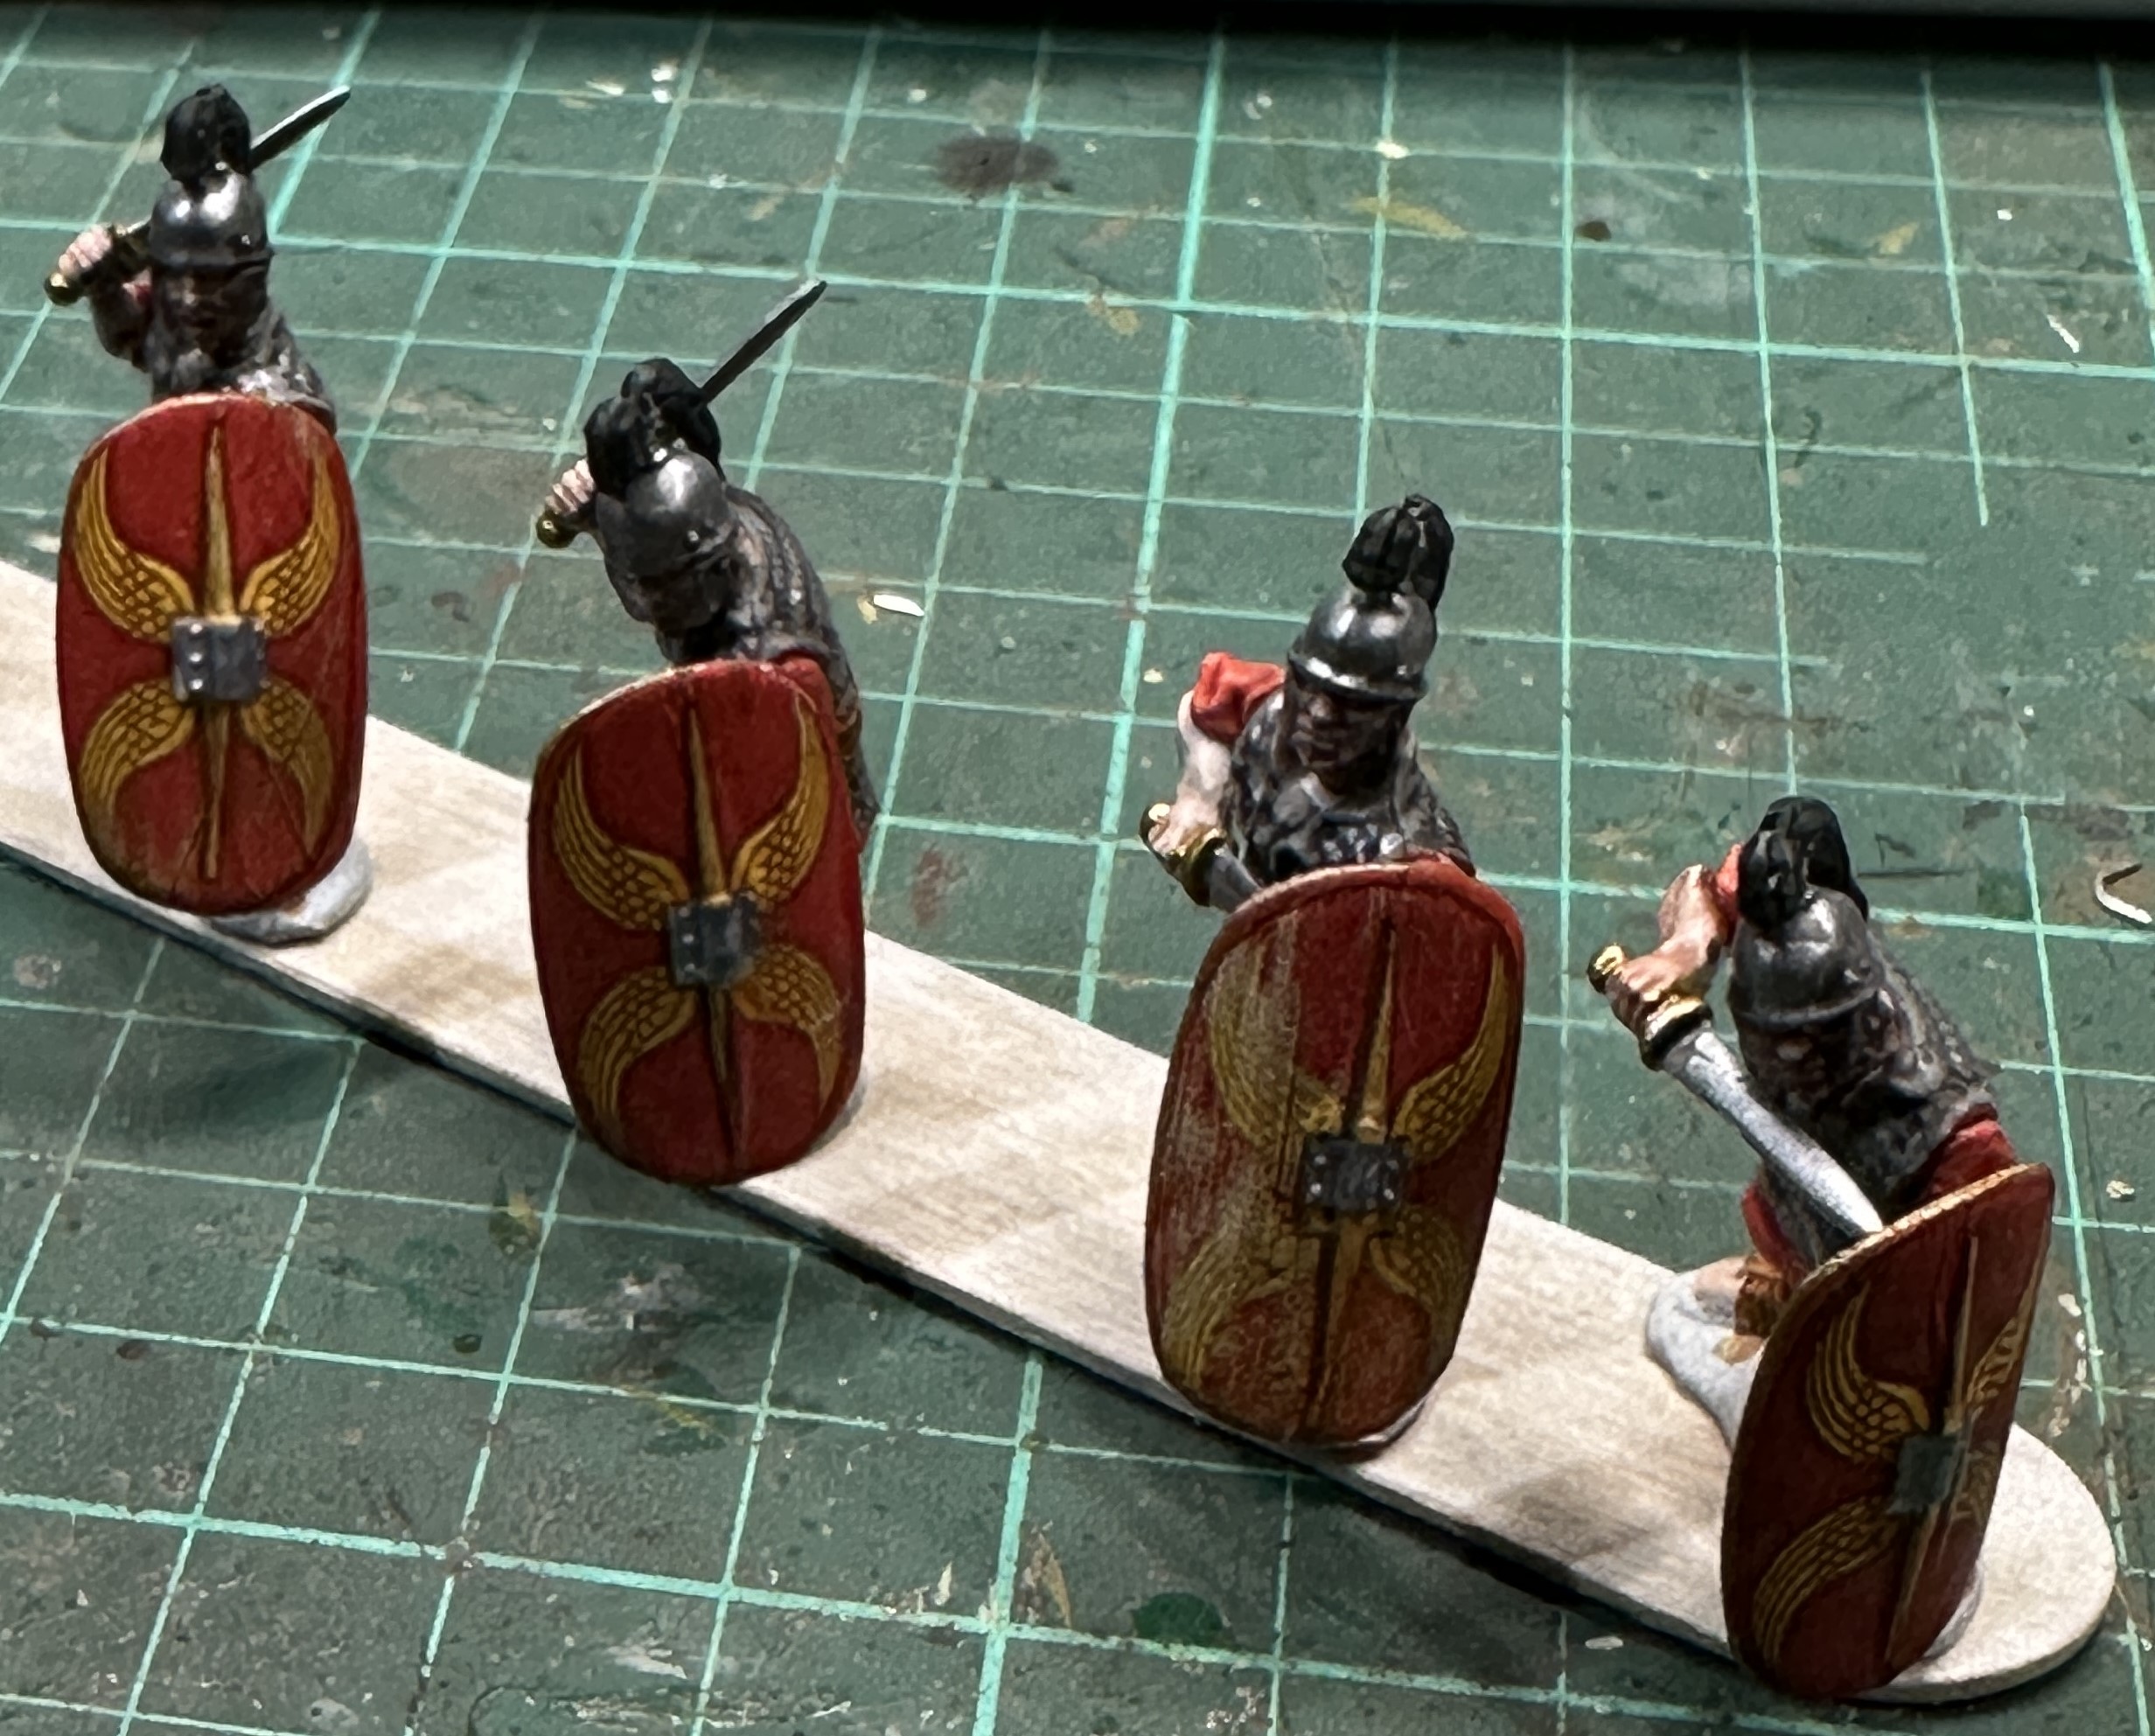
Now to add the shields. They need a bit of extra work in four simple steps:
1 – Fill in any white areas on the edges of the front with red.
2 – Paint the spines on the front with sand golem, just like the colouring on the Connolly painting.
3 – In Hoplite Gold, using the side of the barrel edge of the tip, edge the shields. This creates the bronze rim shown by Connolly and covers any unevenness between the front and back colours.
4 – Finally some silver for the boss.
Then stick them on:
I’m happy so I repeated the whole painting process for another three spatulas, all in one batch this time. I finished the whole unit of six bases (24 miniatures) in three sessions of an hour to an hour and a half each. So a full unit of 24 done in around four hours. I found the three spatulas worth easy enough to batch together so will be able to do four spatulas at a time, getting a whole unit finished with each completed batch by so doing.
For context I’m painting sixteen GW Dryads at the moment, wet blending Speedpaint with brushes in a more traditional way. Admittedly the level of detailing is much higher but they took me about twice as long (8 hours) to get the paint on.
So with Speedpaint the traditional way I’m getting one miniature finished in about 30 minutes. With the pens I’m getting one finished miniature in 10 minutes. For me the pens are three times faster. Clearly there is a drop off in finish quality per miniature but for this type of project it is the volume that matters and the finished effect is more from the look of whole units. Nobody should be looking too closely at any individual model.
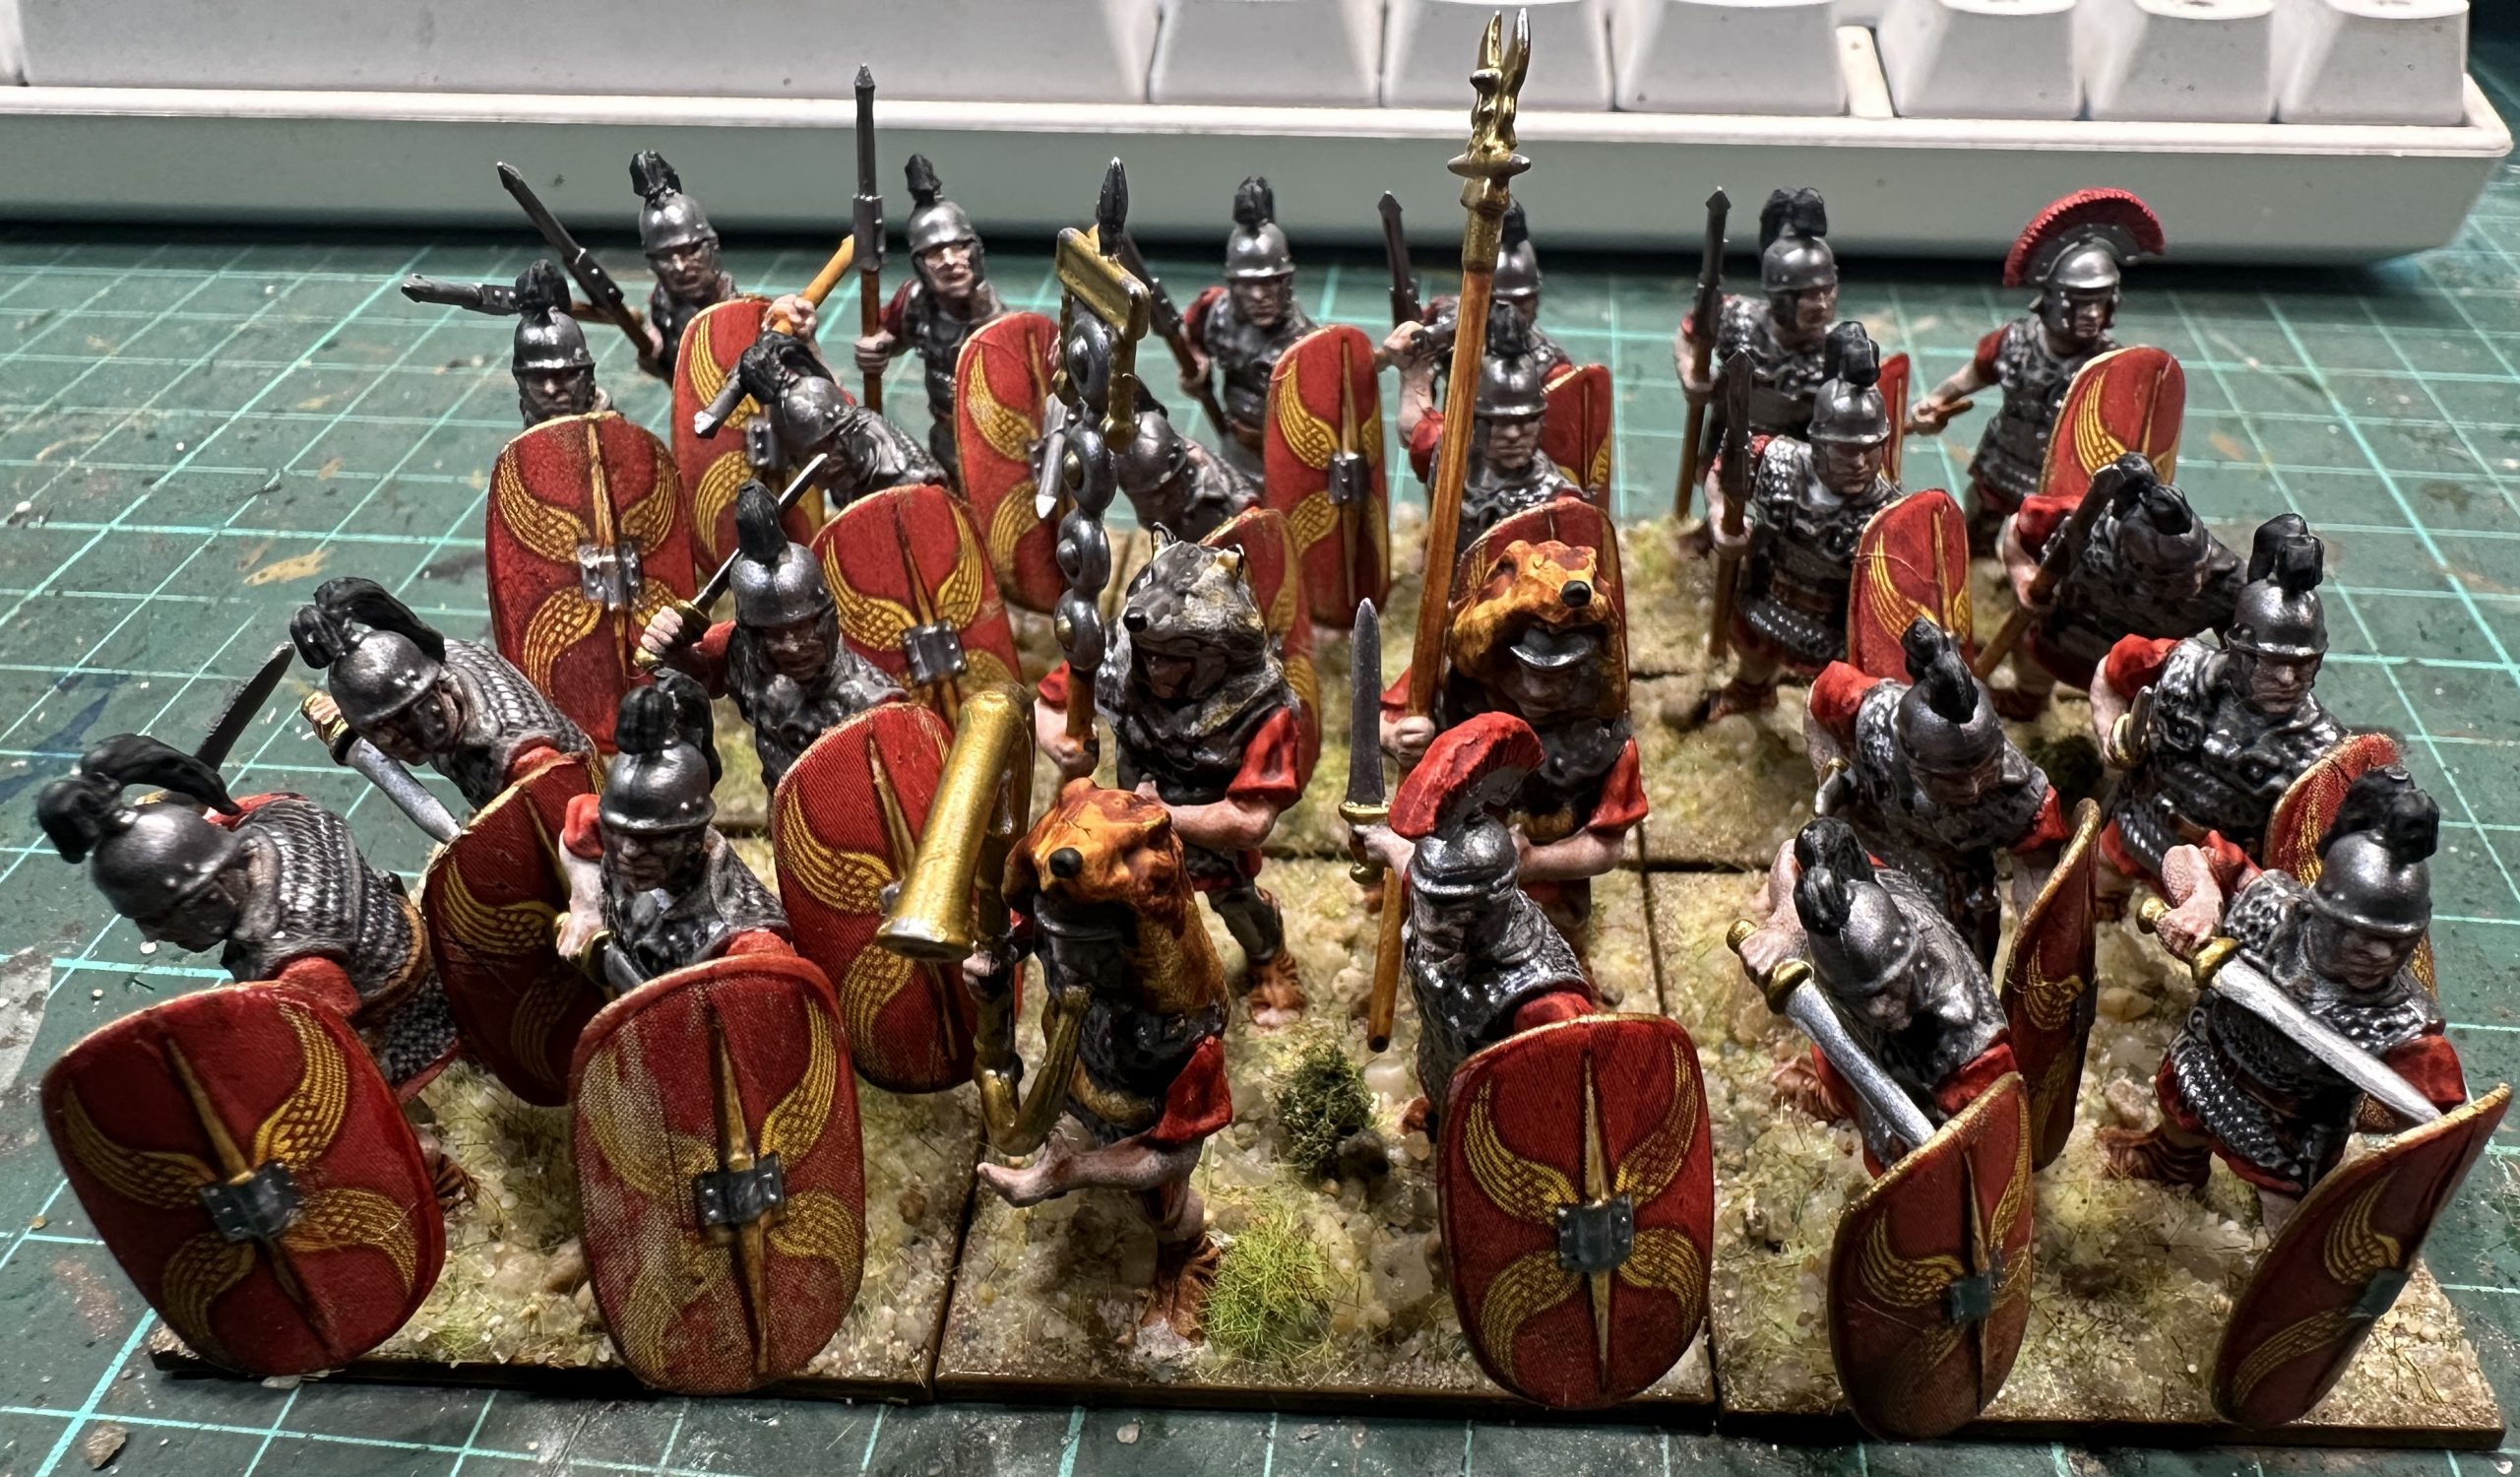
So that’s on unit done. Next on to check the basing scheme and see them finished 🙂
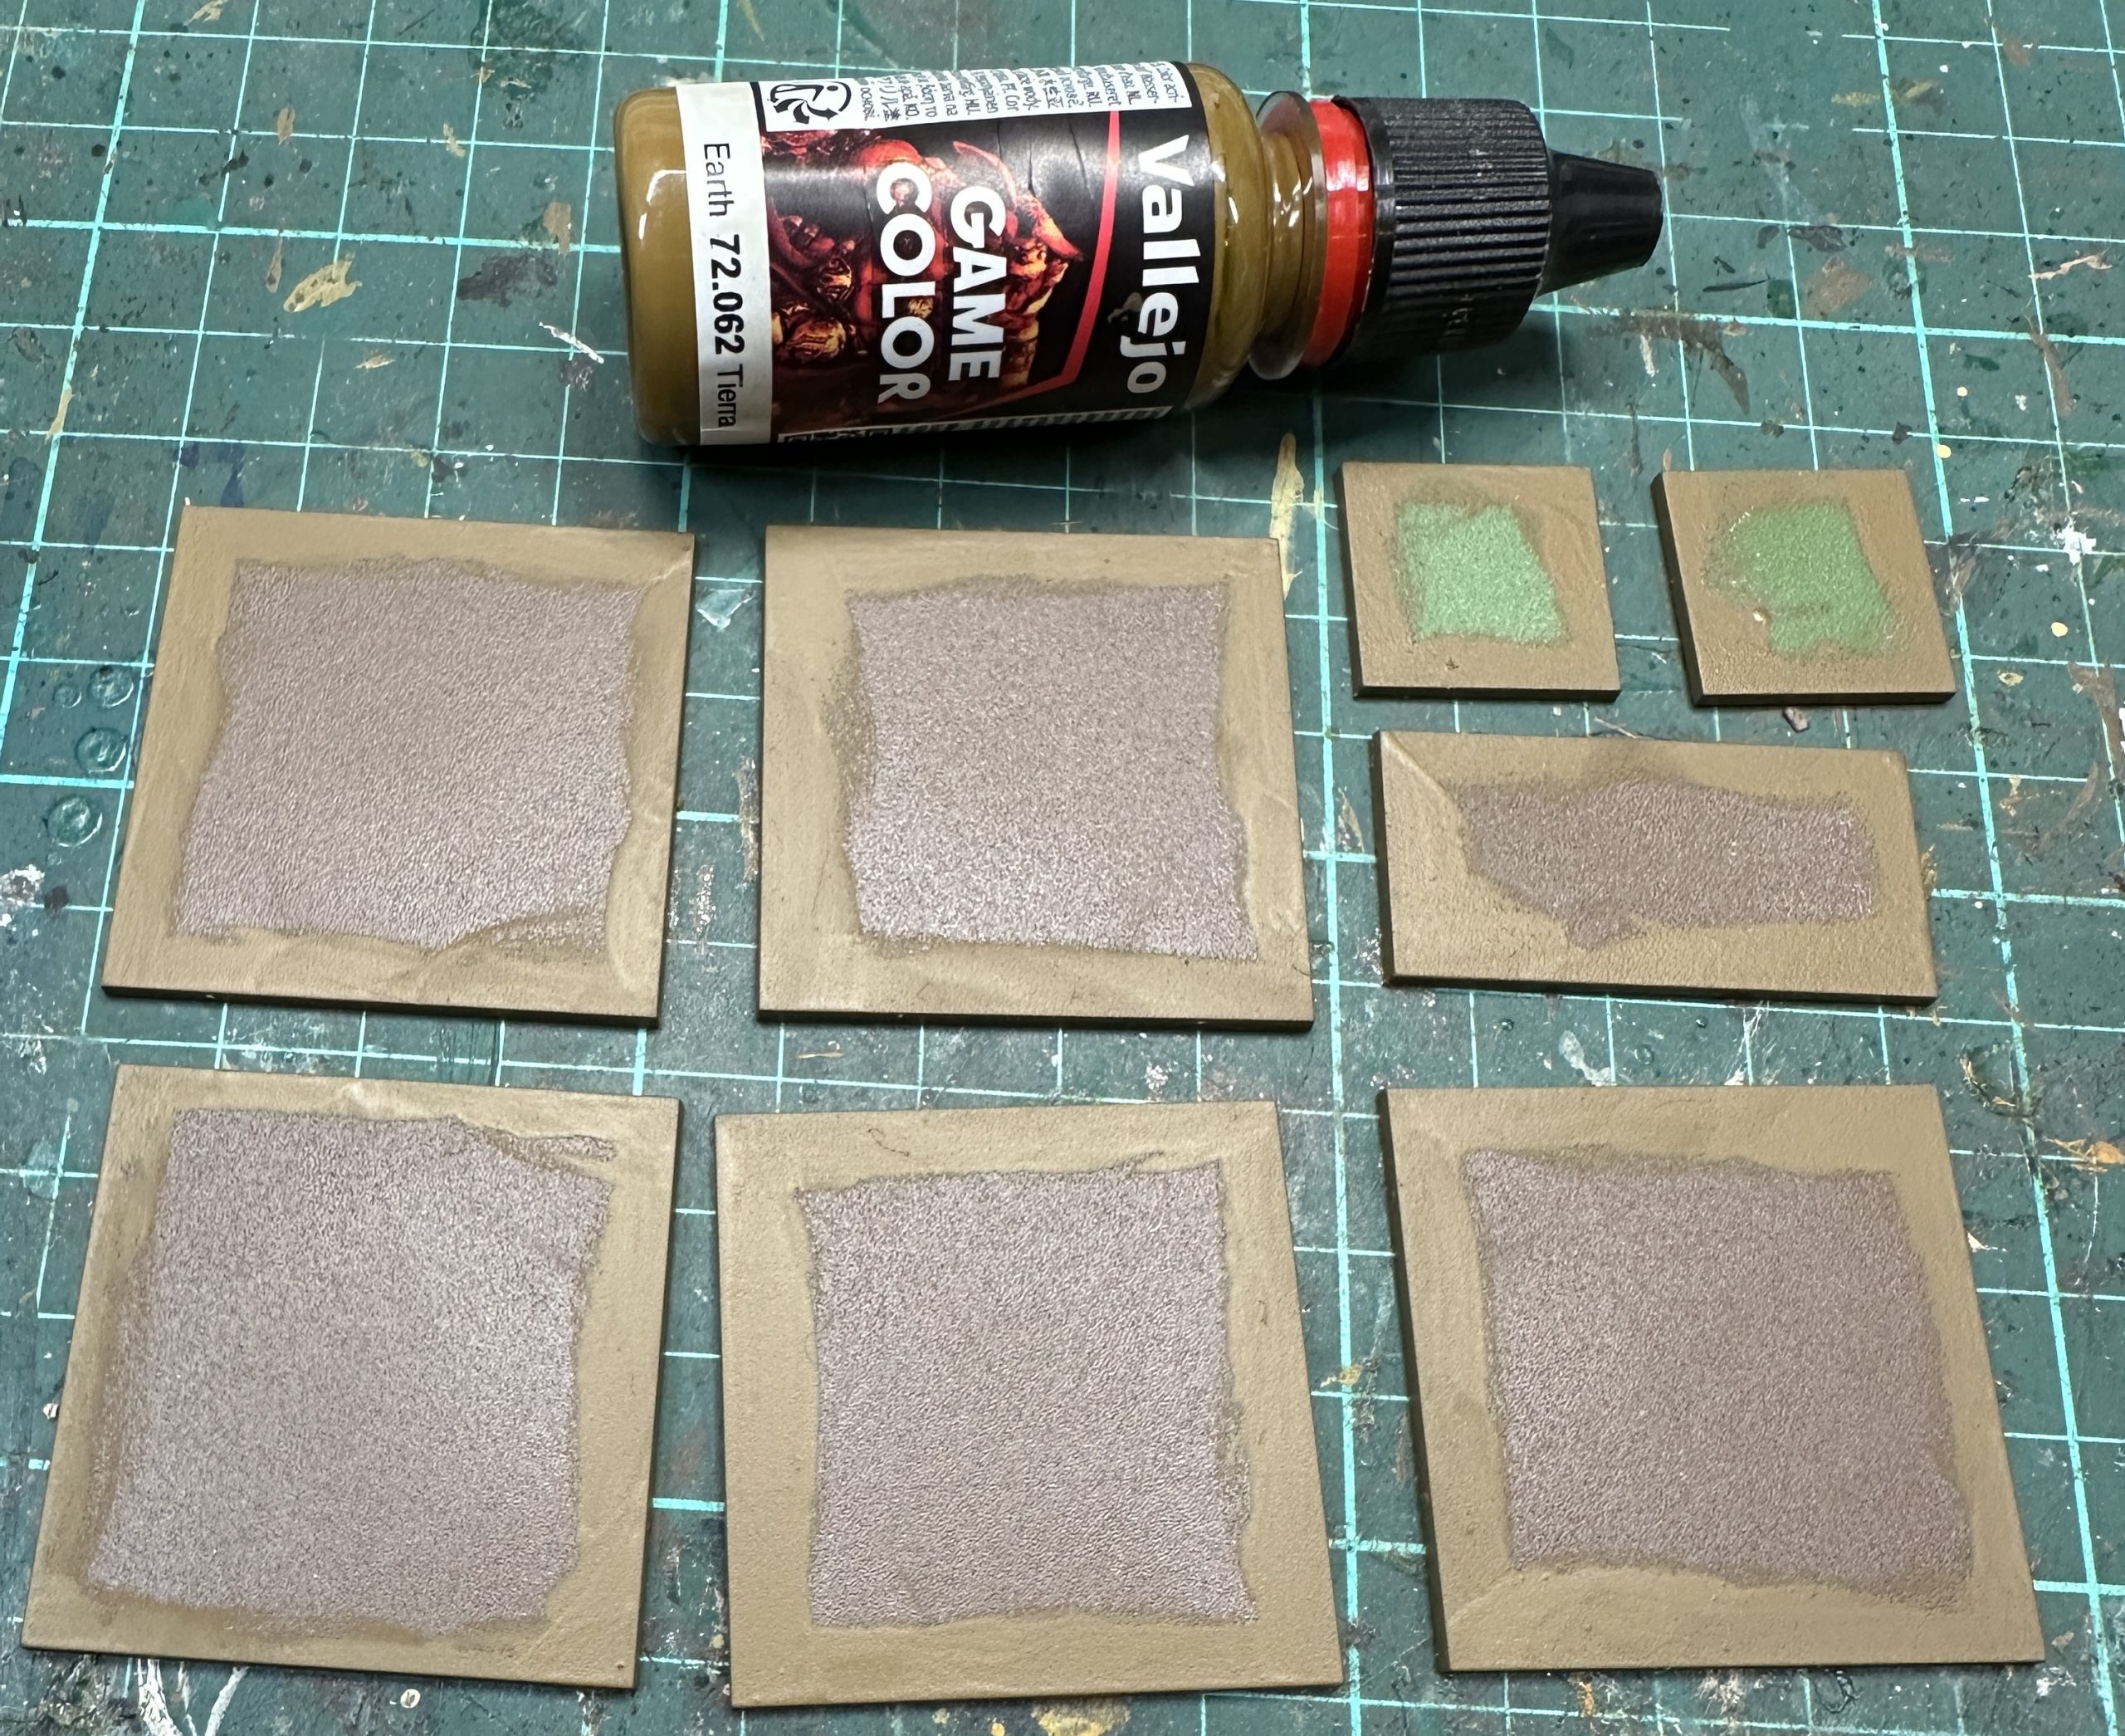
Basing
Here are the bases, Renedra 40x40mm with a 2×1 and two 1×1 20mm to aid casualty removal if used with rule systems where that is a thing. Here is the formation layout:
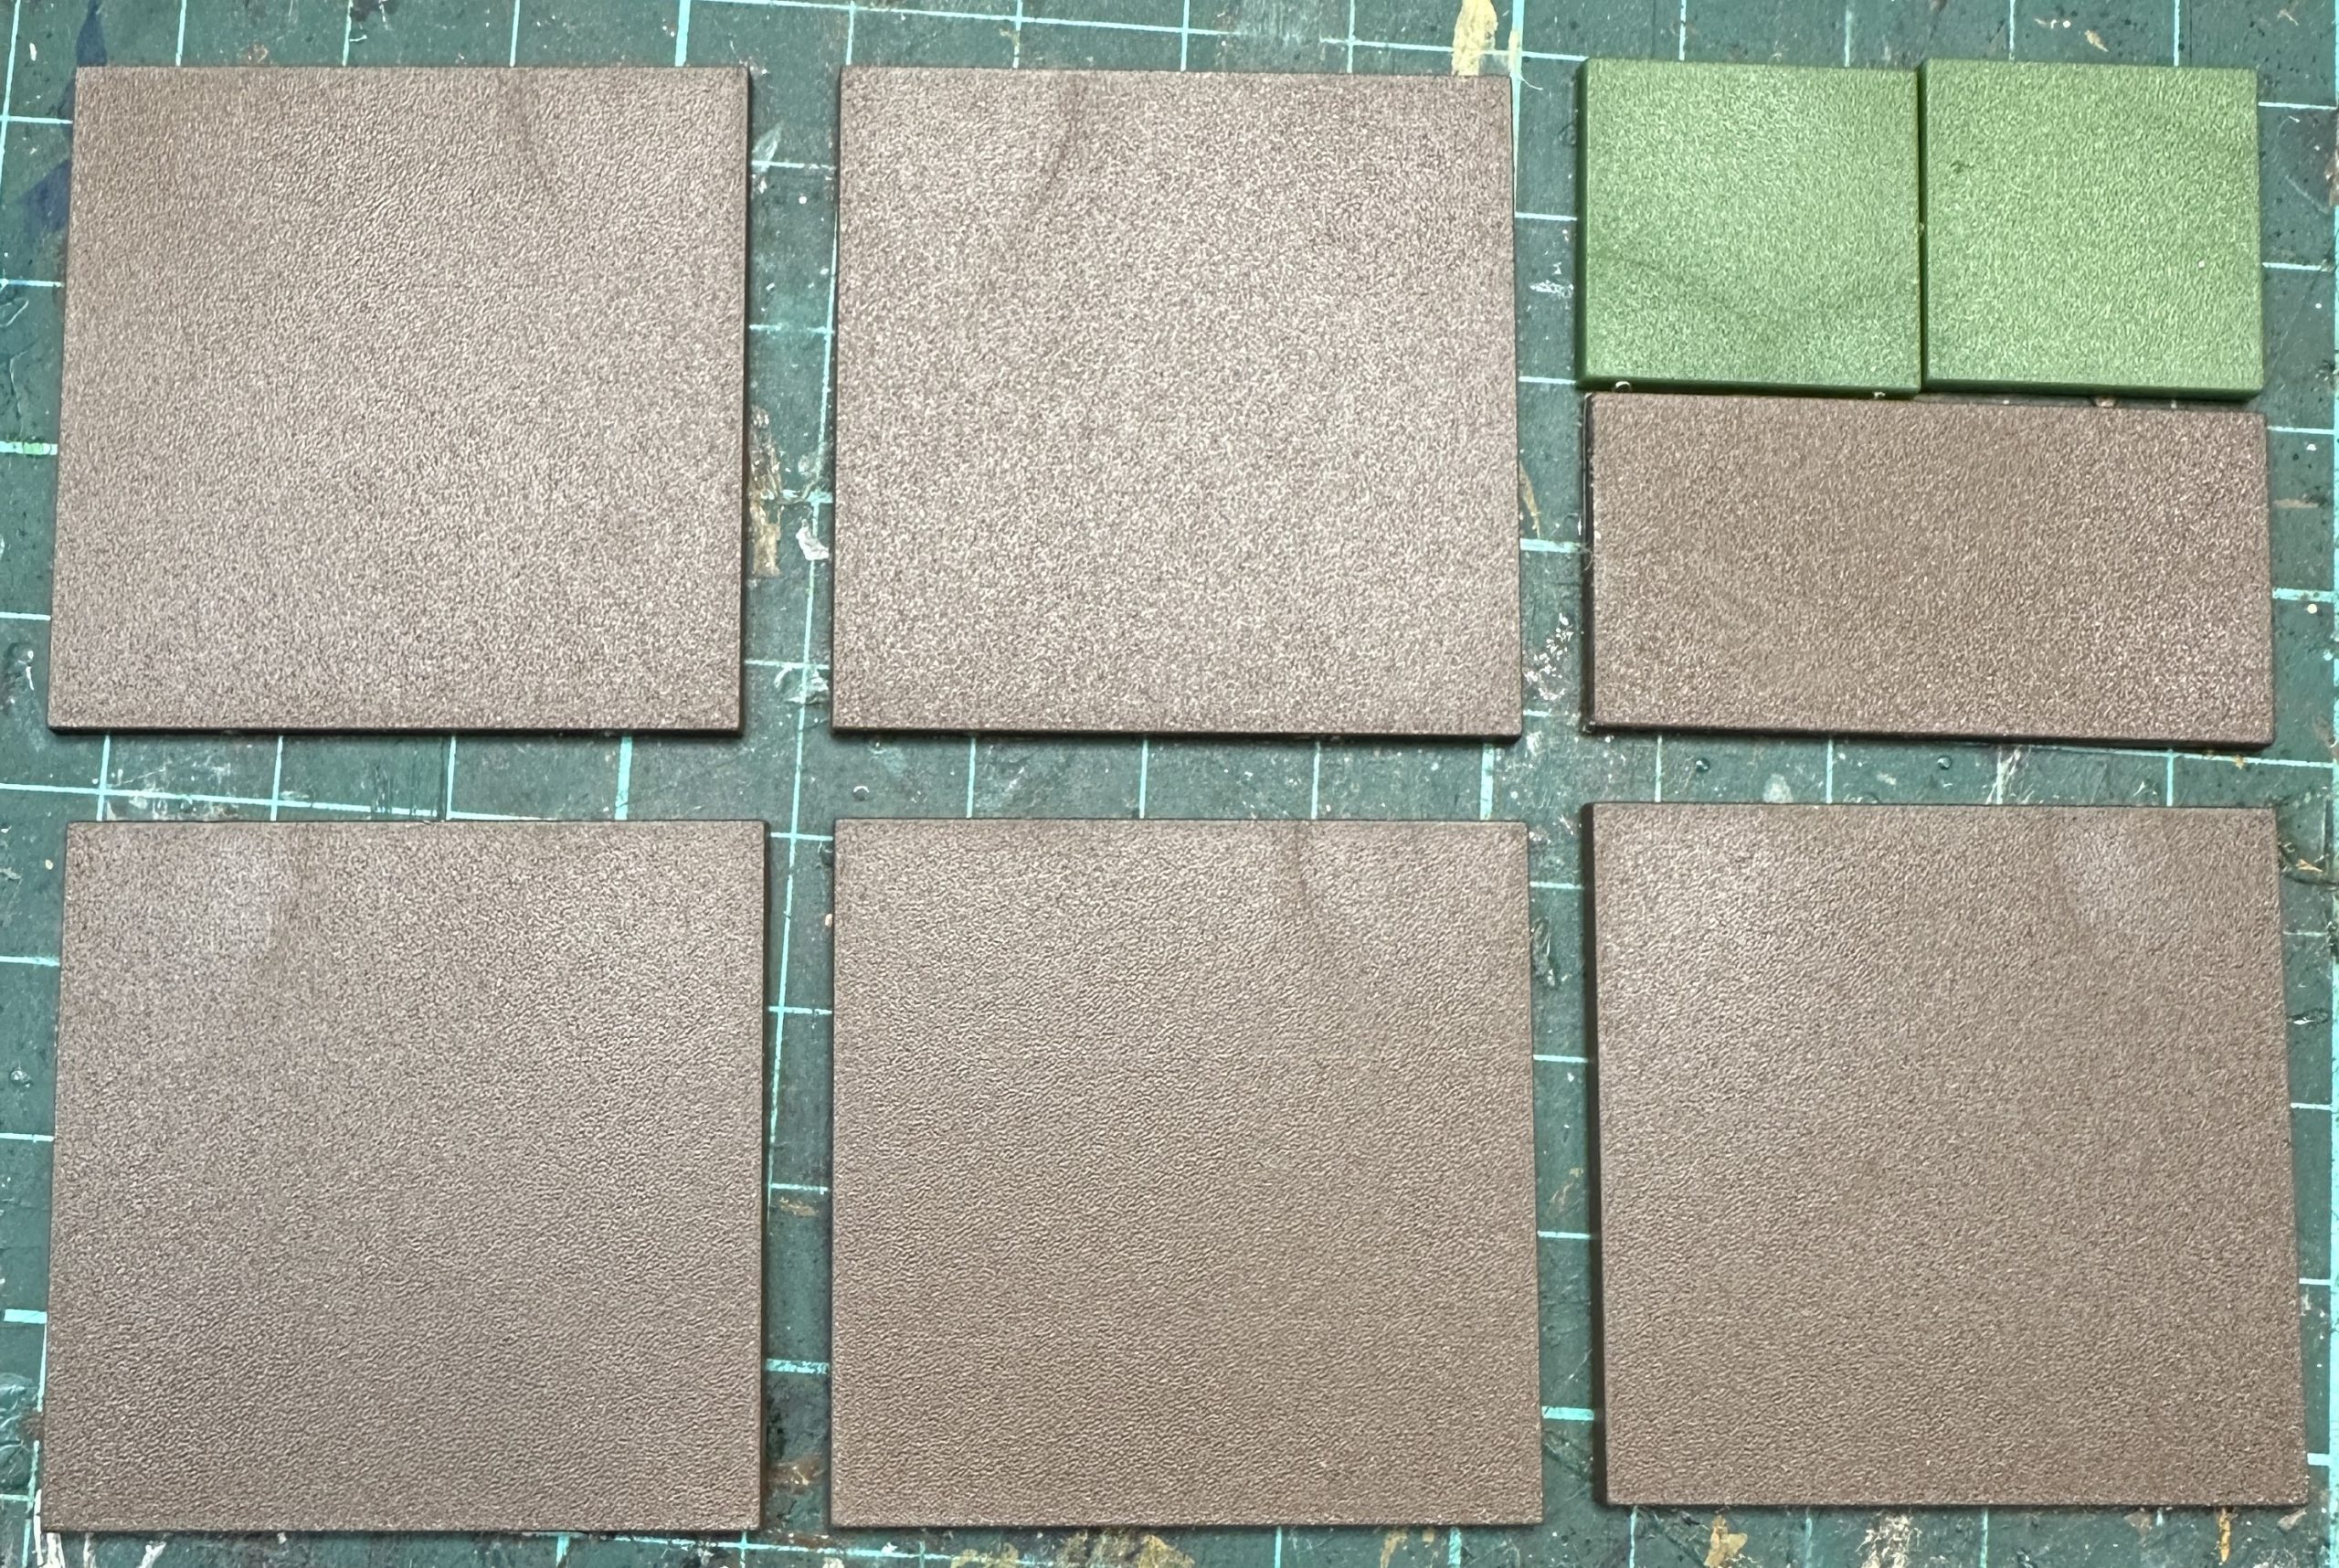
Edging with Vallejo Earth which is my usual choice so these will sit well alongside other bases I’ve done. Not cheating here, you can’t edge plastic bases with Speedpaint.
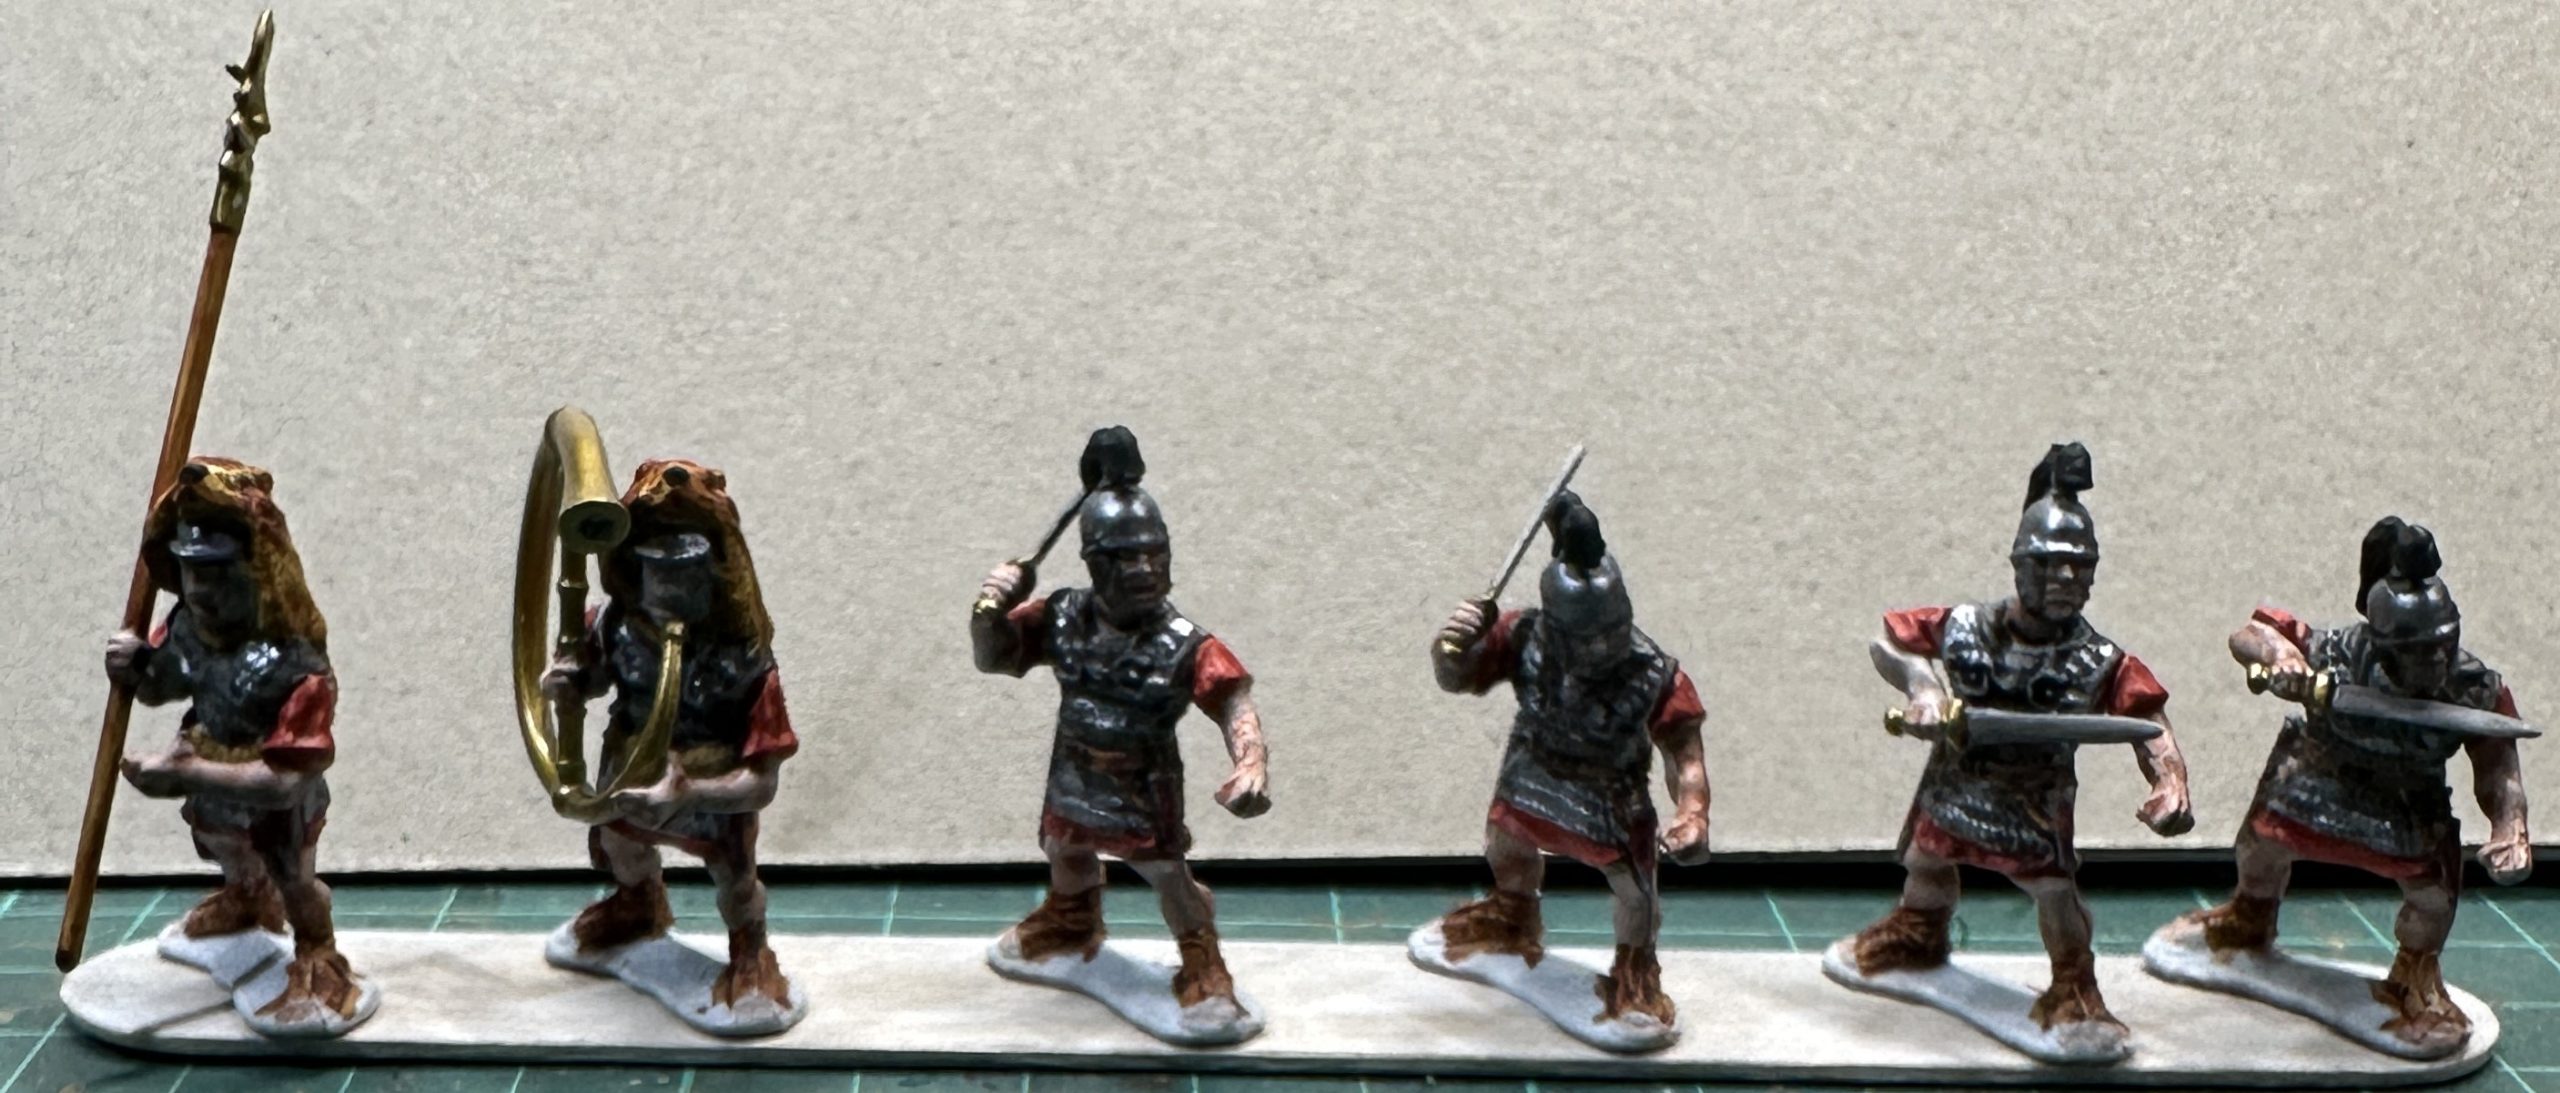
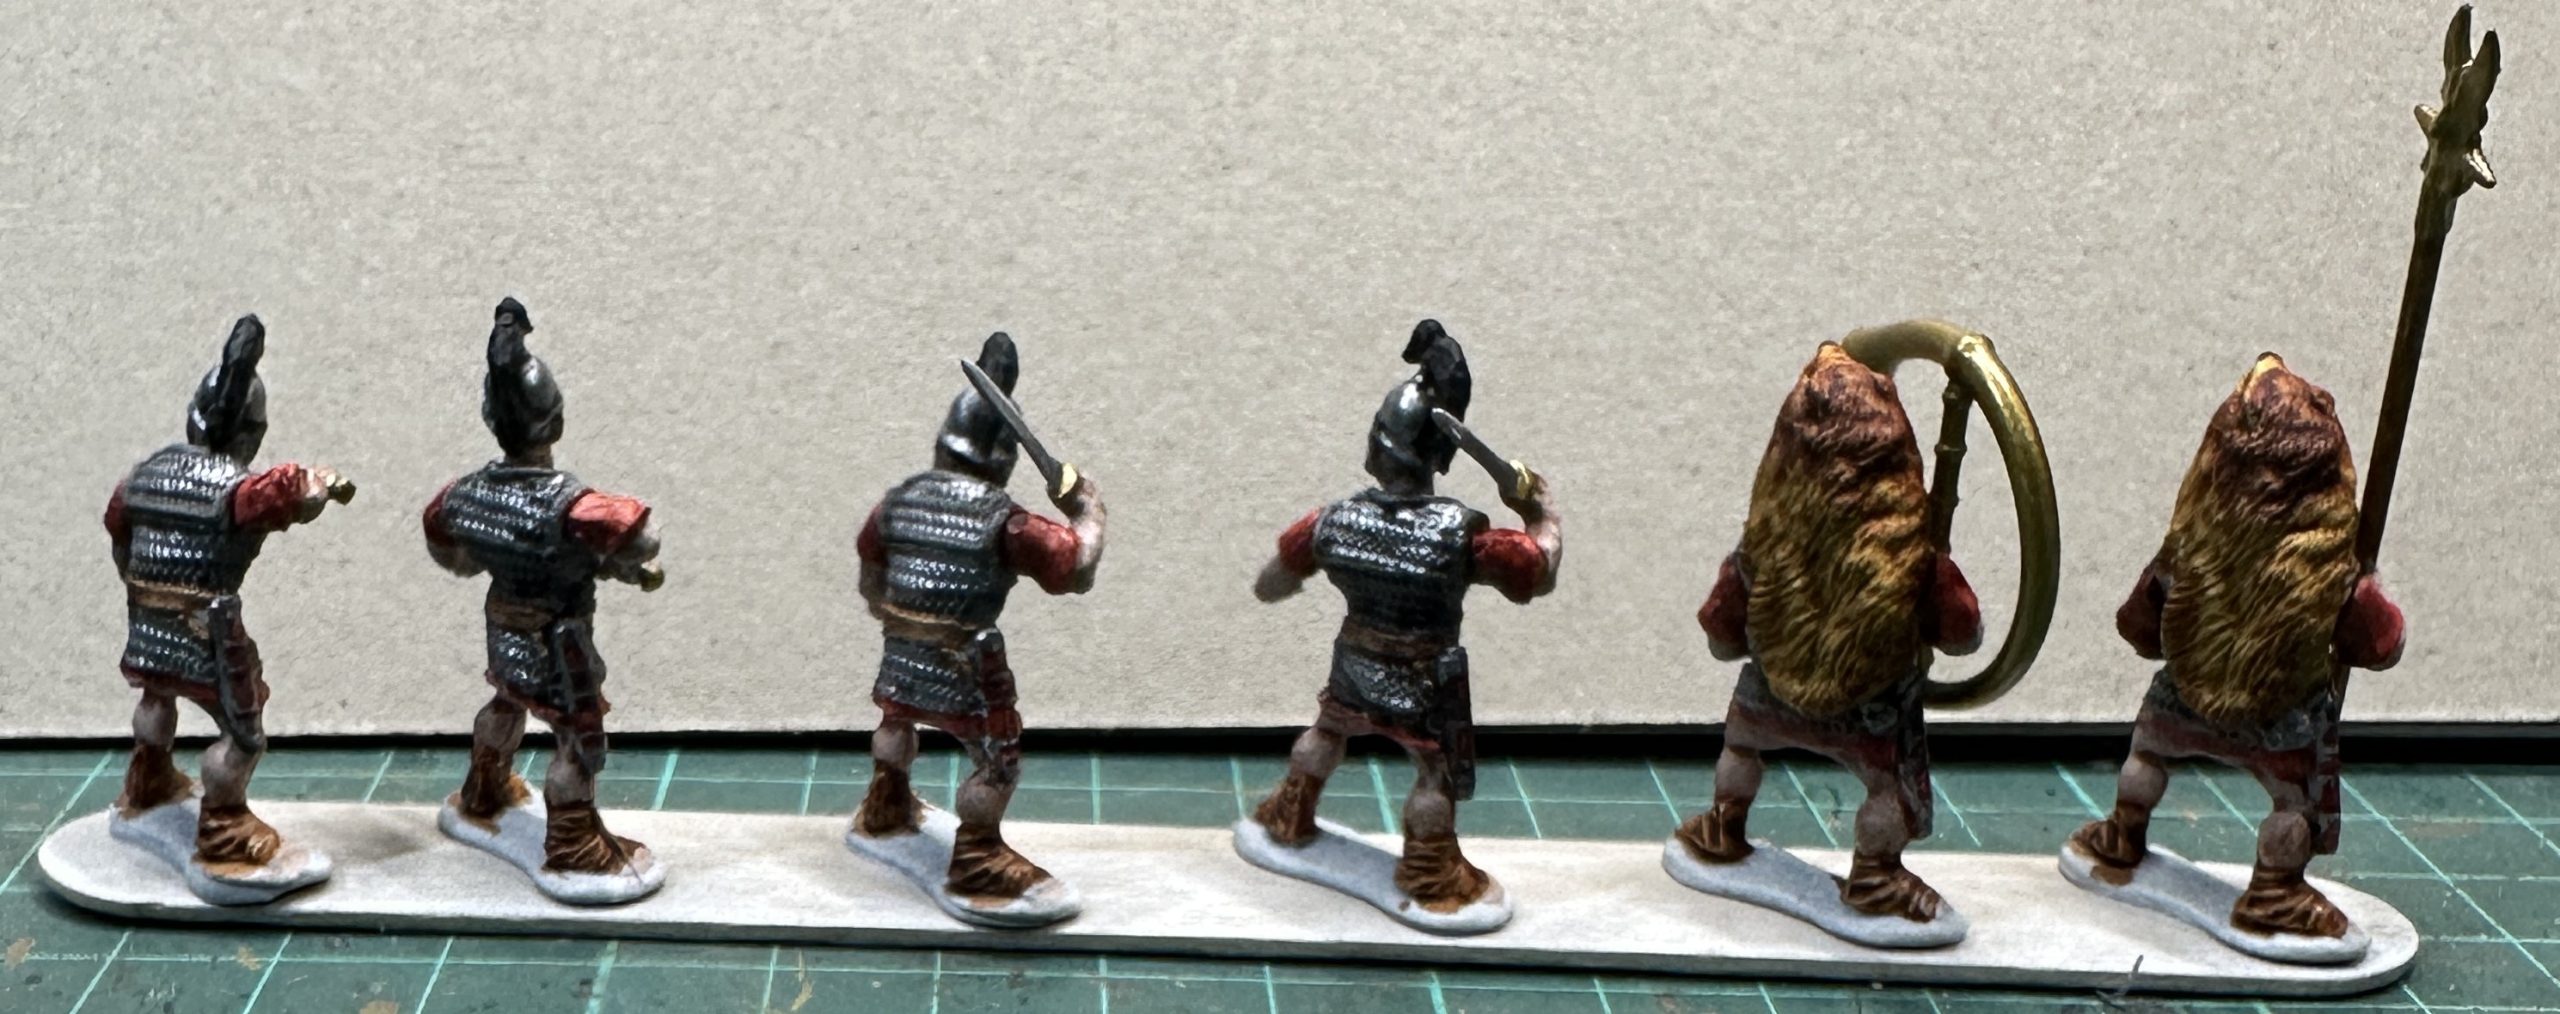
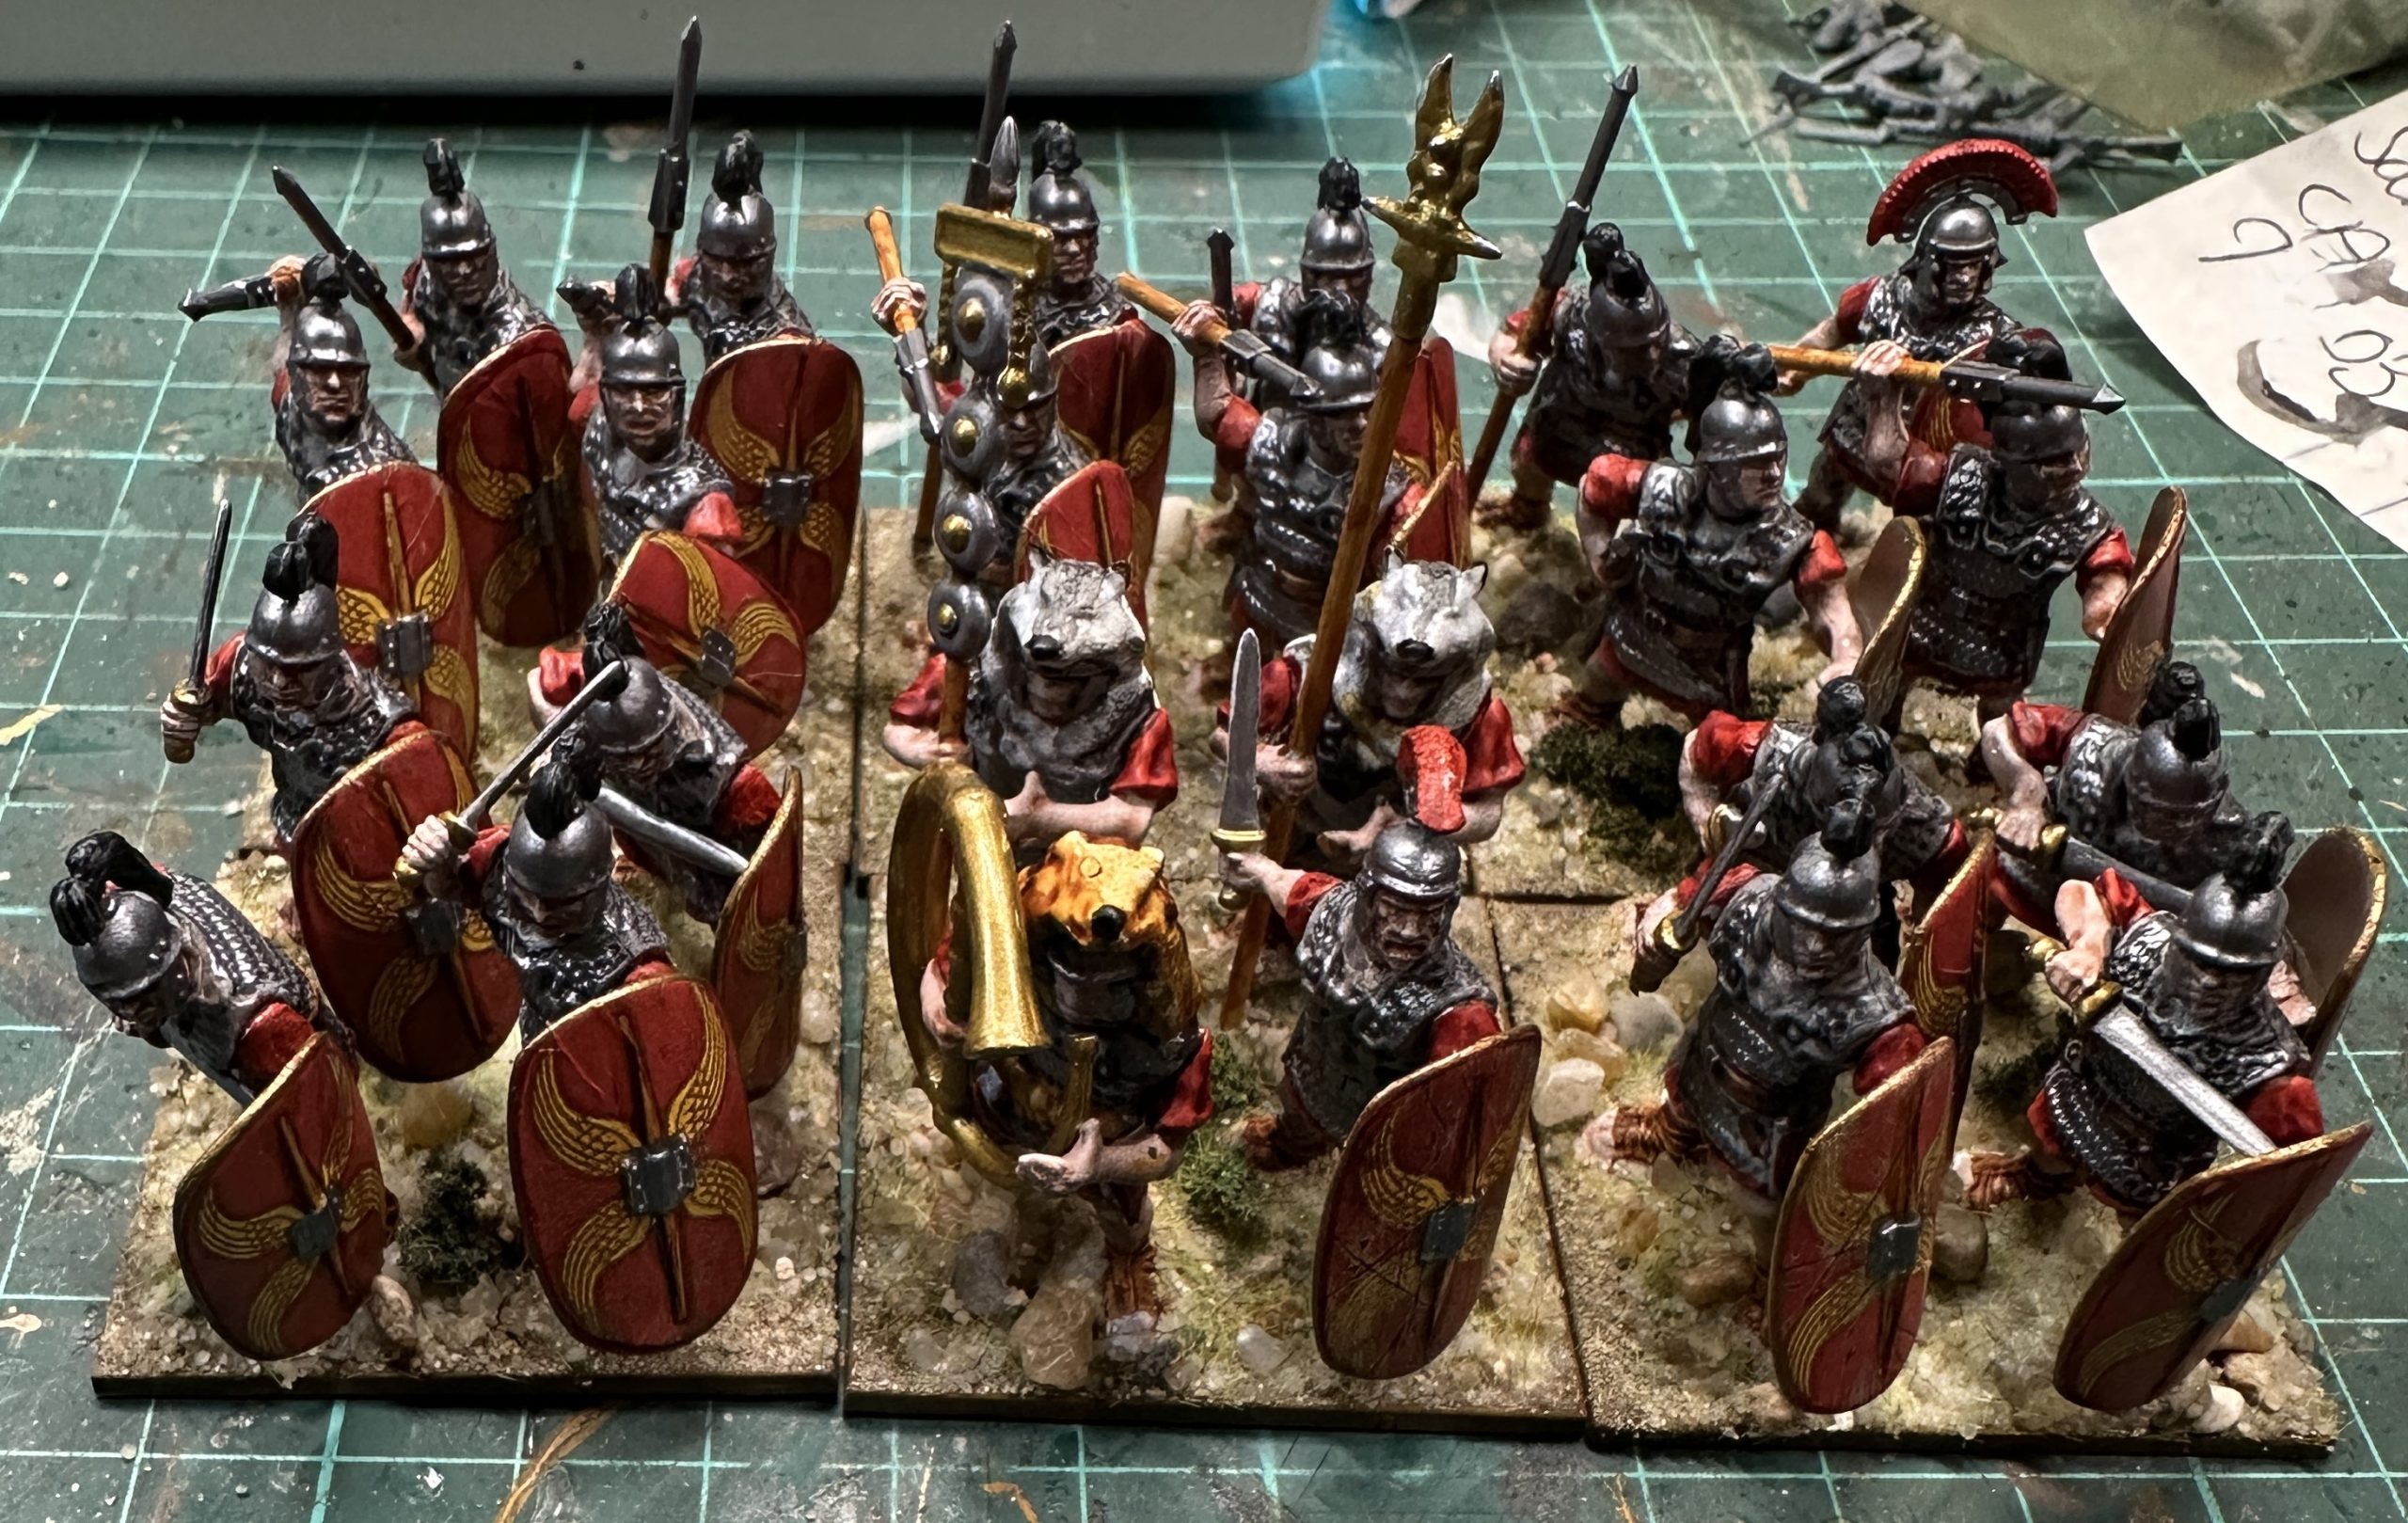
A bit of time spent laying out the miniatures and then ranking them up. The Wargames Factory sculpts create a bit of an issue here as many shield arms are thrust forward creating an angle on the shield that takes up quite a lot of room. Got it in the end by slightly off-setting front and back ranks on each base. There is the command group in the middle and the rear rank is led by an optio with his vine staff.
Stuck them down and then on to scatter. Krautcover Soil of Sparta.
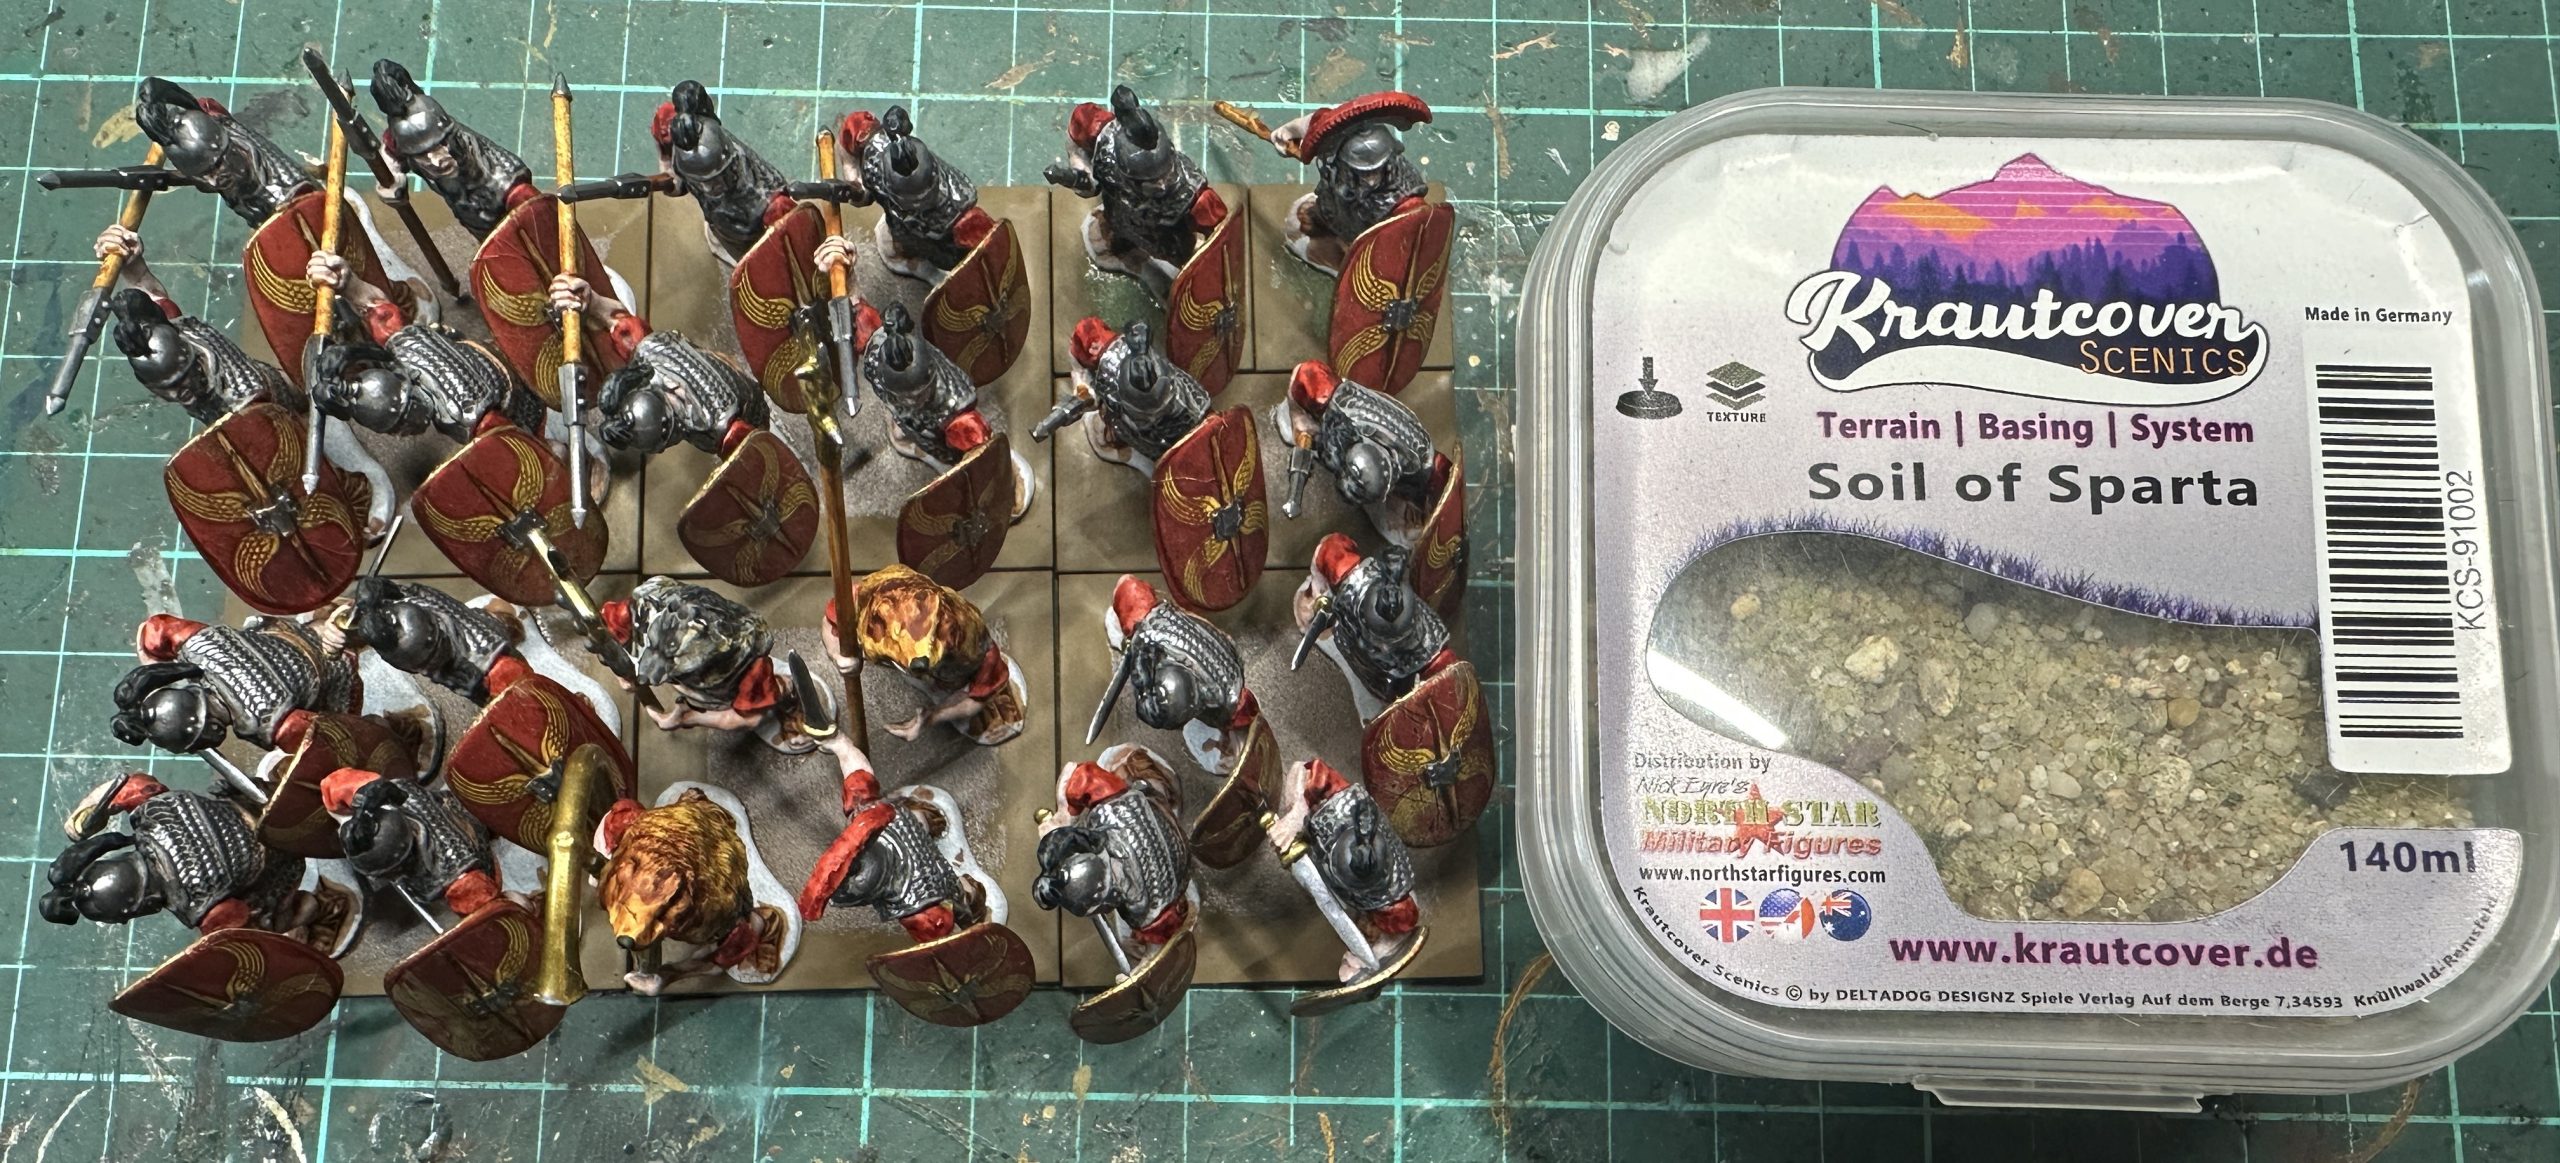
Finished.
Second Cohort and a tweak to the wolf pelt technique.
Here’s the second unit complete:
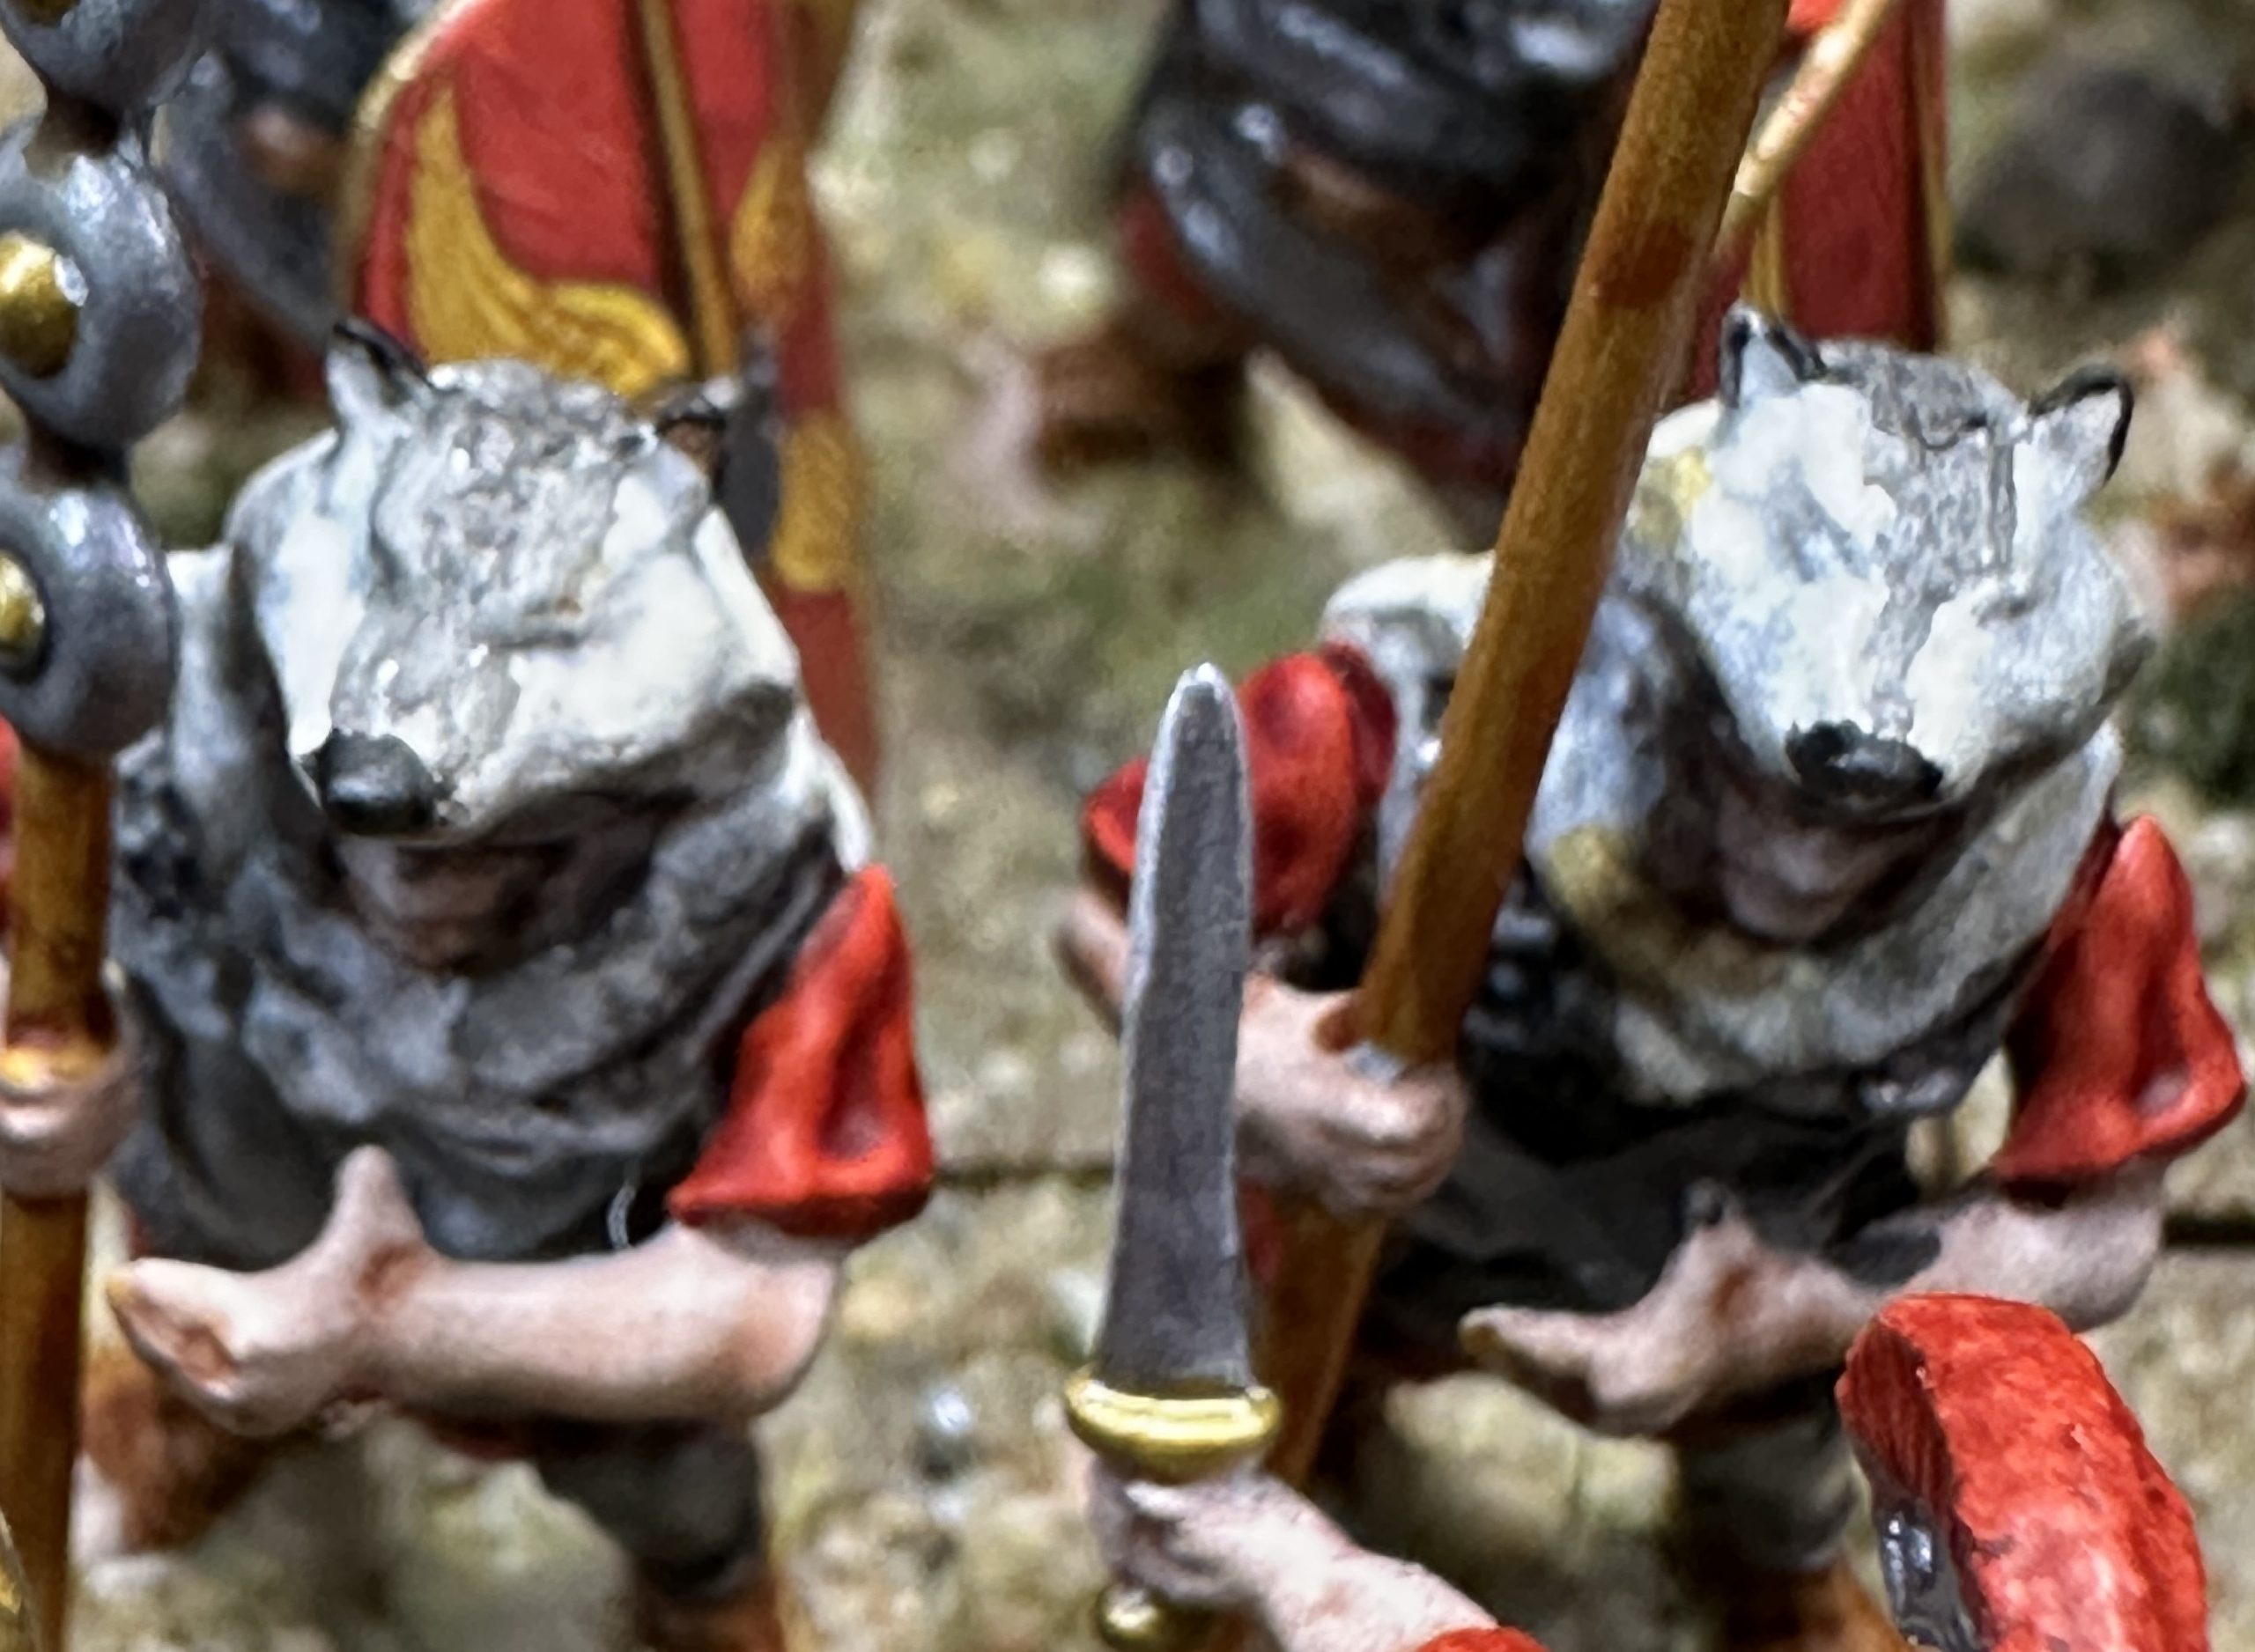
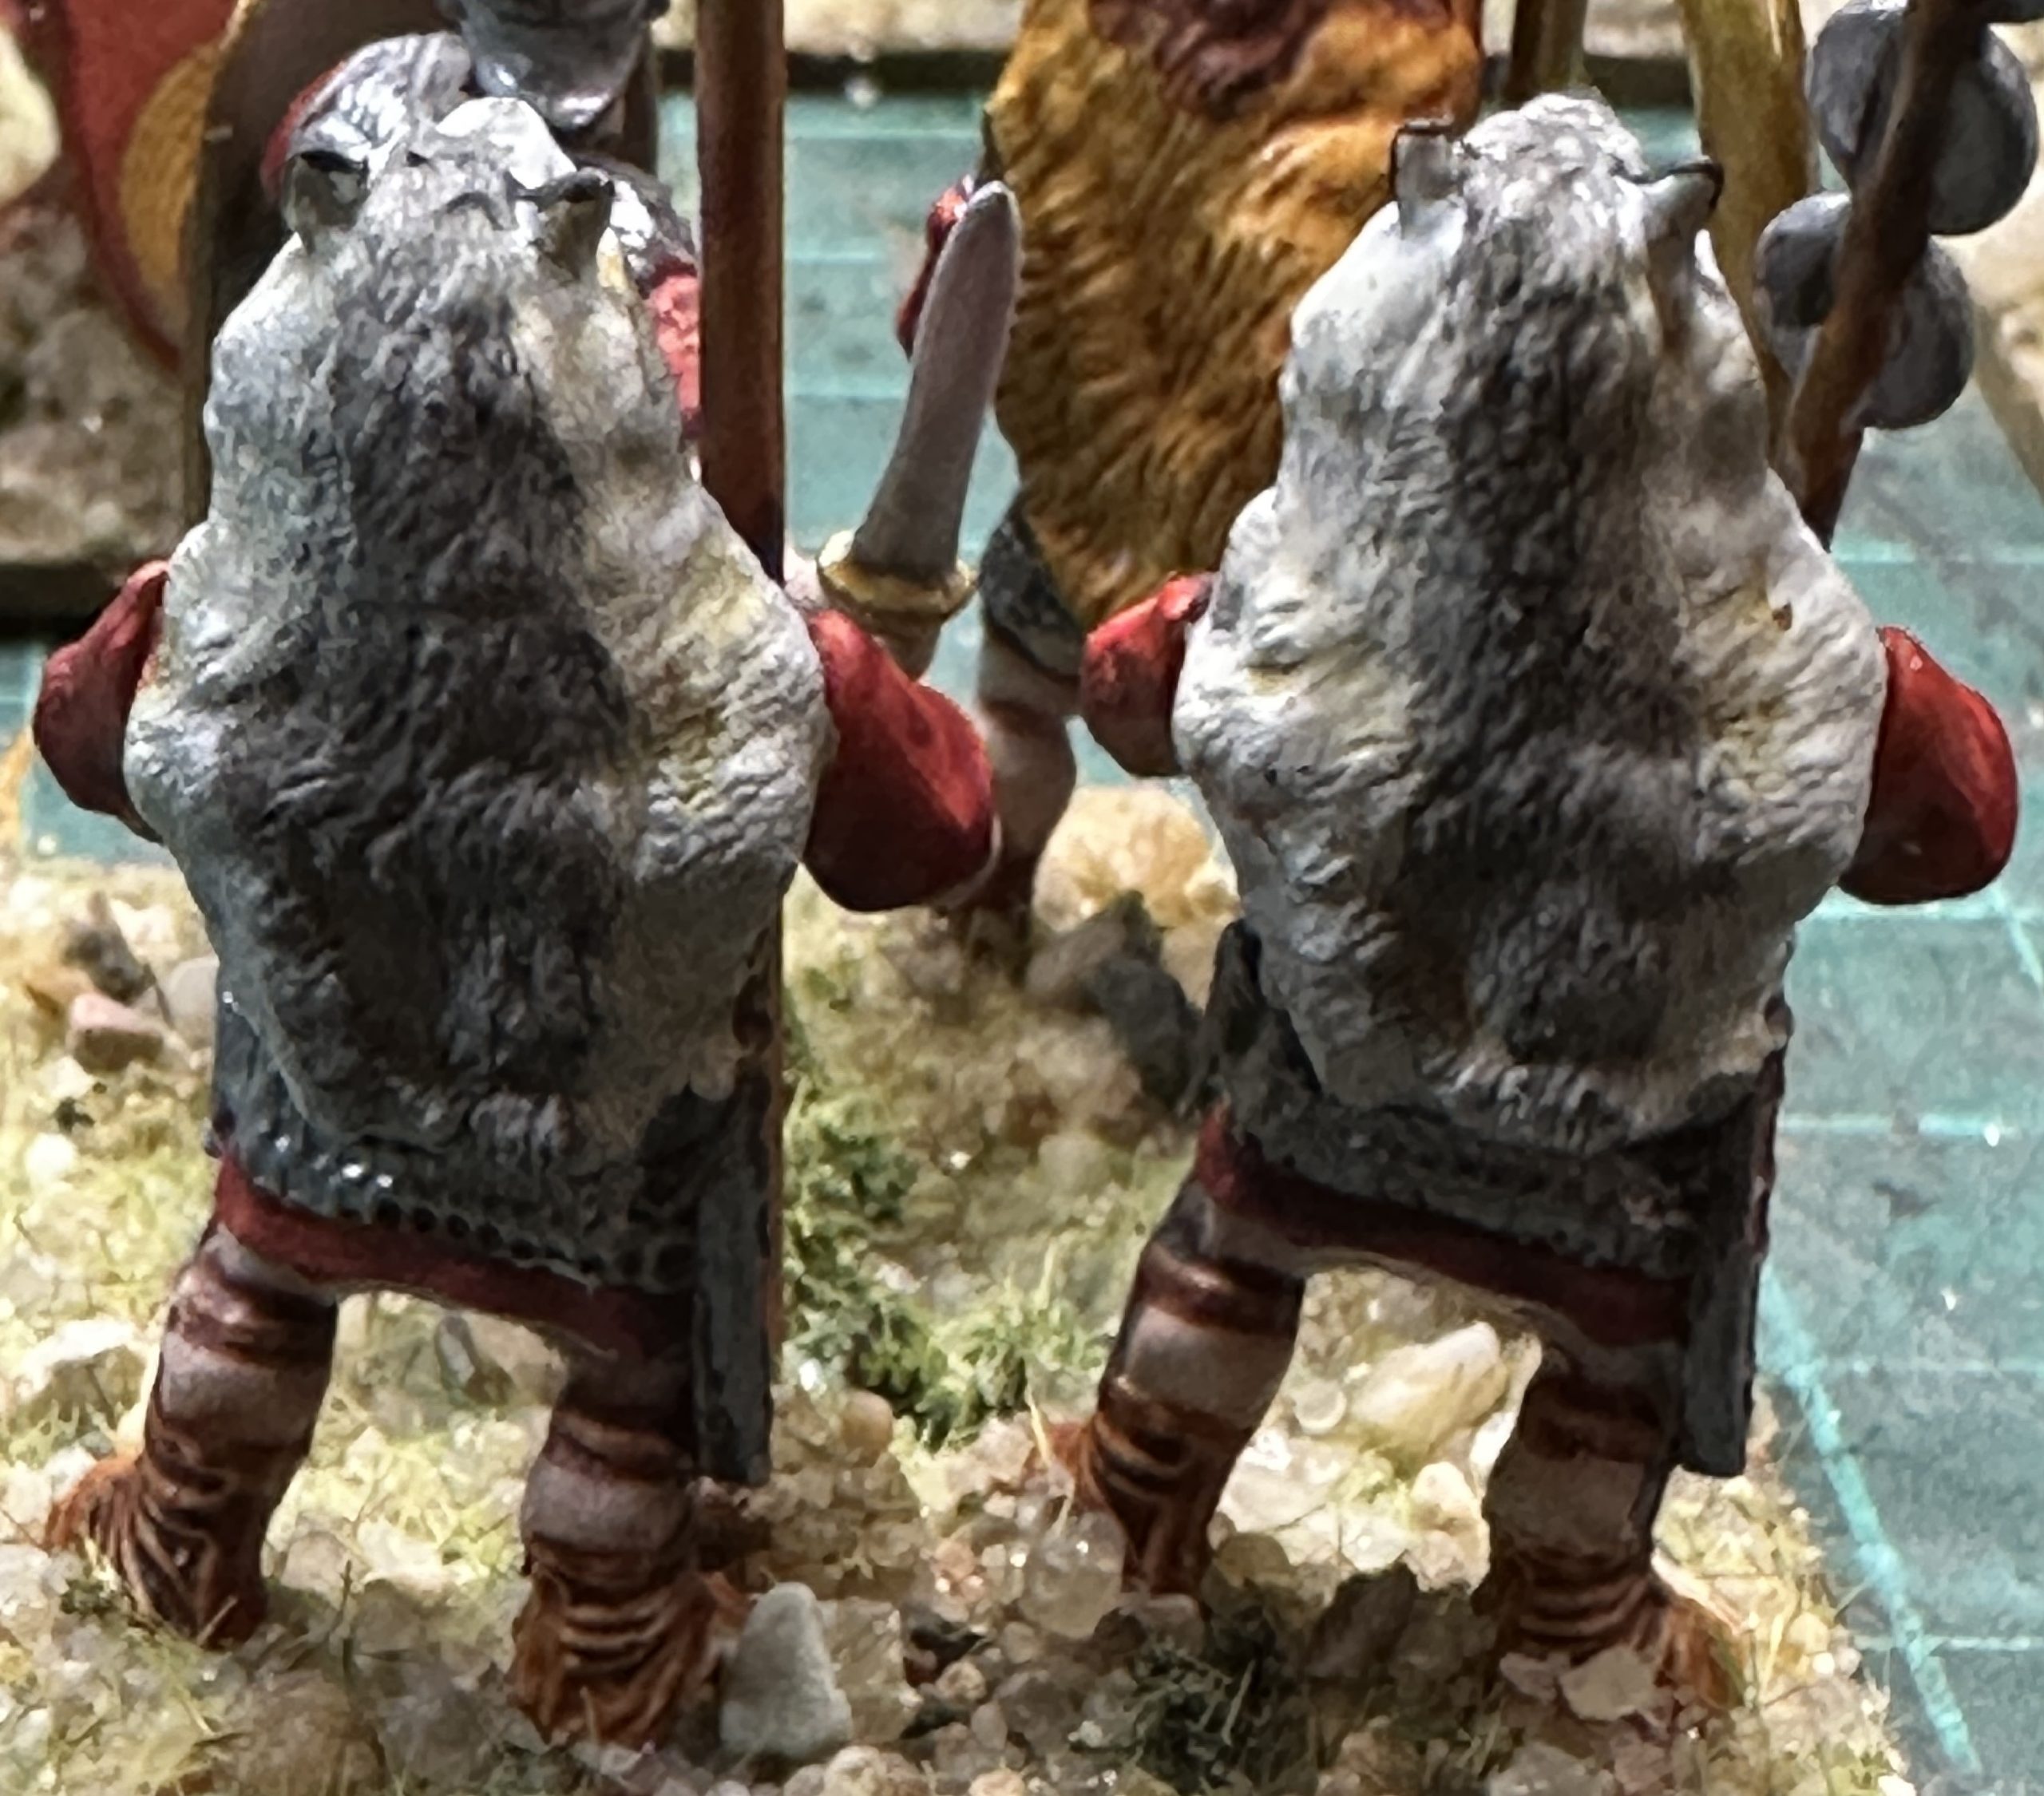
Same steps as the first unit. I did tweak the technique on the wolf pelts a tiny bit. I’m wet blending the Gravelord Grey parts with a tiny bit of Sand Golem and trying to leave a few bits nearly white in places by barely touching the zenith undercoat. I was trying to do this with the pens neat but found on the second time around that putting a small amount of water onto the pelt area first helps the blending process. I just wet my finger in some water and then wipe it across the pelt so it is damp, not fully wet. Then very gently tap on the Sand Golem in two broken stripes alongside the central area – leaving the edges untouched. Then I mostly wipe this off with my finger – leaving a much paler Sand Golem tone in patches and recesses. Then the grey goes onto the central section from the nose along the snout and then in a broad stripe down the centre of the back. If it looks too strong it can also be wiped back with a finger to give an instant highlight.
When dry, I edge highlight the ears with black.
This is what I got:
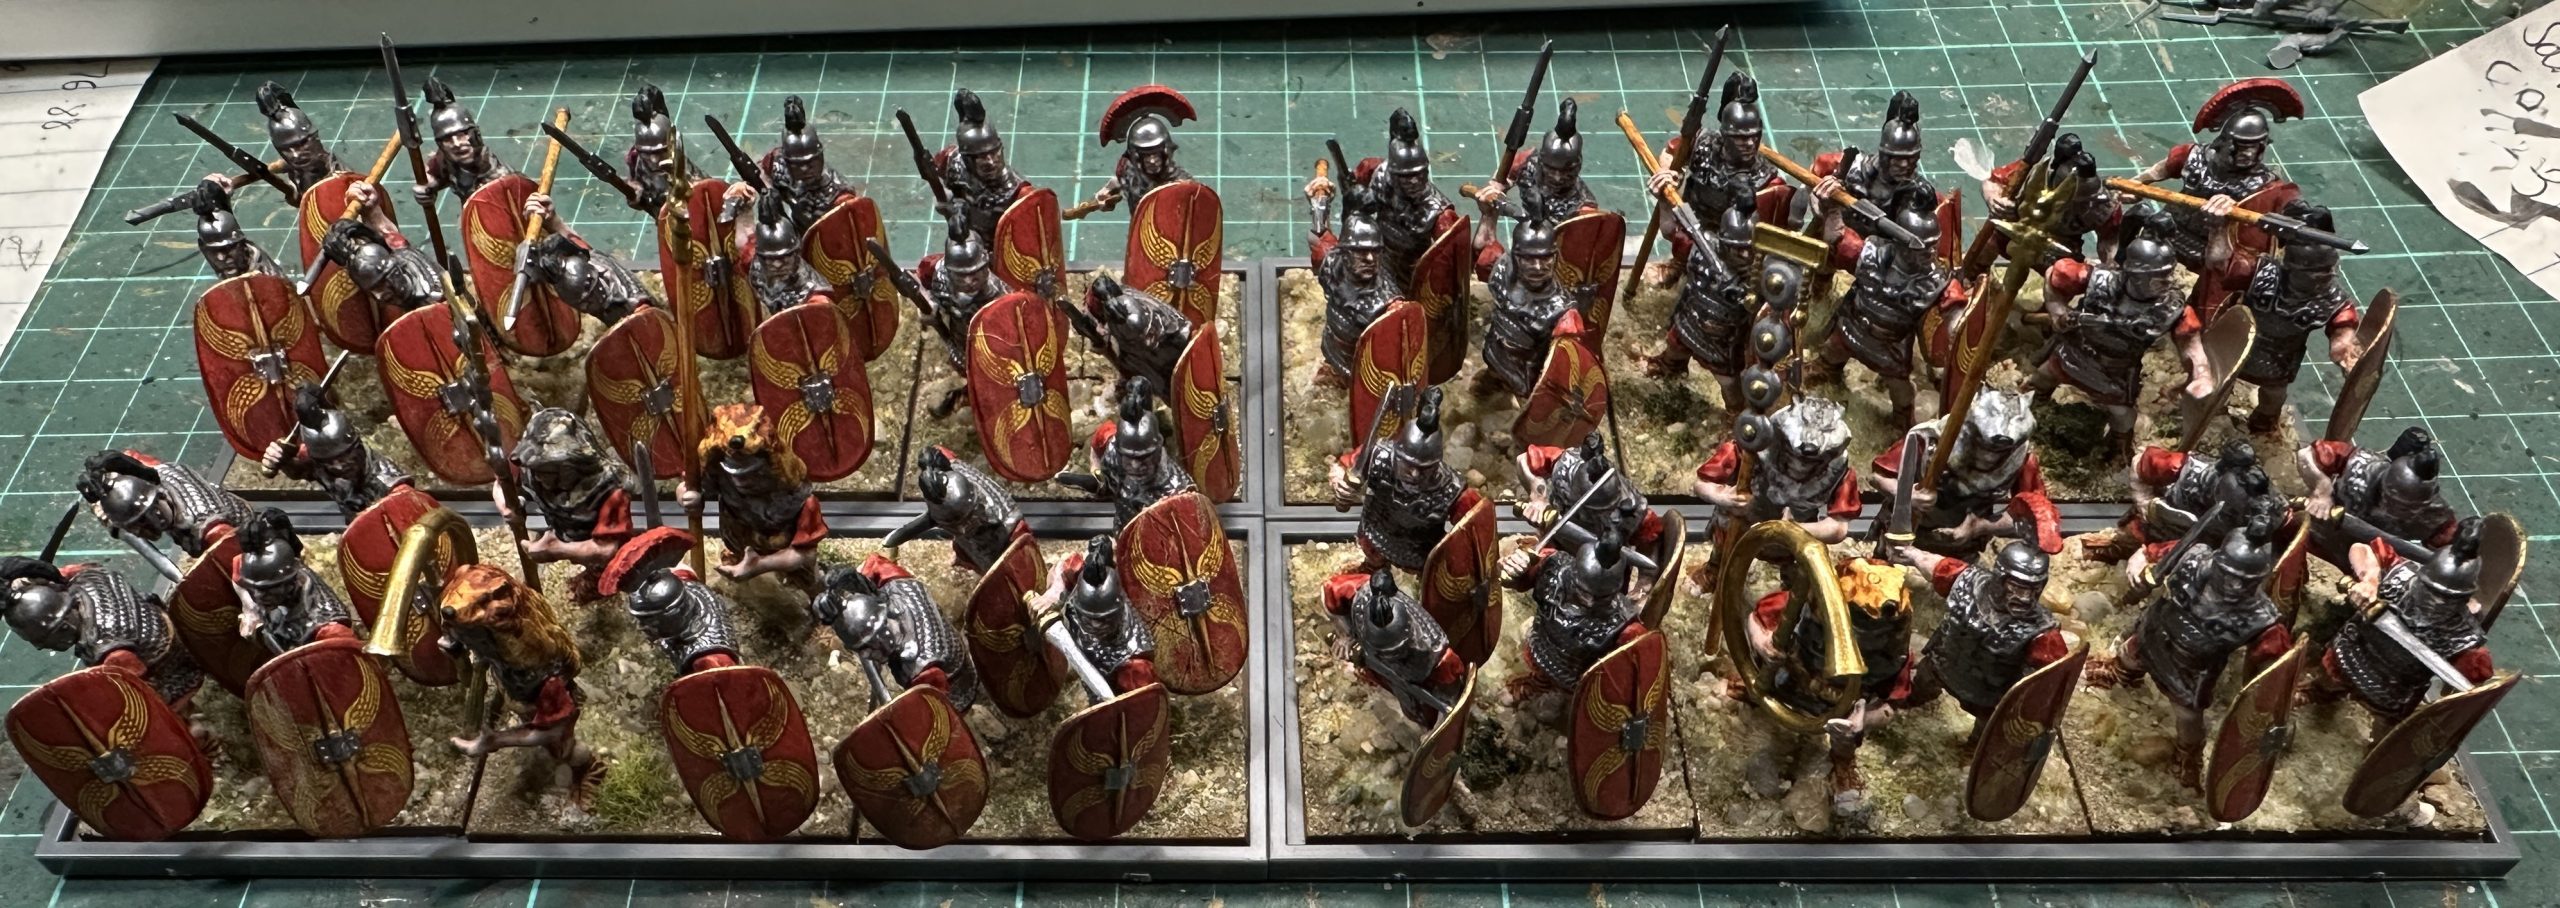
So now there are two units. I’m using these Victrix movement trays to help with moving them round easily. I may base texture them if I’m keeping the army.
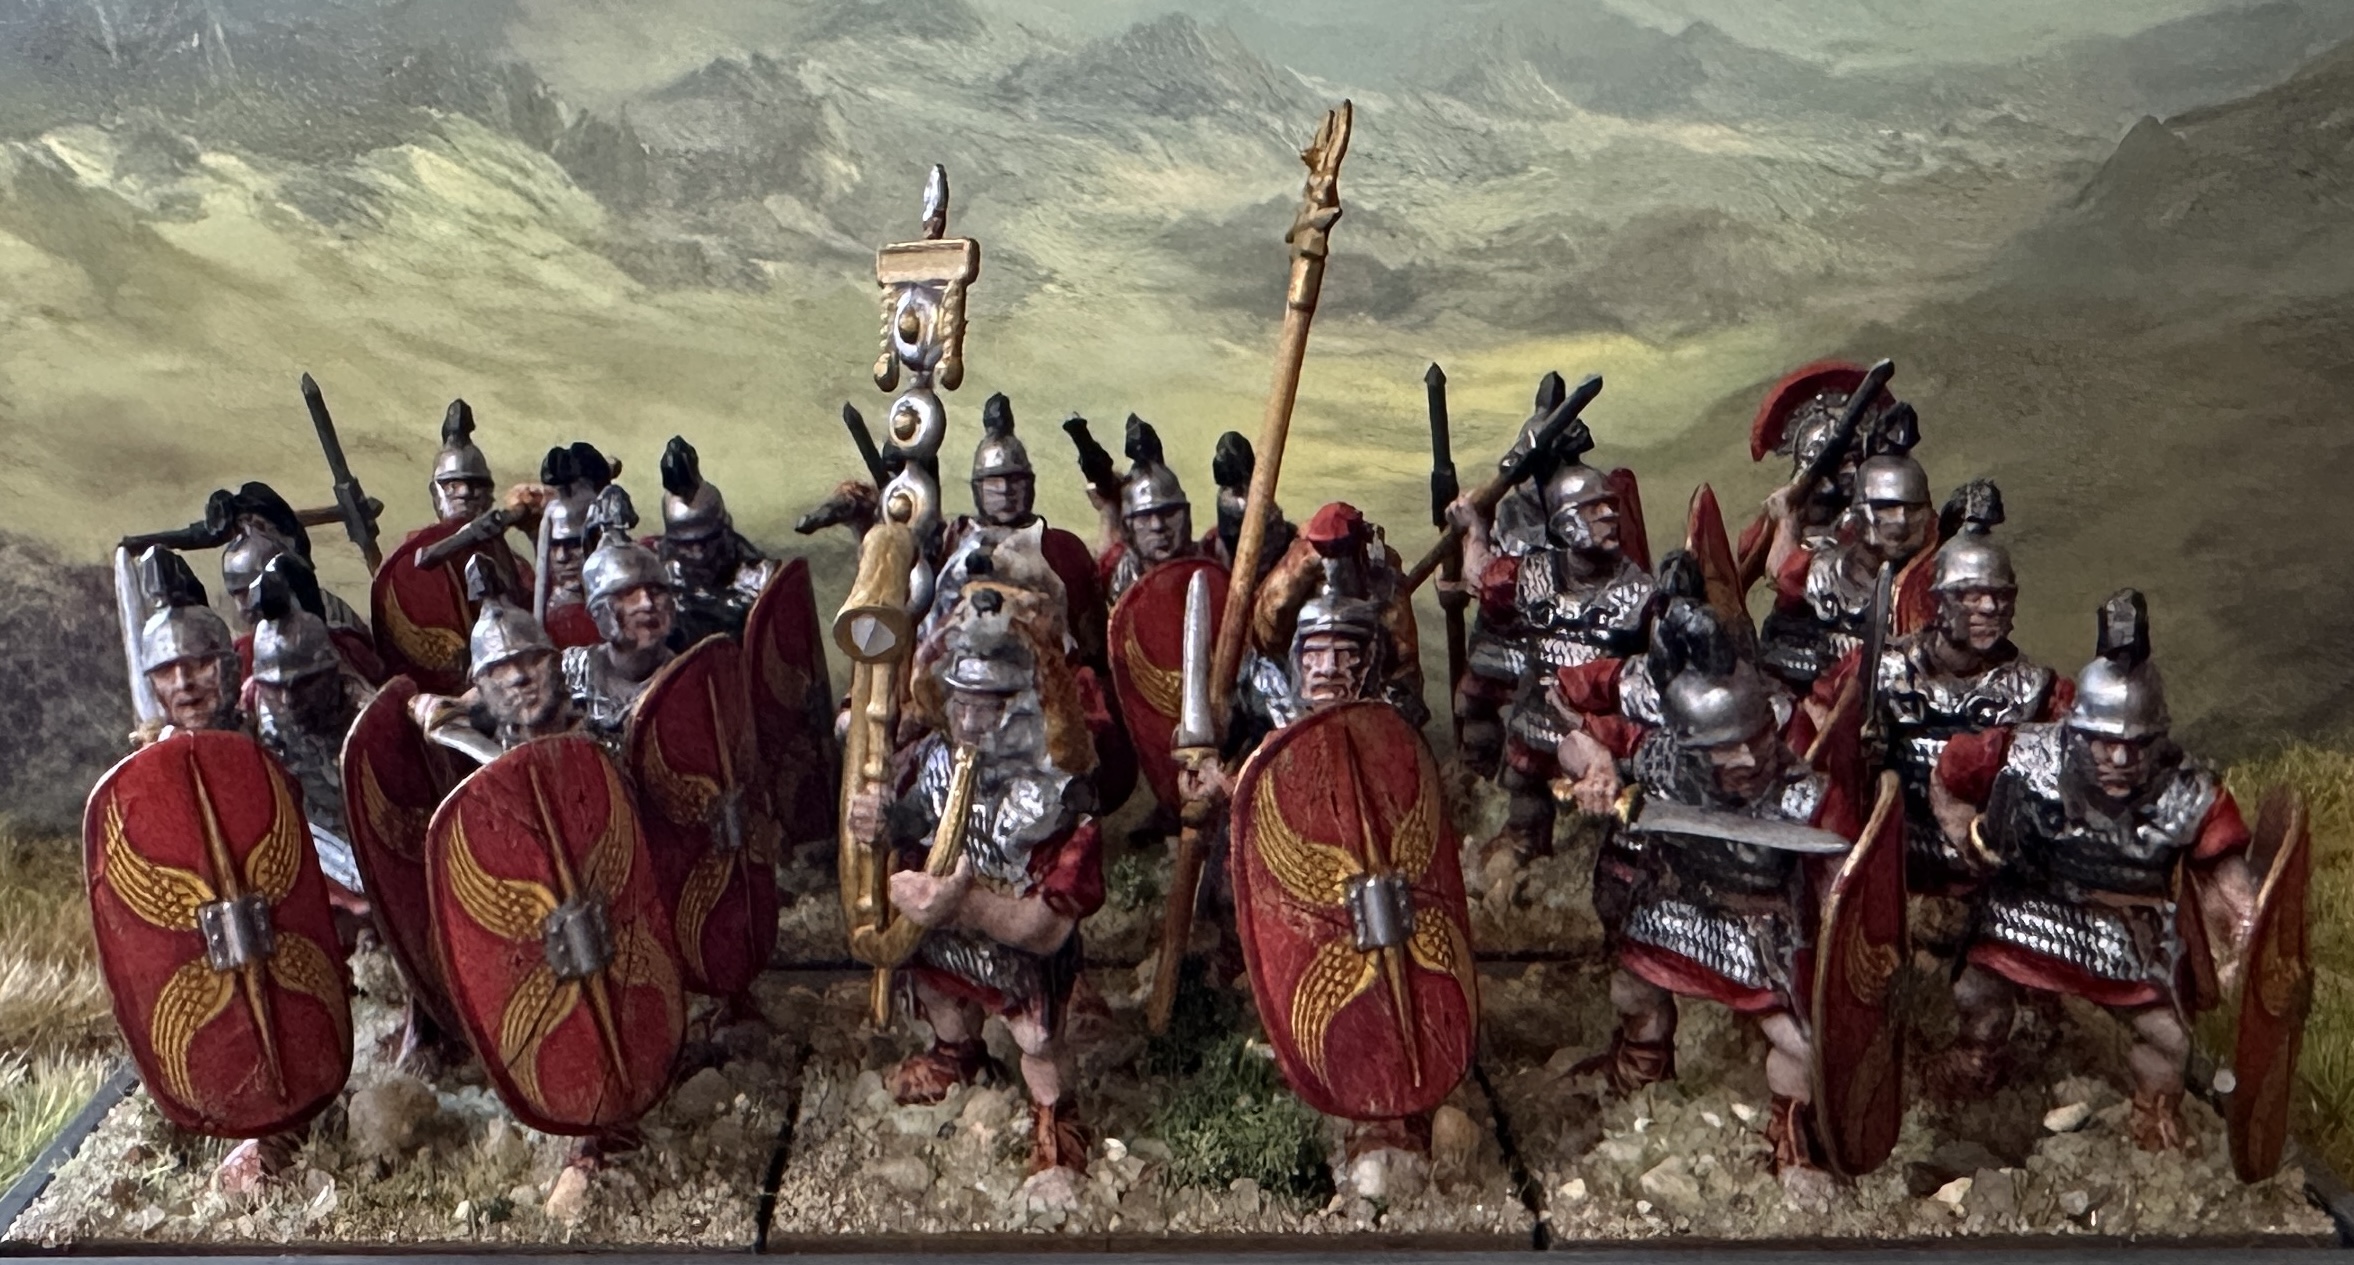
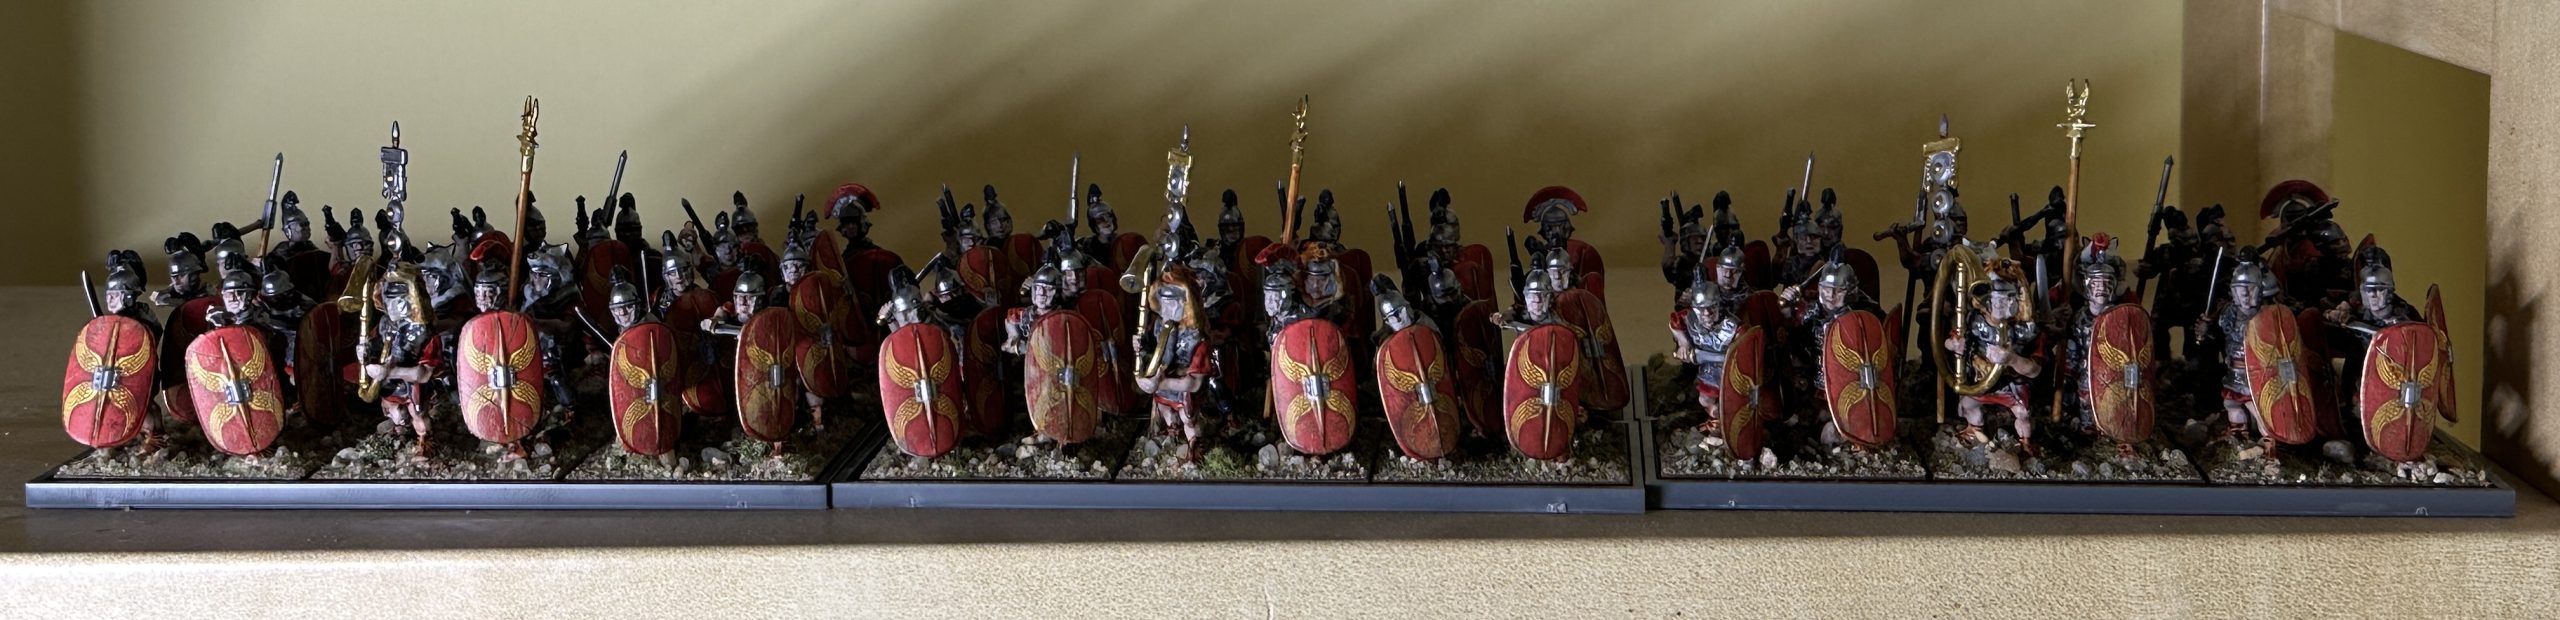
And then there were three, and a GB for me :)
Half way there. Starting to look a bit more impressive:
Thanks to those involved for the GB. Always feels good to see my stuff on the telly. I’ve thoroughly enjoyed getting these guys done so quickly and have come to terms with my more perfectionist tendencies to accept a “just enough is good enough” final finish.
Another one finished and only one left.
This is the fifth unit to be finished with only one remaining now. Then I’m on to the leaders.