
![Perfect Call Of Duty-Style Miniatures? Wargames Atlantic’s Operators Review [7 Days Early Access]](https://images.beastsofwar.com/2026/02/unboxing-wargames-atlantic-operators-coverimage-225-127.jpg)


Something of a Maze


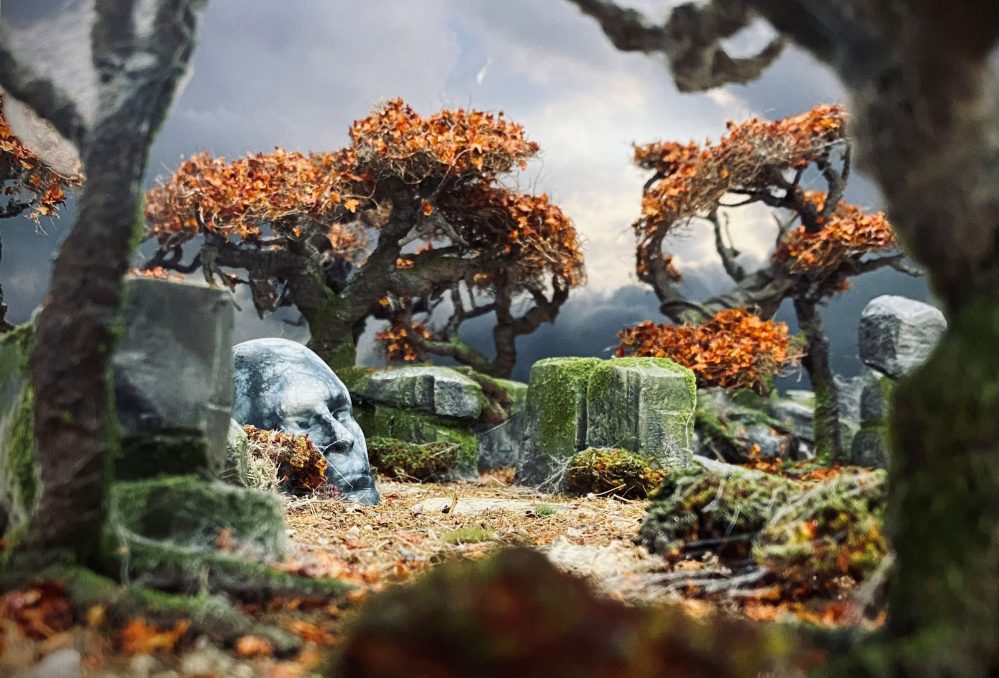
Marble Head
This morning, I set about painting the marble features of this setup.
It was just an excuse to add another texture and a set of colours to the build, and to create a few feature tiles.
These are the only 3D printed parts for this build. I printed them out on one of my Creality K1 Max filament printers using my usual PLA+
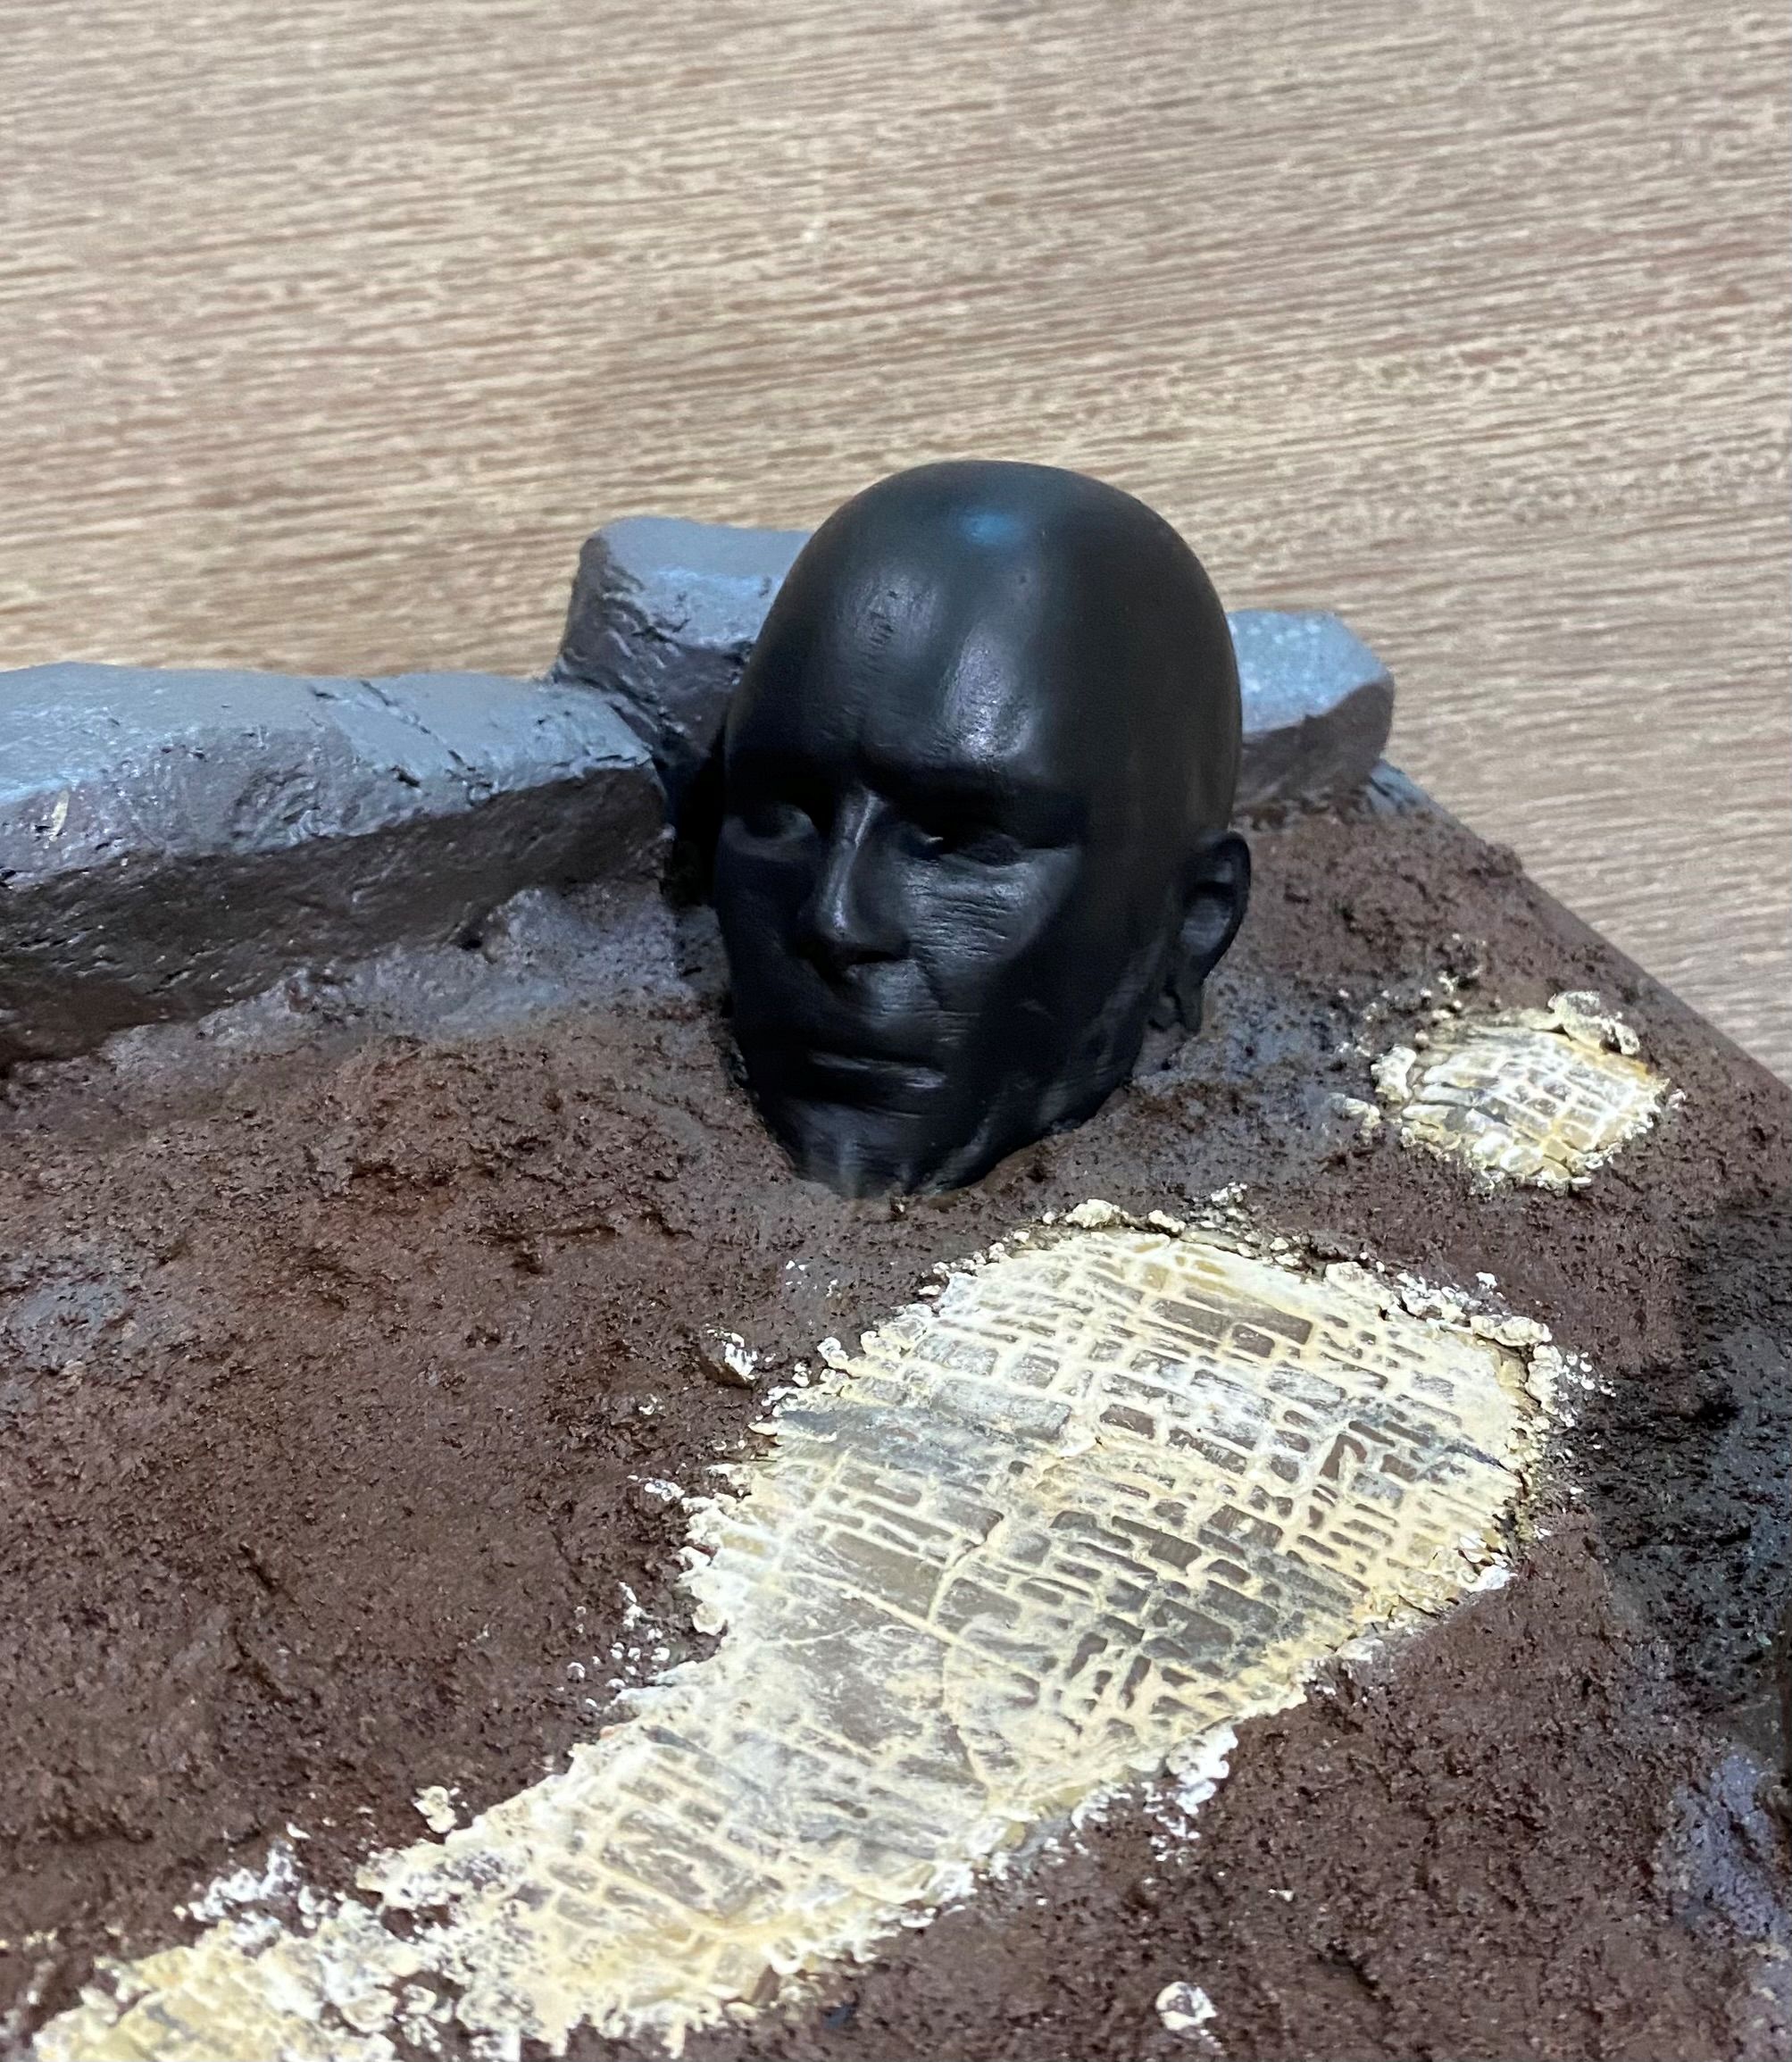 I started off by painting the statue with contrast black paint from Games Workshops range, although any black would have done the trick.
 I then got hold of some dried-out baby wipes. Luckily having kids I had some of these in the car, even luckier my kids are a bit older now and as these have been sat in my car for a few years now in the glove box they were well and truly dried out.
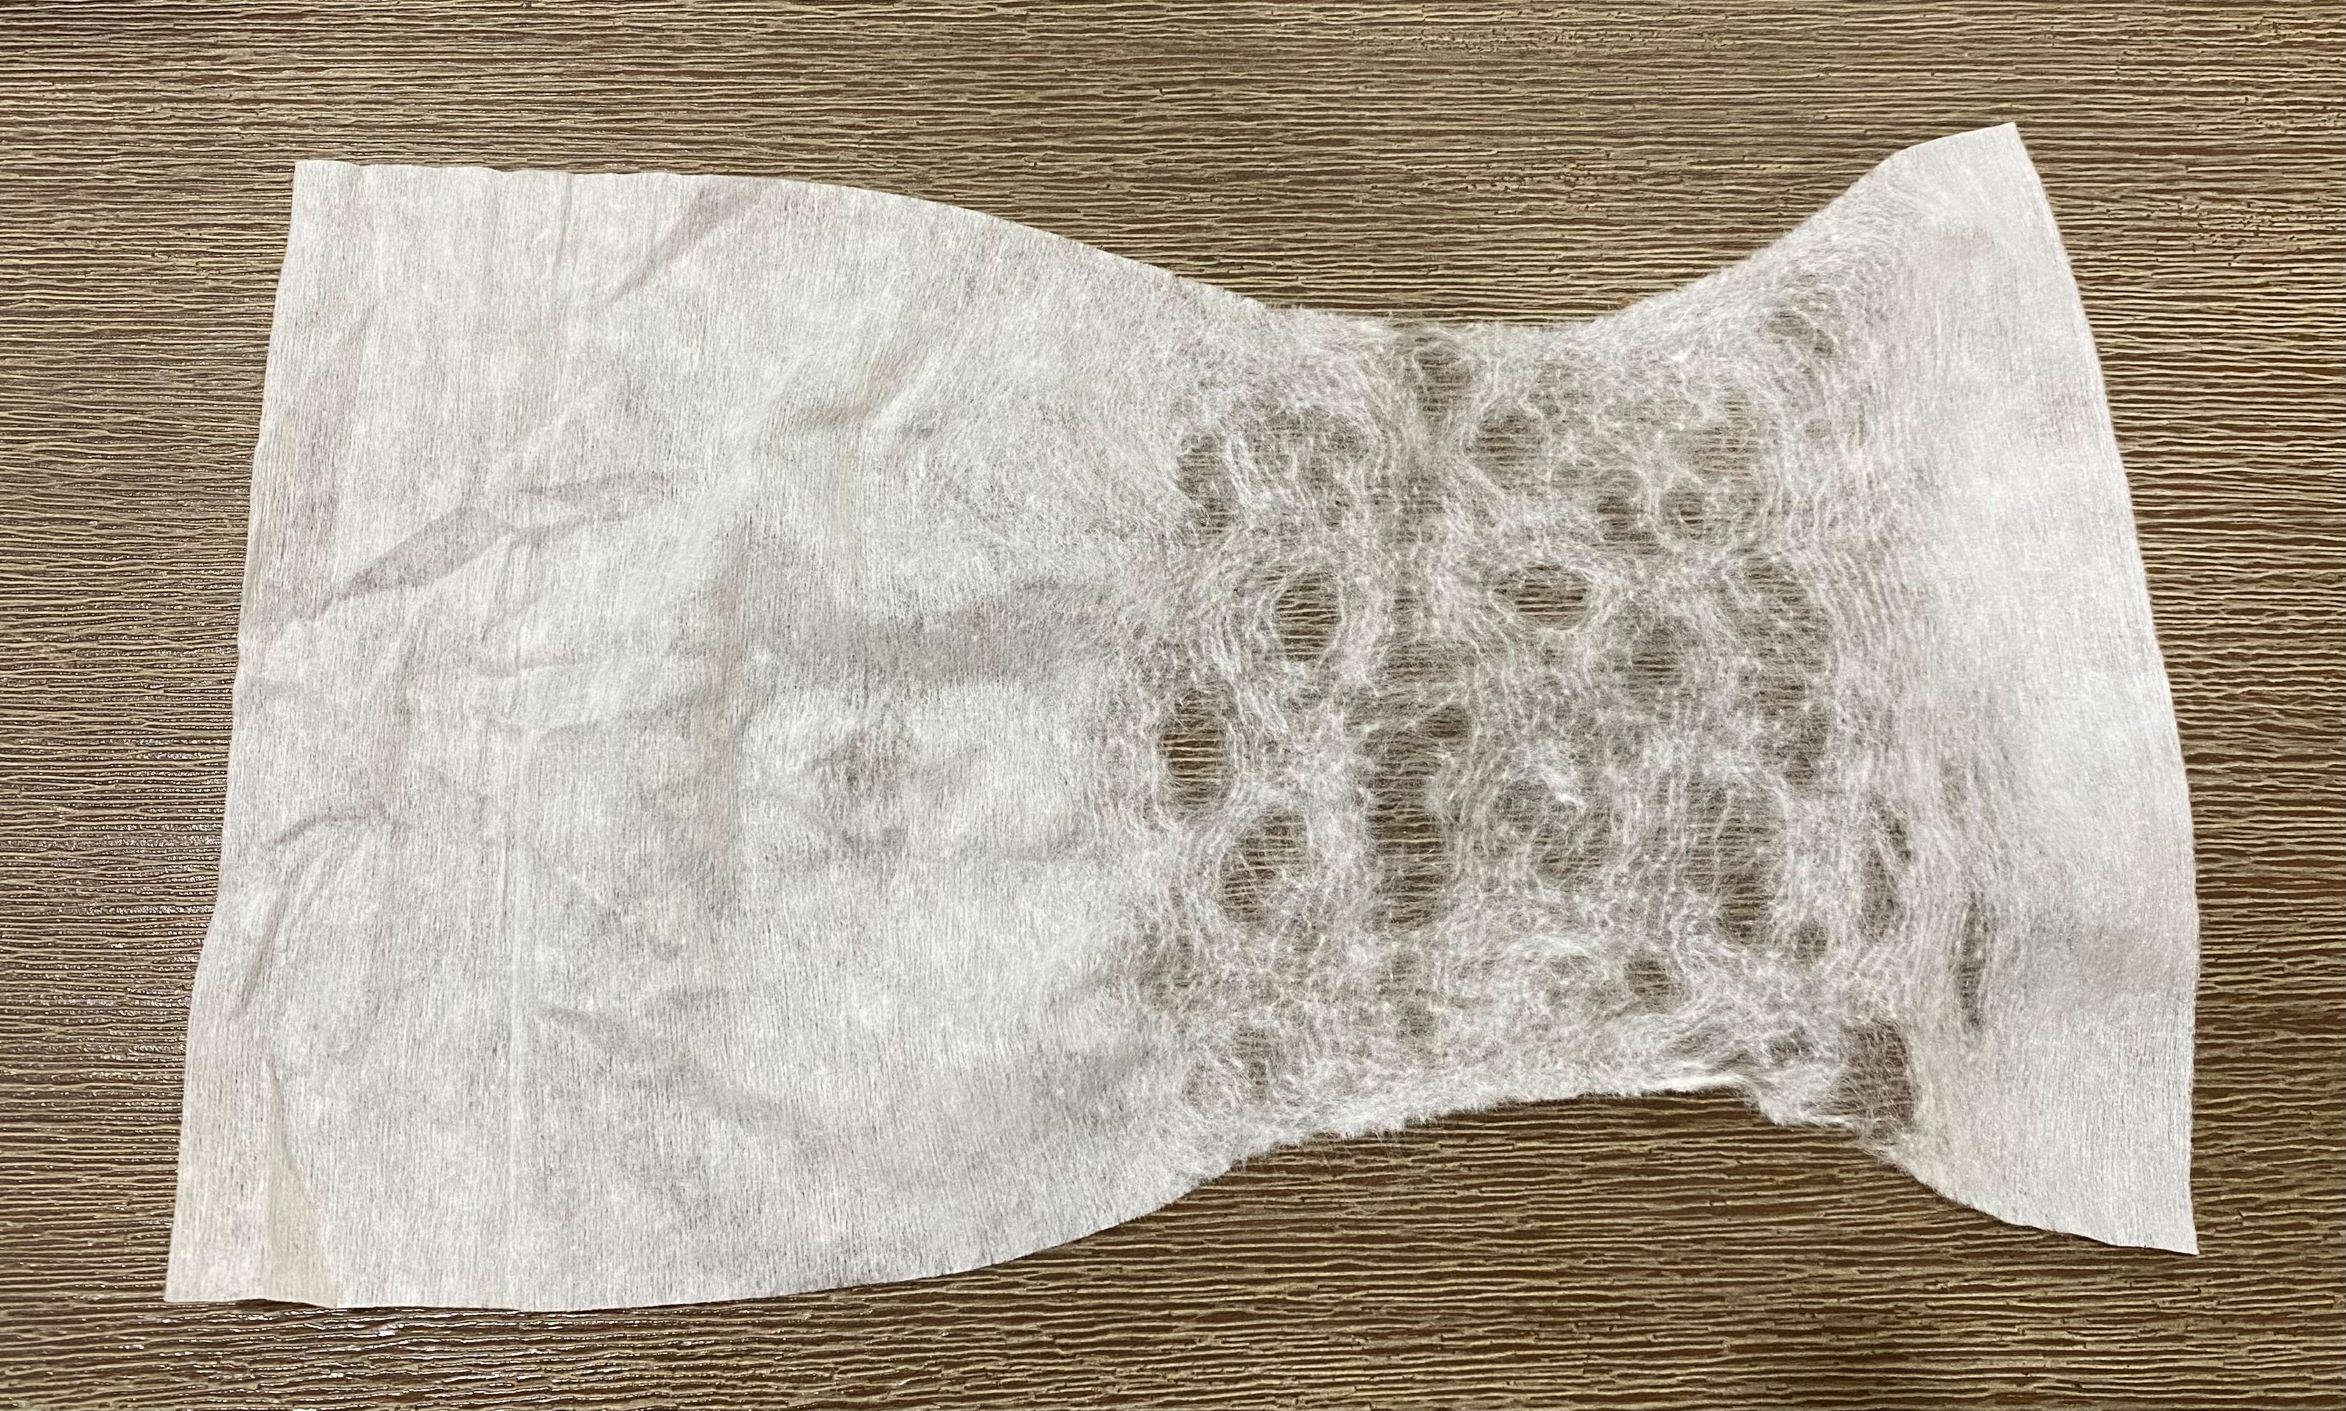 I teased the baby wipe apart by pulling on it gently. The more holes you create when doing this the less 'veins' will be created with the finished effect.
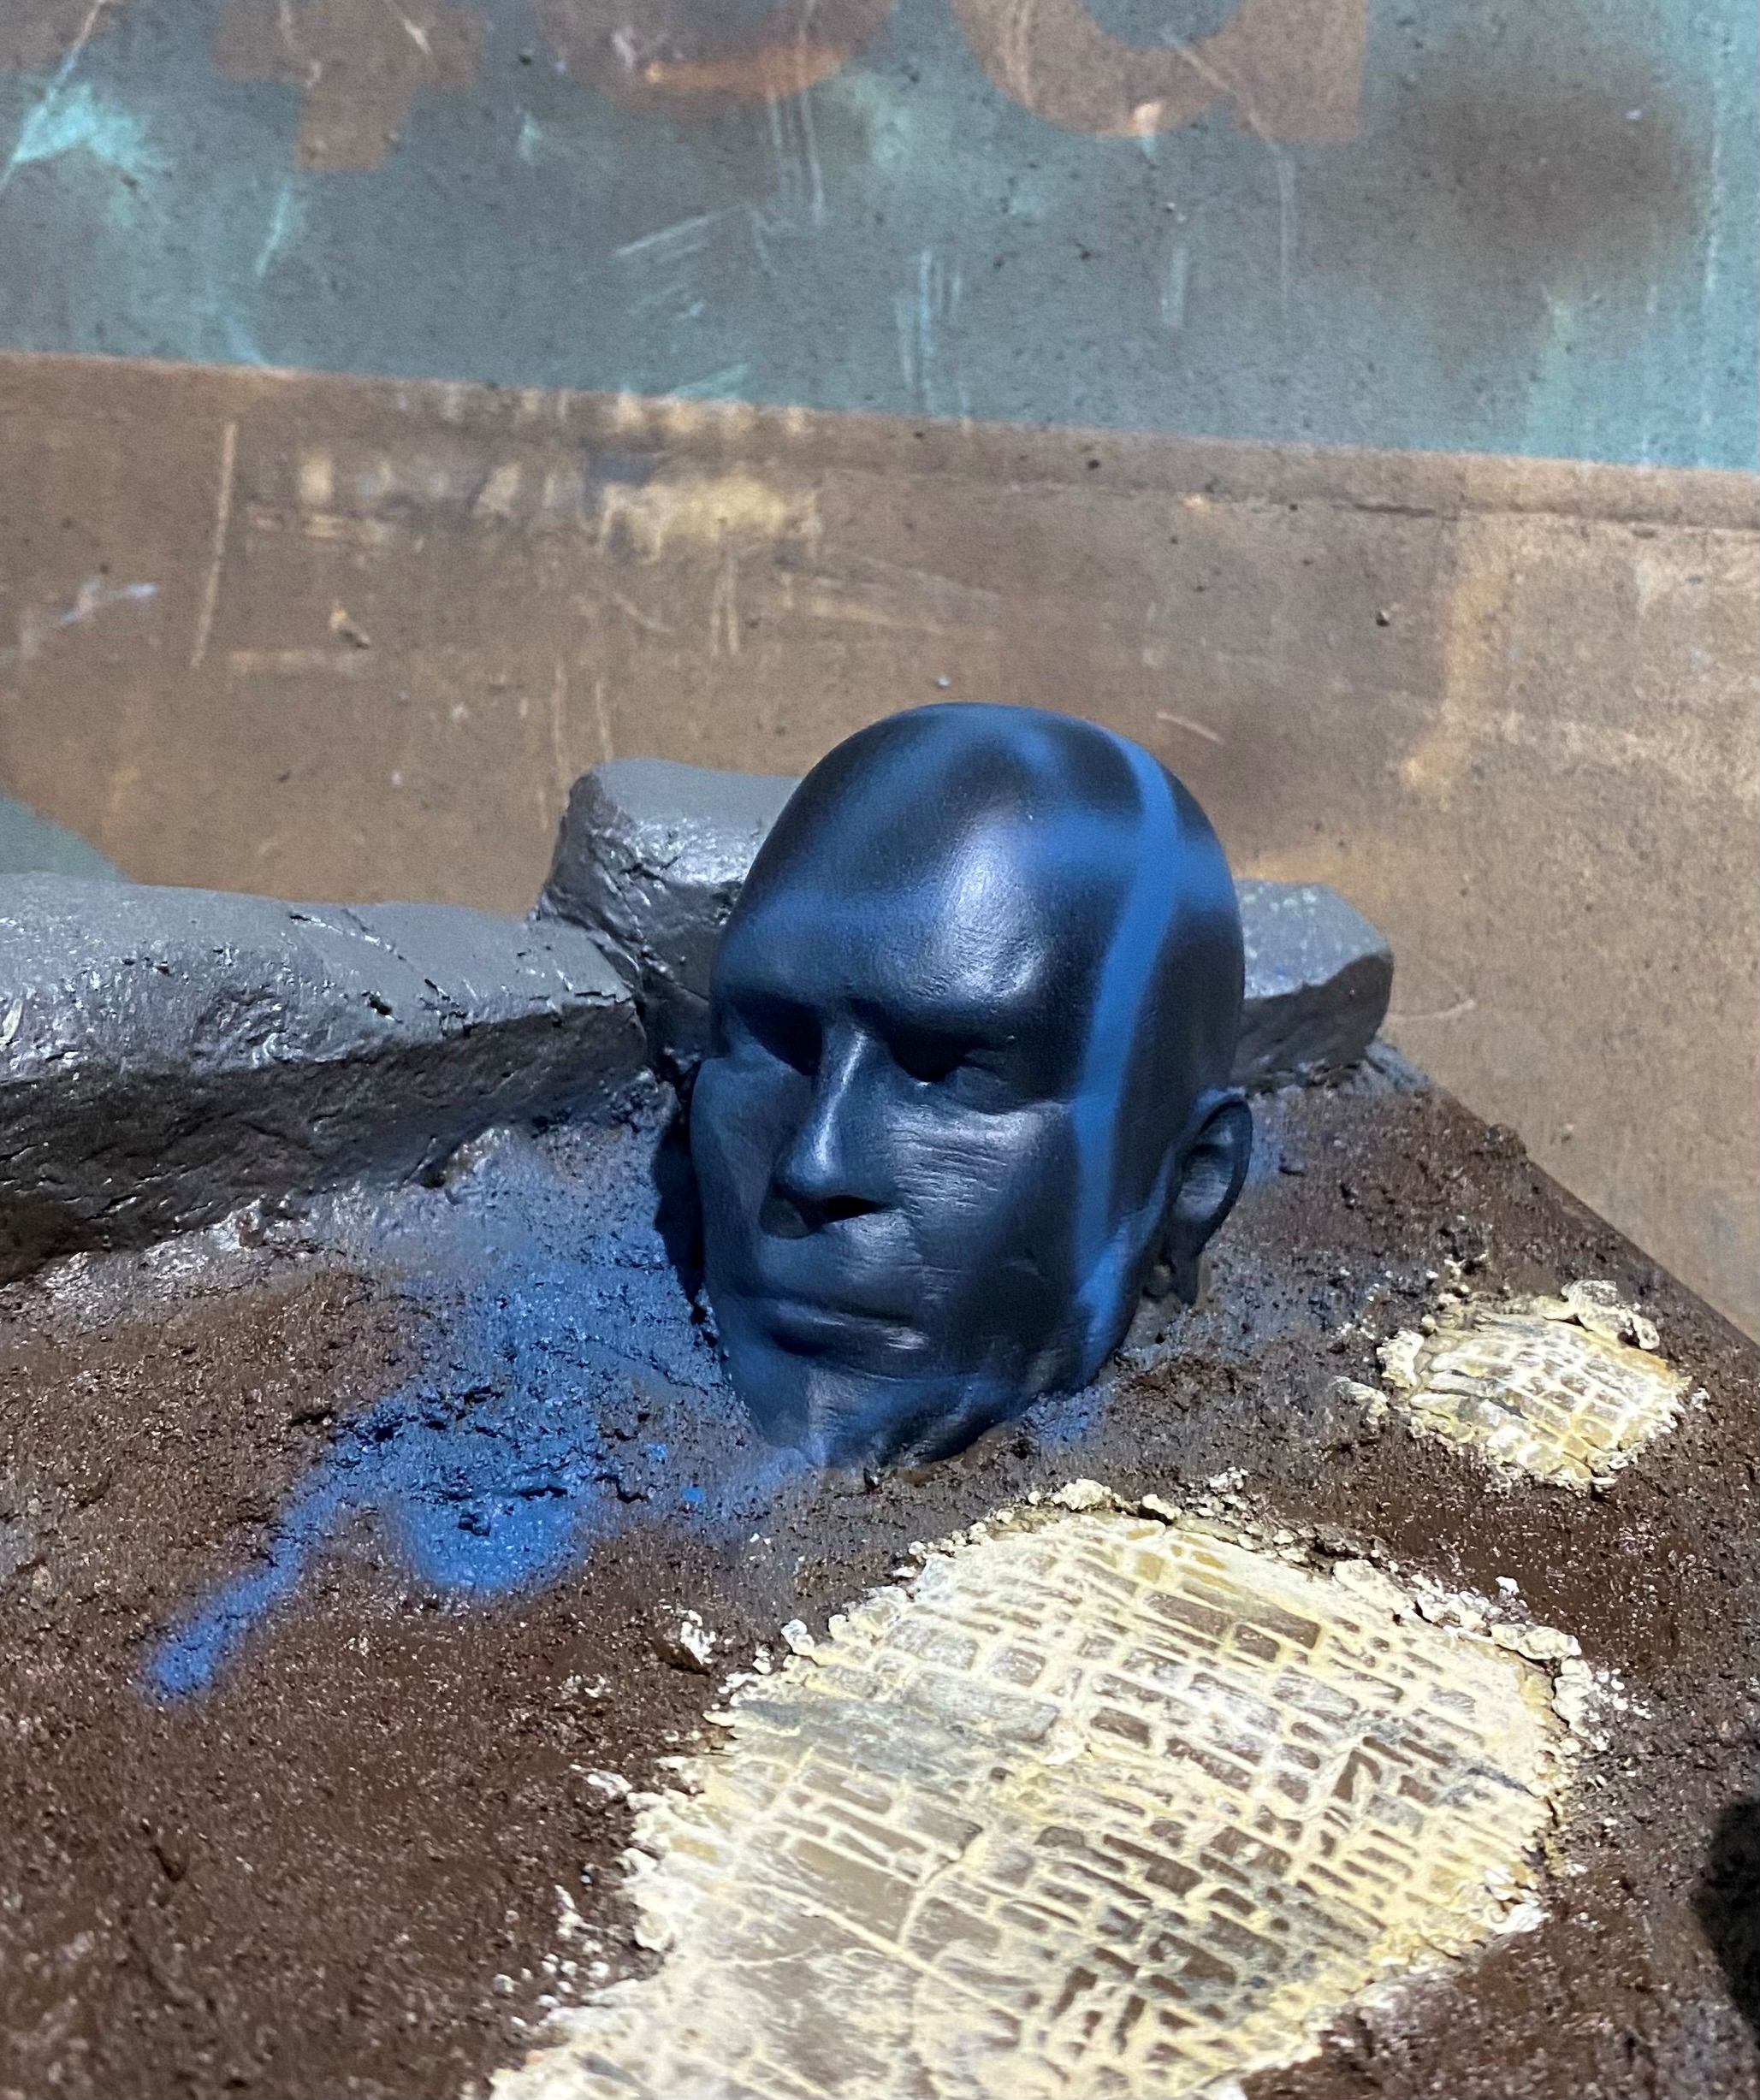 I then sprayed on a few lines with a blue and a bluish grey. You can use any colour for this, and this step really is completely optional and can even be left out if you prefer.
 Next is to cover the statue with the baby wipe. You really want to get this as snug a fit as possible. This can be tricky with irregular shaped things. As I plan to have some plant life around I know that I can hide any bits I am not happy with later down the track.
 I then used a cheap airbrush to apply some off white followed by some white to the statue. I concentrated most of the white to the top of the model.
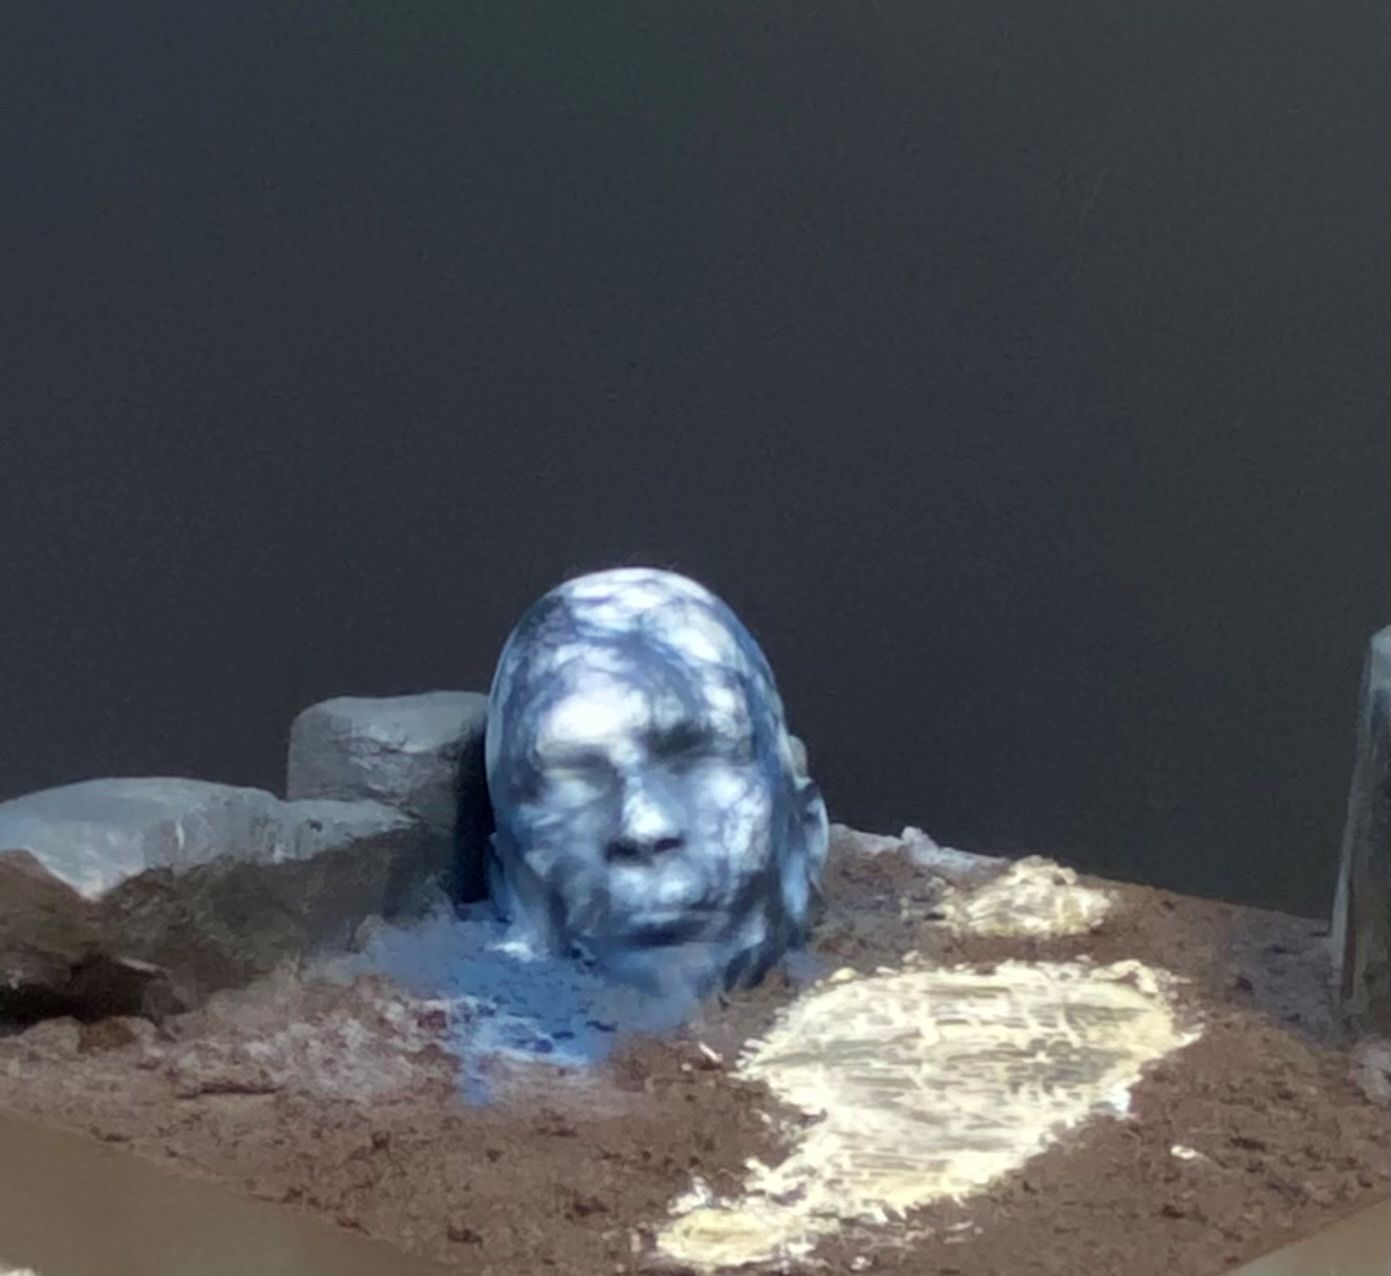 Finally, remove the baby wipe and you will end up with something a bit like this.
Obviously, I have a fair amount of the darker colour showing on mine. If you take the baby wipe off and find it too dark for your liking, you can simply add another layer of baby wipe and go over it again with off-white and then white. This will turn some of the current darker lines into very pale grey lines, which also creates a nice effect.


Subscribe
Login
Please login to comment
0 Comments
oldest


![Zenit Miniatures’ Samurai Warlords Now Live On Kickstarter [Updated]](https://images.beastsofwar.com/2026/02/samurai-warlords-launch-main-600-338.jpg)


