


![10mm Medieval Miniatures! Azincourt English Army Review | Wargames Atlantic [7 Days Early Access]](https://images.beastsofwar.com/2026/03/unboxing-wargames-atlantic-azincourt-english-army-coverimage-225-127.jpg)


Team Yankee Leopard Week – We Paint A Full West German Army


We're excited to be painting up a FULL West German Army from Team Yankee by Battlefront!
Follow Team Yankee Leopard Week
John will be talking through the stages he goes through when painting up an army like this. This includes adding a few twists of his own; moving away from the colour schemes in the book.
Comment To Win!
By Commenting on Beasts of War, Facebook or Youtube you could win 1 of 2 Starter Bundles which include...
- Soviet Starter Force
- German Starter Force
- Team Yankee Rulebook
- Leopard Rulebook
Get chatting and share your thoughts in the comments below!
Grab The West Germans & Leopard Here
How are you going to paint your own West Germans?
Blogging At This Event:
What Are John's Plans For Painting The West Germans?
We get stuck into an awesome PVLOG where we're painting up a full army of West Germans for us to use in our games of Team Yankee.
In this first video we're talking with John to find out what his plans are.
The Army Is Built & Ready To Prime
With the plans lain out we turn our minds towards what colours we're going to be using and how we might approach priming these awesome models.
Thankfully there are plenty of neat paints out there within the Army Painter Range designed for this particular job!
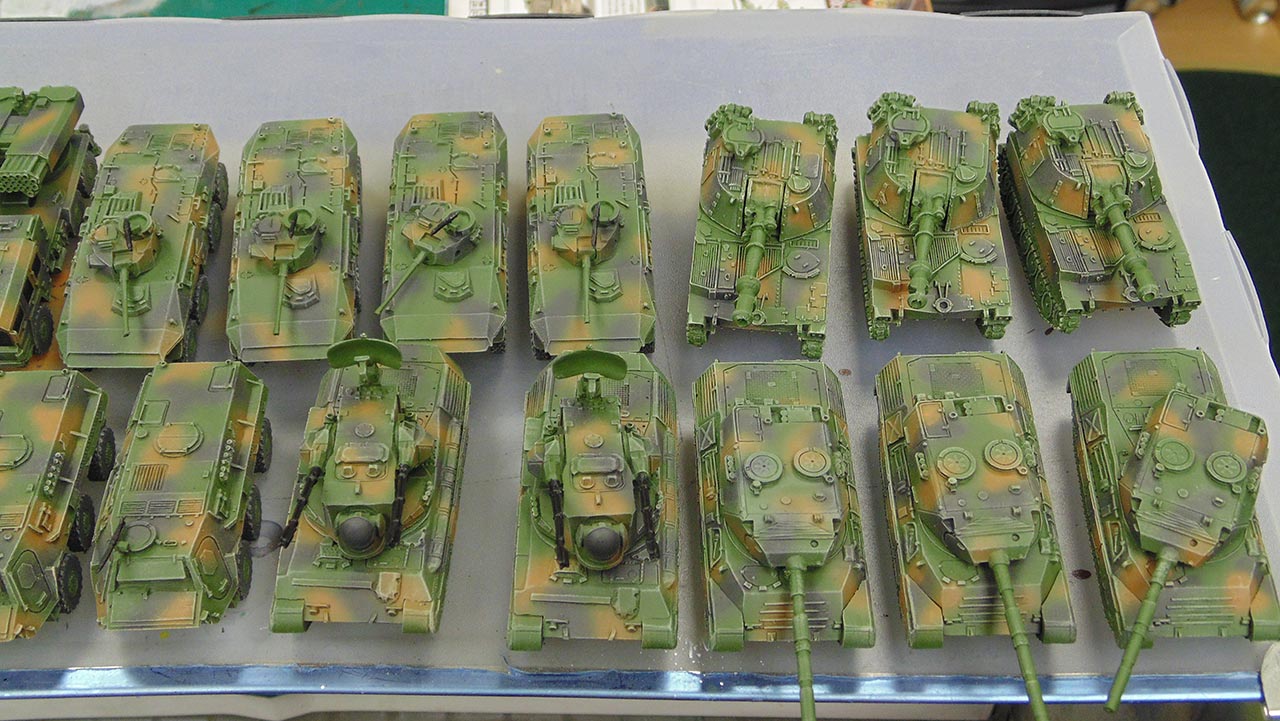
Getting The First Layers Of Camouflage Down On The Army
With the primer down we start to look at the way in which we're going to camouflage these tanks.
Within the book you might find some helpful guides to get you started.
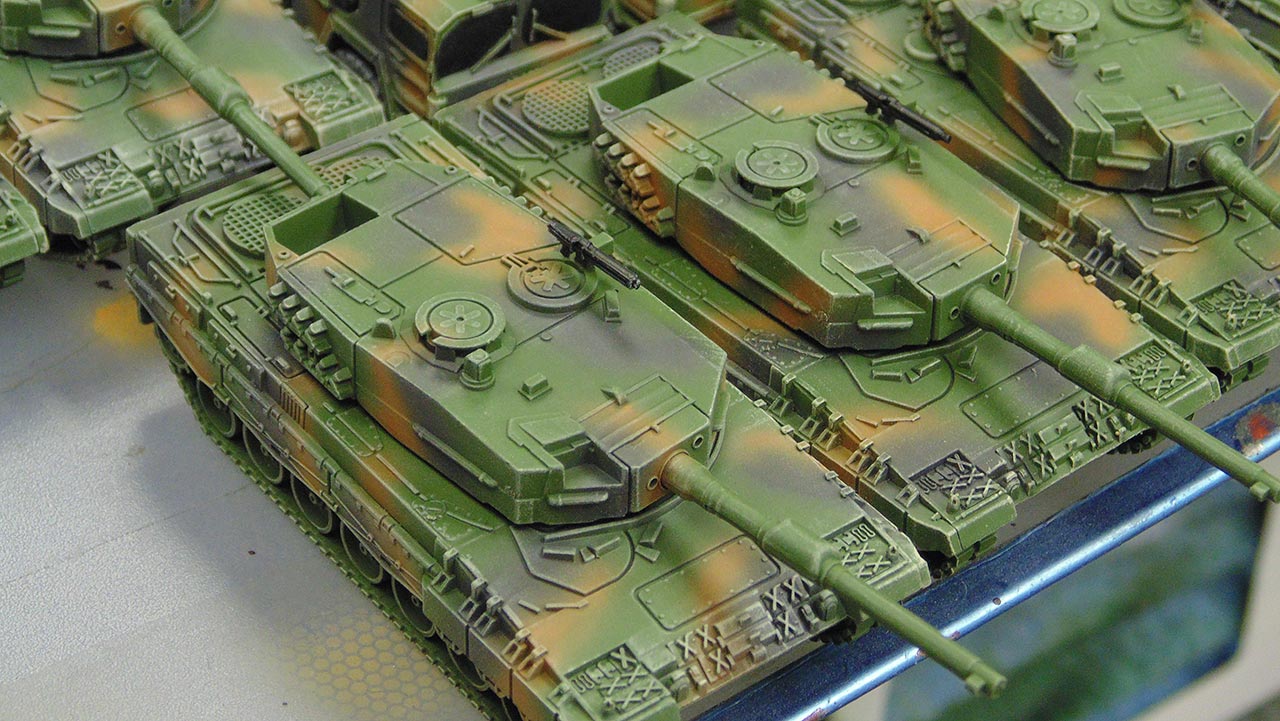
Adding The Second Colour For The West German Camouflage
With the first bit of camouflage done we move onto adding the second and with that the pattern is coming together nicely.
Using an airbrush is certainly making this job very easy indeed!
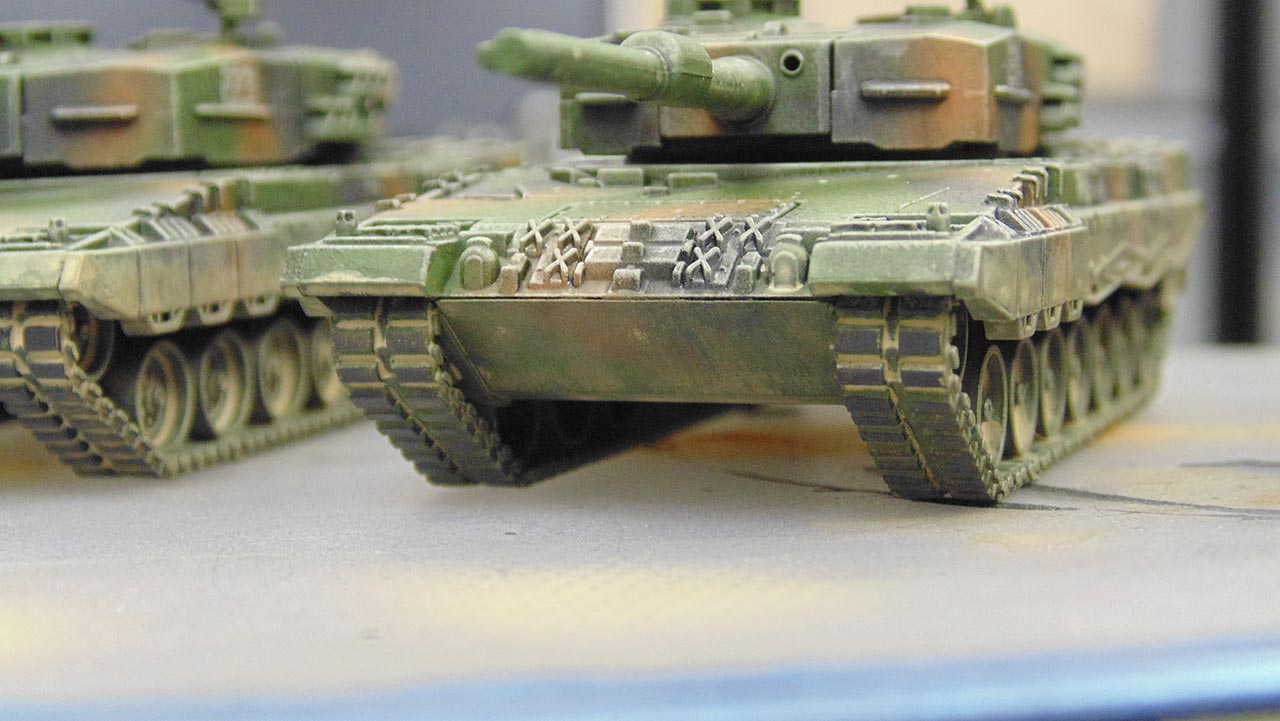
Time To Get The First Details Done On The West Germans
With the main camouflage patterning done we move onto working on the first detail work for the West Germans.
This is the stage where you start to make the vehicles pop and make them look a lot less like toys!

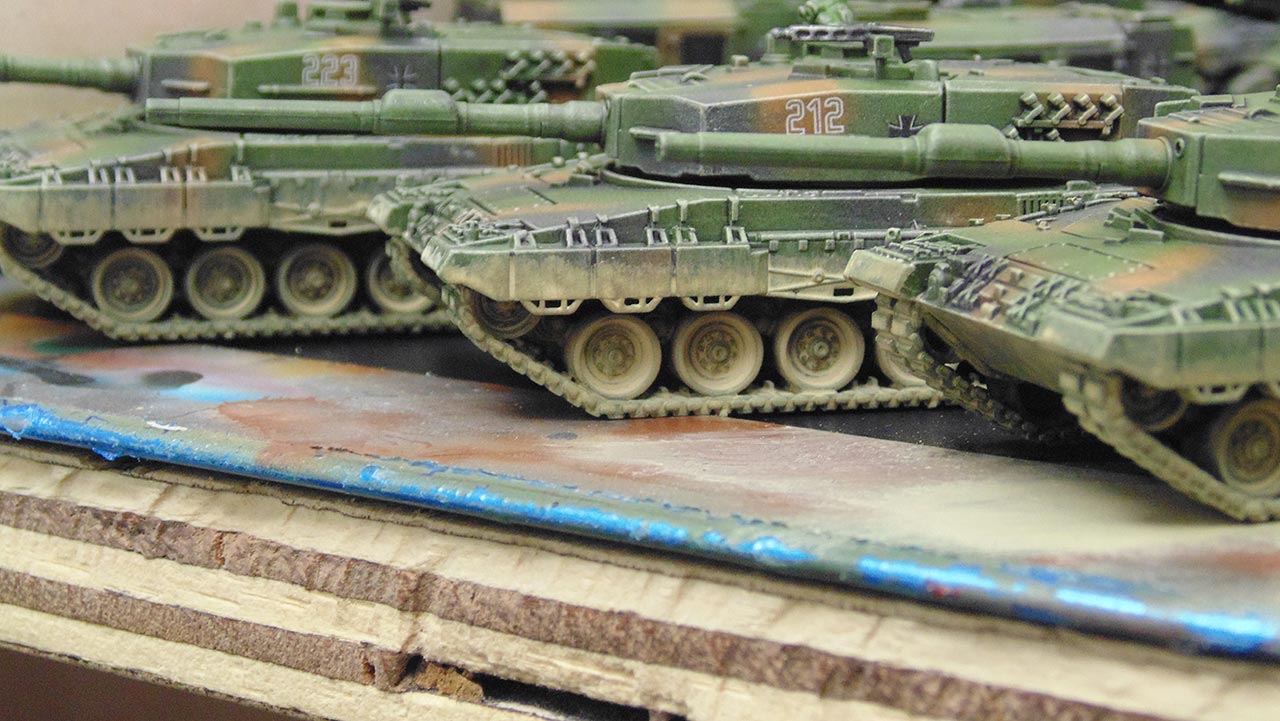
Next Up The Highlights For The Armour
While you might not have thought it you do need to so some highlighting on tanks! So, we get stuck into the work on the armour and show off a few funky techniques.

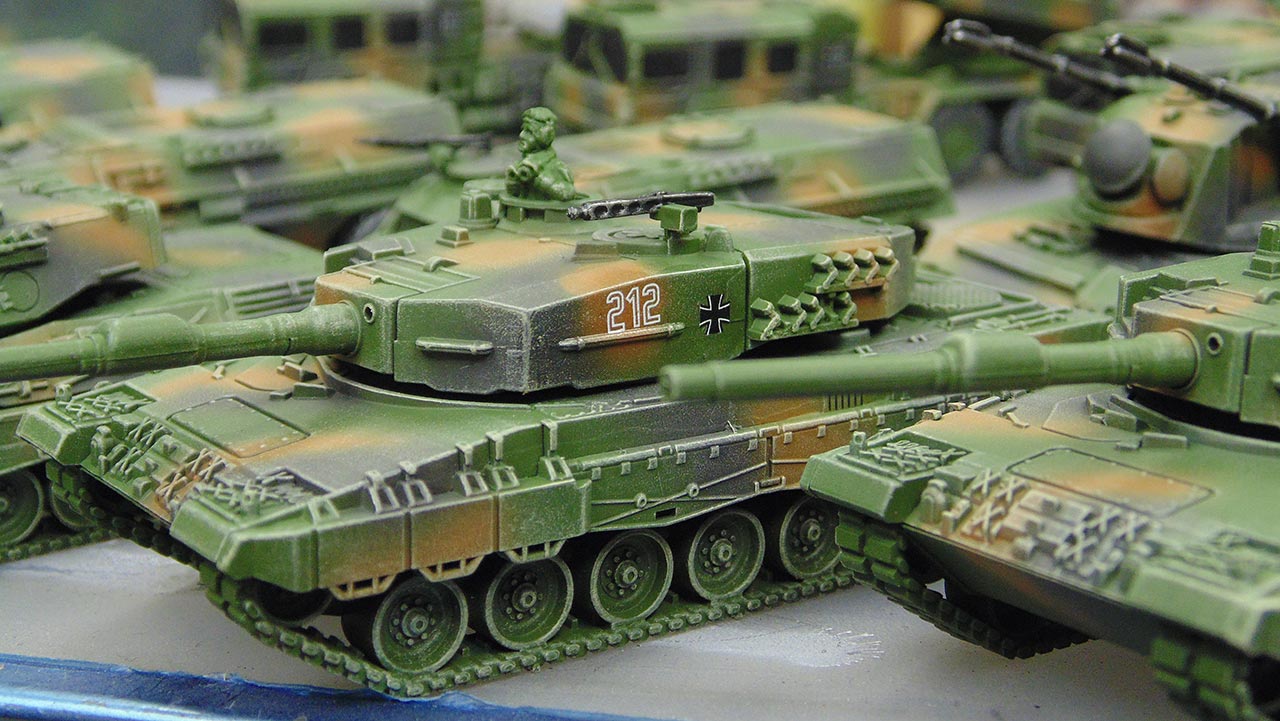
Getting Transfers Onto The Vehicles For Added Character
Now we move onto the tricky business of transfers. This can be a very fidgety part of finishing off your model but John shows you how you can do it with very little fuss.
Also make sure to follow any kind of guides out there when adding transfers so you get the right markings on the right vehicles!
Adding Gloss Varnish To Help With The Washing Step
...the next step involves some gloss varnish which will eventually help with the washing step.
It might make things look a bit shiny but have no fear, John has plans!
Giving The Army A Wash to Bring Back the Details
Now it's the all important Wash stage where you start to bring back some of the details that might have been lost in the painting process.
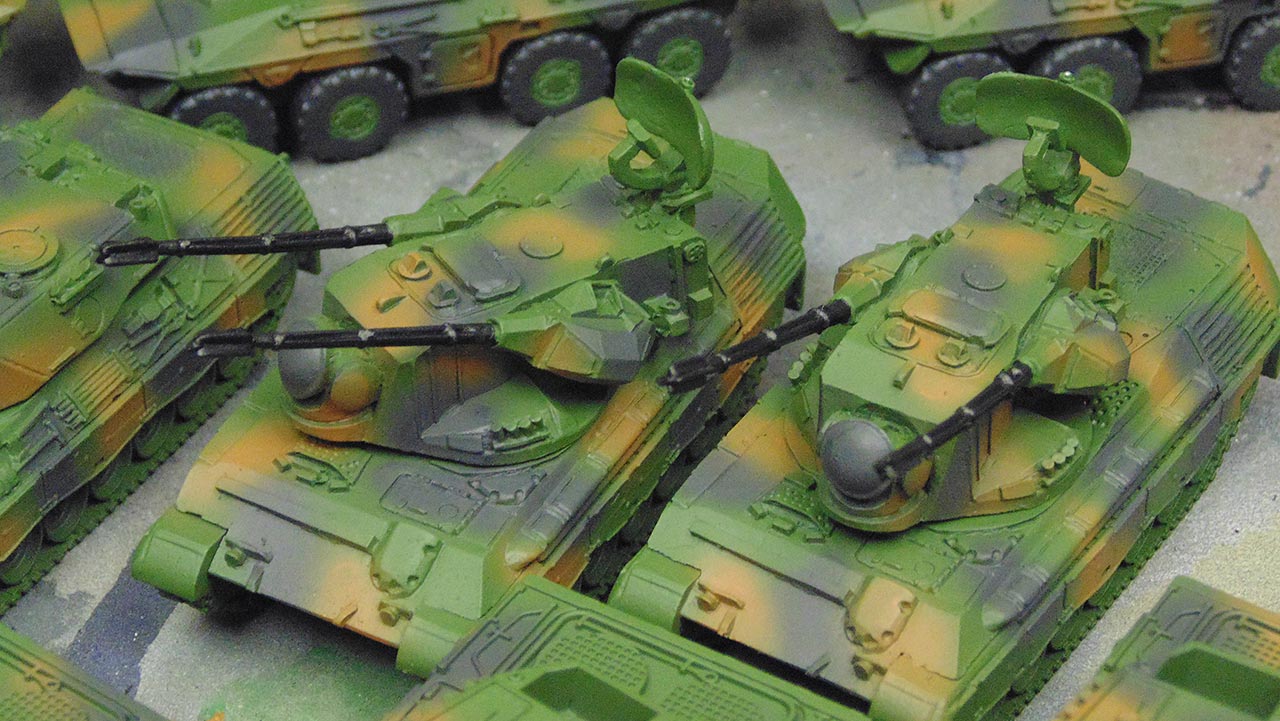
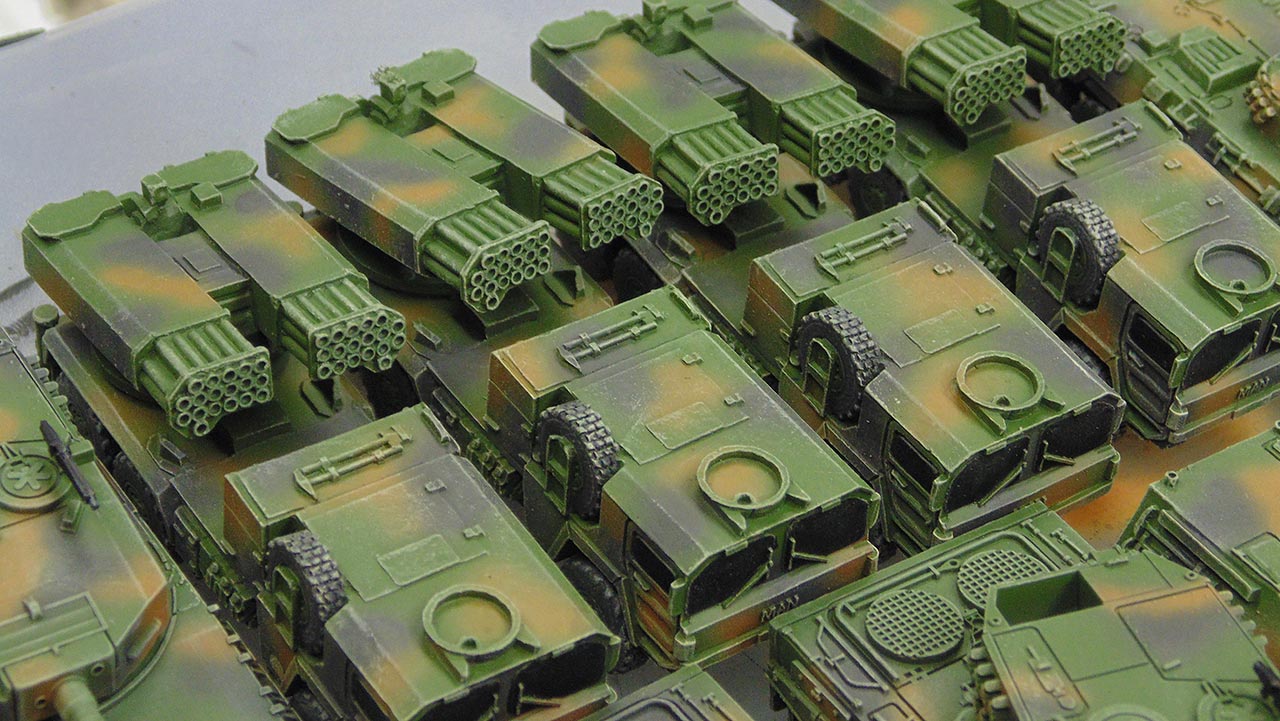
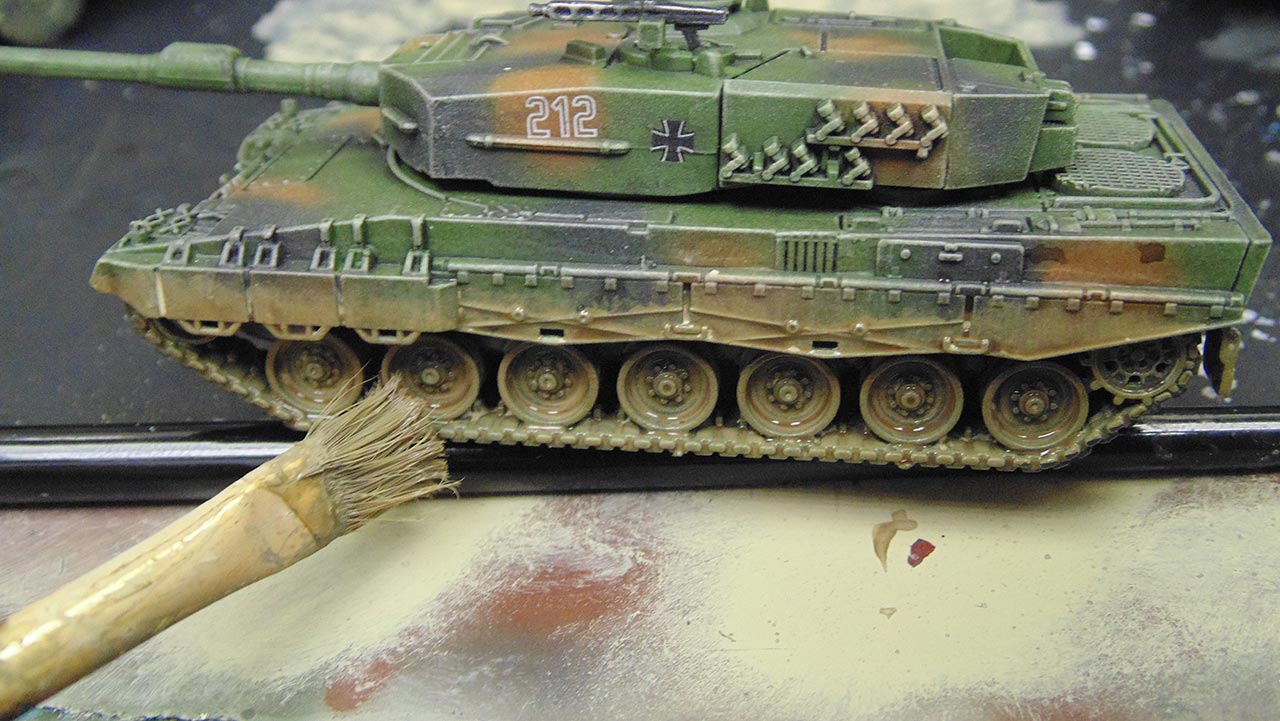
Time To Get Some Dirt On The West German Forces
No vehicle is complete without a good layer of dirt and grime to show that it has been used on the battlefield.
With that in mind we're going to be showing you how you can add just the right amount of grime to your armour without it looking strange!
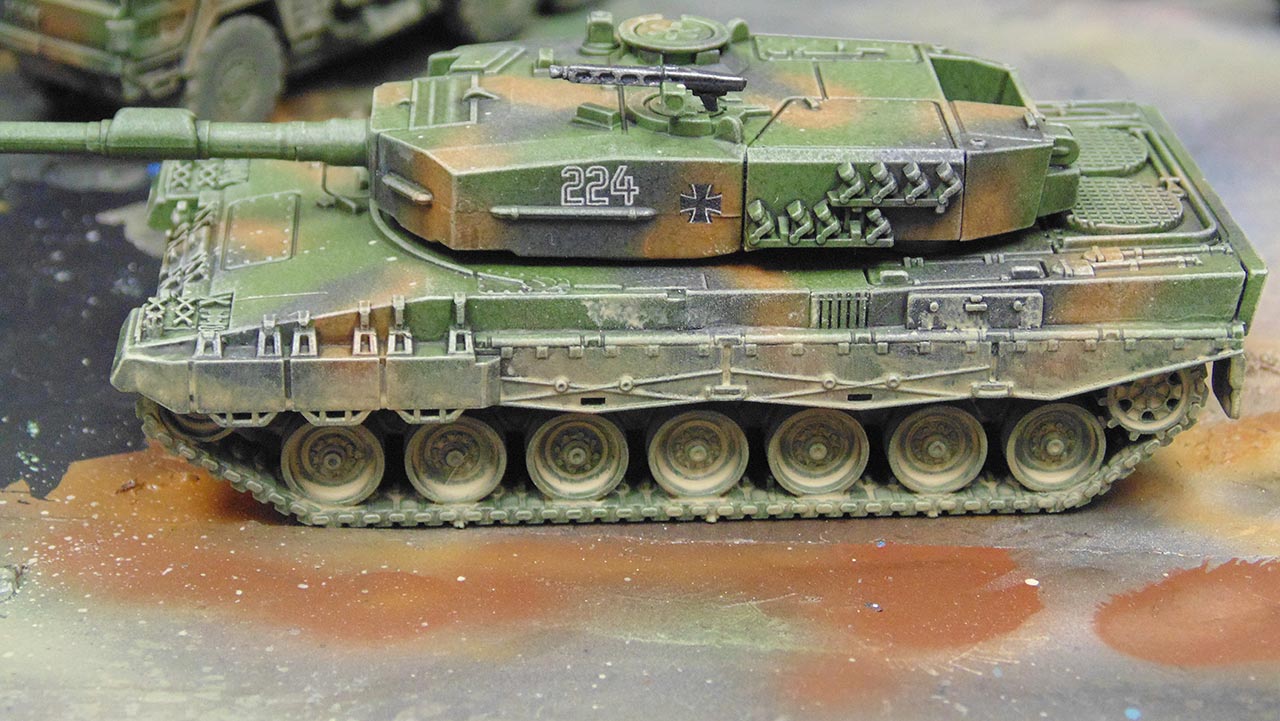

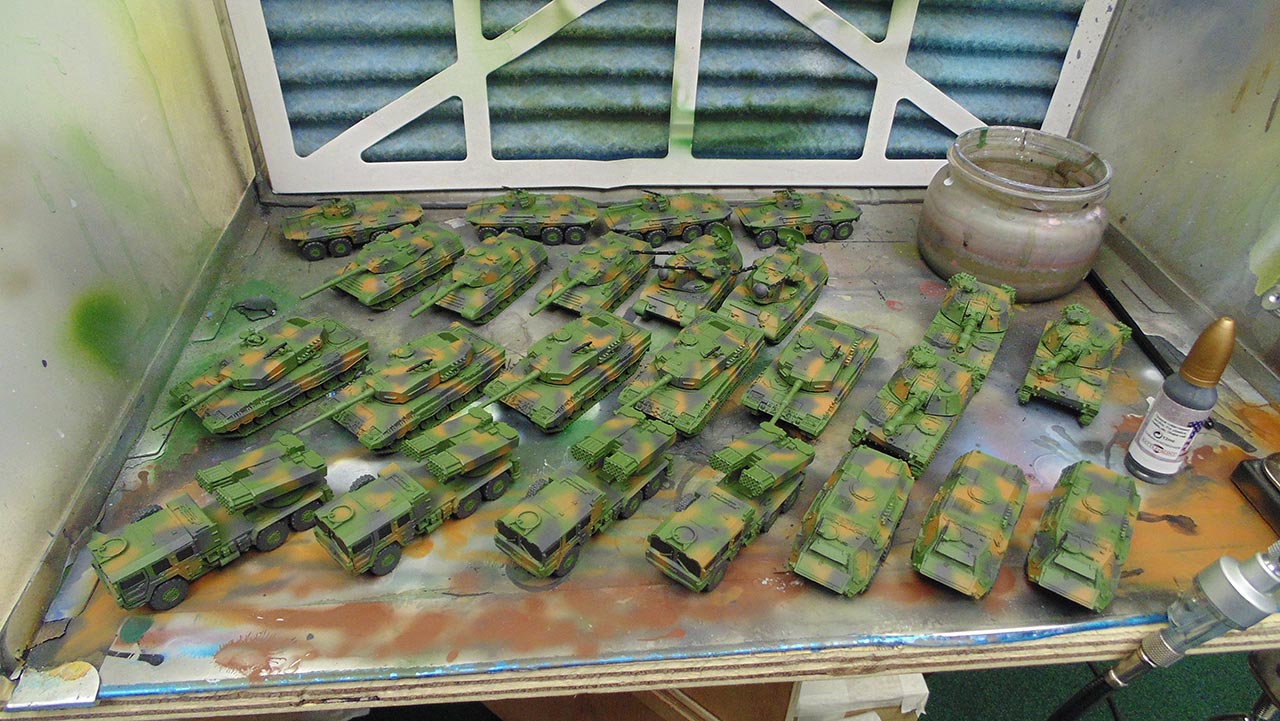
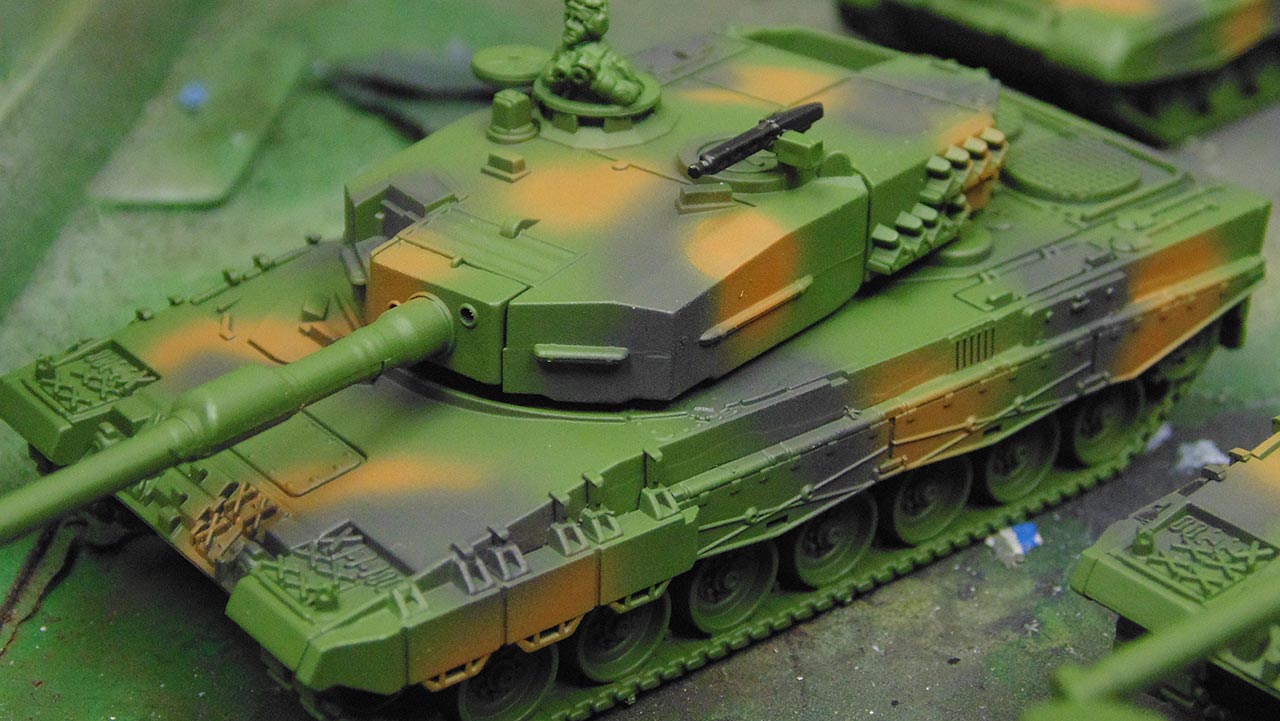
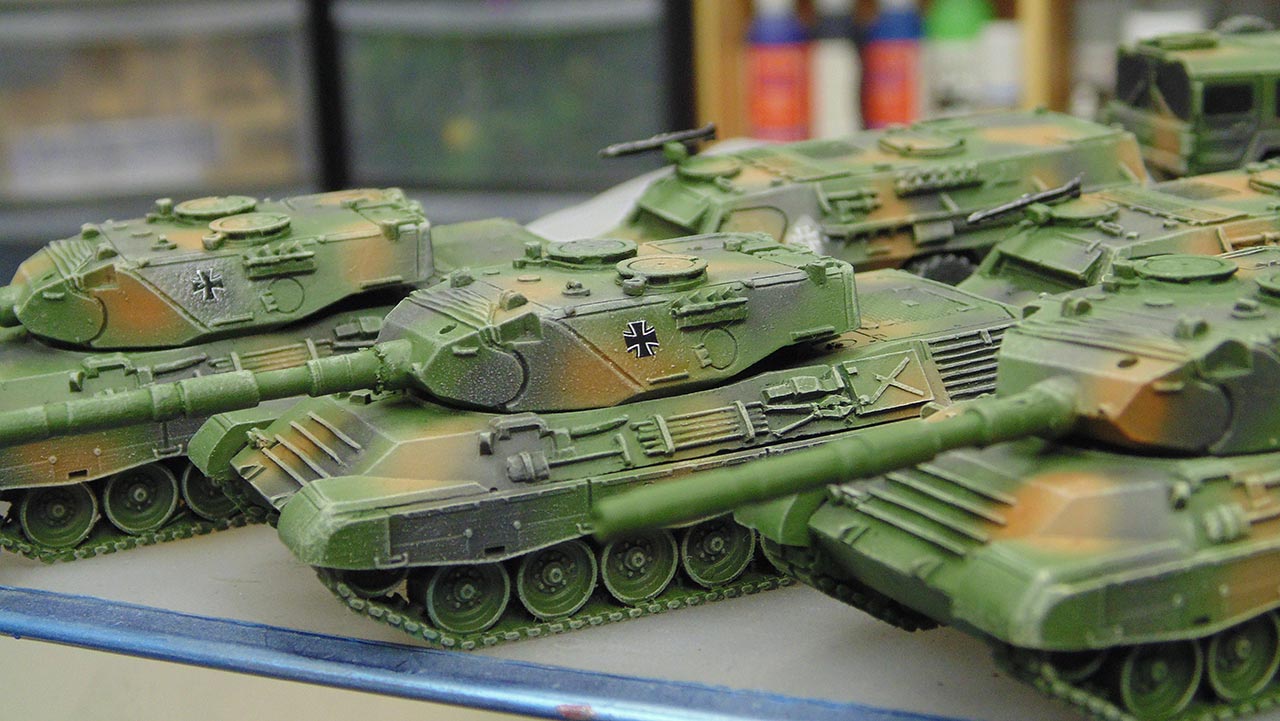
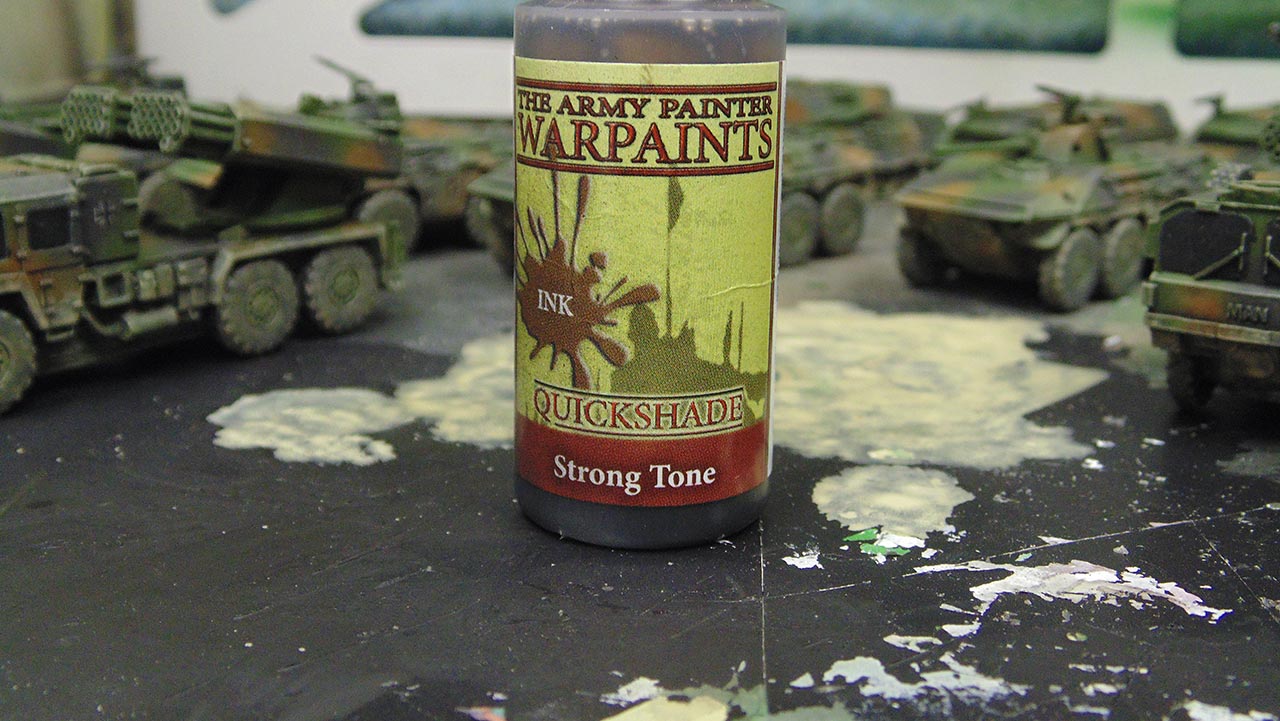
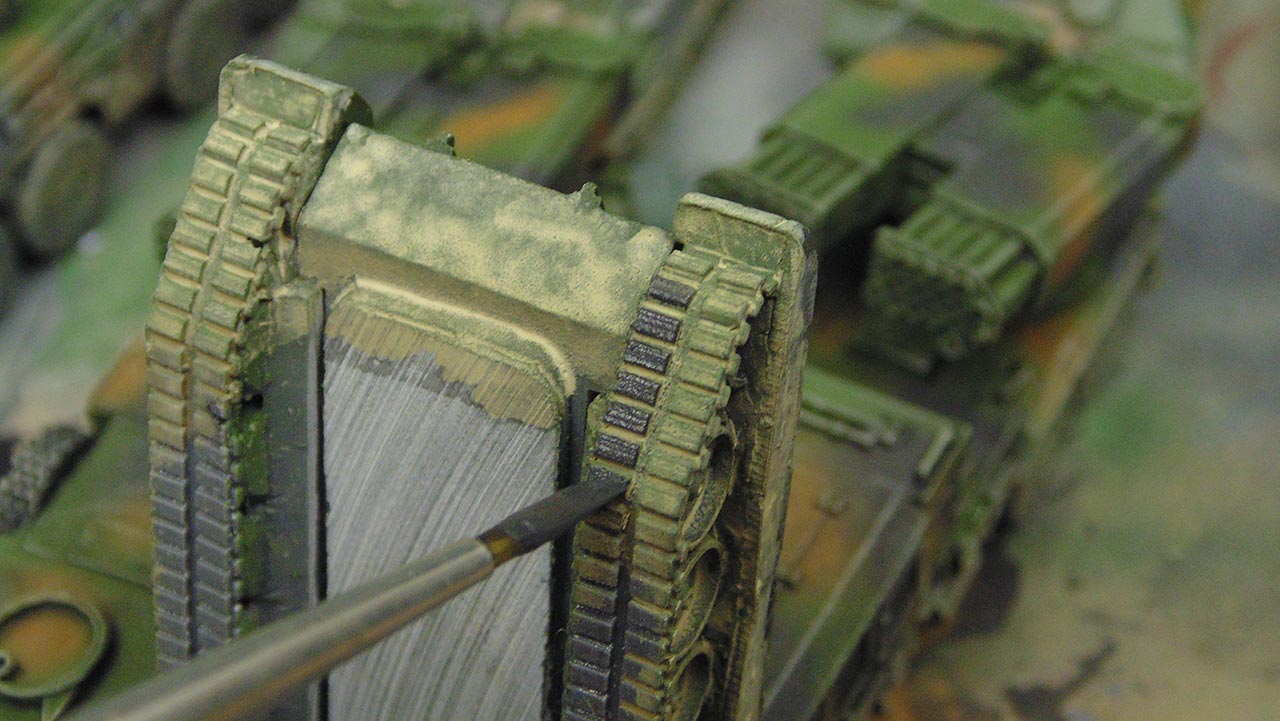
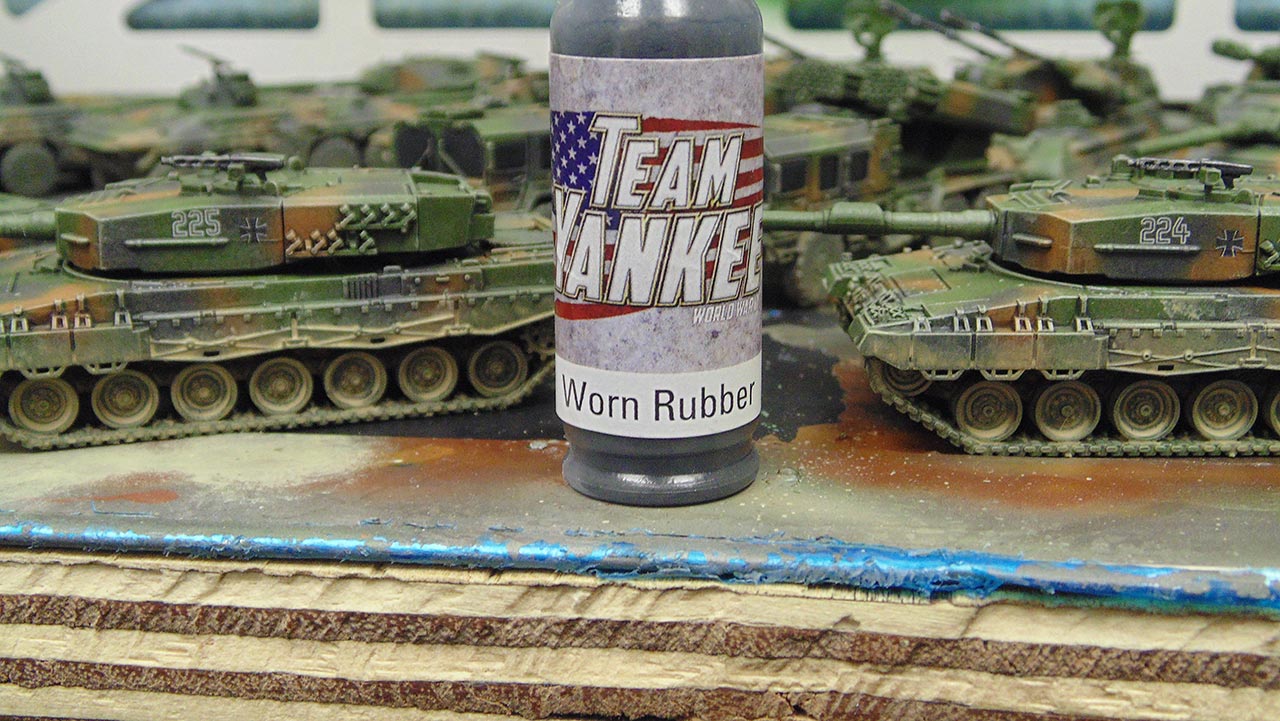
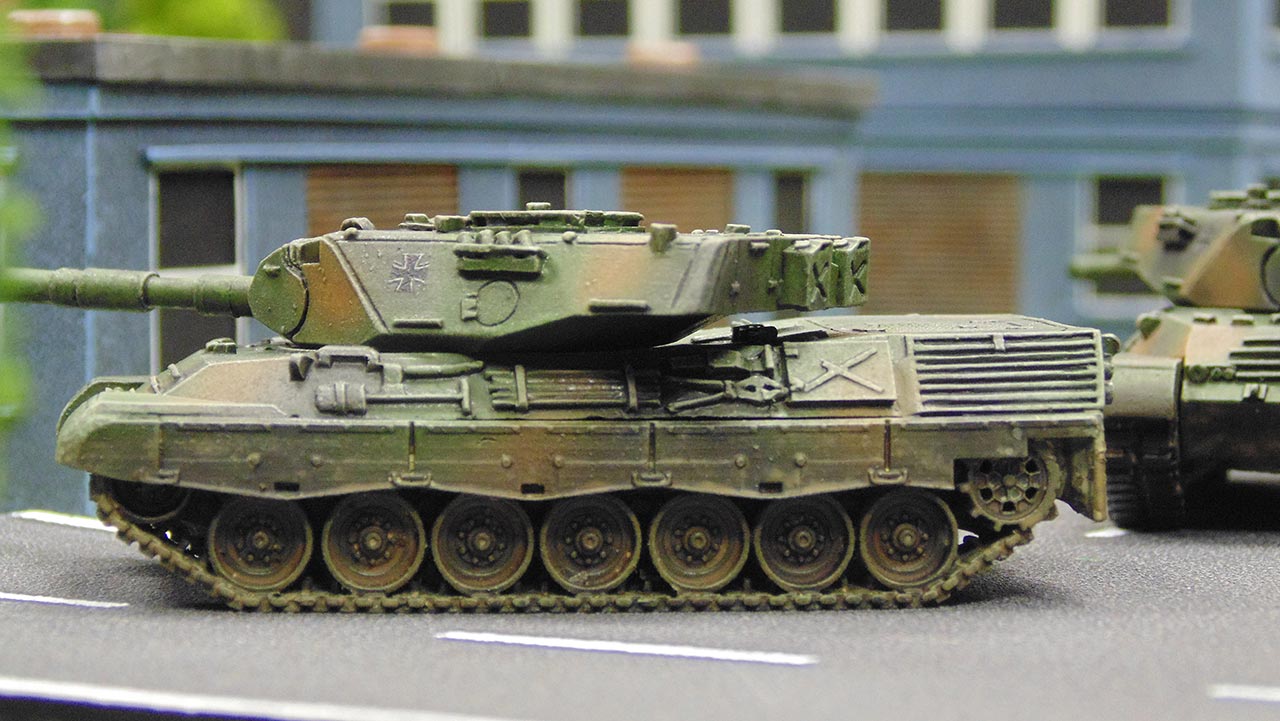
Bringing Out The Final Details
With the aid of Strong Tone and Worn Rubber from Army Painter we start to pick out some more of the Final Details on these tanks.
...lets see how these tracks turn out.
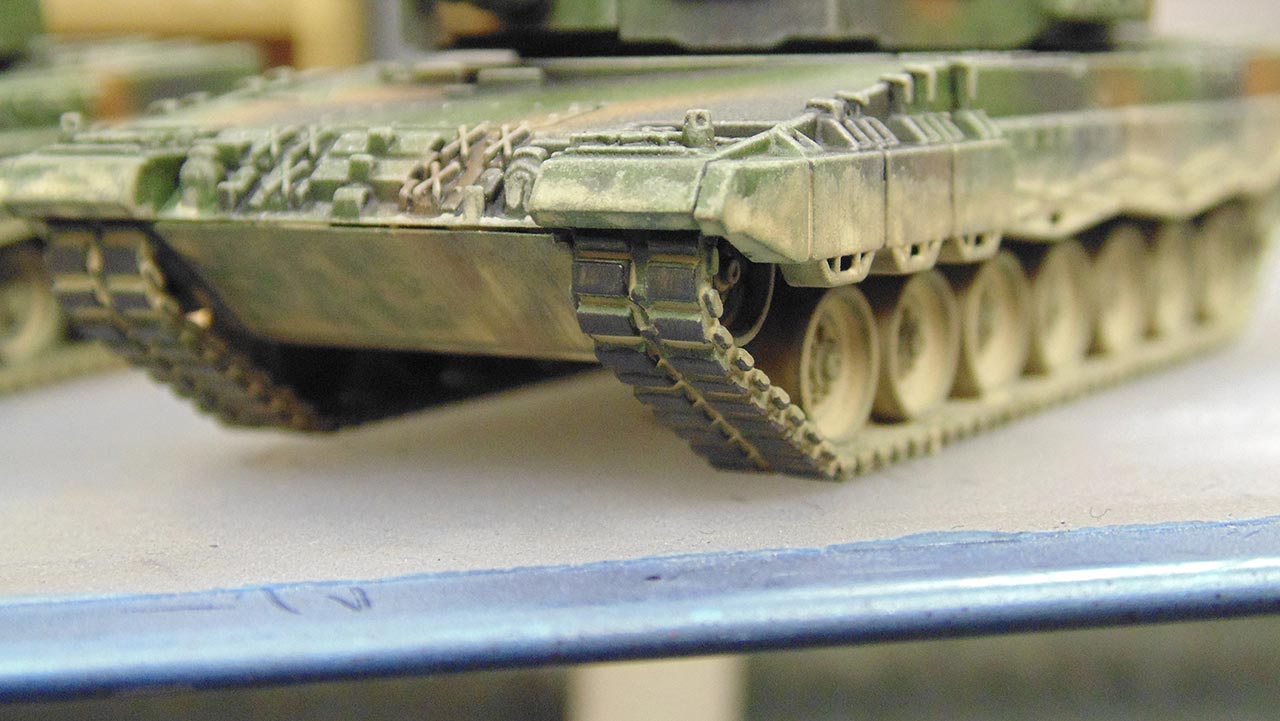
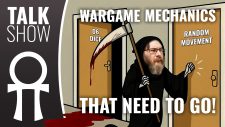
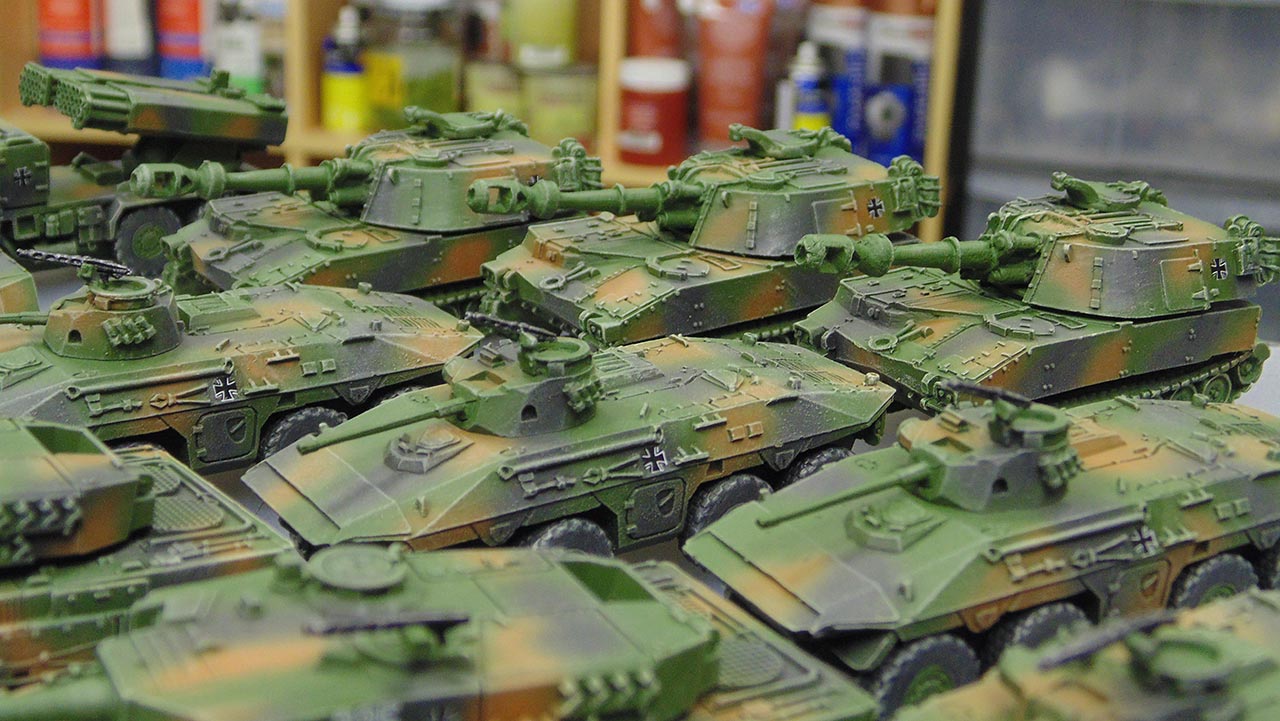
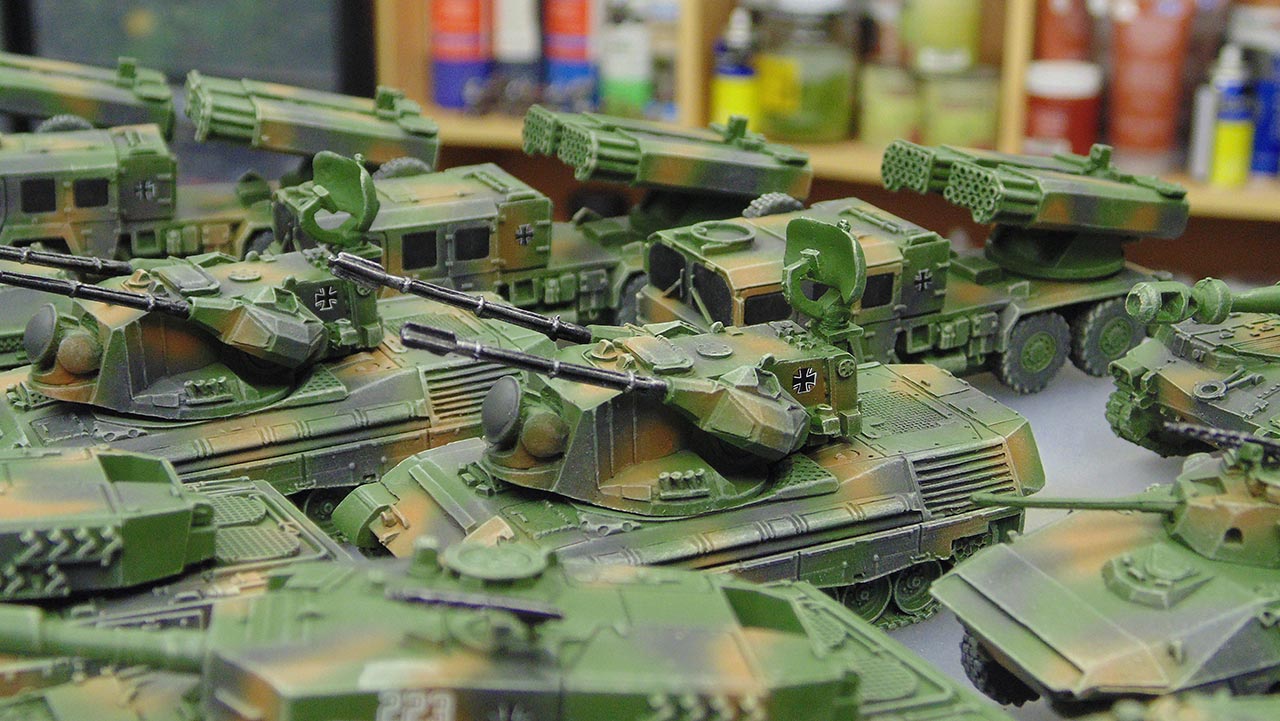
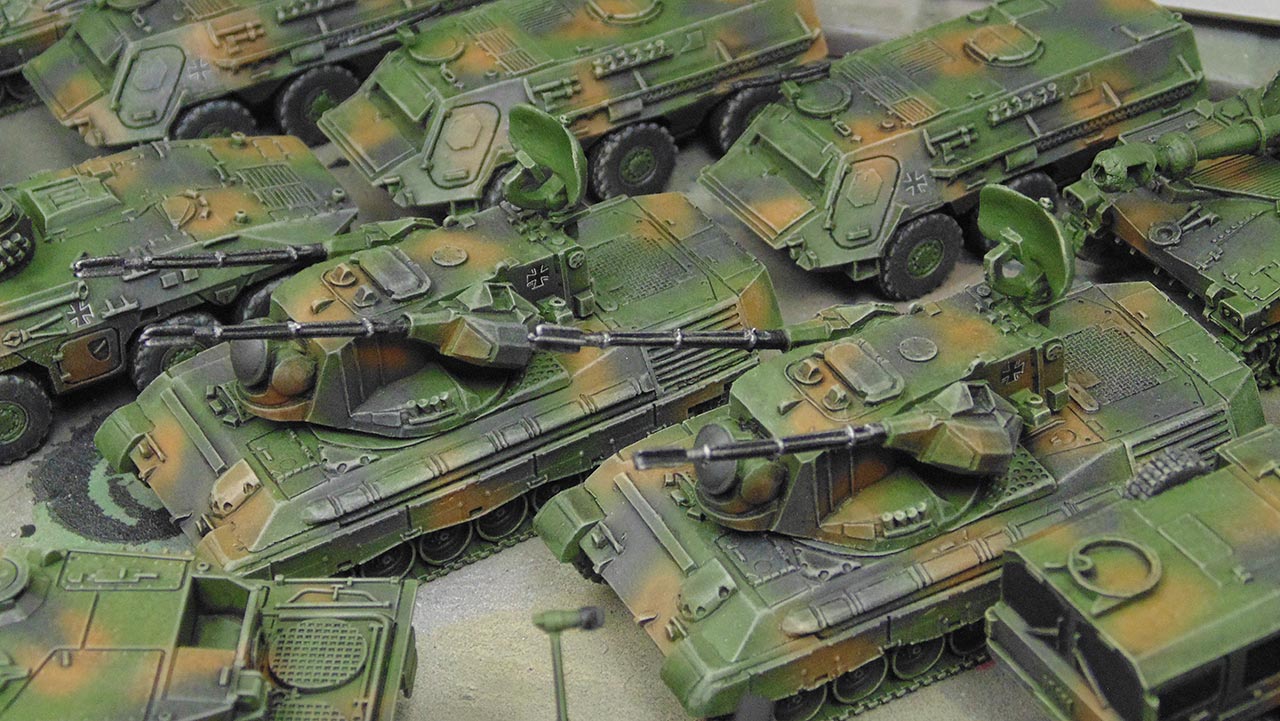
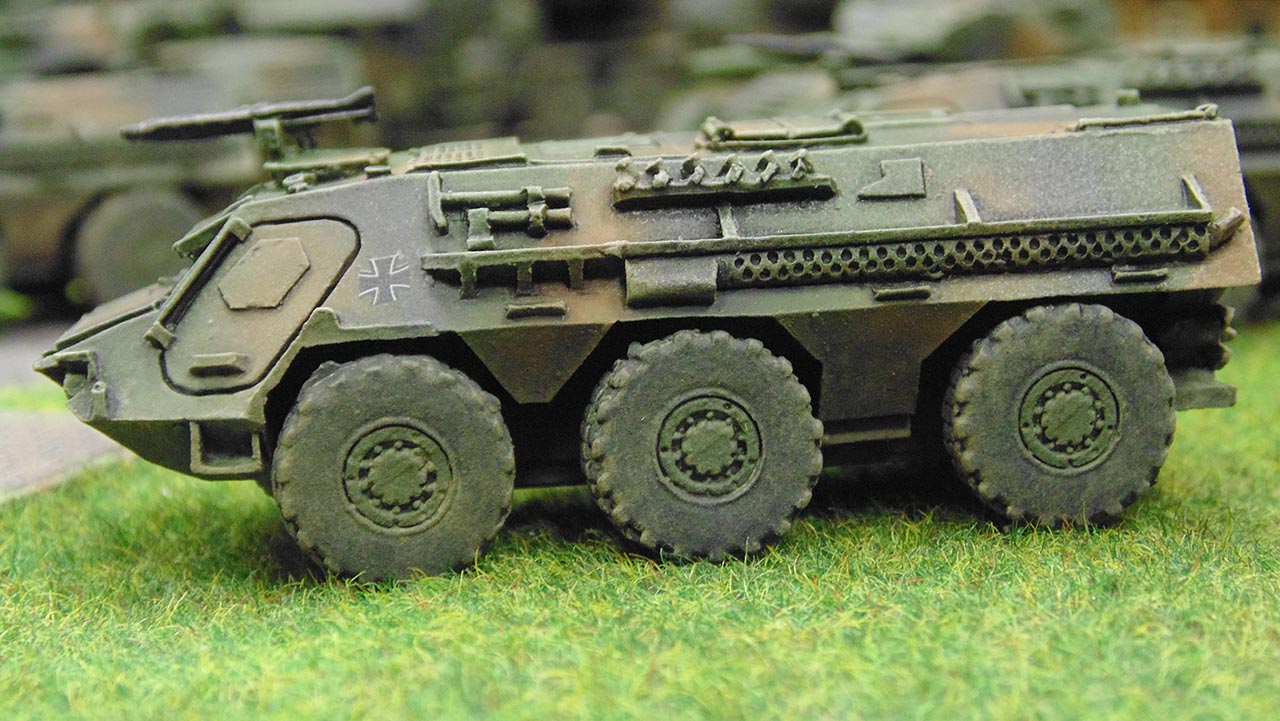
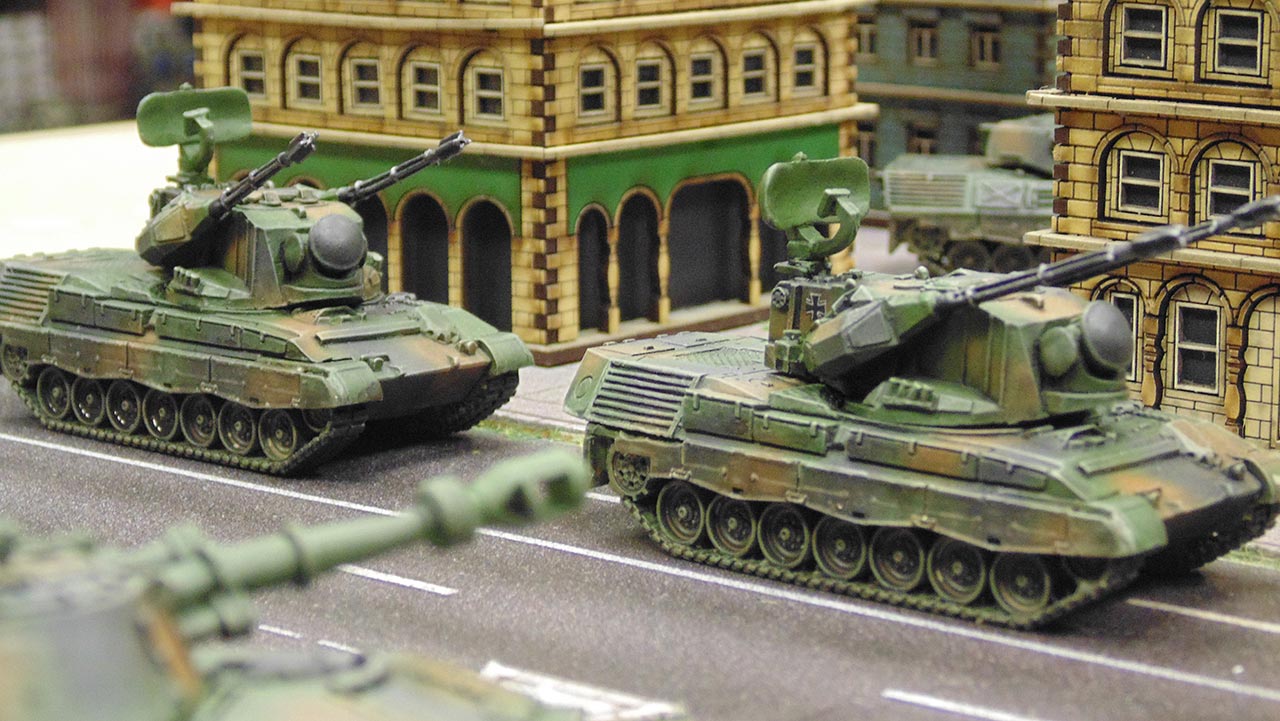
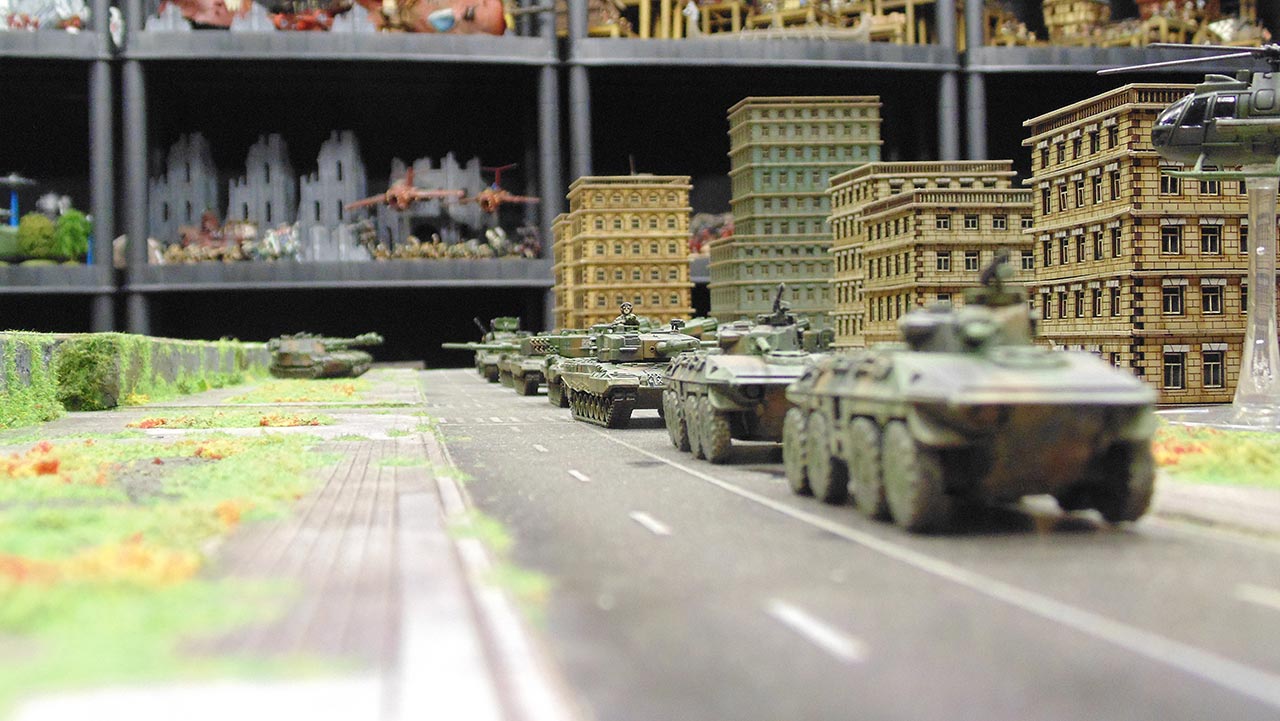
The Army Is Finished & On The Table
With the army finished we get it down onto the table so you can see it in all of its glory. It's a good feeling when your army makes it to the battlefield and it all looks ace!
What do you think of the final look?

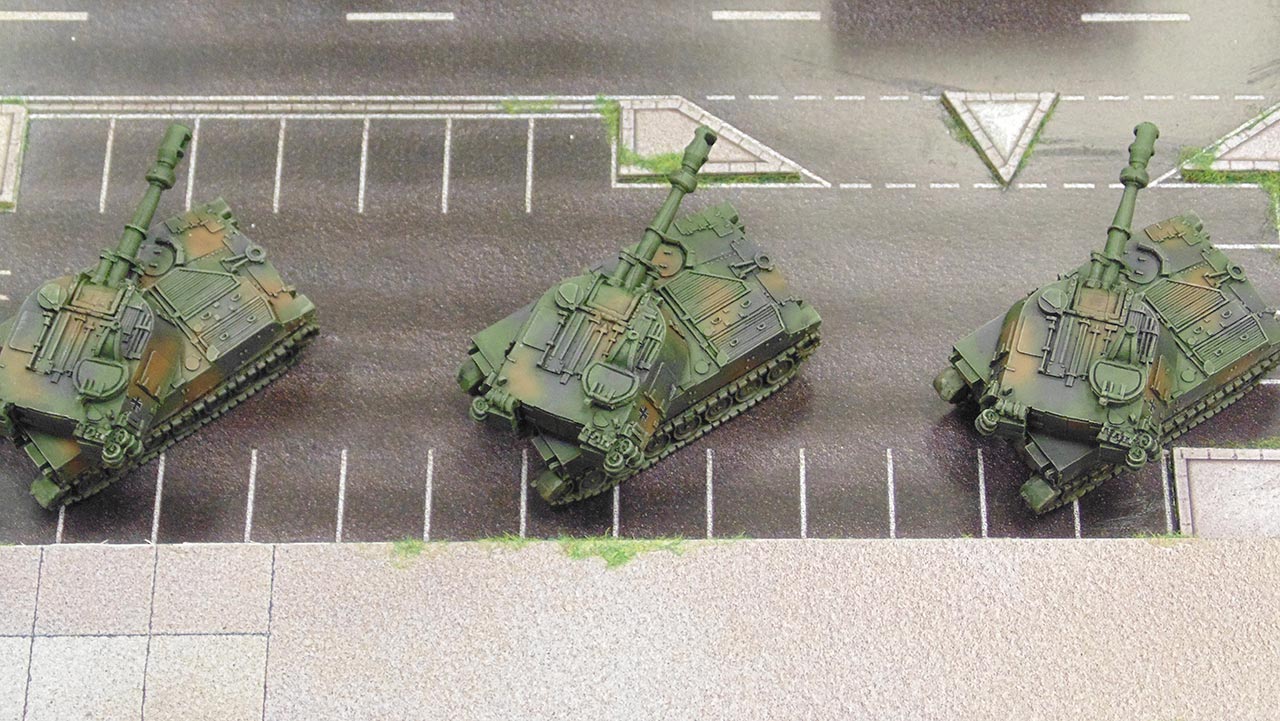


Finished Miniatures 360° Video
And with that we had to show off the wonderful miniatures from this range in 360 degree awesomeness.
We think these vehicles have turned out very nicely and we can't wait to get them down onto the tabletop so we can play with them.


![StarCraft Tabletop Miniatures Game Pre-Orders Live Now [Updated]](https://images.beastsofwar.com/2026/03/starcraft-tmg-news-cover-600-338.jpg)


![Mounted US Cavalry On Kickstarter For Dead Man’s Hand! [Updated]](https://images.beastsofwar.com/2026/03/us-cavalry-main-600-338.jpg)


![Play WW2 Commando Operations With Butcher & Bolt [Updated]](https://images.beastsofwar.com/2026/03/relaunch-600-338.jpg)


Wow!…This looks so awesome!…Love the way You get the small details to pop out.
How come john gets all the best jobs. Lucky, lucky man
Need to get an airbrush…
I really like the wheeled AFV’s of the German army that is what the American army is missing really to make them look more interesting.
Nice. NATO tricolour is achievable with brushing and looks great. I’m working on the other 4 Leopards this weekend.
Great step by step tutorials! I would love to see this for other games as well!
You guys should change the name of the title for these tutorials, from “We Paint A Full West German Army”, to… JOHN Paints A Full West German Army! 😉
this really starting to make me venture into this game, now i know how to do effective cammo
Fantastic work John!
That’s some serious horde painting 😉
Looks great. How much total time do you think you have invested? I only get infrequent small chunks of hobby time right now.
I think this force took about 25-30 hours including drying times. Say however, you got a starter box. That would maybe take 3 days total, so long as your comfortable with an airbrush and have all the material you need at hand 🙂
Efficient and highly effective. End result looks great.
Awesome work @johnlyons!
The Team Yankee paints look rather good. The primer colour is beautiful and I was impressed how well that camouflage brown went over the dark green.
That looks like a fairly simple, yet very effective paint job. It also shows how useful an airbrush can be. (Maybe I should start saving for one.)
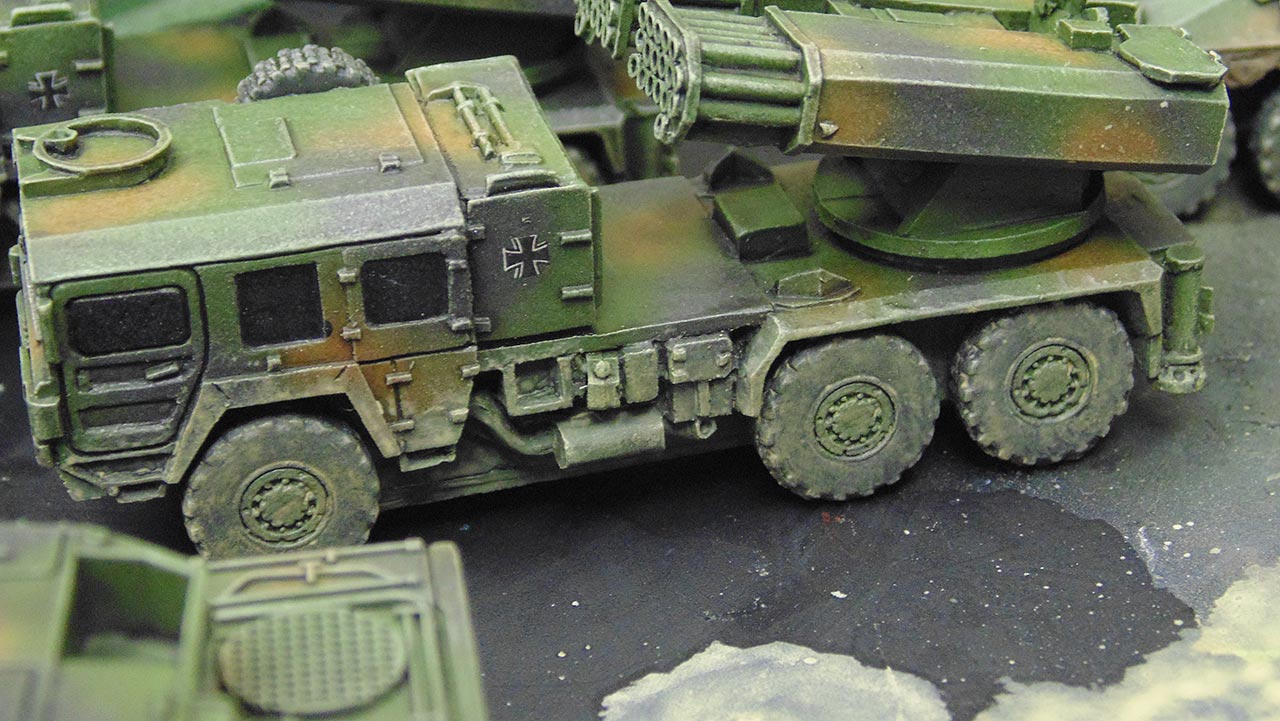
But what did you do to the rocket pod on the helicopter? I know you were in a hurry to finish this army, but that should have gone together a bit better.
I was largely building these kits without instructions. The heli with the wonky pods was the first one I built.
Makes you wonder what you could achieve John if u were given more time. They look great though.
Nice terrain and a fully painted army…look great.
Man, Props to you. Incredibly well done mate!
Very nice and motivating, thanks for the clips!
Great painting tutorial!
Agreed, great job guys!
Looks fantastic. Do you think its worth painting the tools on 15mm? (I’m used to 28mm, Team Yankee is my first time into 15mm)
Also, for the windows did you brush on the gloss or airbrush?
It really is a matter of taste and time. Paint what you feel comfortable doing. For the most part, the tools would have had paint on them, generally green handle with the metal in black. To to honest, the drybrush stage gives the tools enough definition for a “tabletop” standard.
@johnlyons
Top drawer stuff Sir!
My Kampfgruppe Müller has arrived yesterday and the NATO Green spray can today.
Just waiting for some magnets now so the assembly and painting can commence!
Got some nice ideas for the infantry as well for when they come out..
Next on the shopping list will be the Marders 😎
Should come with magnets?
The new battlefront plastic kits don’t come with magnets, turret pegs instead. However they still have the space for magnets (5mm x 1mm if I remember correctly) should you wish to use them..
They look great! I really need to start using my airbrush…
What about the ground troops?
I love a good hobby vlog
Awesome! Thanks!
It’s looking very nice
Ended up painting my US force in Nato camo. Not sure if I want to paint the Germans the same or go with something else.
Intricate camo like this has always scared me. Airbrushed seem to be the way forward.
I’m more used to broad strokes of camo work, but seeing how easy this all comes together and from a fairly limited palate of colours, does stir up some inkling to try it out. I’ve always thought as well that 15mm tanks are quite forgiving, but still apprehensive on doing camo like this. Think you may have sold it to me though dude! Thanks
Excellent job as usual, hopefully if I get my hands on some of these they will be half as good
Cracking job John, I don’t think I’ve ever heard you so rushed as the last plot update but all in all the end result is spot on!
Excellent work.
@johnlyons Really, Really good job mate, I think anyone would be very happy to have that has there army………..
They look great, thanks for the tutorial.
What @warzan didn’t have you paint them like the Naucht Wulf? For shame! LOL
I am really looking forward to trying this game out.
cool! I should try air brushing some day. Good idea for video, airbrushing 101
looks good
Amazing job well done
Awesome painting and an awesome army. Thanks
Great work @johnlyons, a very effective scheme that’s worked really well. I’ve been following the paint guides in the main team Yankee book for my American forces, the painting guides are a nice touch to the books I think.
How long time wise would you say the whole army took??
Now im thinking no leopard book quick review for the book by now,
right?
Thanks for doing this… time to break out the paintbrush
These look awesome. Luv the look of these tanks and vehicles. Might just be the army for me
Looks good and a straight forward tutorial. I think an airbrush is a must, though. Look out wallet!
Great video guys. Looking forward to the Brits next.
Great VLOG thanks guys. Total inspiration
Usually only do 28mm, but I think you have to go at least 15mm, to be practical with space. The paint jobs look fantastic with the camo (uhhh…Tanks…drool) and even the choppers look good. Yeah, an airbrush would be your best friend for this. 🙂
Seeing how easy this looks, makes me sad about me own painting skills. 🙂
Very well done. I would need at least one year to paint such an army. I think it’s quiet handy to have someone with a tight schedule behind 😀
Its again à fantástic flog, keep going guys
dam i want this game but i spent my cash on 40k dam hope i win looks awesome
Well done mate! Thanks for this videos helping us to paint some armies faster!
Awesome job sir!
@john – Really enjoyed watching the videos. 🙂
Do you generally use water instead of thinners with the airbrush or was it as you said in the videos just because you had no thinners available at the time?
John any ideas for the Camo netting you see on some of the photos that where in other parts of Leopard week?
great tutorial John, can’t wait to see these ‘in the flesh’ role on Sunday gaming WOOHOO!!!!
awesome work there, i can only imagine christmas morning like excitement of @johnlyons when opeing the hoard 😉
Now to try and use this on my ork vehicles for panzerfauste
Its again à fantástic vlog, keep going guys
Awesome work! I’ll steal that scheme for my UCM..
That camo looks great super simple to do with an airbrush. Perfect type of thing to help out a fledgling airbrush user. Much more friendly than learning on infinity minis!
Awesome
Great job John, those models look amazing. It’s really nice that you went step by step in the painting process. I can’t wait to see them in battle on the tabletop.
Another great series of videos John. Thanks for giving us a bit more detail about thinning your gloss. I’m always a little fearful of mixing water with gloss just for fear of ruining the paintjob it’s going over.
Awesome, lovely looking minis.
Can’t wait to see these models in the store…thanks for the preview
Very nice work.
Its nice to see them bring back the army primers, very helpful for the lazy painter.
Awesome job guys.
Woah! So. Many. Tanks….okay some were SPGs and IFVs but even so, So.Many.Tanks. Love it.
Great work, John! And having it all done in a week is very well done indeed 🙂
Tank God and now paint God. Awesome tutorial and my only question about painting the on board tools has already been answered. Well played Sir.-
Great step by step airbrush tutorial John, now more than ever I need to start using my airbrush (still in it’s box). As i have some old matchbox tanks about, I think they will be my test dummies, and if I can do them then its chocks away.
A pity you could not of done a more indepth Vlog John, but then again theres always the “British Force” you could do it with.
Great inspiration if only I was that fast
Looking forward to John’s Vlog here.
Nicely painted
Nice plog but really quick way to get it table top ready
This is great. How to paint an armored column in a flash.
Nice video painting guide, even a bad painter like me should be able to follow that :). Though with the “British are Coming”, “Black and Green” (finest colours ever seen) will be even easier for me ;). Have not seen the Dry Dust or Battlefield Brown paints for sale on the FoW site?
Awesome stuff
Are the same colours used for the NATO cam for the US tanks as well?
fantastico
They look great, John. Kampfgruppe Löwe ready for action.
Paint job looks good.
Commenting to win, good luck all.
Does it count if you comment via youtube?
Awesome paint job!
oh man what a great job you did. Yes it was some challenge but you pulled it off great.
I got to try those AK washes myself.
That 360 video of the final models is awesome! Really cool perspective.
Great work there
Great VLOG. Even though you were rushed it was a very good down and dirty step by step. I particularly like the use of the airbush. I have been considering picking one up for awhile now. Most how to videos are show casing master class work. What you were doing I think is more practical for someone who is considering getting an airbrush. Painting lots of stuff quickly and efficiently, while many talk about few show it.