![NO Weekender Or Cult Of Games XLBS This Weekend [Updated]](https://images.beastsofwar.com/2026/03/No_Weekender_and_XLBS_this_Weekend-225-127.jpg)


The Drowned Earth – Wispa’s Militia painting project


Recommendations: 116
About the Project
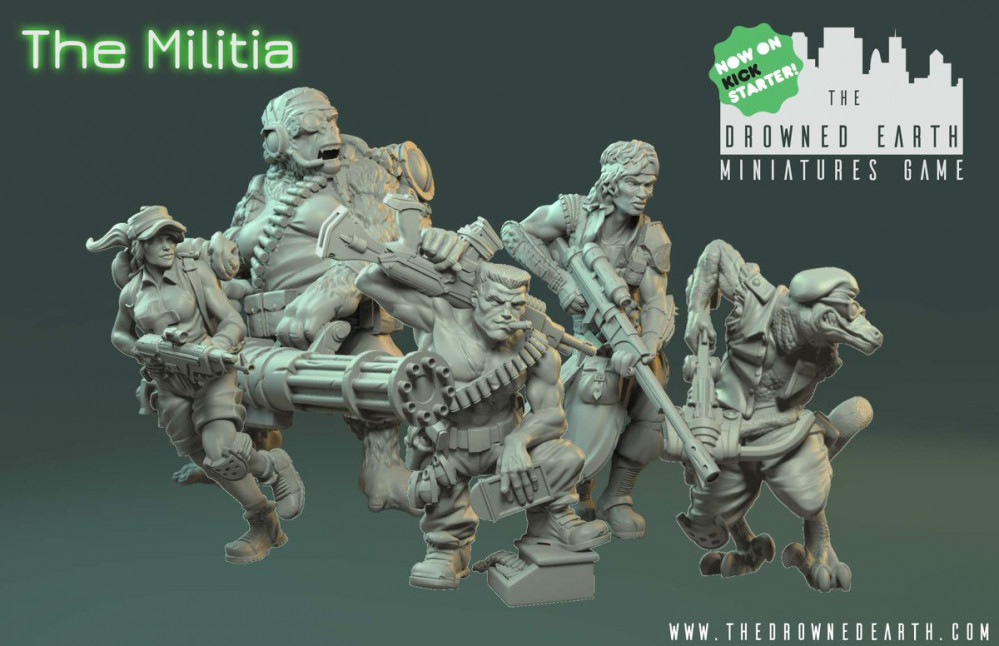
May 2018 - build and paint Drowned Earth KS pledge... I intend to log my progress (which will be fairly slow I fear) as I paint the Militia faction I picked up from the KS. Feb 2019 - completed
Related Game: The Drowned Earth Miniatures Game
Related Genre: Science Fiction
This Project is Completed
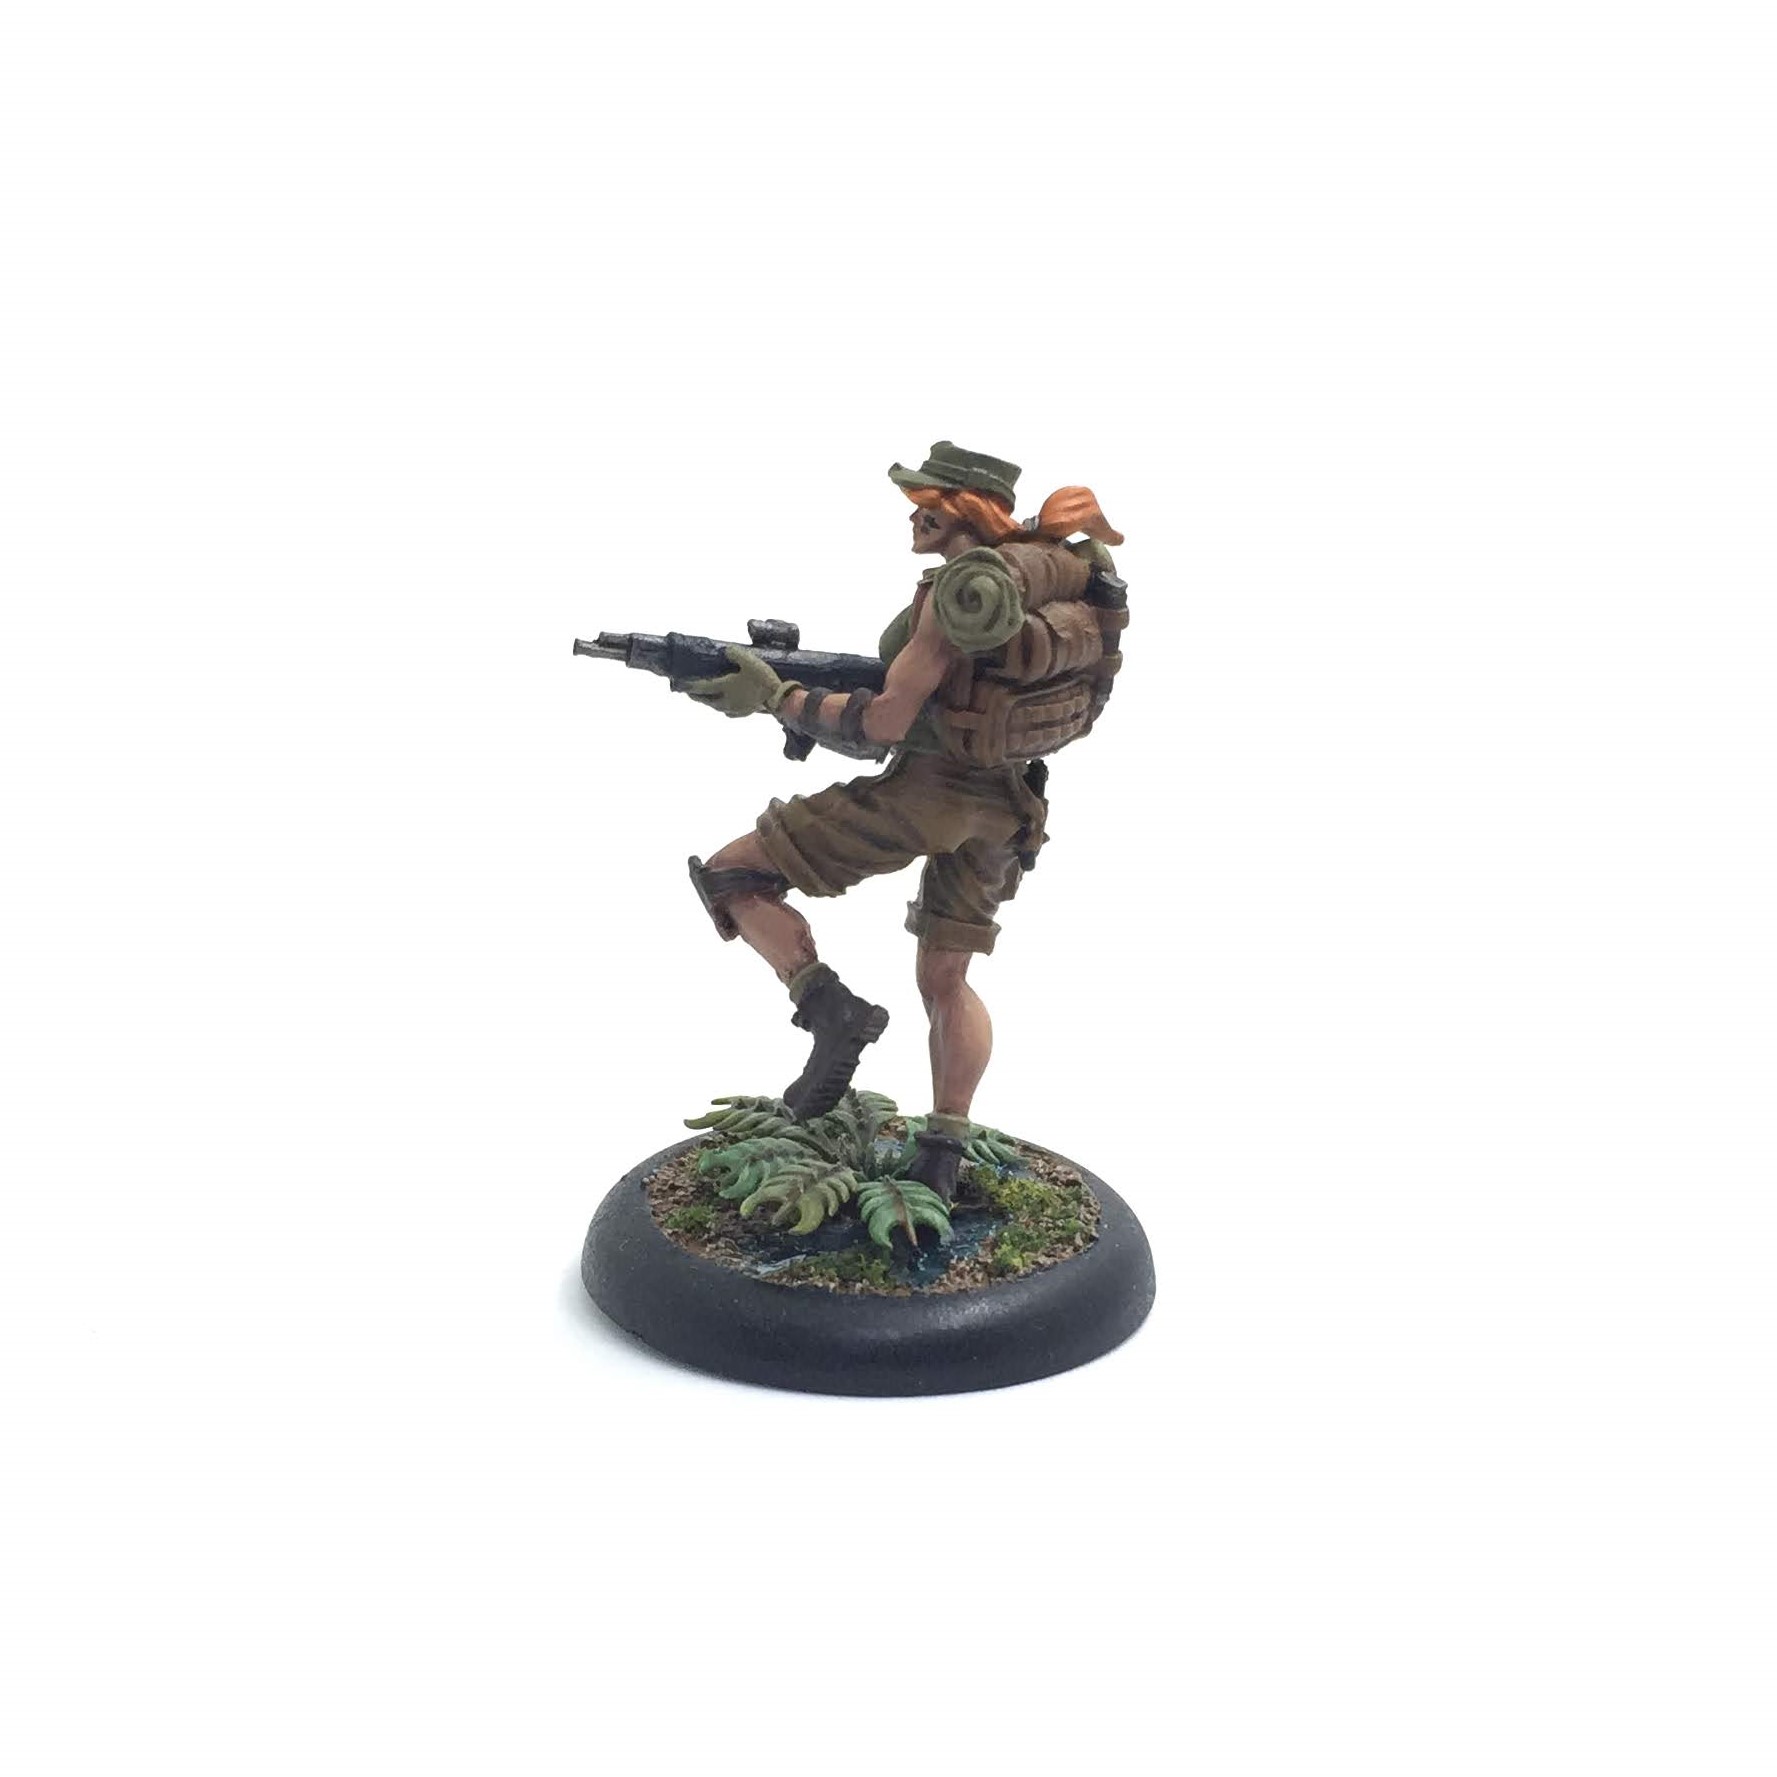
Juchita
Juchita painted to the same stage as the previous minis now. Basically the same browns and greens with washes and highlights. Nothing that’s gonna win any awards but the point is to get them painted so they look good on the table when playing and I think that’s been achieved.
When they are all done and based I’ll try and get some photos done in the light box and more importantly try and get some game play photos to show what they look like in action. That’s the plan anyway but there’s some way to go yet.
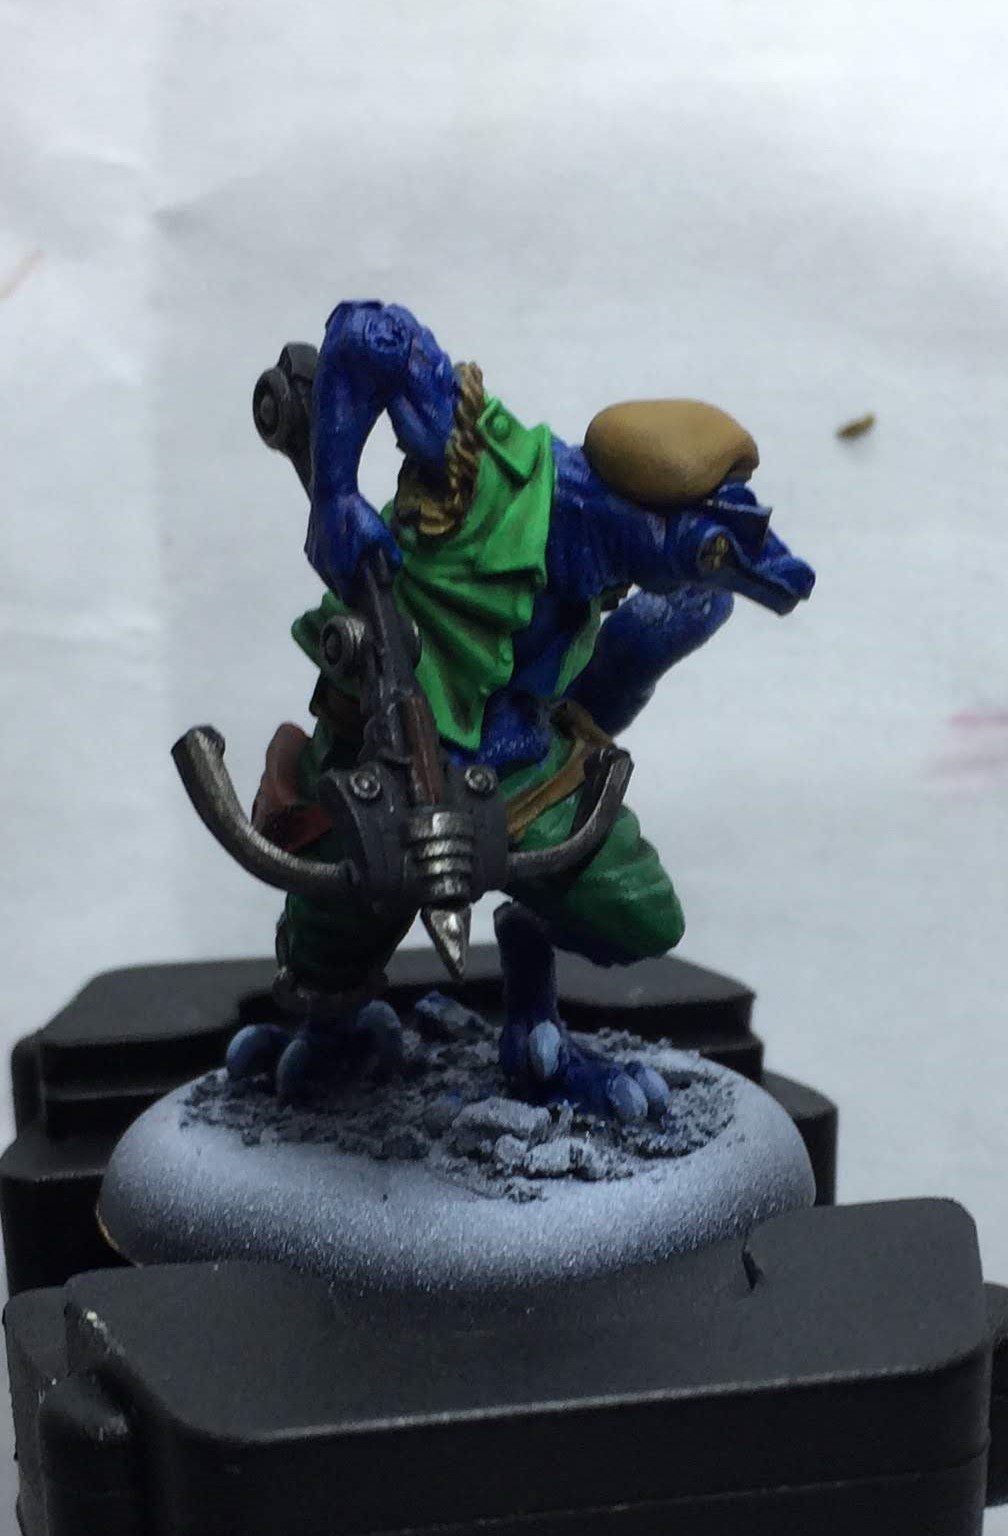
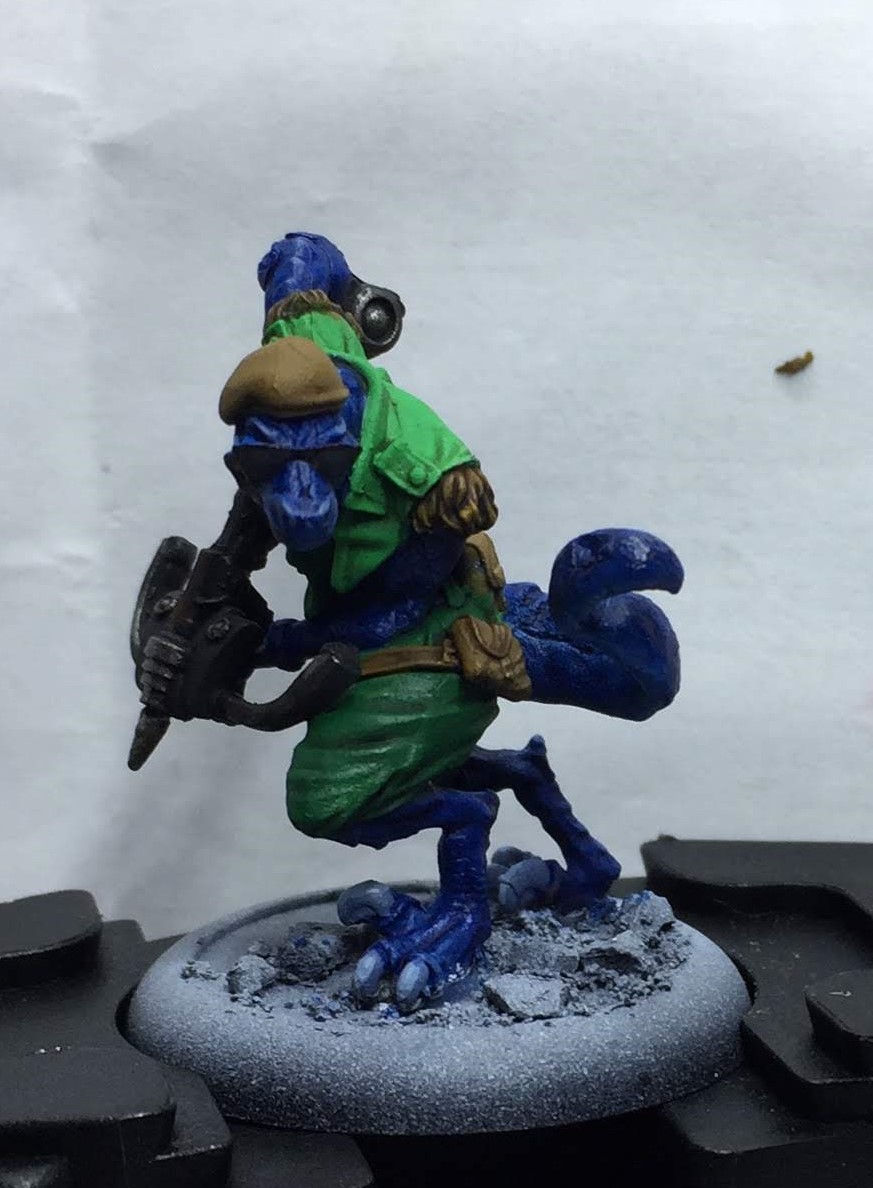
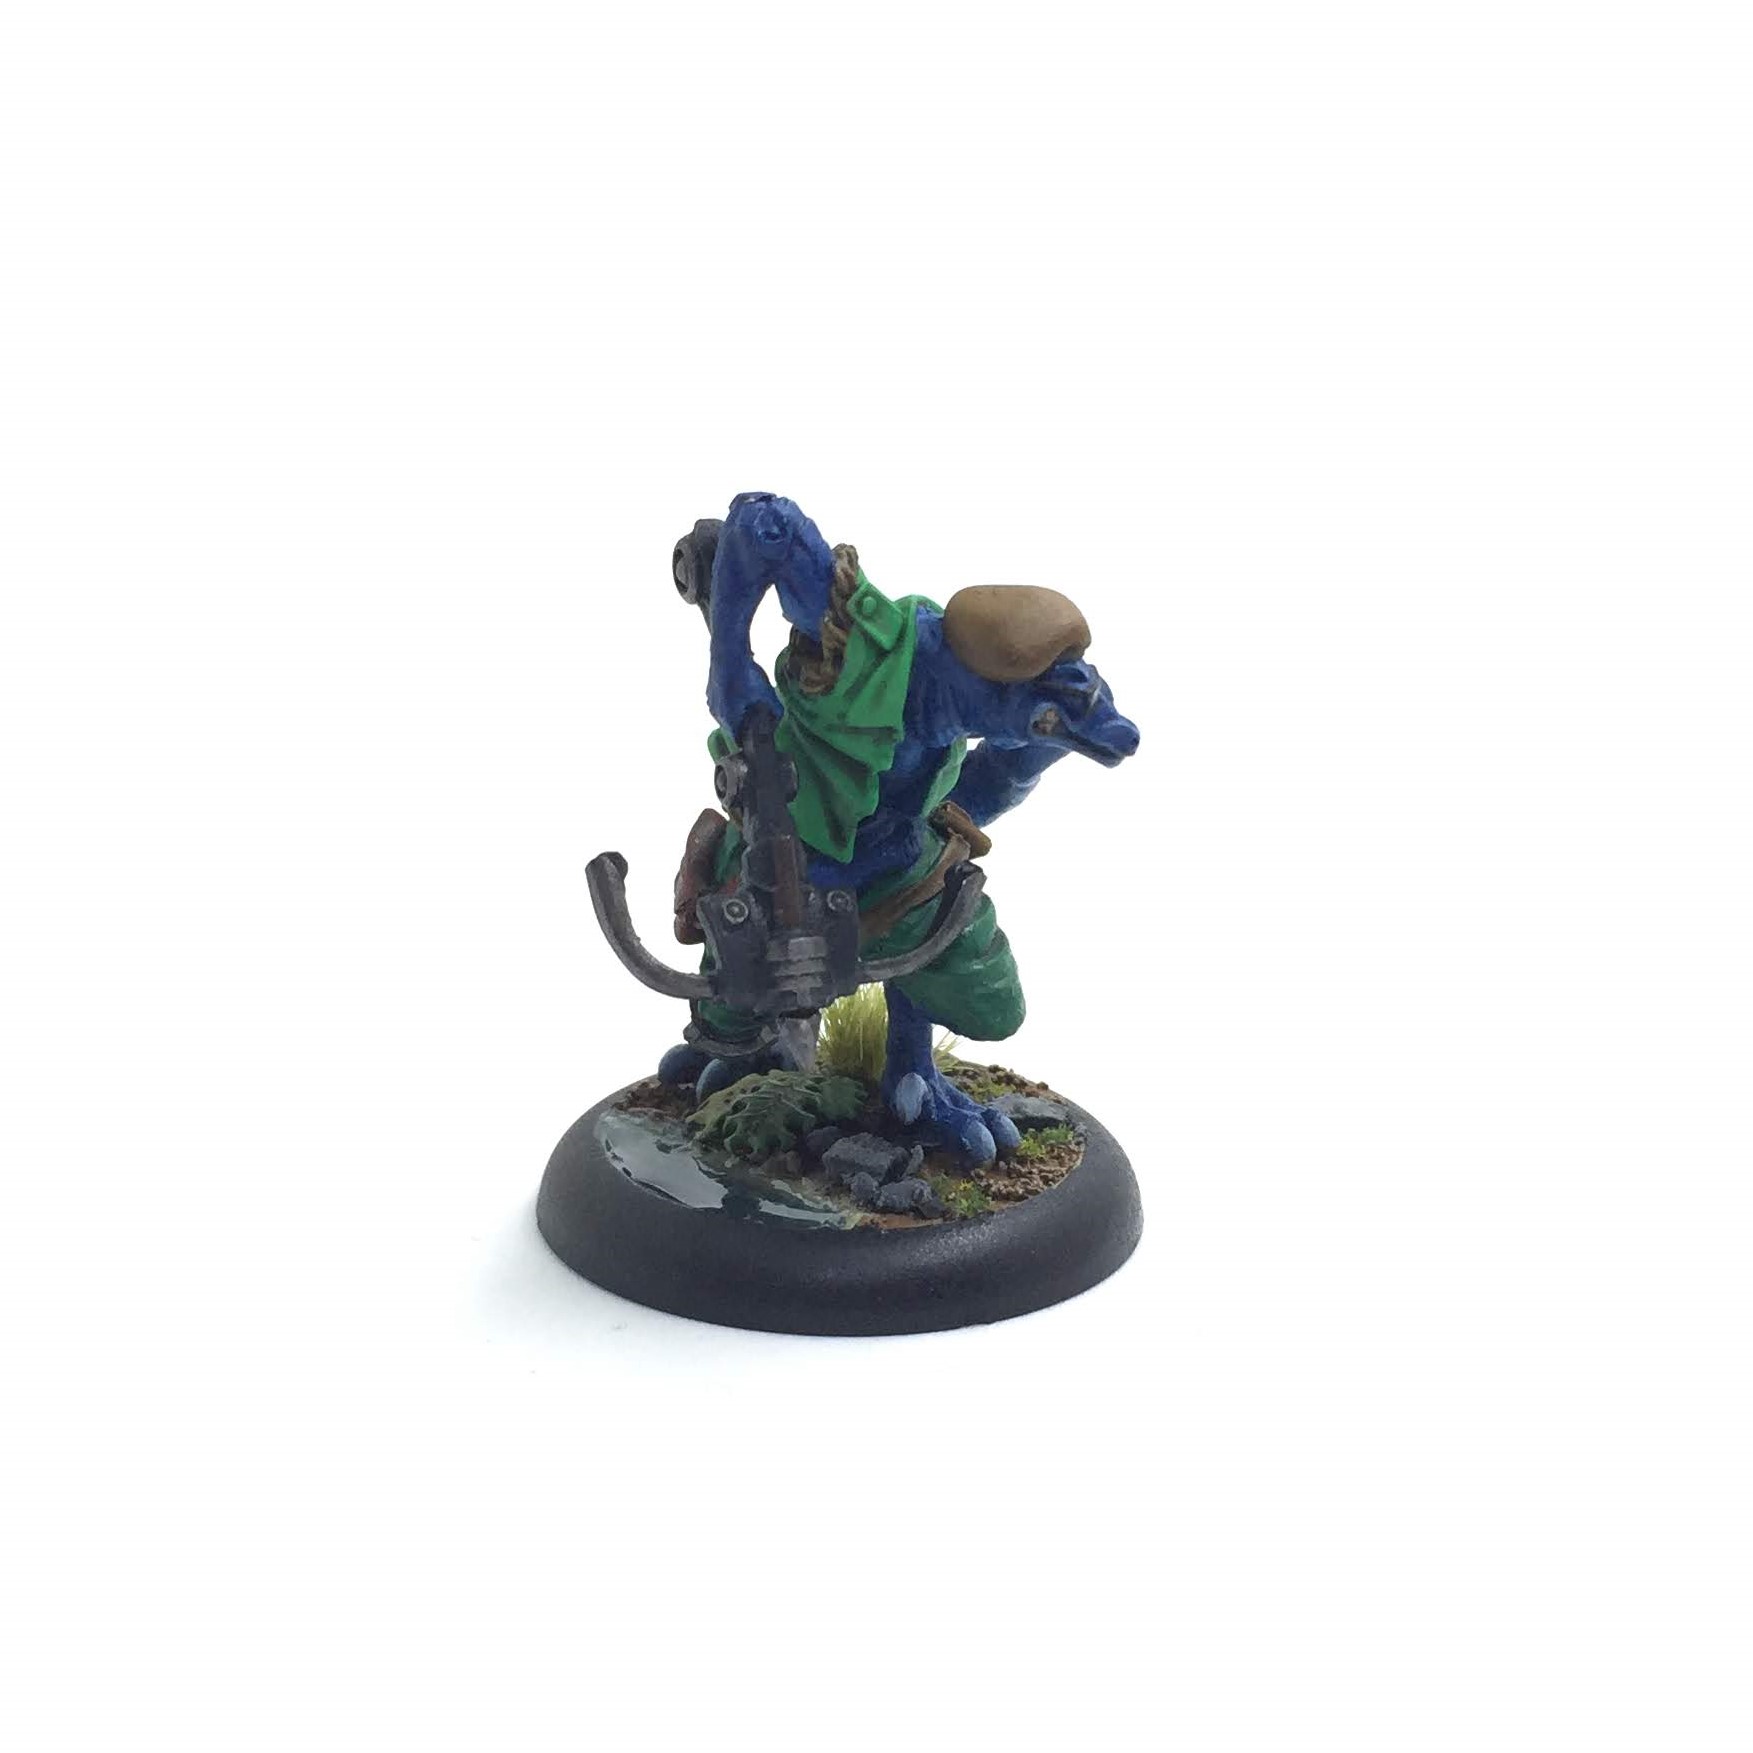
Kraytssk *updated*
Another model done. I’ve a couple of problems with my results here if I was to be critical.
Firstly I attempted to use wet blending on the skin here, something I’ve never really done. I wanted to go from a pale underbelly (Vallejo Model Color Pale Sand 837) to the blue skin (VMC Prussian Blue 965). Through trial and error I managed to avoid a hard line between the two and some more natural transition between the two (just thinning the two colours as I apply then and using a wet brush to merge them seemed to work). I was pretty pleased with the results for a first real go but then I went and added a blue wash all over (I wanted the skin details to pop) and it just ended up losing all the blended stuff. In hindsight I think either just applying the wash where needed or possibly a dry brush would have done want I needed. Lesson learnt there.
Secondly I used some different greens (VMC Light Green & Deep Green) and I think they are problems too cartoony, especially when I compare them with the other models. I guess he’s a blue skins lizard with a cross bow so how realistic do I need to be 😉 If I was to redo tho I’ve use the more duller greens I’d previously used.
The mini looks better than the photos – at least to my old eyes – I can live with it anyway.
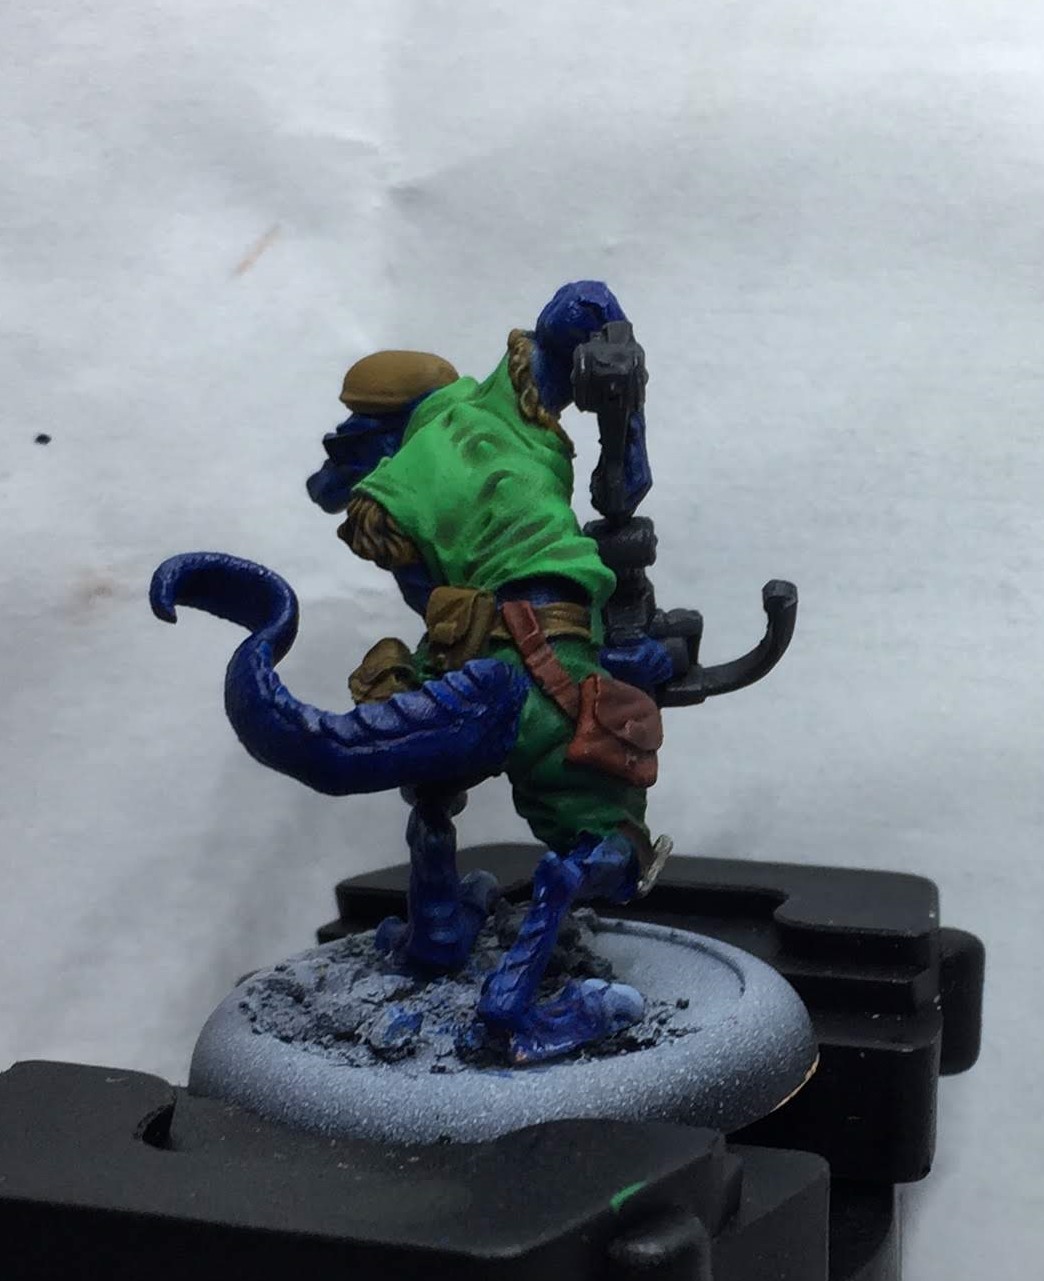
* UPDATE *
I decided to try and redo the blending on the skin, it’s not great but it’s better. All I did was use a wet palette and mix the sand/blue gradually and apply it in thin layers. I think with practice I’ll be able to get some good results – as with all painting stuff its just a case of practice practice practice.
Revised image below..

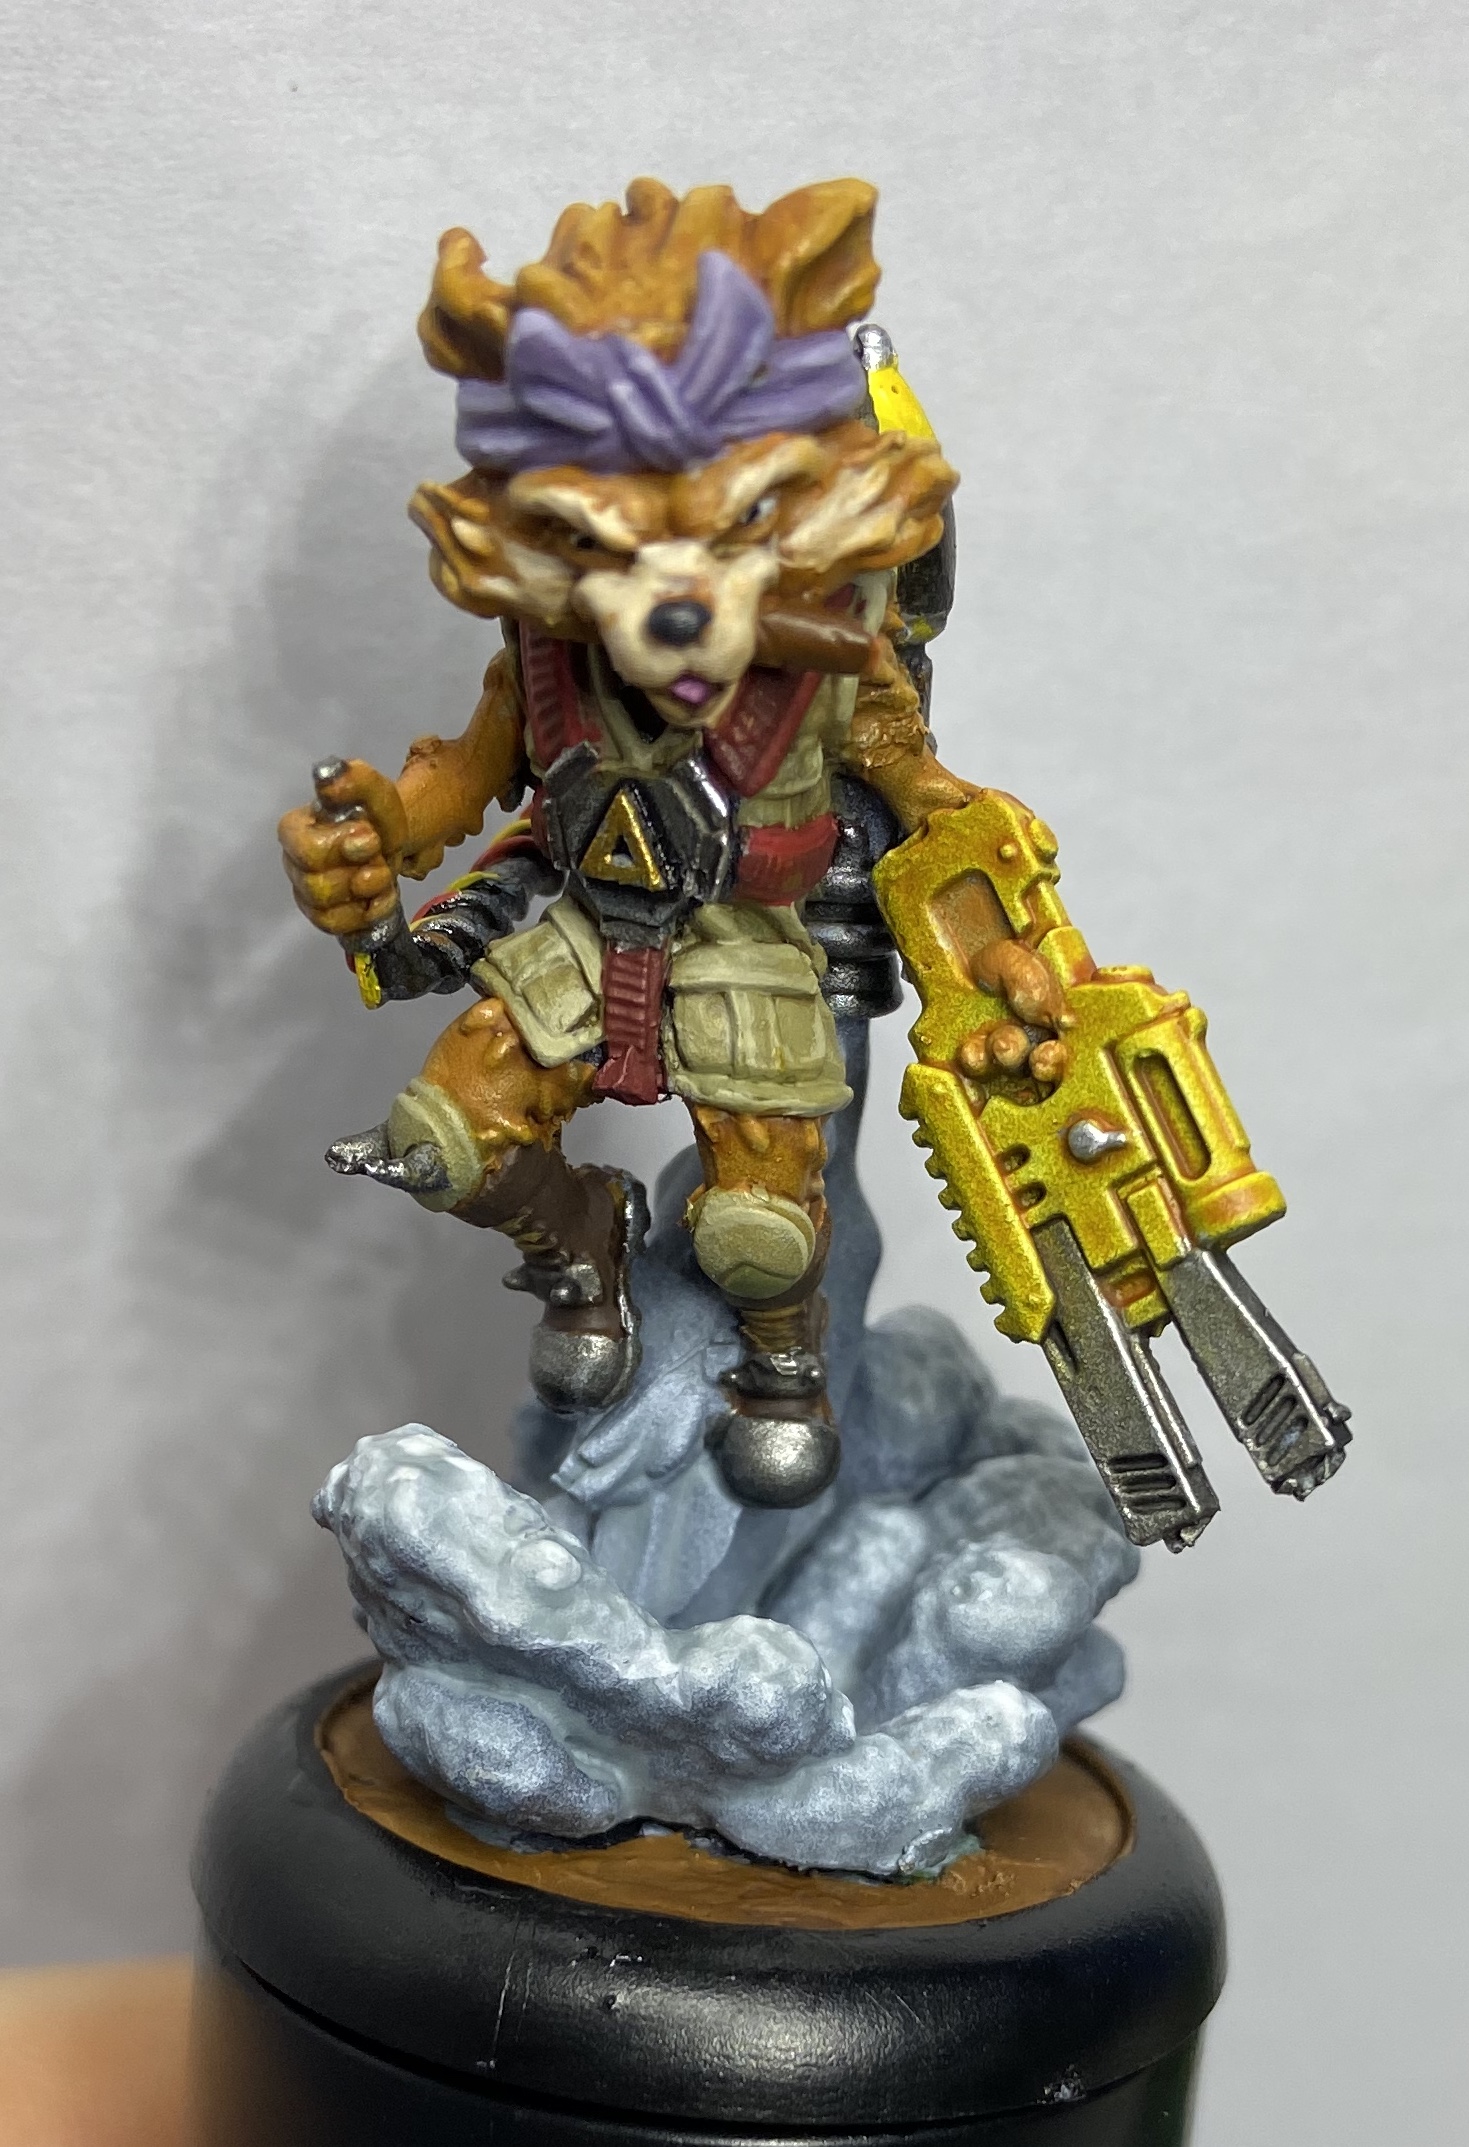
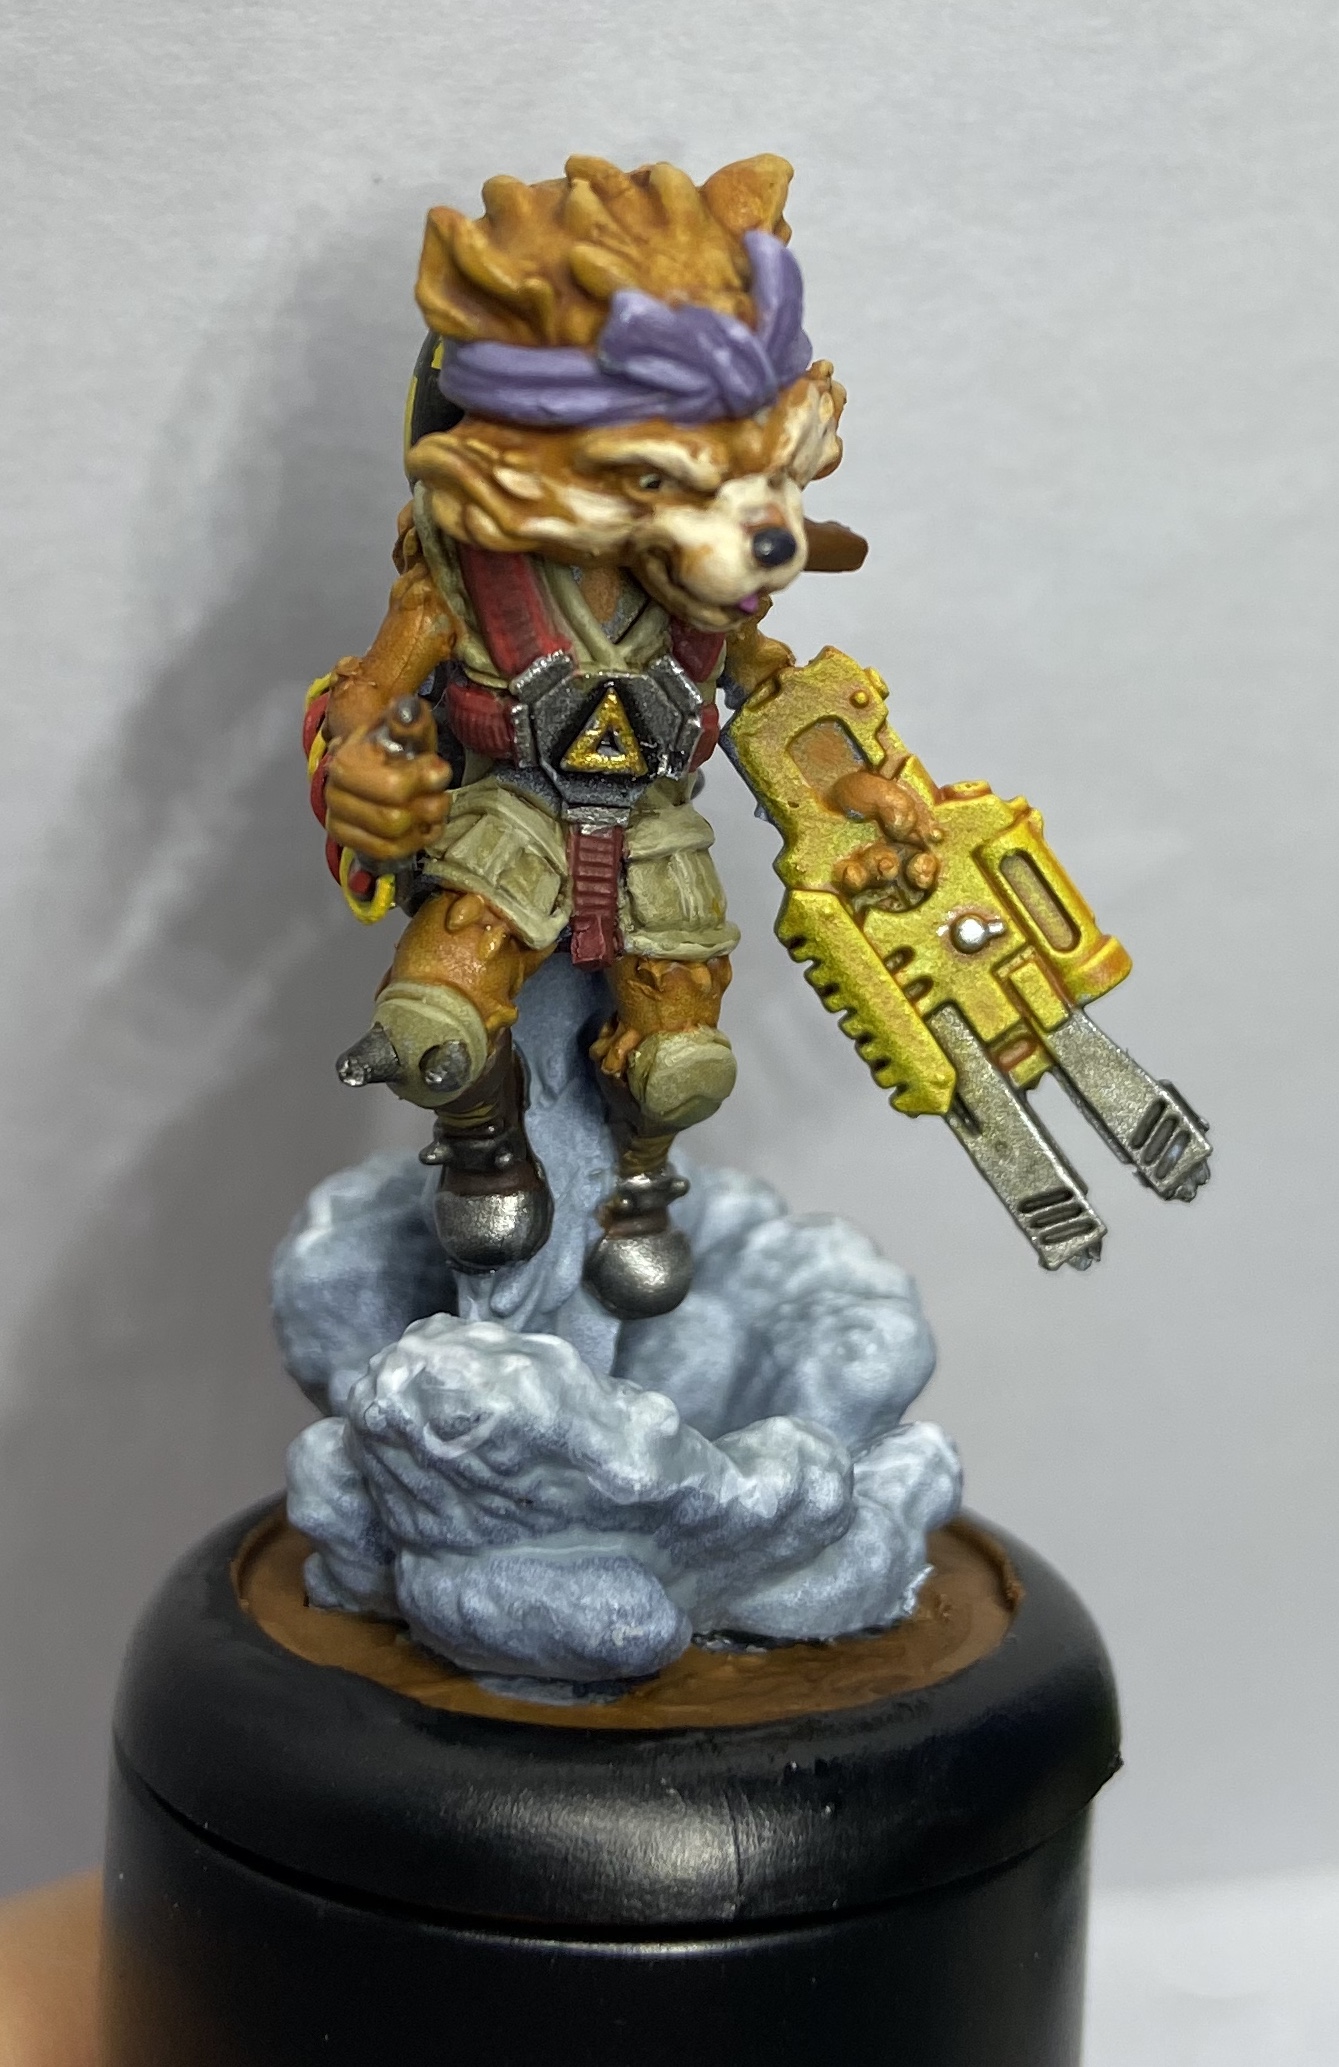
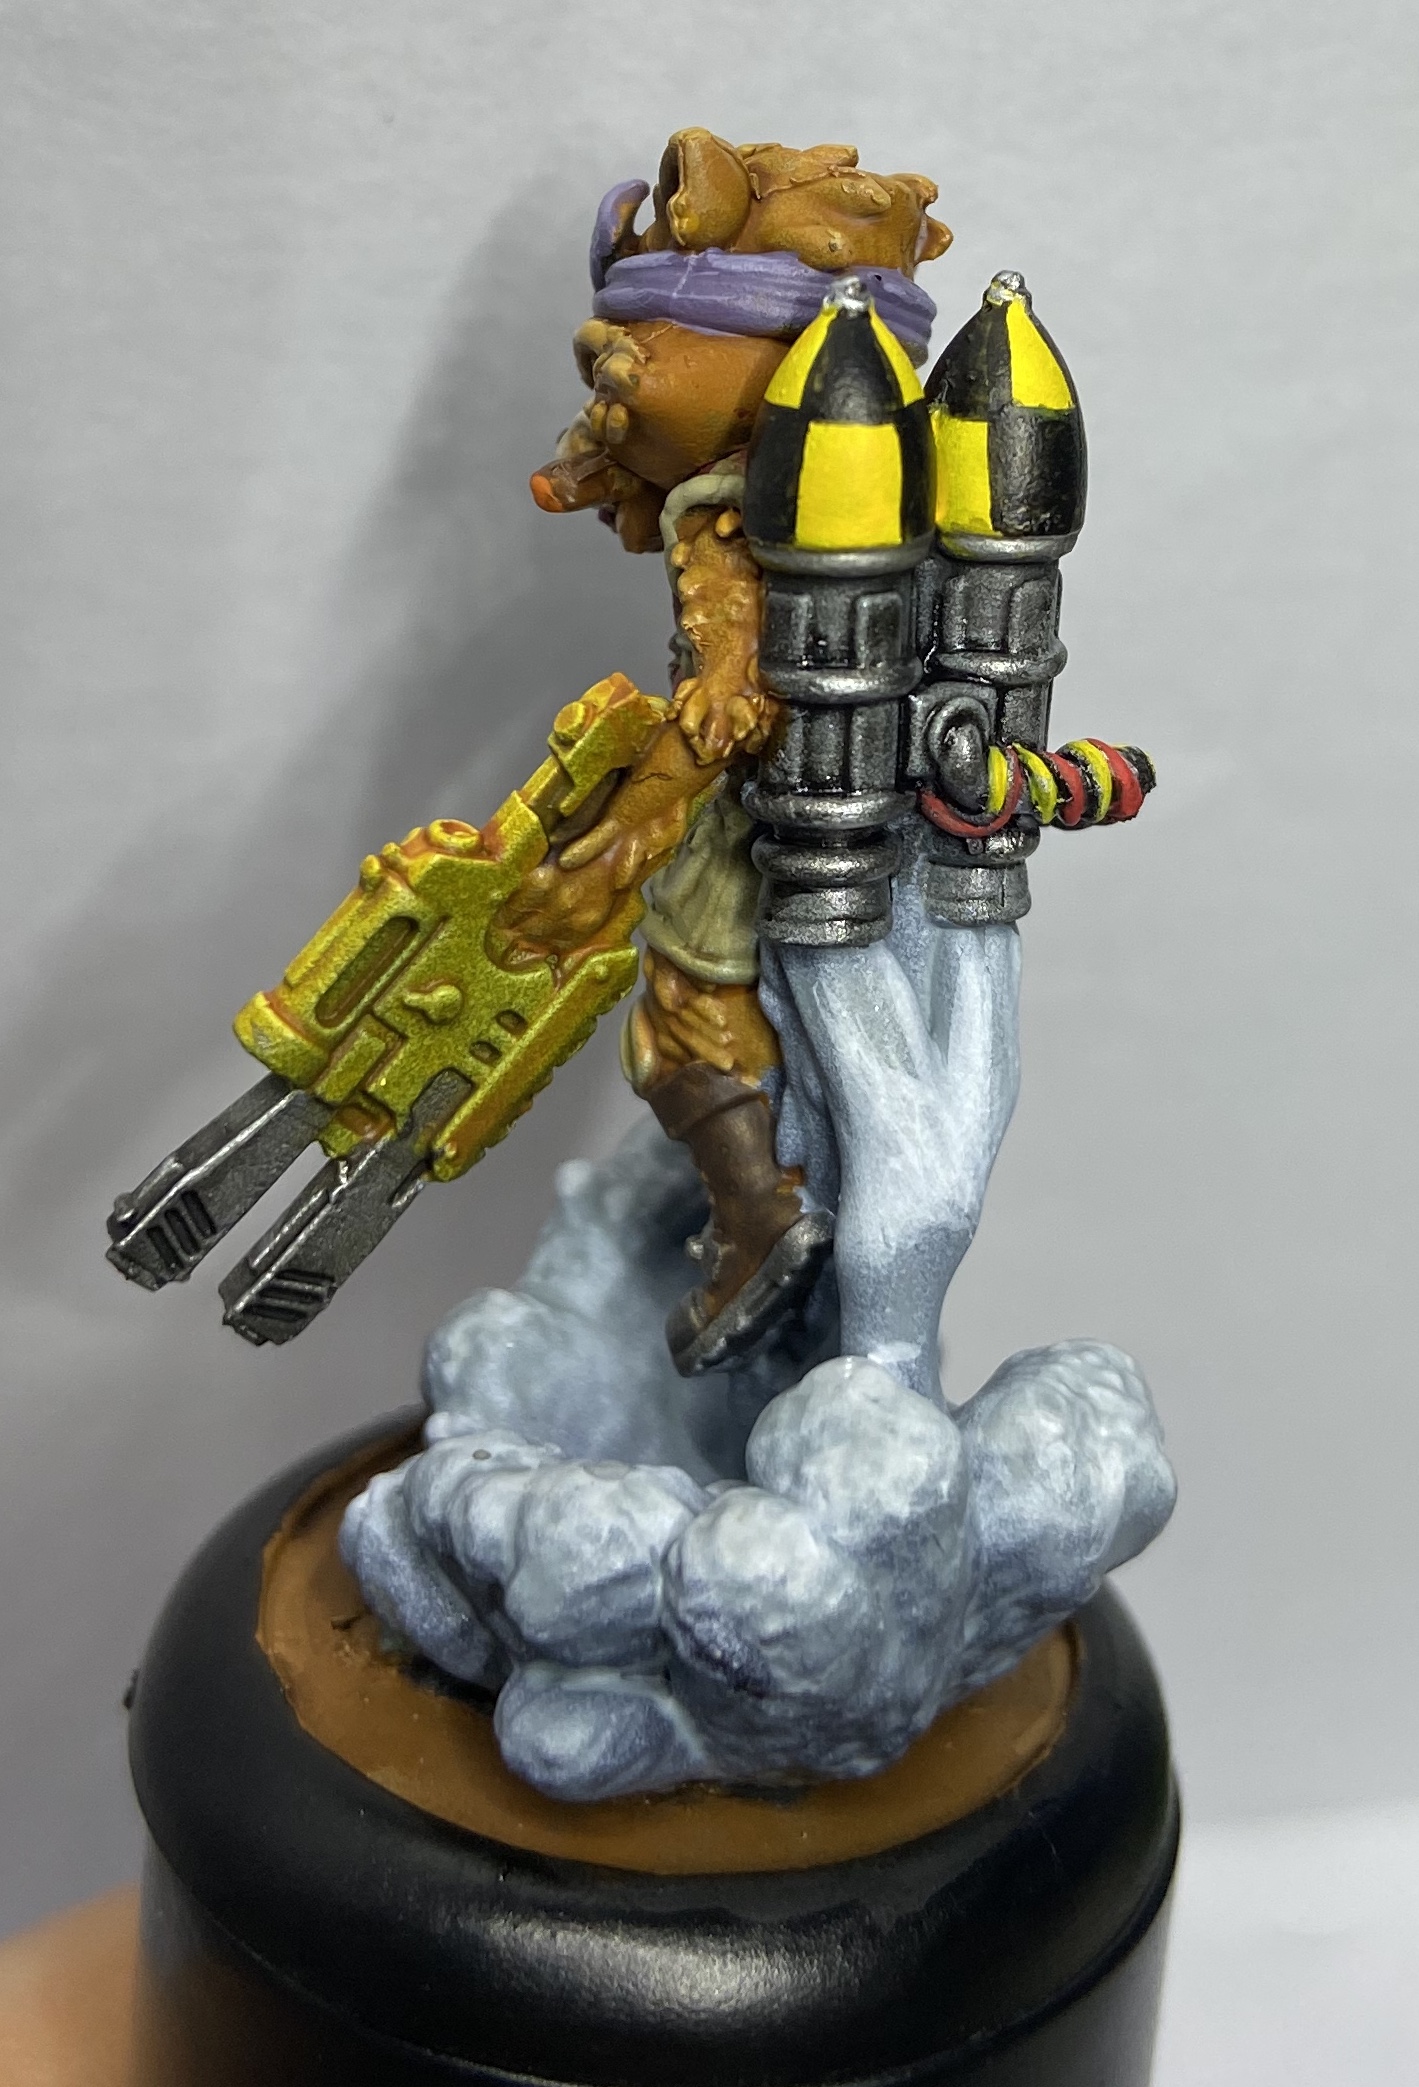
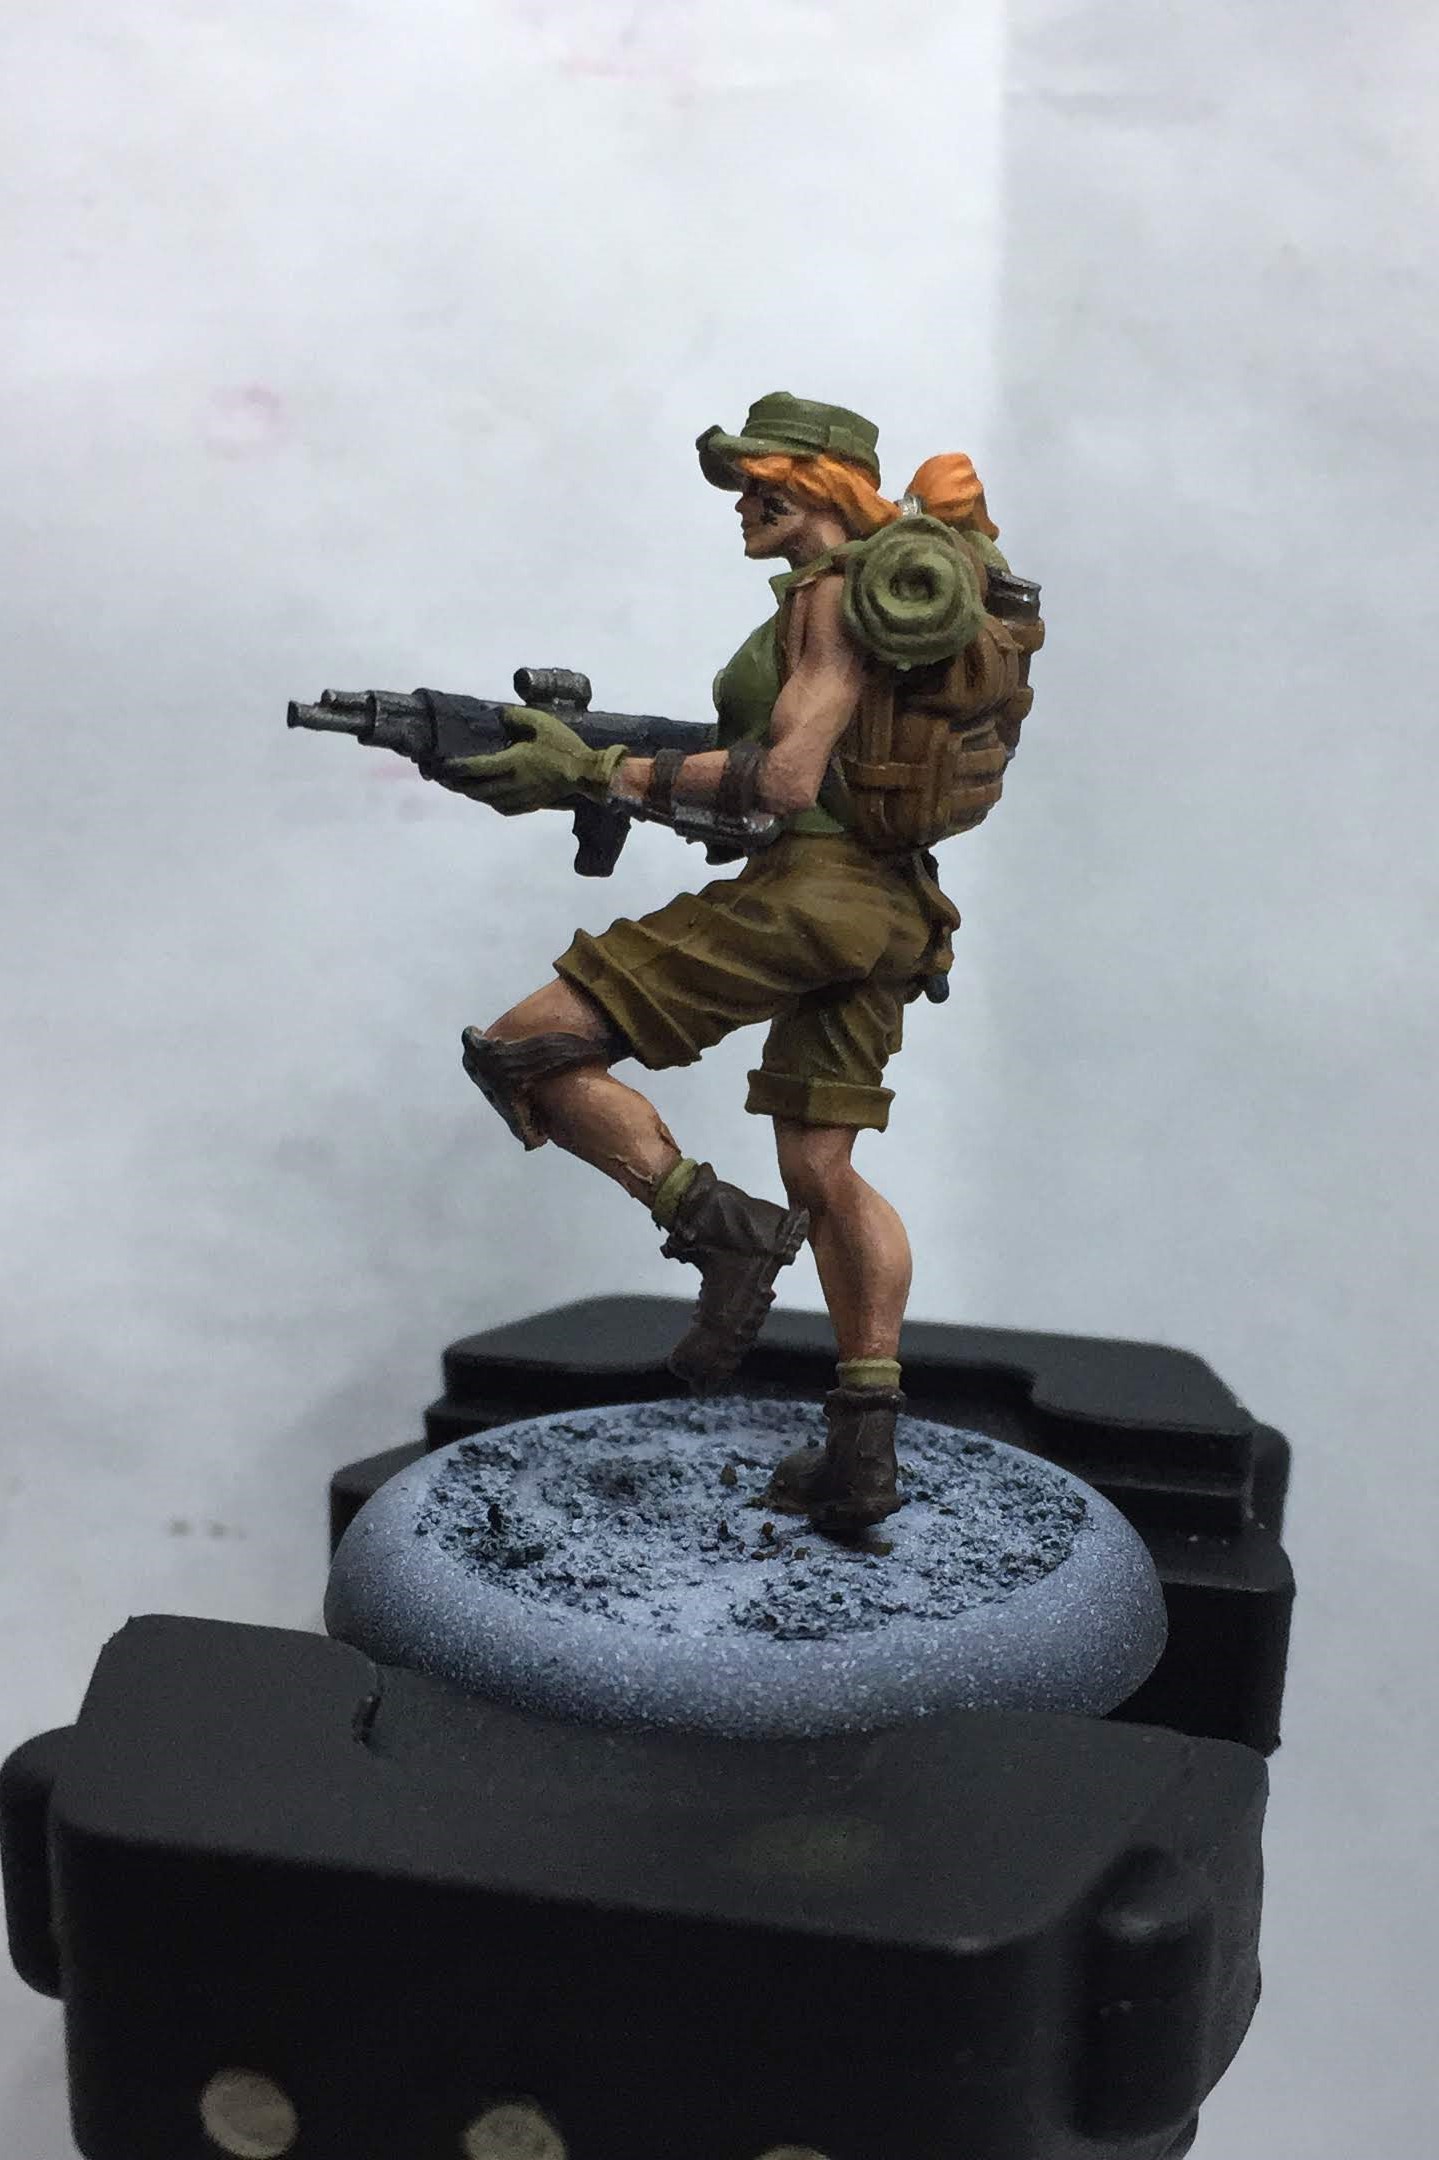
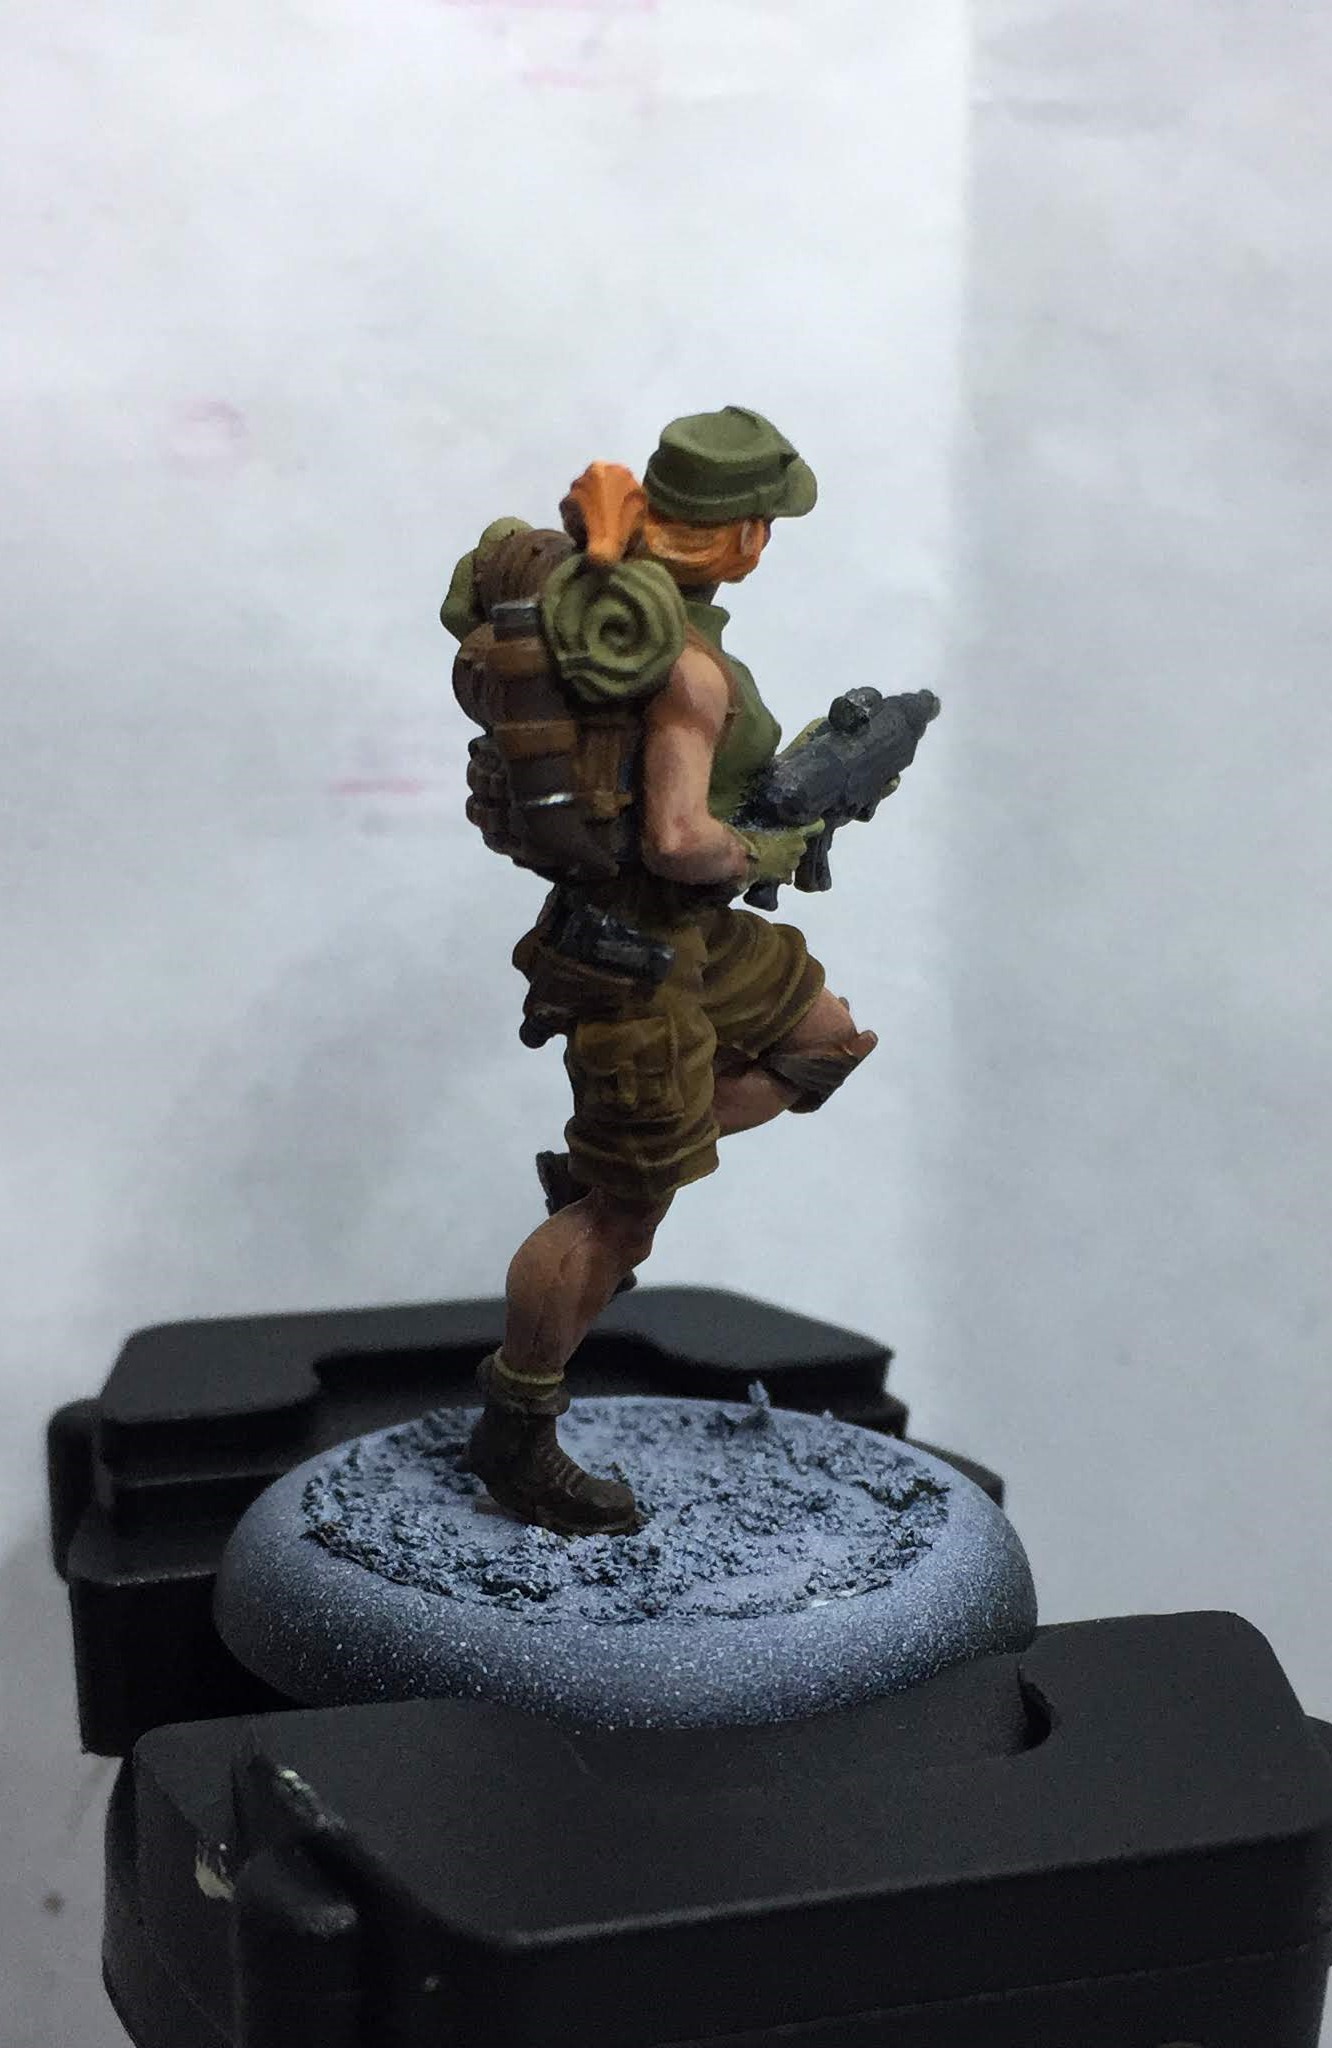
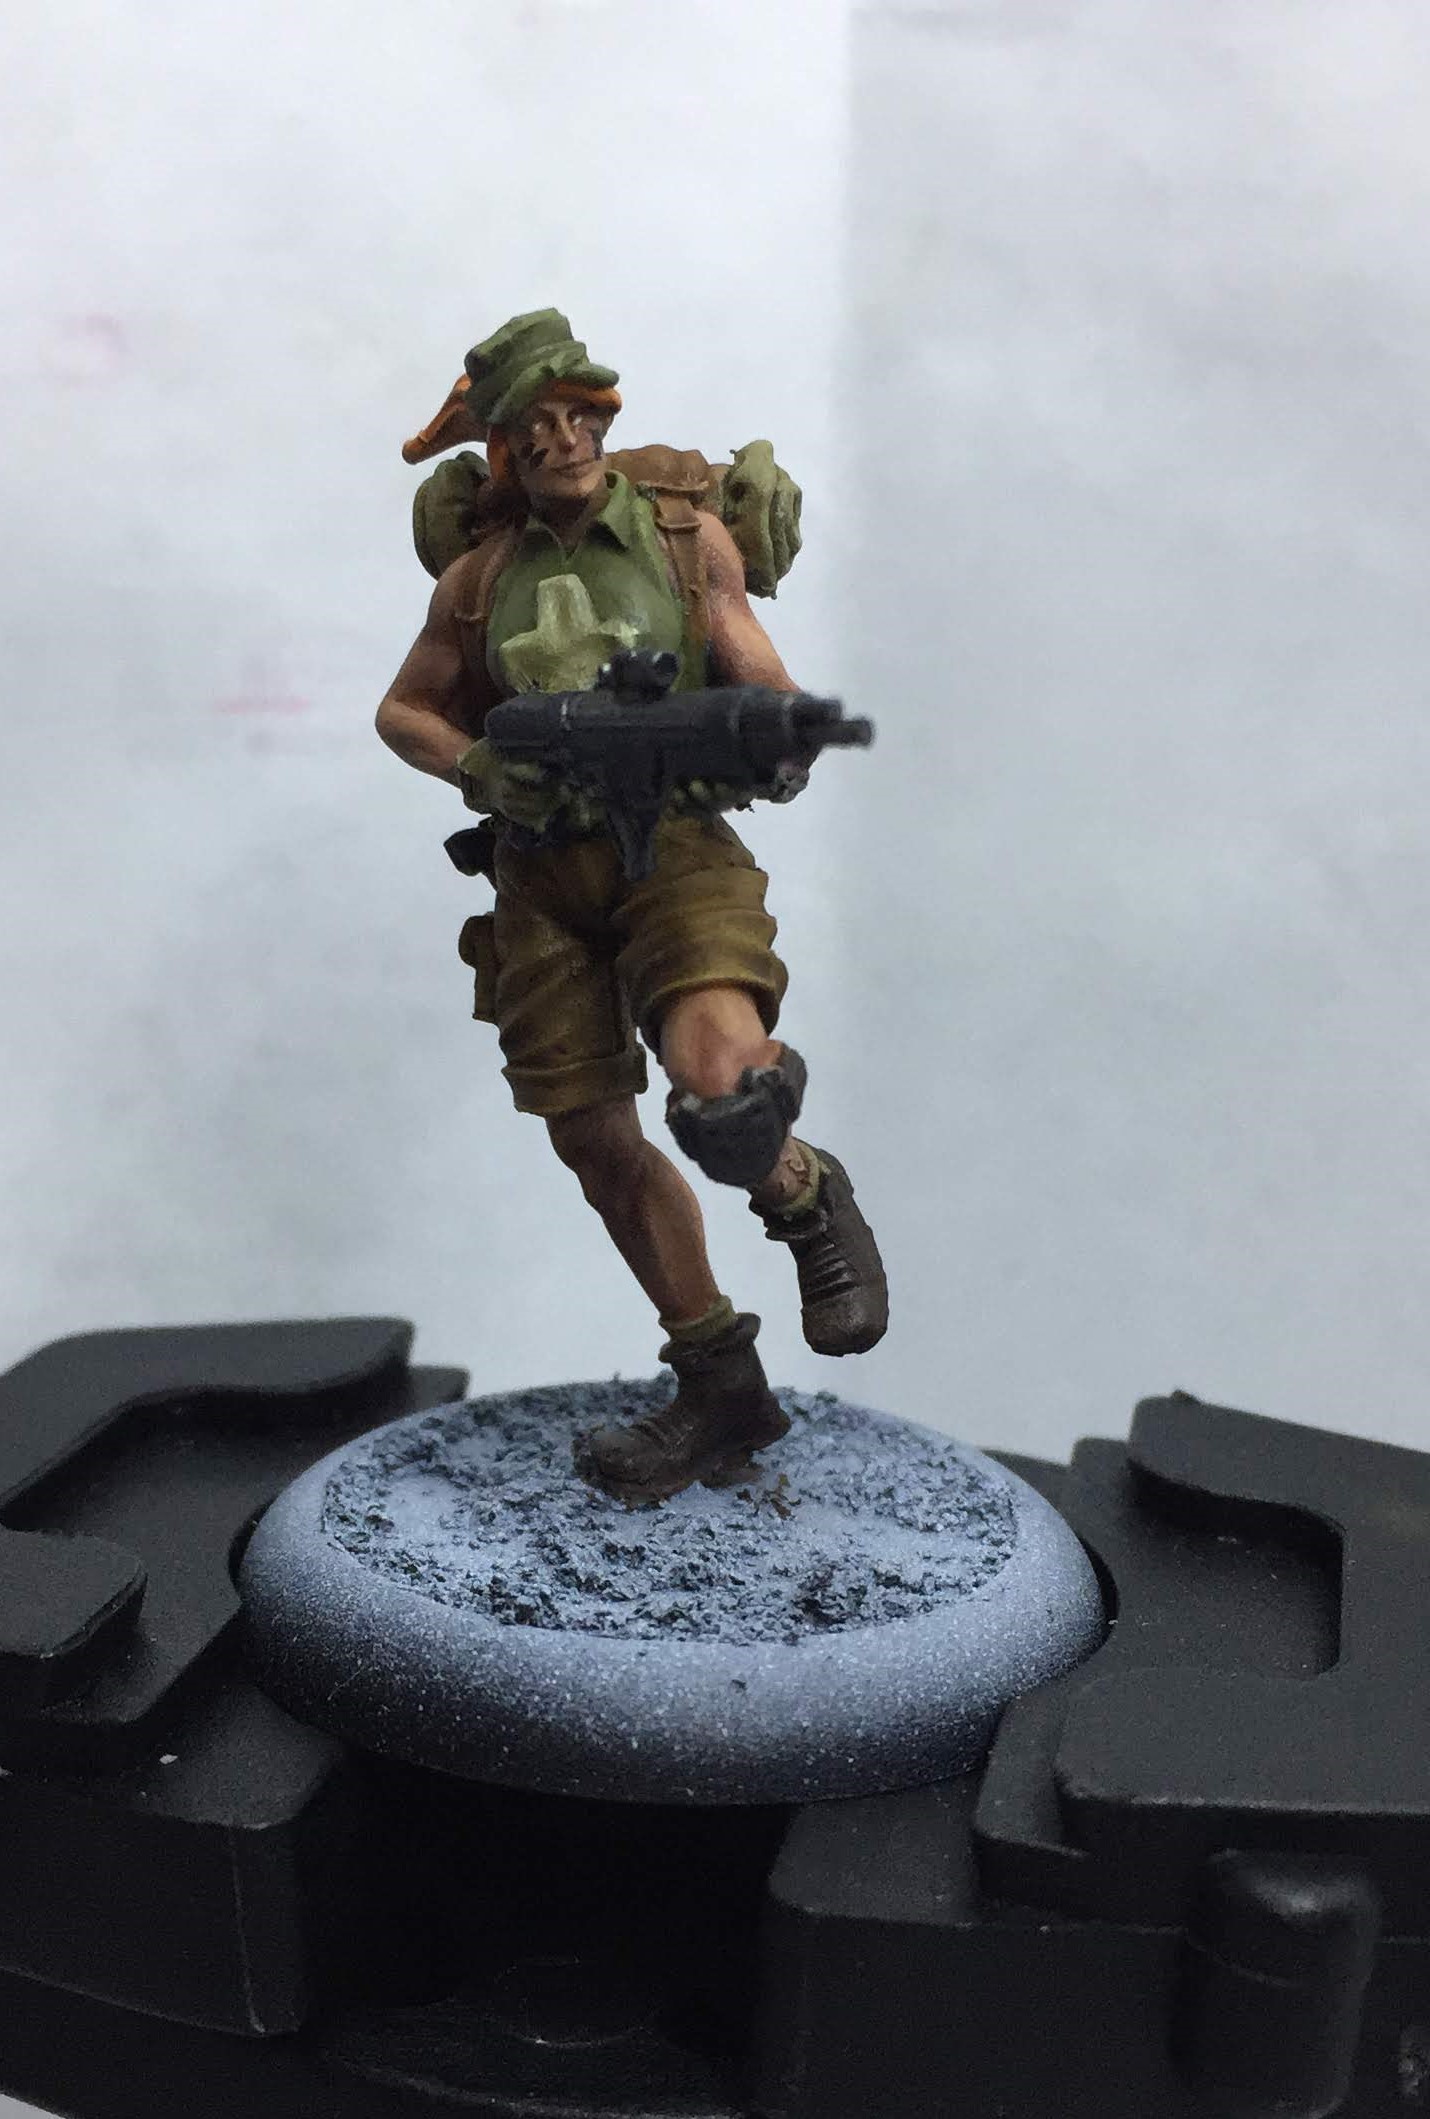
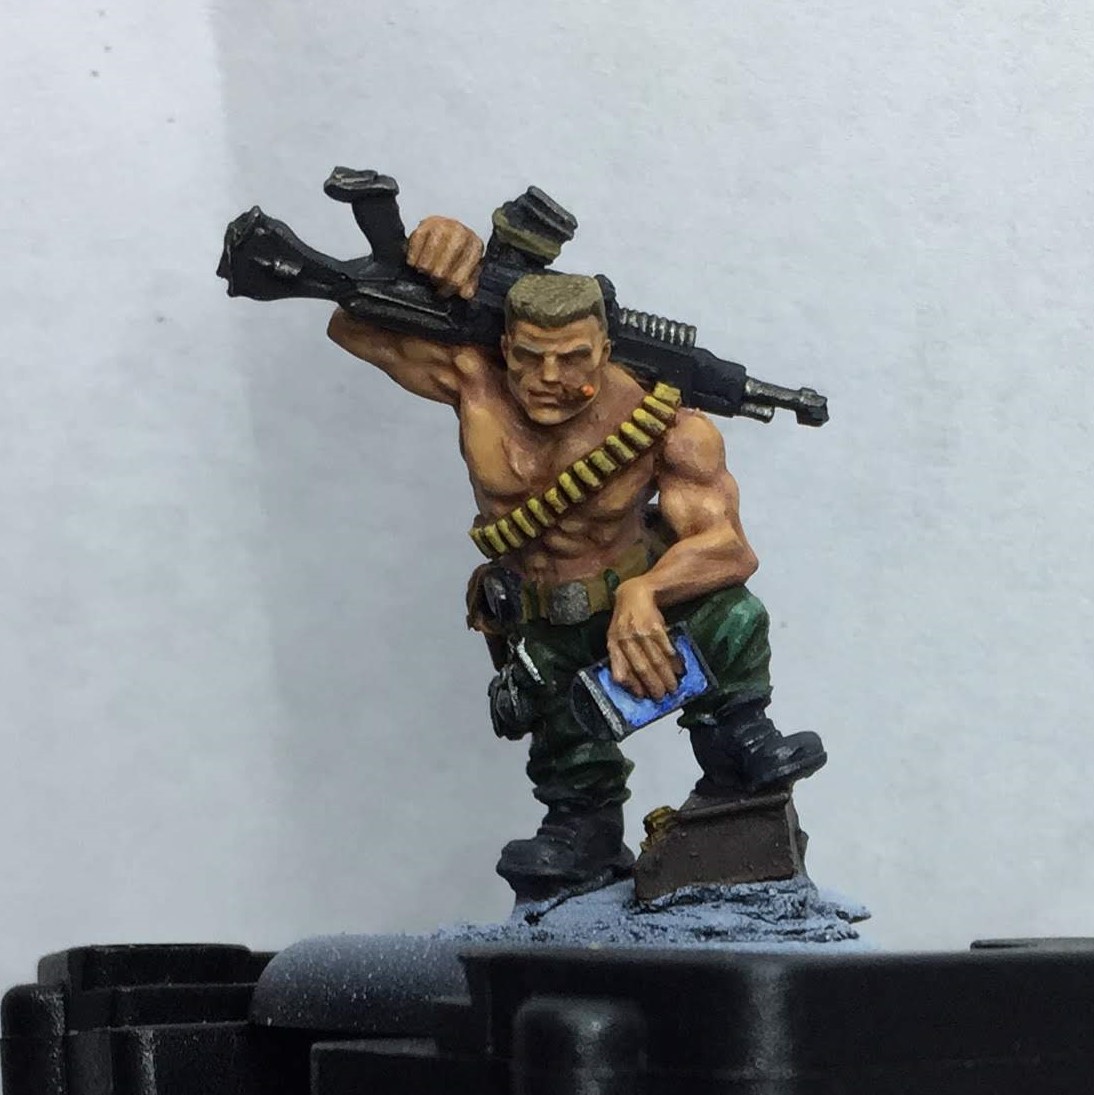
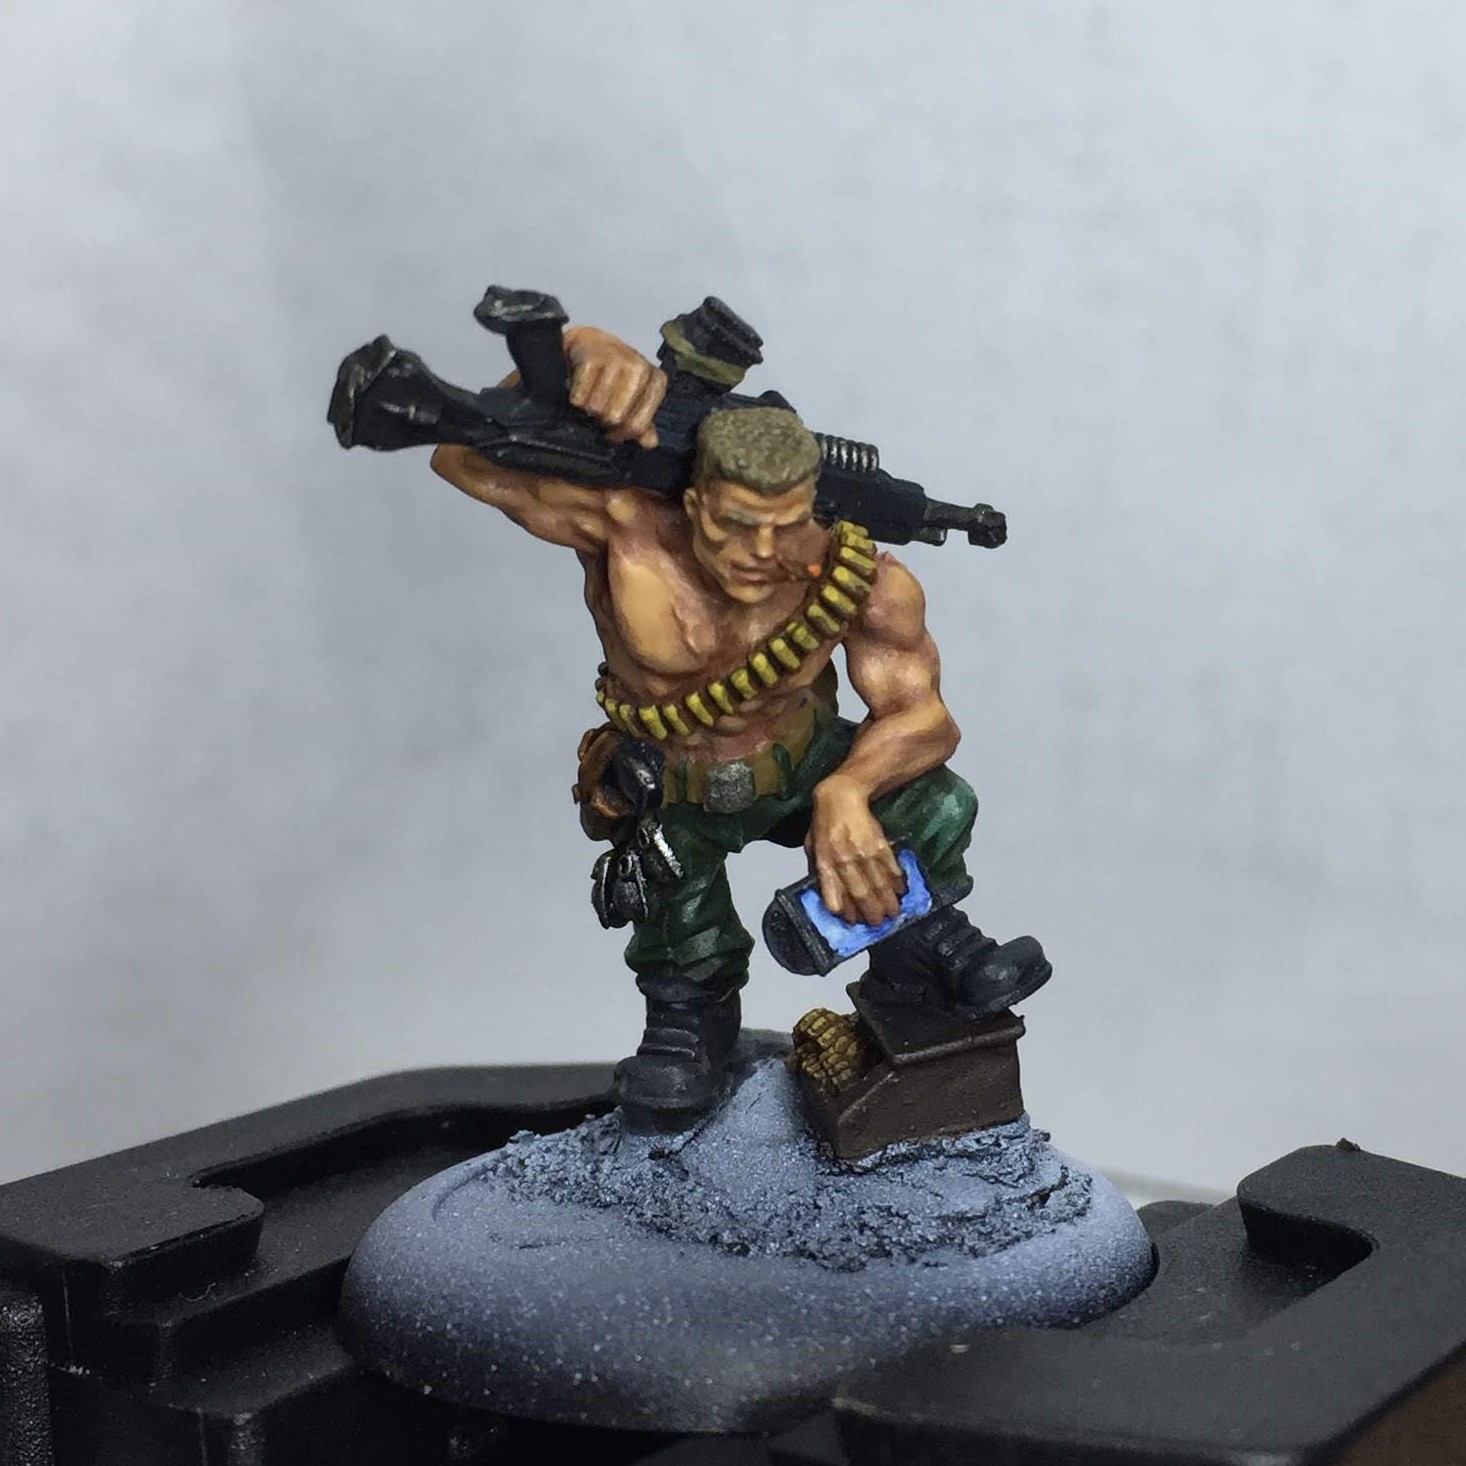
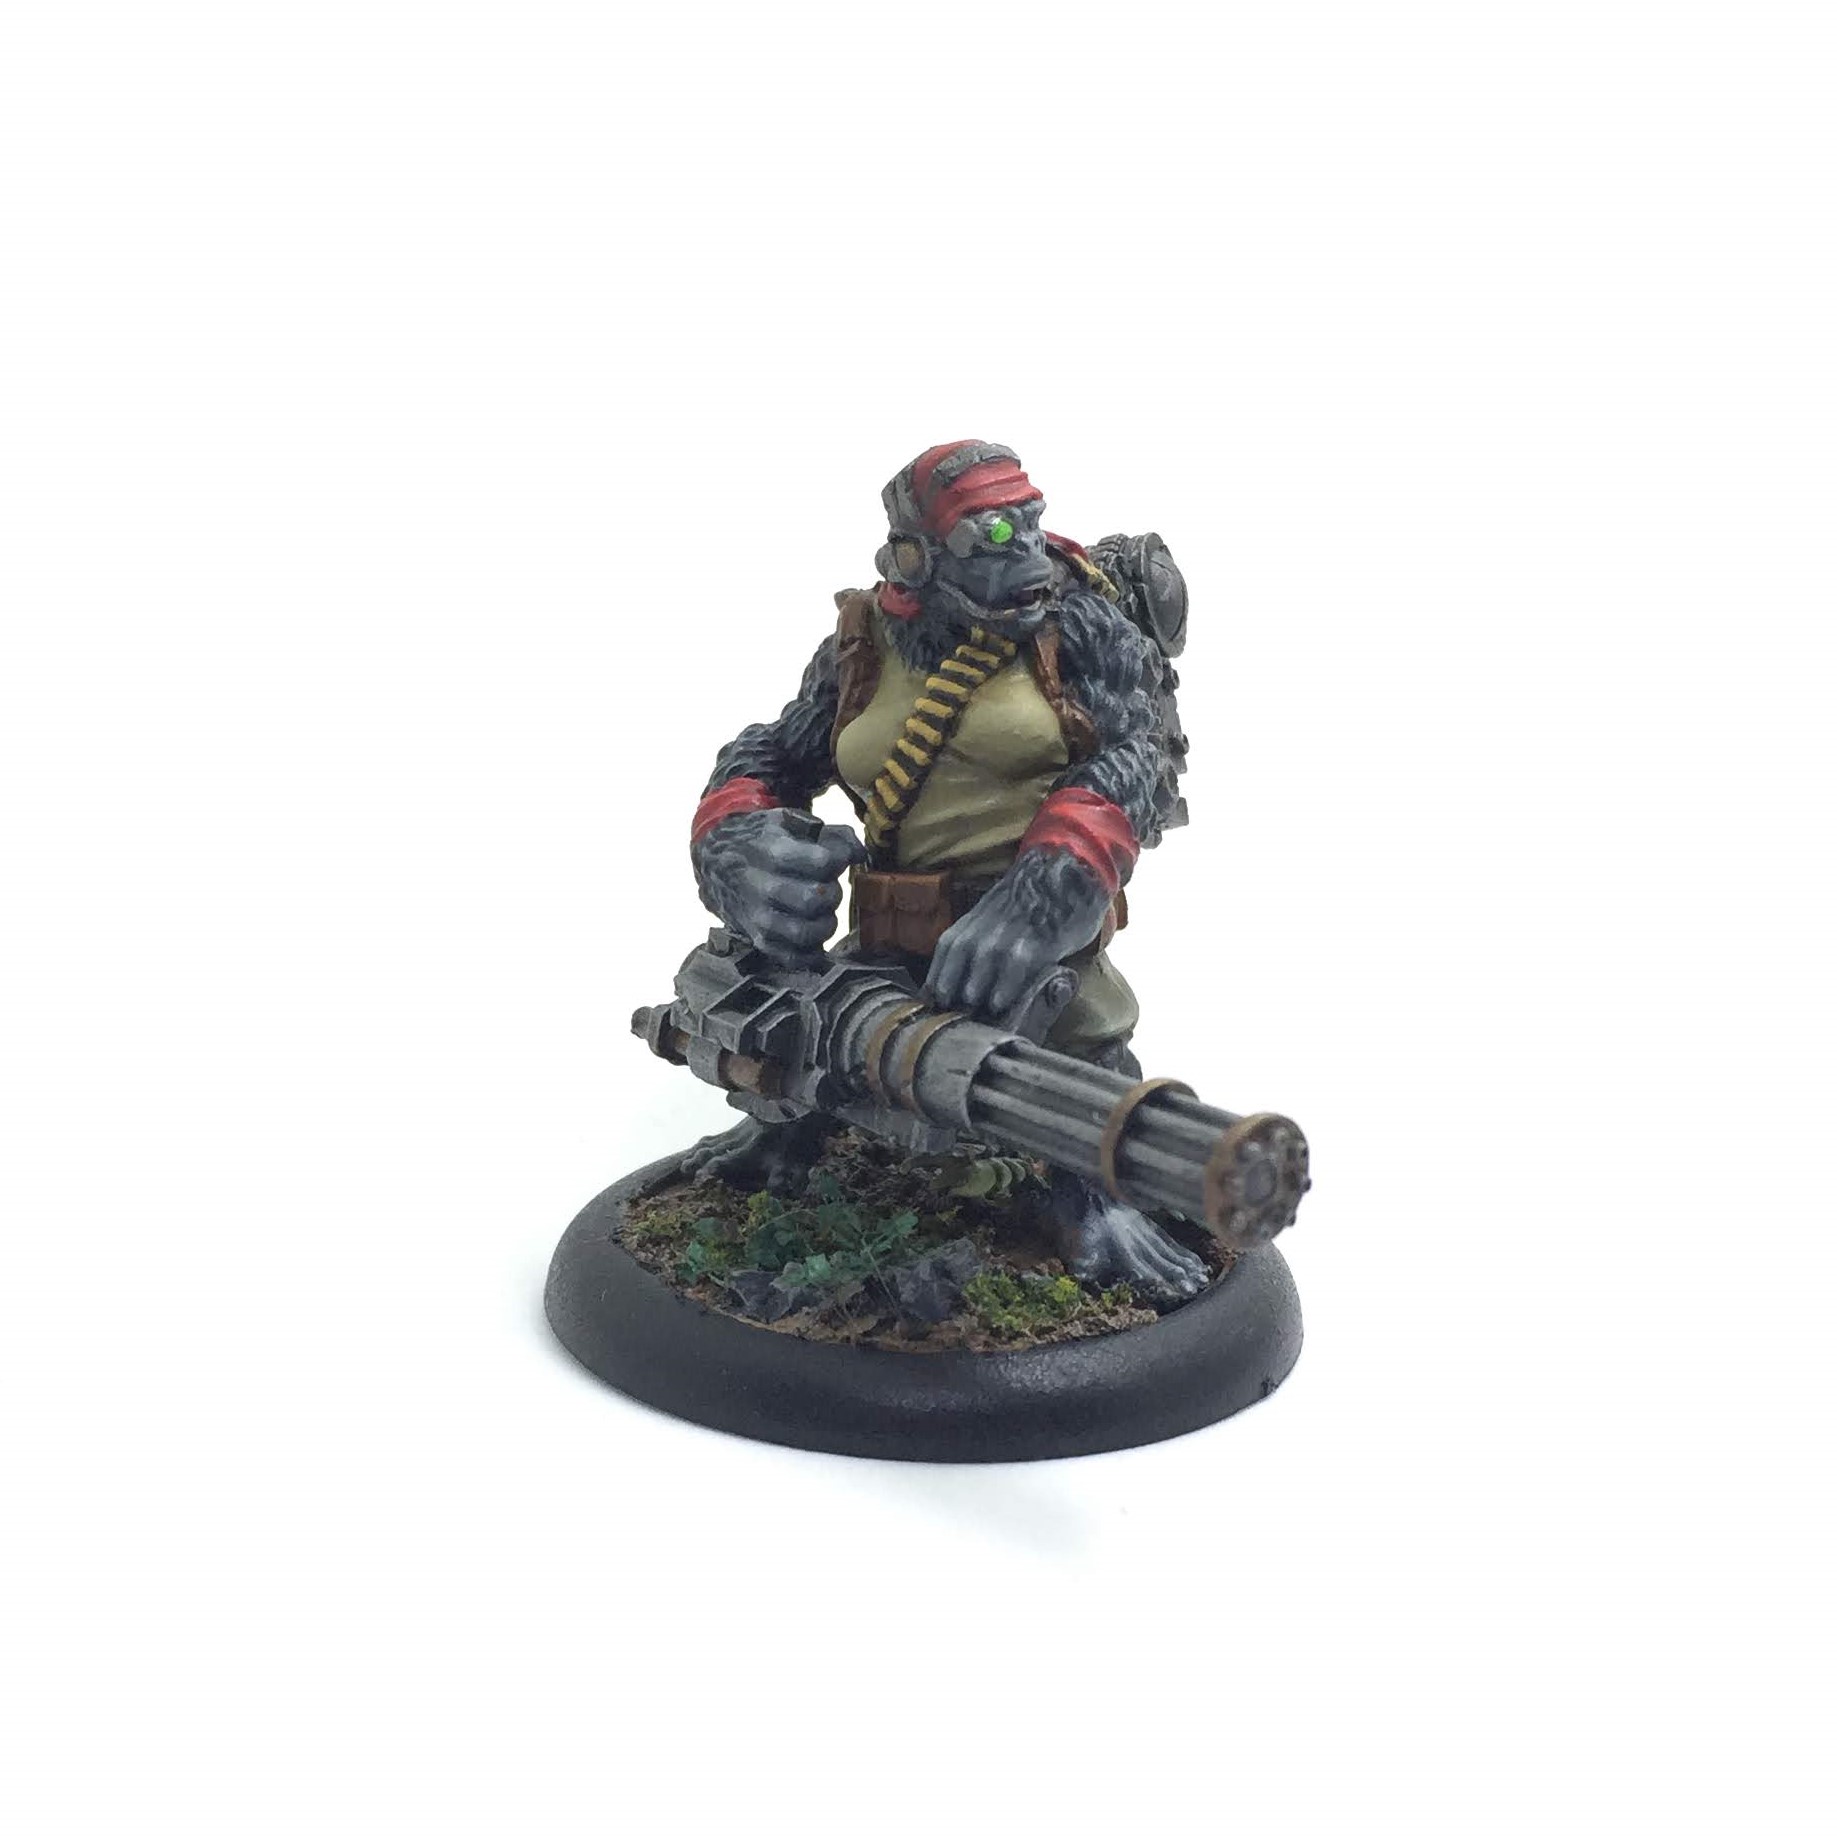
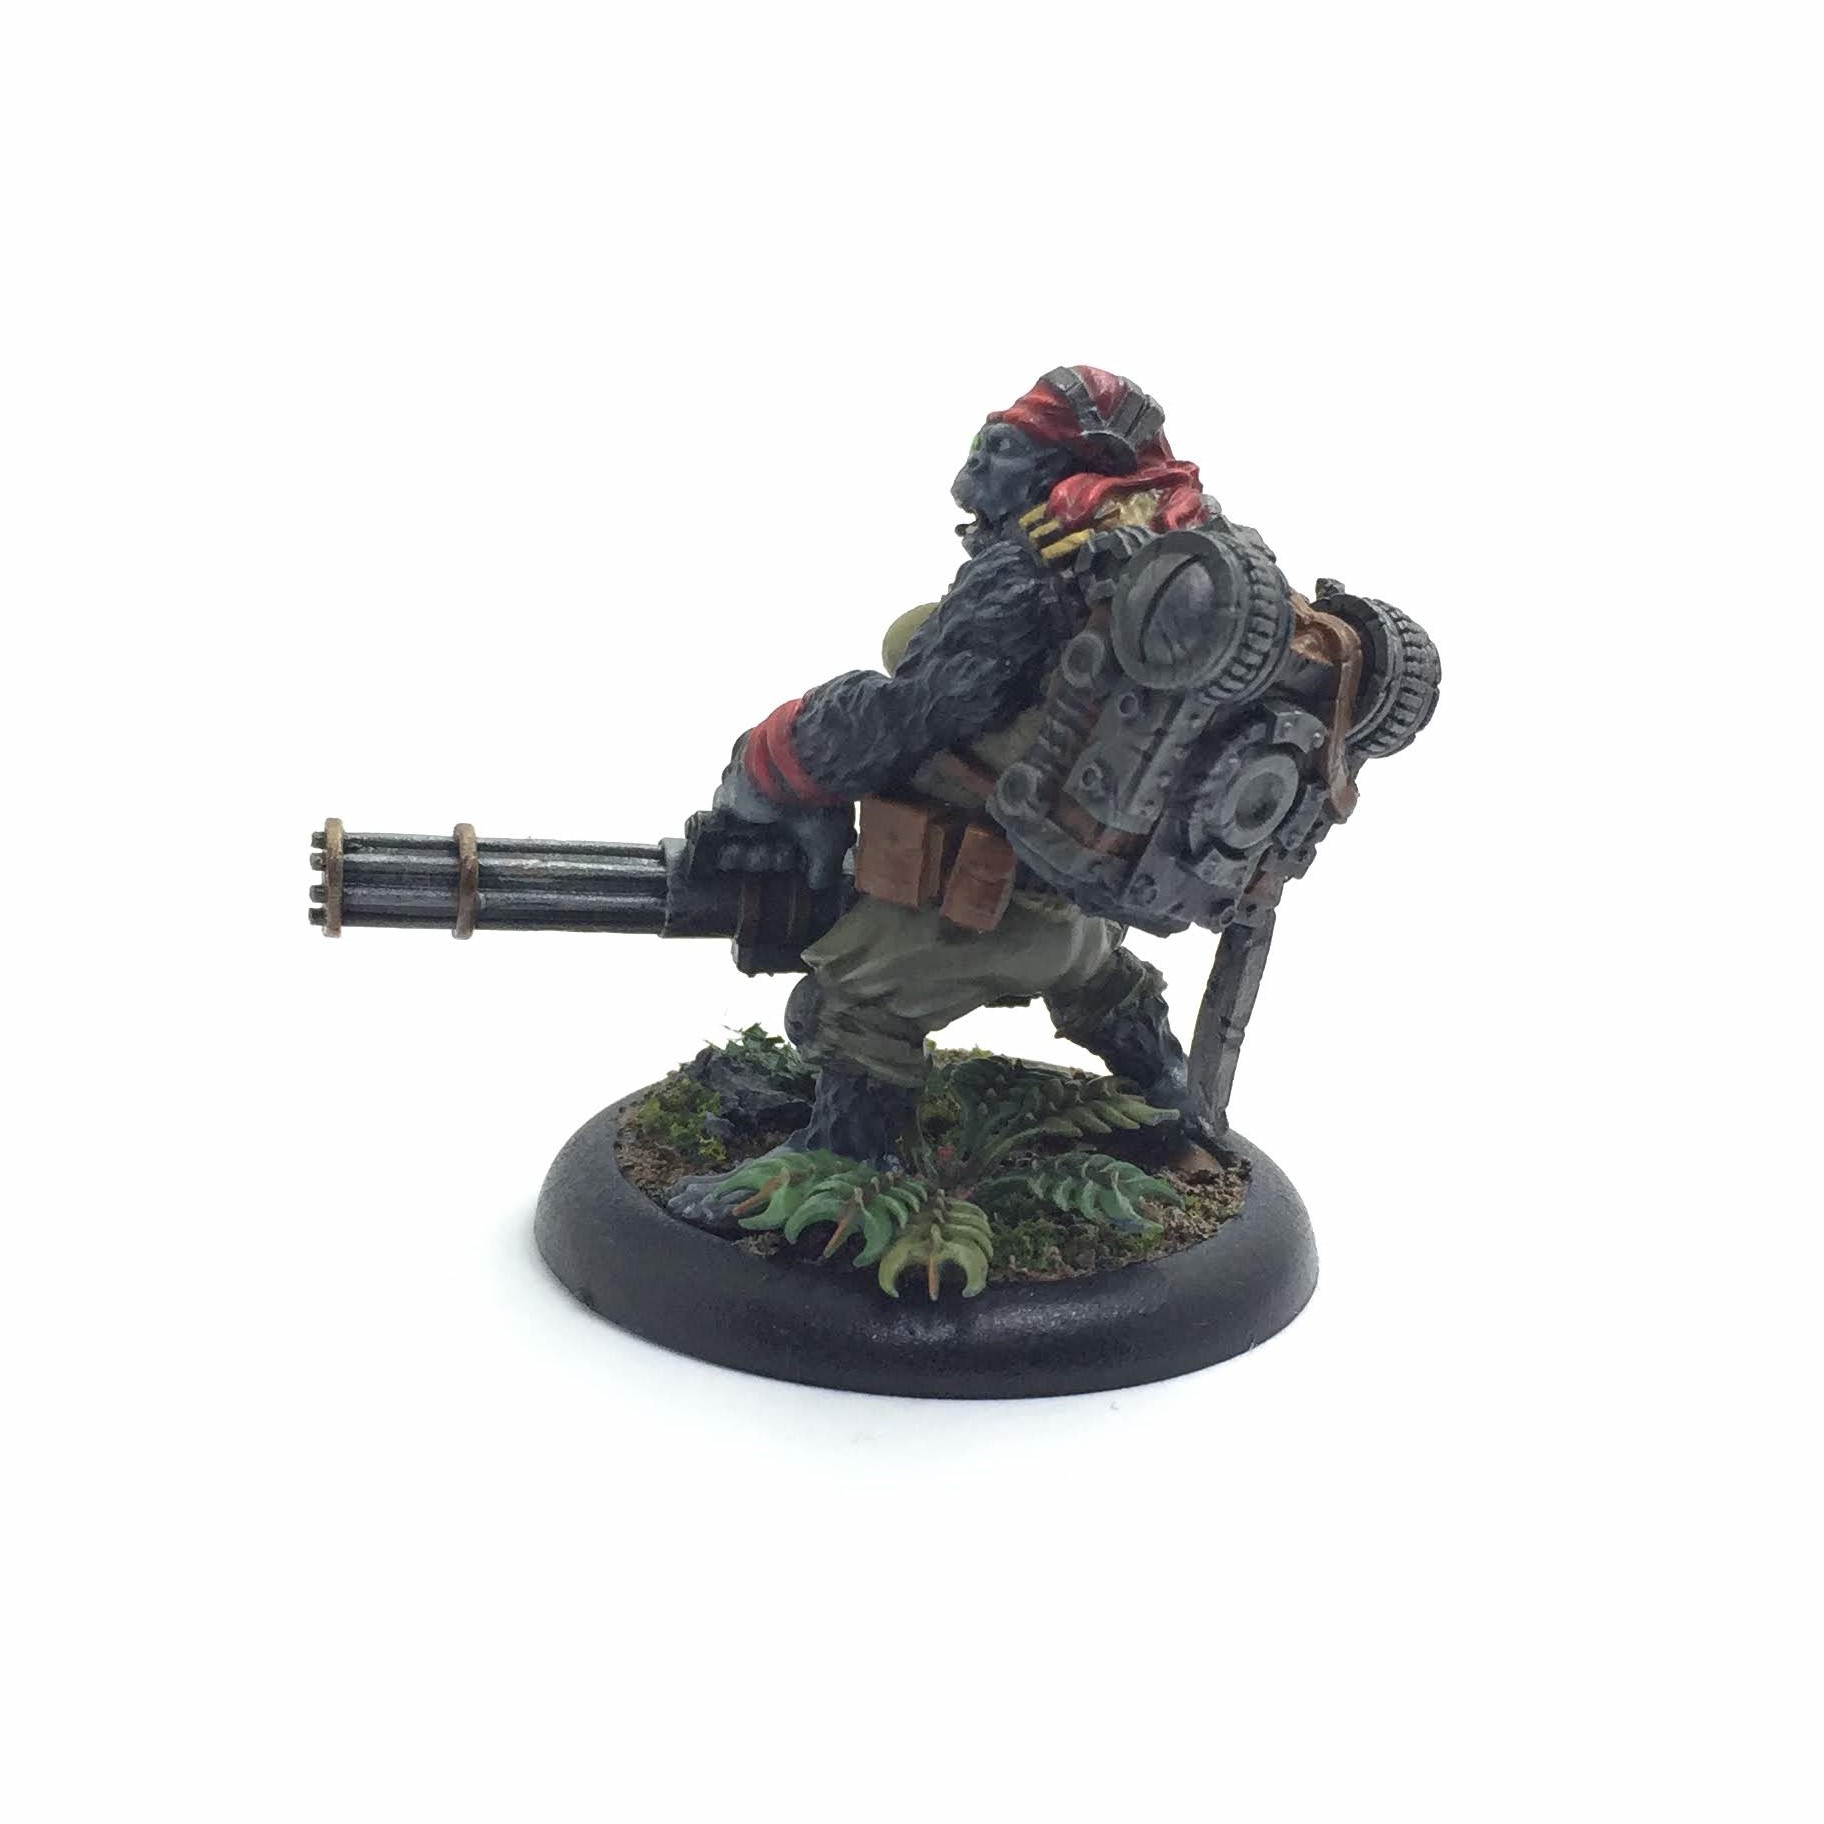
Forek
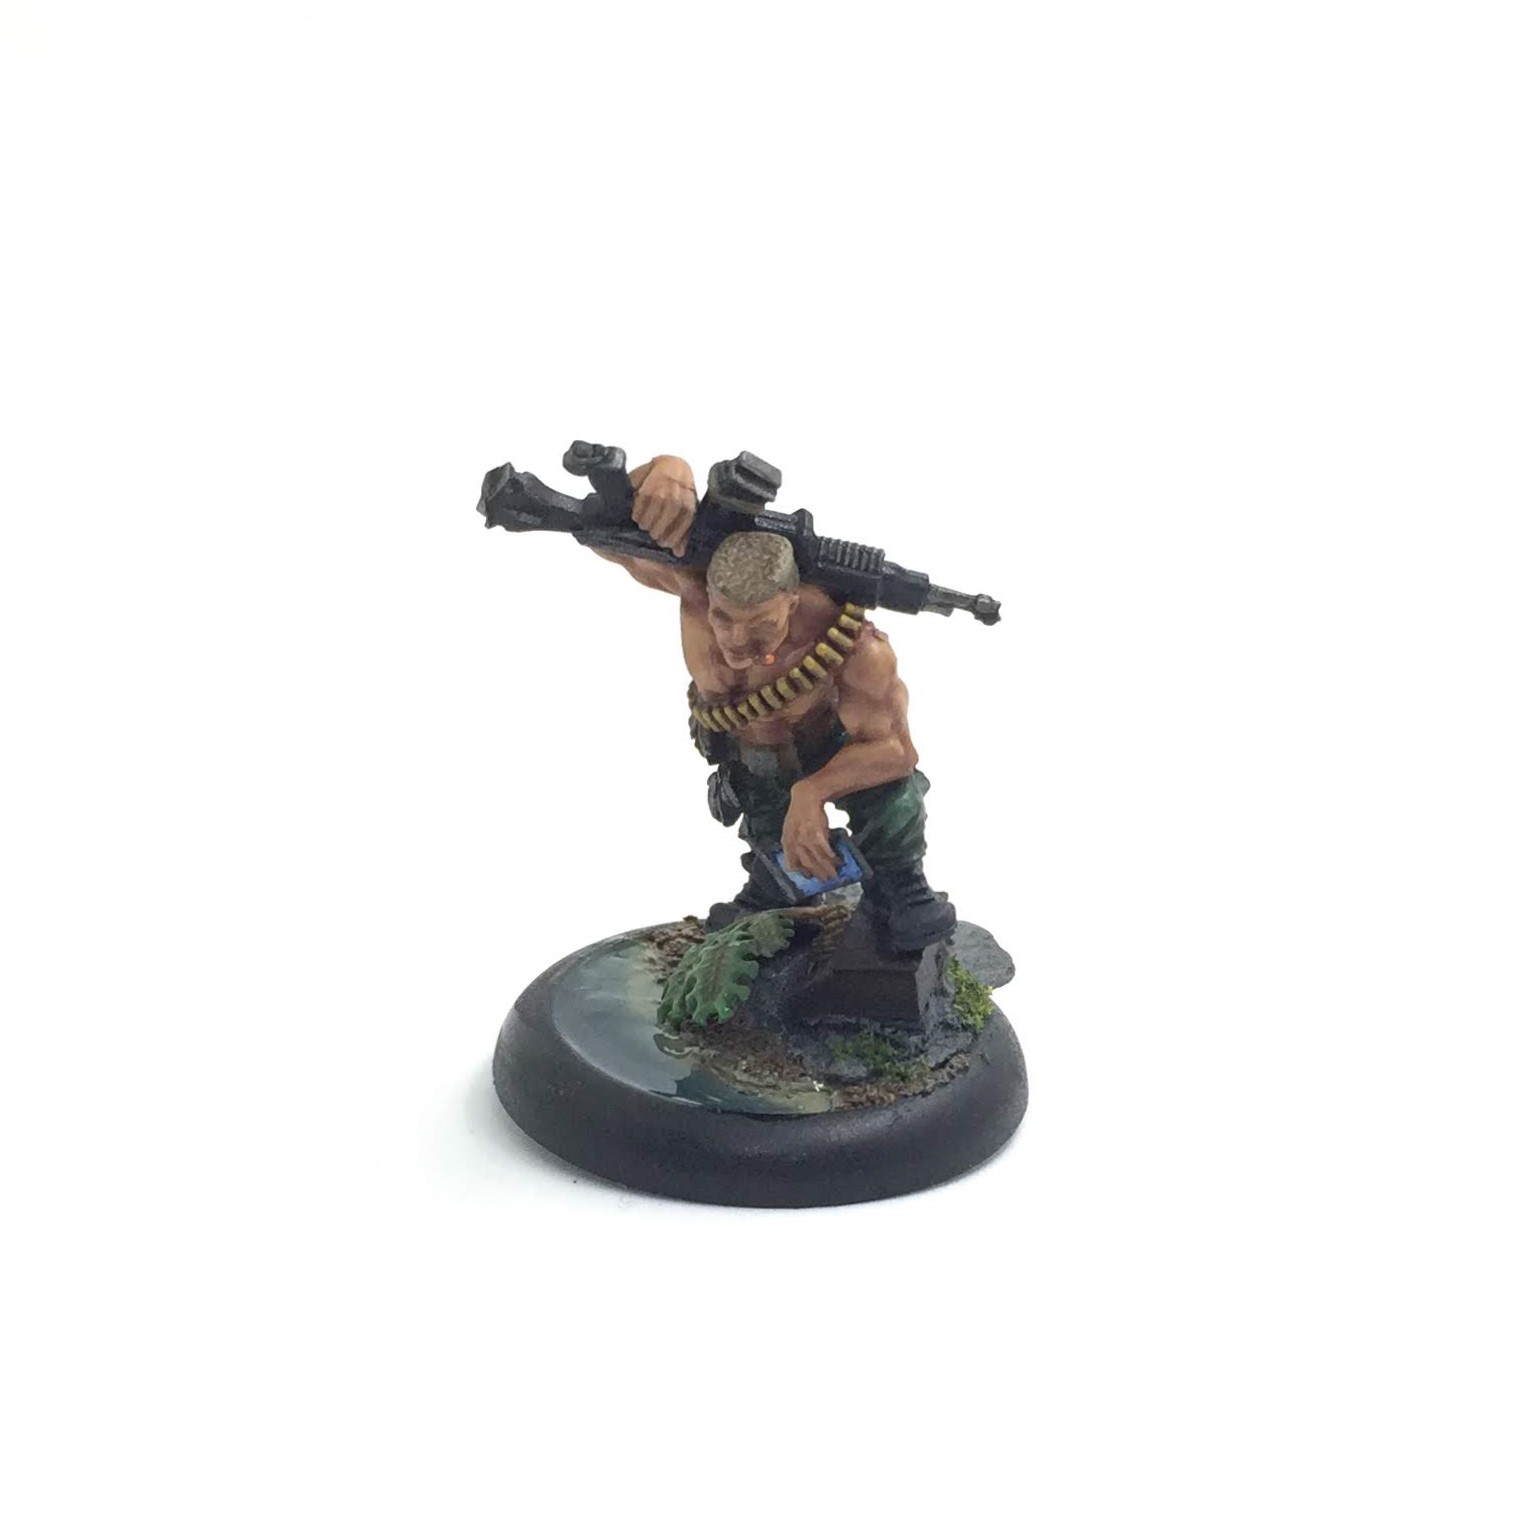
I’ve been painting Forek and the mounted version of him at the same time to ensure consistency in colours used. I plan to post a more step by step for Forek Mounted when that’s finished but in the mean time here’s the standard version.
Colours / techniques used are pretty standard basecoat, wash, highlight. I spend more time on the skin highlighting in gradually lighter tones which I think has worked well. I was too chicken to paint his eyes after that though :).
Trousers : VMC Military Green, Army Painter Military Shader
Skin : Bugmans Glow, then Bugmans Glow / Cadian Fleshtone mix for a few layer until nearly pure Cadian Fleshtone. Finished off with AP Flesh Wash.
Hair : Steel Legion Drab, Agrax Earthshade, VMC Tan Yellow drybrush.
Belt / bags : VMC Flat Earth, Agrax Earthshade
Ammo belt / pistol holder : Mournfang Brown, Agrax Earthshade

Basing Idea - test piece
I’ve done a test piece for the basing I’m going to use – some step pics below.
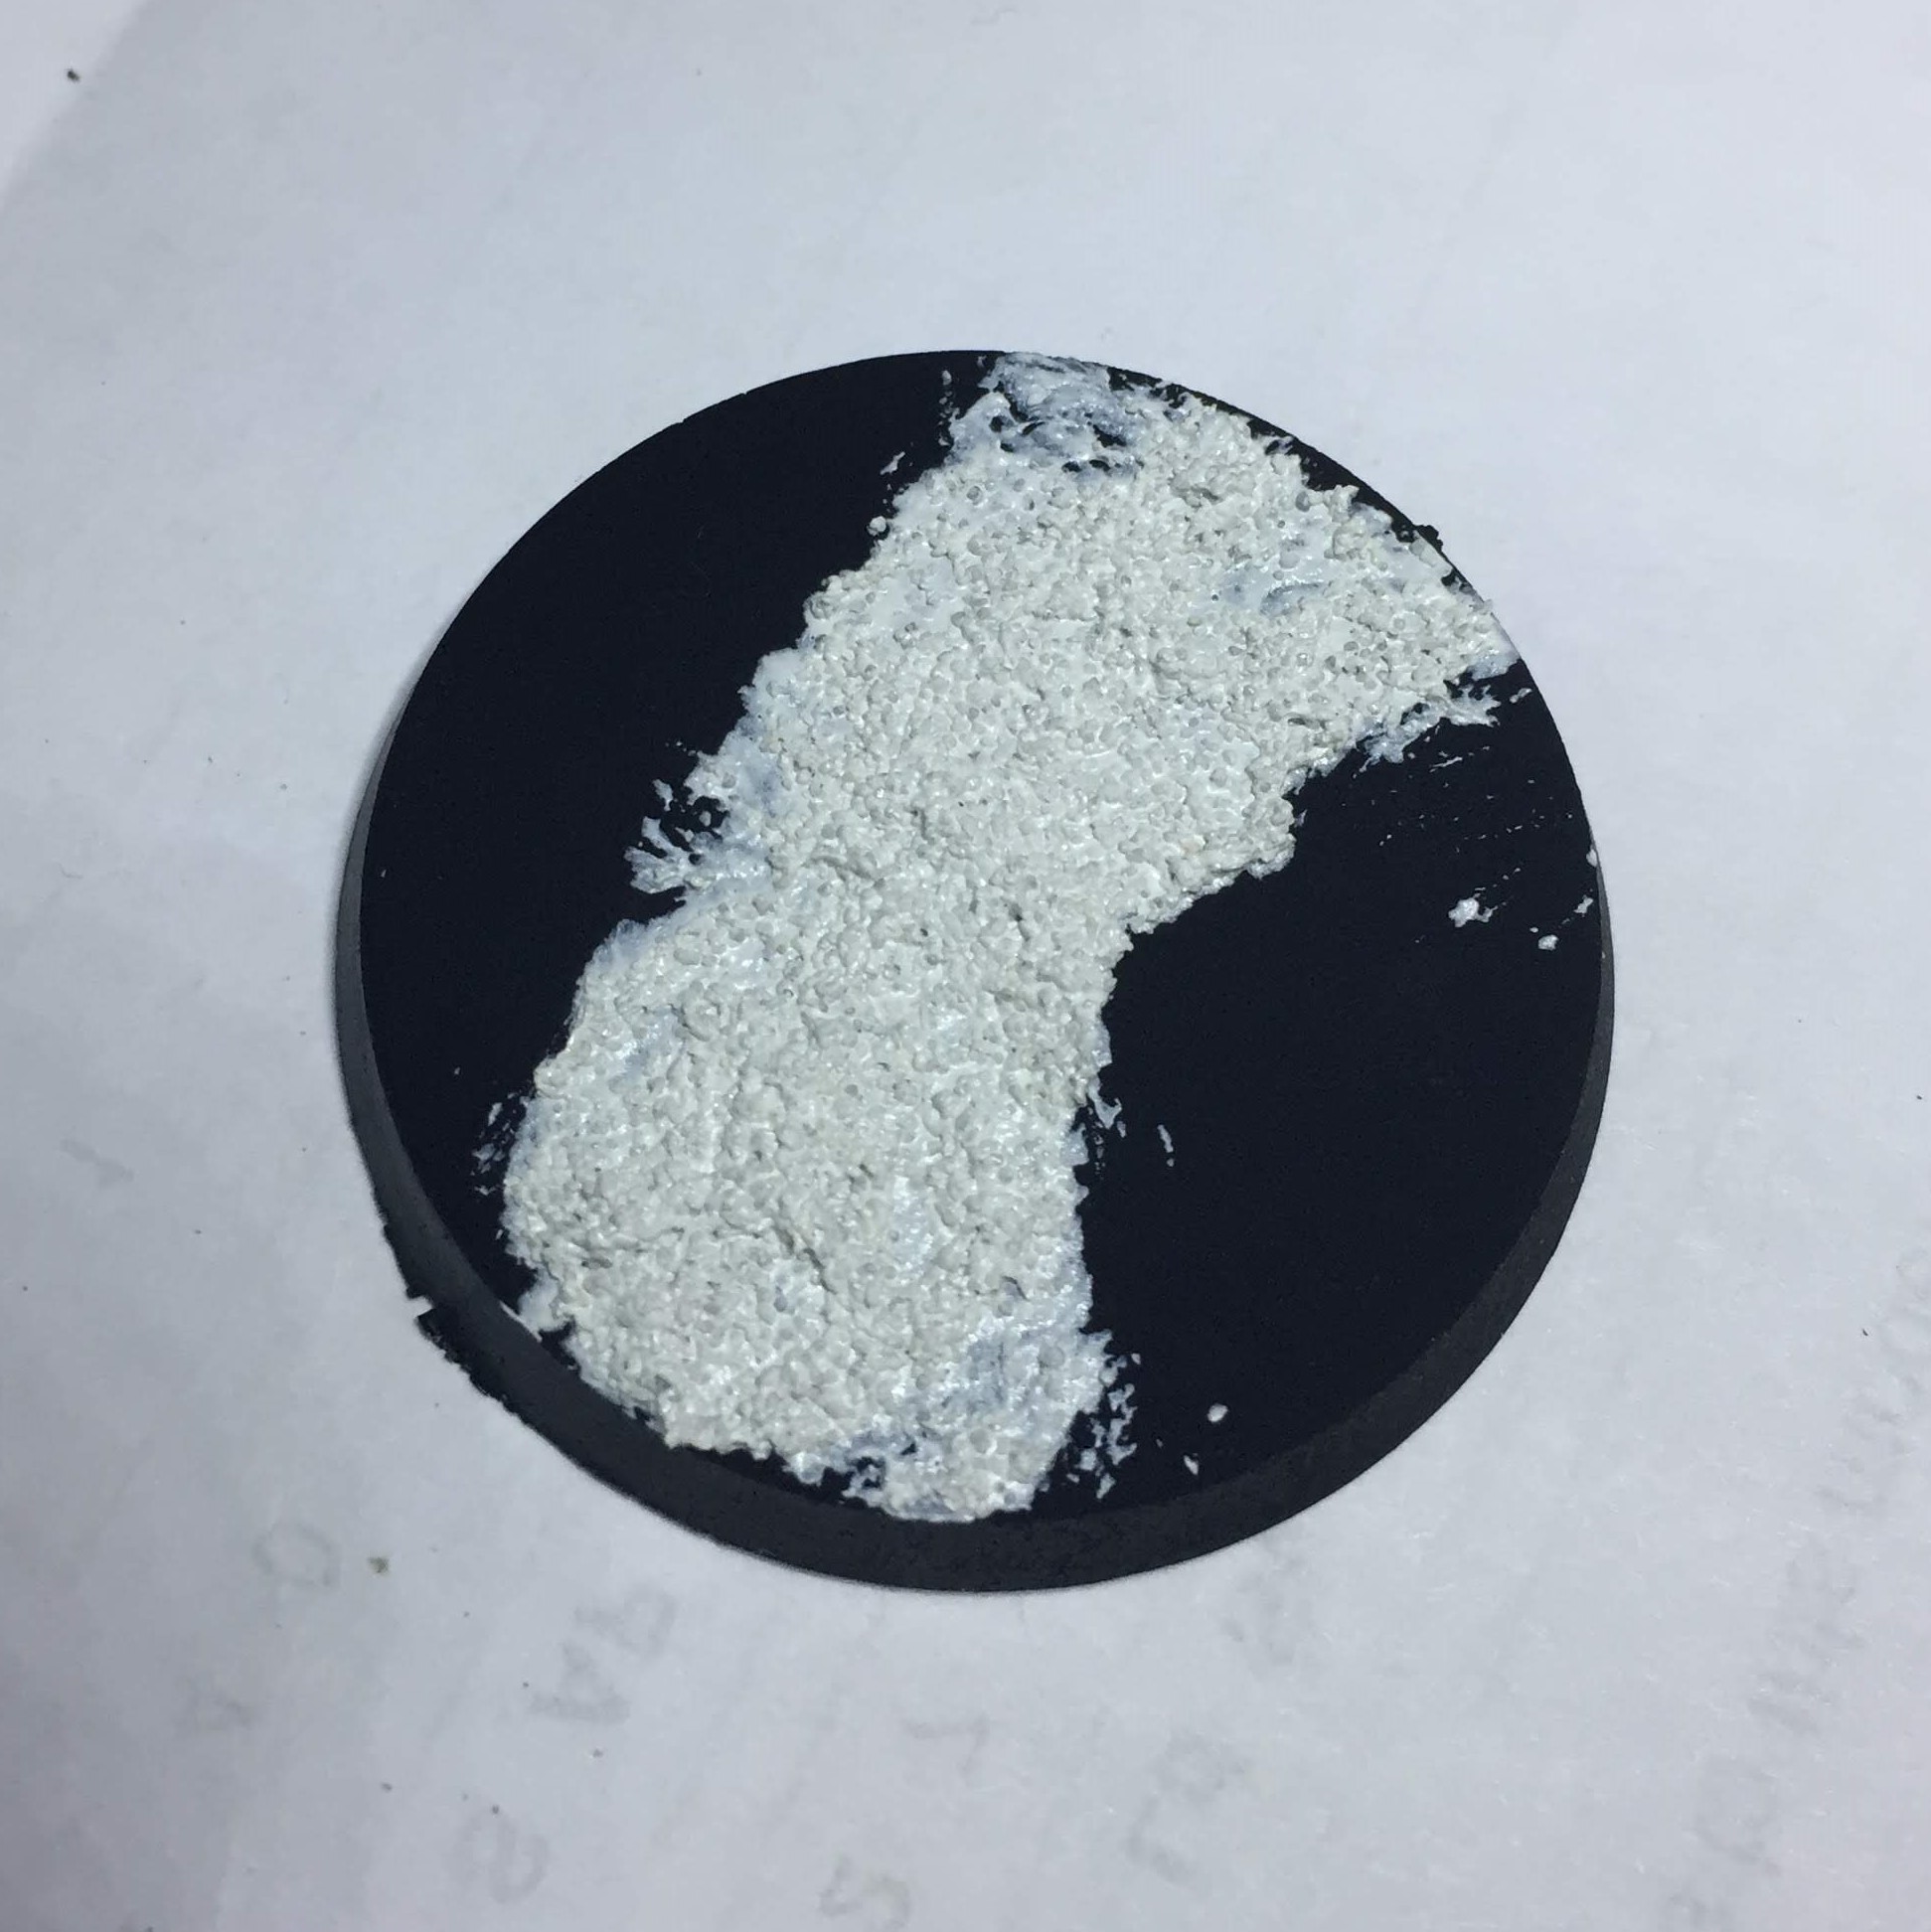 Vallejo Ground Texture (Rough White Pumice)
Here’s the colours / technique I tried to use :
Mud:
VGC Beasty Brown
VMC Flat Earth – heavy drybrush
Terminatus Stone – drybrush
Pools:
(old GW) Rotting Flesh (would be Nurgling Green now I think) mixed with some Steel Legion Drab
Stegadon Scale Green mixed with Steel Legion Drab
Then (tried) to wet blend the two colours.
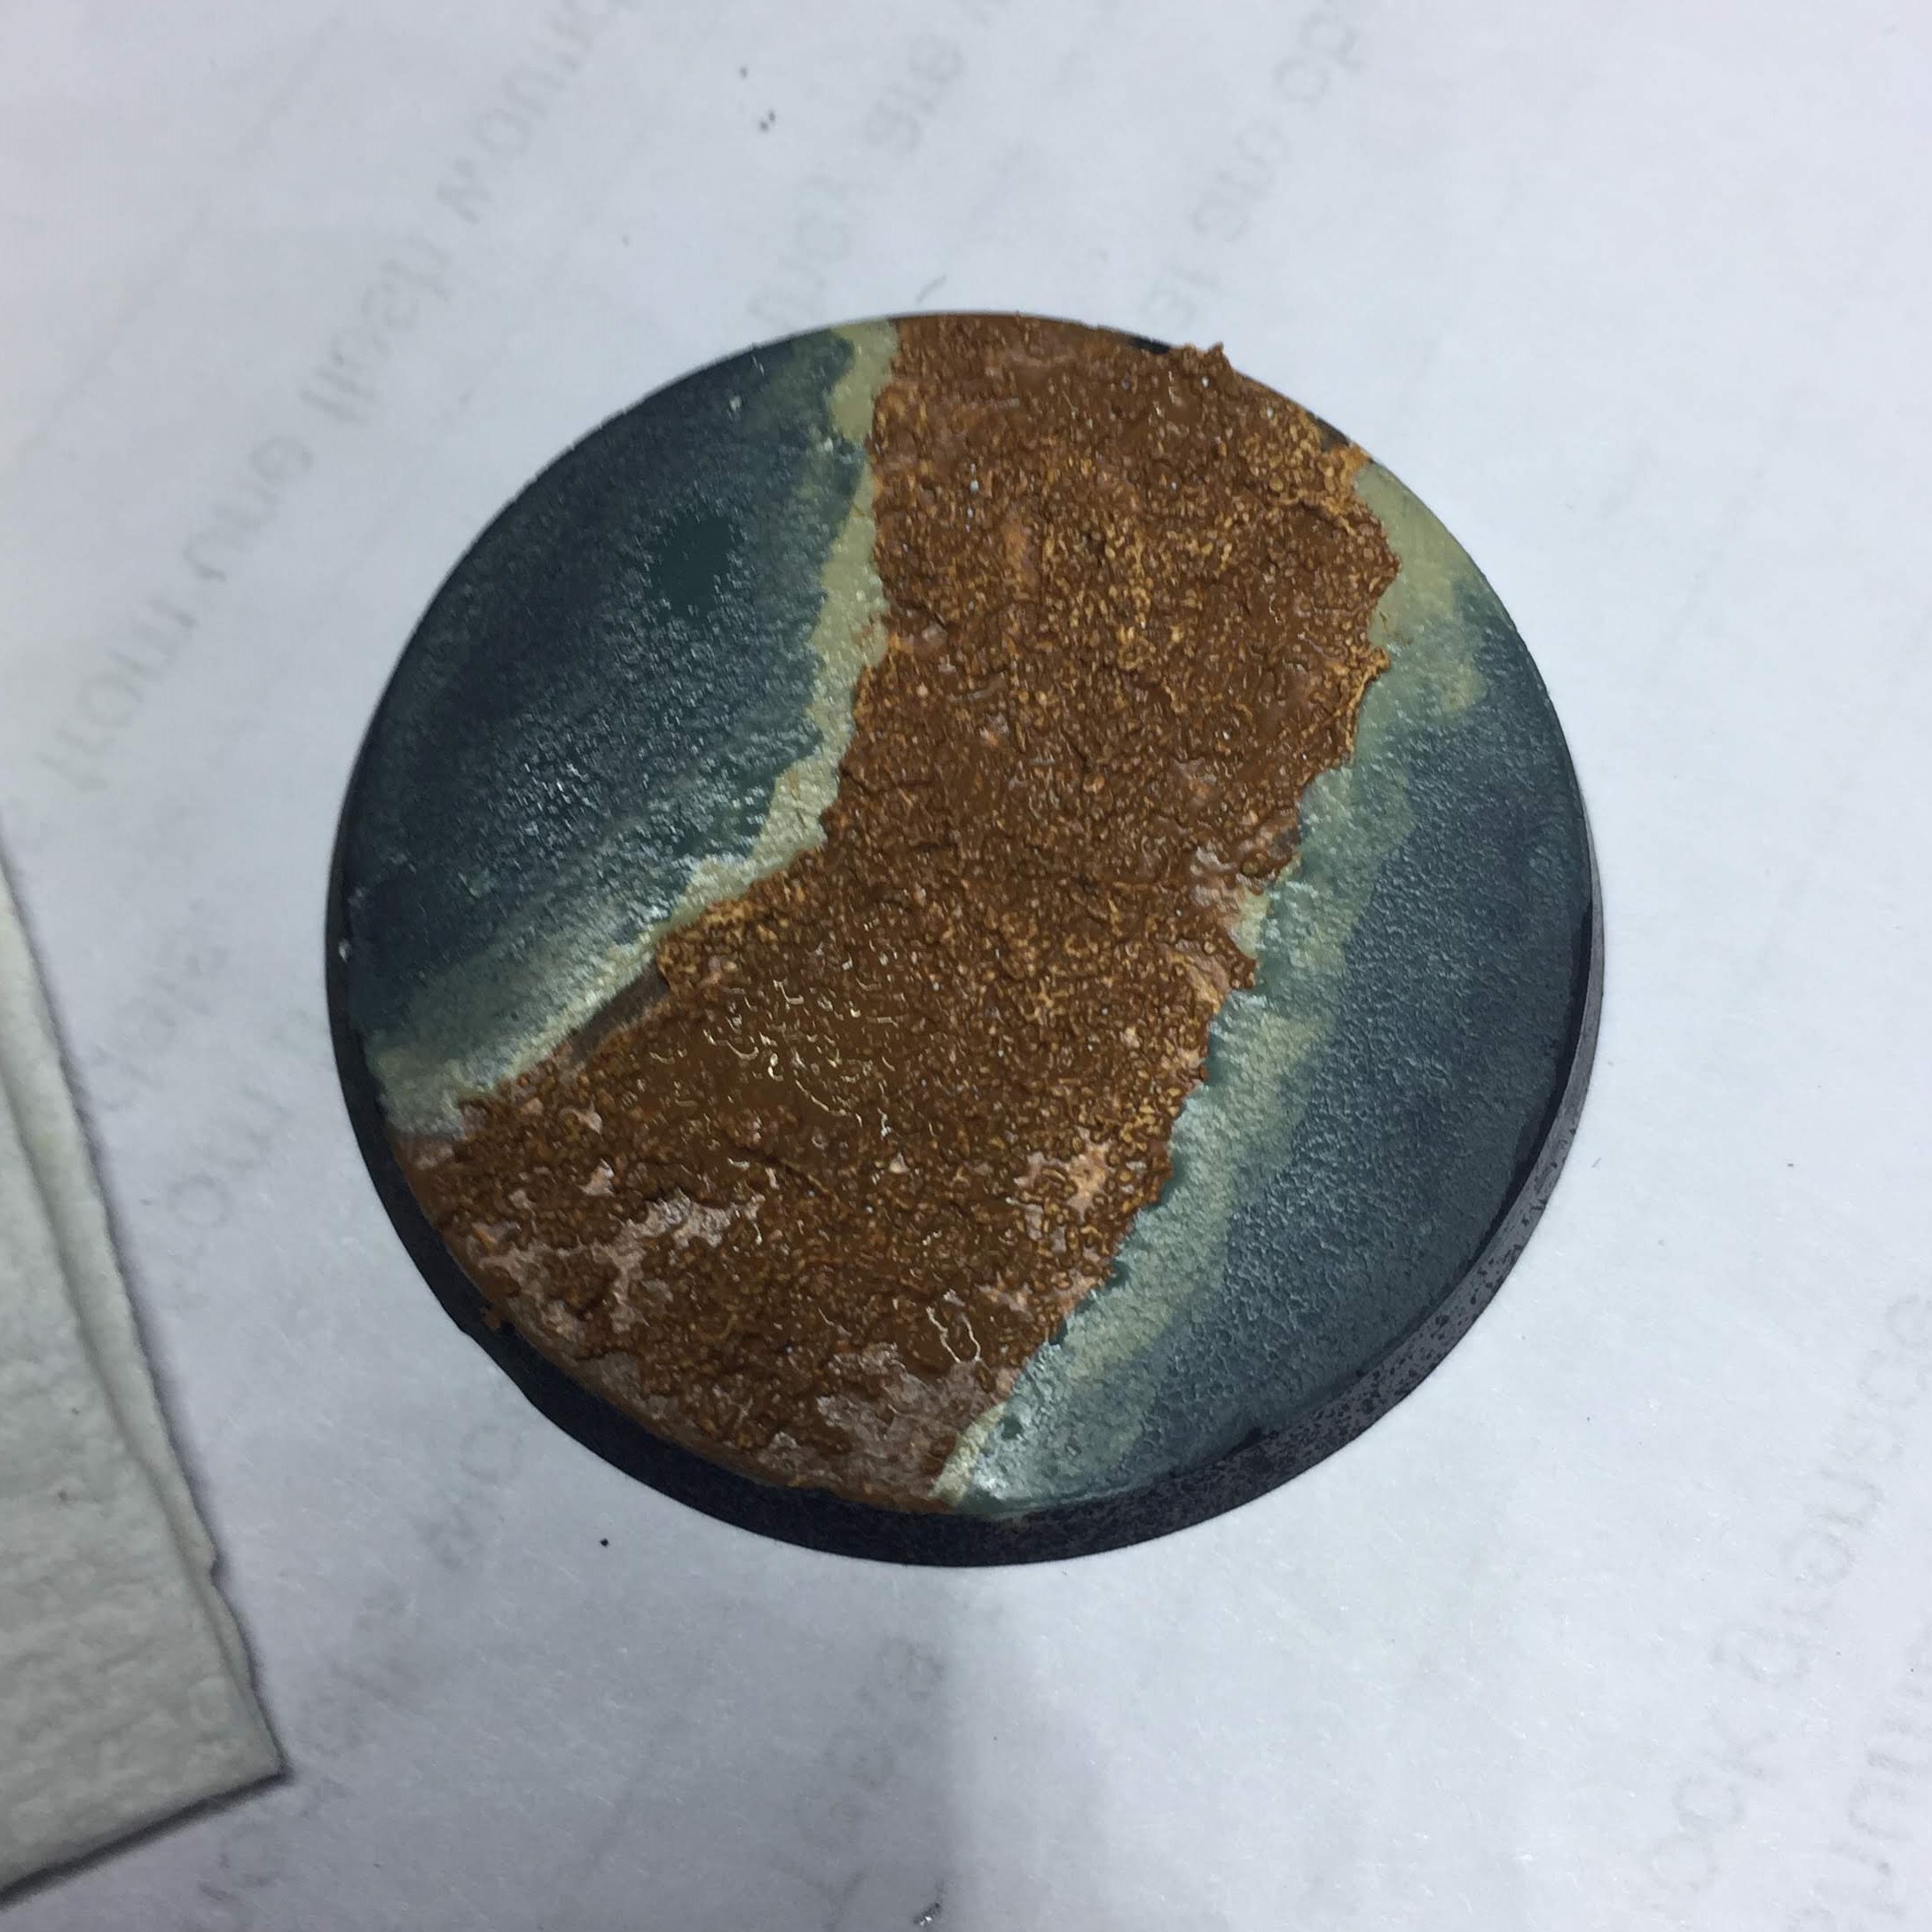 Base colours added
Next step was a wash of Agrax Earthshade all over (but avoid too much or pooling on the watery bits).
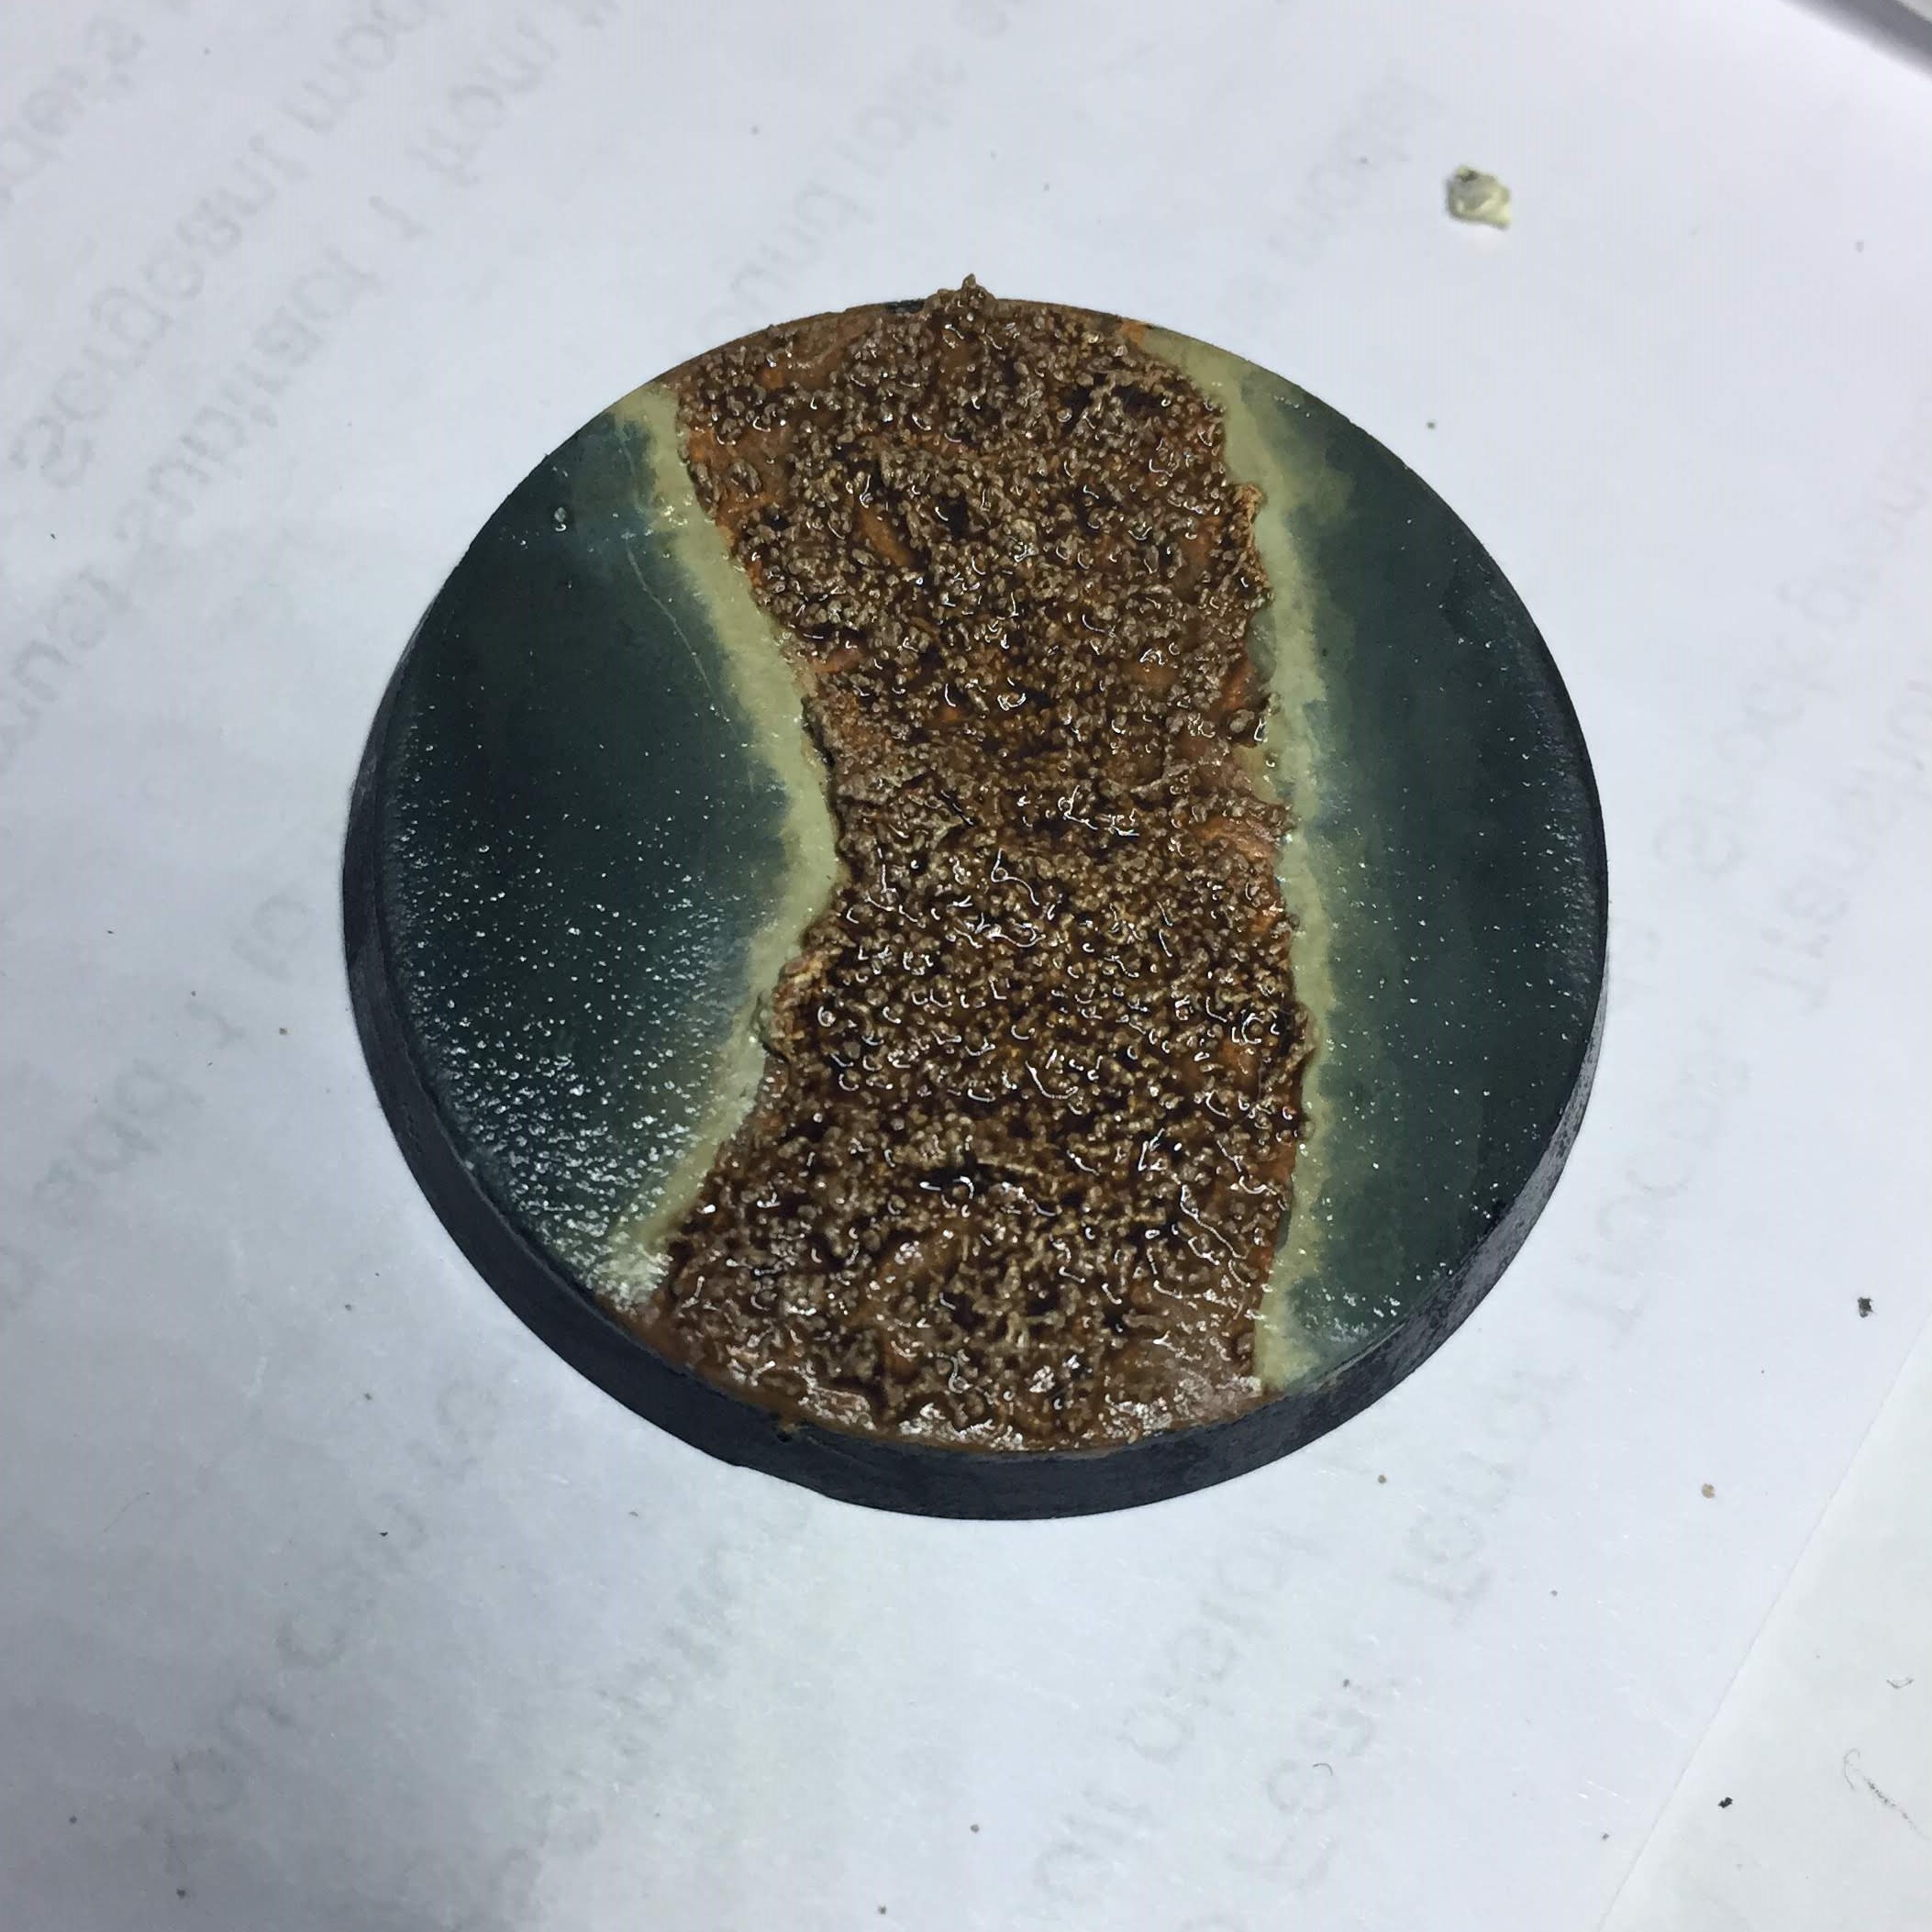 Agrax Earthshade all over (still wet in photo!)
Final step when everything is try was to add some realistic water. It sort of seeped on to the mud bits but in the end that doesn’t look to bad I think. Adds something to it.
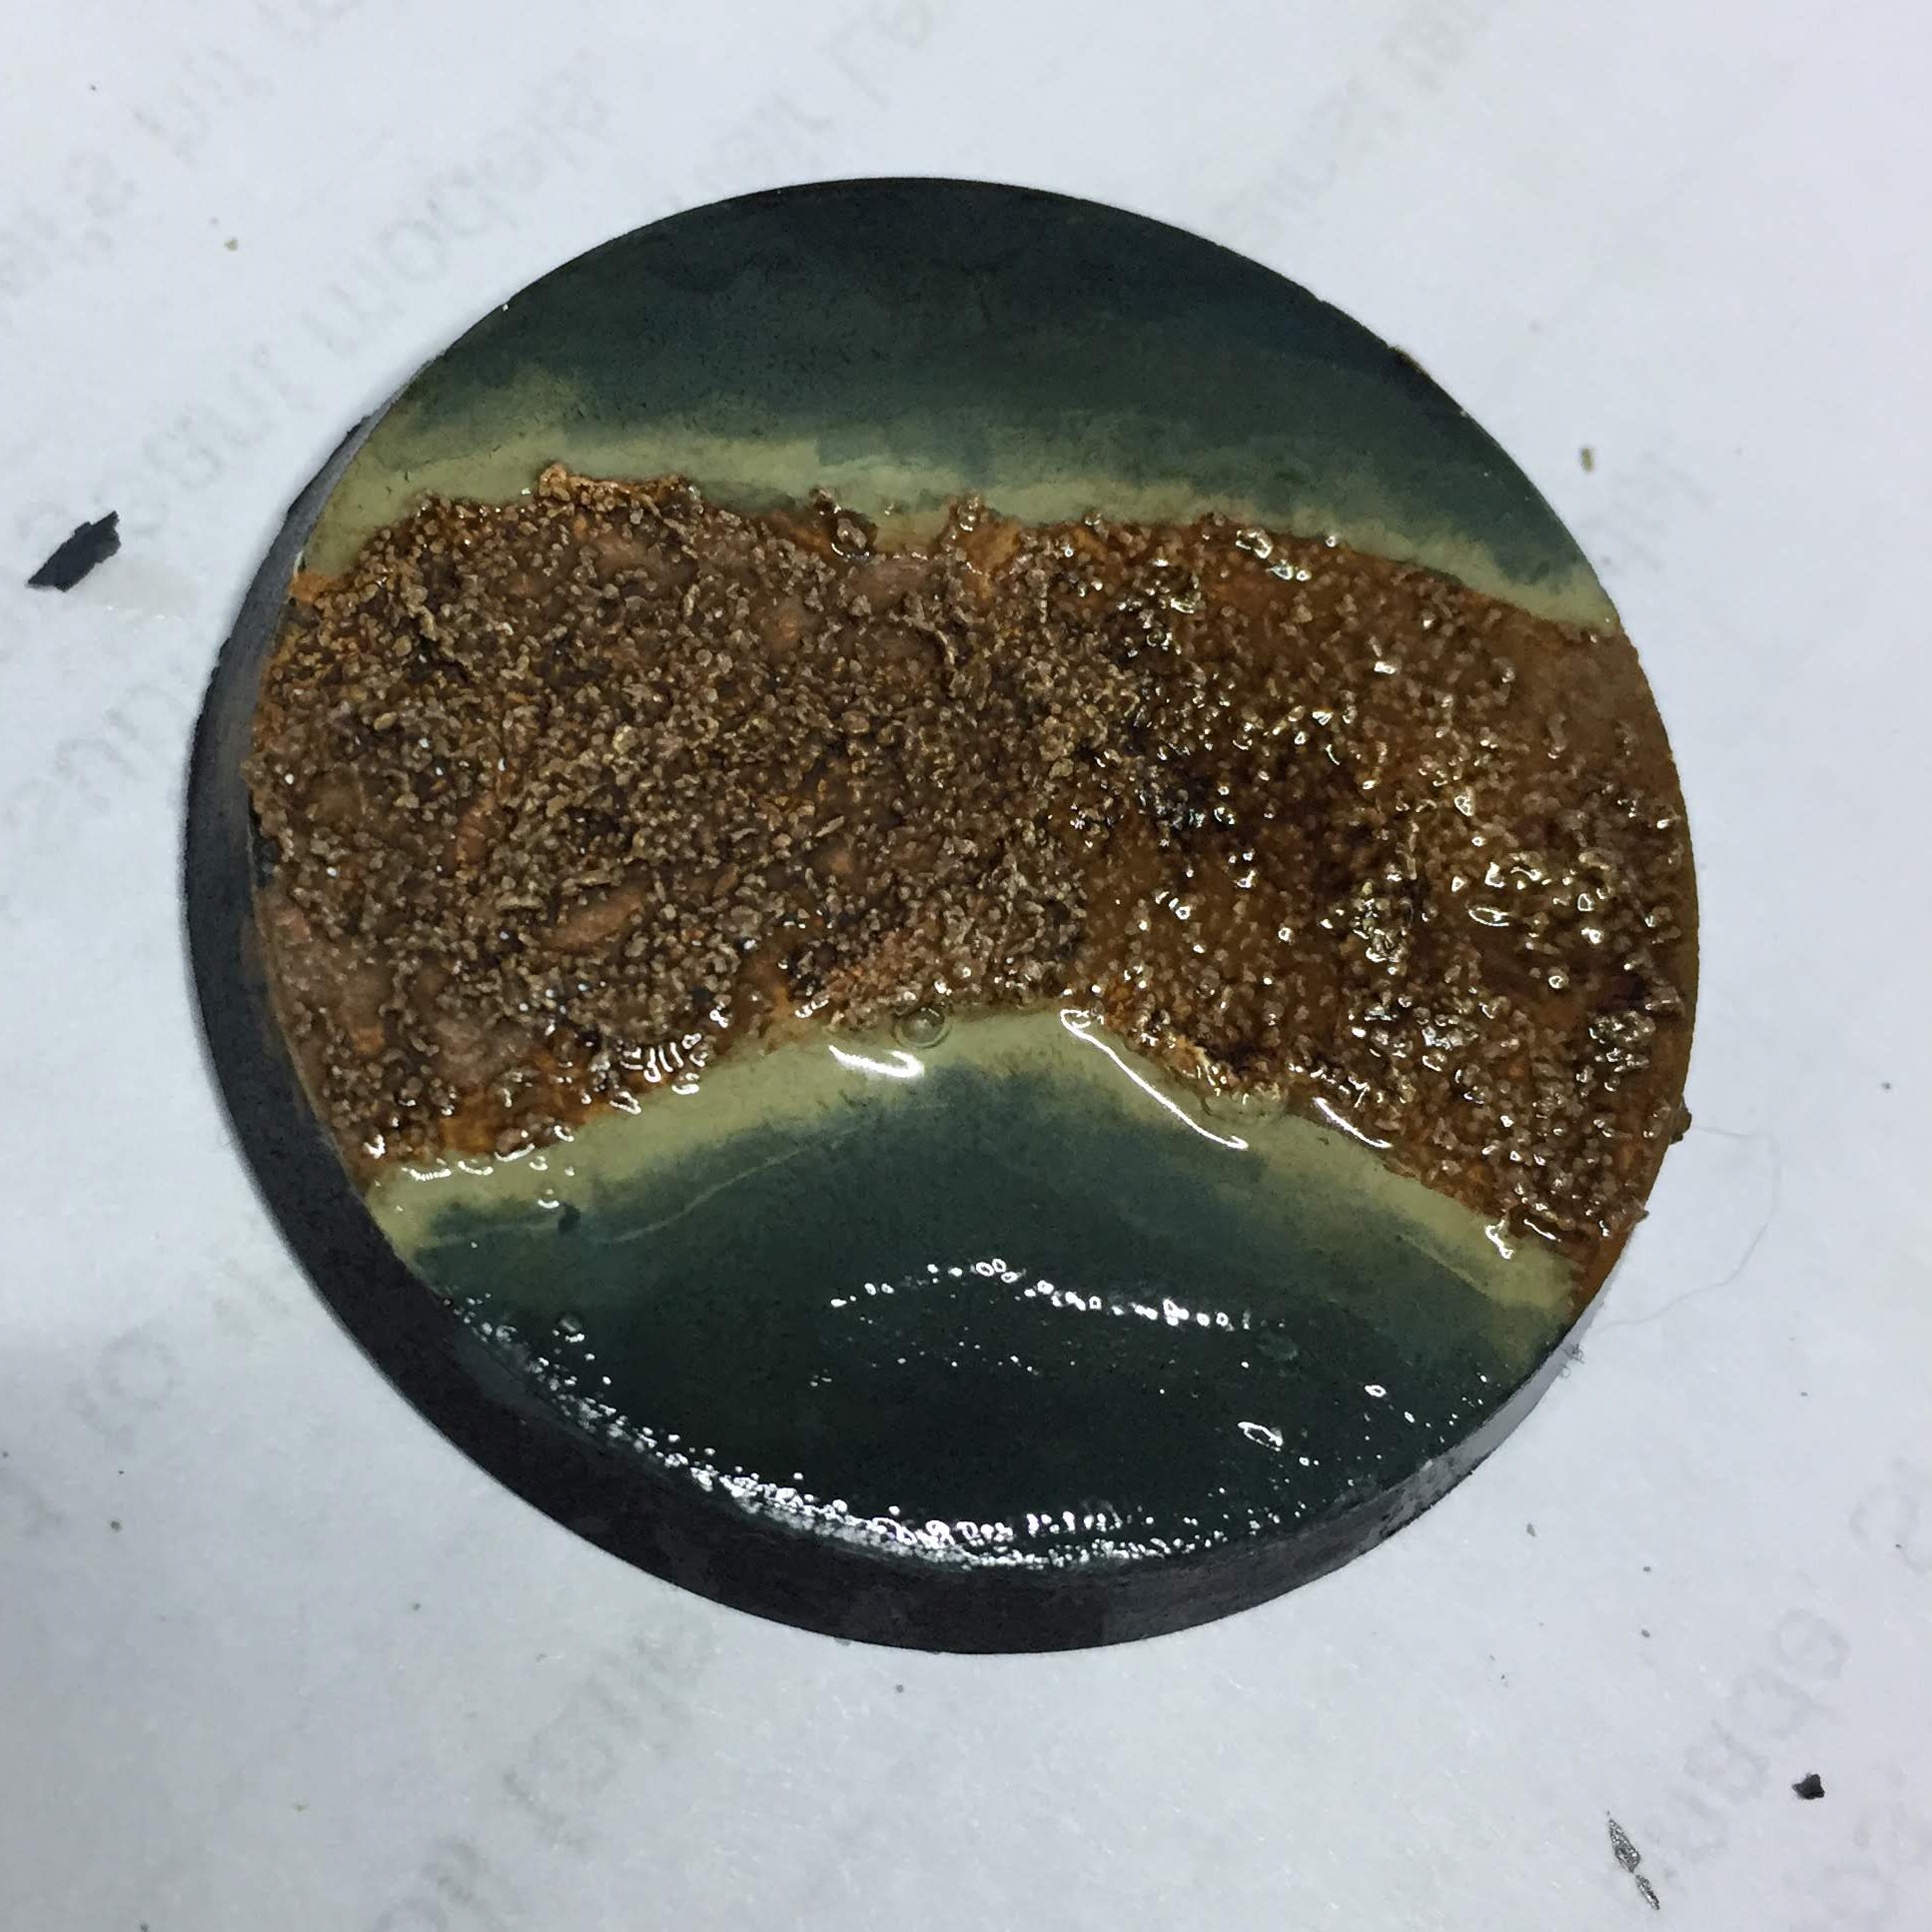 Woodland Scenics Realistic Water - few drops added
I think that’ll work out ok, especially when I’ve added rocks and foliage into the mix so I’ll give it a go…
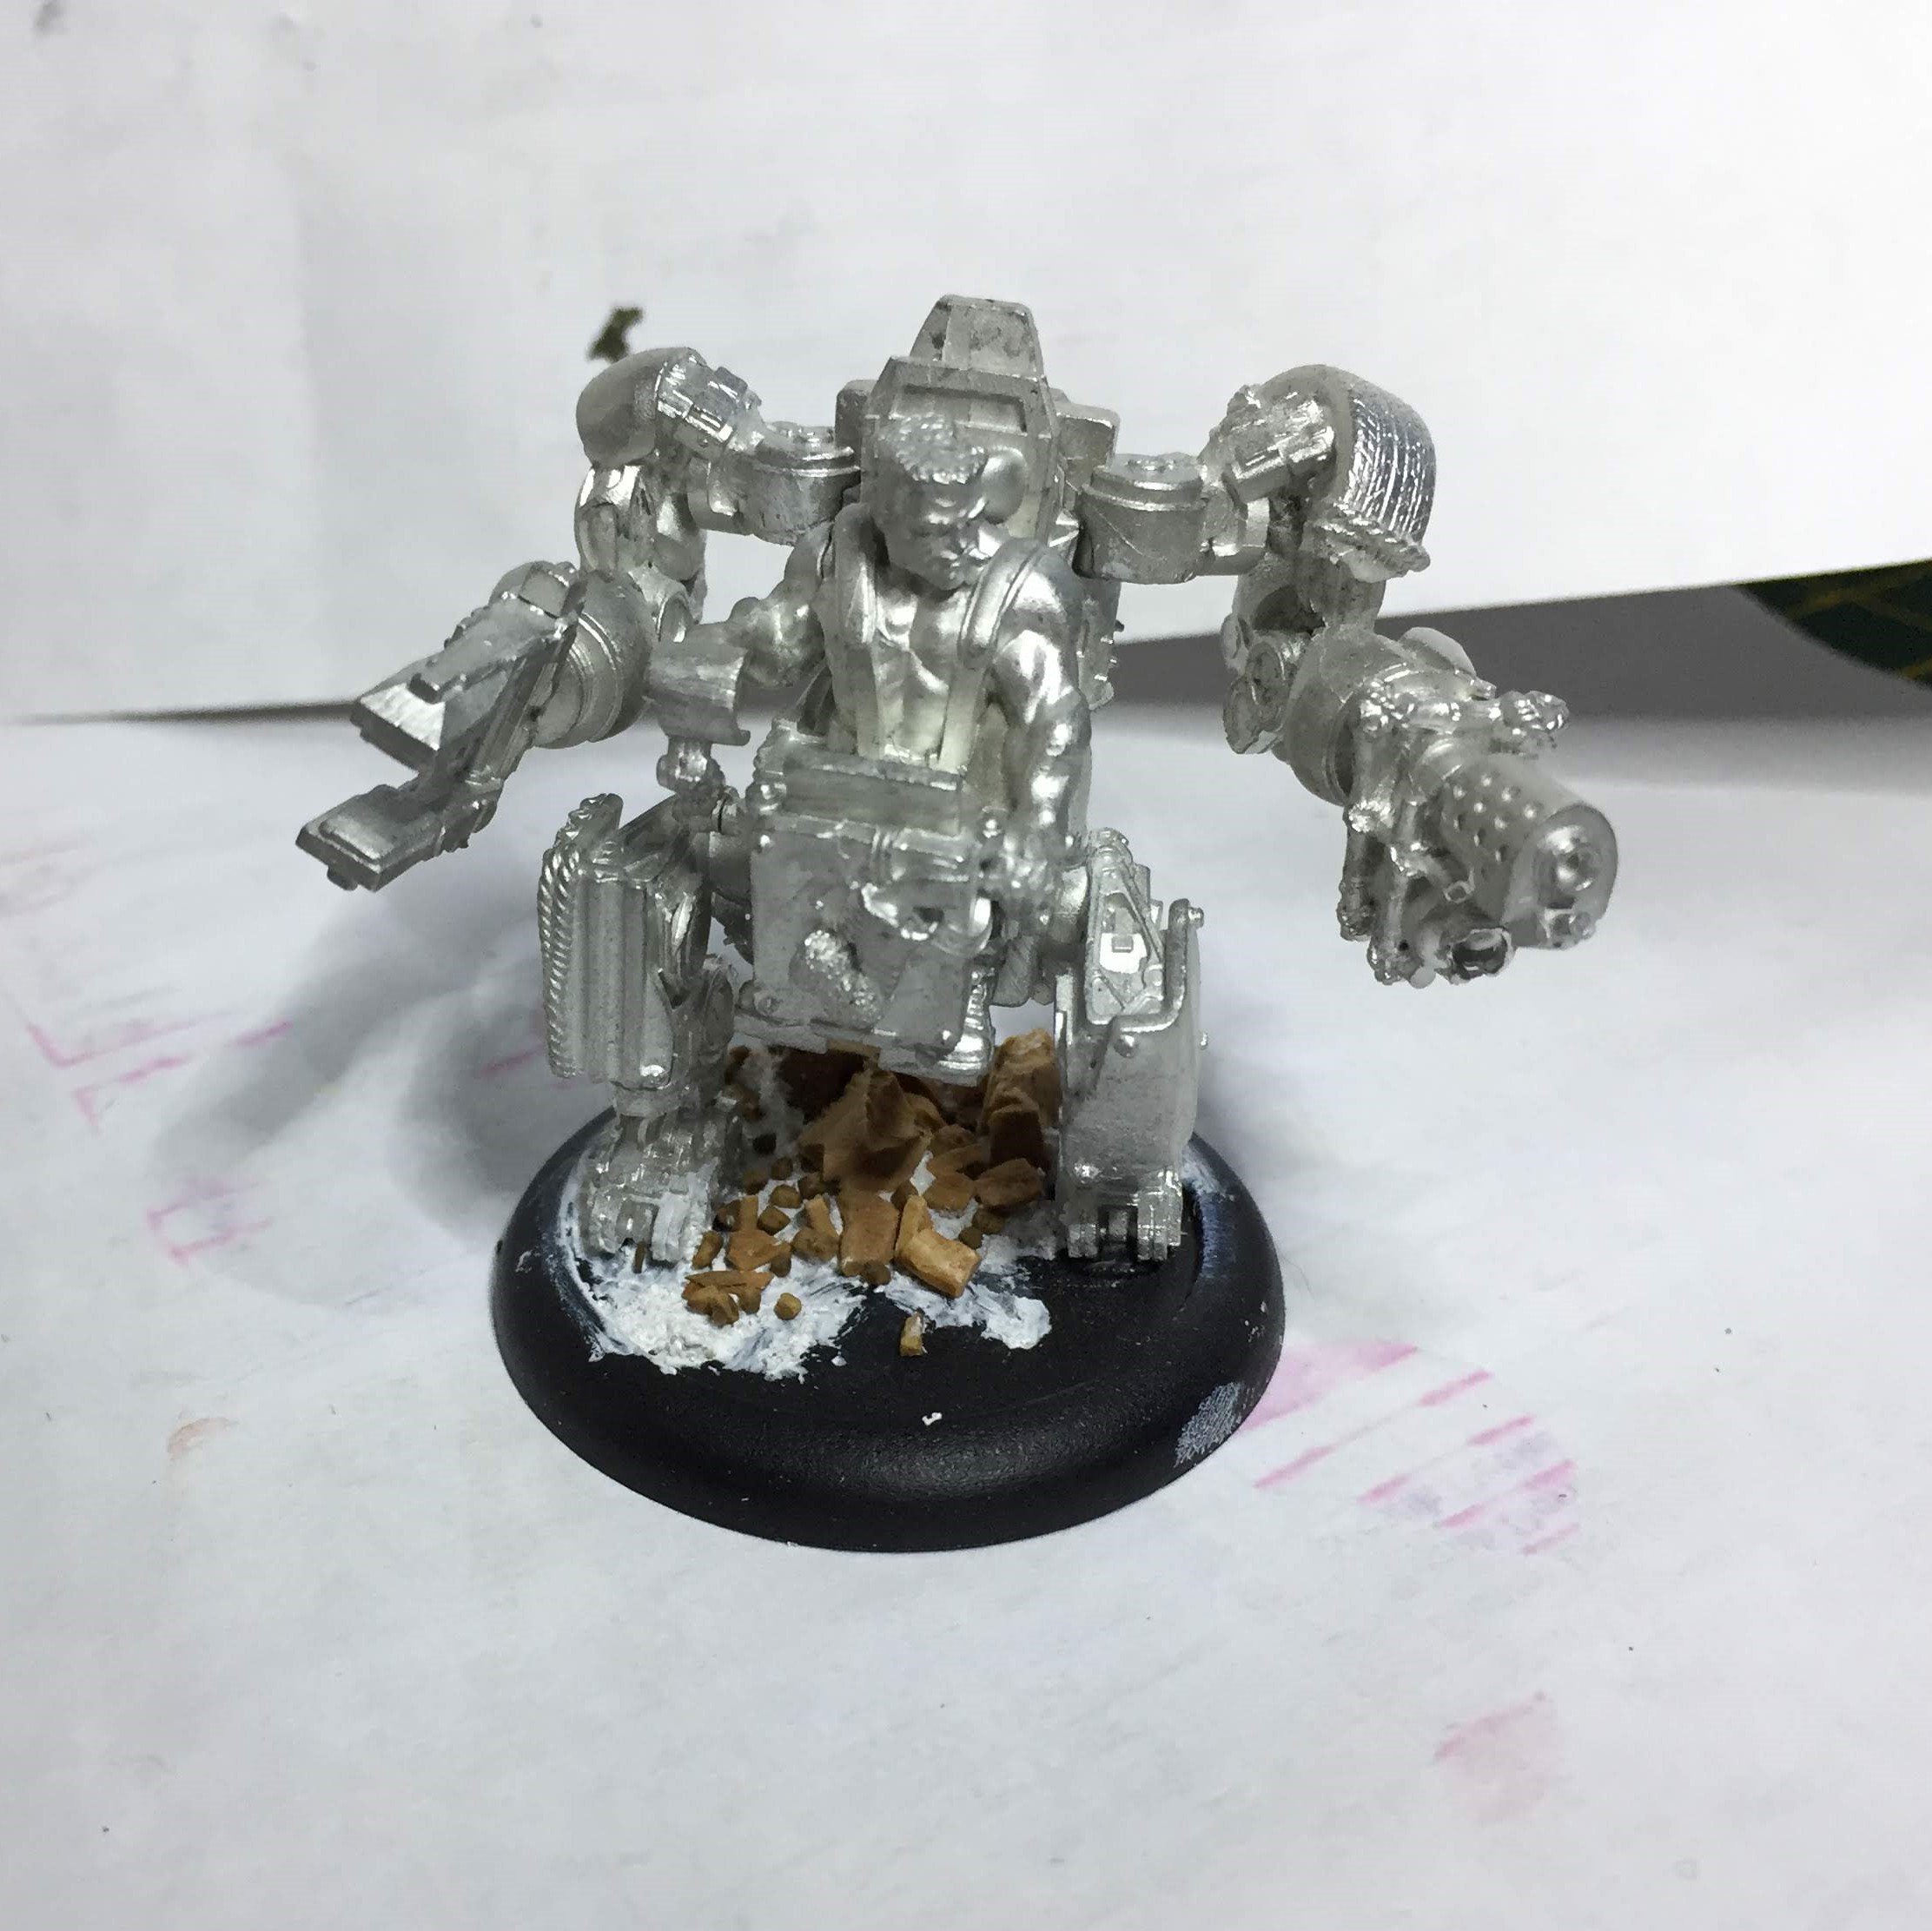
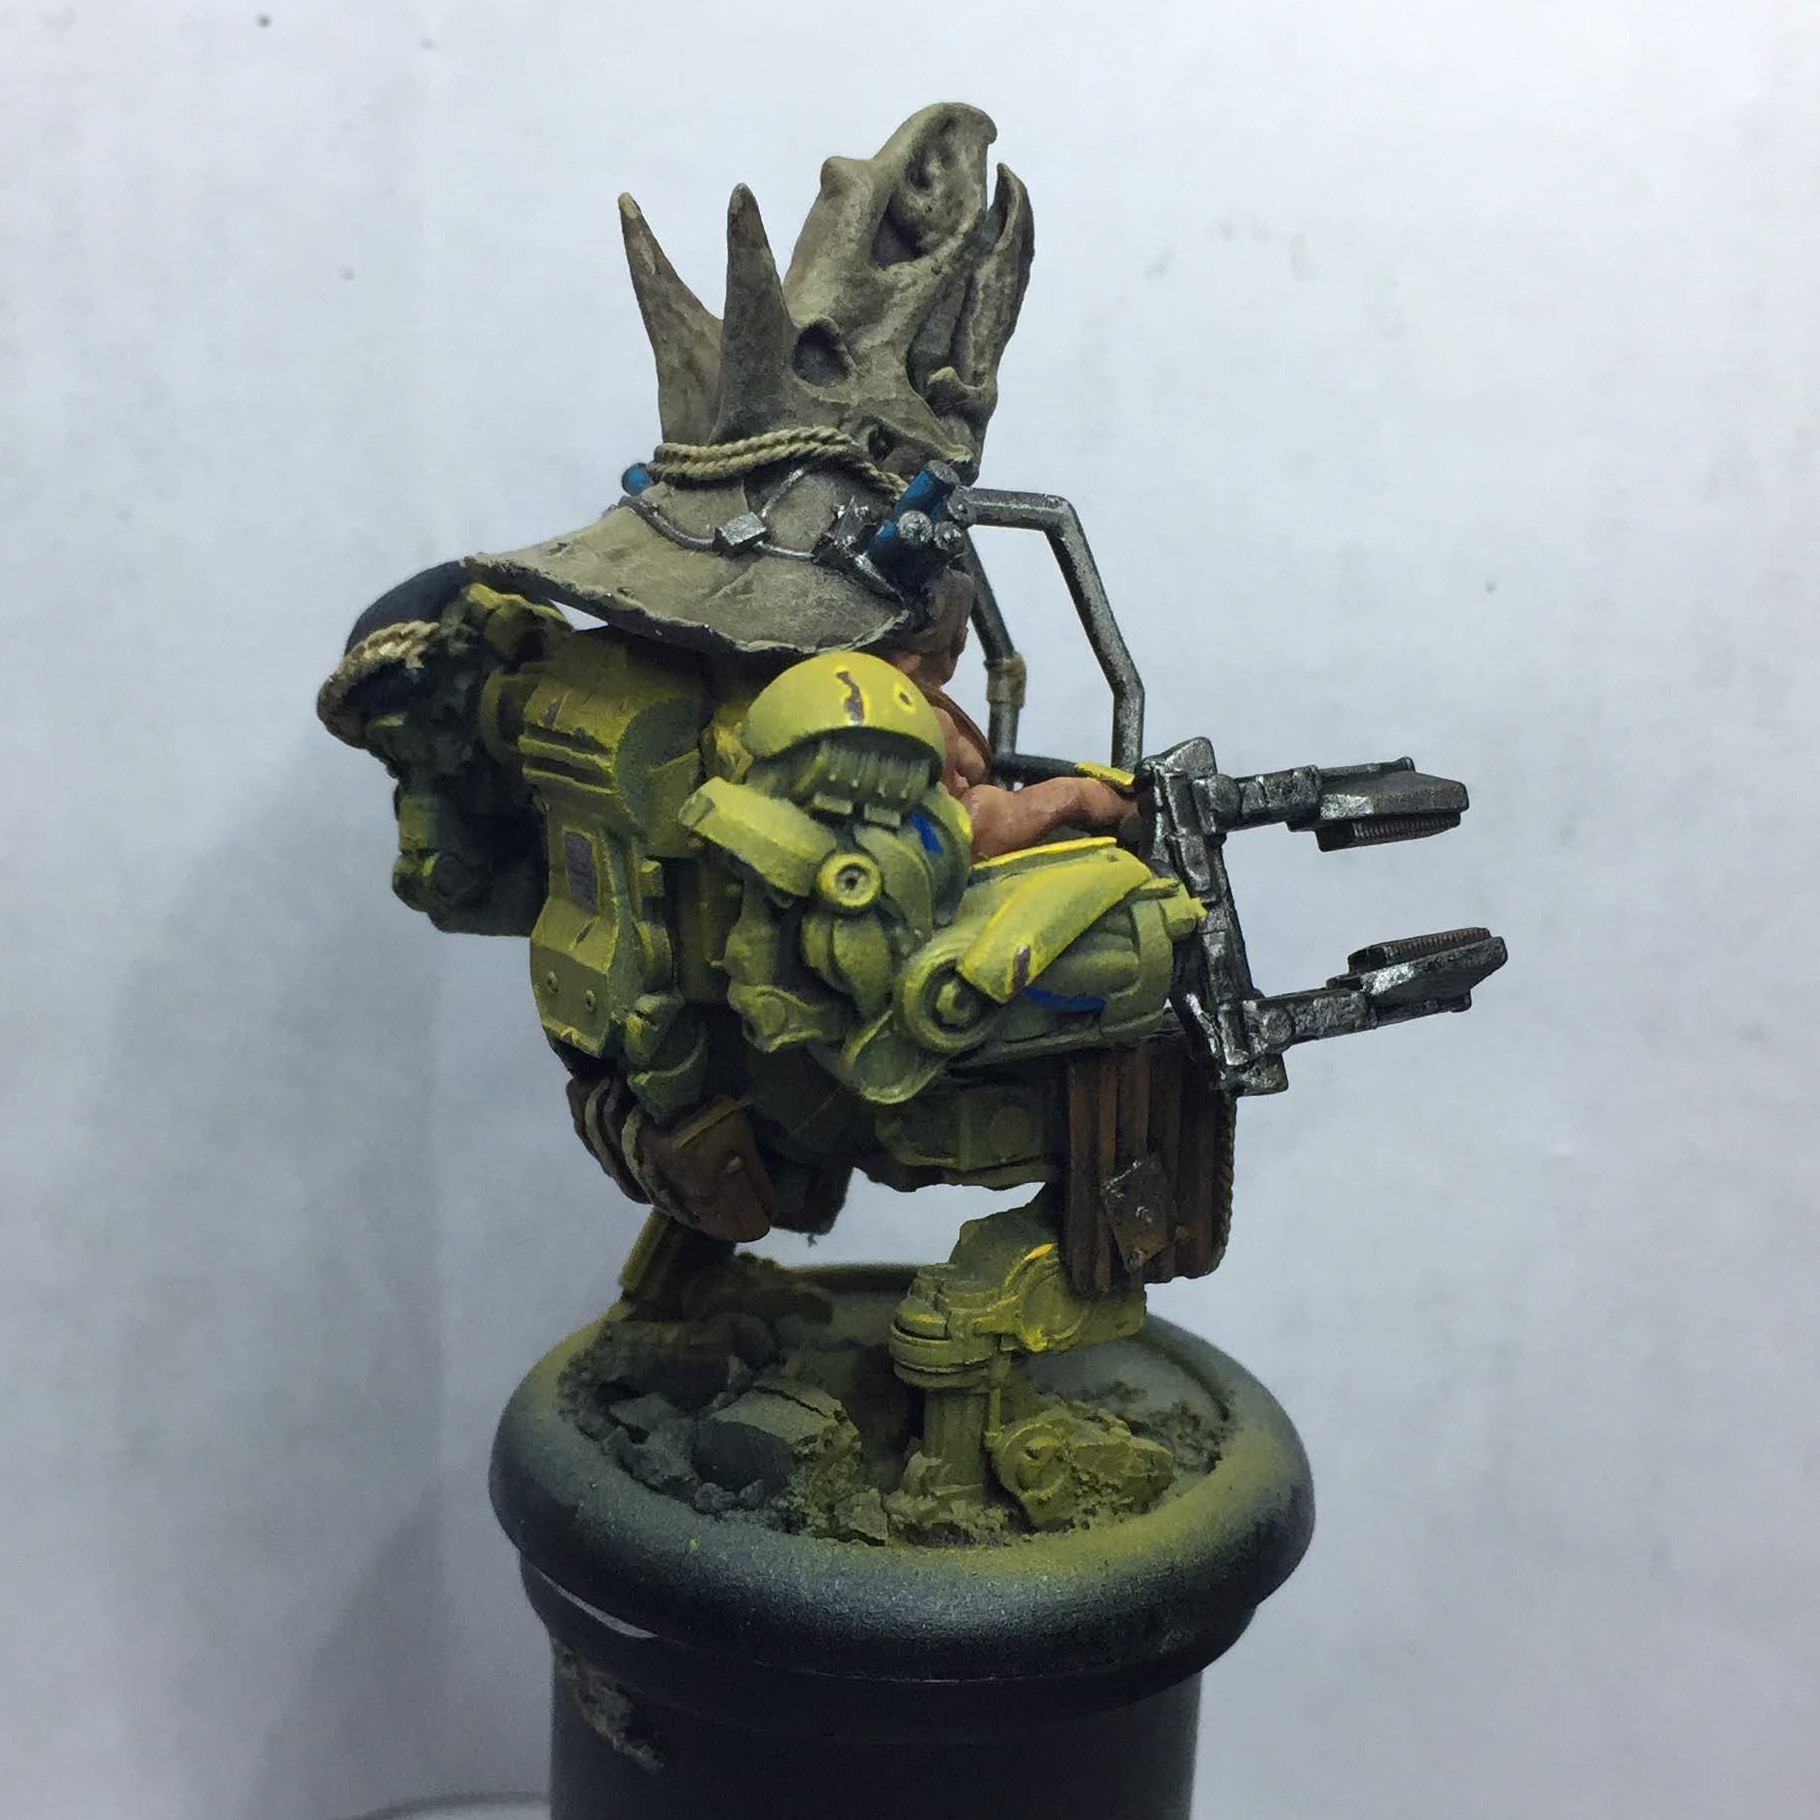
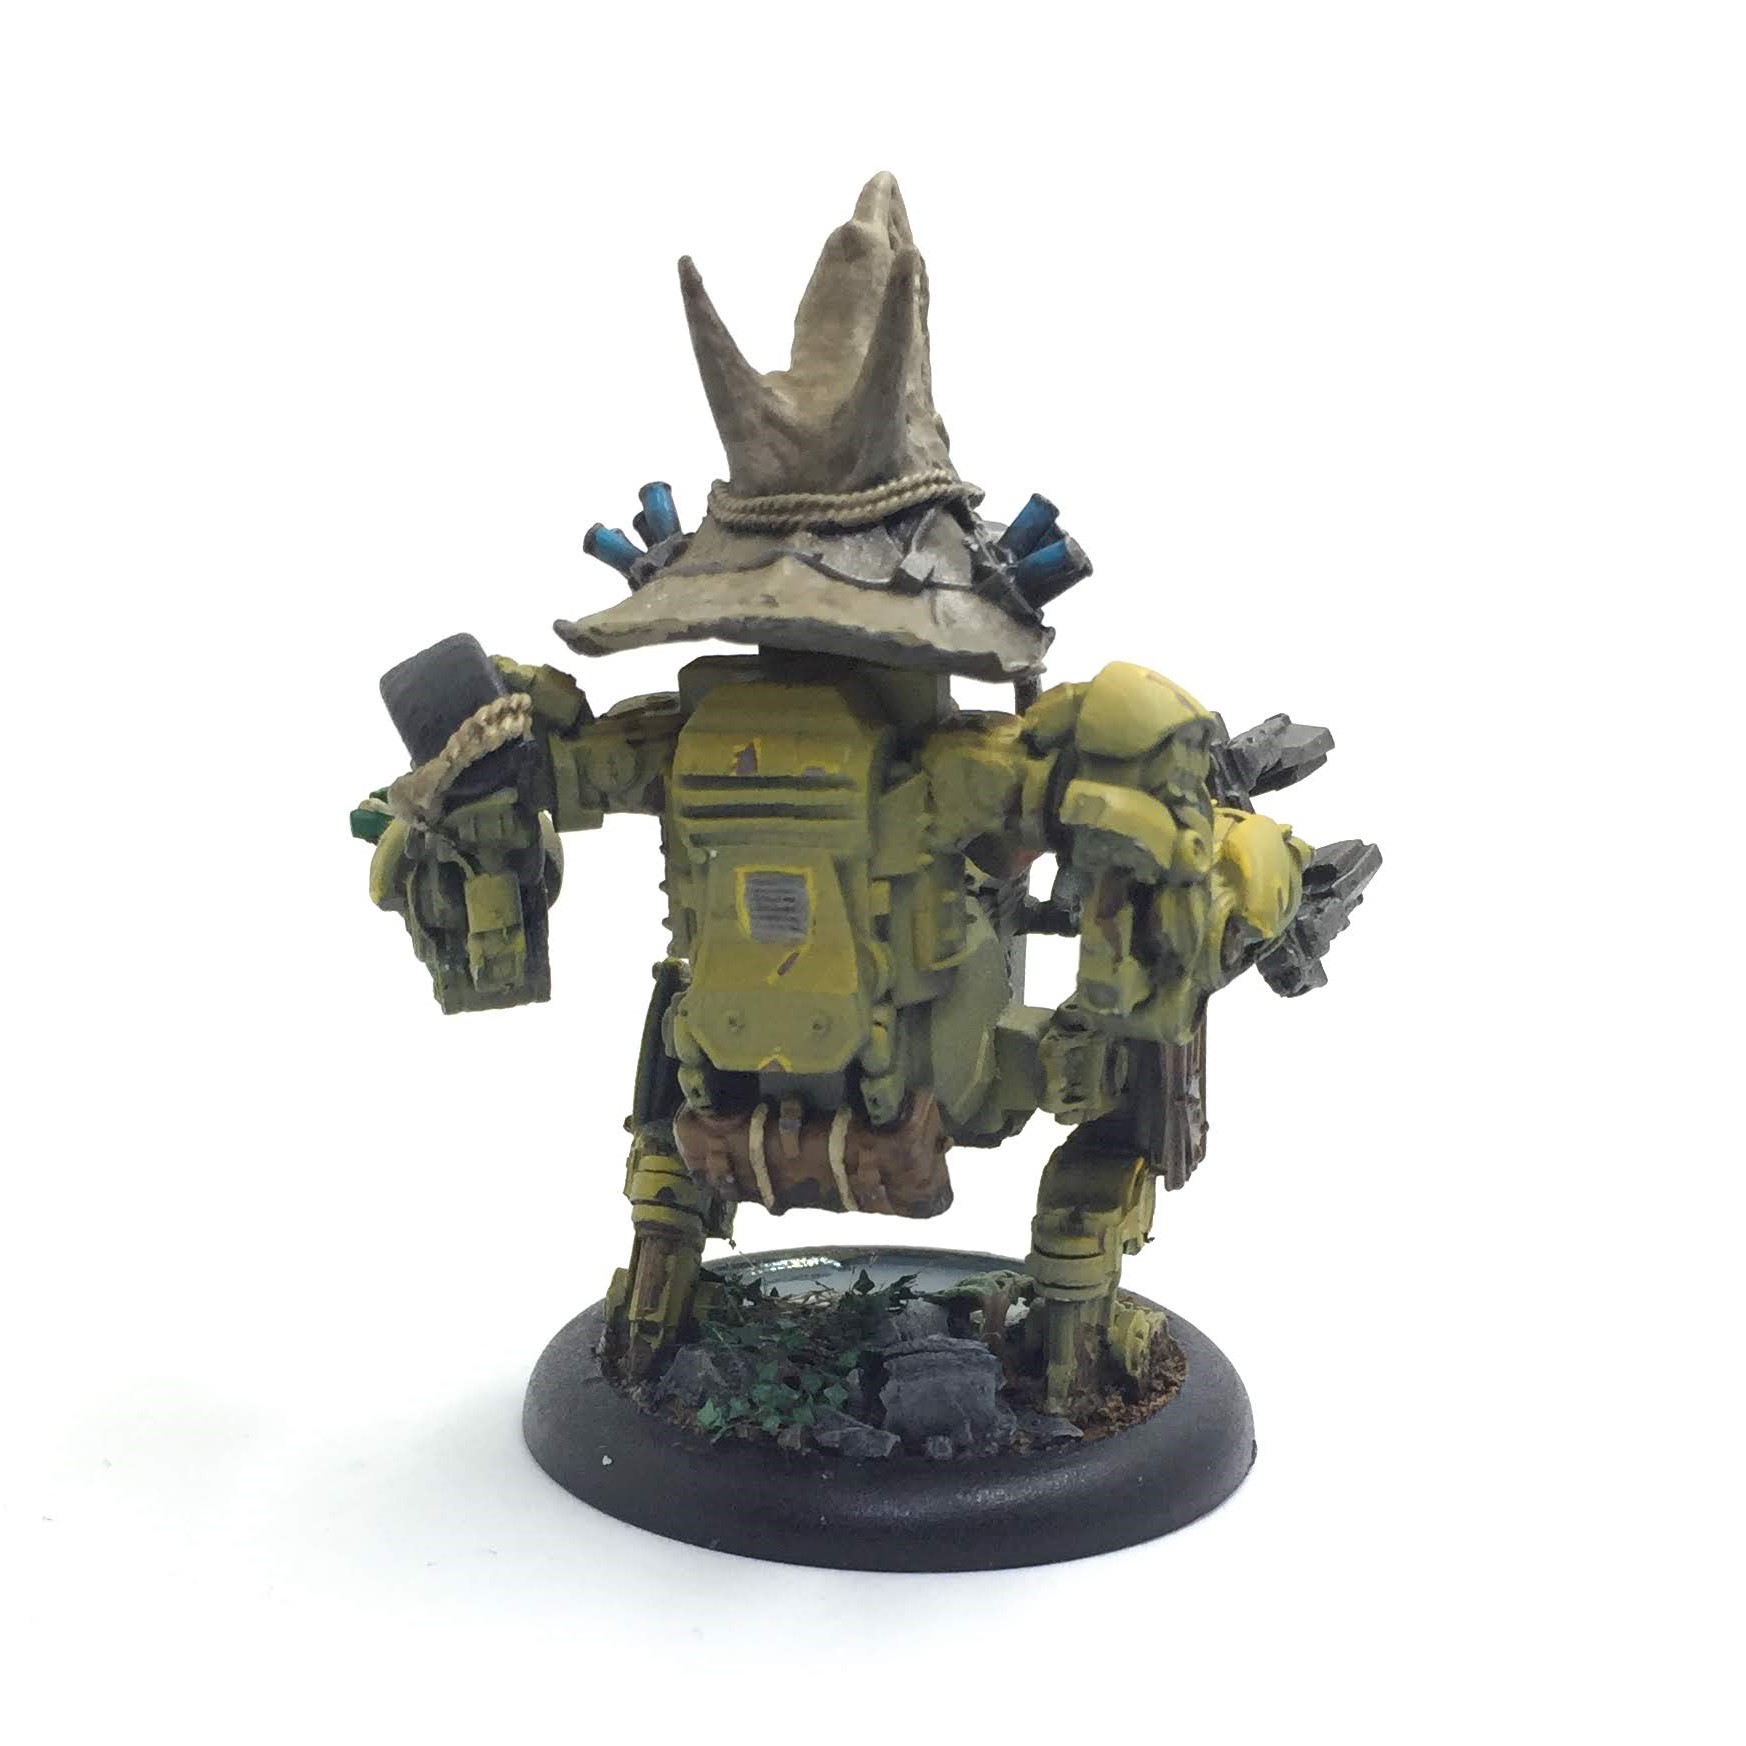
Forek (Mounted) - step by step (ish)
I’ve tried to capture some steps as I did them when building / painting the mounted version of Forek.
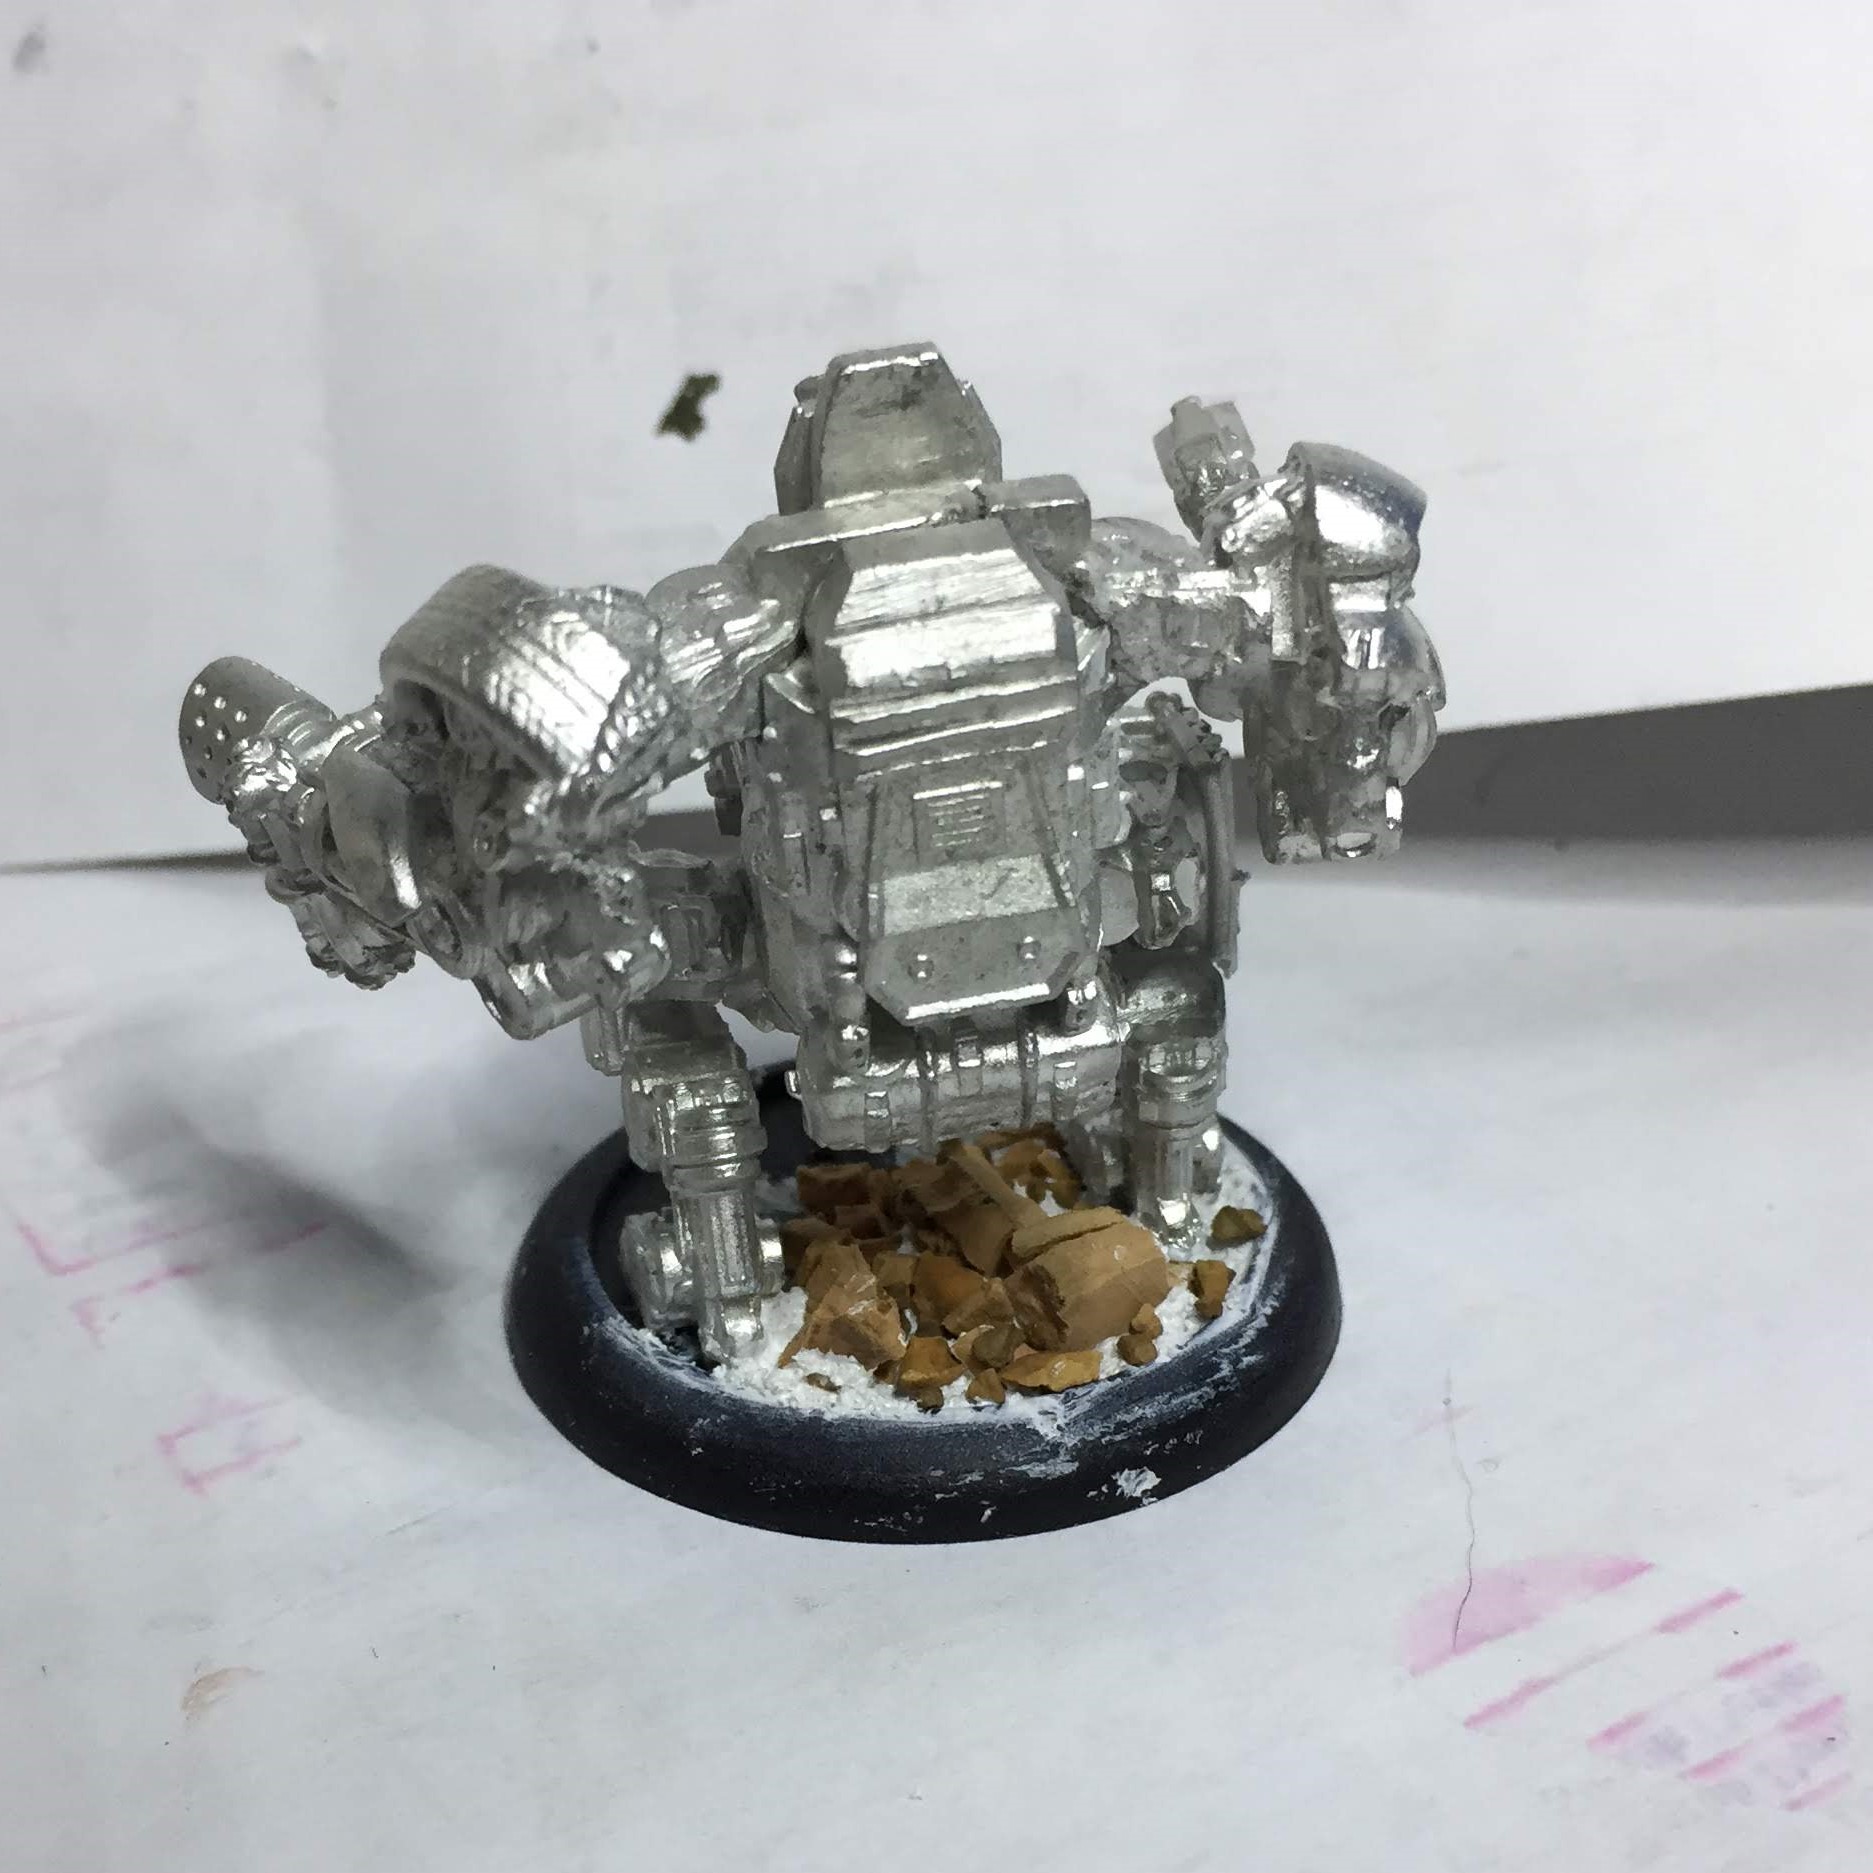
Step 1 – build the main model and added texture/cork to base (as per rest of the faction).
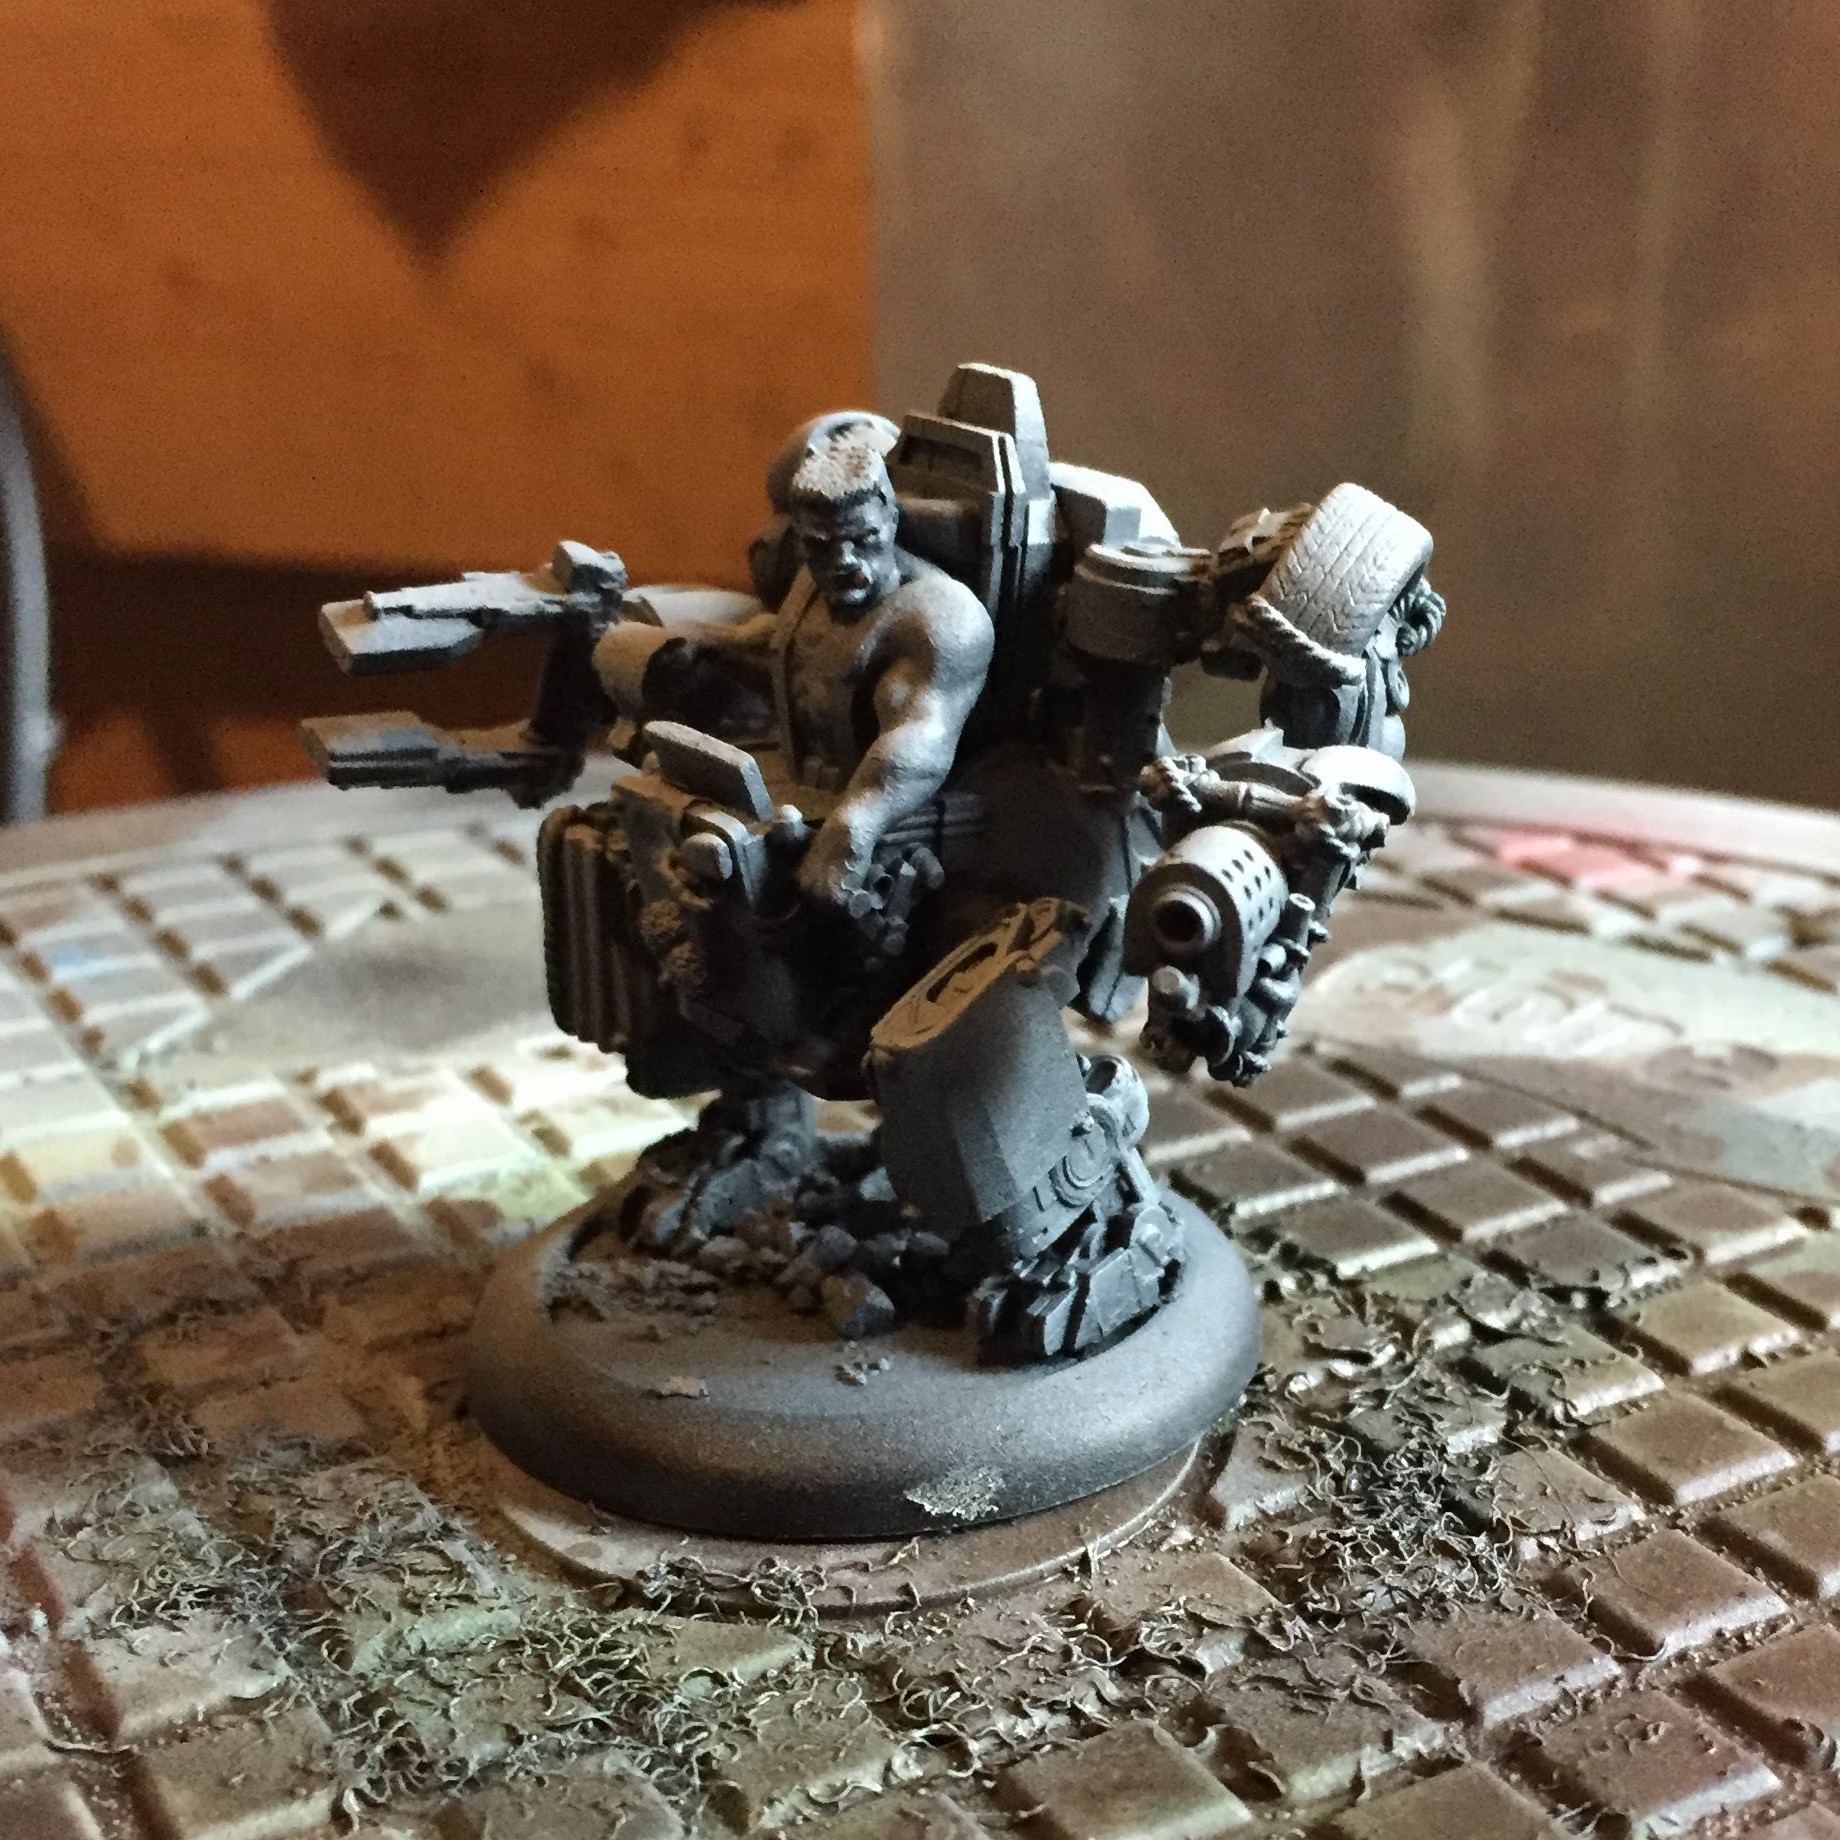
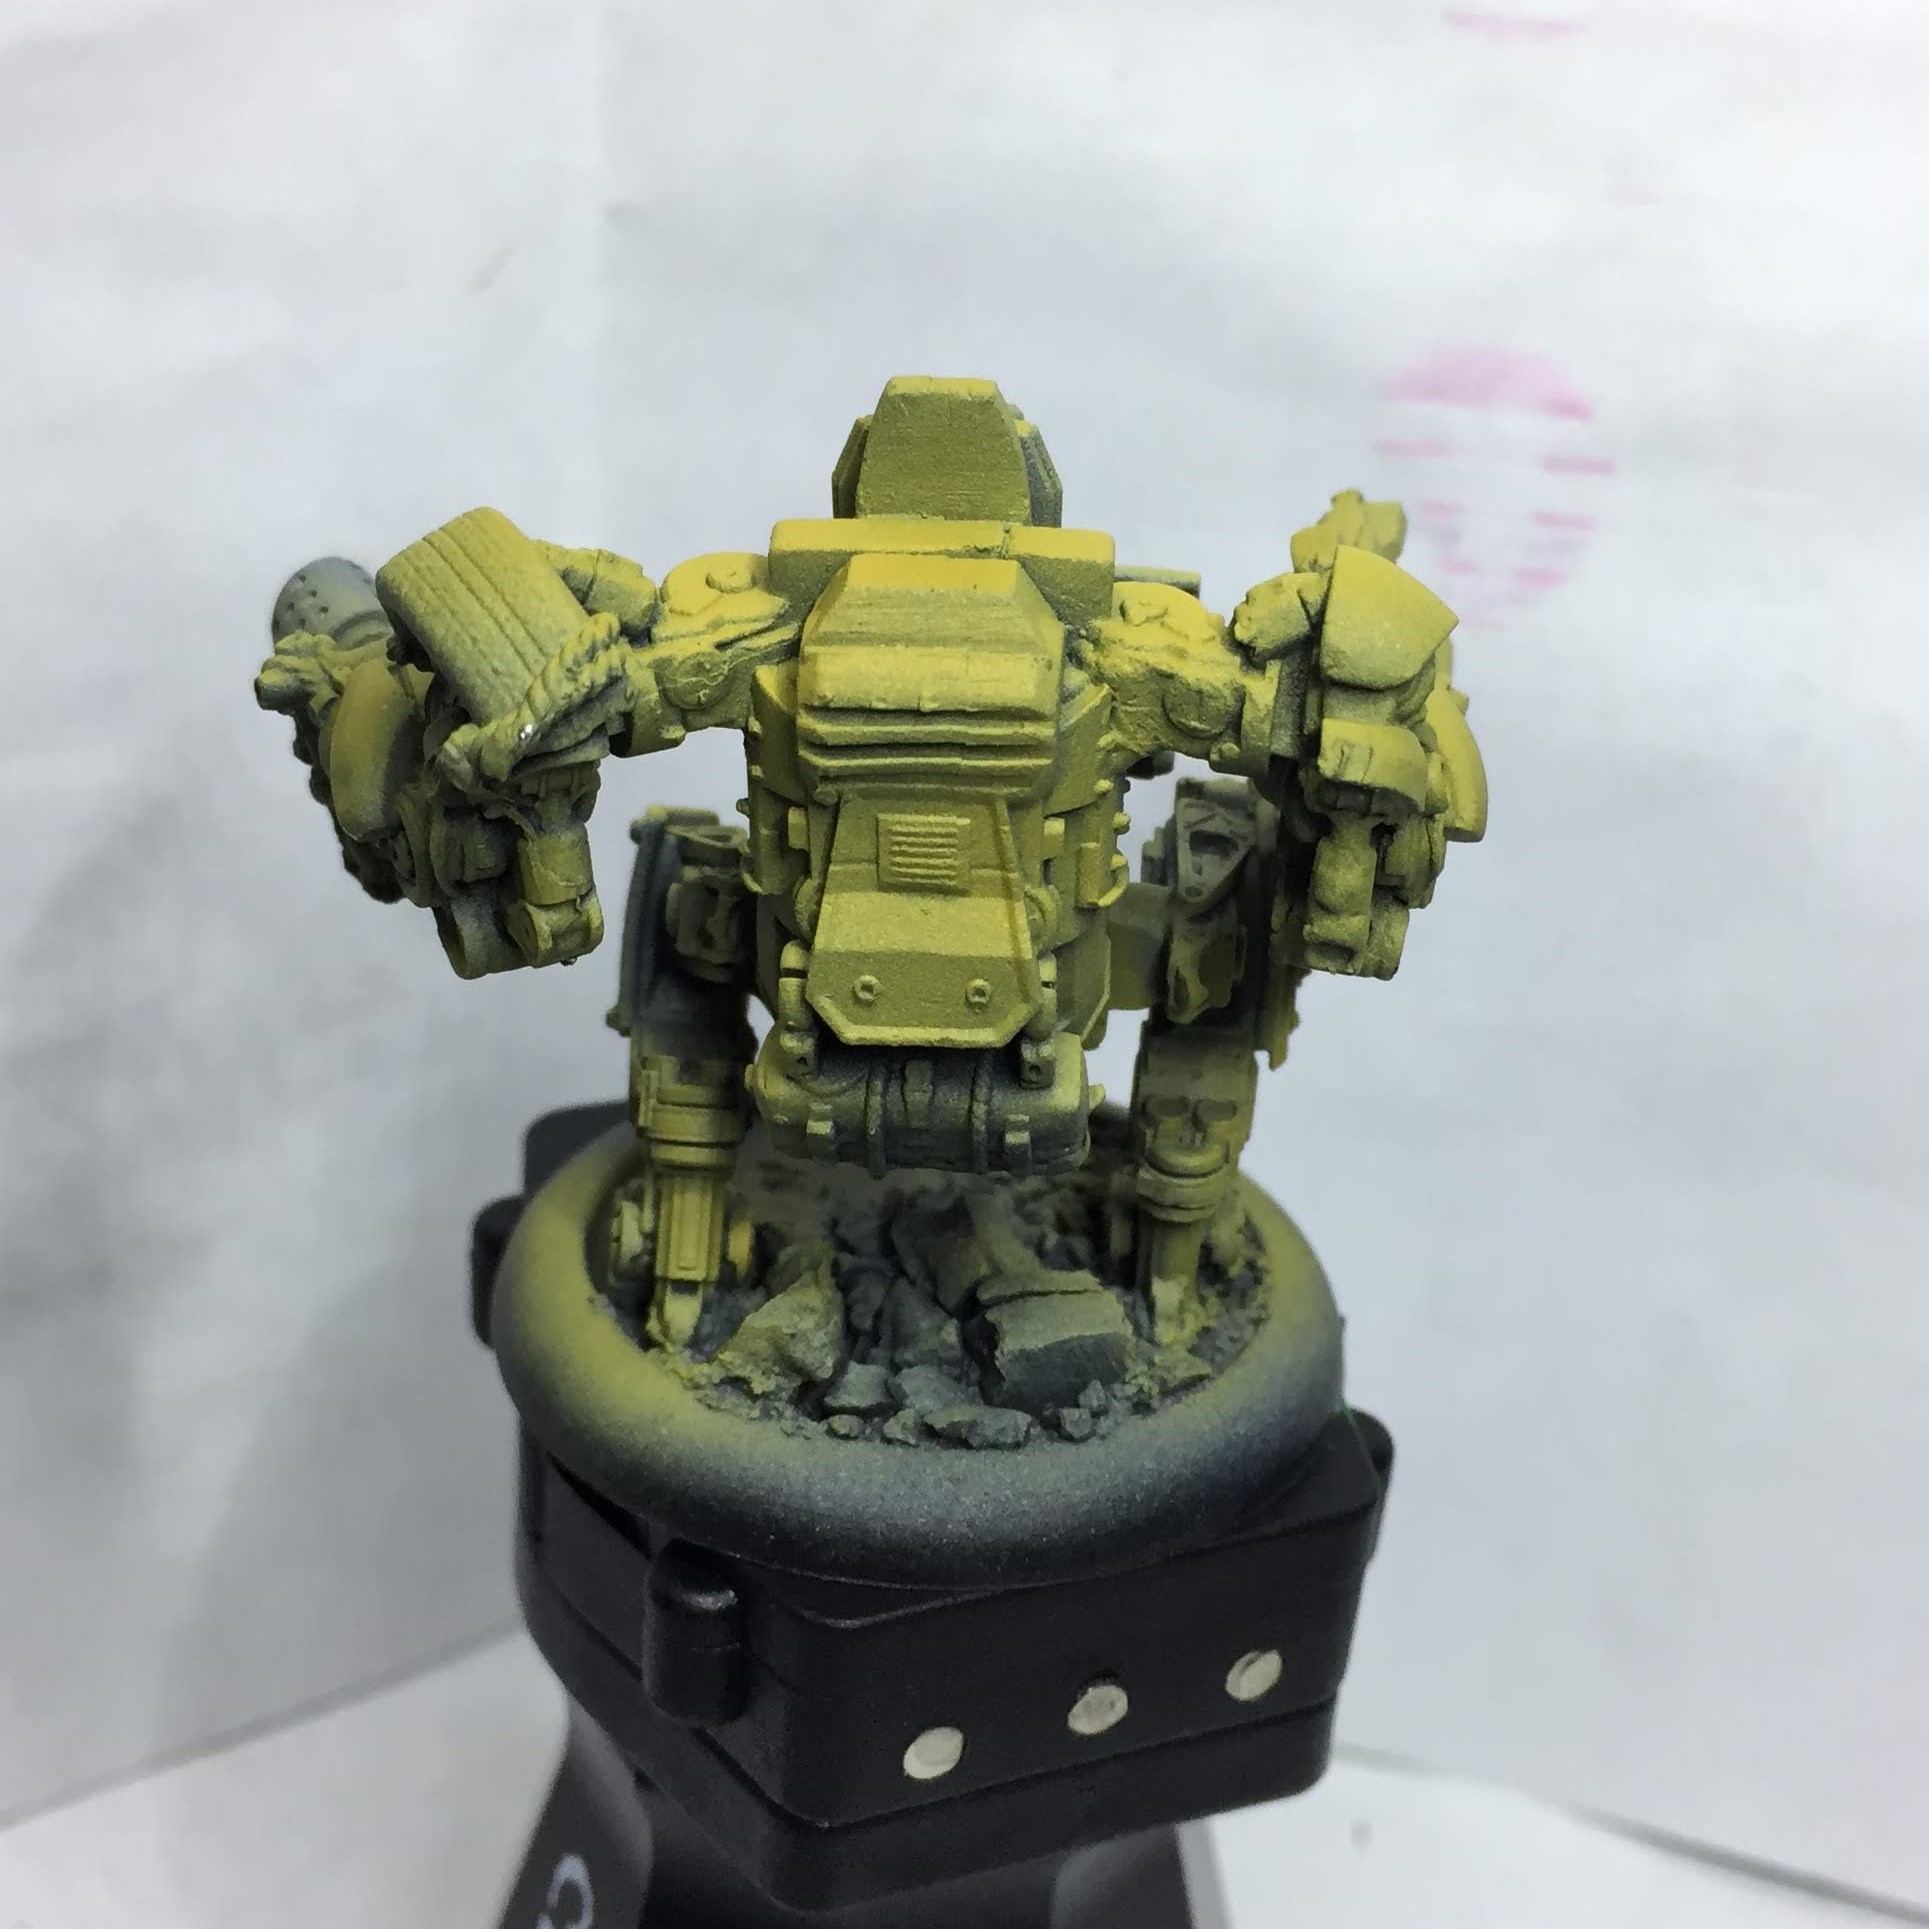
Step 2 – Zenithal airbrush highlighting
Airbrushed black / grey / white to provide a zenithal highlight. ( sorry if the photos don’t really show it clearly).

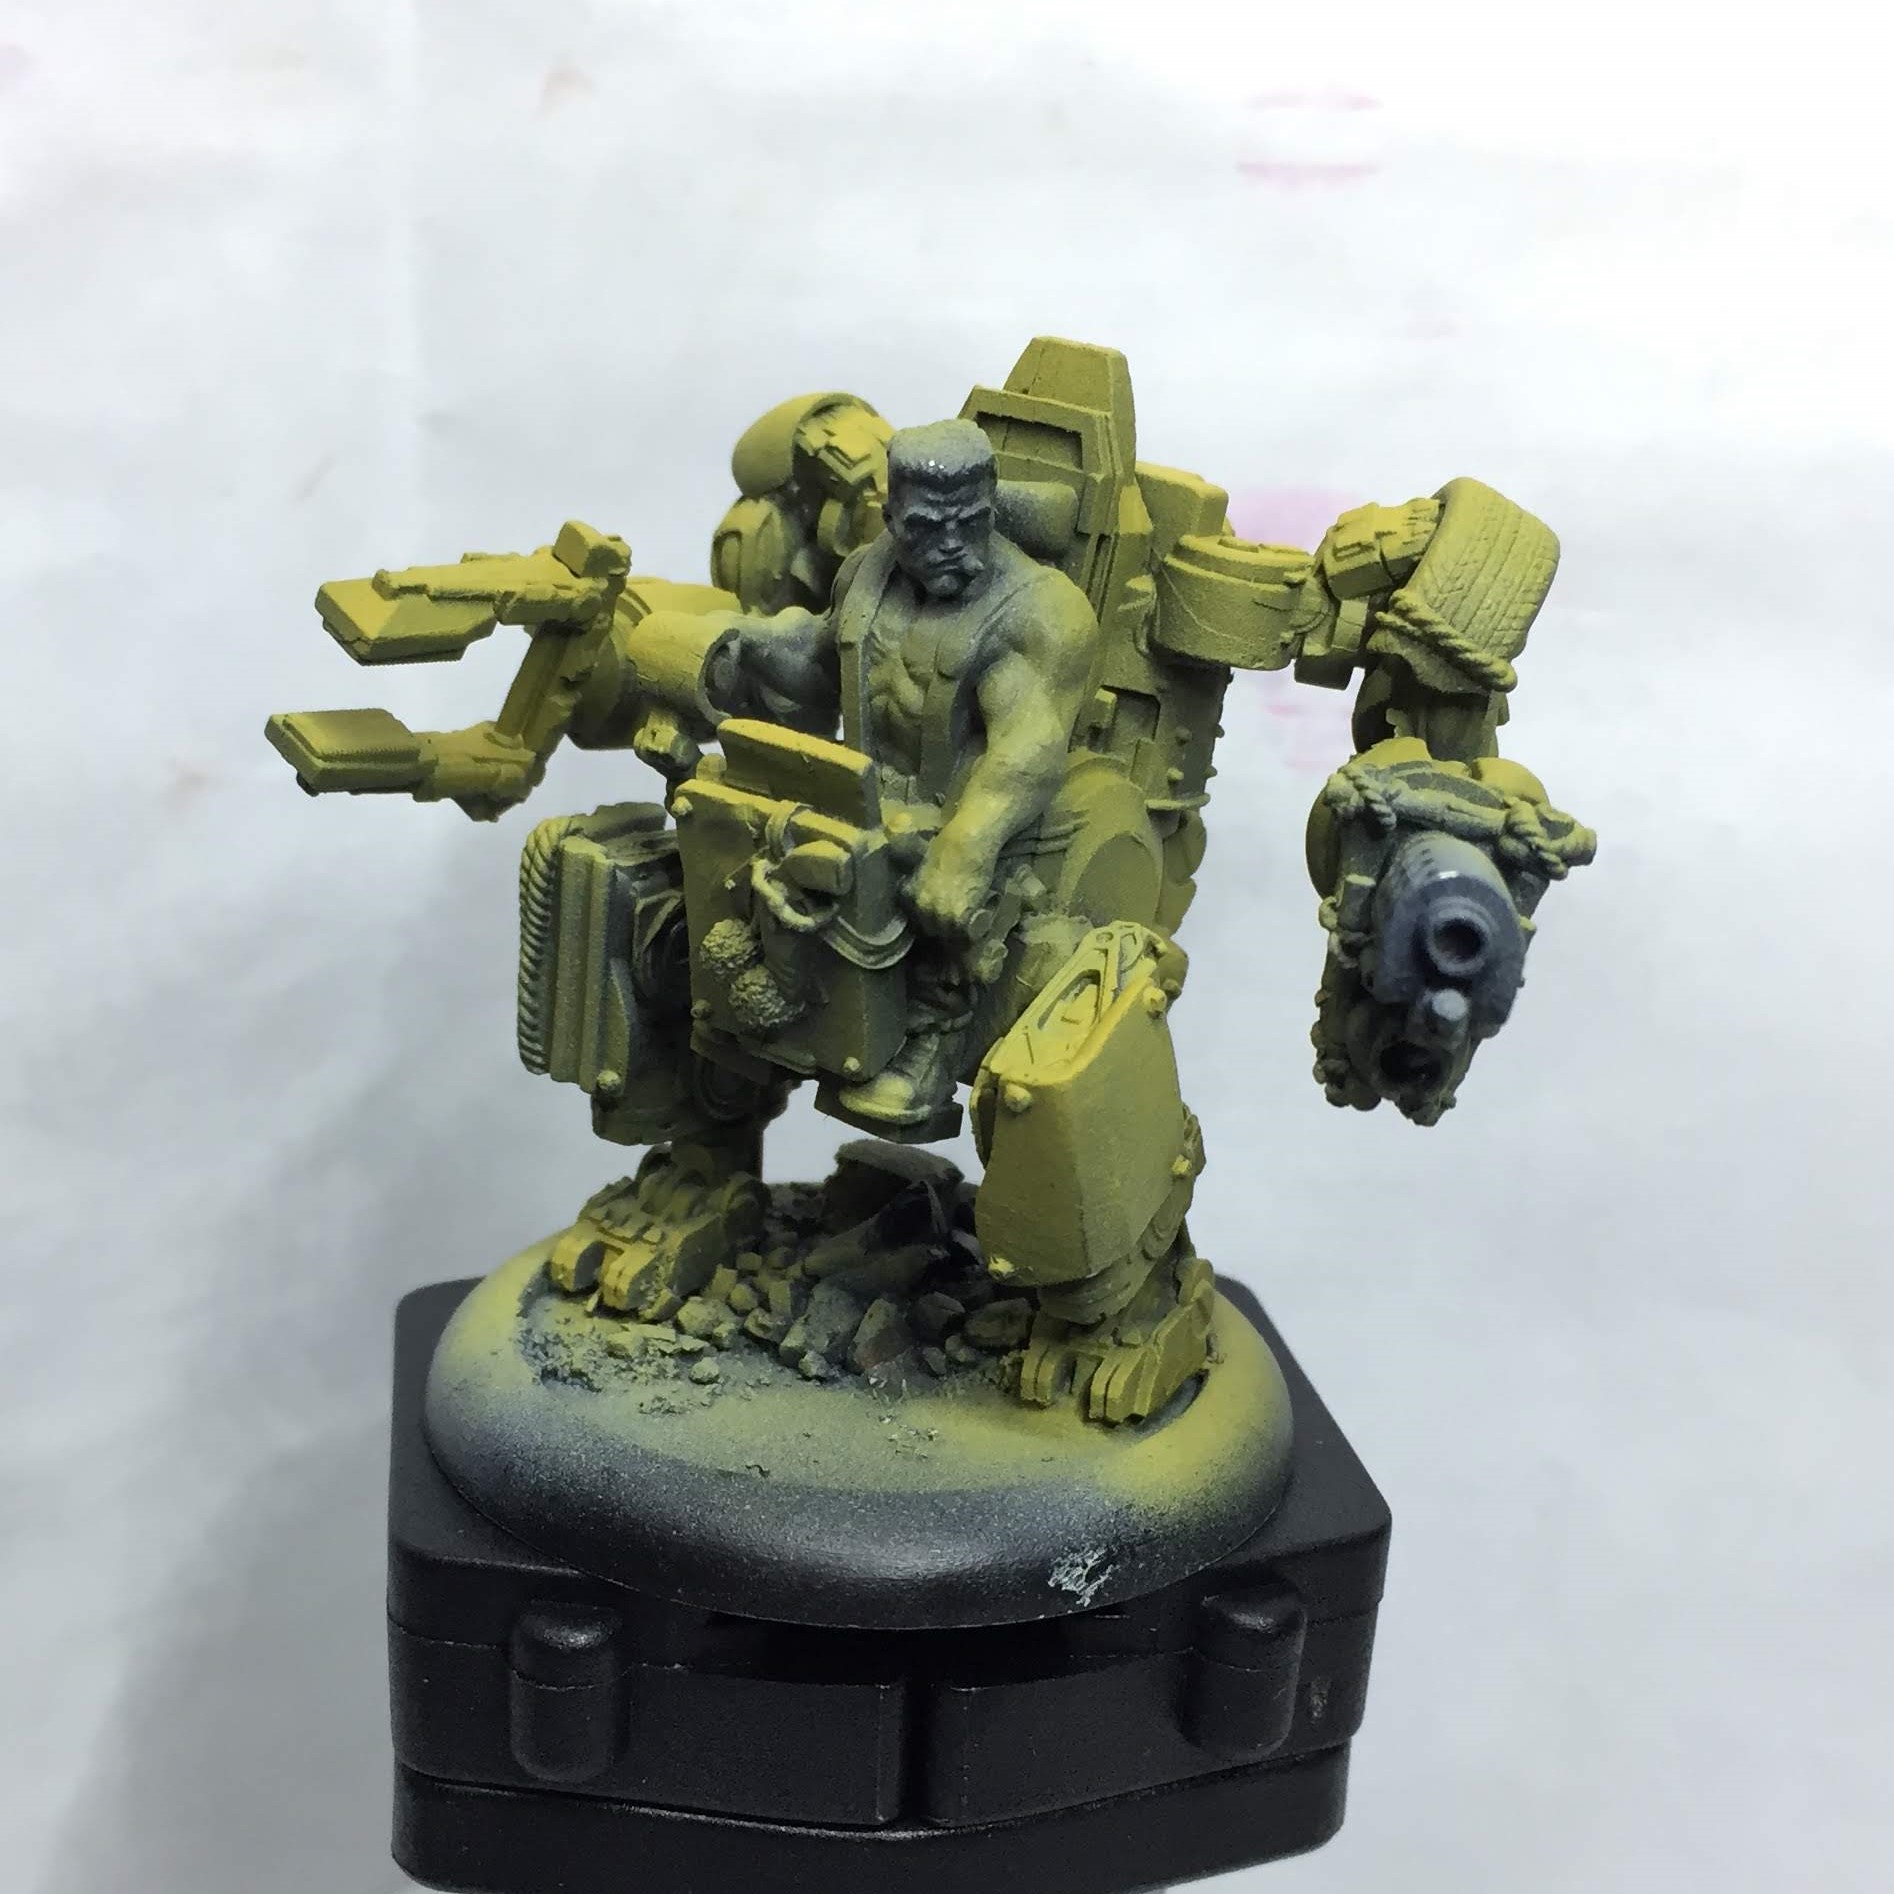
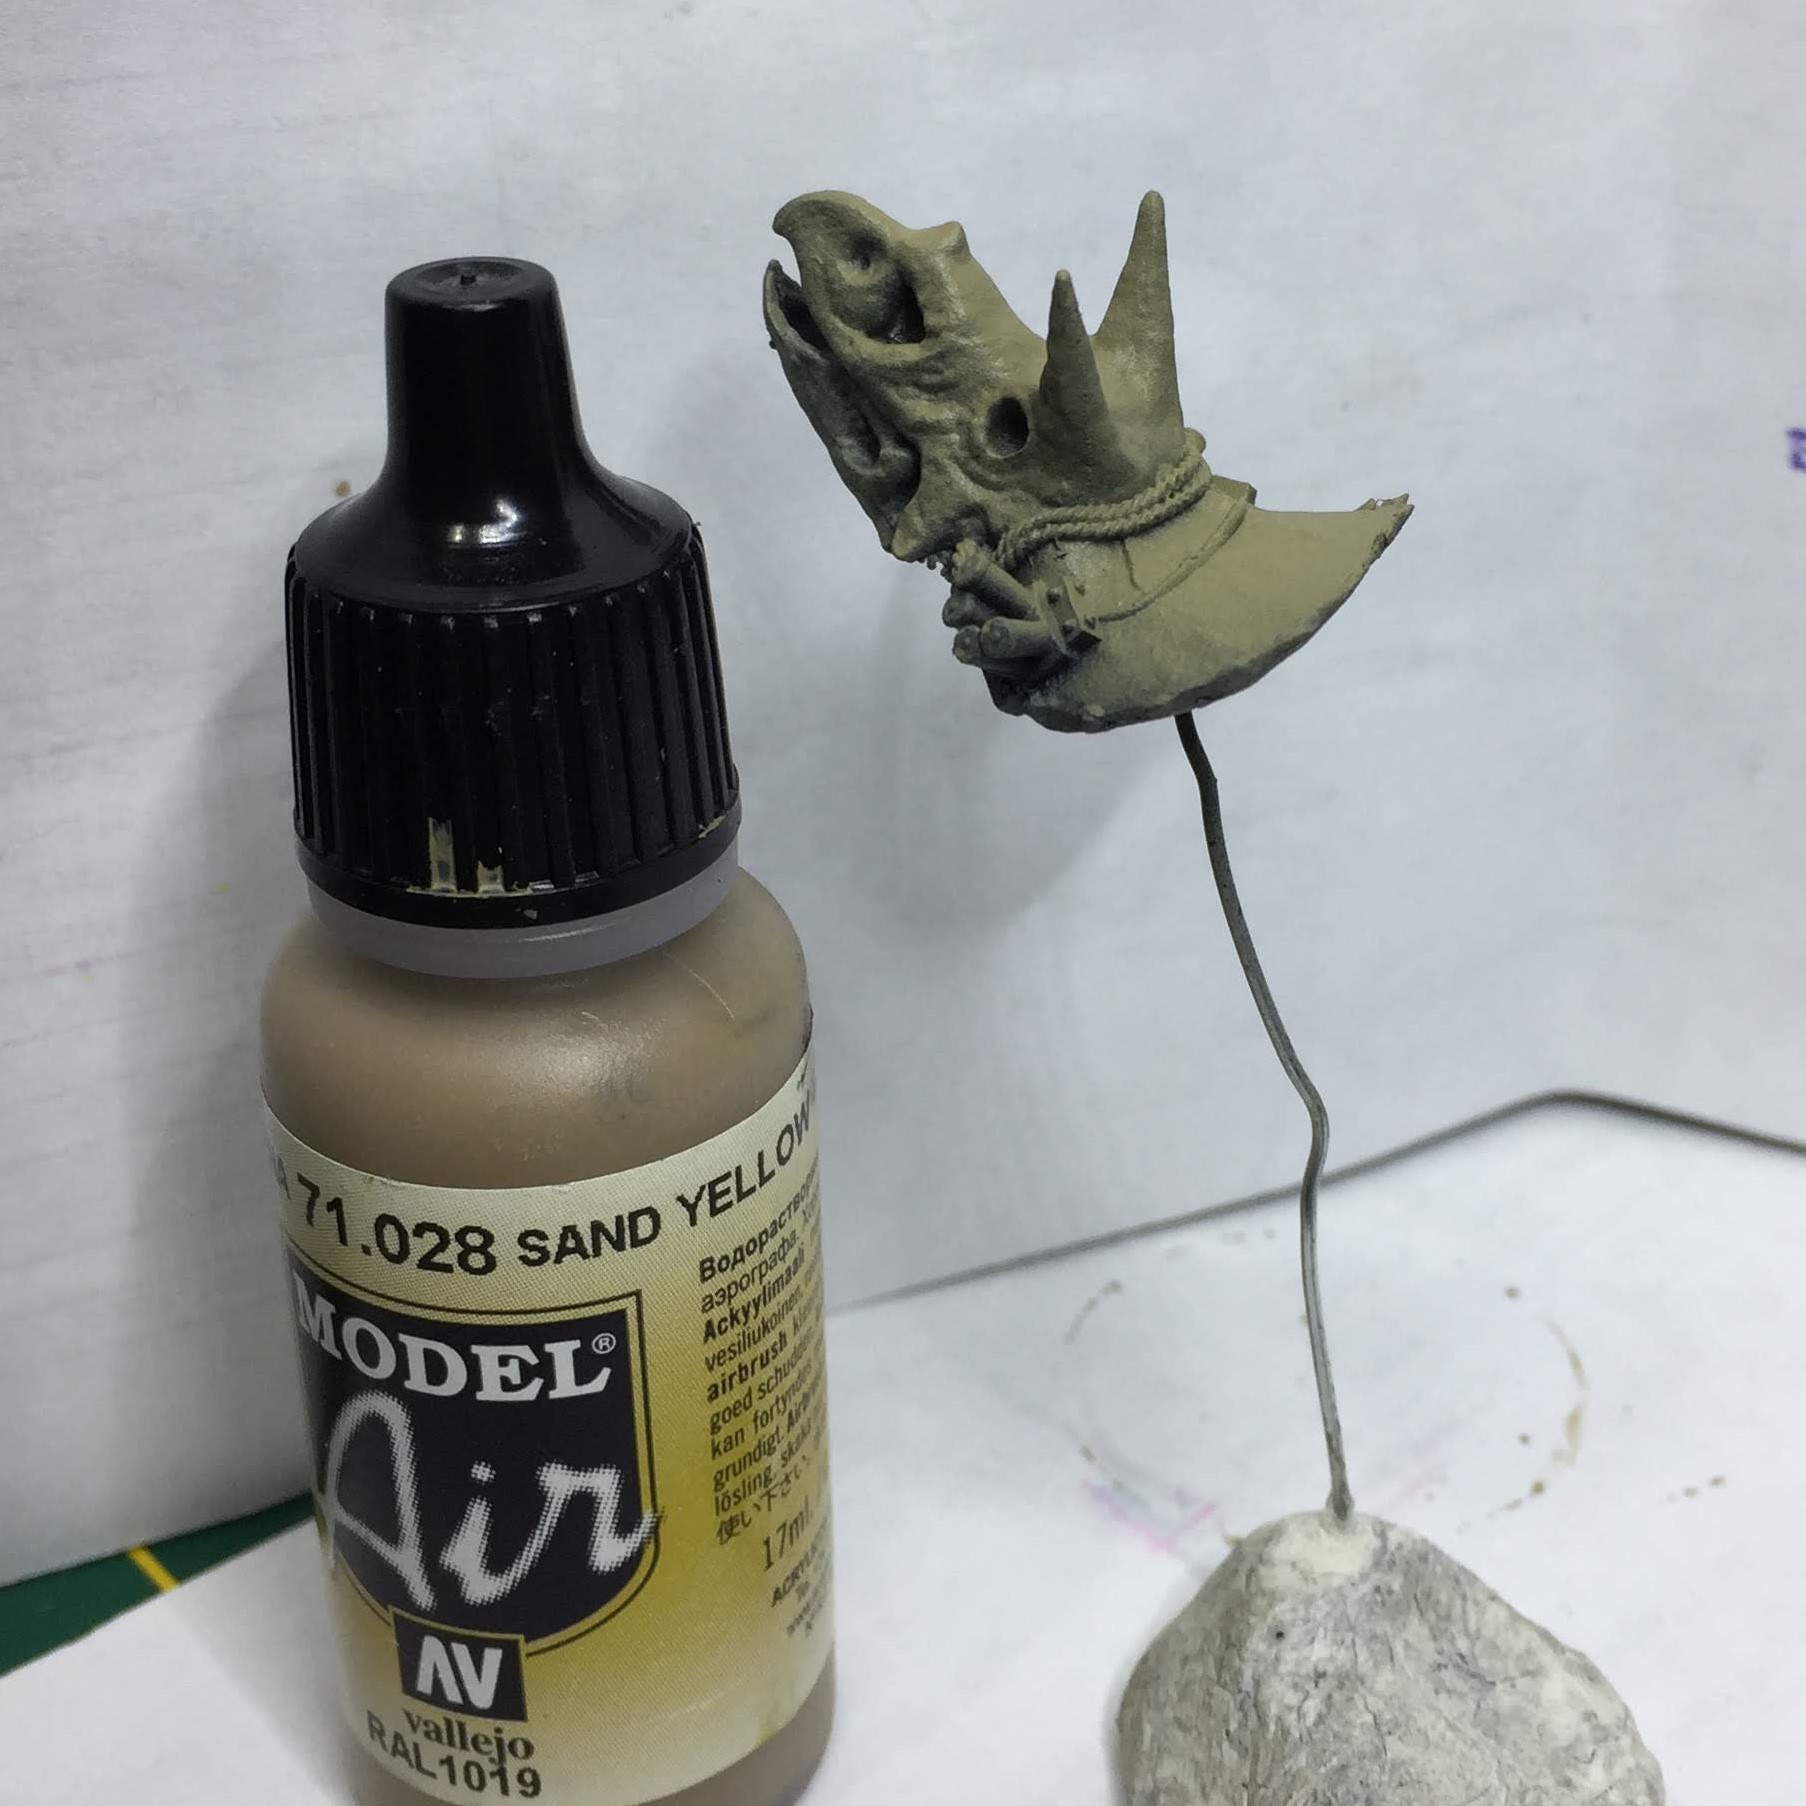
Step 3 – Airbrush base colour.
I decided to stick to the standard yellow colour for the Load Lifter, lightly priming with GW Averland Sunset to try and maintain the zenithal highlighting. Leaving the dino skull off for now so I can get in to paint Forek.
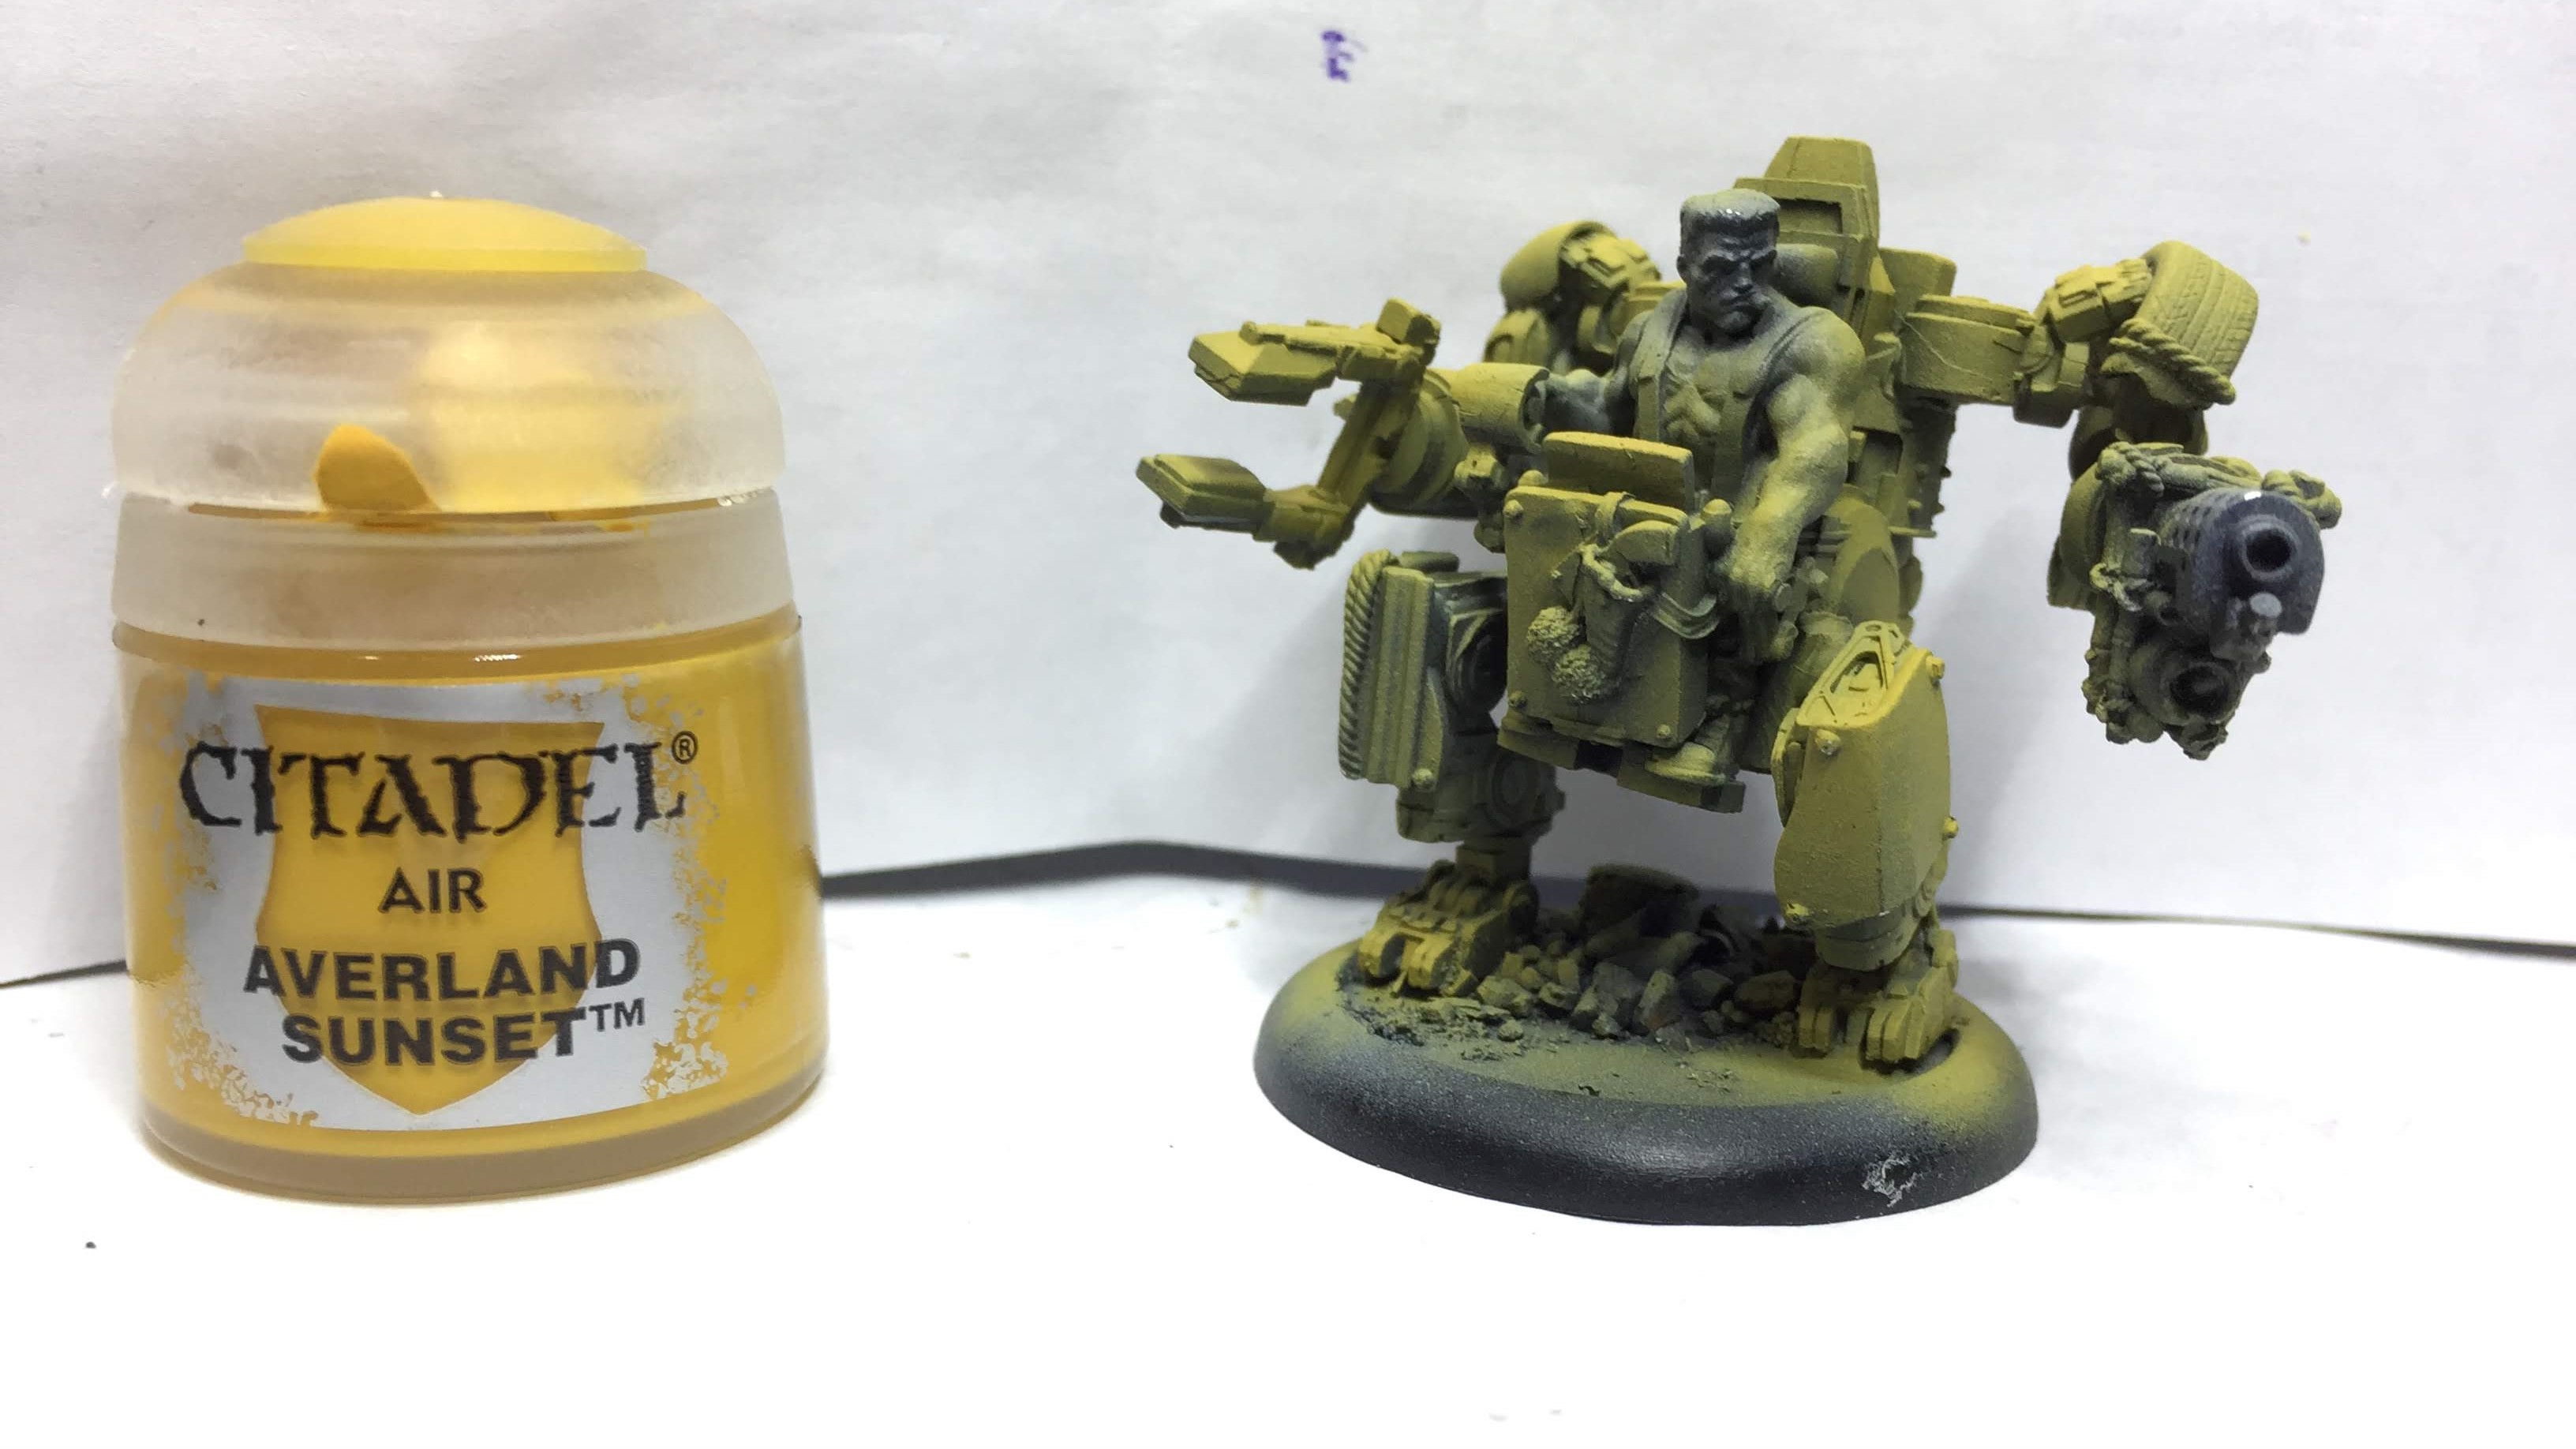
Step 4 – Basecoat.
Applied the basecoat to the majority of the figure now. Not much more of say at this point.
Step 5 – Forek details painted / Lifter drybrushed.
At this time I painted the skin on Forek (at the same time as I was doing the standard mini).
I also didn’t like how the lifter was looking so drybrushed top down with a brighter yellow, which helped I think.
At this stage I’ve learnt to not get too disappointed until you’ve added more detail – eventually the model will come to life for you I find if you stick with it.
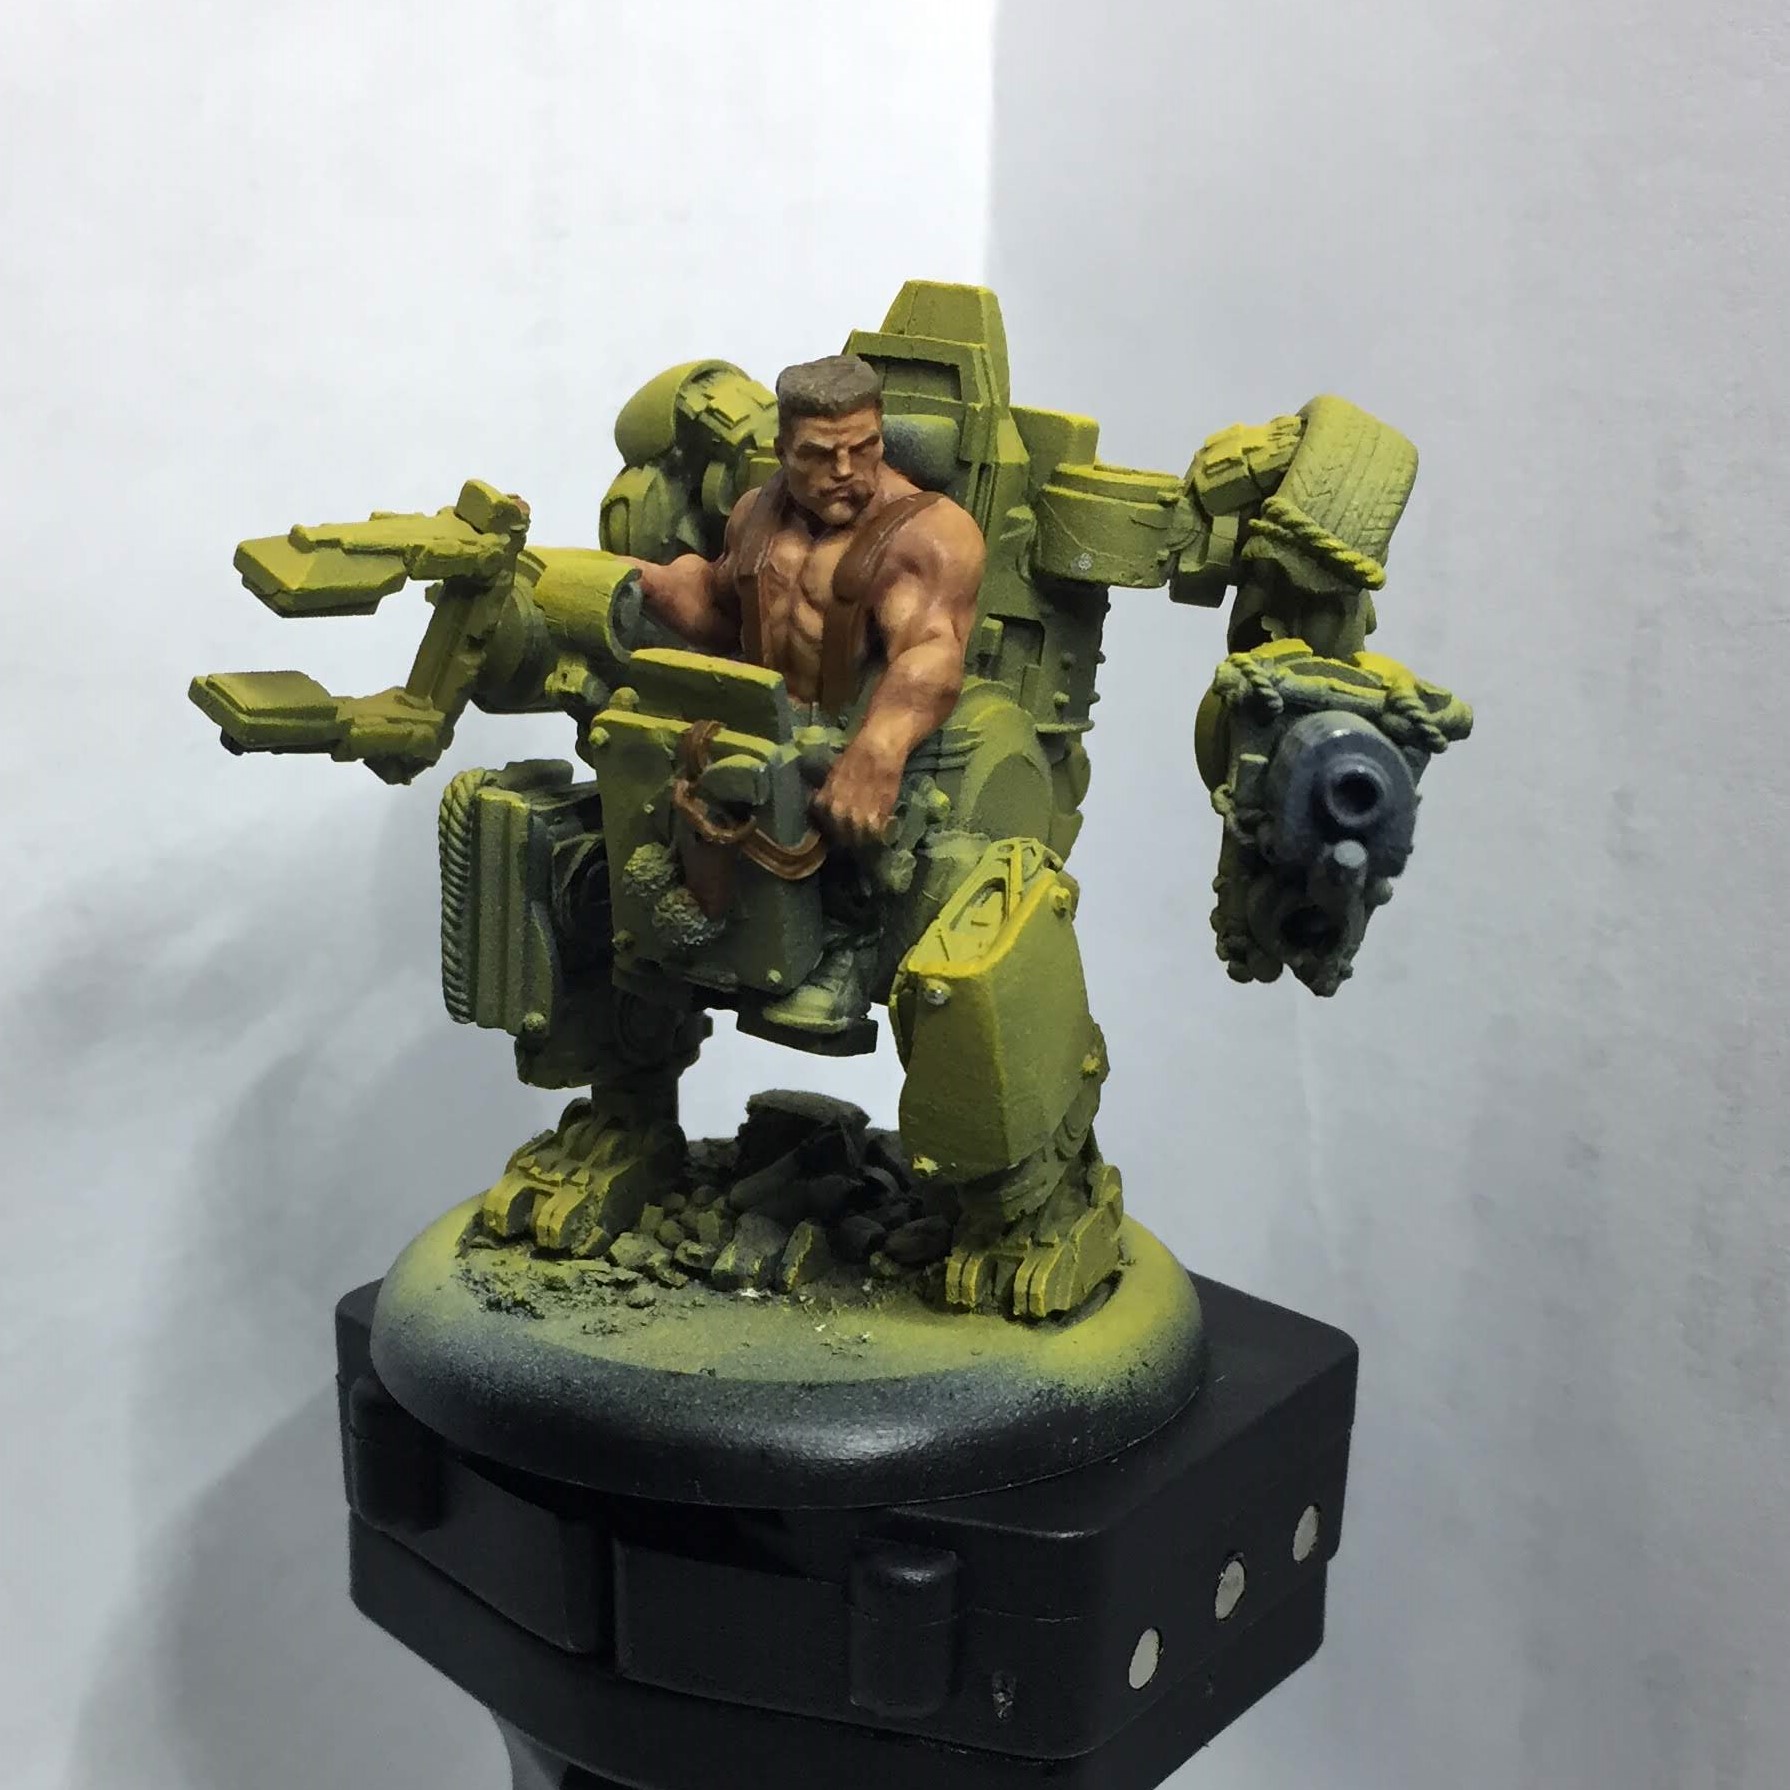
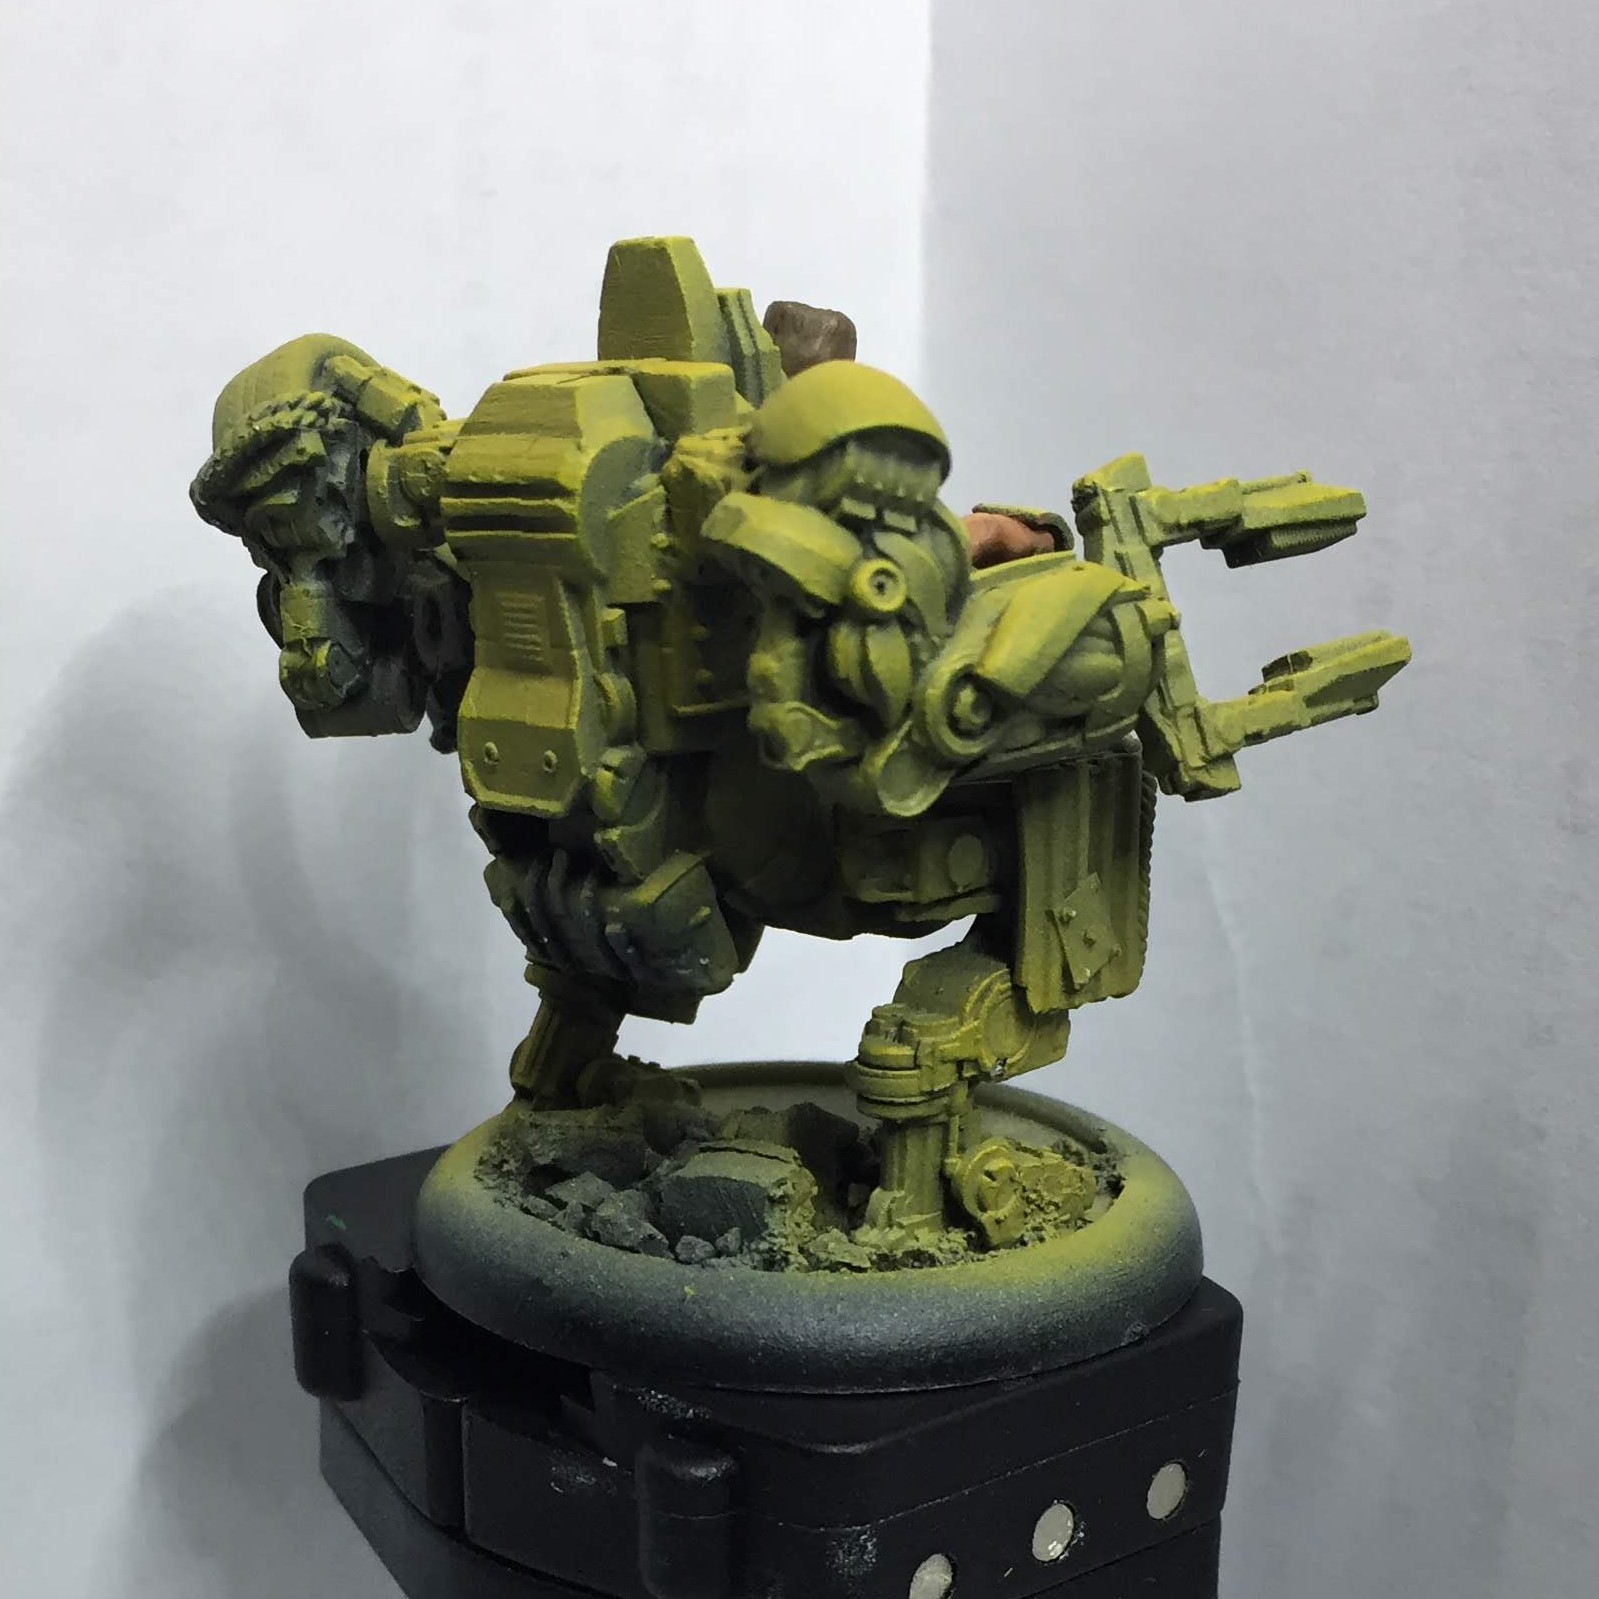
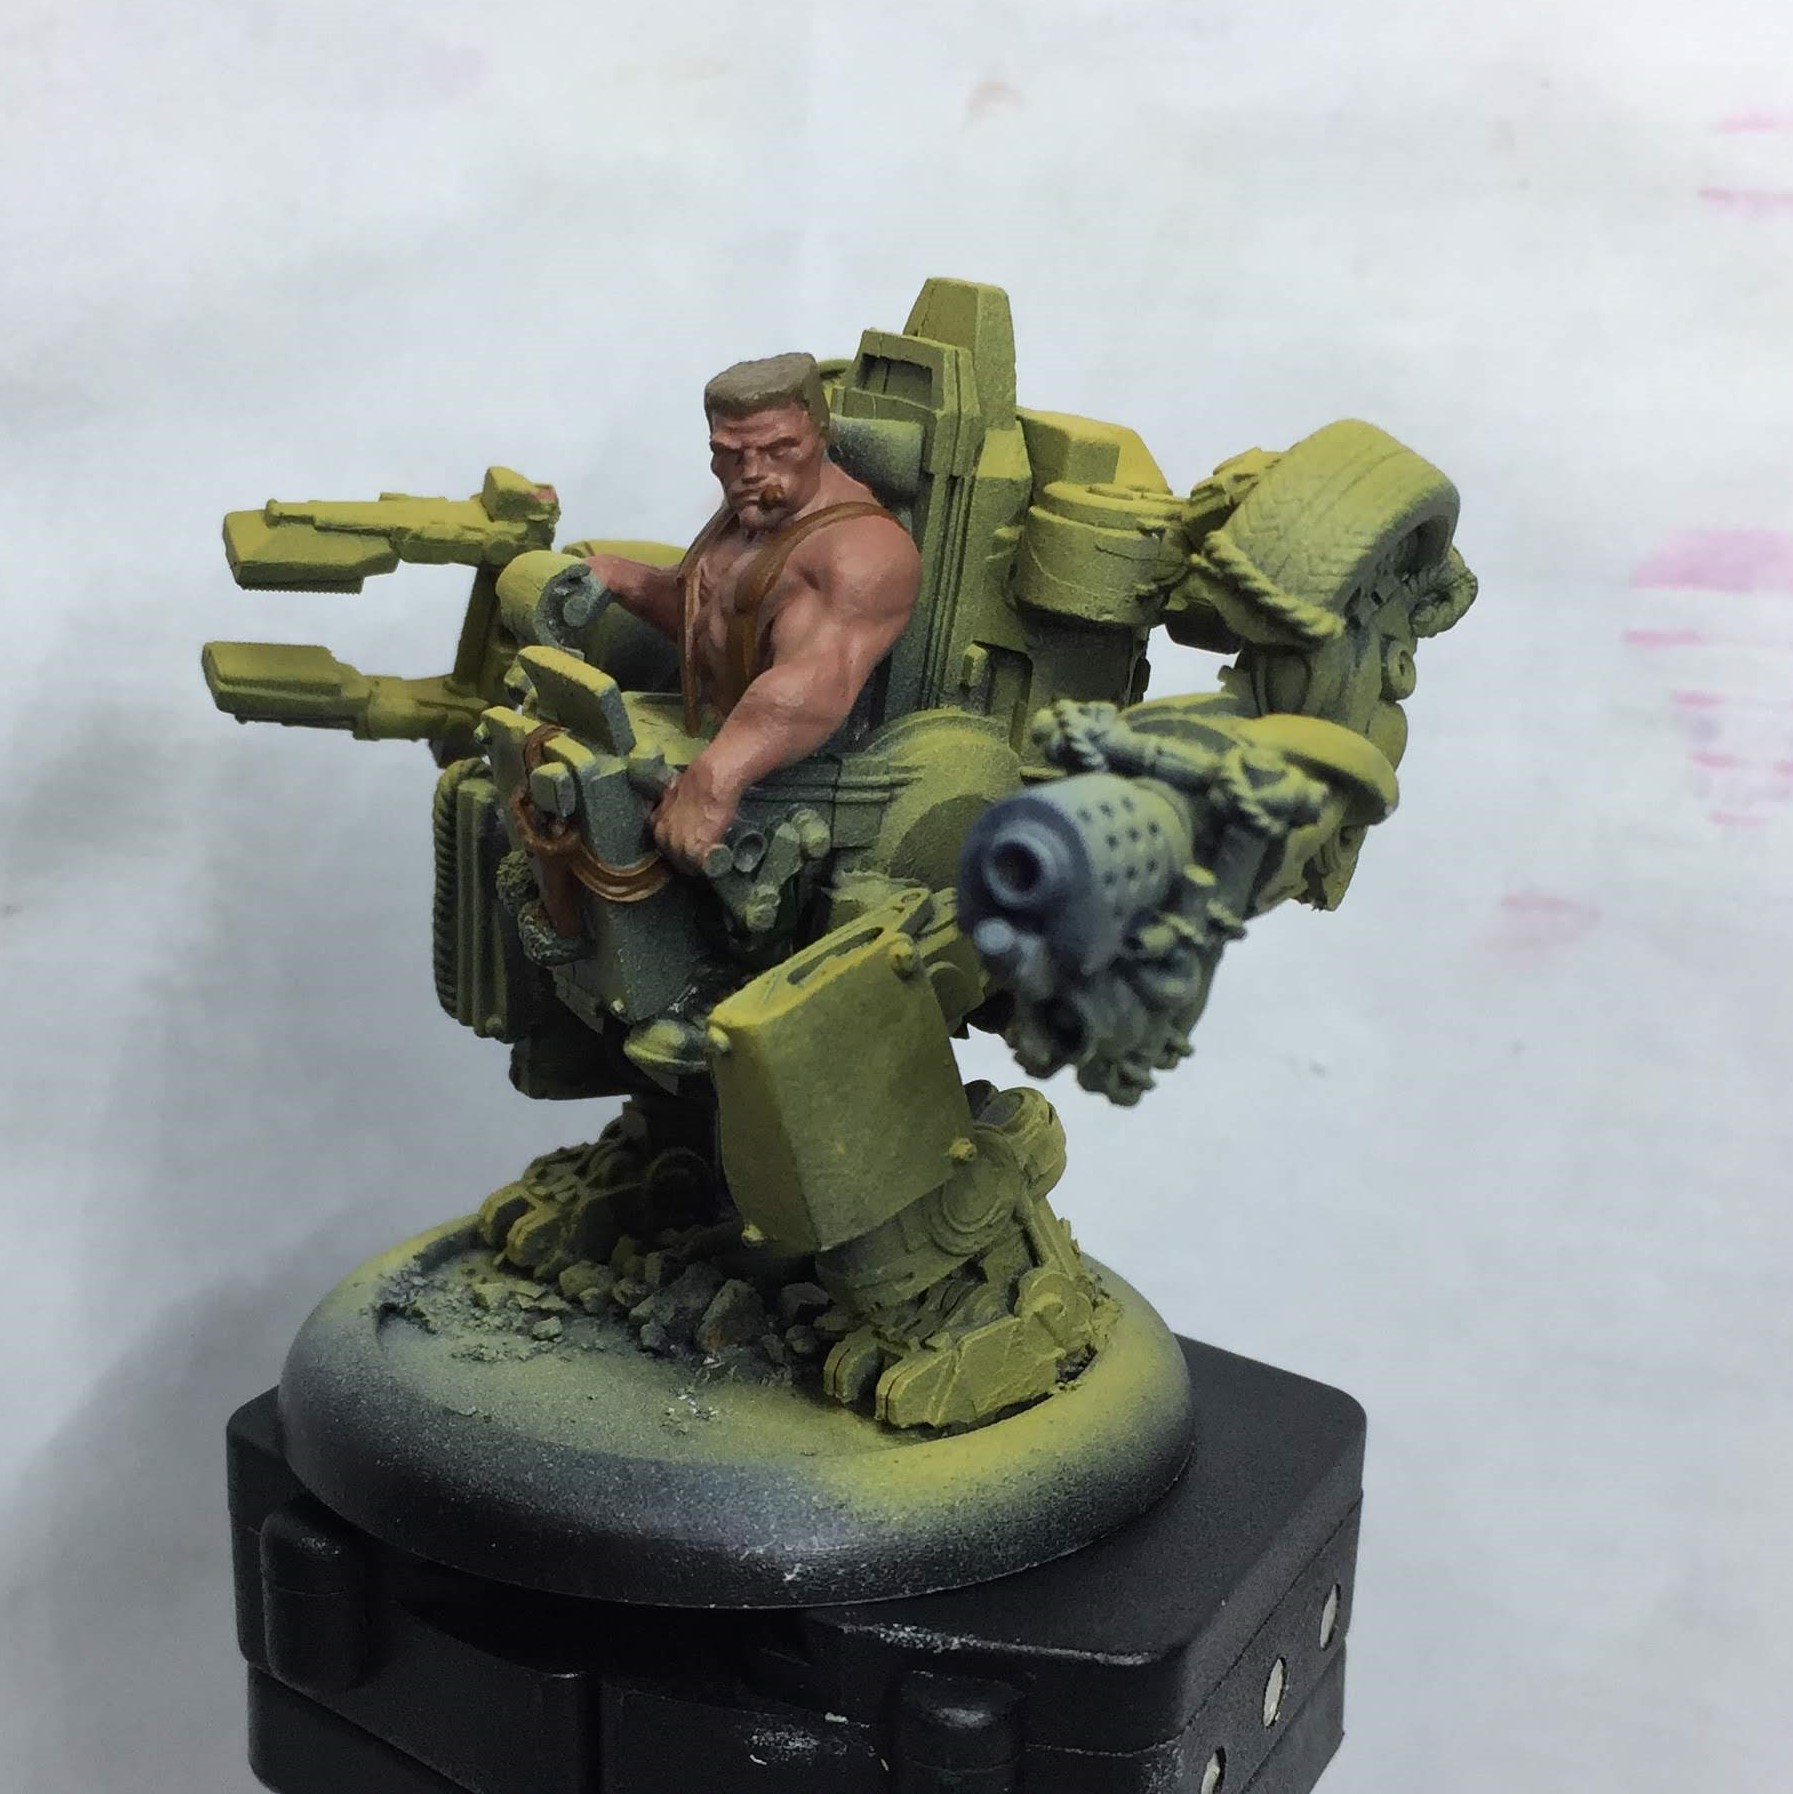
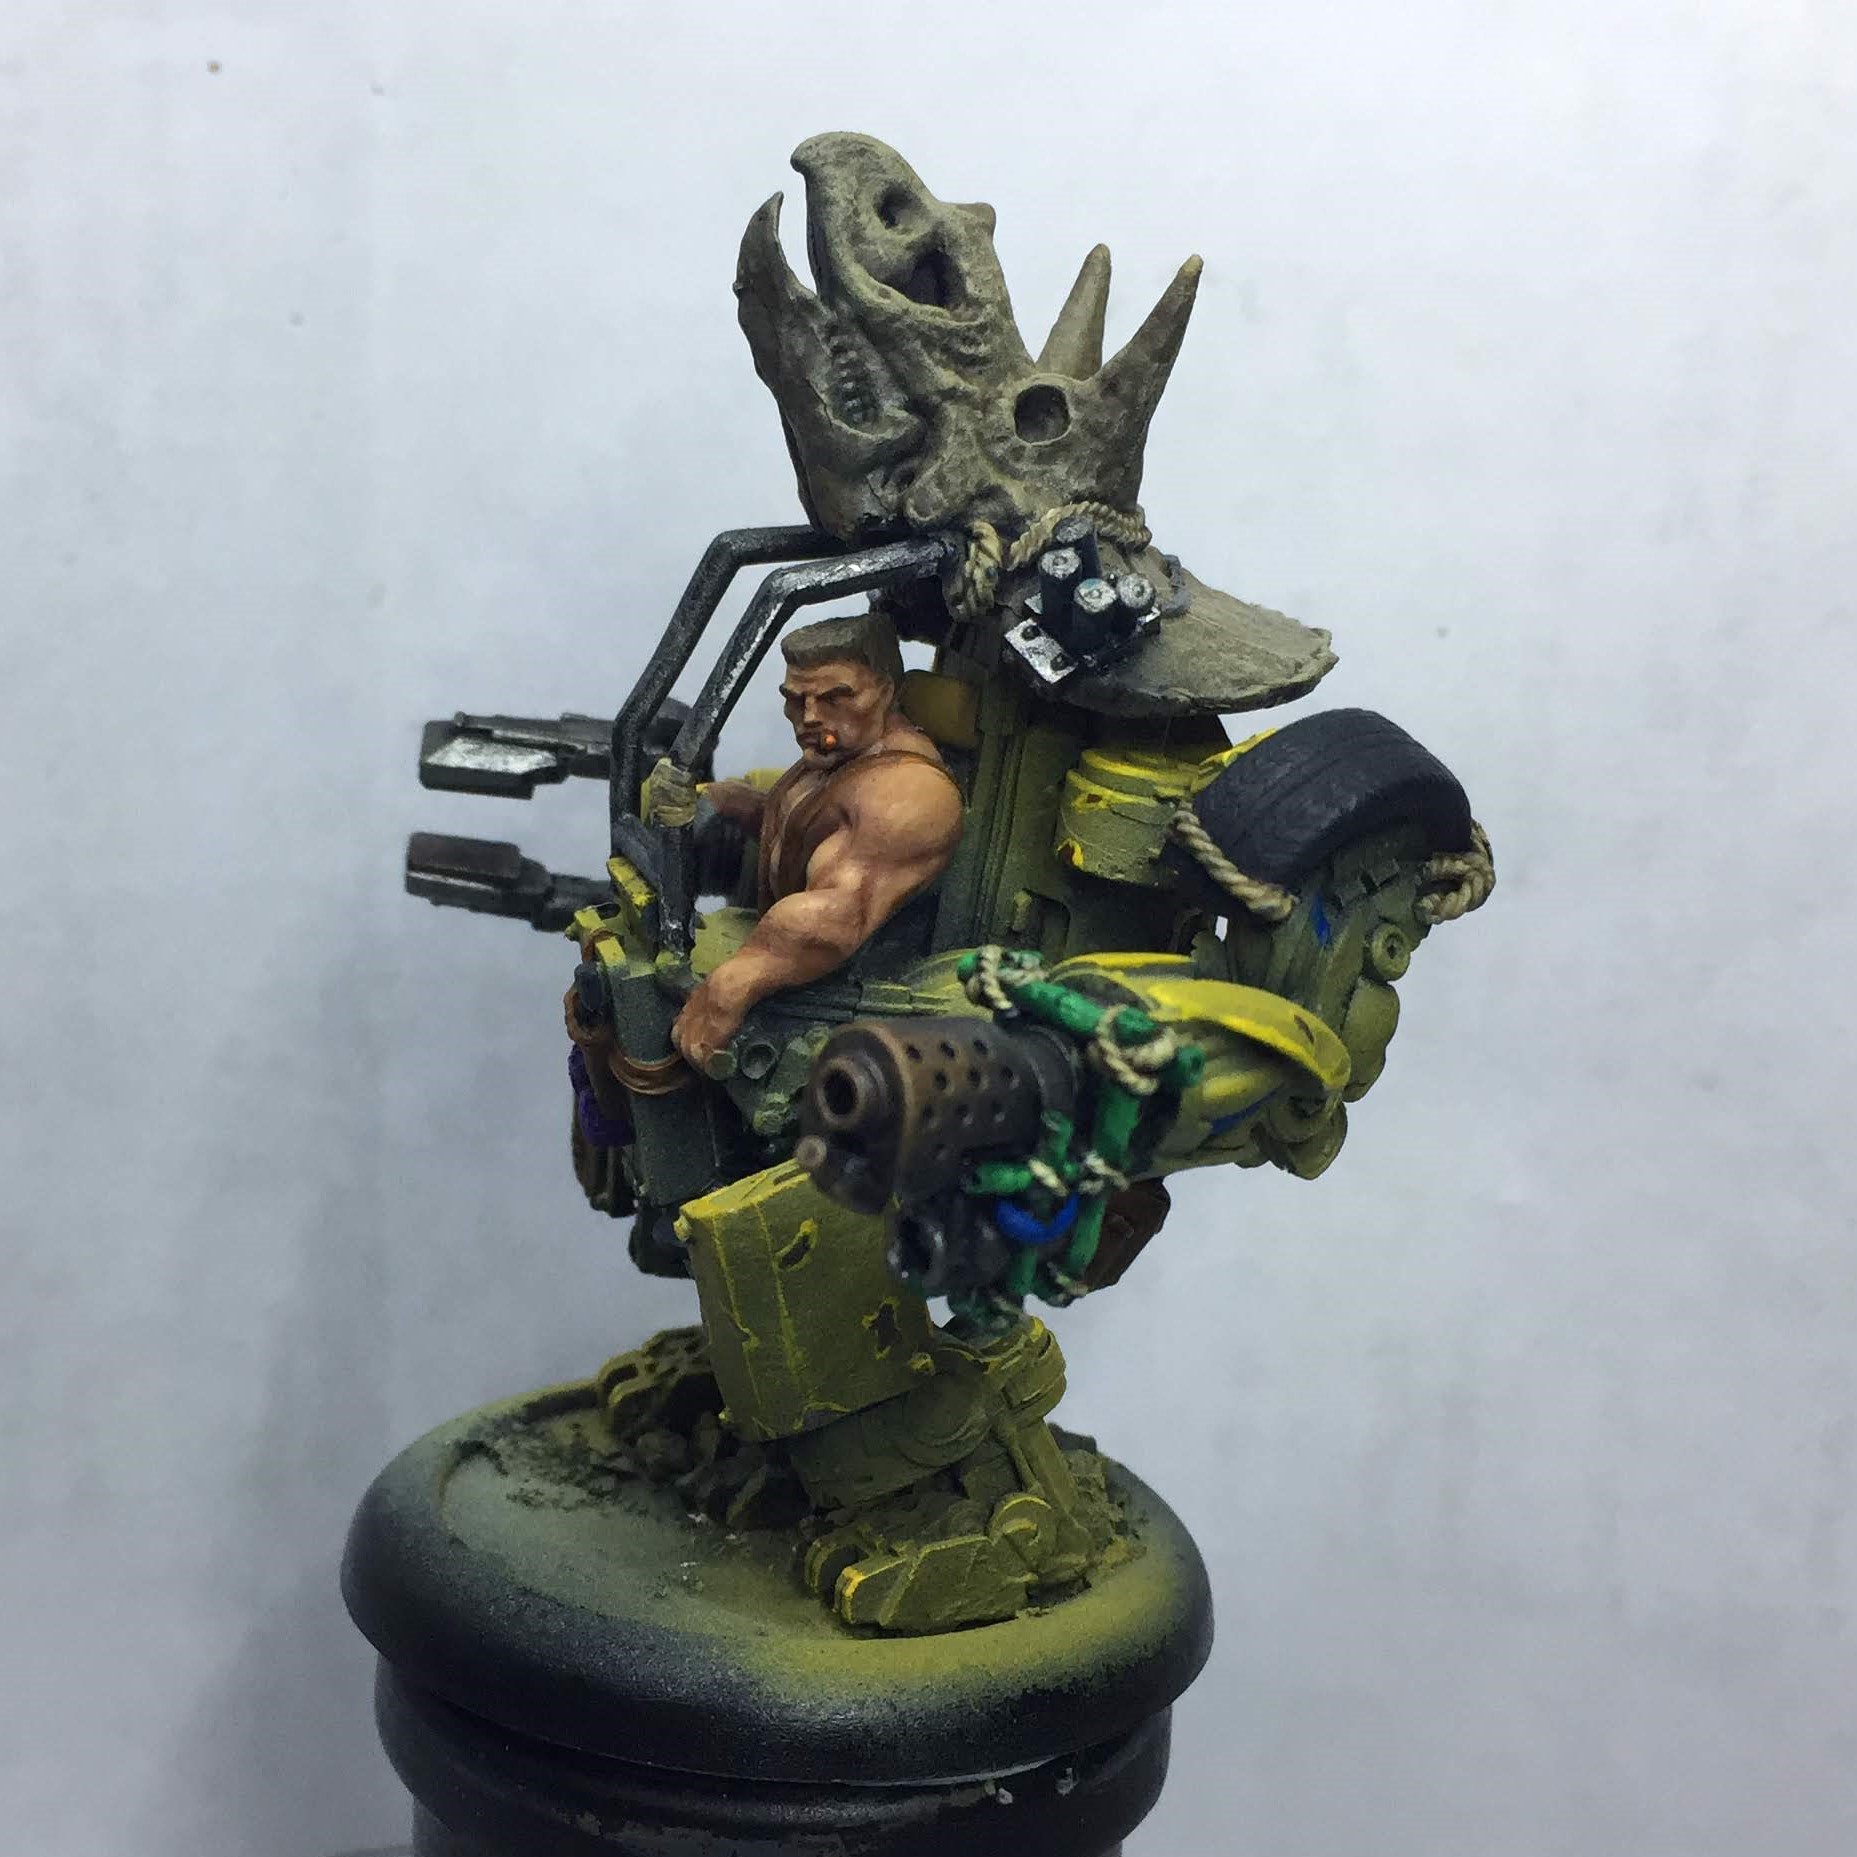
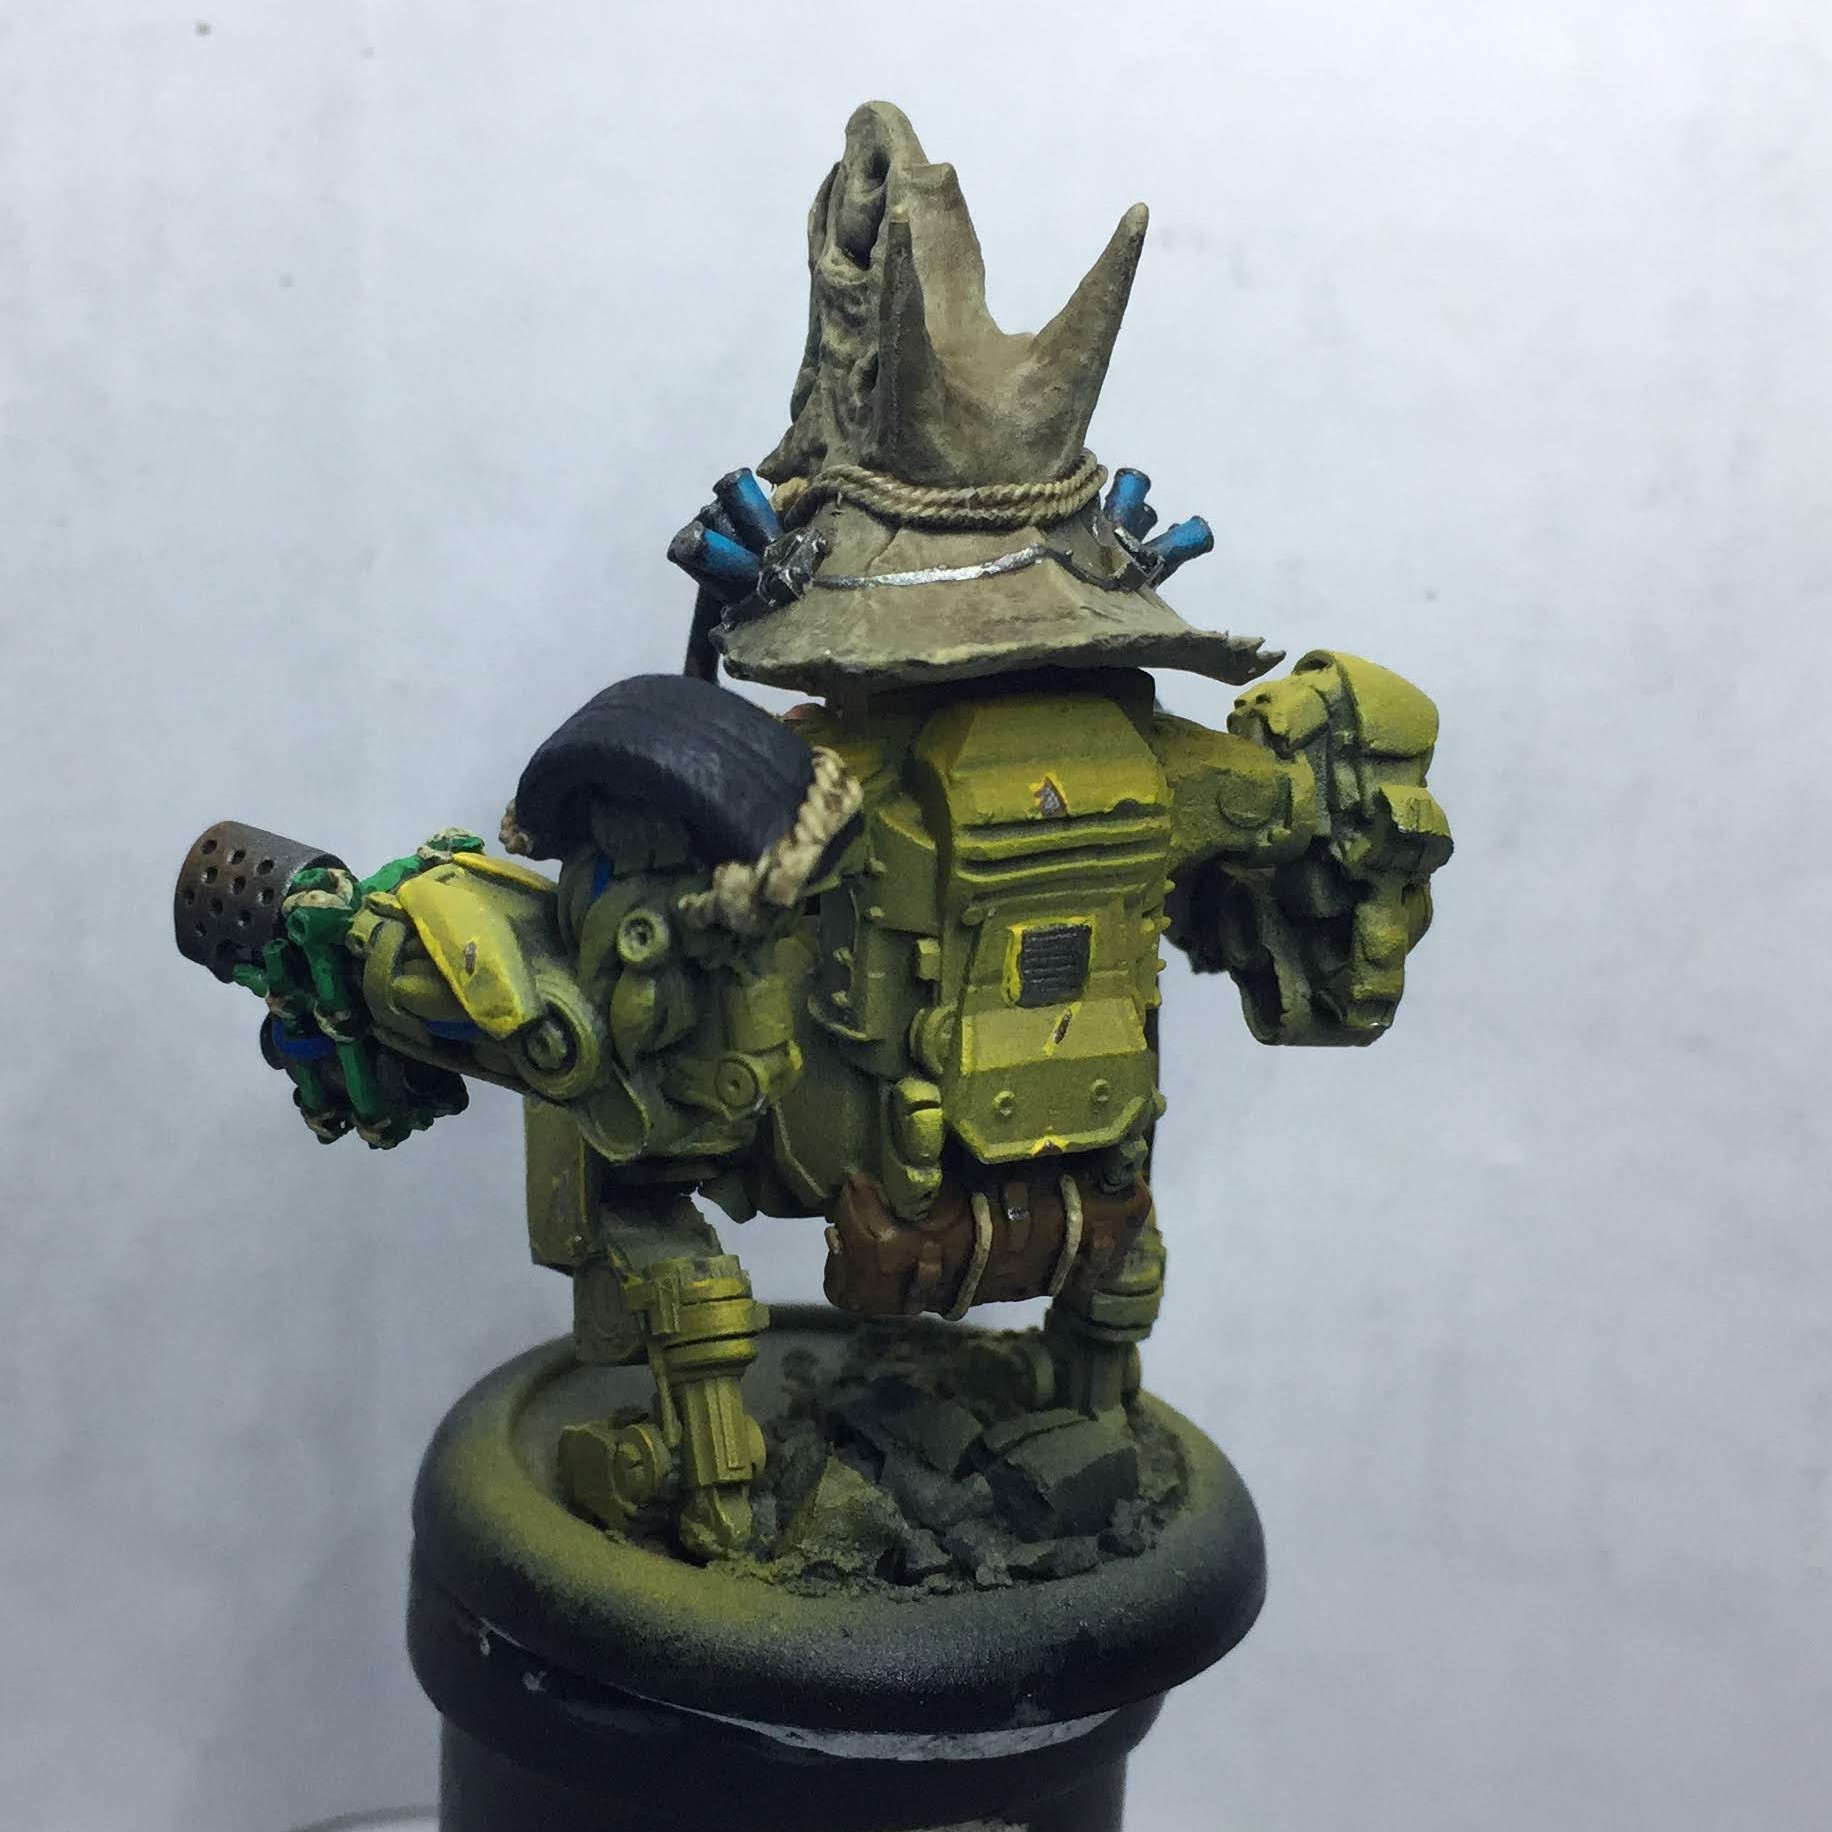
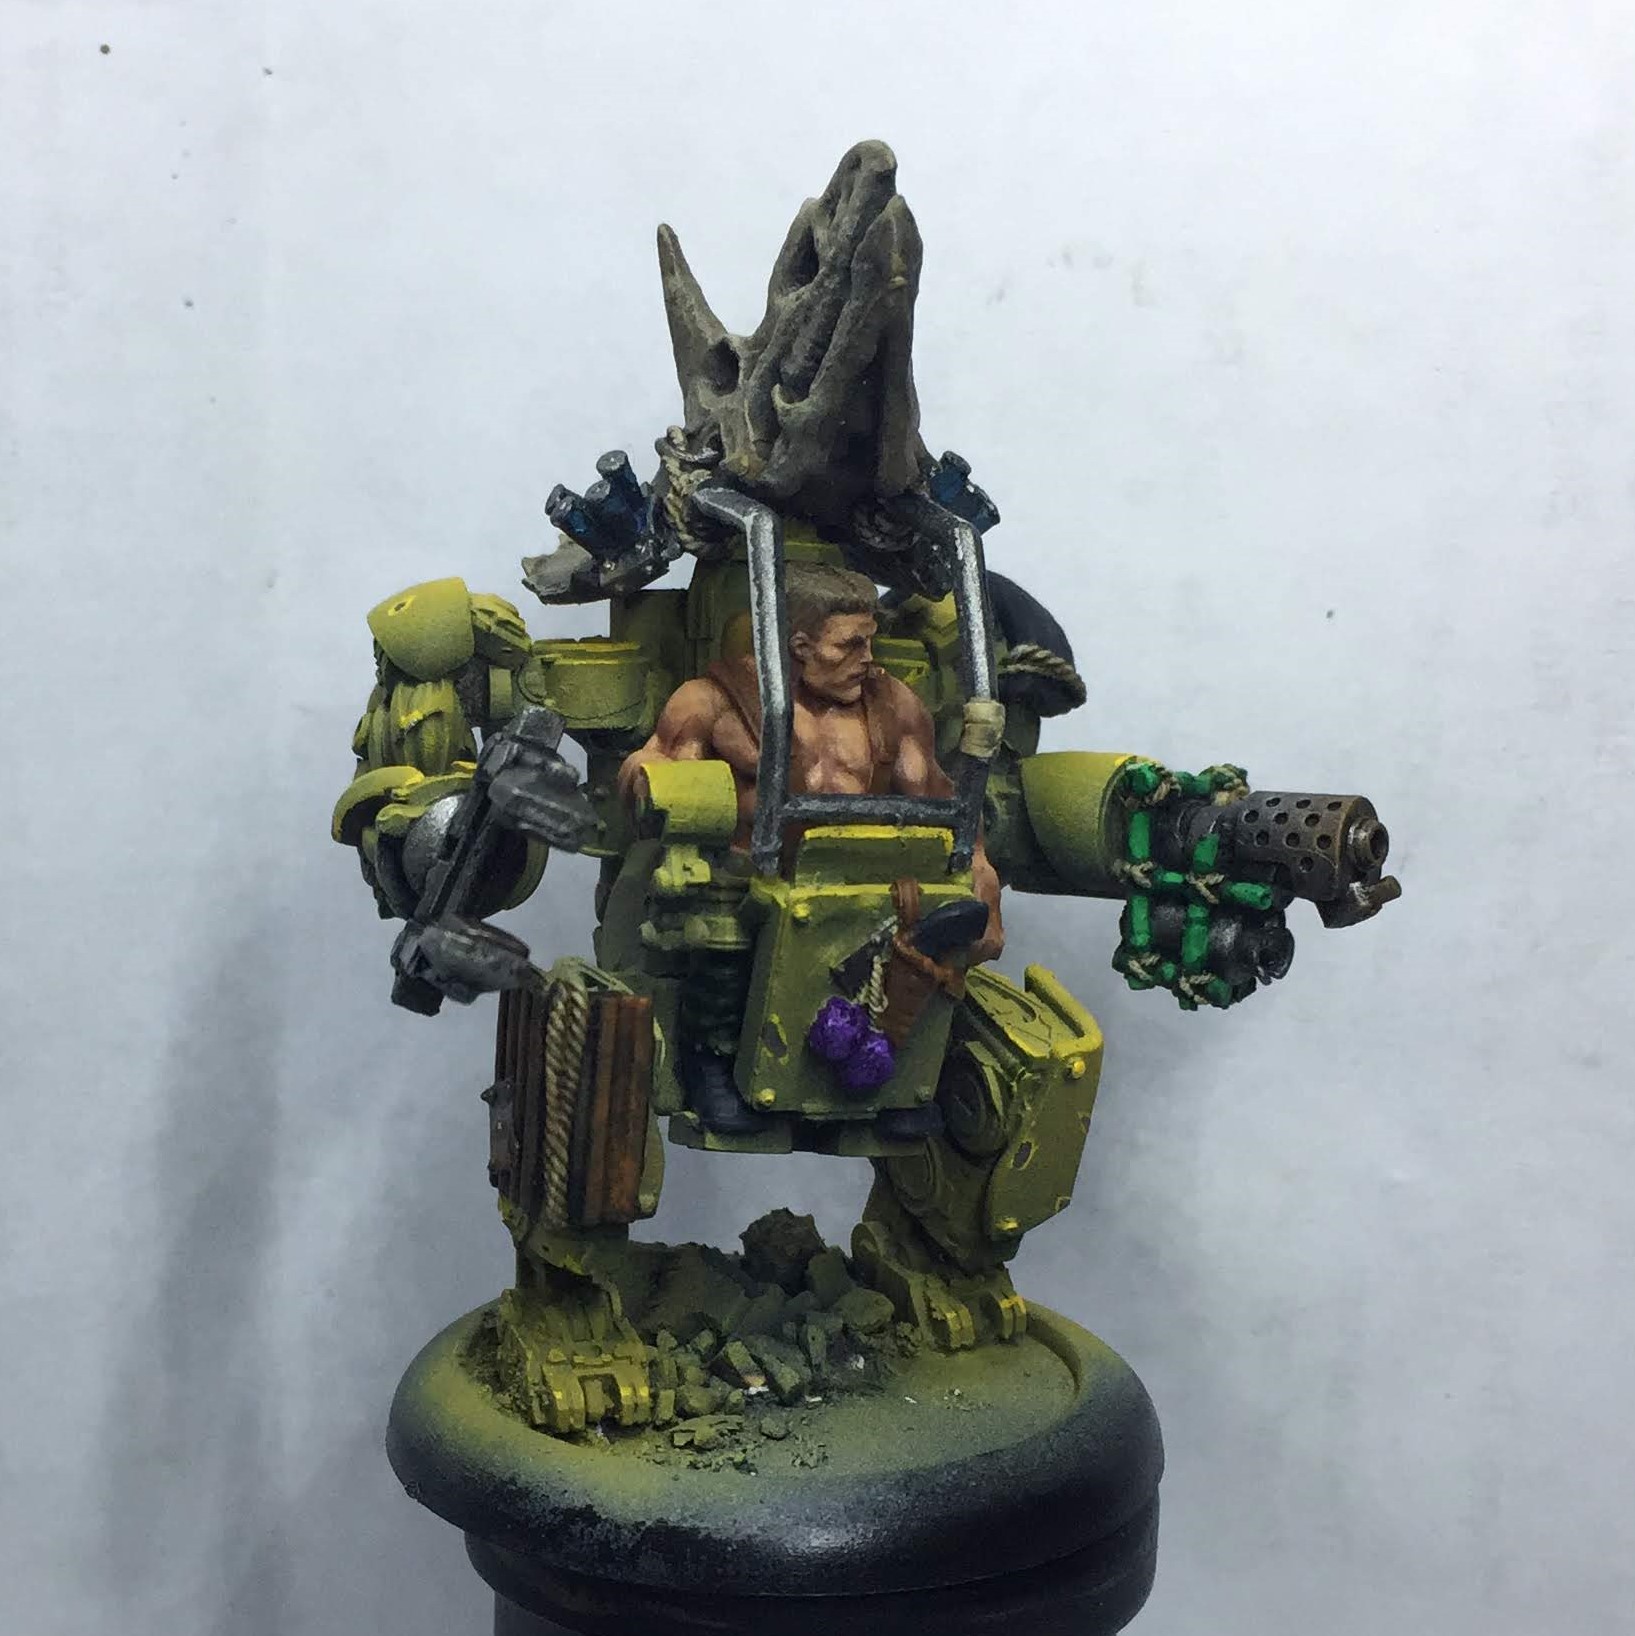
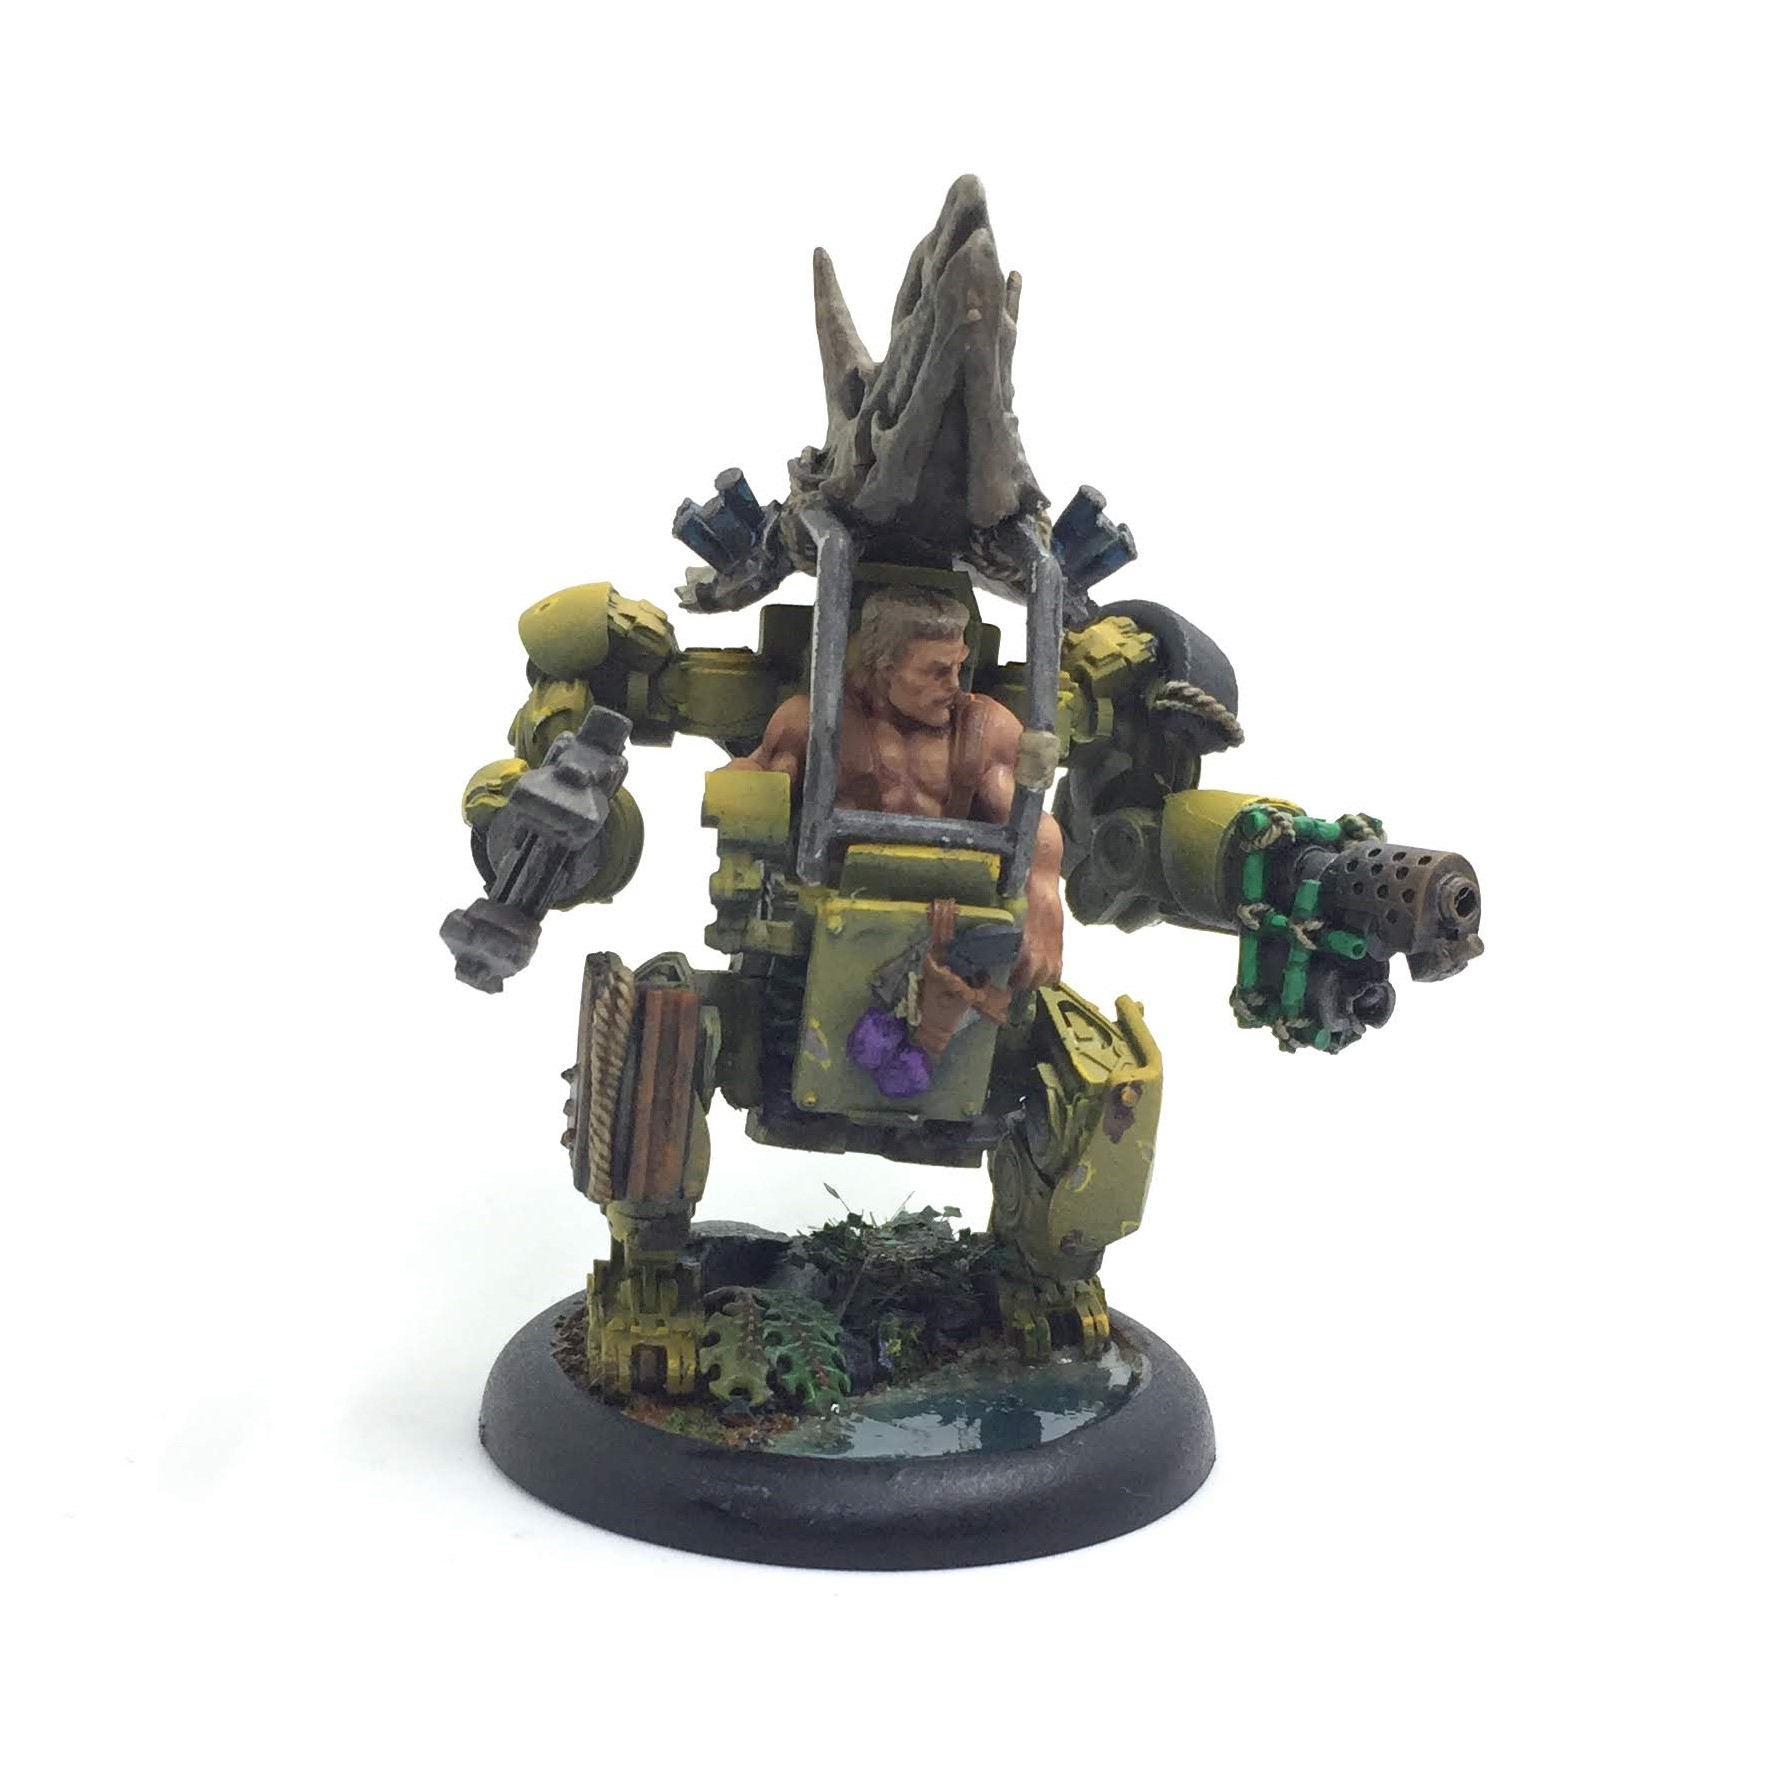
Step 6 – Painted.
Pretty much jumped ahead here to the painted model with the dino skull fitted. I didn’t do a lot of clever stuff here, just basecoats, washes, highlights on the whole. A few edge highlights added to the armour along with some dents (poorly done).
I would add more posts but this seems to be the limit in one thread.
What’s left to do is the basing which I’m doing all in one go across all the minis in the faction. More on that later…
Basing complete
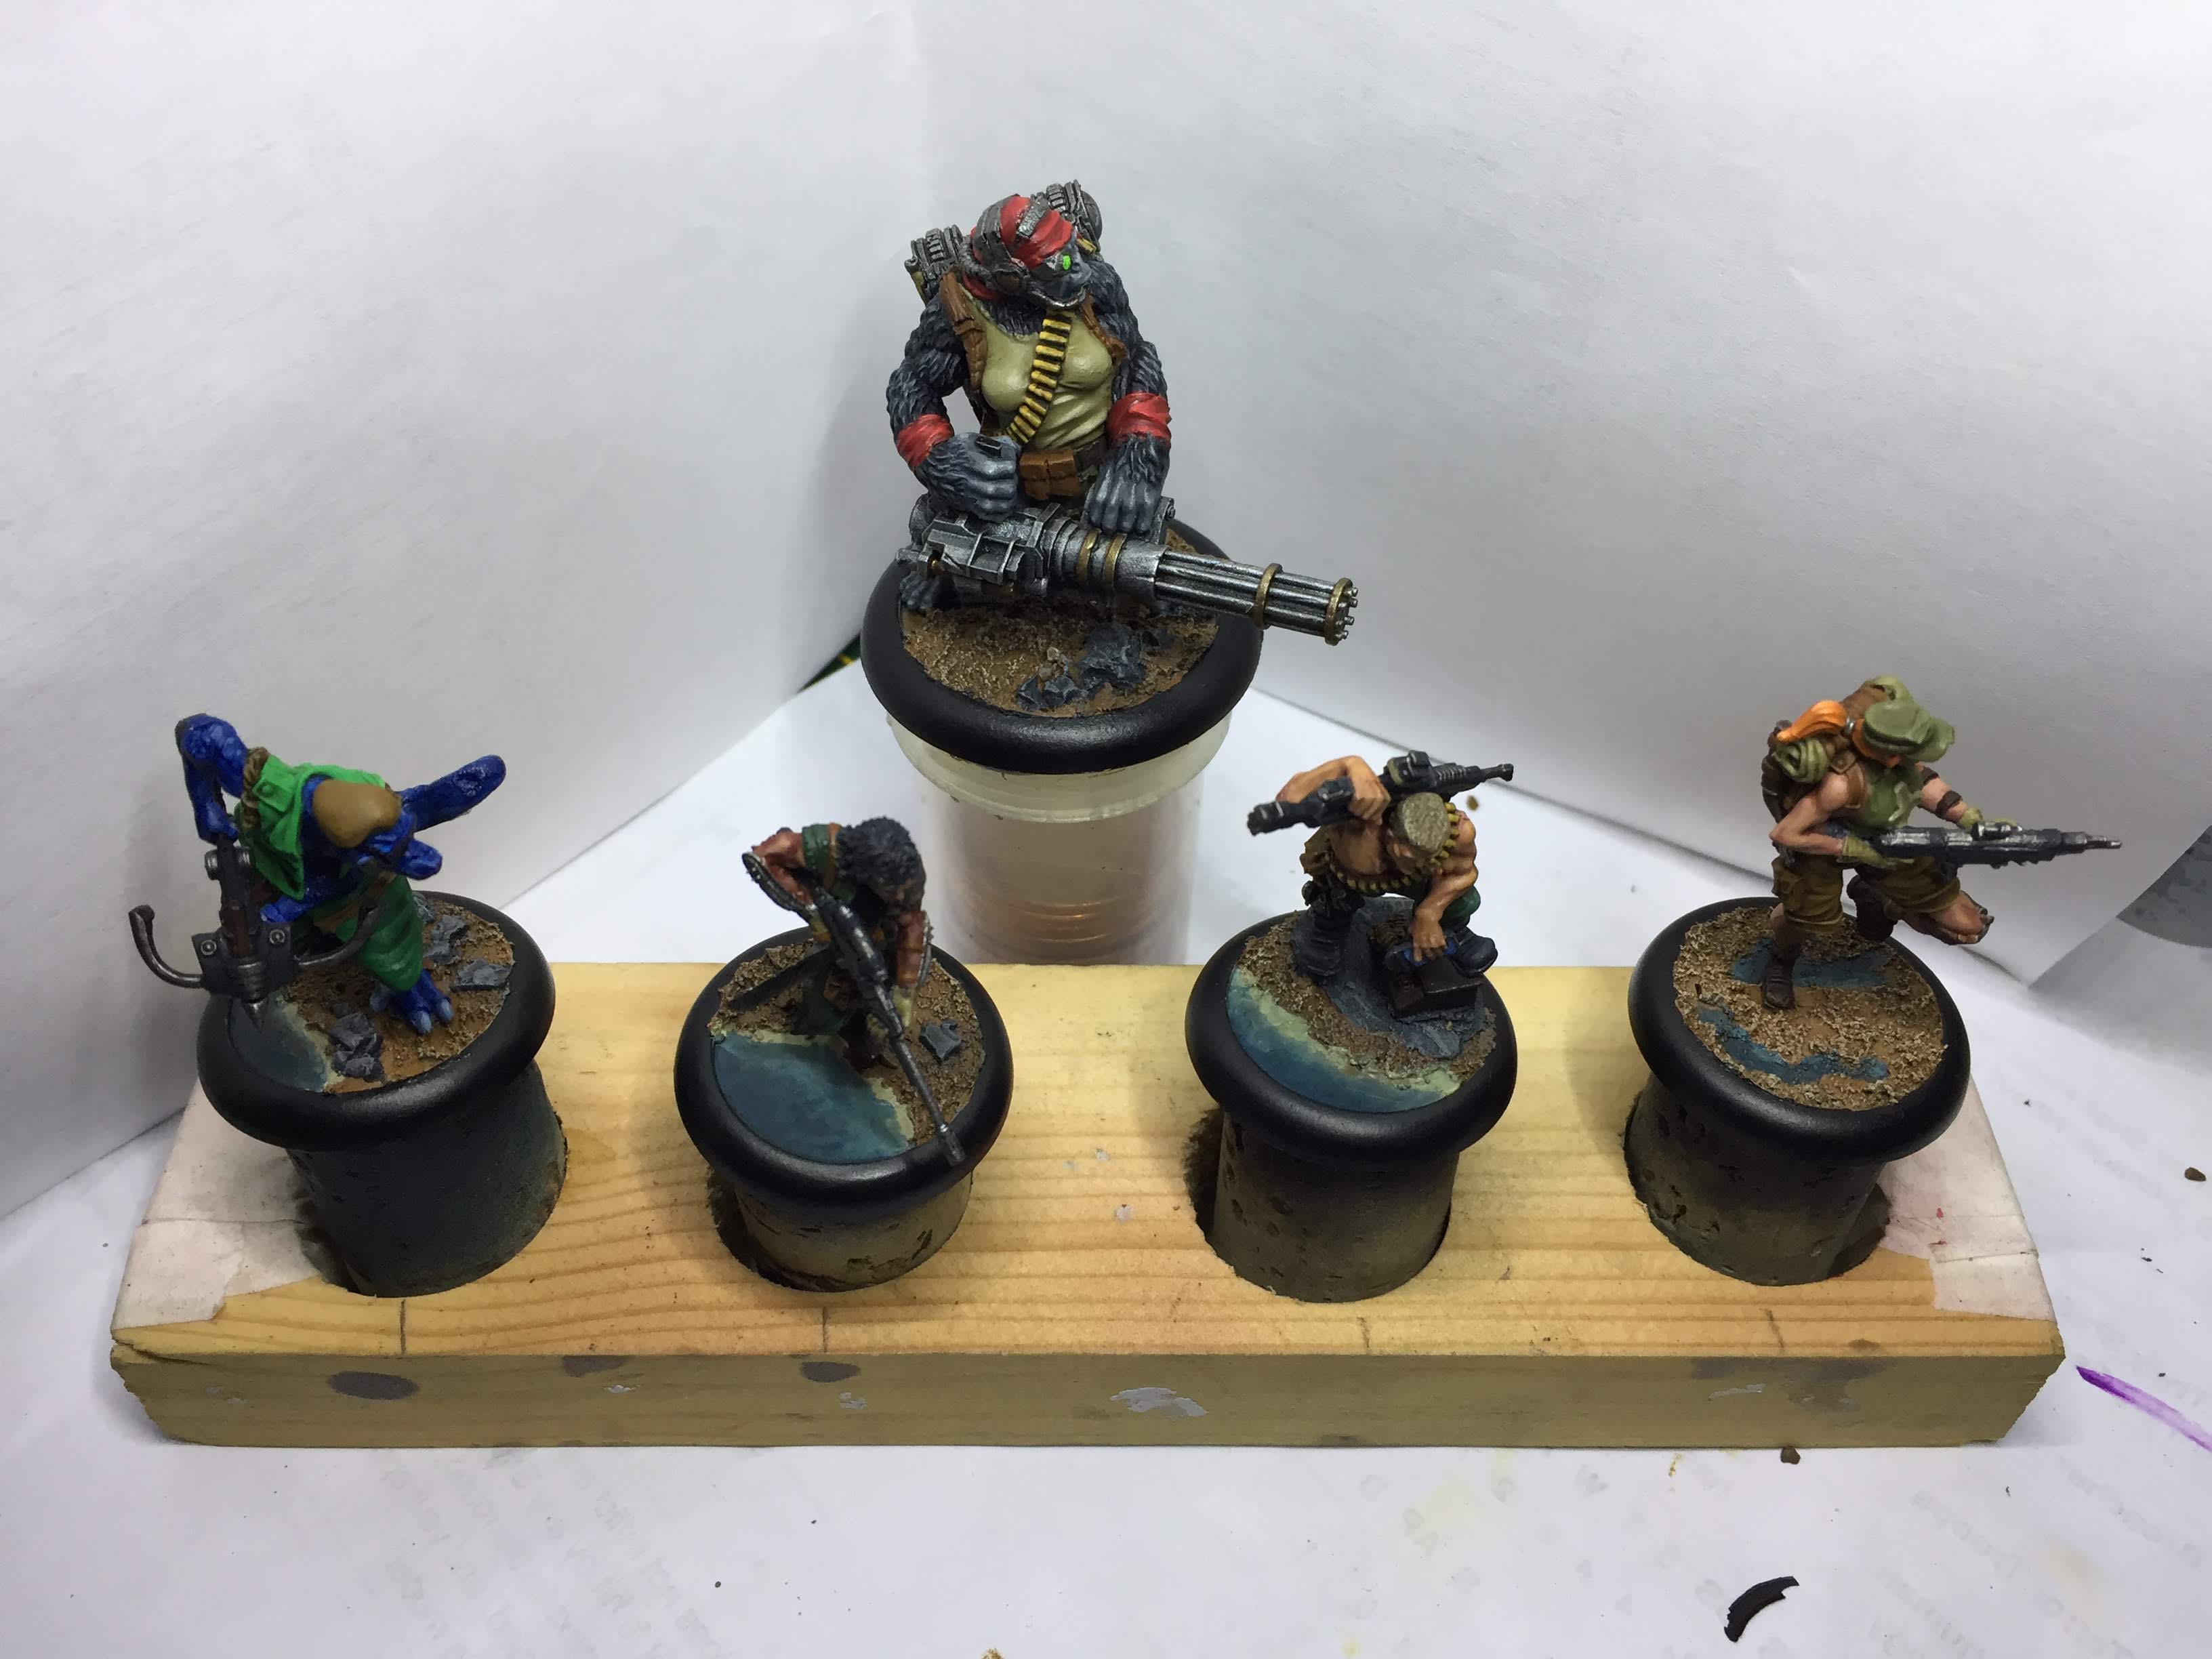 Bases painted
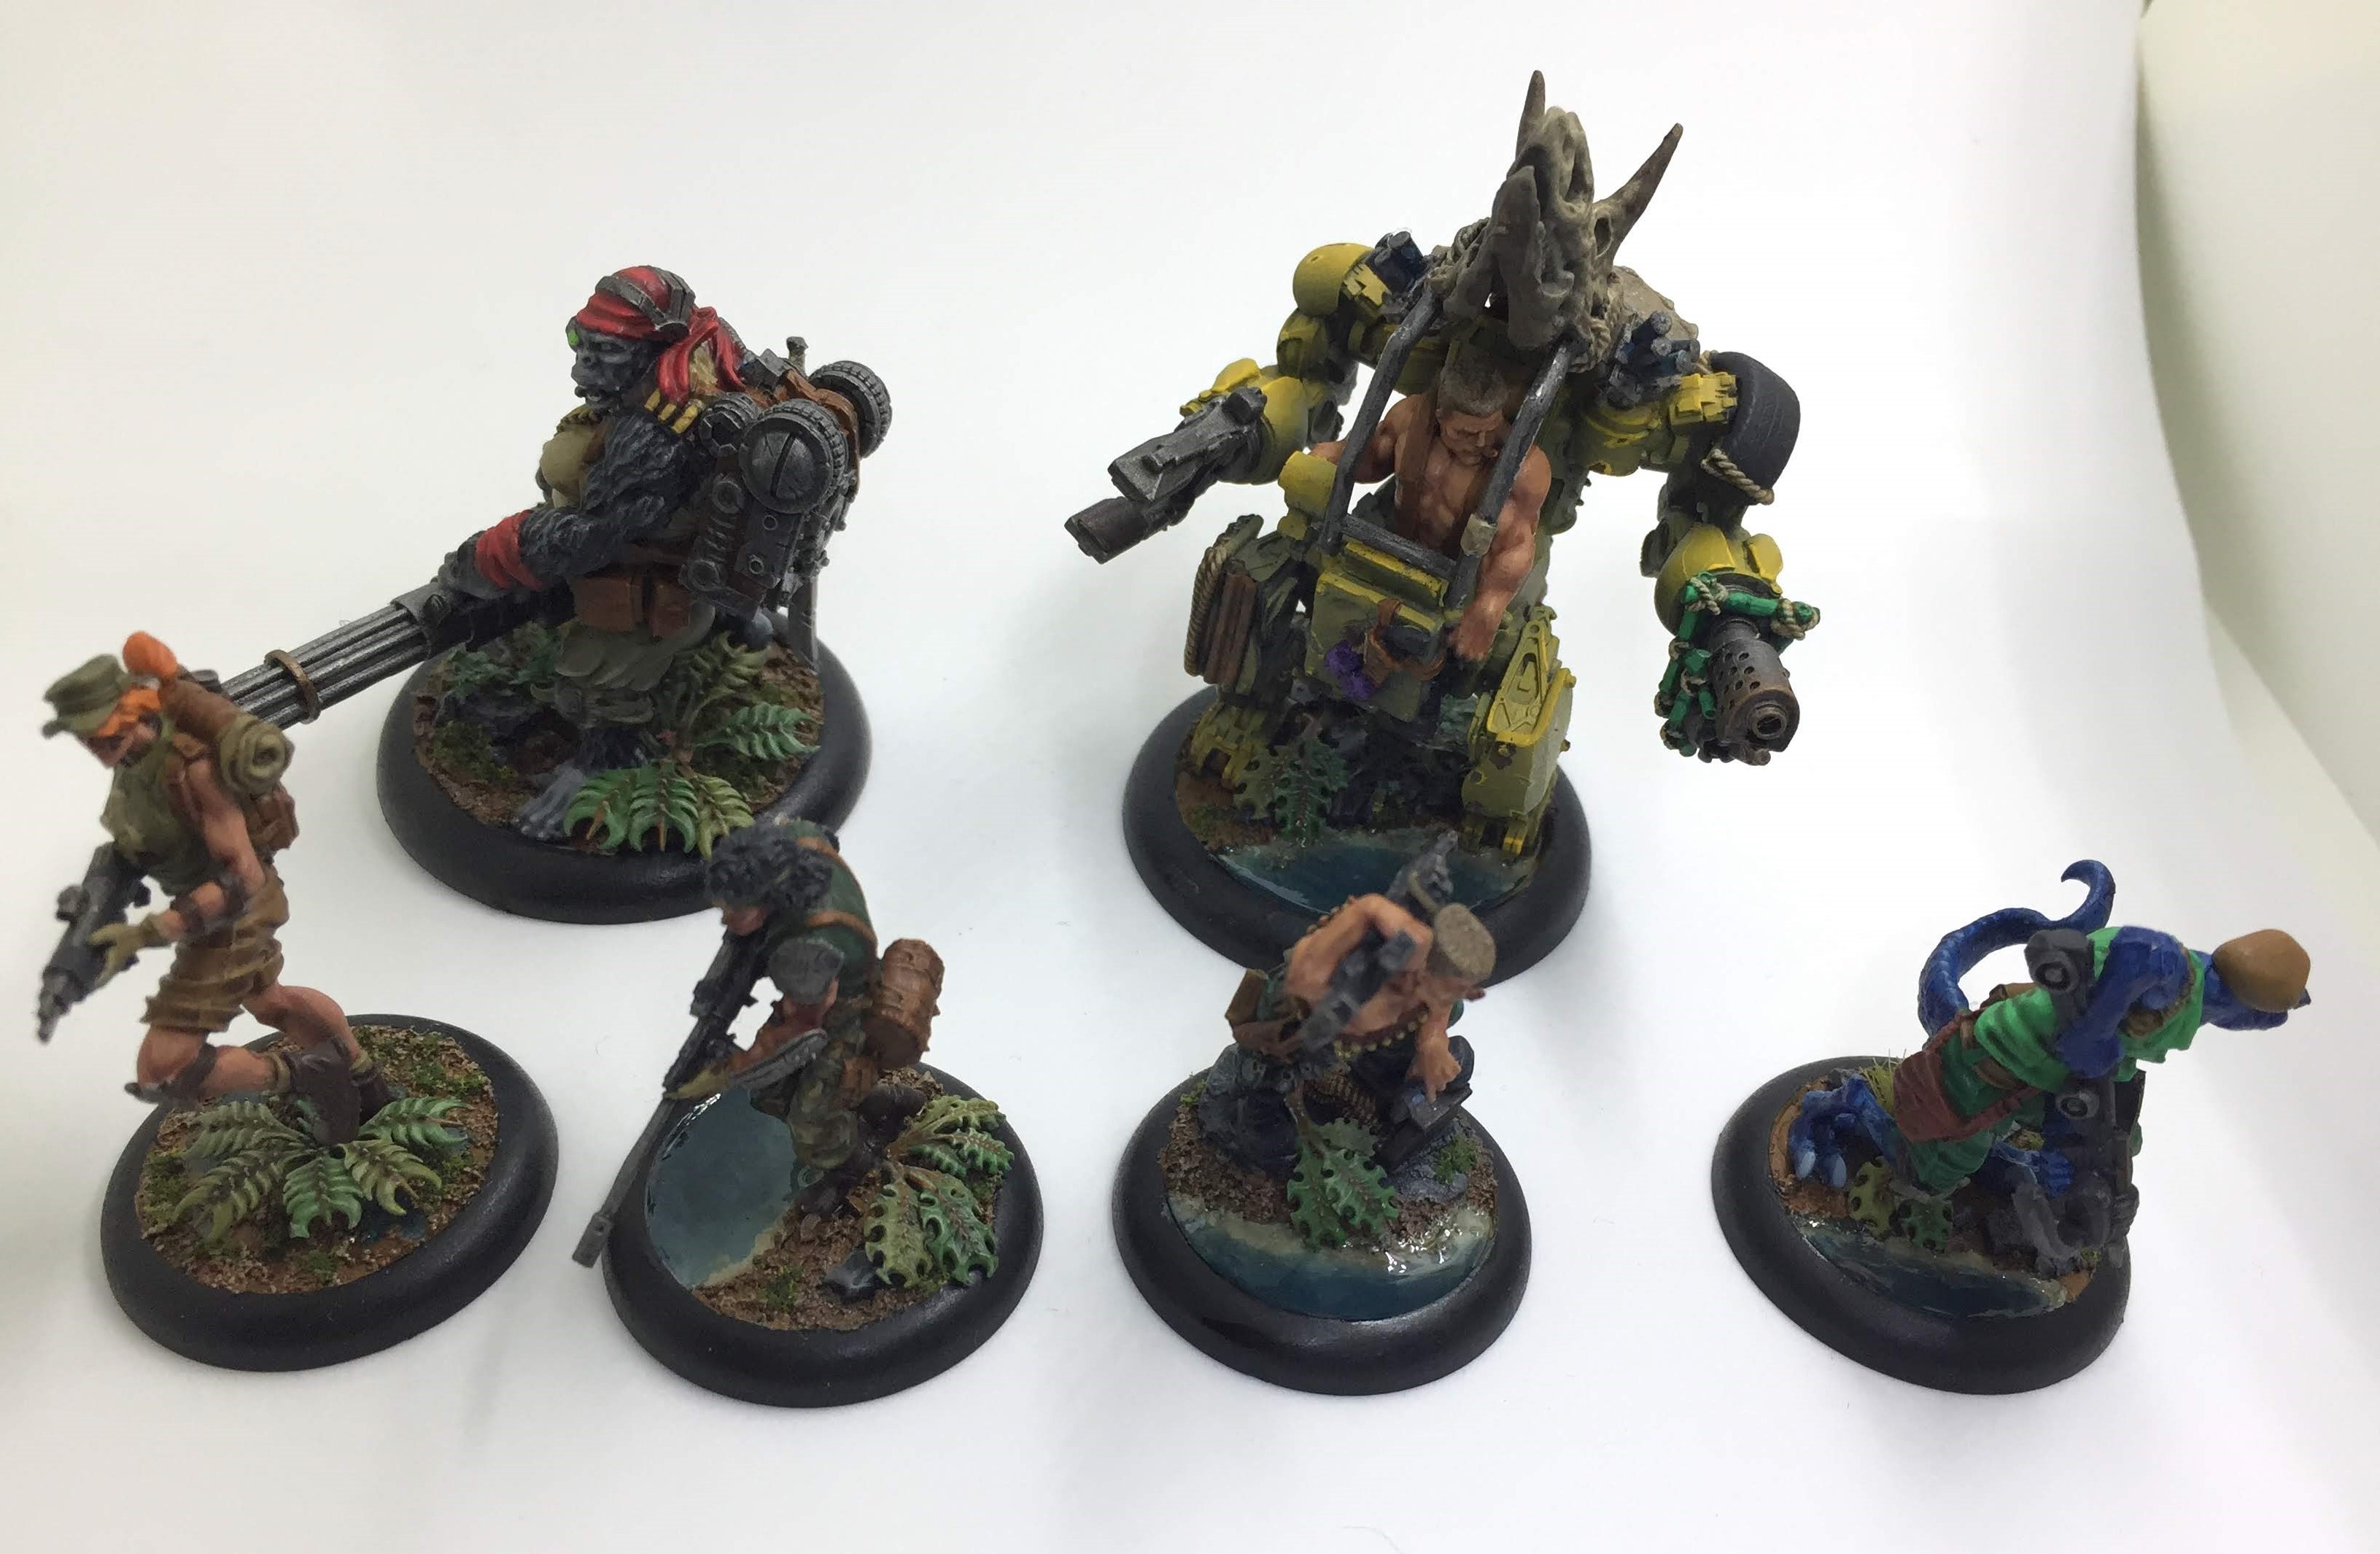
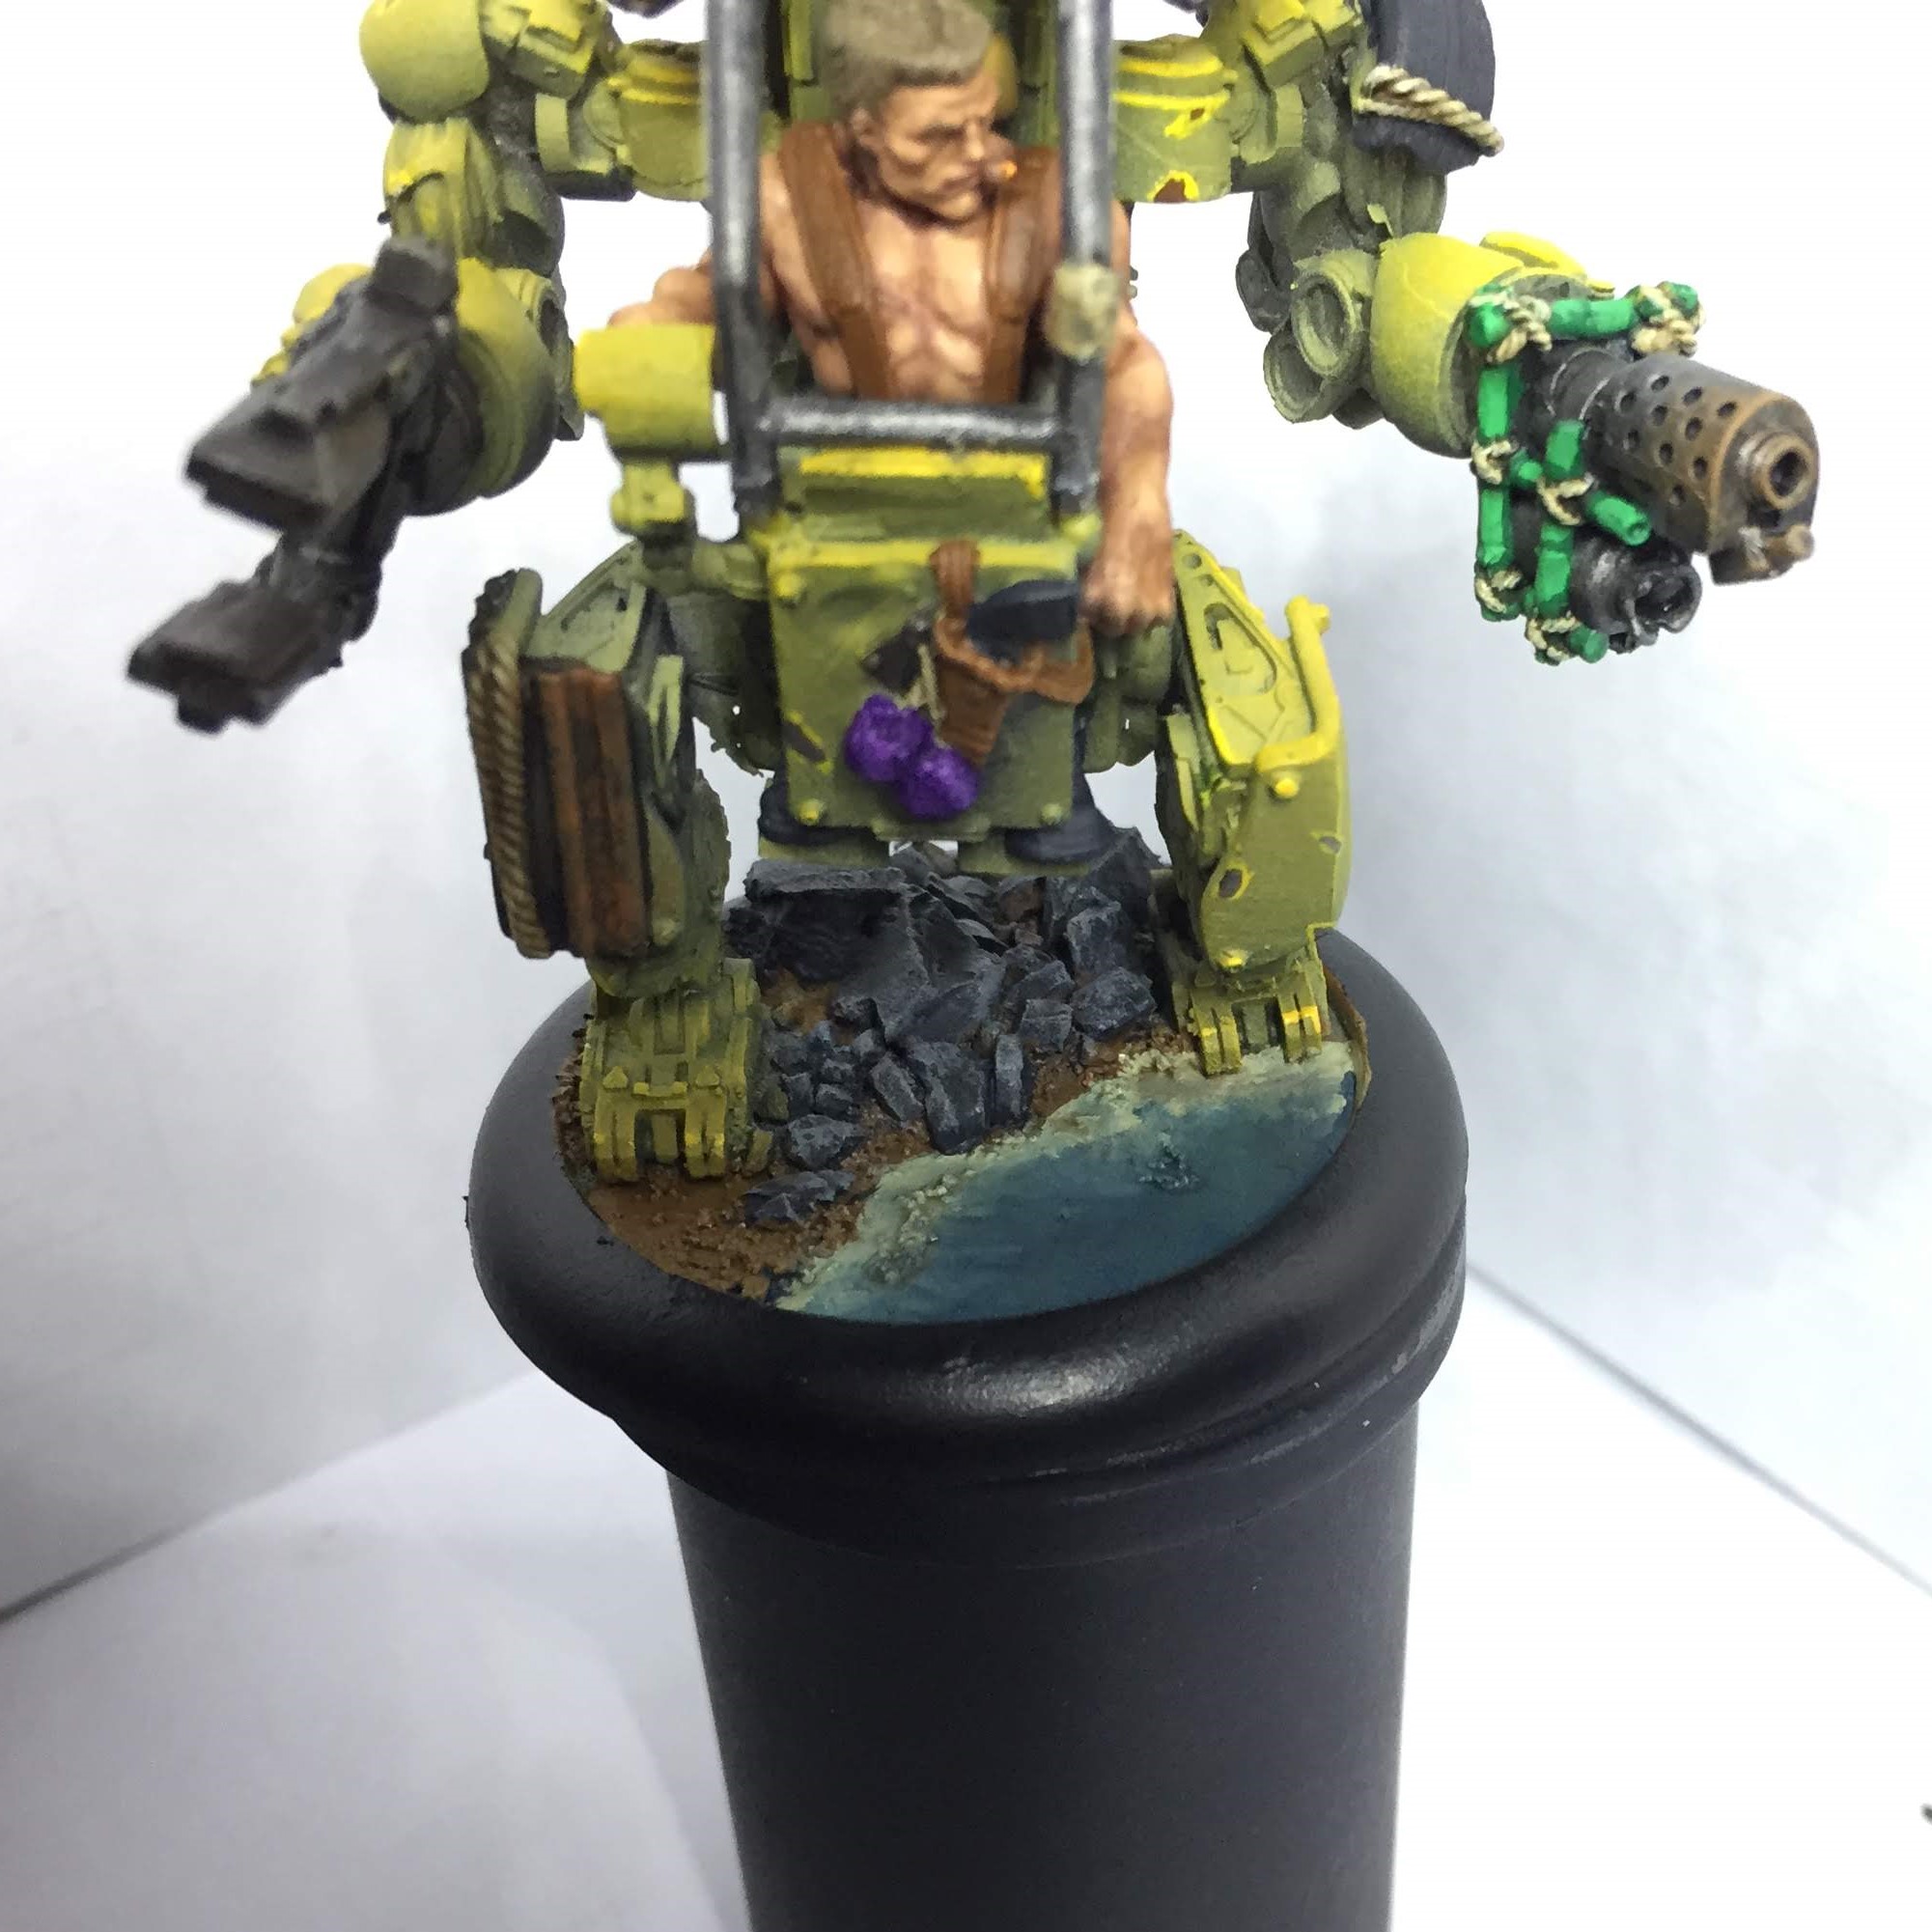 Forek (mounted)
 Here’s the team ready for some detail to be added to the bases. At this point they’ve just had brown mud / grey rocks / blue pools painted.
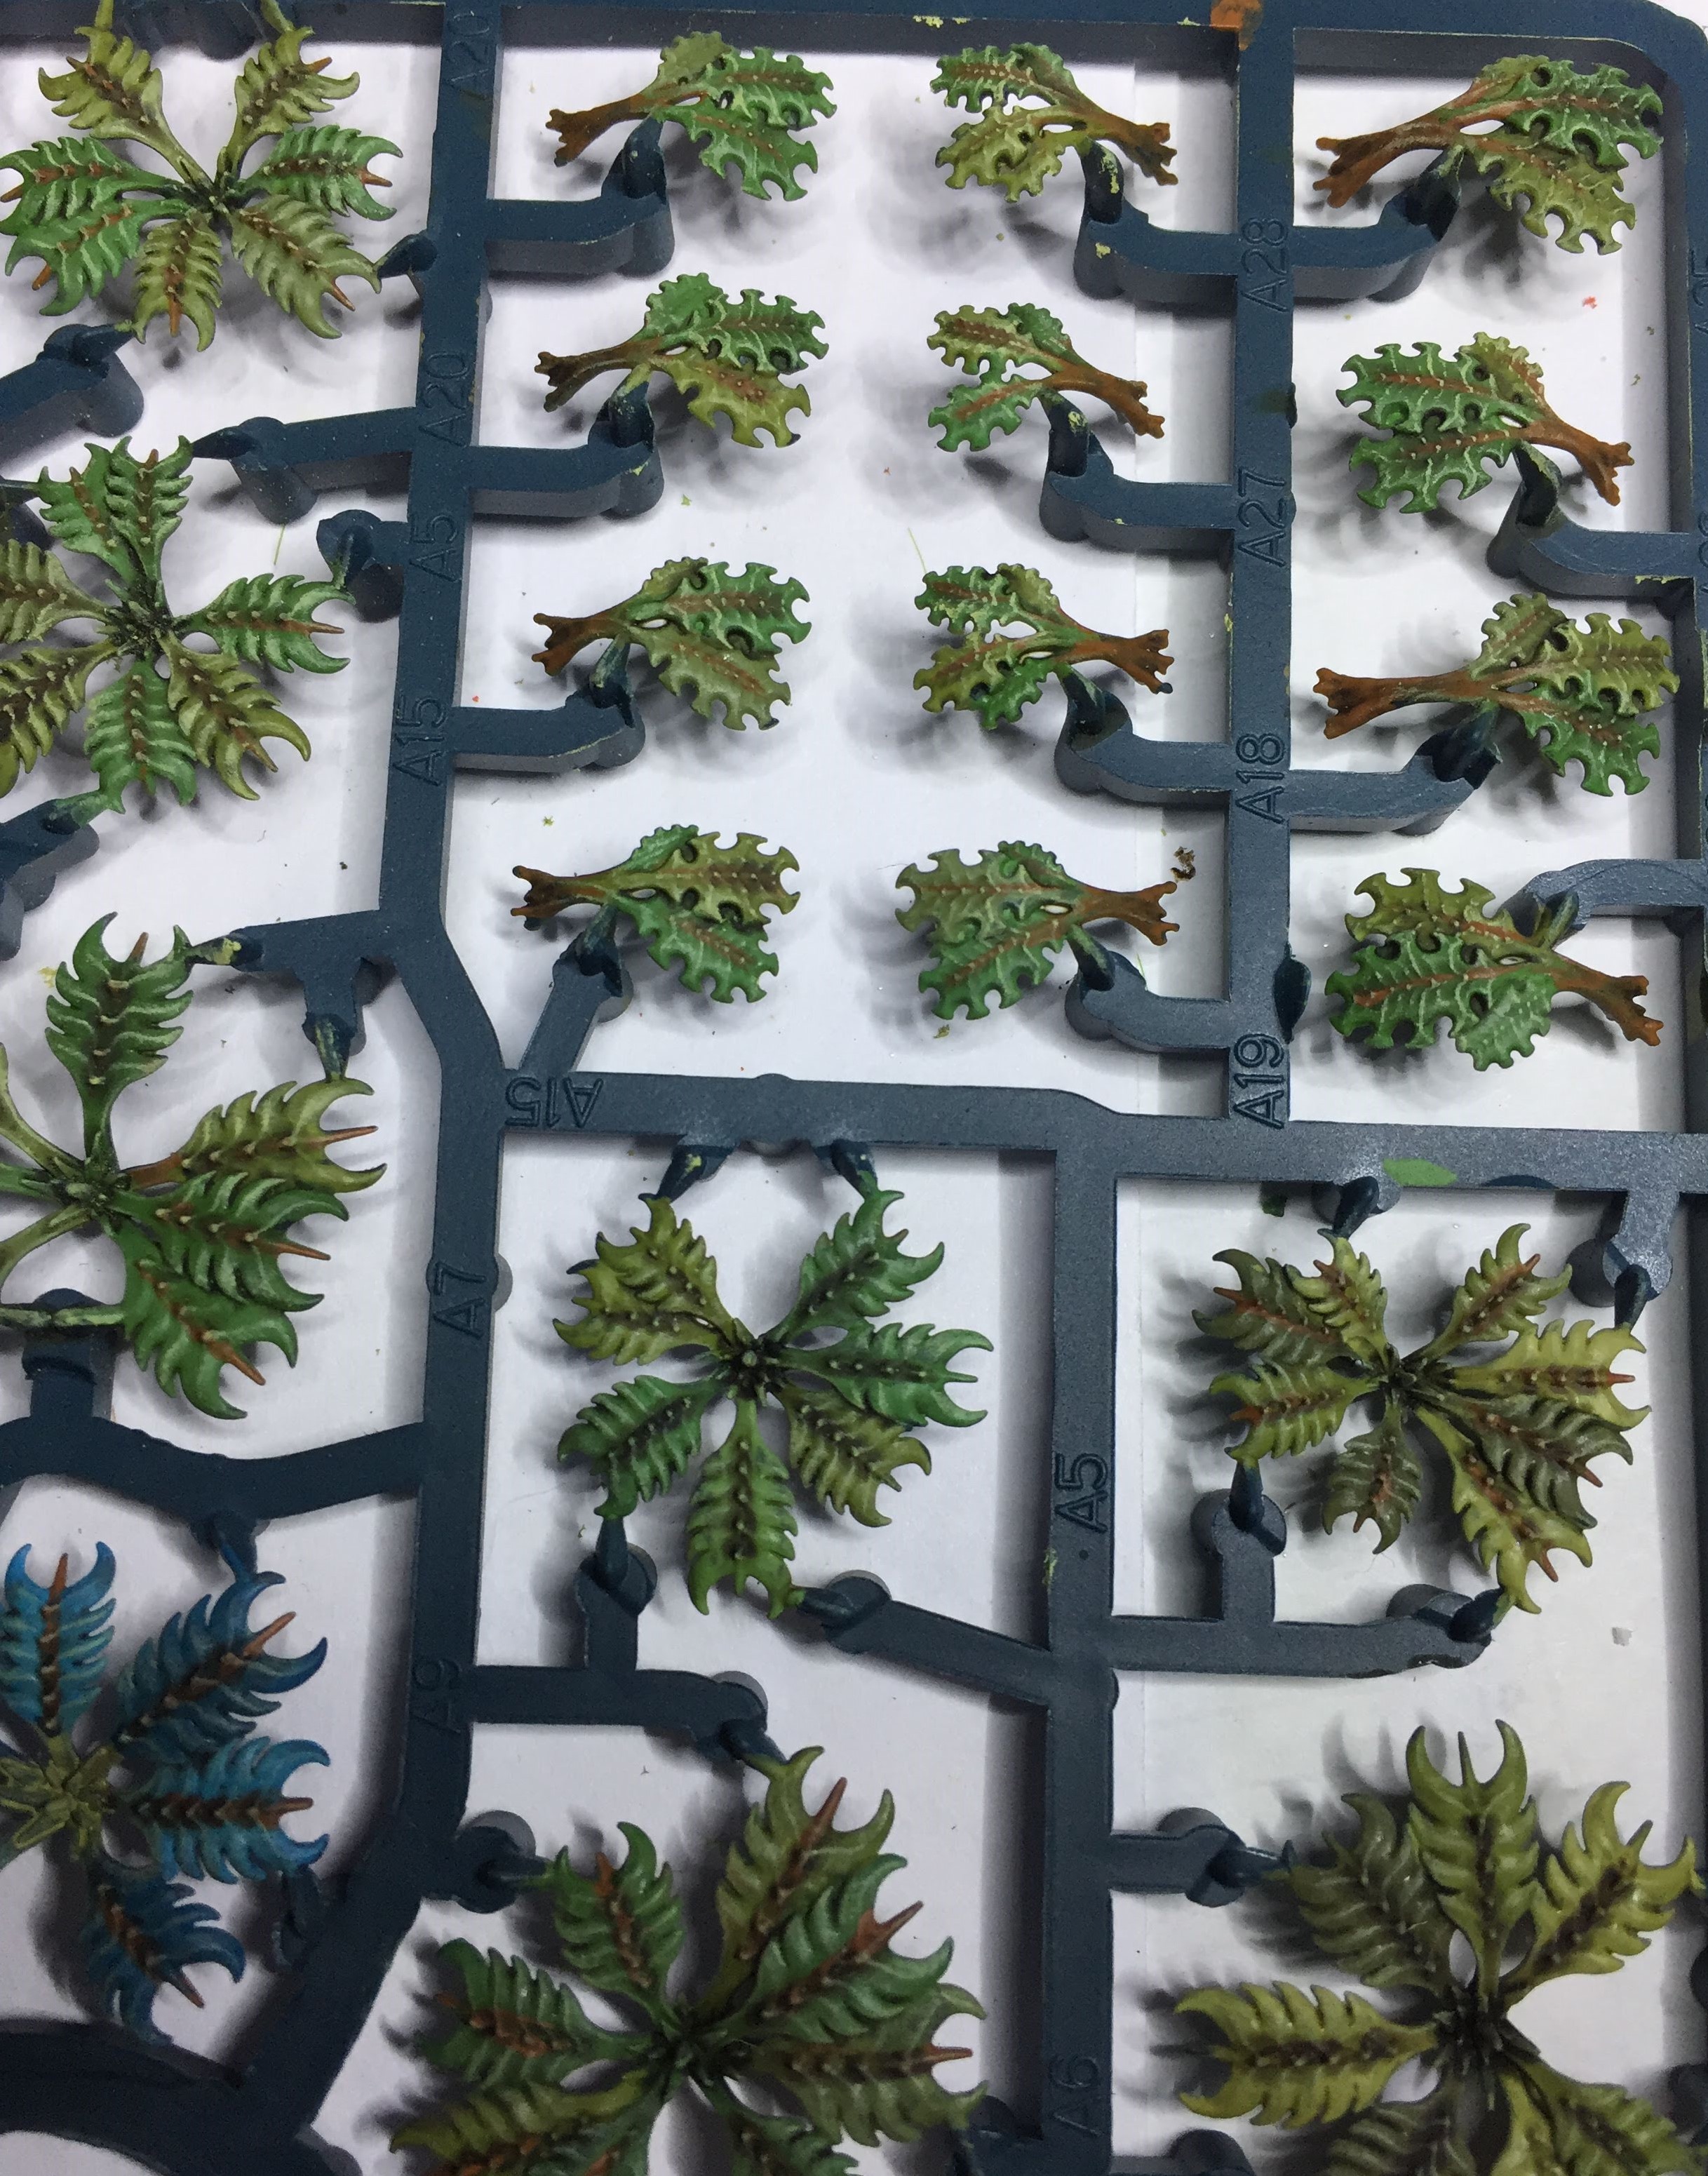 GW Barbed Bracken
I decided the pick up some GW Barbed Bracken to experiment with for foliage rather than simply cut up the plastic aquarium plants I’ve been using for scatter terrain.
The first thing I noticed was that is wasn’t made of hard plastic, but rather a softer almost rubber like material. It was only really noticeable whilst dry brushing and I found that once it had several layers of paint and varnish on it was a bit harder. I liked it, that slight flex makes me think it’s less likely to break off but we’ll see.
 Foliage and water effect added
GW Barbed Bracken added as well as some Army Painter Ivy around the rocks on Ranelle and Forek (mounted) figures. I threw on some green flock as well to break up some of the brown.
As well as that I added some Woodlands Scenics Realistic Water using a pipette into the pools. Most bases needed two layers. It’s worth noting that I did this AFTER I’ve varnished the figures.
All in all, very happy with the results.
DONE
Wall of pics coming up – I’m calling this project as done now but first some final thoughts. I’ve enjoyed using the project facility at OTT/BoW. Generally no issues using it but the following I think would be helpful additions :
- Ability to access your projects from your Profile pic (top right corner of the page) without having to first go into Edit Profile to find the them.
- Ability to be able scroll backwards and forwards in photo galleries
- Ability to preview posts before publishing (I’ve frequently found that photos are upside down etc when published).
If you’re still reading I hope you found something useful or interesting in this project, I’ve certainly found maintaining it has helped motivate me to stick with it.
And finally, thanks to everyone that commented or voted….


Kalen - new addition to Militia
Picked up Kalen sometime ago but got found to painting him over Christmas so thought I’d add him to the project for completeness…