![NO Weekender Or Cult Of Games XLBS This Weekend [Updated]](https://images.beastsofwar.com/2026/03/No_Weekender_and_XLBS_this_Weekend-225-127.jpg)


Kingdom Death:Monster – What have I gotten myself into??!!!


Recommendations: 862
About the Project
I finally bit the proverbial bullet last year and jumped into the deliciously insane, macabre and horrifically beautiful world of Kingdom Death. It all started when one of my viewers over on Twitch sent me a mini to paint as a gift. Loved it so much so I had a renewed look into the game and all the minis that are part of the world. Then I was given another mini as a present from another viewer and I was hooked and got the core game from BackerKit. So all I get done for this amazing game and world will be going HERE! Hope you enjoy as much as I am :)
Related Game: Kingdom Death: Monster
Related Company: Kingdom Death
Related Genre: Survival
This Project is Active
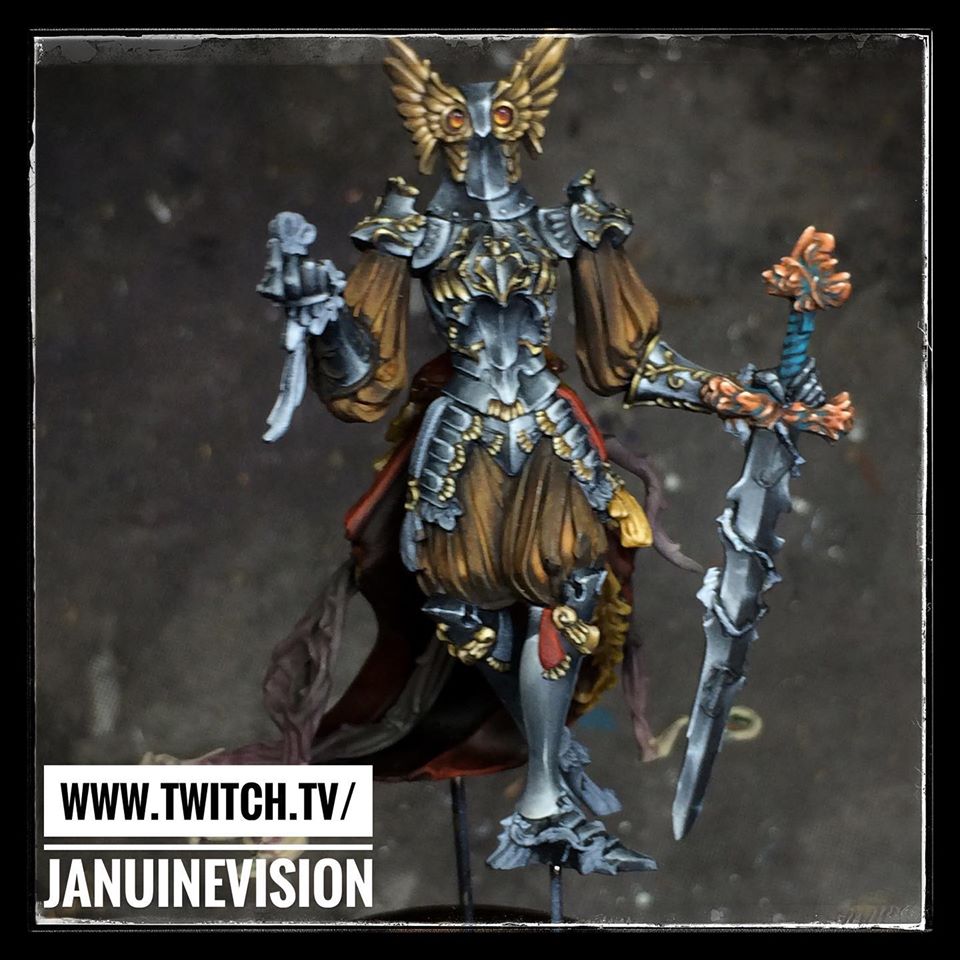
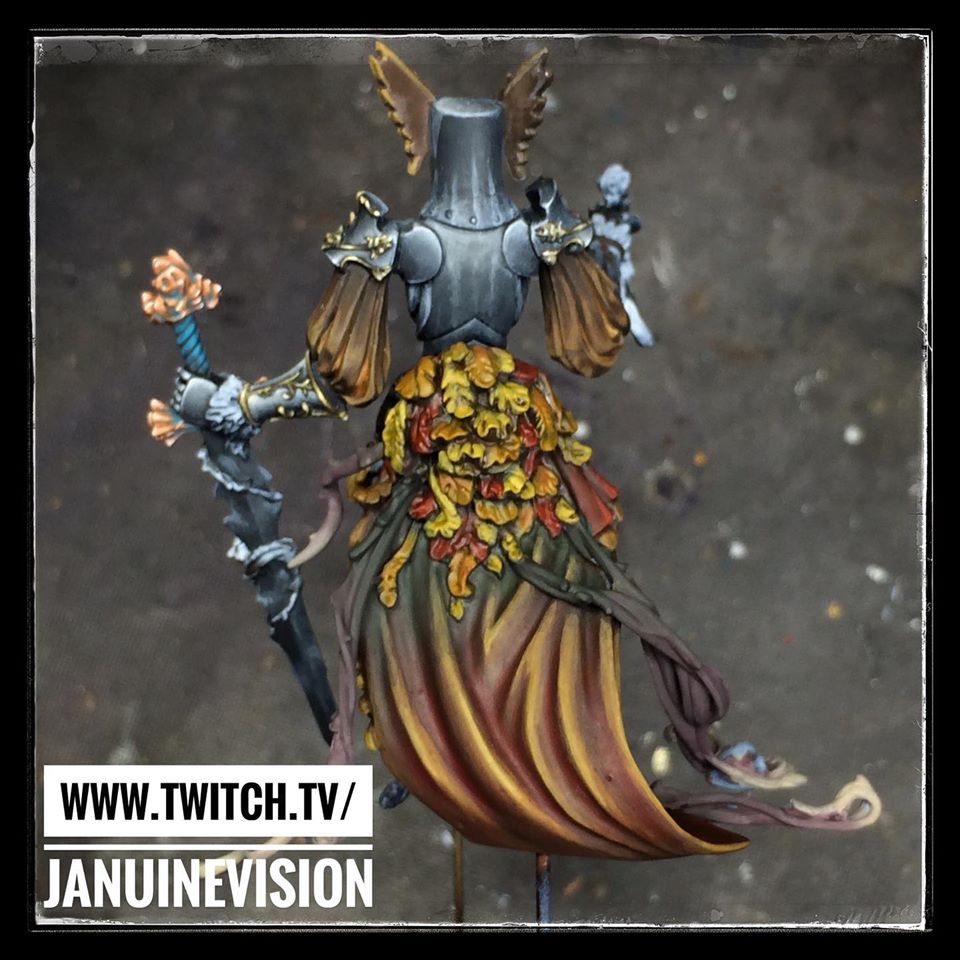
The Flower Knight Returns - Autumnal Gown n Foliage Pt 4
Just a very quick wee update.
The Base has some base sketching down but no photos yet!!
However, made some good progress on yesterday’s Twitch stream on his gown.
Worked the green, red and ochres of the fabric and started on the leaves, much fun and the vines, pain in the arse!!
He’s getting closer to finshed. Still have a bit of the nmm to finish up, more vines (grrrr) work and some more foliage on the knight himself.
The Flower Knight Returns - Building a Base Pt 3
With the base fully built it’s time to prime!!
I start with an overall two light coat black prime using the best airbrush primer on the market imho – Stynylrez by Badger. Pain in the arse to get in Ireland but there are one or two places in the UK that it can be ordered from. I got mine from BarwellBodyworks, a UK airbrush supplier that ships.
Once the two layers of black are totally dry, I go back in with a lateral prime of Stynylrez grey primer. With the grey I spray 45 degree angle around the base paying attention to areas where light will fall and leaving out any dark recesses areas. Most of this is bring out detail and make it more visible for when I paint the base.
And that is the base pretty much ready to go!


The Flower Knight Returns - Building a Base Pt 2
Gooooooooood morning Beasts and happy….. Tuesday, aye, Tuesday…… or so the computer tells me!
And on with Part 2.
With the main core build down, made of paperclips, plasticard, air dry clay and epoxy putty – it’s time to start refining and texturing our build.
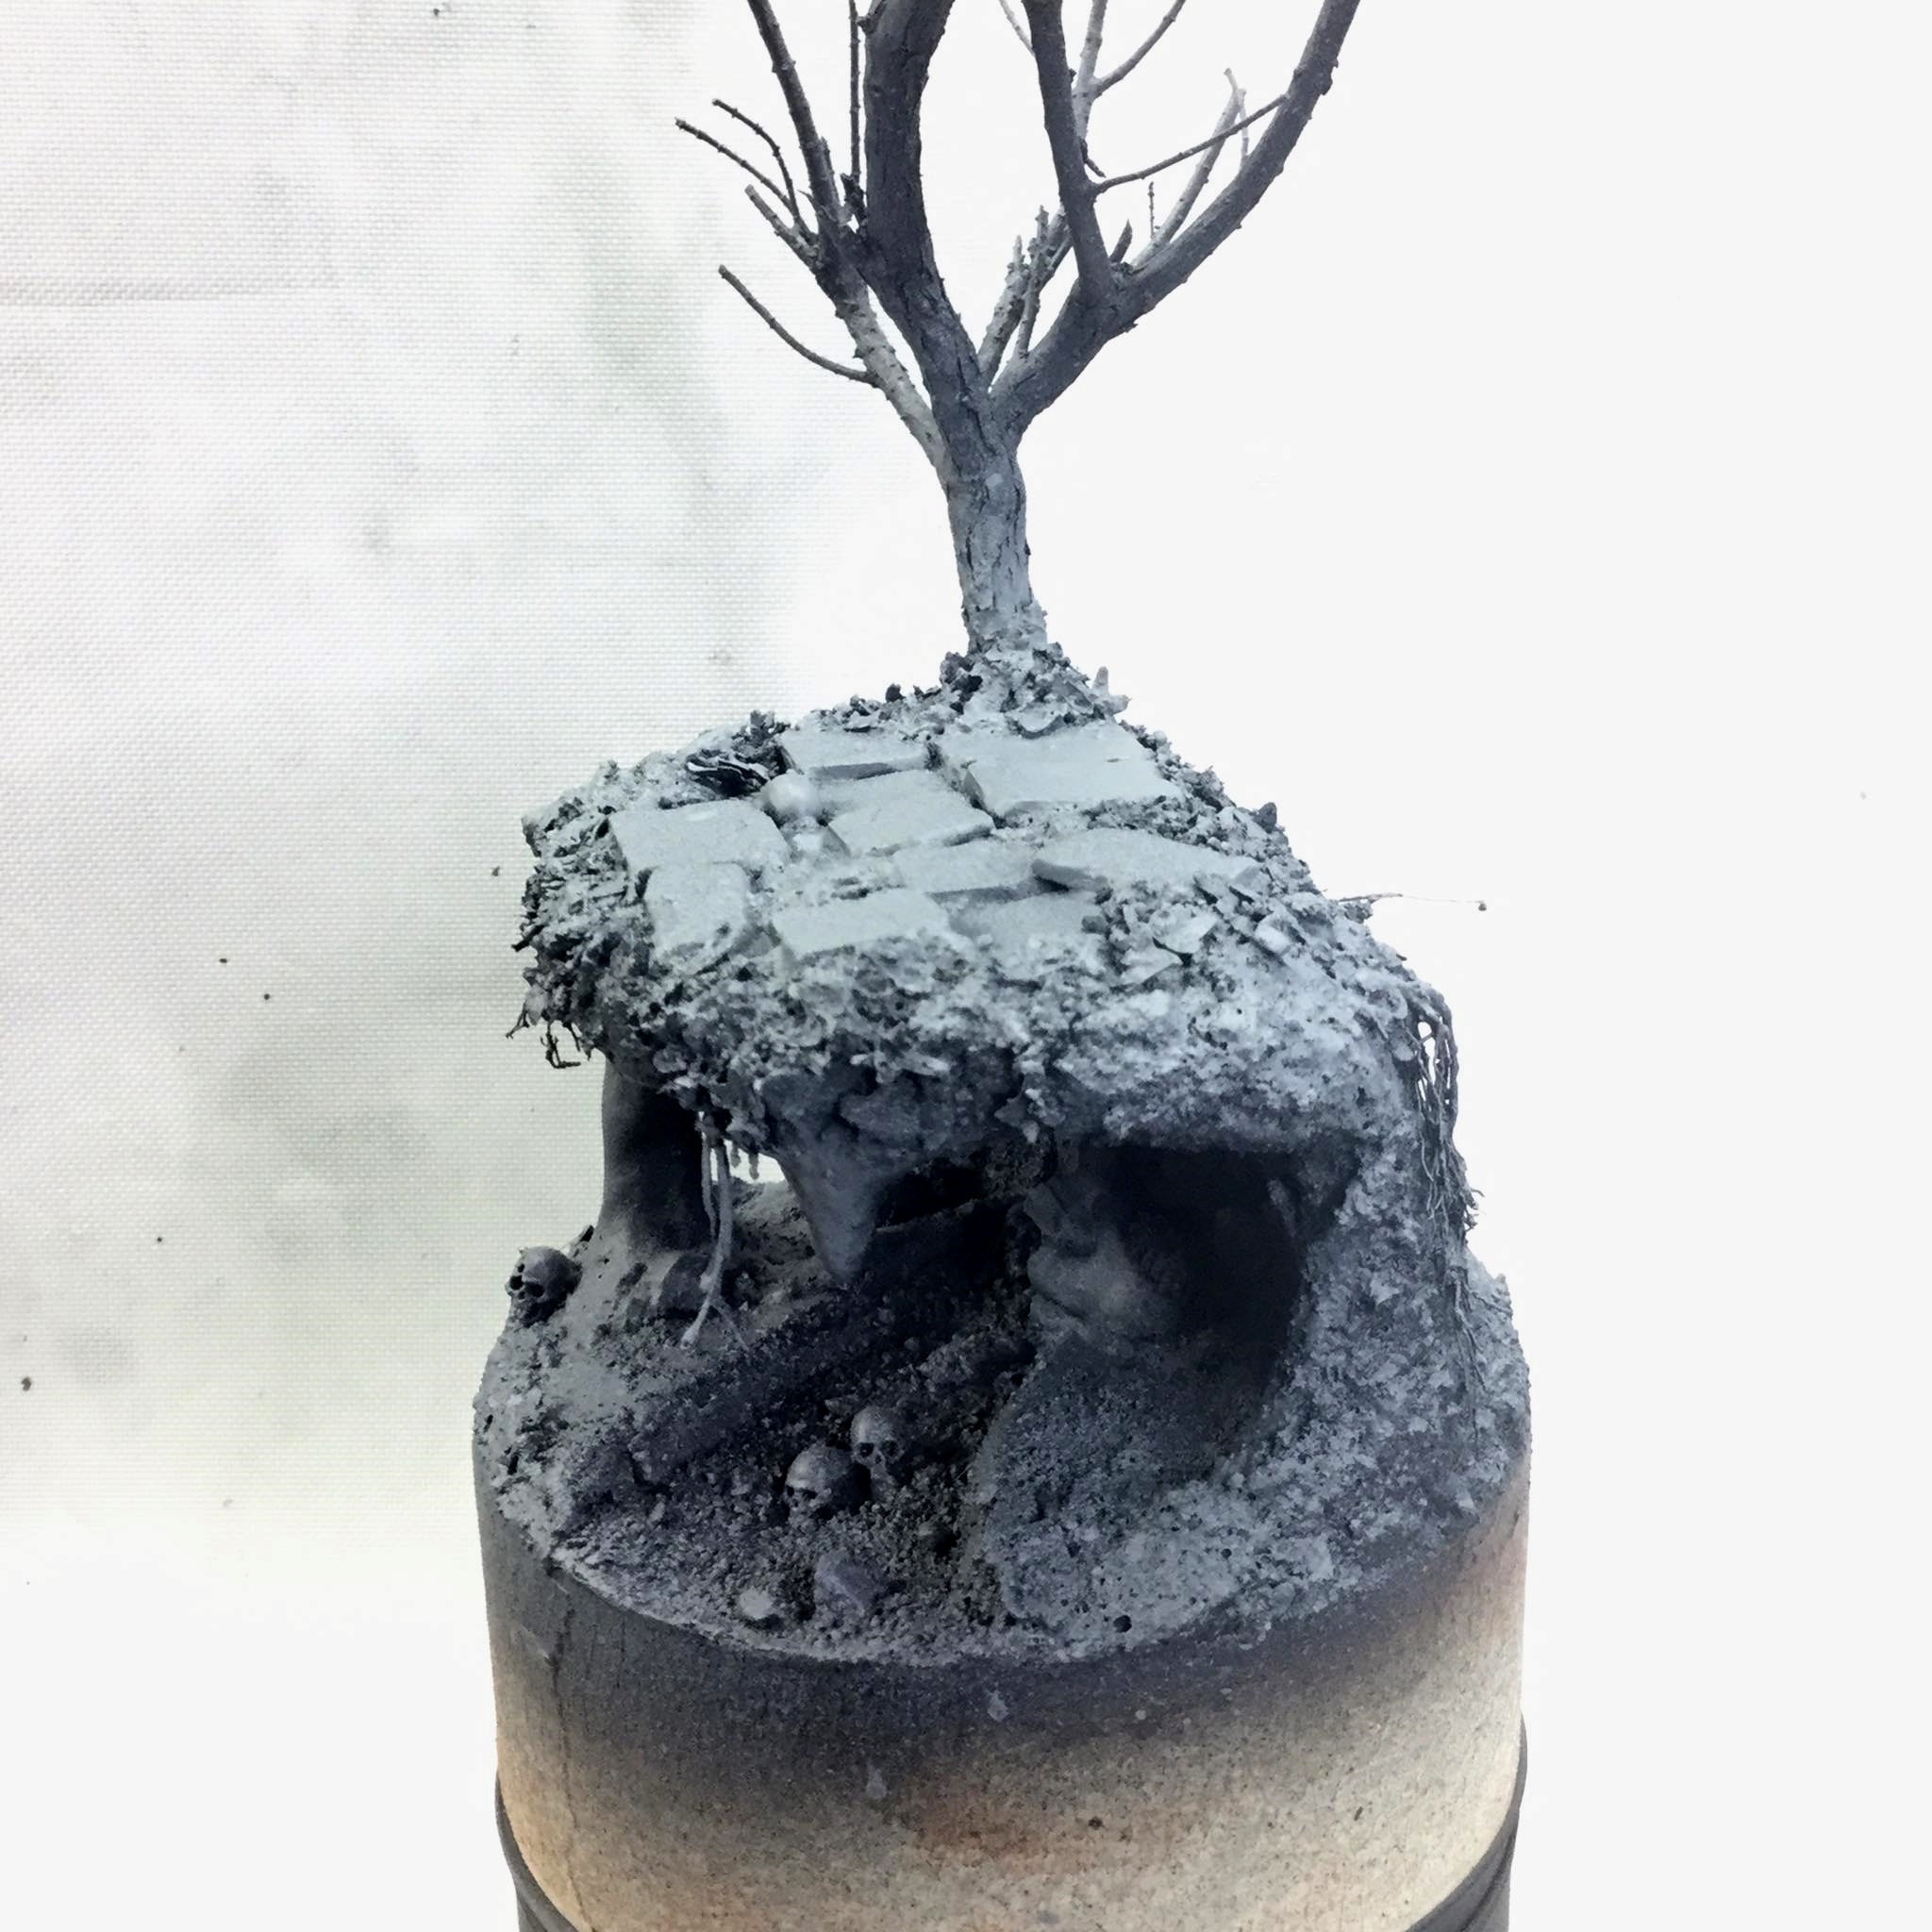
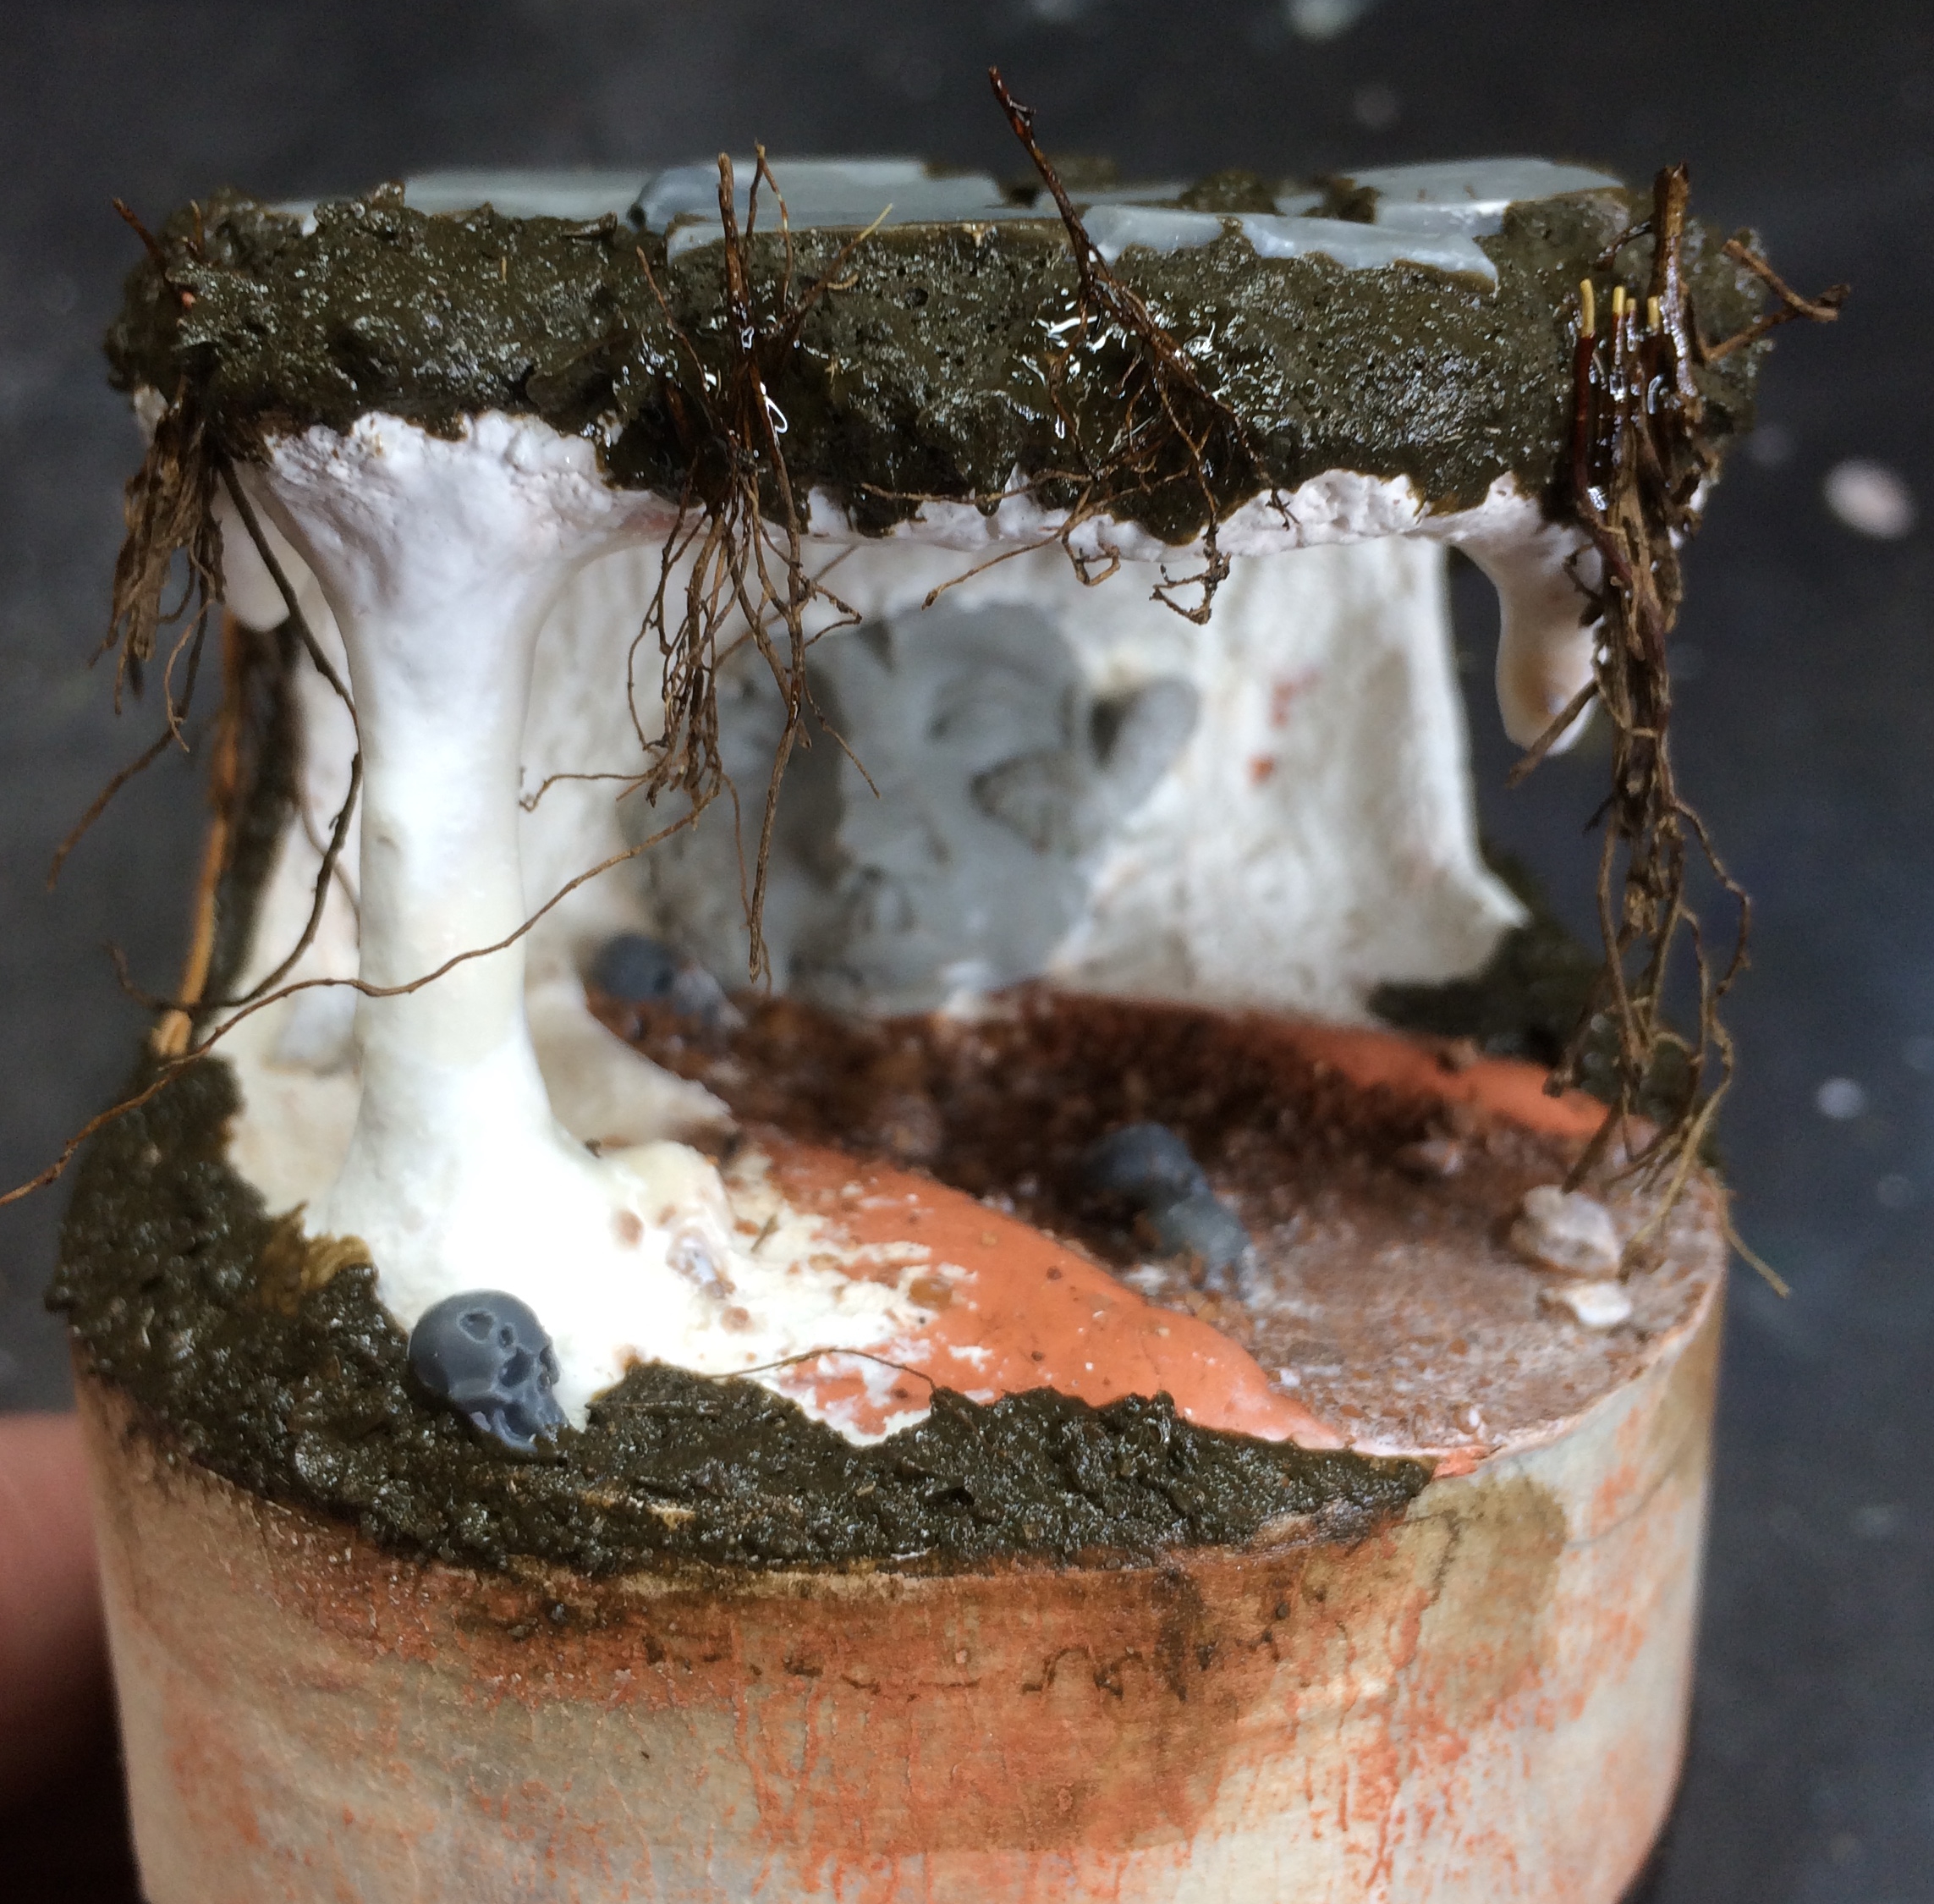
So we have a wee cave, cave stream, an overhang platform and some stalligtites that all need their own texturing.
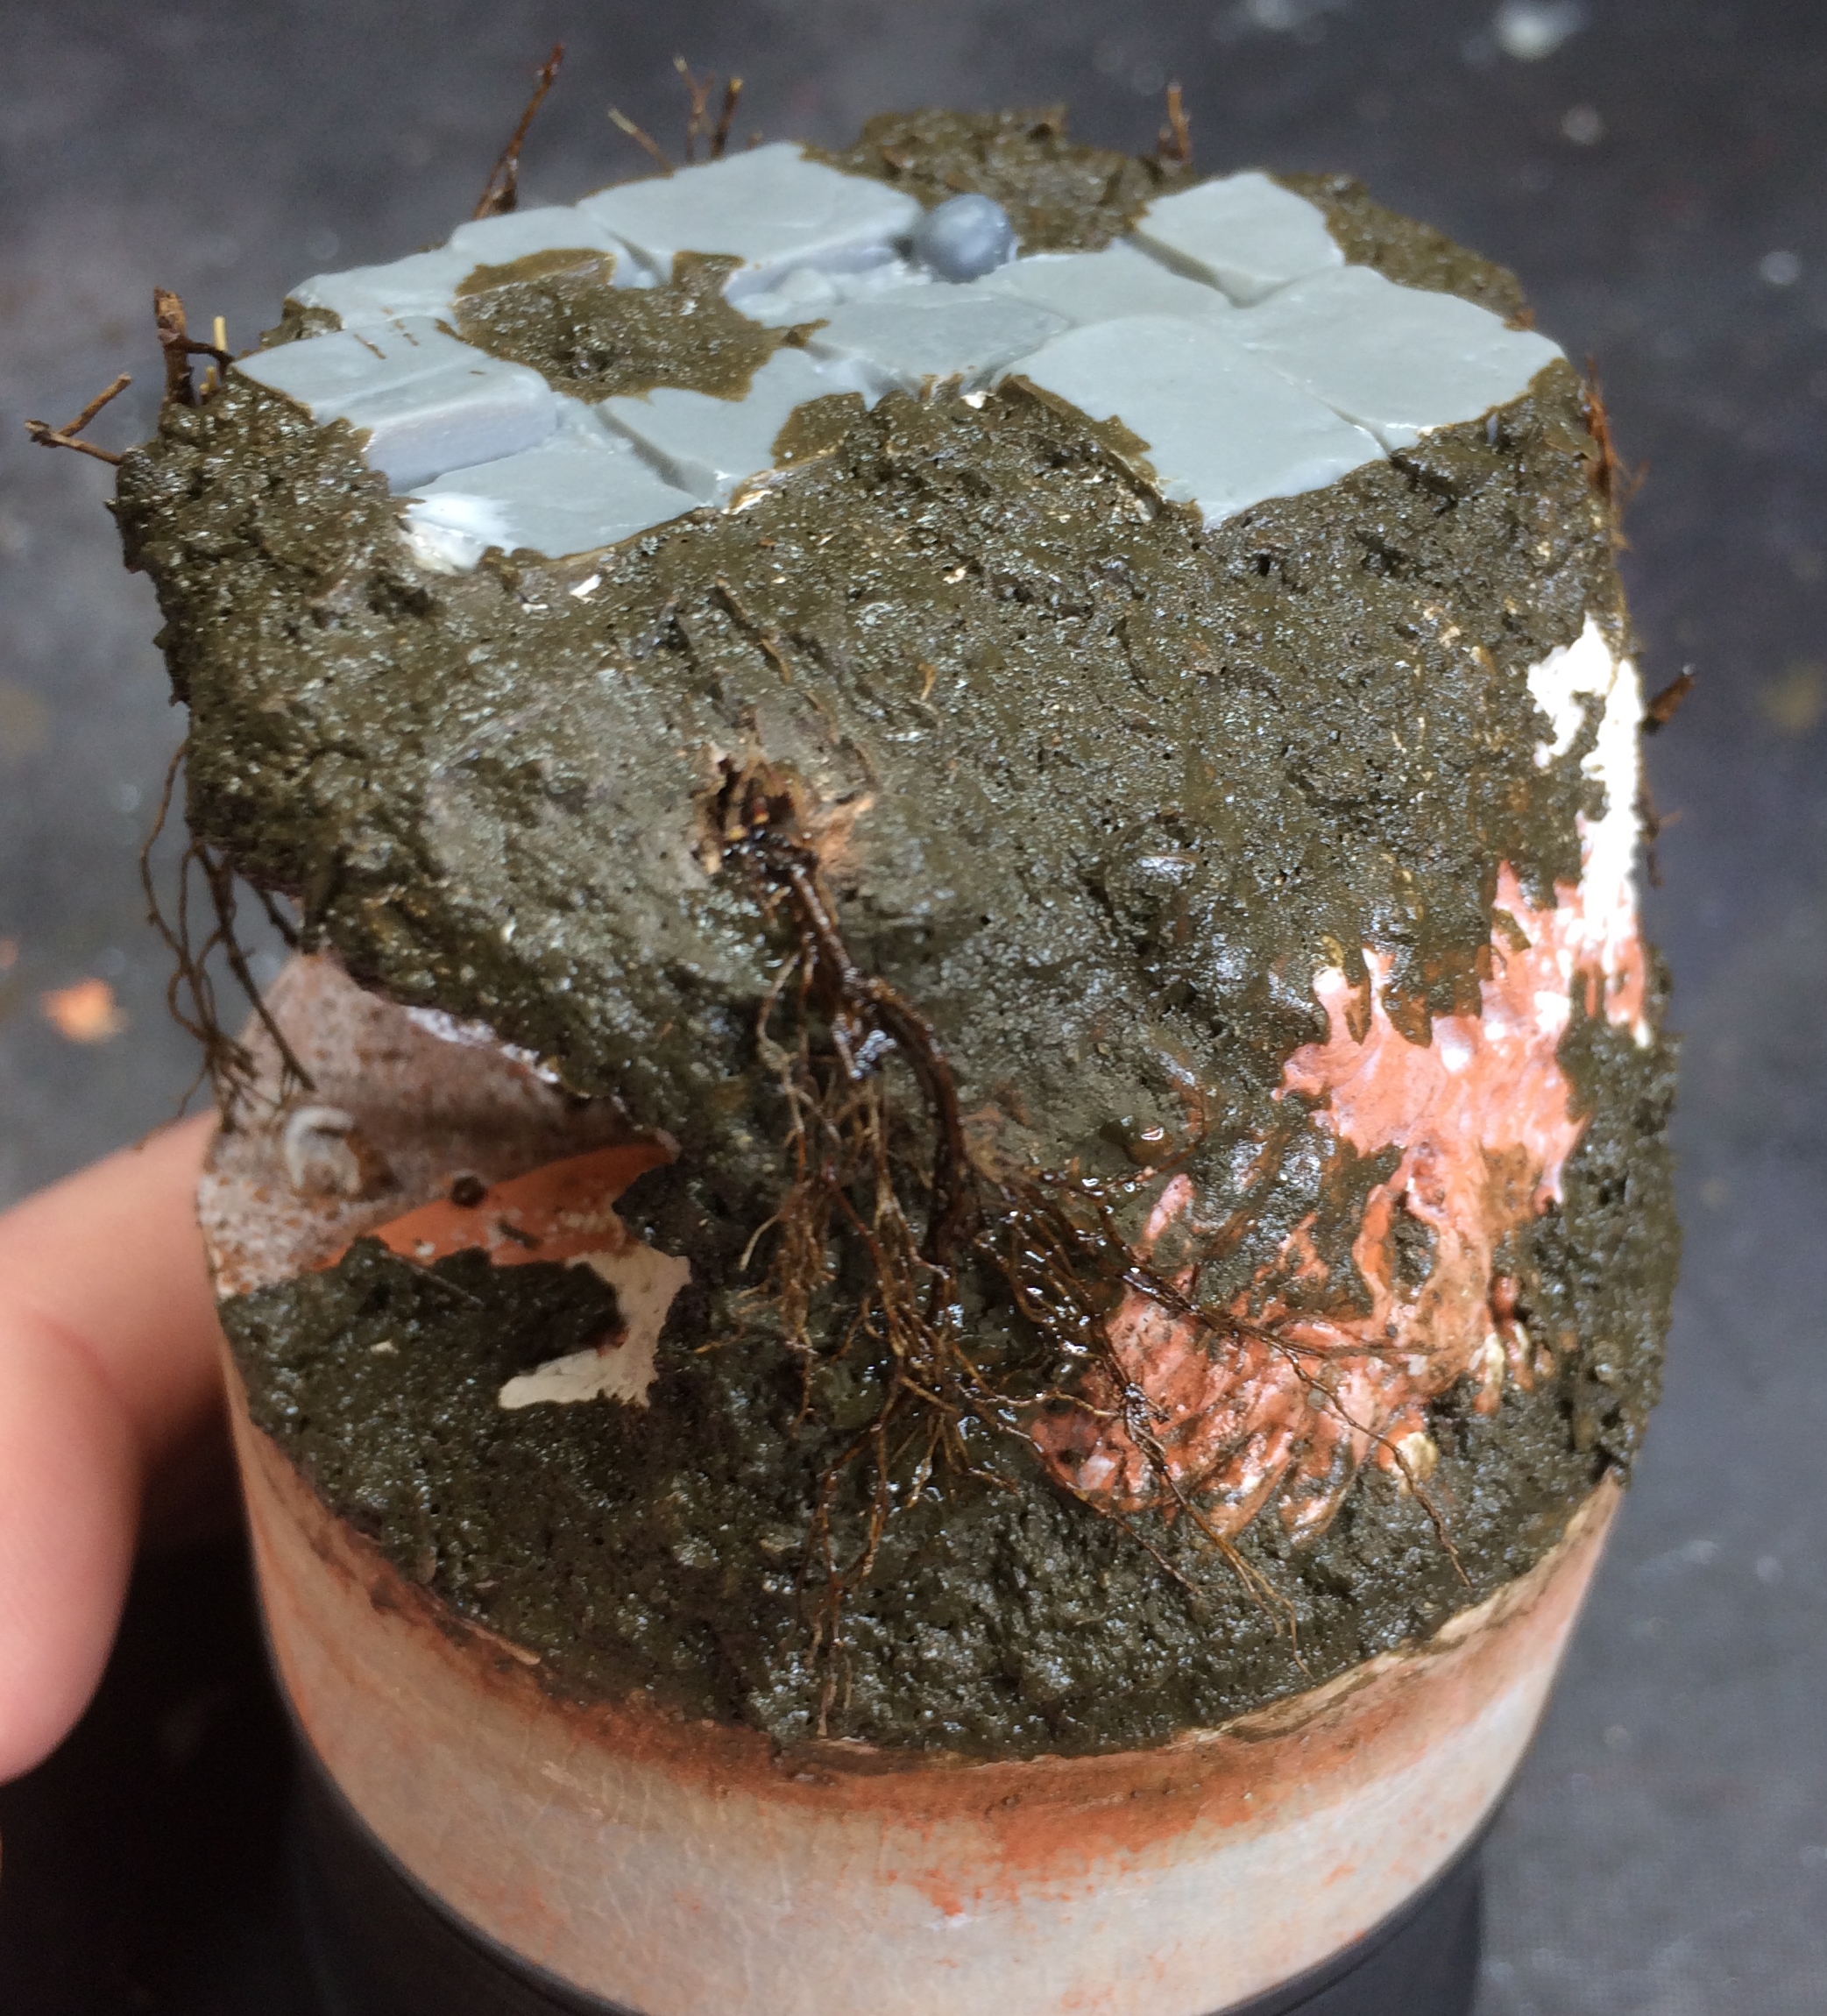
I want an over earthen texture to start with so time to head out into the garden and get some stuffs!
First thing is some mulch!! Well I call it mulch. basically small scale garden detritus! dirt, birch seeds, bits of root and the like. easy to find in an irish garden! I get a box of this stuff and then bake it on a baking tray for an hour. Anything you get out of your garden, woods, parks etc – bake that shit in an oven for an hour – this will a) dry it out nicely and b) kill off any bacteria, bugs, whatever.
For the initial texturing I used some of AK Interatives wet ground acrylic diorama texture paint. This stuff is awesome and comes in a dirty great big 250ml tub. Like GW texture paints except waaaaaaay more cost effective.
I add a few skulls for the GW skull box as well before texturing time.
I mixed some of the mulch into the AK texture and applied that onto the base. First layer to get a base texture and then when that had dried – I drilled some holes in and glued in some roots, again from the garden and then added on some more of the mulch/texture paint to add further texture and bio mass. This second layer had a higher amount of the mulch in it so bits of the organics would be visible.
The cave stream got a thin layer of sand and grit (red canyon grit from Rival Crafts) and the roof of the cave a layer of GW astrogranite debris to give it a rough stoney texture.
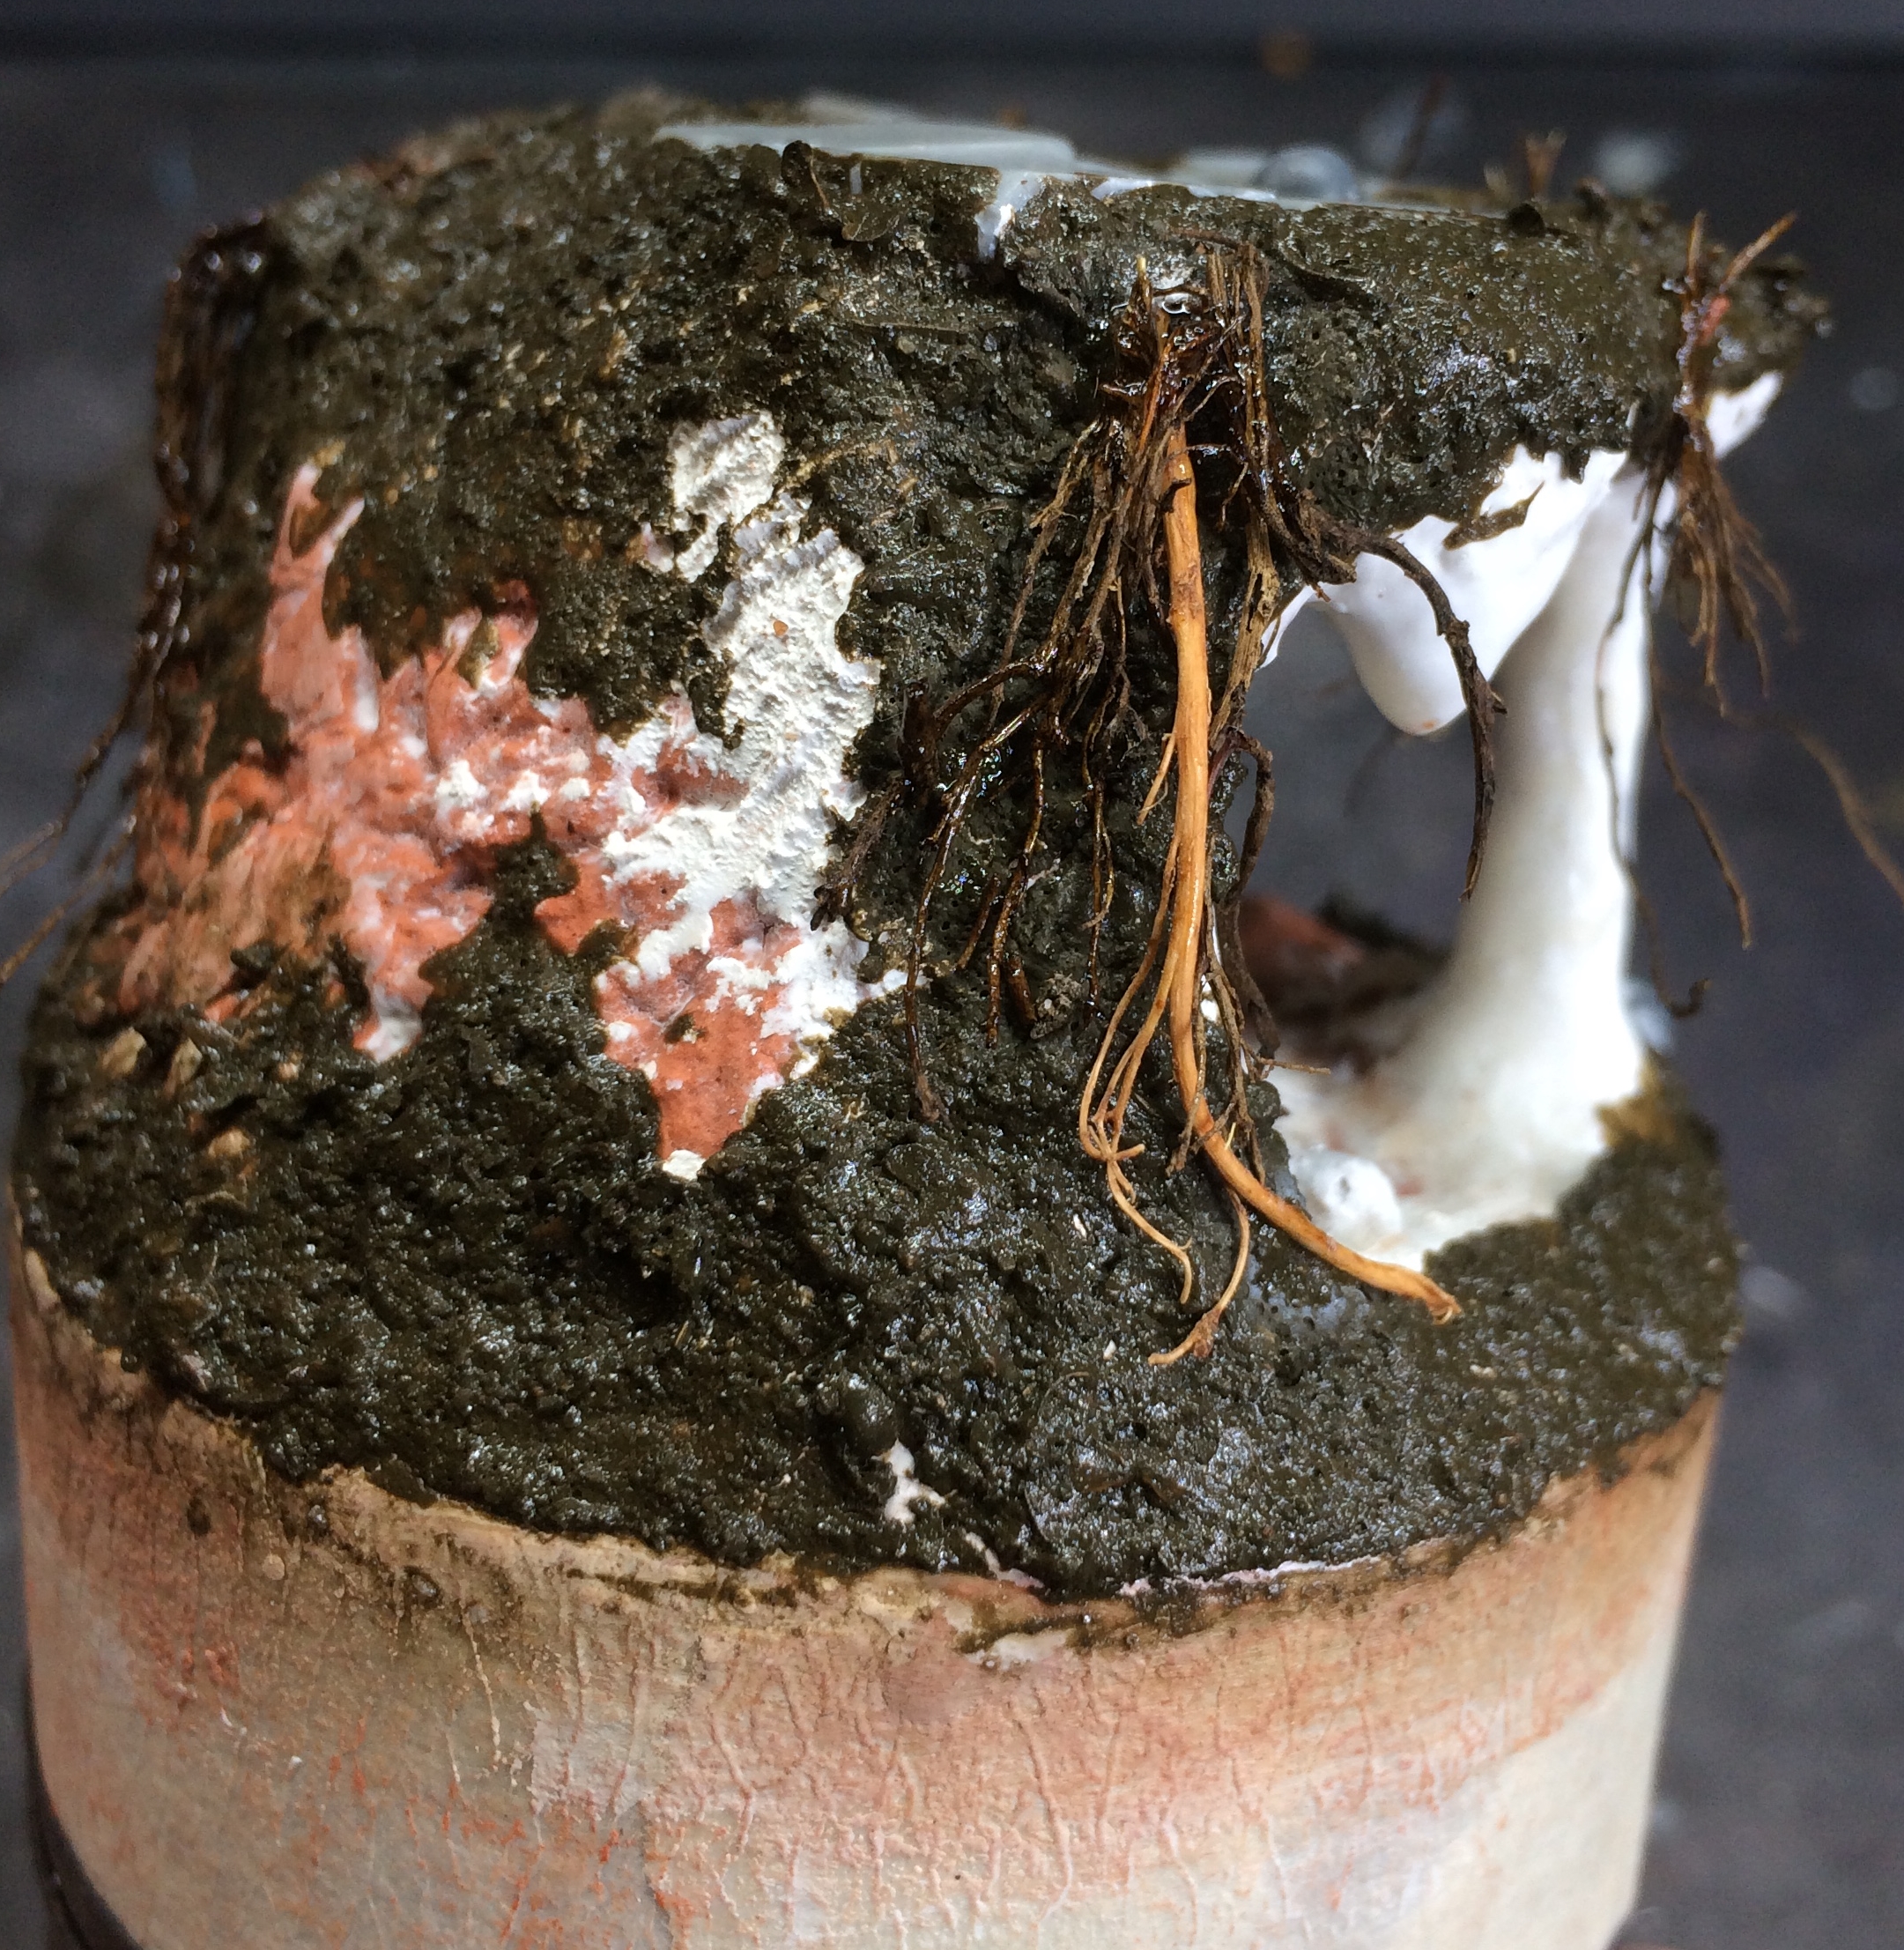
Next up comes sealing. All this needs to be sealed in and down. Now a lot of folk will use thinned down PVA (white glue, Elmer;s glue whatever you want to call it) – DONT! PVA glue is a pain in the arse as even when dried it can reactivate with water which is a paint in the arse especially if you are planning to pour resin for a water feature.
So, instead of using PVA to thin down and use as a sealant, I use wood glue. very similar to PVA with the added bonus of NOT reactivating later on.
I use the wood glue neat and thick on the cave column and the stalligtites to smooth out the texture and give them that more smooth drippy texture they get from being built up of minerals dripping over a long time.
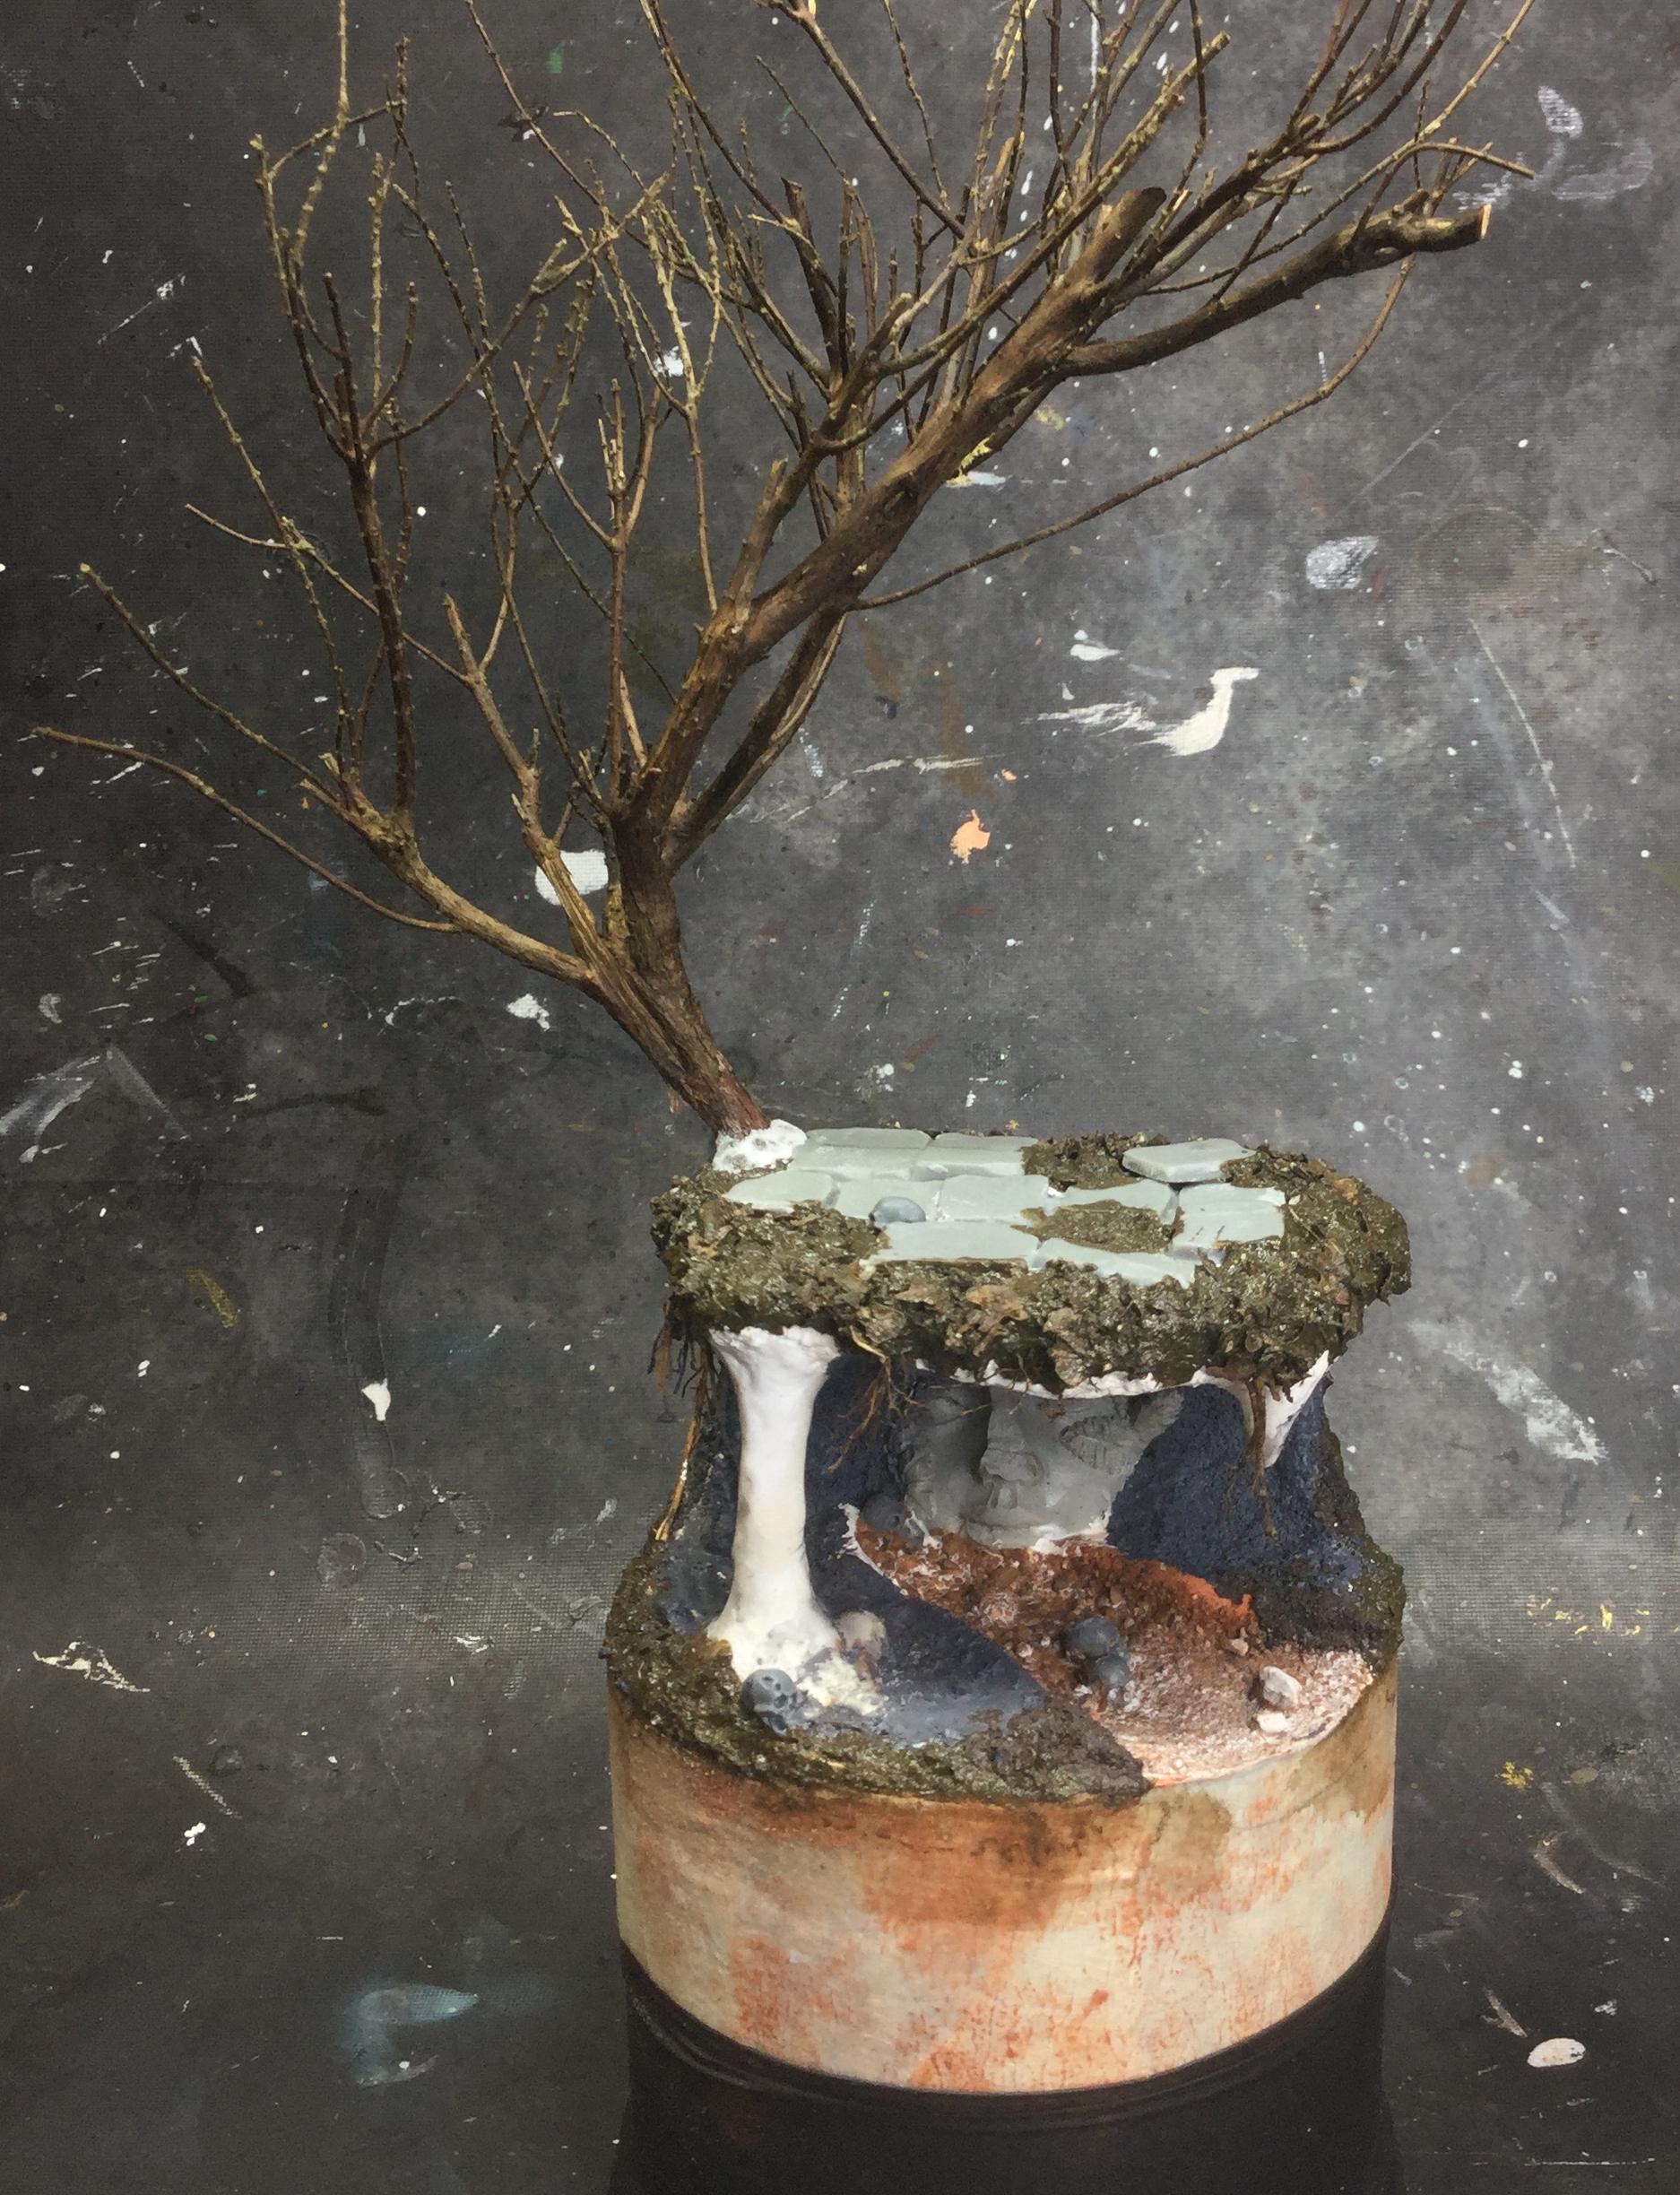
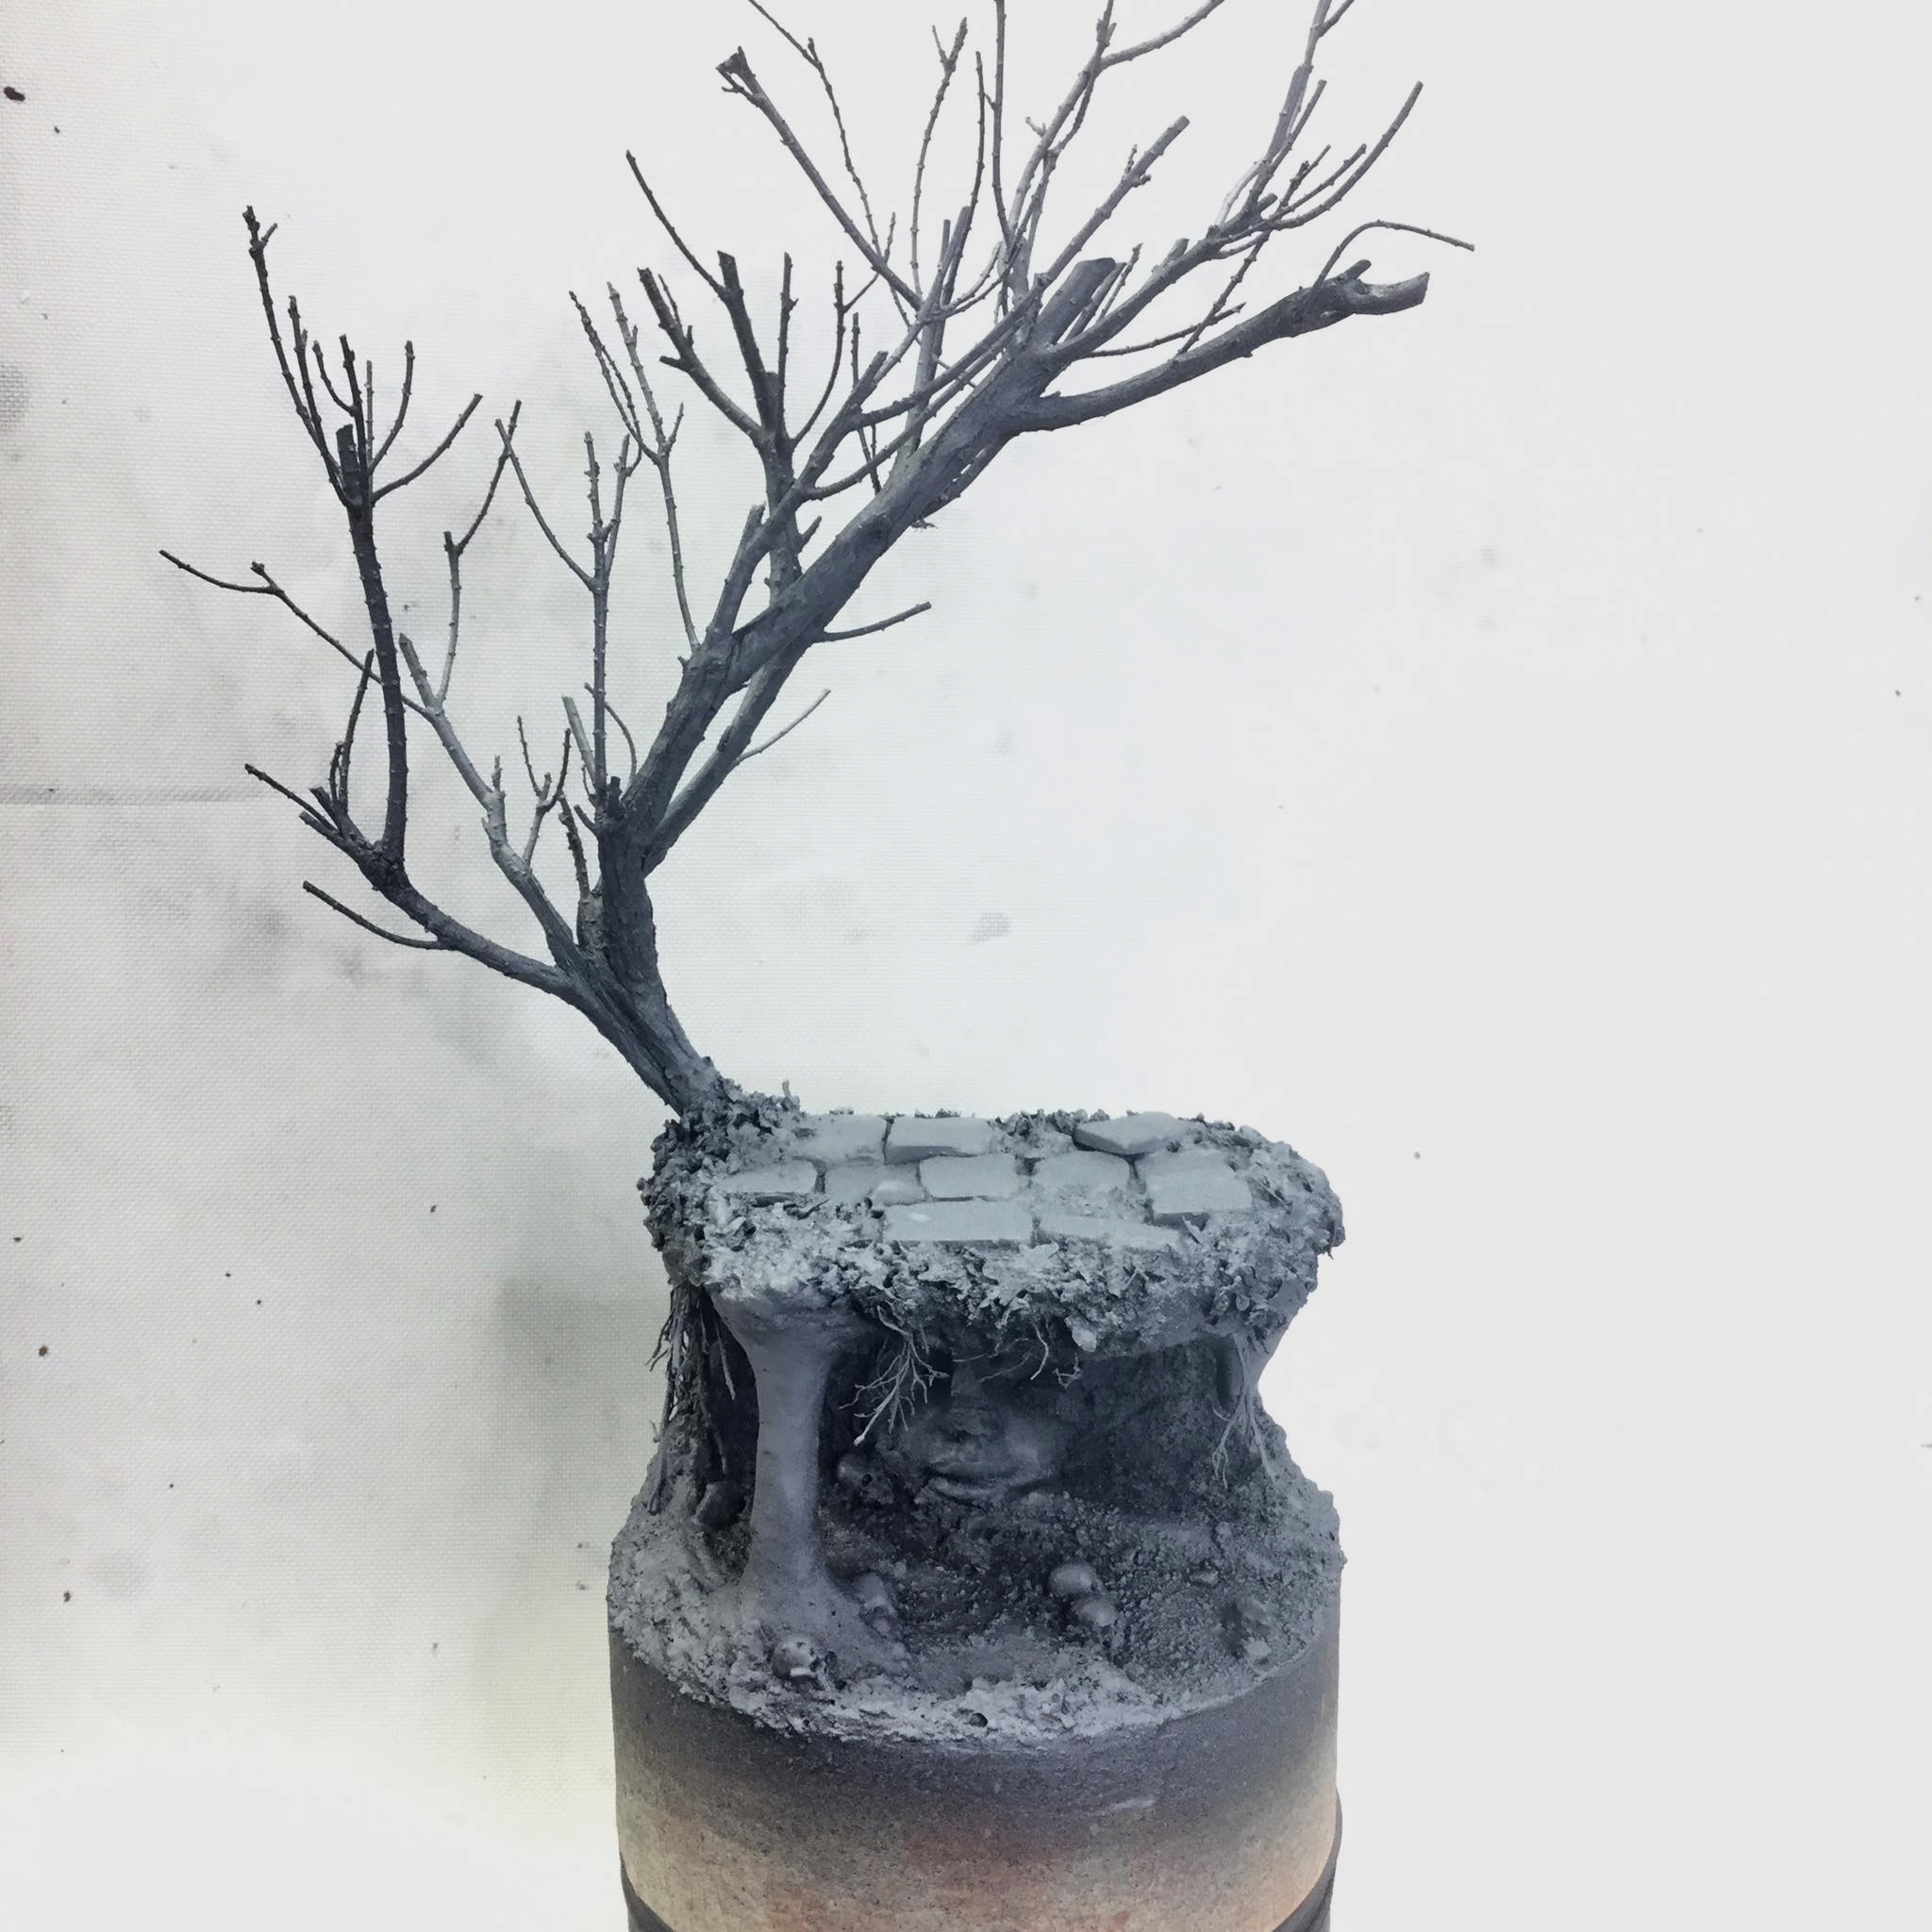
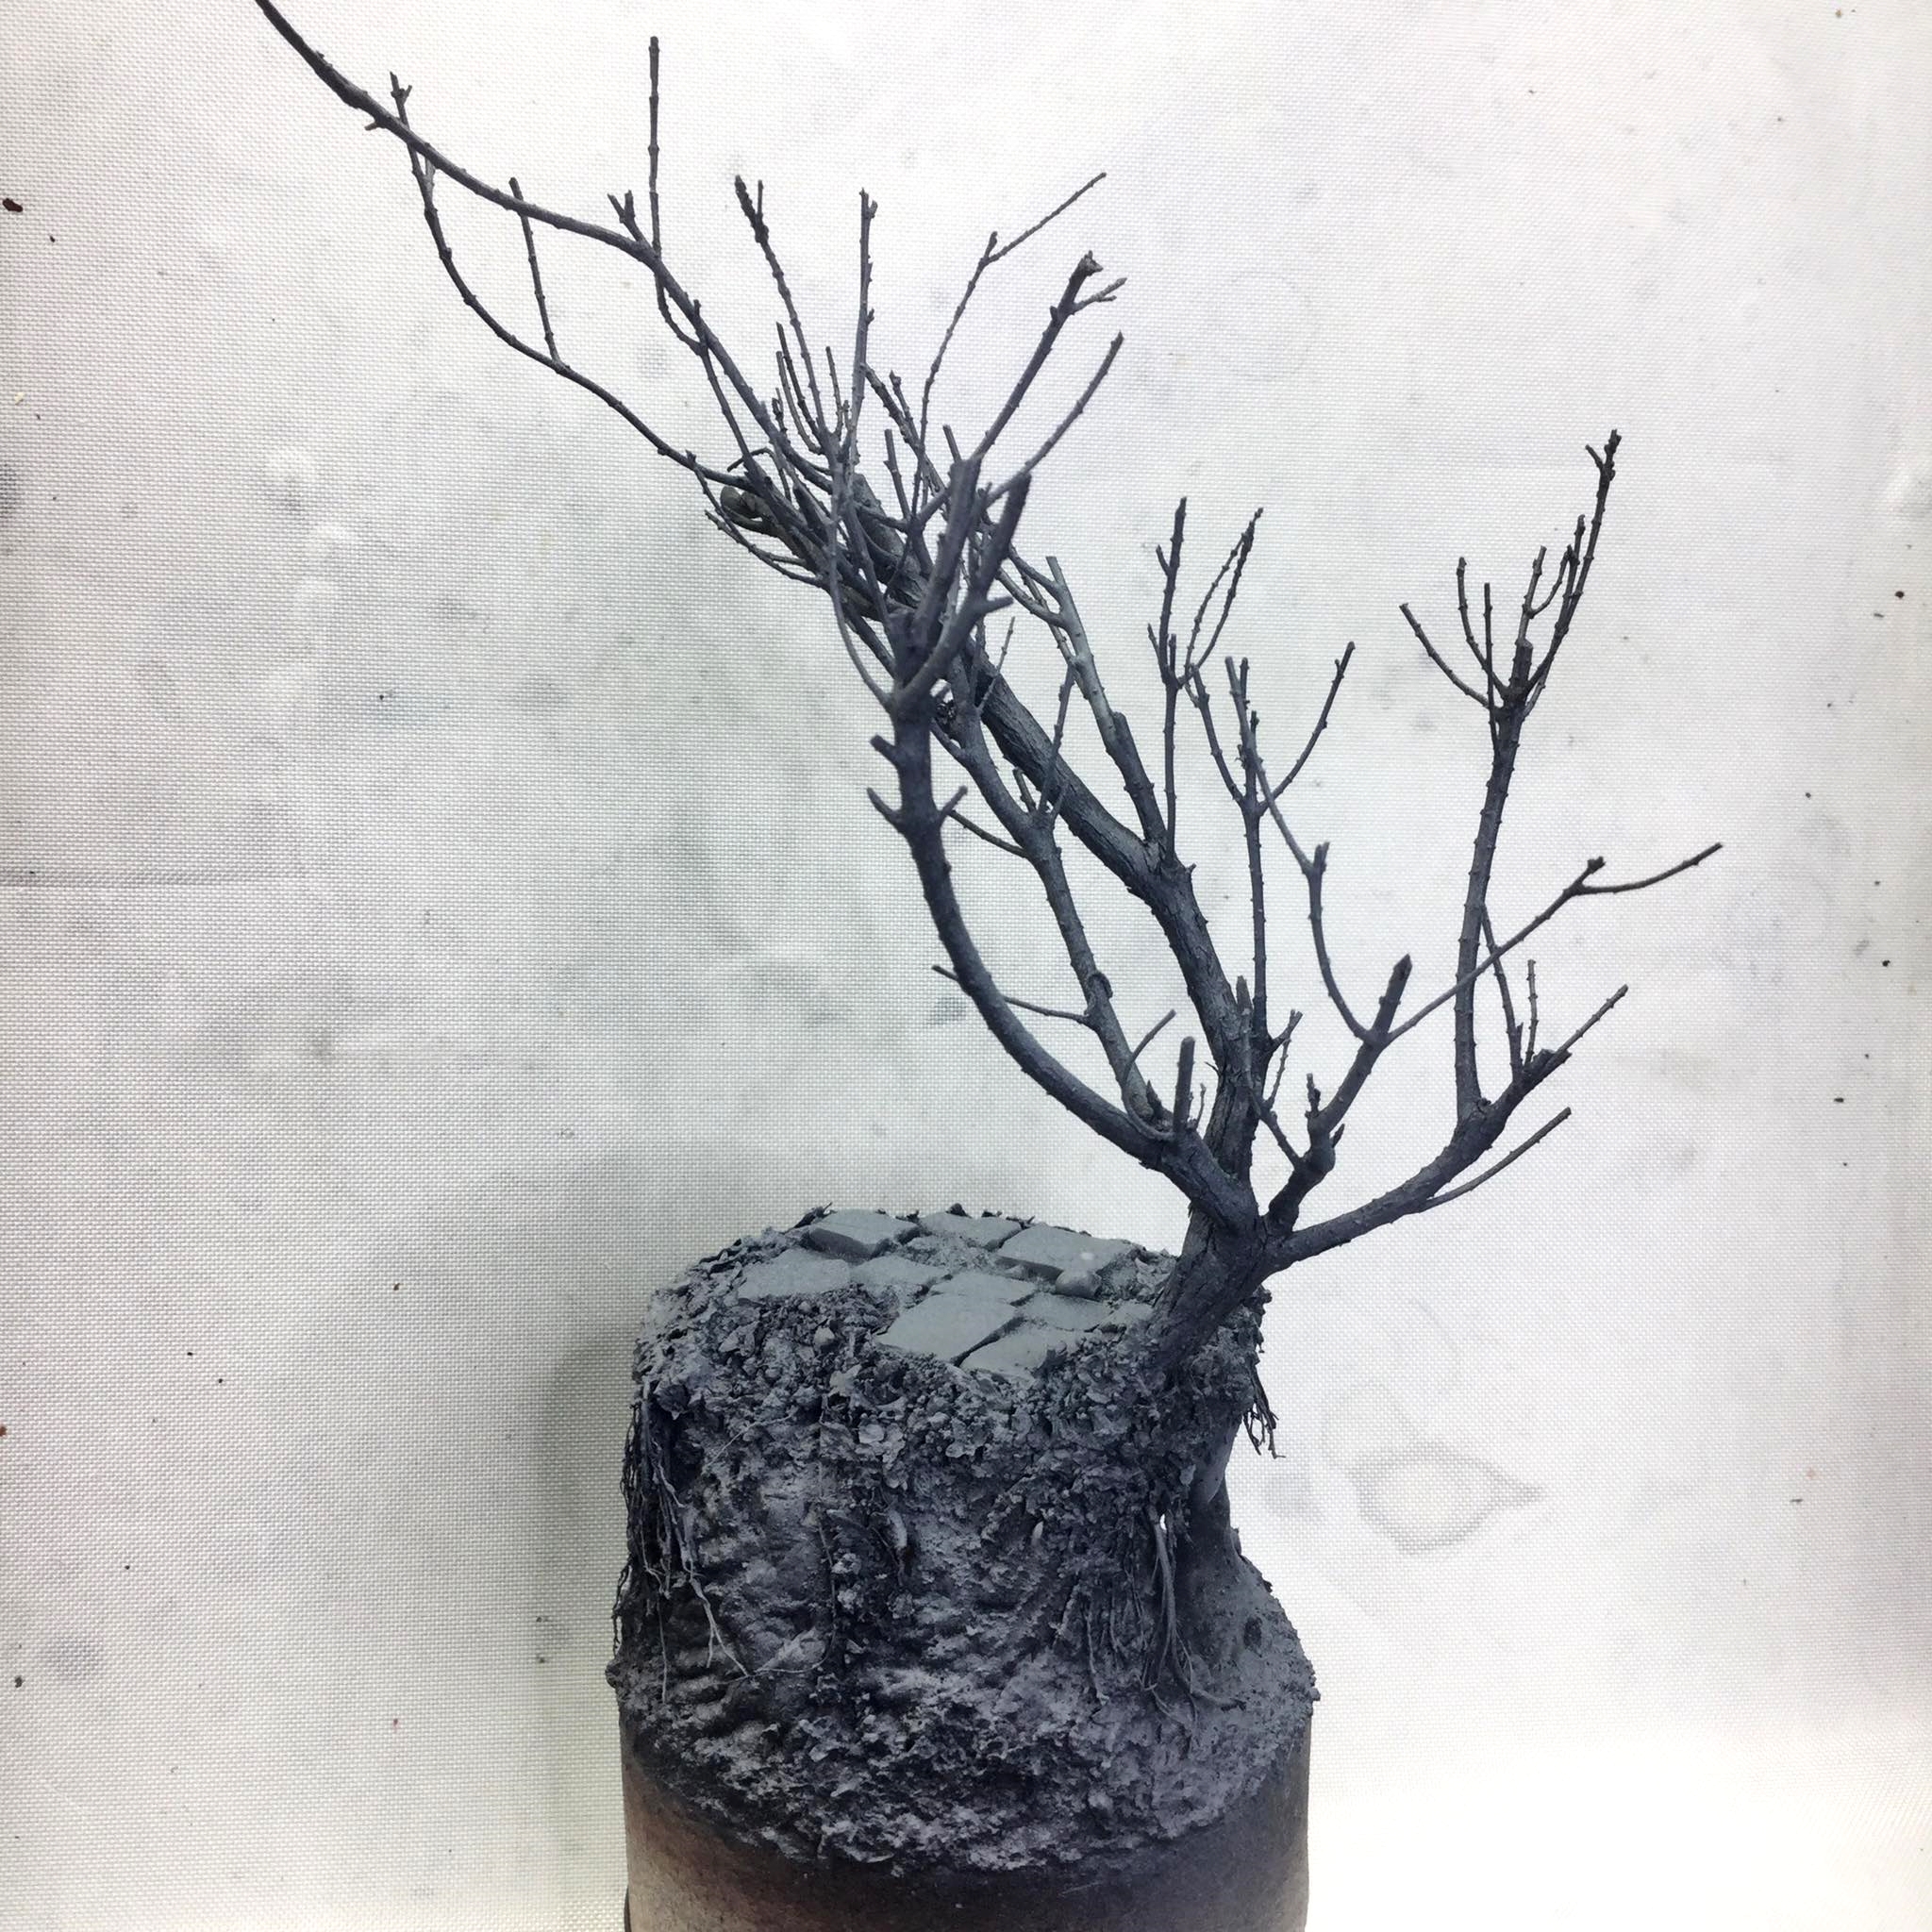
Thought I was all done but felt there was still something missing from the composition…………. need a tree!!!!
Back to the garden!!!
Heather. Heather bushes are bloody amazing and we have tonnes of the buggers in our garden. Look for the parts of the heather bushes that have died back. The scale, size and structure of heather bushes are perfect for making trees and there is no mucking about with wire aramtures, tapes, paper mache etc.
Once again, bake your new trees in a hot oven for an hour or so. The died back parts of the bush are already pretty dried out and seasoned but the oven will finsih that and kill any wee filthy feckers that might be living on it.
I drilled an inch hole up into the ‘truck’ of the tree and another inch hole down into the base. Heavy gauge paperclip to pin the tree to the base and then Gorilla Superglue gel + baking soda to cememt the tree down.


Once the ‘cement’ is dry, another layer of AK Interactive wet grounds and then with the wet brush I picked up some more mulch and pushed it into the wet texture paint to make a base of the tree look more natural and growing out of the base.
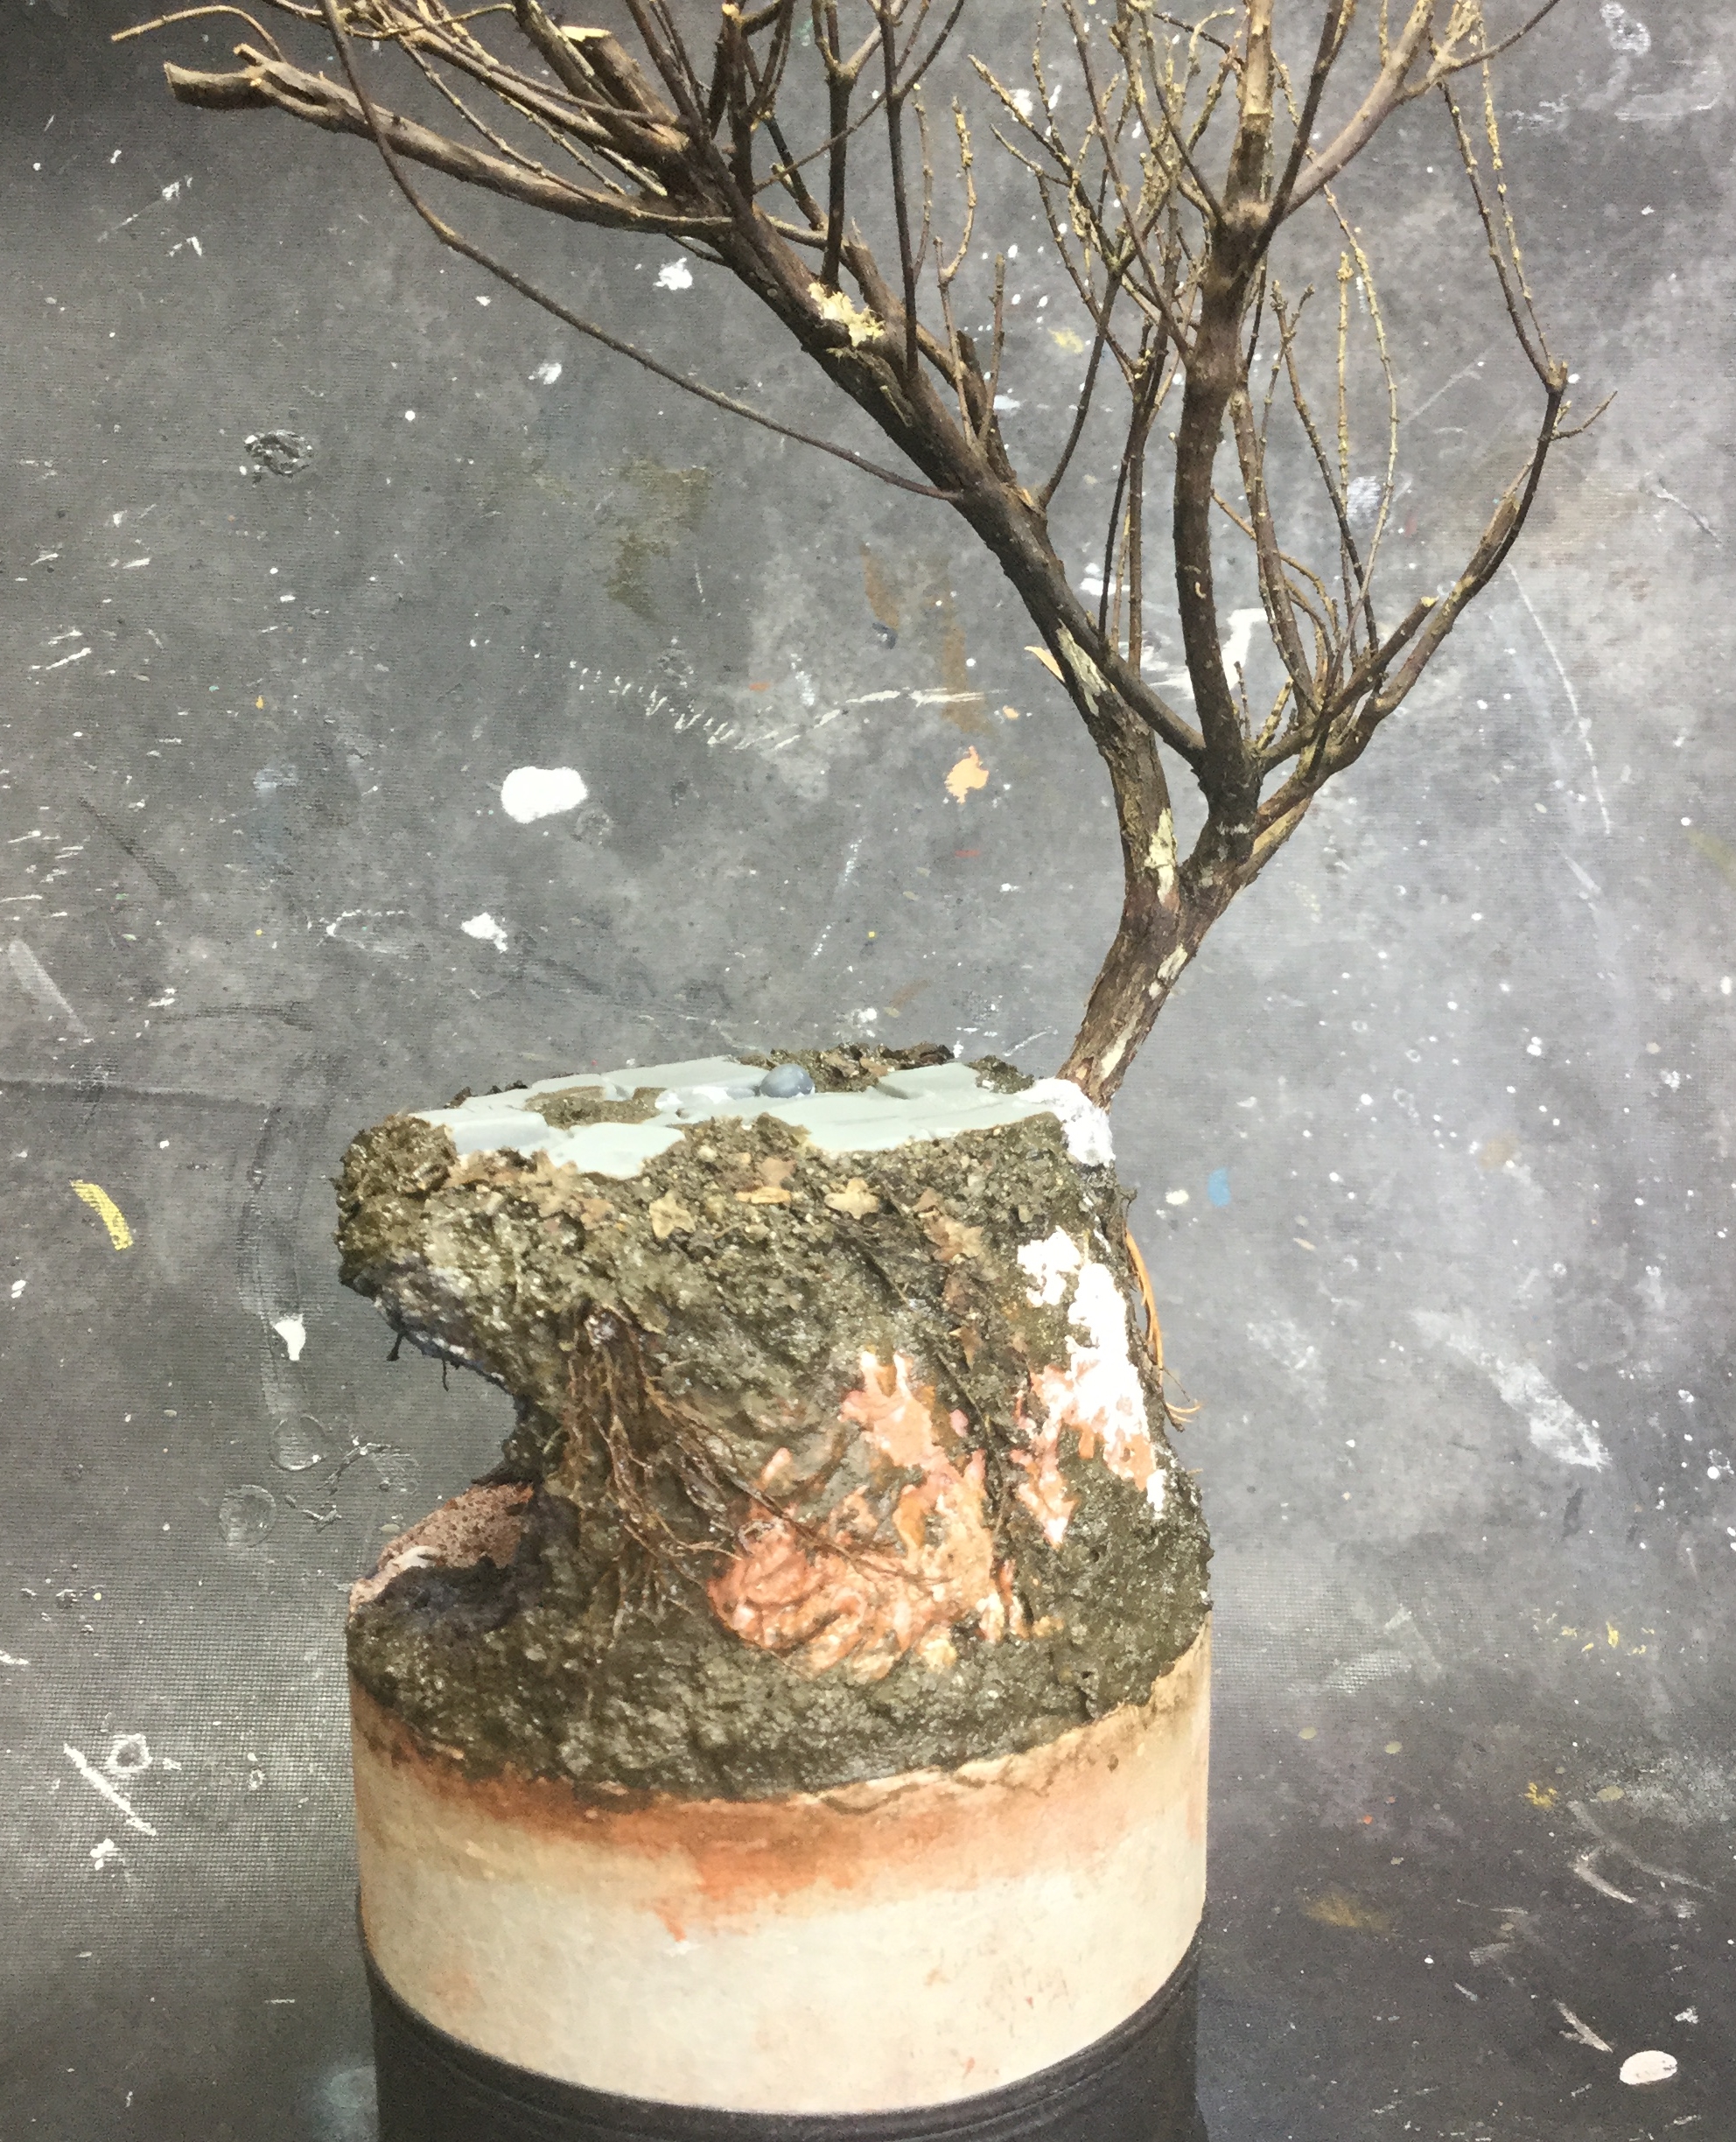
That is essentially now the build for the base complete. There will be more scenic elements still to be attached but they will come after the painting phase – mushrooms from spellcrow, UV resin from greenstuff world and moss from woodland scenics and so on.
So, with the base built its time to prime and thankfully (and finally ) my Stynylrez black primer arrived in the post this morning 😀
 Final compostion check with the miniature in place before priming starts
The Flower Knight Returns - Building a Base Pt 1

So the work on the Flower Knight commission continues and she’s coming along rather nicely buuuuuuut It’s about time to make a base for her. A big old smexy vignette scenic plinth base!! Due to the limitations of how many entries per post, this is gonna take a few posts but stick with me and I’ll walk you through how I build the base for The Flower Knight from KDM 🙂
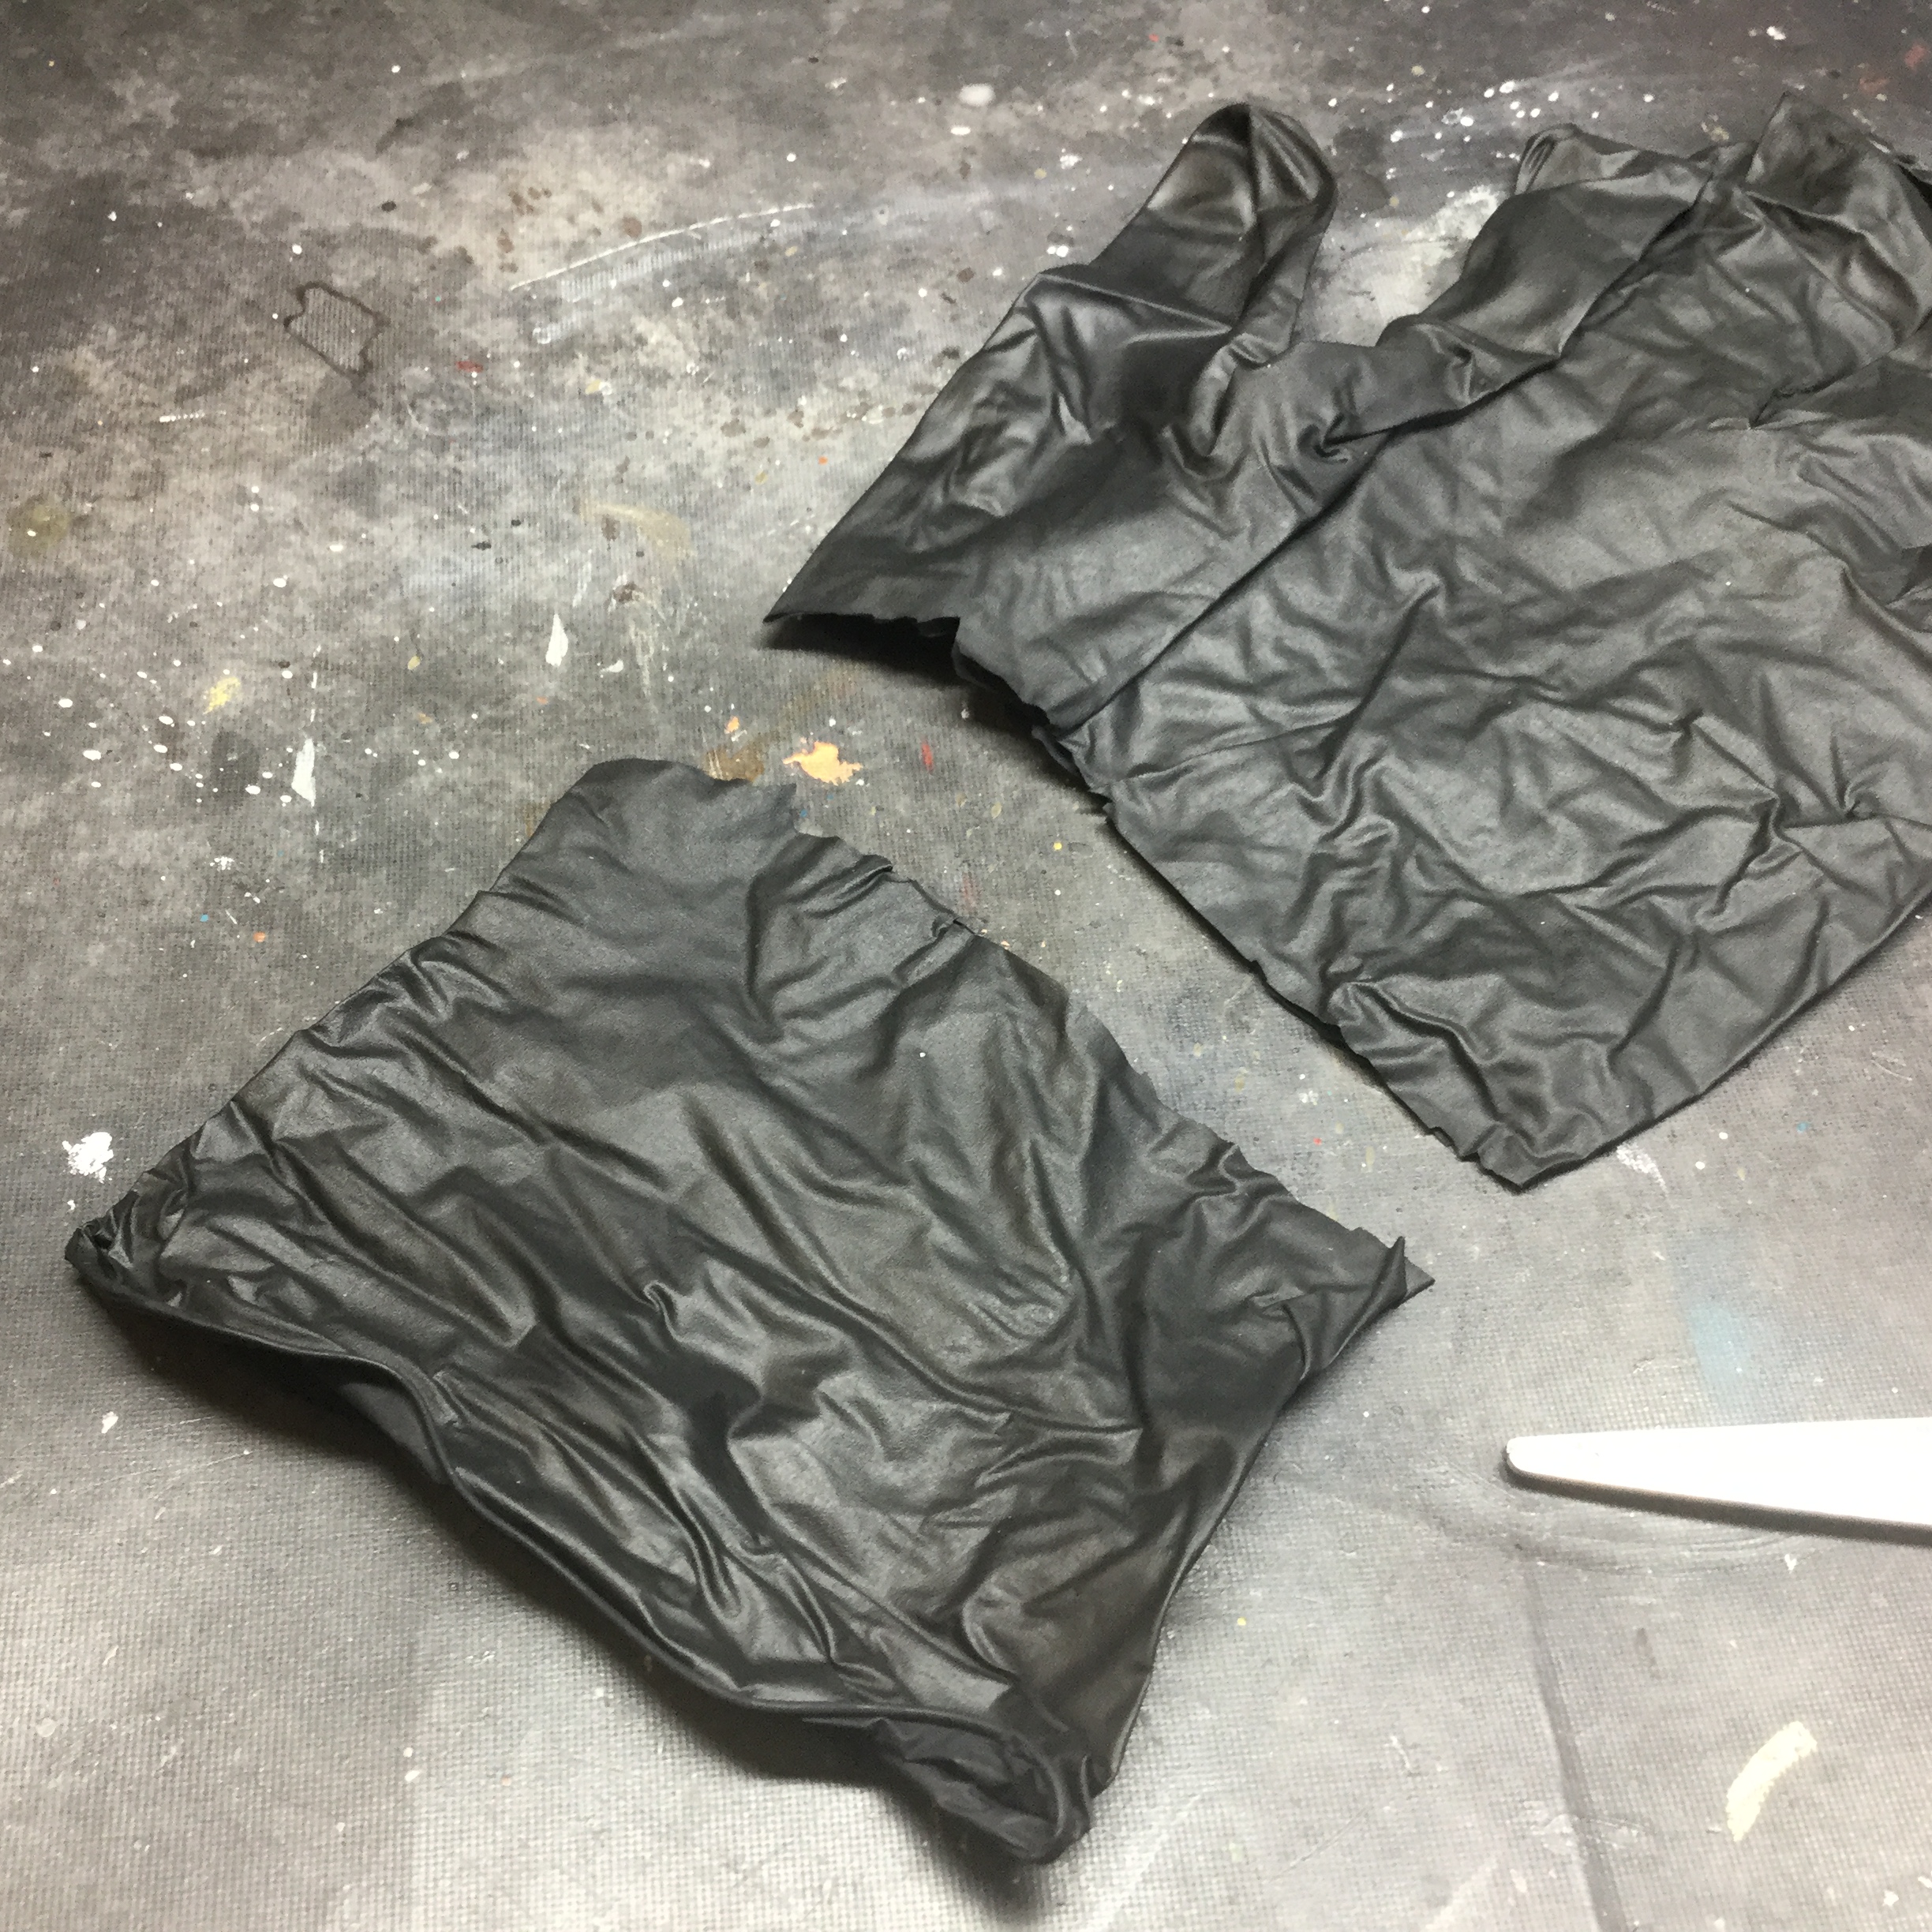
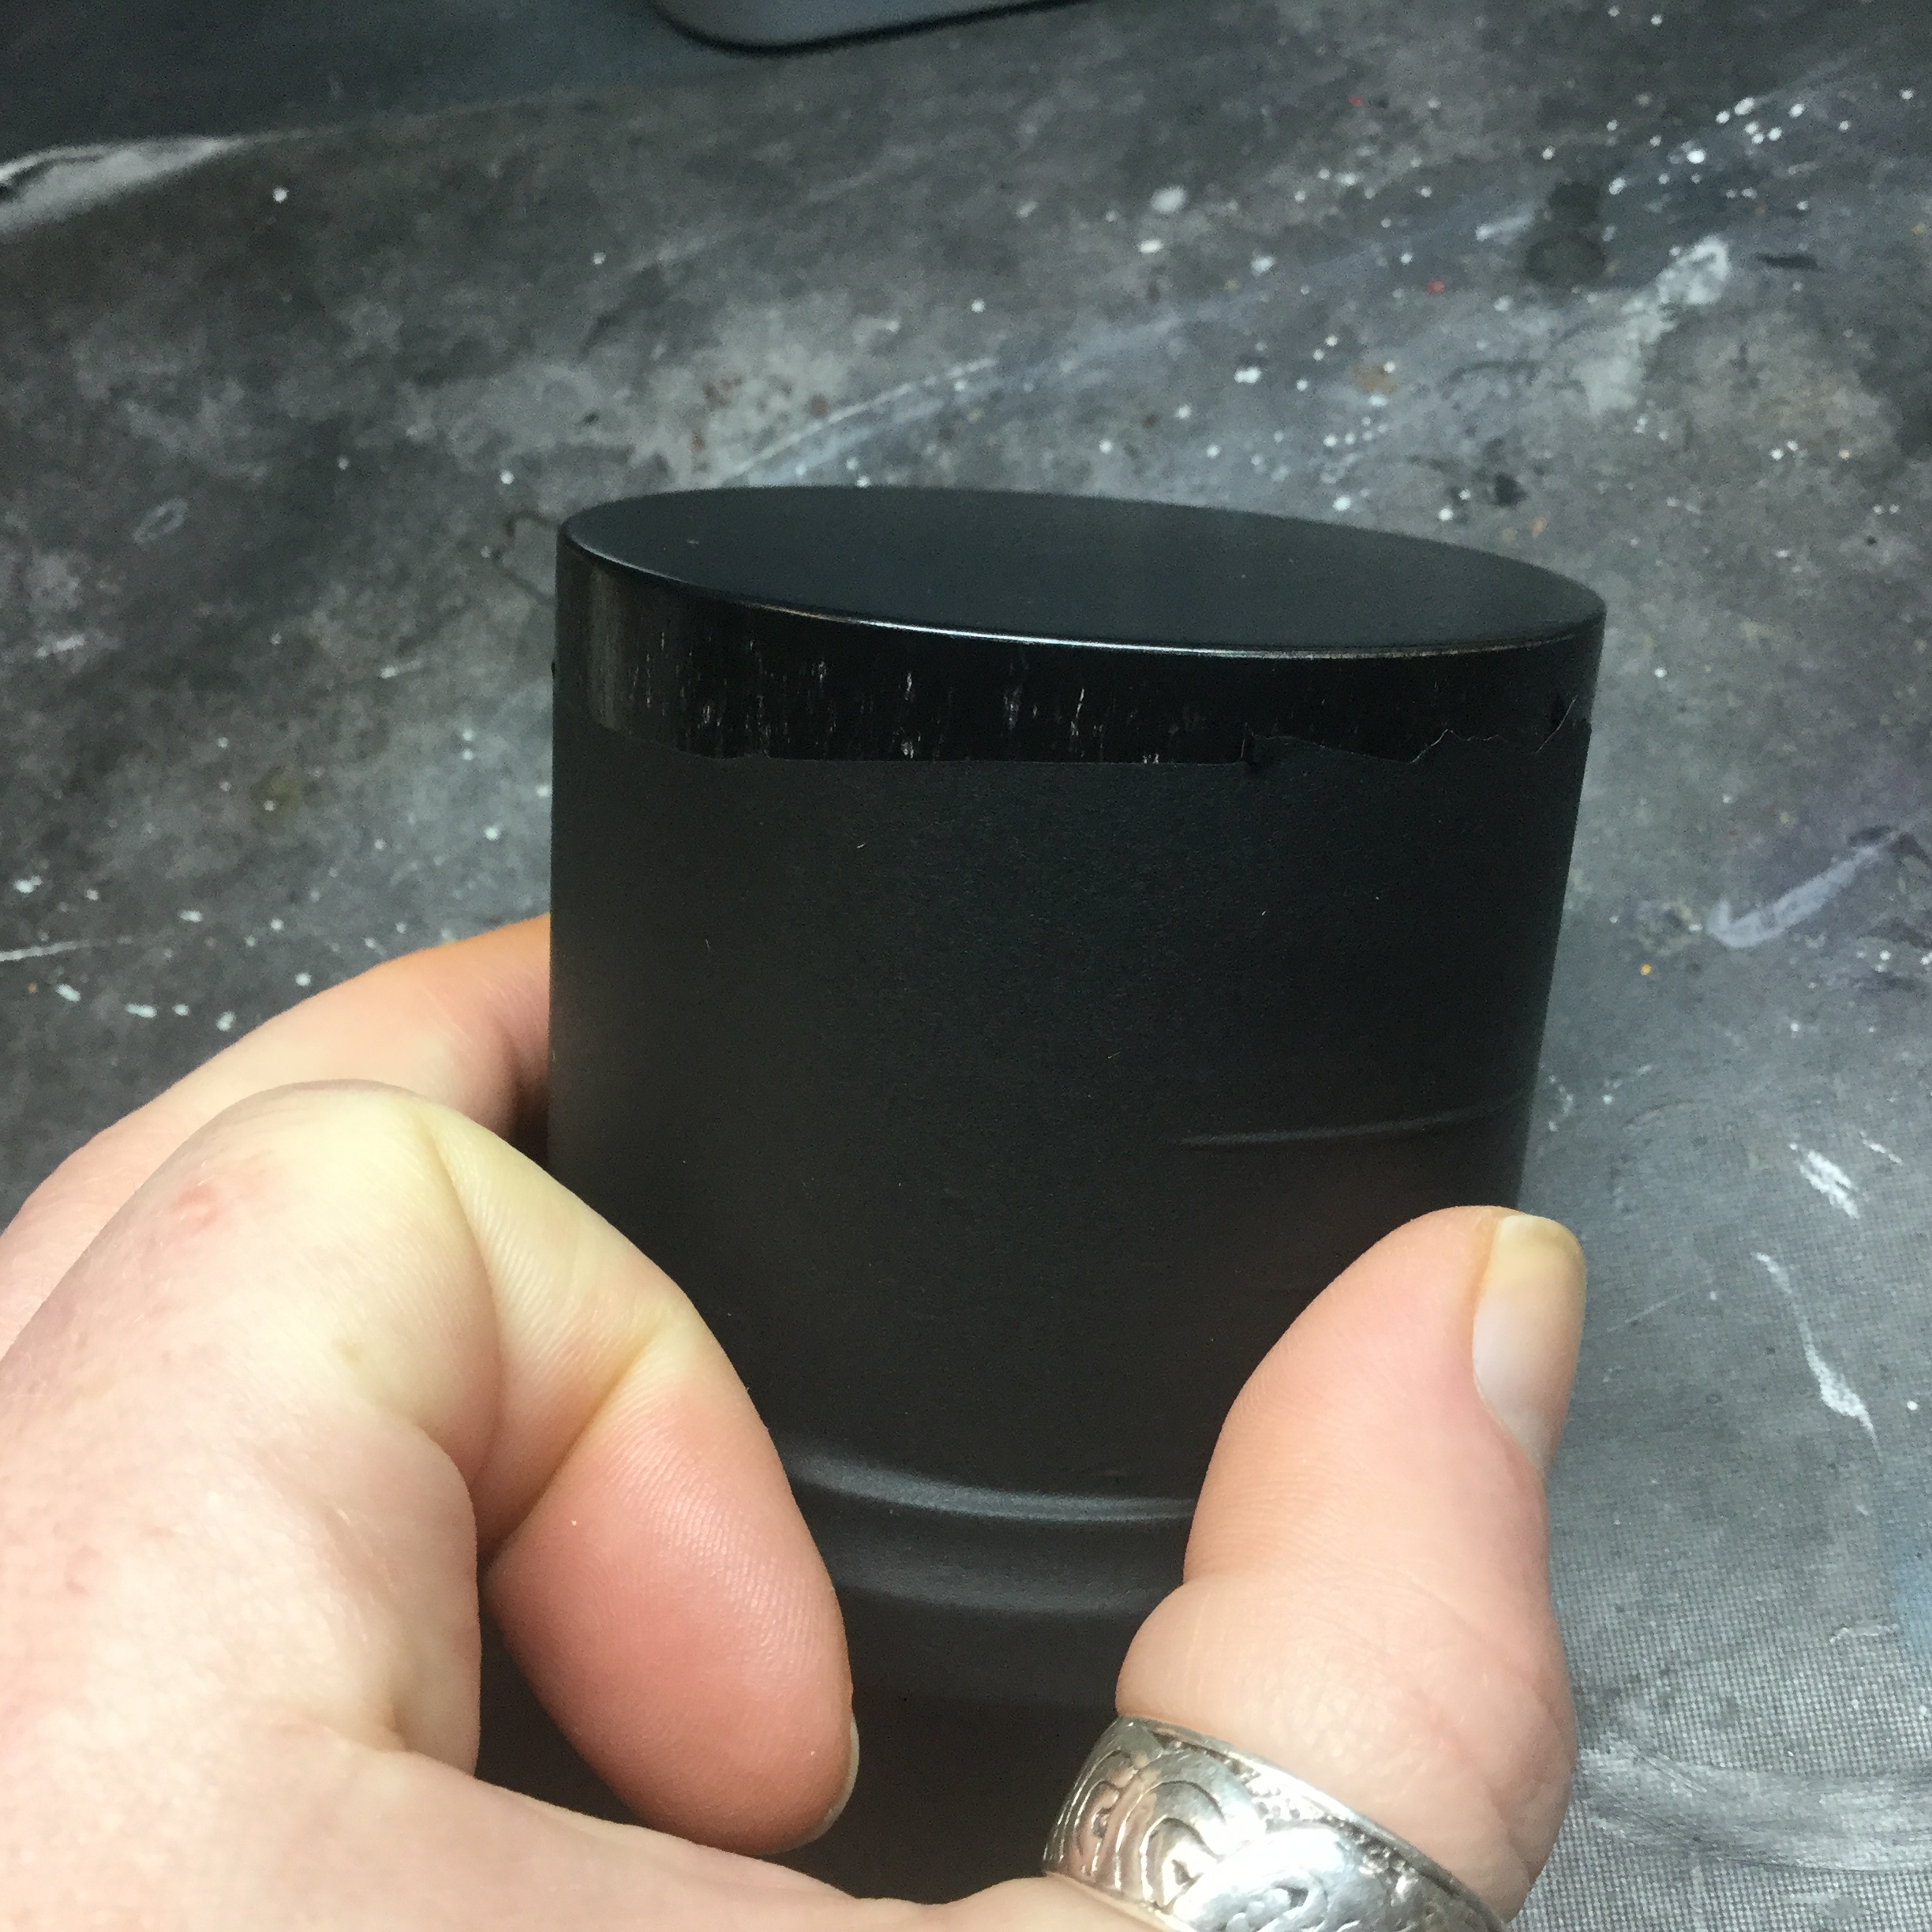
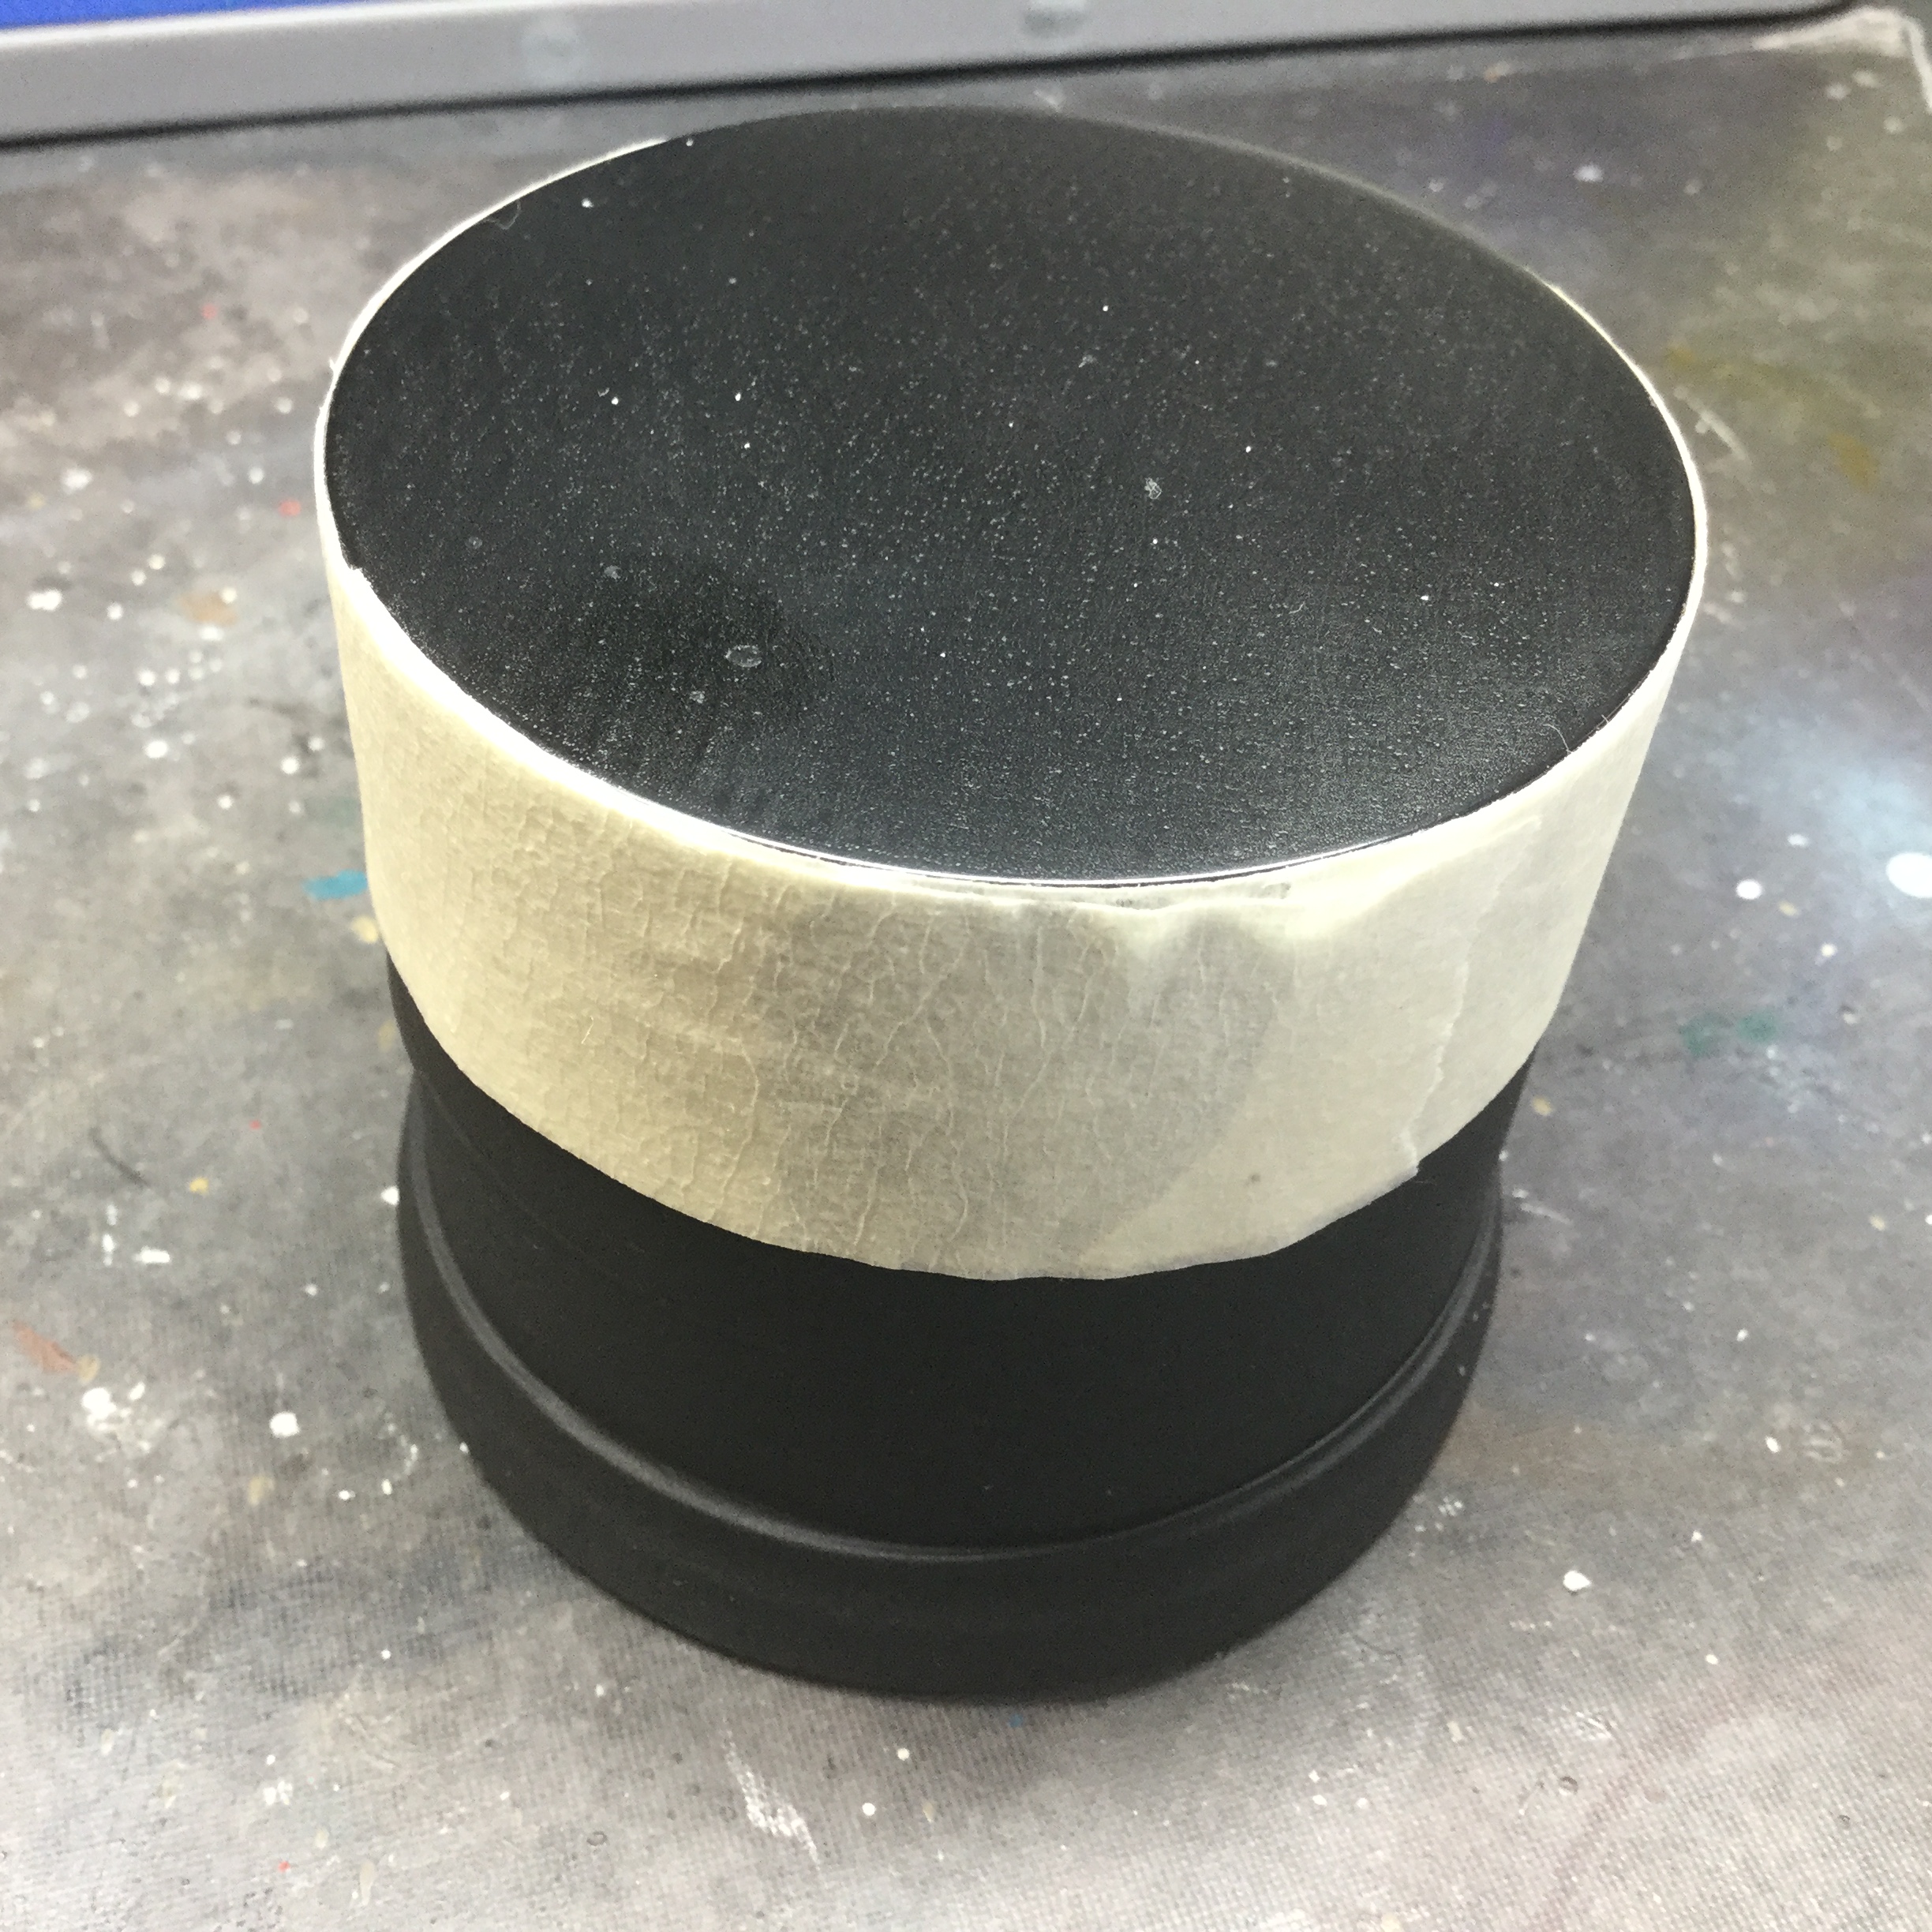
So first things first, let’s get the plinth ready. I chopped the arse….. ahem…. wrist part off of a nitrile medical glove and sleeved it up the shaft of a black lacquered wooden plinth I am using, then fixed it on with masking tape up to the top edge of the plinth. This protects the plinth while I’m working, building and later painting it and gives it a good grip to hold.
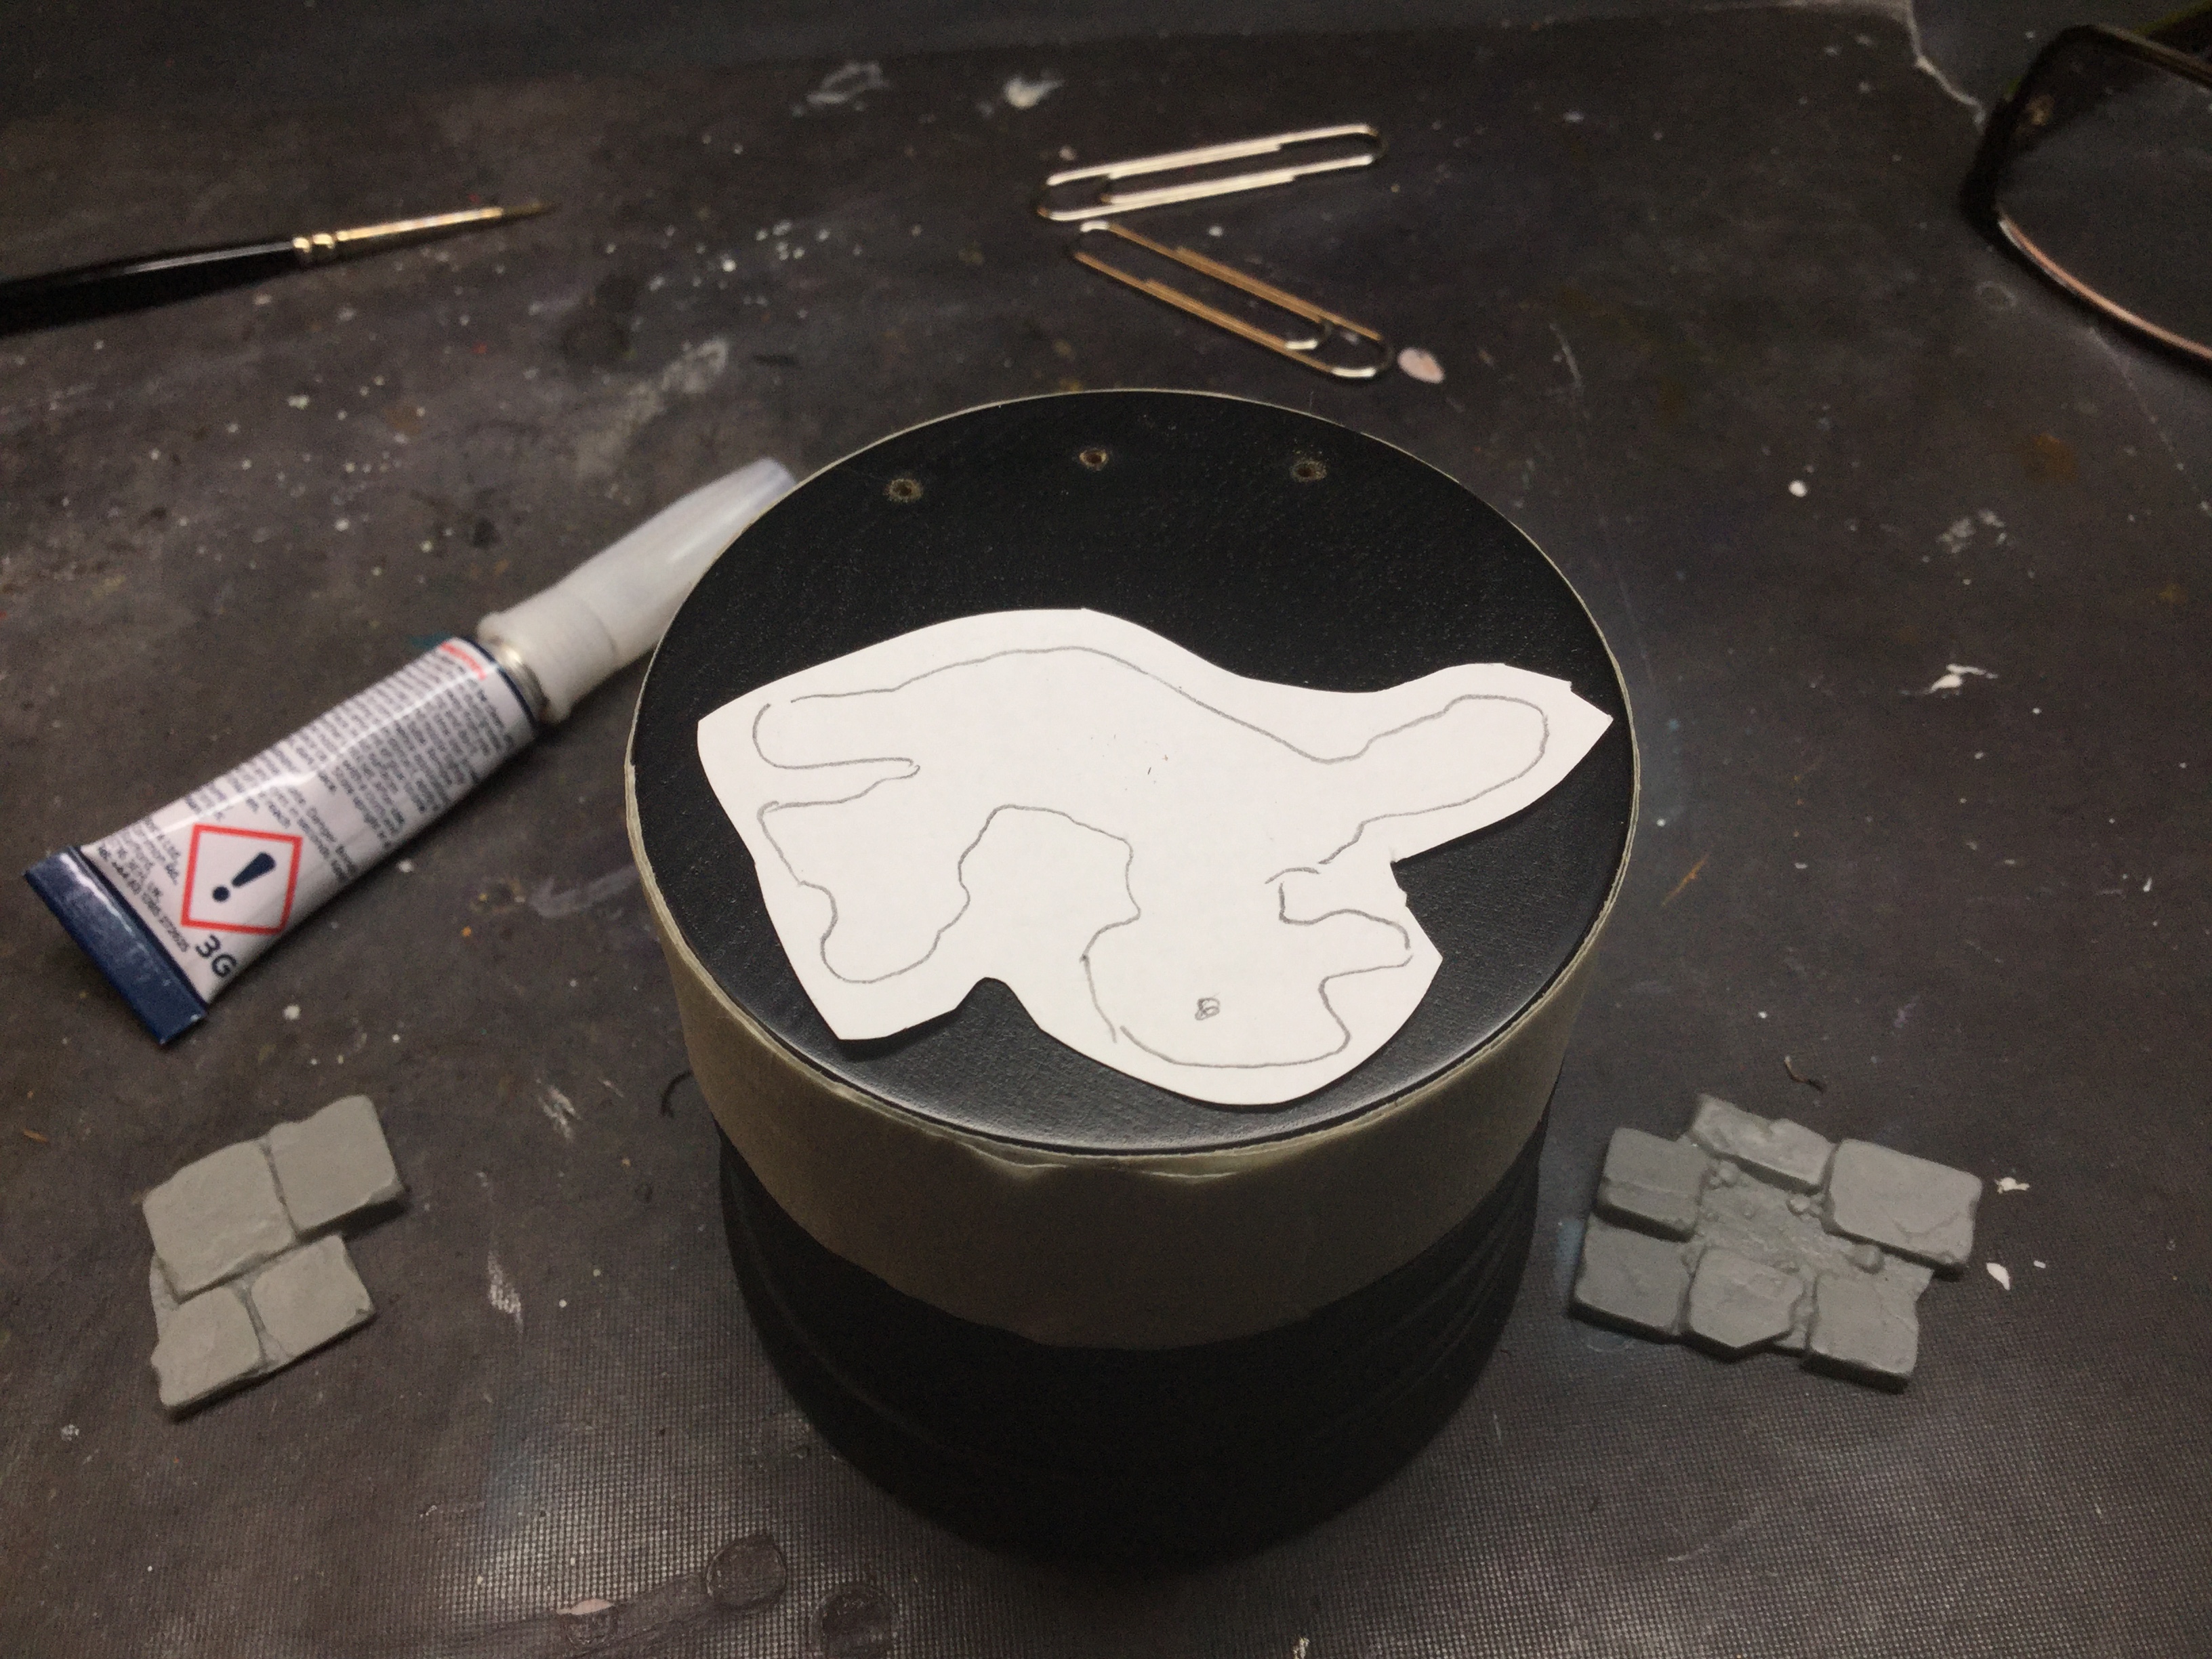
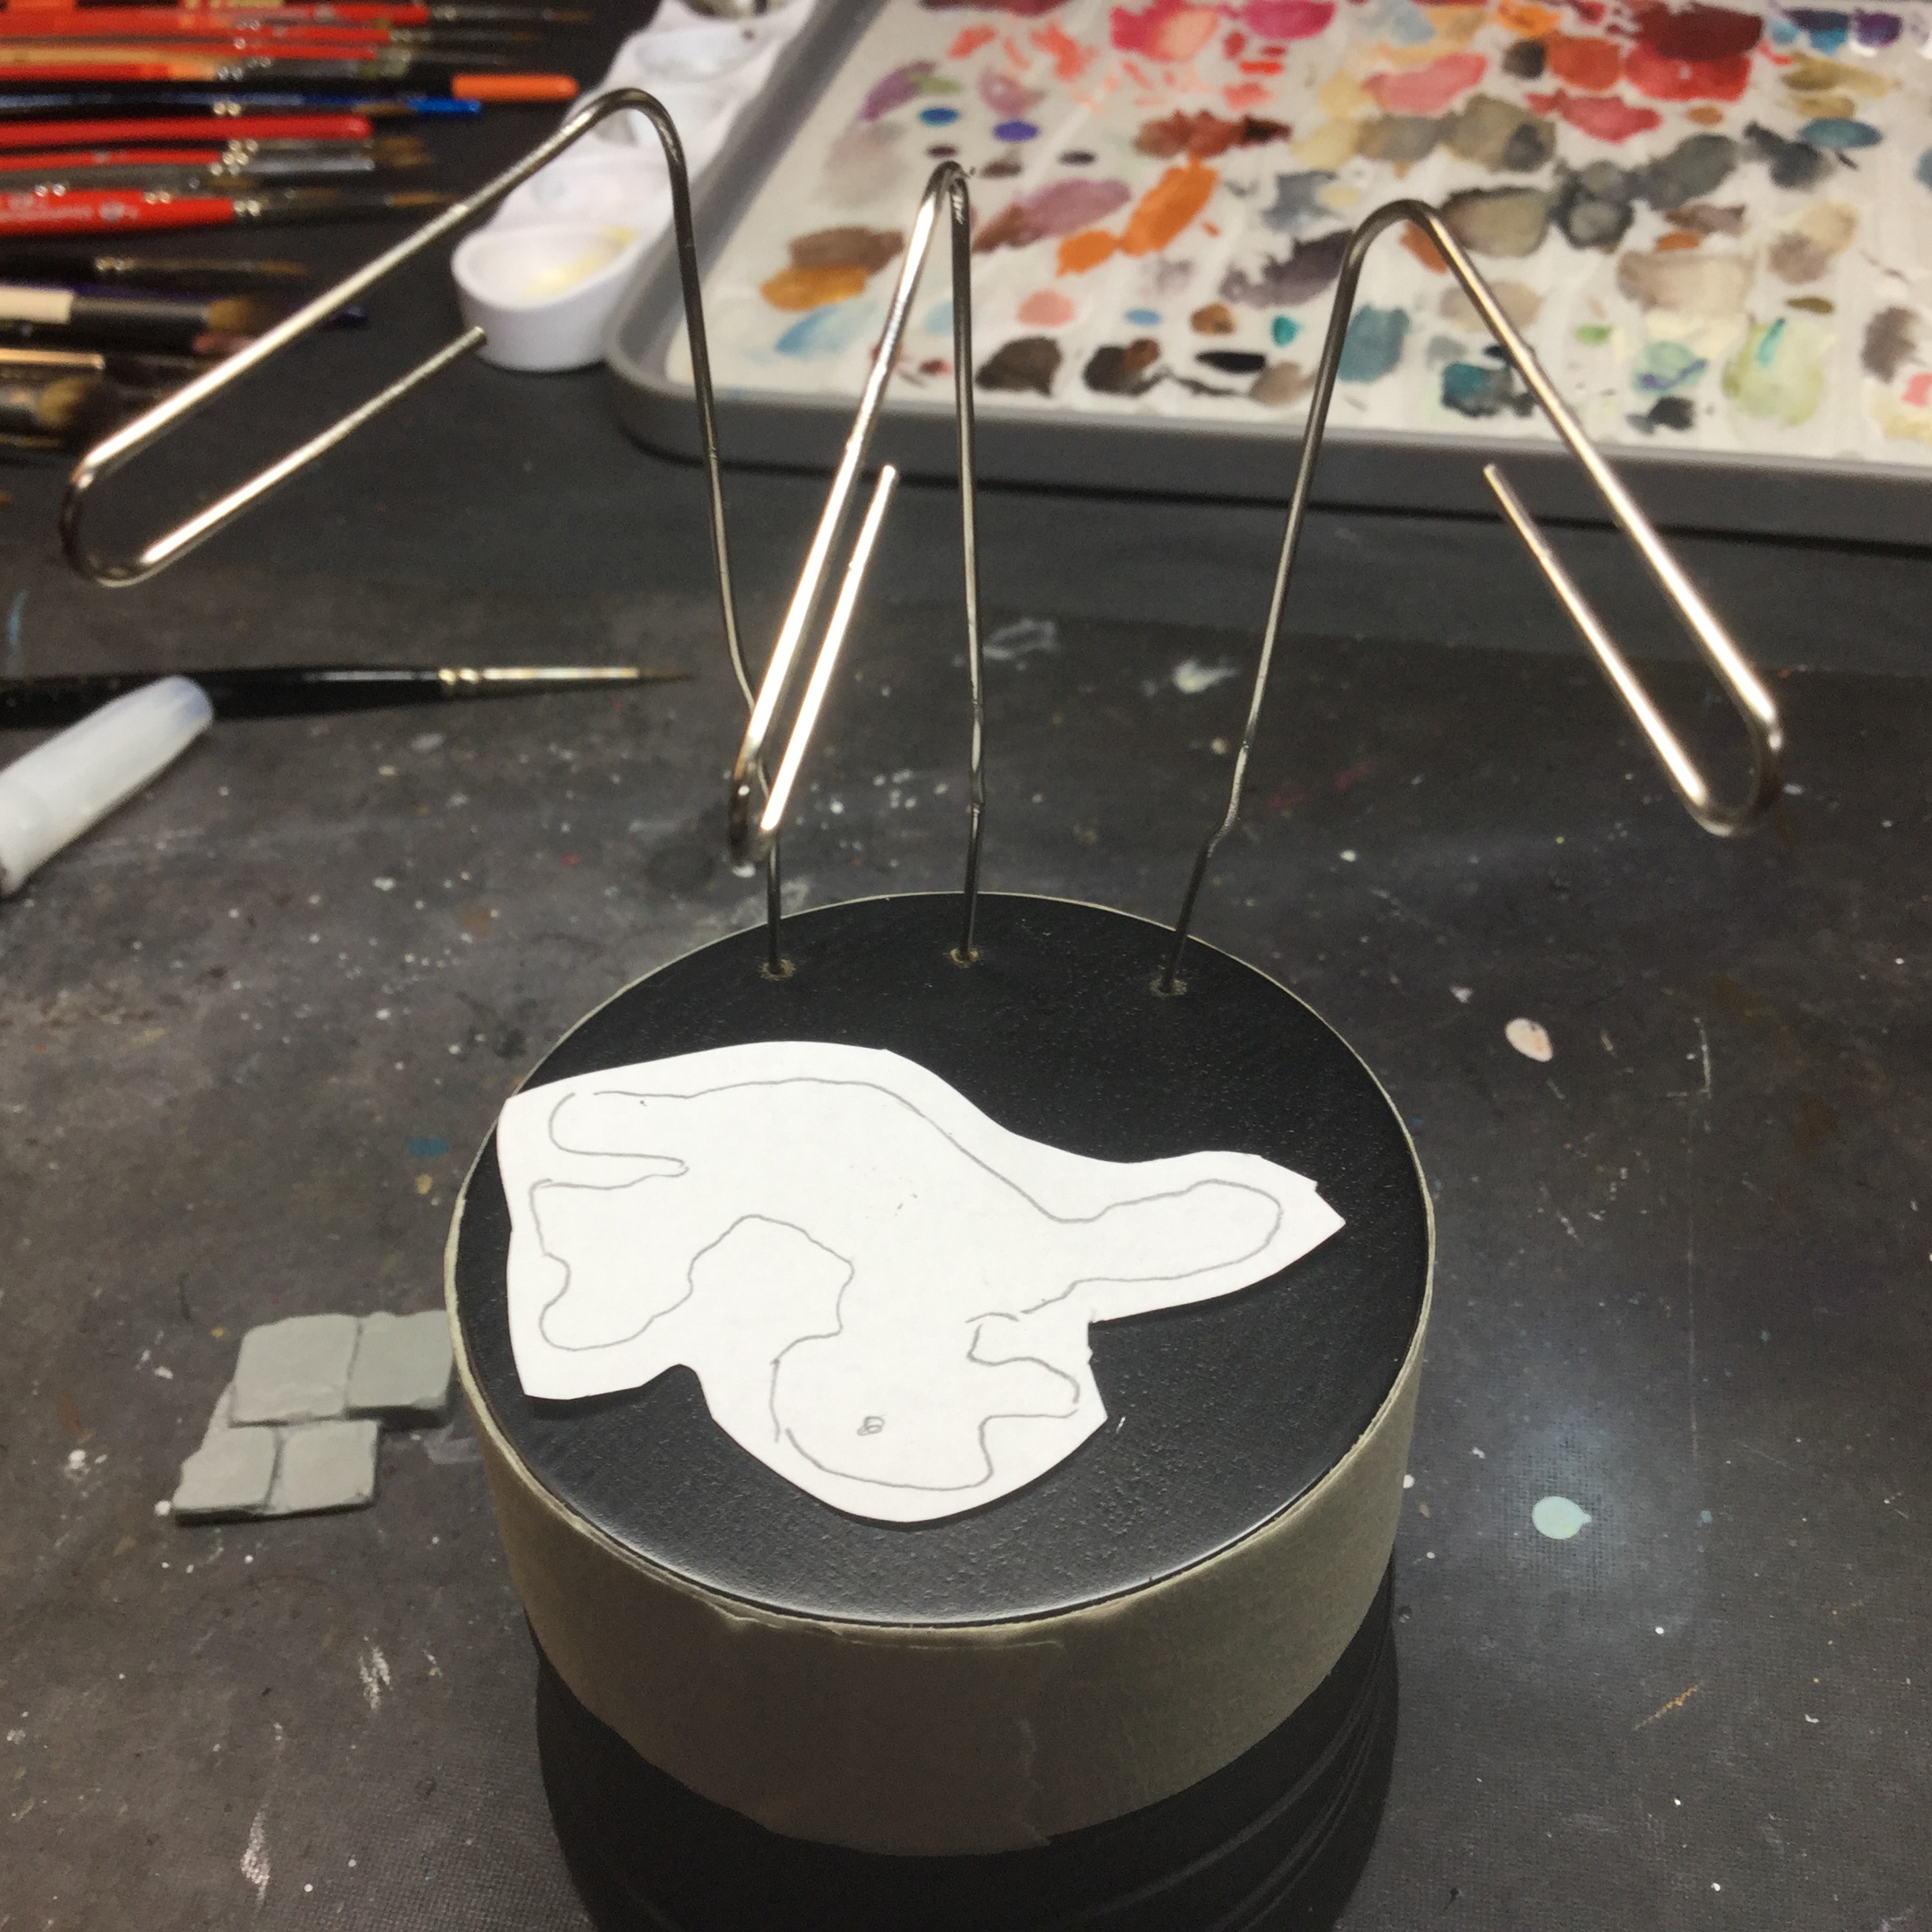
next I traced the ‘footprint’ of the model (that’s the odd little scrap of paper) so I could check easily as I built that the model would fit properly onto the scenic element I was planning to sculpt/build on top of the plinth.
Then, I drilled three holes into the top of the plinth and fitted and glued three large paperclips into the holes as the start of the armature.
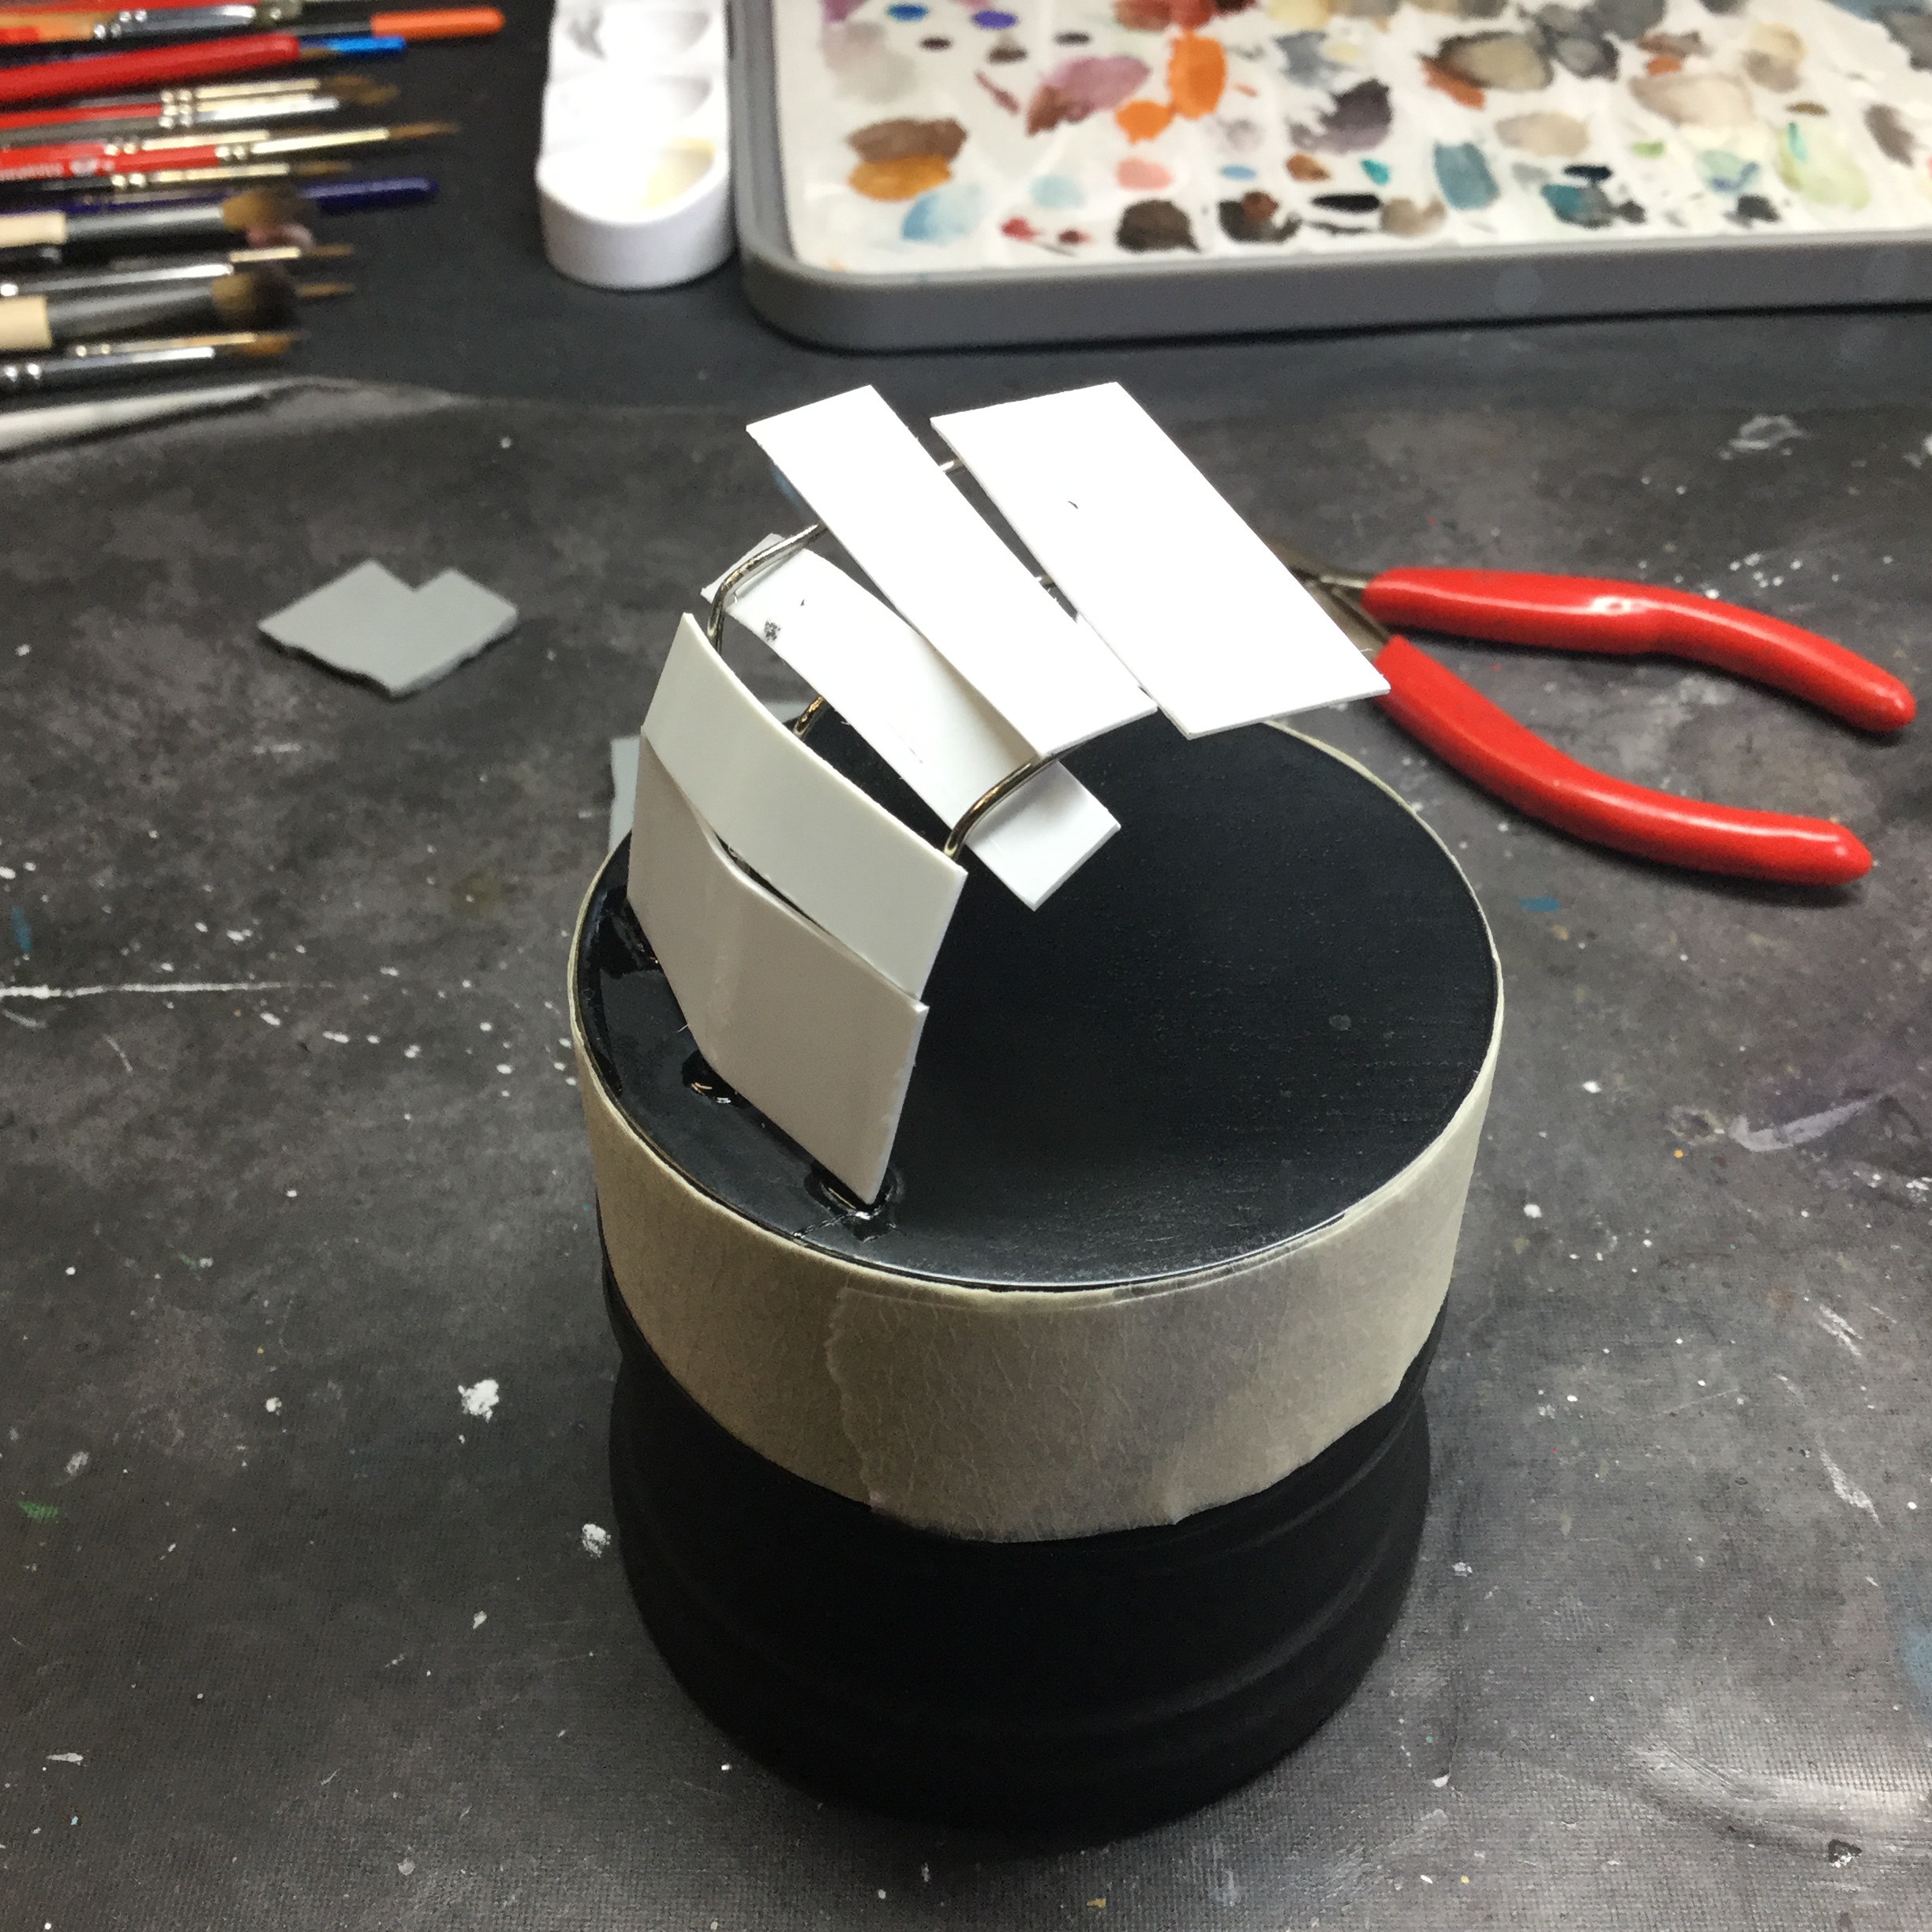
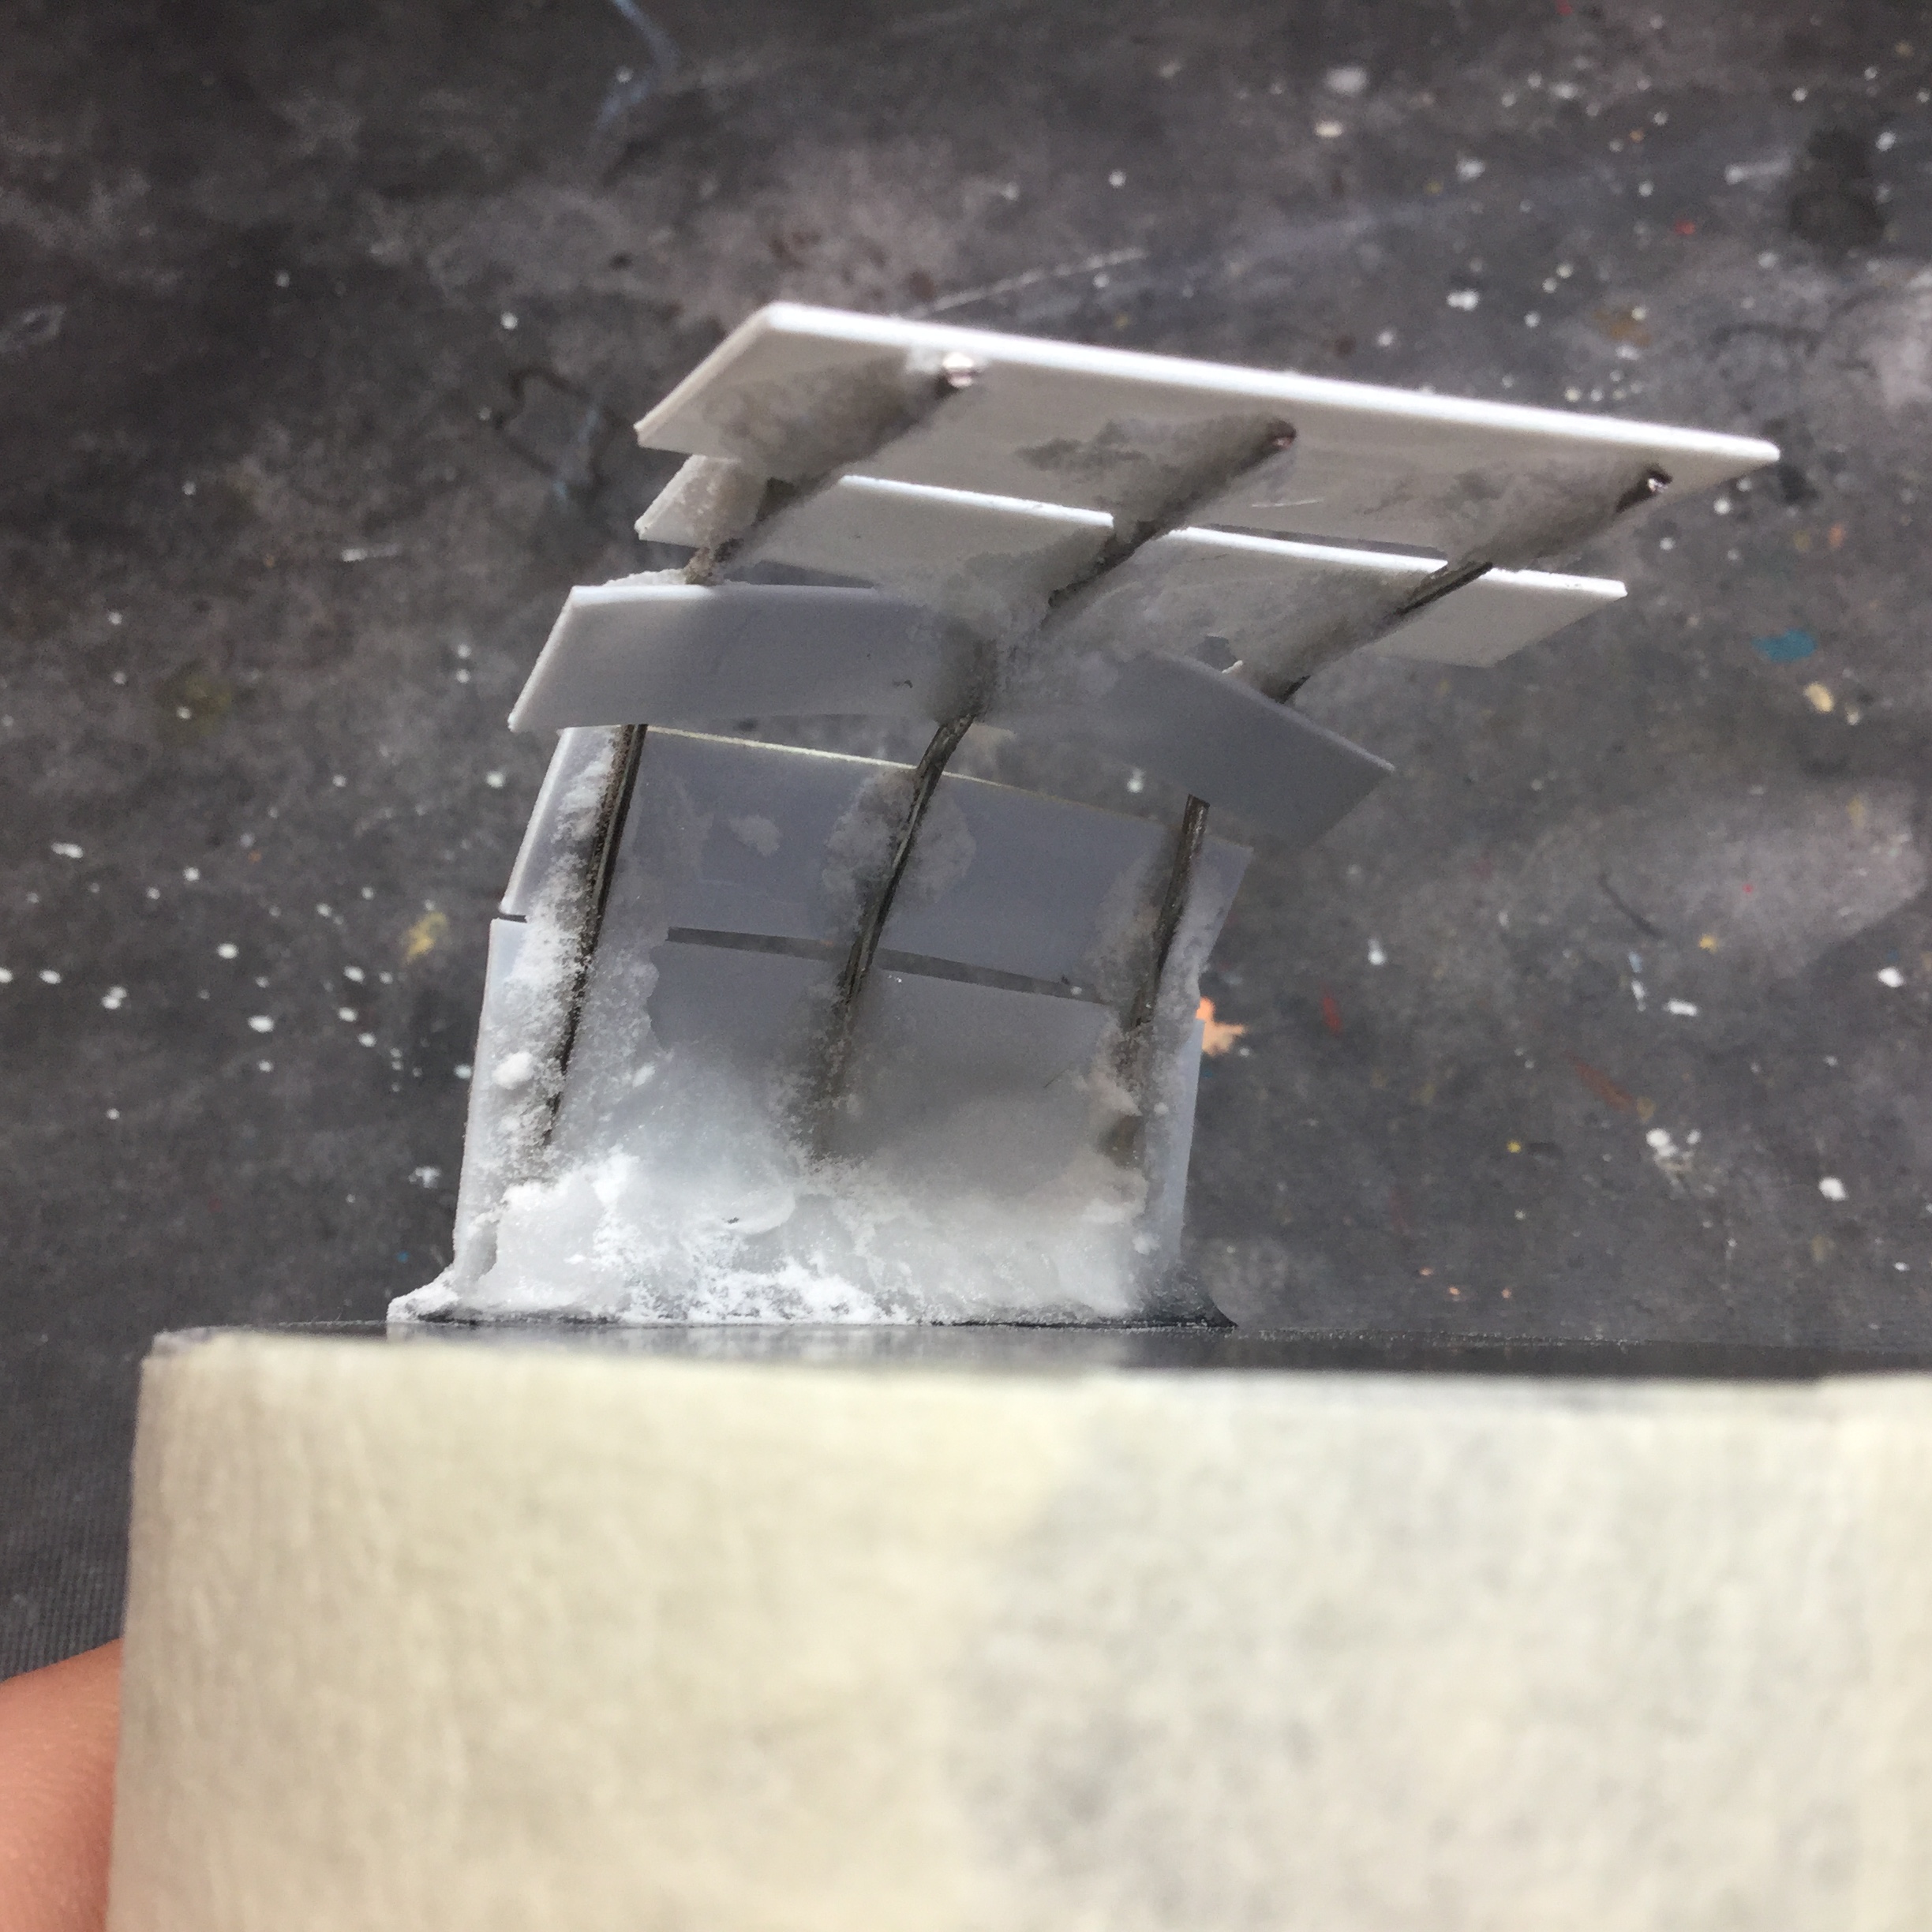
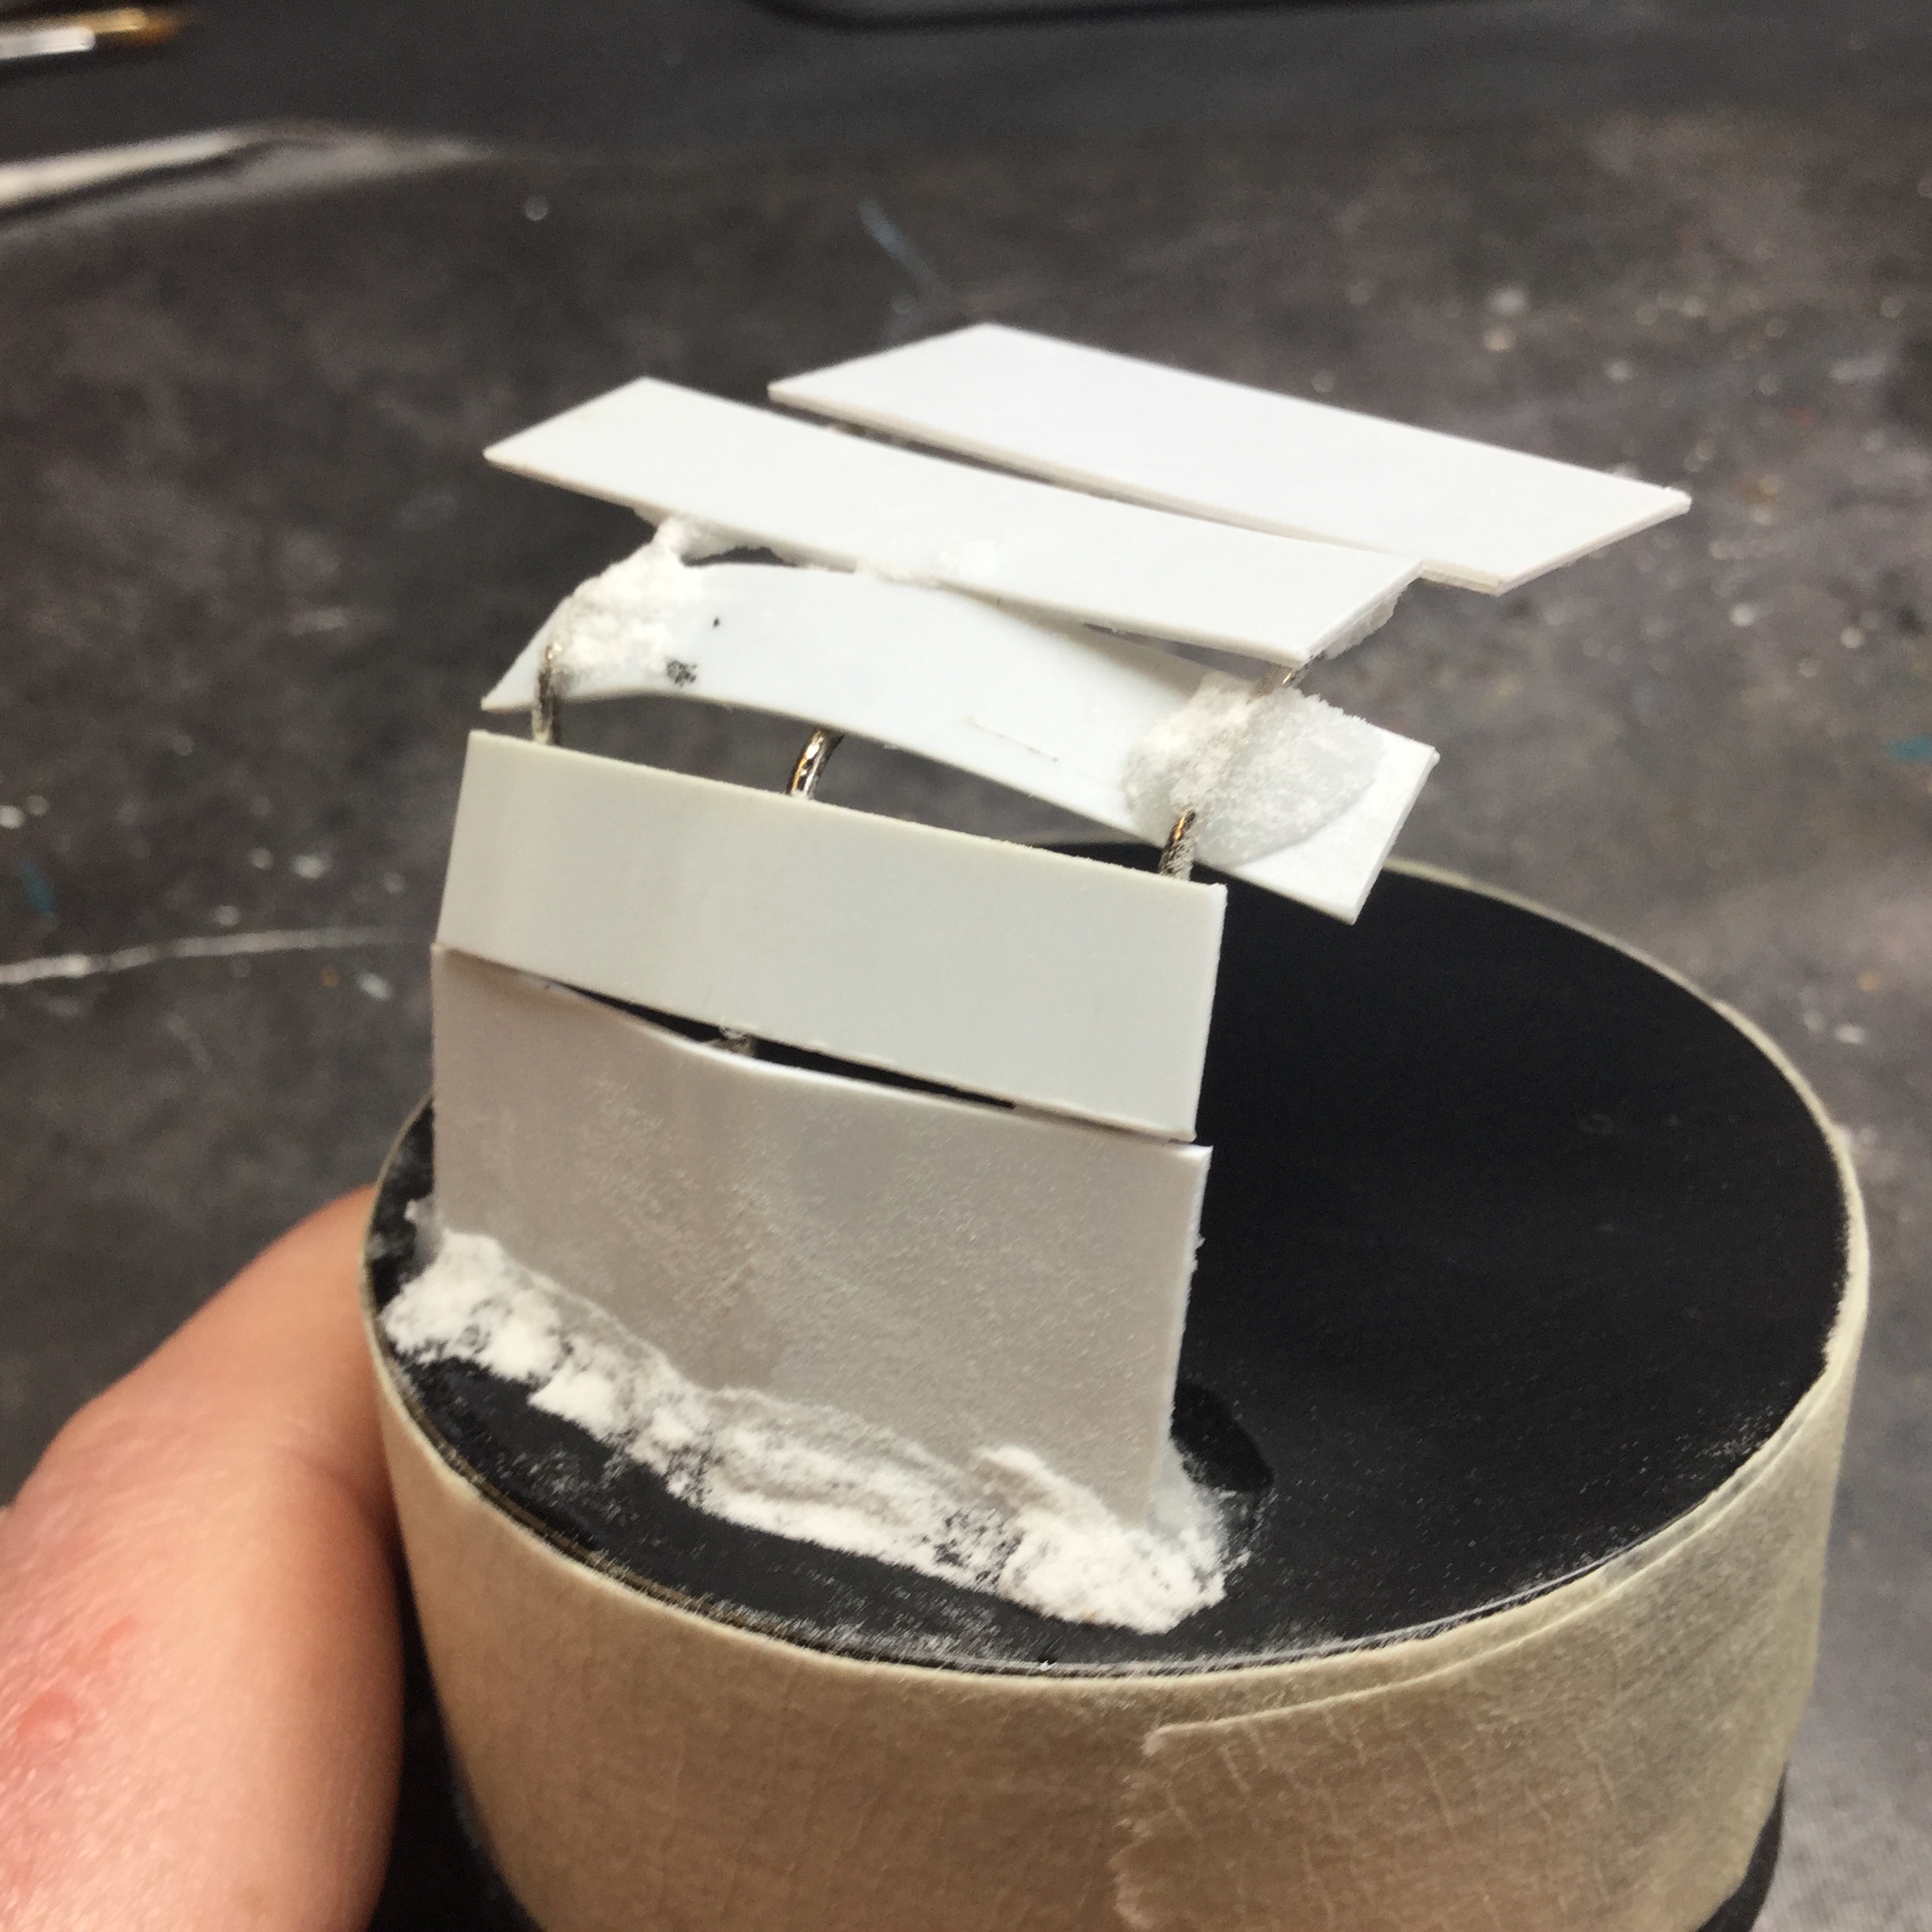
With the ‘pins’ glued in place, bent in the correct direction and trimmed back, next I needed to start added a platform around which to sculpt. I glued on pieces of plasticard to the wire armature then ‘cemented’ them into place with more superglue and baking soda. While some folk use baking soda as a cheap superglue accelerator for superglue, it also makes for a really hard cement with which to secure the armature.
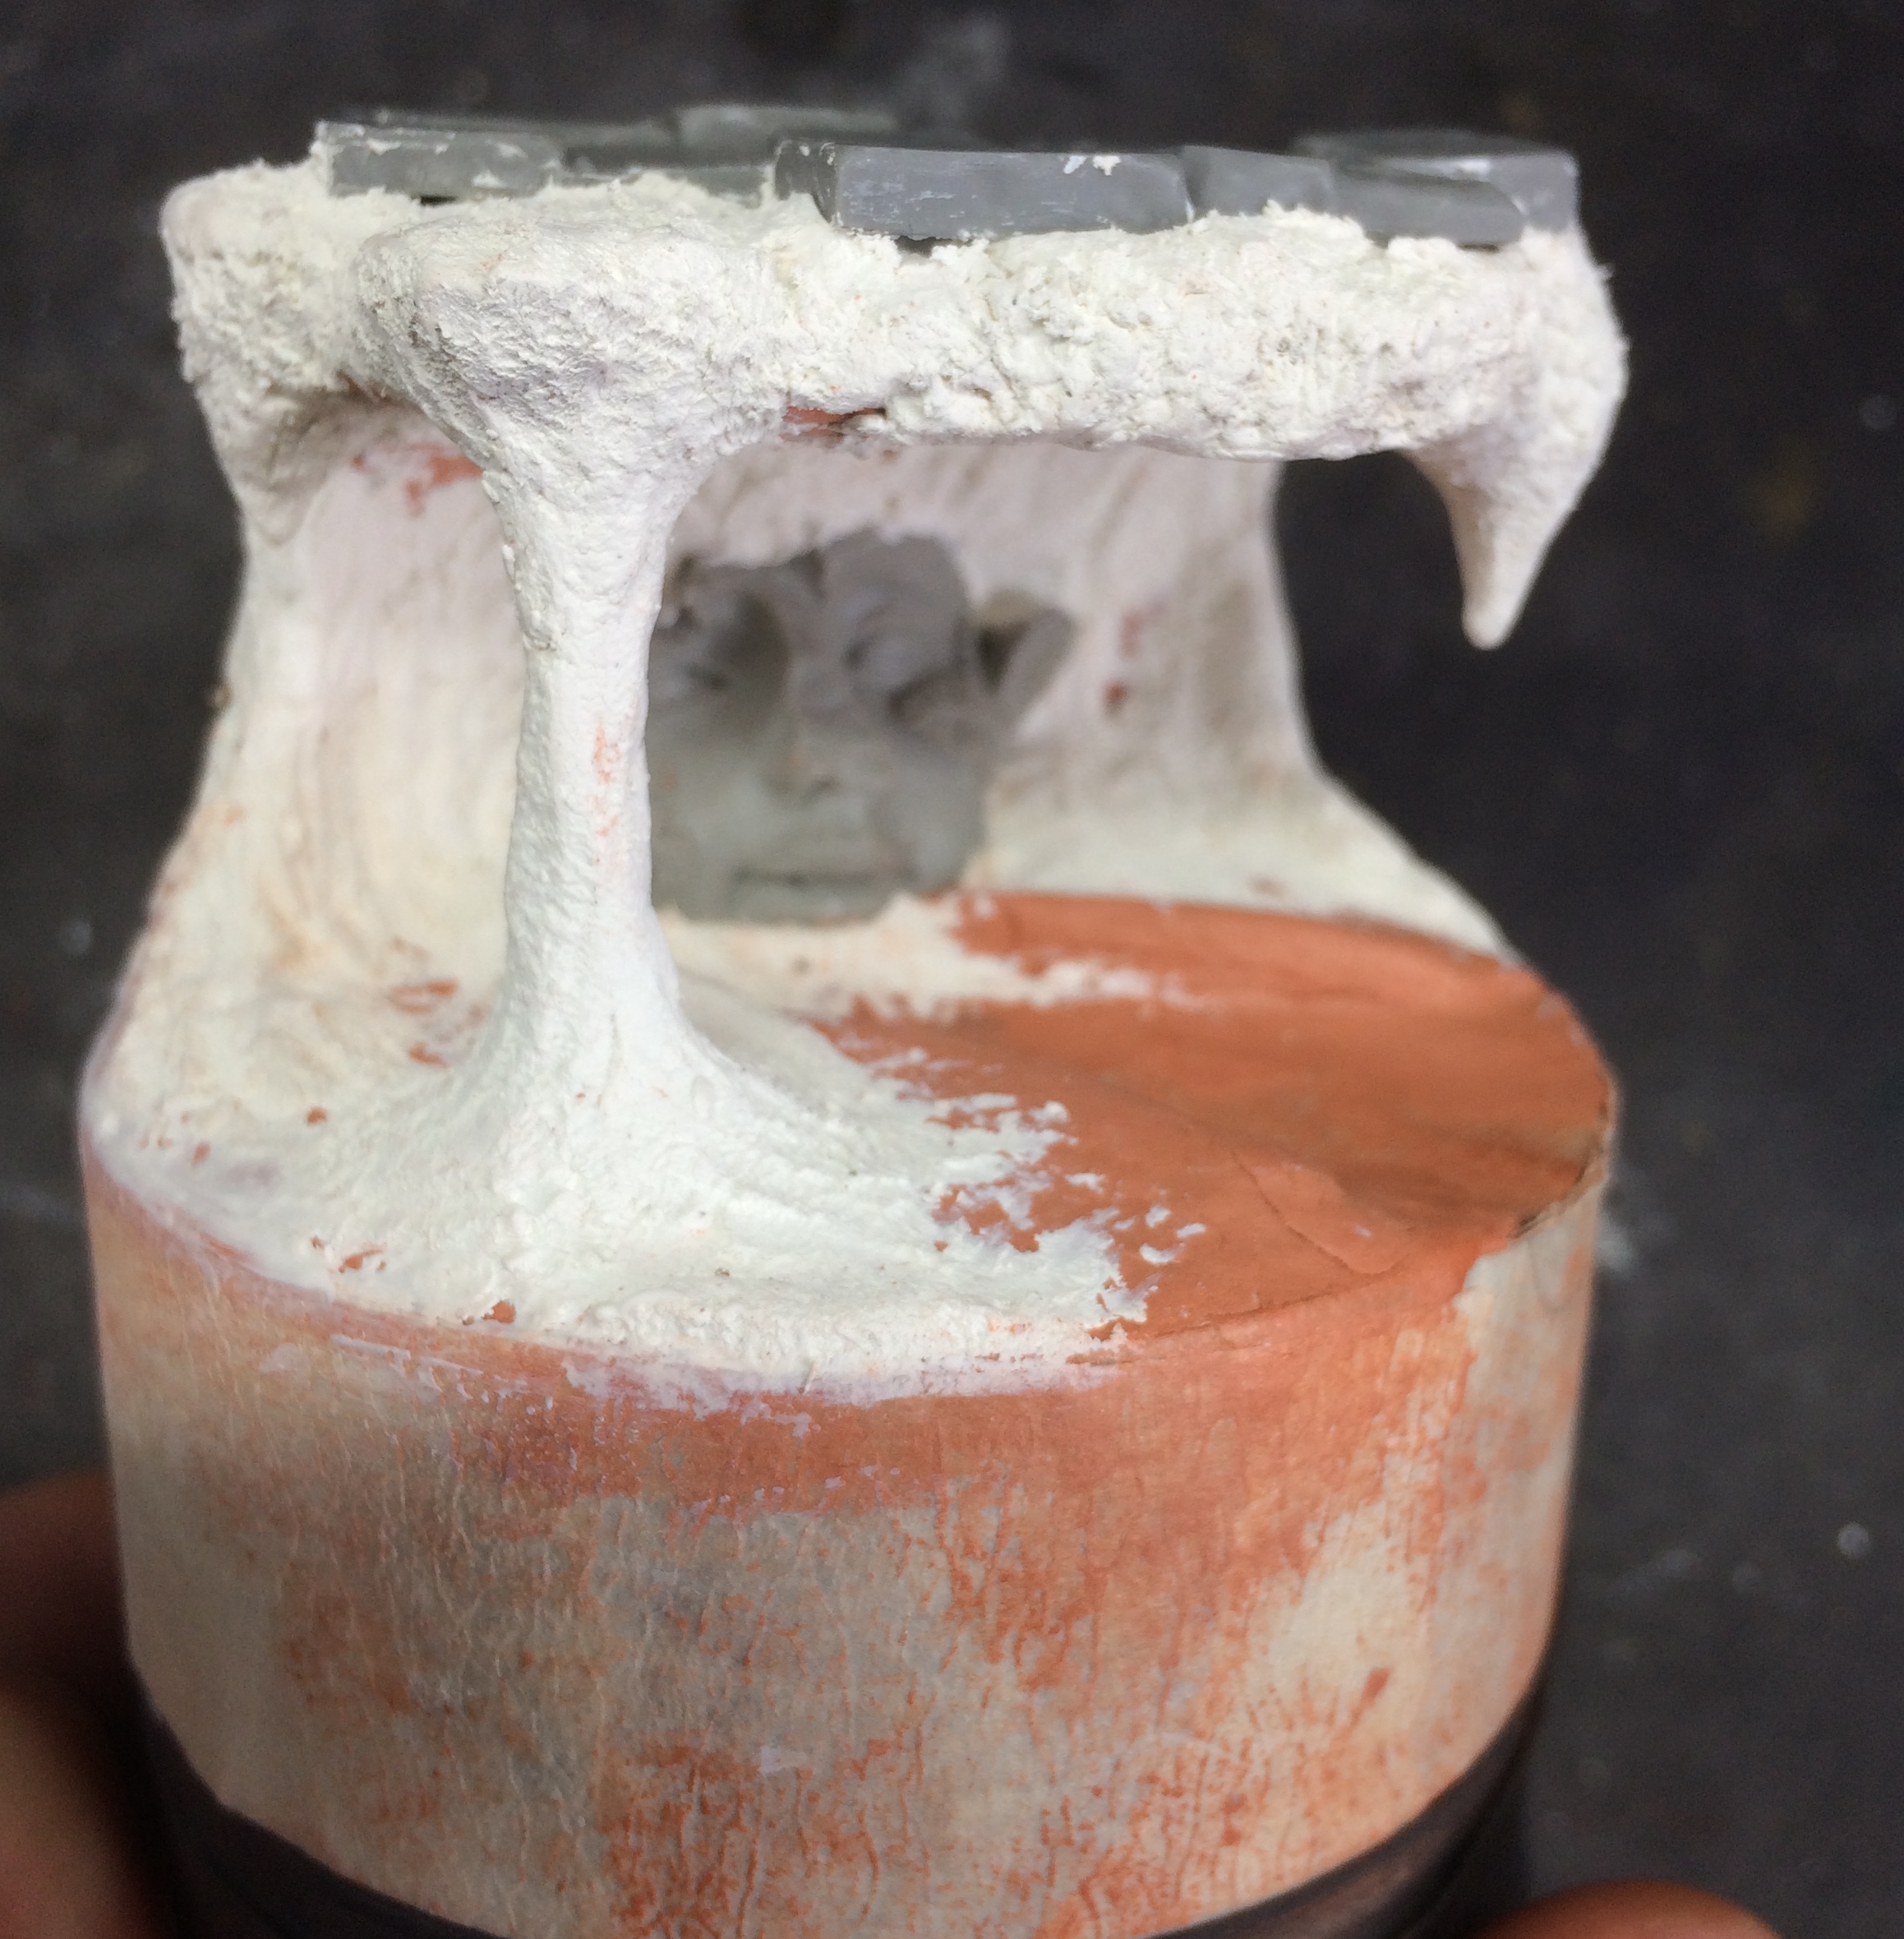
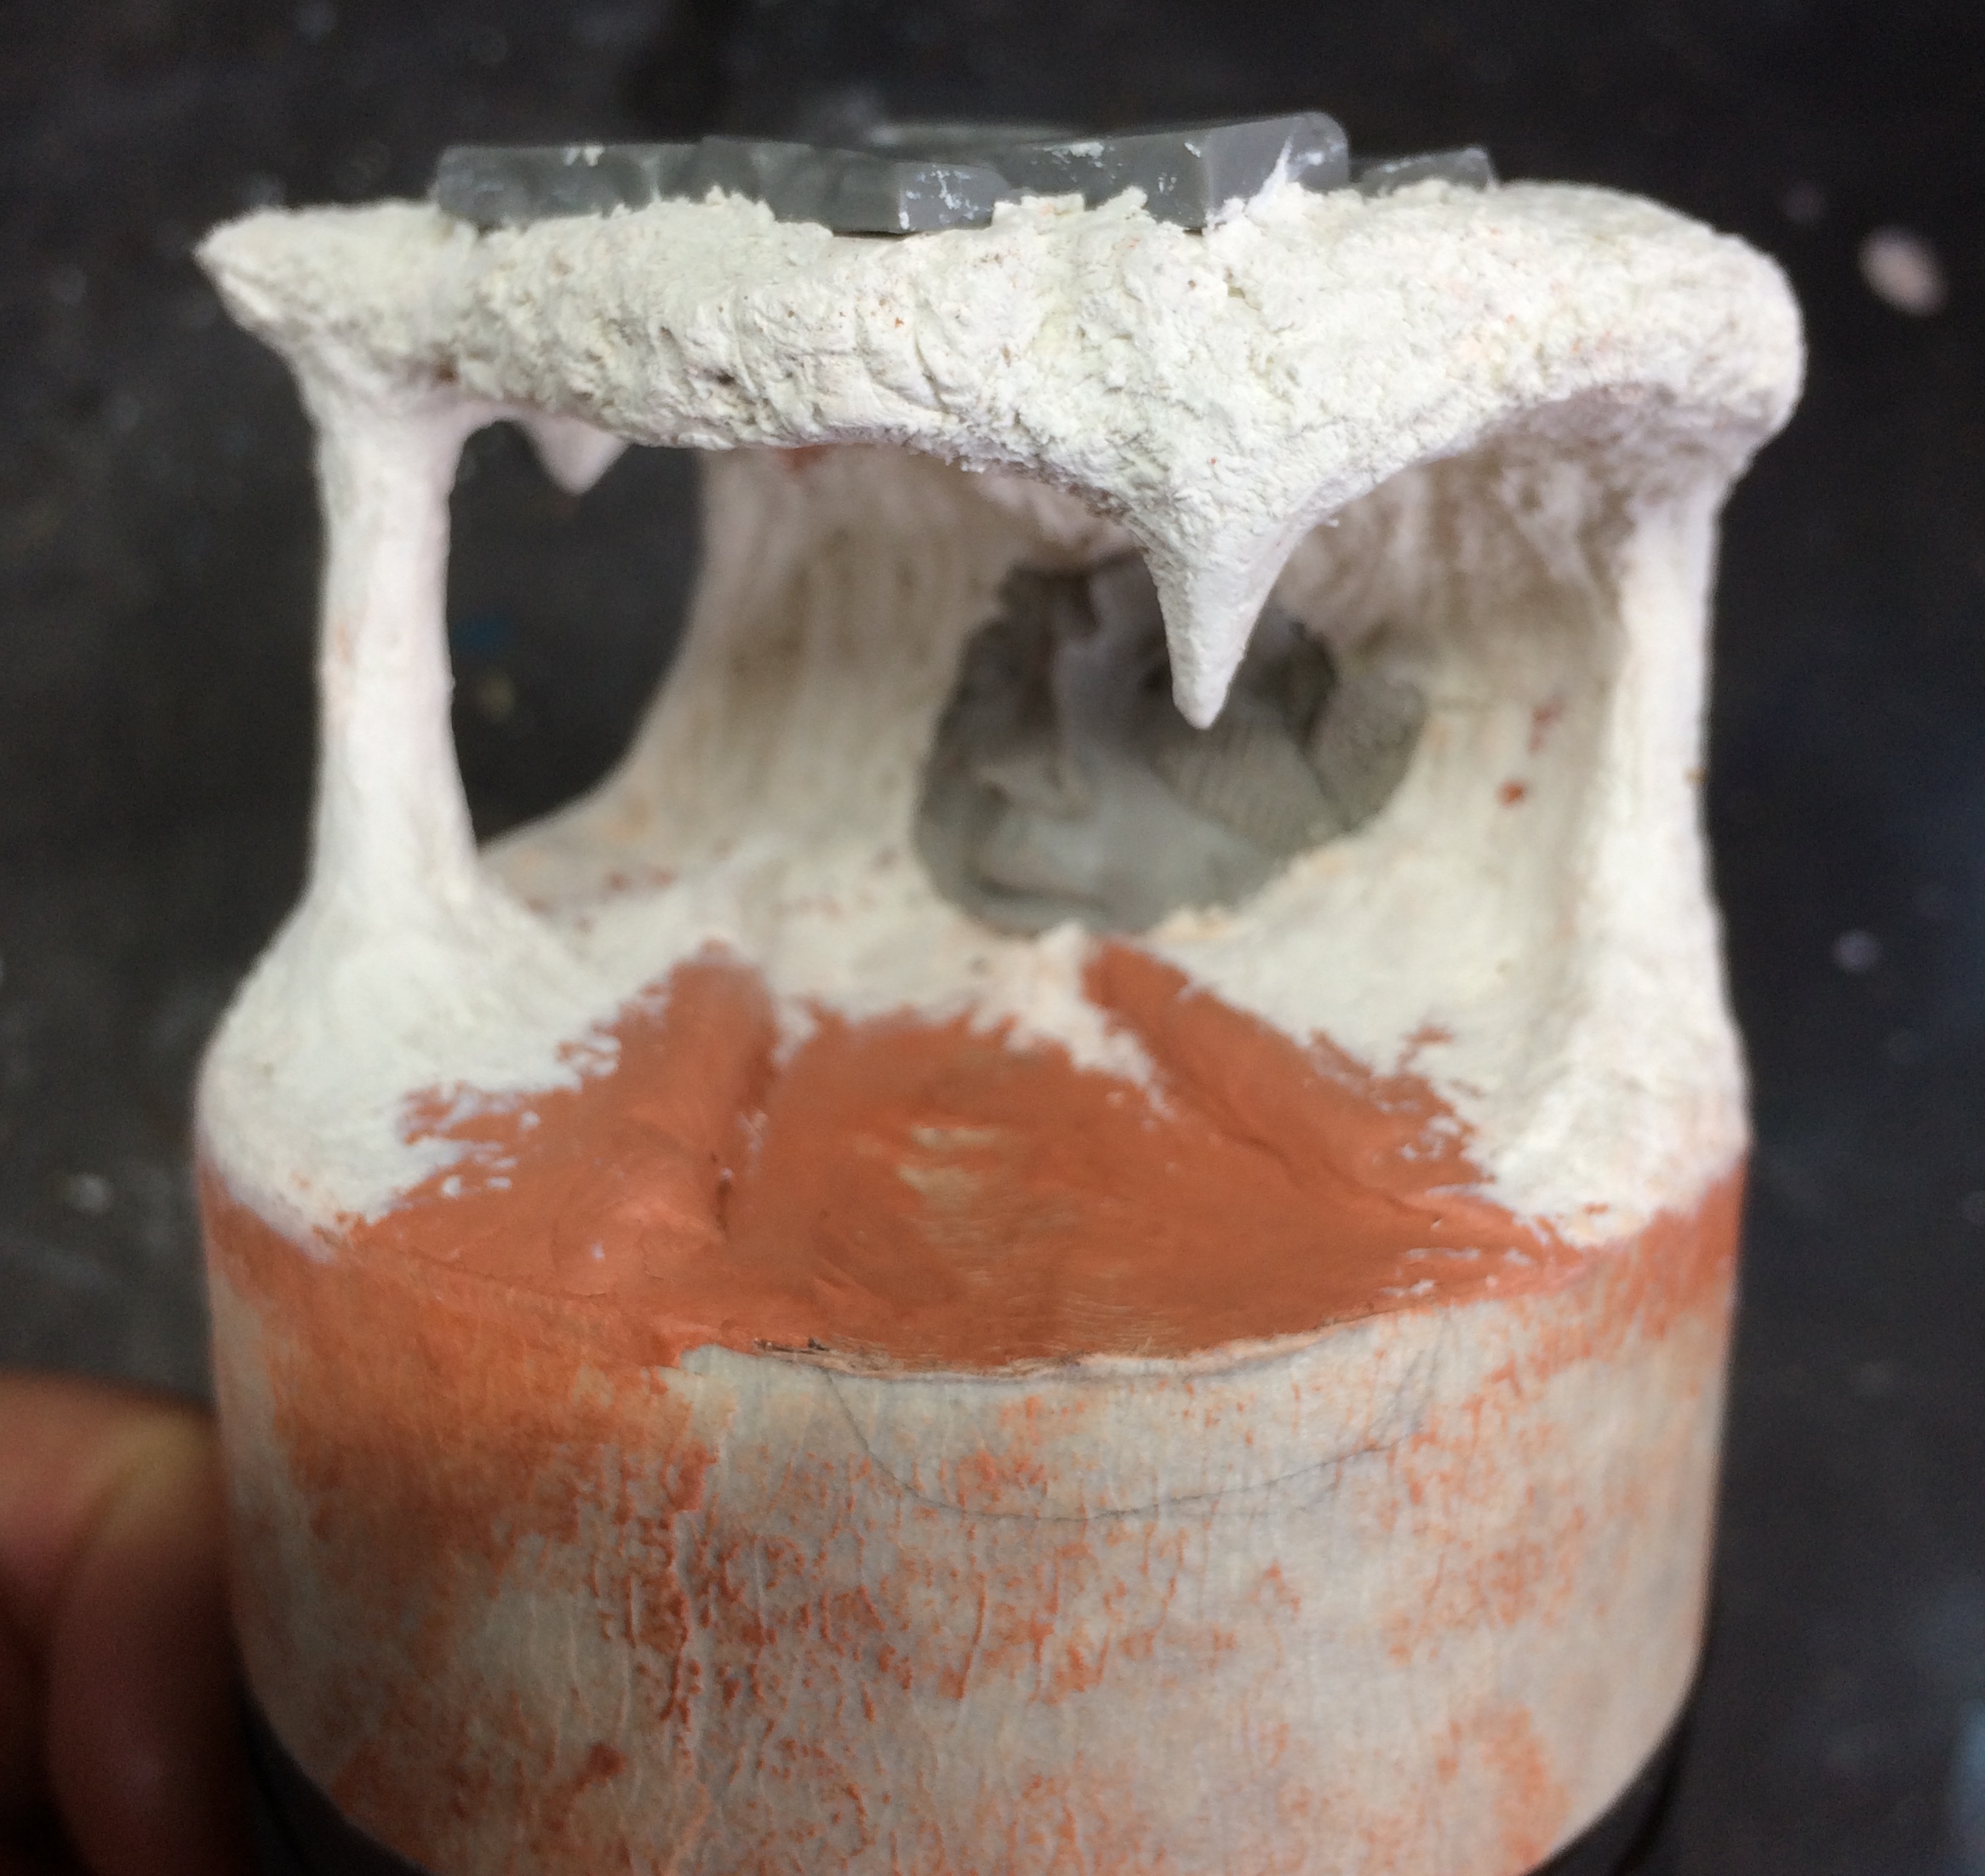
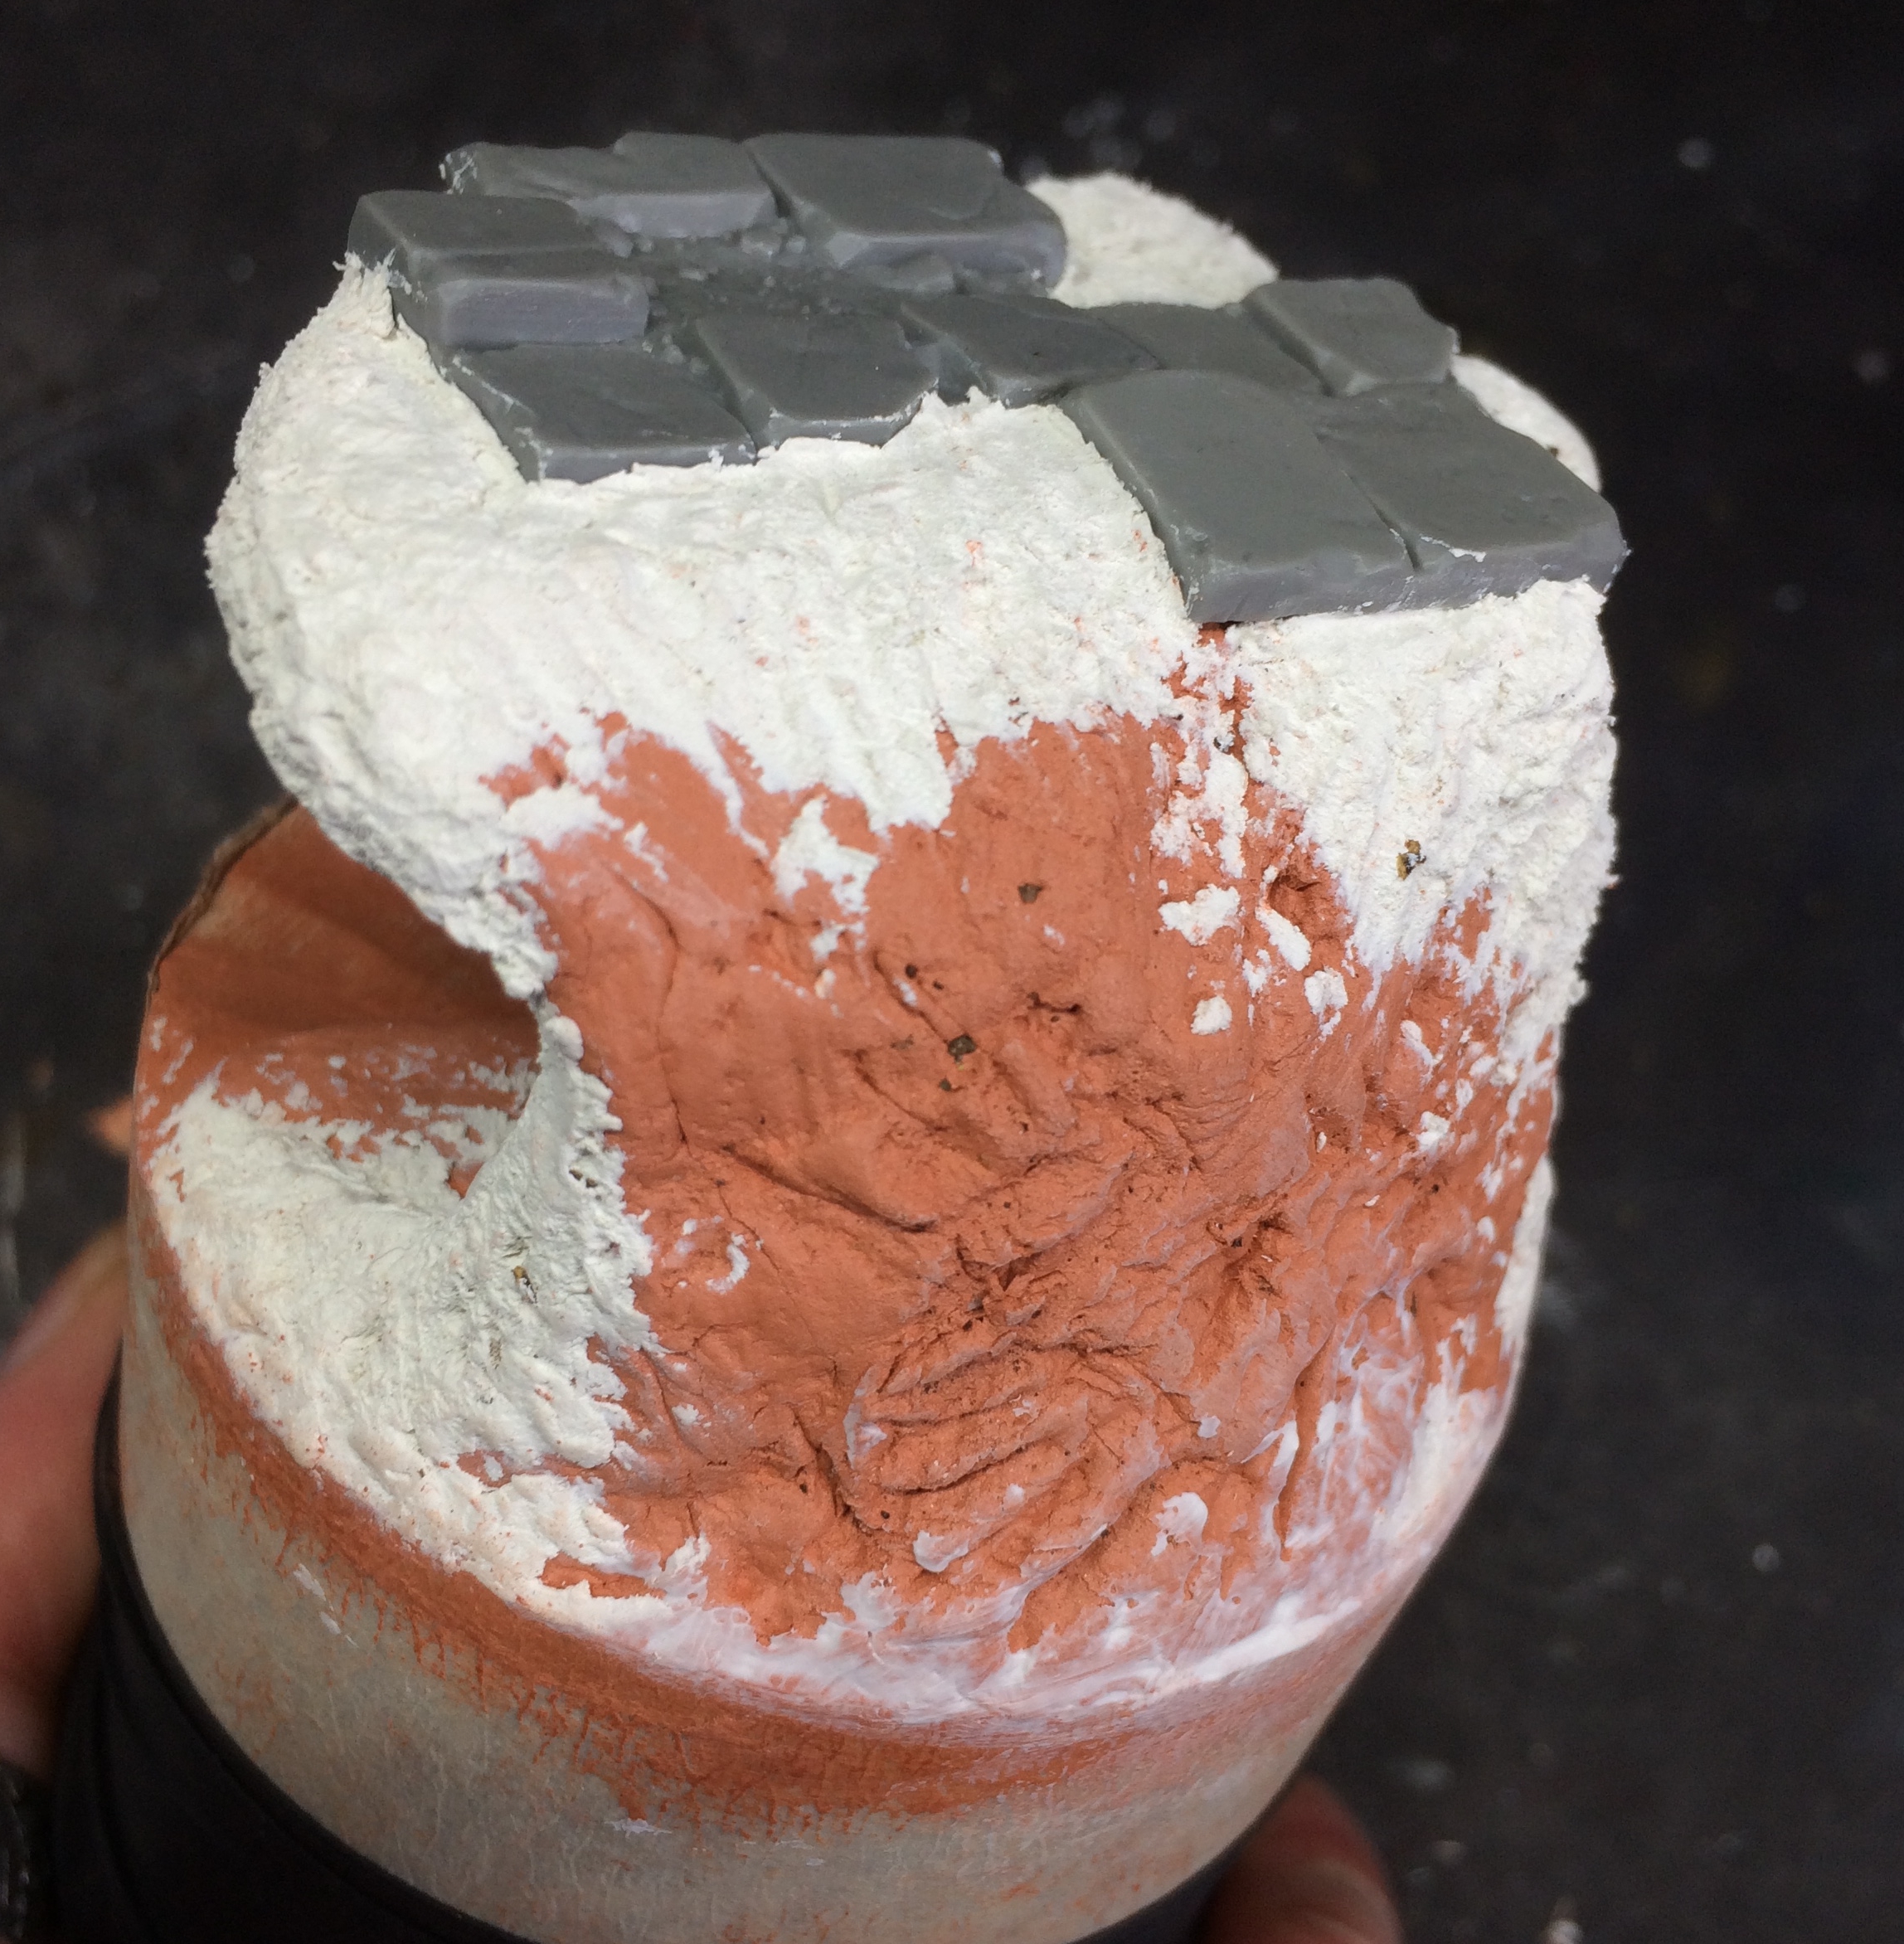
With the armature built and as solid as a Guinness shi……. house, time for some sculpting. First comes the core. For this I used DAS. I hate DAS for the most part as it takes forever to dry and is kinda greasy to work with BUT it is incredibly cheap so I use it for the hard core of a build and then once it (eventually) dries, I sculpted the outer form with milliput extrafine.
While bulking out and starting to refine the cave, overhang, stalligtites (or however you spell those down pointing buggers) cave column, stream bed and so on I pushed some temple flagstones from gamersgrass into the top and a face from Scribor into the back wall and moulded the milliput around them. I left some of the rougher textured DAS peek through at the back as this would be painted as a rock face.
Right – am knackered so off to bed!! Part II comes tomoro!!
Stay home, stay safe, stay hobbying folks 🙂
Death High - The Archivist
Very very quick update on the latest of the Death High I finsihed. The Archivist. She was a wee treasure to paint!! The base is made from scratch as I do wil all the KDM models as their bases are well…. shite. Tried a few wee new things out on here incl a really nice green triad made with scale fantasy and games paints for her skirt, straps etc. Hopefully get some proper stills taken soon but until then…..
Catching up with the Hoorrrroor~!!
Been a while since I updated the KDM project log (well….. all the project logs) so let’s see what’s been going on!!
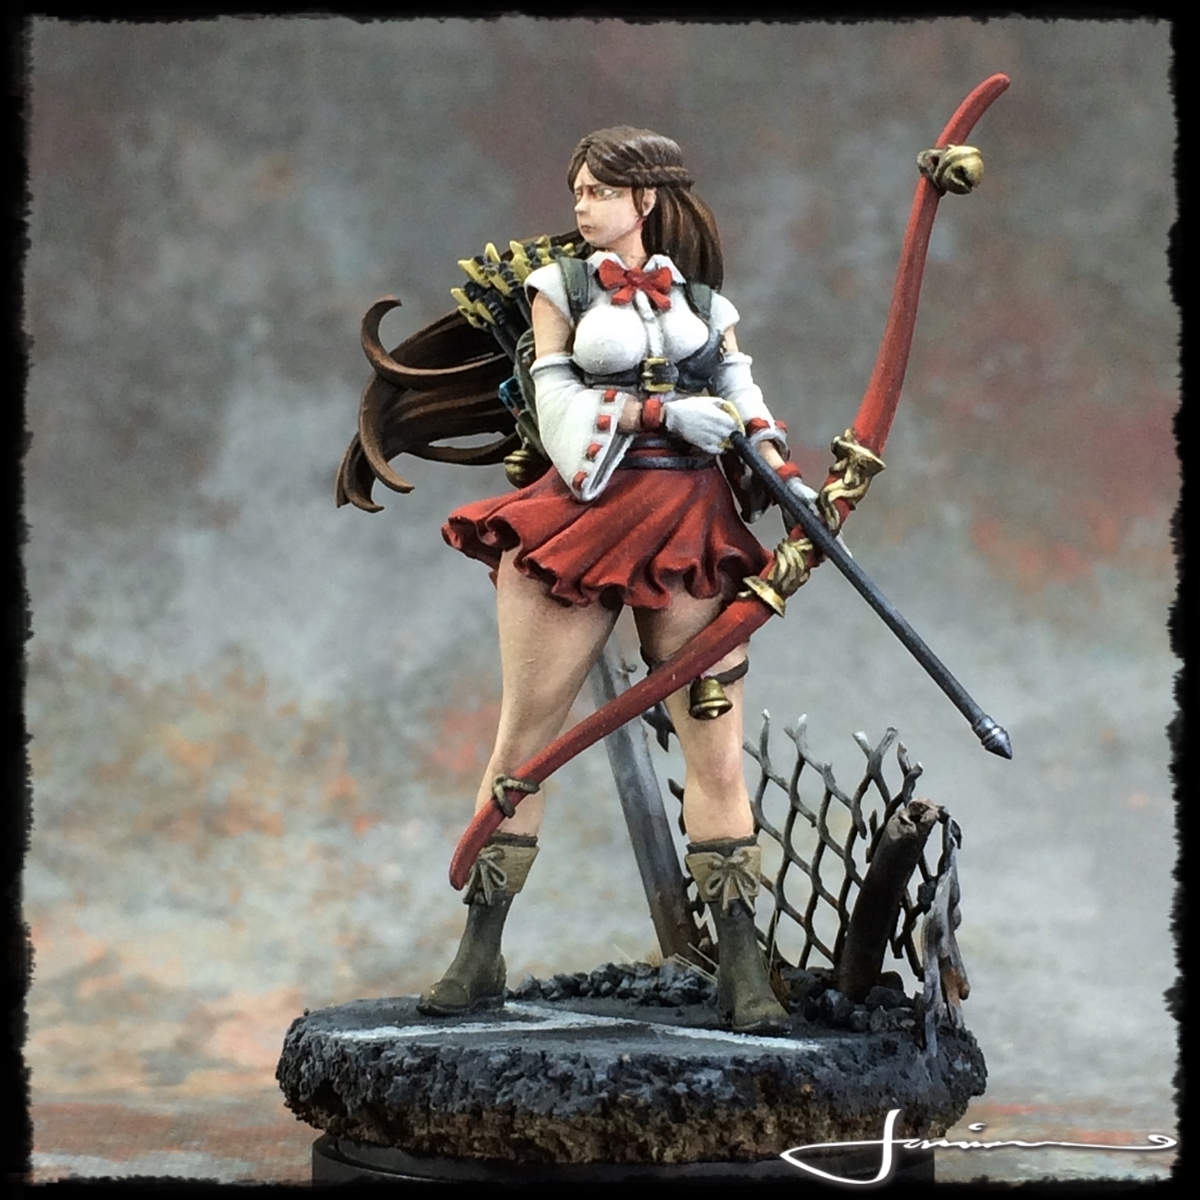
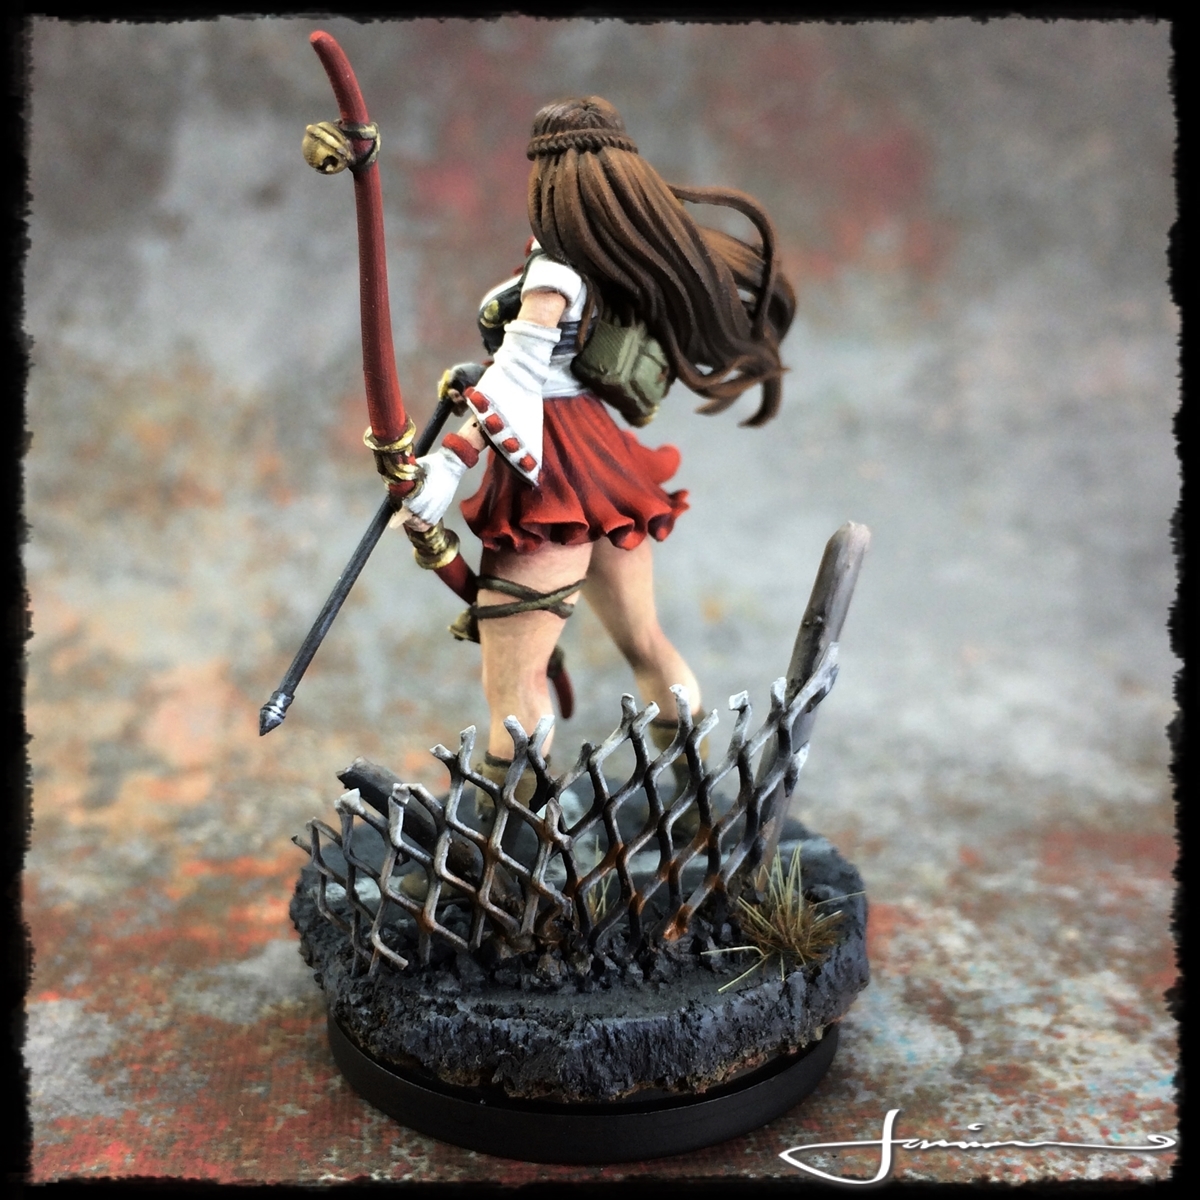
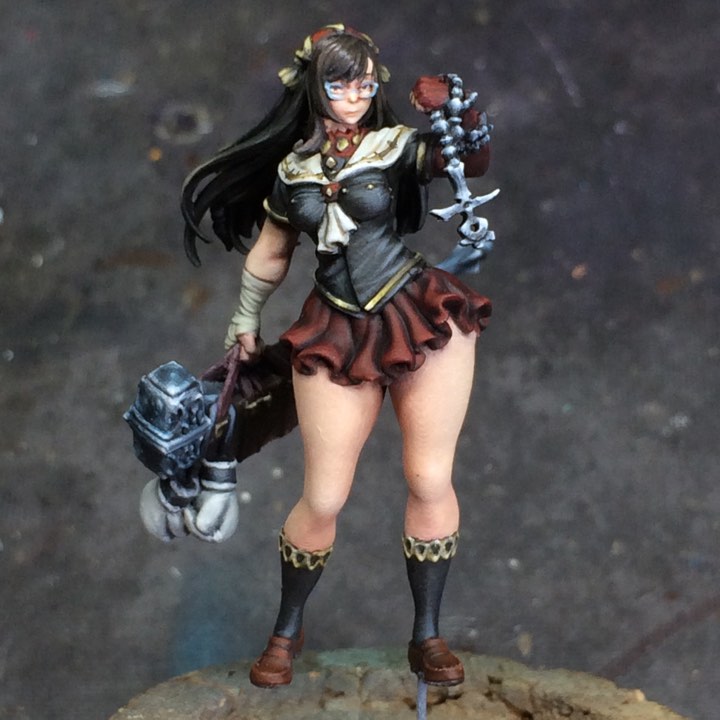
Continuing with the fantastic Death High series I finished and made a base for Miko. Love this mini, was a real treat to paint.
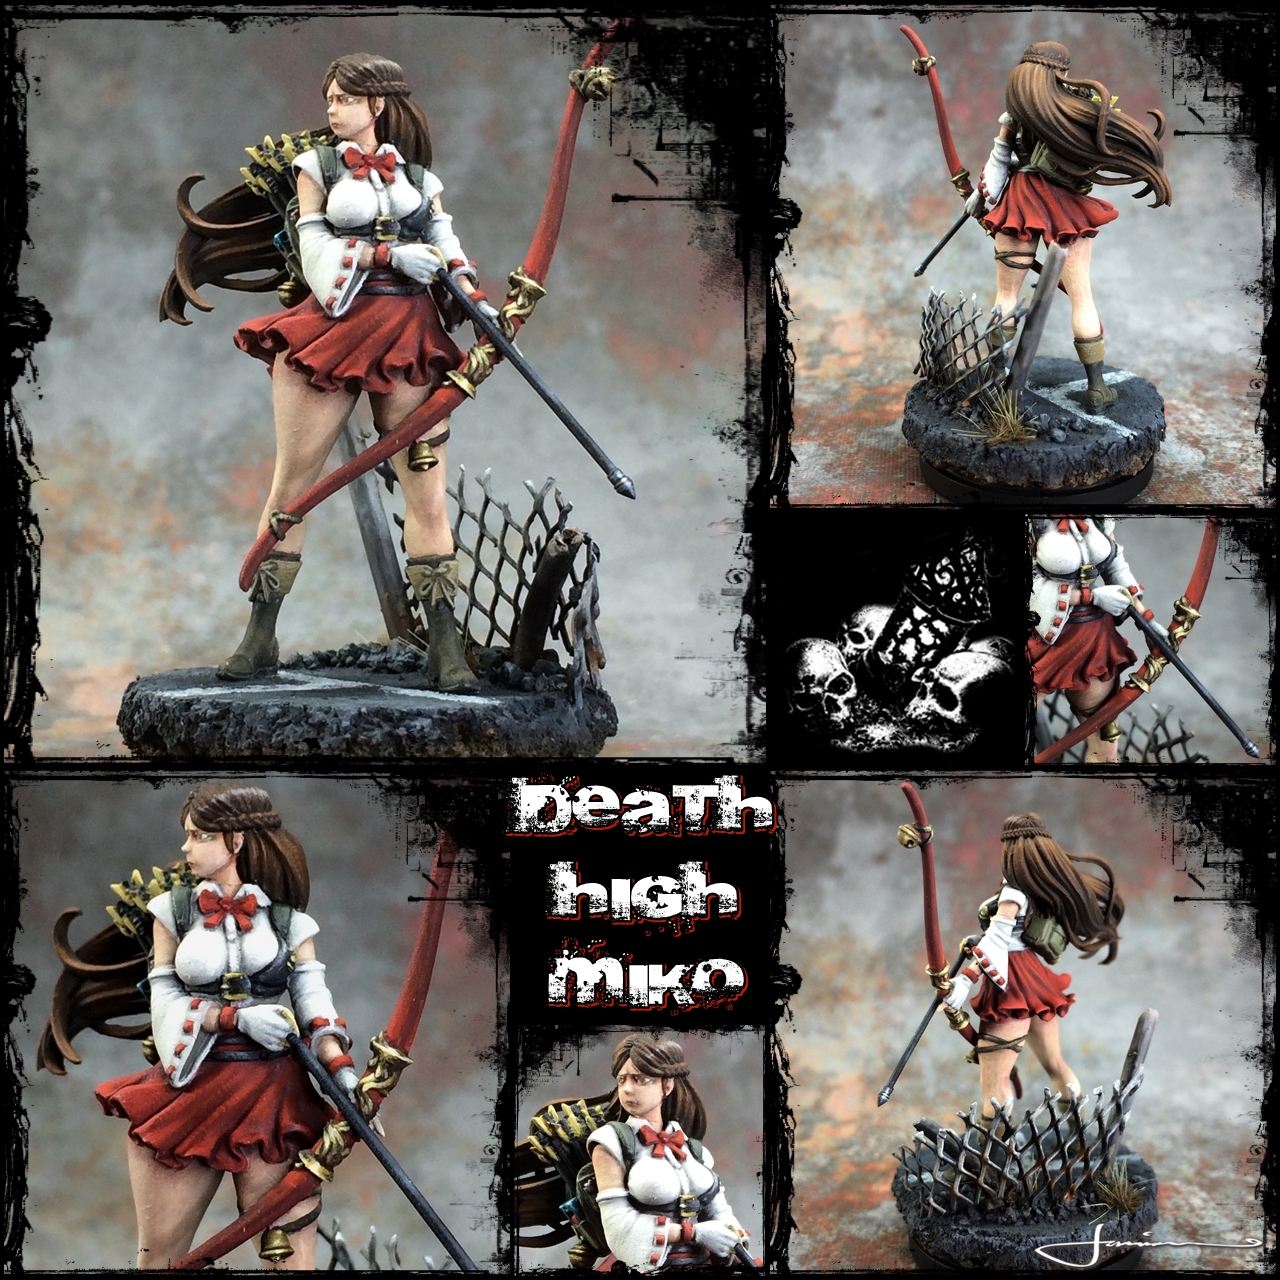 Miko
Miko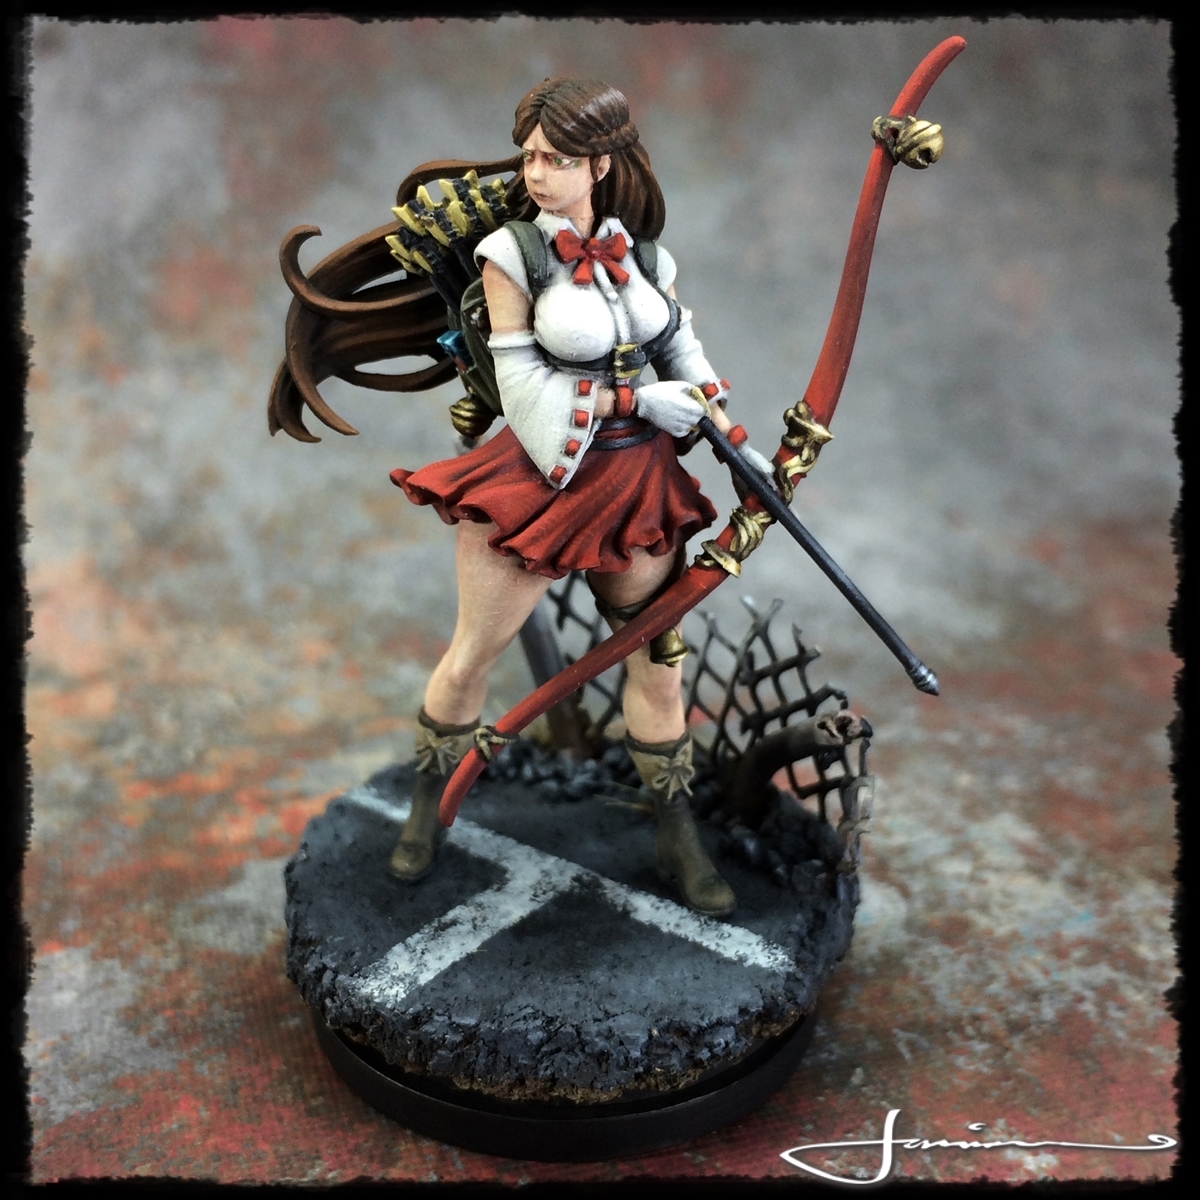

Also finished up the Female Preacher form the same series but still need to get a base made and painted for her so more on her later…………
 Female Preacher
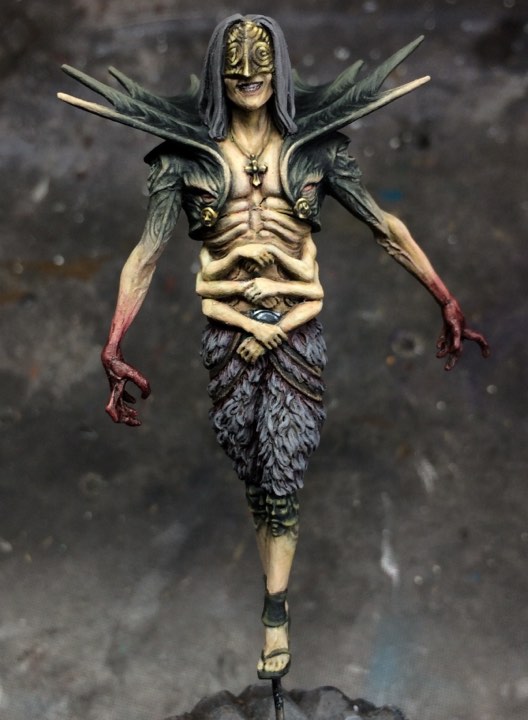
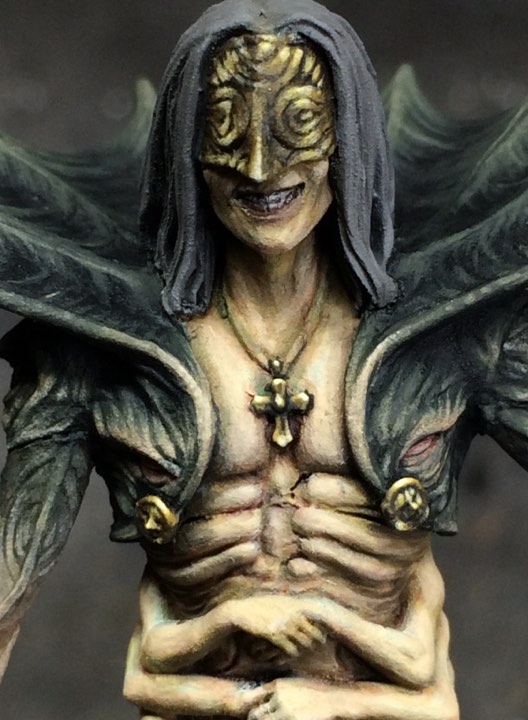
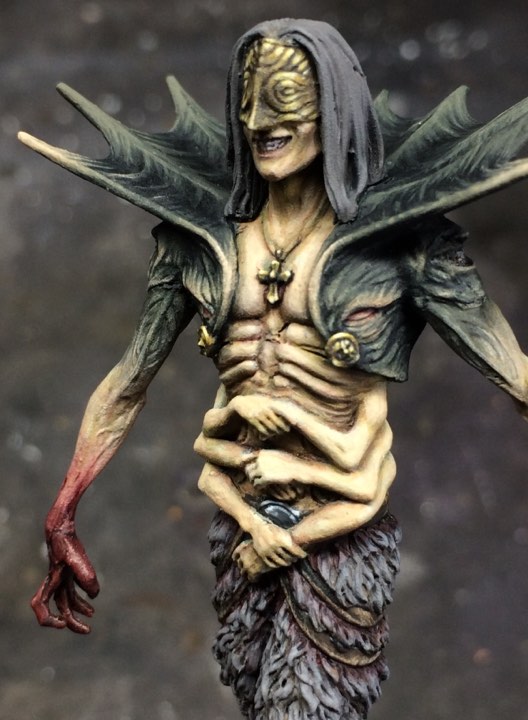
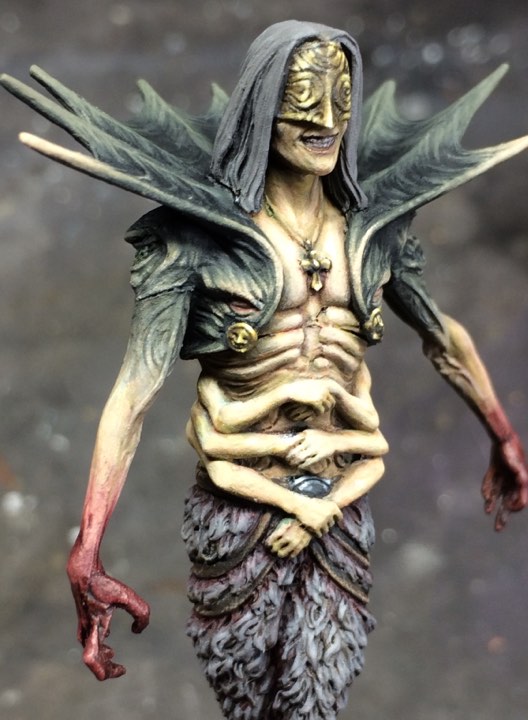
Finally got to take back out the fantastically creepy and awesome Pariah from the White Speaker thread. Love this mini! He’s far from finish but getting a little progress in 🙂
And that’s us mostly caught up………… mostly 😉 maybe a wee sneak peak on how the flower knight is coming along before I go!

Sorry folks – I’ve been trying to upload this photos for 4 days now and ther site just keeps discarding them whenever i hit ‘update’ – Have tried uploading in groups, one by one, differnt shots …….. nothing. Have put up a message in technical support forum but so far no reply or anything. *shrugs*
Edit – photos now up!!! Seems Chrome was just having a hissy fit and using Edge as suggested by the fantastic @ninjily was the key to getting it to works. Sooooo, if you are having trouble uploading photos at all, try using Edge – worked for me 😀
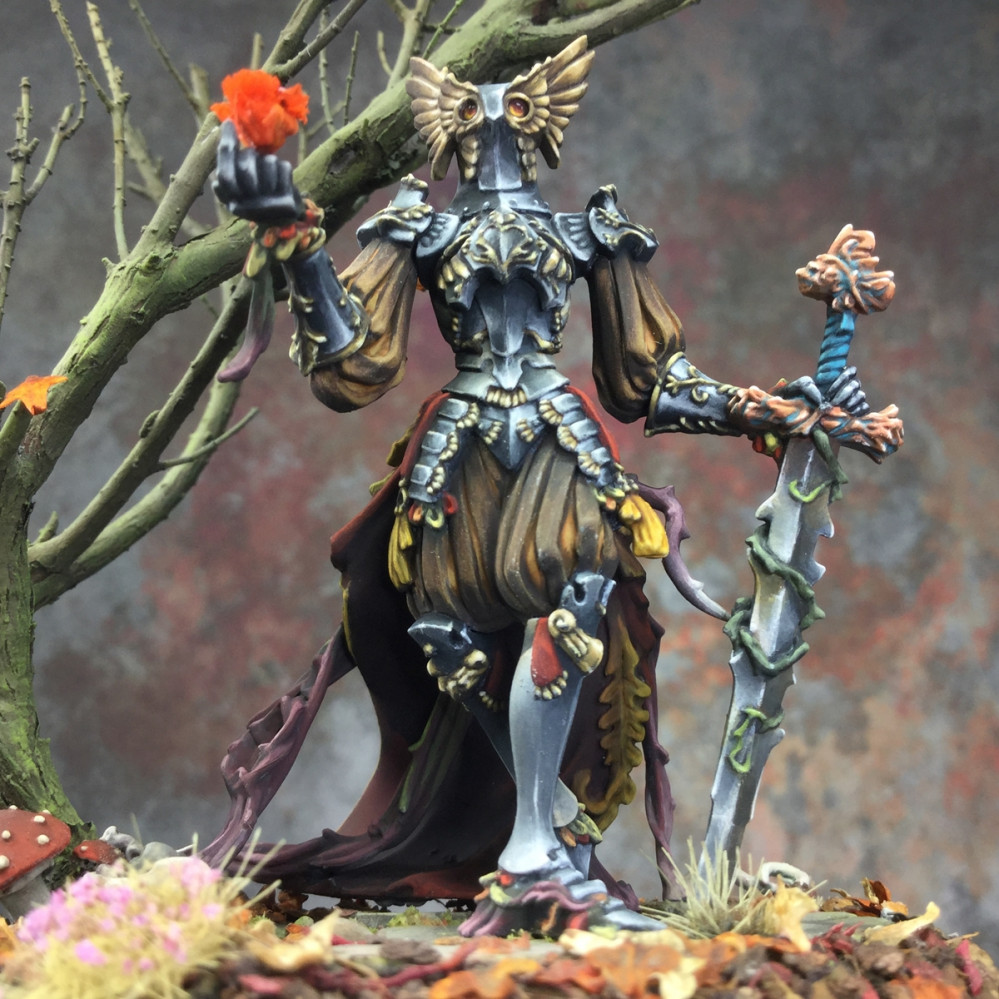
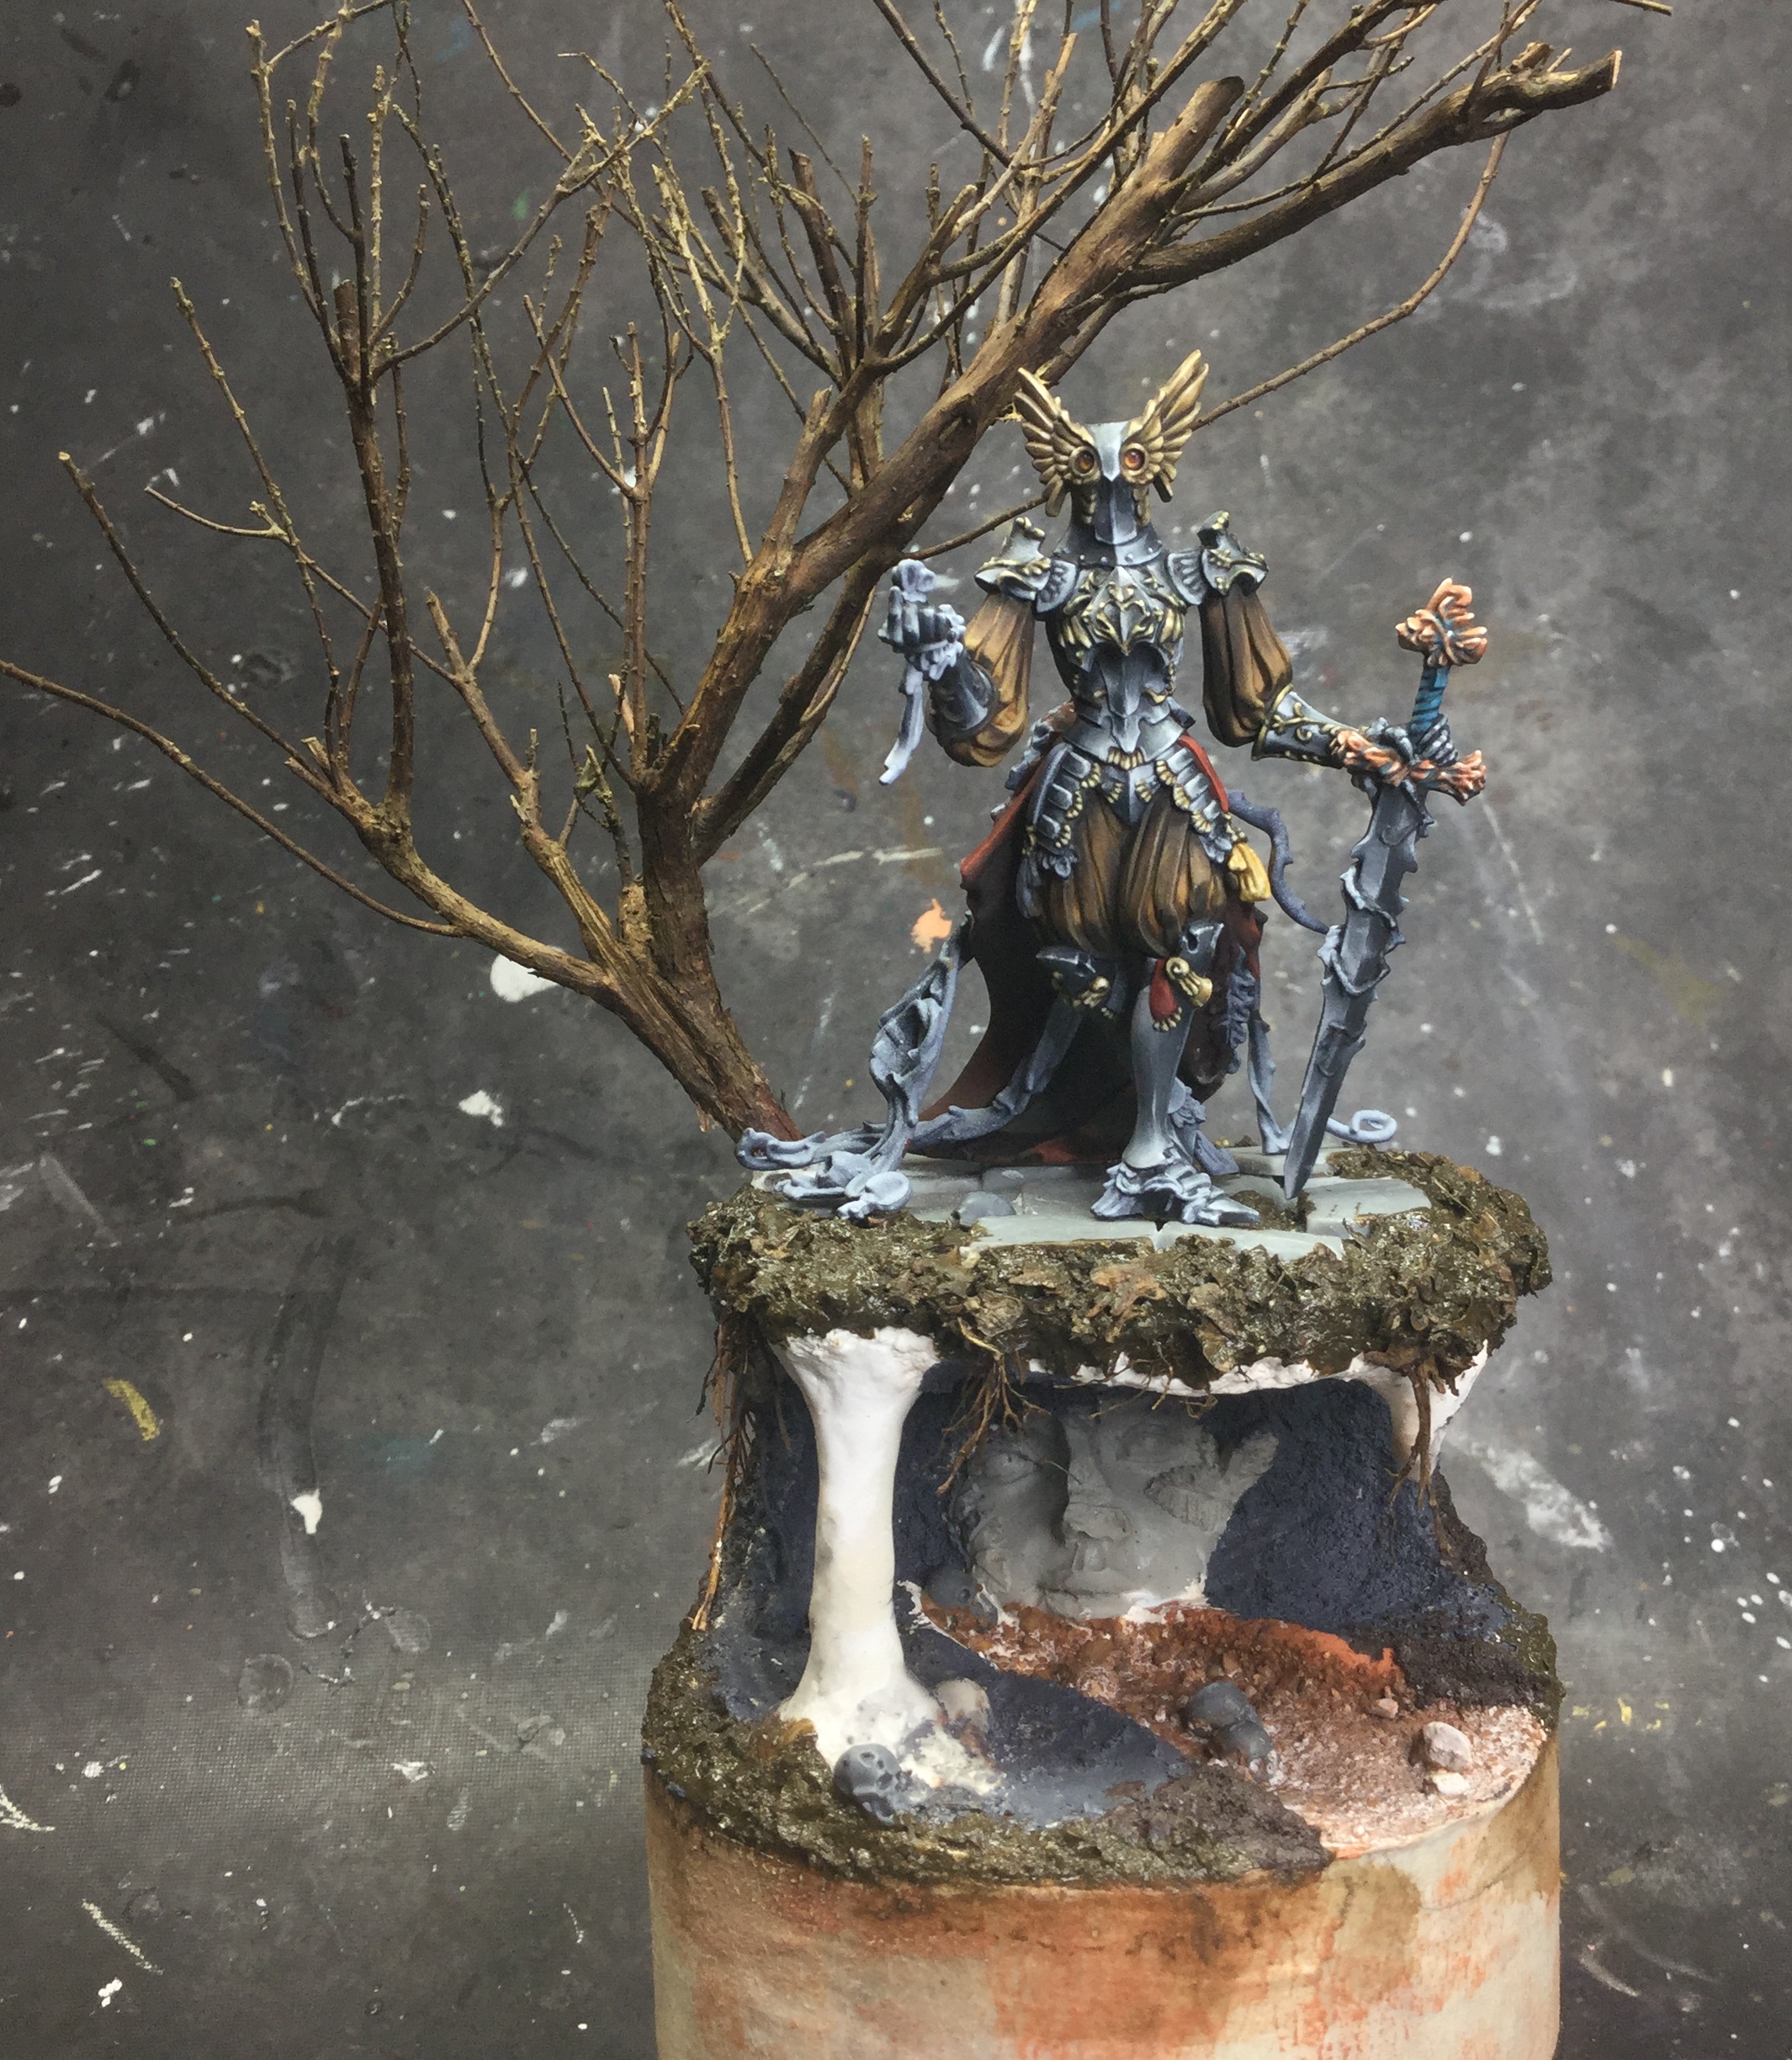
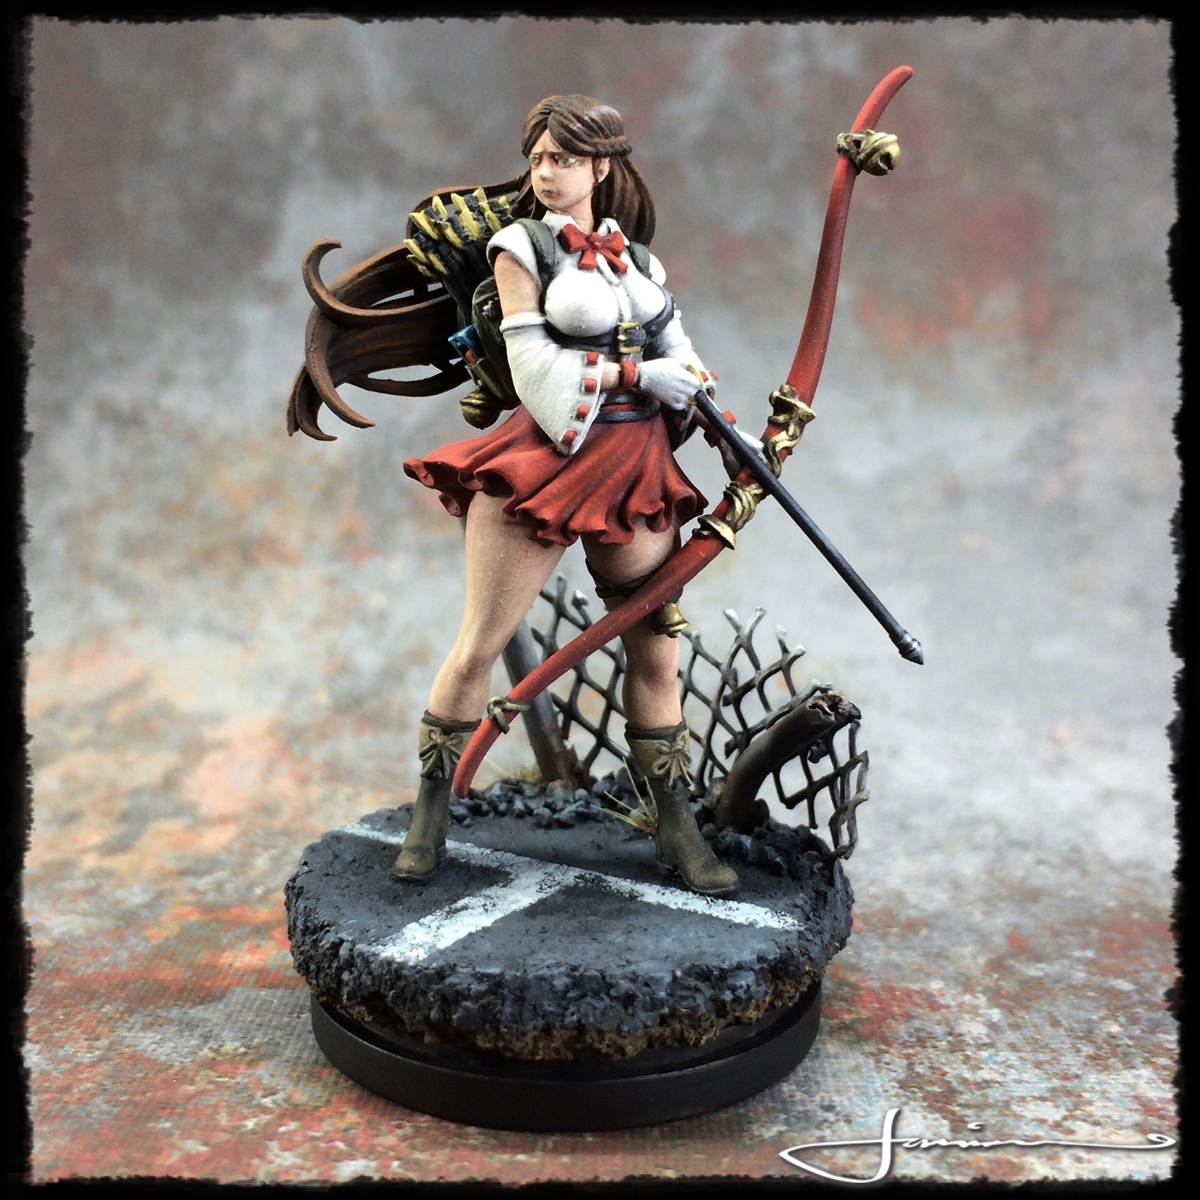
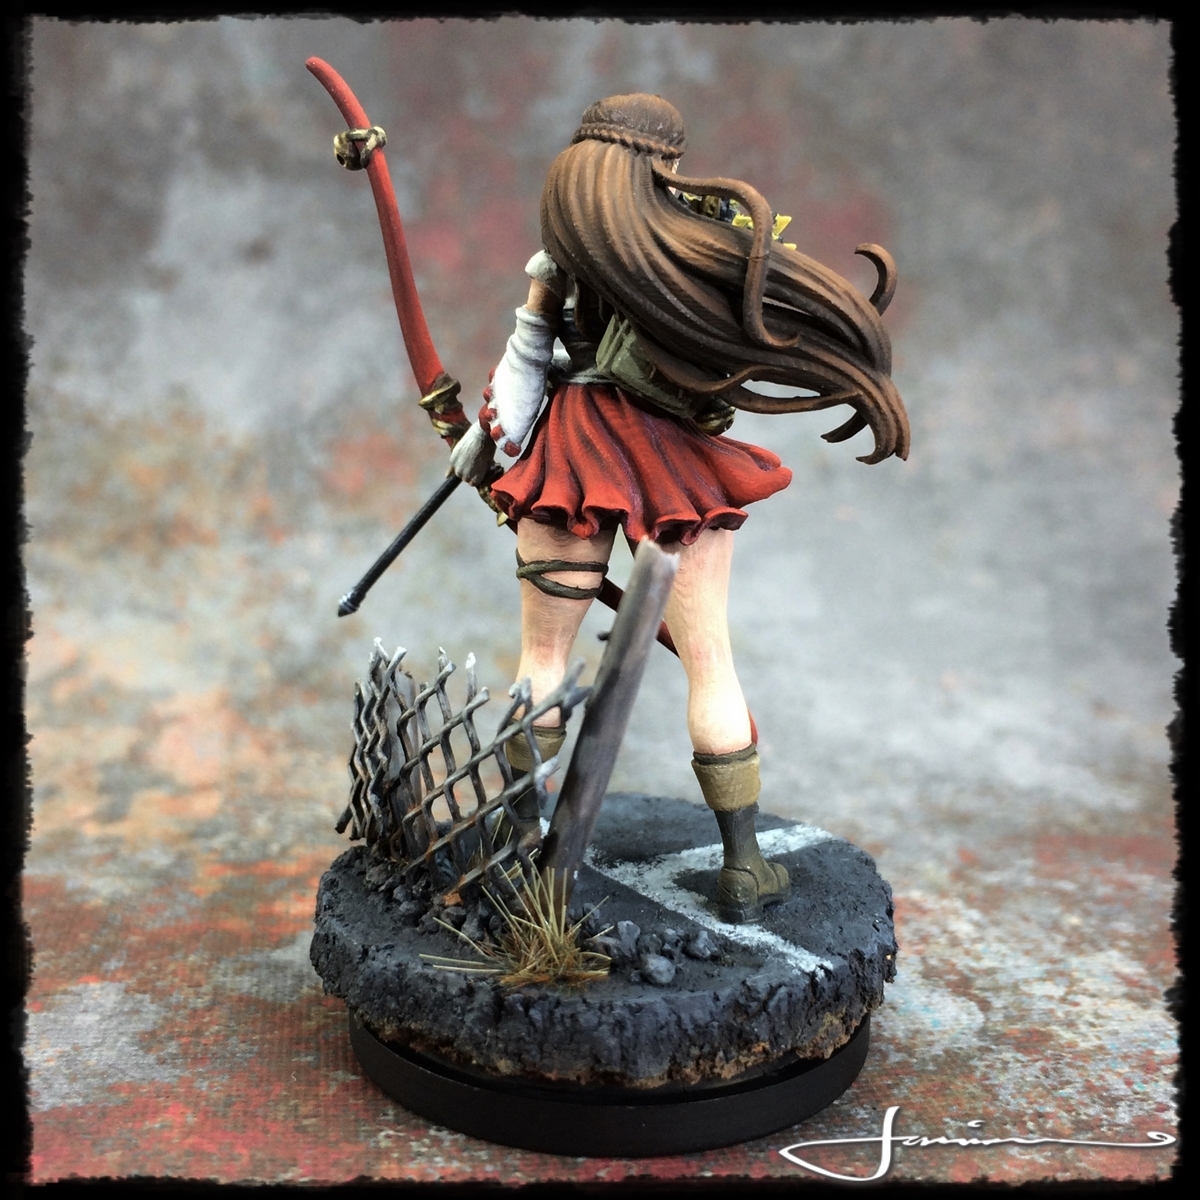
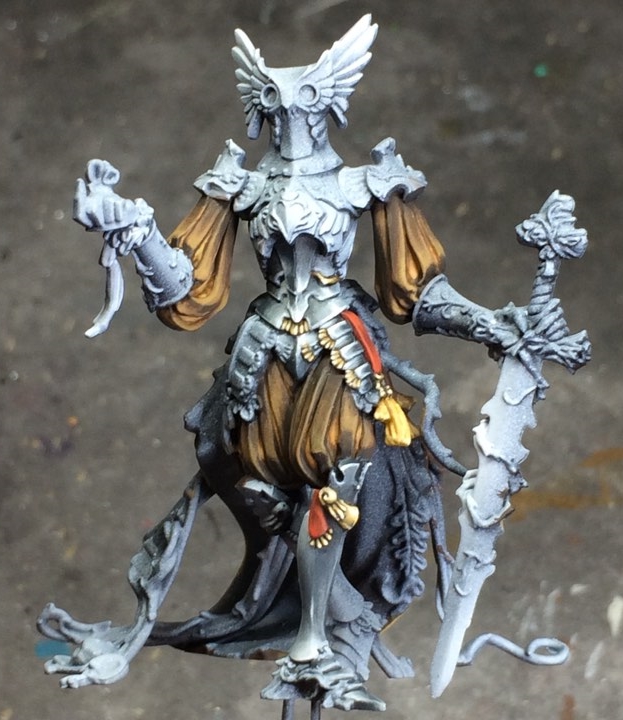
Autumn comes with The Flower Knight
I have been wanting to paint The Flower Knight for an absolute age. It is one of my absolute favourite minis from the house of Poots.
So was thrilled when a client approached me and basically told me to pick a KLD:M model to paint for them as a display piece rather than a game piece.
Initially I picked the black knight but the only copy of him the client had was already assembled and its really needs to be done in sub assembly. So I decided to go with the gorgeous flower knight.
The really nice thing about painting for display rather than play is that Im not constrained by the base size’s footprint. The Flower Knight plays on a 50mm base but wanting a little more real estate to play with I’ll be going with a 70mm diameter plinth for the base.
 Tripled primed and ready to go
After recieveing said knight of flowers, immediately got to the prepping, assembling and priming. Very nice kit and an easy build with no real gap fill or GS work being needed unlike some other of the monsters *cough white lion cough cough*
Standard triple prime that i usually go with through the airbrush: light coat of base black then a second lateral coat using grey and then a final top coat hitting areas of reflection and light using white. (All Stylynrez primers btw)
 Autumn Comes
Decided on an overall Autumnal theme for the knight – plently of browns, oranges, yellows n reds for any cloth and then silver and gold for the armour. Silver will be quite cold and then a nice older browning gold for the filagree, detailing and helemt wings. The roses on the pommel and crossguard of the sword may be done in a reddish copper for variety as well as keeping with the overall autumnal palette.
I started with the german puff and slash sleeves and knickerbockers the knight is sporting. Choosing a soft orange for the silk interiors and then a nice rich soft brown for the outer panels.
The outside of the cloak beneath the leaven bustle echoe the puff n slash but continues on into an ochre at the bottom. I will probably glaze in a more reddish brown to the top of the cloth disappearing beneath the leaves.

Unusually for me I am going nmm for the metals. With KD:M as a whole I have always felt that nmm suits the aesthetic better than tmm.
So made a start by sketching in dark silver of the many many armour panels on the knight. Ont he rare occasions when i turn my hand to nmm I usually sketch it in first and plot the main highlights while pushing fairly quick transitions from shadow to light. Any dodgy transitions can be smoothed out later when i add in some secondary tones and reflections from surrounding elements like a few touches of brown from the cloth reflecting form the cloth onto the armour.
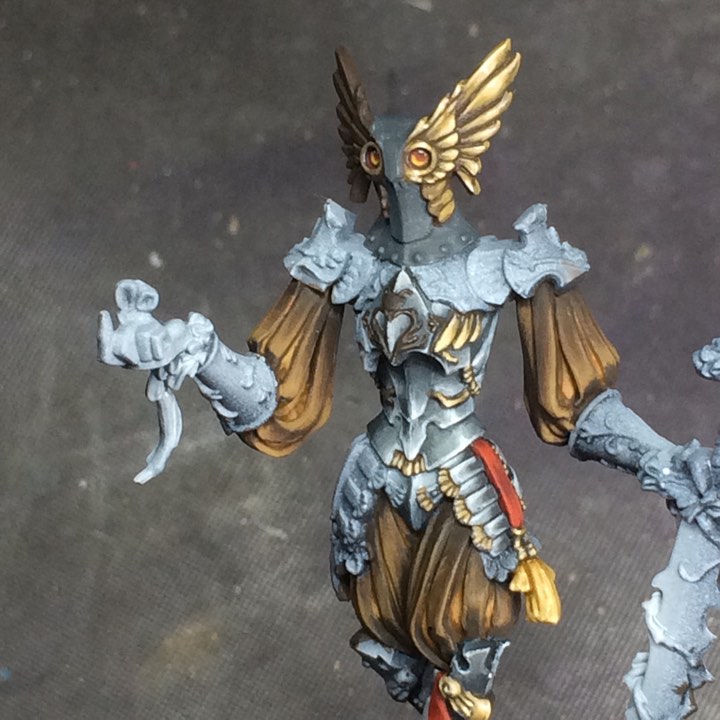
With the armour panels started, I then make a start on the gold filigree and elements to get an idea how it will play with and reflect on the silver panels and also to get an early idea/feel of how the overall paint scheme is working and that brings us up to current point.
Oh – for the eyes – I could have gone with a more complementary colour to the yellow/browns of the surrounding golds. As the brown here is really a dark and muted kind of orange going into yellow – the comp colour to that would blue- blue/green aand that would have worked very nicely BUT would have interrupted the autumnal palette I want to keep quite strictly to so I opted to go with analogous choices rather than complementary ones – yellow/orange/red for the eyes – focusing more towards the red end.
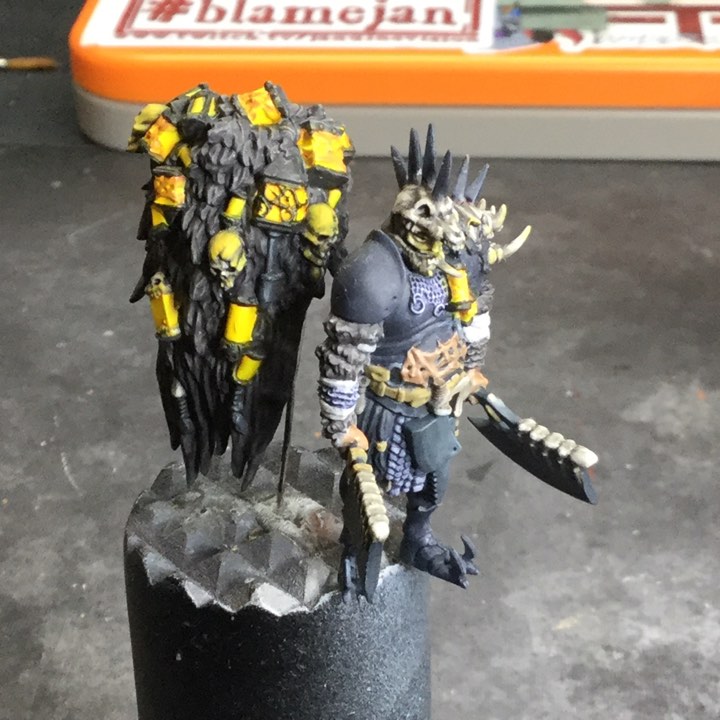
Butcher & Pariah
Two other KDM minis I’ve been trying ot work on and keep putting back on the shelves are The Butcher from the core box and one of my favourite characters/sculpts -The Pariah.
I started these two evil boyos ages ago and they’ve been languishing on (one of ) my WiP shelves for a while….. I need to get them done!!!