

![10mm Medieval Miniatures! Azincourt English Army Review | Wargames Atlantic [7 Days Early Access]](https://images.beastsofwar.com/2026/03/unboxing-wargames-atlantic-azincourt-english-army-coverimage-225-127.jpg)


cyfi’s “the end is nigh” terrain challenge


Recommendations: 257
About the Project
cyfi's "the end is nigh" terrain challenge
Related Genre: Fantasy
This Project is Completed
the seed is planted
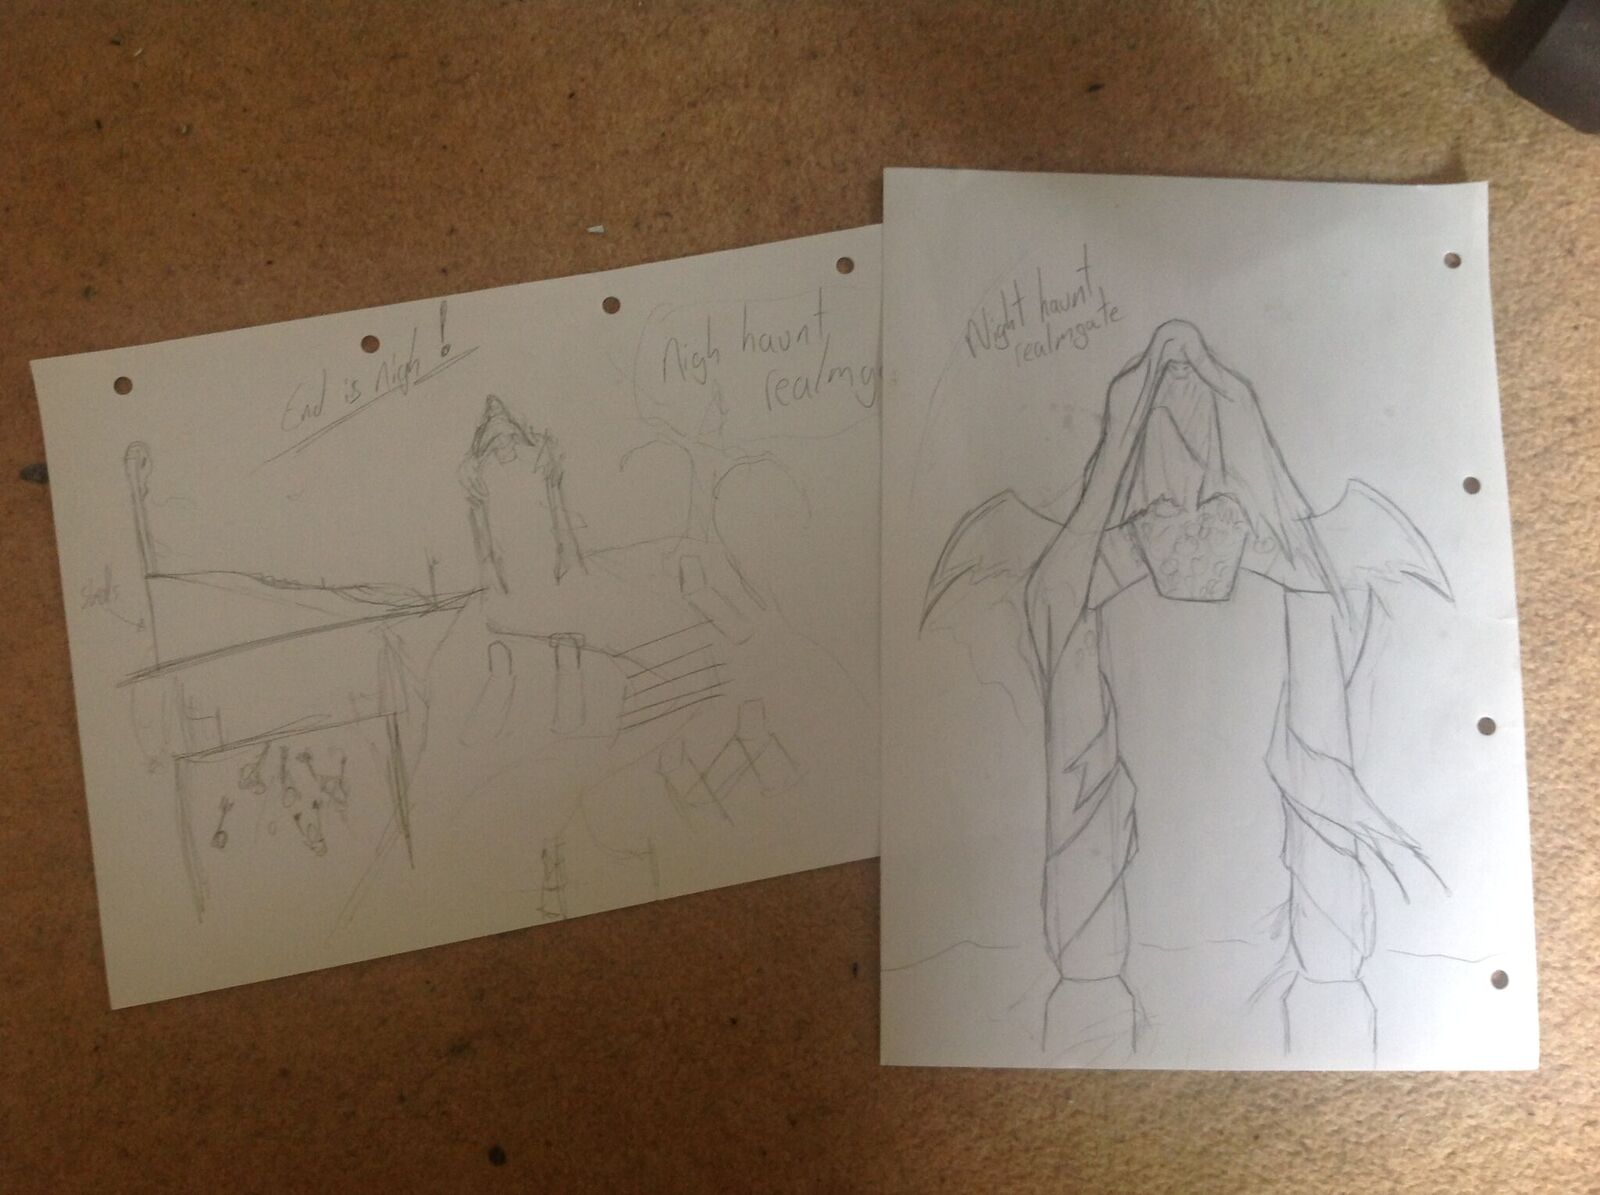
so to the concept stage. with my thoughts very much on the new age of sigmar night haunt I was immediately taken in that direction.
my initial thought was a grave yard but this felt a little under whelming and without the threat suggested buy the theme.
With the need of a threat the solution was obvious, I needed a realm gate! it’s a perfect fit for the theme. when the dead come to the land of the living there numbers only swell with any who stand against them, and that will only make the end swifter.
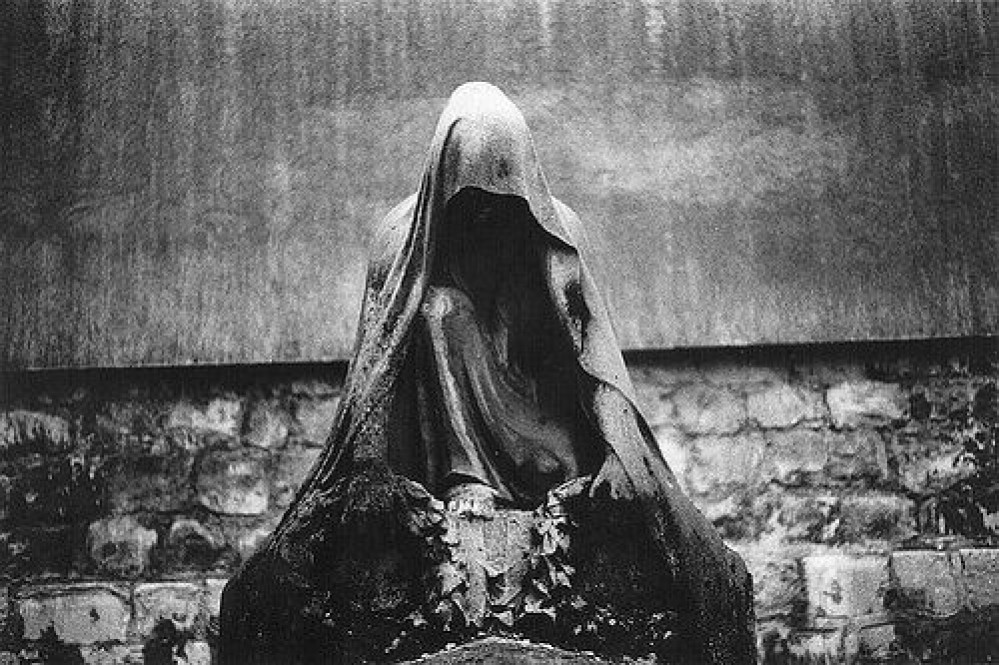
started with a quick google for inspiration and the cover image (see top) jumped out at me.
not a lot to show yet but I have made a quick sketch of where I want to go
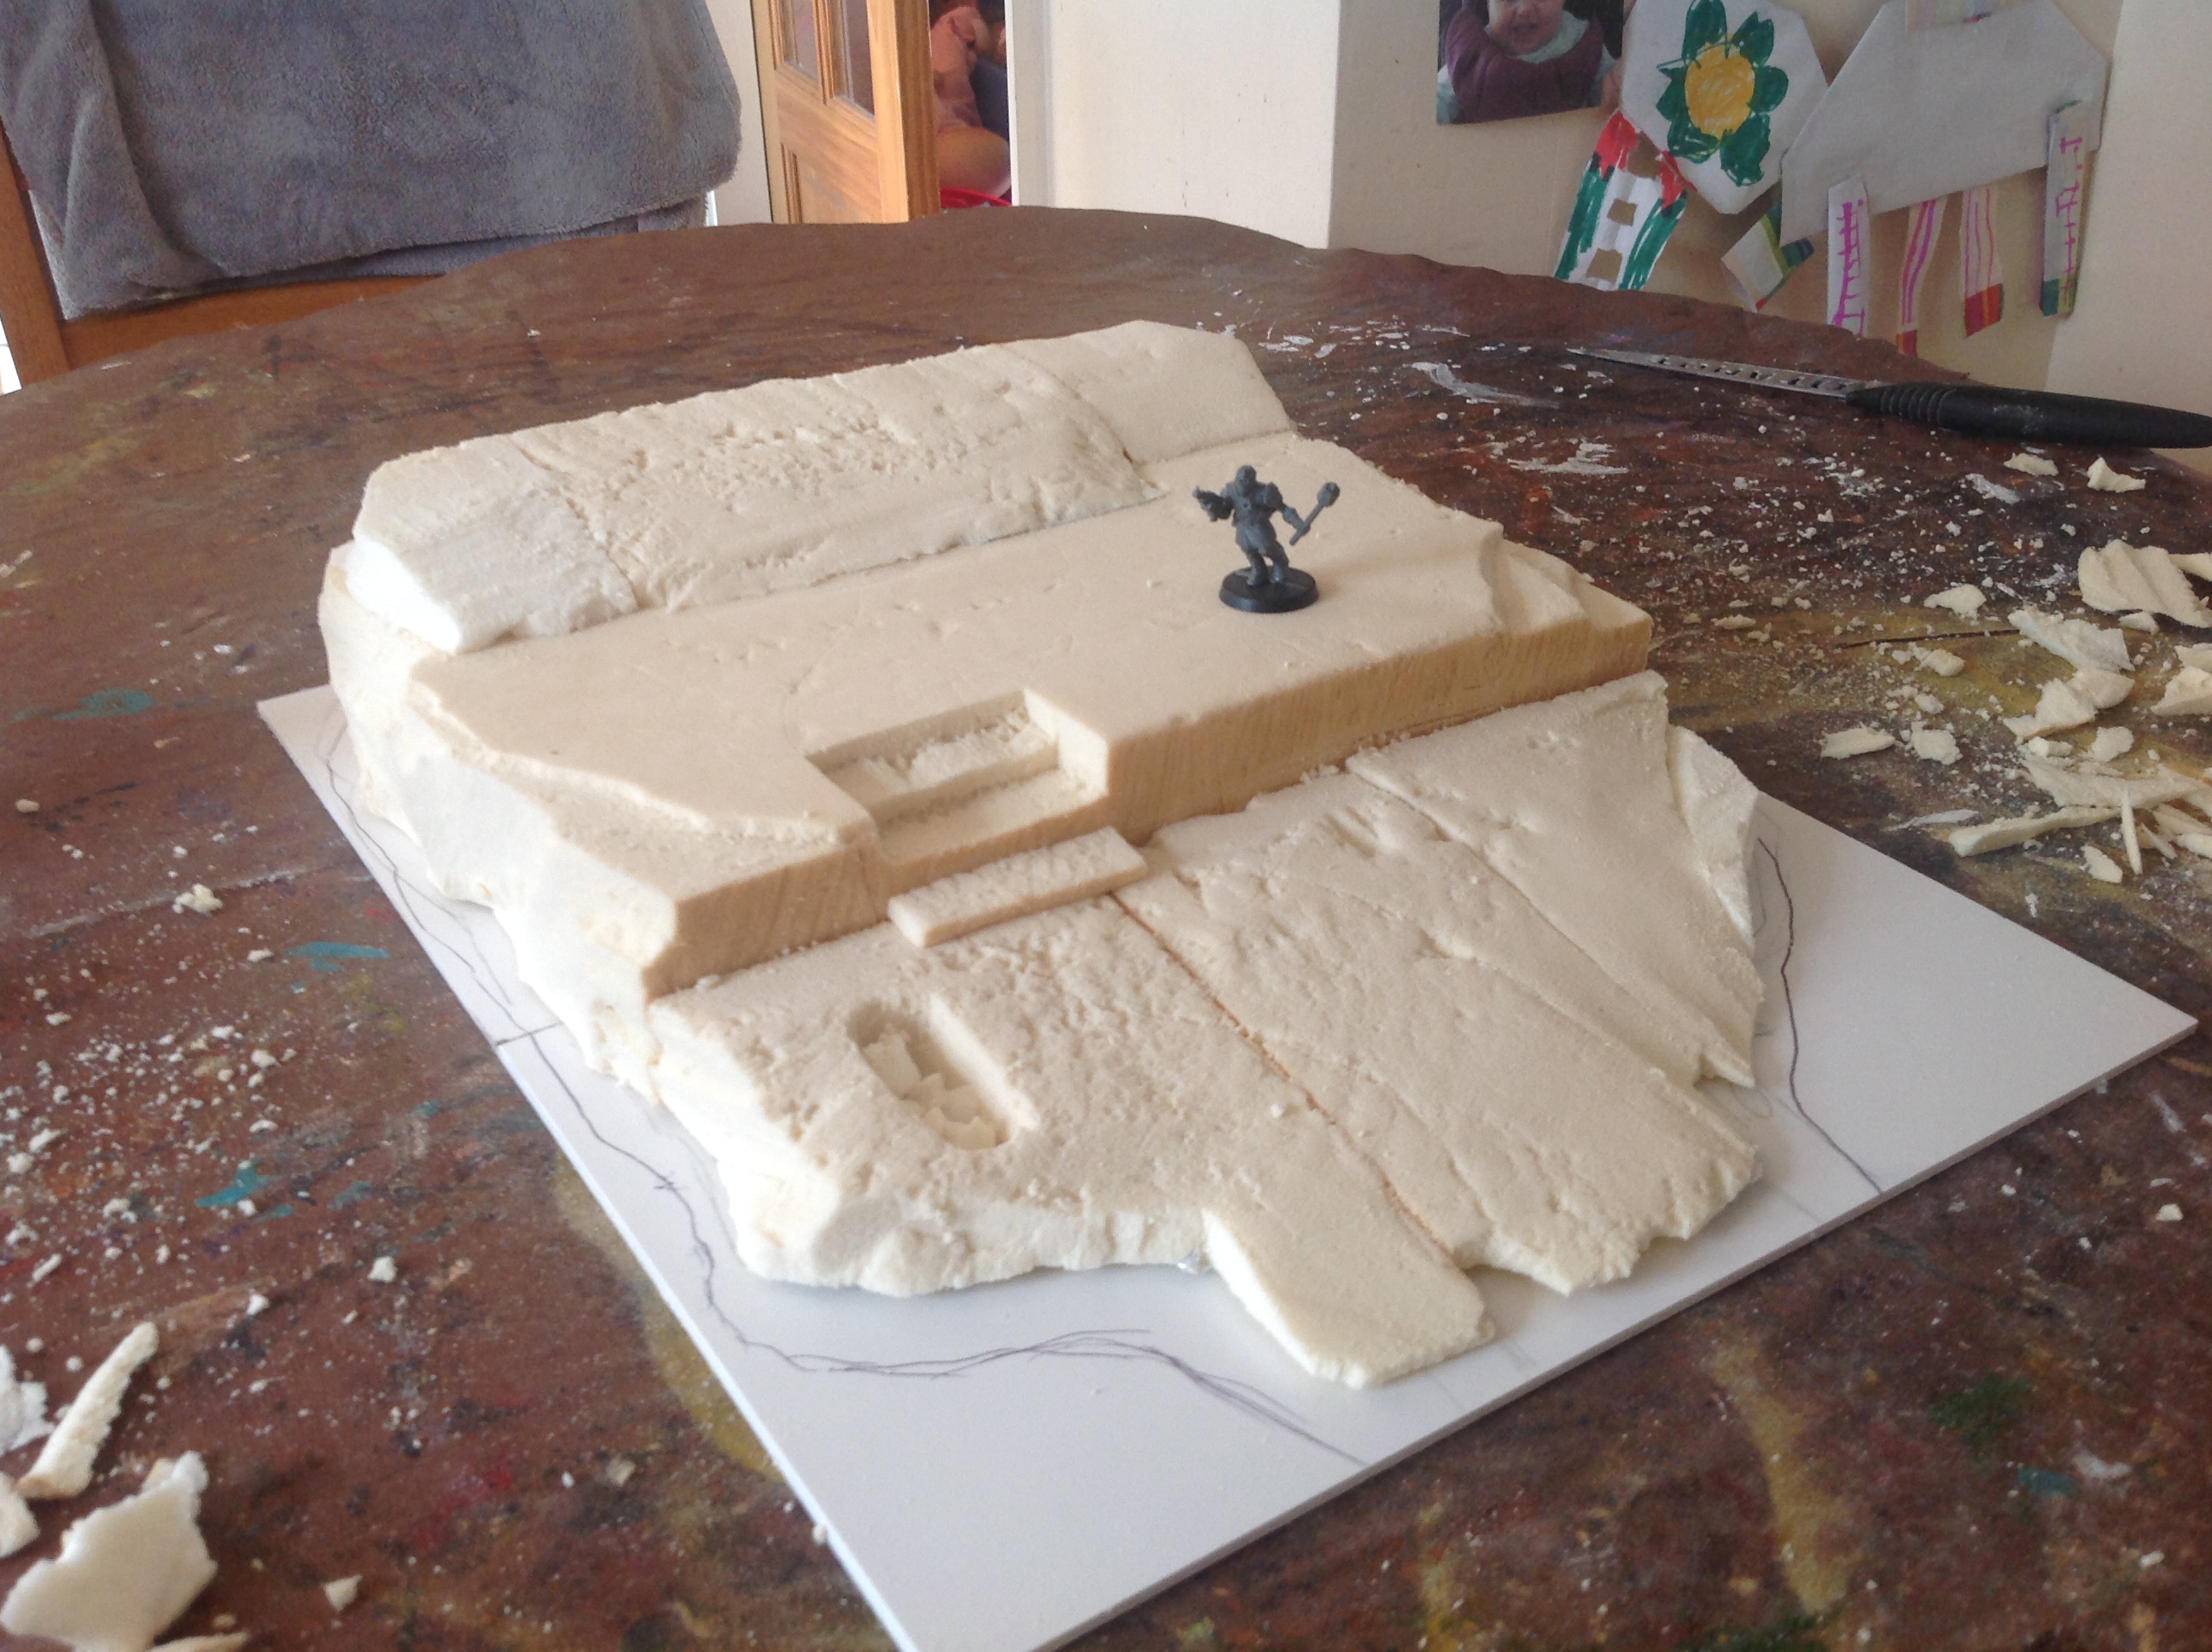
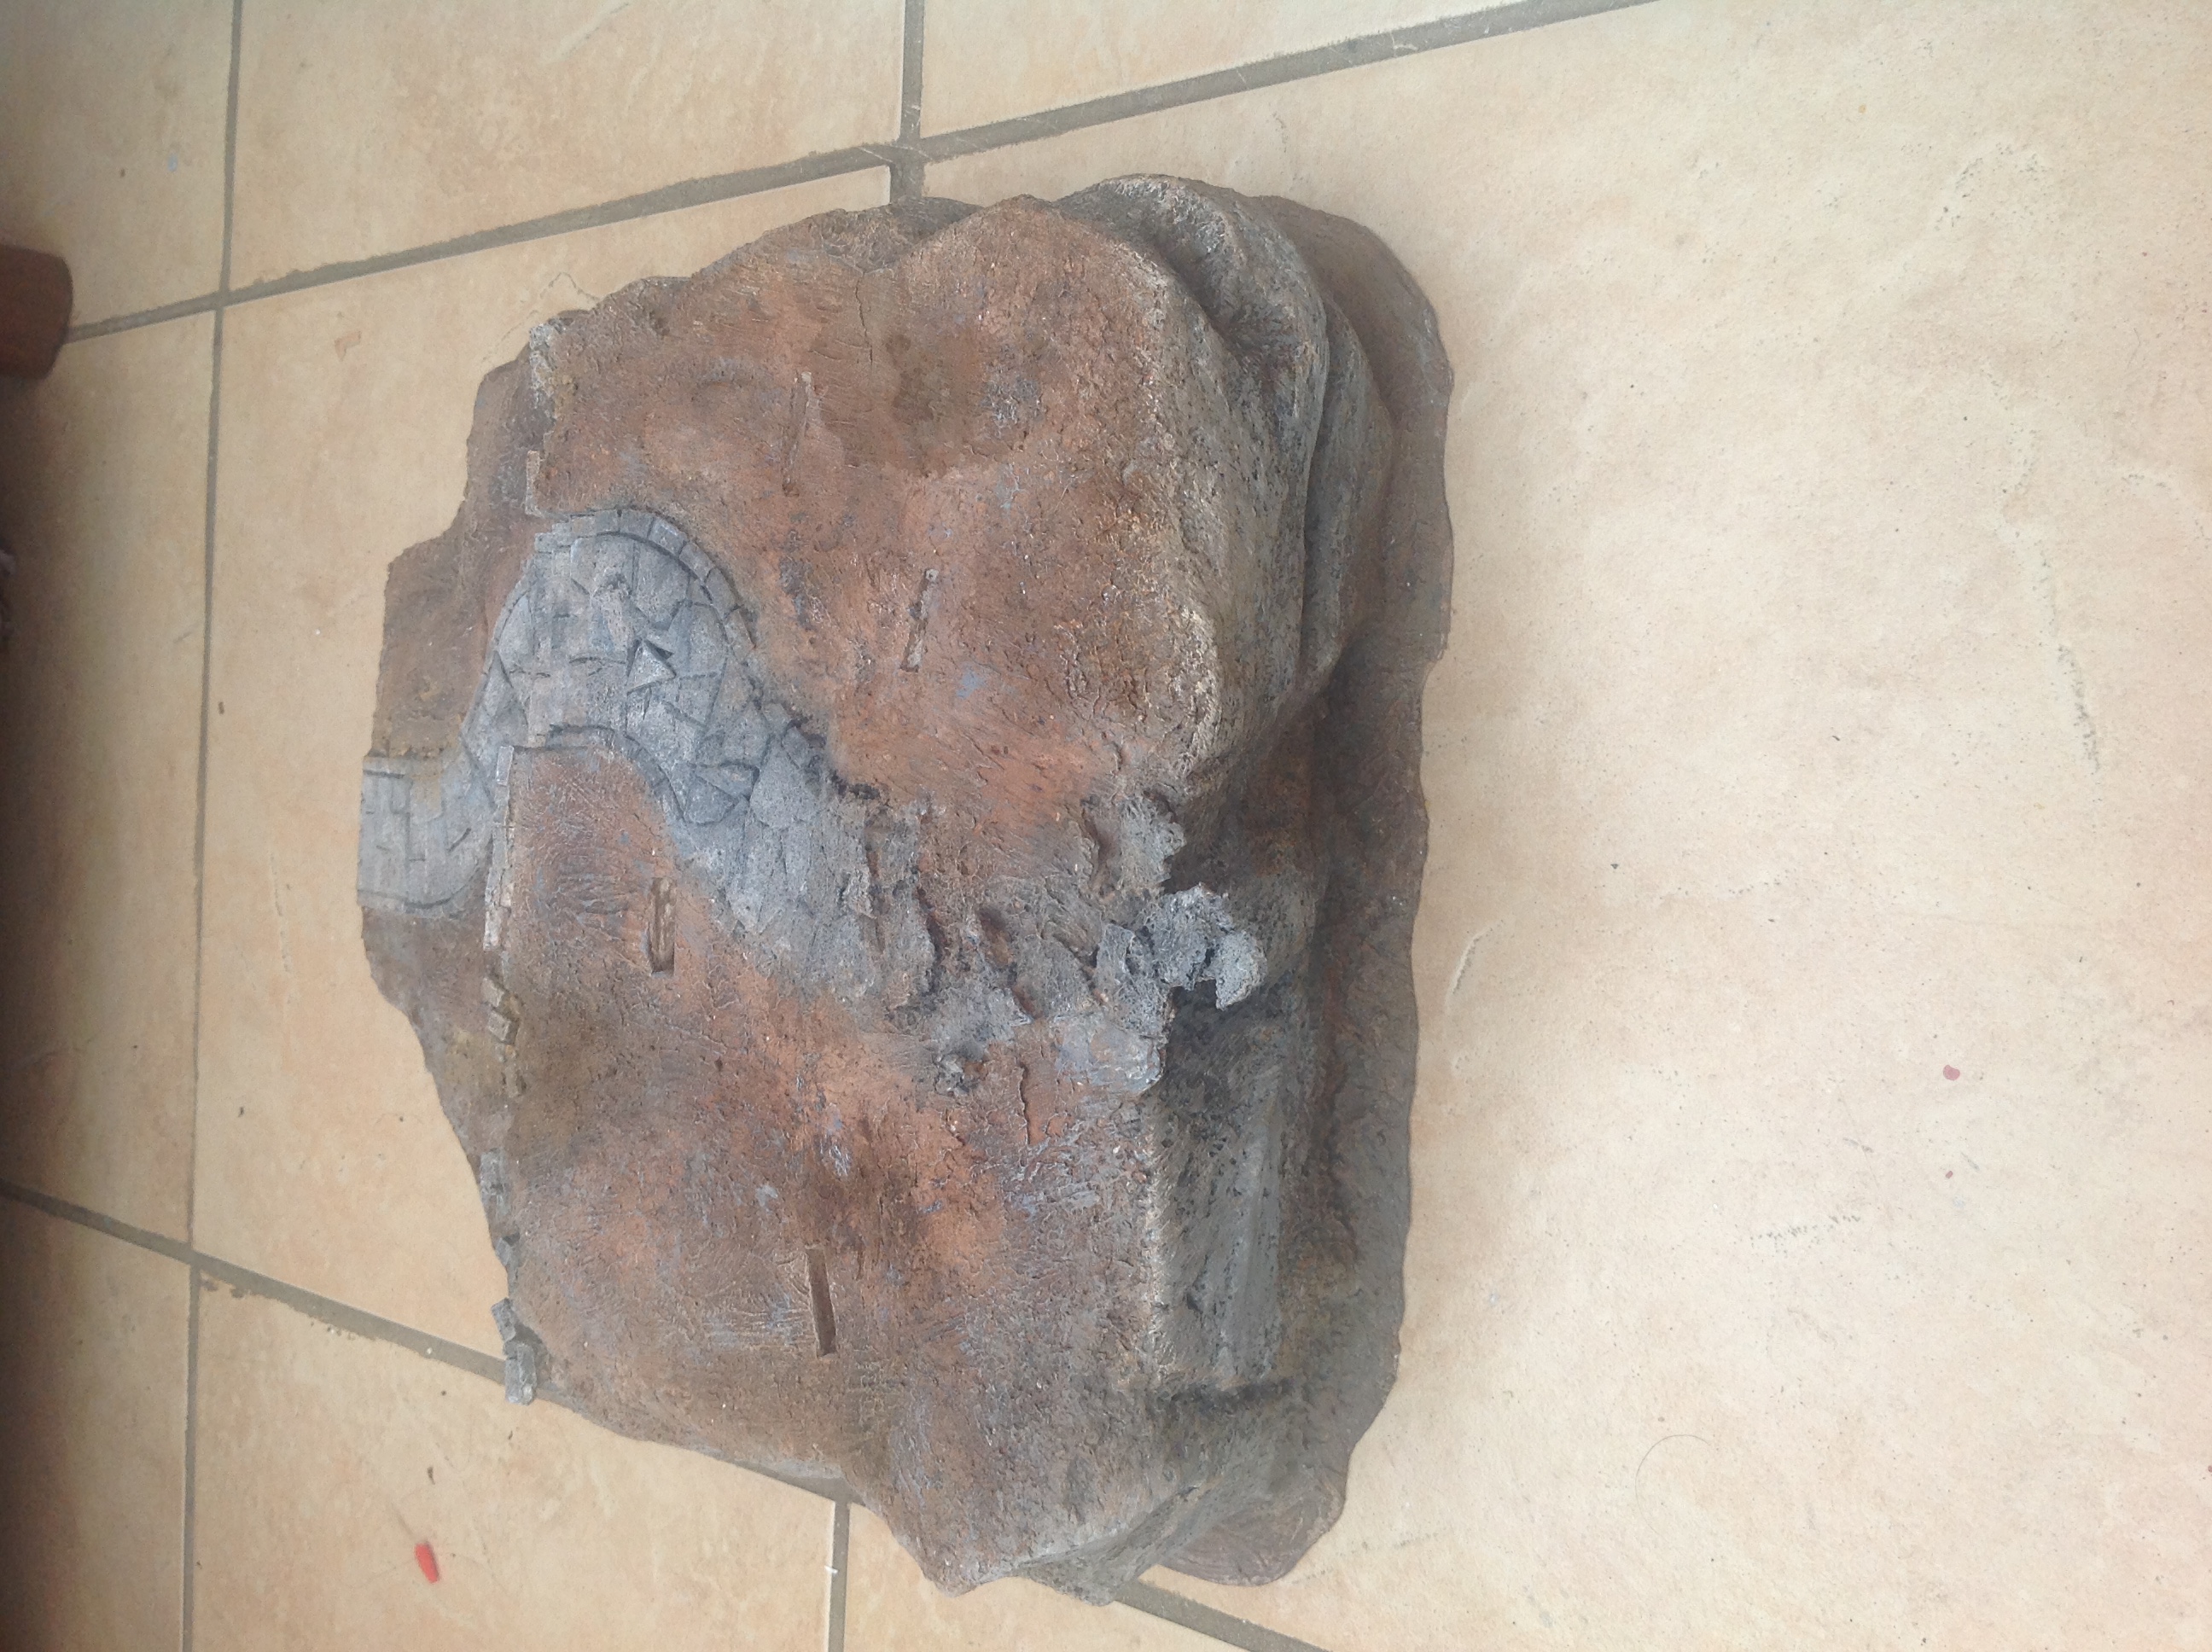
Tending to the ground
Laying out a ruff plan for the cemetery that will house the gate
I’ve got some foamX plastic as a bace, A3 size and sketched out the outline and some details. The shape is ruffle skull shaped, l also want to have this over 3 levels with the gate at the back leading over a drop edge.
This is all very quick as things will most likely change as I work.
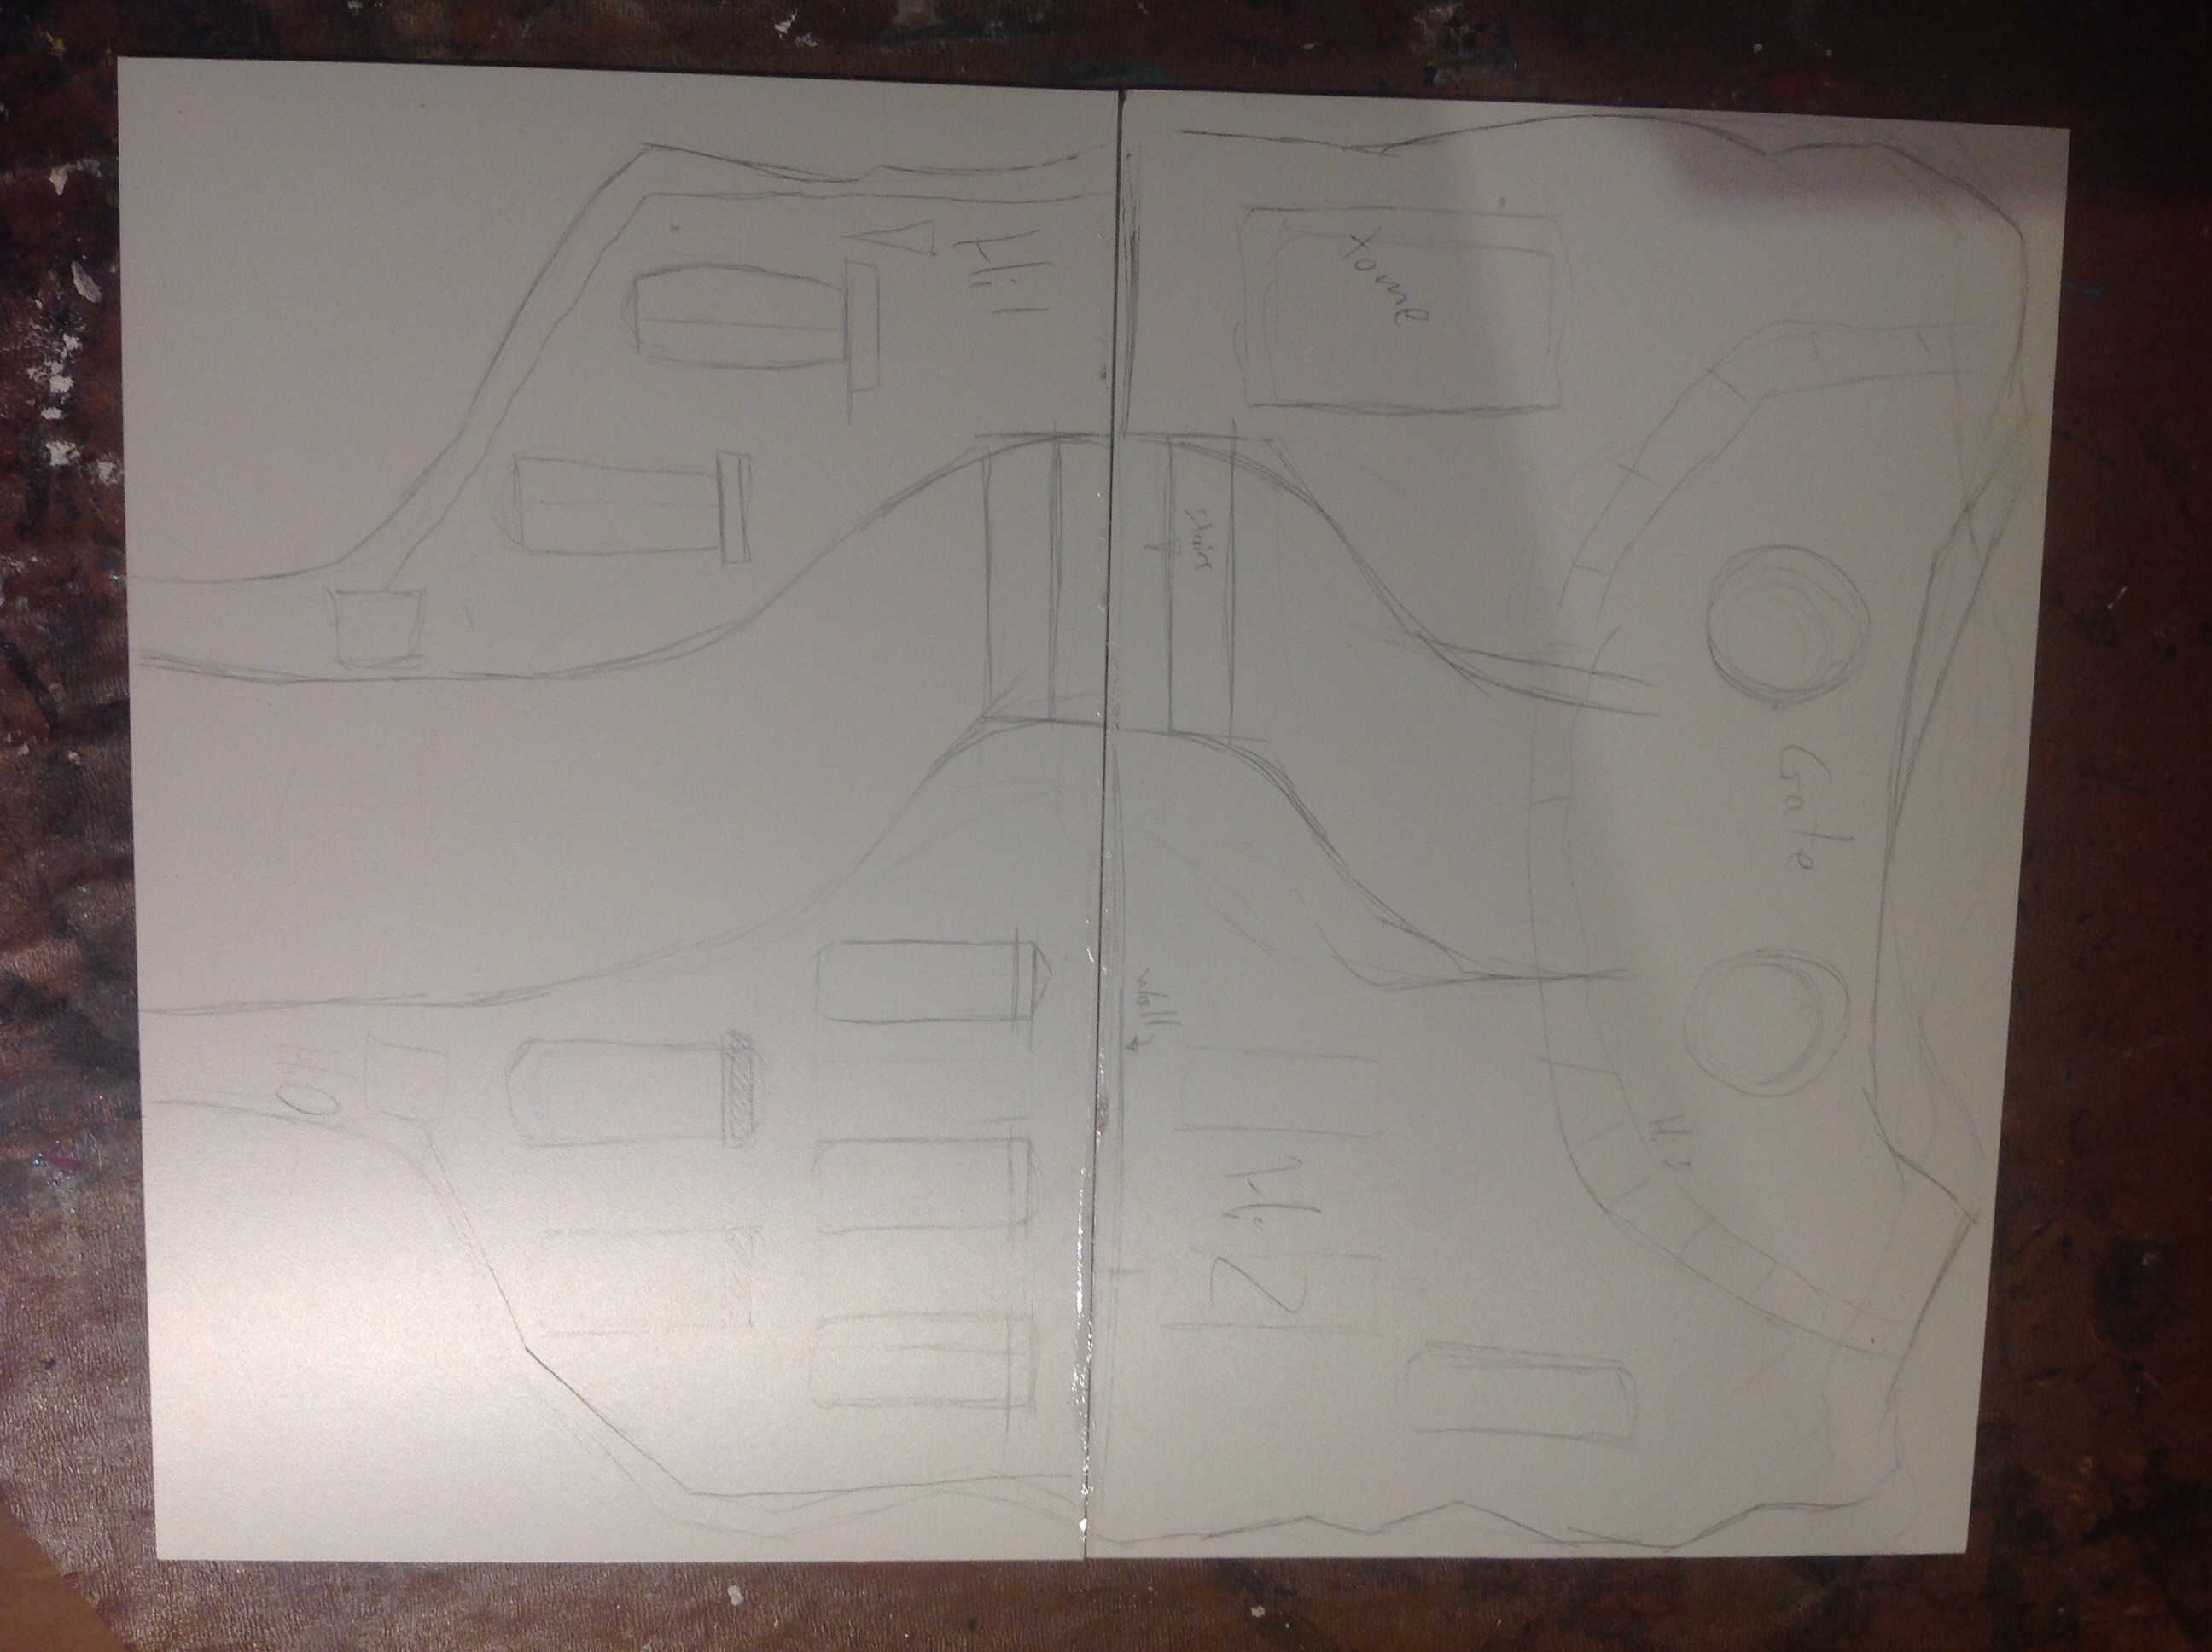
Next step is to cut some insulation foam to the ruff dimensions I want
my plan is to include a retaining wall and stairs between height 1 and 2 but to taper between the other layers
once there glued together I will cave to shape
Tending to the ground part2
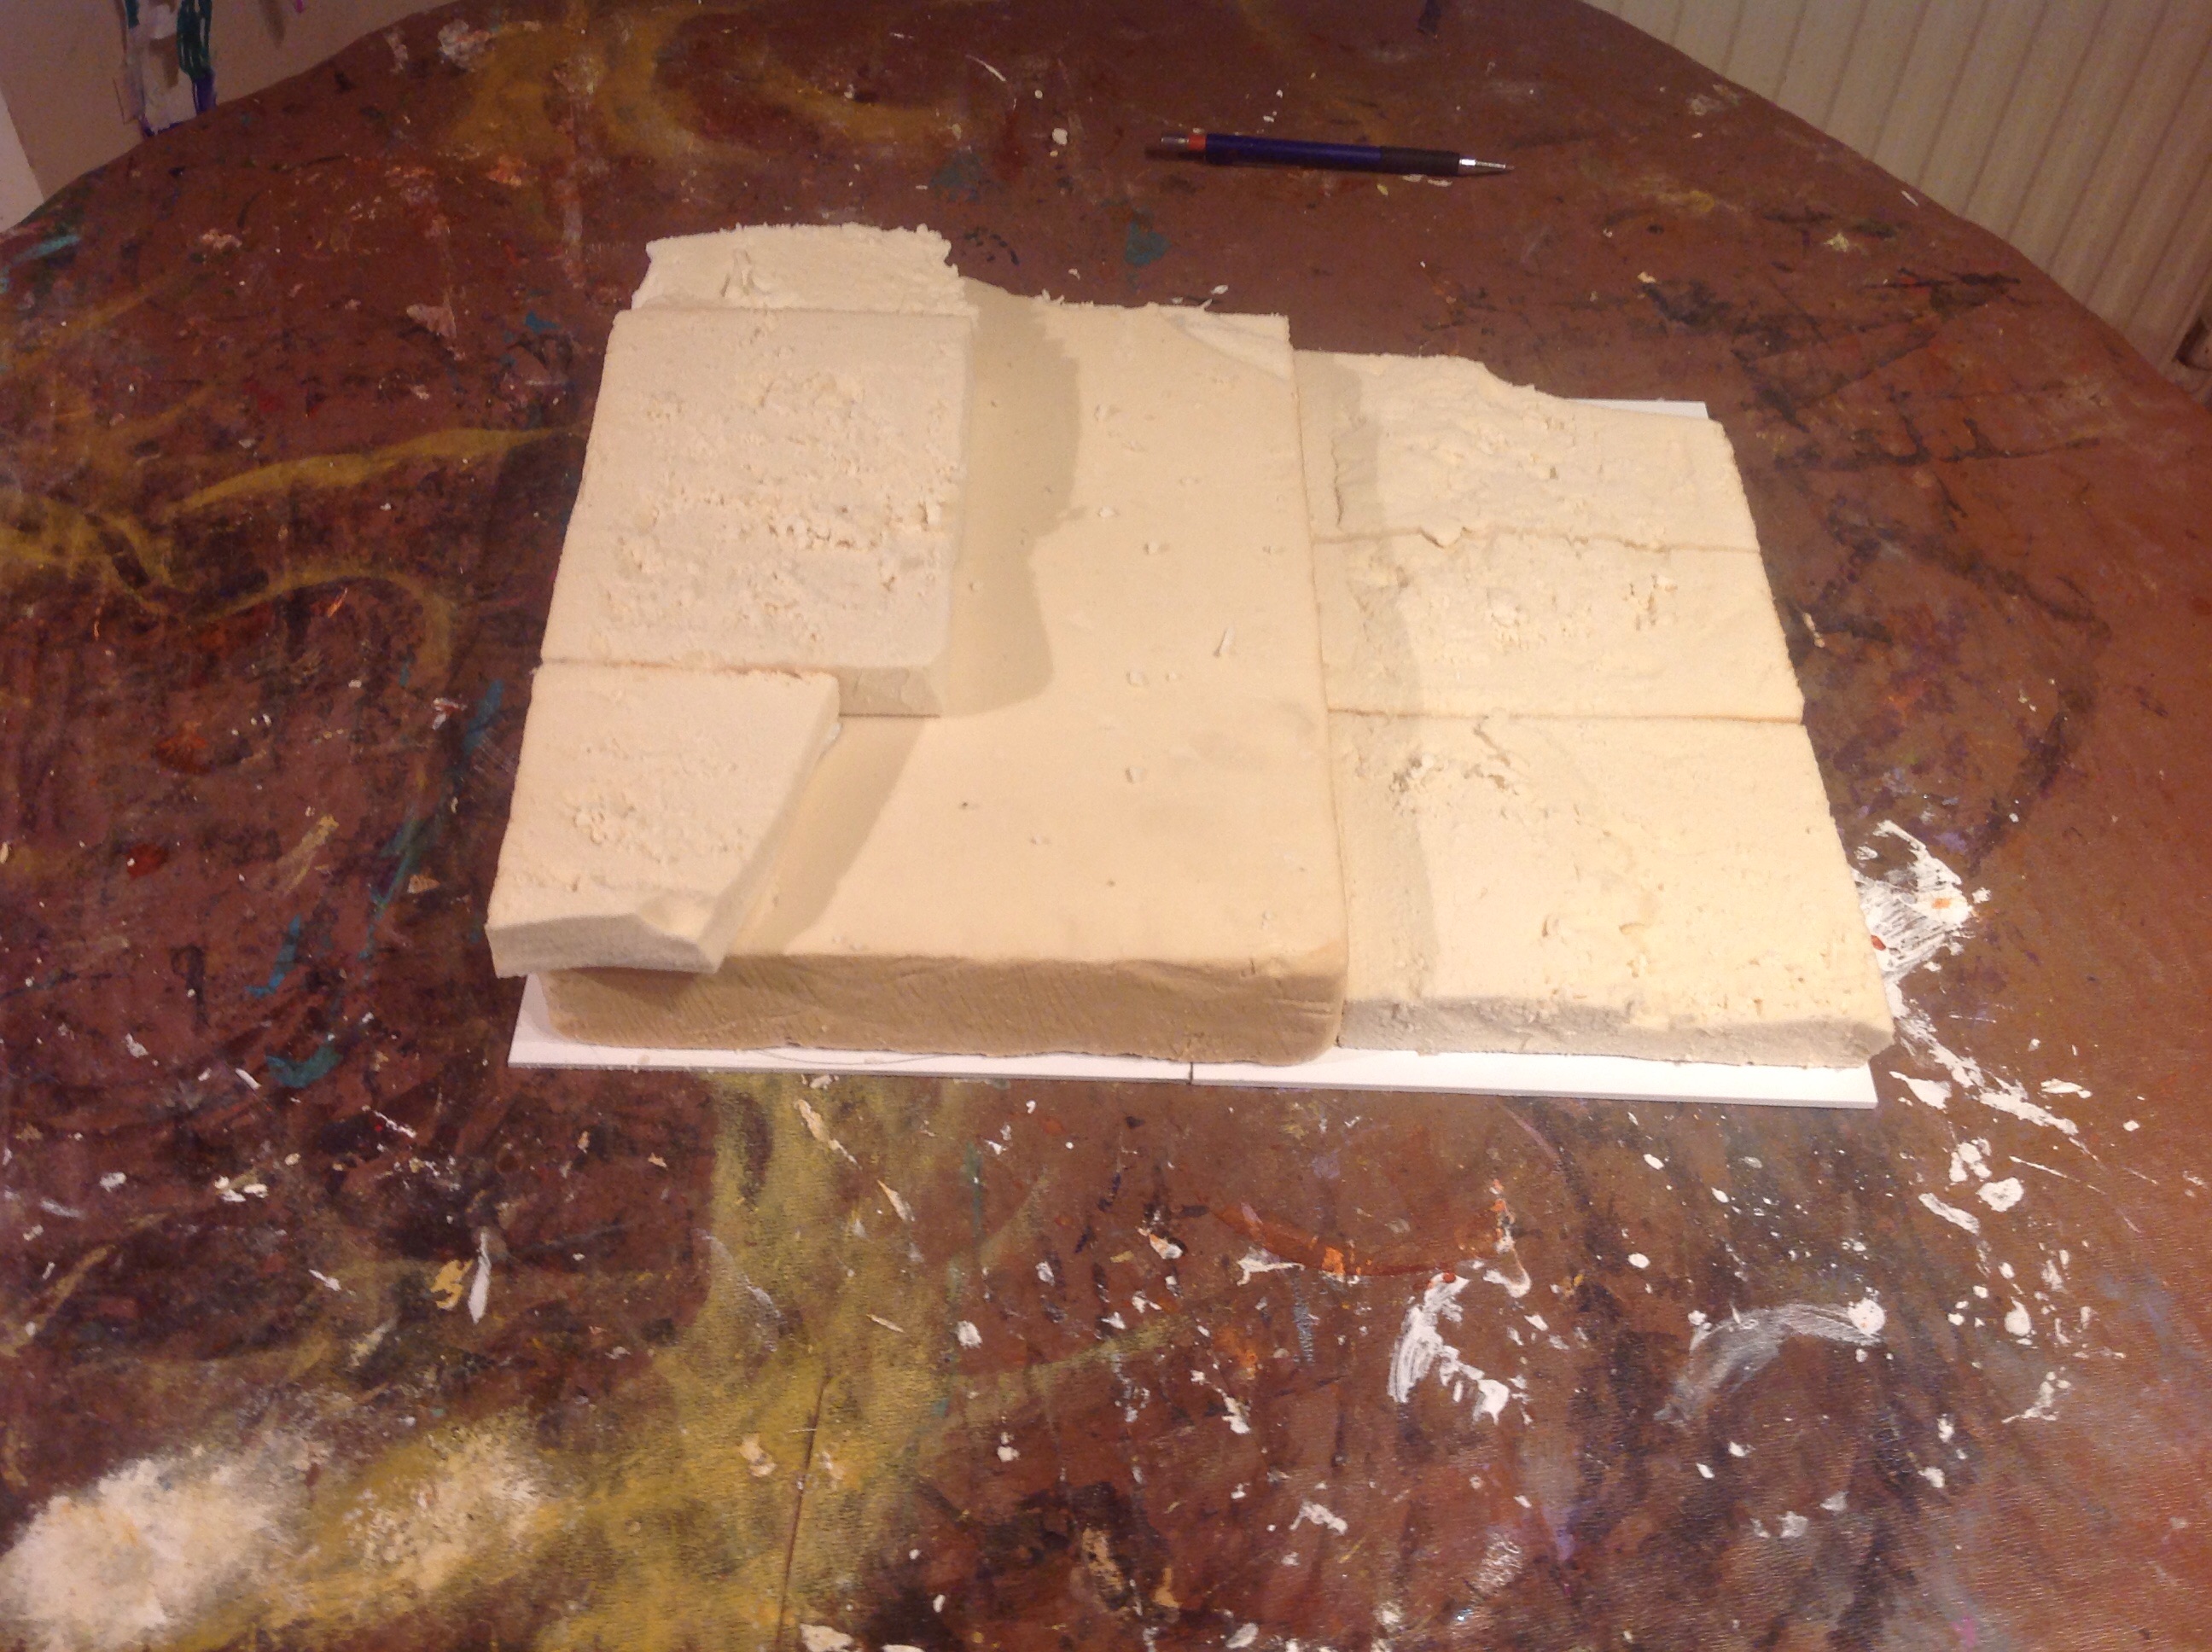
 the gradient and stairs were cut next, again this is all quite ruff at this stage I want to get the overall feeling for the shape
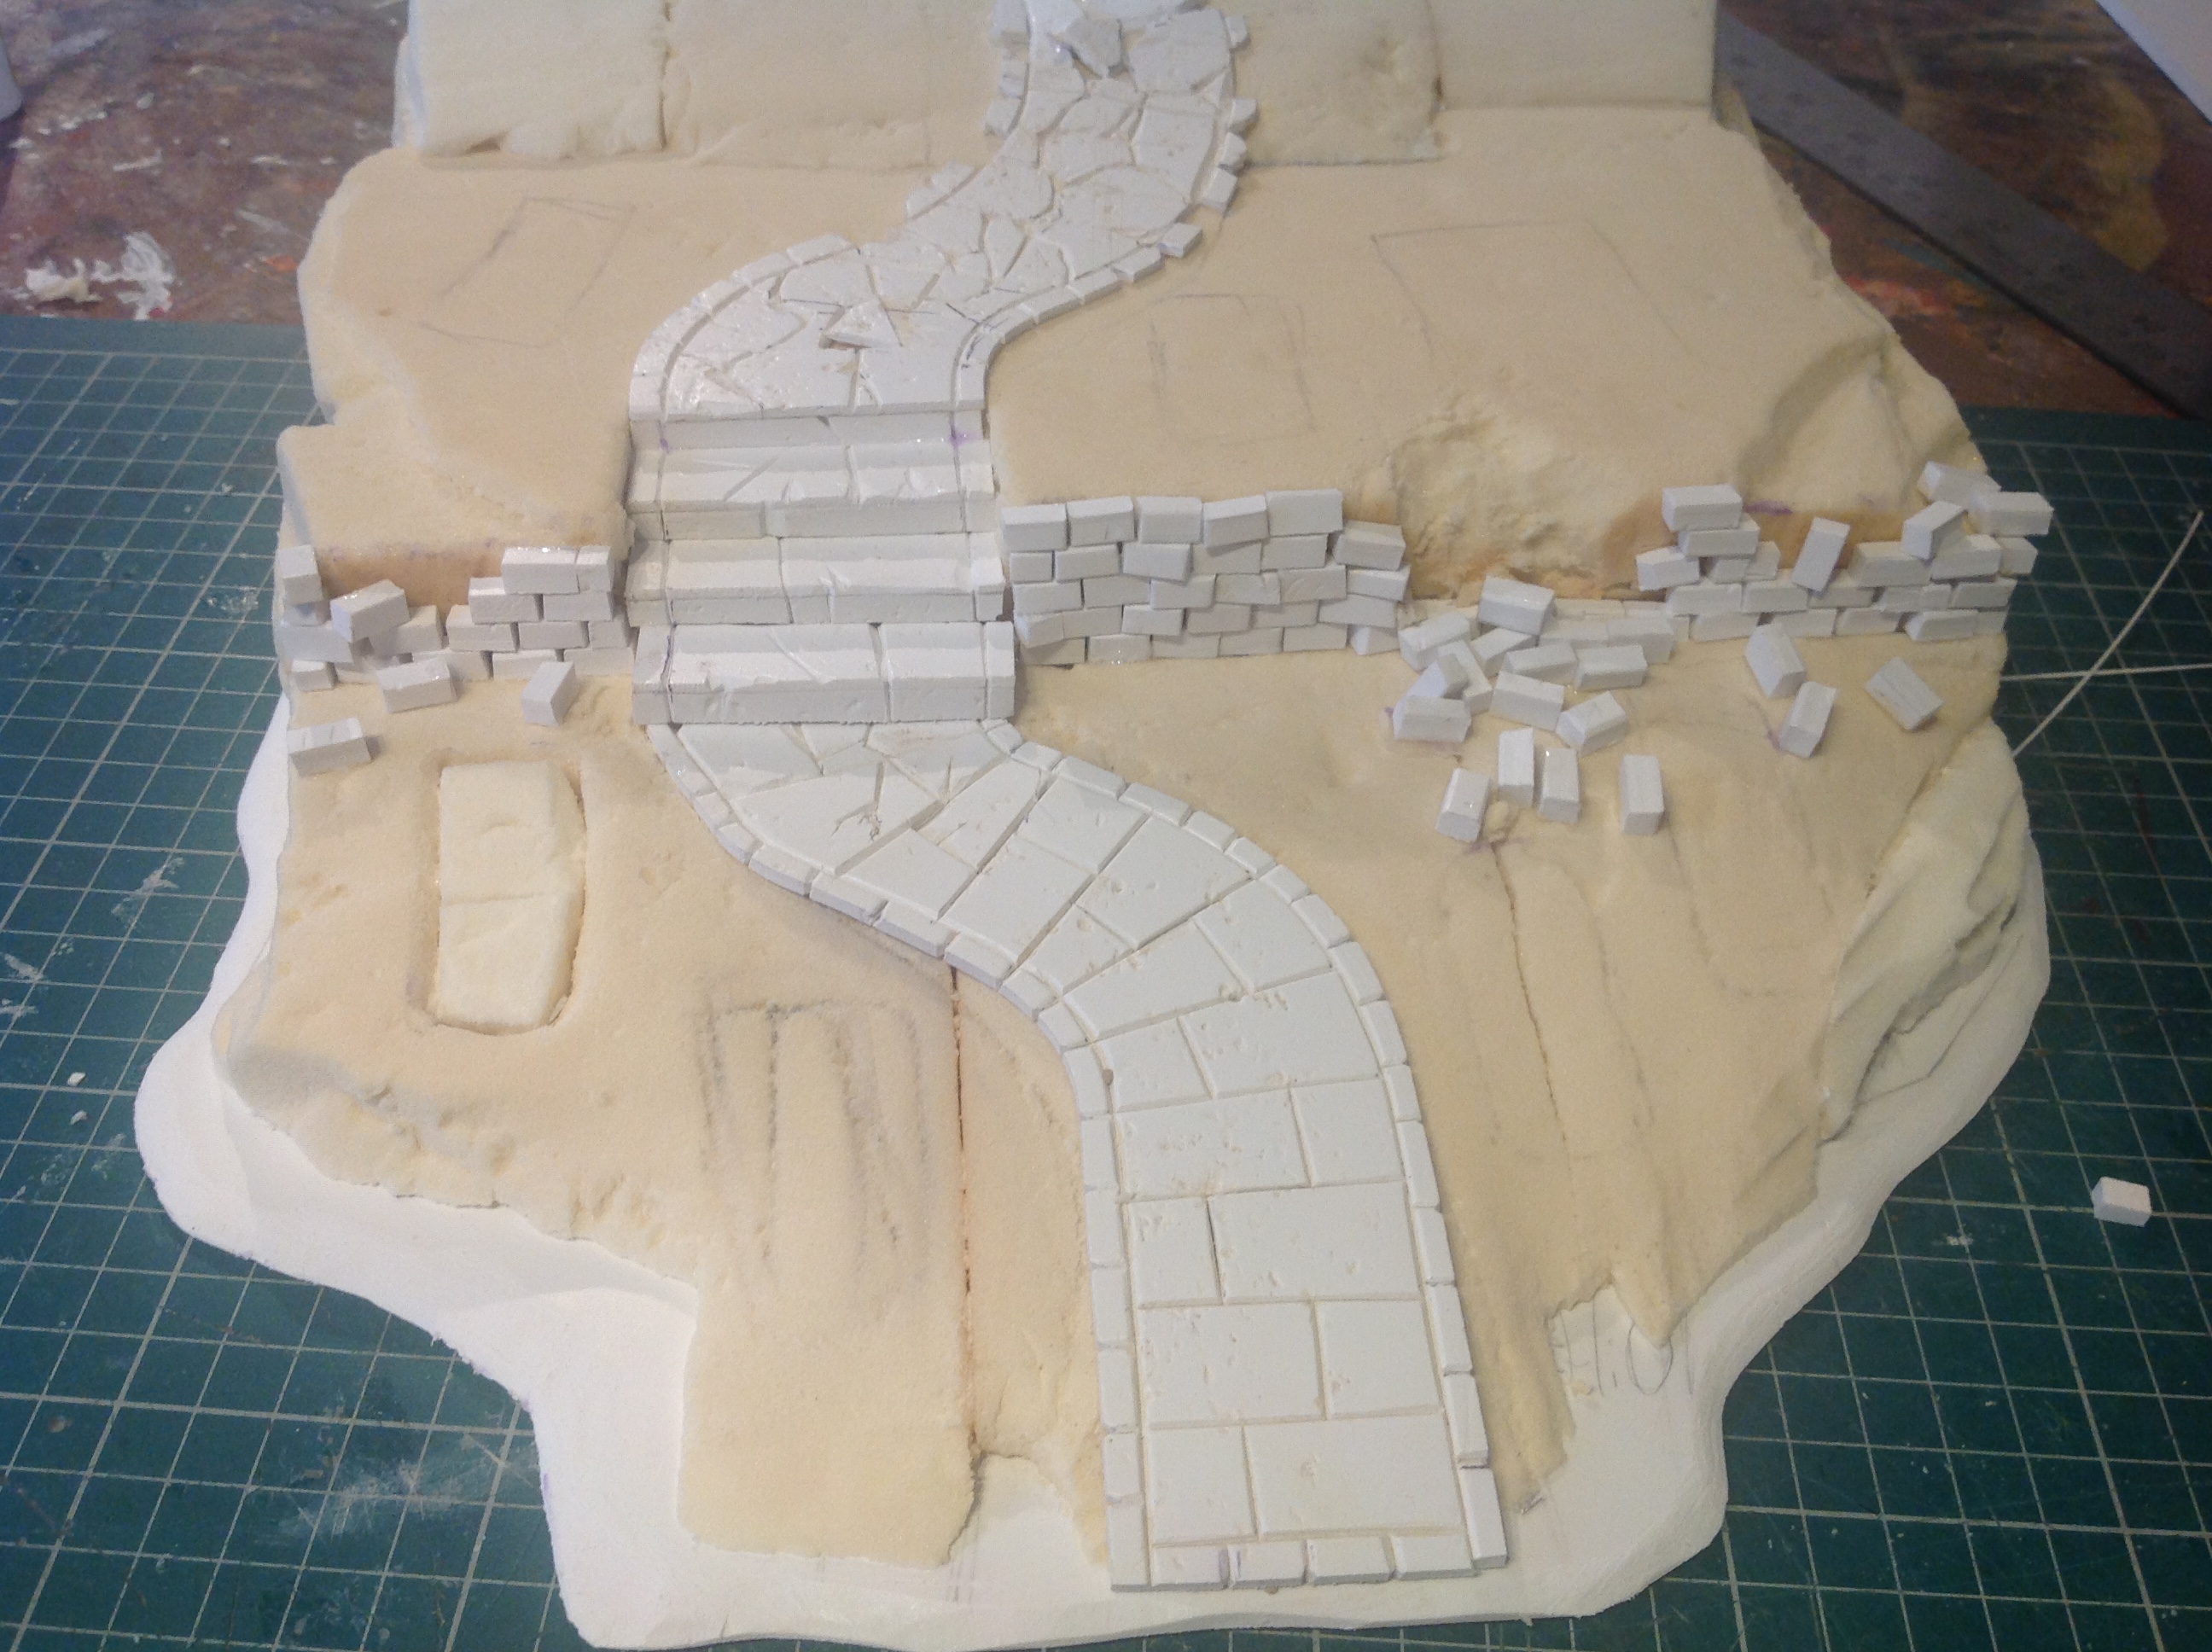
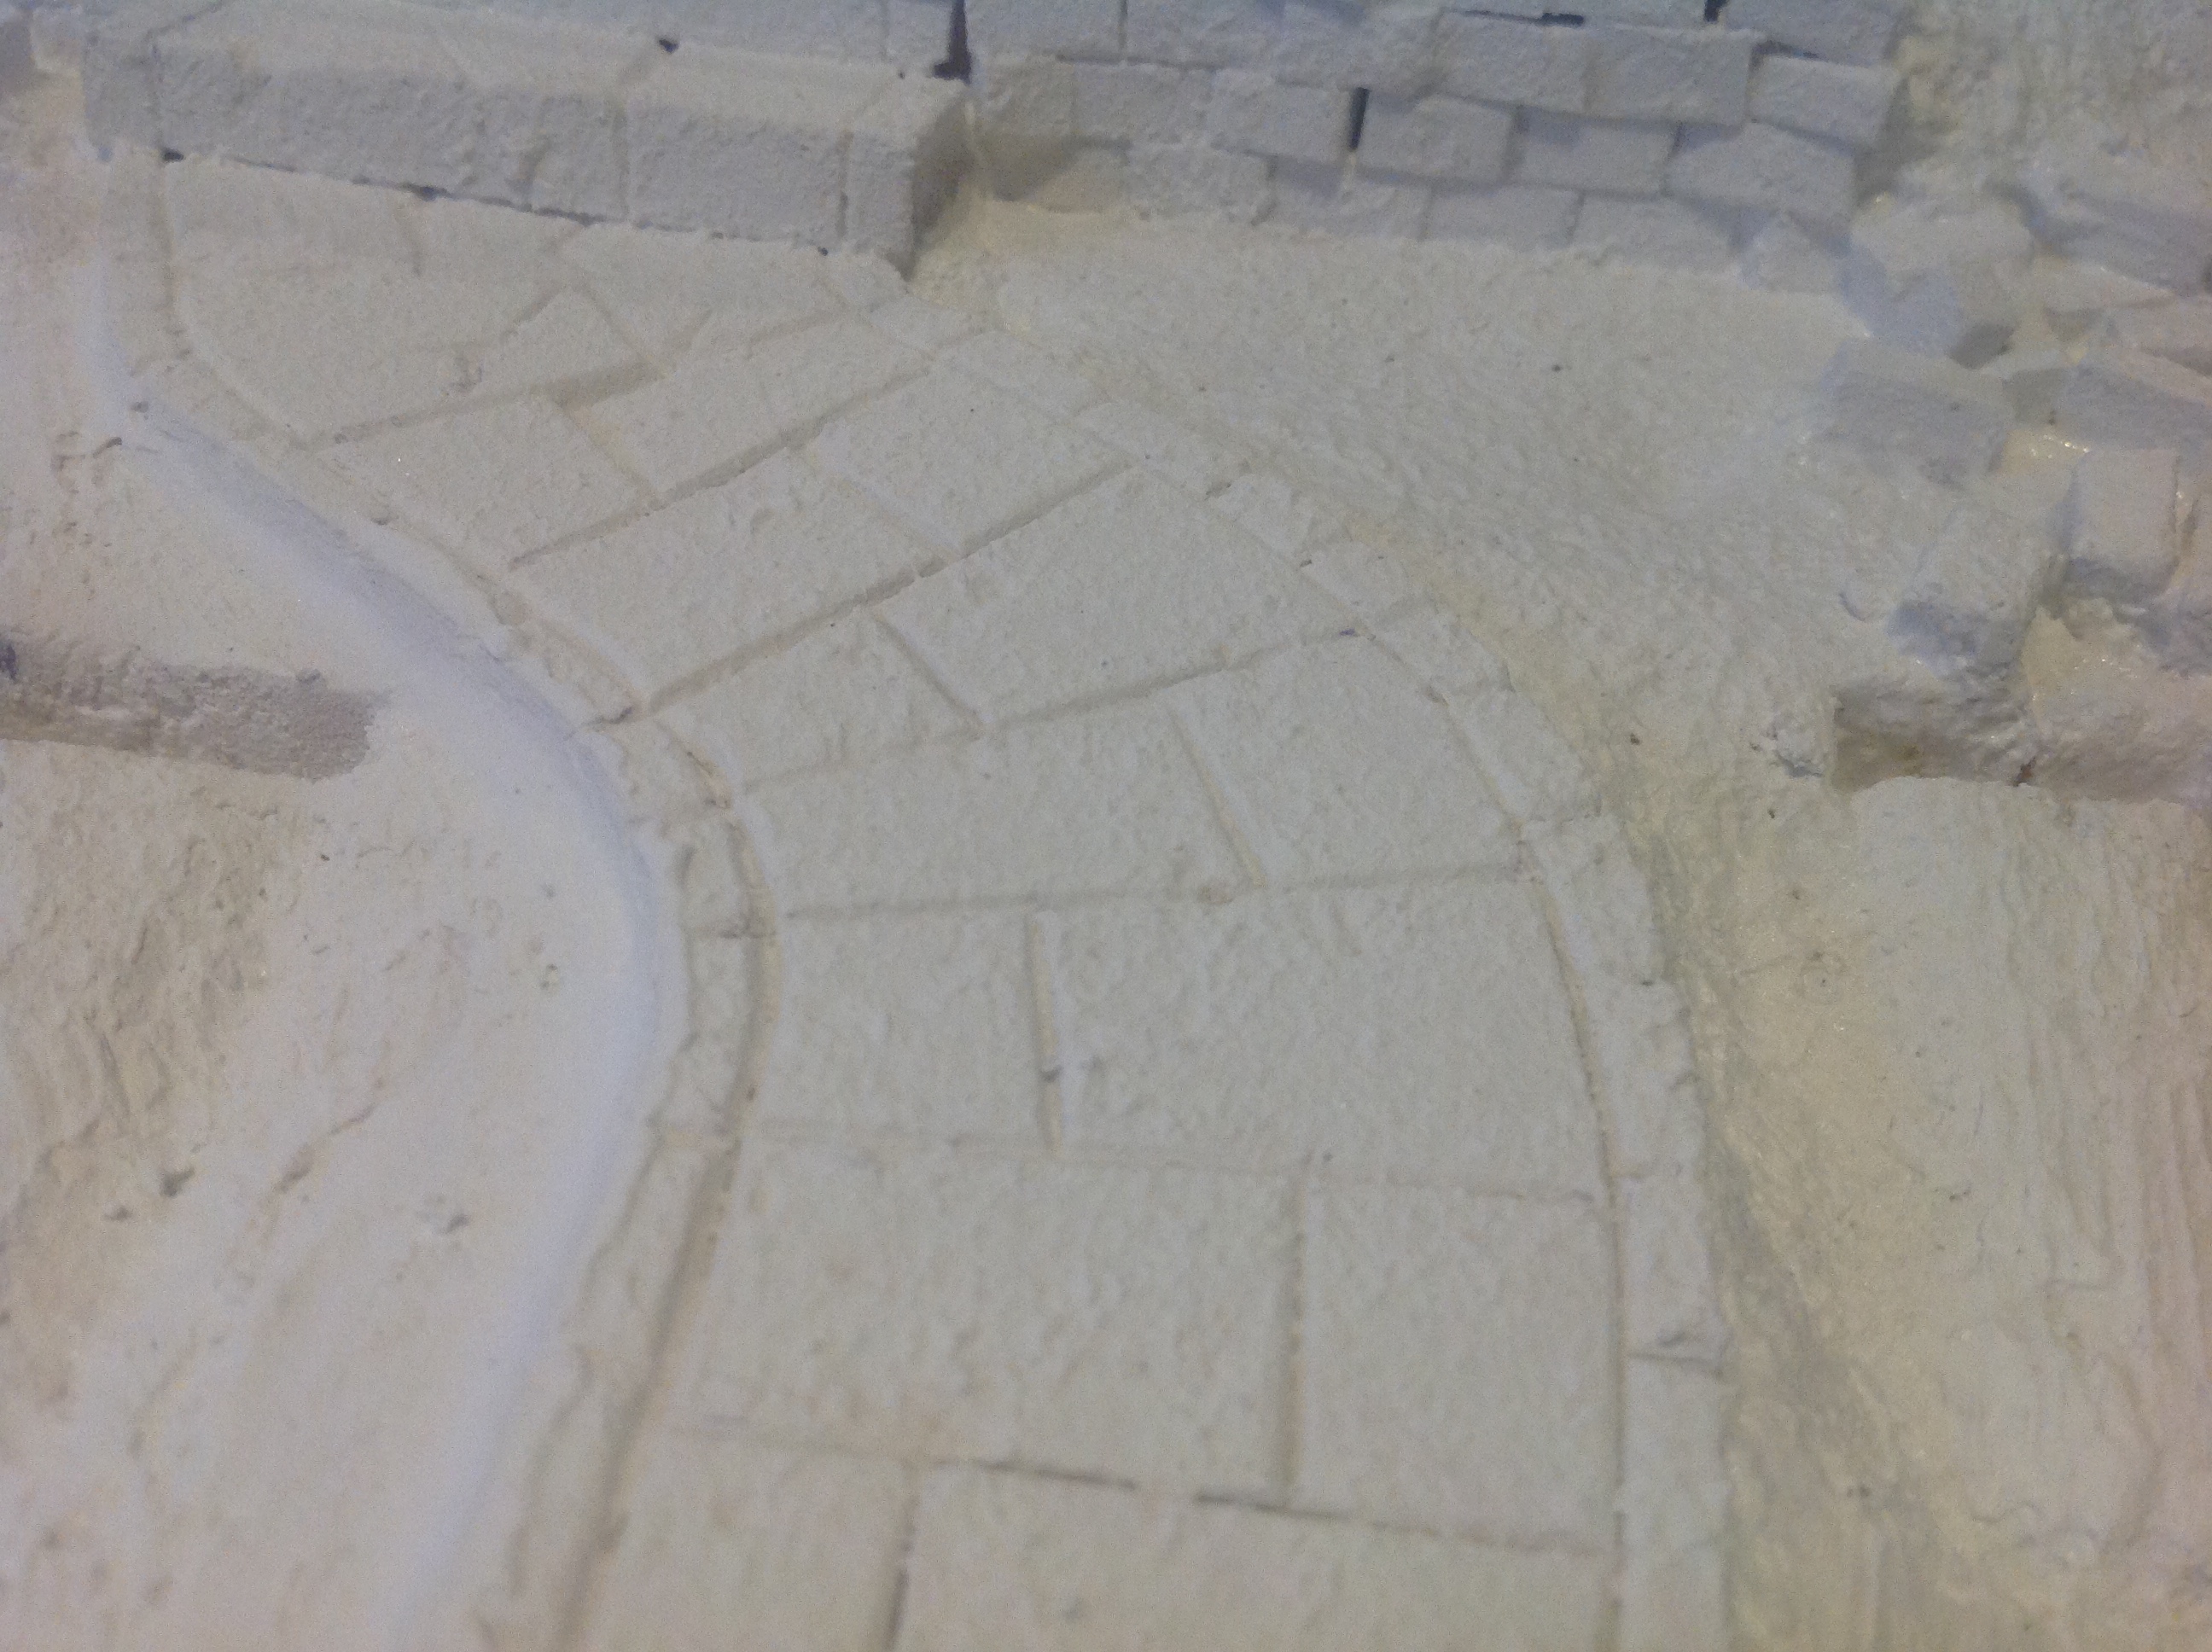
 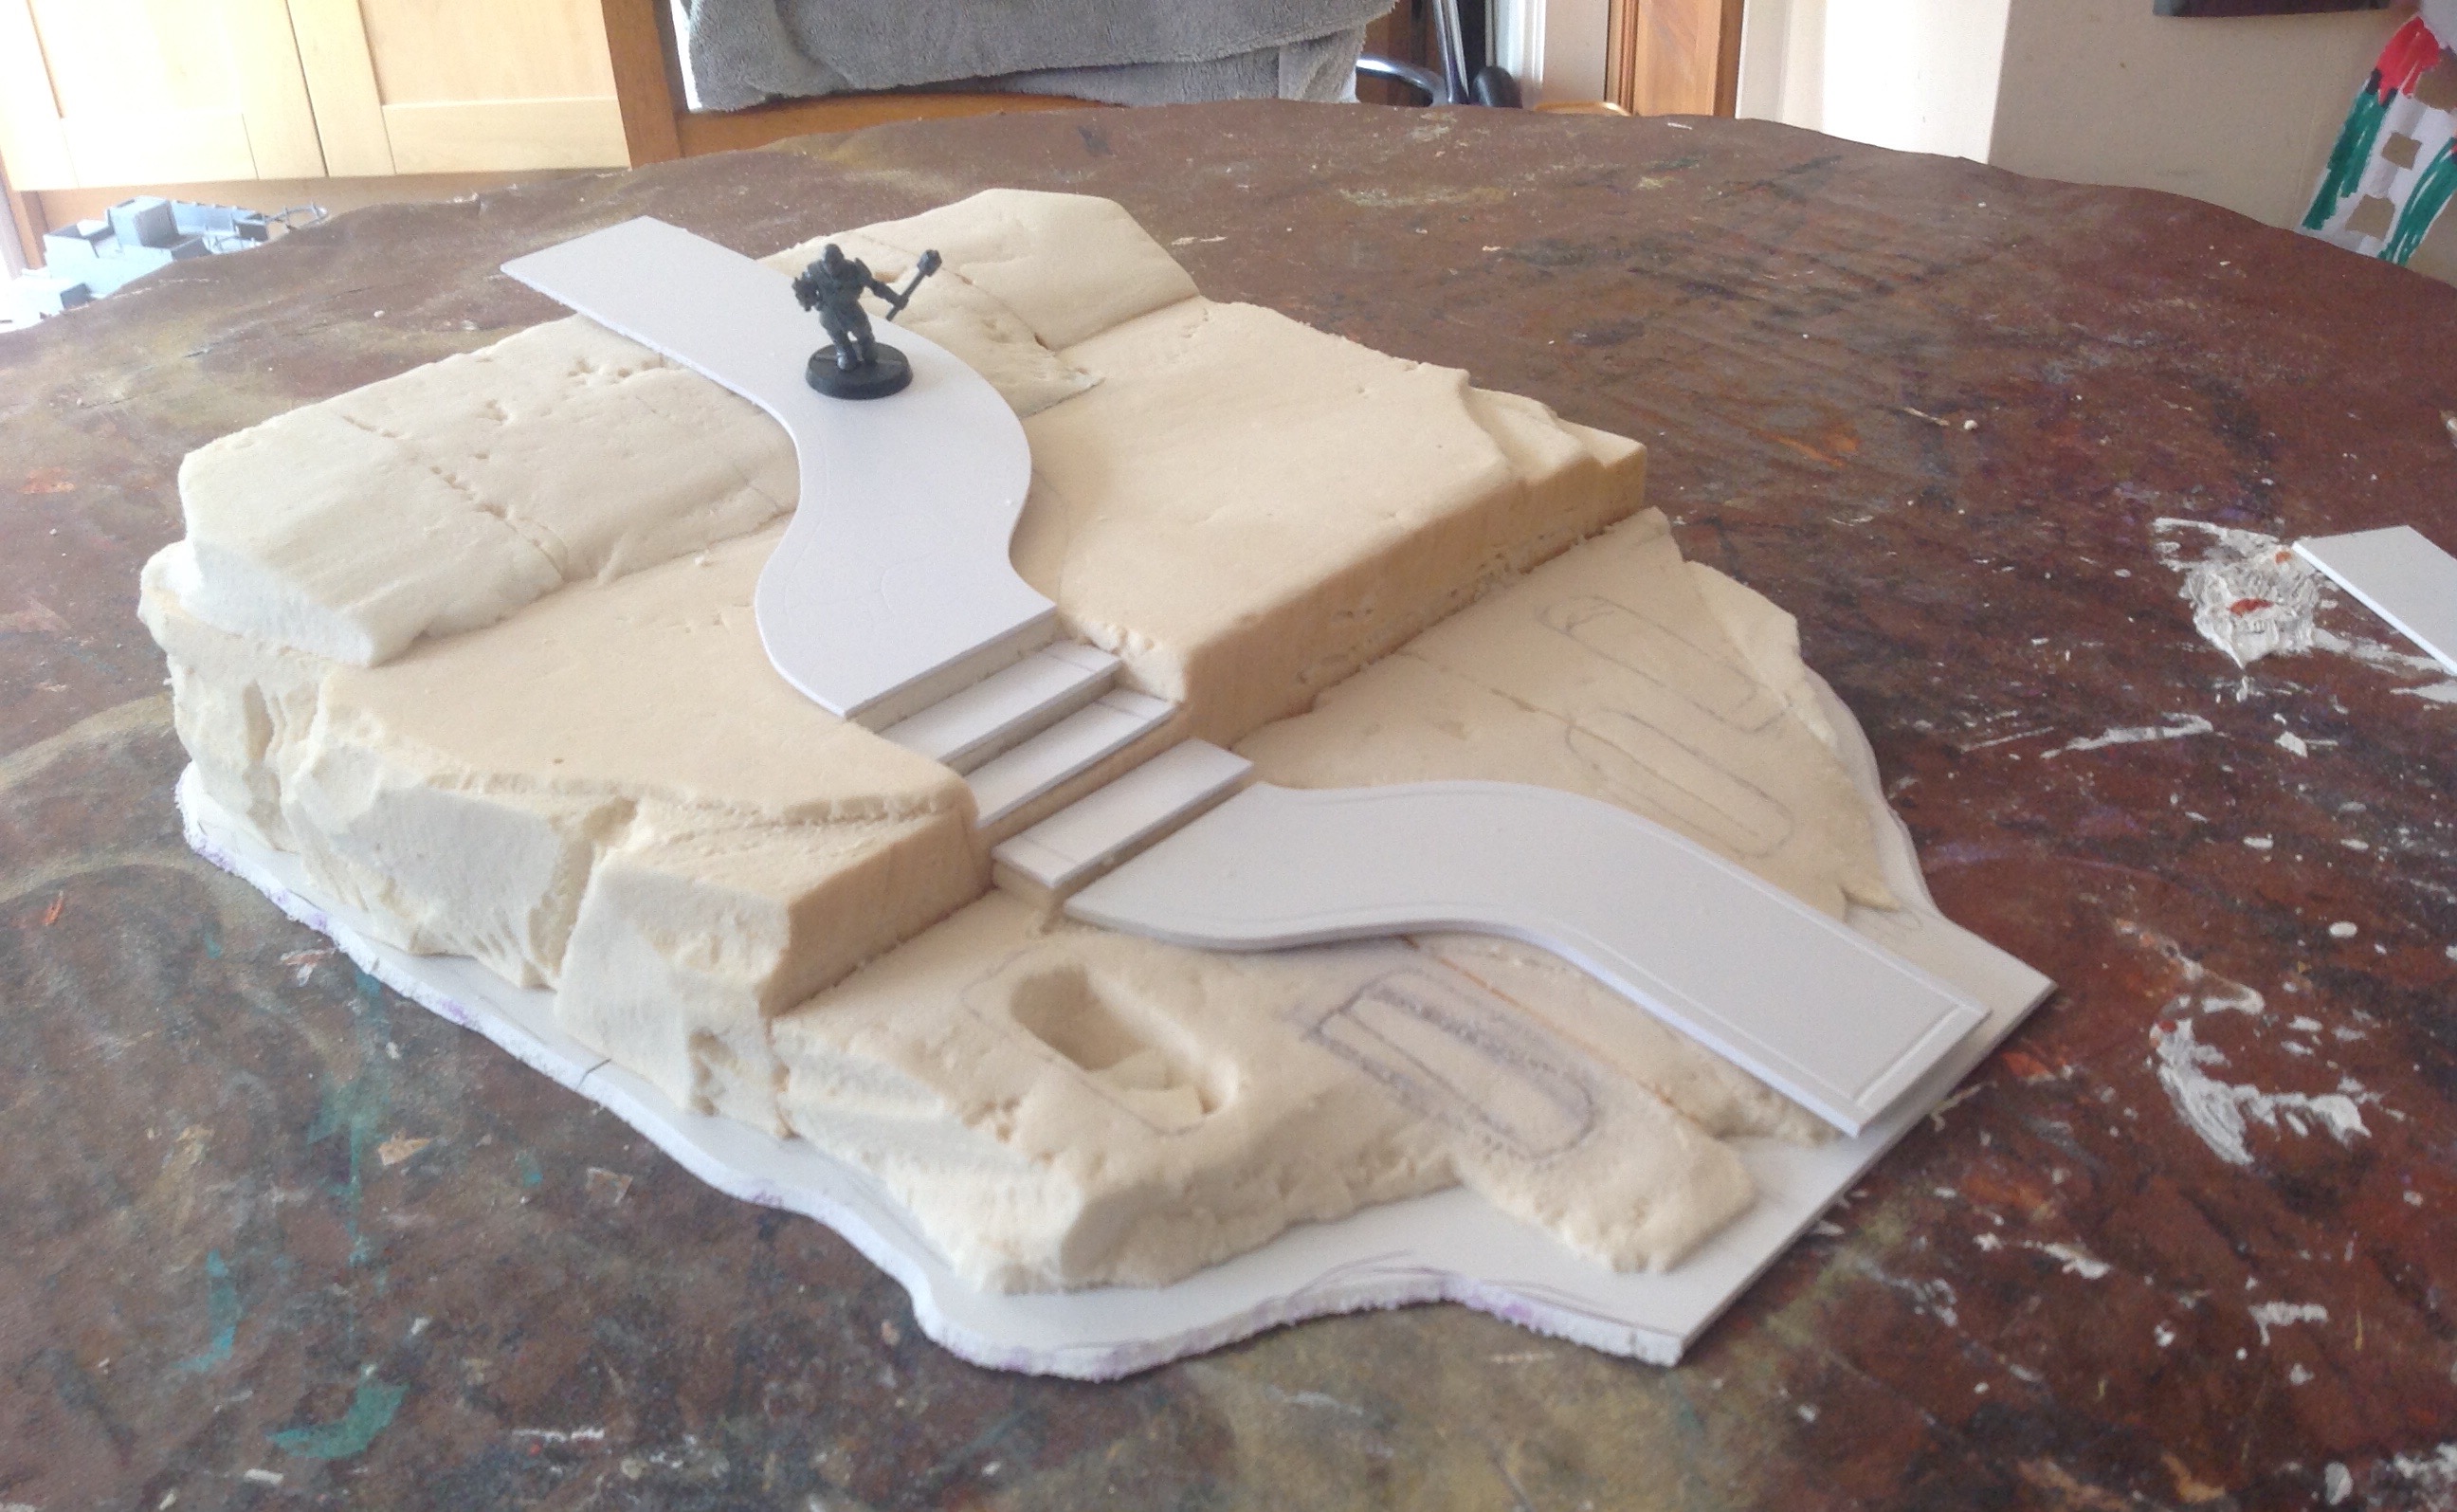 Next I cut the bace to shape and then the two pathways from 3 mm foamX ( plastic used by sign makers) and lay them out to see how they will look. I recut the top part, as the path will led the eye to the gate at the top and it wasn't balanced well
The path that leads beyond
narratively the realm on the opposite side of the gate will spill through and effect the area around it I wanted to show this in the path. As it climes towards the gate I want the path to become more and more broken apart showing that the entropic energy is

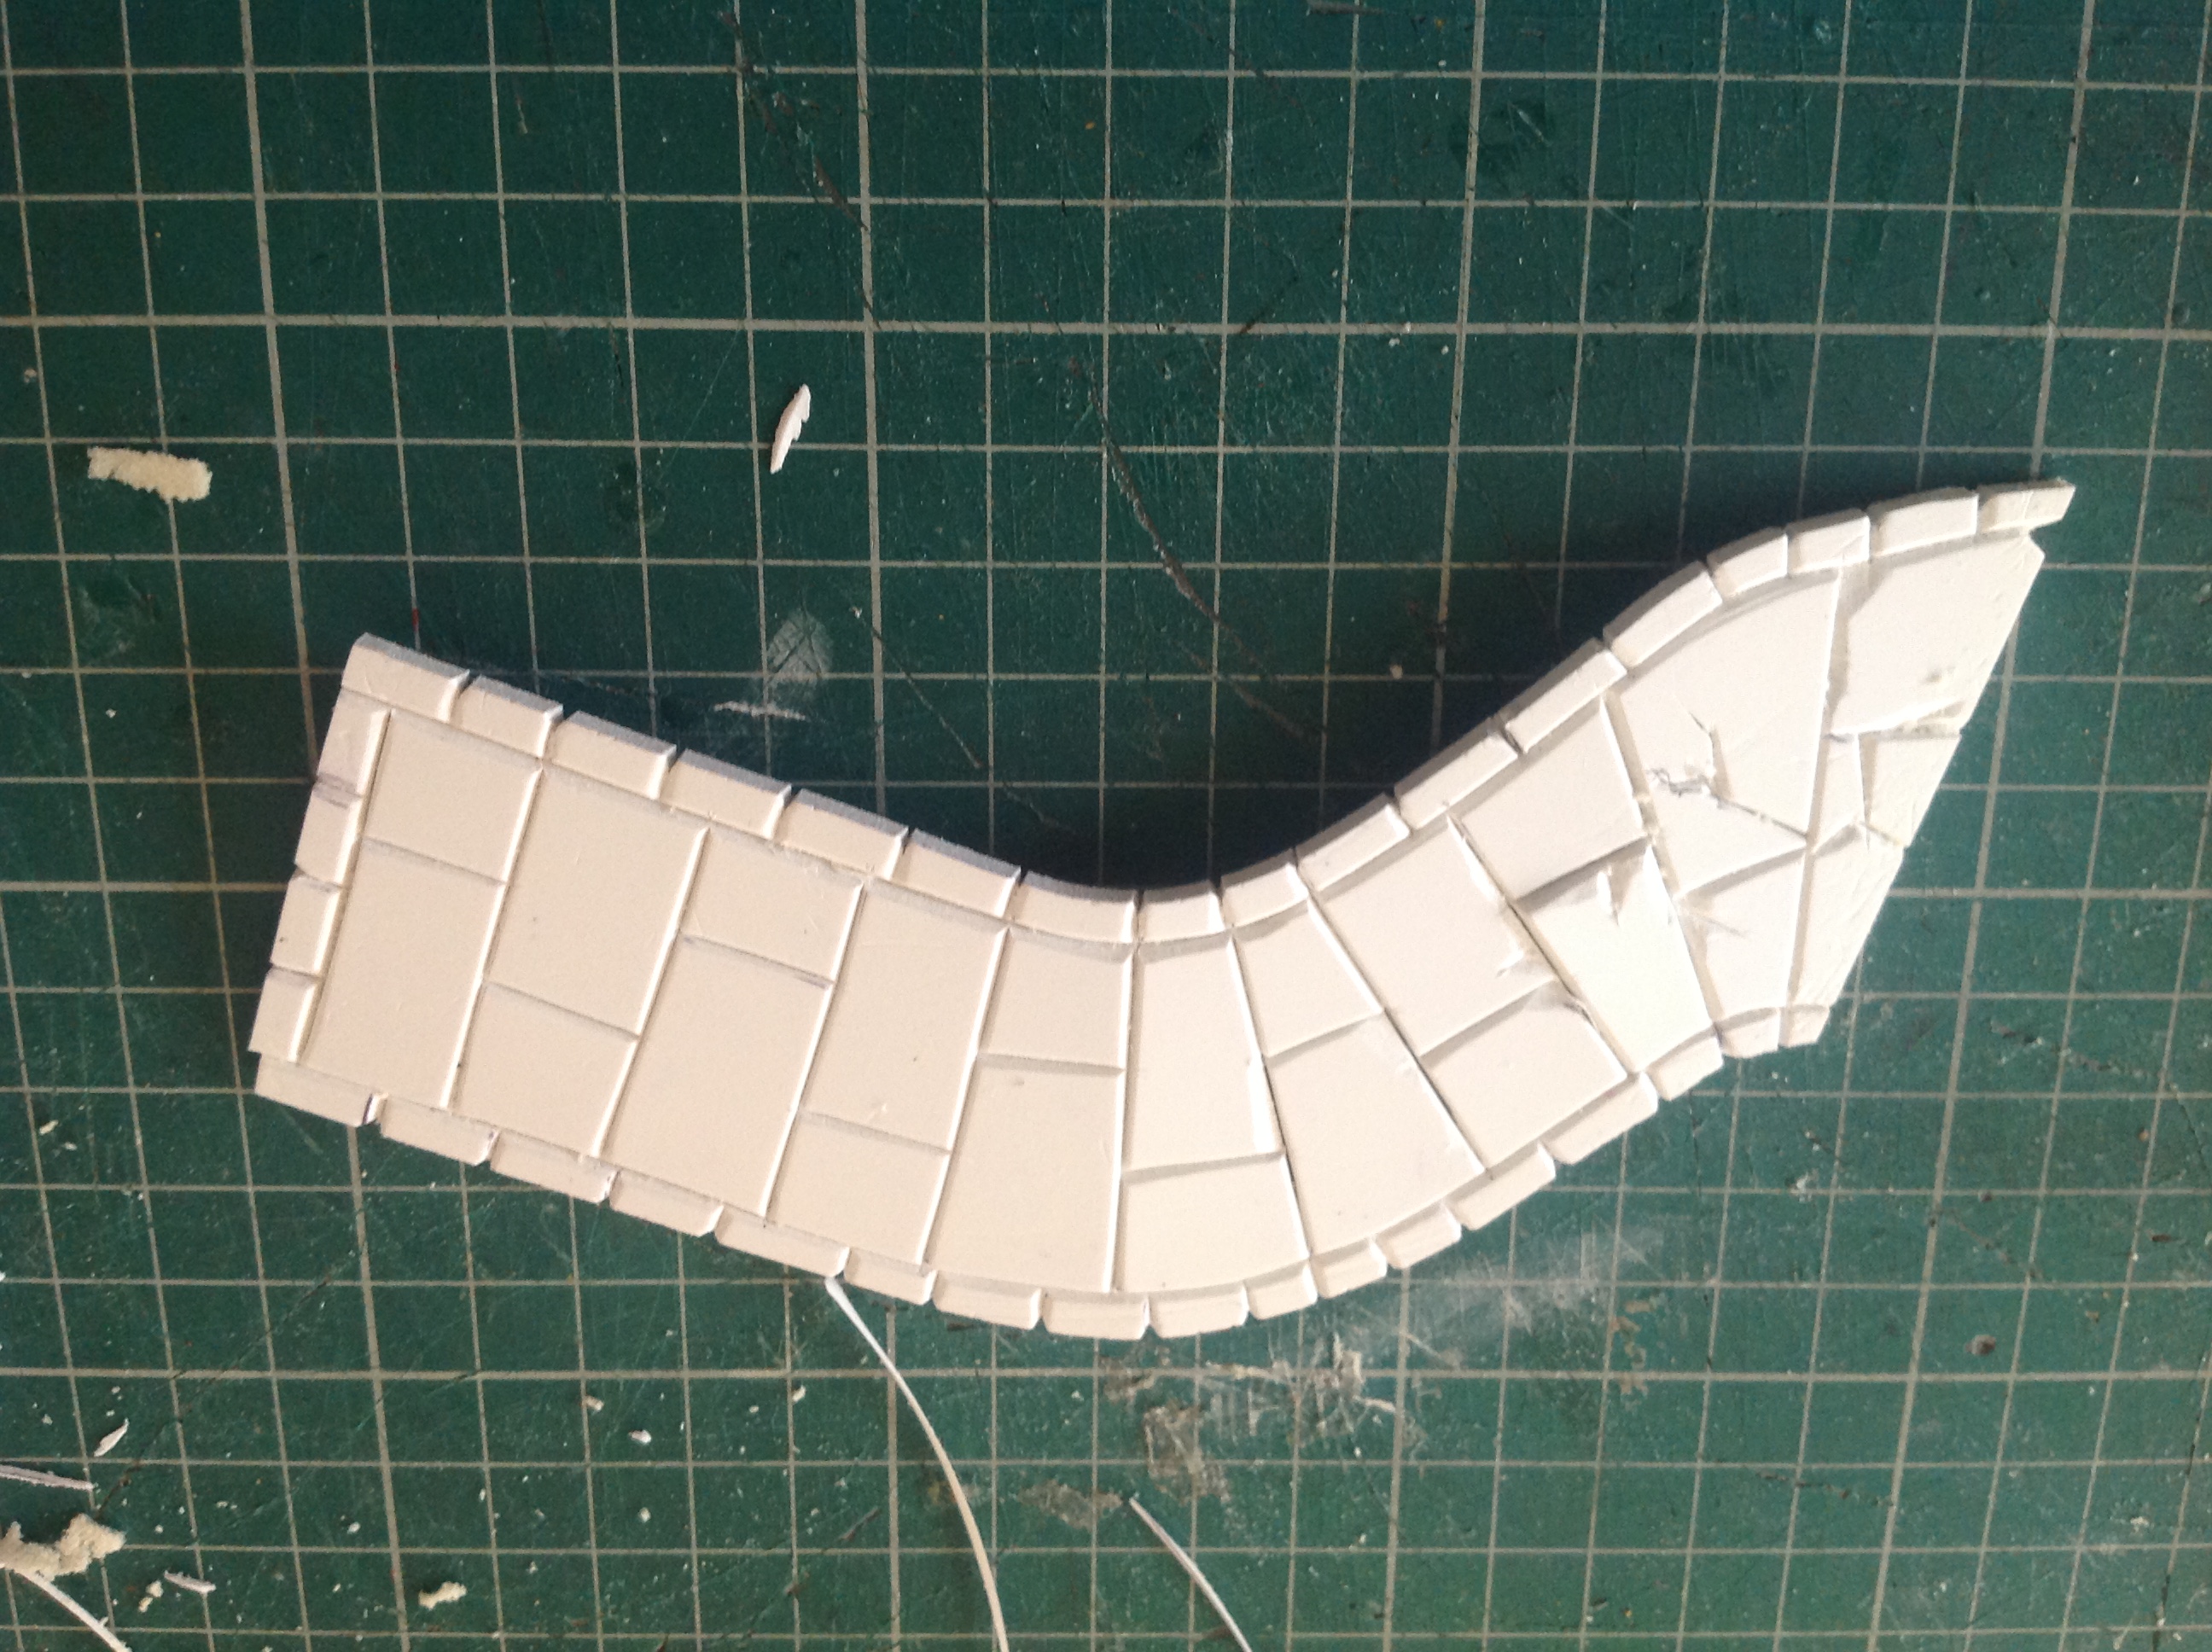
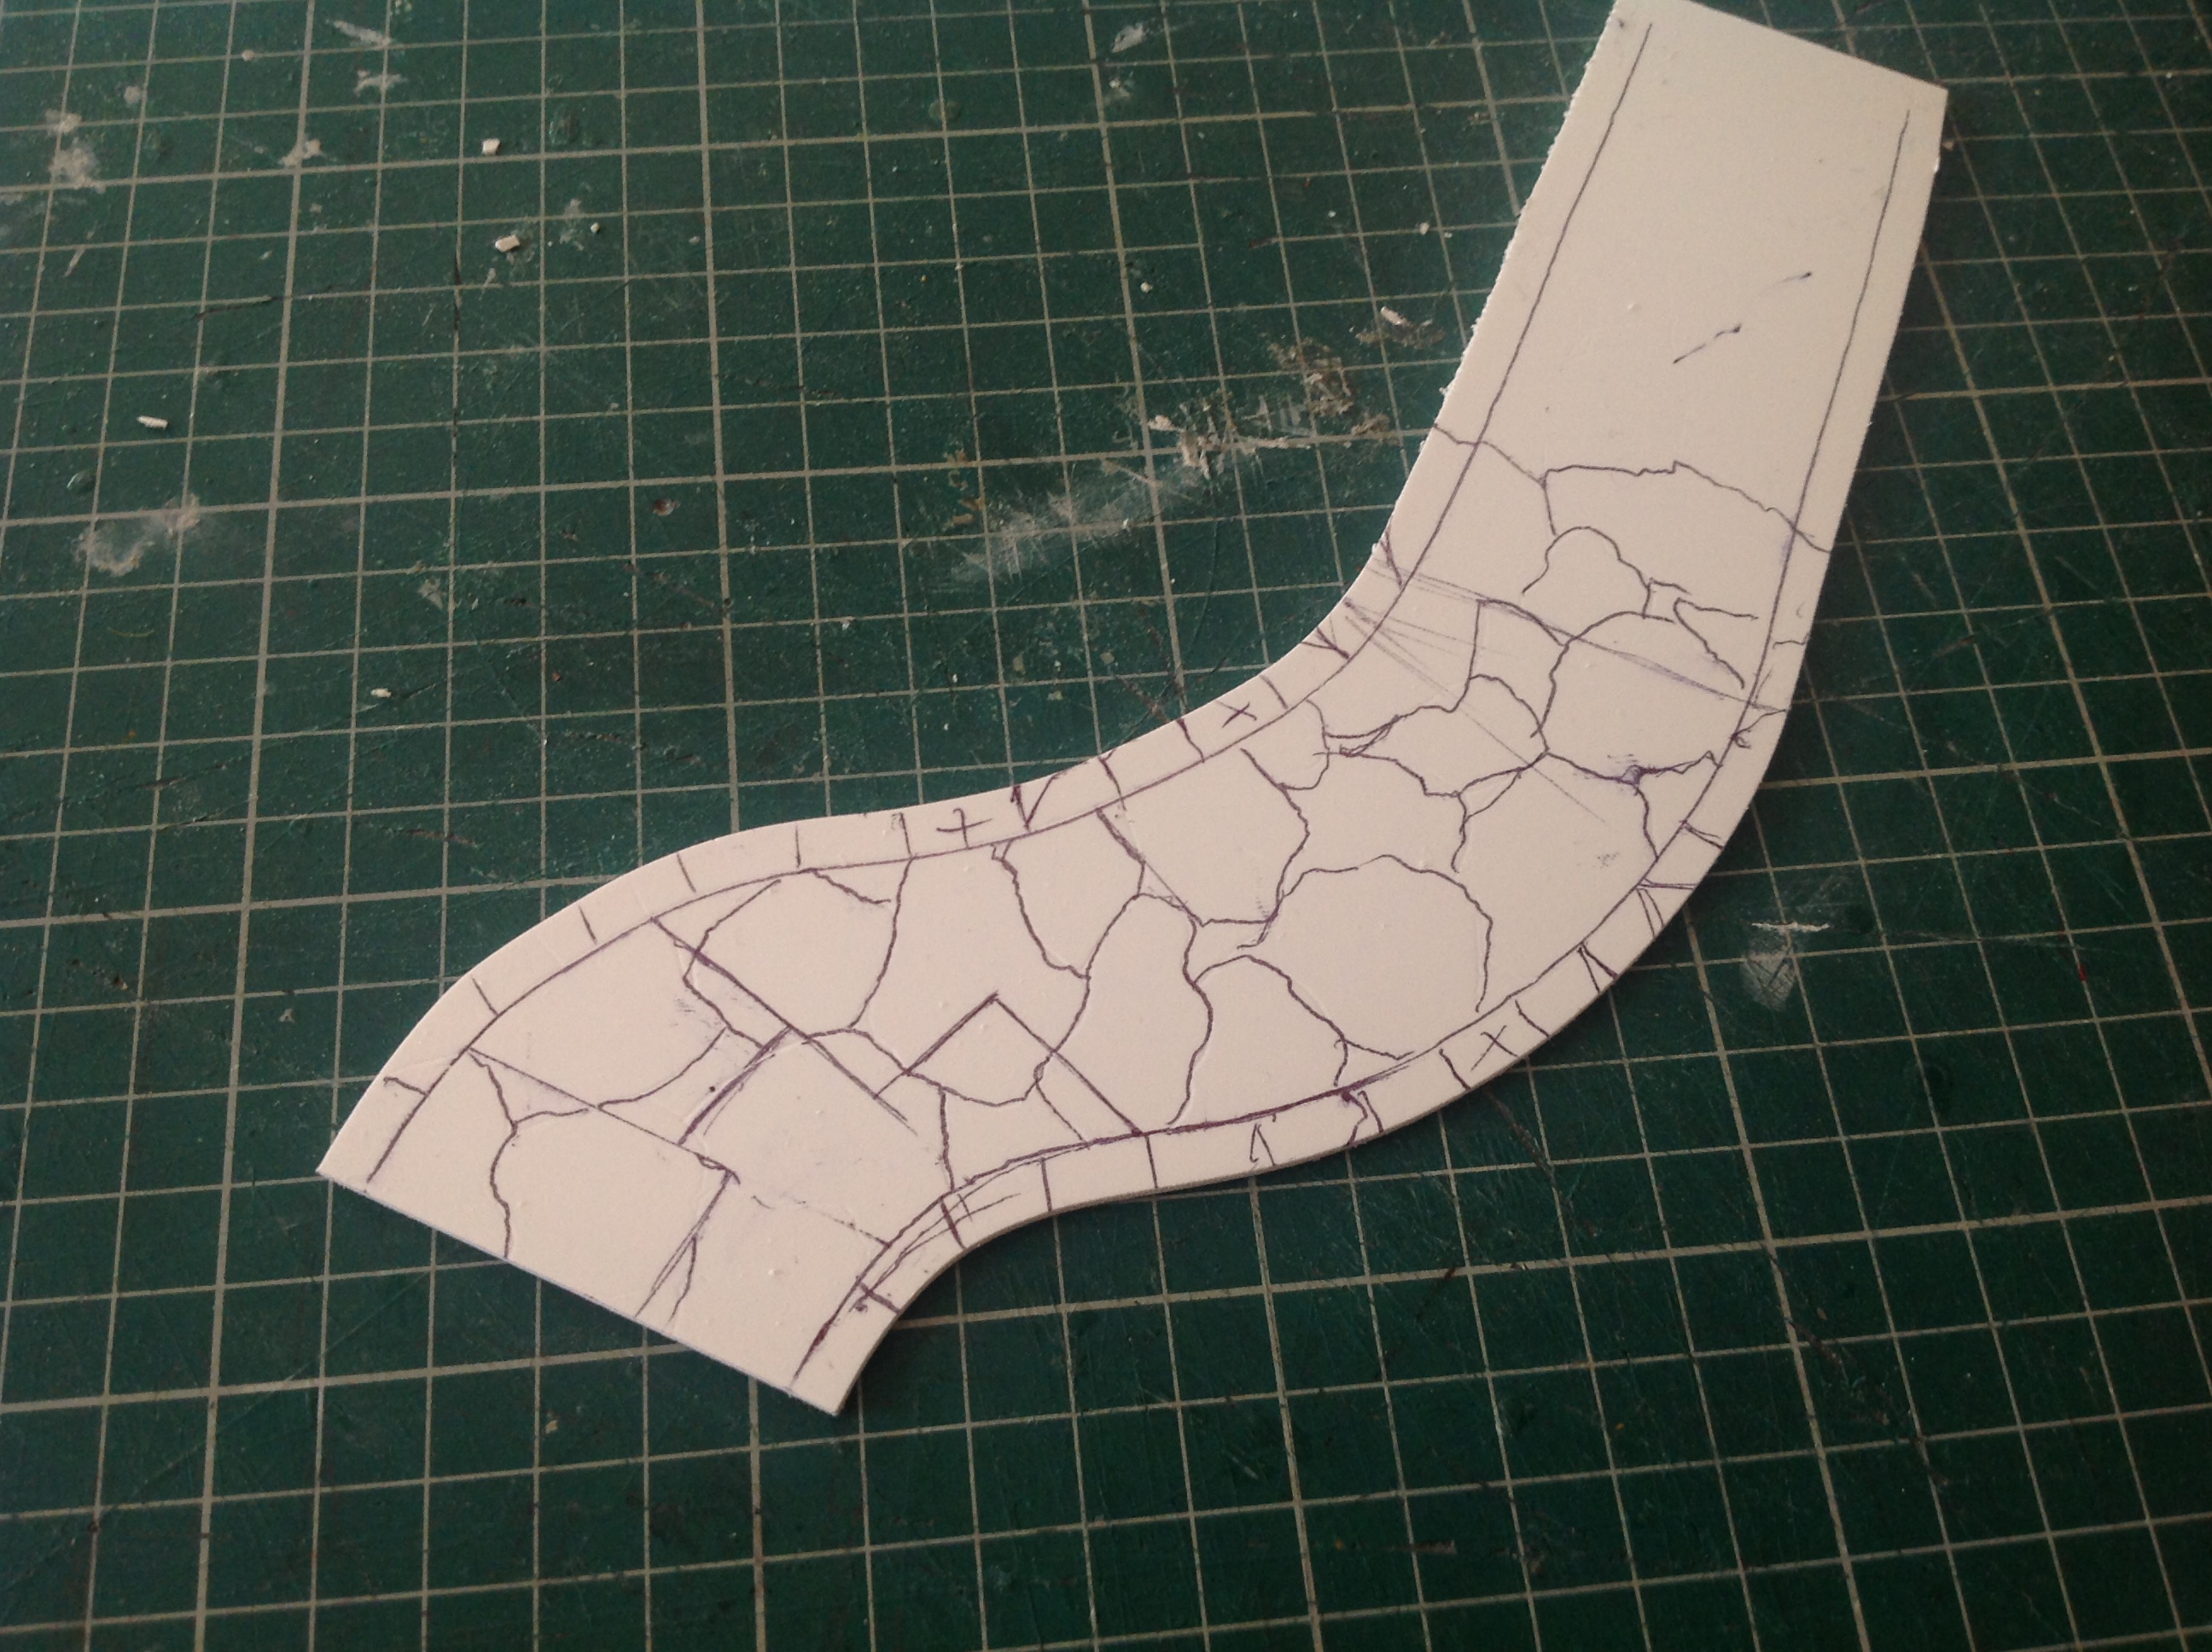
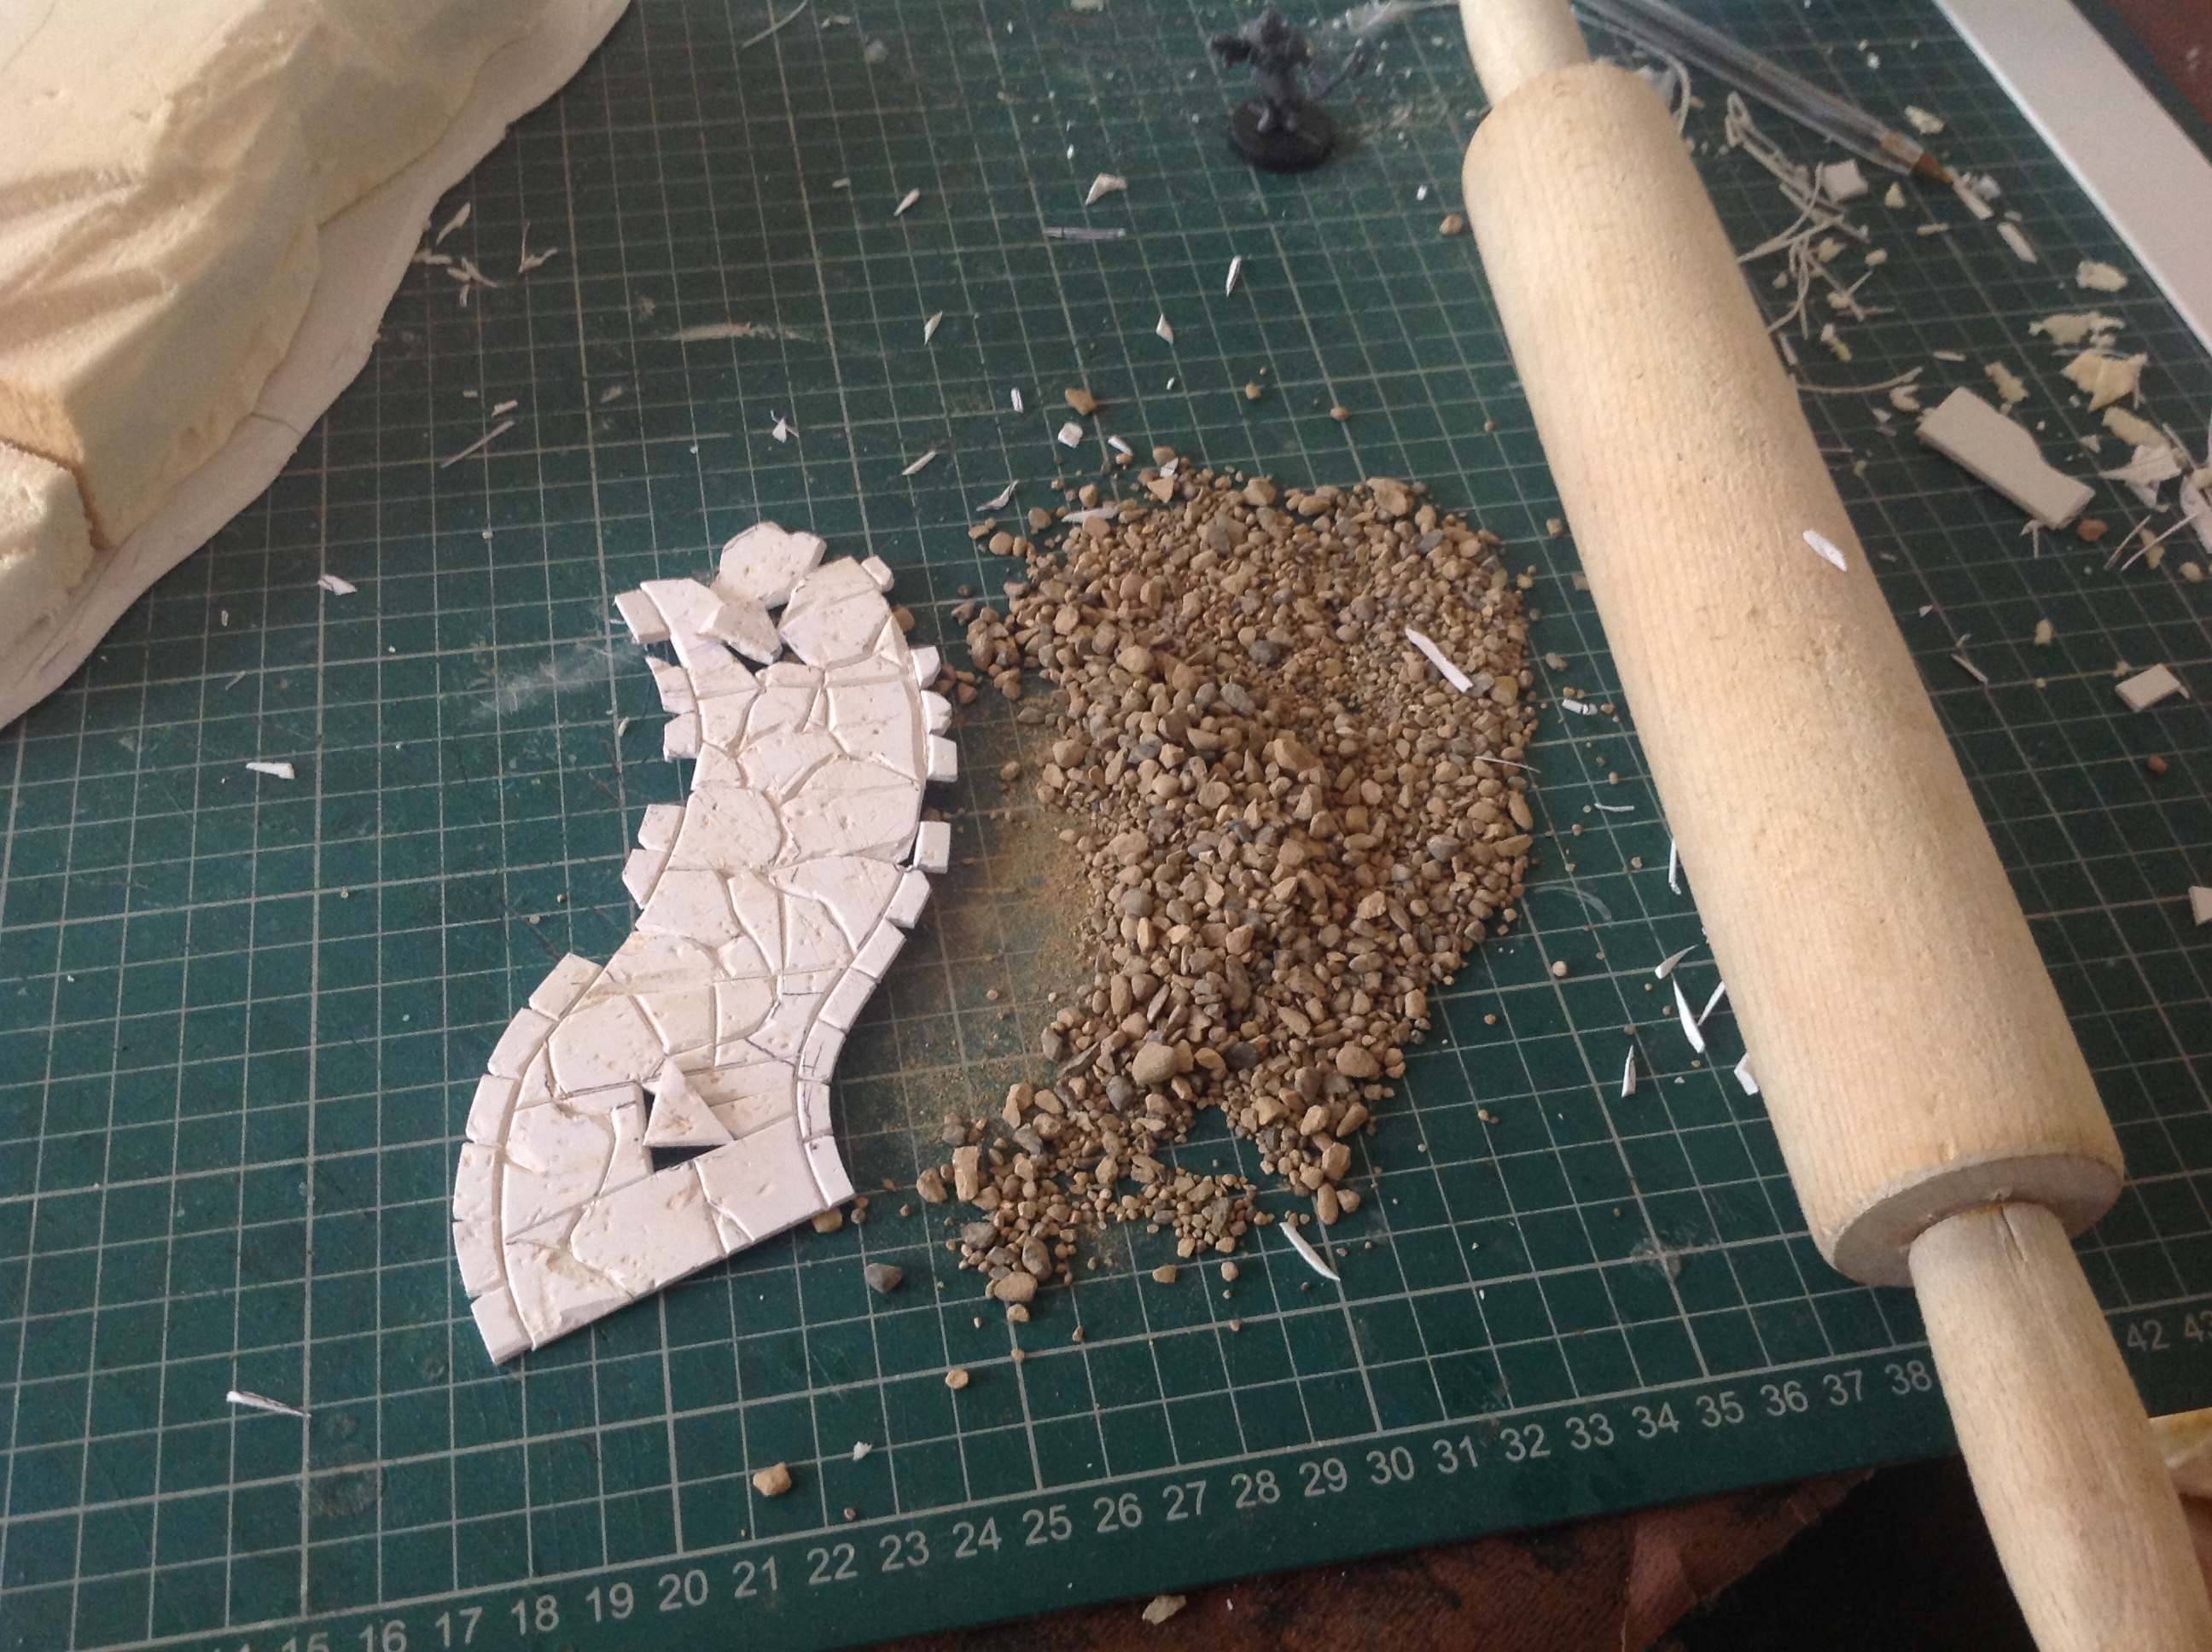
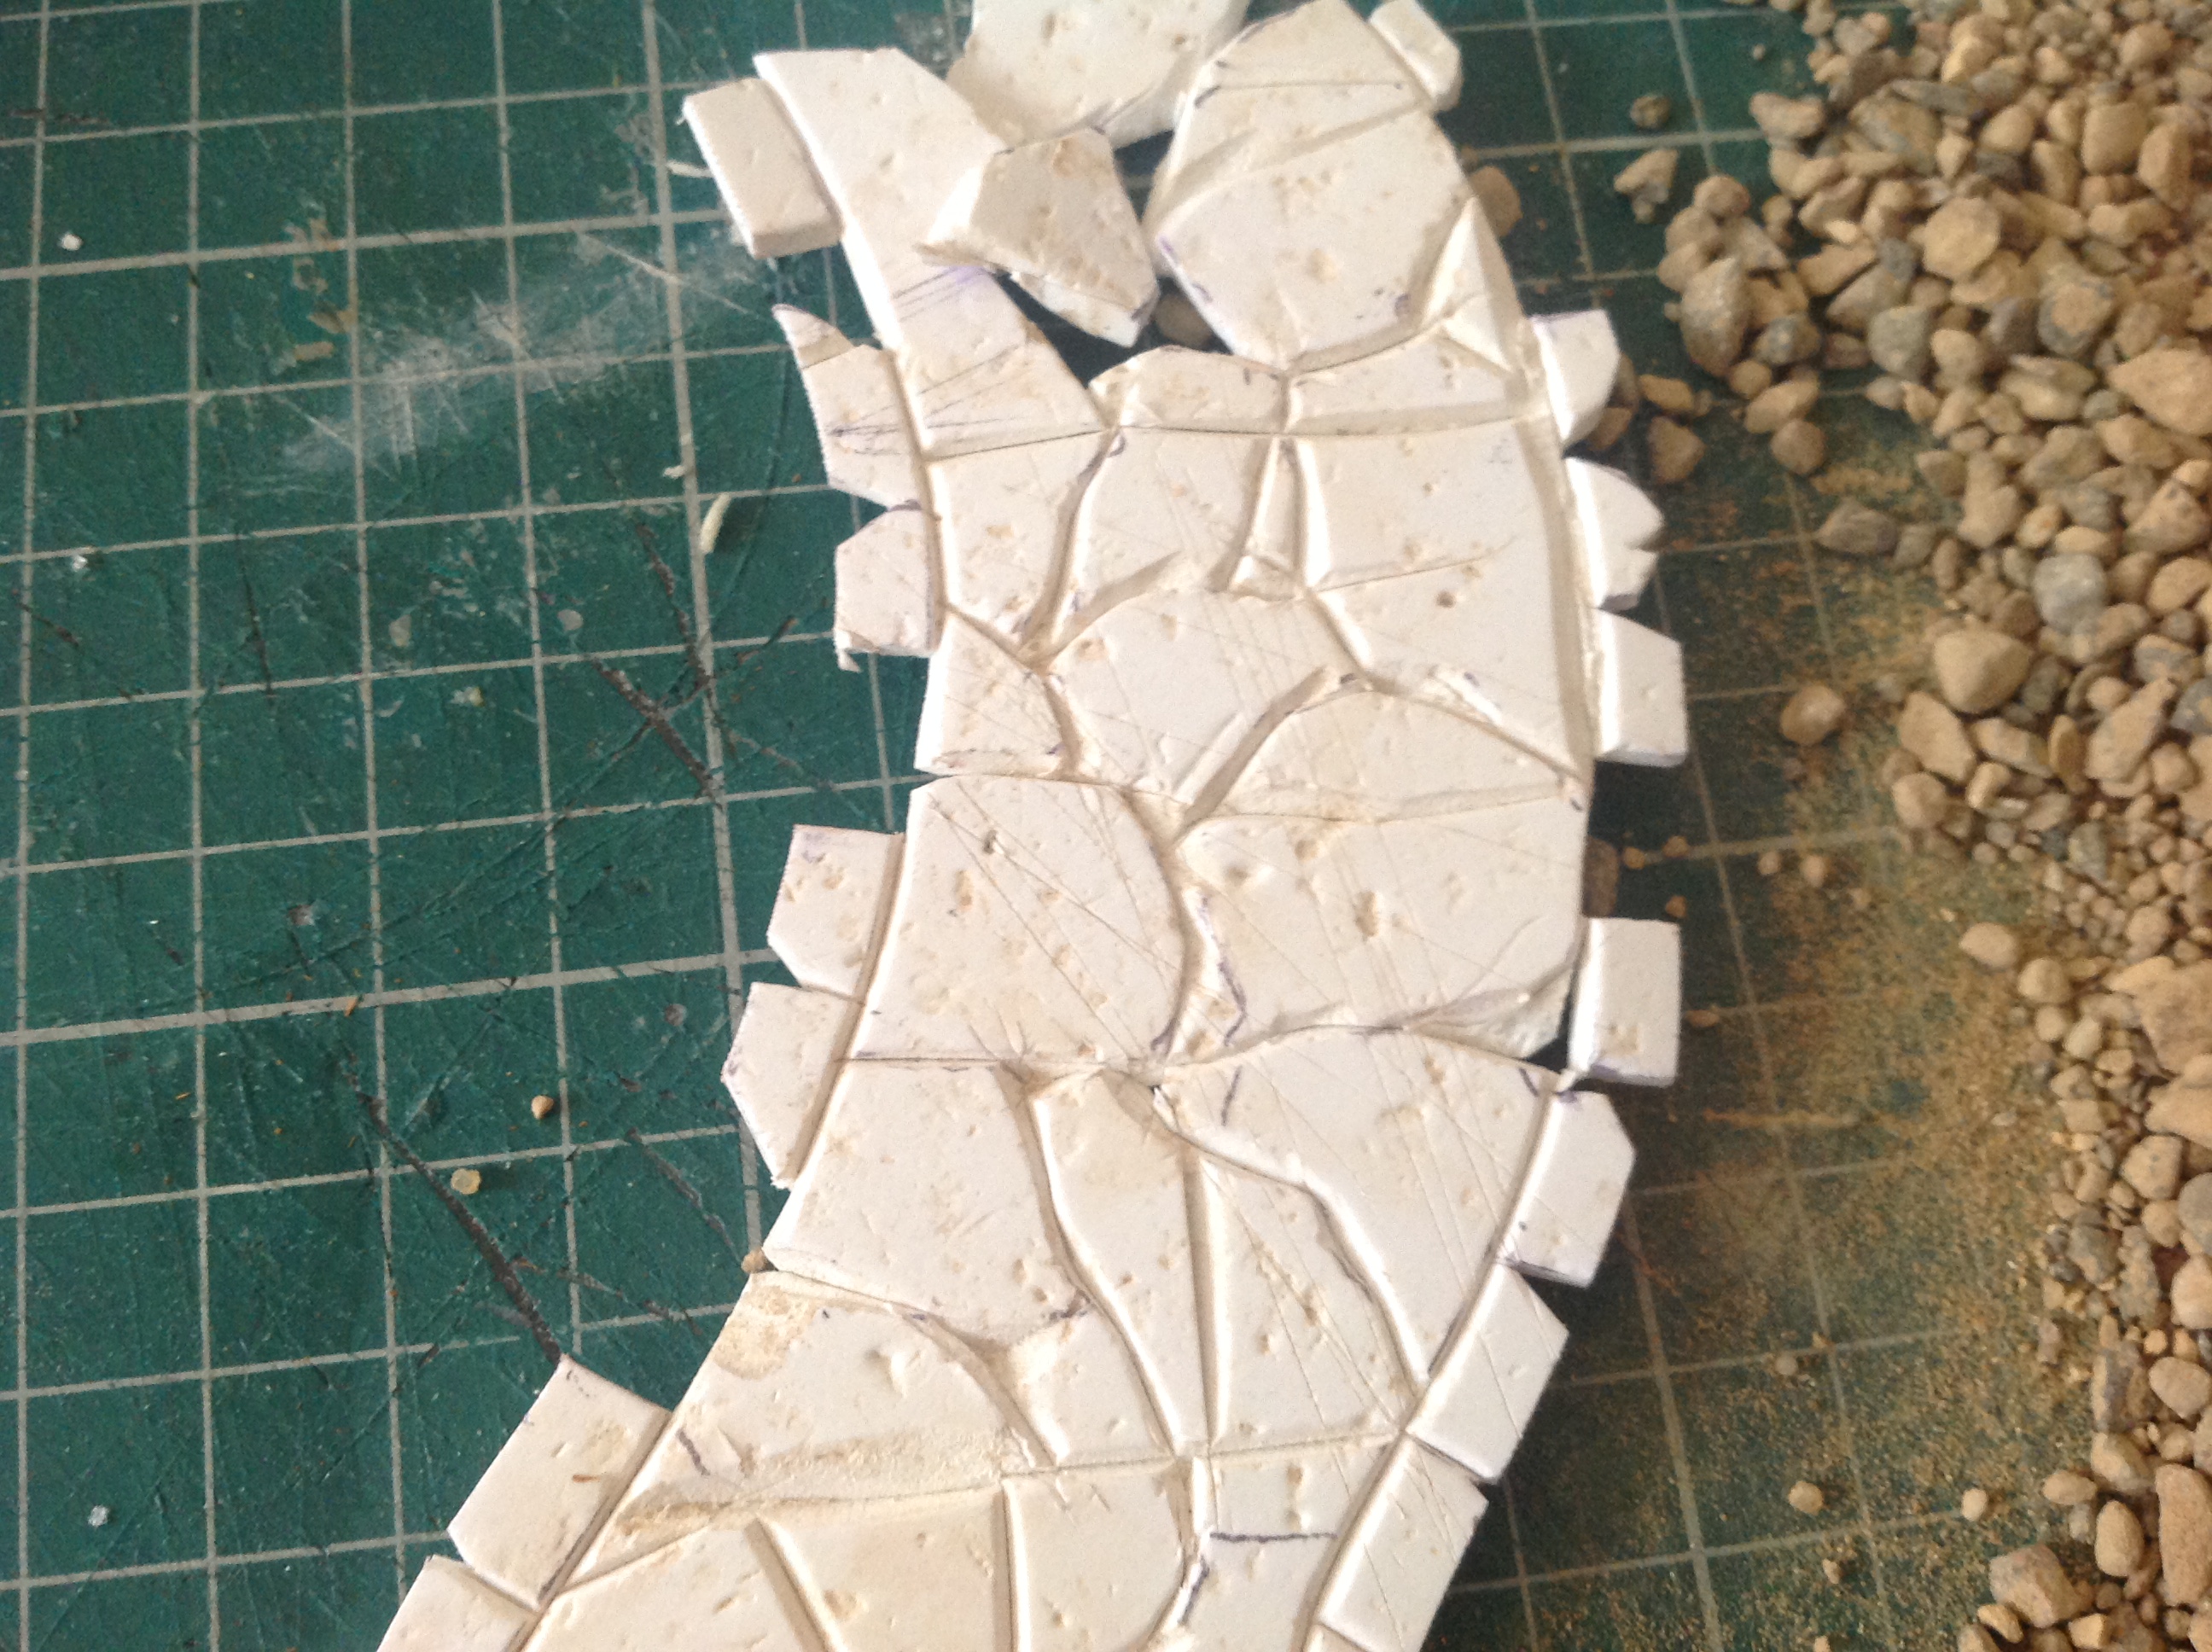
The flags are marked out using a ballpoint heavy handedly over a backing that is on the sheat, this marks the plastic without putting ink on it. Then I cut the channels using a very sharp blade. Once that’s done, I put a handful of loose stones on the table ( protect you table if you do this as it will damage it ) and put the path on top. Then with a rolling pin I press the plastic path in to the stones to transfer the texture.
The path that leads beyond part 2
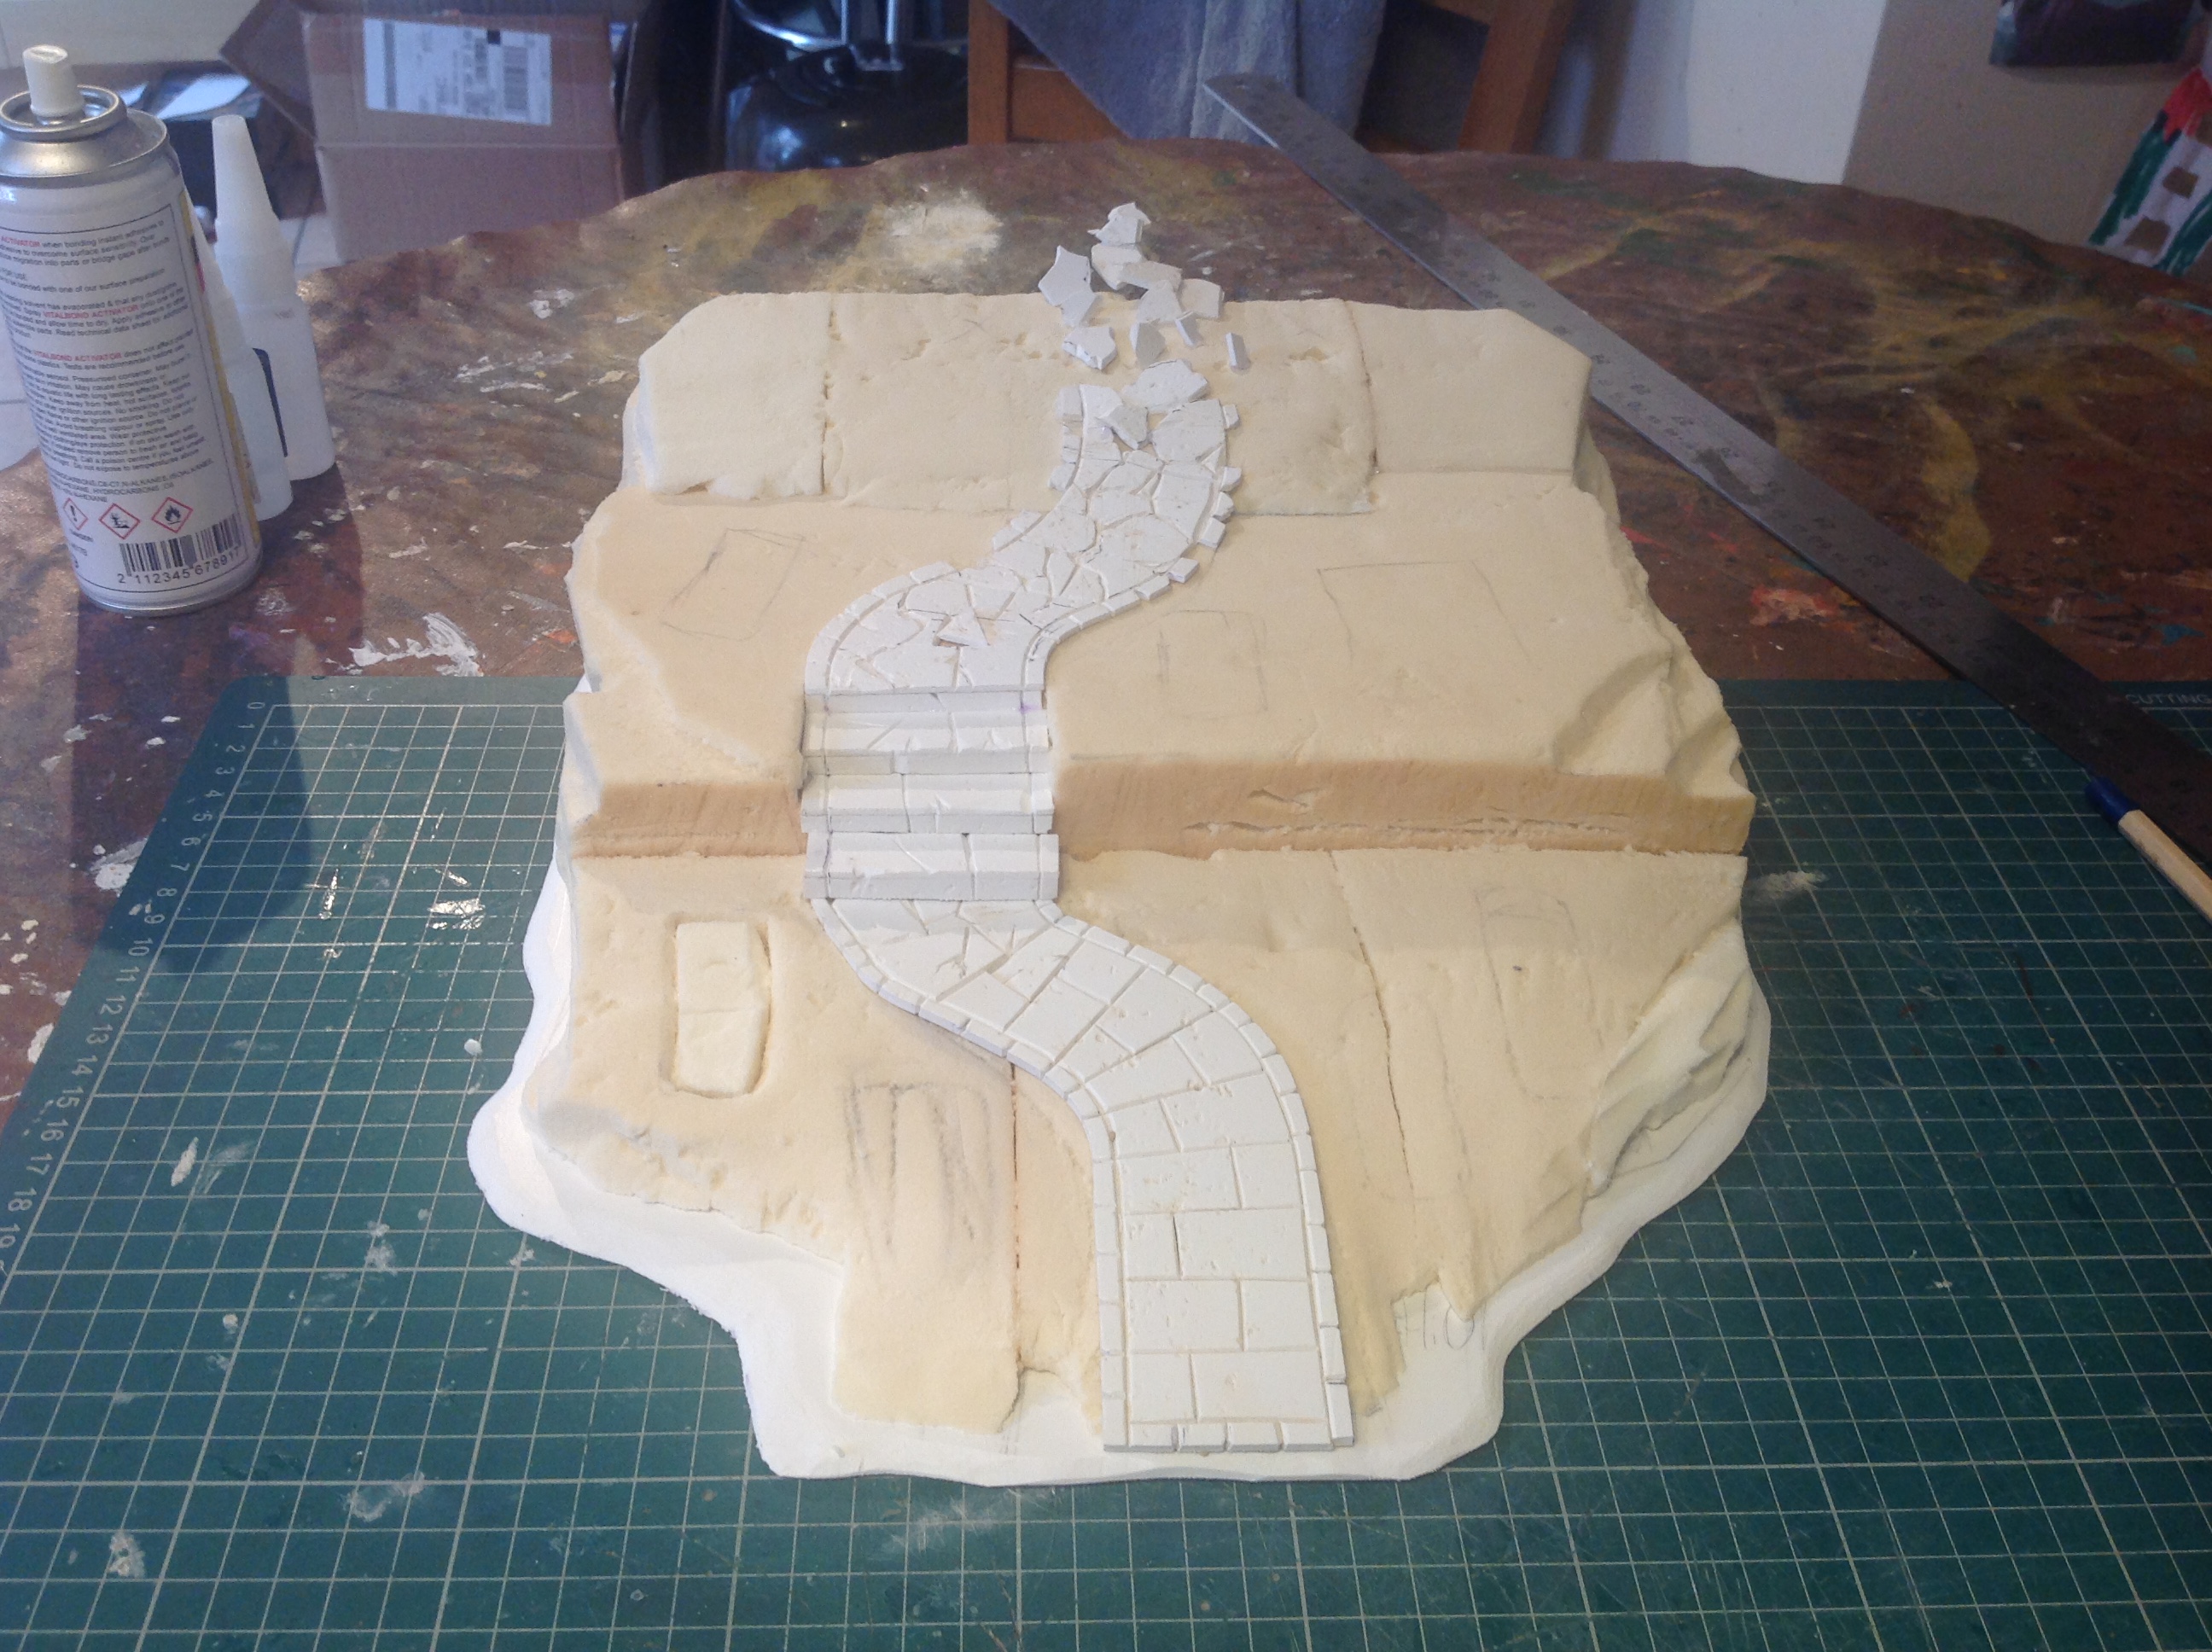
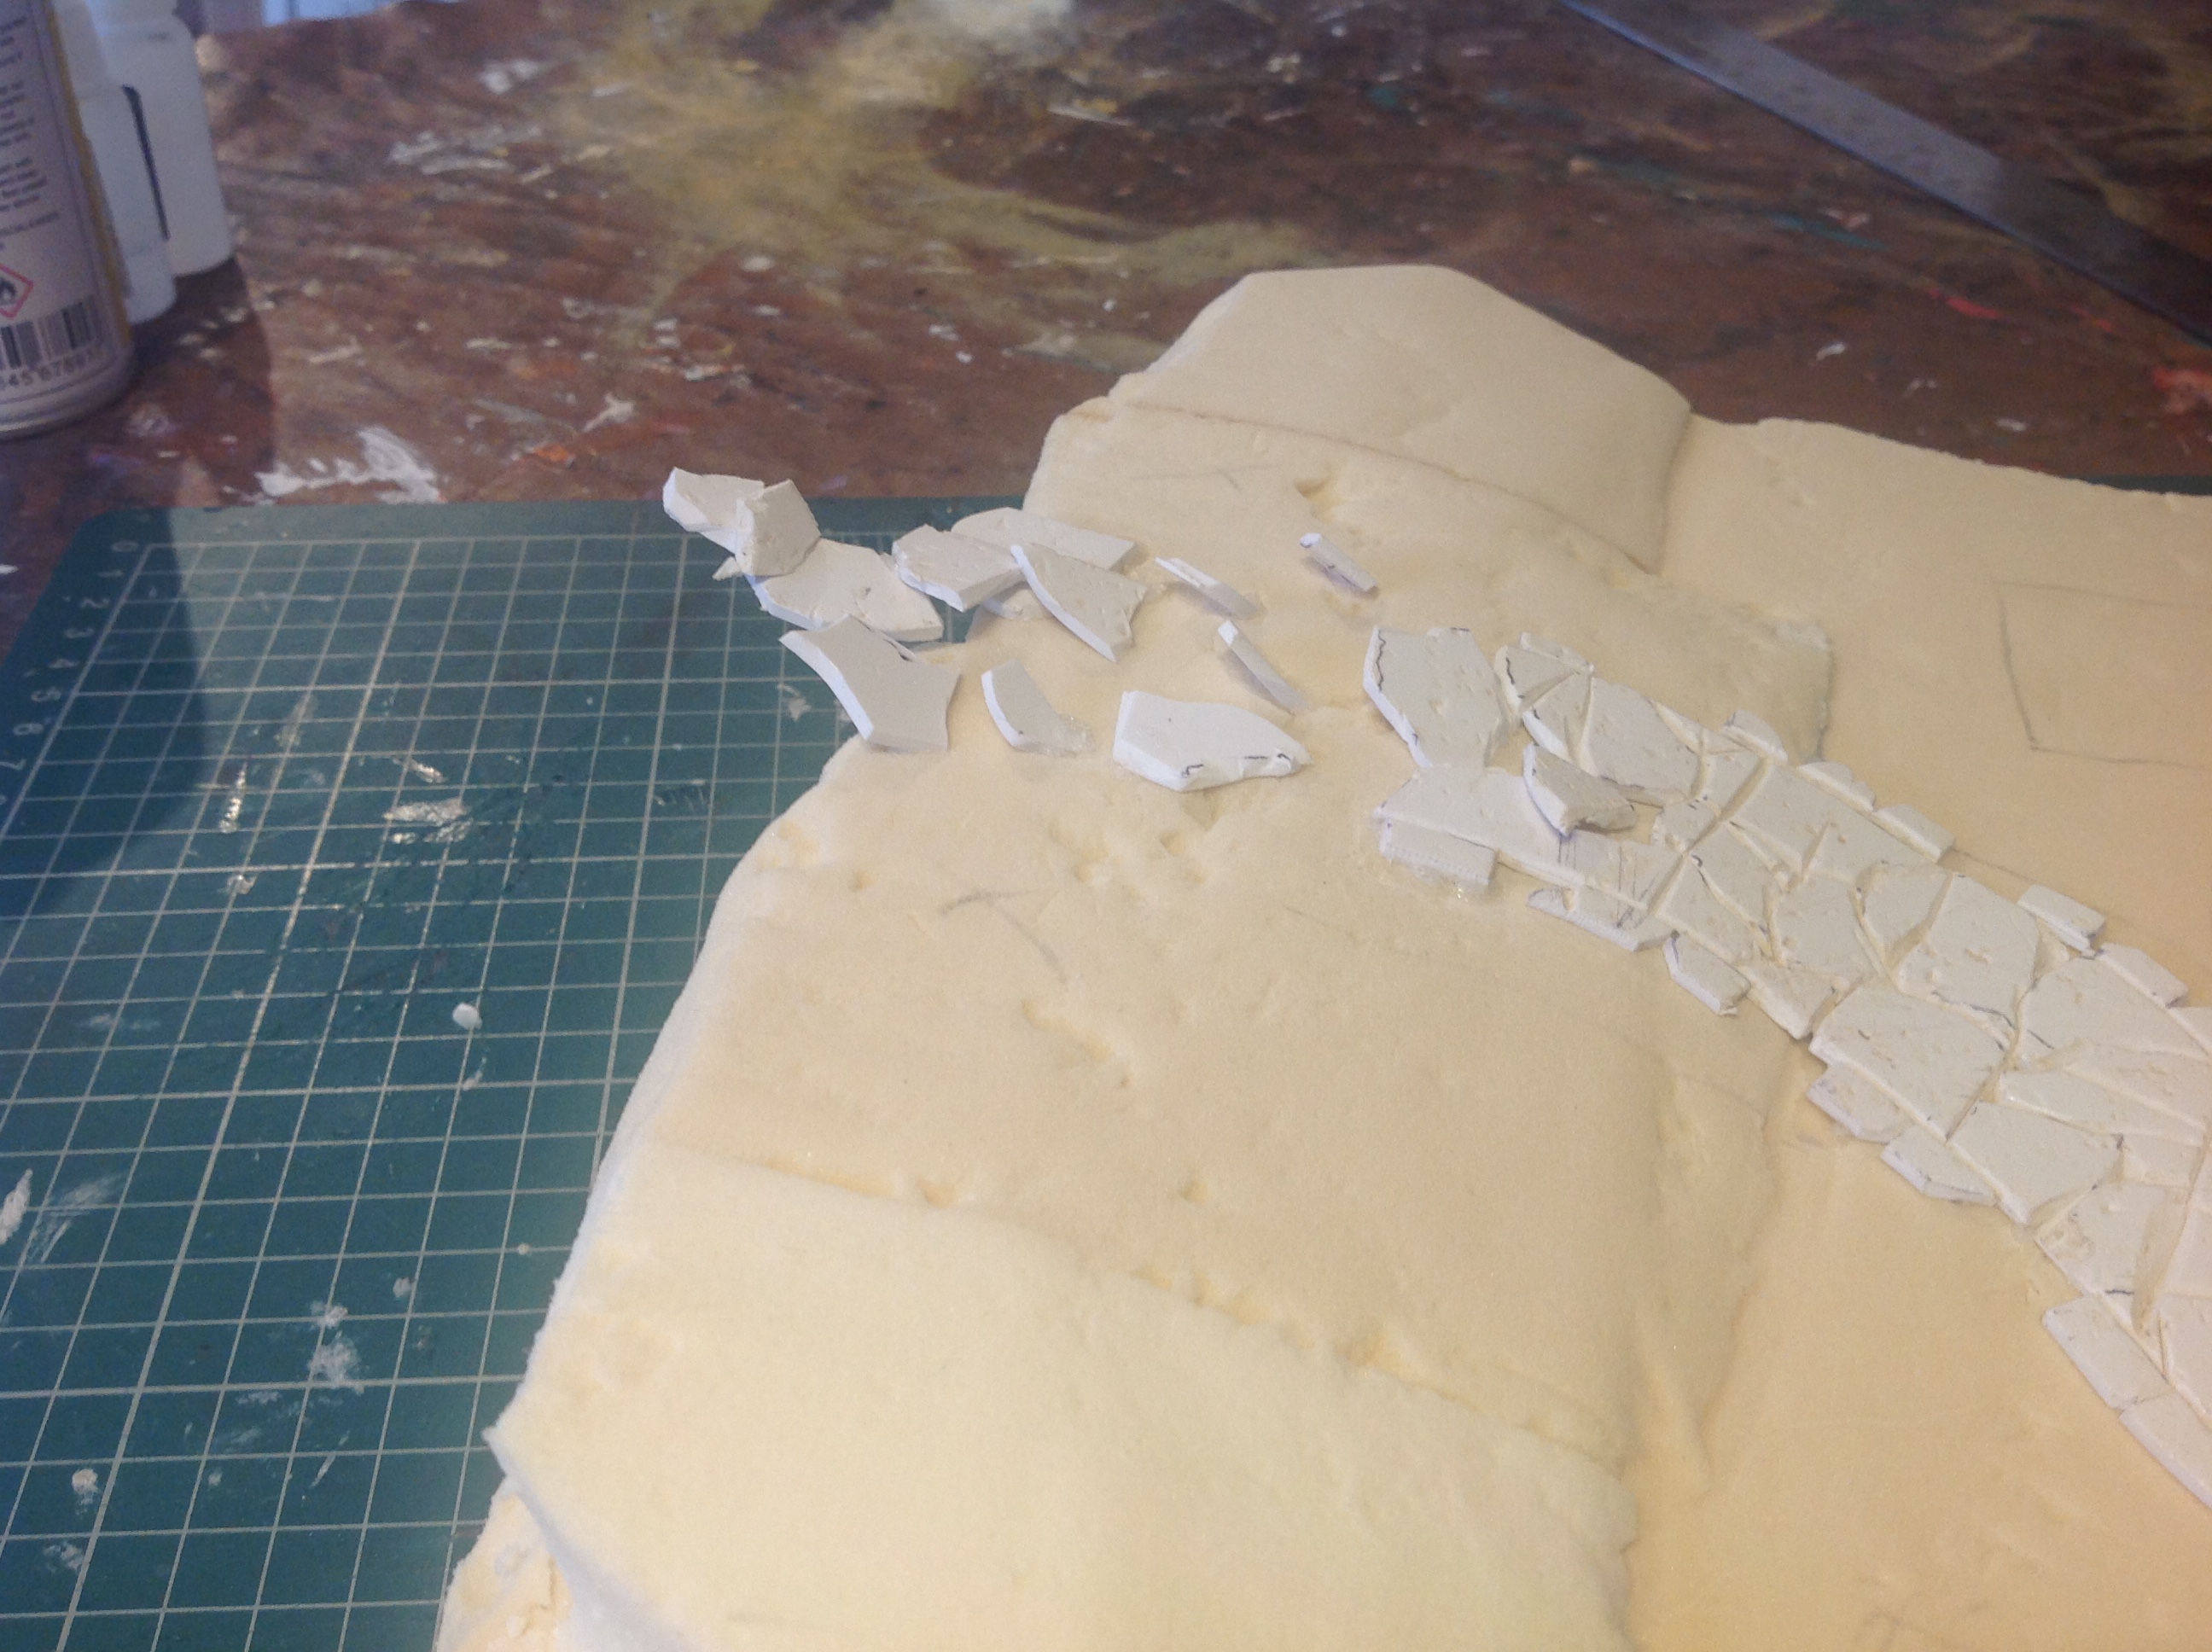
Paths are now glued in and as I worked on it I had an idea, the path is being sucked into the realm beyond.
Also covered the stairs and began to work out the best placement for the graves.

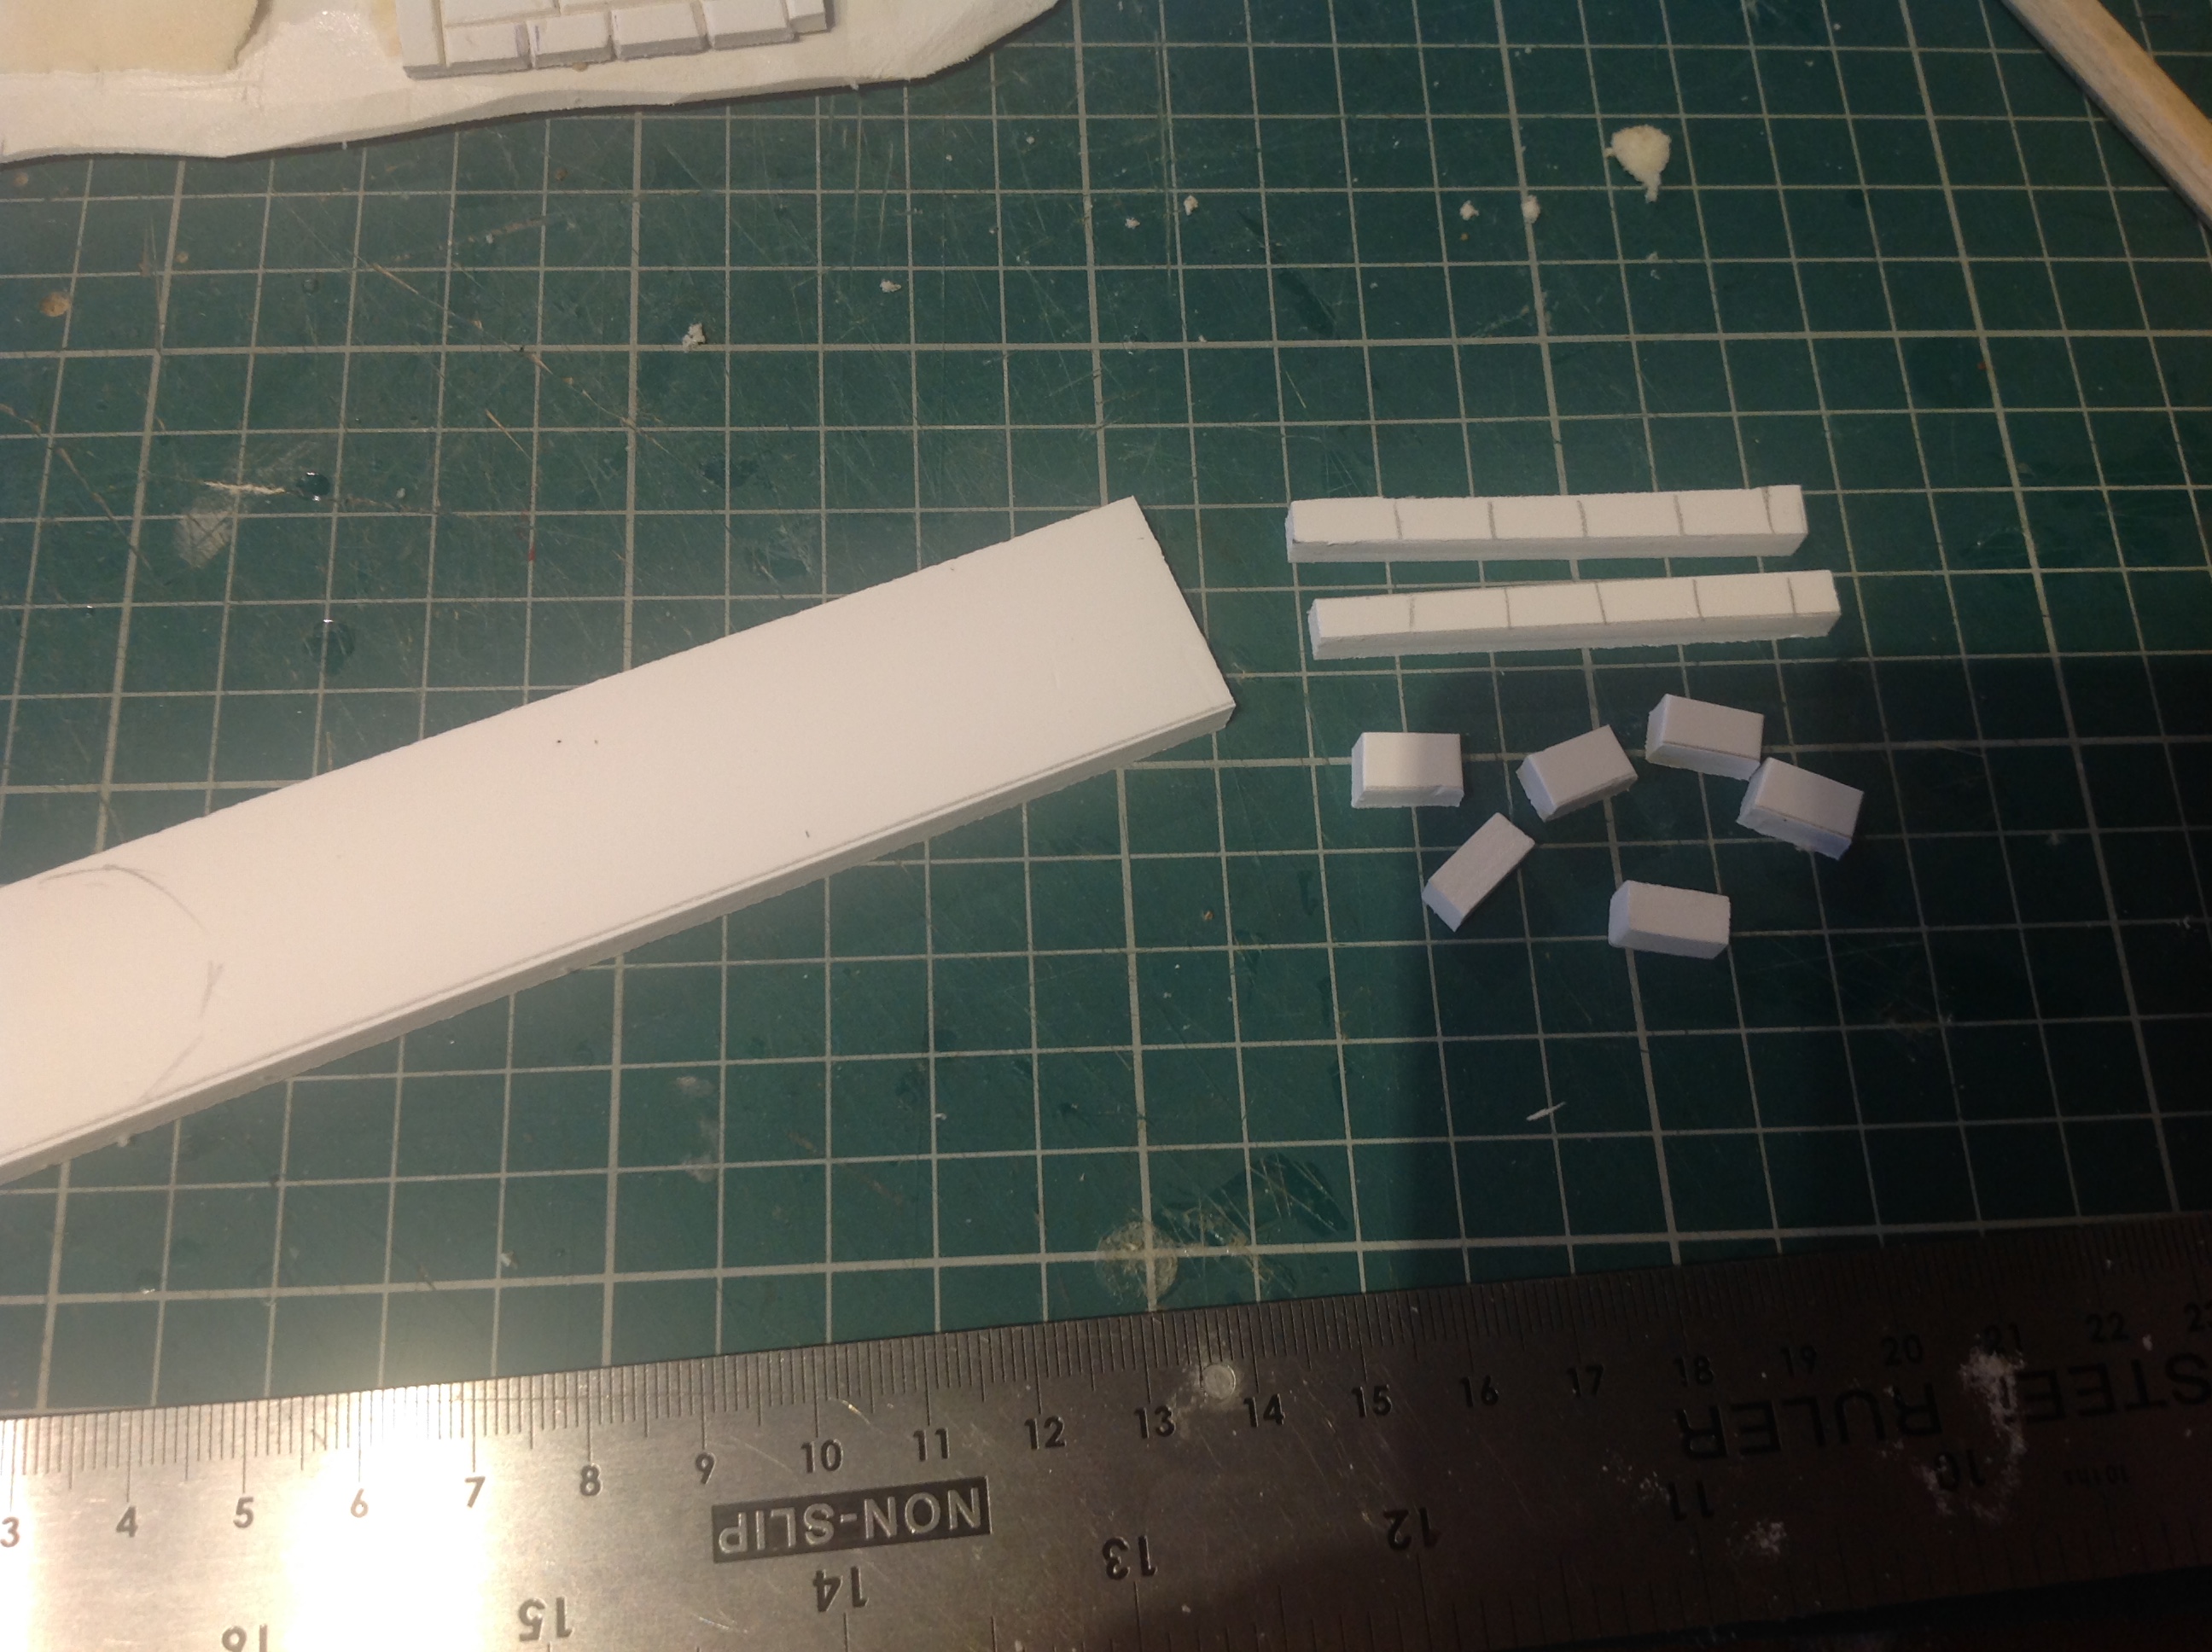
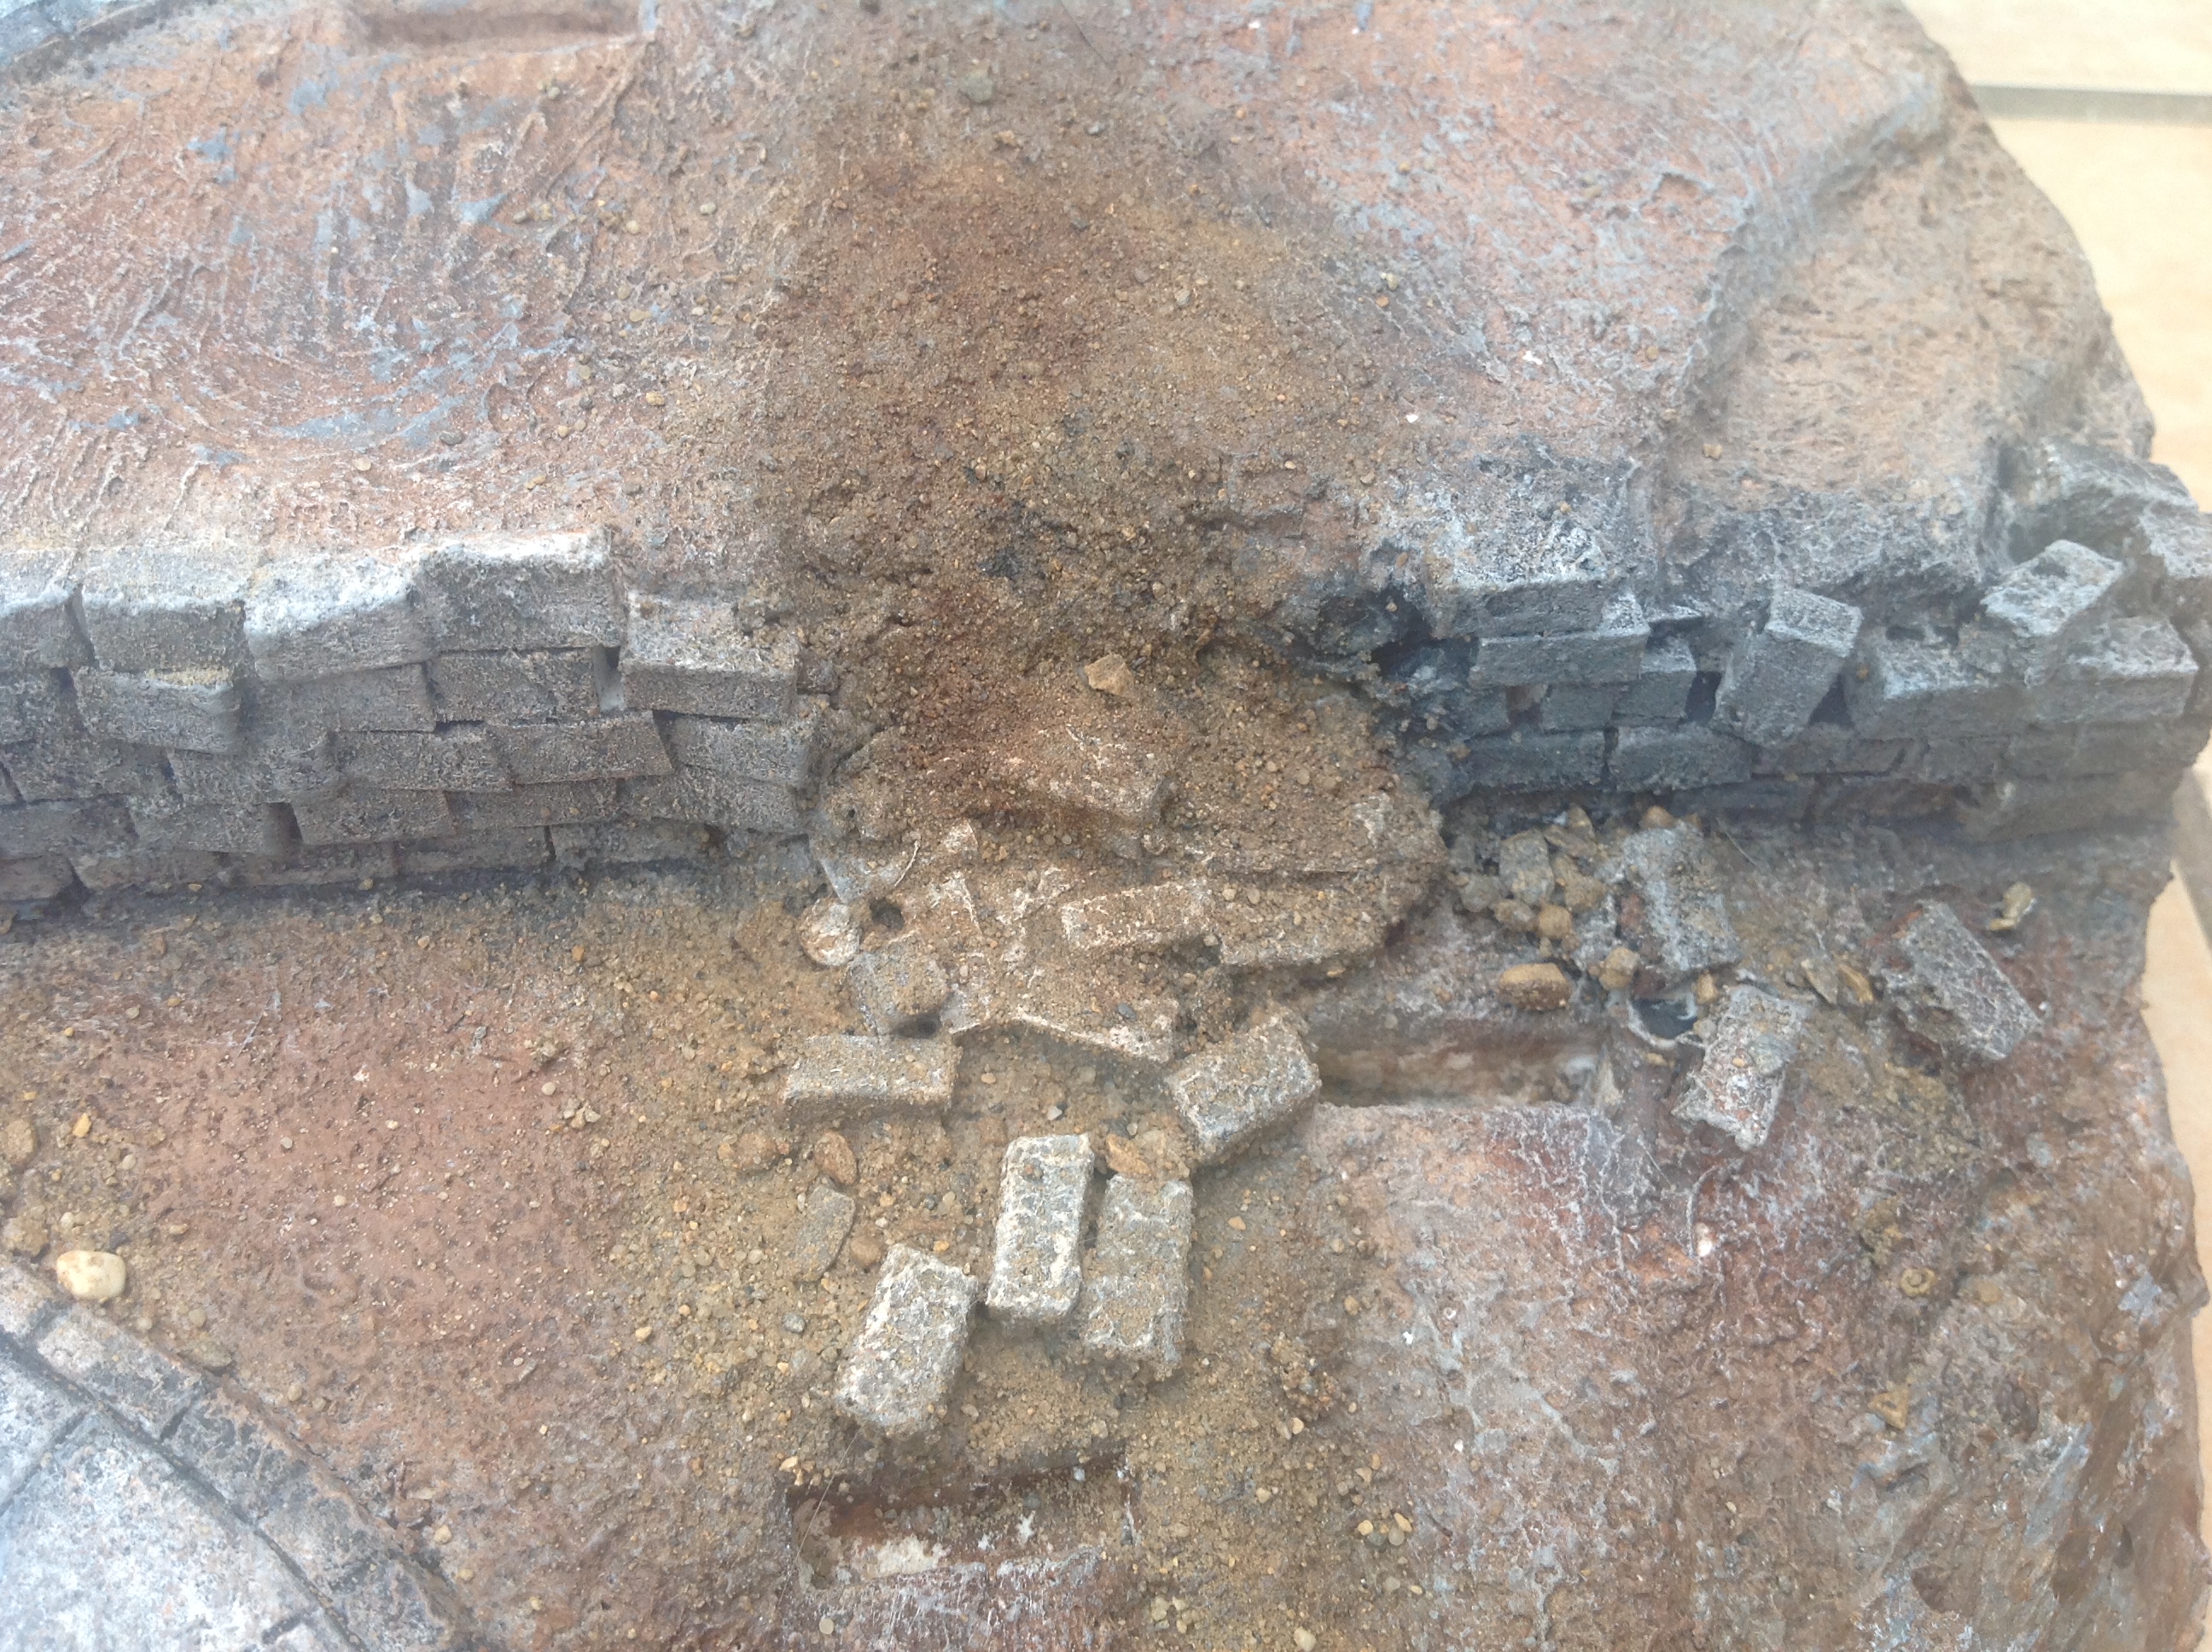
Holding back darkness, the retaining wall
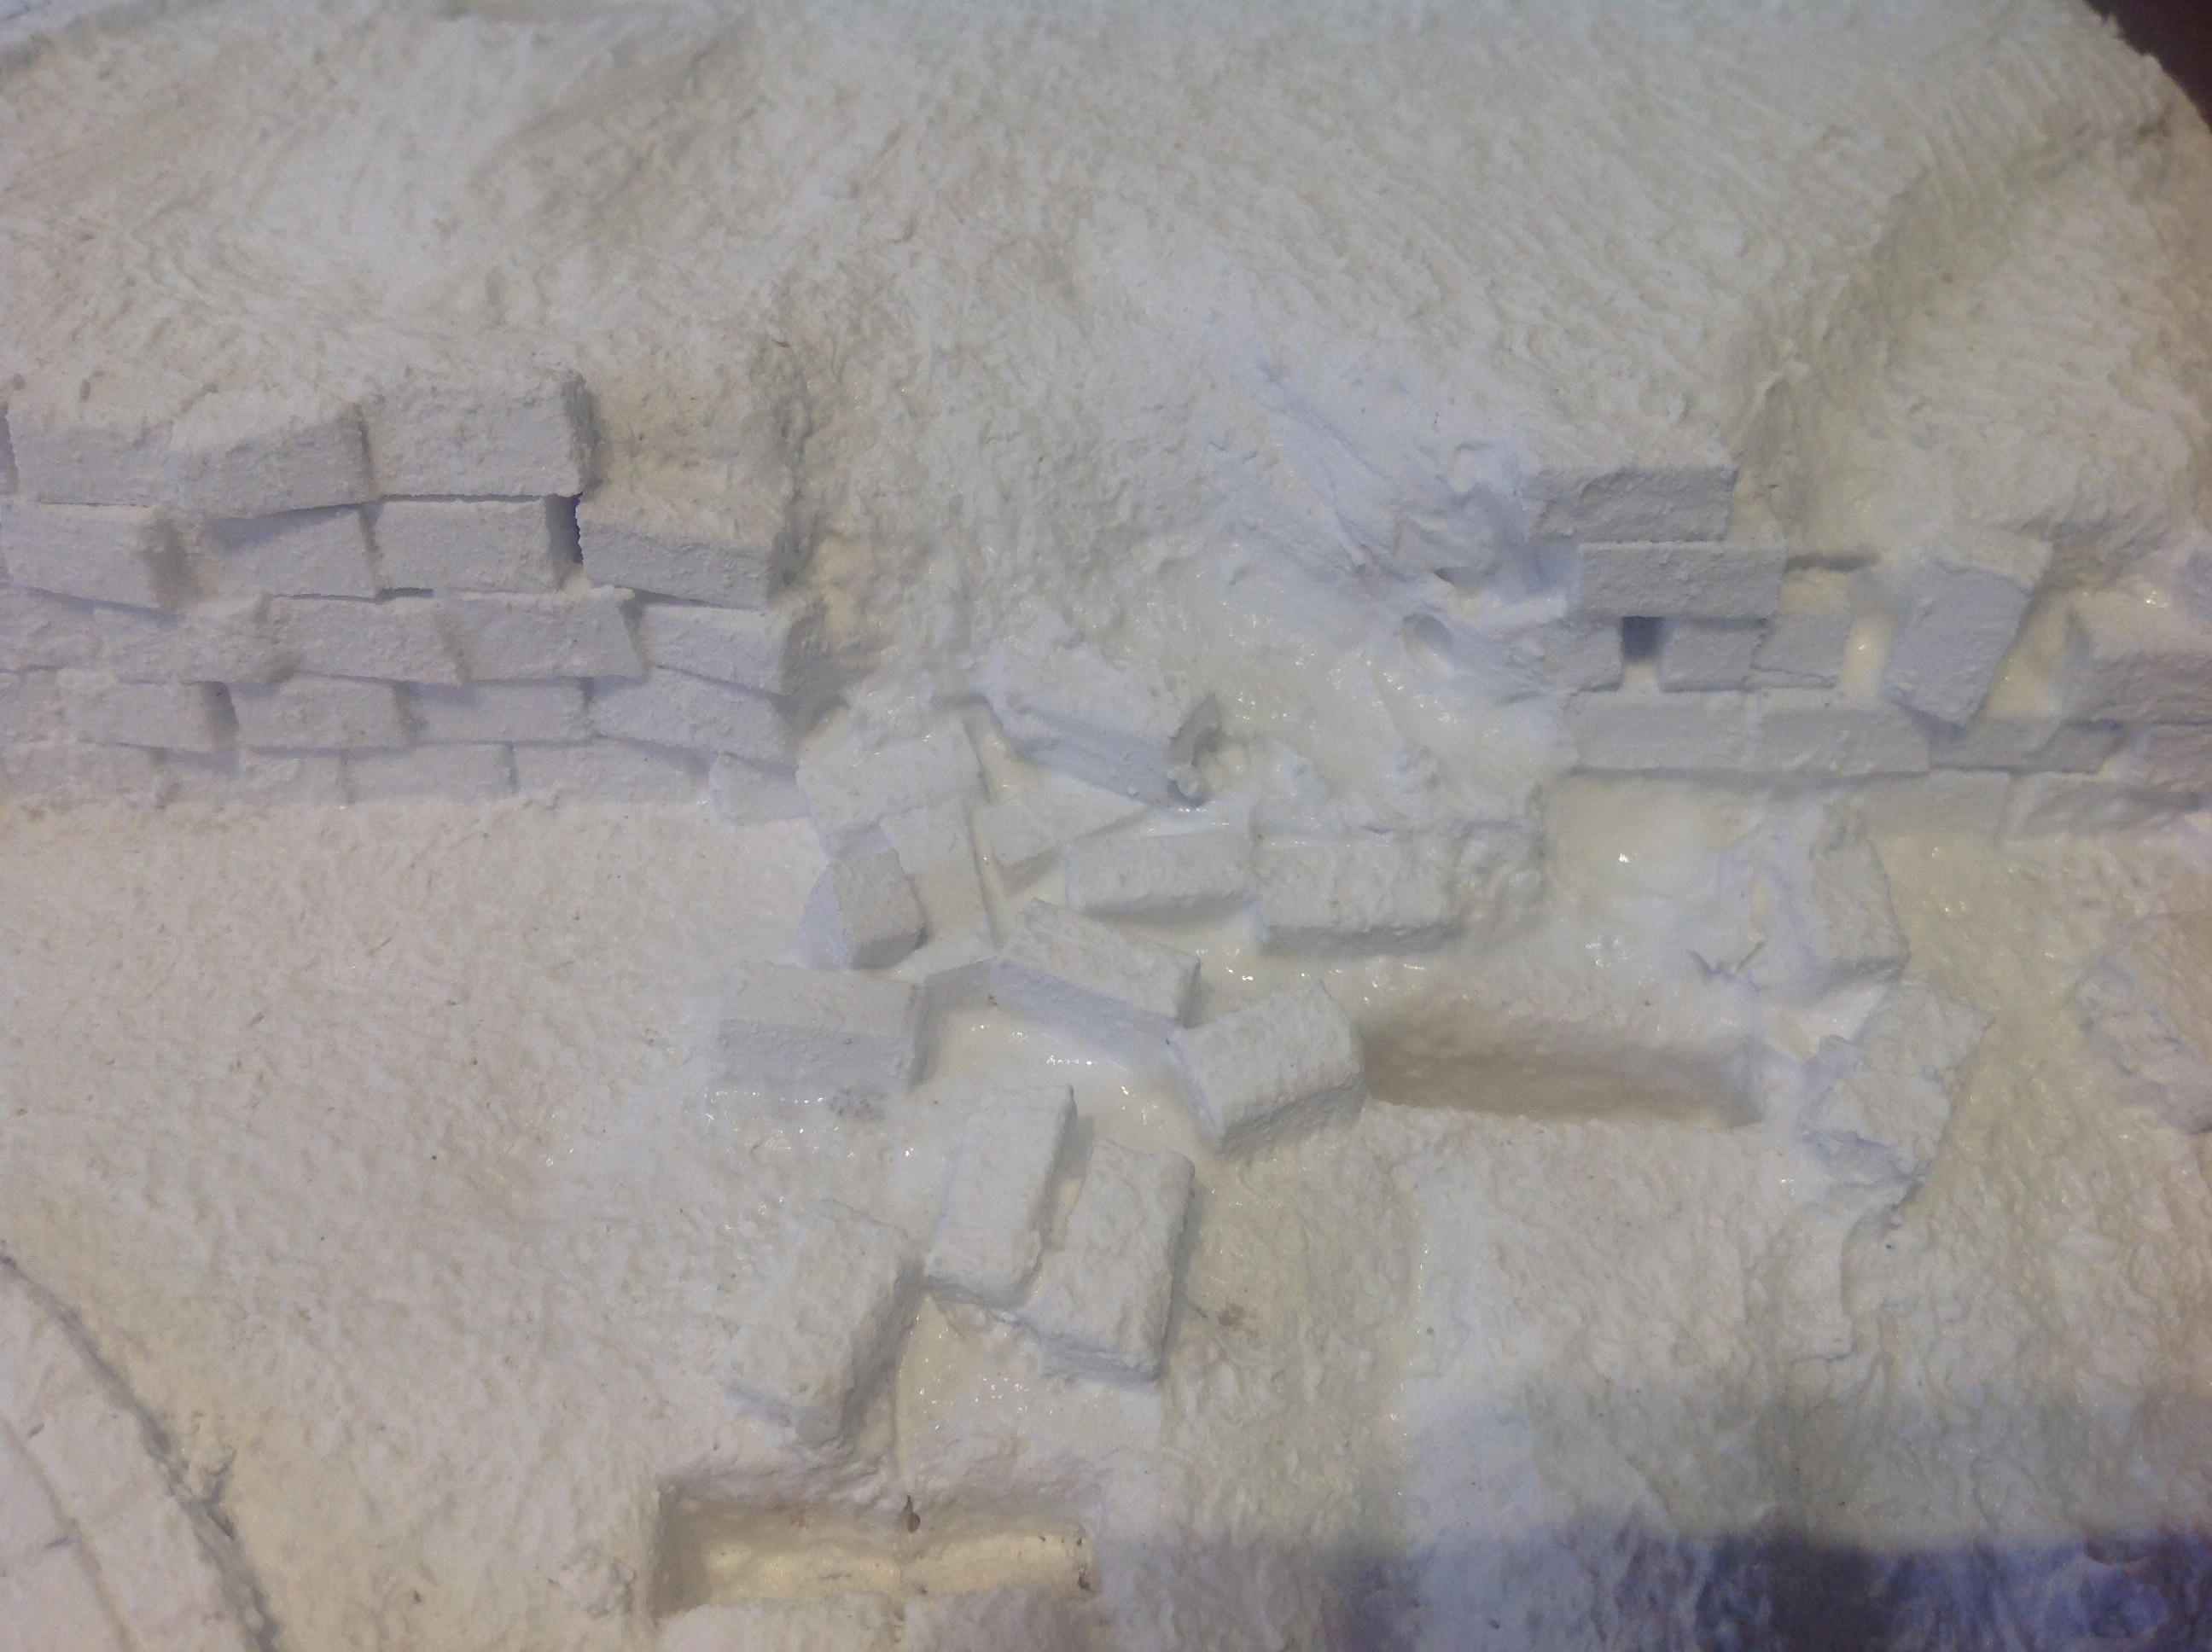
Using 5mm foamX I cut out a lode of 5x5x10 mm blocks, then without glue I built the wall, this was a bit fiddly. Once that was done I pushed two sections down, this might seam a bit of a odd way of doing it but I wanted to introduce a bit of randomness to the colapsed bit and the placement of the loose blocks.
Then using a super thin superglue I put dropps down the back of the wall and then hit it with activating spray
Tending the ground part 3
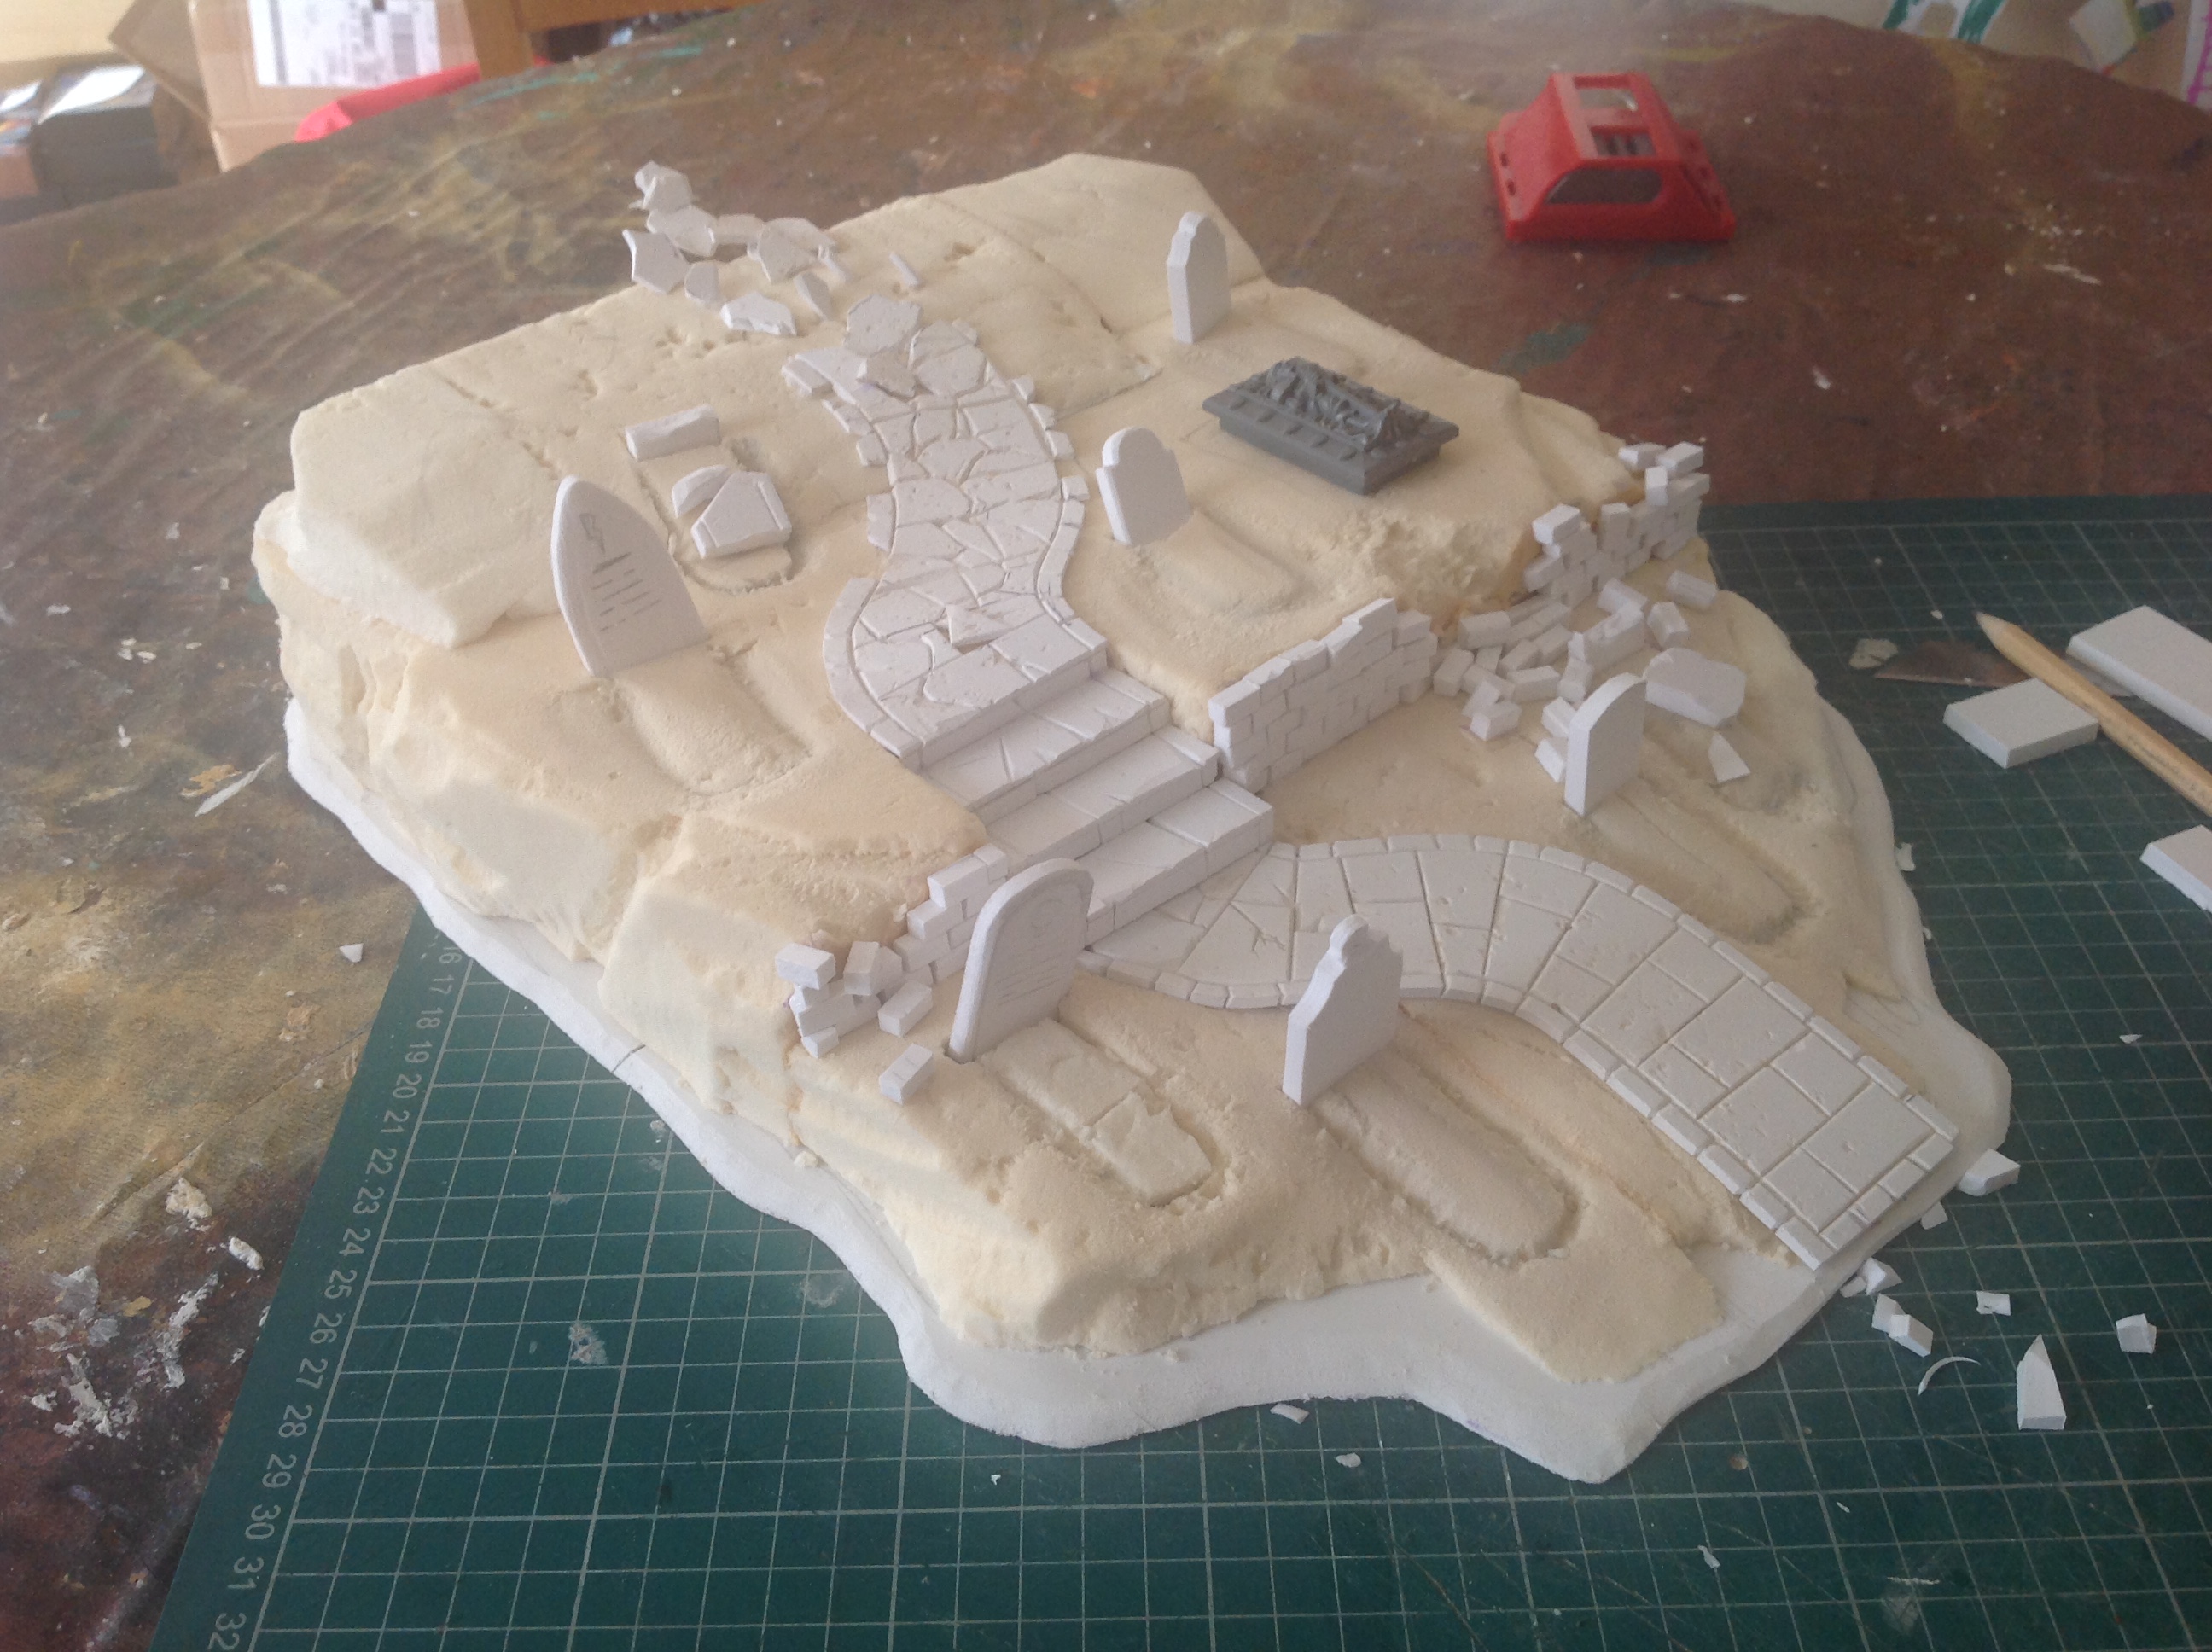
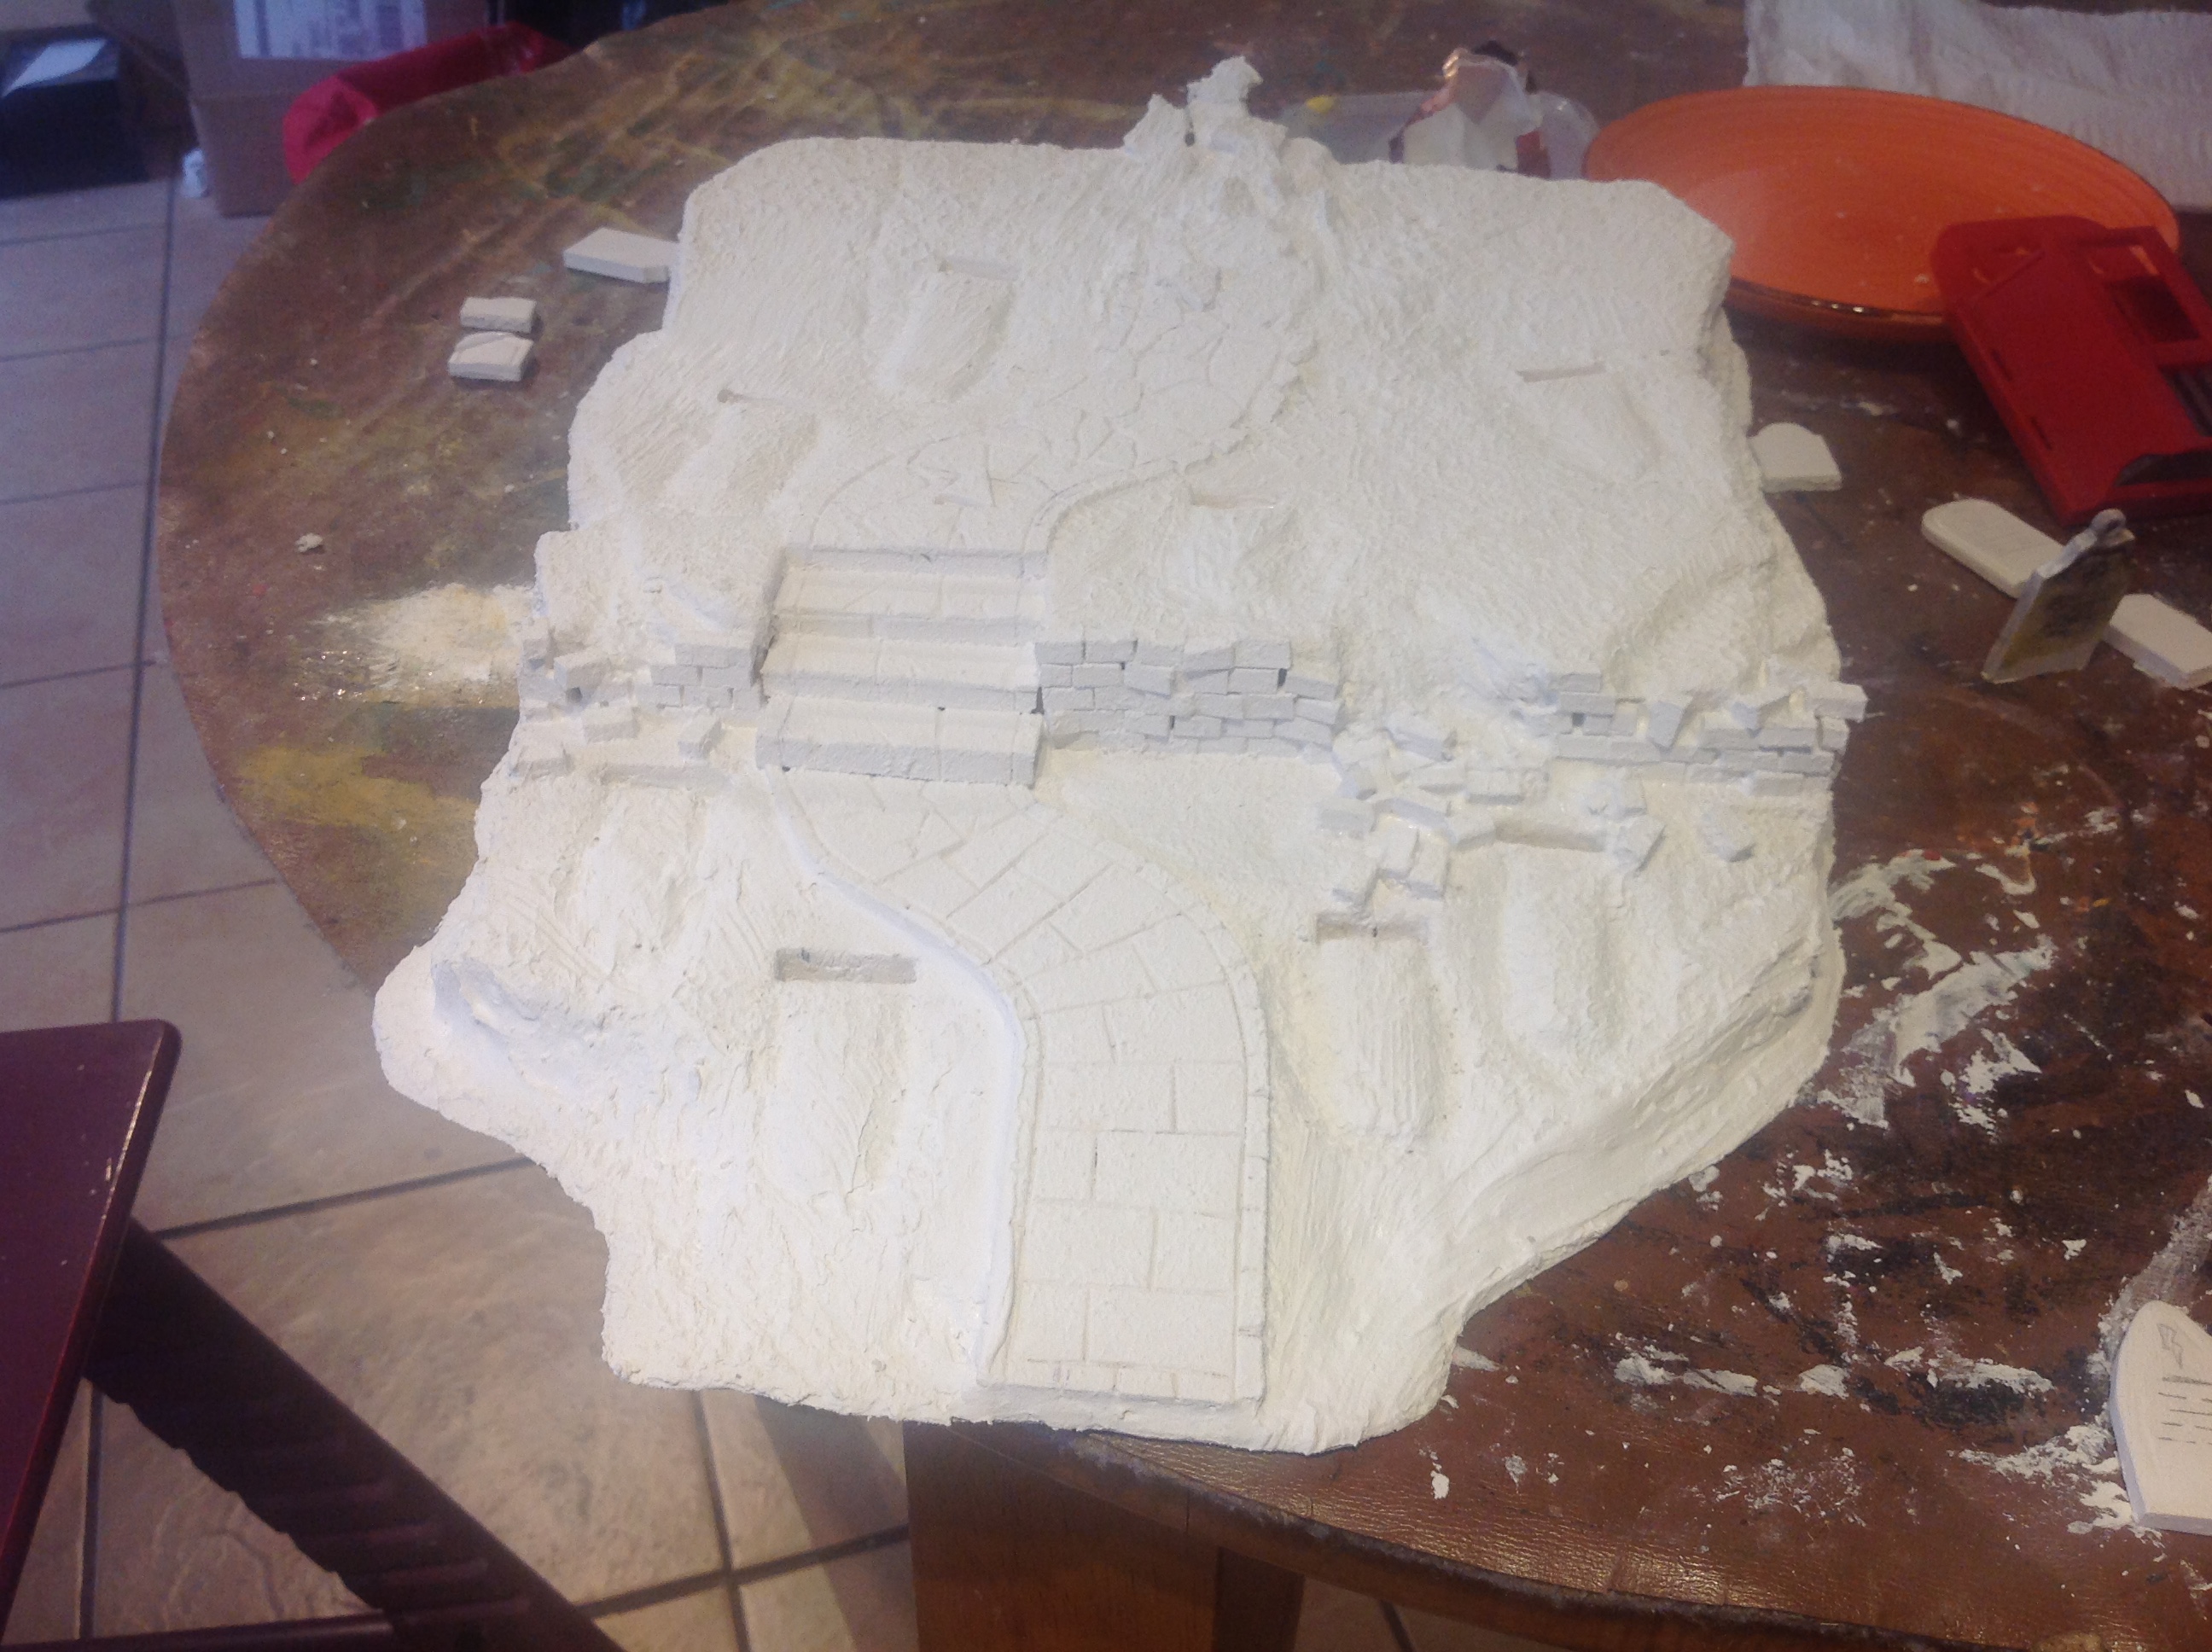
Decided on the position of the graves and cut headstones from the 5mm foamX also dugout a classic hero quest sarcophagus lid to add in.
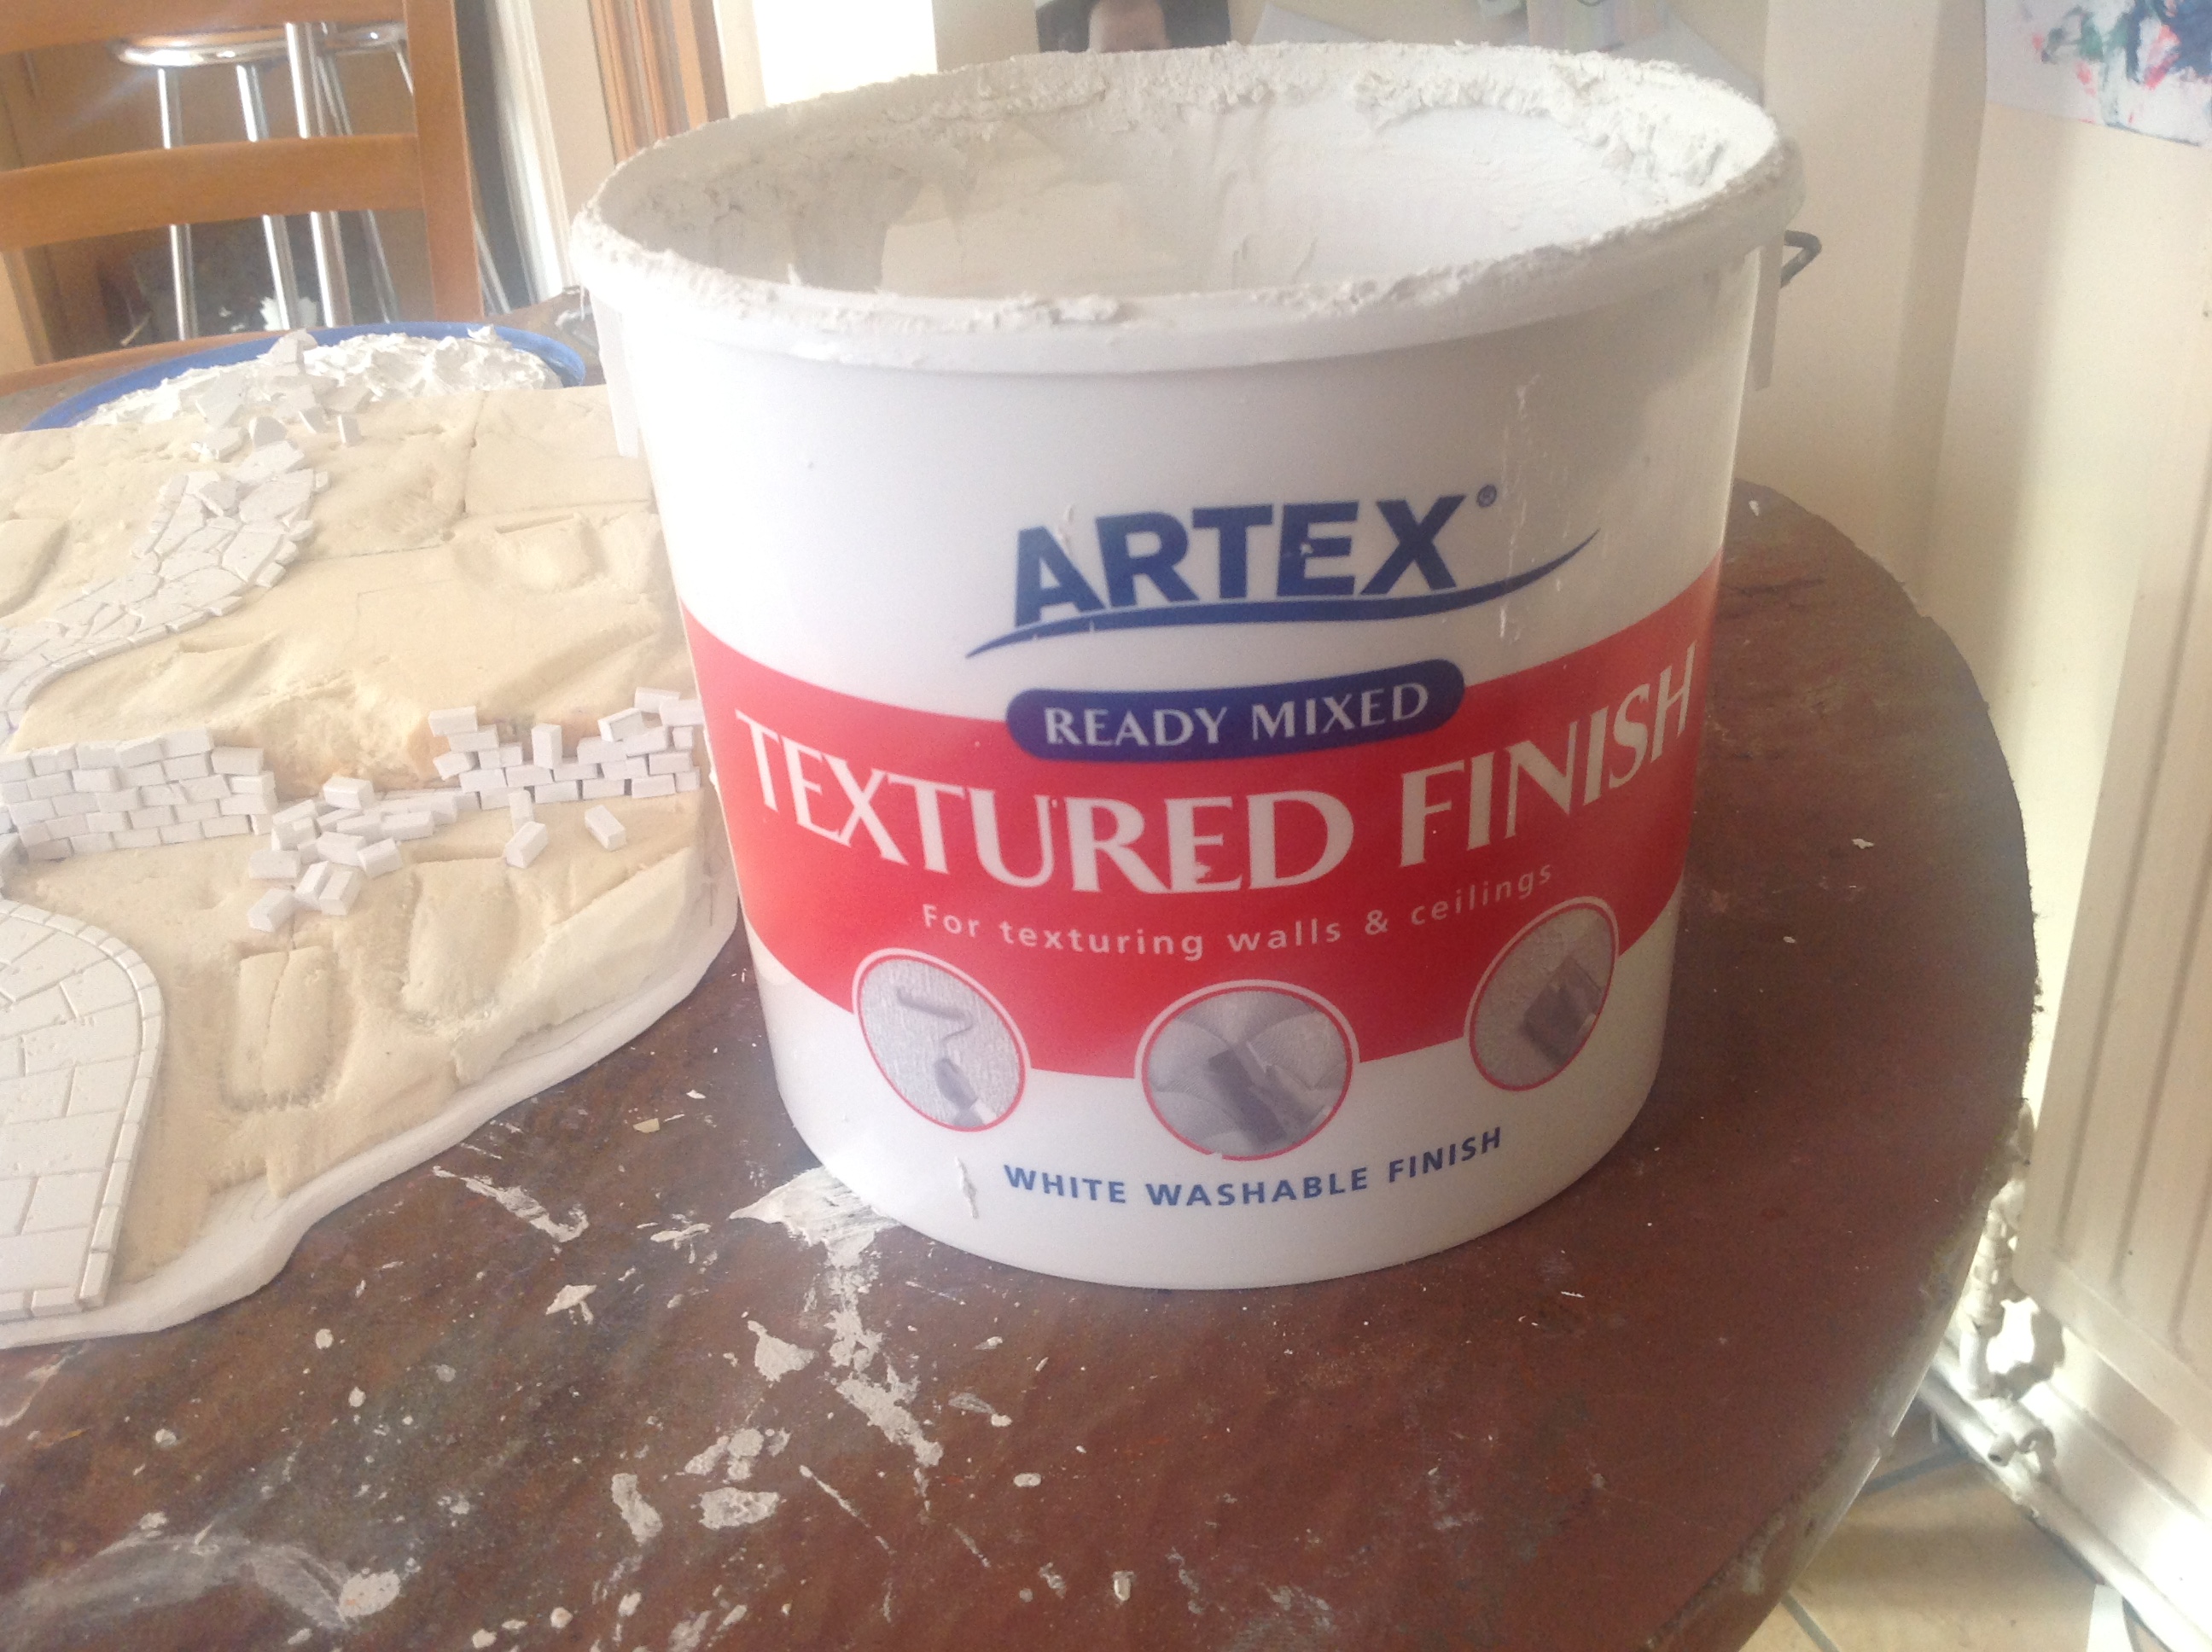
once I was happy with the layout I removed all the stones and gave the whole thing a coating of artex, this will seal and harden the extruded foam insulation, it will also be a undercoat. At the same time I am able to add some additional textures to the pathways and wall.
Tending to the ground part 4
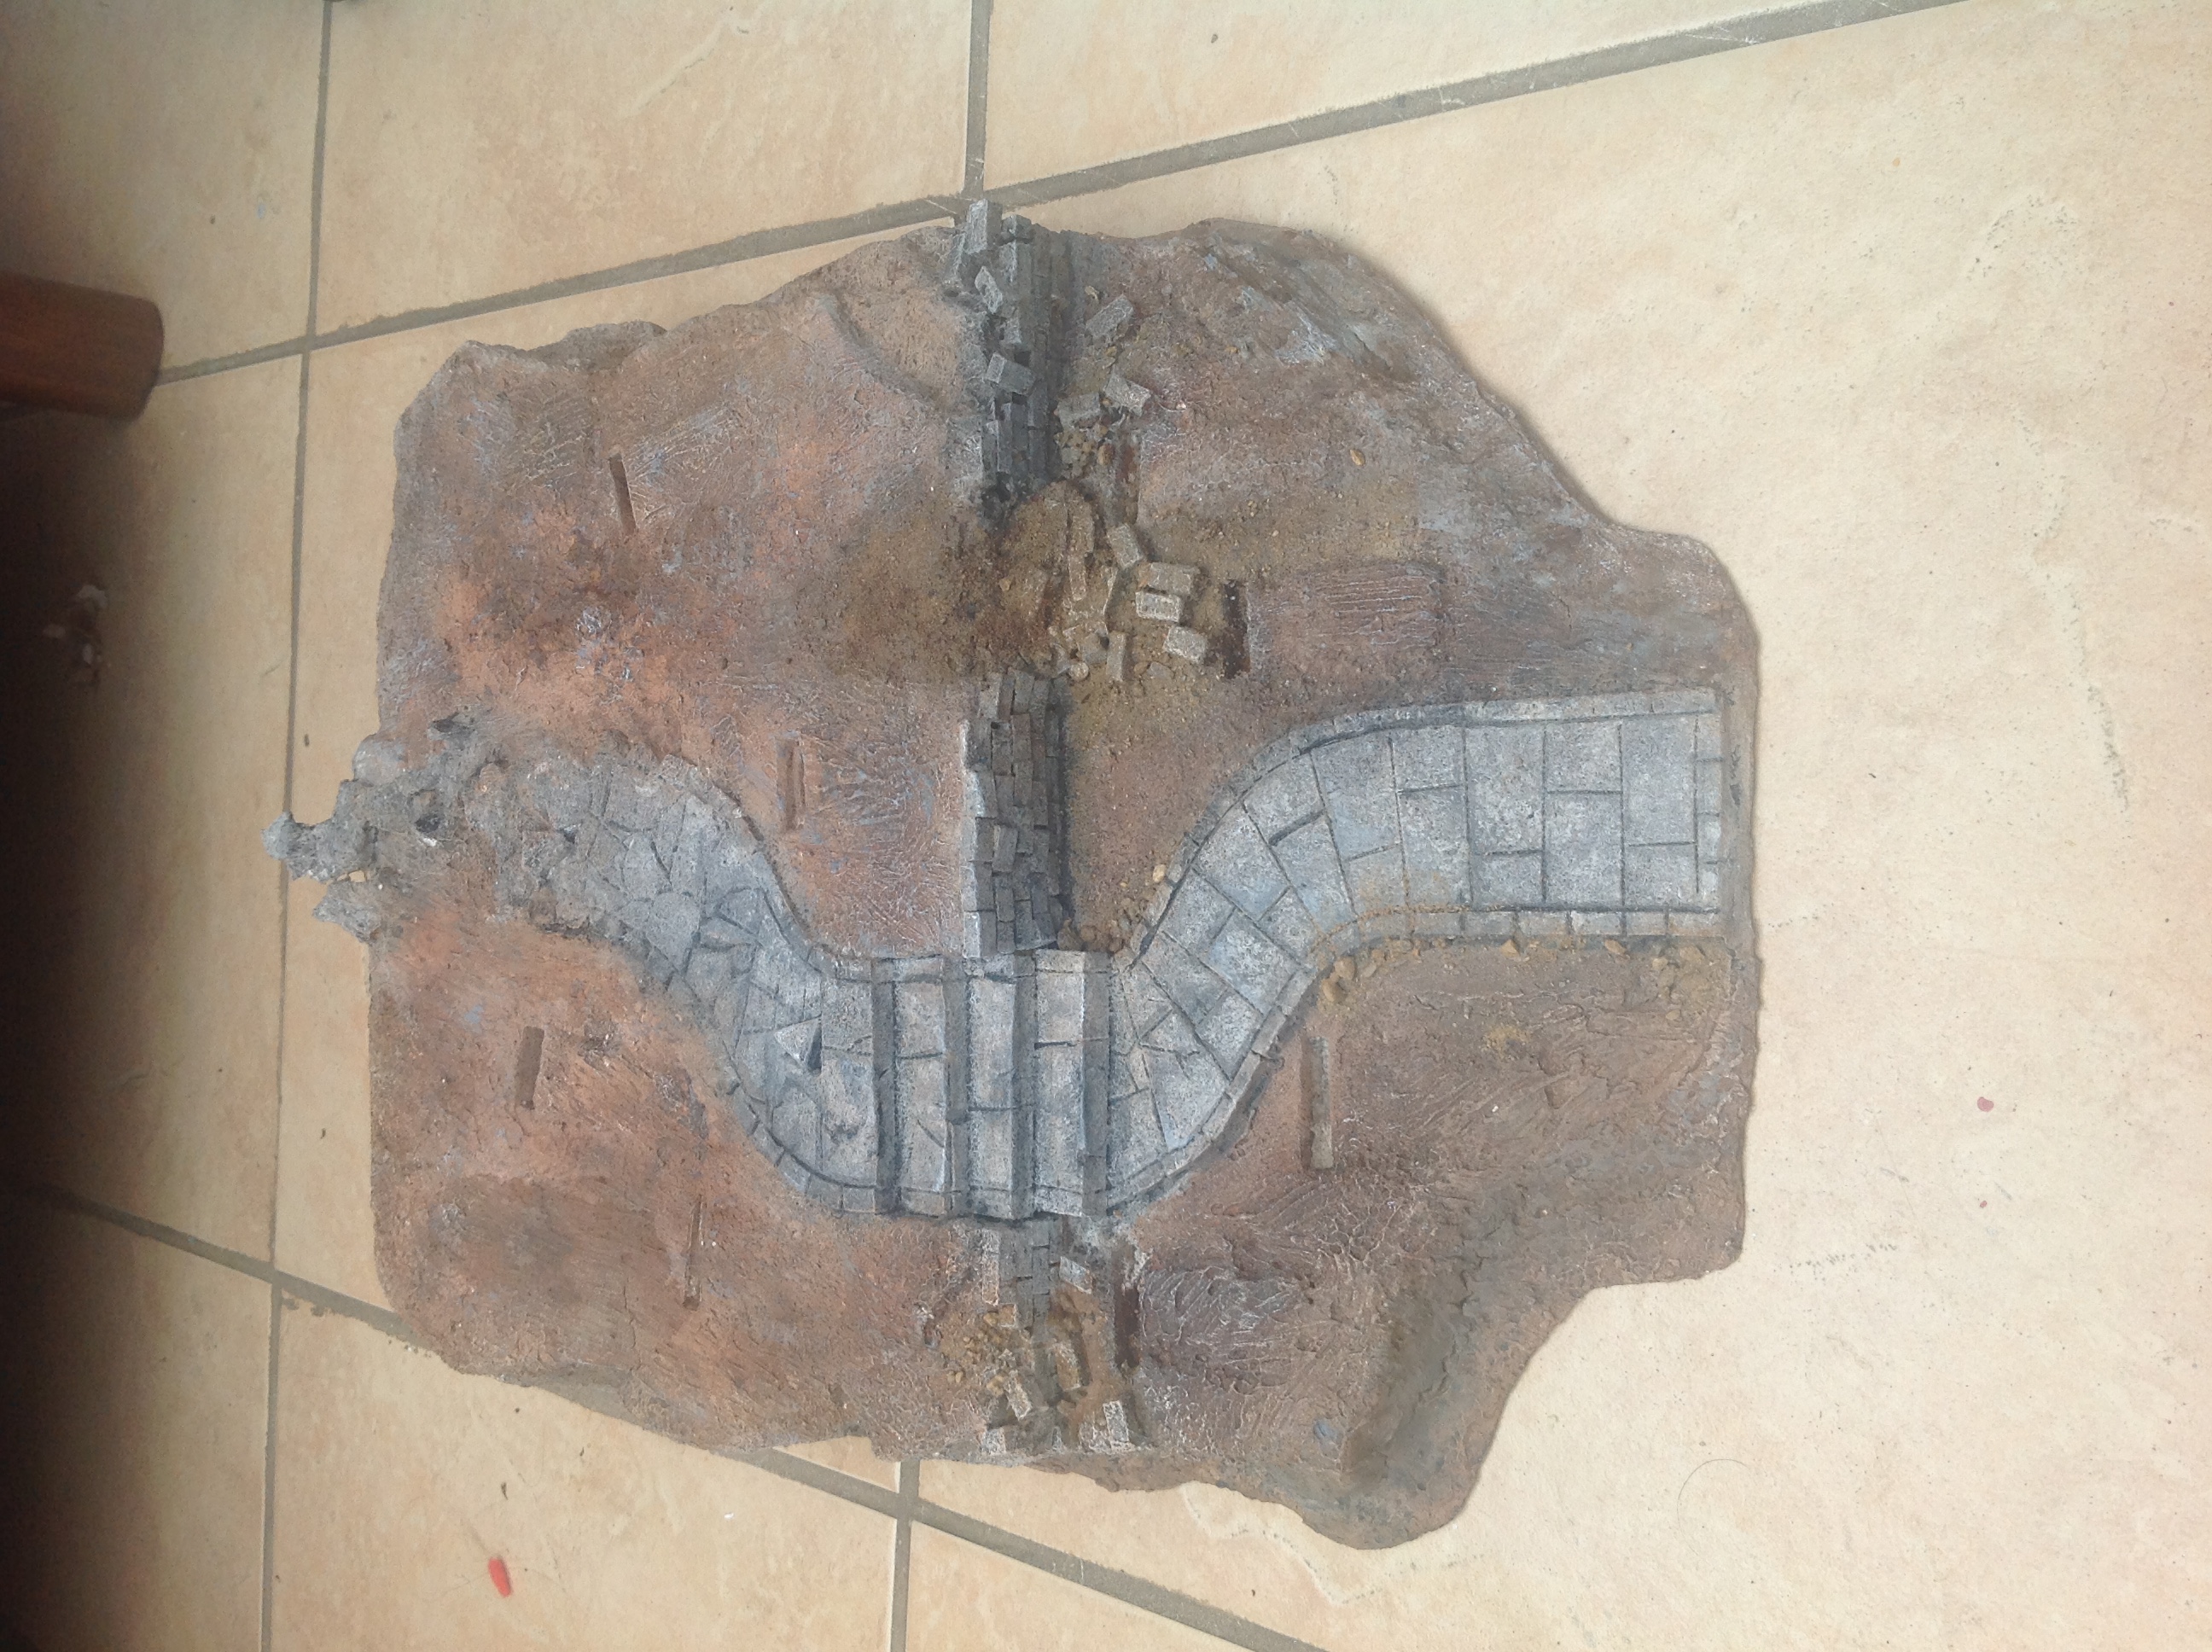
With the artex dry I have put some colours on it along with some sand and stones around the colapsed wall. This is all very quickly don.
the plan is to flock the top so I didn’t need to be to neet At this stage.


![Play WW2 Commando Operations With Butcher & Bolt [Updated]](https://images.beastsofwar.com/2026/03/relaunch-600-338.jpg)


