


![NO Weekender Or Cult Of Games XLBS This Weekend [Updated]](https://images.beastsofwar.com/2026/03/No_Weekender_and_XLBS_this_Weekend-225-127.jpg)


Identifying, Updating, and Painting a Bucket of 90’s Era 40K Orks with Lawnor


Recommendations: 269
About the Project
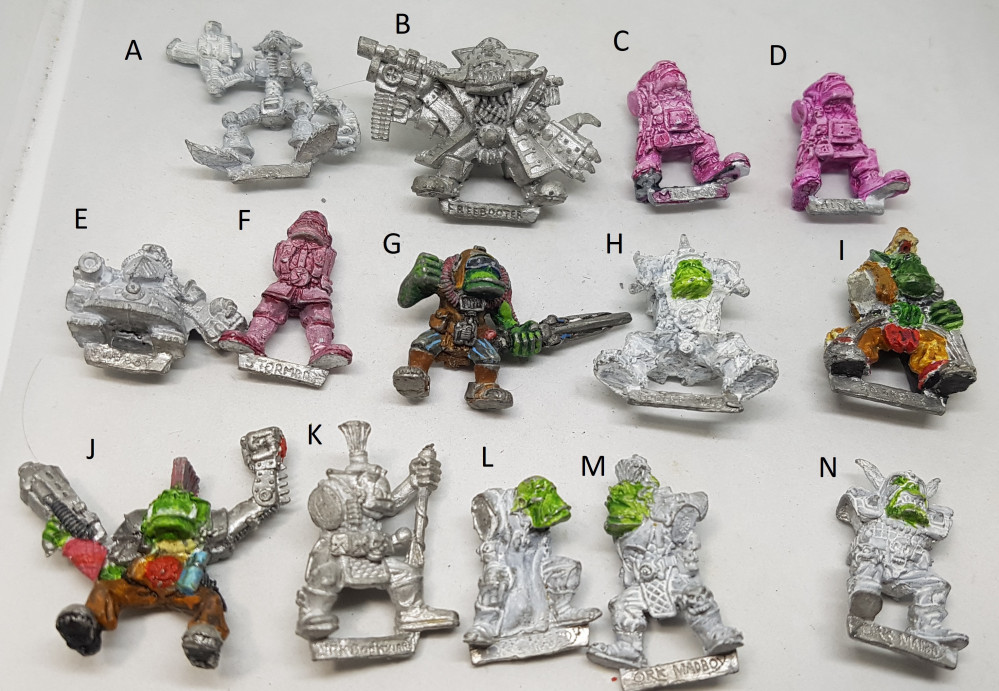
I was handed a bucket of 40k orks many years ago and as I've nearly painted everything else I own its time to get these guys in order so I can paint them when the time comes. I do not know 40k so I don't know my Goffs from my Evil Sunz, or my Snotlings from my Gretchins. I need help and advice with a lot of basics to understand what I have and to prevent me building and painting something I may wish to undo later.
Related Game: Warhammer 40,000
Related Company: Games Workshop
Related Genre: Science Fiction
This Project is Completed
Prep Work - Stripping
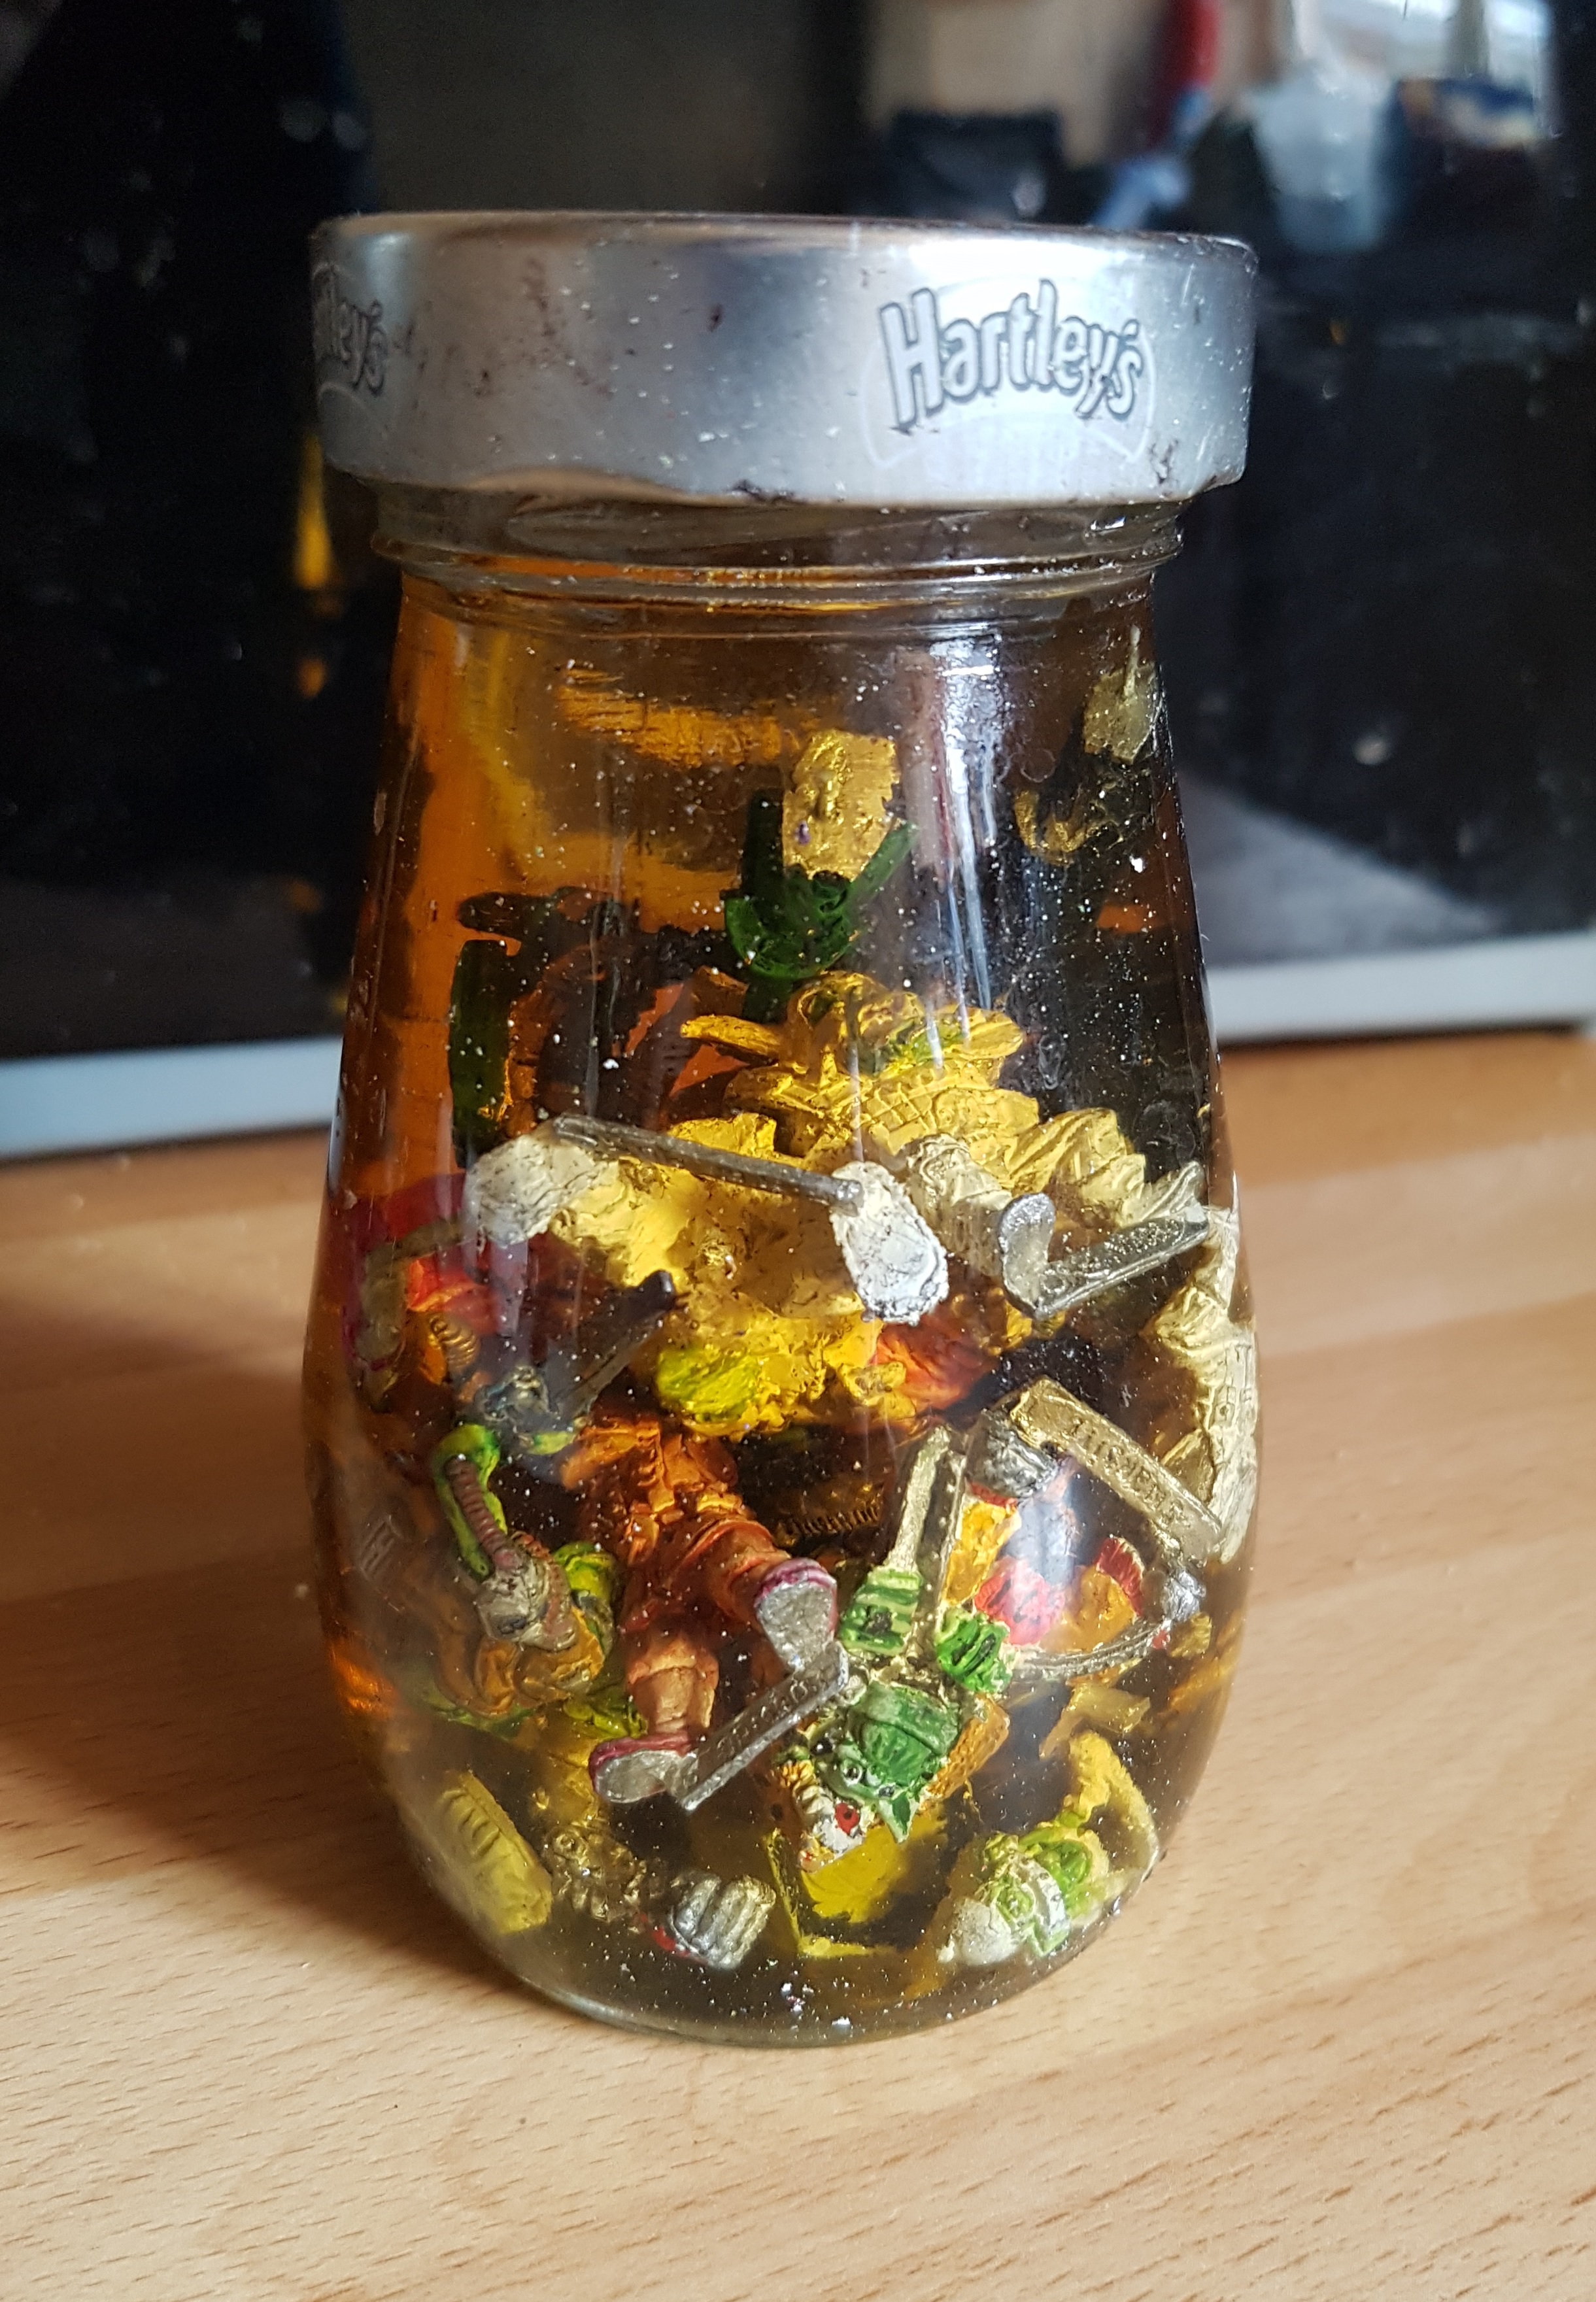
The paint job on these models is incomplete at best, poor and damaged at worst so I’ve stripped the paint off before I begin. I gathered all the orcs (And a couple of other models in need) and put them in an old jam jar and filled it up with straight Dettol and left them for about 30 hours. 24 is the minimum I’d leave for. Longer is always welcome, but be warned of any plastics or resins. Always test non metals first as they may dissolve or warp. Saving sprue for this purpose or asking online is better than destroying your models. I did not risk my plastics this time. I’ll paint over them. Their paint is thin enough and I’ve no idea how Dettol safe 27 year old plastics are.
Do not ever dilute the Dettol. Dettol + Acrylic paint + water = Black sticky tar like goop that you will never remove.
After they’ve had a good long soak I took them outside and scrubbed them down with an old toothbrush, keeping them well away from any water. If you’ve never done this before and are planning on it you need to do it somewhere you can make a mess and wear clothes you don’t mind ruining. As you scrub the solution will get filthy fast. As you scrub you will spray it everywhere no matter how careful you are. Anywhere it touches will get permanently stained. You have been warned.
Once again, keep water away from the minis while scrubbing the paint off. If you add a little water you will have problems, especially if you dunk it back in to the Dettol for a quick swish. However once you are done you can take the Models to the sink and blast them under the tap and scrub them again (After cleaning that toothbrush as best you can) to clean them off. Scrubbing in warm soapy water can also be a good idea. This is safe as you are replacing the Dettol with water really quickly, and not mixing the two together.
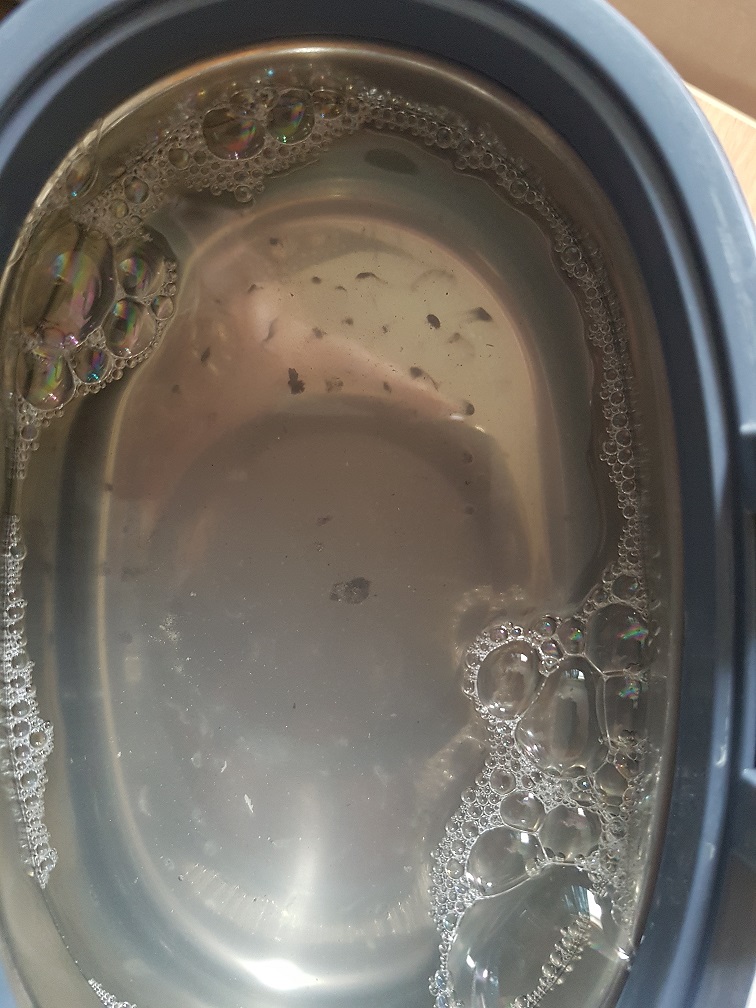
When you are done you will have some shiny models, but likely have some black gunk built up in the hard to reach parts. I’ve always just lived with this and painted over it. Its been unavoidable. Recently I’ve been reading online about people stripping paint with the help of an Ultrasonic Cleaner. I didn’t want to ruin mine by putting the Dettol/paint mix inside it, but I decided to use it now. I put some hot soapy water in mine and then added the models for a final clean. I put them through its 3 minute cycle many times while painting something else and they do look a lot better. It hasn’t gotten everything but its cleaned them up more than I could have manually. You can see the dirt at the bottom of the baths.
If anyone has tried doing the initial stripping in an Ultrasonic Cleaner I’d love to hear how it went and how clean they got the bath afterwards. Would you risk cleaning your airbrush in it afterwards?

Prep Work - Repairs, Upgrades, Building and Priming
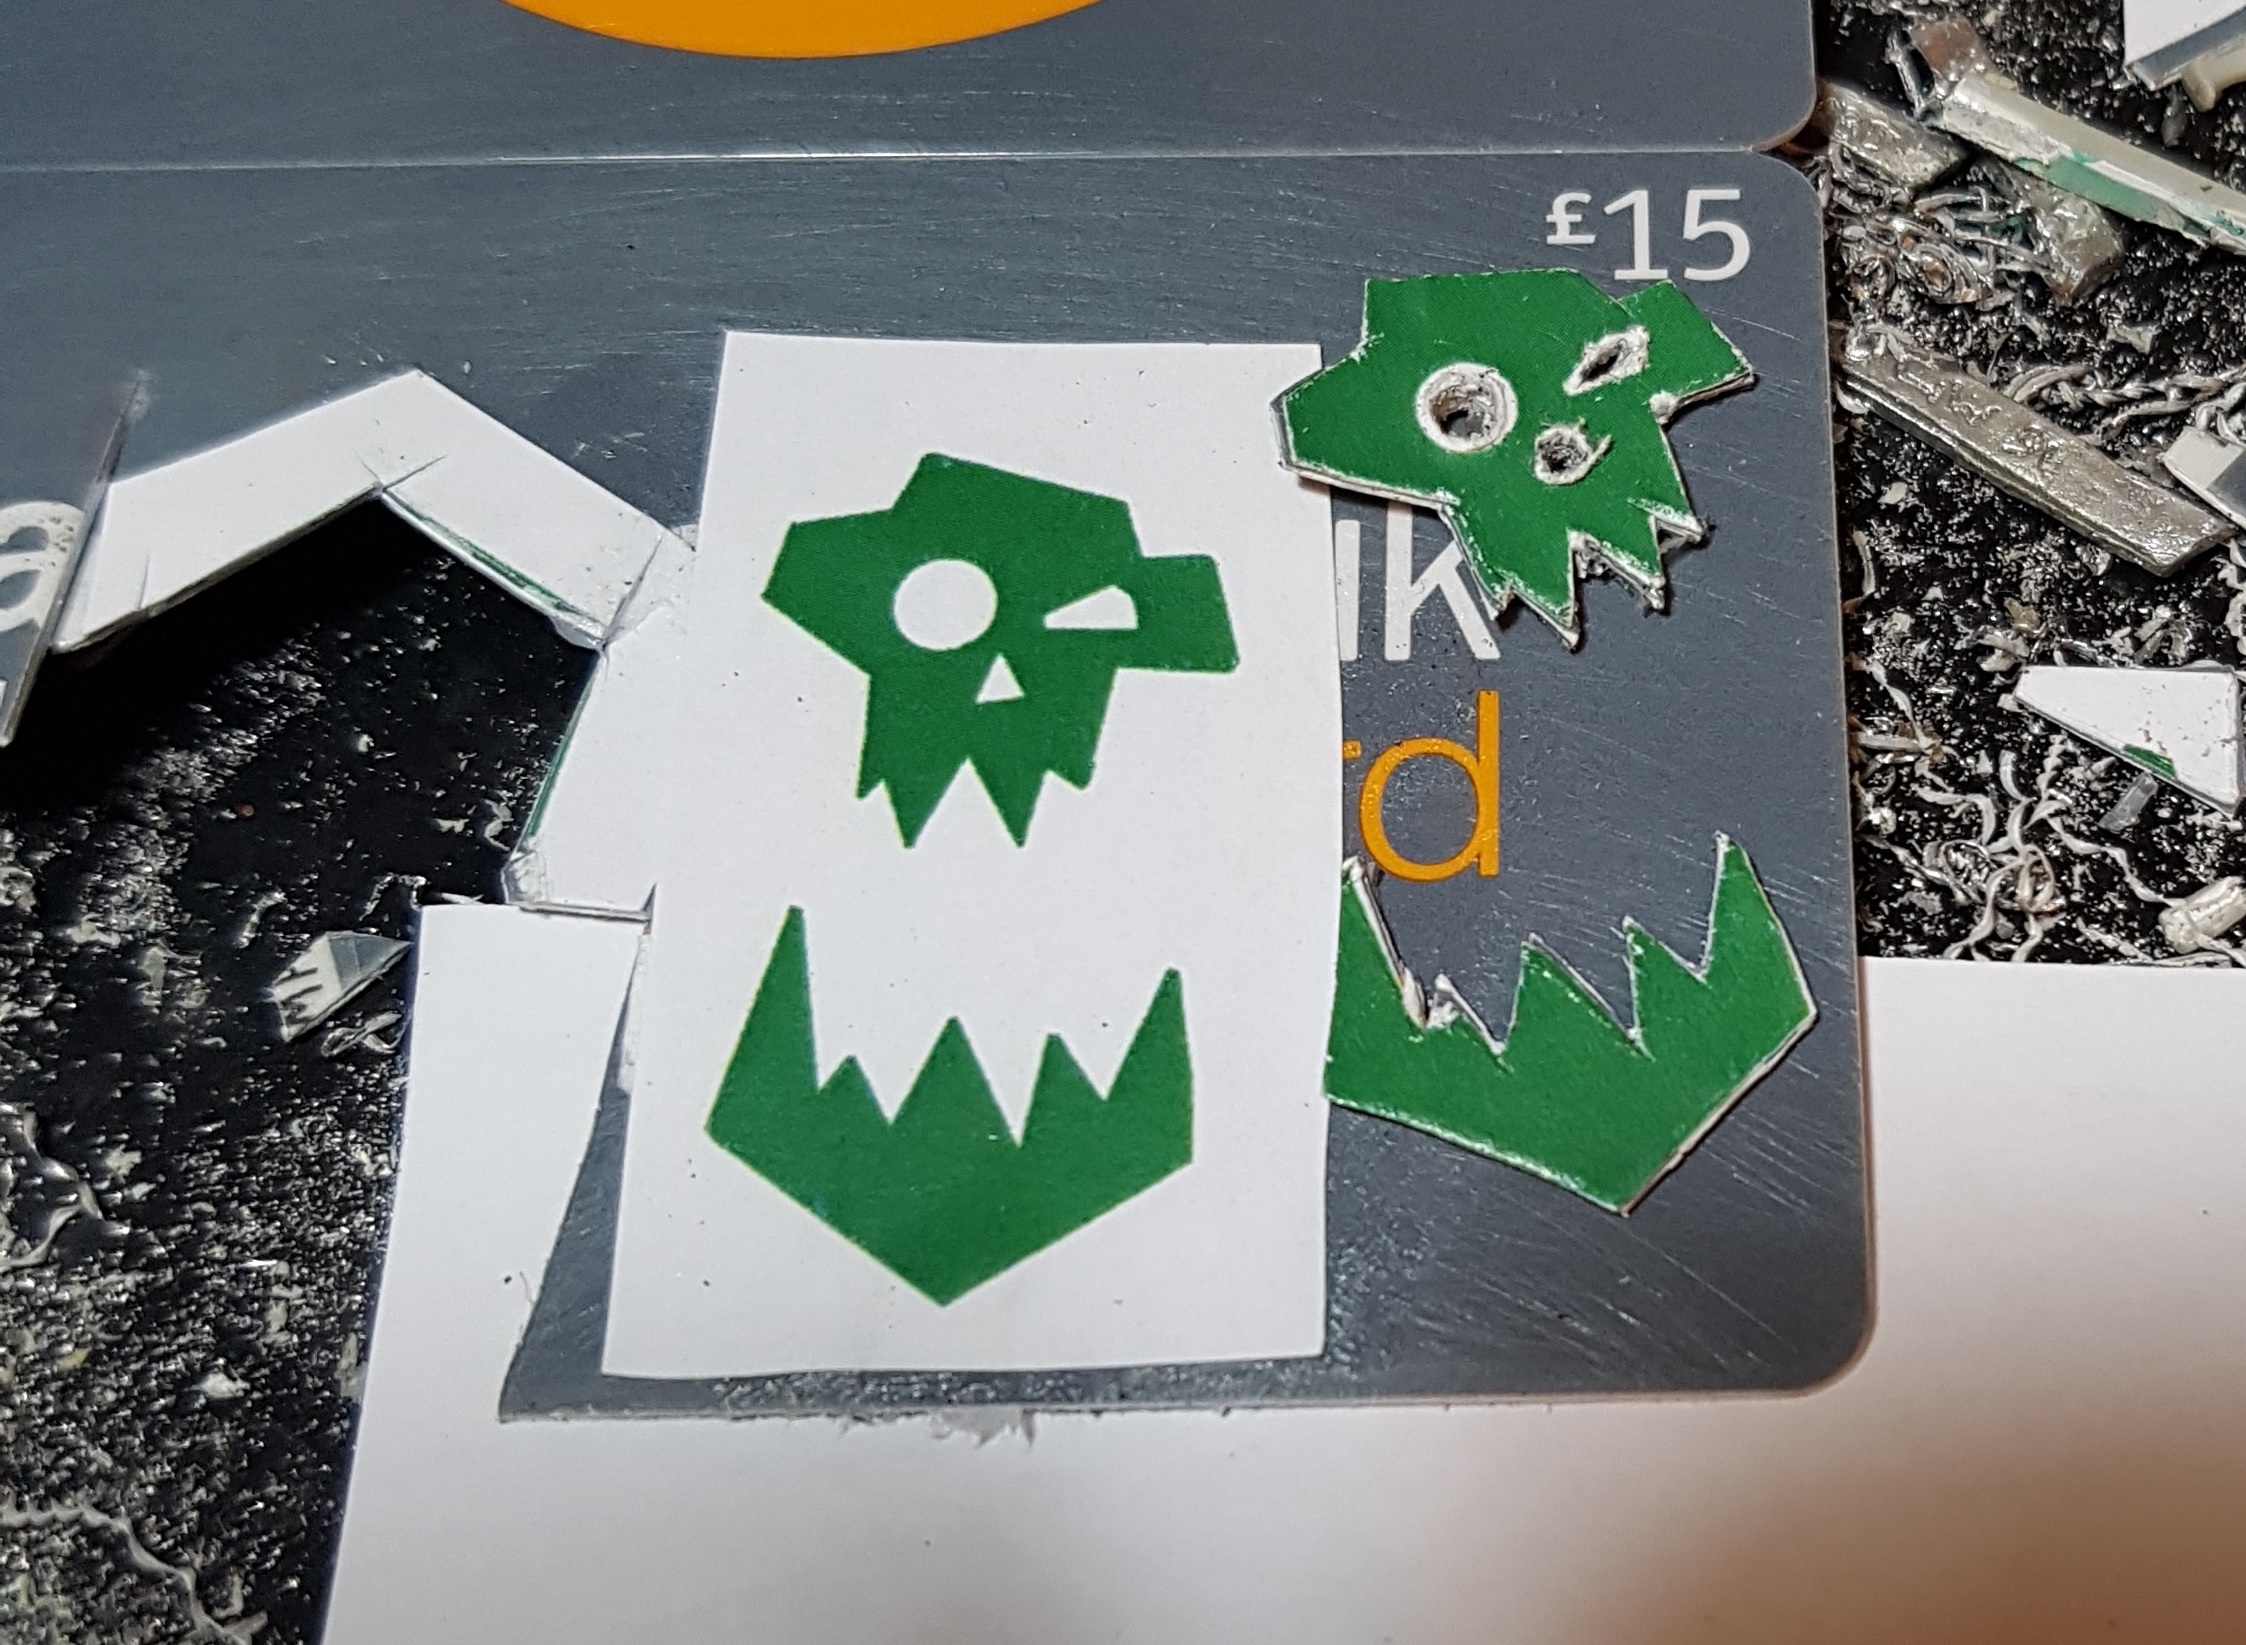
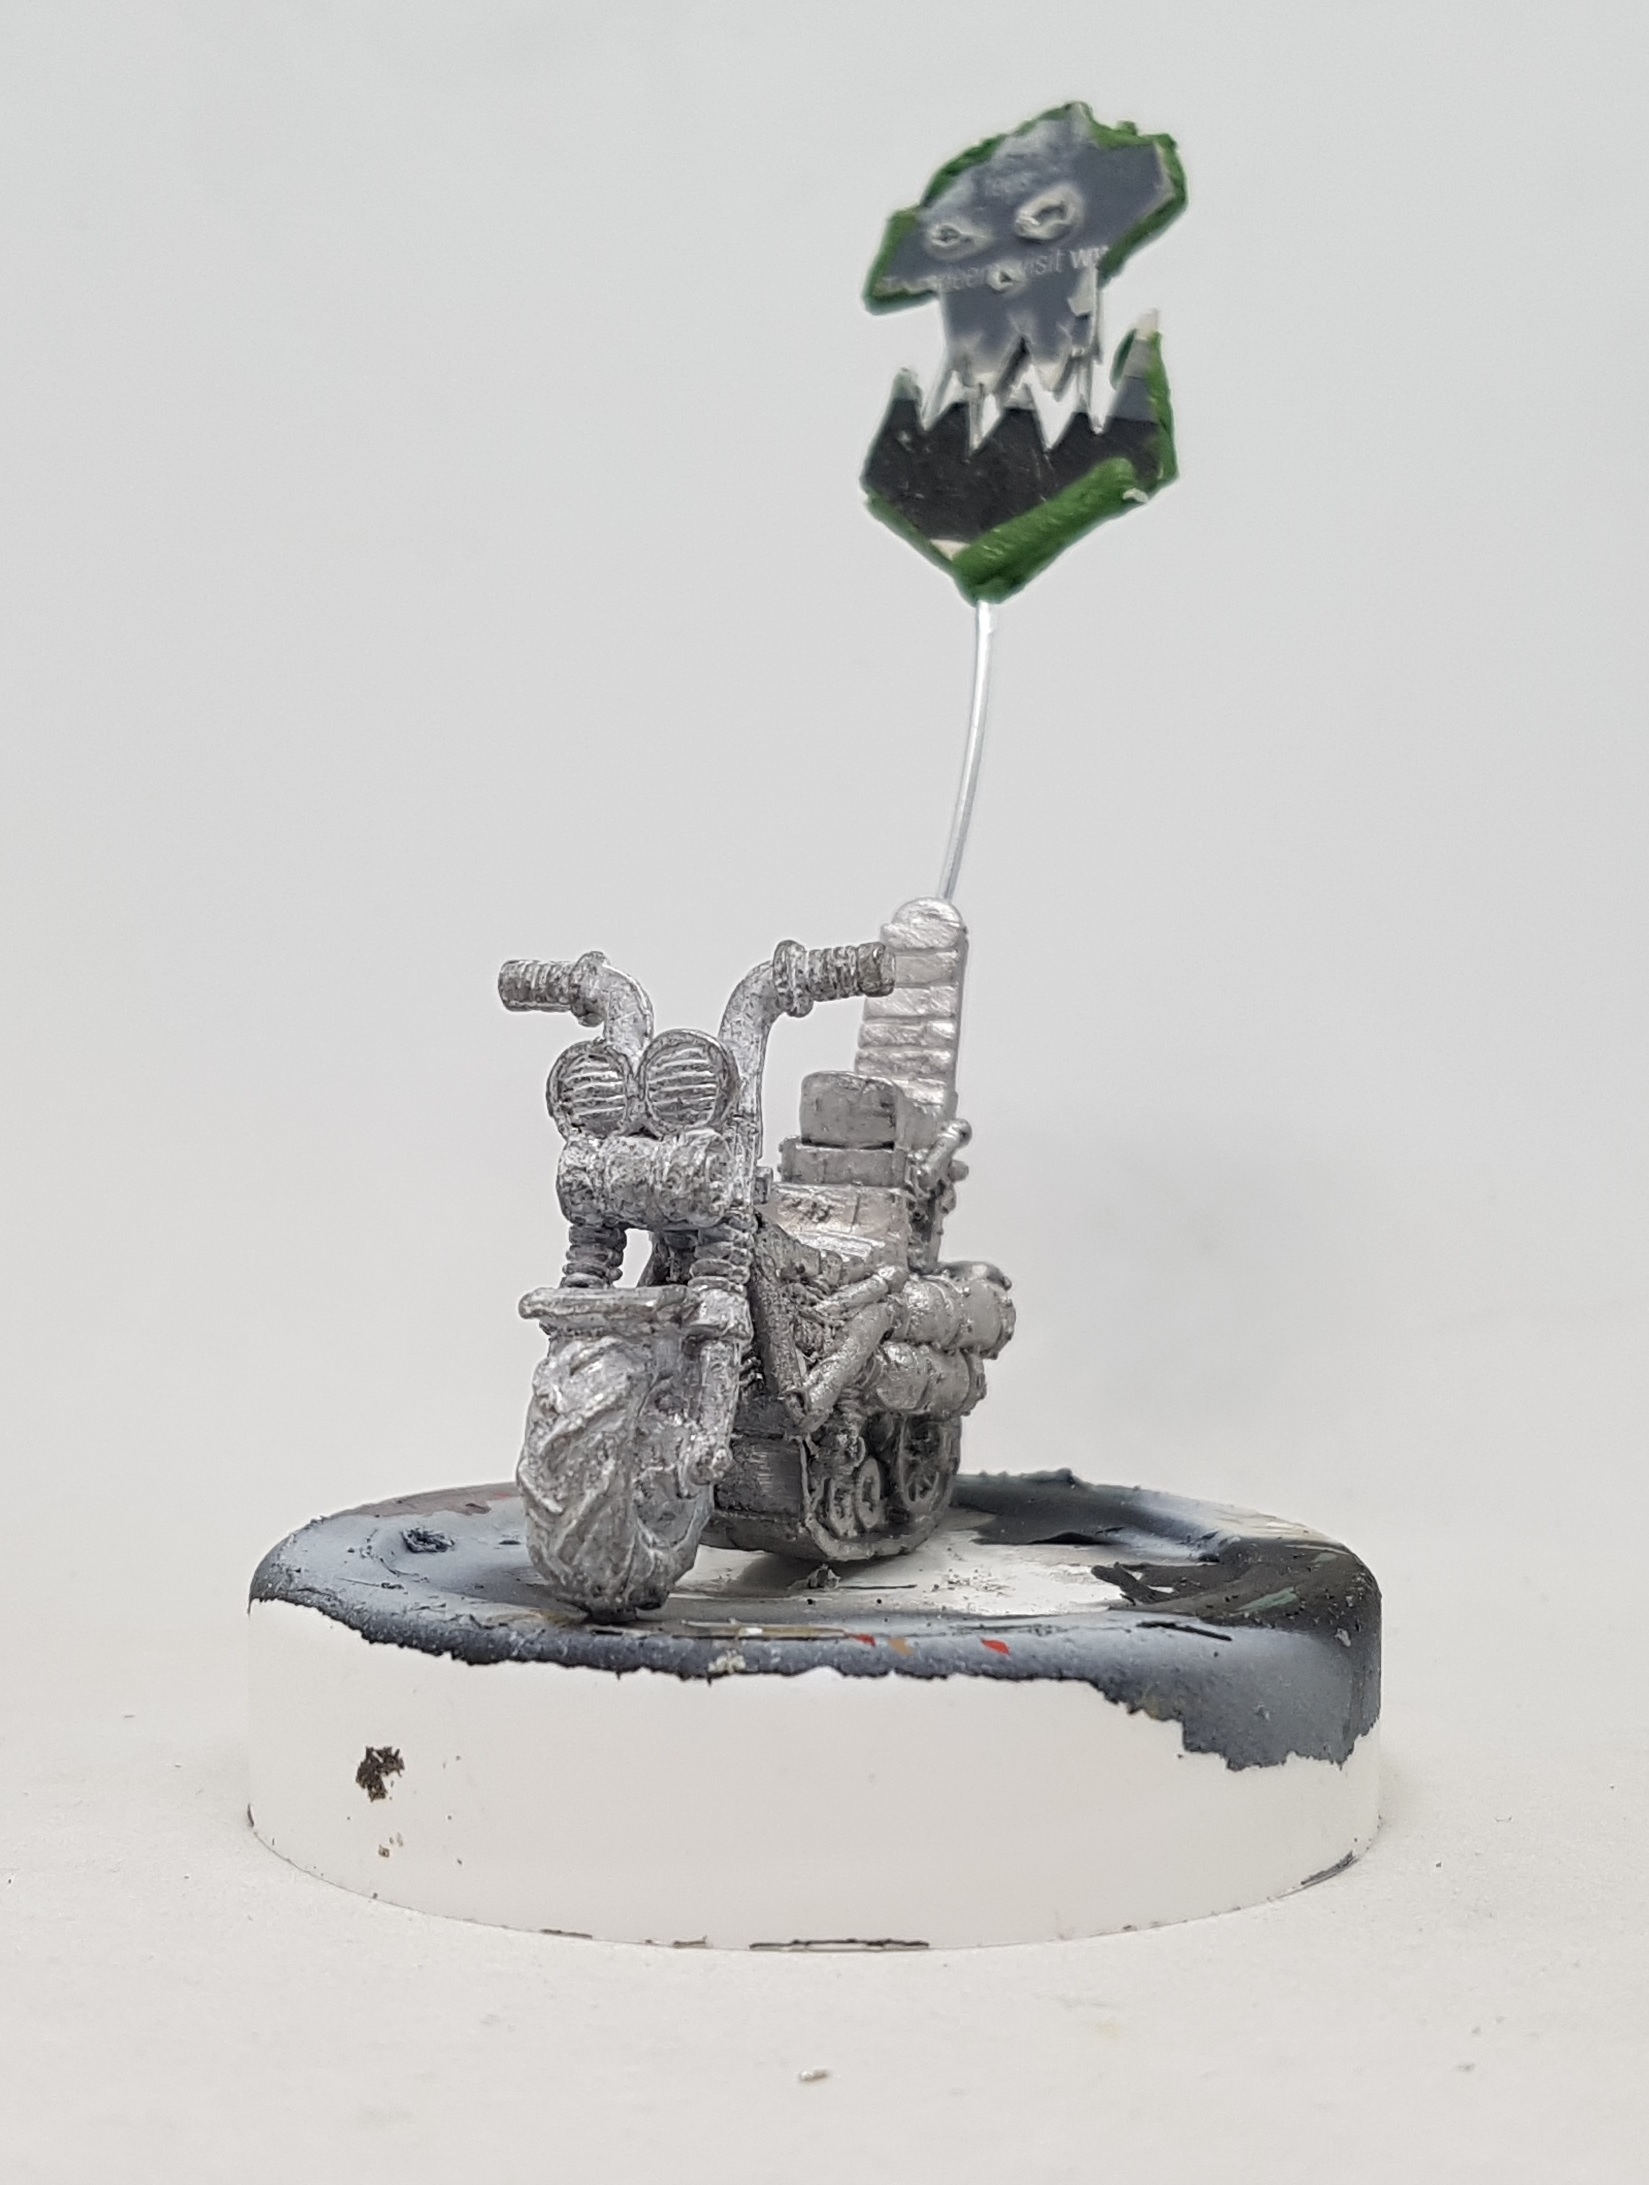
My solitary Warbike was never going to fit in to a unit so it is being upgraded to a Warboss on Warbike. The bike used to have an antenna on the back but that is long gone. I’ve decided to replace it with a home made Waaagh banner to make him stand out more on the table and look more leader-ish. I went online and googled for what these looked like and found a suitable image I wanted to use (here: https://greenblowfly.blogspot.com/2014/06/more-extensive-ork-rumors.html).
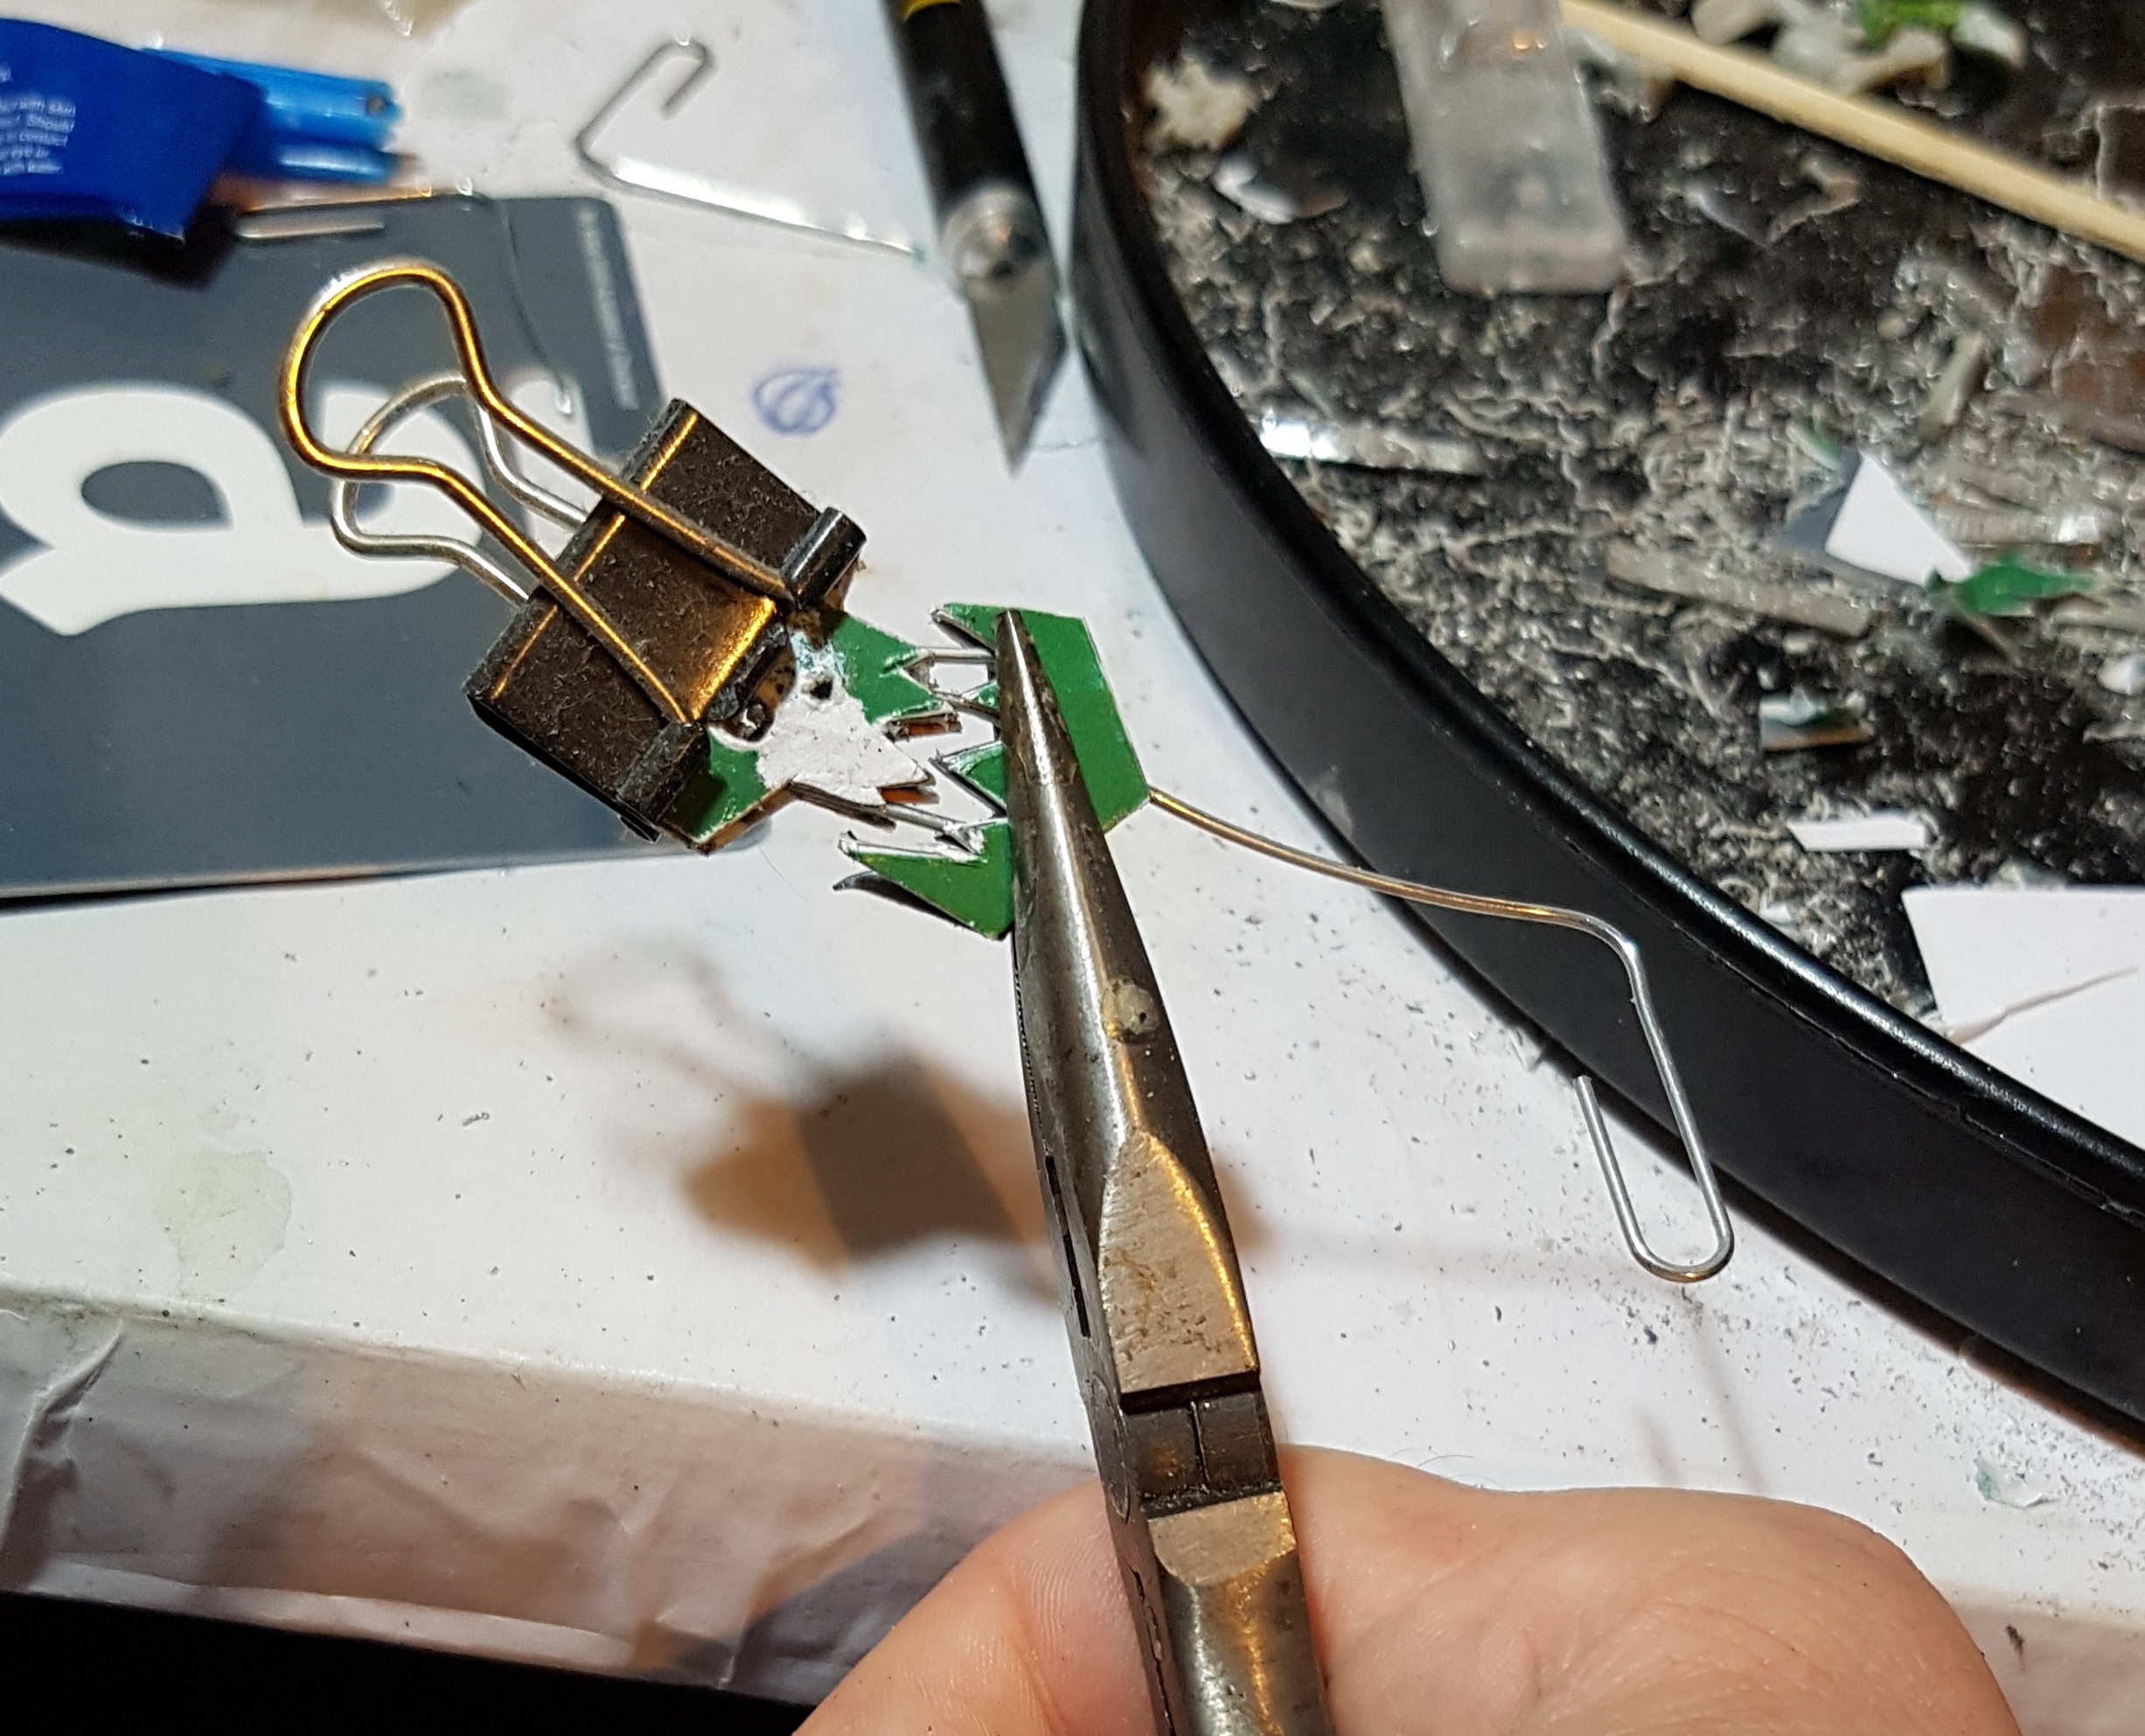
I edited the picture to put more working space between the two halves of the head and then printed it out on a sheet of paper in multiple sizes so I could find something suitable for the scale of the models. The desired size heads were then cut out and glued to an old Amazon gift voucher I had sanded down lightly to give the glue and paint something to stick to. Using a pair of scissors I cut out 2 identical copies of the head as carefully as I could. I drilled out the 3 face-holes and enlarged them with a hobby knife and files as best as I could.
I straightened out 3 paperclips ready for the next stage, and used a file and my fingernails to remove the paper from one of the heads, ready to receive glue. I glued the 3 paperclips to the top section of one head, running parallel to each other and then put the matching head piece over the top. This was secured in place with a bulldog clip. If I were to do this again I would also consider putting a little green stuff around the paperclips inside the banner. The same wad done with the jaw sections. The 3 paperclips are used to ensure the face stays lined up. I clipped off the excess from the outside 2 paperclips, leaving the middle one for the shaft. looking back on it I could have left more behind to look like protruding rebar. This would suite Orks. I didn’t have a second bulldog clip to hand so I held this in place with some pliers for a while.
Once this had thoroughly dried I ran some green stuff around the edges and against the shaft to try and give it some stability. I don’t want it breaking of later. A hole was drilled in to the back of the bike seat where the antenna used to go. The banner has not been glued in to this hole as it will be easier to transport and store as a separate piece.
I may revisit this and clean up the eyes and nose a little more, but this is orks so I don’t need to.
————————————————————————
————————————————————————
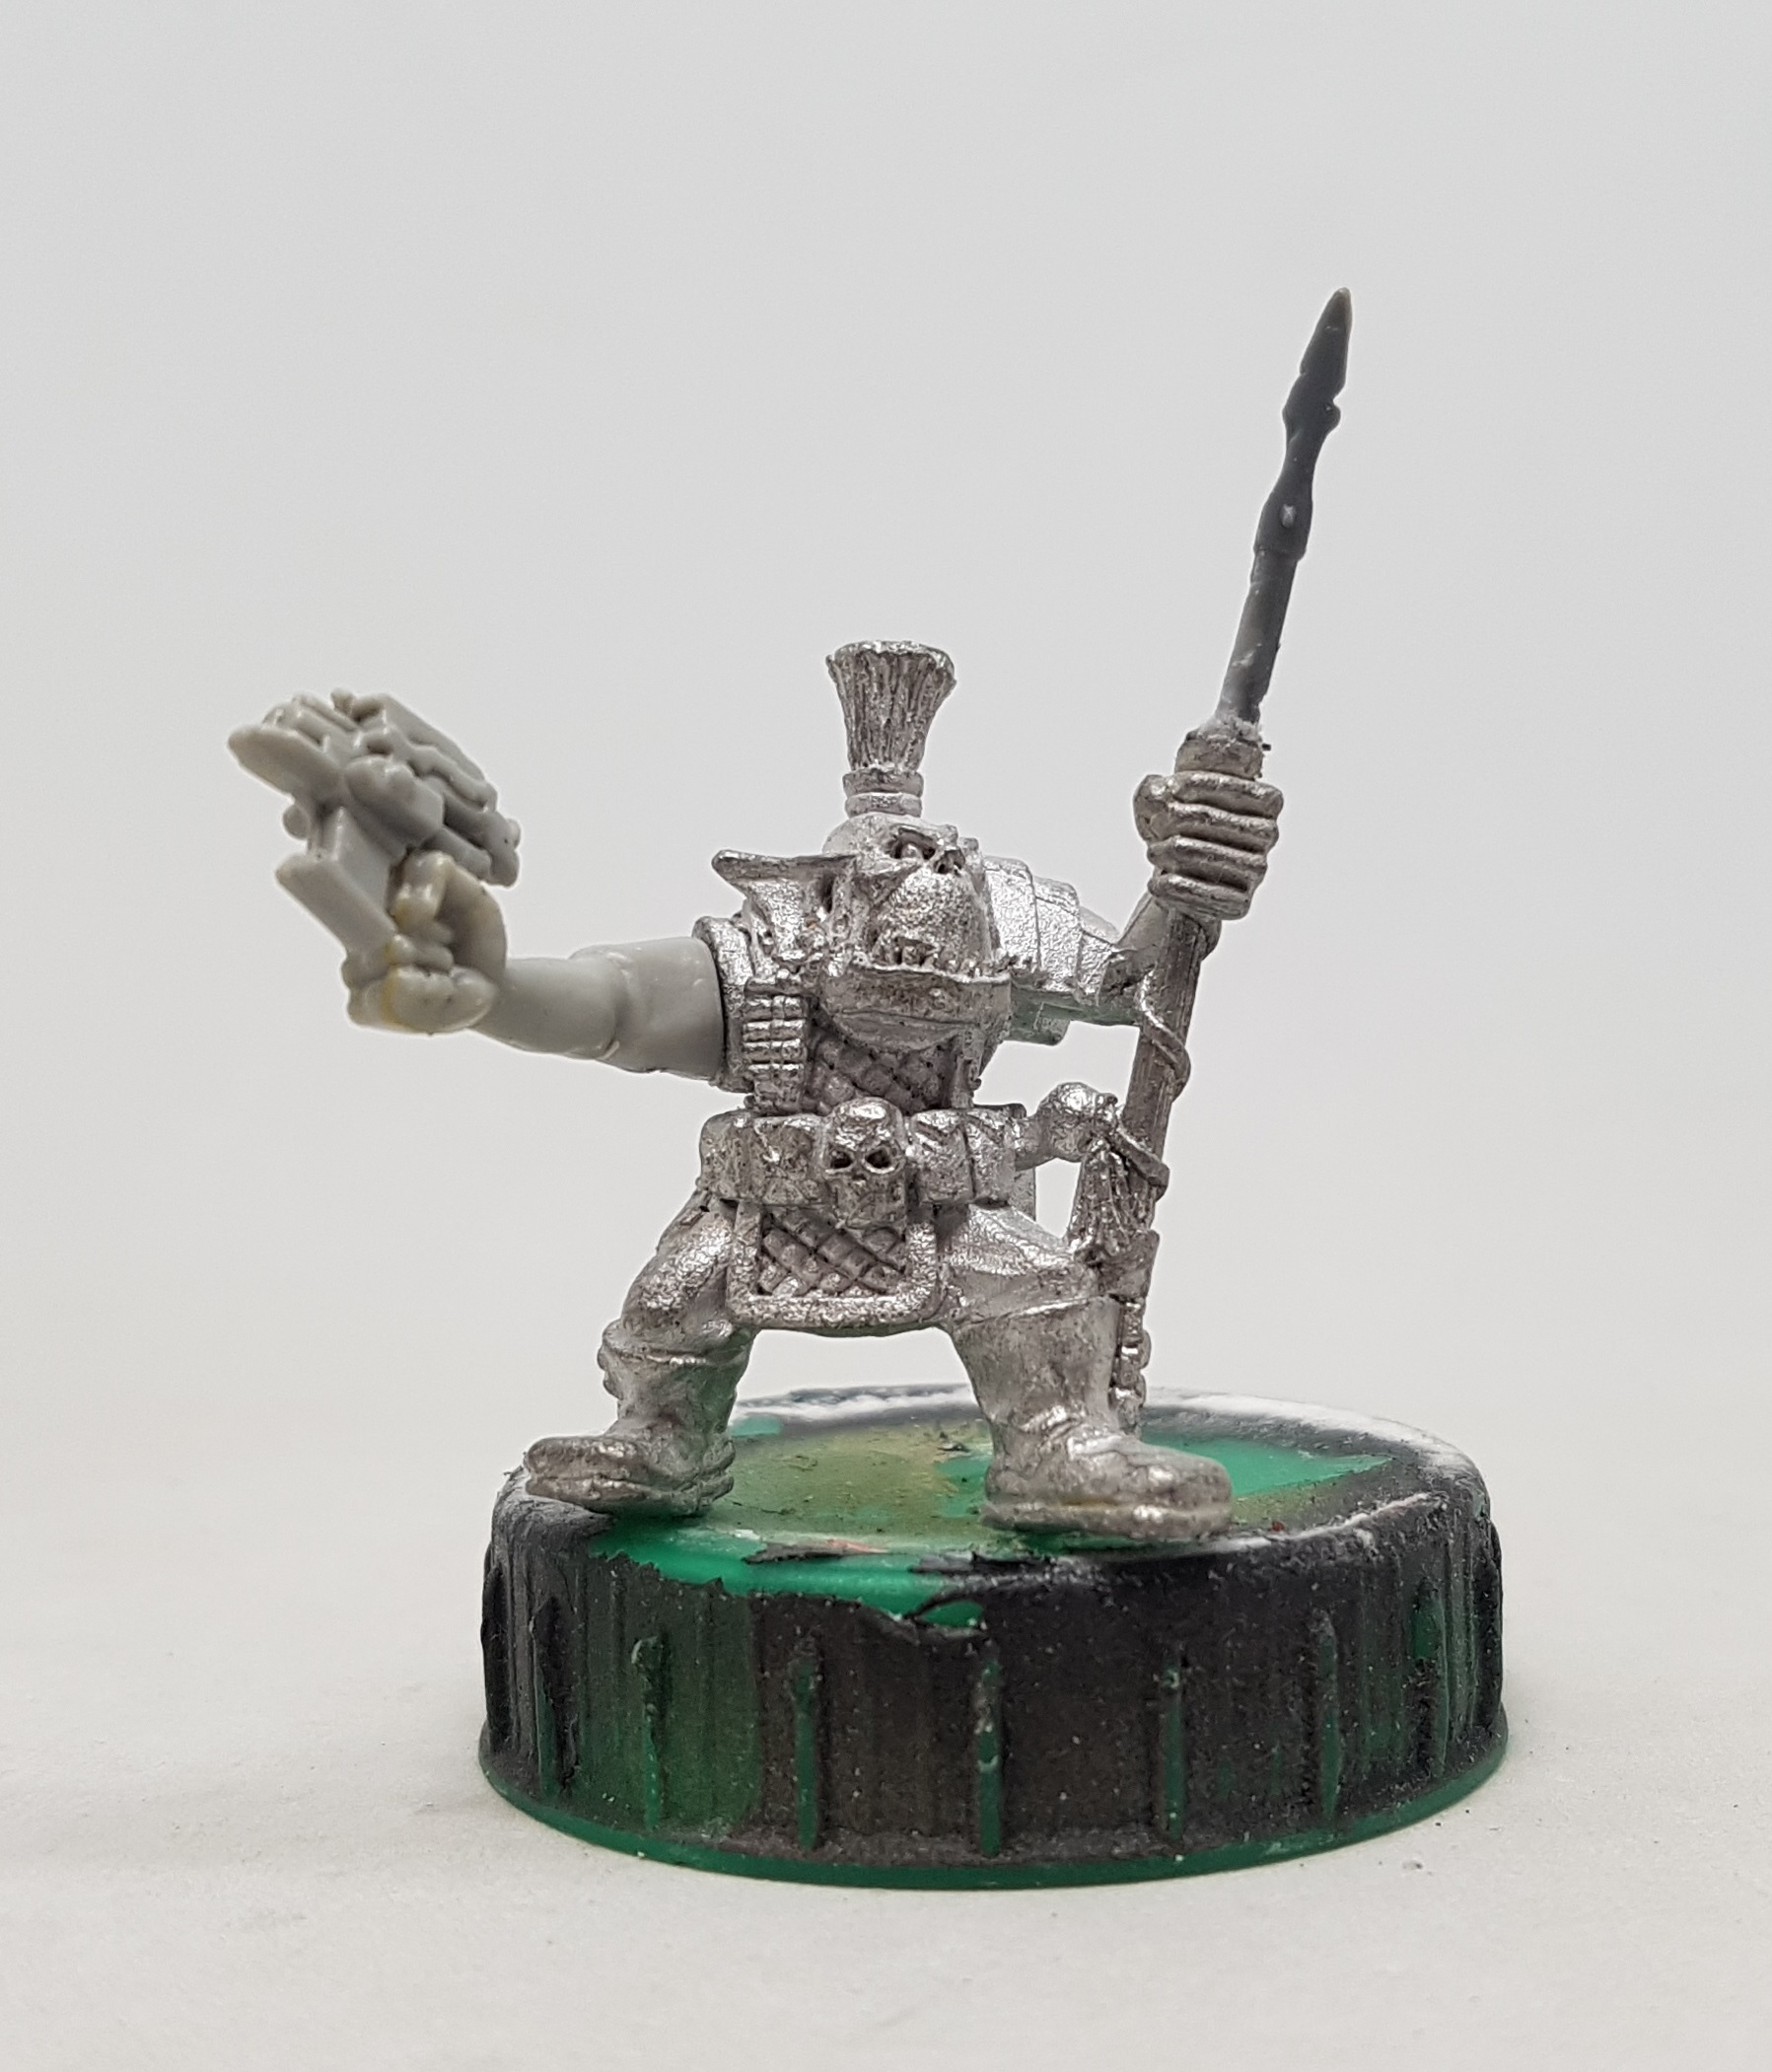
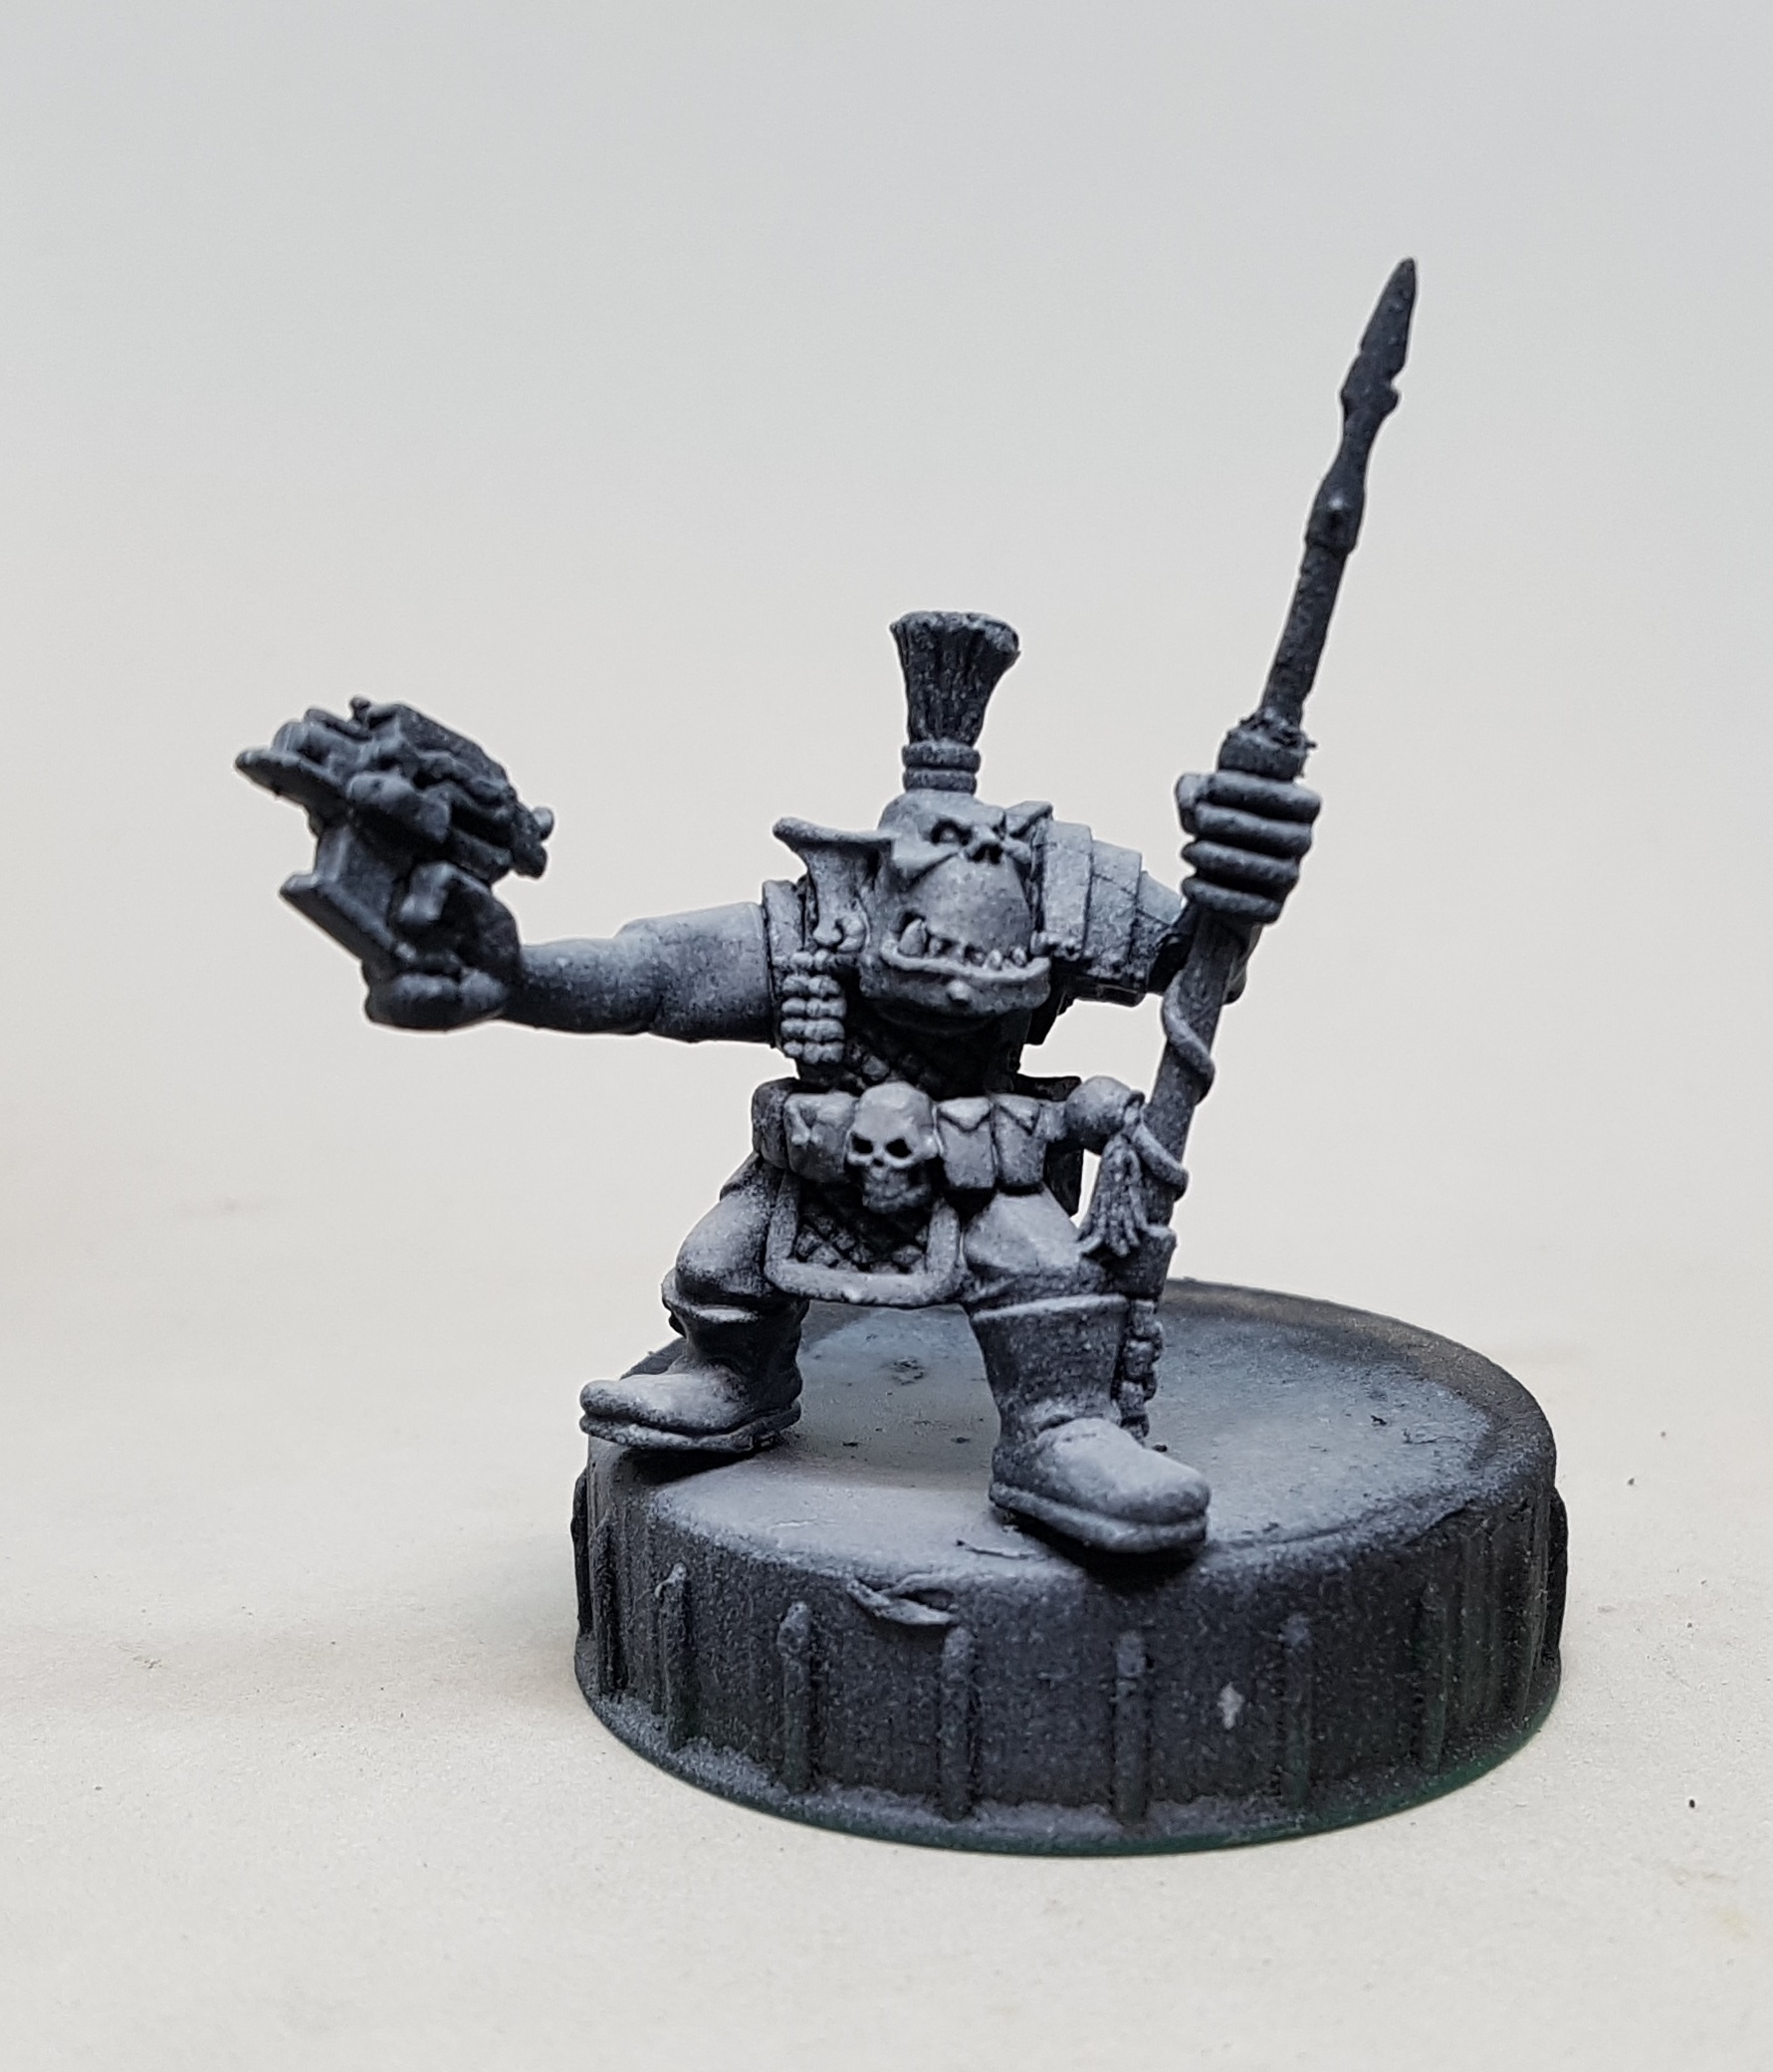
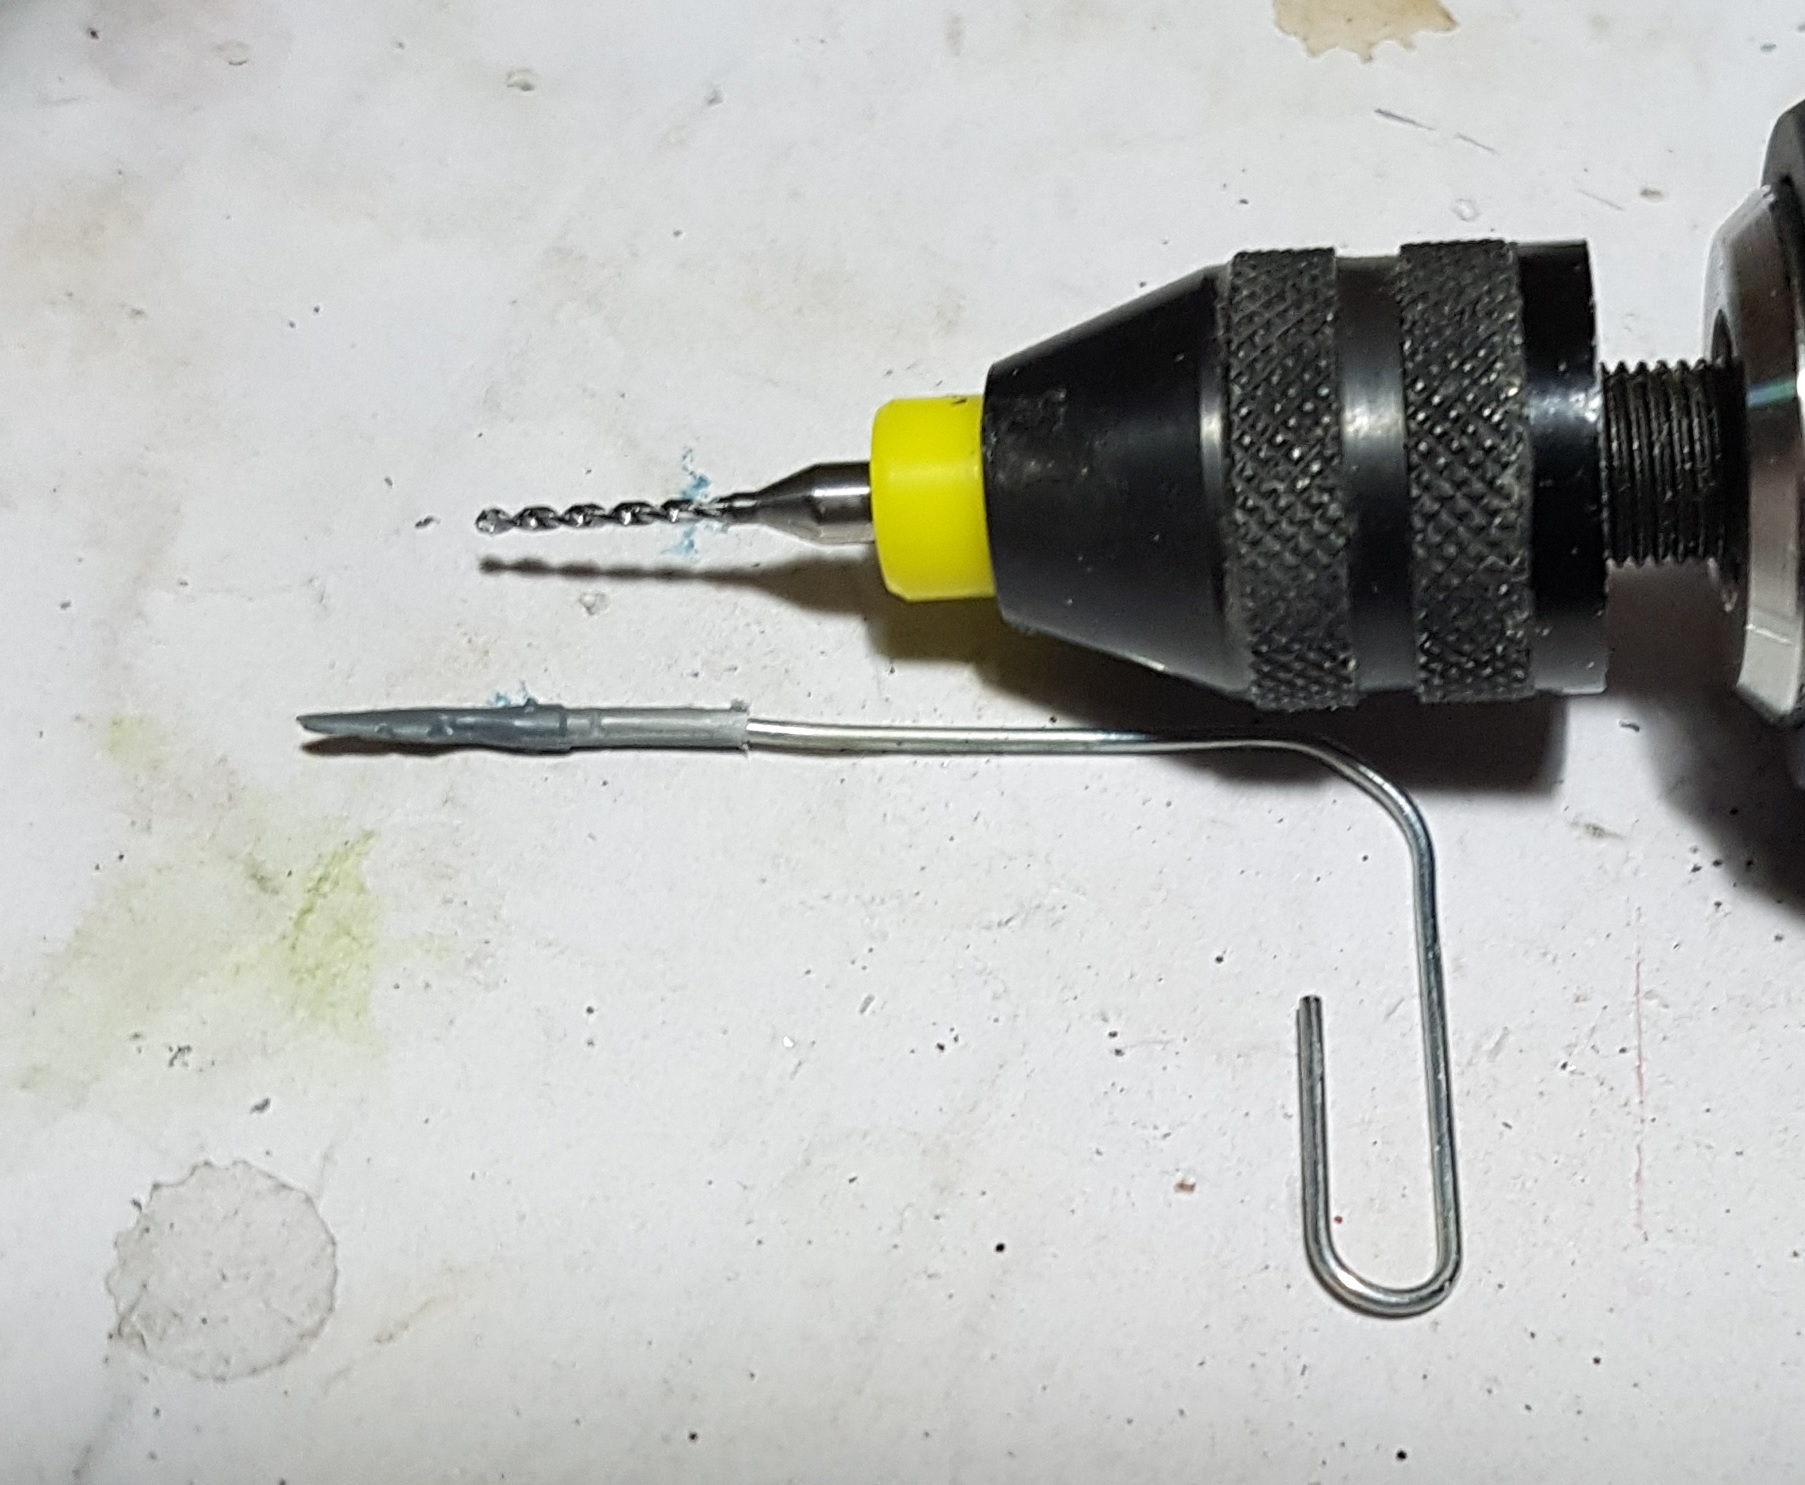
My Runtherd came with a broken staff that needed repairing. I found an old KoW Undead spear, but not much better that I could use. This is where I let you know how much I love my drill. There is no way I could have pinned this on with a pin vice. I’ve said before I could drill a paperclip sized hole in the end of something paperclip sized using it, and I’ve actually done it here first try. I’ve never hurt myself with this either, and had many accidents with the pin vice.
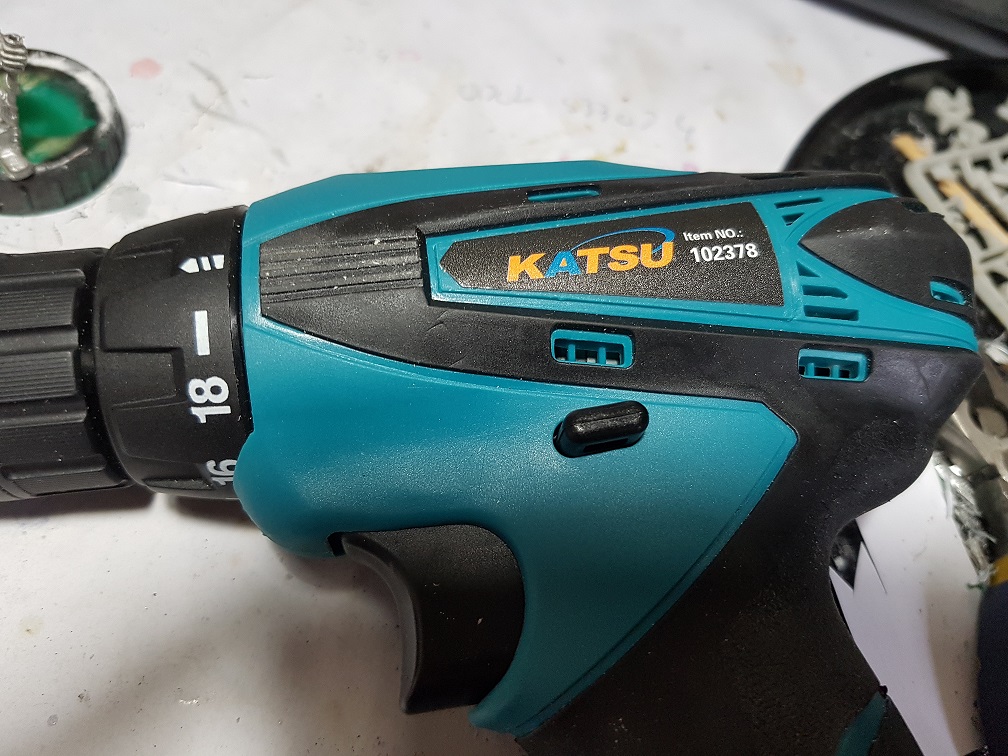
For anyone interested, here is my set up
Drill:
Chuck:
Bits:
————————————————————————
————————————————————————
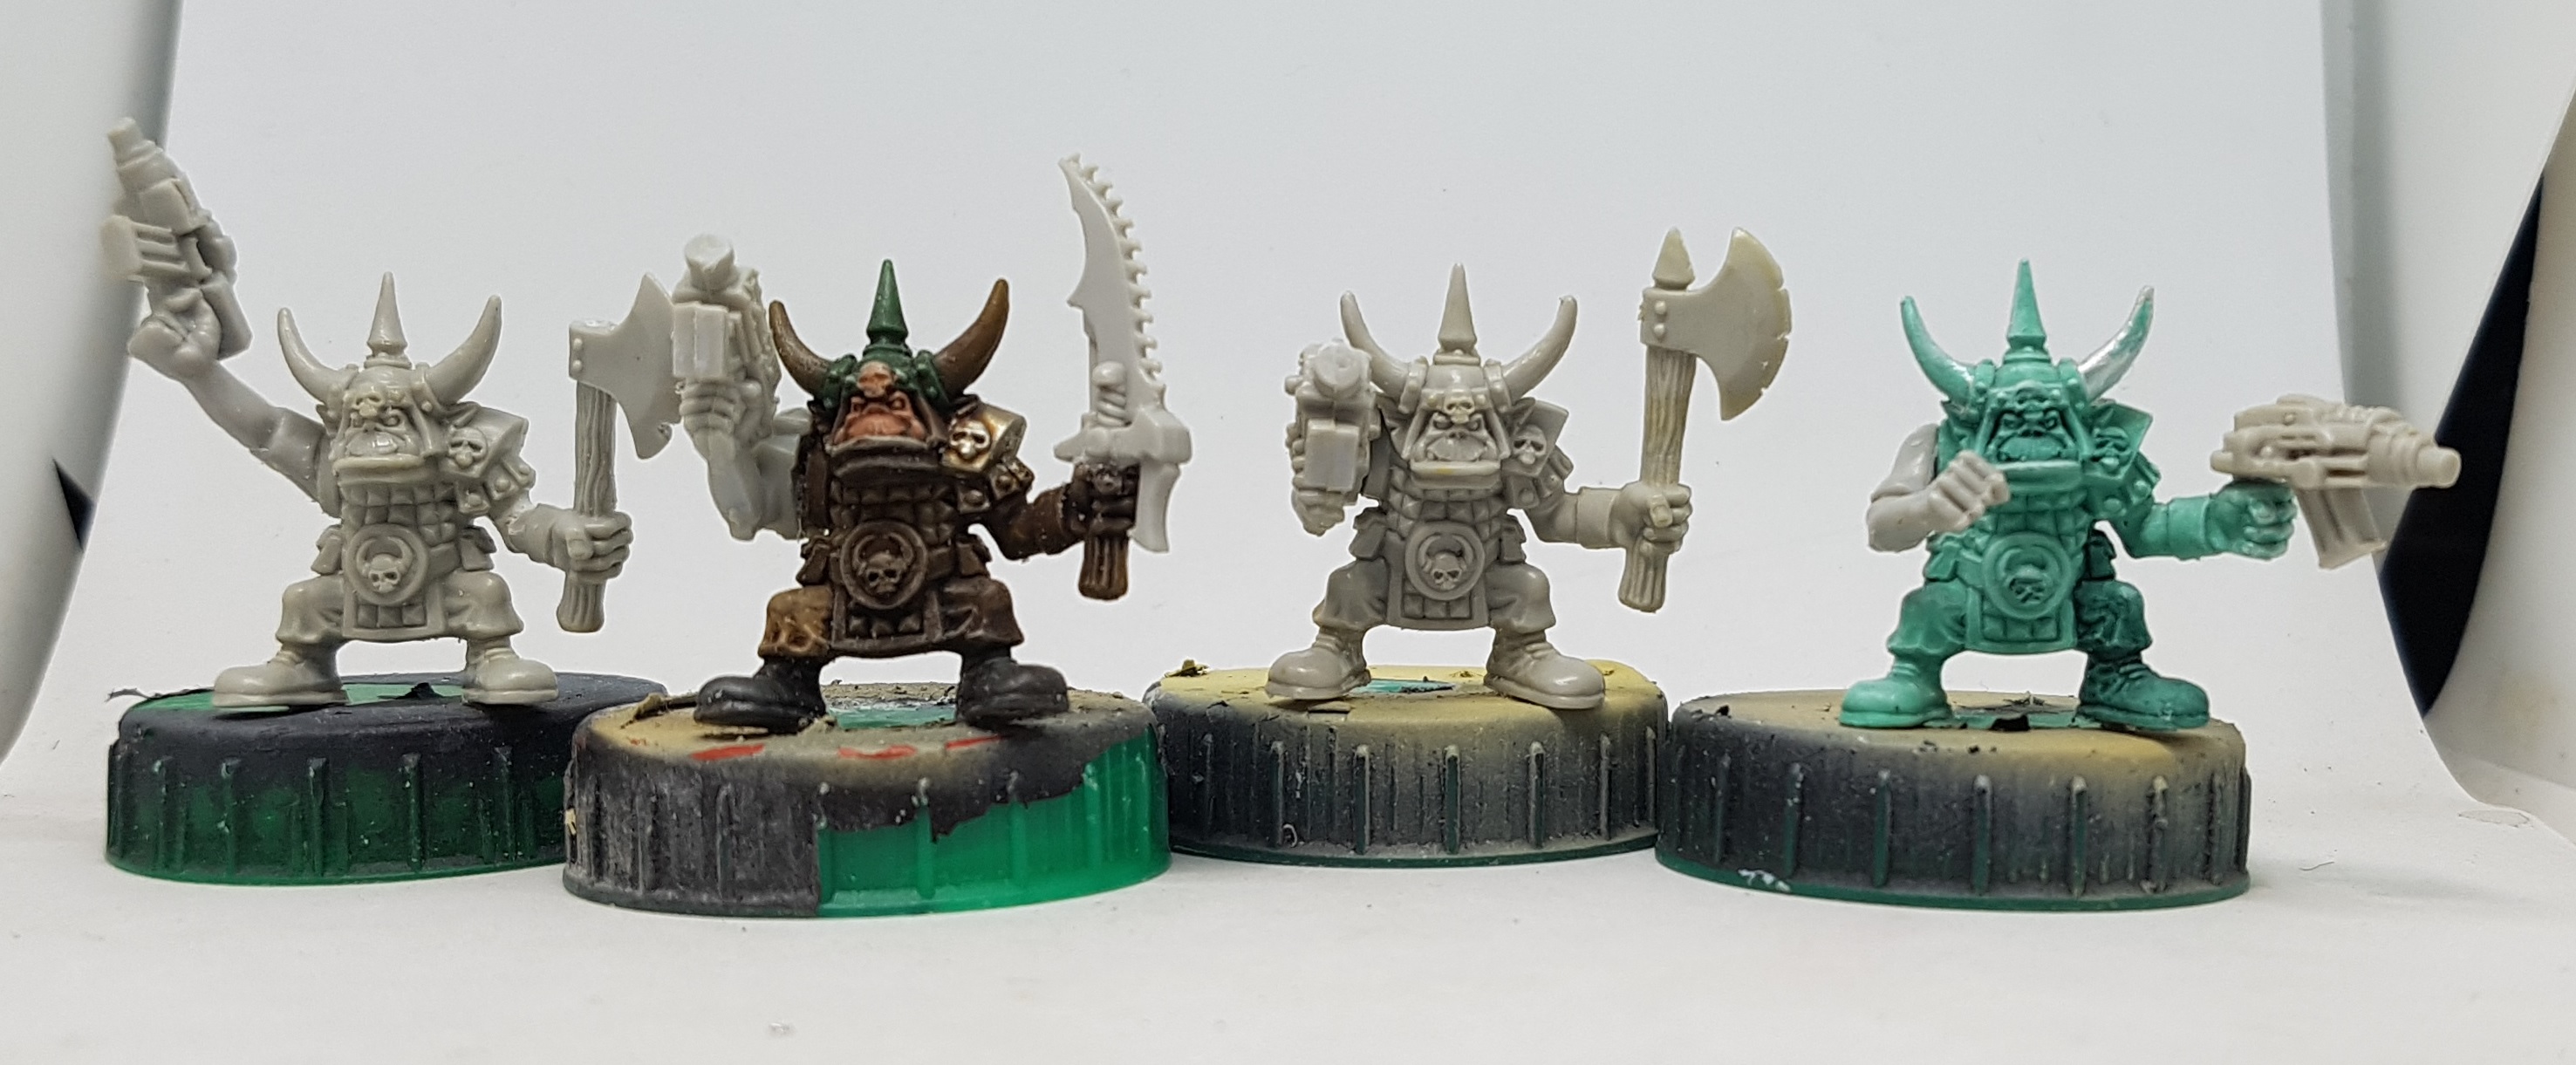
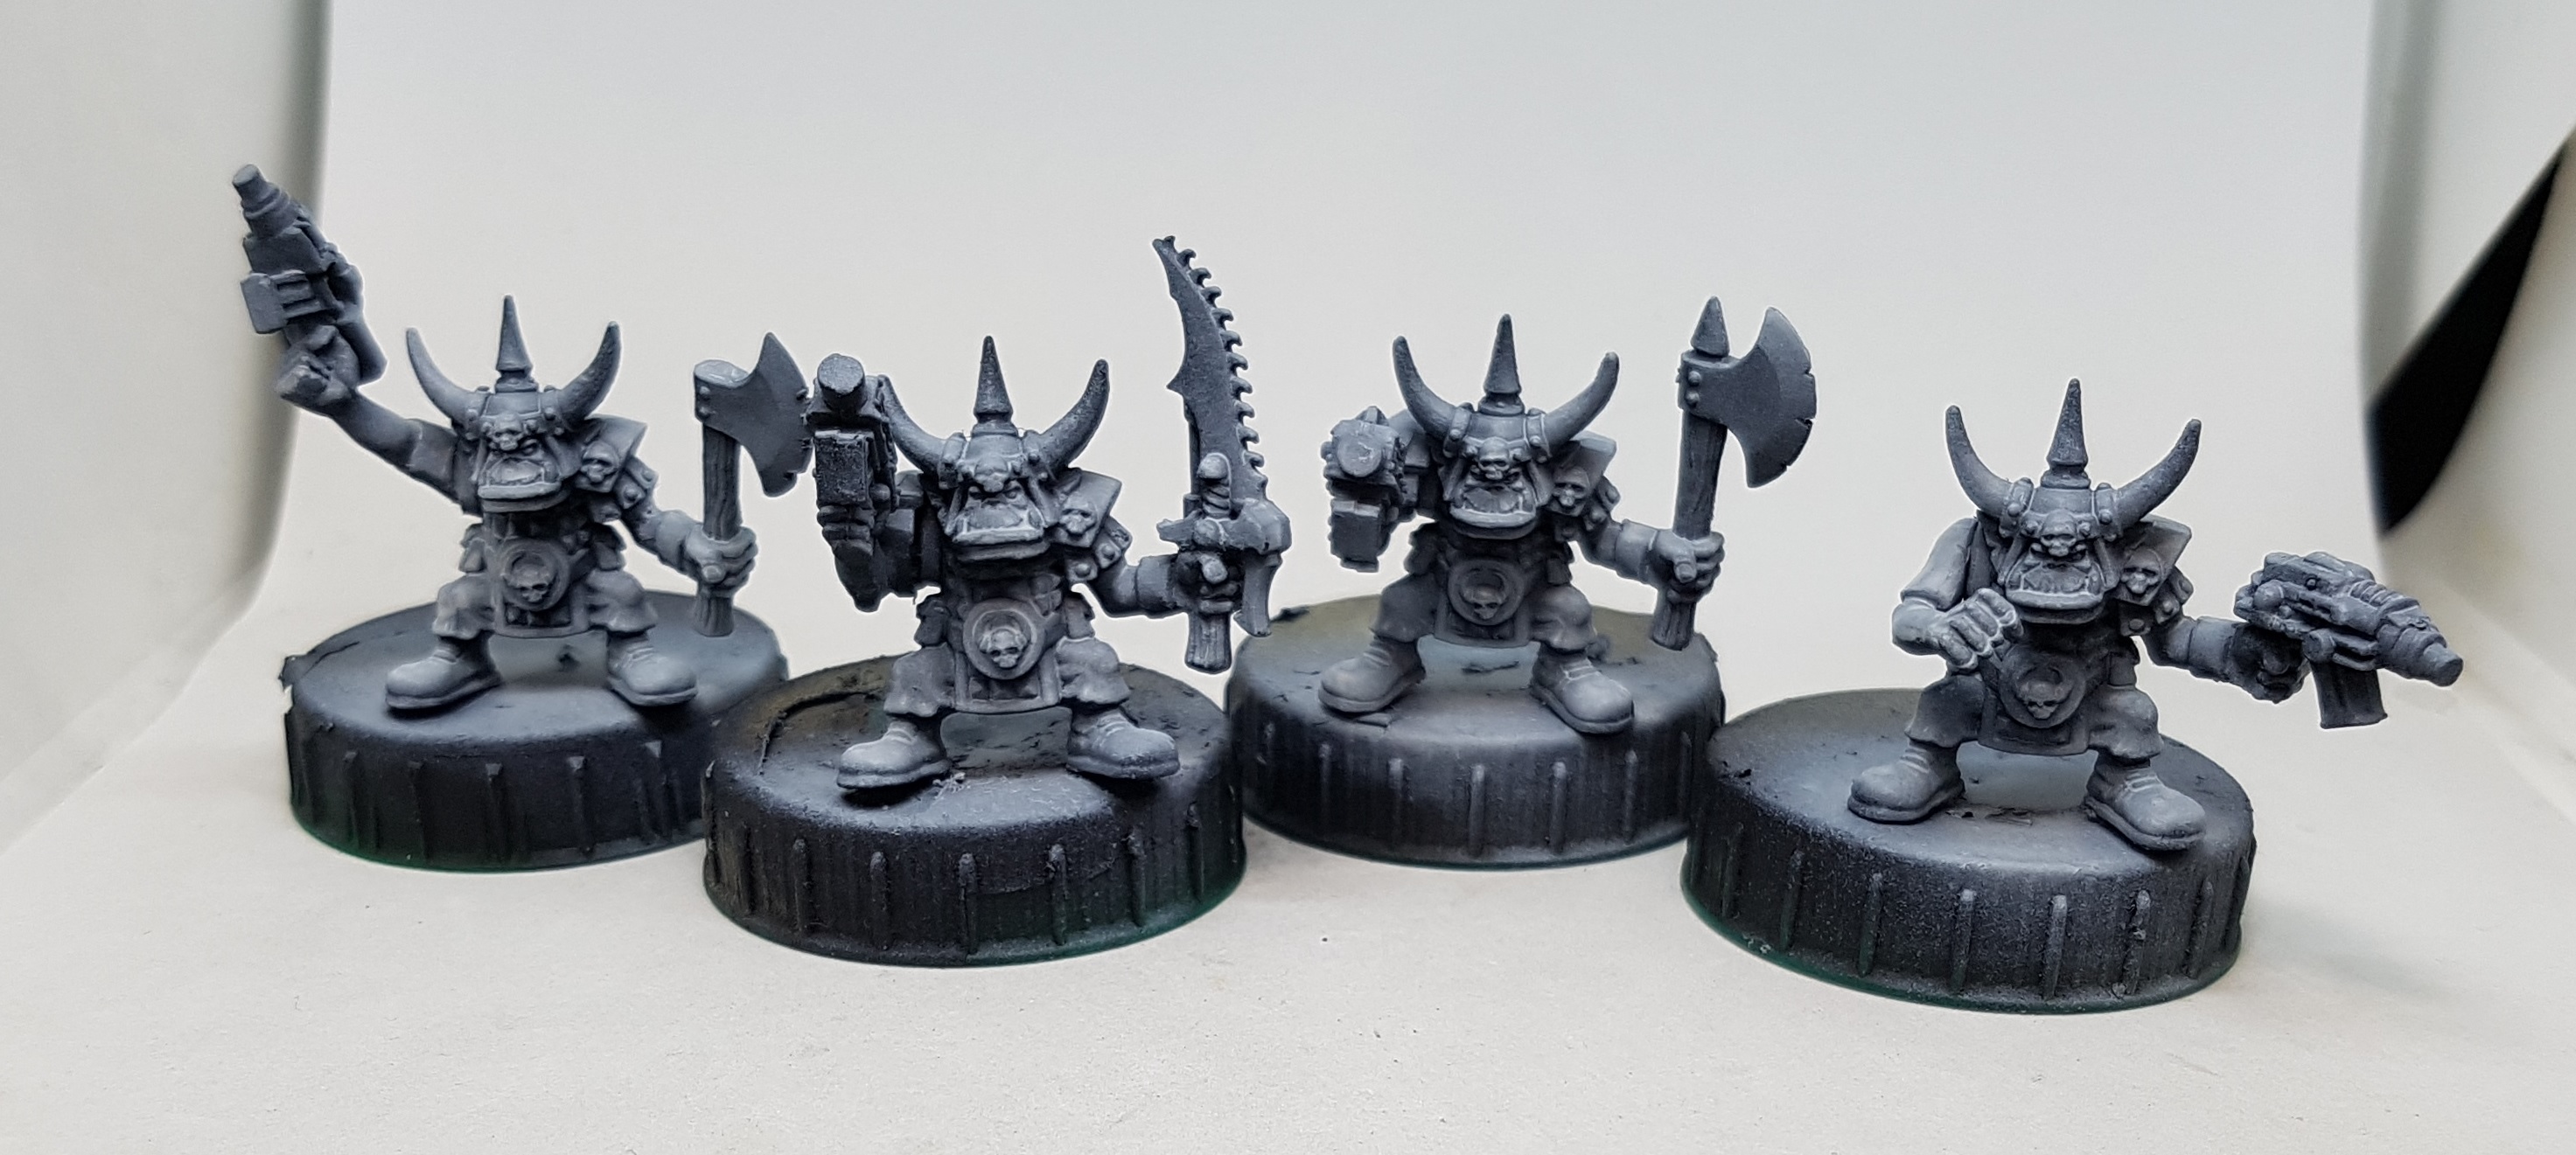
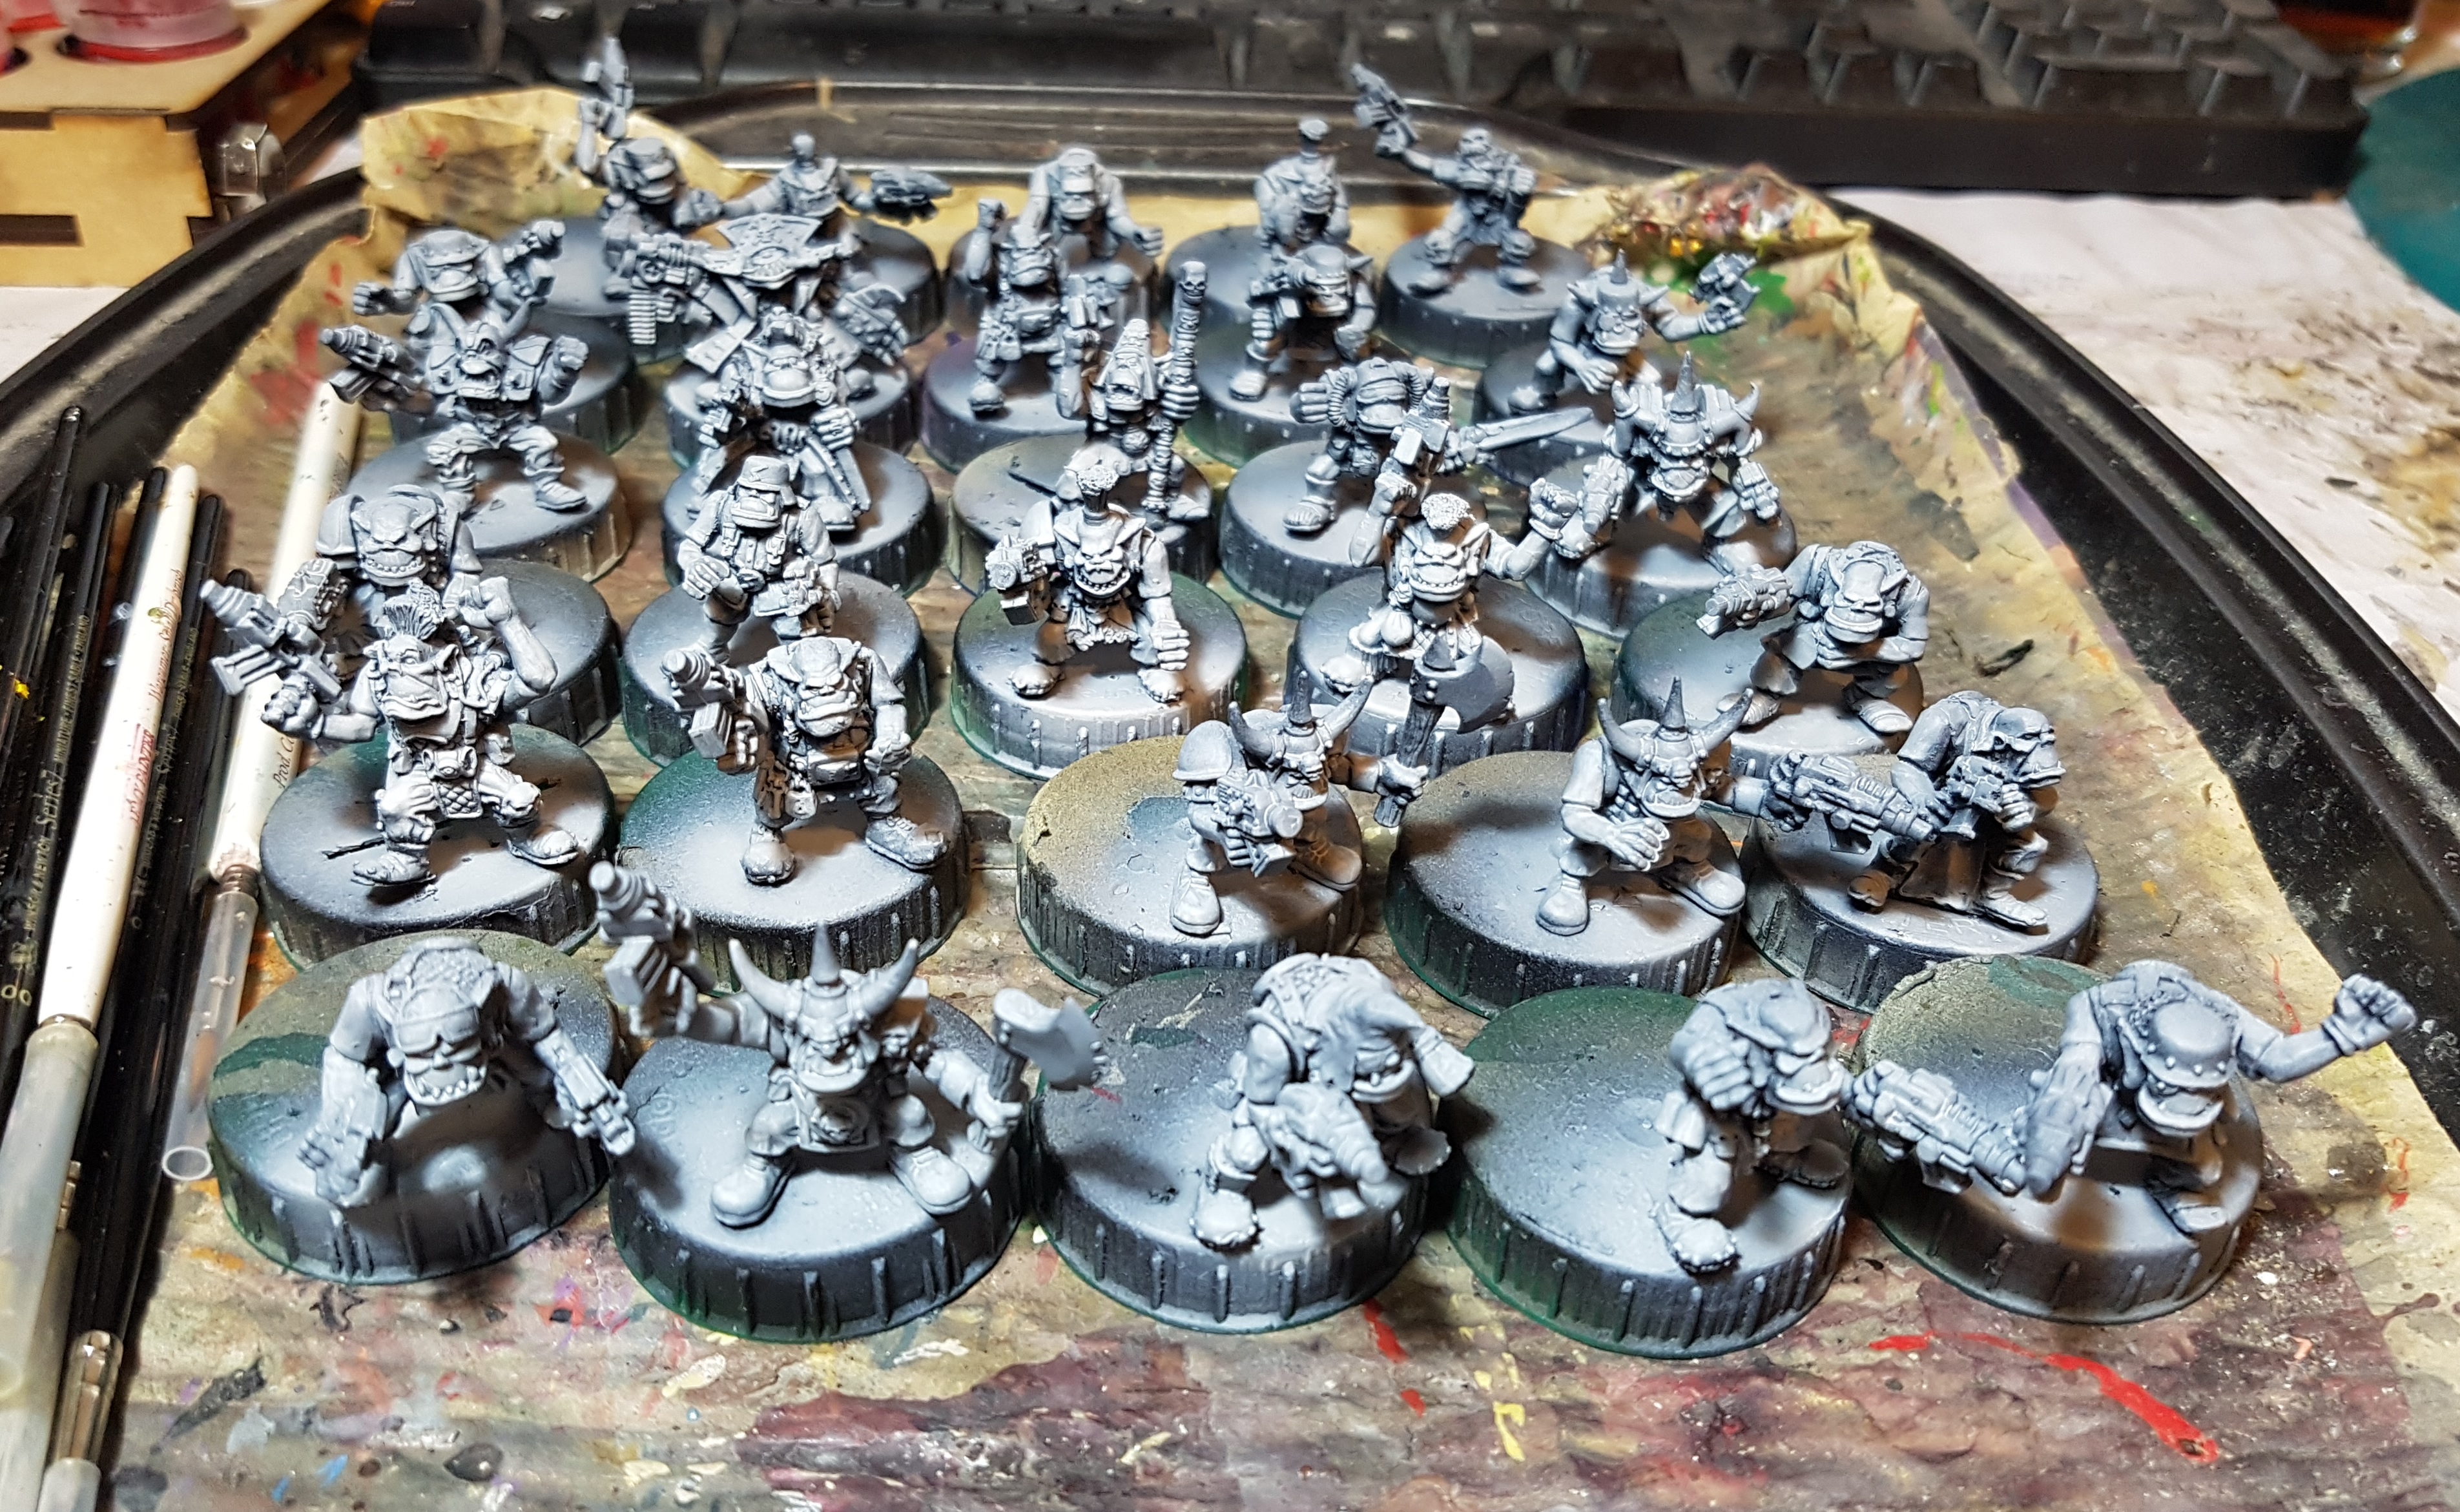
I assembled and primed the rest of my minis ready for painting too. I’m very glad I wasn’t heavy in to GW back in 1990. It’s like the arms were designed without looking at the bodies. There’s a pair that are supposed to reach around and hold the same weapon, but they can never do this because they would have to pass through where the Orks head is as its always in front of the shoulders, instead of on them. Wherever there was similar sculpts I have tried to add variation.
 My Wartrakk came with a broken Las Cannon, which isn't a legal option any more. I improvised a Twin Shoota for it out of two Bolters and a coffee stirrer. Perhaps I should have added some green stuff for strength?
Painting Ork Flesh
With everything primed it is time to start painting. Green is the most common colour and I may have troubles painting it over darker colours, so I am starting with that. The Skorcha turret has an Ork head visible through the top and I want to preserve the zenithal on the rest of the vehicle, so I have applied a line of Silly Putty around the head, stuck some cling film to it that wraps around the rest of the model, and then sealed it down with a second ring of Silly Putty over the first. This will allow me to apply the green through an airbrush safely.
Paints used on the flesh:
- VGA 72.730 Goblin green
- VMC 70.967 Olive Green
- P3 Cryx Bane Base
- P3 Ordic Olive
- P3 Sanguine Highlight
- P3 Wurm Green
- P3 Menoth White Base
- P3 Menoth White Highlight
- GW Carroburg Crimson
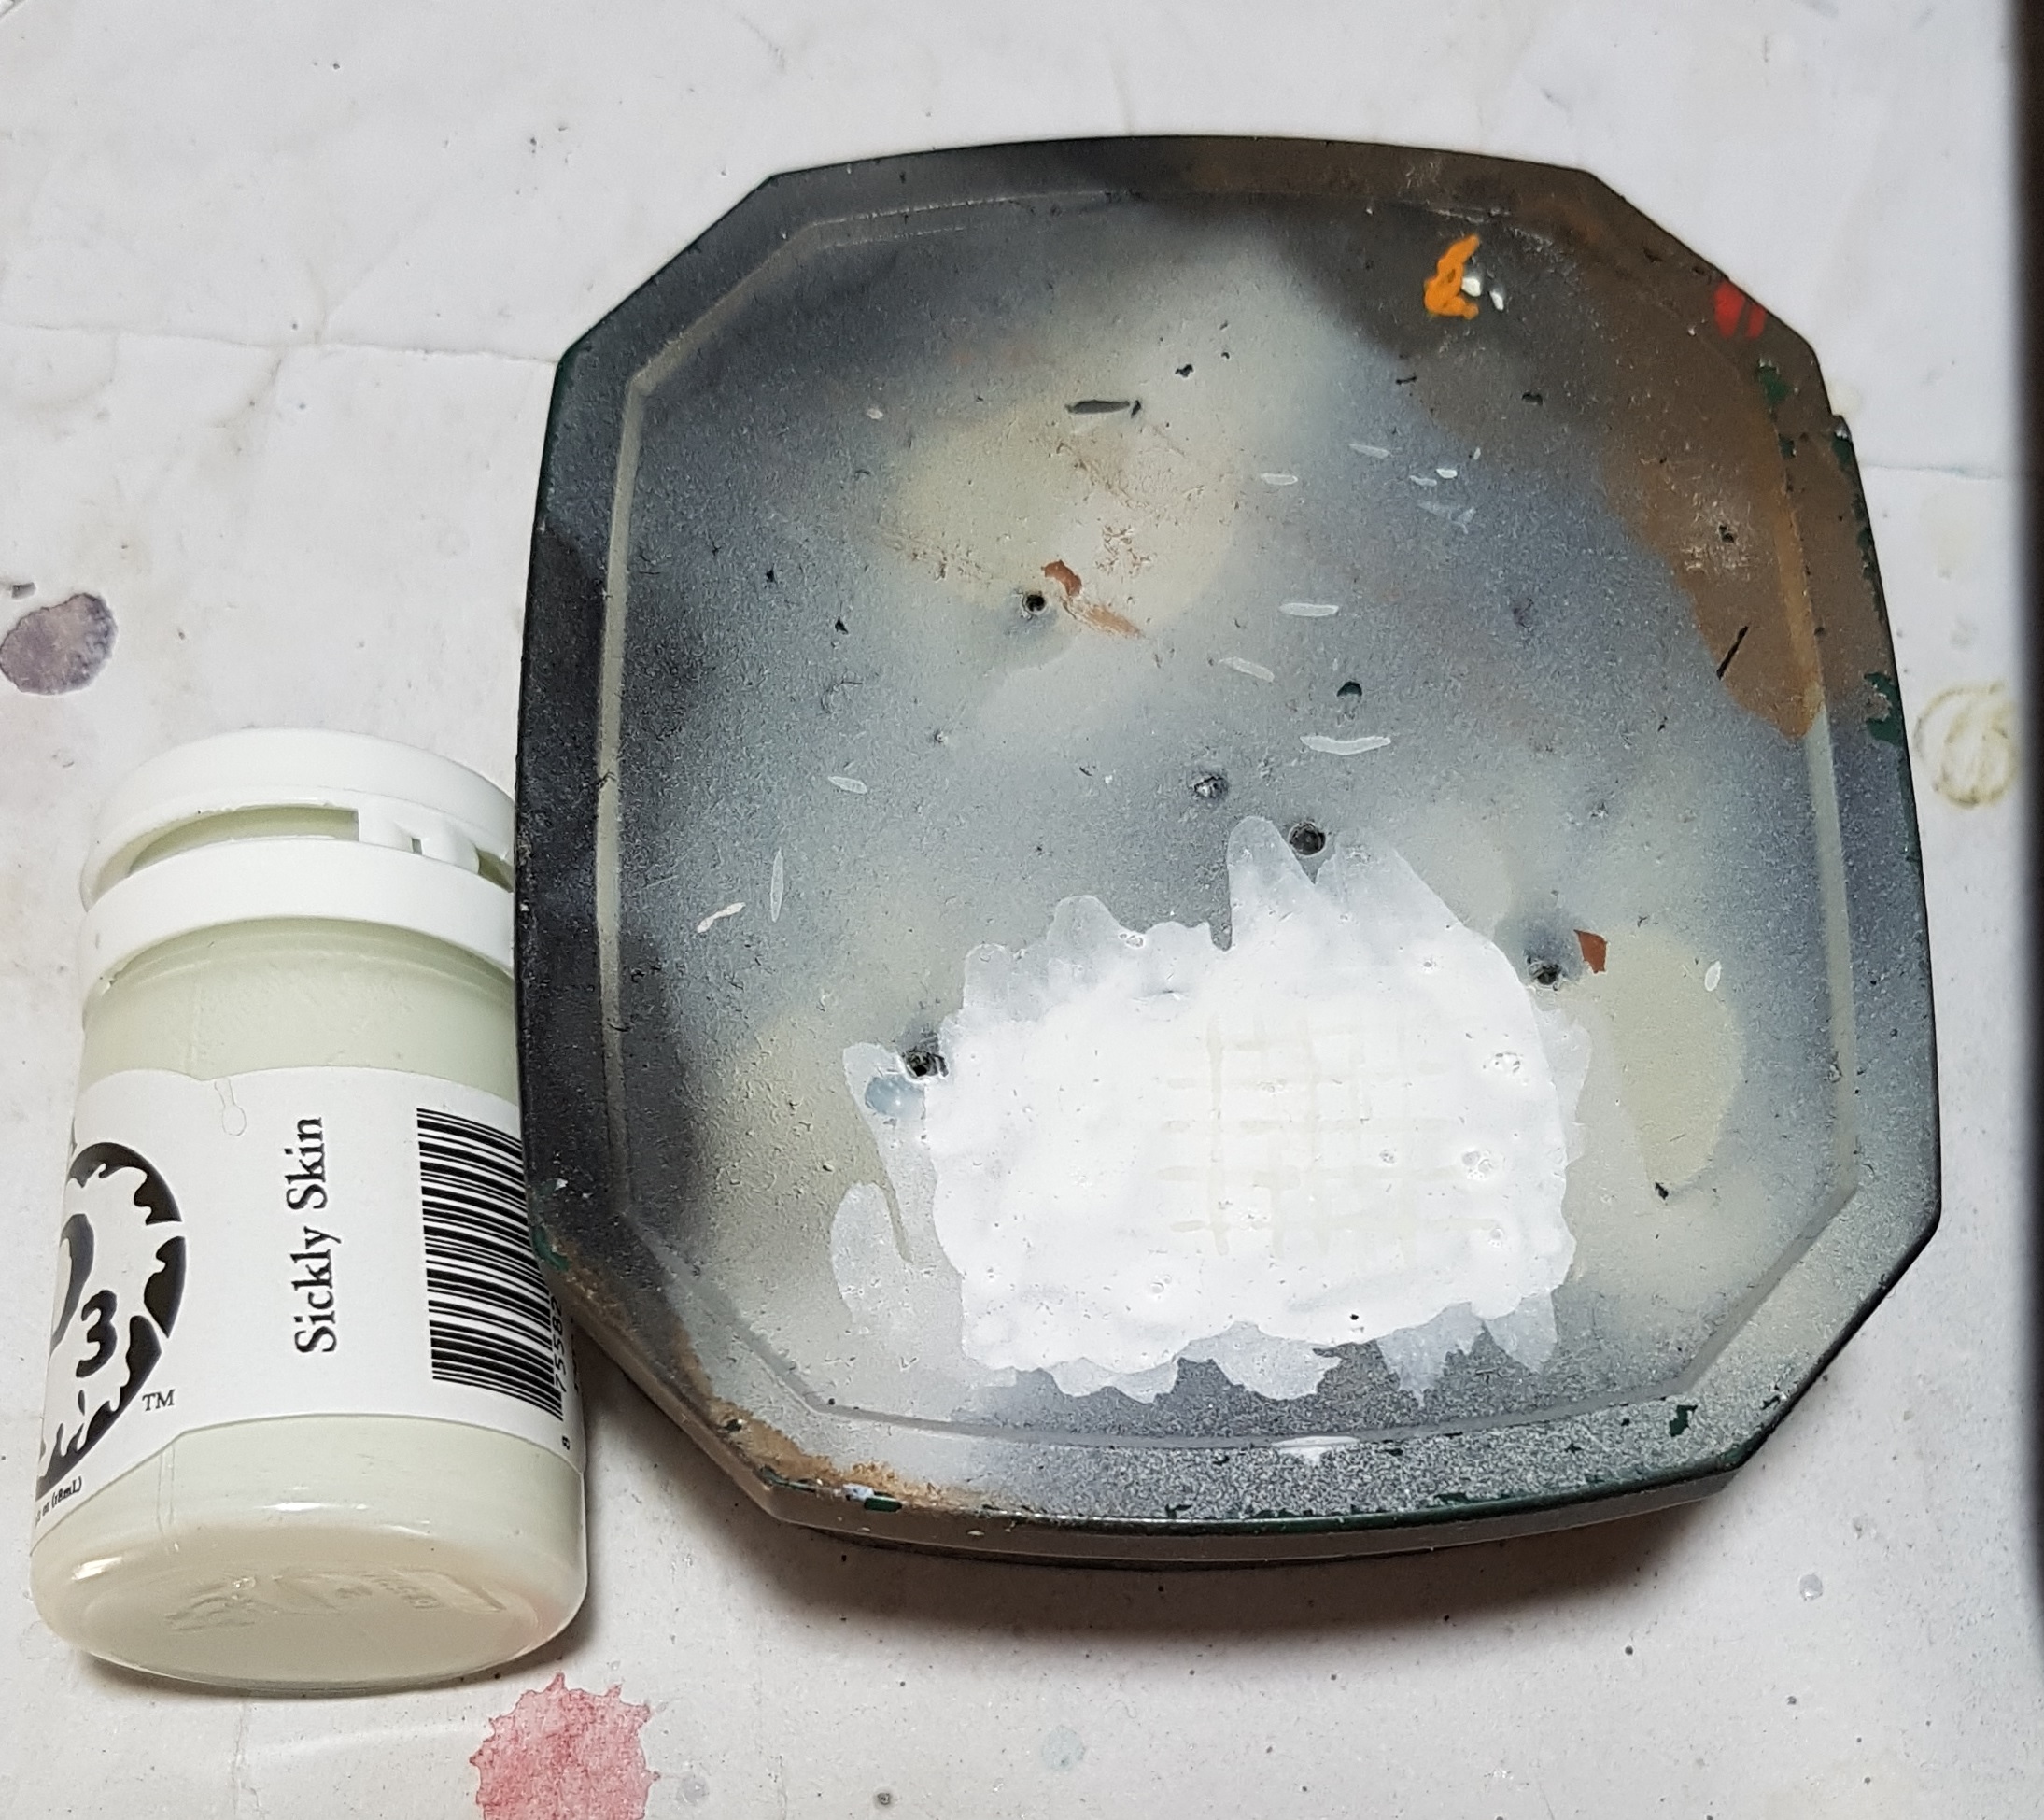
- P3 Sickly Skin
- P3 Thammar Black
 Skorcha protected for airbrushing
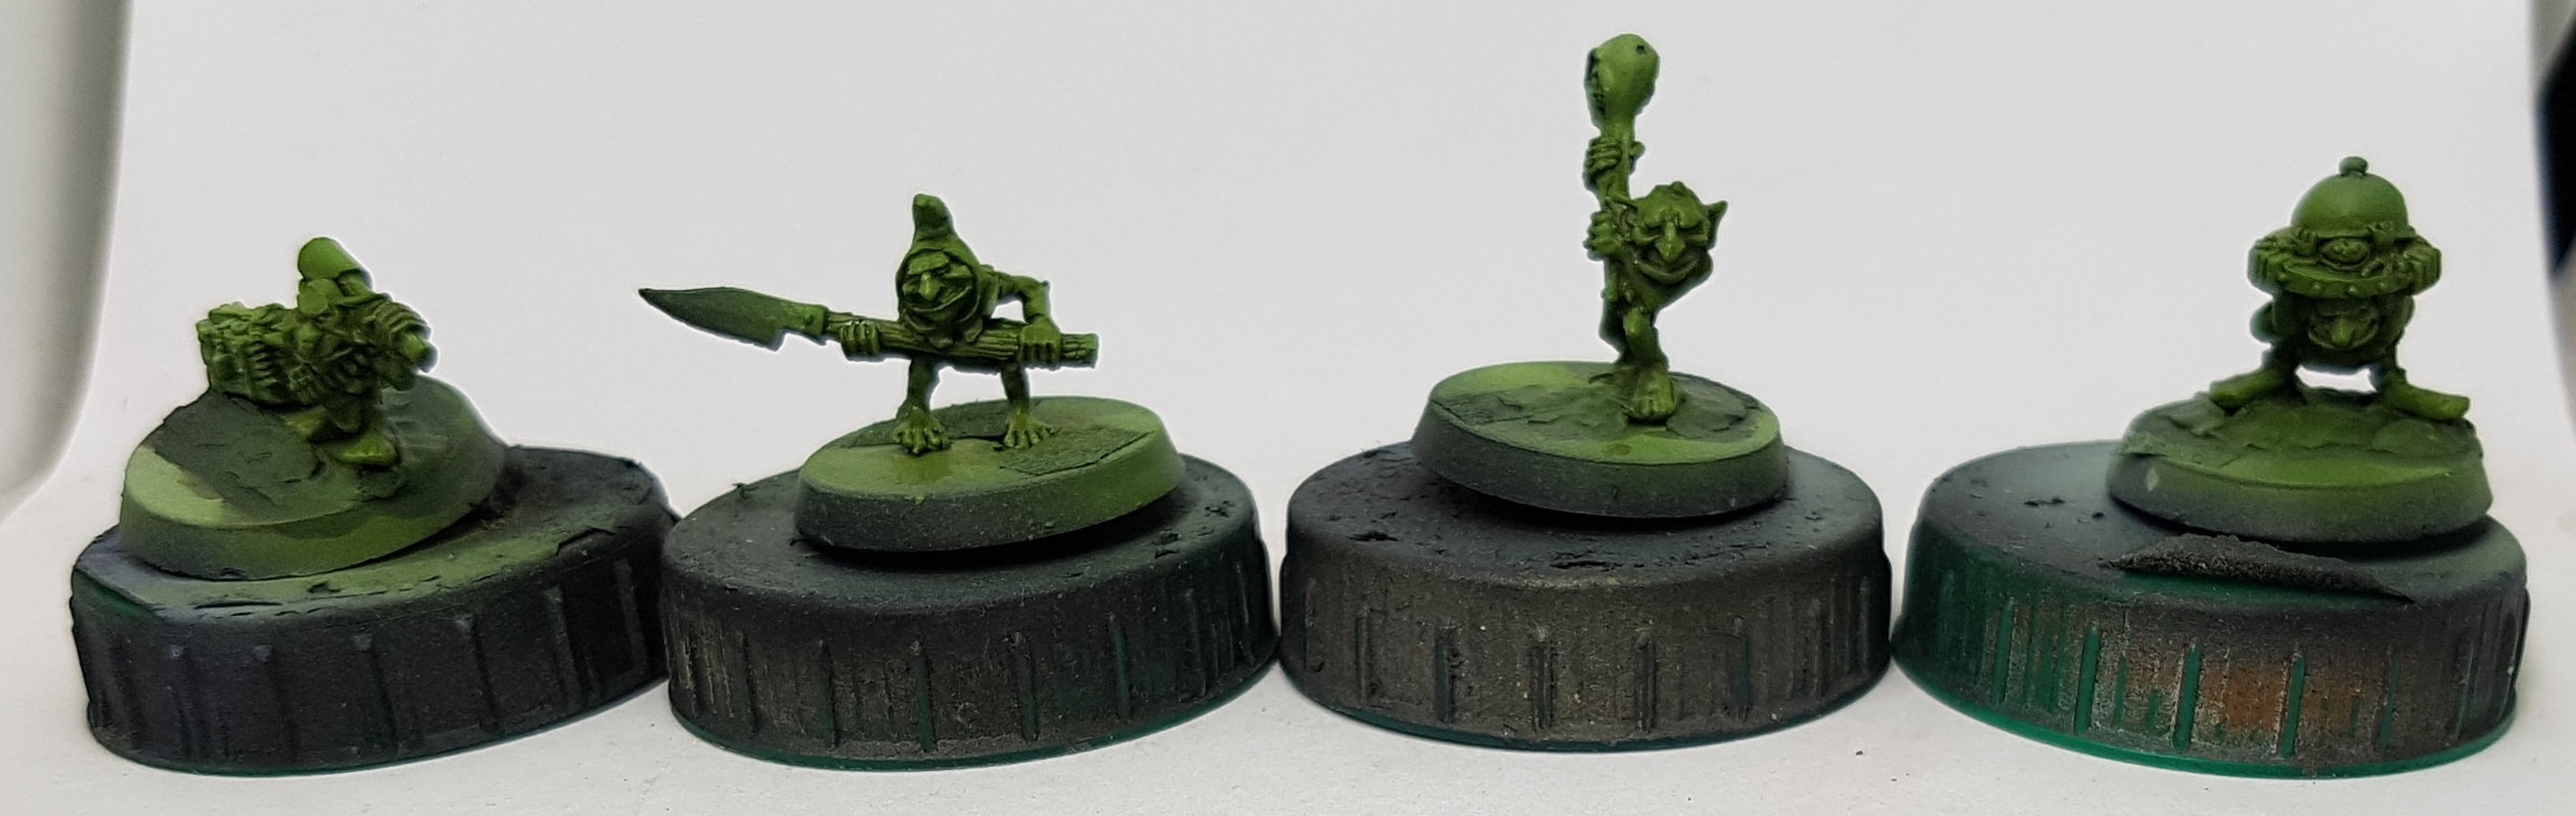
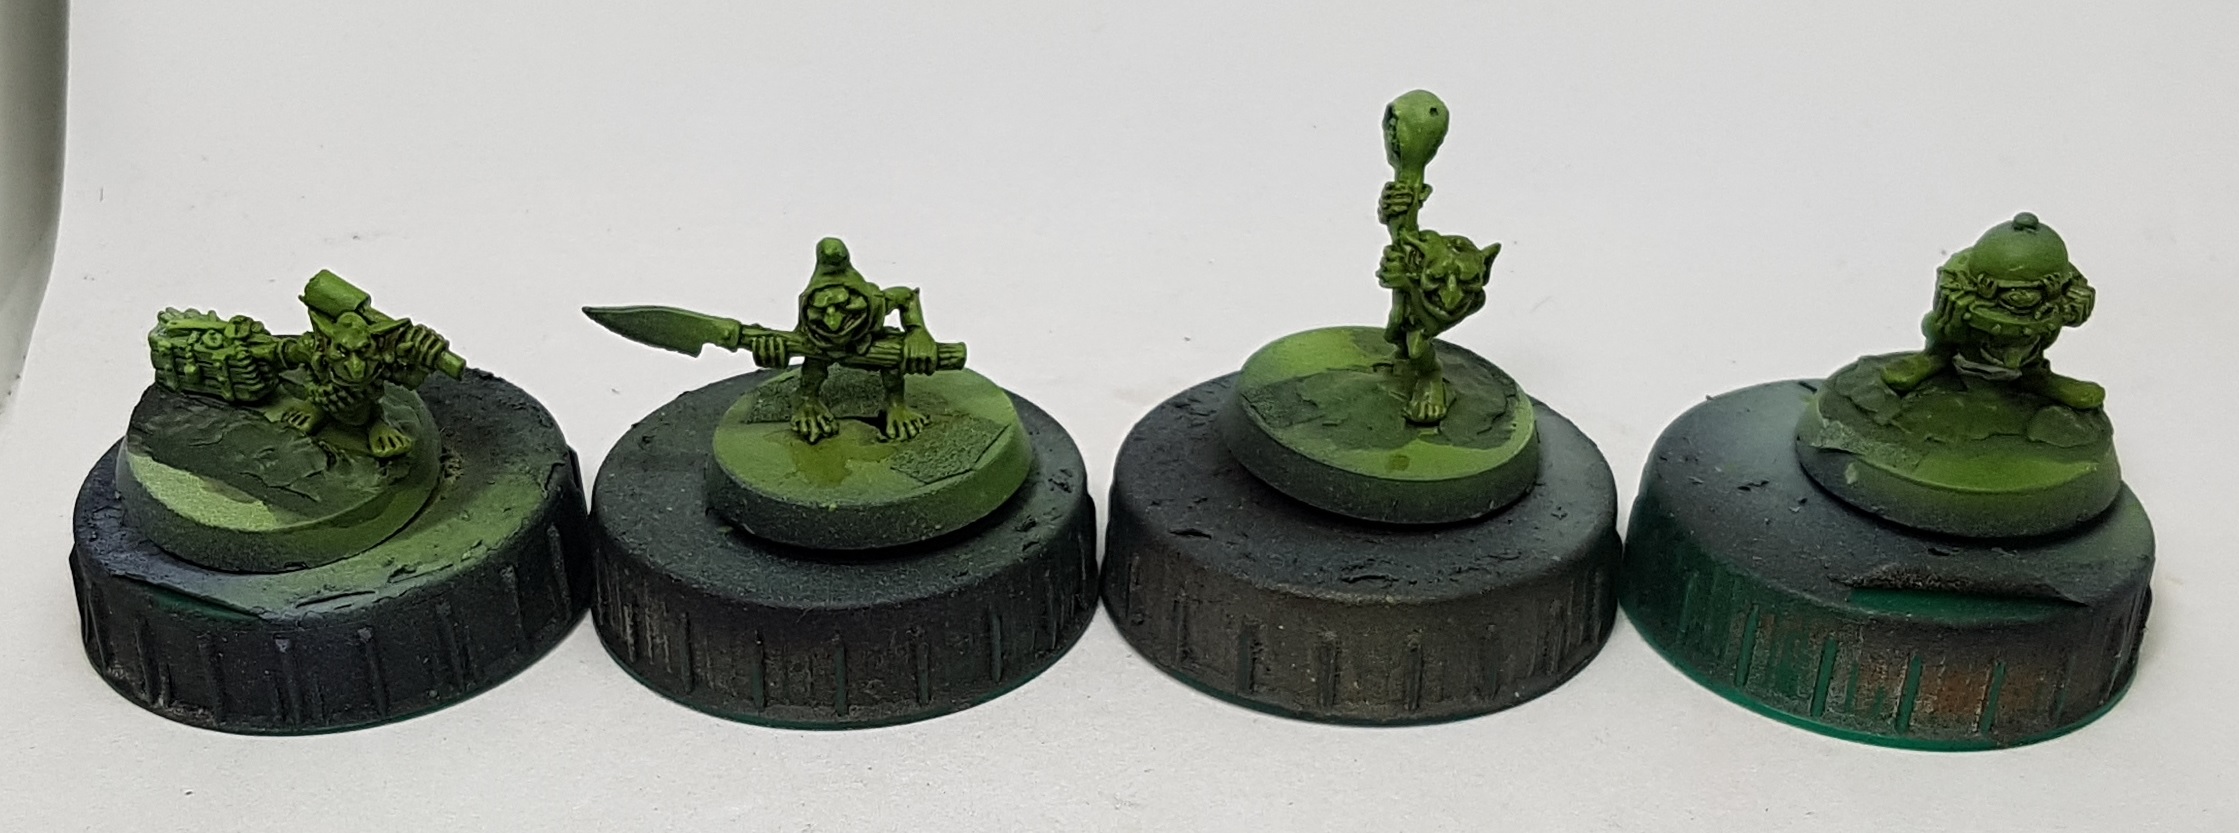
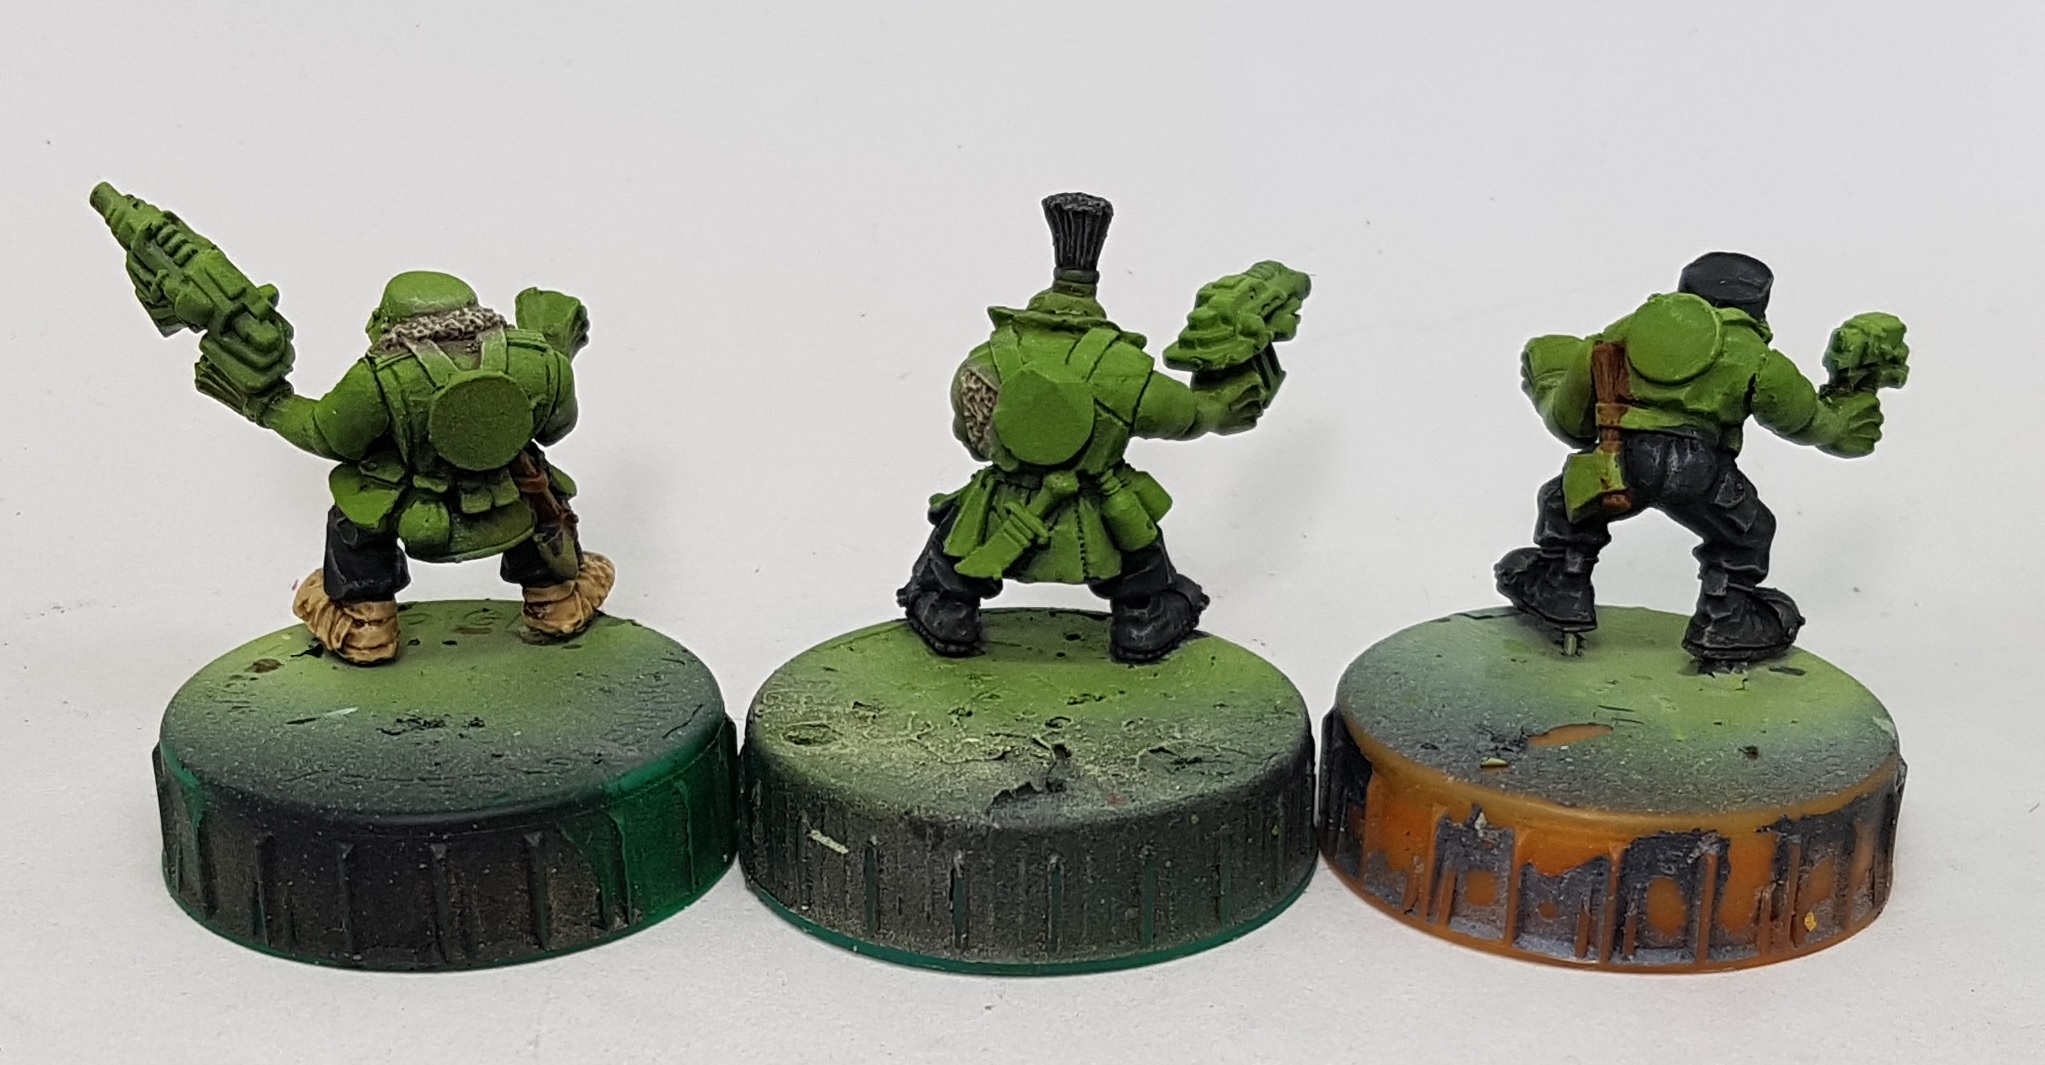
I figures the Runts and the Orks are different subspecies of the same family so they might have different tones to their skin. To aim for this effect I chose to base them with different but similar greens. I started by airbrushing the Runtz with VGA 72.730 Goblin Green. I was very glad I didn’t start the Orks with this as it turns out my pot is old and thick and a little lumpy. My airbrush was not happy with it. I was glad I only had 12 models to do with it as it took more work than it should.
I had a look at my paint rack for a green that was different but not too different, and chose VMC 70.967 Olive Green. I ended up thinning this down 3:1 thinner:paint, but this will vary from person to person, and pot to pot.
Everything was given a shade with an all over wash made from a mix of P3 Cryx Bane Base and P3 Oridc Olive and then left to dry at its own pace.
Another wash was made up using Cryx Bane Base, Oridic Olive, and P3 Sanguine Highlight. This was applied in a much more targeted manner to the recesses and shadows only, paying close attention to the face. This is where you want the eye drawn so this is where the most detail should be encouraged.
When painting a horde army sped and simplicity is the key so a drybrush highlight seemed the way to go. I mixed up P3 Wurm Green and P3 Menoth White Base 2:1 Green:White and drybrushed everything, again paying close attention to the face.
With the flesh done, this just left the eyes, teeth and occasional boil.
Teeth: Base coat Menoth White Base, then highlighted with Menoth White Highlight
Eyes: P3 Sickly Skin (Because its off white and different to the teeth) with a dot of black in the middle
Tongues, Boils, and Scabs: I applied a dot of Carouburg Crimson wash to them and hoped for the best. perhaps I could have put a dot of flesh tone on the top first and let the wash transition to the green? The wash was also applied to any visible tongues and along the edge of the metal plate on one Orks head.
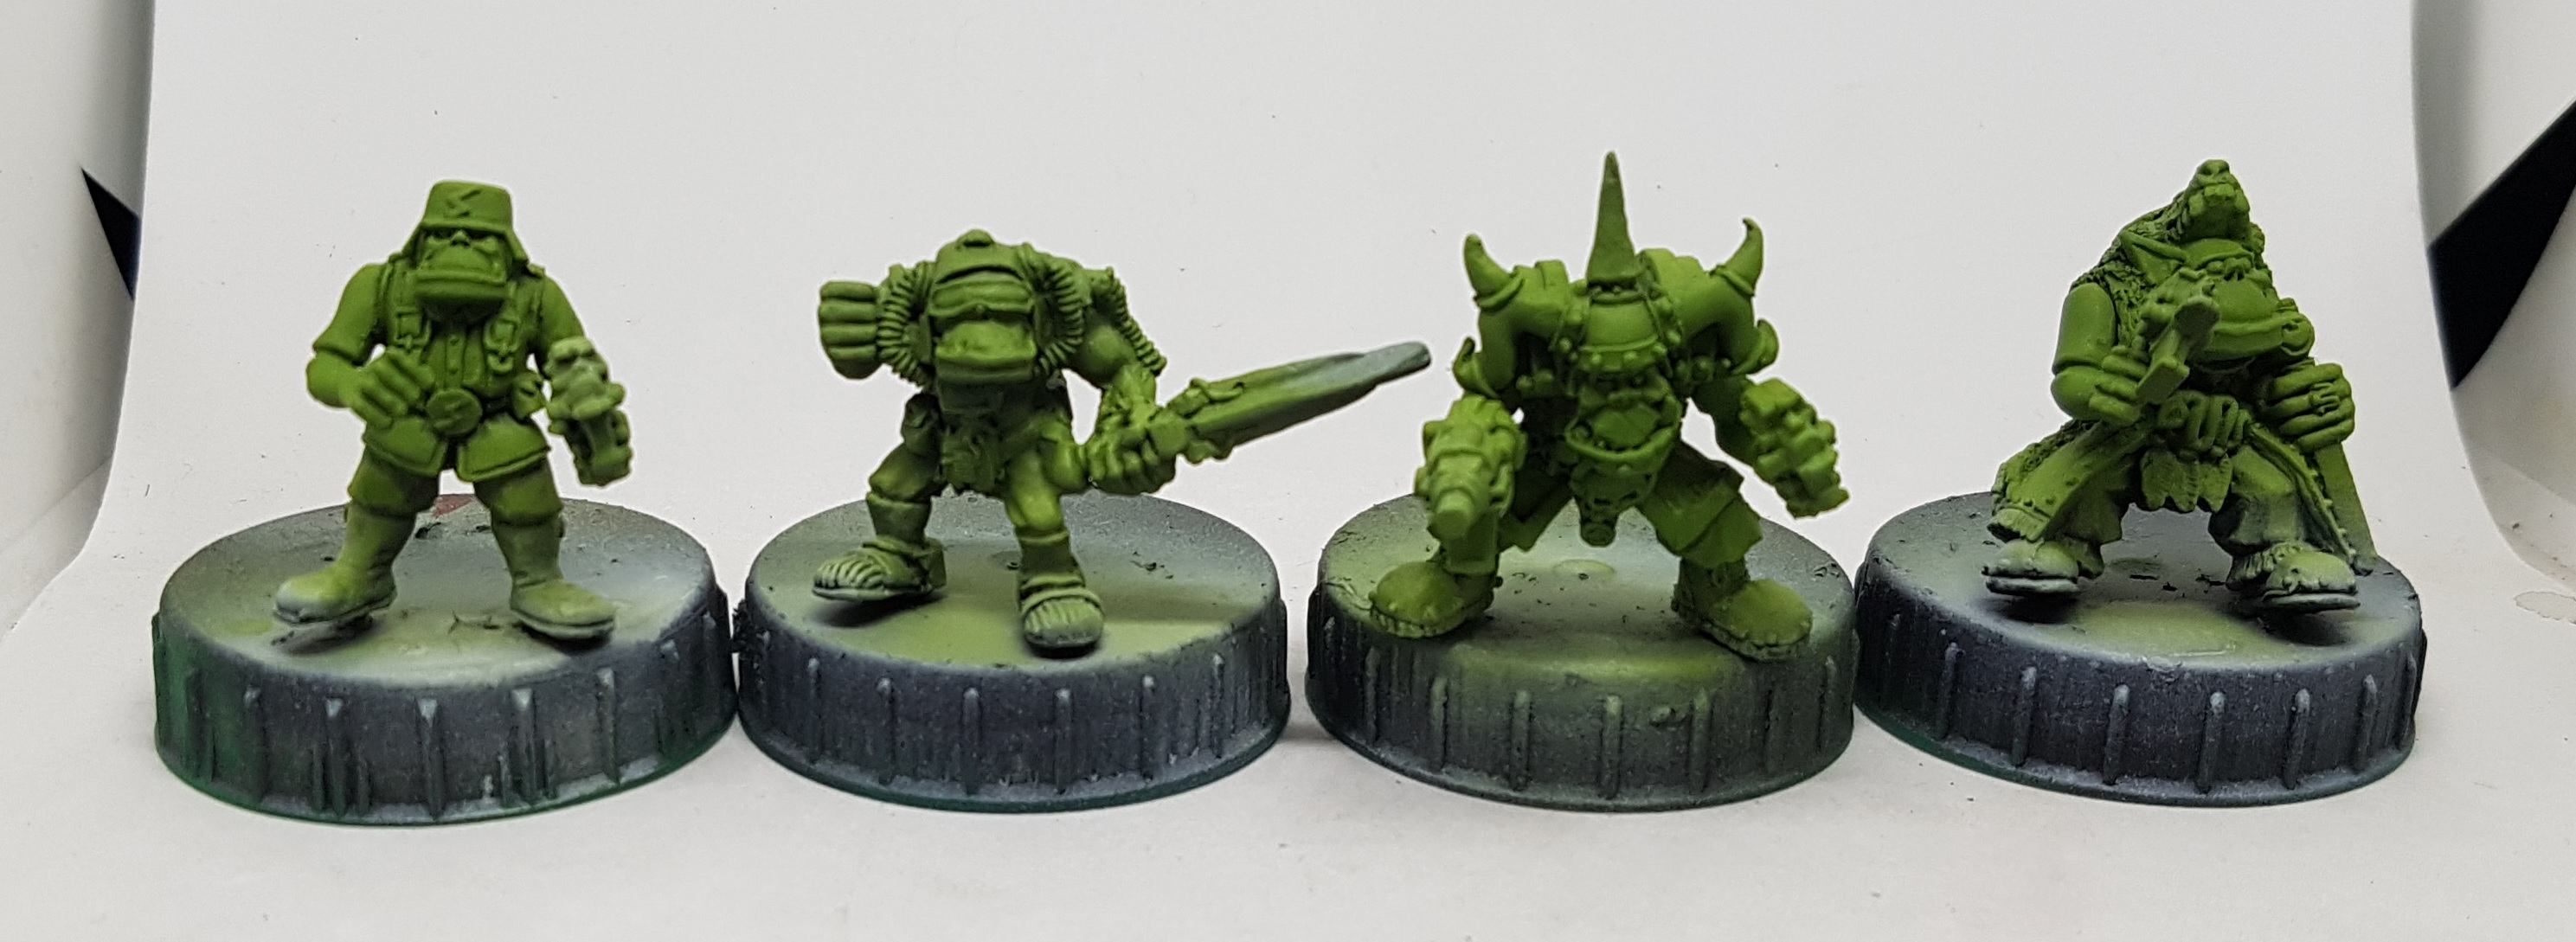
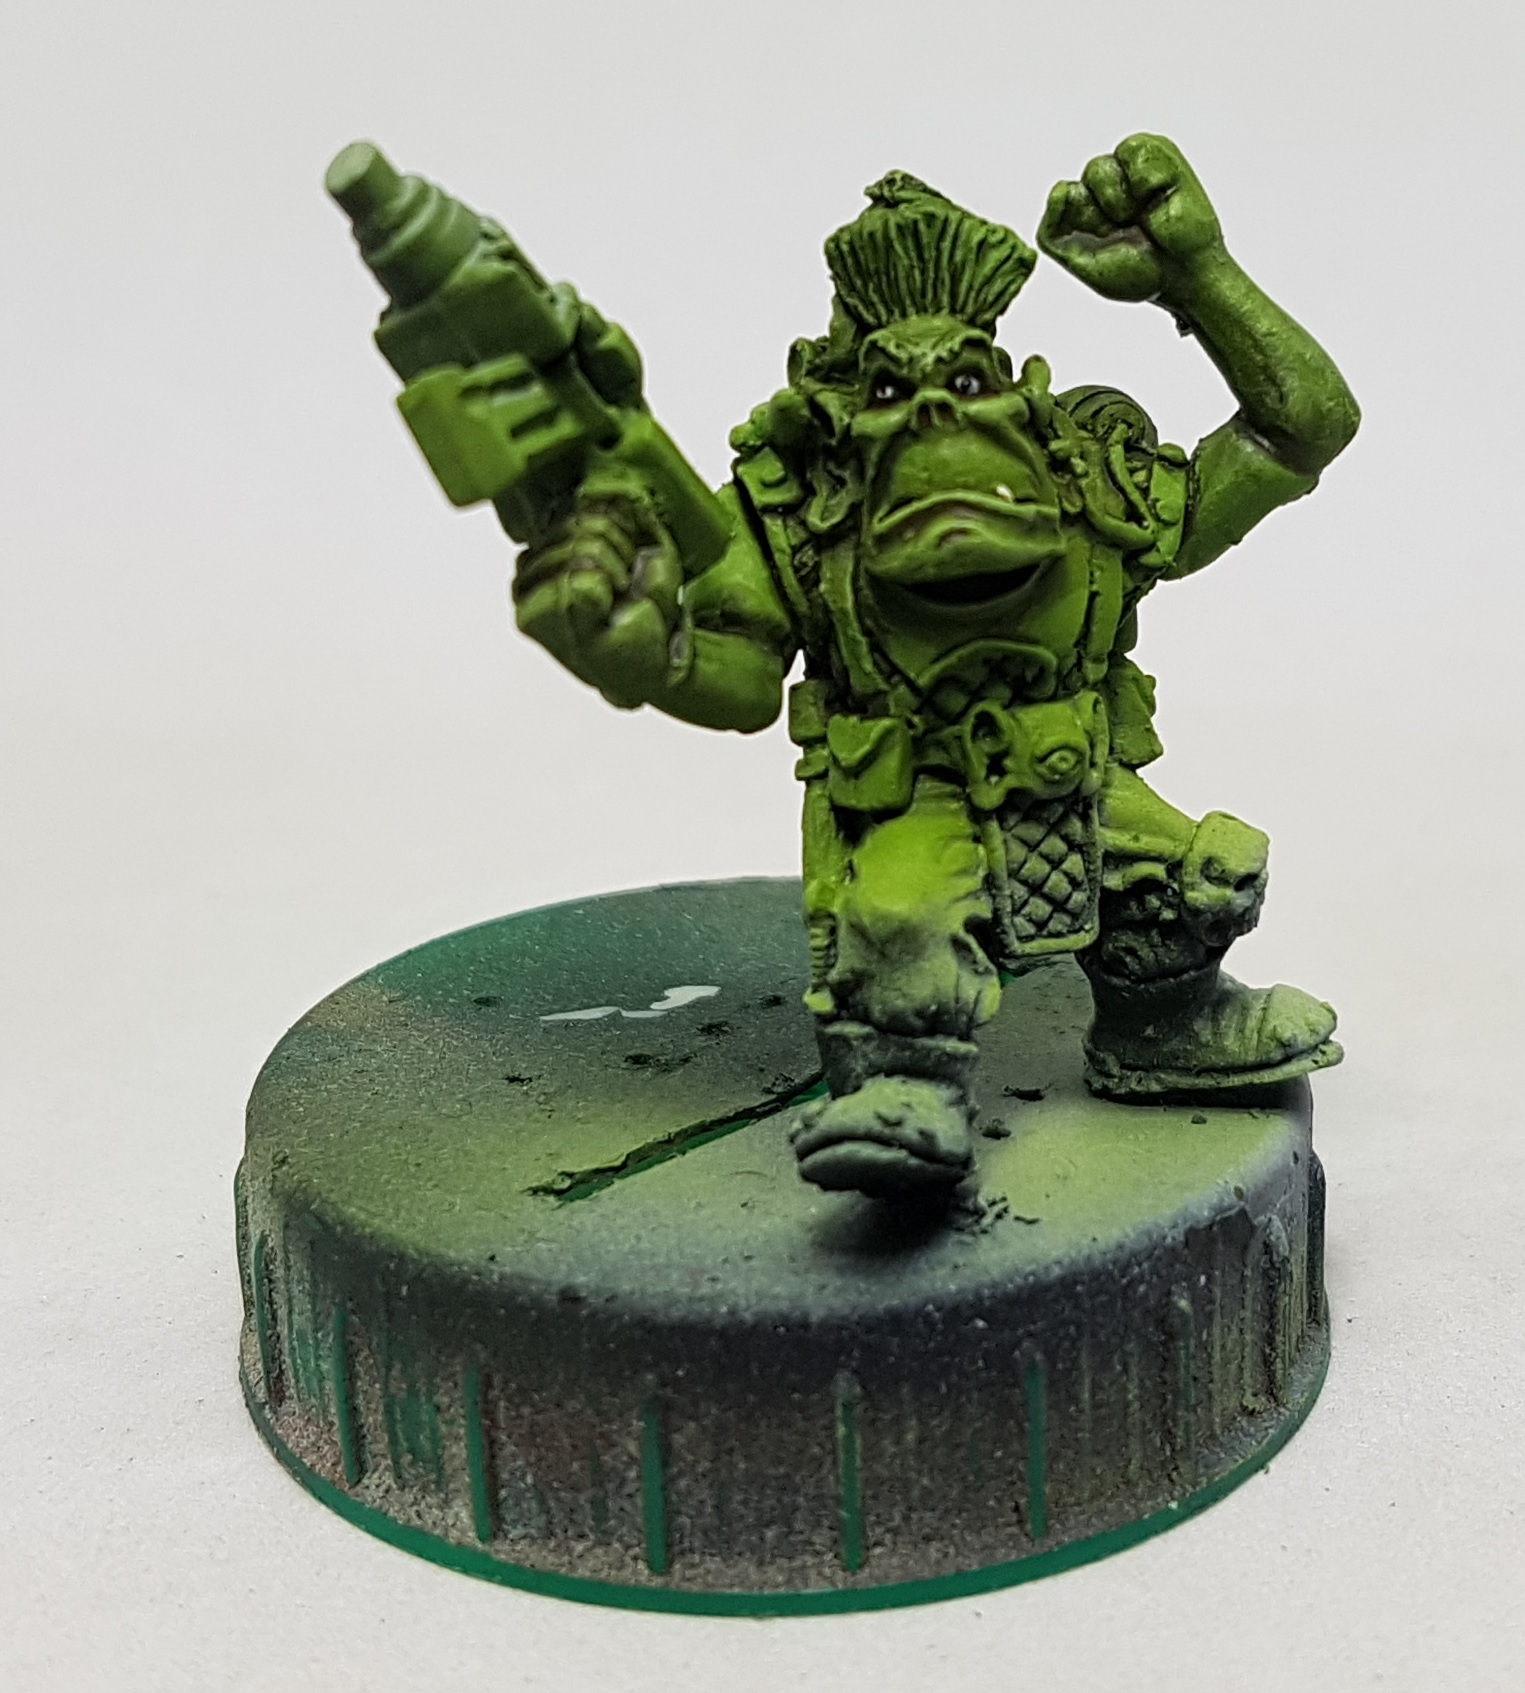
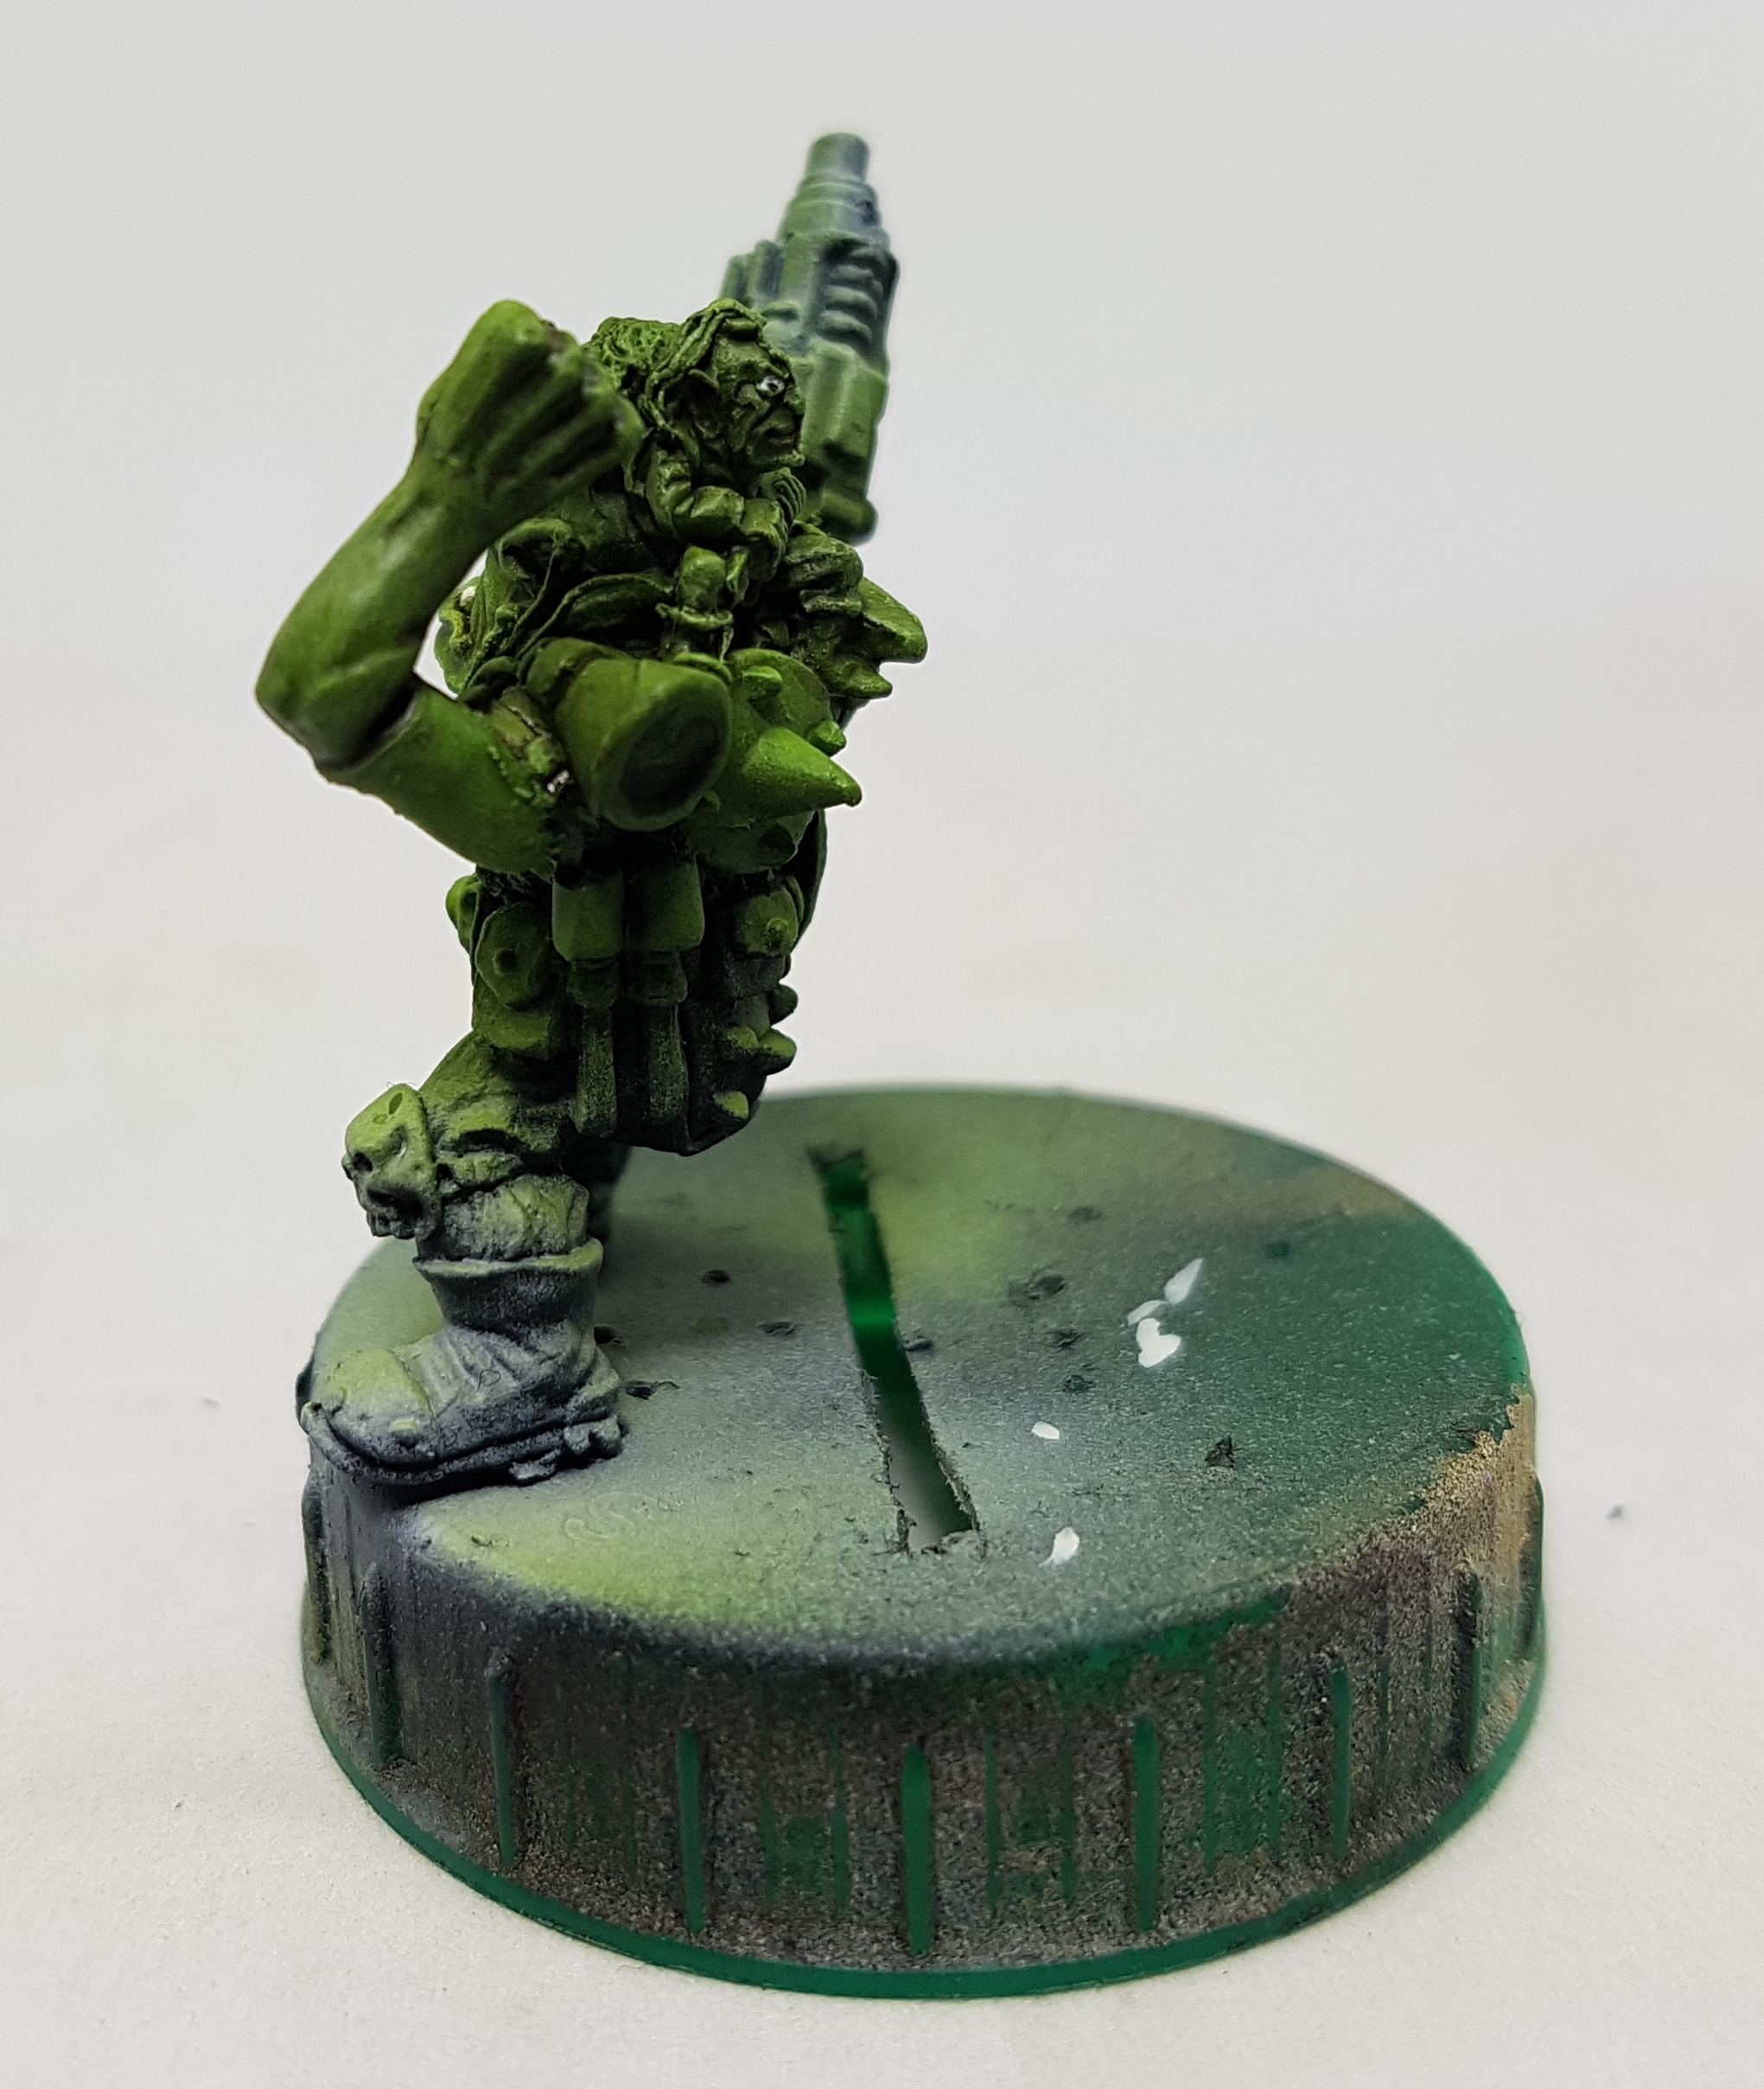
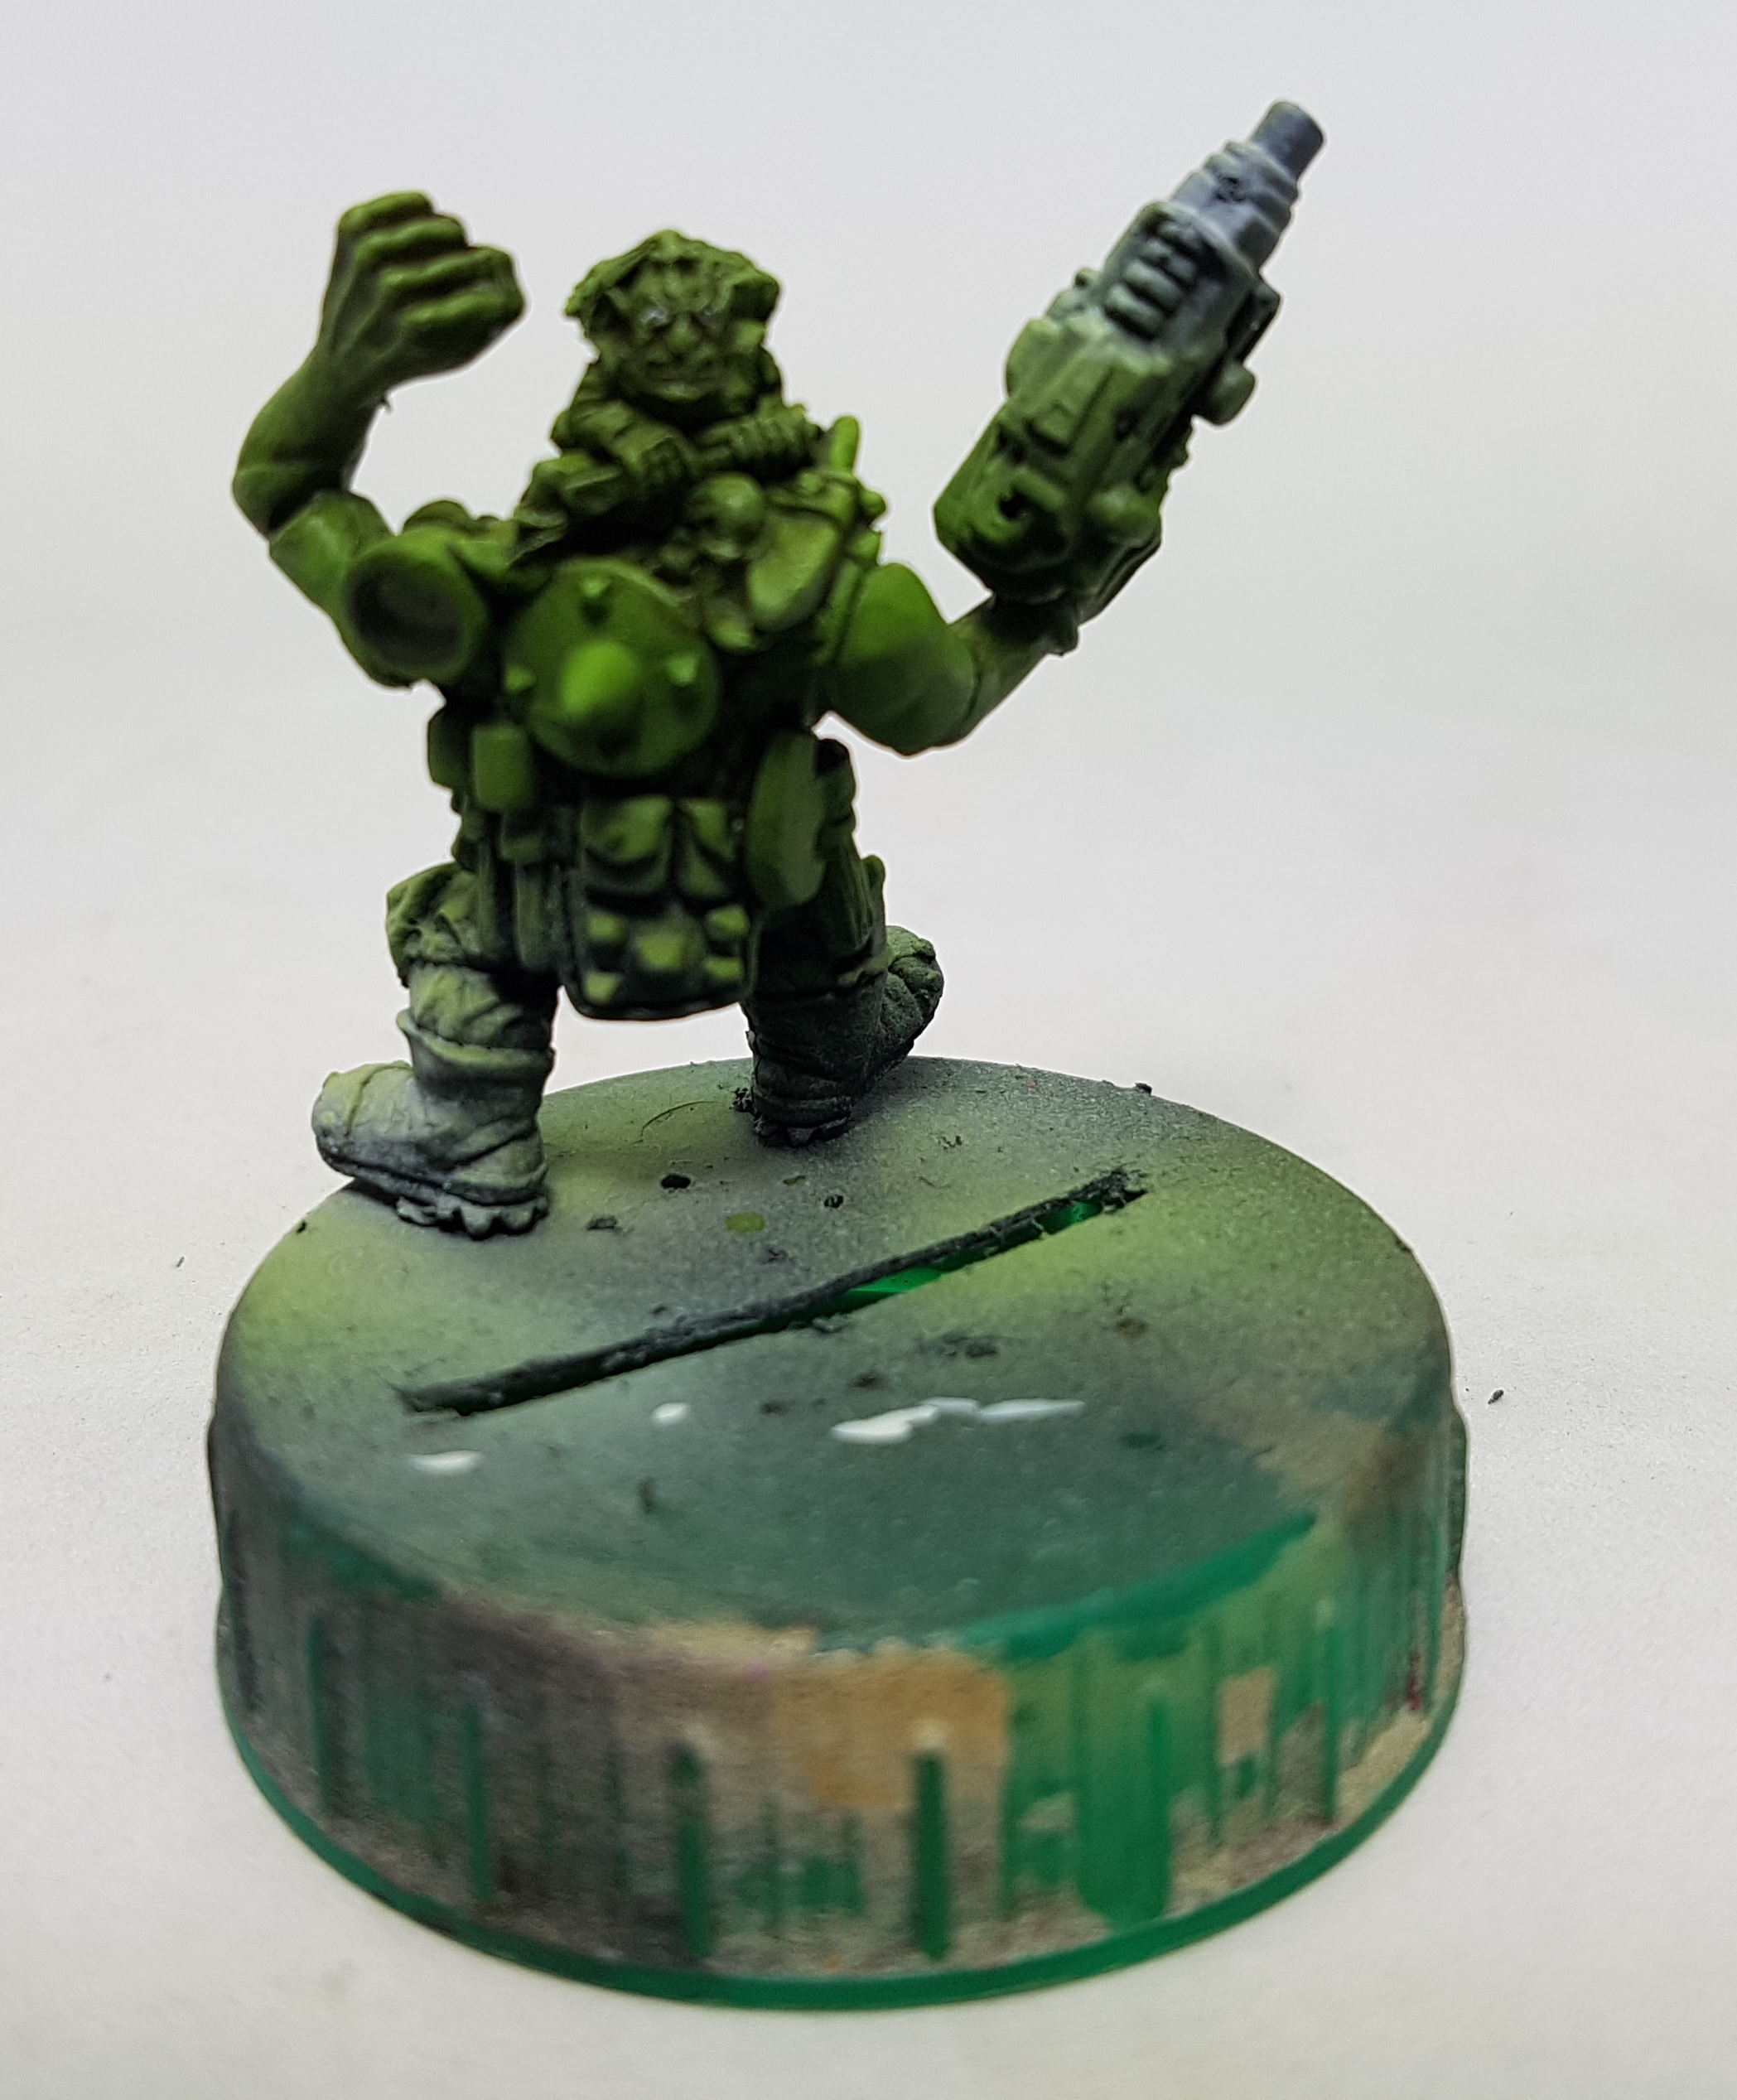
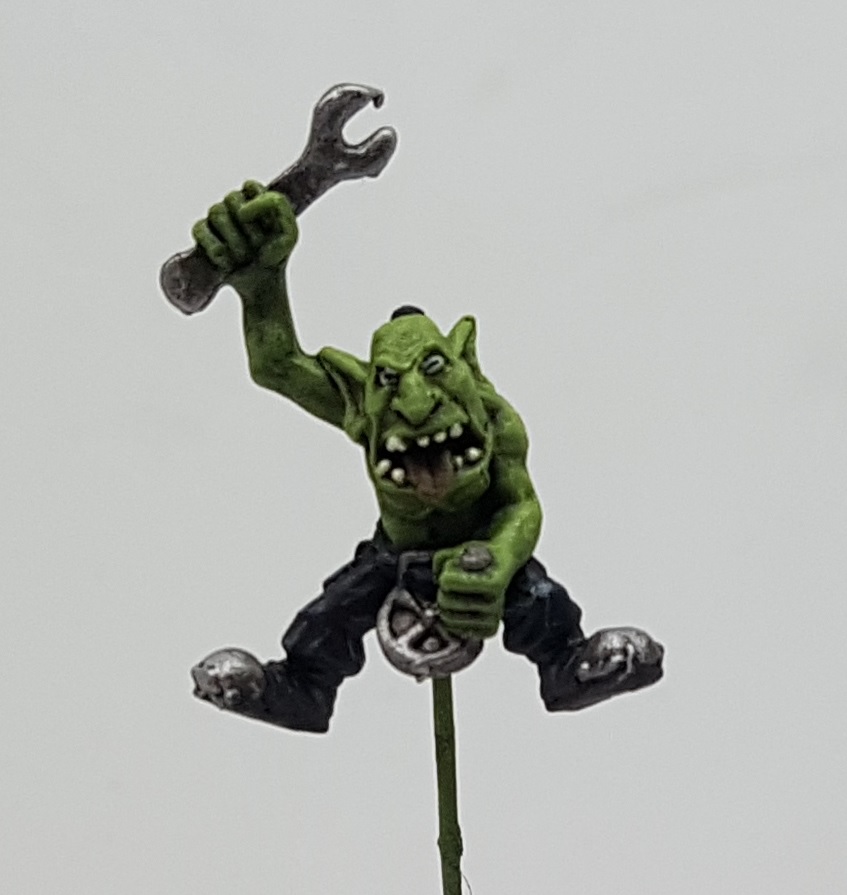
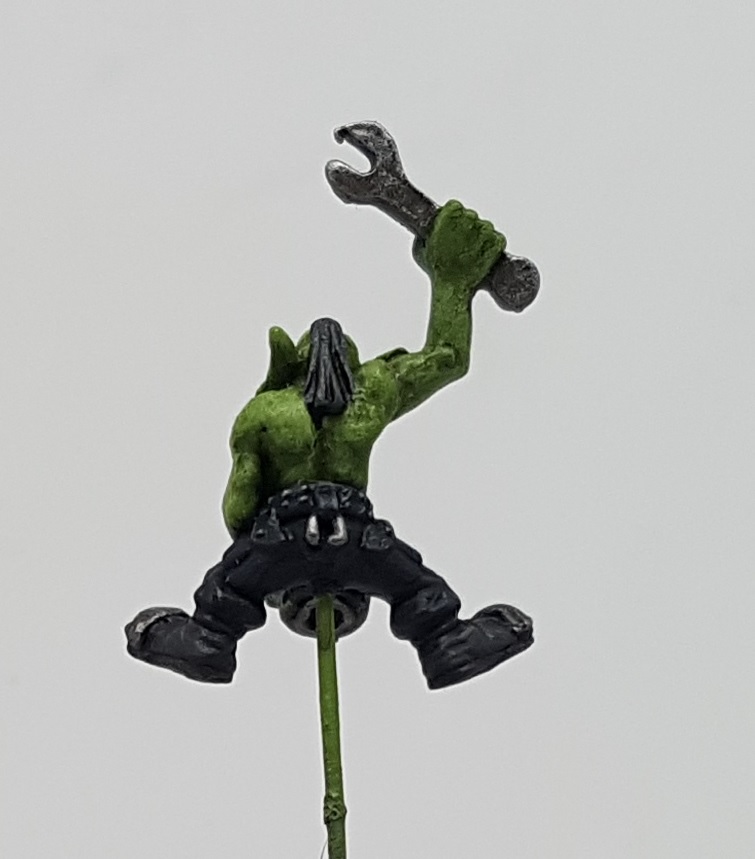
The gallery below also includes a close up of my favourite of the Orks. he has so much expression on his face. He looks like he’s been up for days working on something important and surviving on too much coffee. he’s been asleep for about 45 minutes and the alarms have gone off. he’s up, he’s ready for action, but he has no idea where he is, what time it is, or even who he is anymore.
He also has a Runt on his back, possibly manning the horn that connects to his ear. Can anyone explain what the horn is supposed to be for please. Is he supposed to be deaf? Is it so the Runt can whisper to him? Is it a strange Ork Radio? It might help me decide how to paint it.

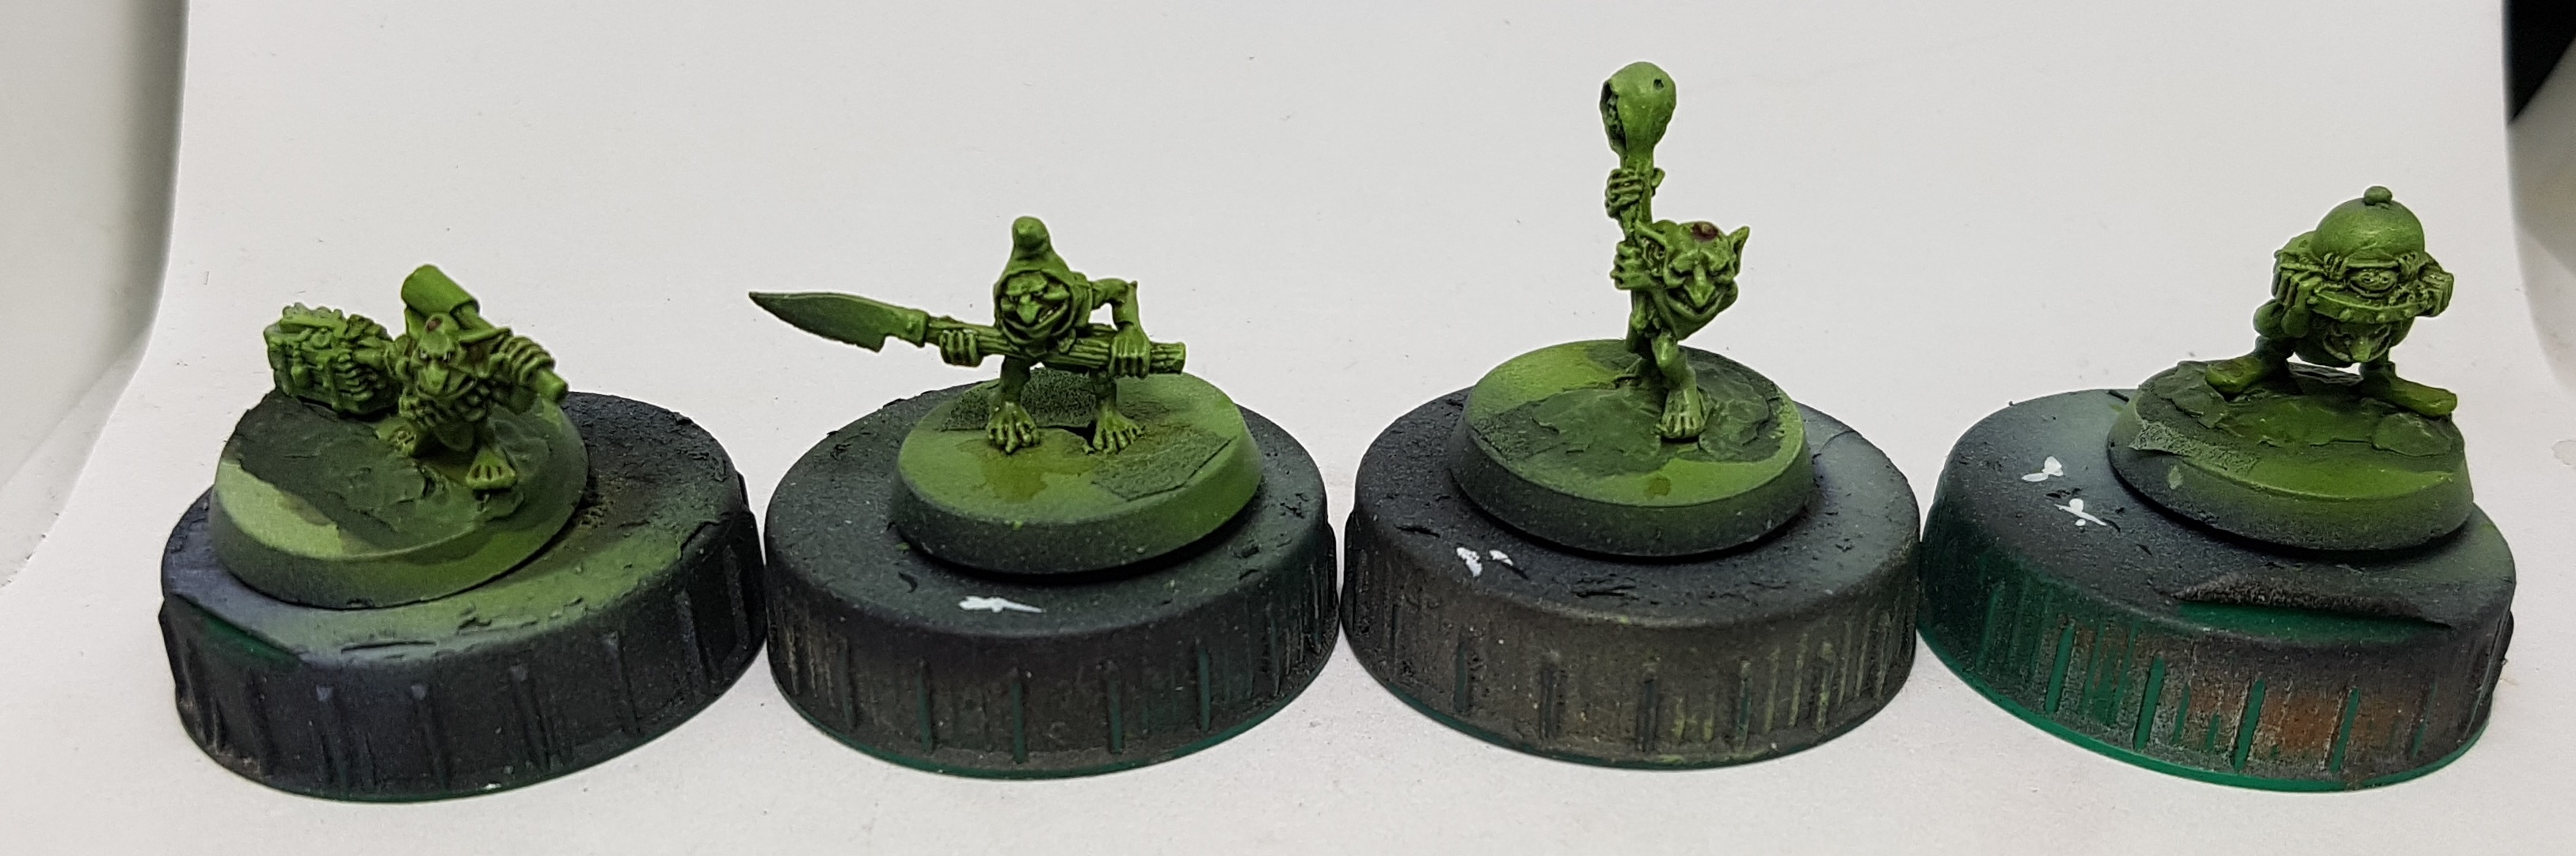

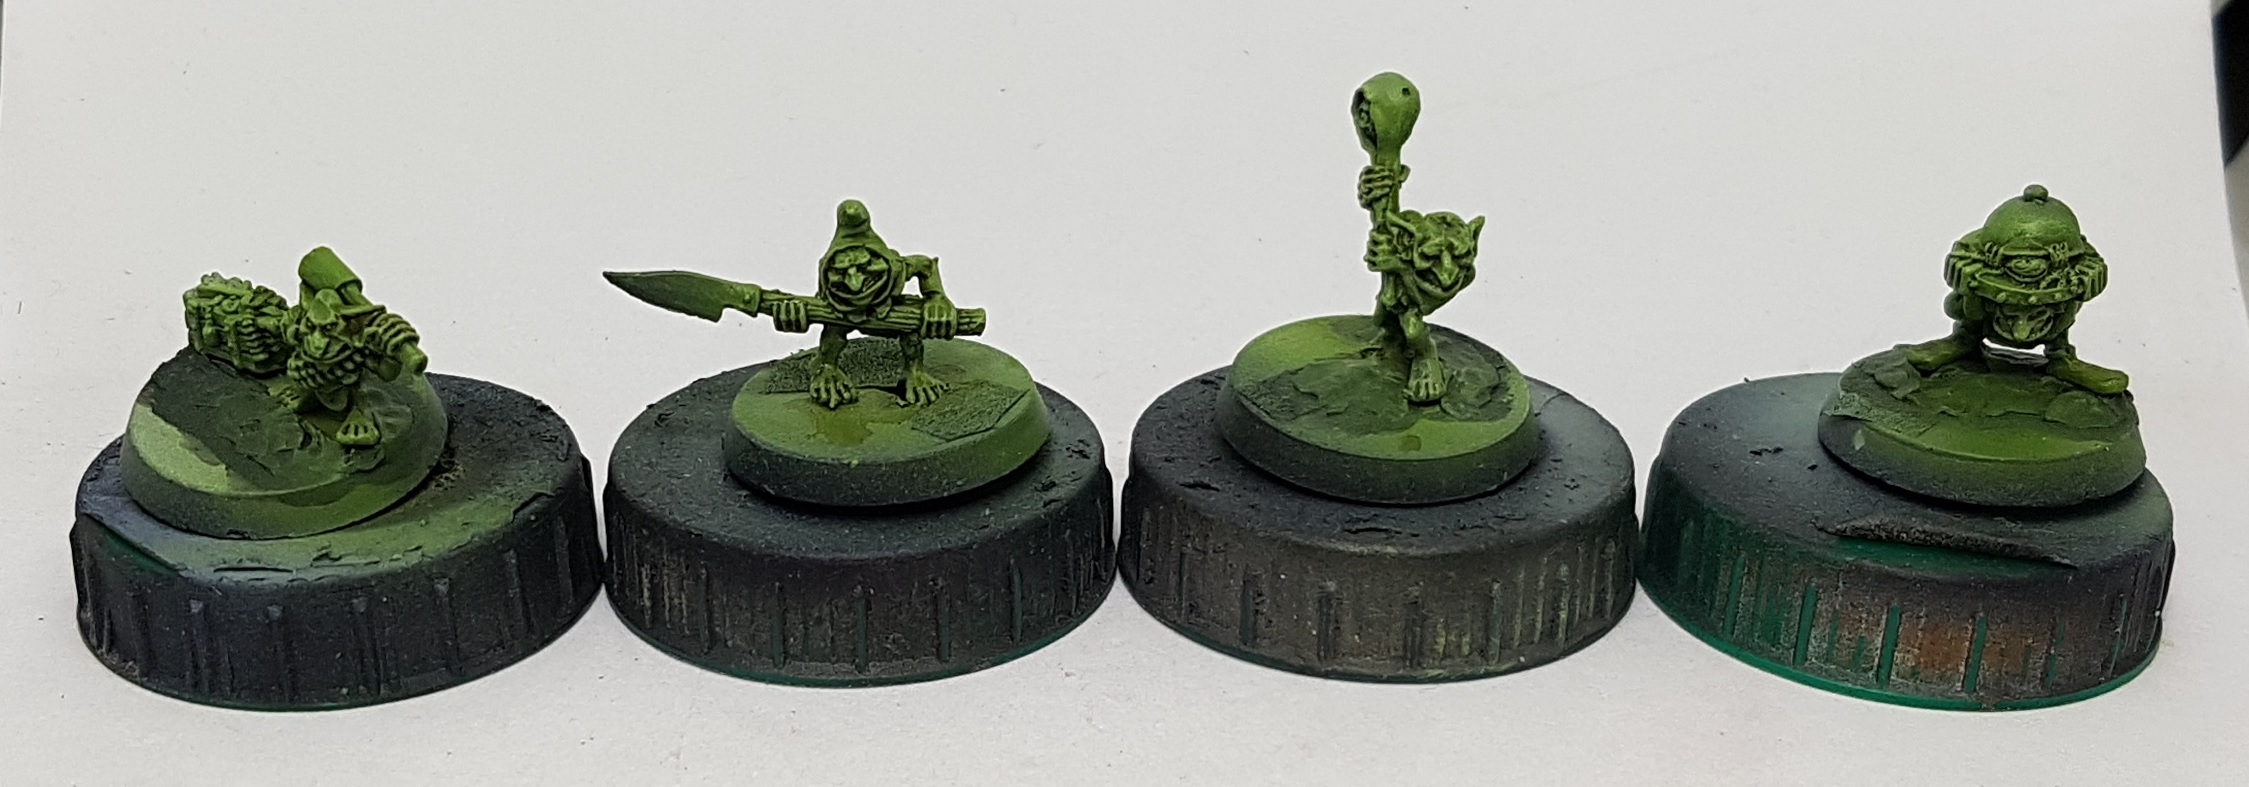
Gretchins (Or Runtz or Snotlings or whatever they are called this week)
There’s a whole lot of models in the project so in order to maintain momentum and never feel like its dragging I’ll be breaking it down in to a series of smaller batch projects. I’m currently thinking:
- 12x Gretchins
- 26 Ork Boys (Maybe 2 lots of 13 so I’ll feel progress quicker?)
- 13 Characters, Solos and Drivers
- 9 Vehicle and machine sub assemblies
Sunday afternoon I started work on my Gretchins, and somehow had them all done except the bases before bed. All the flesh parts were done in the previous stage. Here are the paints I used for this step:
The Basecoat
The first thing I had to do was paint the stones inside the sling as that’s a drybrush job and they are recessed so can’t be drybrushed without coating everything around them. They got a quick base of Bastion grey, a wash of Nuln oil, then a drybrush of Menoth White Base. Then I picked out the following base coats:
 Washes were then applied: The crate got undiluted Woodgrain, the nets got Seraphim Sepia, and the leathers and other woods got Agrax Earthshade
Next came a highlighting stage. I tried drybrushing Menoth White Base over all the browns. It worked well on the wood, but turned out to be too much of a contrast on the leather when I tried it on the sling. A second coat of Agrax Earthshade over the top fixed it and gave it nice highlights. I also lightly drybrushed the furry loin cloth of the one guy who has one.
I used Jack Bone to drubrush highlight the crate to make it look like the stain had worn in places exposing the wood core.
Deck Tan was diluted to try to make it as thin as possible while still retaining control. I need to try for thinner next time. This was then applied to the “blacks” as highlights.
The blacks were then washed with Nuln Oil to dampen the highlights and provide shade. Afterwards more Deck Tan could have been applied for glints and extreme highlights, but I decided not to do that on these little guys.

Now we are on the final stages. Time to pick out all the remaining details:
- Tentacles: Midlund Flesh washed with Druchii Violet
- Serving Tray: Cold Steel
- Arrow Flights: Evil Sunz Scarlett washed with Caroburg Crimson
- Iron: Pig Iron
- Rope: Rucksack tan, washed with Agrax Earthshade (Shade inside the crate with it while you’re at it)
- Bullets: Brass Balls washed with Agrax Earthshade
- Hair: Ironhull Grey washed with Nuln Oil
- Bronze: Molten Bronze with a wash of Agrax Earthshade
 All the Iron was washed with Nuln Oil and then drybrushed with Cold Steel. The serving tray was given a trace on Nuln in the recesses, and then drybrushed up with Quicksilver. The ropes were drubrushed gently with Menoth White Base.
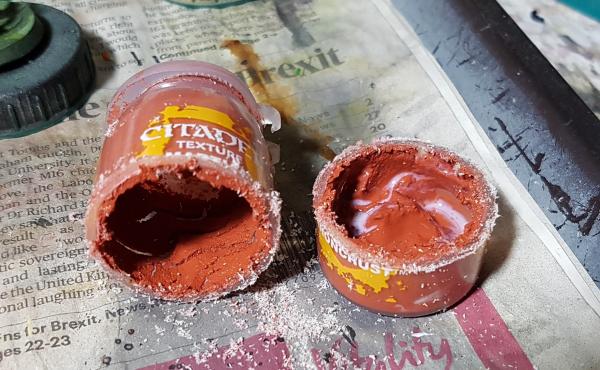
I’ve decided to paint the bases with a red earth to contrast the green of their flesh. I’ve used Martian Ironcrust which comes in those stupid pots so you can’t get to the bottom half of the paint without taking a saw to the bottle.
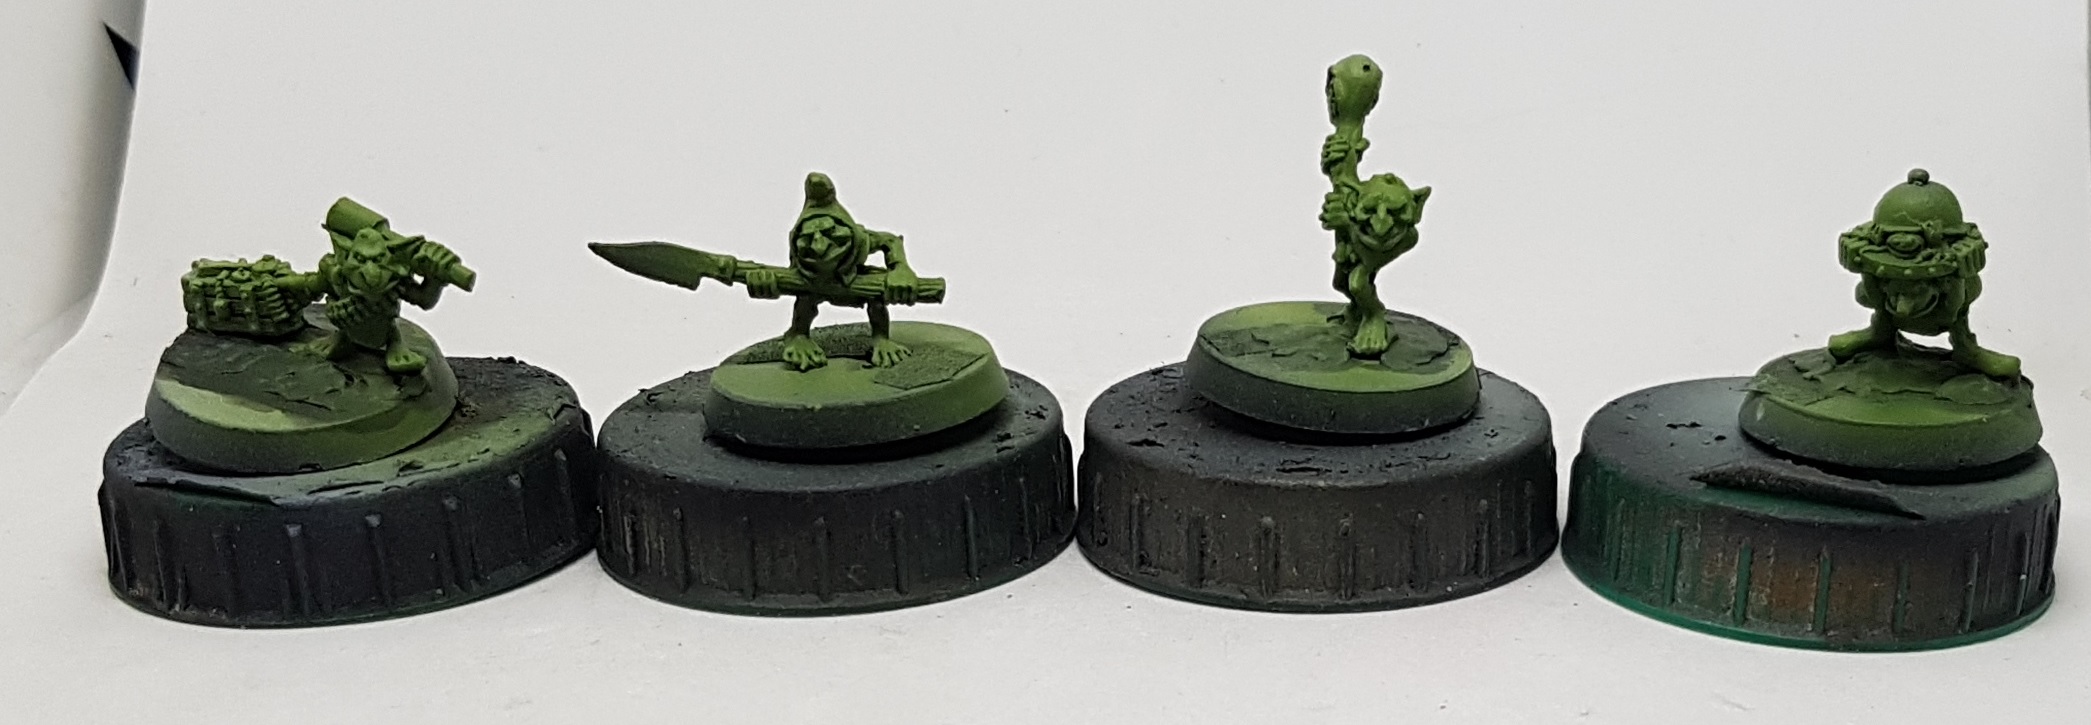
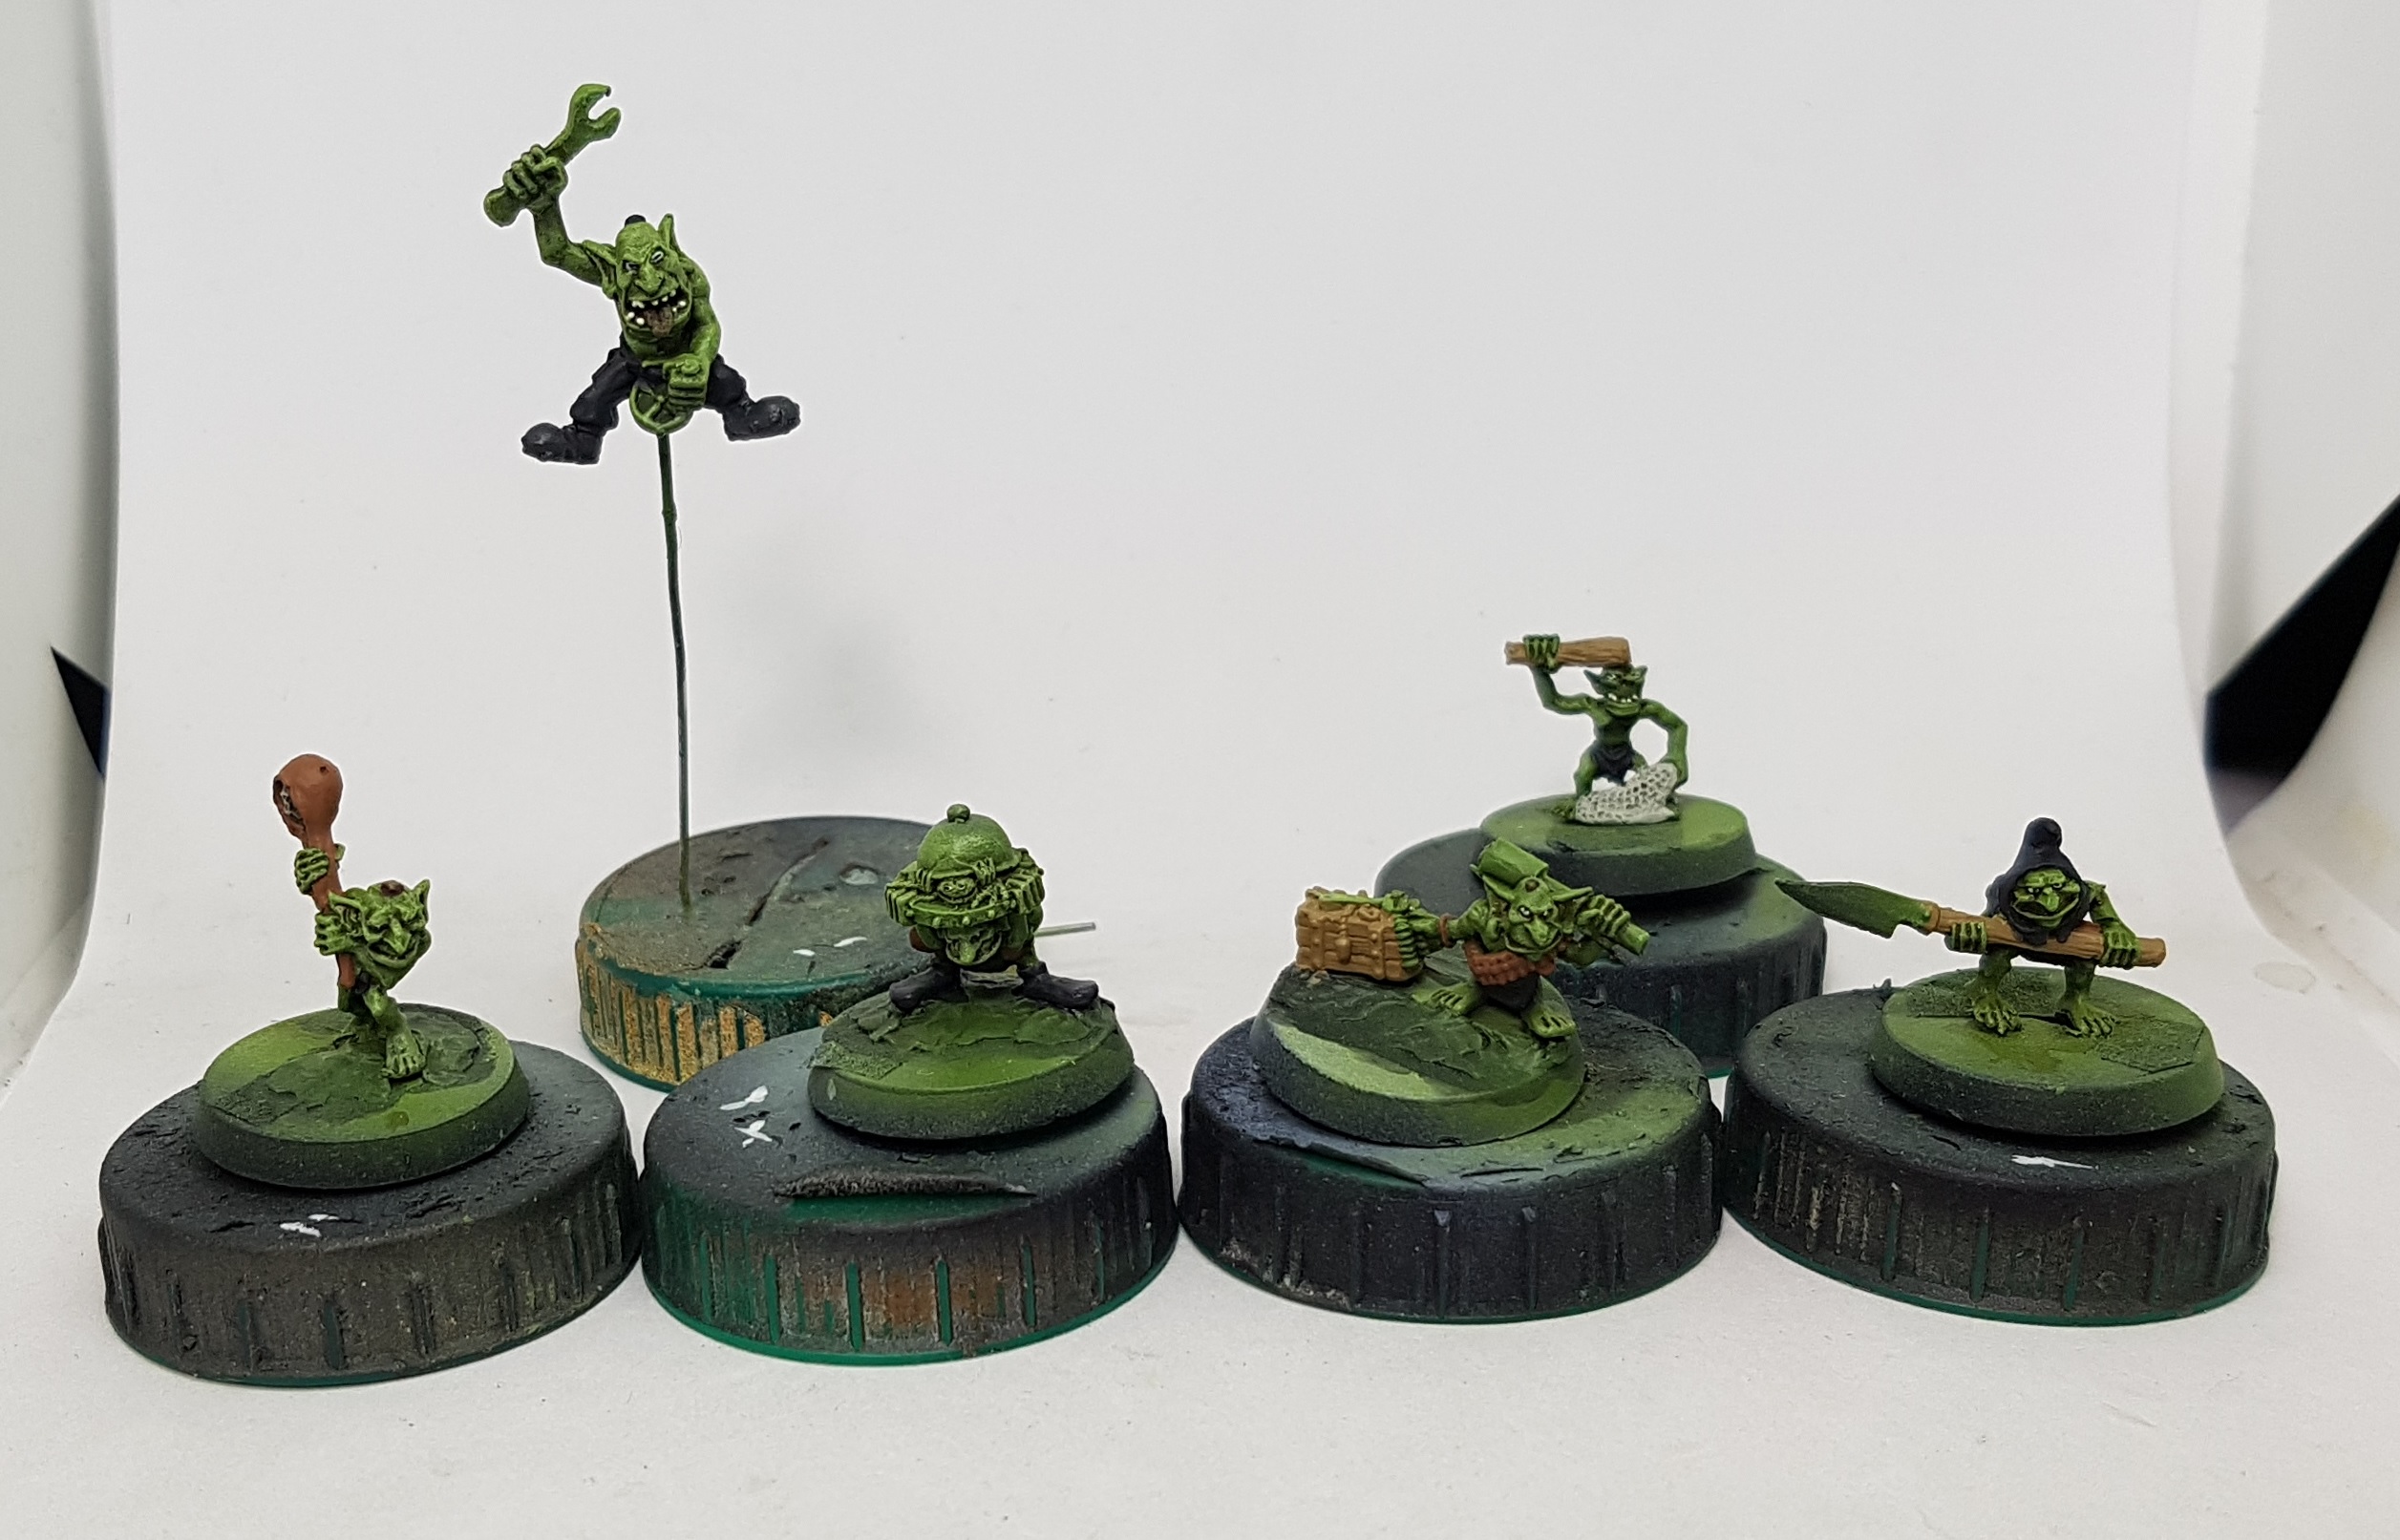
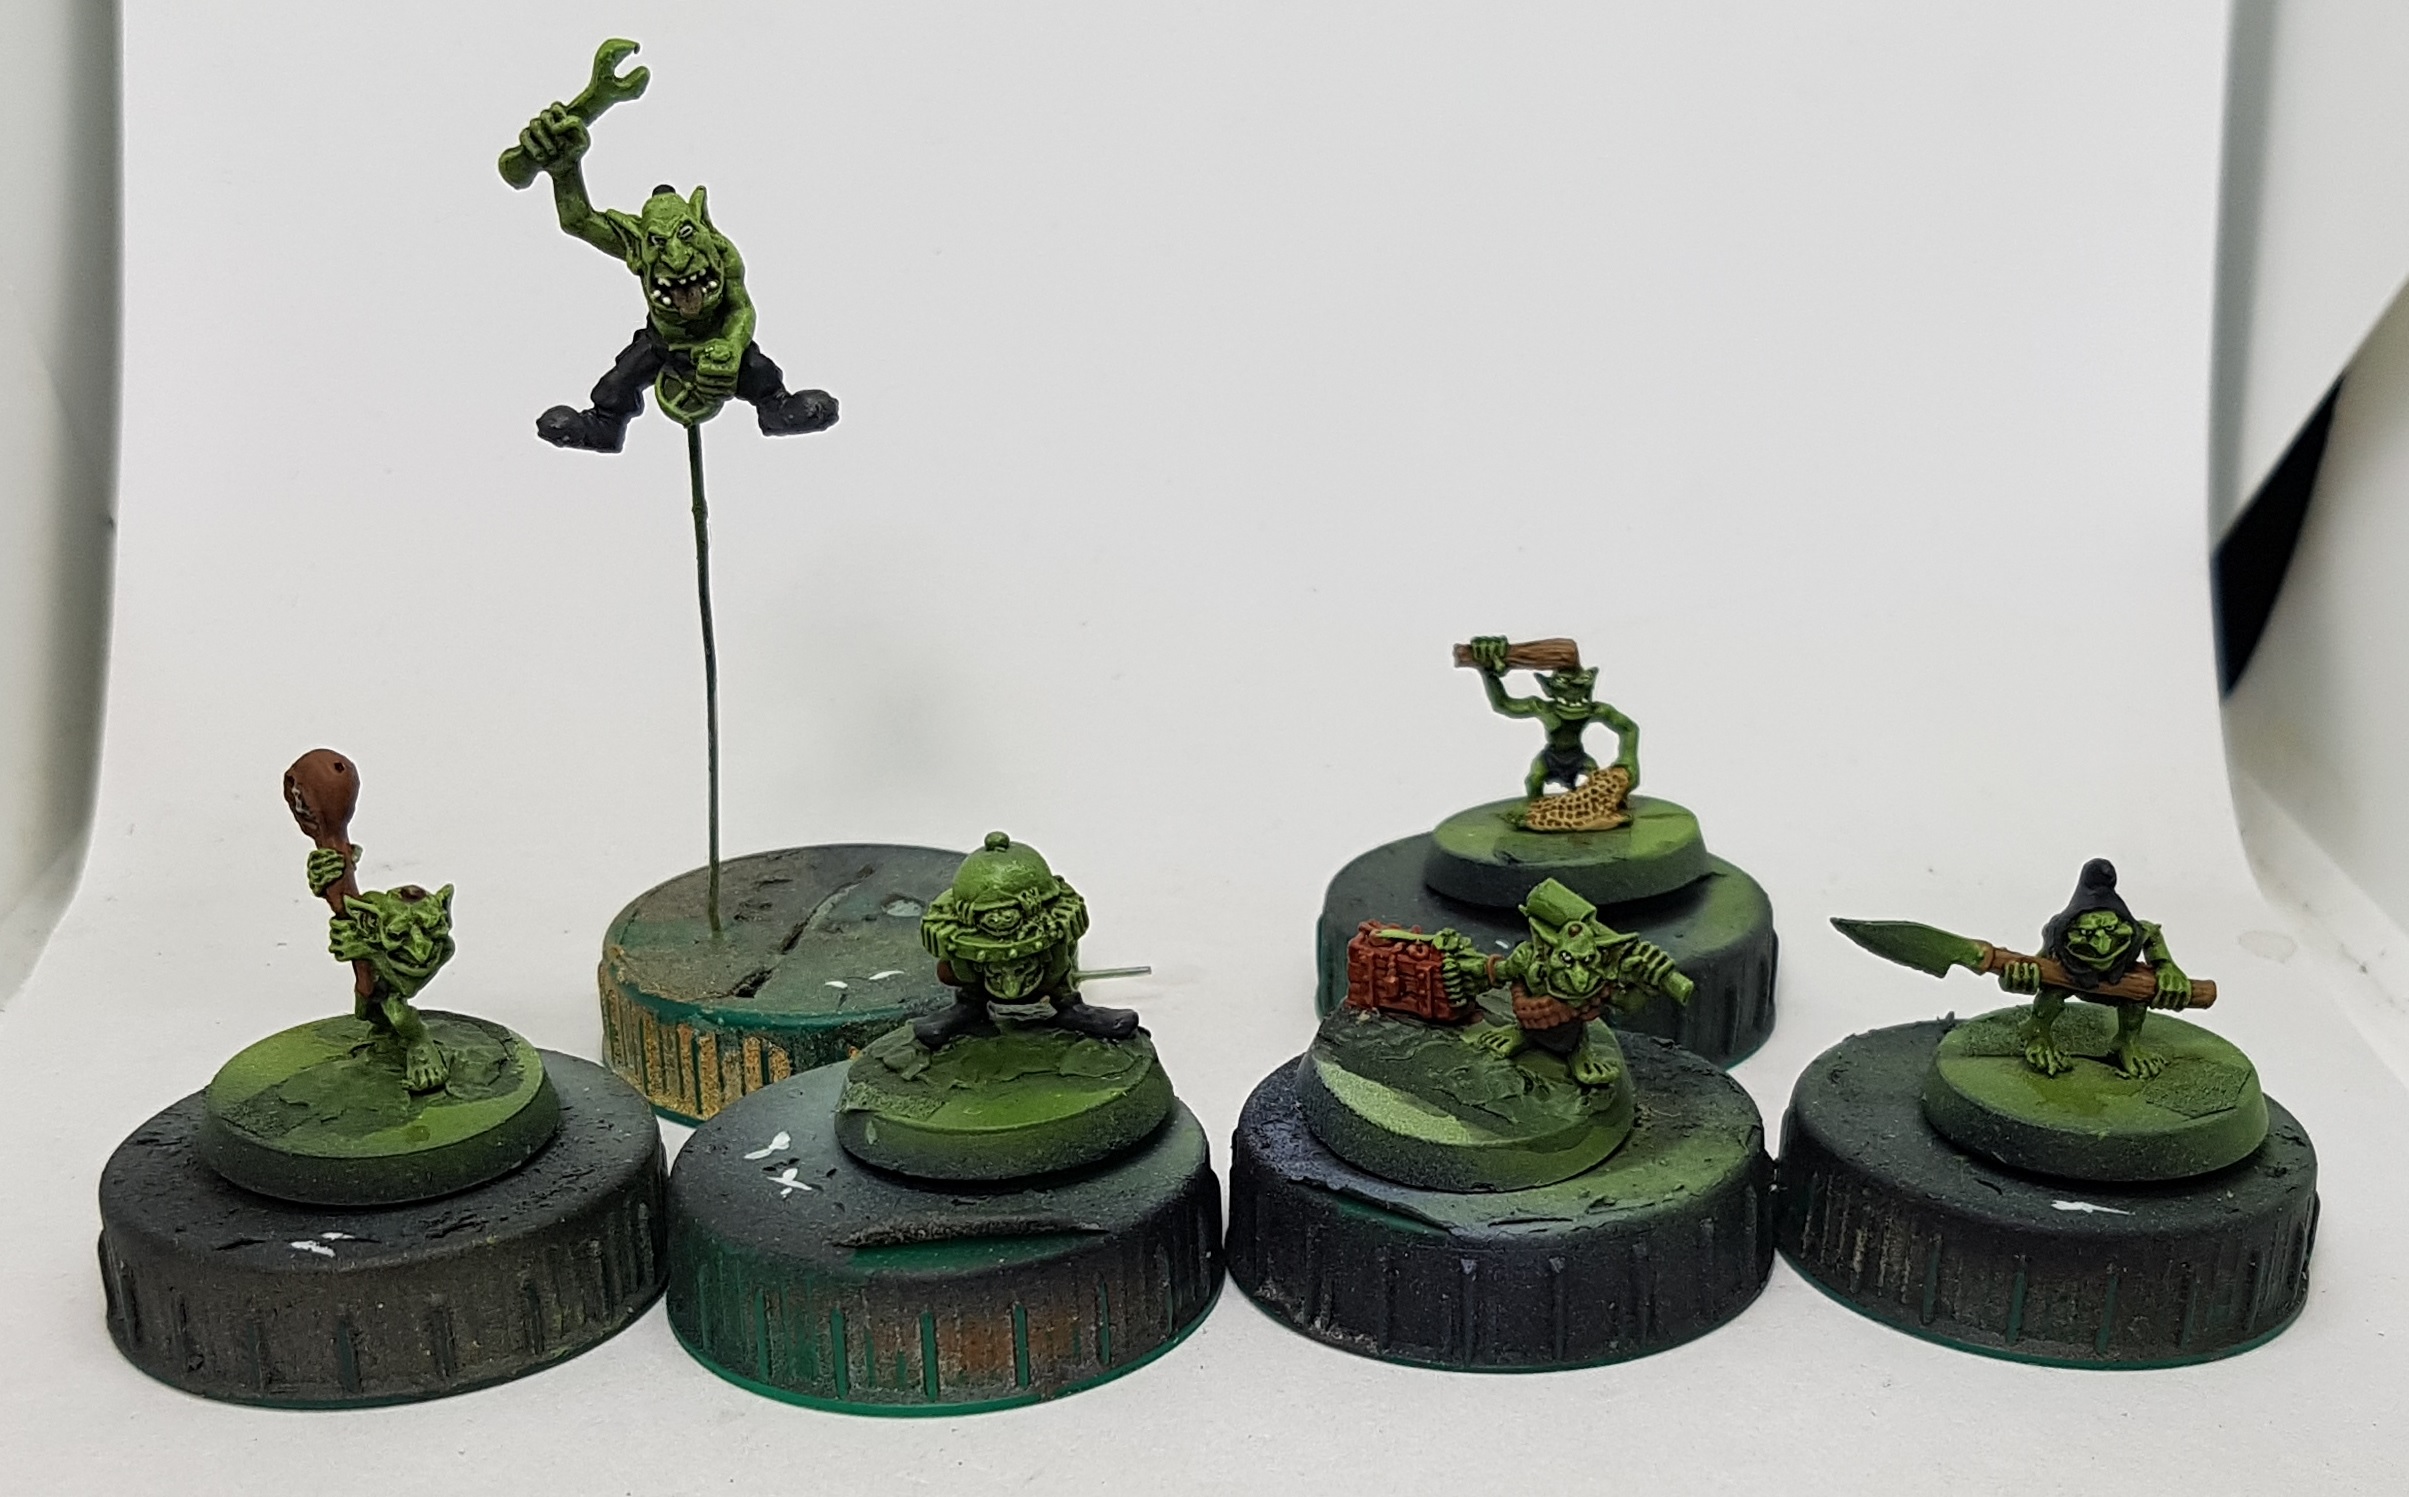
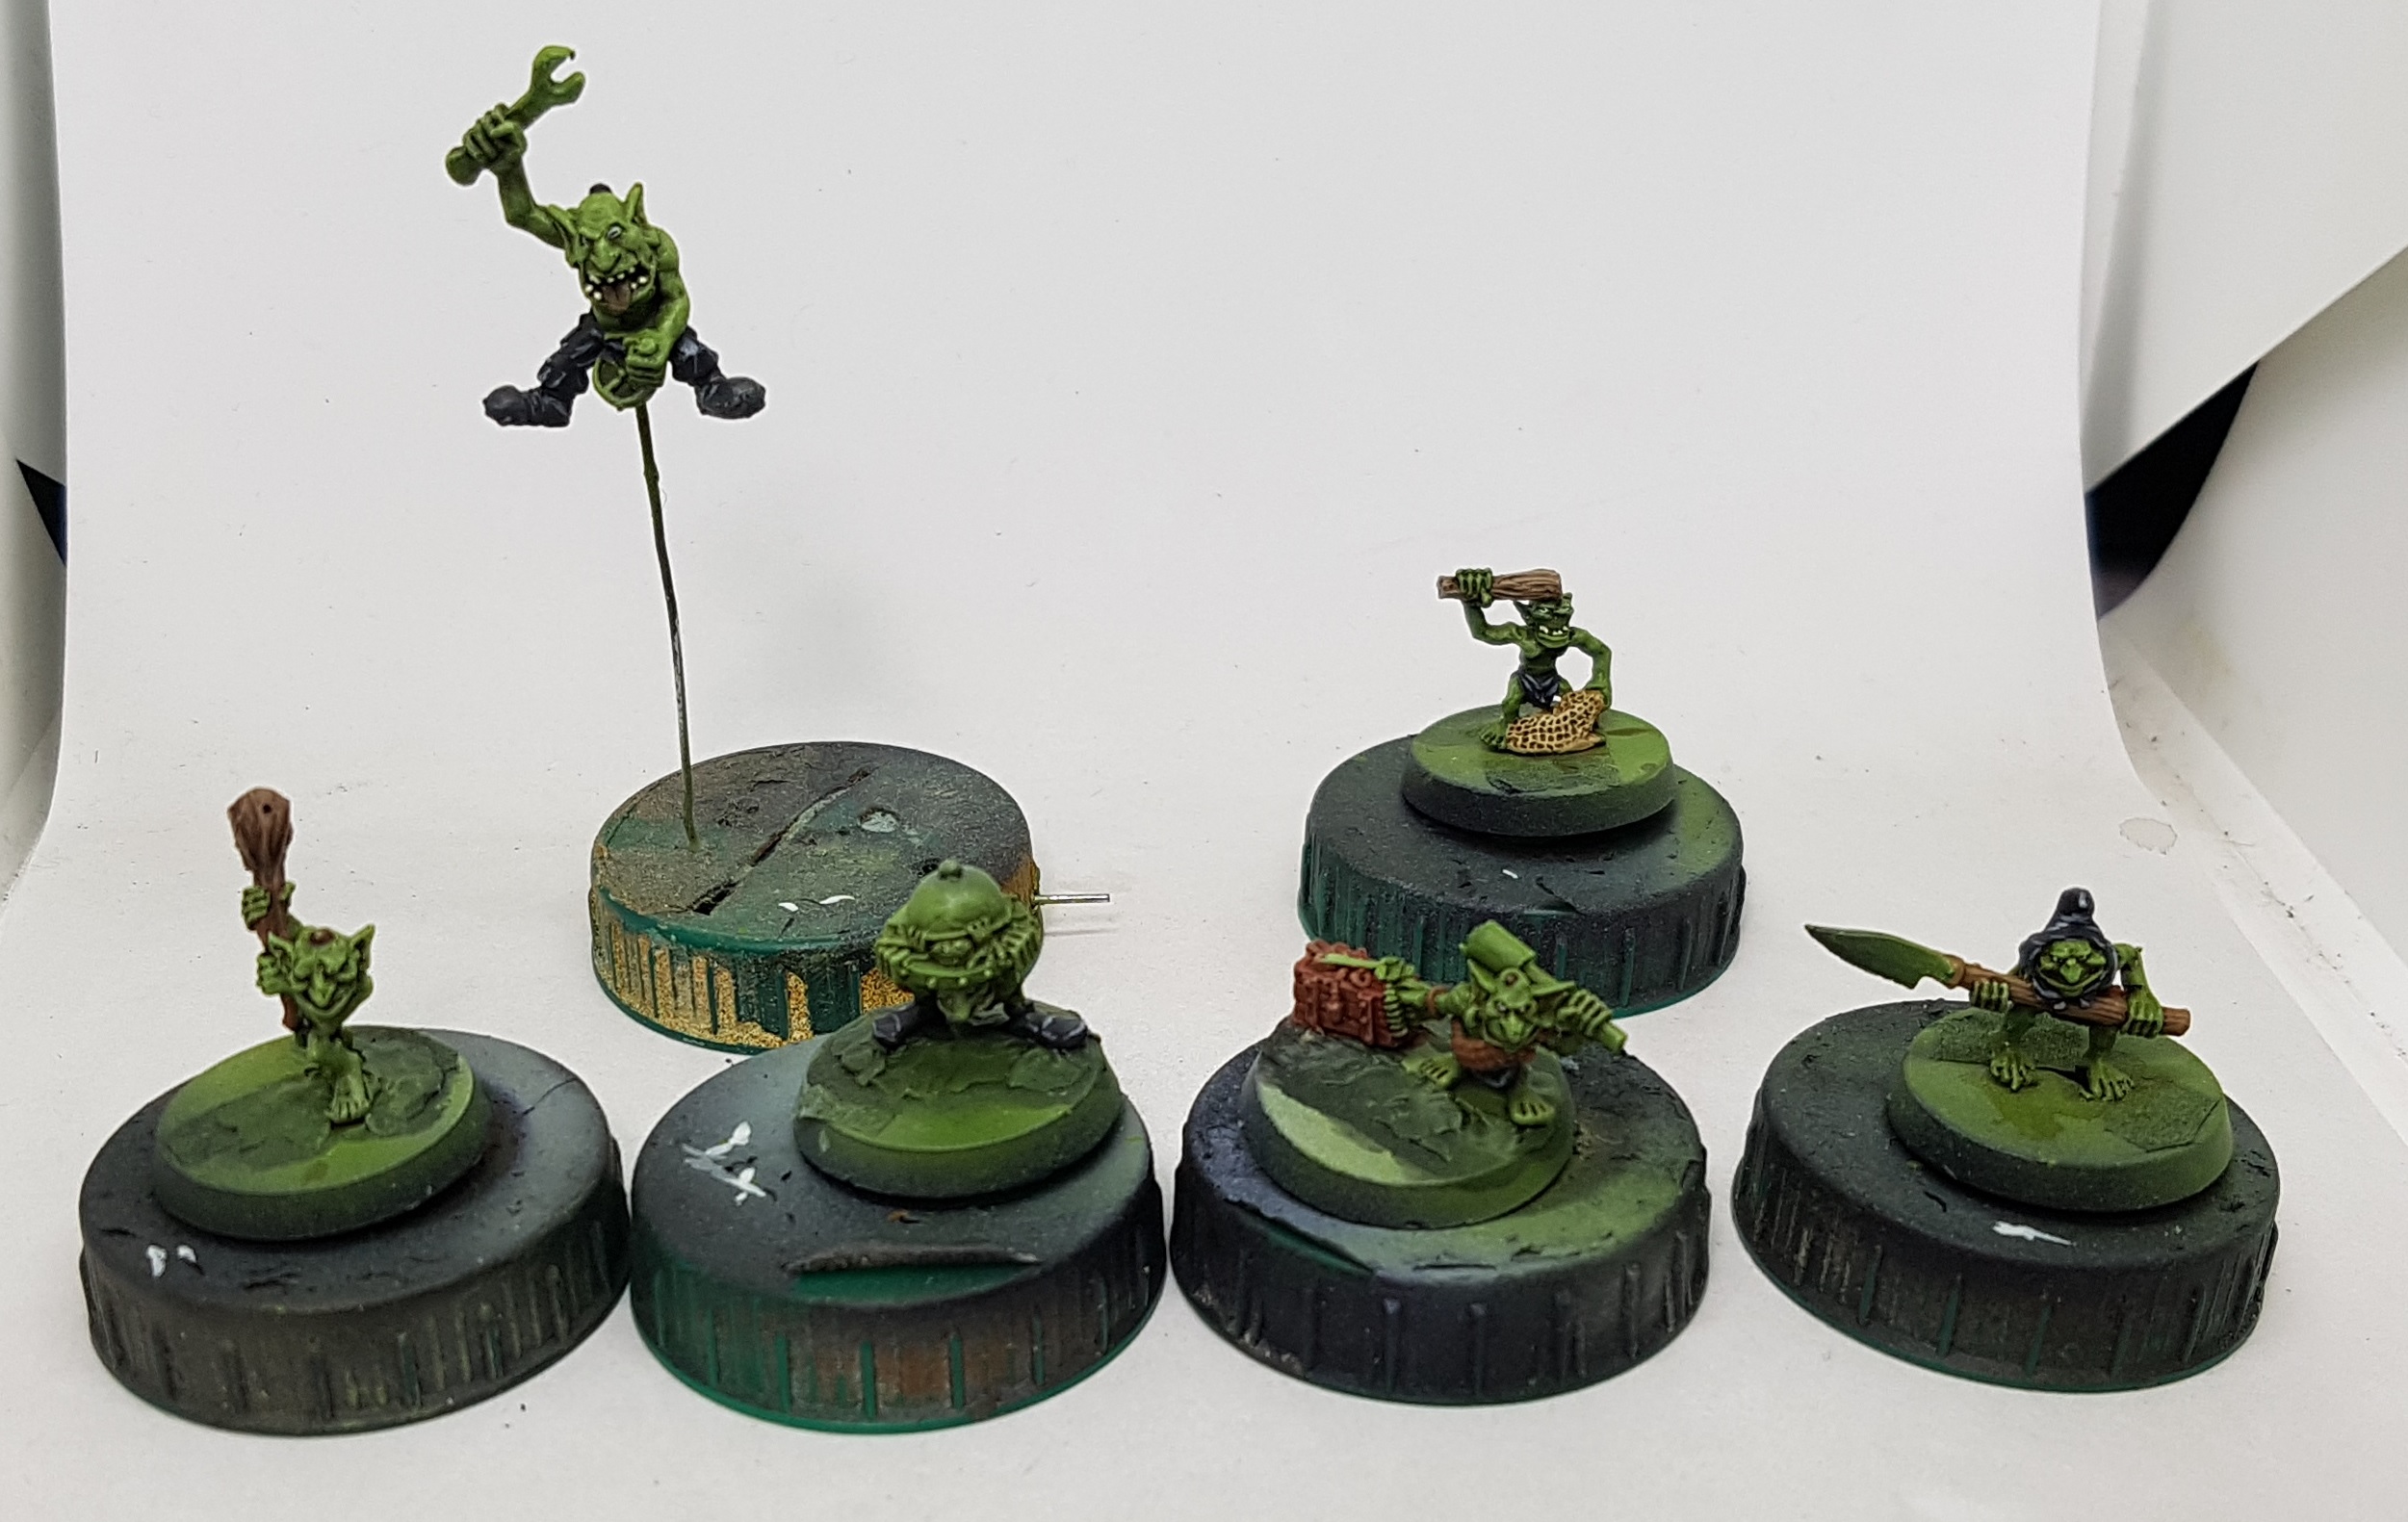
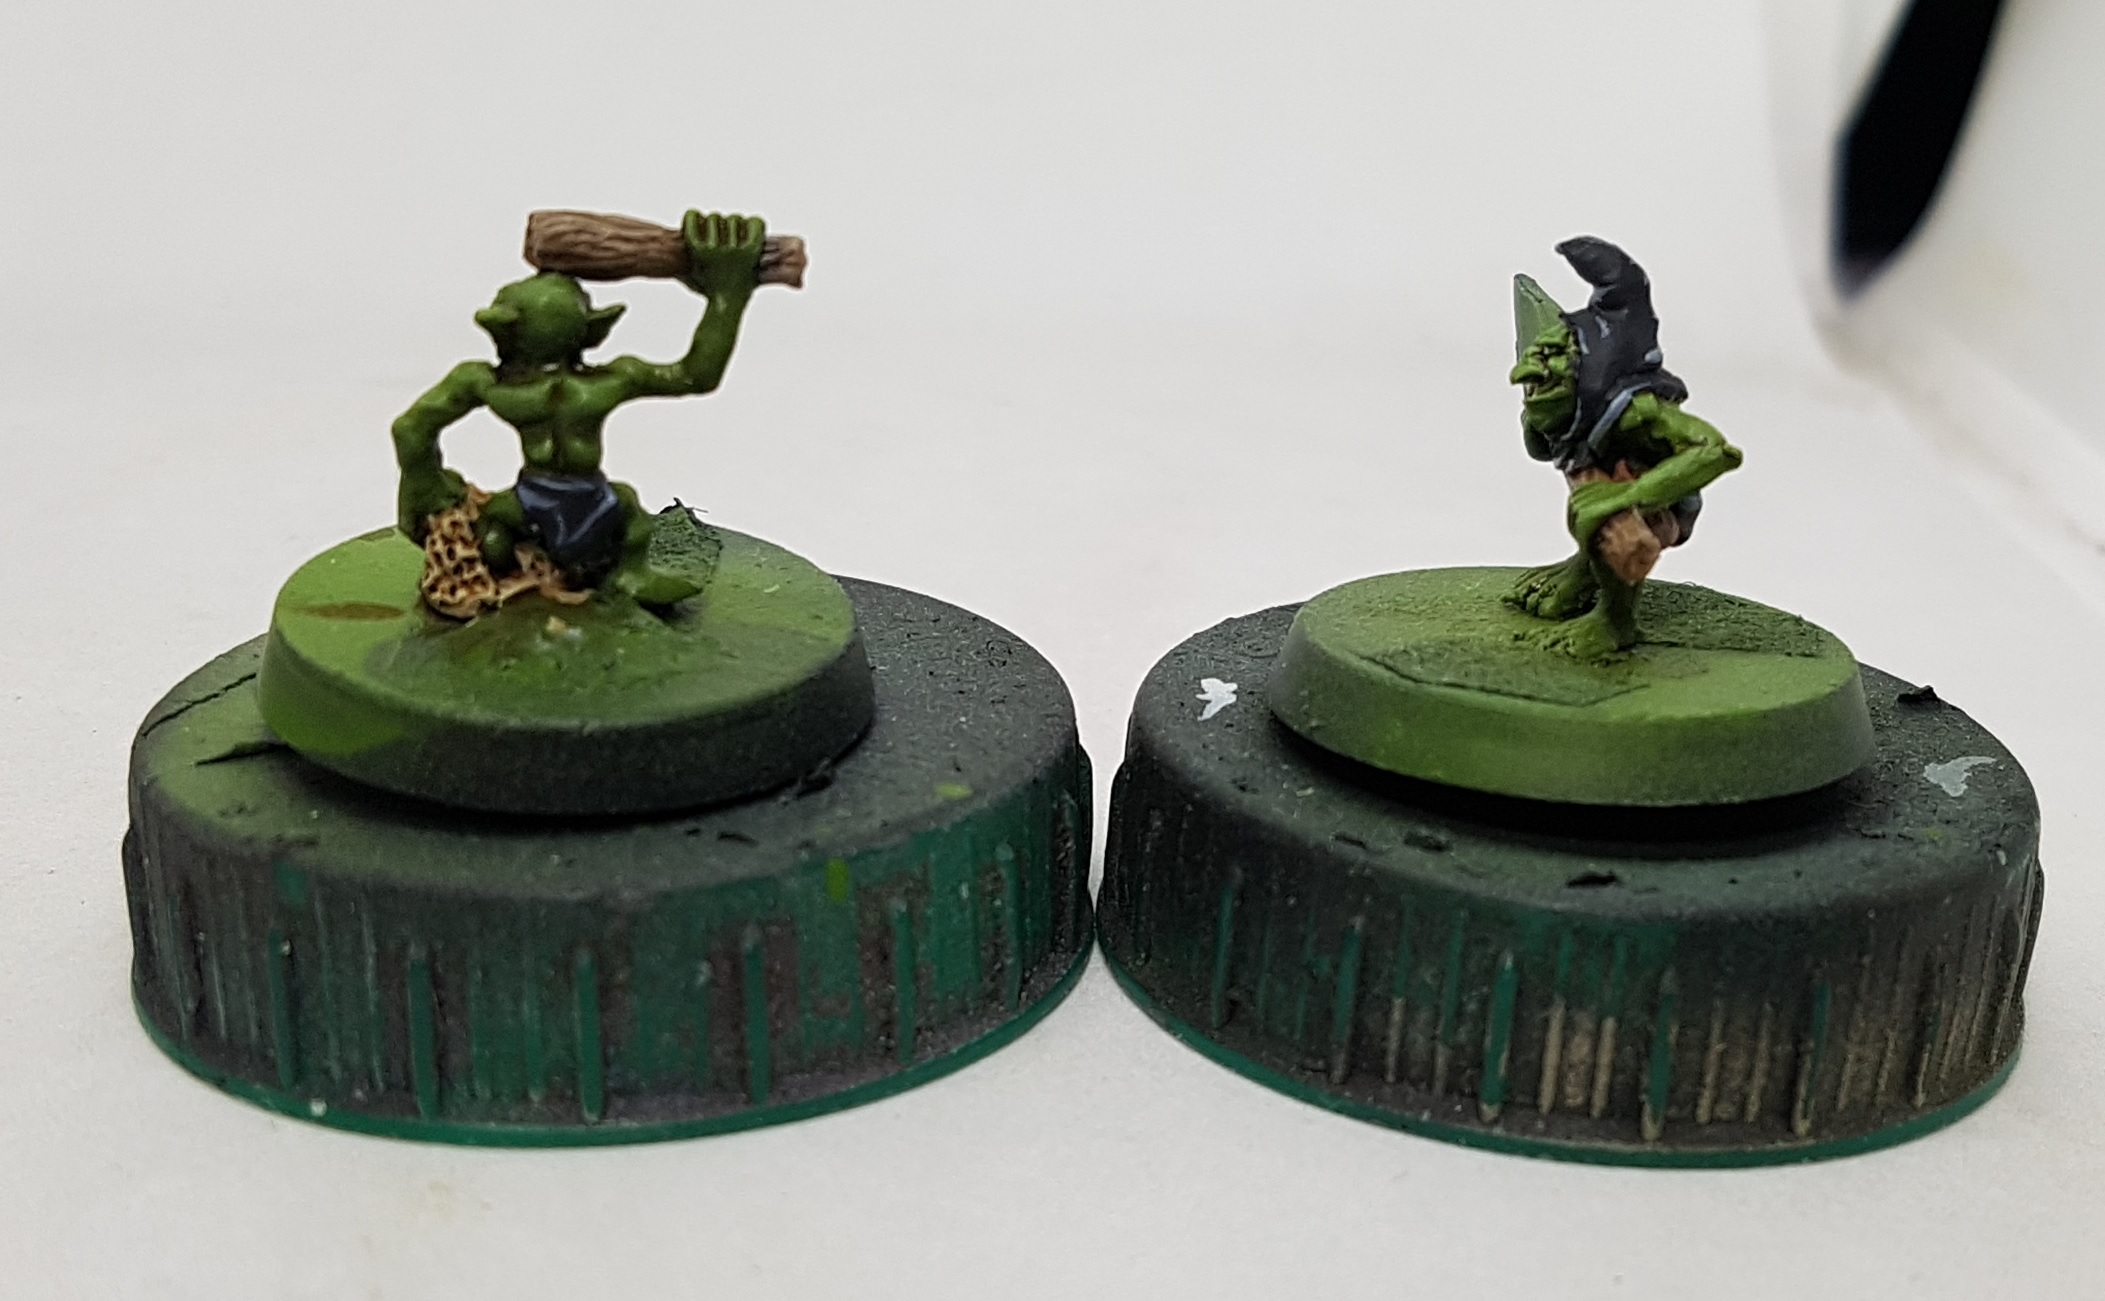
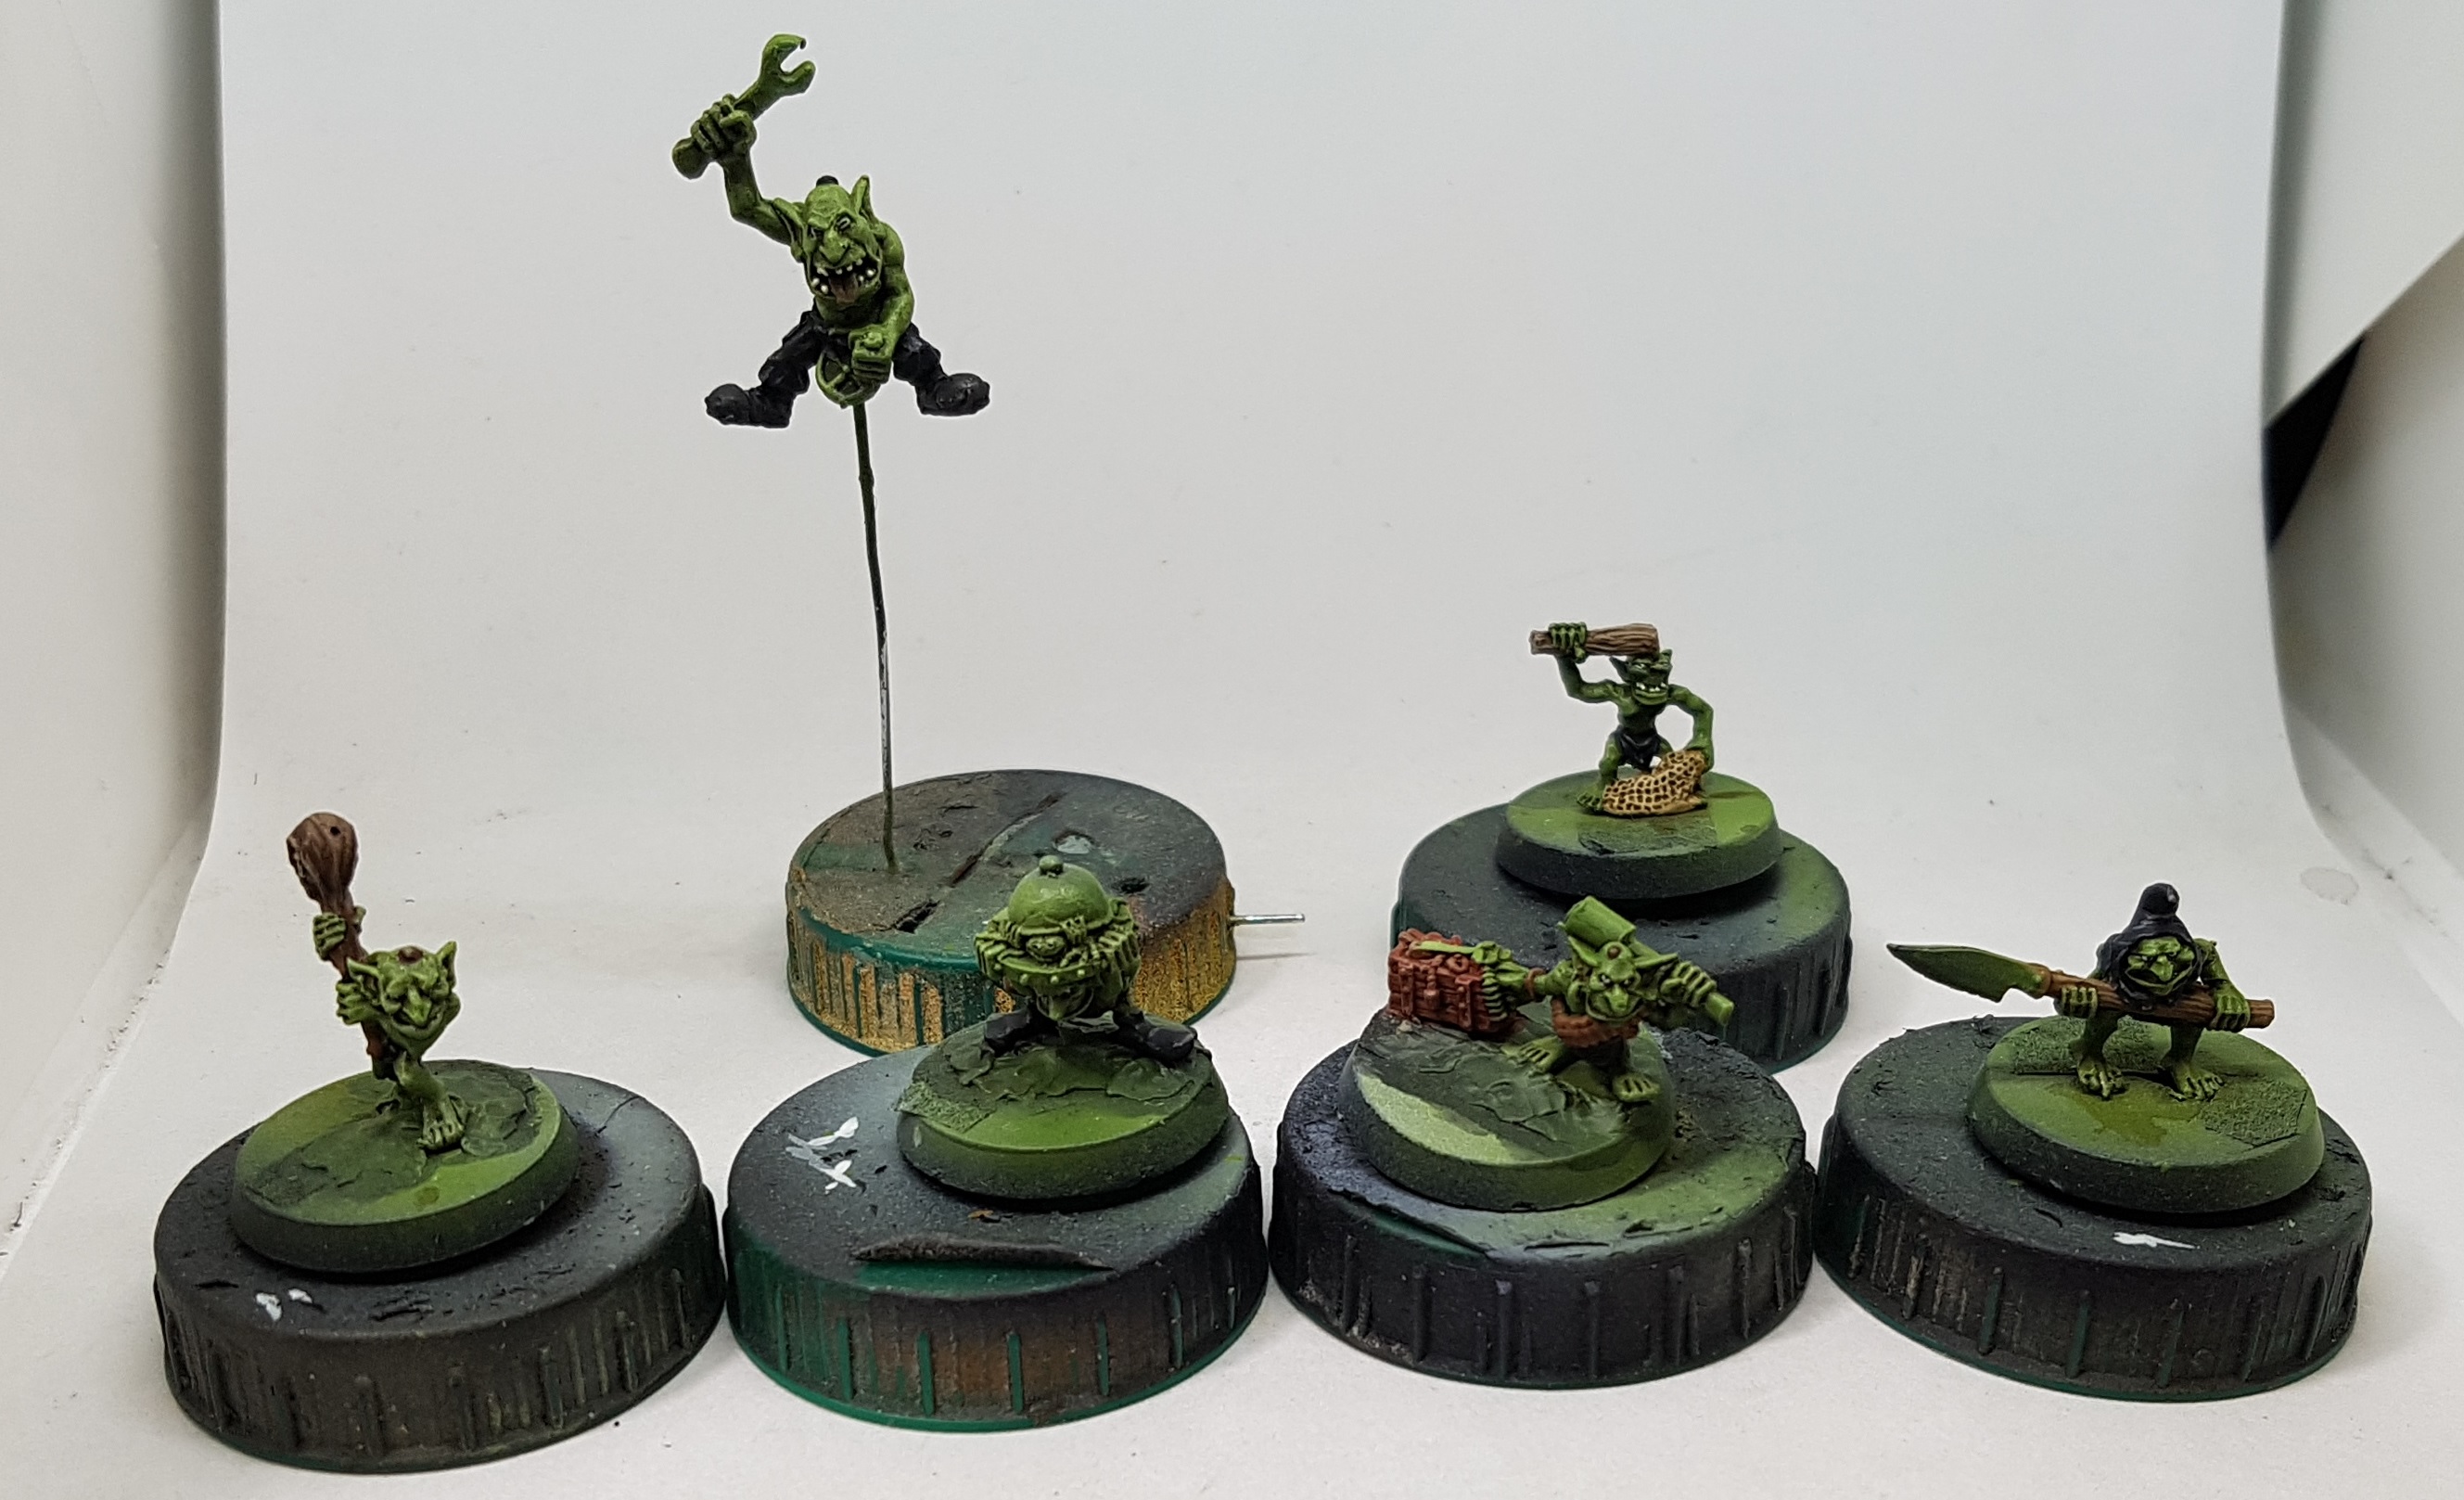
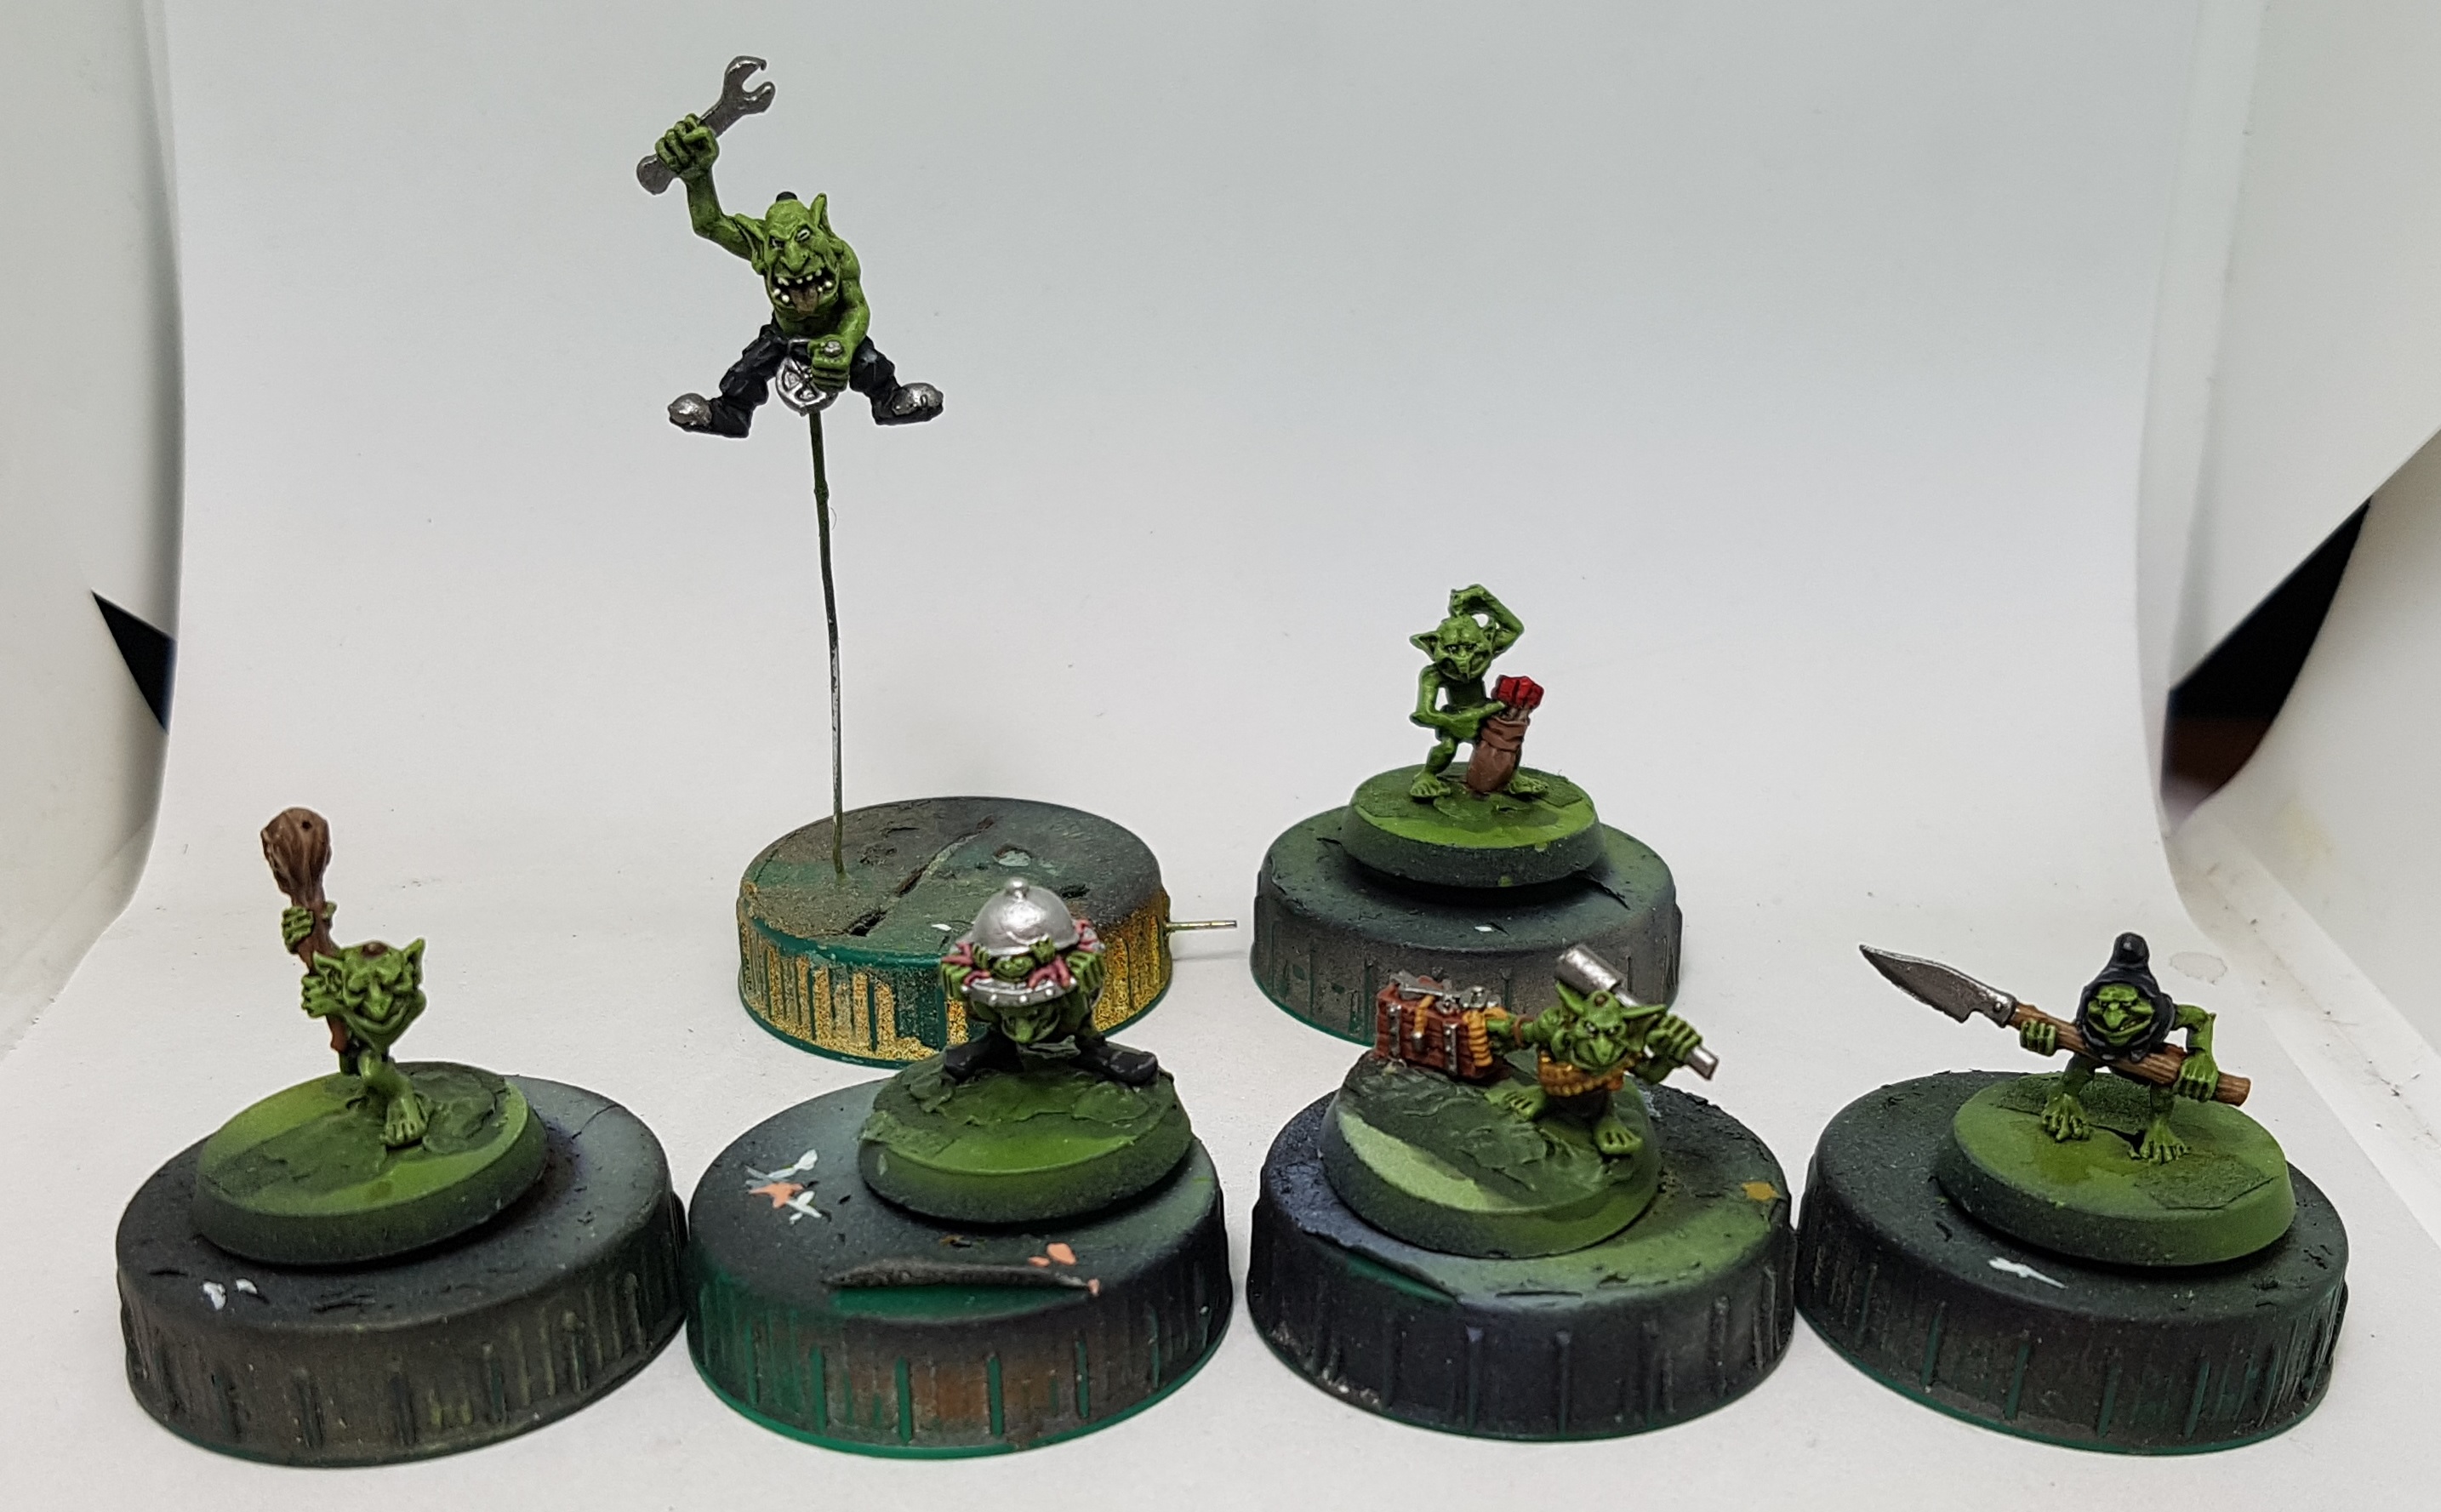
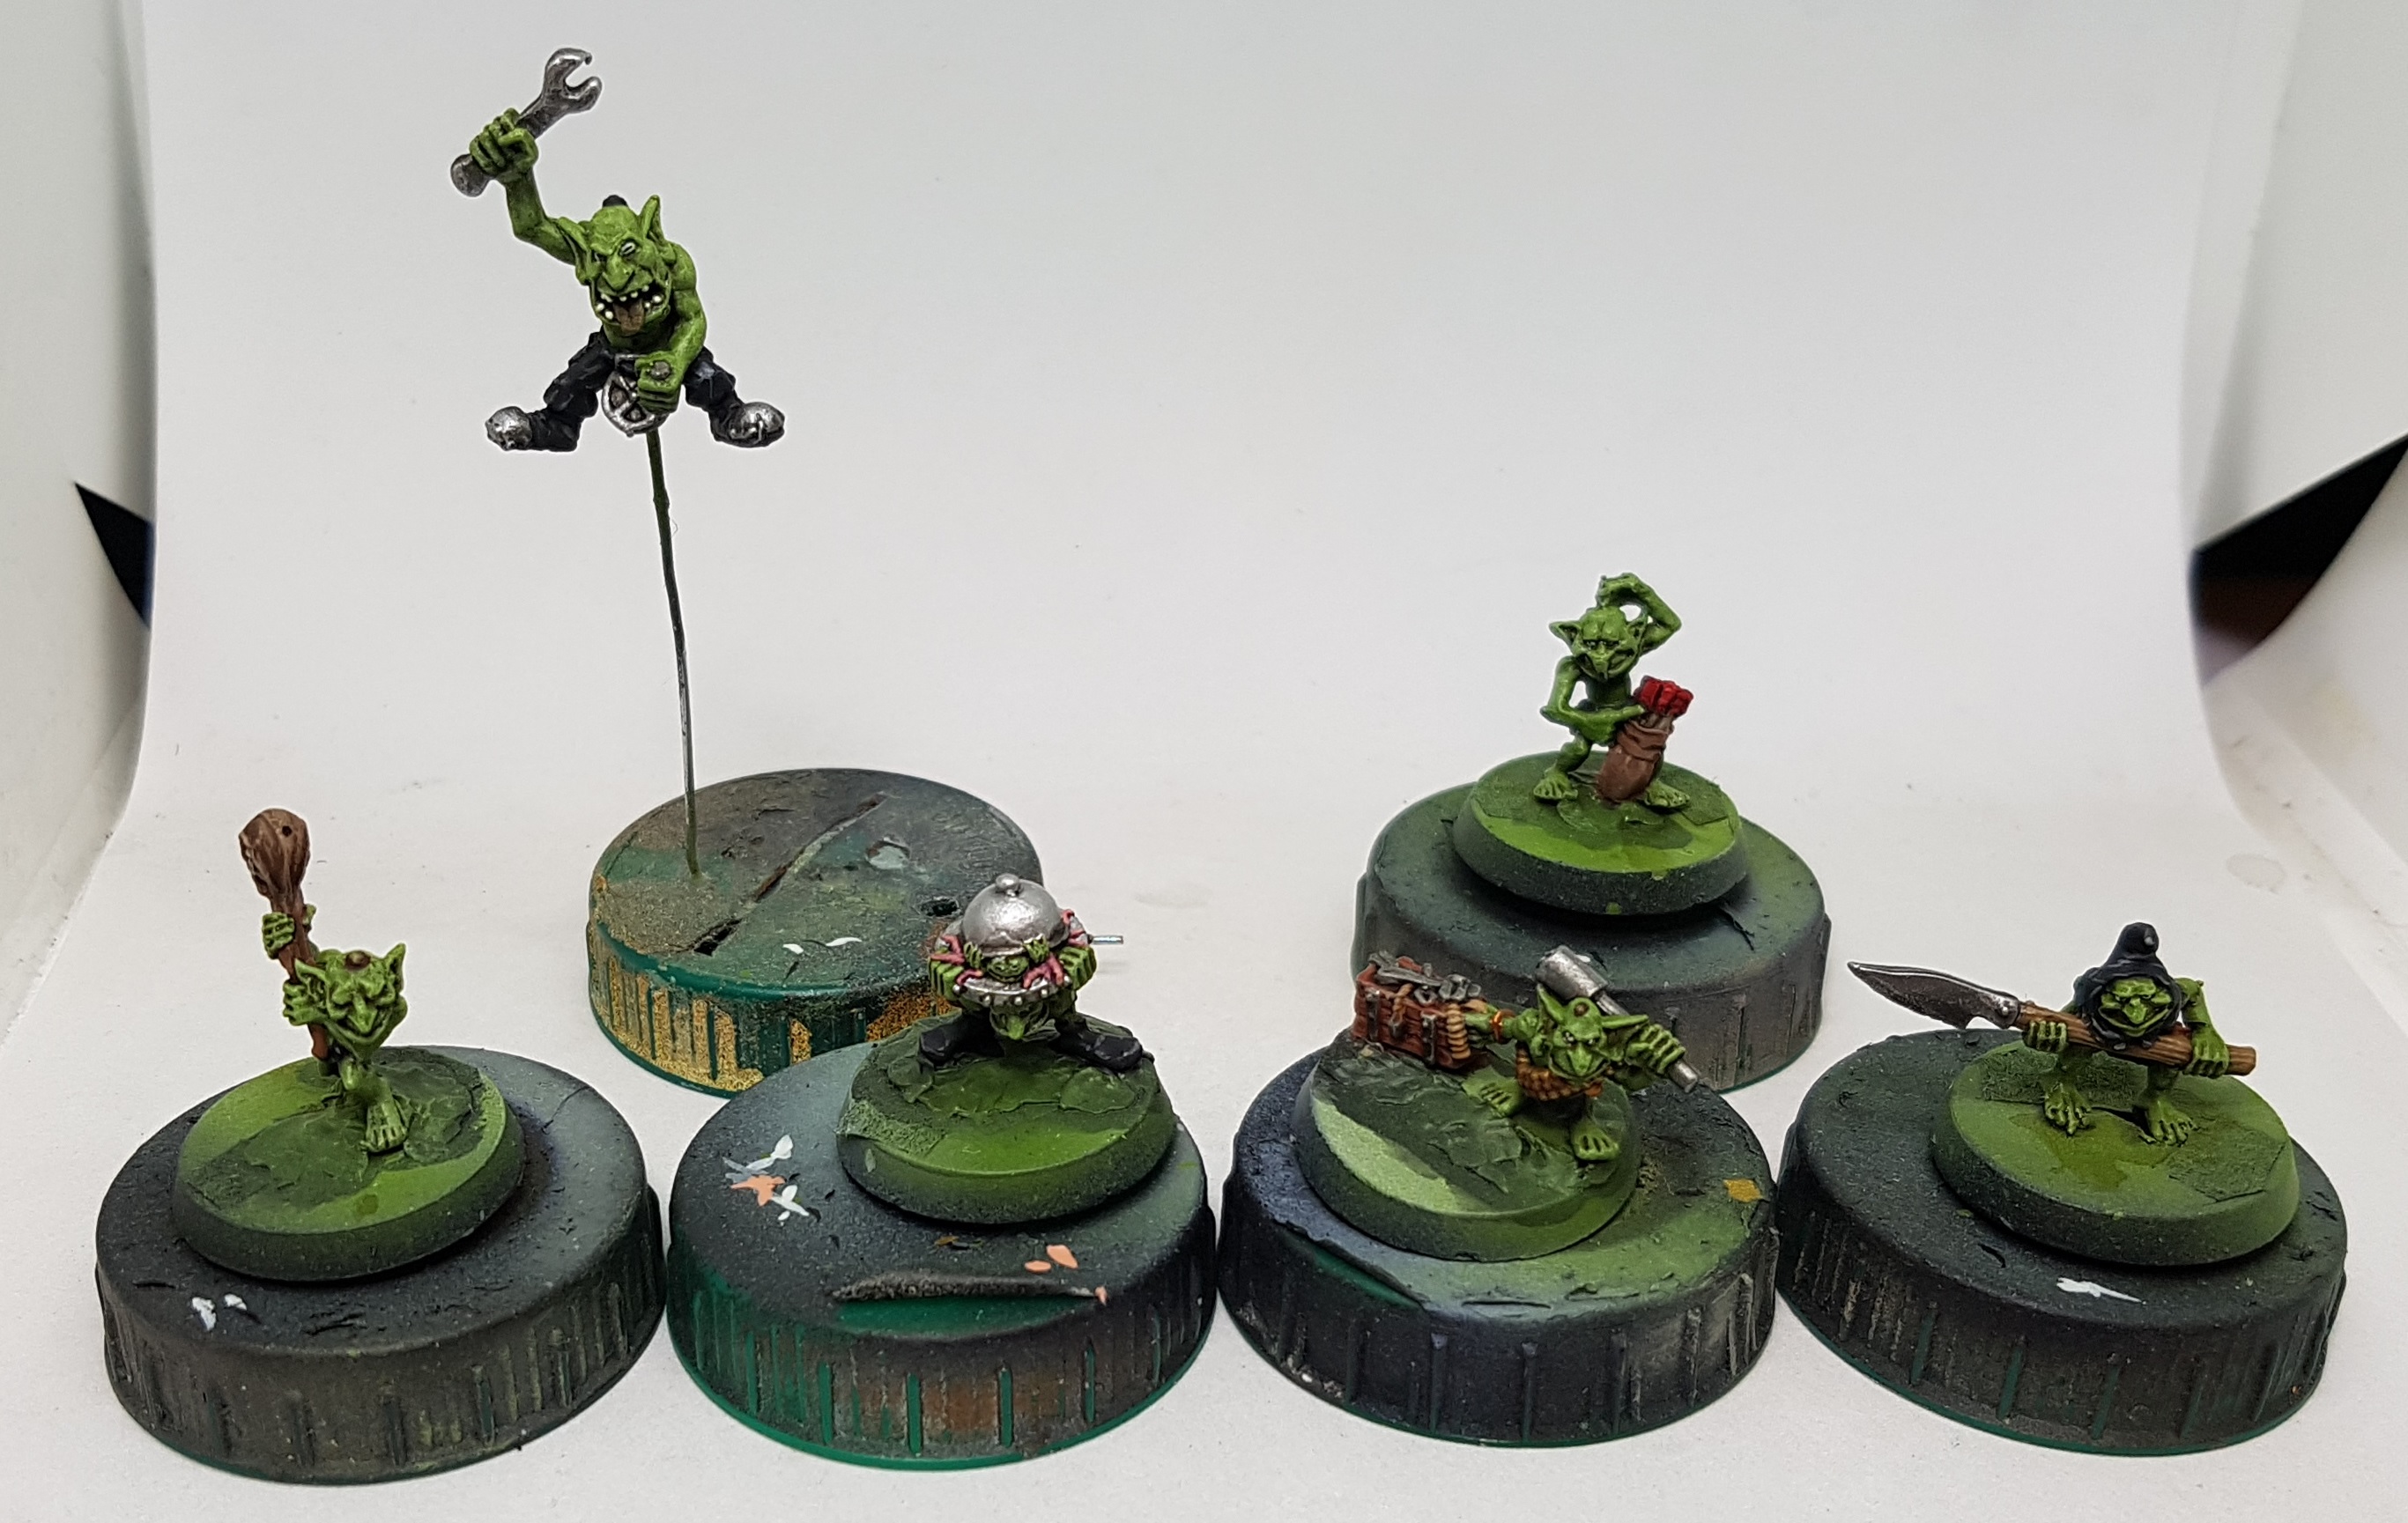
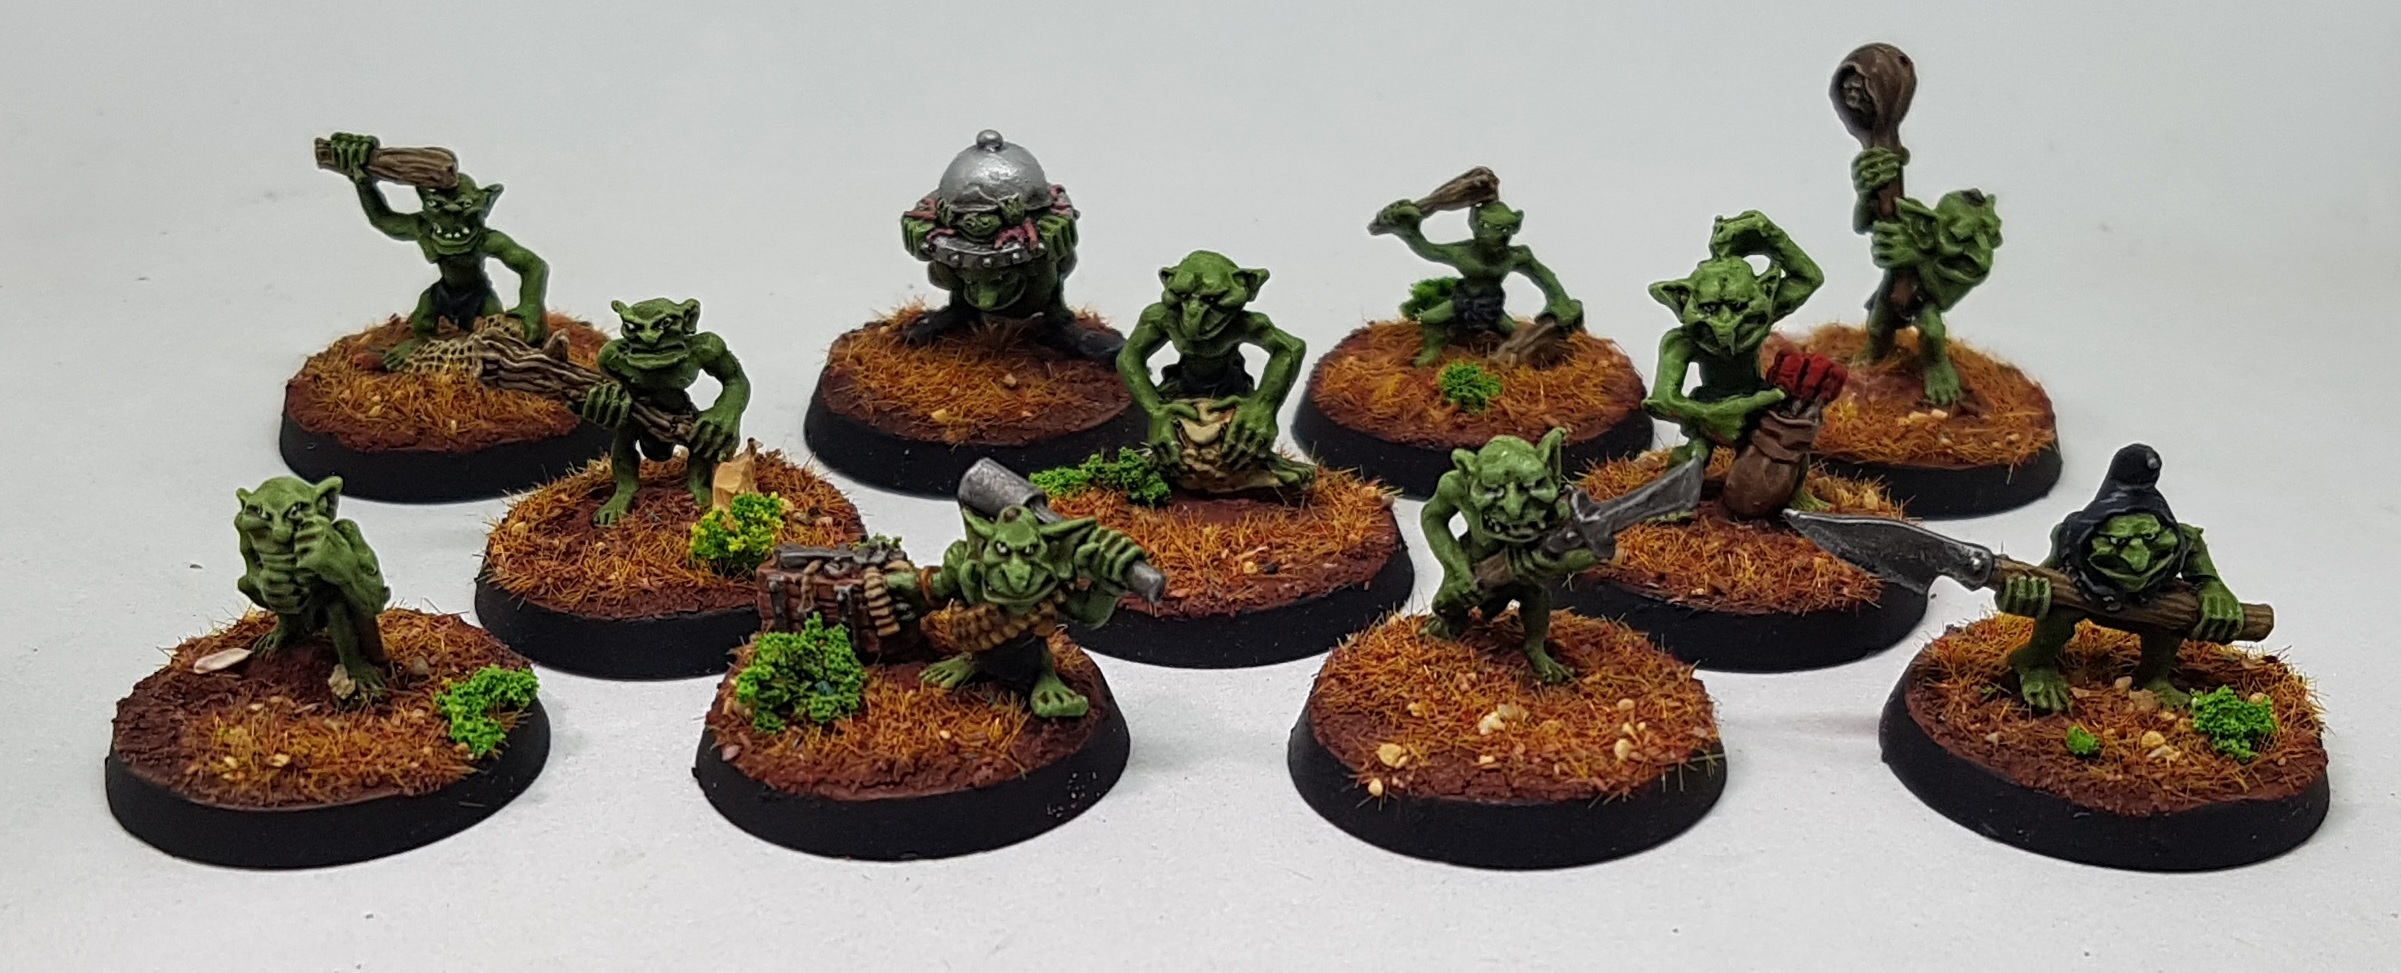
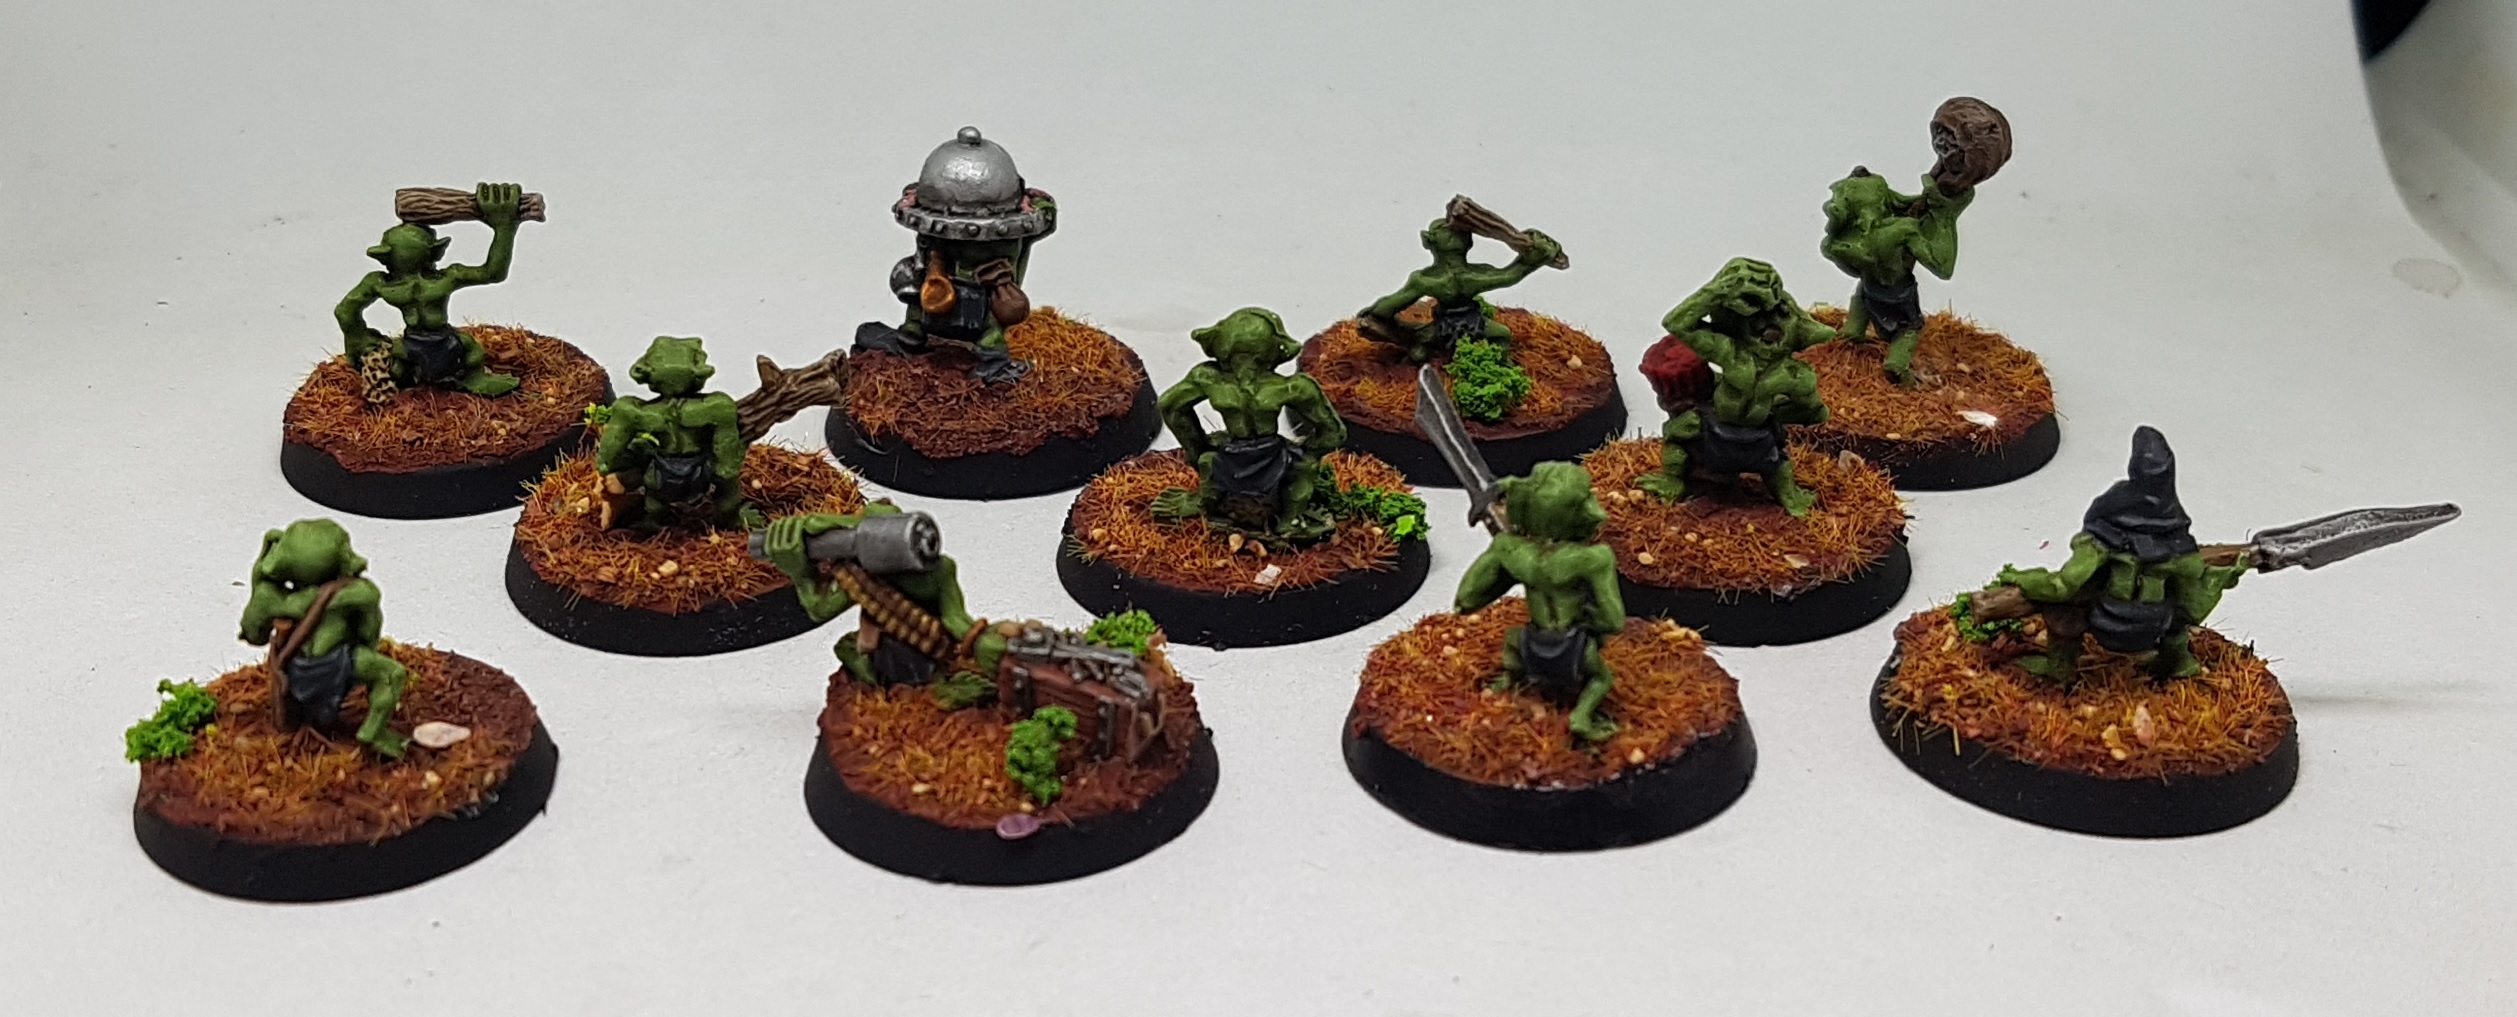
The bases were then left to dry overnight before getting a wash of Agrax Earthshade, and a drybrush of Beast Hide. The edges were then painted Black. Everything was varnished before receiving a scatter of Serious Play’s Baked Canyon landscape texture. I’ve also got some red tufts I plan on using, but they were too tall for the Gretchins but will hopefully see use on the Orks. I’ll include a more detailed guide to my basing when I’m working with one of their larger bases (40mm or bike base?). See the gallery below for some working shots and final pictures of 11 finished Gretchins and 1 Gretchin passenger awaiting his vehicle.
Next up, 13 of the Ork Boys.


Ork Boyz
I’ve split my Boyz in to two batches of 13 to make them more manageable. The mission with this project is to “modernise” the paint scheme on these classic sculpts, while maintaining their character and appeal. I want them to fit in with the paint jobs on the web store so if I buy any more Orks they will look like a cohesive army.
To start with, I painted the fur lining a few of them have as this would be messy.
I then base coated these Boyz the same as with the Gretchins from earlier:
Then, the wood got painted as such:
The foot wraps got a base coat of P3 Menoth White Base (Next time I’ll try for P3 Hammerfall Khaki. Its a little darker and browner). The leathers and the wraps all got a wash of GW Agrax Earthshade.
Once it was dry I drybrushed P3 Beast Hide over all the leathers. P3 Menoth White base was then drybrushed as an extra high highlight on the leathers and all over the wraps.
While doing the feet I caught the trousers and I liked it so after wearing out the paint on the wraps I also used this drybrush to add highlights to the blacks and greys. All the blacks and greys were then washed with GW Nuln Oil.
Now comes decision time. Undershirts and their sleeves will be an off white. I might mix tones between models. Asset Drop just shipped out an off-white blue linen mix I’ve yet to try, and I could make up a warm off-white from VMC Deck Tan or something else. Guns, weapons and plates will be a dirty iron, with the odd spot of gold. I’ve an unopened pot of P3 Deathless Metal I’ve not tried yet but hear good things about. I found some very old waterslide transfers I might scatter around the models later which includes some checker pattern. I may even have the courage to paint some checker pattern.
This still leaves some large cloth areas like tunics in need of a colour. I don’t want to go near-black again. it would fit, but then they may as well be single colour minis. This could be my opportunity to tie in some classic Ork Colorz ( https://1d4chan.org/wiki/Colorz) . I could paint different models wearing red, blue or yellow. It would help brighten up the unit, and allow me to paint similar models to look different. I could pick out those colours on detail pieces or shoulder pads on the other minis to tie everything together.
I’m a little afraid it’ll look too bright though and not work. The other option is something like Circle Orboros grey, or go for what I think of as Walking Dead White Shirt (You know. They’ve been wearing that shirt for months without washing it. Its filthy, and brown but you kinda know it was white once).
What are peoples thoughts? I’d really appreciate feedback on this point, and soon as I’m hoping to start work again tonight, or tomorrow at the latest. Here are some examples of some of the larger surfaces in need of a colour decision:
After the chat below I decided to go with my Walking Dead White for the tunics. its a simple and lazy recipe, but it easily produces something that looks like it was white once, before you wore it for 6 straight months of post apocalypse without even thinking about detergent. I also went over the wraps on the feet with this as I was not happy with my previous results.
Base P3 Trollblood Highlight
Wash: Agrax Earthshade
Drybrush: P3 menoth White Base
——————————————————————————————–
I had a little time to paint this week so I painted the leather, then the cloth and then the iron:
Leather:
Base P3 Bootstrap leather
Wash GW Agrax Earthshade
Drybrush P3 beasthide, and then the upper parts with P3 menoth White base
Shirts:
Undercoat Black
Base Hakata Ocean grey
Highlight with Hakata Gris Bleu Fonce
Wash with diluted Instar heavy Black
Highlight with Grix Blue Fonce
The pictures in the Asset Drop guide for this suggested I would get more of an off white with a hint of blue to it than I actually got. At this point I wasn’t impressed with the way the Orks were looking. i got a lot happier once the wash got on the iron
Iron
Undercoat black
Base: P3 Pig iron
Wash GW Nuln Oil
Drubrush P3 Cold Steel
This leaves the straps, bone, gold and then the detail pieces which will allow me to add some colour, and some dreaded checker patterns!
On an unrelated note, if anyone has some spare Las Cannons for a Predator tank or a Land Raider (Which also needs a sponson optic) and doesn’t mind parting with them please let me know. I’m fixing up some damaged second hand pieces and need them. I also have the resin body for Abaddon the Despoiler. He either needs all the other parts sending to me, or he needs to be adopted by someone else who has the parts.
Next stage was to pick out the belts, straps and other leather areas that needed a different tone. They were base coated in VMC Panzer Aces 302 Dark Rust, drubrushed P3 Beast Hide, and then washed GW Agrax Earthshade.
The Golds were base coated P3 Rhulic Gold, except the Binoculars that were painted P3 Brass Balls. Everythign was washed with GW Agrax Earthshade, highlighted back up with the abse colour, and then again with P3 Solid Gold.
Bone and horns were painted P3 jack Bone, washed GW Seraphim Sepia, and then drybrushed up with P3 Menoth White Highlight.
I then picked out the studs etc with P3 Cold Steel.
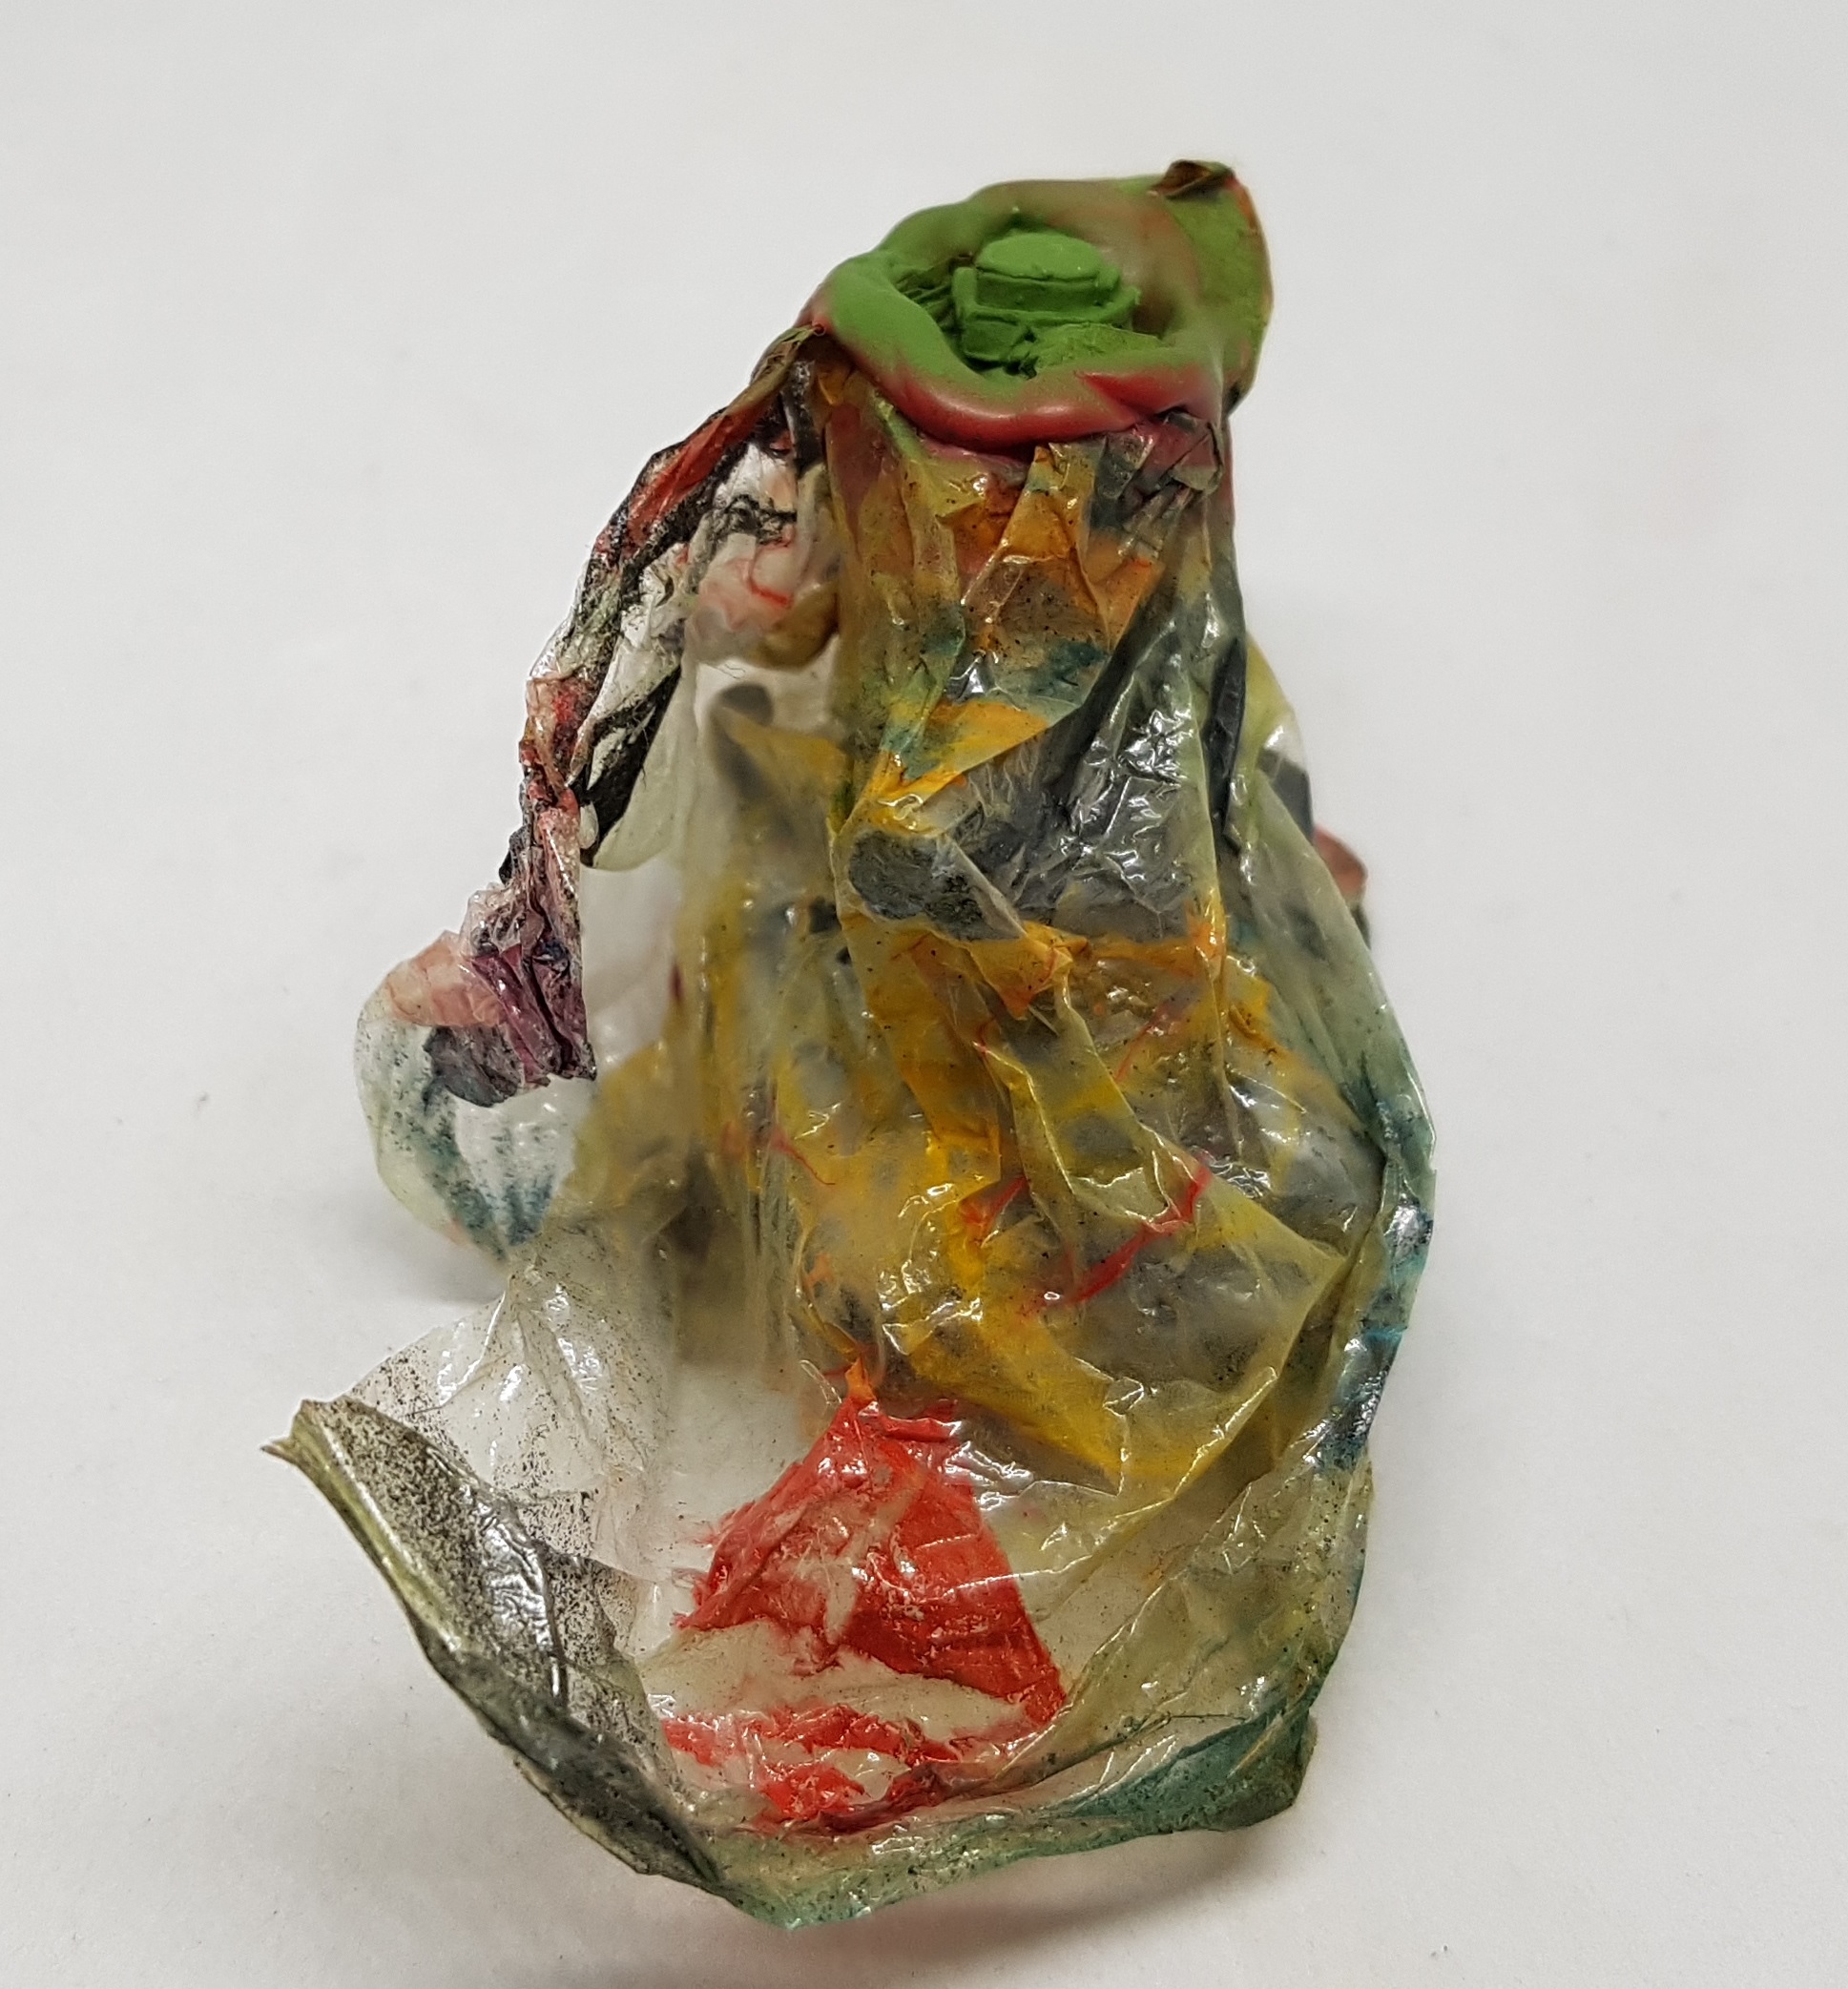
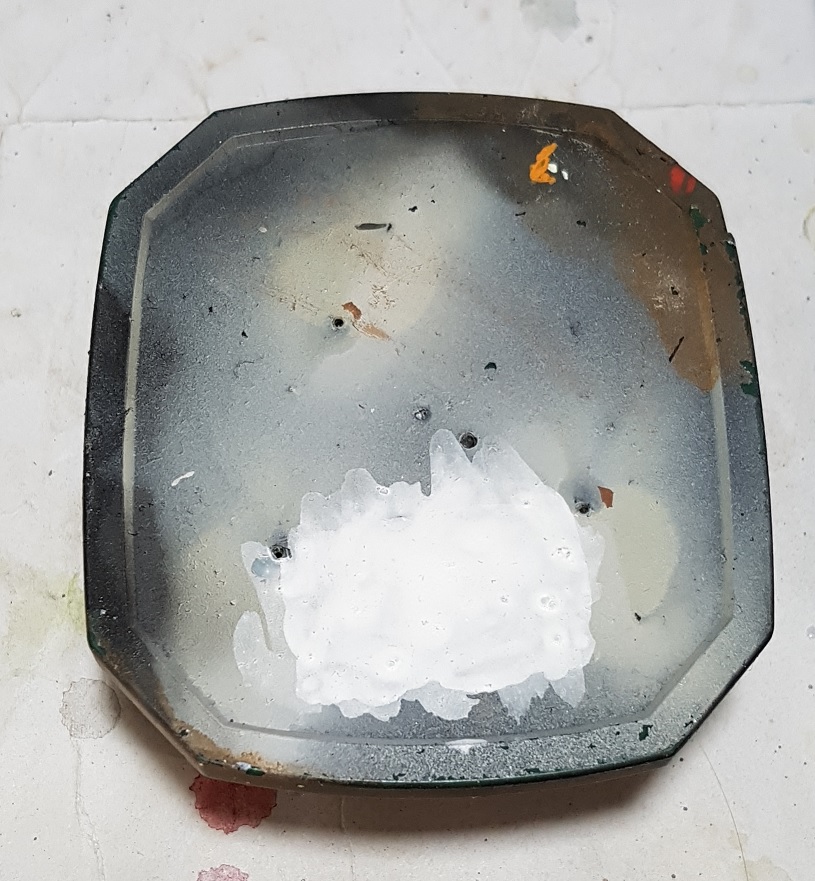
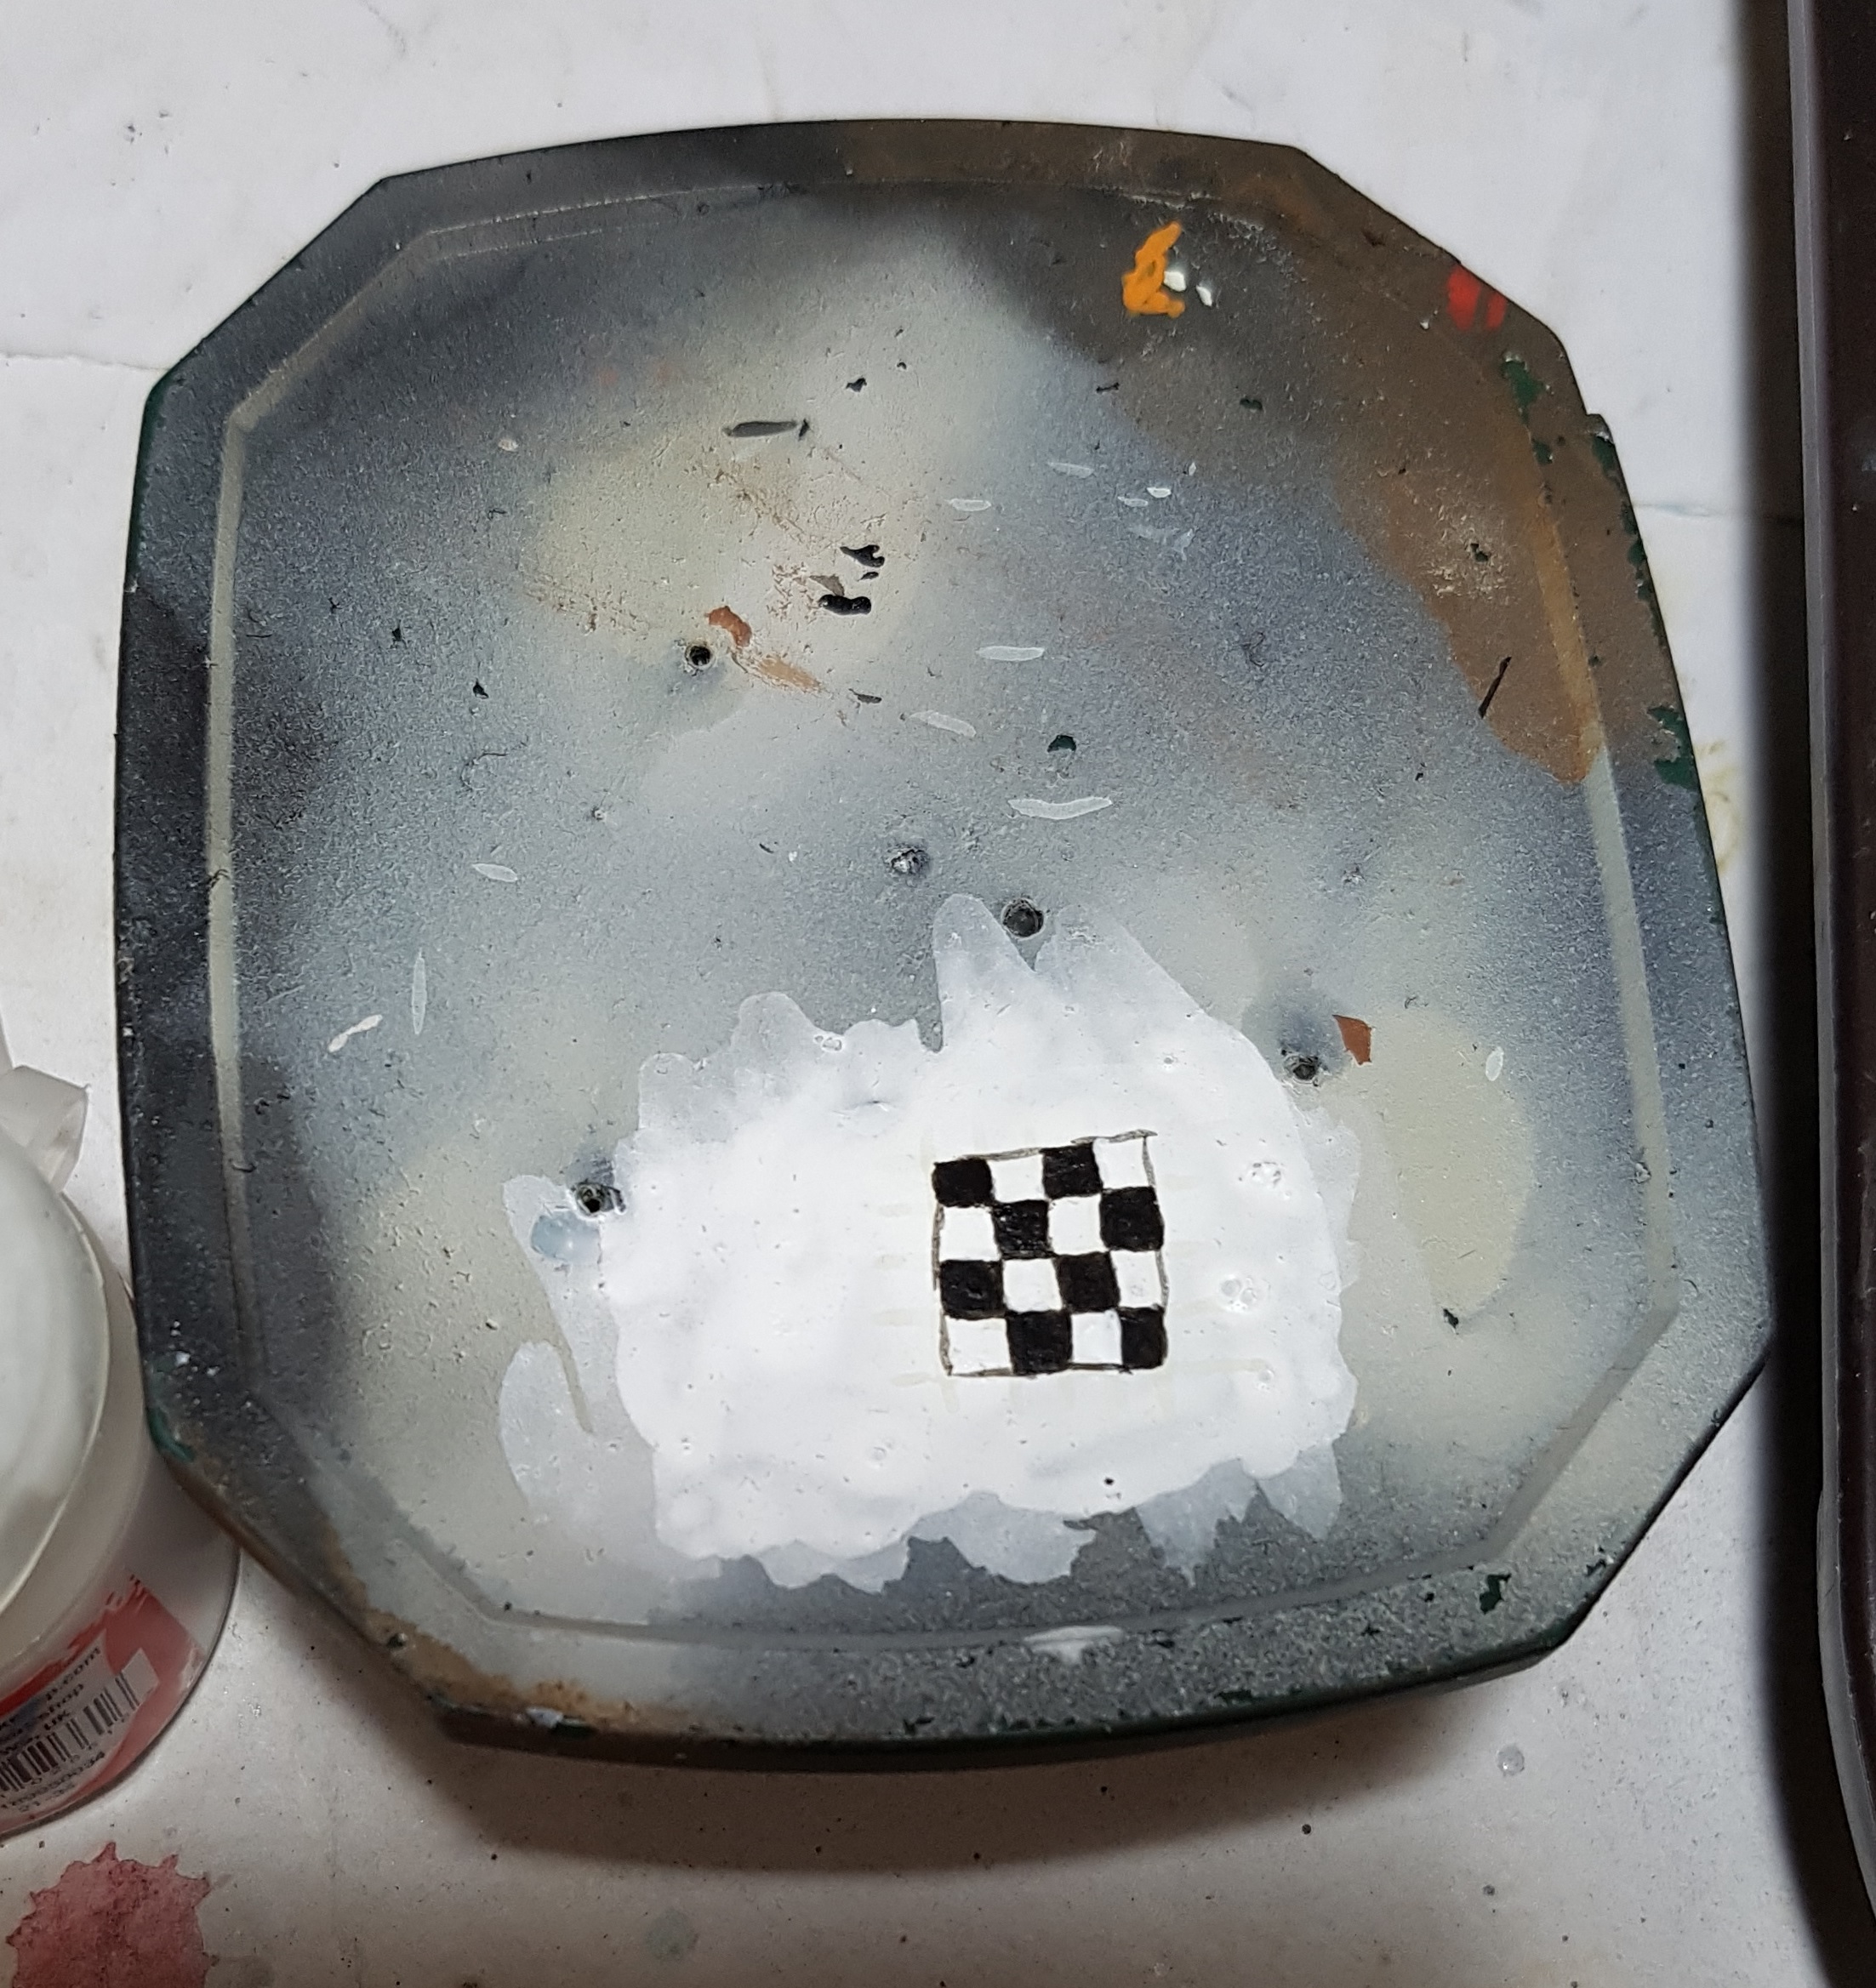
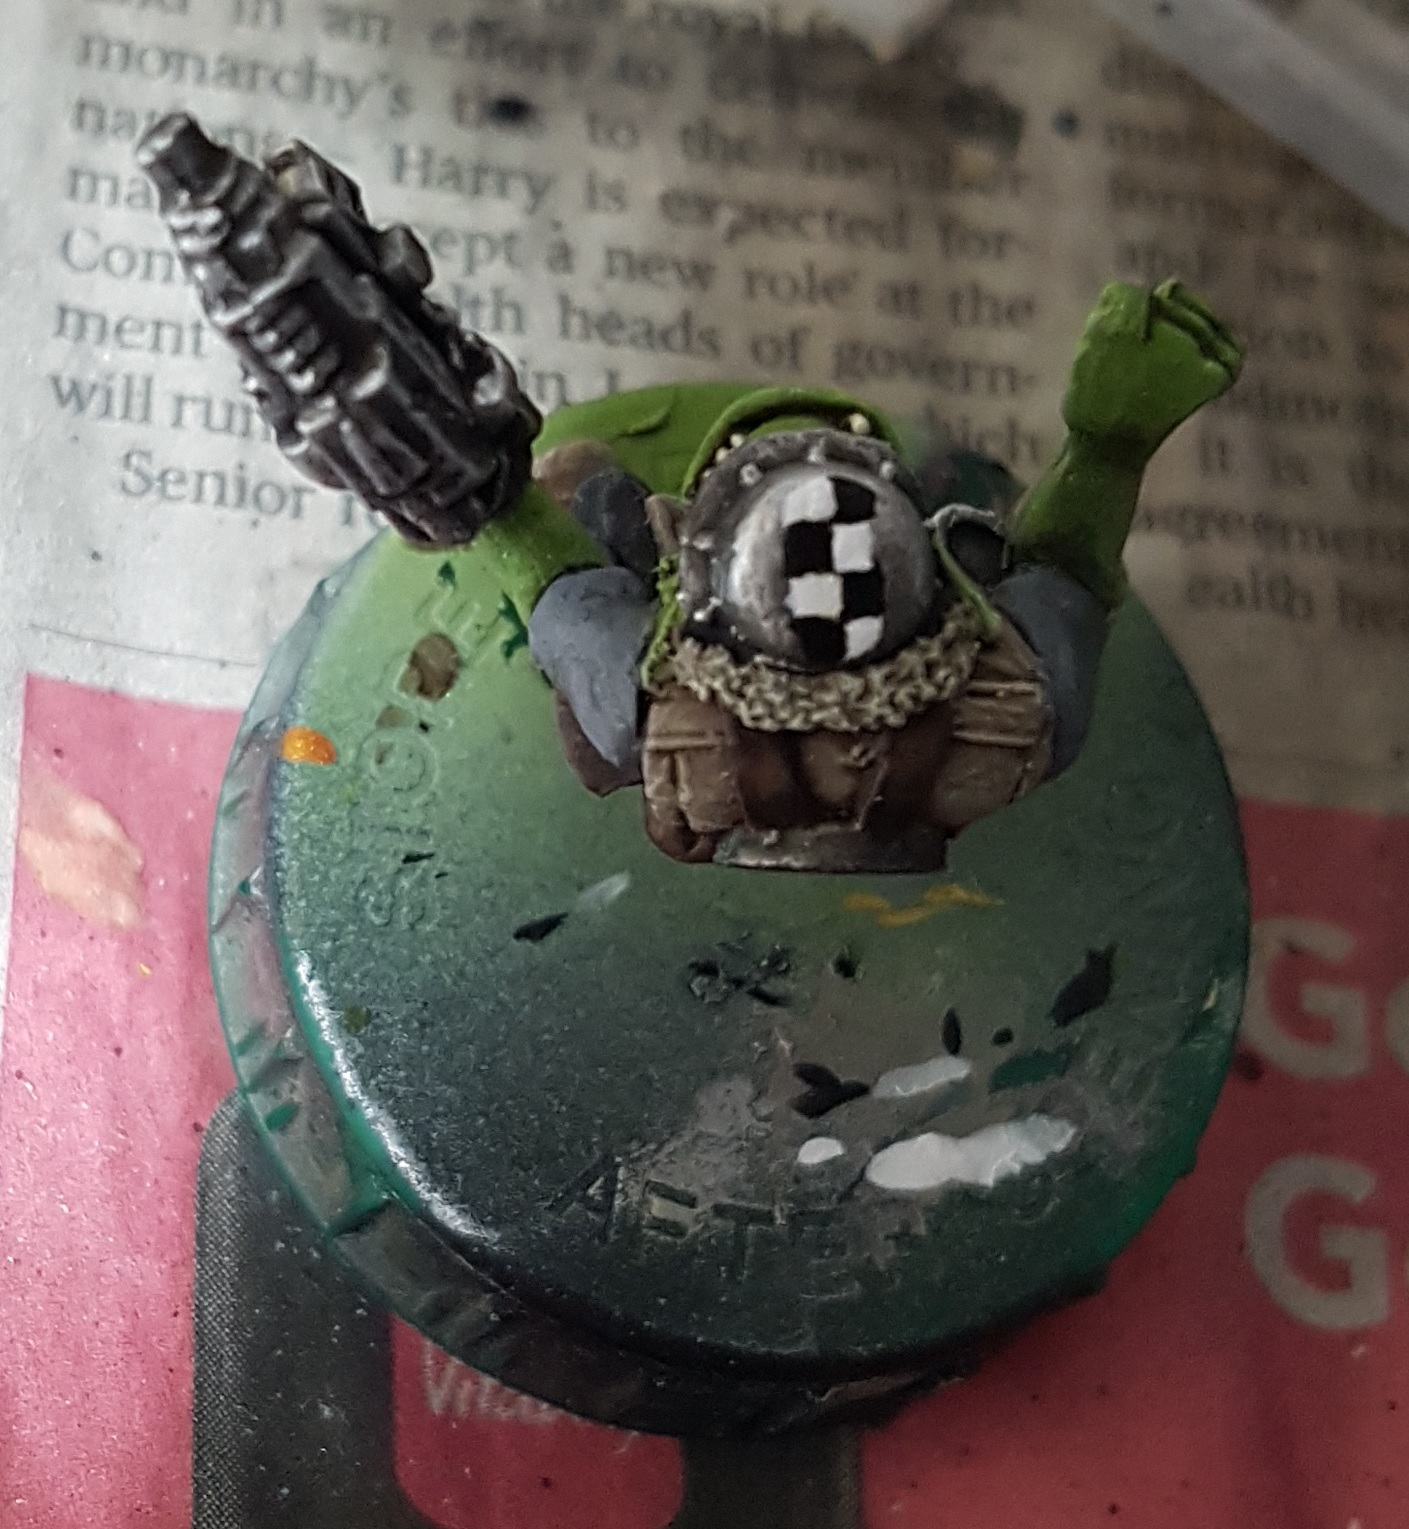
I’ve never painted check patterns before. I have a hard enough time drawing a straight line with a pencil. I watched some guides and experimented on an old coffee jar lid to see if I was brave enough to do it on a model. I primed an area white, marked out some lines in off white (P3 Sickly Skin) so it could easily be painted over again. I put a small dot of black in the middle of every to-be black square, and then went back and filled in some areas with black using multiple careful coats. After painting the black, I tidied up the white. It worked out well enough so I picked some areas on the models to apply it to and repeated the process. It’s not perfect, but Orks painted this on their armour themselves so it probably wouldn’t be prefect.


Next I painted the scabbards with a Foundry African Flesh Light 126C base, Agrax Earthshade wash, and a Menoth White Highlight …highlight.
Bottles and glass got a base of P3 Coal Black, a wash of a mix of Coal Black and Black, and highlighted back up with Coal black with progressively more Menoth White base added to it.
Ropes and cords got a base from a mix of P3 Mouldy ochre, washed with Agrax Earthshade (Why don’t they sell this by the pint?), and a drybrush of Menoth White Base (It seems to work well with most things).
Corks were based with P3 Hammerfall Khaki, Washed with Agrax Earthshade, and drybrushed with Menoth White Base.
Some of them seem to be carrying divers flippers for whatever reason. I went with the Secret Weapon rubber mix for these. Undercoat black, base Tire Black Highlight Rubber, and highlight further with Rubber Highlight.
It was at this point that I remembered to take more photos.
This leaves picking out some primary colours, adding a little rust, applying a transfer and basing. Only 1 text box and 1 pic slot left is this entry so lets see what I can do.
Yellow:
- Undercoat P3 Mouldy Ochre (Yellow has poor coverage, except for this colour)
- Base: P3 heartfire mix with P3 Cygnus Yellow
- Highlight 1: Cygnar Yellow
- Highlight 2: Cygnar Yellow mixed with Menoth White Highlight
- All glazed together with a few coats of P3 Yellow Ink
Red:
- Base: GW Khorne Red
- Highlight 1: GW Evil Sunz Scarlett
- Highlight 2: GW Wild Rider Red
- Highlight 3: GW Wild Rider Red mixed with Menoth White highlight
- All unified with a glaze of P3 Red Ink
Blue:
- VMC 70.899 Dark Prussian Blue (I love this colour)
- Highlight 1: P3 Cygnar Blue Base
- Highlight 2: Cygnar Blue Highlight
- Highlight 3: Cygnar Blue Highlight mixed with Menoth White Highlight
- All unified together with a glaze of Cygnar Blue Highlight
White:
- Base: P3 Sickly Skin
- Shade: P3 Trollblood Highlight wash
- High: any White
I found a sheet of Ork transfers printed in 2000 in a box of second hand stuff so I thought I’d give them a go. There was only really one surface suitable that wasn’t already covered in check so I only applied one. Having used Mantic, Warlord, and Flames of War transfers before I would have to say I was not impressed by GWs transfers. It’s an old design and possibly it hasn’t aged well so perhaps a newer sheet would impress me a little more?
The rust was made up from a dilute mix of Vallejo 73.108 Brown Iron Oxide pigment, and Alcladd II ALCWP-001 Deep Rust. because they are what I own and a mix has looked better than one or other alone before. I kept it dilute and applied it in select places so it did not take over the iron. When I applied it over a large flat surface I dabbed it with my finger after, often applying a few coats this way to diffuse any hard edges to the stain.
The bases were prepped along the way as they have some long drying times. Pin holes were measured before painting. Any slots were covered with masking tape and everything was primed black in advance. As before, they were given a heavy coat of GW Martian Ironcrust textured paint. I find that old pots of this work better than new pots. If you plan on using some allow it to age suitable before use if you can. Crack the seal once, close the lid and just leave it somewhere for 6+ months.
Anyway, the textured paint was given a day to dry and then flooded with GW Agrax Earthshade. This was left overnight to dry and drybrushed up with P3 Beast Hide. The lip was then tidied up with black paint again. The Orks were attached when all painting was finished and everything was airbrushed with a coat of gloss varnish, and then a coat of matt varnish. Glassware was then picked out again with gloss. They were then allowed to dry thoroughly before having Serious Play’s Baked Canyon Landscape Texture applied. Before giving them a thorough dunk in the mix, I added one small piece of the green sponge from the tub as this helps set everything off and just dunking did not guarantee a base got any.
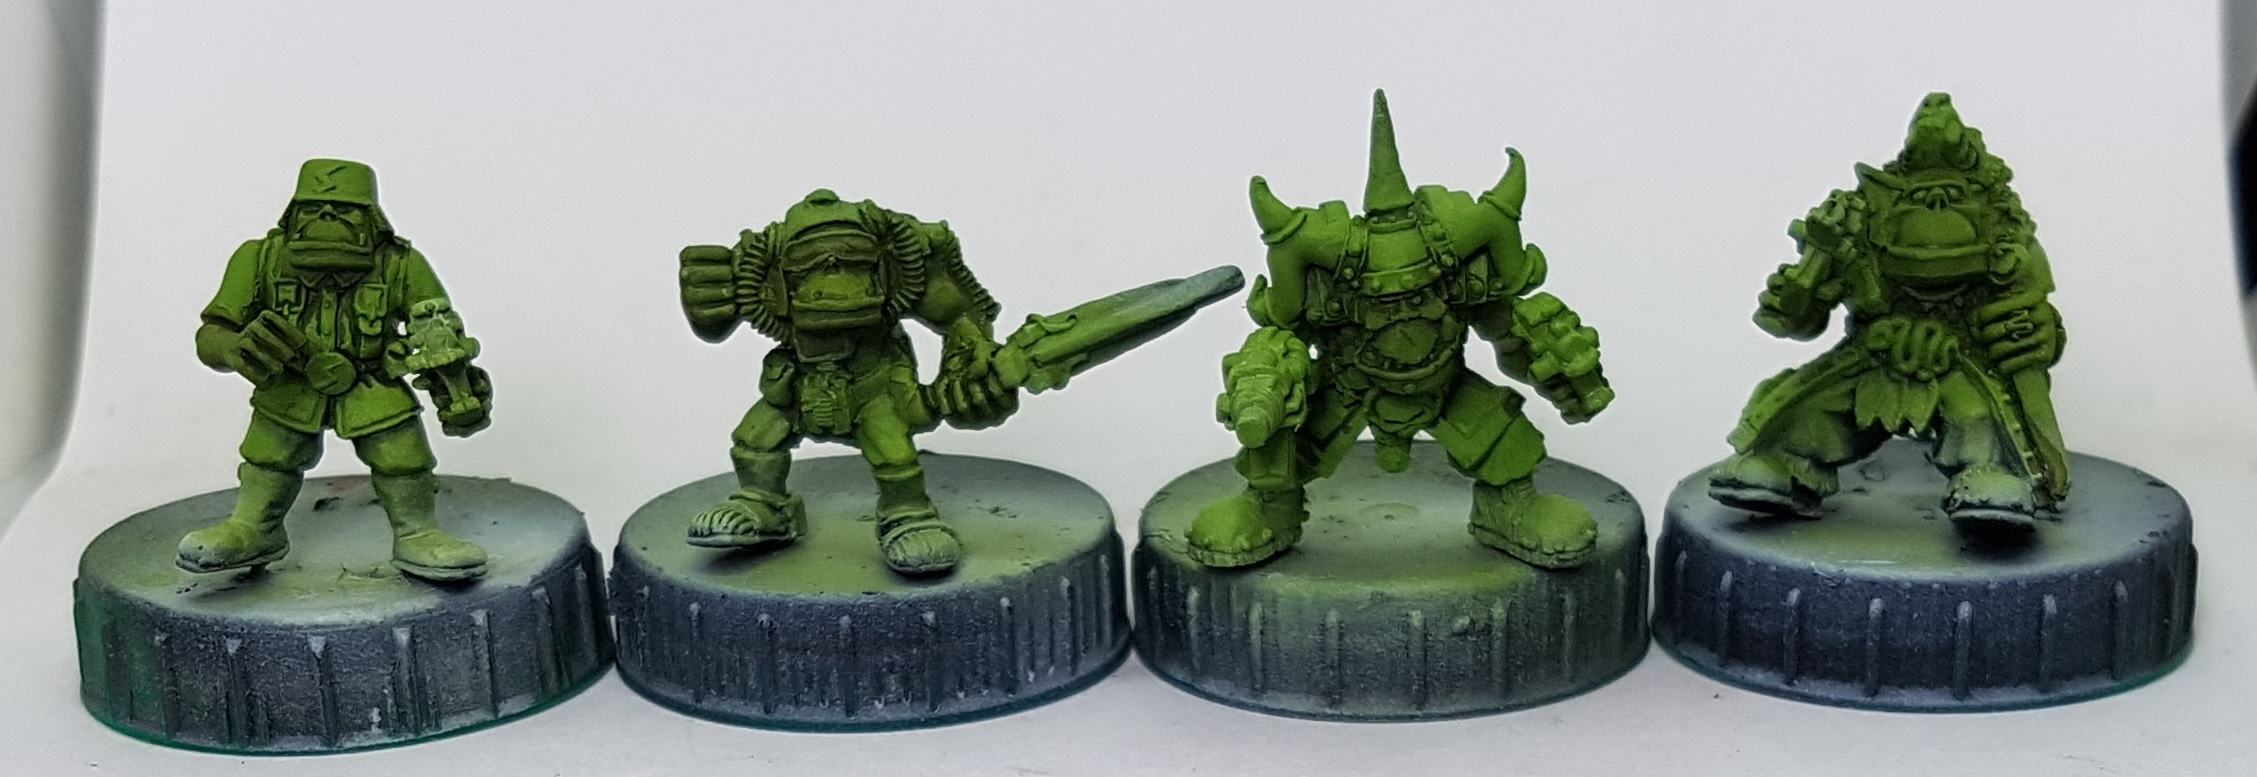
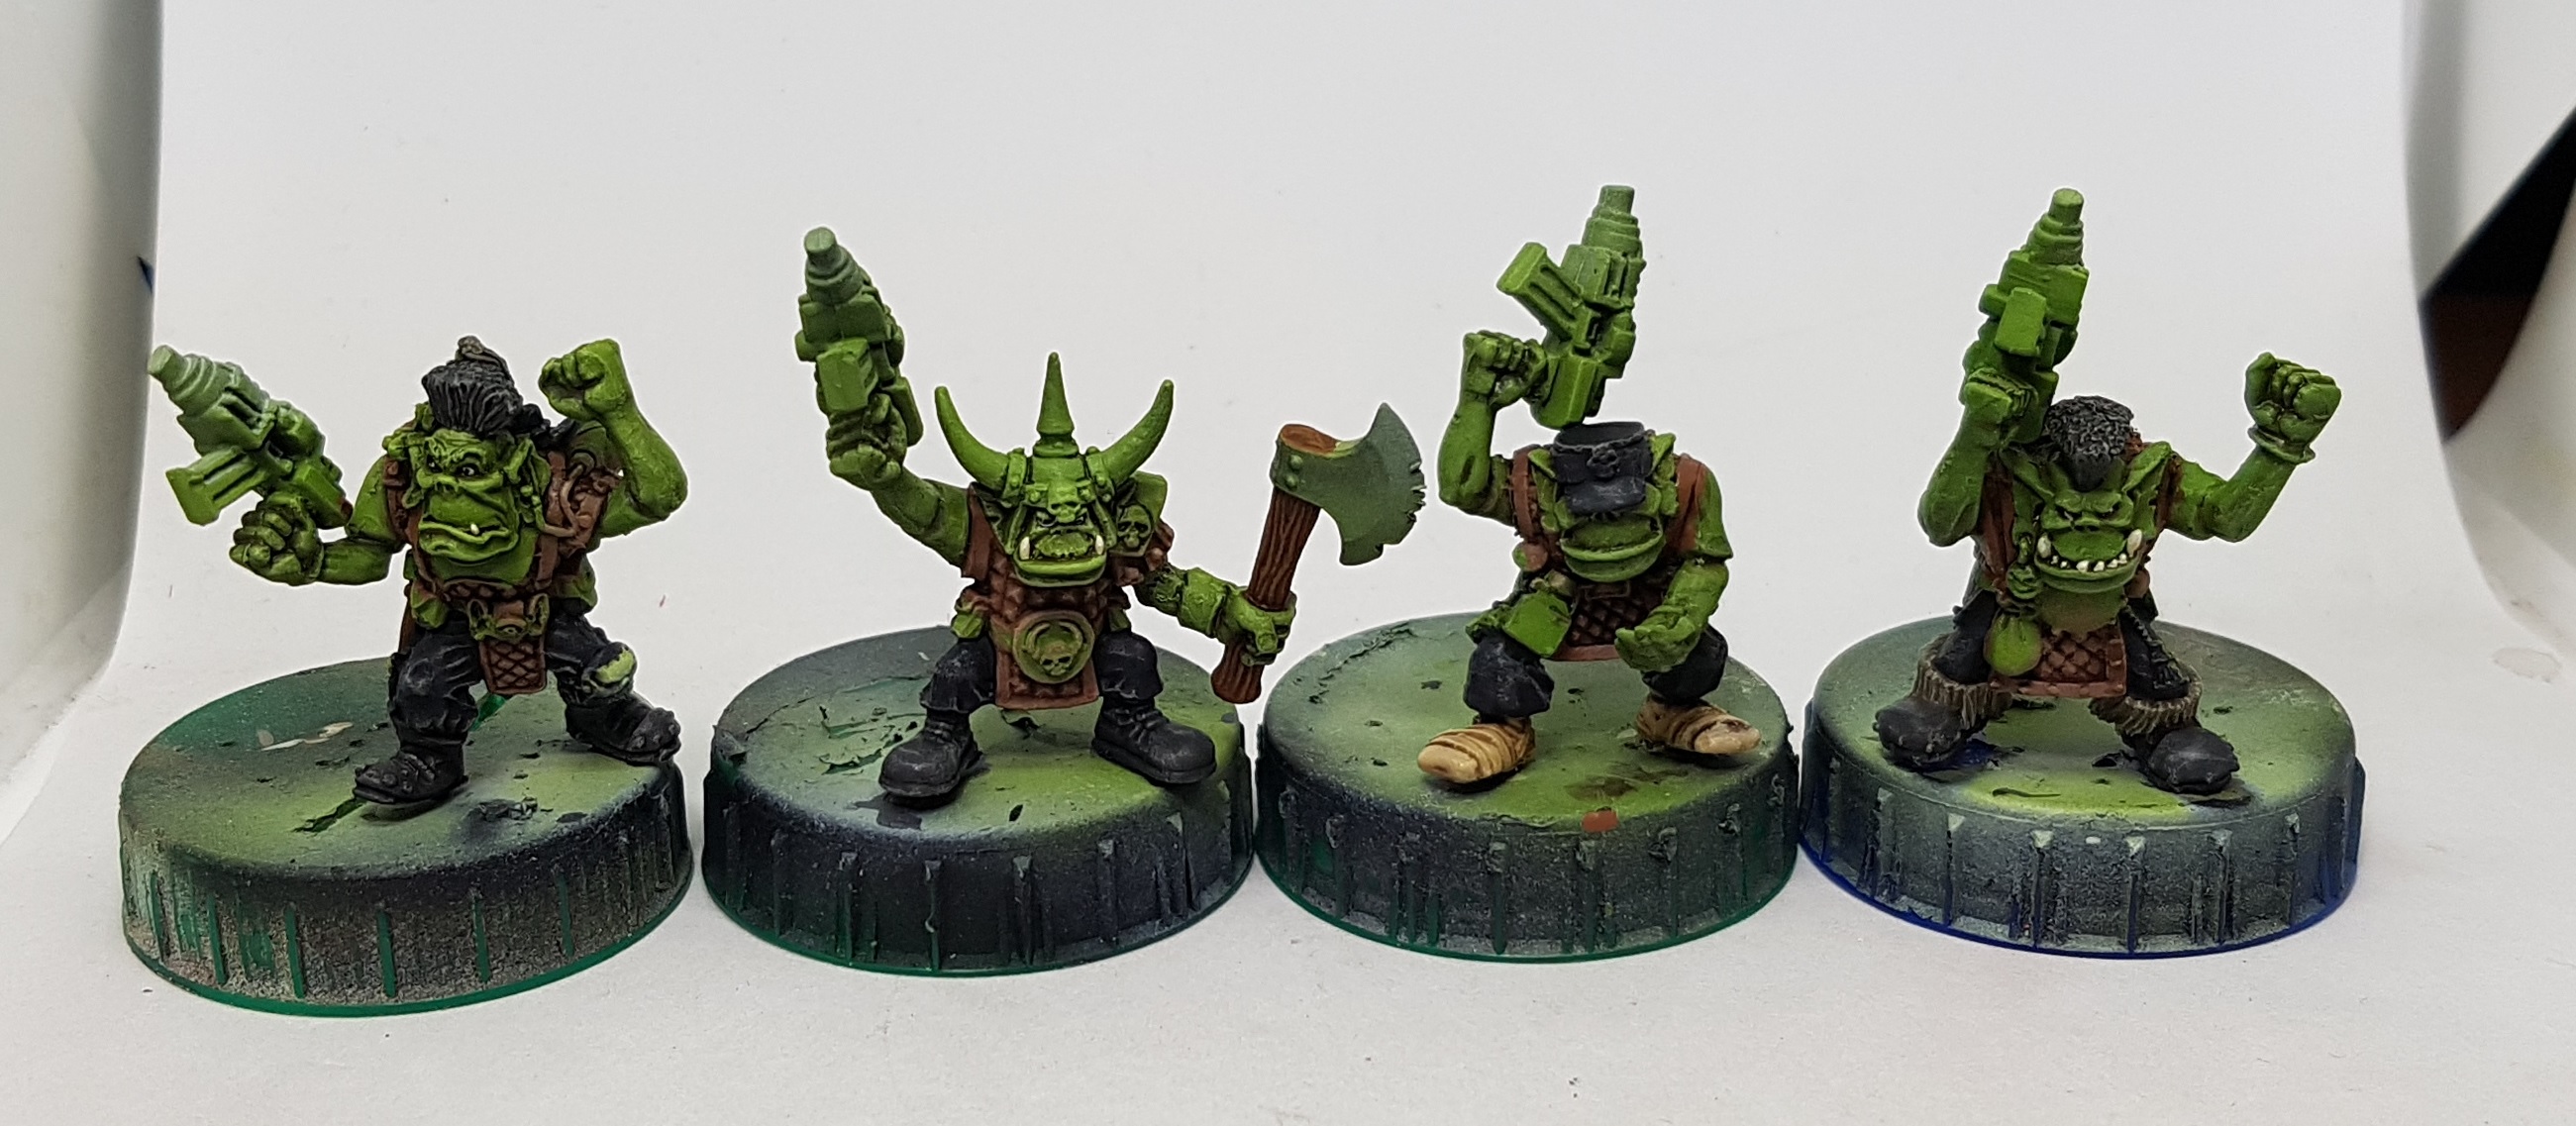
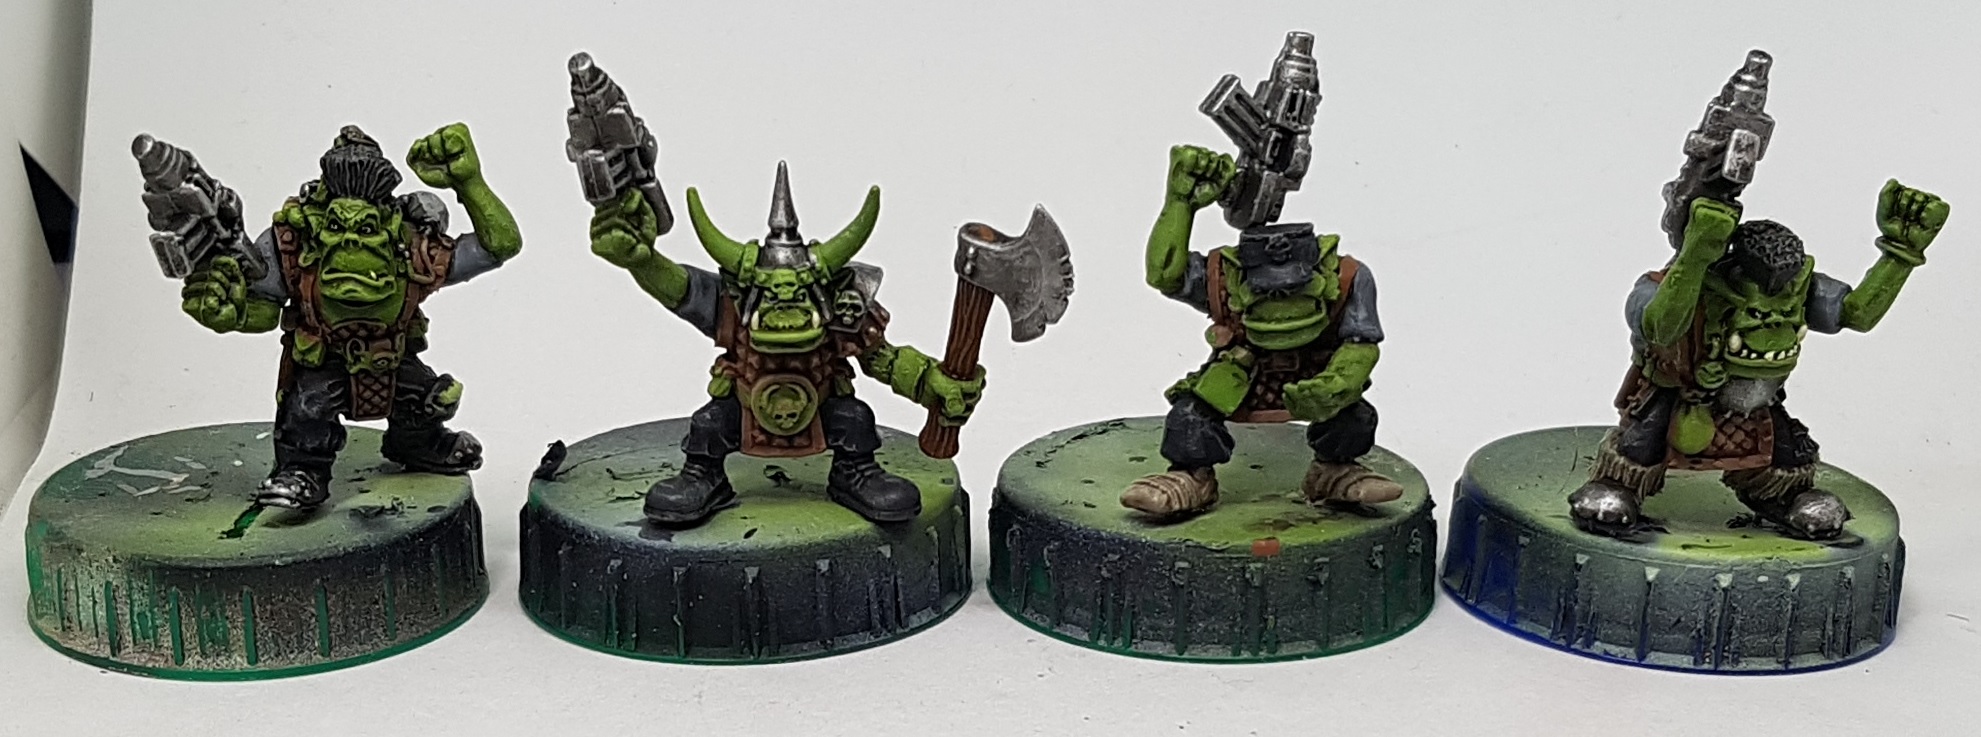
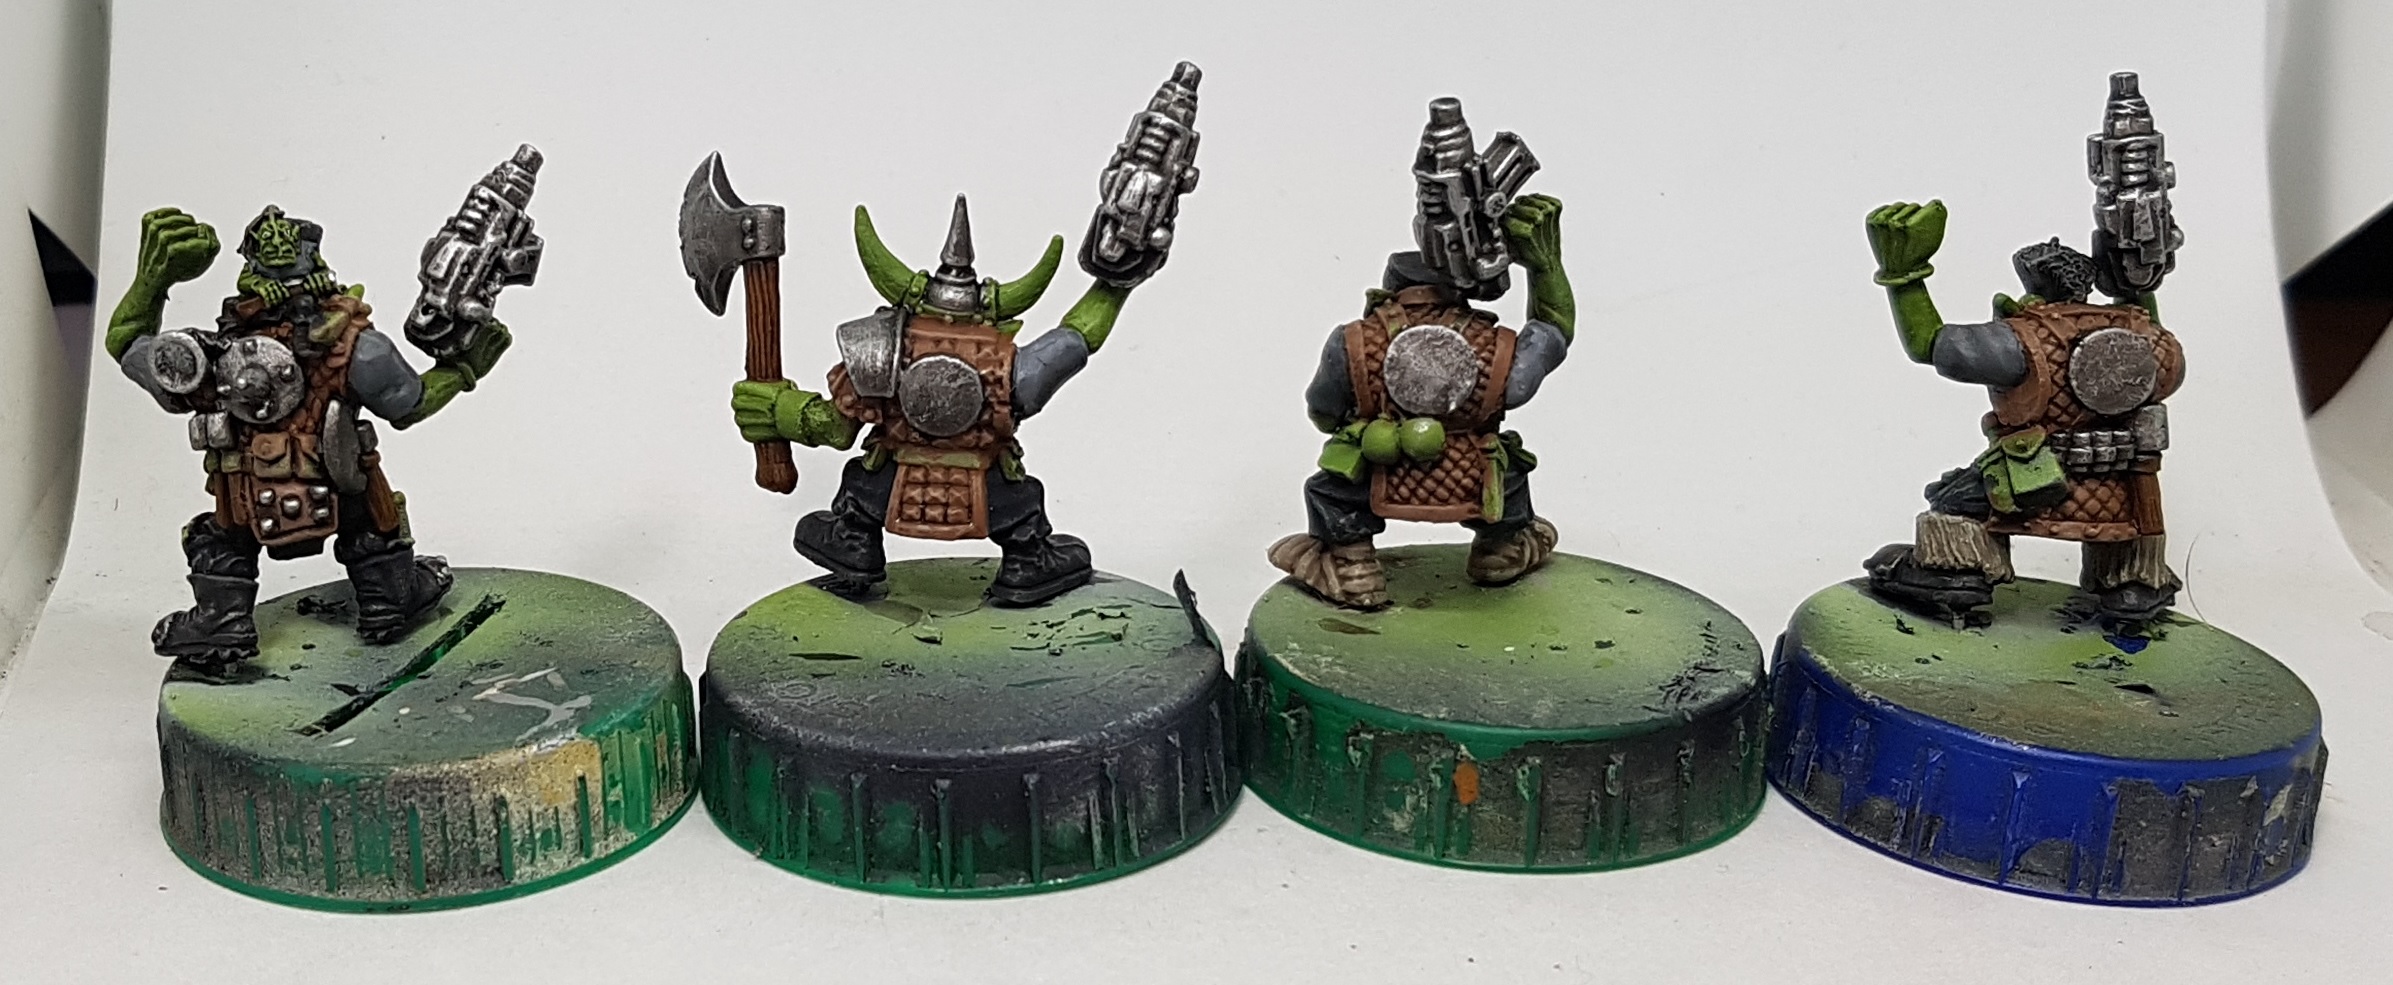
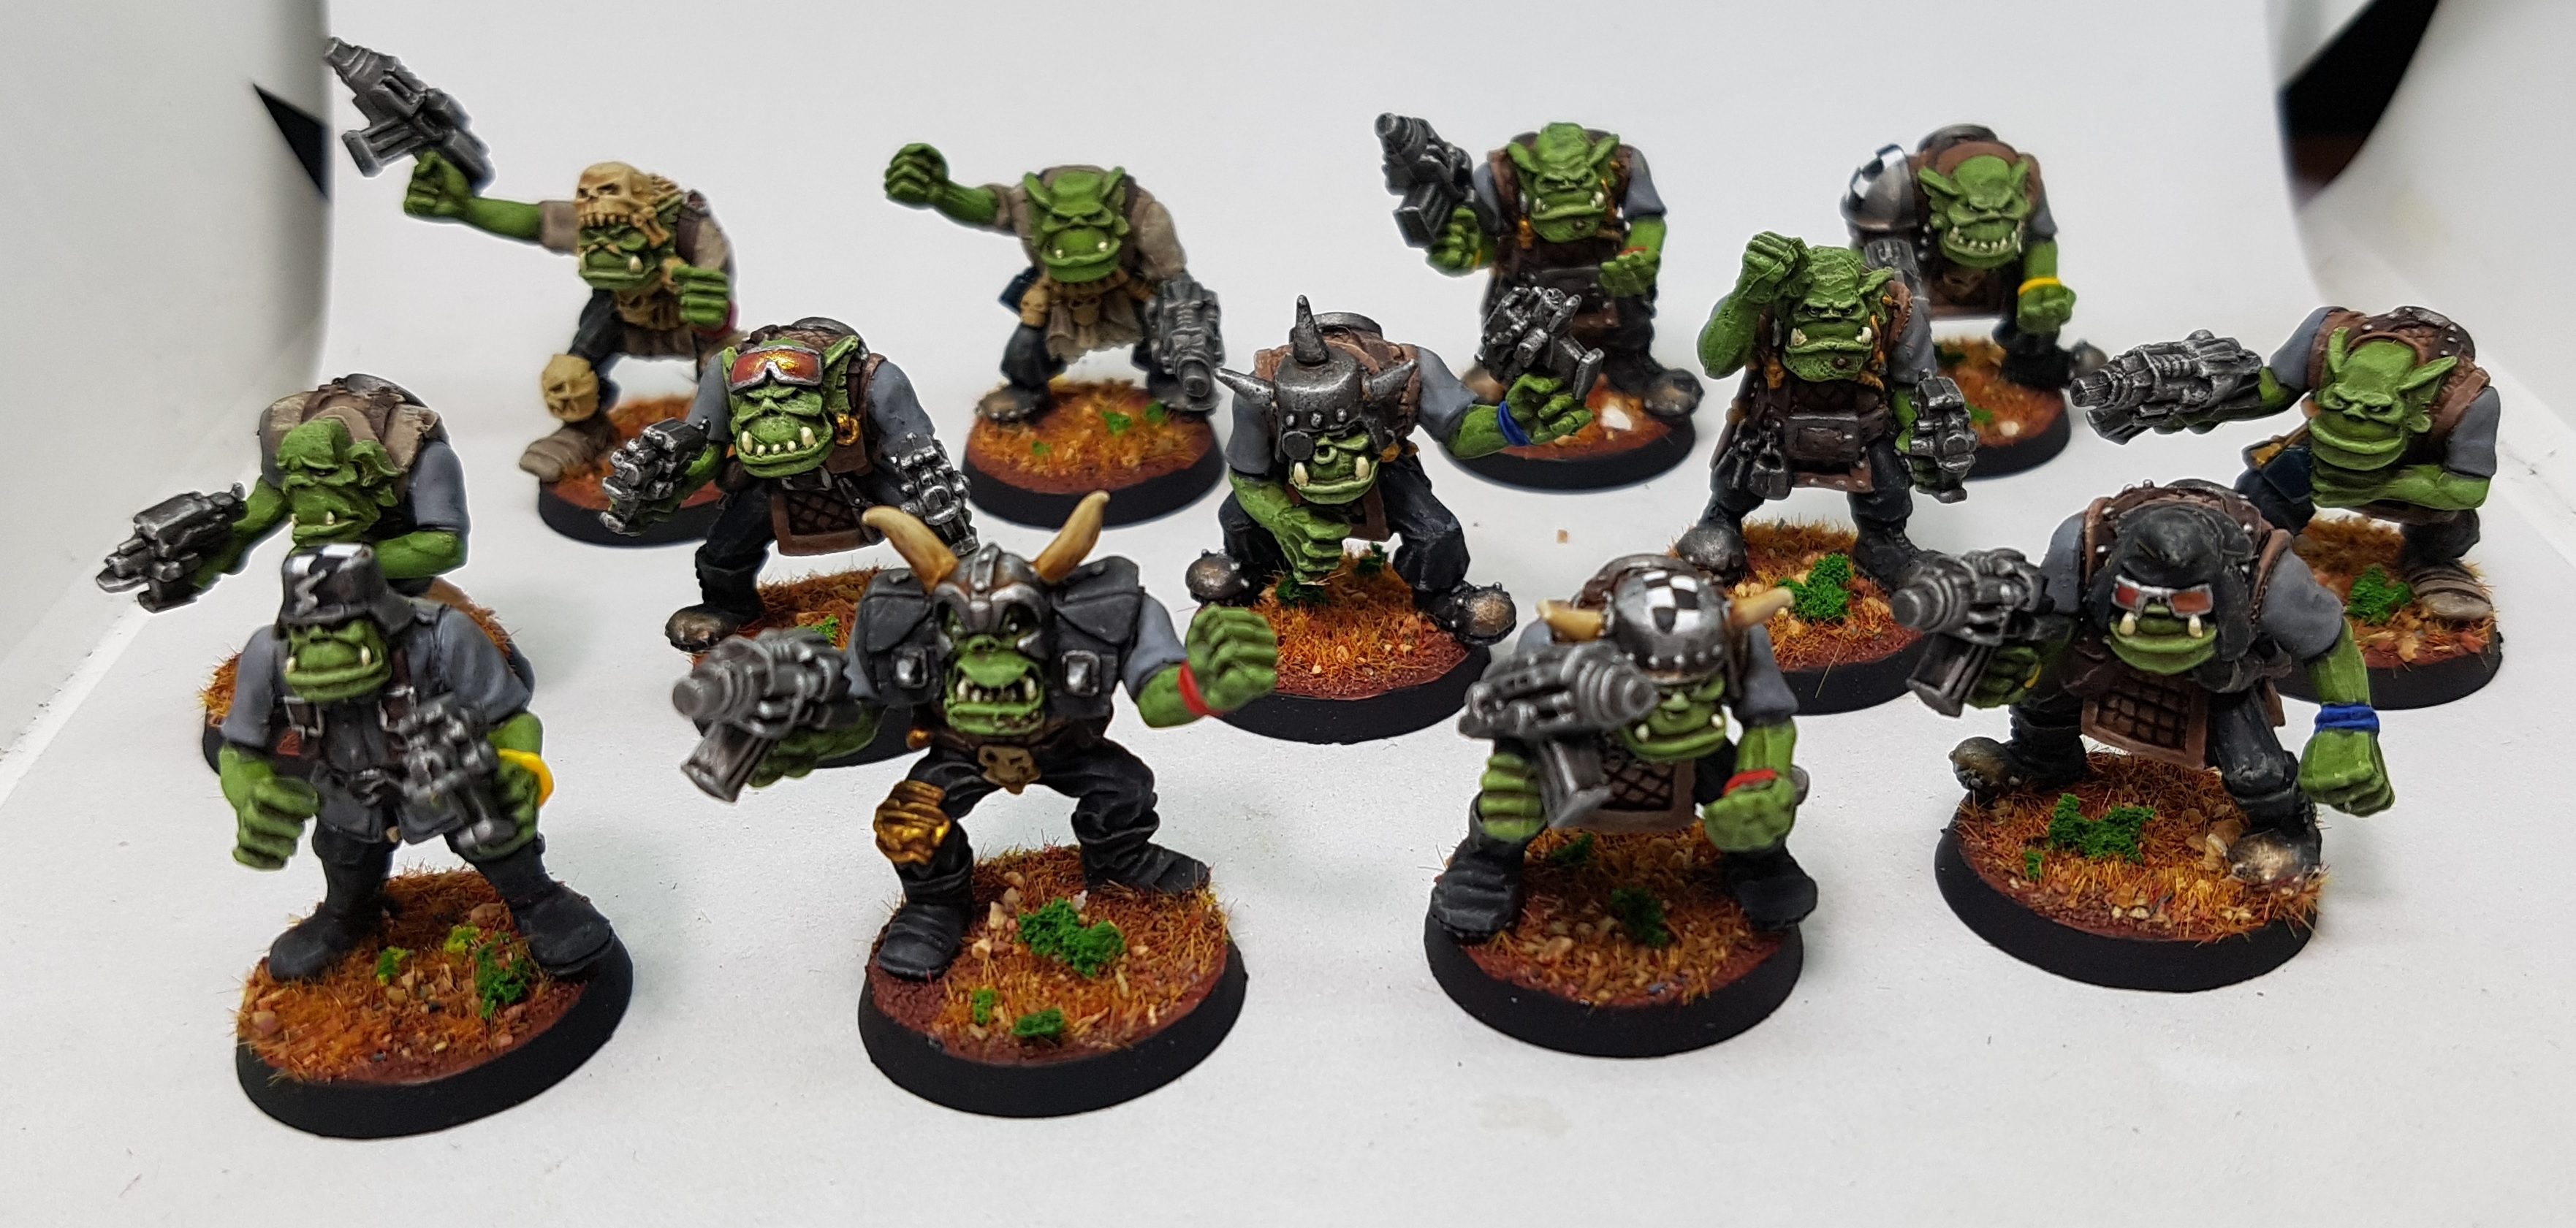
I will include more detailed shots of everything in a gallery at the end, but for now here is a group shot. I am currently most of the way through the final 13 Ork Boys using the same methods as above.
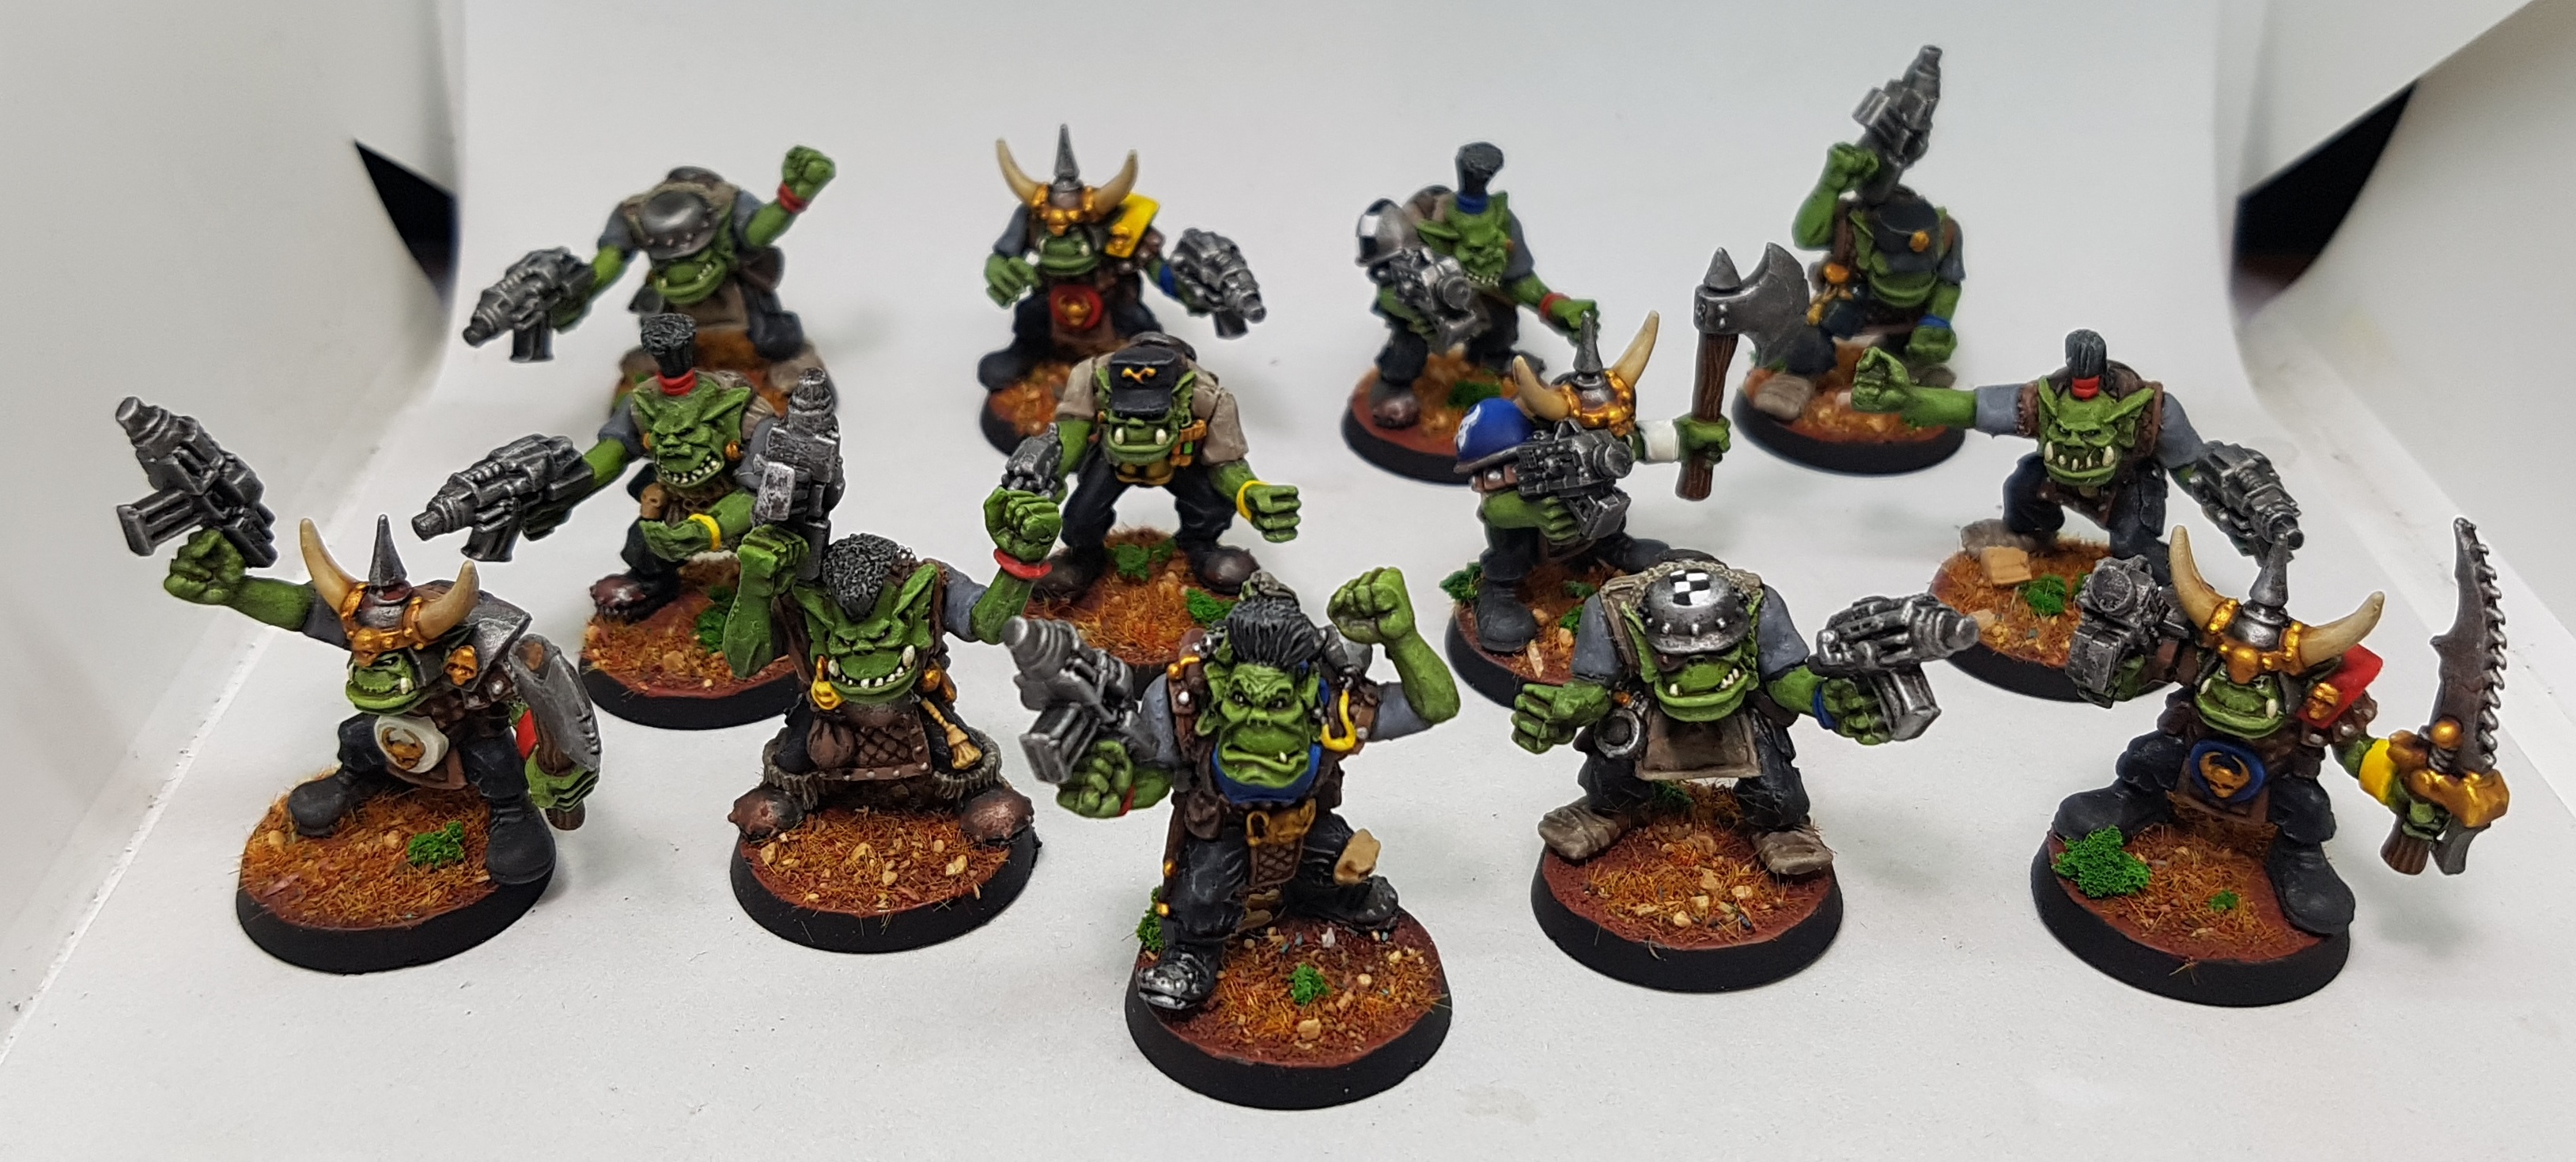
More Ork Boyz
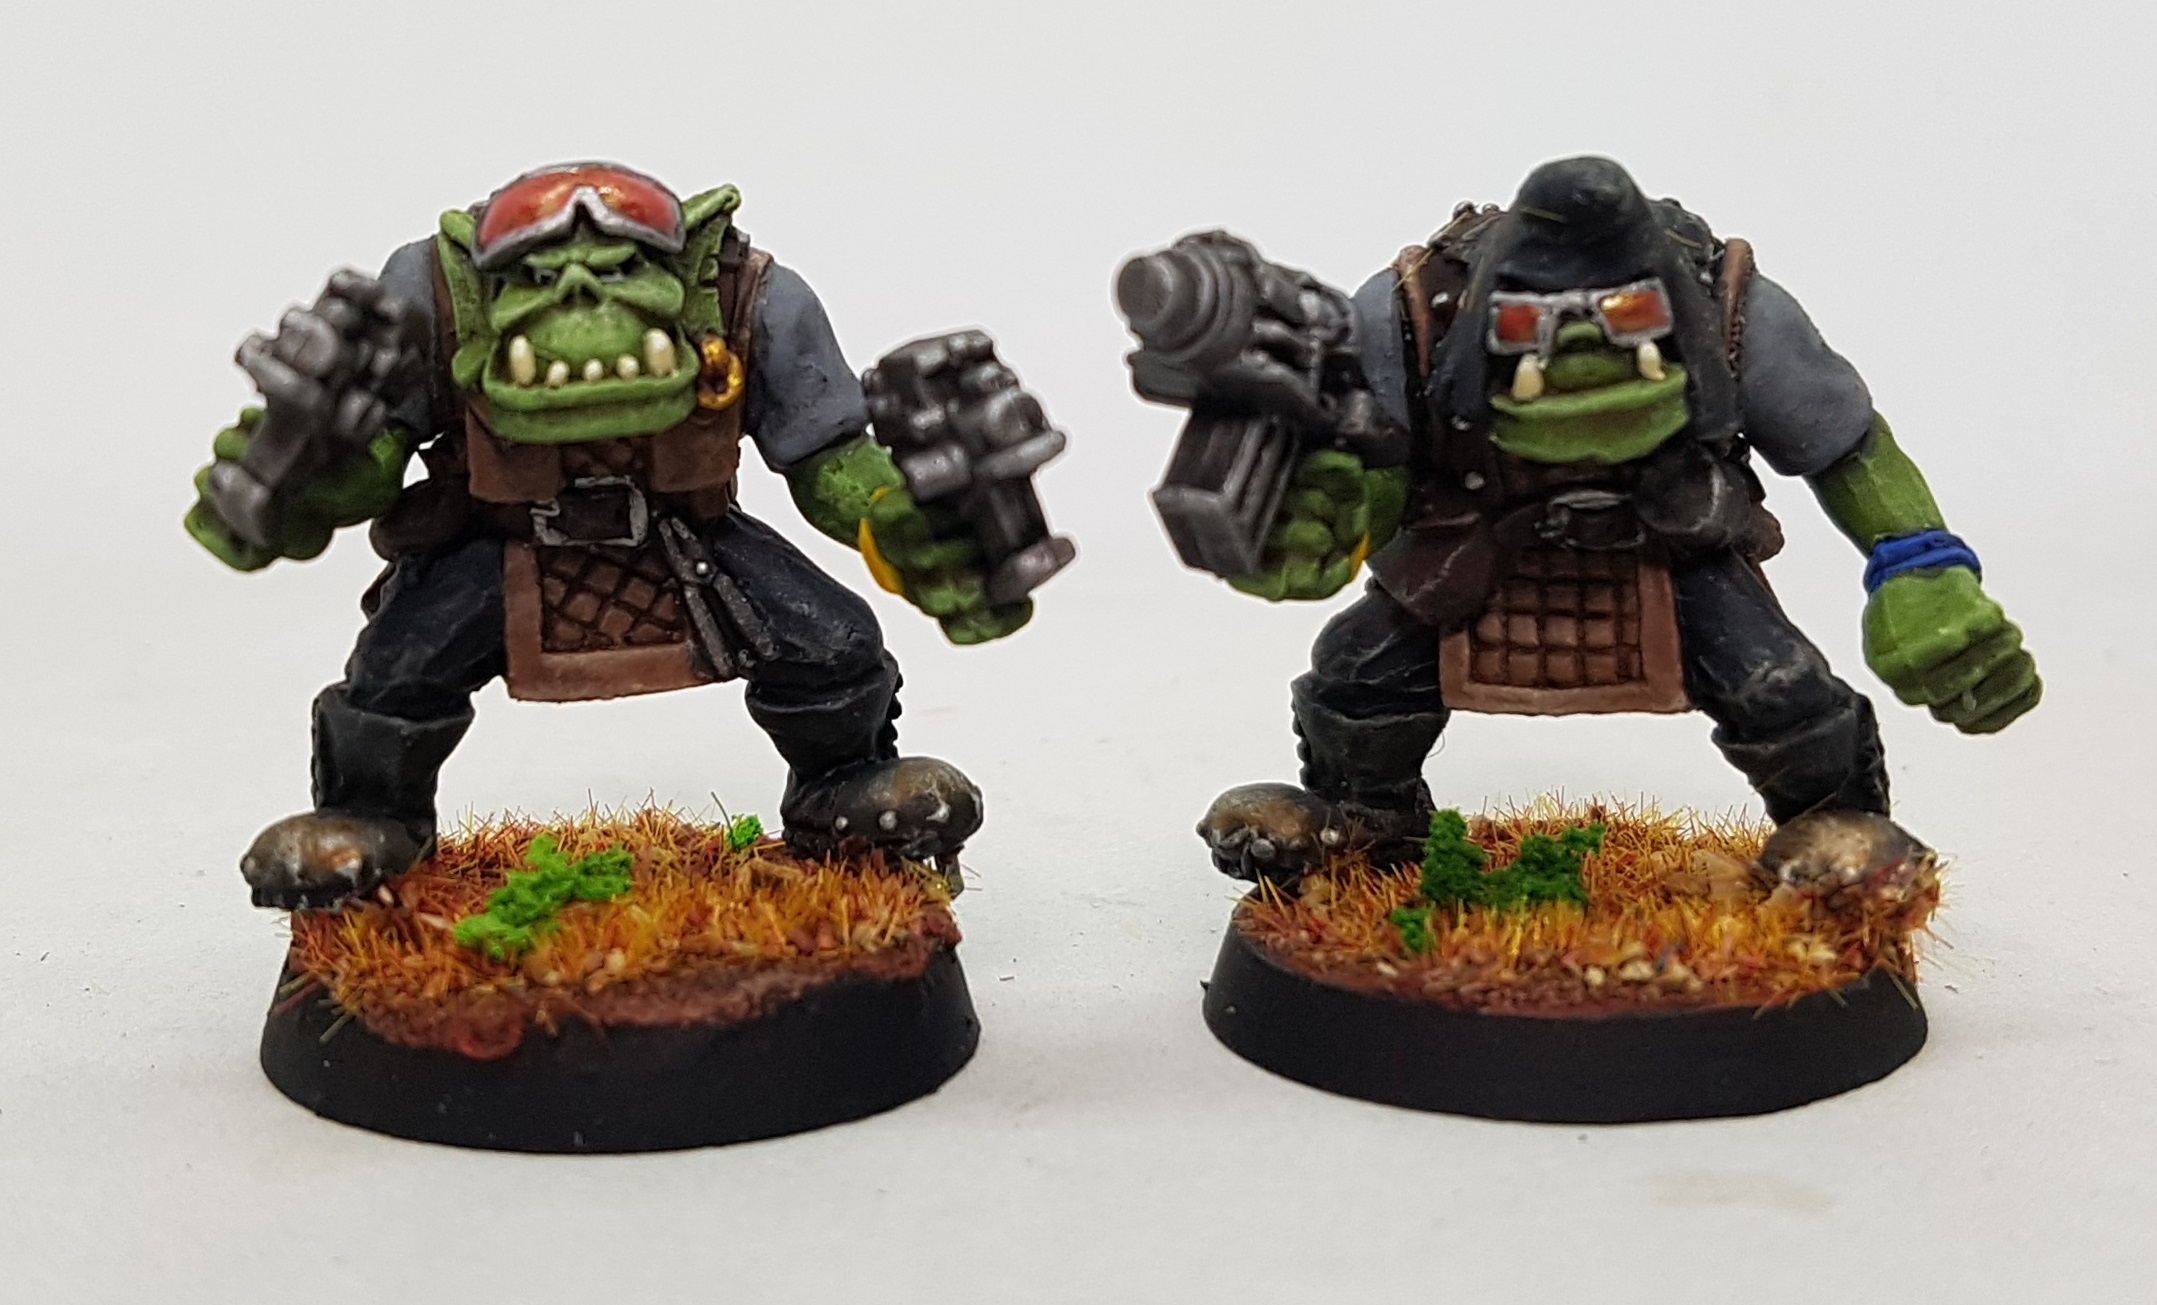
I painted up the second batch of 13 Ork Boyz using the same methods as last time. Two of them had glasses, as do 2 from the next batch. I own a pot of Red Goblin Colour shift paint I received in an Asset Drop box a while back so I applied that on the lenses over a black undercoat, before tidying up the frames with some P3 Cold Steel. After everything was varnished the lenses got a final coat of gloss varnish, along with any bottles.
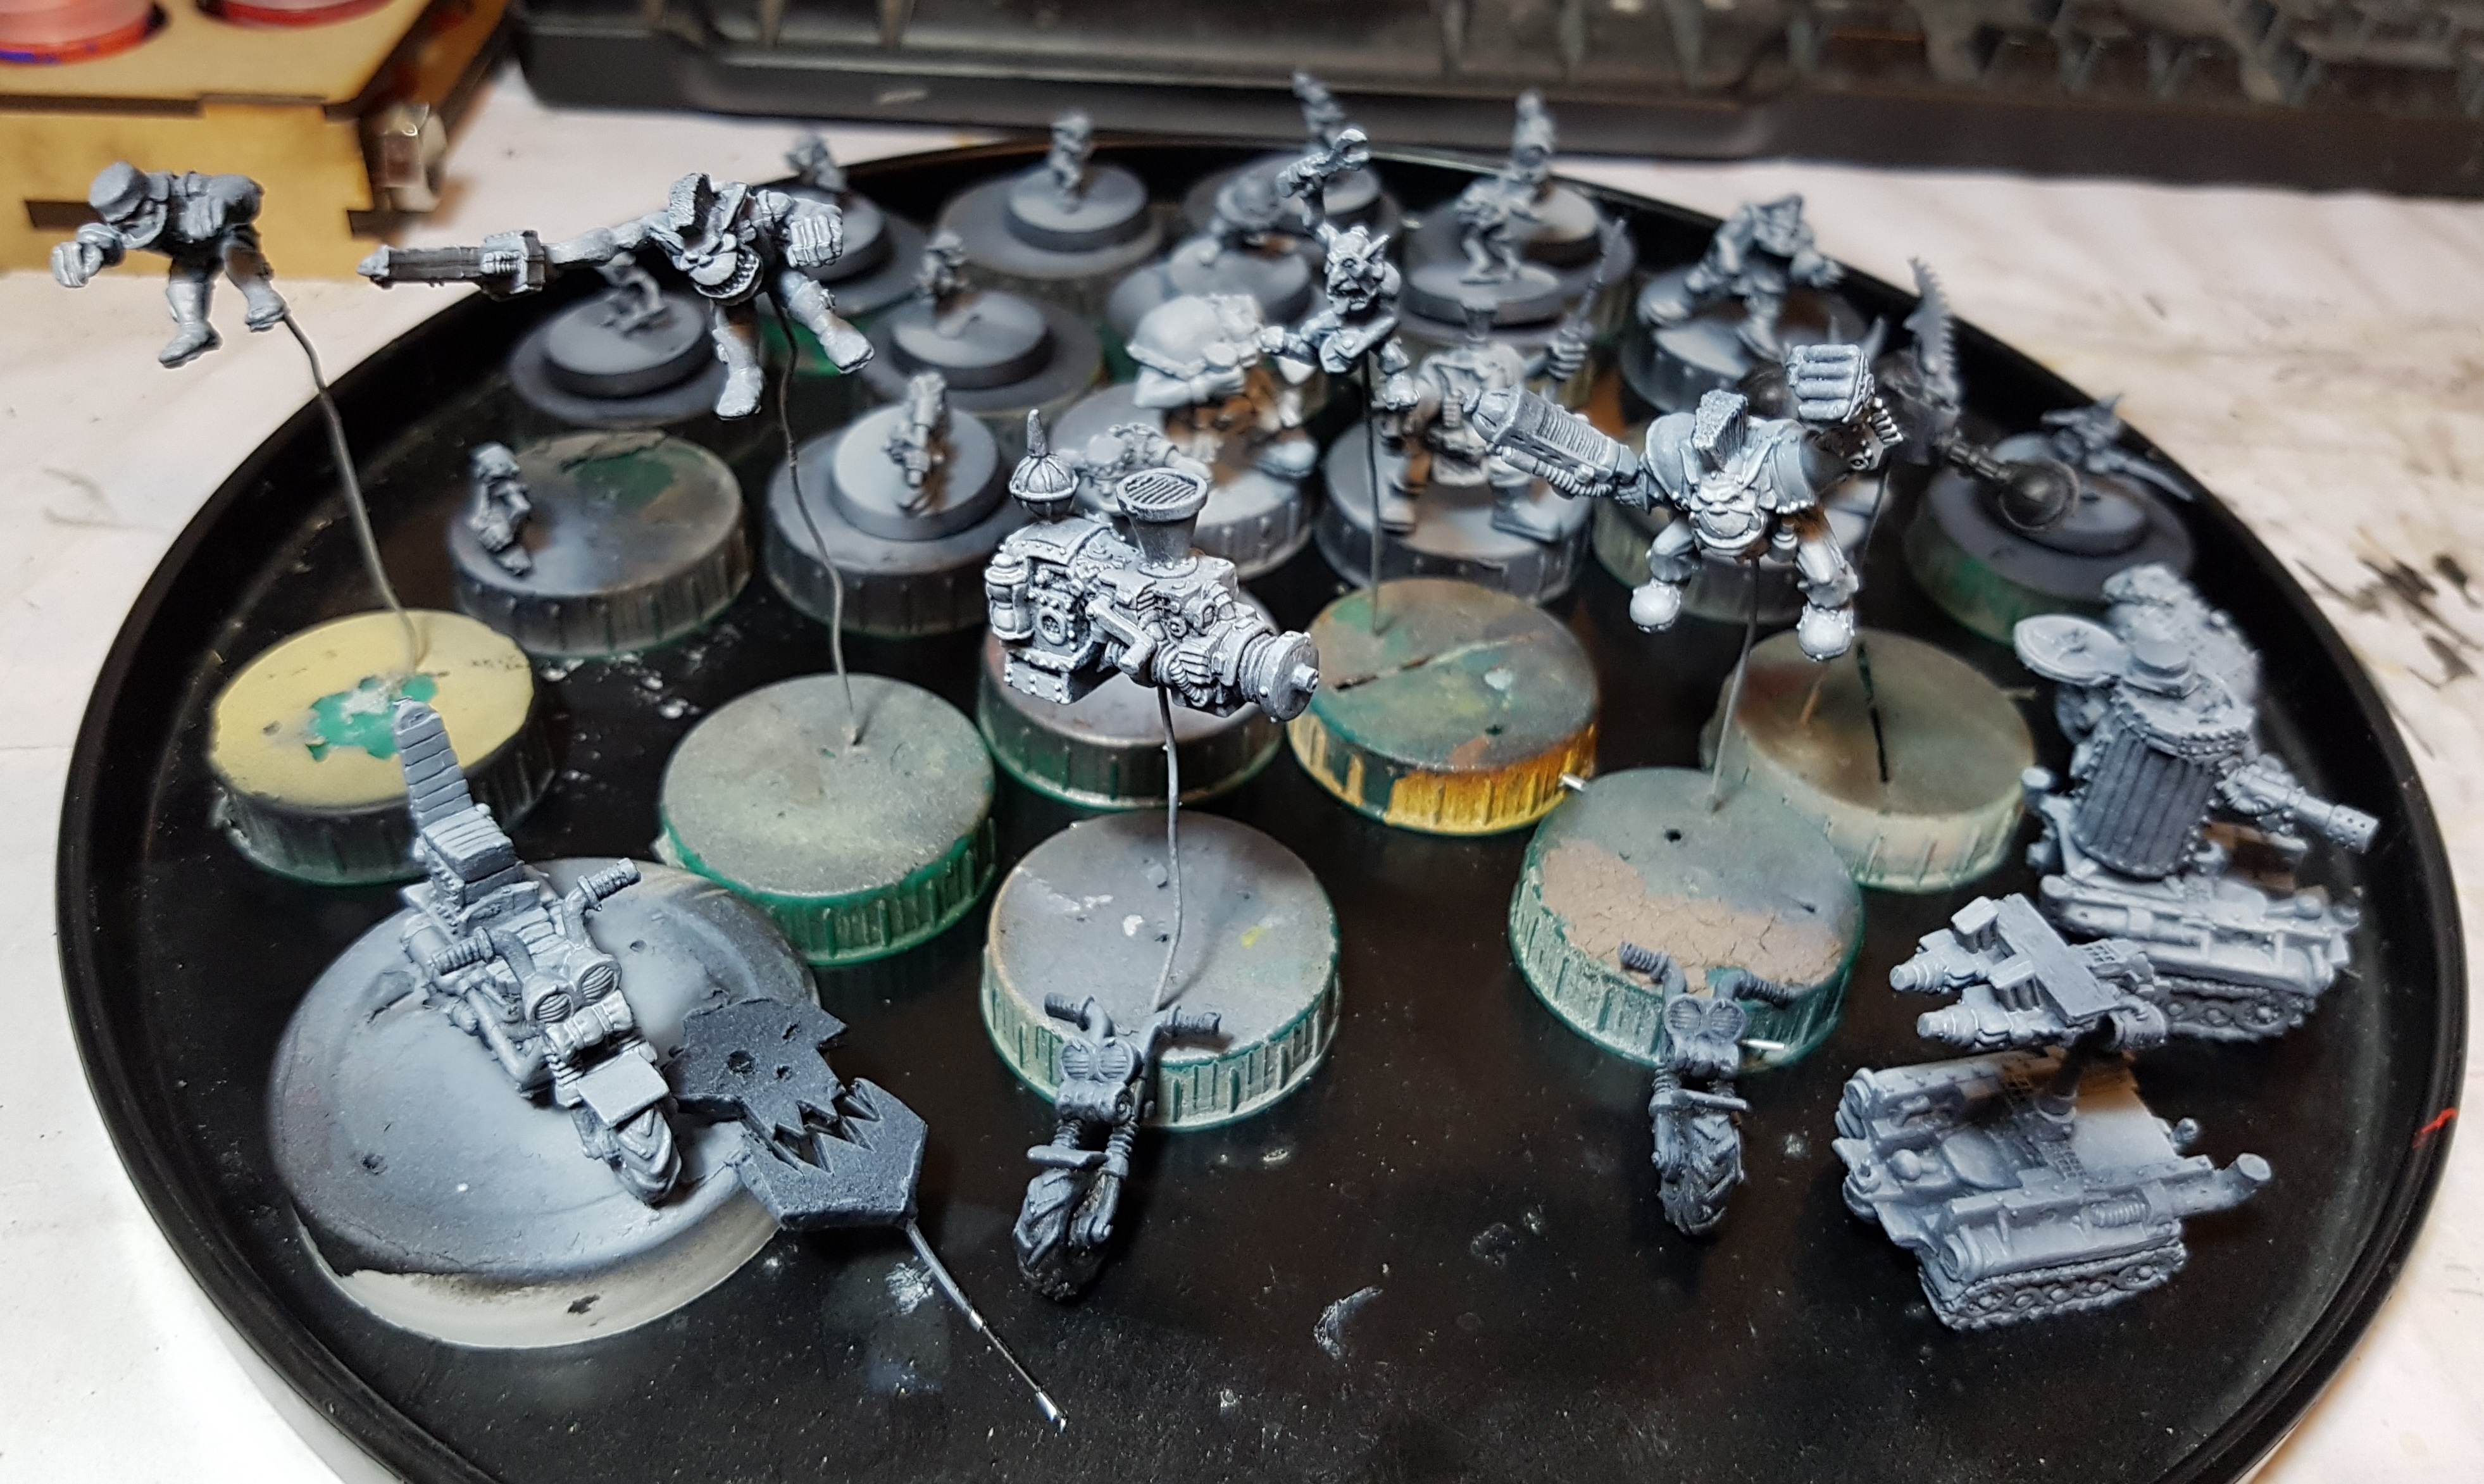
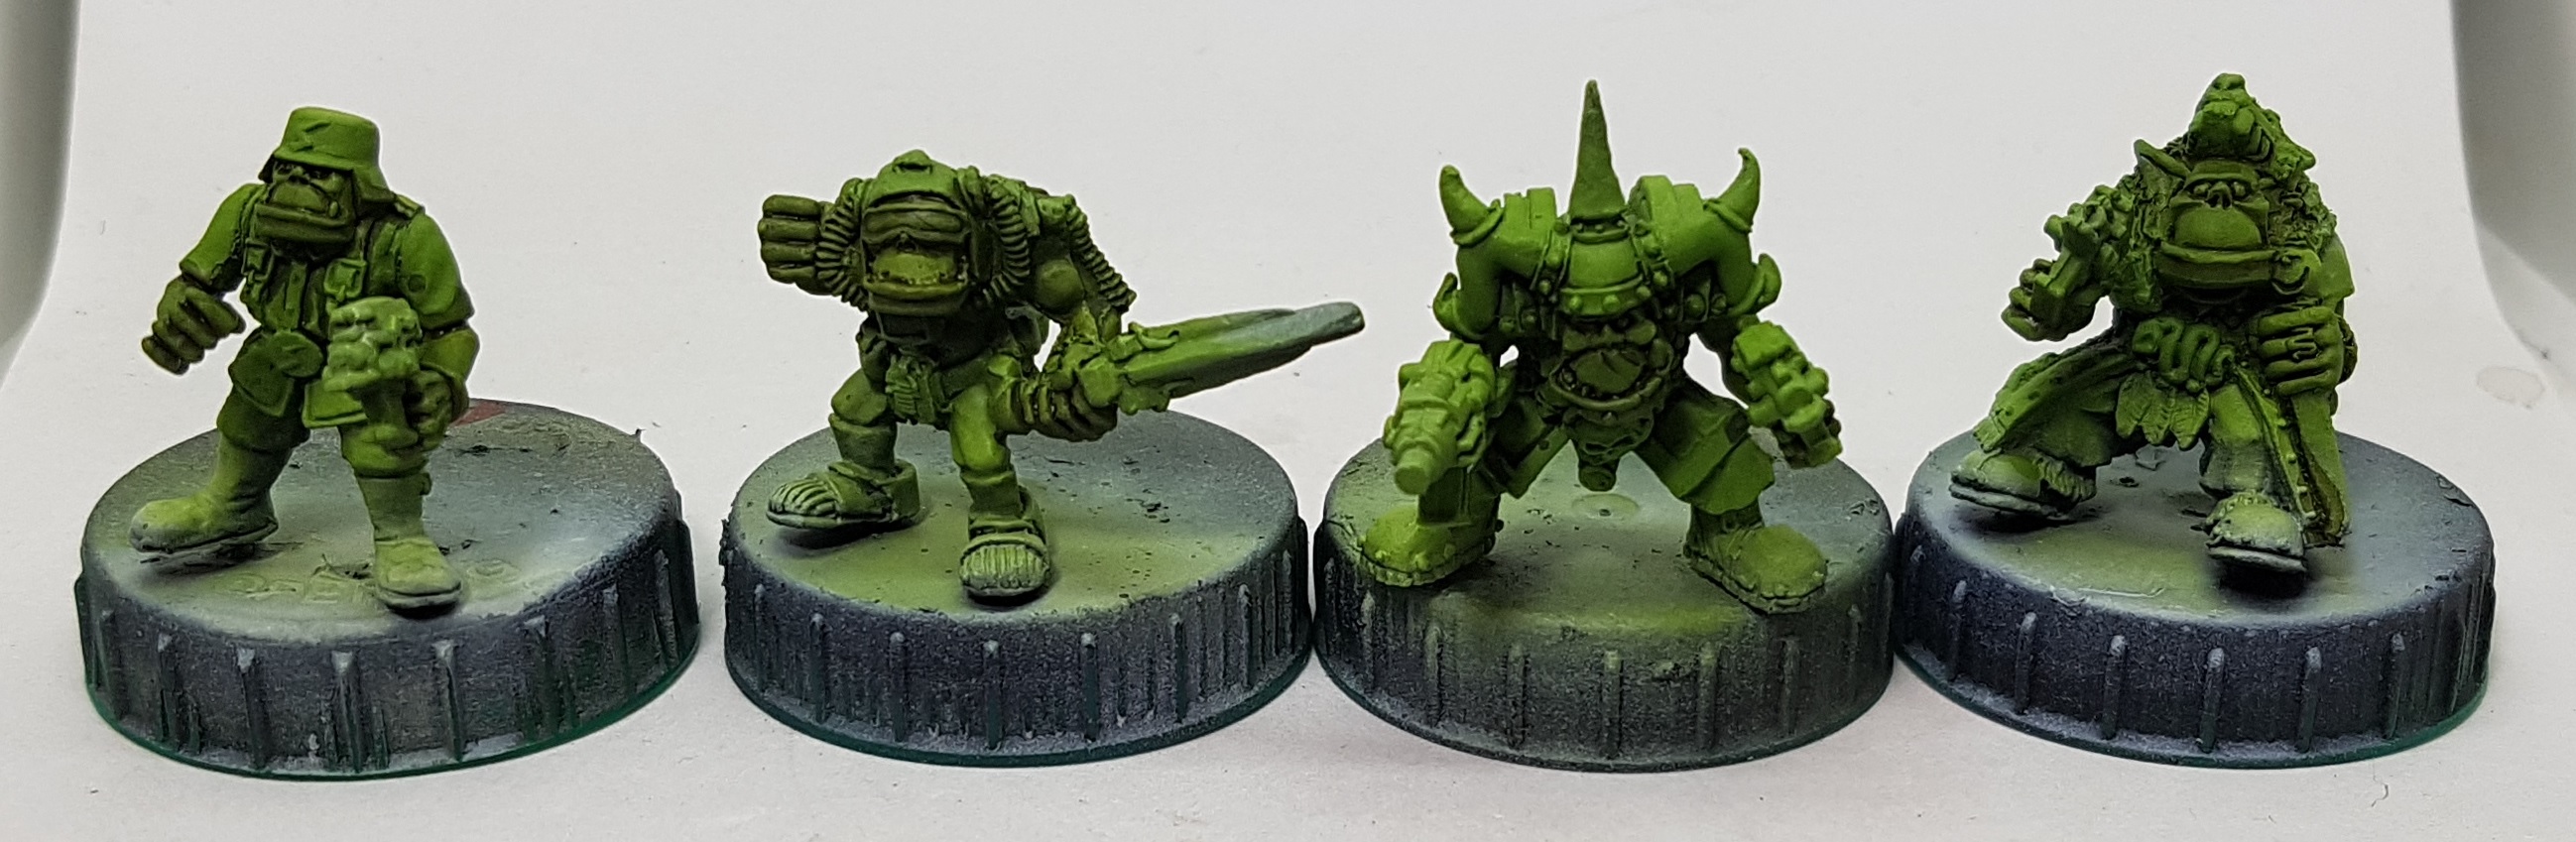
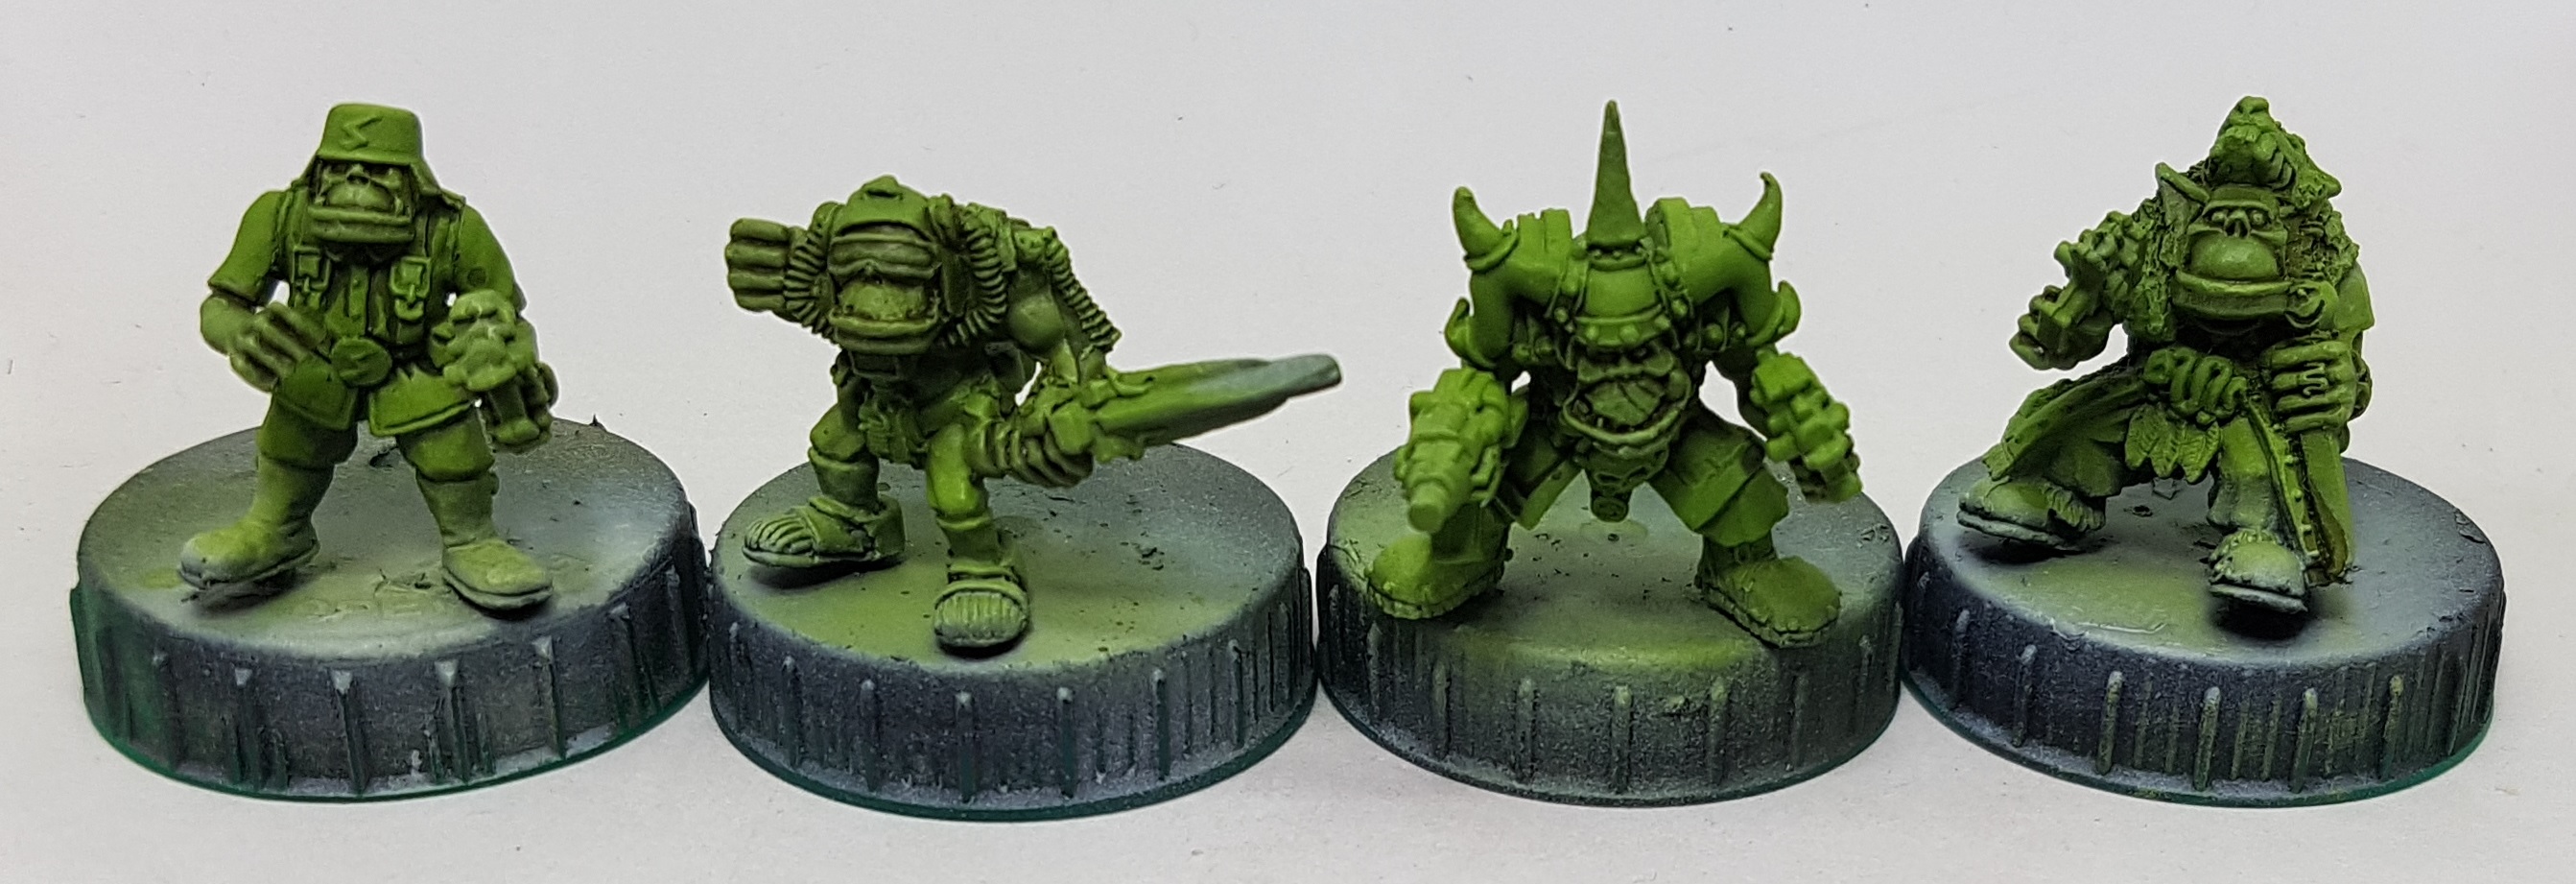
Solos and Vehicle Crew
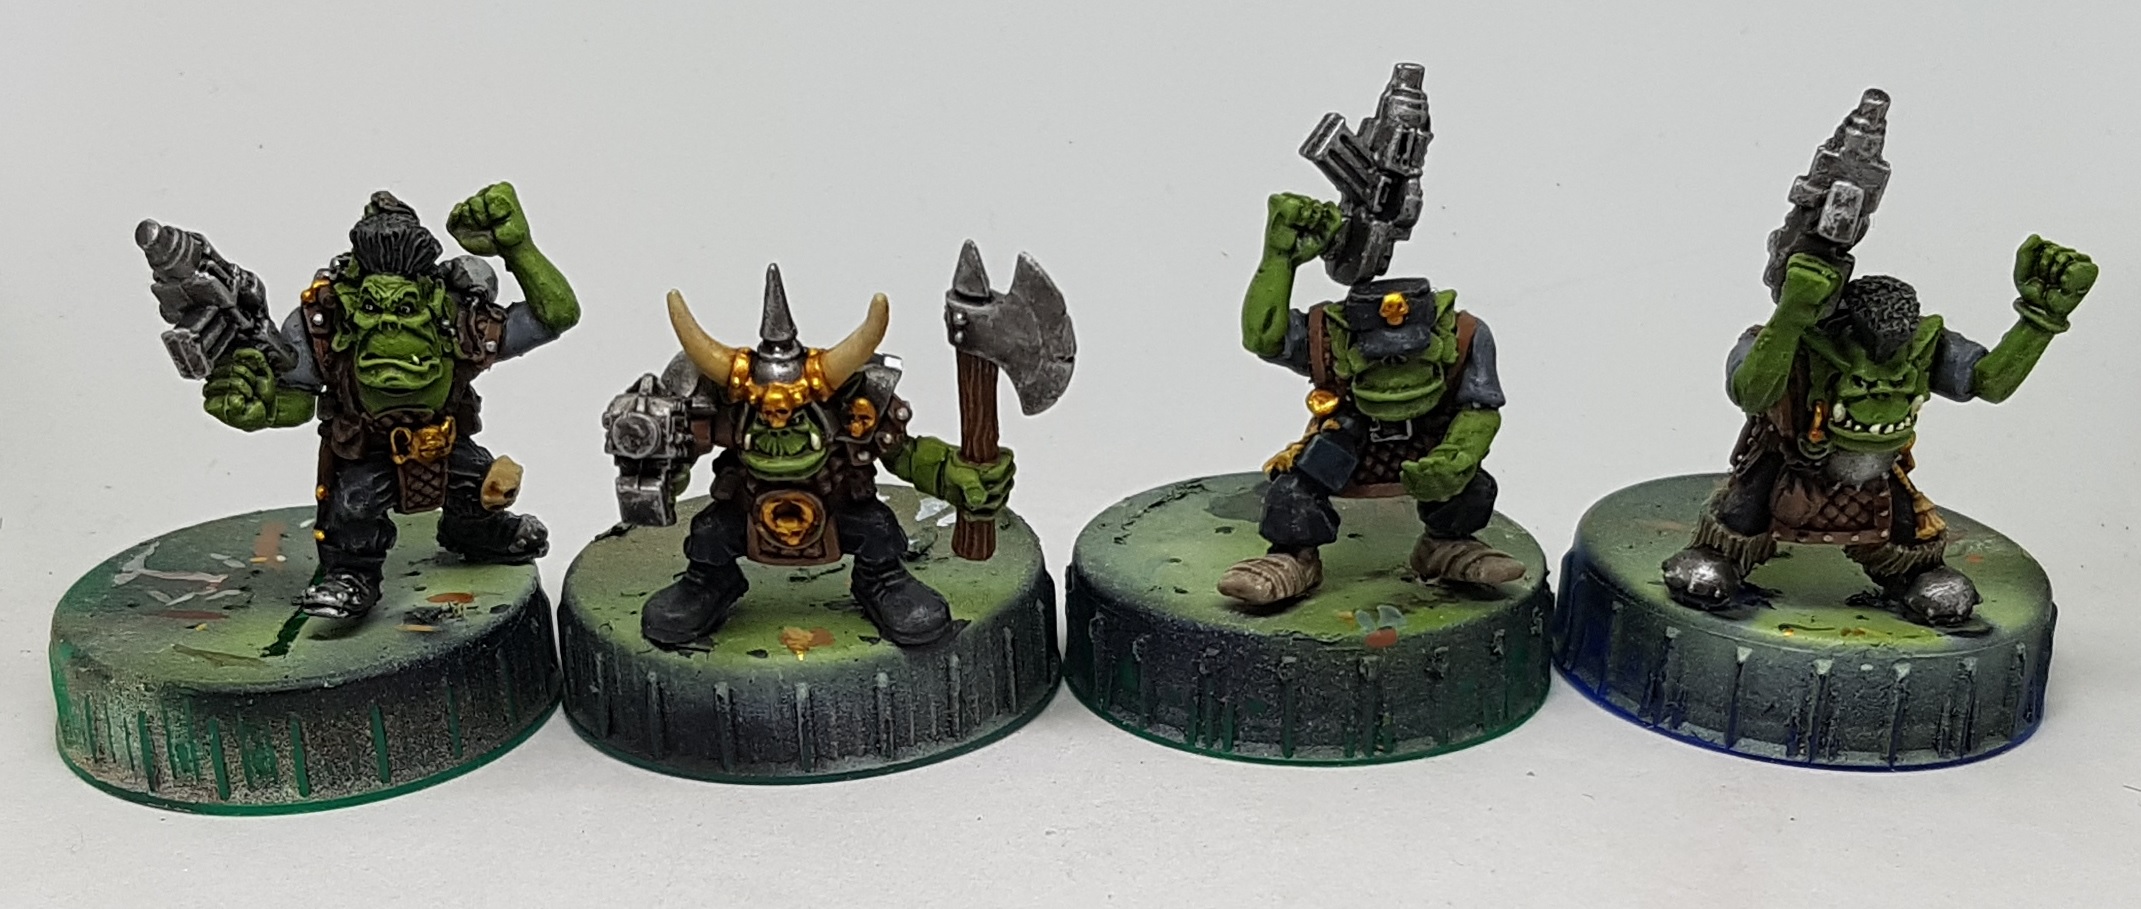
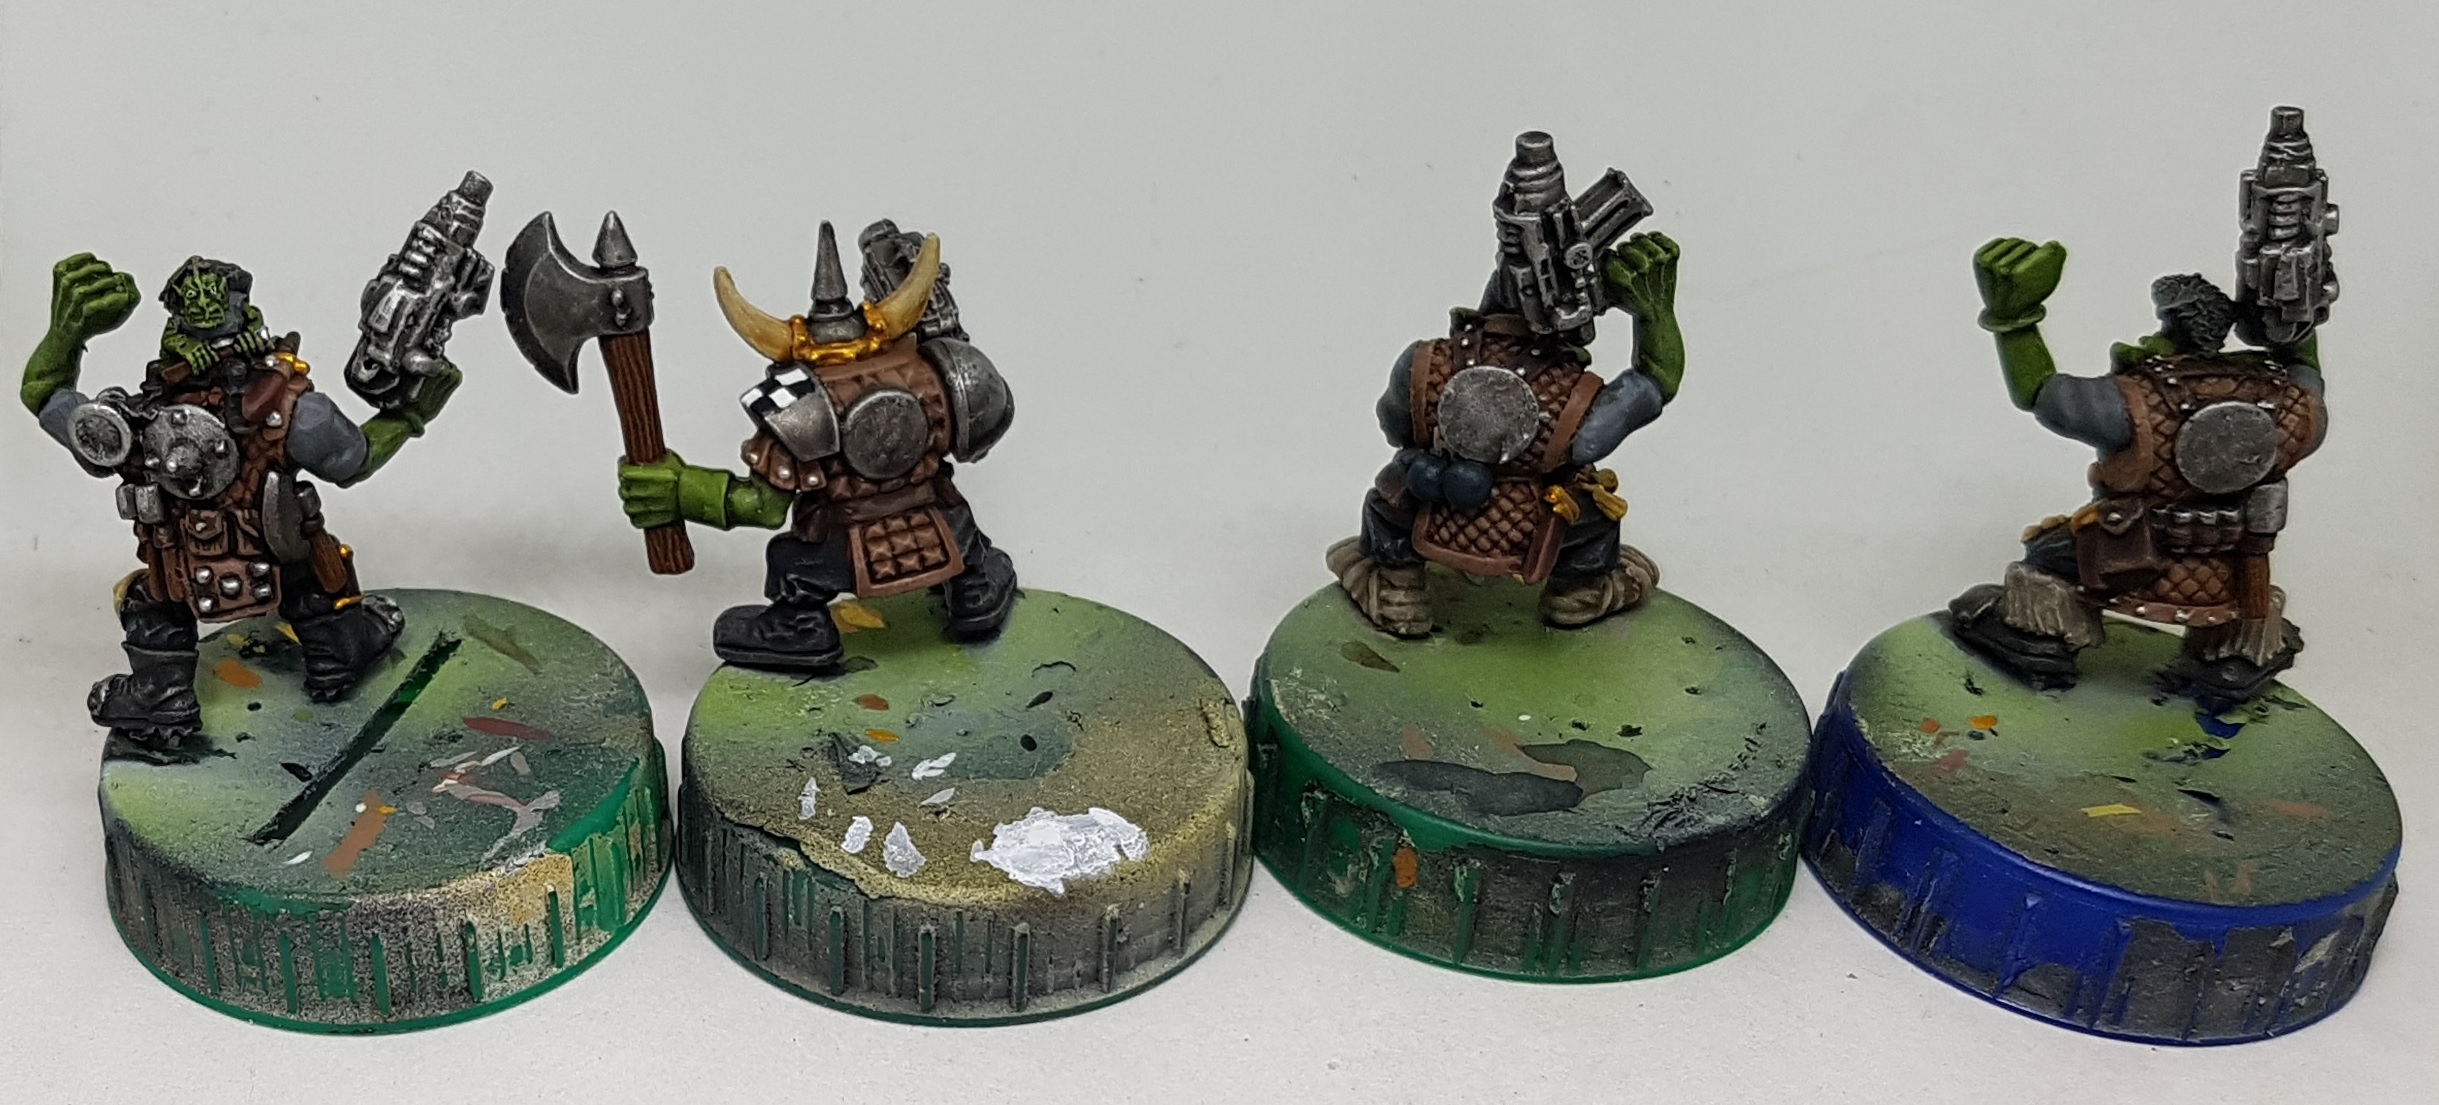
I’m not working with mass infantry any more. I can stray from the core scheme and do some more interesting things now. I’m going to try to carry over as many of the colours as I can so everything fits together, but I can have a little more fun here.
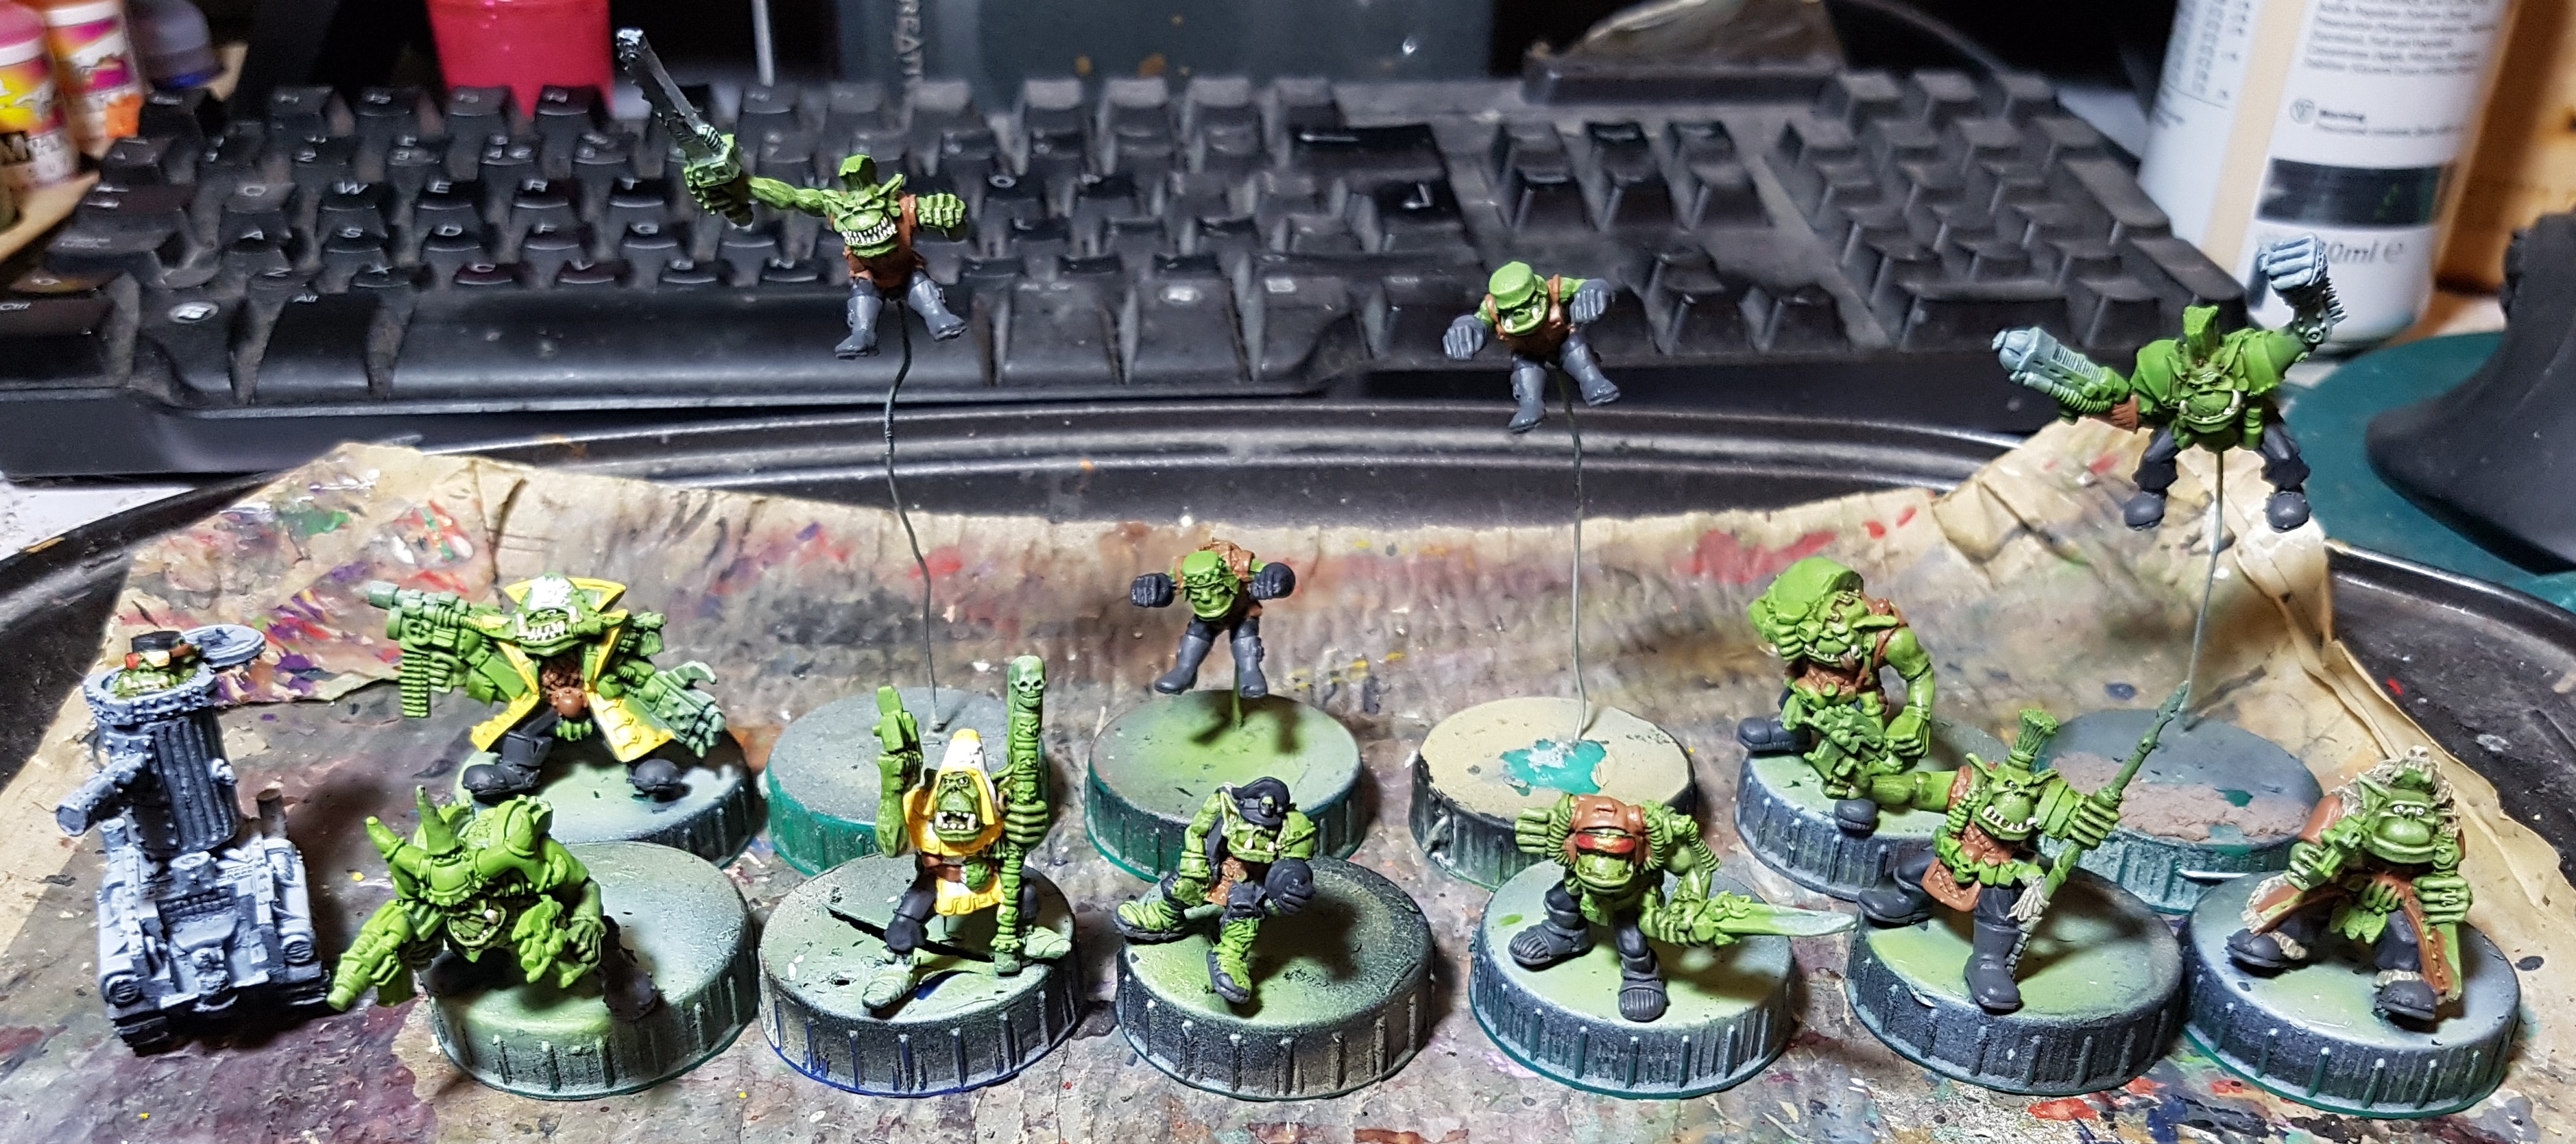
I’ve started laying the ground work with the blacks and leathers to see what I’m working with and what I want to be different. There’s a Flash Gitz Freebooter and a Weird Boy in there that want lots of yellow, so I’ve given them a couple of undercoats of white before going over that with P3 Mouldy Ochre, as its a yellow with good coverage. Once I’ve painted everything around this colour I’ll tidy it up and then shade and highlight.
I’m thinking the Weirdboy will be wearing a lot of blue, and the pilot with the power sword (Bolko?) will be dressed in the darker leather I’ve been using for straps. I’m also thinking of using that colour on the edges of the coat for the guy in the wolf pelt. Any thoughts?
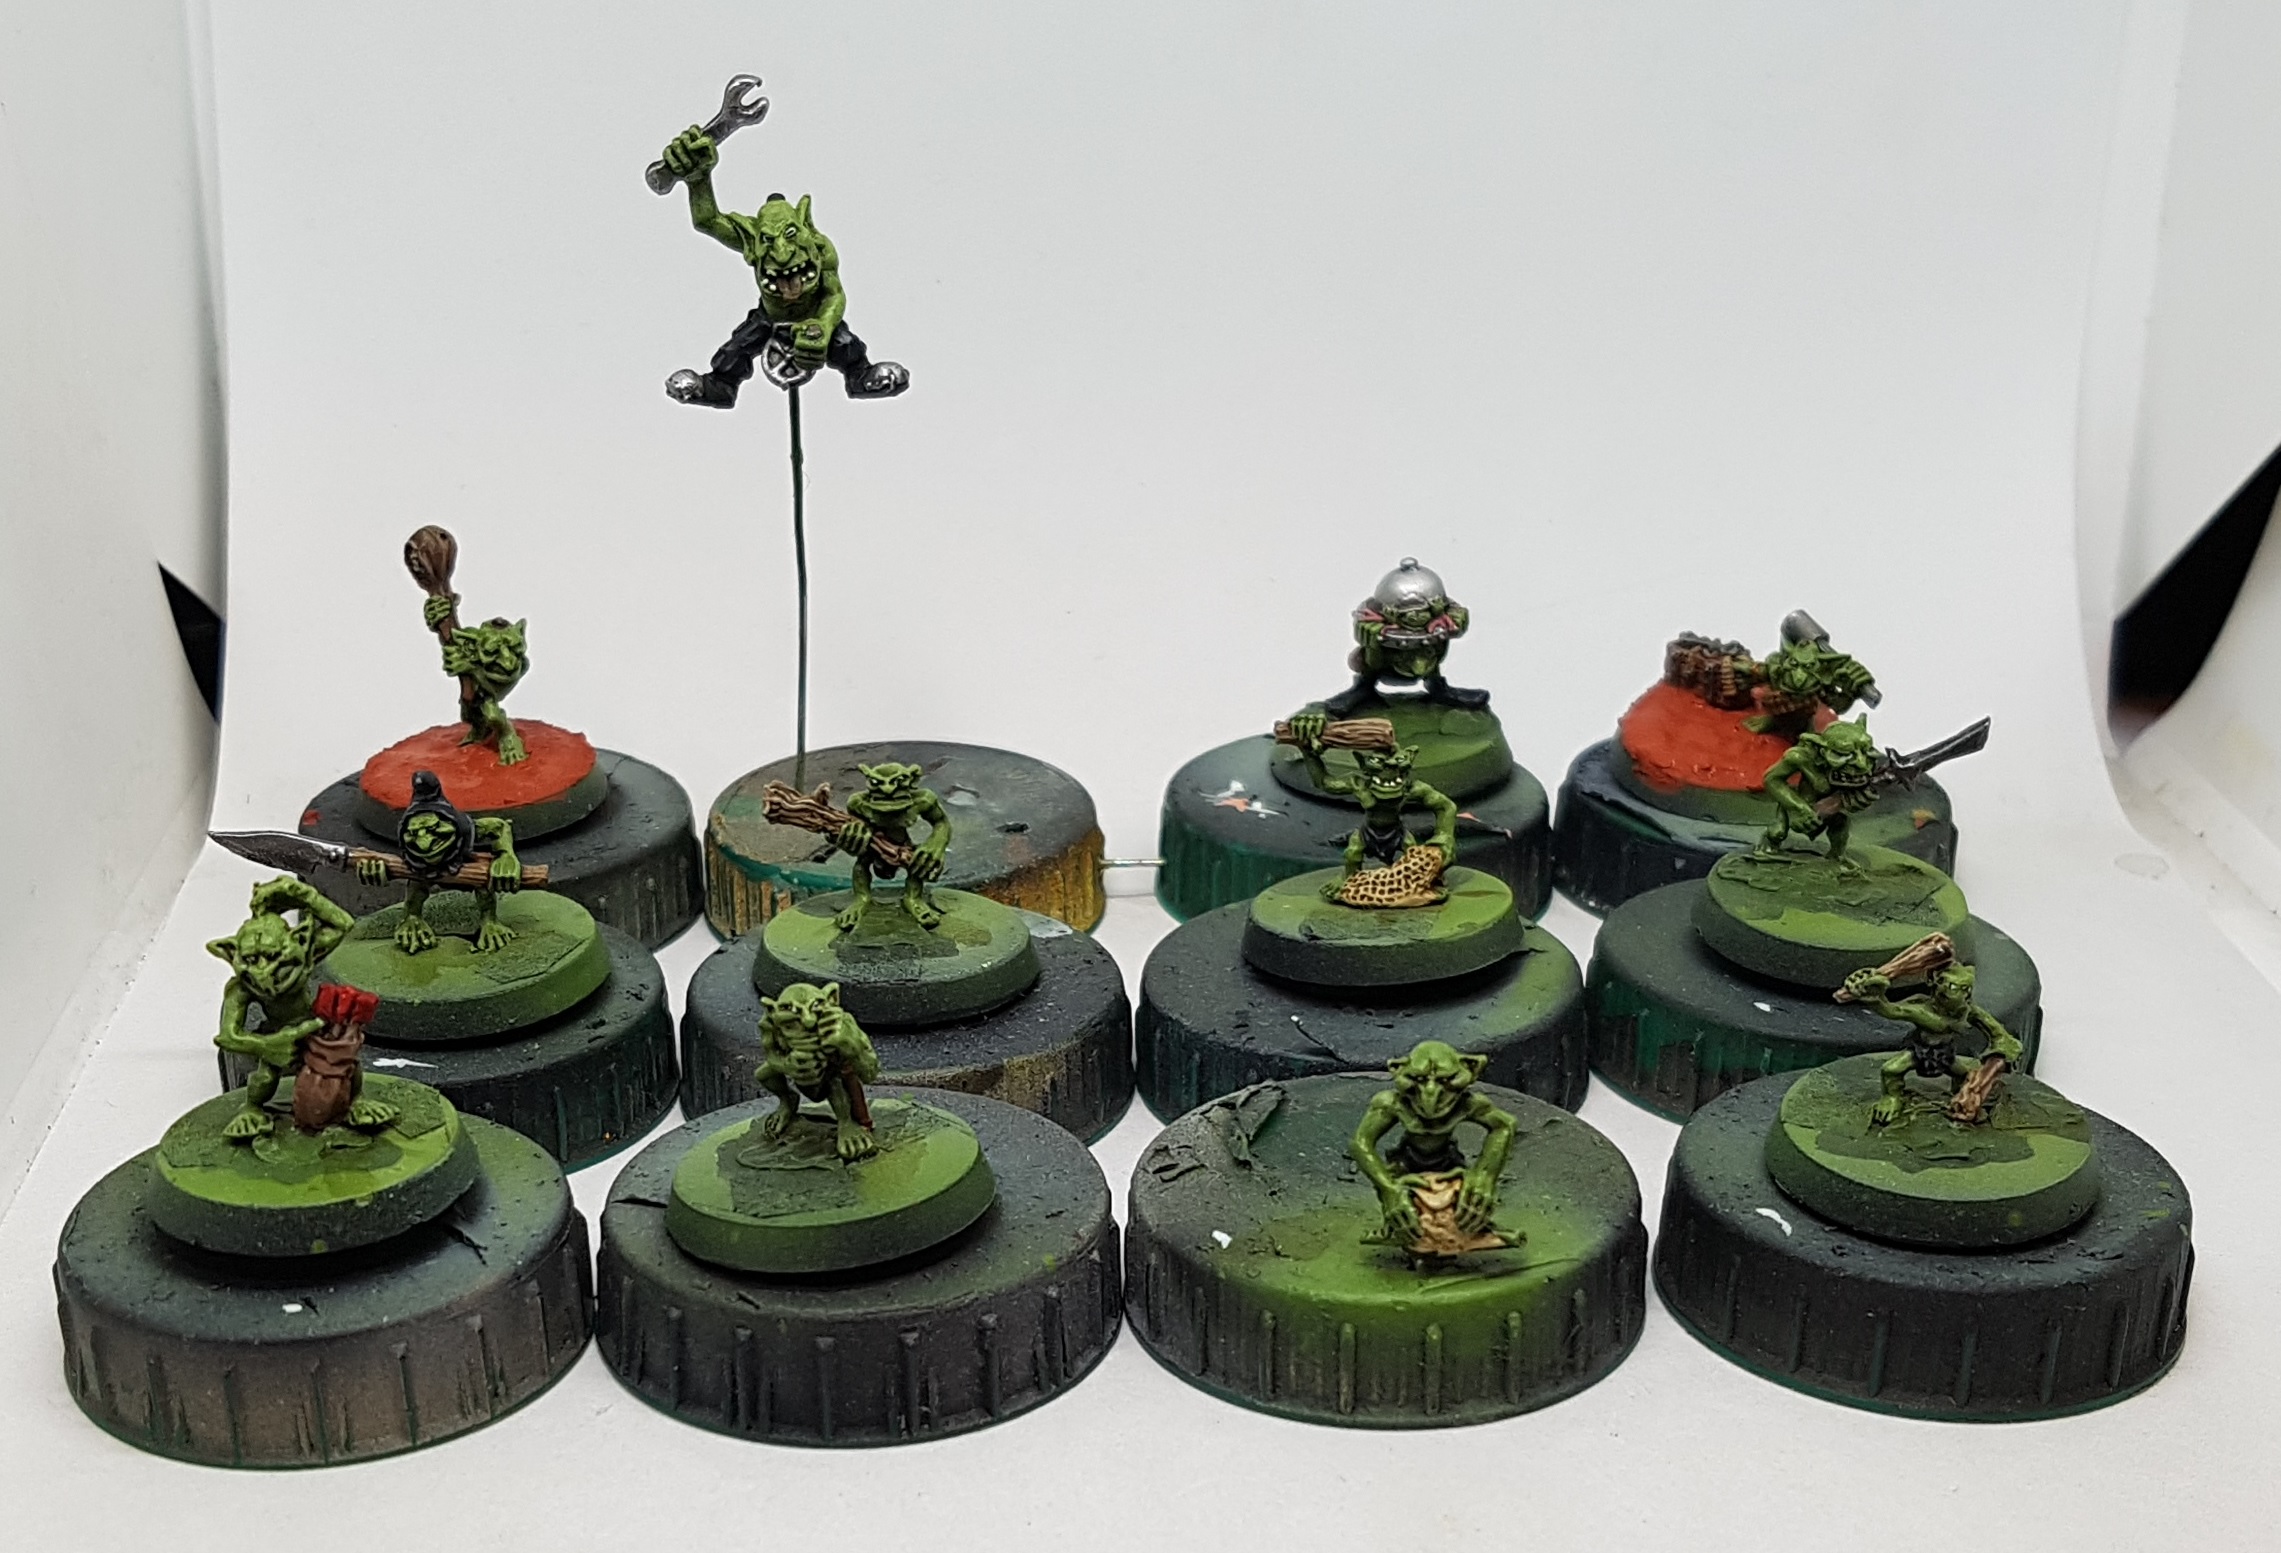
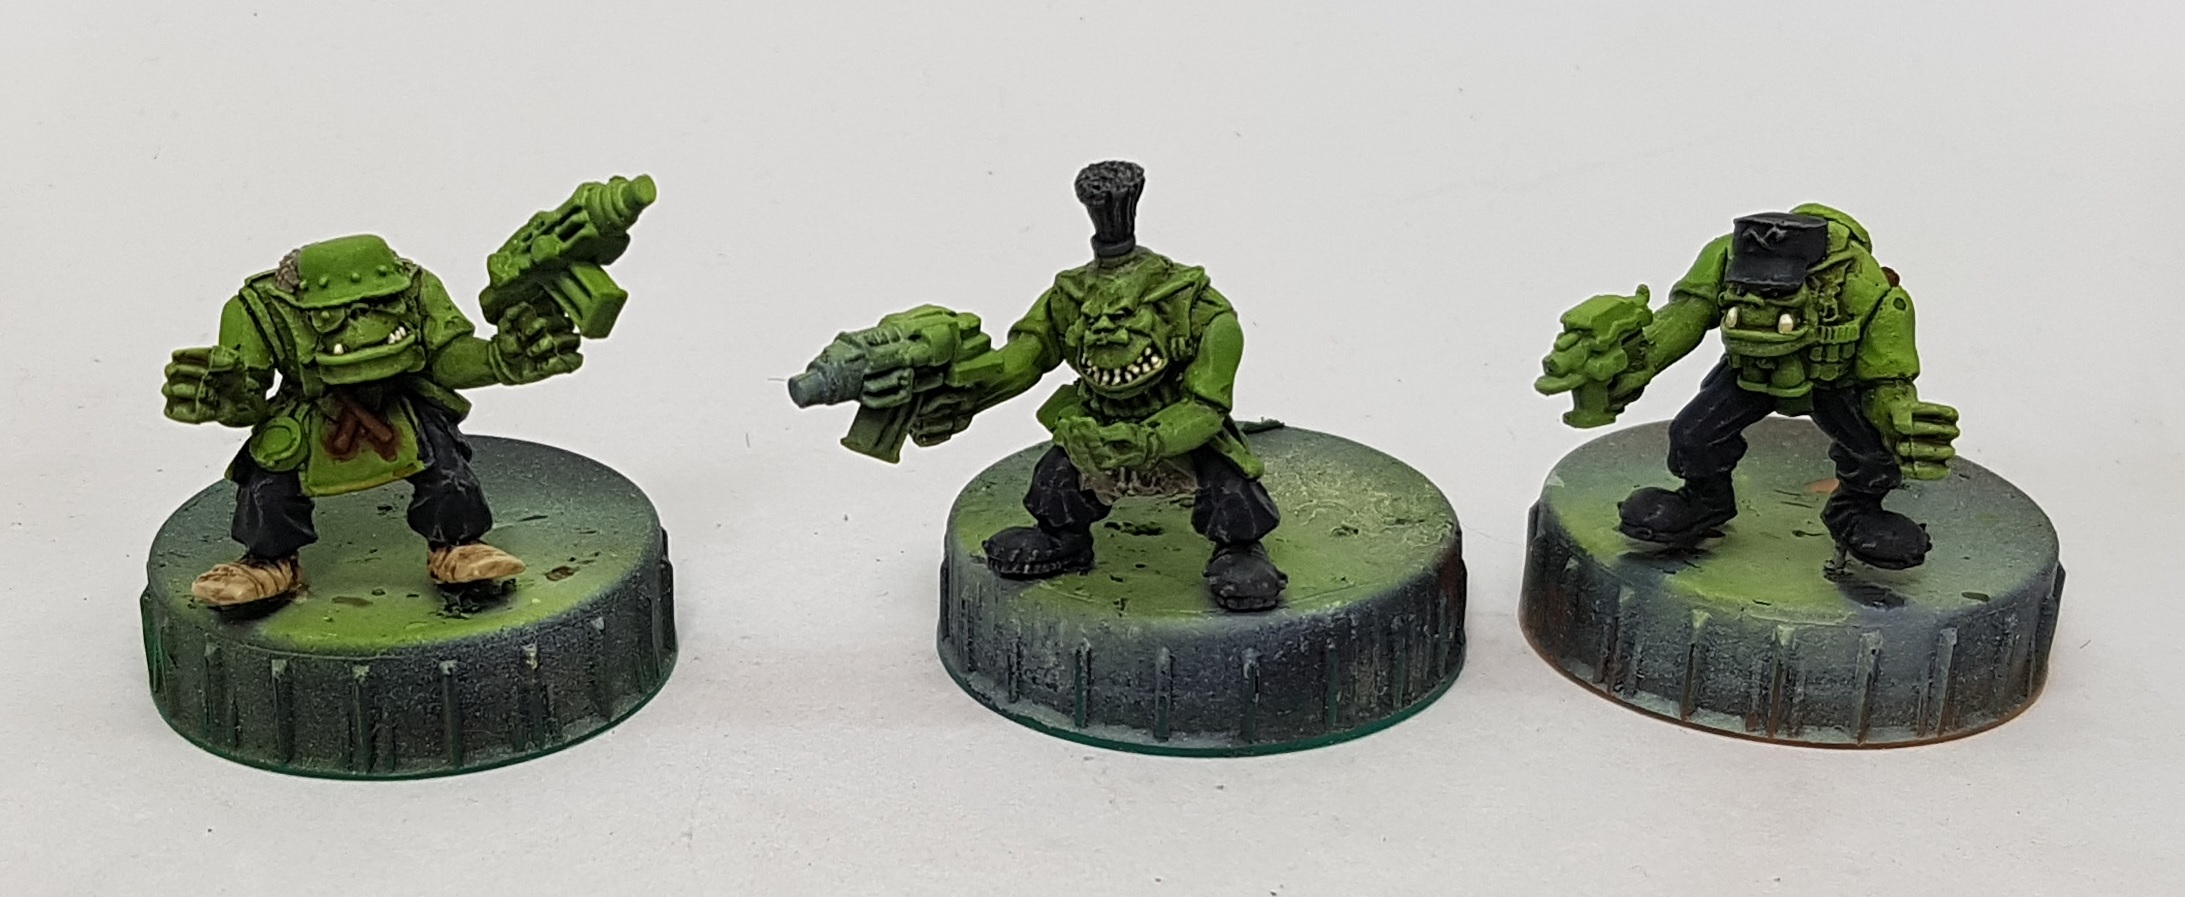
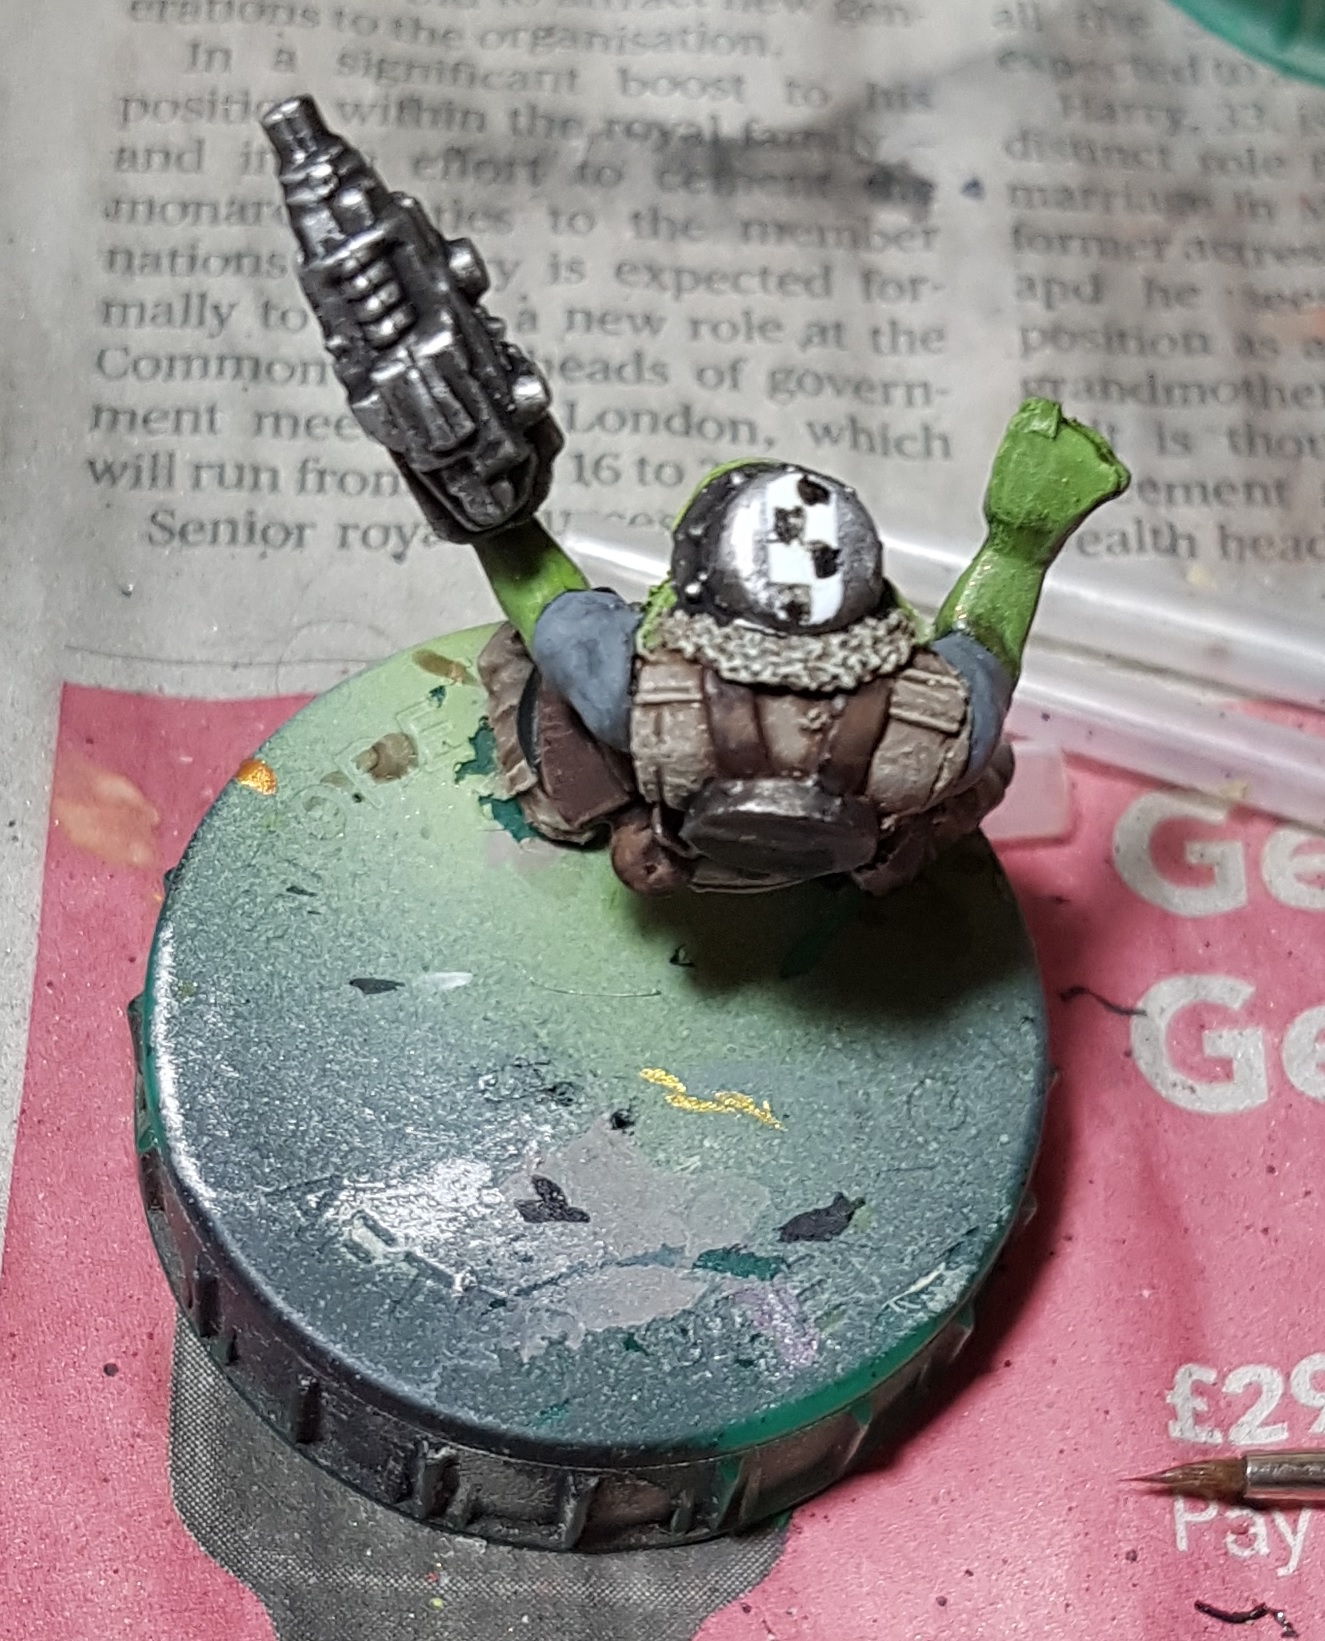
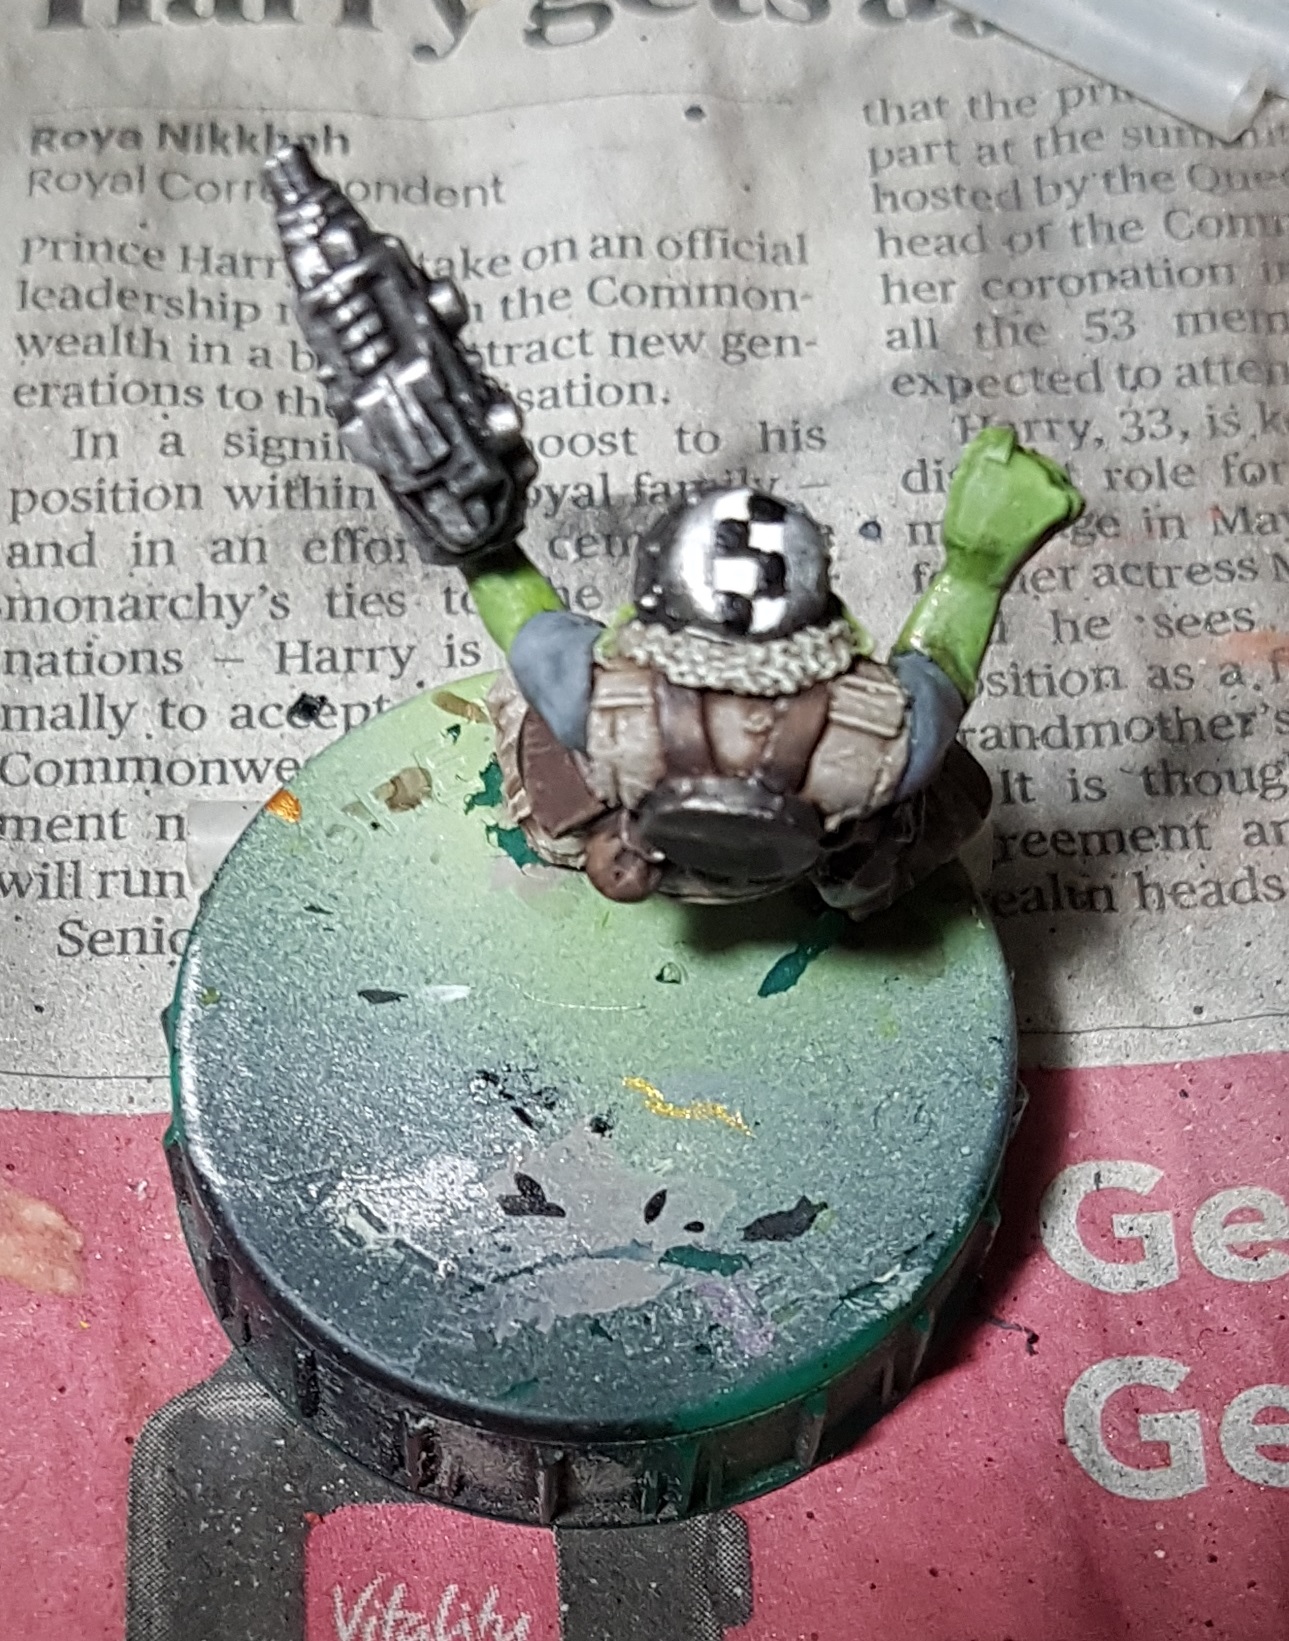
For anyone looking at those guys on paperclips and thinking of doing that, you should know theres a lot of Blu Tak underneath to provide weight and stability. Those Orks are metal and it gets top heavy otherwise. The paperclips are bent underneath and poke through a hole in the side of the bottle cap as well as being glued in place. This holds everything still. You can see this on the middle Ork in this pic.
Its been a few weeks, but these guys are now done. I used all the same paint schemes as before wherever applicable, except as noted below
Hair:
Magenta hair was base coated with P3 Murderous magenta, and the red hair was done with GW Evil Sunz Scarlet. They were both washed with GW Carroburg Crimson, and finally drybrushed with their base. I should have drybrushed with an off white before applying the wash.
The hair on the severed head was painted the same as the skull and the staff, and then given two coats of Secret Weapon Sewer Water wash.
Metals:
There were a lot of metal sections near each other so I needed to break up the tones. I used VGA 72.754 Gunmetal to produce the dark tones on the armour, and VGC 72.053 Chainmail for the chainmail. I experimented with Mission Models Cold Rolled Steel over black on the power claw, and over turquoise for the power sword. Everything was washed in Nuln oil and highlighted with P3 Cold Steel.
The Flash Gitz gun was painted using a 1:1 mix of Secret Weapon Engine Metal & Secret Weapon Old Oil over black. A 1:1 mix of Secret Weapon Engine Metal & Secret Weapon Fresh Oil was used to pick out some of the puter panels of the gun. it was then drybrush highlighted with Engine metal. The recesses were given a targeted wash of Old Oil.
The white on the skull on hats was P3 Sickly Skin, highlighted in P3 Morrow White.
The Feathers were VMC Deck tan, washed with Seraphim Sepia and drybrushed with P3 Menoth White highlight.
The wood grain was base coated with P3 Gun Corps Brown. the grain was picked out with Menoth White Highlight, and then washed a couple of times, pushing the wash to the back of the stock, with 1 P3Yellow Ink, 1 P3 Bloodstone, 4 parts P3 Brown ink, and then again with a little P3 Blue ink added to it.
The Cigar was painted in P3 Hammerfall Khaki and P3 Battlefield Brown and washed in Agrax Earthshade. The glow was P3 Ember Orange, touched up with VMC Yellow Fluro.
The Power Sword was painted using Duncan’s technique here but suing the following paints, often mixing for in between colours:
VMC Panzer Aces 309 Periscopes
VMC 70.966 Turquoise
P3 Underbelly Blue
P3 Morrow White
The copper wiring is Darkstar Copper, my new favourite exposed wiring paint. It’s a great colour.
Gold belt buckles/shields were based with Darkstar Aged Copper. drybrush with Darkstar Copper, wash with INSTAR Heavy Brown, and highlight with Darkstar Polished Copper.
The pipe was base coated with Menoth White Base, washed with thinned VMC 70.828 Woodgrain, highlighted with Menoth White base again and washed again. A the bowl was then filled with a little Agrax Earthshade for ageing and dirt.
They were based the same, but now I finally had some large enough bases to use the Javis Scenics red tufts I’ve had for ages. They really are too big to use on anything and I regret buying them (Internet order so I didn’t see them properly until after they arrived), but they work well enough here.
 2 Weirdboyz
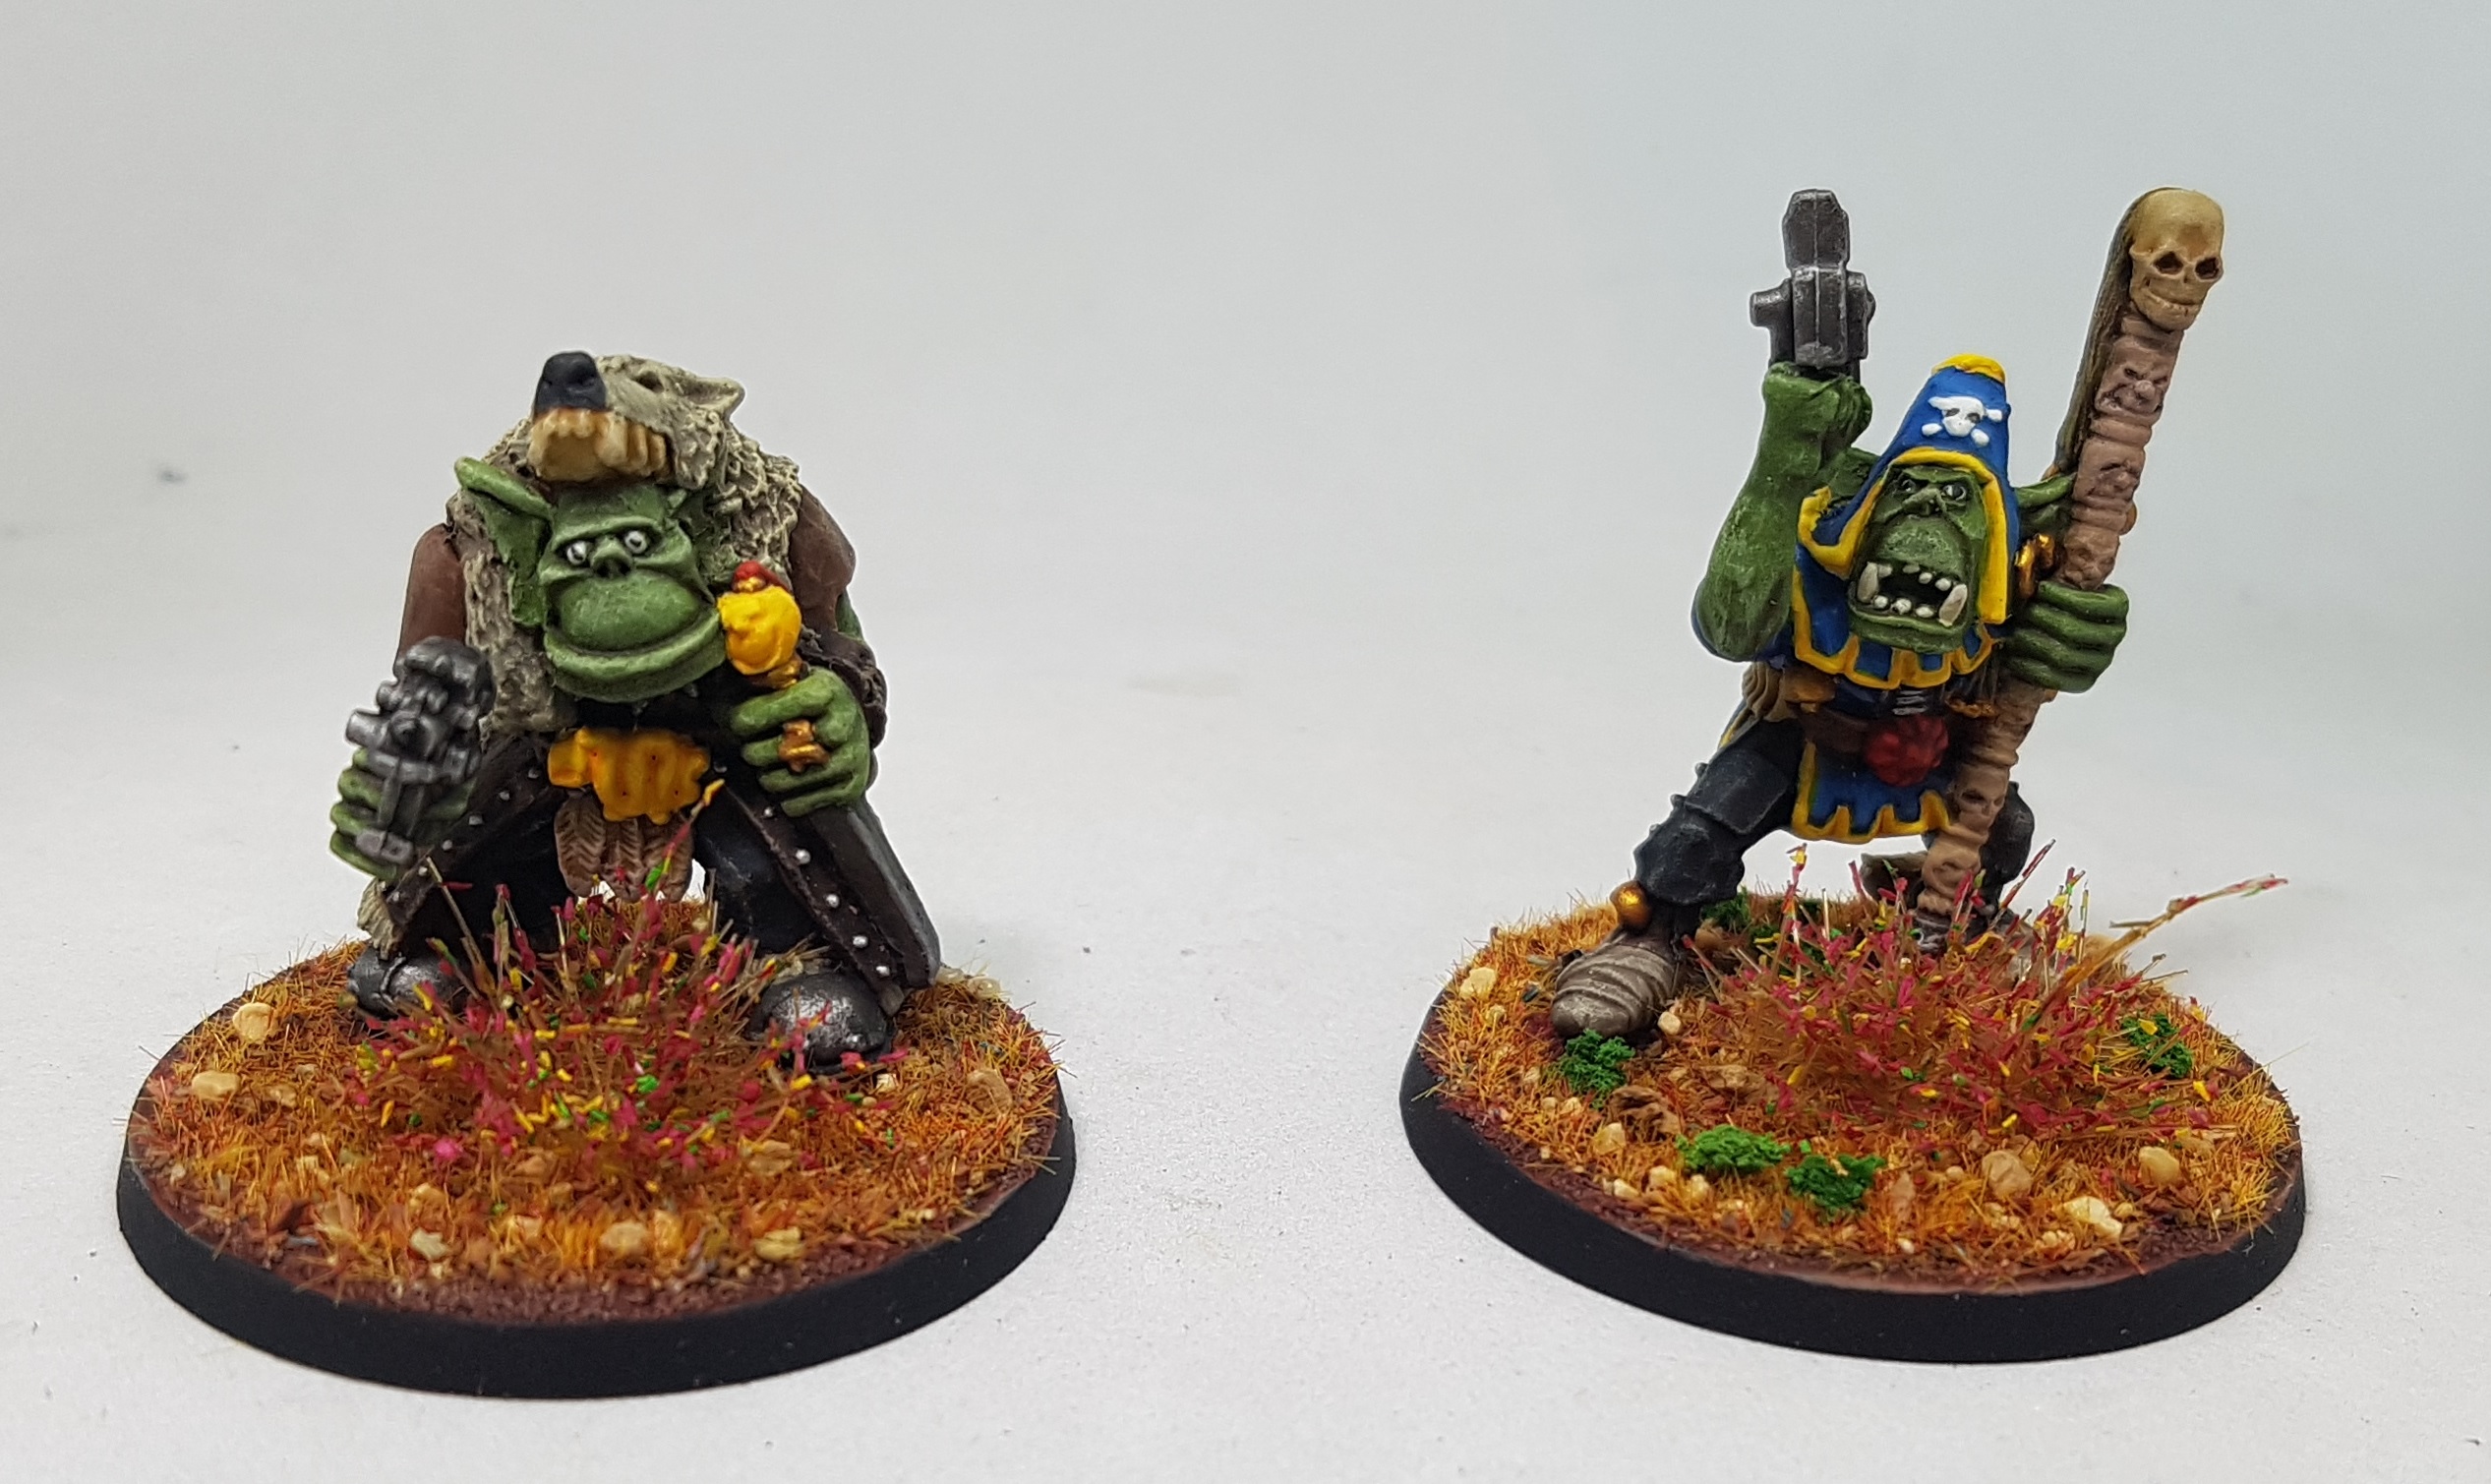
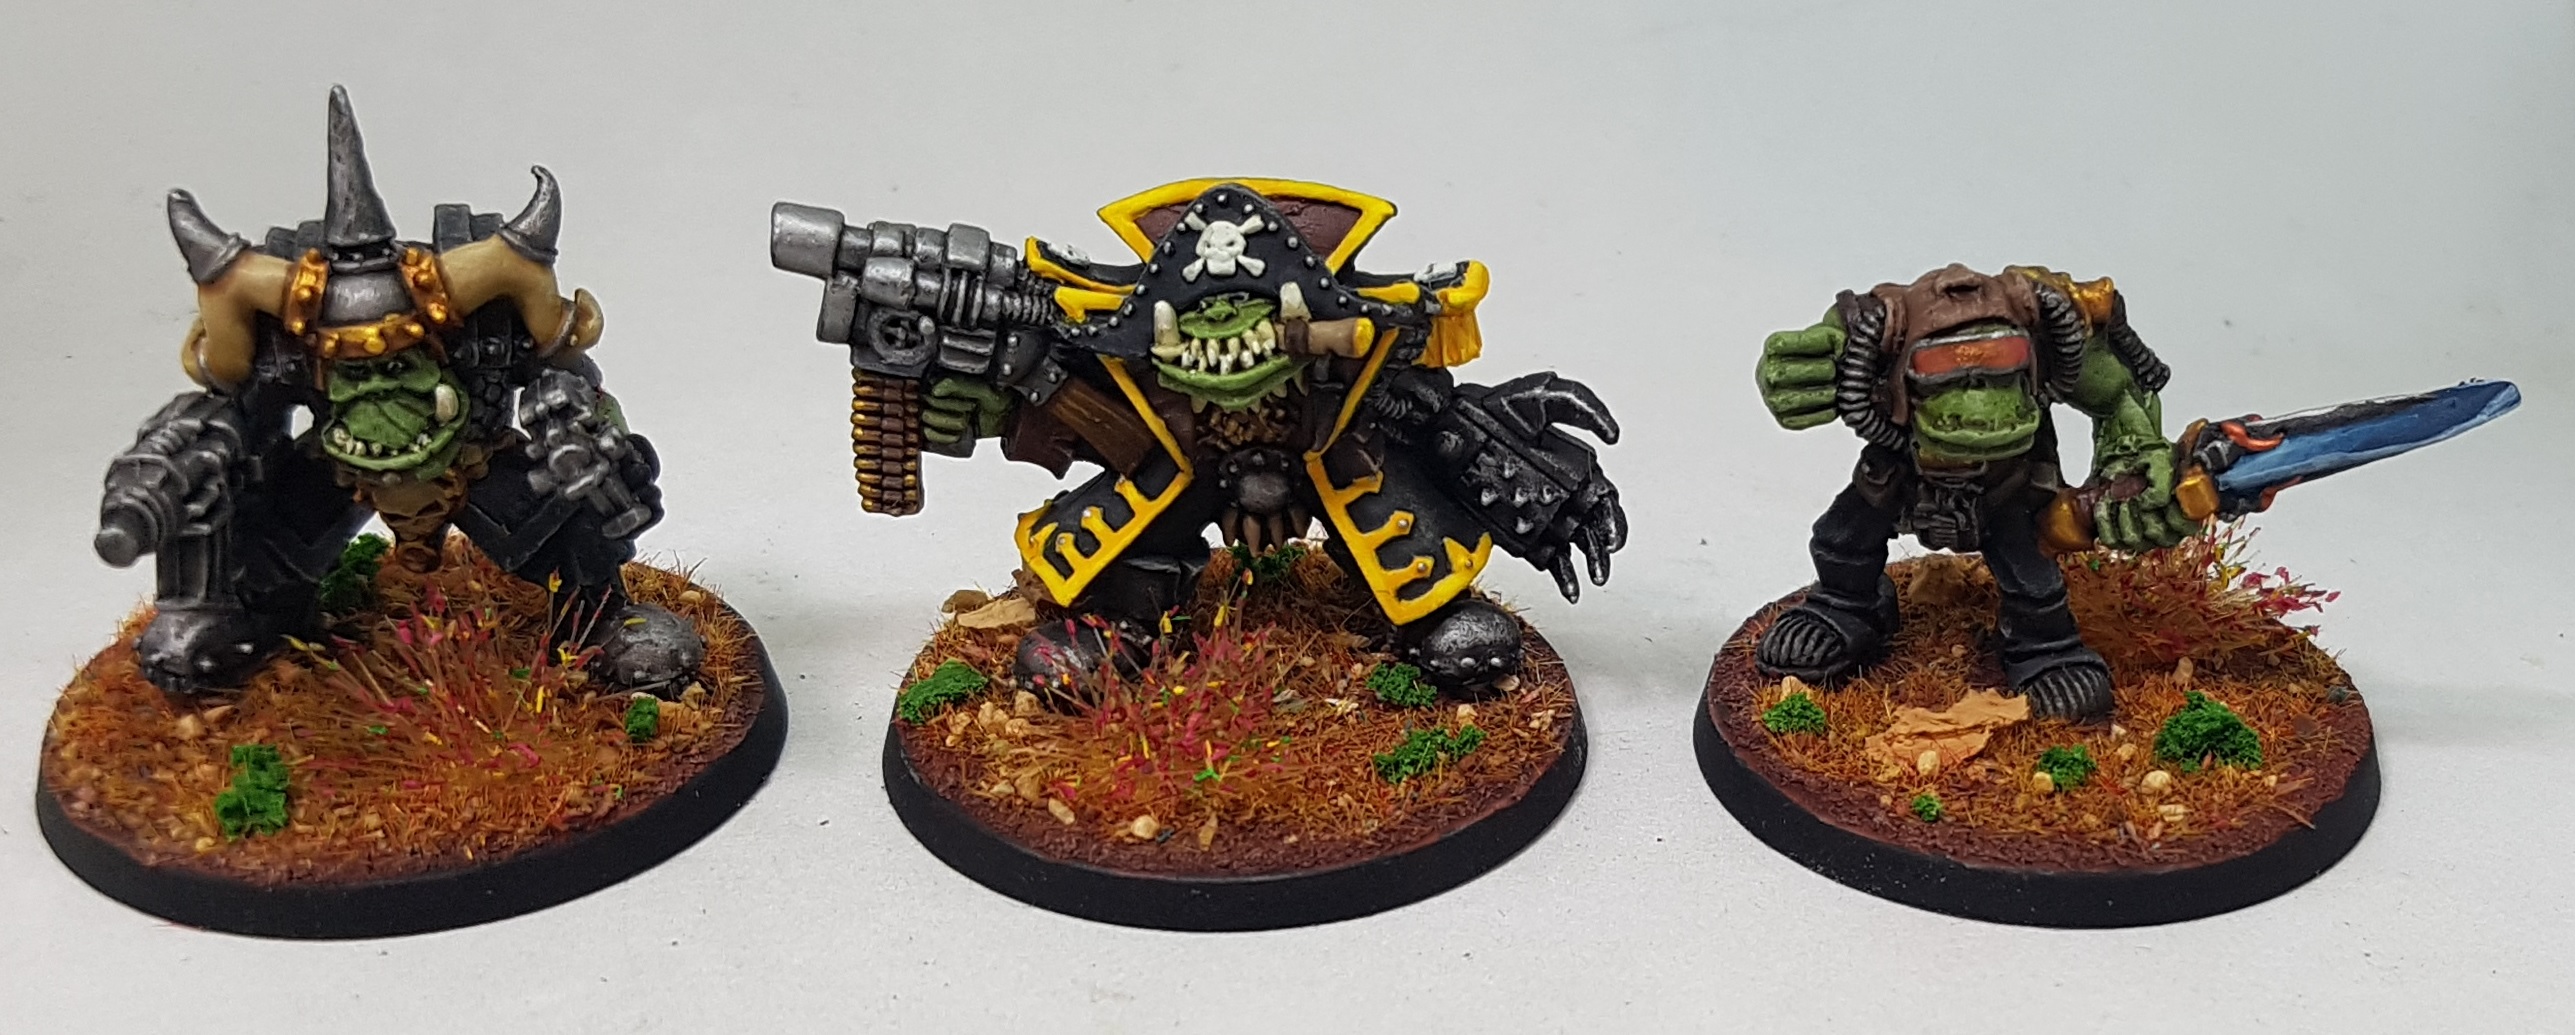 A Warboss, a Flash Gitz Freebooter with Power Claw Warboss, and another Warboss with a Power Sword, made from an old character called Bolko
 Runtherd
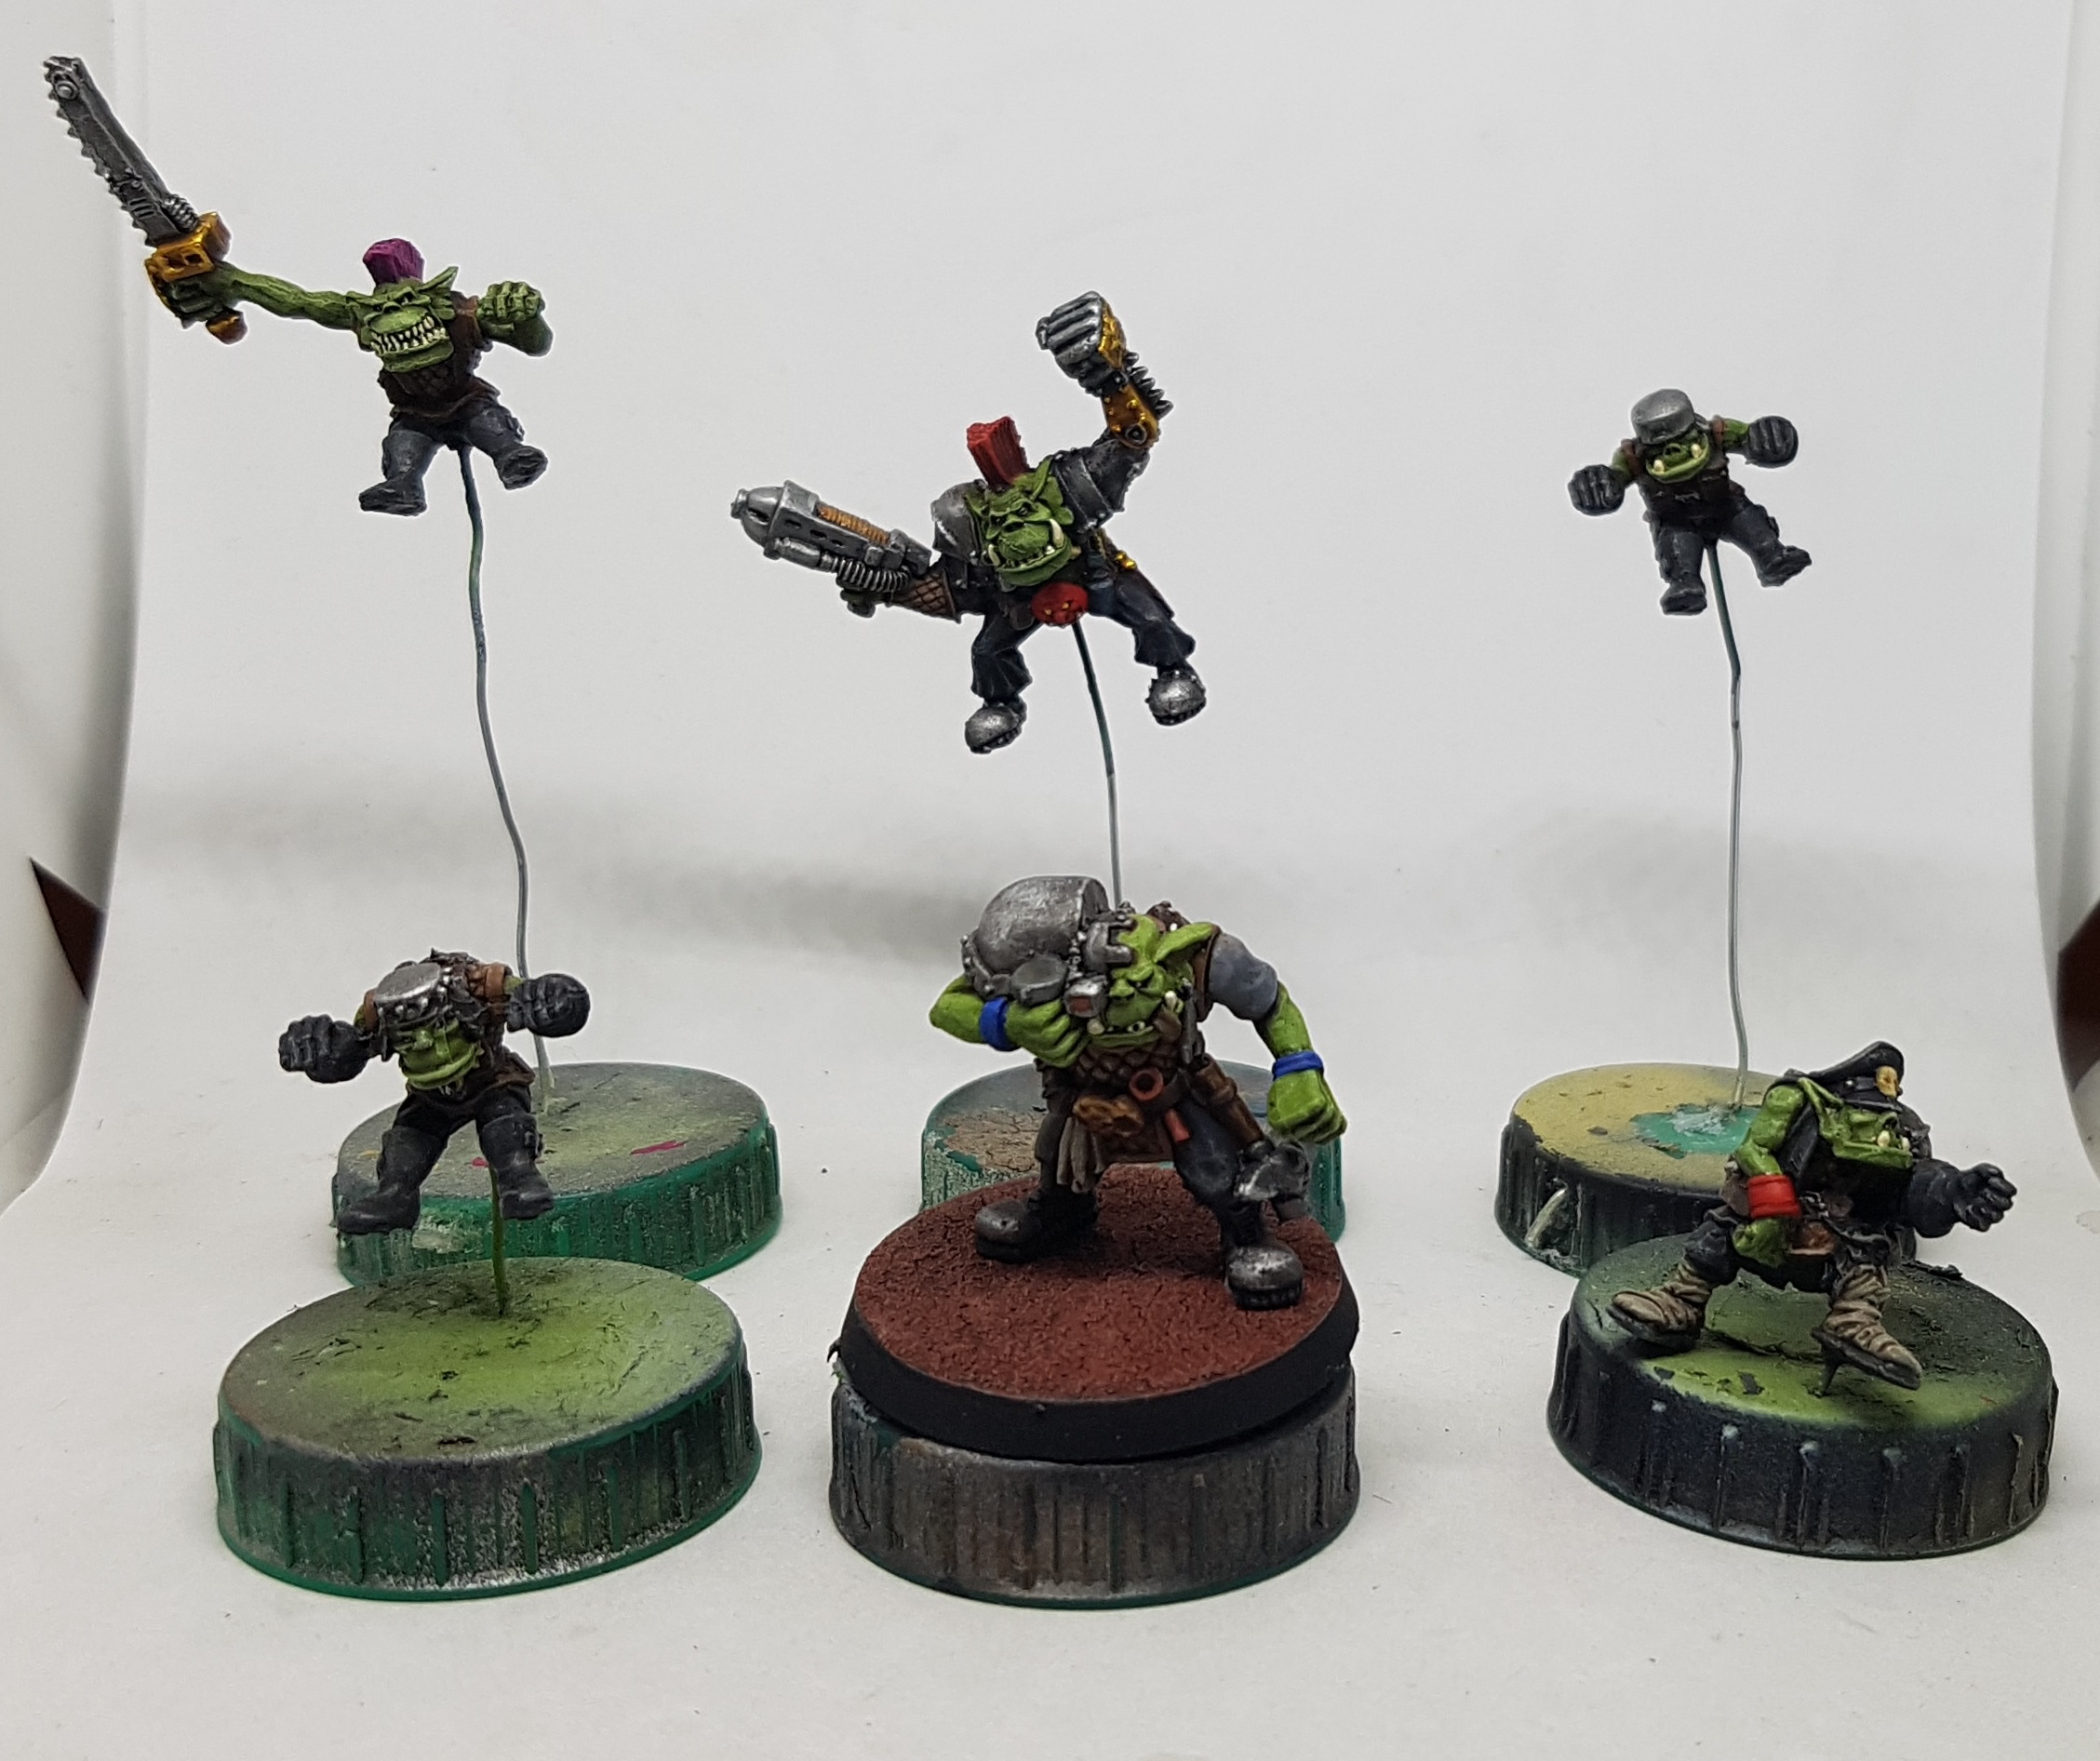 These guys are awaiting mechanical part before they are done done. That's all that's left now. 3 vehicles and one big gun.
I realised last night that I forgot to add a little rust to these guys. As such I revisited them with a slightly diluted mix of Mission Models Transparent Rust. I applied it to a few crevices, and on to a few open surfaces before dabbing it with my finger to diffuse it a little.
Ork Machines
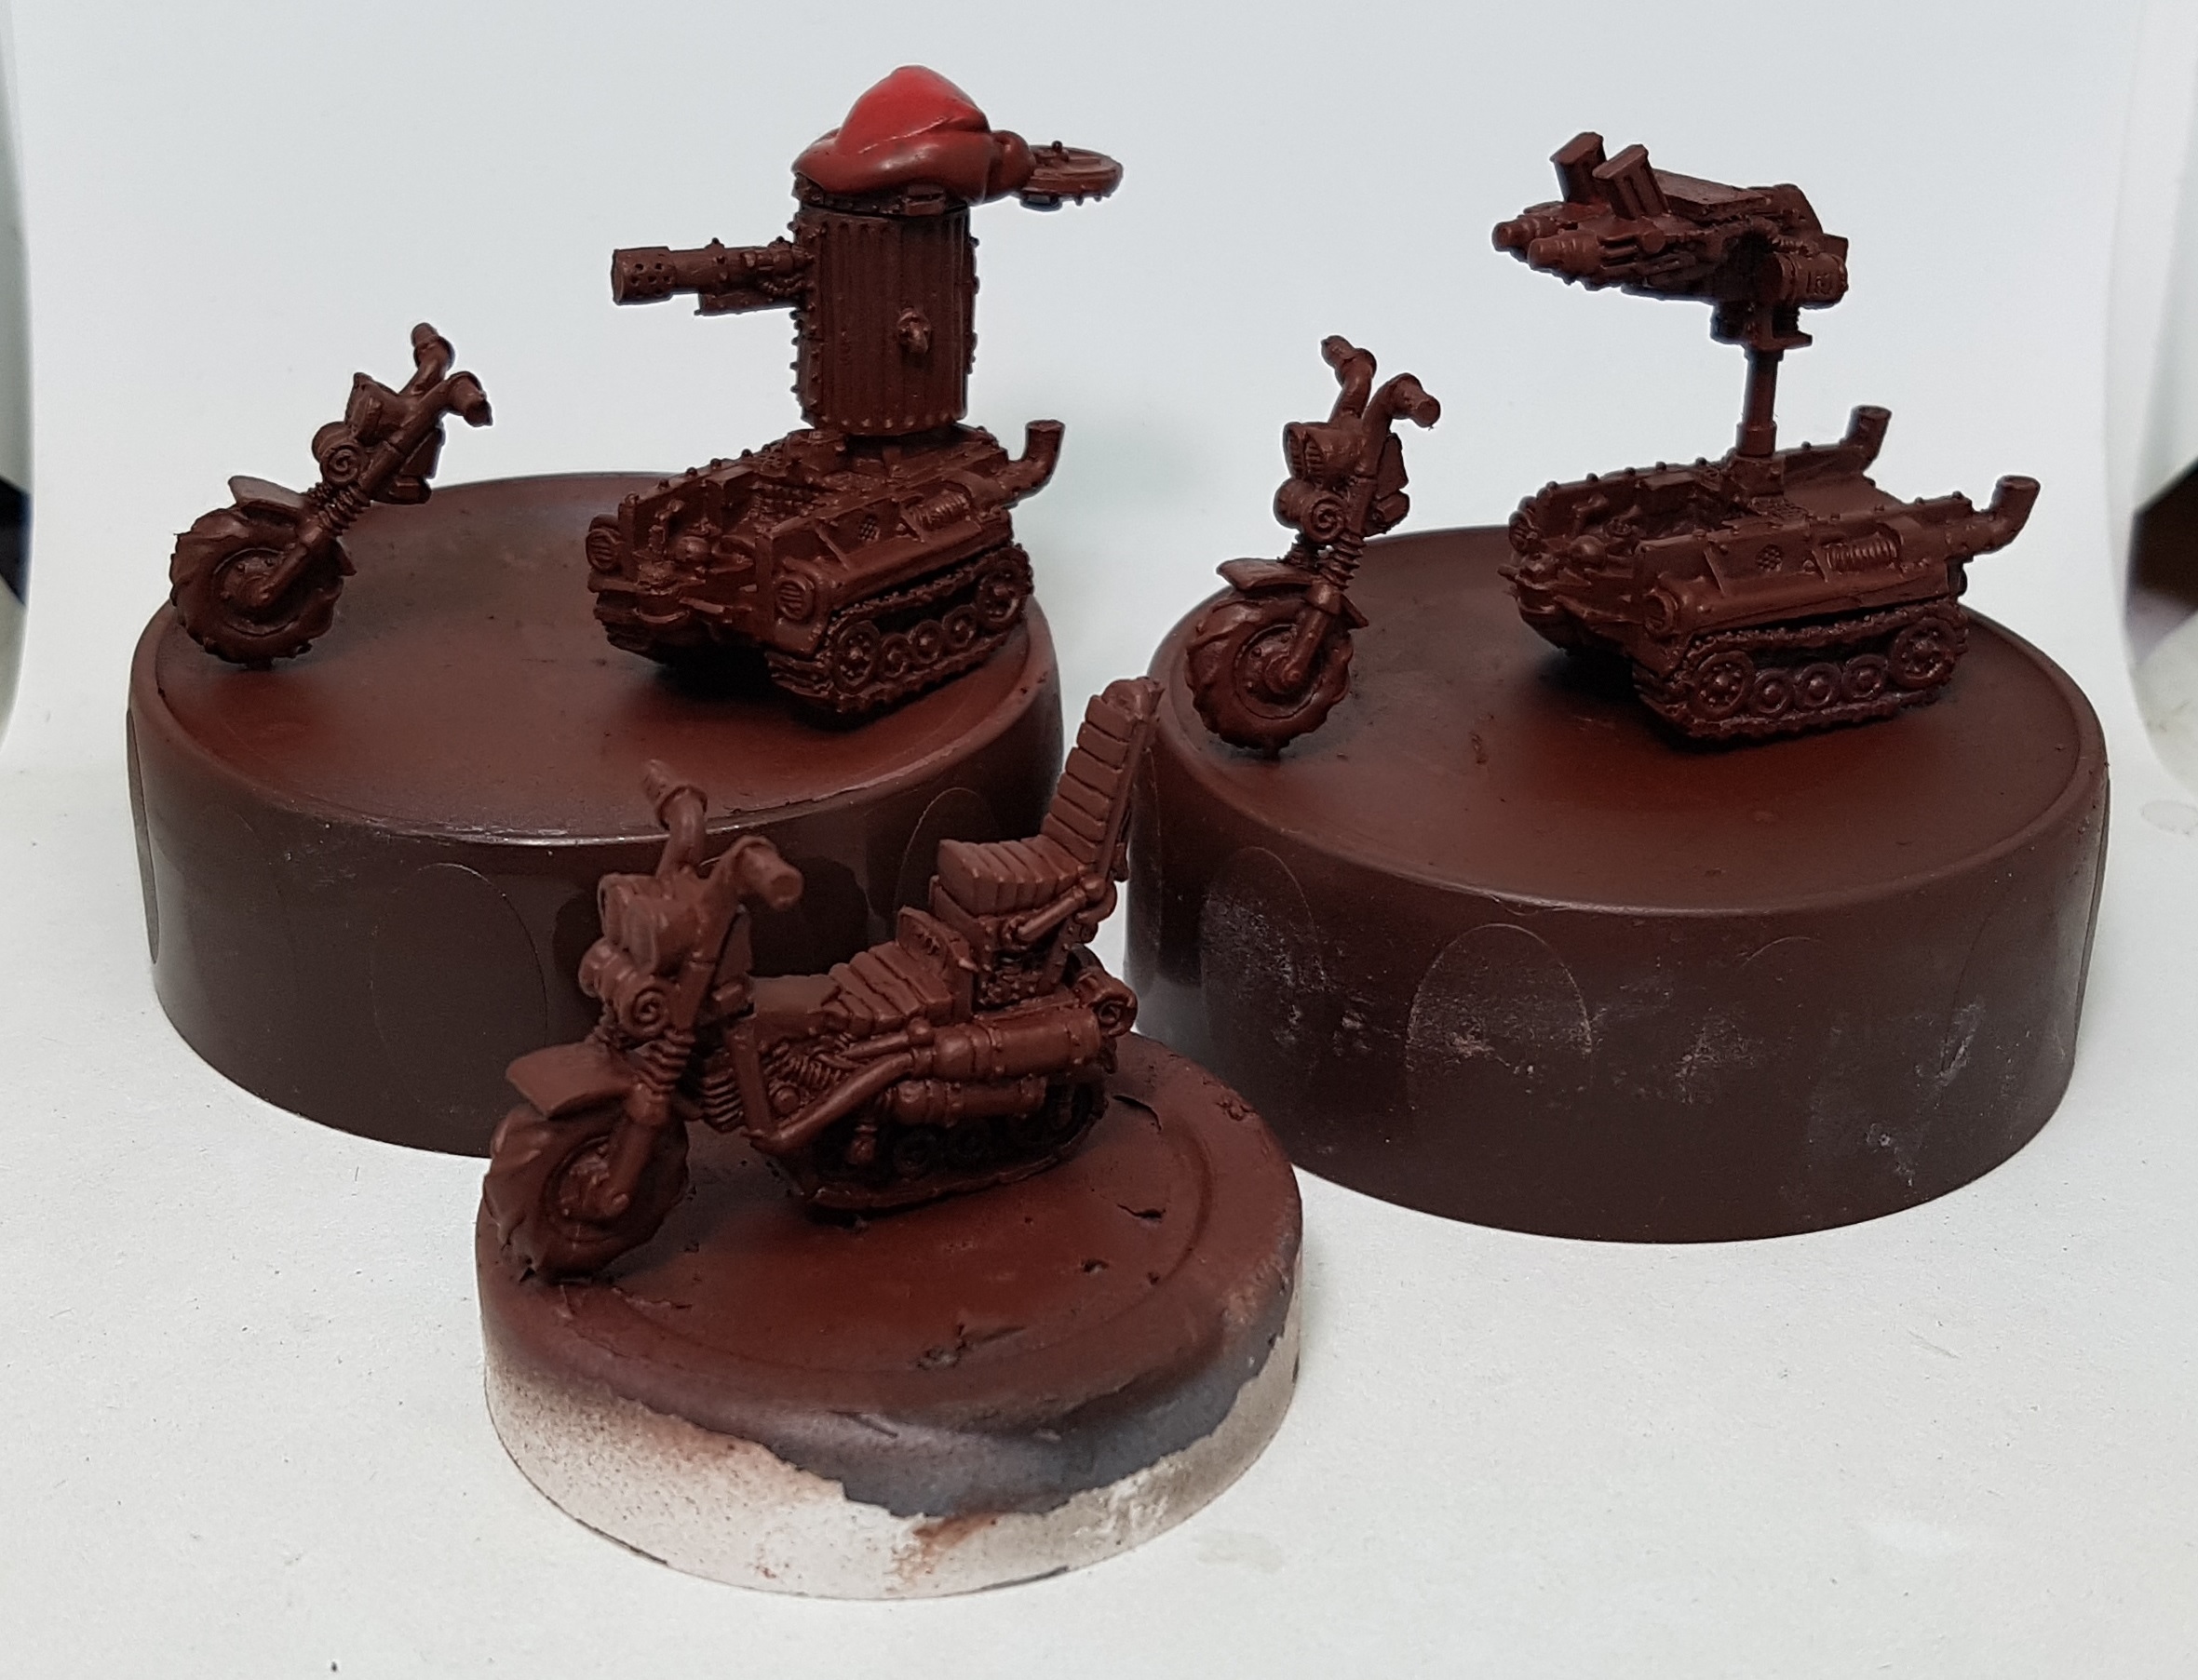
This just leaves the 3 vehicles and the Shokk Attack gun to paint. Everything was zenithally primed at the same time as the Orks a long time ago. The Ork in the Skorcha got a coat of gloss varnish to protect it, and then was masked off with silly putty.
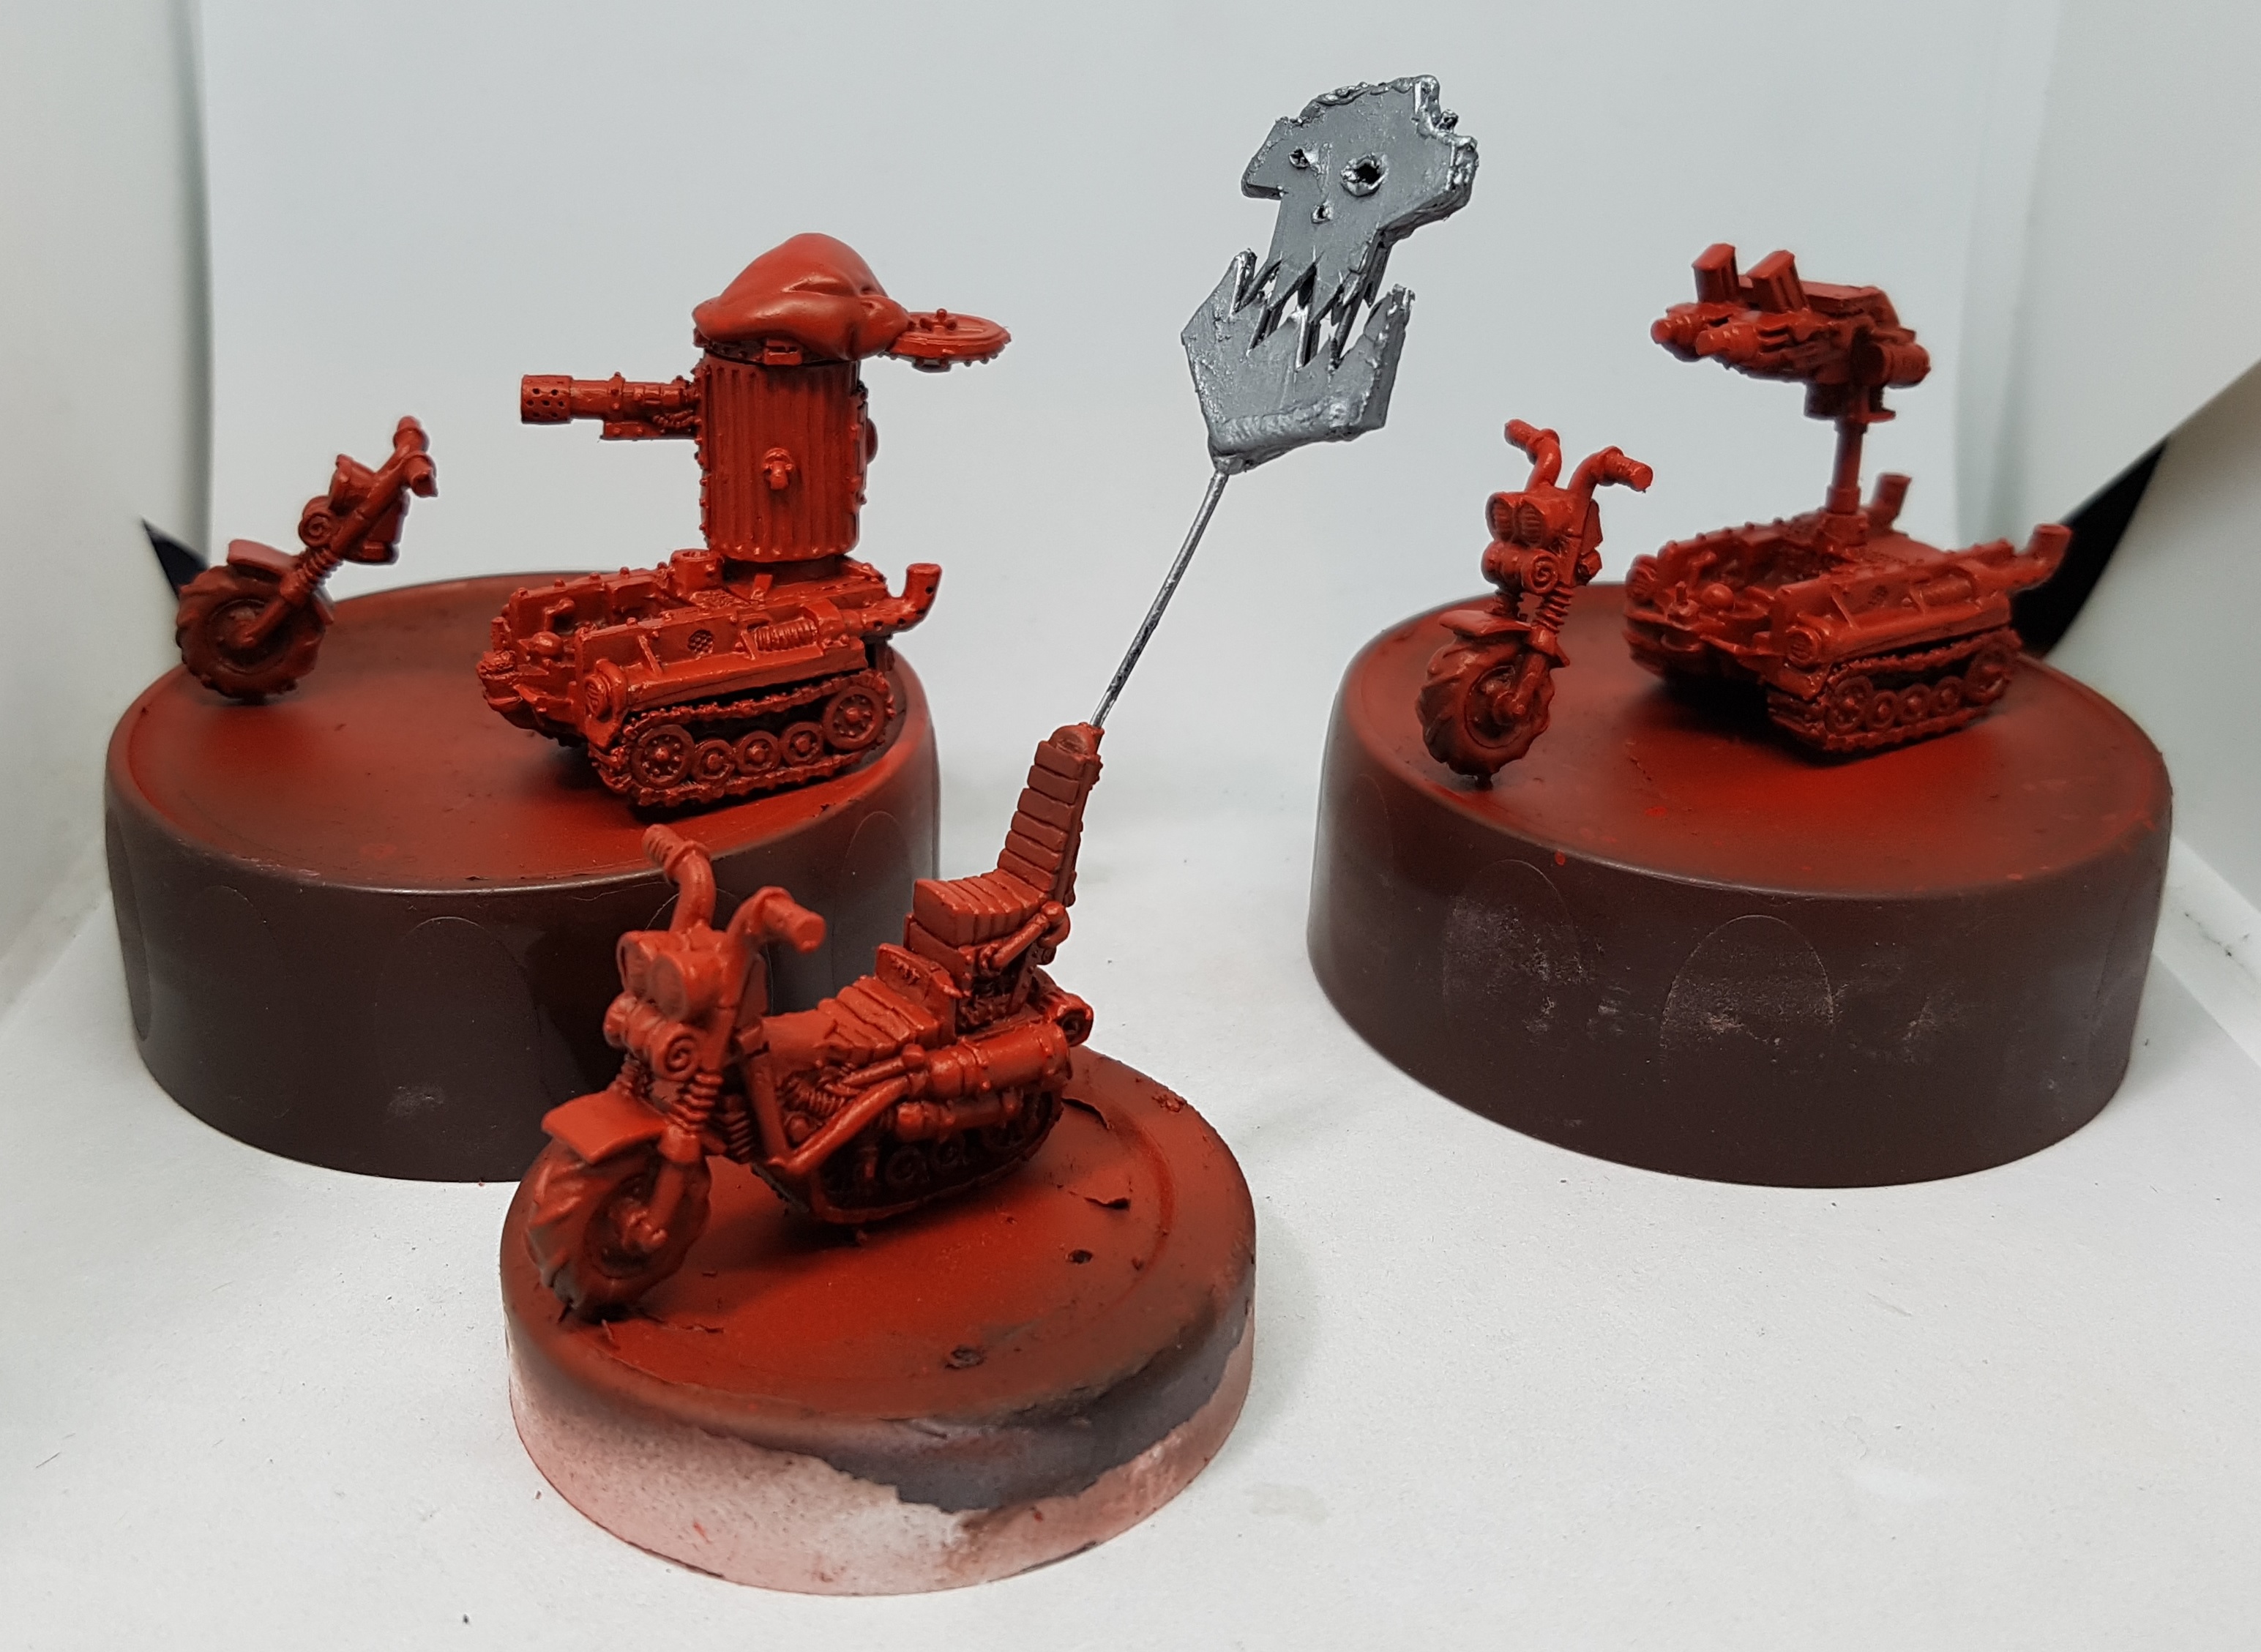
The vehicles were given an undercoat of VMC 70.985 Hull Red as its a great colour. Red has poor coverage and this will provide a great foundation and shade colour. I then airbrushed VGC 72.010 Bloody Red only from the sides and from above to allow for shadows to form naturally with the Hull Red.
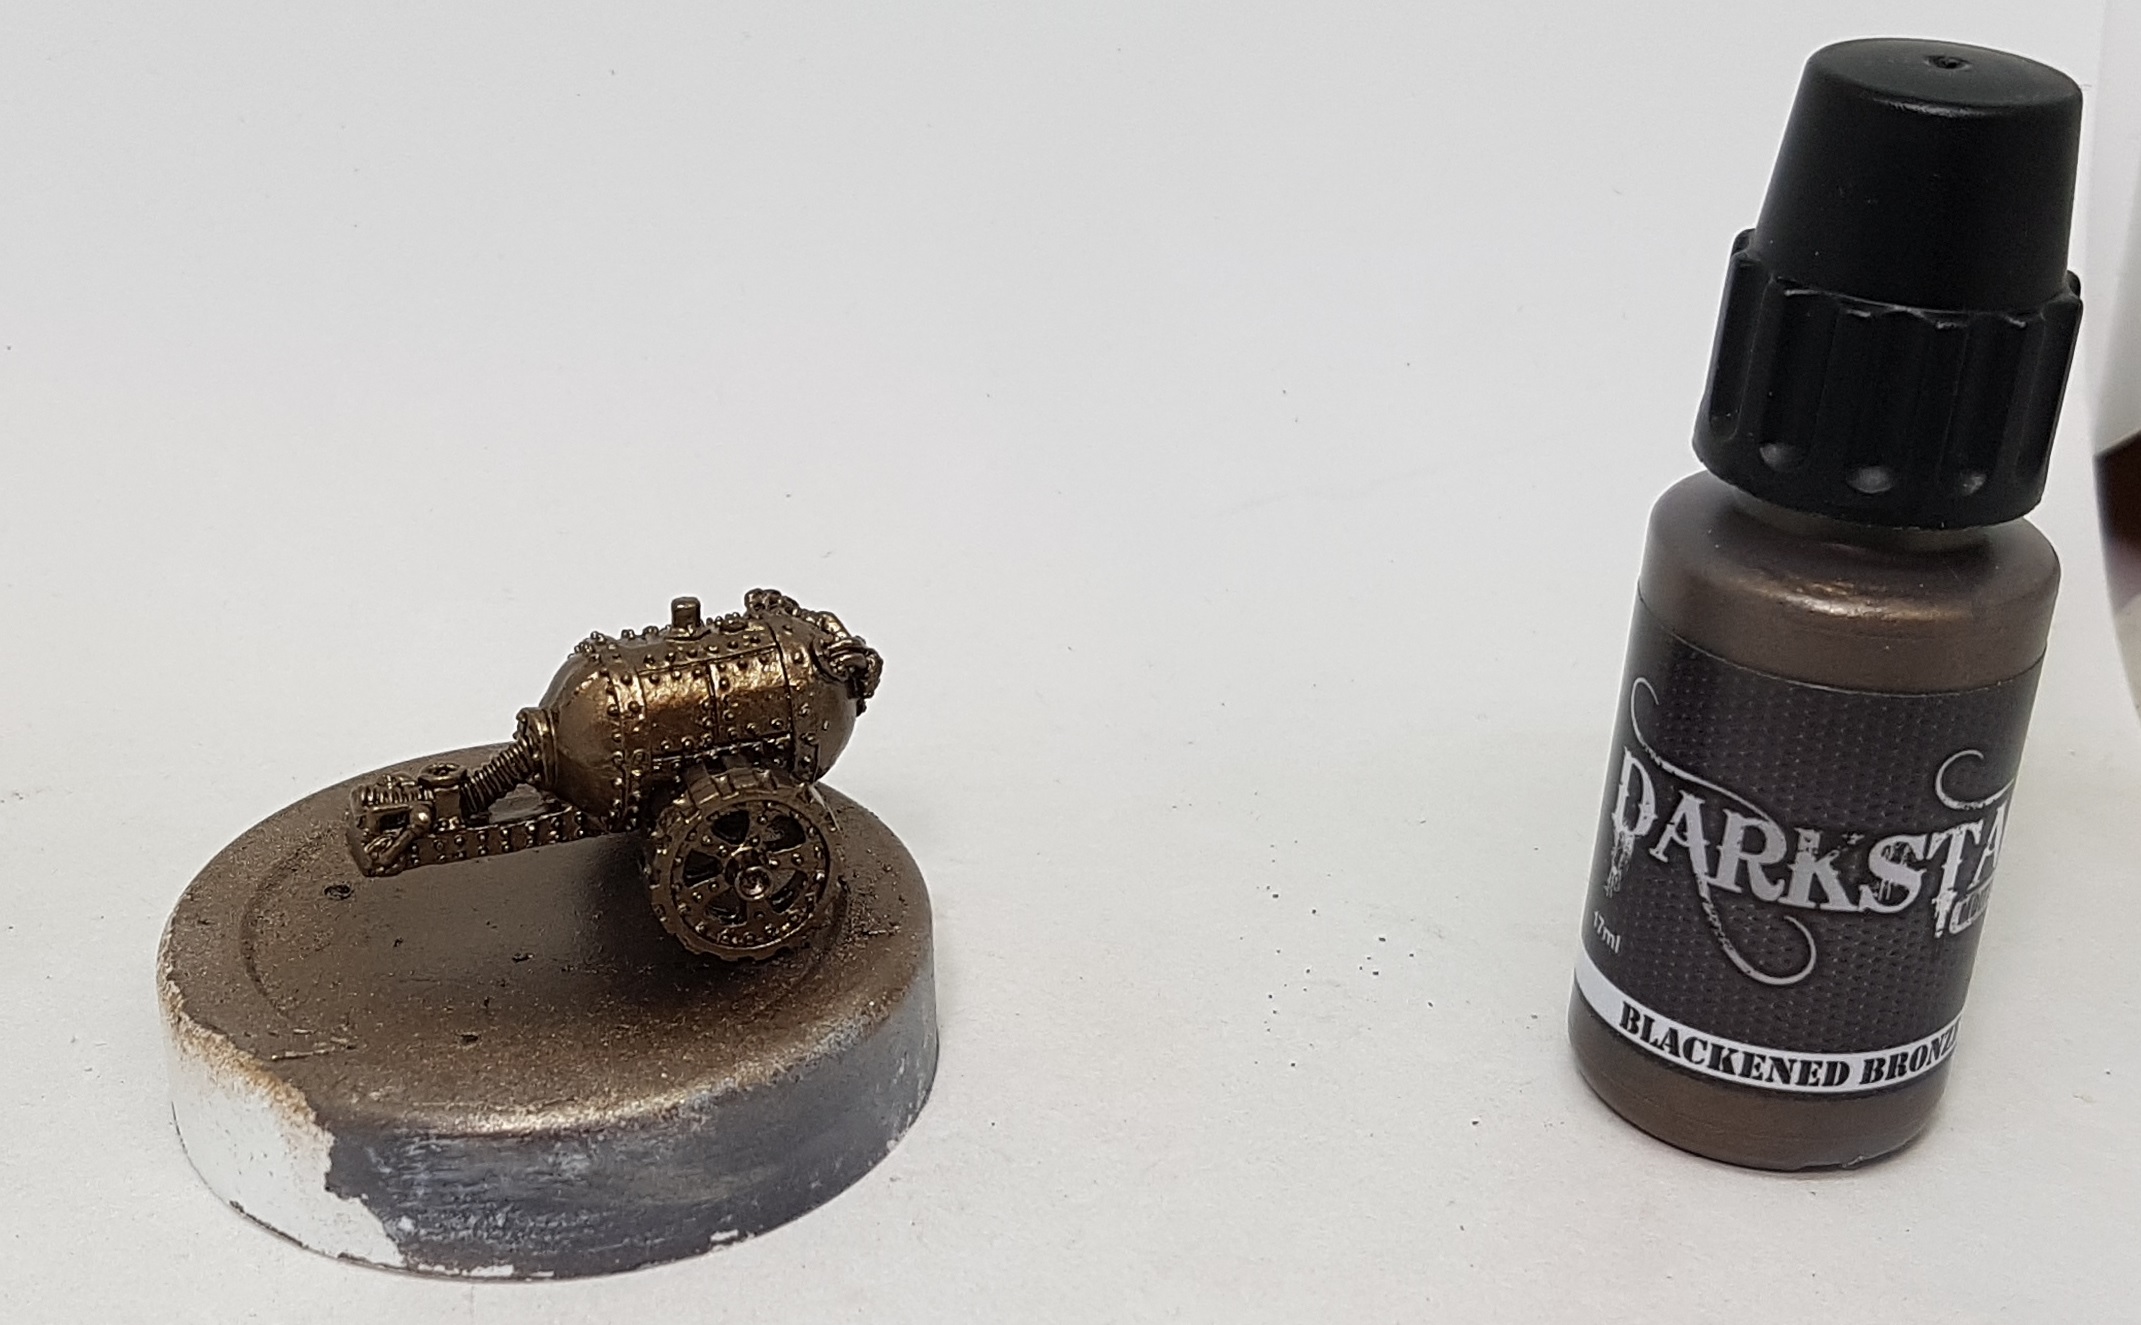
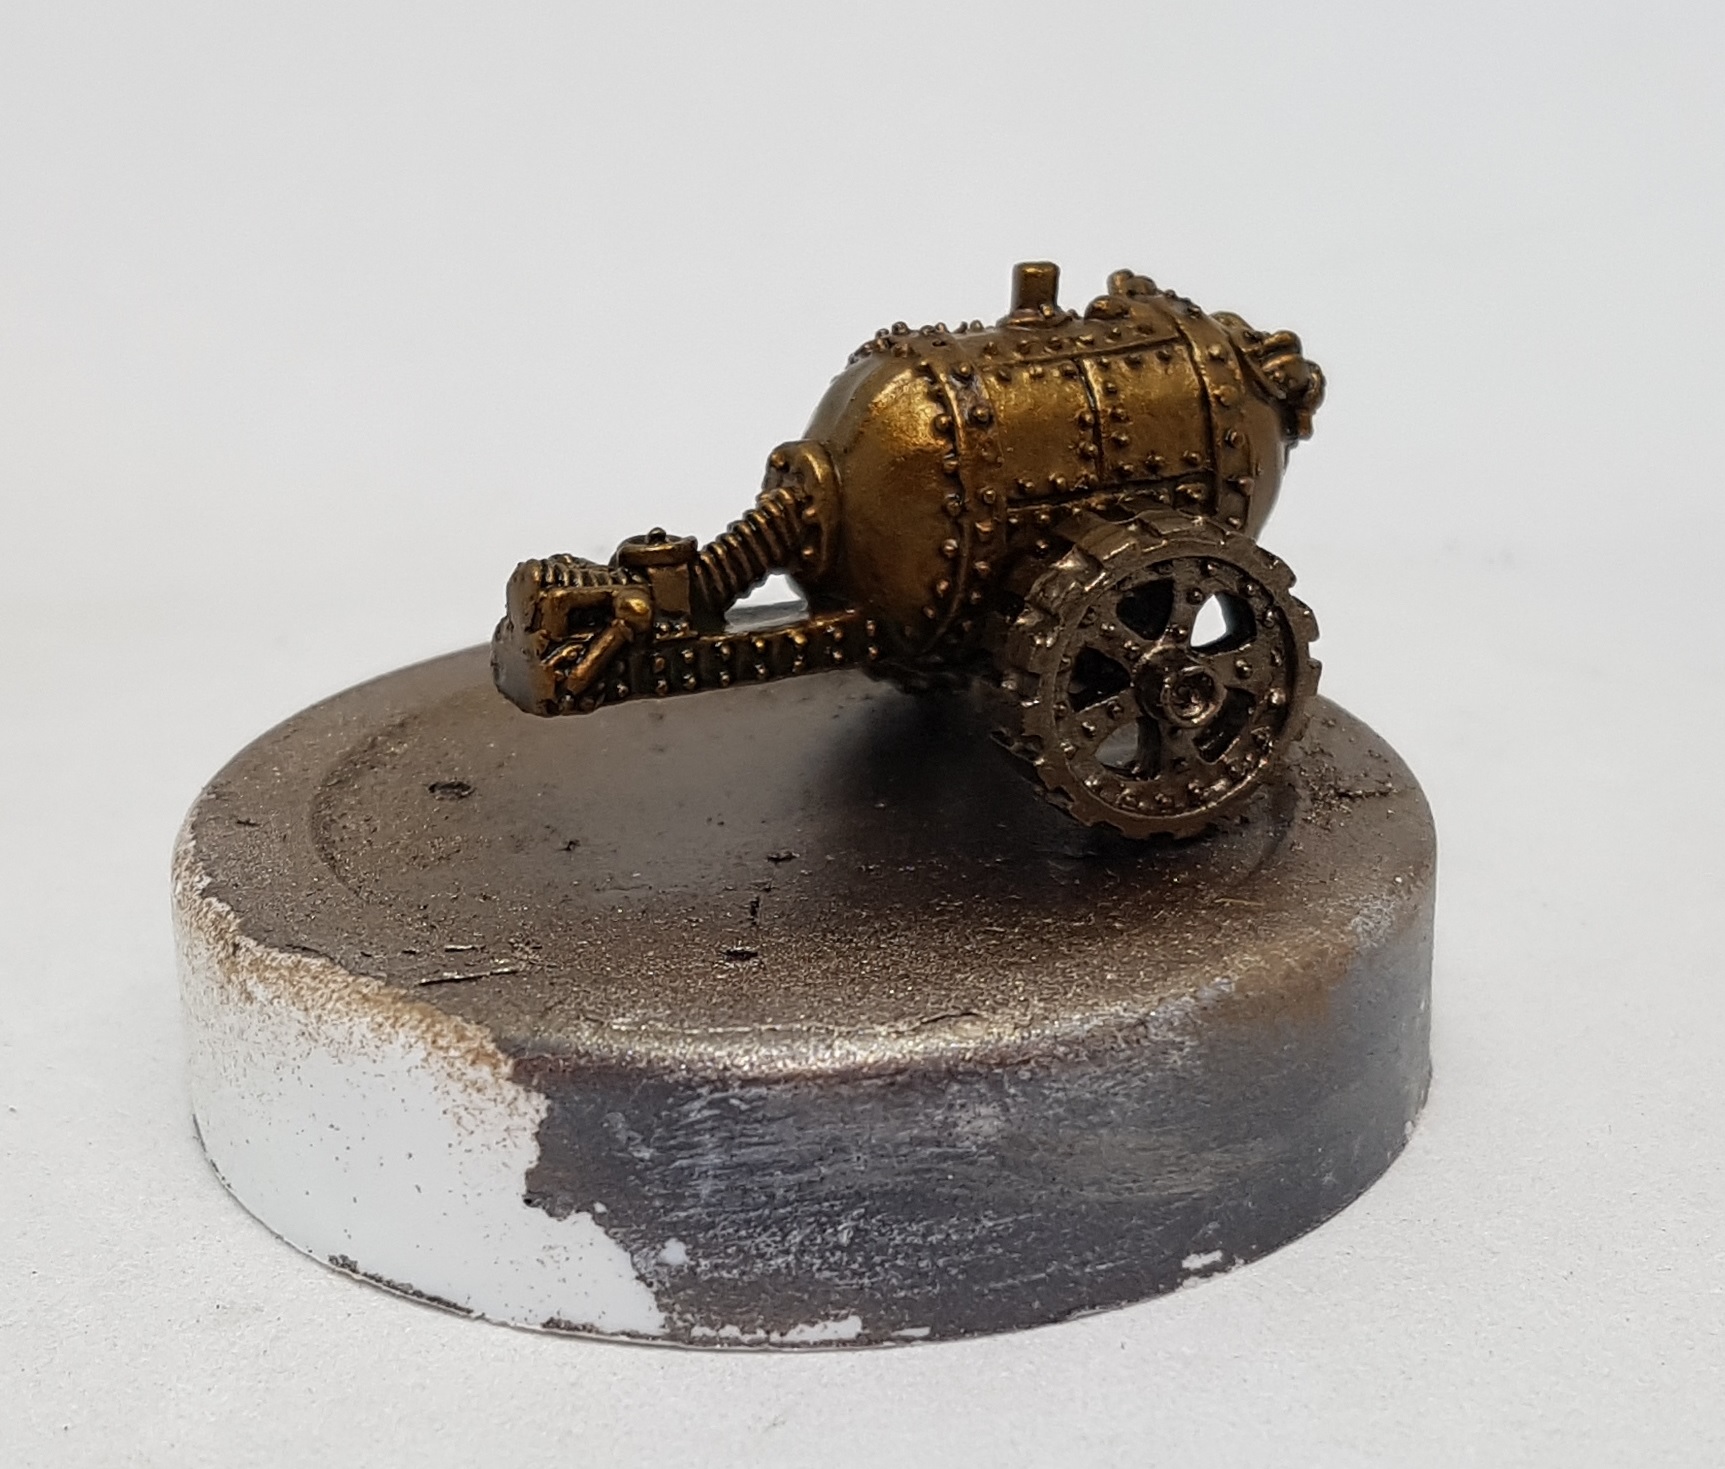
I have some Darkstar Brozes from Asset Drop I’ve been wanting to work with for a while and the fuel tank for the Skorcha seems like an ideal target. It got an even coat of Darkstar Blackened Bronze, and then a drybrush of Darkstar Bronze. I say drybrush, but I’ve found metallics rarely drybrush the same as non metallics. This was almost an overbrush, just with the direction of light kept in mind. It then got 2 heavy washes with diluted Secret Weapon Sewer Water.
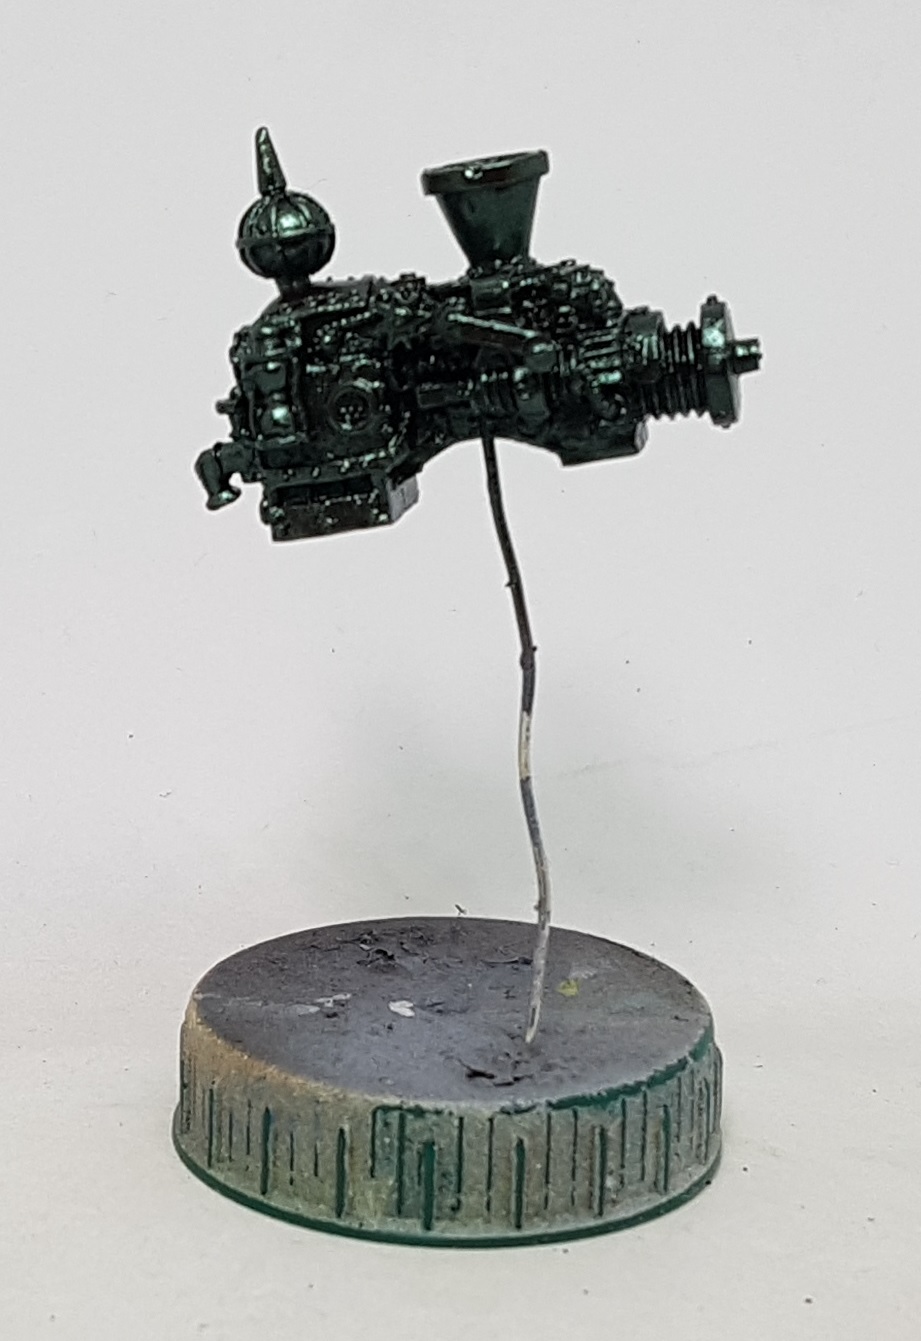
AssetDrop this month gave me 3 new colour shift metallics from a company I’ve not heard of before: Turbo Dork. I’ve decided to try out their Dark Net on the gun. The gun was undercoated in gloss black, as is always recommended for colour shift paints. it then got 3-4 airbrush coats of Dark Net, which seems to be metallic black, with a greenish shimmer to it.
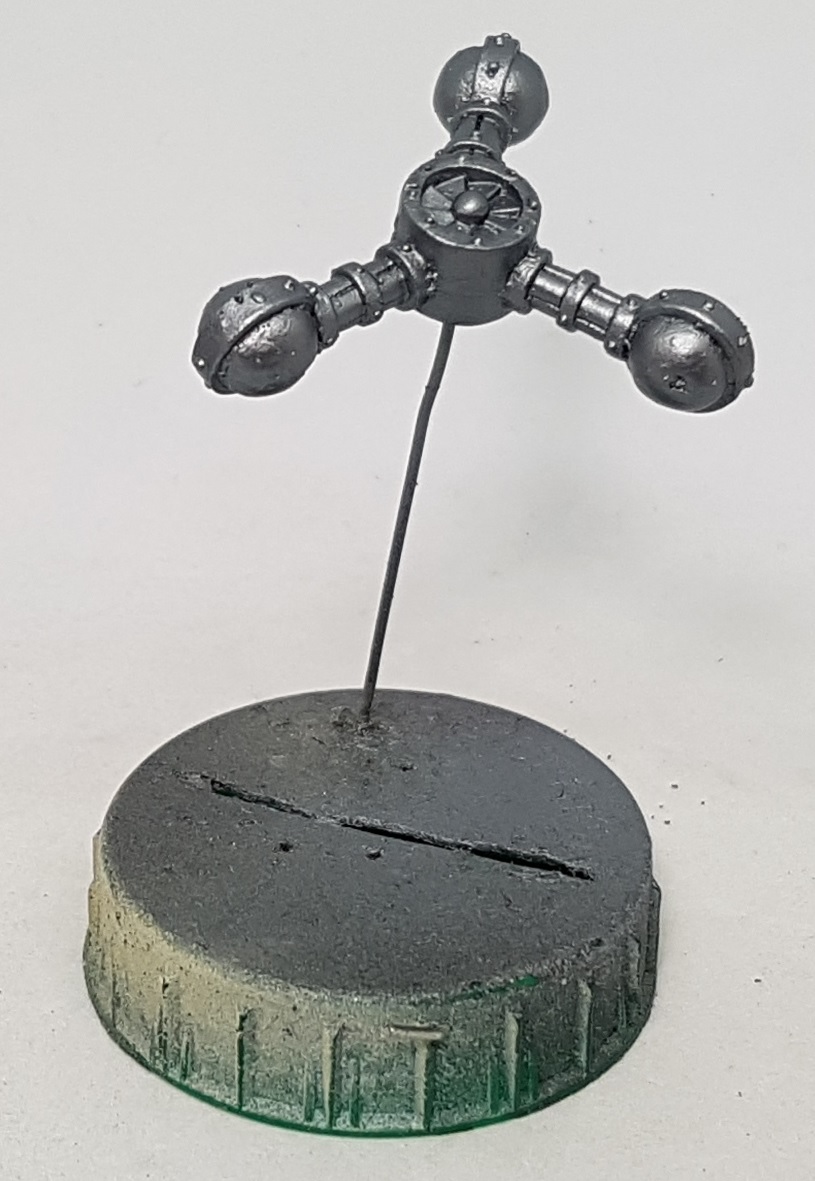
The spinny part of the gun (Fins? Blades?) and the banner got a base coat of VGA 72.753 Chainmail Silver. I’ll be rusting up the banner, painting over that rust, and then chipping through it later. The gun will have sections picked out in iron and brass later to make it match the blades and its handle back on the Ork.
I’ve also applied the textured paint to the bases. I hope to get more painting done this weekend. If I’m lucky these models will be simple and I can finish them off this weekend and start something new for the first time in forever. This project is wearing a little thin, but I am enjoying finally being able to try different things.
I finished these guys off over the weekend, starting with an extra airbrush highlight of VGC Bloody Red mixed with VMC 70.845 Sunny Skin Tone. I then removed the silly putty, and finally pin washed with Hull Red. I then blacked out the tyres, hand grips, tracks and anything that would be iron. Ammo Mig Dark Tracks was then applied in irregular splotches using an old drybrush over all the tracks. Once everything else was finished Alcad II Mid pigment was then brushed on dry over the tracks and partially on to the wheels inside. A little Ammo Mig Gun metal pigment was finally rubbed on to the edges using my finger tip. This looks like soot, but must be graphite as it gives it a dirty metallic glint.
The tyres and hand grips were painted using Secret Weapon paints. Based with Tire black, drybrushed with Rubber, and finally a gentle drybrush with Rubber Highlight.
The Irons were painted the same as normal, but I picked out some pipes on the bike with VMC 71.064 Chrome. This was not shaded or highlighted.
The gold and copper was painted the same as with the Orks. The hourglass on the big gun was painted with Dark net Afterburner colour shift paint as I wanted ti try it out and I wasn’t sure where to begin painting an hourglass.
The headlights were undercoated in white and then given a couple of washes with VMC Yellow Fluo. Once dry I added a little Fluo to P3 Menoth White Highlight and painted the middle of the horizontal lines on each of the lights.
The wood was painted the same as the gun stock for the Flash Gitz Freebooter.
the green bed rolls were painted with P3 Iosan Green, and then washed with Vallejo Model Wash 76.519 olive green because its on my desk and I don’t know if I’ve ever actually used it. They were highlighted back up with the Iosan Green afterwards. This made the whole thing look a little more christmassy than I was happy with, but its a WIP so we will see.
The suspension on the handelbars was based with P3 Ironhull Grey and washed with Nuln Oil. They didn’t seem to need a highlight afterwards.
The glowing blue lights were undercoated white and then given an even coat of P3 Arcane Blue before being washed with P3 Meridious Blue. They were given an edging wash of P3 Turquoise Ink mixed with Coal Black, and final highlights of Arcane Blue mixed with increasing amounts of Menoth White Highlight. I toned the whole thing back done (Probably too far) with a glaze of Arcane Blue.
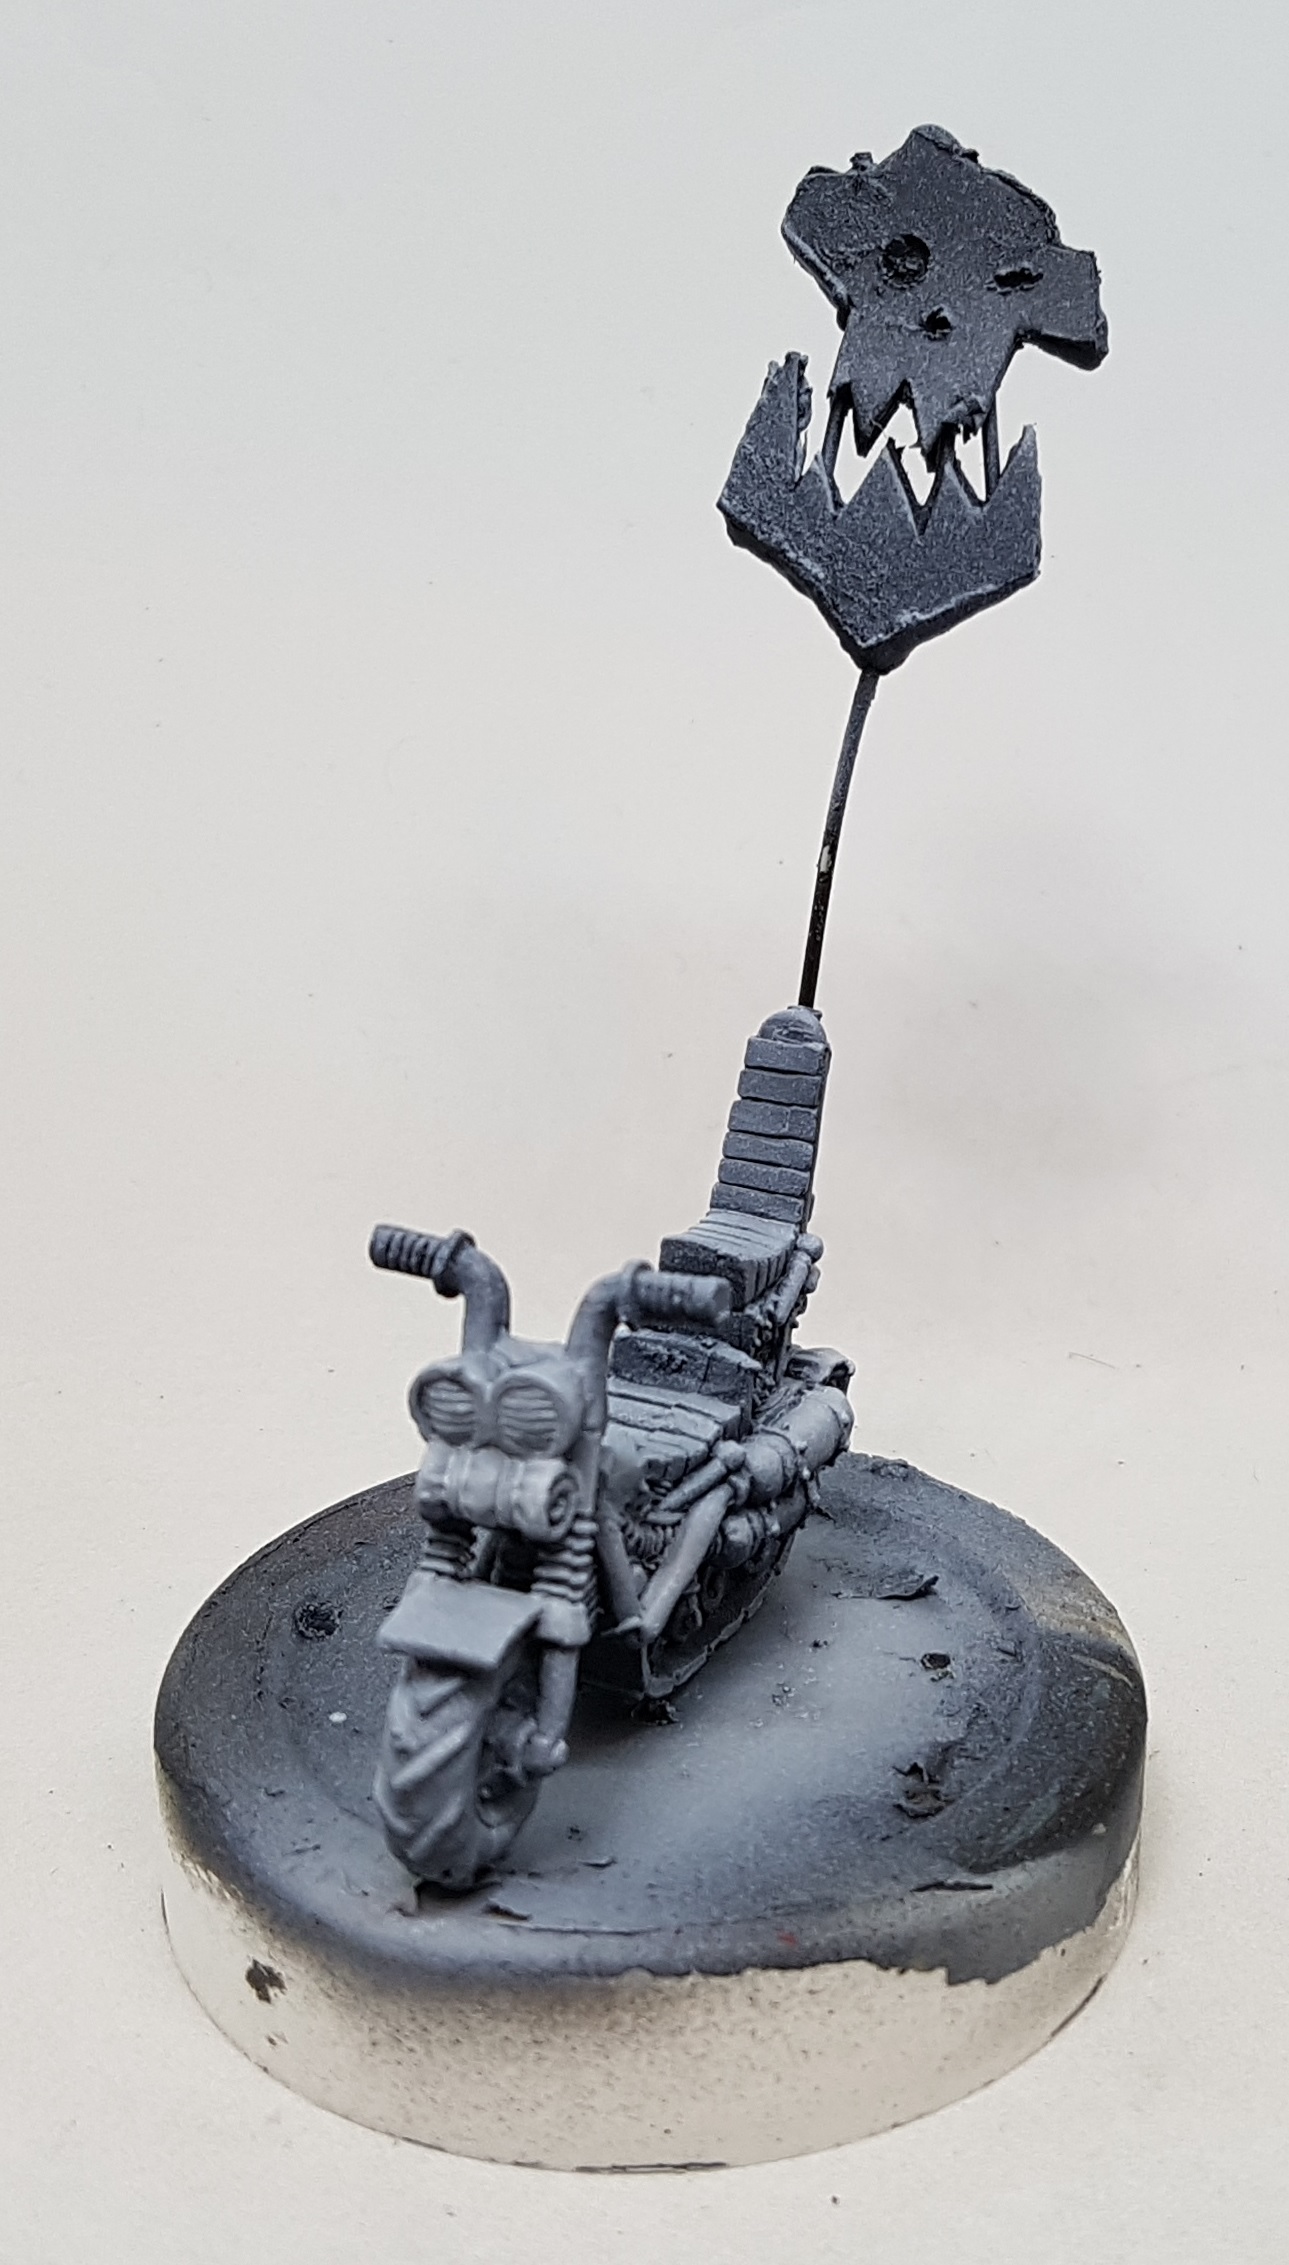
The Banner was given a patchy coat of GW Typhus Corrosion and then drybrushed with GW Ryza Rust. I coated the edges of everything with liquid mask and then painted the 2 faces with VGC 72.147 Heavy BlackGreen. Due to the damage caused by cutting and drilling the plastic the paint wanted to stay away from the edges anyway. Once the paint was fully dry I removed the liqud mask with the help of a rubber.
The bronze tank was given another drybrush of Darkstar Bronze and washed with diluted Secret Weapon Green-Black wash. After everything was finished but before gluing the guy on to it a watery mix of Secret Weapon Faded Blue pigment was applied all over. Once it had dried I took a drybrush and cleaned it off, hoping to leave the worst of it in the crevices.
——————————————————————————————–
Everything was assembled on to its bases, varnished and then flocked. I’m very glad model kits have come along so far. Its like the different parts were designed with no thought about how they go together or how big the contact points will be. These guys are going to break in storage unfortunately.
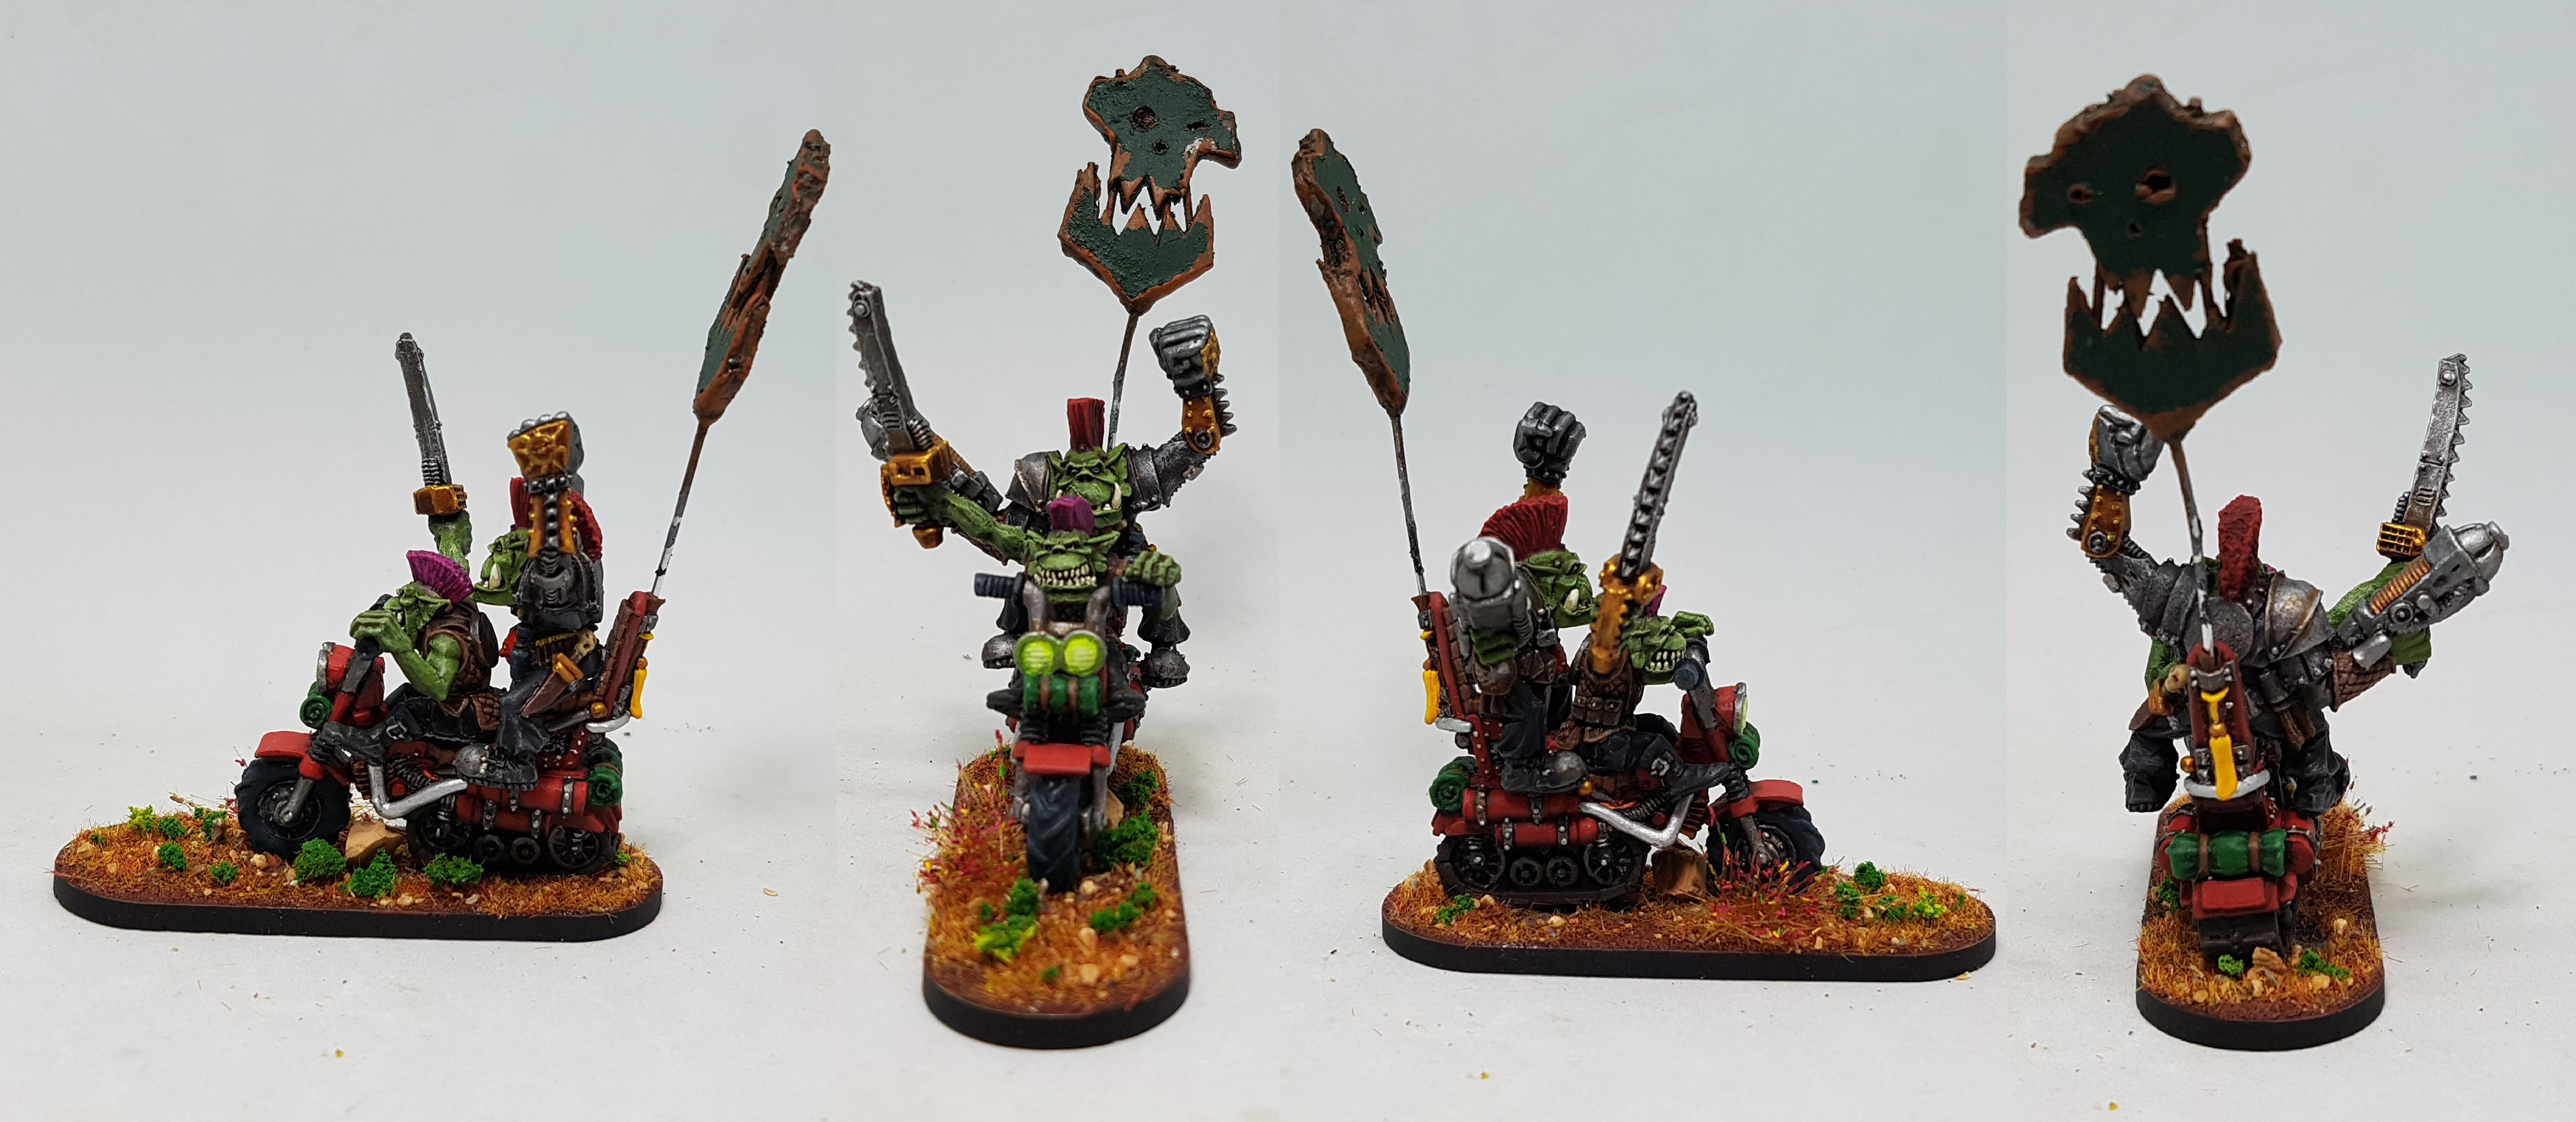 Warboss on Warbike
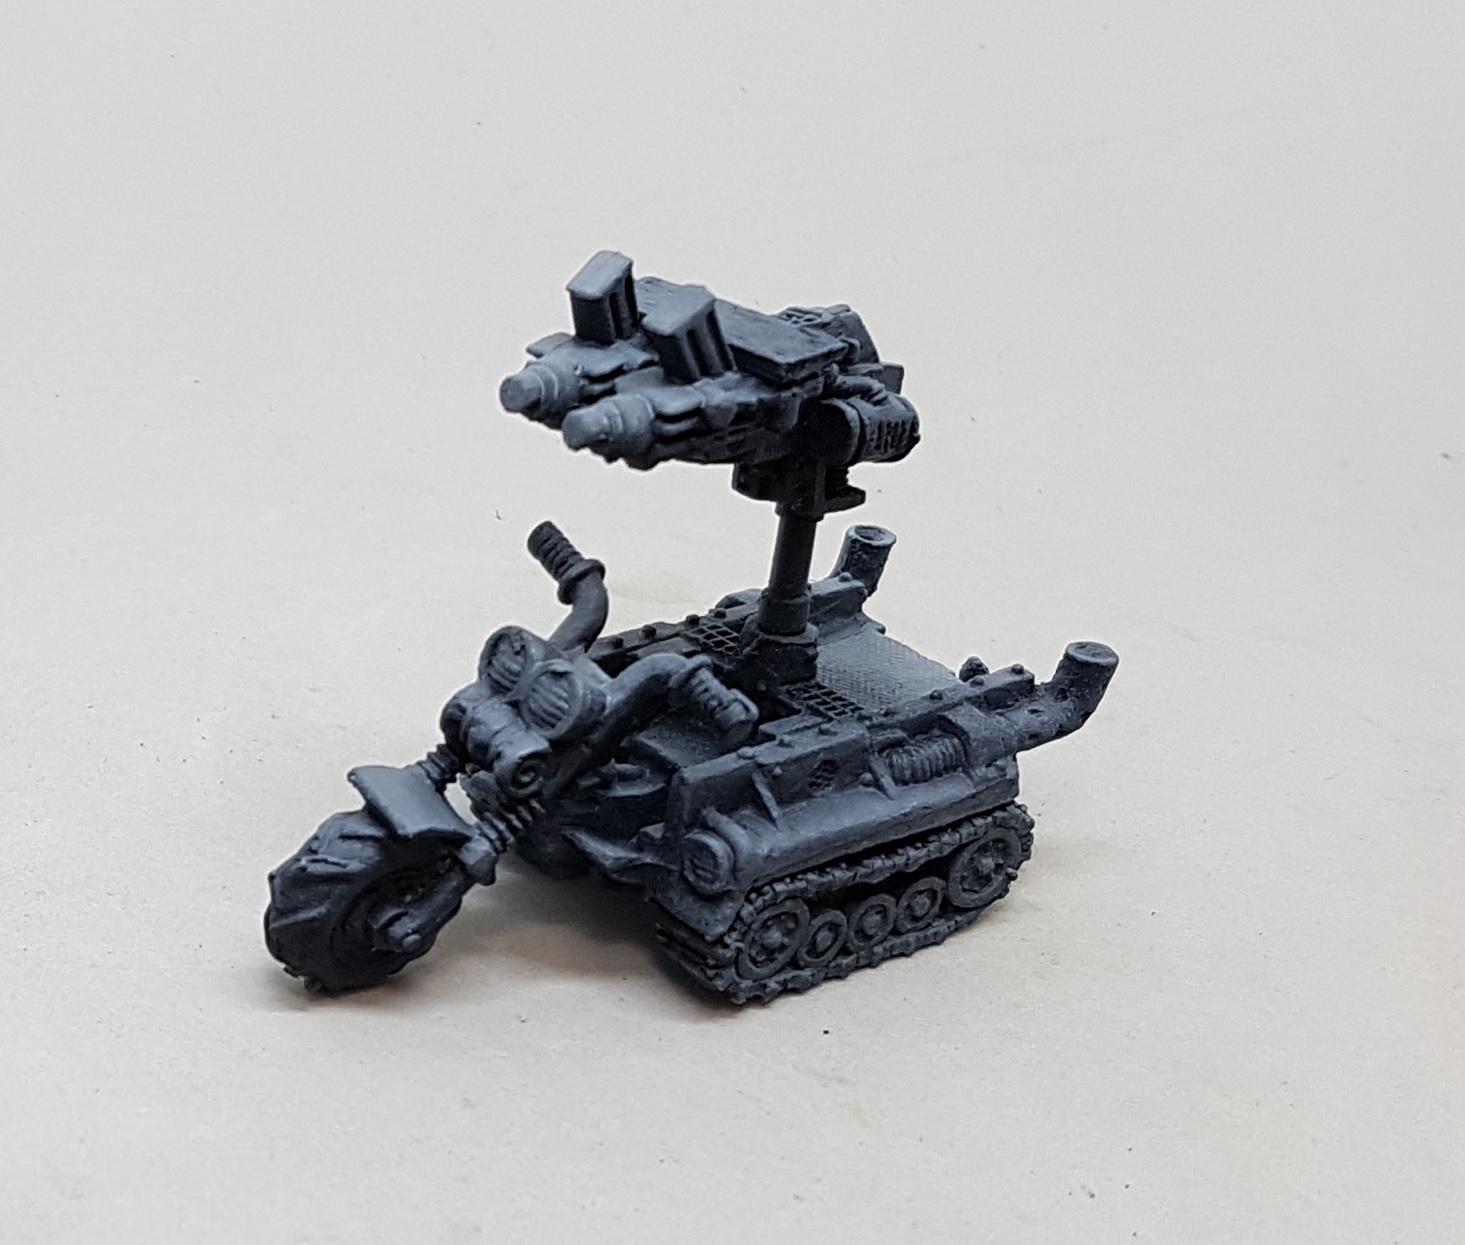
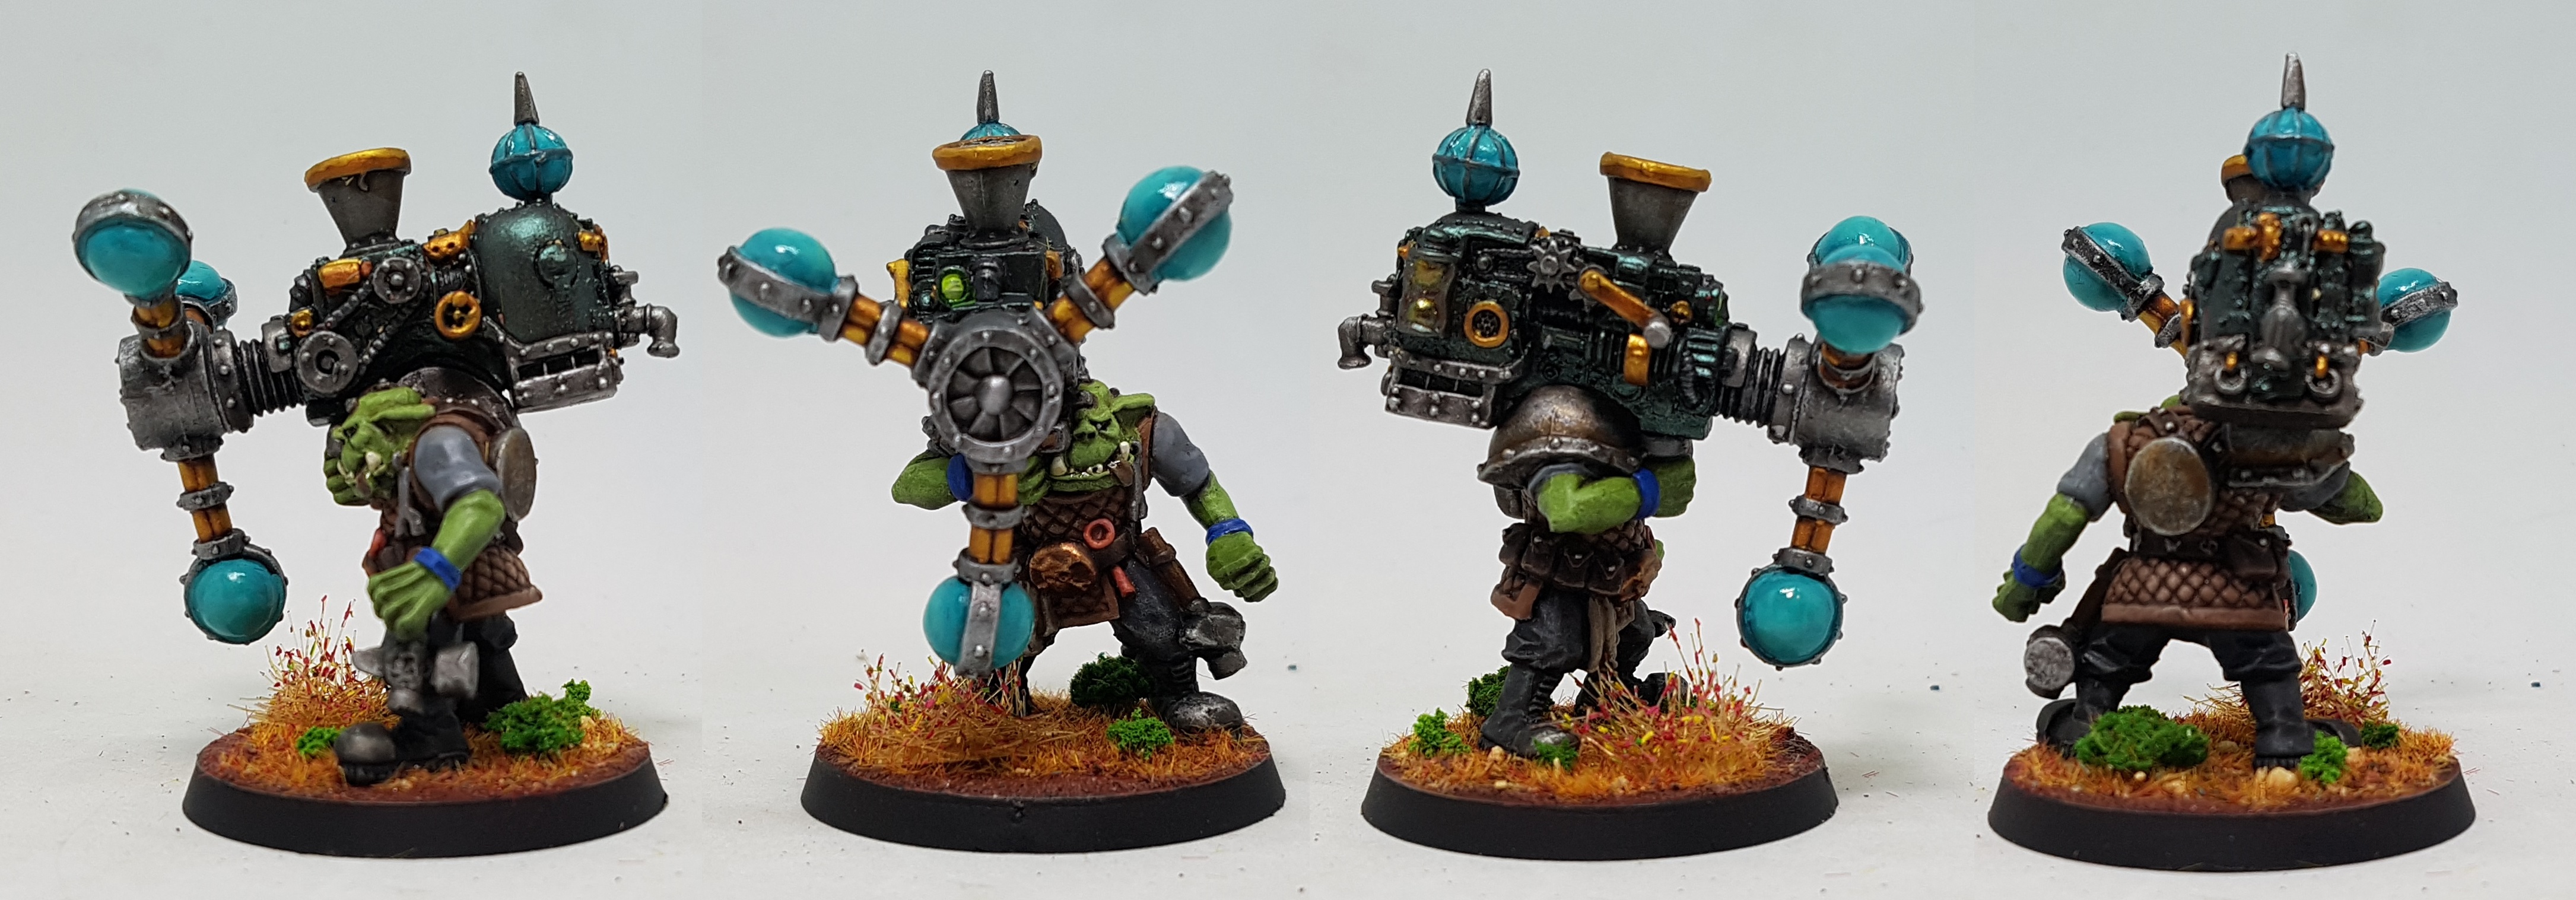 Bik Mek with Shokk Attack Gun. How does anyone carry that thing?
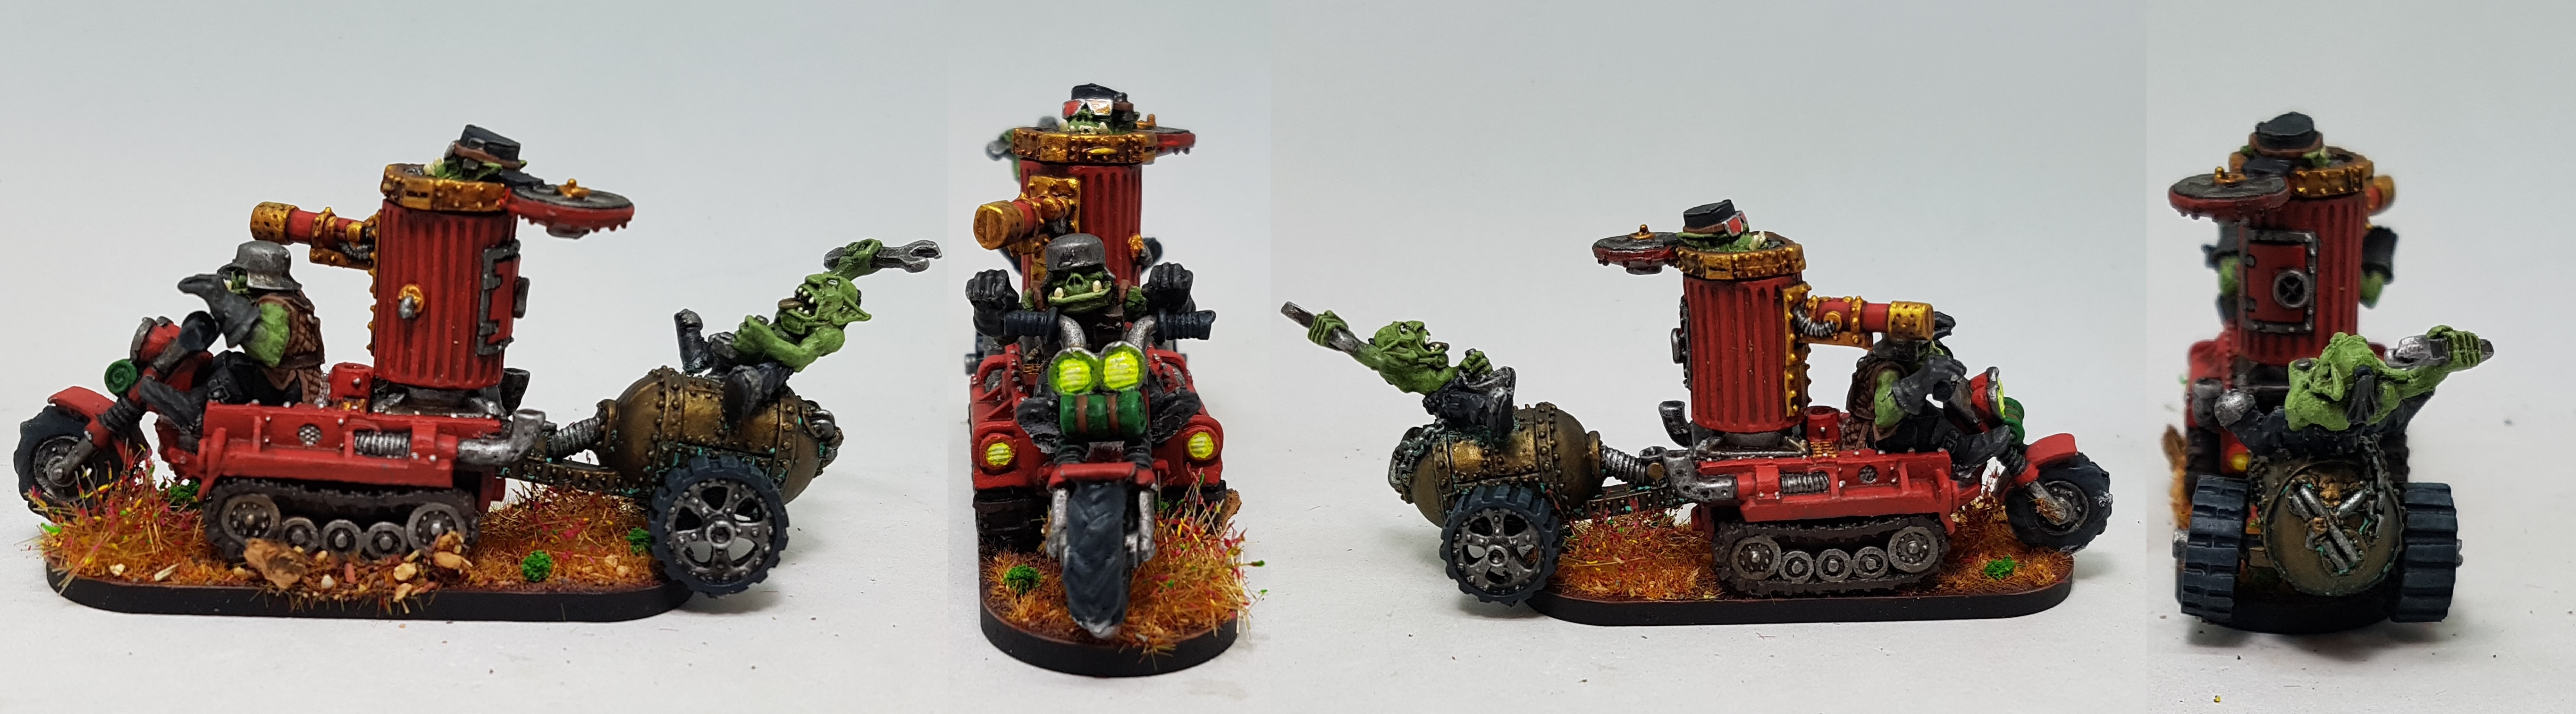 Wartrakk Skorcha. Sadly, there's no way to fit the tank on the base so it remains a separate part
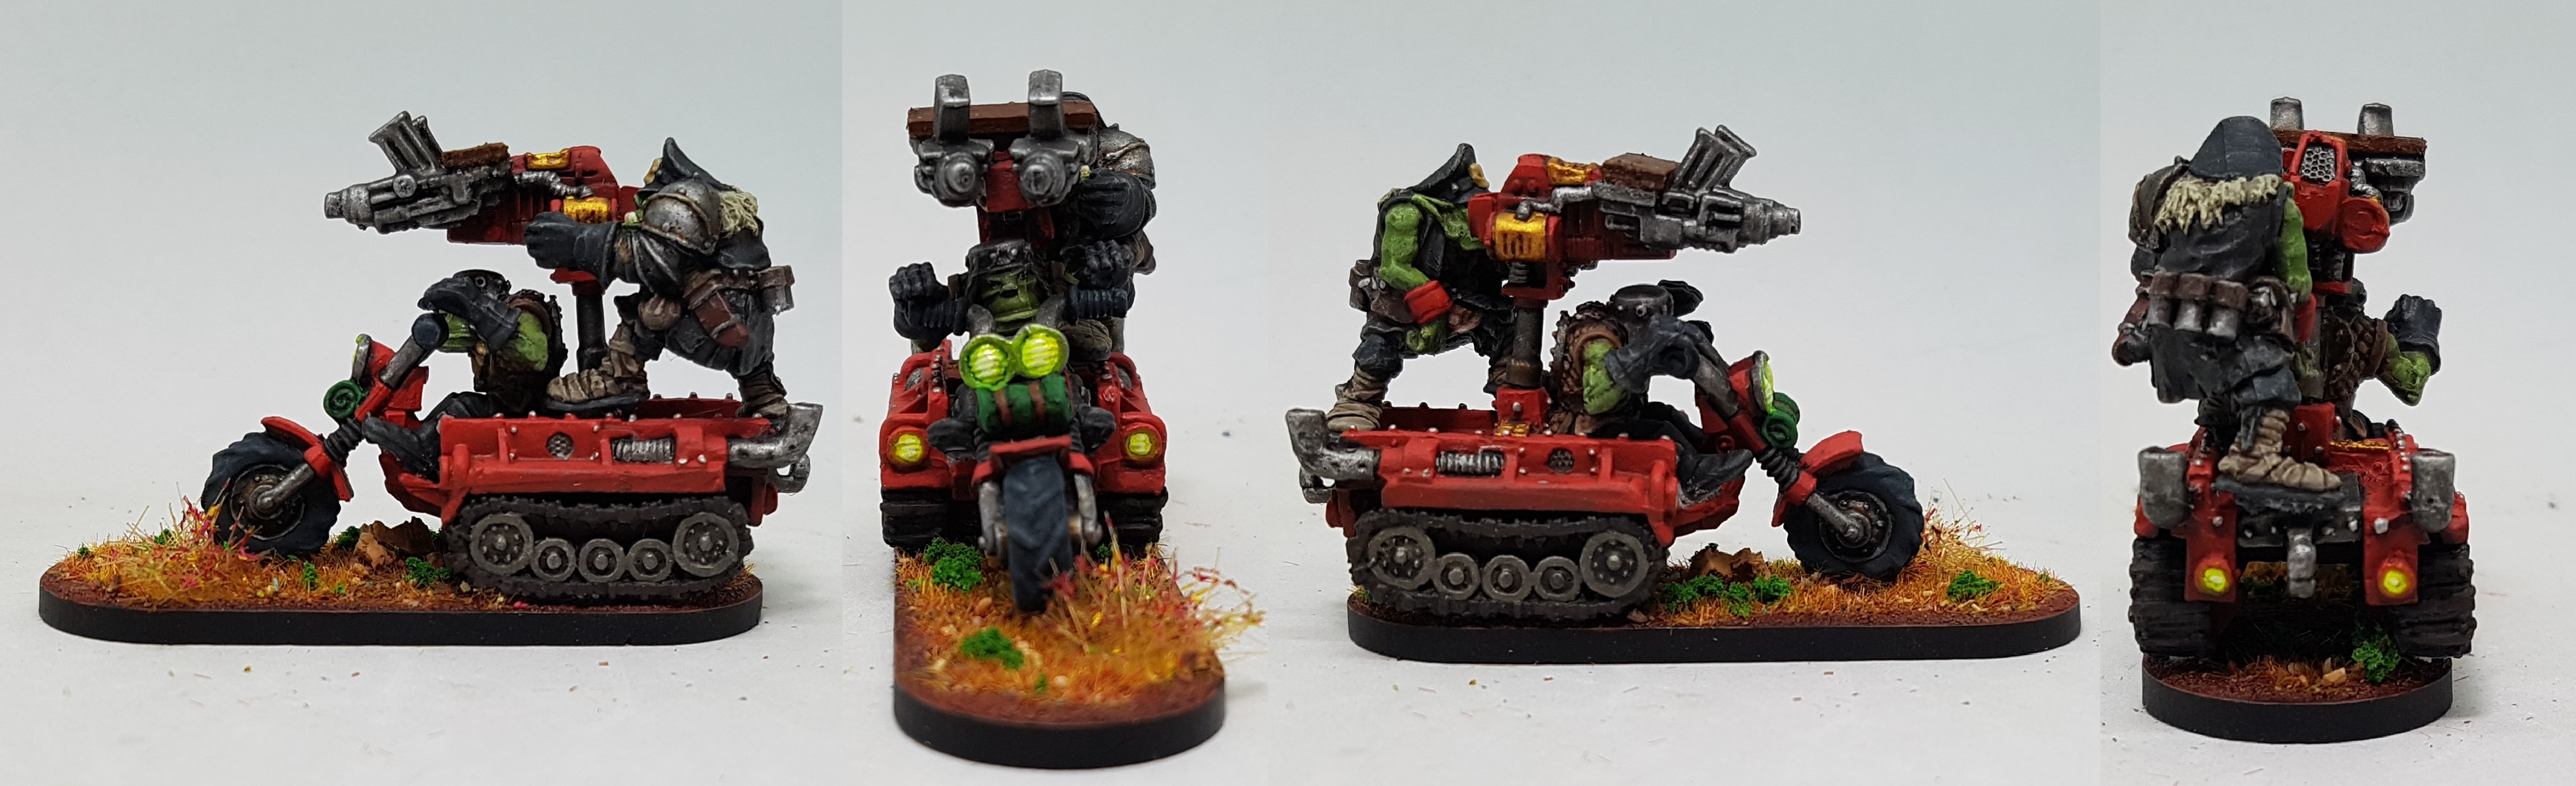 Wartrakk with Twin Big Shoota, which appears to have been "Expunged" from their website over the past few weeks. Has it been removed from the game?


![StarCraft Tabletop Miniatures Game Pre-Orders Live Now [Updated]](https://images.beastsofwar.com/2026/03/starcraft-tmg-news-cover-600-338.jpg)


