![10mm Medieval Miniatures! Azincourt English Army Review | Wargames Atlantic [7 Days Early Access]](https://images.beastsofwar.com/2026/03/unboxing-wargames-atlantic-azincourt-english-army-coverimage-225-127.jpg)


The End is Nigh: Deadlands


Recommendations: 354
About the Project
For my “The End is Nigh” terrain challenge entry, I will be producing a full-blown nightmare landscape, known as a Deadland, in the award winning, Weird West, Deadlands RPG setting, as well as the Great Rail Wars miniatures game and some board and living card games, by Pinnacle Entertainment Group, first published in 1996 and still going strong with it’s Reloaded version using their Savage Worlds engine. In the setting there are some evil spirits that are attempting to turn the world into a true Hell on Earth by causing more and more fear throughout the land which causes even the landscape to warp. The end goal is the world to become a Deadland at which time these spirits can freely walk the earth.
Related Game: Savage Worlds
Related Genre: Western
This Project is Active
Rock On!
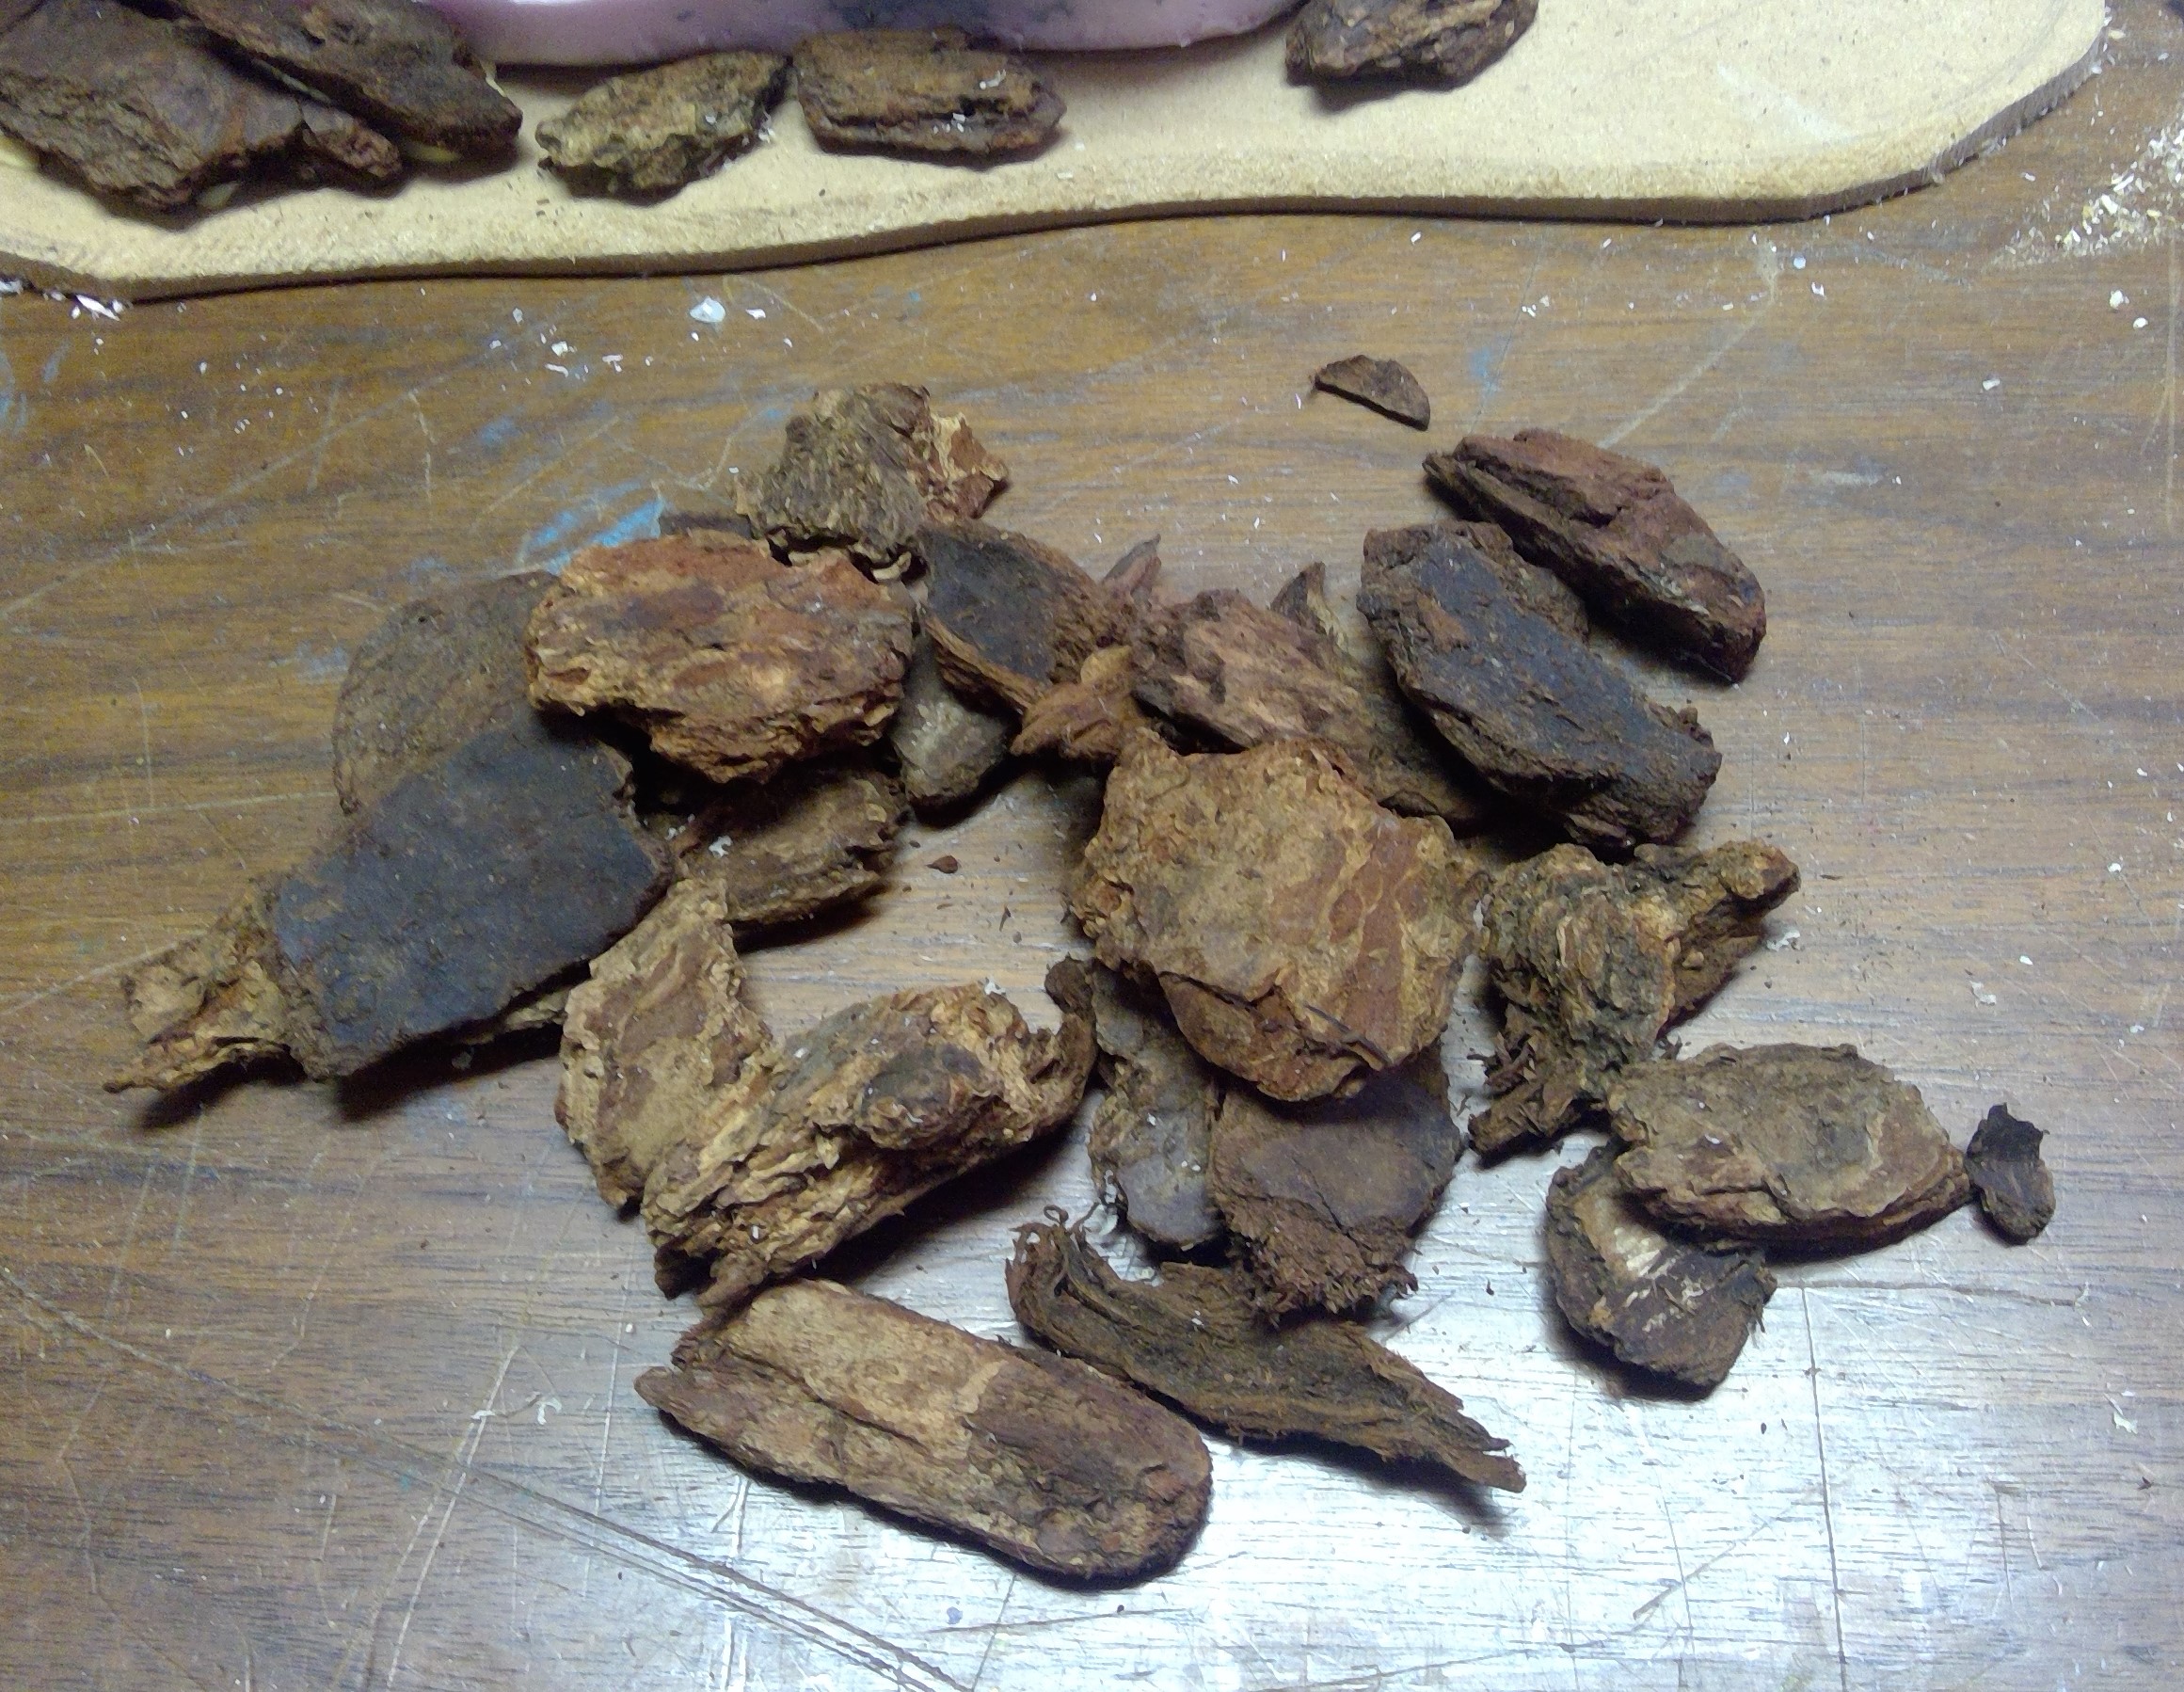
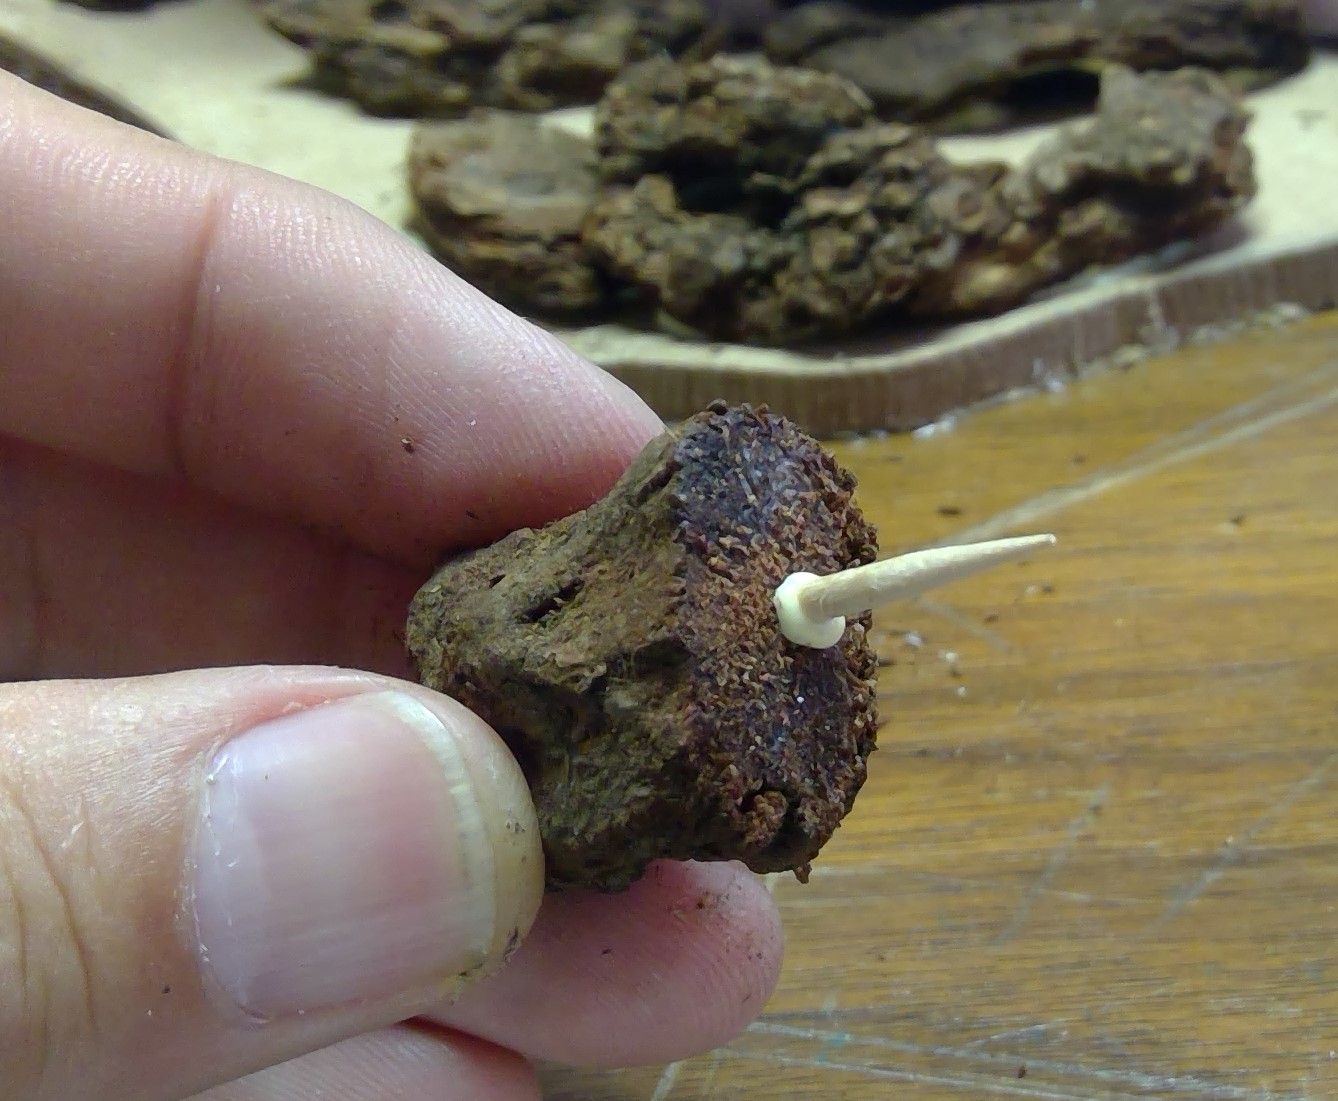
Once all that had time to set I added large “rocks”, in the form of pine bark nuggets, around the bottom of the mesa just like the others I already own. These stacks of “rocks” were mostly glued in place with wood glue.

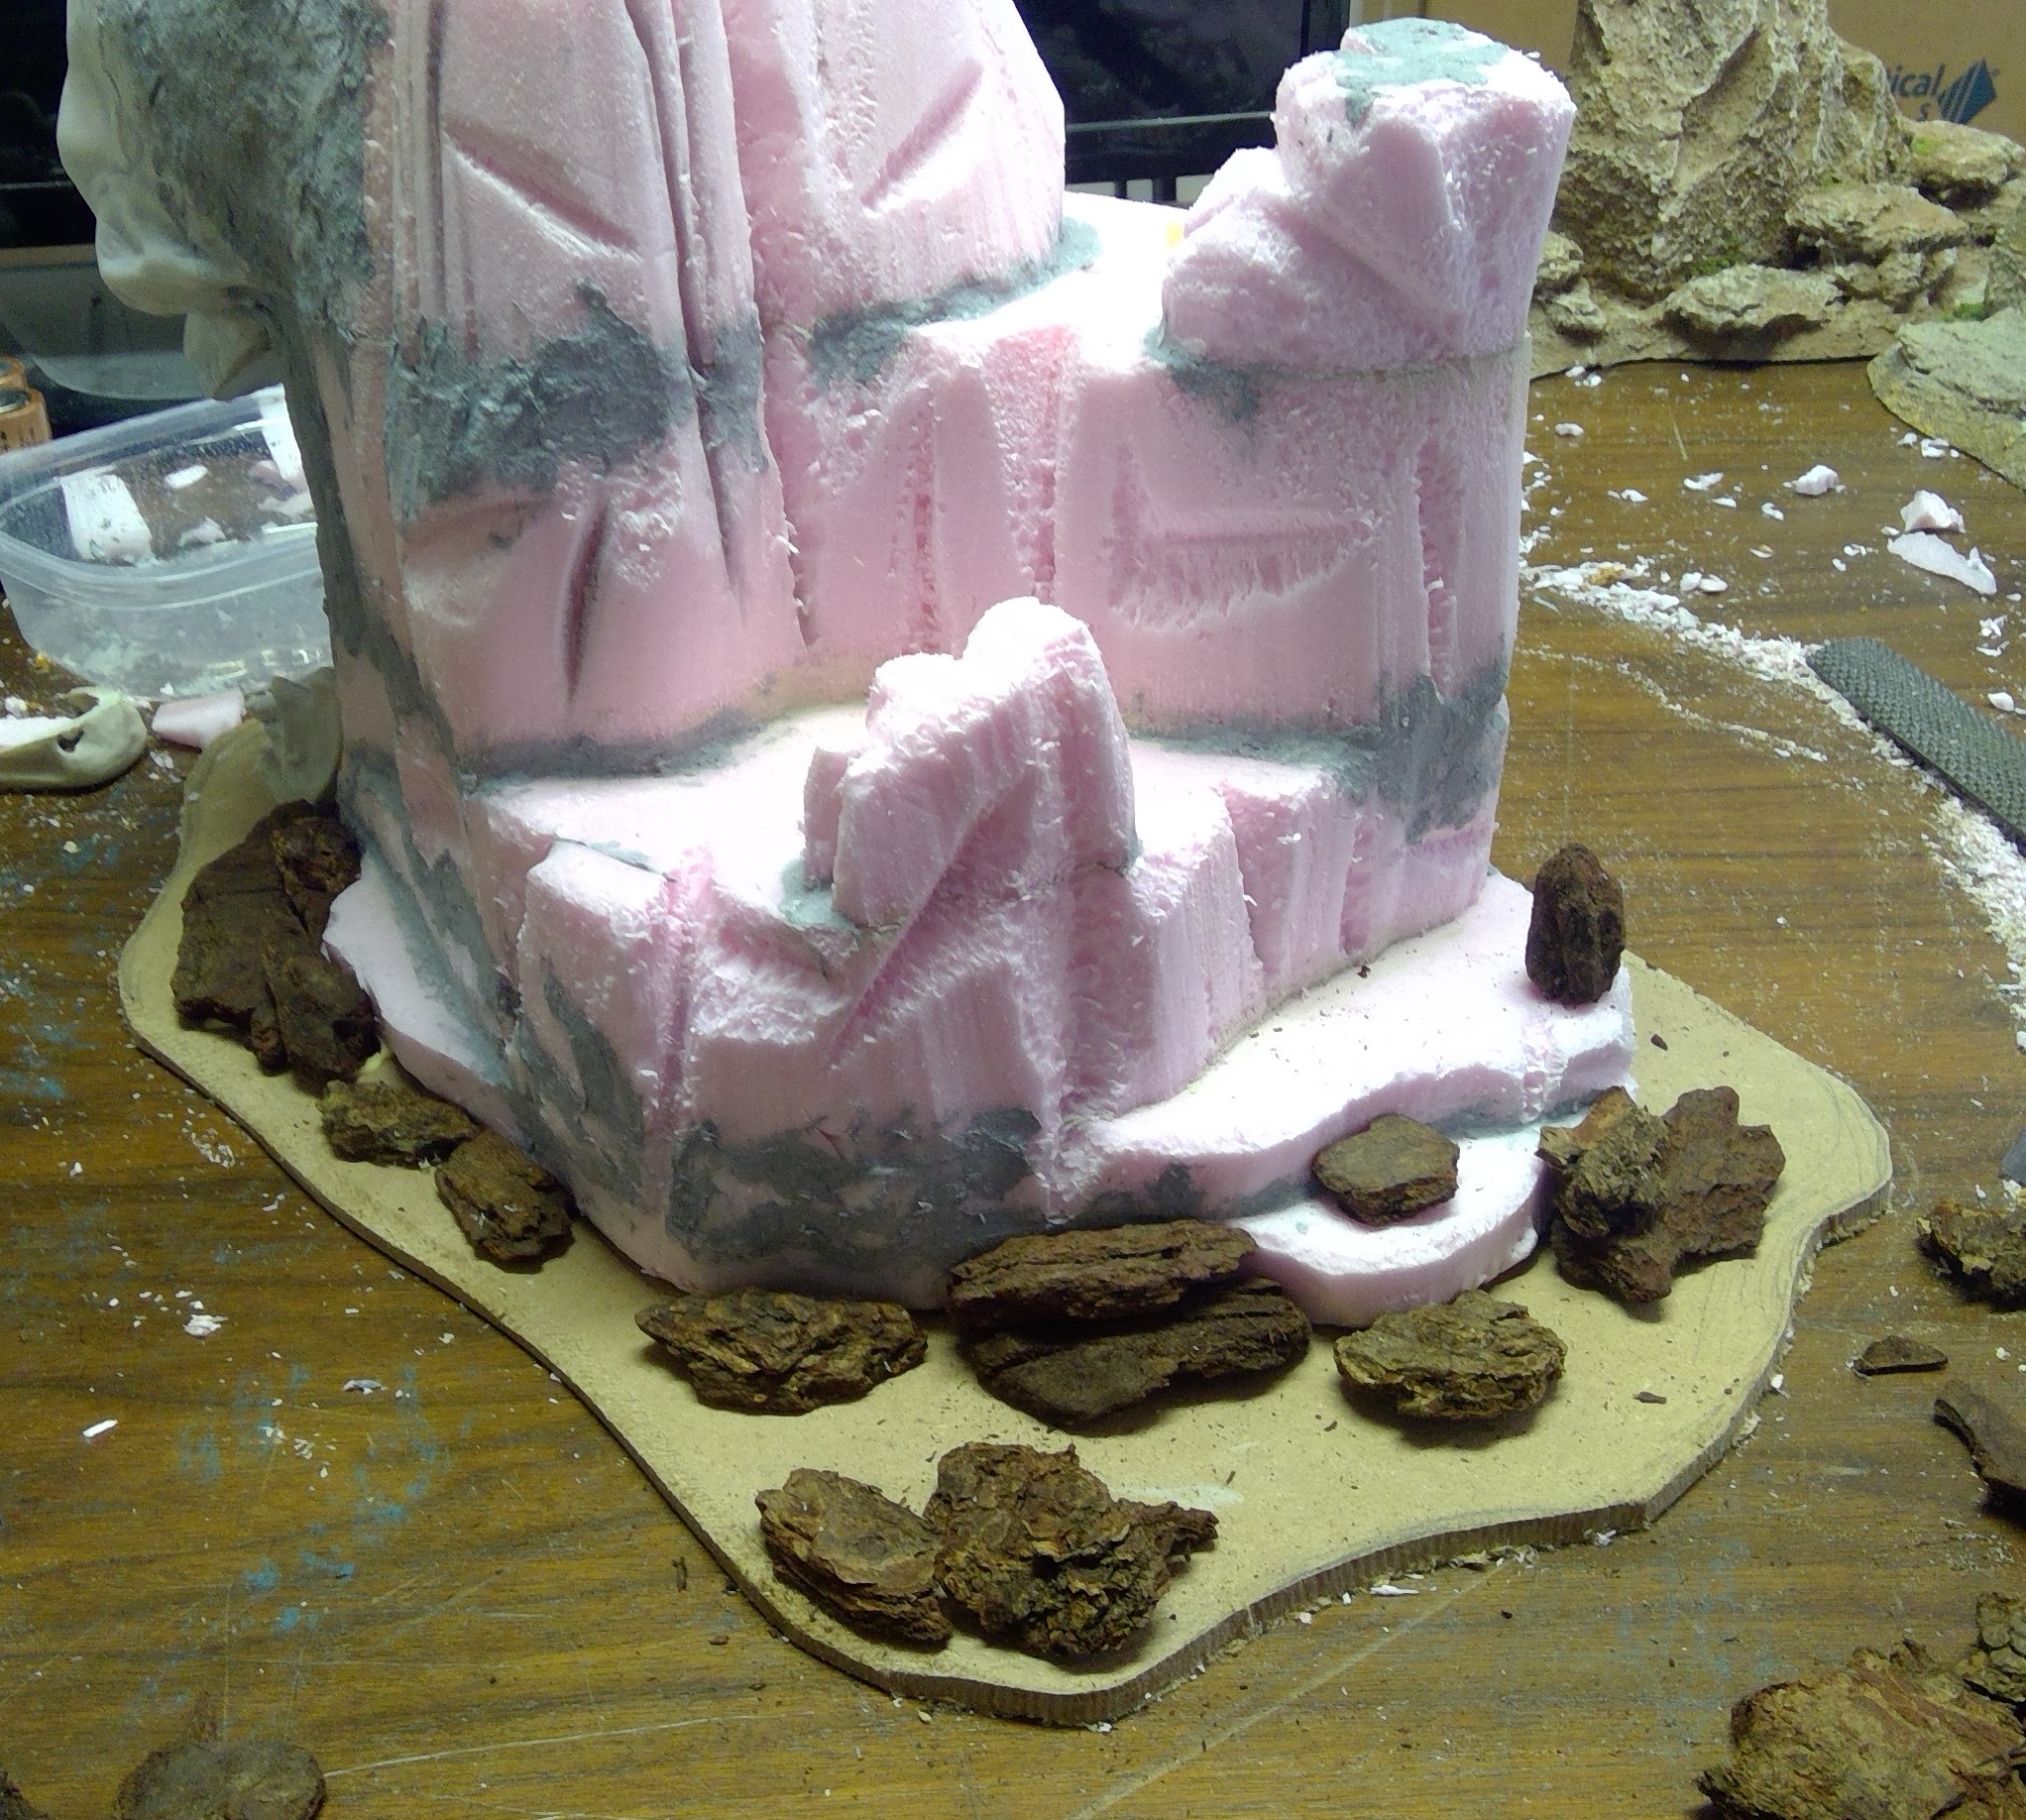

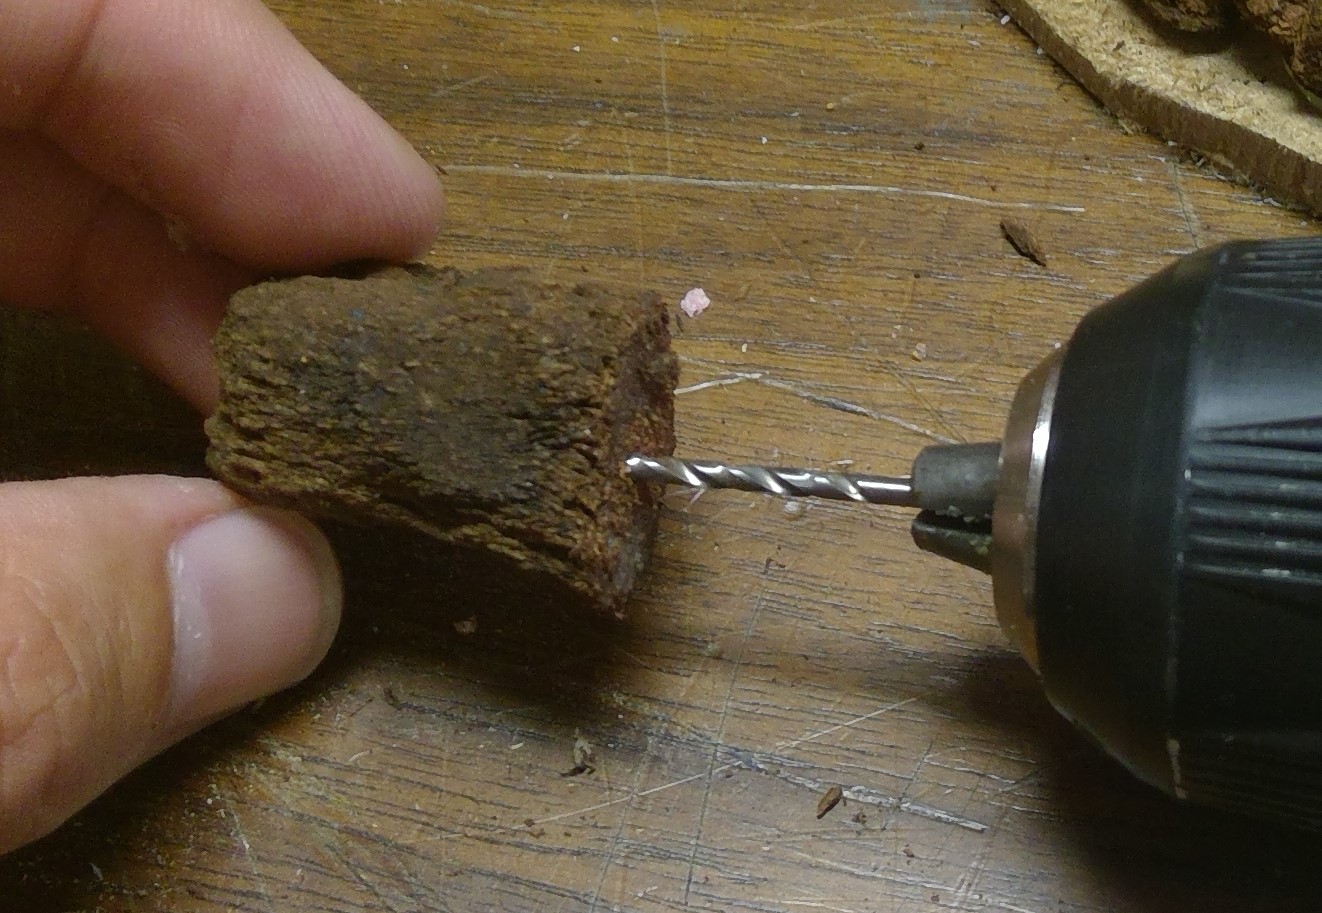
For the one sort of standing on the second layer of the mesa, I decided to pin it with a toothpick to give it more support and strength.
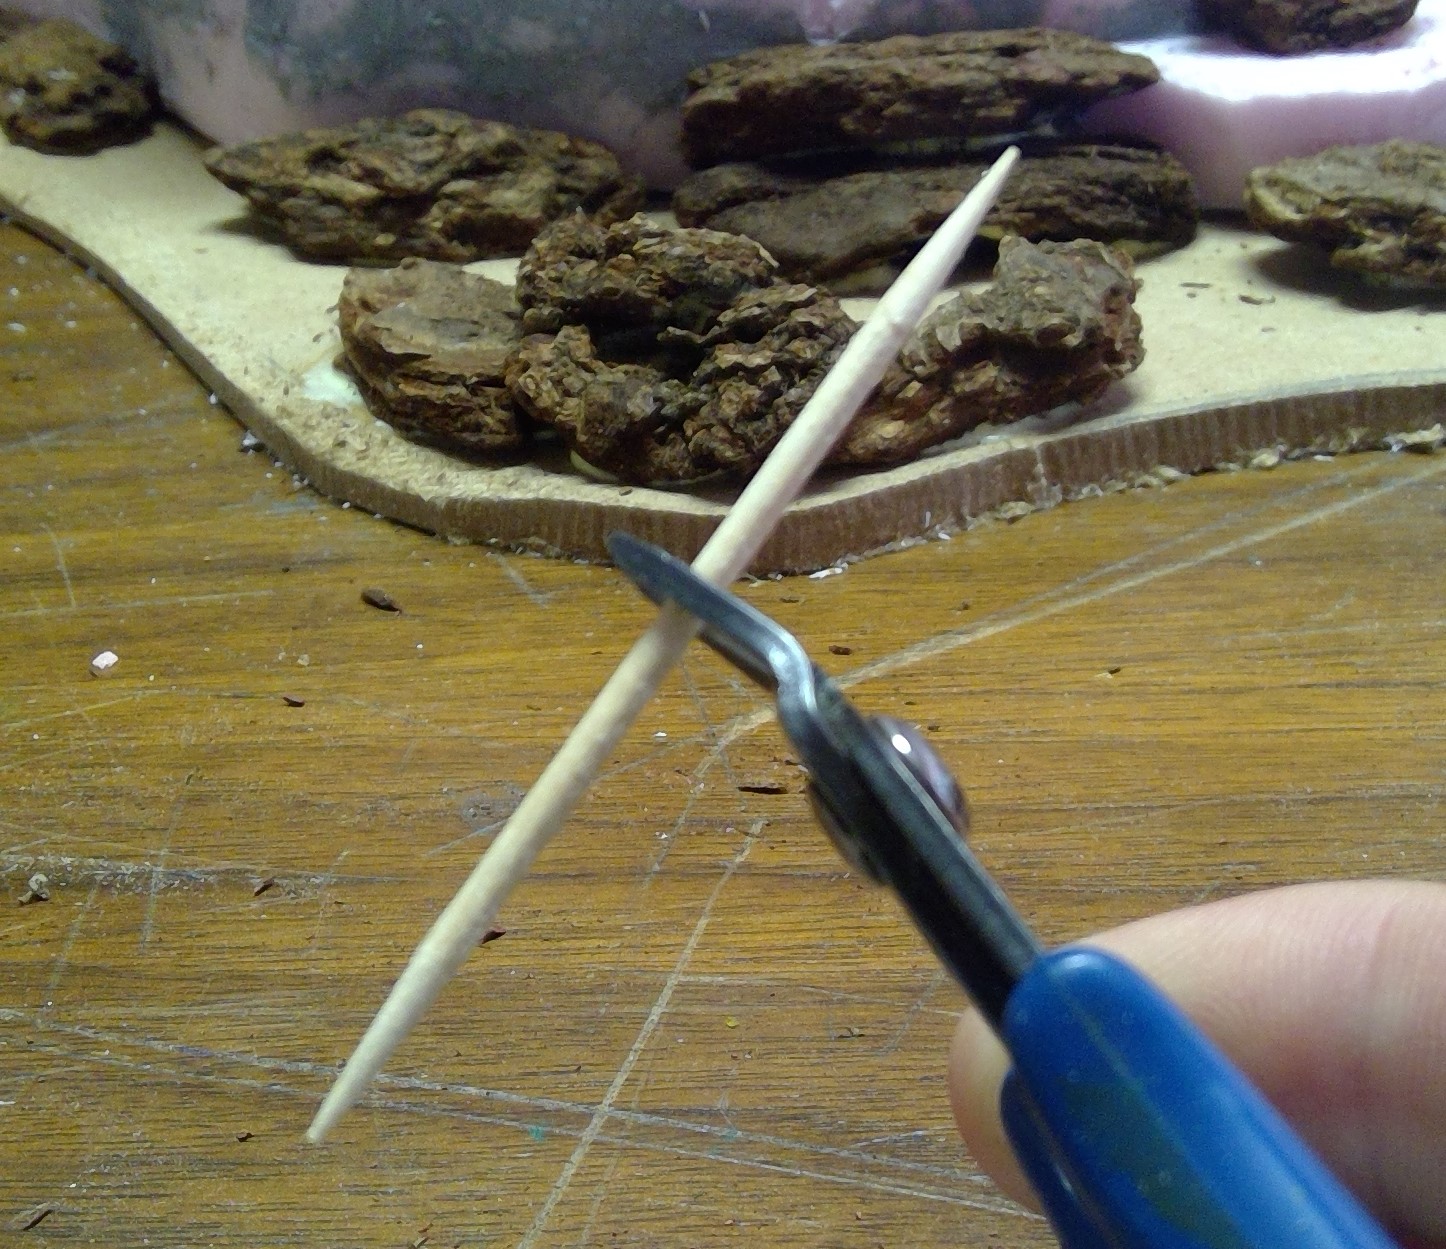

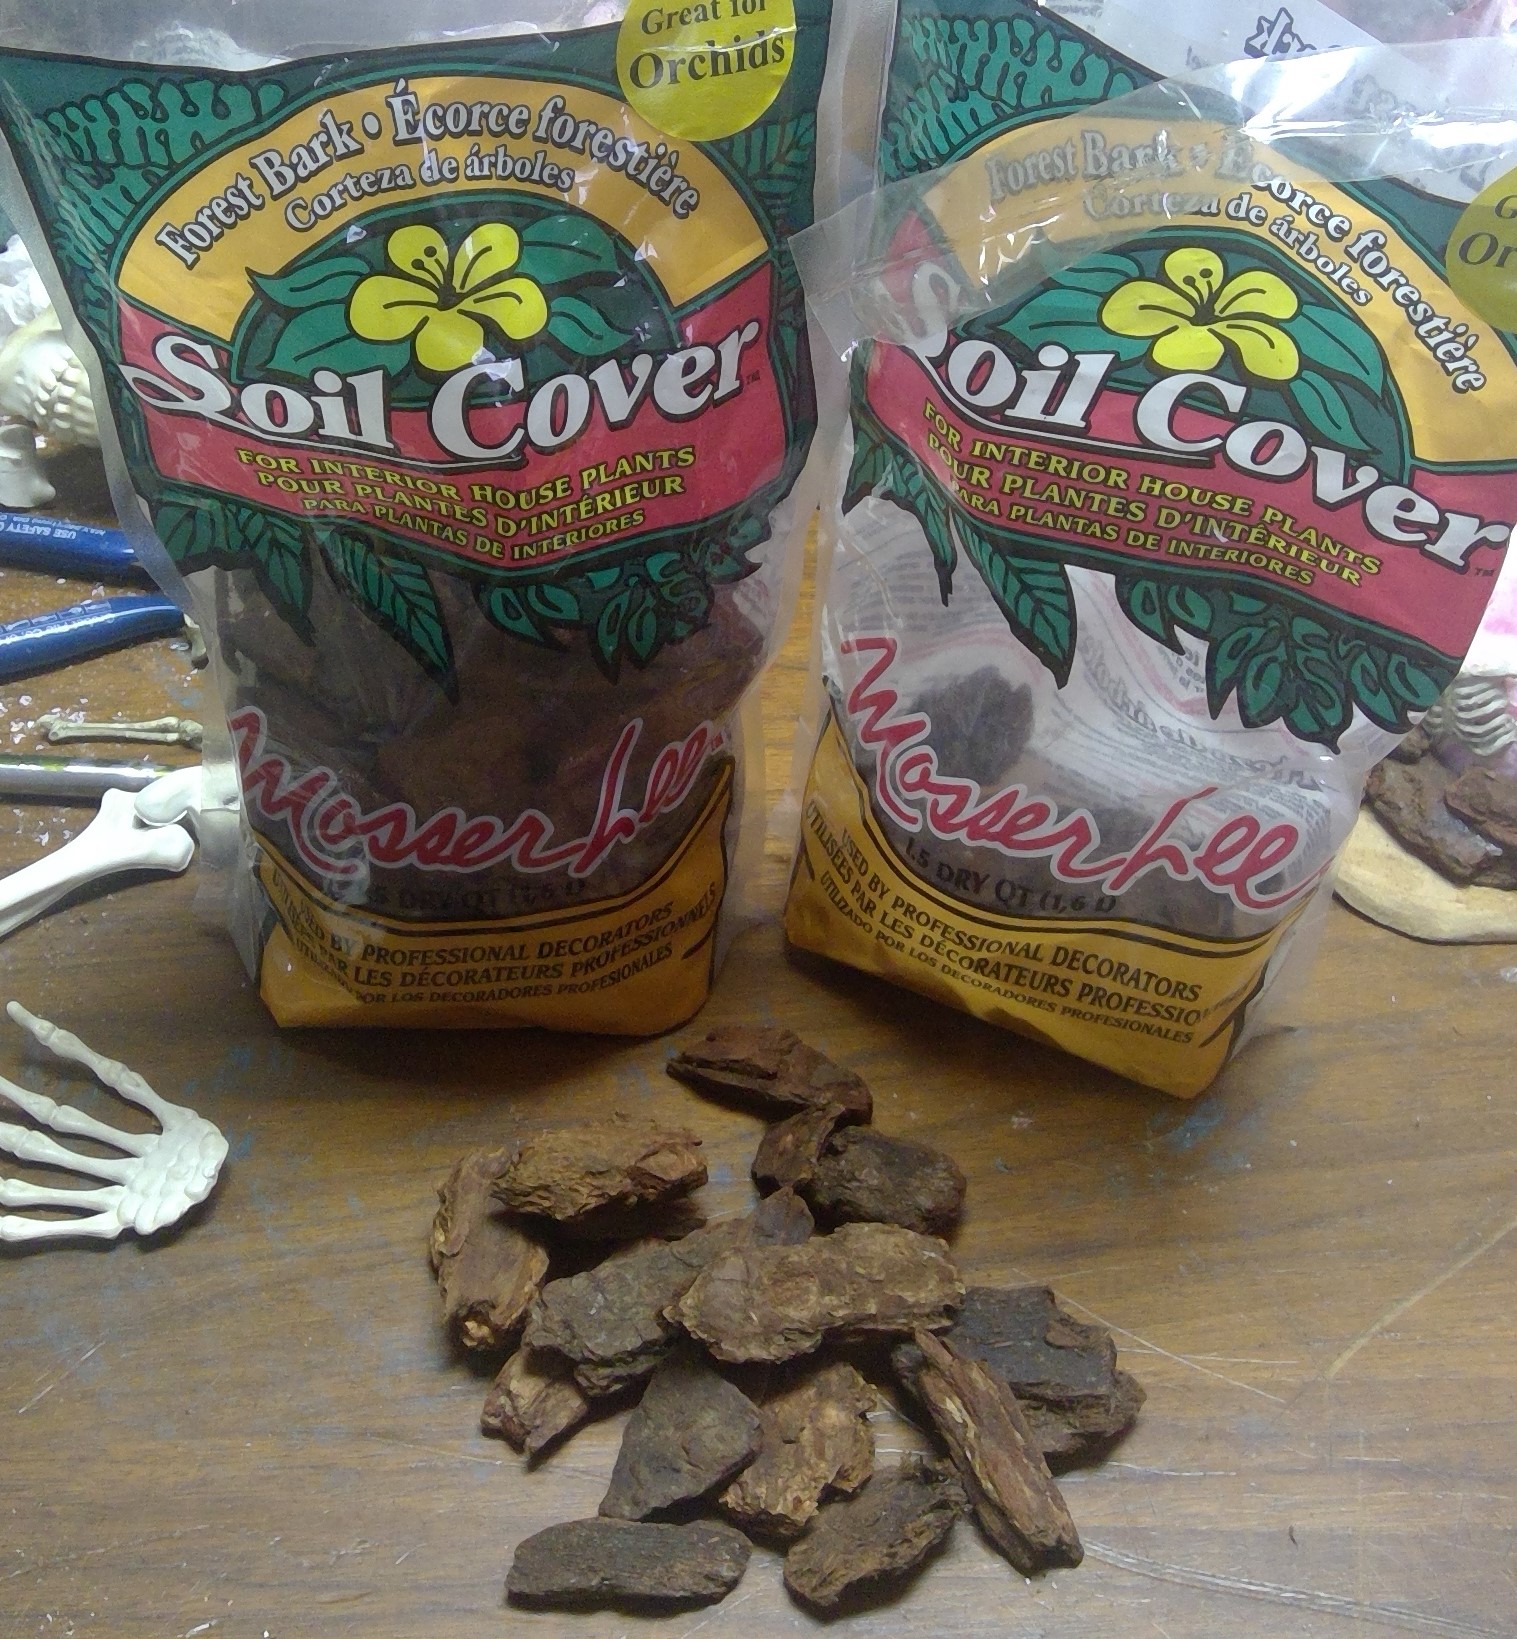
It’s getting difficult to find the large pine bark chips/nuggets here in the states. They are used in gardens and landscaping. Years ago, you could get very large, three cubic foot, bags of large bark chips, like 4+ inch sized chips. That size bag would last most gamers, or even clubs, a lifetime. These days the nuggets in those bags are quite small. Also those bags hold moisture for ages, and are stored outdoors in most cases, and one would have to dry the nuggets in some way before using. That said, those large bags cost only about 3usd, so it might be worth the effort to pick through the bag and dry them in an oven on low. If you do that, please keep an eye on it as you wouldn’t want to burn down your home.
I got lucky. As I was shopping for the nuggets, I spotted some smaller bags of the things on a clearance table for only $1 each. While that is still considerably higher in price than the large bags these were all nice sized chips and were dry. I purchased six bags. That should last me through several projects.
Once all of this is set up I will come back once again with CelluClay to blend the jaw into the mesa as well as blending in the “rocks” and filling some of the gaps.
Basing
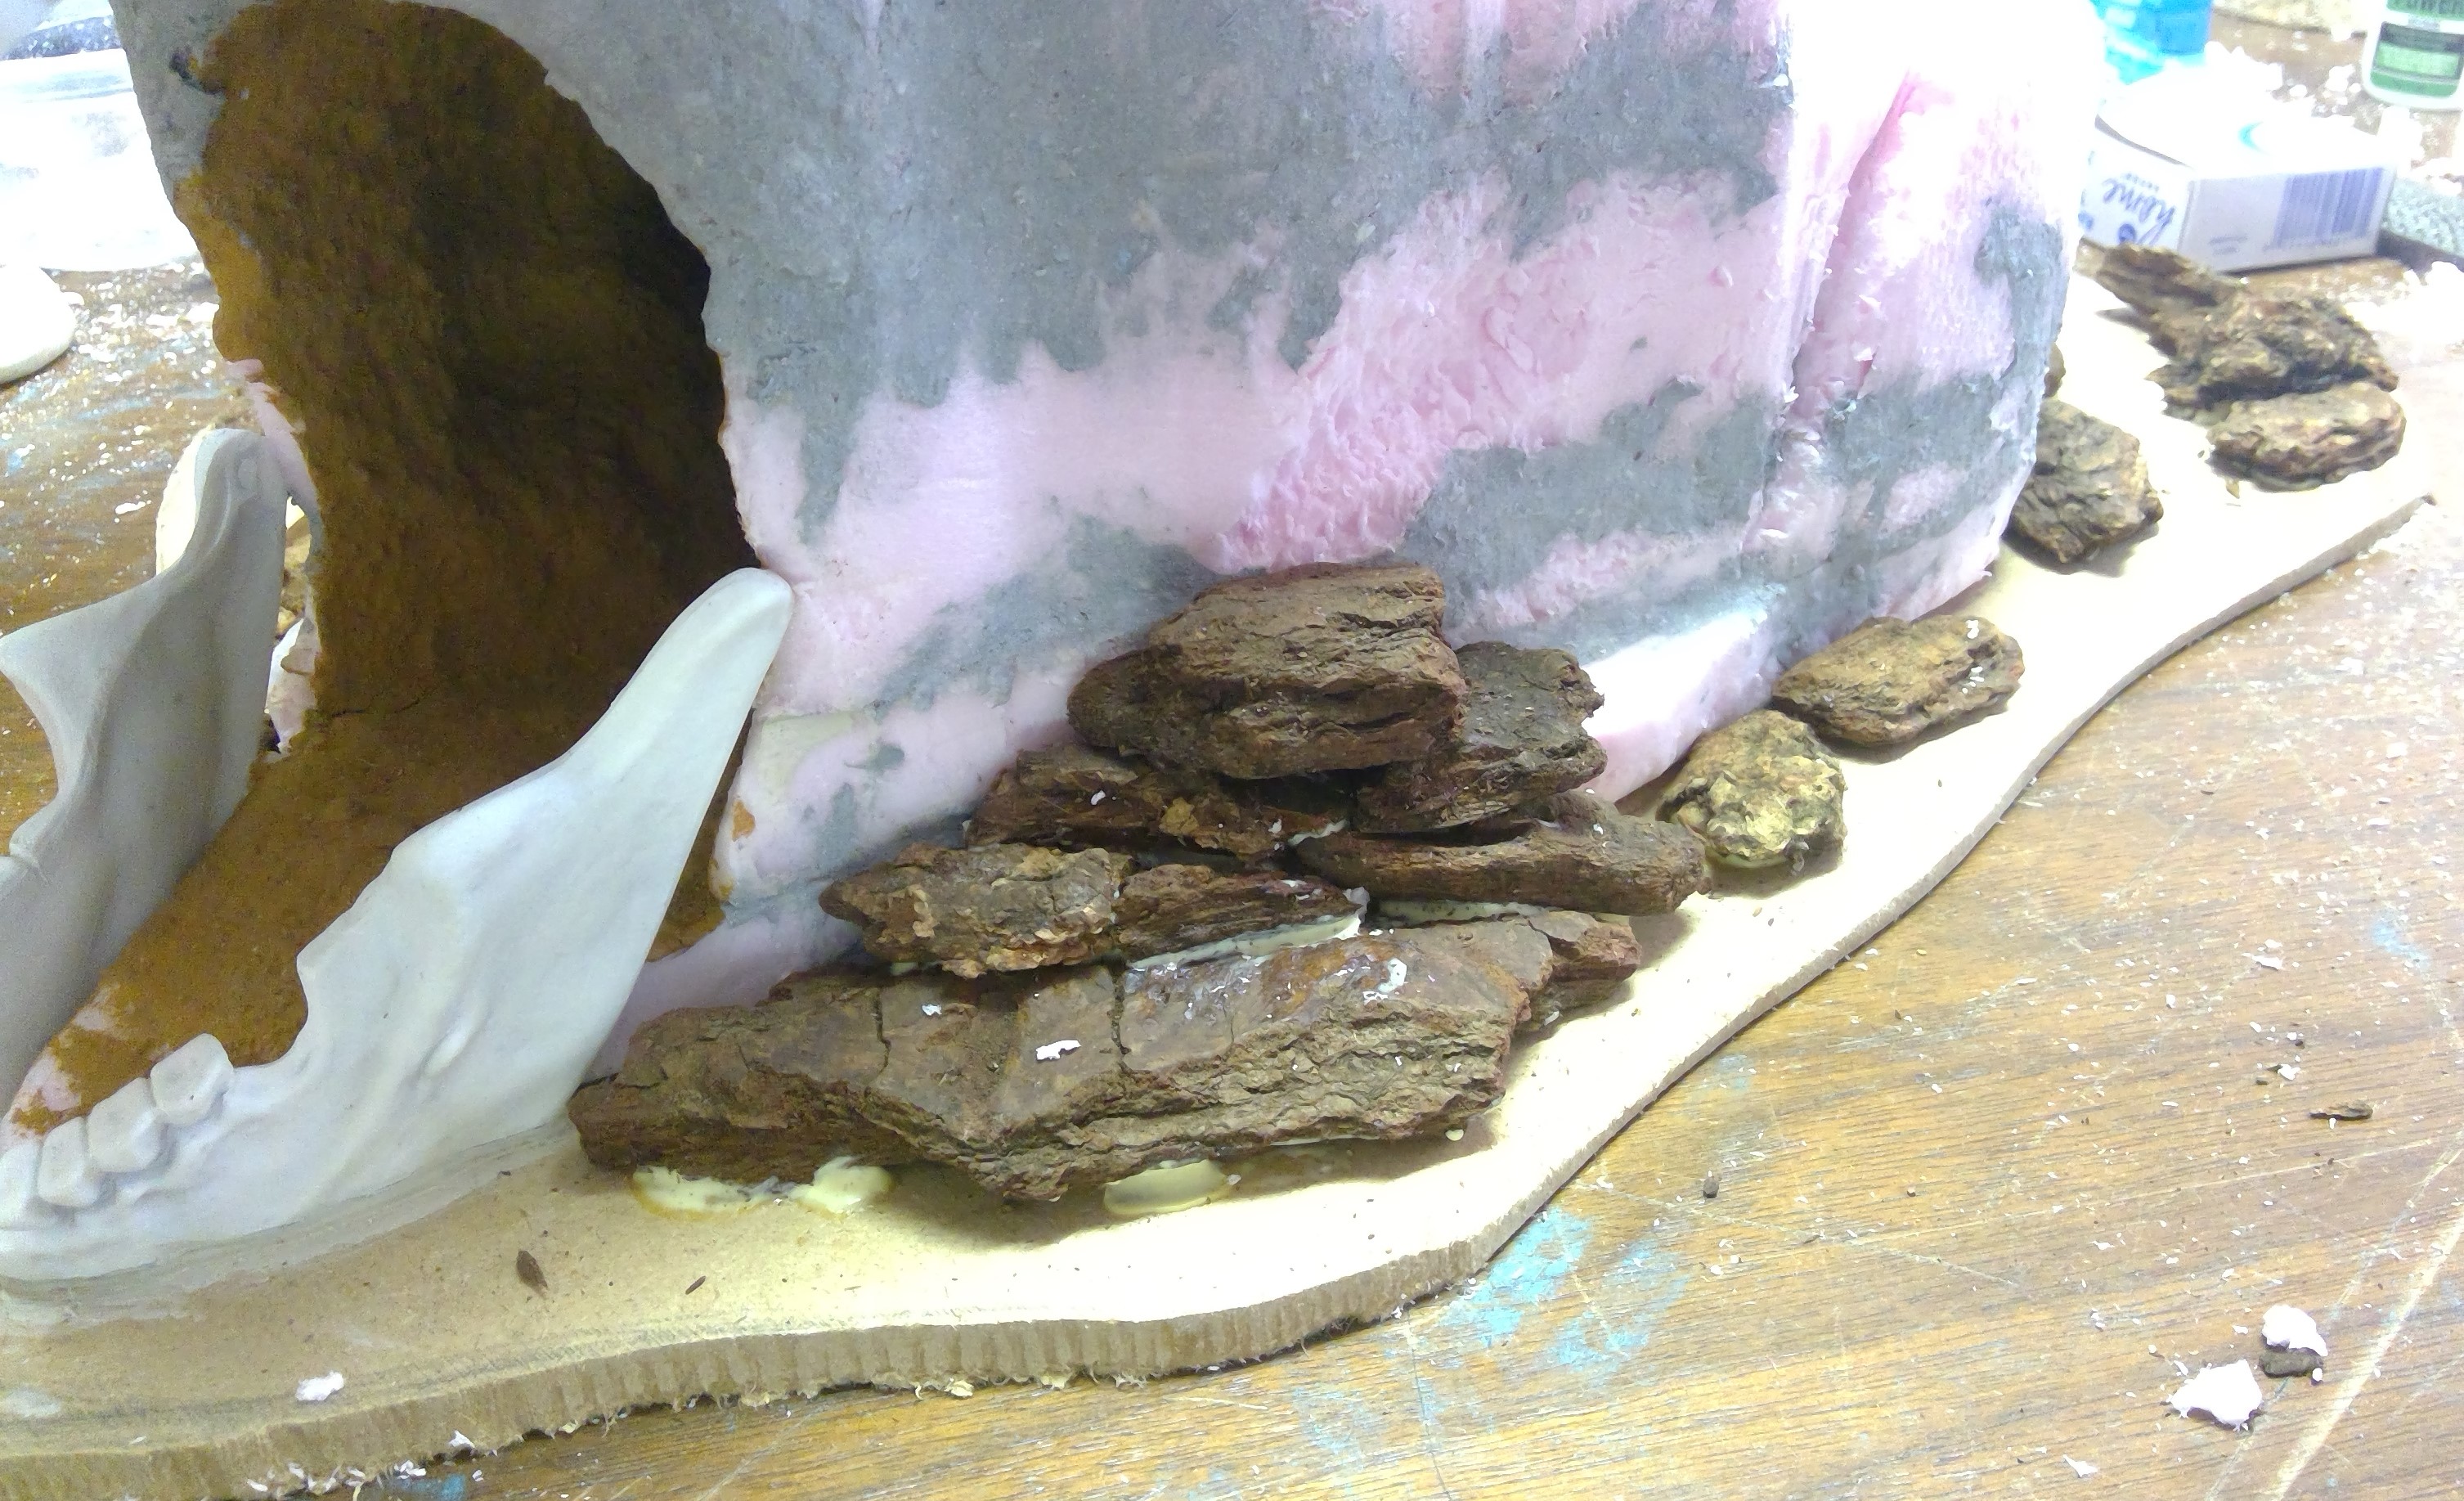
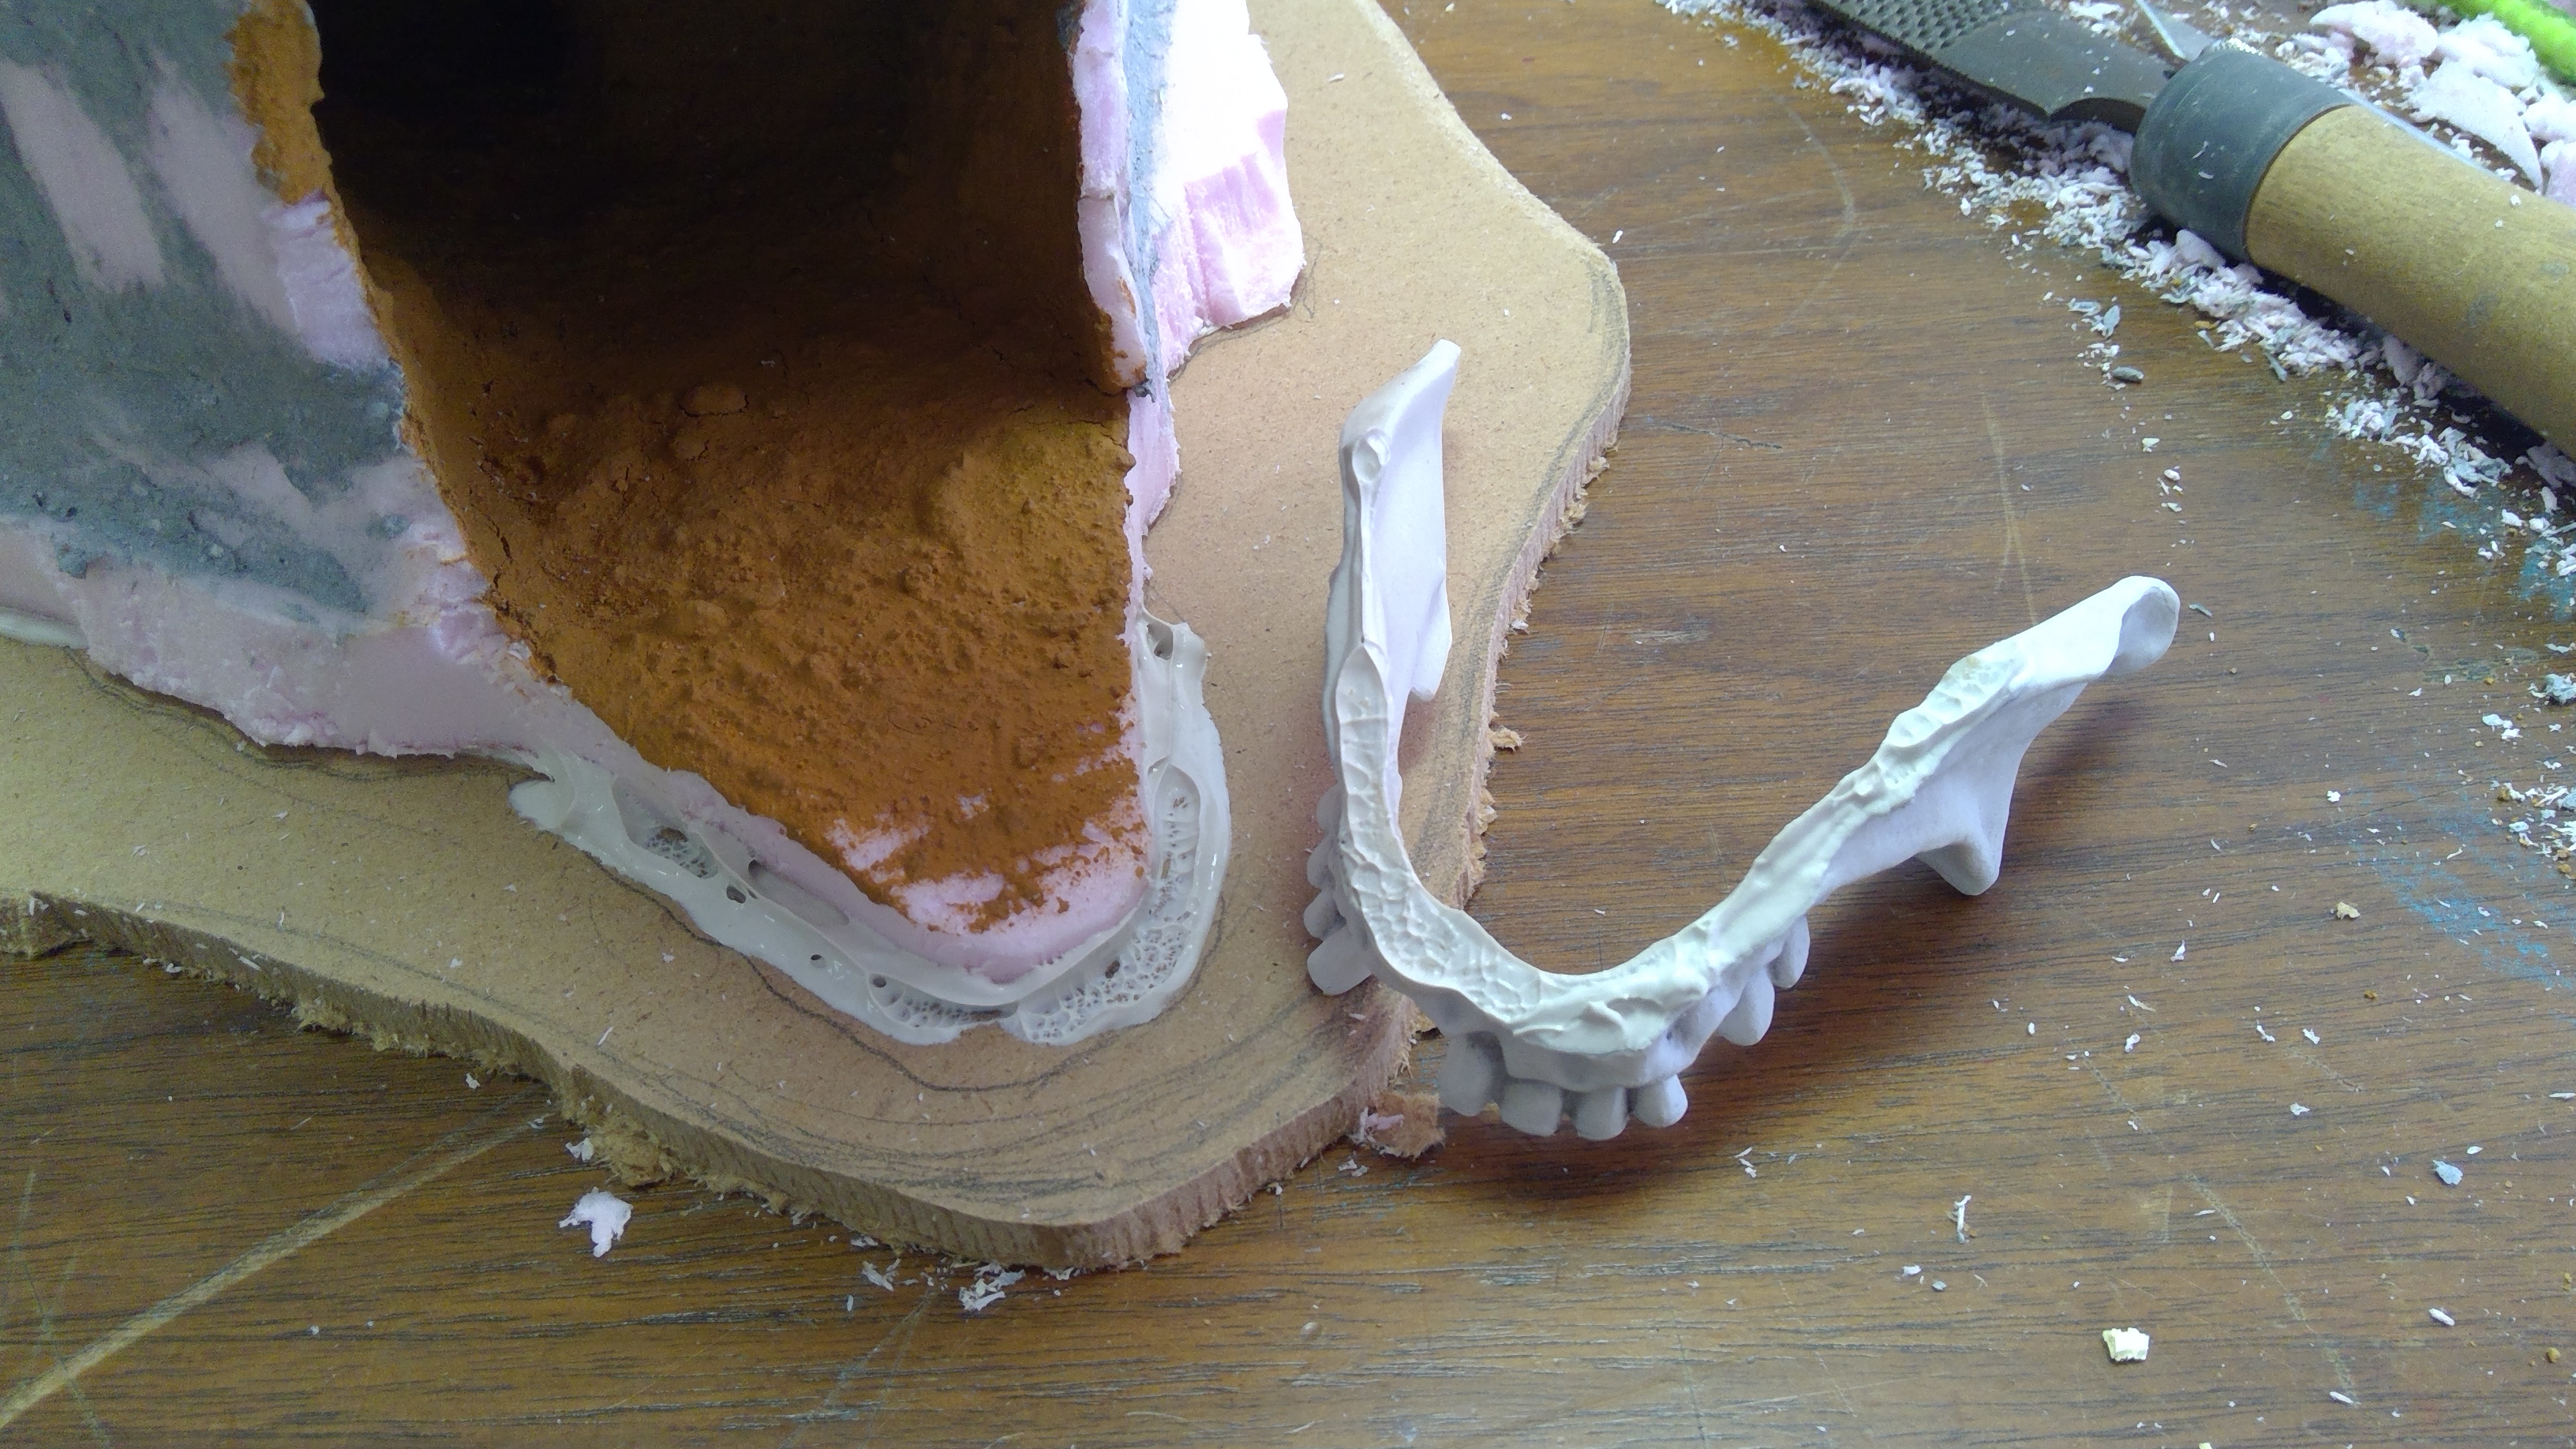
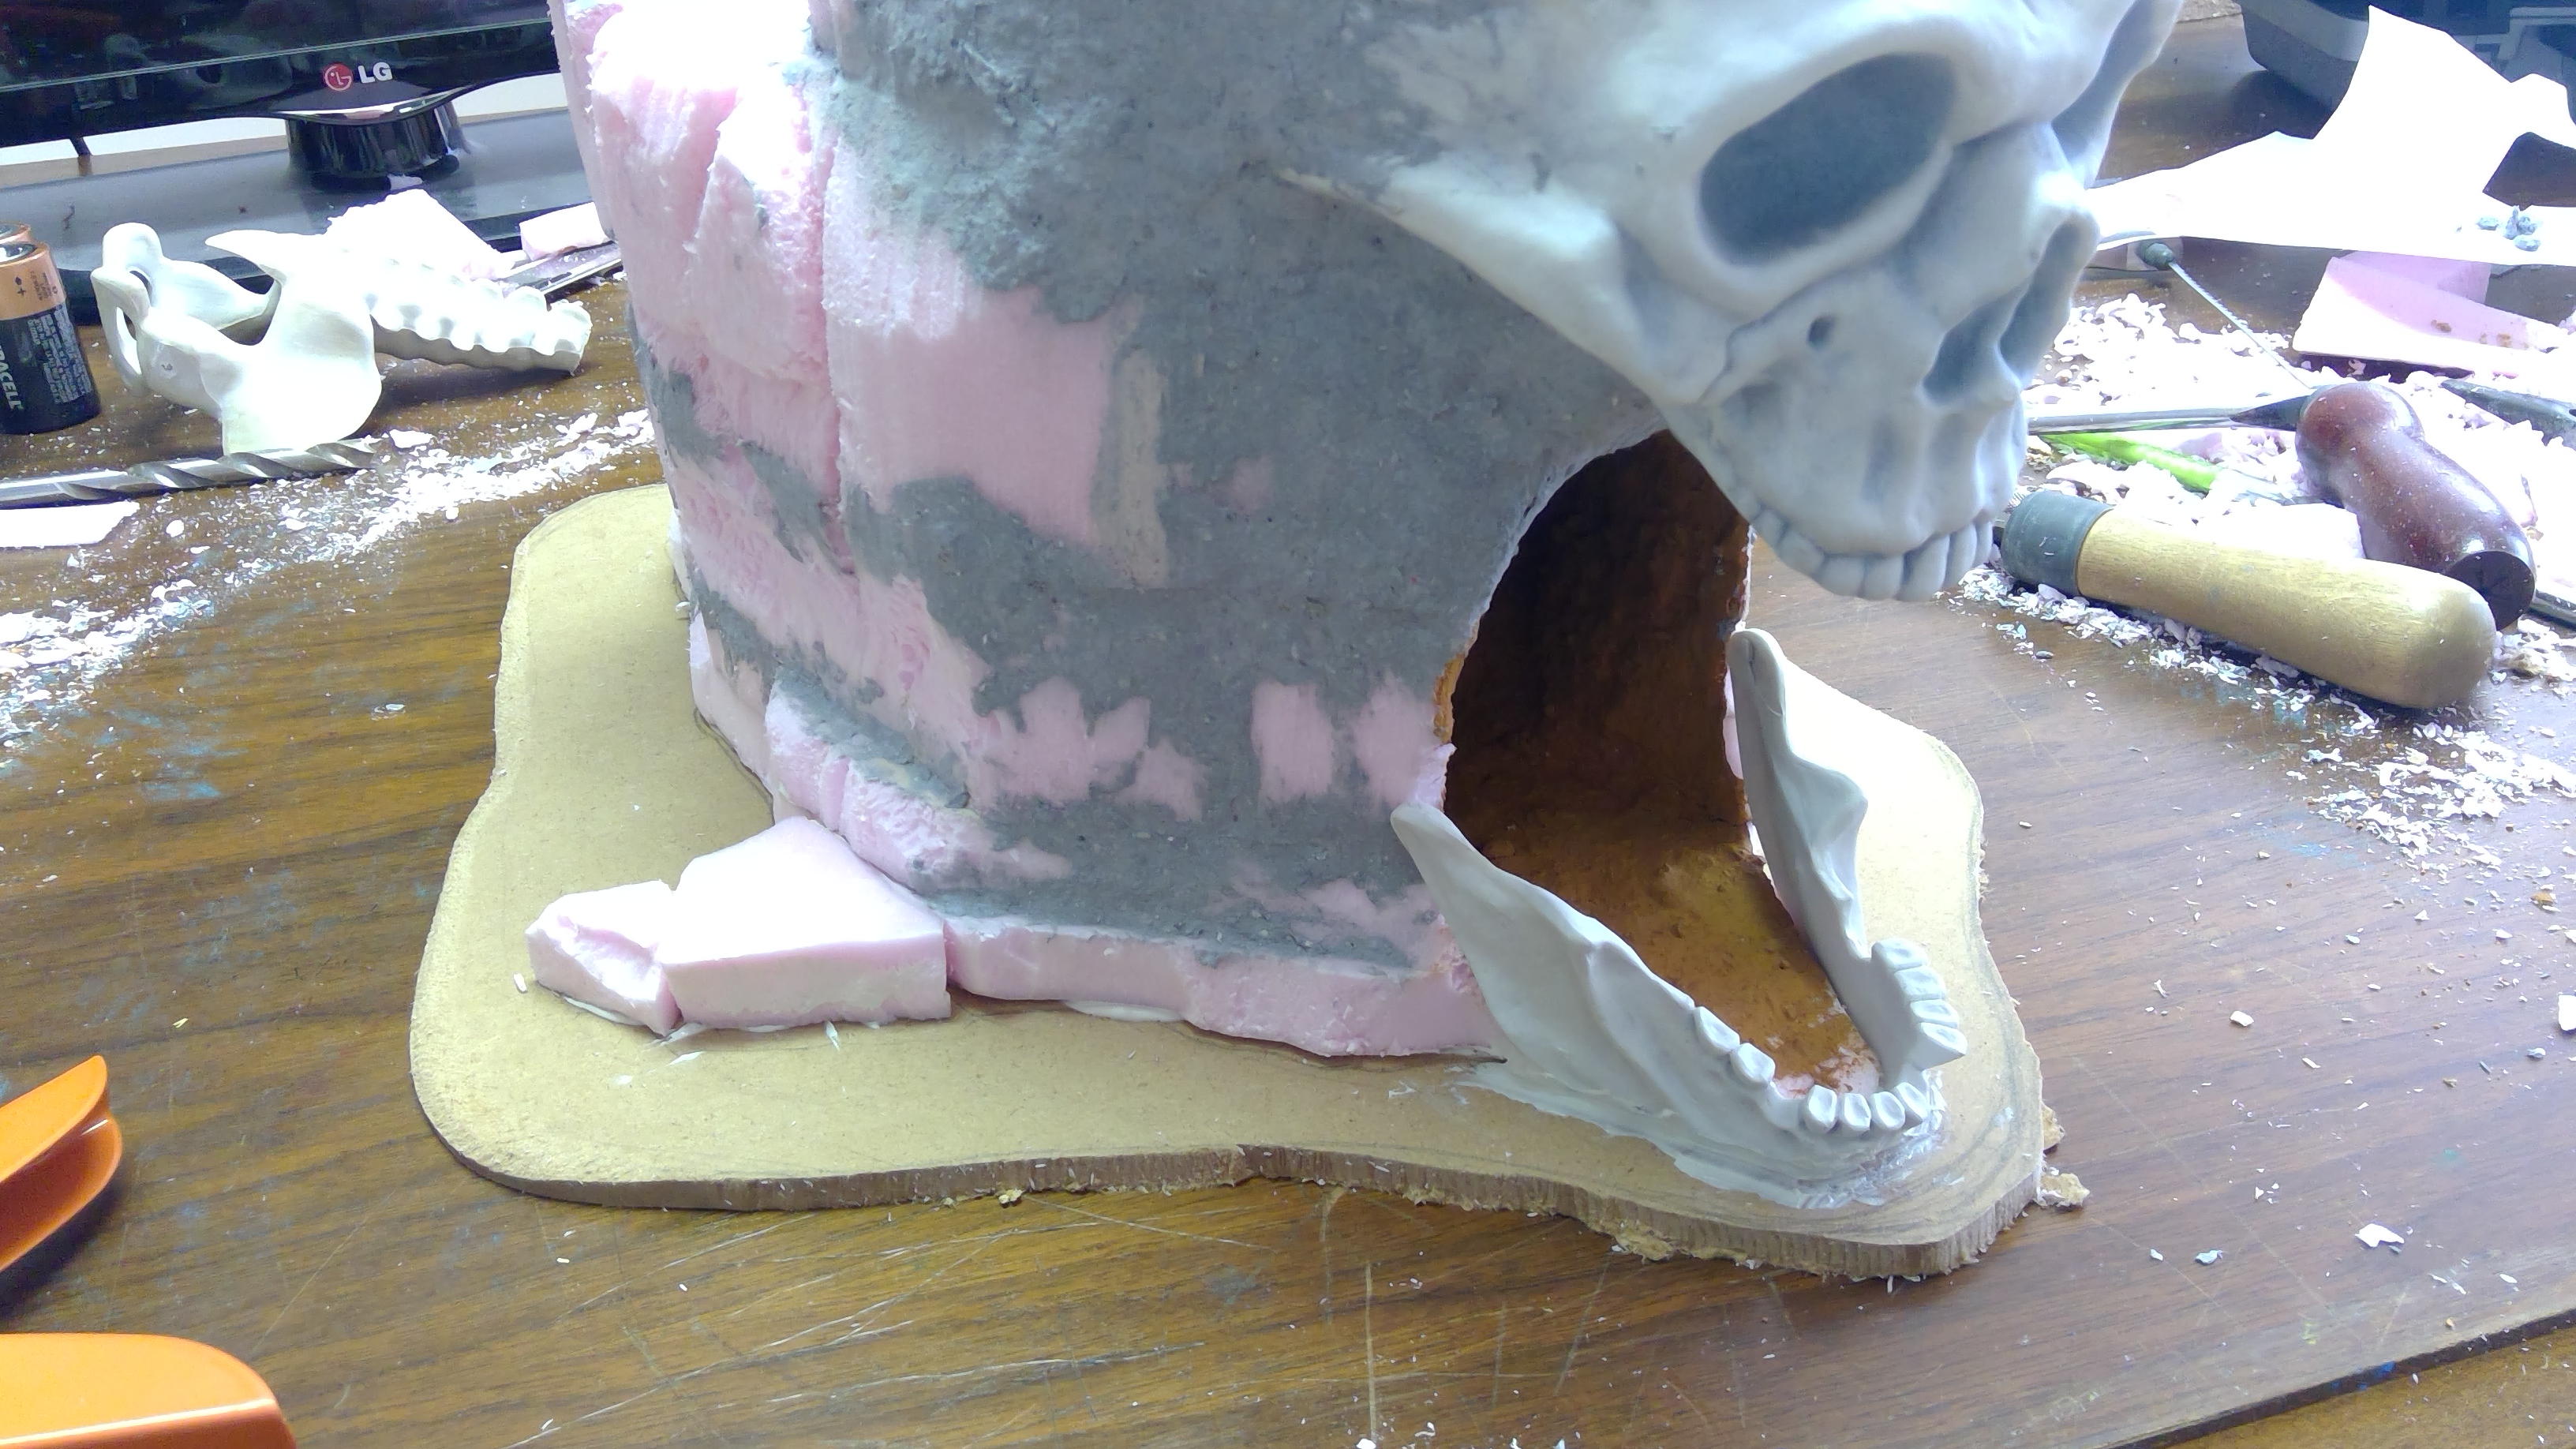
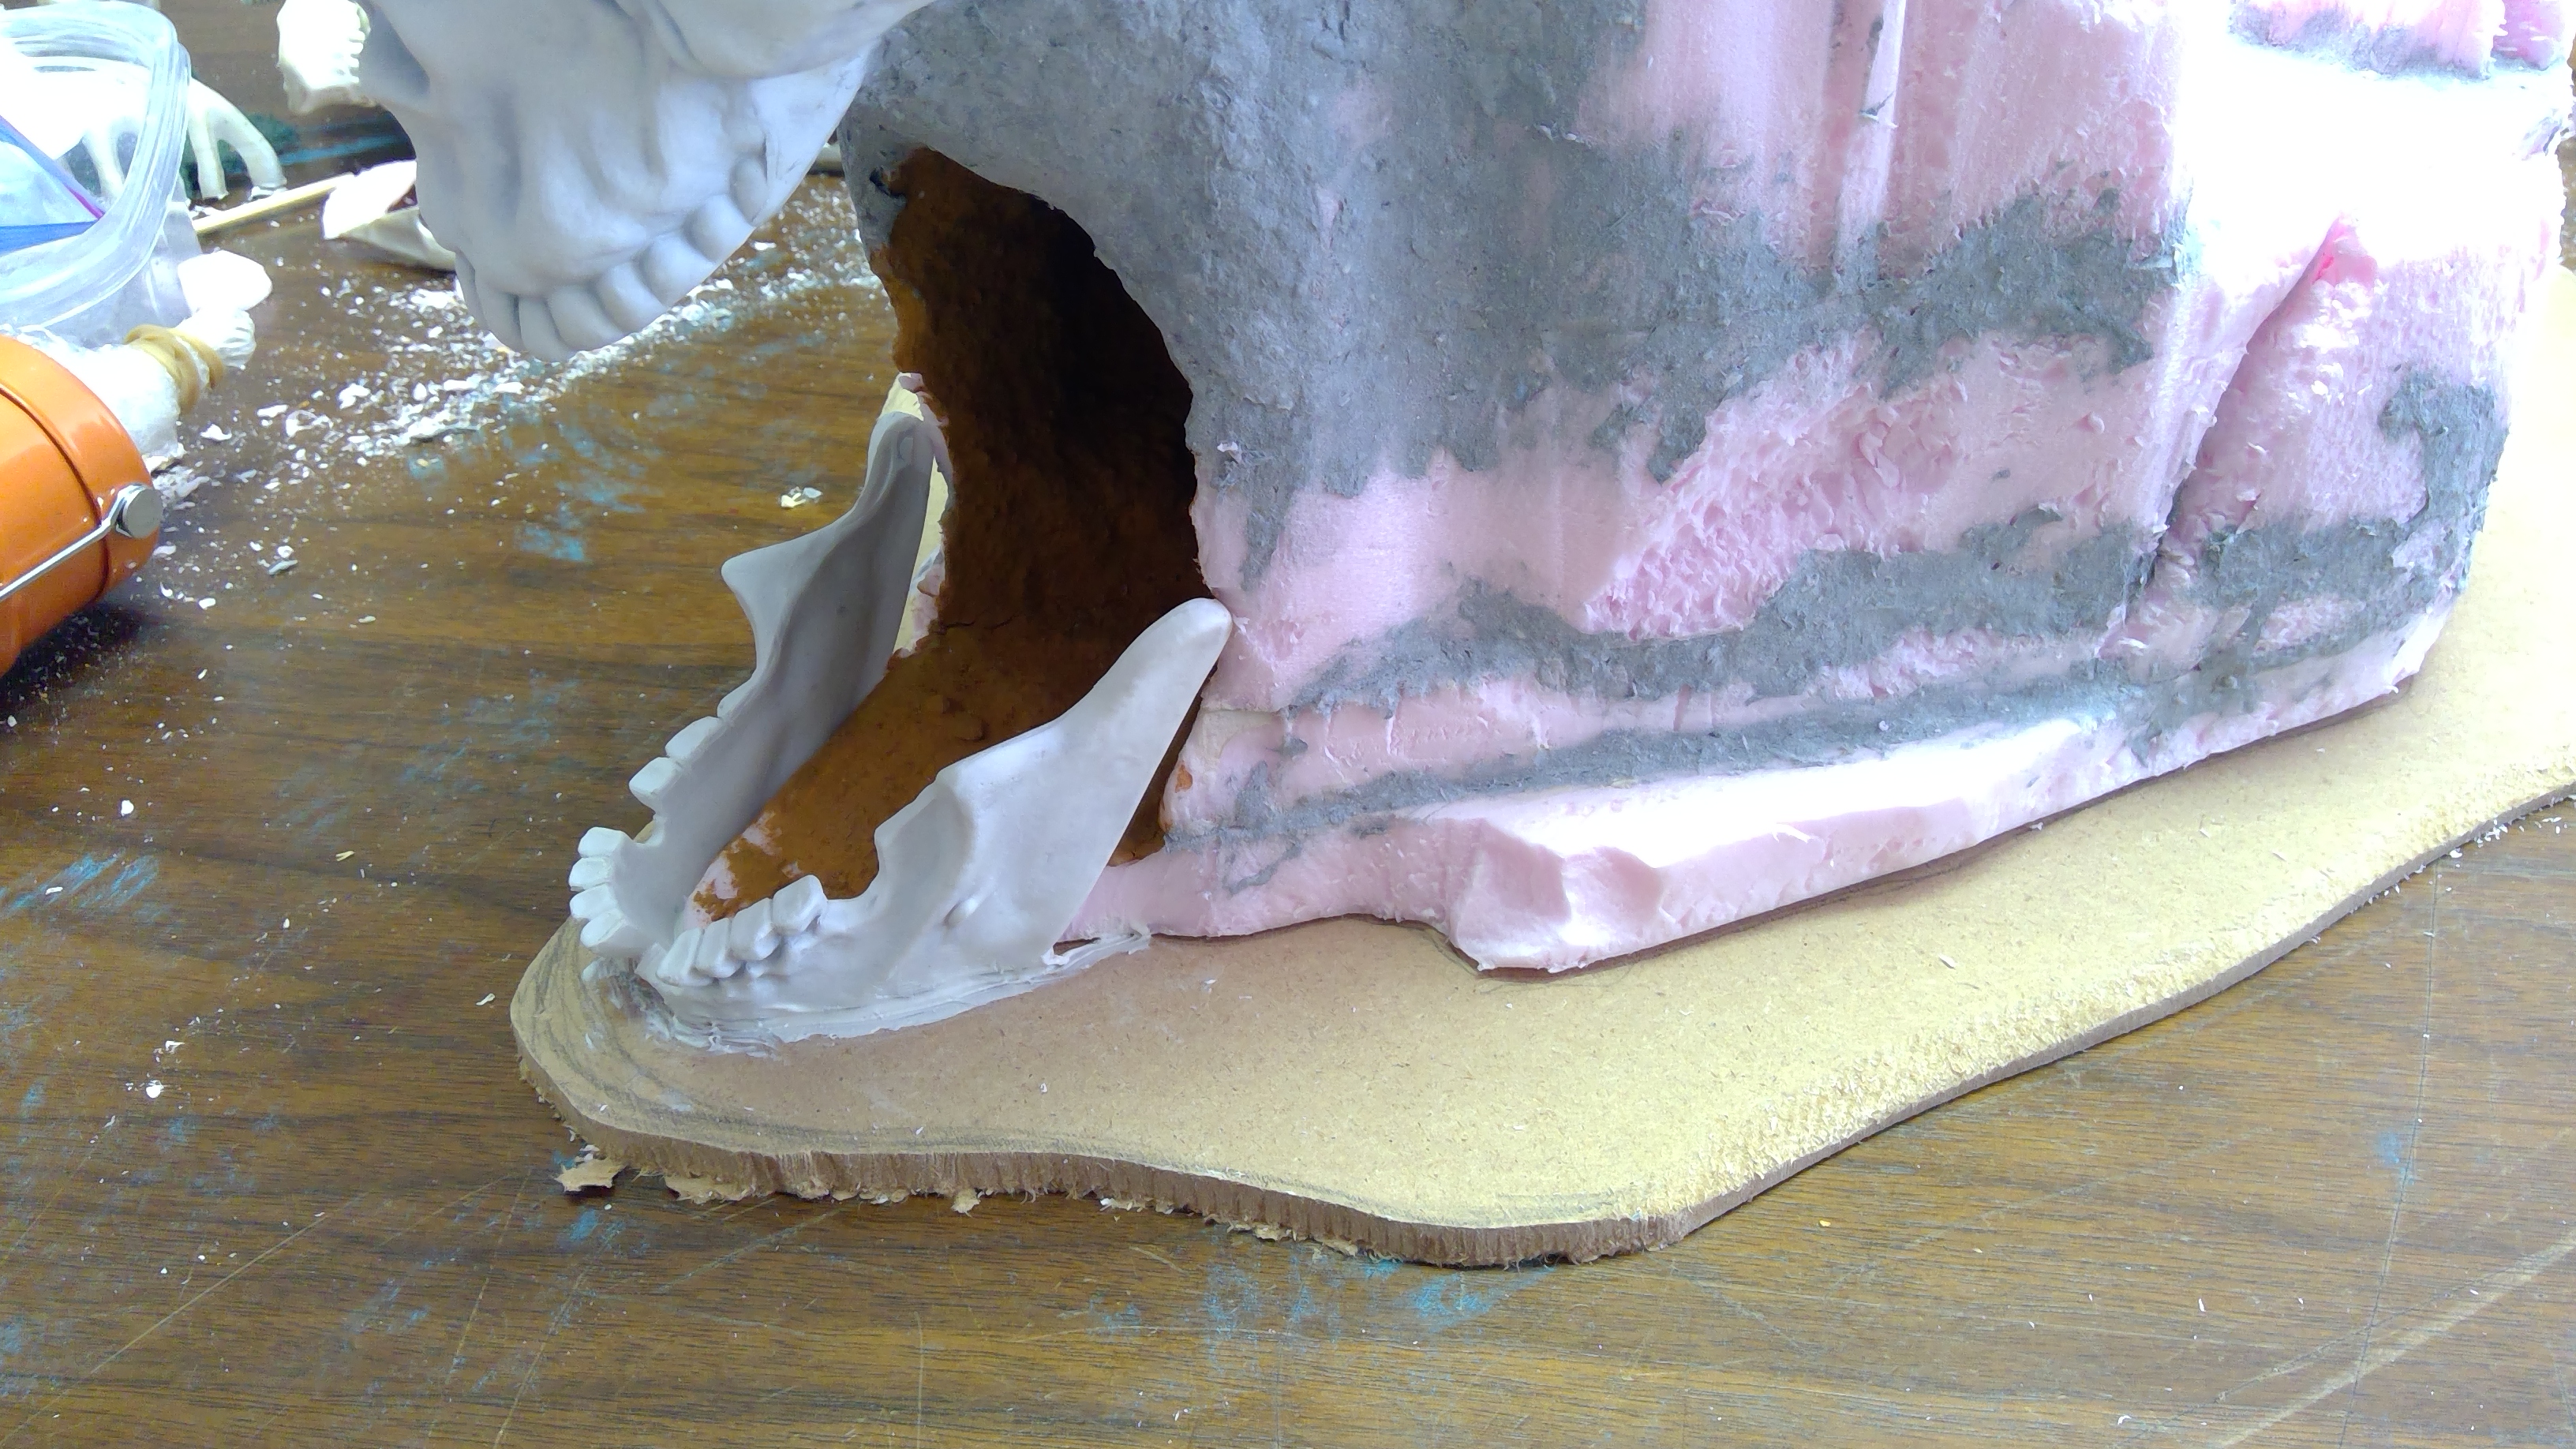
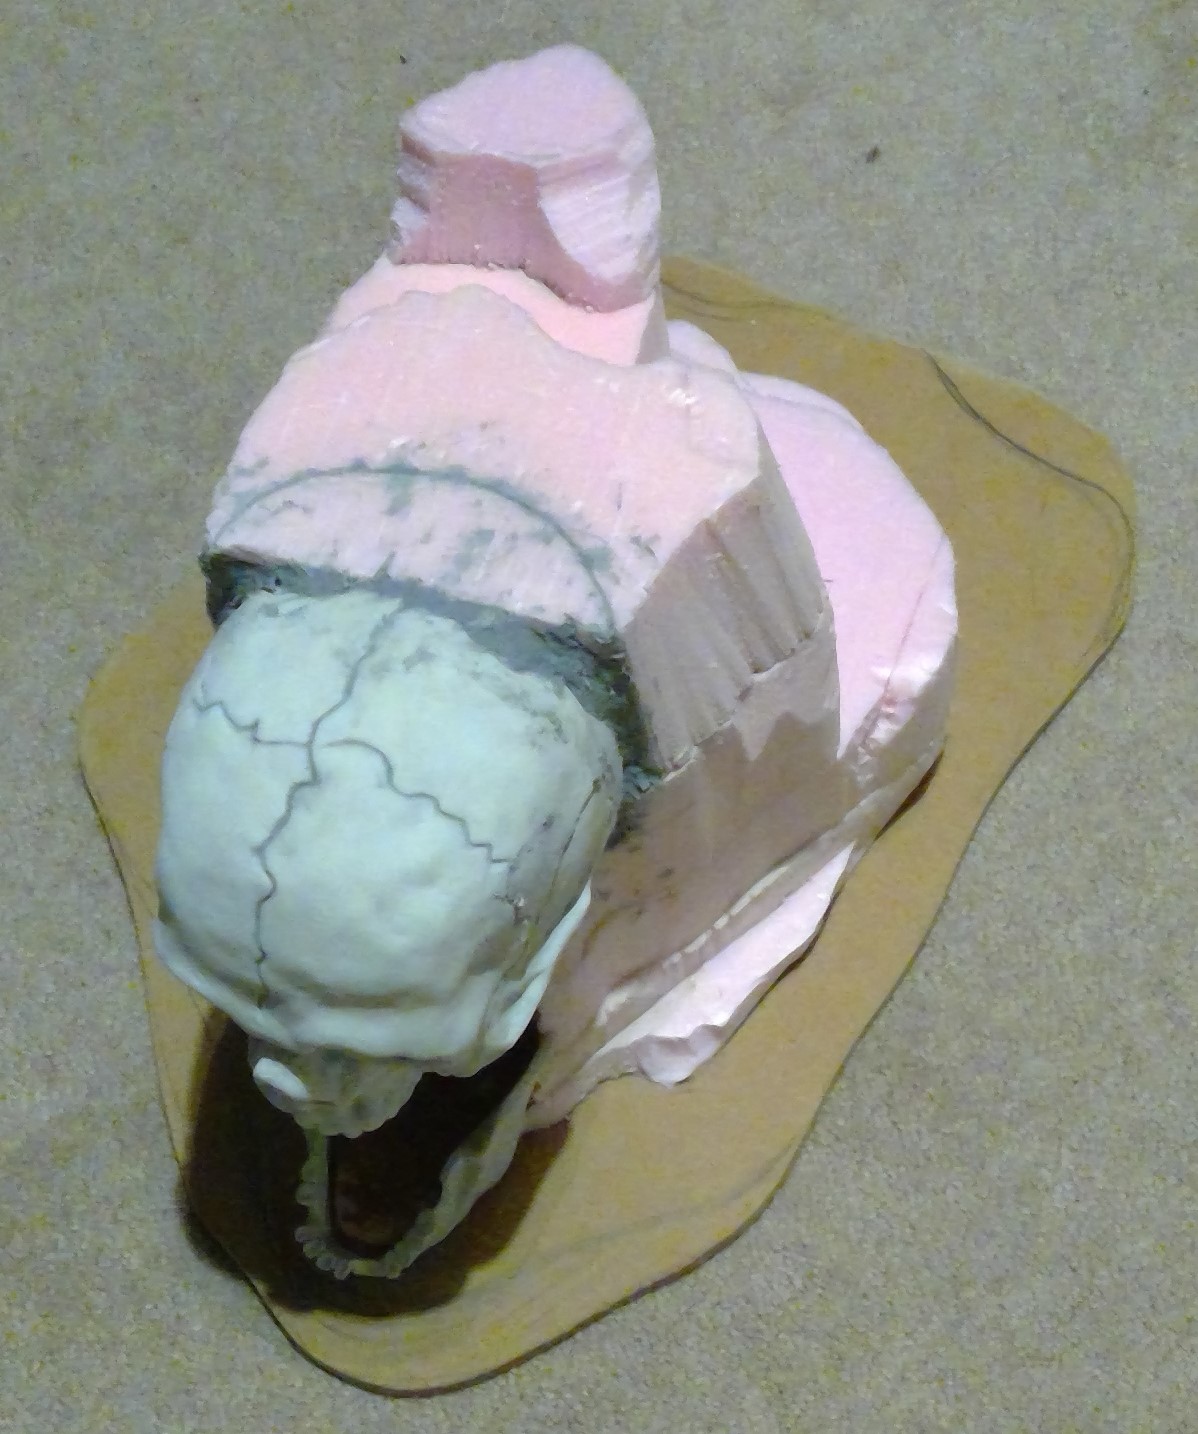
I glued the cave to the base using the same technique as gluing up the layers. I made sure the hole for the tea light lined up with the hole in the cave. I also glued the lower jaw in place.
Arrrrrrrrrggggggg
I write up a big entry, hit publish, and after several minutes of “spinning” nothing happens and the entry is gone. Last time that happened the site had logged me out without me knowing. Not so much this time.
Time to do it again. Perhaps in a couple smaller chunks.
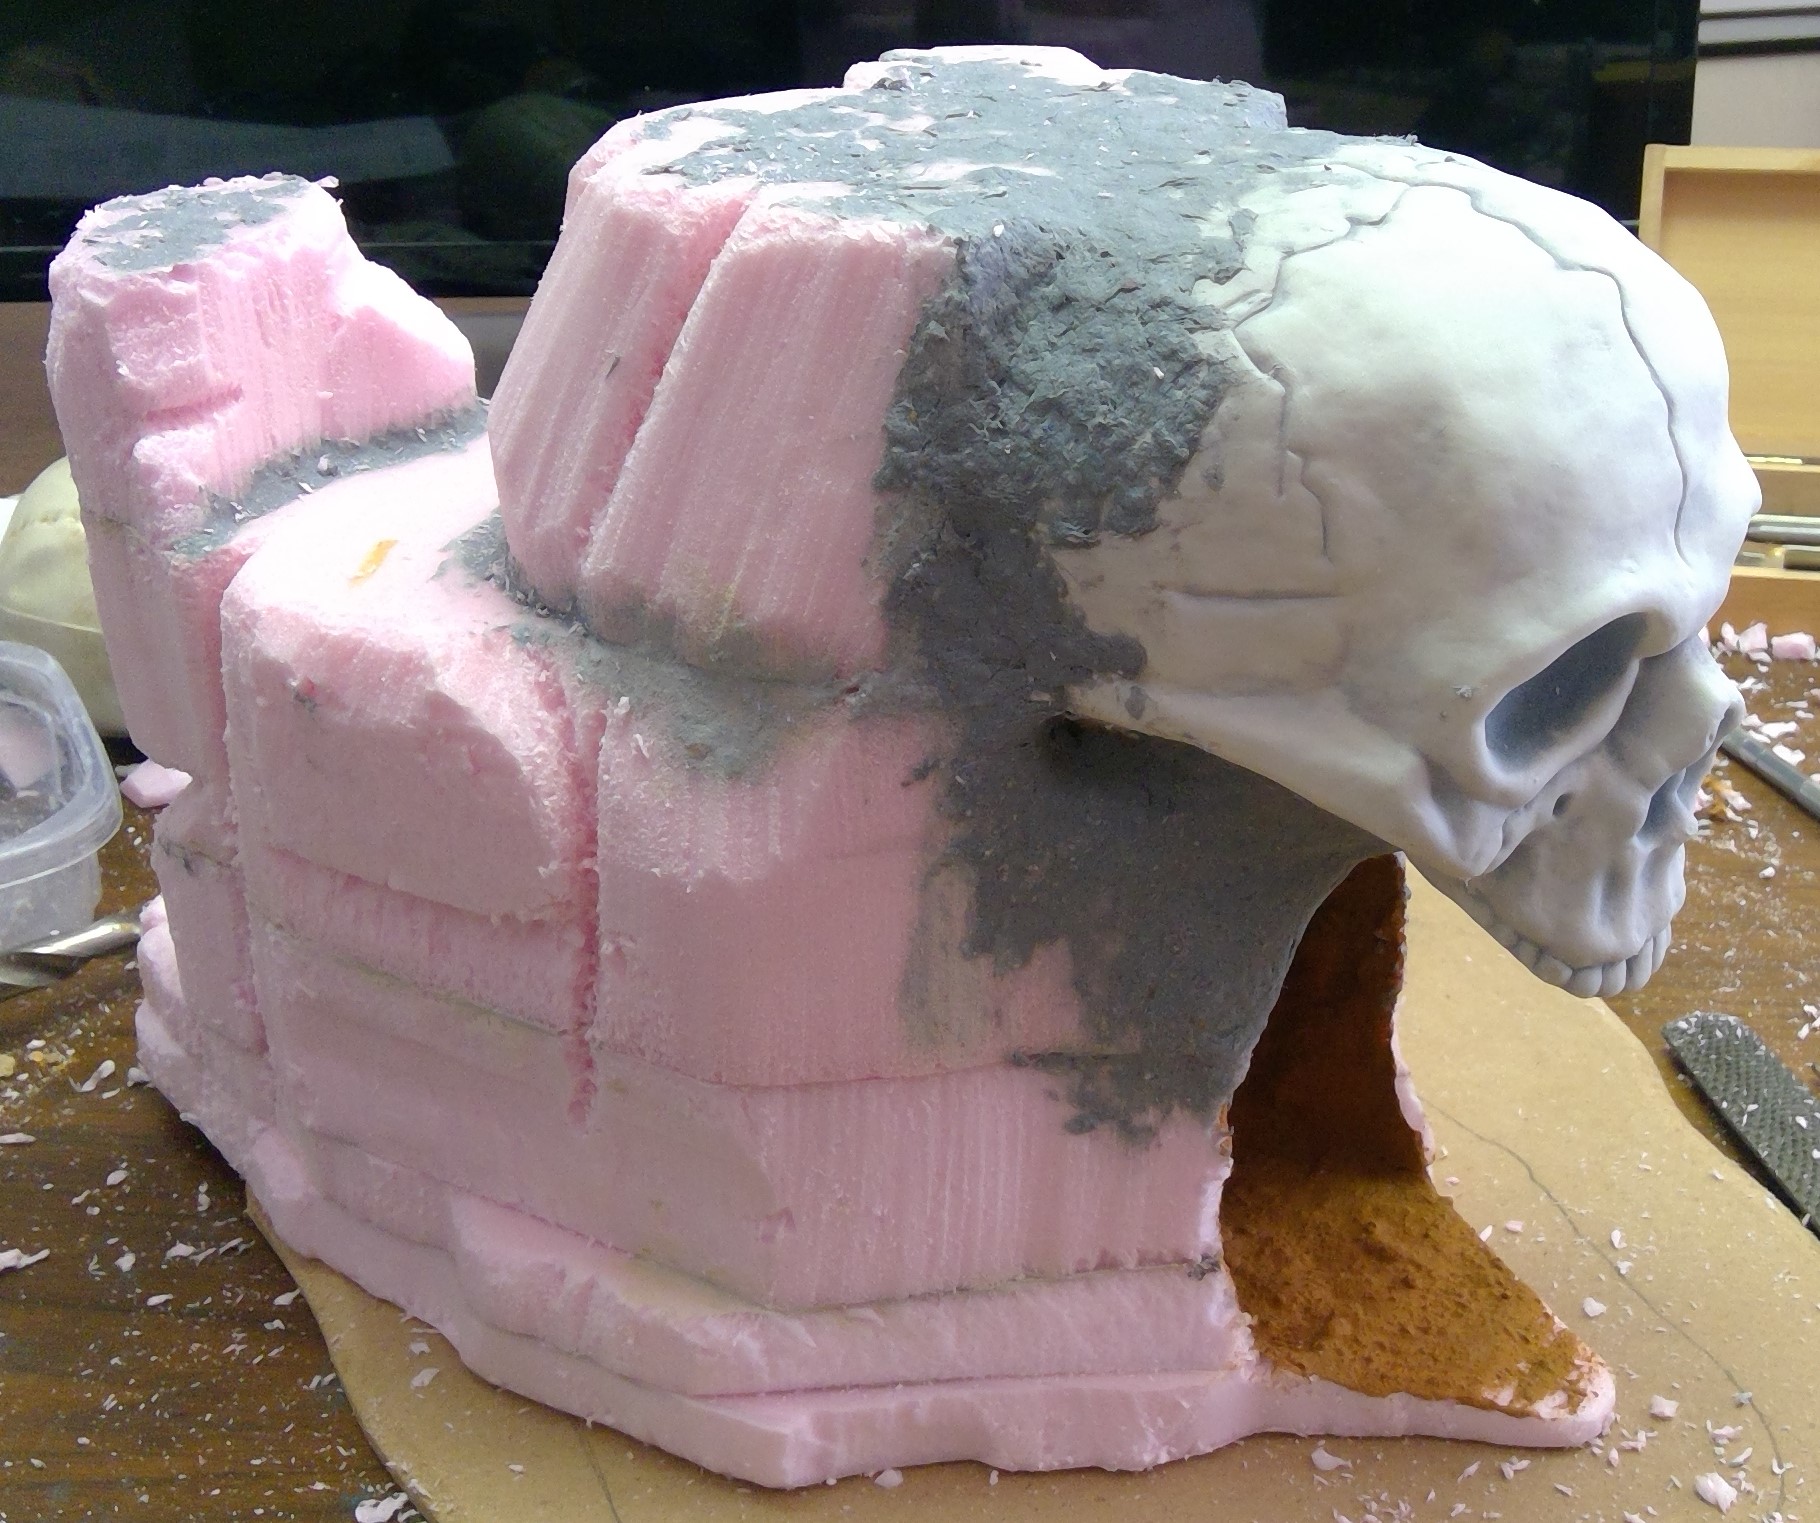
The Shape of Things
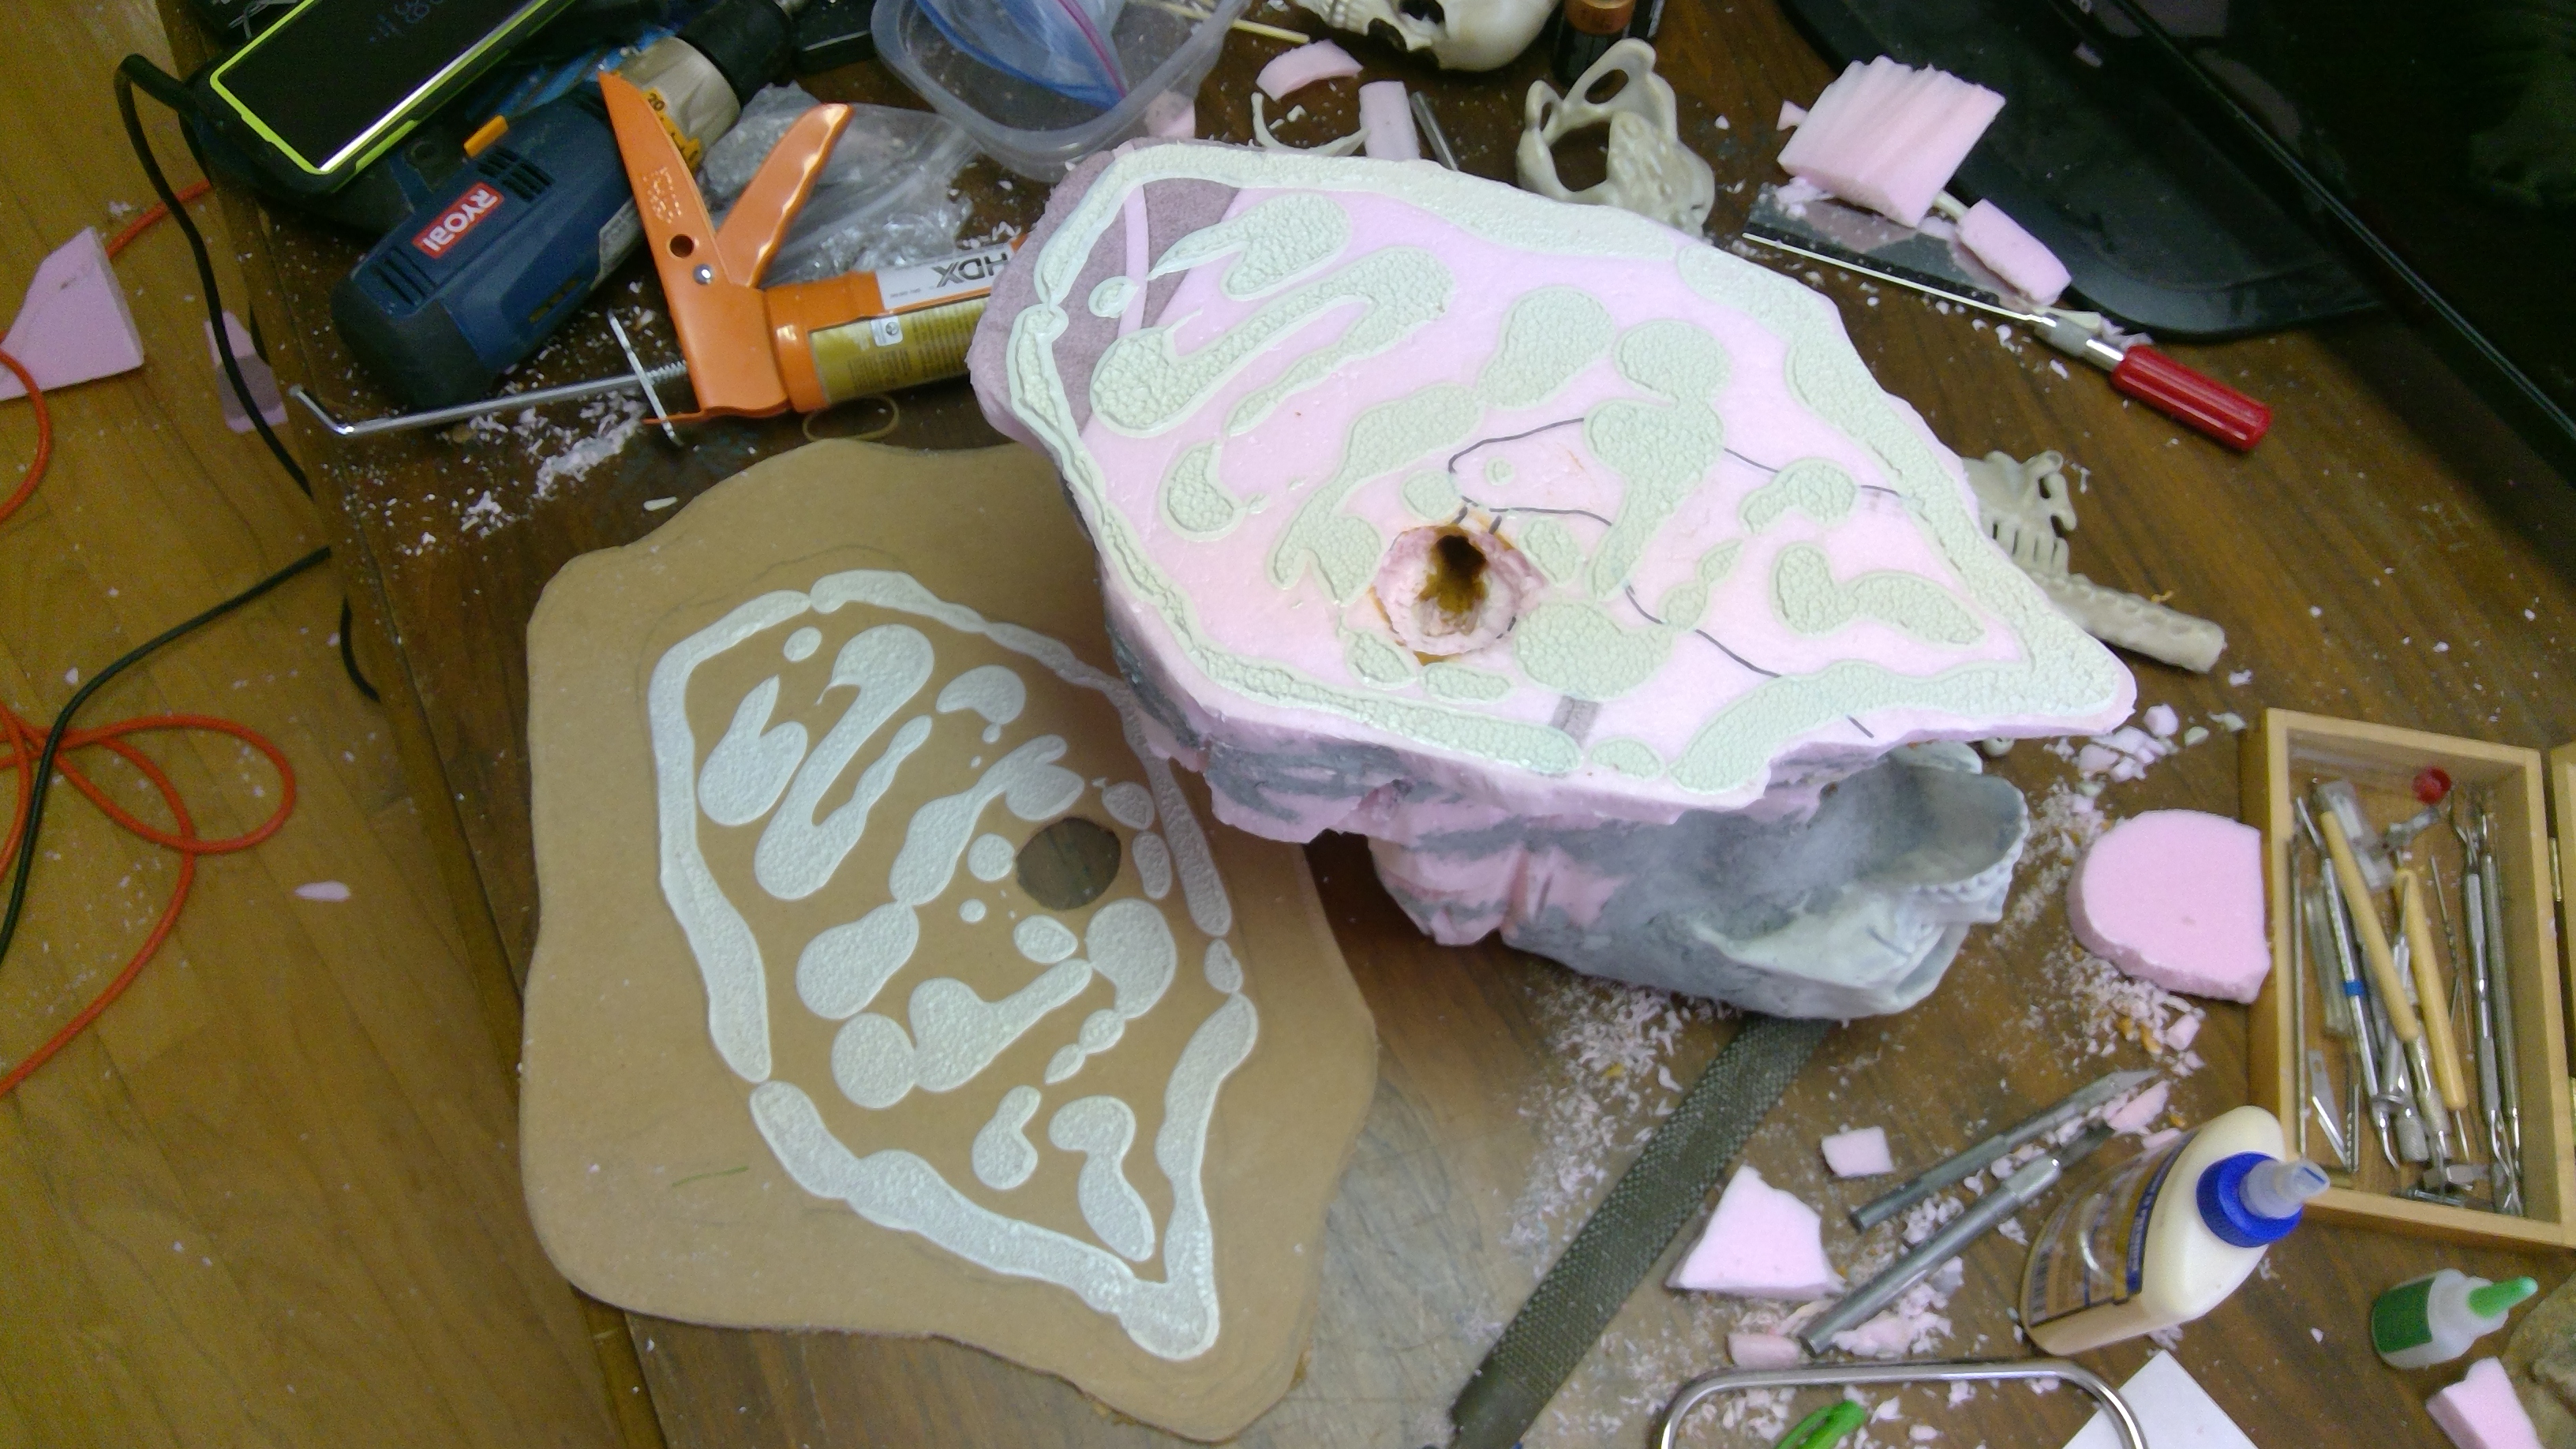
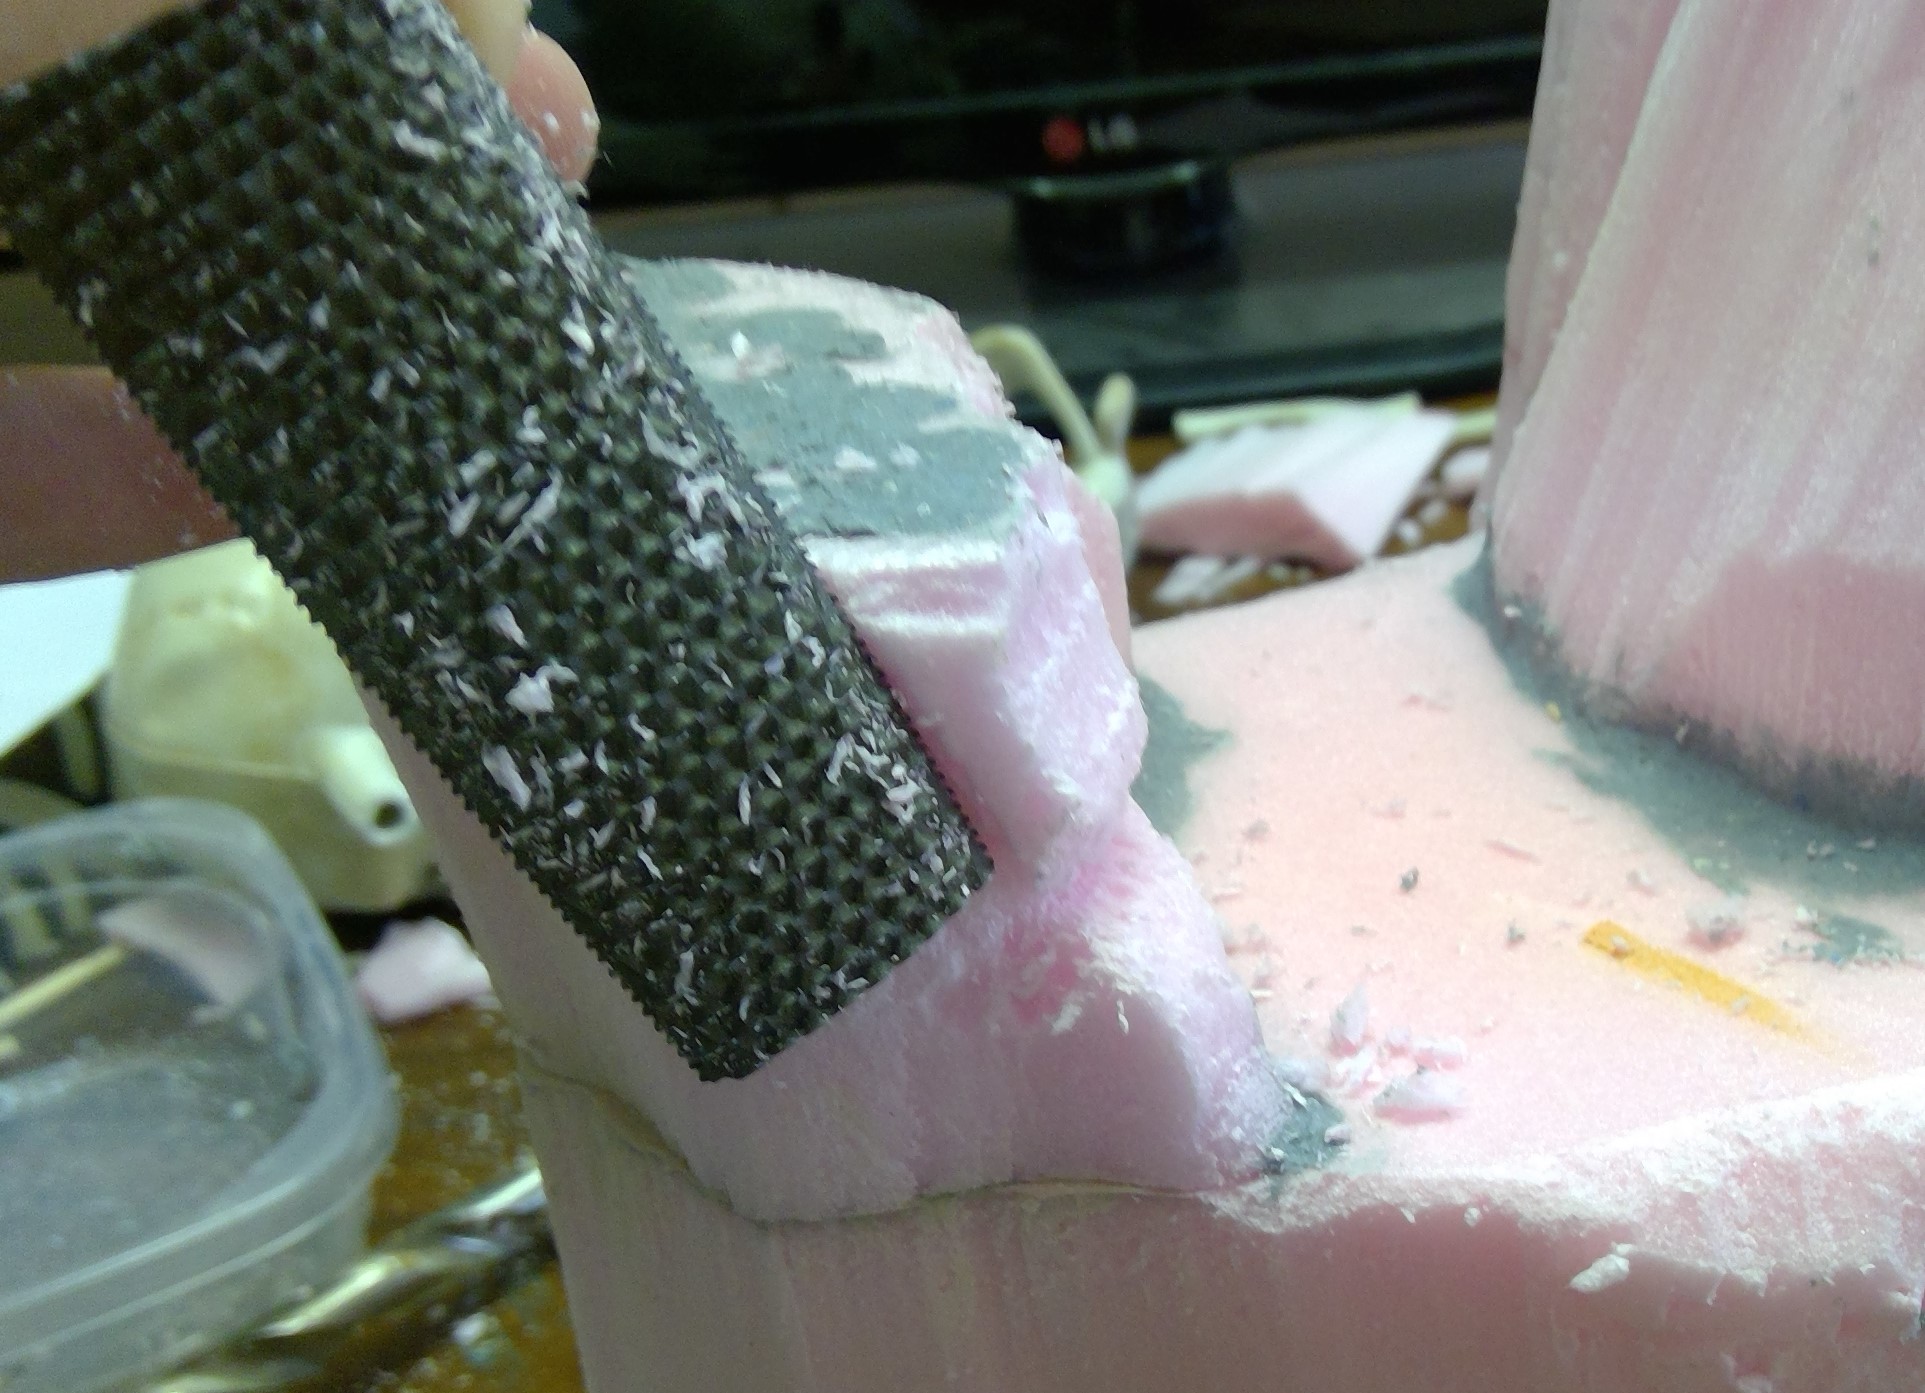
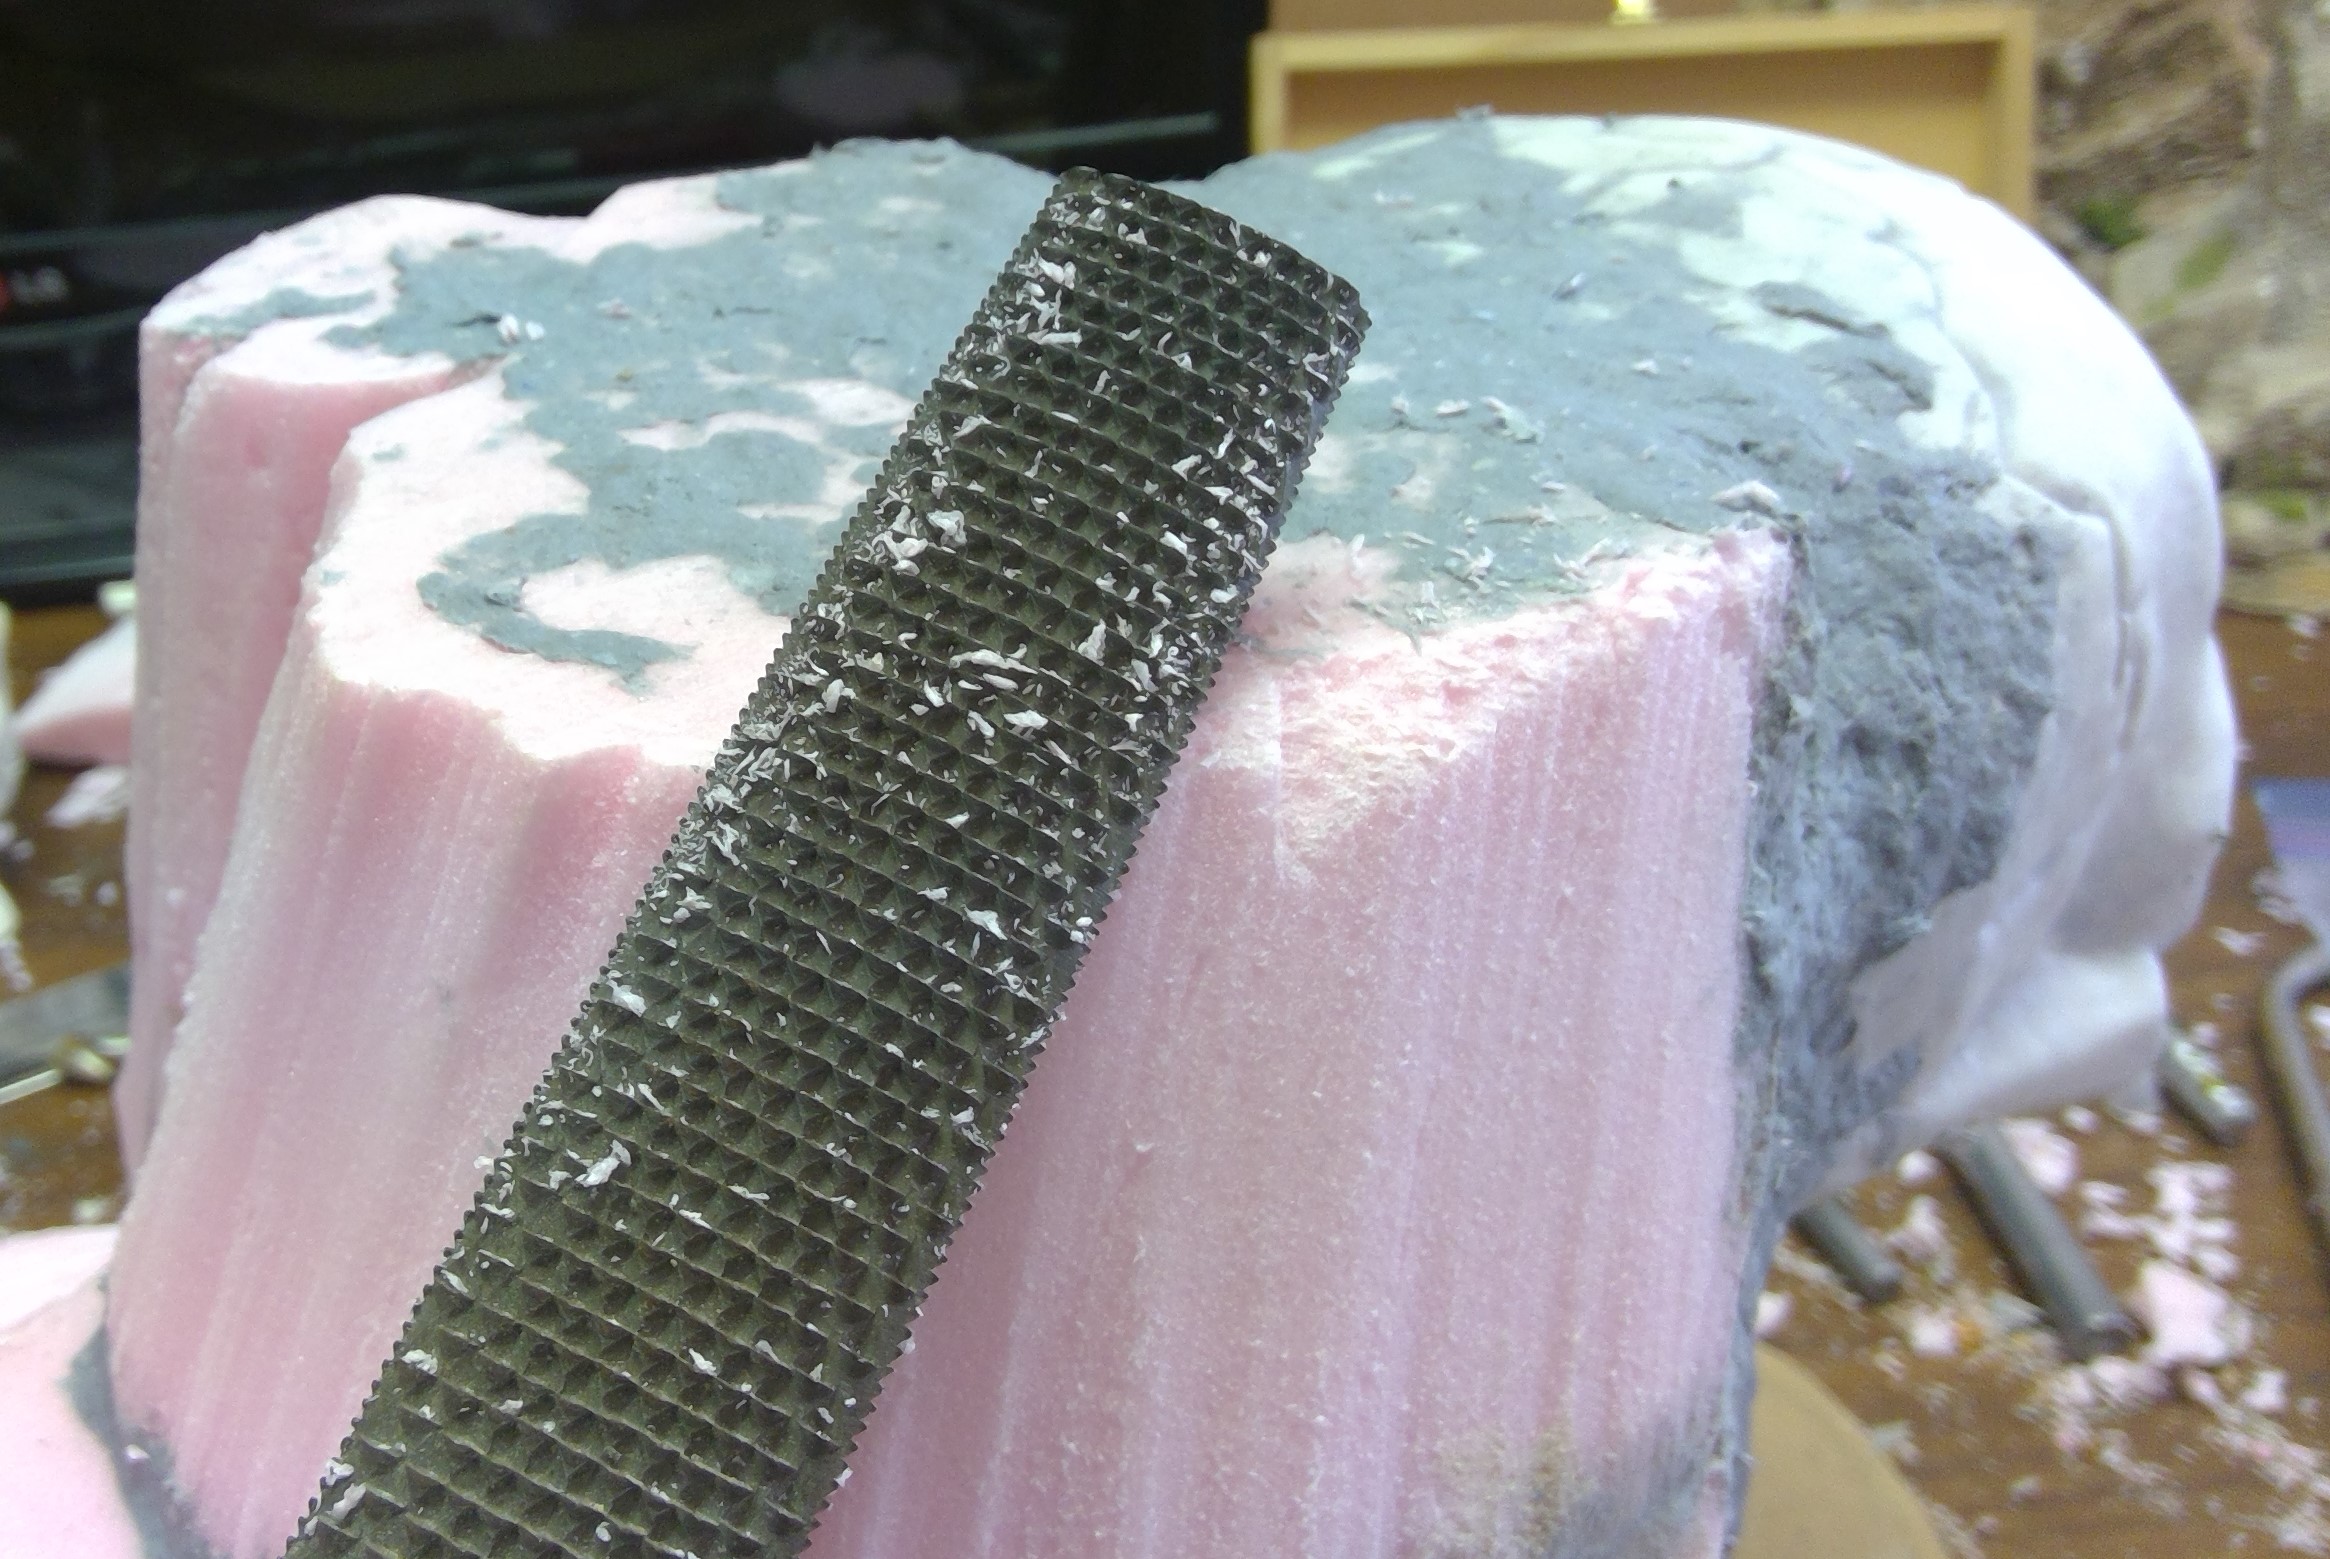
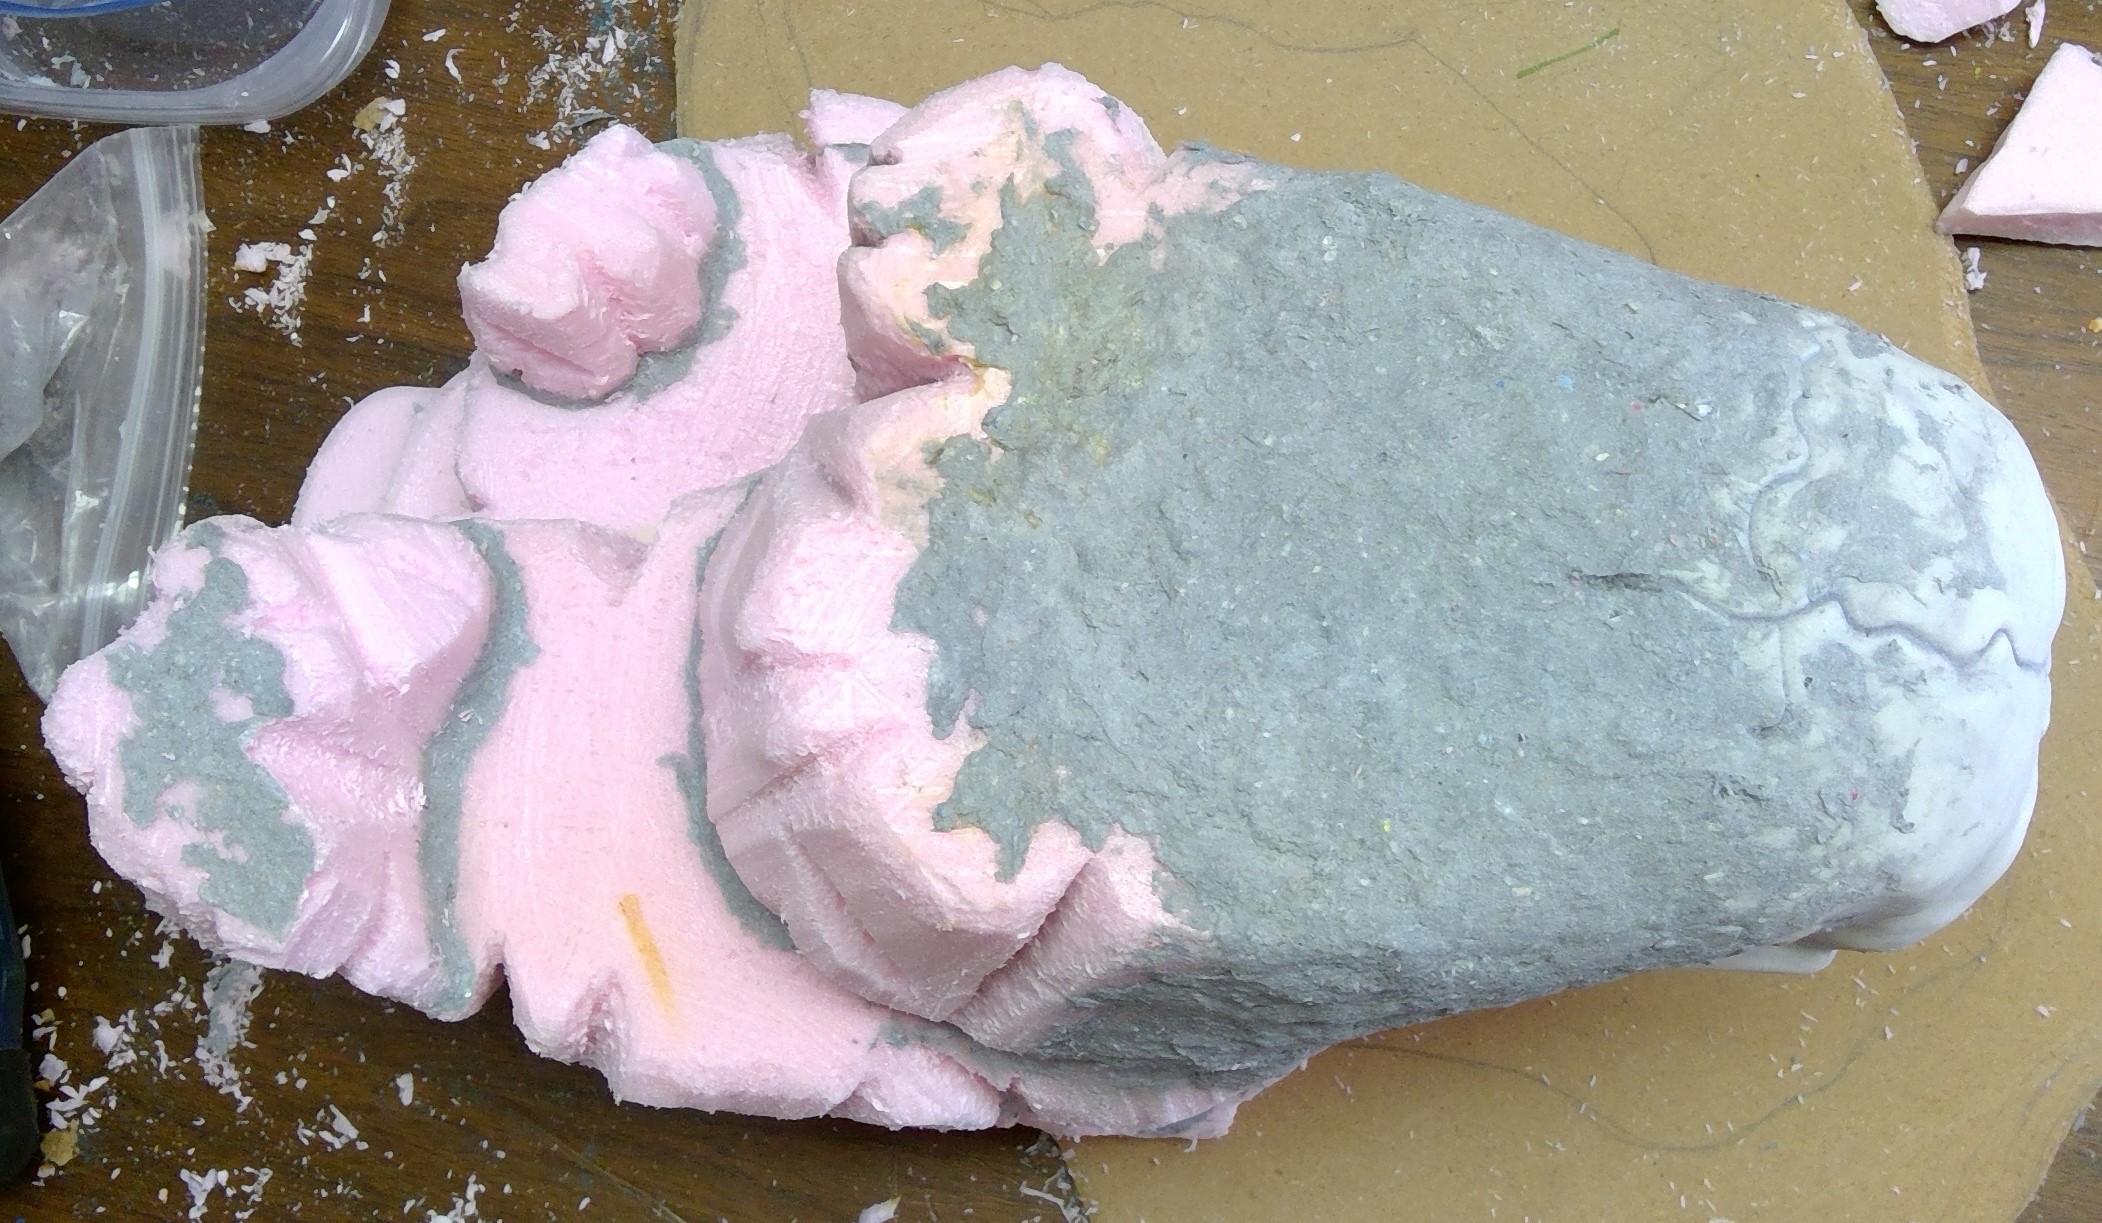
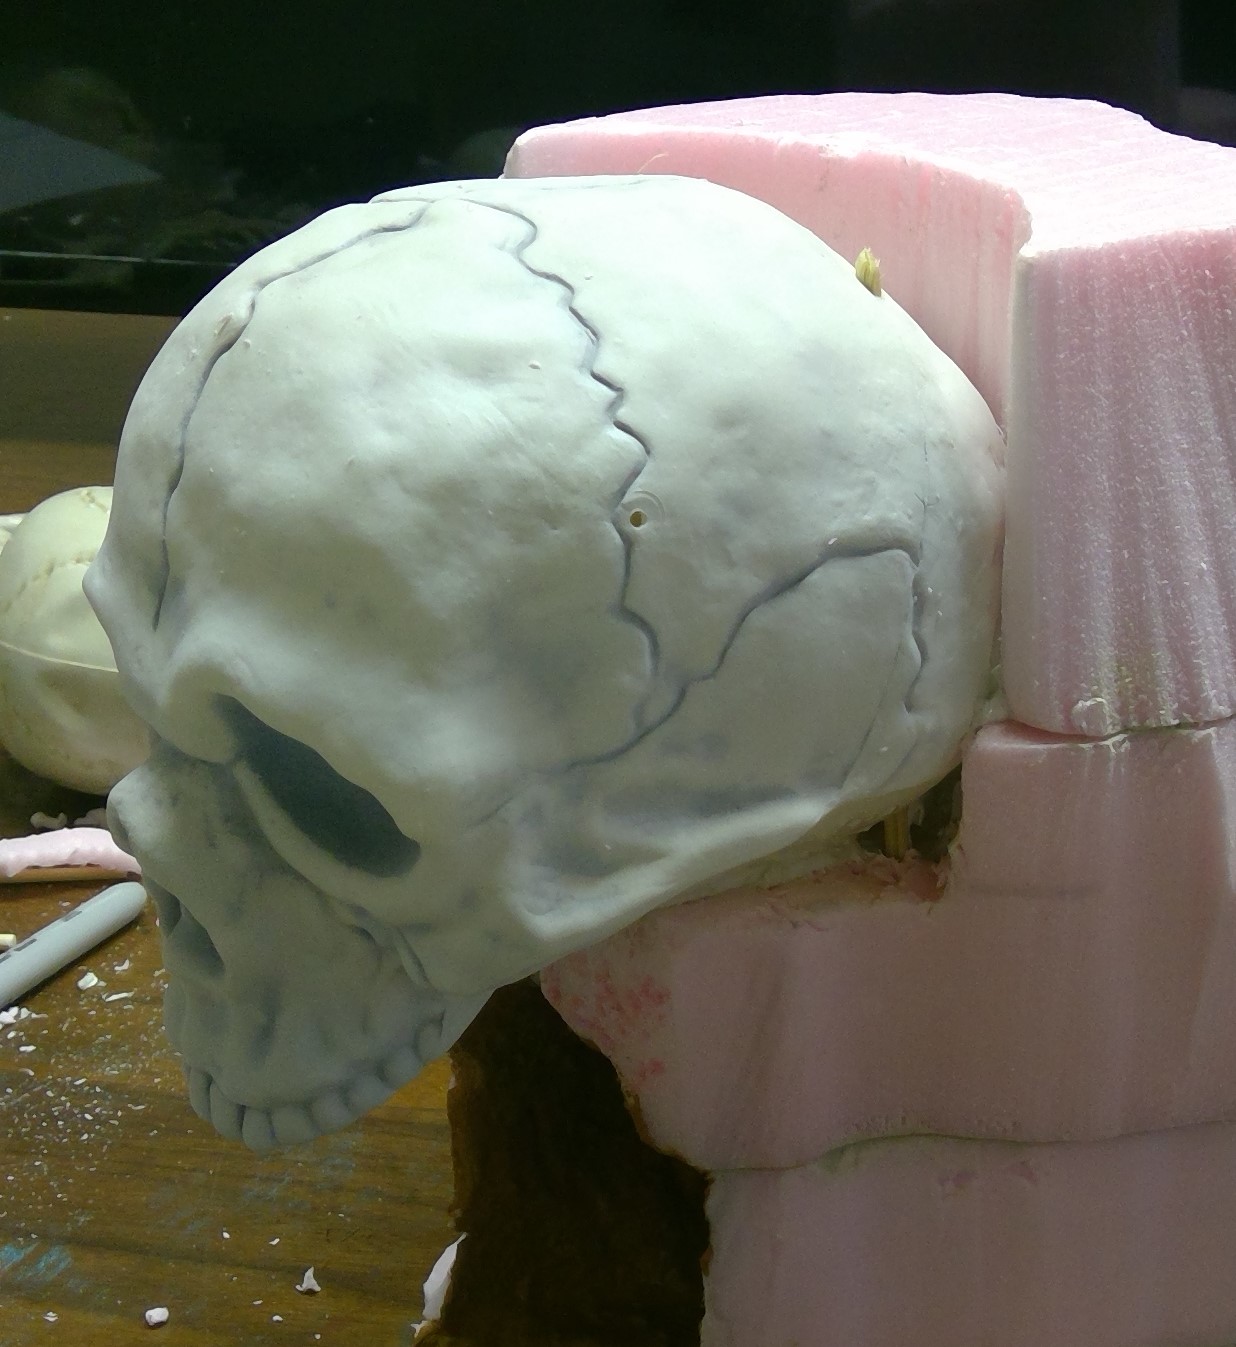
While the CelluClay was drying I began to work in the details around the mesa. These take the form of slightly rounding the hard edges and adding cracks and gouges to give a more natural look and visual interest. The gouges were achieved in a variety of ways, for some I simply cut them in with a hobby knife, pencil and other pointy objects, but most were done with a heavy rasp, as was rounding the edges. I prefer the rasp, despite the mess it makes. I find that the details come more naturally and start to define themselves. To take out larger chunks, use the rasp as intended, by pushing. To have a bit more control you can pull the rasp in the “non-cutting” direction, this also creates less mess and gives a finer cut and smoother surface.
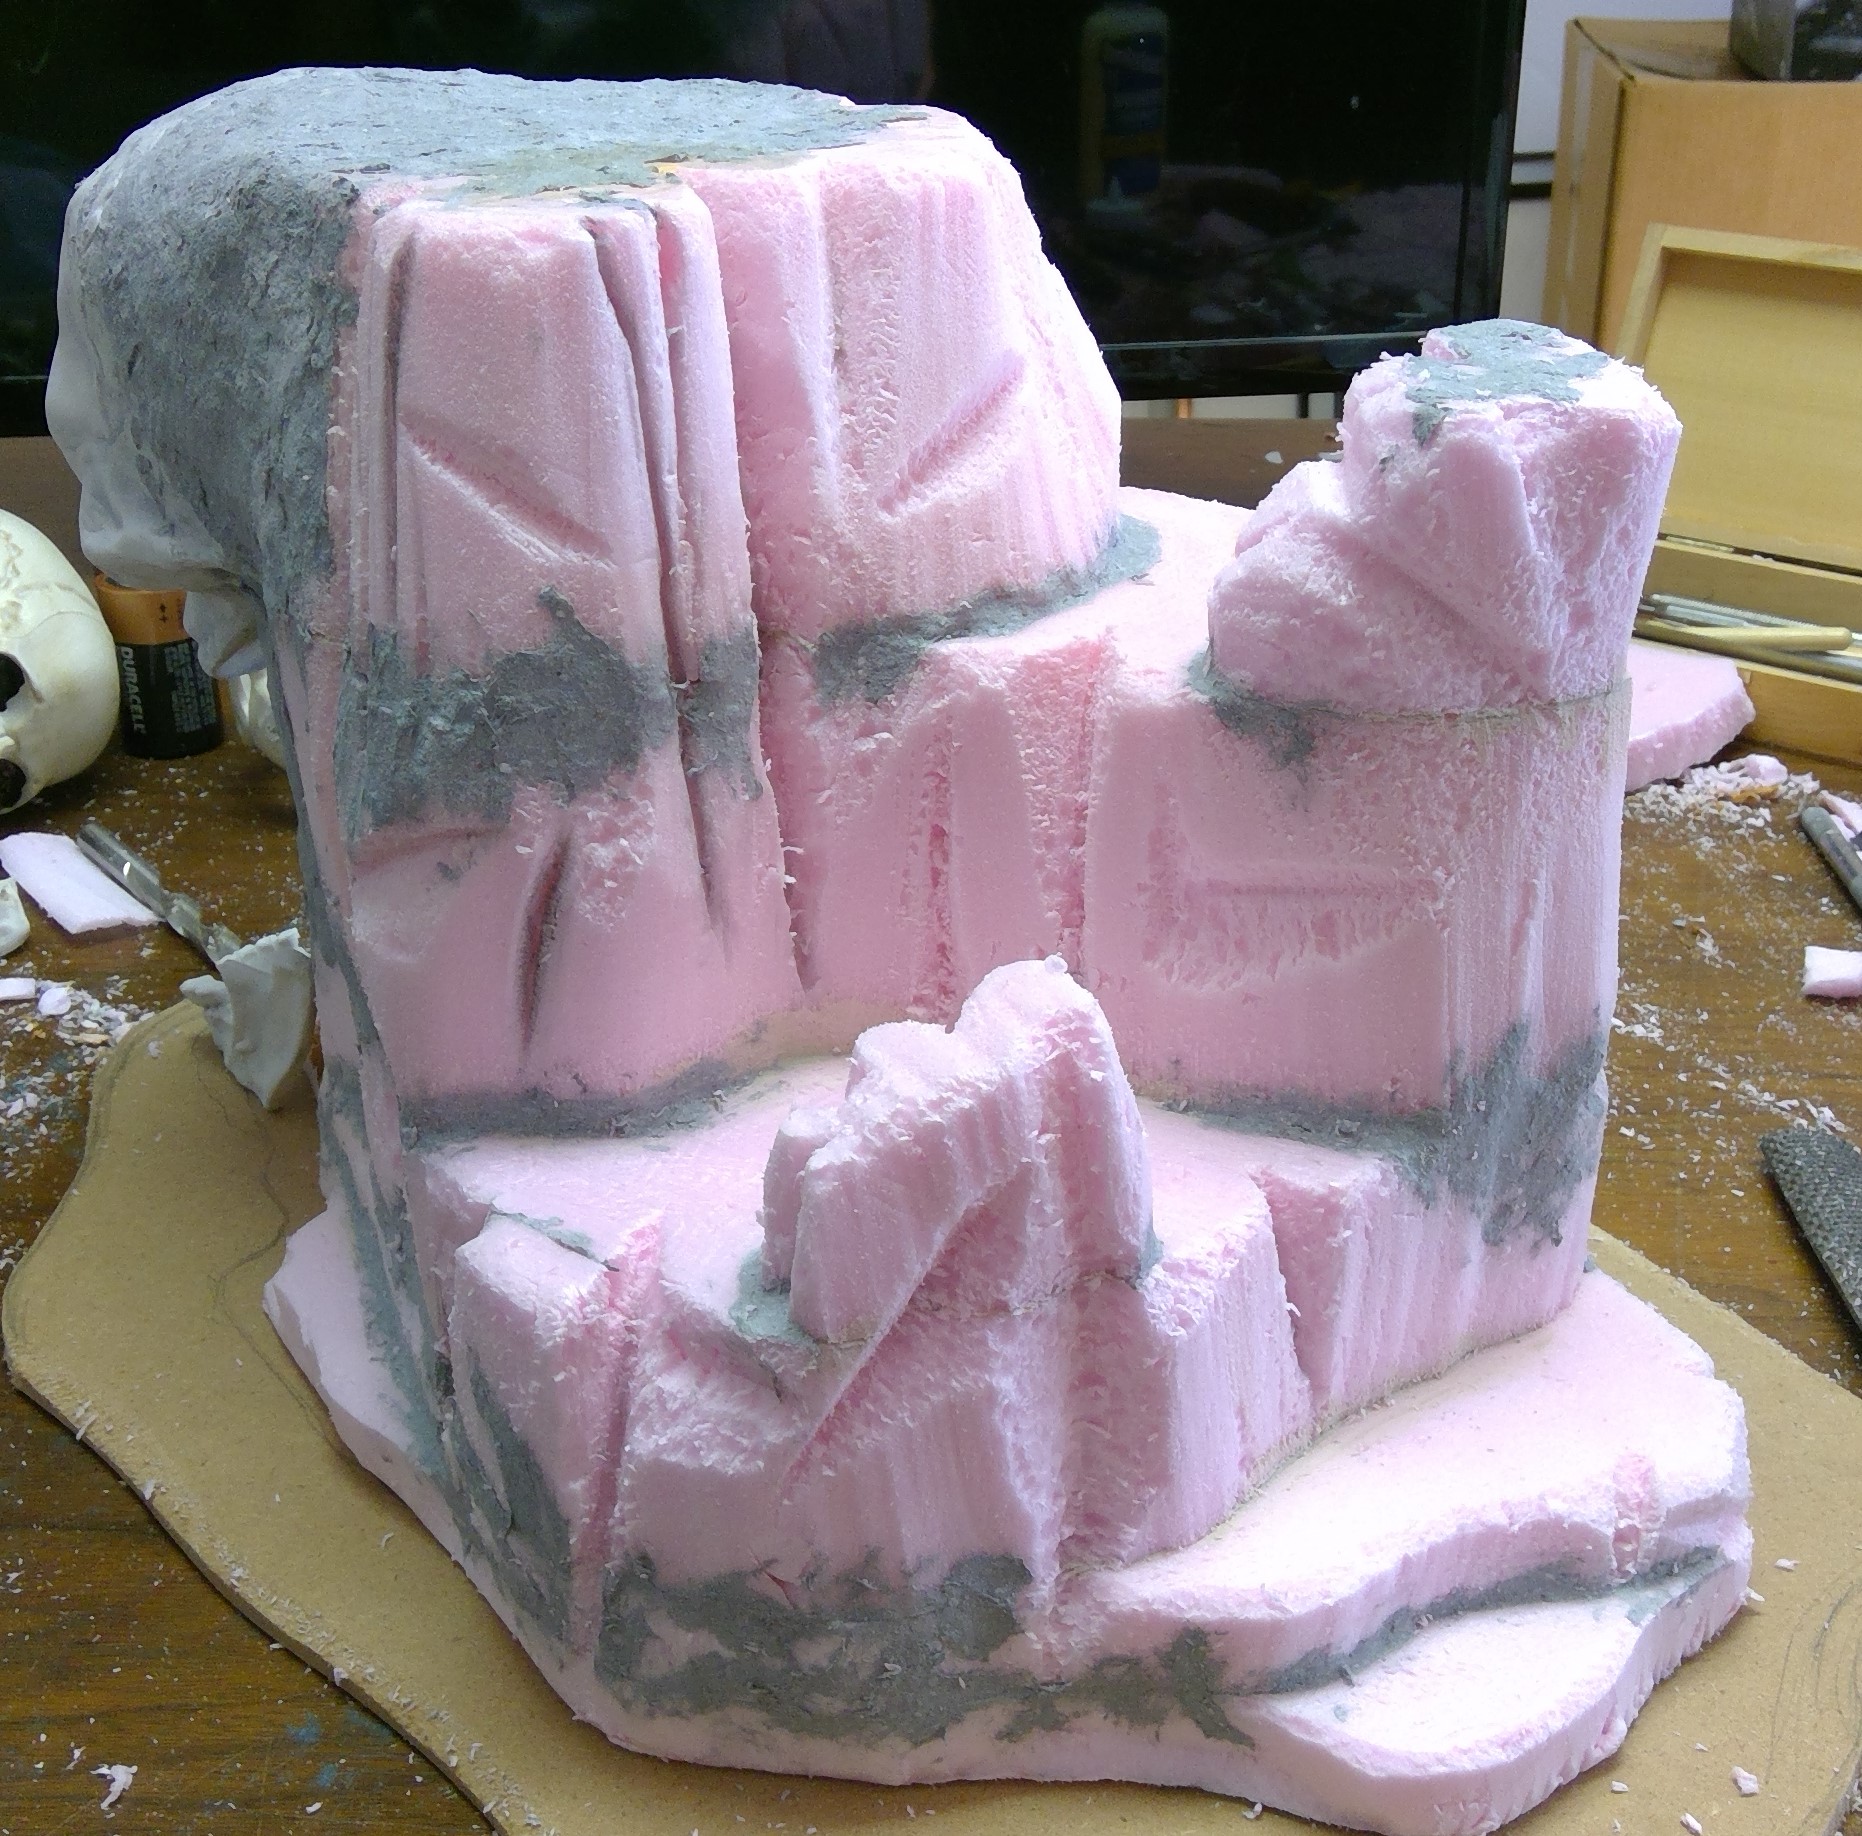

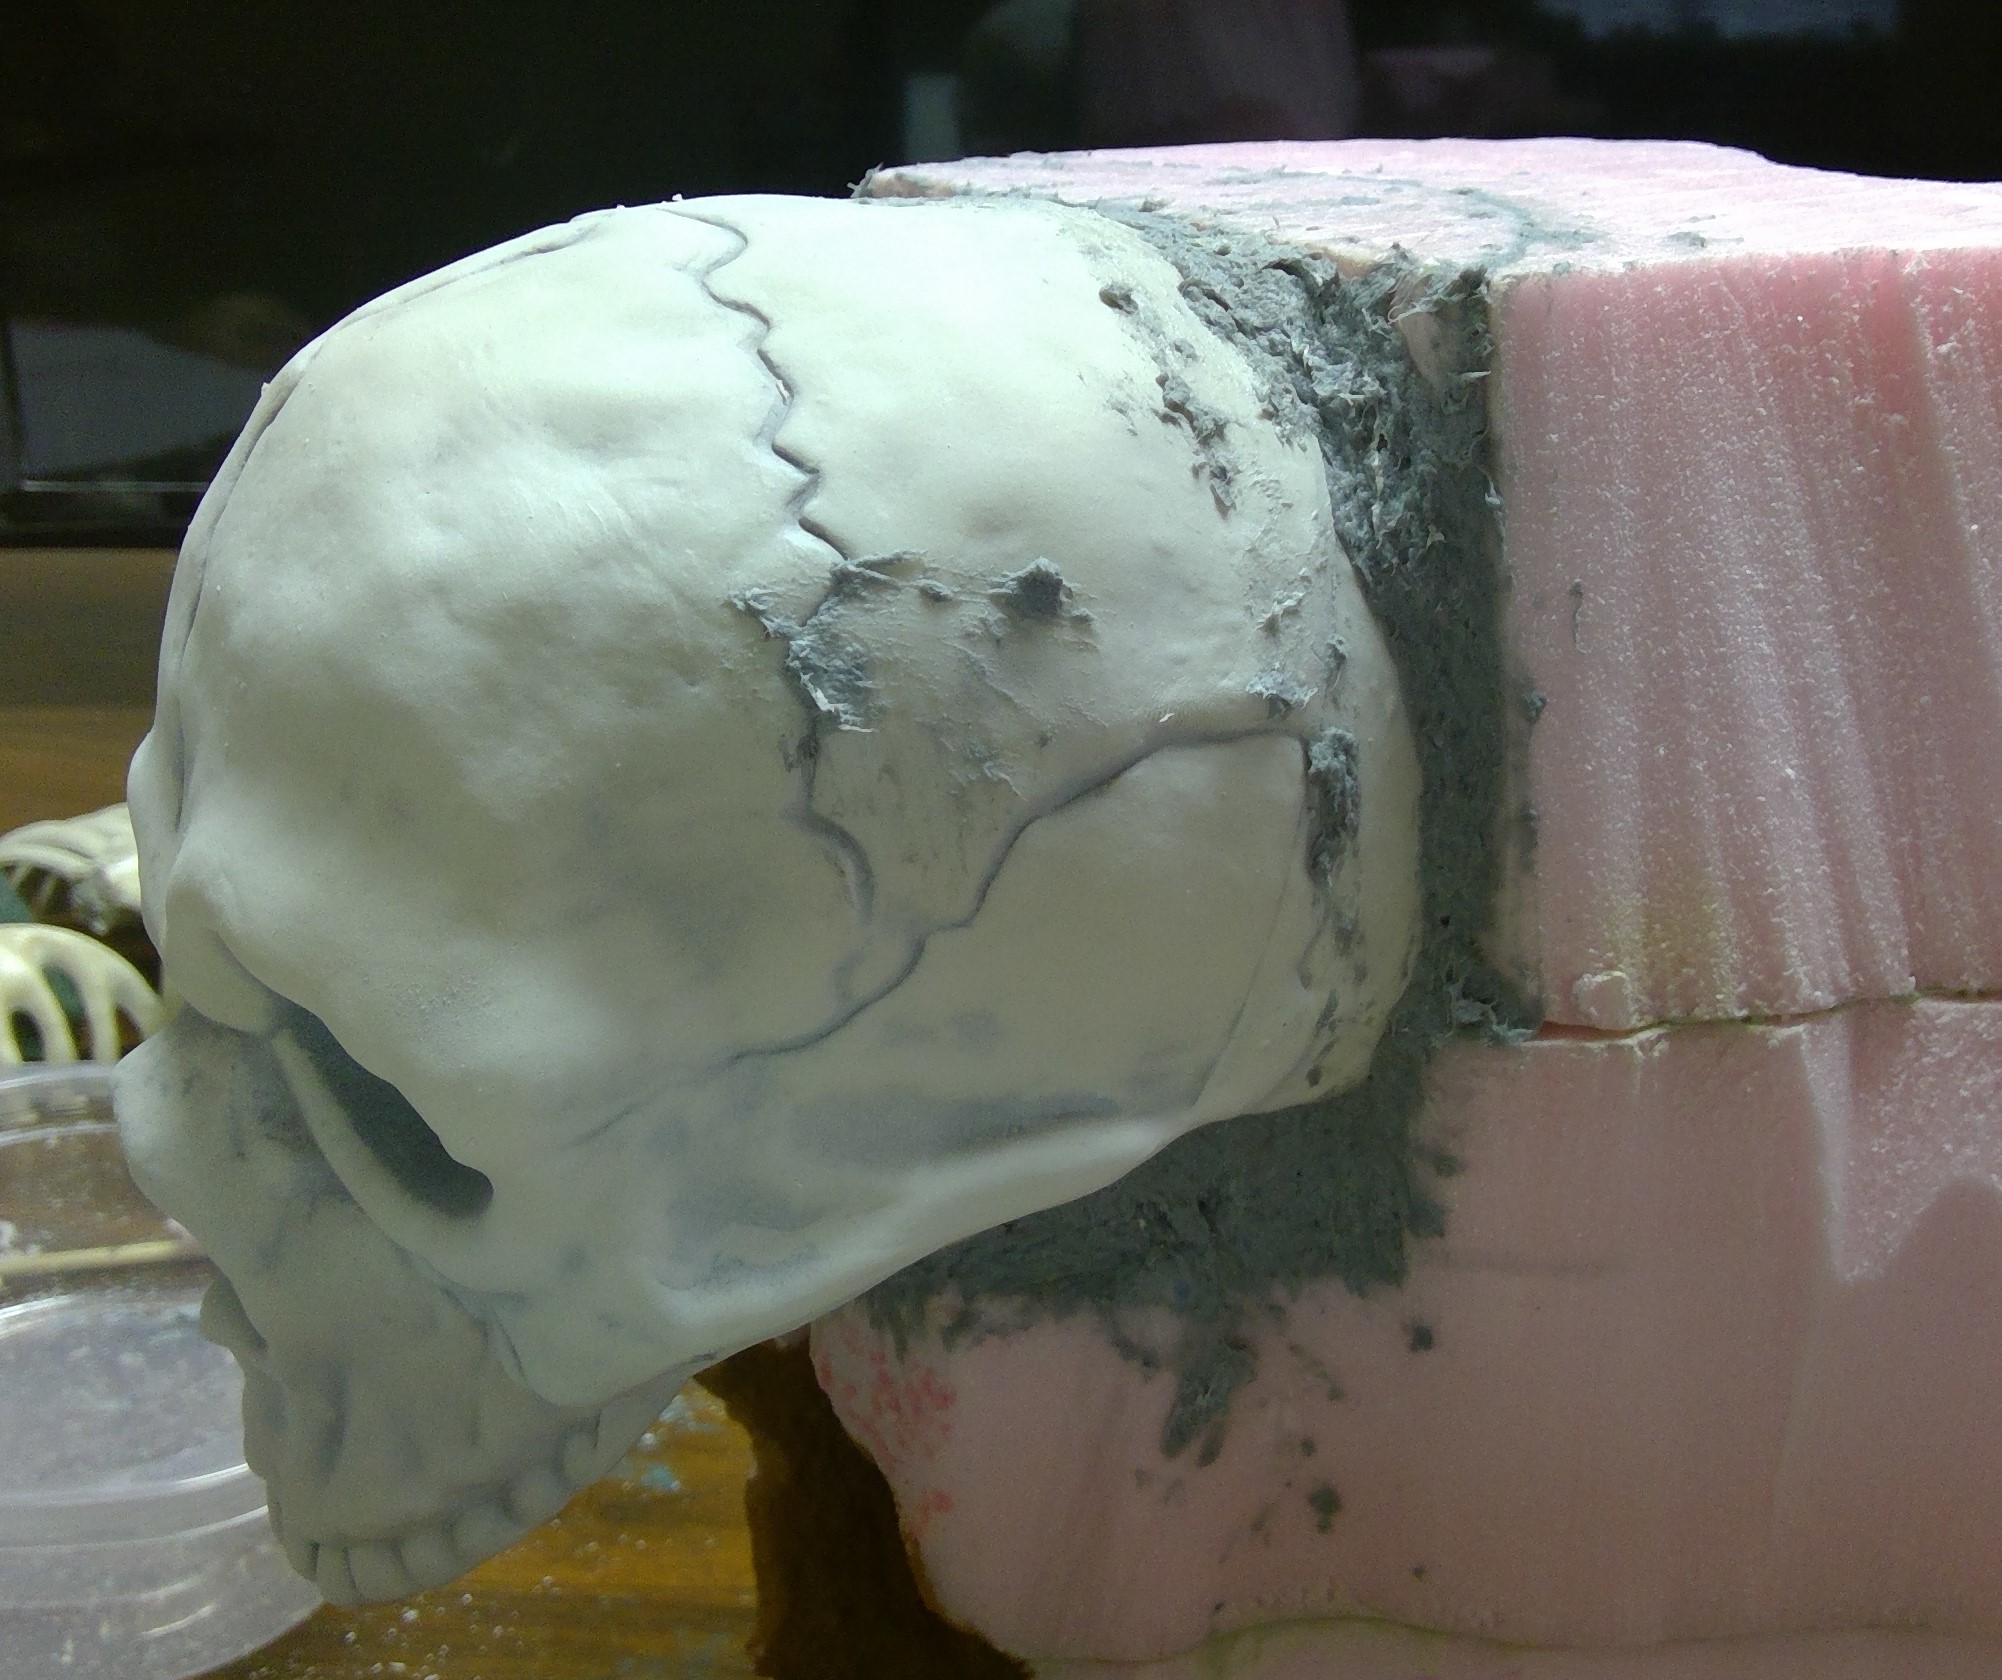
Once the layer of CelluClay had cured I could add one last layer to the area around the skull to make it blend more seamlessly into the mesa, thus making the shape more natural. I also filled gaps at this time as well.
I will add the final gouges/crags in the CelluClay once it is all mounted up, with the bottom jaw in place and blended in. Which is the next step.
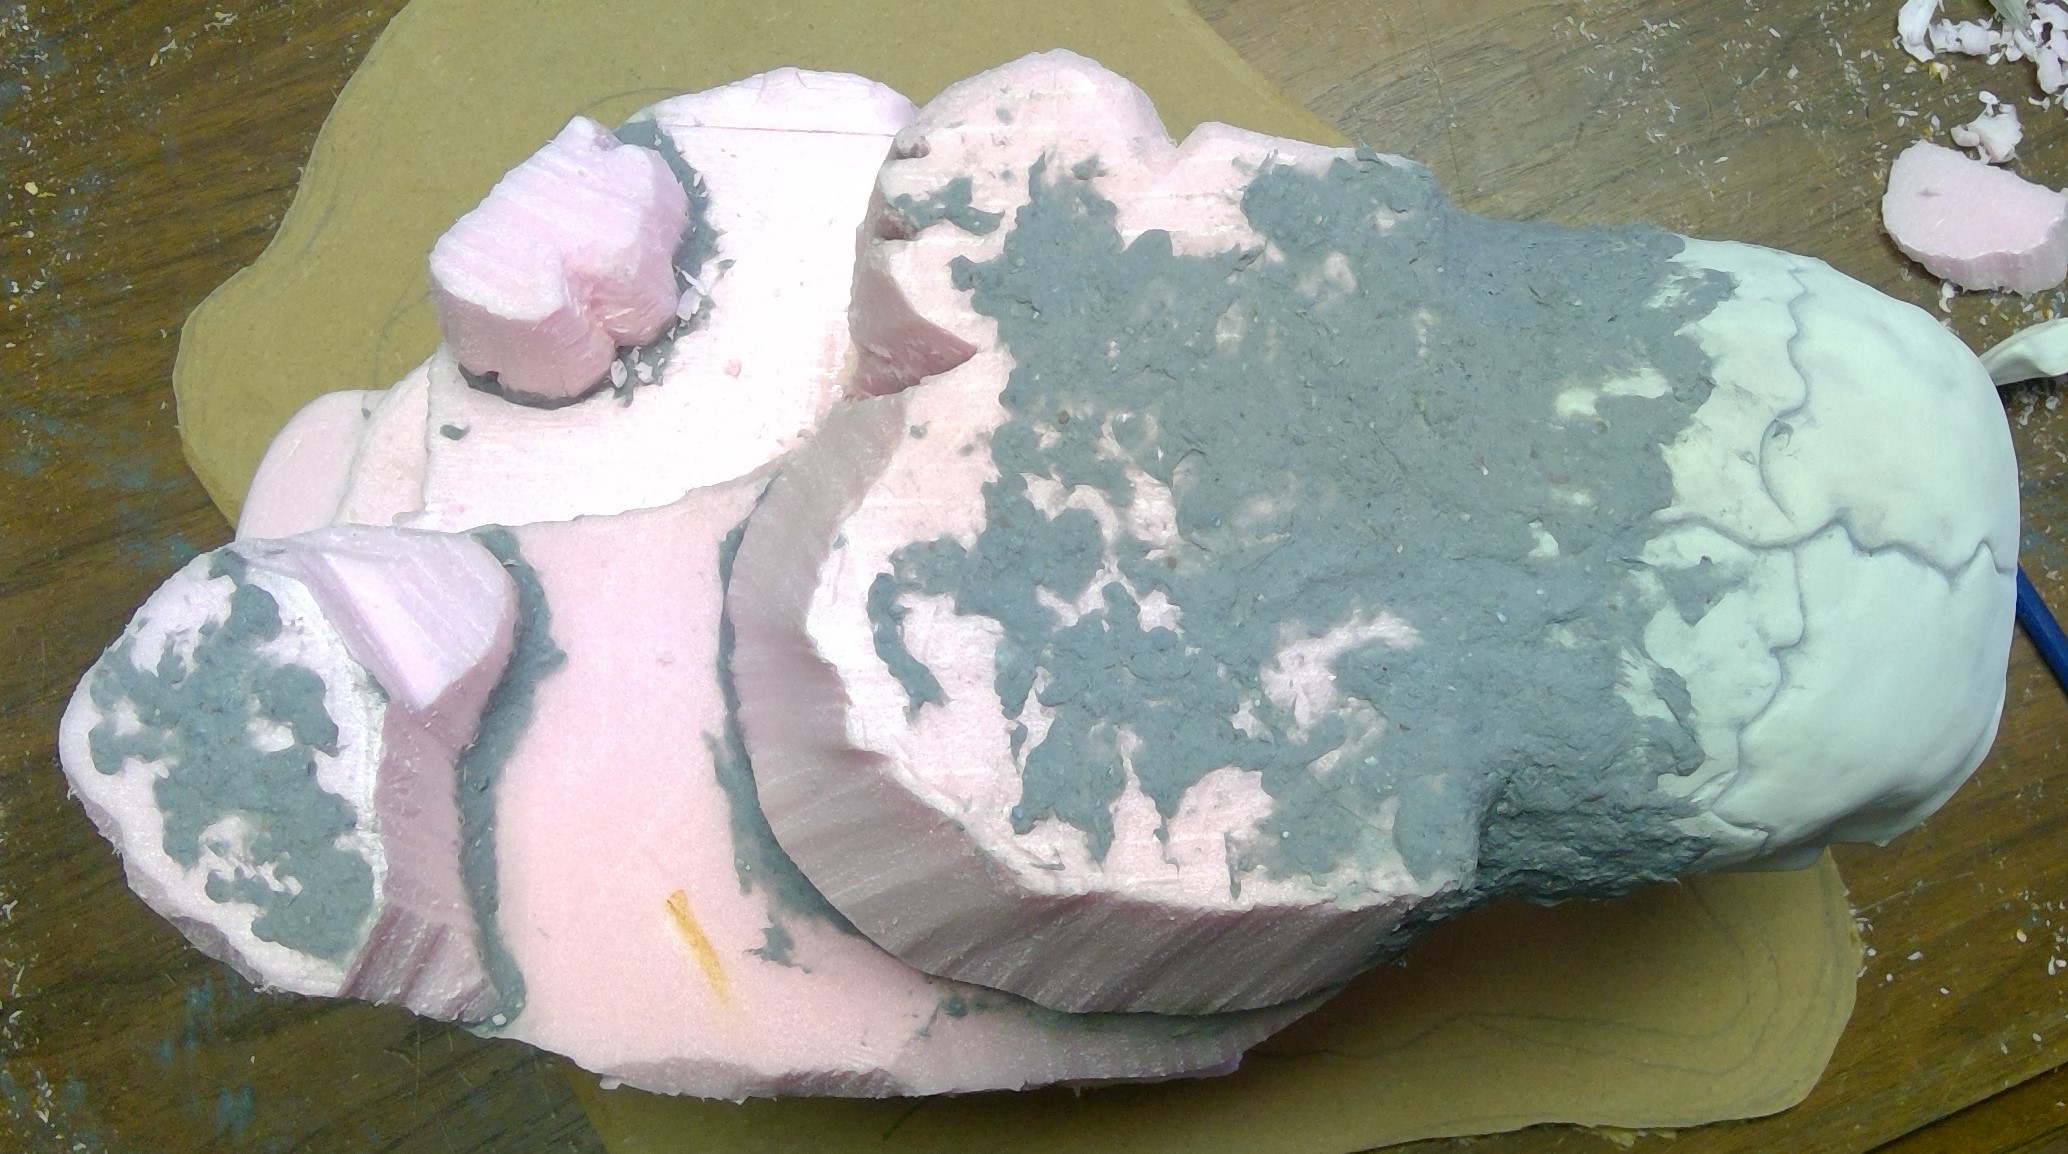
The Ways of CelluClay
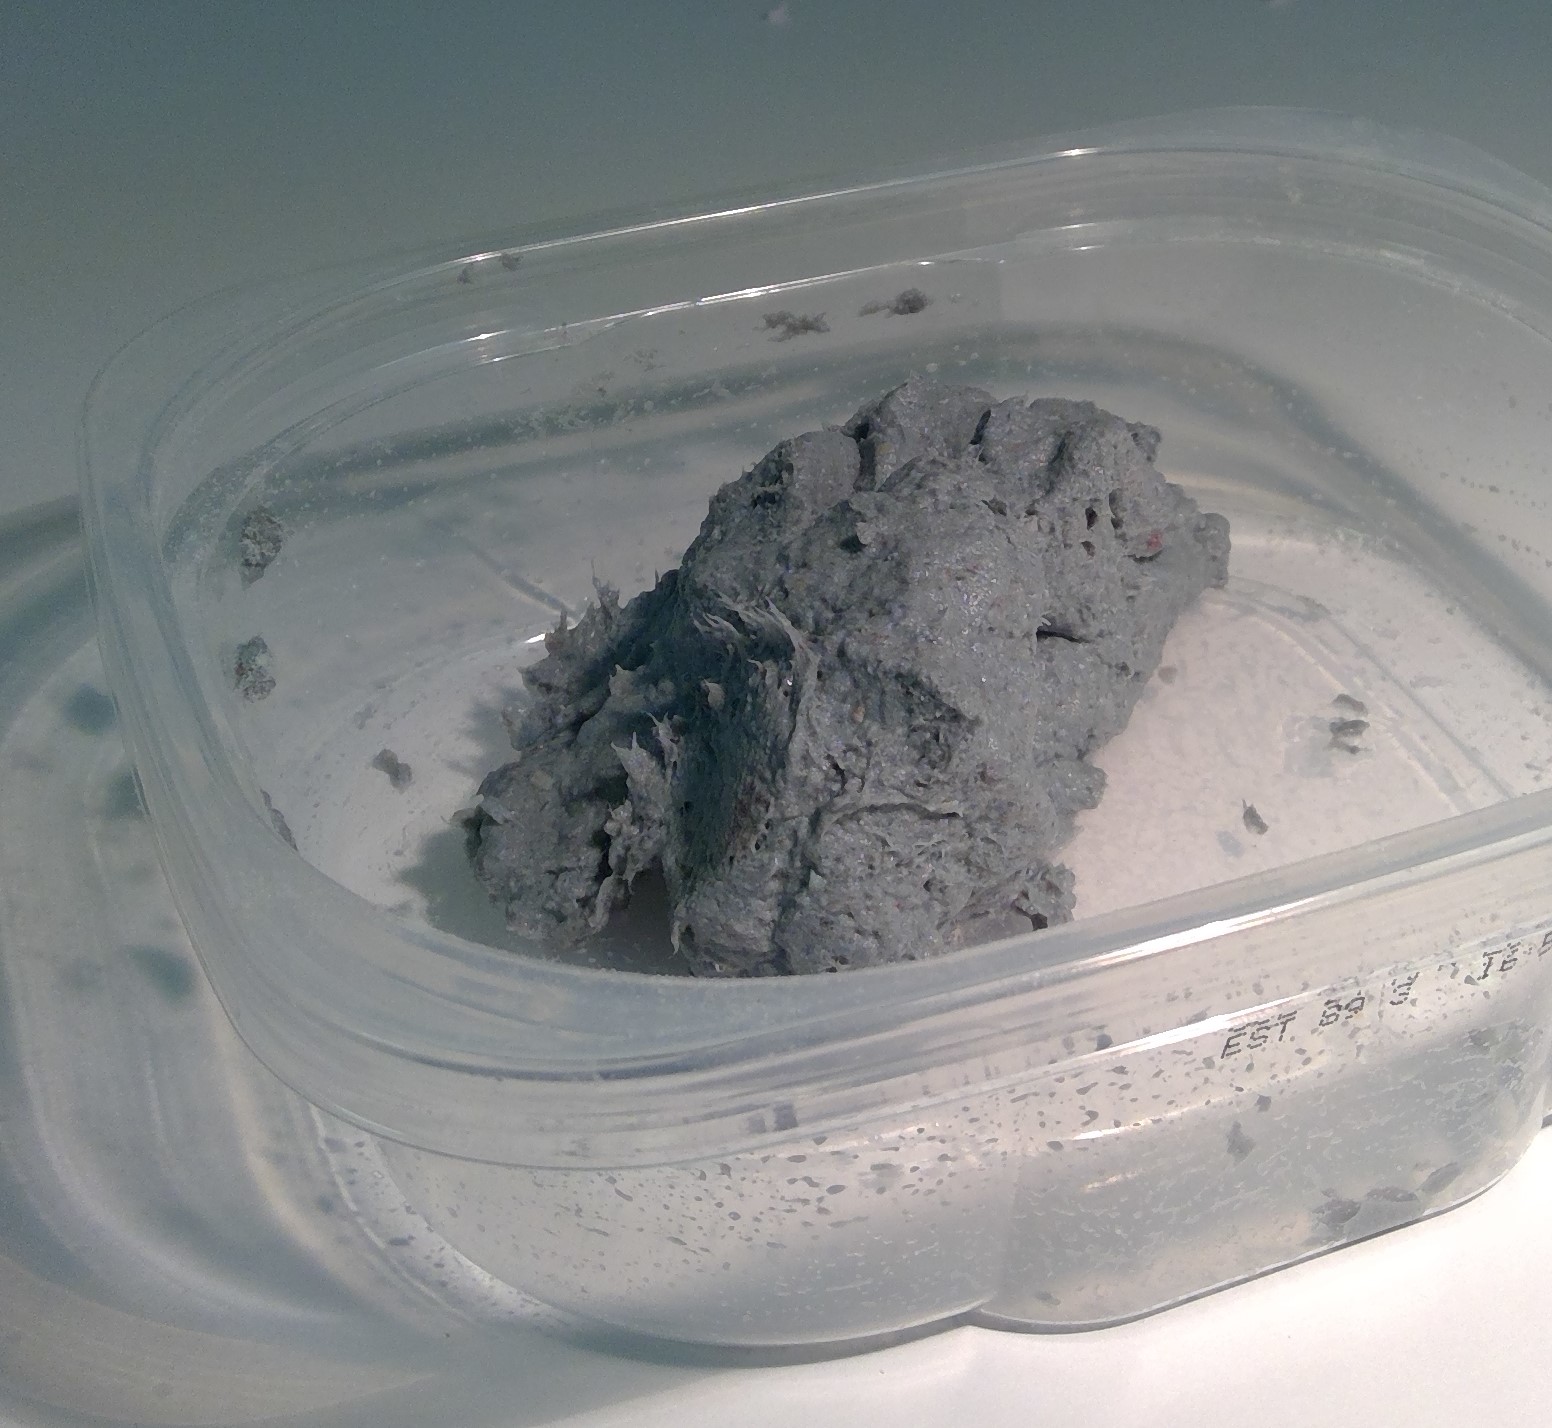
Having now redone the CelluClay sections, I can say that I most certainly used too much water. I have now reworked those areas, following the instructions a bit closer using warm water the help it mix and much less of it. I worked in a couple of layers, as opposed to one heavy one, to aid in the drying time.
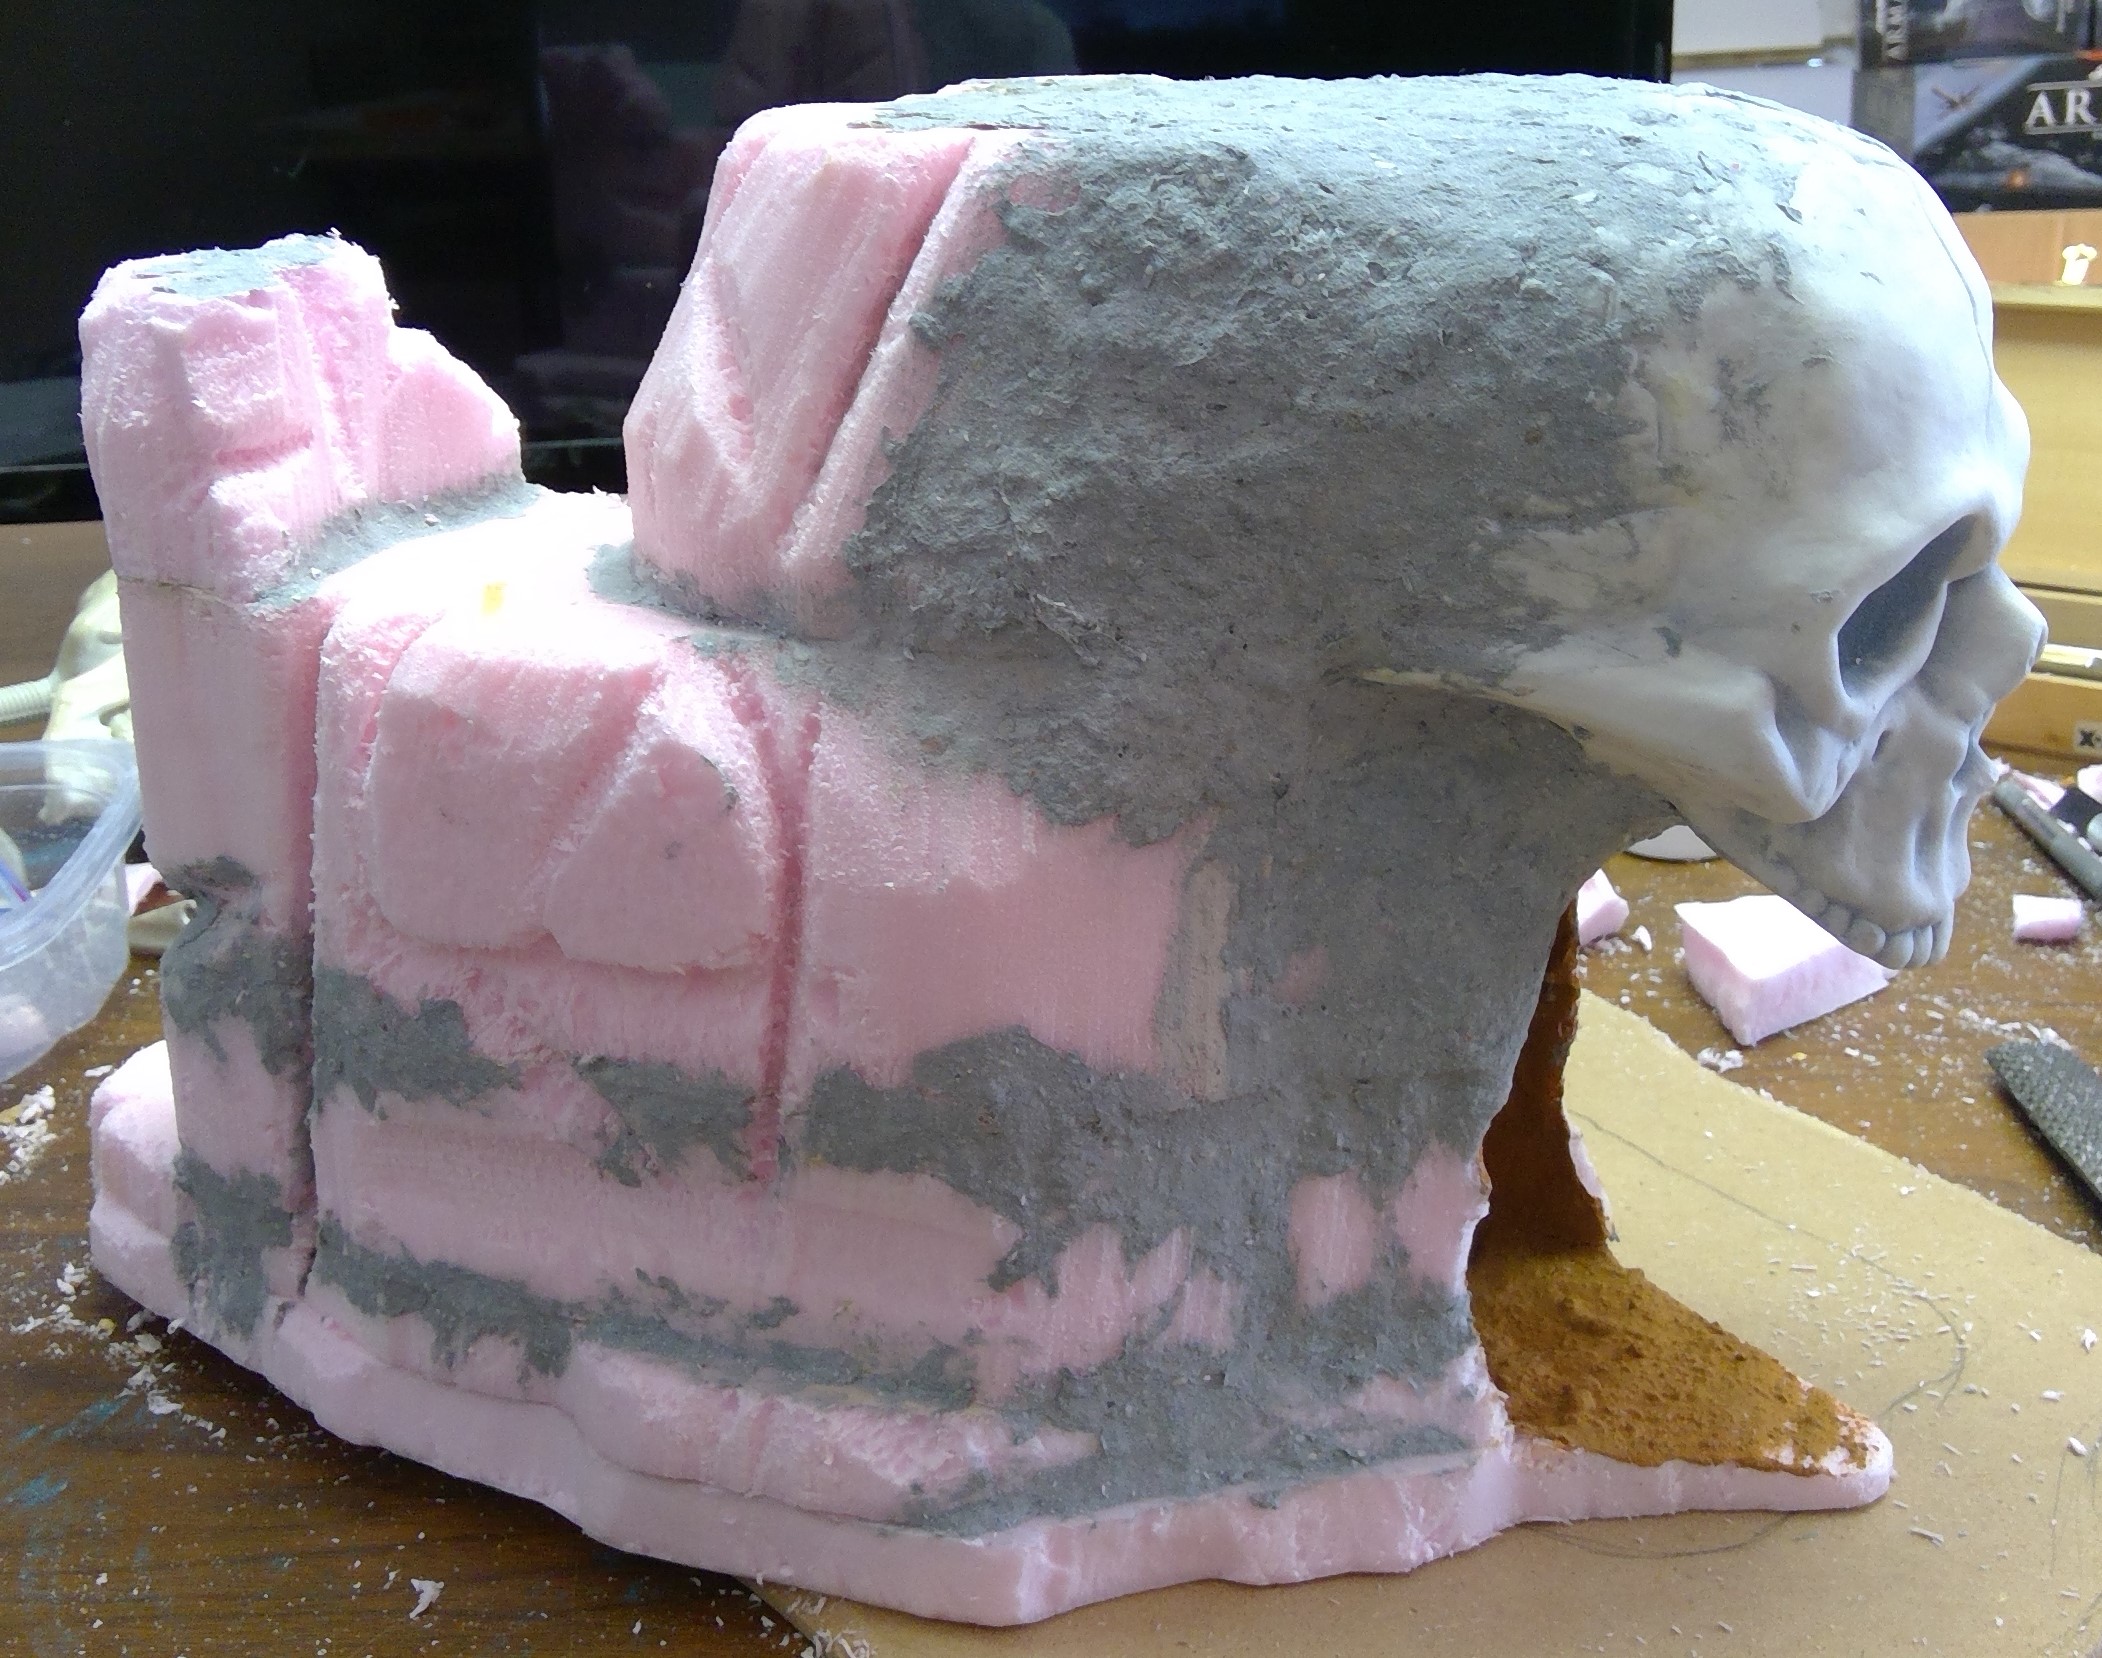
I also worked some across the tops of the mesa to eliminate some of the boring flatness and started filling some of the gaps between the layers of foam. I found that the CelluClay does not like the smooth surface of the slick flat areas so I simply smeared some wood glue over, and slightly under, those areas. That said, it’s sticking fine to the cut or roughed up sections as well as the primed skull.
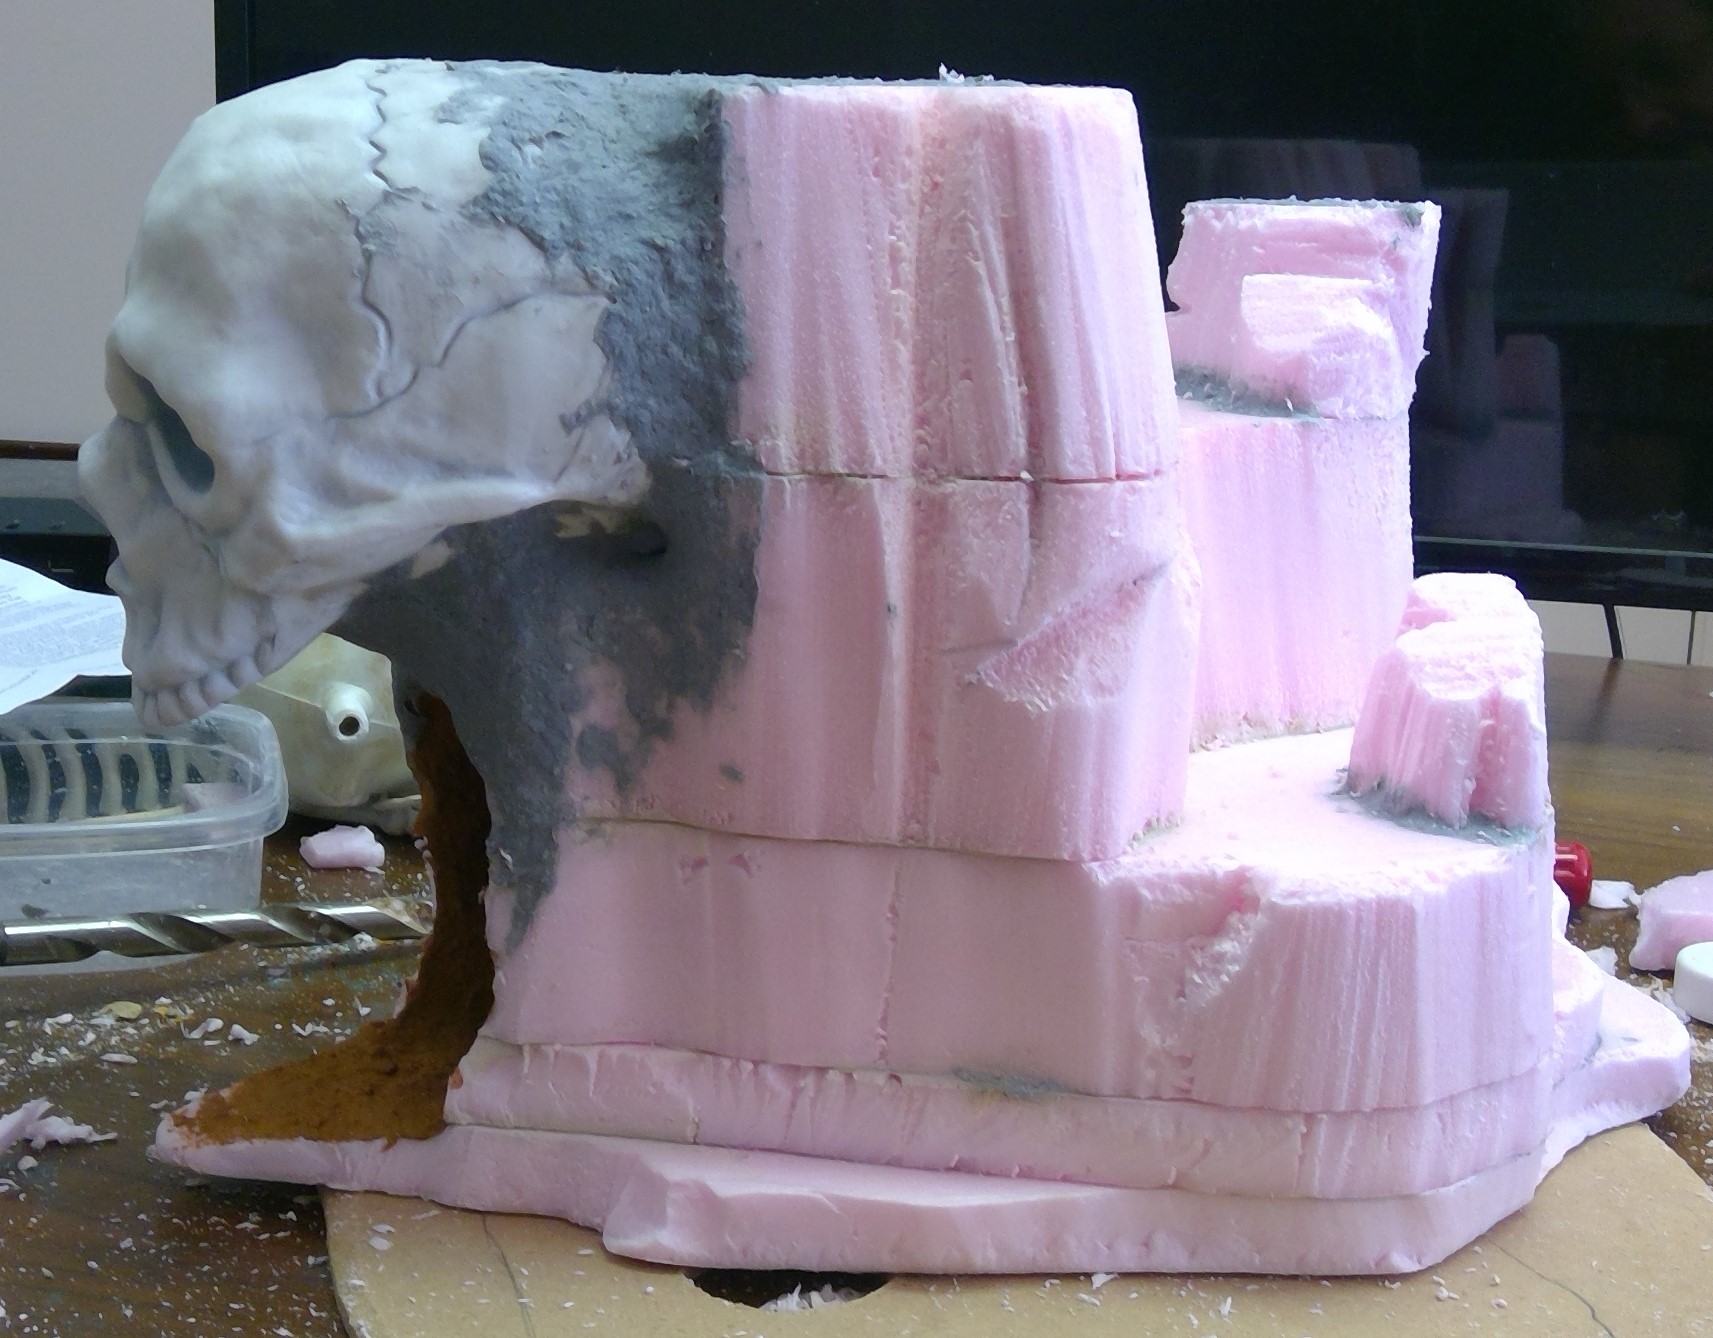
I will add a bit more CelluClay to make the transition from mesa to skull a bit more seamless and more “natural” looking. I will also be blending the bottom jaw into the mesa and up to the skull once it is all mounted to the base. I want the bottom jaw to appear as if the mesa has opened its giant mouth, not like the jaw fell to the ground.
Dry *@#% You....Dry!
Well, I’m now stuck waiting for the CelluClay to dry. It was my first time using it and I’m not sure if I added too much water or put it on too thick but it’s taking much longer to dry than I had expected. I think I’ll purchase some Sculptamold soon to compare the two.
If it’s not dry by morning I will dig out what is still wet and add more dry CelluClay to the mix and give it another shot.
This first bit of Deadlands only has about another day or so of work to be completed. If our family vacation had not been smack in the middle of the challenge, I would be done with this nice centerpiece and on to the other table fillers.
Still, this challenge was the motivation I needed to get in gear on this project. I plan to continue working on the Deadlands over the next couple weeks, then come back to it periodically, and will continue to post my progress.
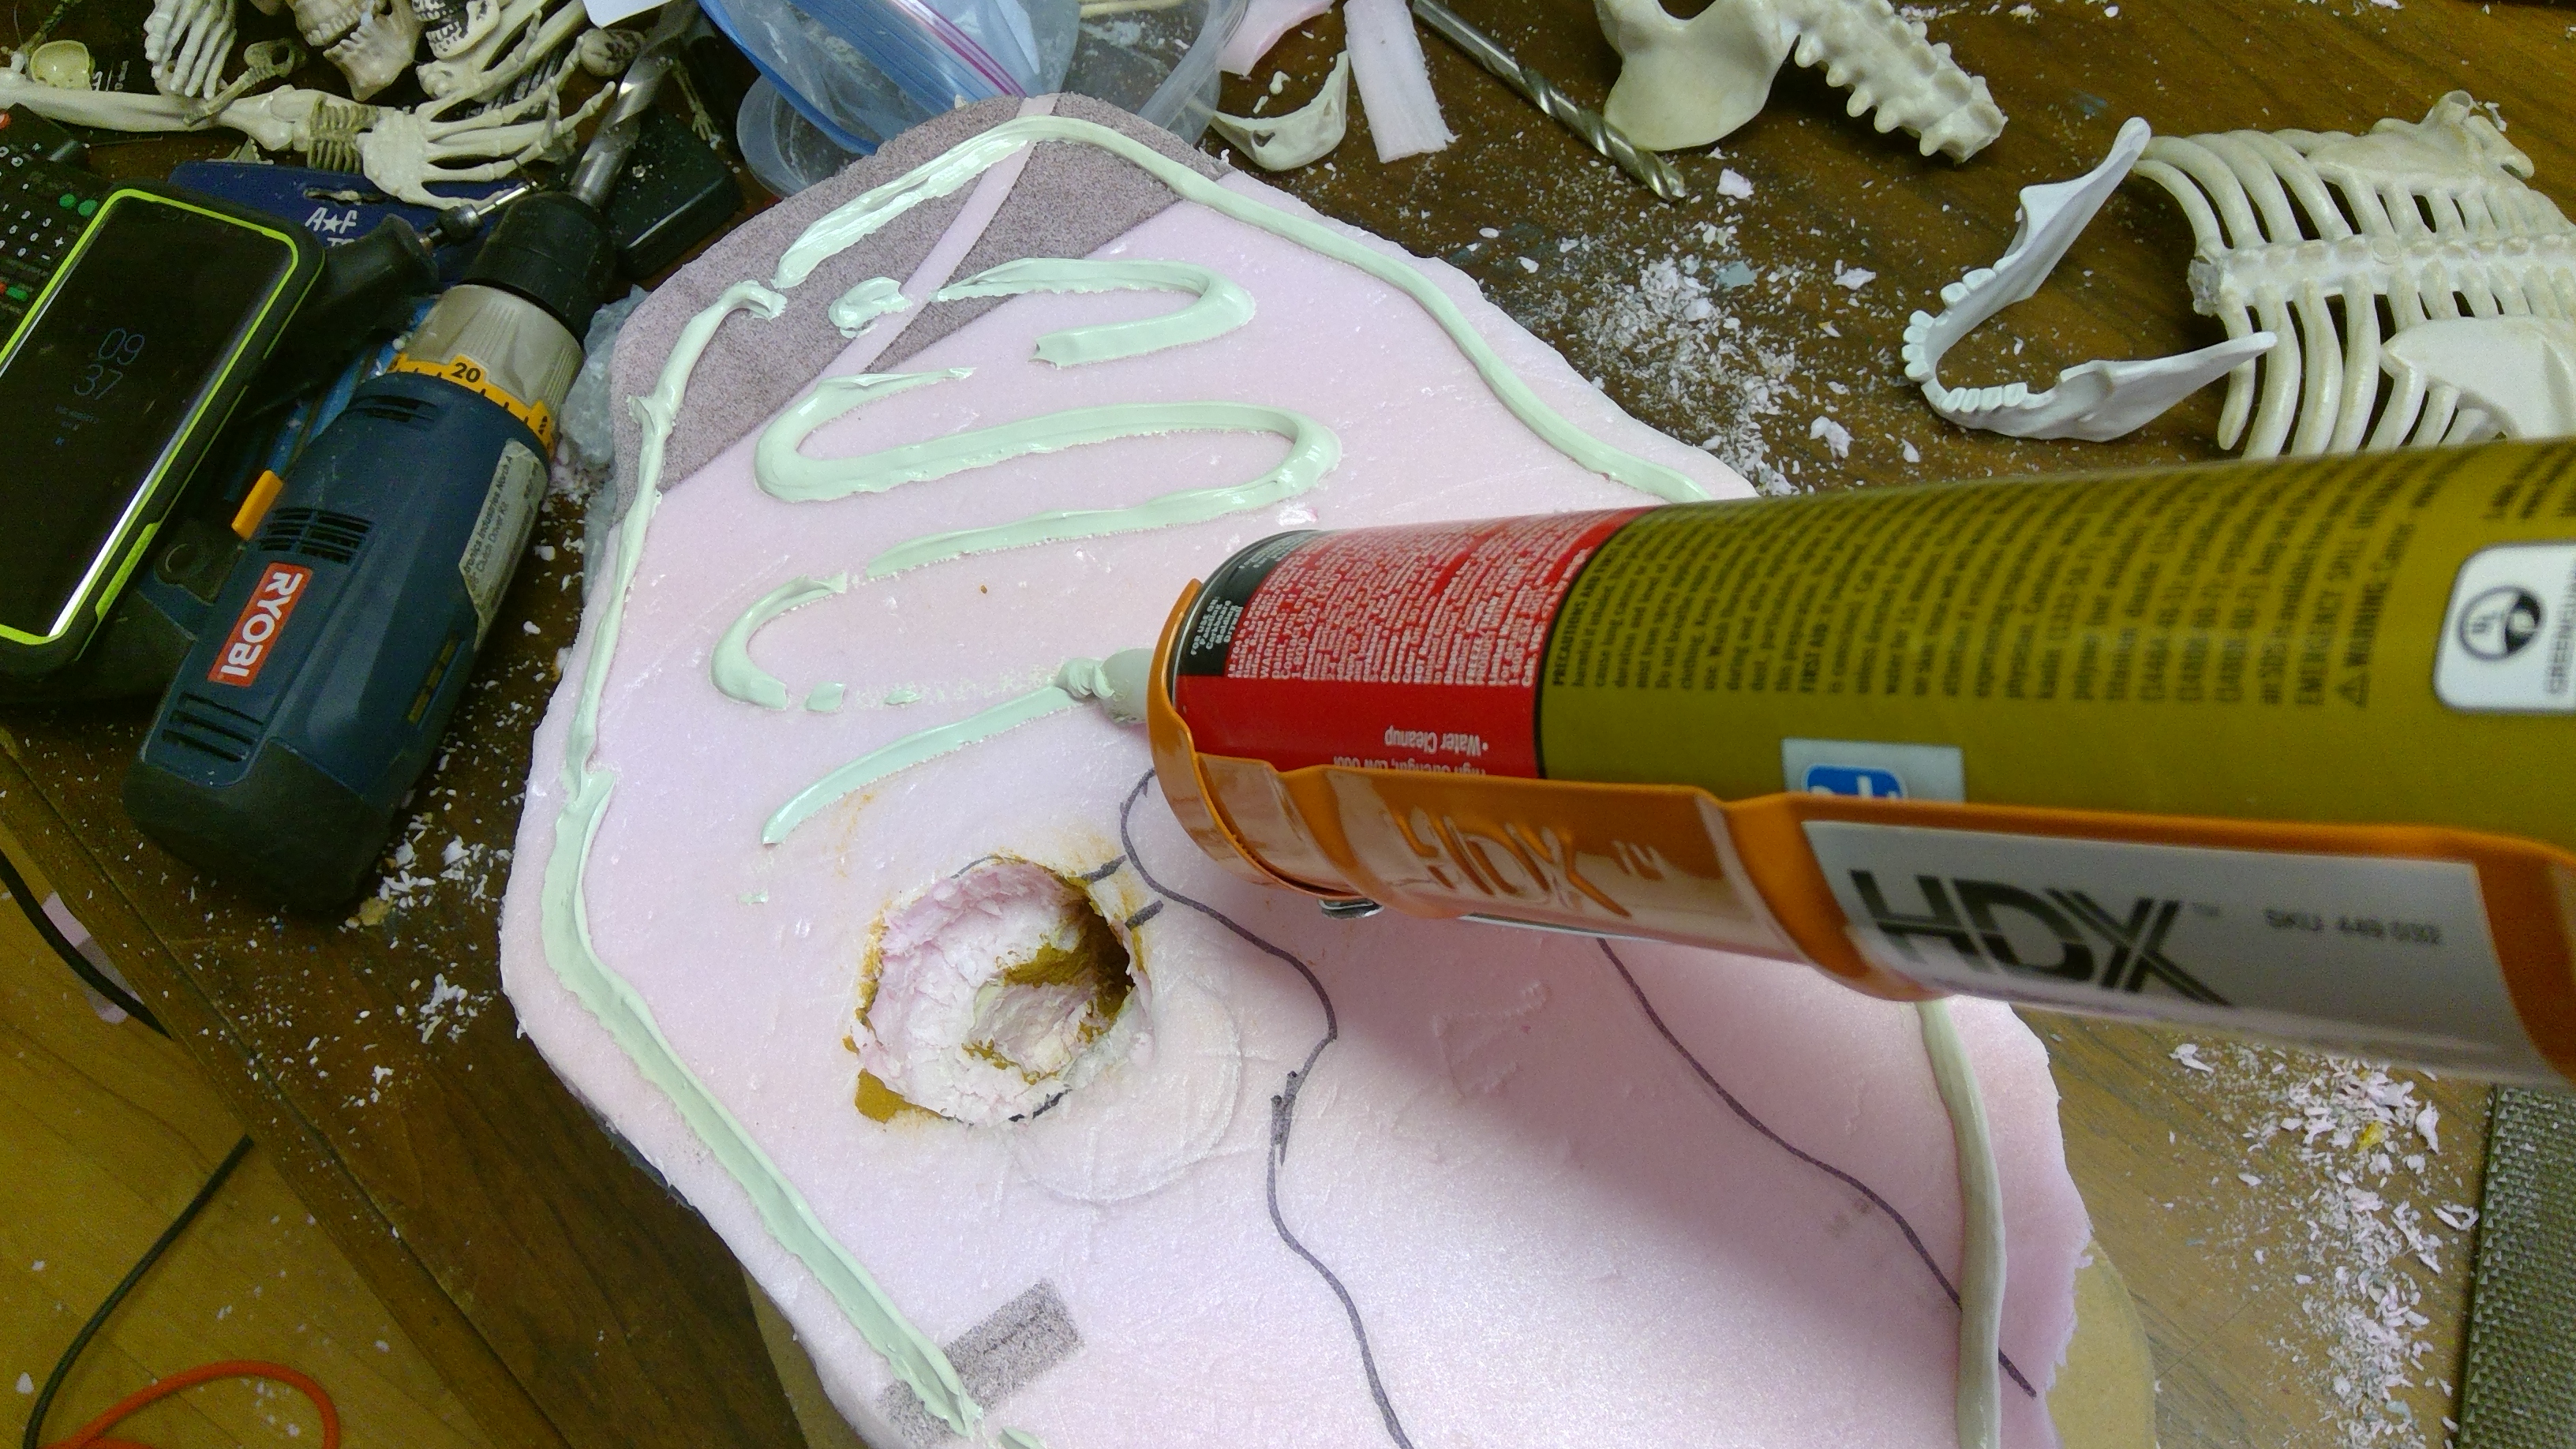
Prepping the Base
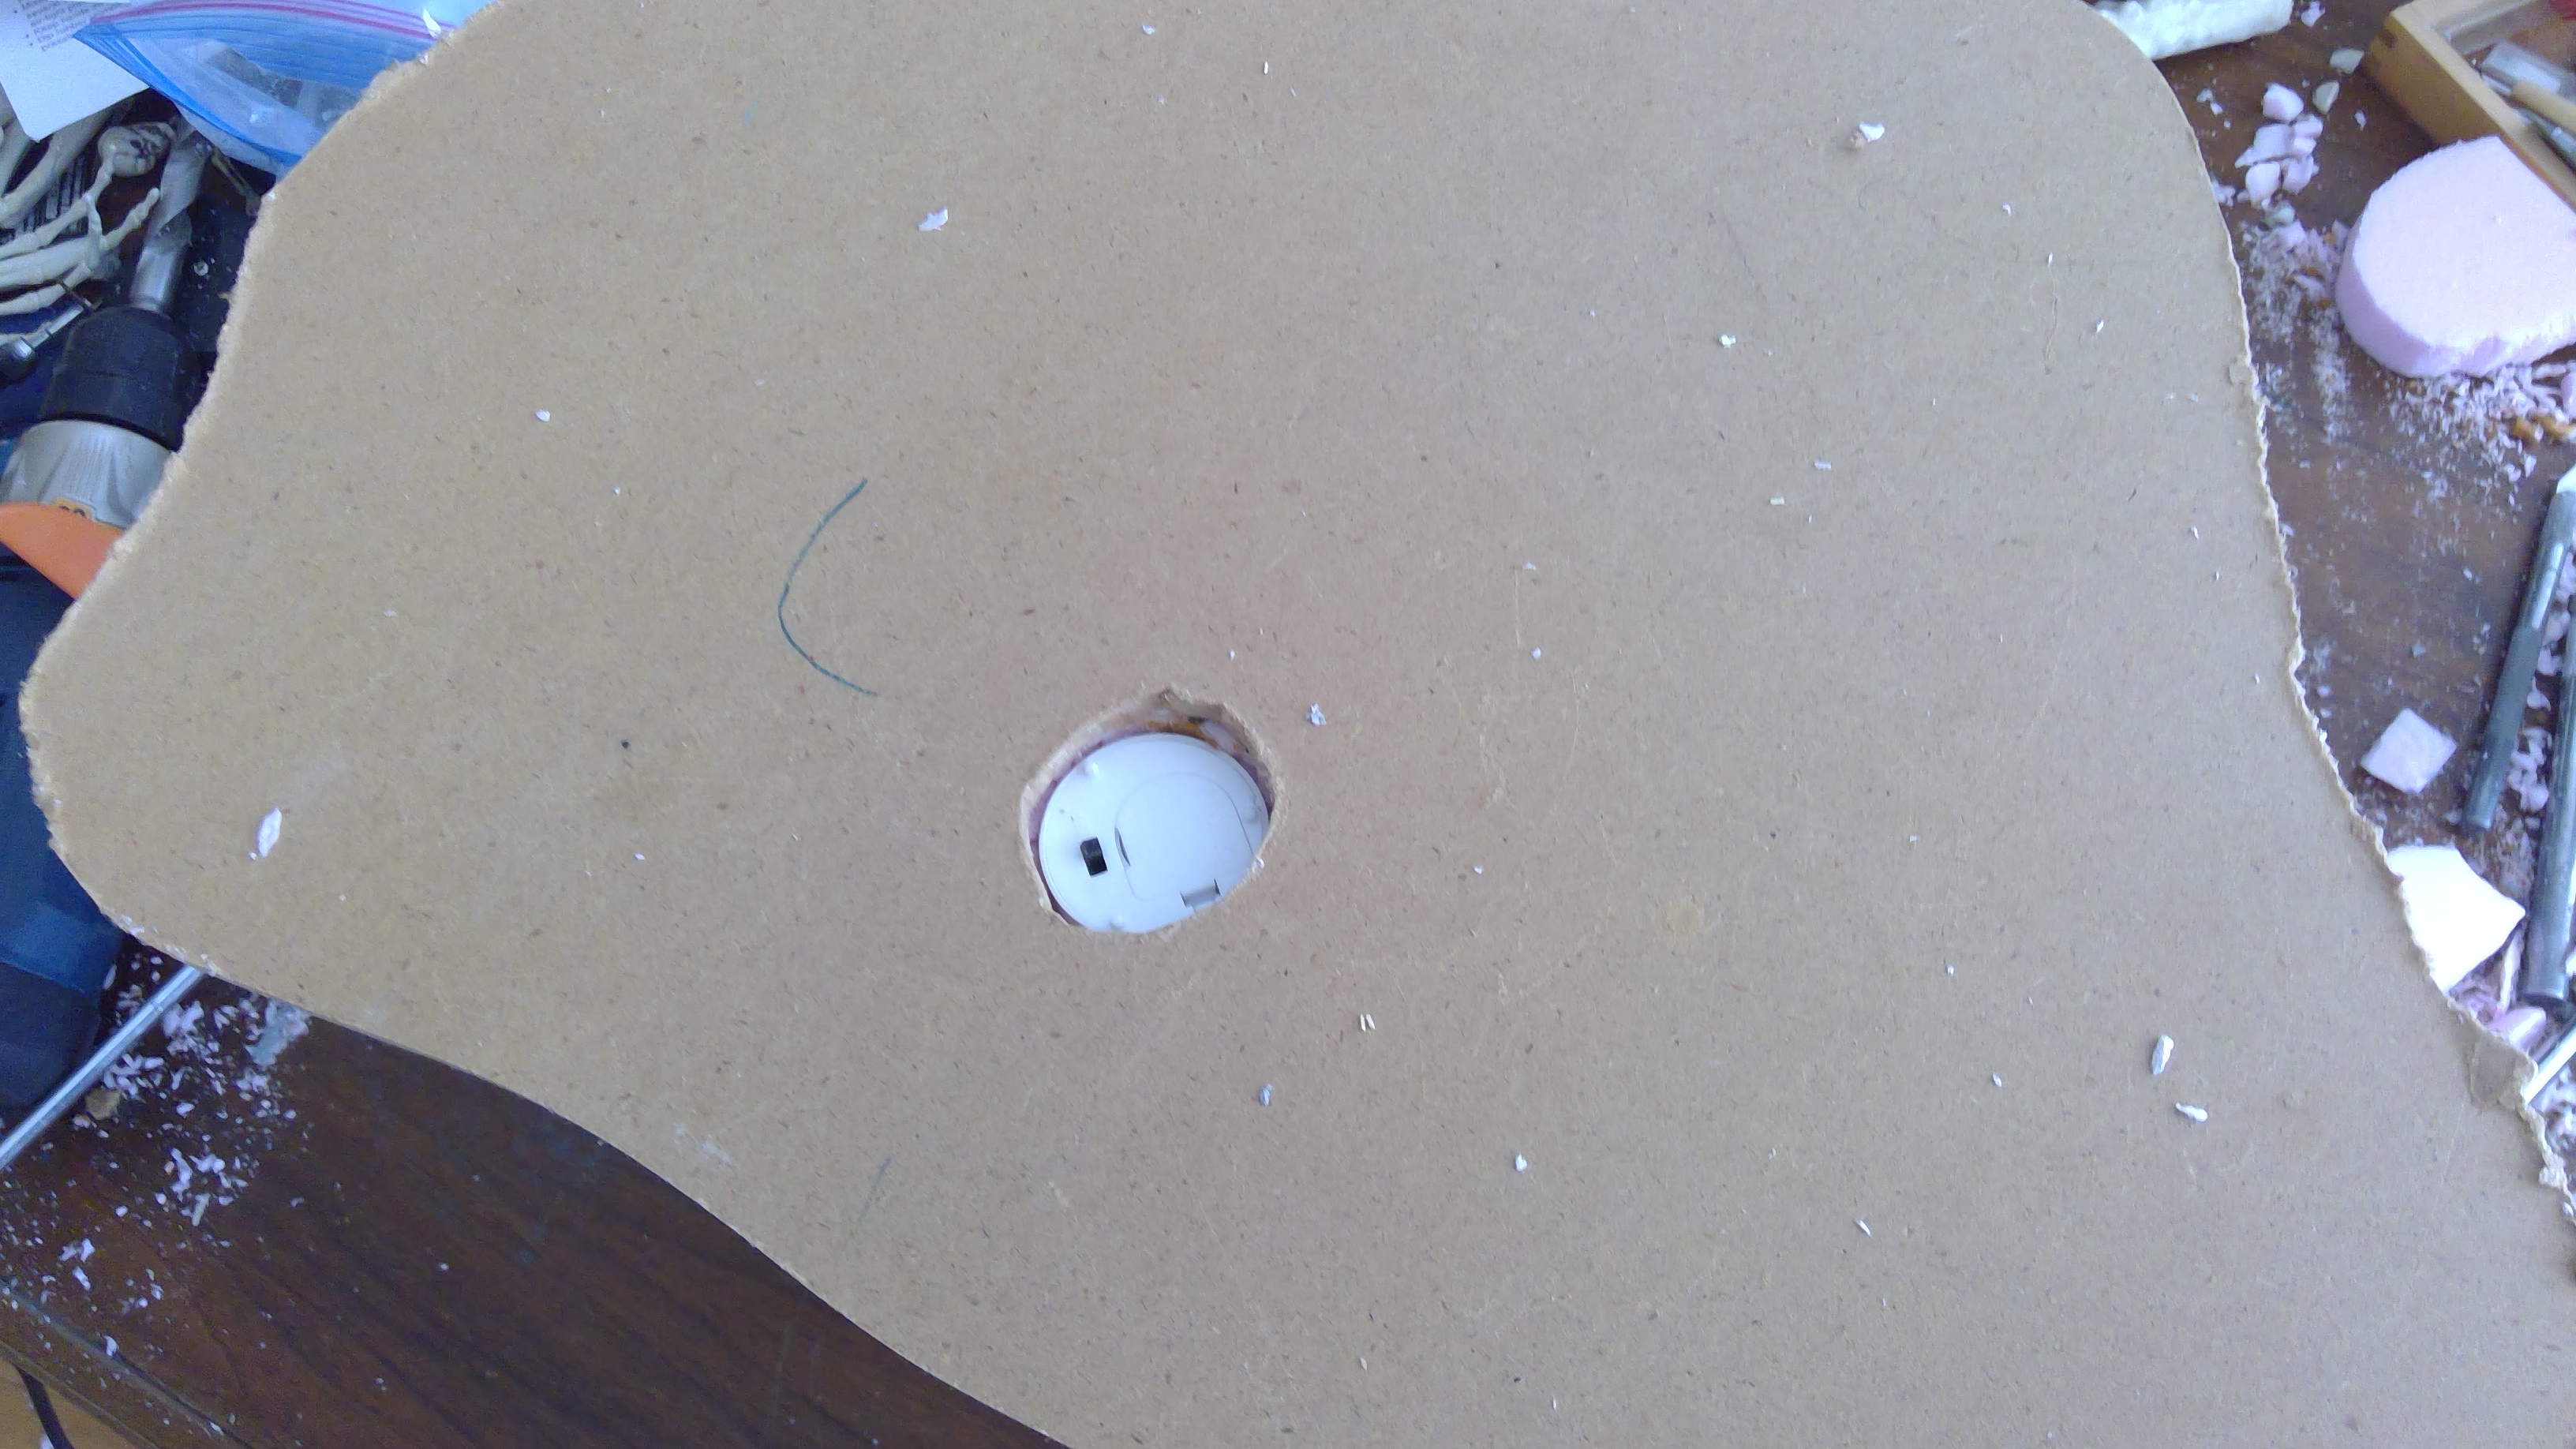
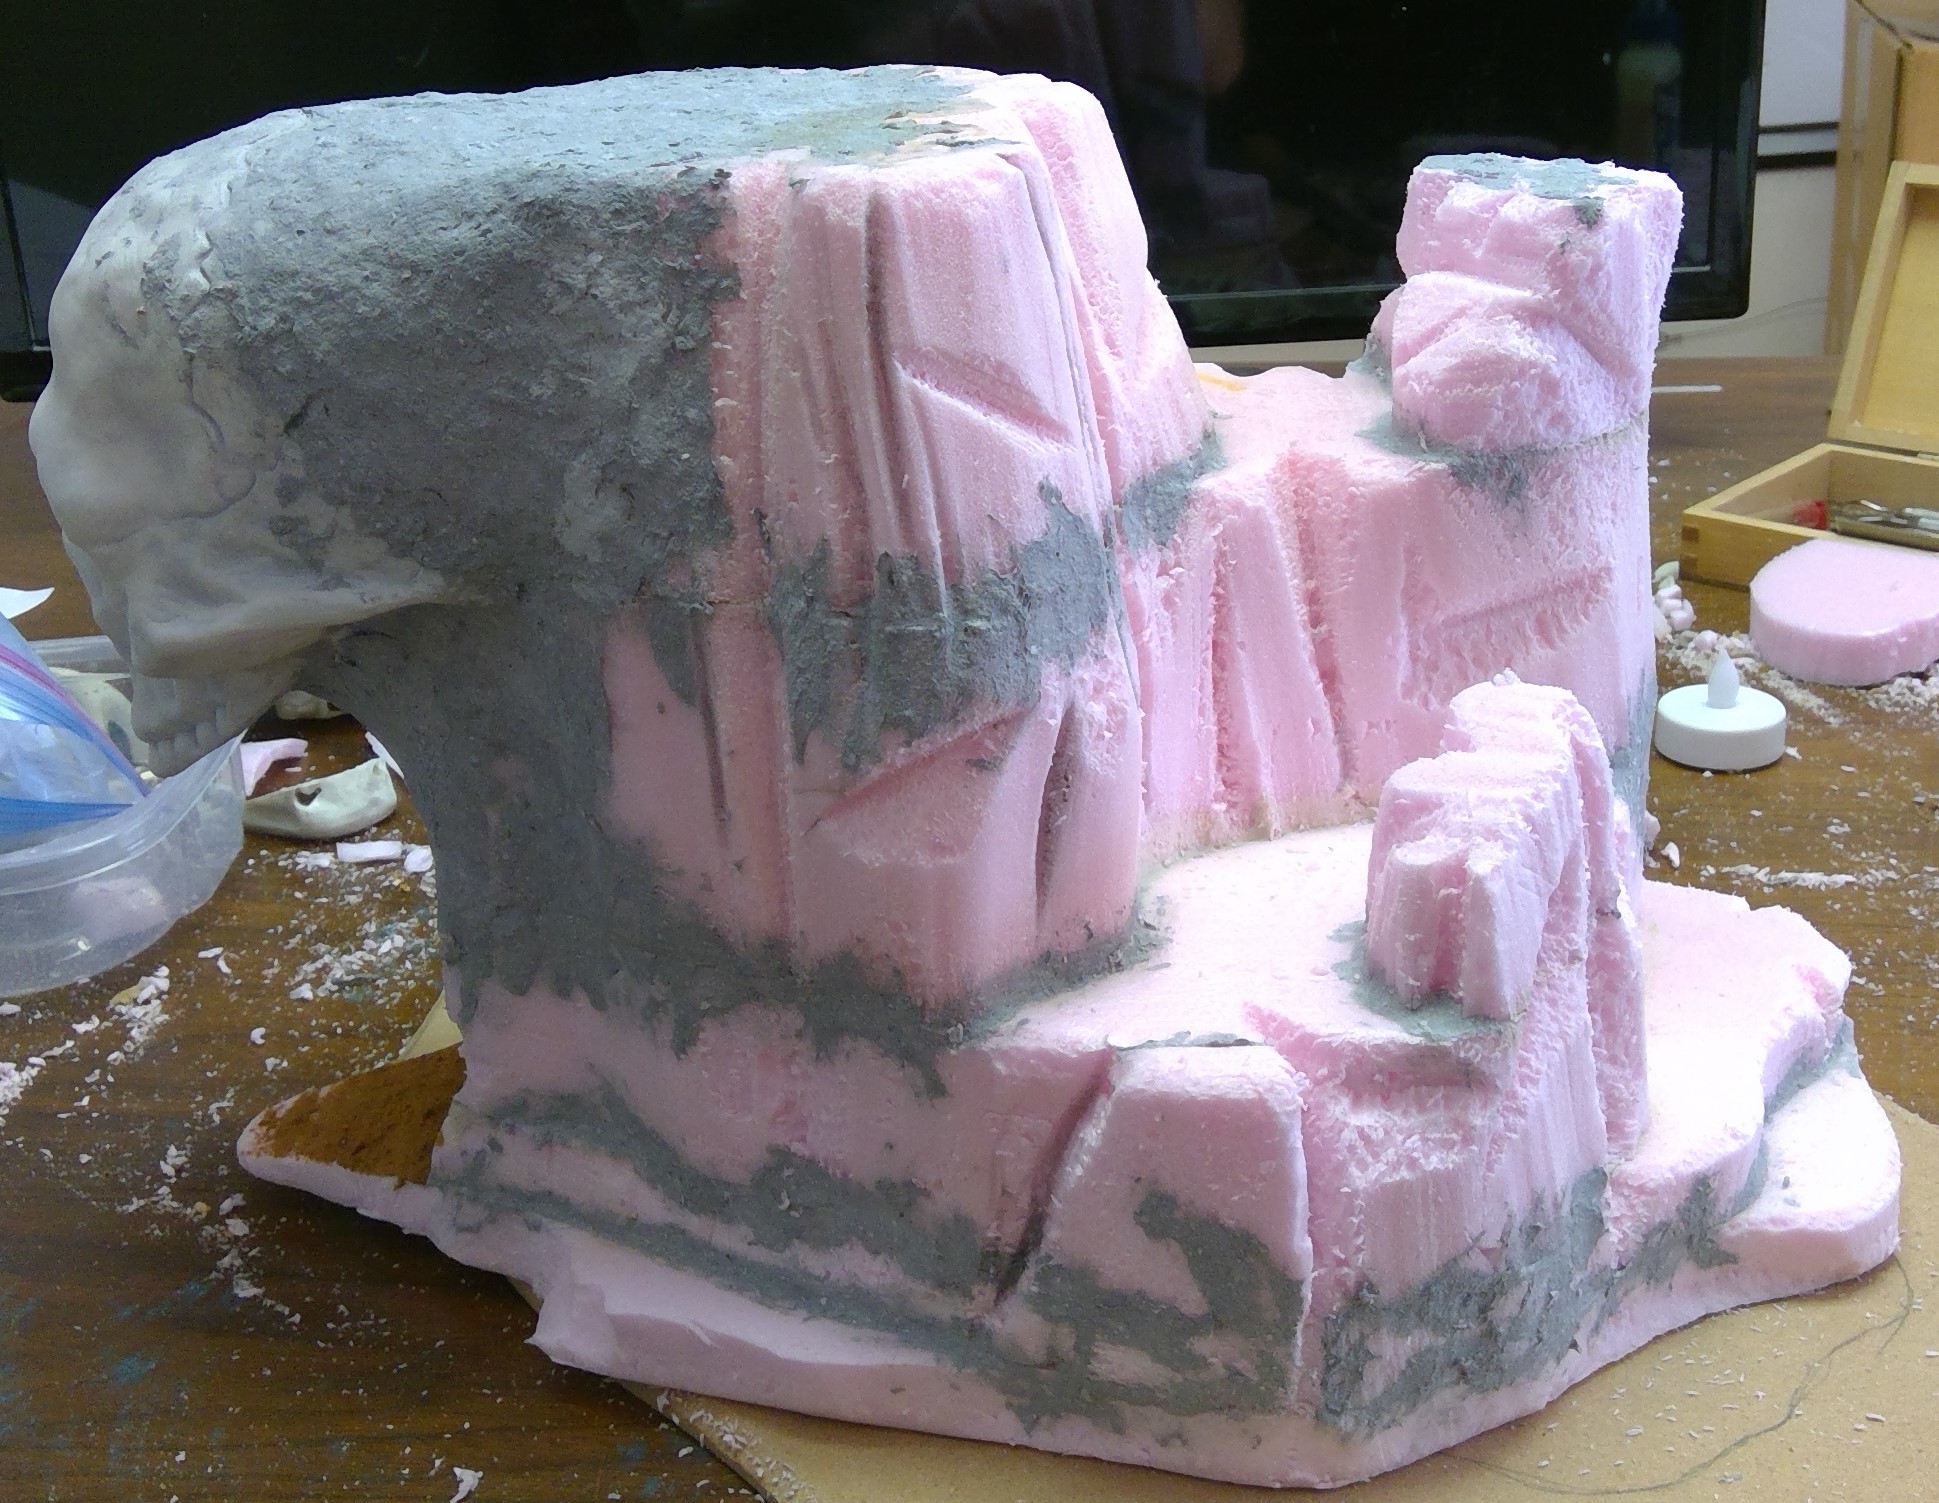
I made a rough outline of the mesa, including the hole for the tea light, on a sheet of MDF. I then cut it out with a jigsaw. For the hole for the tea light I drilled a largish hole in the center and finished the cut with the jigsaw. I then lined up the mesa/cave on the base and traced around it so I have guidelines when it comes time to glue it down. I also redefined some of the edges and re-cut them with a coping saw (which is kinda like a wood saw version of the jewelers saw).
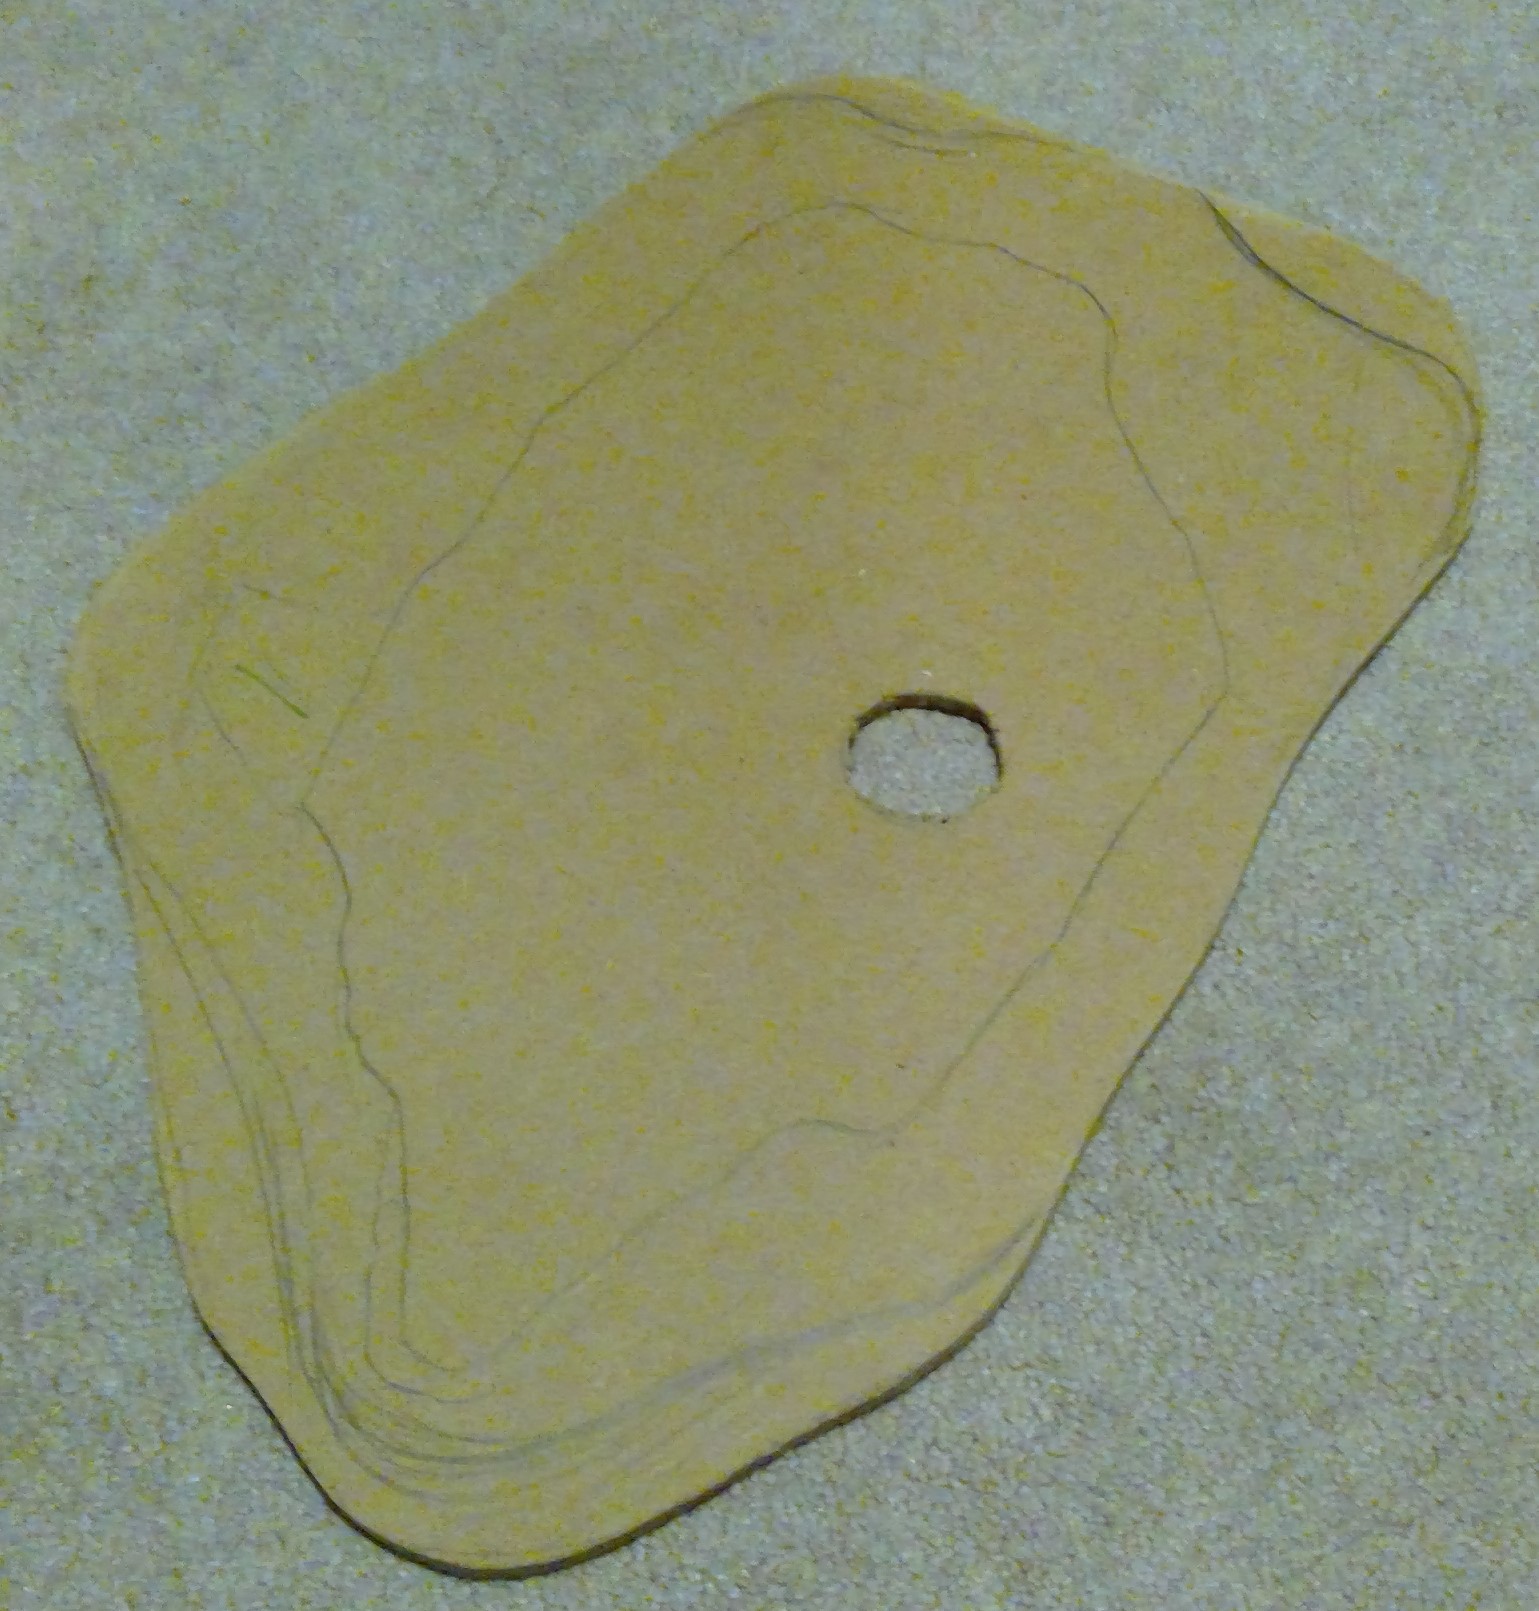
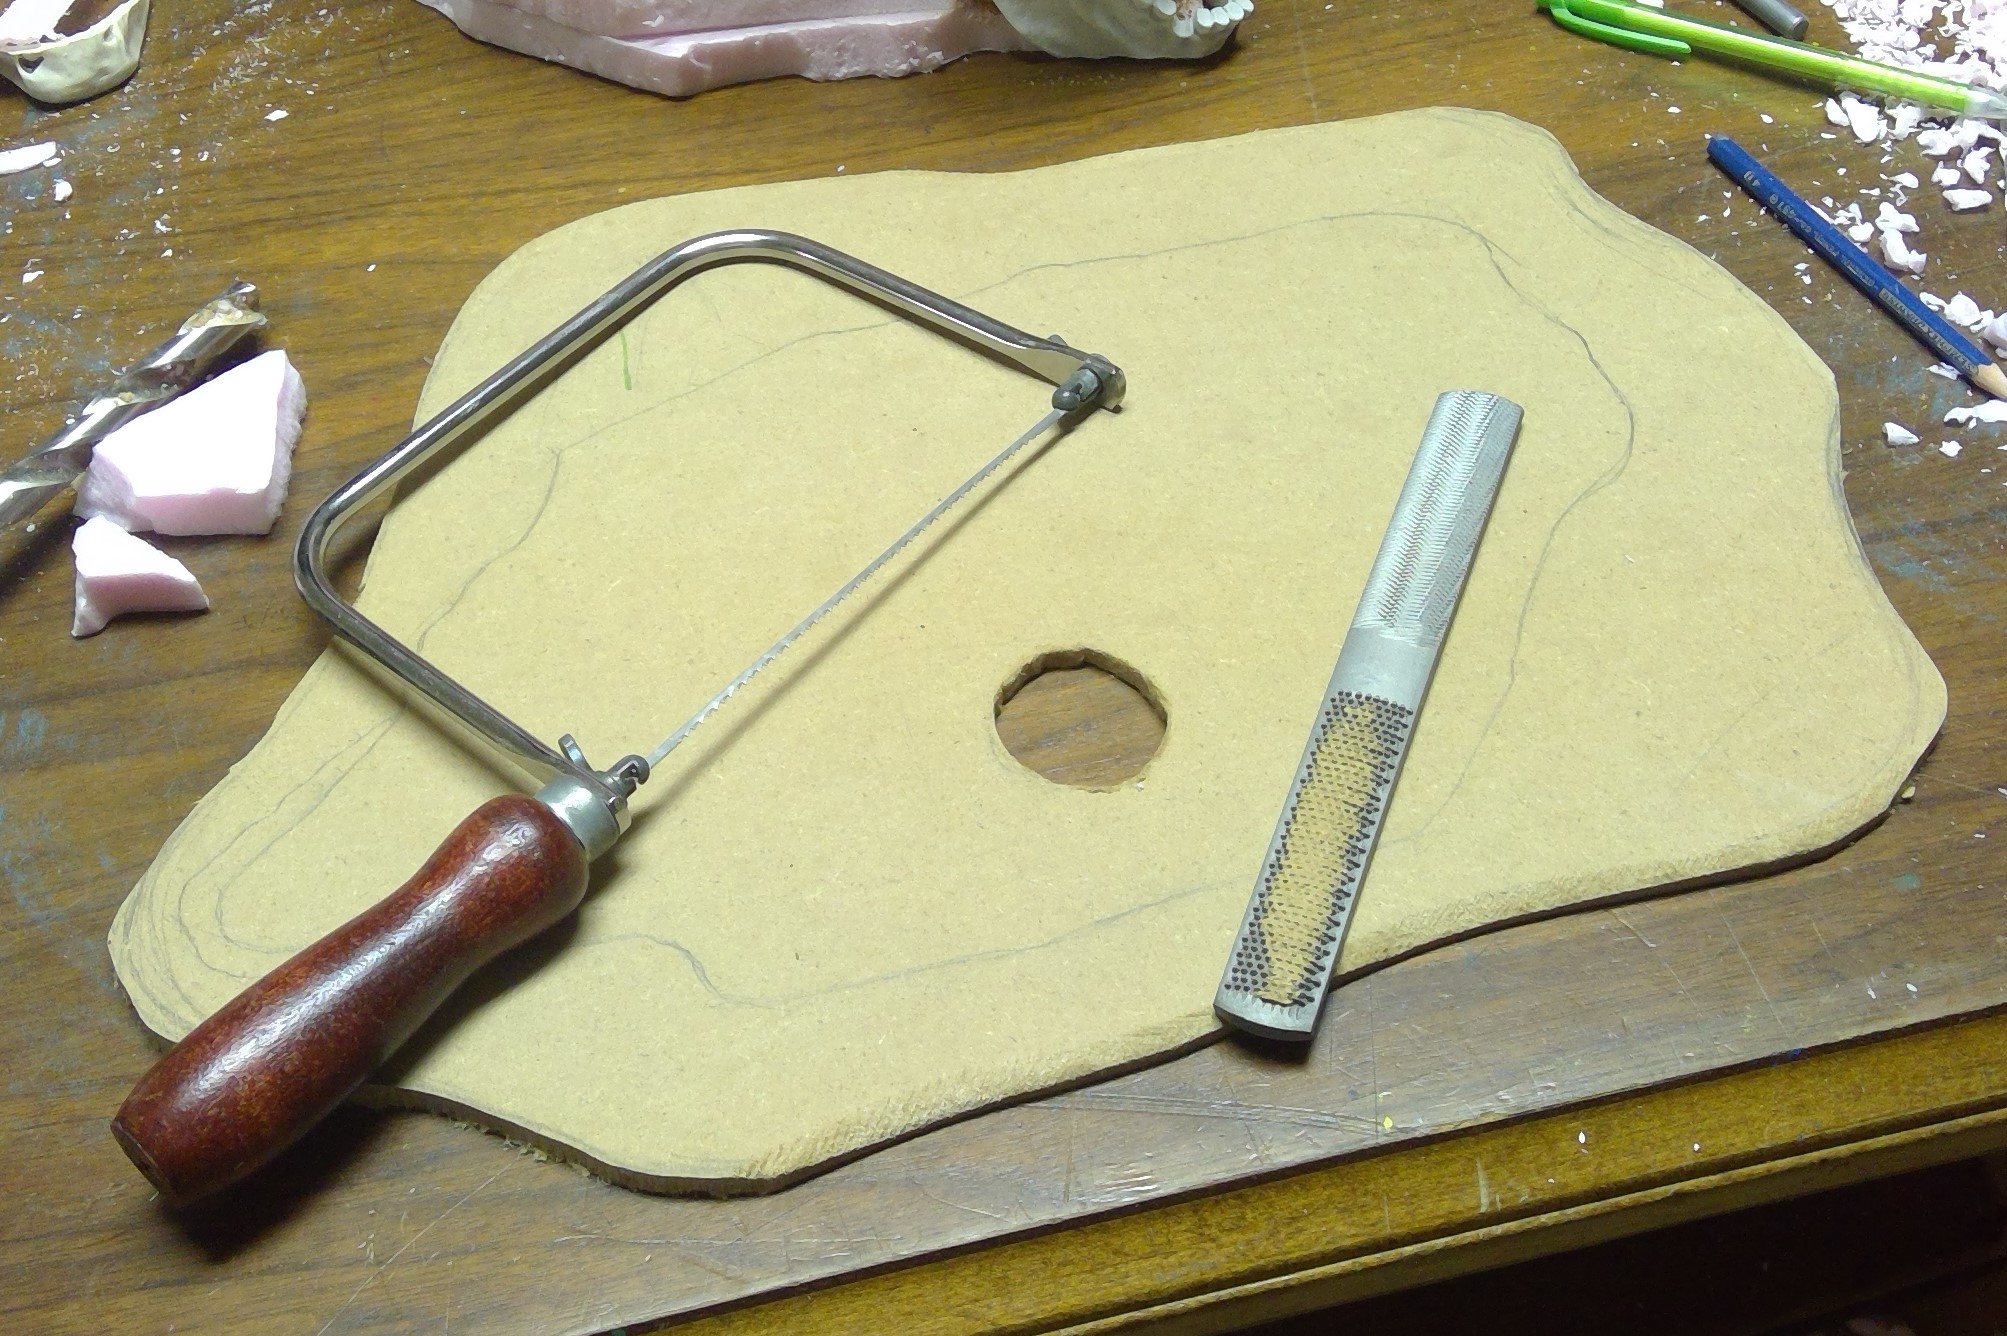
Now it is on to beveling the edges. I started with a rasp and once I have a decent bevel I will smooth it all out with a palm sander in the morning. It’s too late in the evening to run a power tool.
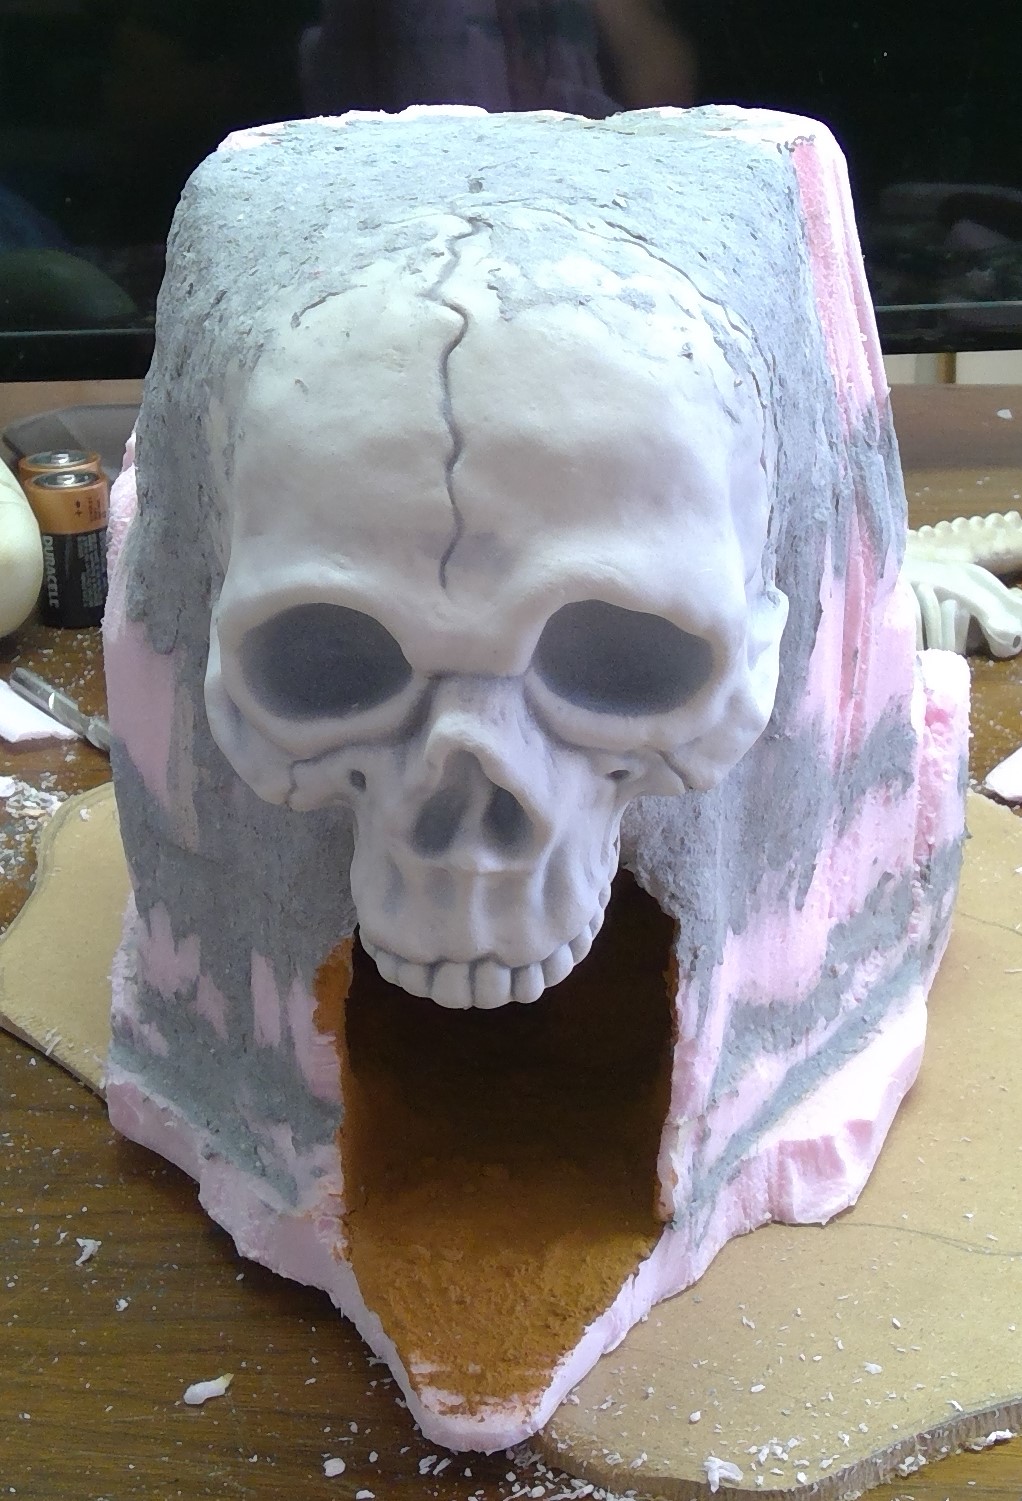
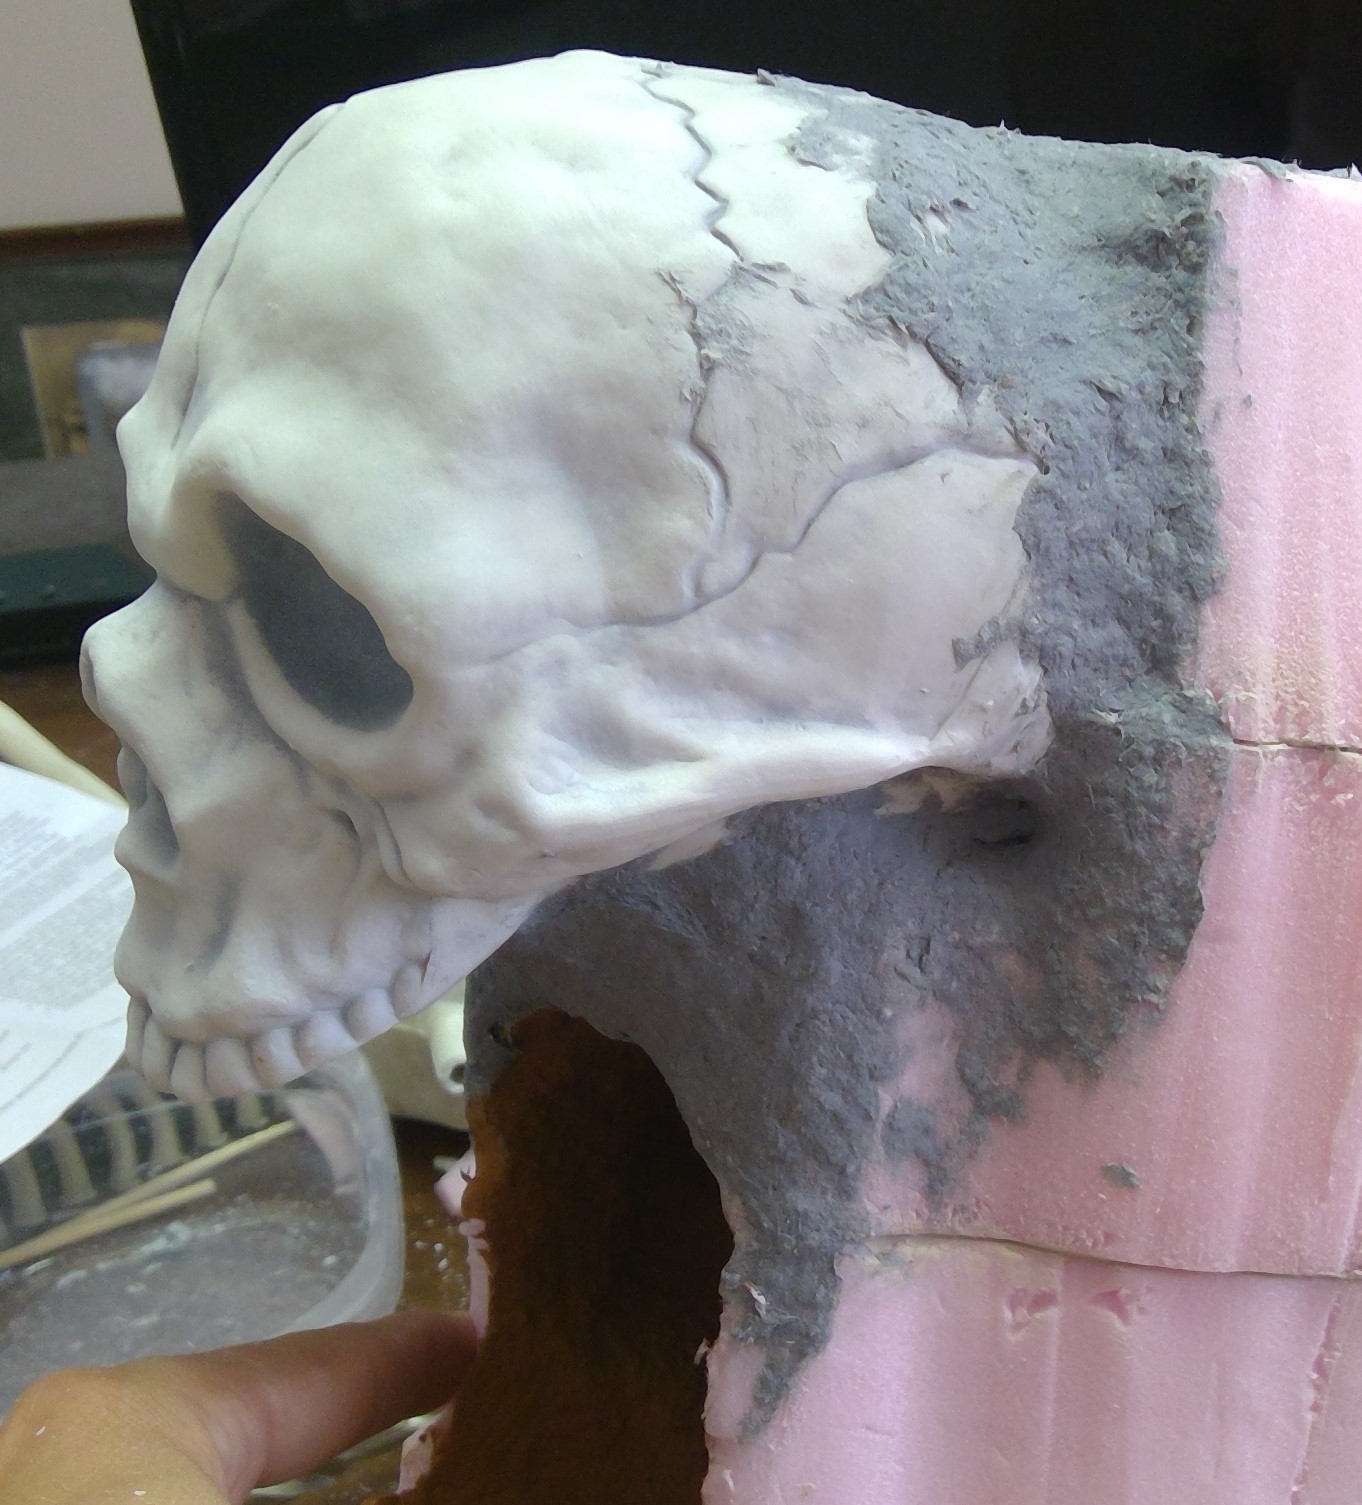
Mounting the Skull
The skull is now pinned in place with the skewers and glued with Liquid Nails: Project adhesive.
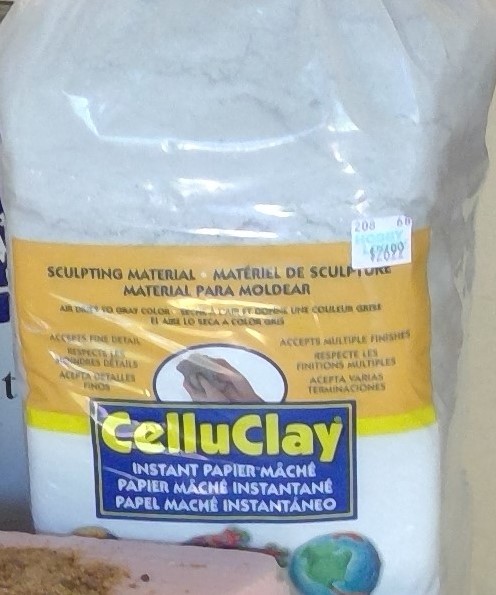
I have also started to fill the large gaps with the CelluClay. CelluClay is basically a fine paper-mache substance that you just add water to. It is sandable and paintable when dry. I will be adding more as the build goes on.


![Play WW2 Commando Operations With Butcher & Bolt [Updated]](https://images.beastsofwar.com/2026/03/relaunch-600-338.jpg)


