


![NO Weekender Or Cult Of Games XLBS This Weekend [Updated]](https://images.beastsofwar.com/2026/03/No_Weekender_and_XLBS_this_Weekend-225-127.jpg)


Space Hulk


Recommendations: 453
About the Project
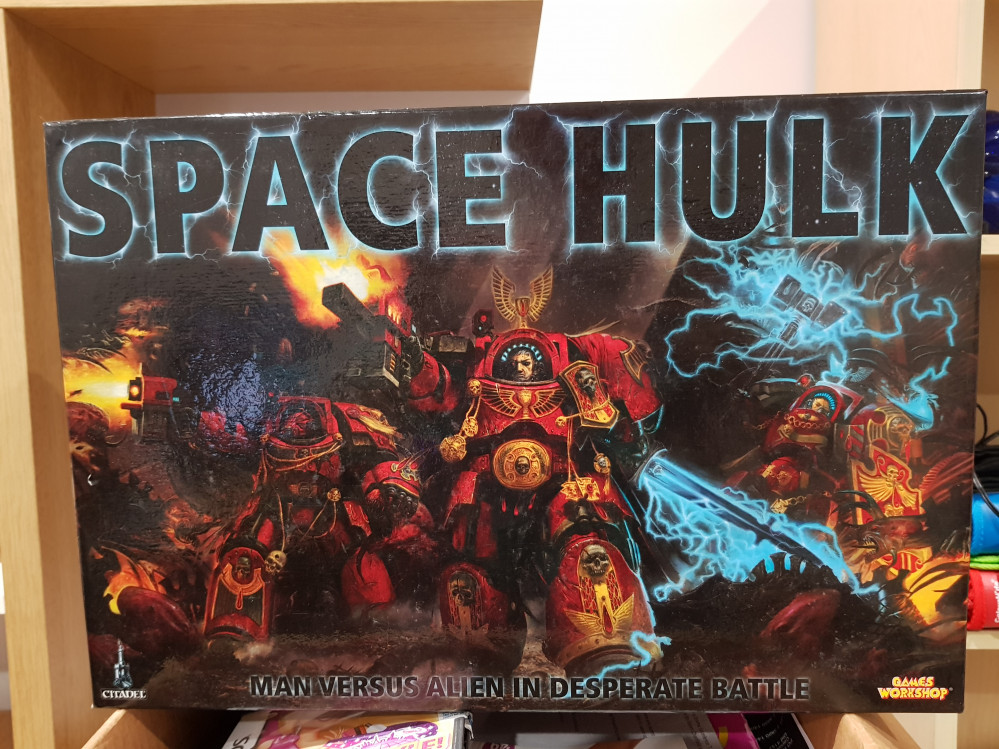
I recently was trolling through Facebook Marketplace when I found a copy of the 2014 Space Hulk for sale for $AU 50.00 (UK Pounds 28.00 - $US 37.00 - Bargin !!!) When I contacted the seller he said he had never painted the figures and I immediately started thinking I can use these in both 40K and Space Hulk and raced over to grab them. The thing is, until very recently, I stepped away from GW and although I knew this version had some amazing sculpts I could use in 40K, I didn't realise they were on moulded in bases !!! AGGGHHH !!! I decided - I can cut them off and put them on GW bases .. !!! - Boy this was going to be one hell of a task - NOTE: I am no golden deamon winner or supper kitbasher .. so this is a everyday man's tale of how to make them look "err ok" and !!! - I am not done yet so it might be a project called - Space Hulk - What not to do !! - But here goes.. Day 1 (oh and 2 and 3 - 4 and a bit of 5 - Cutting, clipping, shaving) - Oops no .. day 1 - a trip to GW and a quick splurge on some adeptus mechanicus (in my mind - Space Hulky type bases).. Now back to the wounds .. err I mean cutting of the models (and me a bit) ..
Related Game: Space Hulk
Related Company: Games Workshop
Related Genre: Science Fiction
This Project is Active
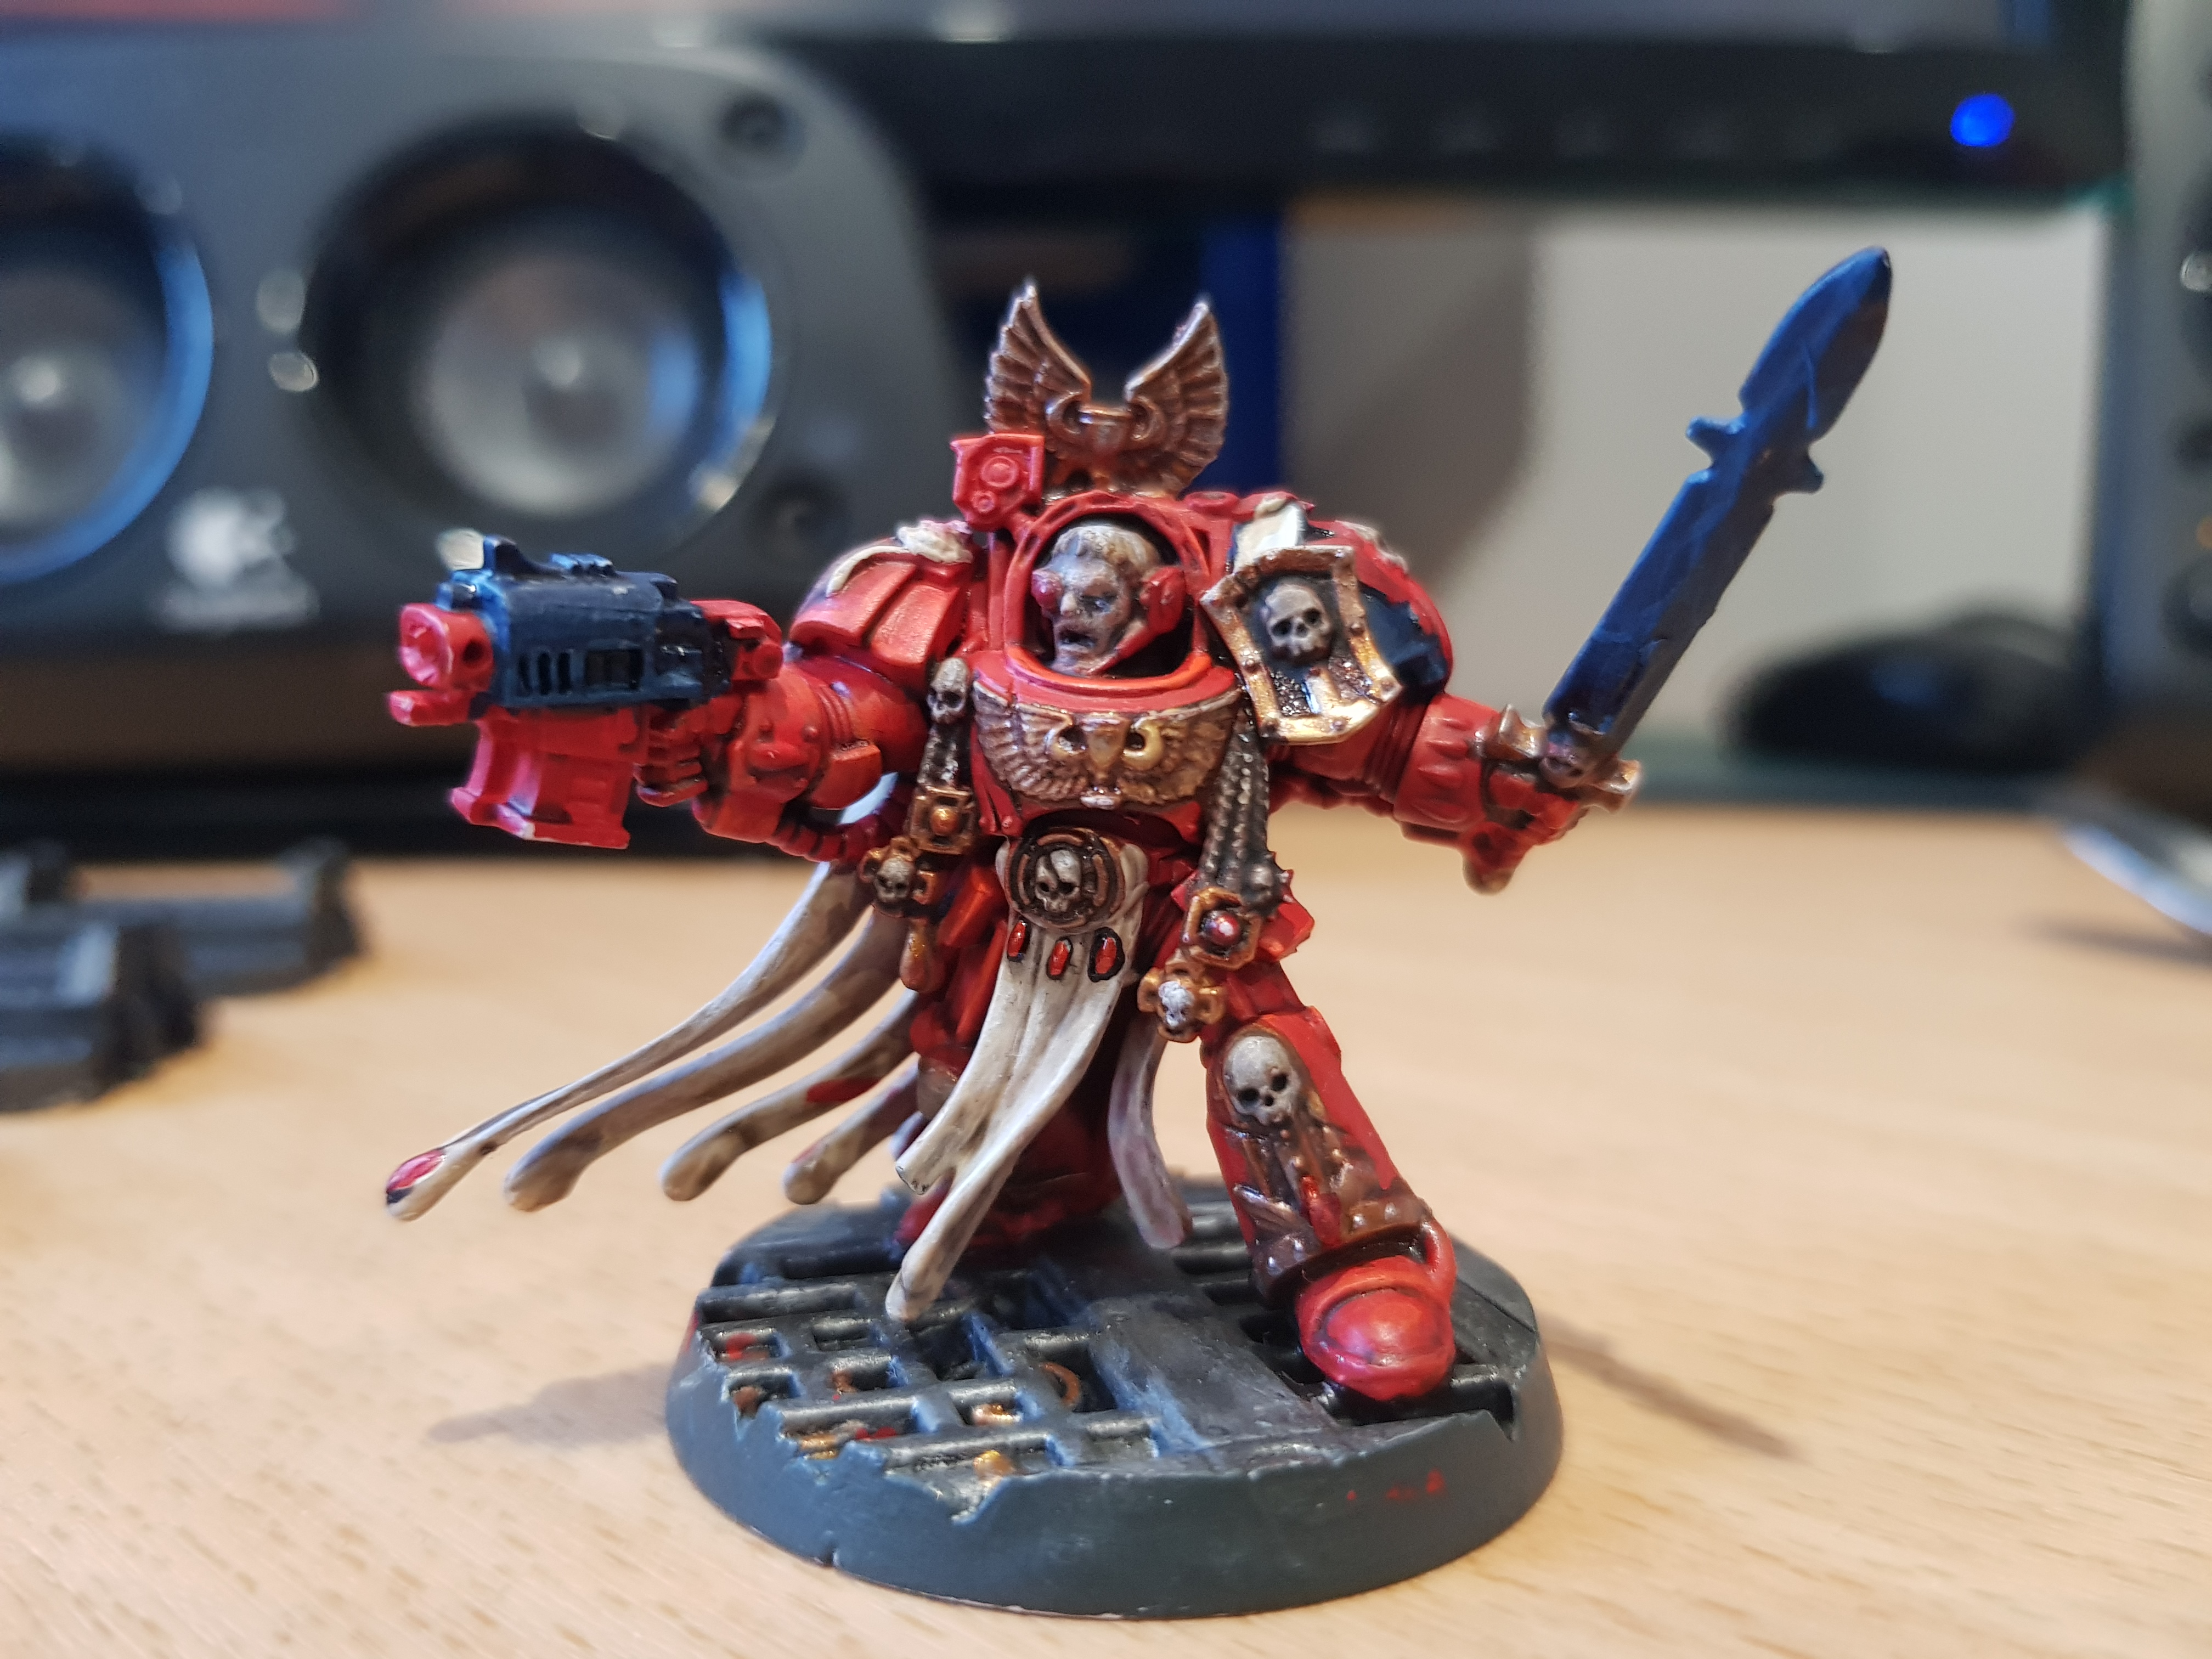
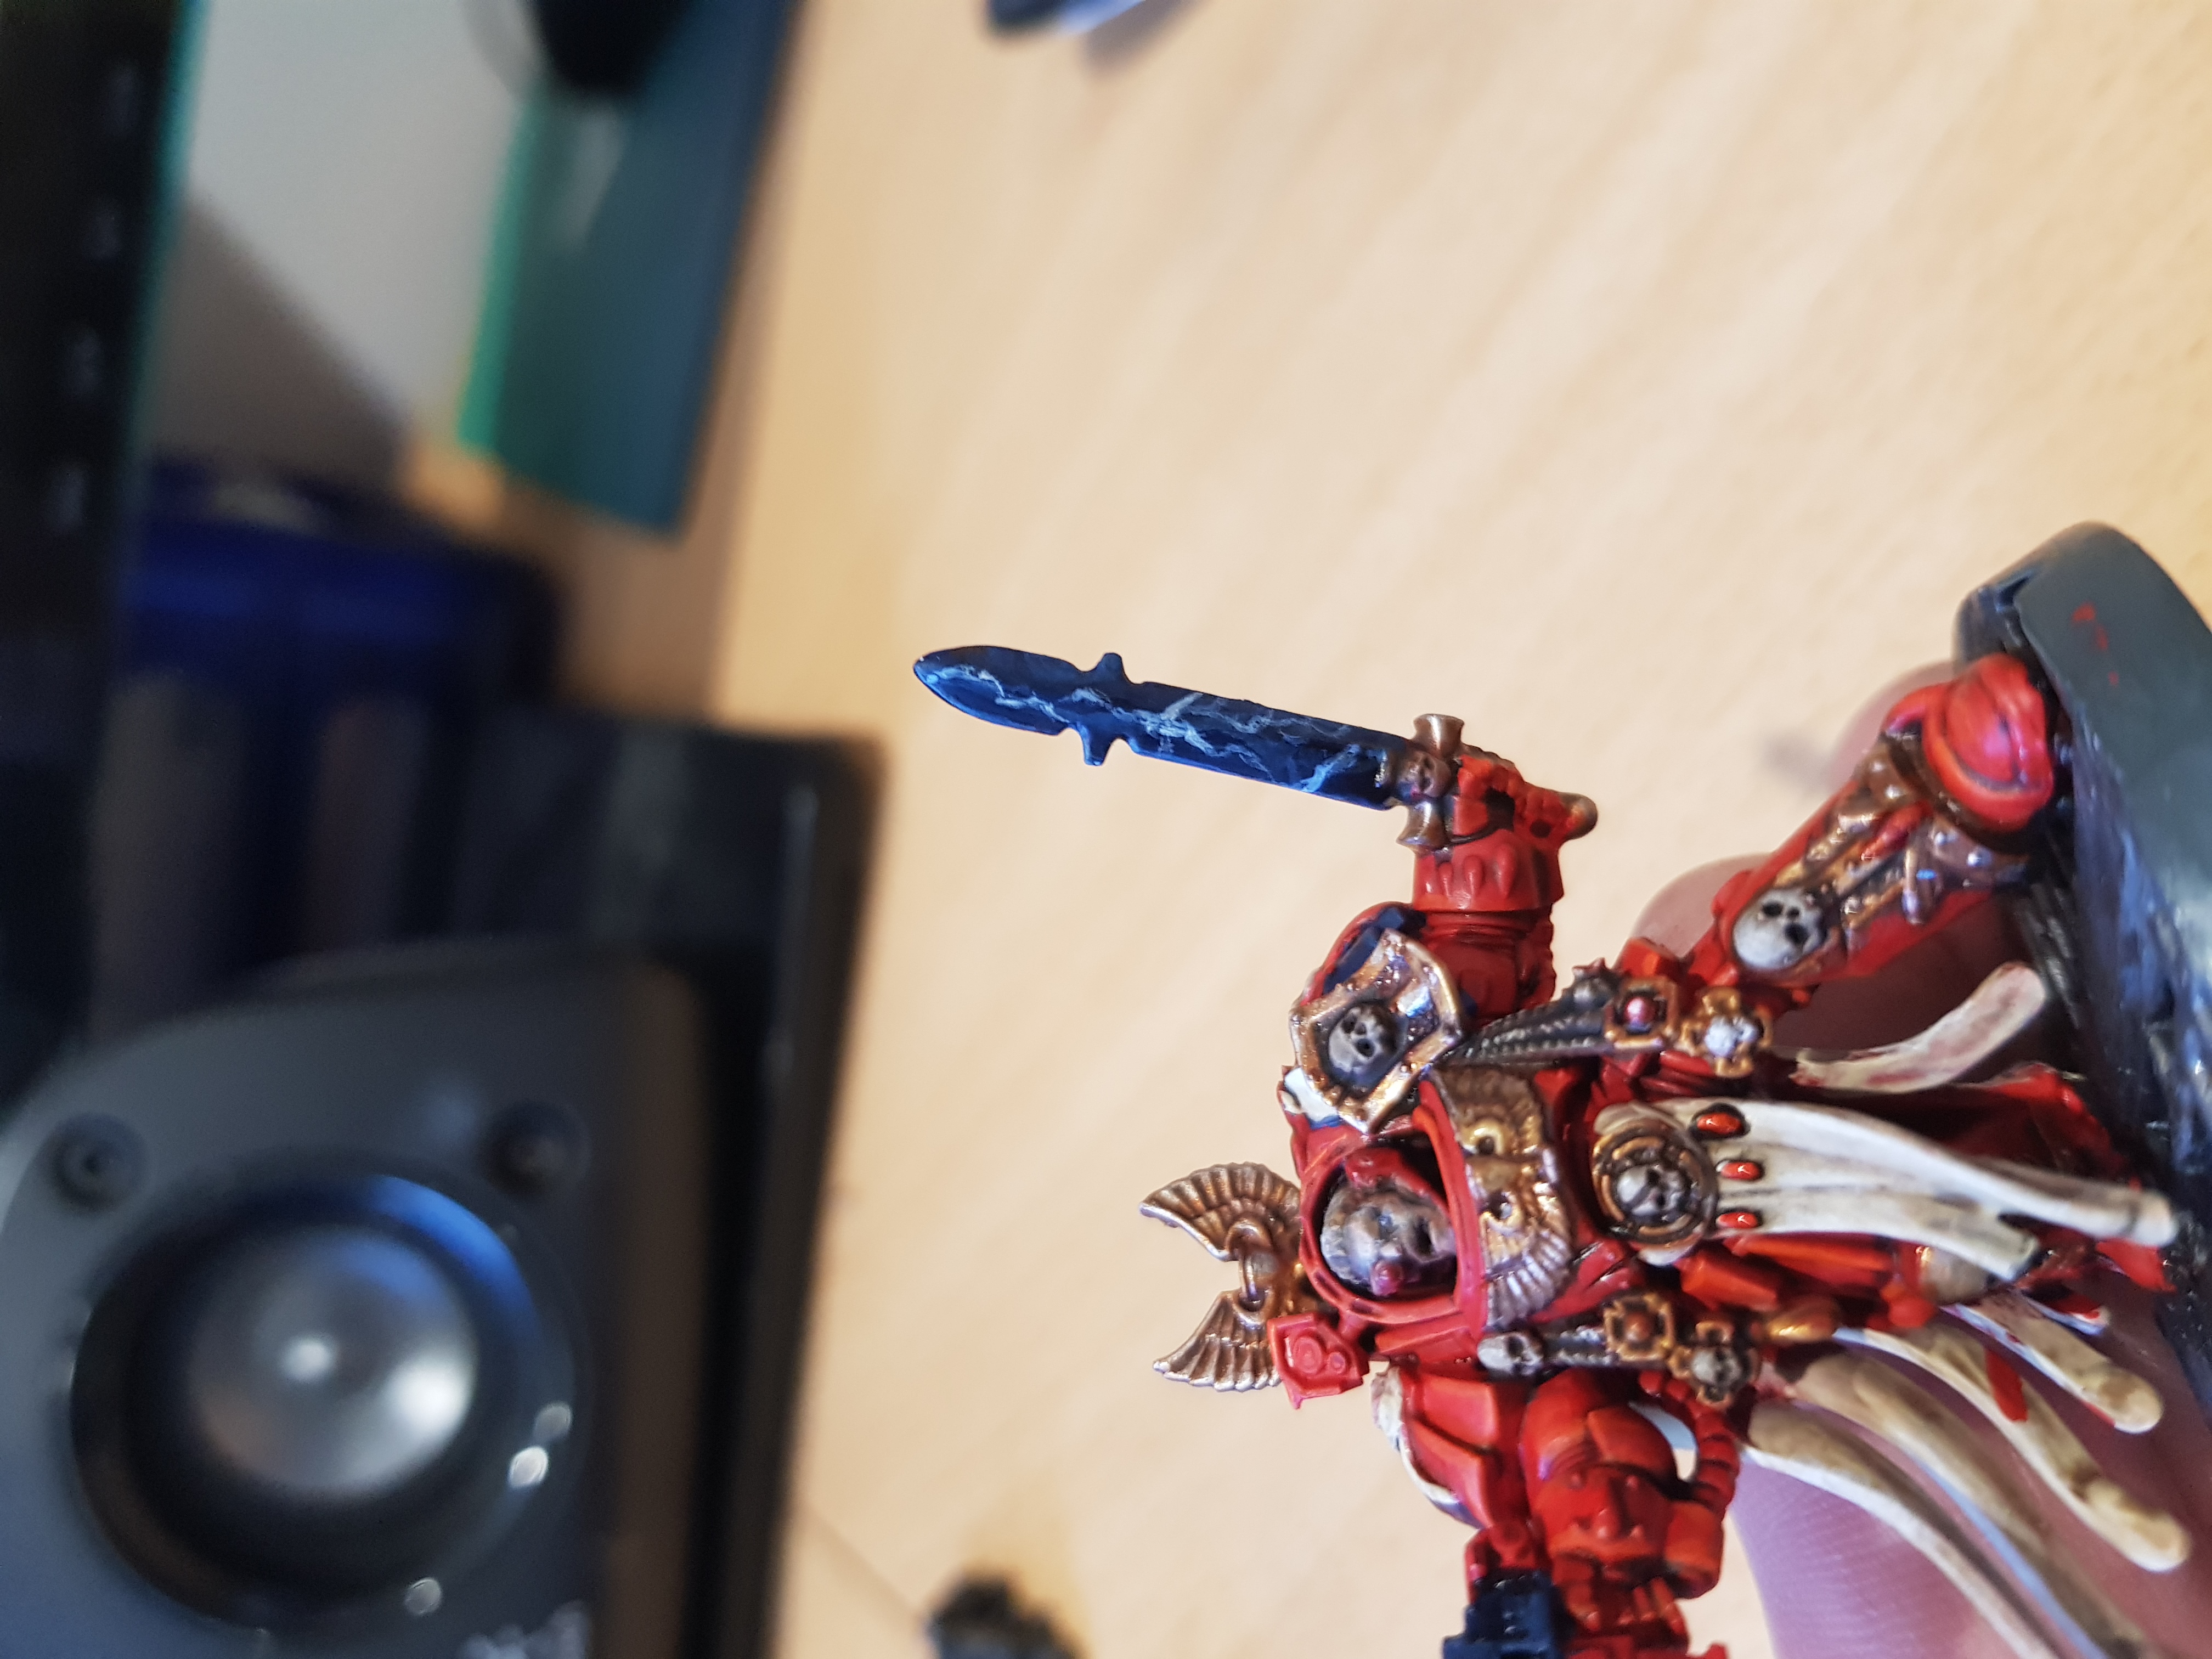
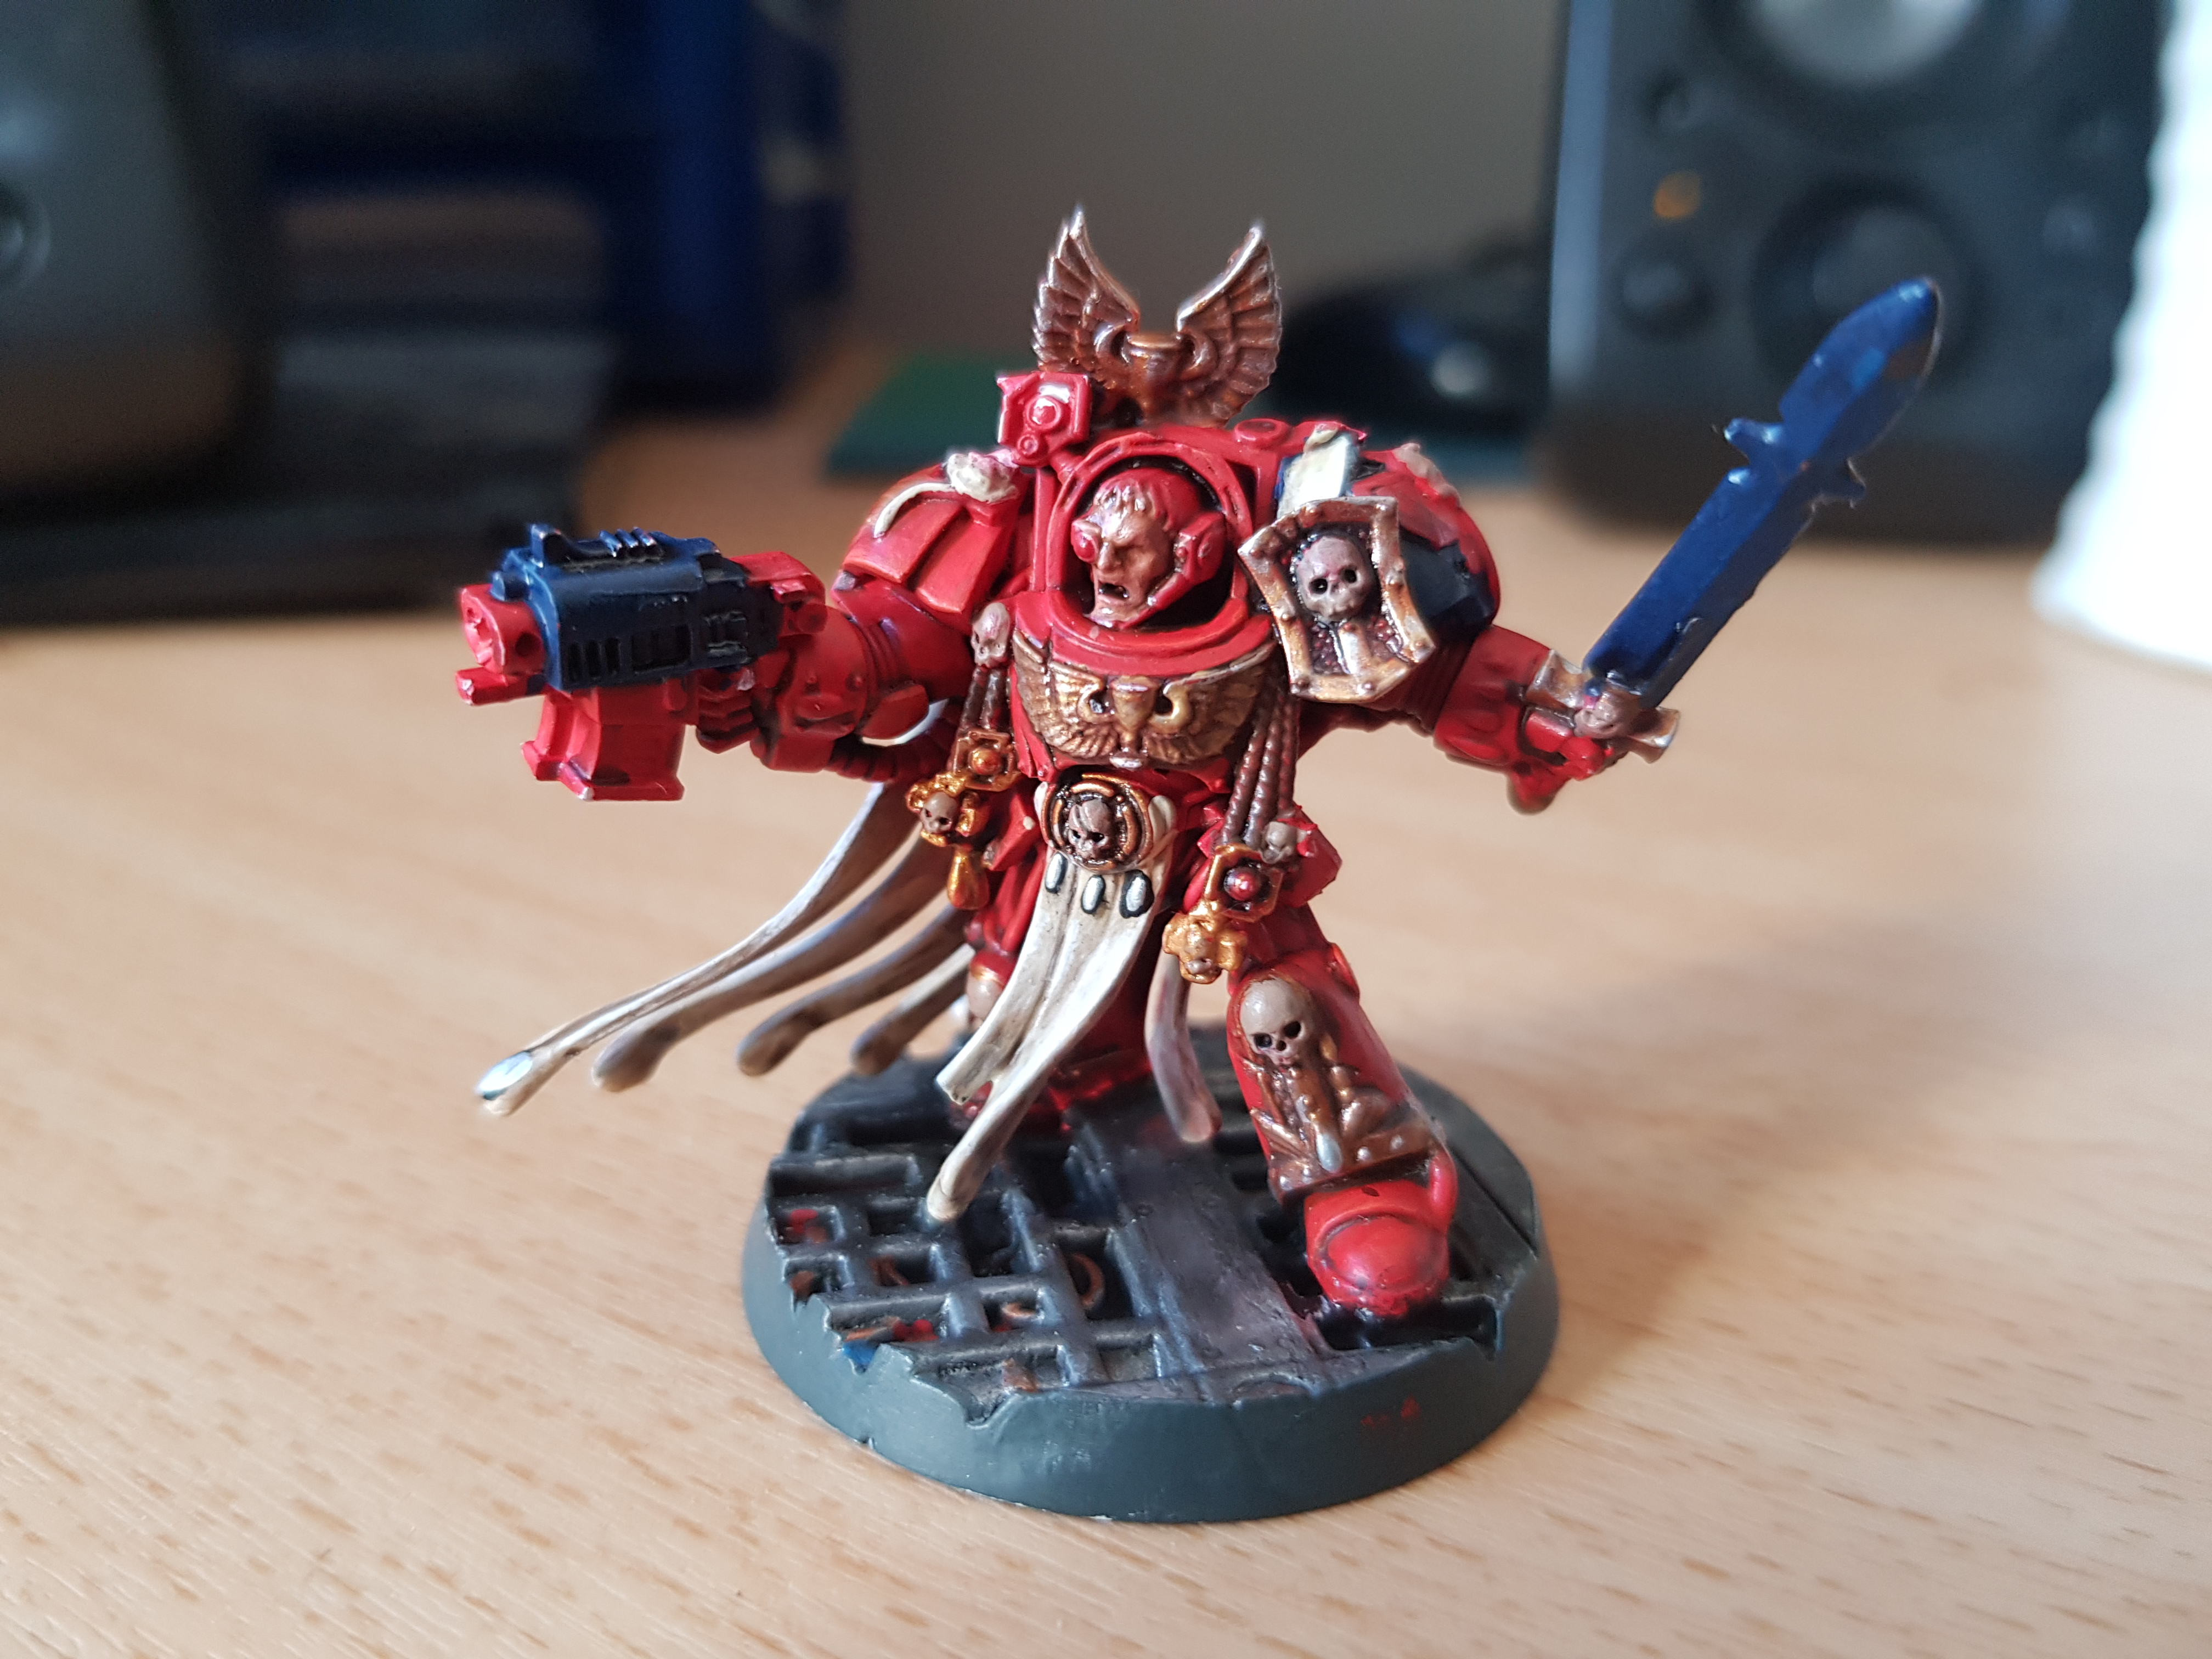
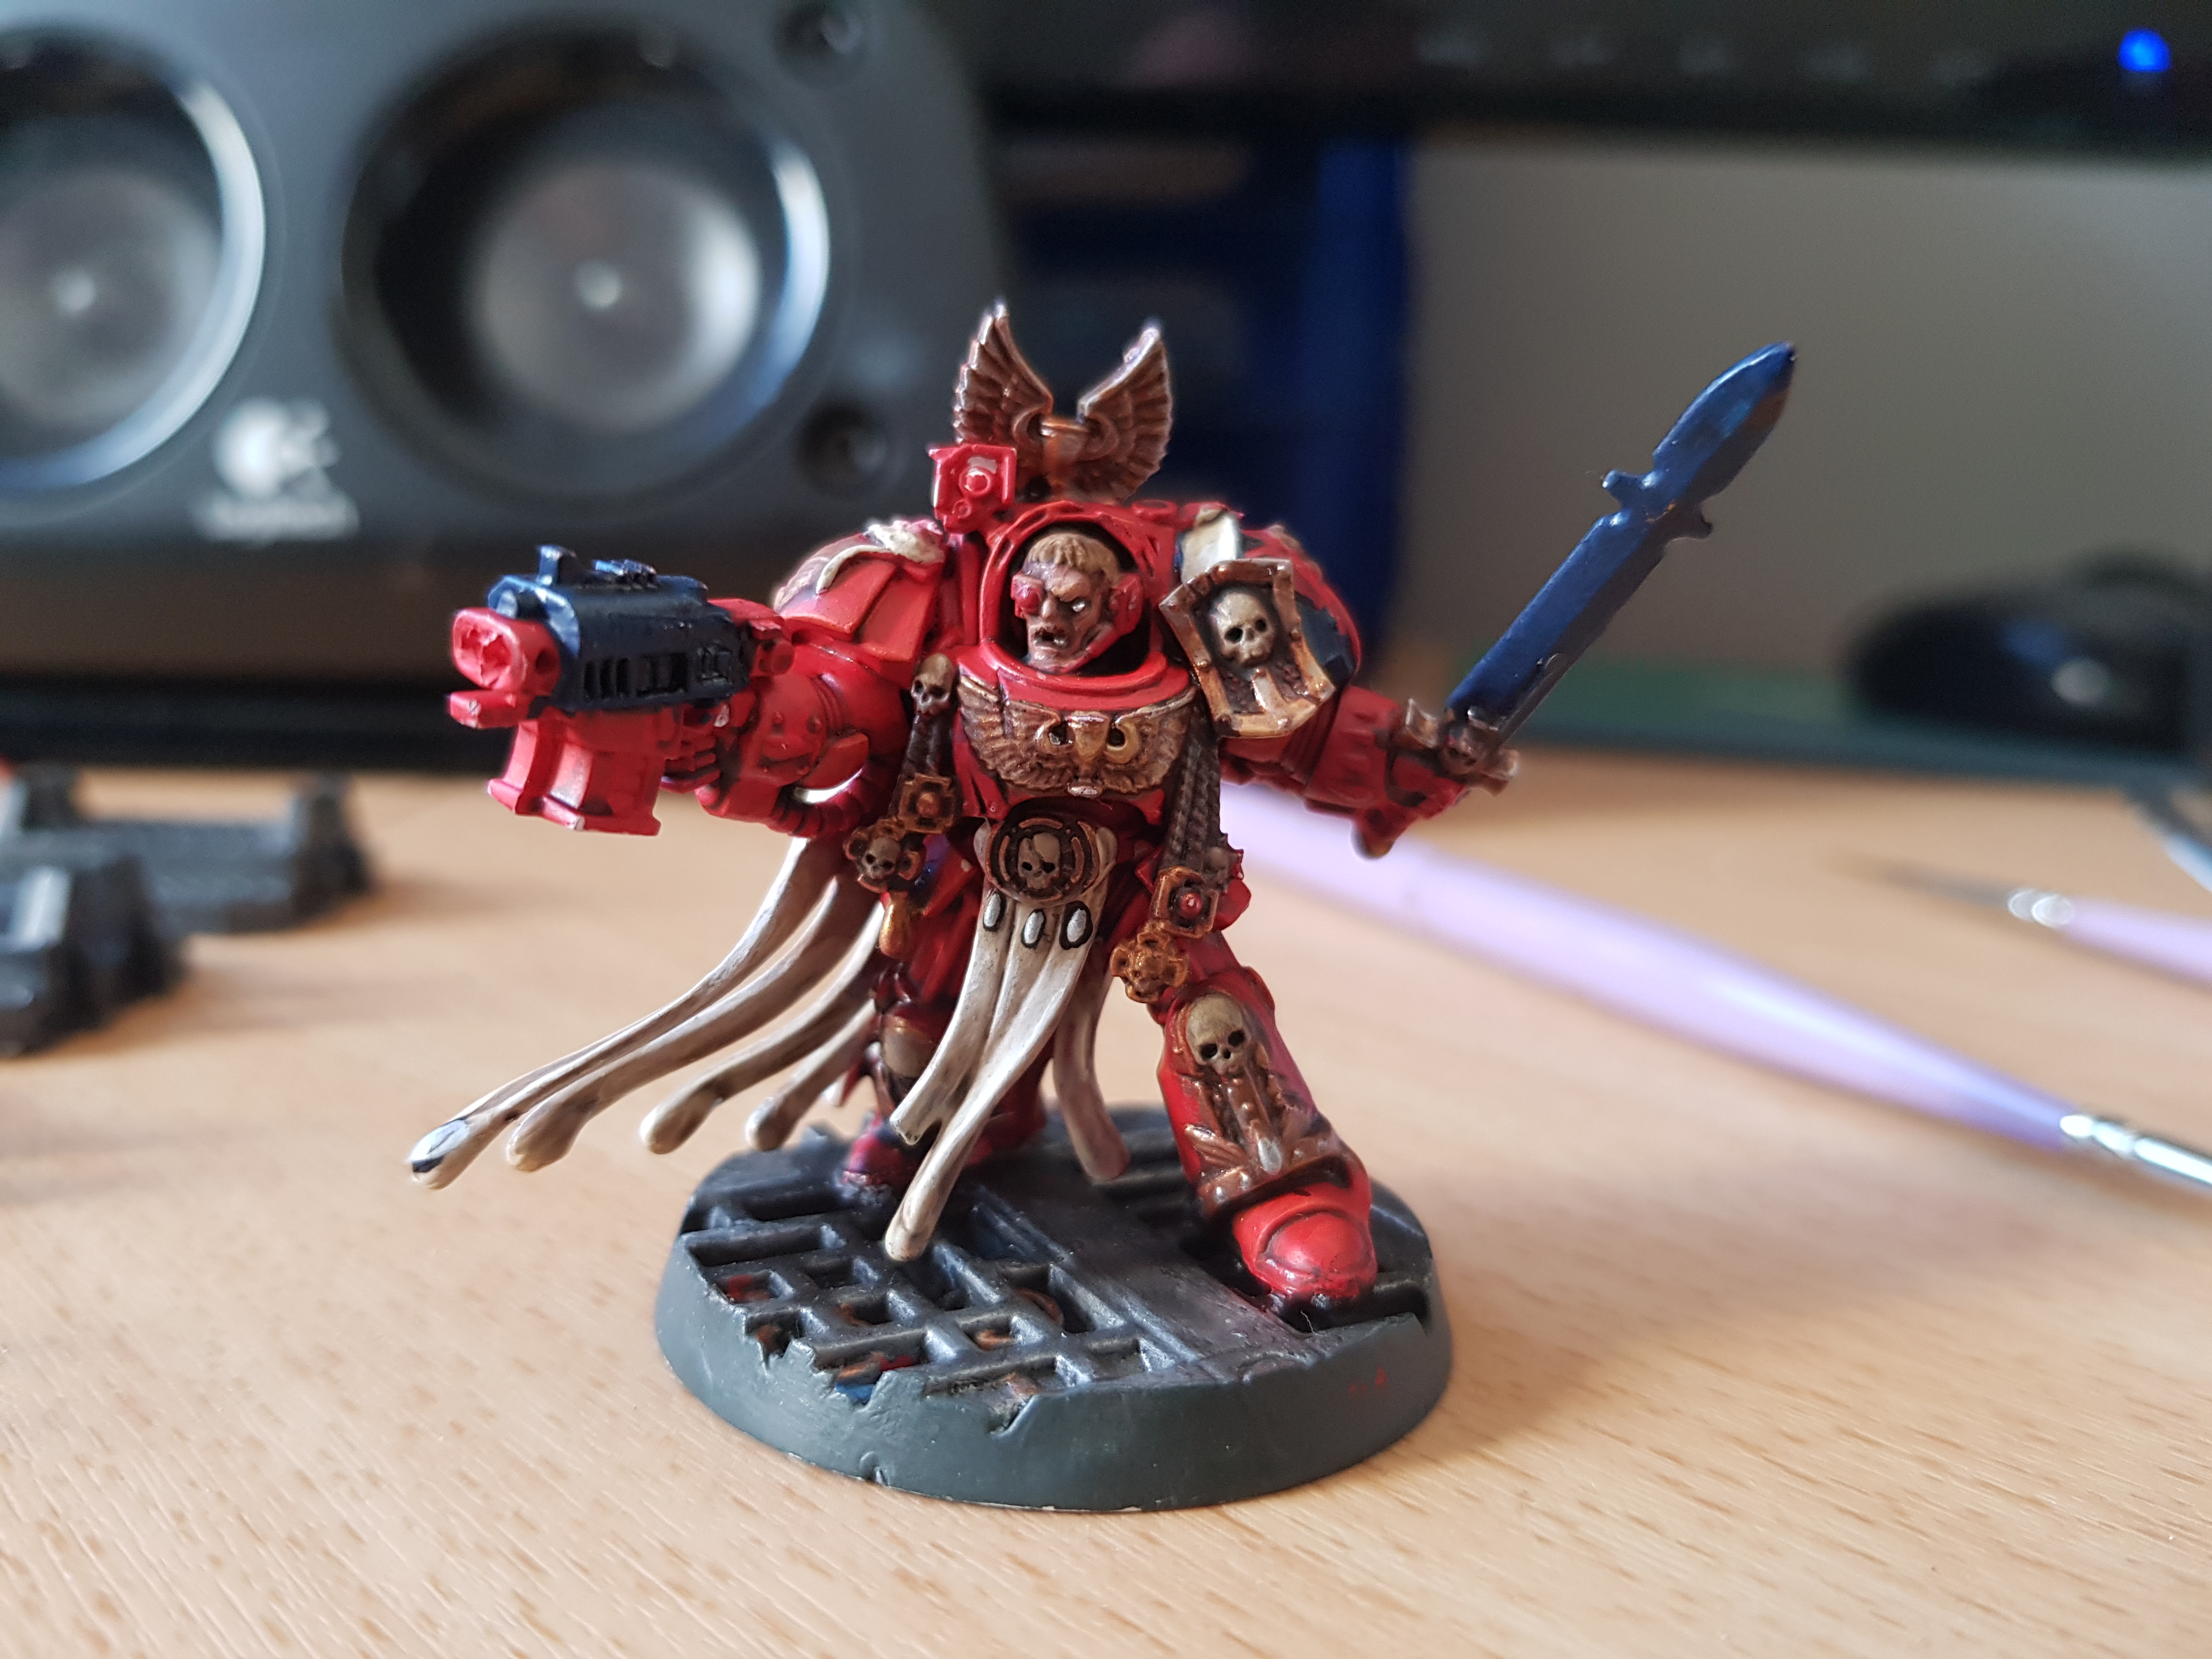
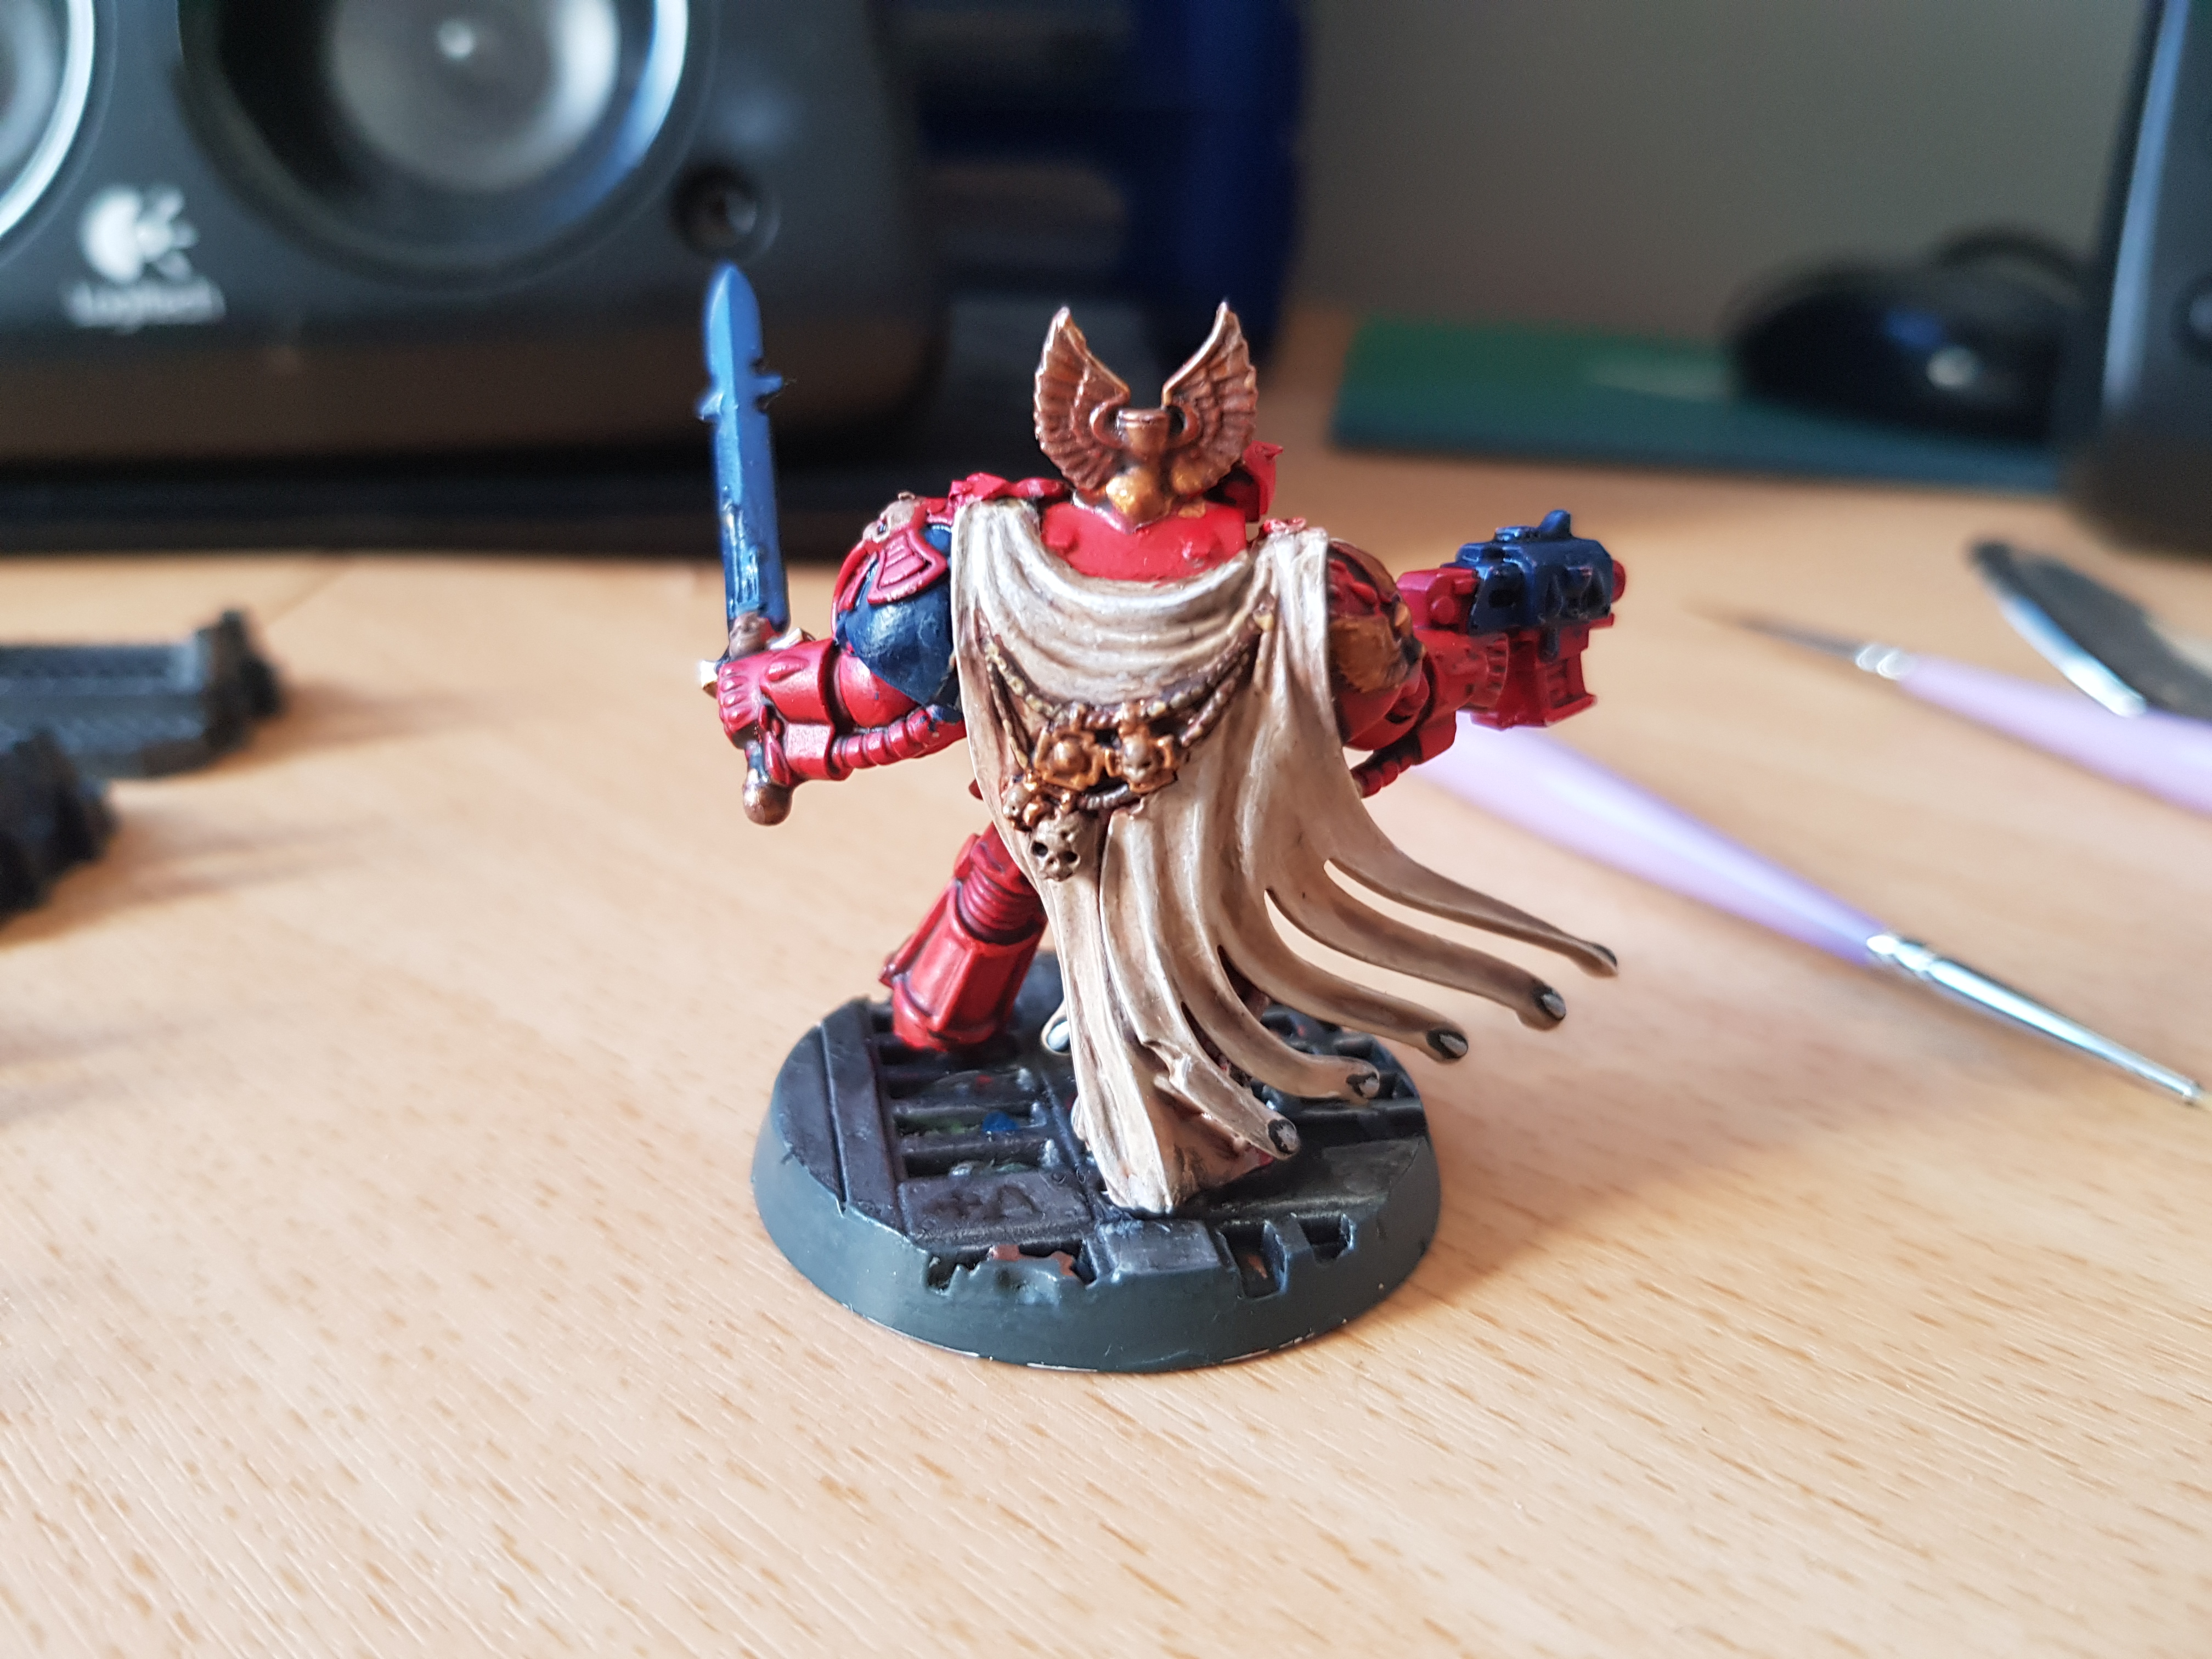
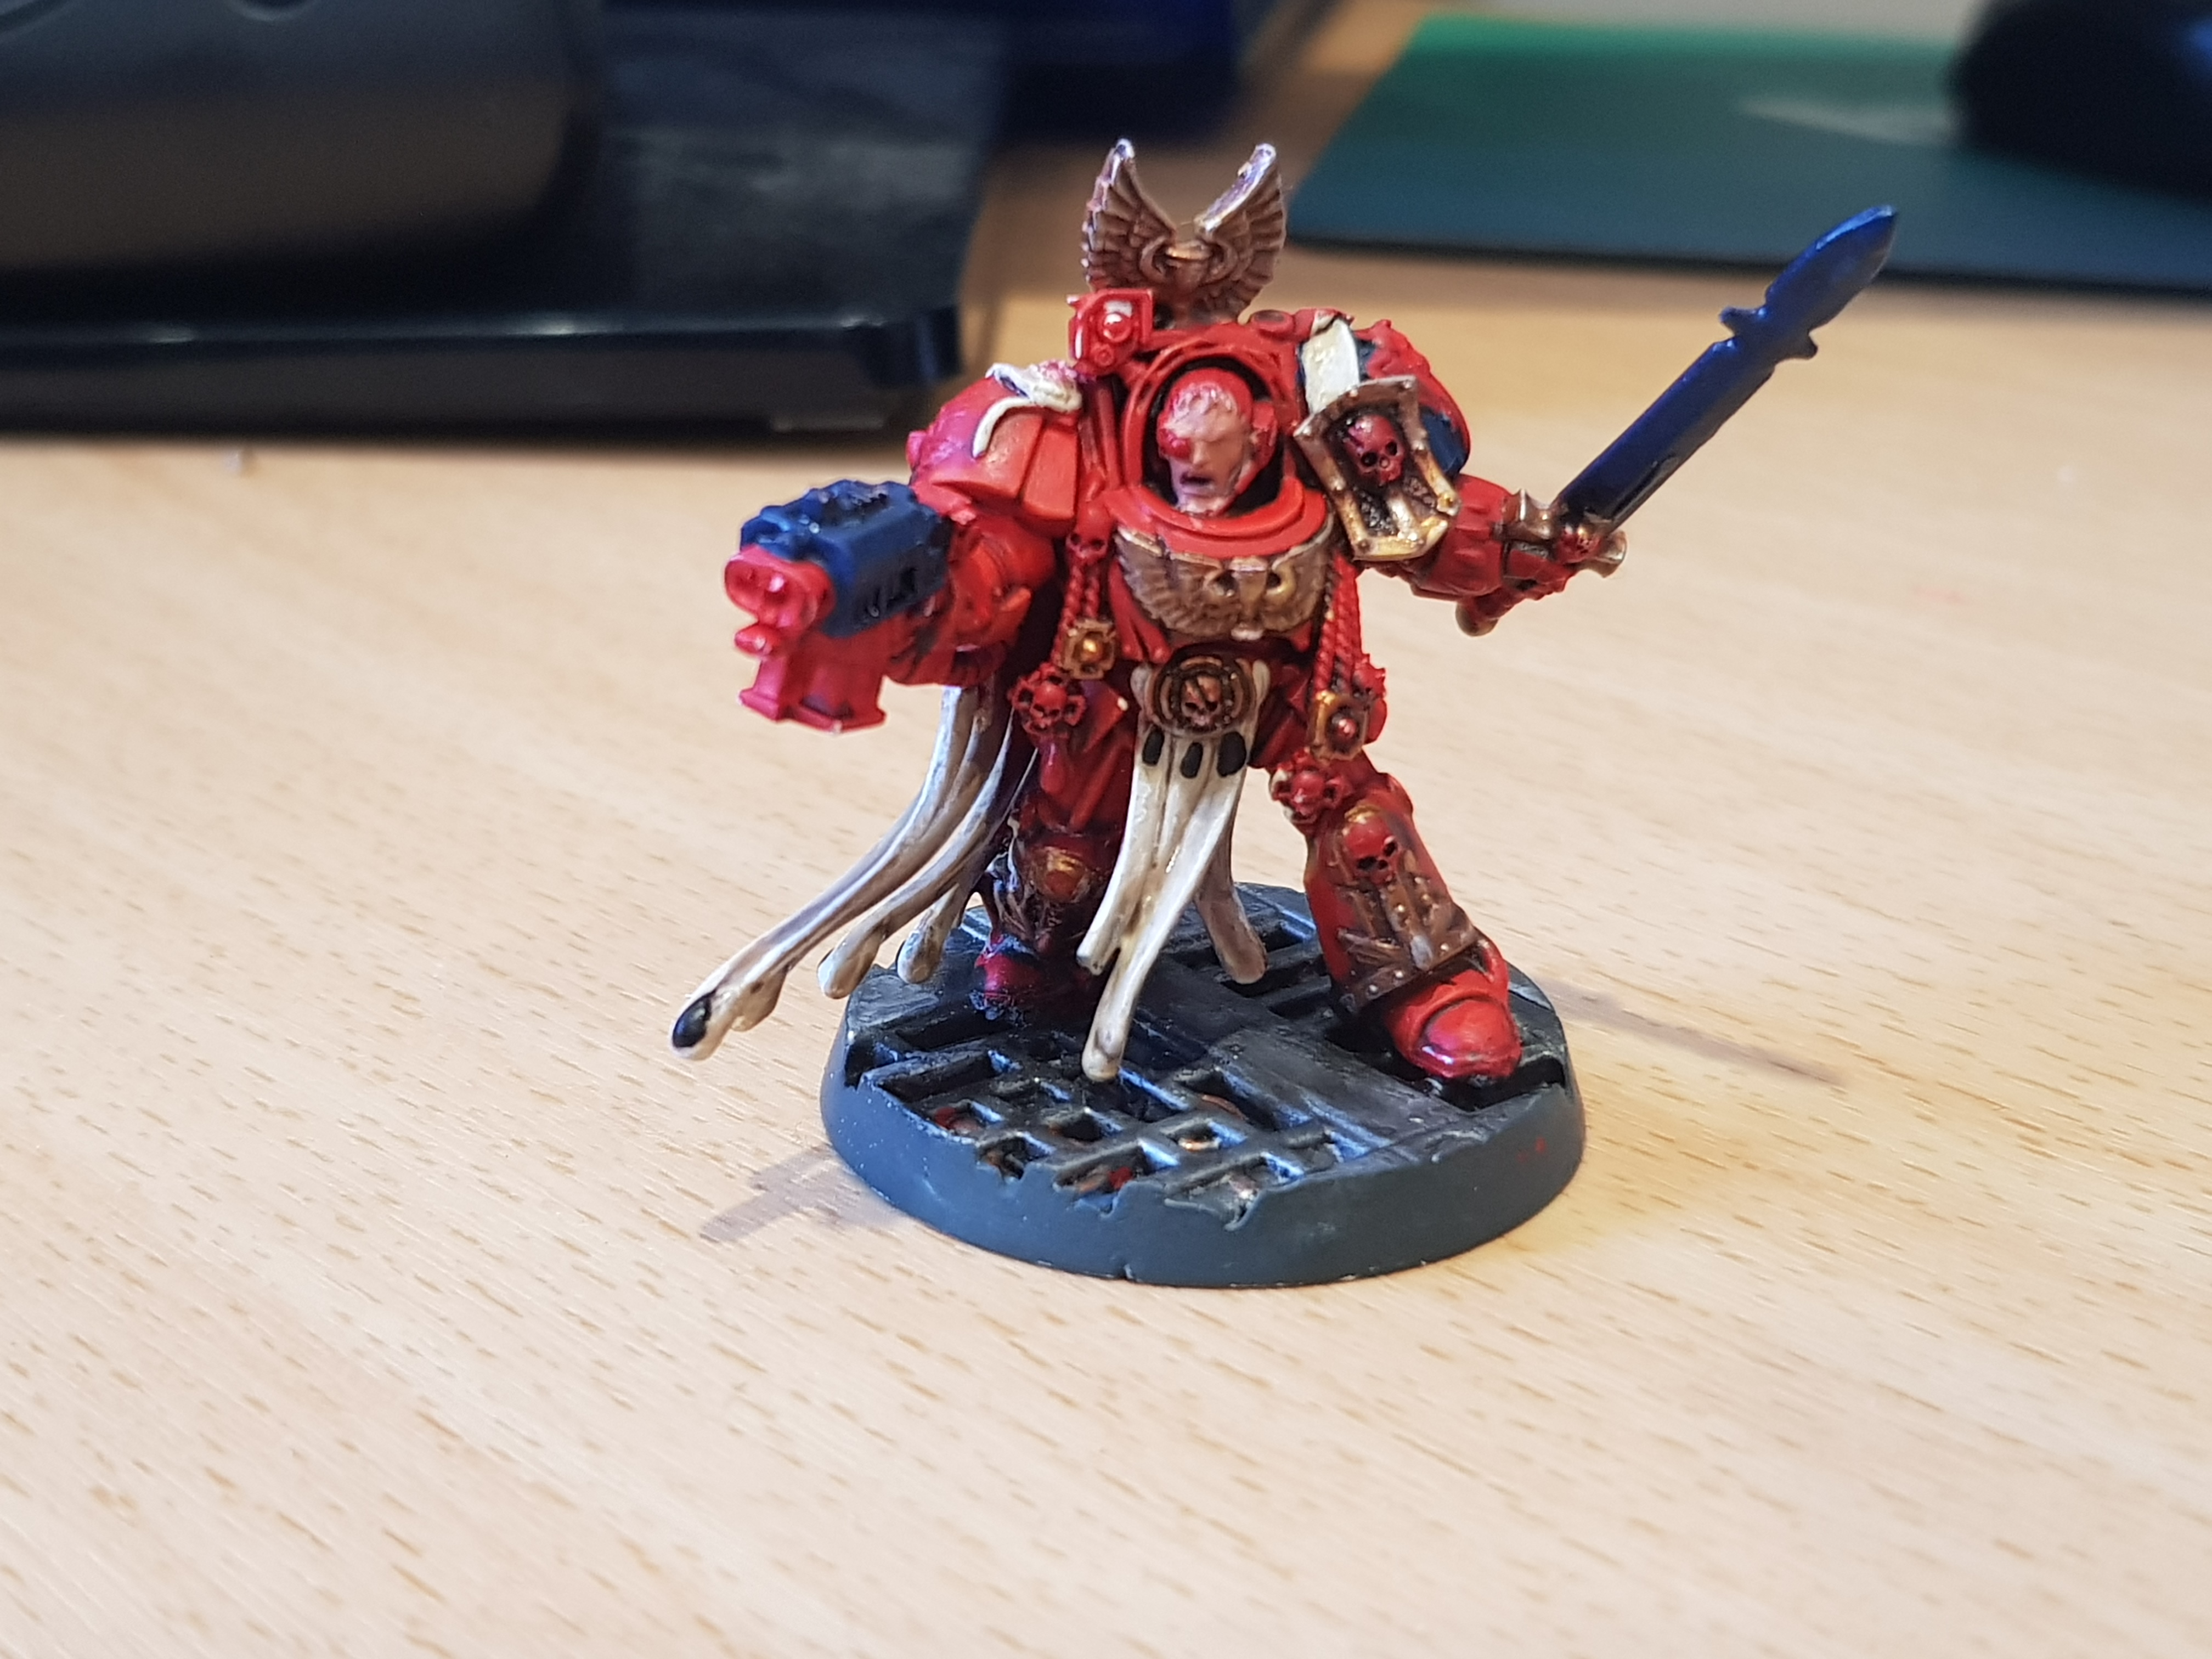
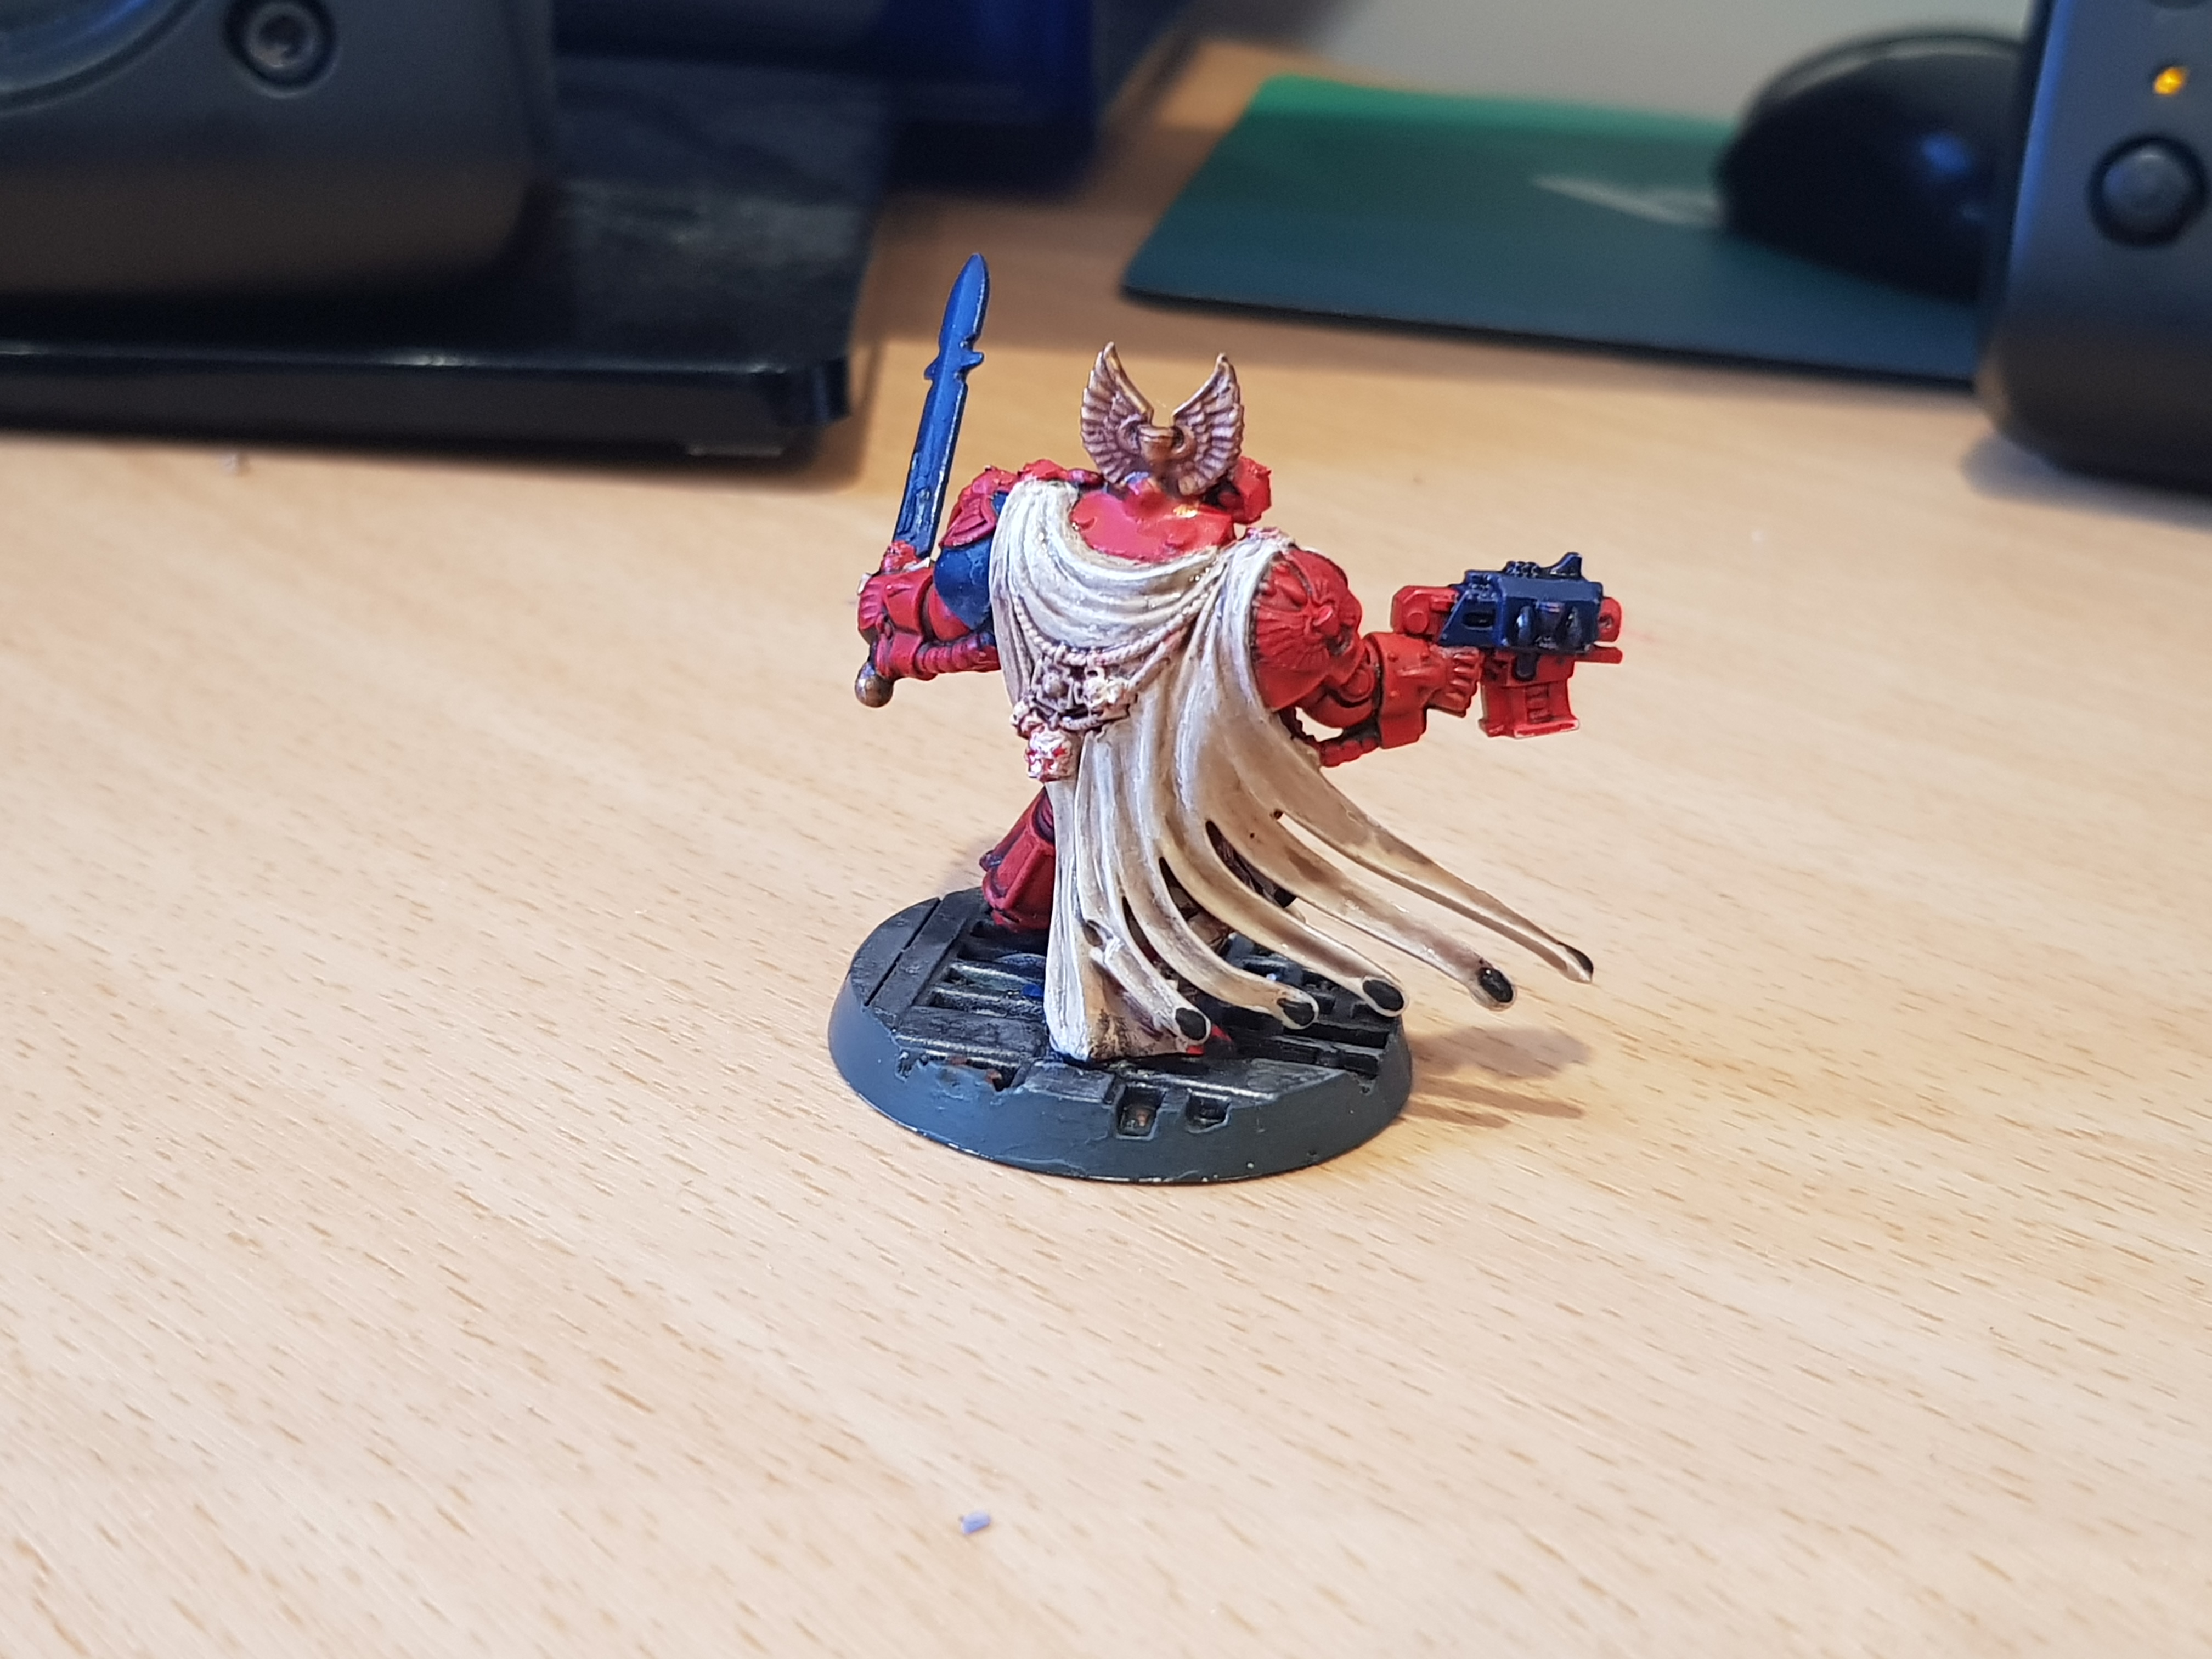
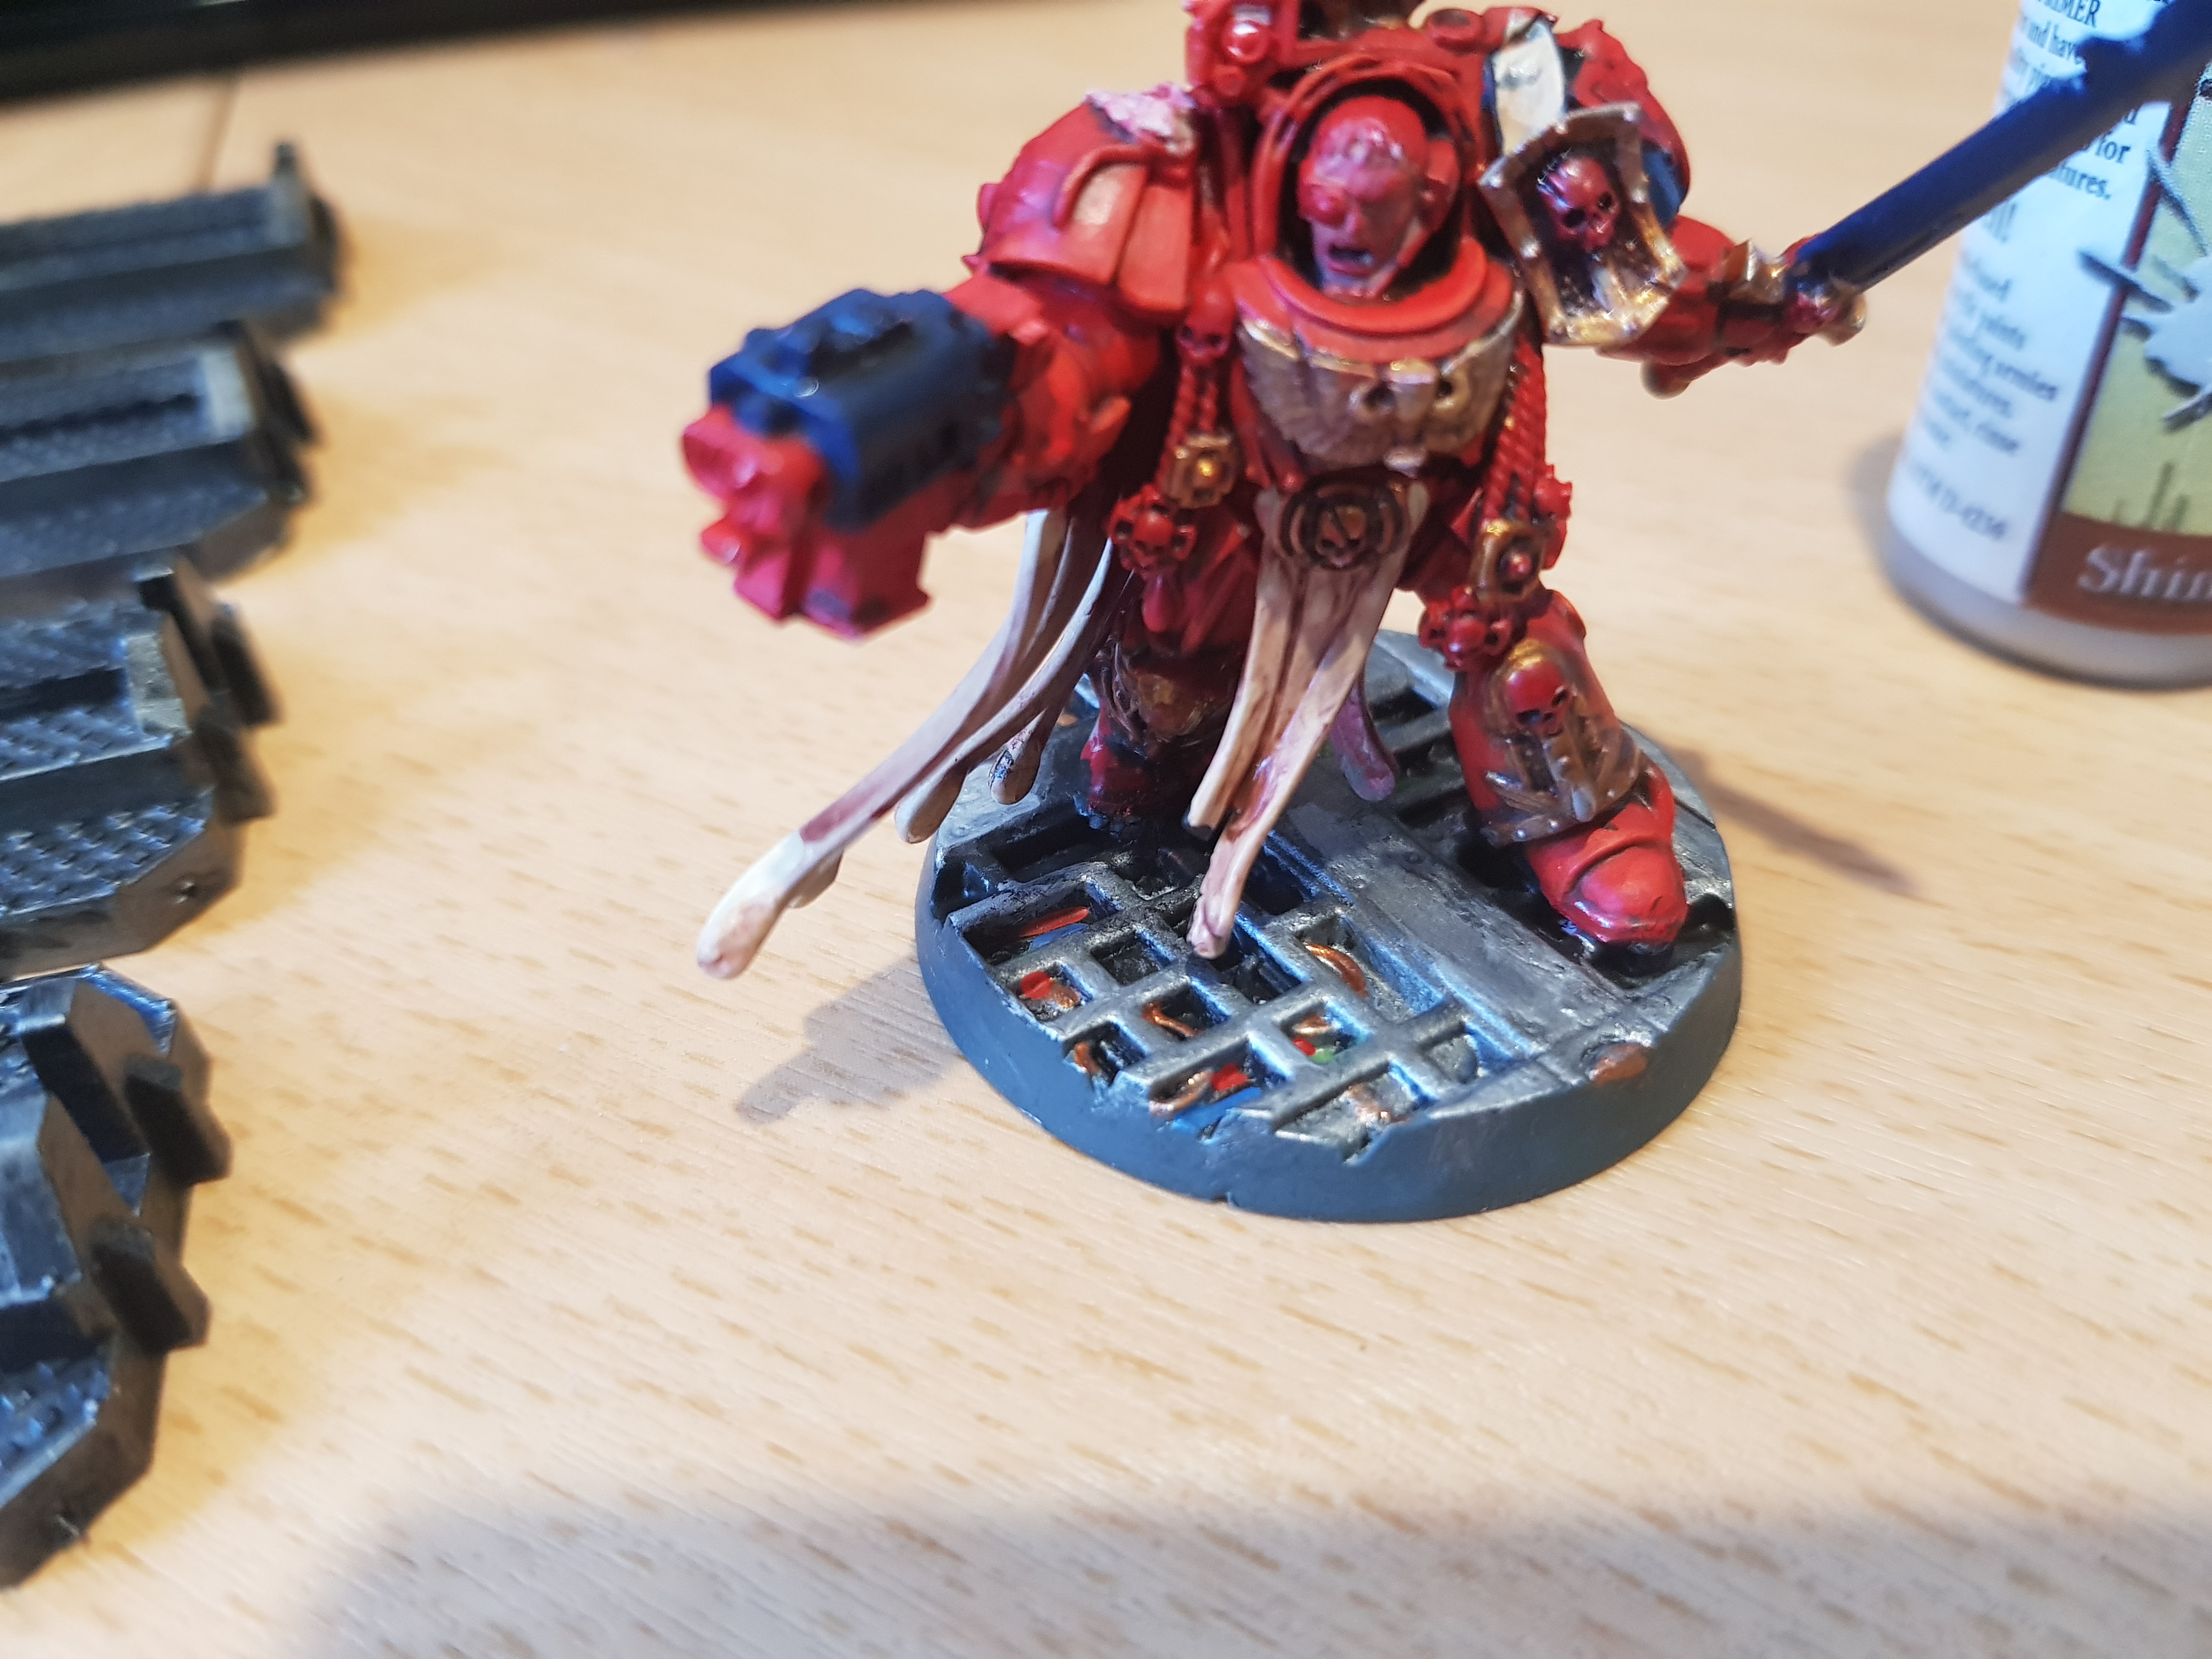
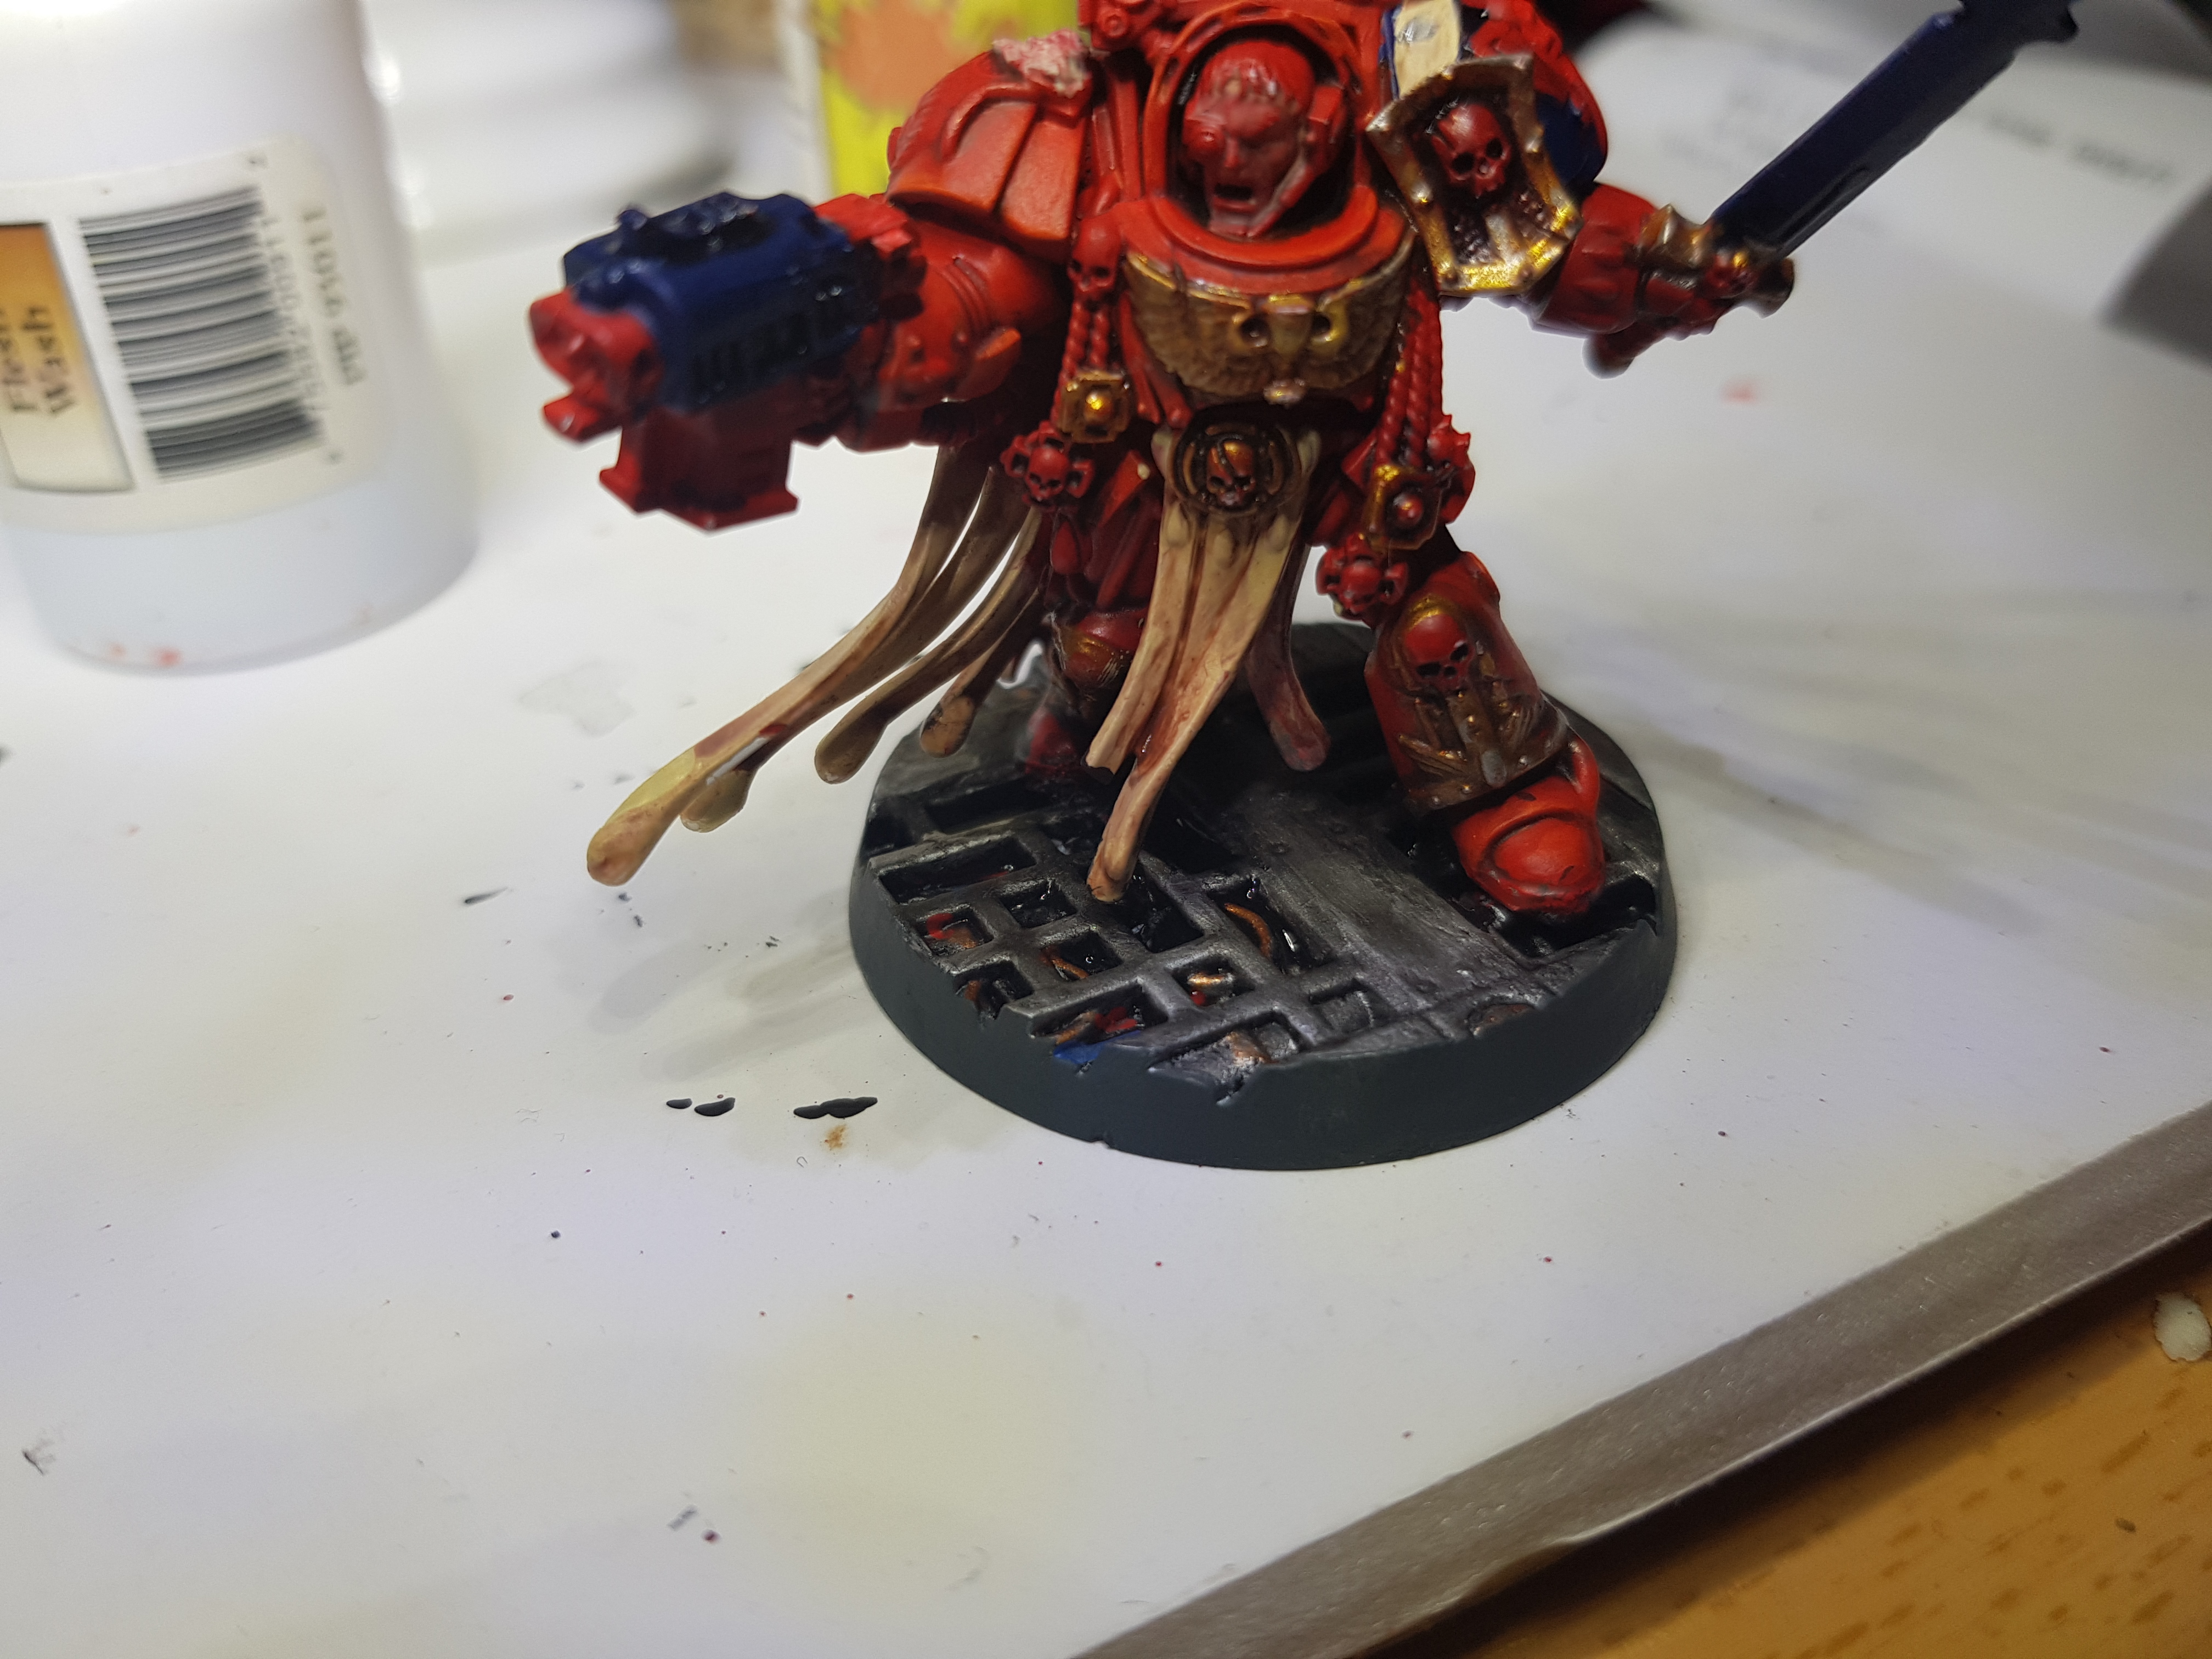
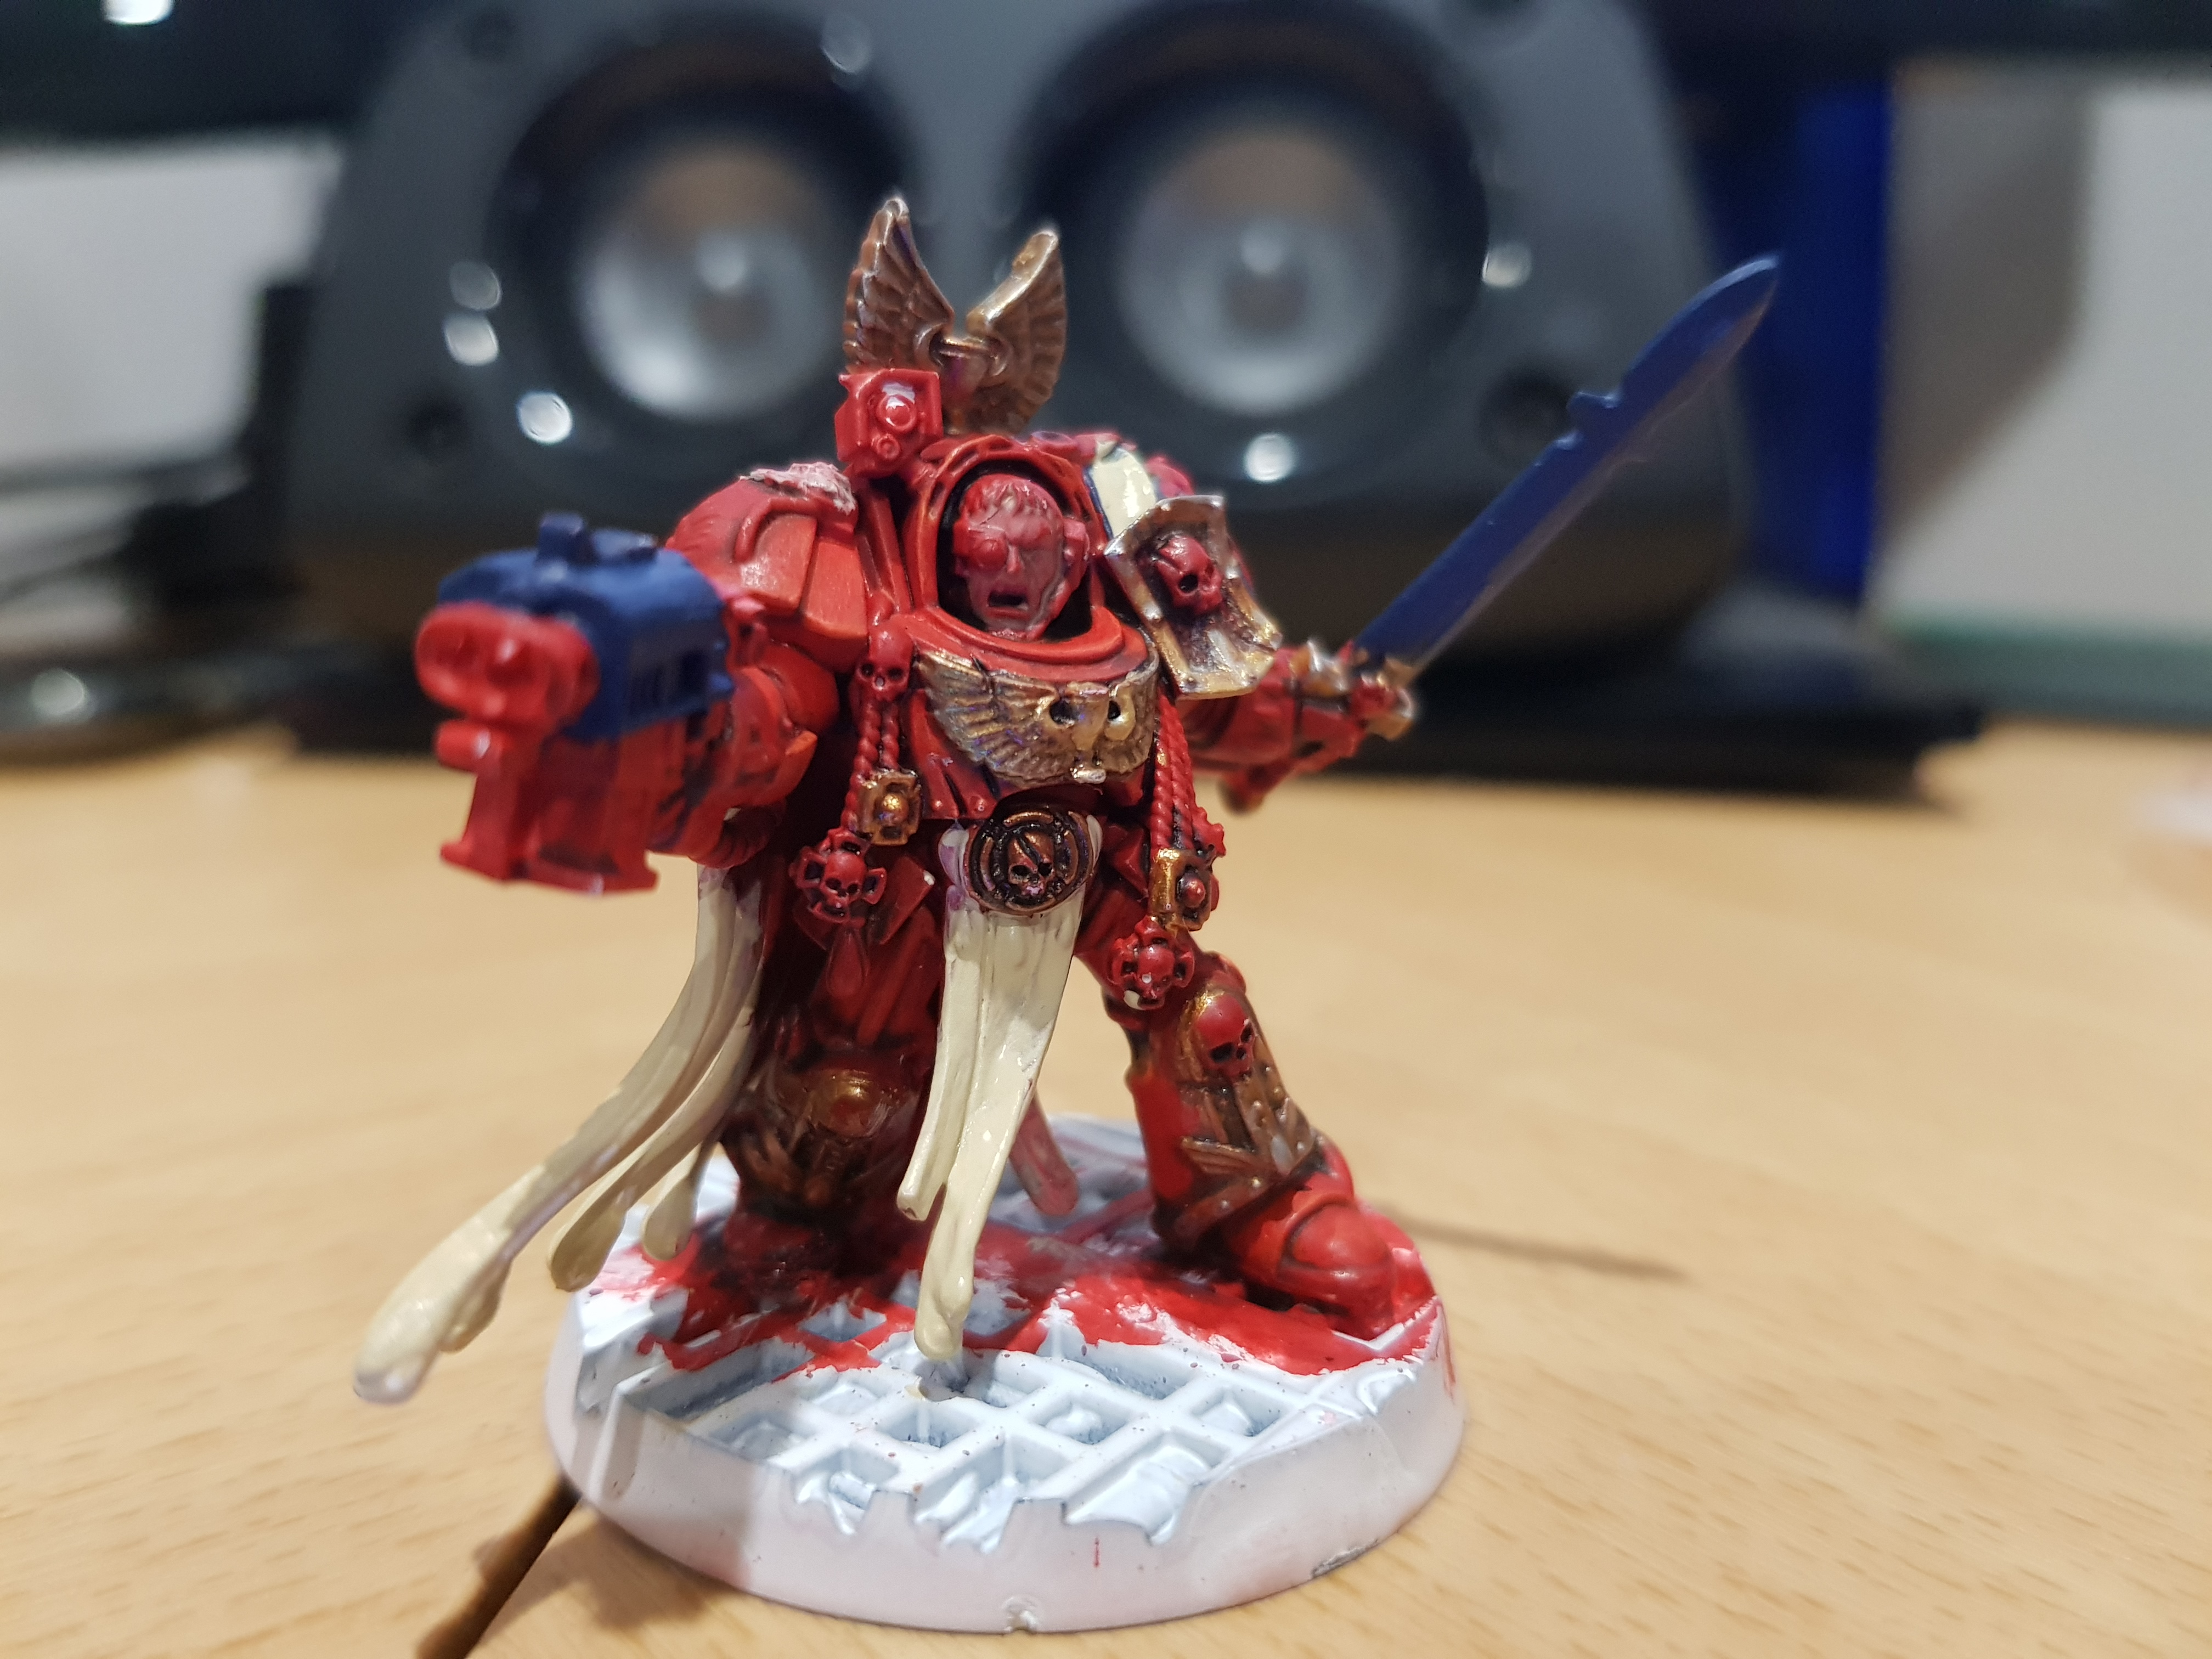
STEP 15 - Gems and Blood
Getting a little closer to the end of the first figure. I have painted flat back around all the blood drops and gems … then back over these with silver, and finally Tamiya clear red and Tamiya clear blue for the blood drops and gems. … a few more details and washes to go … whew .. lots to paint on these minis ..

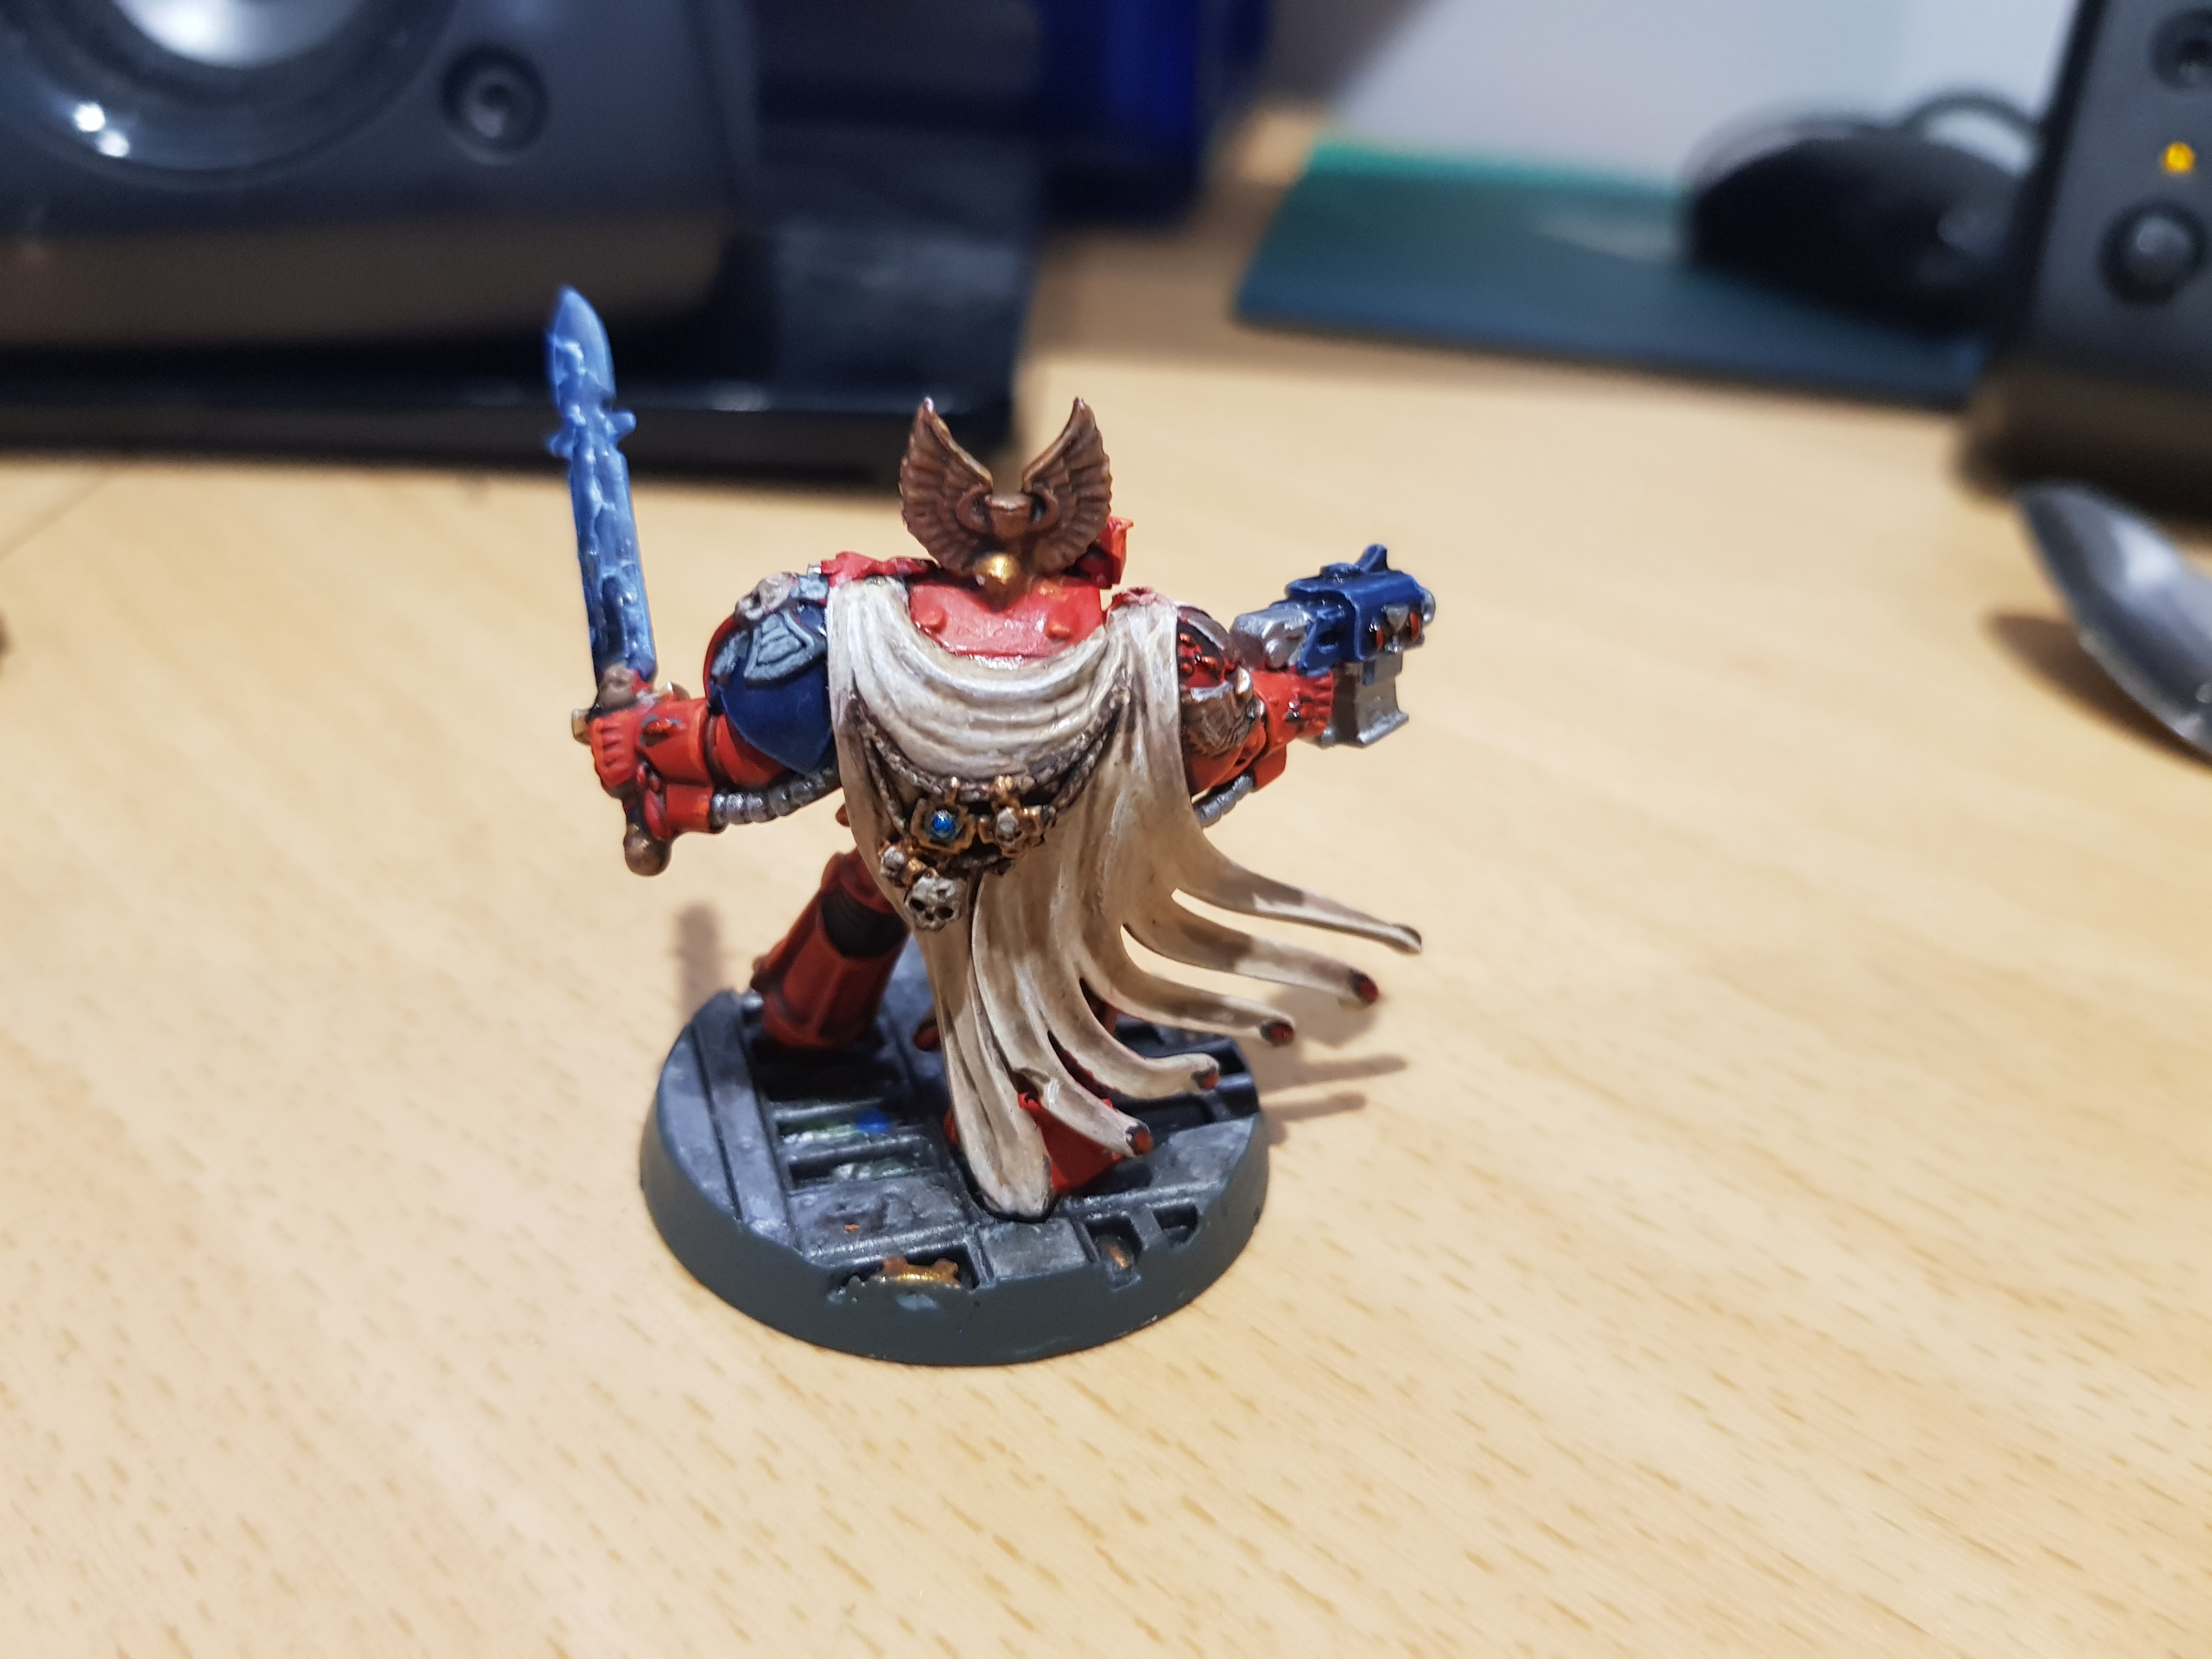
Step 14 - Some Highlights and detail
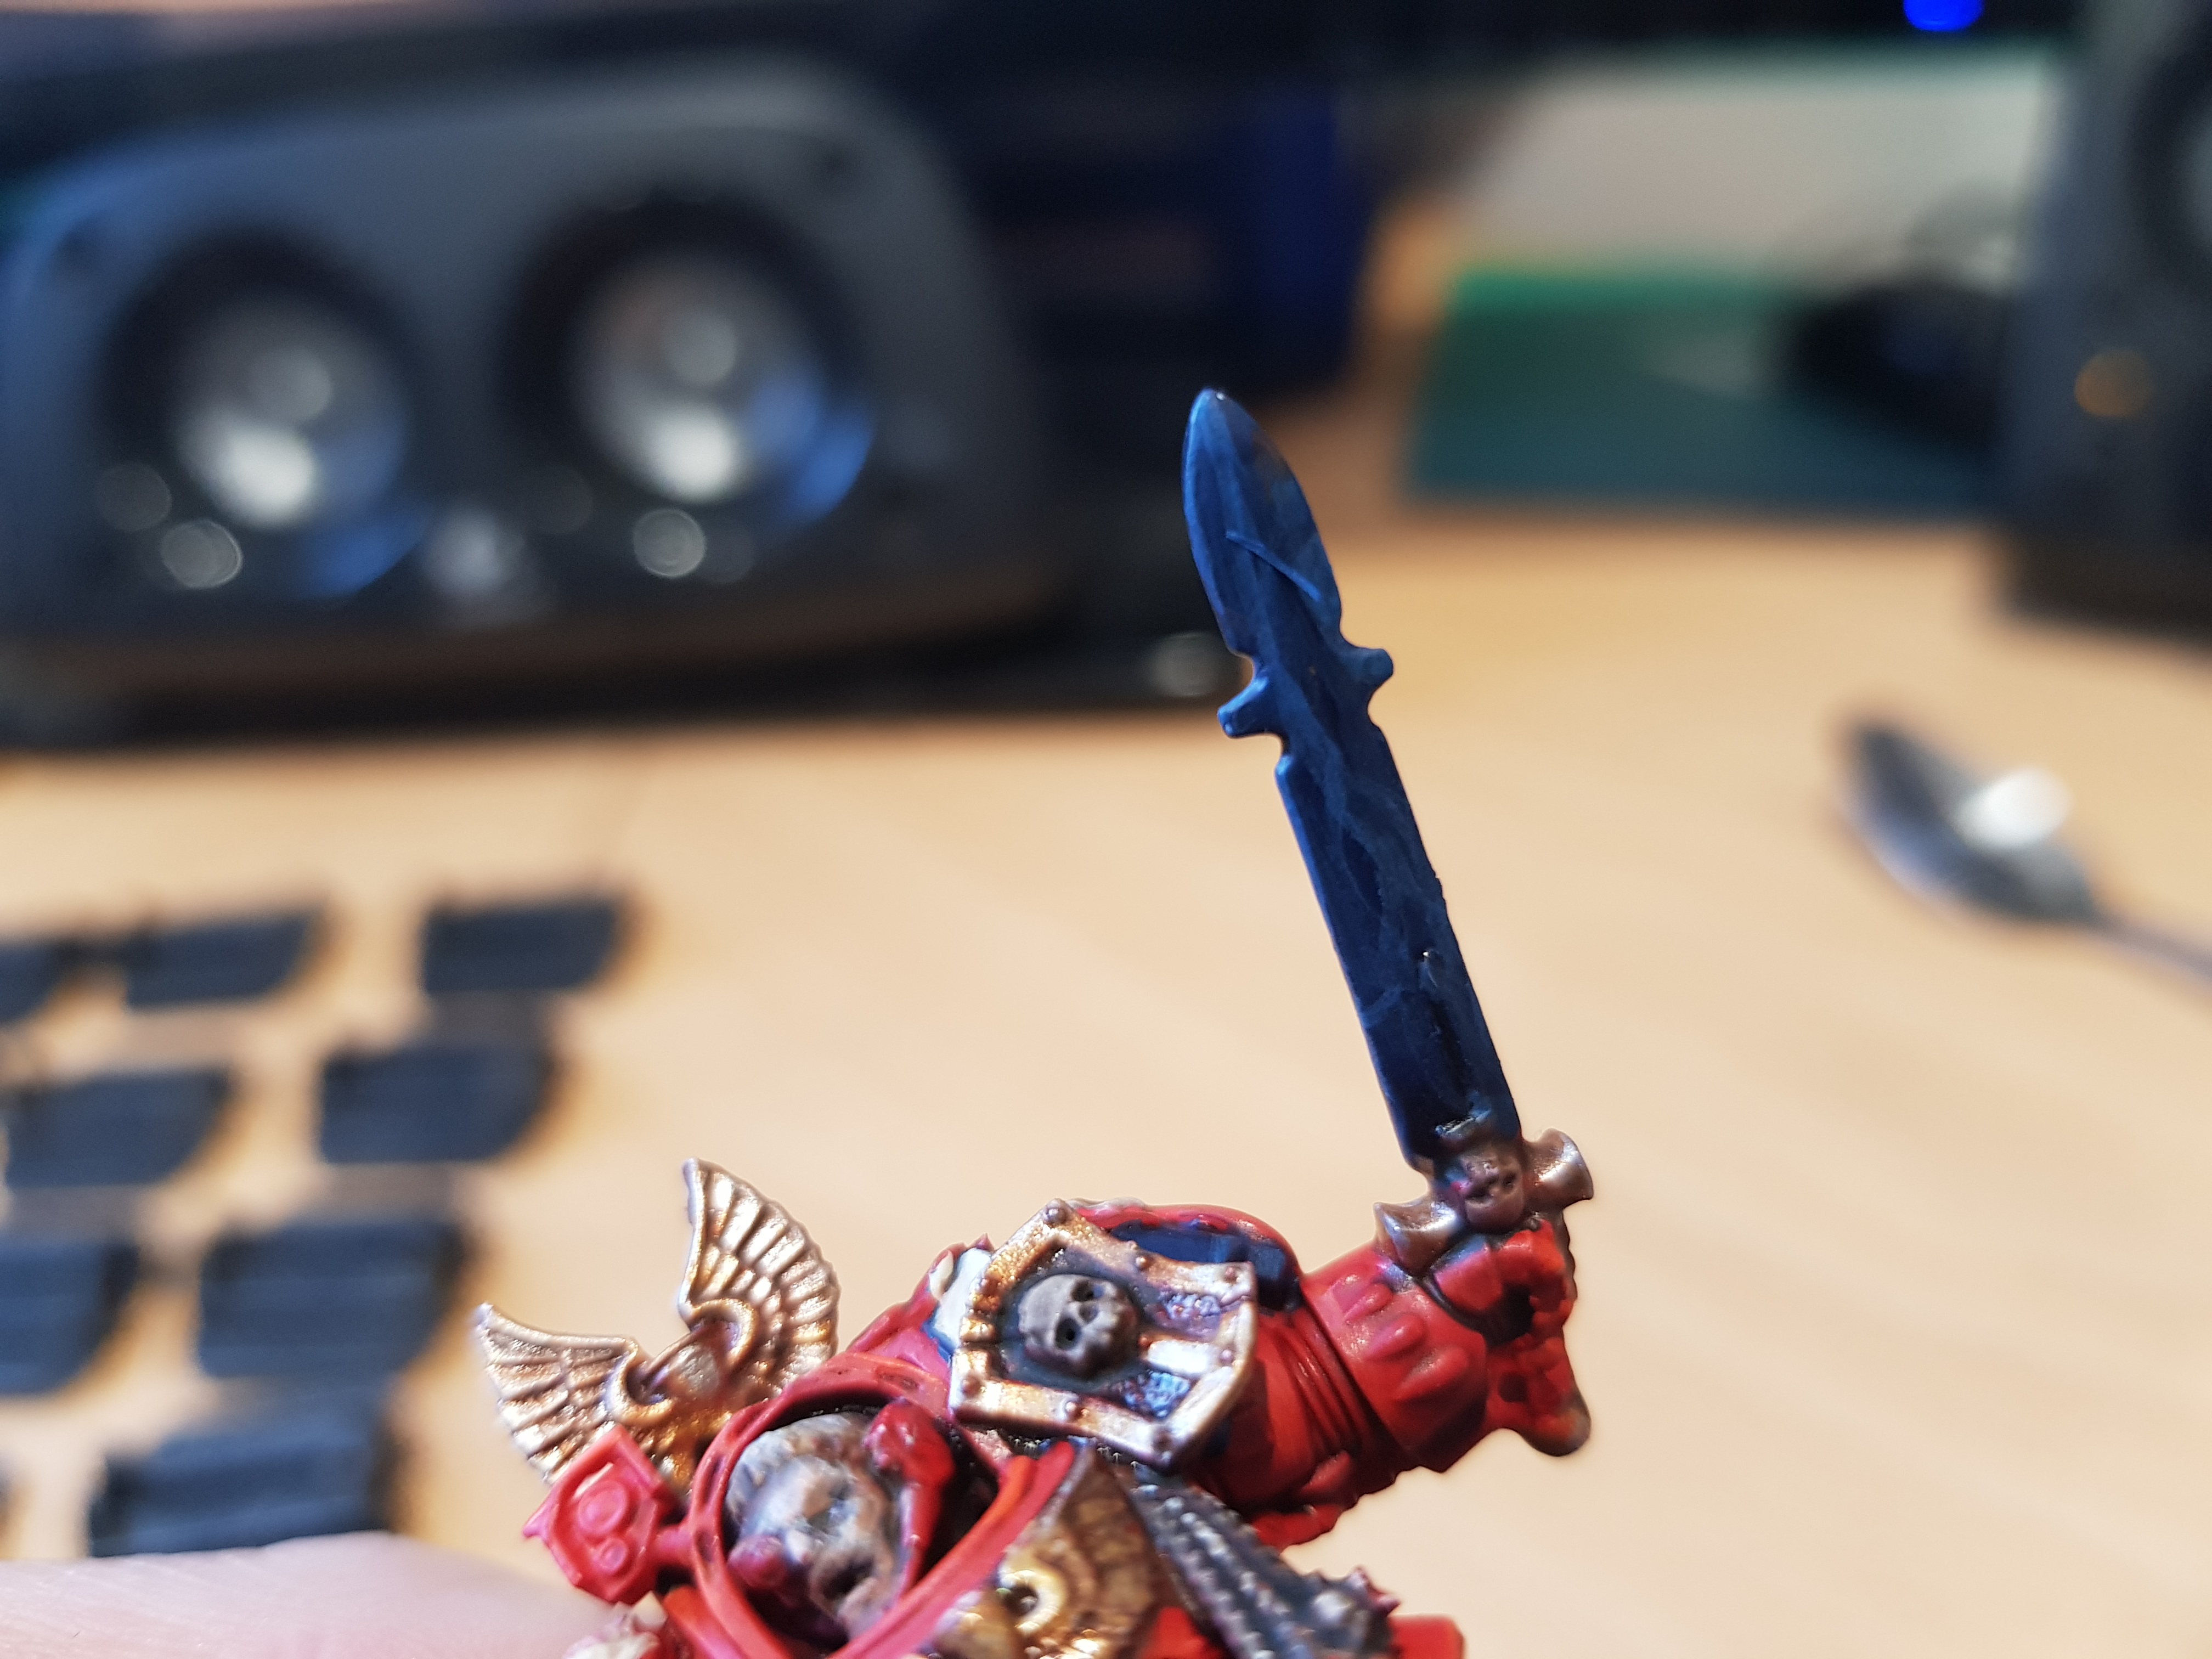
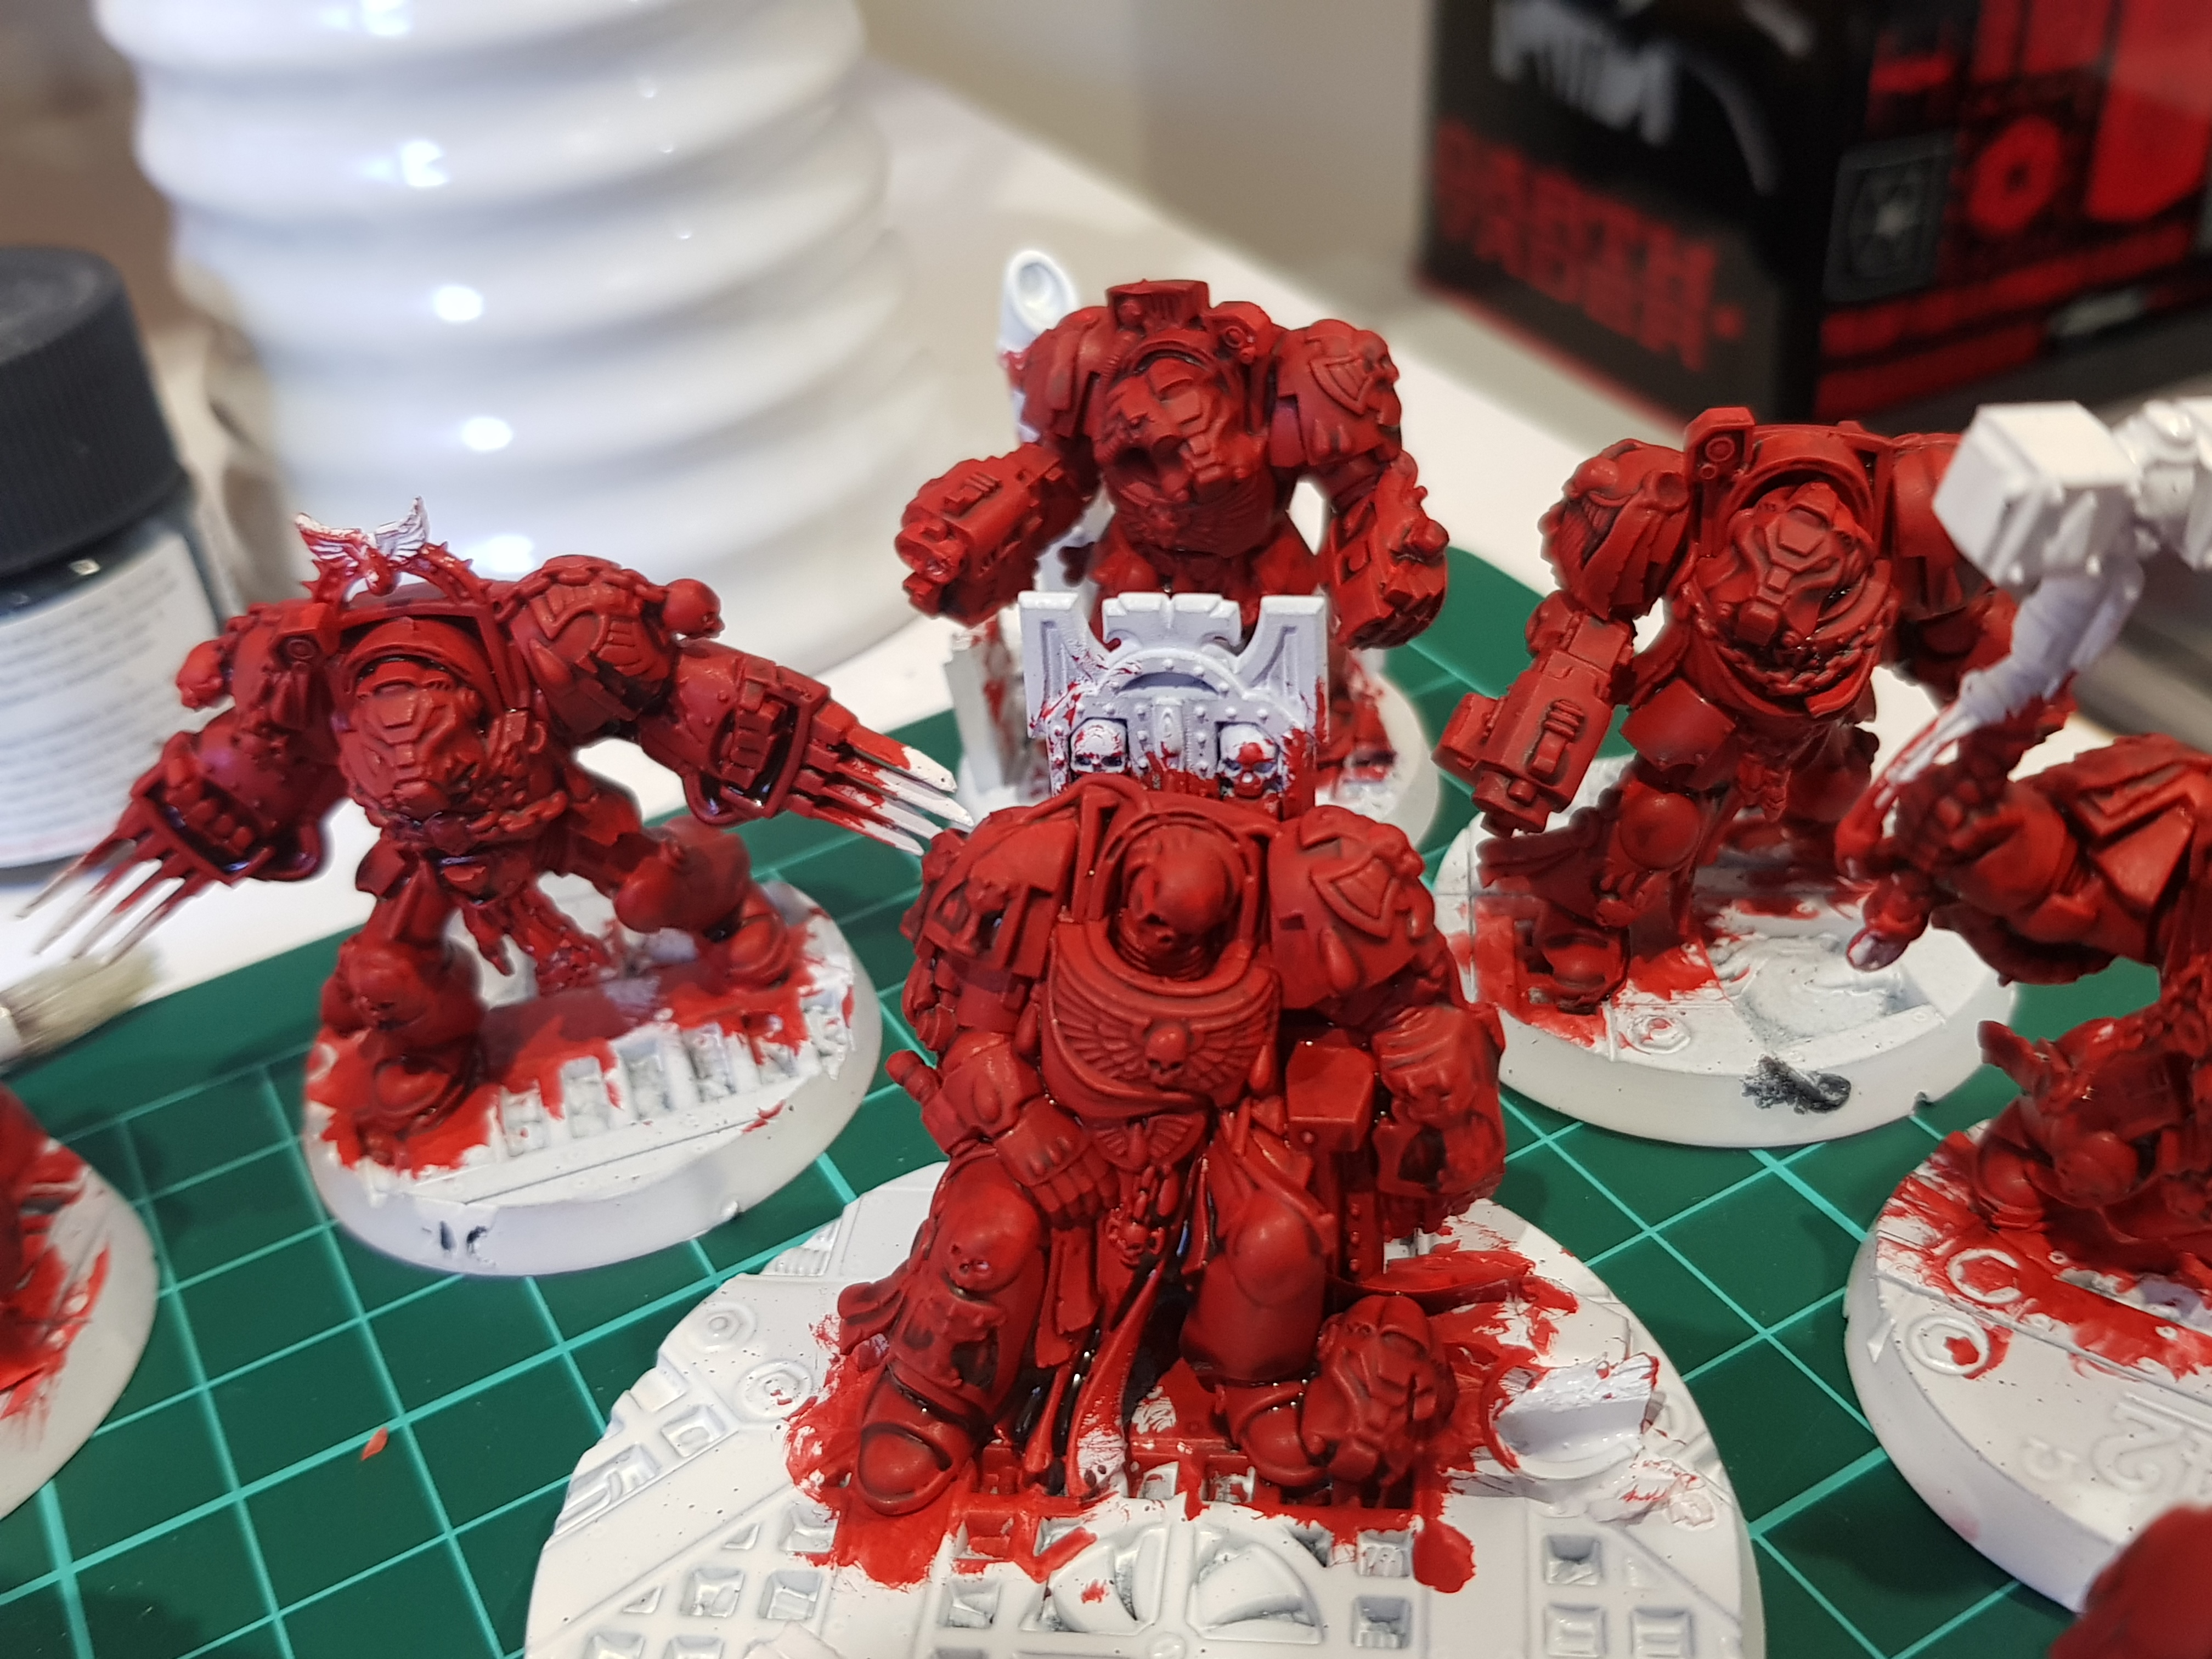
Working on the armour some more – cleaning up with Evil Sunz Scarlet and then highlighting with AP Lava Orange – (was going to use Frie Dragon Bright but it has gone rock hard 🙁 … The blue areas were washed with GW’s Drakenhoth nightshade then re-painted with Kantor Blue – Edge Highlighting on the weapon, shoulder pad and Power Sword with Alitoc Blue. When this dried – I used a very watered down alitoc blue to start the electrical (lightning) on the sword. When dry, this was highlighted with thin lines over the alitoc blue using AP electric blue and then some white to pick out the final highlights of the “lightning”
Step 13 - Next bits
Not sure why I called these steps but I am going to keep rambling – Probably more like updates, but hey, I am a first timer at this project business – oh thanks to all those who have been smashing buttons 🙂 …
I have been working away at this commander for a while .. and the next phase was to start picking out the bits .. so all of the skulls got an coat of Monster Brown (AP) and all of the dangly bits got some greedy gold (also AP). The strings (ropes) that everything is on also got a base coat of oak brown – the skulls and the ropes (f0r want of a better term) then had the edges picked out (rope) and/or highlight if AP Desert yellow.. then the whole thing got a bath in Agrax Earthshade … (whats left of the spilt bottle :/) I also painted all the bloodrops I had blacked out, with AP shining silver for my soon to come quick and easy blood finish. Oh and the eye I filled in white with my usual sneaky trick of the black dot with an artline 200 0.4 permanent marker.
Step 12 - Moving along
Now the base is dry and I am working through the cape. Always a challenge (especially when you spill your agrax earthshade !! Anyway .. An Agrax Earthshade wash followed up with a reapplication of the Army Painter Skeleton bone and then army painter white on the edges. A quick coat of army painter tanned flesh on the face and finally some black dots in preparation for the blood drops on the bottom of the cape !
Step 11 - Back to the base
While the Skeleton bone and wash was drying I decided to tackle the base.
I don’t usually do the base this soon but to be honest the white base was bothering me (I don’t know why) and maybe I was just a little keen to see if the idea for the bases was going to look any good.
I started with a cheap paint (2 dollar shop) black followed by a coat of Army Painters gum metal then a dry brush of shinning silver. I picked out bits with the green blue red and coppers (in the pics below) and then gave the whole thing a wash in Nuln oil.
The edges of the base were done in a colour I made from Tamiya Nato Black and Royal light grey to lighten it up a little (Nato black was a little too dark for what I wanted)
Step 10 - More Painting

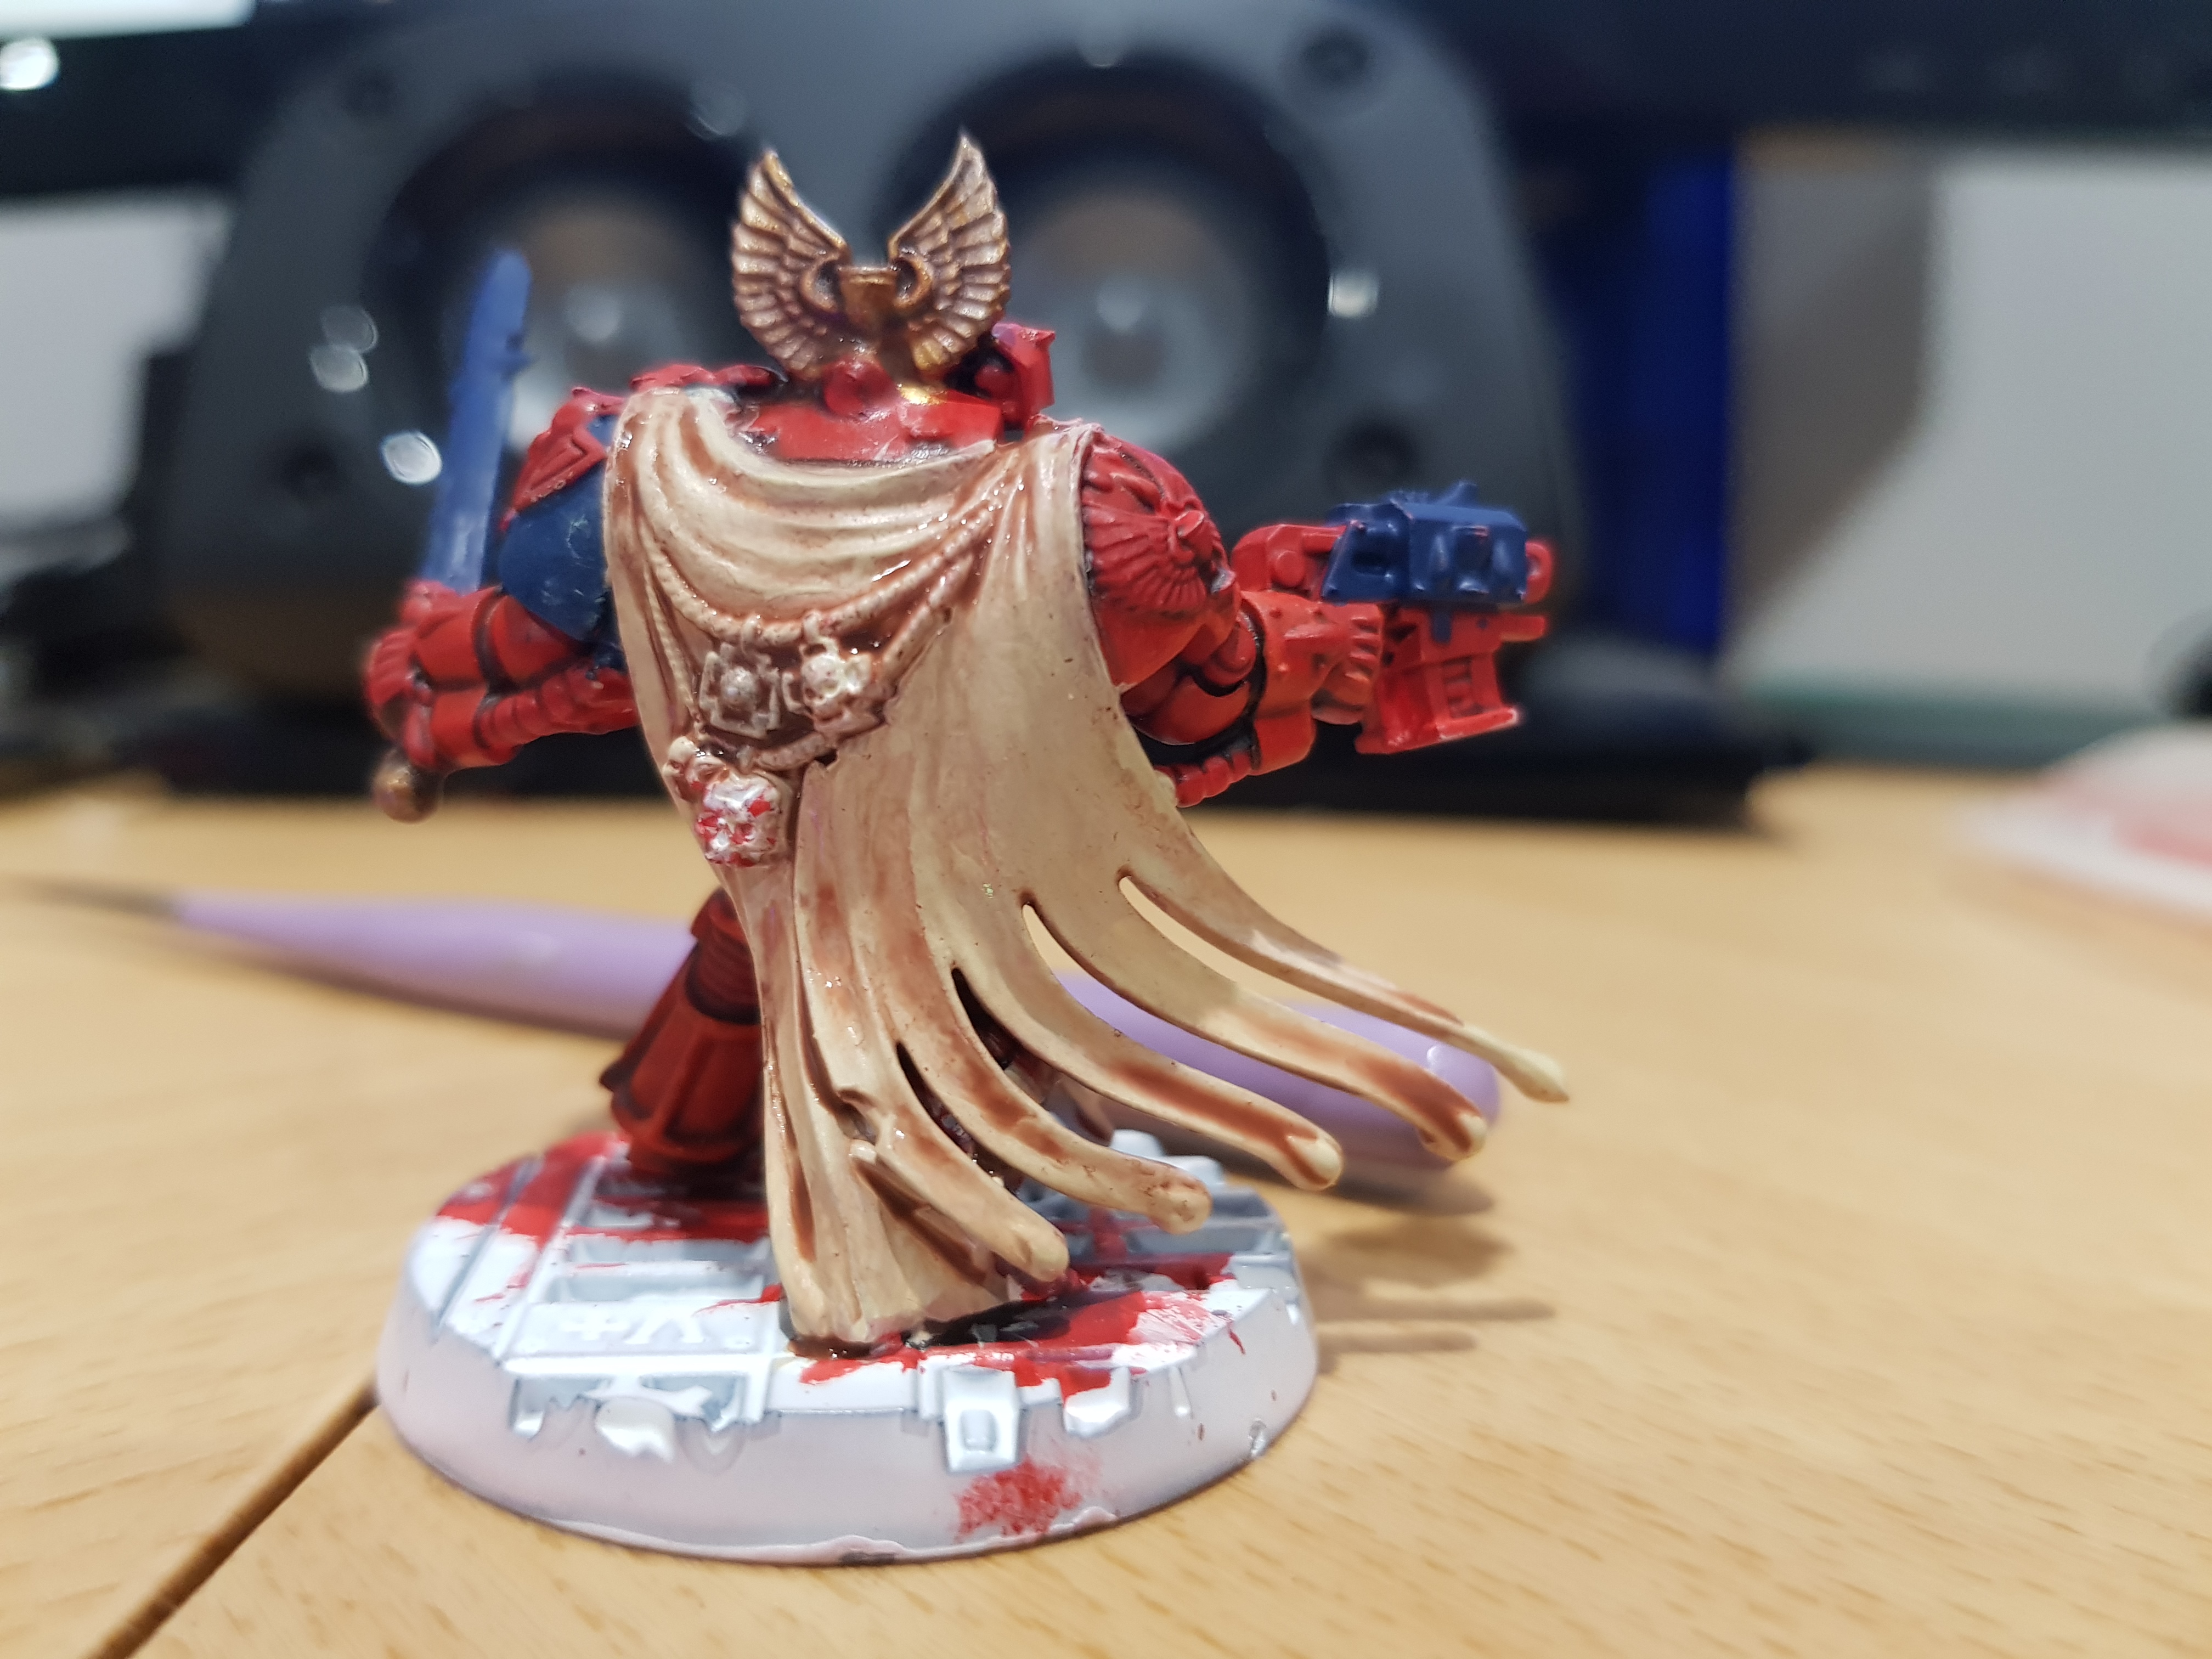

I have decided to go with a white finish on the captains cape, so to this end I have started with 2 coats of watered down Army Painter Skeleton bone and then a wash of P3 Flesh Wash. I like the P3 wash when I want a warmer shade .. it is a little more red / orange than some of the washes and seems to add a little bit of warmth, next up I will paint back up a layer of Skeleton bone before going for a top of Army Painter Matt white. Sometimes I use Tamiya white too because it is very thin and opaque .. and it allows the under colour to come through but for some reason it can dry a little powdery at times too. Worth the experiment though !
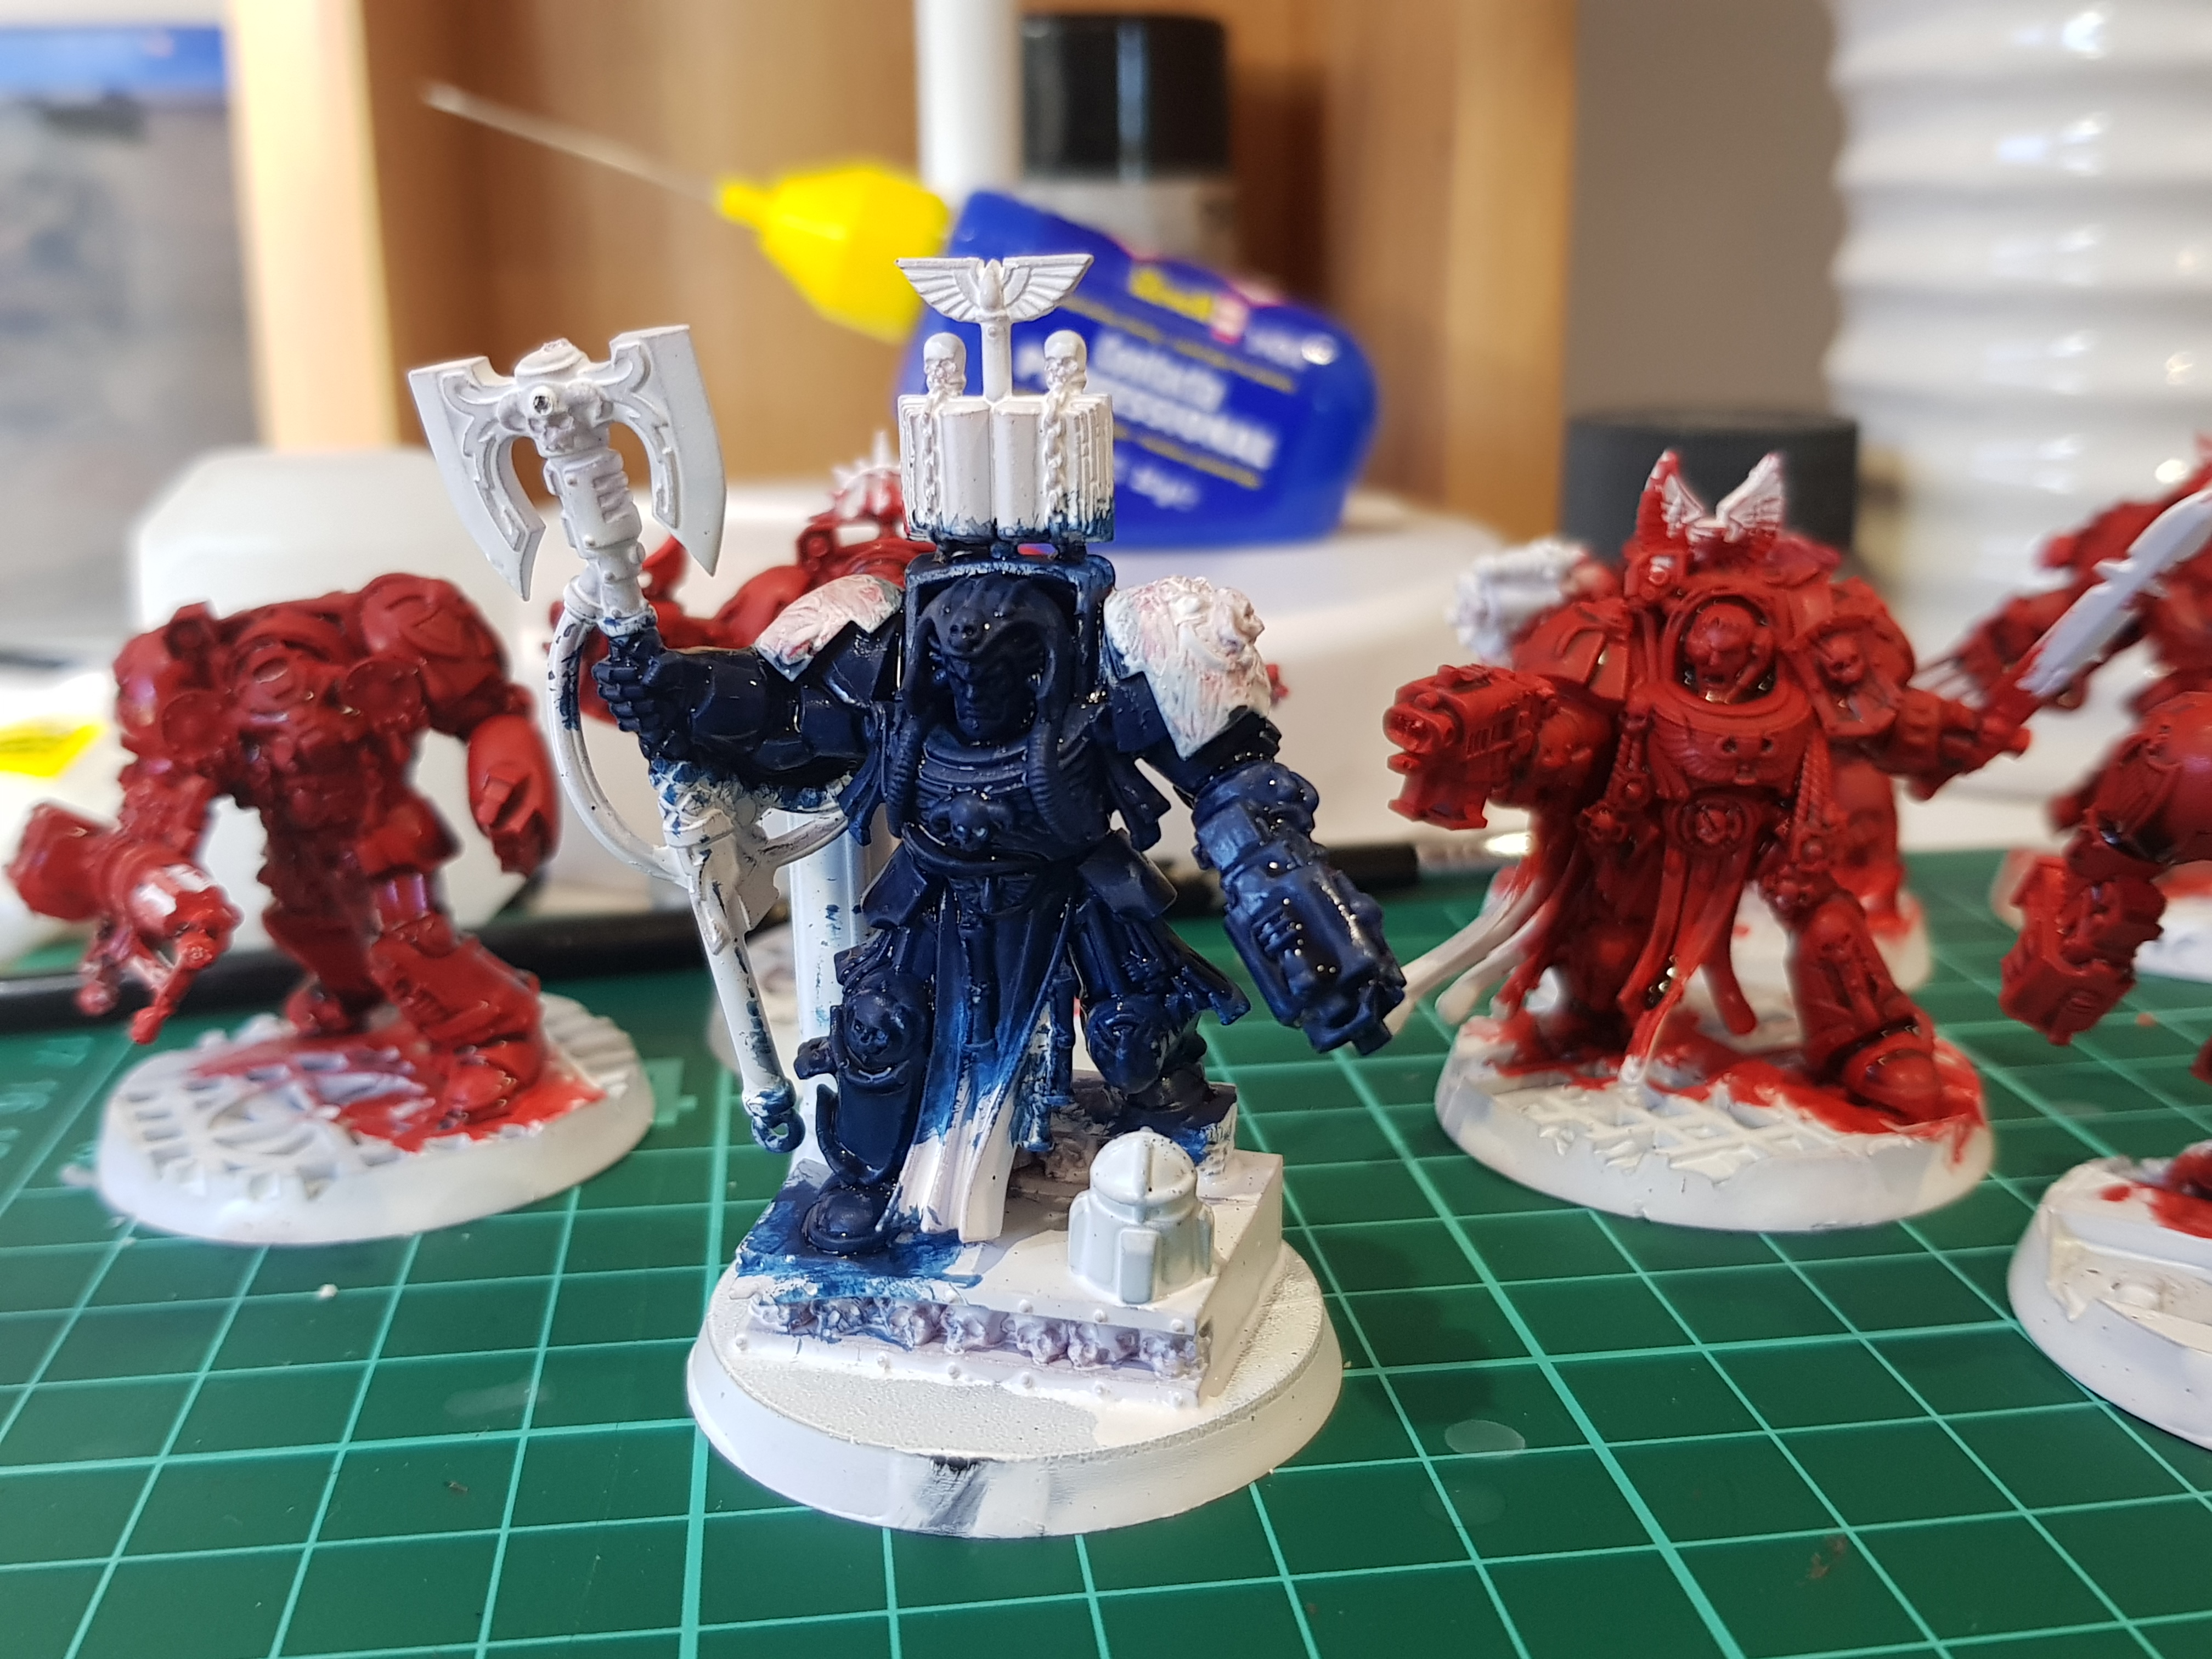
Step 9 - Adding Gold and Blue


I decided to start with the Commander to try different ideas .. pretty much going traditional but I did decide to go with dark blue for the shoulder pad, power sword and bolt gun to tie him in a little with the Librarian. Paints used included in the pics
Step 8 - Washing
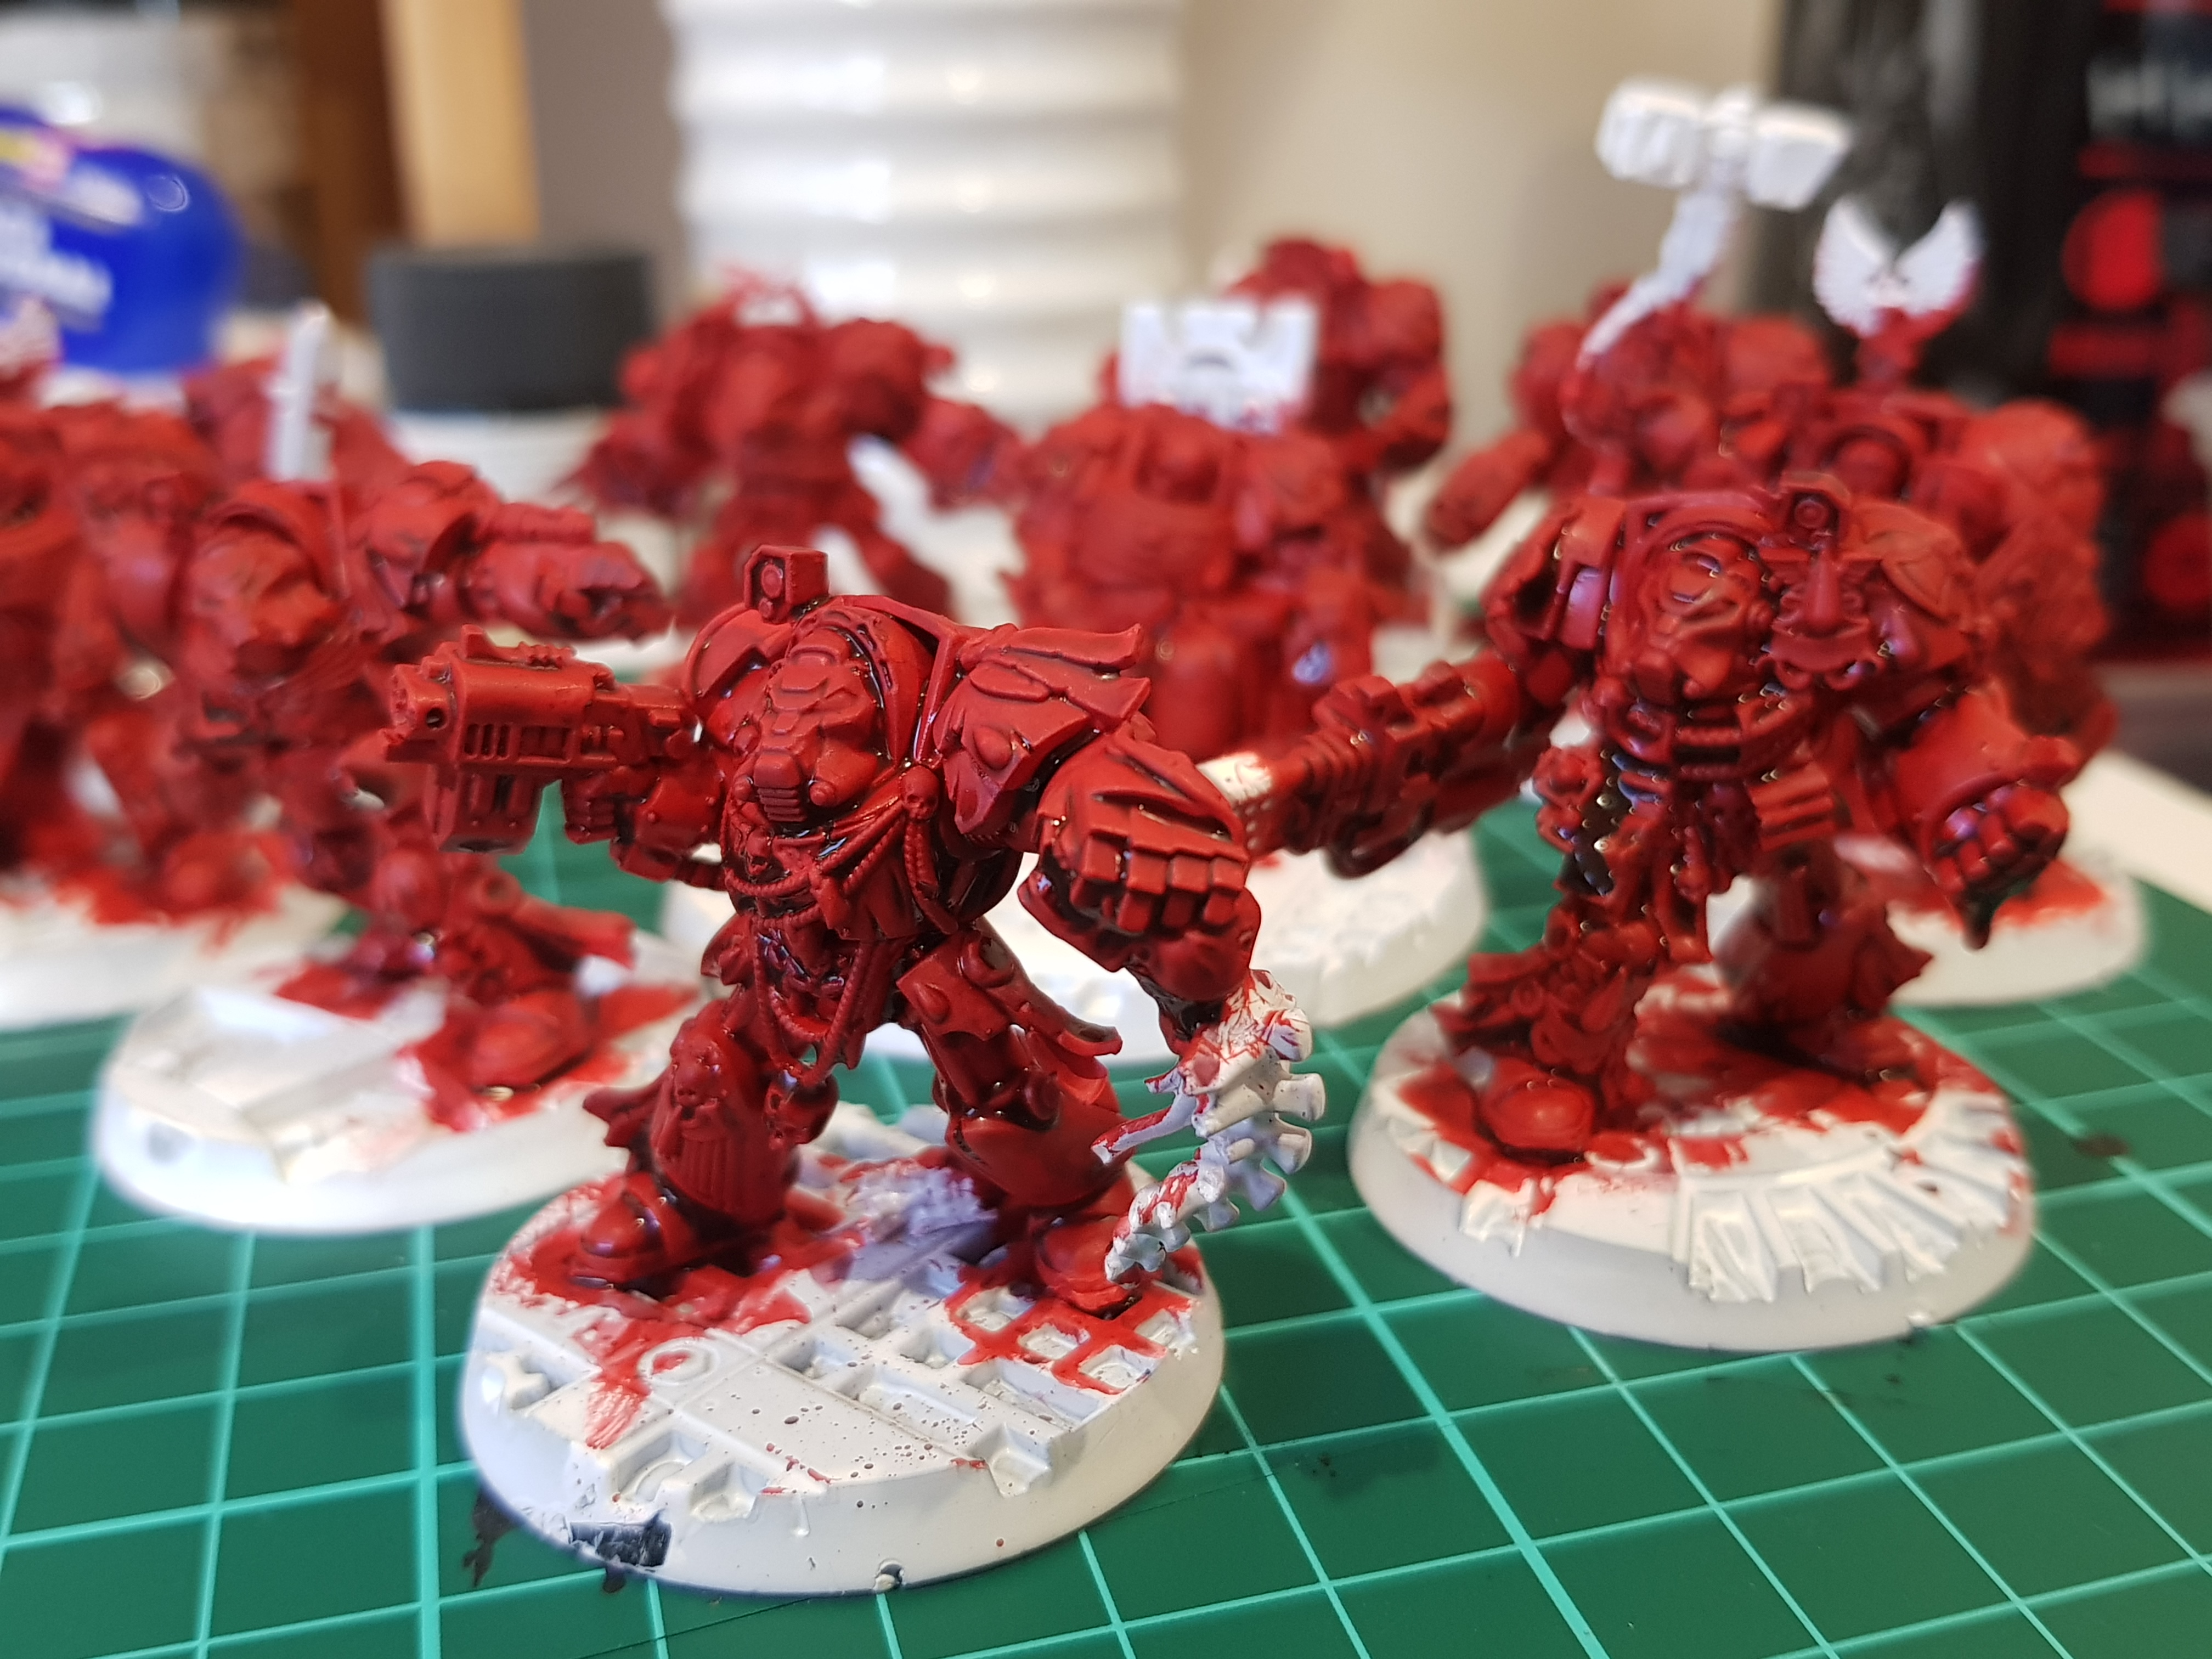
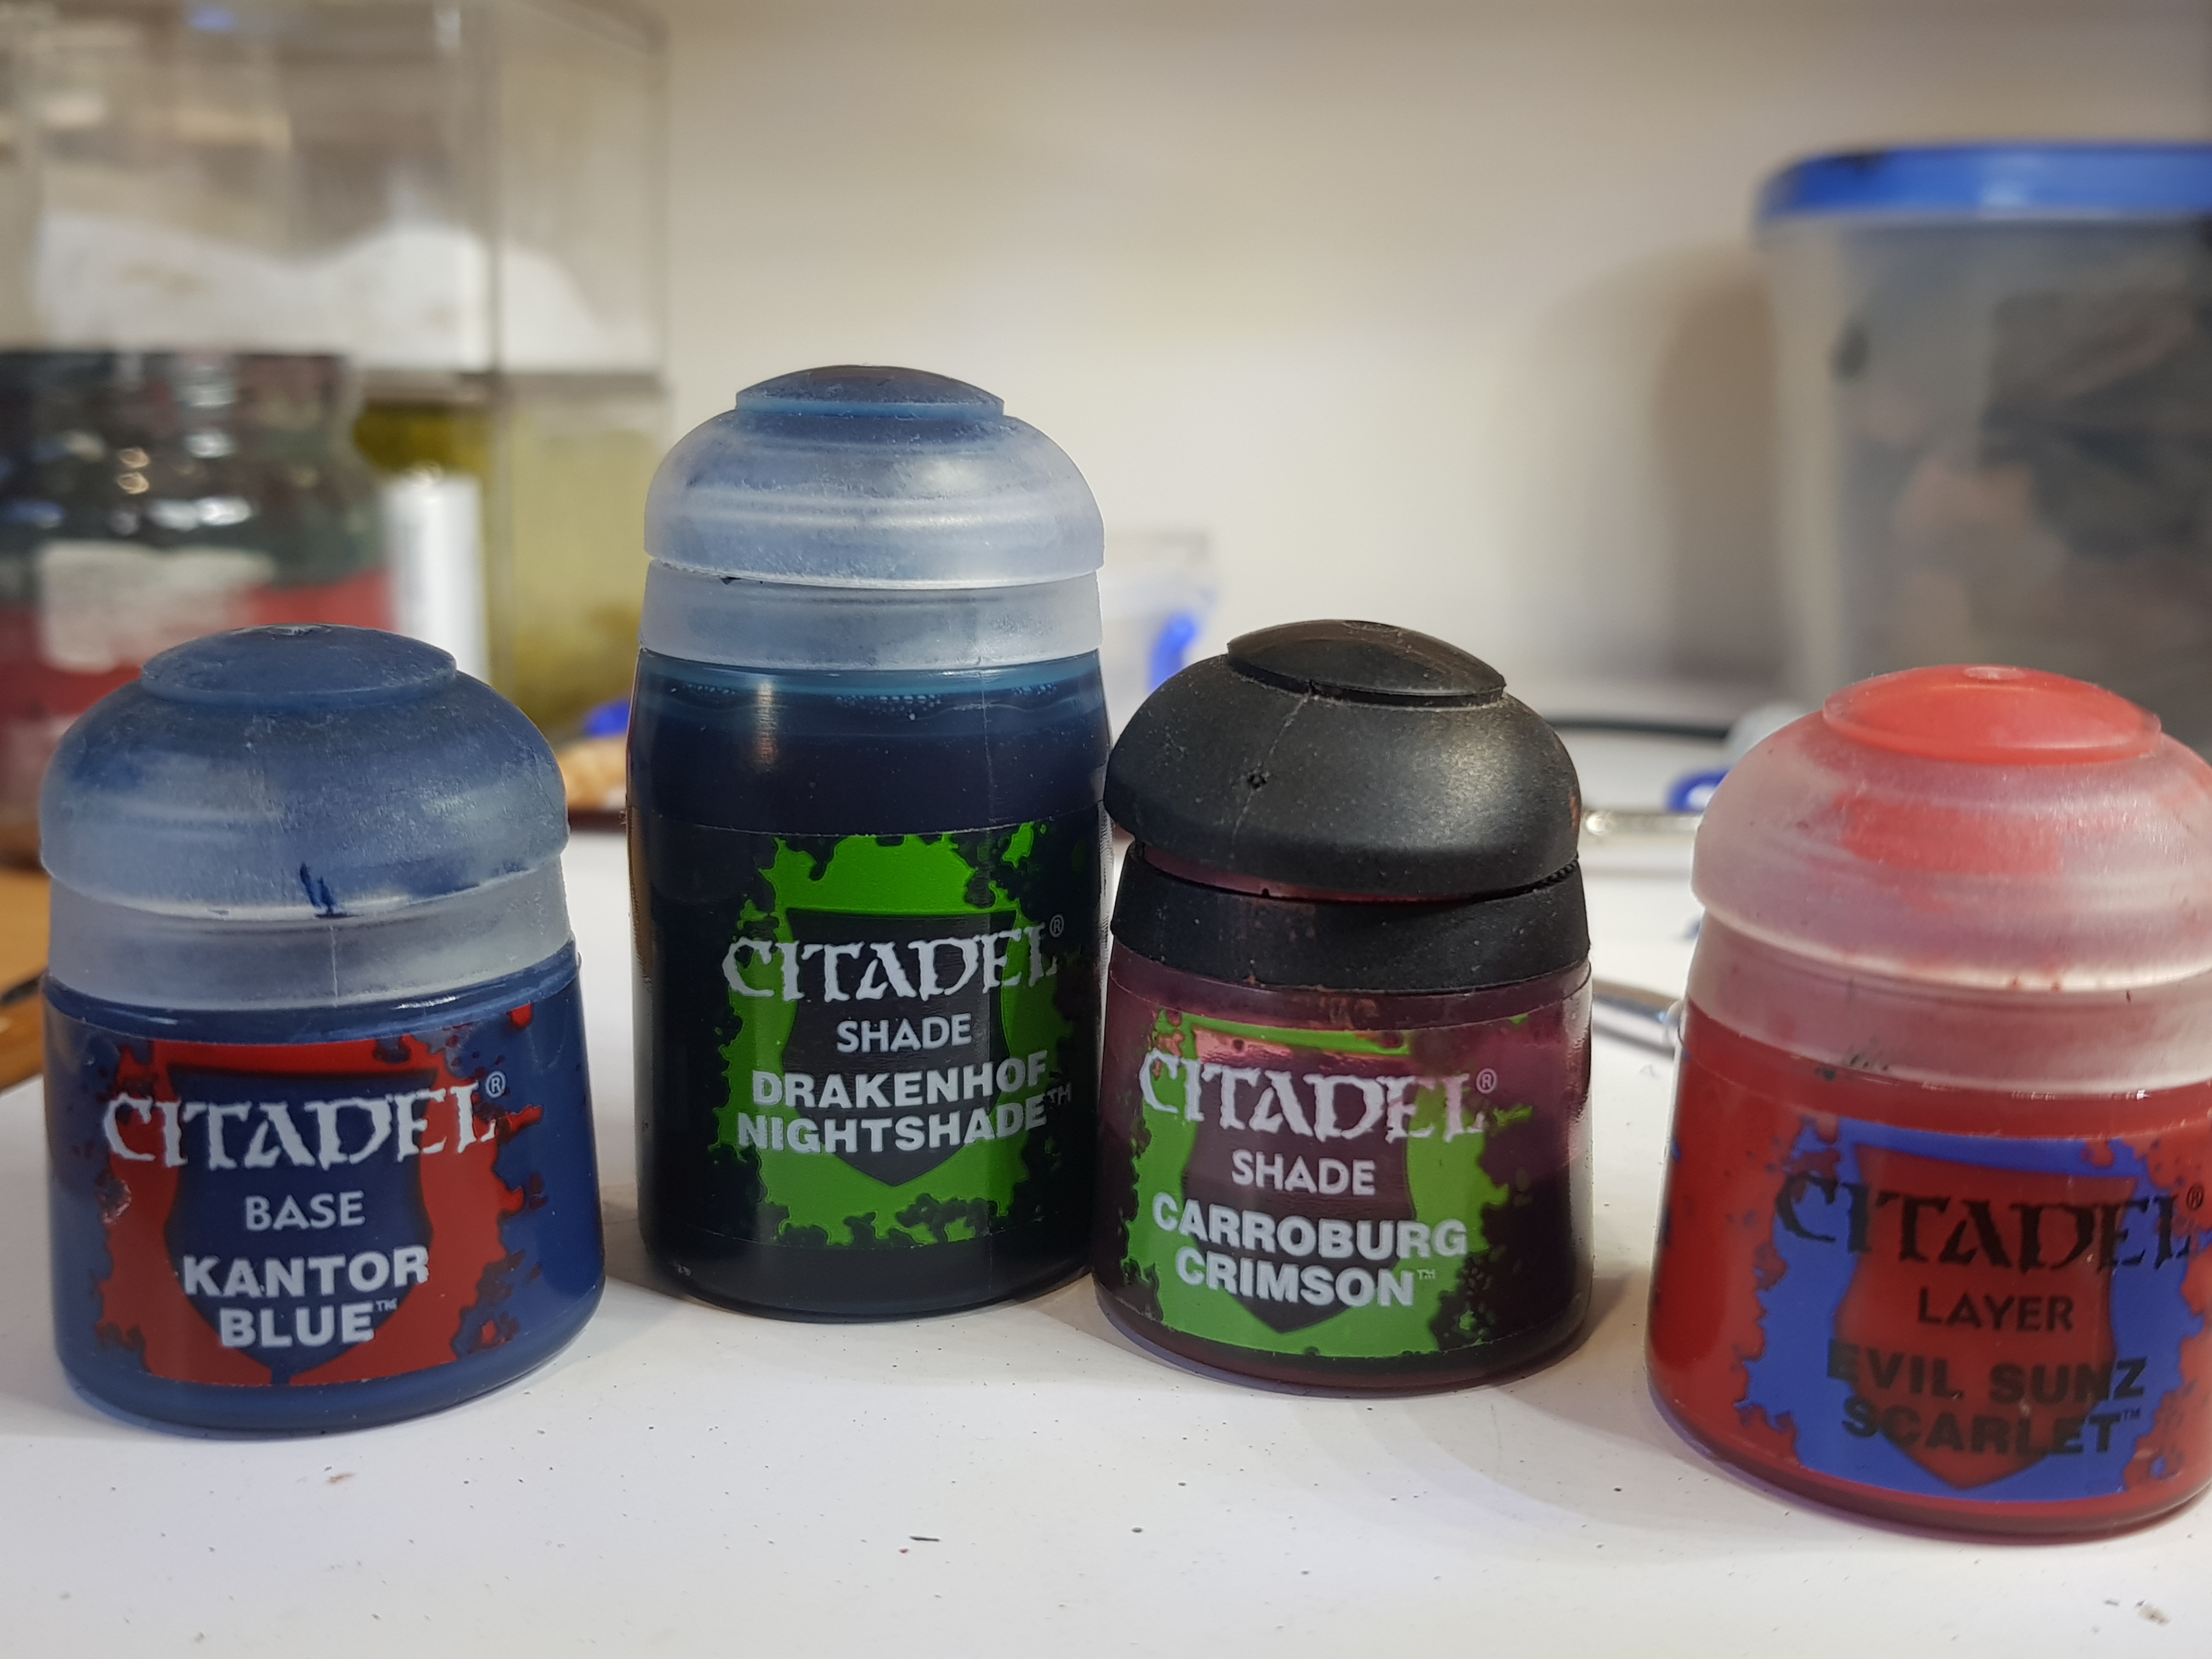

I decided to go with a crimson wash (see paints below) all over and very liberal – it looked a bit rough when still partly wet (in the pictures below) Ready for the next step .. at the same time as I did these (after the red so as not to pollute the brushes and washes) I painted the librarian in blue (Kantor Blue) and gave him a wash of Drakenhoth nightshade. This got all the primary colours and washes in place.


![StarCraft Tabletop Miniatures Game Pre-Orders Live Now [Updated]](https://images.beastsofwar.com/2026/03/starcraft-tmg-news-cover-600-338.jpg)


