


Speed Build of Adeptus Titanicus Titan Battlegroup Box


Recommendations: 44
About the Project
Greetings, I am known in my local community for getting miniatures together pretty fast and I have gone into Adeptus Titanicus pretty heavily. I managed to snag one of the Titan Battlegroup boxes and I am going to document my progress. Regards, Khibyusa
Related Game: Adeptus Titanicus
Related Company: Games Workshop
Related Genre: Science Fiction
This Project is Active
Titan Legio
Greetings,
Here is my current Titan and Knight forces.
The blue and purple-pink flames are my first Legio. I am thinking of calling them Poeni Ignis (Punic Fire) and naming them after Carthaginian generals and commanders after those who fought during the Punic Wars. The fire was purple originally, but I added the pink to make it pop more. The reason for the purple is that the Punic peoples made the purple dye that was one of the most expensive dyes in the ancient world, which led to it being used for royalty.
The unpainted or multi-coloured Titans and Knights will be their opposite number. I am tempted to make them red and maybe name them after Roman generals to mirror the Carthaginians…
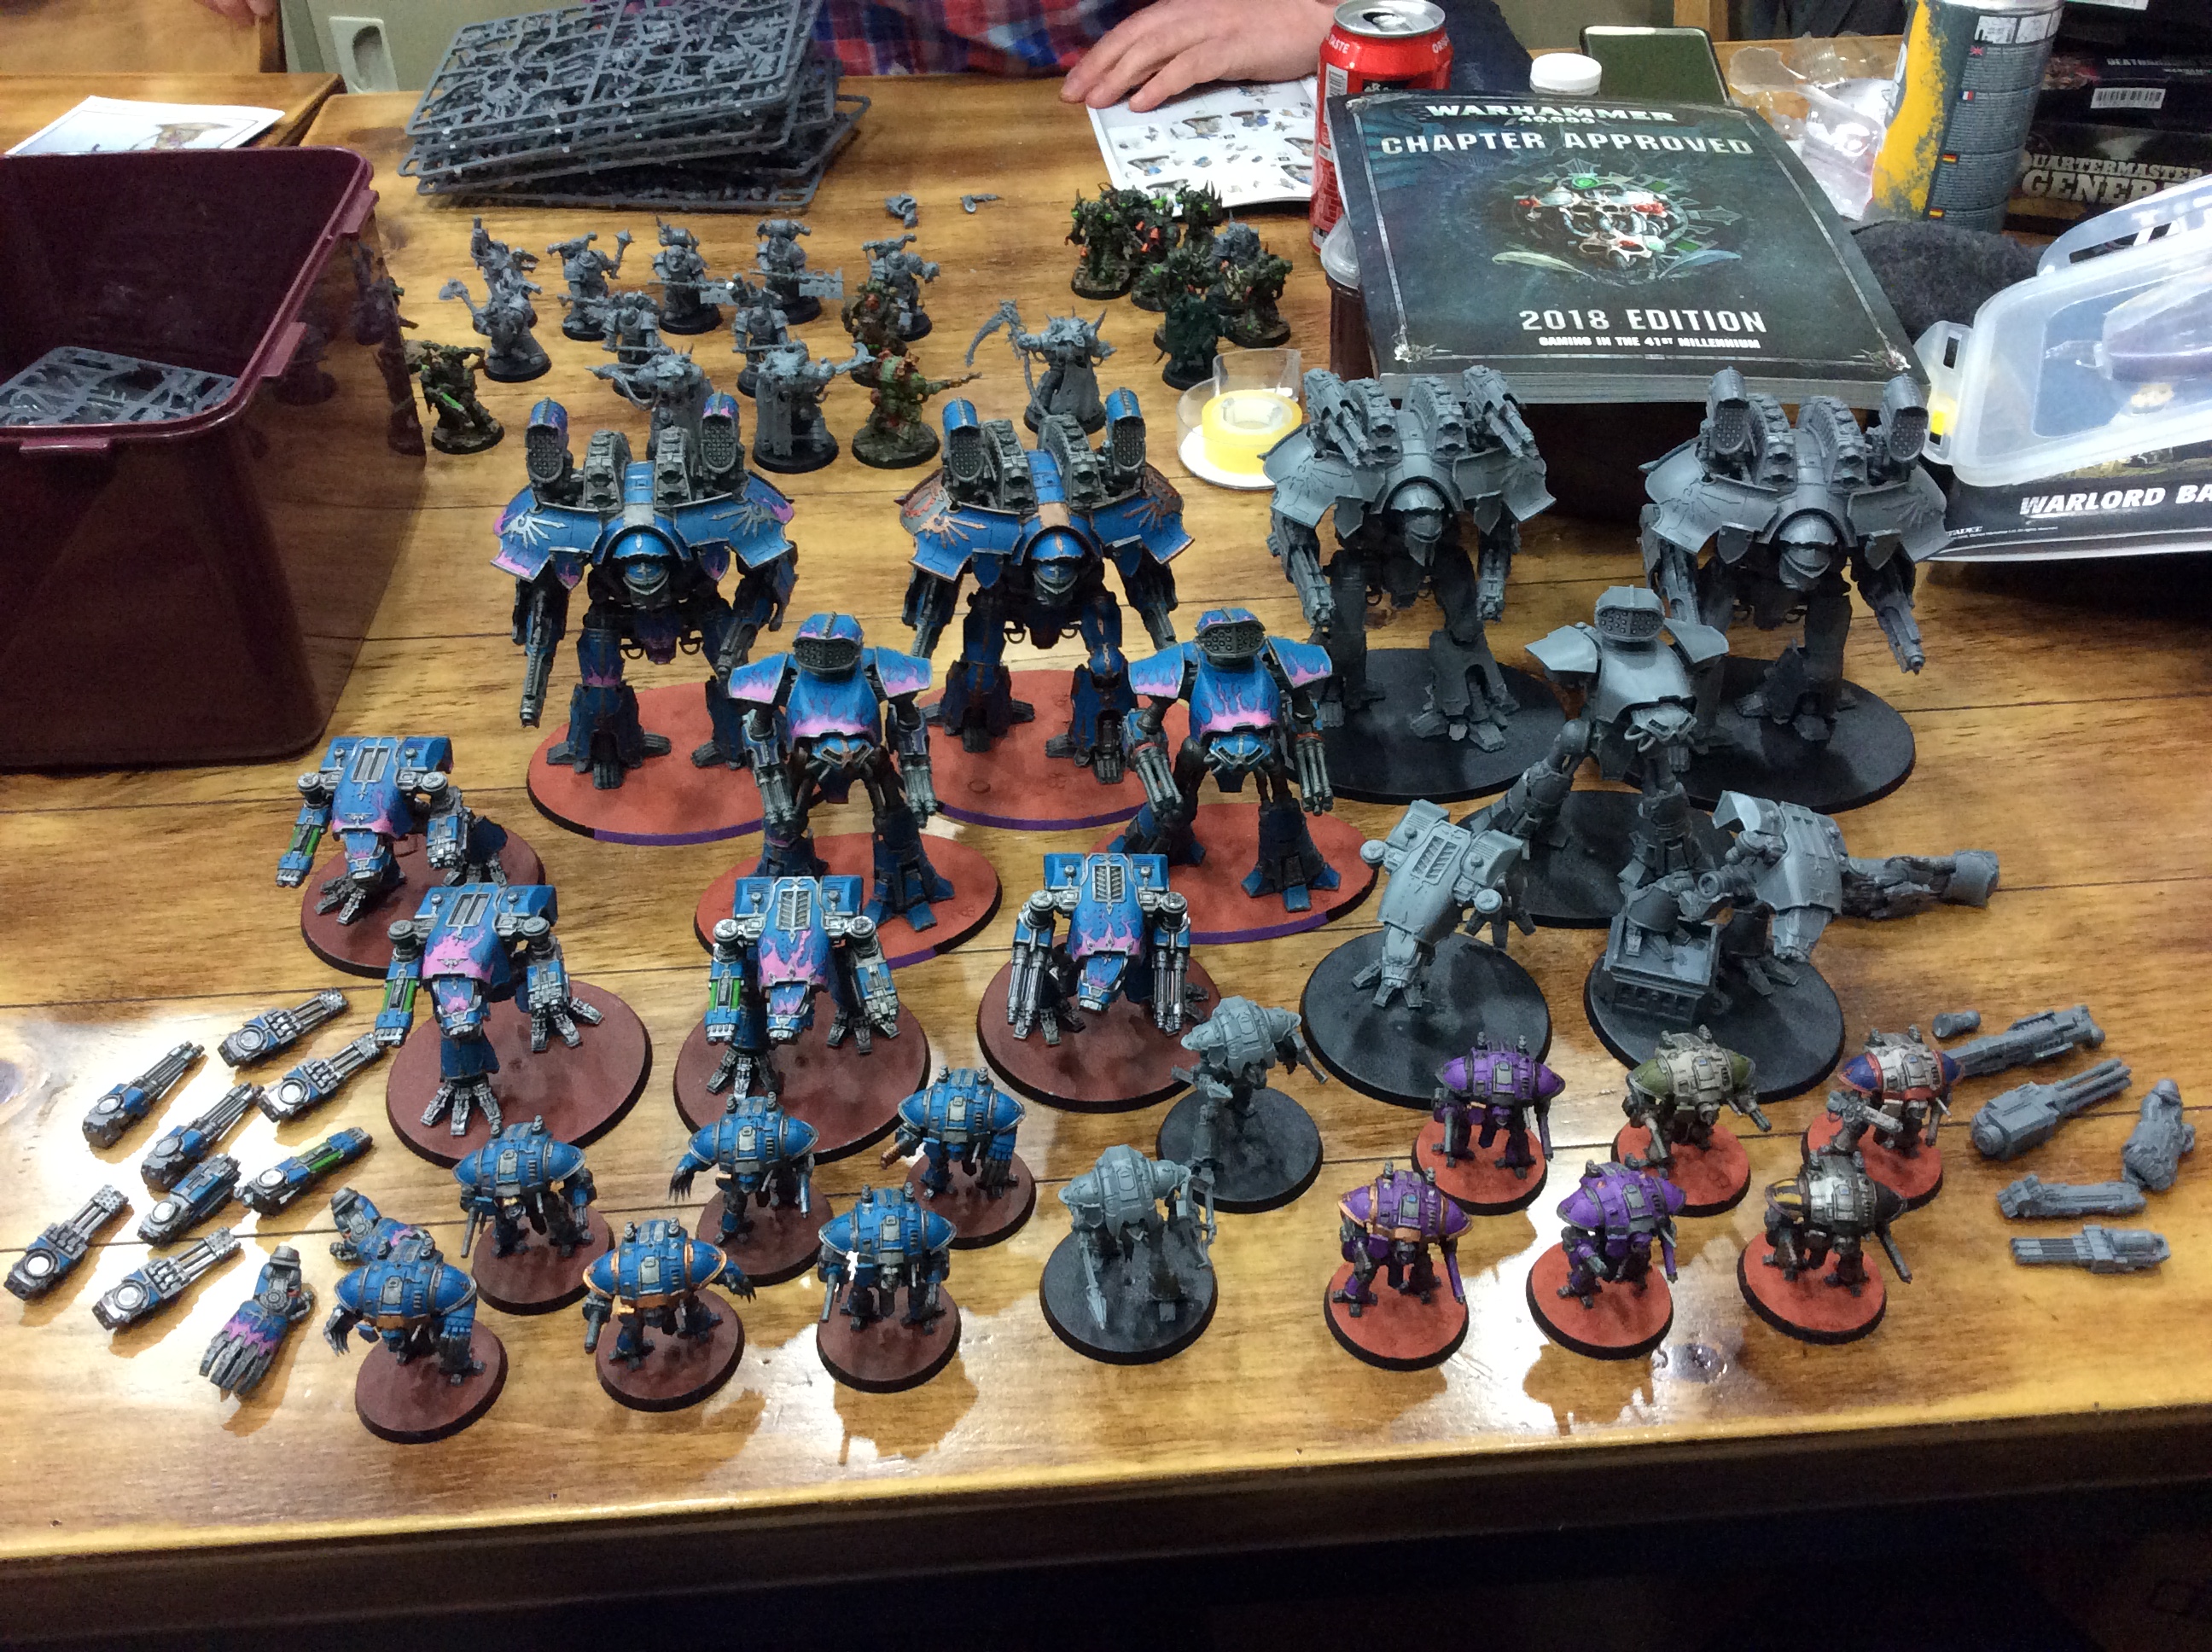 4 Warlords, 3 Reavers, 6 Warhounds, 12 Questoris Knights and 2 Cestus Knights.
Regards,
Khibyusa
Warhounds
Greetings,
The Warhounds are the last two Titans to finish off.
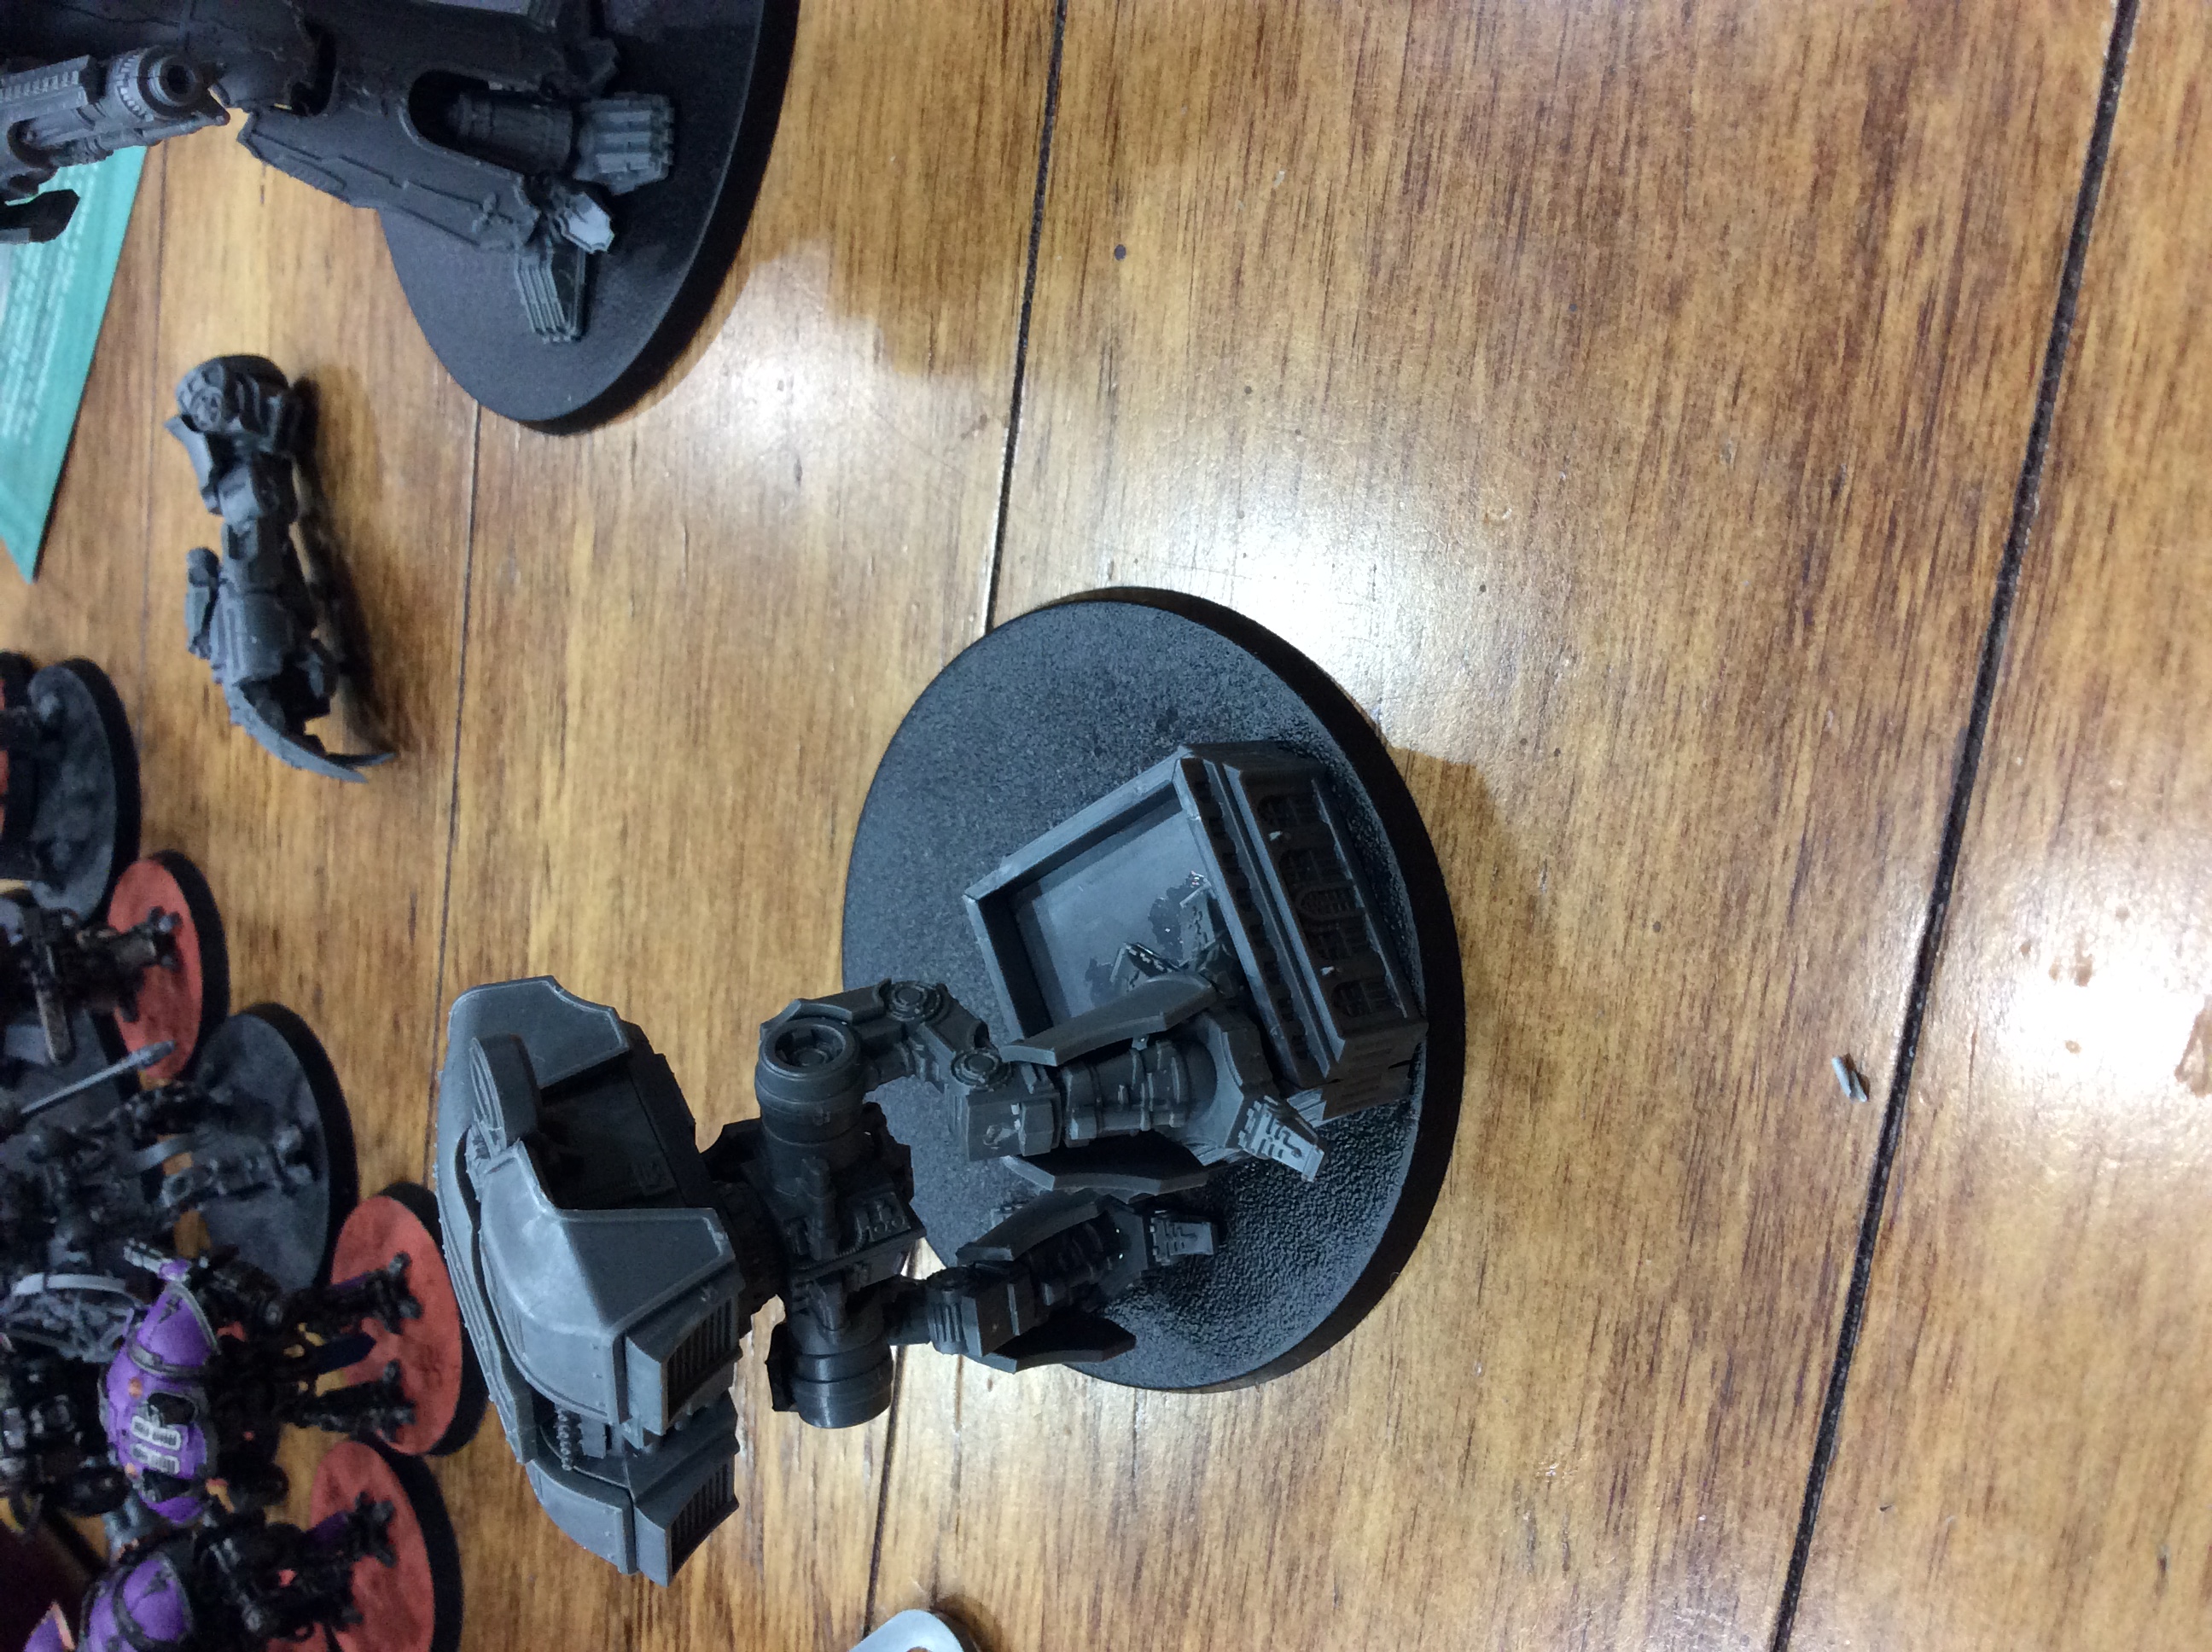
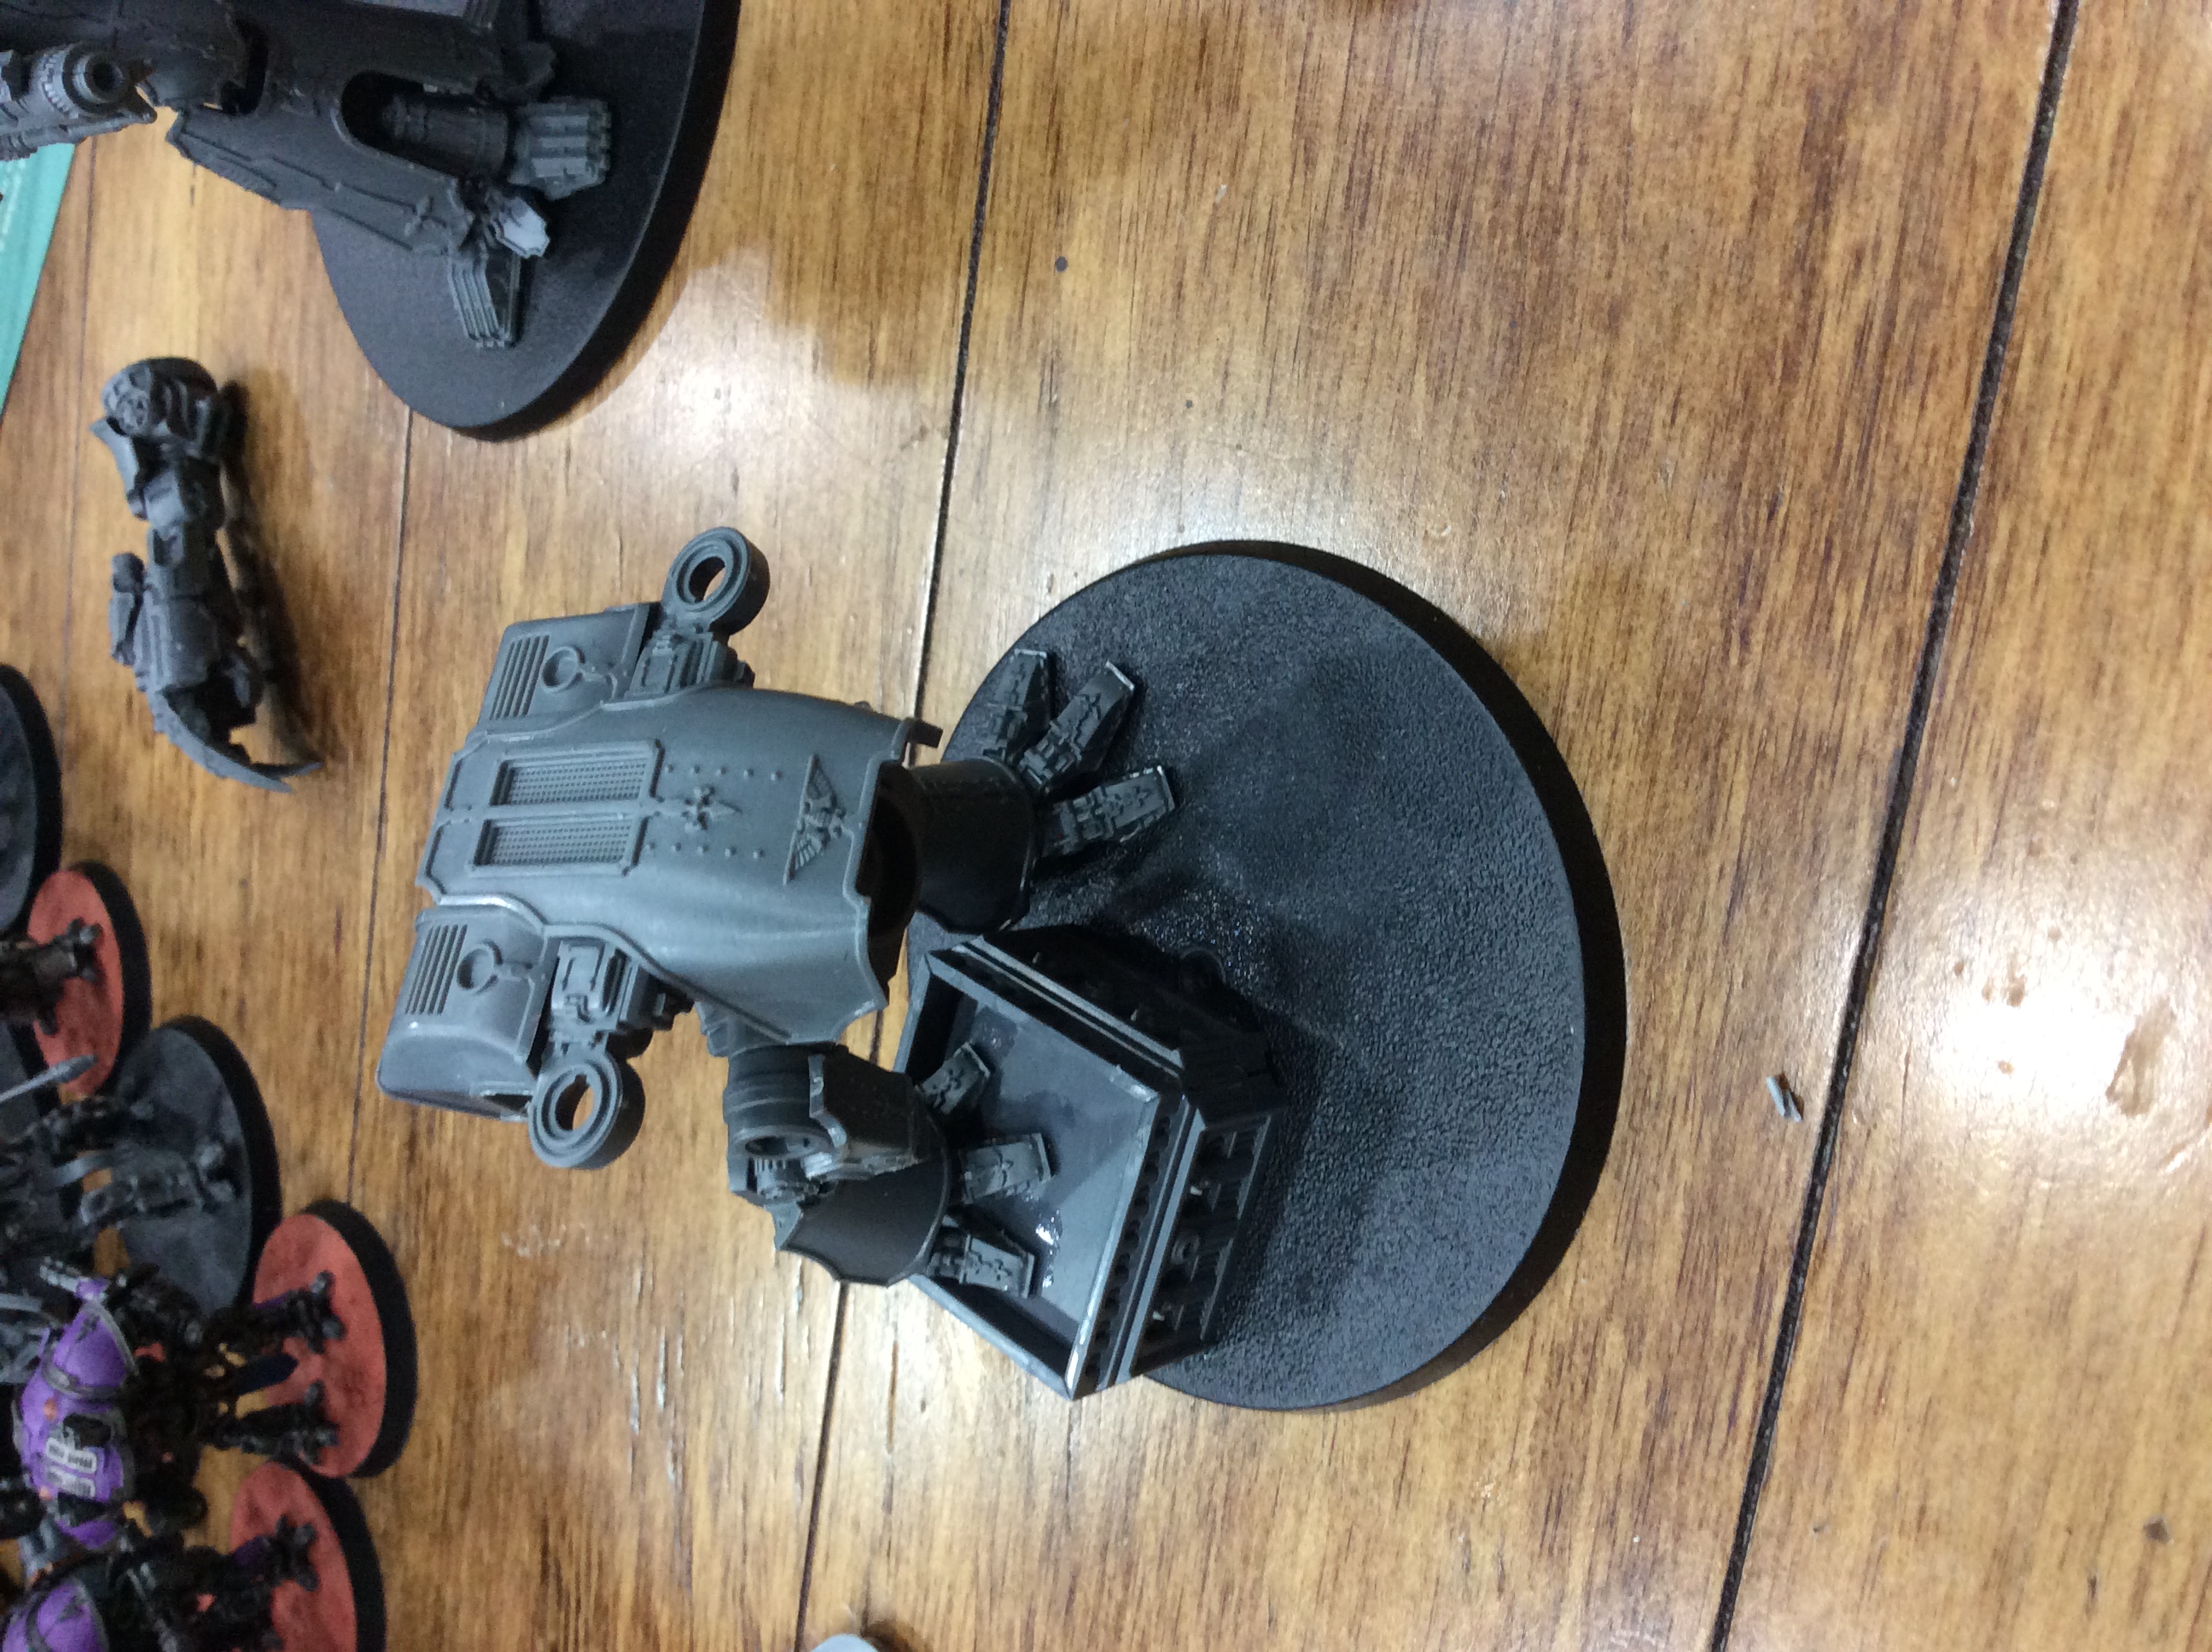

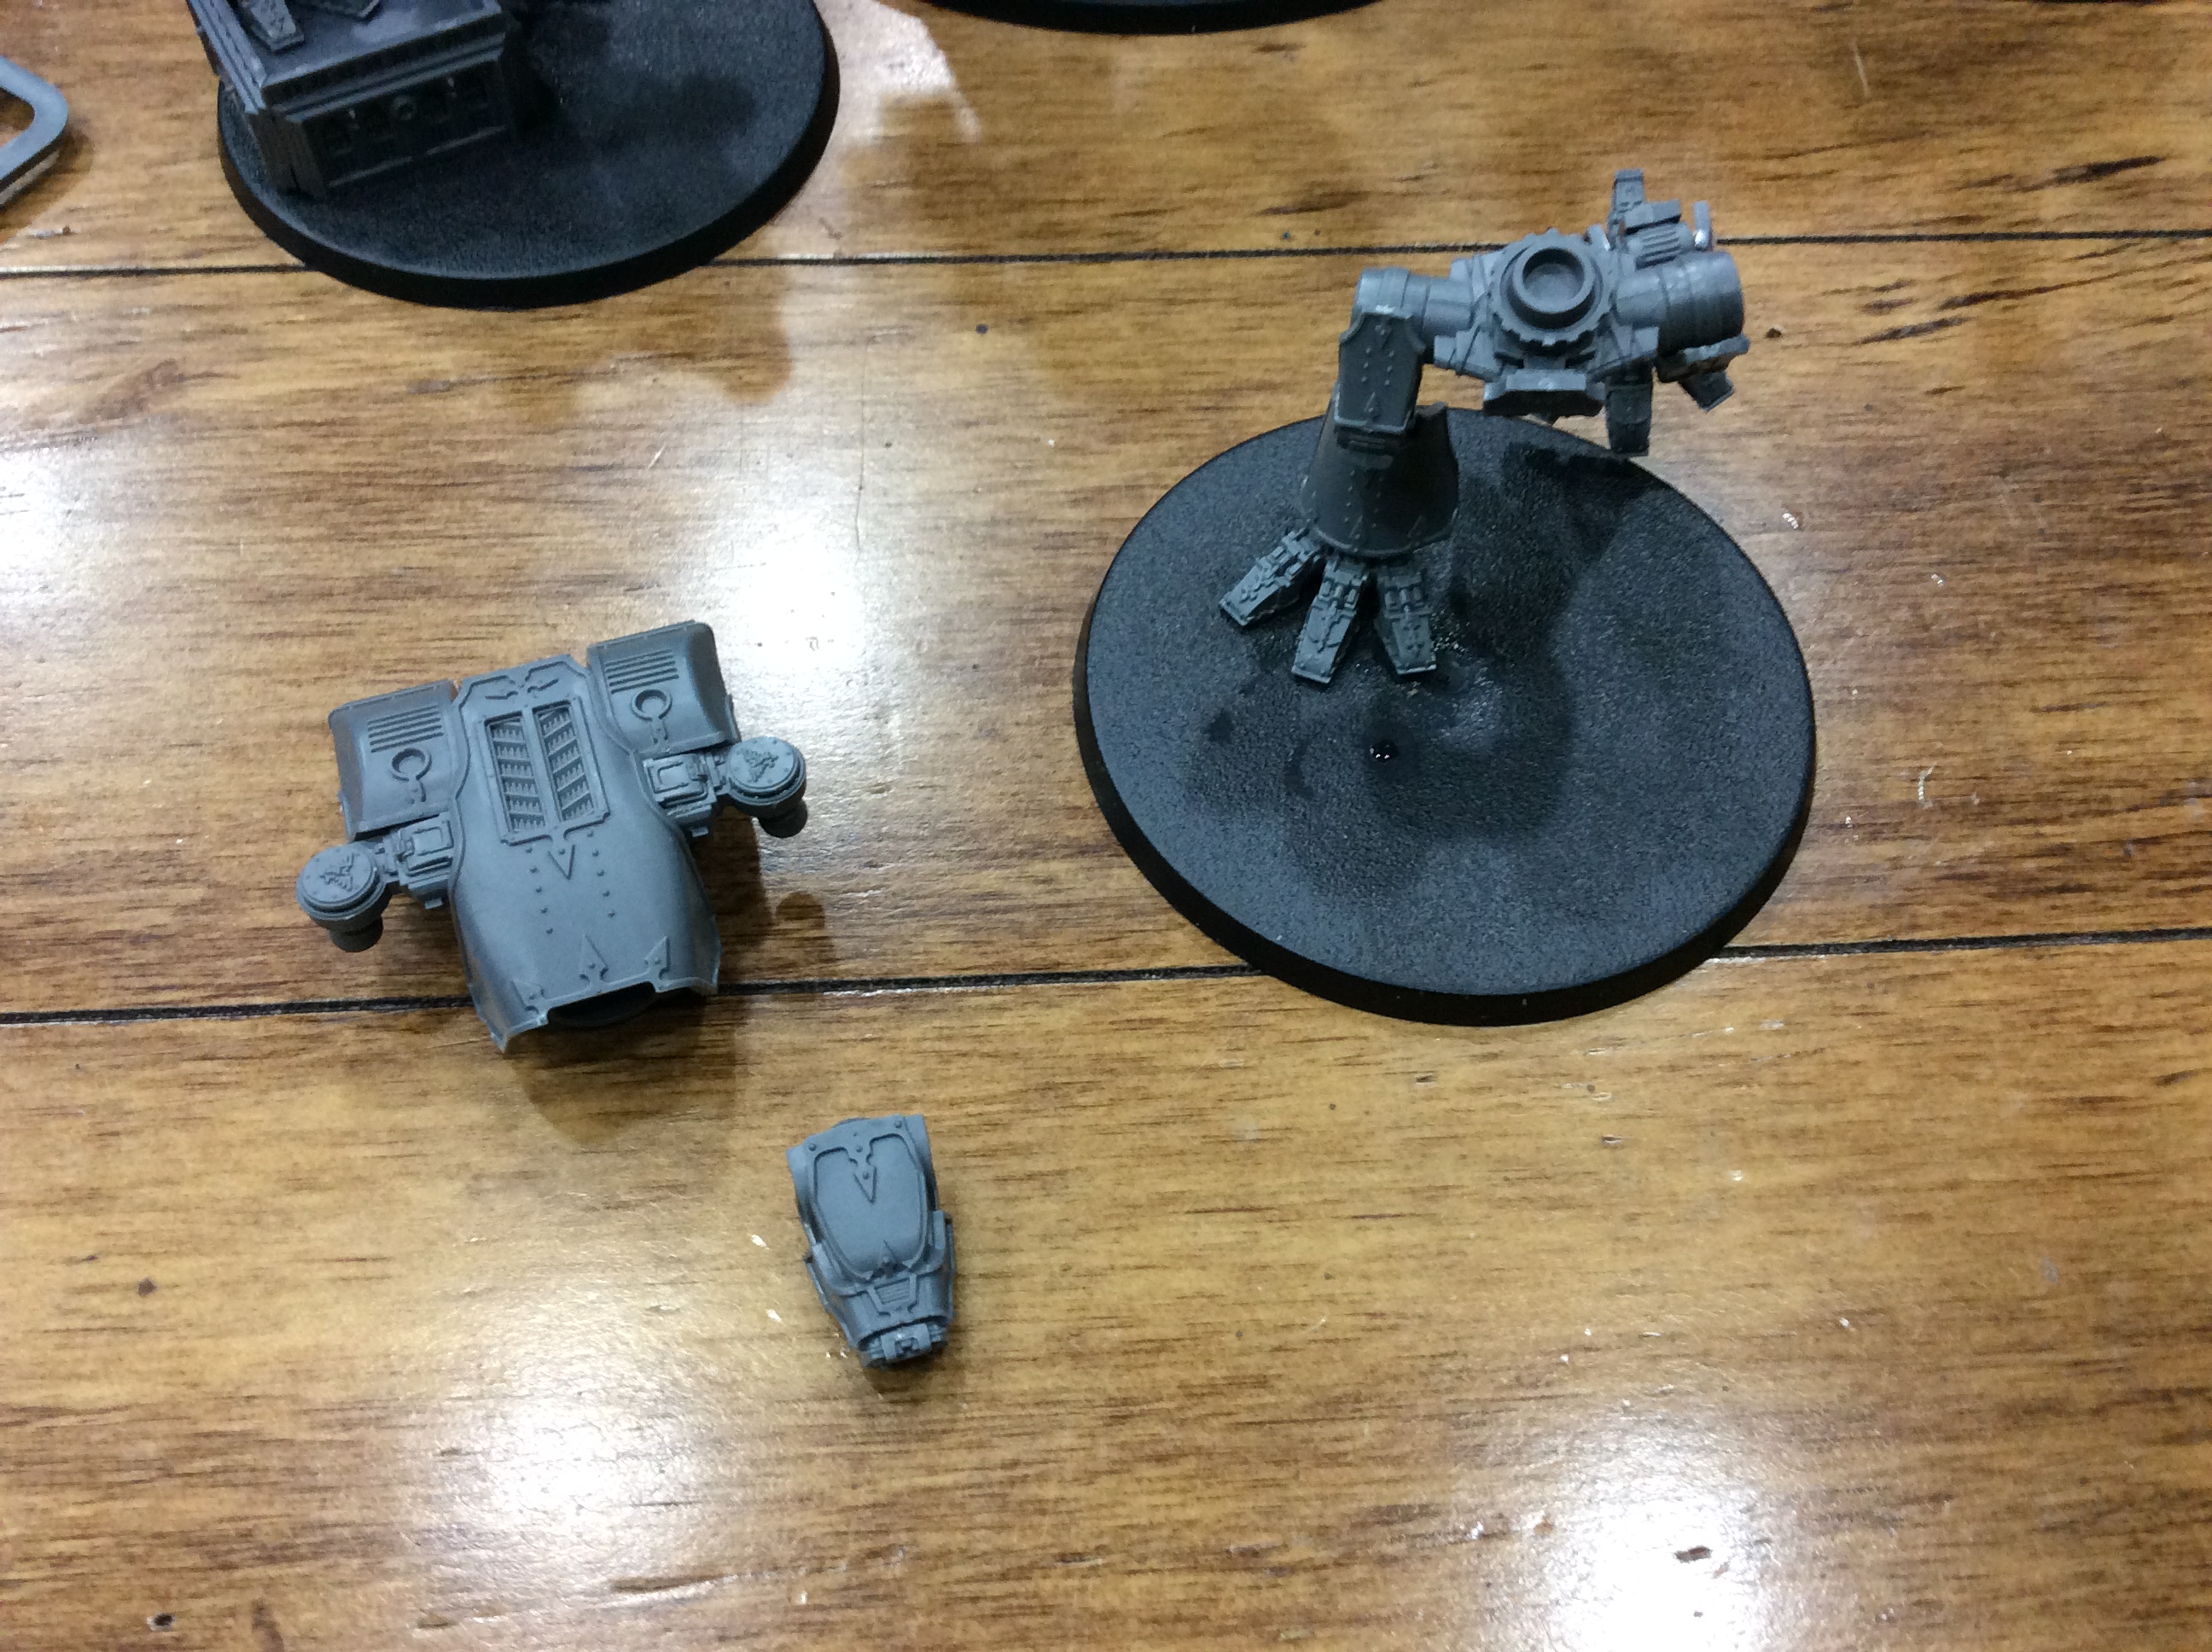
The Warhounds are broken down into three parts, the torso, legs and the head. I wanted to make a pair of more animated Warhounds.
The first one I made was the one stepping on a small building and the other is moving a a full loping stride.
I need to do a lot of green stuff work, but that will be after I get a lot more magnets.
I still have most of their weapons to build, but they are done. I hope that I have passed my speed build challenge.
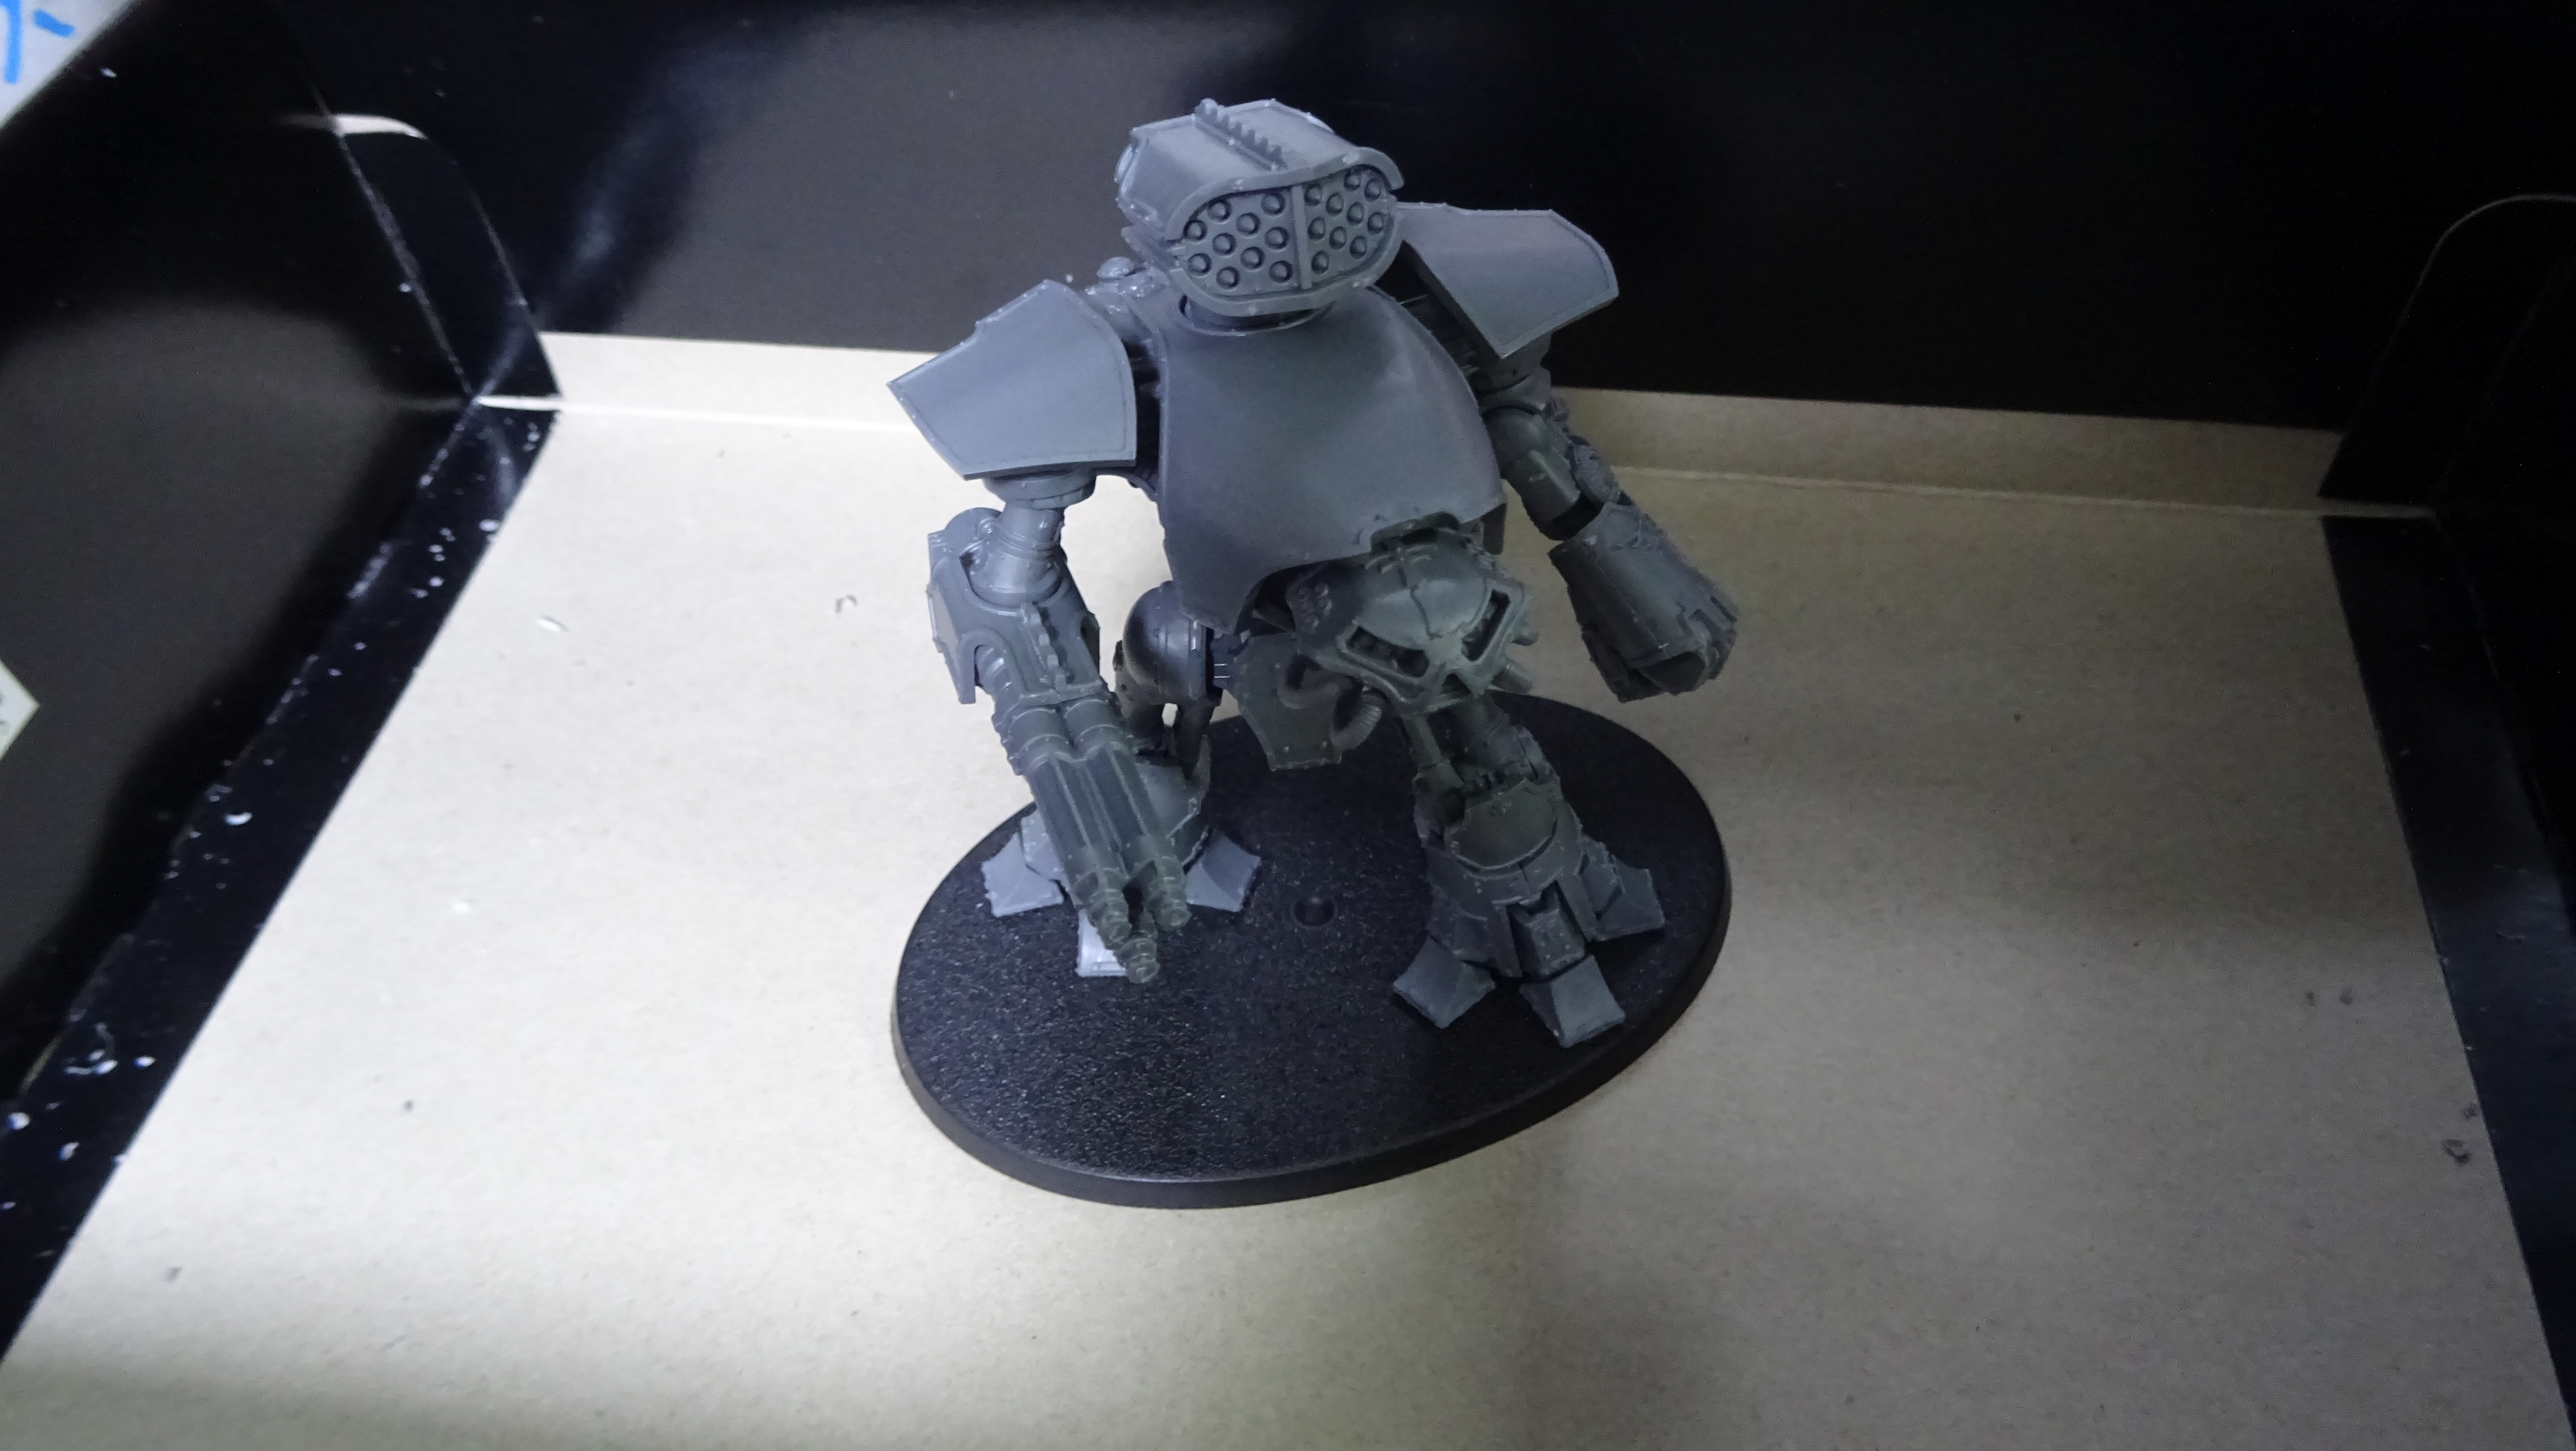
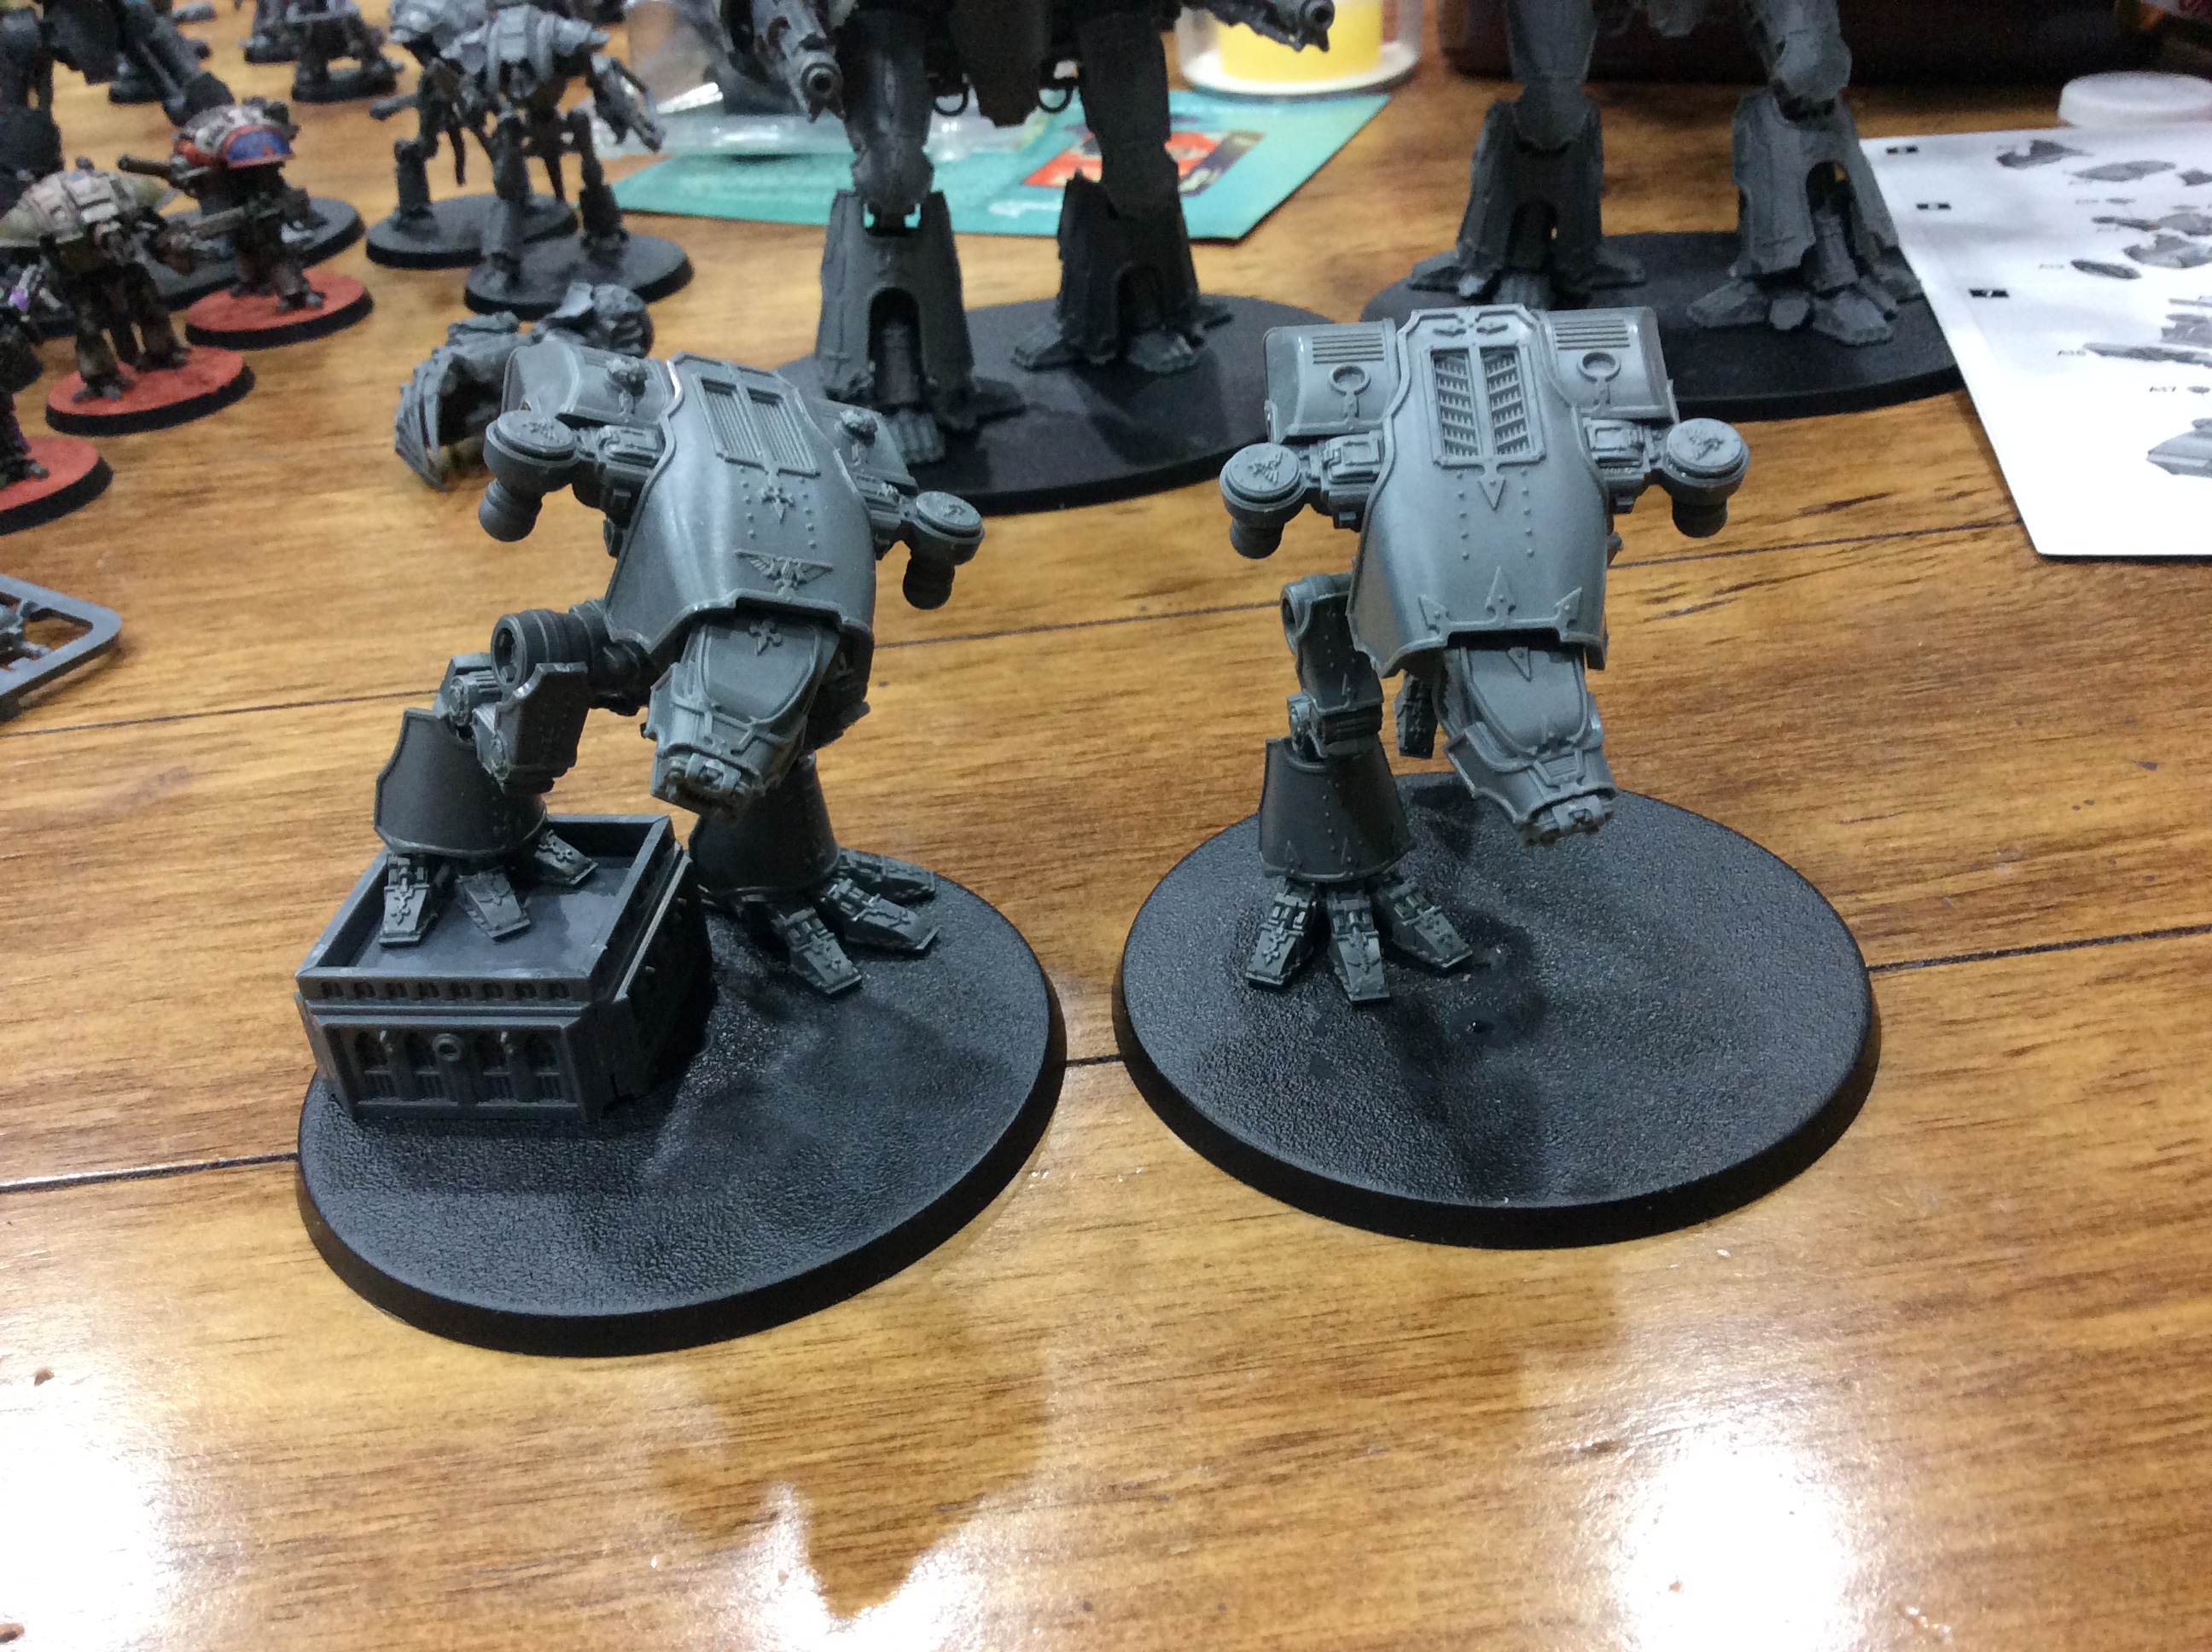 Completed chassis.
Here are the two brutes in their finished pose.
They are predatory in their aspect unlike their previously built counterparts. They are very reminiscent of the velociraptors from Jurassic Park.
Regards,
Khibyusa
Finishing the Warlord
Greetings,
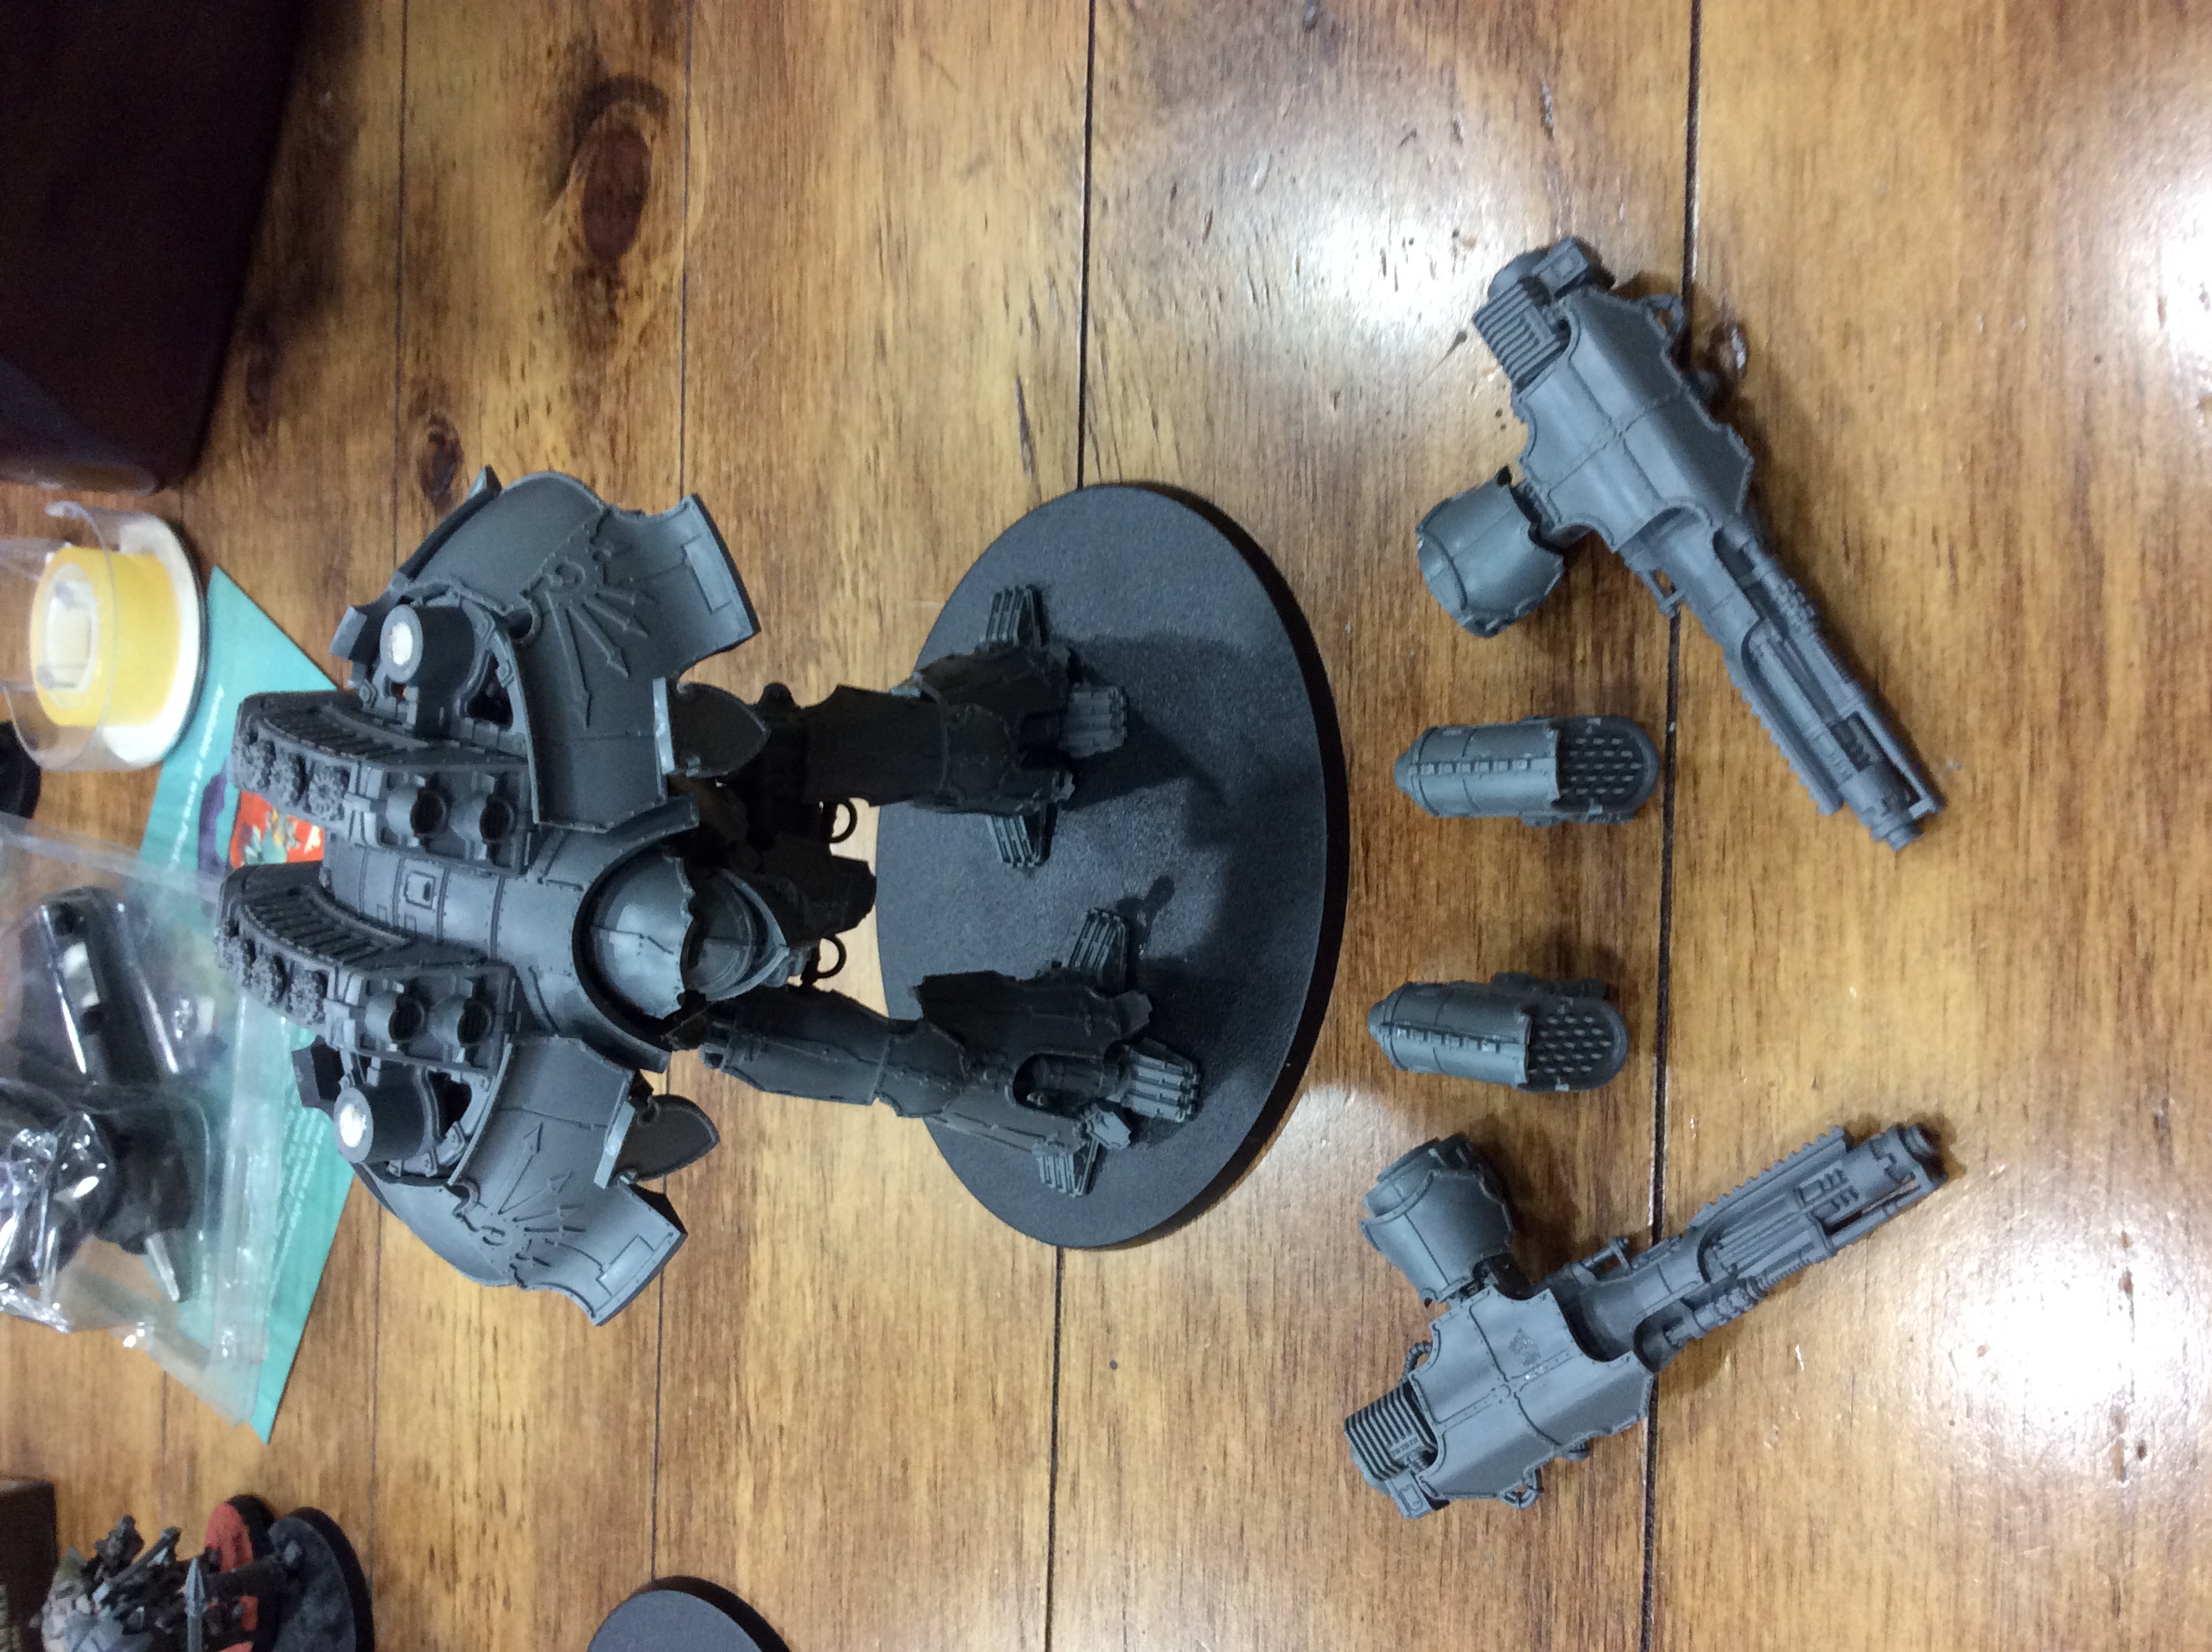
The Warlord is one of the easier Titans to build. Finishing the Warlord off from this point is just throwing the weapons and the head together and adding magnets to the weapons and the carapace and the shoulders.
That is it for the Warlord. Now onto the simplest Titans, the Warhounds.
Regards,
Khibyusa
Haynes Vehicle Guide: Warlord Titan
Greetings,
This is going to be the start of a blizzard of posts. Hopefully they will be beneficial for people embarking upon throwing one of these minis together.
There was a change in venue as I do try to attempt to be social on the weekends….
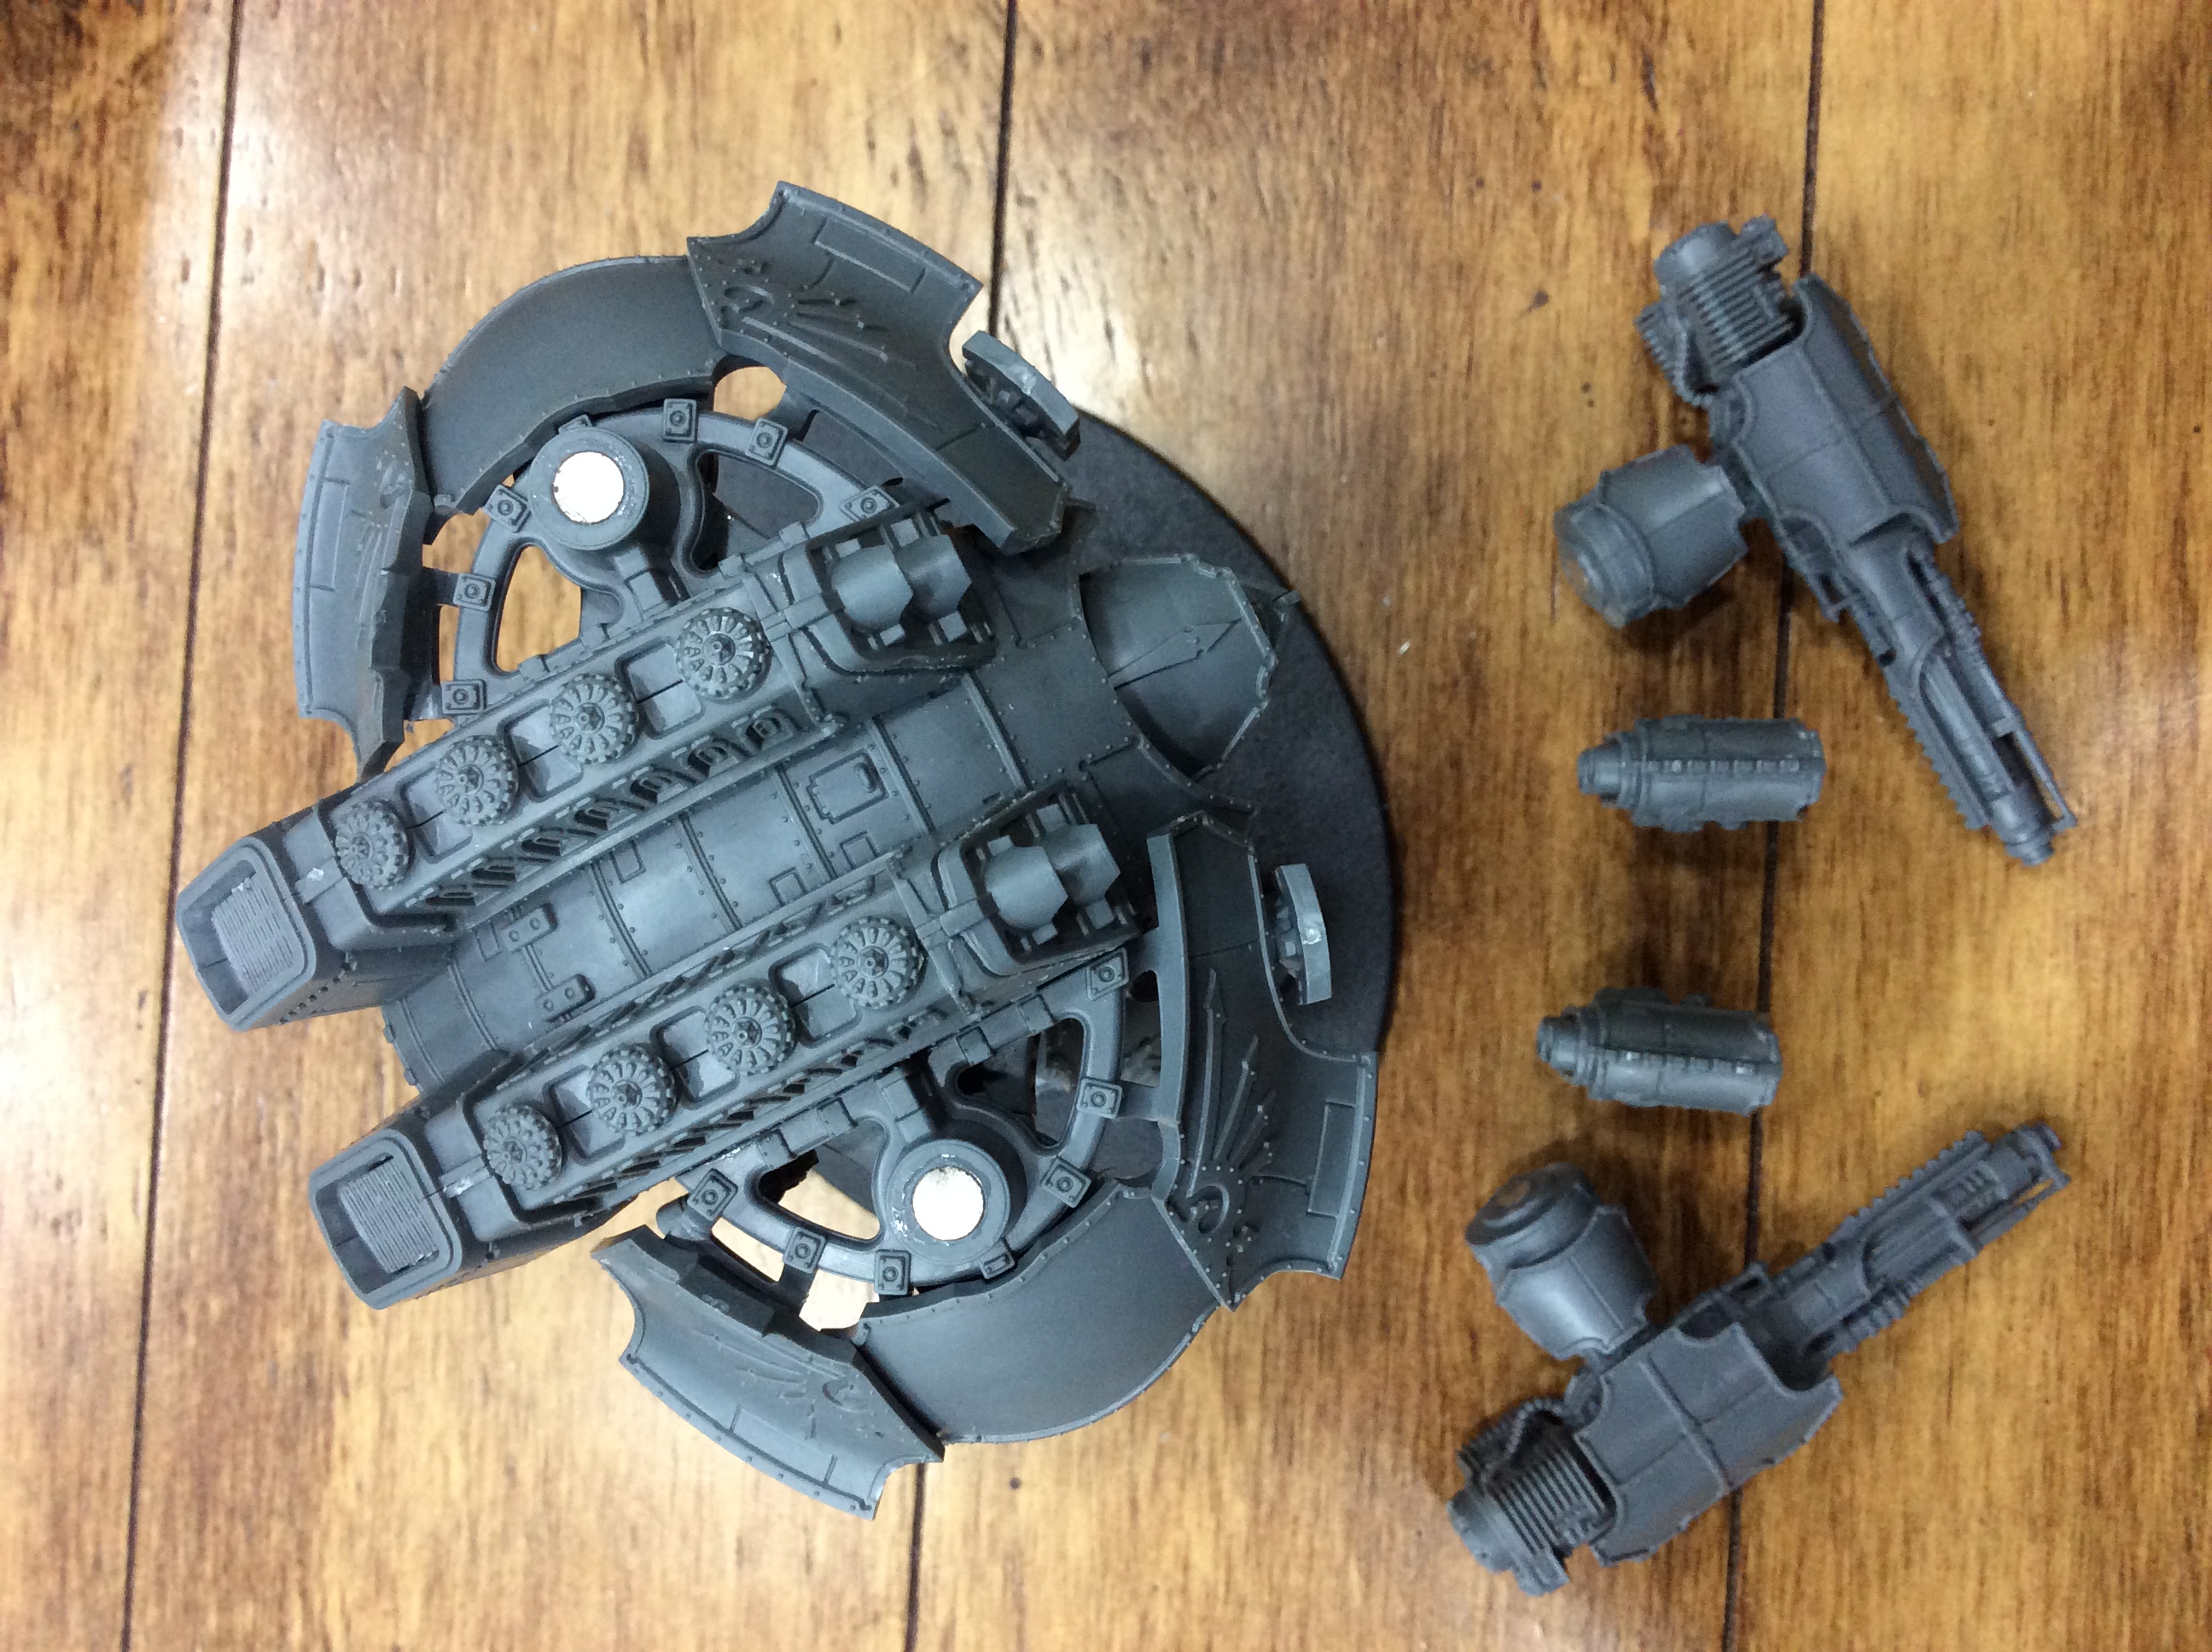
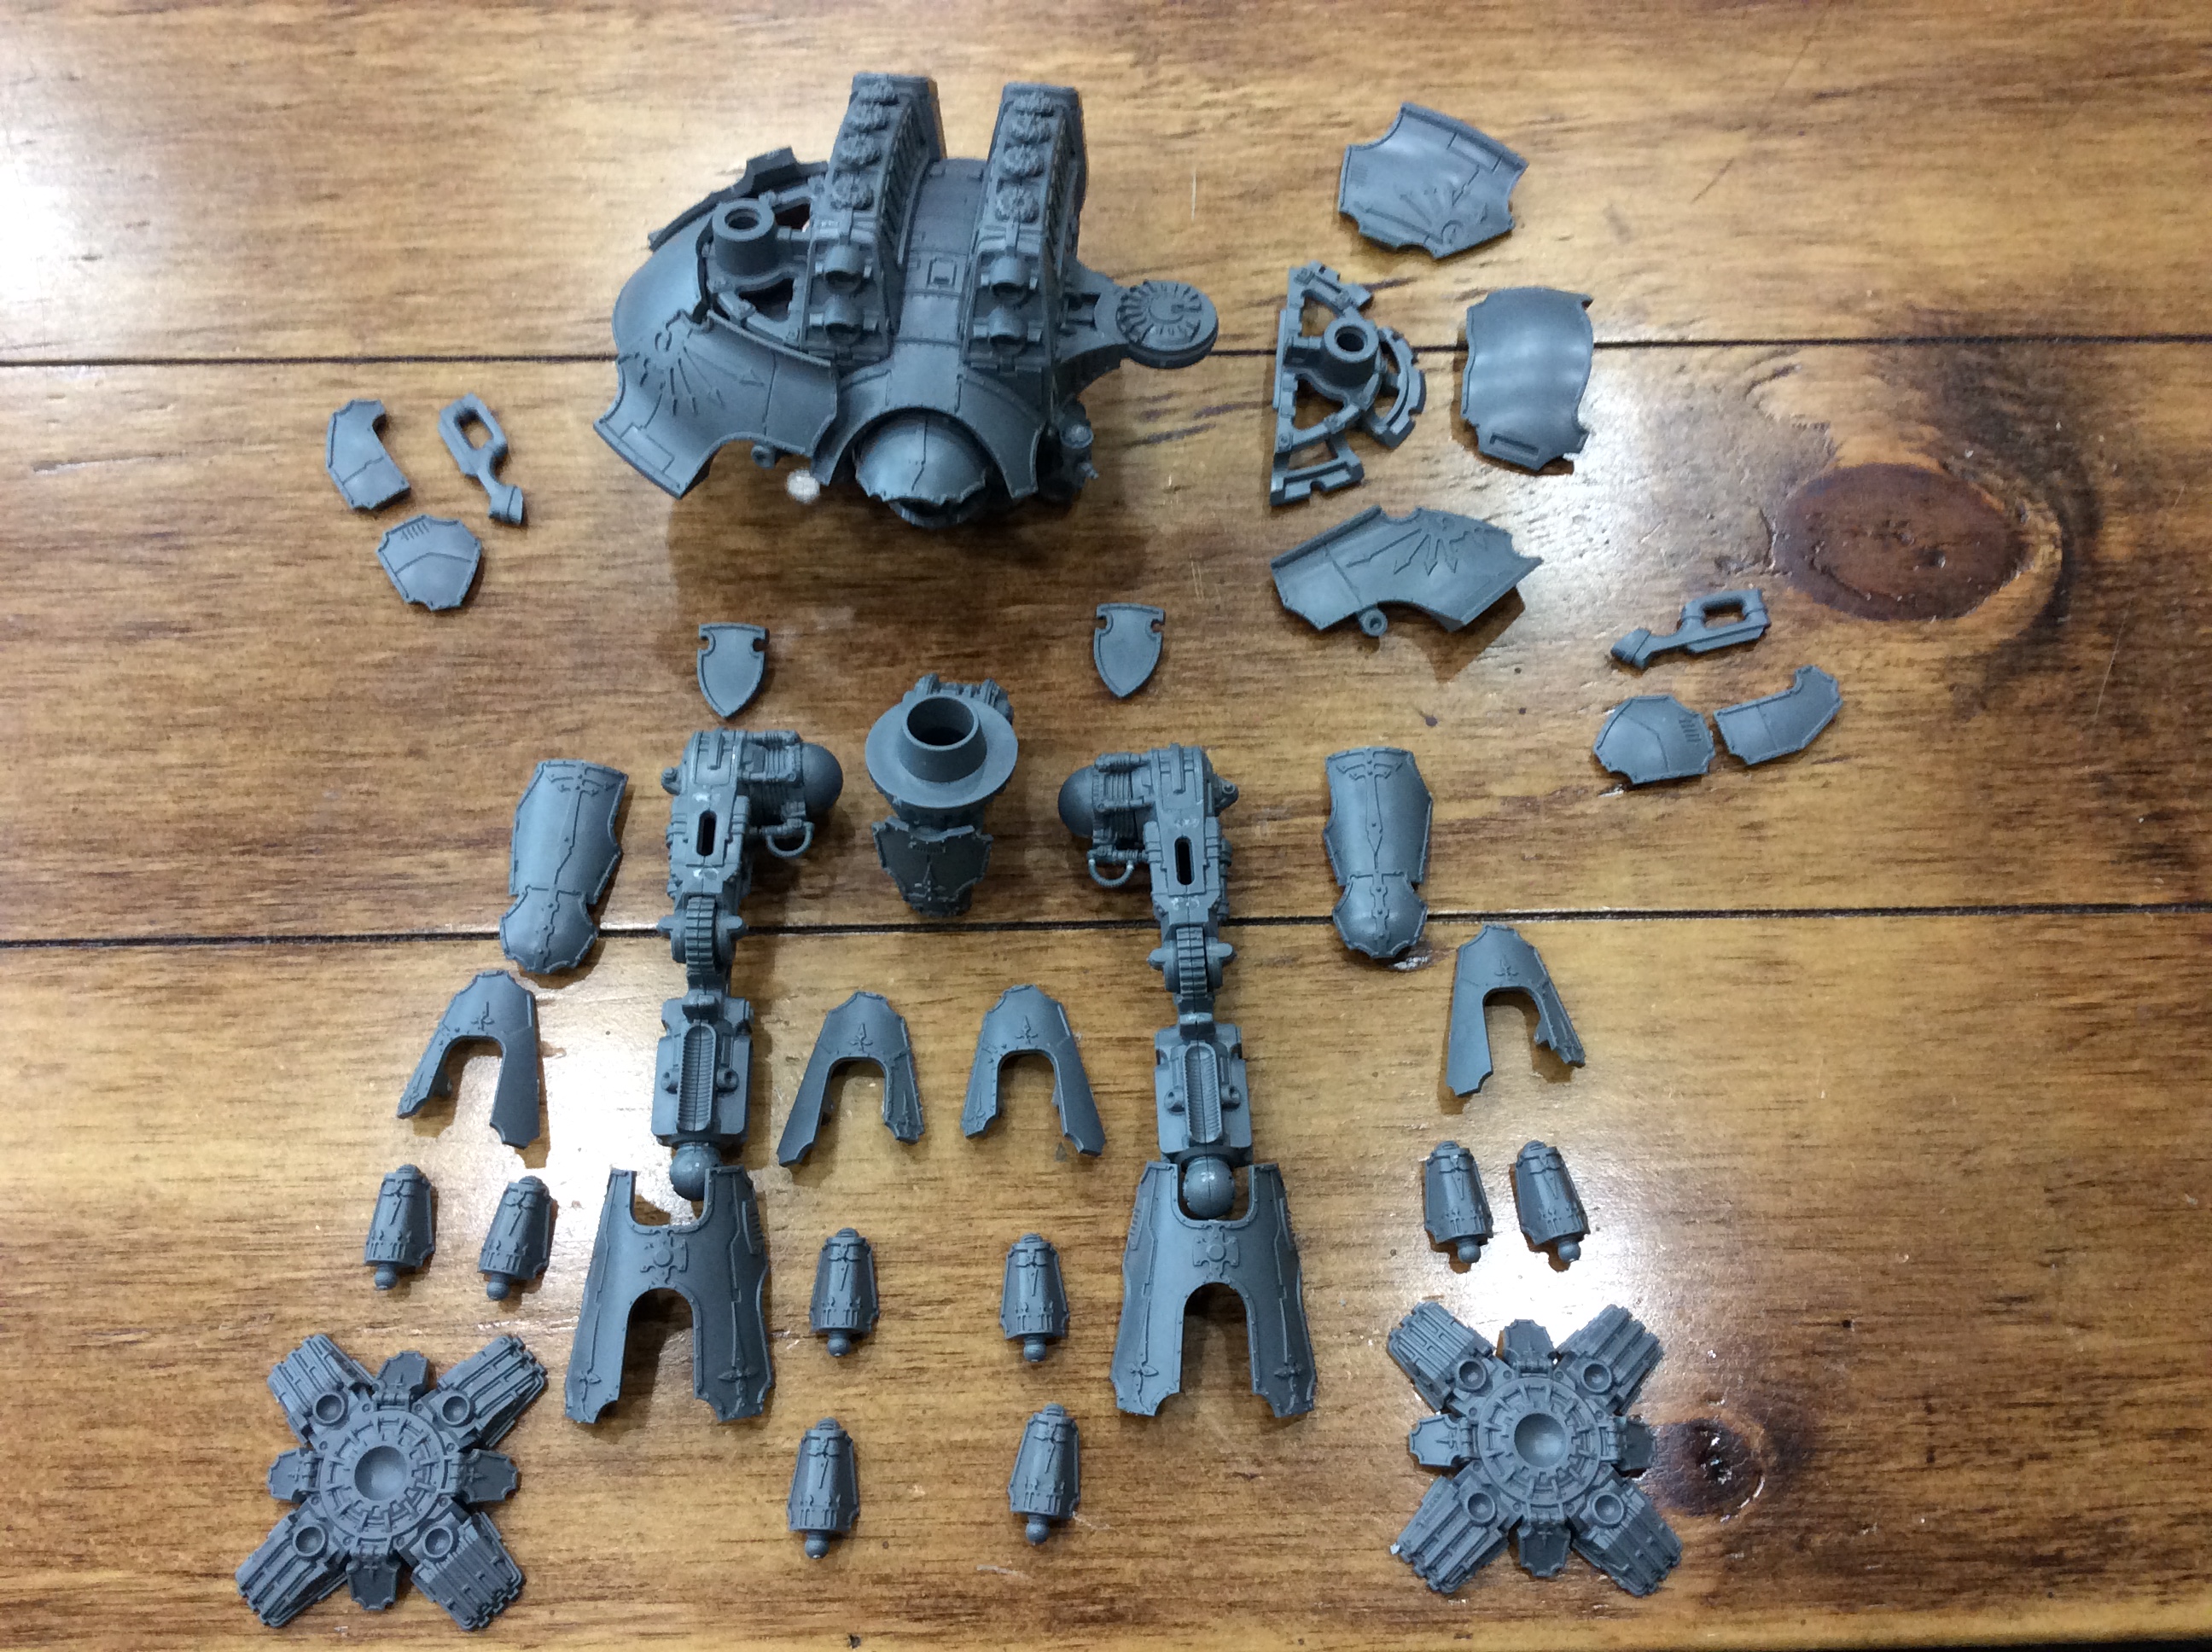 Exploded View of the Warlord
So the Warlord torso was powered through. I added the right pauldron with to the Titan (I forgot to take the photos of the how to make this and the torso flank armour, but they are pretty easy to do).
On the left of the photo is the torso flank armour. It adds a lot of negative space to the Warlord which is rather emaciated without the armour plates added. The three pieces are a bit of a pain to put together at first glance. Dry fit to make sure you have the correct placement of these plates.
The waist and legs are some of the more awkward pieces to get right. I will try and break it down into easy bits.
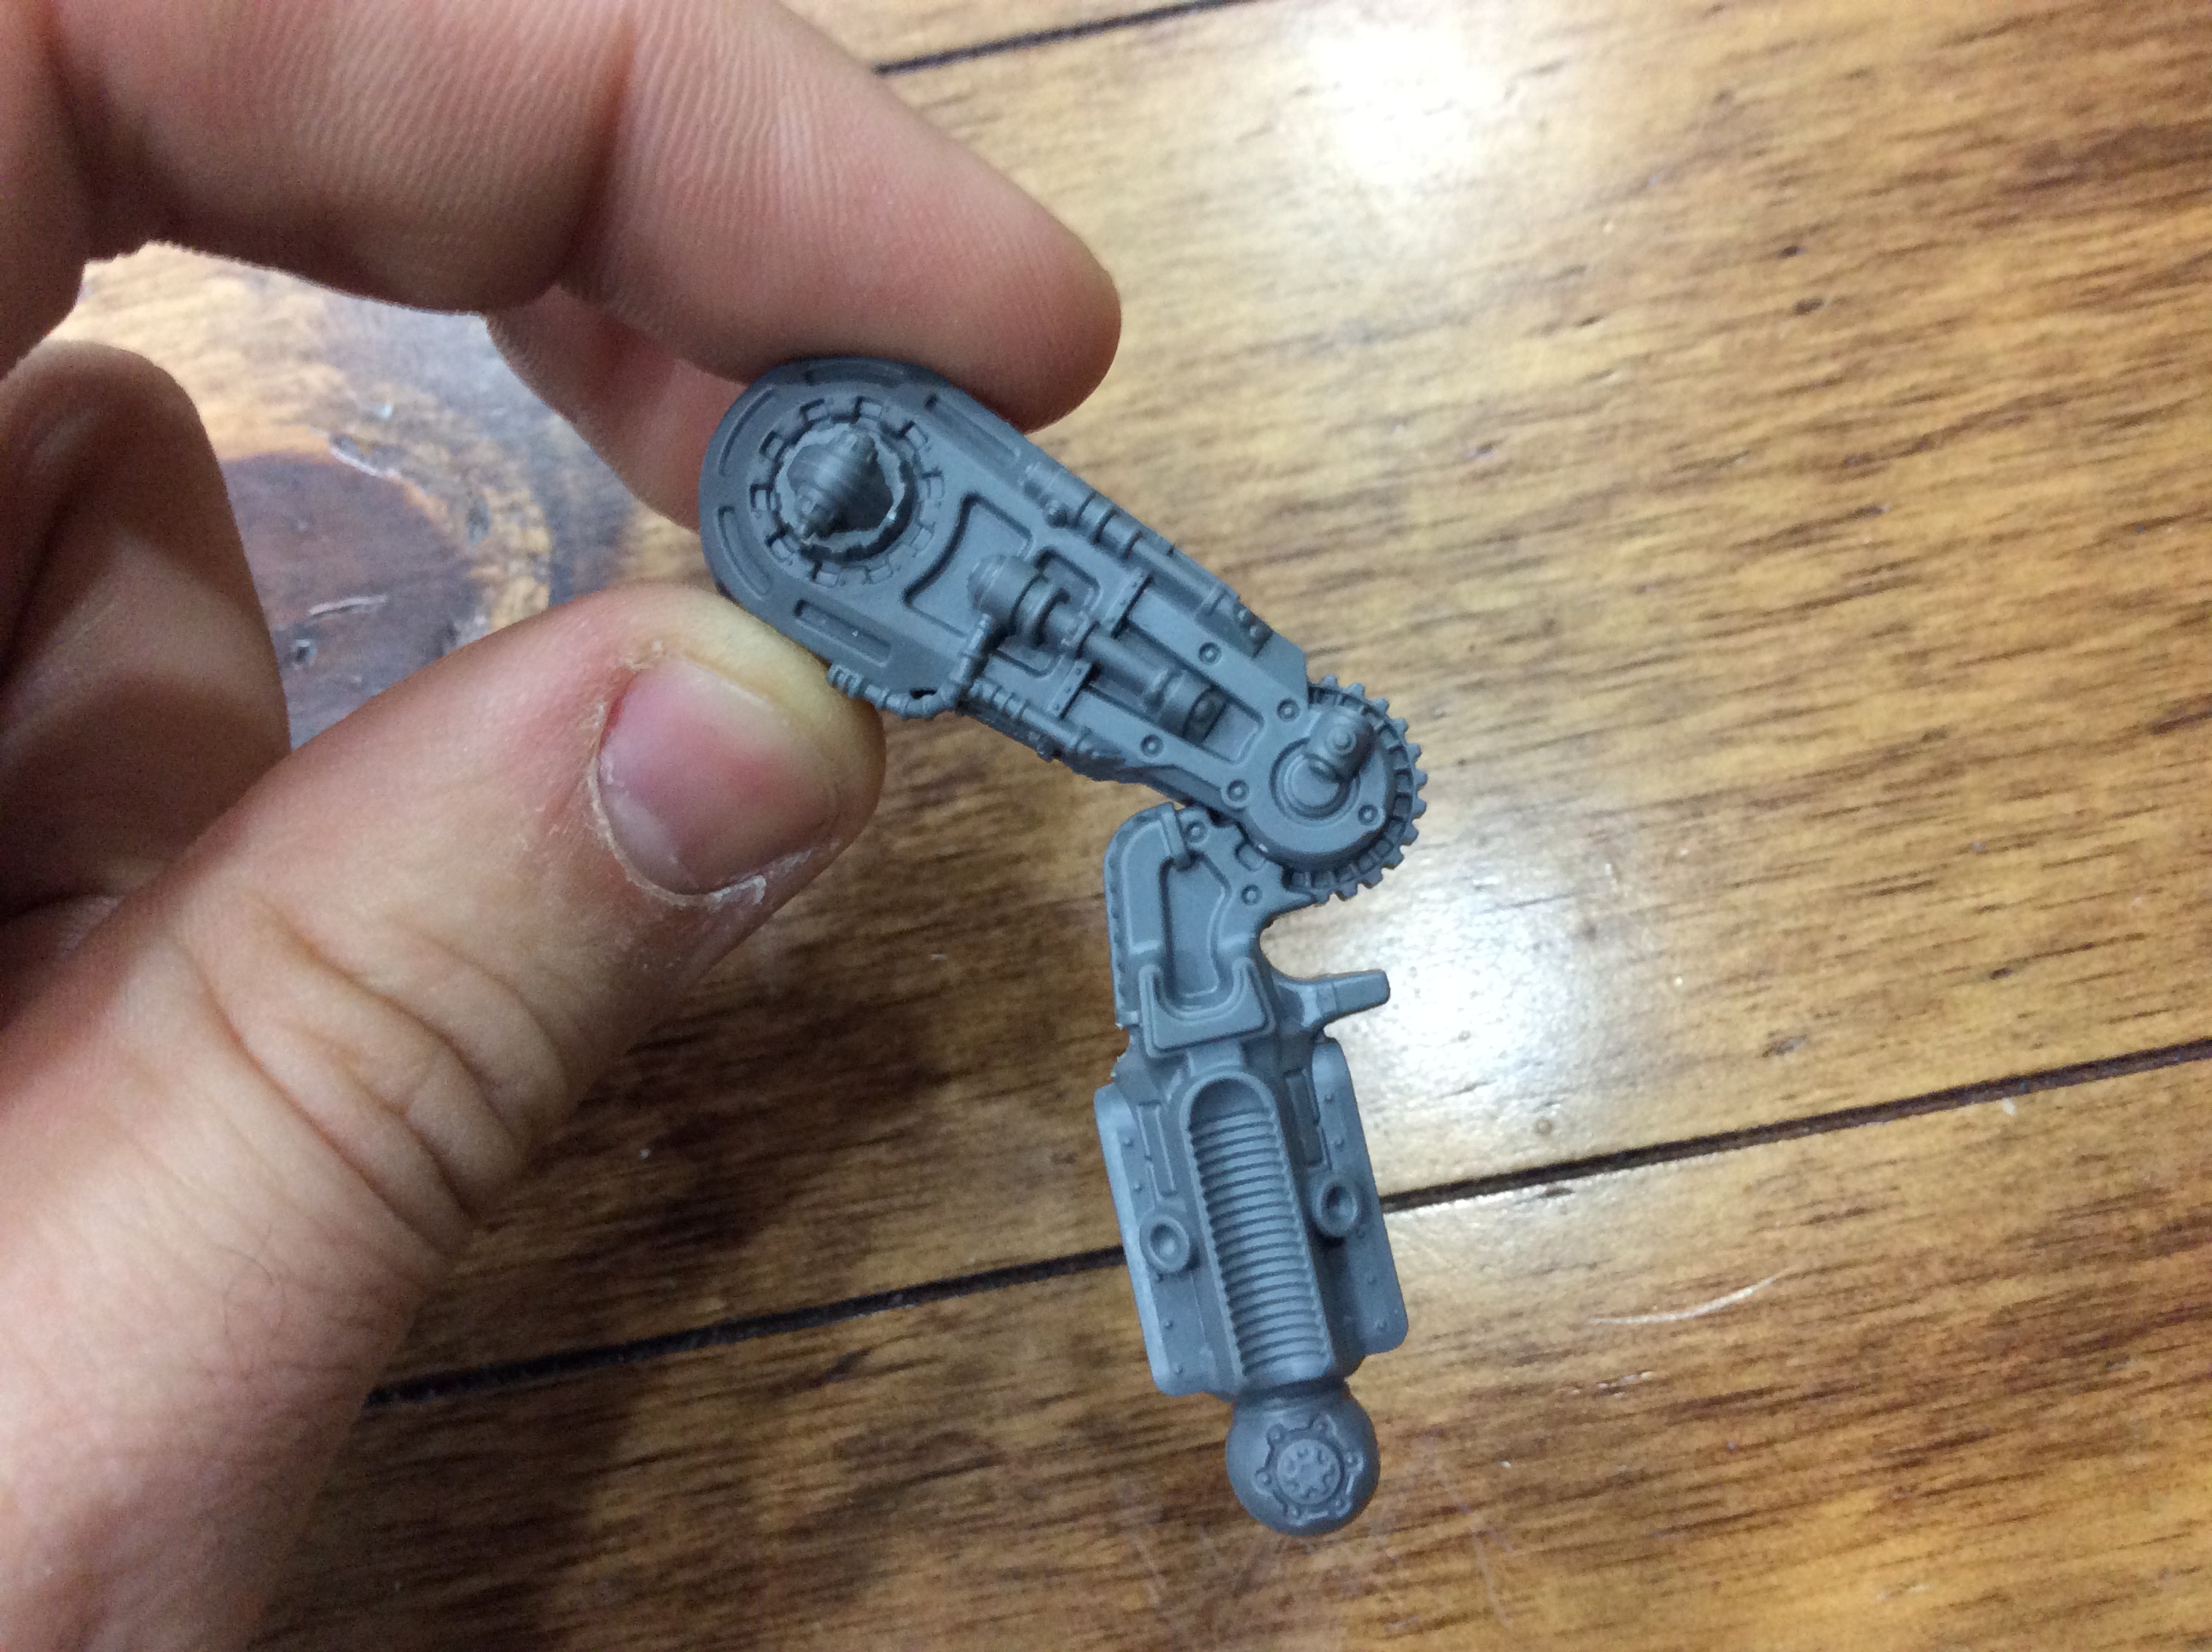 Bendy leg. Knee on the right of the photo.
Right, so I didn’t take all of the photos I should have done for these next steps…
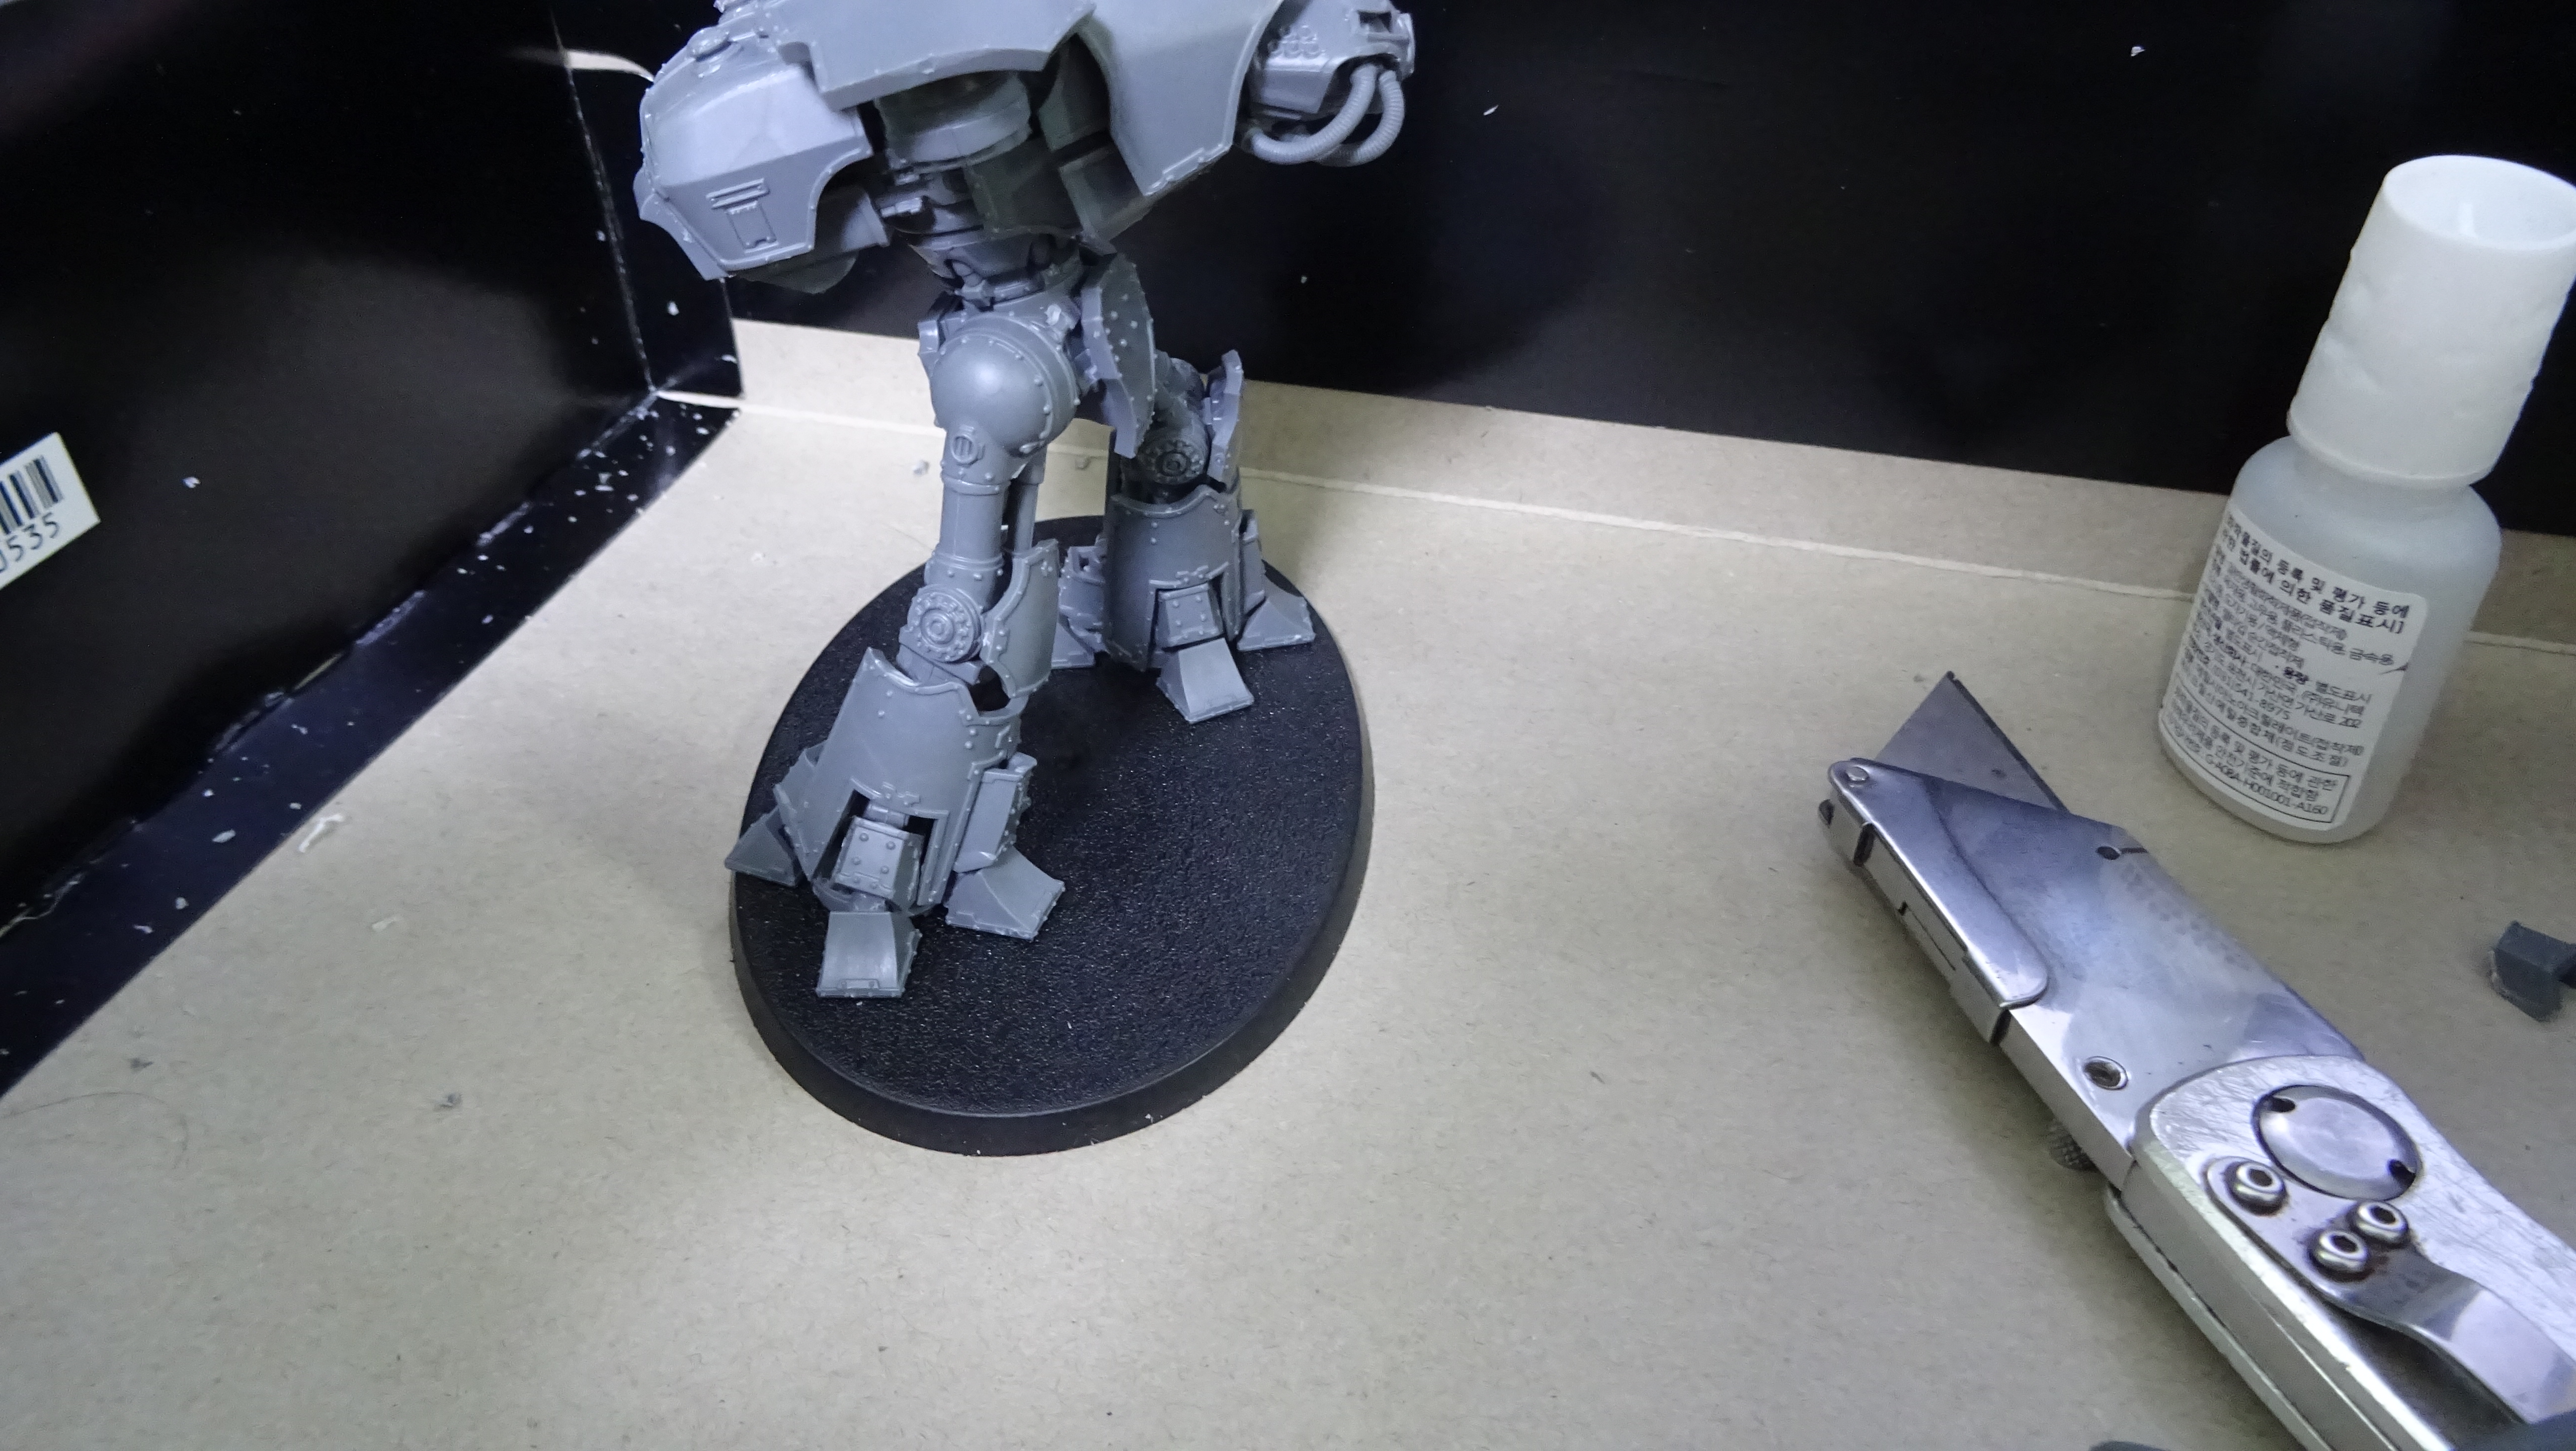
To pose the legs, what you need to do first is try and figure out what pose you want your Warlord to be in. I wanted a right leg forward, striding into combat pose. So I posed the feet in that way. The feet were glued then the rest was precariously perched using as few hands, feet, tentacles and prehensile tails as possible.
A drop of glue in each of the ankle points to fix the lower legs into position.
Once the glue has dried, glue the hips.
Once the glue is dry glue the knees.
Now I am a heretic, according to some of the other hobbyists here, by using superglue not poly-cement.
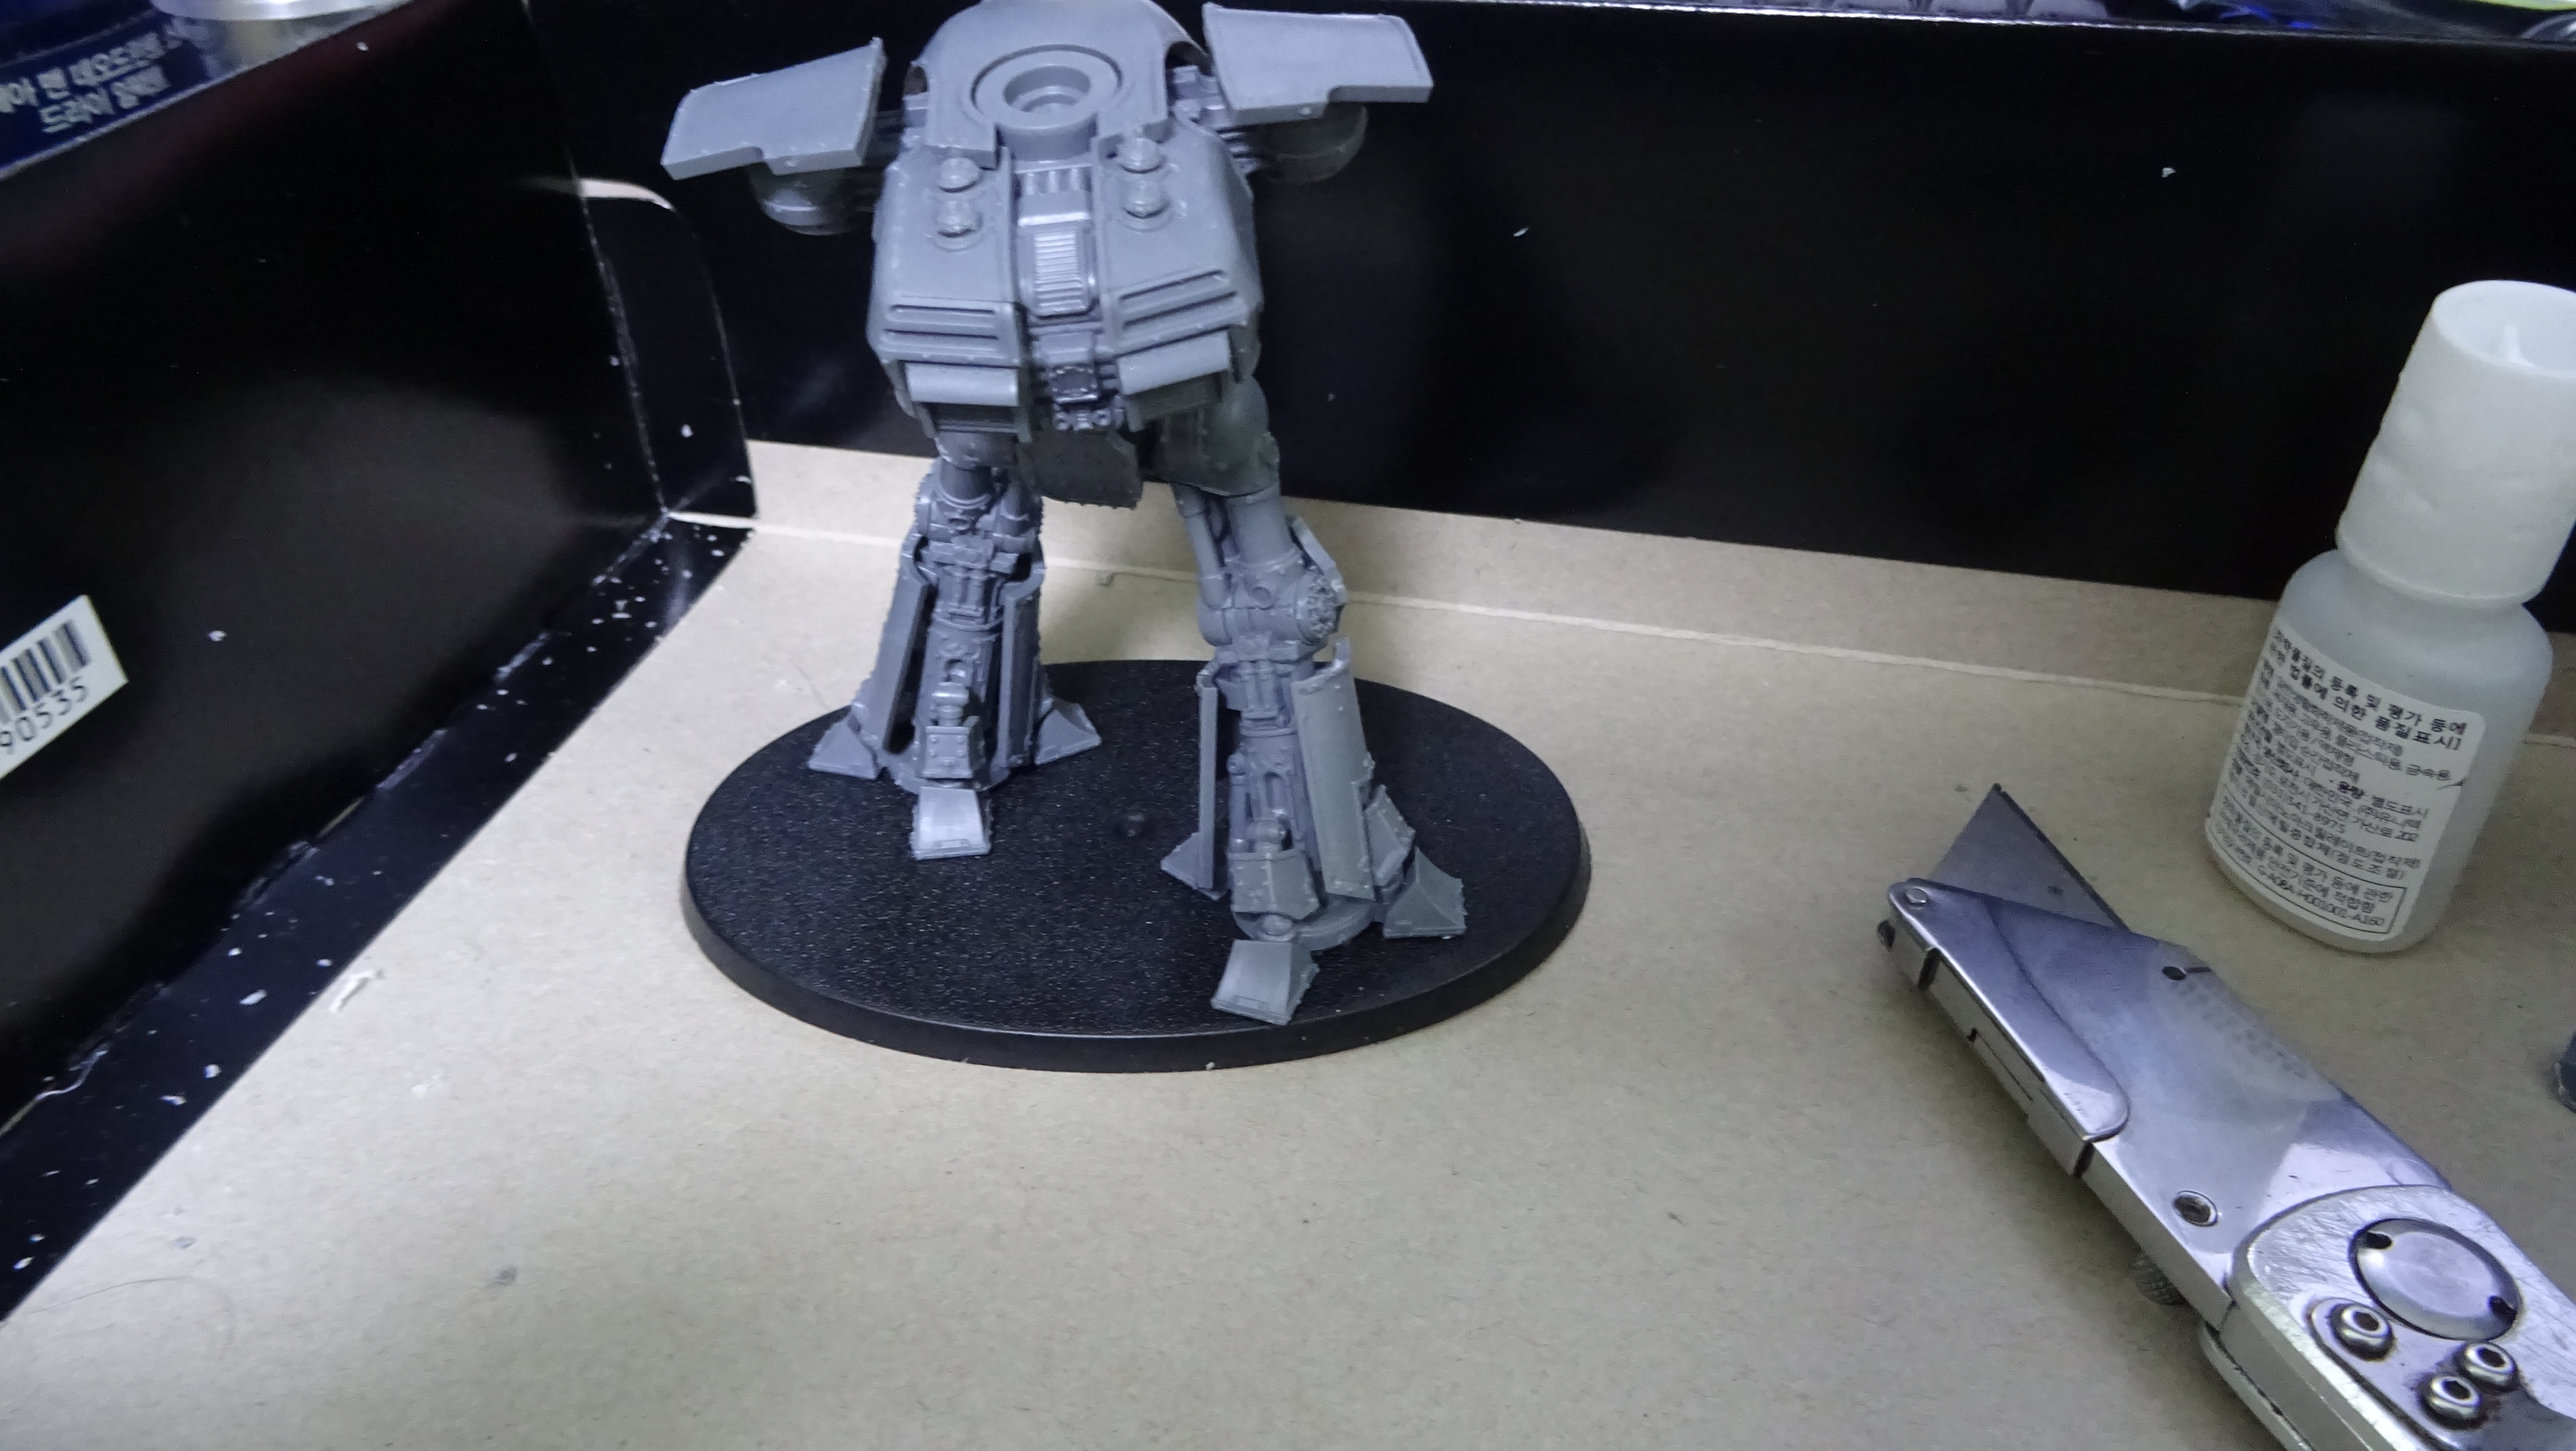
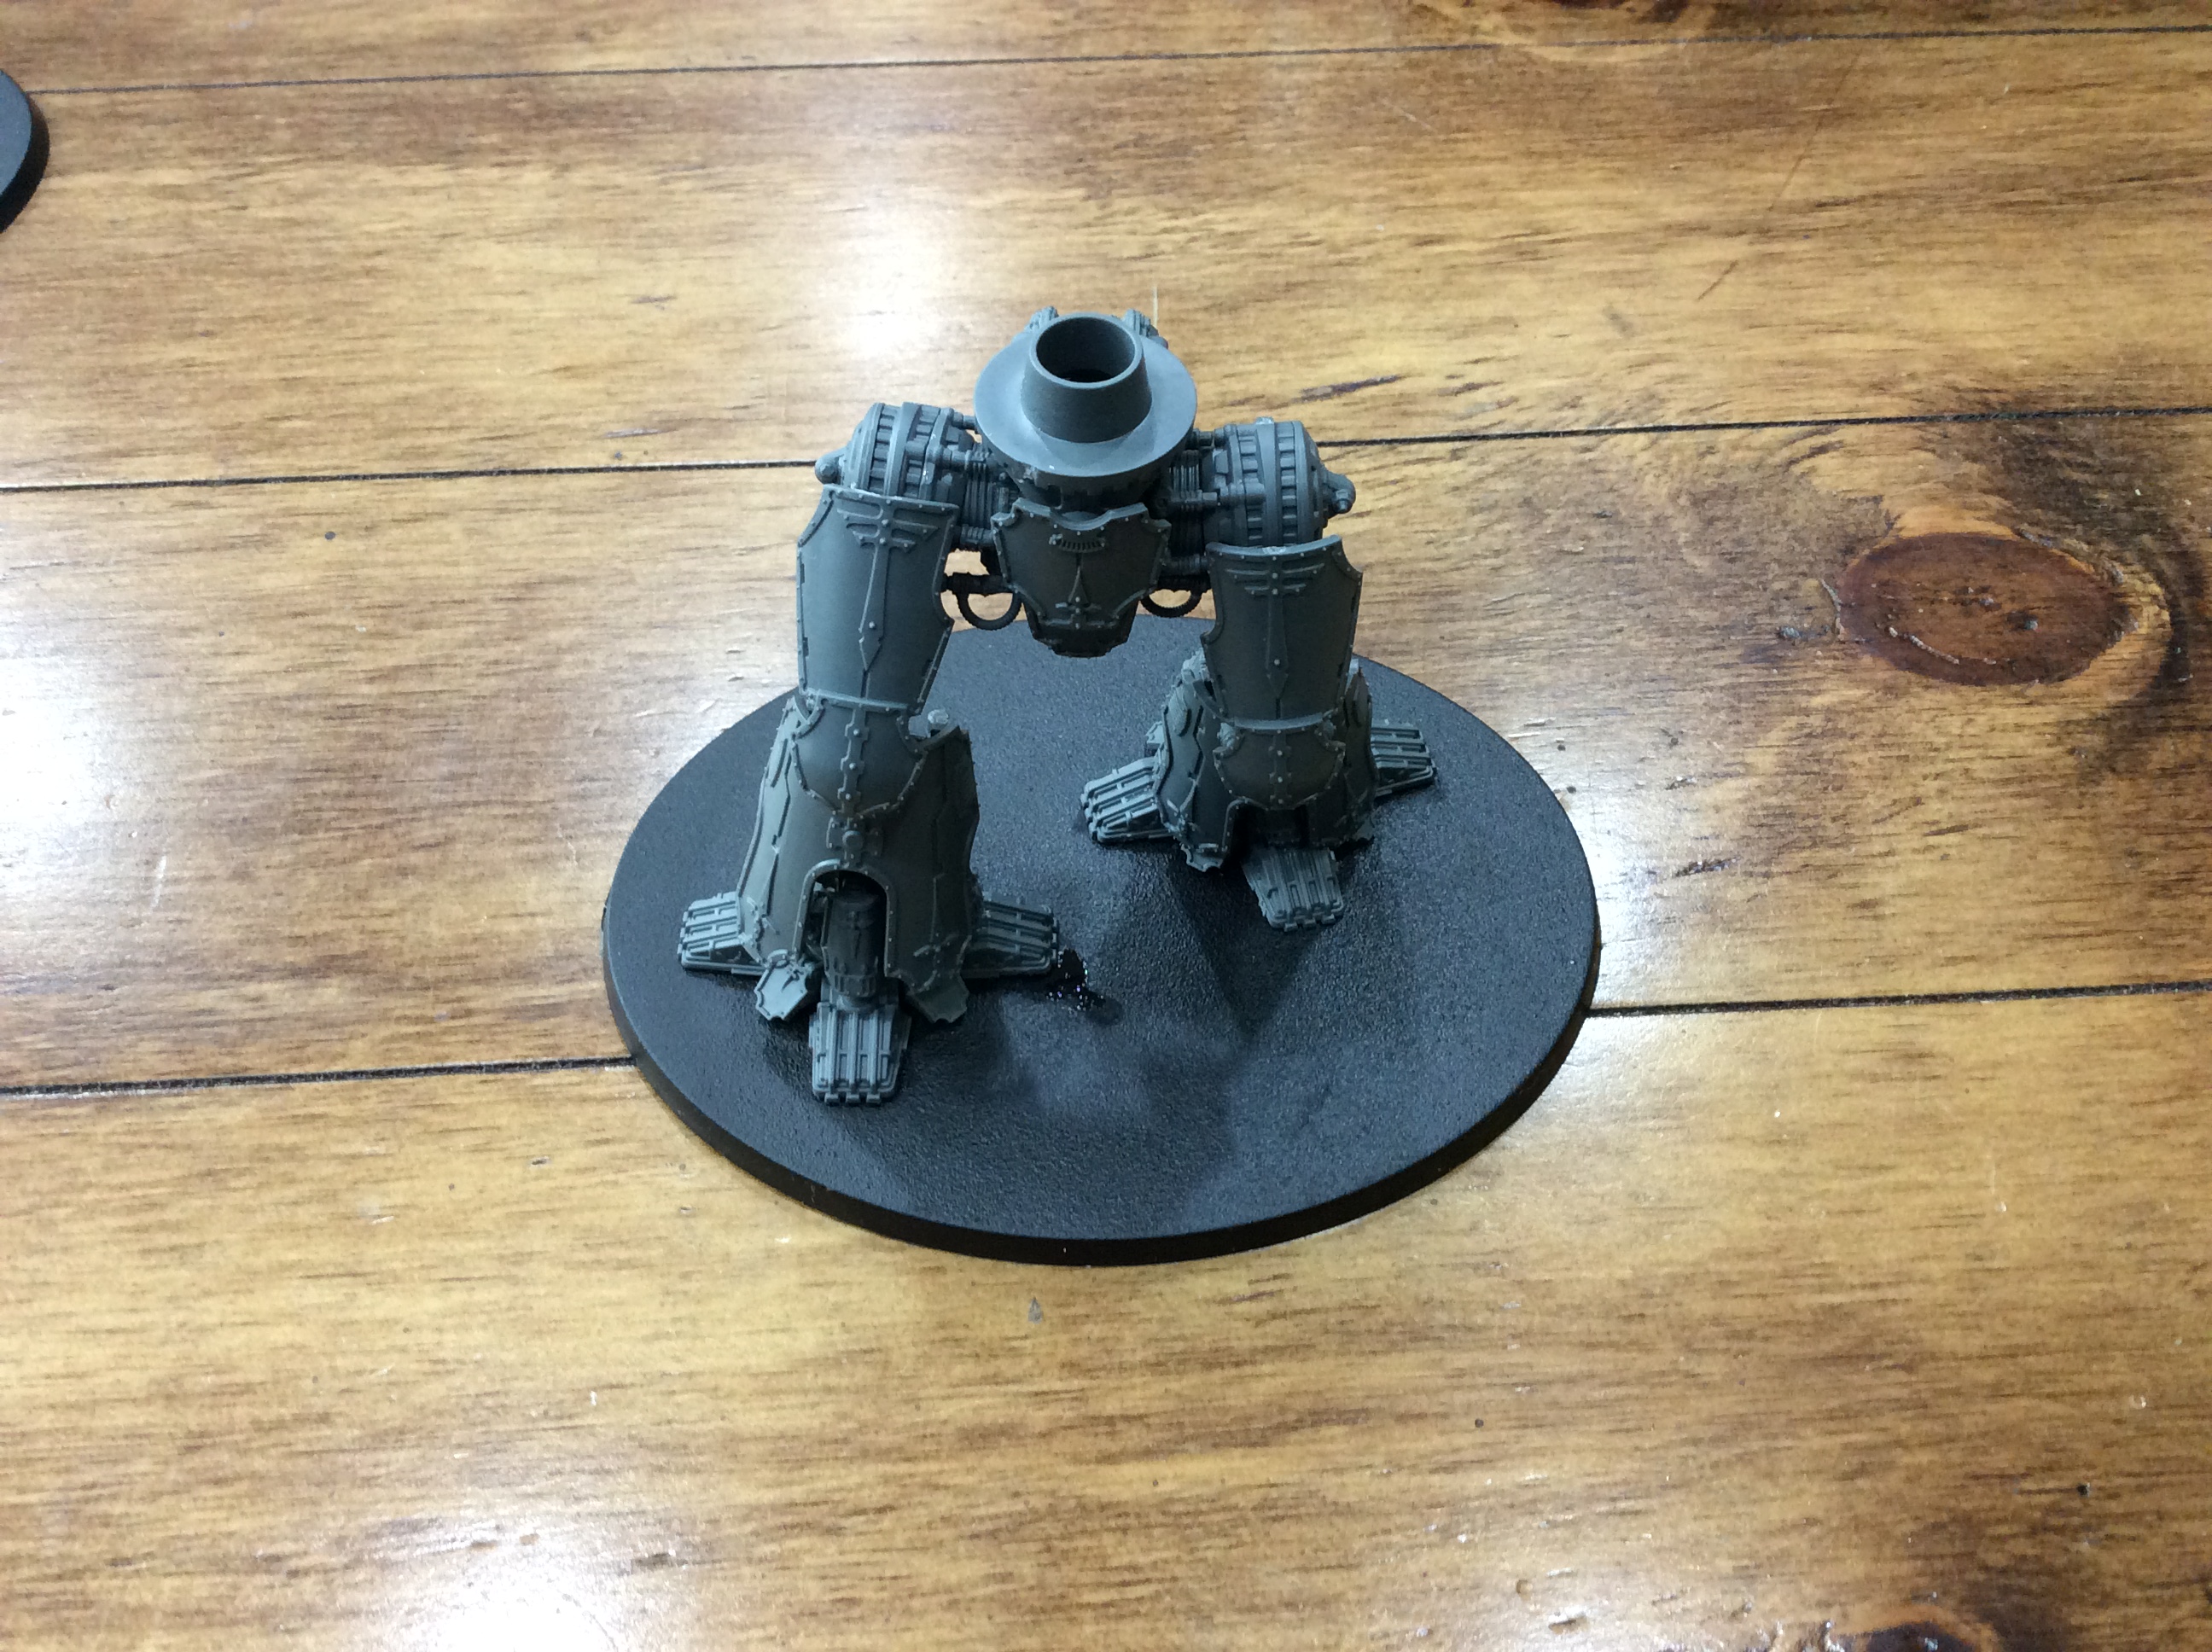 Final legs posing front.
 Final leg posing rear view
The ankle pistons go on first then the thigh, ankle and shin armour. It is relatively simple to be honest. You have to be careful with the angle of the shin as some angles are too severe for the armour plates.
Regards,
Khibyusa
Warlord Titan legs: Do's and Don'ts...
Greetings,
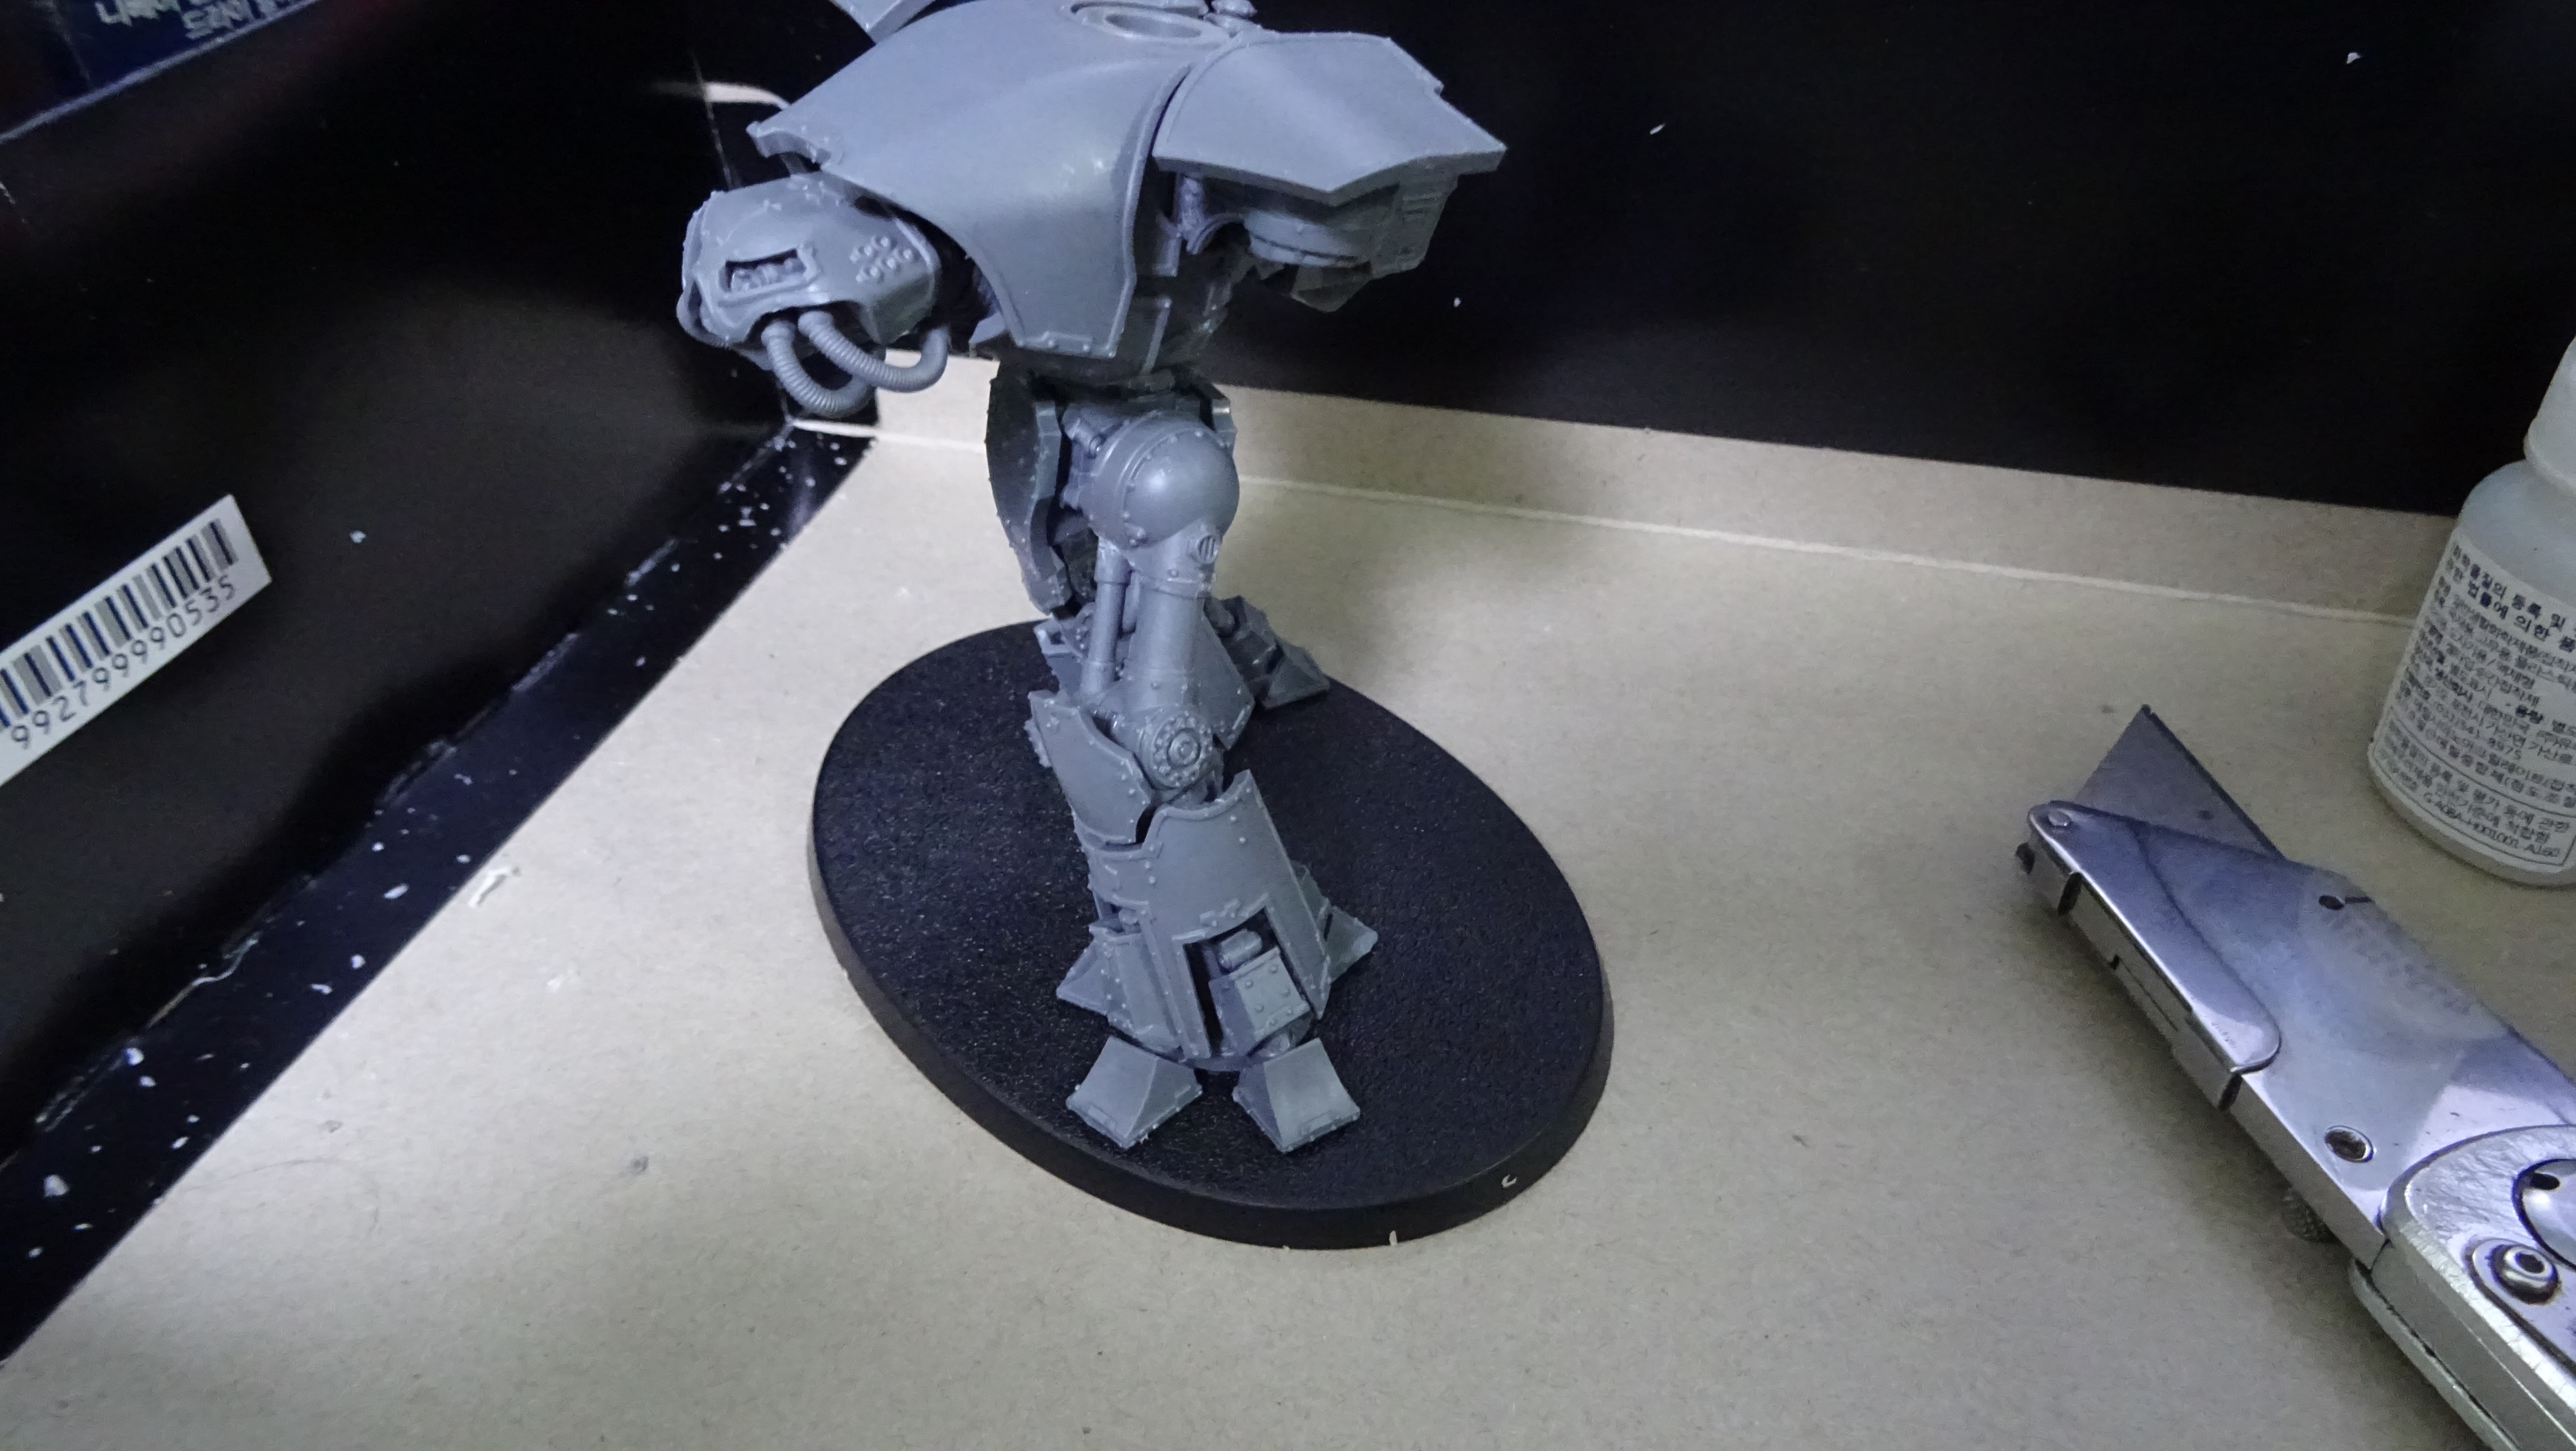
Constructing the legs of the Warlord Titan is apparently a bit of an issue. I have seen many a photo of Warlords with their legs on backwards or bent at the wrong angle.
 Right thigh, right side. The knee has a small flat bulge on the front/top. This is where the thigh guard and knee plate goes.
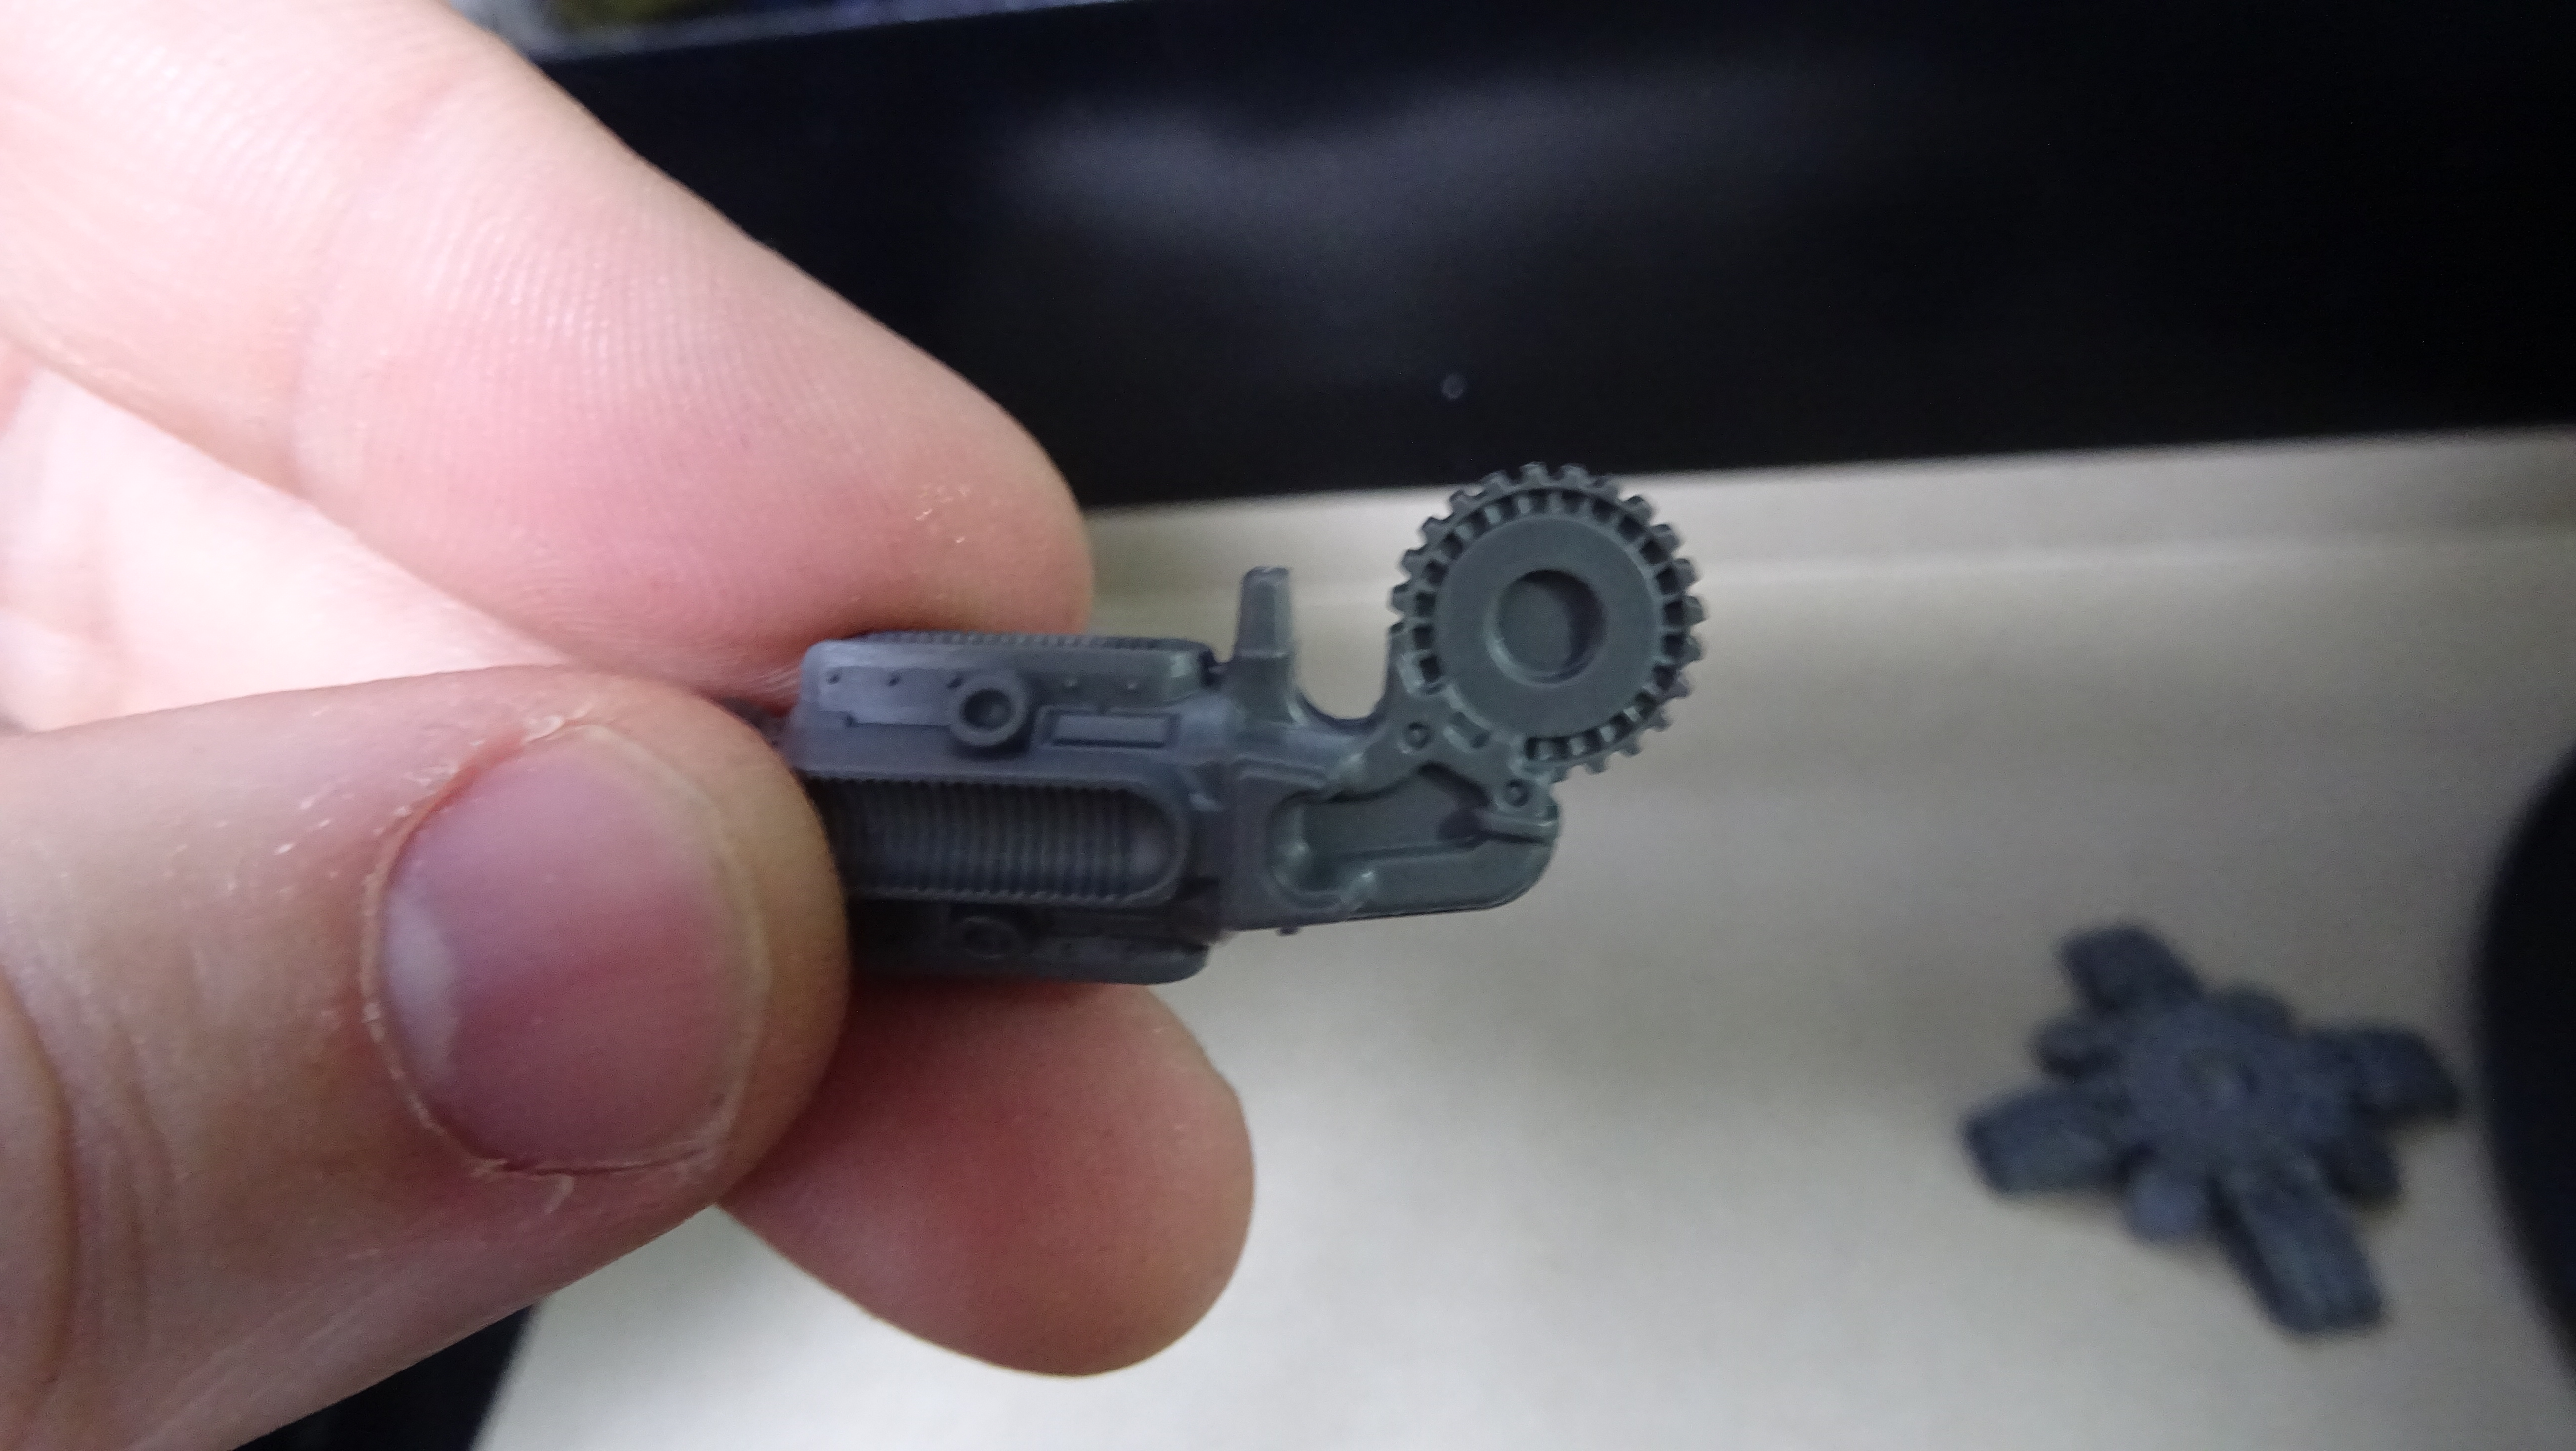 Lower leg and knee. The small protrusion just below the knee cog is where the final part of the shin armour plates goes. That is the front of the leg.
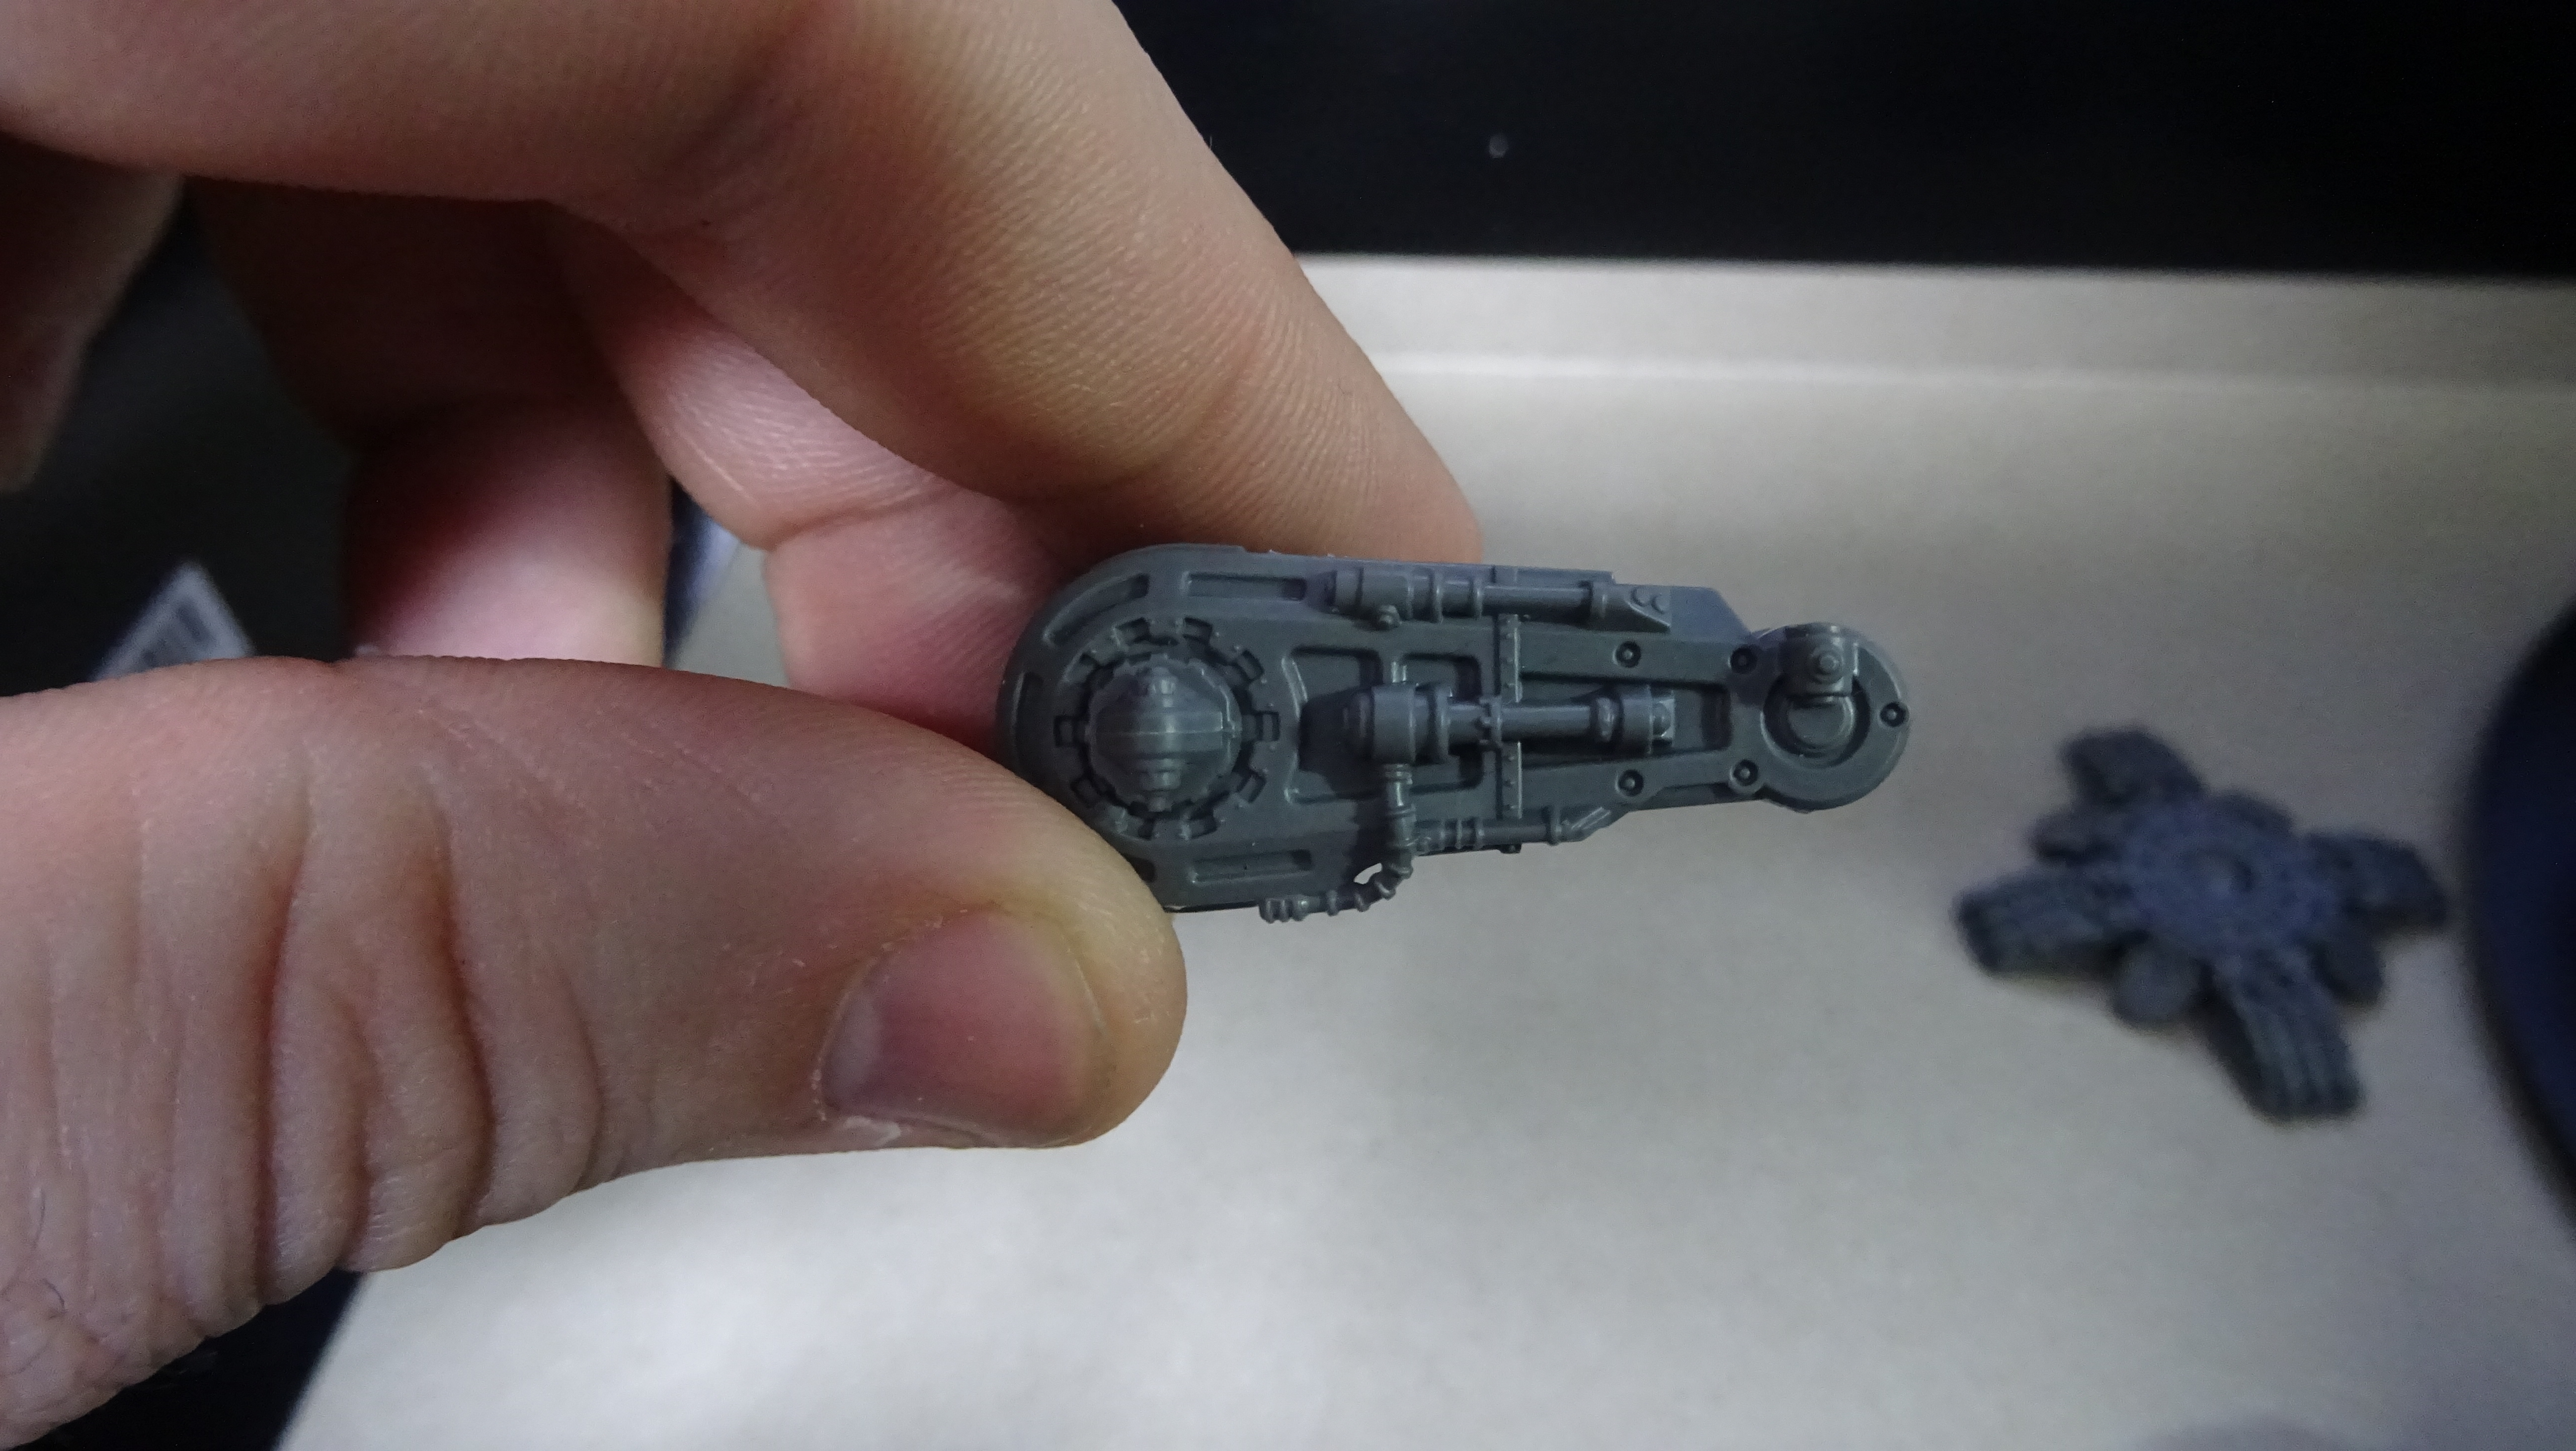
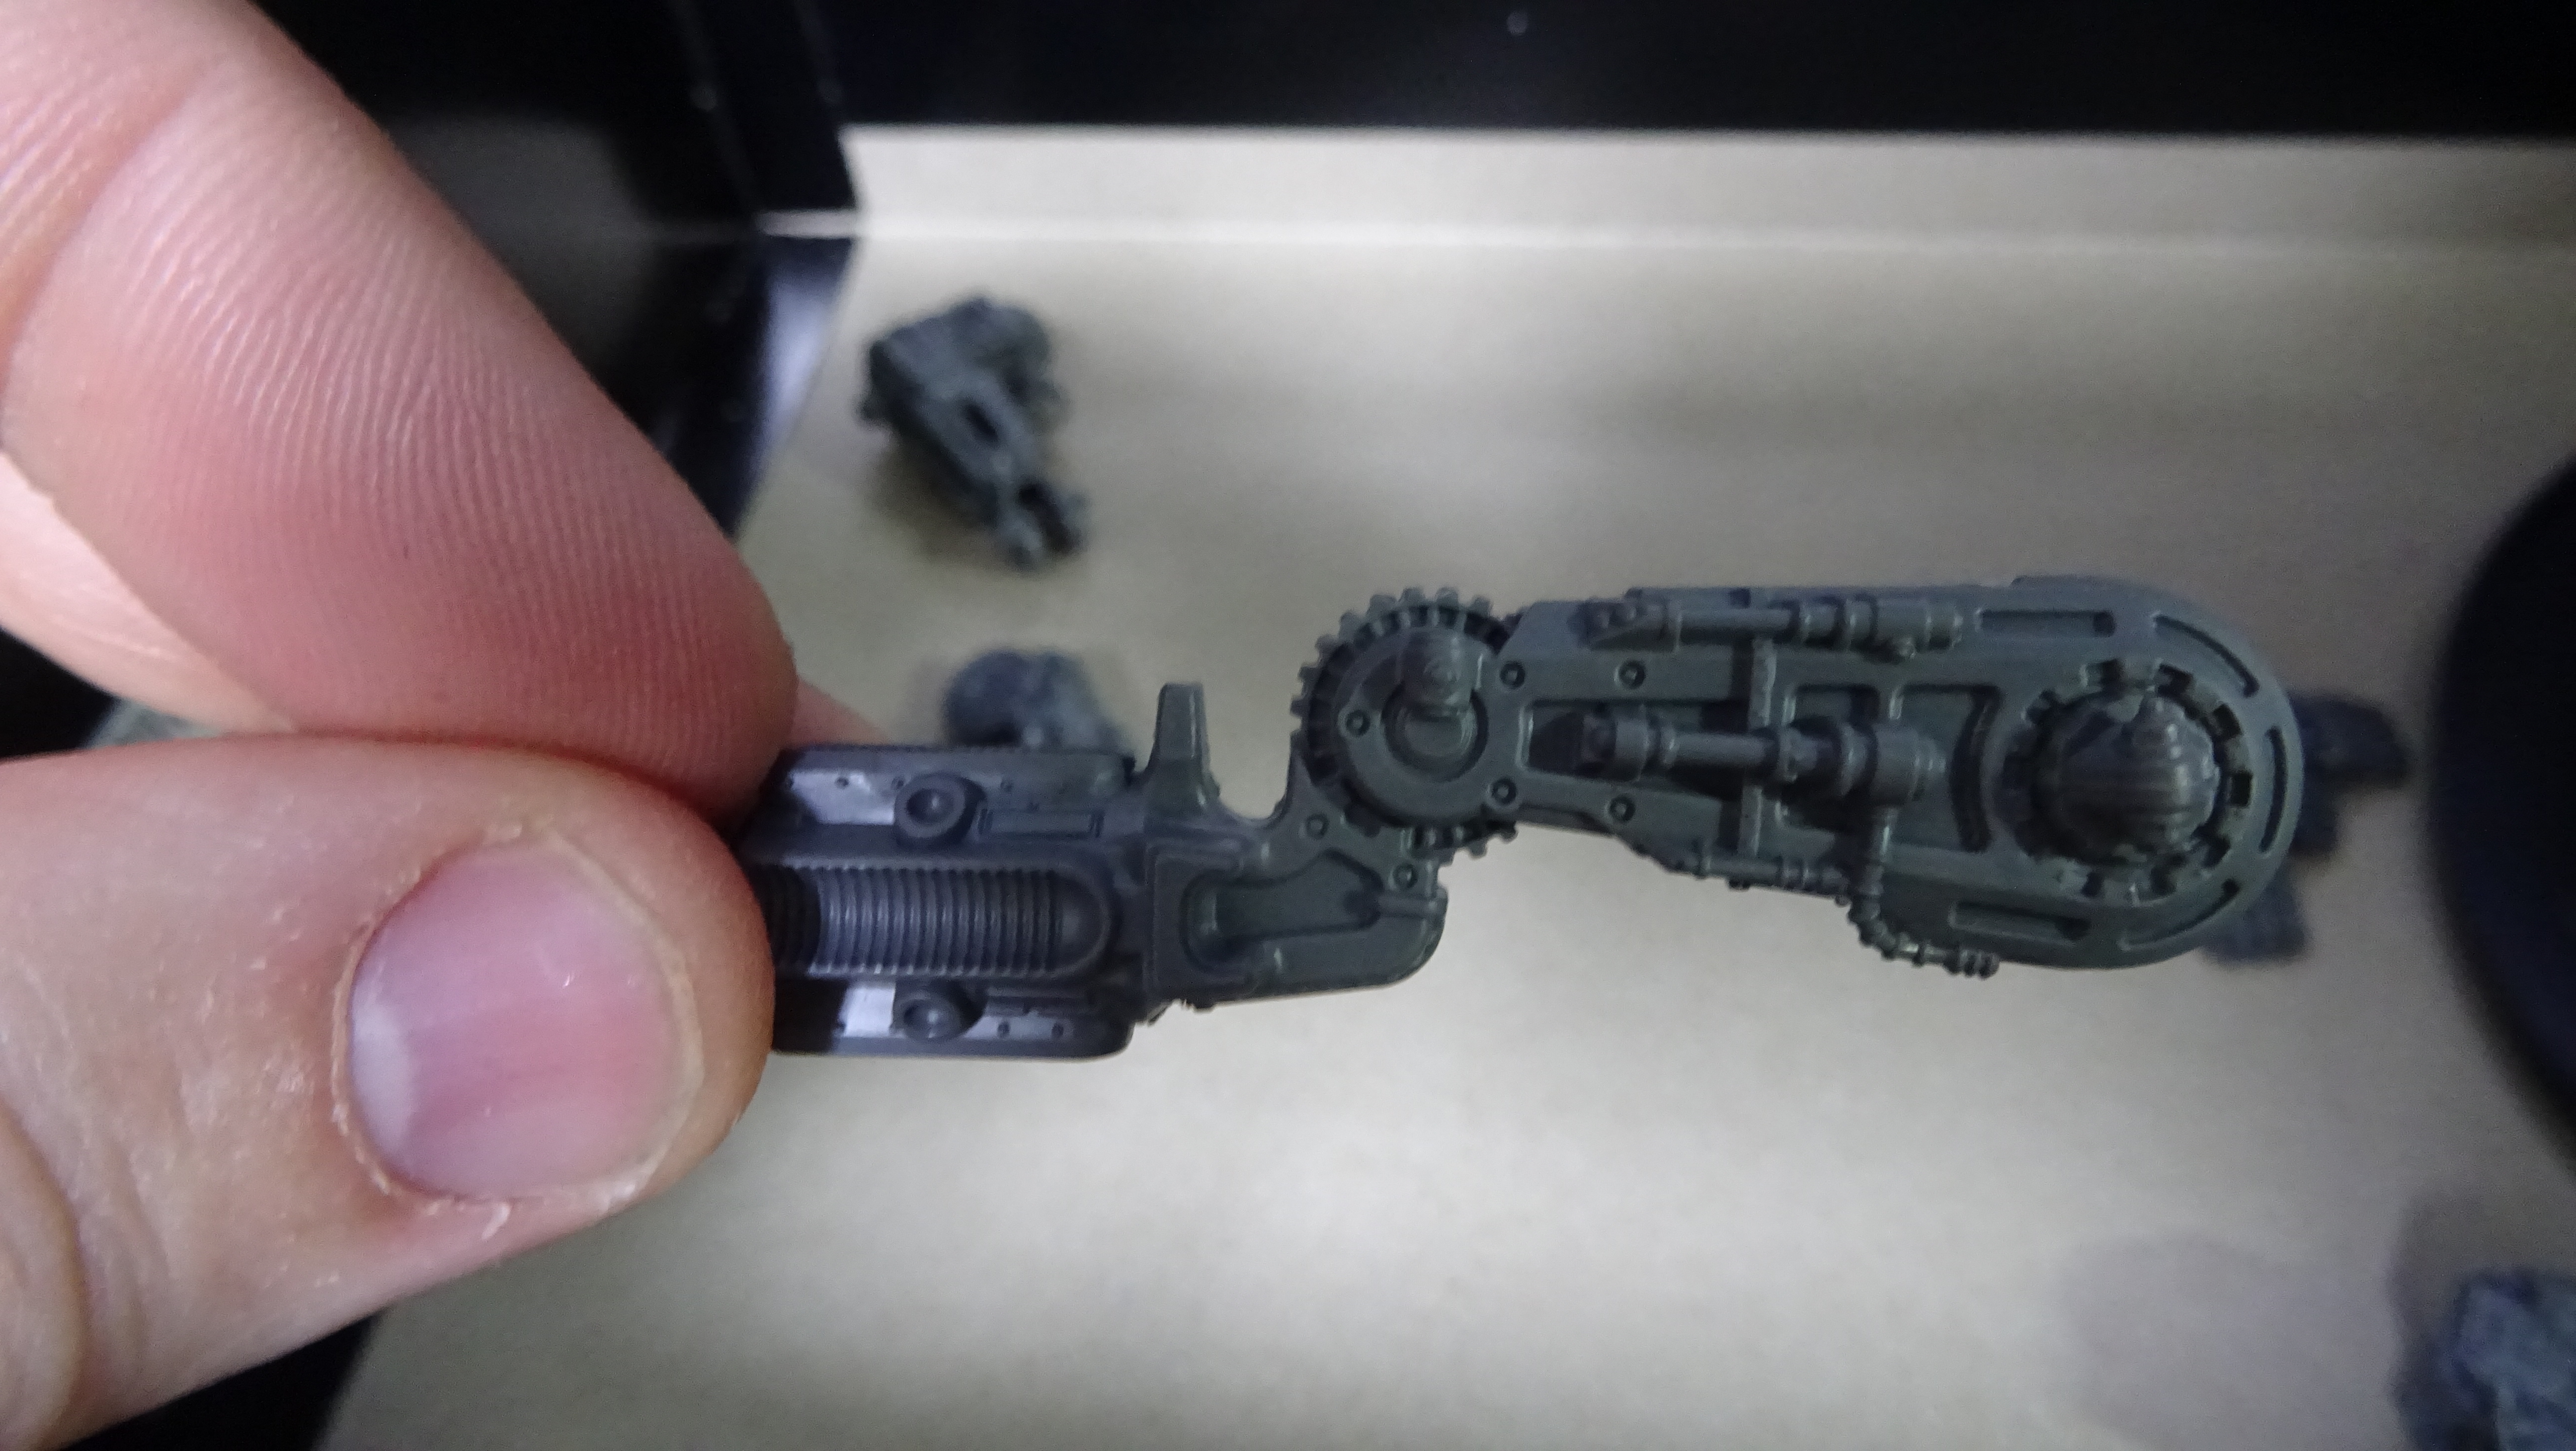 Completed leg. You can push the lower leg into the thigh. DO NOT ADD GLUE TO IT YET!!!!
Once you have both legs put together with the knee joints unglued then you can begin to pose it.
I will talk about how to do this in the next post.
Regards,
Khibyusa
Onto the Warlord
Greetings,
This will be the final post of the day. After the horrors of the Reaver I pass into much more favourable pastures of the Warlord.
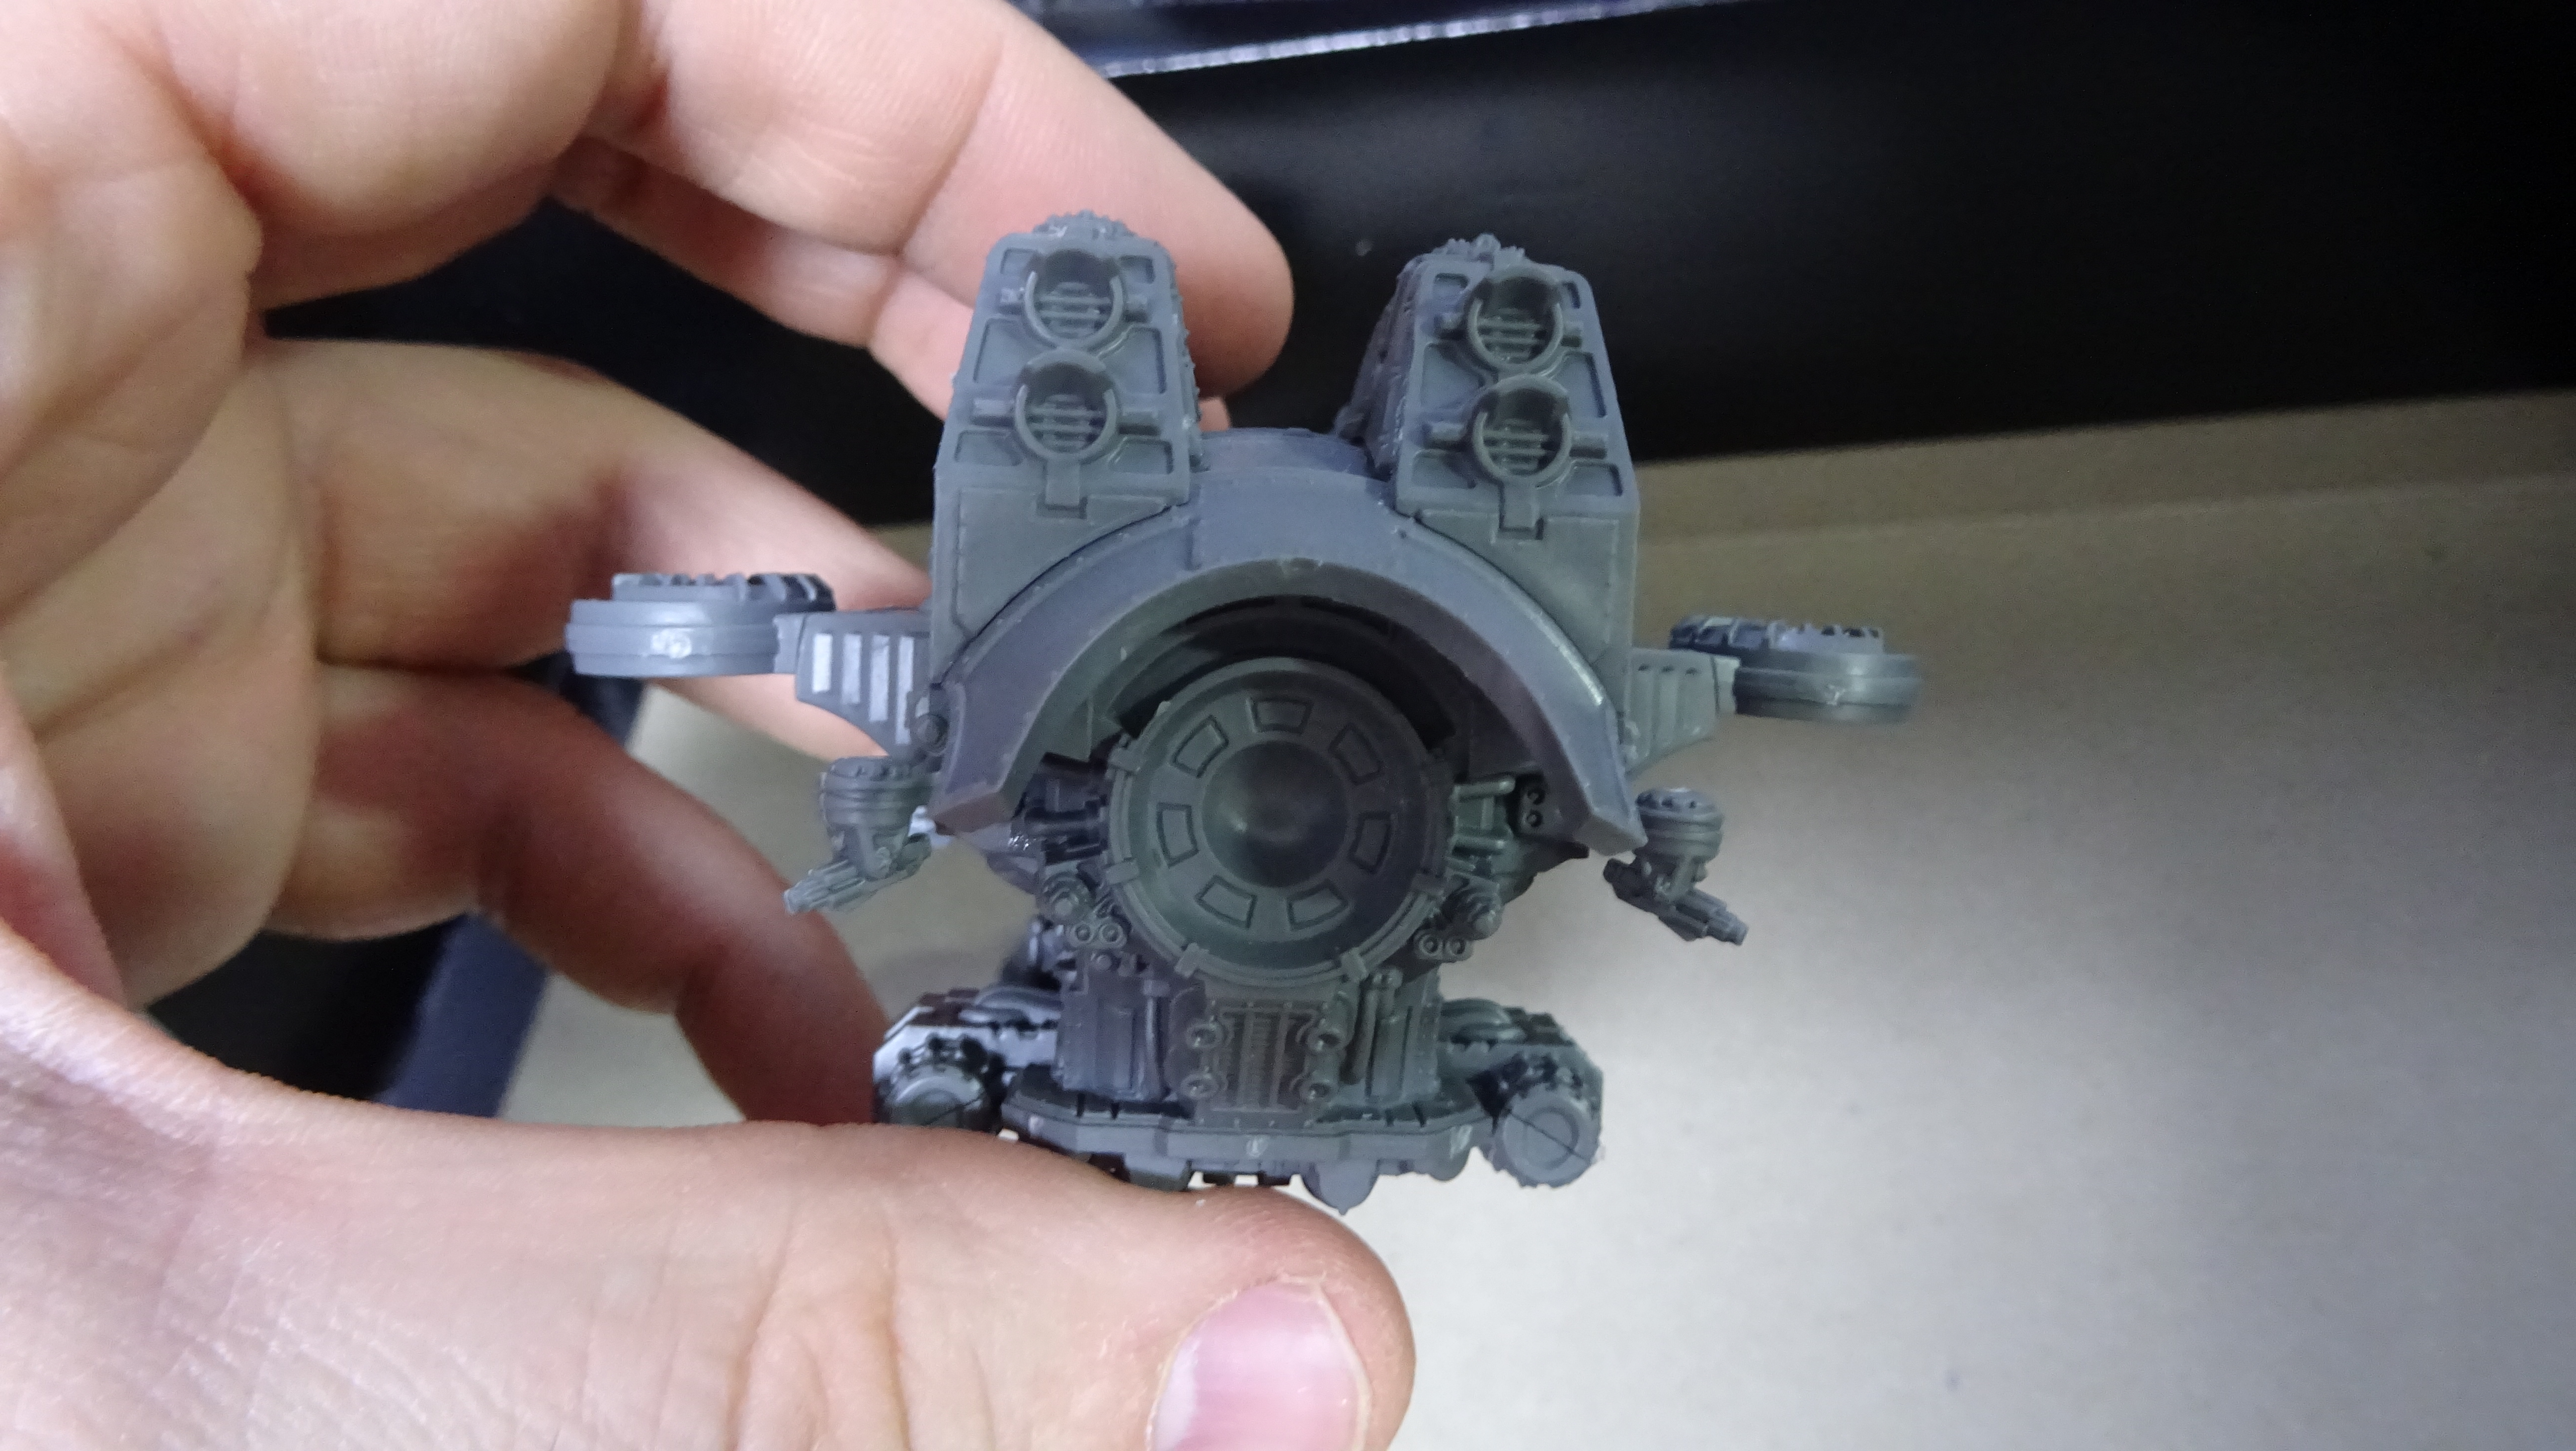 Torso front
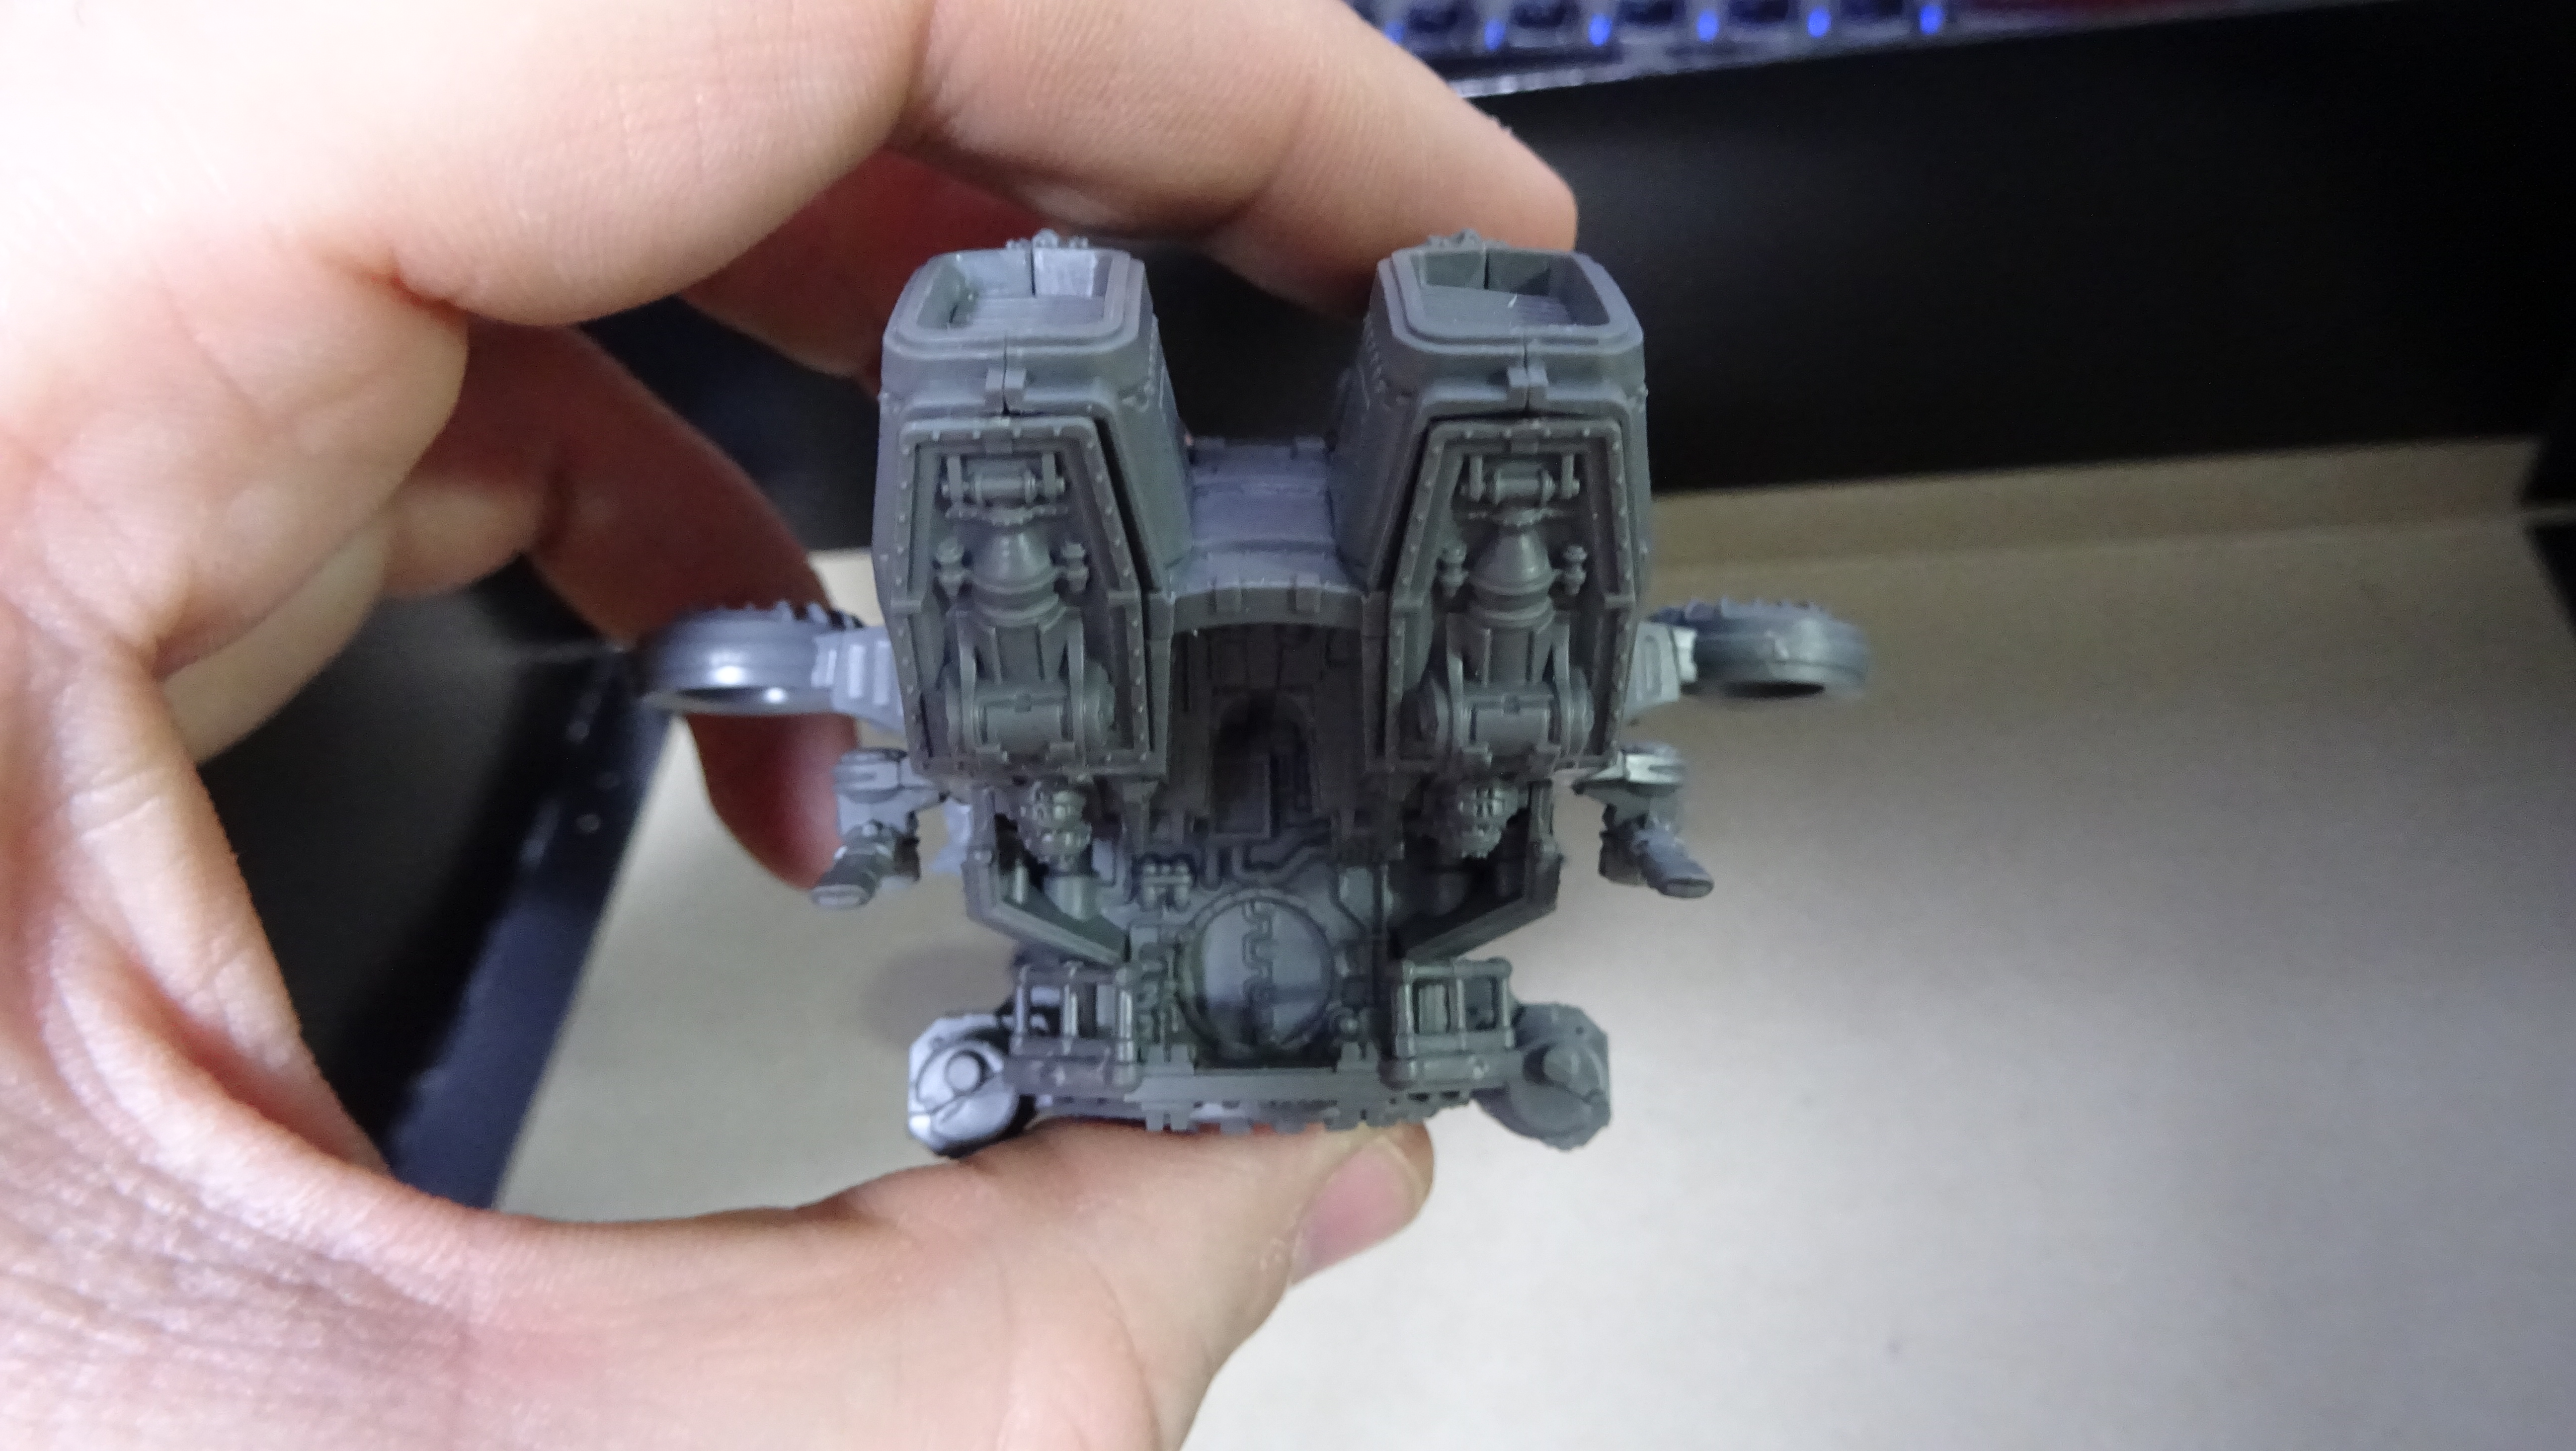 Torso rear
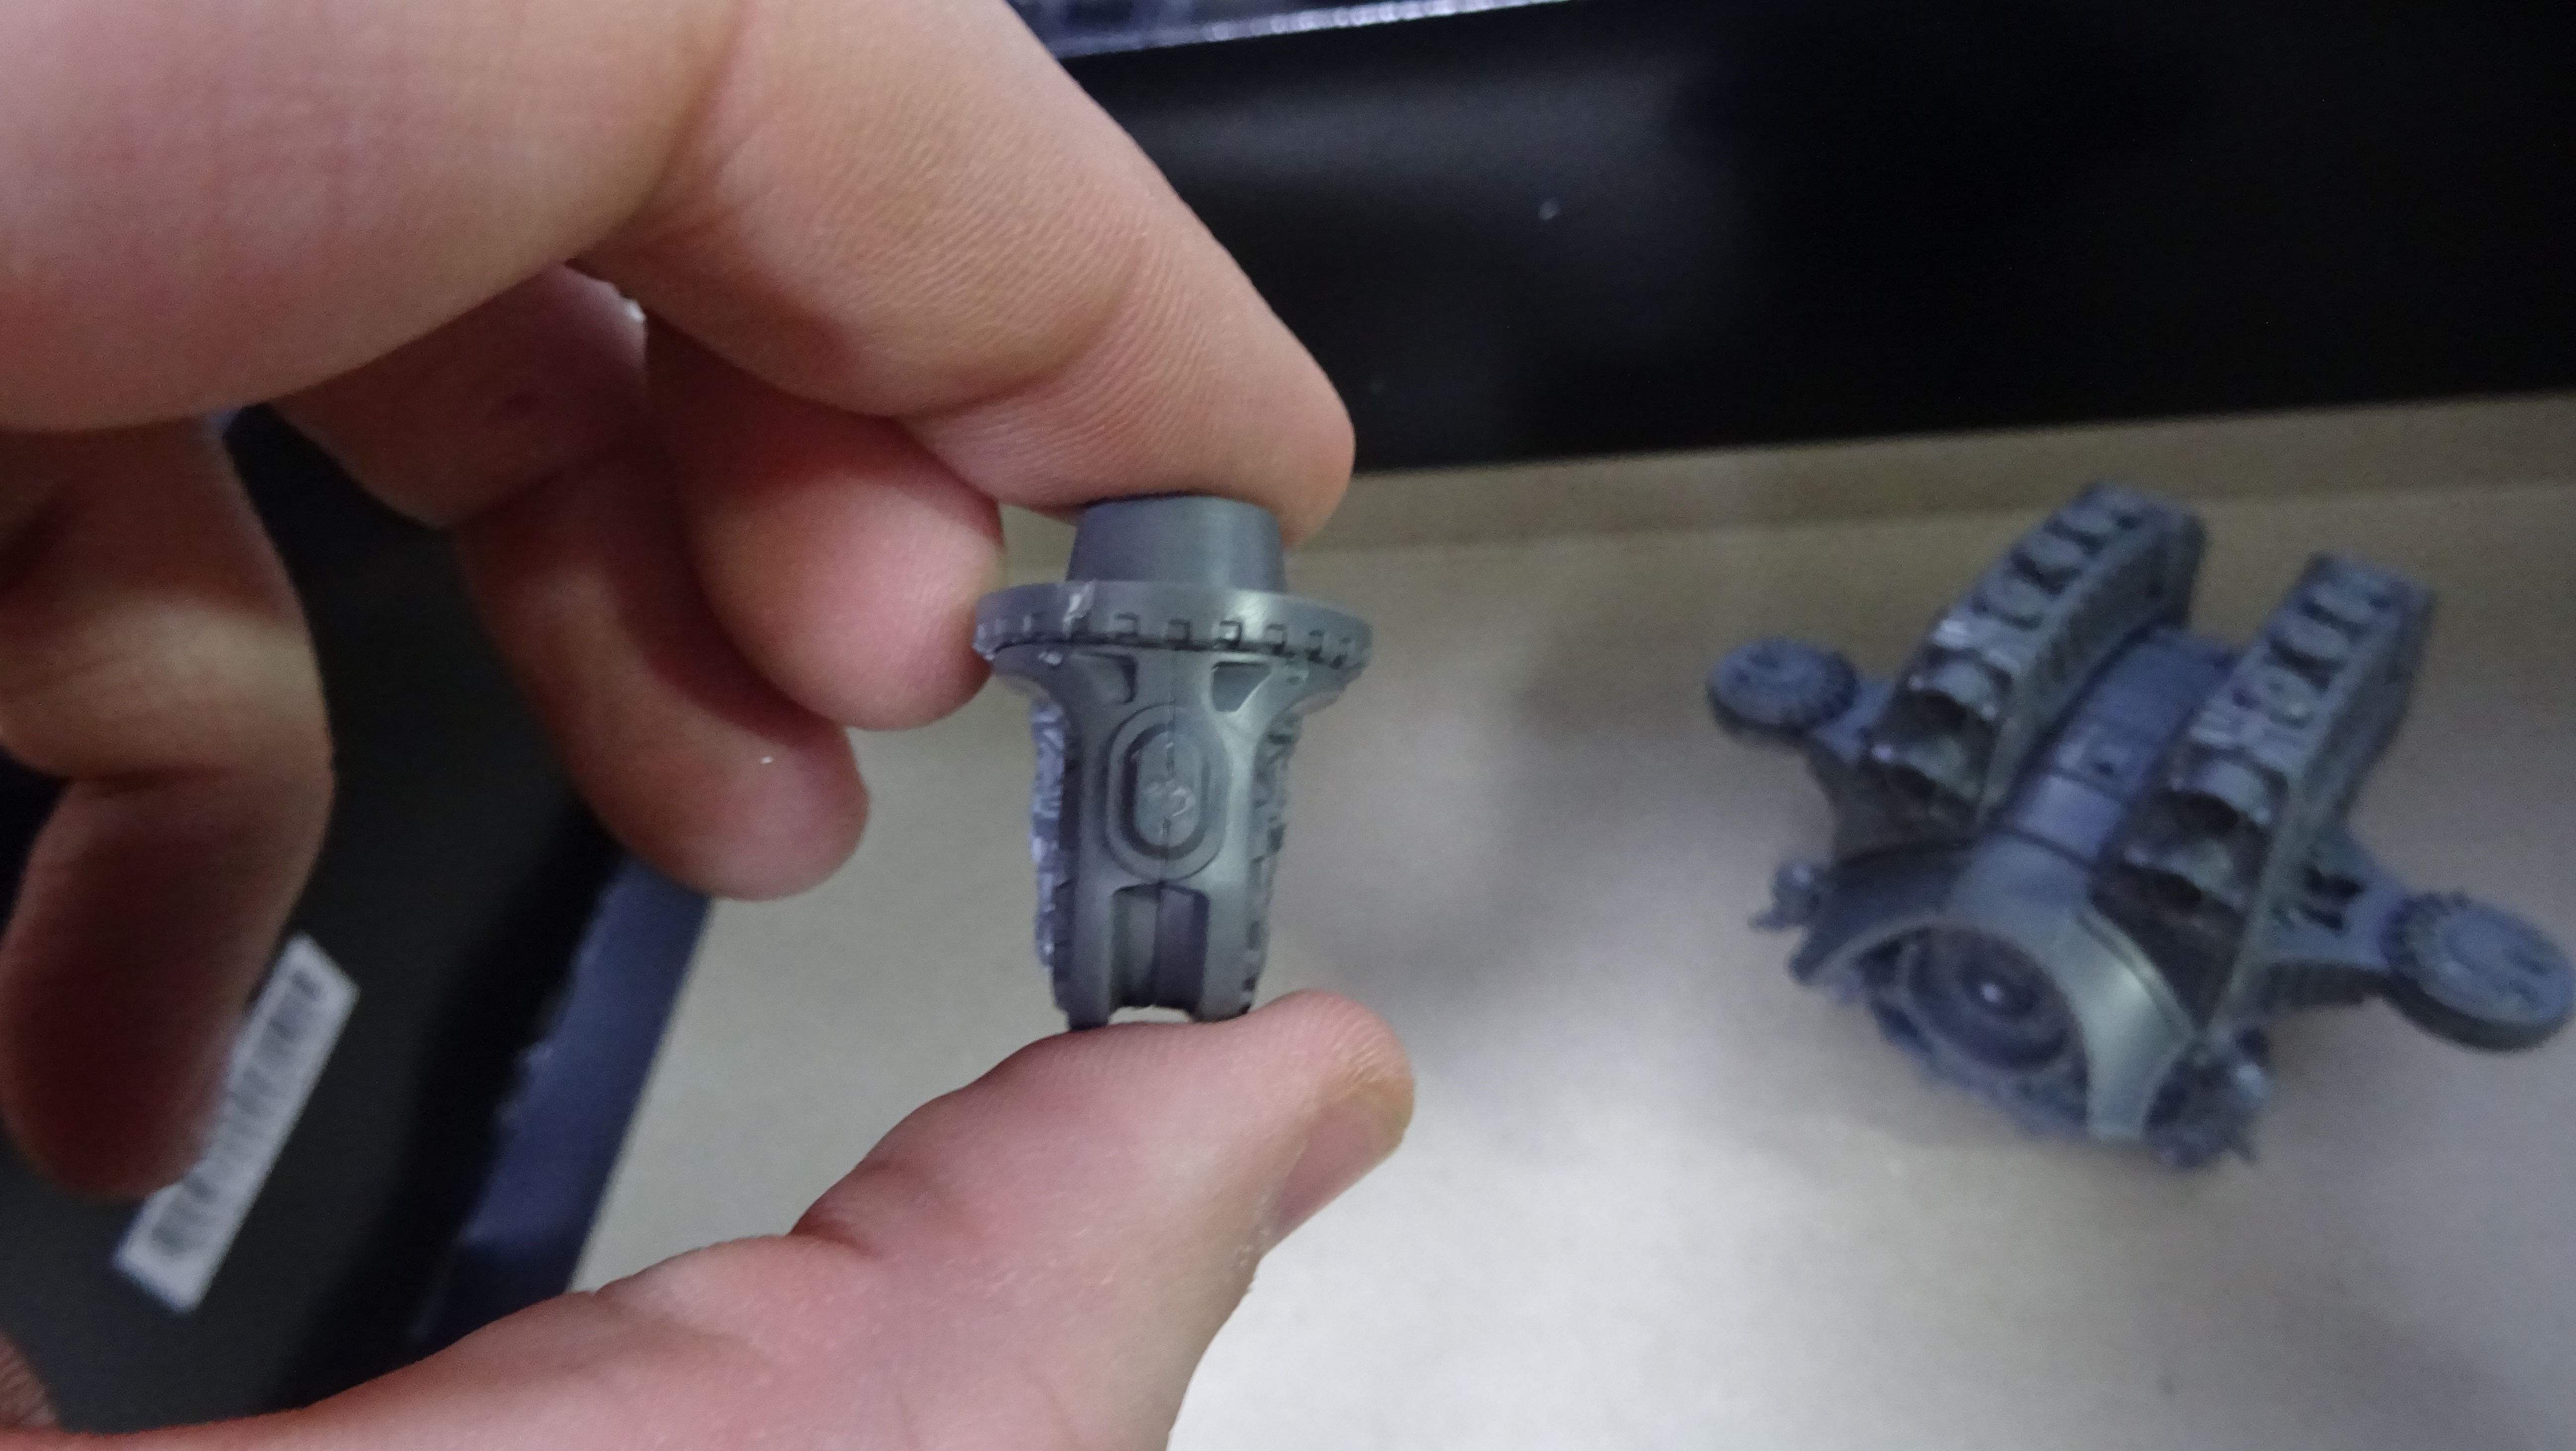 Waist and hips
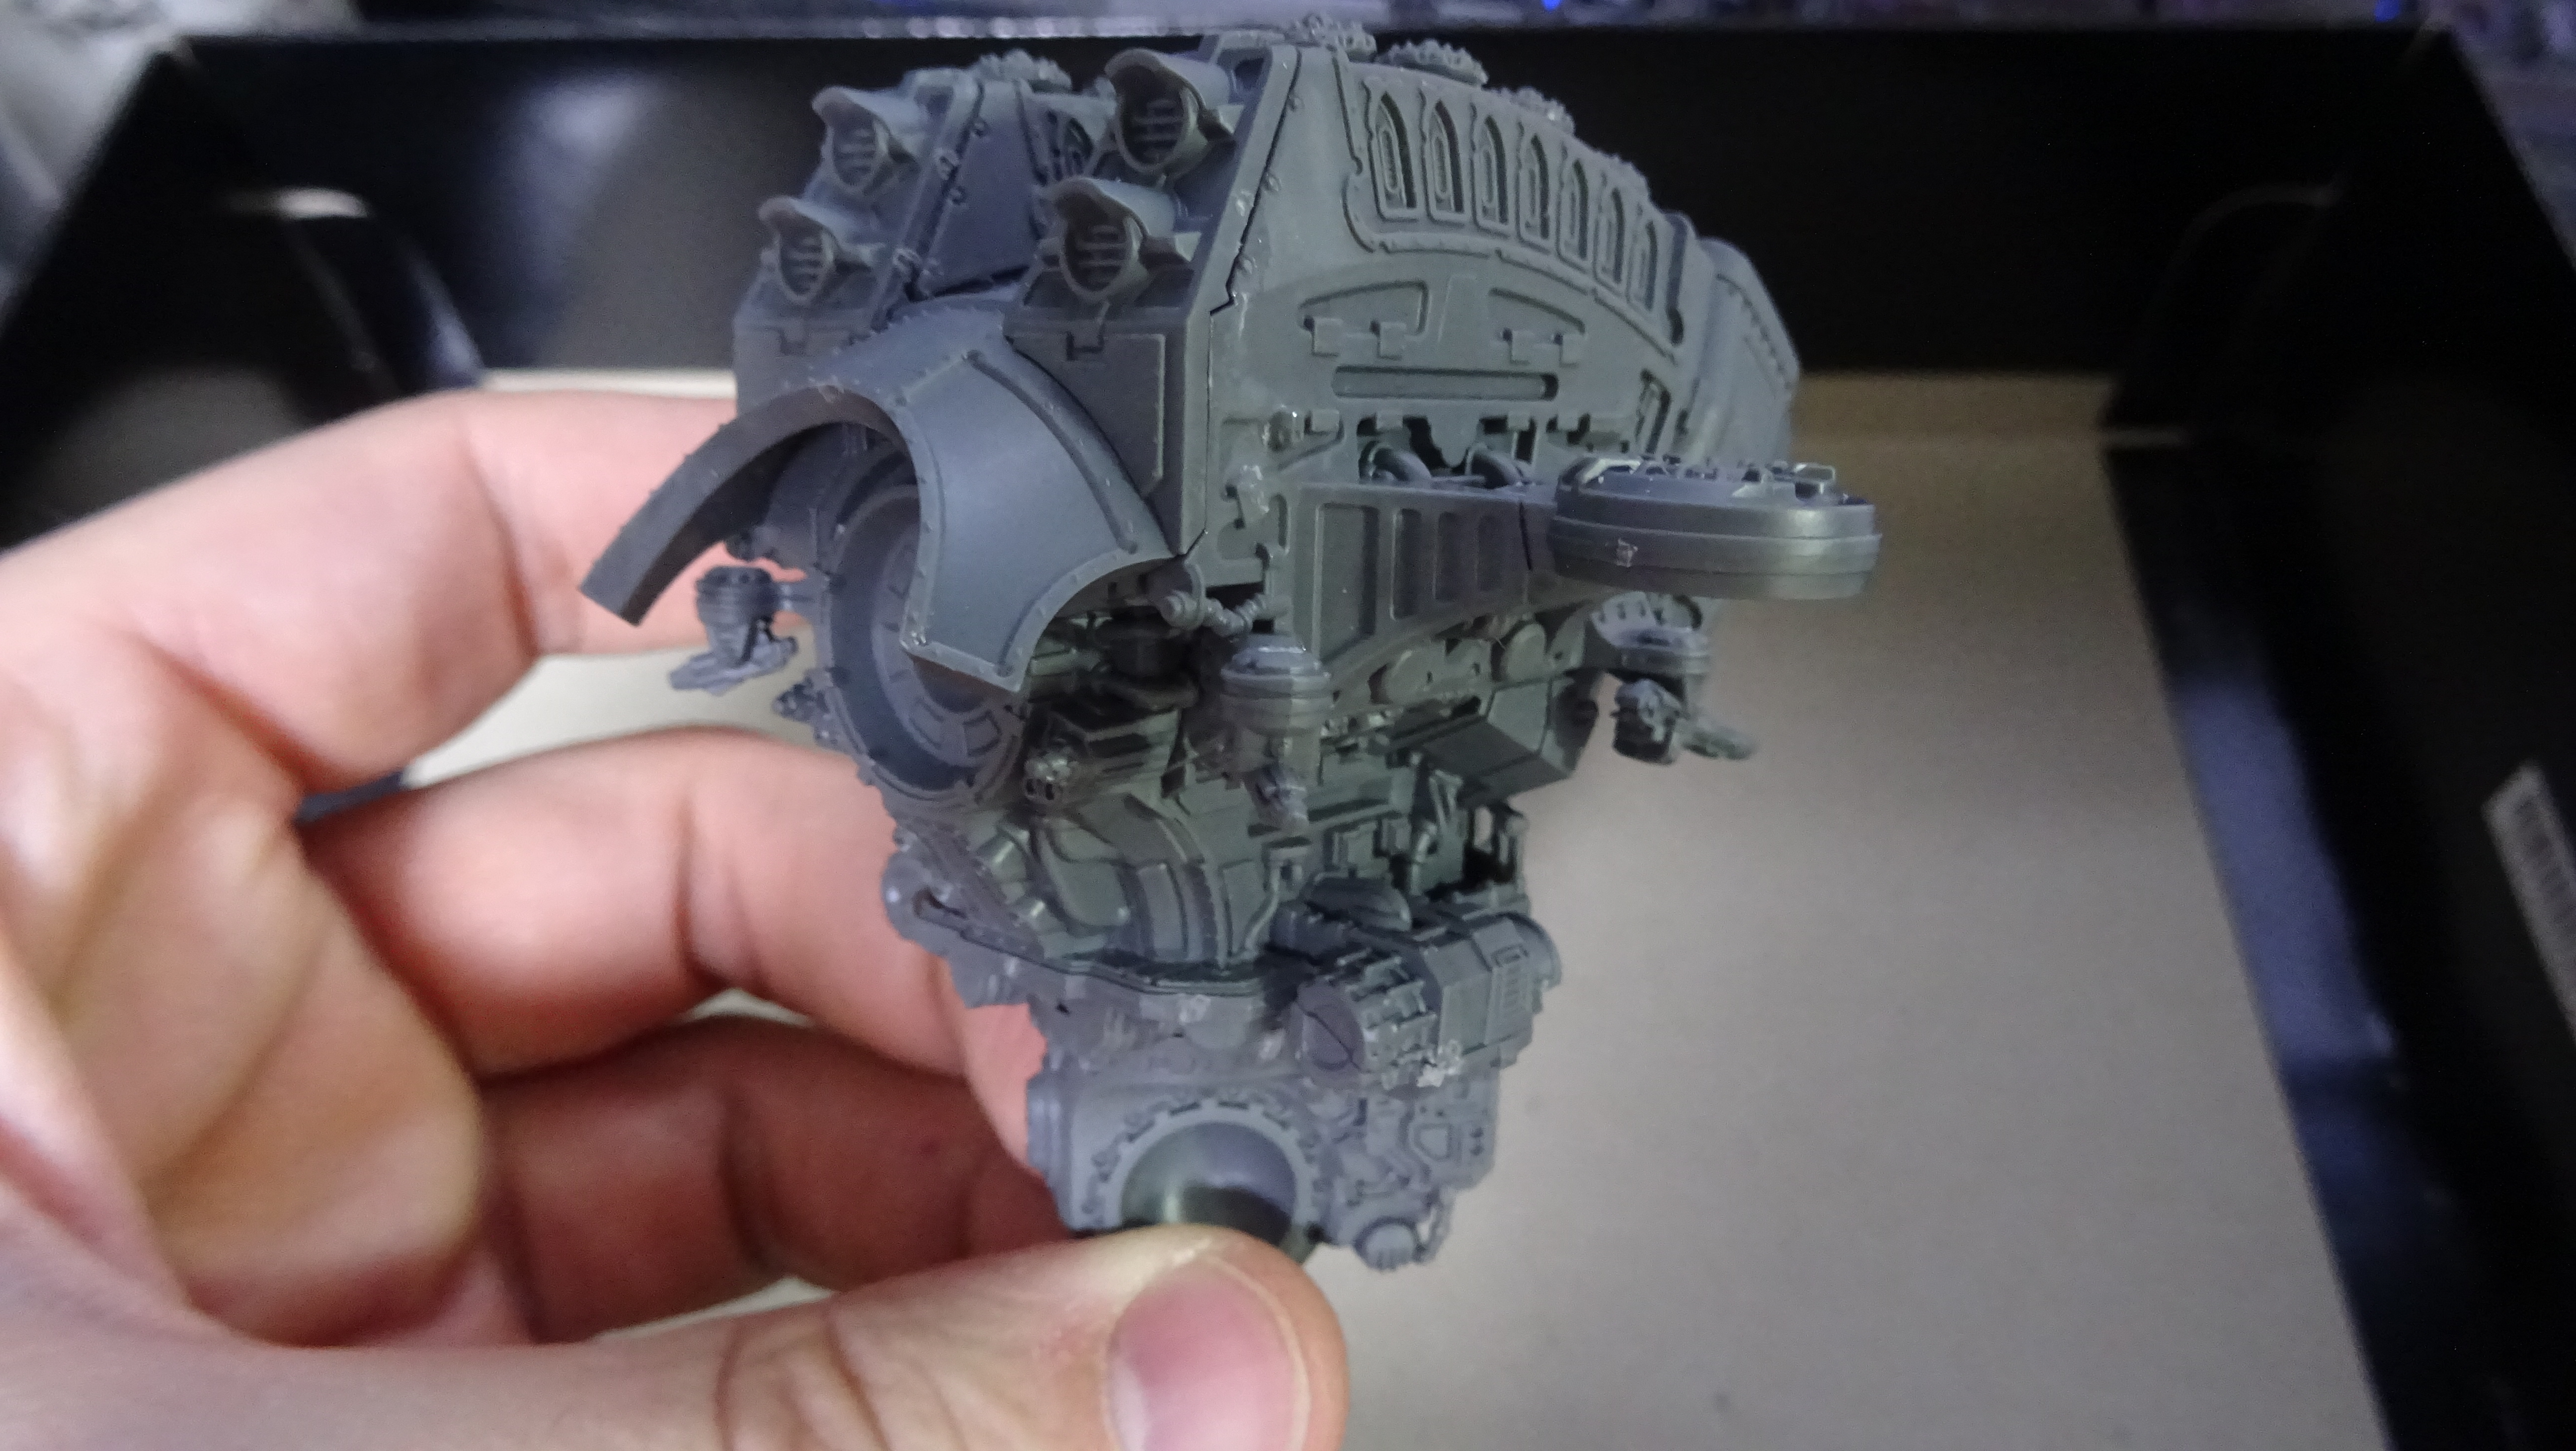 Dry fit of the waist and torso
It is so dumb as to how fast these parts have gone together. The difference between completely CAD made product and a bodged hybrid…
The armour plates are yet to go on, but they will go on as I pose the model.
The next part will be the legs, feet and the hip connection points. Tomorrow will hopefully see the three remaining Titans completed. I will be doing something daft with one of the Warhounds though. Some base diorama of it jumping through or over a building mayhaps…
Regards,
Khibyusa
Pew Pews and completed Warlord
Greetings,
Guns and arm struts. The completed Reaver.
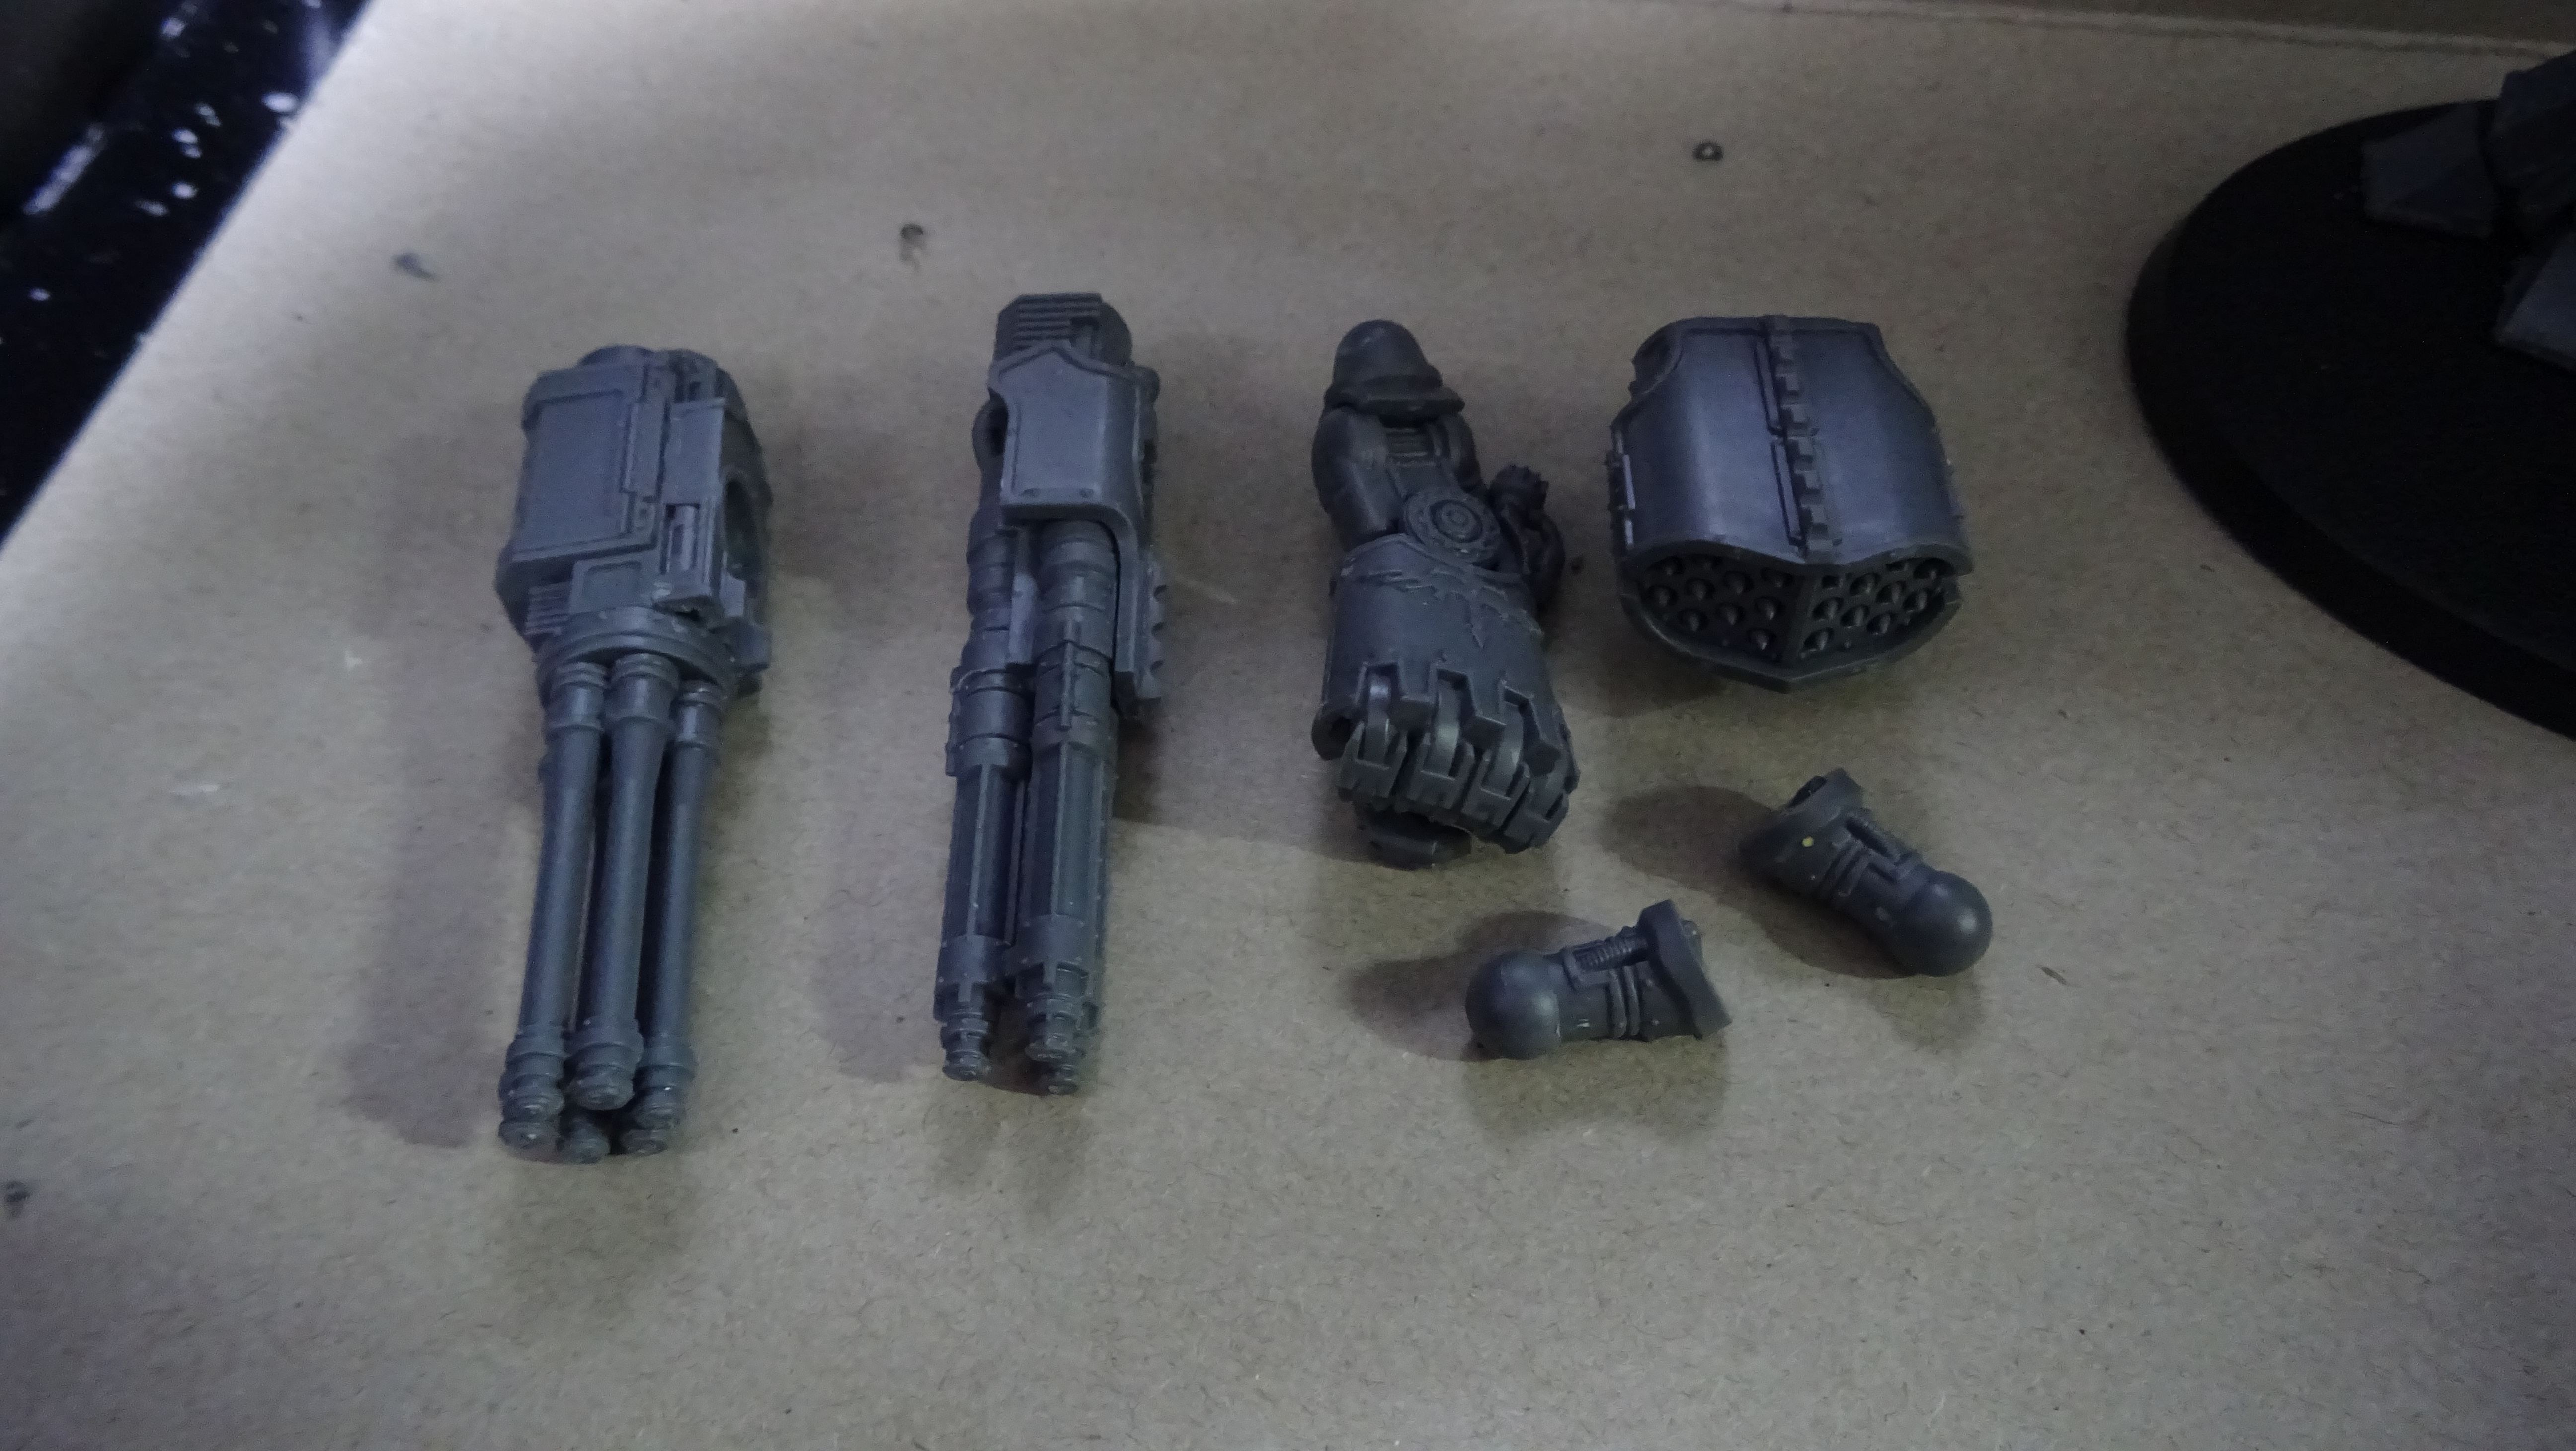
Now the pain in the proverbial.
I like to try and make the Reaver look as if it is striding. The issue is that the trailing foot has issues with how the armoured shin plate fits with the toe armour. With the way that the Reaver is striding and how the armour plates are supposed to fir I have had to leave out a single slab of toe armour.
If you are attempting to copy this, don’t place the feet more then 15mm infront of the other. that should still allow the toe plate to be used in the construction.
I shall hide it with a small ruined building.
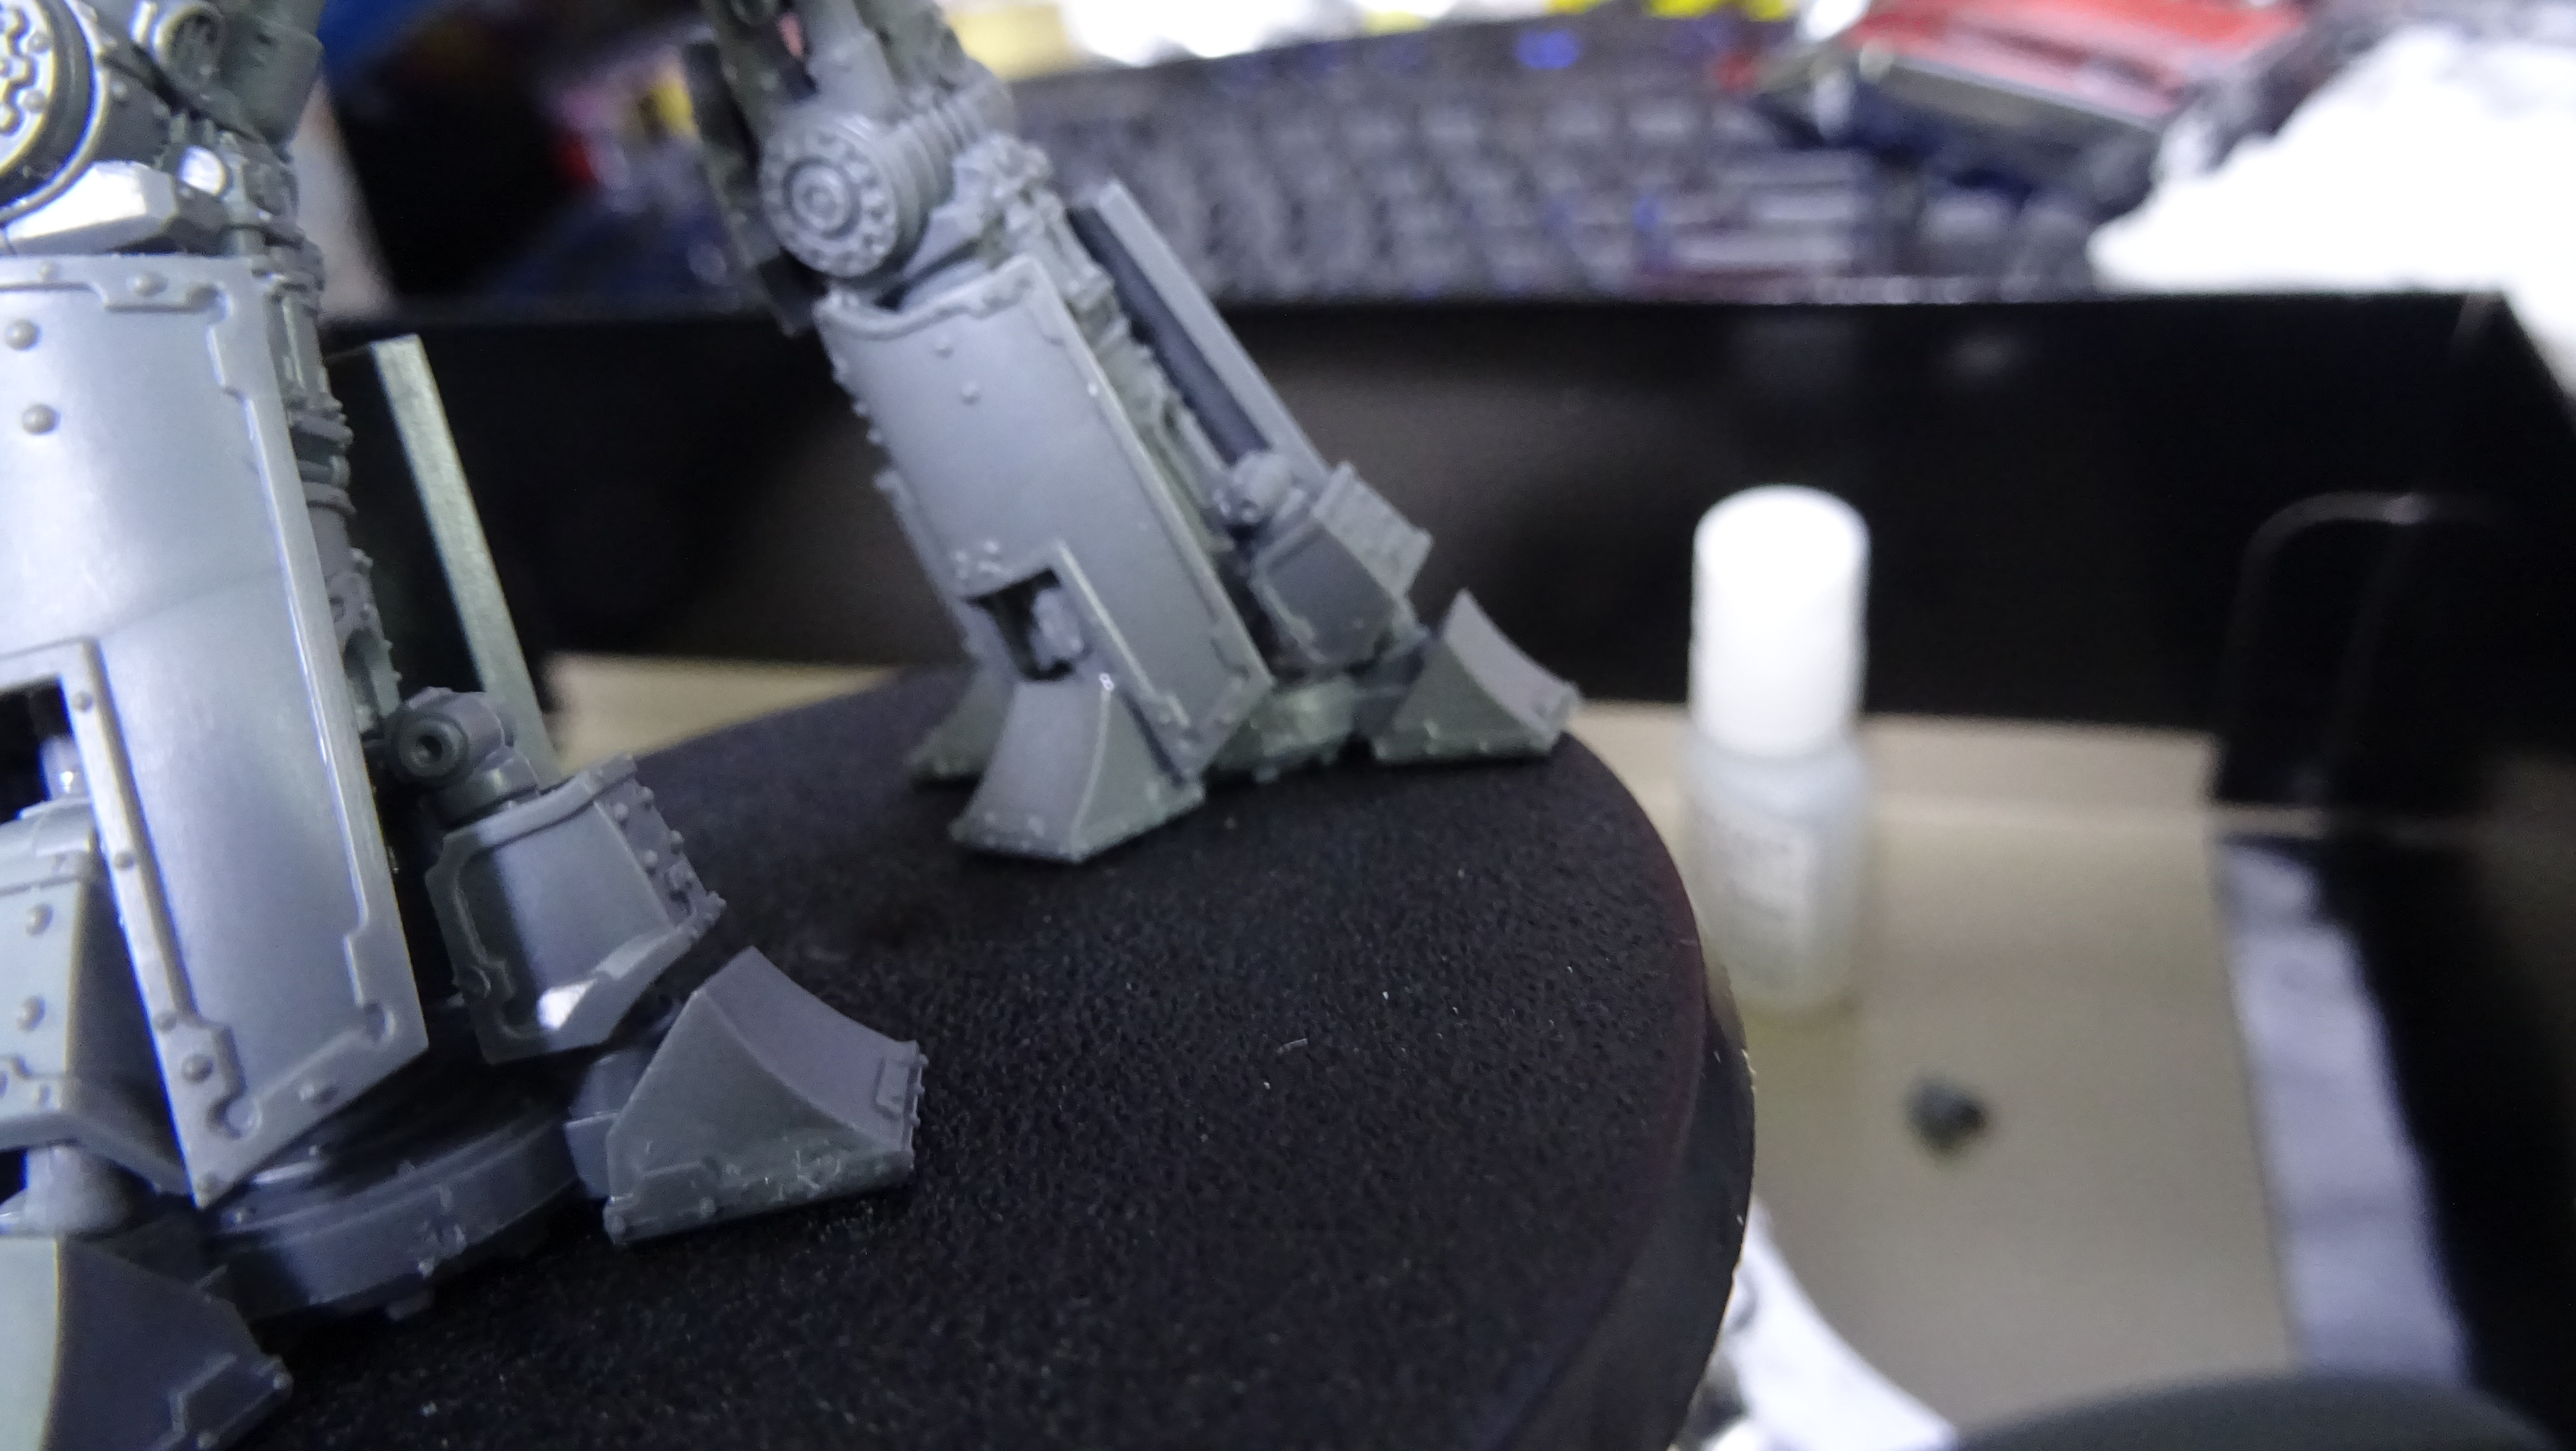 See the fail.
Legs and feet.
Greetings,
Legs are done, but I have an issue…. It will be explained at a later date in a pitfalls to watch out for post.


![Play WW2 Commando Operations With Butcher & Bolt [Updated]](https://images.beastsofwar.com/2026/03/relaunch-600-338.jpg)


