


![NO Weekender Or Cult Of Games XLBS This Weekend [Updated]](https://images.beastsofwar.com/2026/03/No_Weekender_and_XLBS_this_Weekend-225-127.jpg)


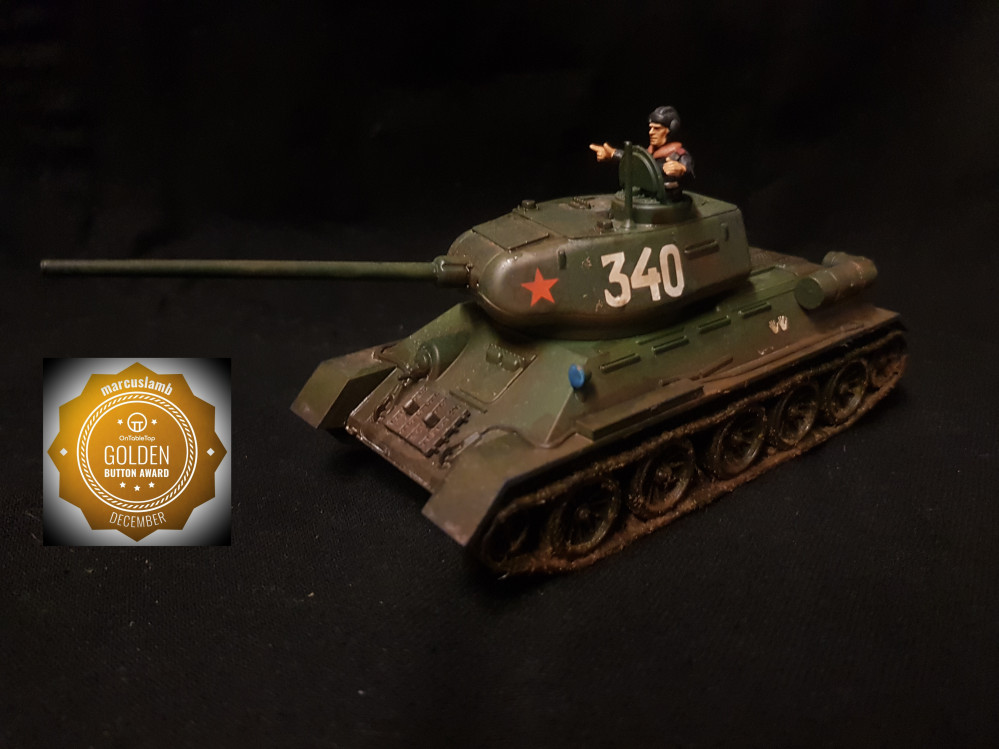
Baby’s First T-34


Recommendations: 230
About the Project
So I've been collecting Bolt Action Germans for just under a year now. None of which I've gotten round to painting up yet! But I also decided I wanted a few Soviets - cause T-34s! Fortunately my middle brother bought me both a T34/85 and a Panther for Christmas. With a few days stuck at my parents over the Christmas period I thought it's time to really get stuck in to that tank! This is the first tank or AFV that I've ever painted, also my first time really using an airbrush in anger so this is going to be a massive learning experience. All advice, tips and constructive criticism is massively welcome!
Related Game: Bolt Action
Related Company: Warlord Games
Related Genre: Historical
This Project is Completed
Build
This build was *super* simple. I suppose it makes sense – the T-34 was a pretty simple design so it makes sense that the kit is pretty simple. Bu I’m guessing this is one of Warlord’s earlier plastic models. There are not as many detailed parts as I’m used to in some of their other kits and the instructions were also not as clear or detailed as in later ones. But like I say it doesn’t really need it – it’s so easy to put together – took probably about 15 minutes tops.
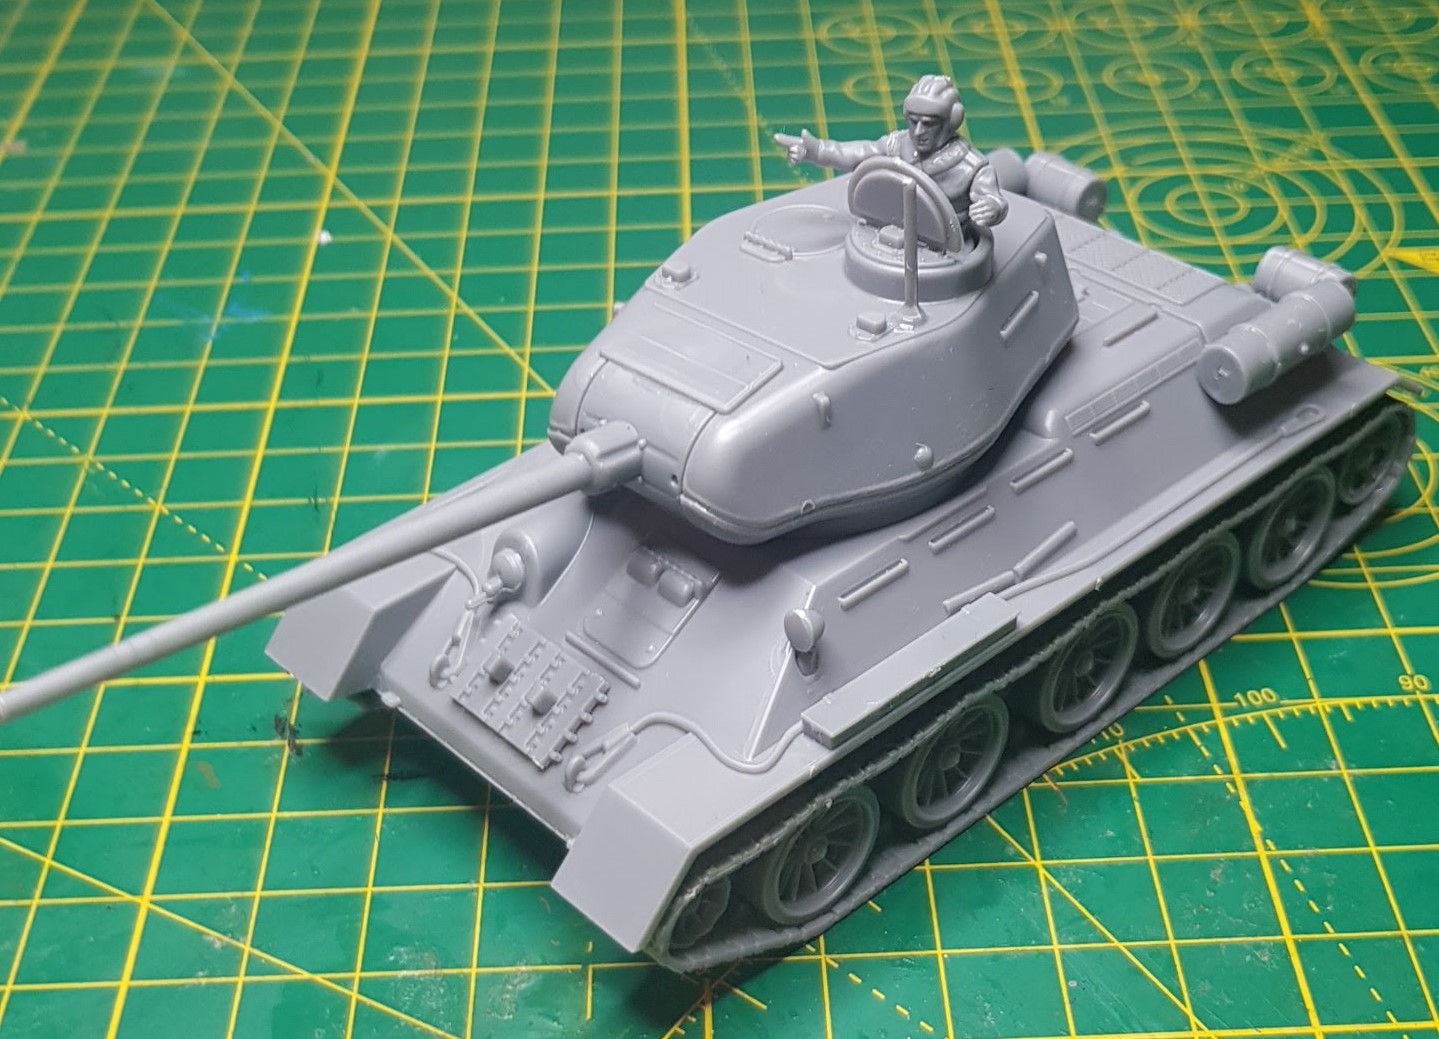 Completed Build
Zenith
Primed the model with Vallejo black surface primer through the airbrush as its’ so damp and misty outside – then, inspired by John, I decided to try to Zenith this model. This will be my 2nd ever attempt to do this. In my first attempt I decided I didn’t go heavy enough with the greys and the the whites and it was just too subtle. So this time I decided to go a bit heavier.
My airbrush is the Bartsharp 186k as recommended to me by Gerry on the forums. Comes with .3, .5 and .8mm needles and nozzles. All this was done using the .5
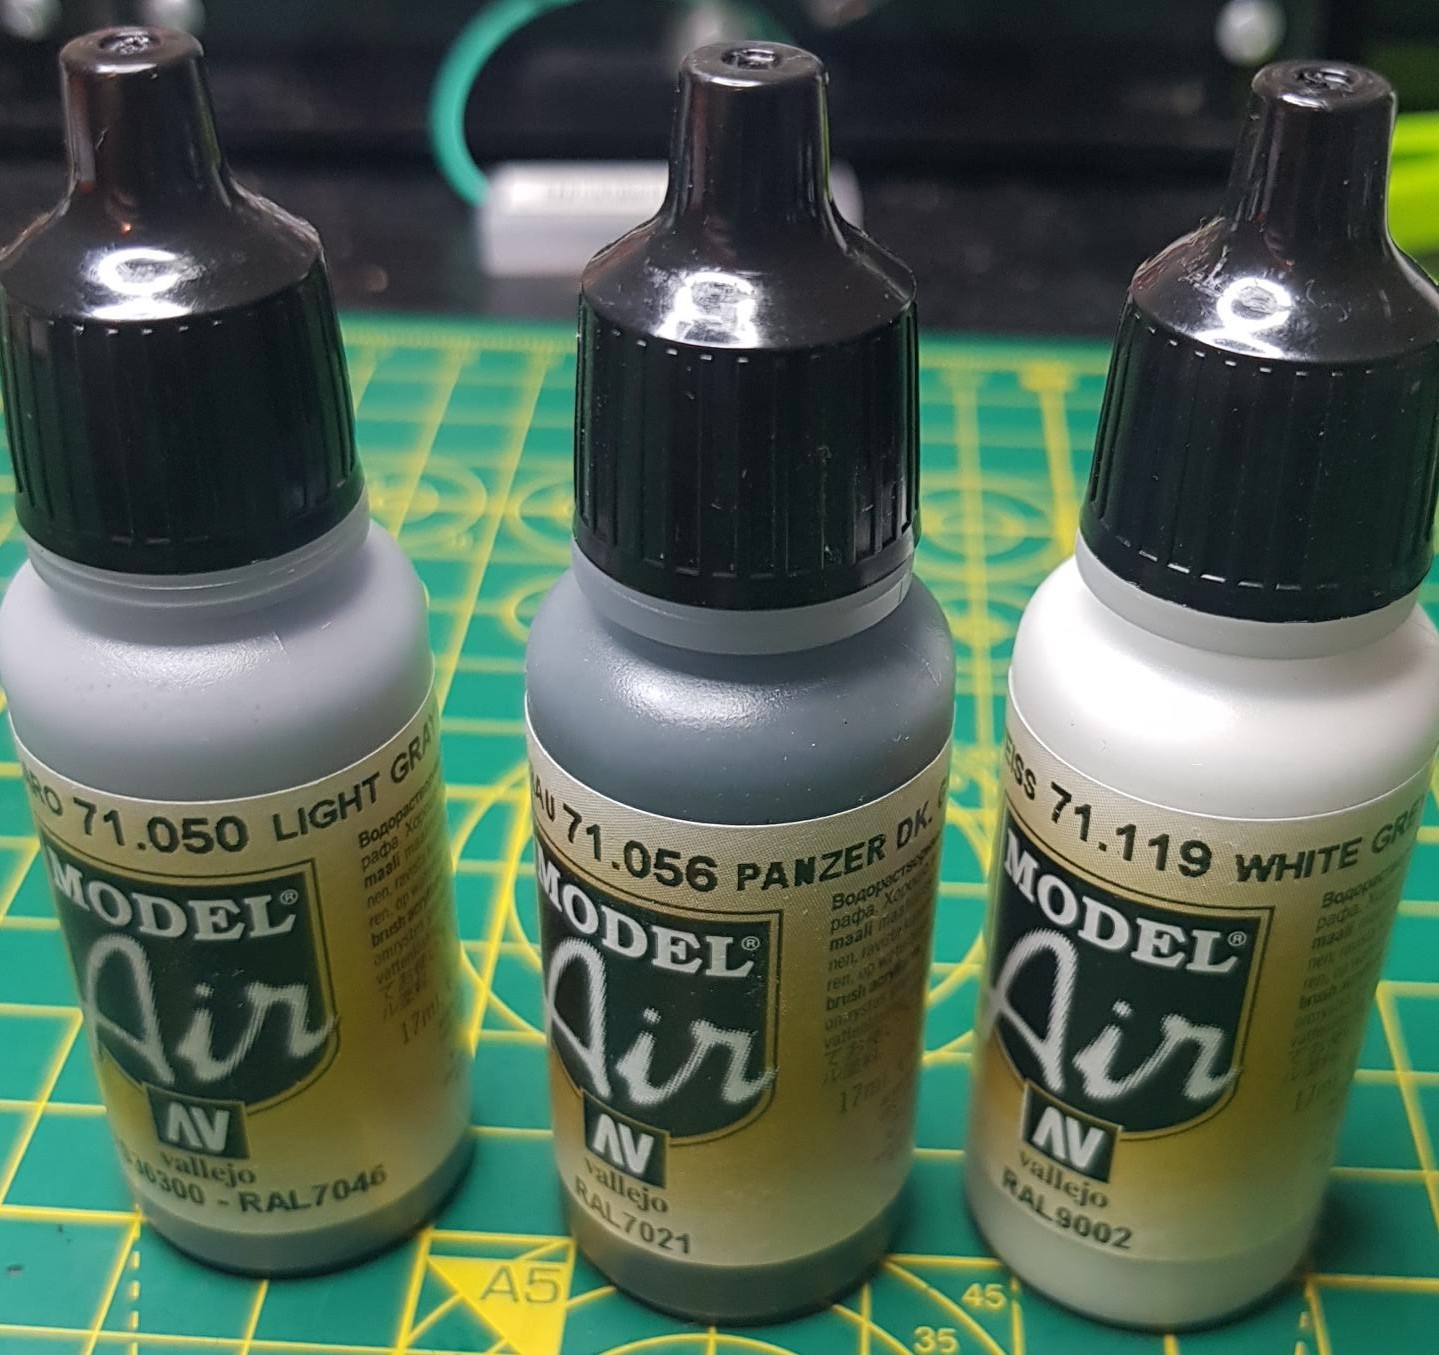 Decided for 3 shades of Zenith. 1st Panzer Dark Grey, then Light Grey and White Grey. All Vallejo Model Air
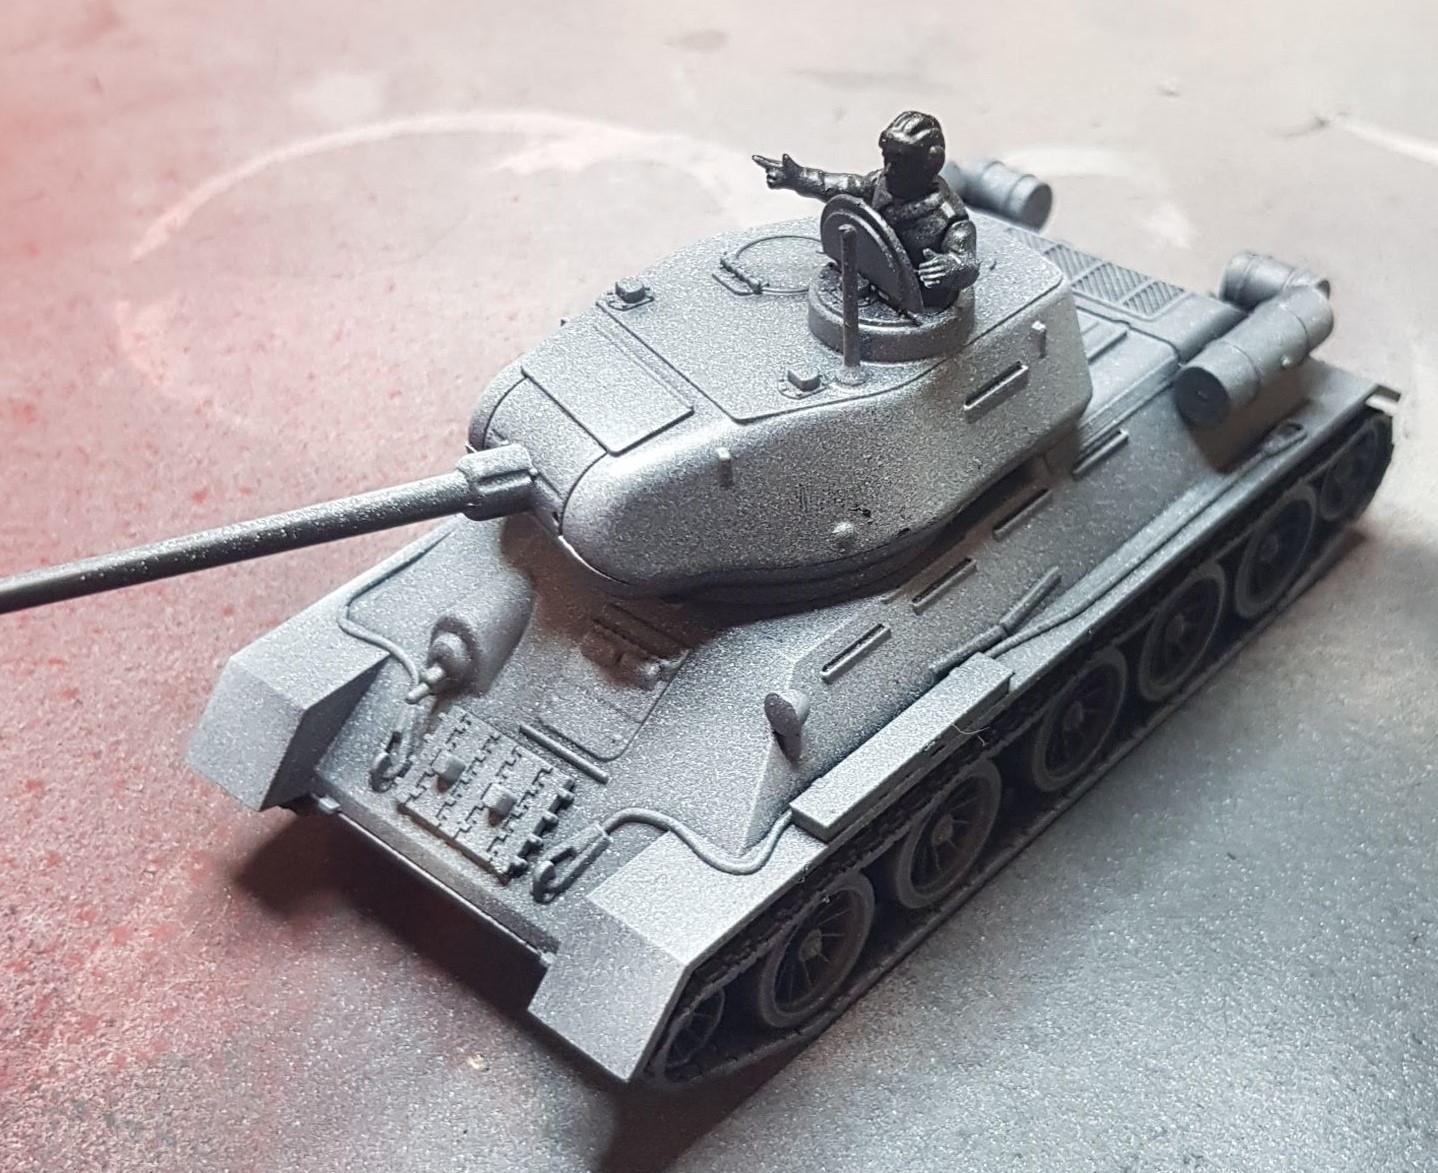 Zenithing complete
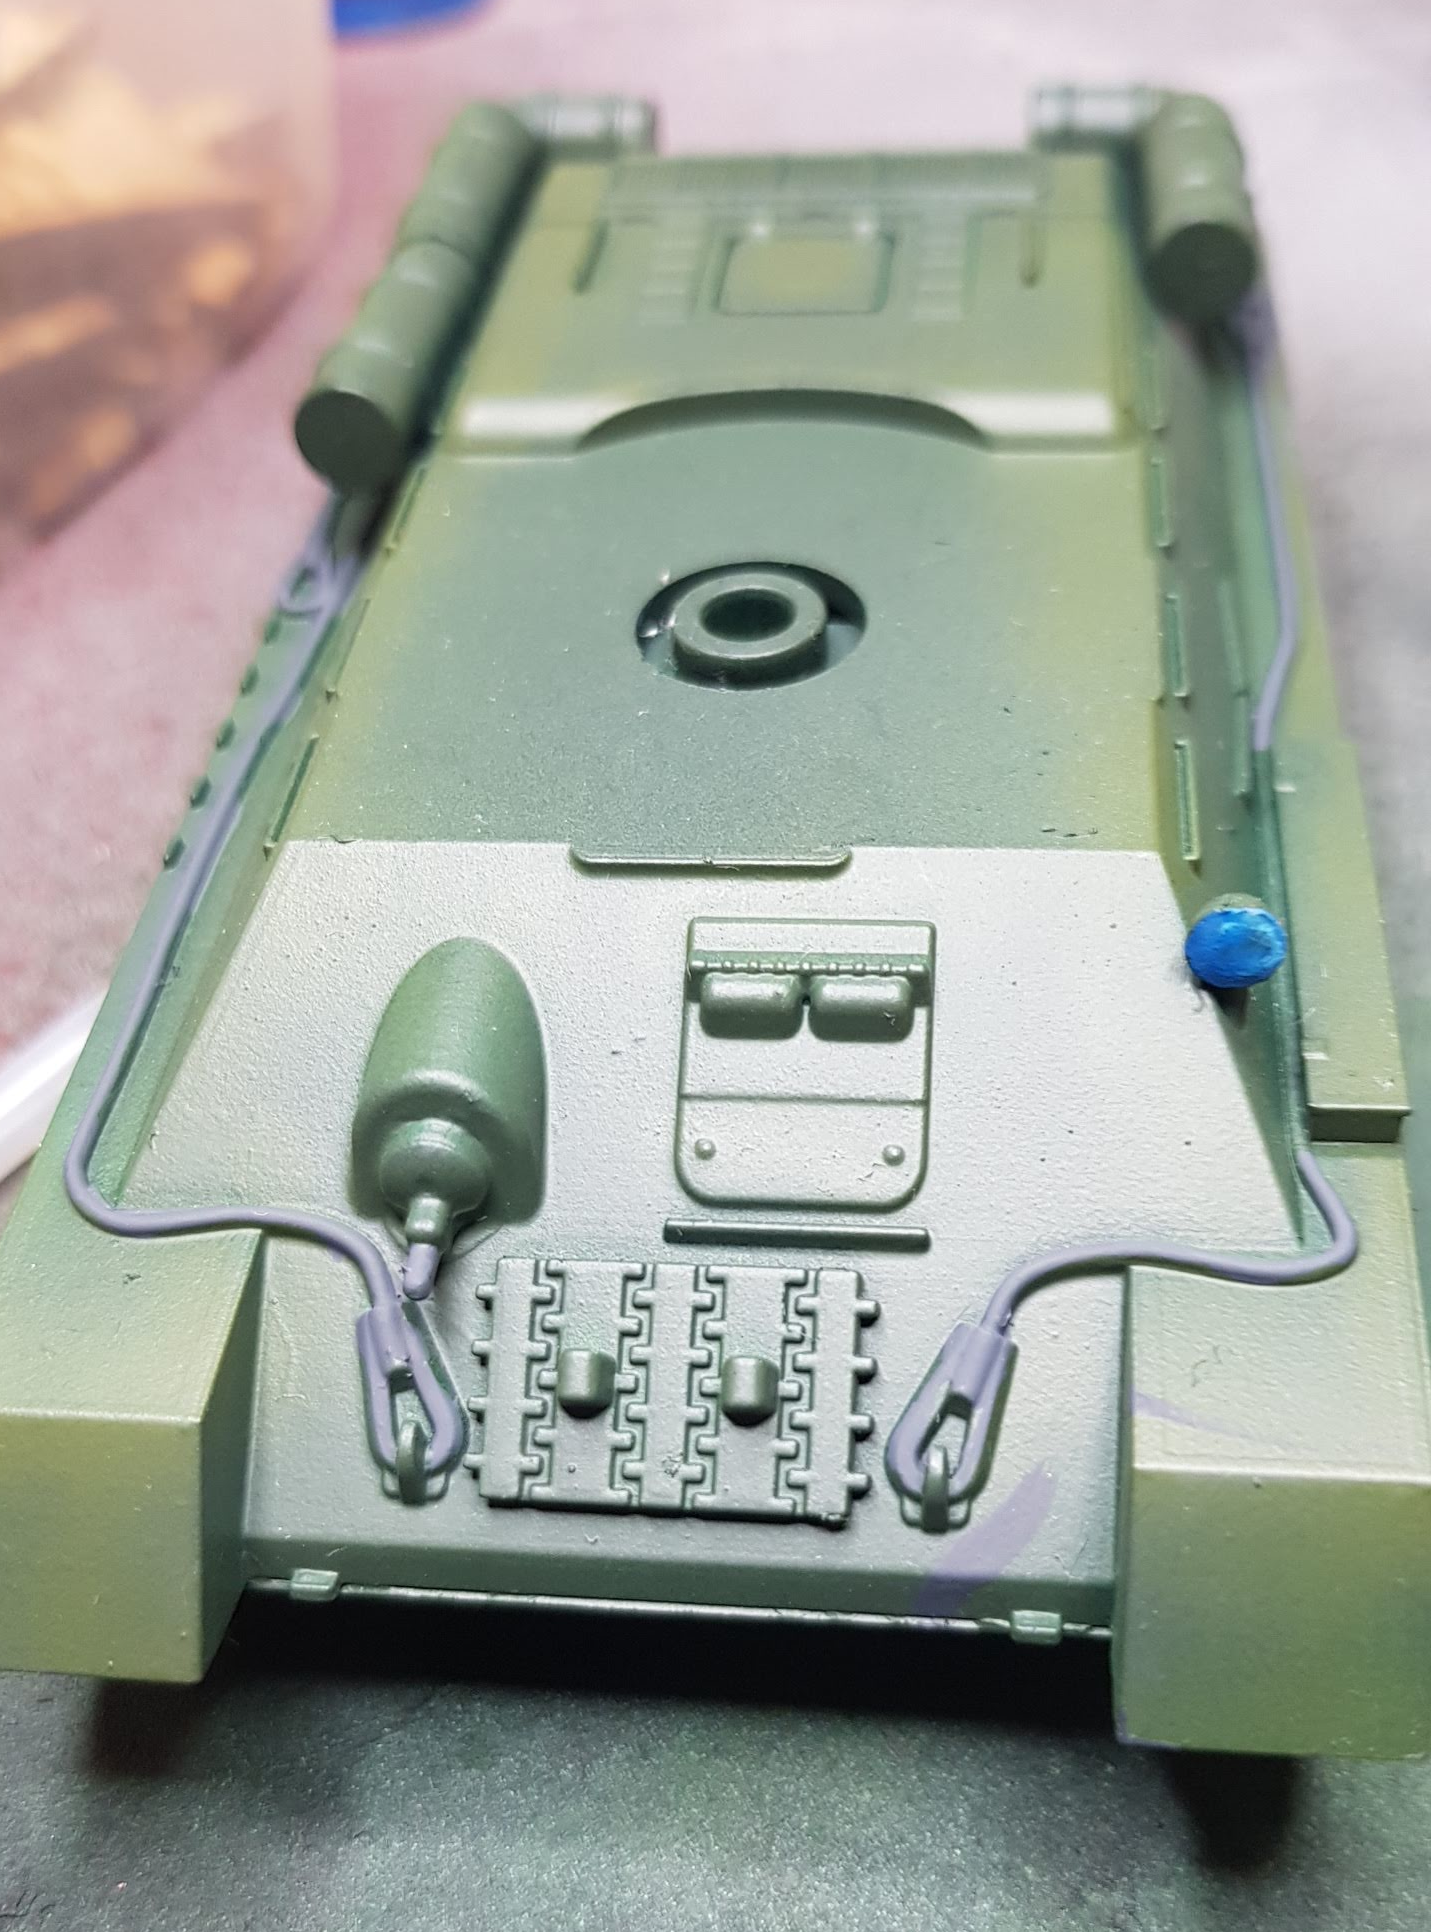
Base Coat - and the first cockup!
So time to base coat the tank. Didn’t have a specific Russian Green in my collection so had a look at what I had and decided Vallejo model air Olive Green looked ok.
 First base coat
I liked how the paint job went on and the zenith highlights seemed to come through nicely but I didn’t like the overall colour. Looked more like a US or British paint scheme.
That’s when I realised I’m an idiot and have an amazing little app on my phone called Paint Rack. I use it mostly to keep track of what paints I own but it also has some very lovely colour tools. I can just select the colour I really want – like the Vallejo Russian Green and it will tell me what the closest matches I have in my collection are!
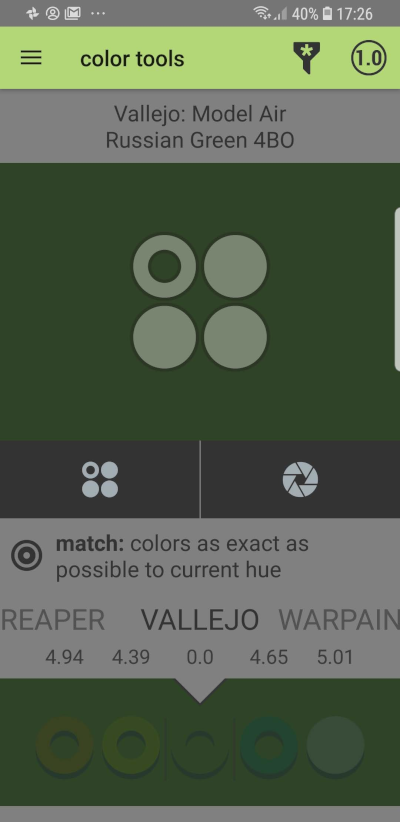 Paint Rack Colour Matching
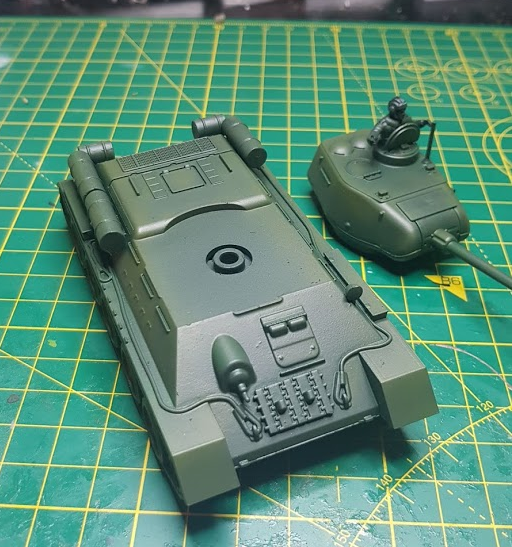
So turns out my Model Air Camo Dark Green is a pretty decent match – so I gave the model another coat with this through the airbrush. It kind of ruined the zenith effect with a 2nd coat but I’m much happier with the overall colour.
 2nd base coat
Highlight
After adding the coat of Dark Camo Green, I decided the highlighting and shading from the zenith just wasn’t enough. So thought I’d add on some highlights. Put some Vallejo Model Air Medium Olive into the airbrush, dropped down to the .3mm needle and nozzle and tried to brush on a few highlights.

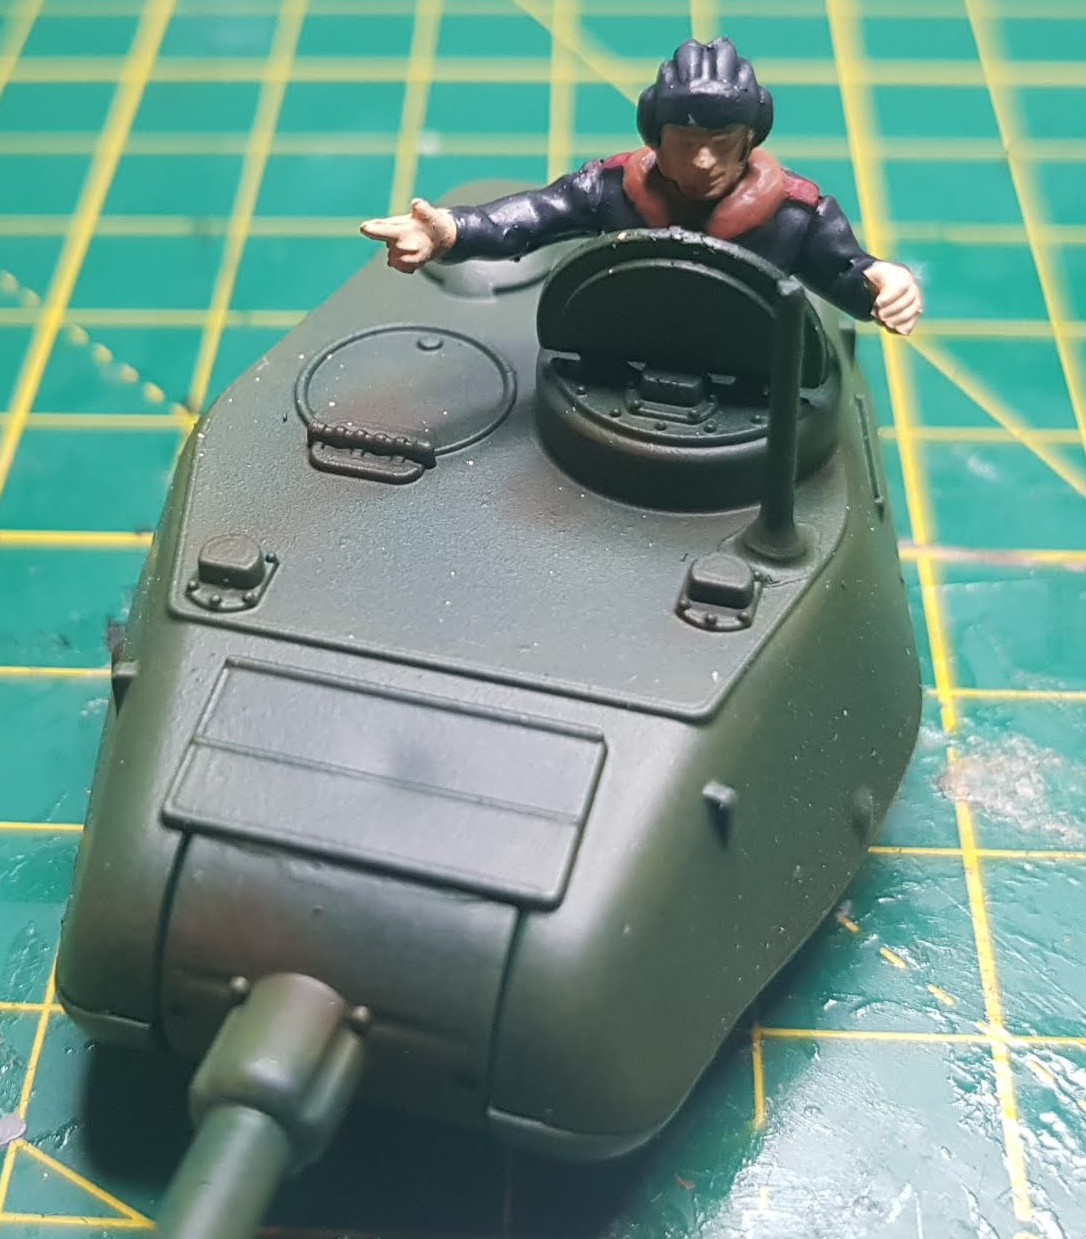
Bit of Detailing
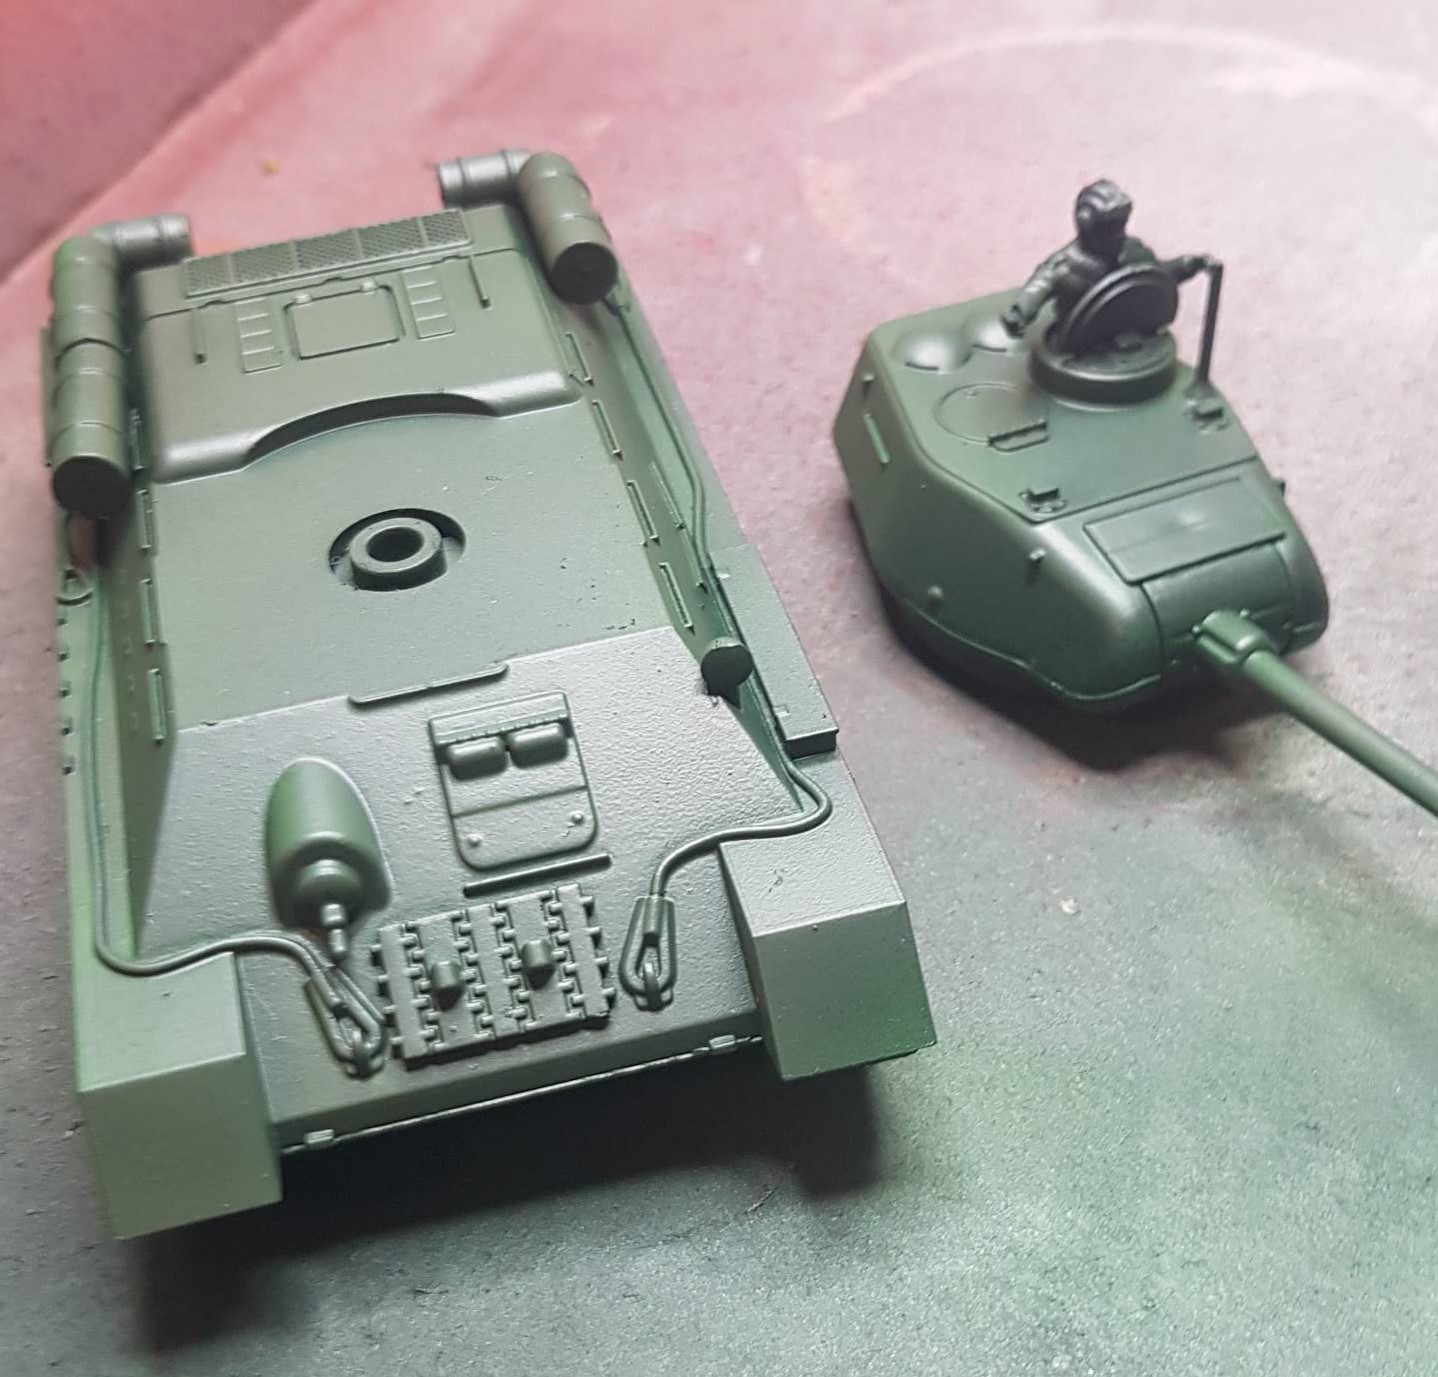
Time to do a bit of detailing so I painted the tracks, the tow cables and the road wheels with Vallejo Model Colour Dark Grey mixed with a couple of drops of Matt Black. The headlight I did a Medium Blue then wet blended in a little white to give it a better light look
And yes you can see how I cocked up and flicked some grey over the front of the tank. I’ll try and fix that later in weathering!
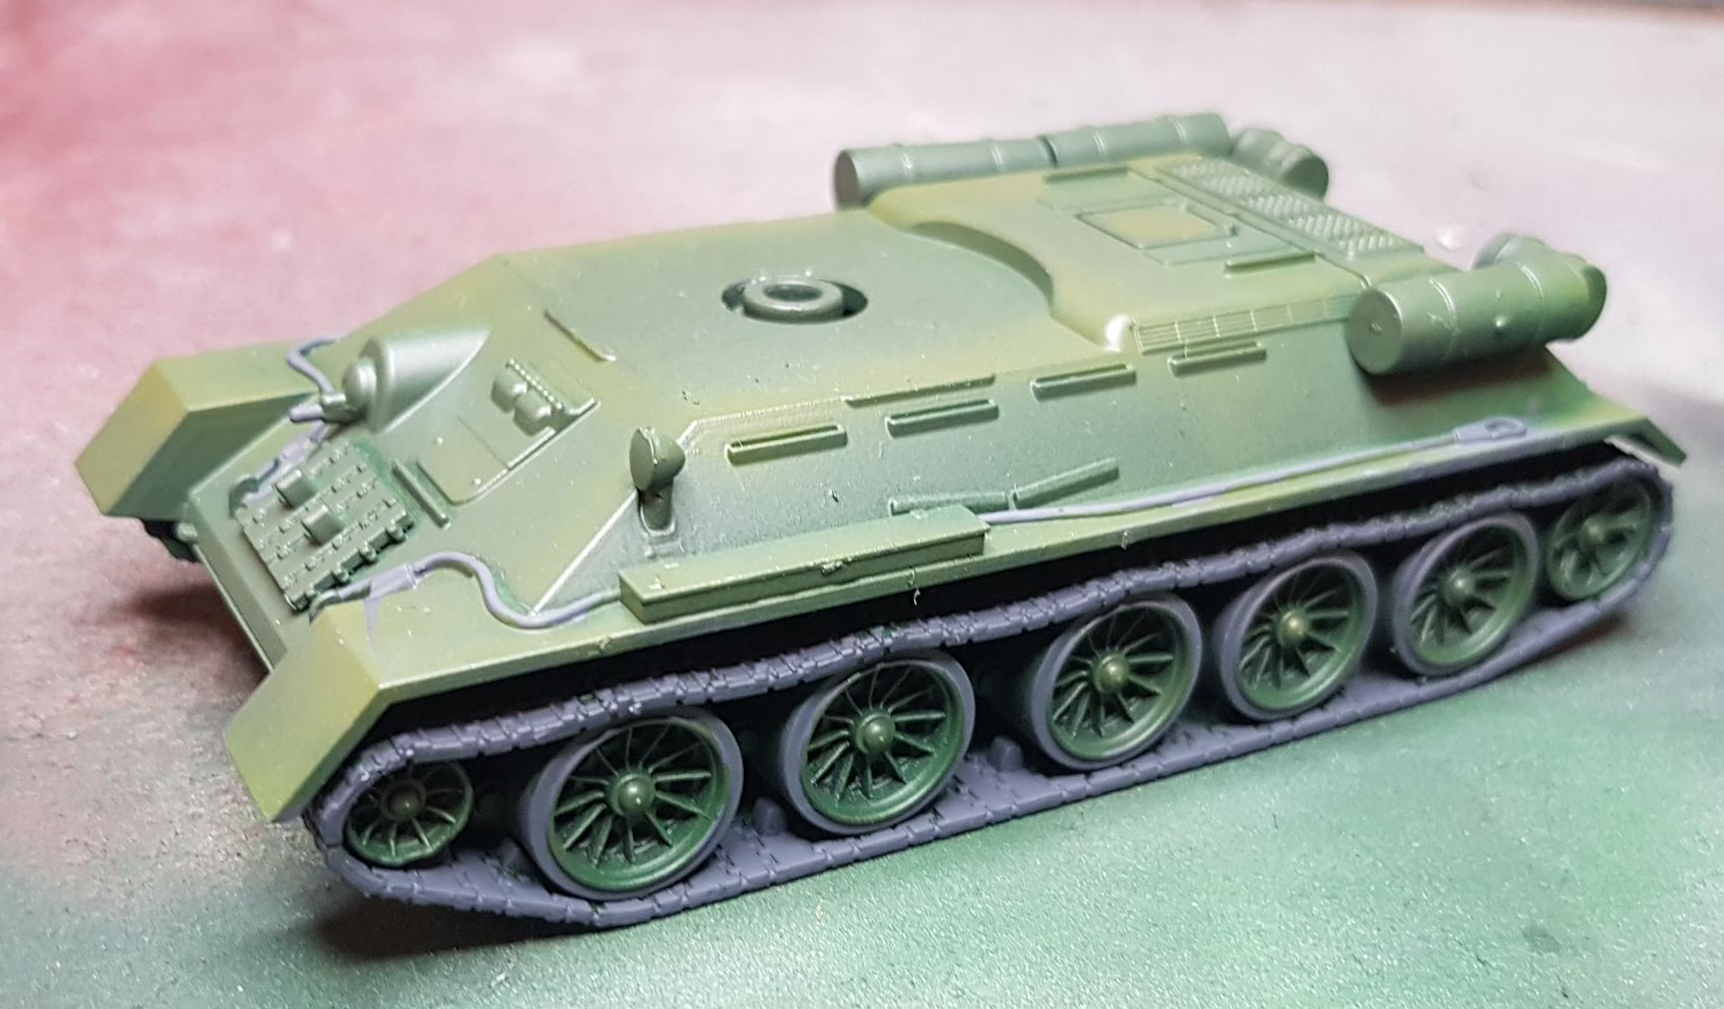
In retrospect the grey on the tracks and cables is a bit too light – will see if washes can bring it down a bit
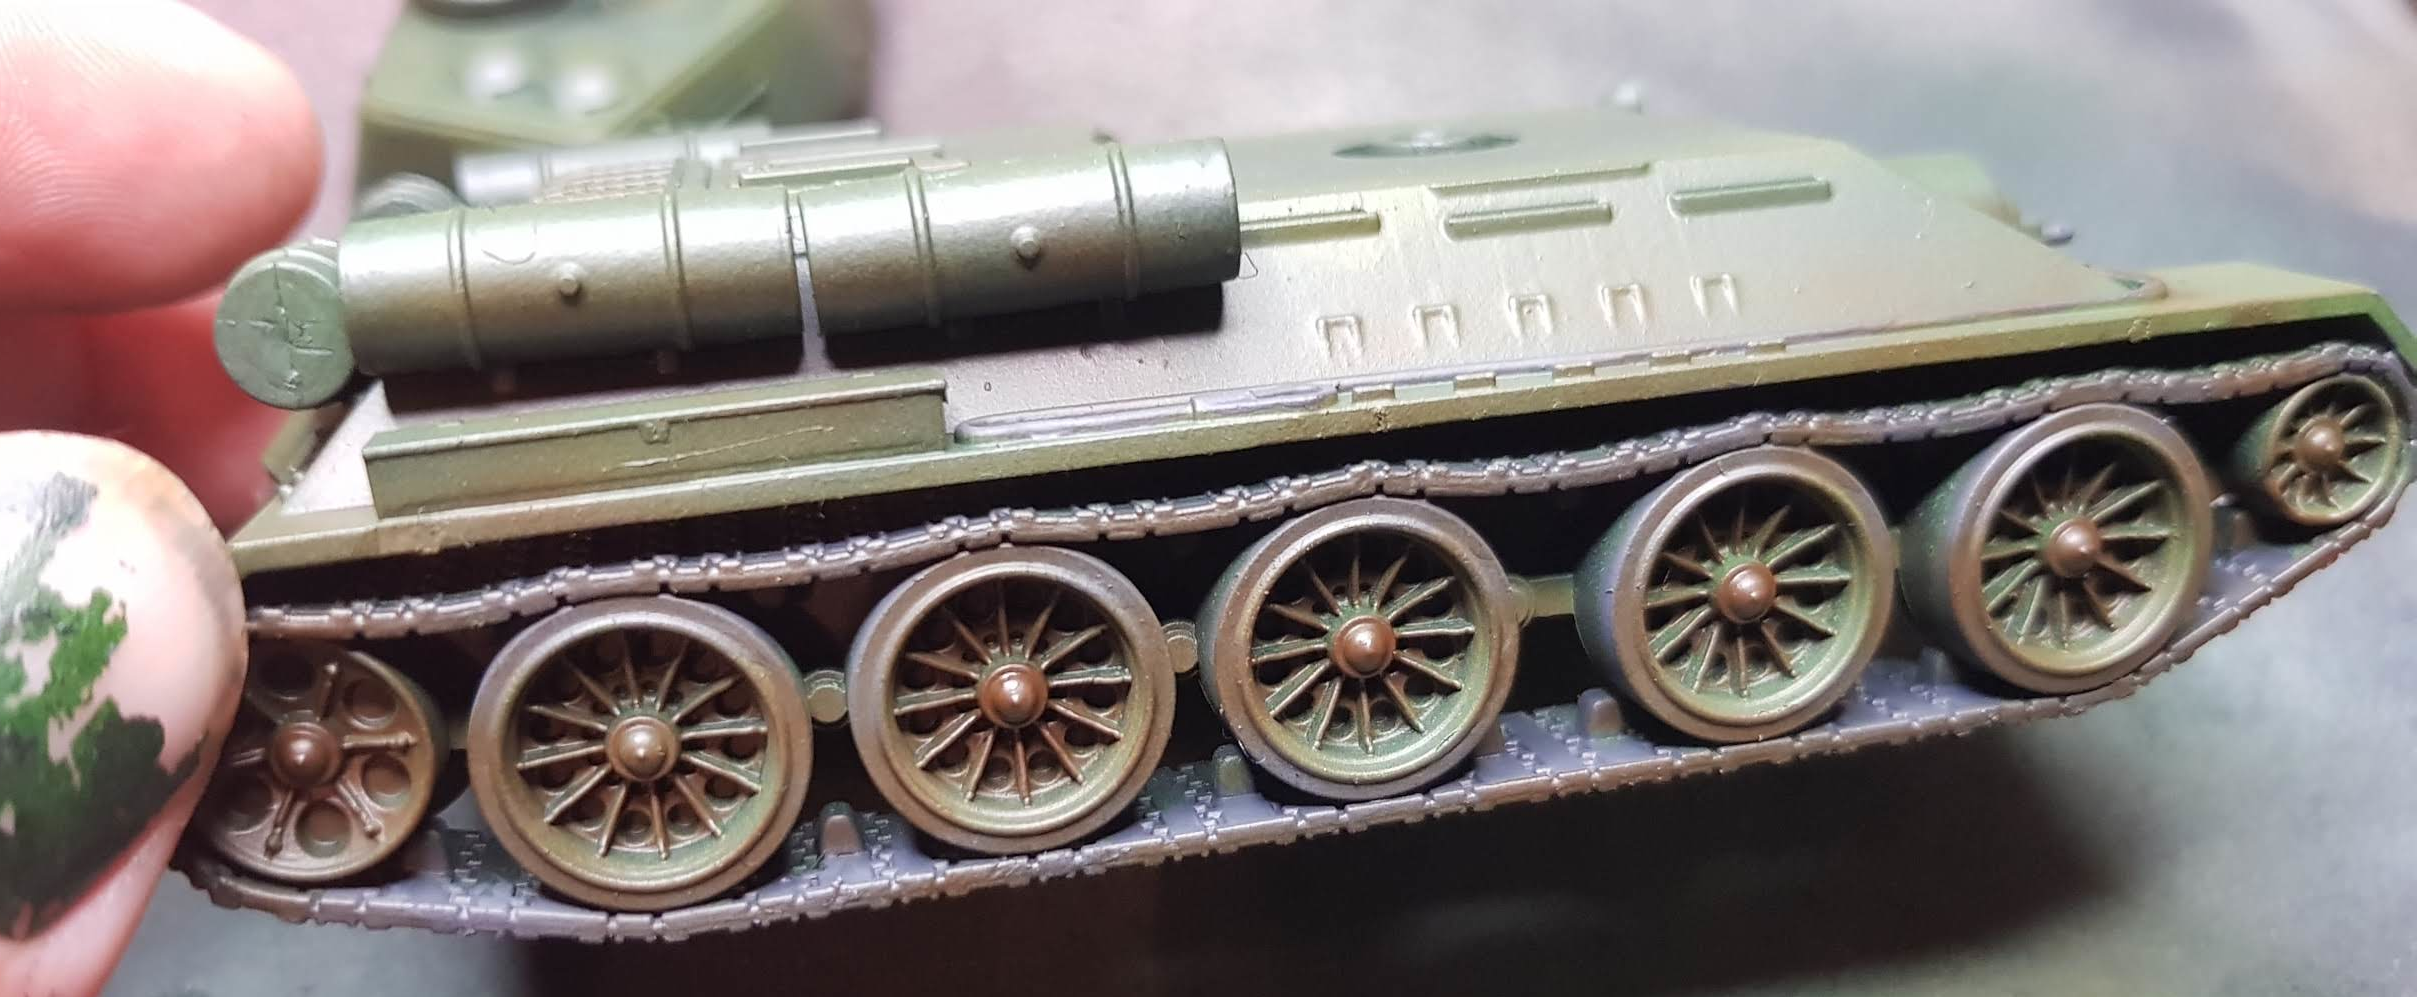
Weathering Step 1
Time to start with a little bit of weathering. Put a little bit of Vallejo Model Air Burnt Umber into the airbrush and spayed a bit onto the tracks and the bottom of the hull and turret.

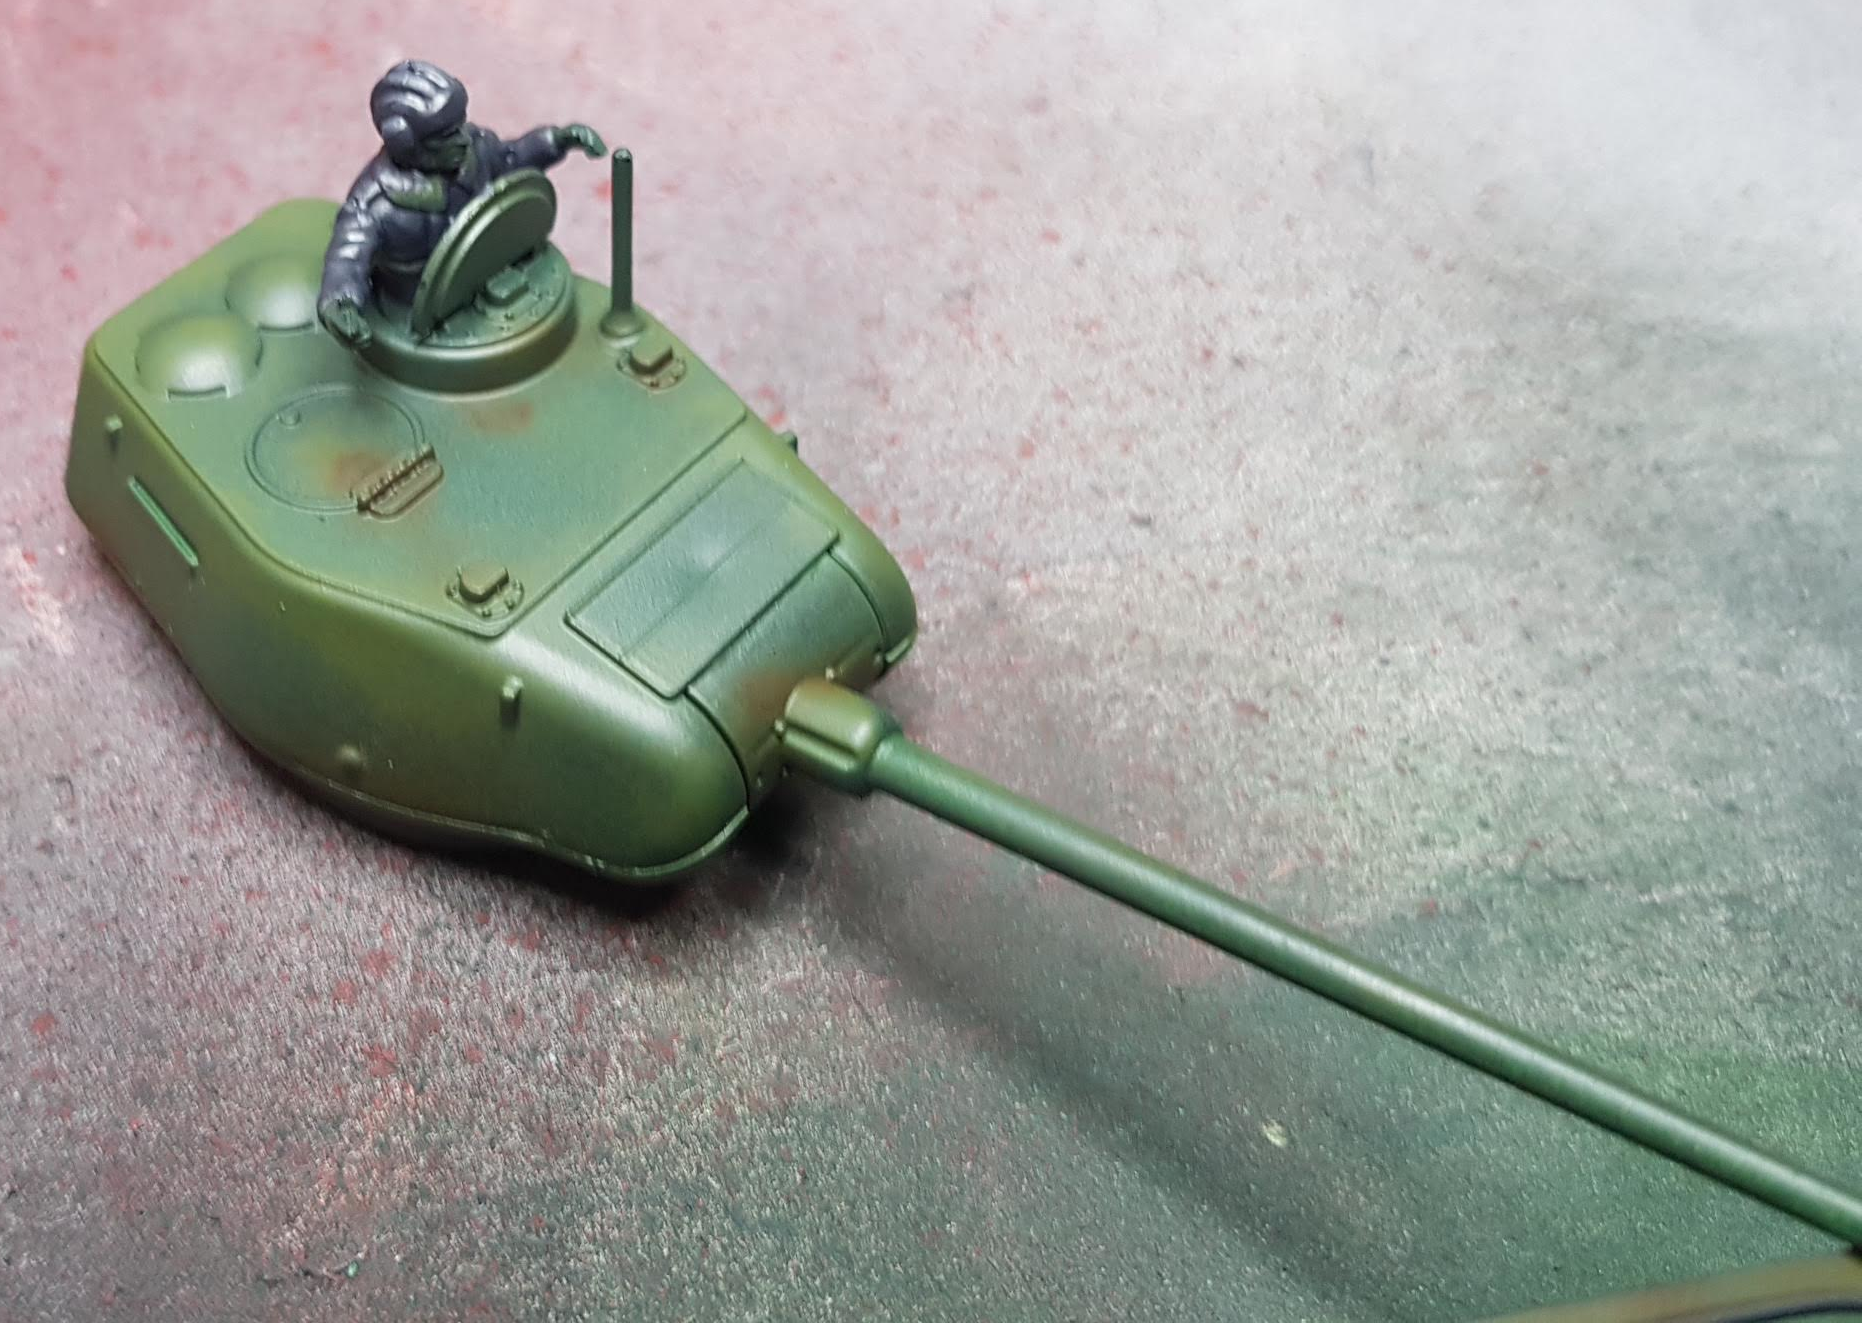
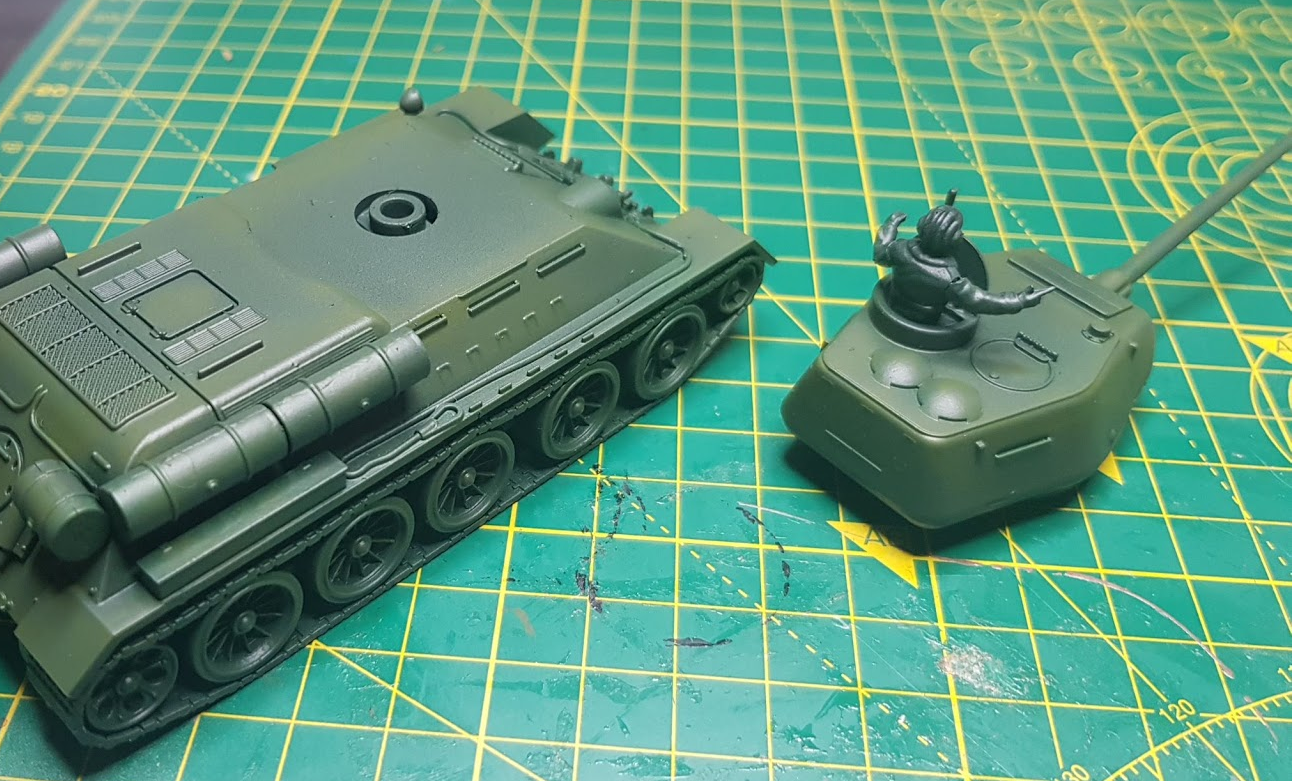
Commander Detail
Finishing off the work on the commander. For the uniform I used the Dark Grey mix I had from before that I used on the tracks and tow cables and just added a couple more drops of black (I got the Everlasting Wet Palette from Kickstarter and it’s awesome). Army Painter Fur Brown on the collar, AP Leather Brown for the belt and AV Flat Flesh for the skin tones.
Did a little bit of wet blending on the uniform while I was at it but didnt bother with any of the rest

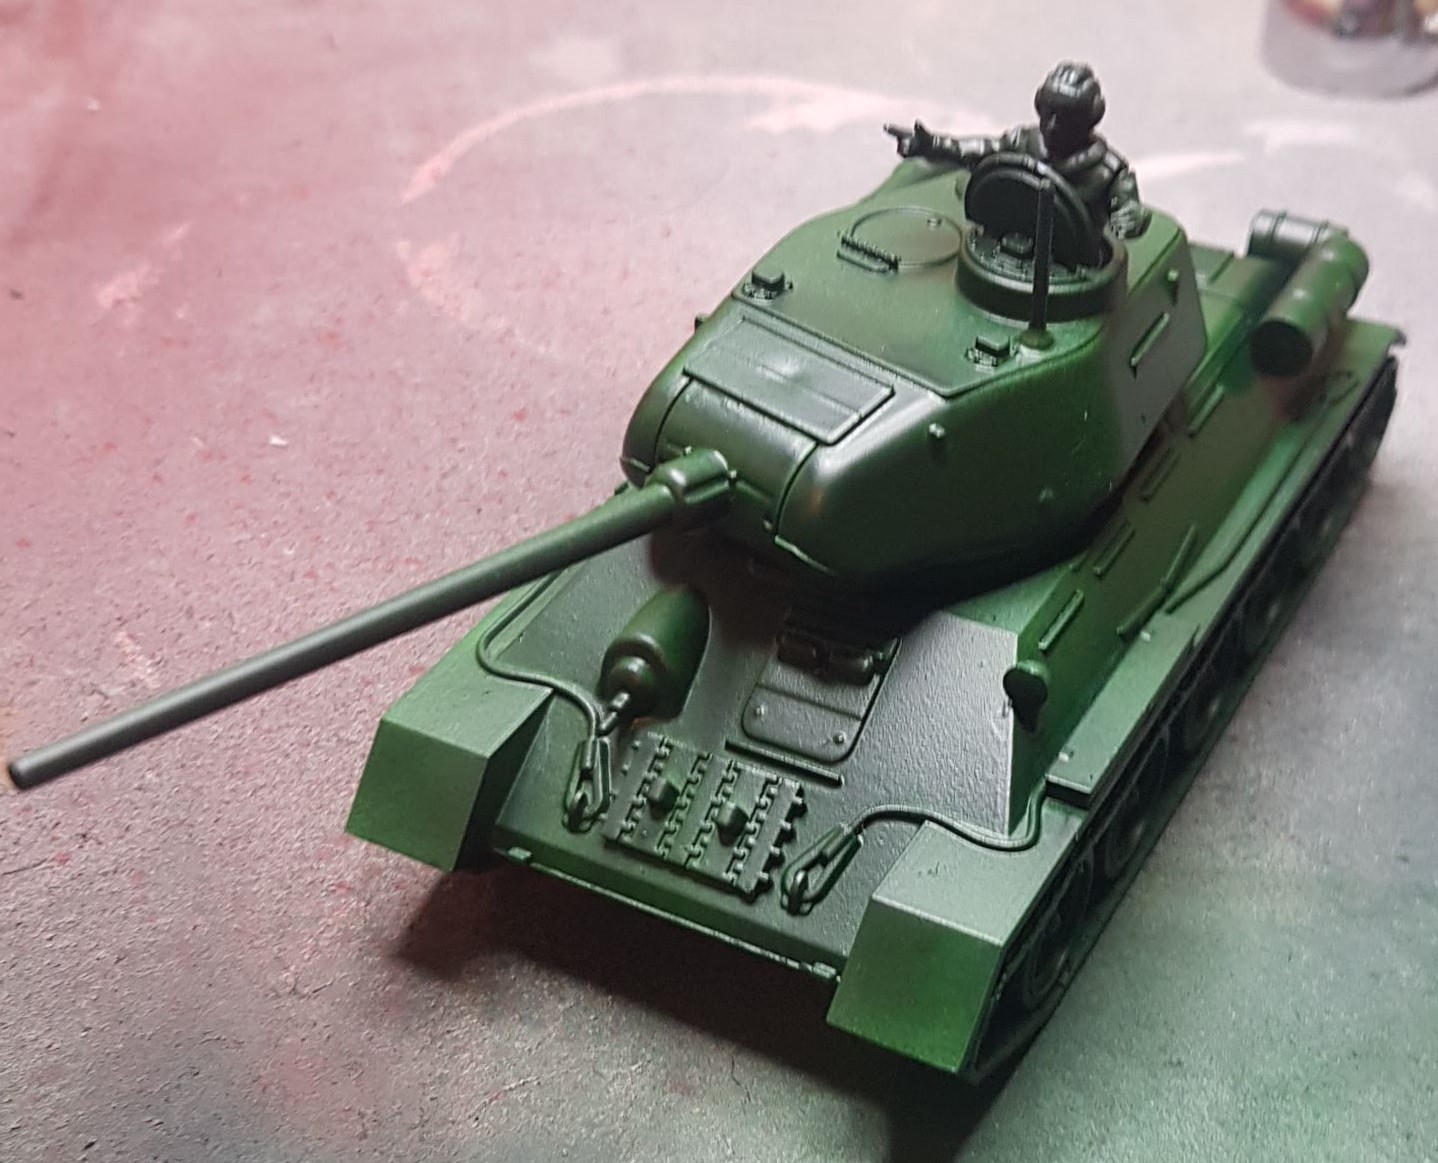
Ok, I’m pretty happy with where I am right now but not sure where to go next with this model – so all advice welcome!!!
Little more weathering
After the first cost had dried I decided it wasn’t quite dark enough. So I went over with another coat of Burnt Umber then to add a bit of contrast did a light coat of model air Mud Brown. A slightly lighter shade
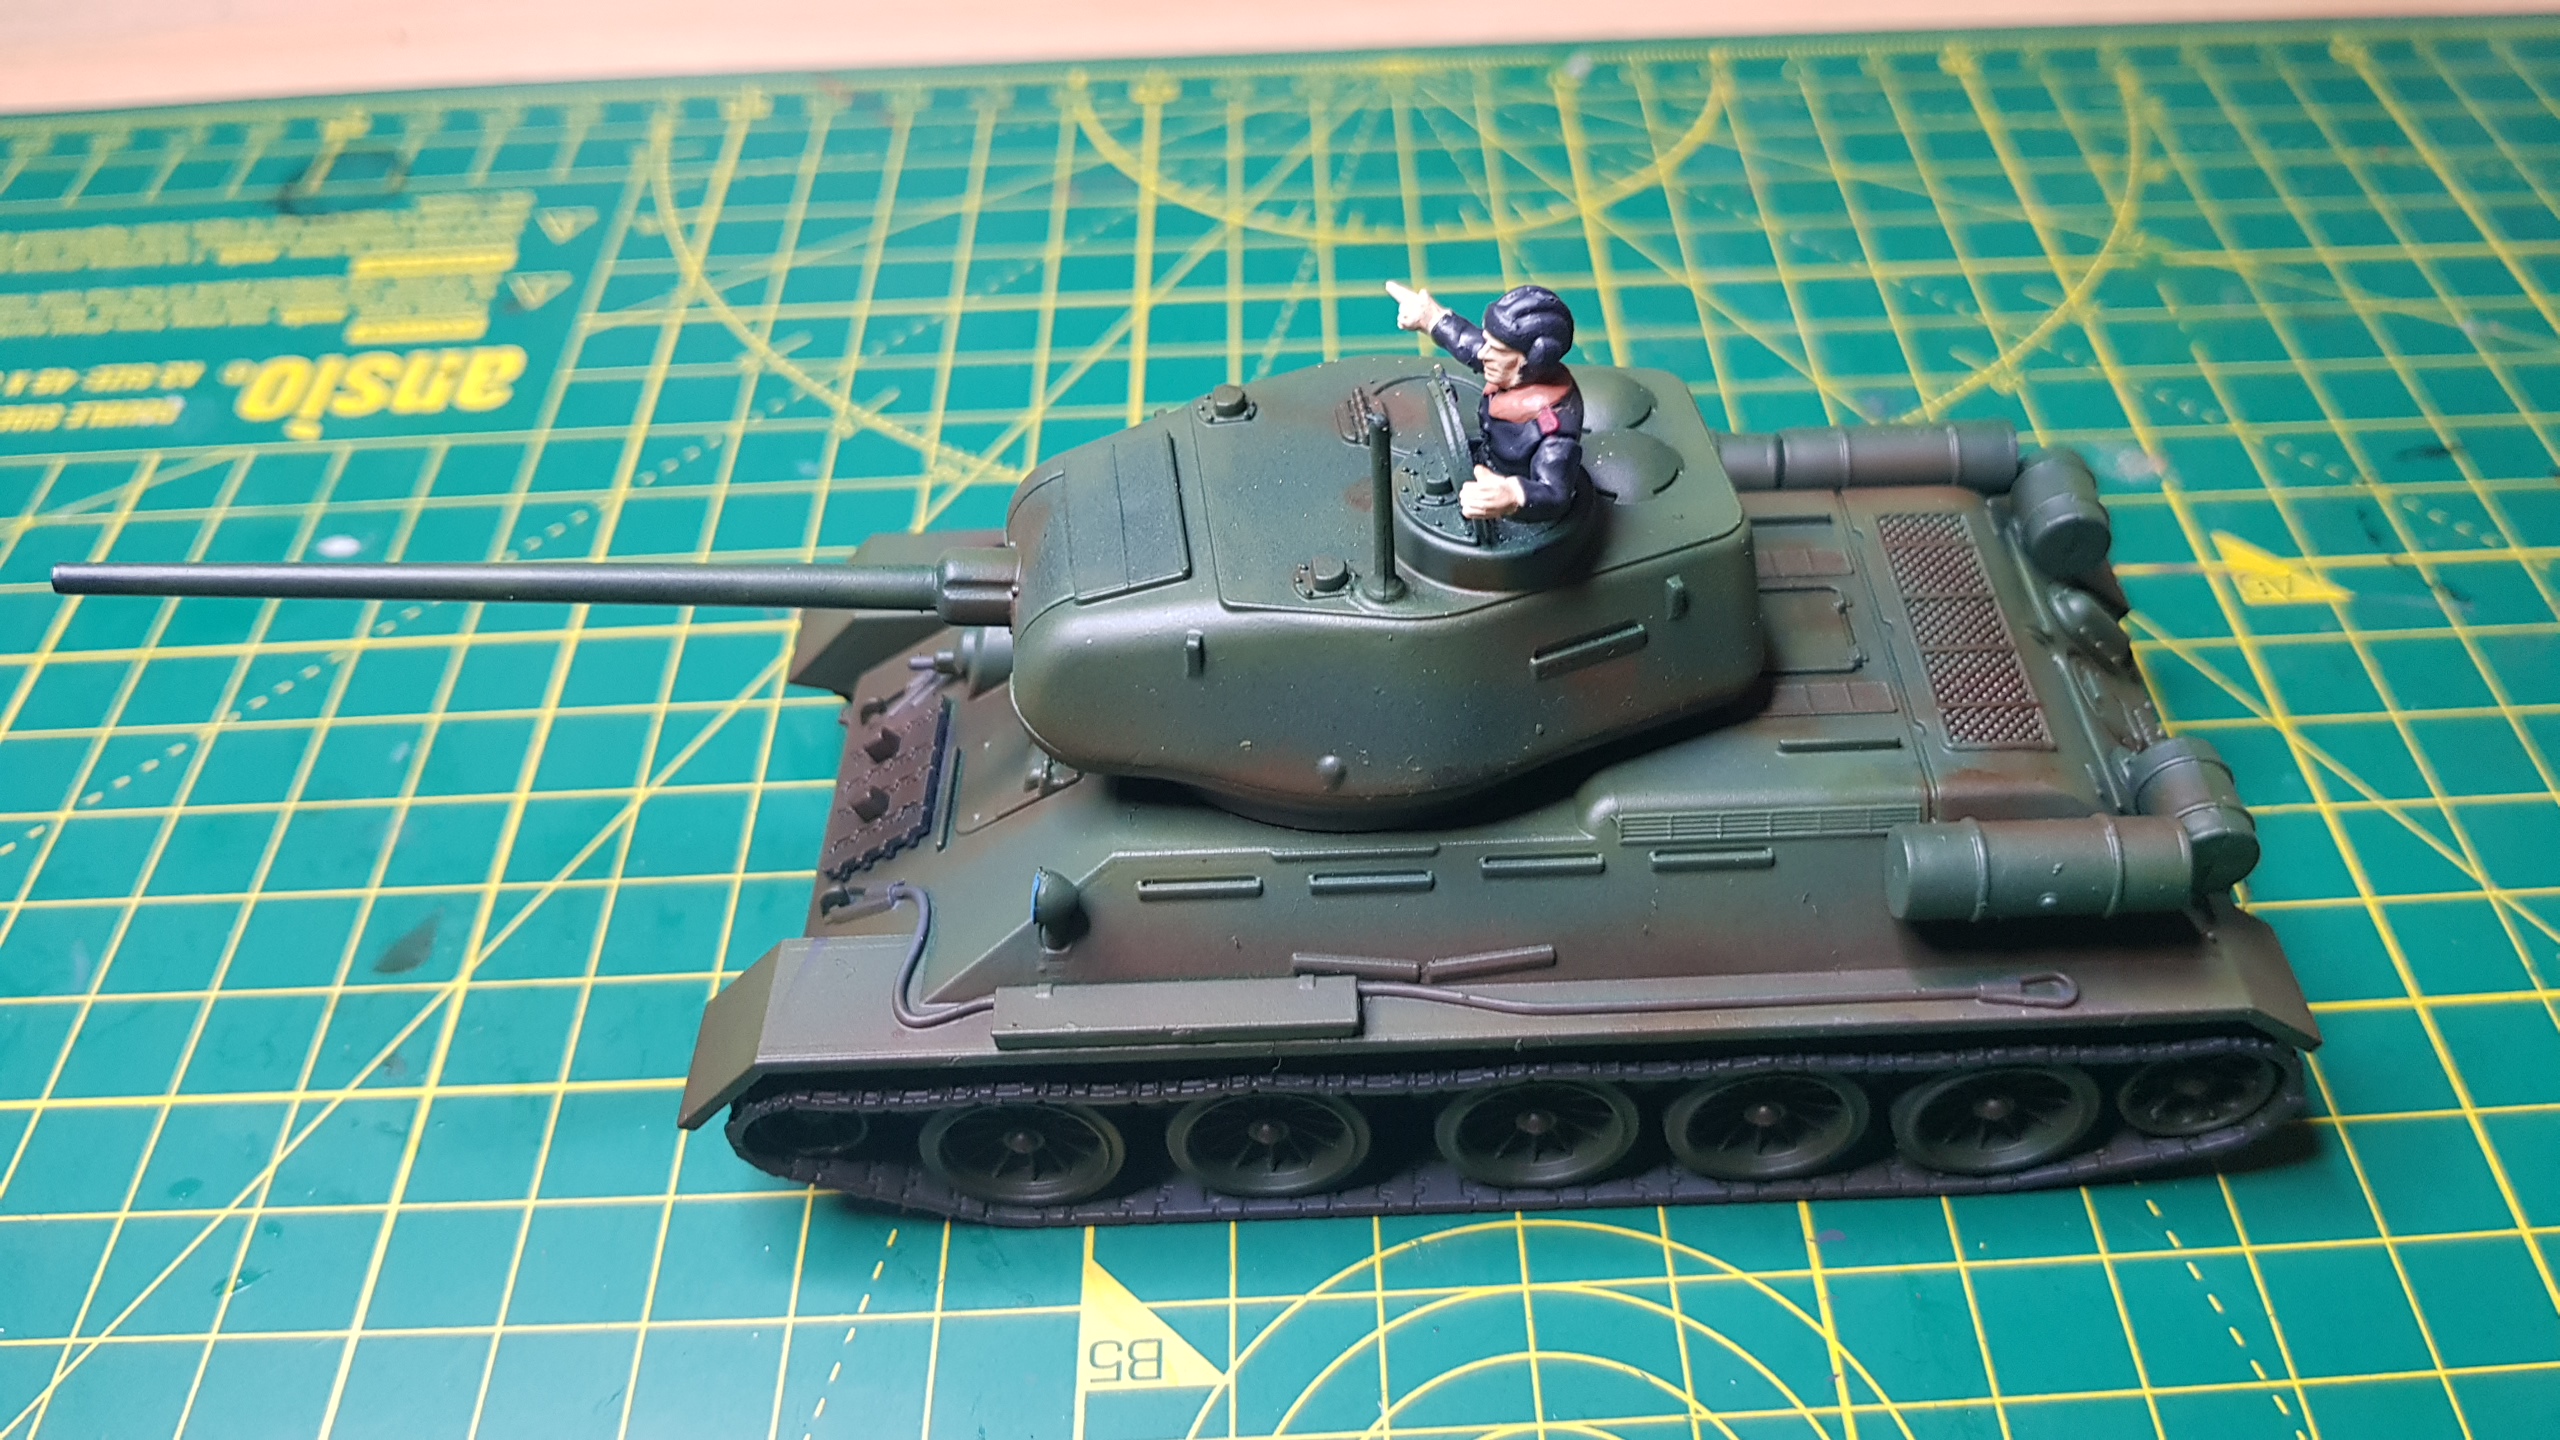 More mud


