


![Alternative Trench Crusade Miniatures? Trench Missionaries Review | Wargames Atlantic [7 Days Early Access]](https://images.beastsofwar.com/2026/03/unboxing-wargames-atlantic-trench-missionaries-coverimage-225-127.jpg)


Solo Wargaming – Example Playthrough (Pic Heavy)


Recommendations: 321
About the Project
Example playthrough of a solo game for illustrative purposes. Best reviewed using the 'View Oldest Entries First' option.
Related Game: Warhammer Fantasy Battles
Related Genre: General
This Project is Completed
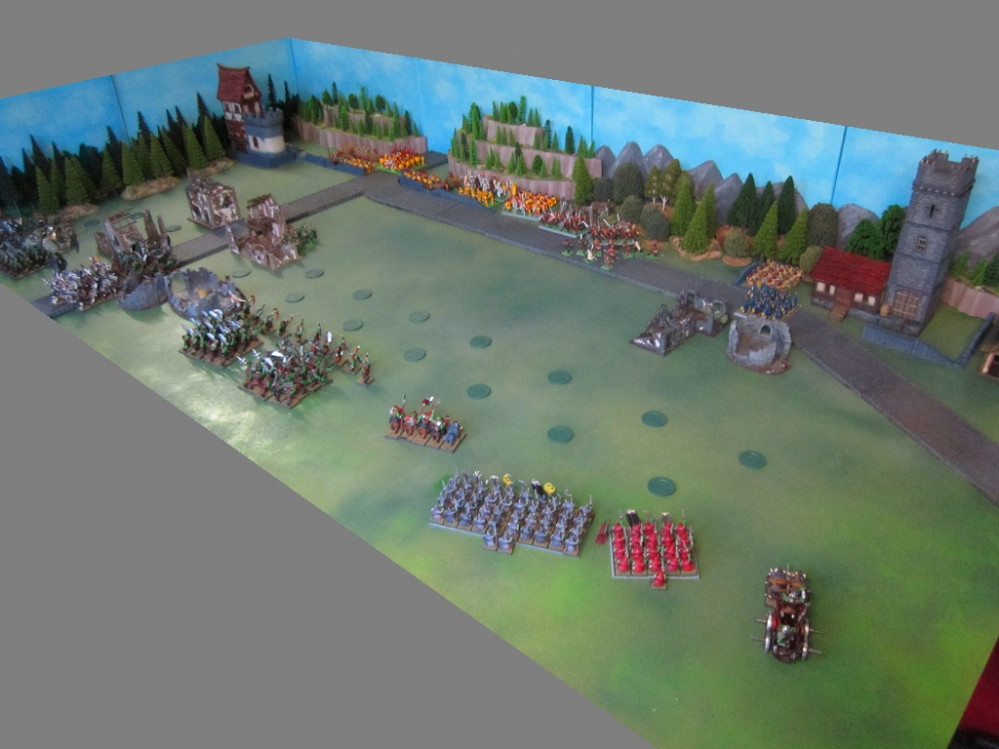
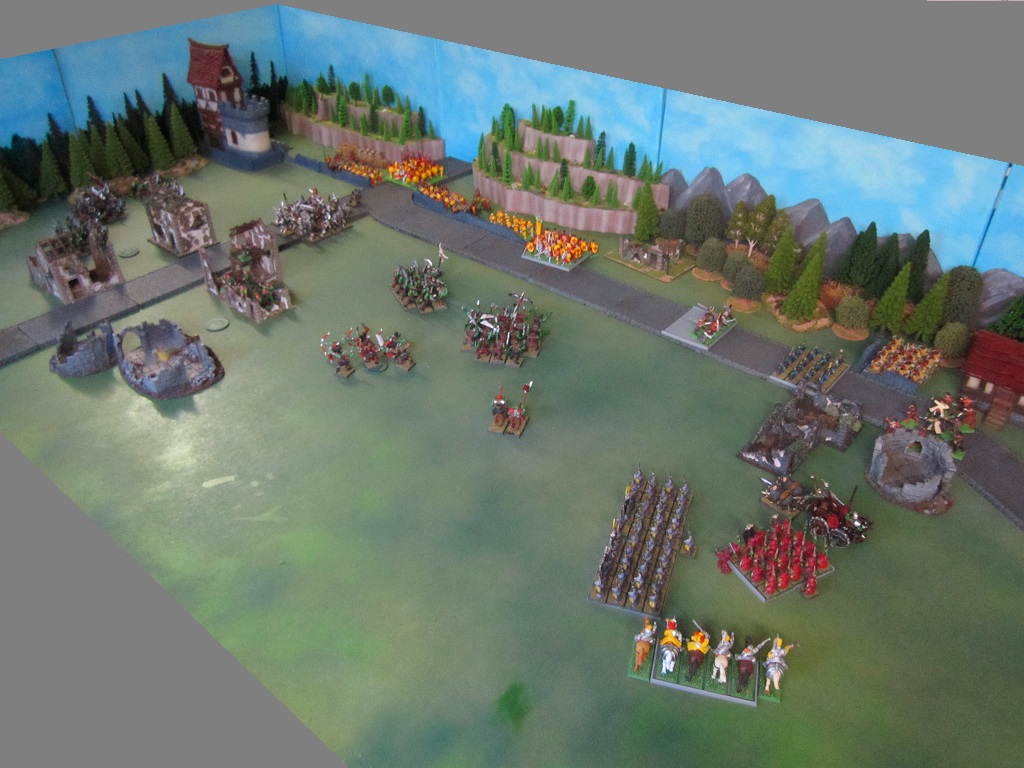
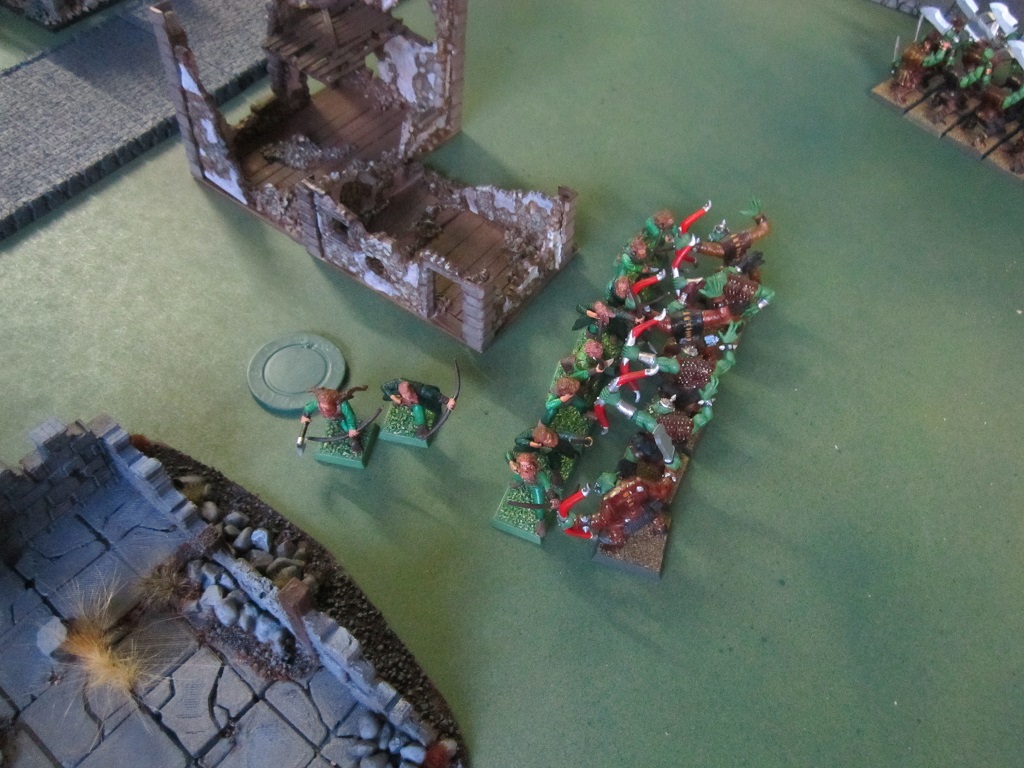
Orcs Turn 3
In the third orc turn the orc units once again advance in accordance with their predetermined strategy. The only exception was the archers on the right flank, who, having screened the infantry blocks up close to the human lines, fell back to harass the huntsmen or pistoliers as the opportunity would present itself.
On the left flank the unit of regular orcs set off a flame trap and failed their leadership check after suffering injuries, consequently having their movement penalised. The remainder of the left flank continued to try and make up ground lost due to earlier delays.
In the centre the giant stepped off the road (it did not want to become a target for overreaching cannon balls fired through other units). The handful of savage orcs on the road pressed forward in a frenzy, and the warlord’s personal unit of black orcs advanced to within striking distance of the human lines.
To the right the orc infantry advanced on the swordsmen, the two remaining boar boys moved forward and the goblins reformed to face the pistoliers. Failed animosity checks left the goblins outside the guard tower unable to respond to the archers advance.
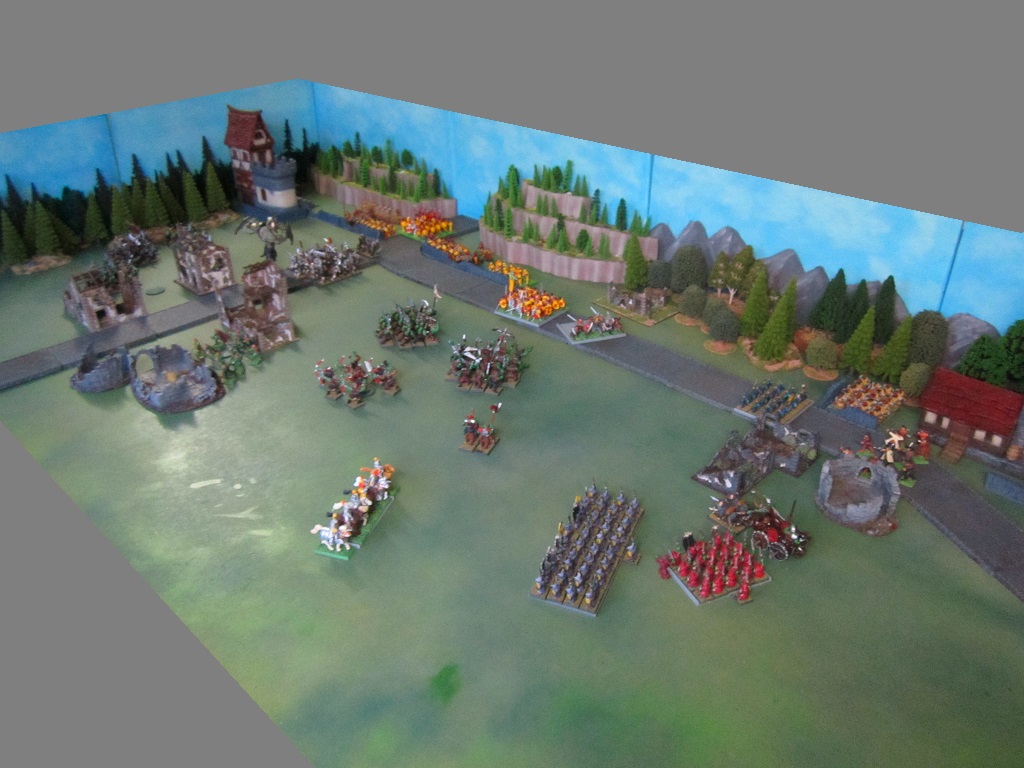
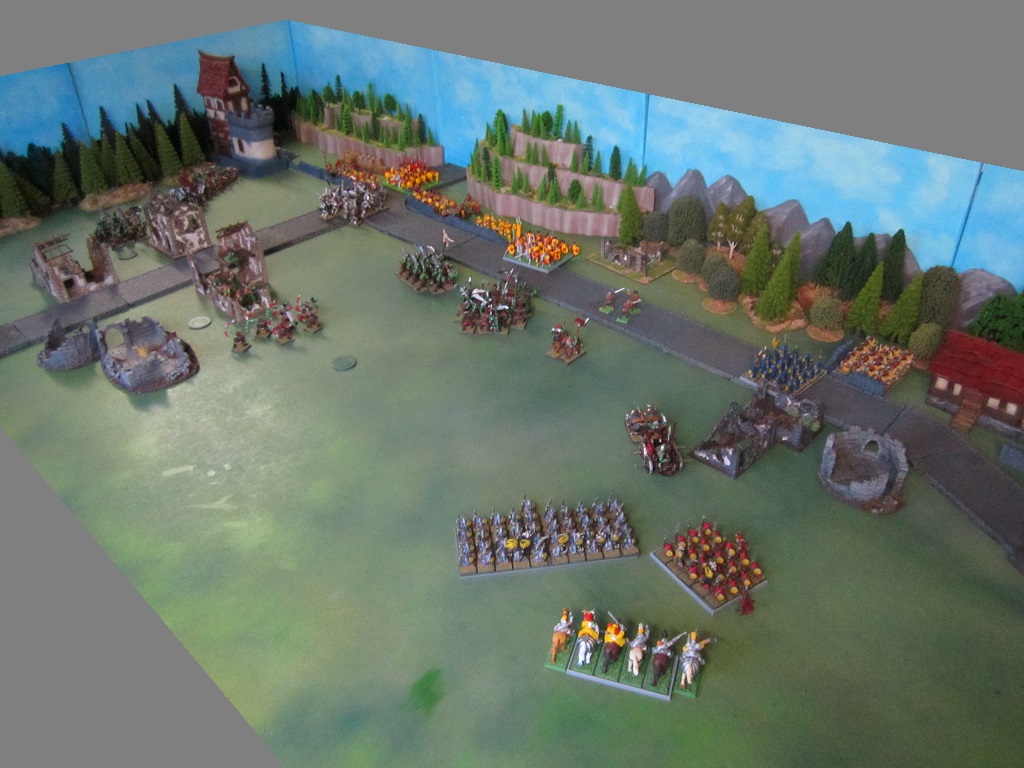
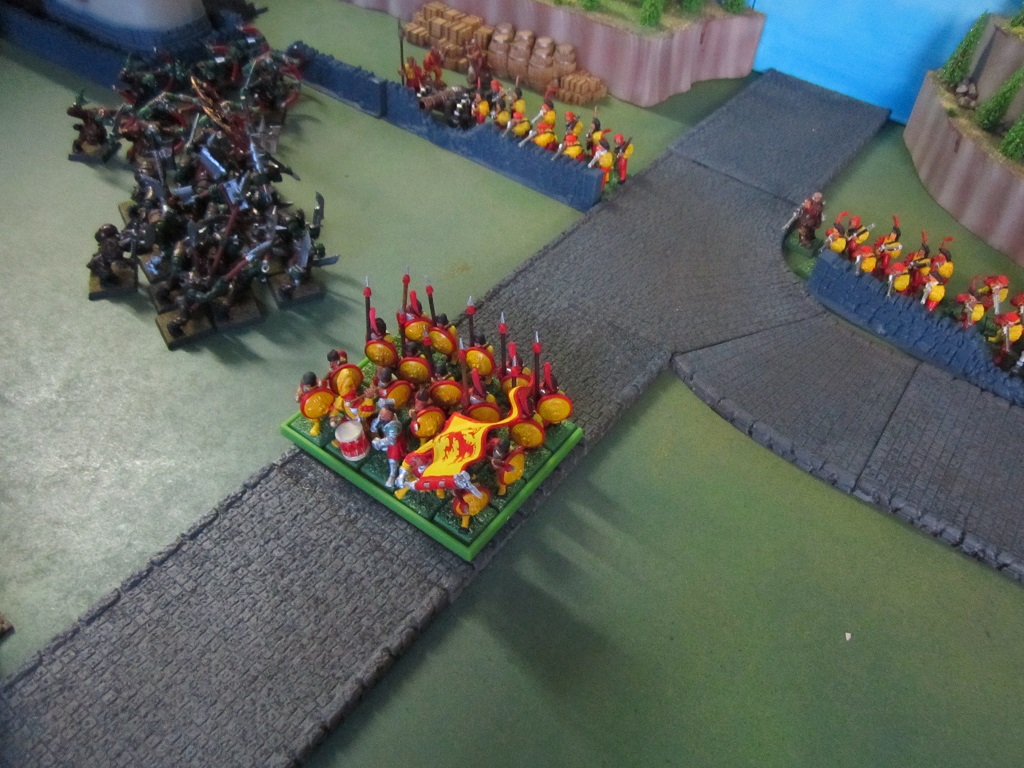
Humans Turn 4
While the first three rounds of shooting had cumulatively been quite effective, and the animosity and traps had held up the advance of the orcs left flank, the orc line was about to hit. This would effectively be the last turn for directed fire or any manoeuvering of the main line prior to combat commencing in earnest. The fusilier detachment once again stood firm, it’s combined fire finally felling the giant and killing all but one of the savage orcs on the road.
The huntsmen, now threatened by the advance of the orc archers, moved back into the ruins and fired on their adversaries. The remaining free company, being cut down by arrow fire where they stood, made the bold determination to attempt to charge the unit of blue goblin spearmen and set off toward the guard tower rather than face certain death by goblin arrow. The archers, at the tower door, began forcing entry into the tower.
The pistoliers moved to outflank the goblin reinforcements, a situation that would tie up both elements of the armies in a stalemate for the remainder of the game. The swordsmen, faced with the threat of two advancing infantry blocks, had a difficult decision to make.
Solo Wargaming Decision Analysis
The commander of the human reinforcing company, bunkered within his unit of swordsmen, has a decision to make. His is the only unit in the human force that can absorb the charge of an orc unit, but he is presently facing two. If he charges the orc boys (on the left of screen), and fails to break and rout the unit in a single round, then the frenzied savage orcs (on the right) will pile in to the flank of his unit in the next round and likely destroy it utterly. Conversely, if he charges the savage orcs, the standard orcs will run into the other flank of his unit in the next turn. If he charges either and does win combat (he is likely to win given he will be charging, has a larger number of models and more ranks than either of the opposing units which have both sustained casualties form shooting and traps to this point) and pursues and overruns the enemy unit, that would leave the left flank of the human lines undefended against the advancing orc right flank (that chariot has been lumbering slowly forward all game but it’s close to having it’s moment…).
Based on analysis of the available options, the human commander decides to fall back and receive the charge next round. As it turns out this course of action allows the crossbowmen to his right to fire at the unit of orcs in front of them, inflicting heavy casualties.
Orcs Turn 4
In truly heroic and noble fashion, the lone savage orc on the road charges the fusiliers in a frenzied rage. And is promptly skewered on a pike… However with the way clear the black orcs march right up to the fusiliers, leaving it in no way uncertain what was in store for them next round.
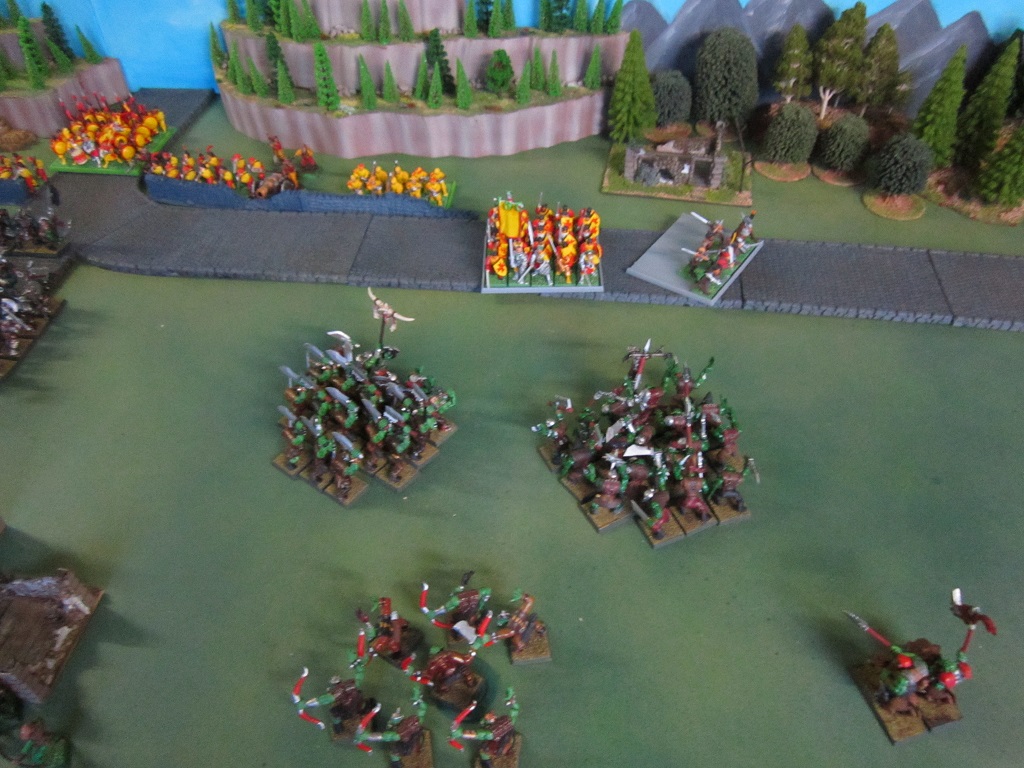
The left flank began to gel, with the archers forming up to allow space for the other infantry units to sweep around. on the far right the goblins continued to dance with the pistoliers. the chariot continued to rumble forward. The archers in the centre moved on the concealed huntsmen, loosing arrows as they advanced. The goblin archers fired on their only viable target, the advancing free company, and shot them to ribbons.
Humans Turn 5
In turn 5 the archers succeed in lighting the signal fire, alerting the nearby populace to the presence of the orc raiders.
Both cannons fire canister into the unit of black orcs, with all other available supporting fire opening up point blank in an abhorrent display of shooting superiority. More than half of the elite black orc unit is cut down in one round of shooting. However, the survivors, keen to extract revenge, stand firm.
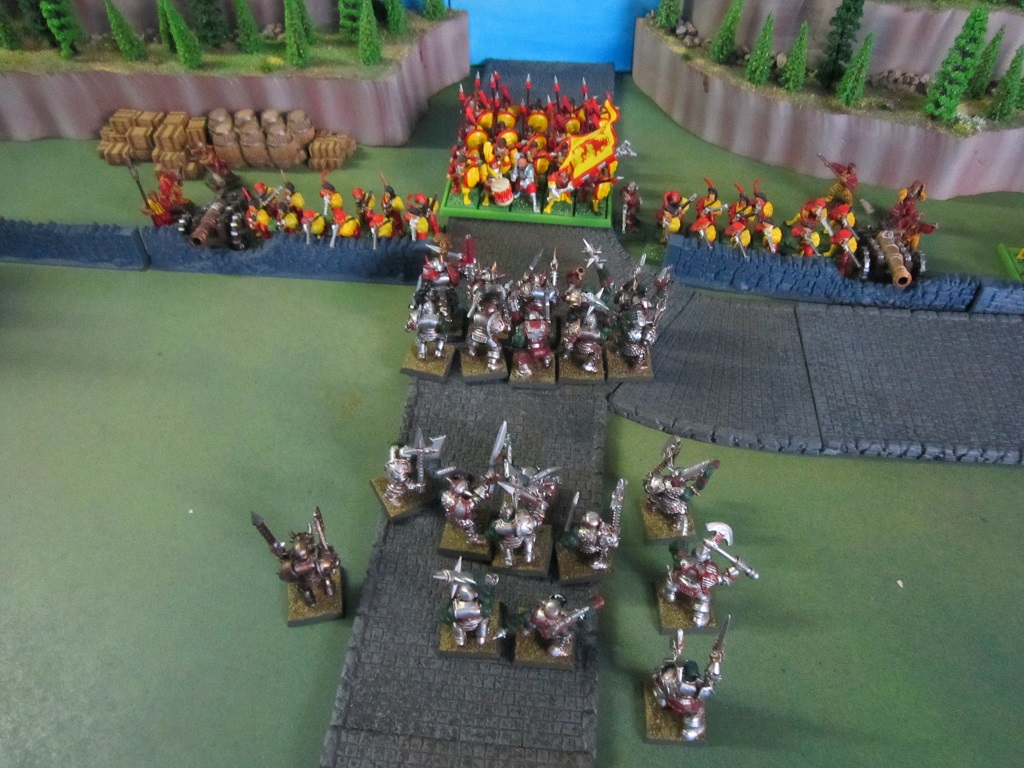
Finally, in the centre of the table, the Huntsmen’s discipline fails them. Seeking revenge for their fallen comrades from the previous evening, they give up their defensive position and charge the orc scouts, losing another two of their number but standing firm for the next round of combat.
Solo Gamer’s Note – This was not called for by the rules but it seemed narratively appropriate that I make a leadership check at this juncture given these units had squared off in the scouting encounter the previous evening. With the huntsman rolling above their leadership score of 7, they break form their defensive position and engage the orcs in hand to hand combat. Statistically, it would have been wiser for the scouts to hold the defensive position and force the orcs to try and engage them in hand to hand combat in a situation that favoured them. The dice gods however decreed that it be otherwise…
Orc Turn 5
Combat time. The remaining orc boar boys charge the few remaining free company fighters and run them down. The swordsmen are charged by the large block of savage orcs they were squaring up against last round. The orc unit that had additionally been threatening the swordsmen ends up charging the unit of crossbowmen that was firing on it in the previous round. The understrength black orcs fall upon the spearmen unit from the fusiliers force.
Solo gamers note – these charges were all determined to be the most statistically viable options from the available alternatives.
in the combat phase the swordsmen and crossbowmen survive the initial charge and protracted hand to hand combat ensues. The huntsmen kill and rout the orc archers whom they charged in the previous round. The black orcs and warlord are defeated (surprisingly) by the spearmen for comparatively few casualties. Failing a leadership check to restrain their enthusiasm, the spearmen rush forward to cut down the fleeing survivors, opening a gap in the defensive line.
Humans Turn 6
The victorious spearmen on the road reform to face the left flank of the orc forces. The pistoliers gallop back towards the human lines to lend support.
In the shooting phase the fusiliers inflict heavy shooting casualties on the orc big uns. In the combat phase the crossbowmen and orcs continue a grinding war of attrition with their orc counterparts, with neither side yielding.
Orcs Turn 6 and Remaining Turns
The remnants of the orc left flank are shot down, killed in combat or intercepted by the human spearmen unit, except for the unit of orc scouts that succeeds in weaving between units and disappearing through the mountain pass, killing one of the cannon crews on the way through for good measure.
The orcs in the centre succeed in killing the crossbowmen they were engaged with, the few spent survivors falling on the handgunners and being clubbed down.
The savage orcs are finally killed by the swordsmen, who are then in turn charged and destroyed by the chariot. The chariot overruns into a solid wall and is destroyed utterly in a mass of splintering wood and, one can imagine, maniacally grinning orc charioteer.
The blue goblin spearmen finally get themselves organised and kill all the remaining archers holed up in the tower. At this stage it was pretty much all over bar the counting…
And The Winner Is....
In a points count, the human forces were way ahead at the end of the day. From that perspective then the battle can be considered a human victory.
However, were we looking at the game from the perspective of an on-going campaign, it would be a Pyrrhic victory at best. The remaining human forces (a single cannon, one unit of handgunners, half a unit of spearmen and a light cavalry squad) are not sufficient to hold the pass against further incursions. In fact, had I pressed on for a couple more quick turns the remaining goblin forces would likely have been sufficient to wipe out all the remaining human forces (save perhaps the pistoliers who would be able to outmanoeuvre the infantry, leaving them threatened only by dubious massed goblin archery). The goblin leader would then be free to lead their forces through the mountain and raid with relative impunity.
Any other would-be monstrous warlords in the area could now easily lead their forces through the unprotected pass and on to mayhem. from this perspective then, the outcome loss more like a loss for the human faction.

![StarCraft Tabletop Miniatures Game Pre-Orders Live Now [Updated]](https://images.beastsofwar.com/2026/03/starcraft-tmg-news-cover-600-338.jpg)


![Mounted US Cavalry On Kickstarter For Dead Man’s Hand! [Updated]](https://images.beastsofwar.com/2026/03/us-cavalry-main-600-338.jpg)


![Play WW2 Commando Operations With Butcher & Bolt [Updated]](https://images.beastsofwar.com/2026/03/relaunch-600-338.jpg)


