


![How To Paint Moonstone’s Nanny | Goblin King Games [7 Days Early Access]](https://images.beastsofwar.com/2024/12/3CU-Gobin-King-Games-Moonstone-Shades-Nanny-coverimage-225-127.jpg)


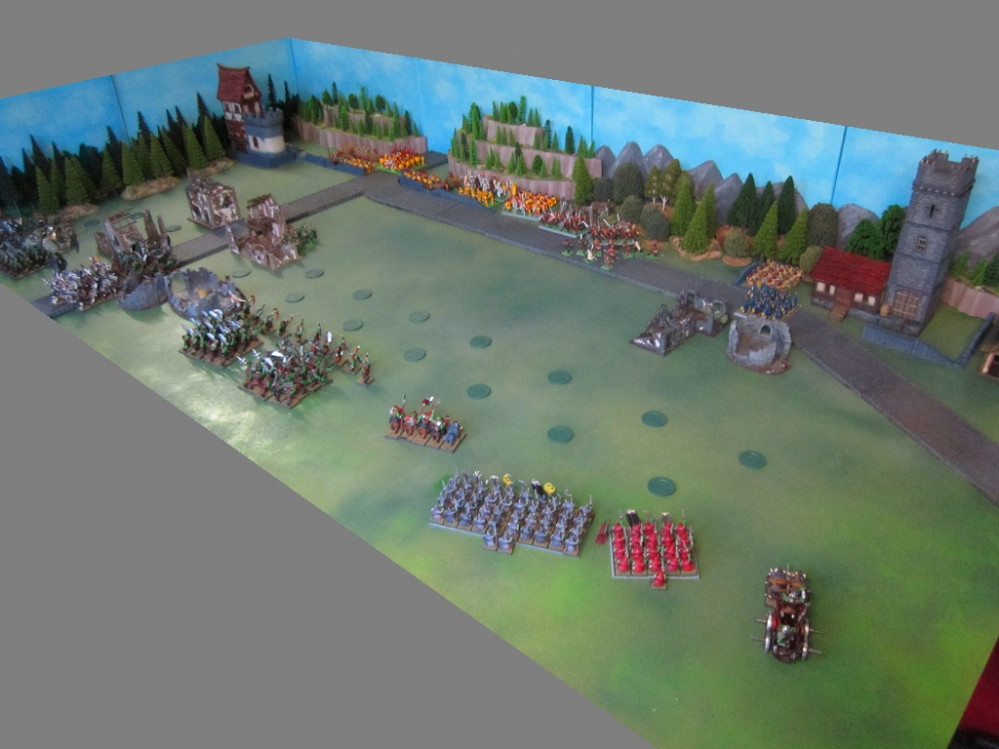
Solo Wargaming - Example Playthrough (Pic Heavy)


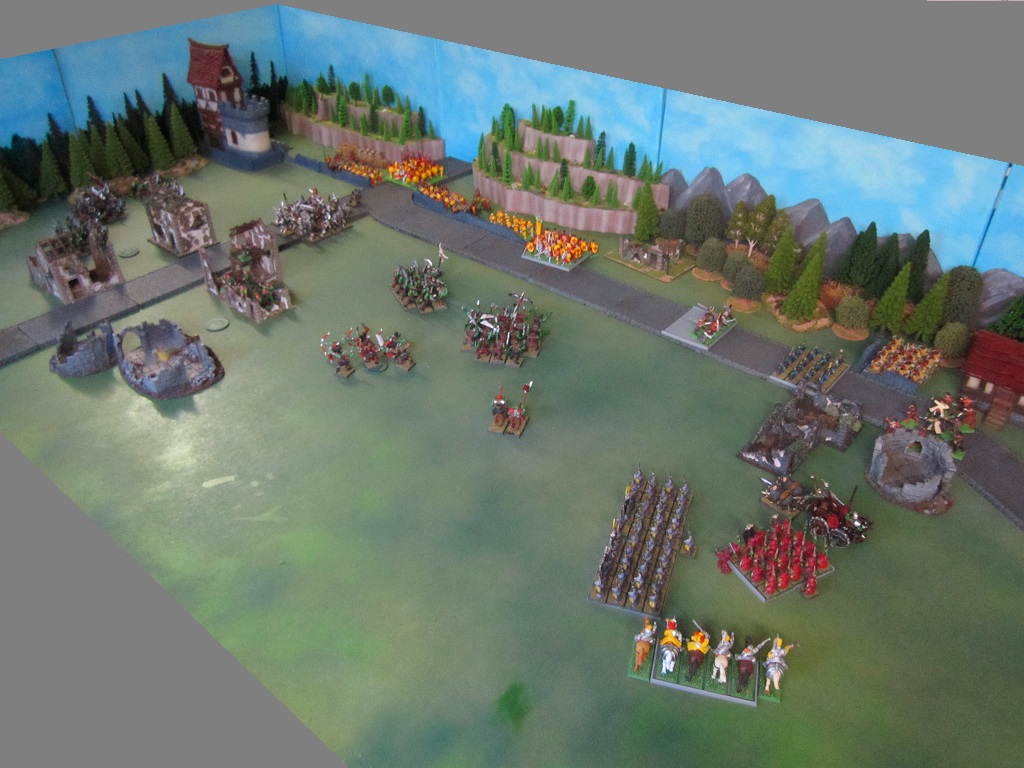
Humans Turn 4
While the first three rounds of shooting had cumulatively been quite effective, and the animosity and traps had held up the advance of the orcs left flank, the orc line was about to hit. This would effectively be the last turn for directed fire or any manoeuvering of the main line prior to combat commencing in earnest. The fusilier detachment once again stood firm, it’s combined fire finally felling the giant and killing all but one of the savage orcs on the road.
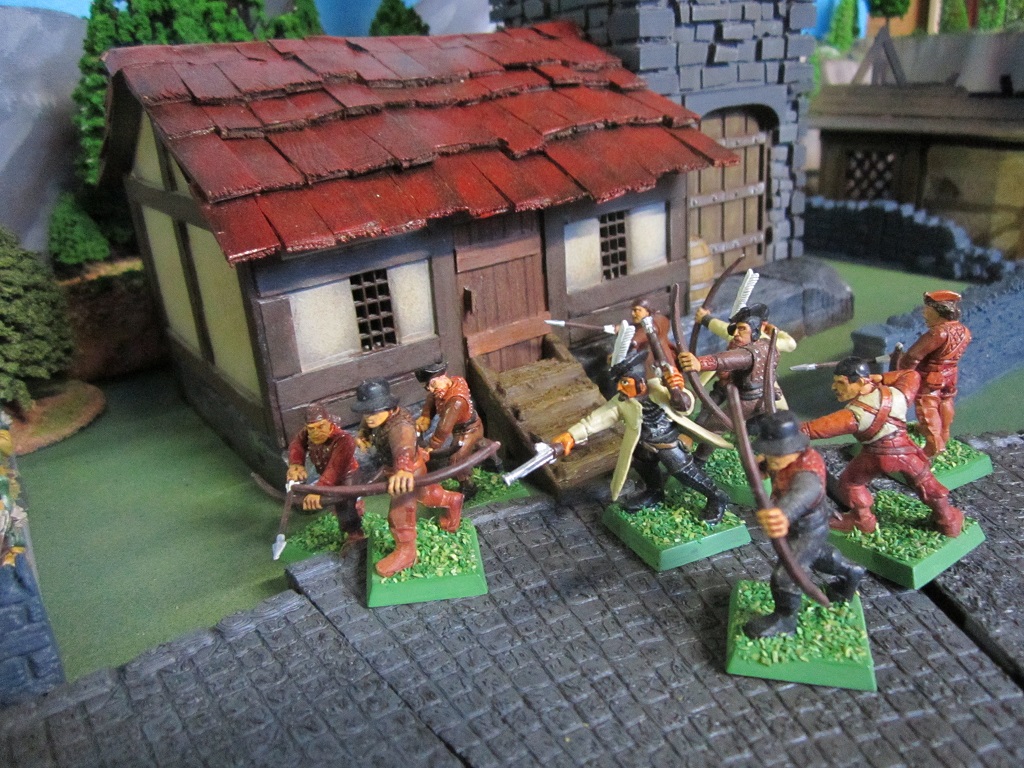
The huntsmen, now threatened by the advance of the orc archers, moved back into the ruins and fired on their adversaries. The remaining free company, being cut down by arrow fire where they stood, made the bold determination to attempt to charge the unit of blue goblin spearmen and set off toward the guard tower rather than face certain death by goblin arrow. The archers, at the tower door, began forcing entry into the tower.
The pistoliers moved to outflank the goblin reinforcements, a situation that would tie up both elements of the armies in a stalemate for the remainder of the game. The swordsmen, faced with the threat of two advancing infantry blocks, had a difficult decision to make.
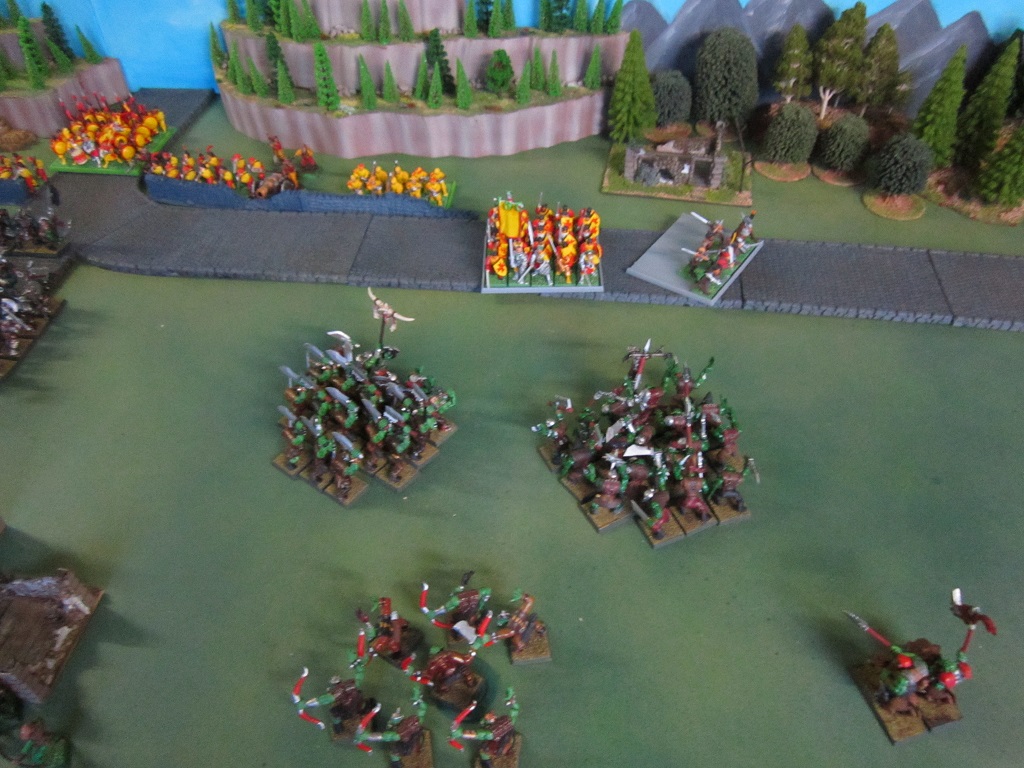
Solo Wargaming Decision Analysis
The commander of the human reinforcing company, bunkered within his unit of swordsmen, has a decision to make. His is the only unit in the human force that can absorb the charge of an orc unit, but he is presently facing two. If he charges the orc boys (on the left of screen), and fails to break and rout the unit in a single round, then the frenzied savage orcs (on the right) will pile in to the flank of his unit in the next round and likely destroy it utterly. Conversely, if he charges the savage orcs, the standard orcs will run into the other flank of his unit in the next turn. If he charges either and does win combat (he is likely to win given he will be charging, has a larger number of models and more ranks than either of the opposing units which have both sustained casualties form shooting and traps to this point) and pursues and overruns the enemy unit, that would leave the left flank of the human lines undefended against the advancing orc right flank (that chariot has been lumbering slowly forward all game but it’s close to having it’s moment…).
Based on analysis of the available options, the human commander decides to fall back and receive the charge next round. As it turns out this course of action allows the crossbowmen to his right to fire at the unit of orcs in front of them, inflicting heavy casualties.


Leave a Reply