

![10mm Medieval Miniatures! Azincourt English Army Review | Wargames Atlantic [7 Days Early Access]](https://images.beastsofwar.com/2026/03/unboxing-wargames-atlantic-azincourt-english-army-coverimage-225-127.jpg)


Foehammer’s 2019 New Year’s Resolution


Recommendations: 305
About the Project
Half way through 2018, after over 10 years in my previous house, my family and I moved to a newer, bigger house, driven mostly by the increasing size of offspring. However, a side effect of moving (particularly packing and unpacking) was the realization of just how much gaming/miniatures stuff I have, particularly of the unpainted variety. Fortunately this pile of hobby stuff didn't significantly increase over the holidays. Thus my mission: New Years Resolution - make a significant dent in my pile of unpainted minis. The reason I chose to do this as a new project is there is going to be no consistent theme to these painting completions. No single game system. No single army. I'm just making it a goal to paint some more of something every day. If I get tired of painting 1 thing, I will jump to another. Some days, I plan to just randomly reach into my pile of stuff, no peaking, pull something out, and paint it. Lets see how it goes.
Related Genre: General
This Project is Active
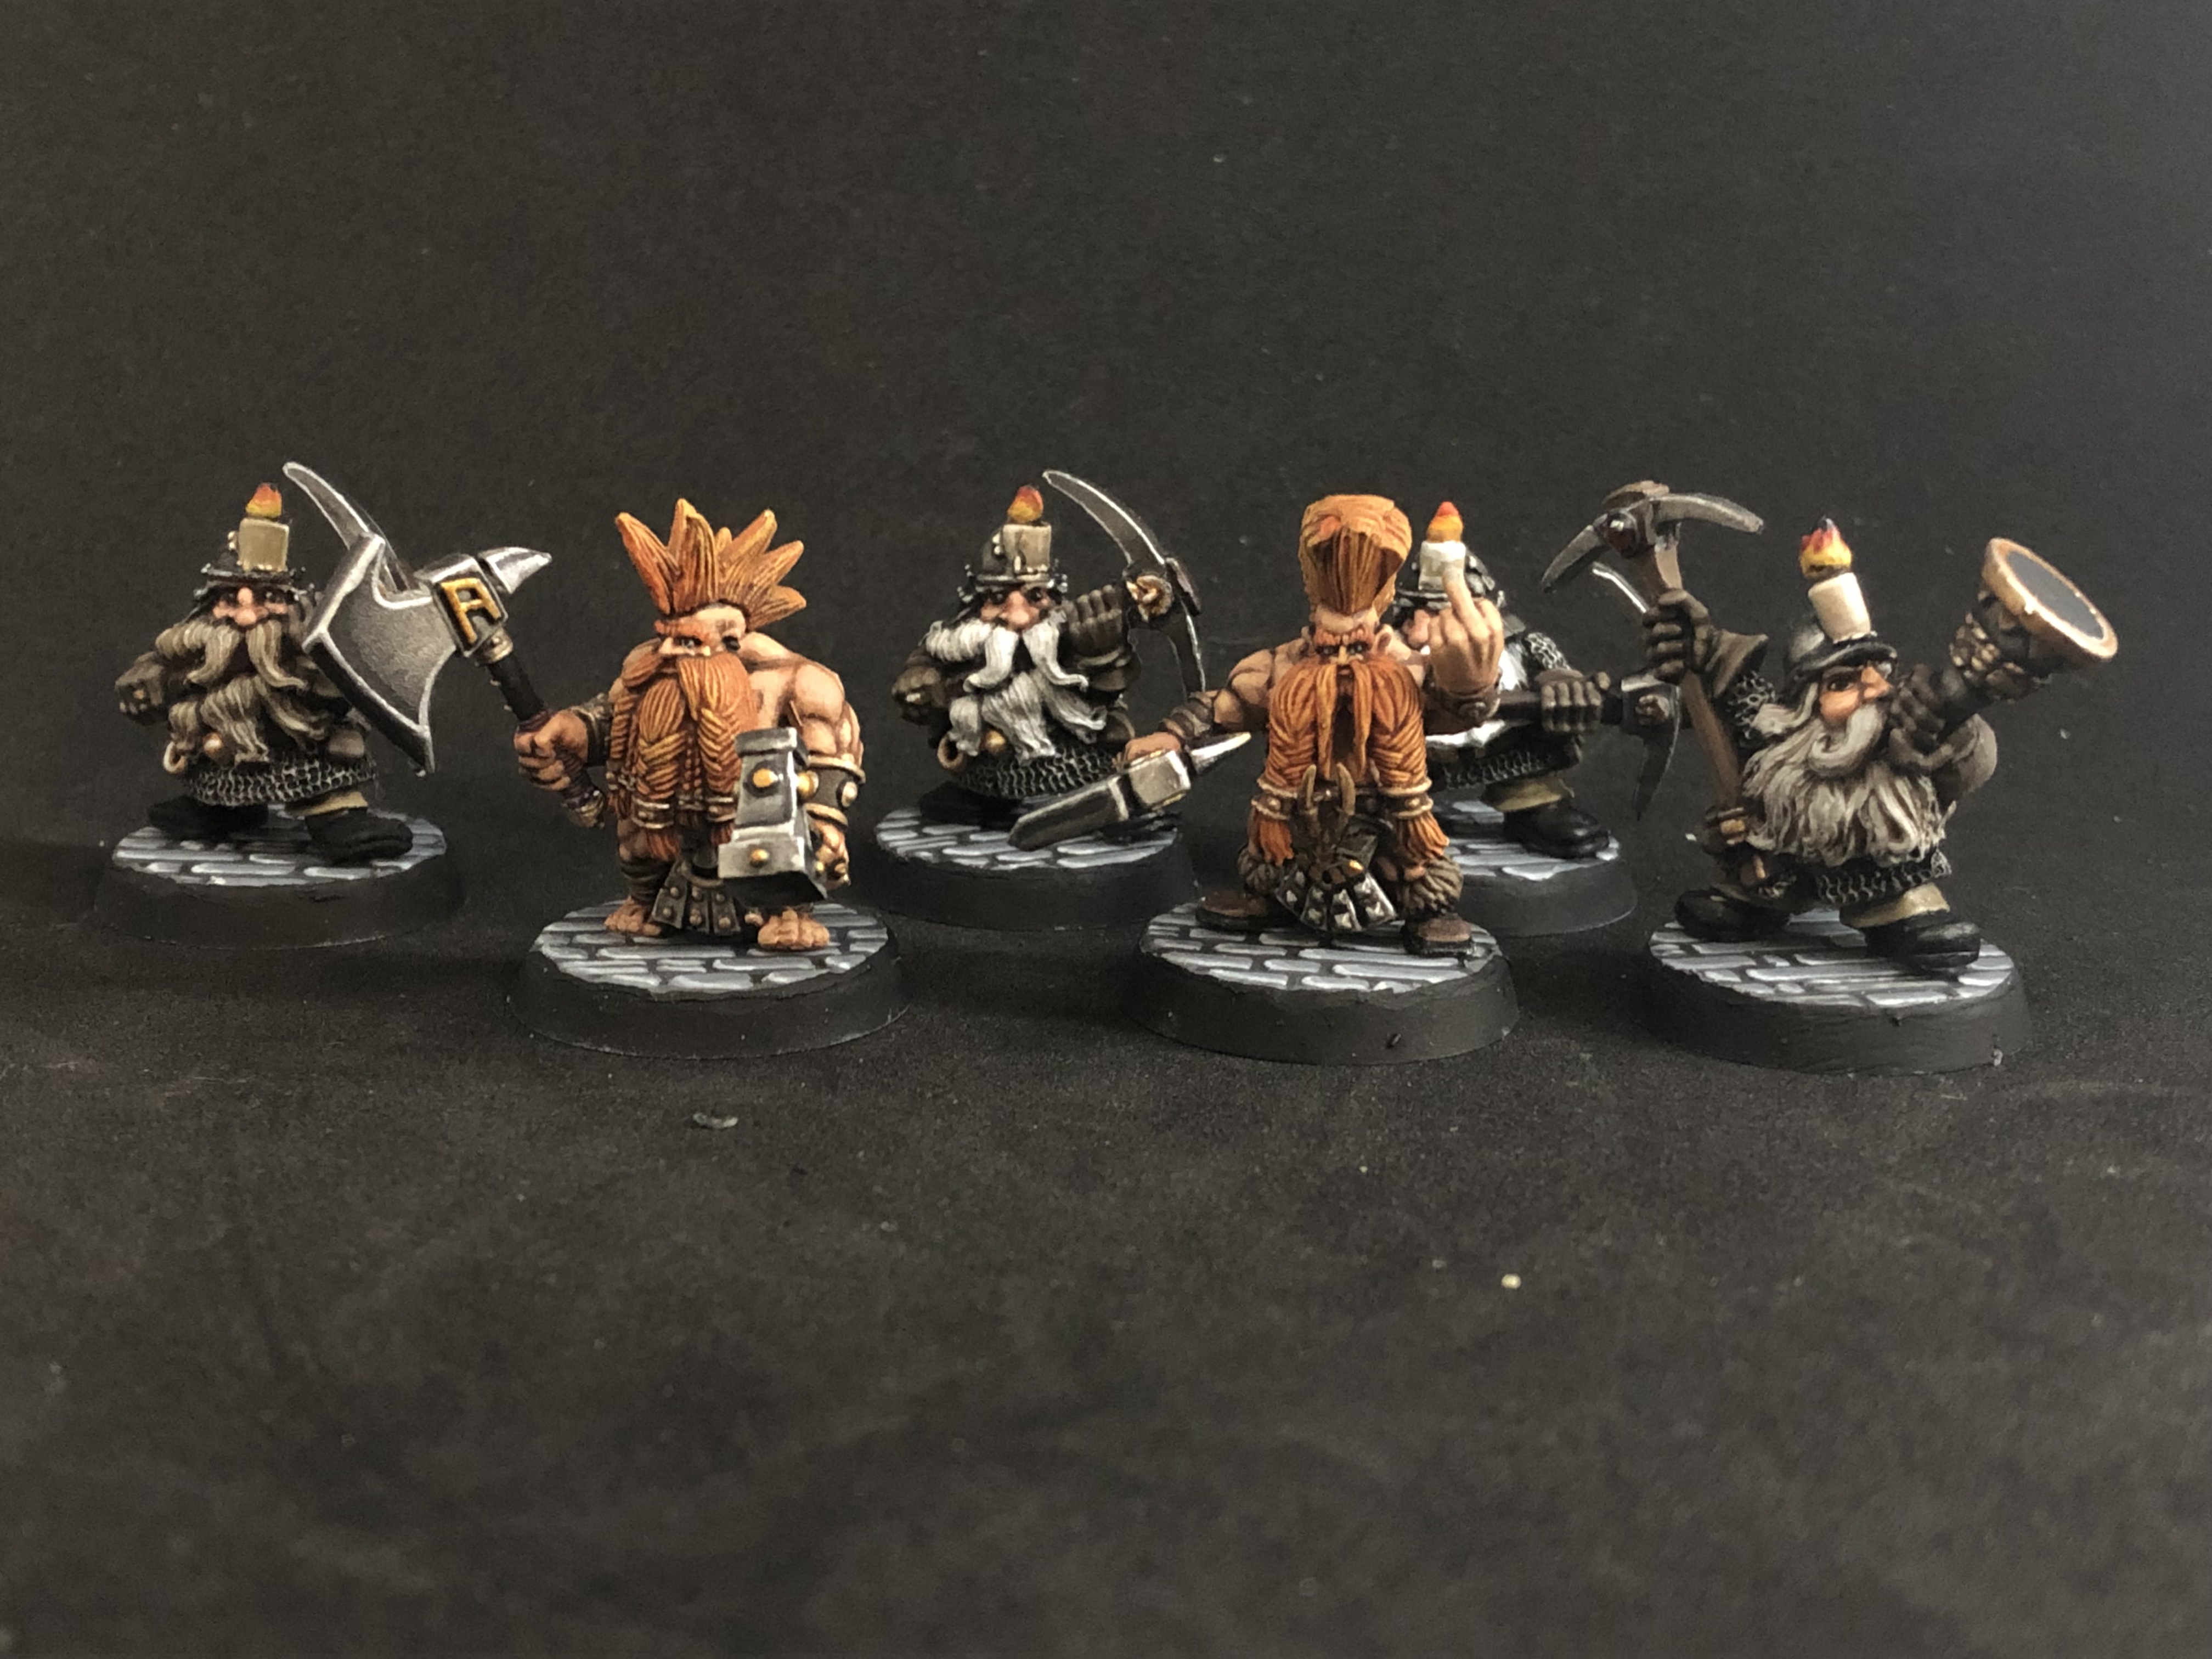
Some more dwarves,
Another really quick update, more dwarves completed/polished for use in Warlords of Erehwon. The miners are old WHFB metals, while the slayers/berserkers are Avatars of War plastics. The AoW guys weapons are a little on the big side, but still look cool.
…particularly the guy giving the single-finger hello (and no that’s not a conversion)
Hoping to get a group shot once I get a few more completed.
 Another 6 done
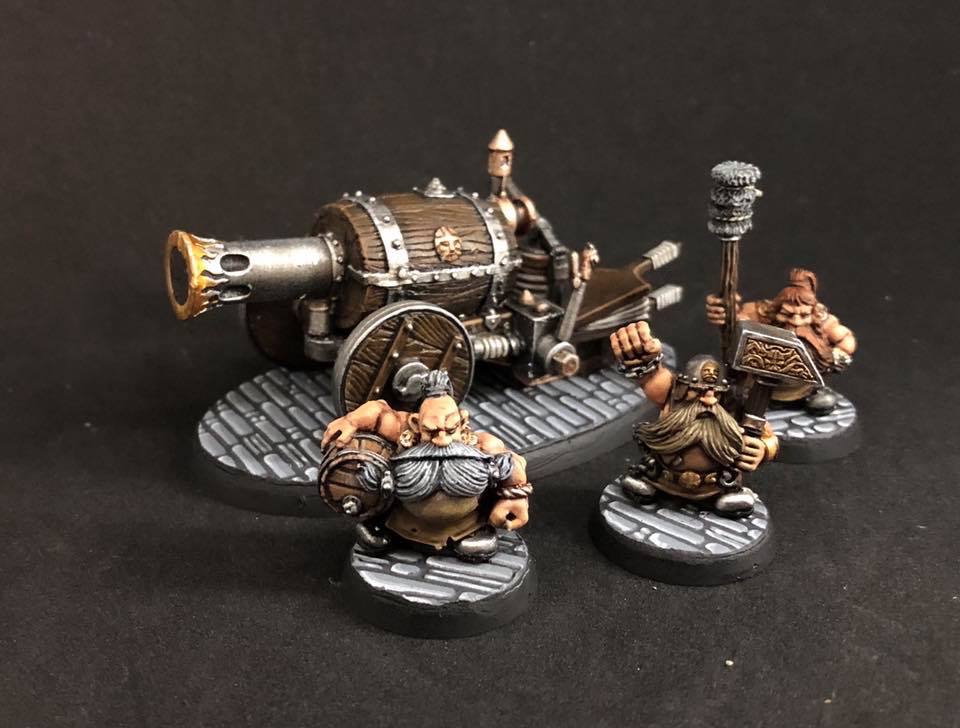
Oldie, but Goodie
While there is no doubt that today’s miniatures are, technically, miles more detailed and advanced than those of even 5 years ago, sometimes there’s something very satisfying about painting up a great hunk of metal. Old-school WHFB Dwarf Flame Cannon.
Painted up for Warlords of Erehwon.
#pinktanksforjohn
@johnlyons
so, after this week’s hobby hangout, I figured I had to pull out an old 40k tank, finish it up, and post it, if only to make John twitch.
Granted I don’t think pink 40k tanks will bother him as much.
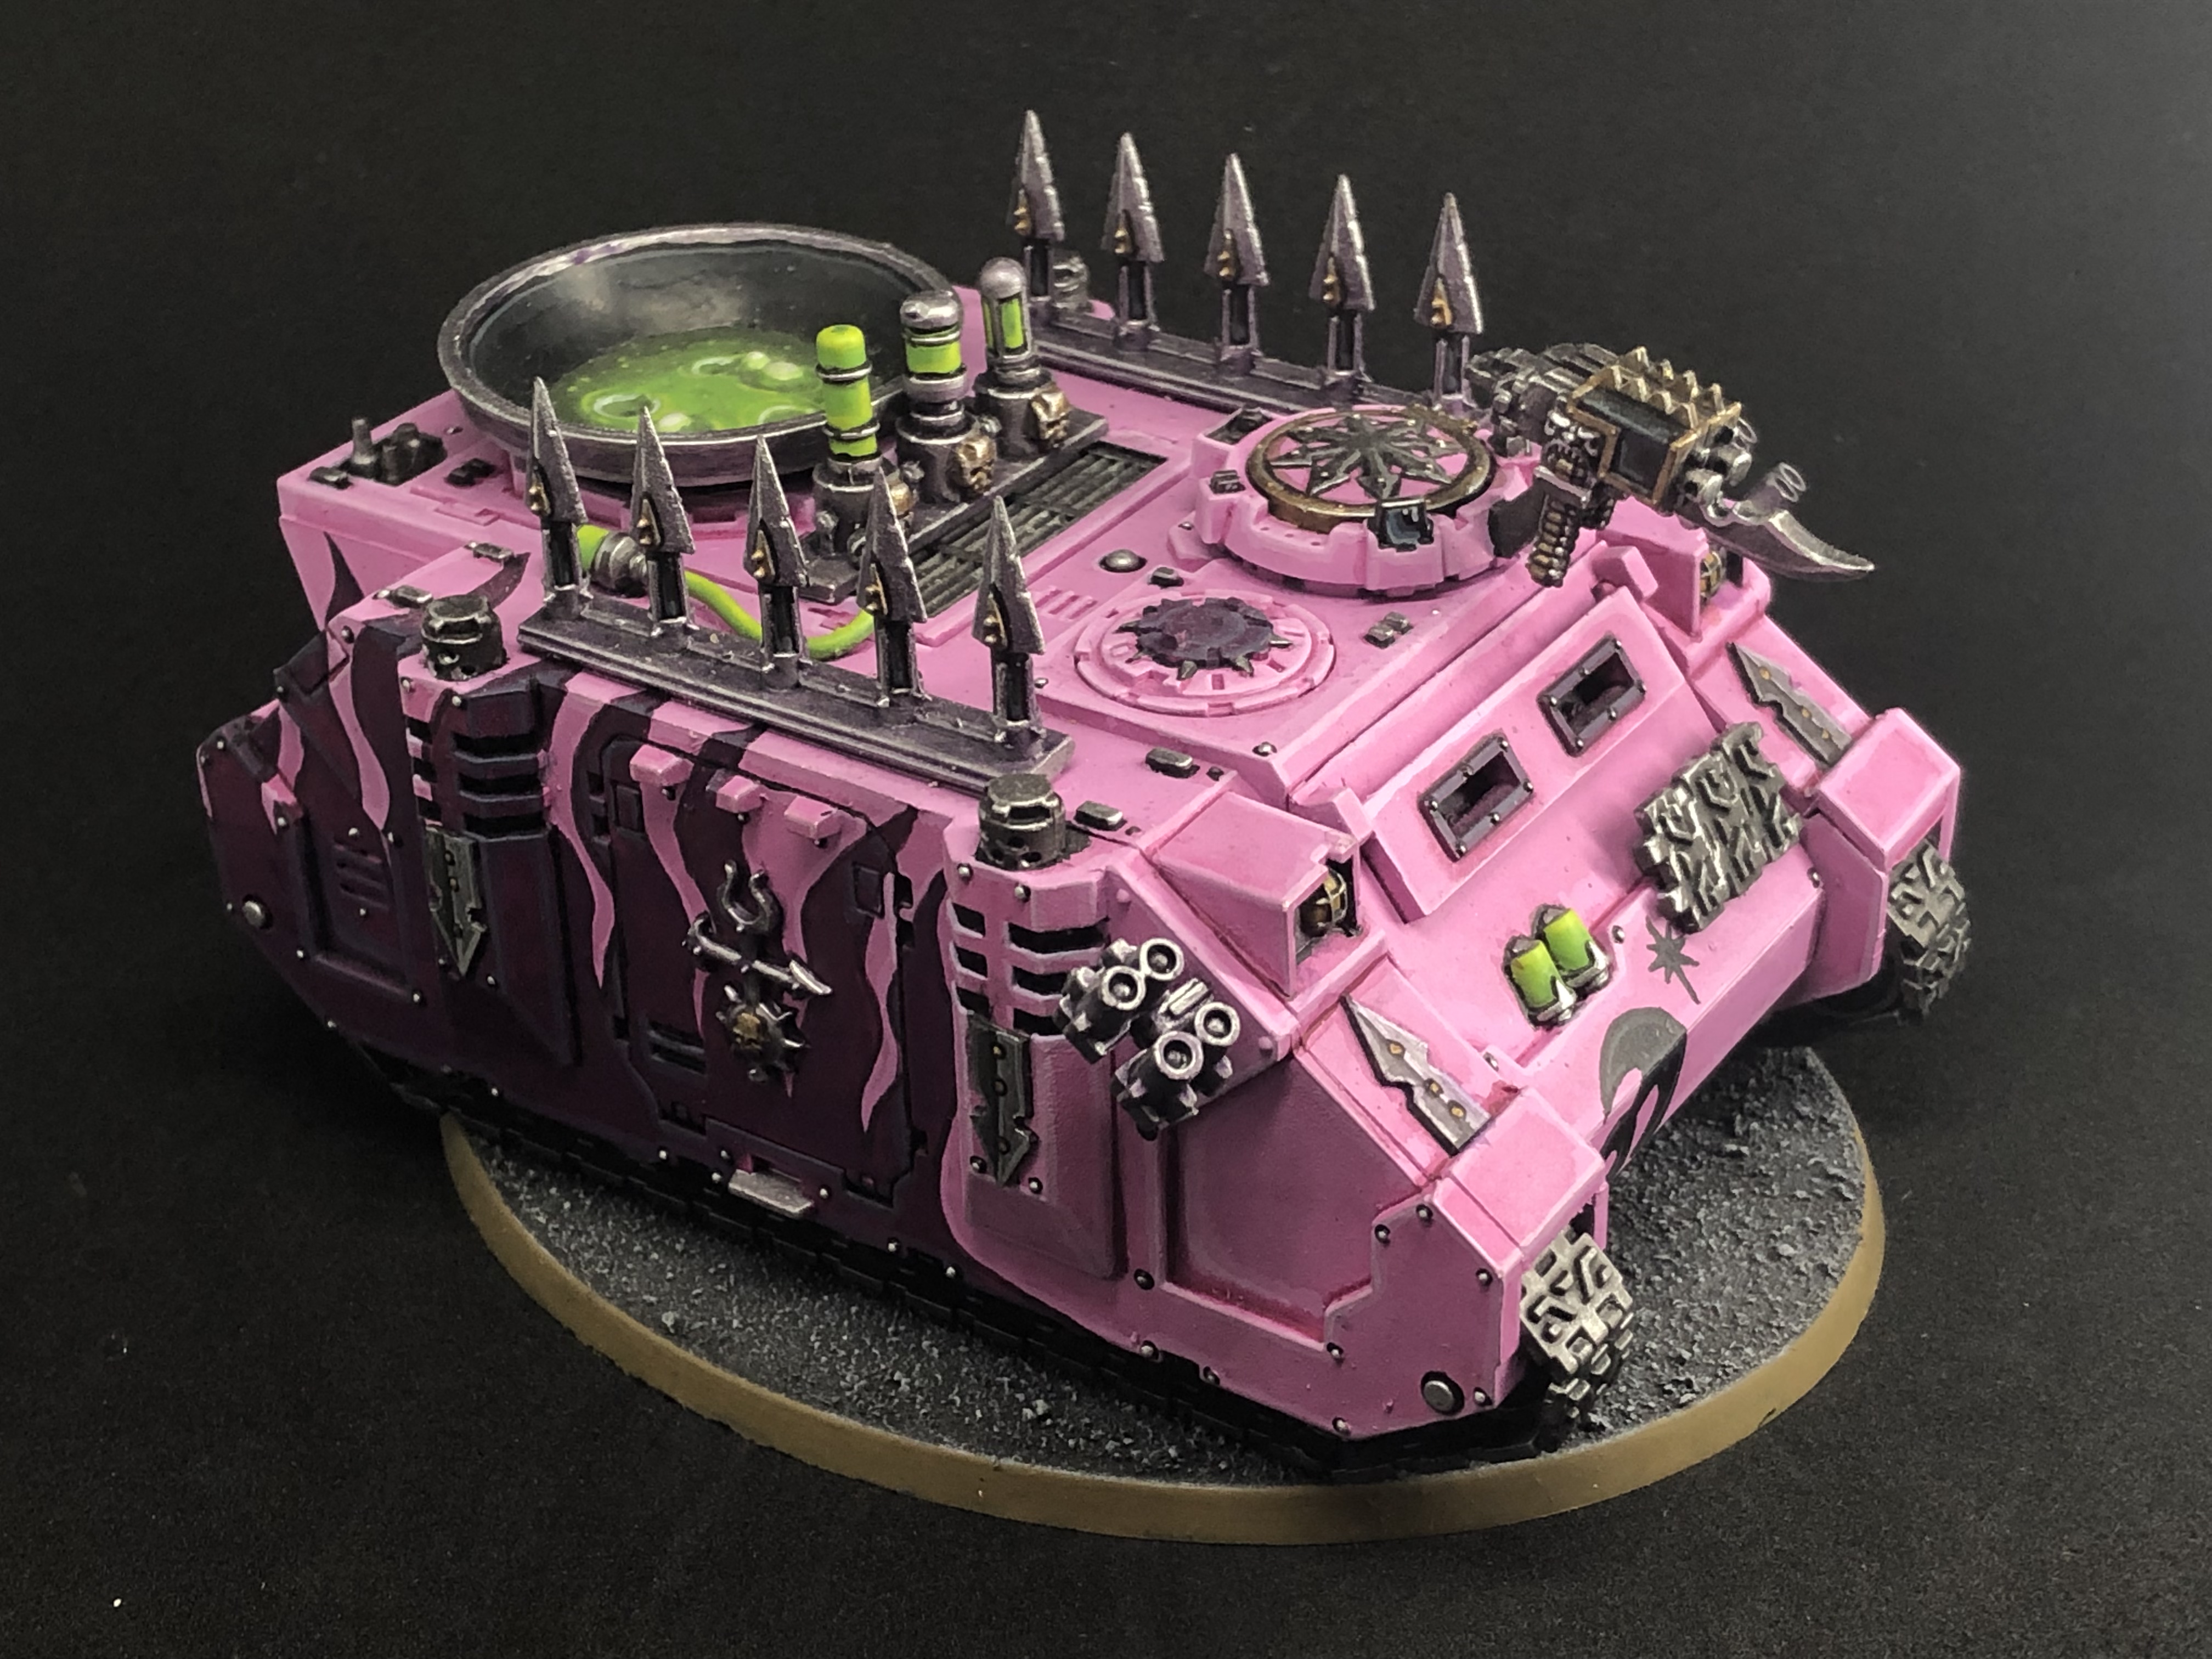 Rhino of the Slanneshi Flawless Host
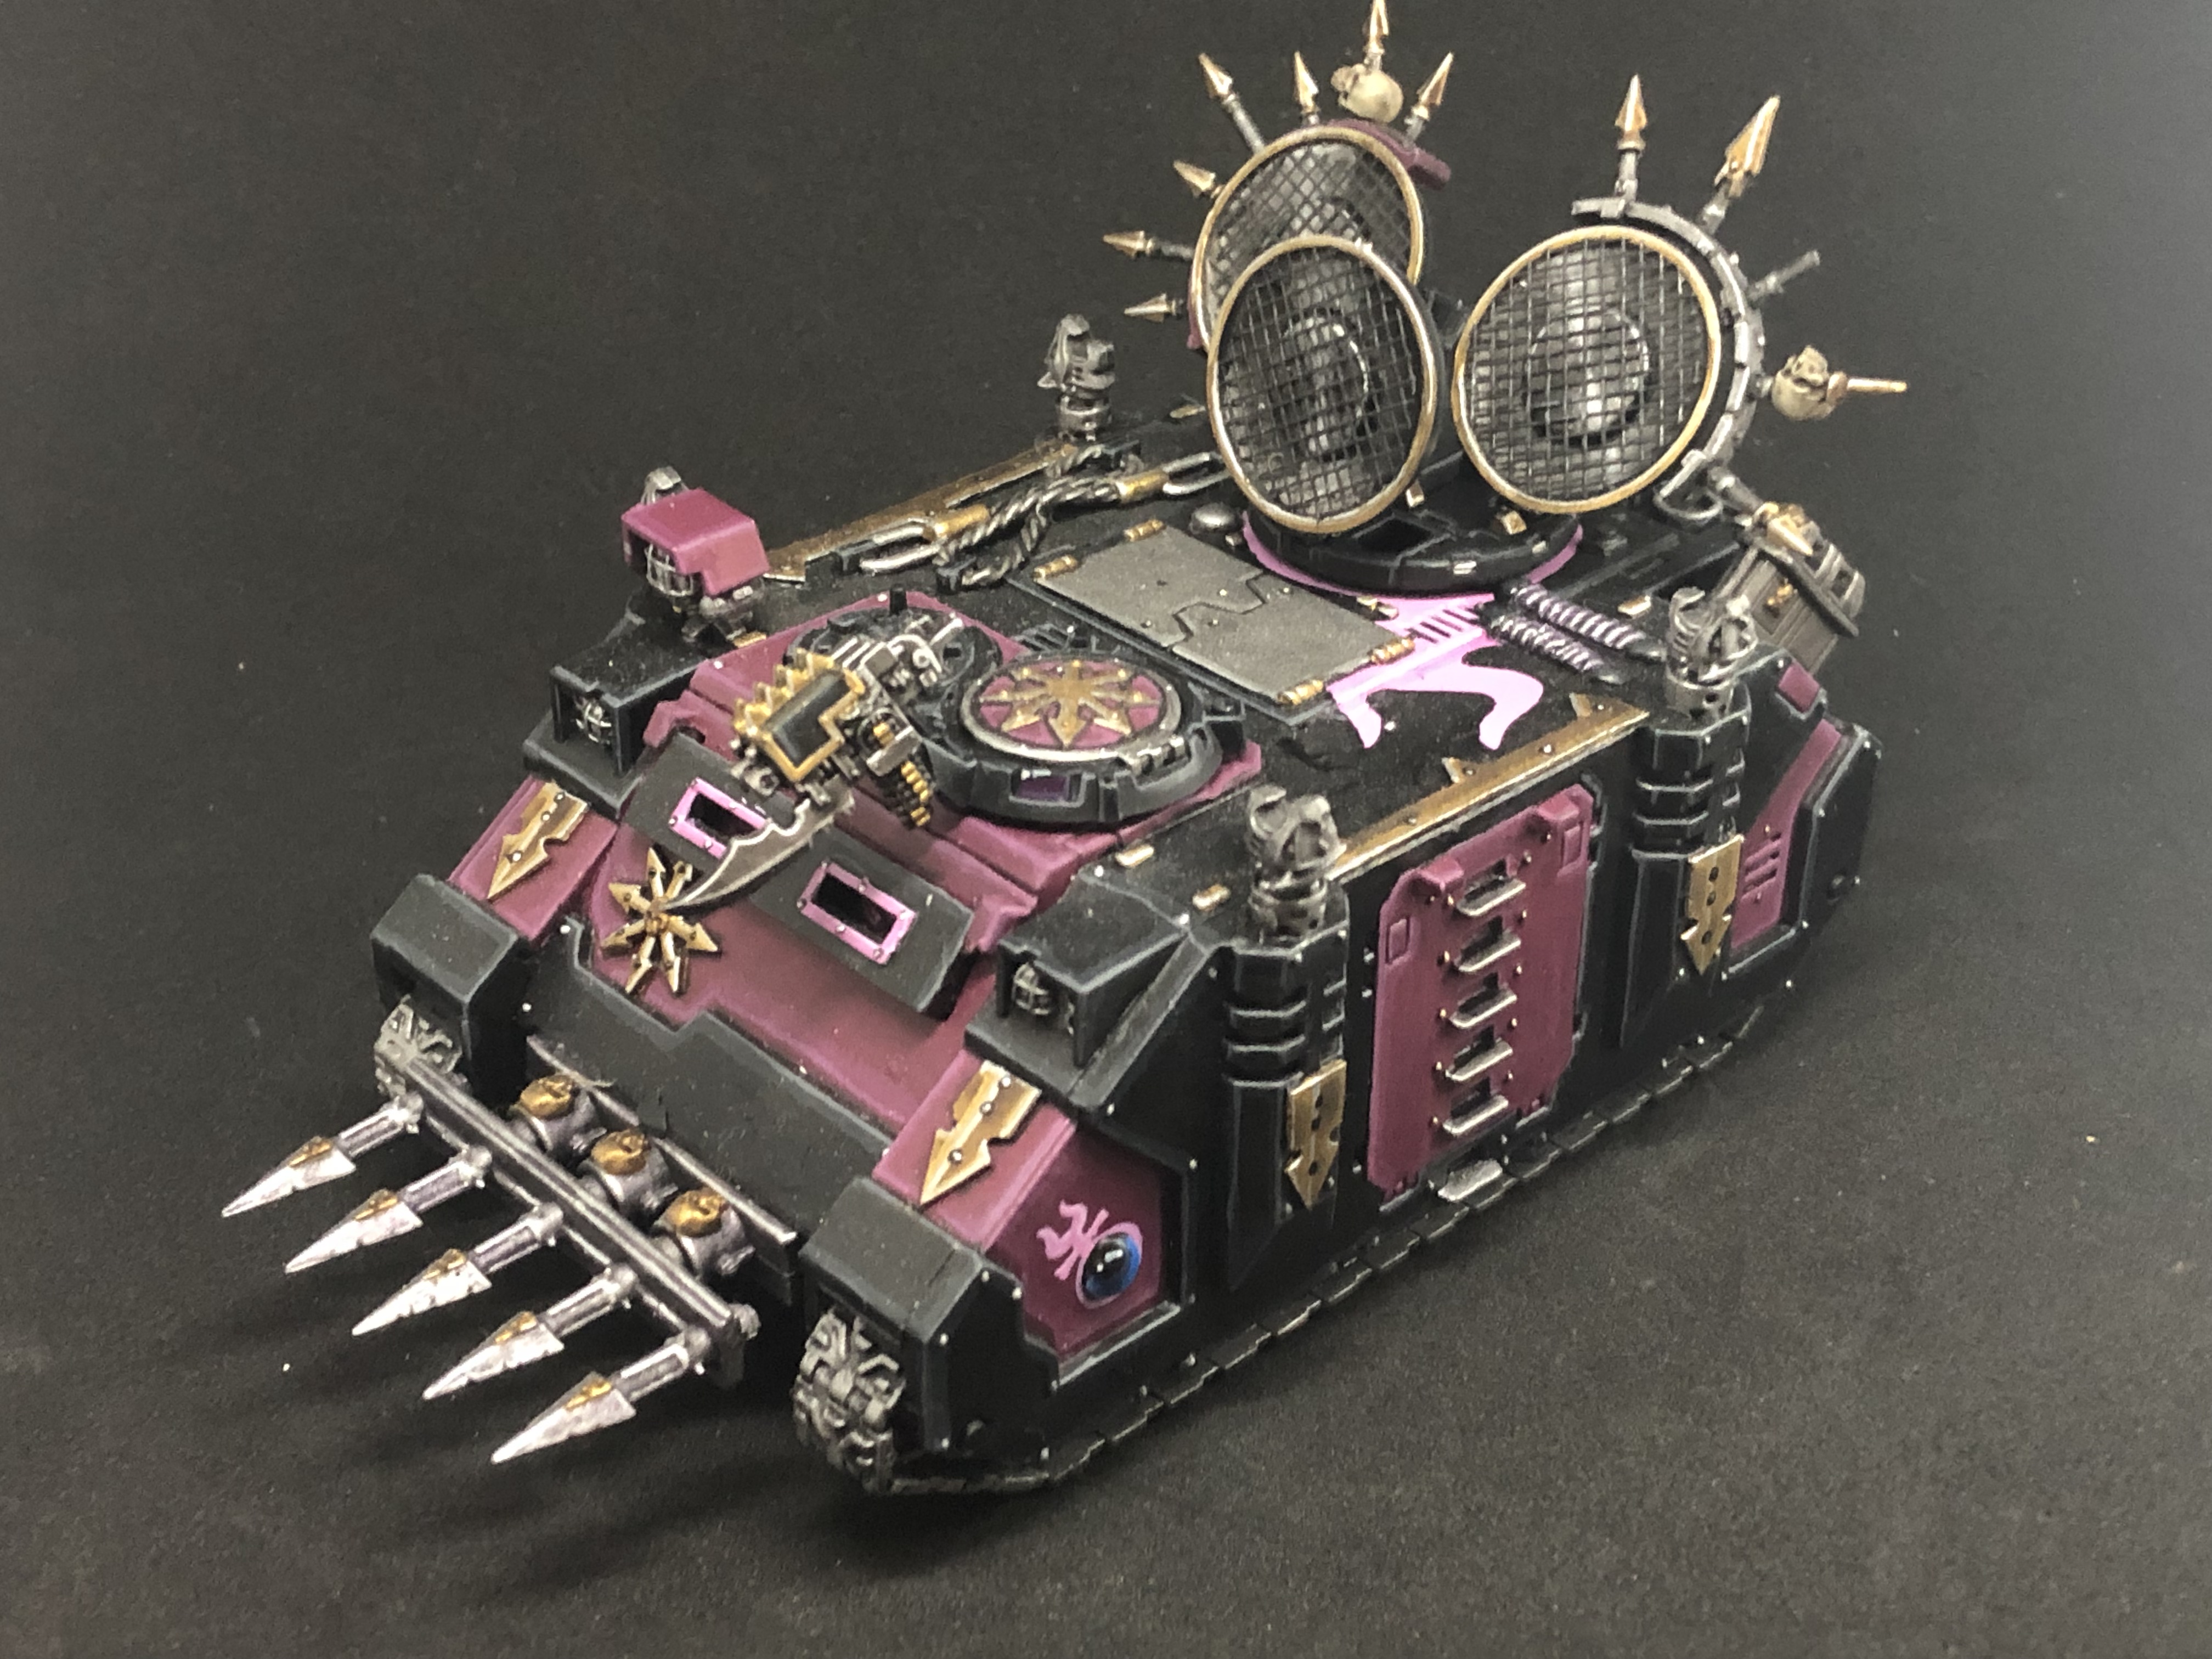 Darker, but still pink
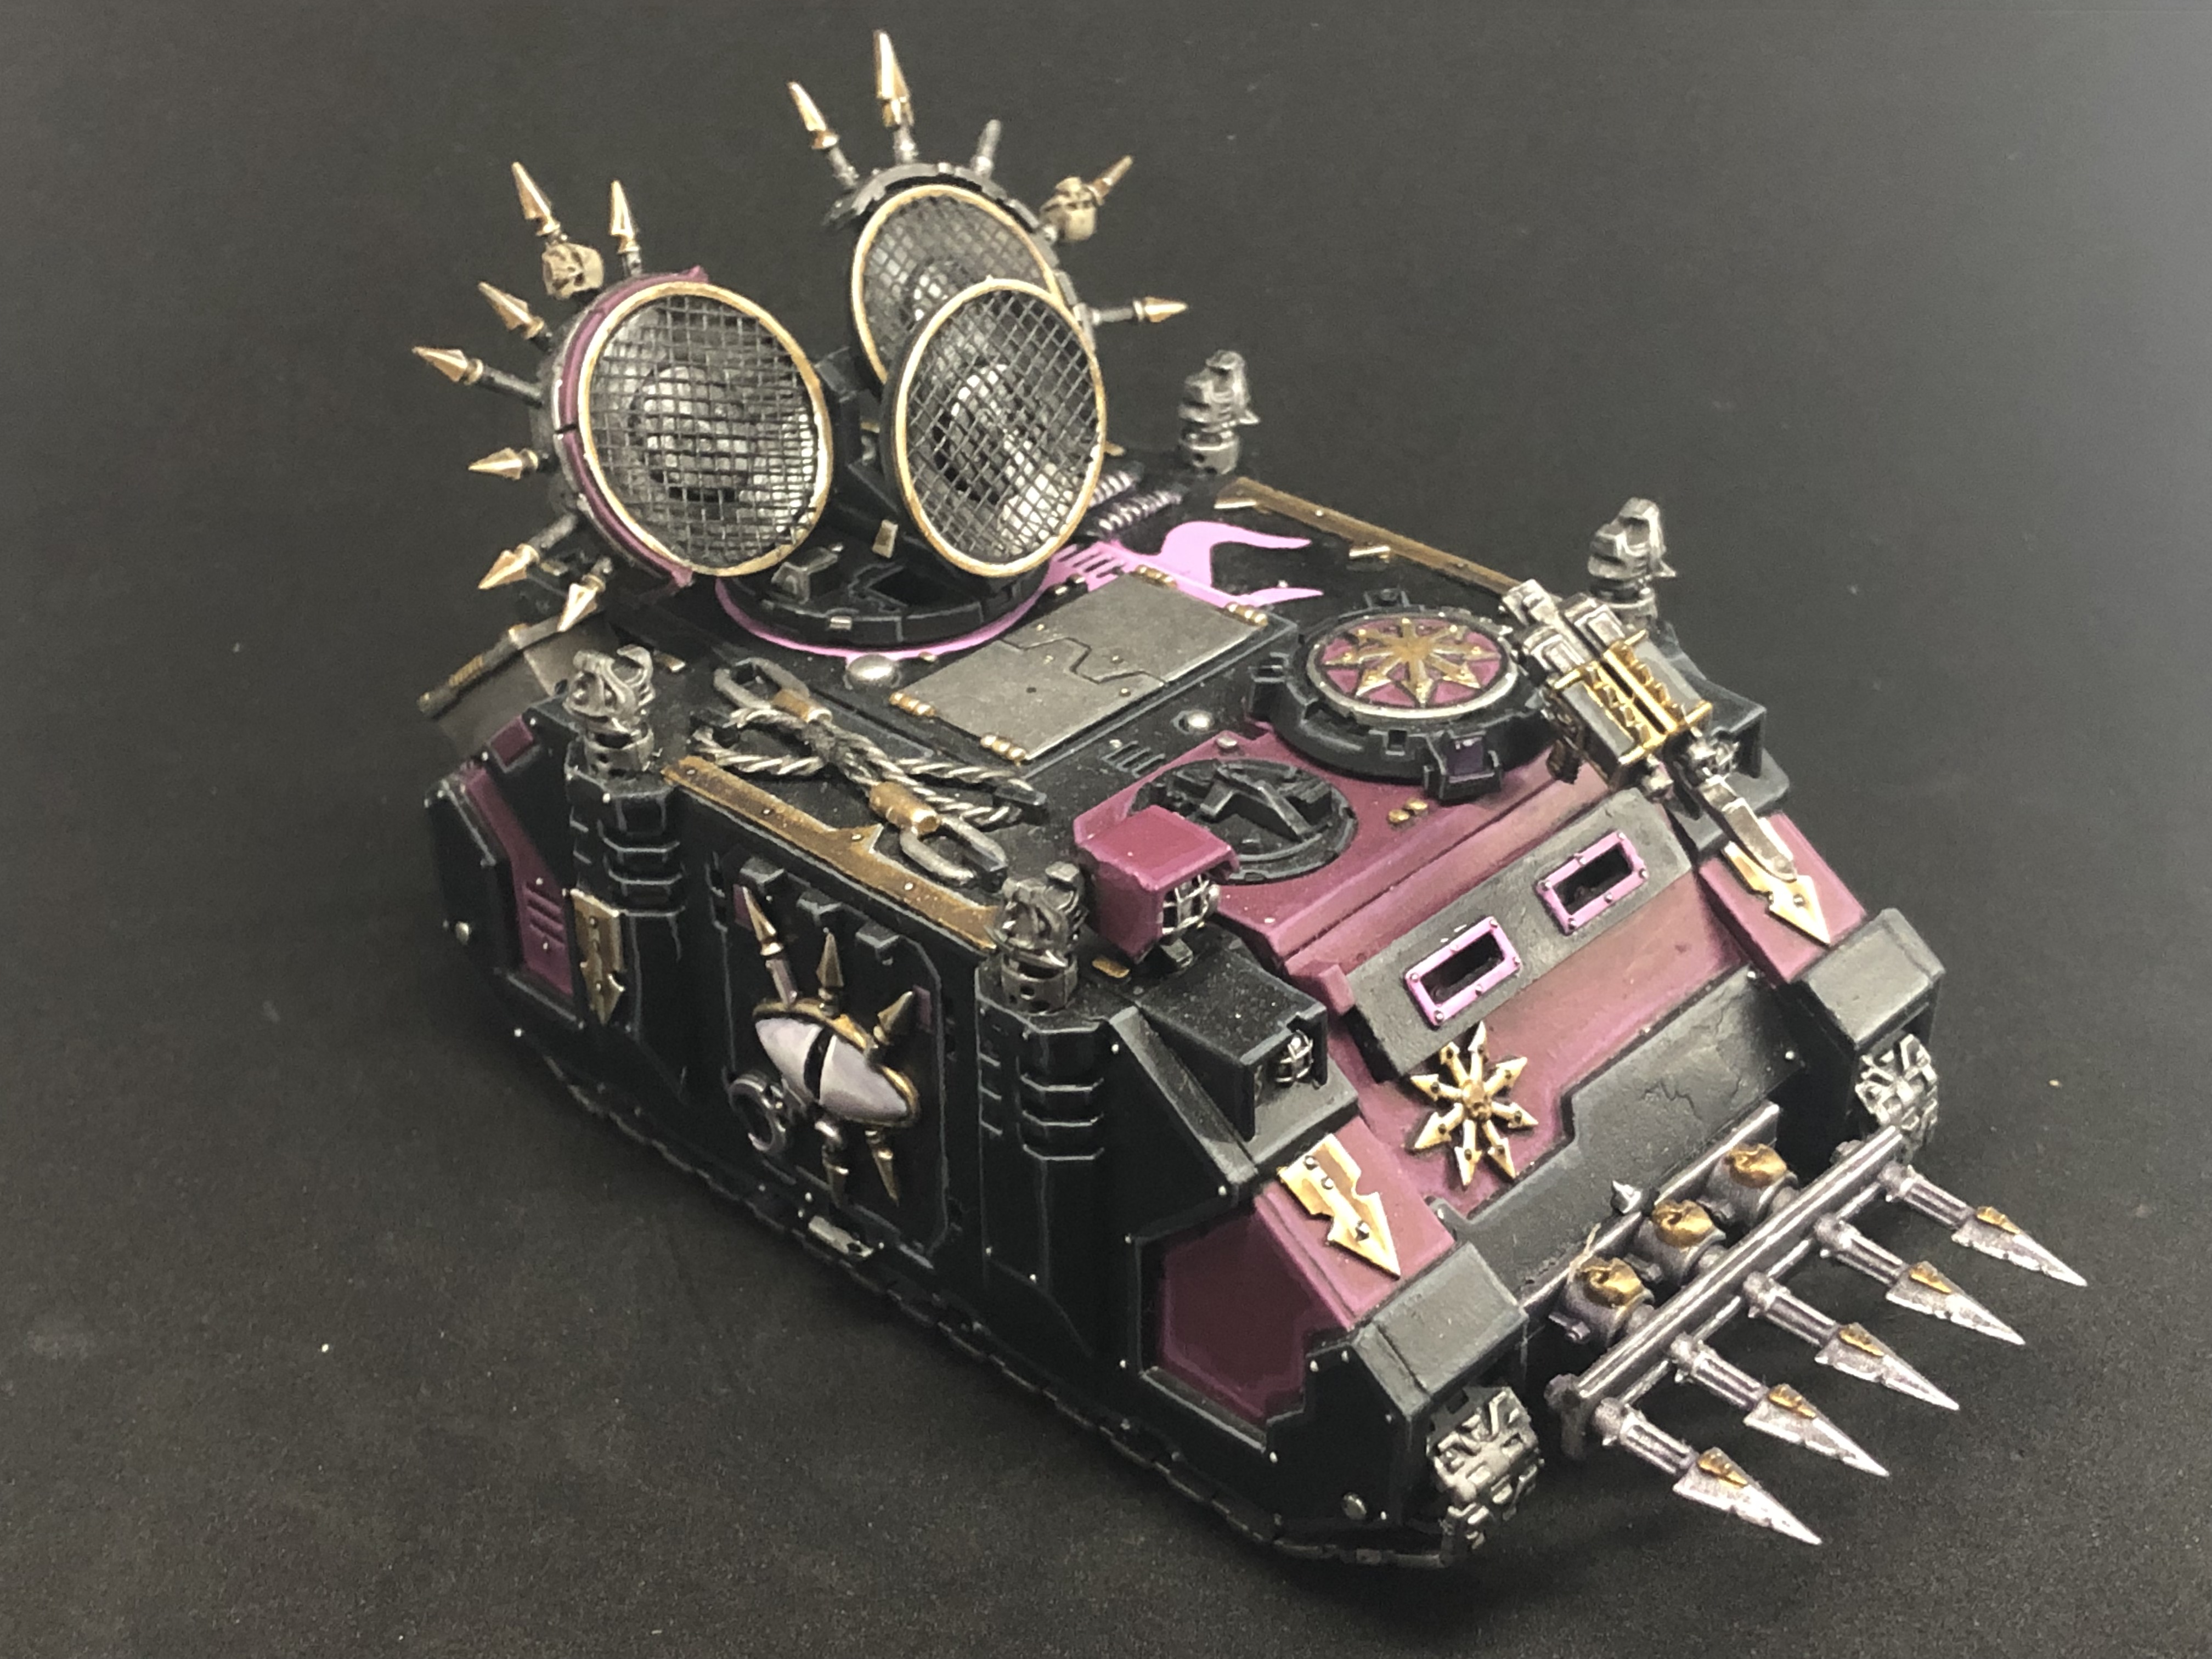 More pink tanks
Time to fight for nowhere!
 Finally got this book this weekend
As shown above, finally got a copy of the Warlords of Erehwon book. While I’m only part of the way through it, it seems like a great rule system, very similar to BA/Gates of Antares, that will allow players to play “warband” sized games with their variety of fantasy miniatures.
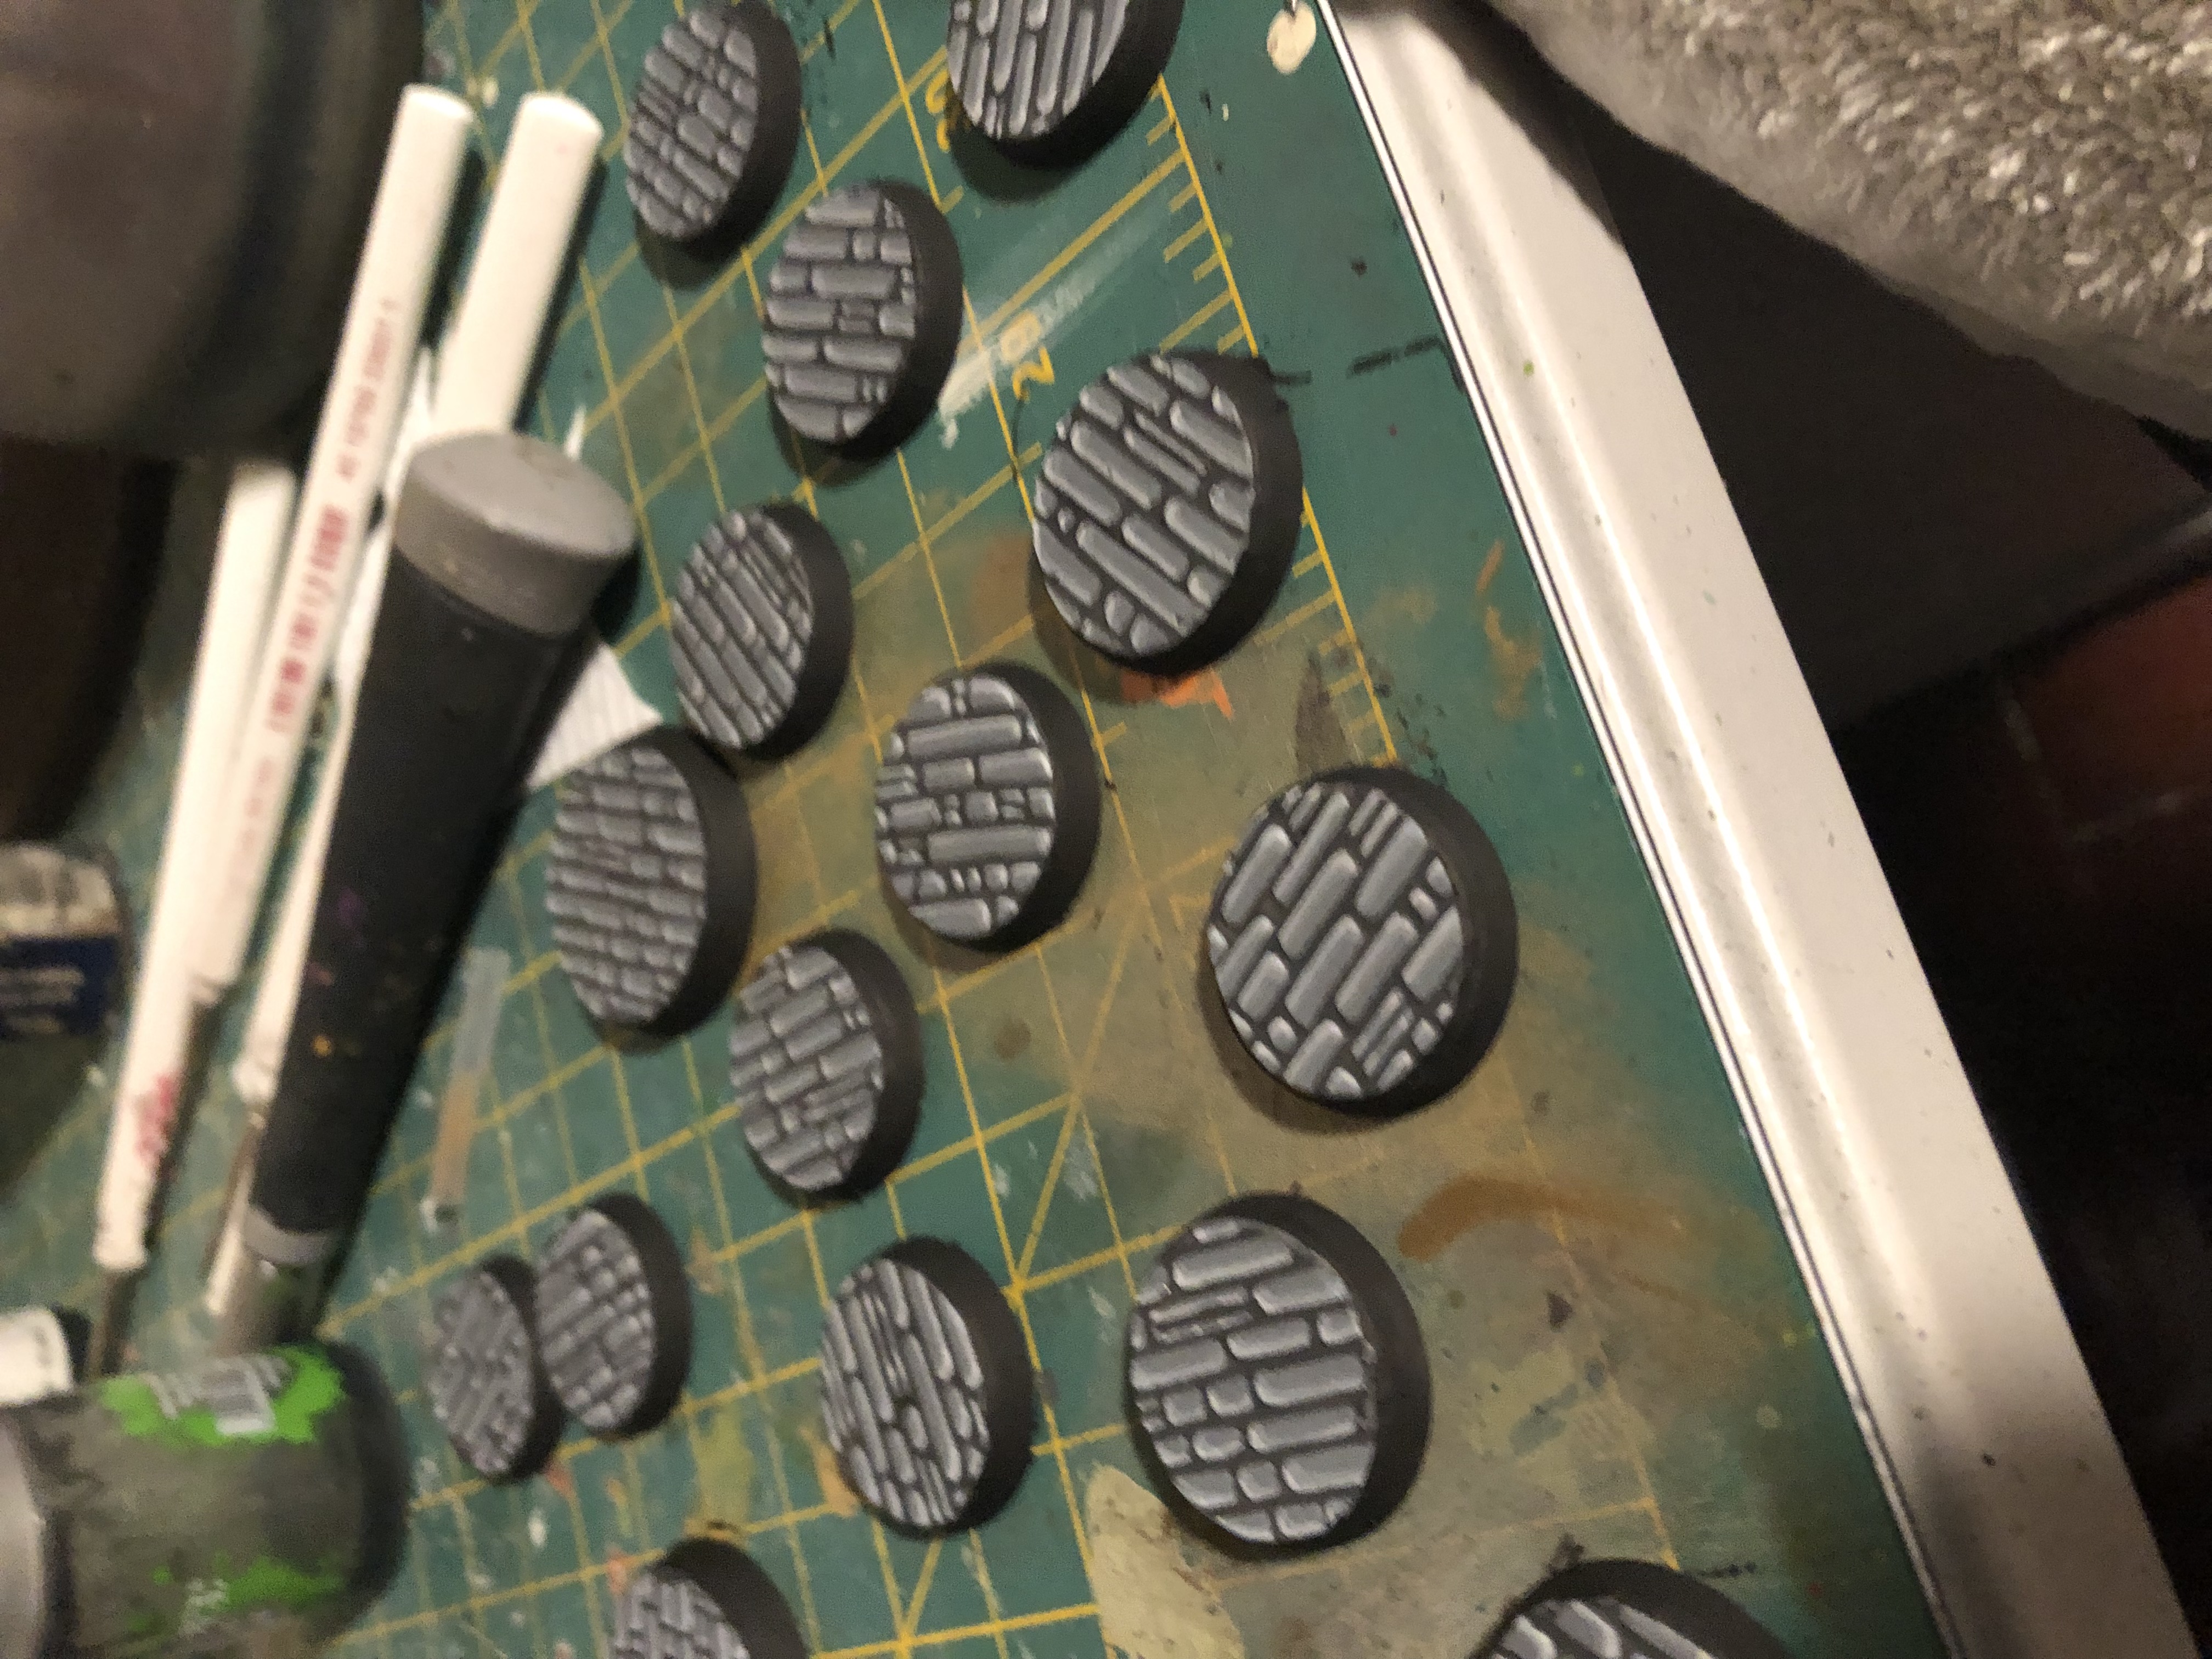
Continuing the base tutorial. The next step is to paint the final highlight. This is a very light gray, almost white, painting as a small L-Shape at the very corner of the two highlighted edges. This is to provide a sharp highlight for that edge. If you aren’t a huge fan of high-contrast painting, you can skip this step and stop with the previous highlights.
 Bases with final highlight and recess shading
Ok. Last two steps.
the second to last step is lining crevices in the bases between the stones. This cleans up any mistakes made previously with highlights. I did this with a thin brush and very watered down dark grey paint, but you could also use an art pen of the correct color. I like watered down paint as it seeps into recesses, and also is easily whipped away if you make an error.
lastly, paint the base rim black, and you are done!
 Rims painted black for completion
Brick-crazy
While I’m pushing to get the bases complete, if I just spent all my time painting bricks, I’d go mad. So, I have been giving myself some breaks painting some of my dwarf miniatures that I’m hoping to use for warlords of Erehwon. These are 3 plastic dwarf miners that were sitting in my miniature cabinet primed black probably for a decade.
Glad to have them painted, and particularly happy with how the standard bearer came out. Making progress on the resolution.
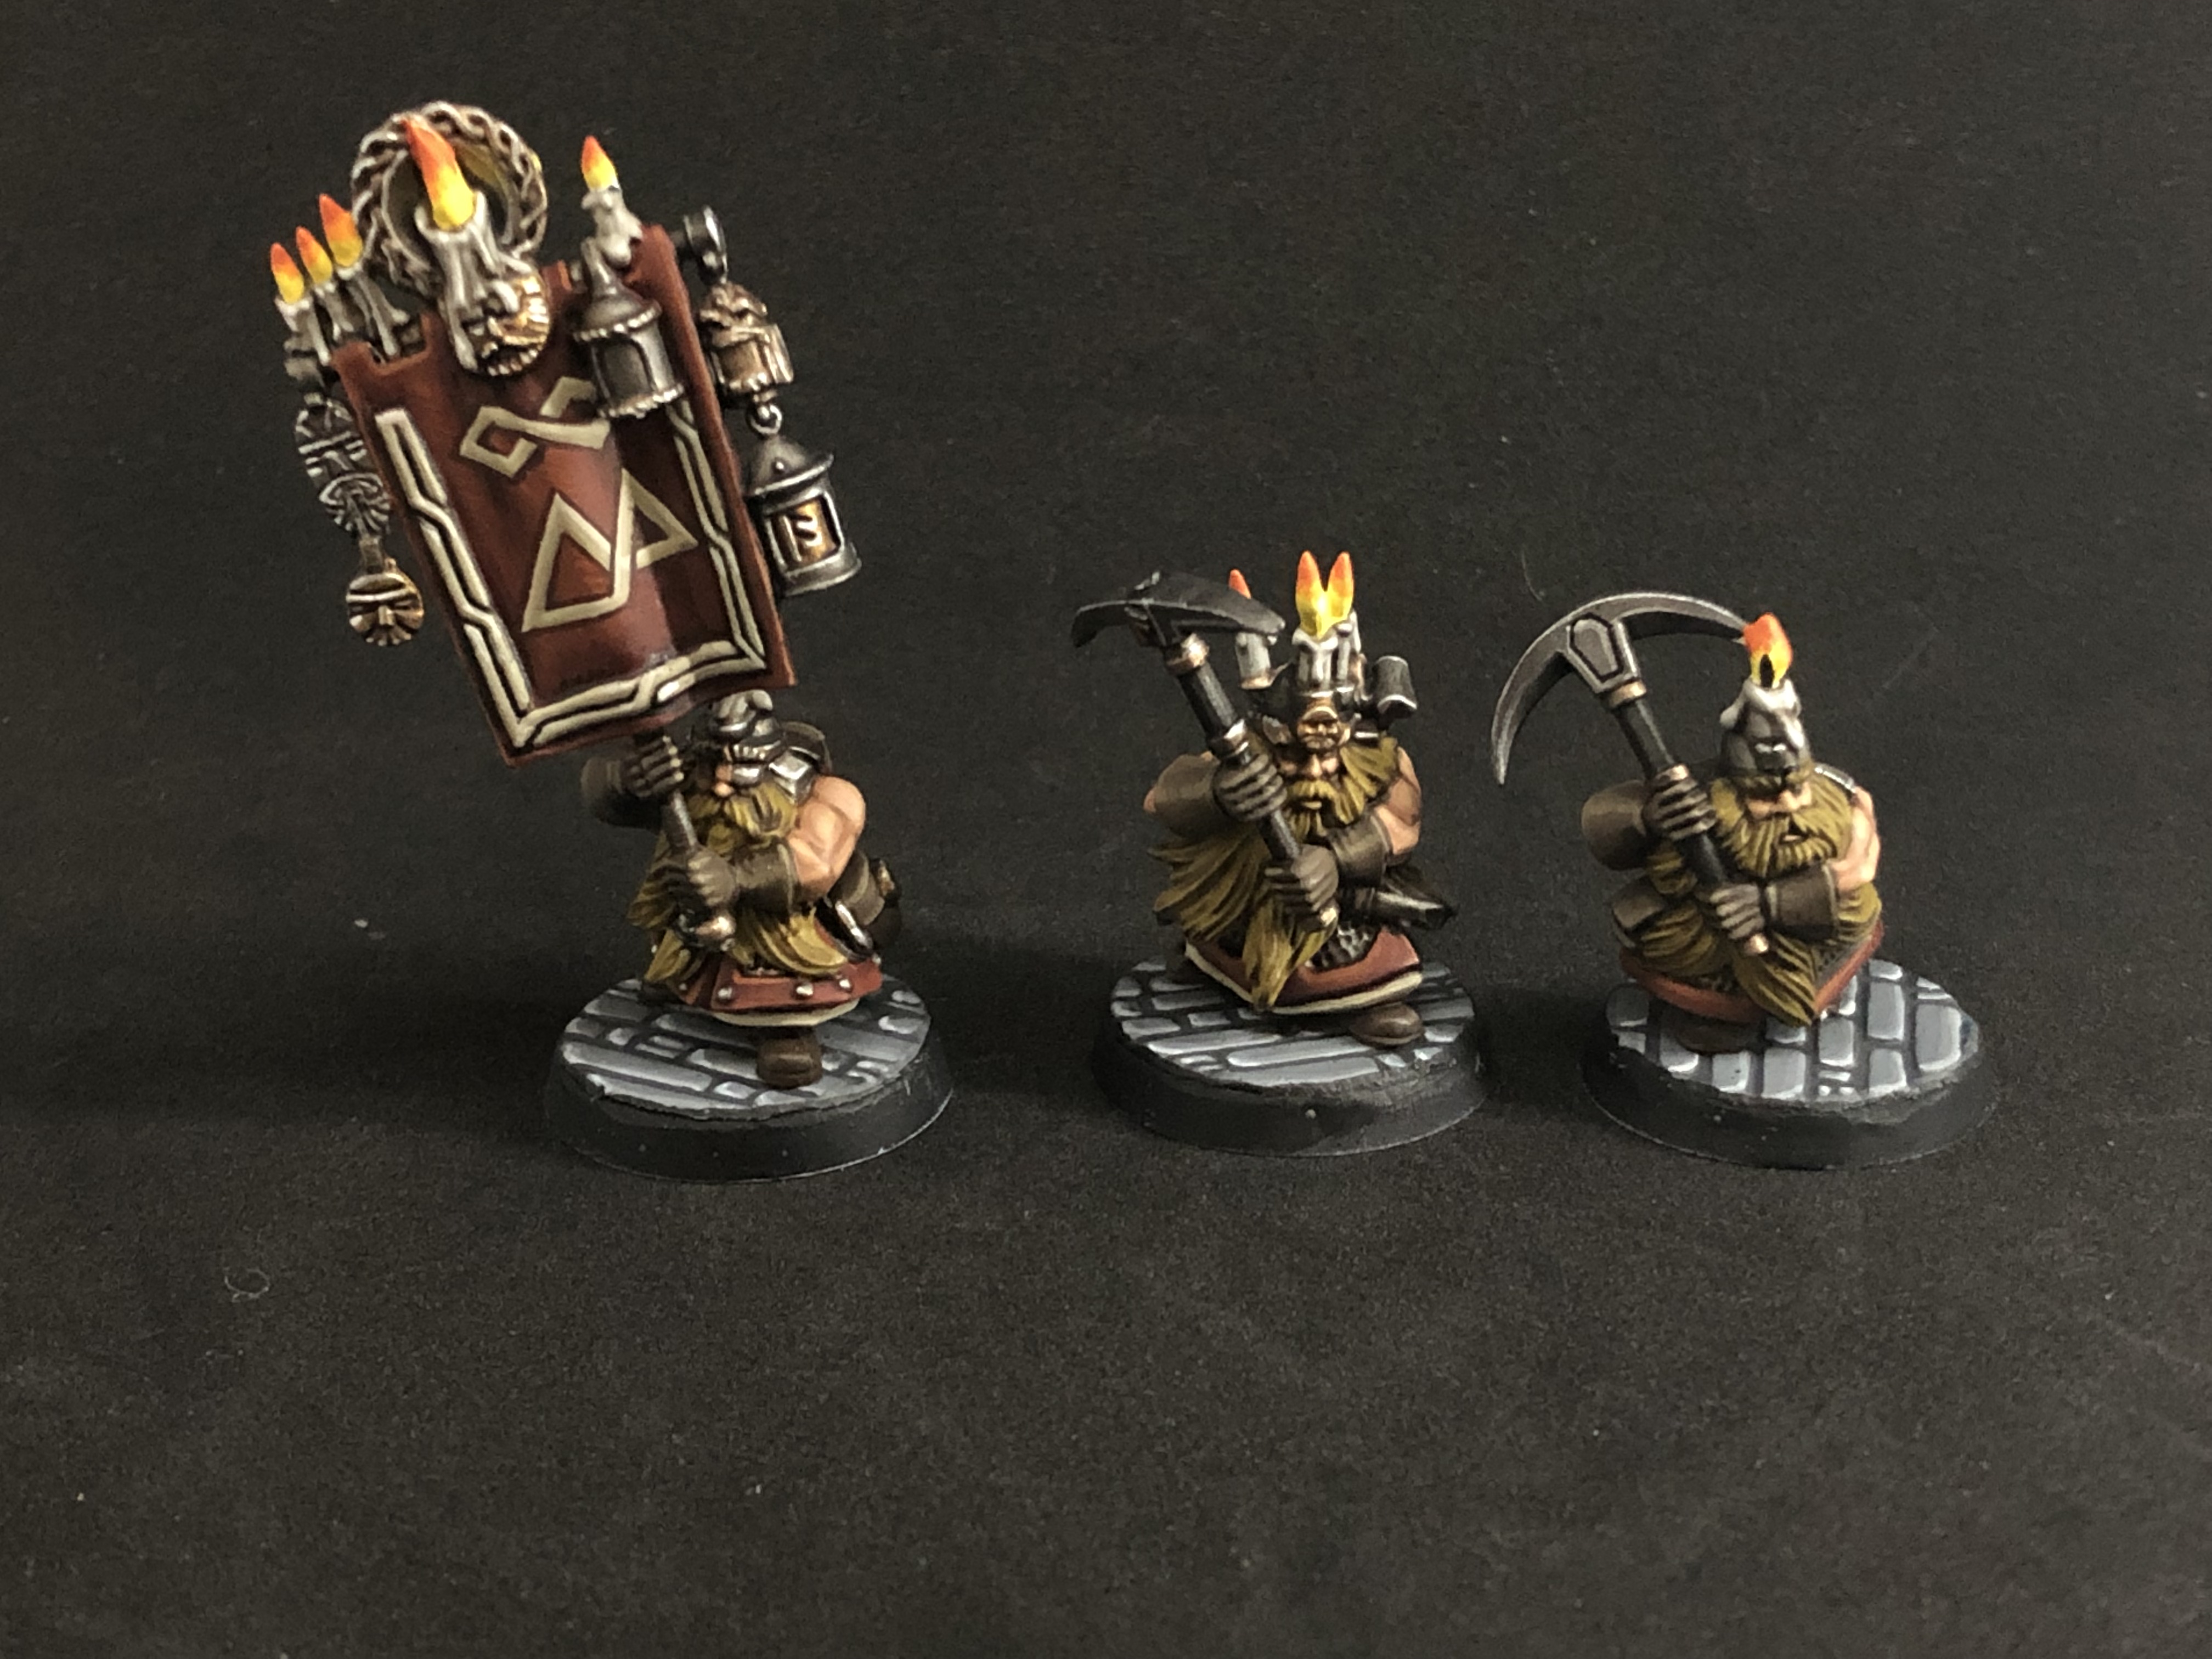 Front view
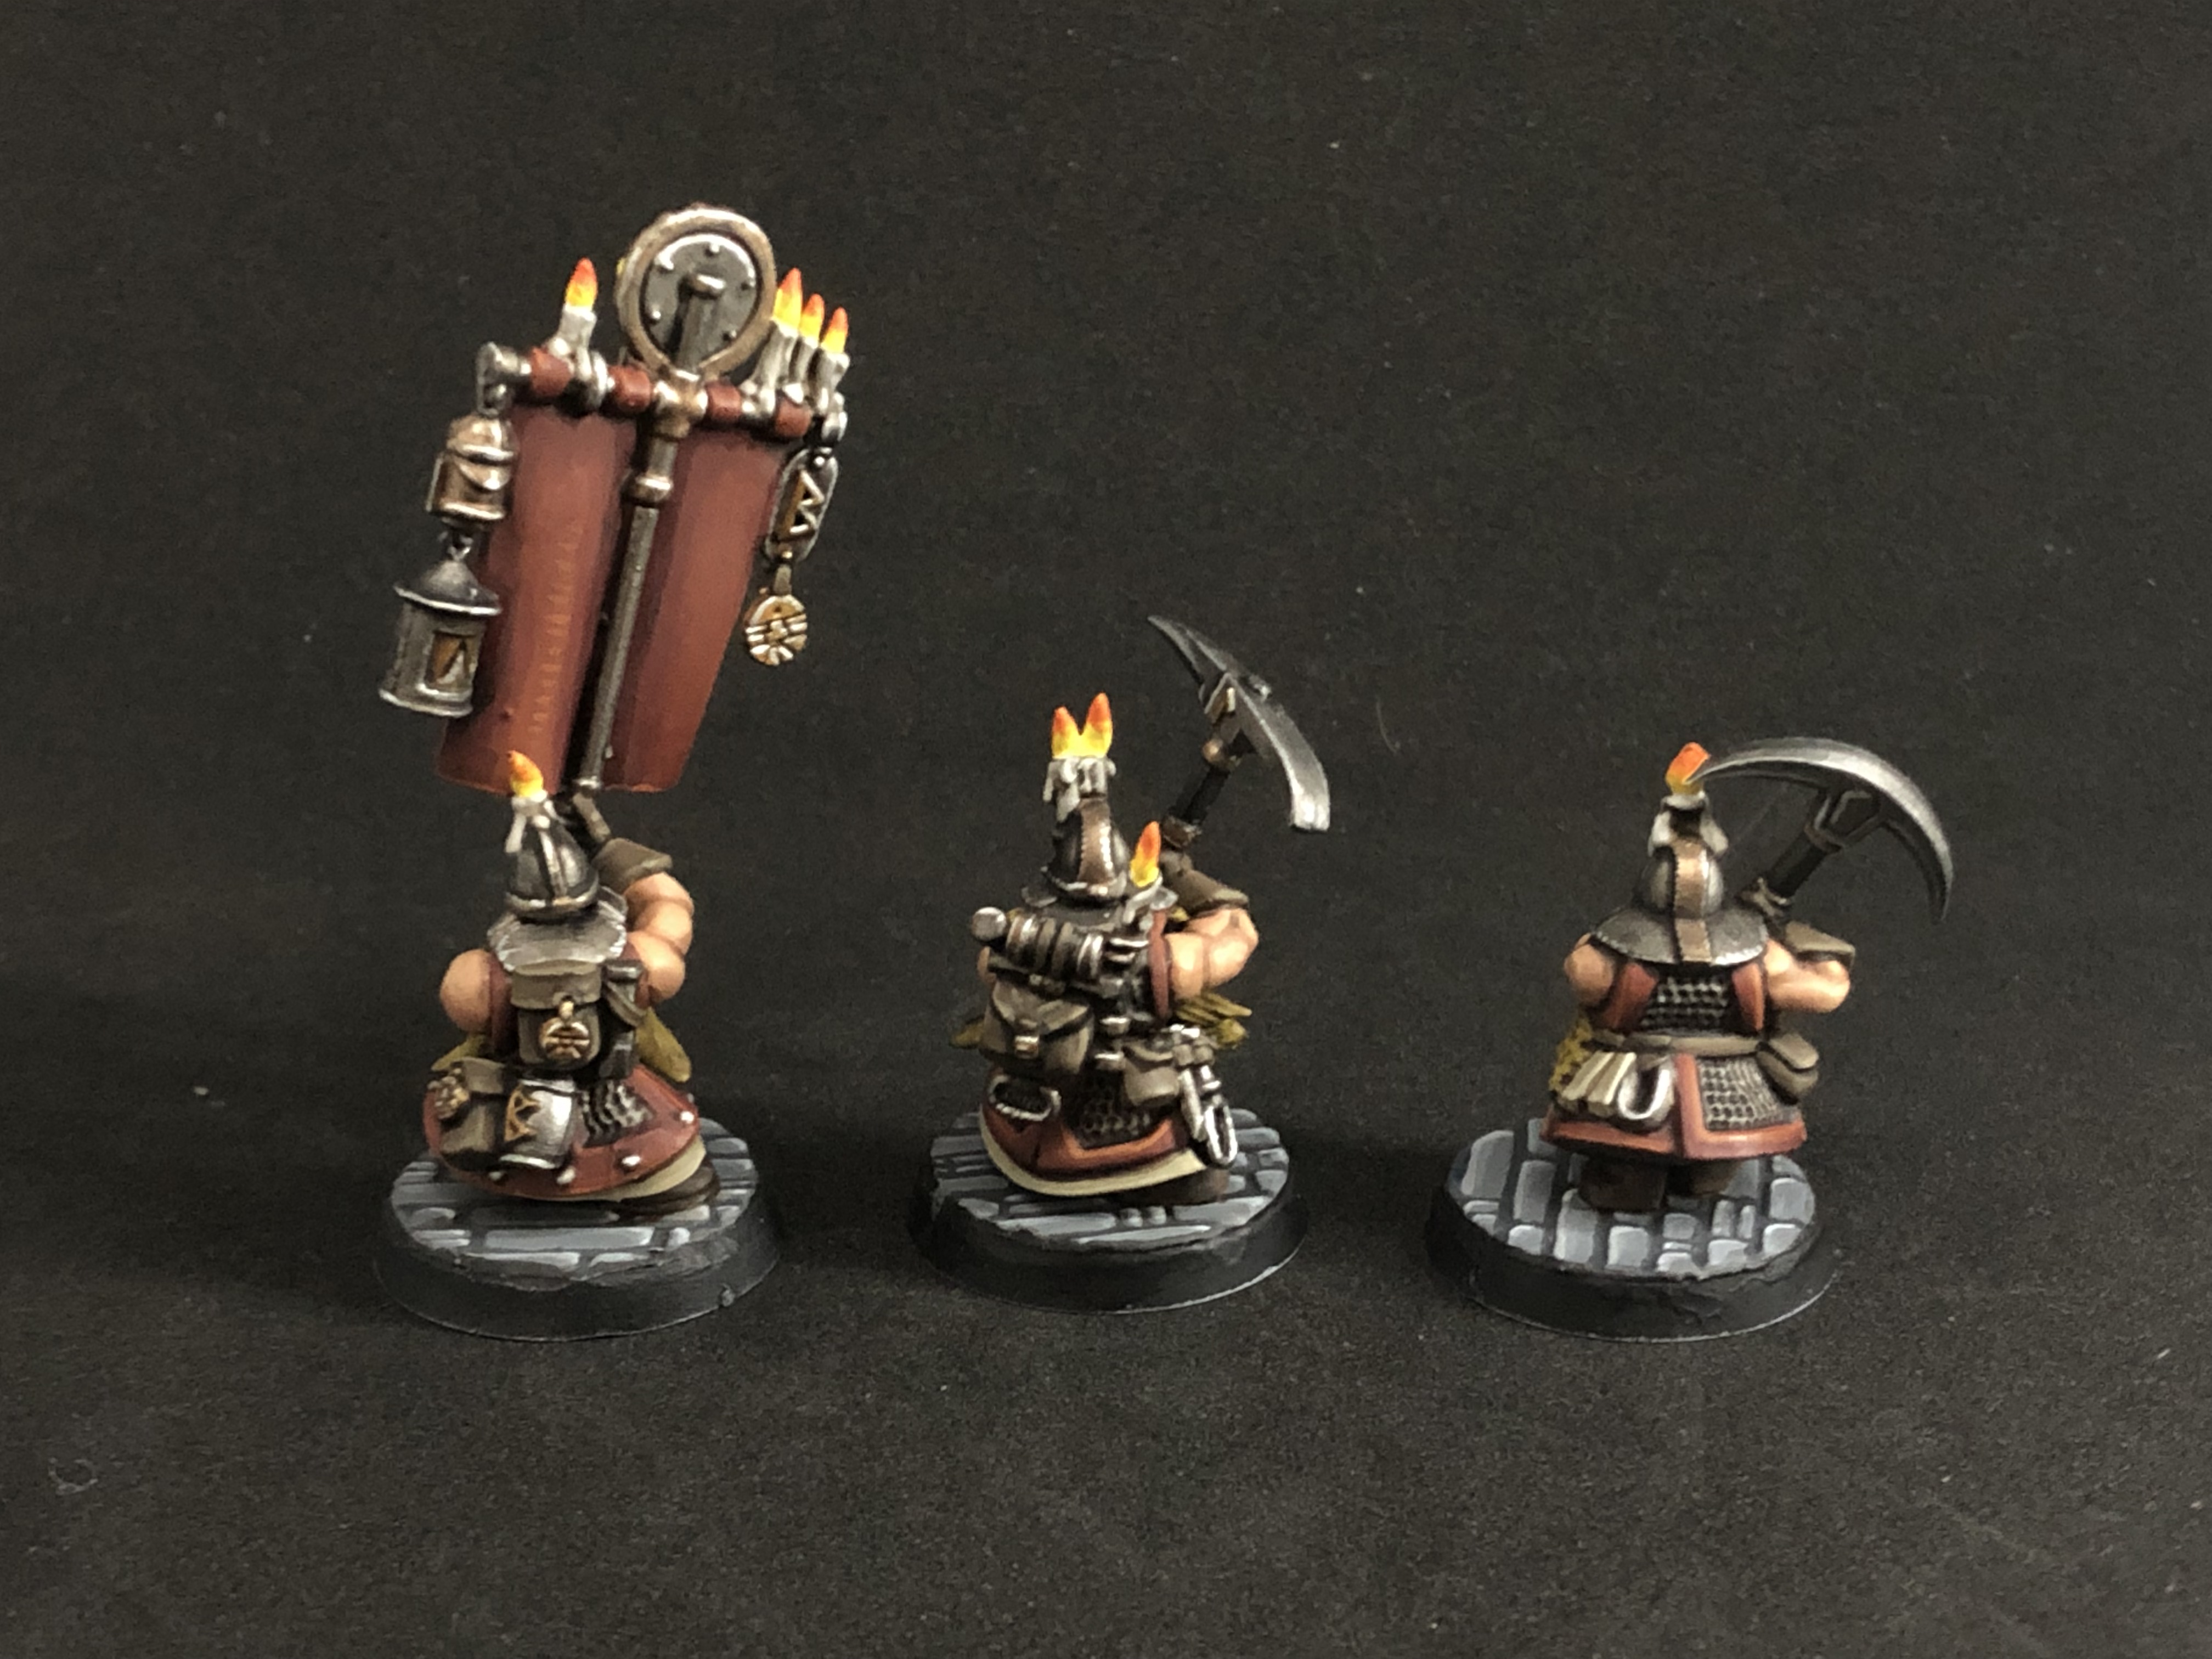 Rear view
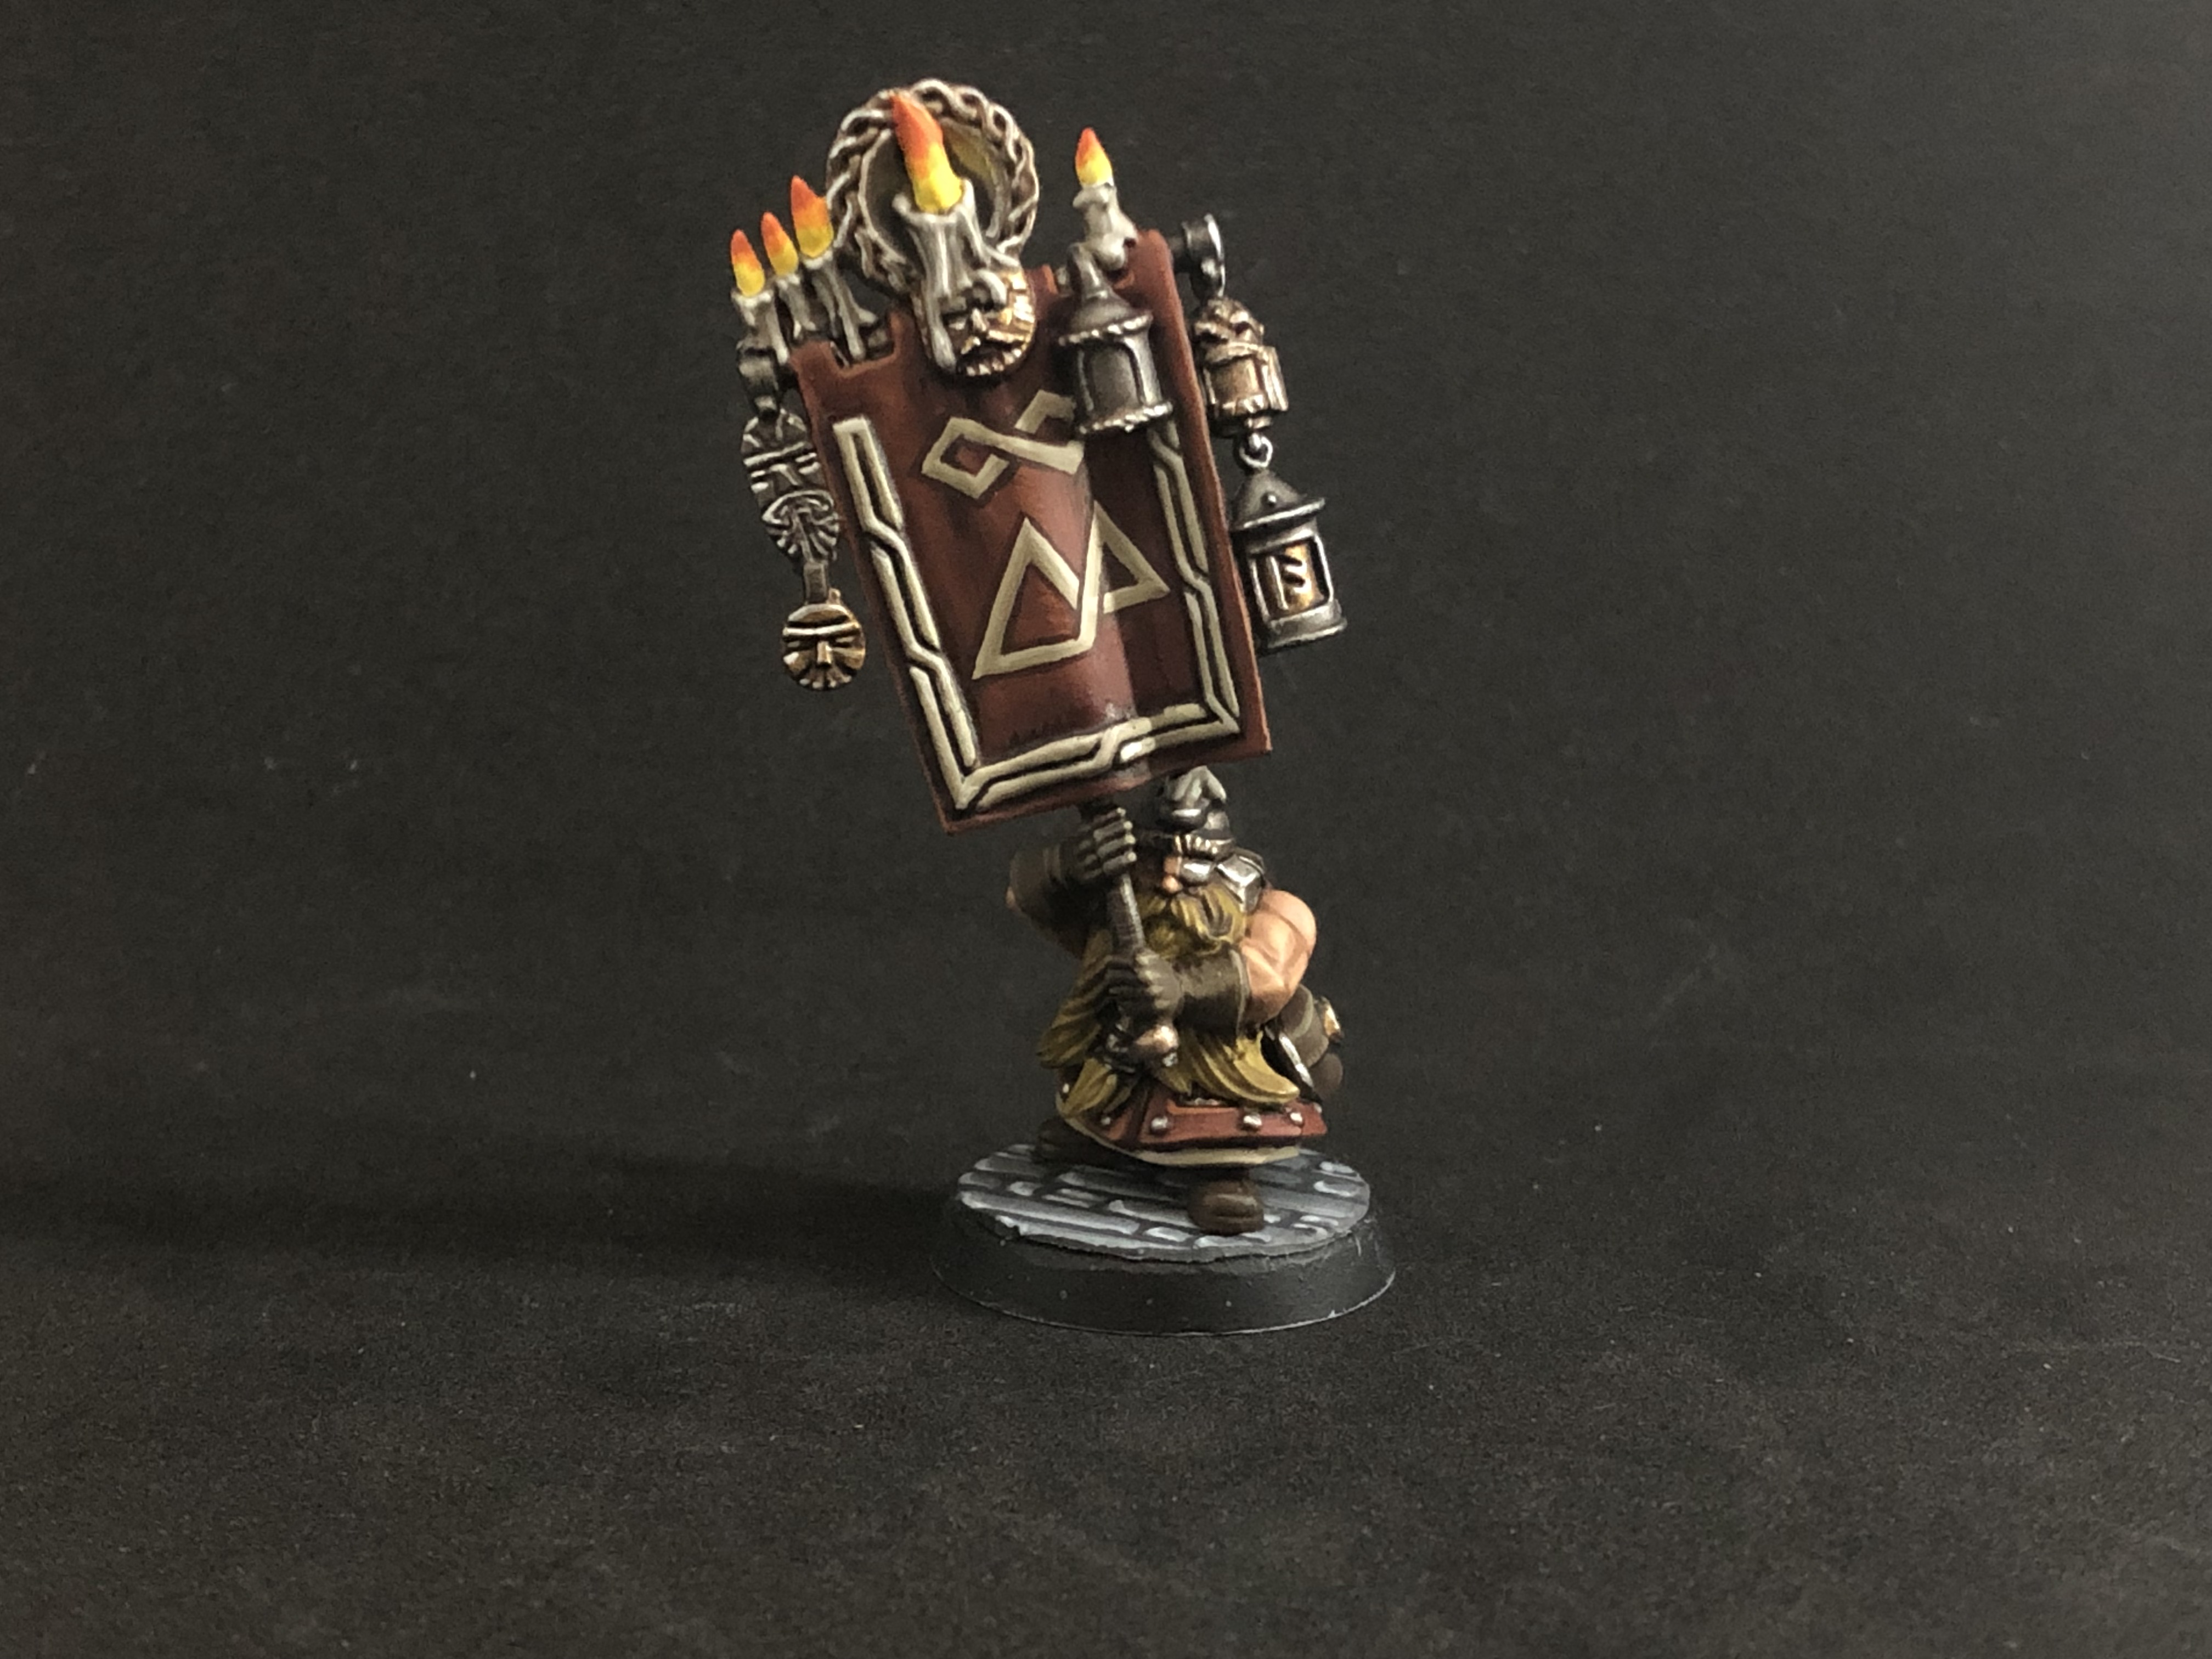 Detail shot of the standard bearer.
Brick basing tutorial 2, phase 1
The second half of my basing tutorial covers painting, which accounts for a lot of the appearance. Once all the bases are created, they are:
1) primed
2) basecoated with a medium grey
3) washed with GW Nuln oil
4) allowed to fully dry
this gives a solid color, while the wash picks out the stone details.
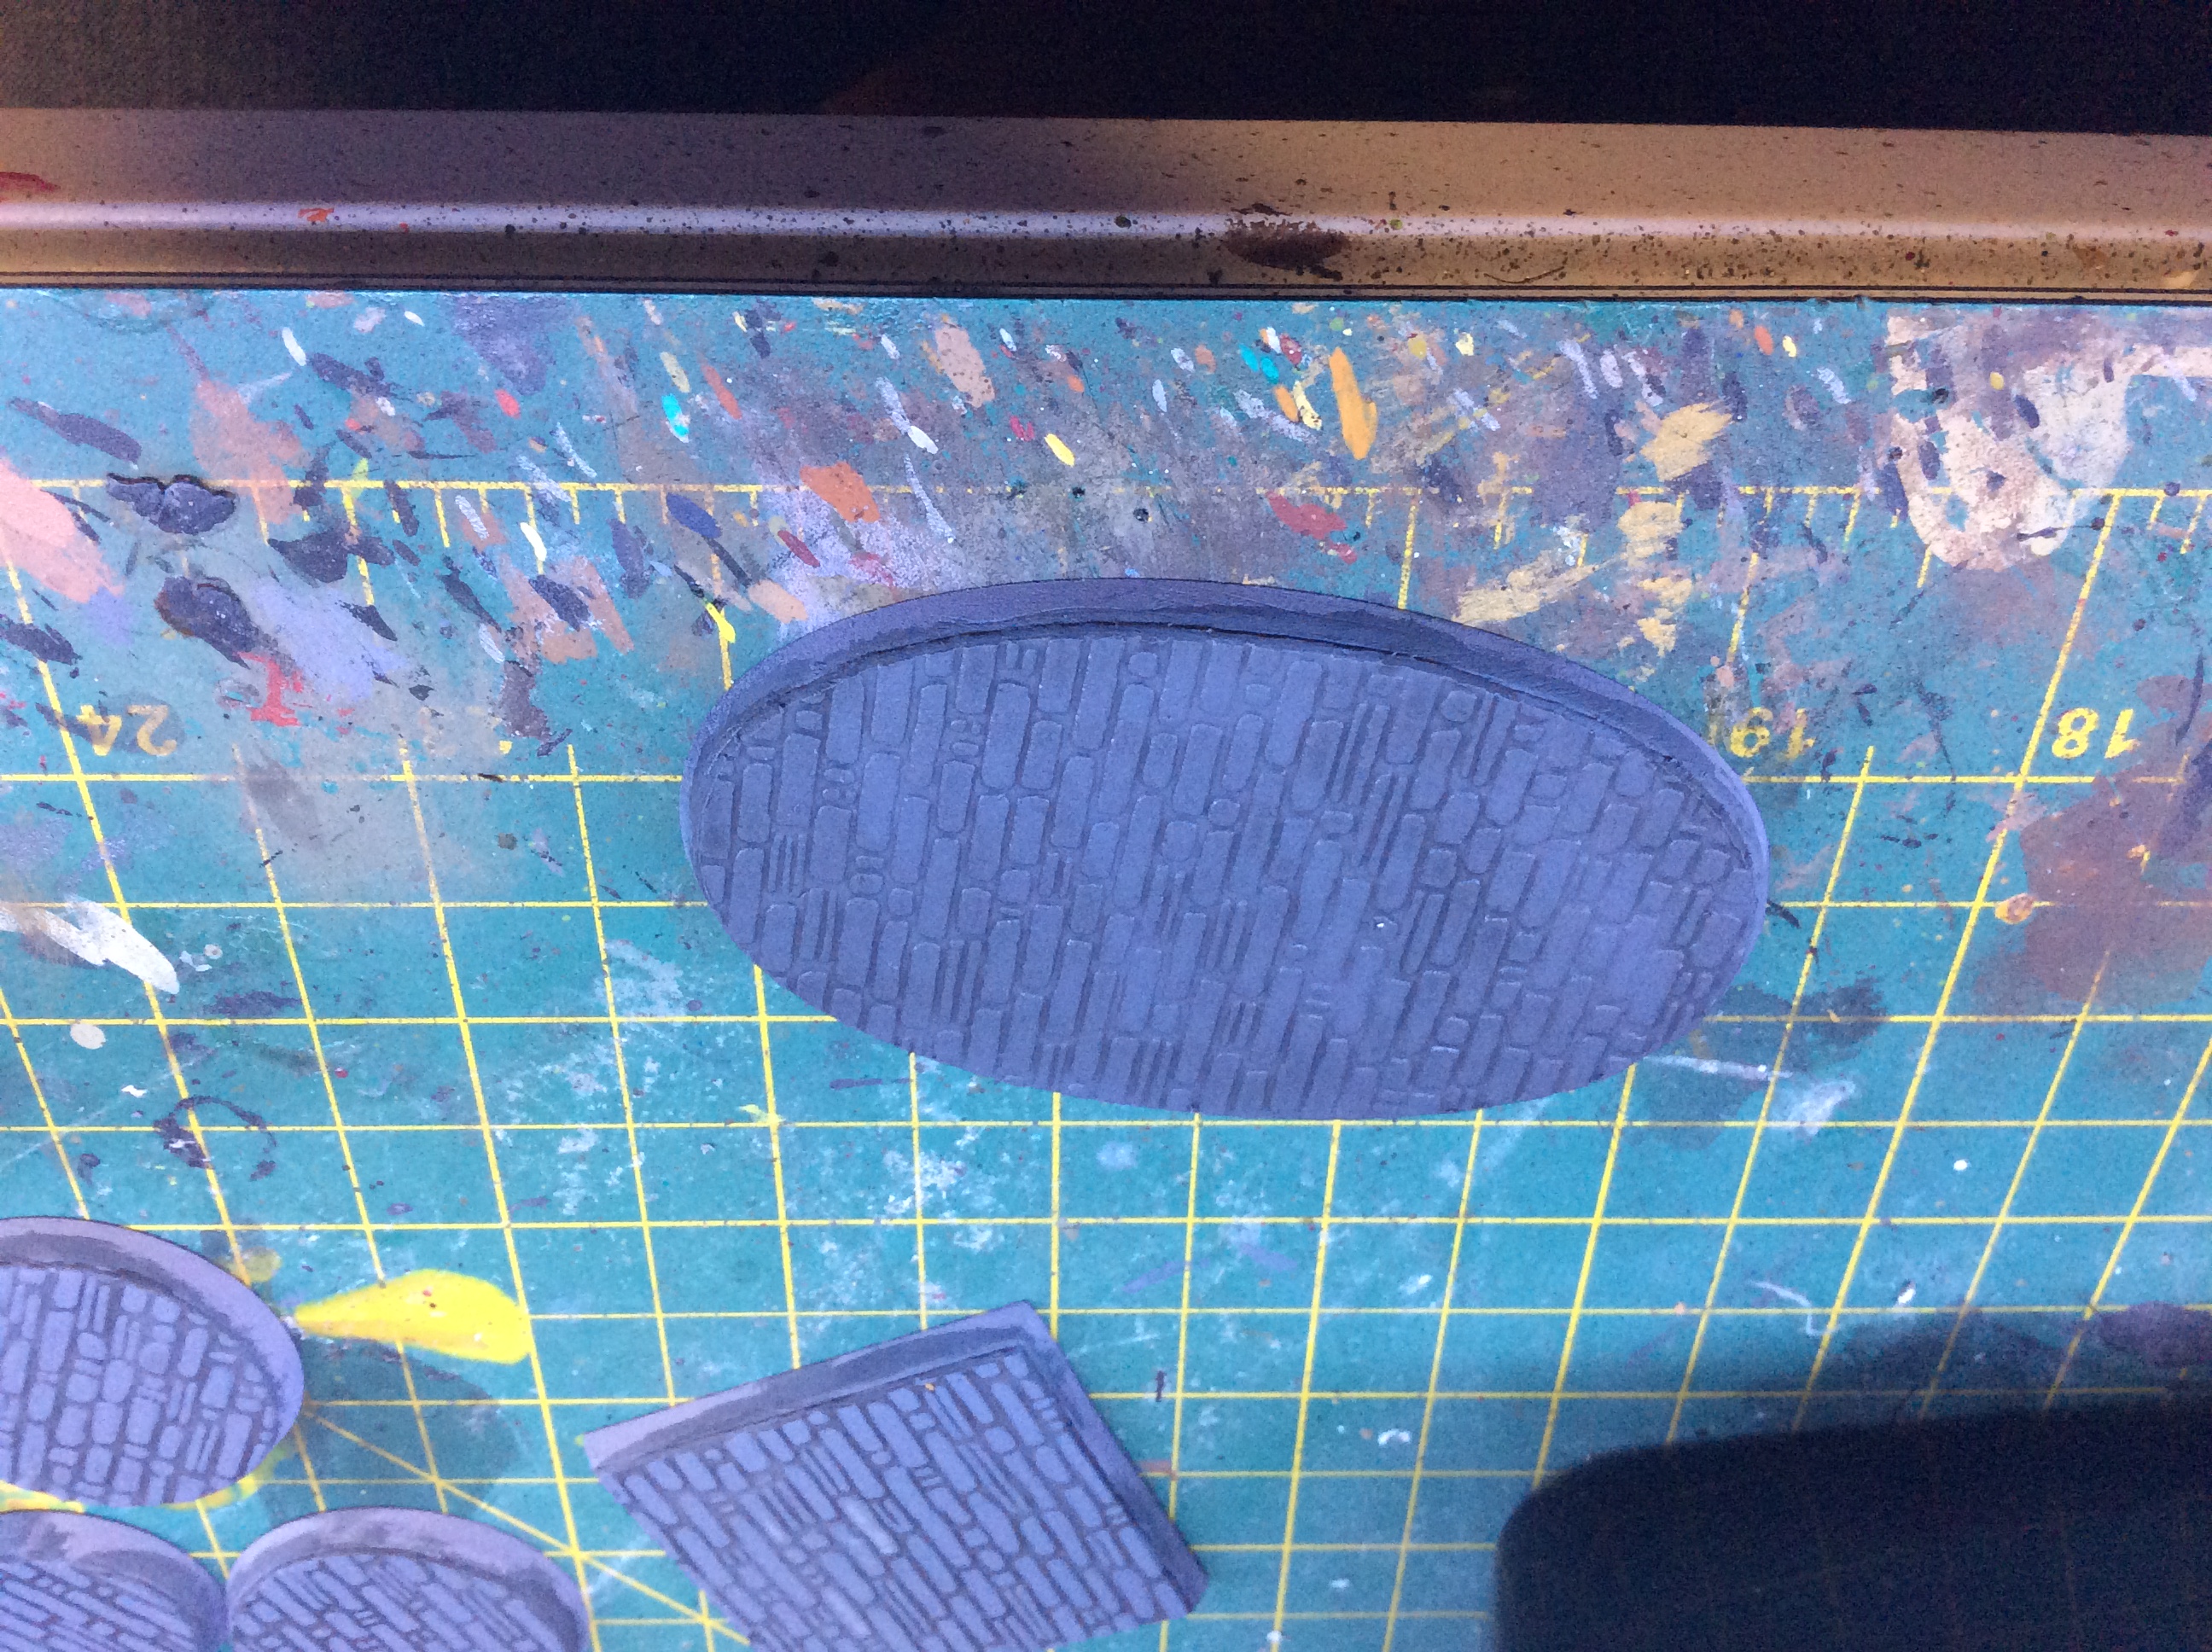 Base primed, base coated, and washed
Once this is dry, we proceed through the first 3 steps of painting.
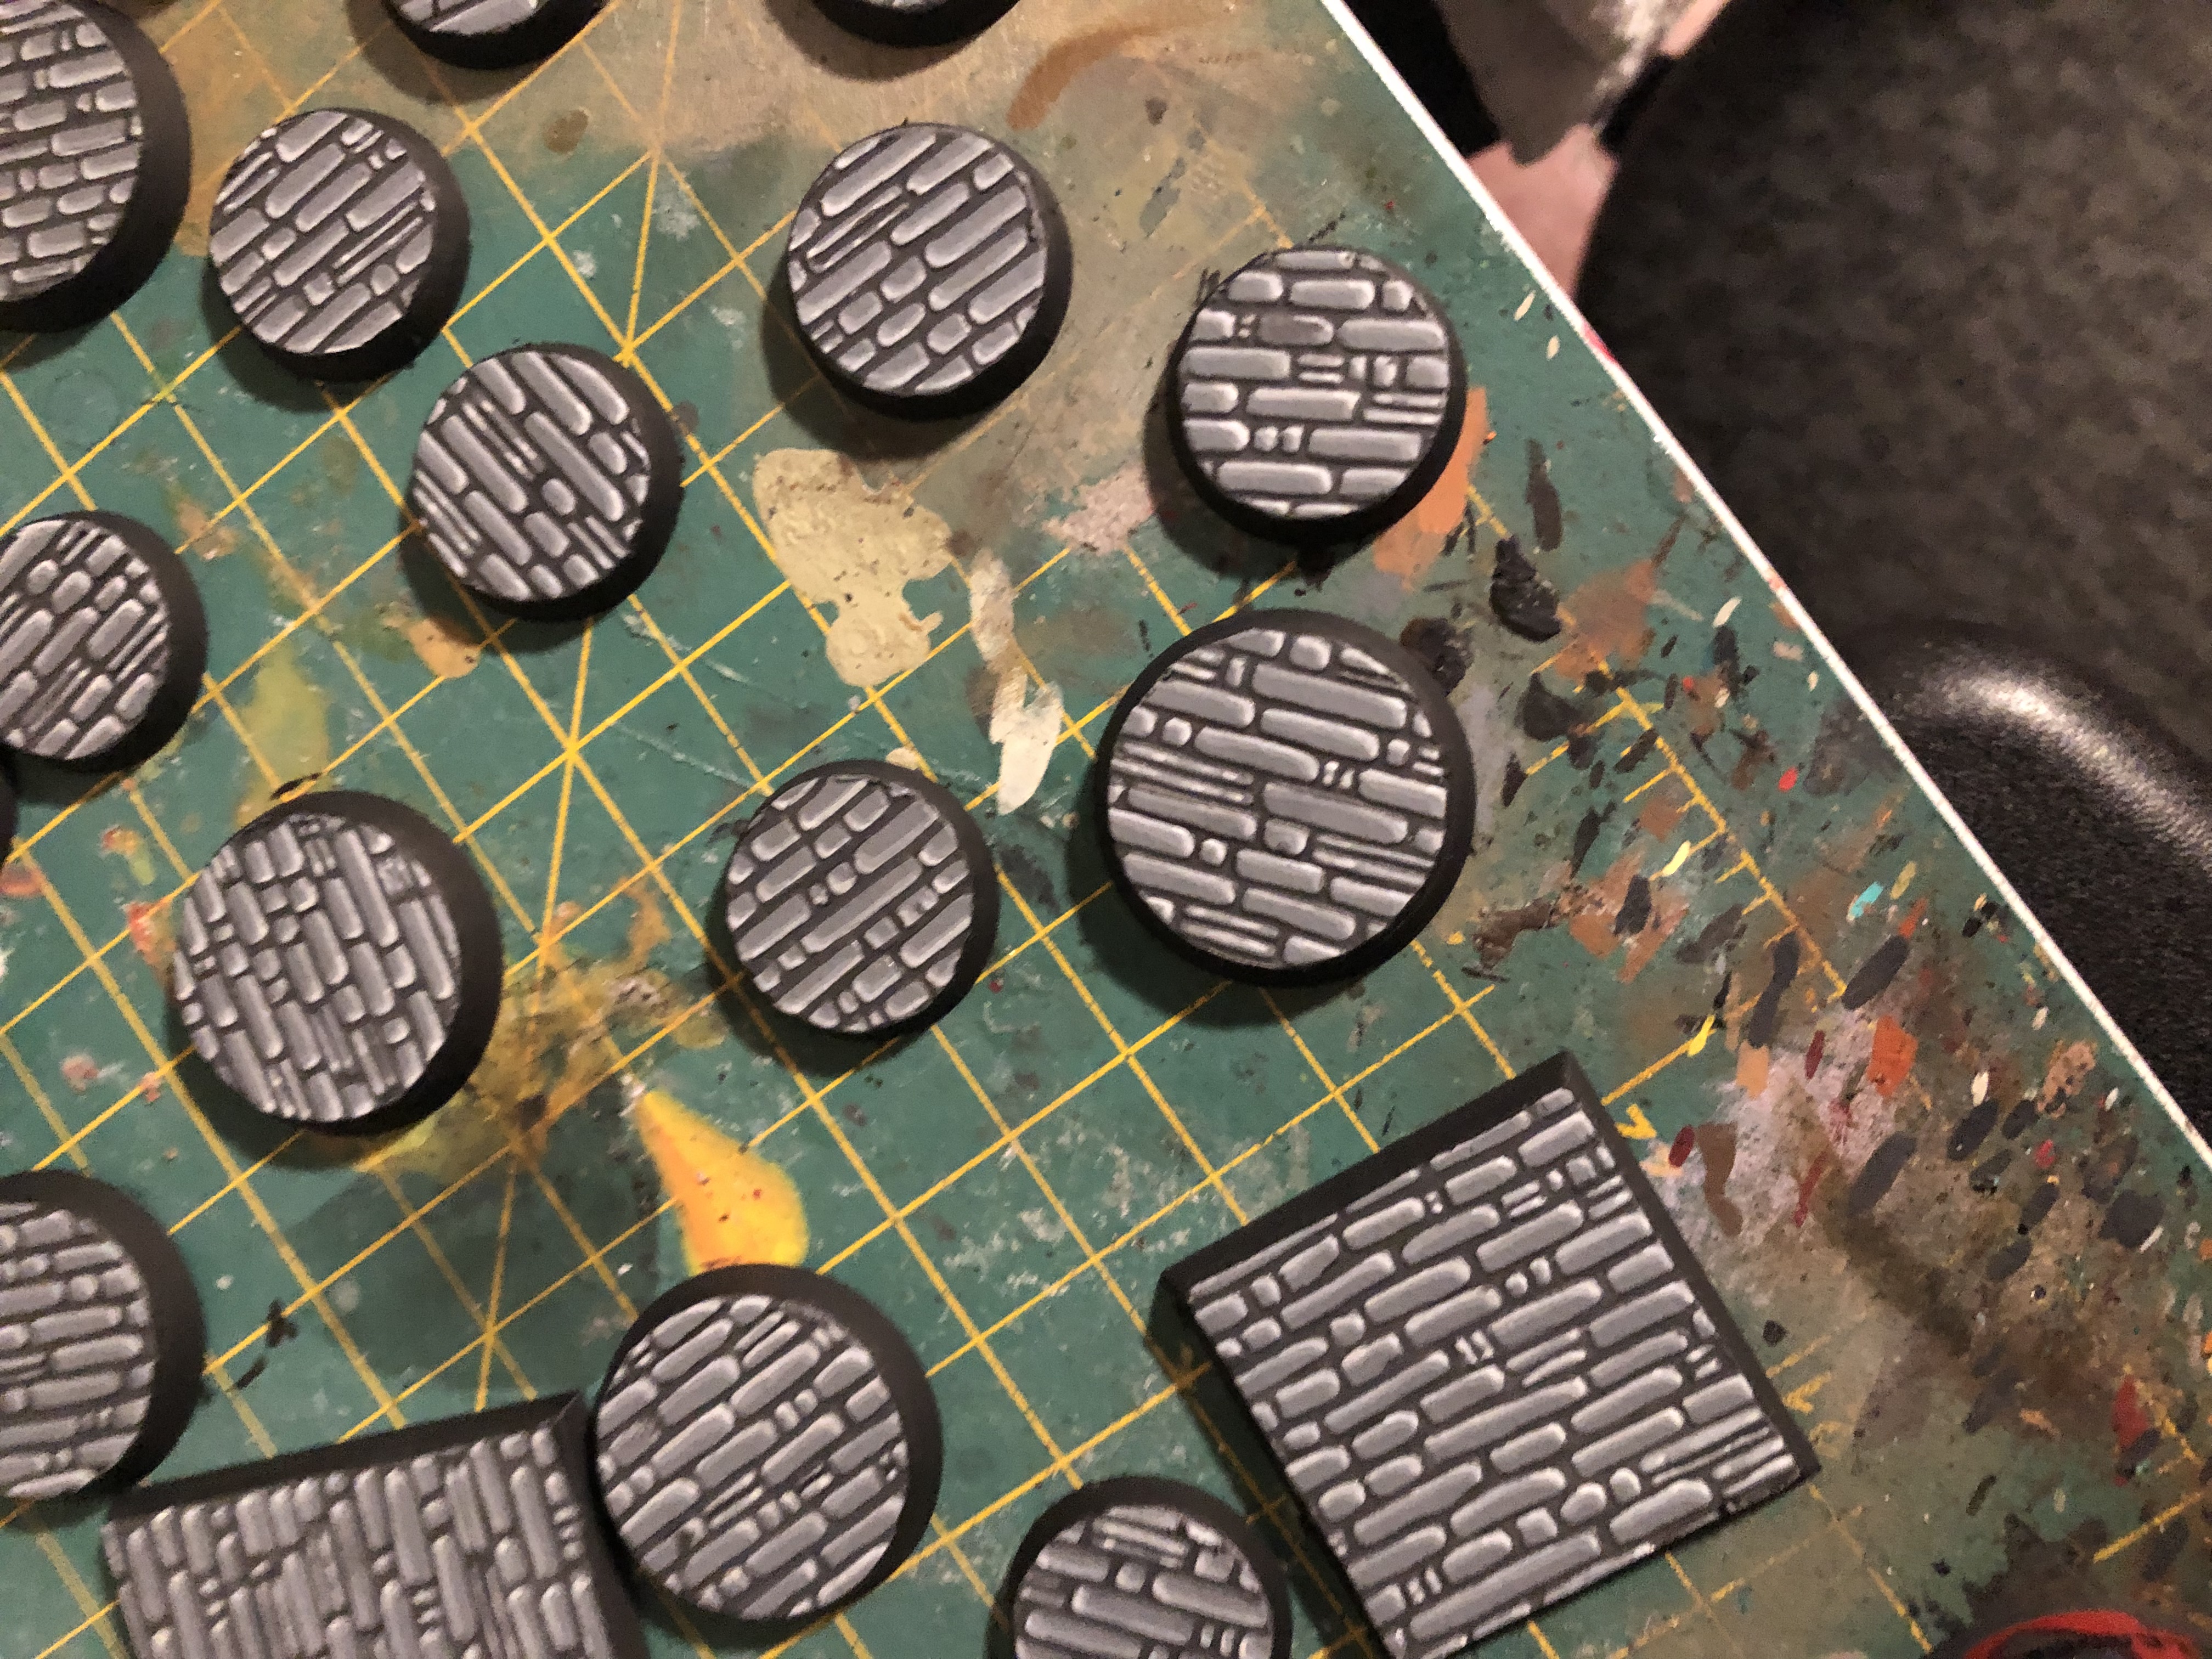
1) use the grey base coat color to pick out the bricks
2) using a slightly lighter shade of grey, paint a broad highlight on one short edge and one long edge of each brick. Consistently highlight the same edges to give the impression of a uniform light source
3) repeat step 2, using a lighter shade of grey, only painting a finer highlight on the same two edges
dont worry about being too neat, as the second to last step will clean things up.
The next post will finish the bases with 1 last highlight, a shading step, and painting the black lip of the base.
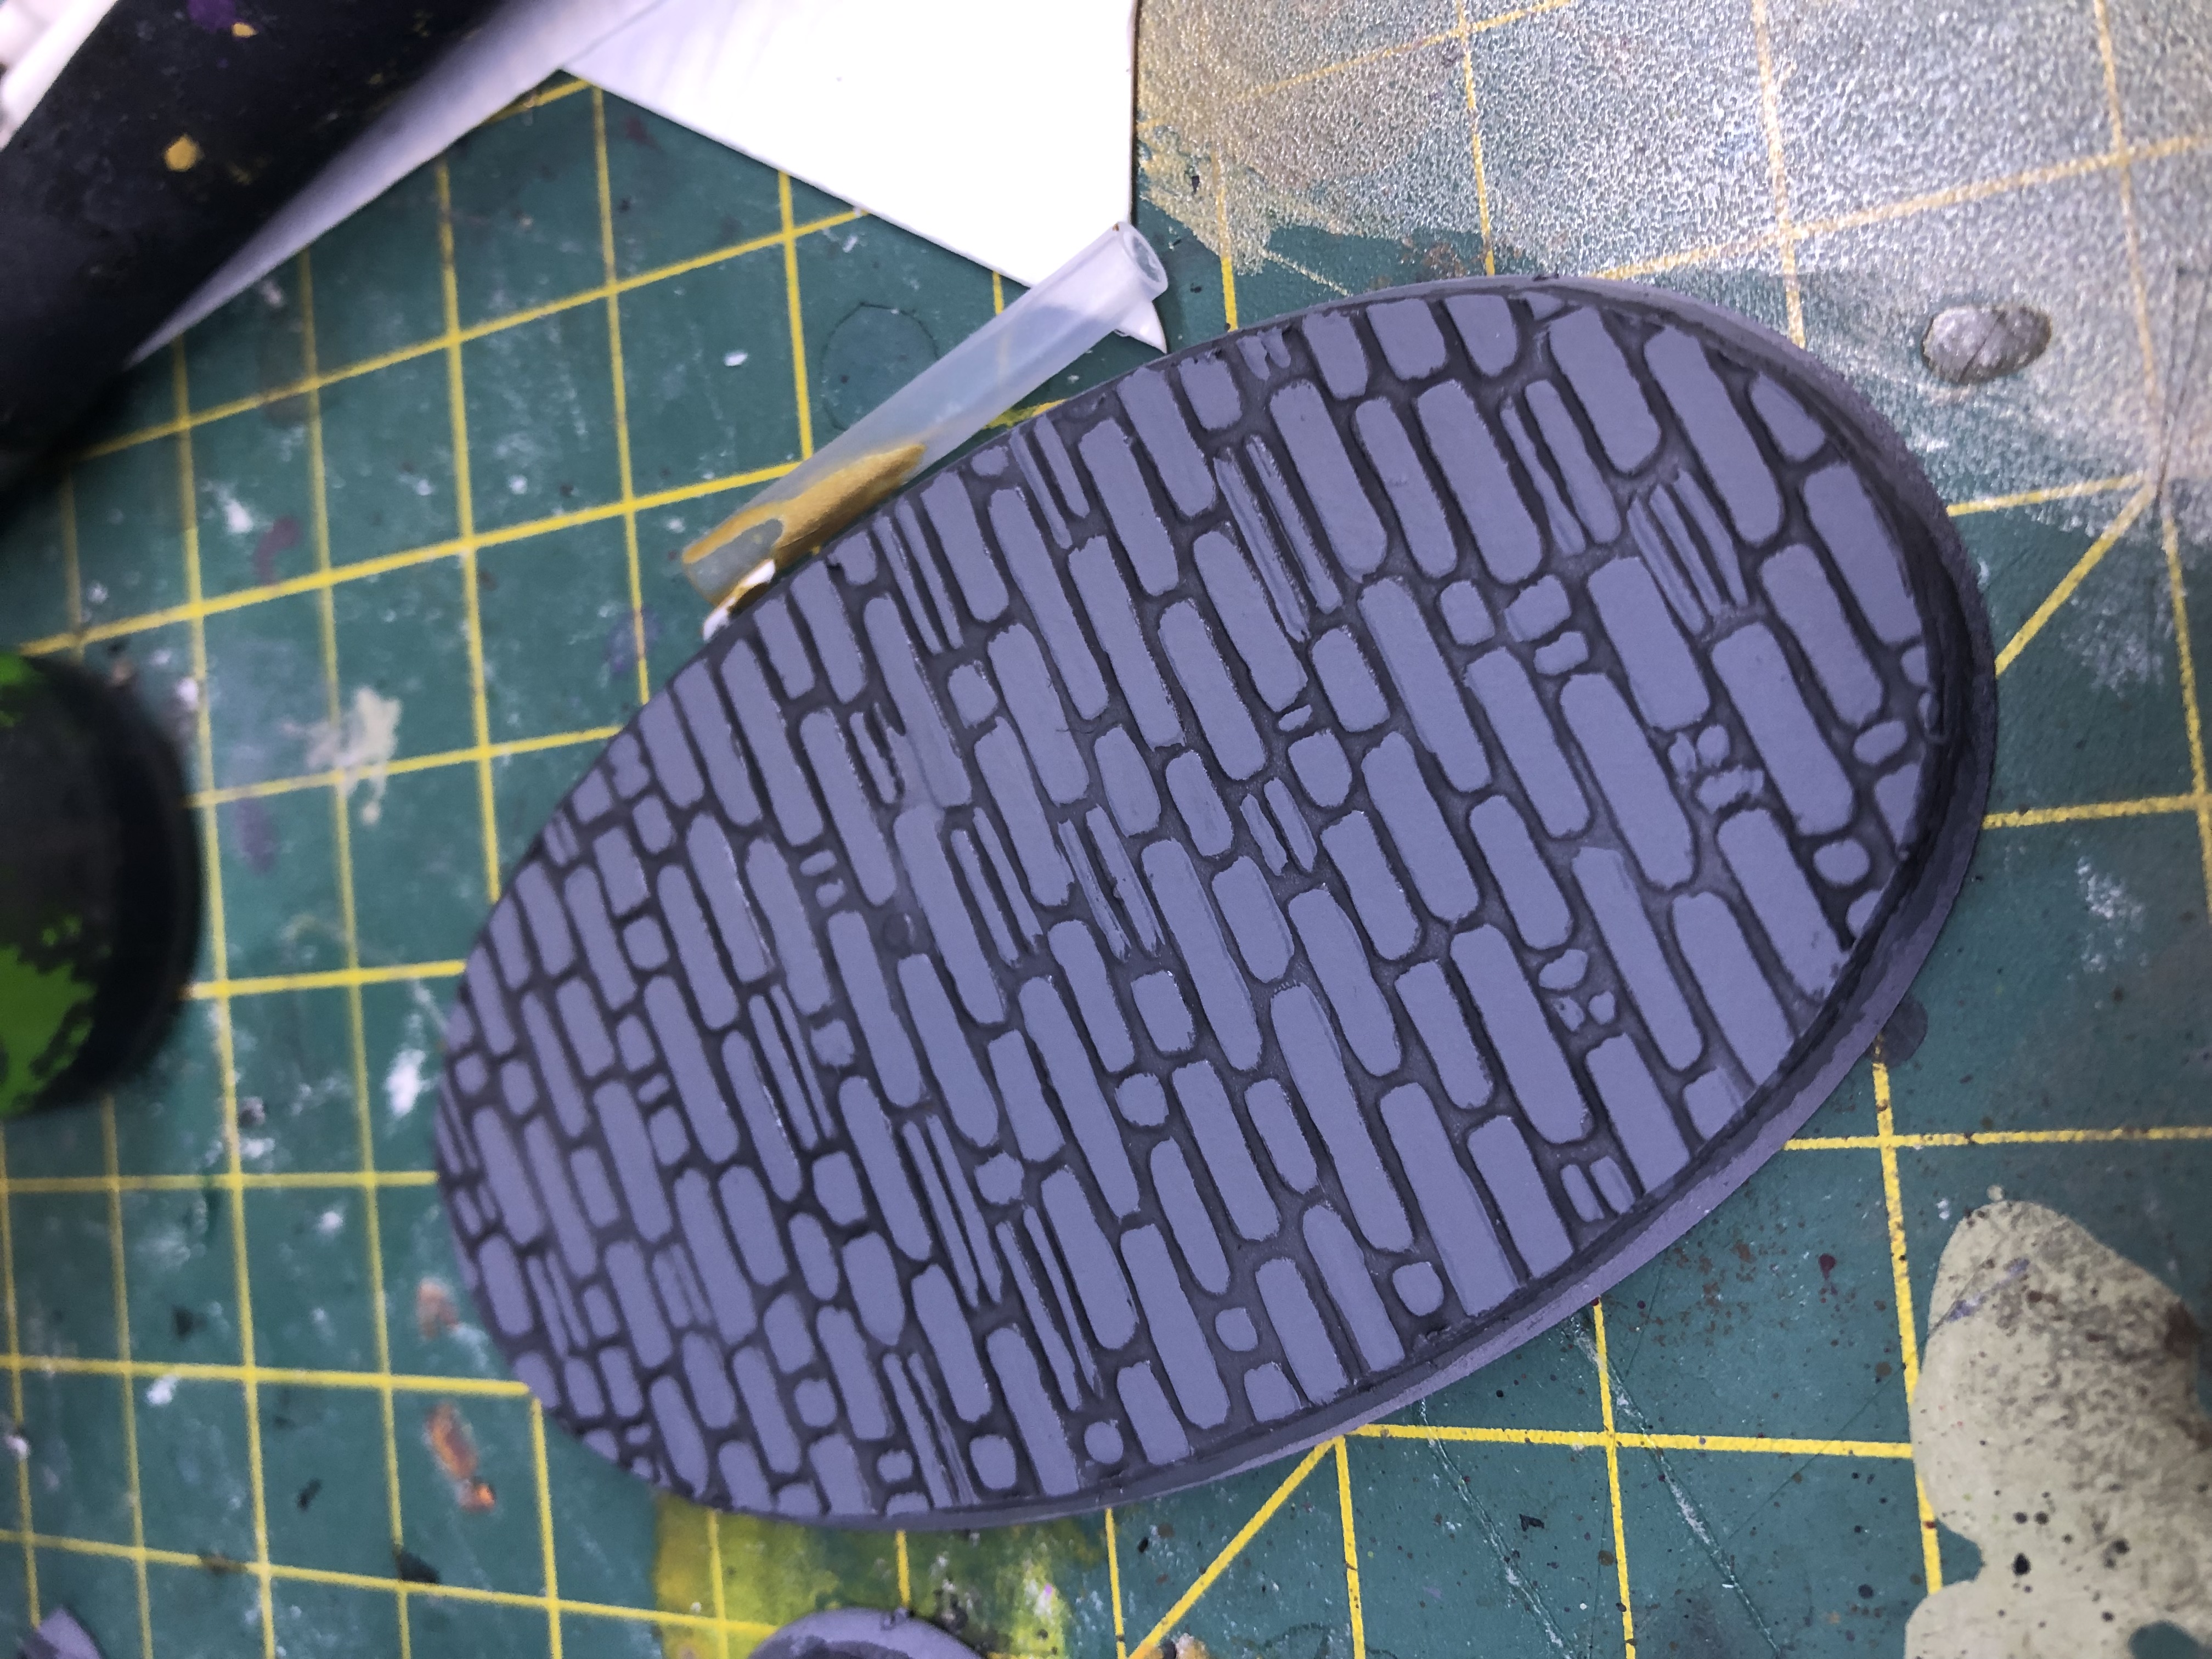 Base with bricks repainted
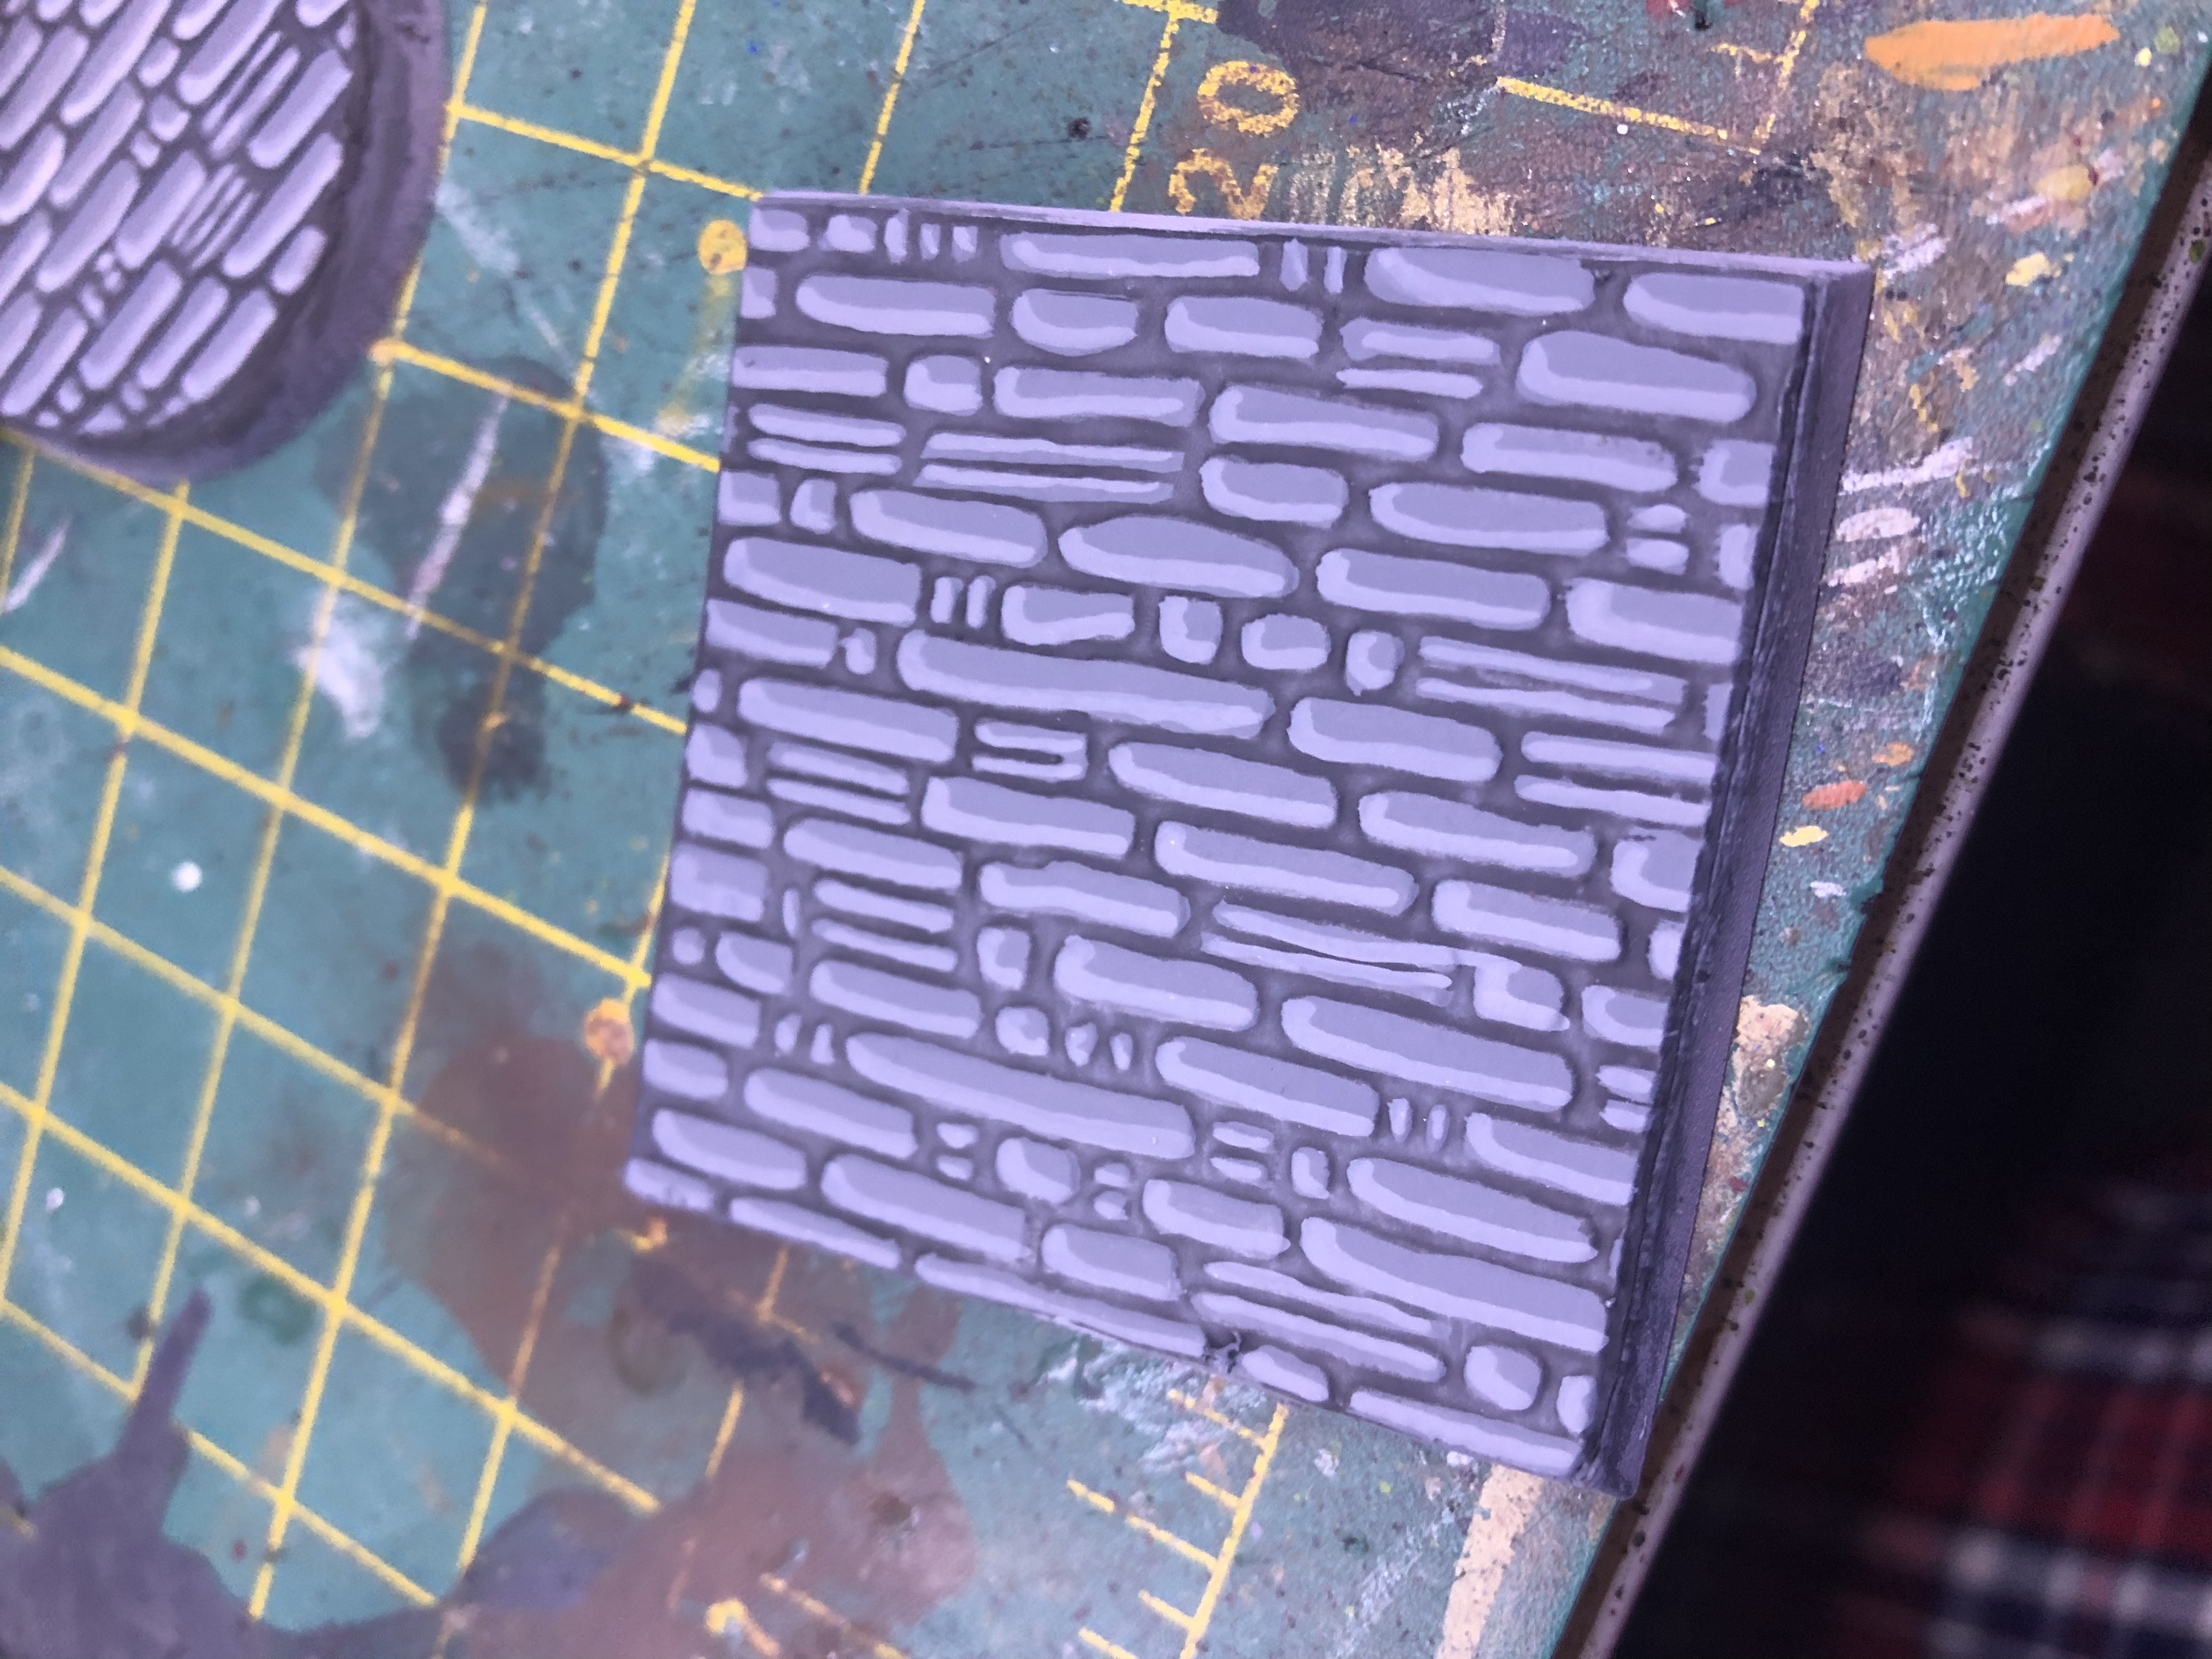 Base with a single broad highlight on the bricks
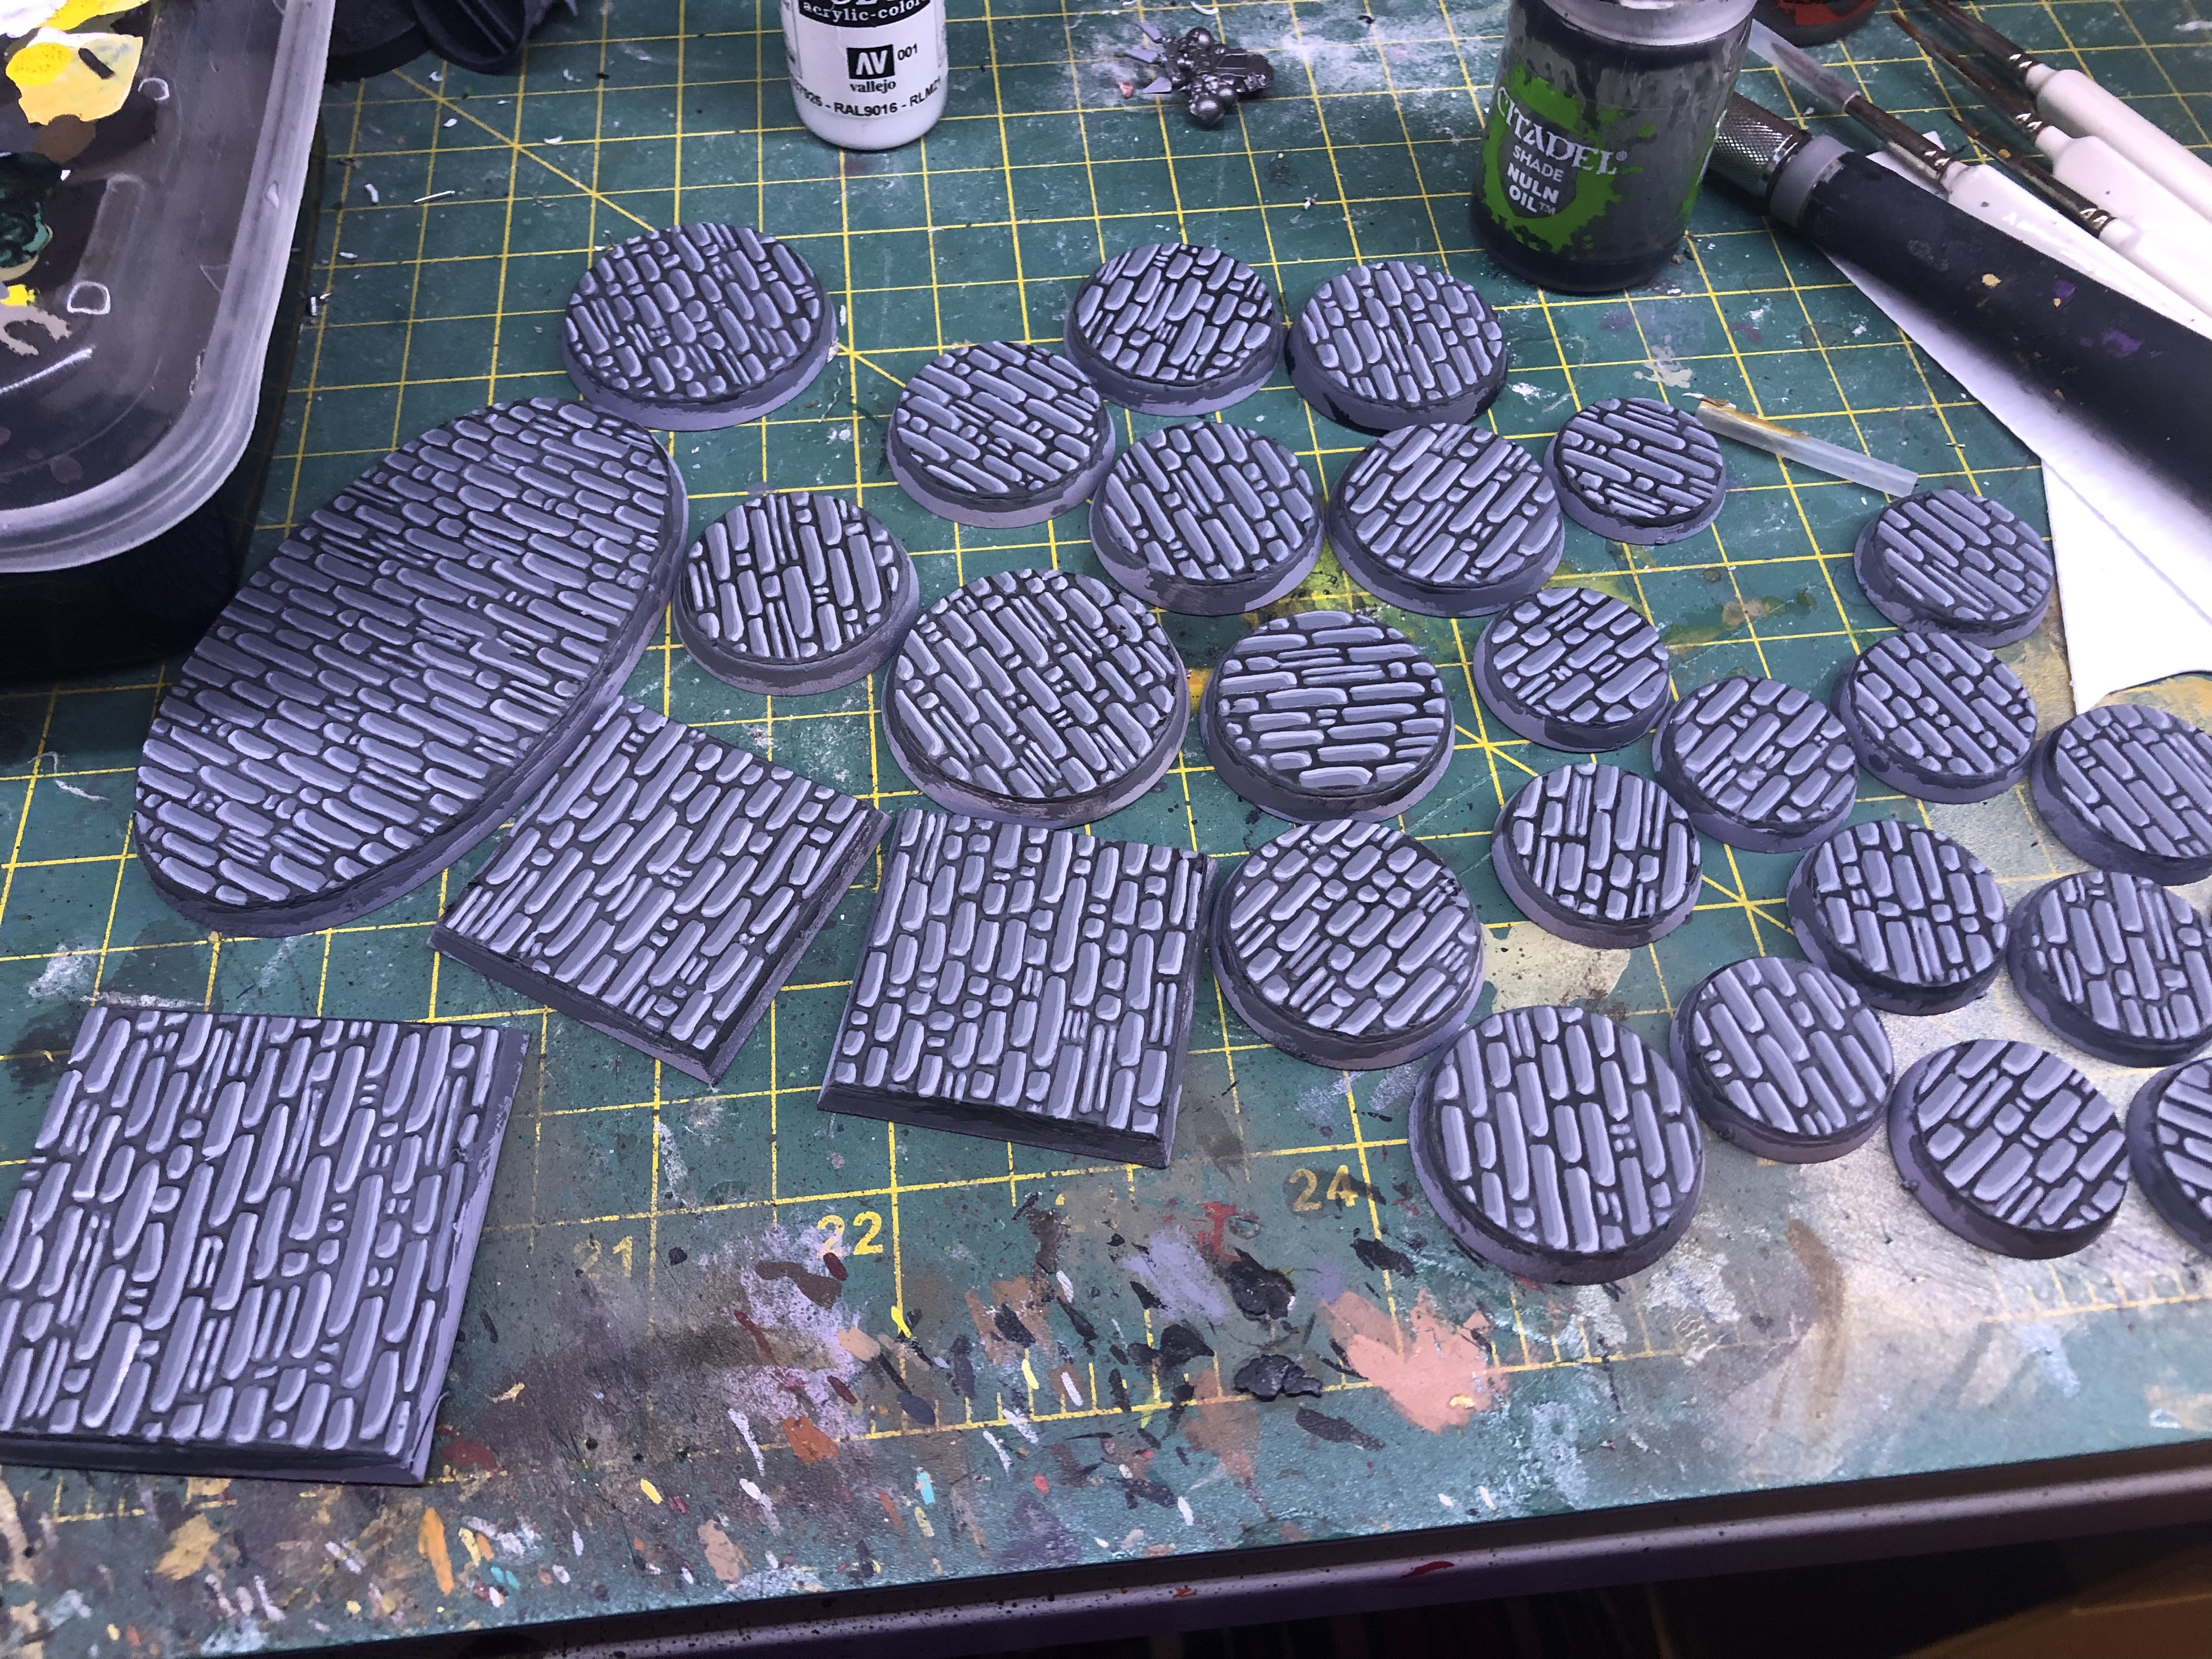 Bases with 2 highlights applied
Dwarf basing tutorial, part 1
Ok, several people have been asking how I did the dwarves bases. I finally got around to doing a second round of them for the next set of minis, so took the opportunity to document the process. You need
– sharp hobby knife
– plastic bases
– plastic glue
– textured plasticard (see link)
start by laying the plasticard face down on your work surface. Then, apply plastic glue to the tops of your bases. This should be a thin coat spread all the way to the edge to ensure good adhesion. Press bases against the bottom of the plasticard, leaving enough space to fit a knife blade between bases for cutting.
leave to dry/set.
 bases glued to plasticard
Once dry, cut the plasticard sheet to separate the individual bases. These are rough cuts. The detail work is later.
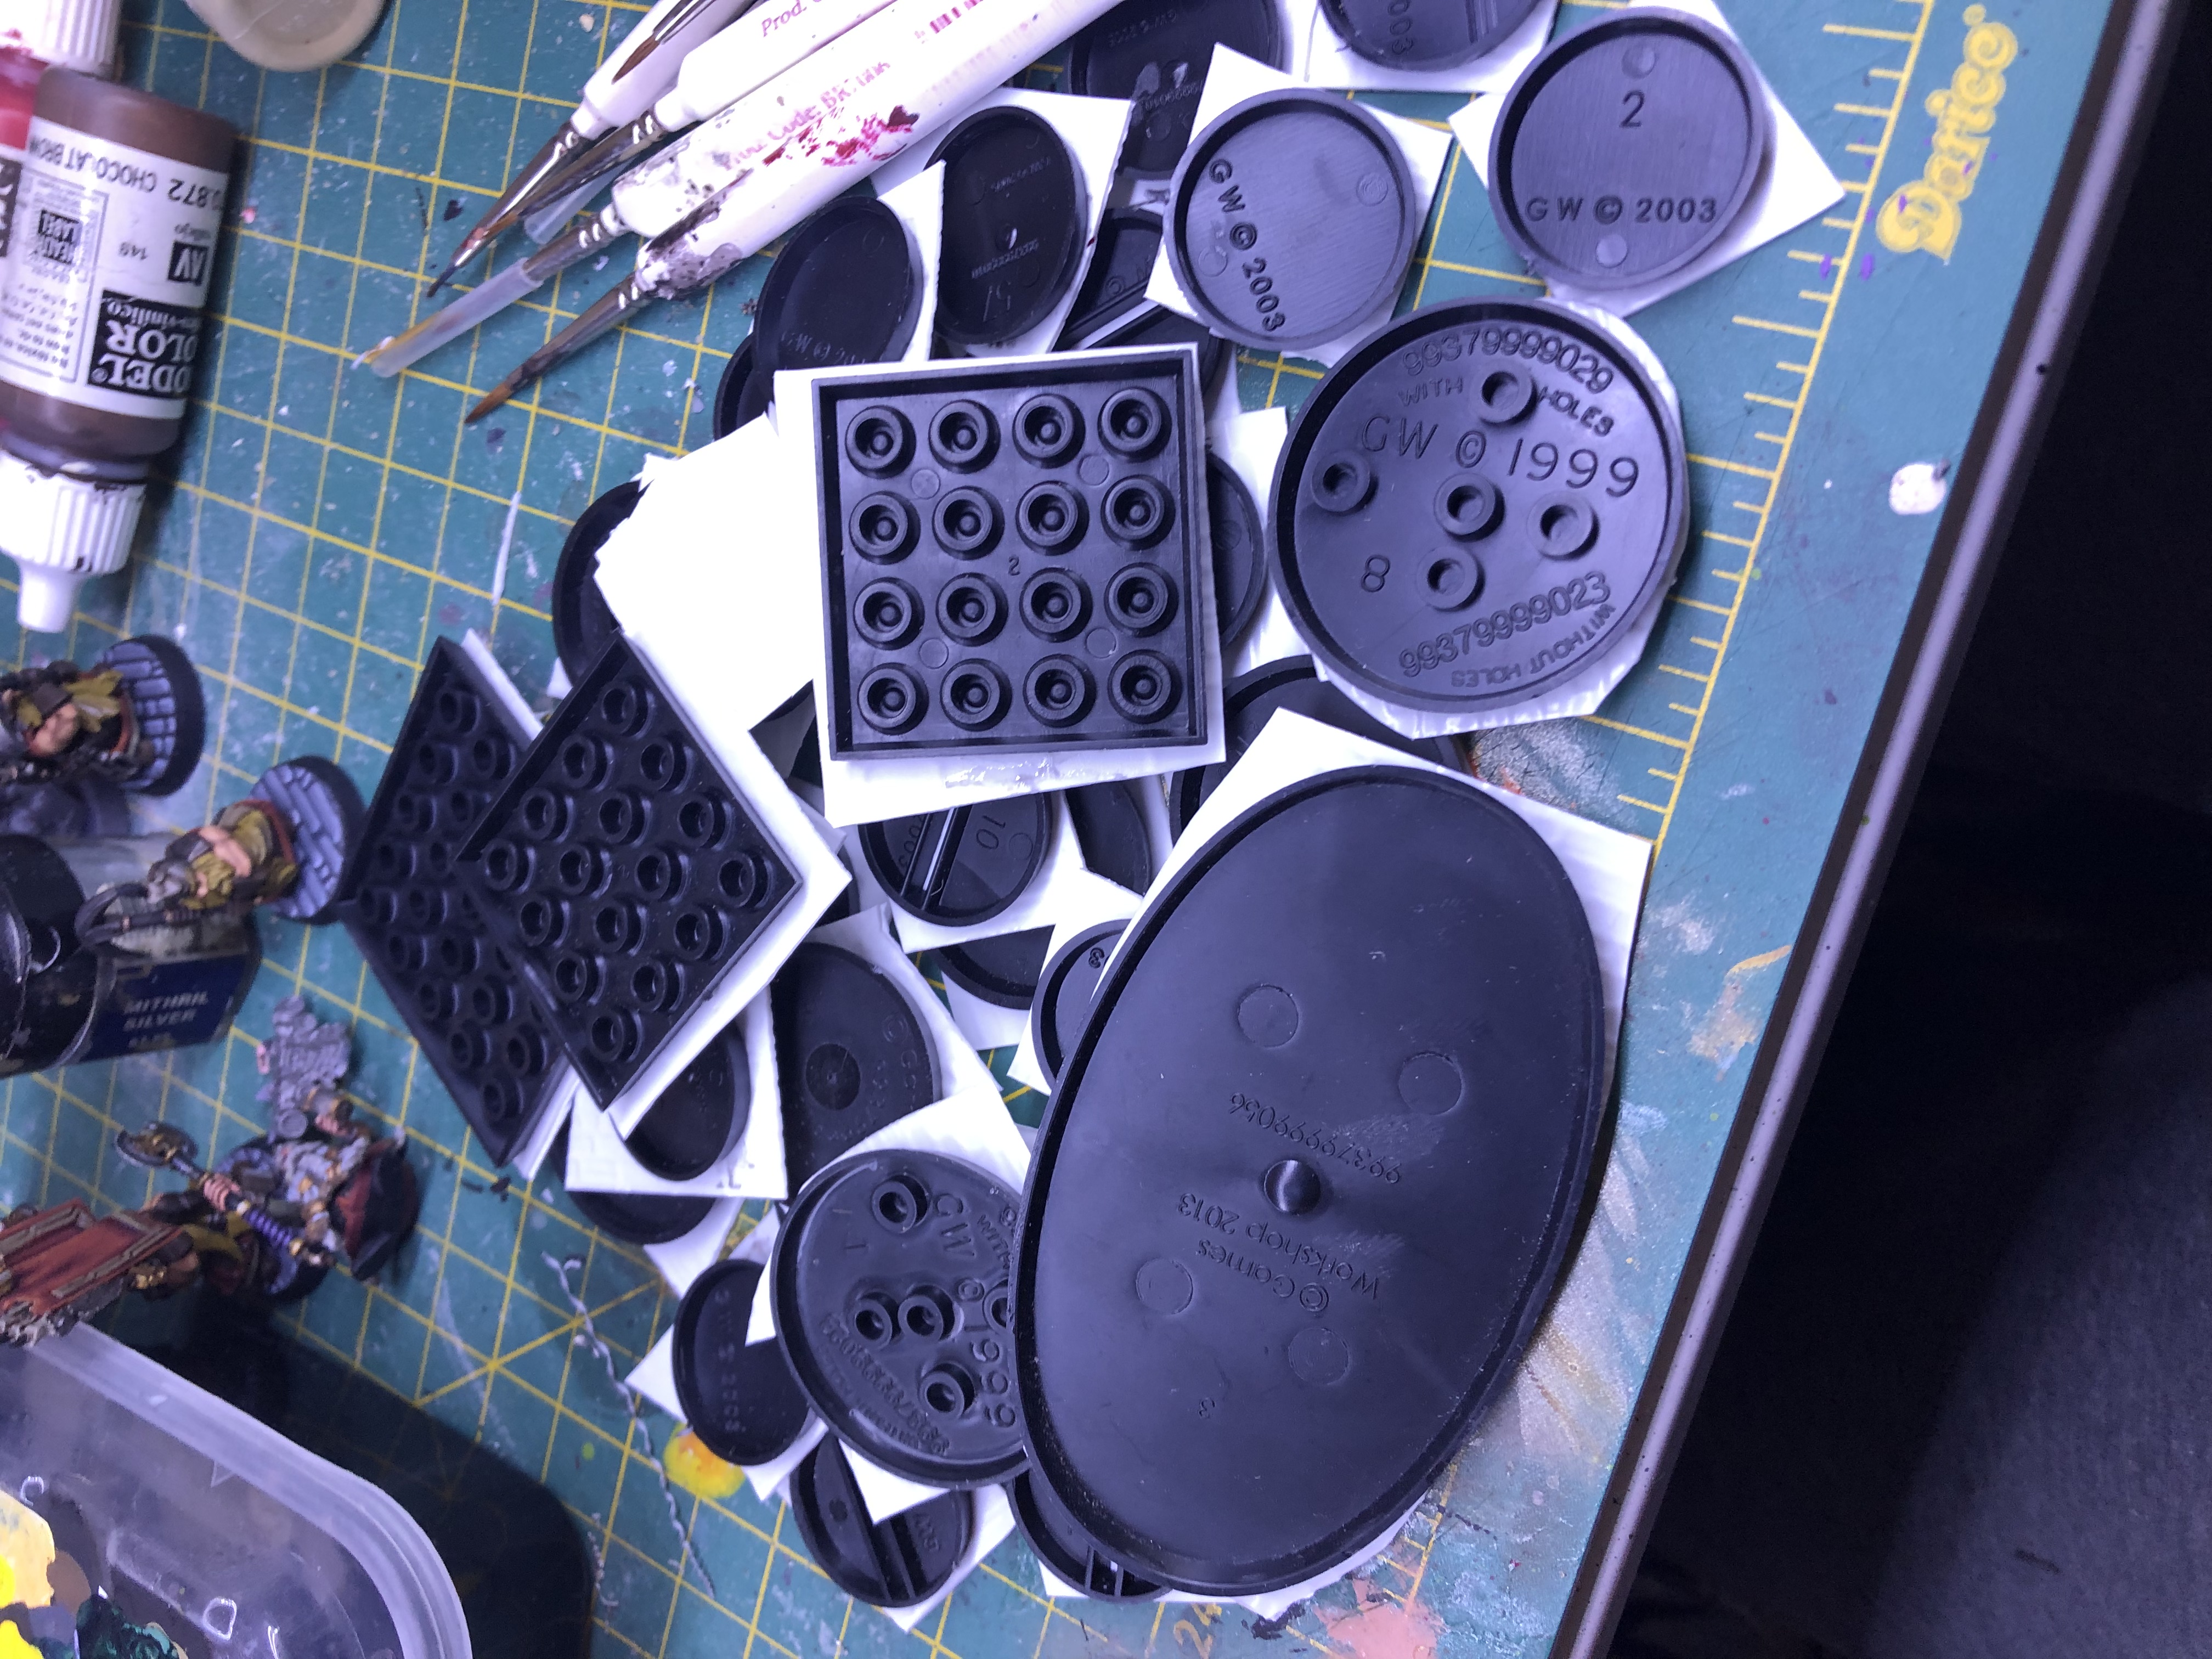 Bases separated
Now, take each base and place it face down on your cutting mat. While rotating the base, cut as much excess plasticard as you can from around the edge of the base. Be careful with the knife work.
 base with most of the excess material cut away
90% done. Now, flip the base over. While holding it in one hand, run your knife blade around the base, using the beveled edge as a guide, trimming off any small amounts of overhanging plasticard material. The plasticard should now be flush with the beveled edges of the base. You can run your finger along it to identify any areas needing further smoothing.
 Trimming the last excess material
Lastly, you may find the top lip of the base has a hard/sharp edge from the previous cuts. To soften this, I reverse my knife blade and run it quickly along the lid hard edge, just like I was removing a mold line. 1-2 passes and the edge should now be softer/smoother.
this will get you 1-200 bases from just $8 of materials.
Next steps, priming and painting.

The dwarves just keep on comm’n
Even though I had envisioned this project being a bit more random, the dwarf-theme has been pretty consistent recently. I’m excited about warlords of Erehwon, so trying to get a warbands worth of dwarves table-ready.
this group includes some plastics from both the basic GW dwarf plastics, as well as some of the Blackfire Pass starter set plastics. It also has 2 old GW dwarf metal minis in the form of the cannon crewman (far right) and one of the guards from the Anvil of Doom.
i am also working on another set of bases, so should have a tutorial on those shortly. Maybe later this weekend.
 Full group
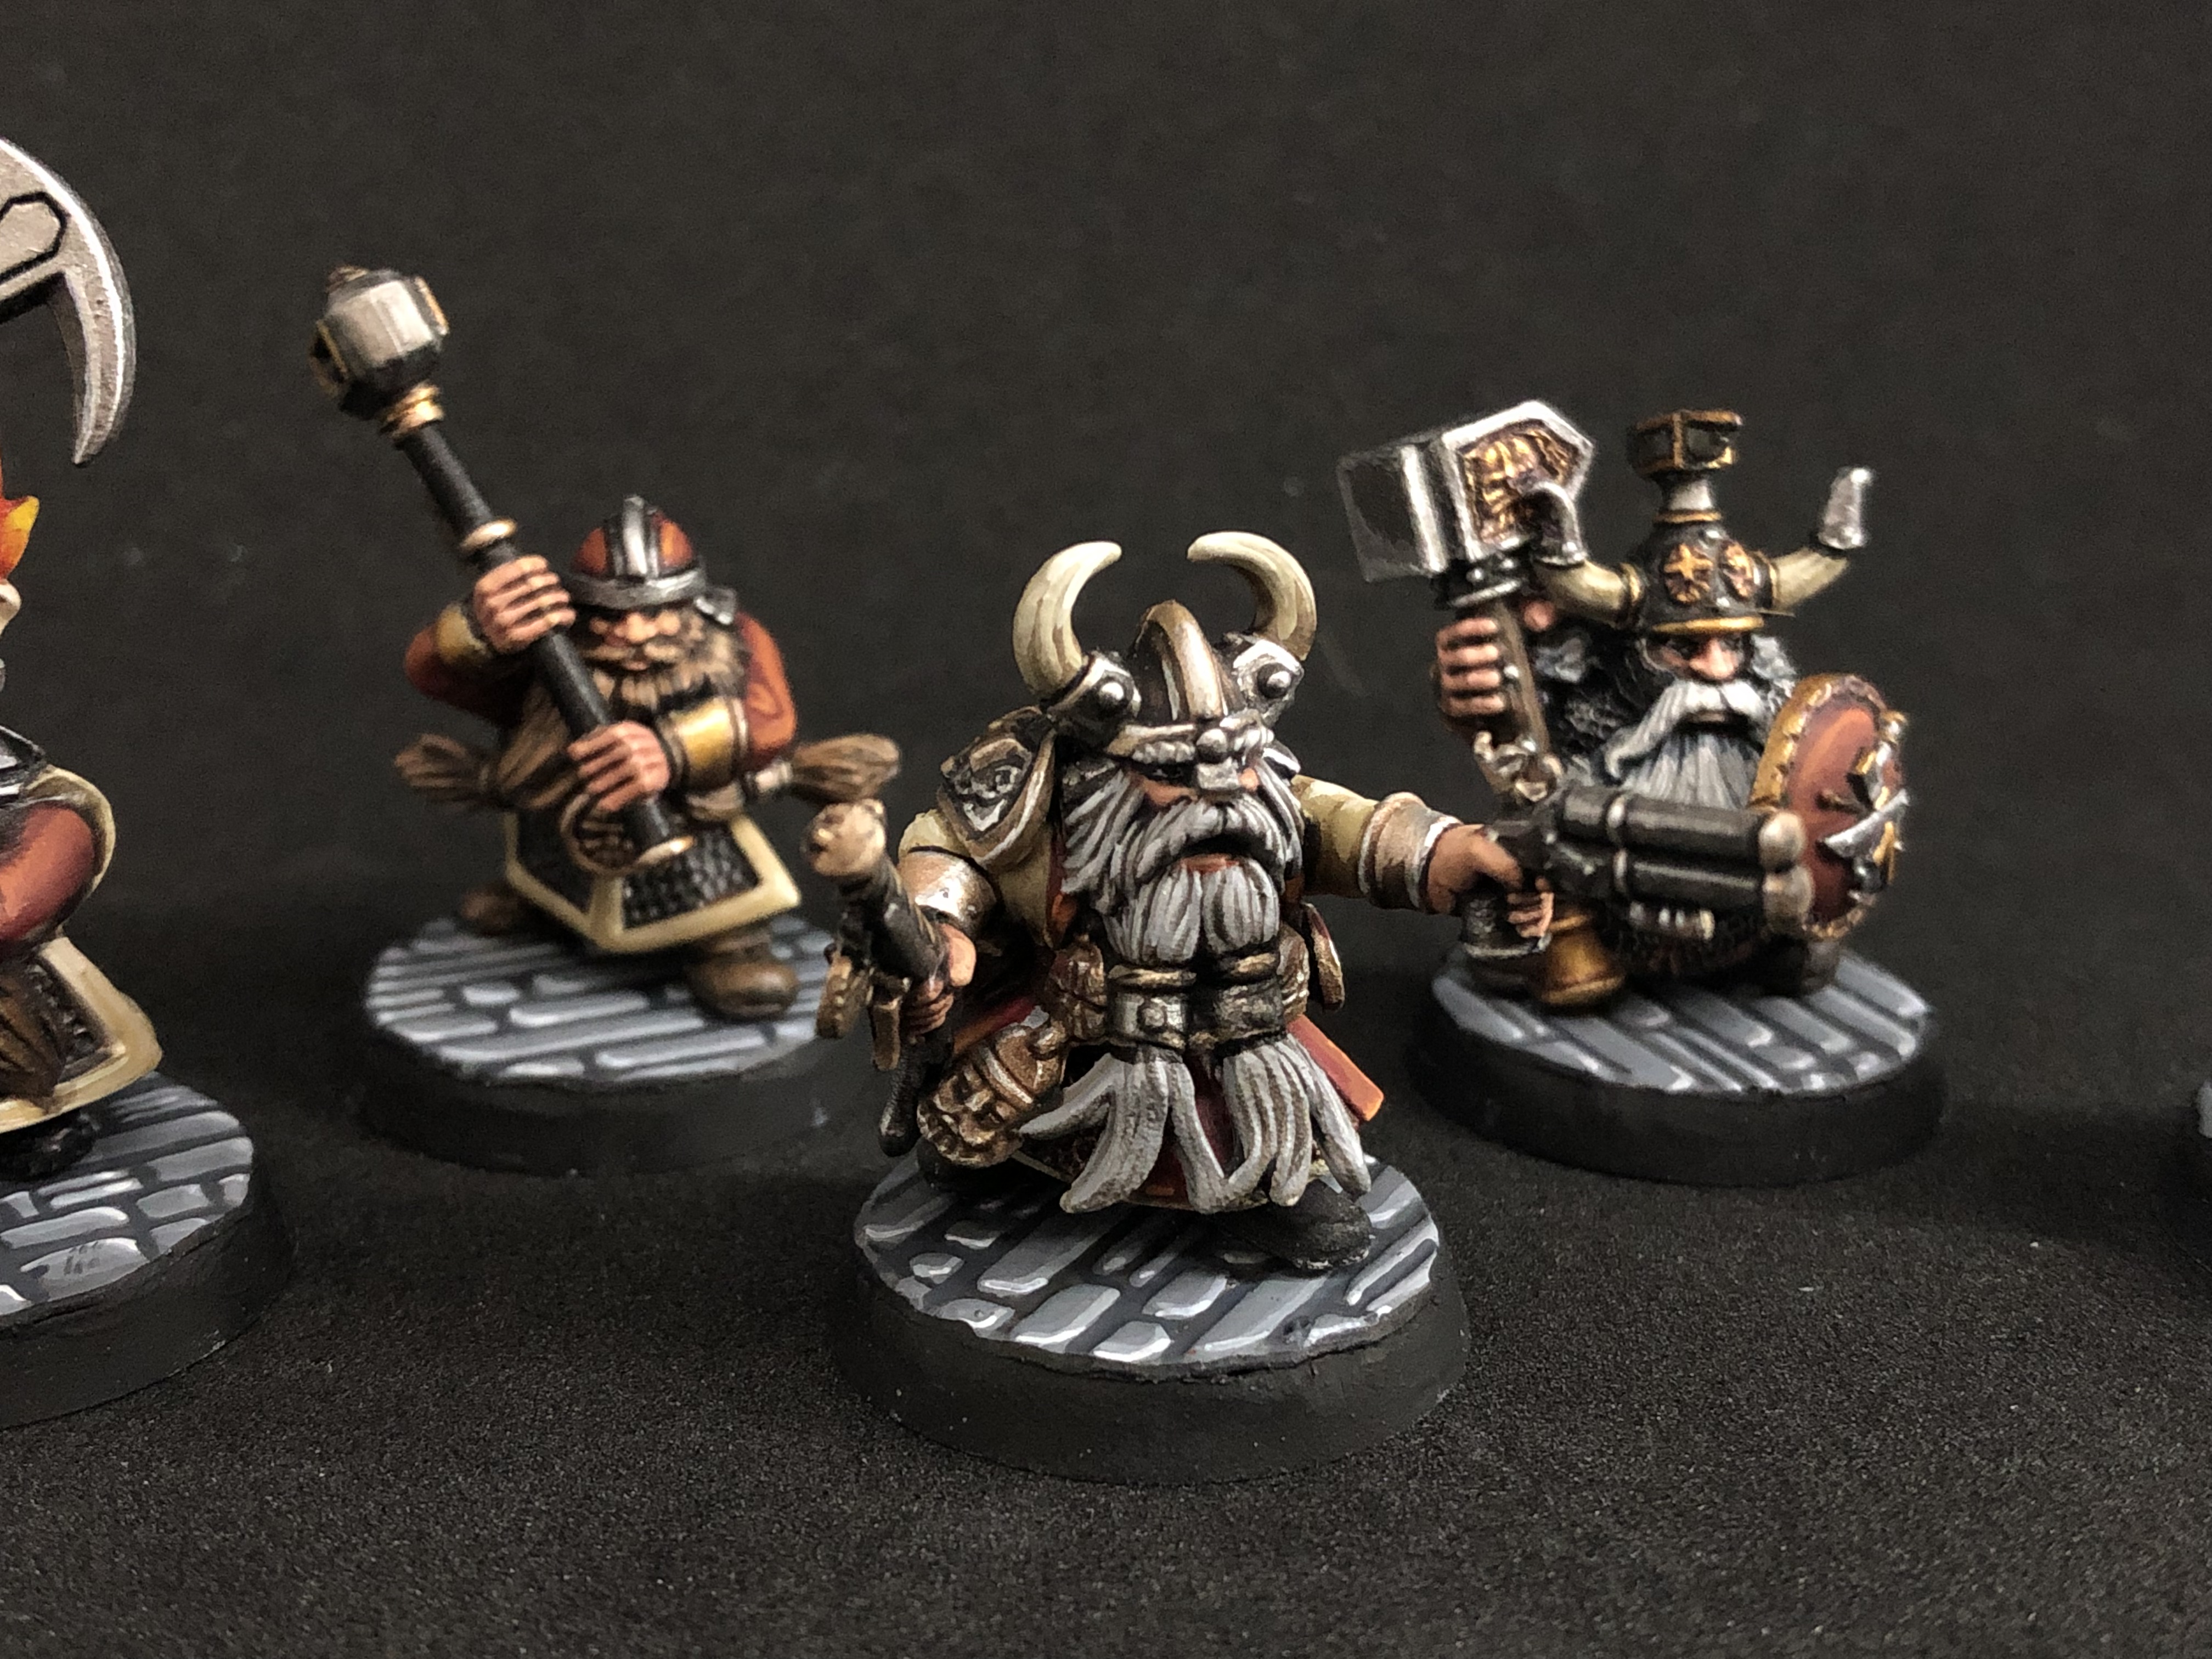 Close up of thunderer champion
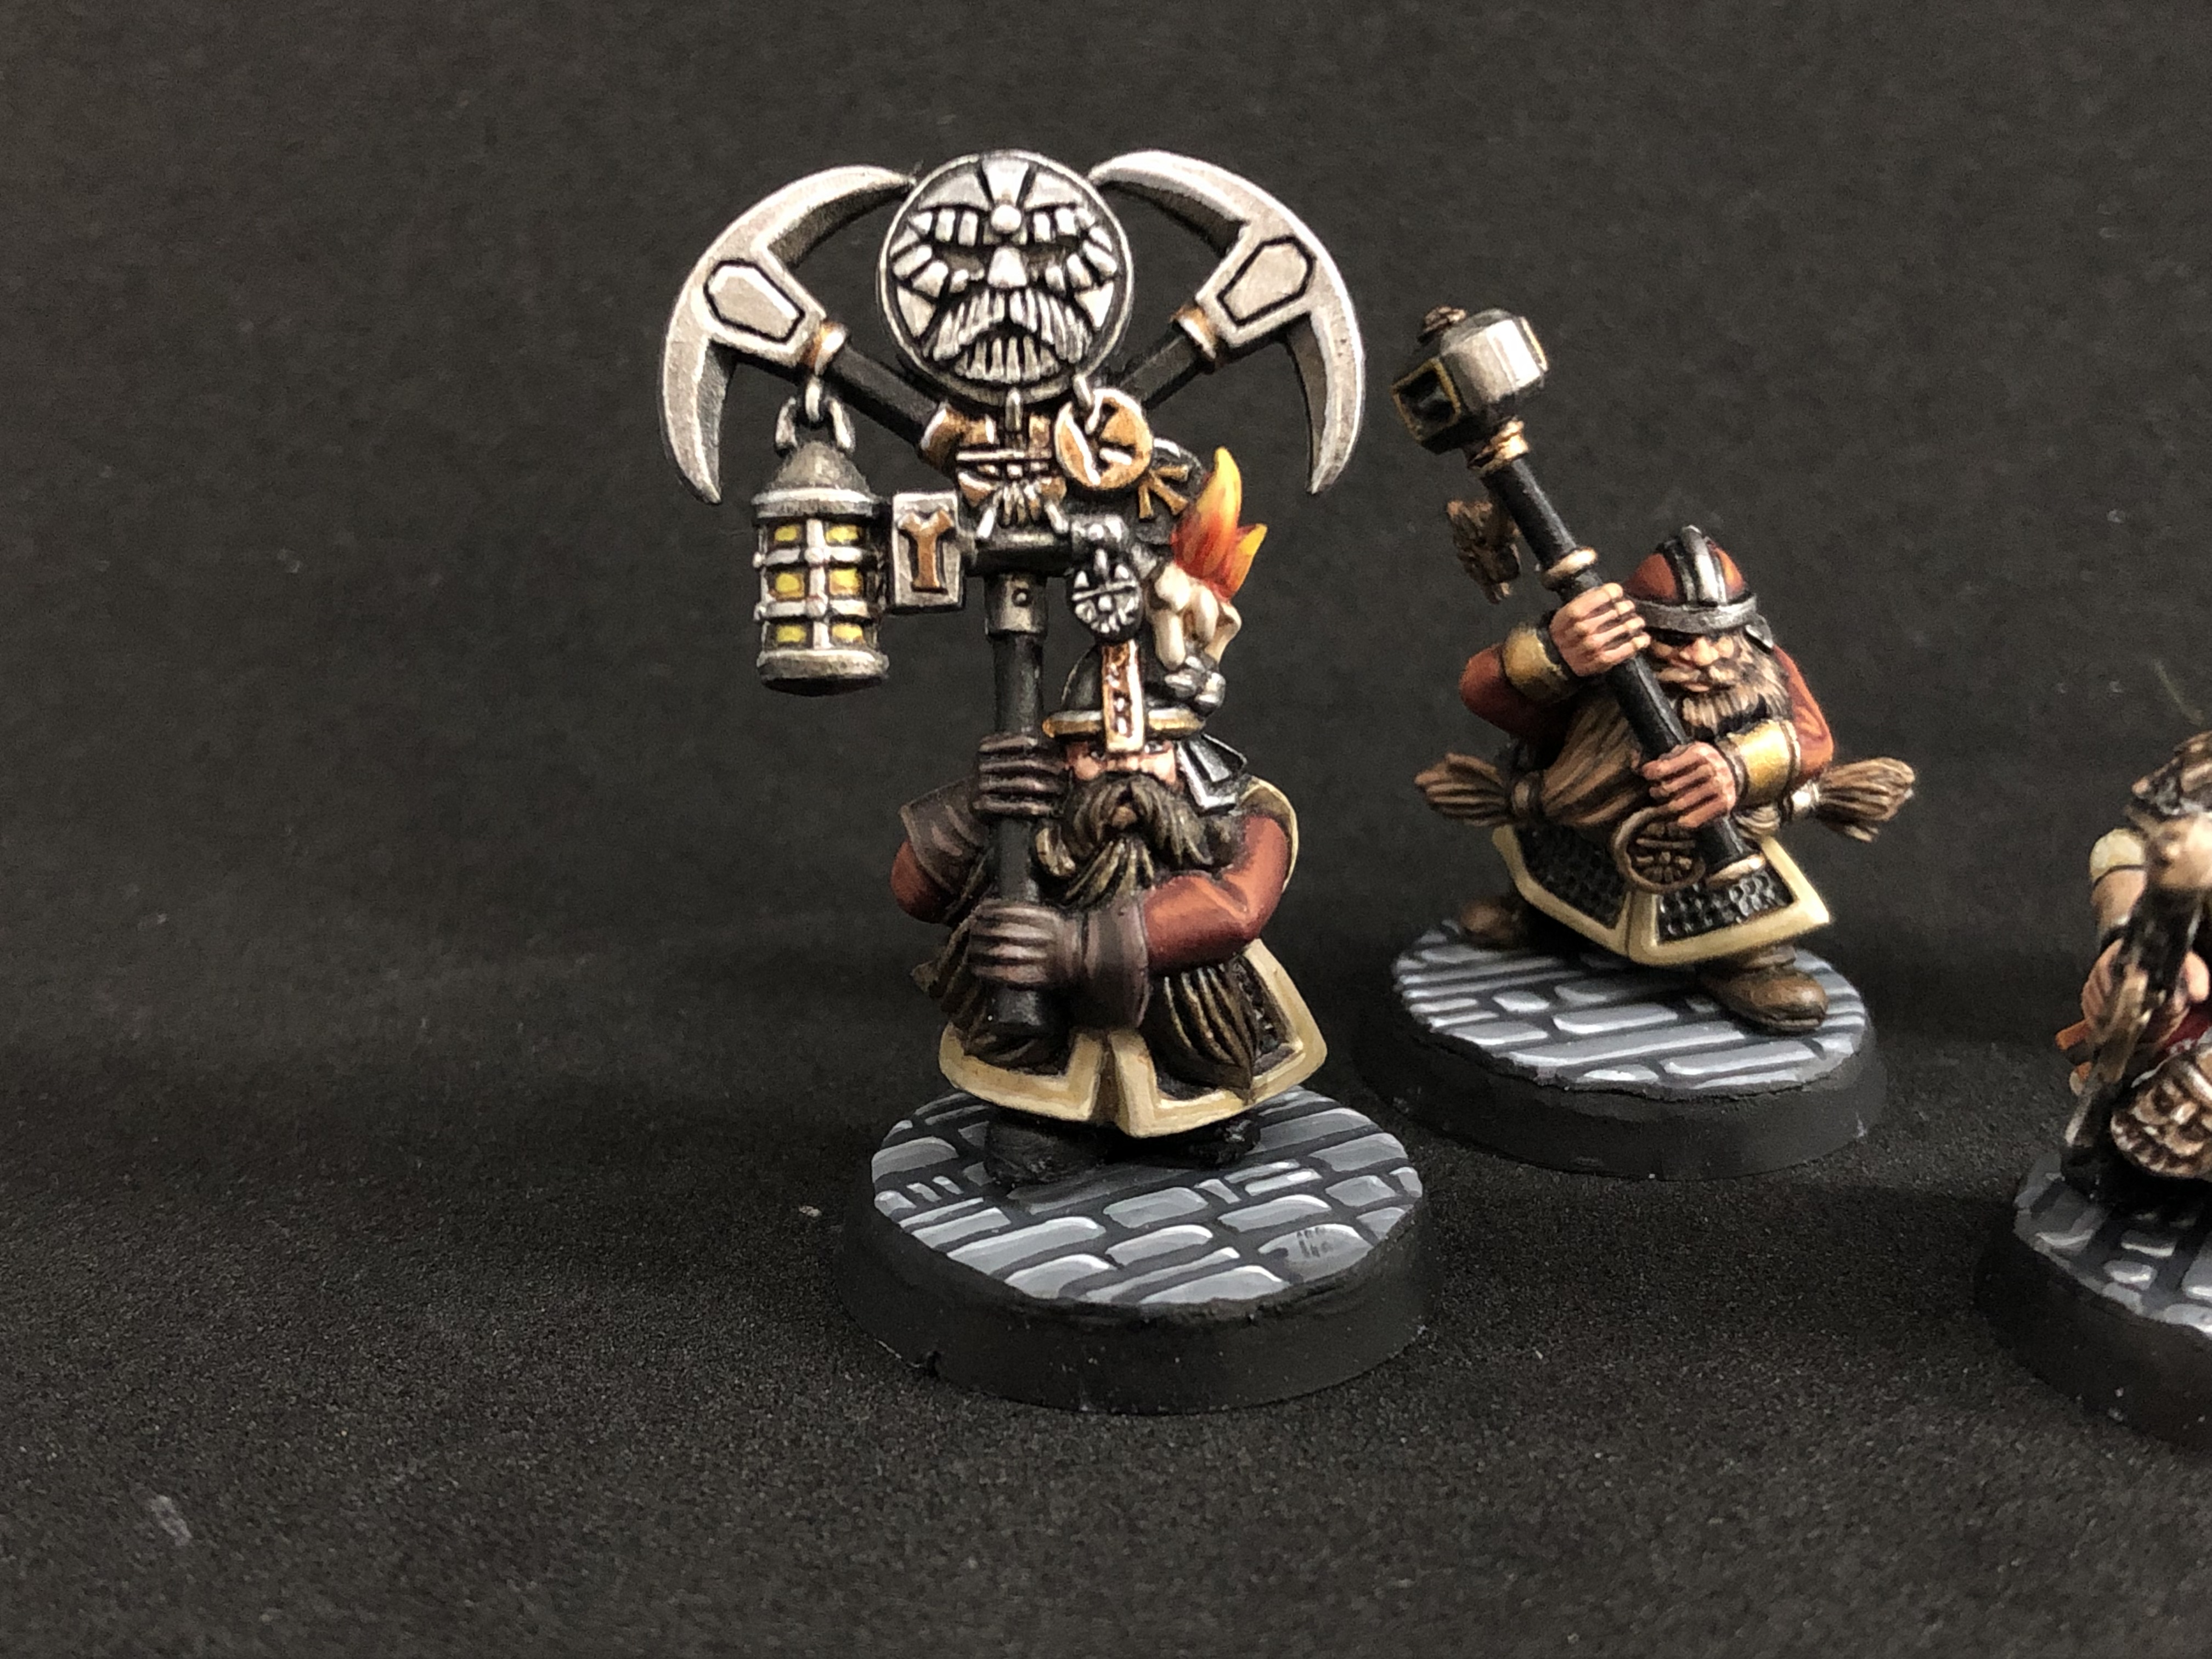 Close up of miner standard bearer


![Play WW2 Commando Operations With Butcher & Bolt [Updated]](https://images.beastsofwar.com/2026/03/relaunch-600-338.jpg)


