


![1918 Spring Offensive Wargame | Full Rules Overview with John & Gerry (WW1 Tabletop Game) [7 Days Early Access]](https://images.beastsofwar.com/2026/03/unboxing-warfulcrum-games-1918-spring-offensive-review-coverimage1-225-127.jpeg)


Fallout/Roanoke VA Mashup Table


Recommendations: 157
About the Project
This is the entry for the Modiphius Fallout Design competition for Mishap Games. We entered it in the retailer best table category. ----------------------------------- It is a fallout-ized version of a local landmark: the Mill Mountain Star. The Star has been around for decades and the overlook area is a popular destination. A village of ghouls has sprung up around the Star, worshiping it and the beleaguered Mr. Handy that maintains the lighting. The ghouls have even captured a technician to keep Mr. Handy running. ----------------------------------- Information about the Star: https://www.visitroanokeva.com/things-to-do/attractions/roanoke-star/ You can see from the main photo that we cut the tree cover back significantly. ----------------------------------- Google street view map link to the Overlook Area: https://goo.gl/maps/Ea8uVWcusMz ----------------------------------- Rough differences with reality: -Went with the older red/white/blue scheme for the star lights. Felt more in tune with Fallout's patriotic tendencies -Reduced the number of lights in the star, didn't double up some of the colors. -Added rocks to the overlook as the vault entrance does't look right without rocks. -Tweaked the road sizes to accommodate Corvegas -Removed some detail that would have hindered game play, like the front porch of the bathroom, the bollards at the trail edge, and minor elevation changes. -Buildings have generally been smooshed and resized similar to the process the Fallout videos games use
Related Game: Fallout: Wasteland Warfare
Related Company: Modiphius Entertainment
Related Genre: Post-Apocalyptic
This Project is Completed
The Beginning
This is the entry for the Modiphius Fallout Design competition for Mishap Games. We entered it in the retailer best table category.
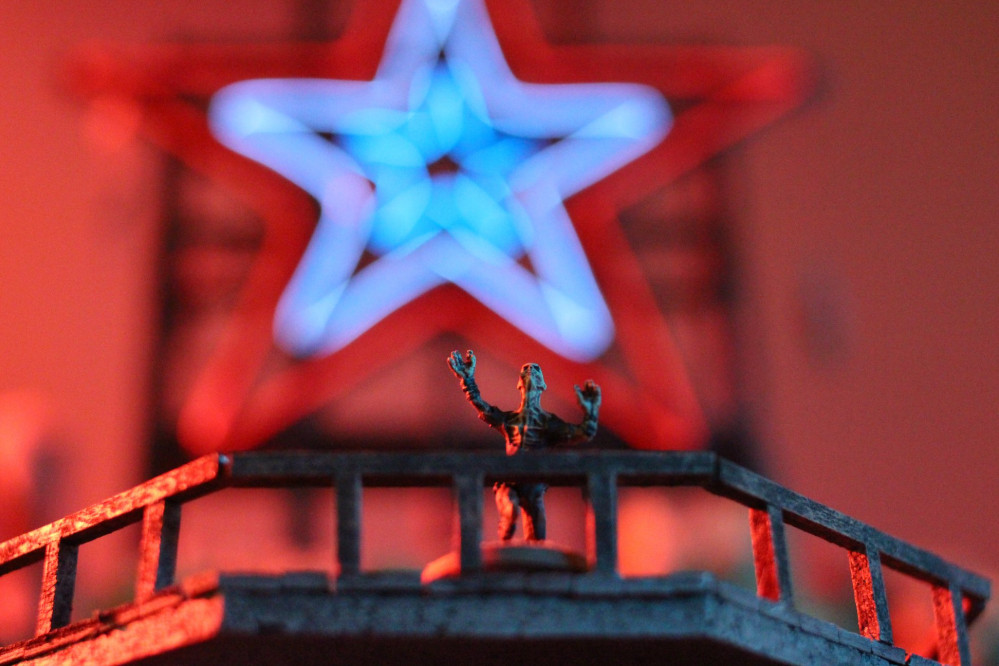
It is a fallout-ized version of a local landmark: the Mill Mountain Star. The Star has been around for decades and the overlook area is a popular destination. A village of ghouls has sprung up around the Star, worshiping it and the beleaguered Mr. Handy that maintains the lighting. The ghouls have even captured a technician to keep Mr. Handy running.
Information about the Star: https://www.visitroanokeva.com/things-to-do/attractions/roanoke-star/ You can see from the main photo that we cut the tree cover back significantly.
Google street view map link to the Overlook Area: https://goo.gl/maps/Ea8uVWcusMz
Rough differences with reality:
- Went with the older red/white/blue scheme for the star lights. Felt more in tune with Fallout’s patriotic tendencies
- Reduced the number of lights in the star, didn’t double up some of the colors.
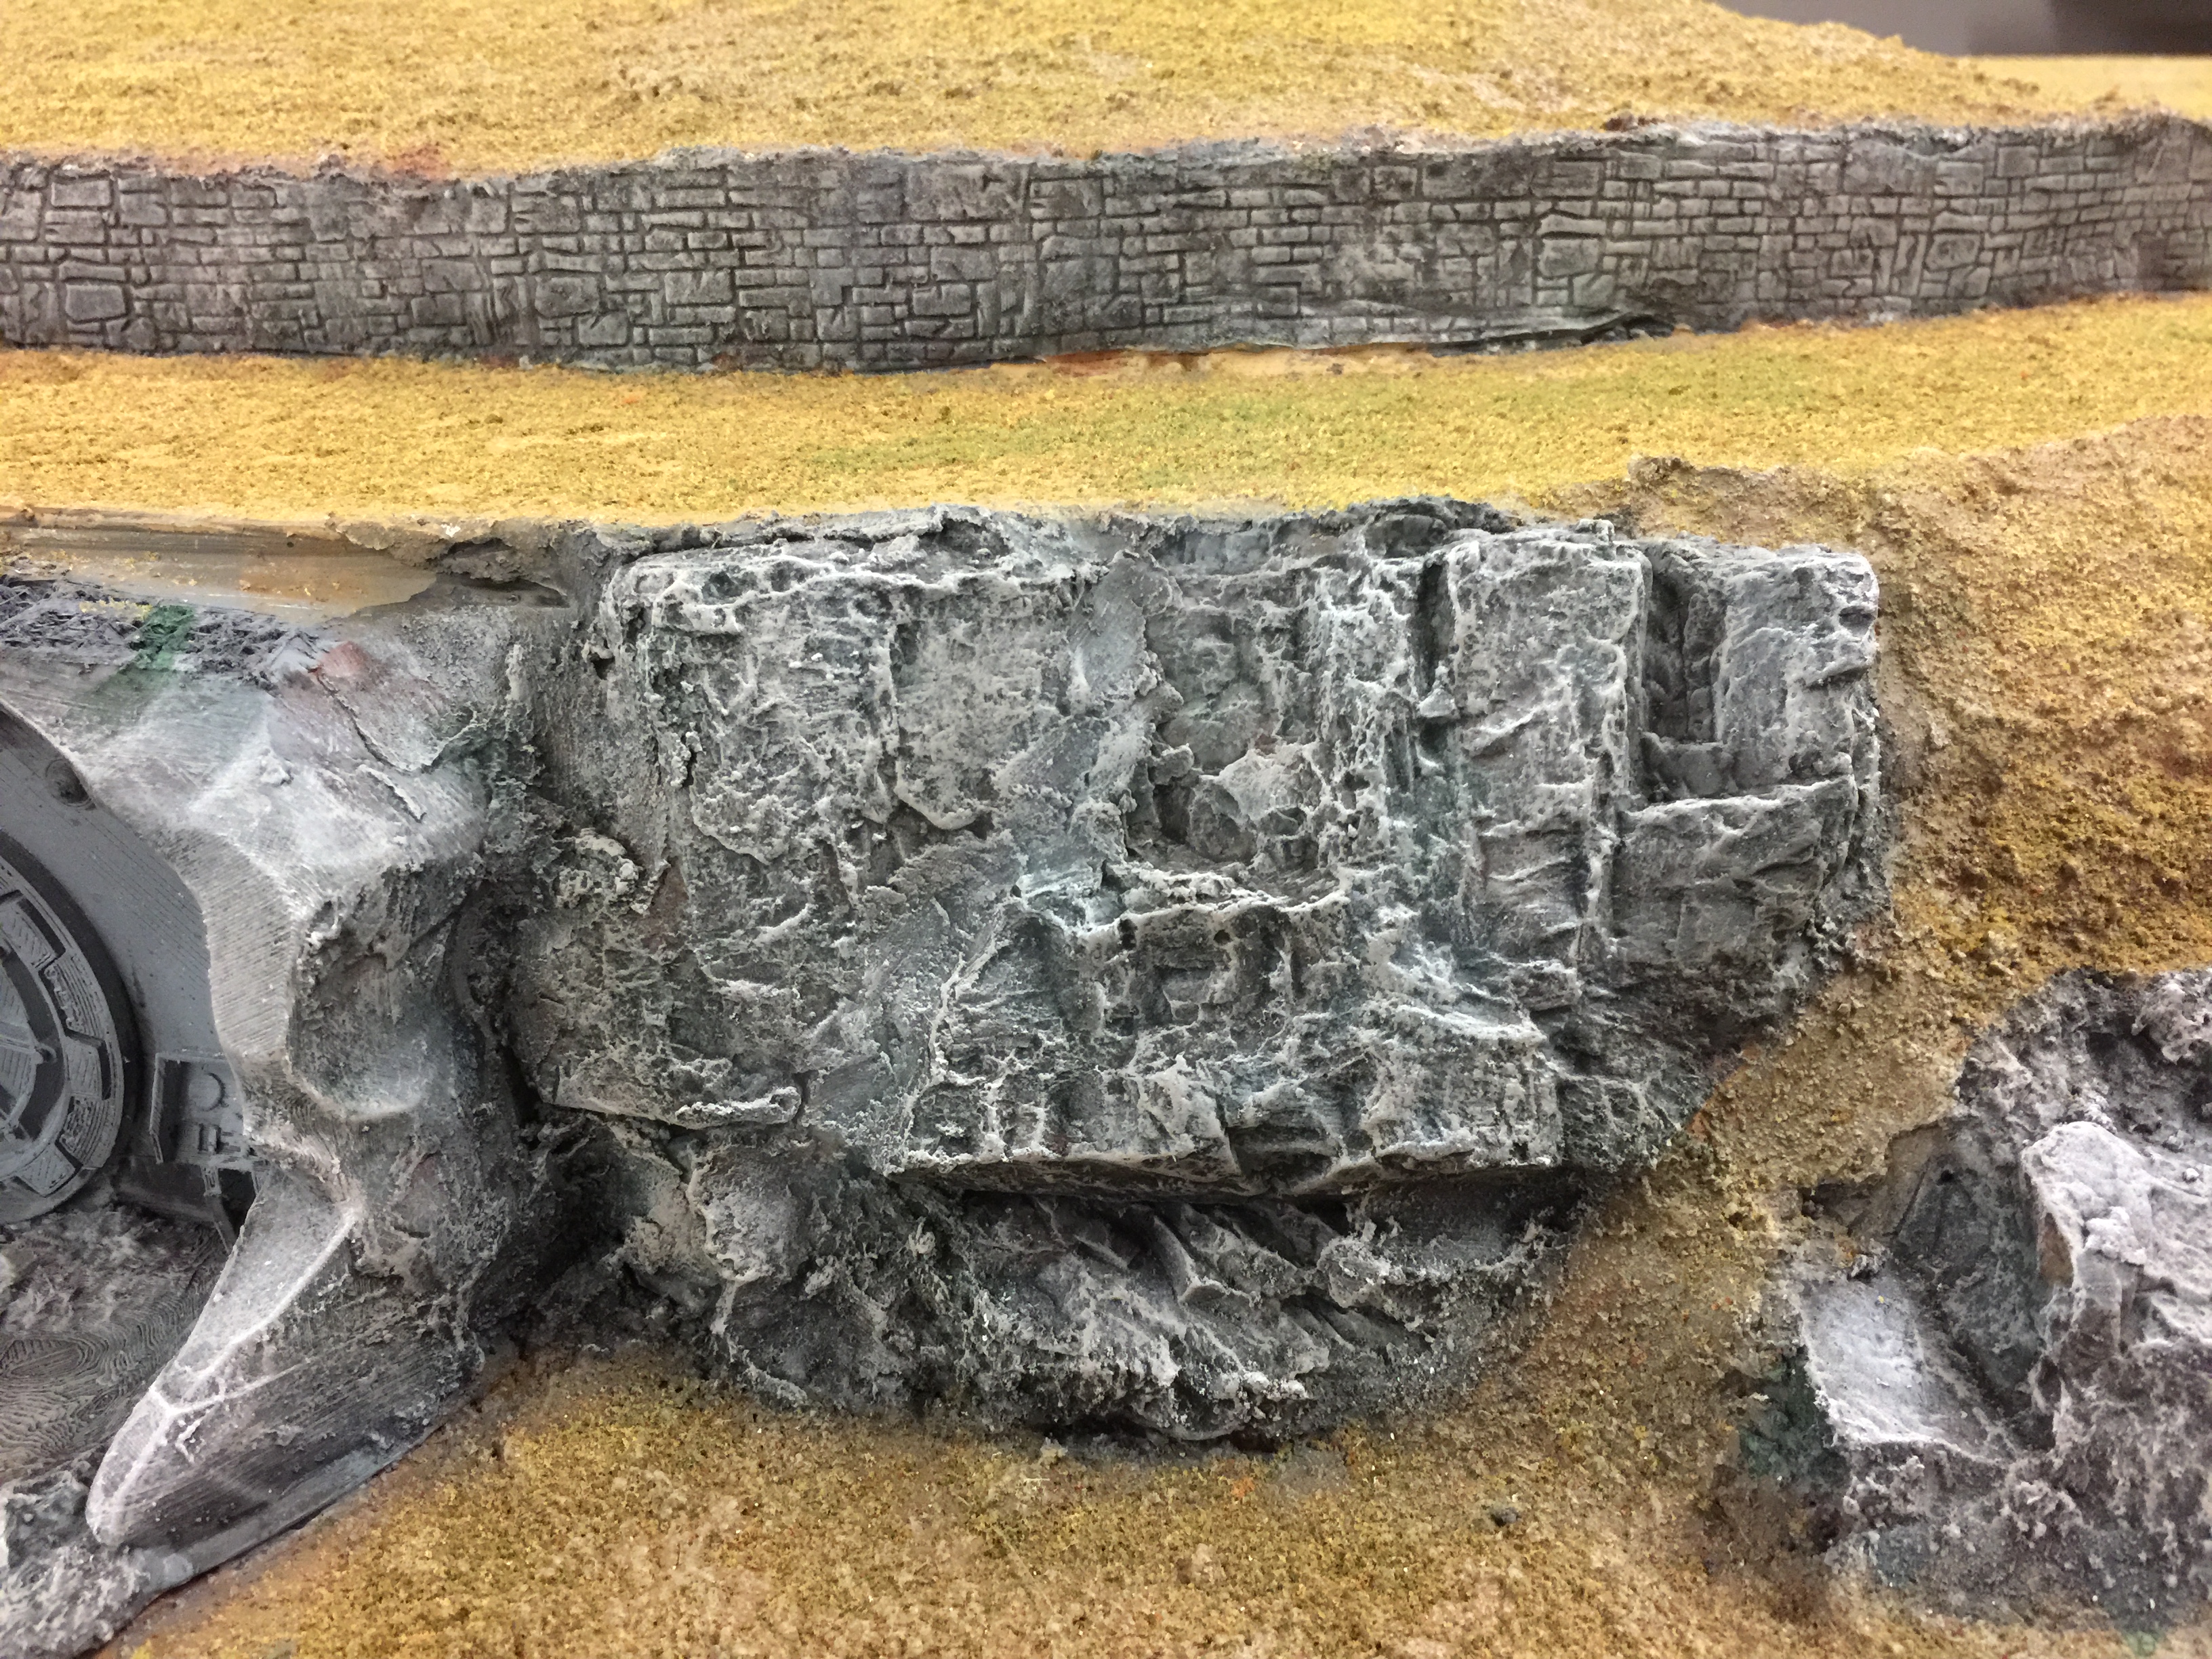
- Added rocks to the overlook as the vault entrance does’t look right without rocks.
- Tweaked the road sizes to accommodate Corvegas
- Removed some detail that would have hindered game play, like the front porch of the bathroom, the bollards at the trail edge, and minor elevation changes.
- Buildings have generally been smooshed and resized similar to the process the Fallout videos games use
Constructing the Table
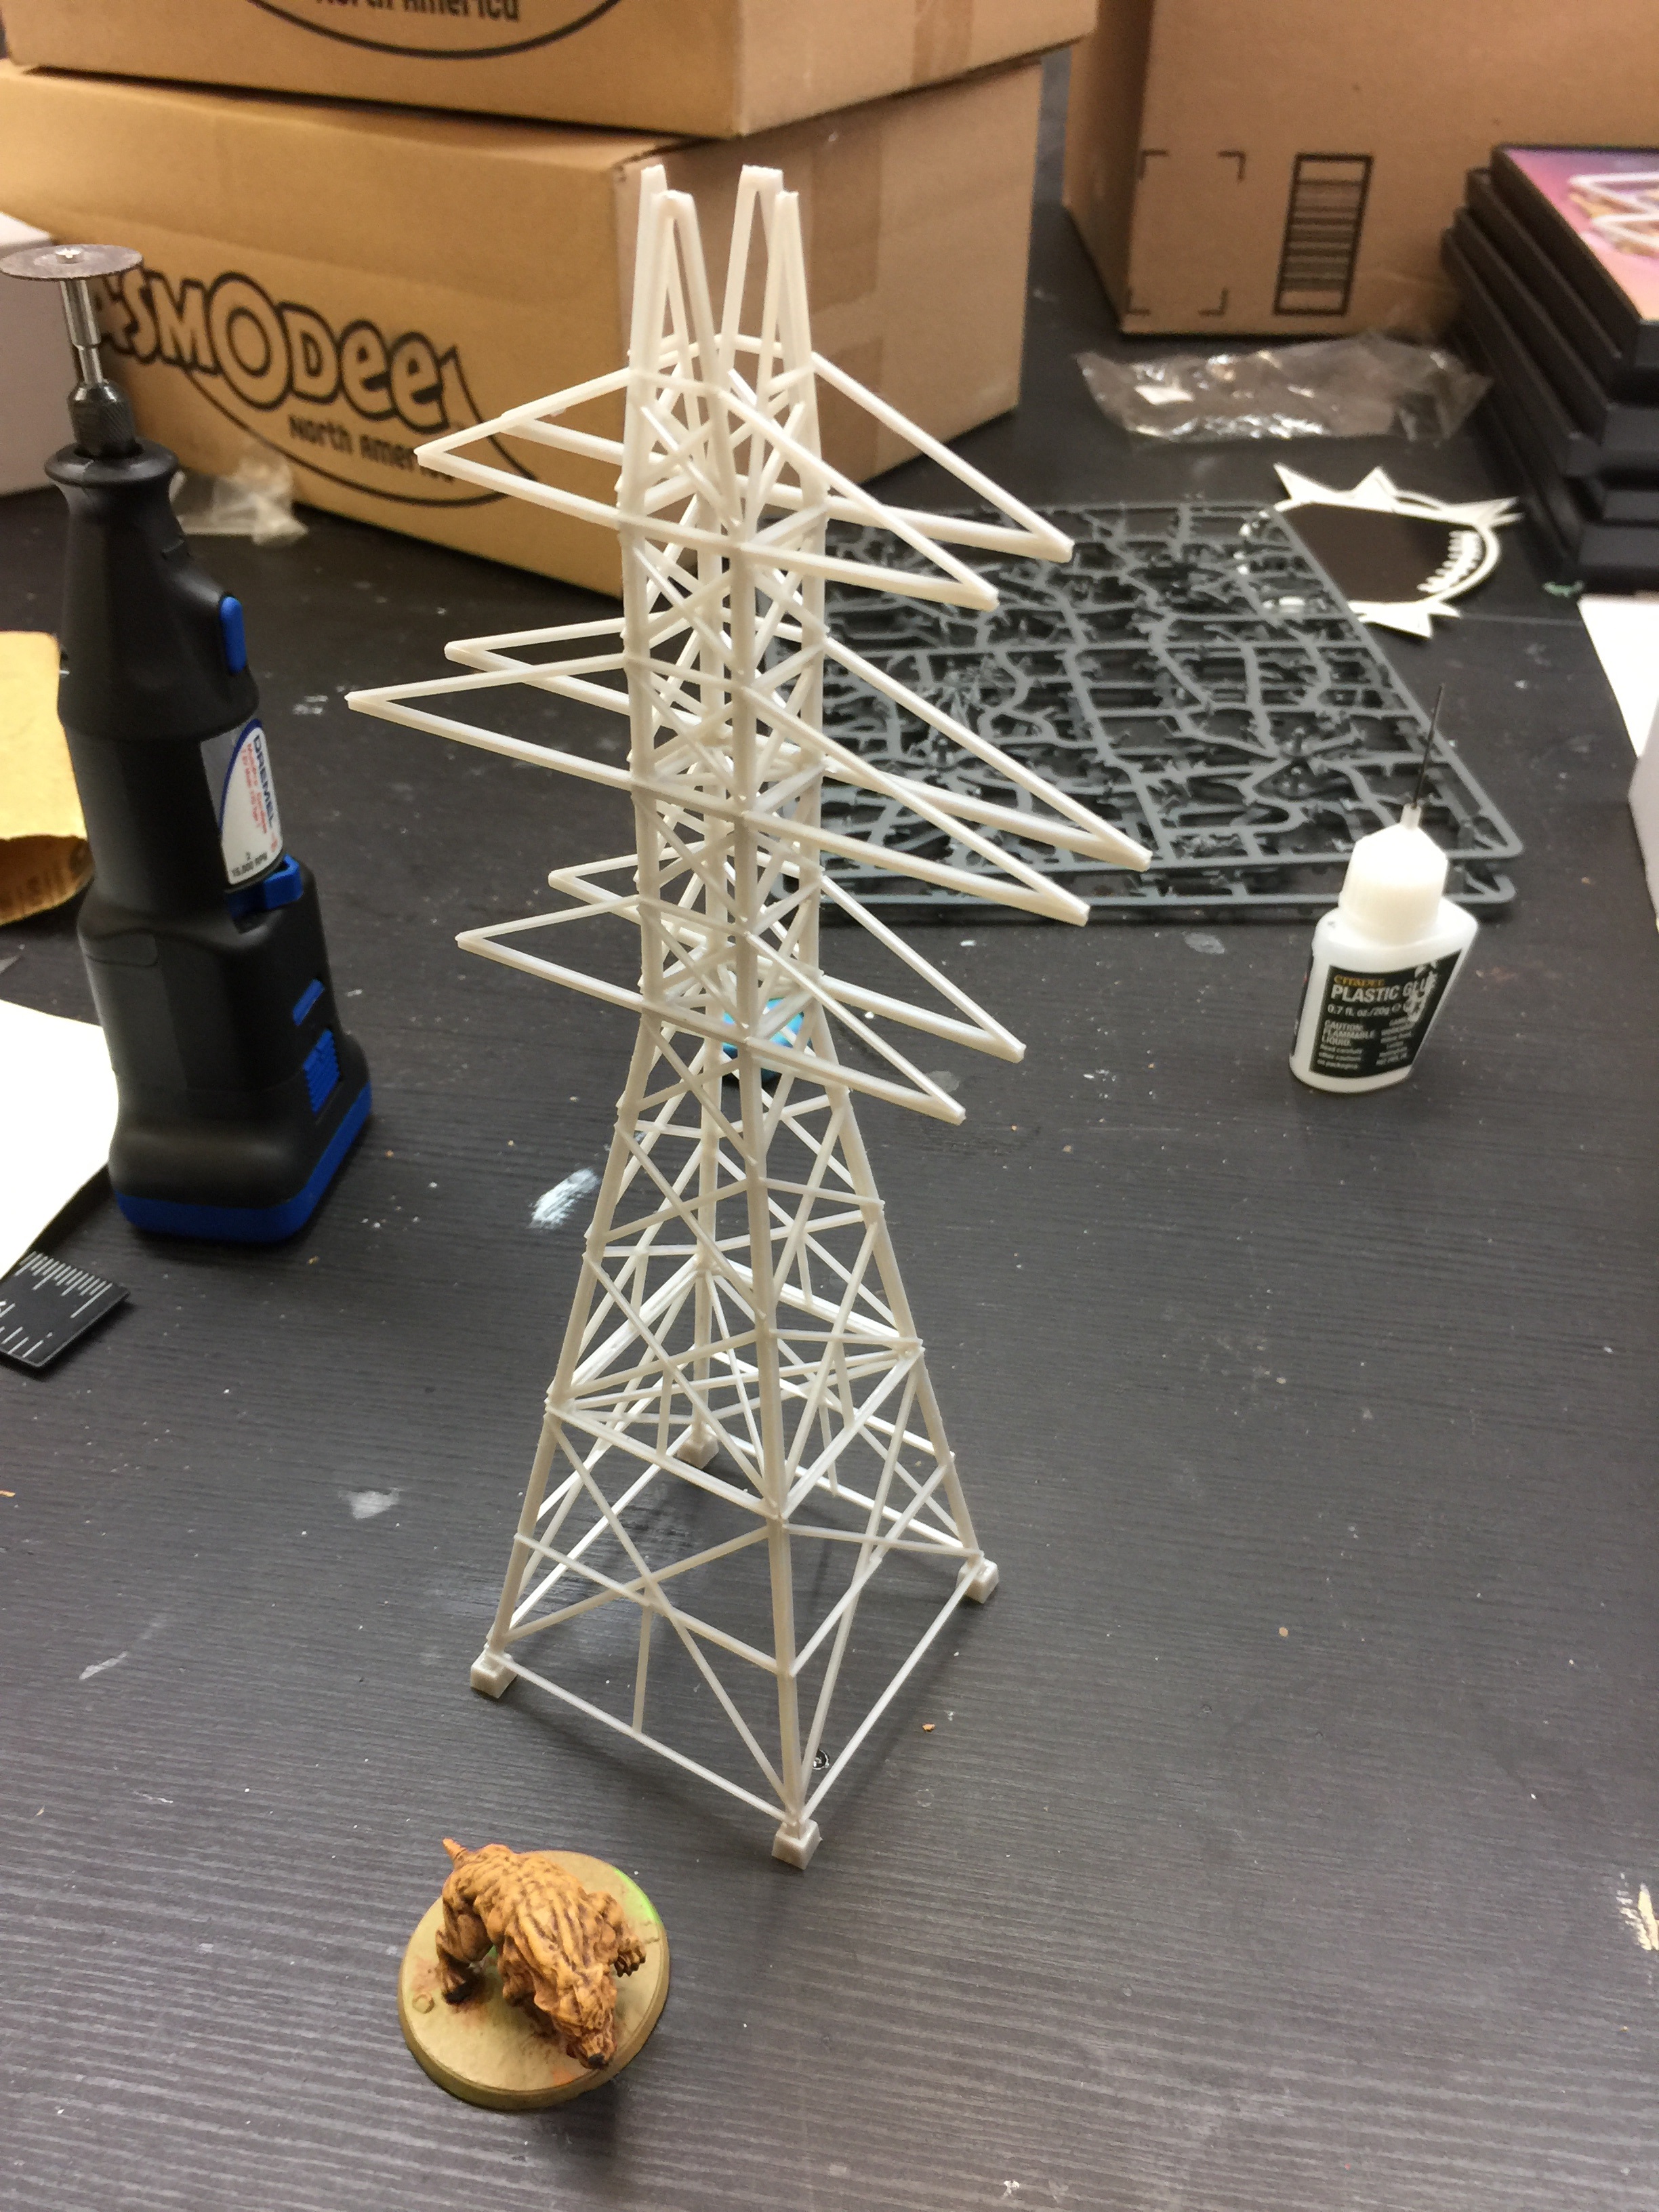

- Image 1: Managed to snag a power transmission tower kit that looks roughly similar to the radio tower on Mill Mountain. By combining the parts together, it makes a pretty convincing broken radio tower.
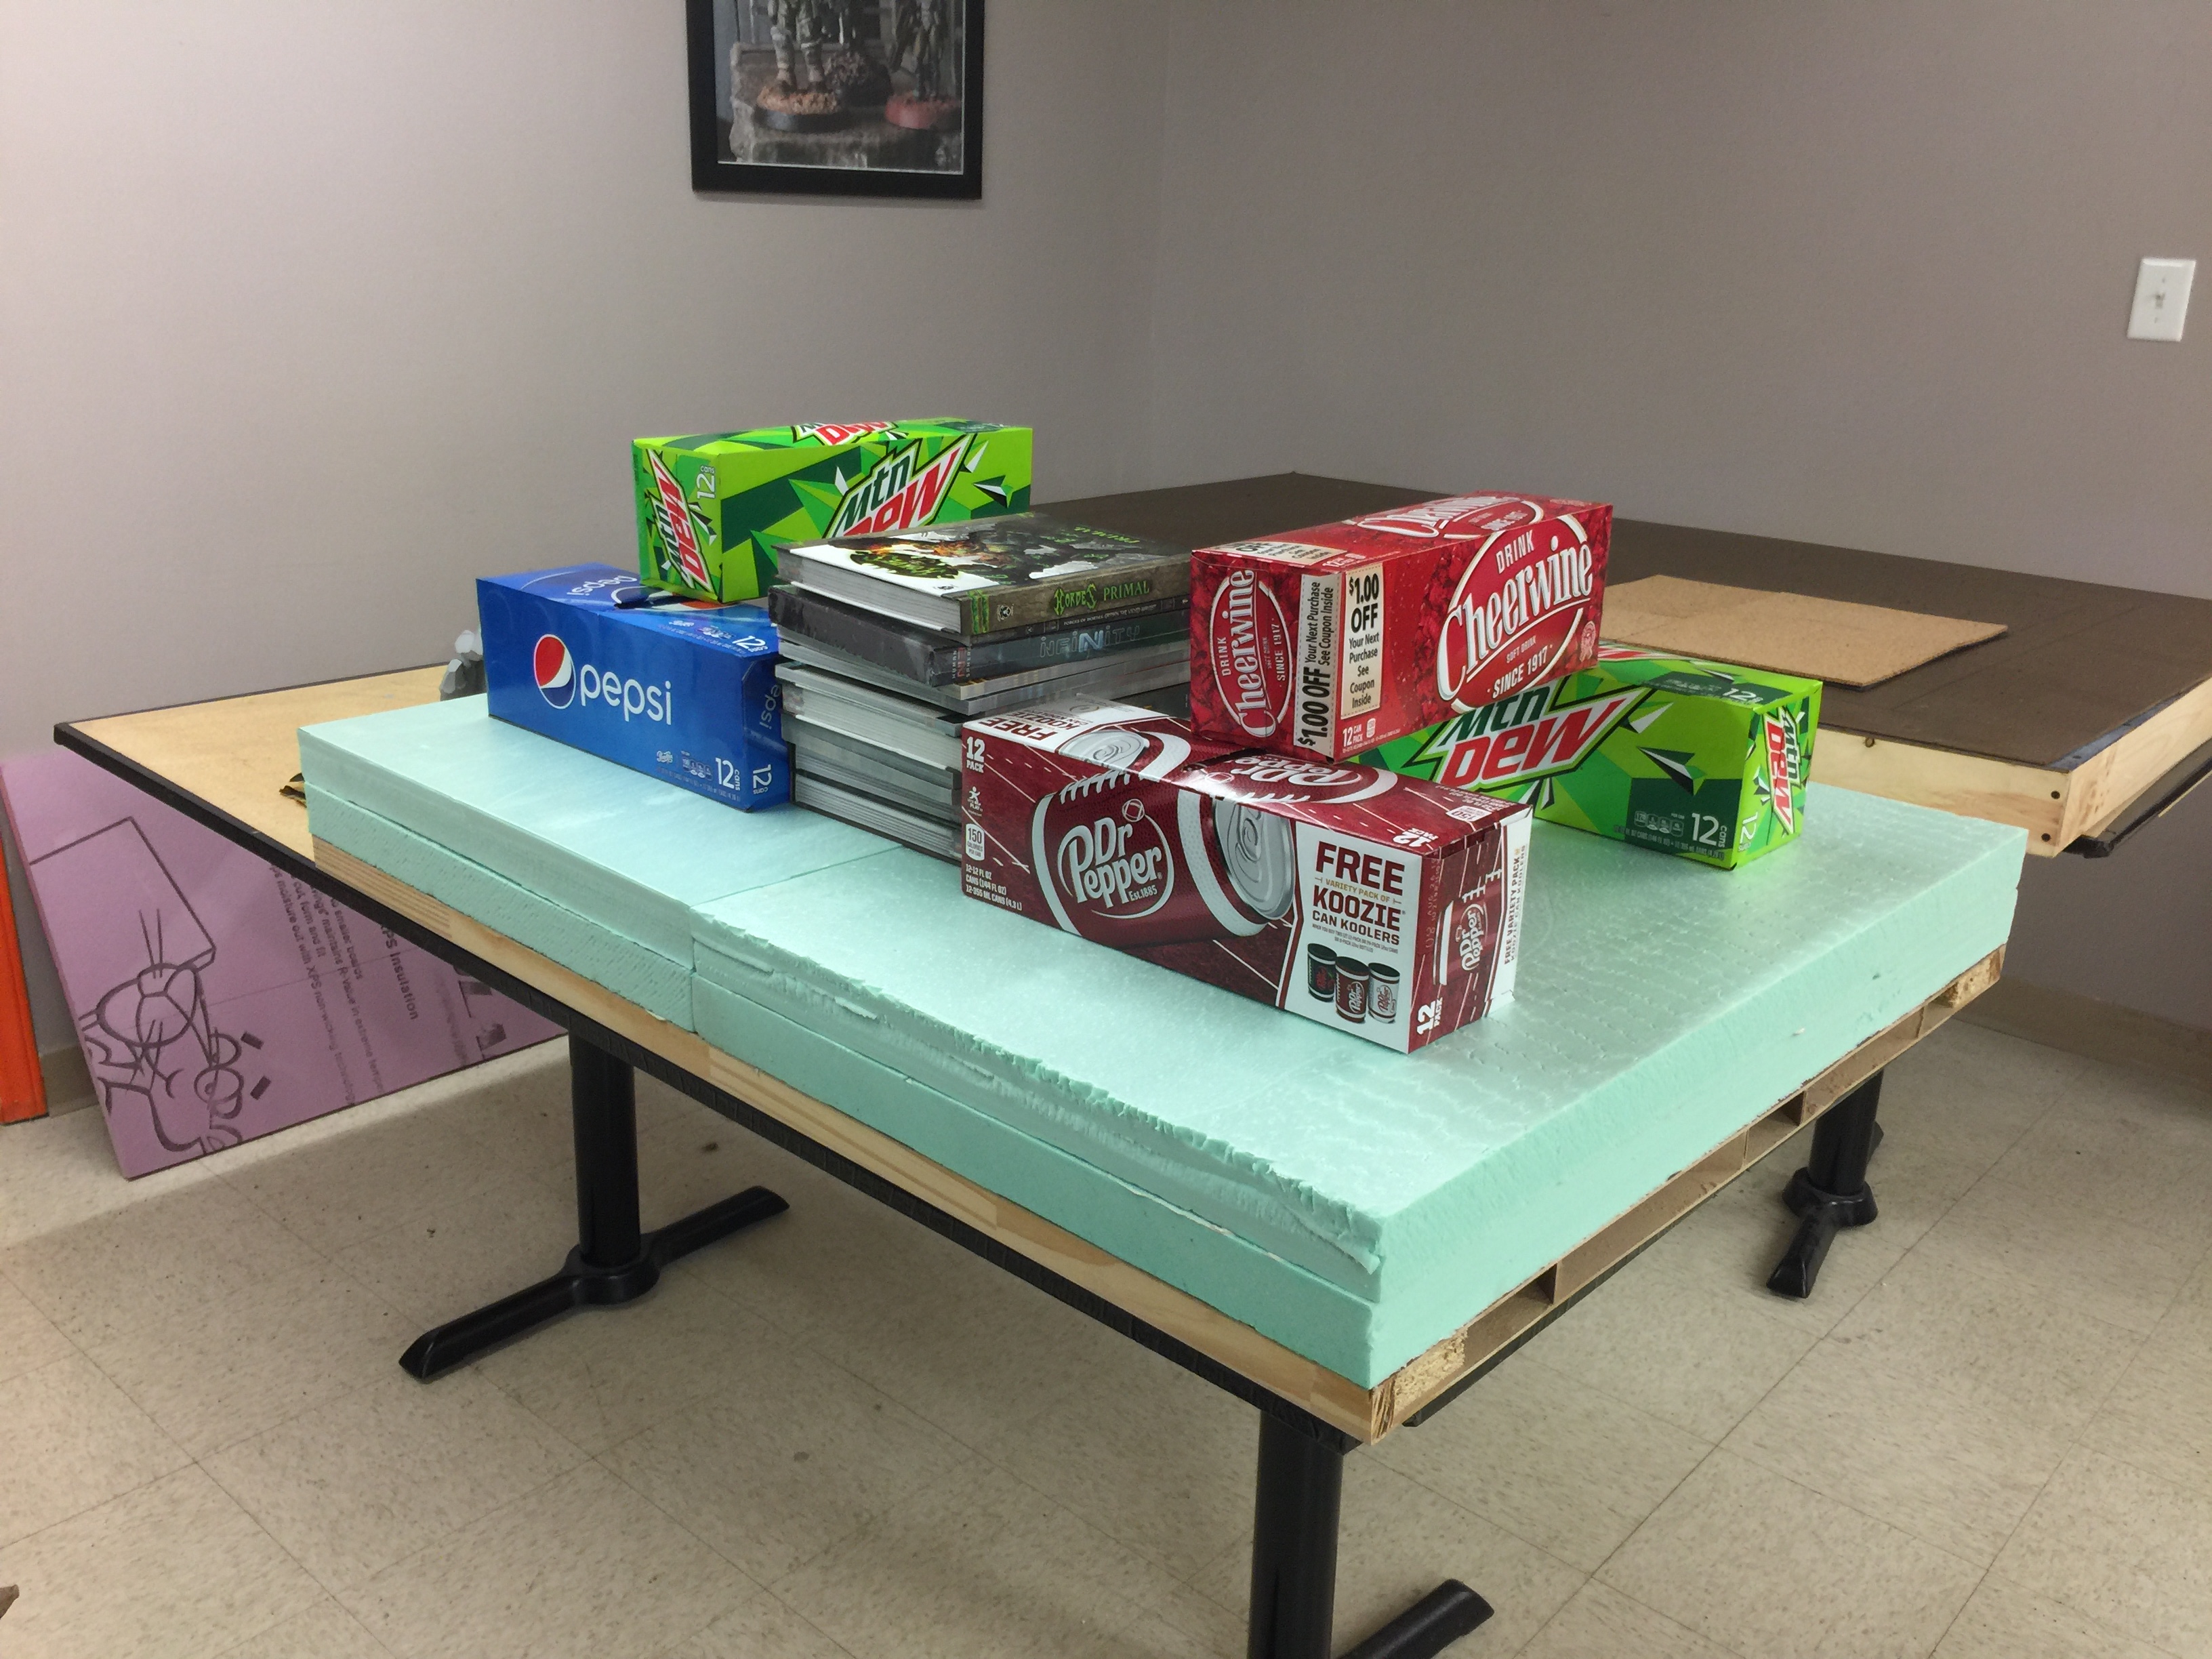
- Image 2: Sandwich together the foam layers needed for the elevations. Keep em weighed down overnight and use good construction adhesive.
- Image 3: Sketching is an important part of table creation. Luckily we have multiple vinyl x-wing mats laying around. Flip them over to the white side and you have a great wet-erase marker surface to sketch life size.
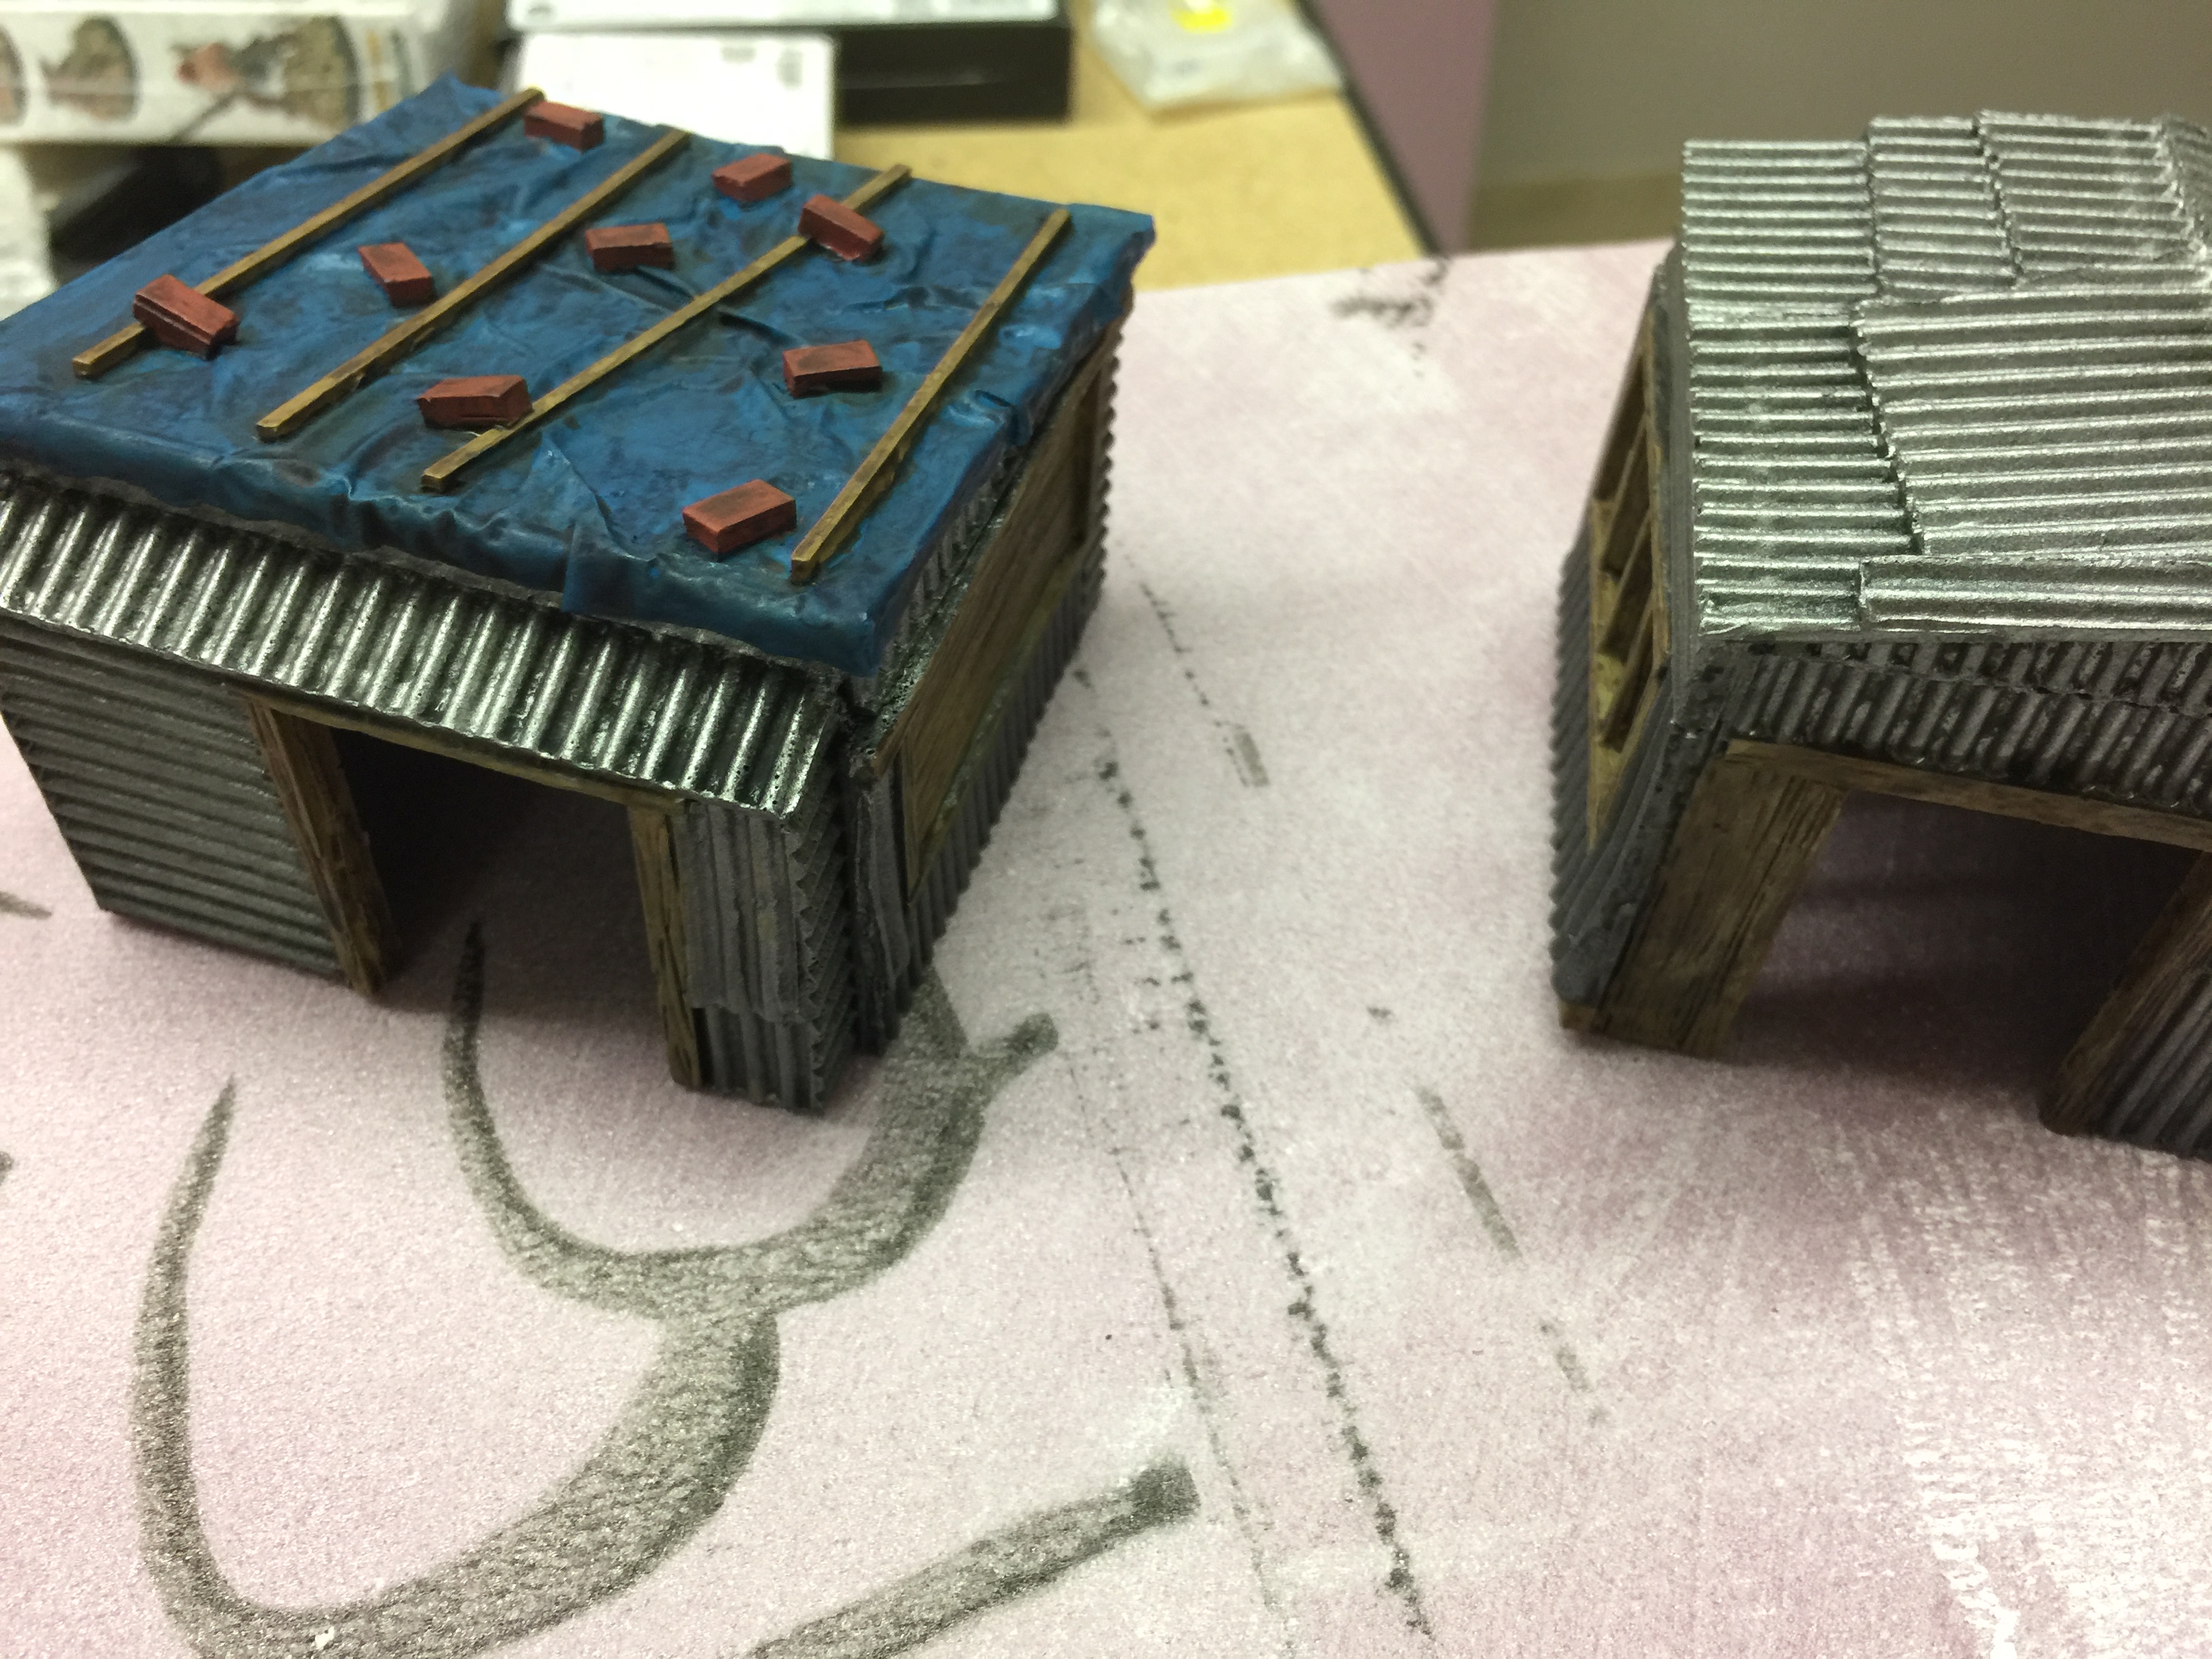
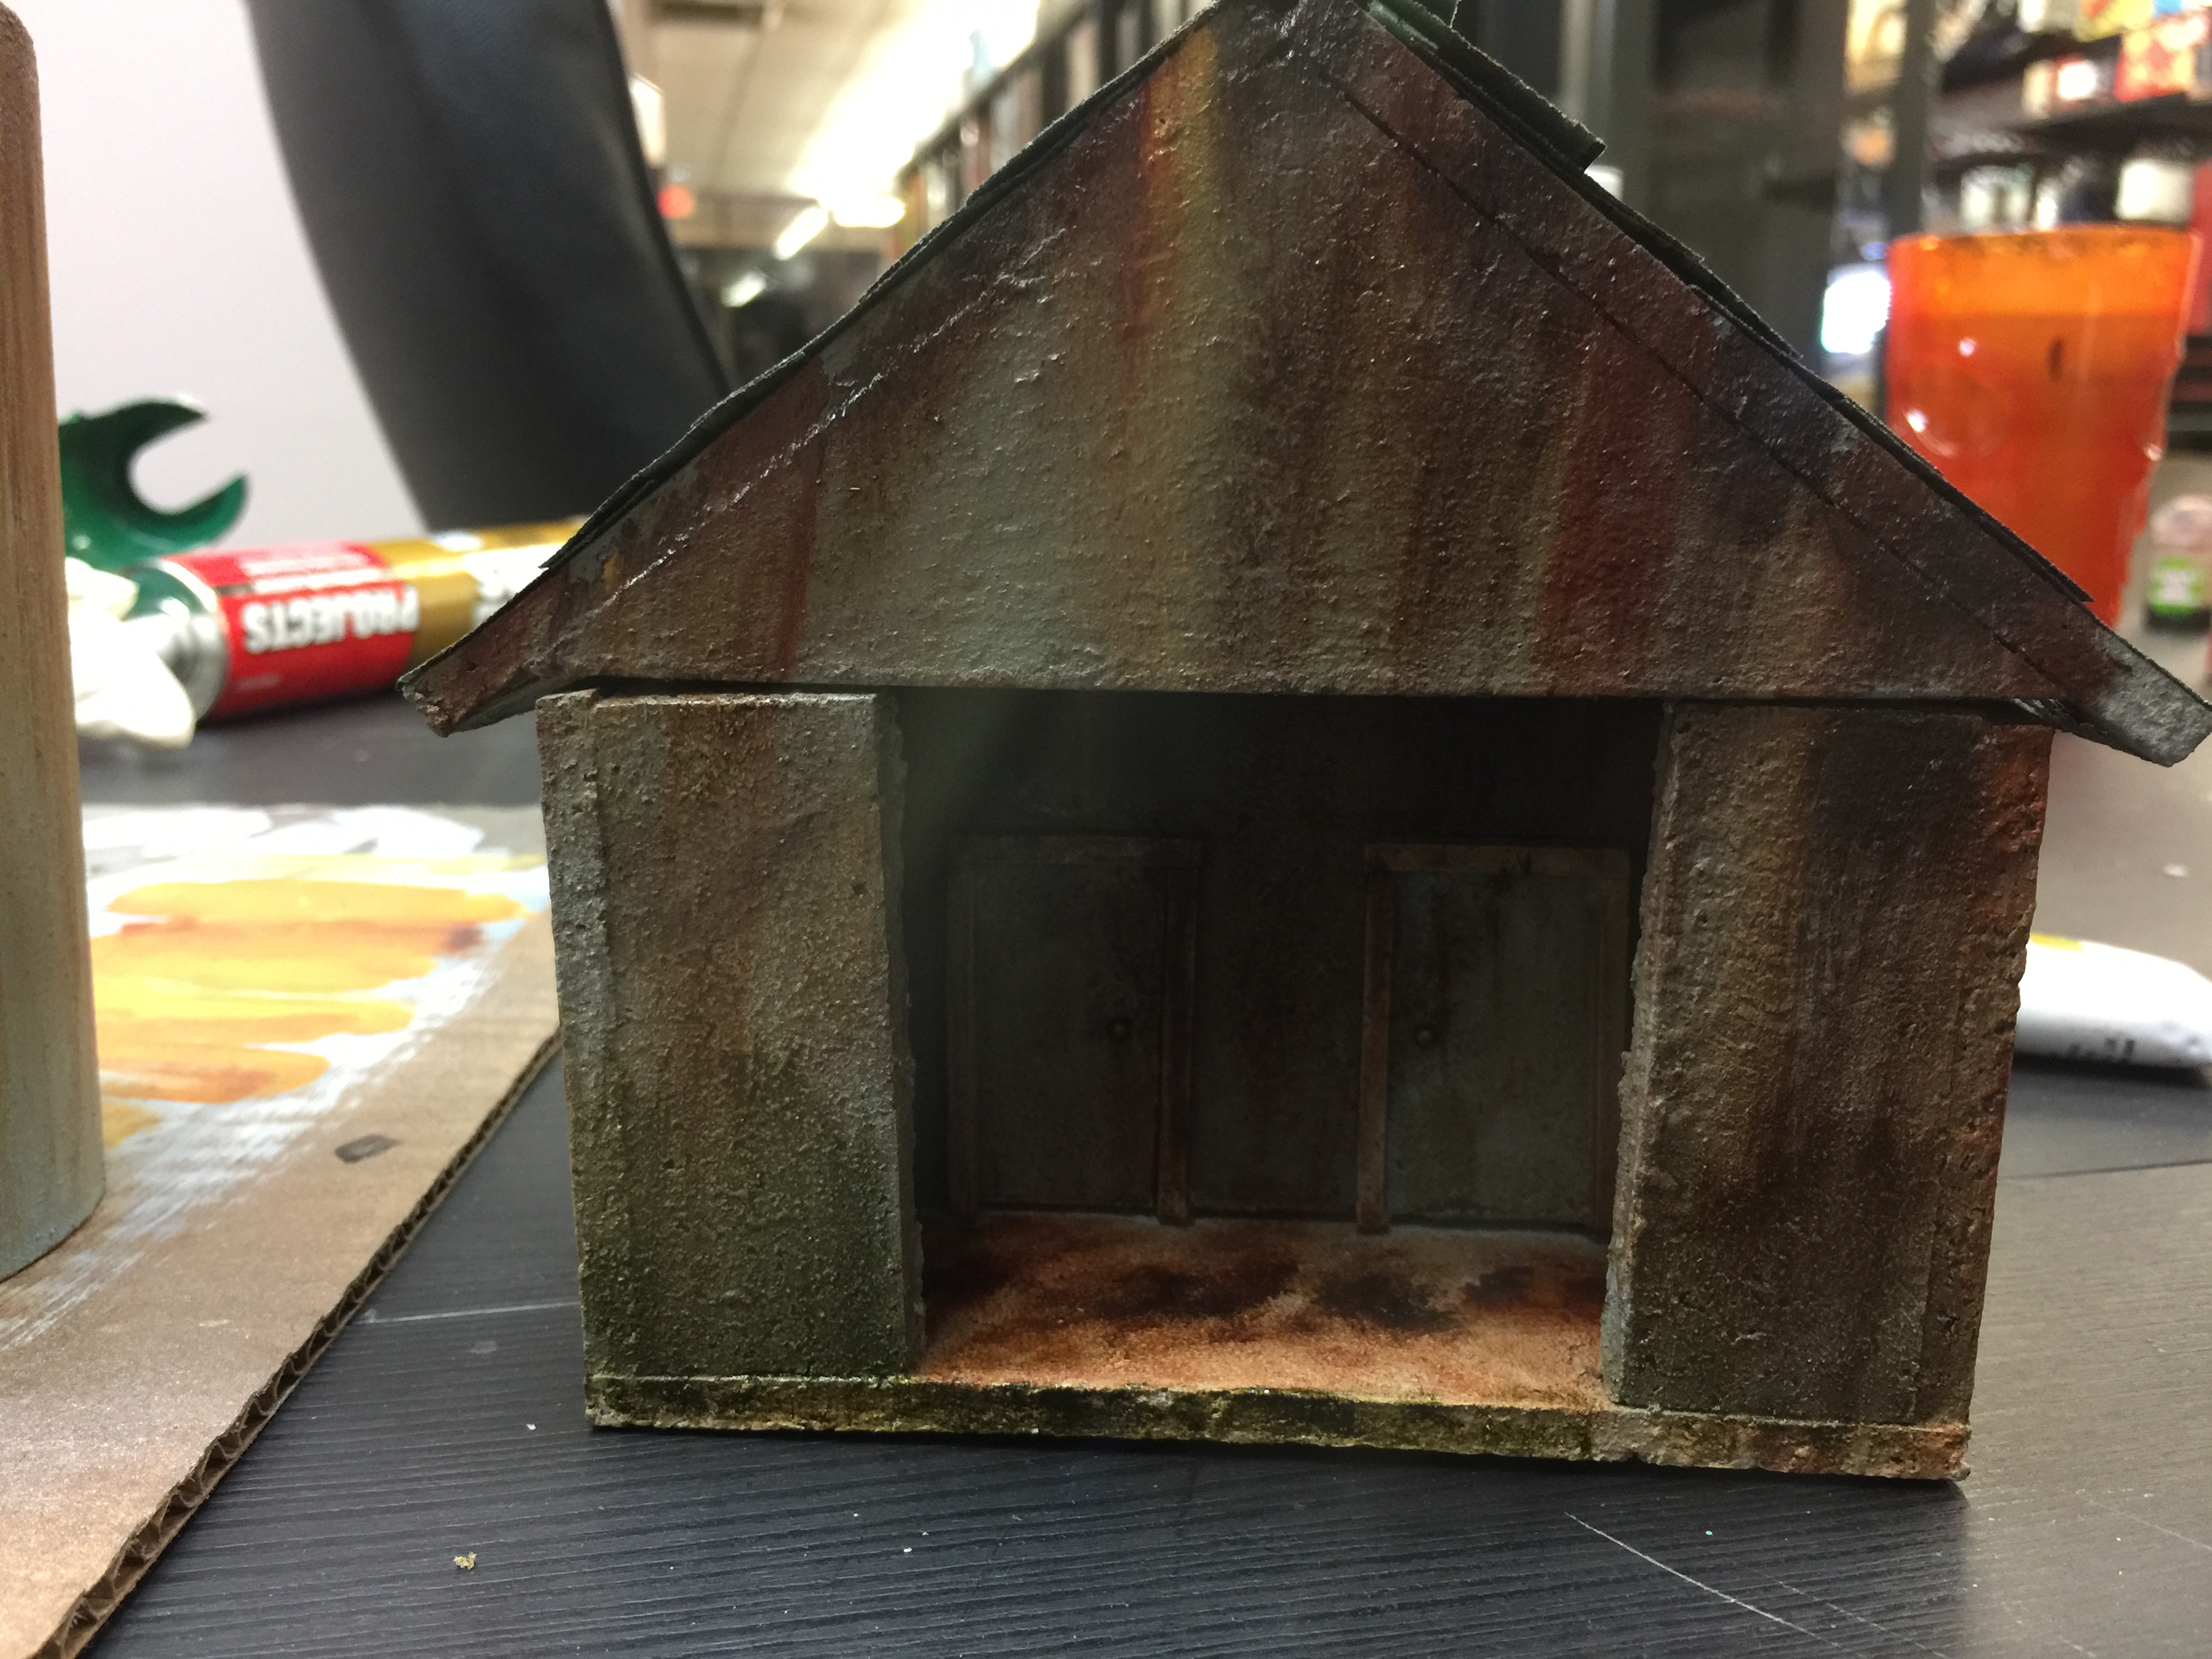
Building the Buildings
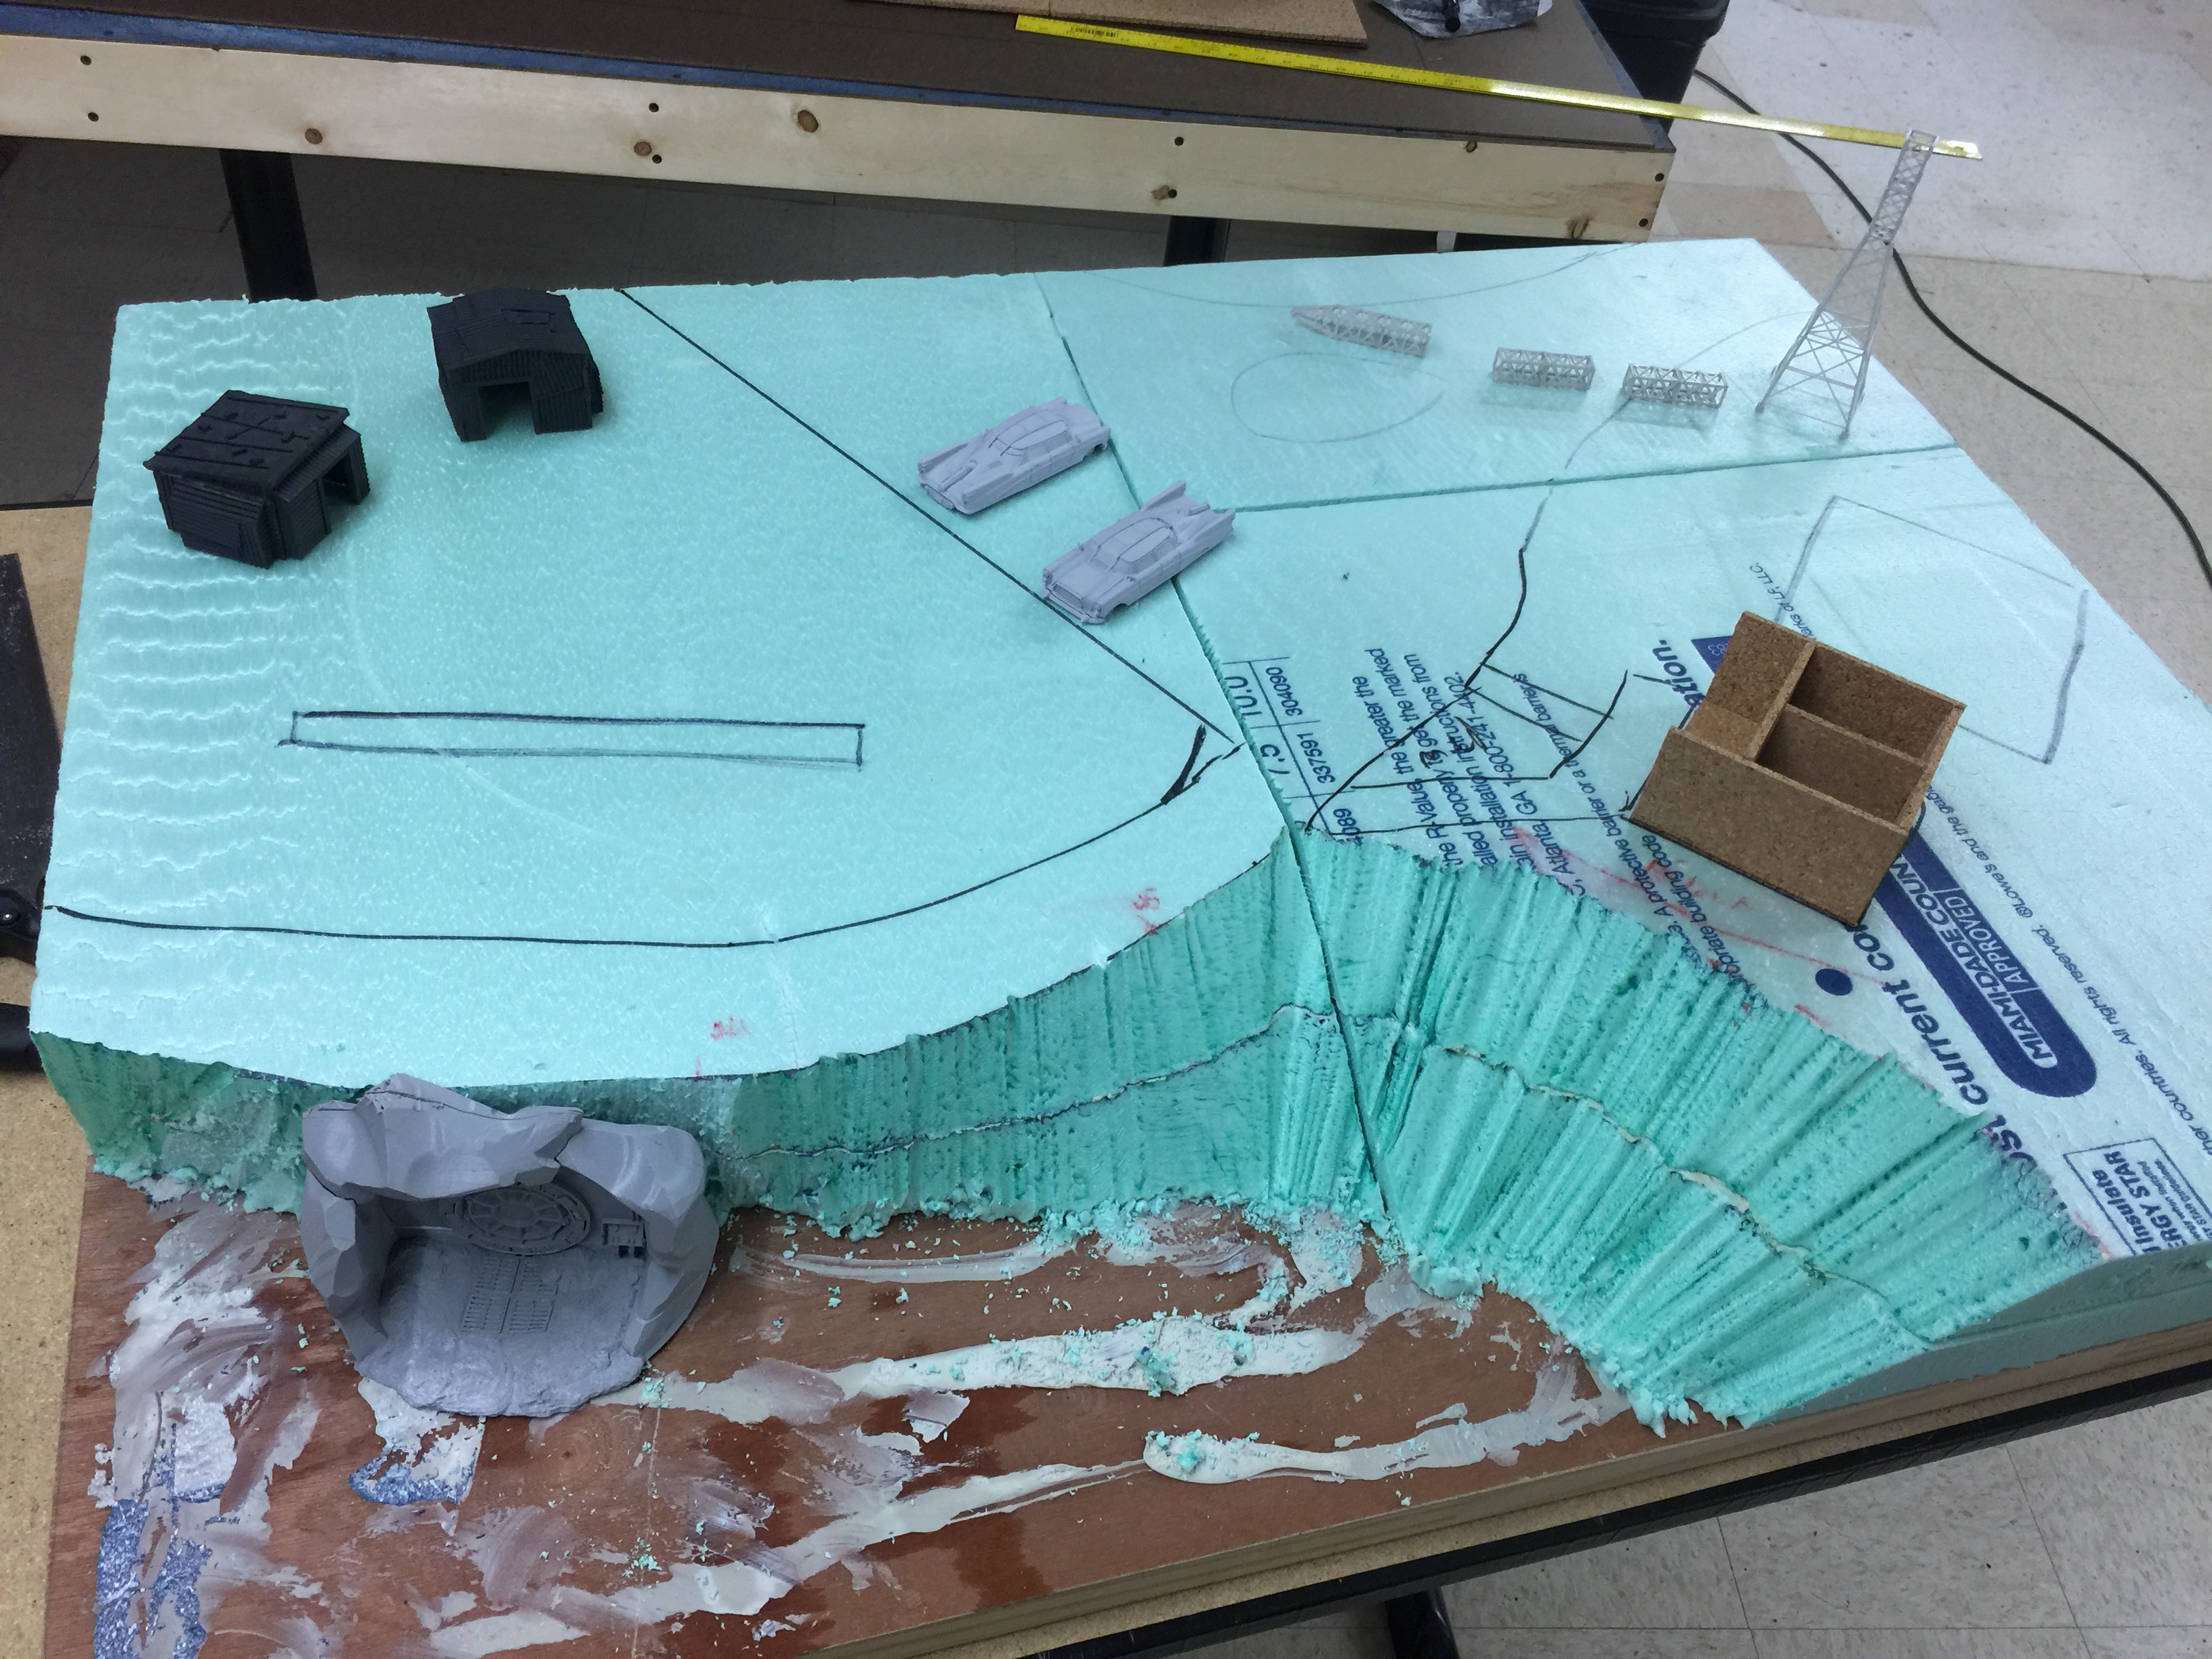
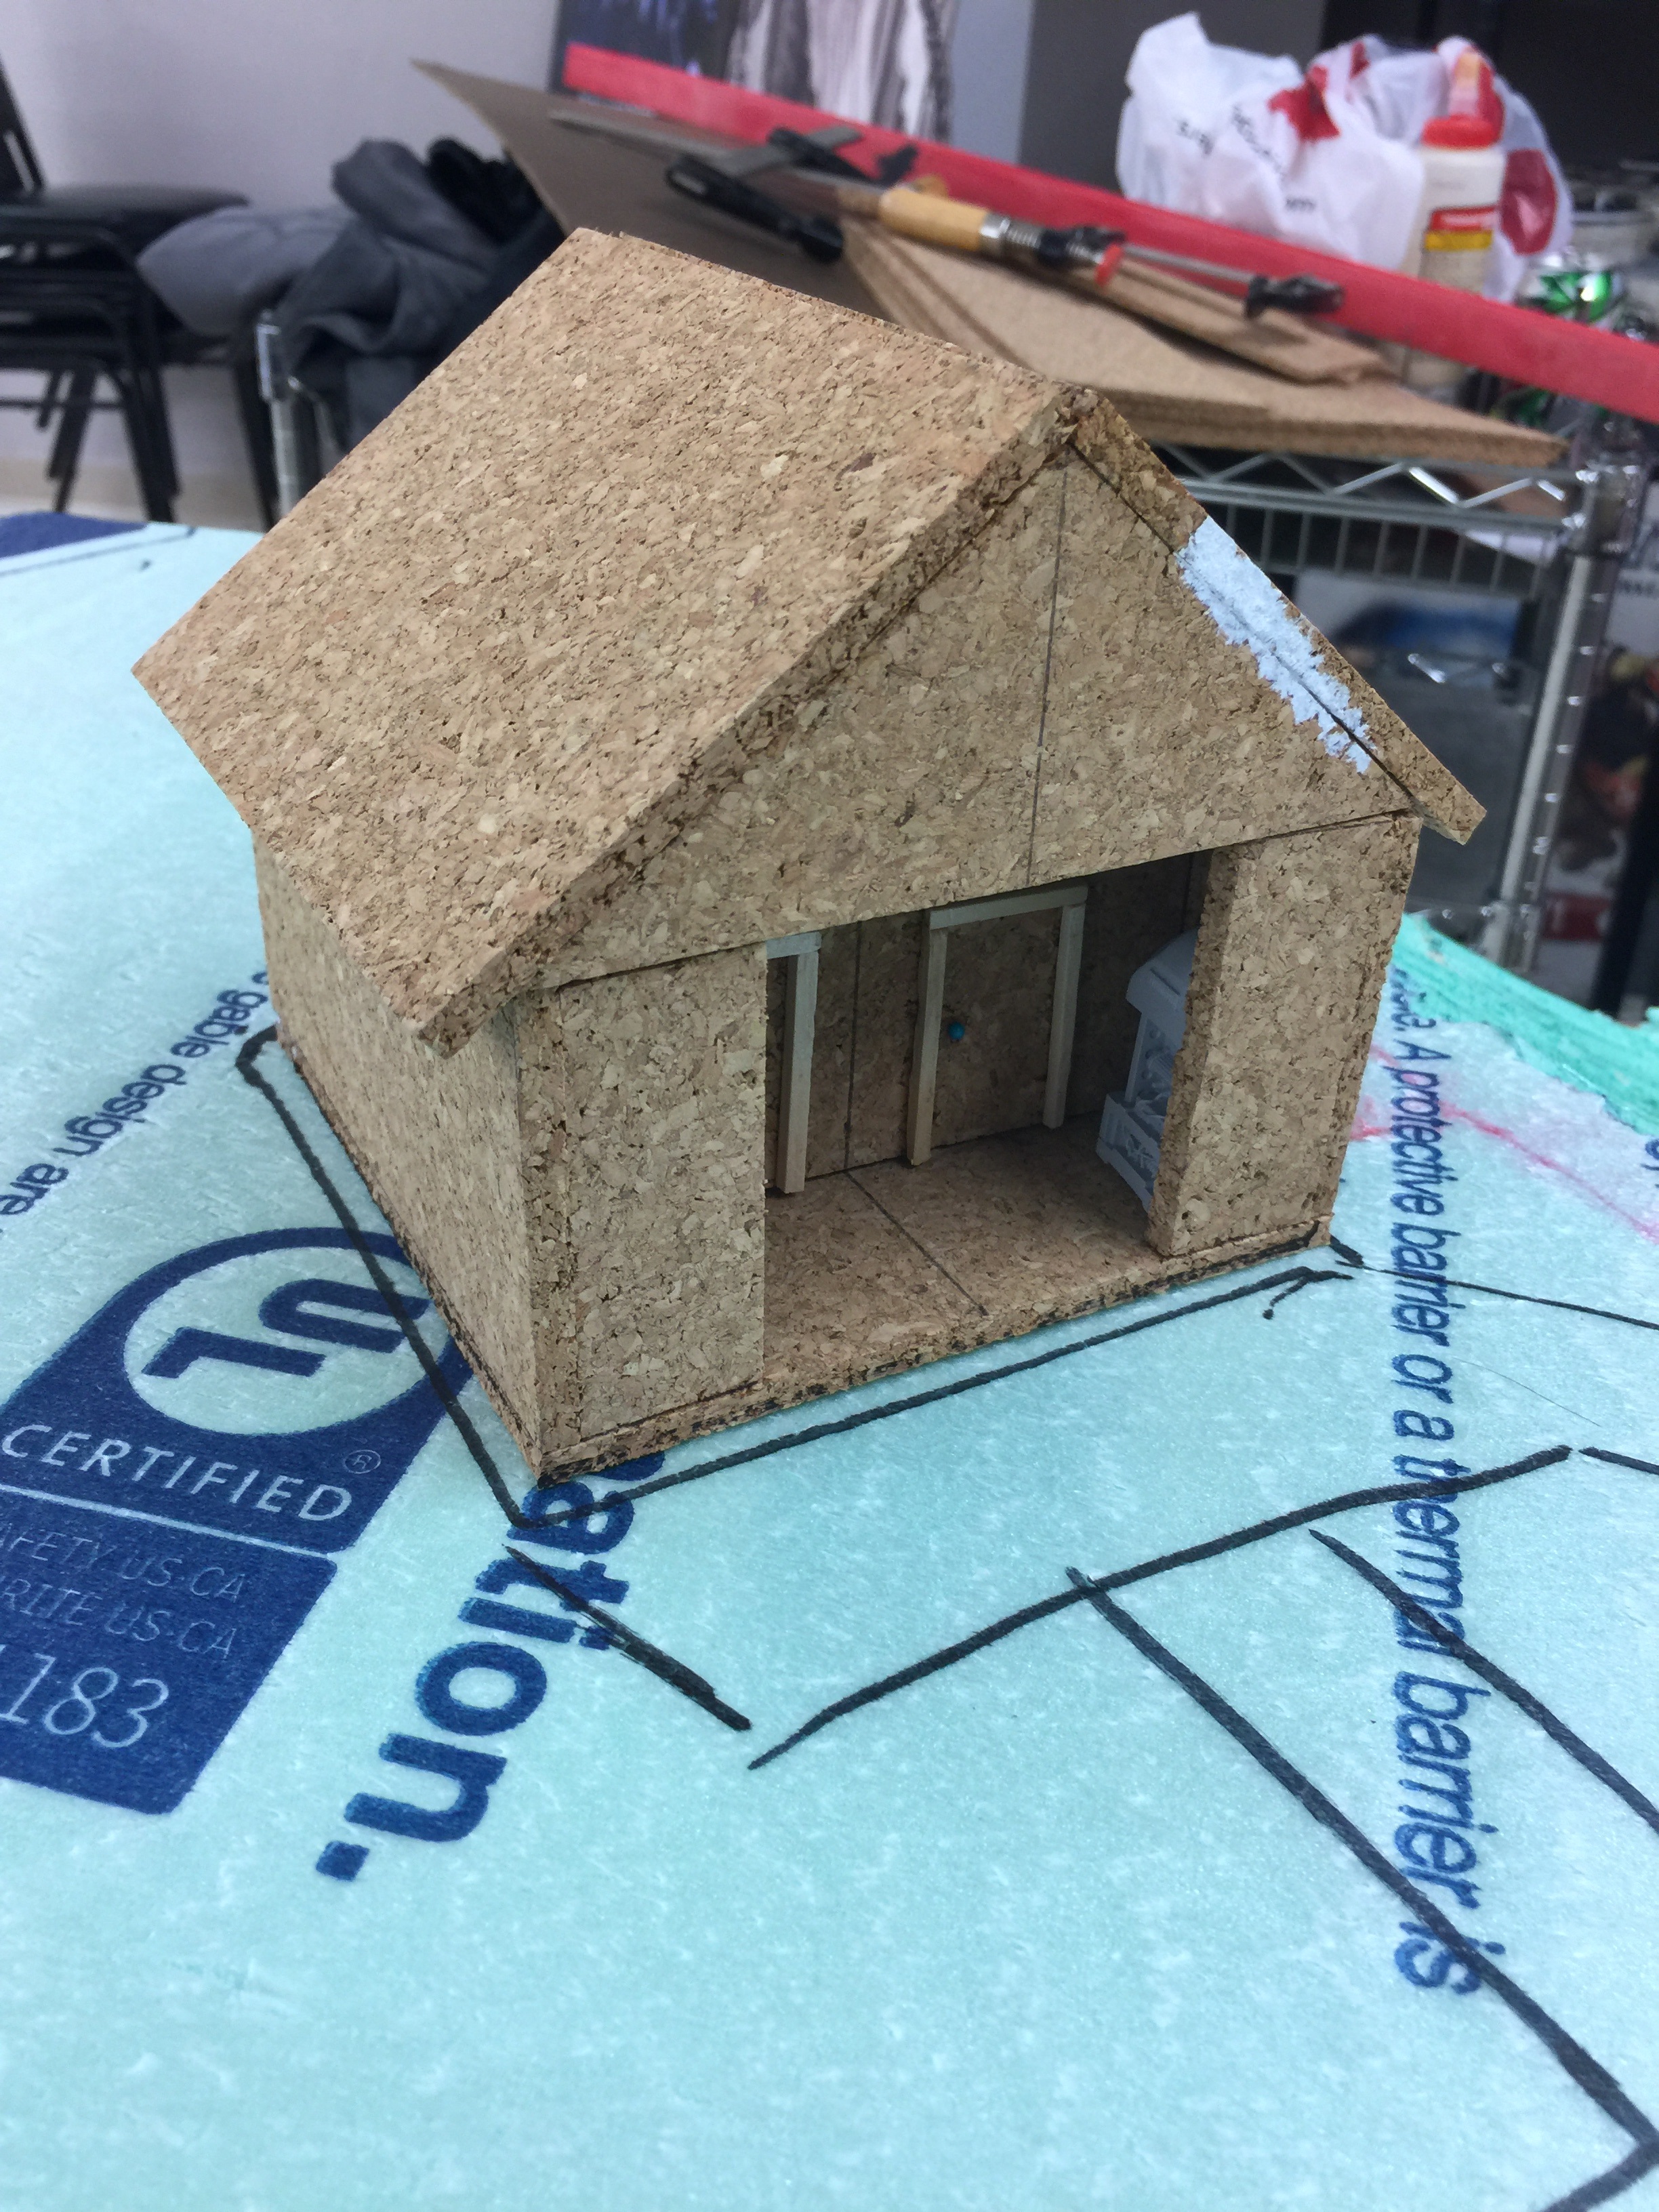
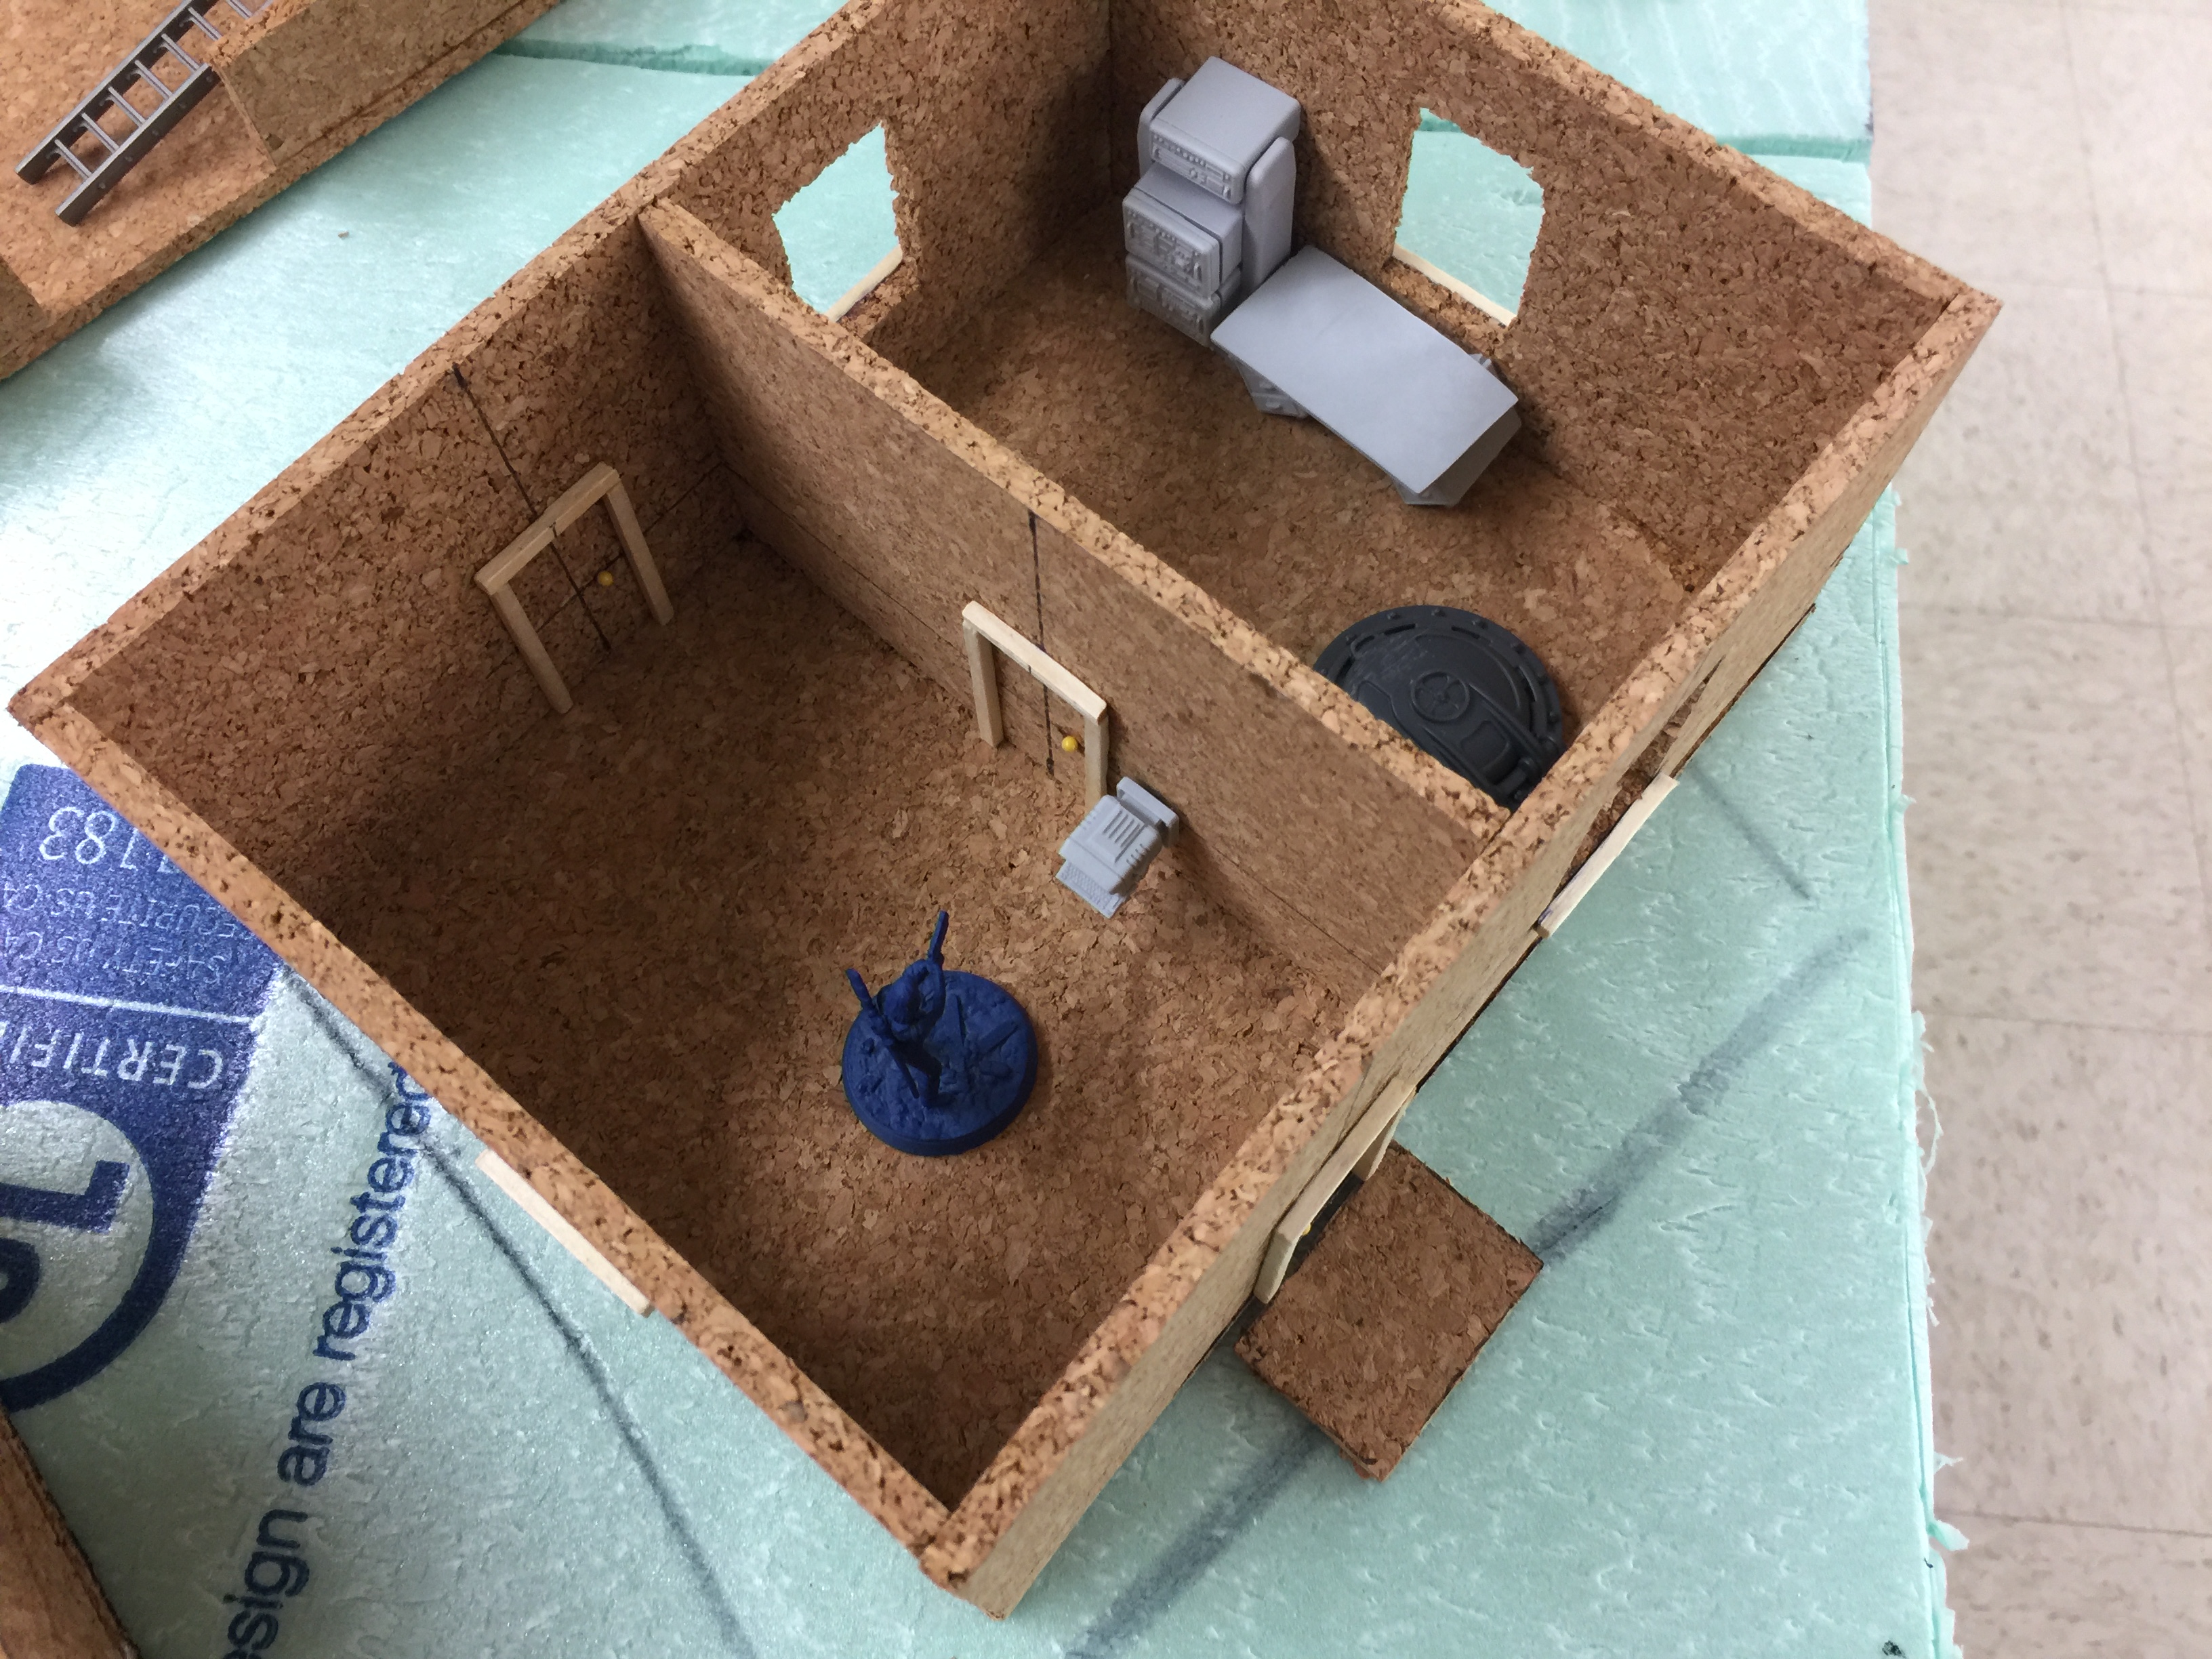
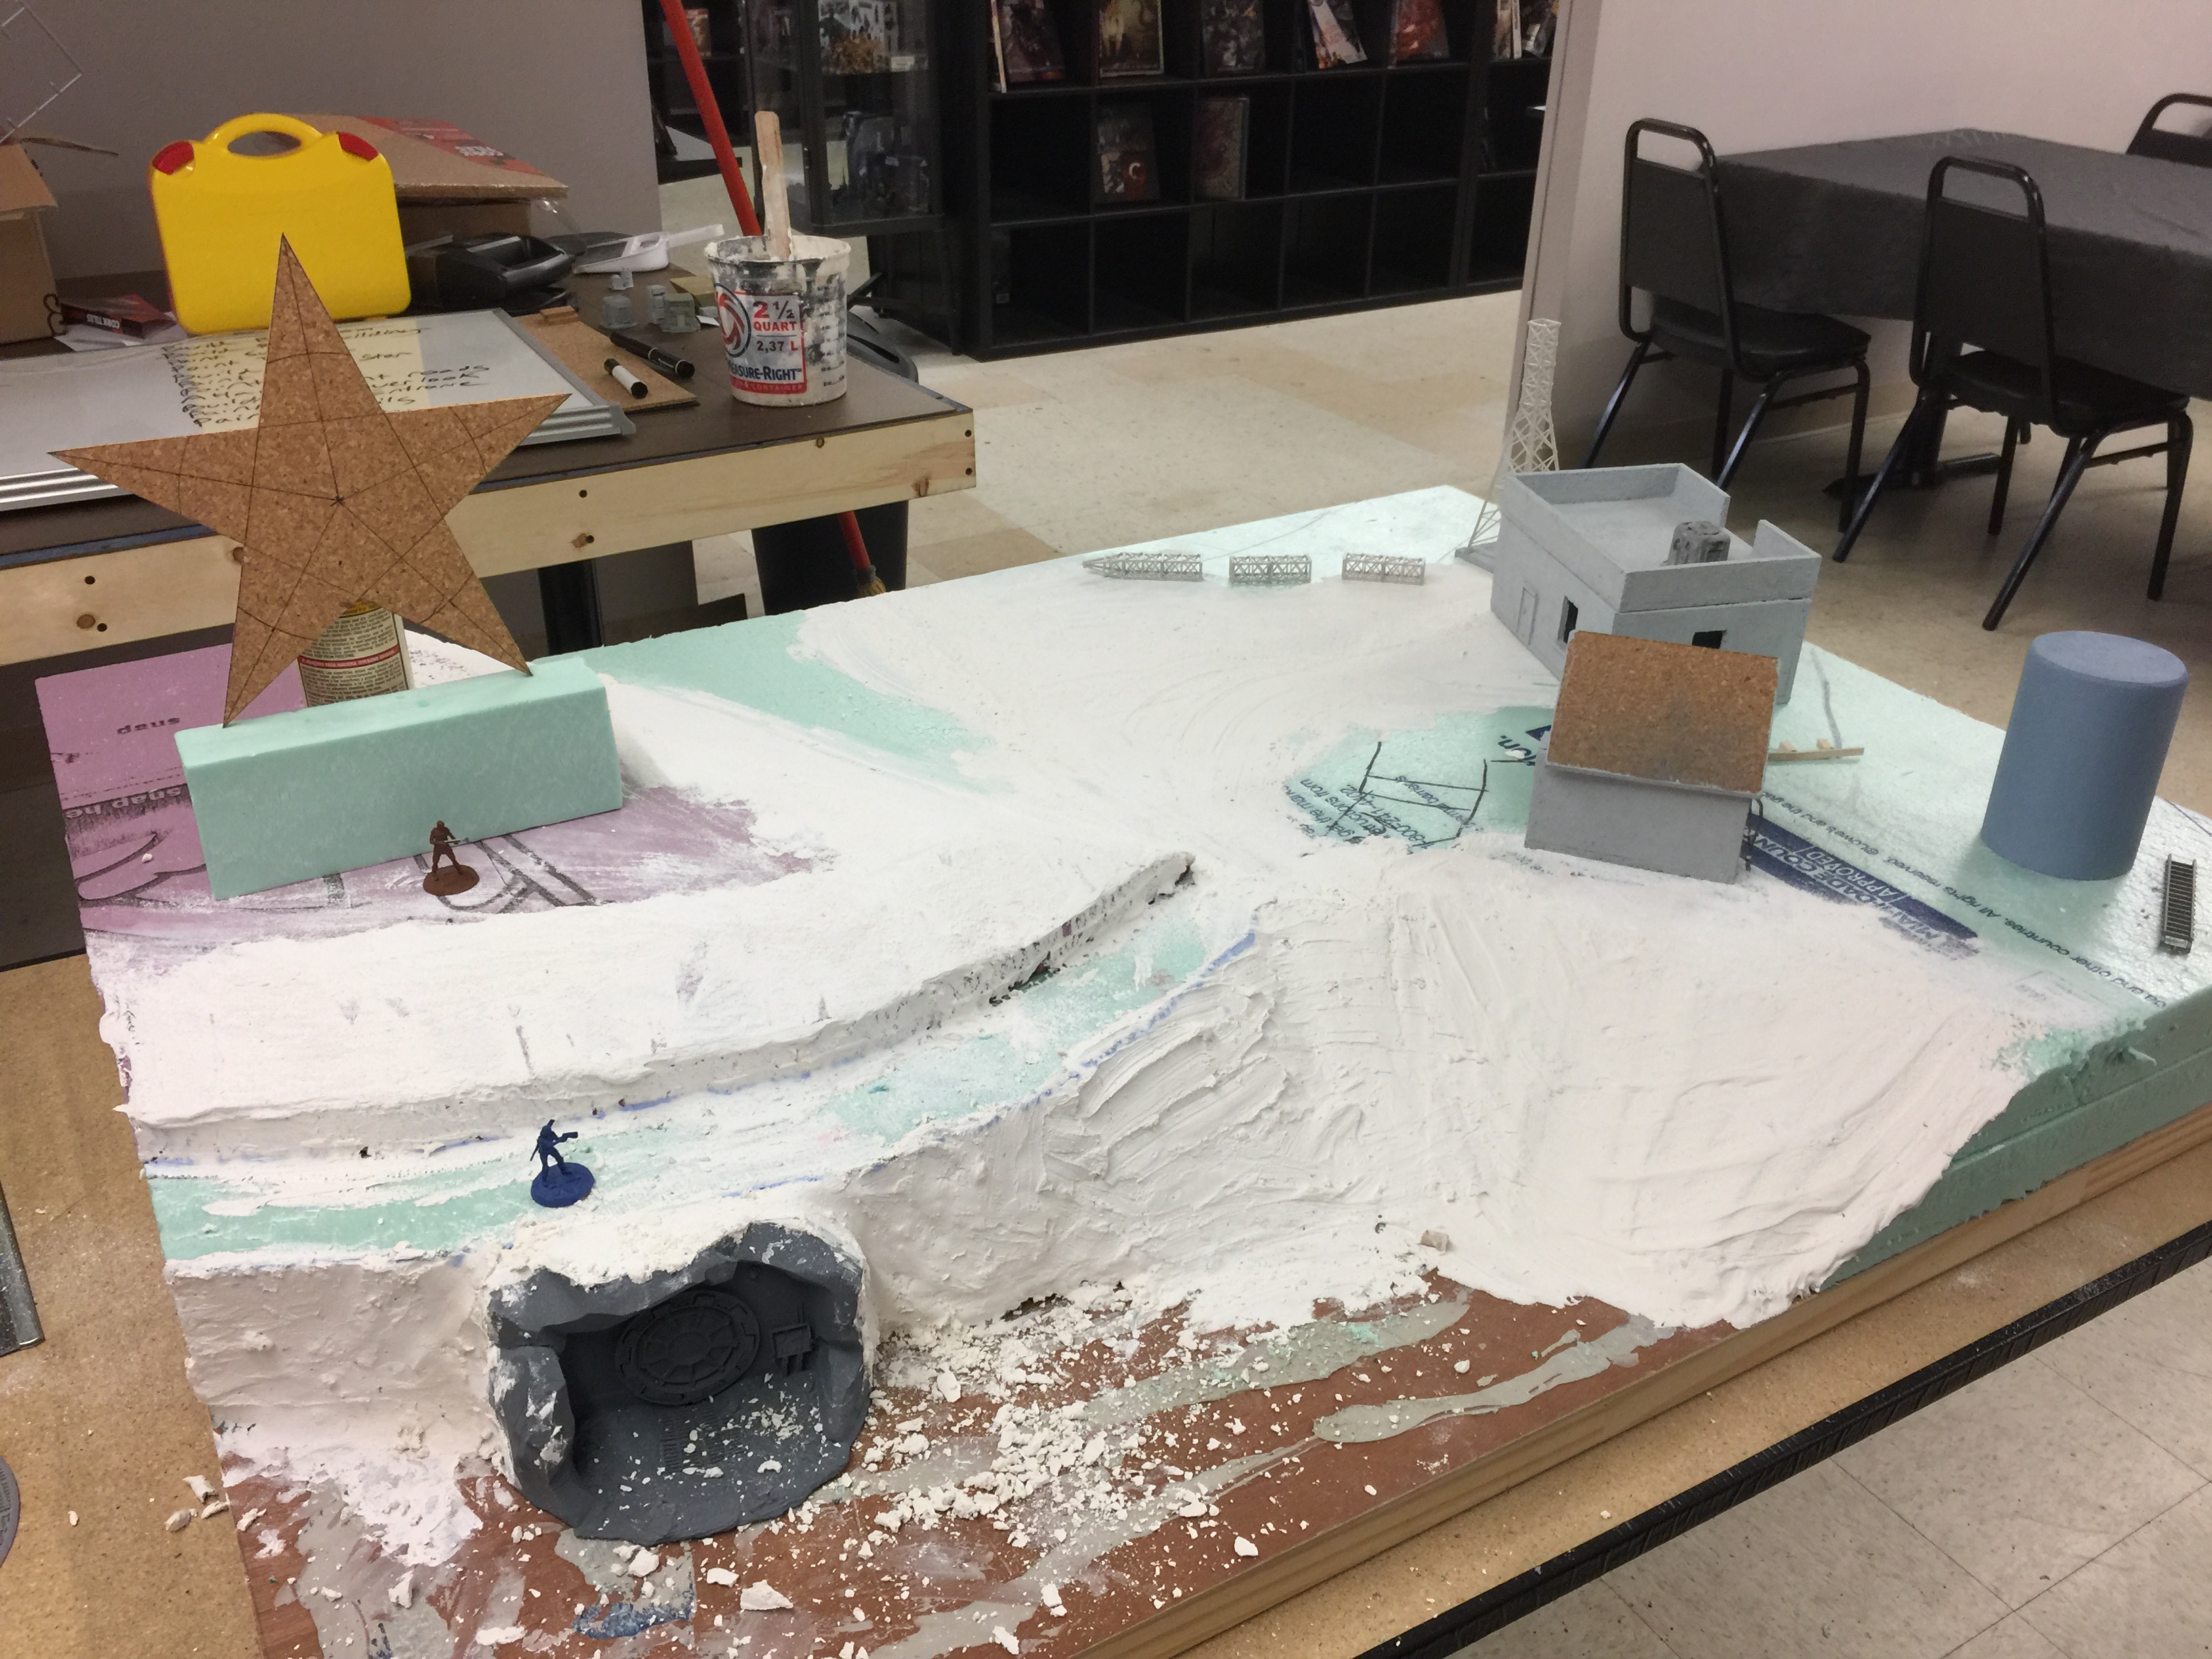
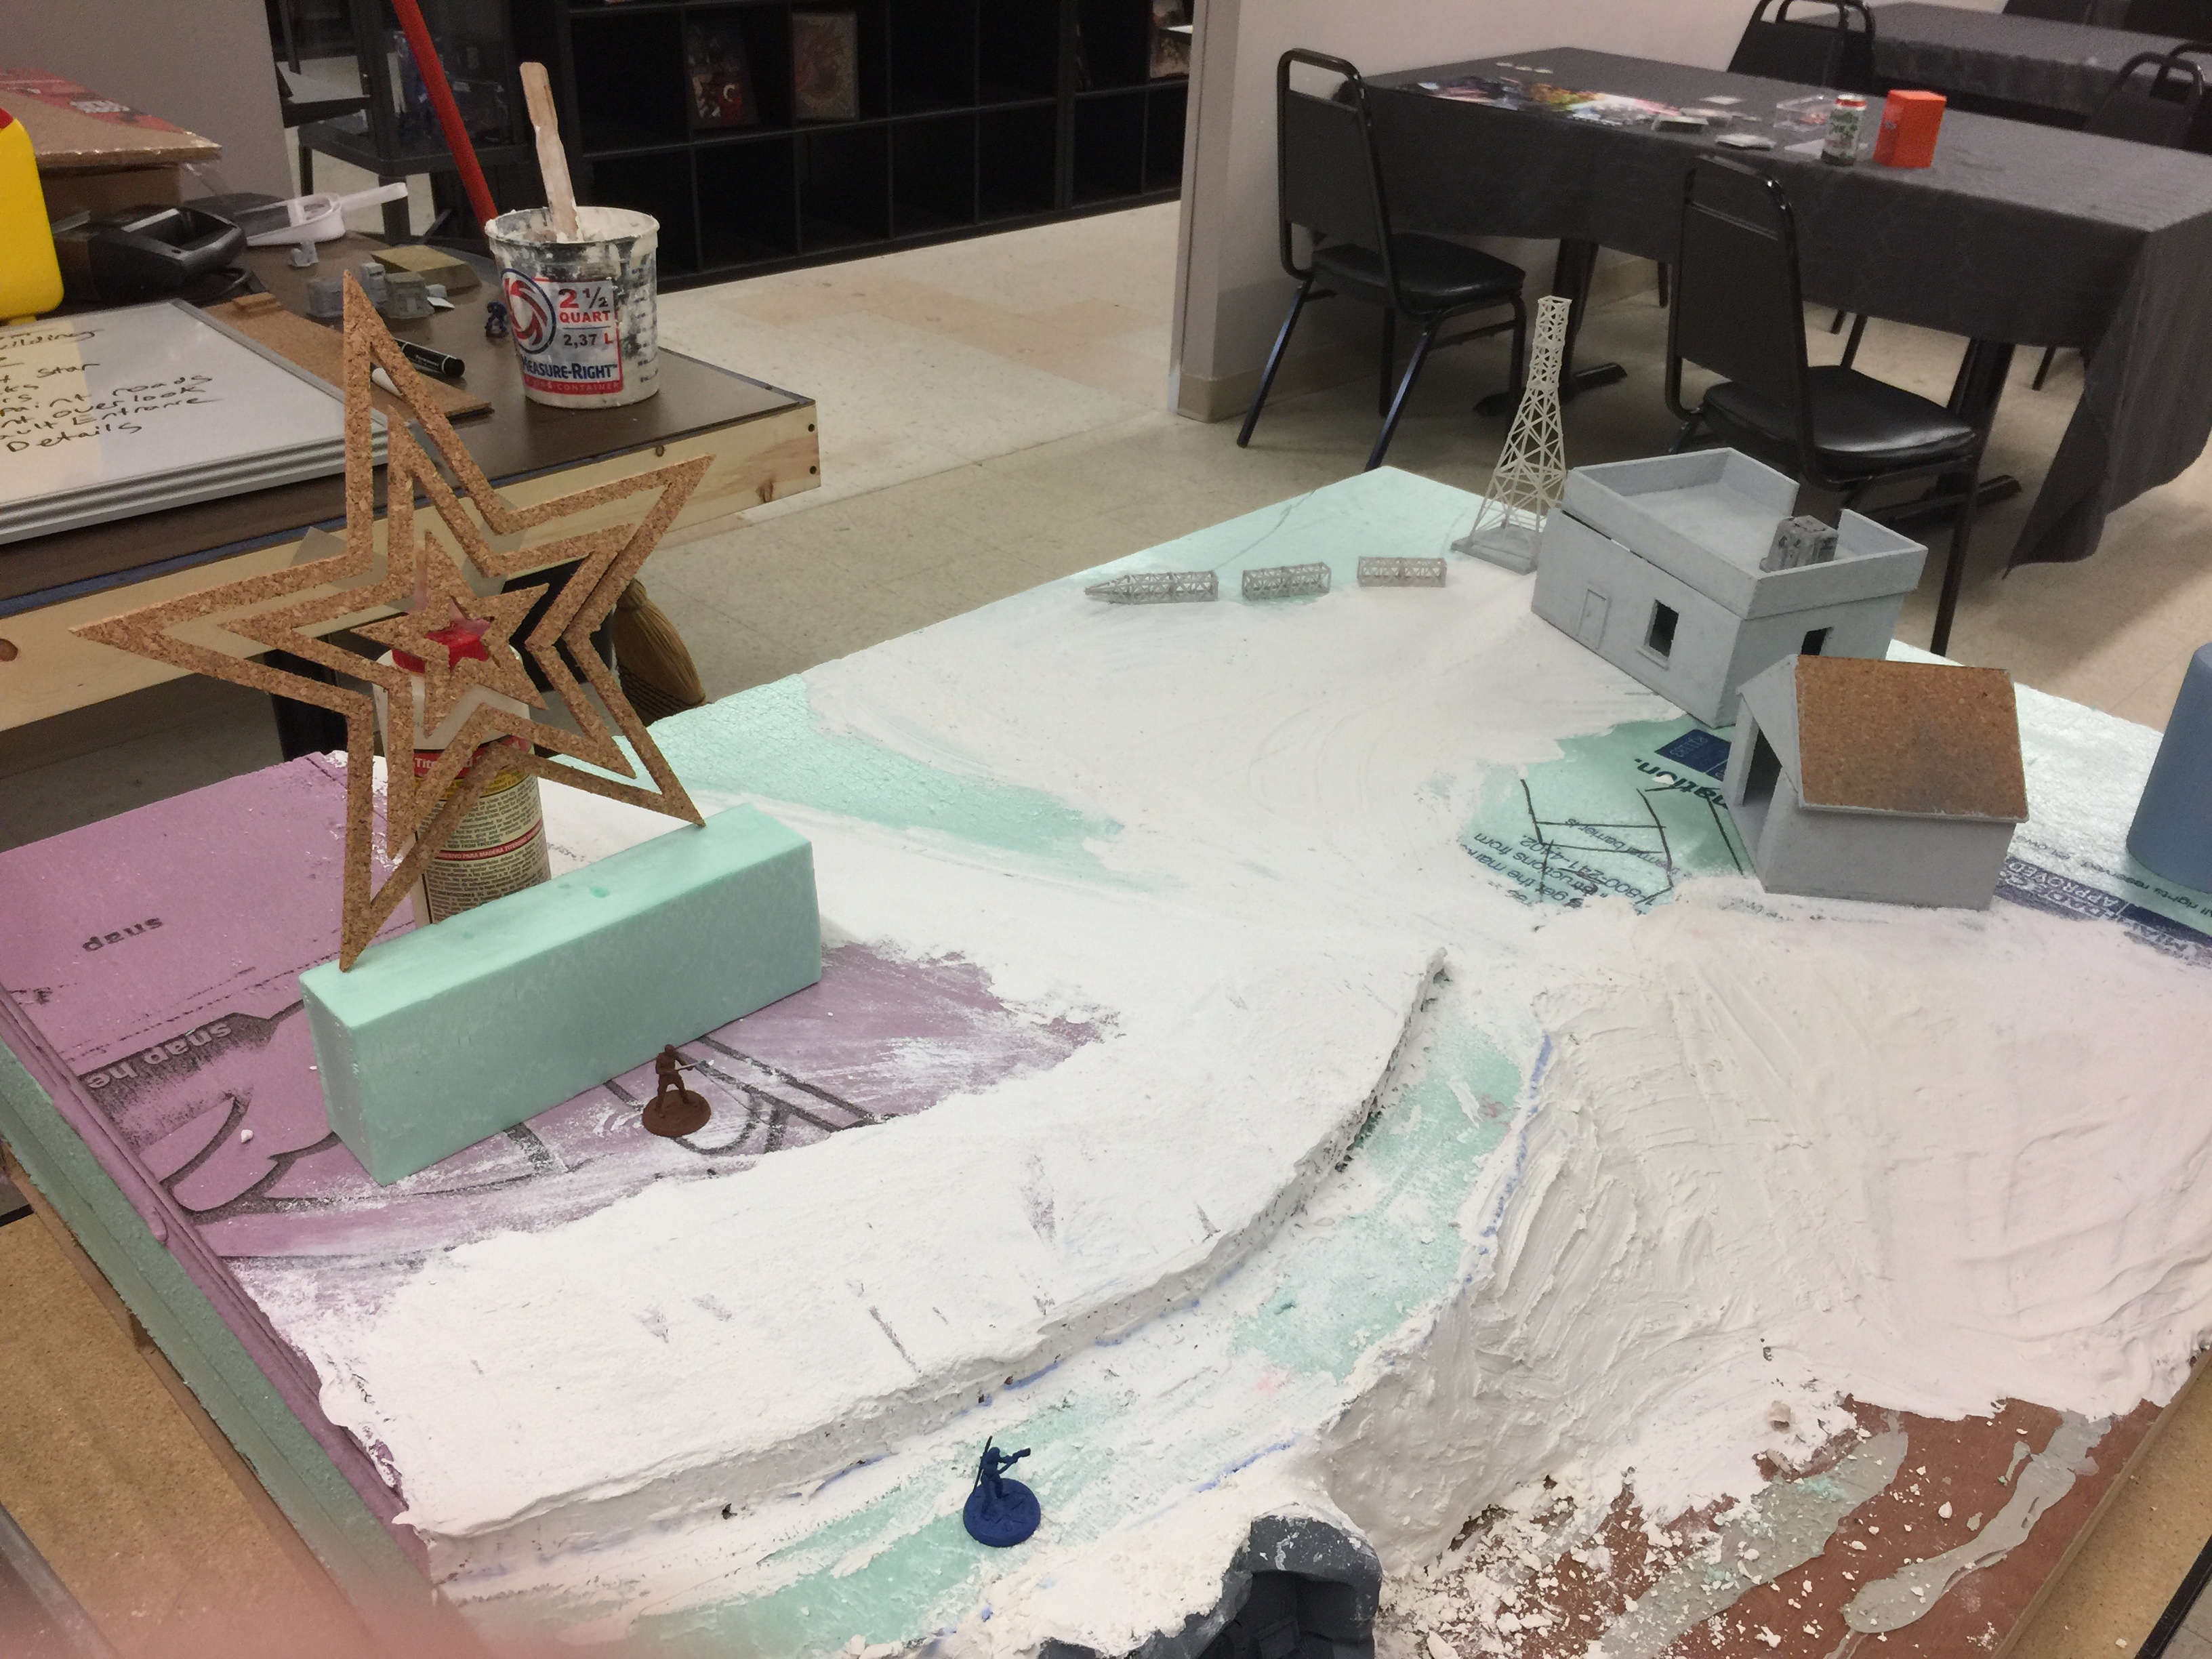
- Image 1: Hacked out the start of the contours and placed bits and bobs around toe get a feel for layout. Sketched the layout directly onto the foam.
- Image 2: The mostly finished bathroom made from cork tiles. This table was our first experiment at cork construction. For more info, google Matakishi’s Tea house.
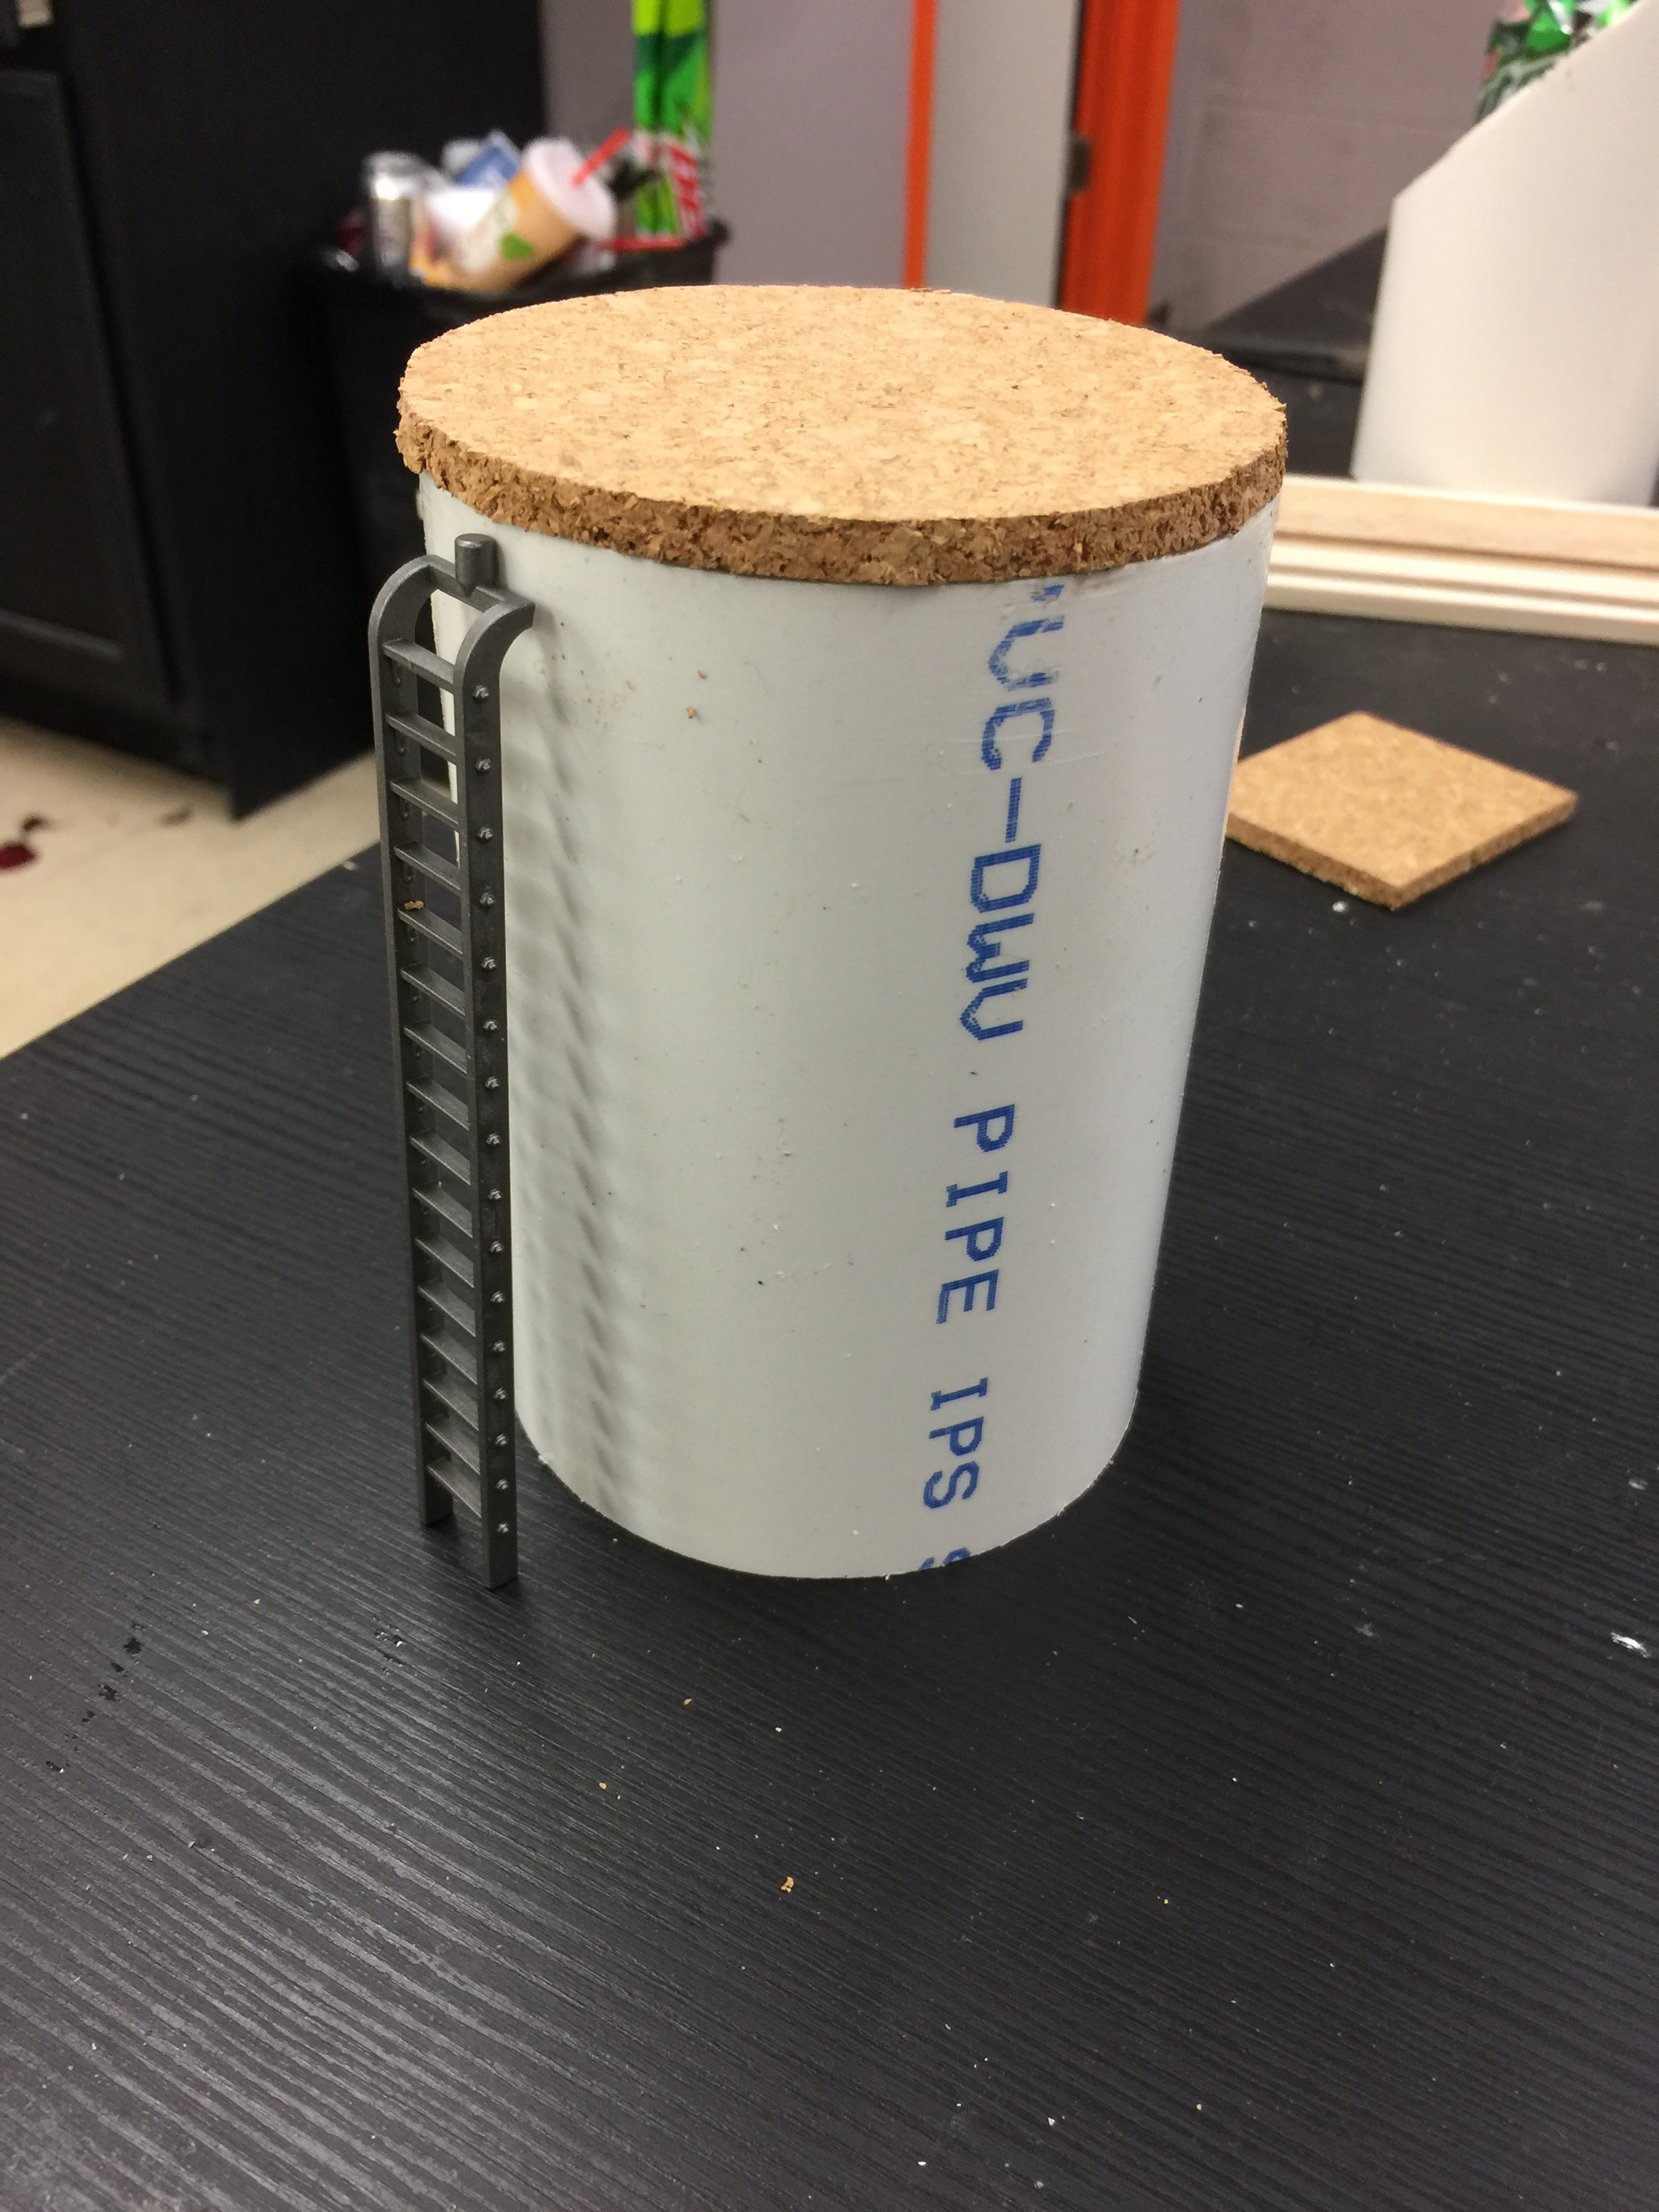
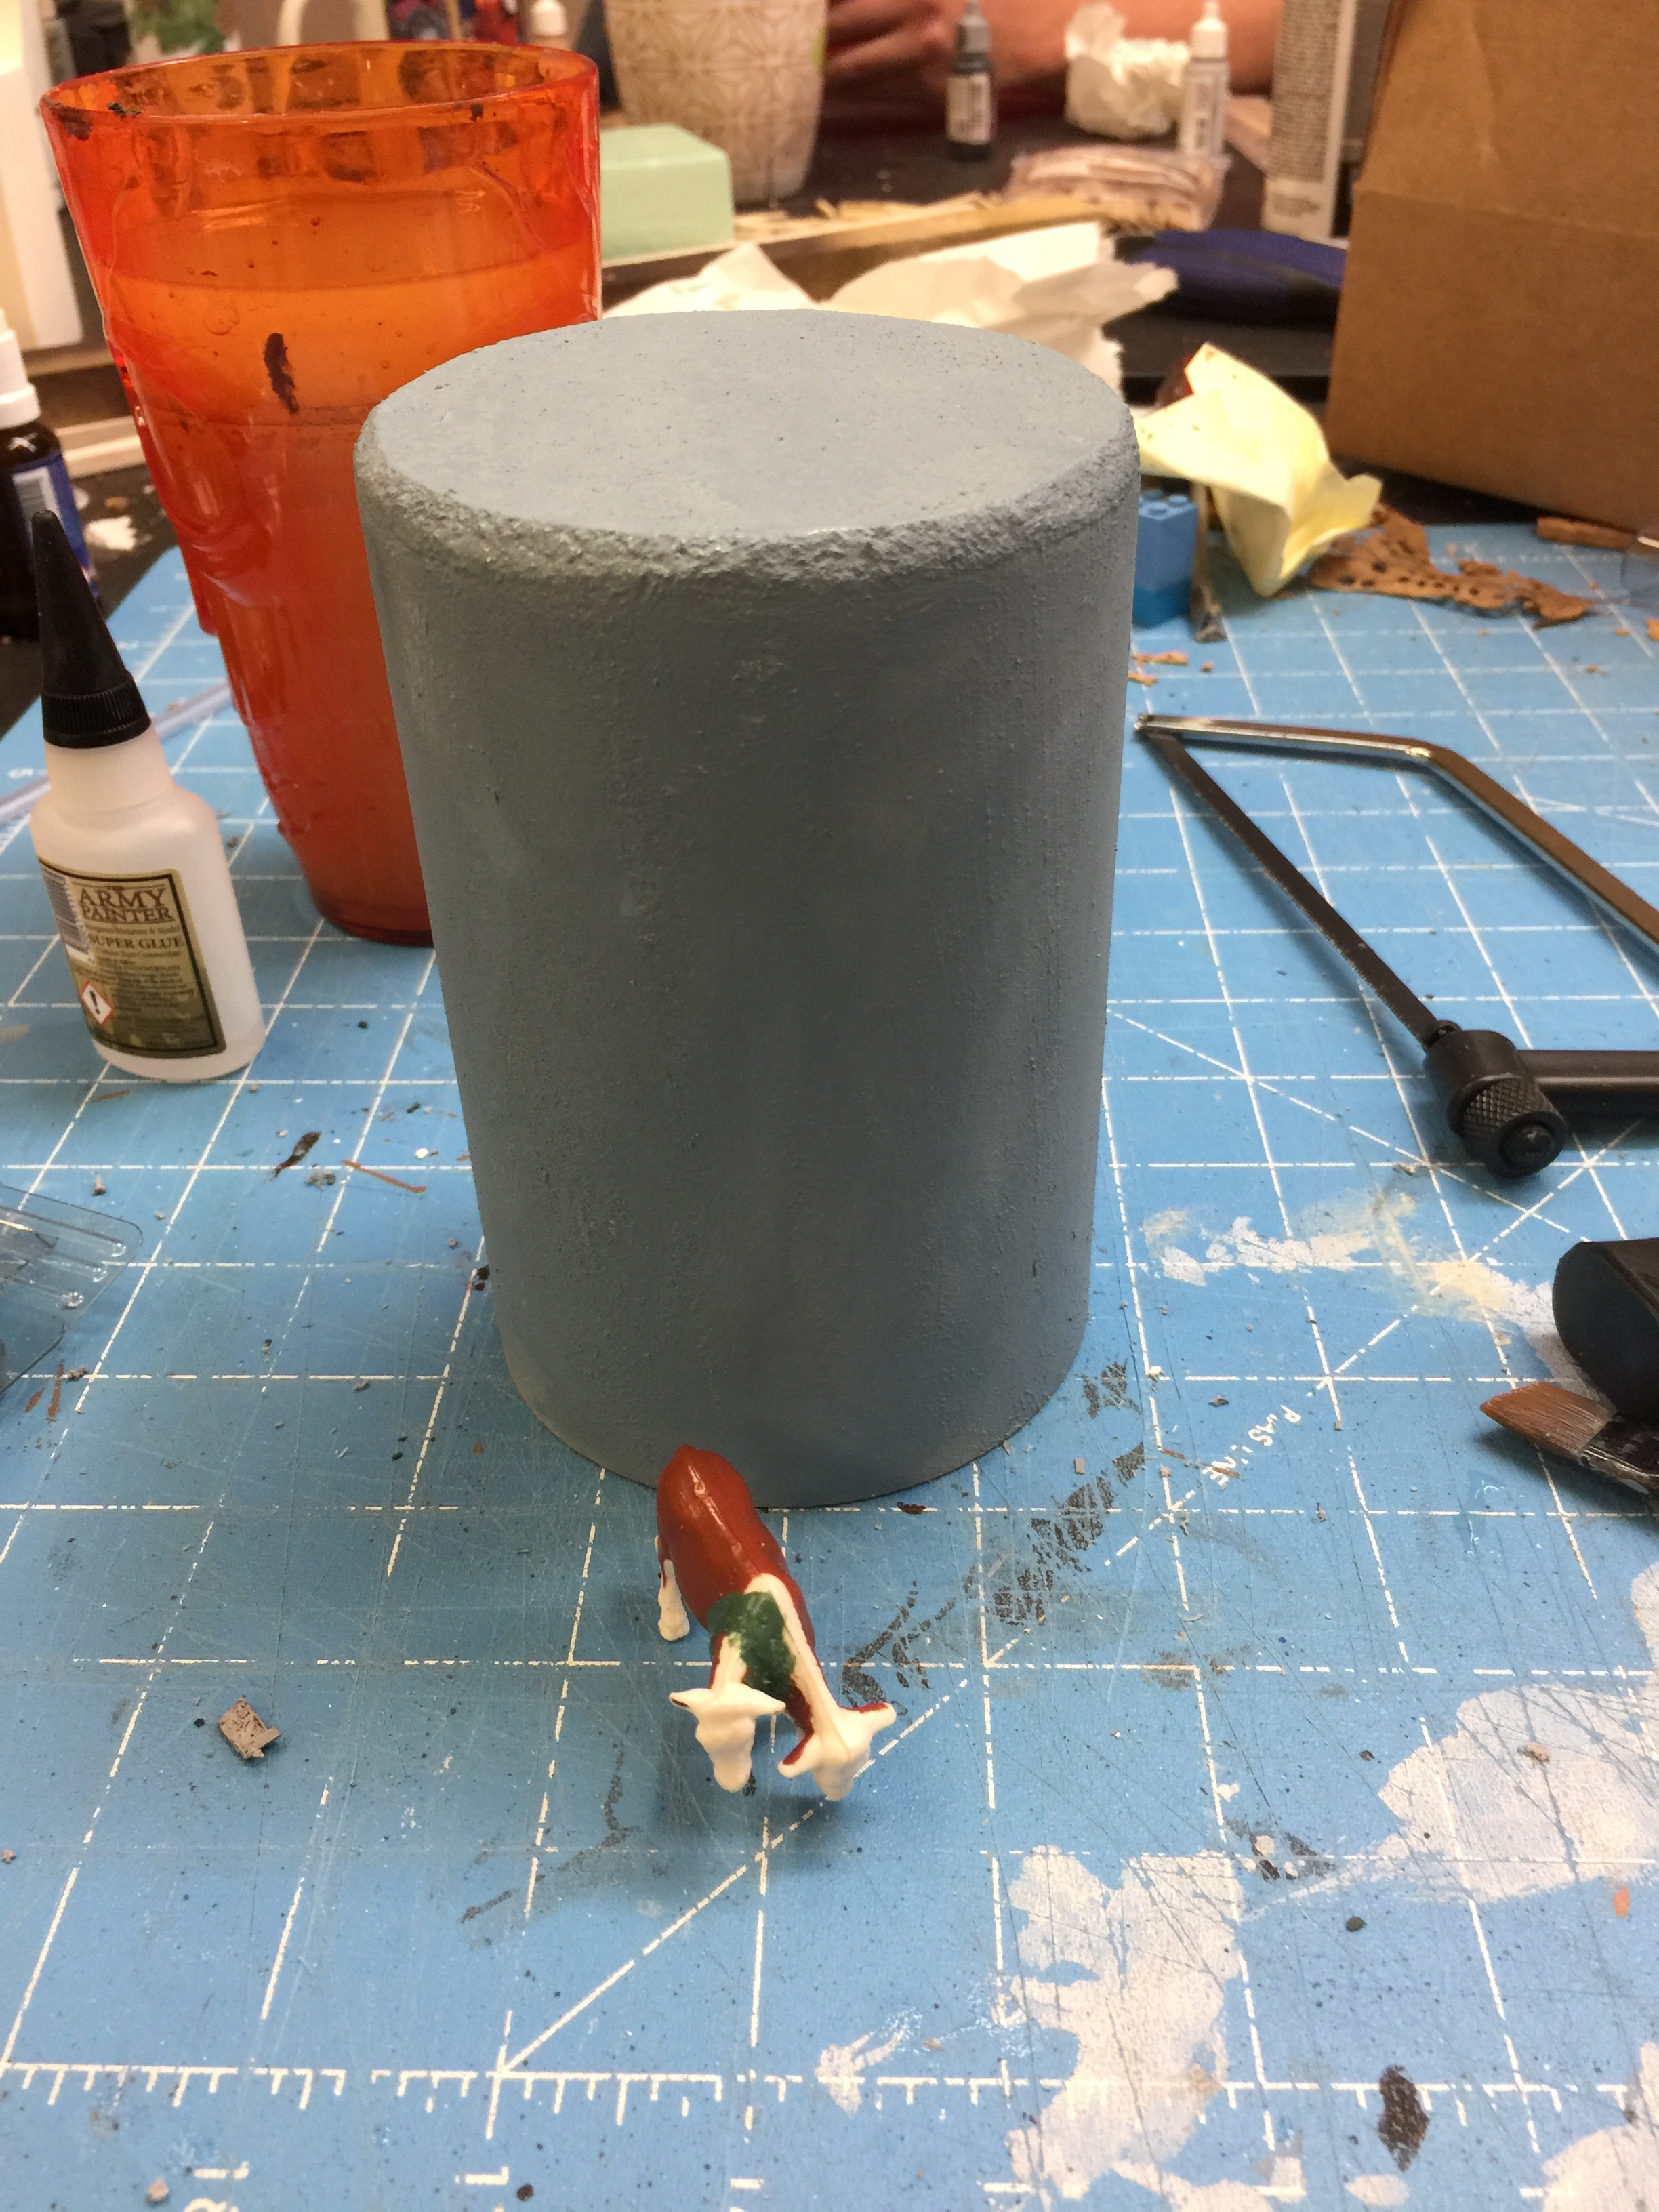
- Image 3: A water tower from scratch.
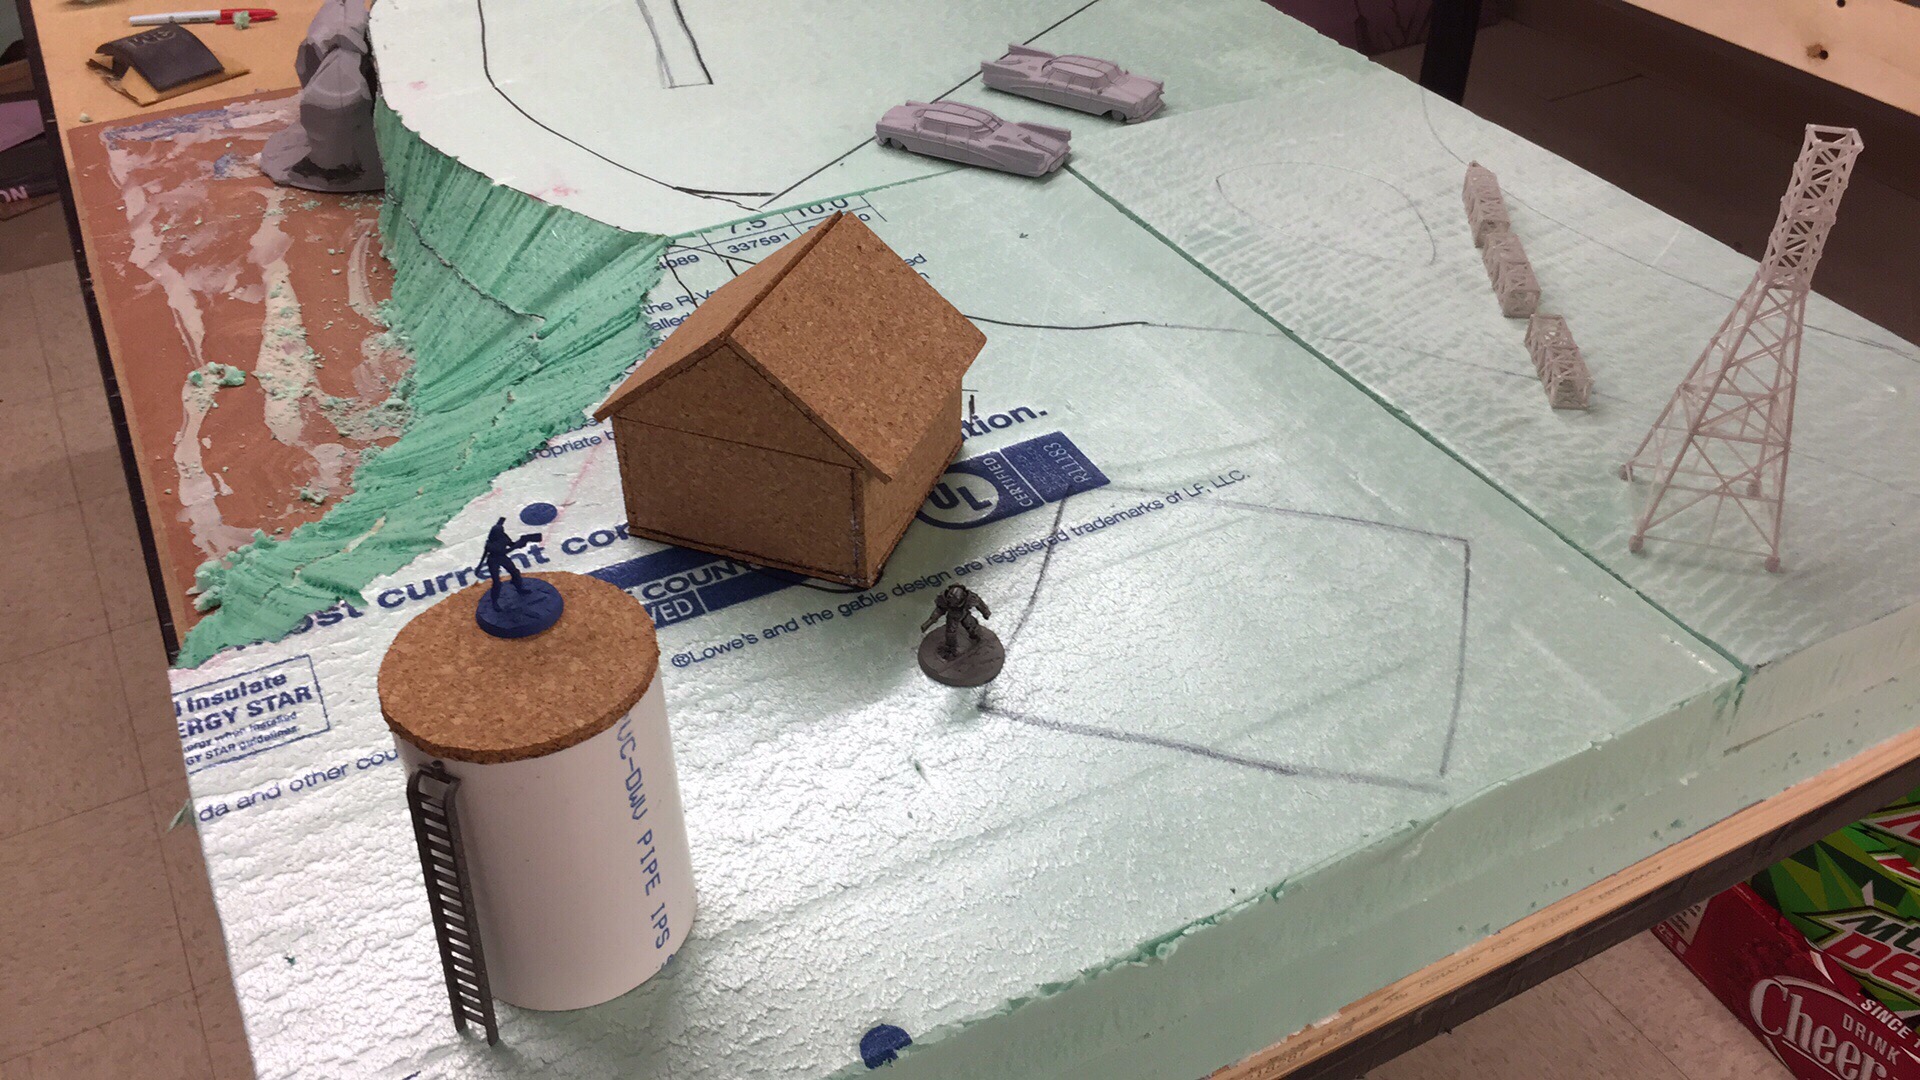
- Image 4: Shuffling buildings around to get a feel for layout
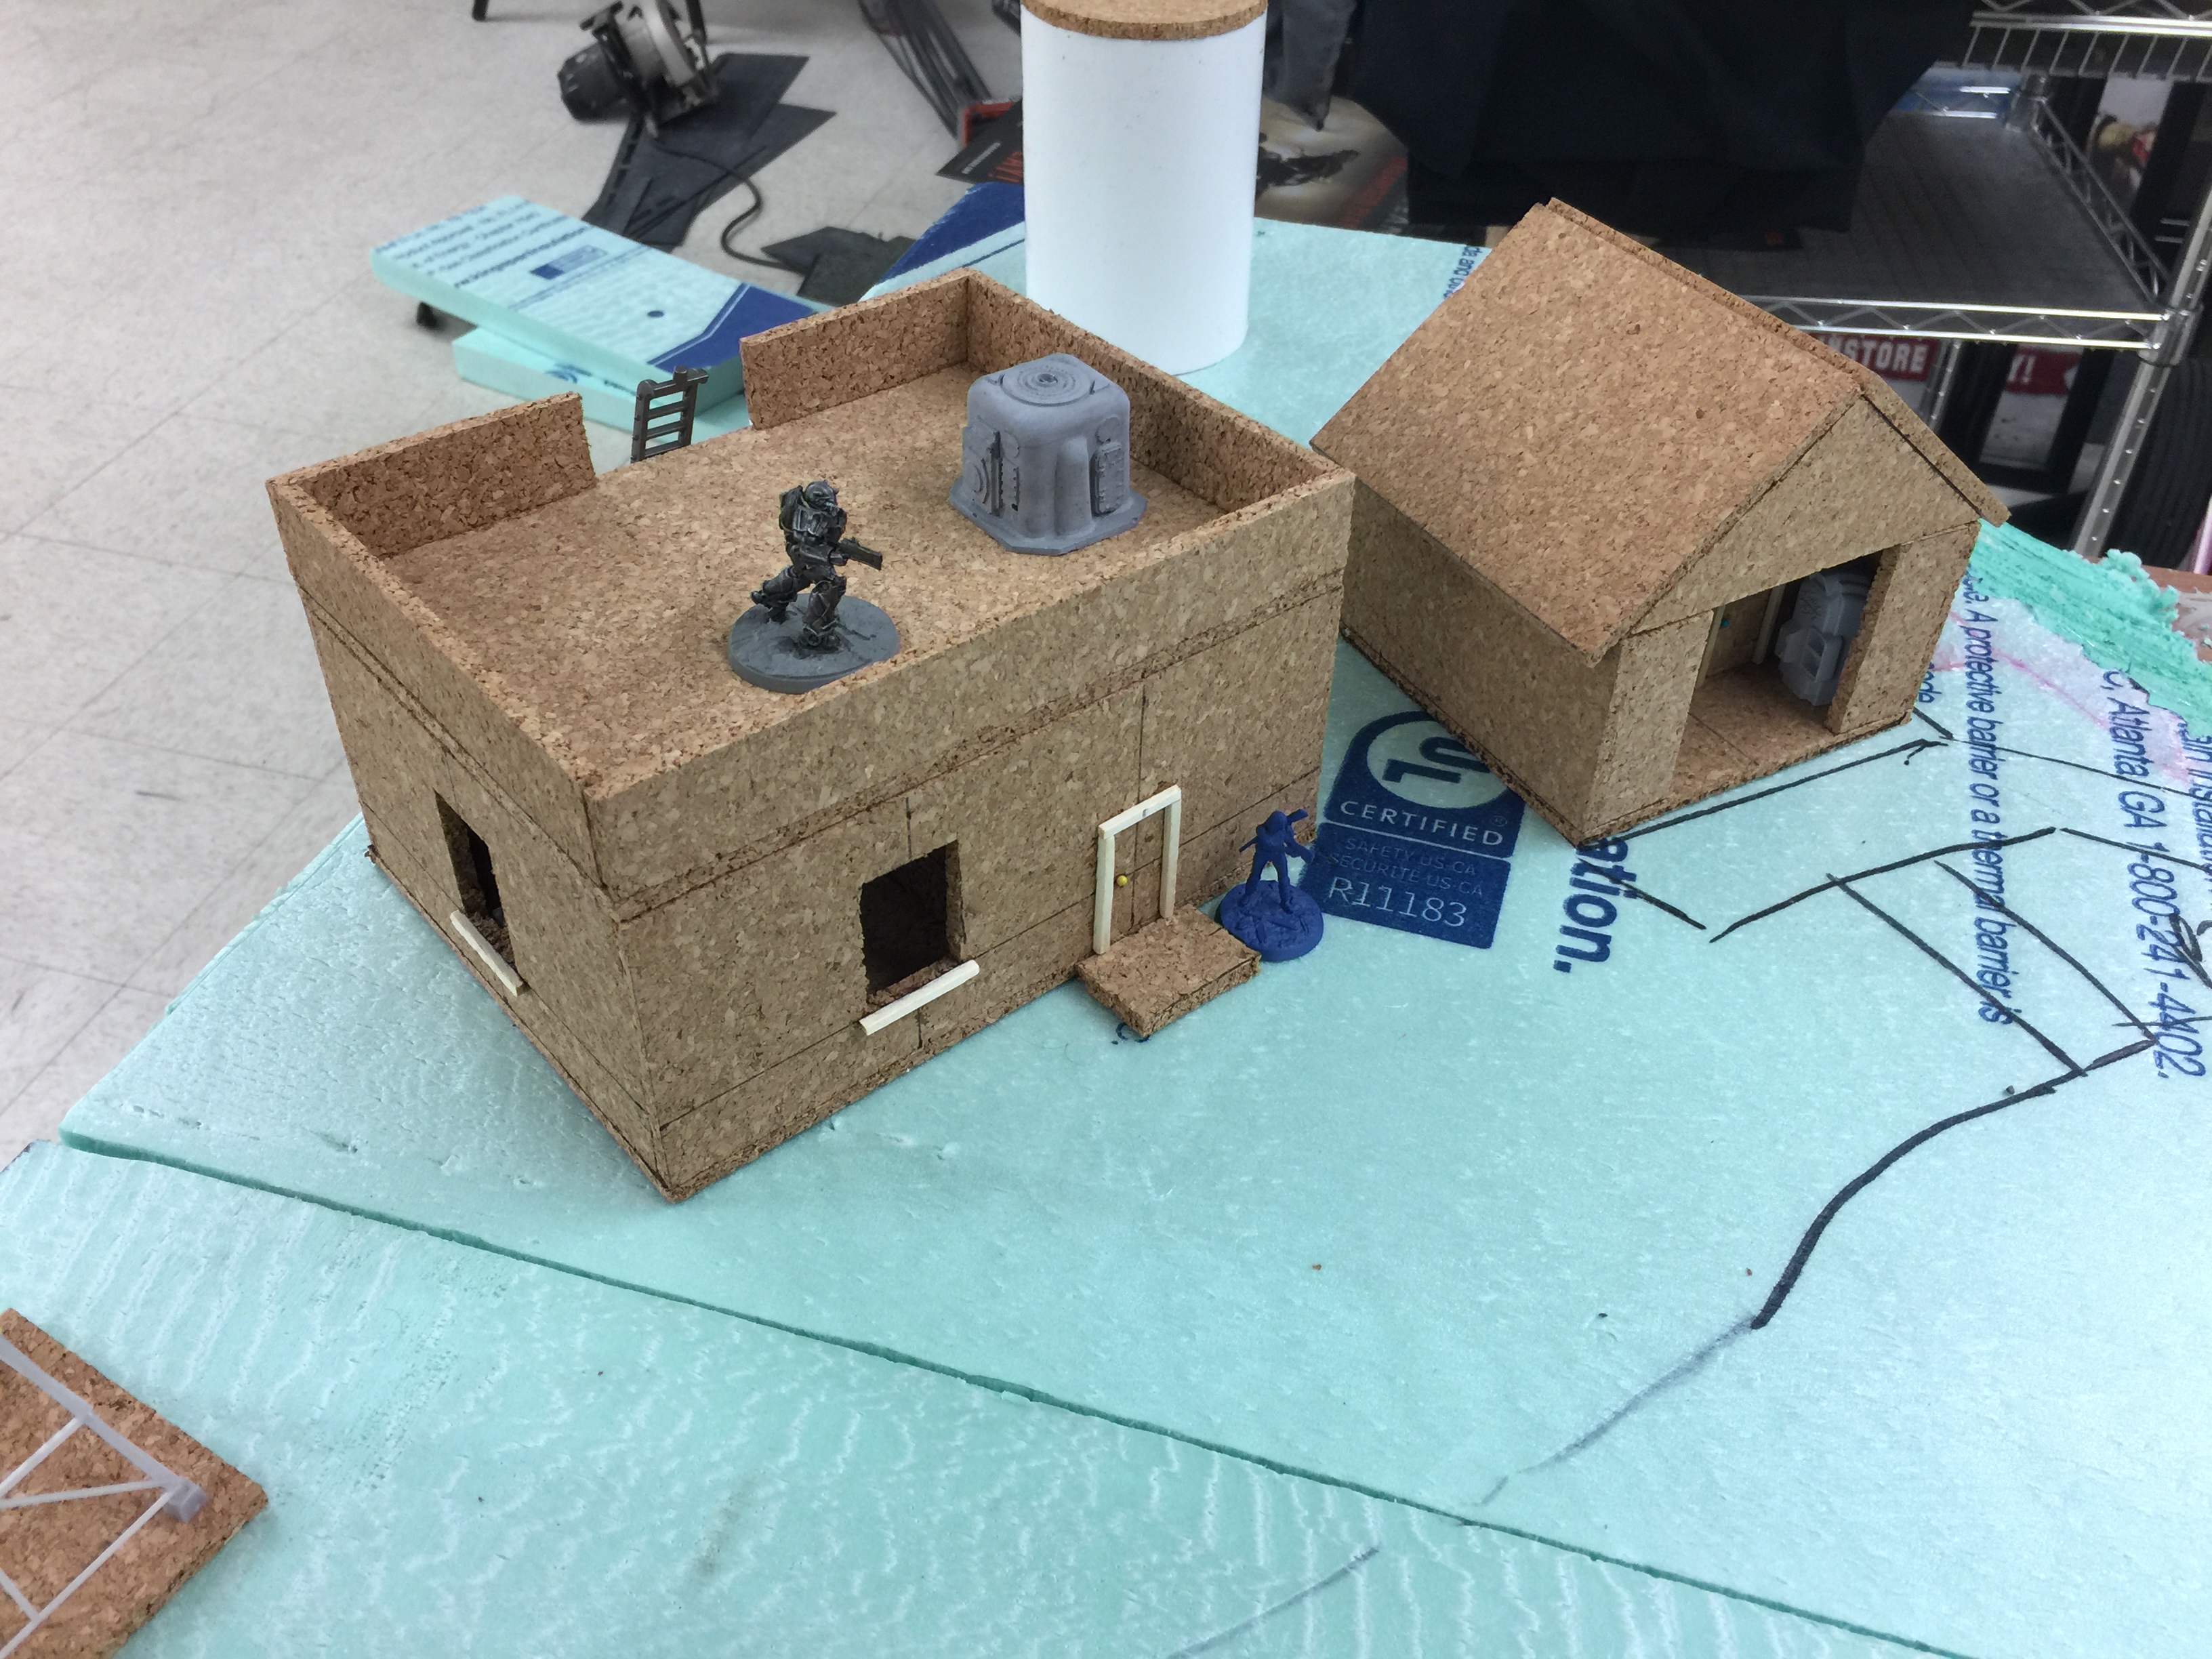
- Image 5: The radio building joins the layout. Craft matchsticks for door trim, pin heads for door knobs, more match sticks for window sills. The generator is an old and busted resin cast from Spartan Scenics.
- Image 6: Testing the interior layout of the radio building.
- Image 7: The basecoated water tower. The edges of the cork were sanded before painting to smooth them out. The basecoat paint was mixed with chinchilla dust to provide a minimum amount of texture and to disguise the cork. All of the cork buildings eventually receive a chinchilla dust and paint coating.
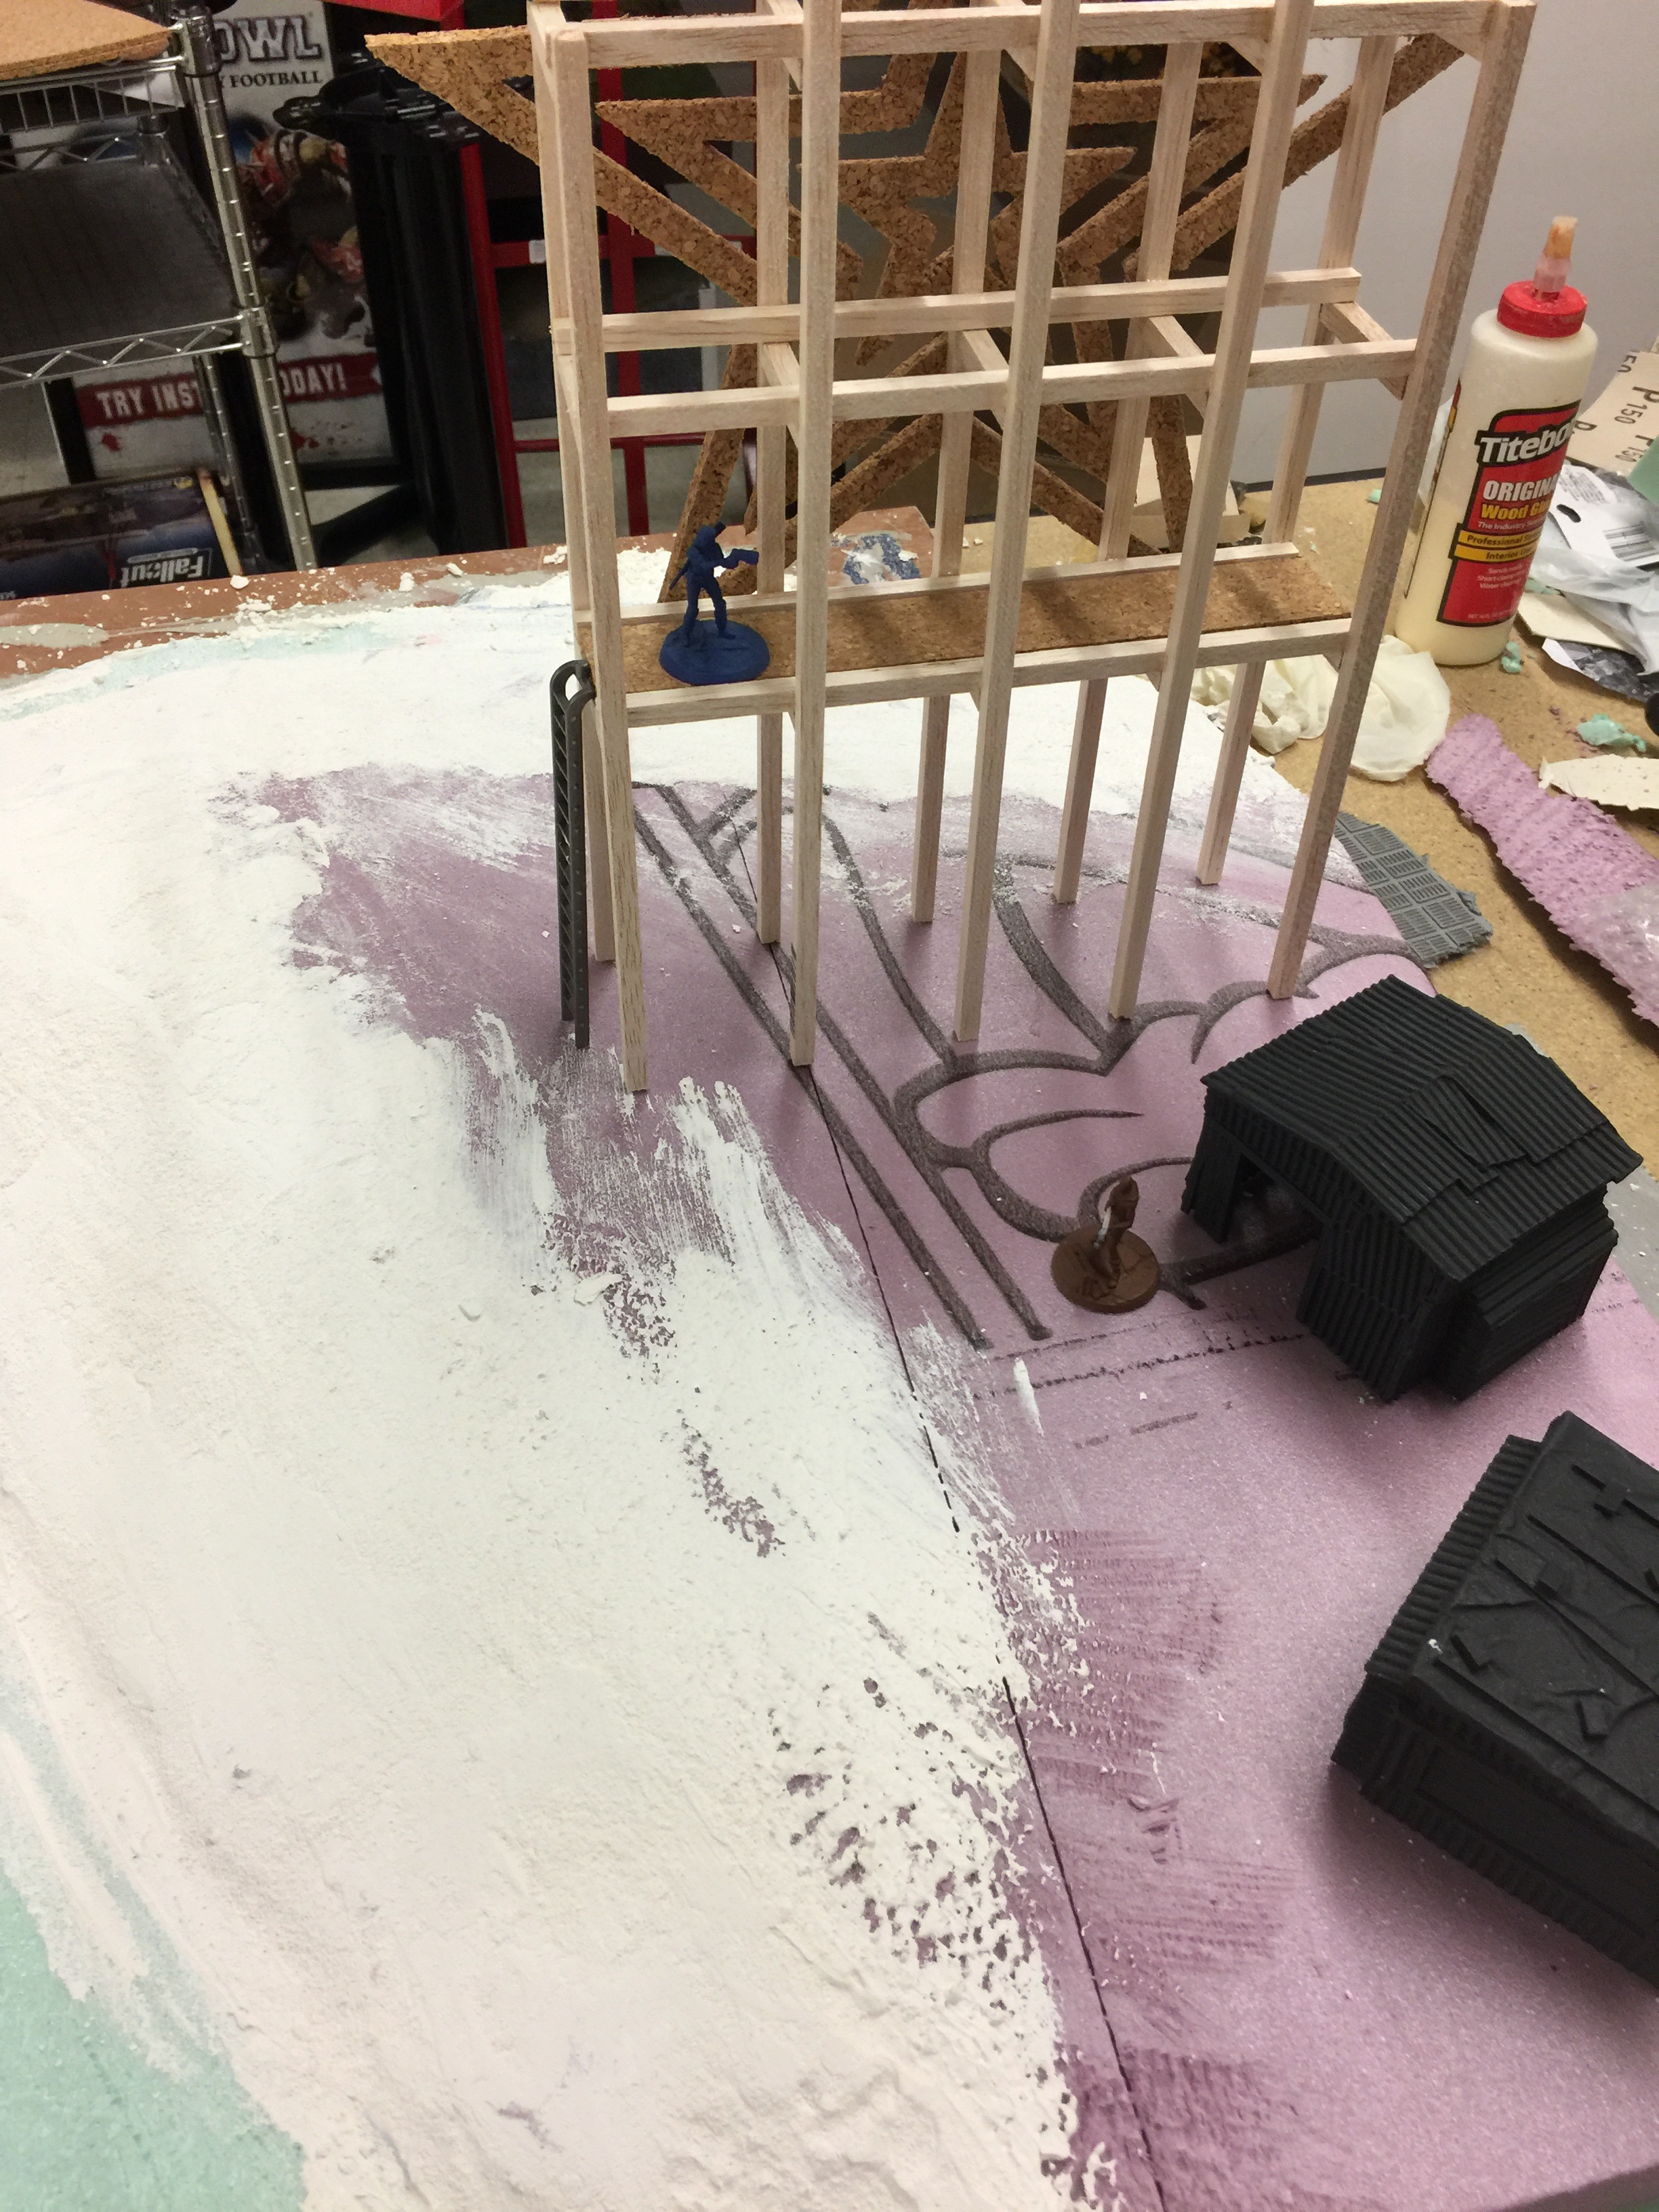
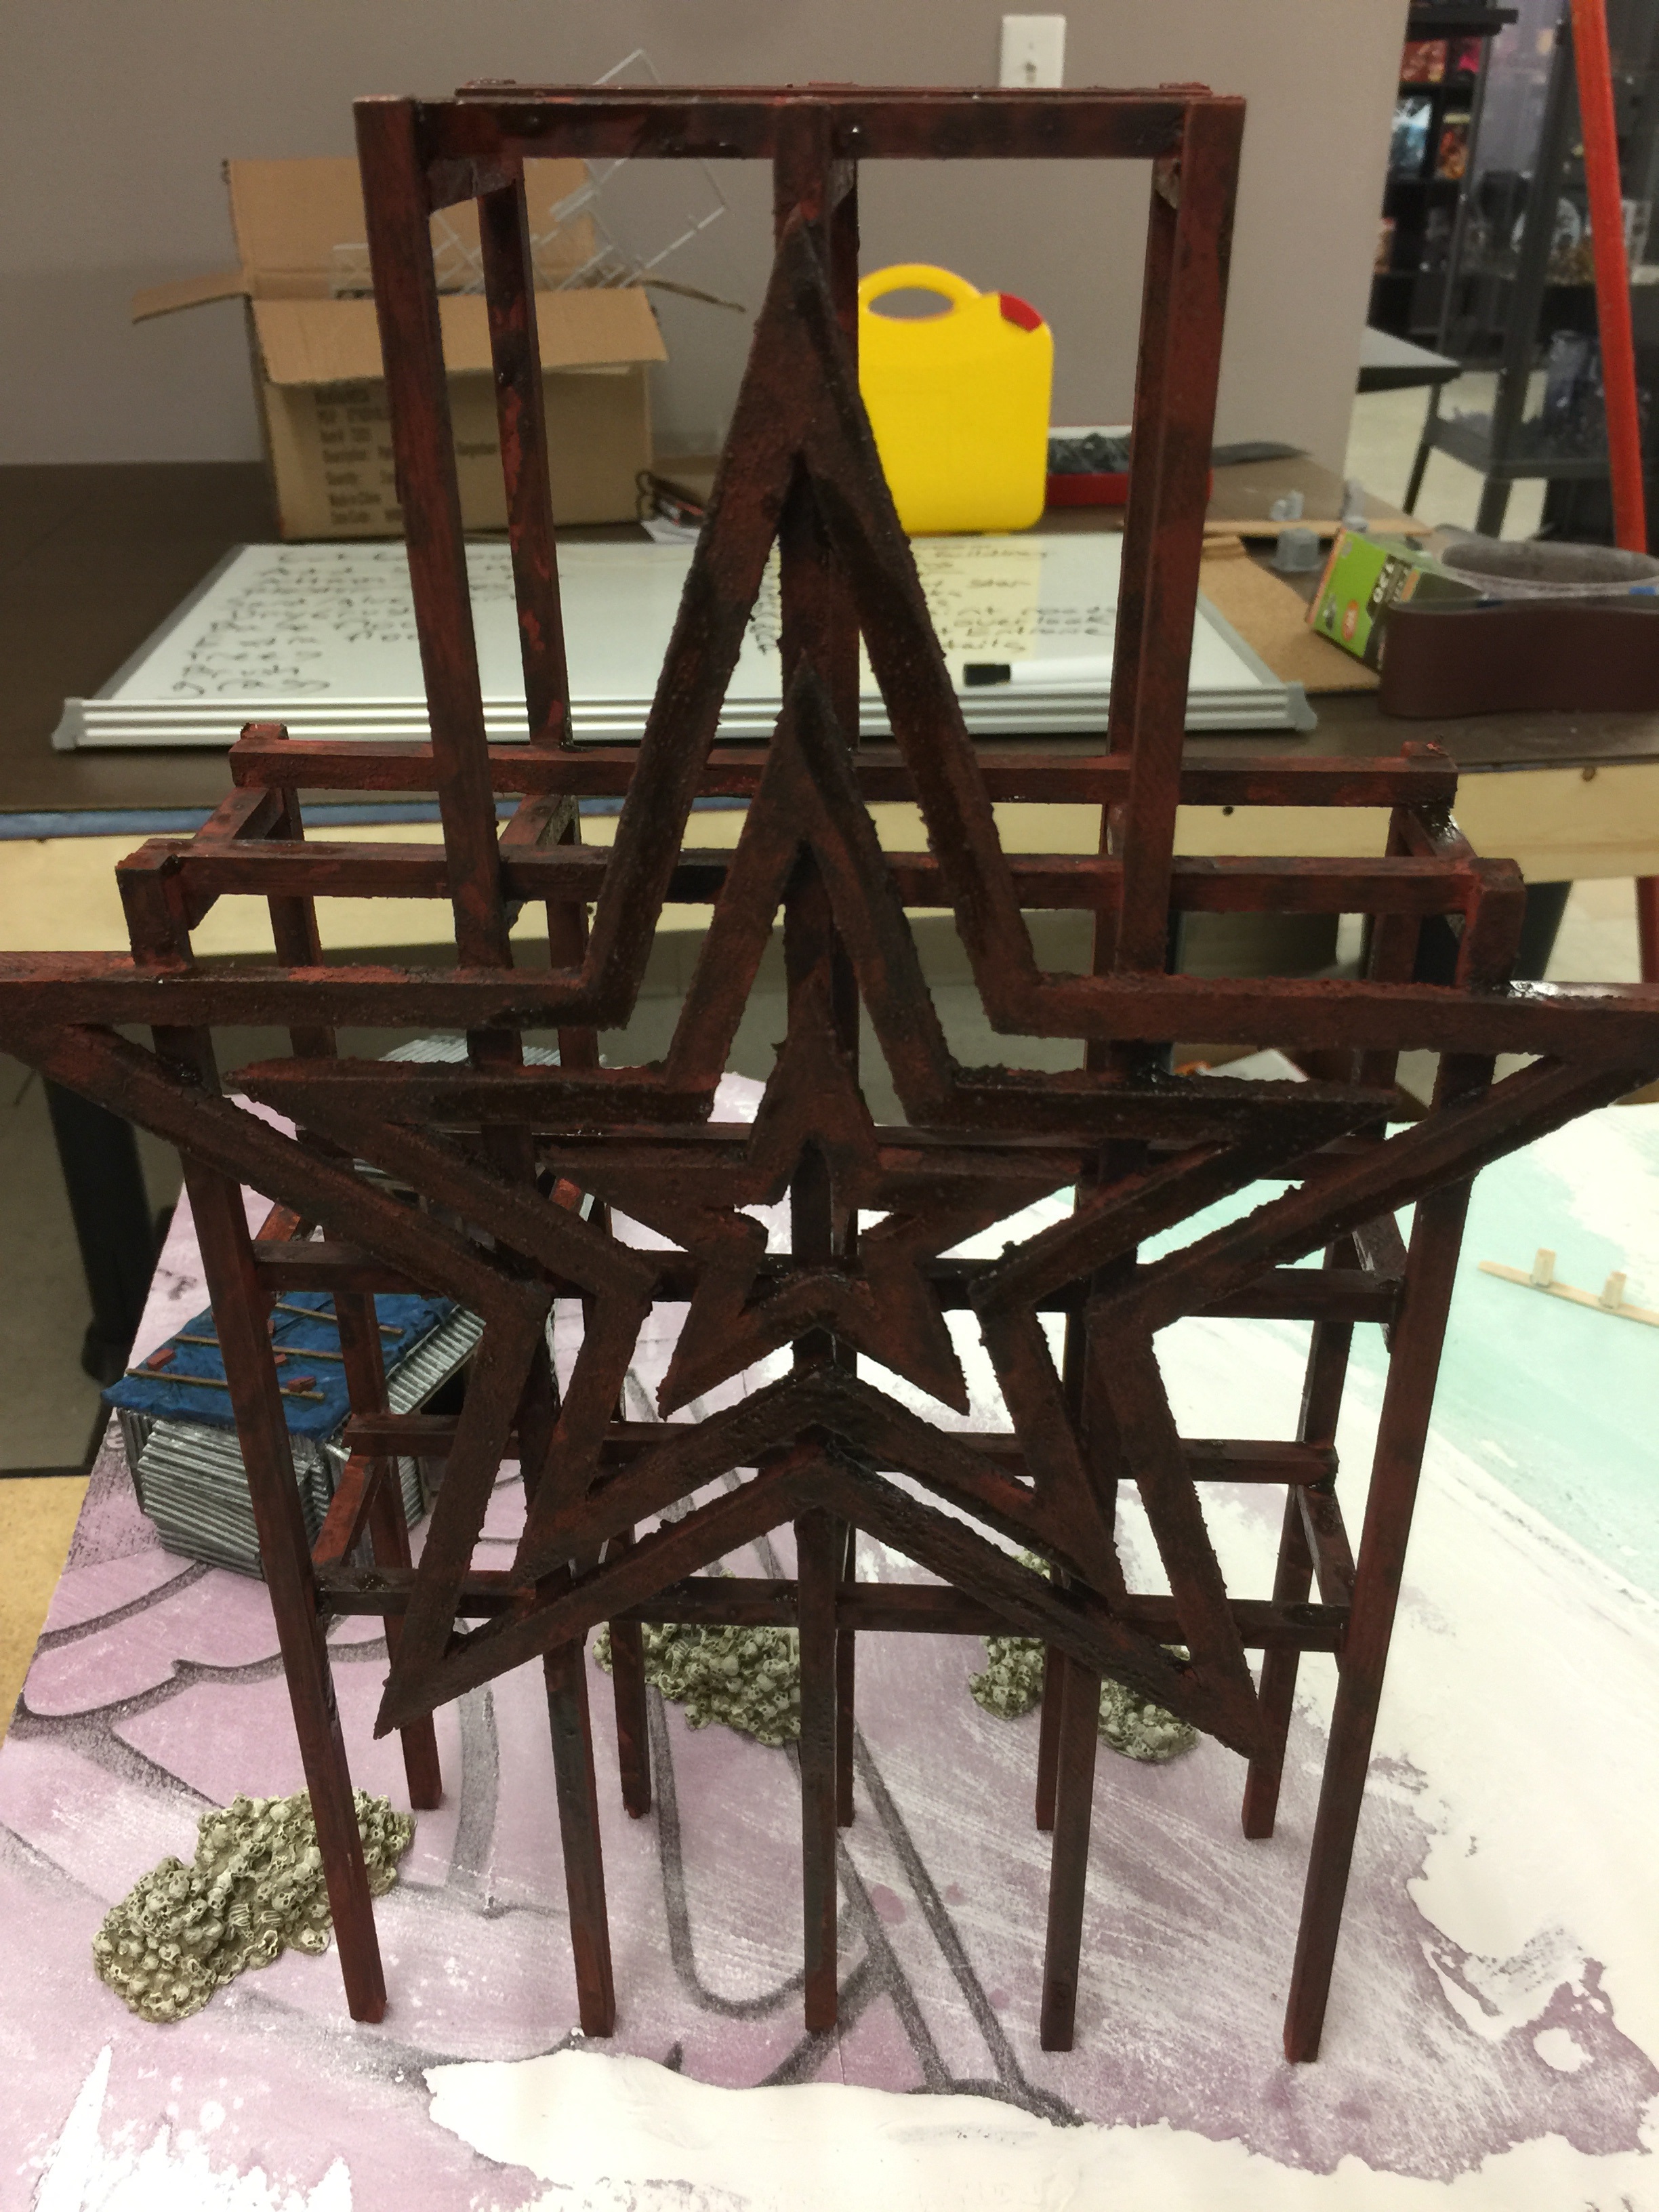
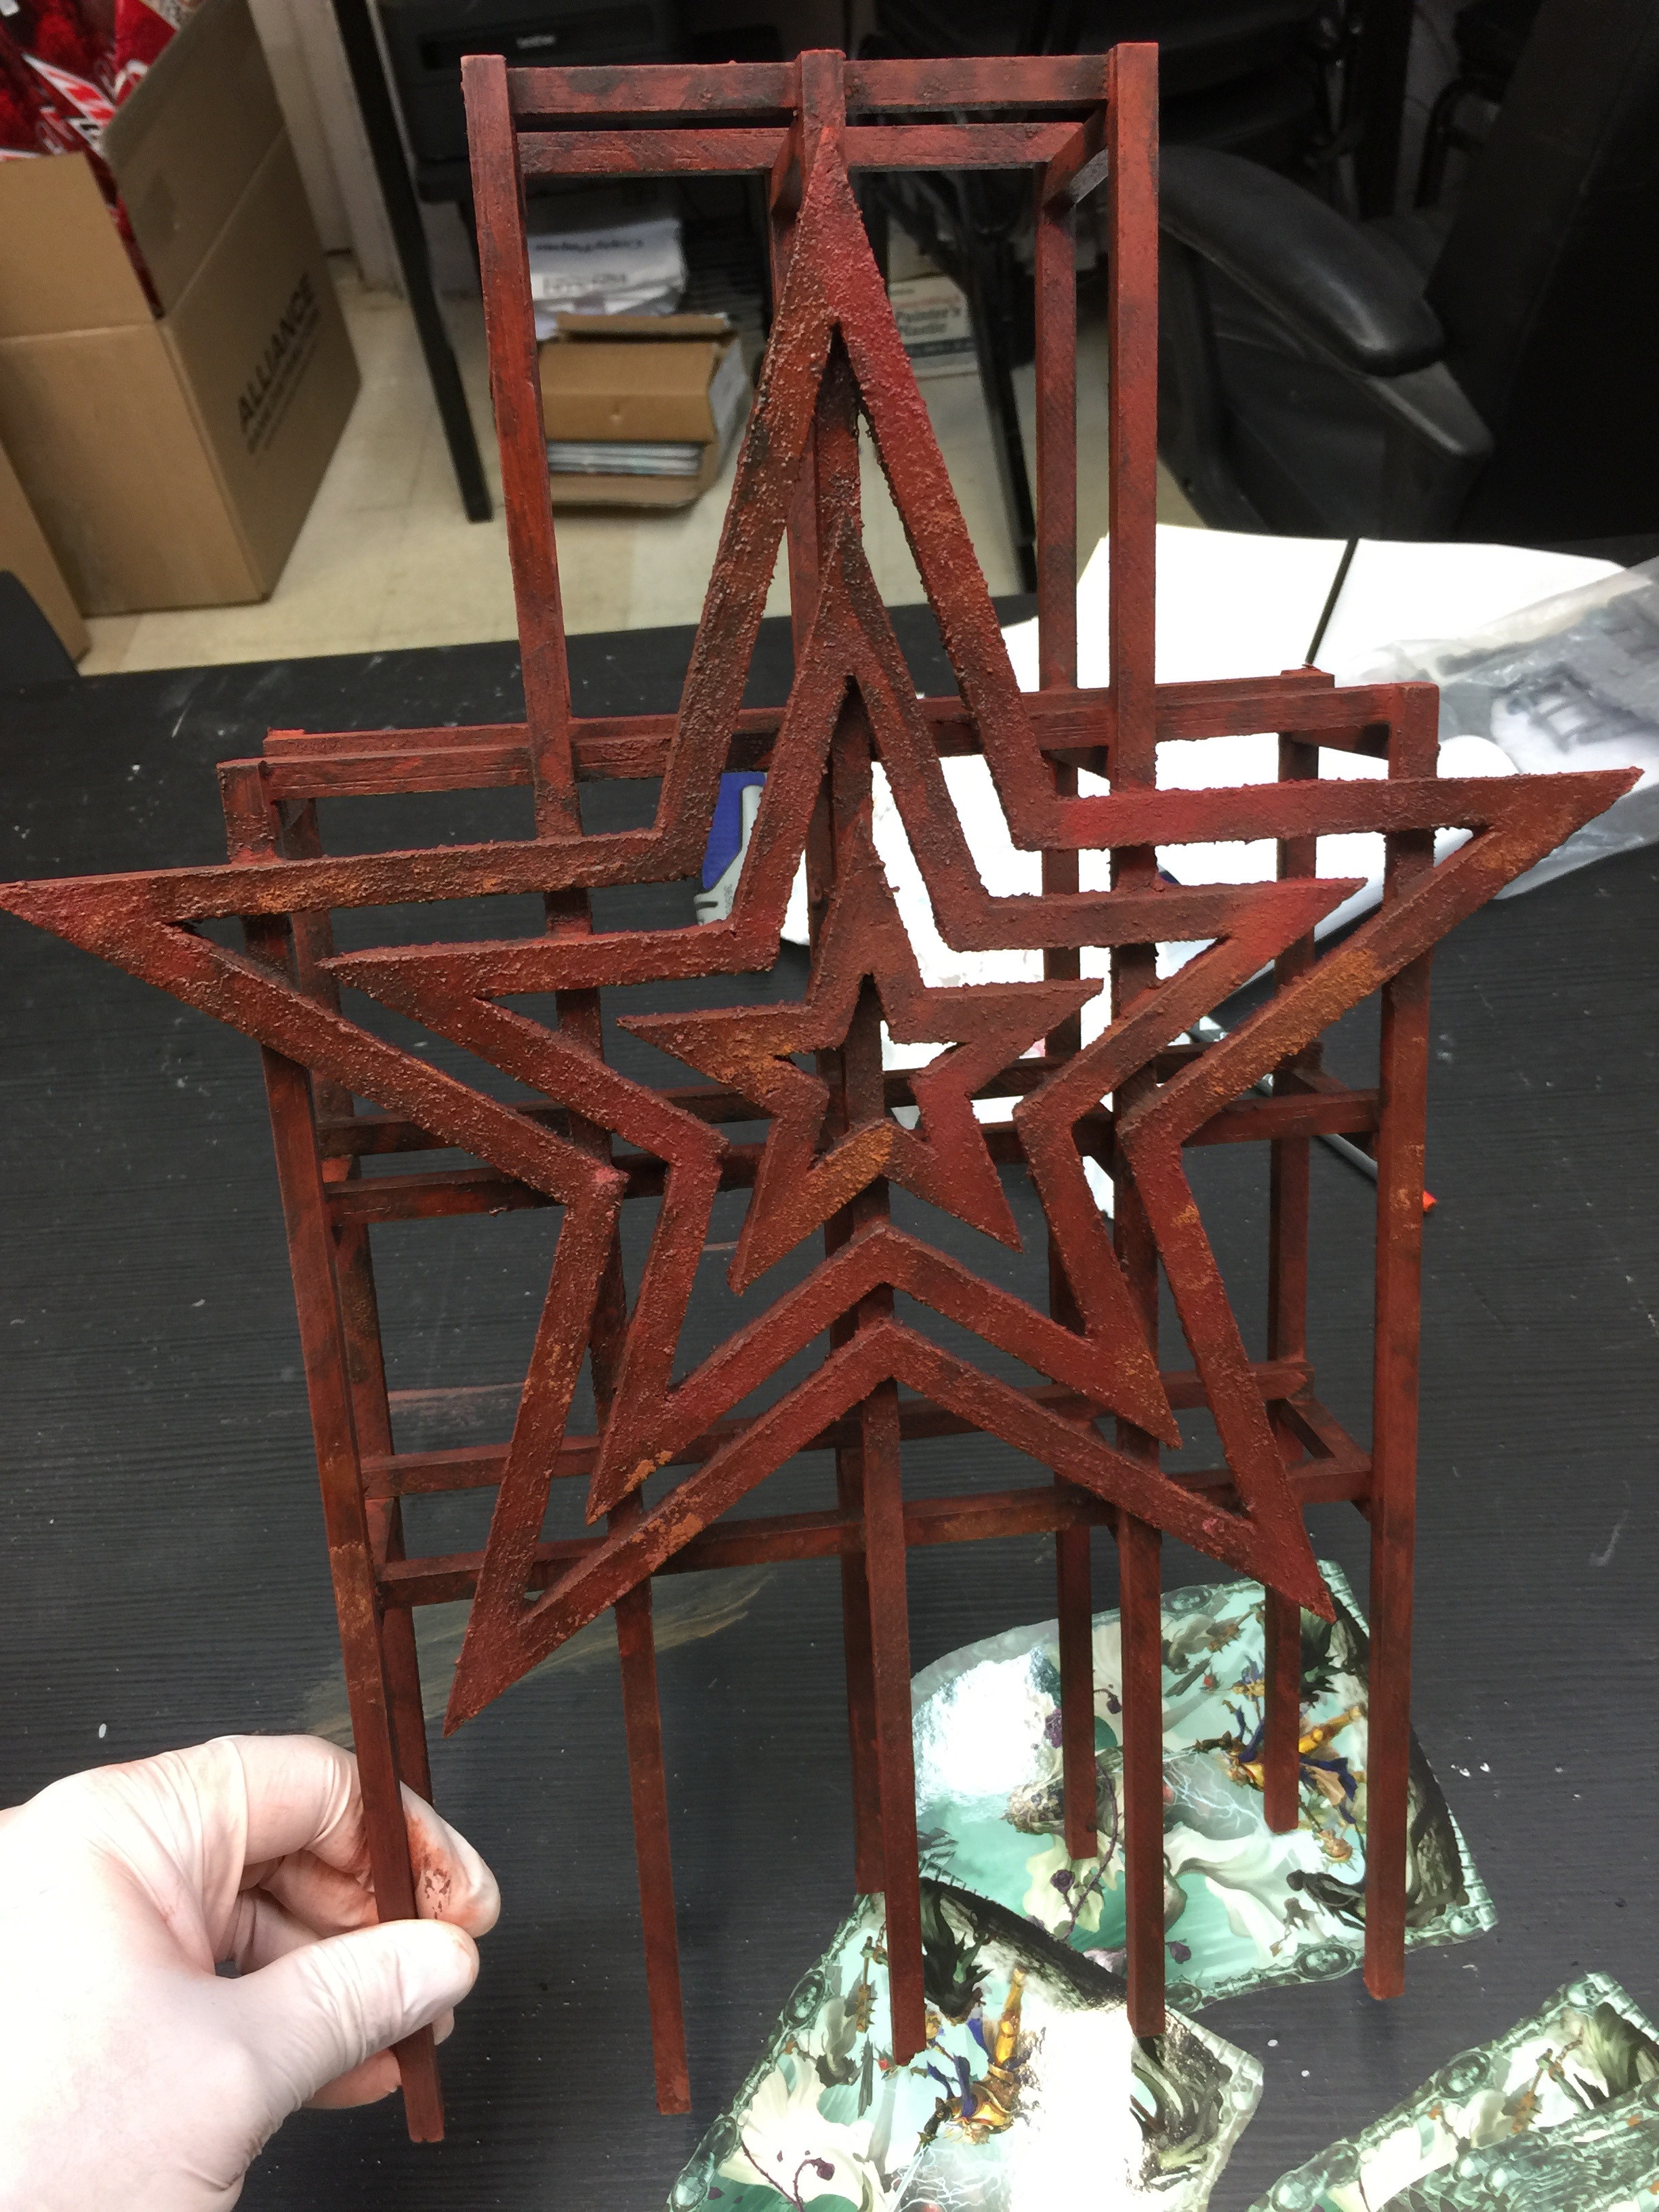
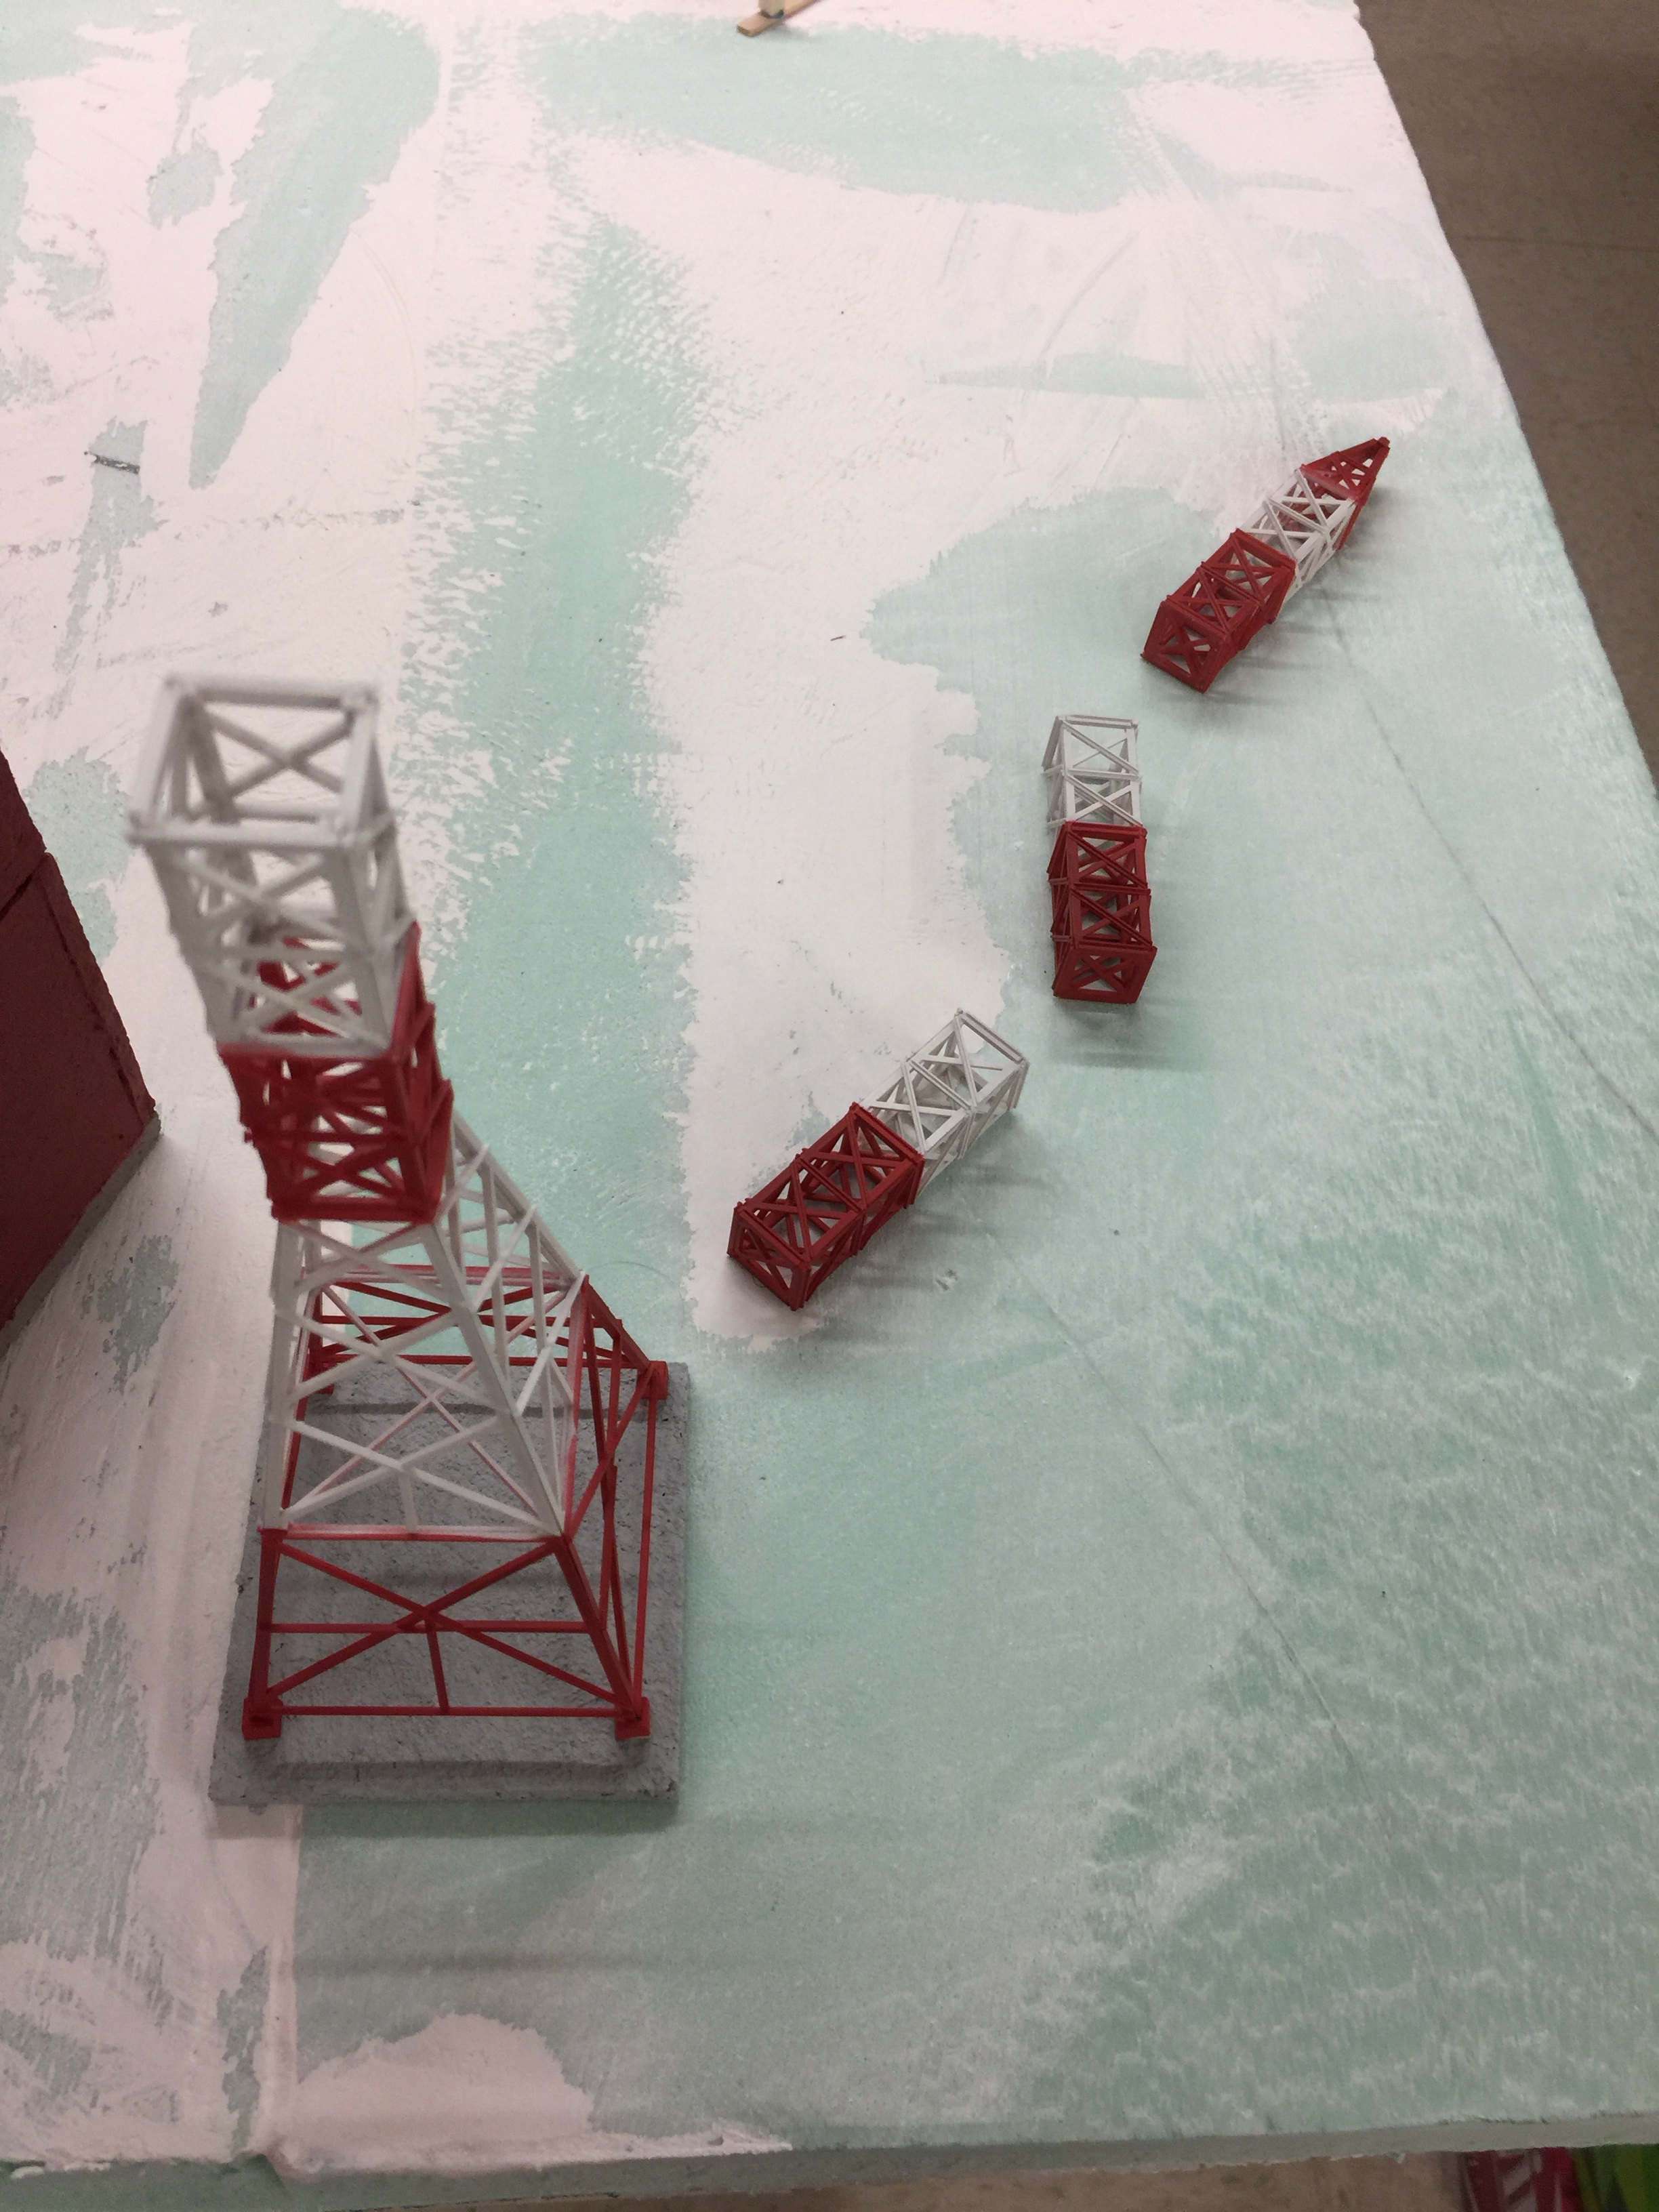
Building the Star
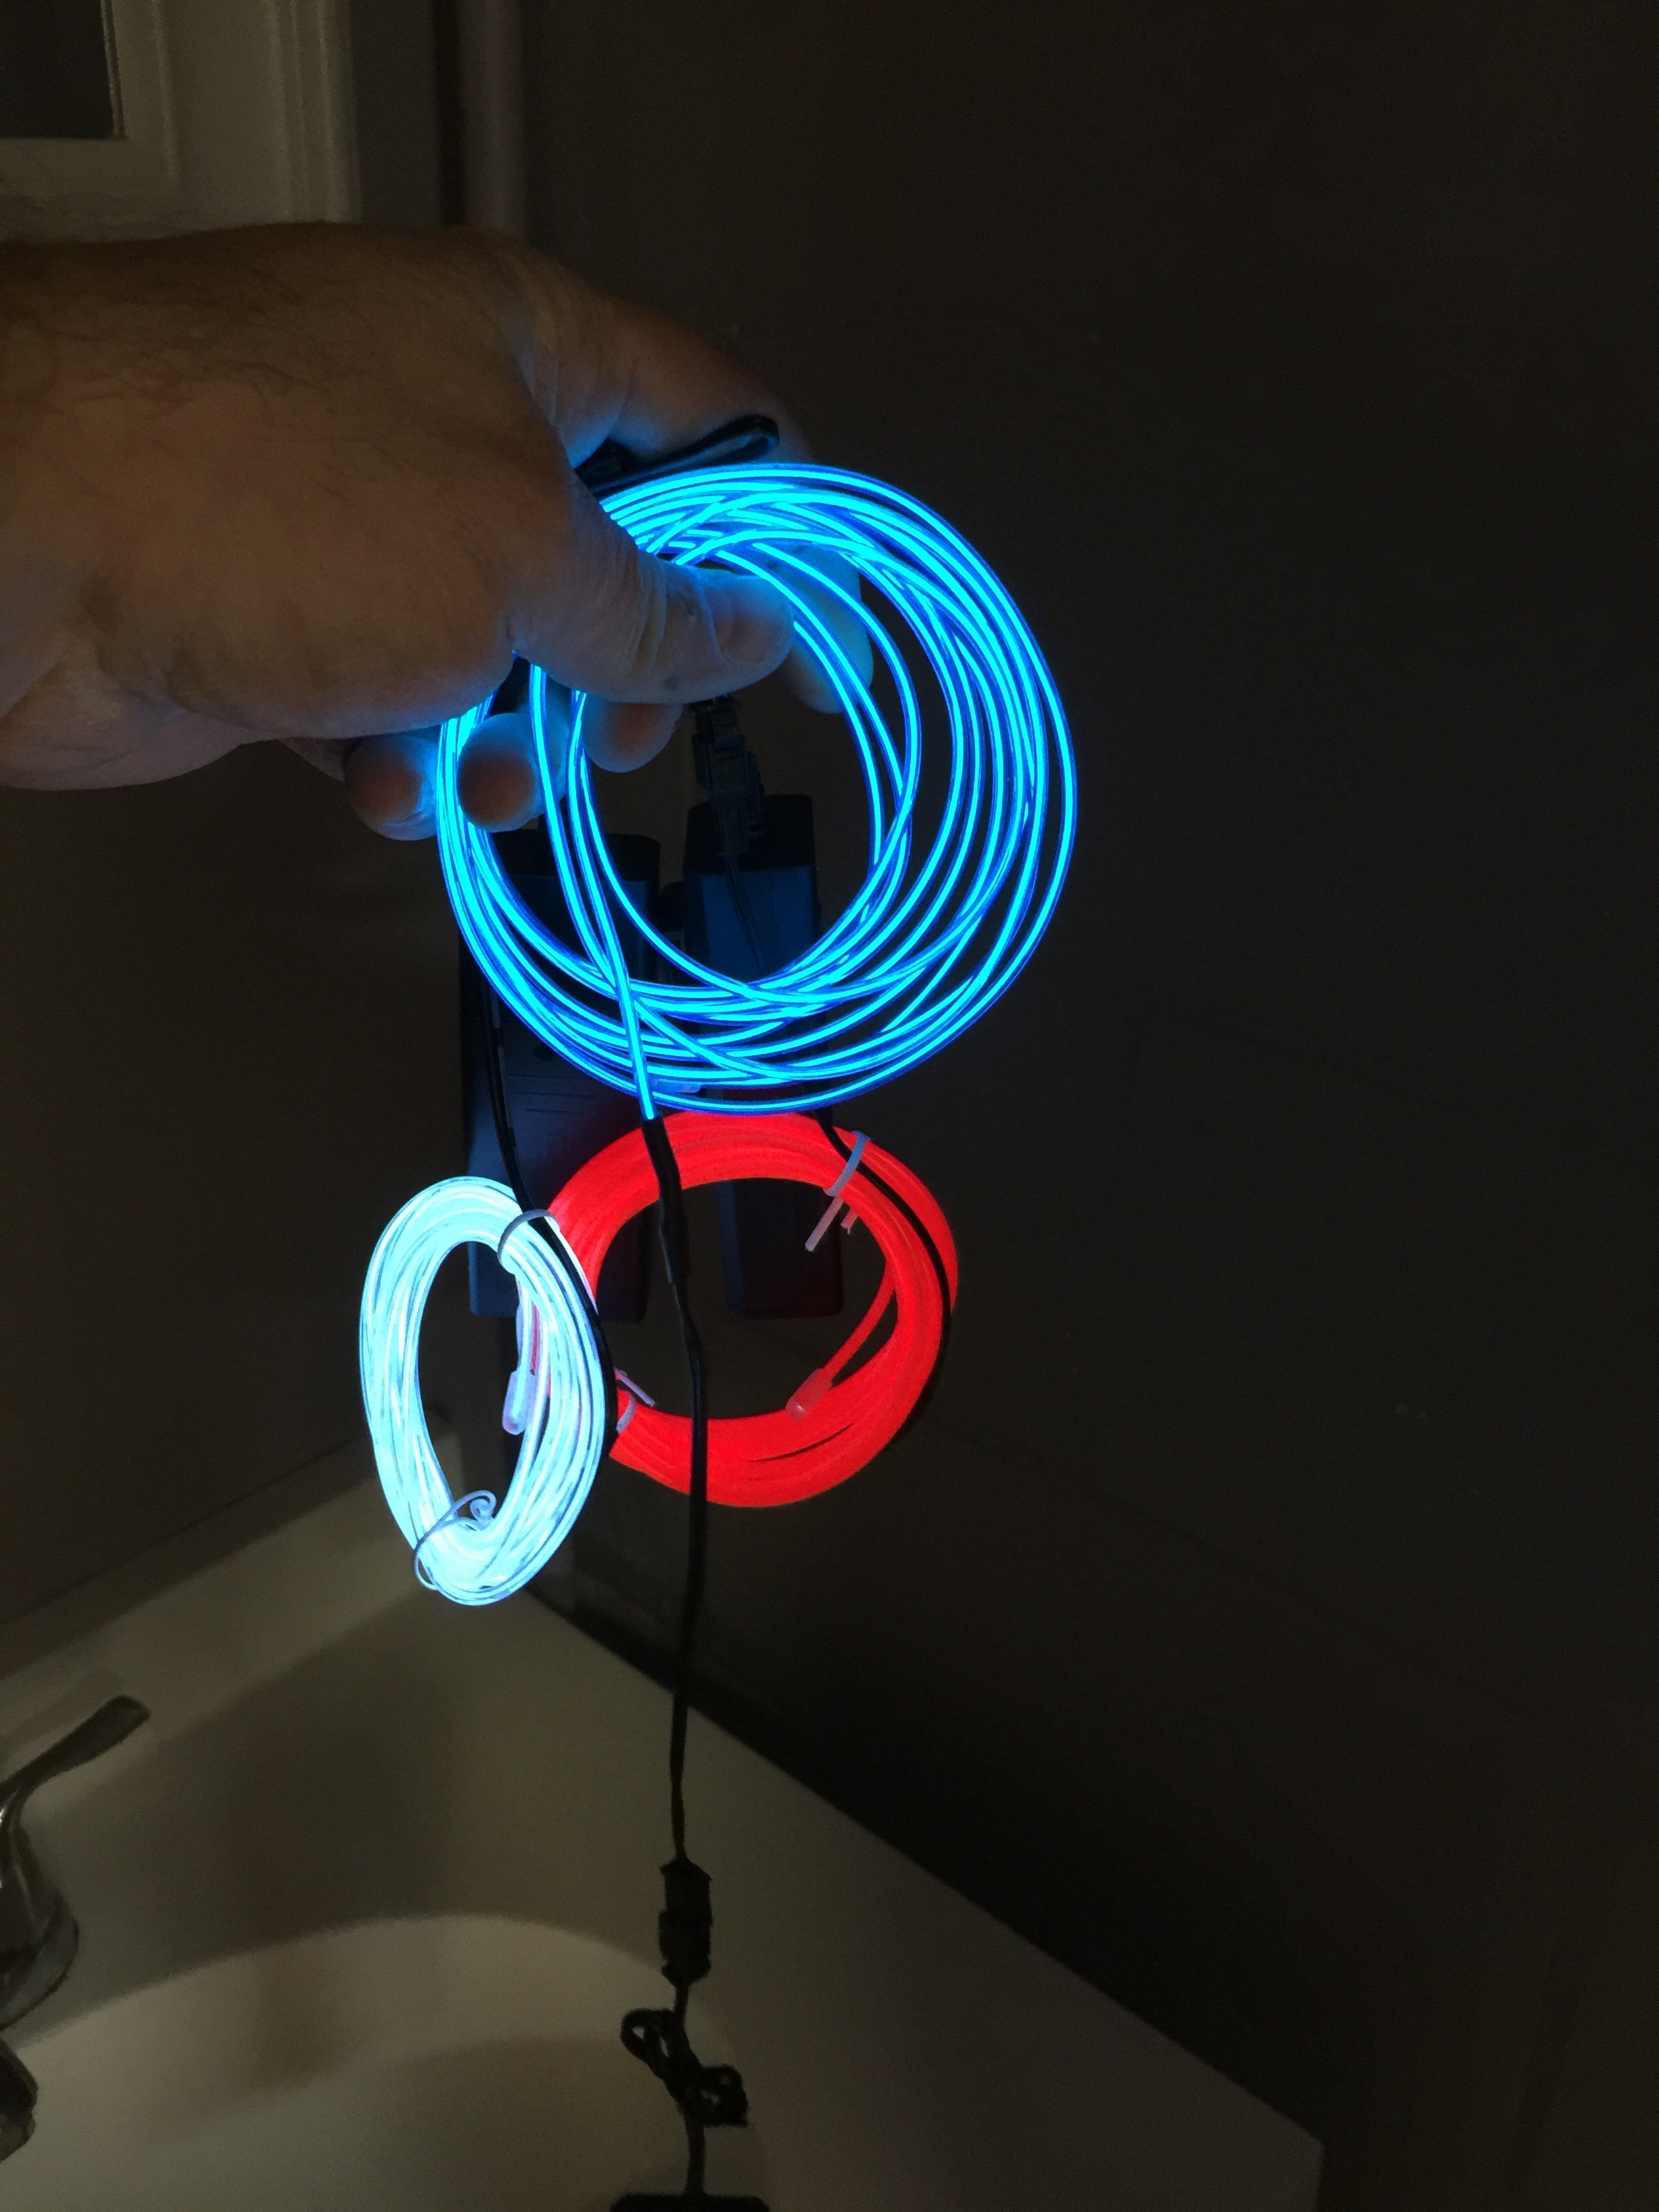
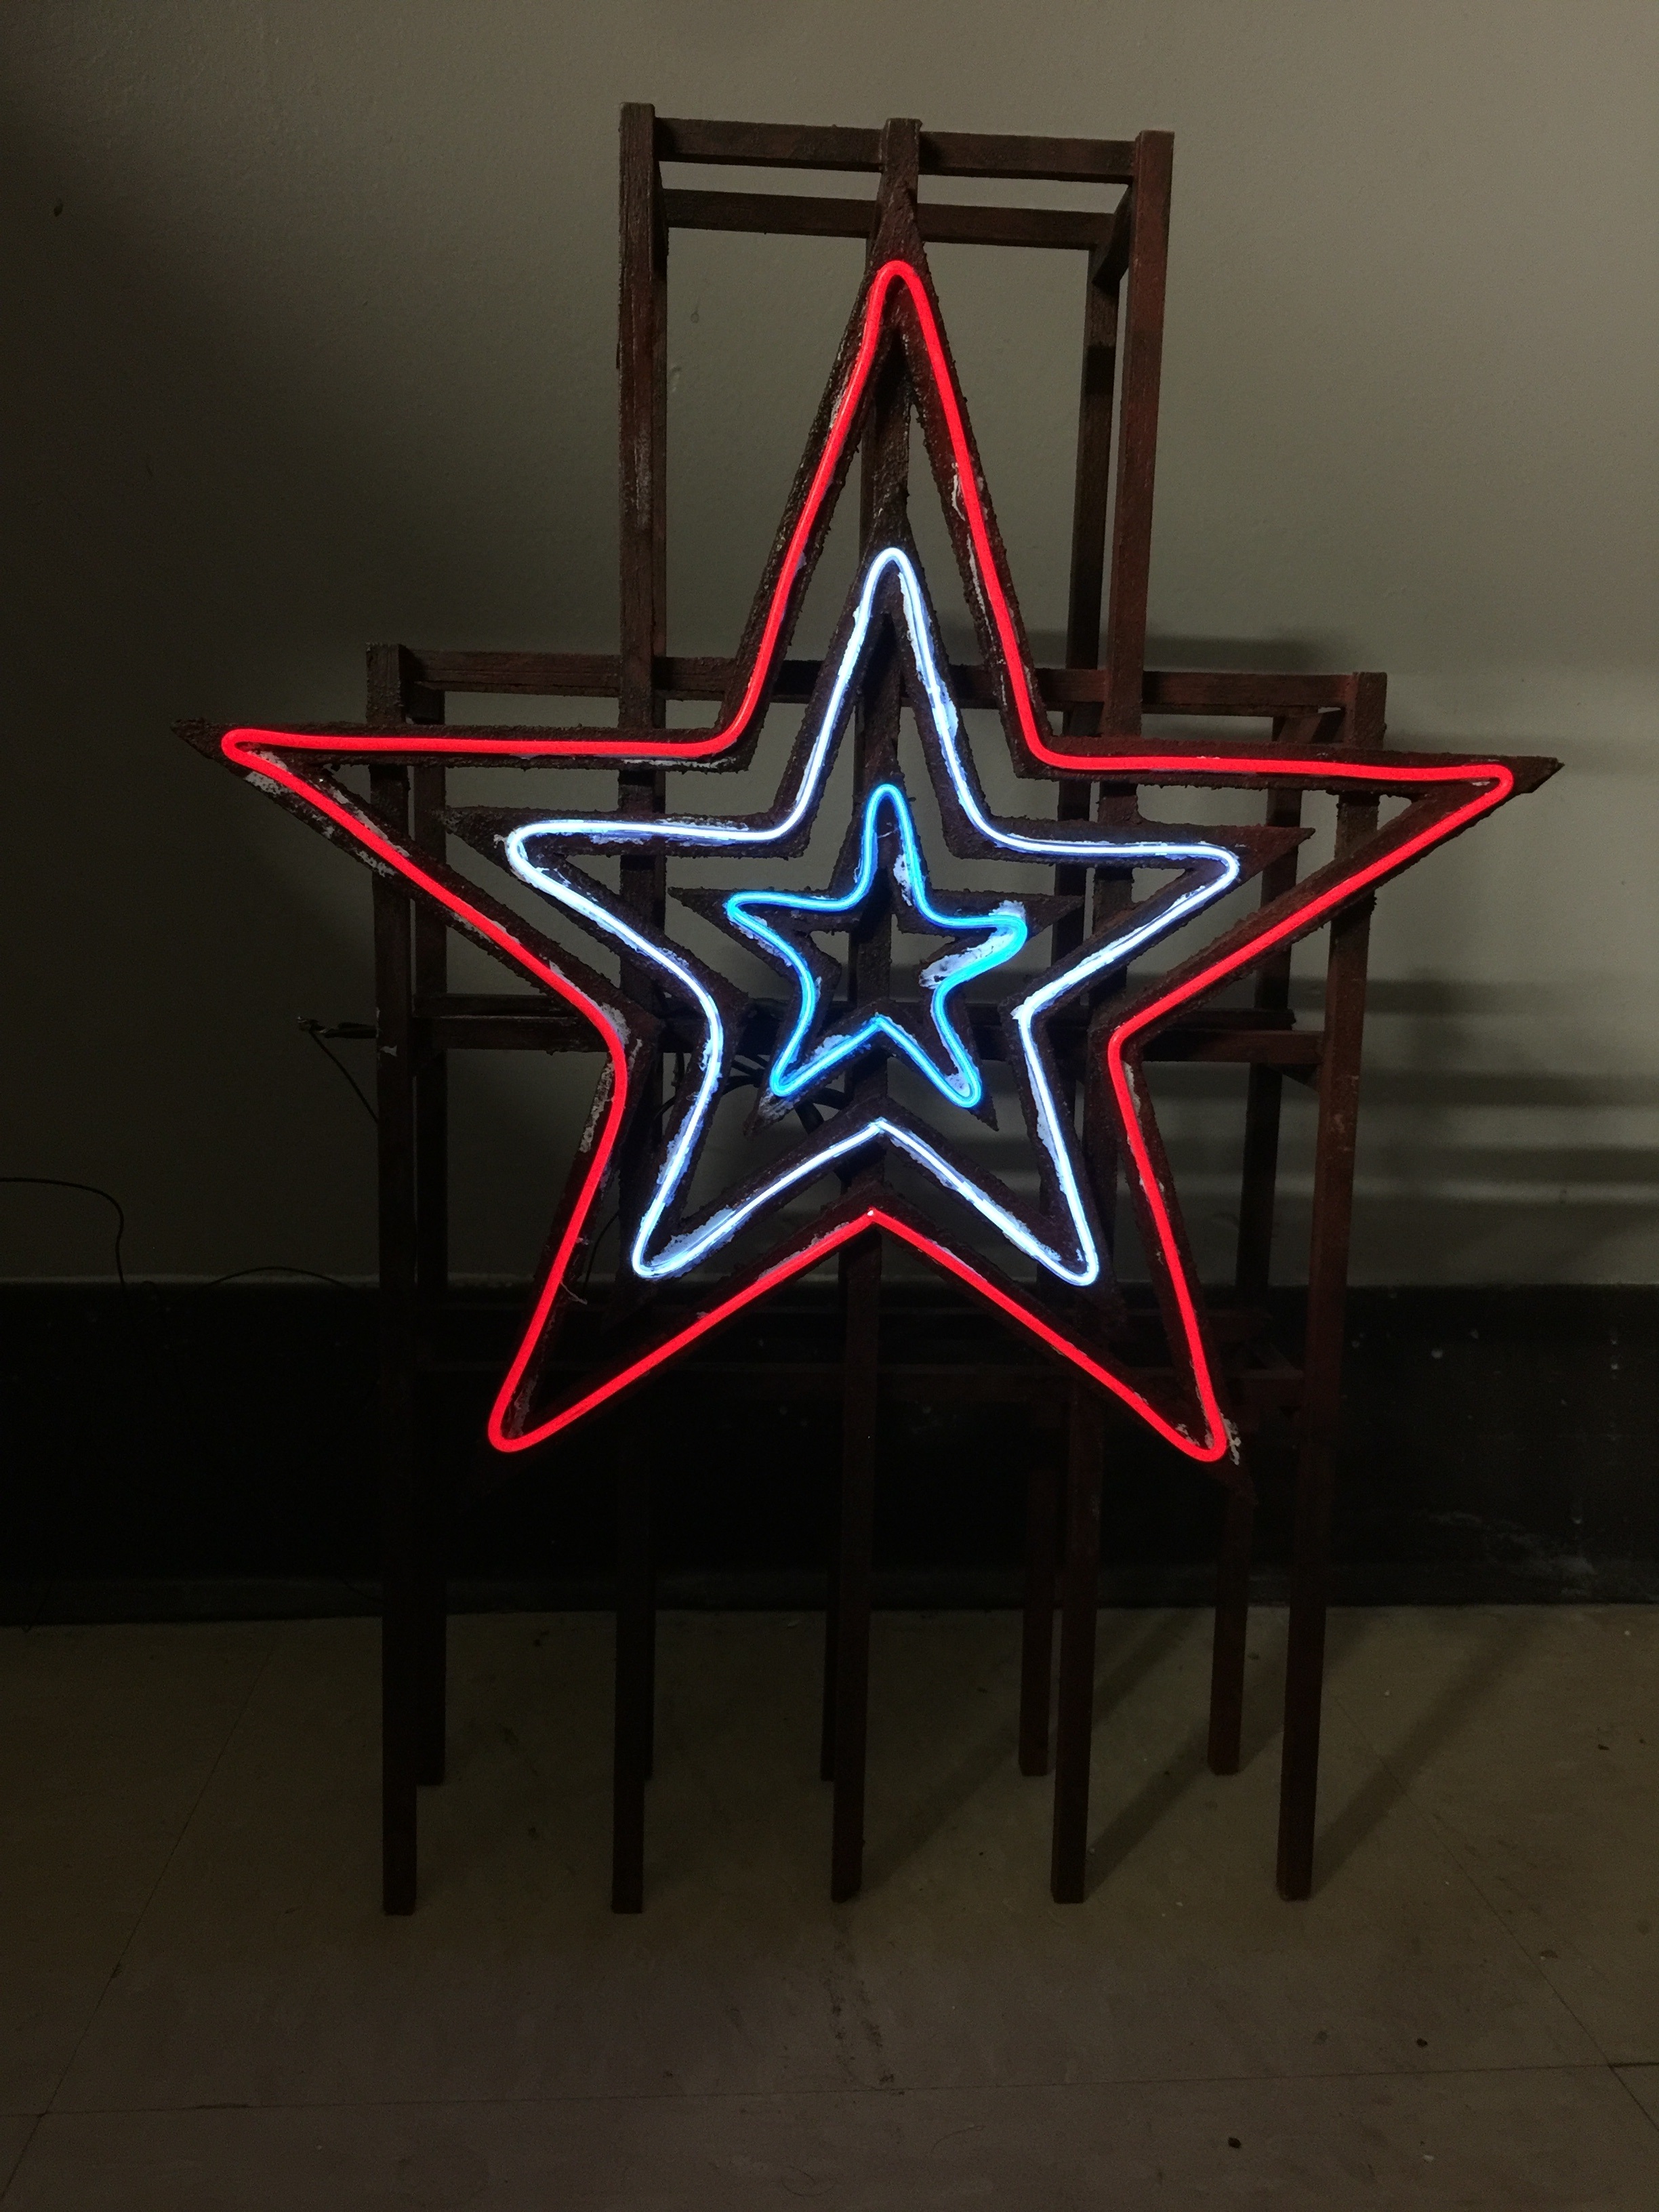
- Image 1: Ordered EL neon wire from Amazon. Pretty bright in the dark, but not nearly as bright in the daylight. Still, for $16 it’s perfect. Did some real basic cutting and electrical taping to make sure I can run off one battery pack.
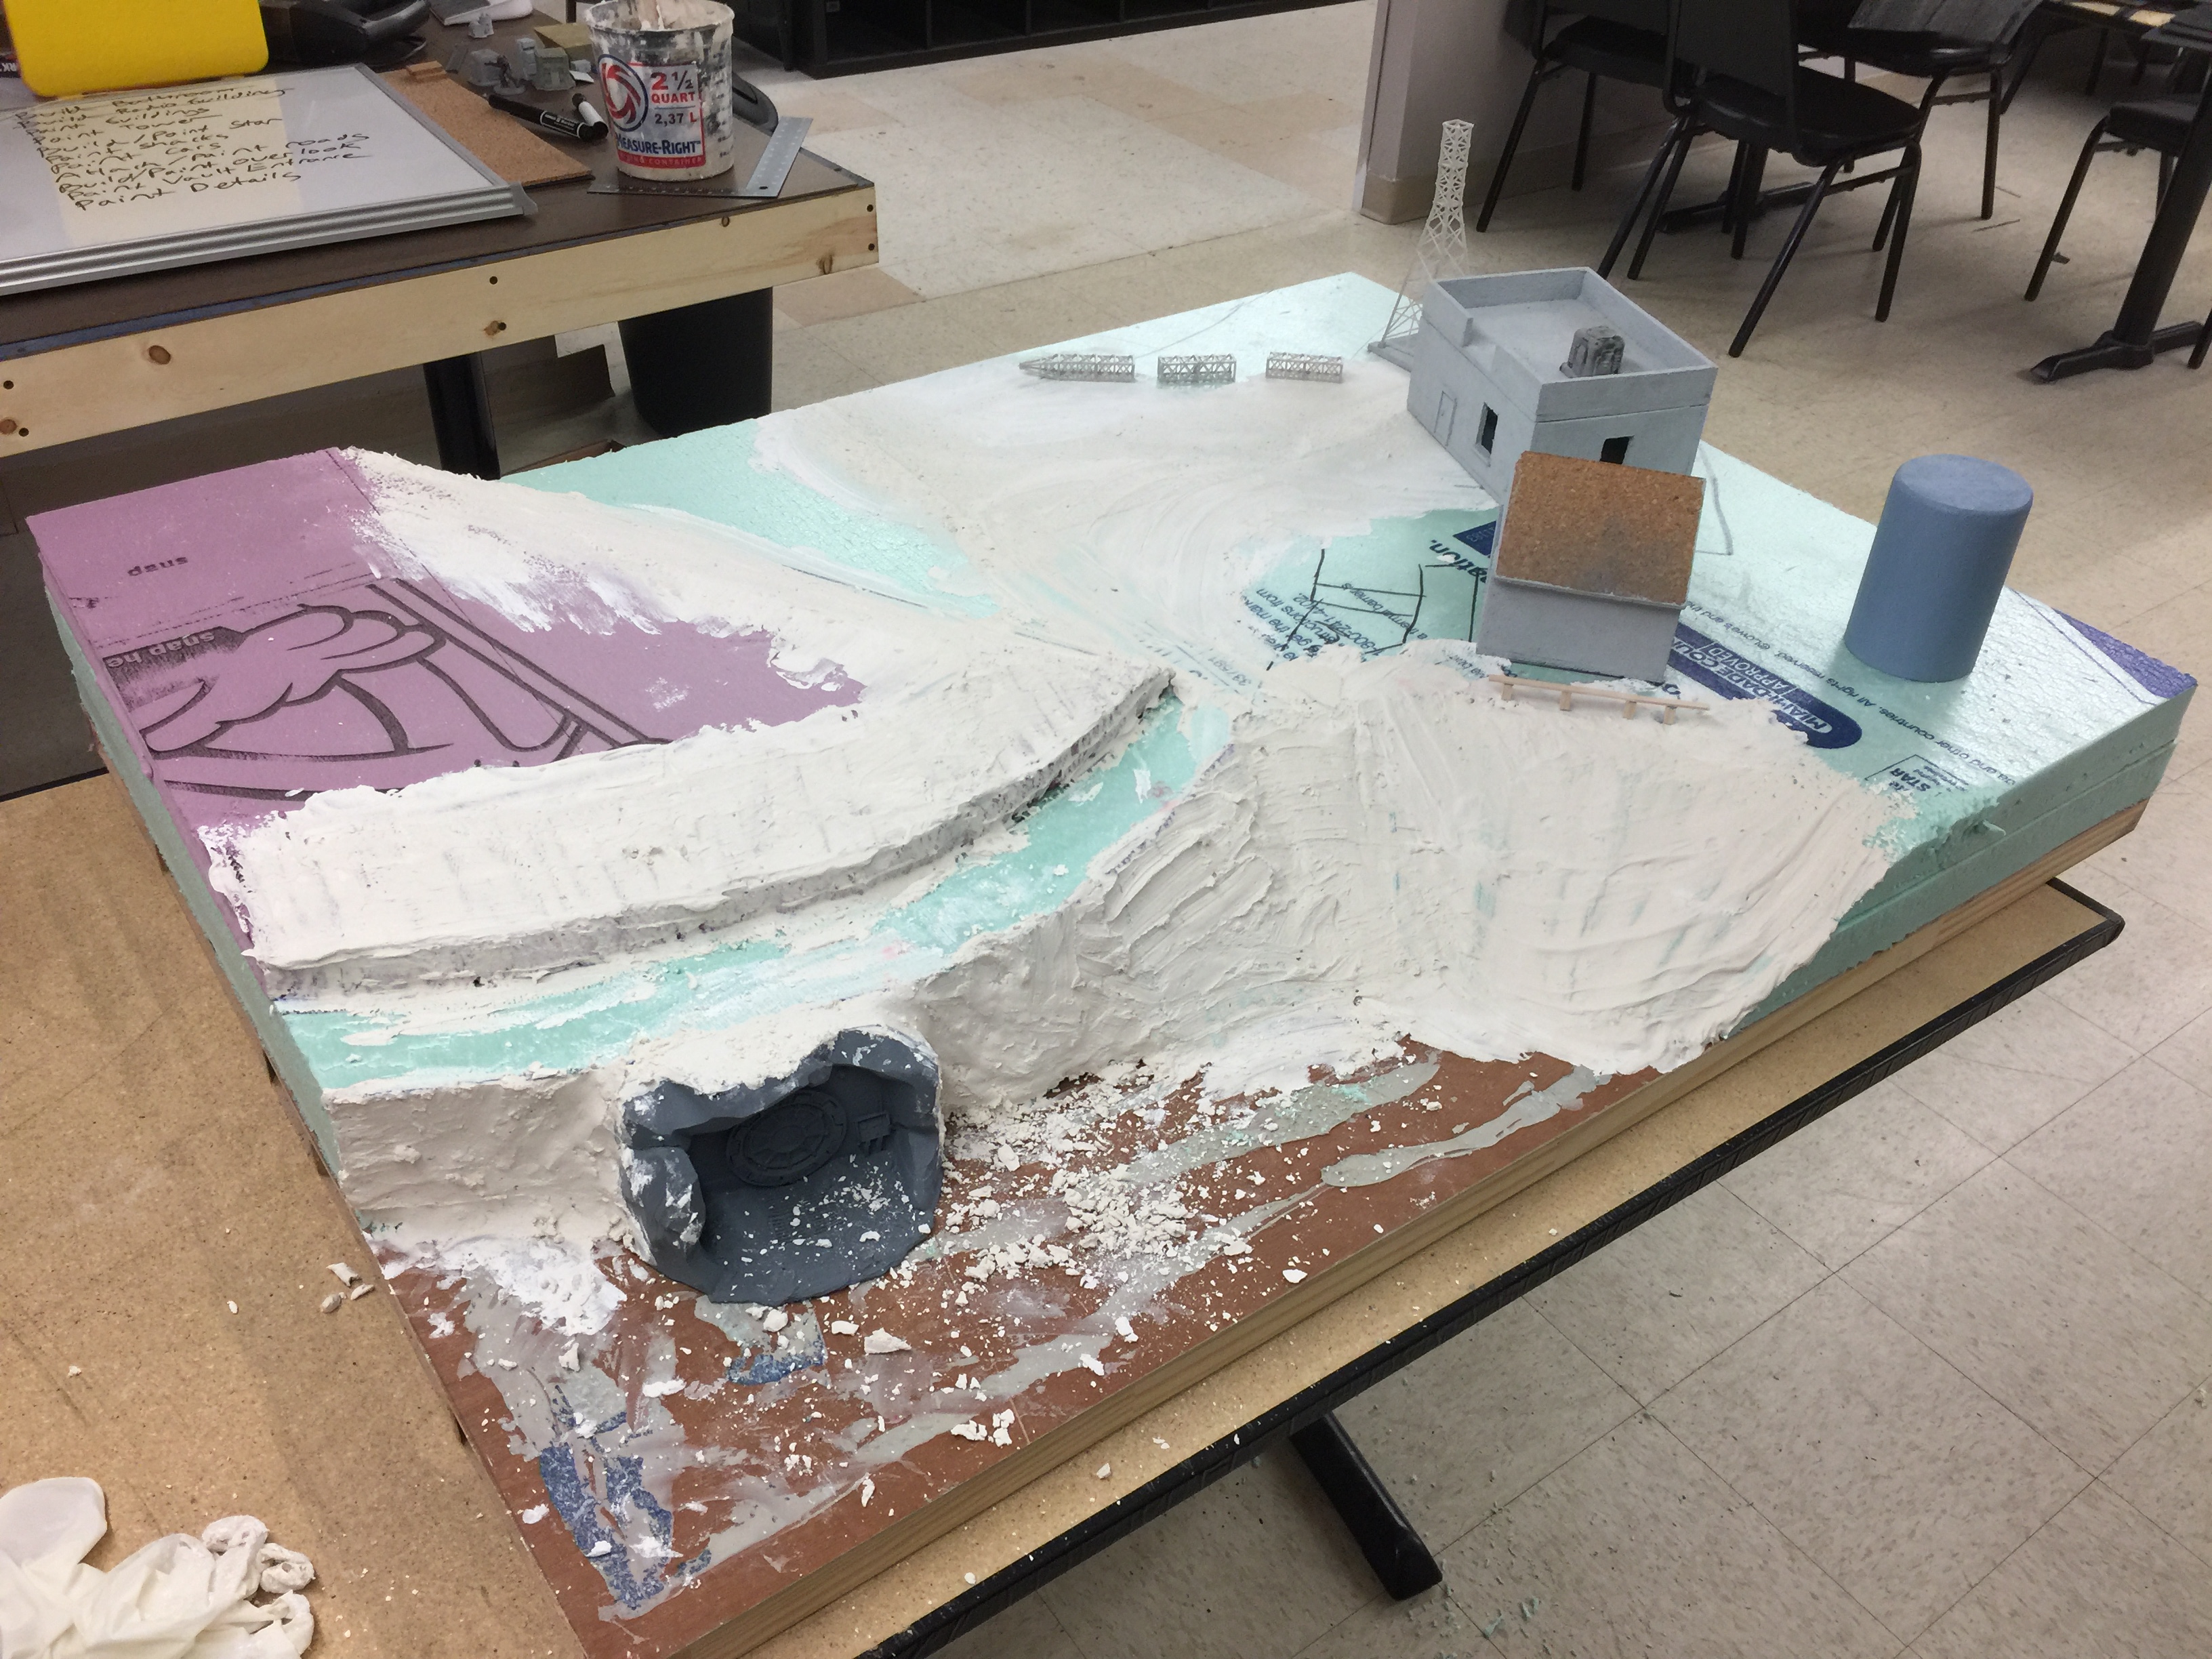
- Image 2: Realized the star was going to take a bit to construct so I plastered the hills and contours.
- Image 3: Cut the basic star shape from a single cork tile using a compass and a protractor. Tested it for size and position
- Image 4: After lots and lots of drawing and cutting, got the triple nested stars in place.
- Image 5: Built a basic framework for the star from craft basswood. Discovered by accident that there’s room for a platform, so added that.
- Image 6: Automotive rust primer and a chinchilla dust coat.
- Image 7: Adding some weathering powders and sealing
- Image 8: Adding the neon wire and lighting it up. Had to touch up the super glue white spots later.
More Details!

- Image 1: Rolled out the stone retaining wall with two packs of greenstuff and a roller from Green Stuff World. Awesome tool.
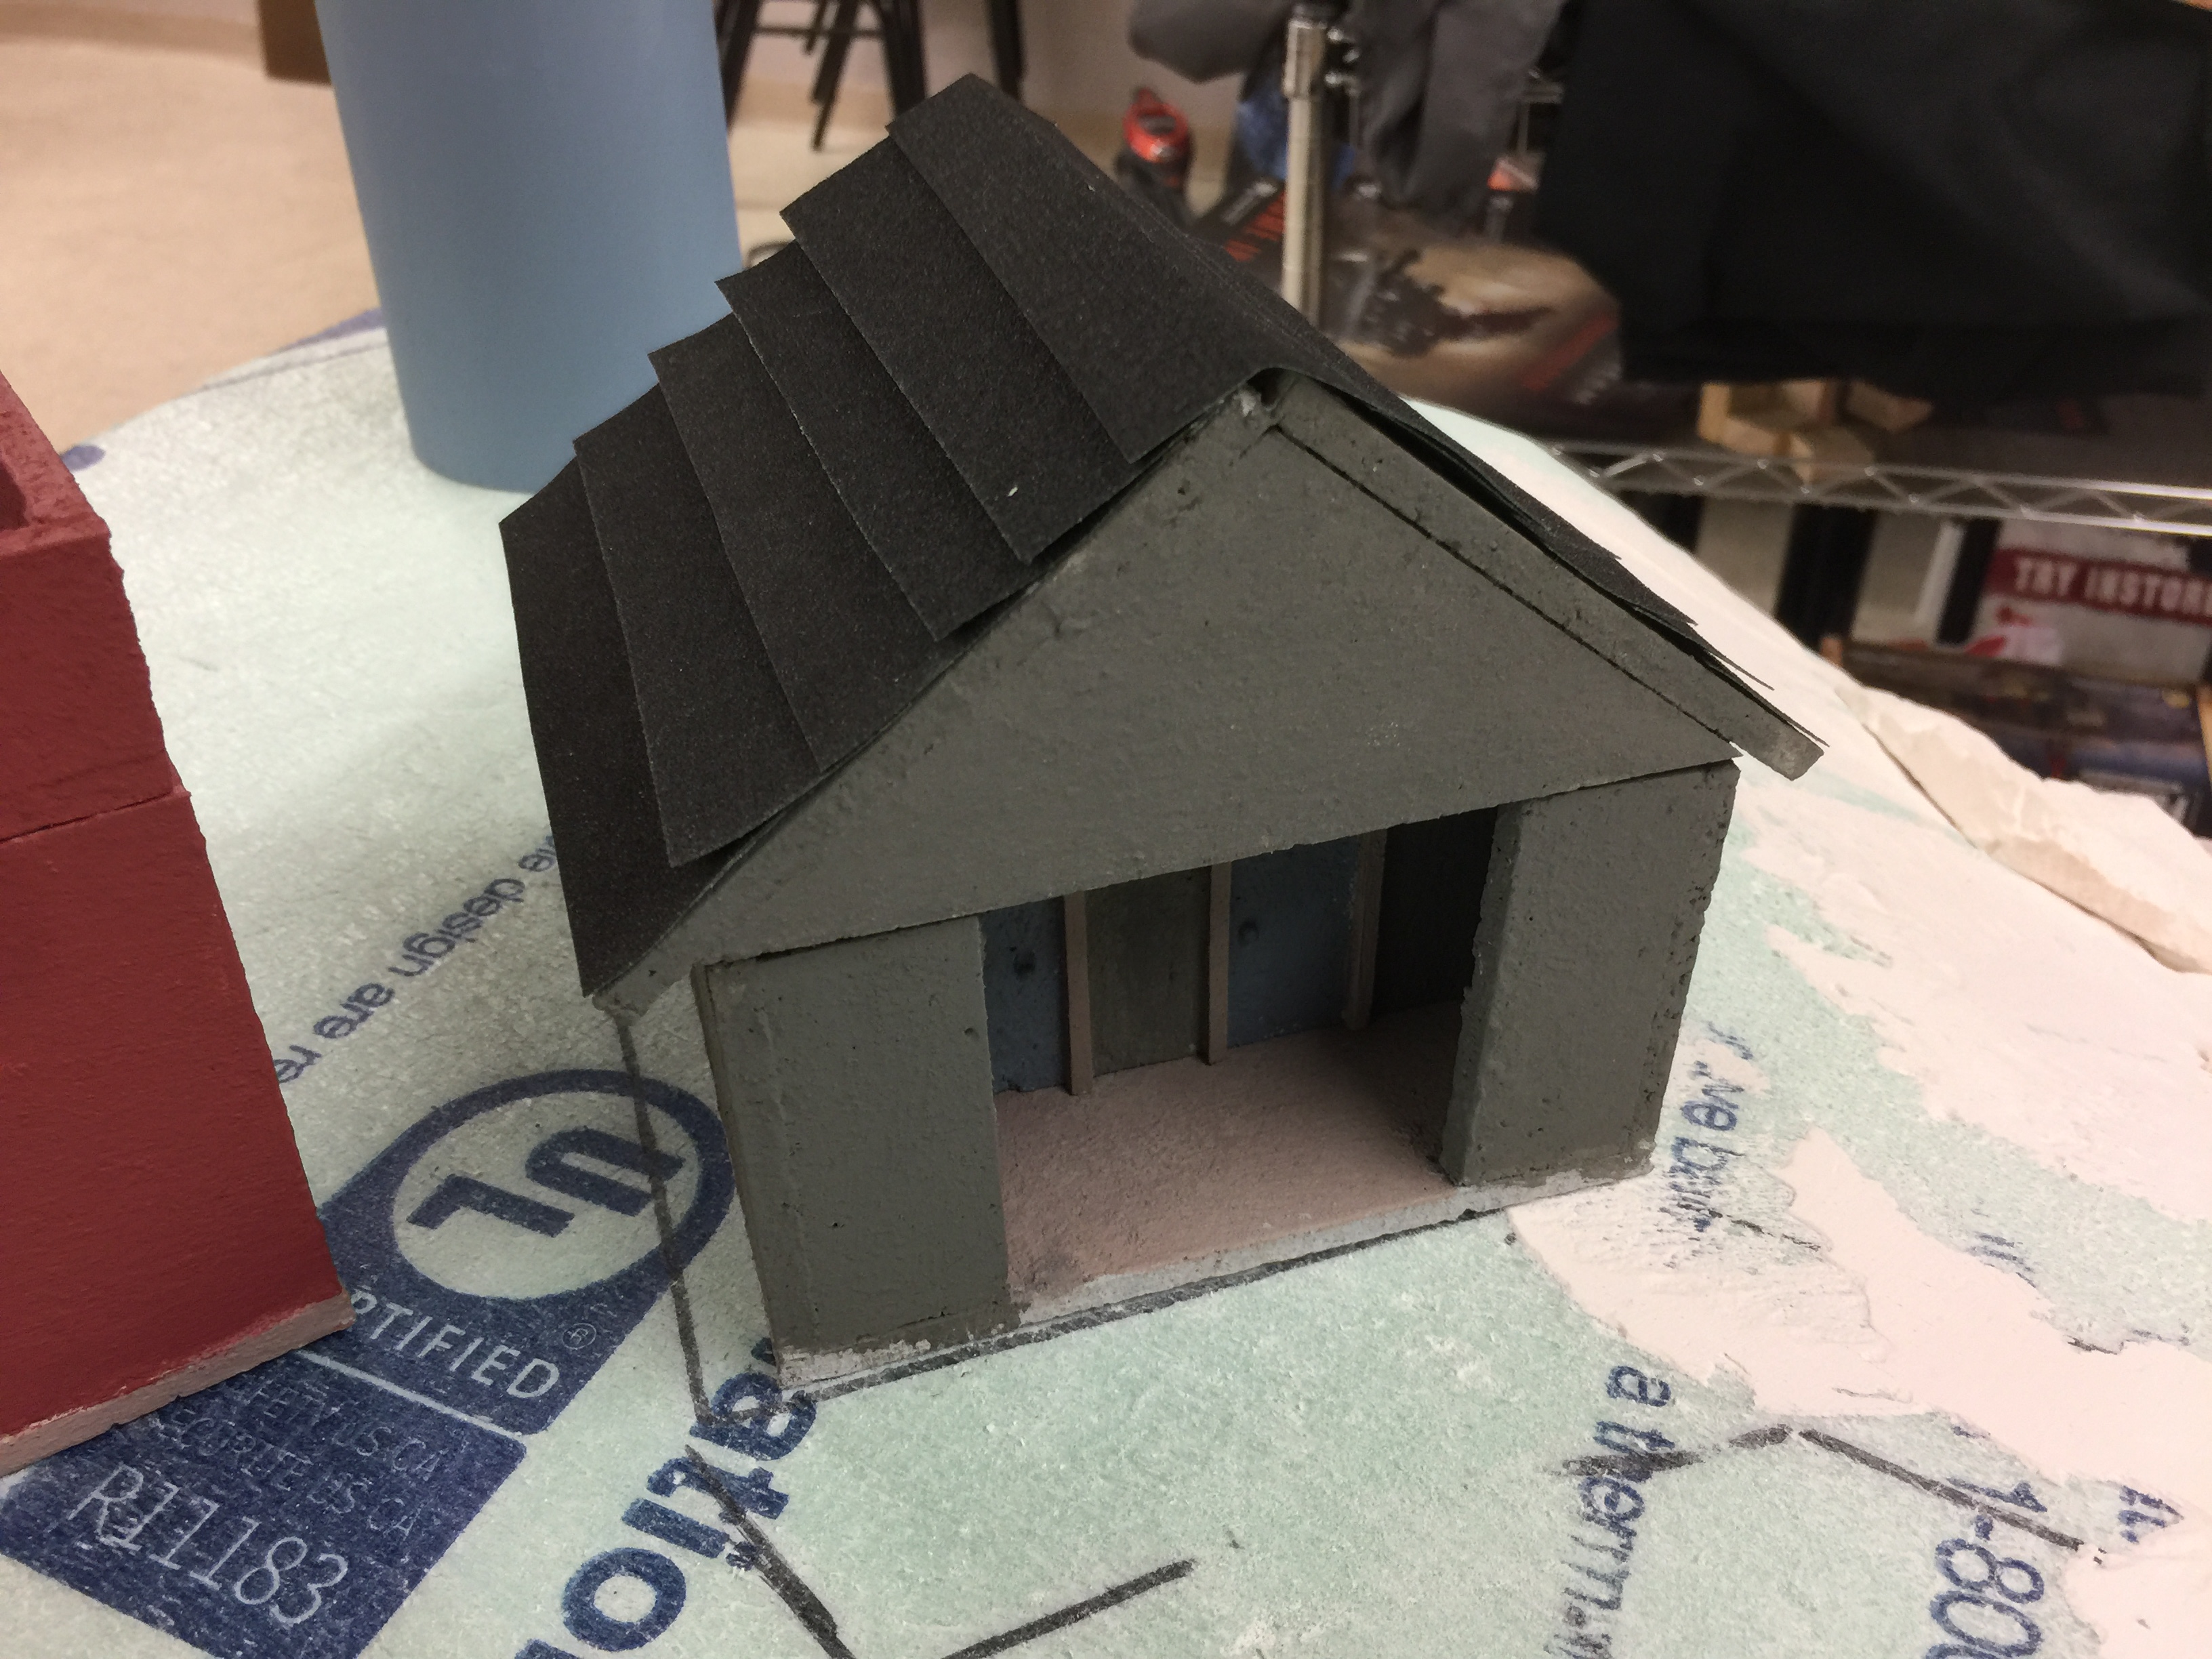
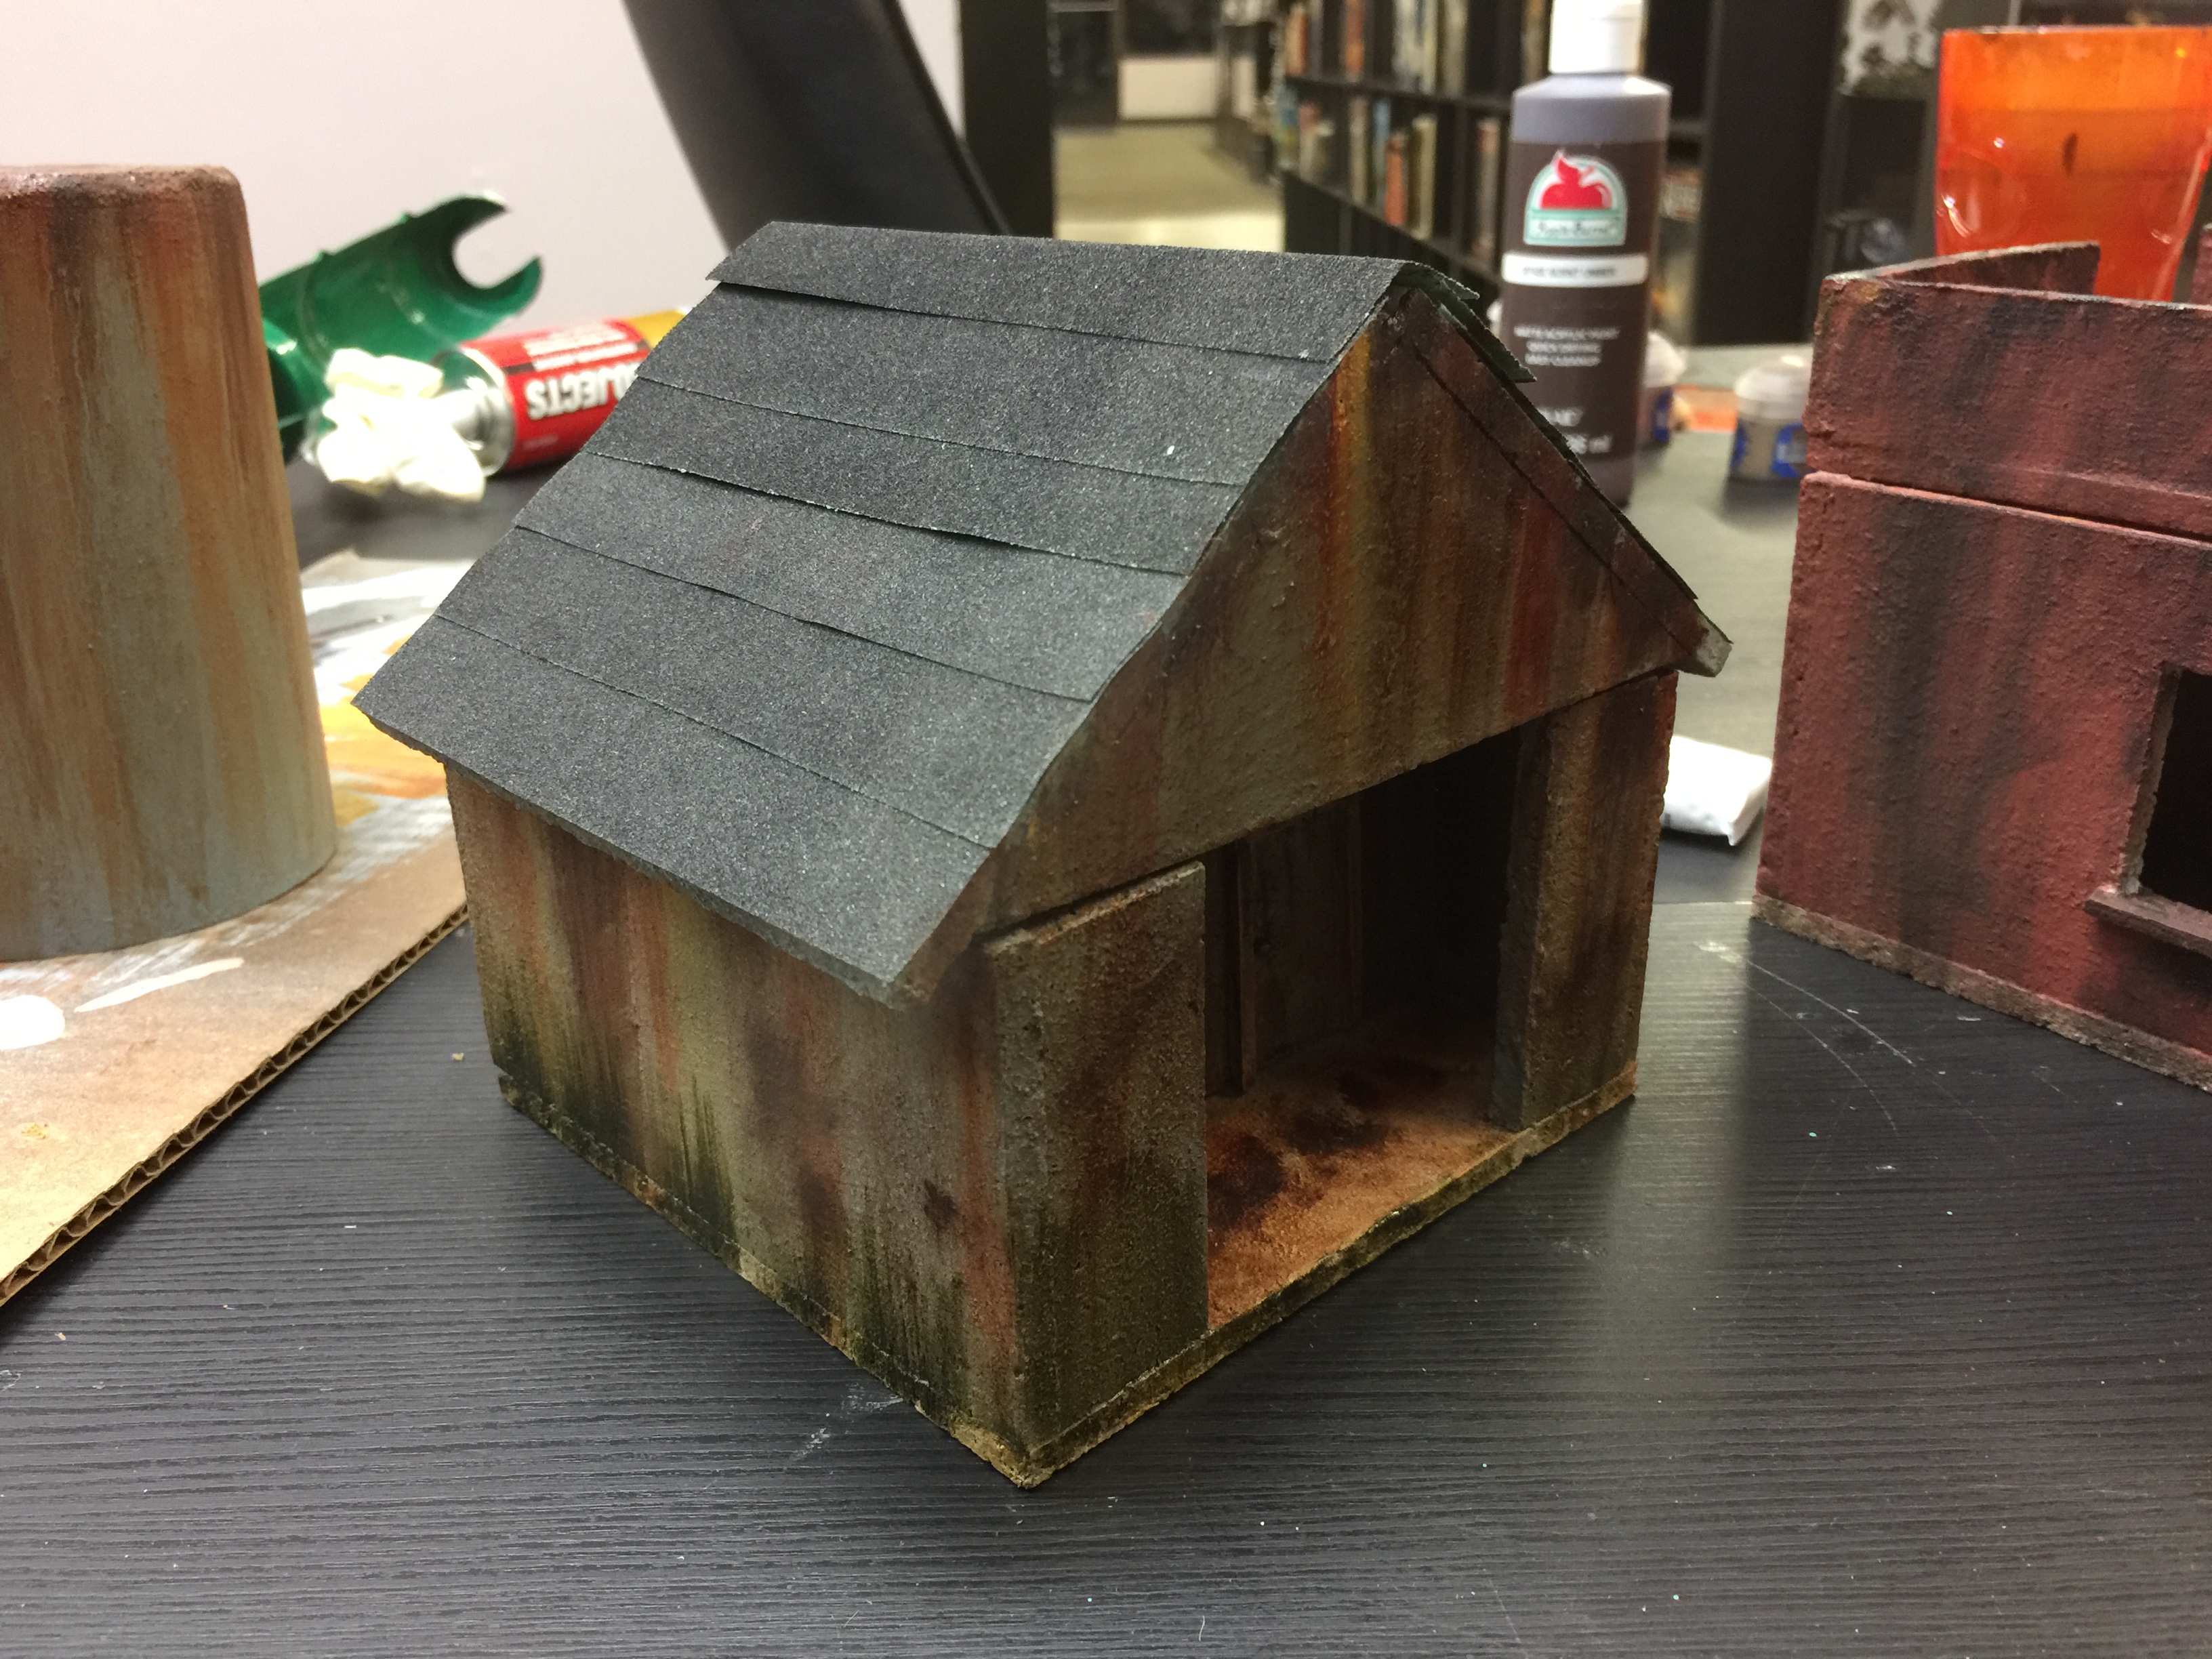
- Image 2: Basecoated the bathroom and went with a simple shingle rough of sandpaper.
- Image 3: Painted up some resin shacks from who-knows-where for the ghoul village.
- Image 4: Got some bright red and white and the radio tower, to be toned down later by weathering.
- Image 5: Testing the 3d printed bathroom fixtures in place along with the Nuka-Cola machine from Modiphius
Rocks and Flocks
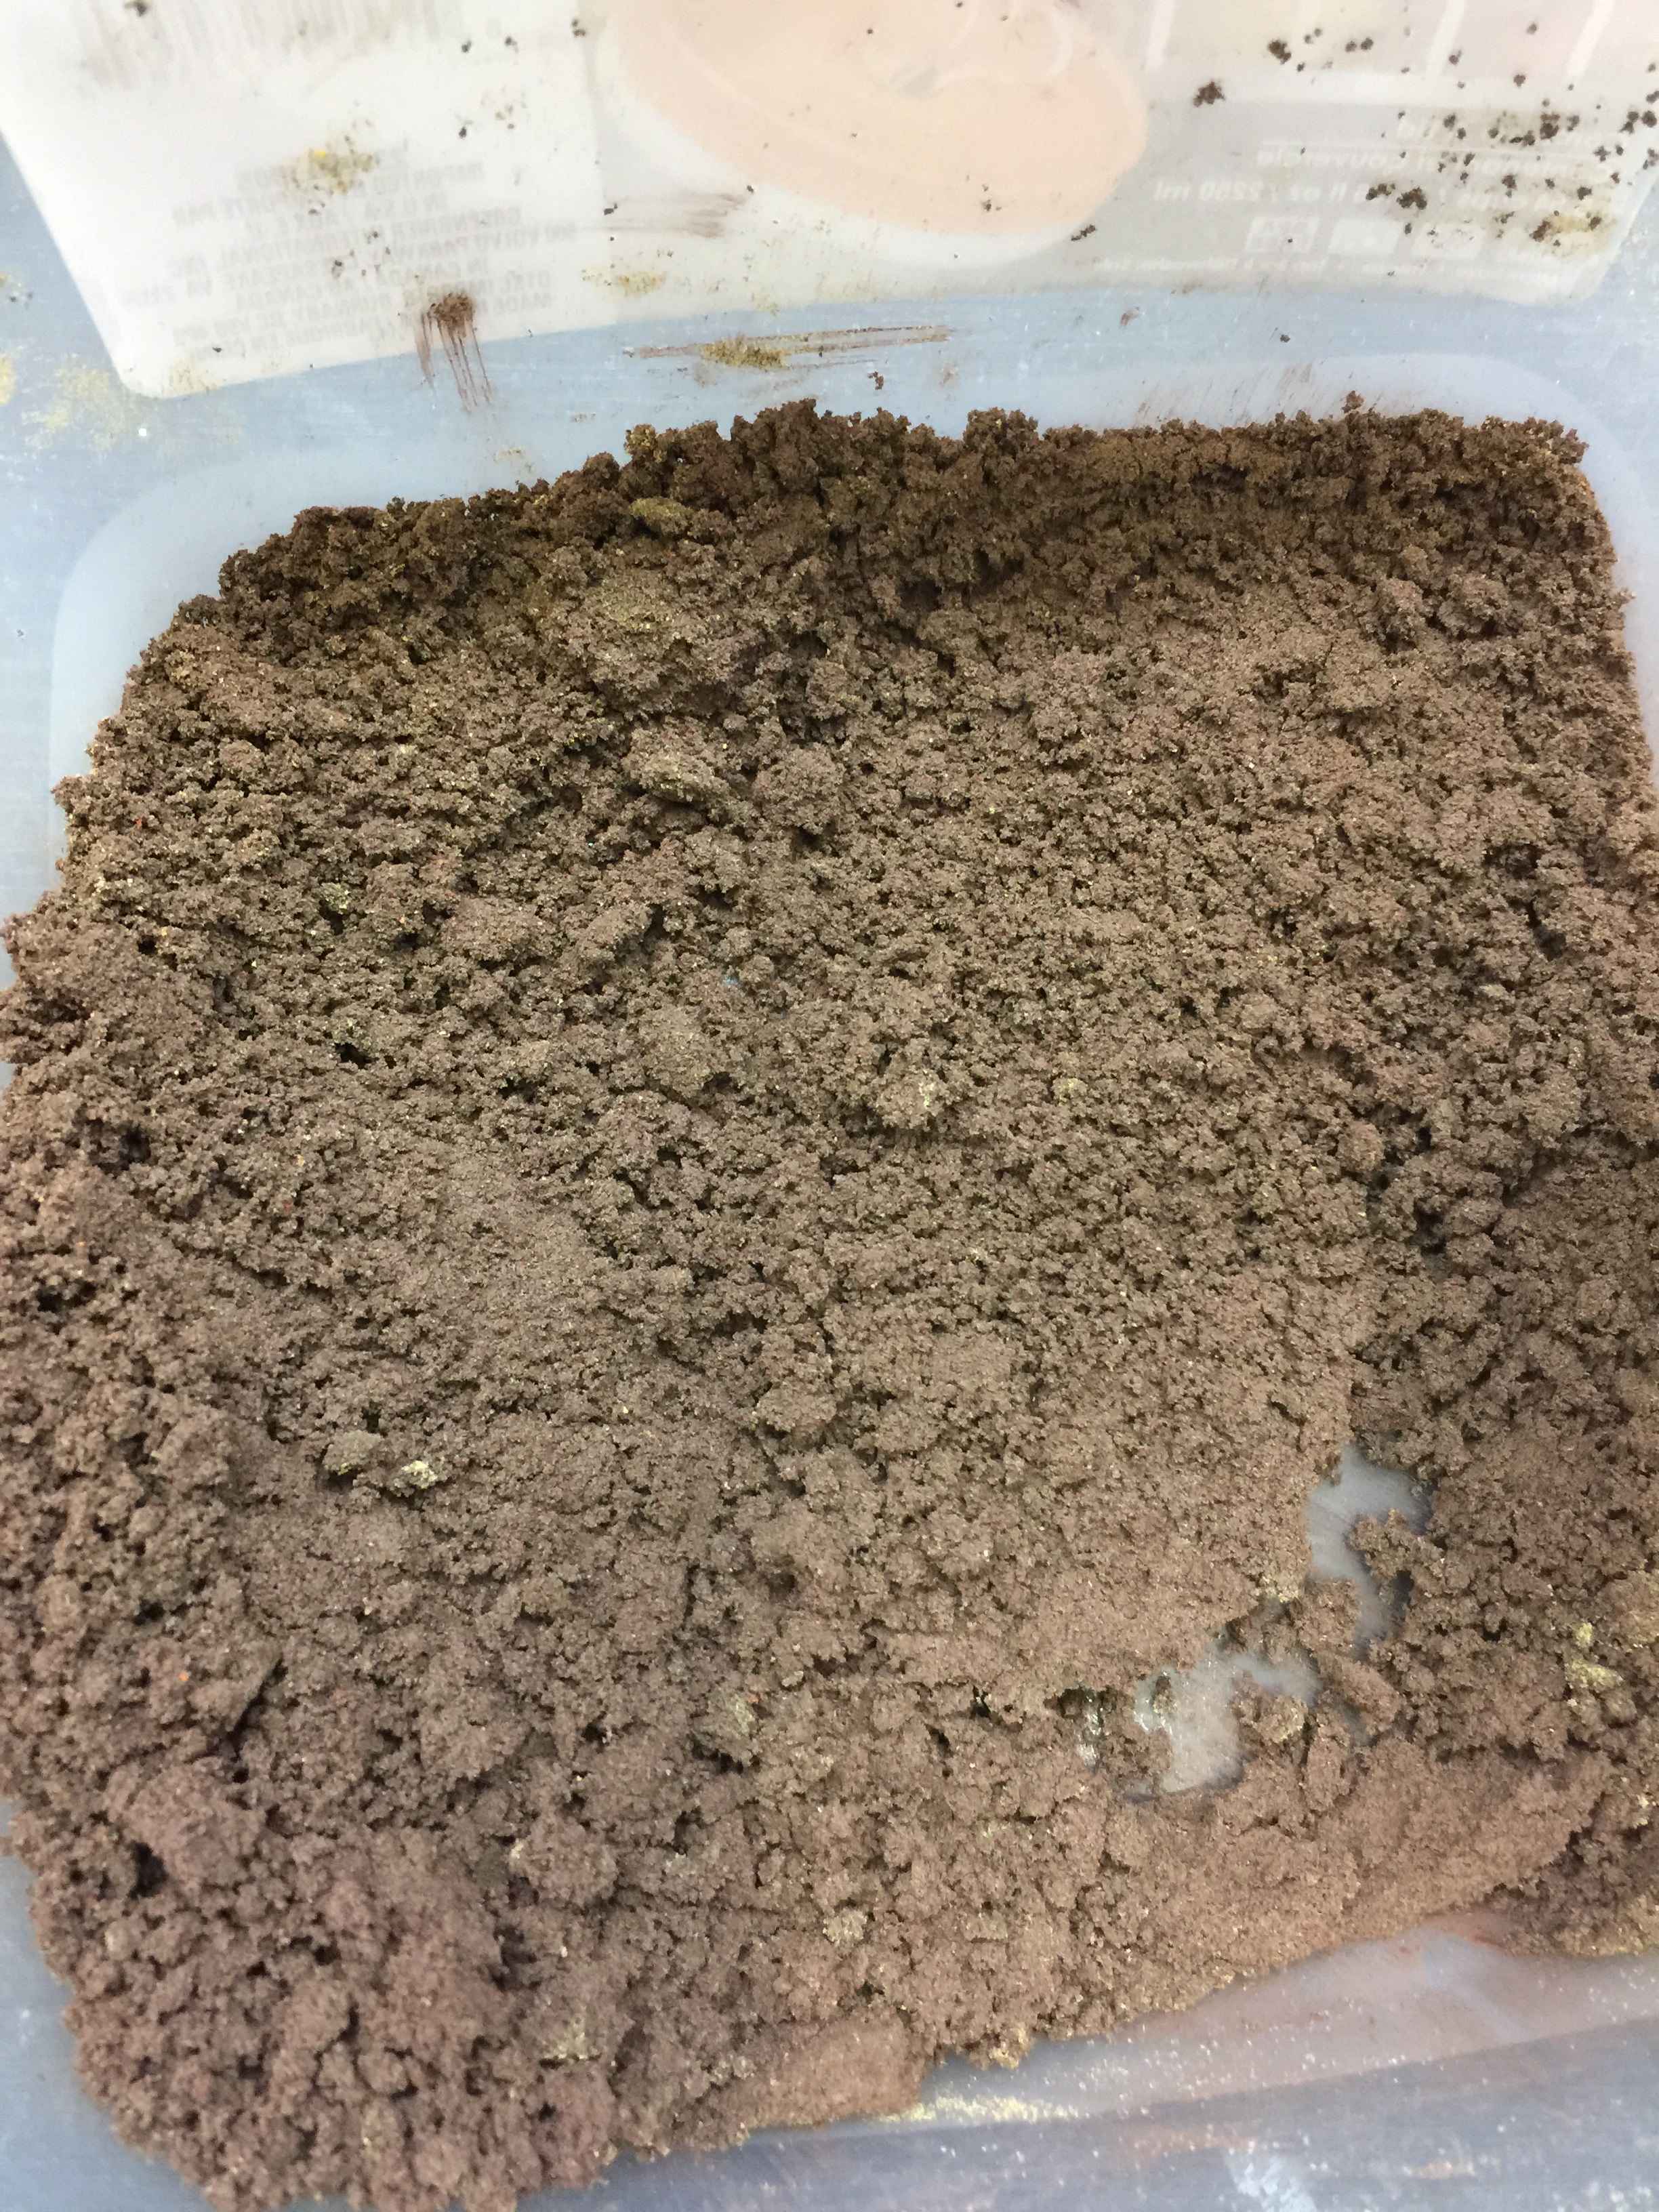


- Image 1: In a project this big, a lot of things go wrong. Sometimes rolling with the failures defines how a project turns out. I figured as a Fallout table, we should have brown, dead flock. Turned out to be a huge mistake. Looked terrible on the board
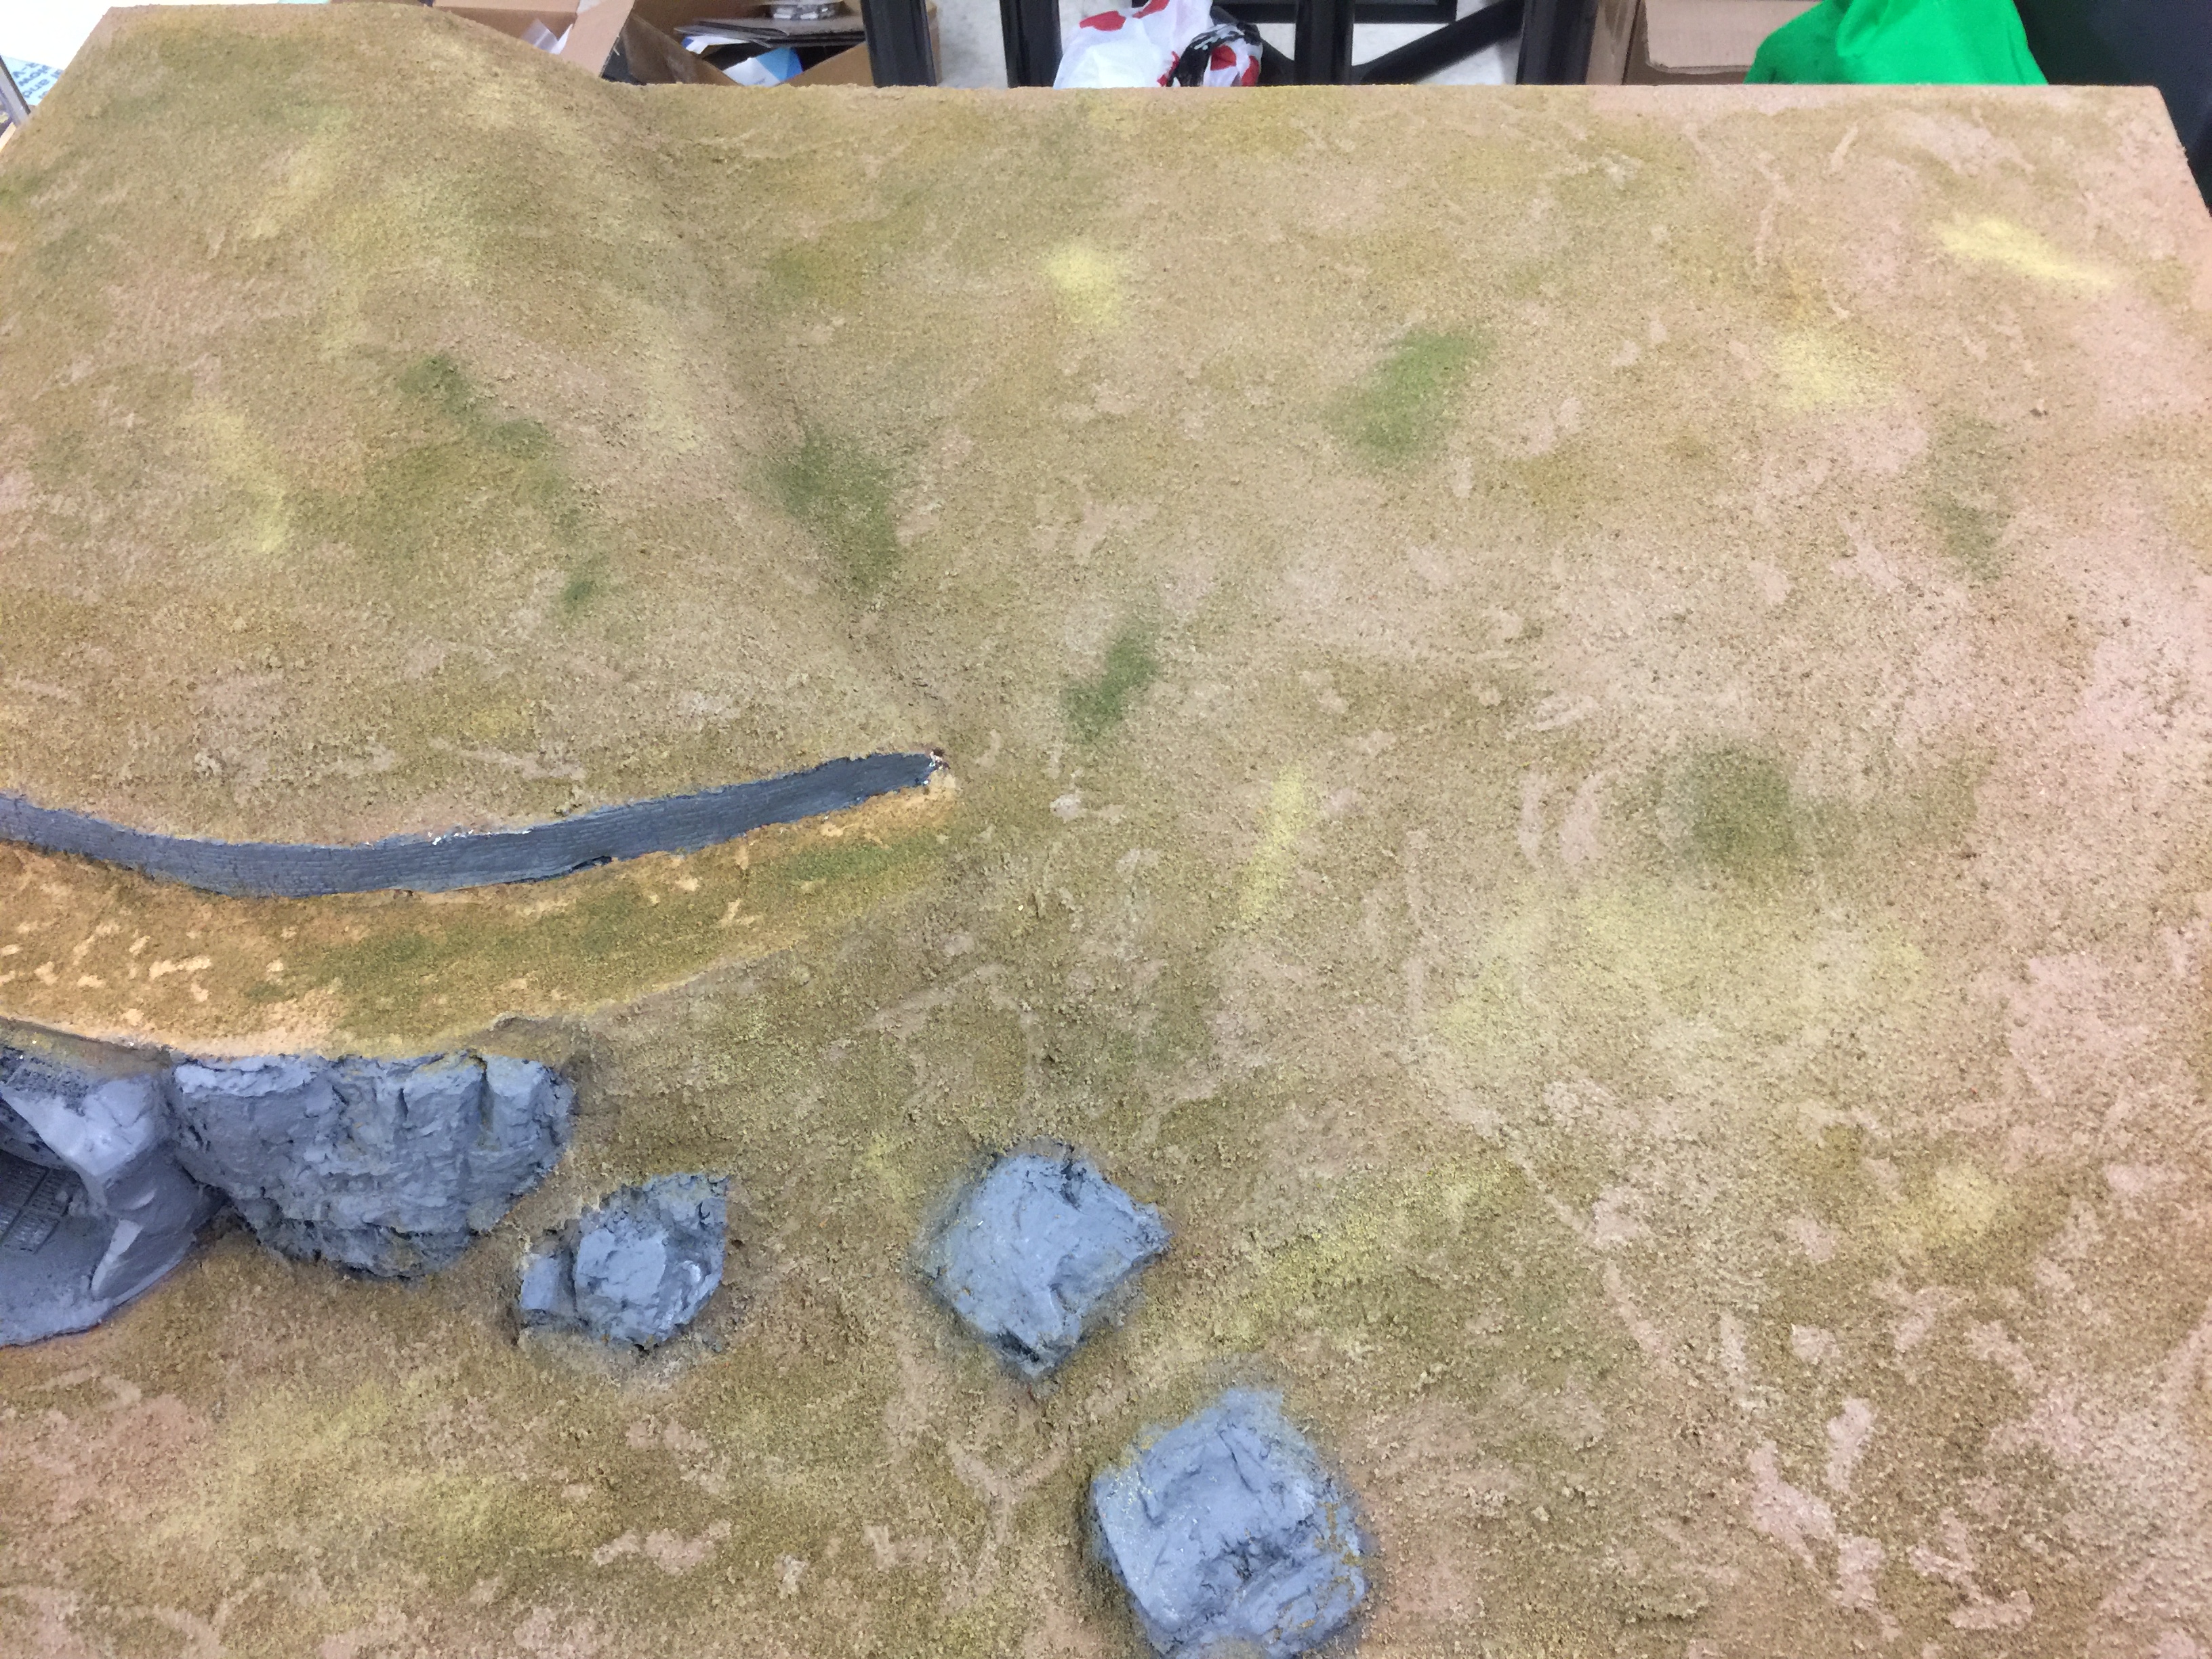
- Image 2: The flocking we ended up going with. A sparse, green-yellow mix but very patchy
- Image 3: A close up.
- Image 4: Trying a new (to me) technique for the rocks. Basecoat grey, leopard spotting with crazy washes, then more drybrushes.
- Image 5: Turns out nicely! Also note how the color has shifted on the flock. It seems to shift in photos, but the closest color is the yellow green from the first images in this post.
Roads and Trees


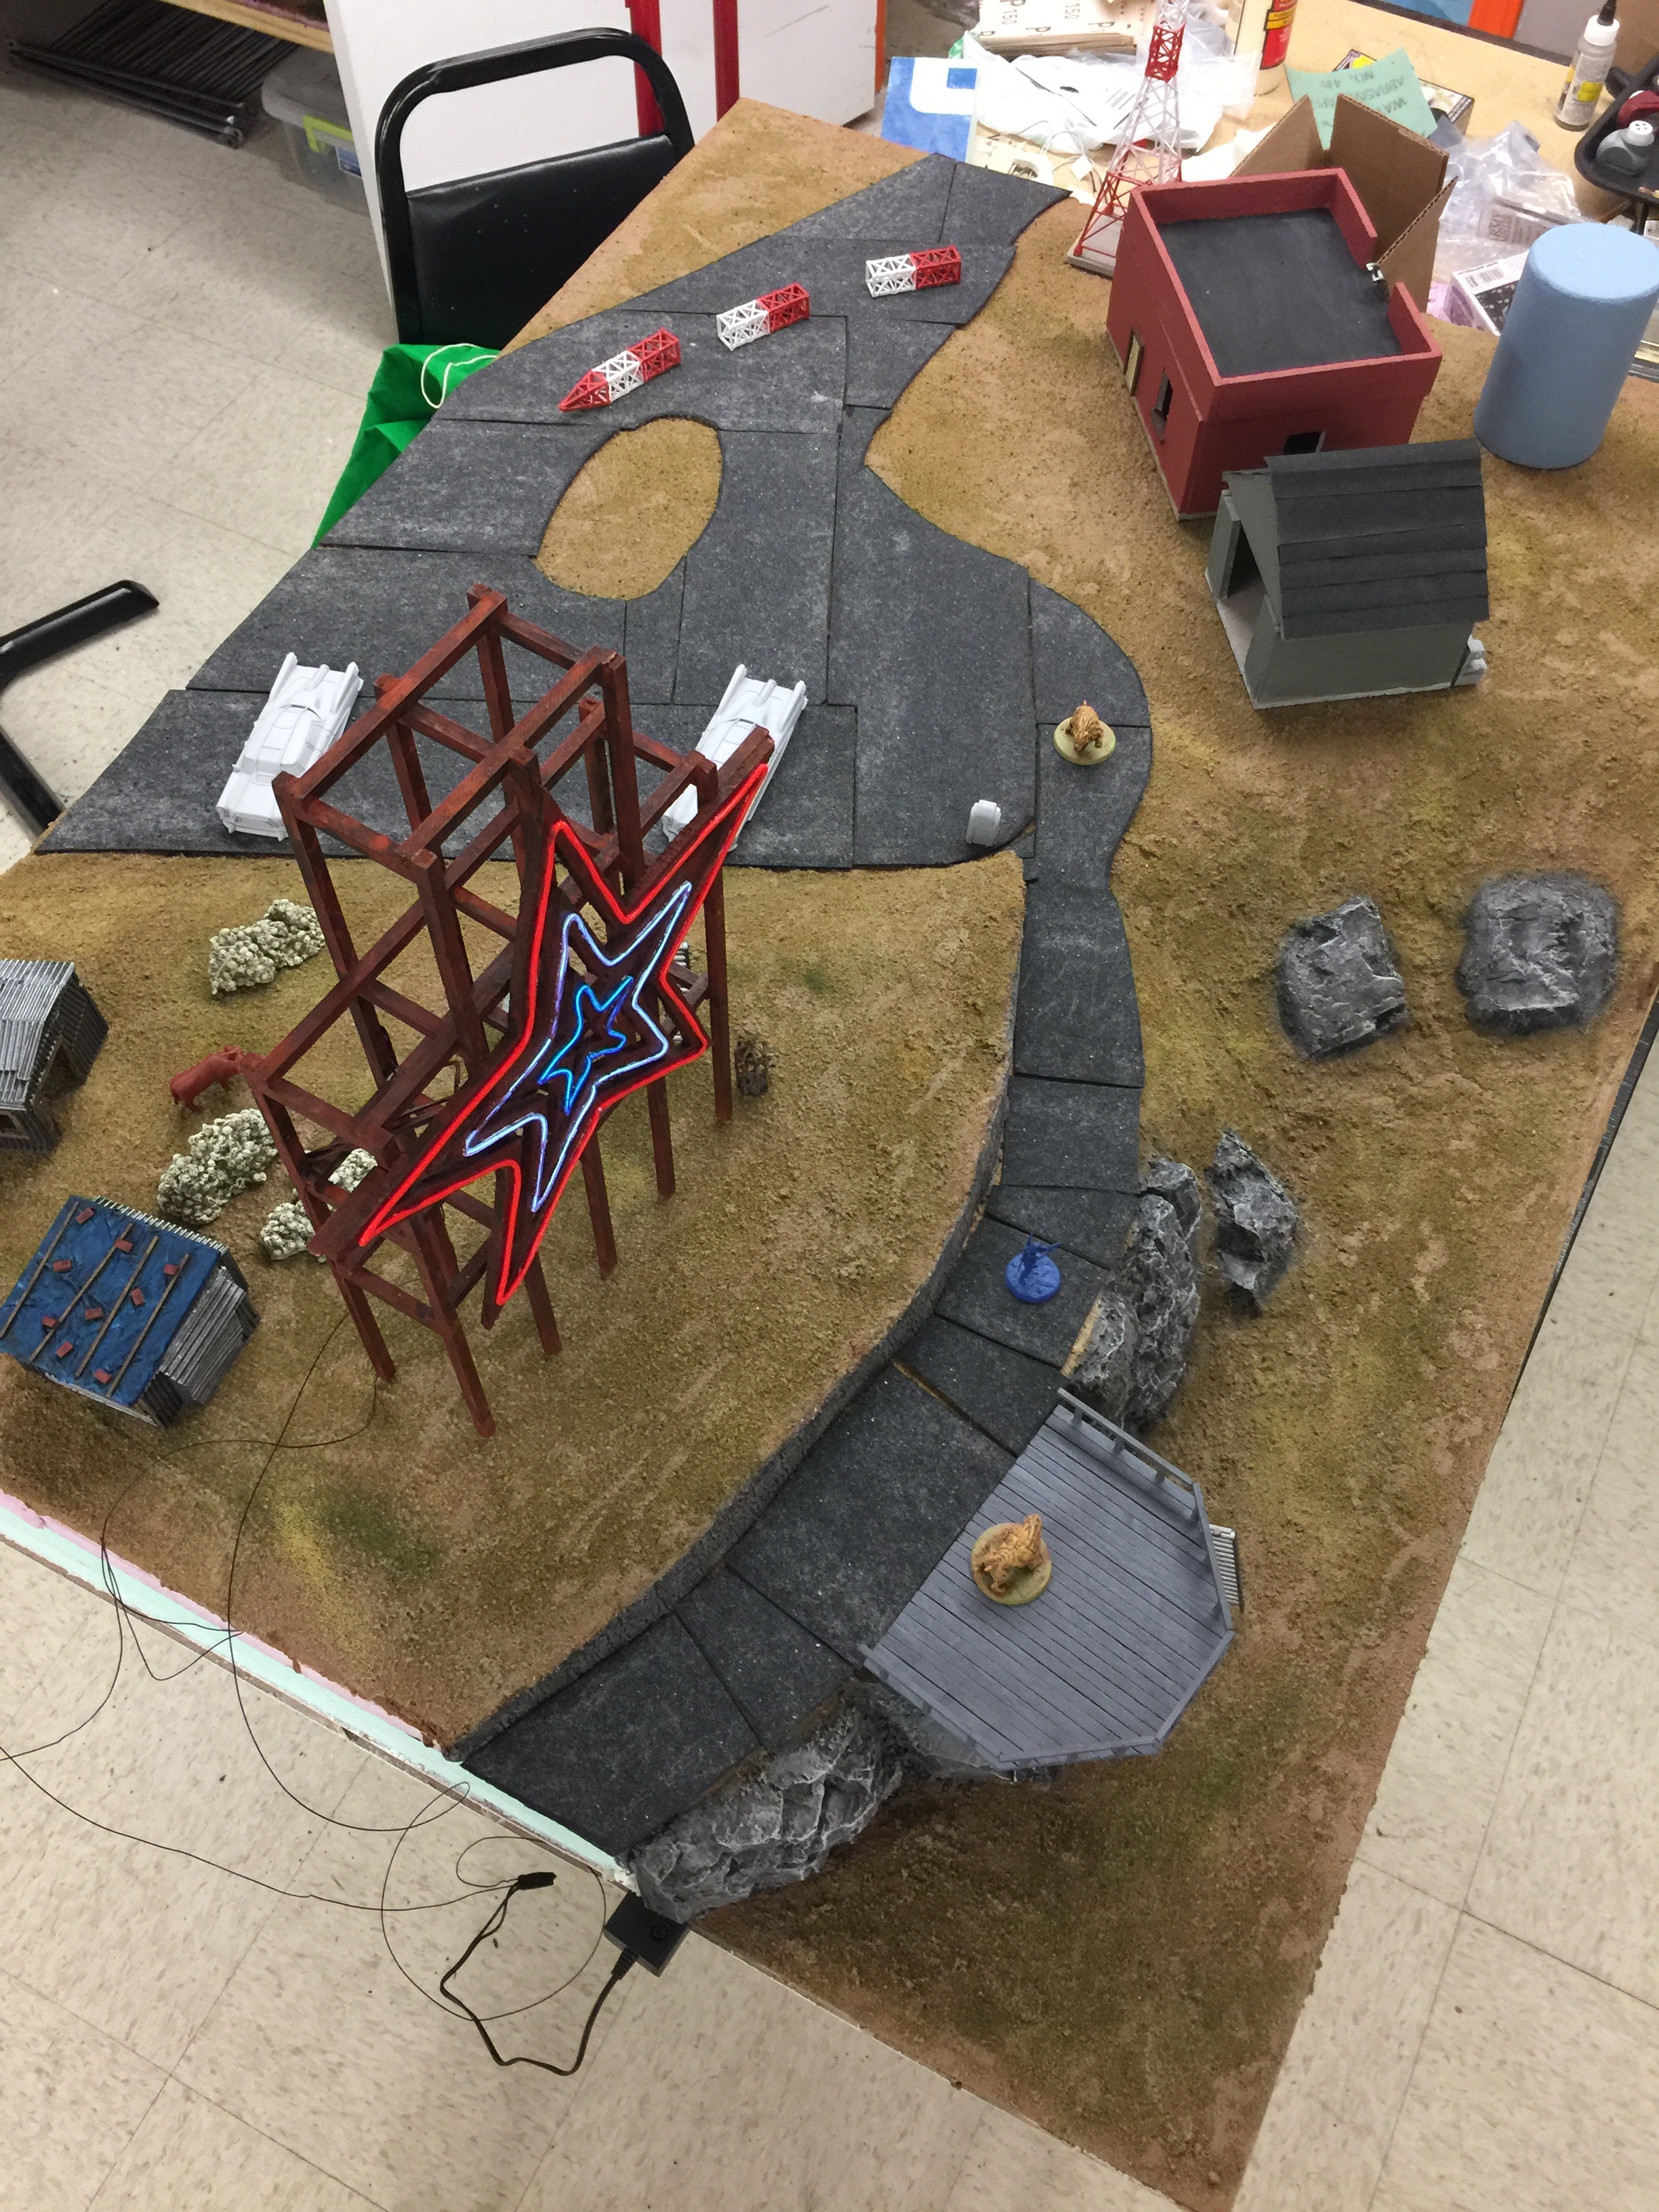
- Image 1: Testing out how many trees to add to the board along with the edges of the road. String is great for laying things out on flocked boards, you can move the edge until it feels right. Also the unpainted overlook makes an appearance.
- Image 2: Another angle of tree density.
- Image 3: Attached road made from the underside of roof shingles. Great road material. Also attached the painted overlook. The board is really taking shape now.
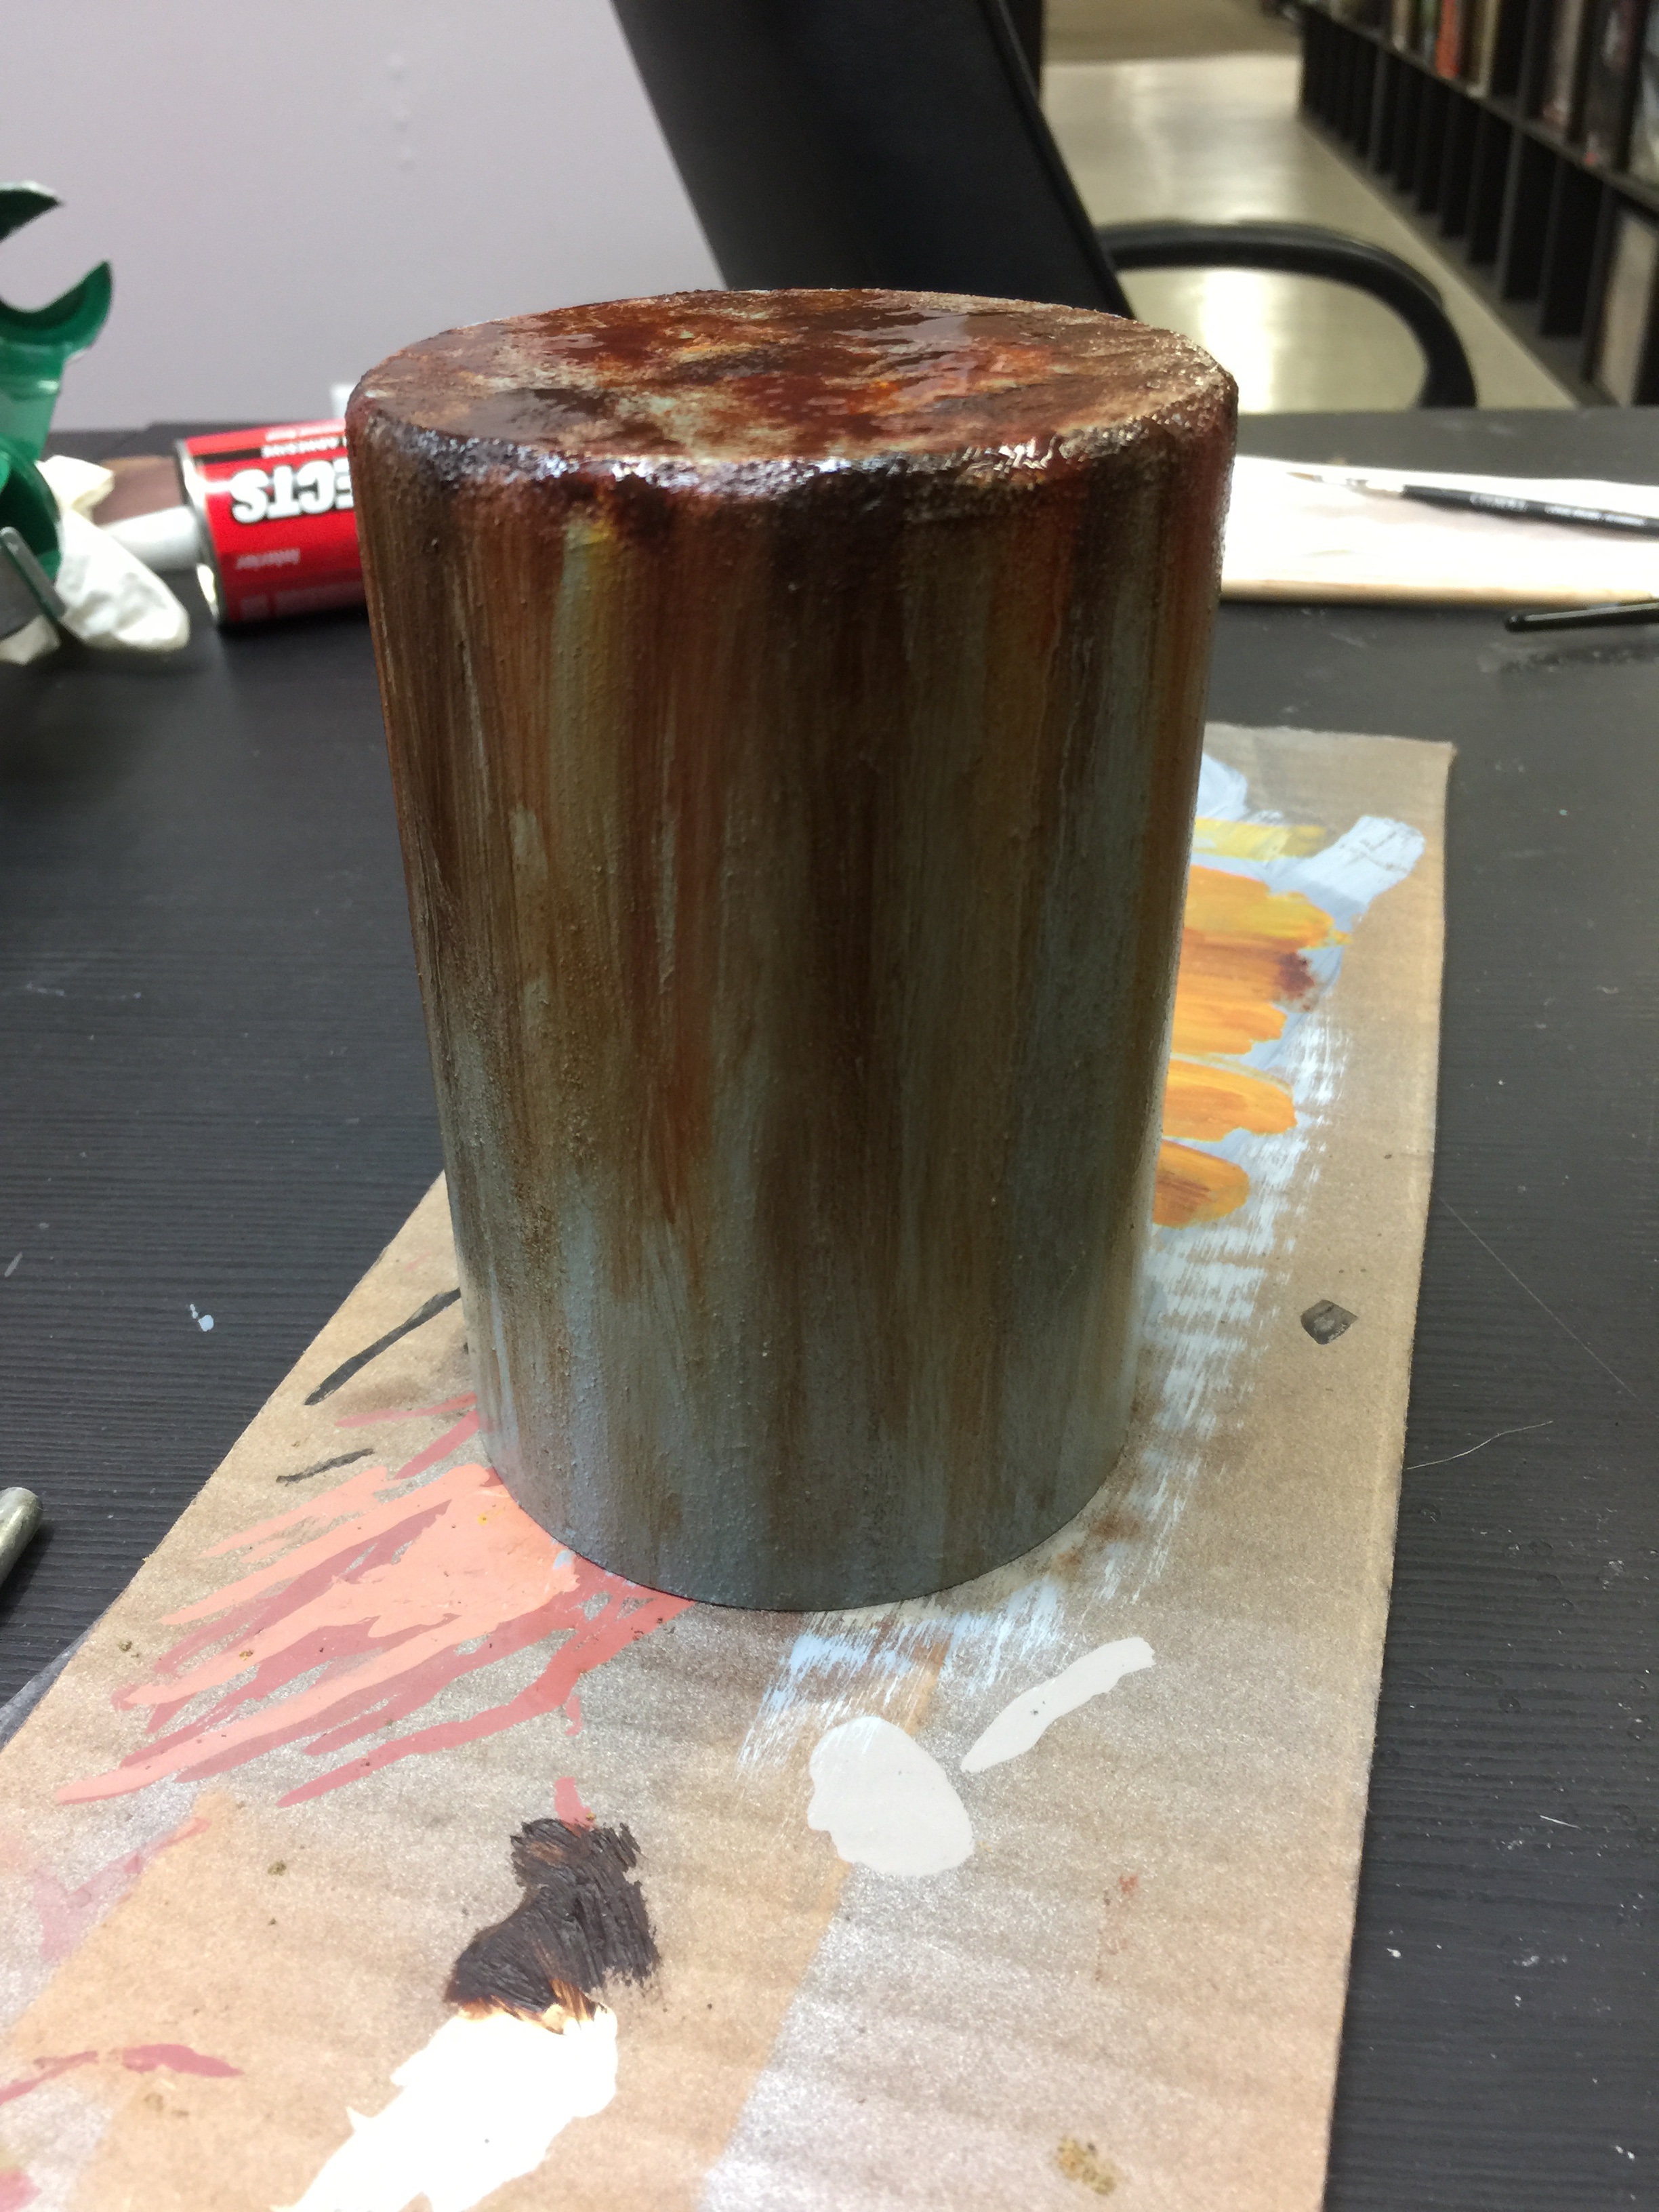
Oiling Up
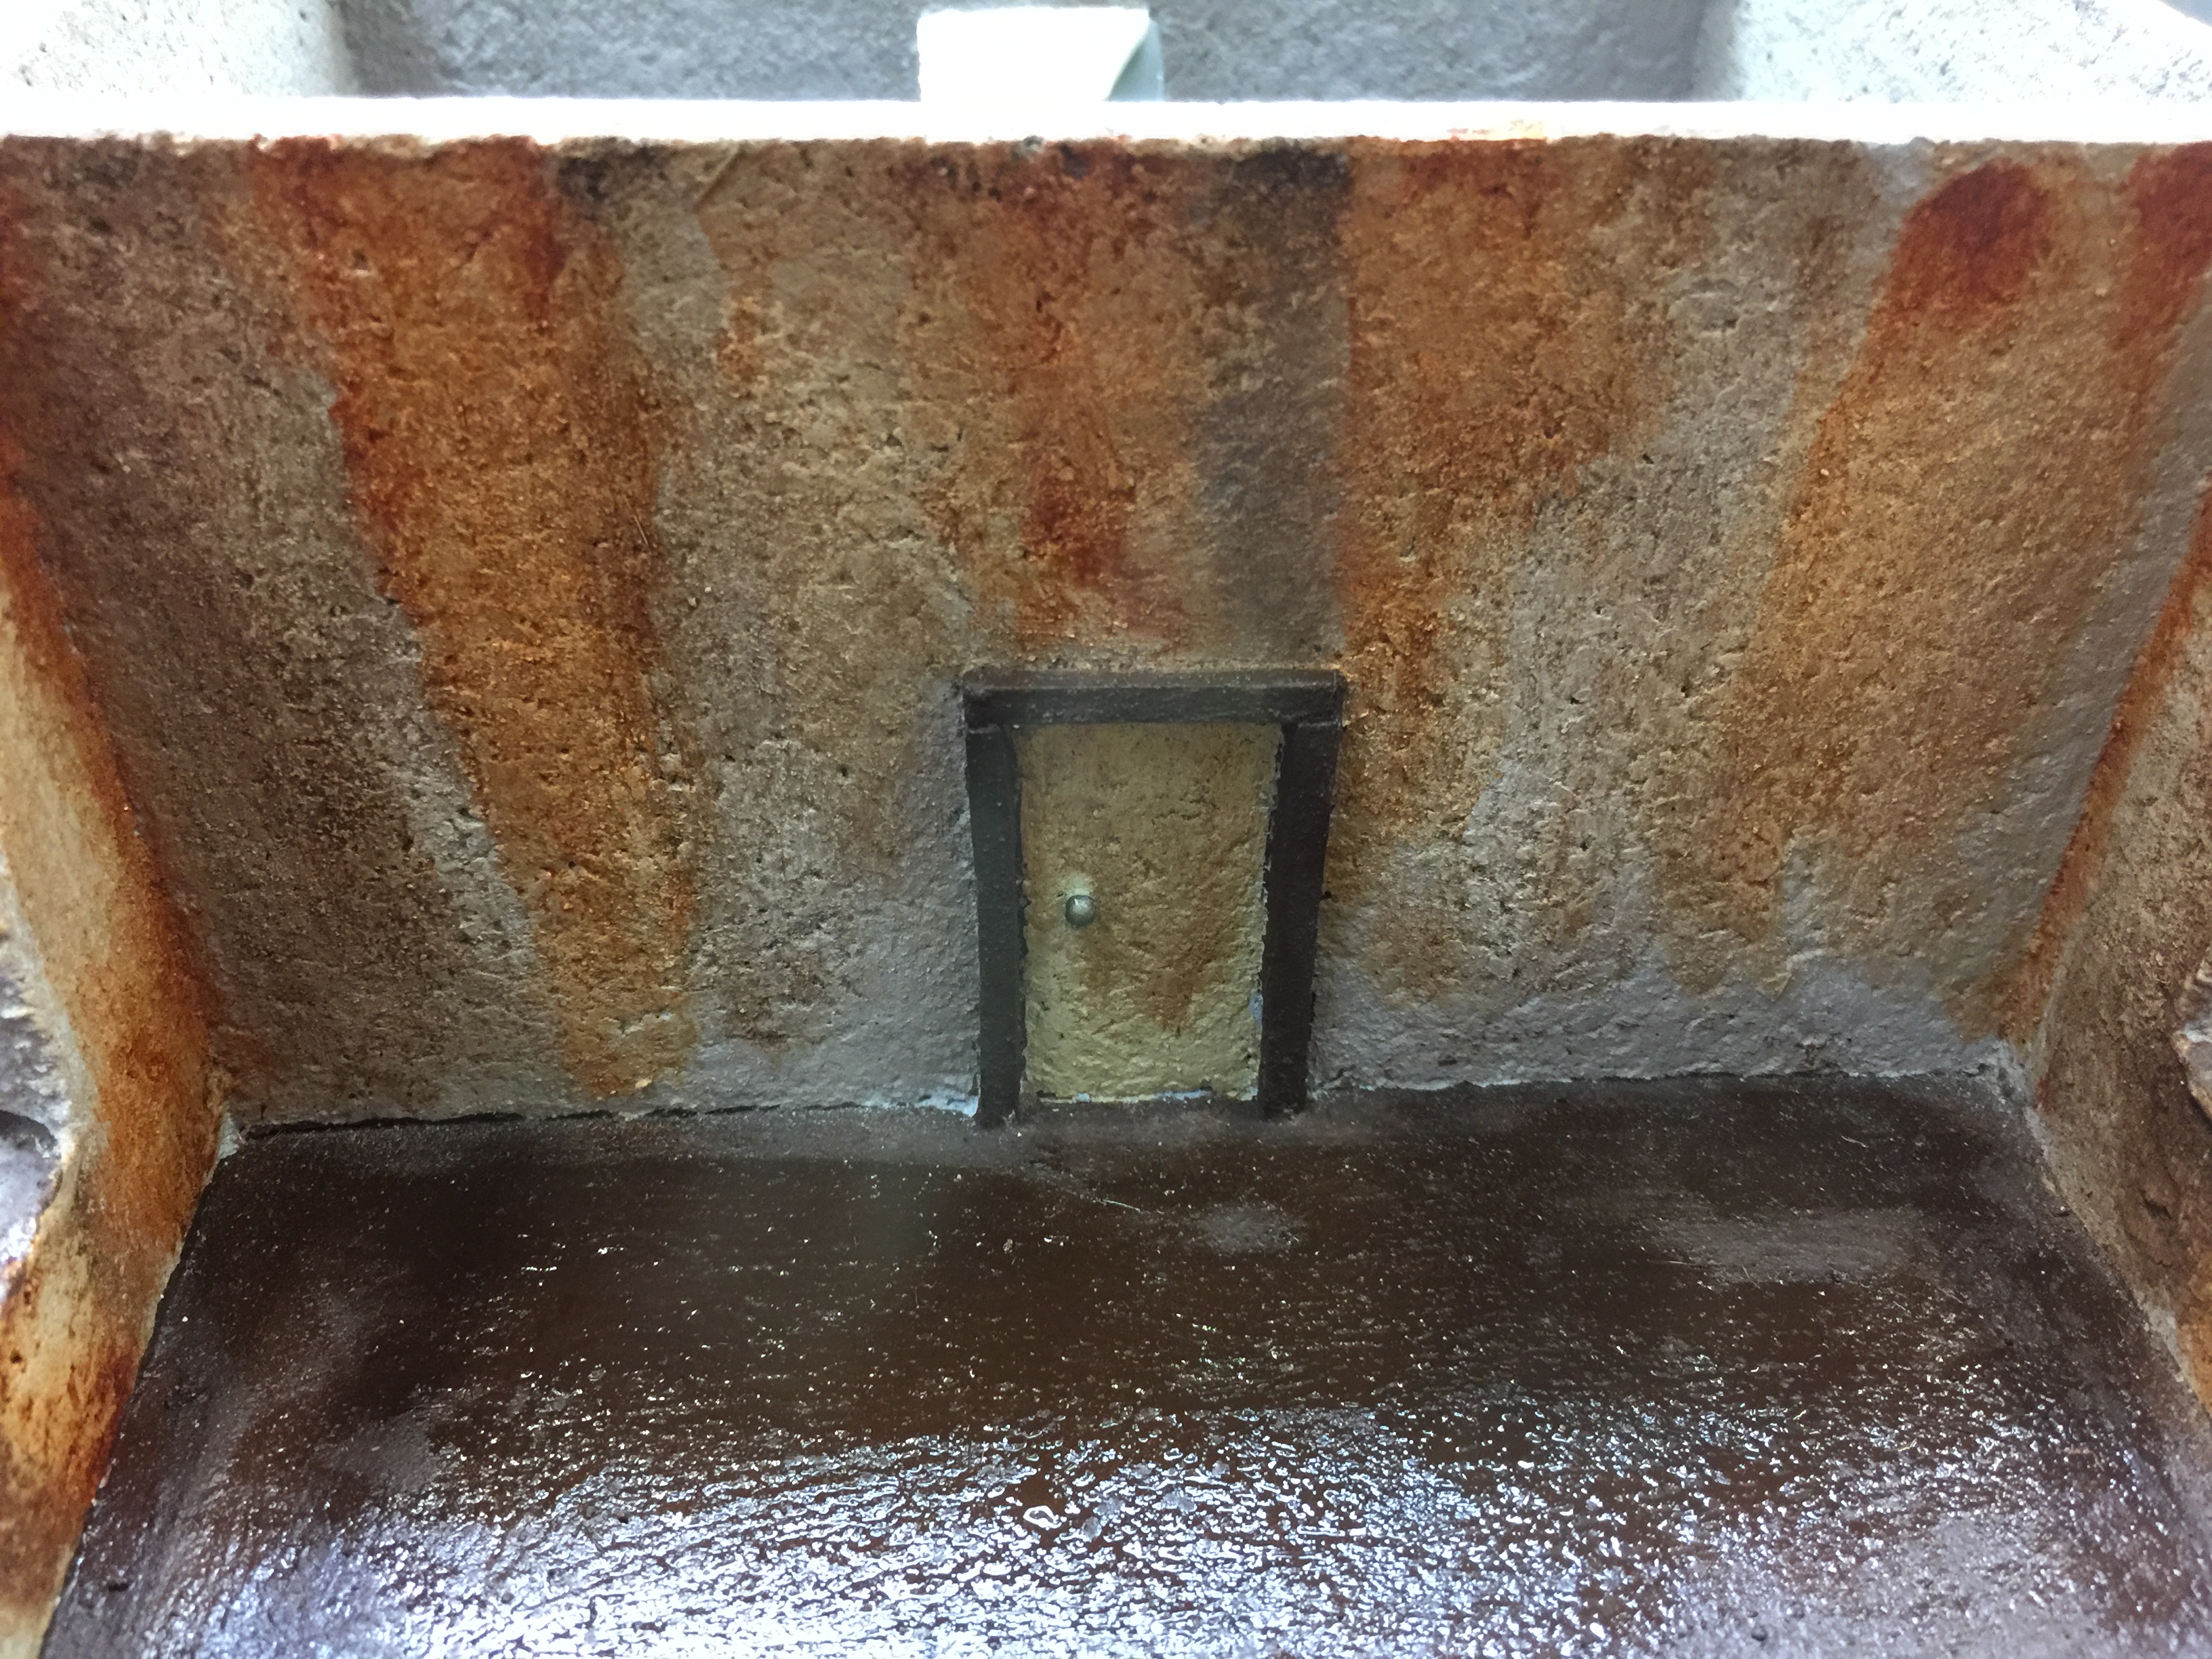

- Image 1: I learned oil weathering techniques from this page. http://www.richbuilds.com/articles/build-review-sarissa-precisions-residential-trailer-28mm-mdf-wargames-terrain/ This first picture is the inside of the radio room
- Image 2: The weathered water tower
- Image 3: The weathered bathroom
- Image 4: The bathroom at an angle
- Image 5: The front of the vault entrance. Vault 611 is a direct reference to J611, a famous locomotive at the local Virginia Museum of Transportation. Sort of the inspiration for the look of the polar express. http://www.vmt.org/collections/rail/steam-locomotives/steam-locomotive-norfolk-and-western-class-j-611/


![StarCraft Tabletop Miniatures Game Pre-Orders Live Now [Updated]](https://images.beastsofwar.com/2026/03/starcraft-tmg-news-cover-600-338.jpg)


![Mounted US Cavalry On Kickstarter For Dead Man’s Hand! [Updated]](https://images.beastsofwar.com/2026/03/us-cavalry-main-600-338.jpg)


