![NO Weekender Or Cult Of Games XLBS This Weekend [Updated]](https://images.beastsofwar.com/2026/03/No_Weekender_and_XLBS_this_Weekend-225-127.jpg)


The Emperor Protects ~ Adepta Sororitas ~ A Sisters of Battle Project


Recommendations: 959
About the Project
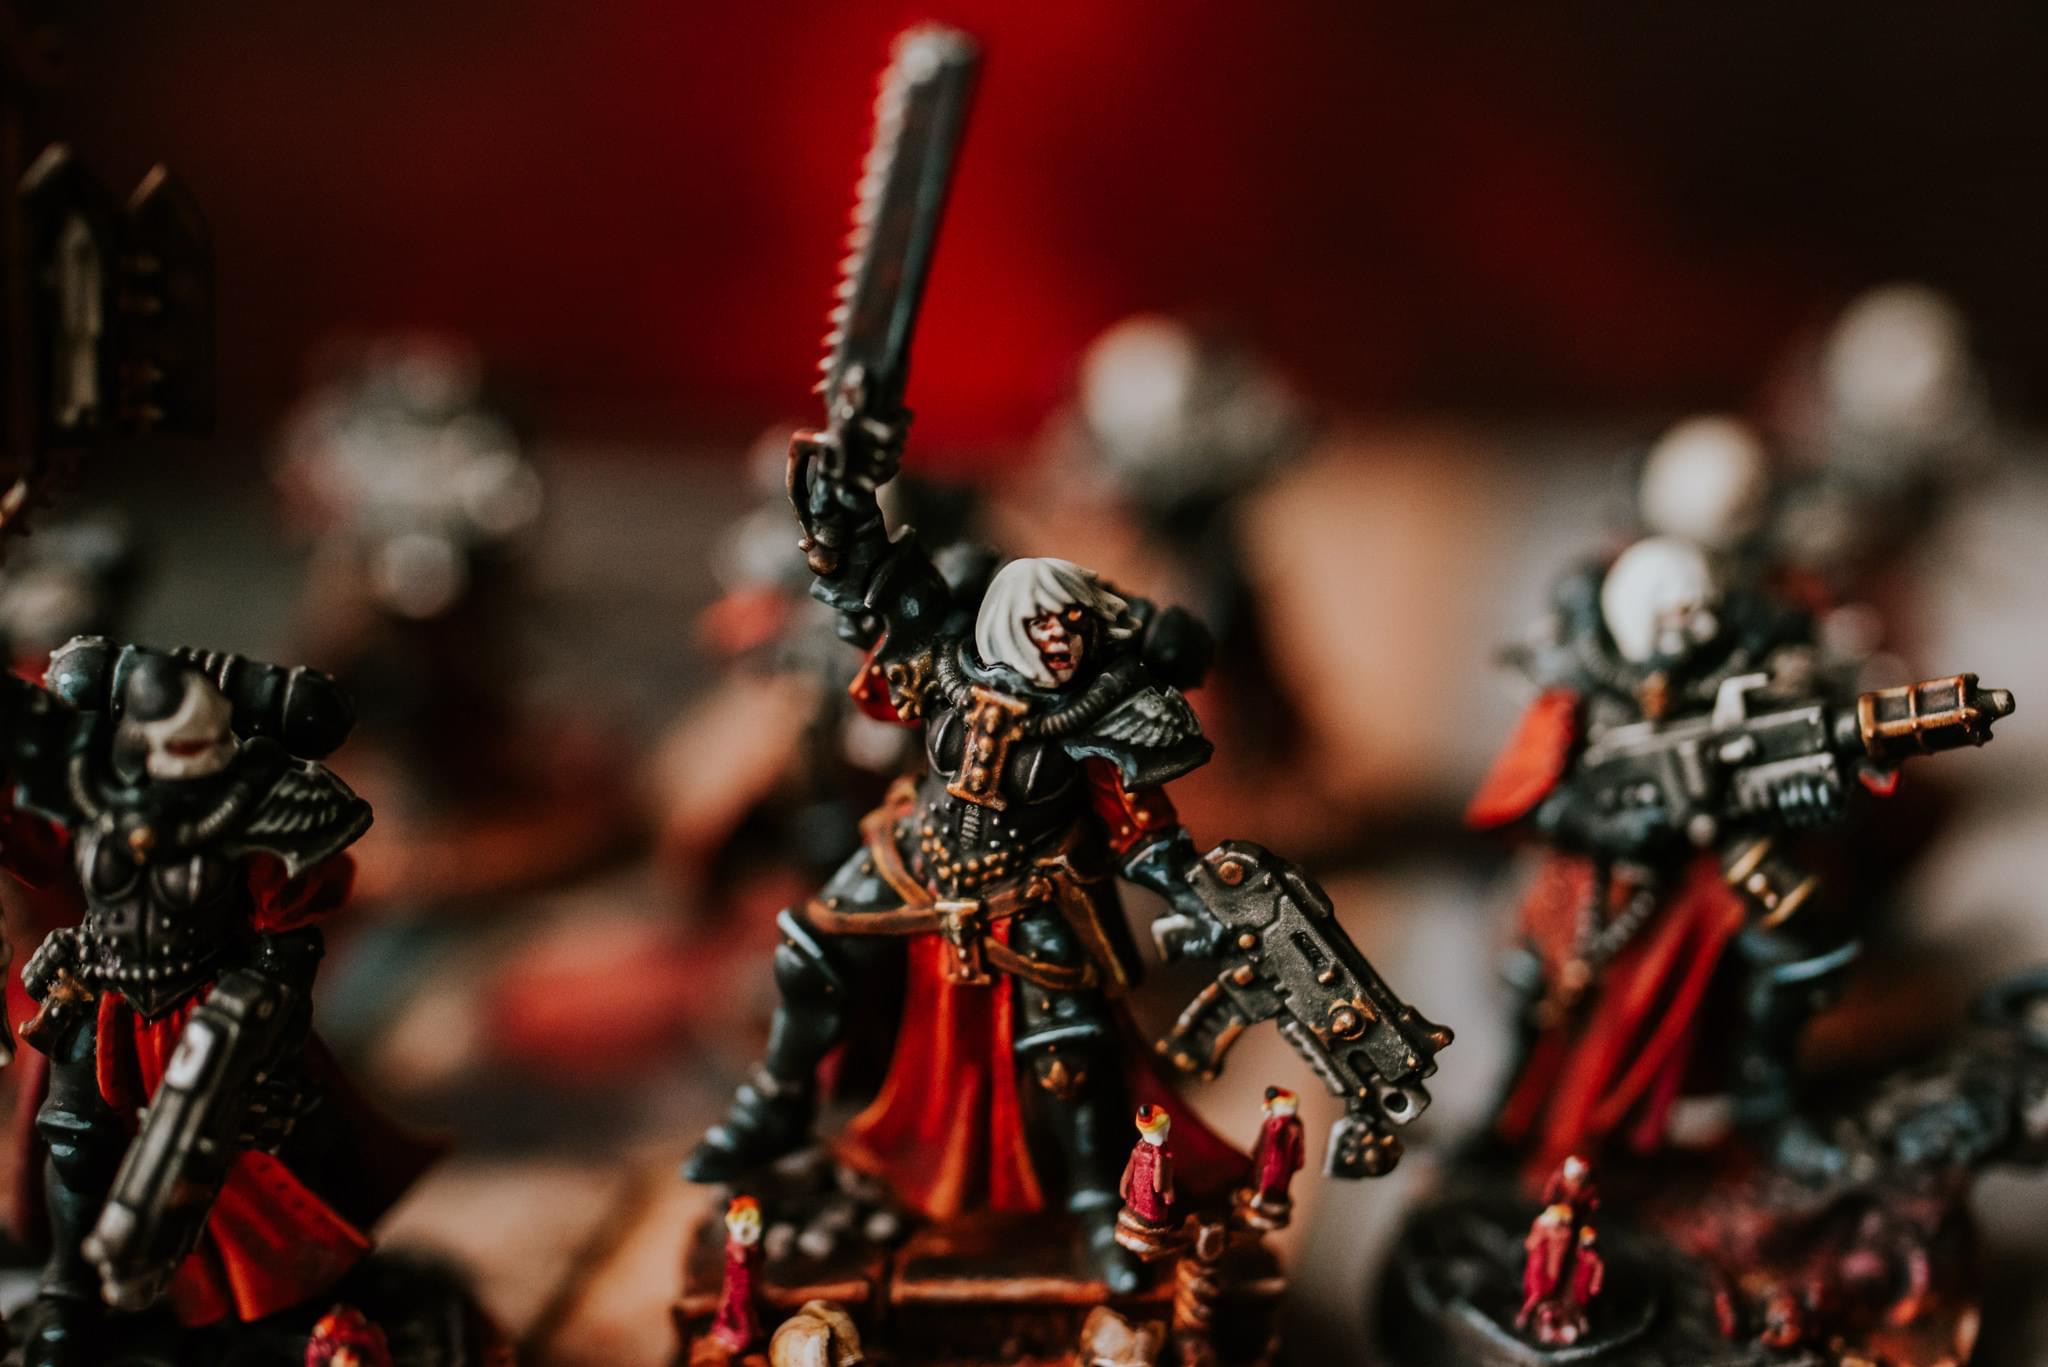
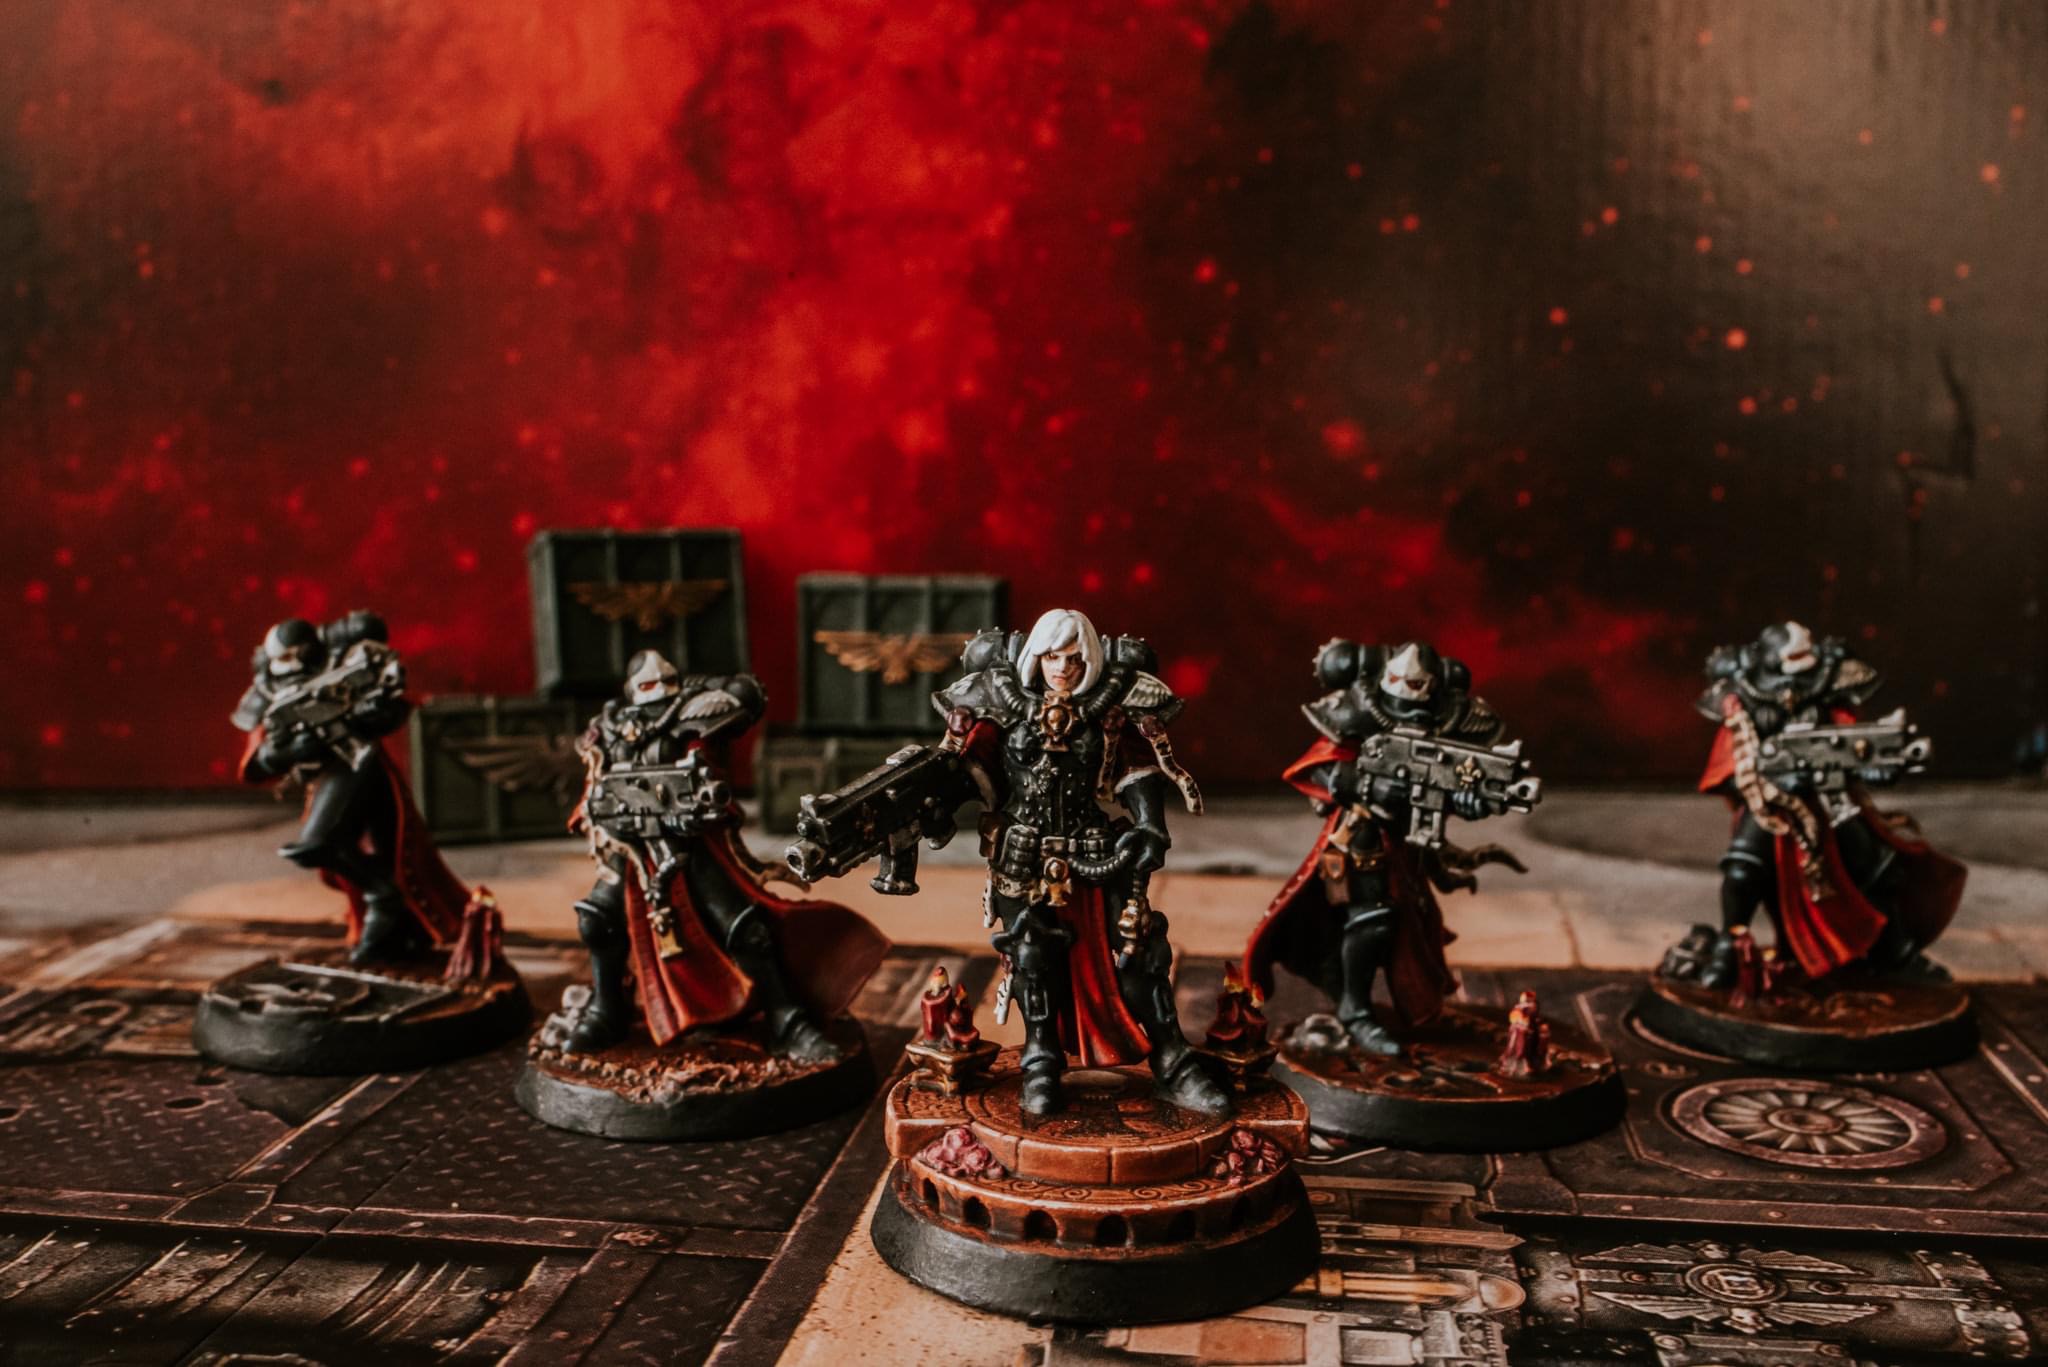
***** THE EMPEROR PROTECTS ***** I've been a backstage member since 2012 and have never shared anything I've made. (HOW VERY DARE I?) After being one of the lucky few to acquire the Sisters of Battle box I thought it would be cool to attempt to track my progress of putting this brand new army (for me) together before they are let loose upon the battlefield to unleash fire and faith upon the heretics. Original project goal achieved. Limited Edition Sisters of Battle Starter Box complete! Stay tuned for incoming pile of shame purging & painting. YES!
Related Game: Warhammer 40,000
Related Company: Games Workshop
Related Genre: Science Fiction
This Project is Active
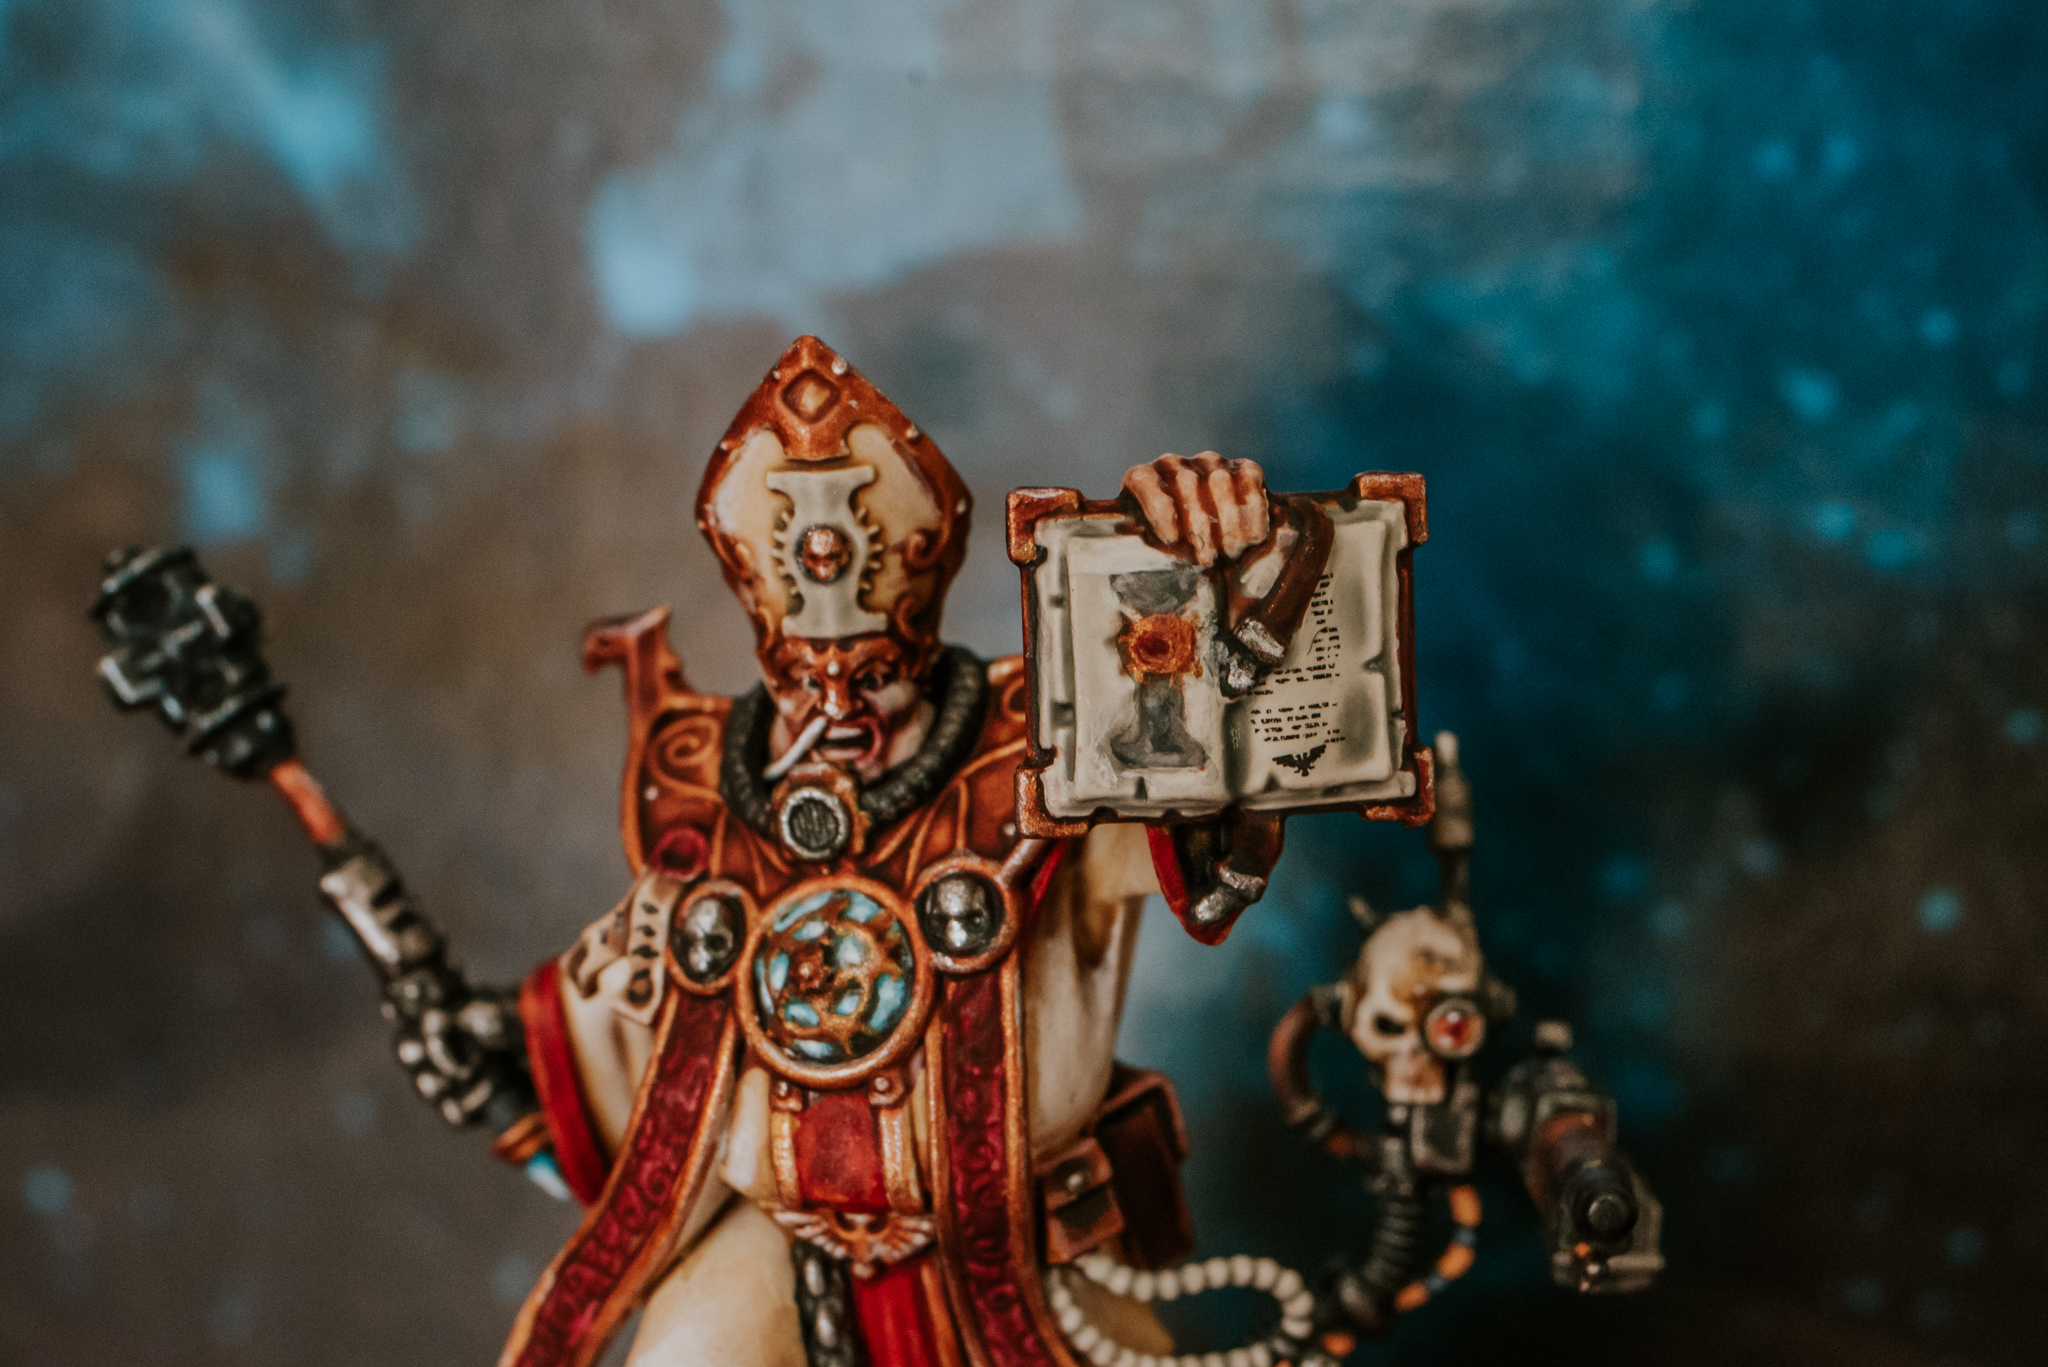
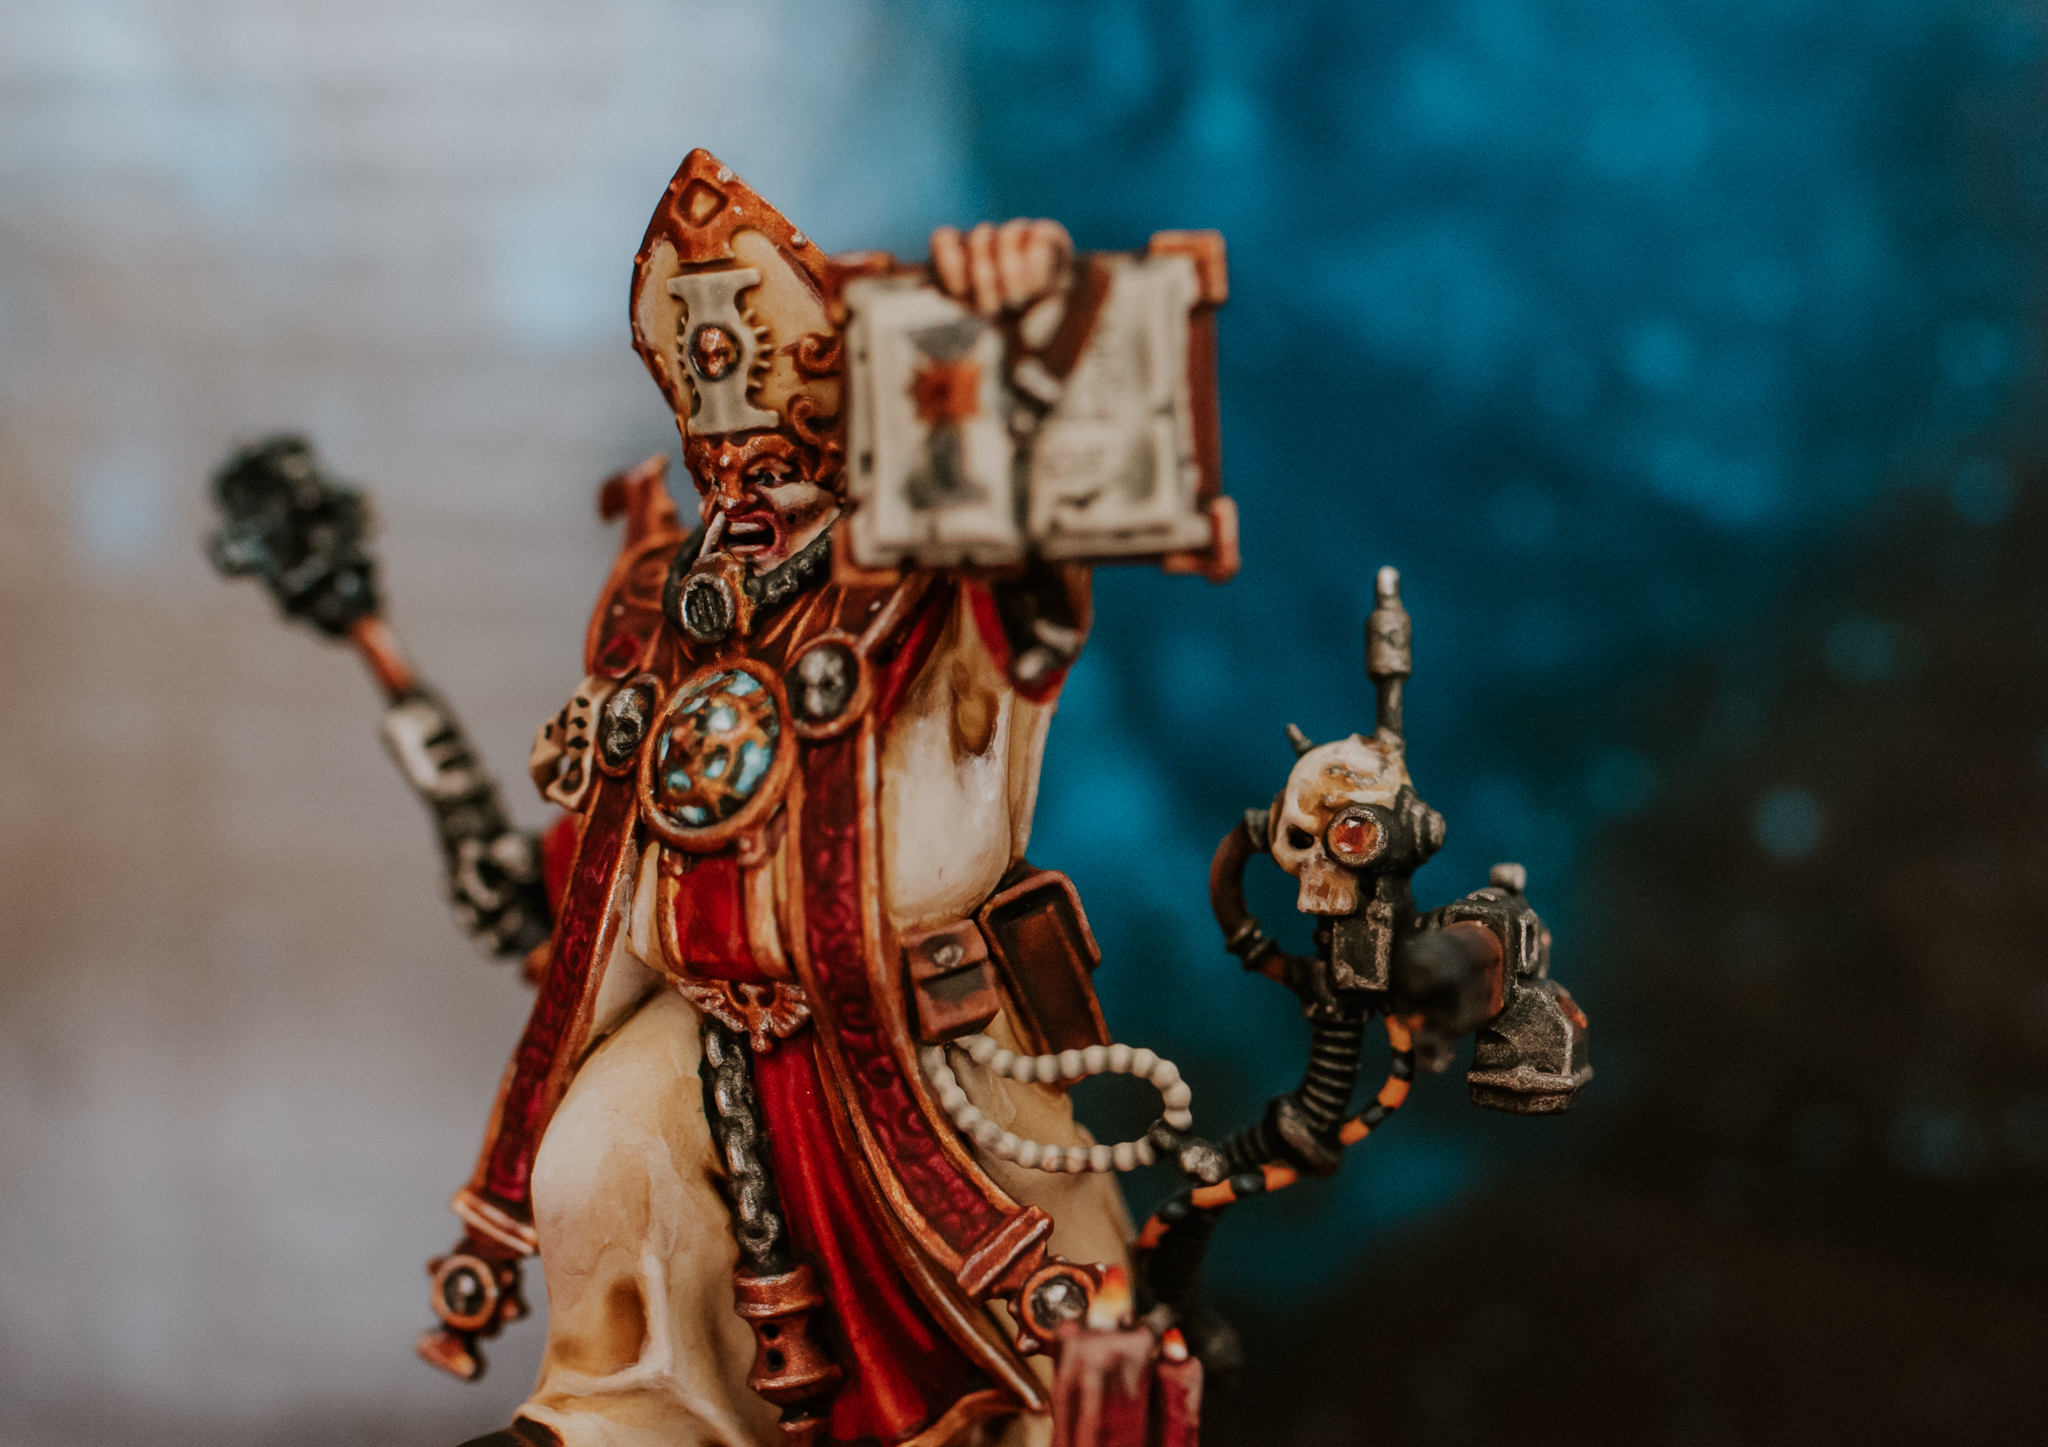
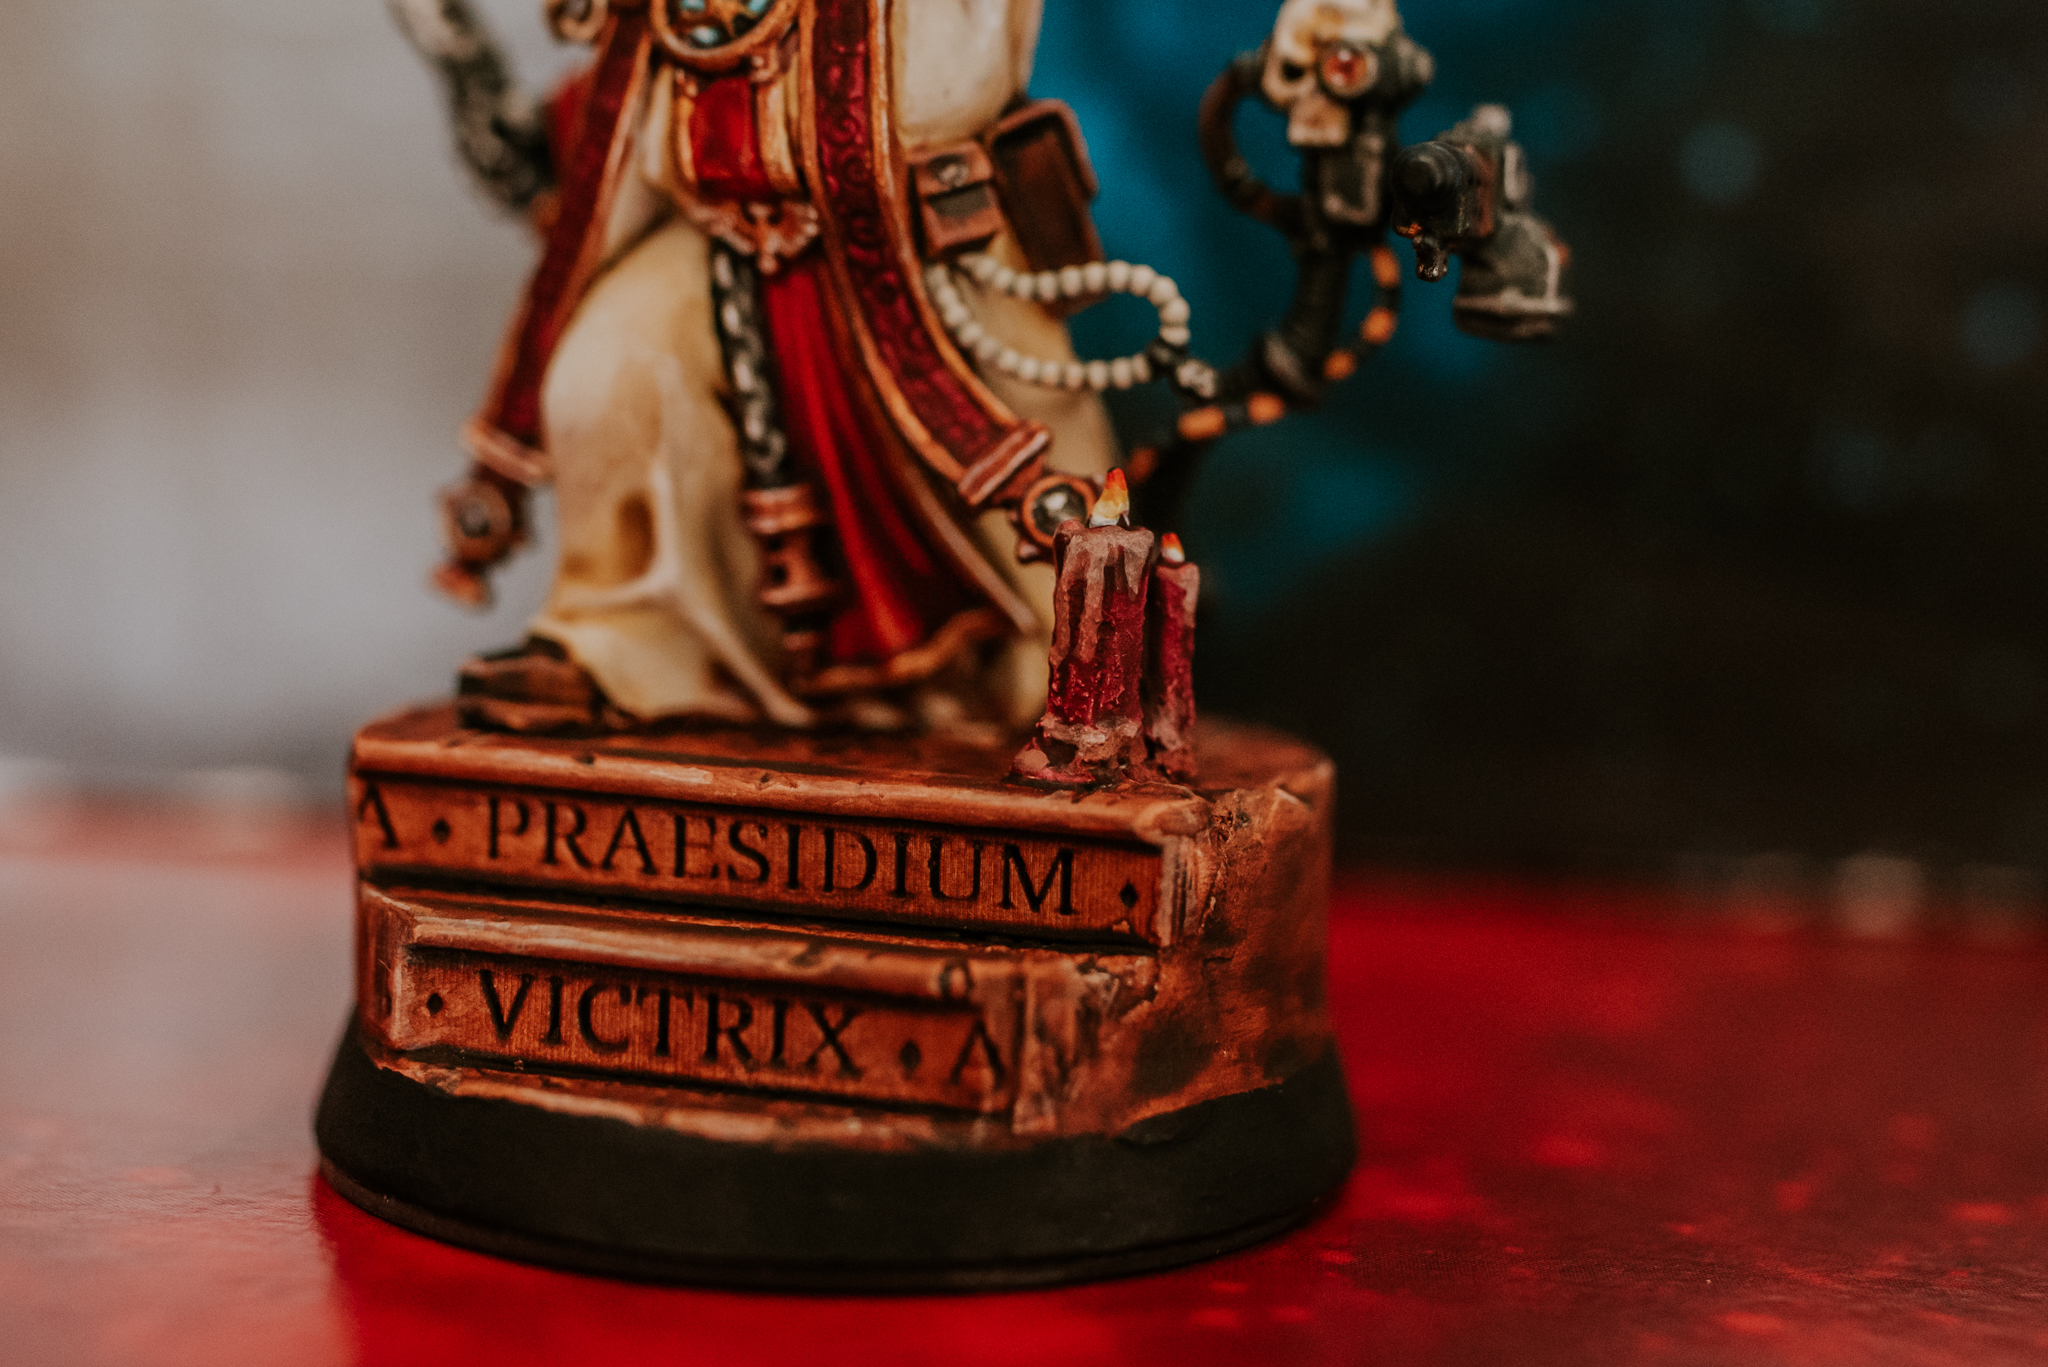
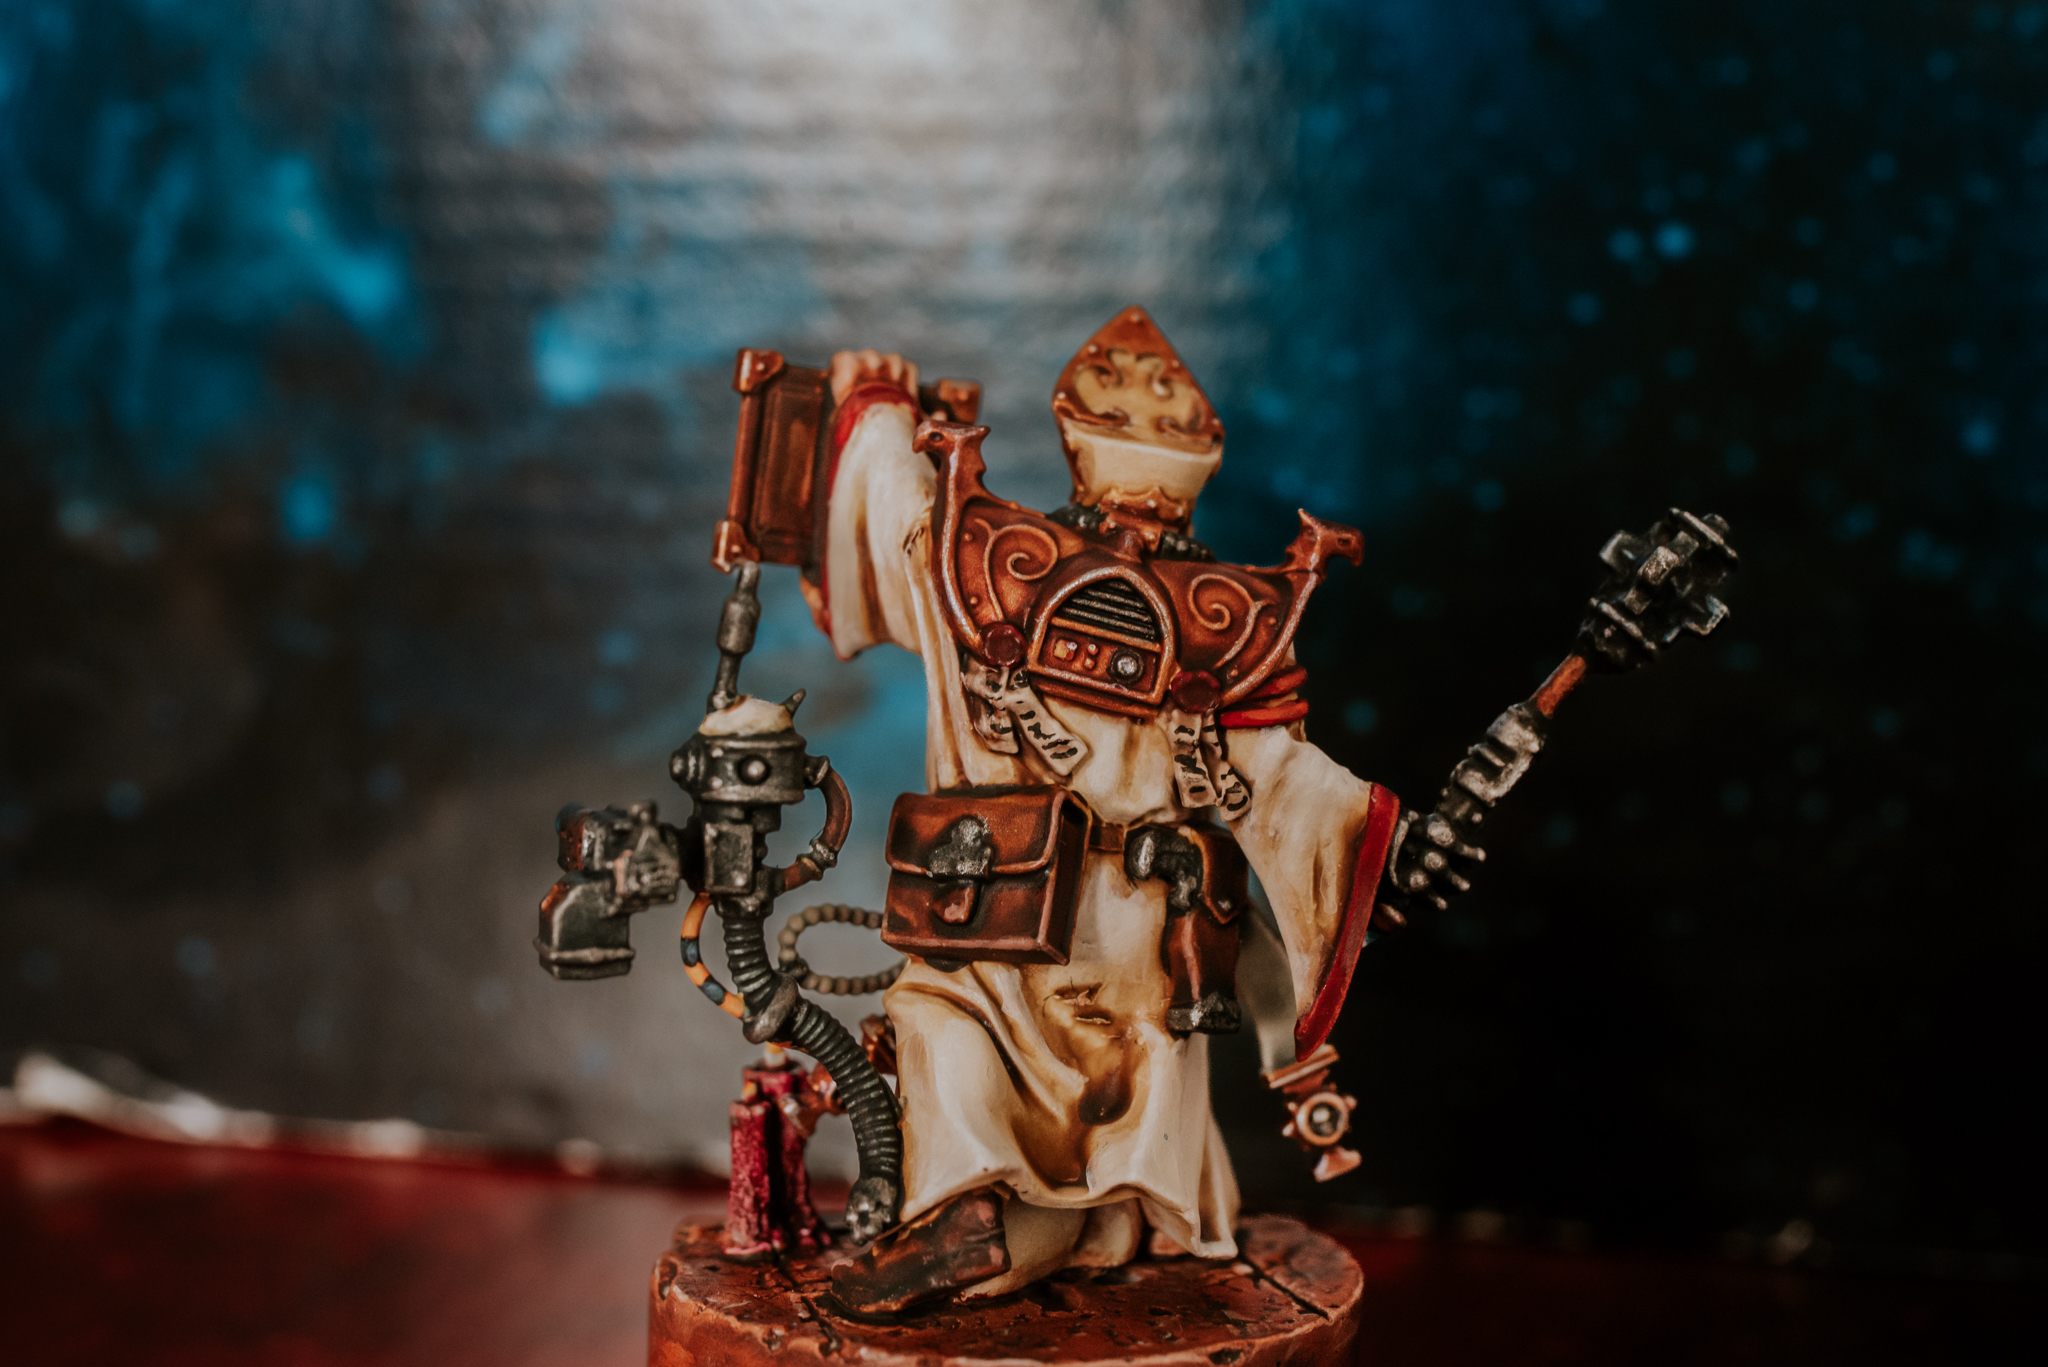
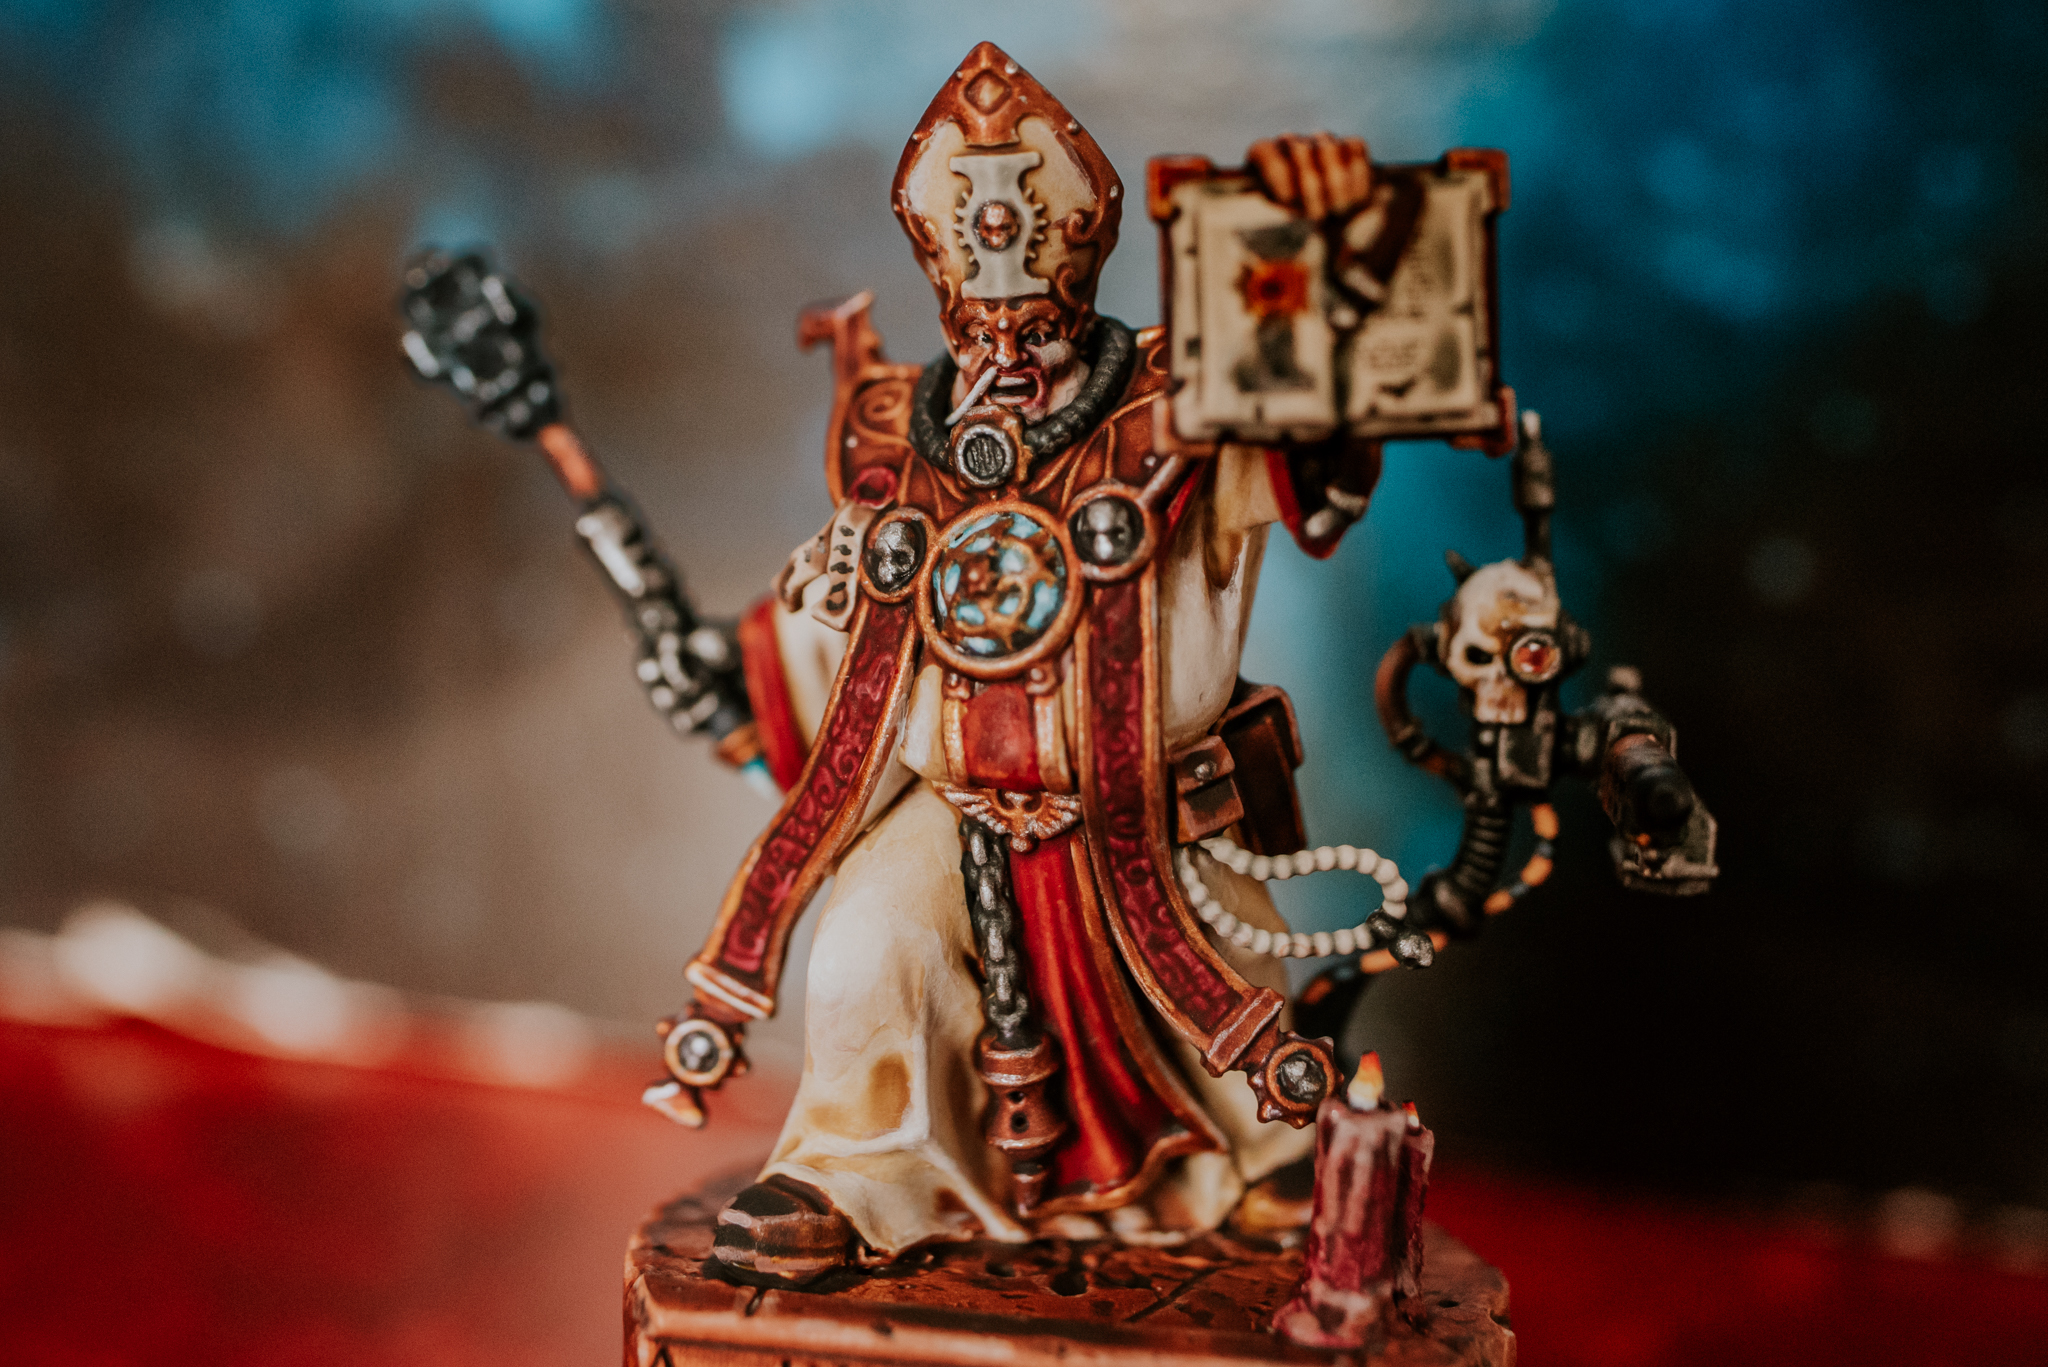
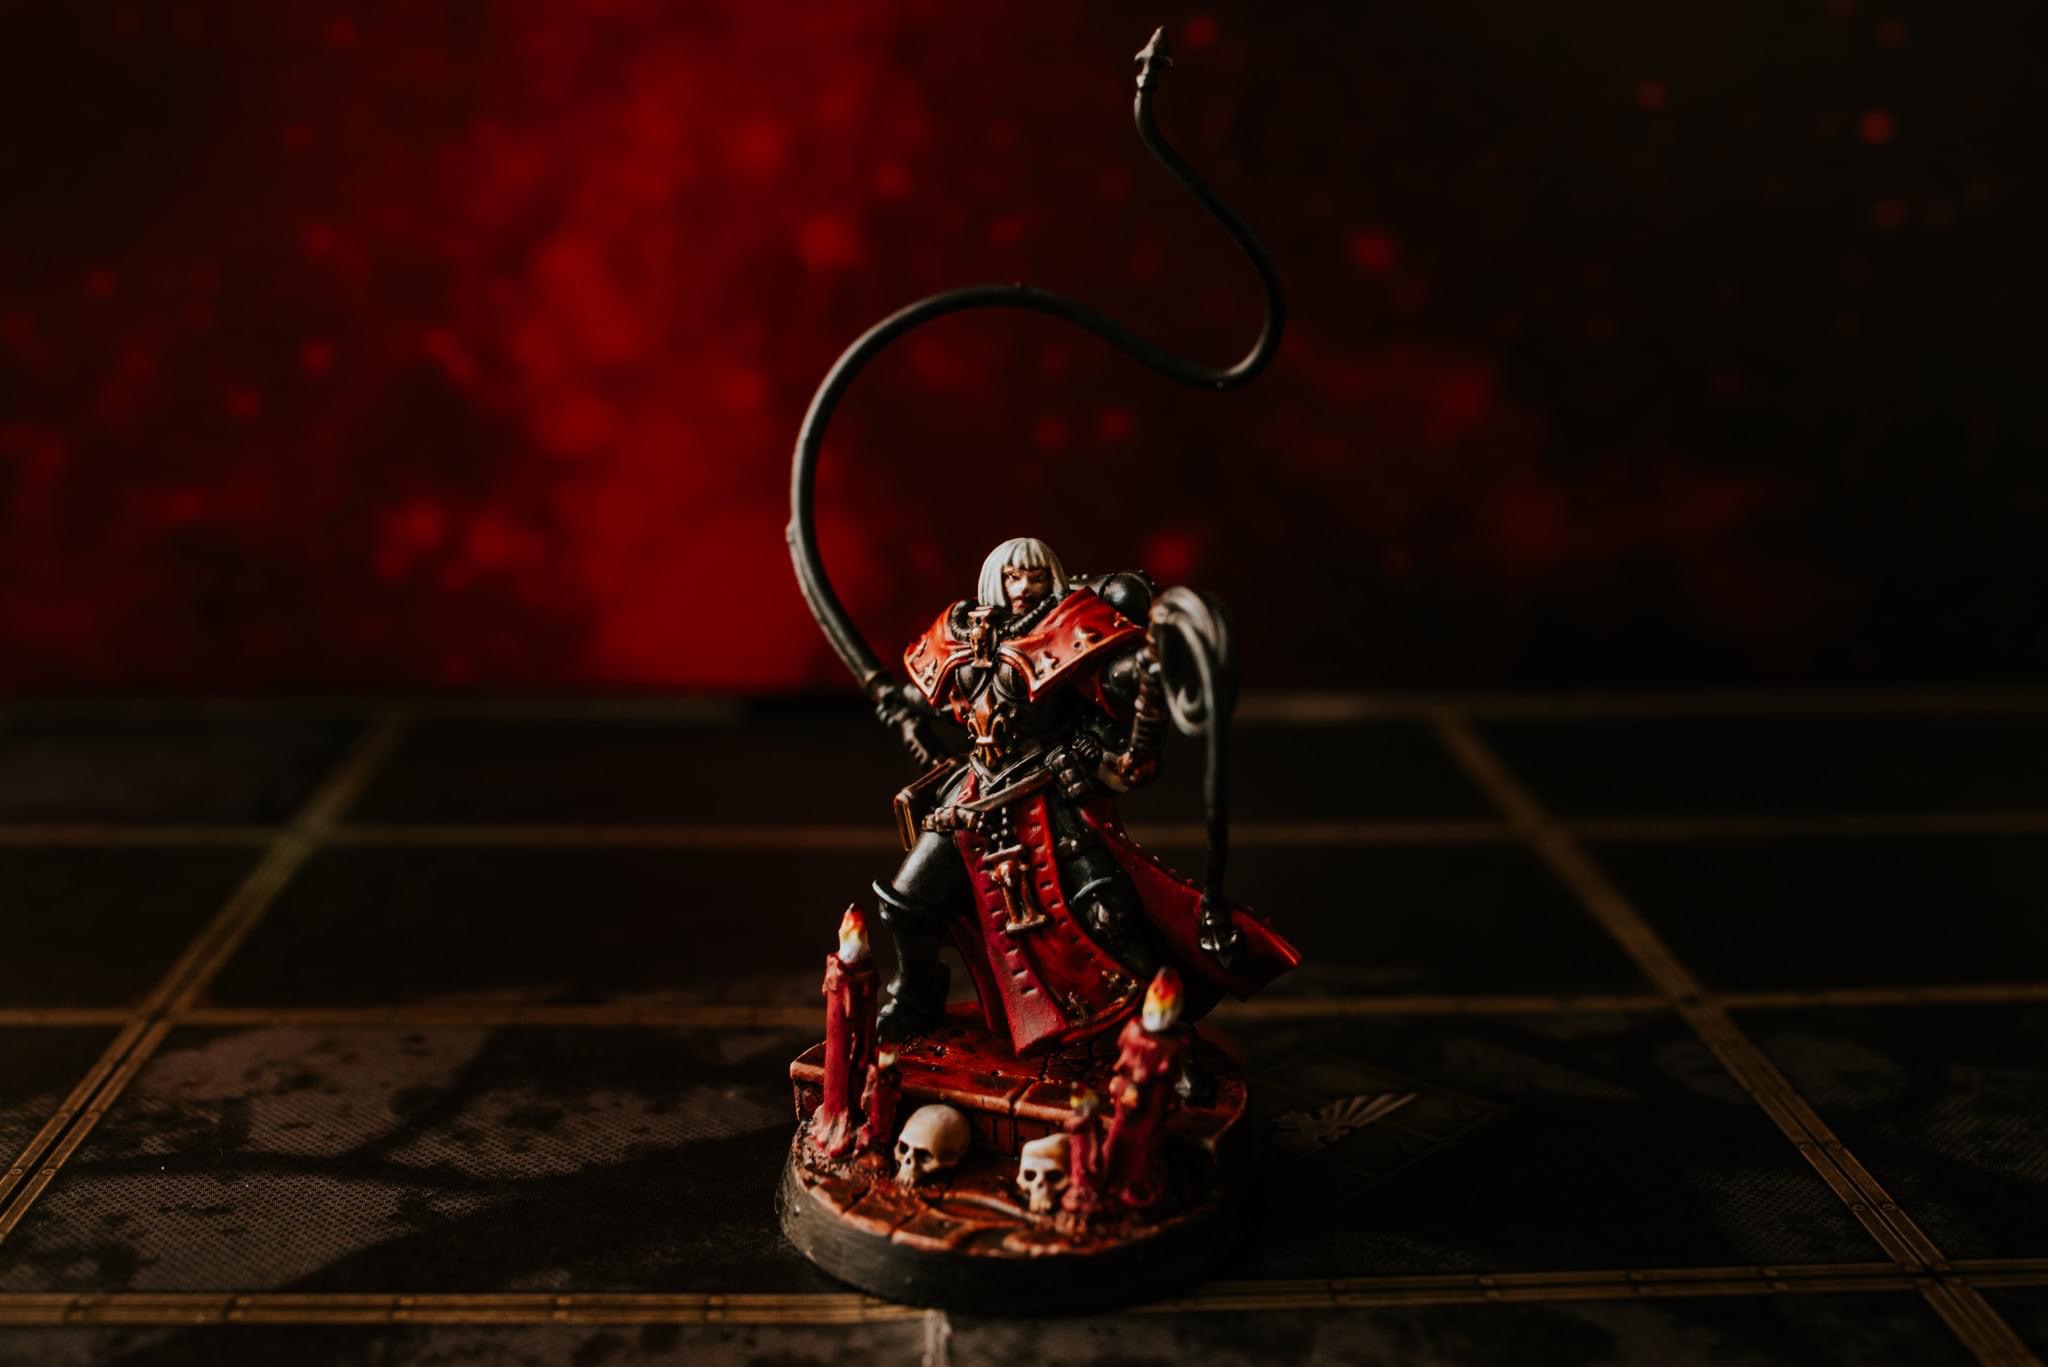
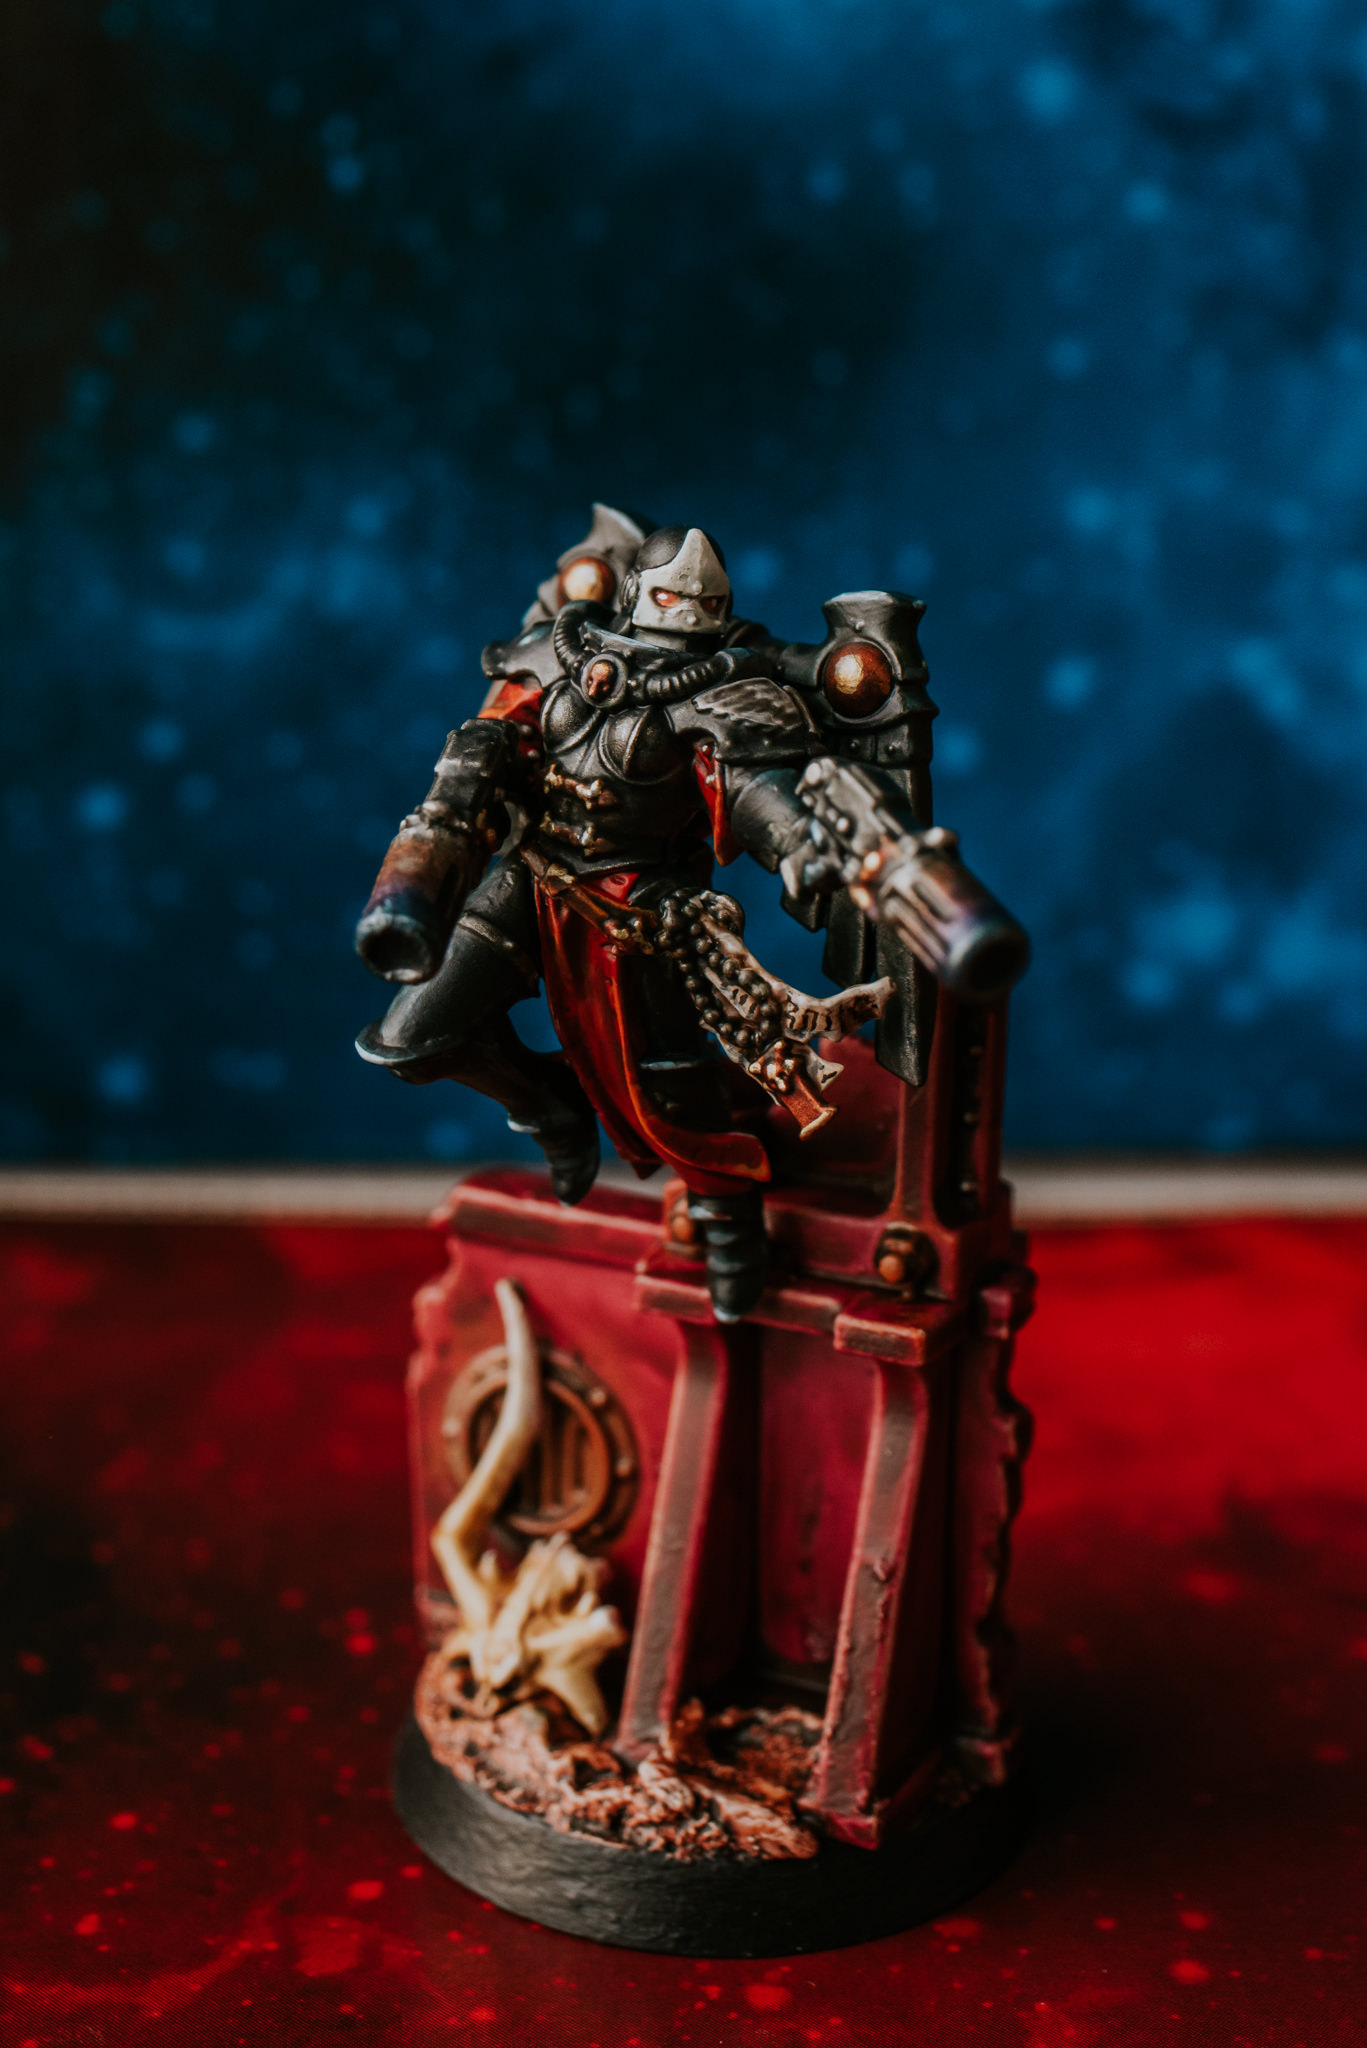
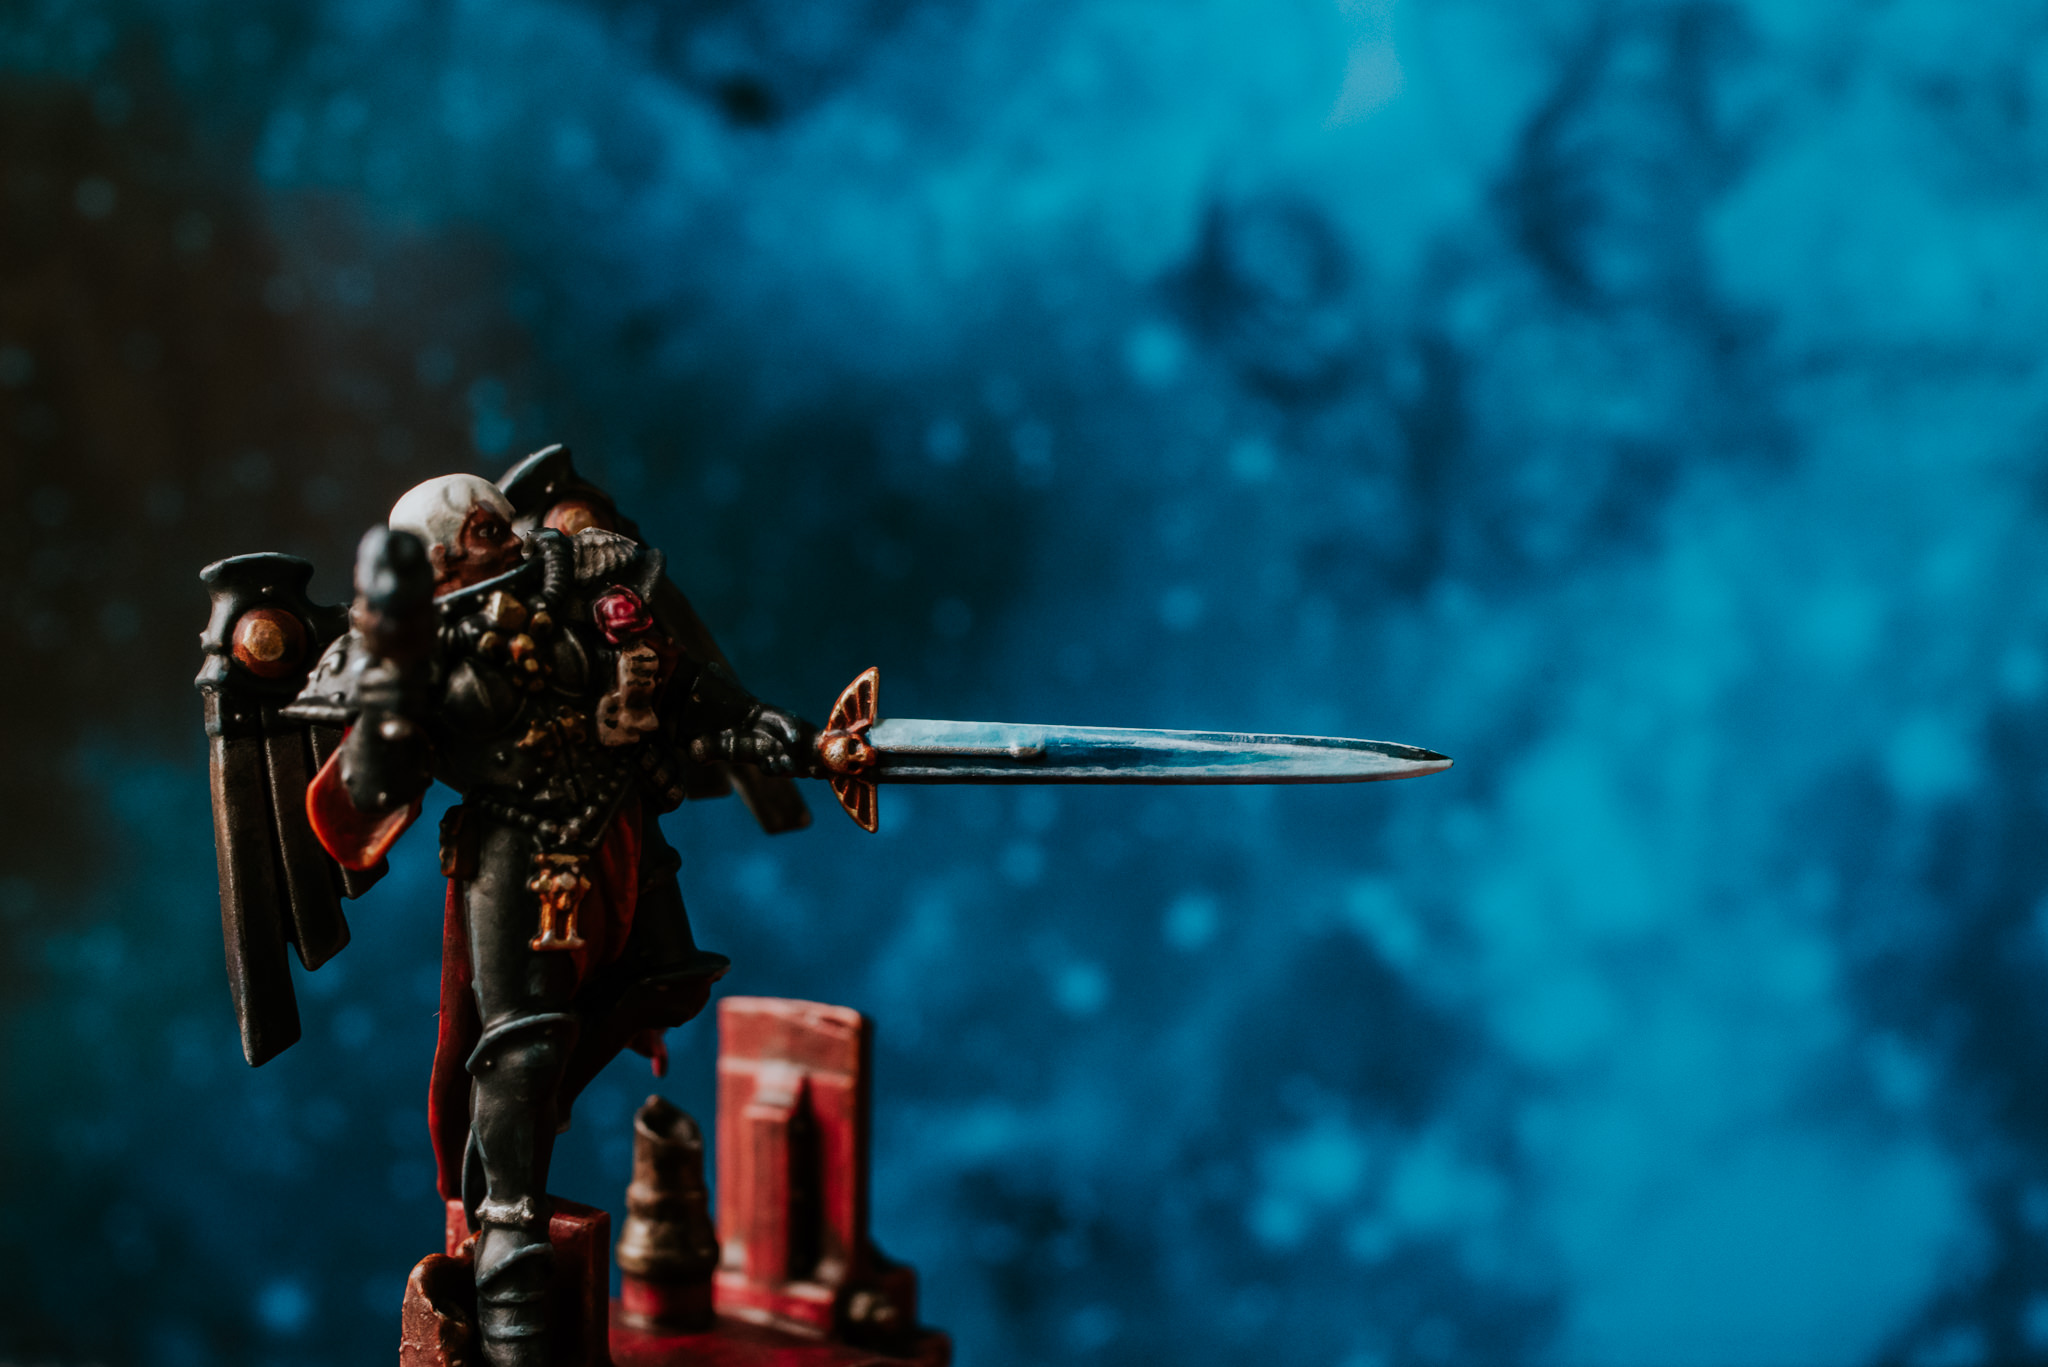
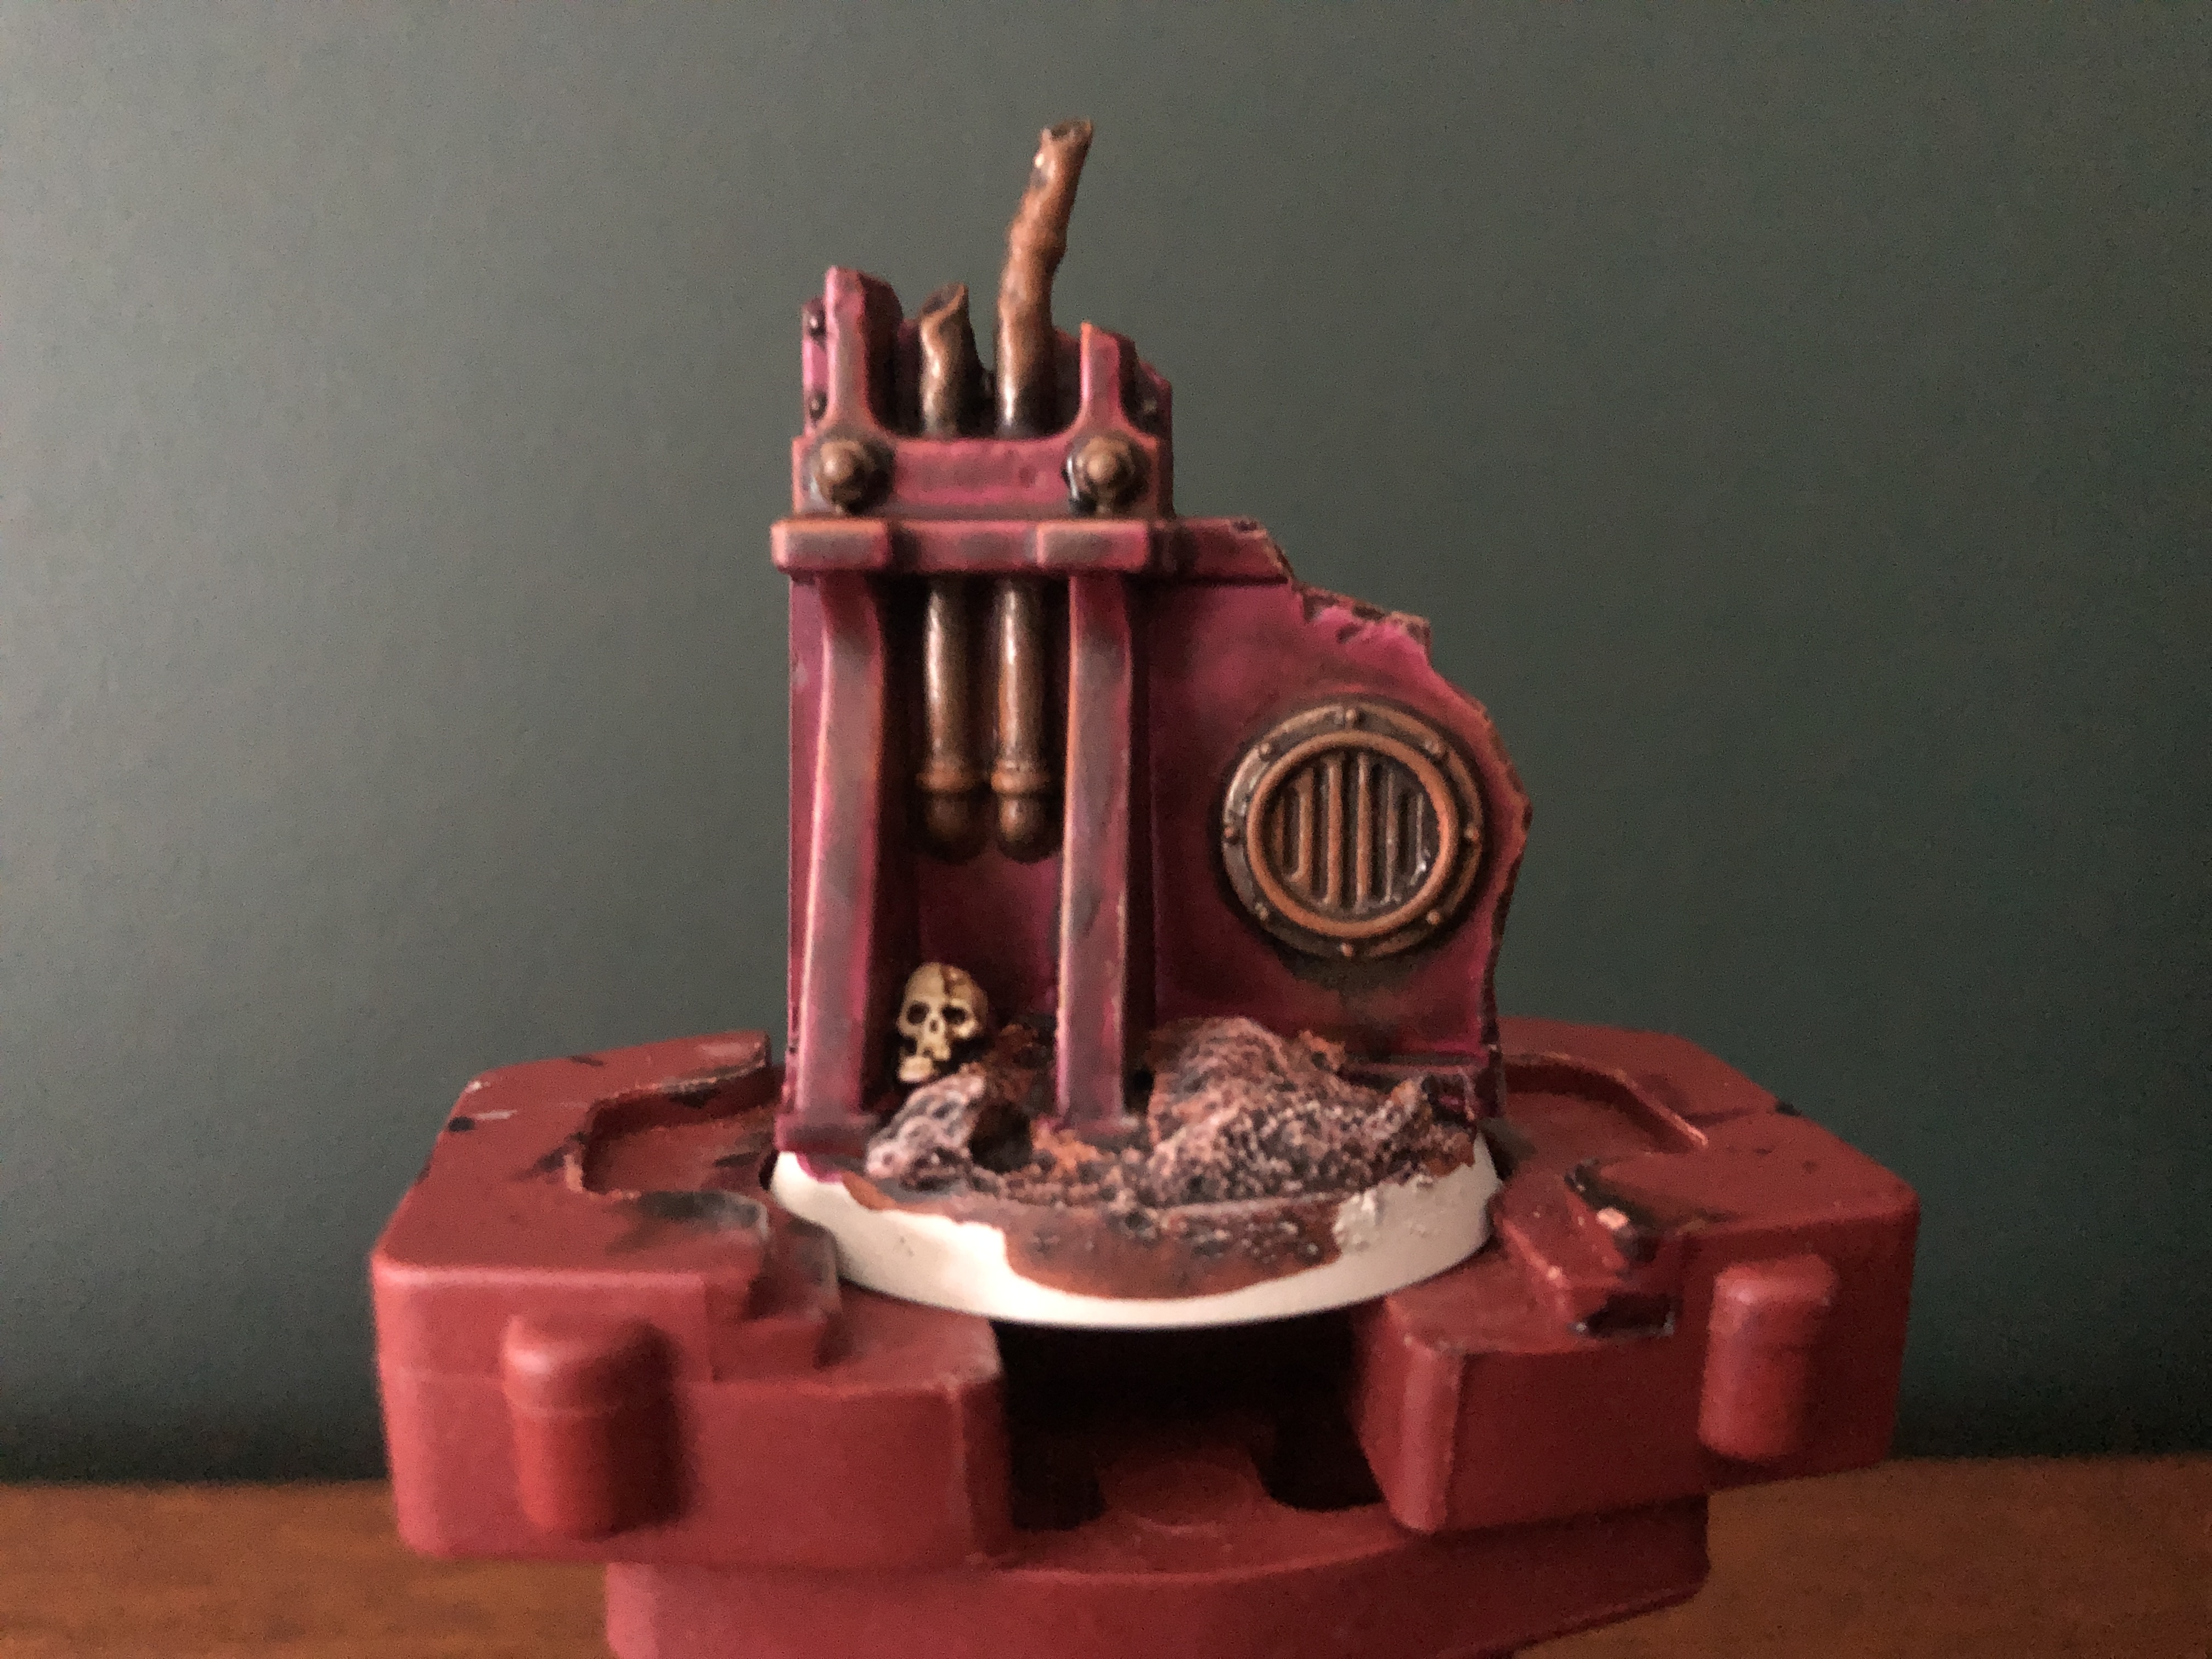
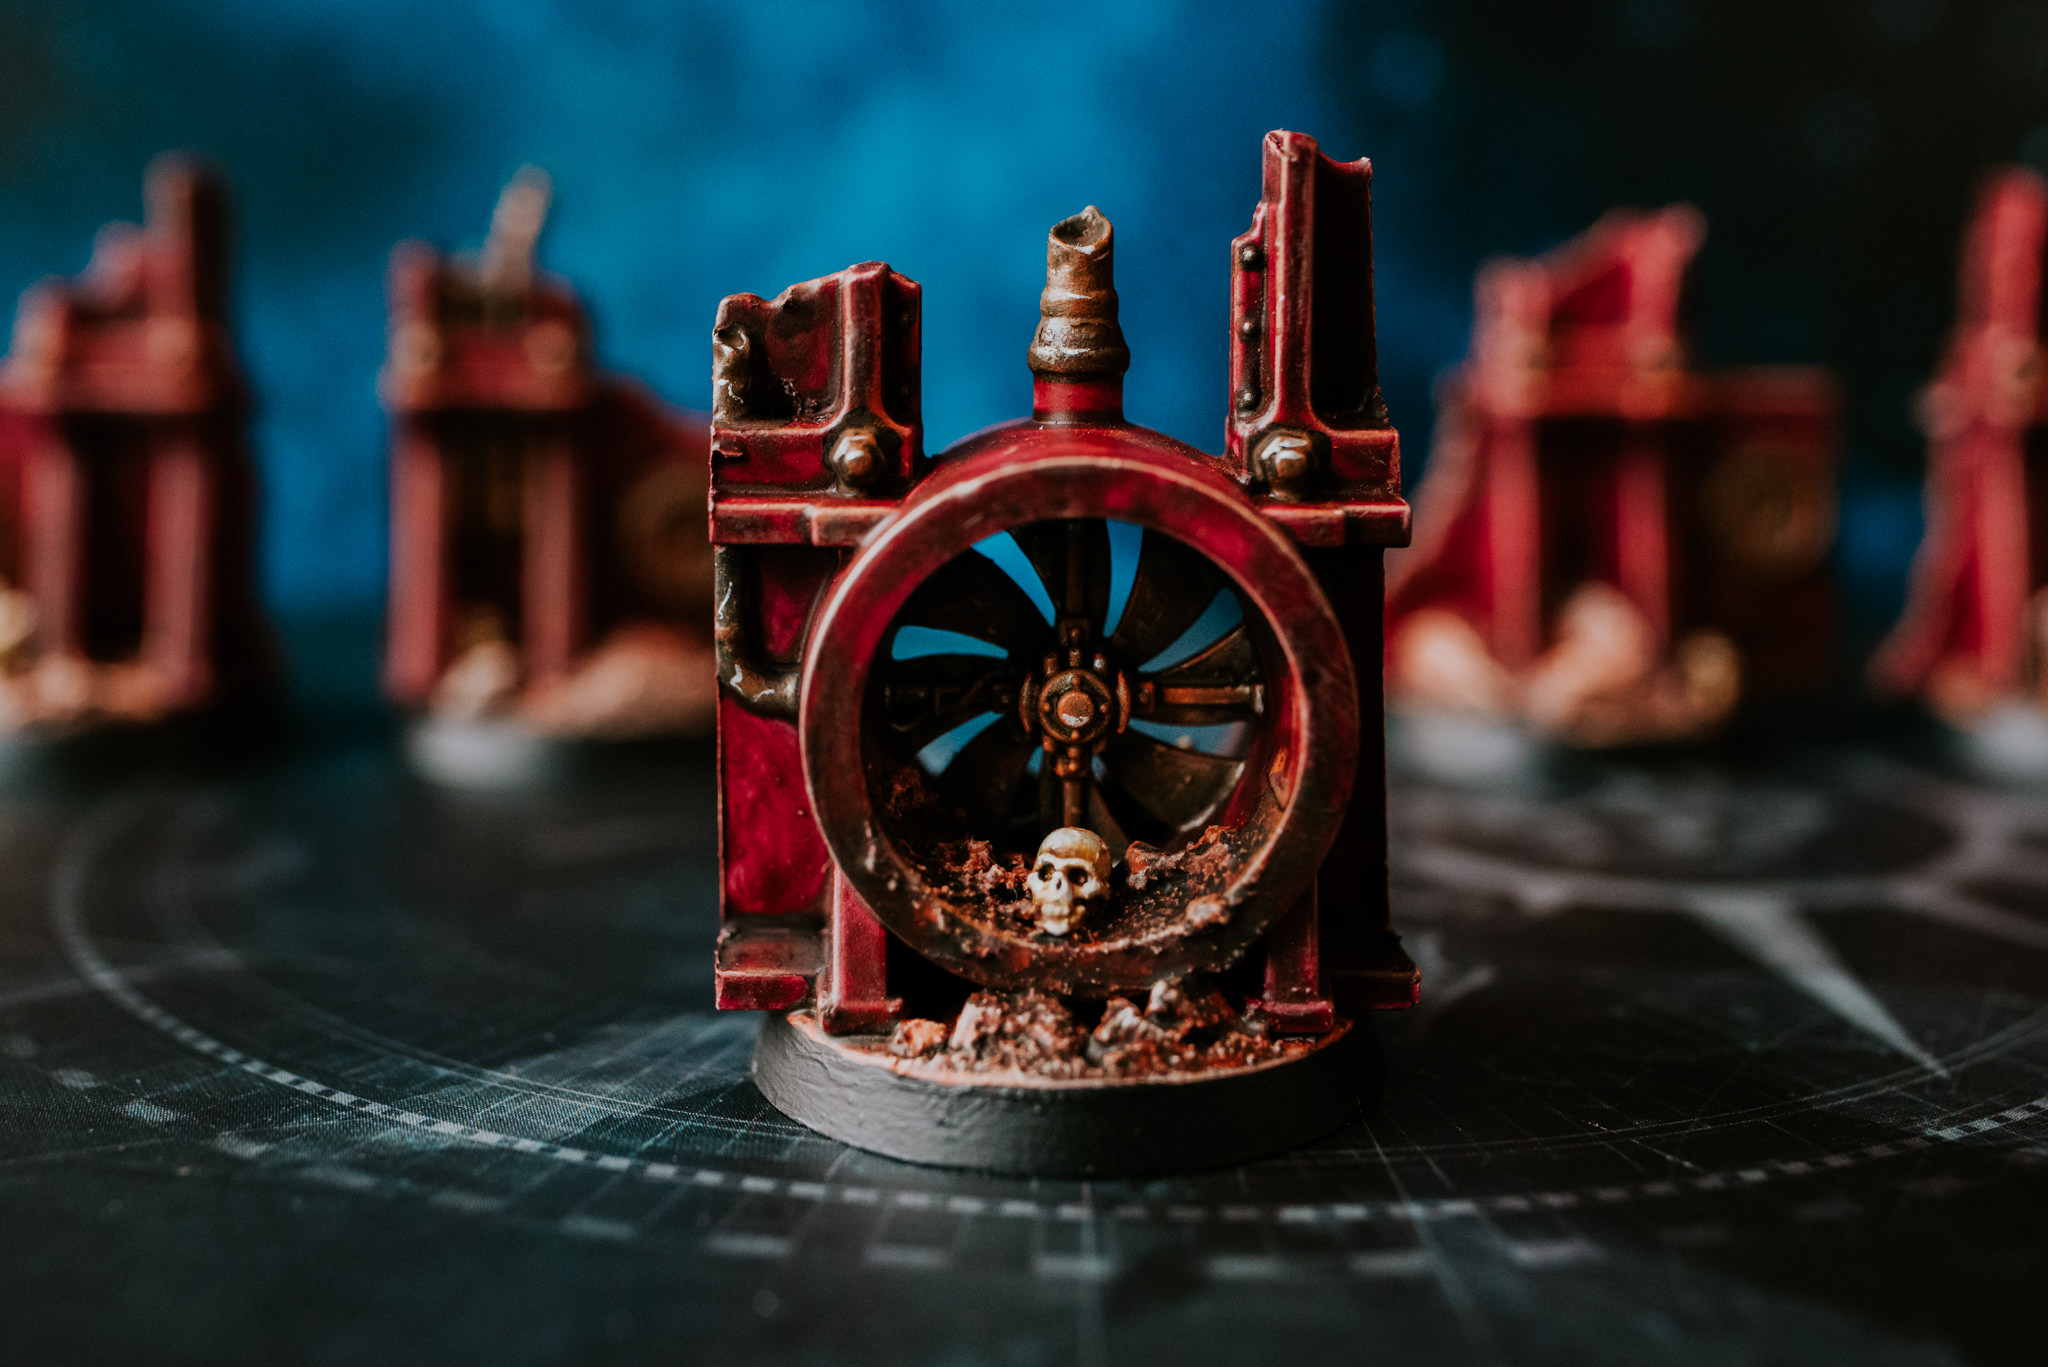
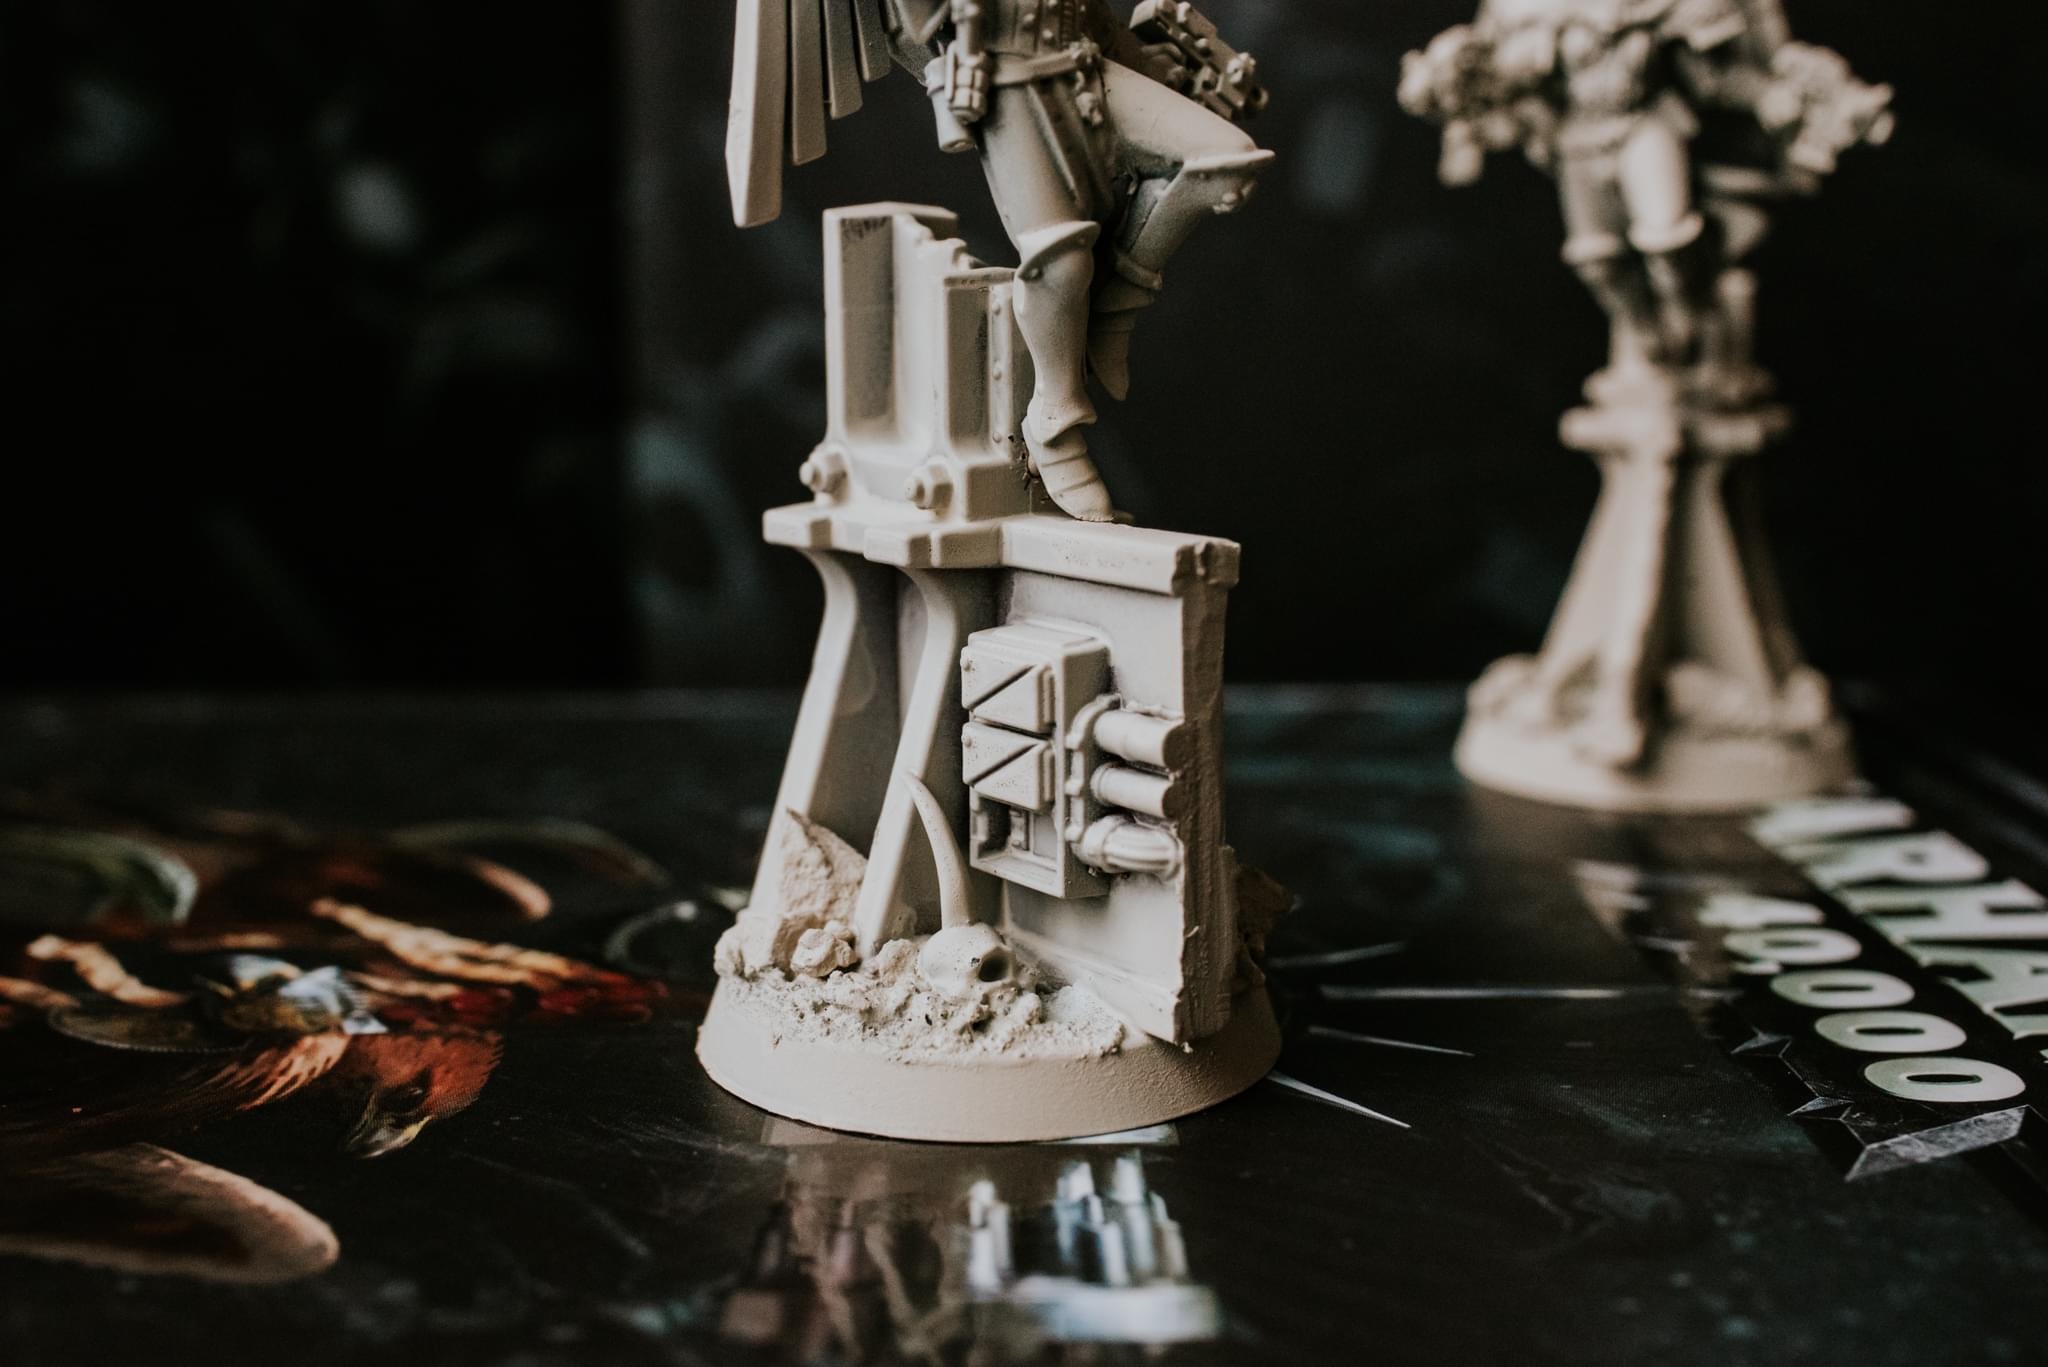
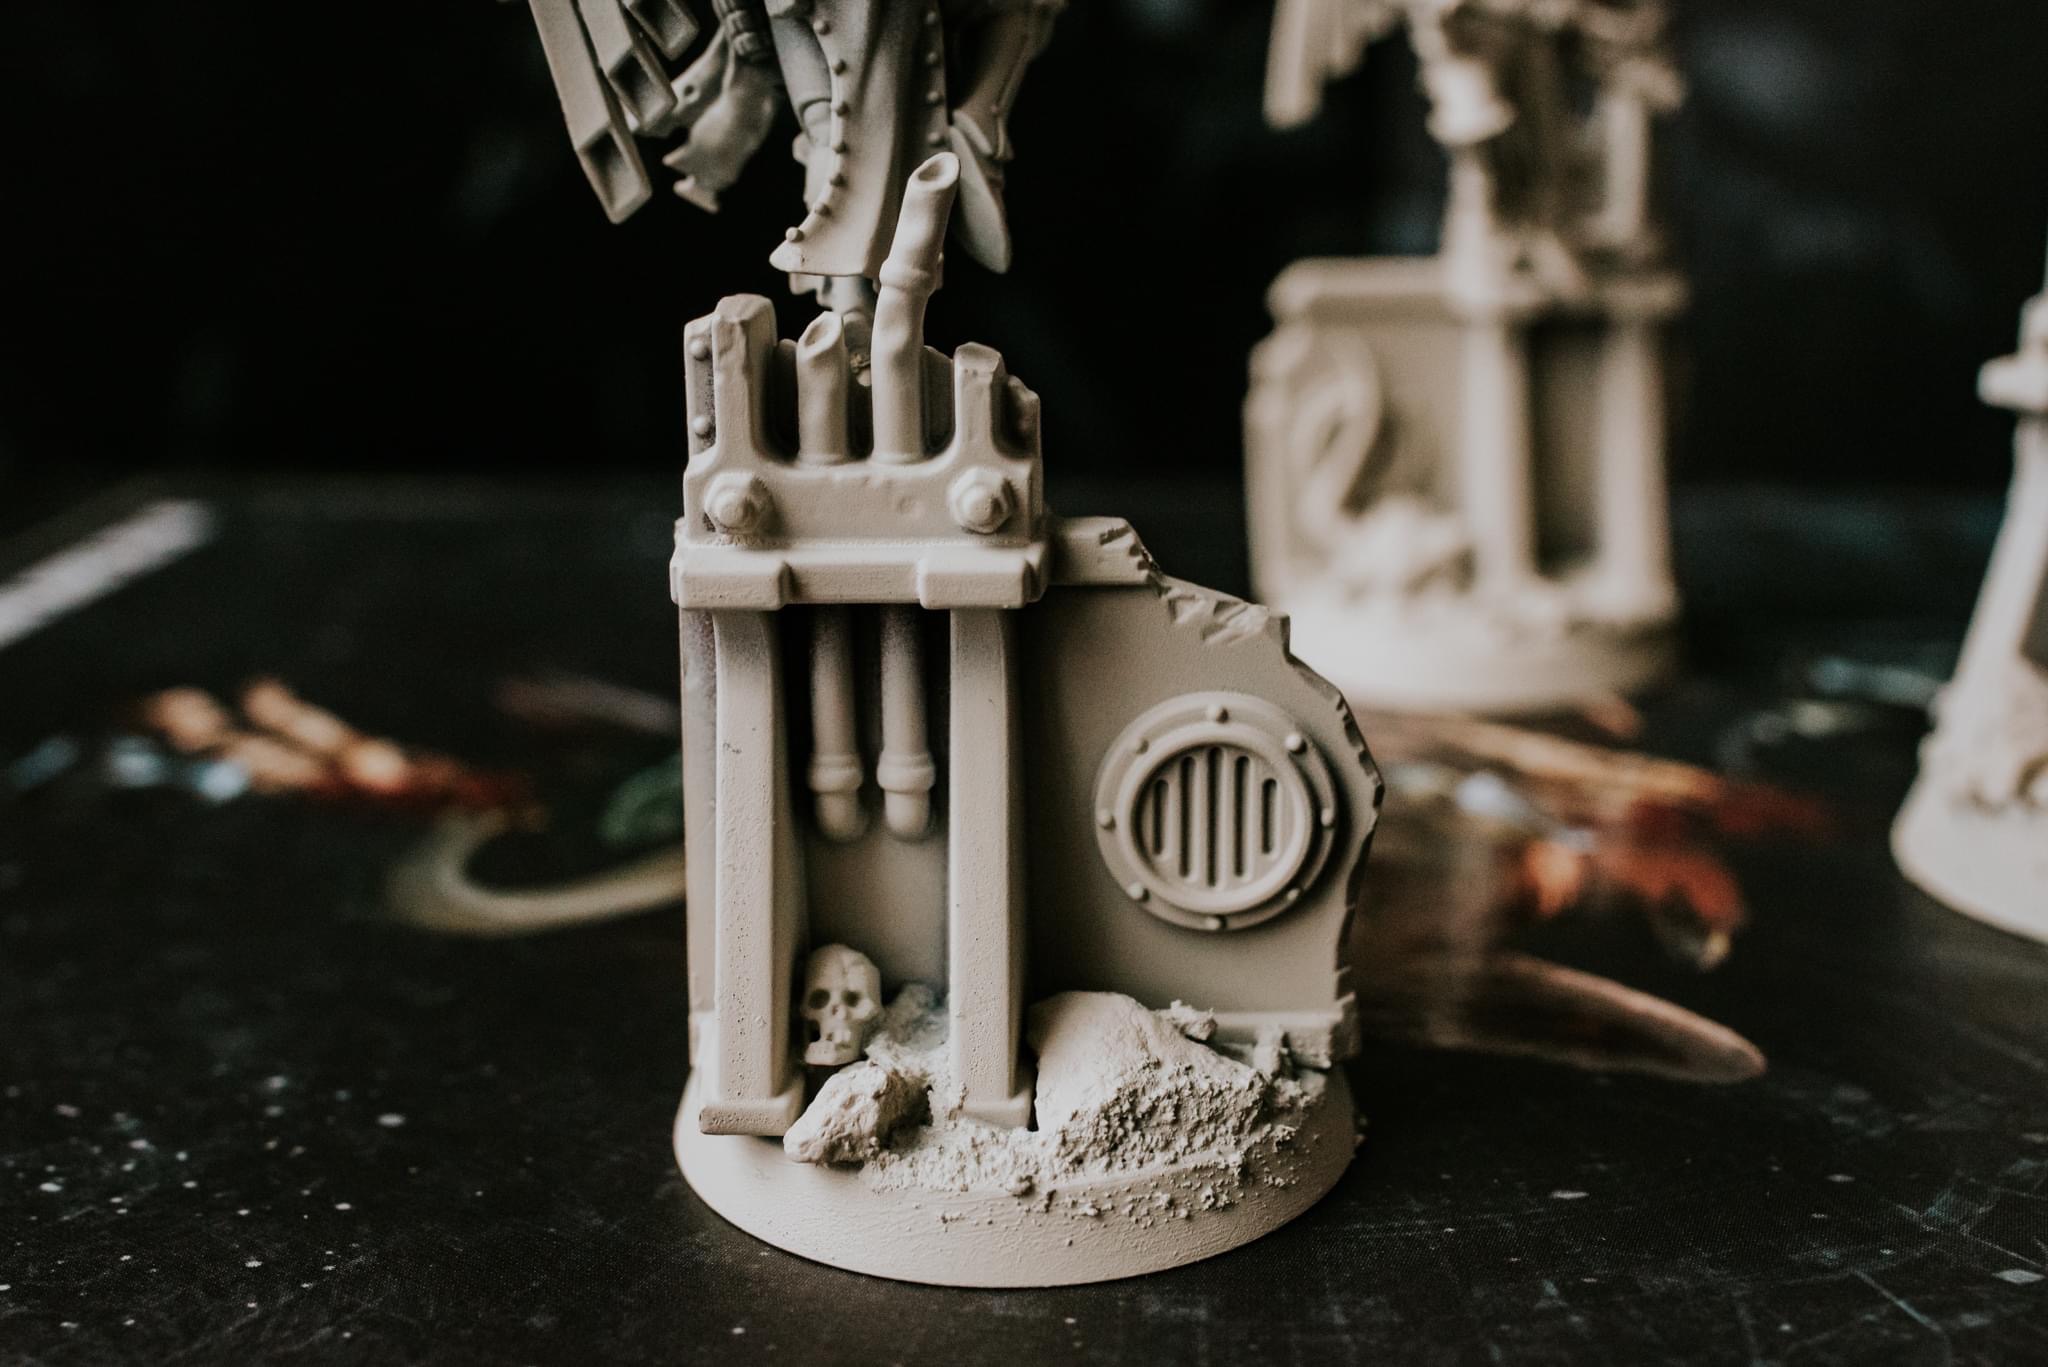
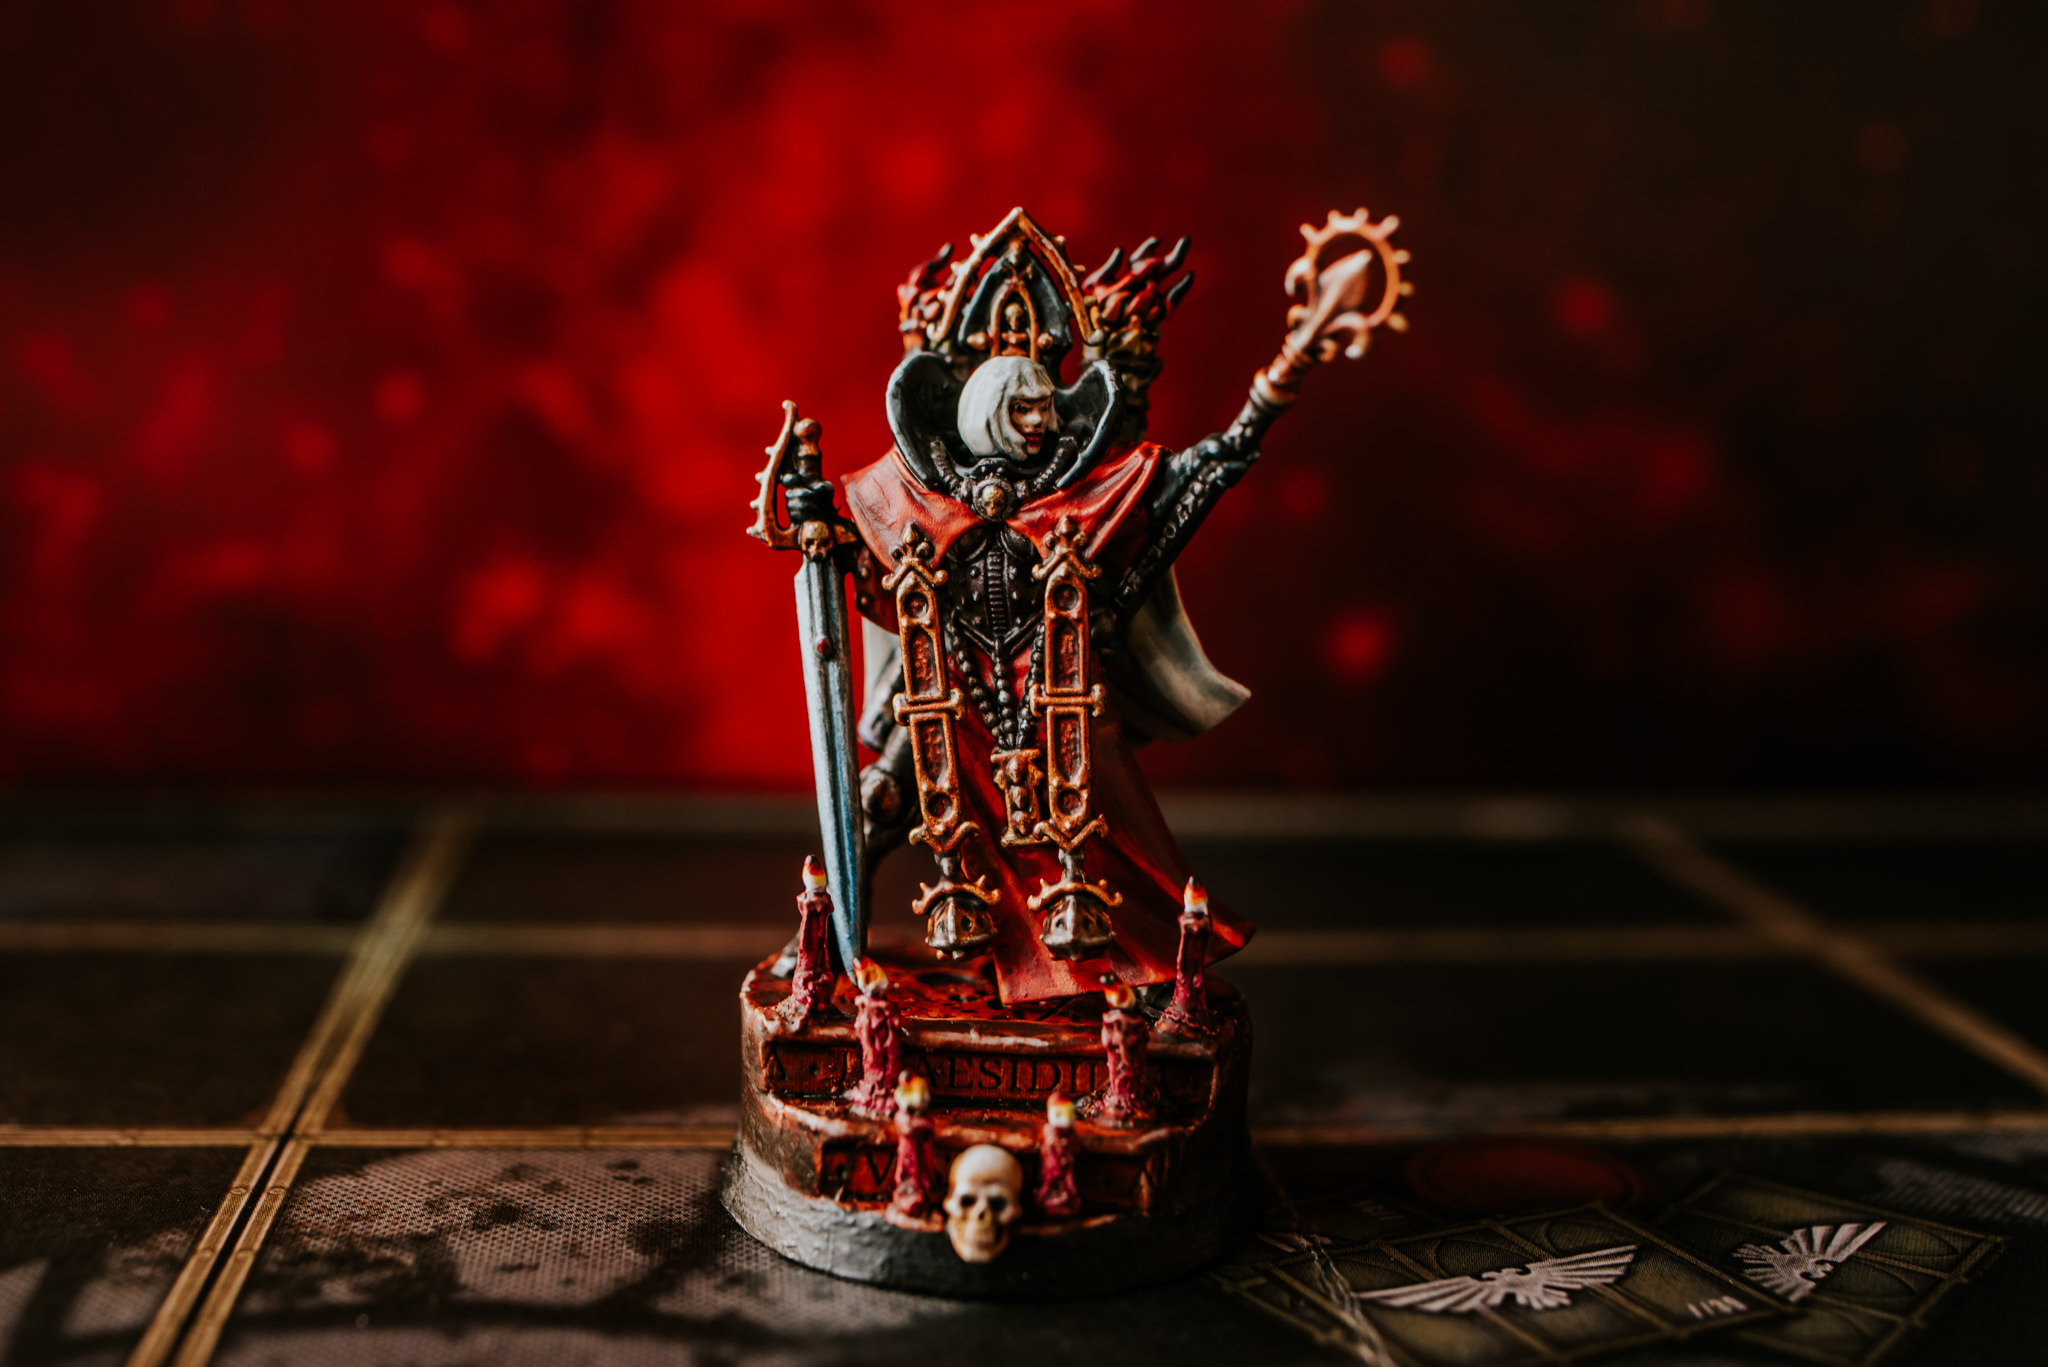
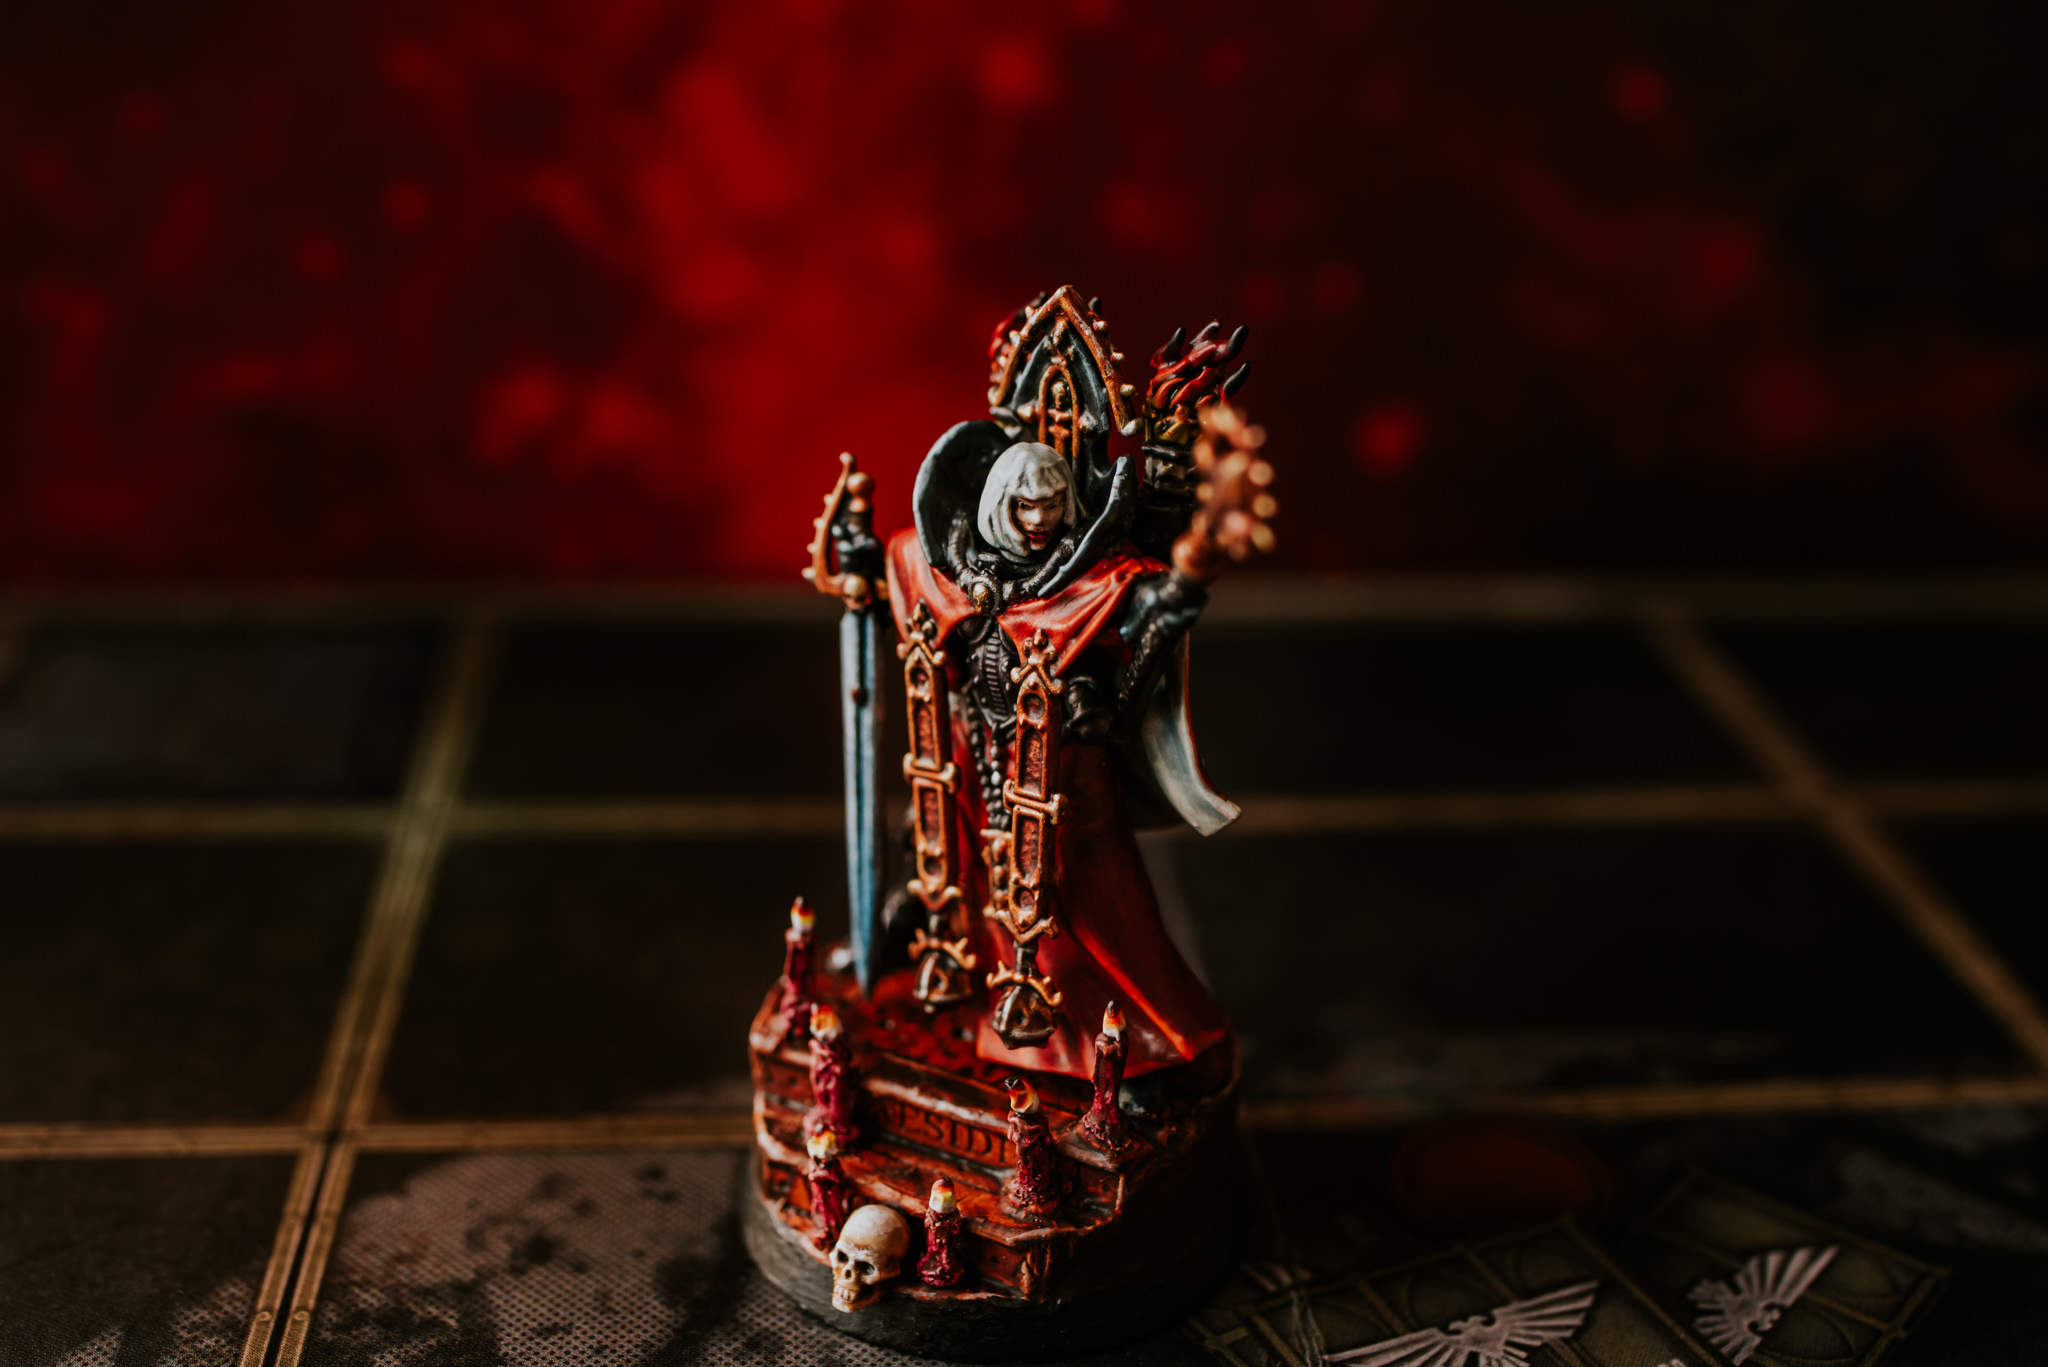
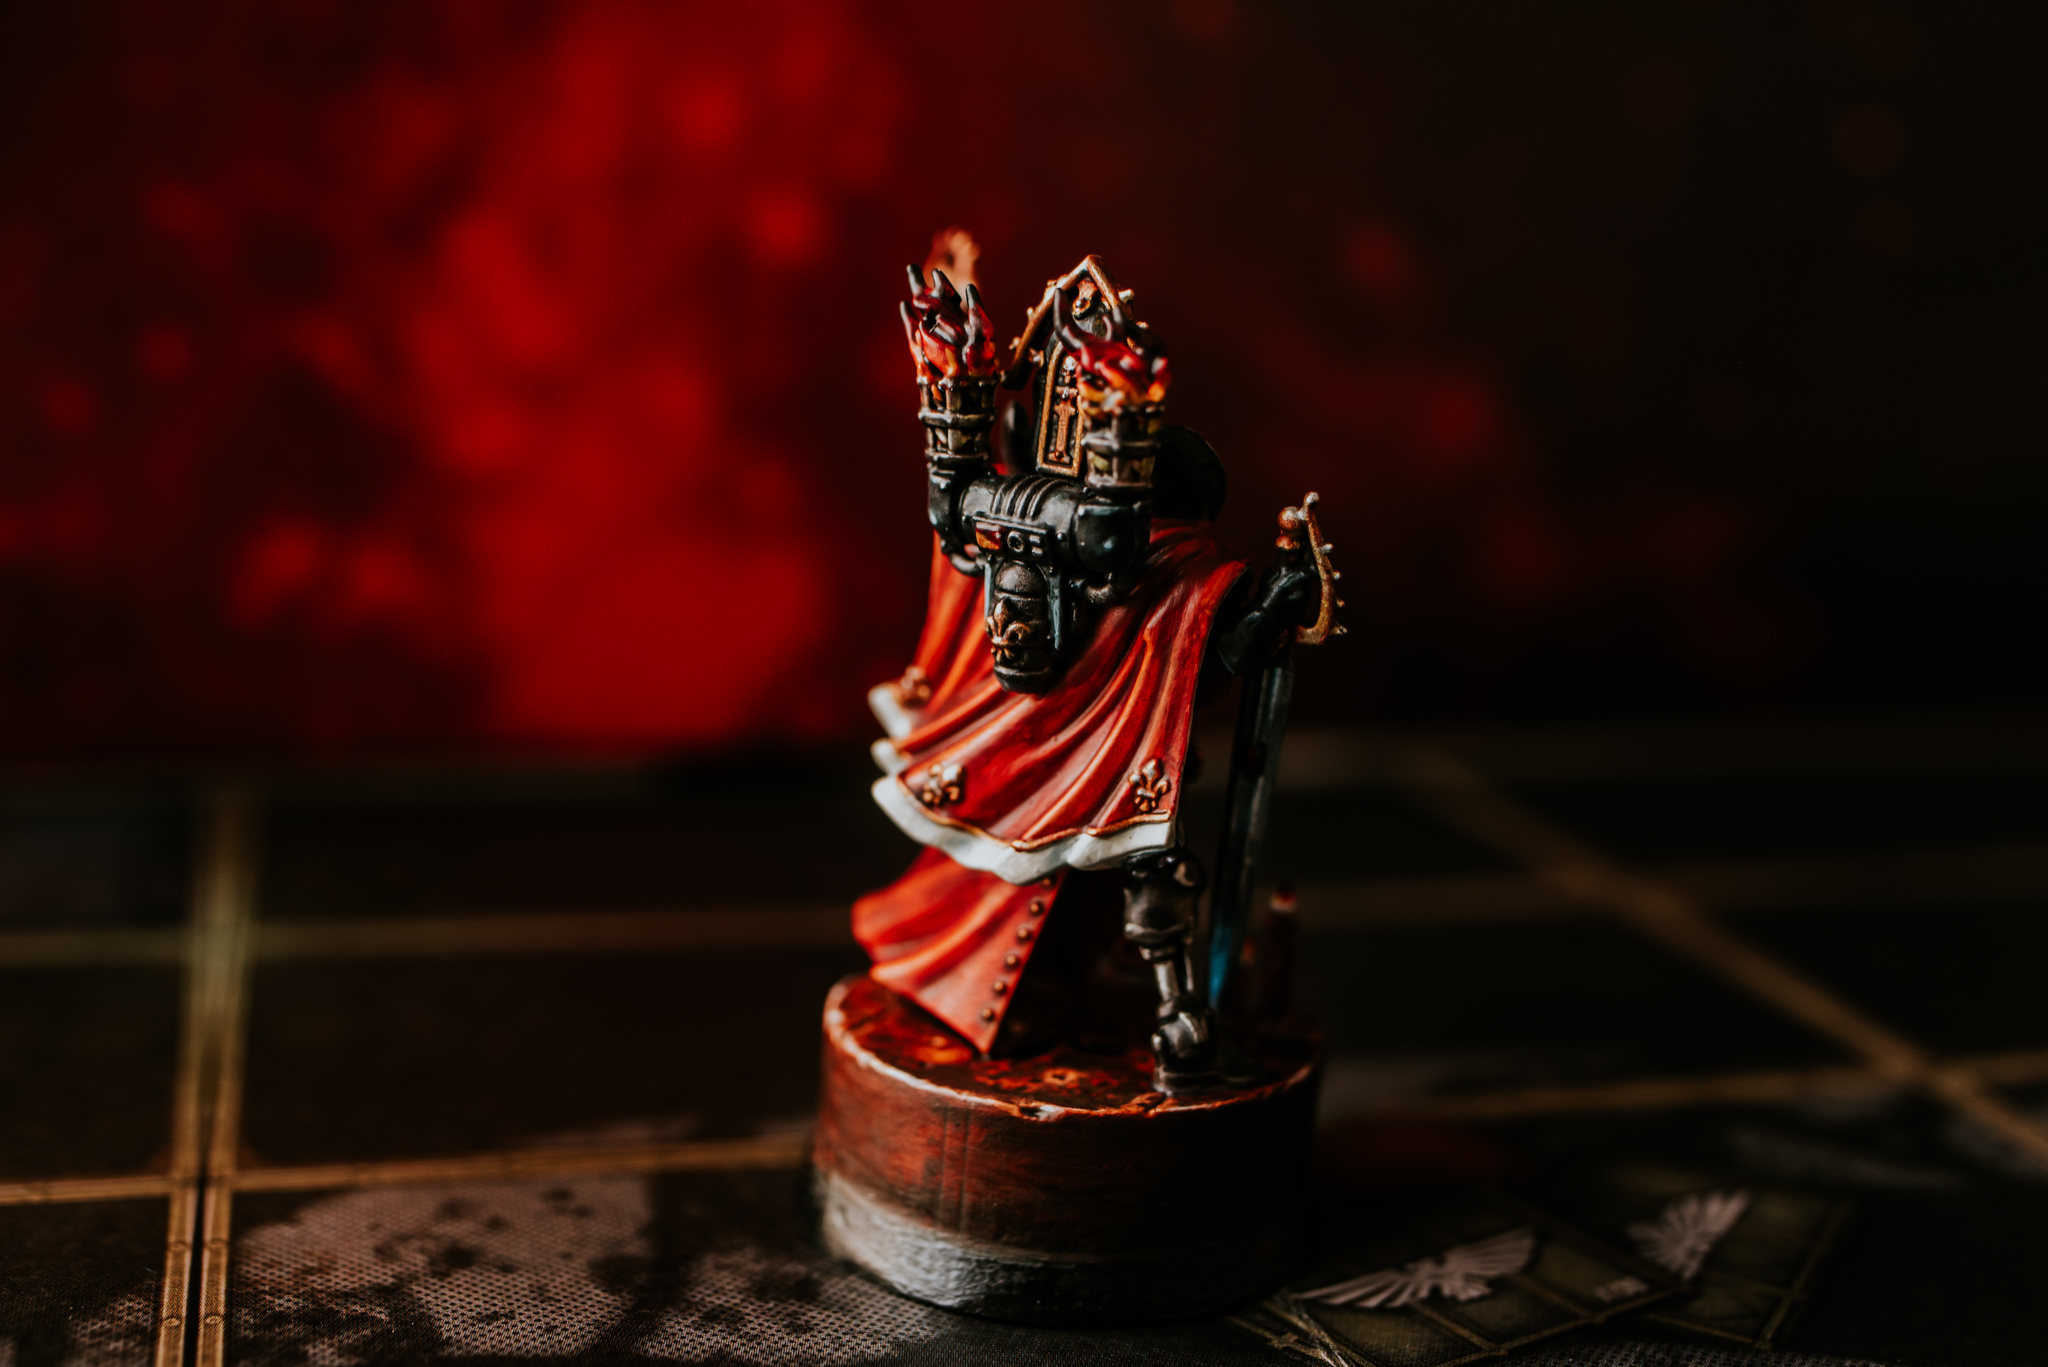
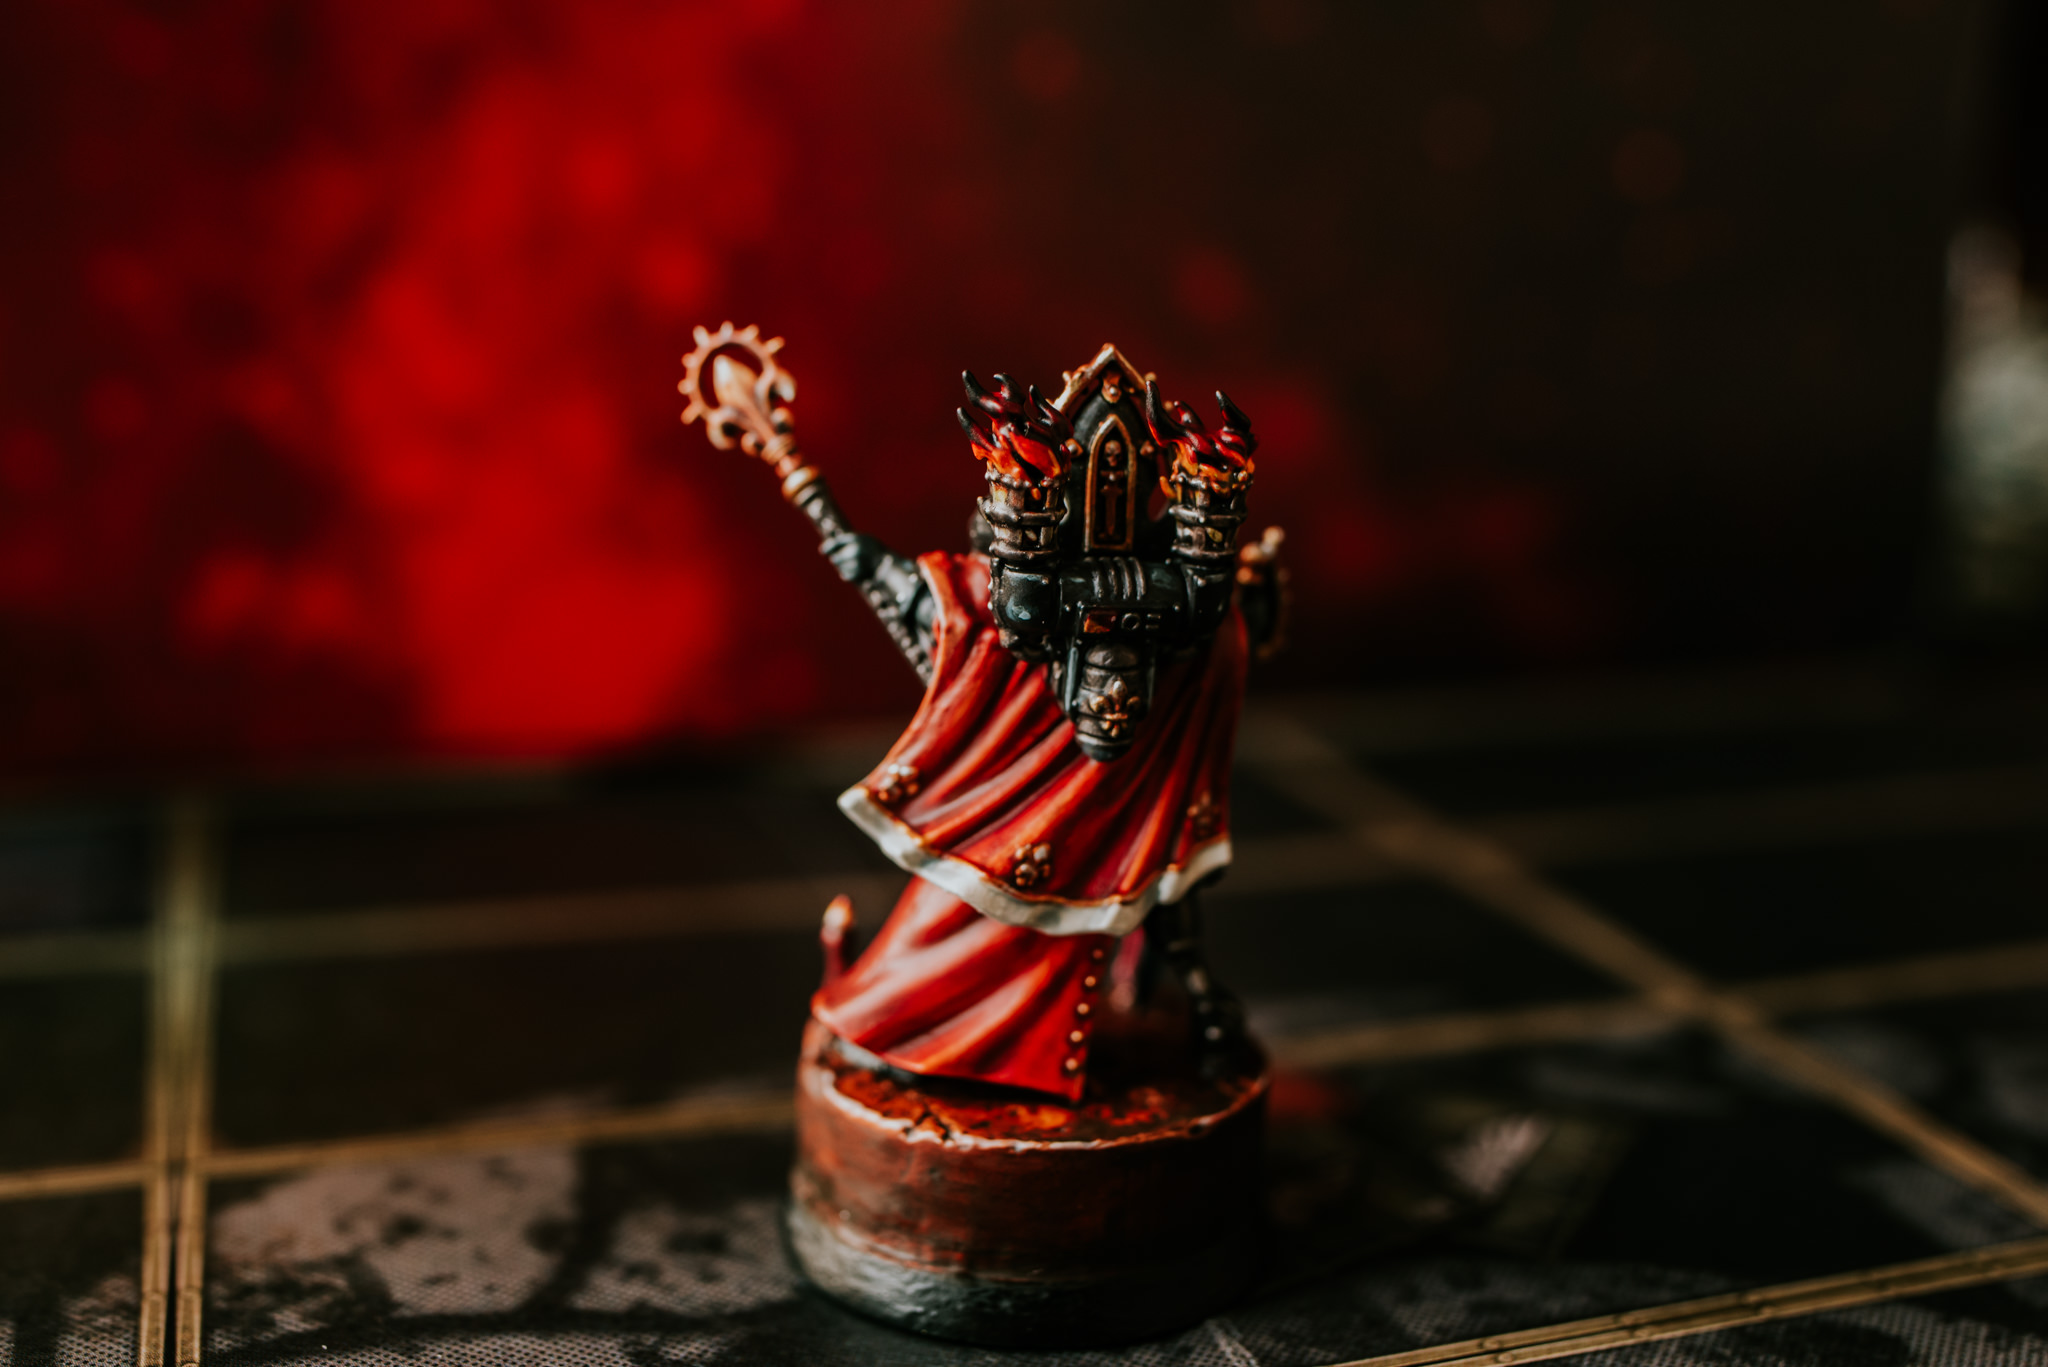
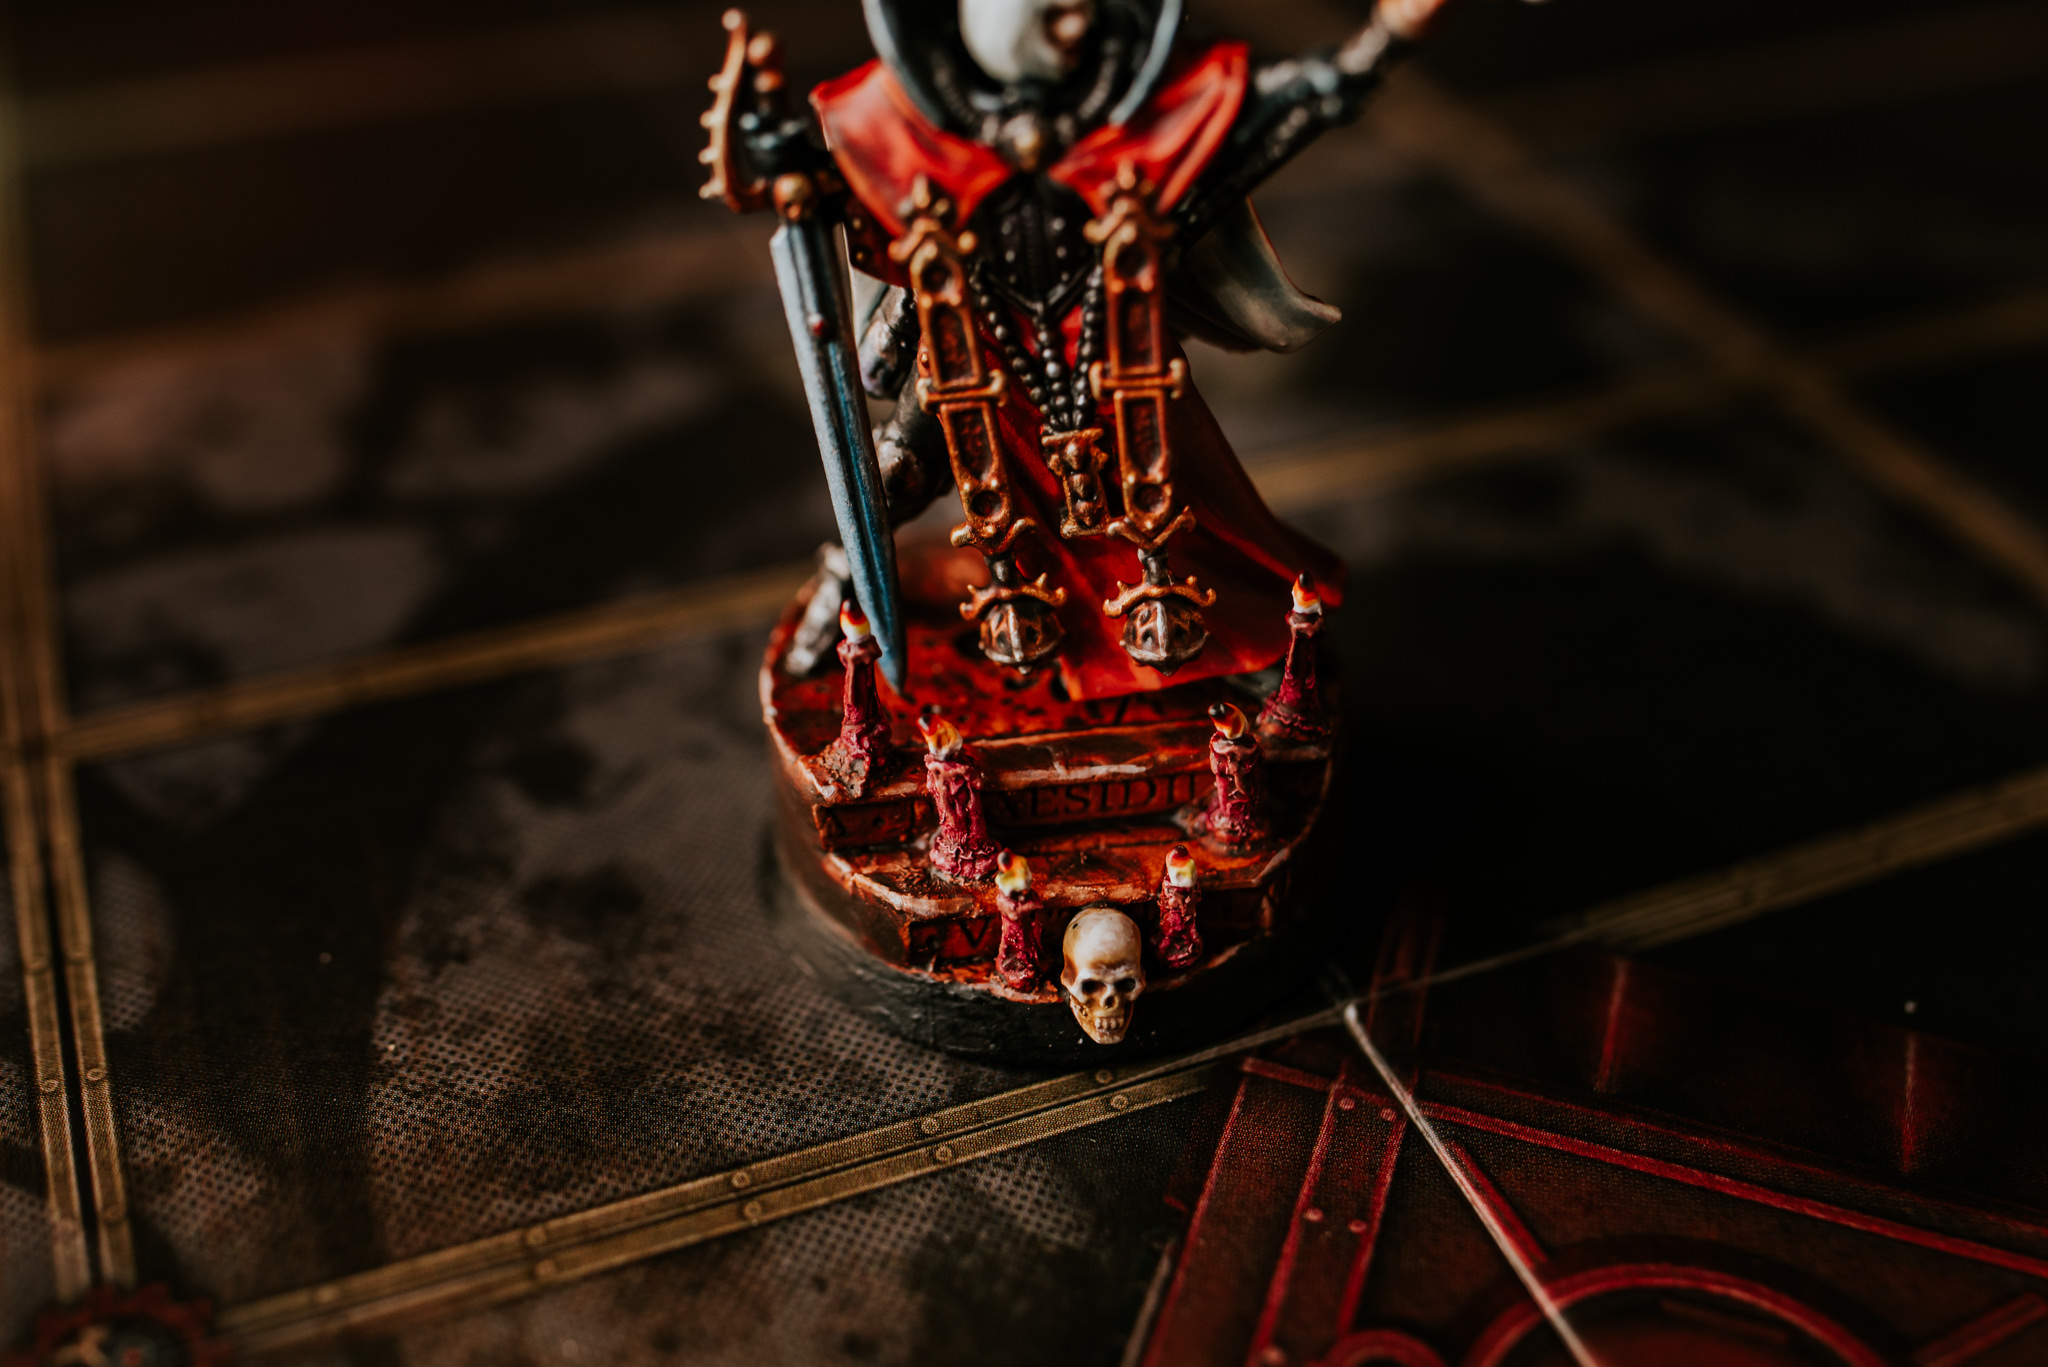
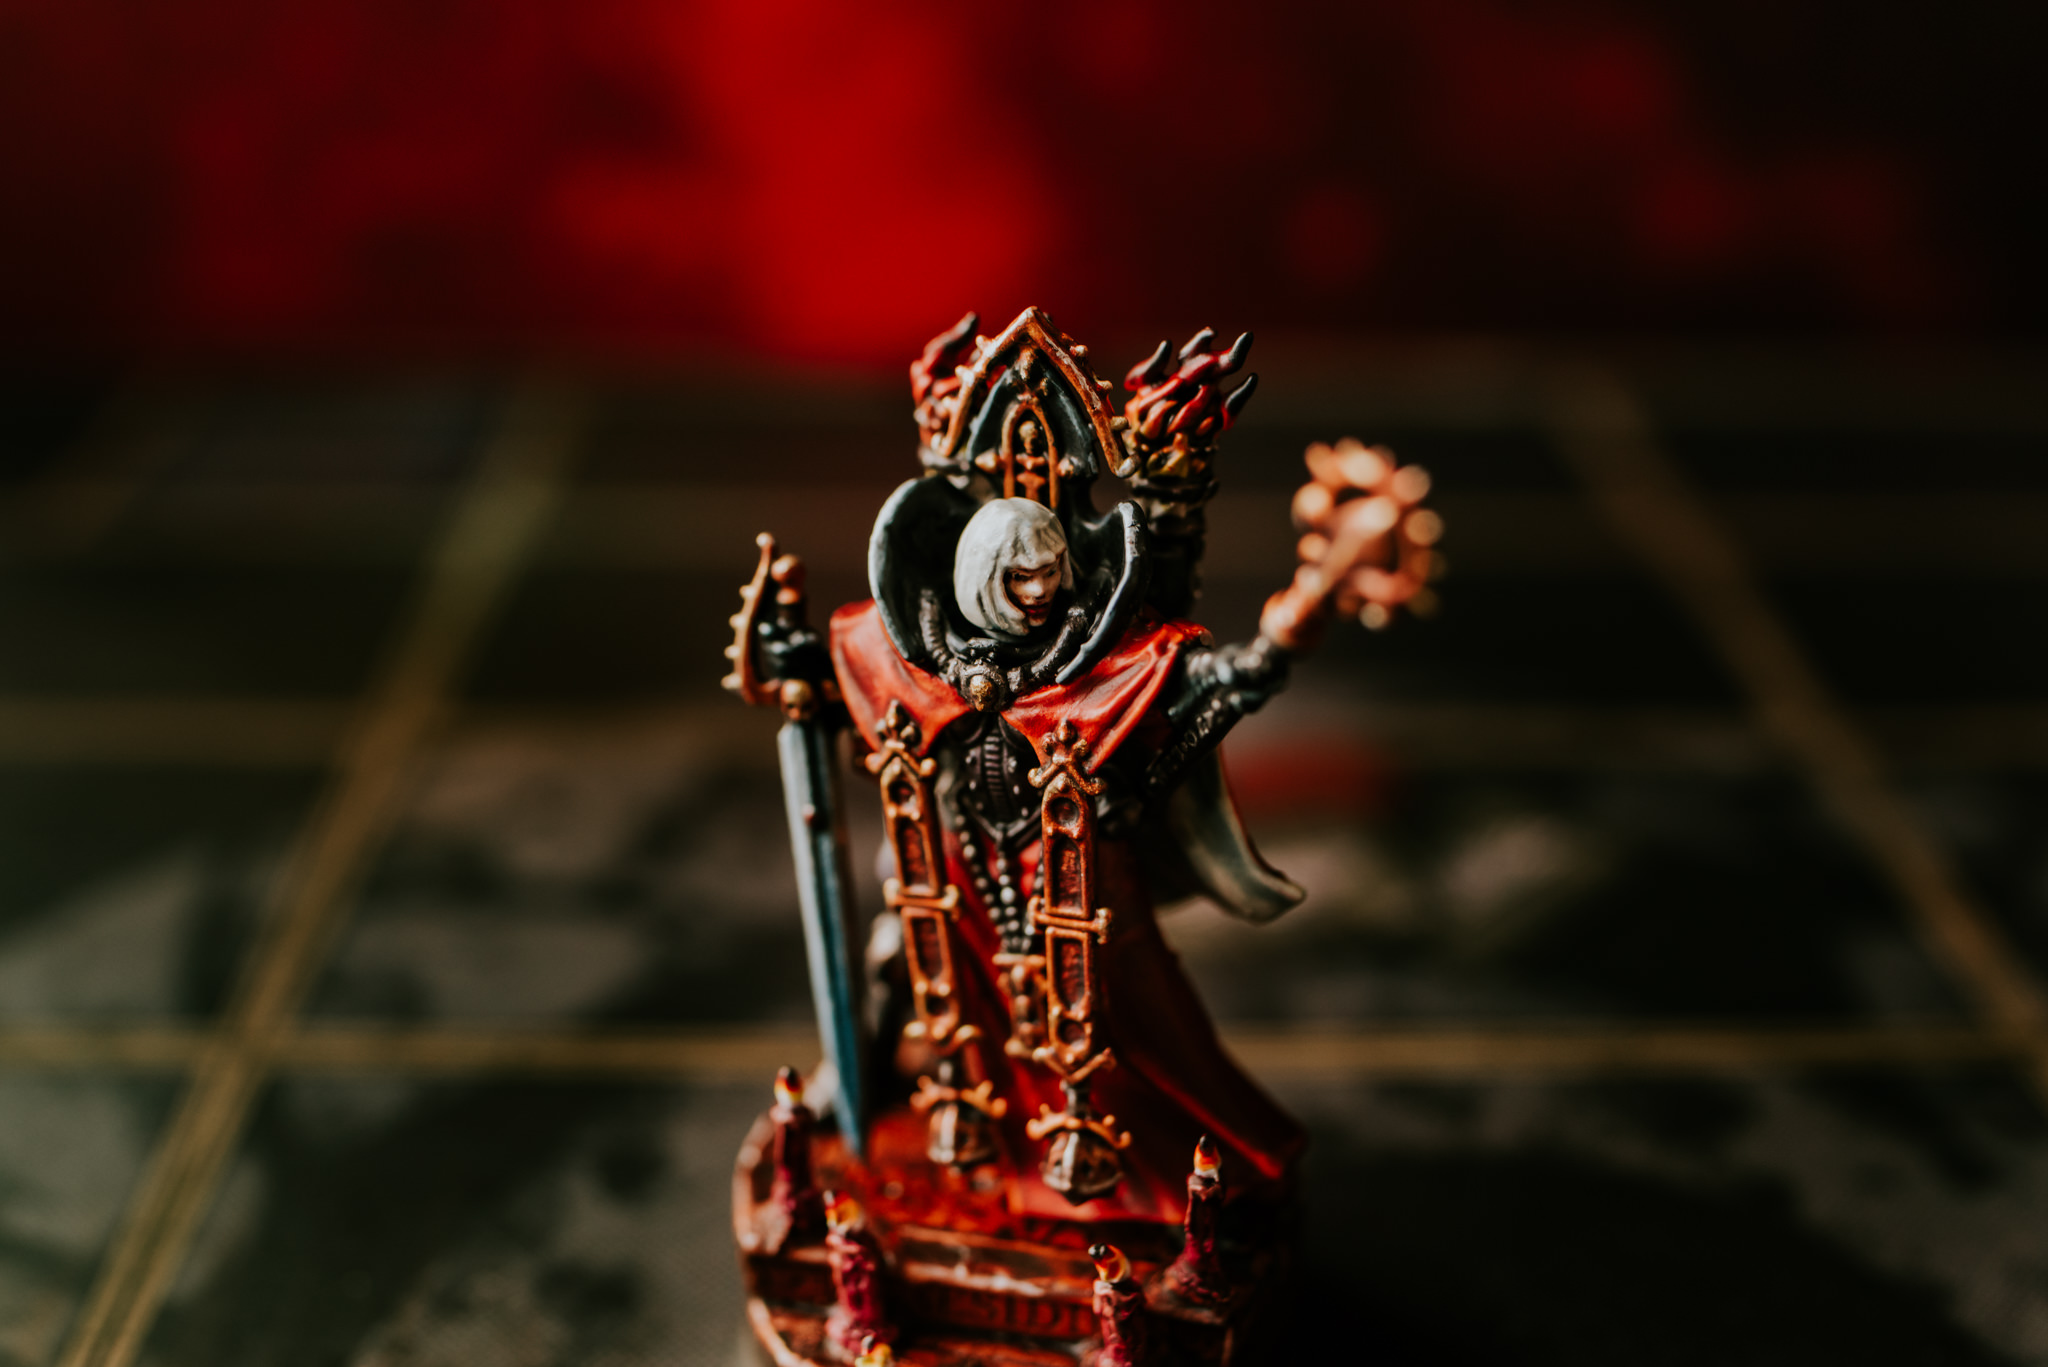
THE EMPEROR PROTECTS ~ PRIEST COMPLETE
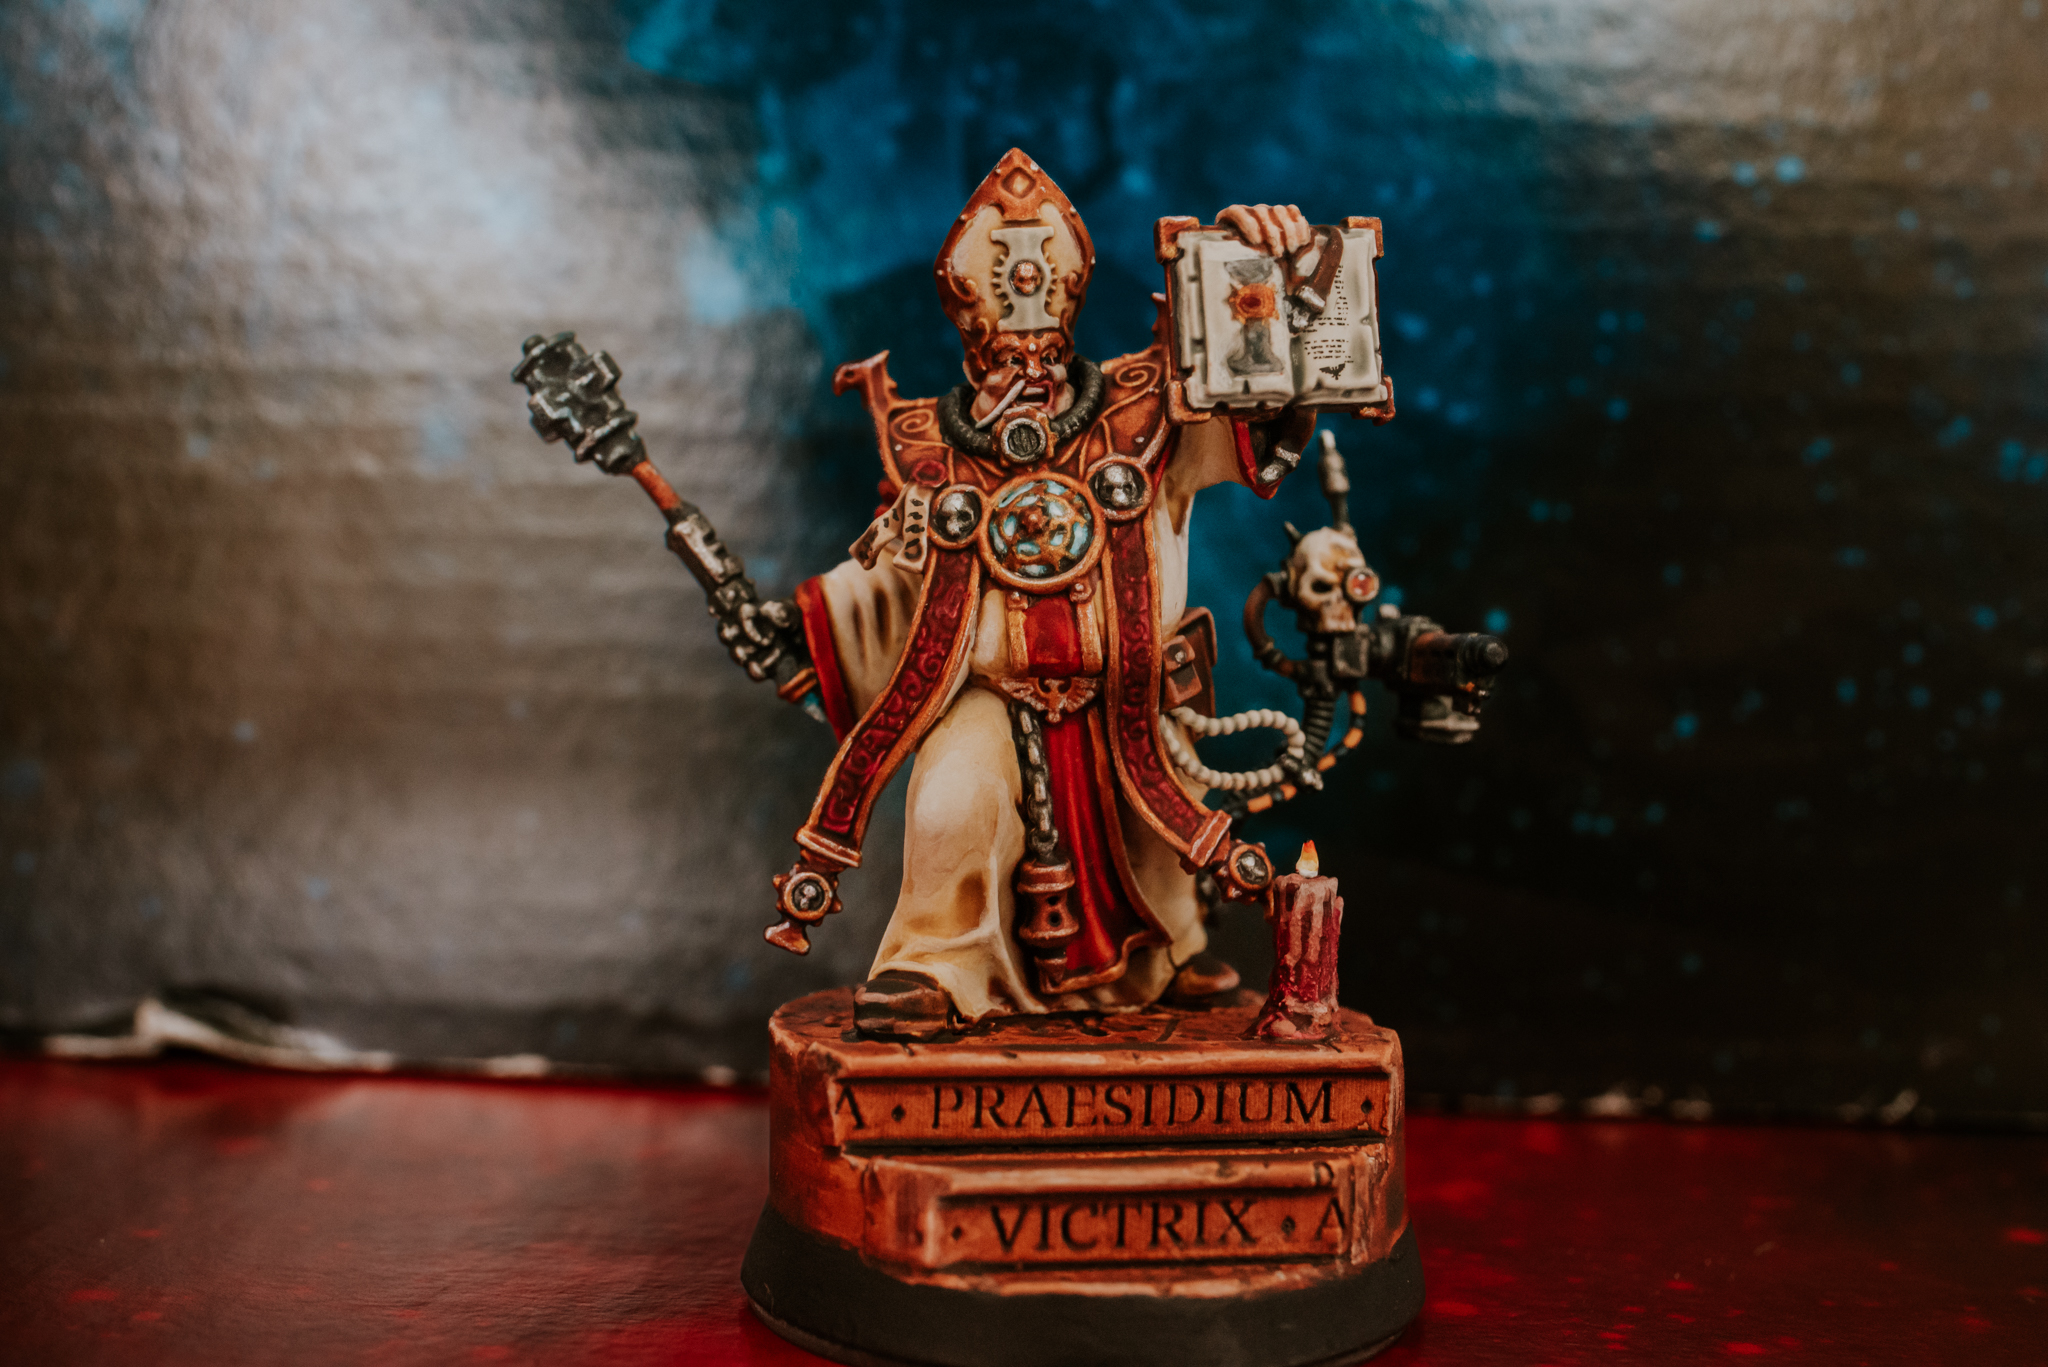
HOLY FEEDING TUBES
*****
I finished a thing. Only took me two months on and off which is actually really quick for me ? Here’s my fat boy priest for your viewing pleasure. The books a bit shit but it was well hard. Overall probably my best painted character yet & such a joy to paint too. Next I’ll be painting another four Repentia.
Much Love & sacred Argos catalogues.
ETERNITY GATE

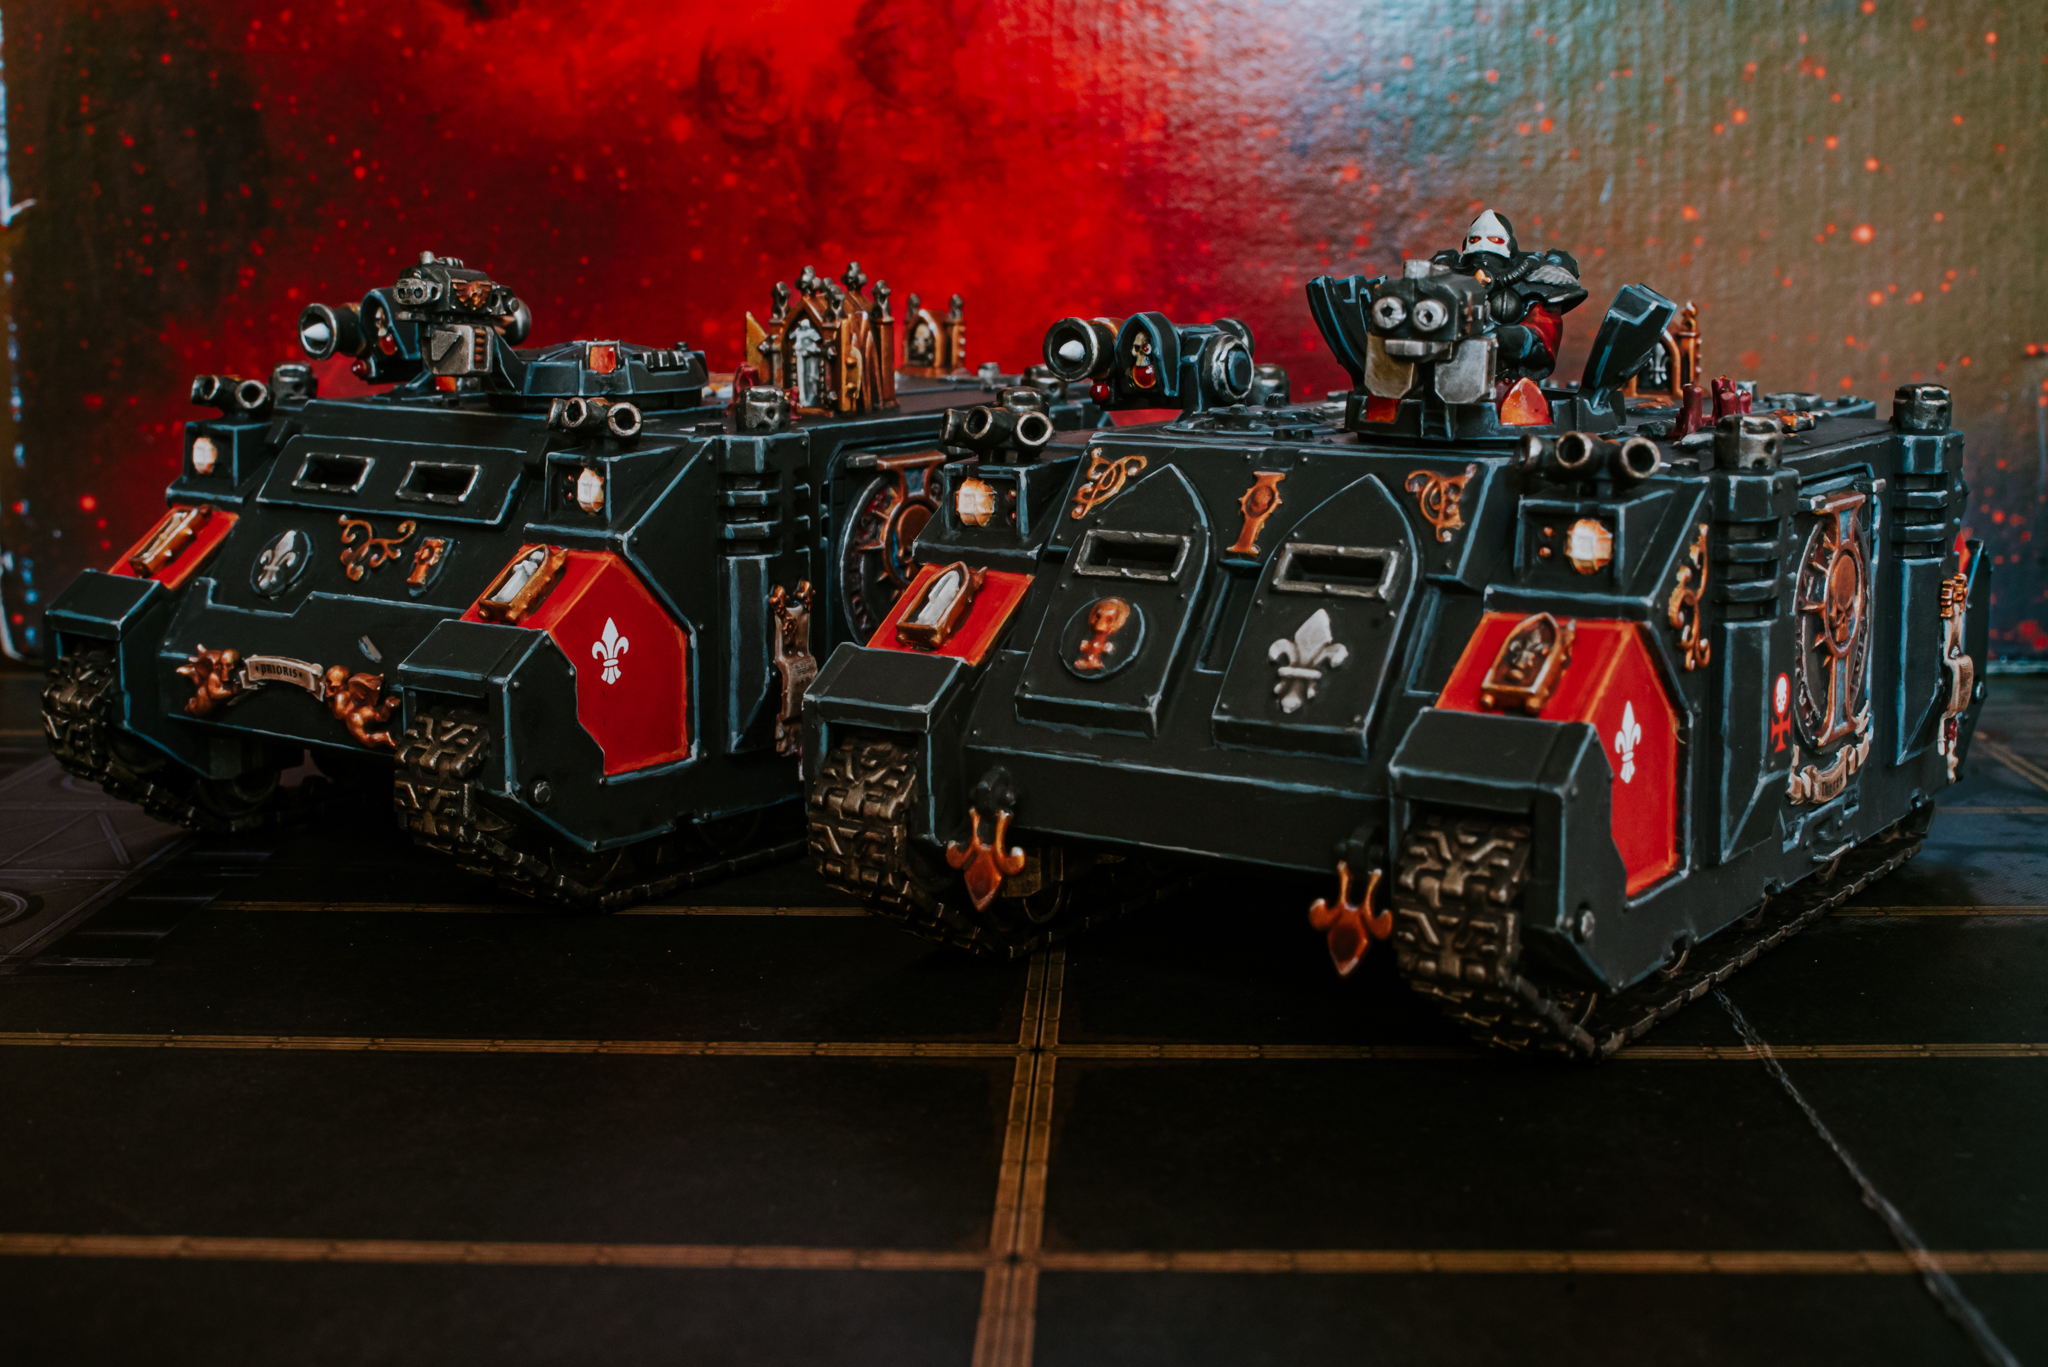
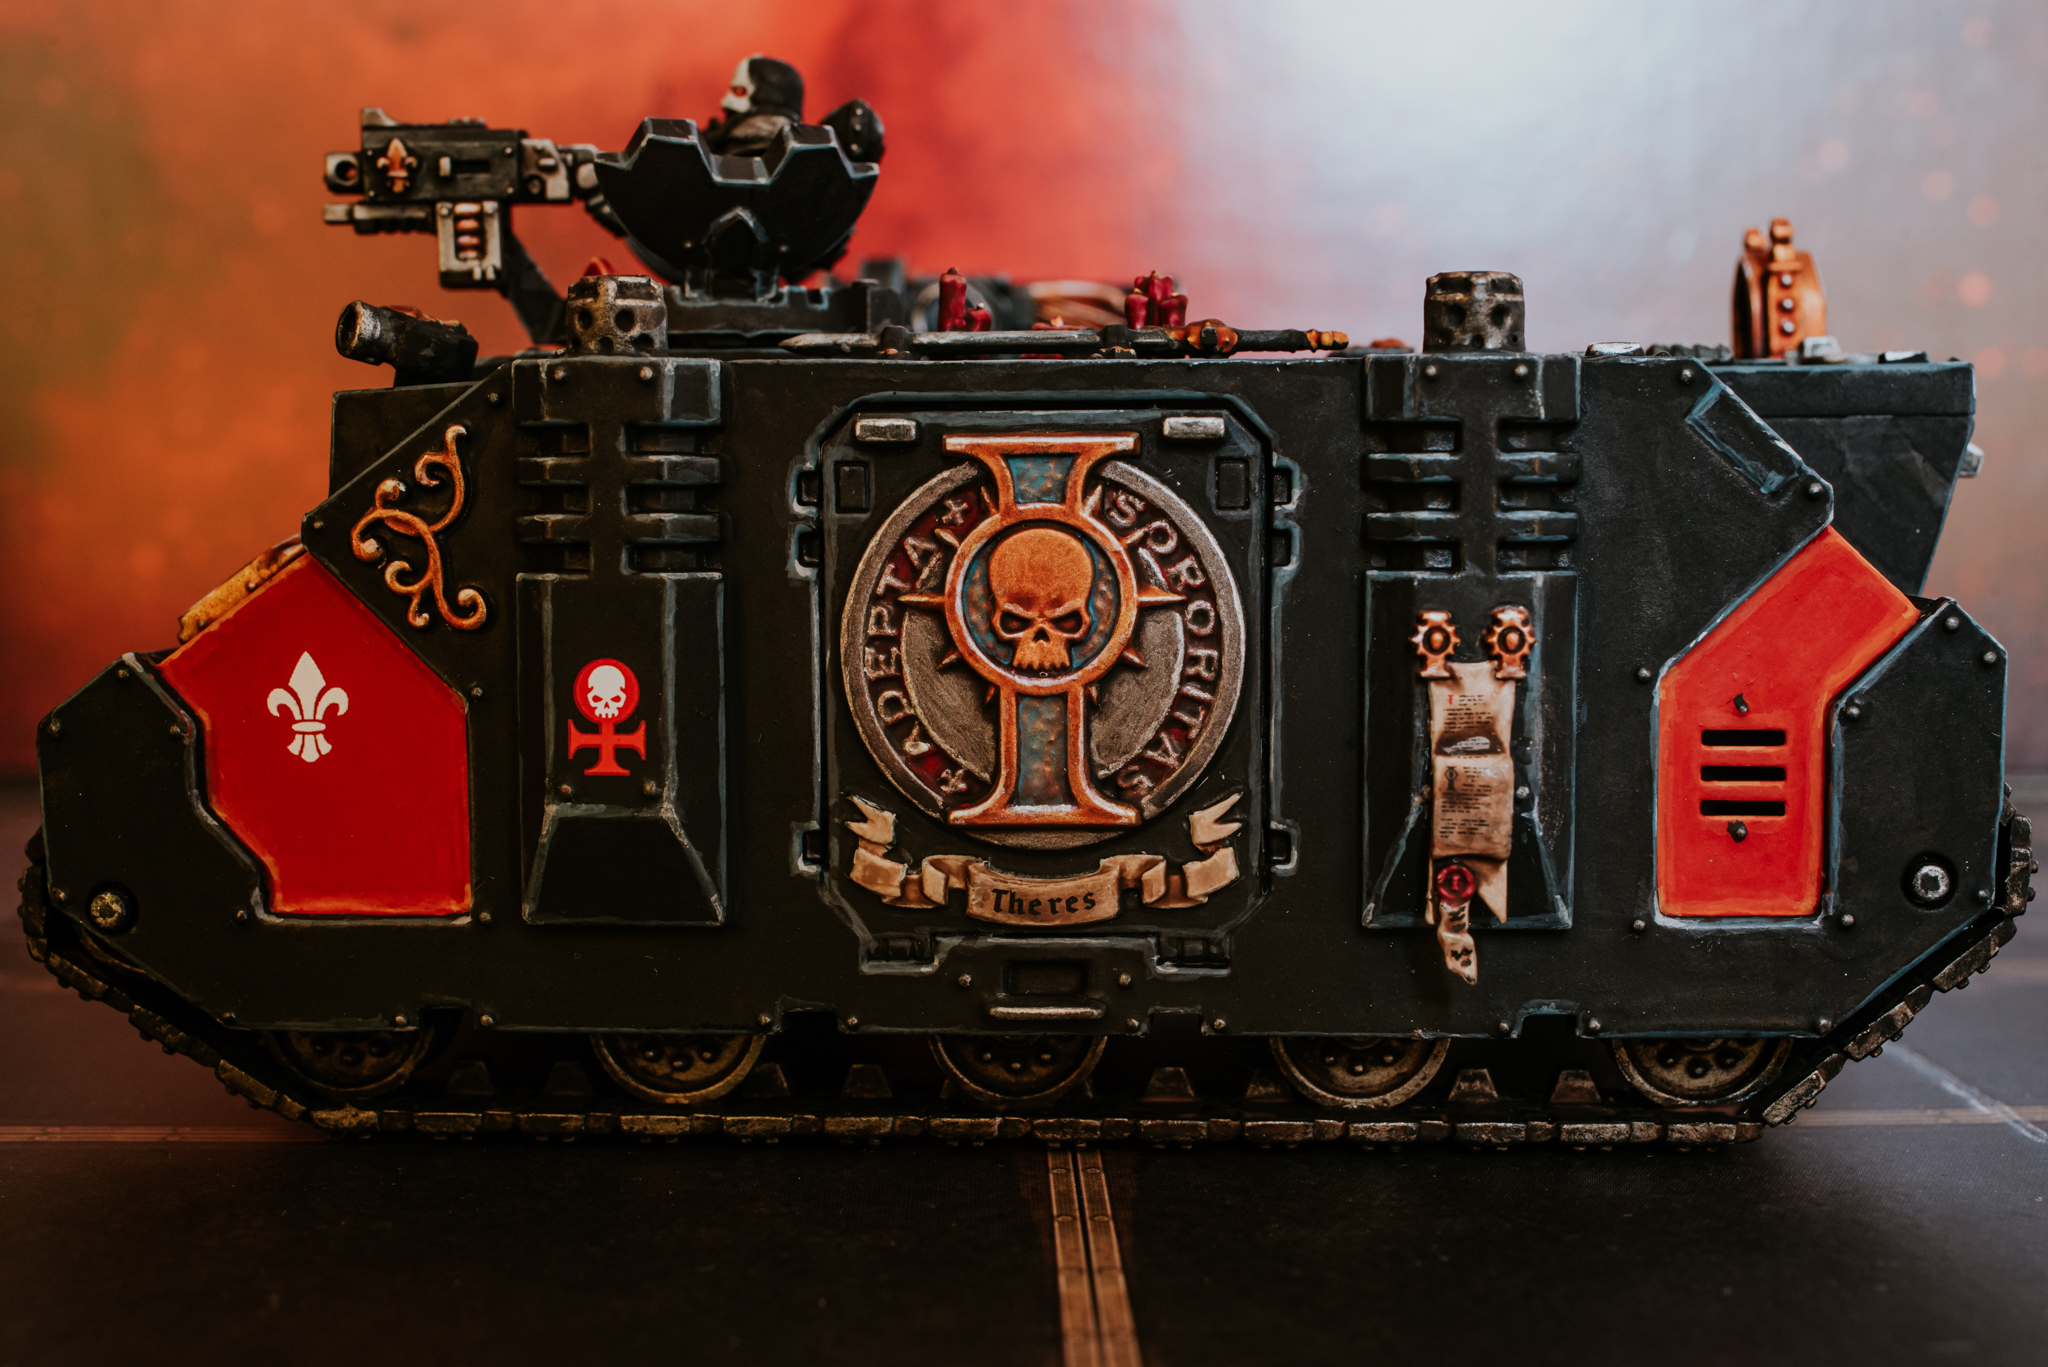
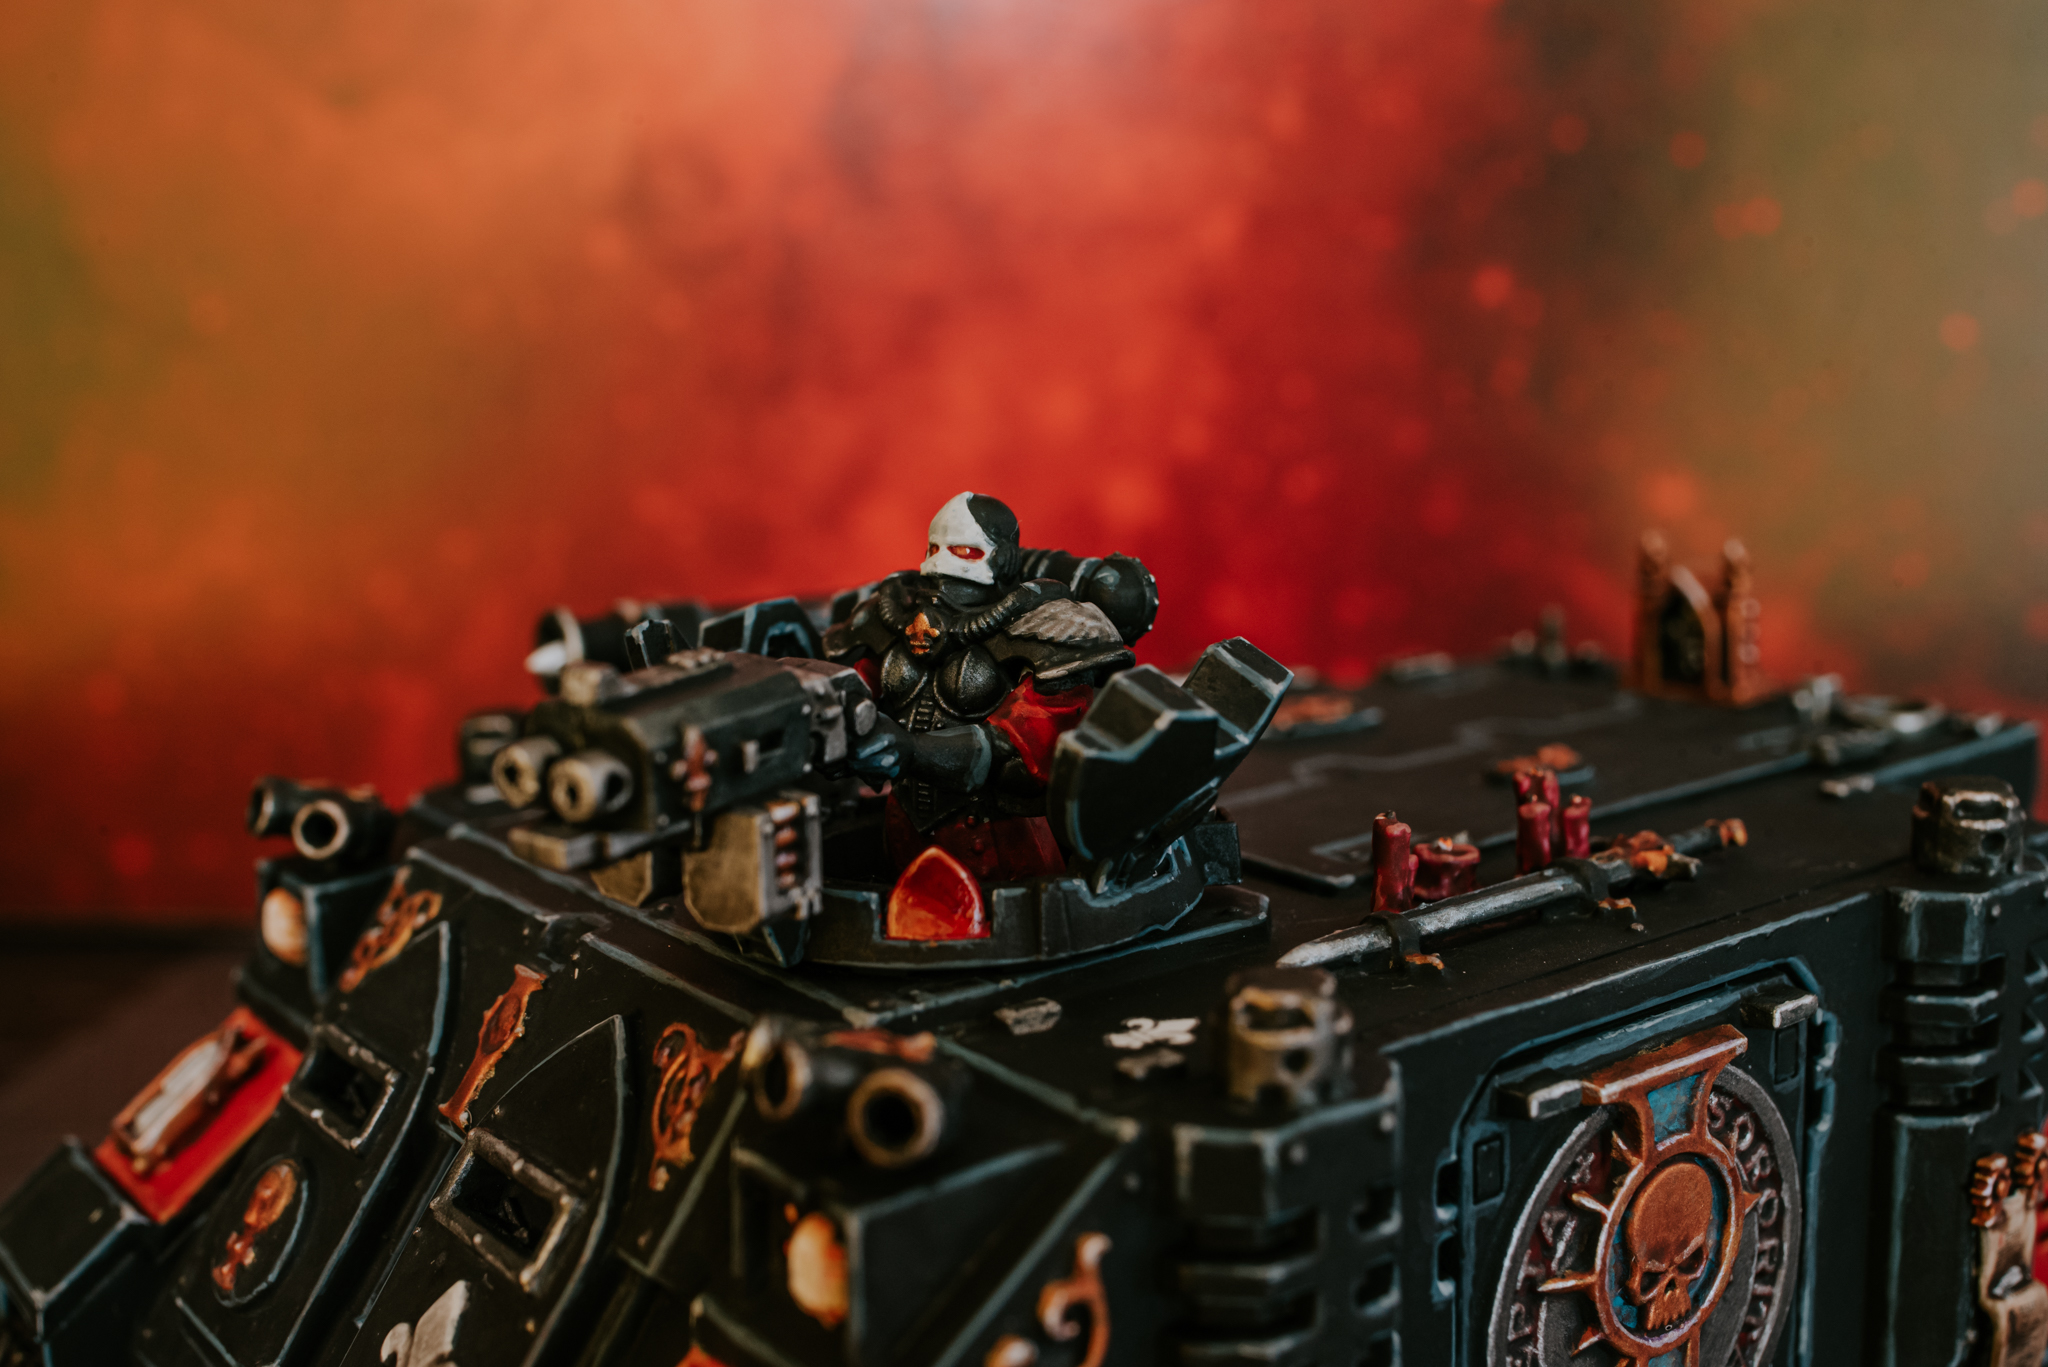
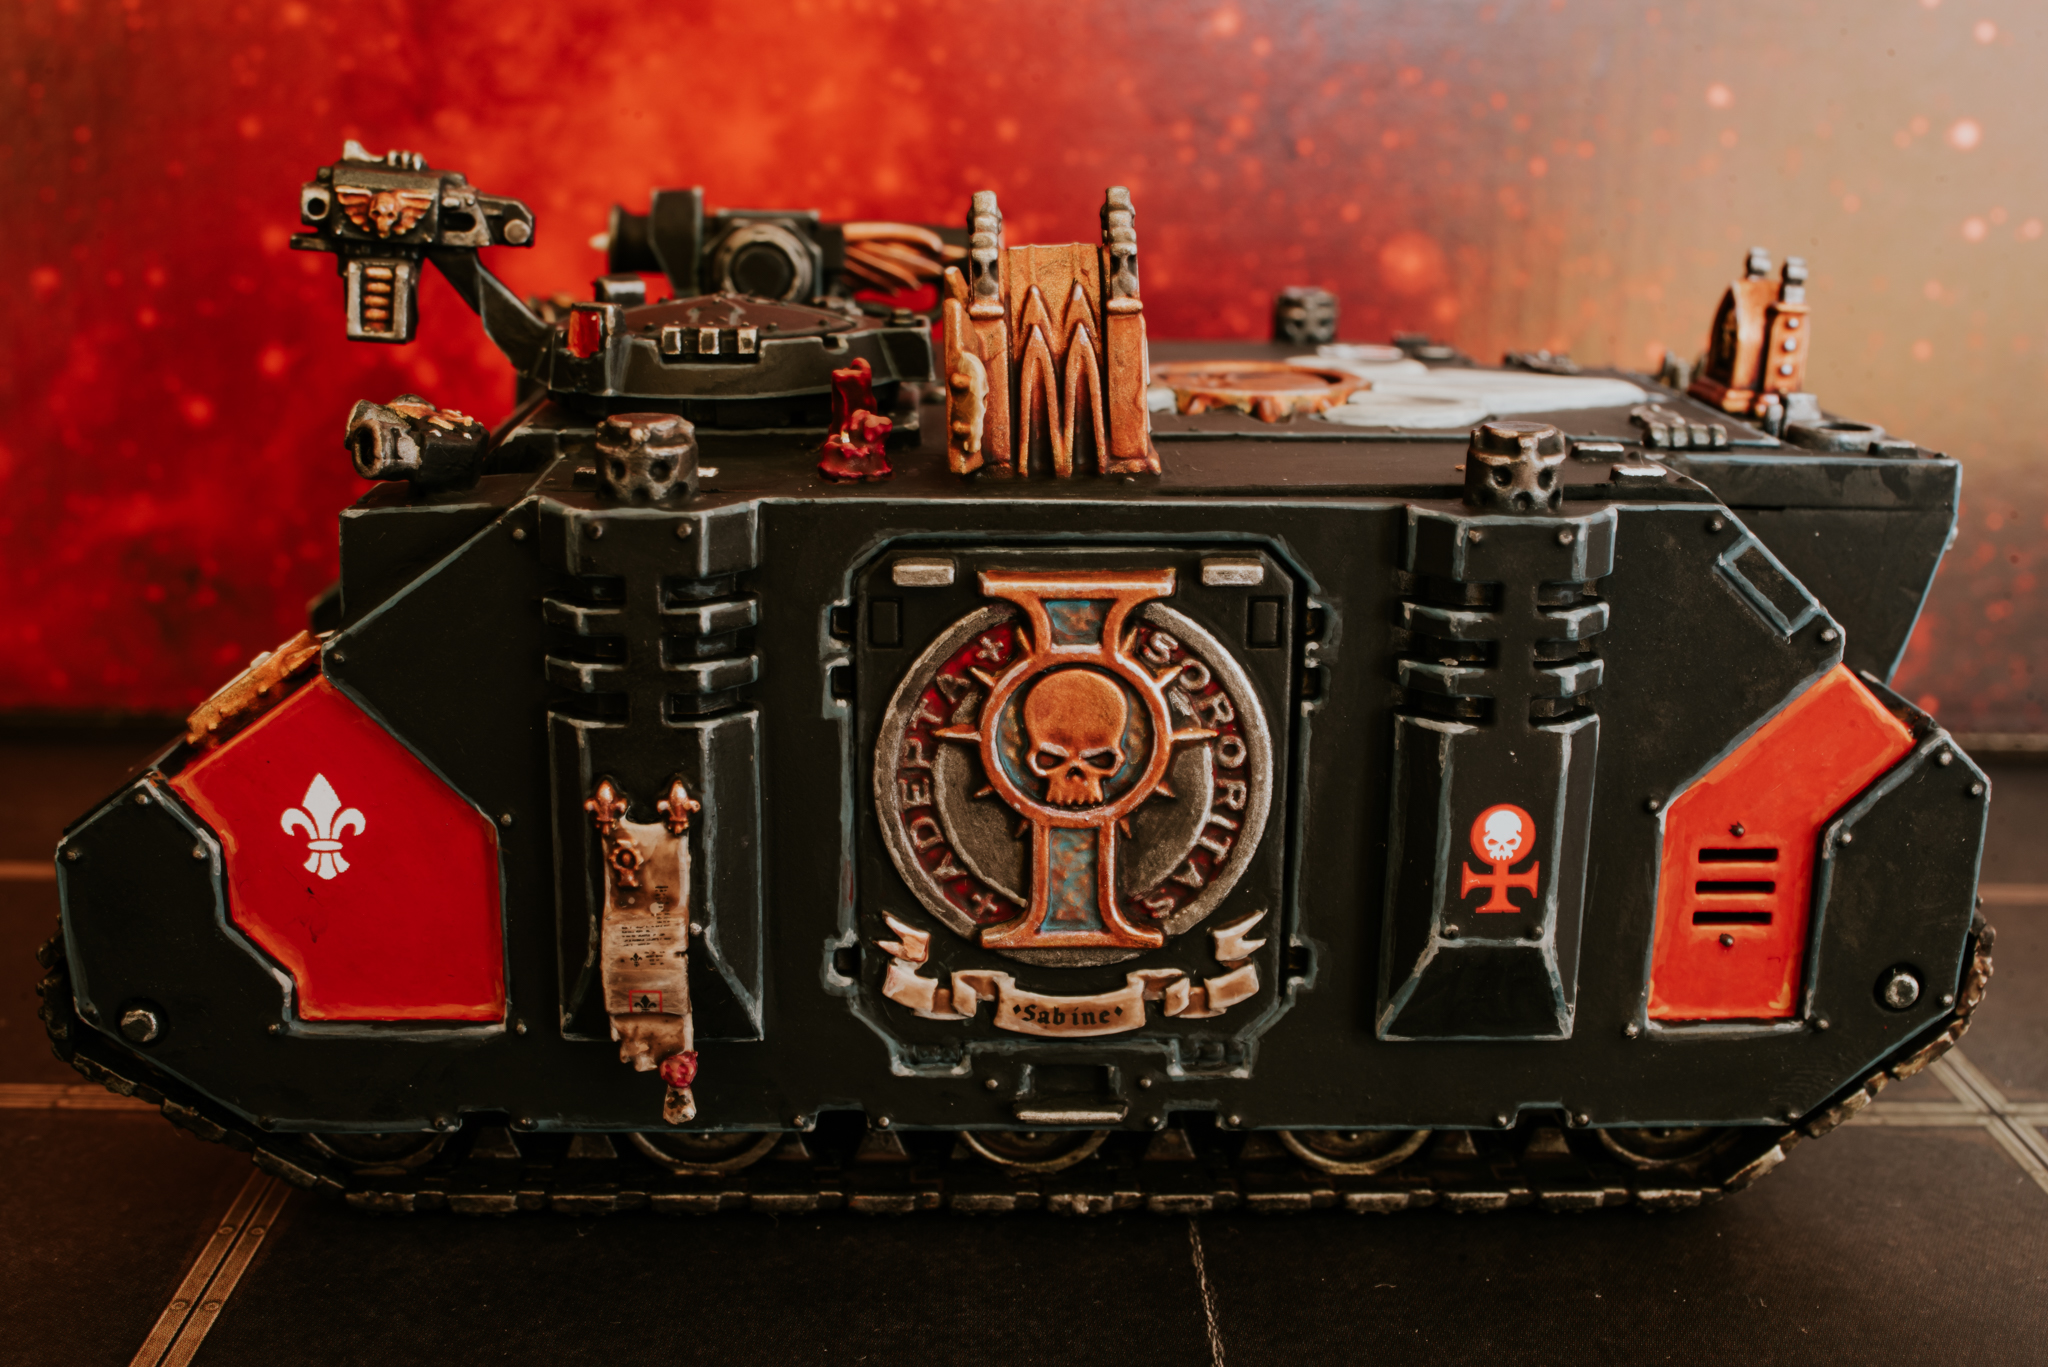
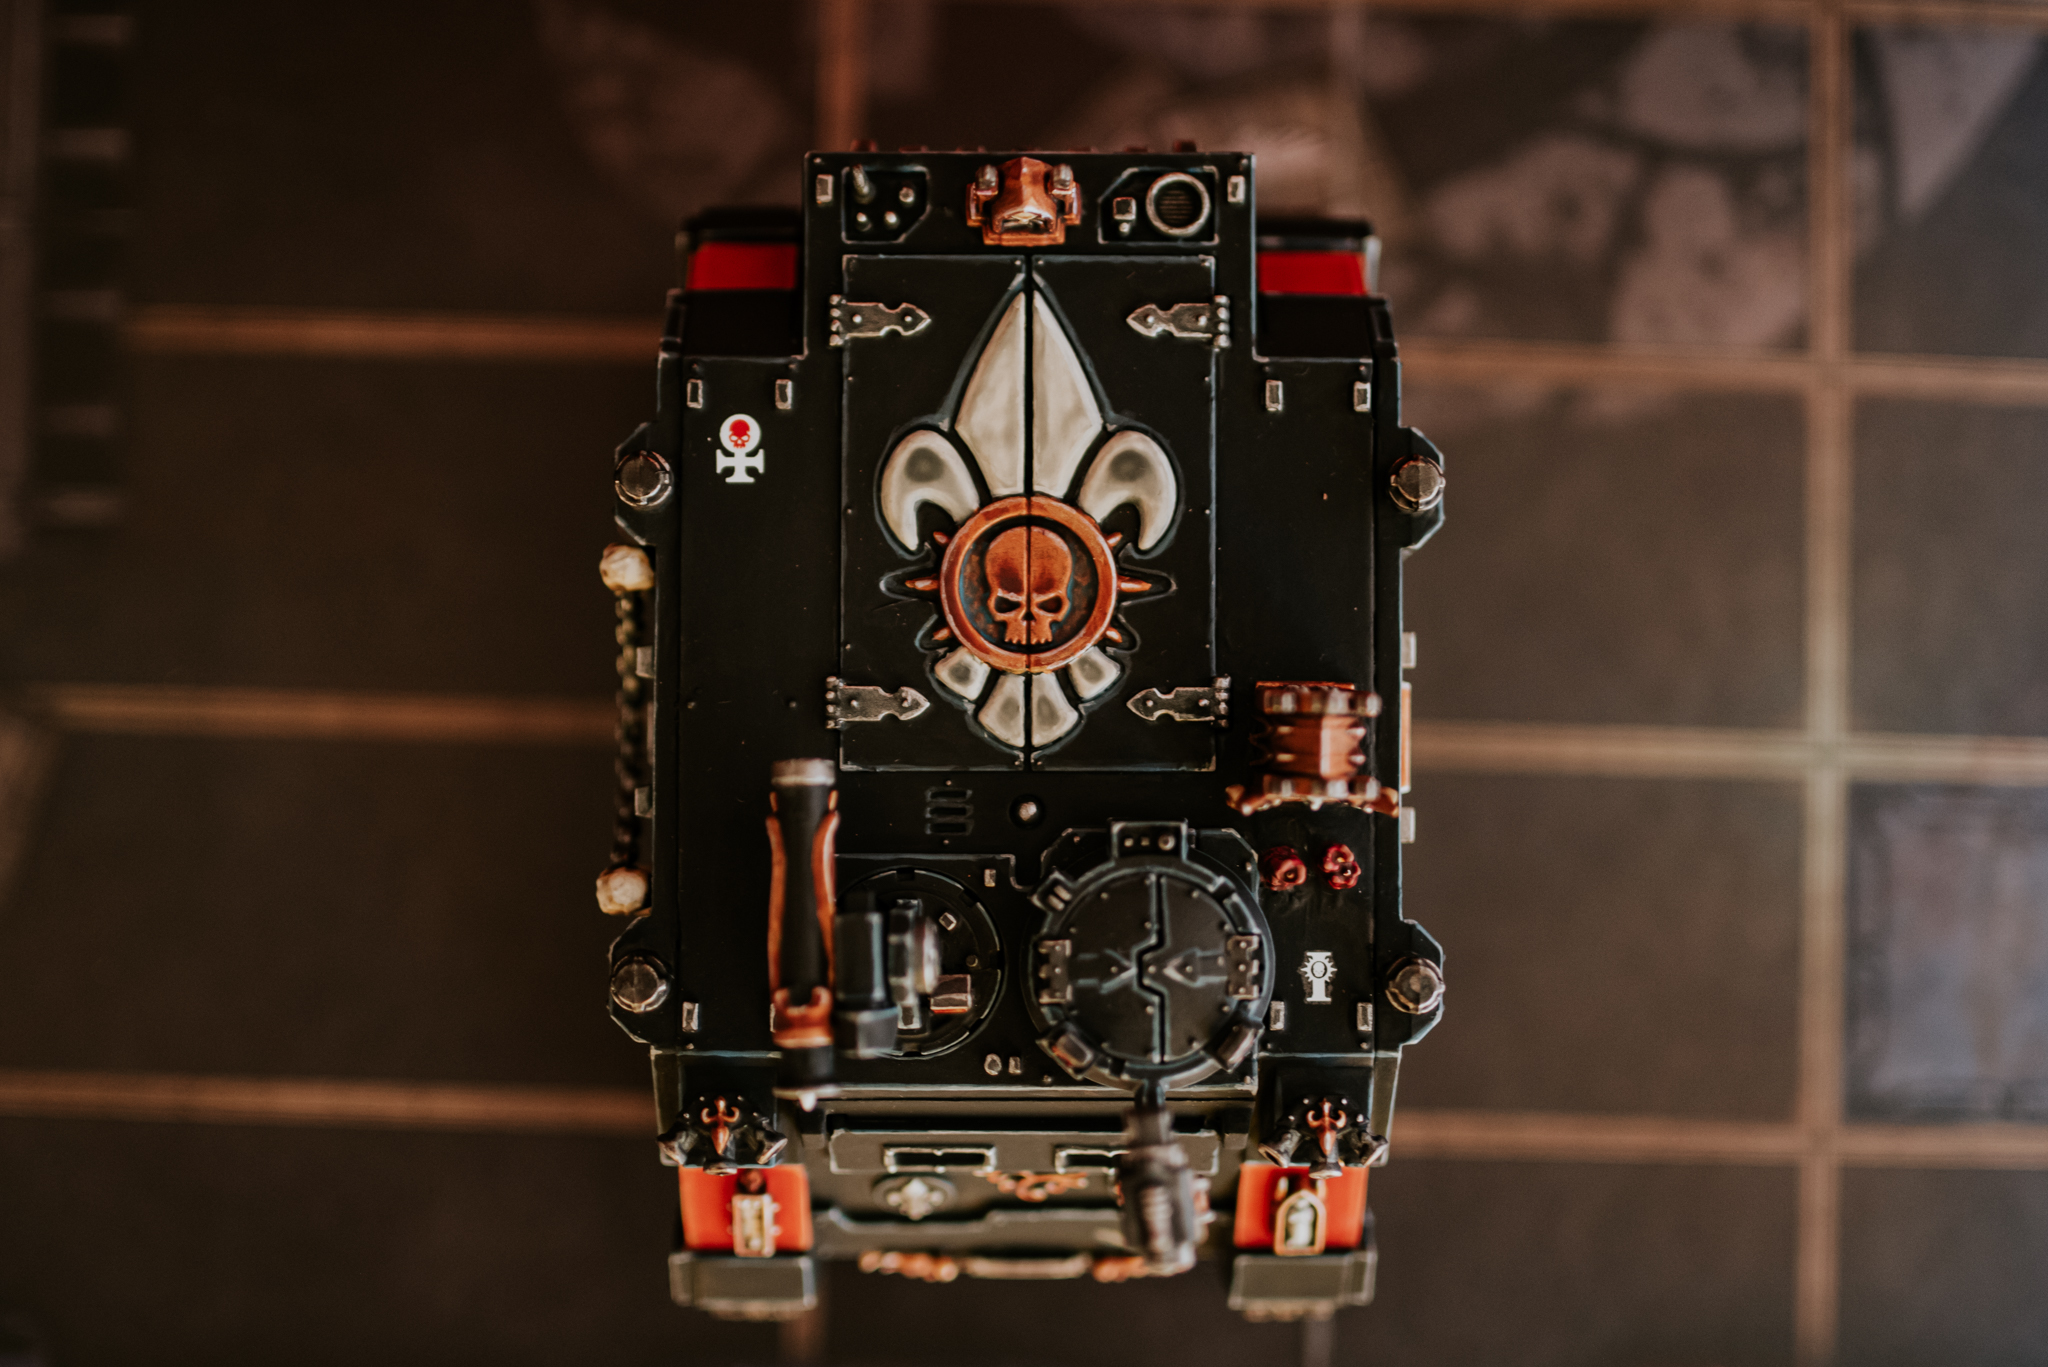
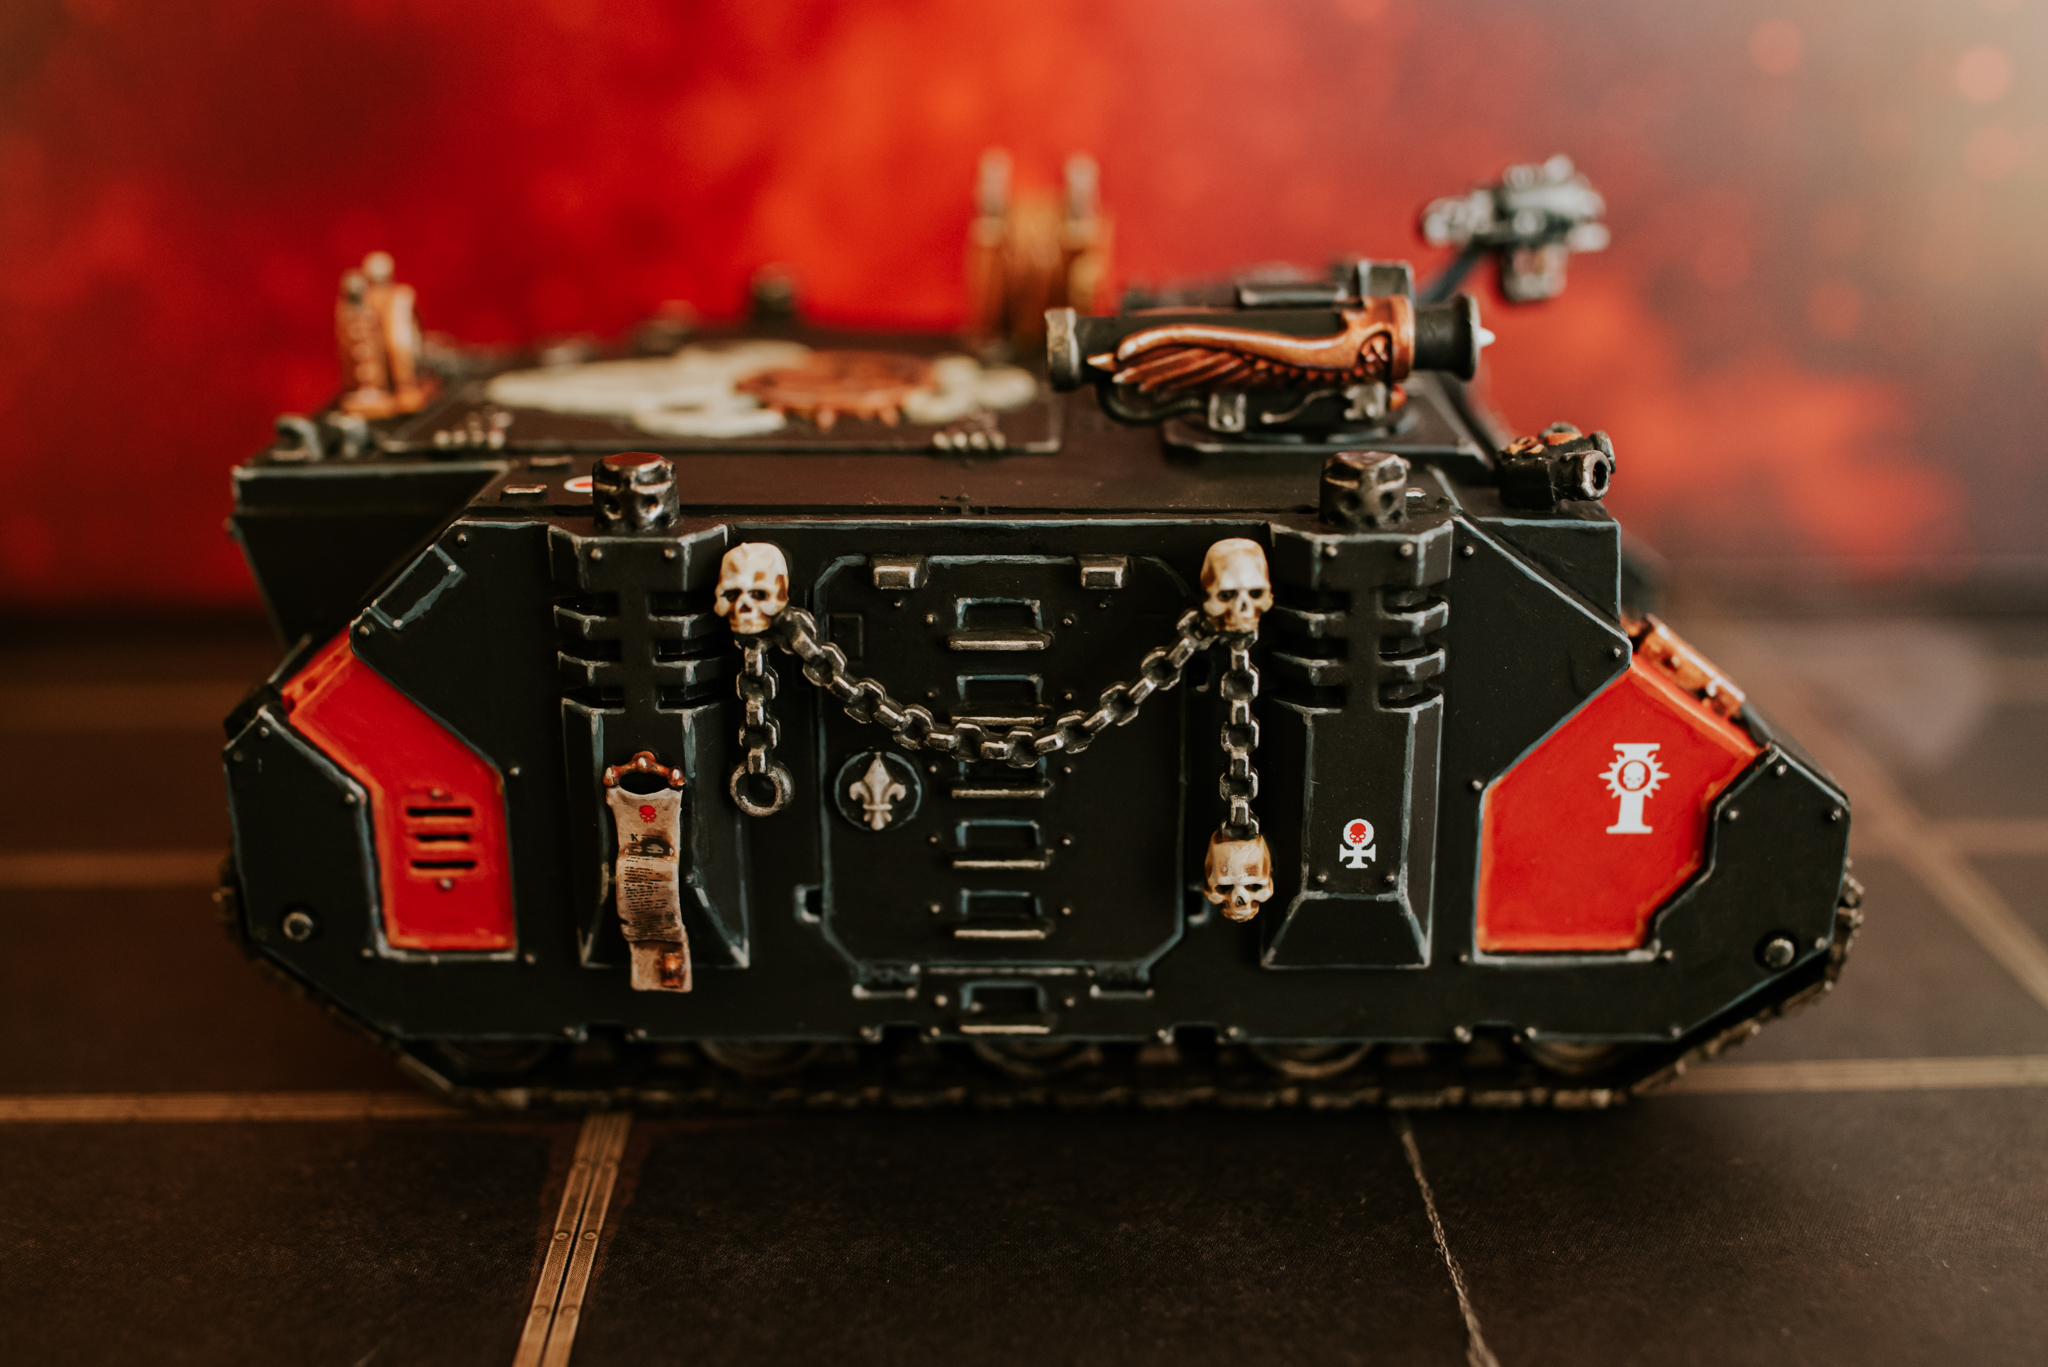
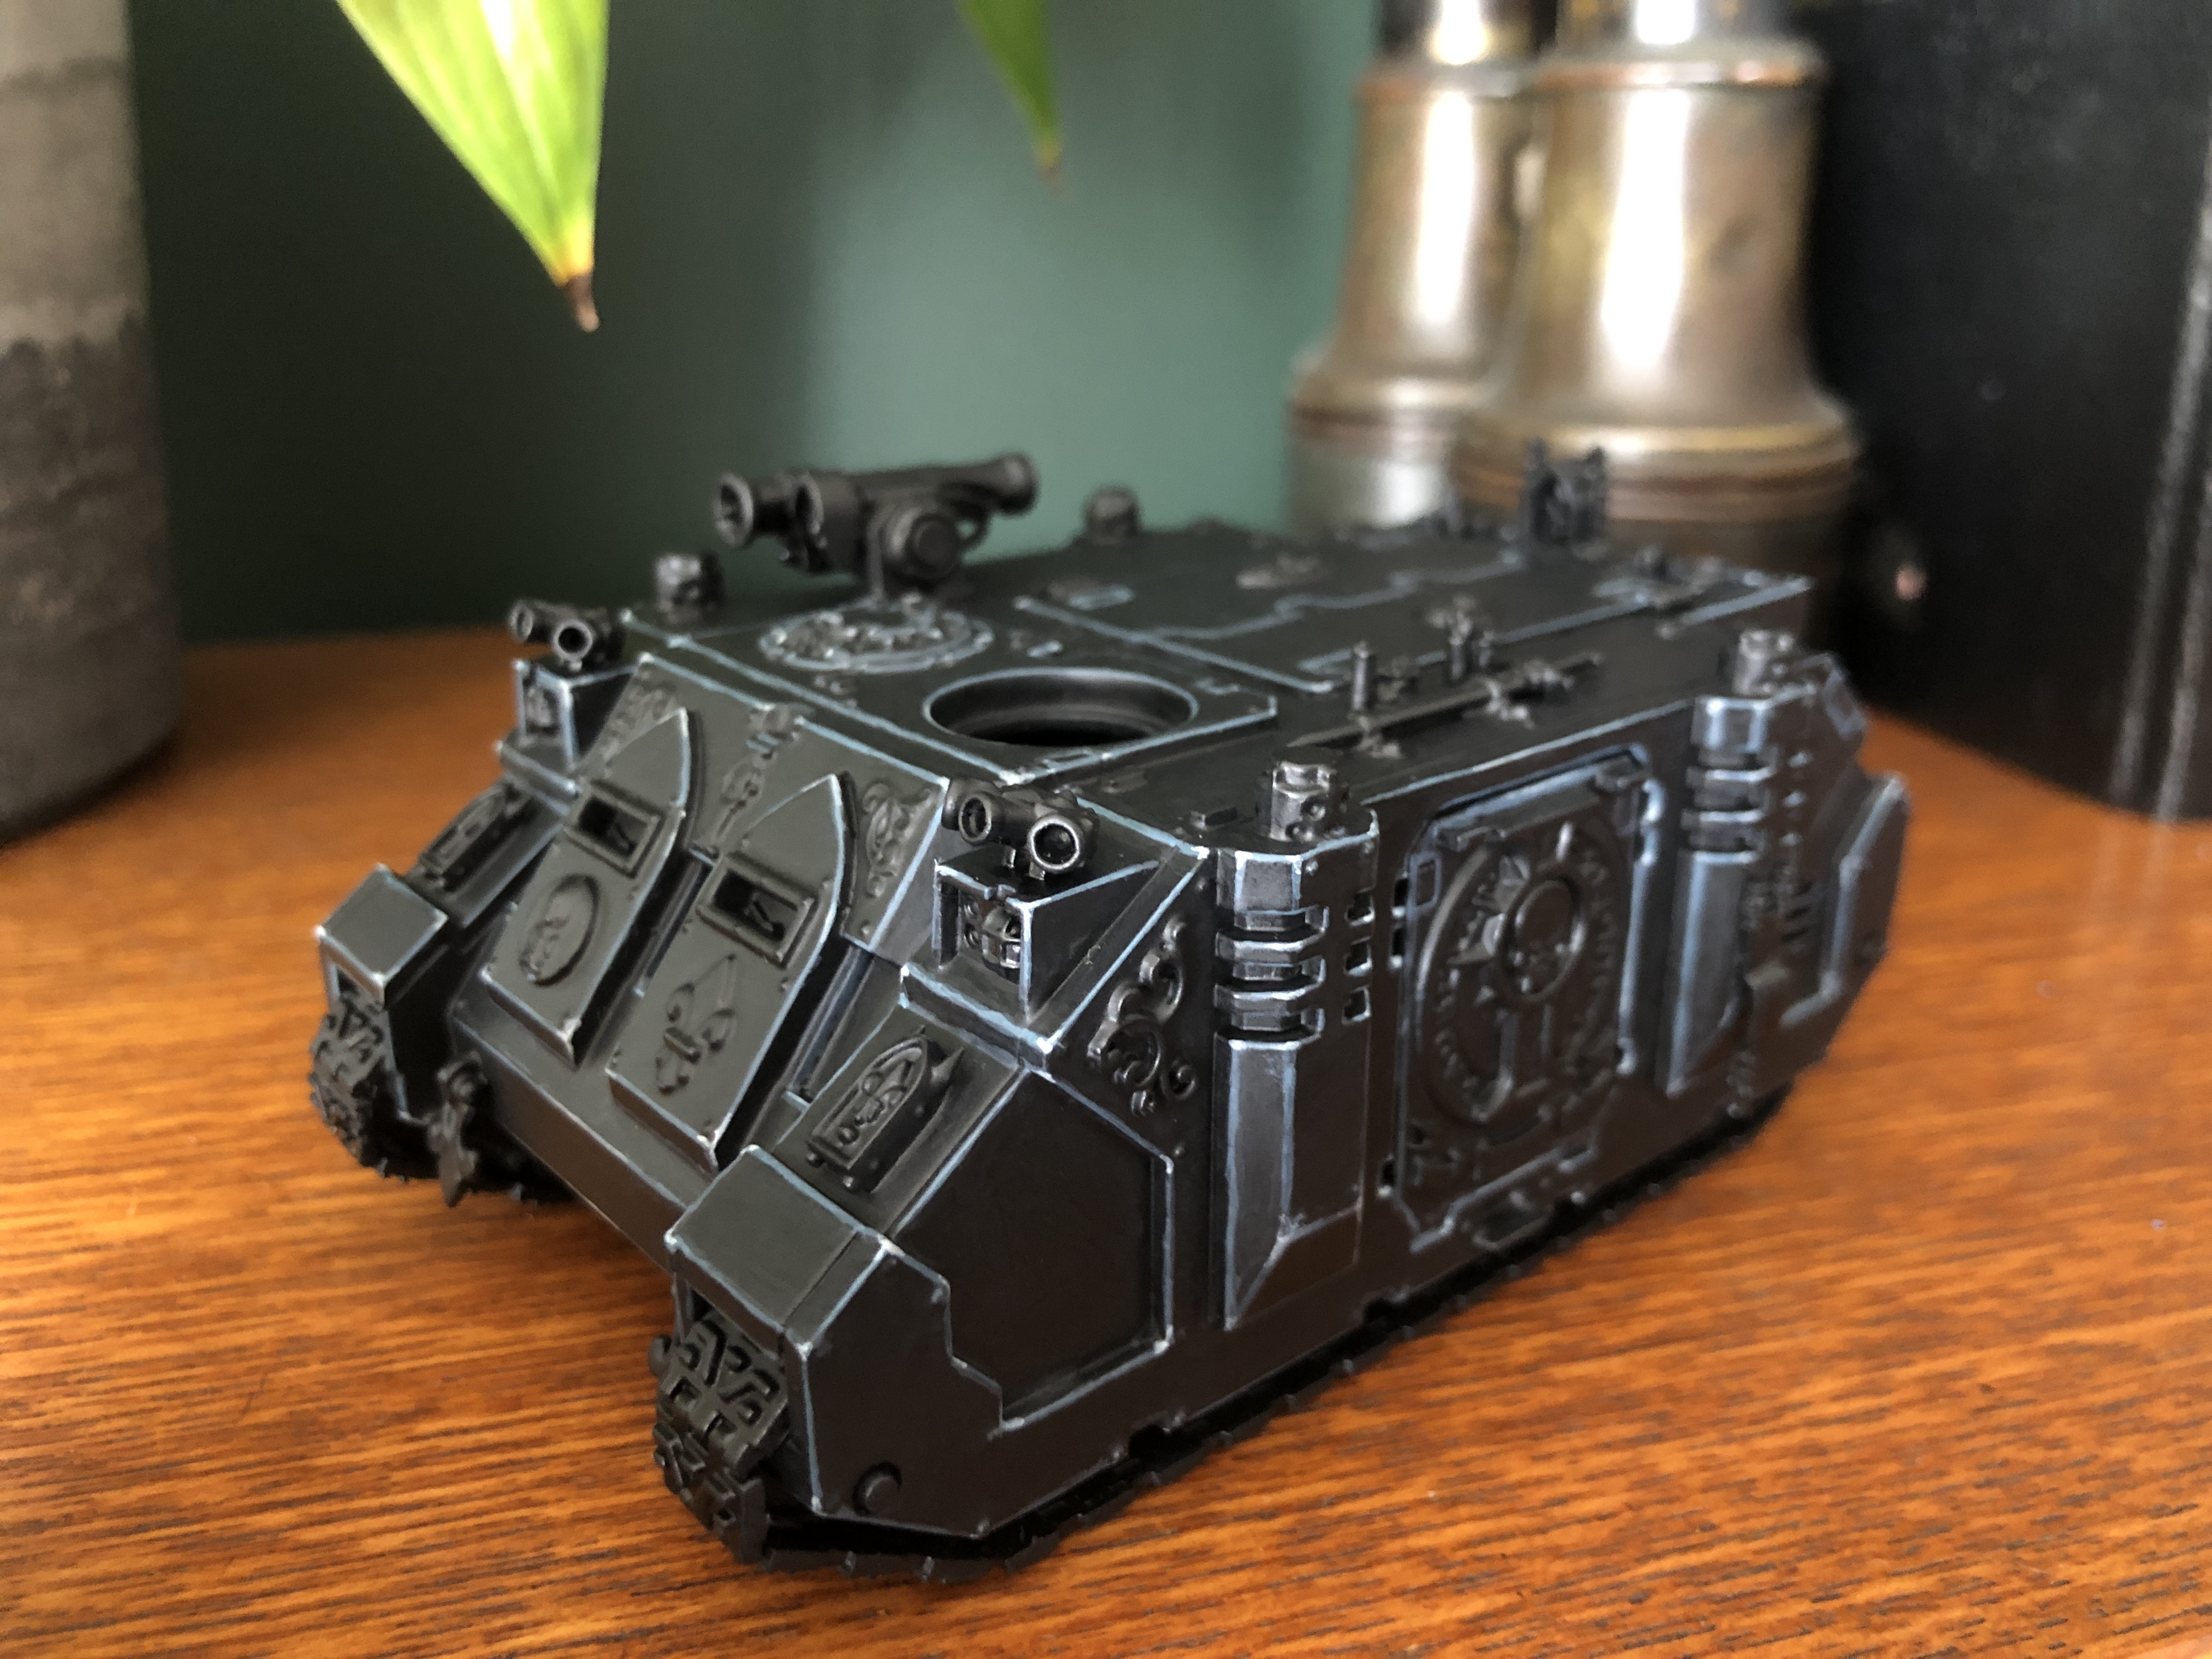
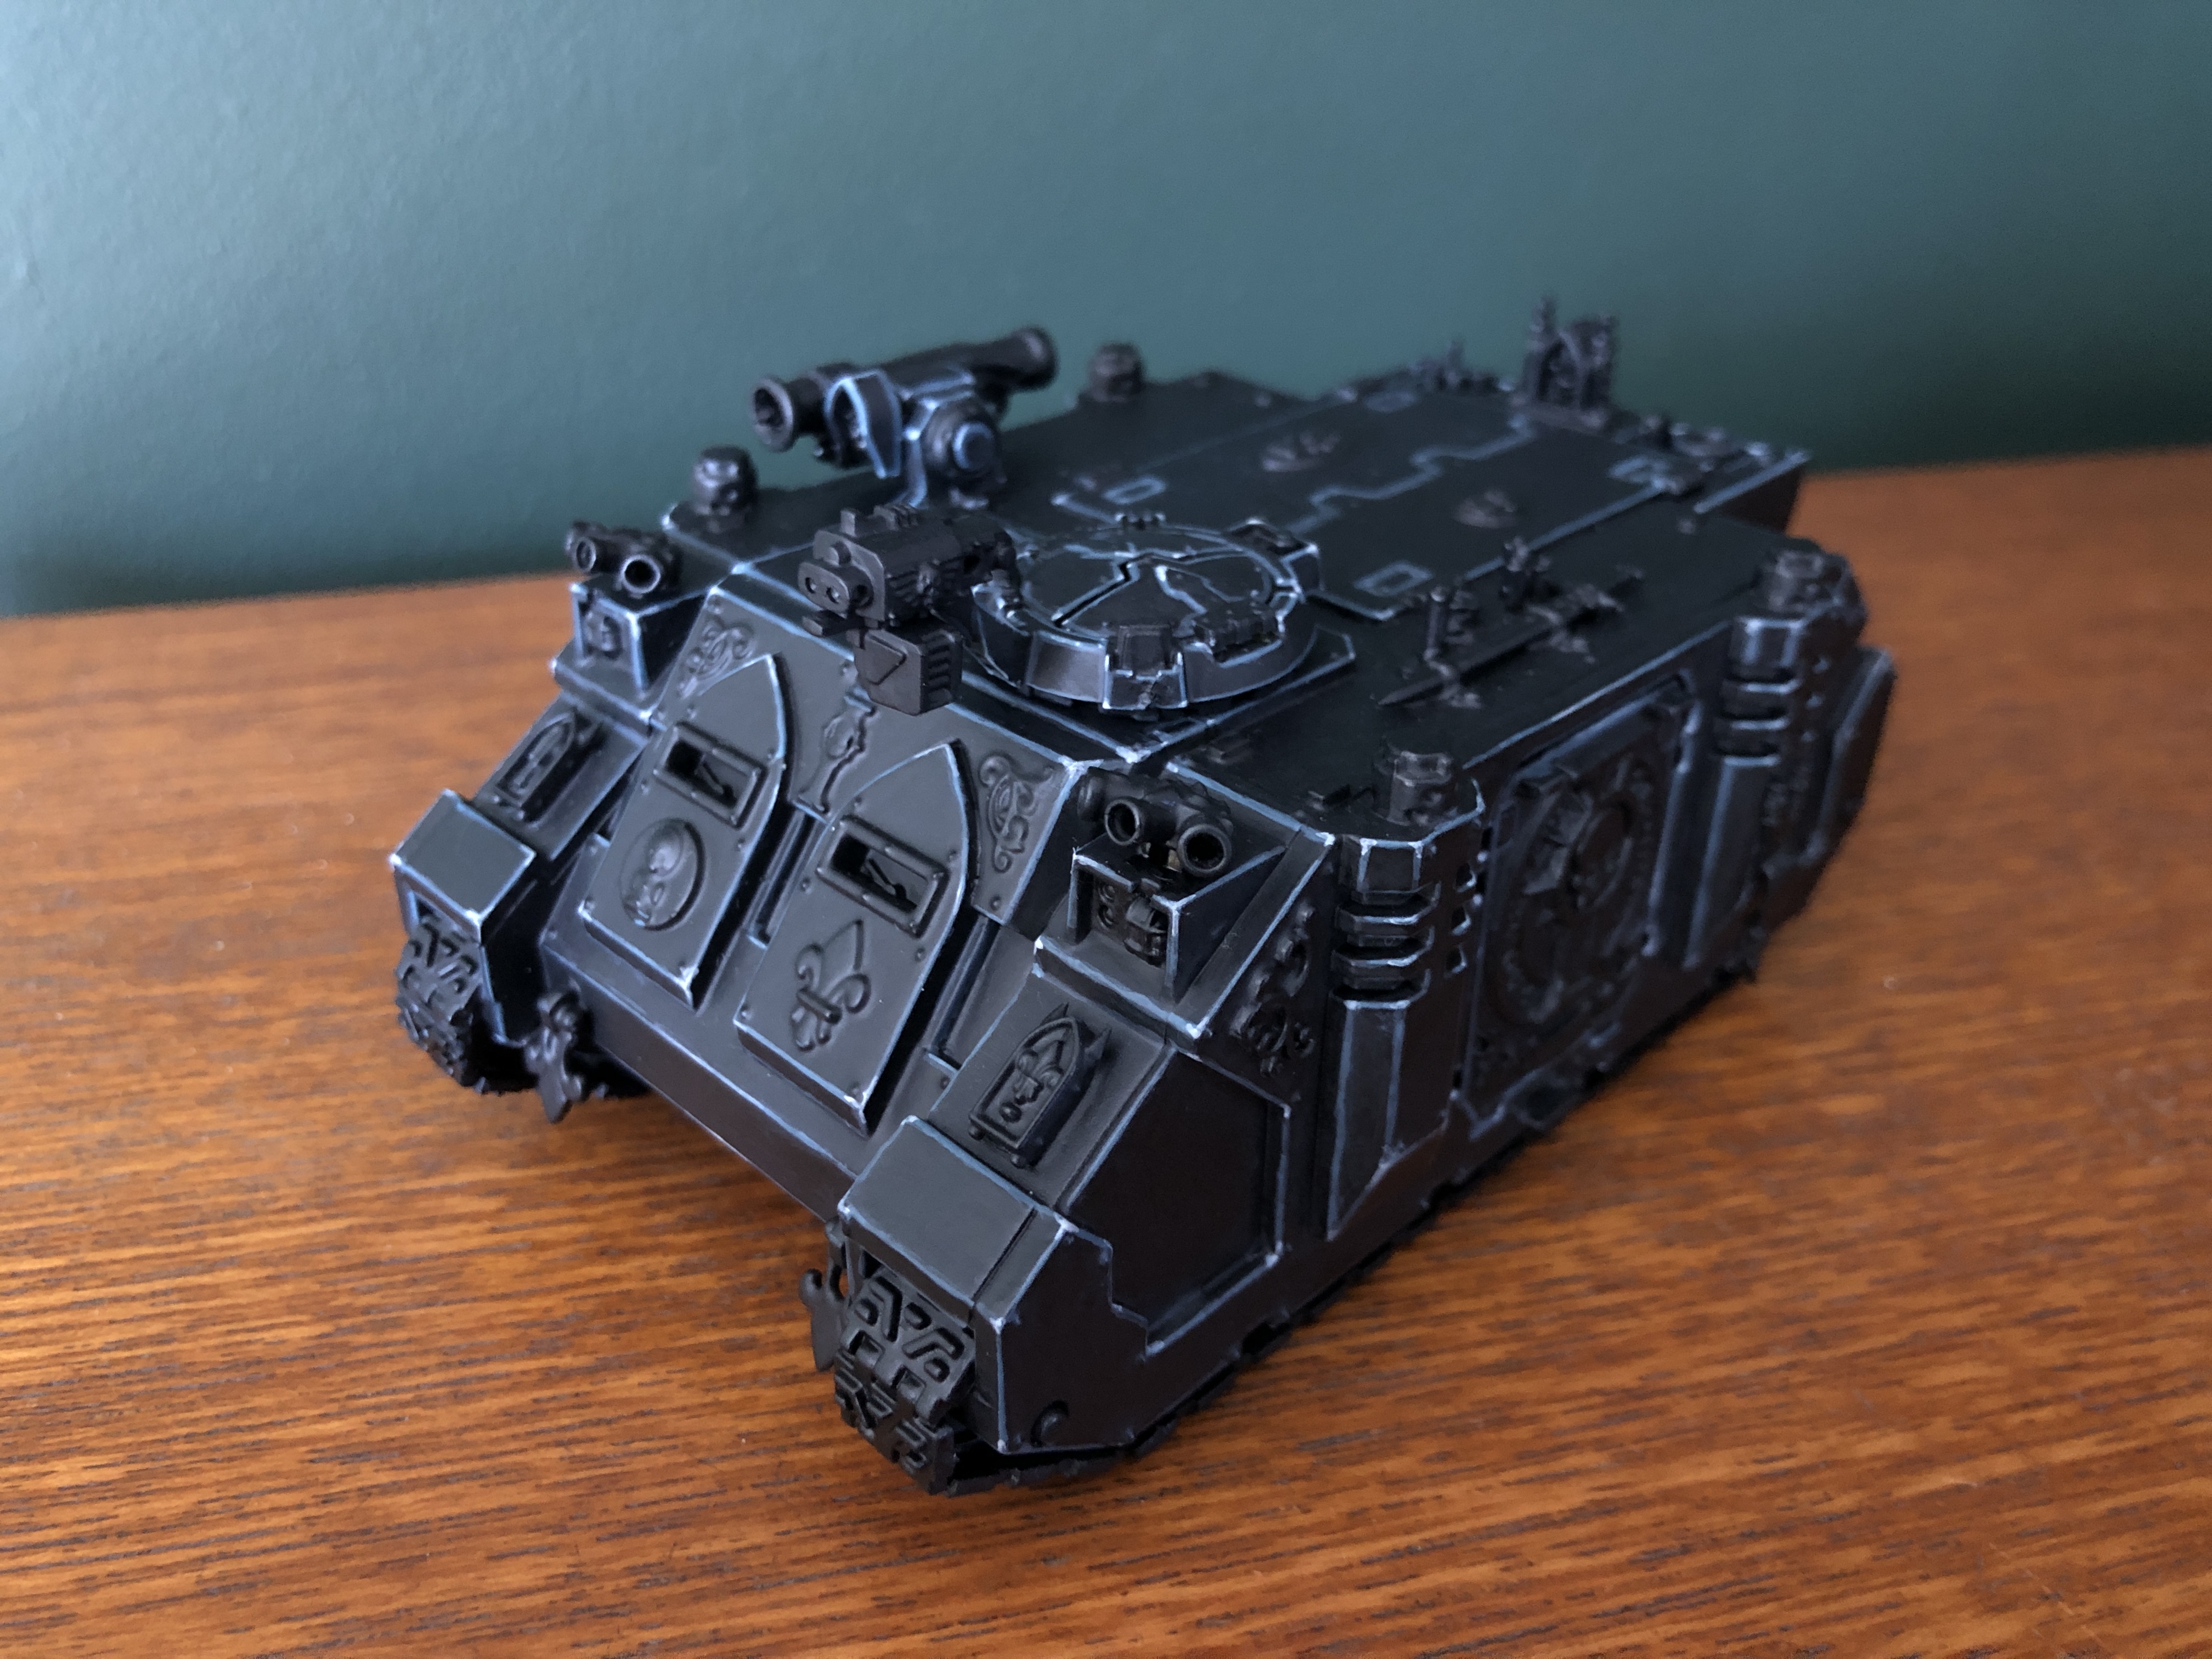
THE EMPEROR PROTECTS ~ RHINOS COMPLETE
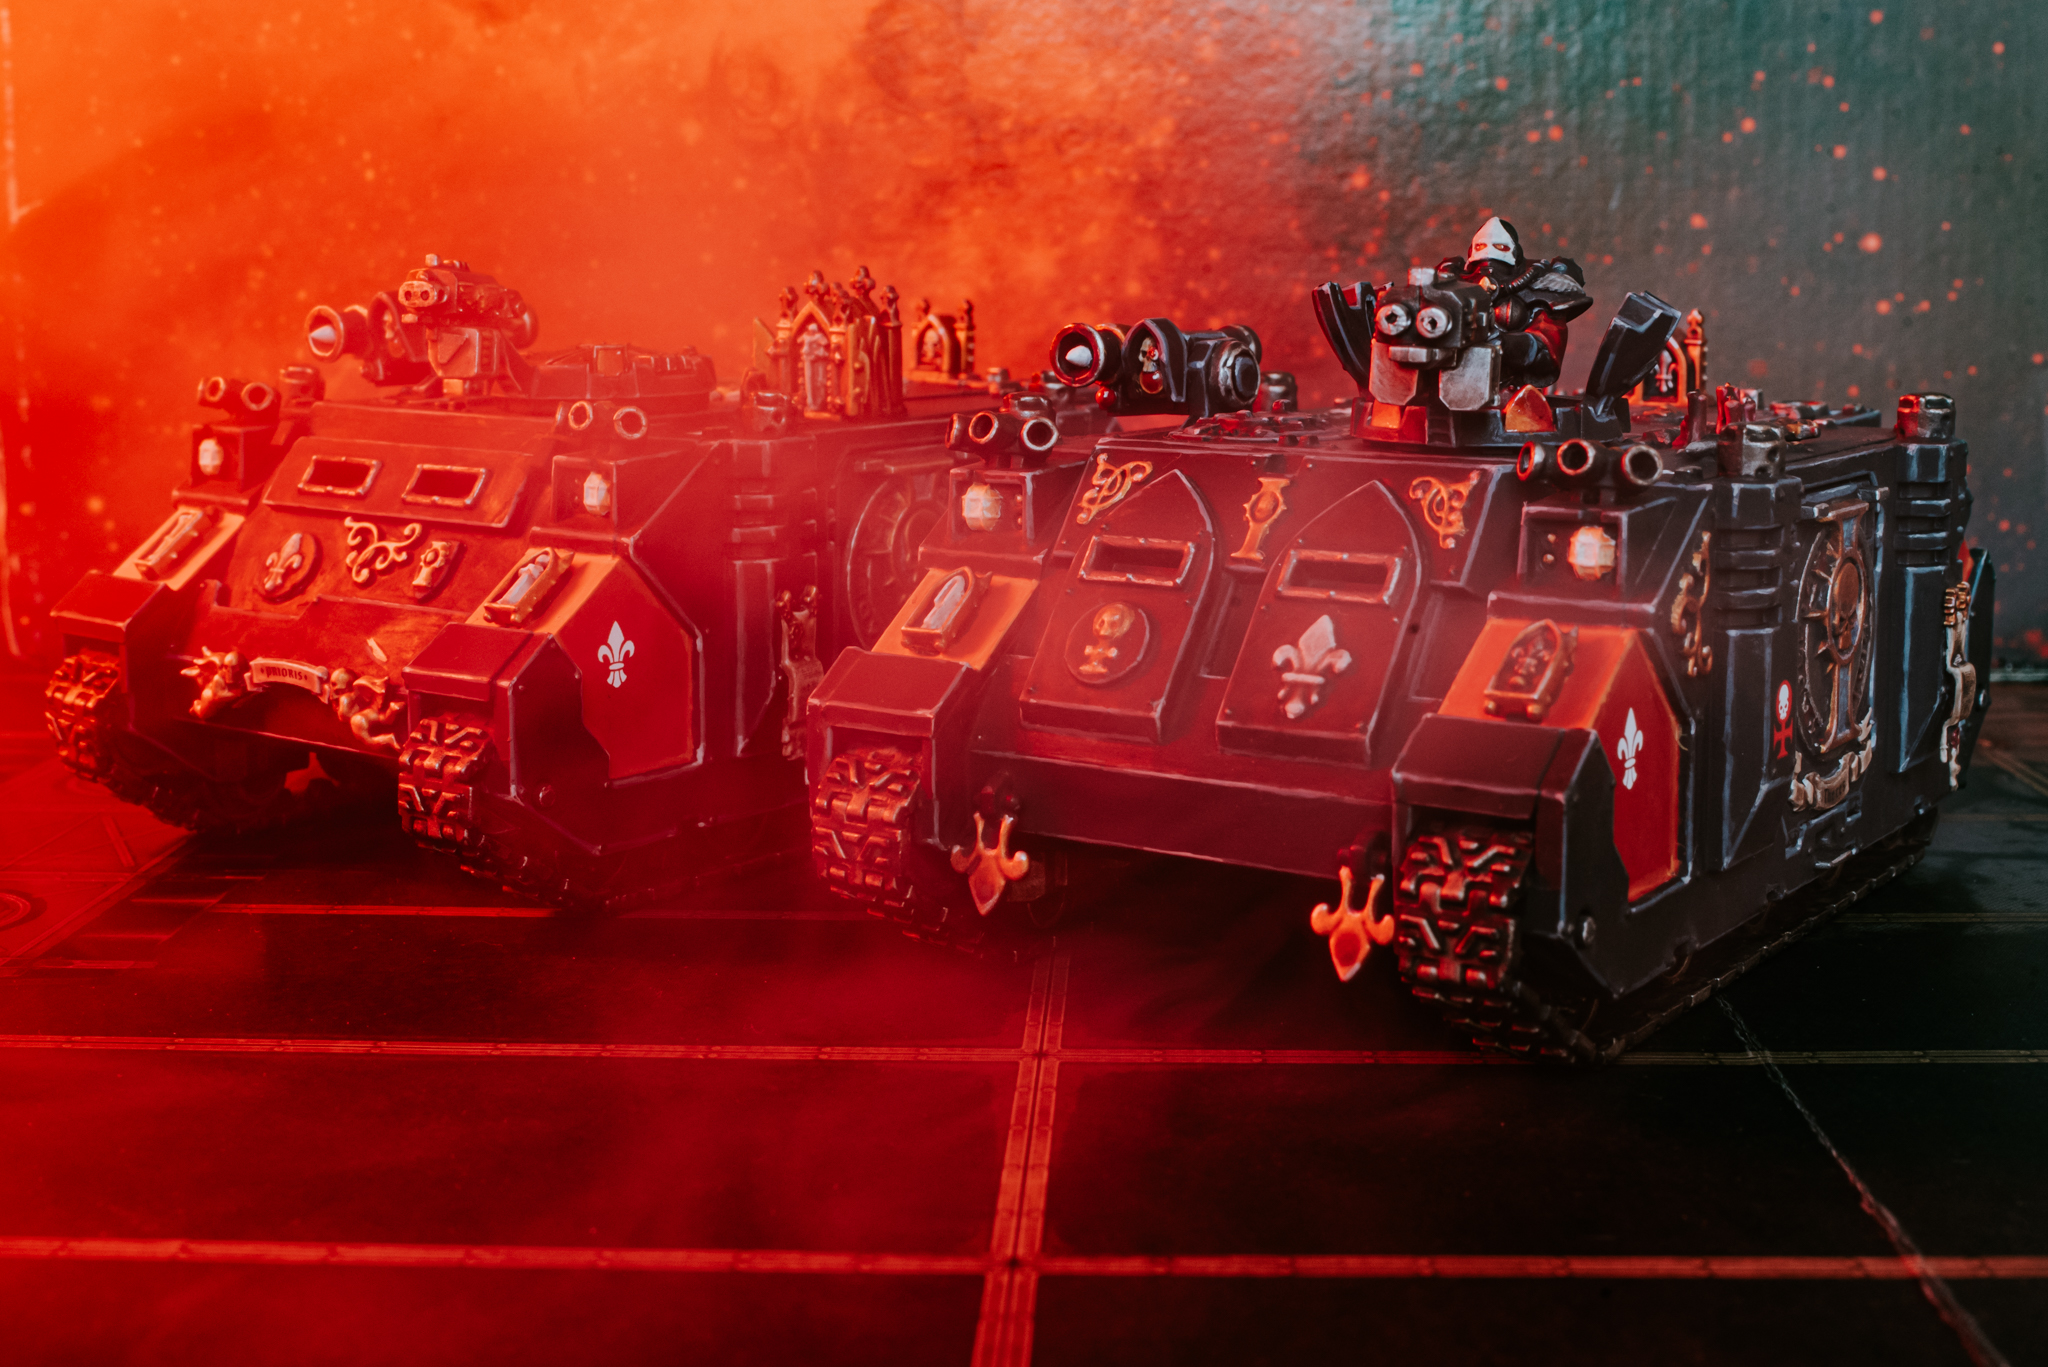
THROUGH THE FIRE WE RIDE
*****
Jeeeeeeez these tanks took a loooooong time. But ya know what I’m going to stop saying that from now on. This hobby ain’t about time limits for me it’s about relaxation & doing as much as I can on stuff when I have chance. I have the pressure of work, a one year old & all kinds of stuff going on in my life so why on earth i’d make the one none screen based part of my existence a job is beyond me. Anyway here’s to completing stuff in your own time & smashing it outta the park. I’m damn chuffed with how these two Rhinos came out. They’re gonna be taking to the battlefield very soon at Warhammer world against some Deathguard.
As you guys can see below I’ve been writing & creating guides now for every single one of my models but have realised it’s turning this beloved hobby into something I don’t want it to be. Painting is my meditation & by adding more screen time to describe steps I’m not enjoying it as much. From now on I’m going to be sharing the finished models only on this here project blog. Mainly for the reason above but also because every single recipe that’s involved in every single miniature has been covered in previous posts.
Much Love & enjoy my wild Rhinoceroses. YES!
ETERNITY GATE


WAVE TWO BEGINS ~ A SISTERS OF BATTLE RHINO PAINTING GUIDE ~ PART 1
WHAT A TANKER
*****
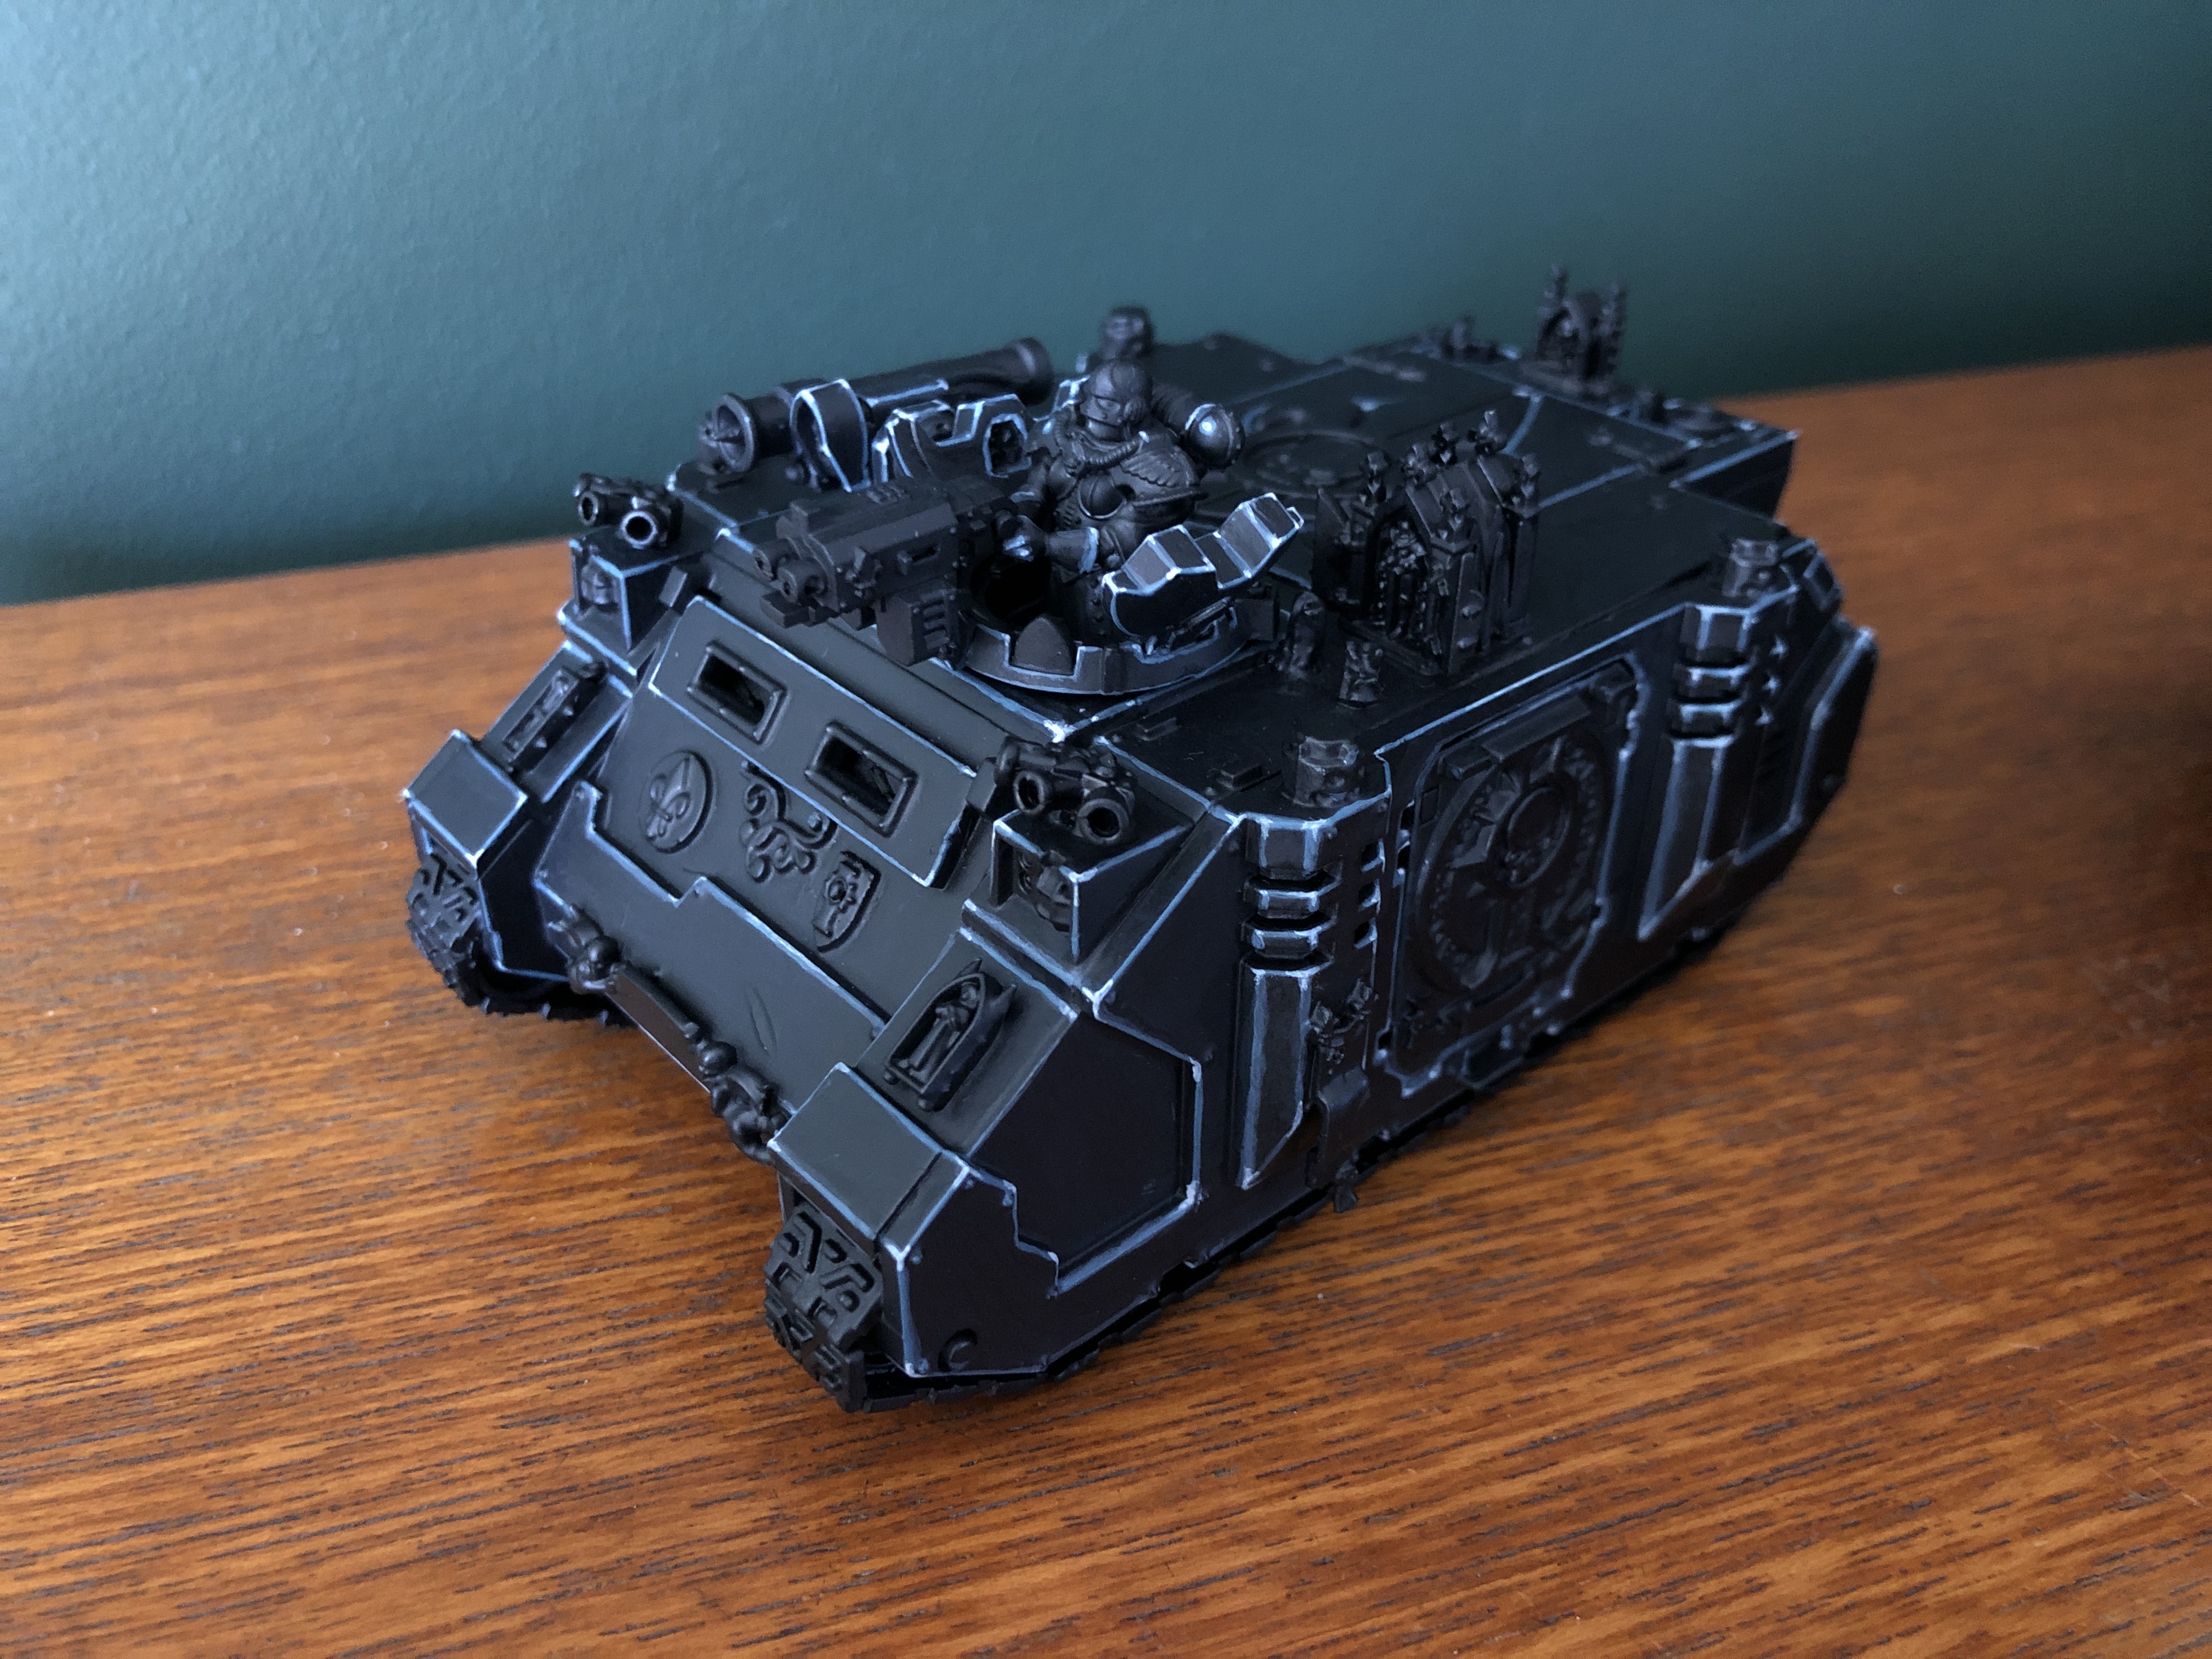
Yes i’m back & I’ve been all kinds of busy on sisters hobby goodness. I’ve actually now completed assembly of wave two of my Adepta Sororitas army. Normally I’d show off everything I’ve built at once but instead I’m gonna hit you with it bit by bit to be DRAMATIC.YES!
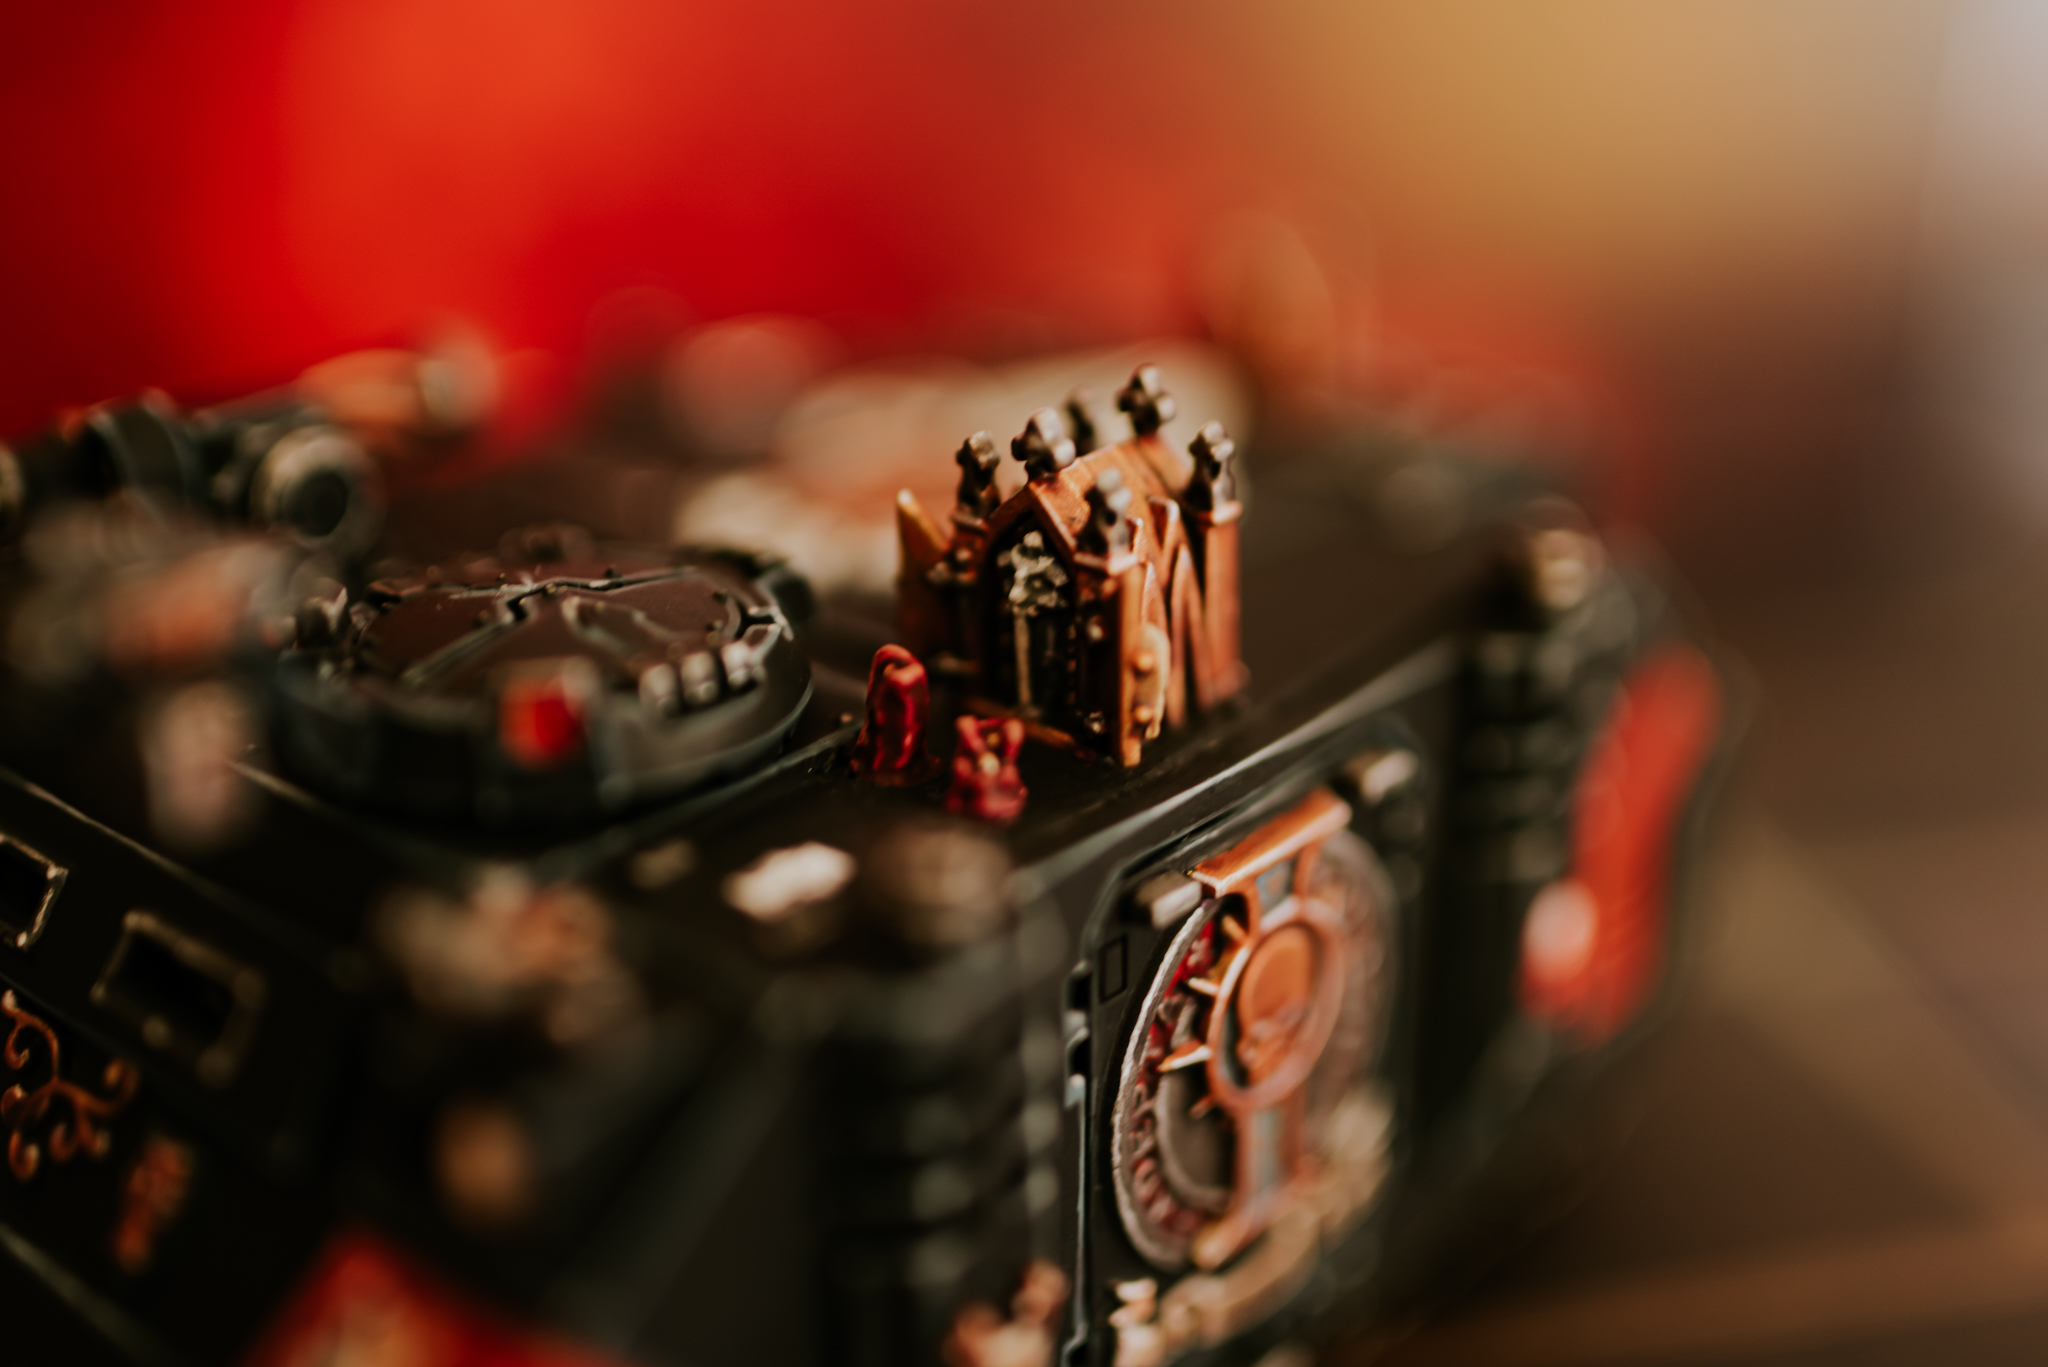
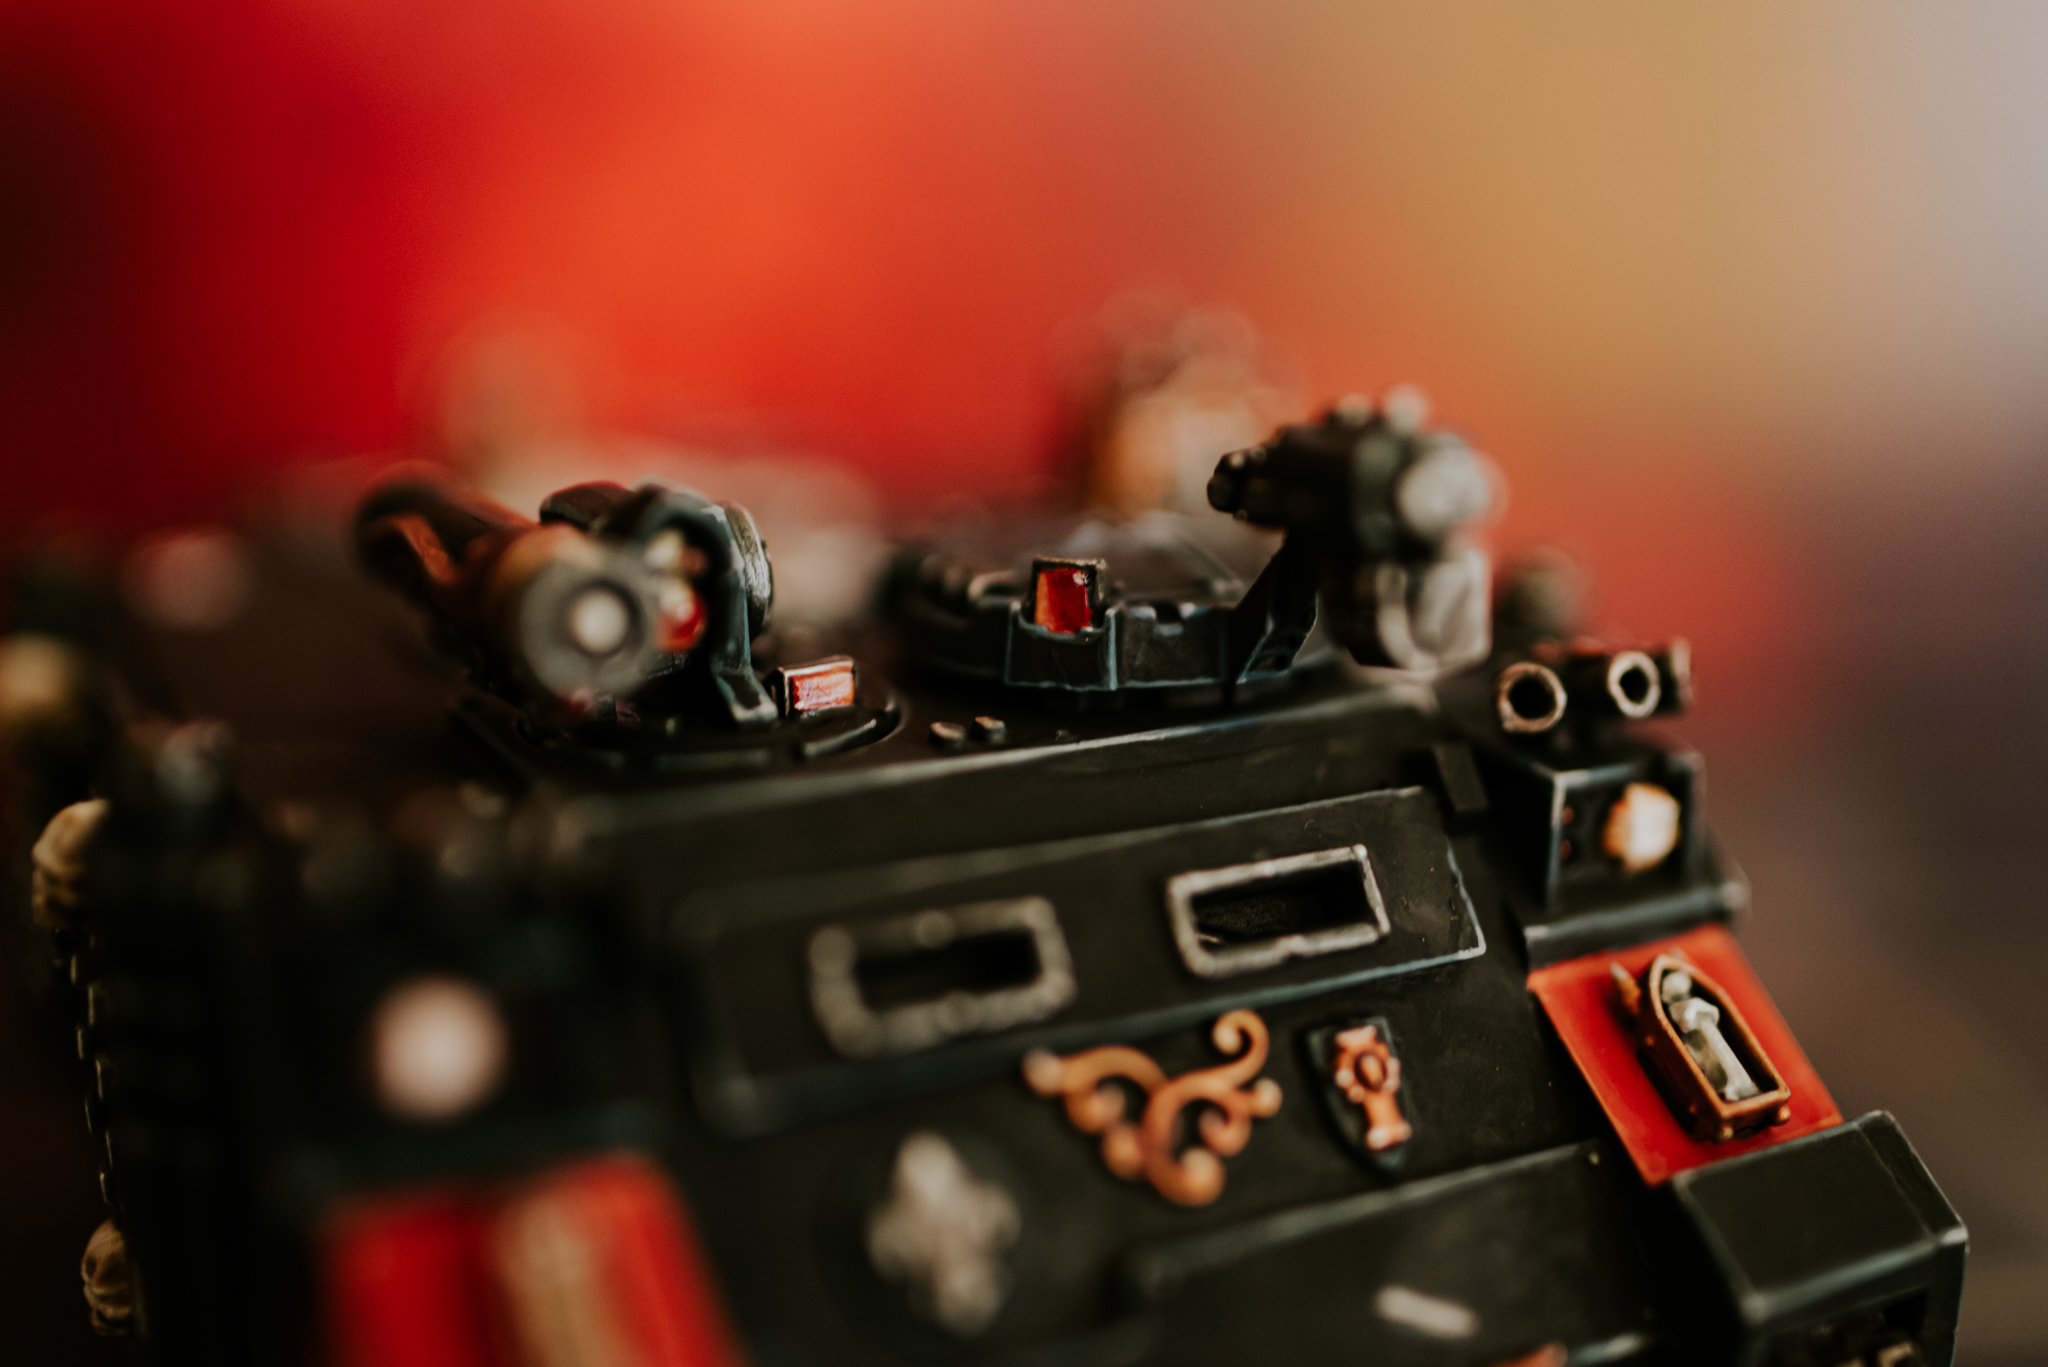
Today I’m showing off Part 1 of my painting guide for two Rhinos. I’ve had a spare Deathguard Rhino kicking about from the last run of Conquest Magazine for donkeys years. I decided to purchase one of the new Sisters of Battle Rhino kits & spread all of those badass themed accessories between the two tanks.
This did involve me converting one of the Storm Bolter hatches and making one out of spare bits. On top of that I purchased another Sisters Hunter Killer missile from eBay and some more smoke launchers. Those bits also came with a couple of spare accessories from the Exorcist kit which I made into little shrines on top of the two tank chassis. I then added a few candles here & there to tie into the rest of my army & build that narrative of Emperor worship.
I’m chuffed with how the actually kits came together in the end. So… ONTO the PAINTING.
PAINT LIST
*****
• ARMY PAINTER MATT BLACK SPRAY
• CONTRAST BLACK TEMPLAR
• DARK REPEAR
• THUNDERHAWK BLUE
• ARMY PAINTER ASH GREY

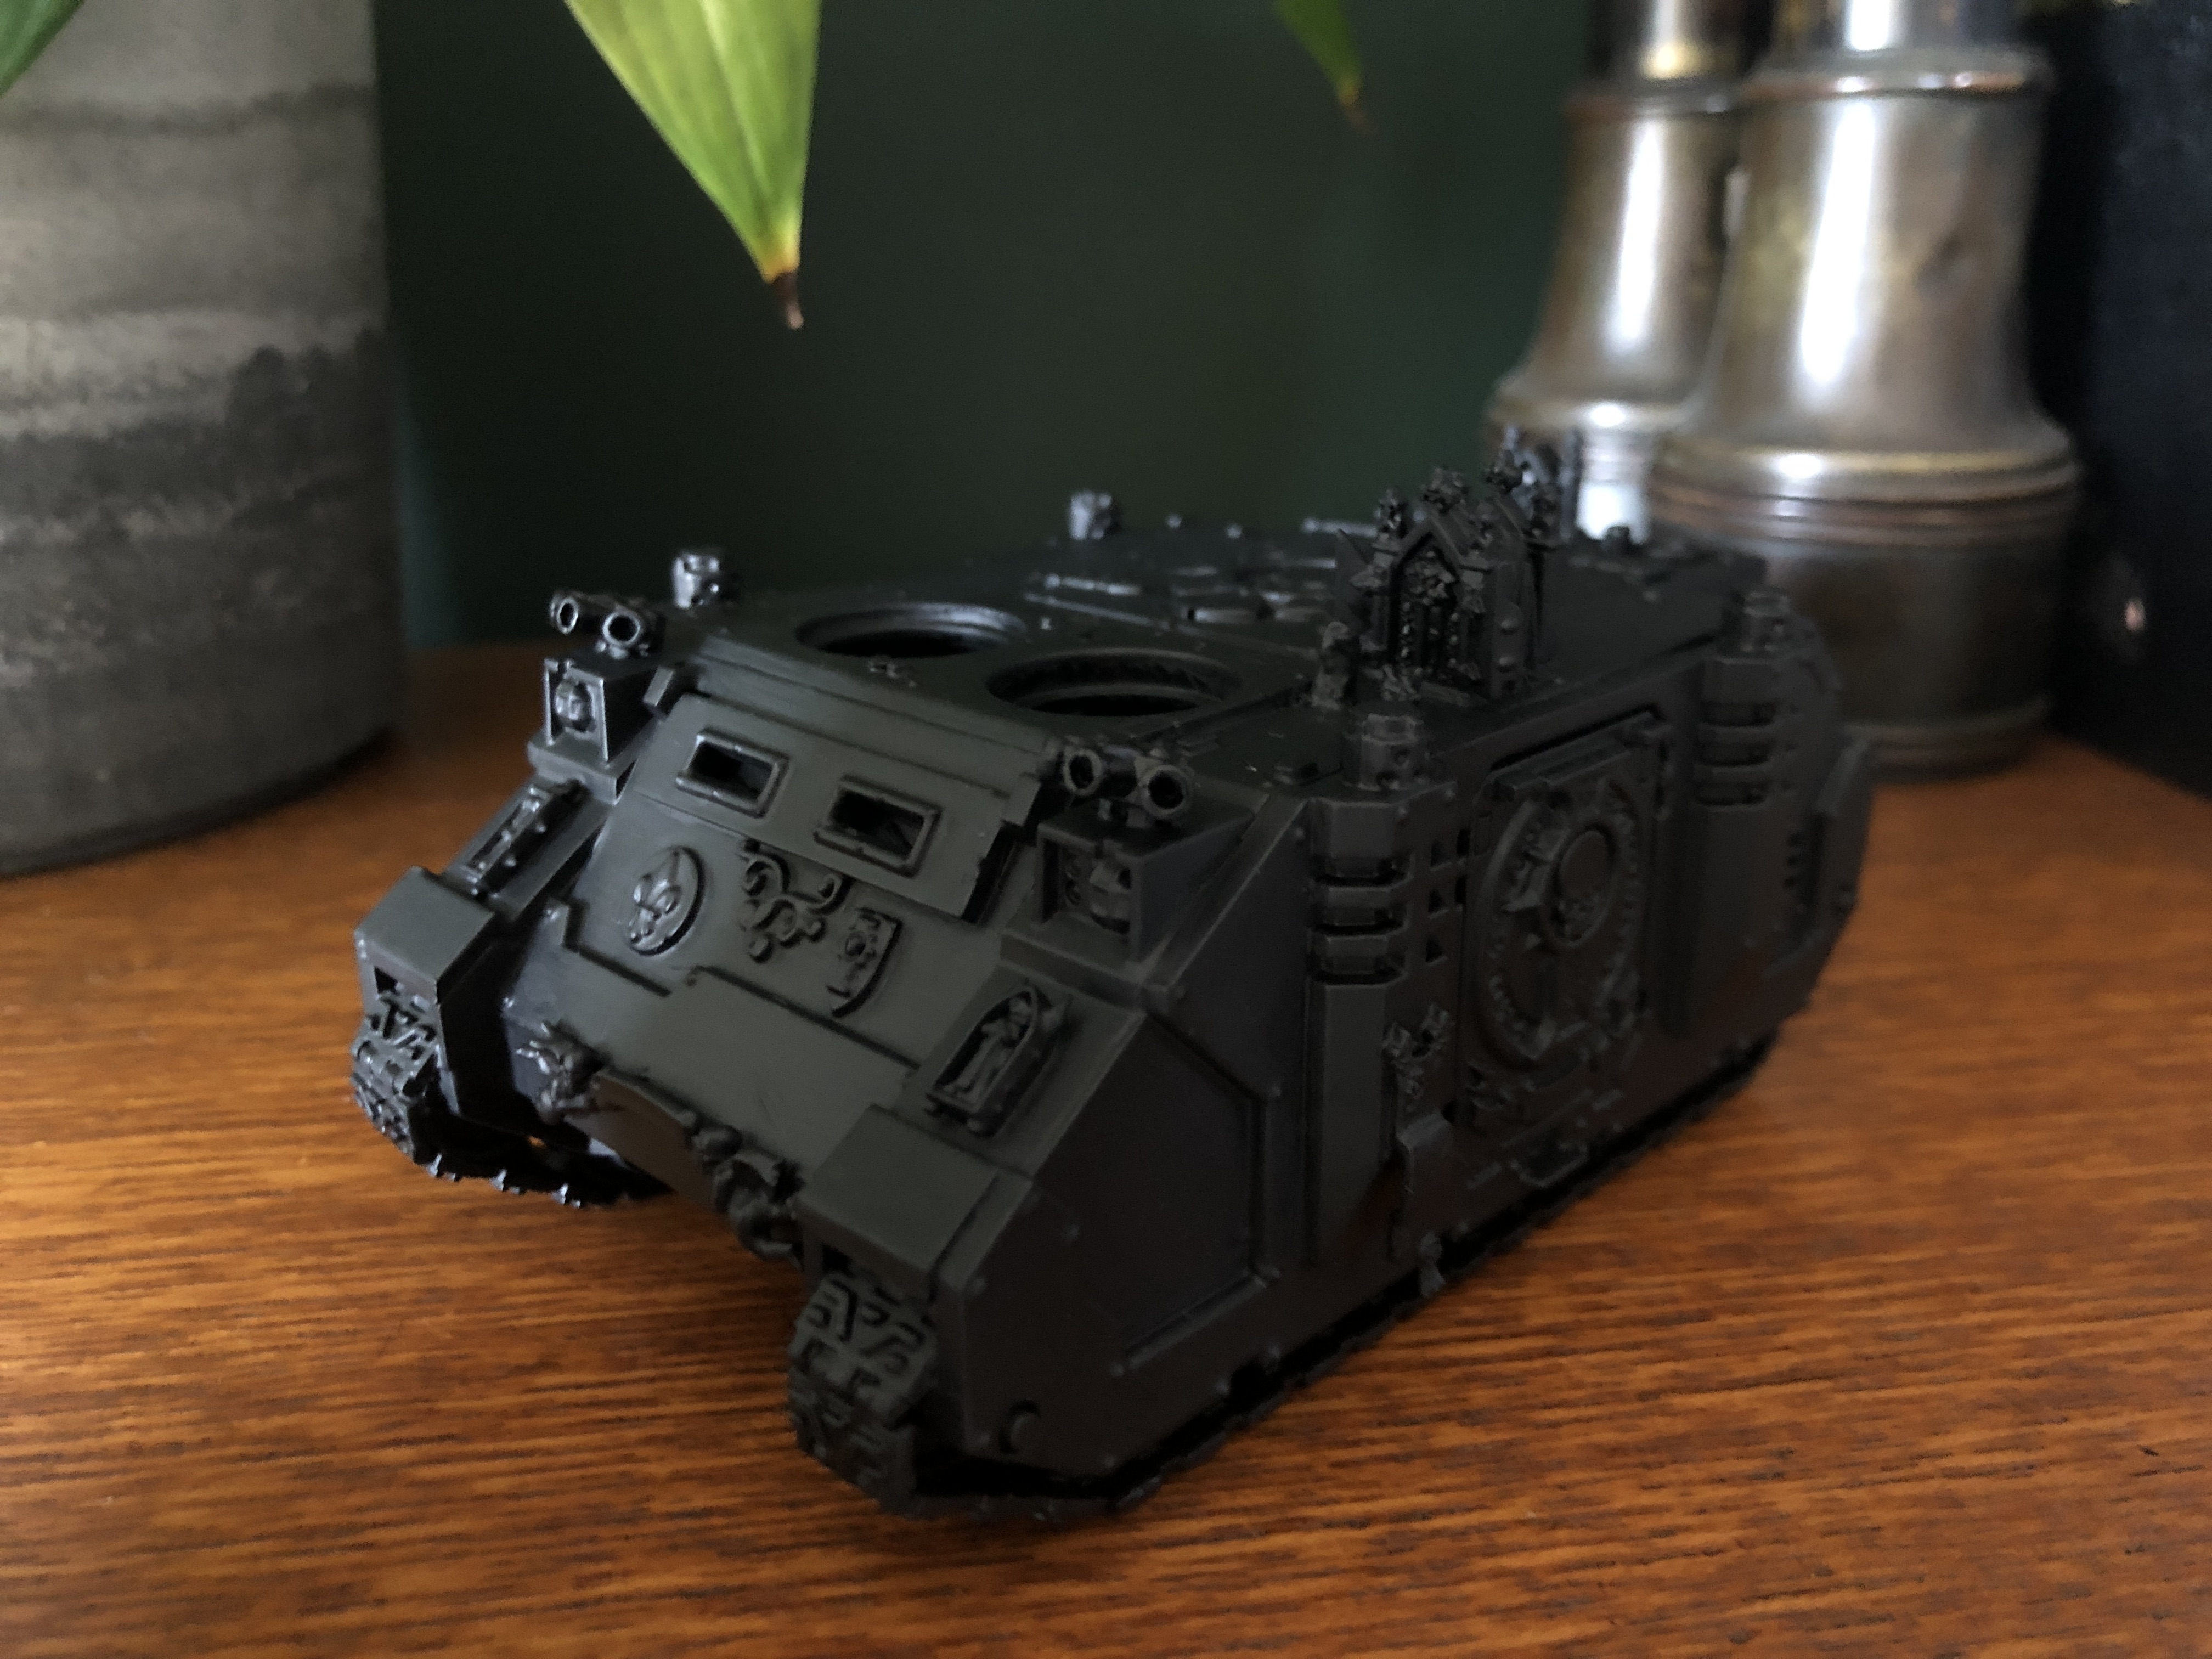
ALL BLACK. EVERYTHING
*****
I began with a spray of Army Painter Matt Black before hitting all of the tank with a base coat of Contrast Black Templar. It was at this point I realised how terrible it looked. haha. 3 more coats of Black Templar Contrast later it became a lot less patchy and a finish I could finally work with. Honestly as soon as my next cash comes in I’m buying an airbrush. I’ve had enough of crappy base coats & rattle cans not matching. It’s time to level up at last.
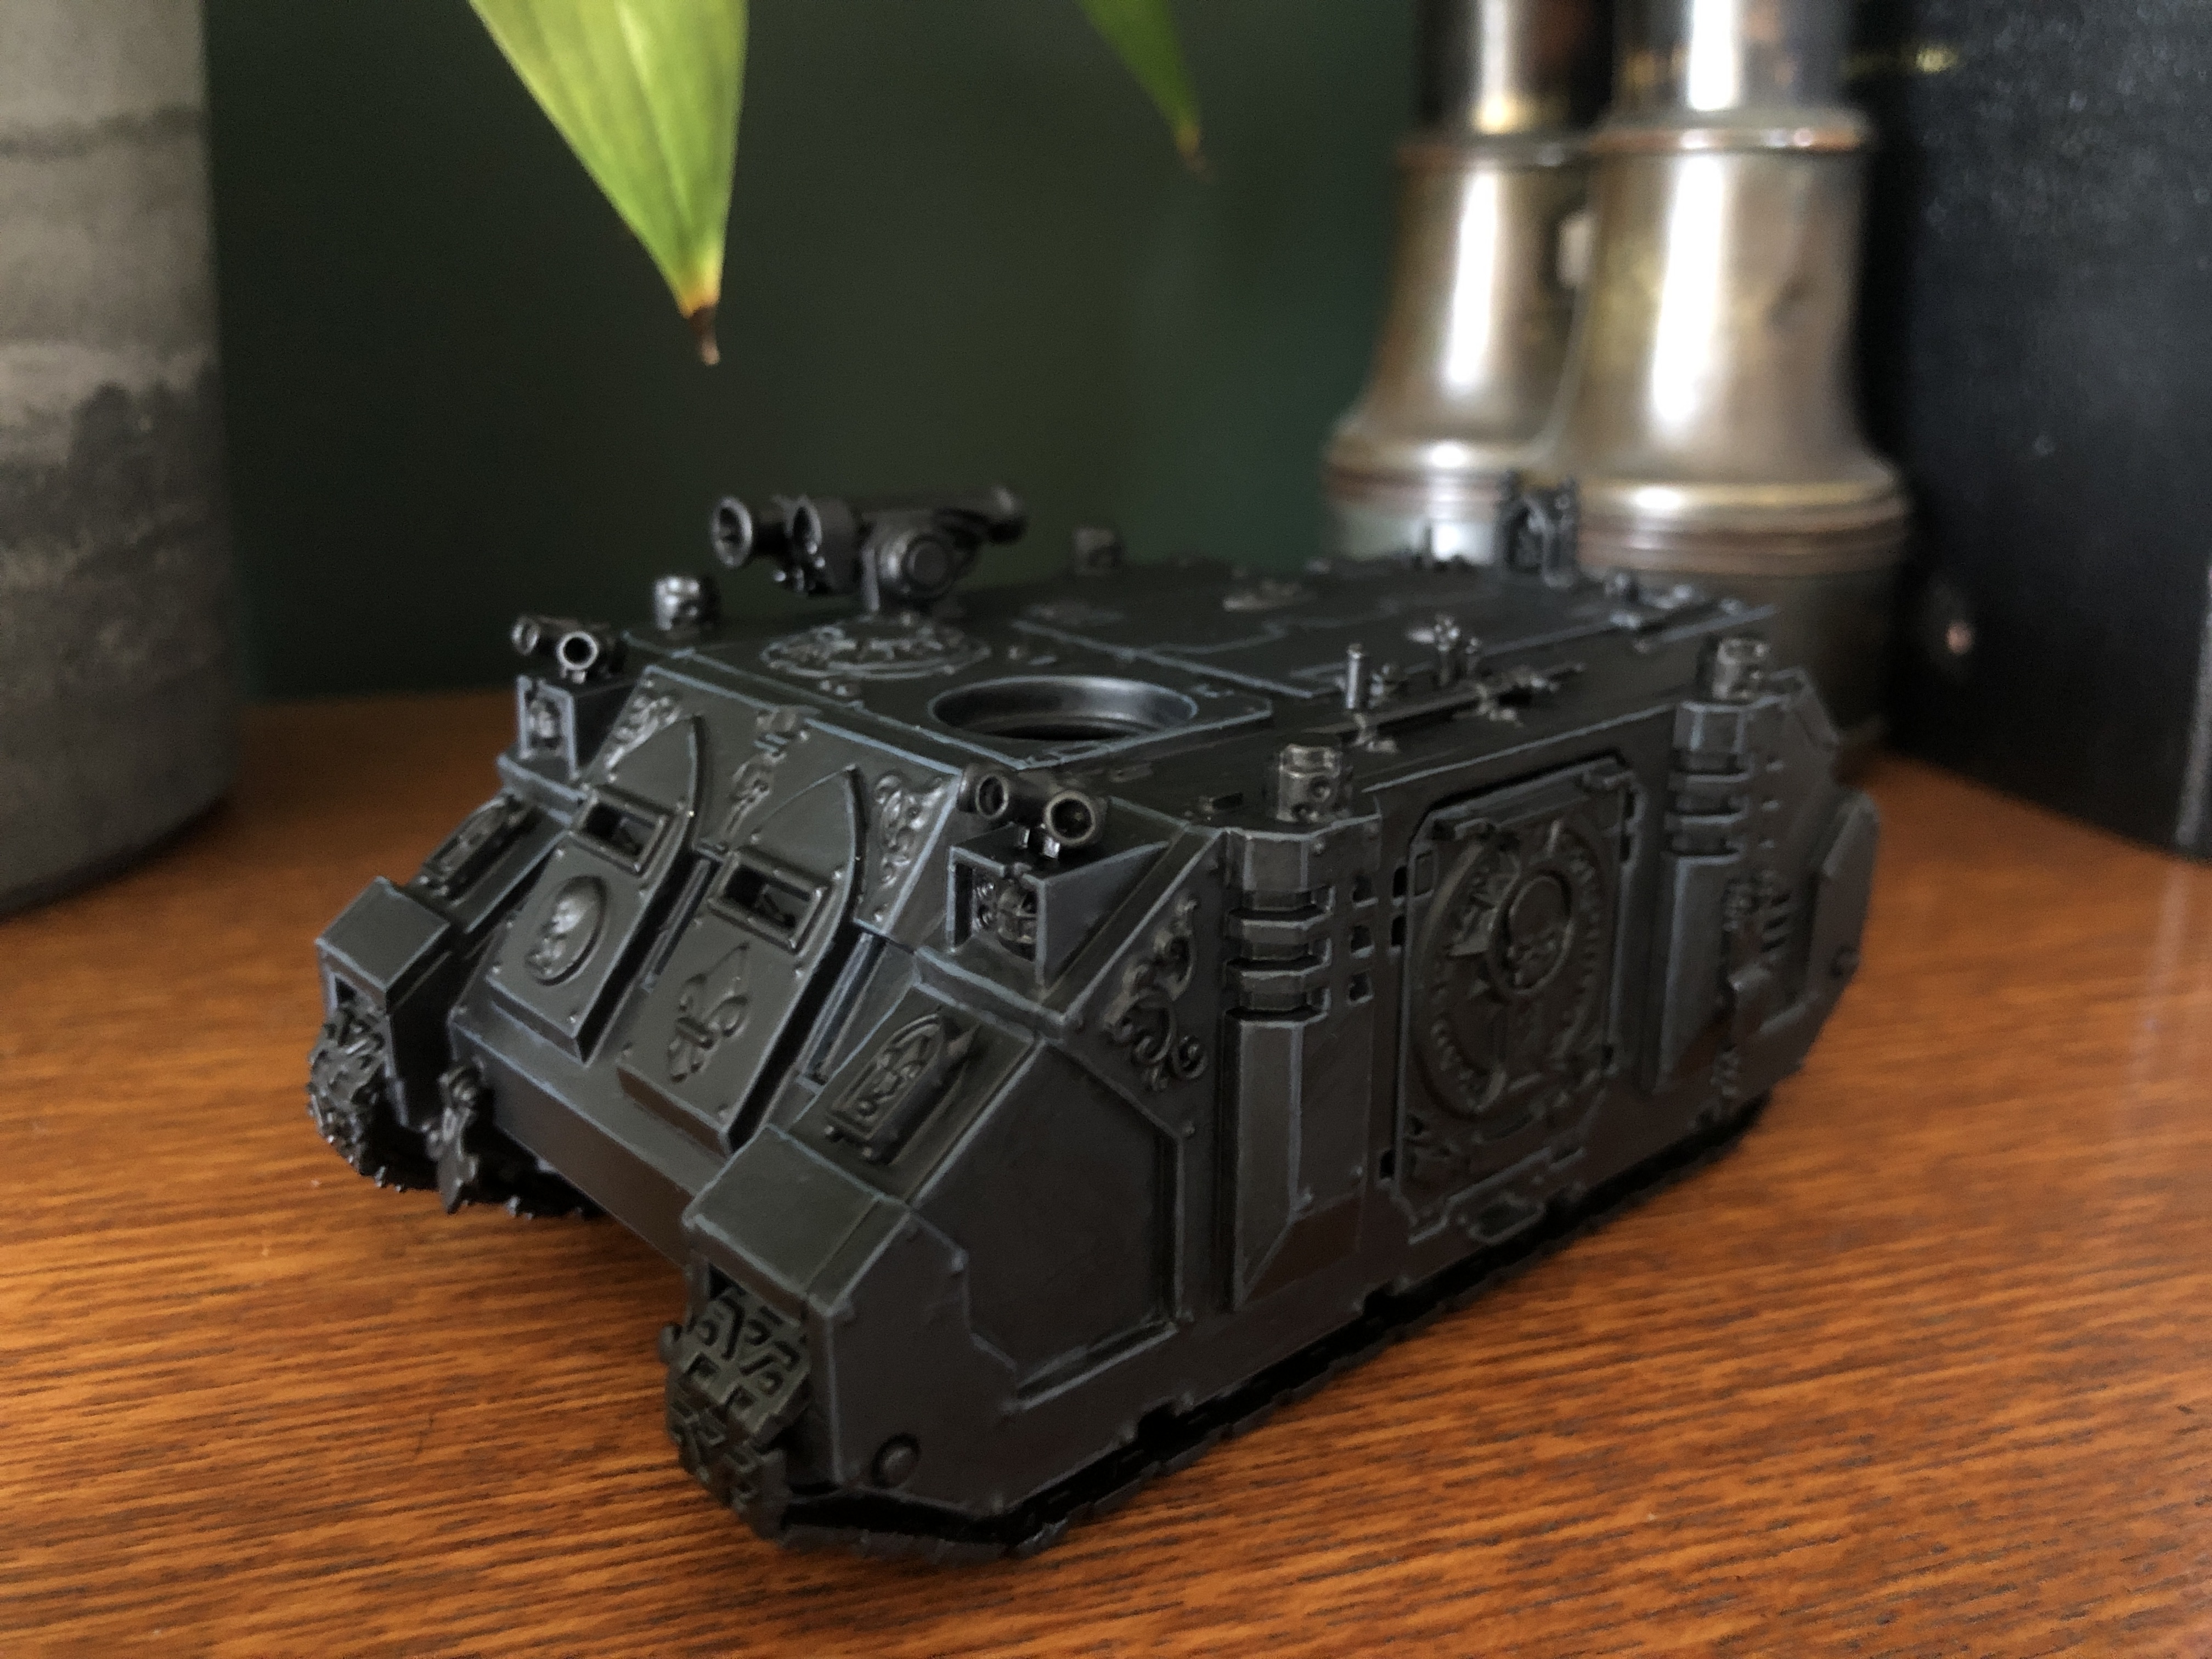
With a reasonably smooth base layer I then went about edge highlighting my Rhinos. I really wanted to push myself with these first two tanks. Seeing them as a practise run before tackling my Exorcists & Immolators. I recently invested in some Artis Opus brushes so I had no excuse. It was edge highlighting time!
The first highlight across the edges of every single rhino panel was with Dark Reaper. This first edge was a little bit broader than the others. I used a number 2 brush for all of the highlights mixing paint in a wet palette to get a consistency like semi skimmed milk.
I then applied a second highlight of Thunderhawk Blue keeping the edge thinner than the previous layer so some of the Dark Reaper still showed through. Finally I applied a last highlight of Army Painter Ash Grey to just the corners of the panels to create a catch light on each surface. I also applied the same highlight mix to all of the turrets.
RHINOS INBOUND
*****
That’s the black complete on my Rhinos & I have to say I’m really pleased with how these guys have come out so far. Next I’ll be moving onto applying some details to the tanks. Stay tuned for awesomeness. YES!
Much Love
ETERNITY GATE
THE EMPEROR PROTECTS ~ PROJECT GOAL COMPLETE
I ONLY BLOODY DID IT
*****
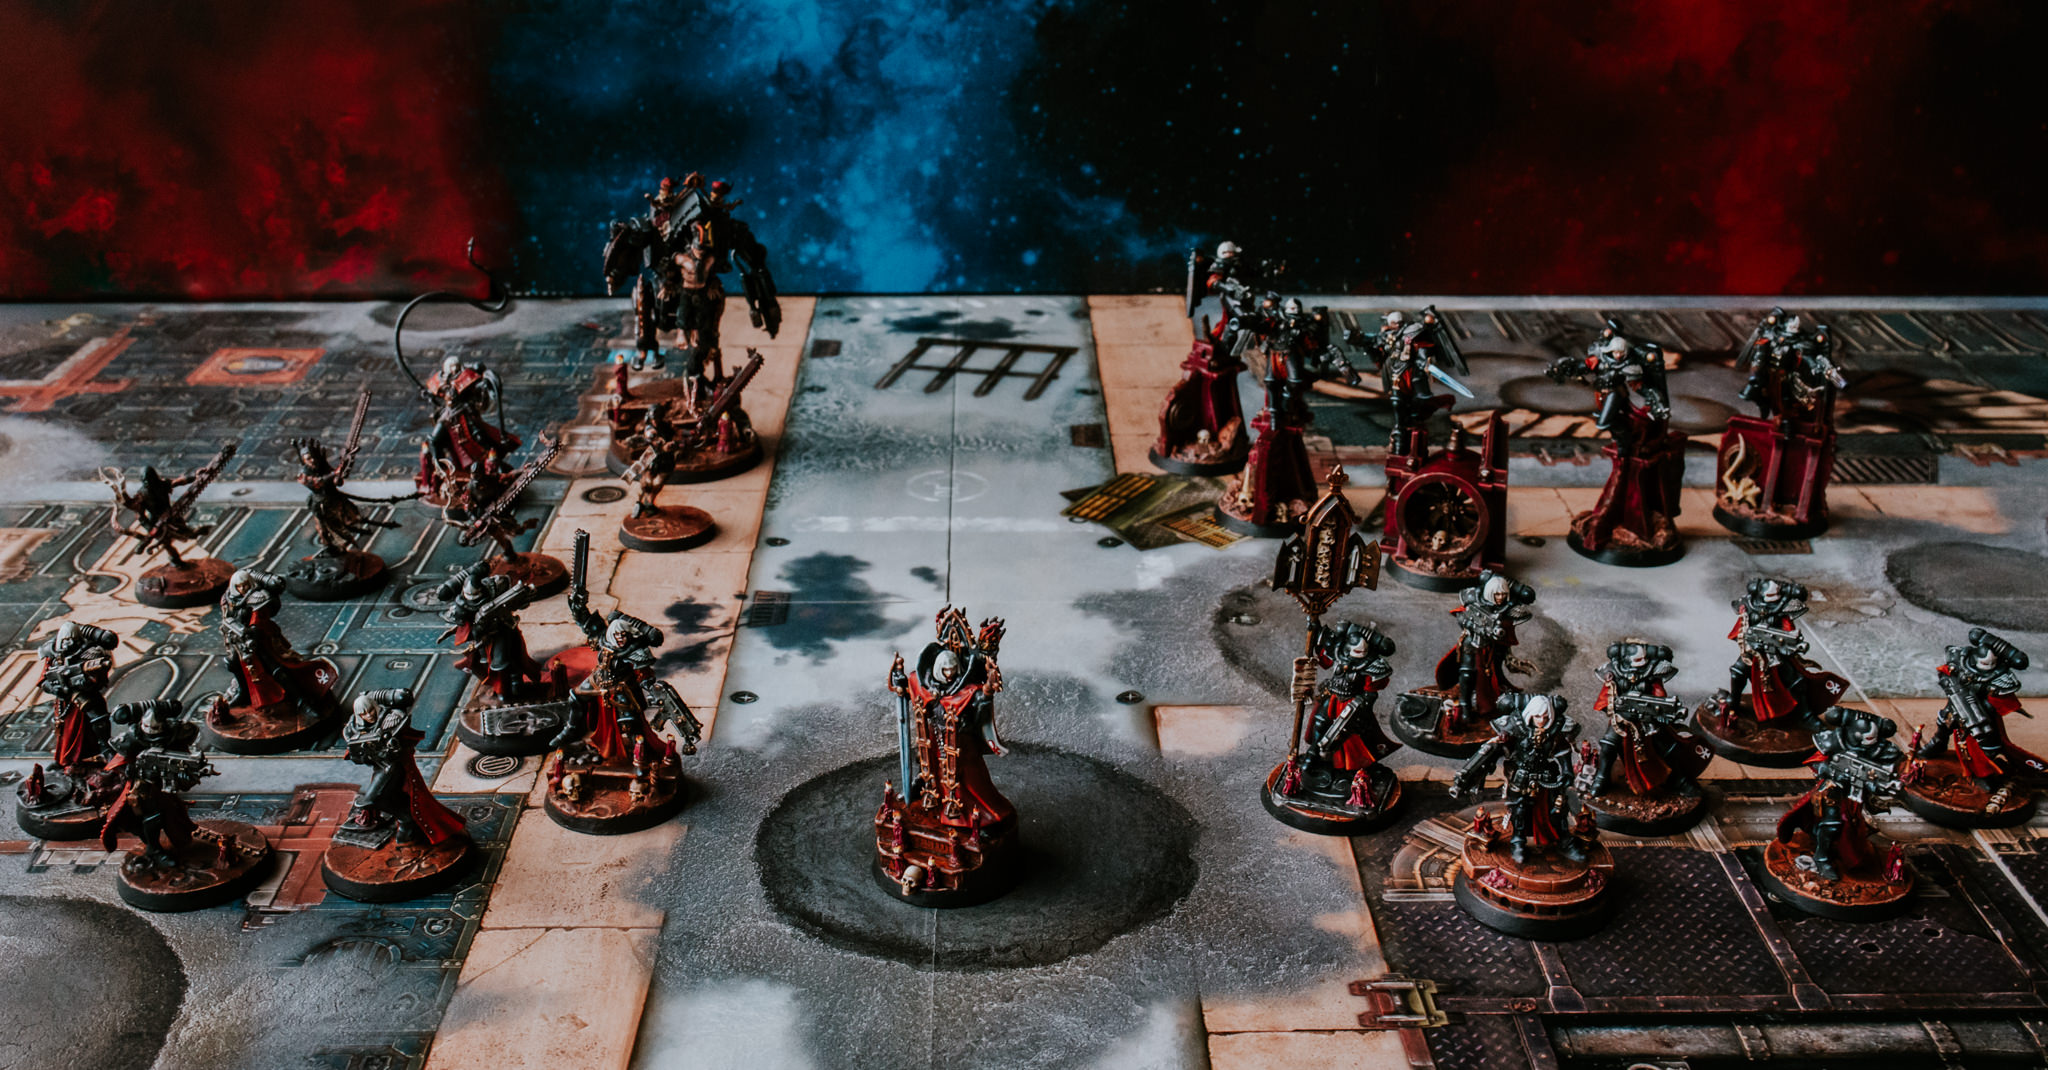
It has taken over a year to complete but I finally finished painting my Limited Edition Sisters Box minus the 3 Arco Flagellants which I’ll do a big squad of at some point. Chuffed to finally have a little fully painted force. I mentioned in the forums that this army is my first fully painted army since i was a kid. Plus back then it was a case of slapping on one thick coat of Humbrol & calling it a day.

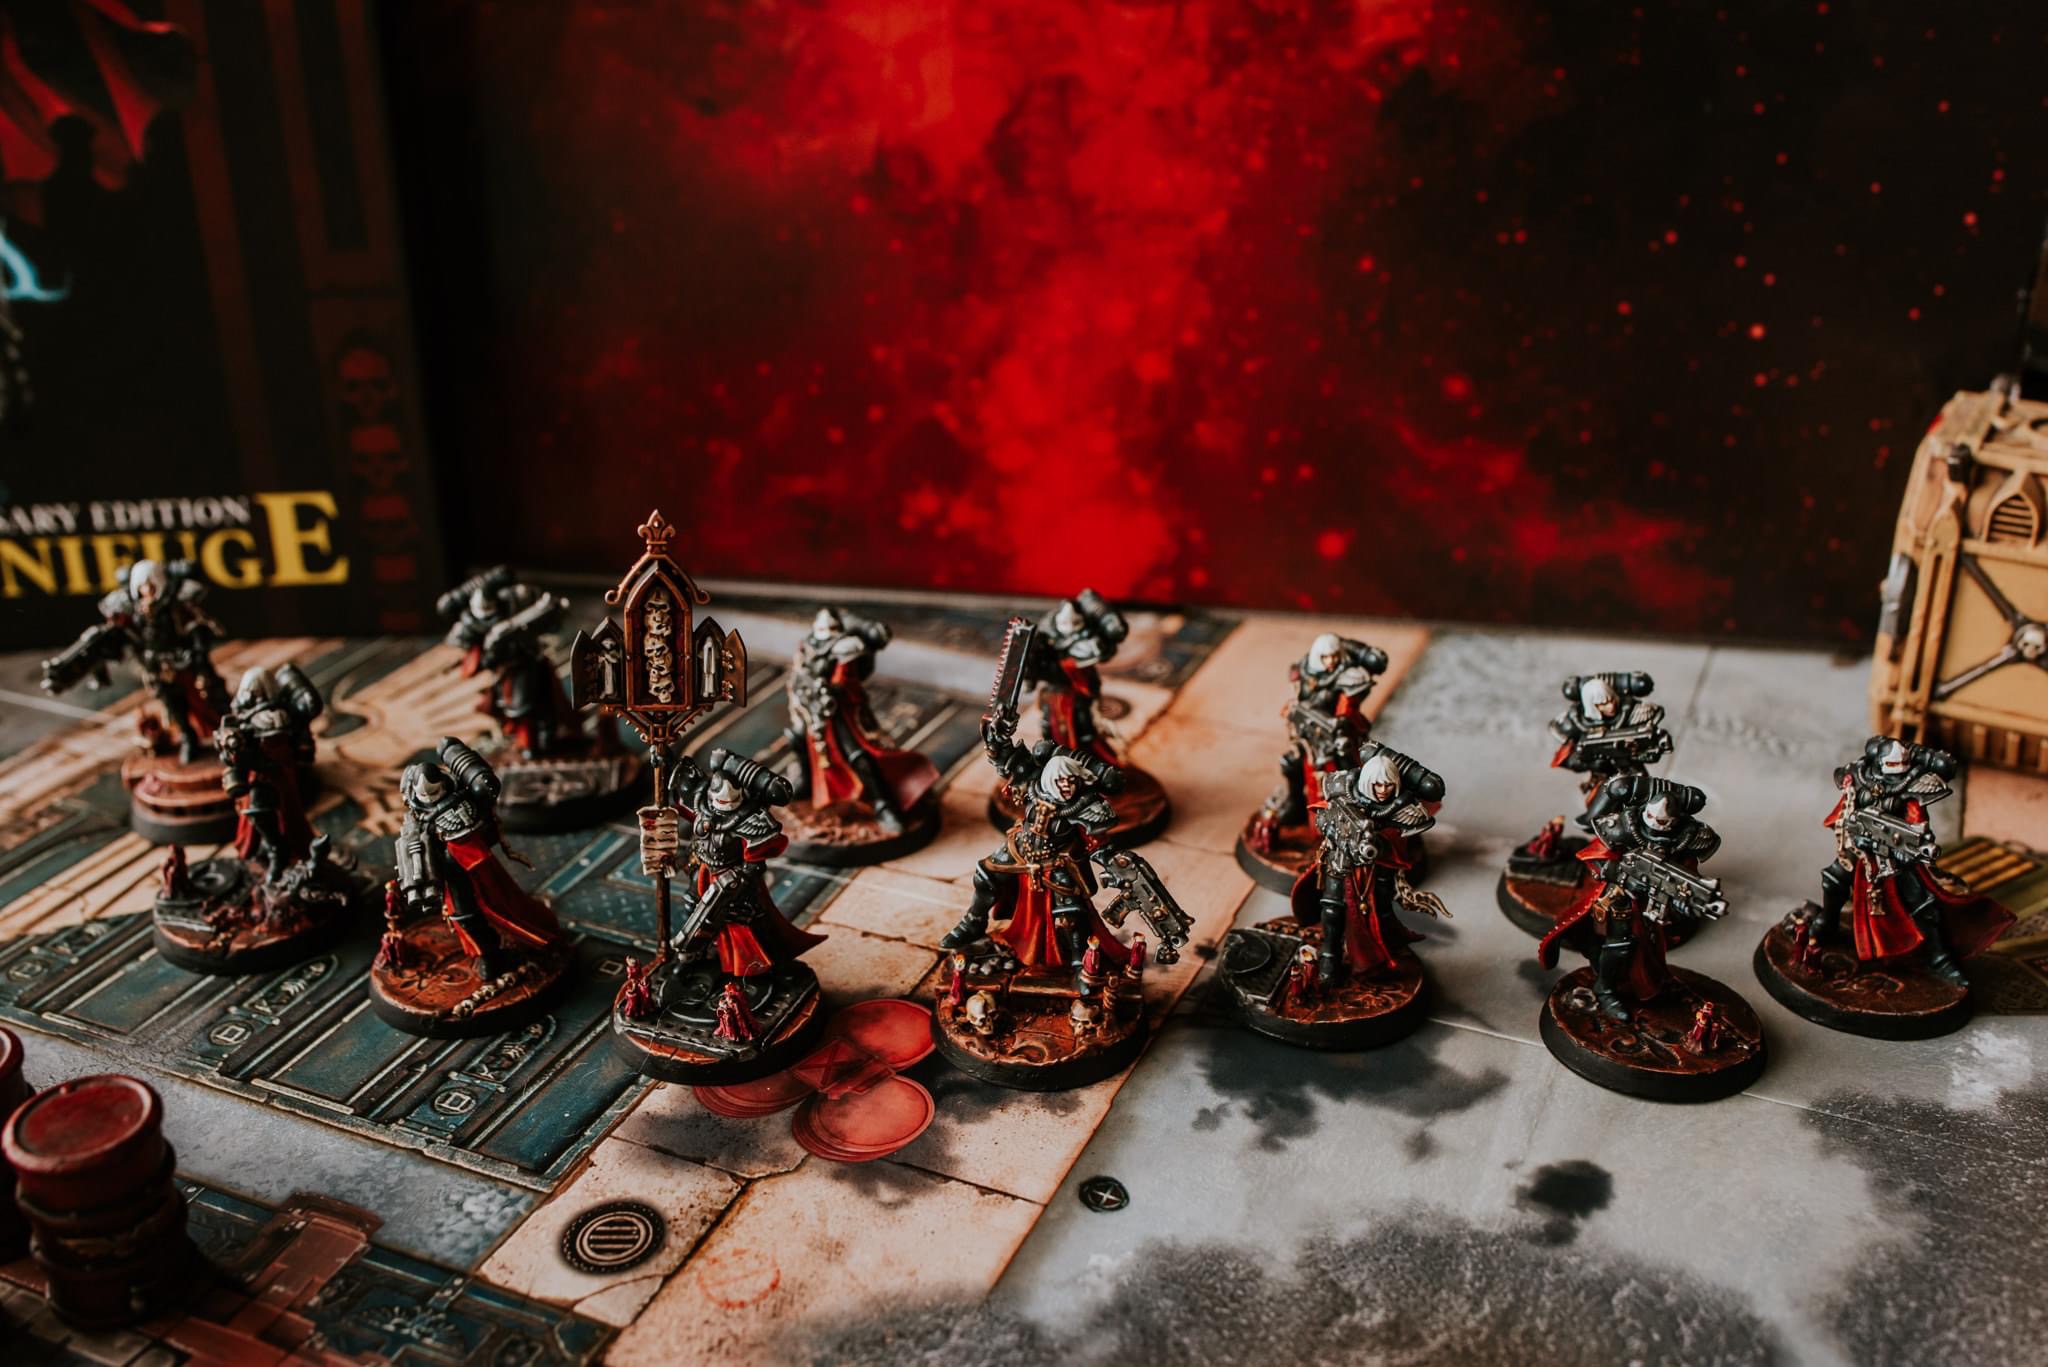
This project has made me a far better painter, far more enthusiastic for my hobby & just absolutely addicted to Sisters of Battle. I’m honoured that so many of you have followed along on this journey. As a wedding photographer lockdown has had a big impact on me plus I recently had a baby boy. It sounds silly but these little plastic ladies have been the one constant in the craziness of the last 365 days. So…. With my goal complete what’s next….Errrrm let me show you.

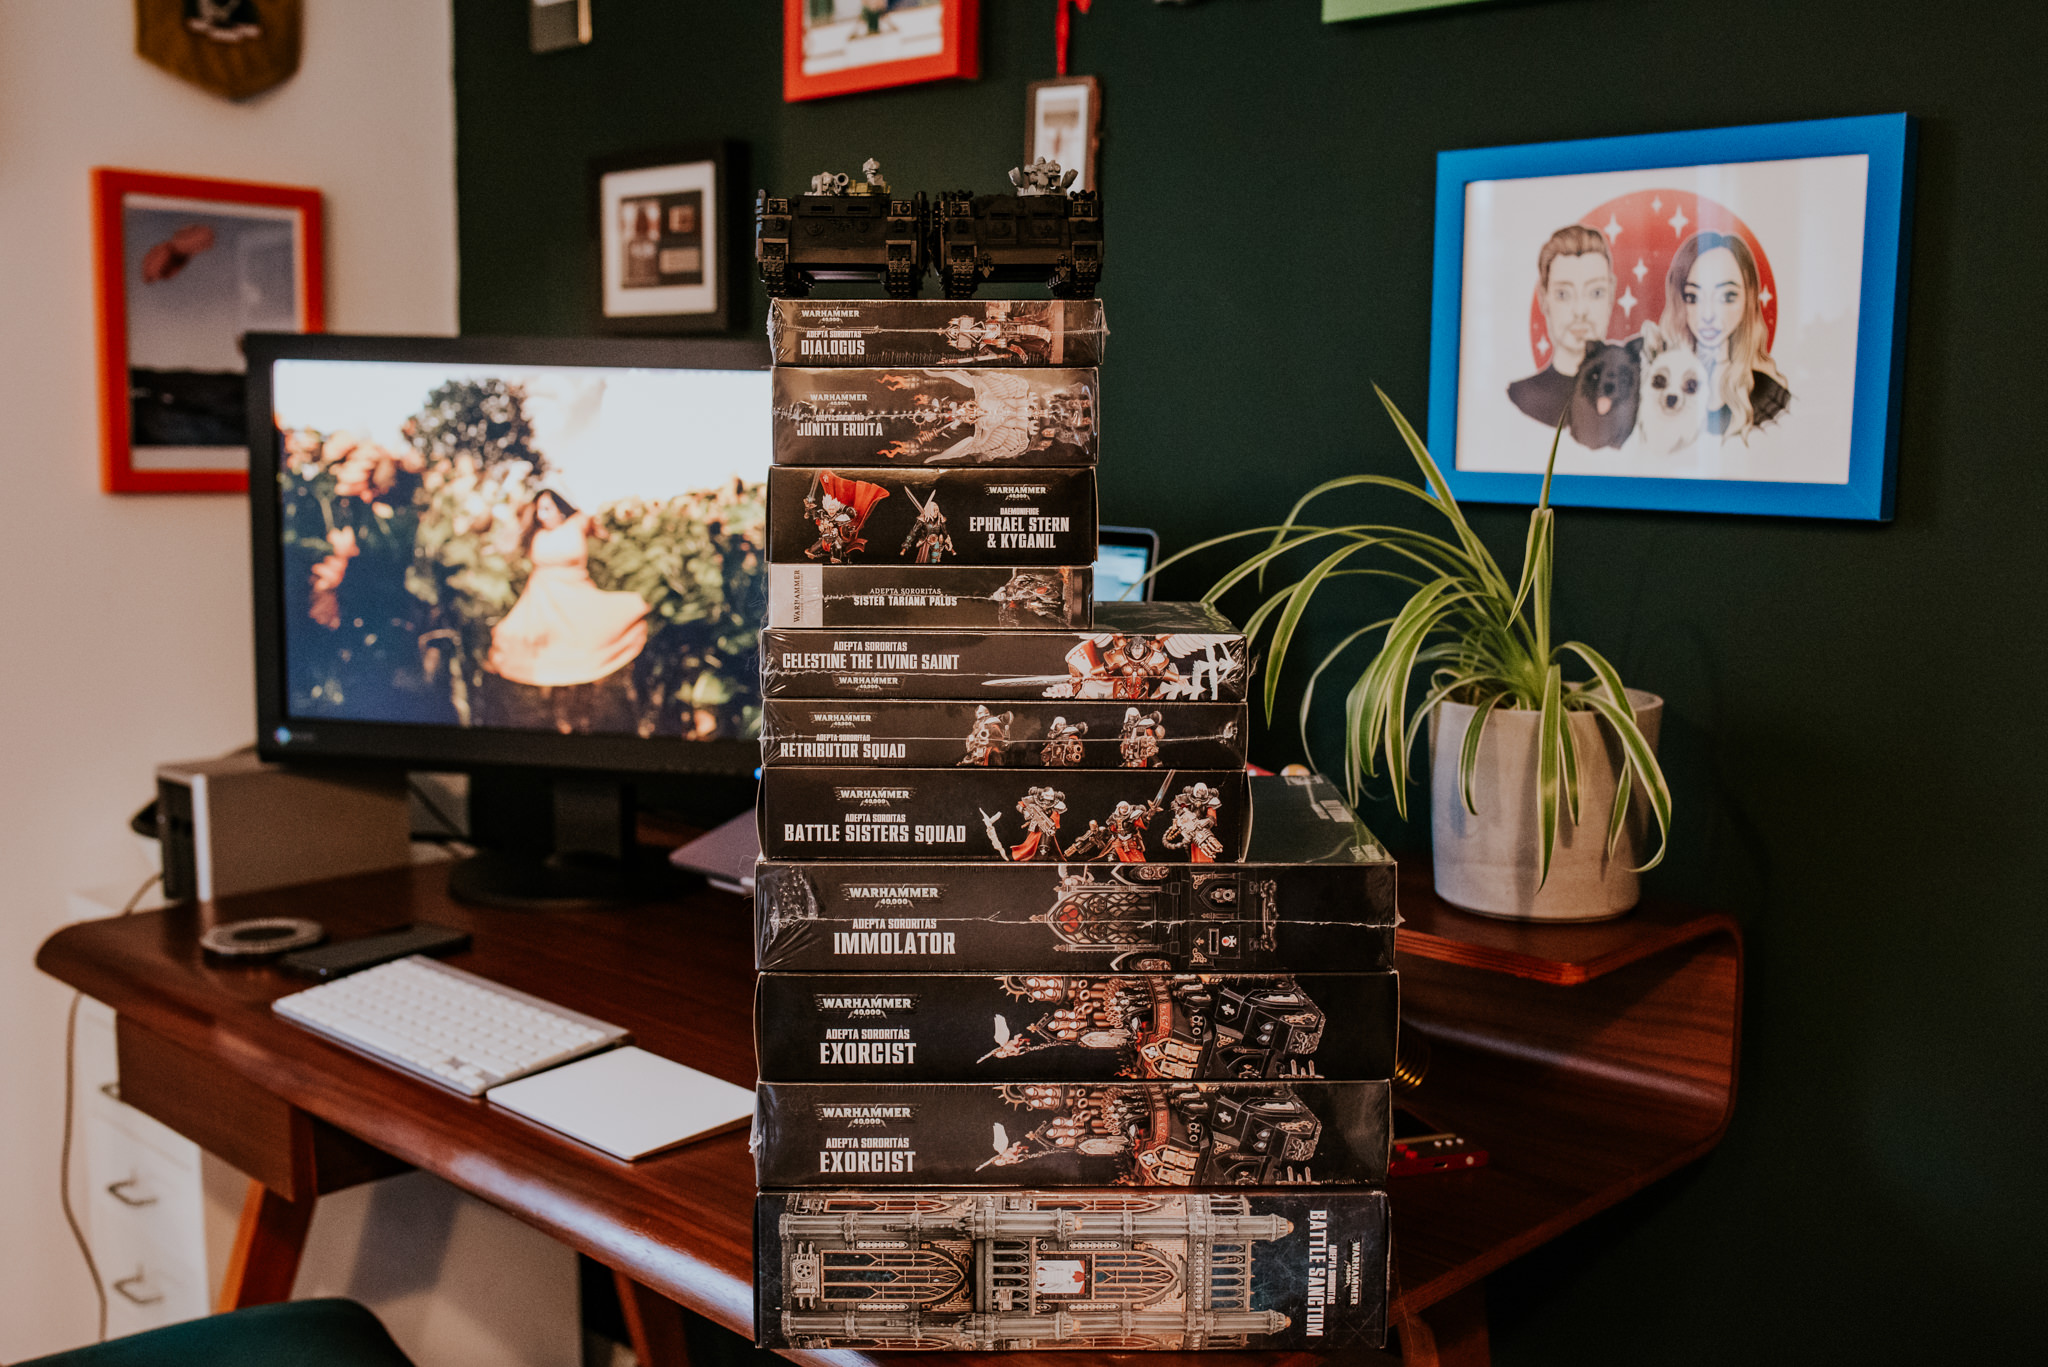
TOWER OF SHAME
*****
Here’s a picture of my tower of shame. Is this the end of this project log? Hell no! In fact it’s only just started. I’m going to be moving into the next stages of bulking out my Sisters force. I’ll be sharing army lists, more painting tutorials & of course more badass photos with you lovely lot so stay tuned. See those two rhinos on the top of mount nunaliscious. Those bad boys are next. YES!
Again I can’t thank you enough for been along for the ride.
See you on the next one!
Much Love
ETERNITY GATE
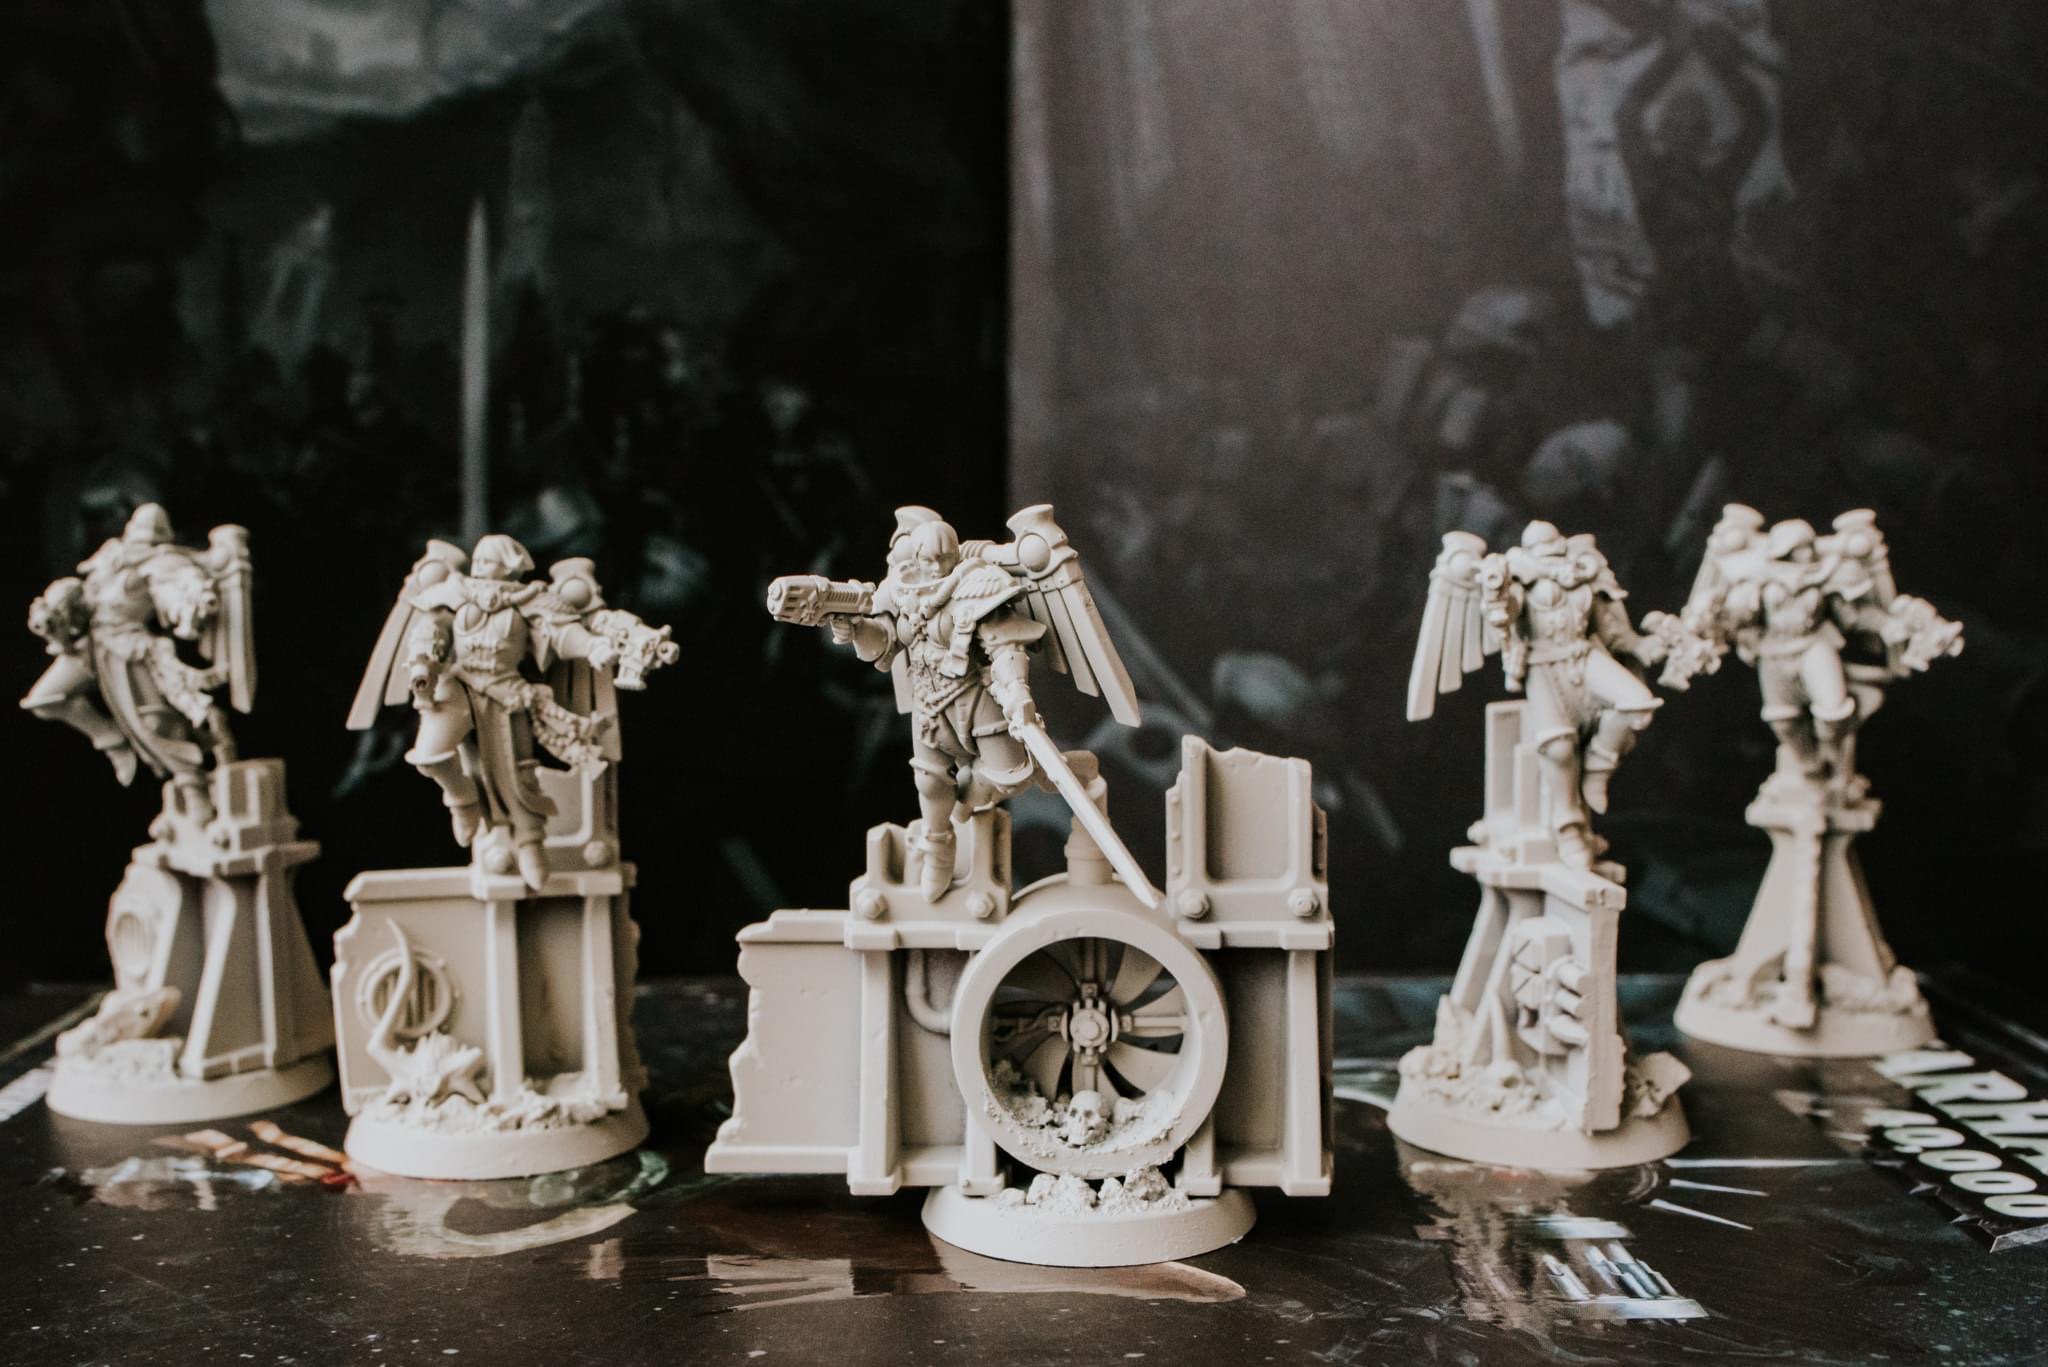
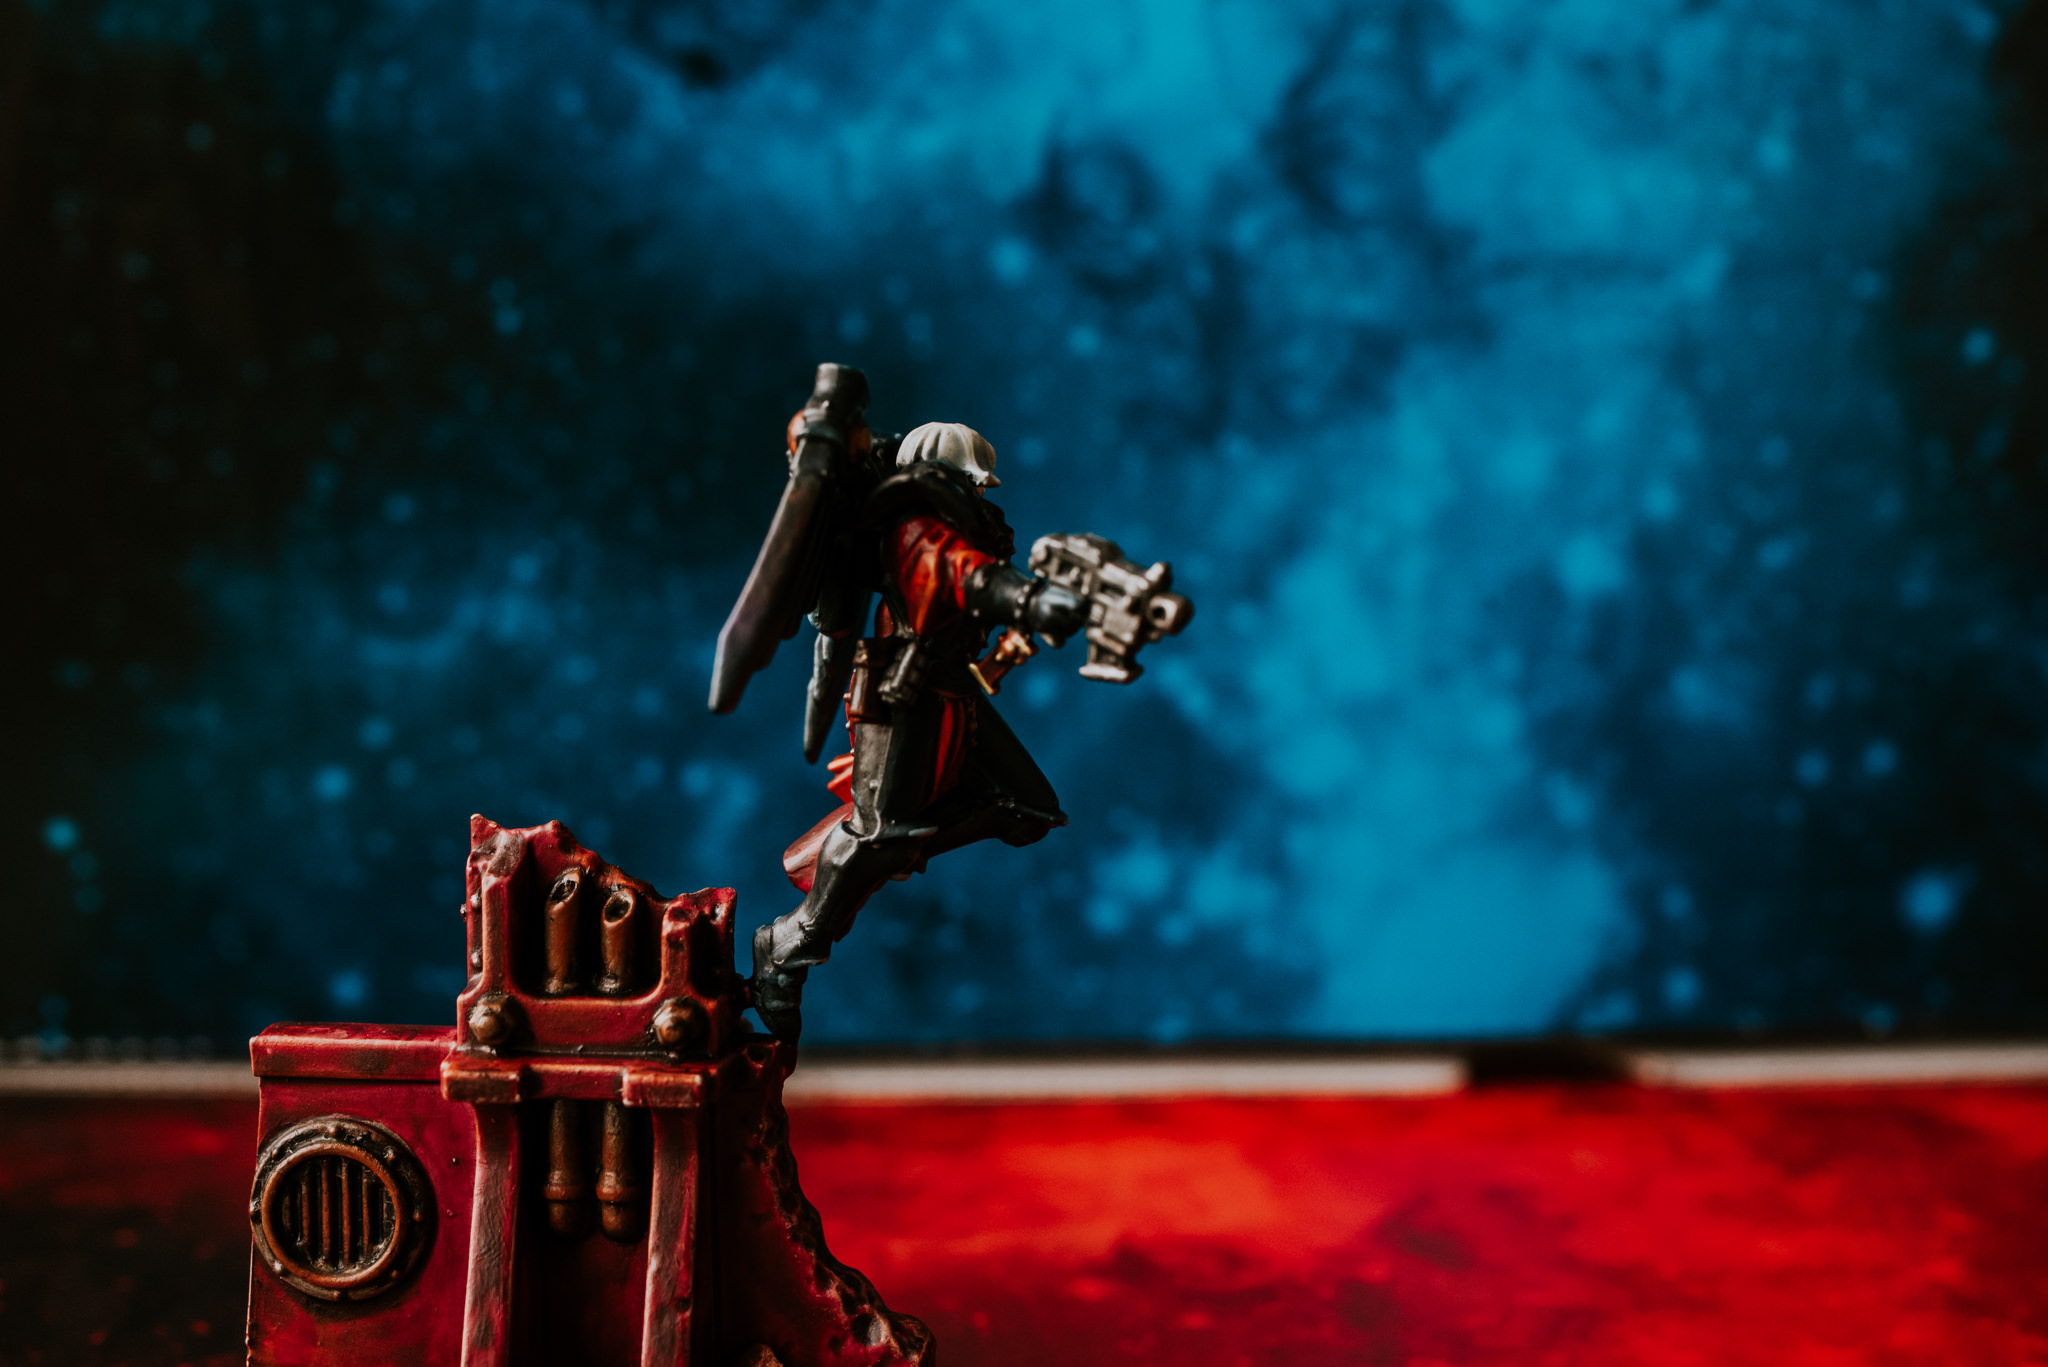
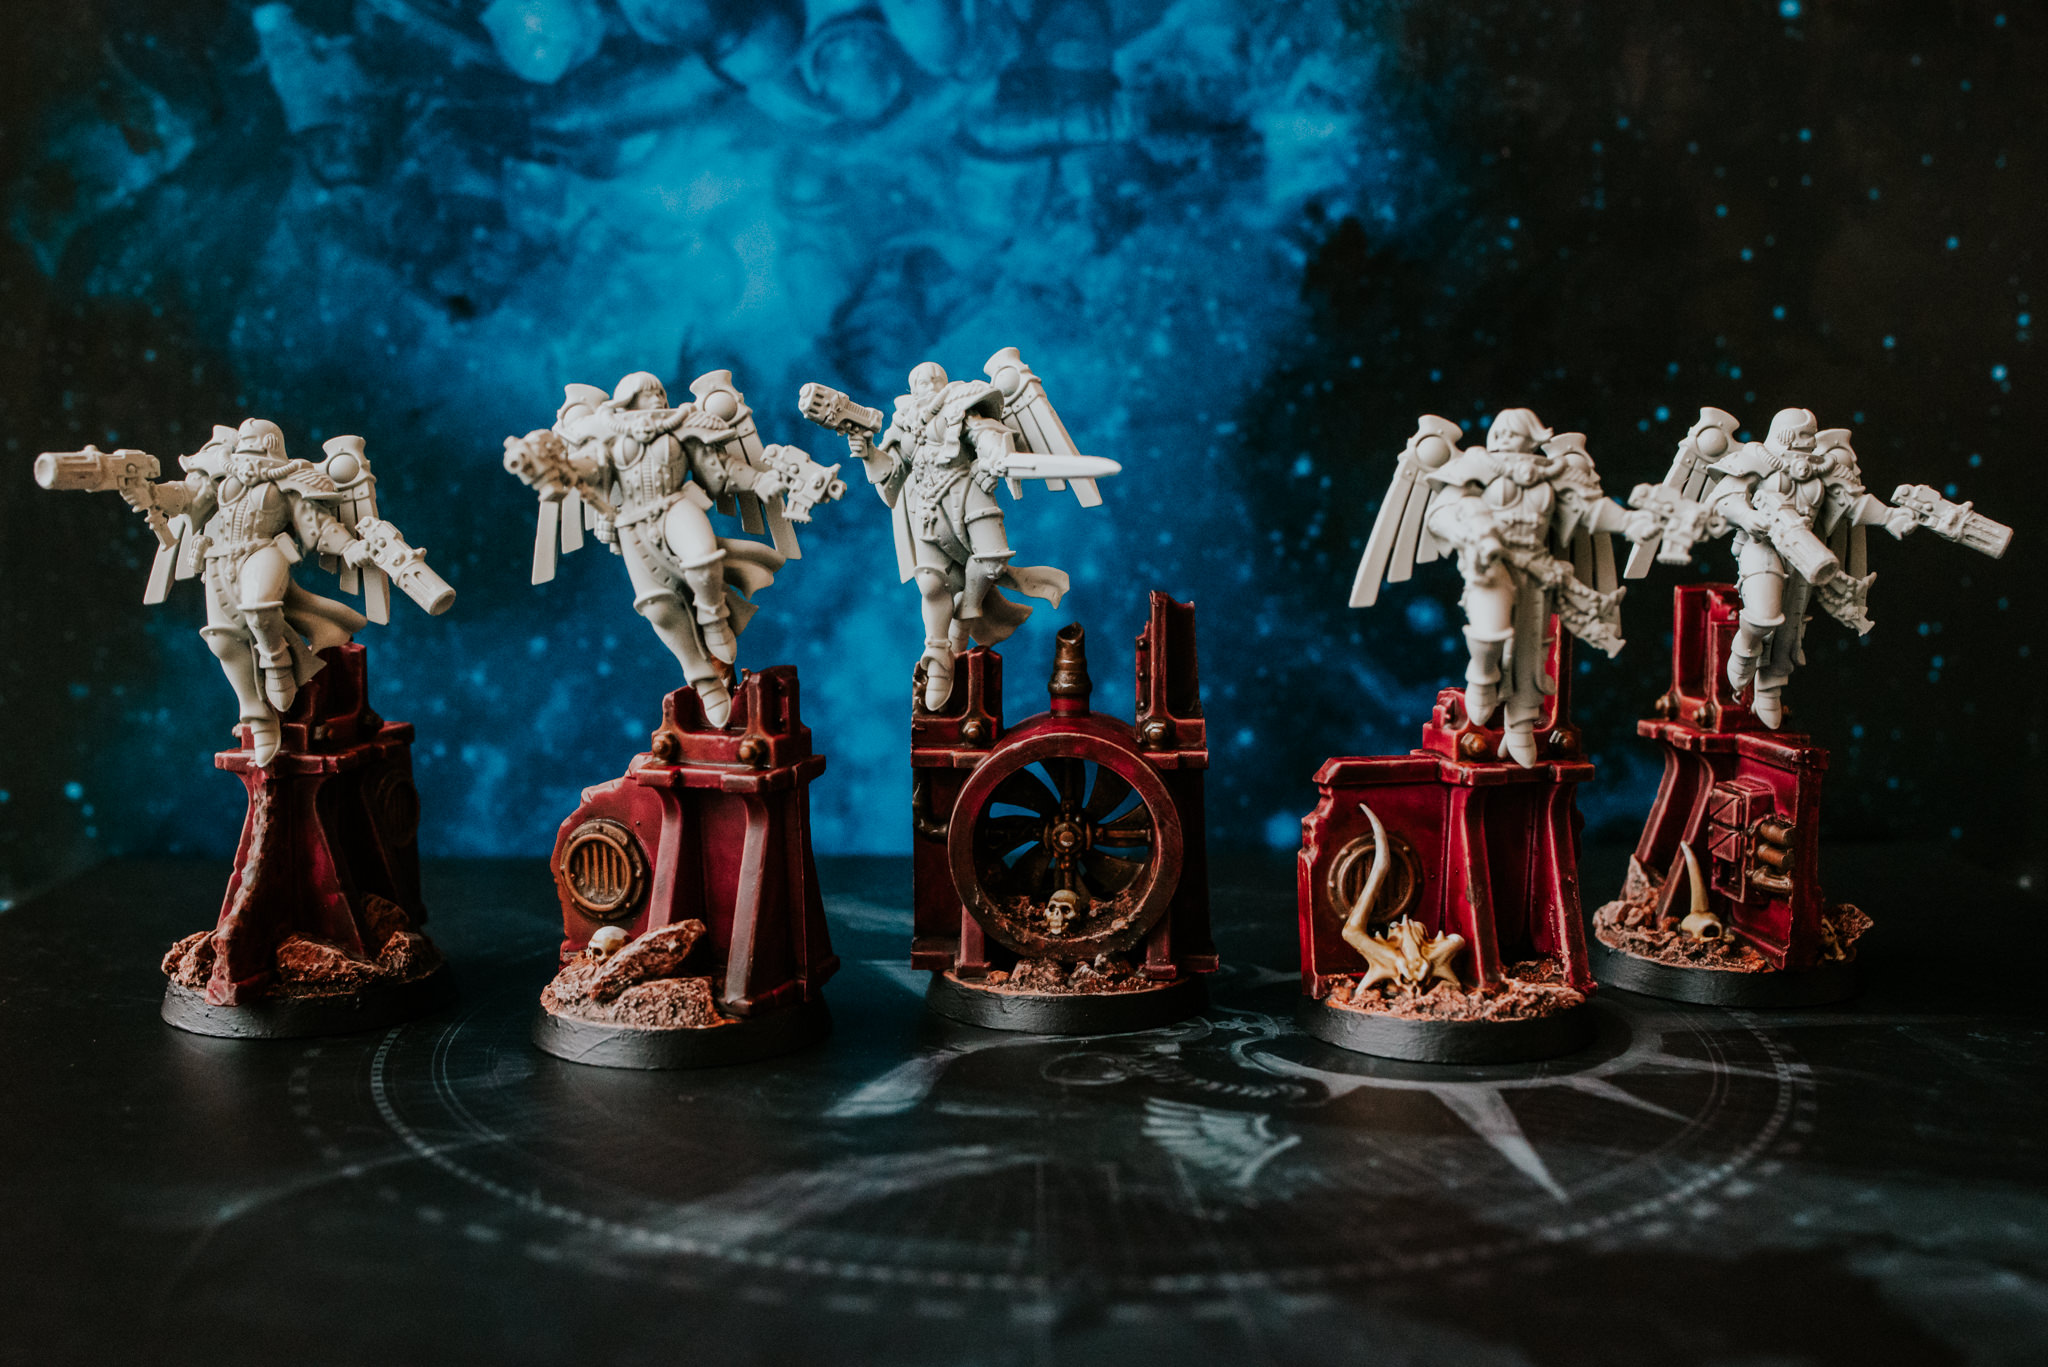
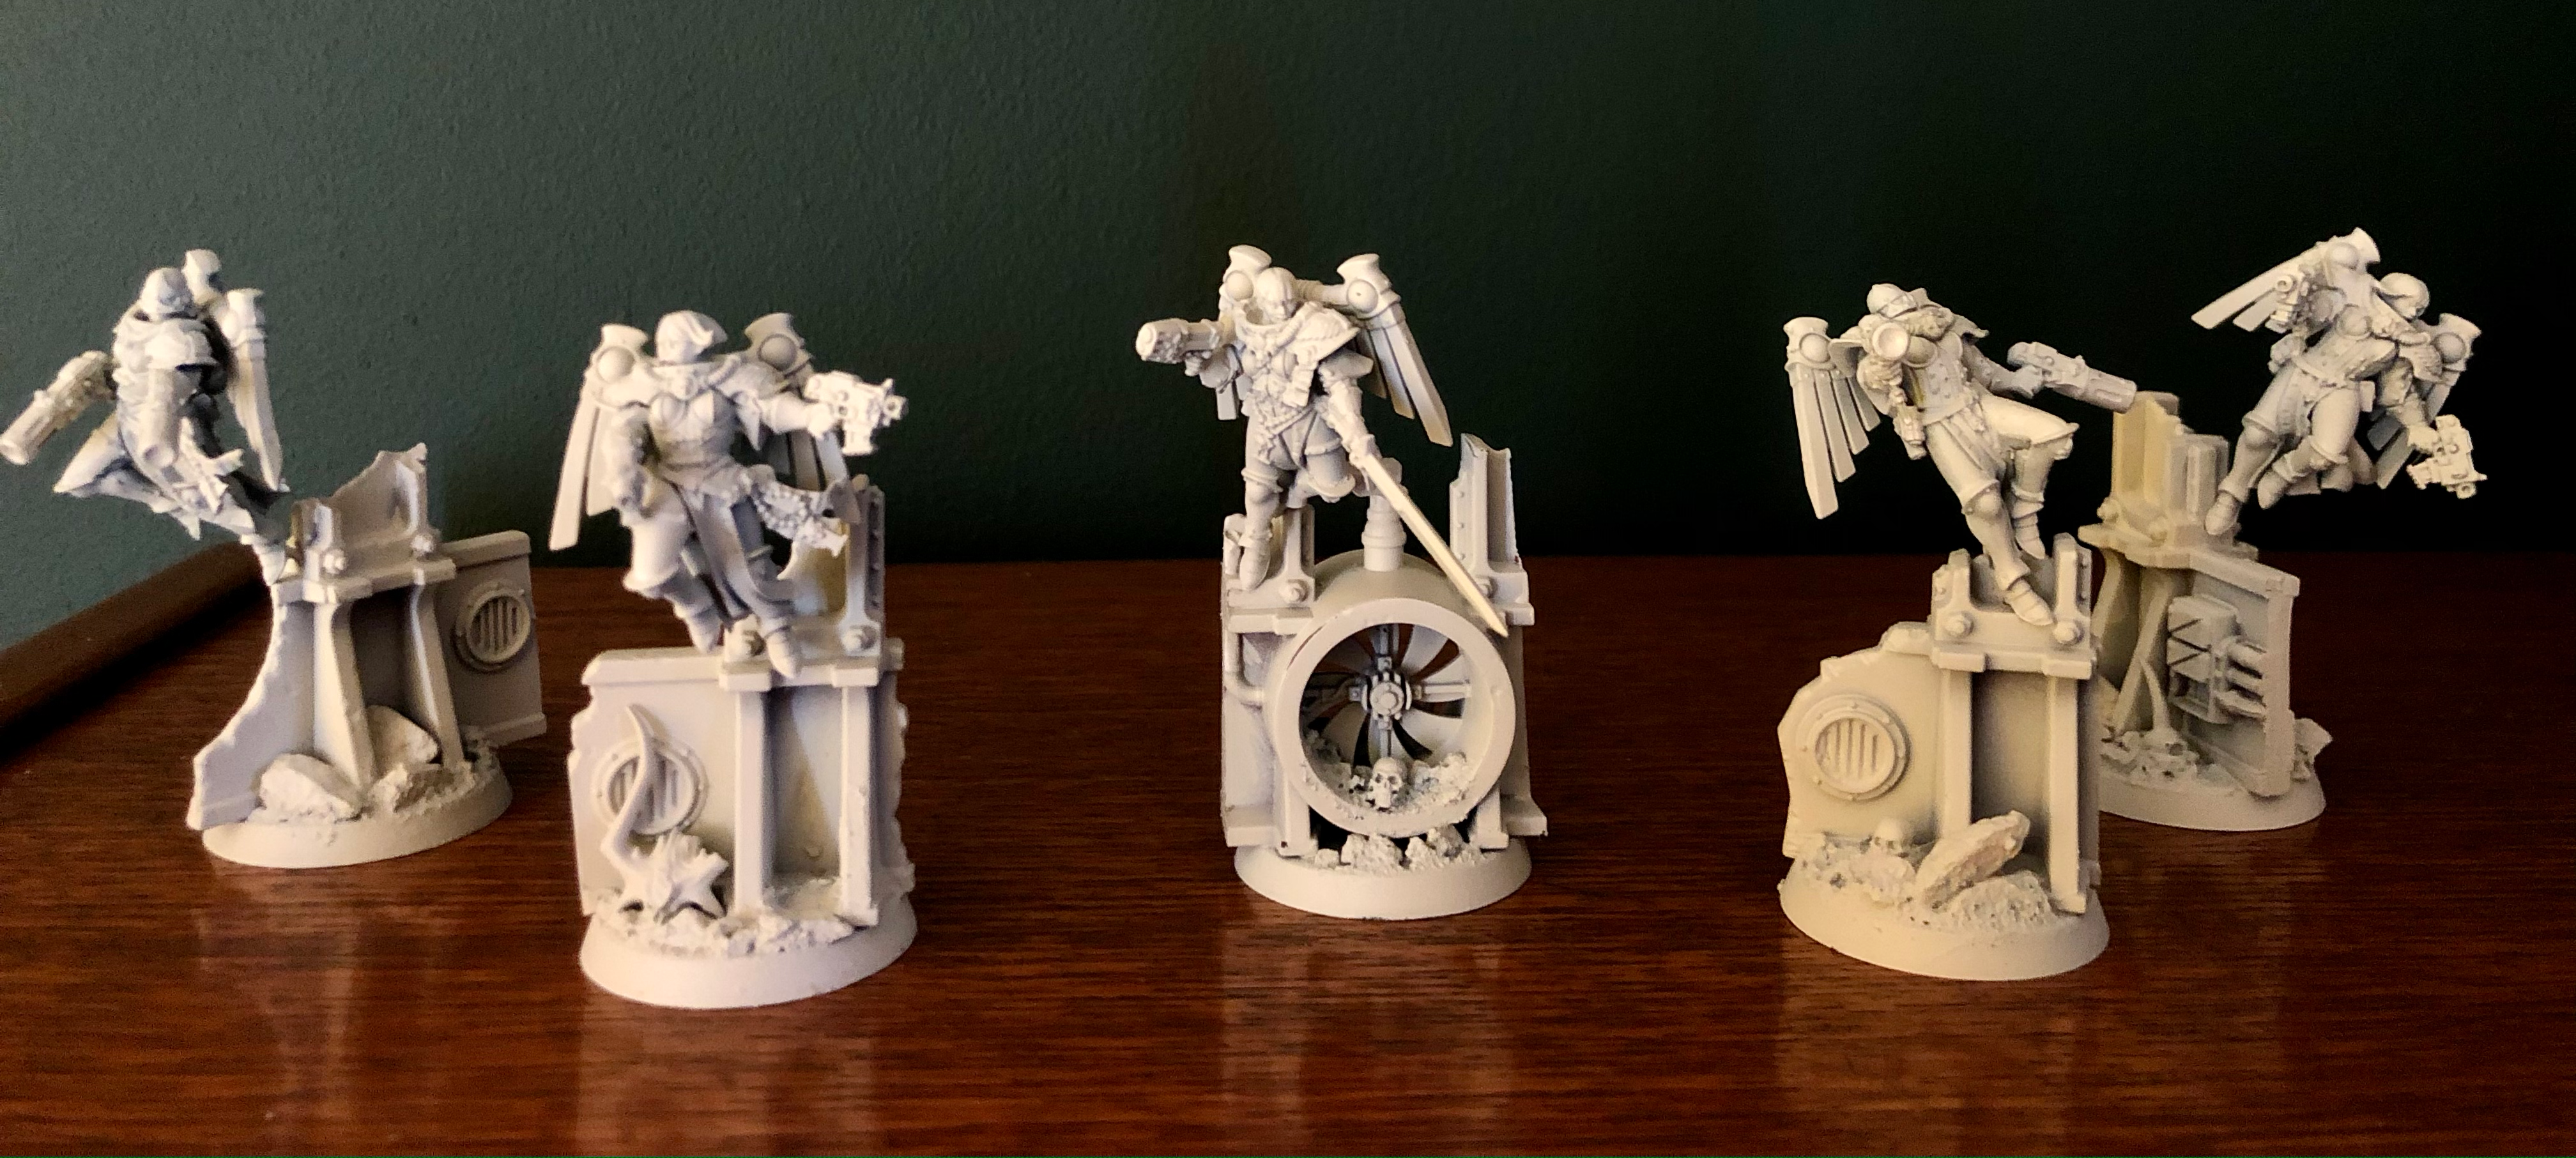
THE EMPEROR PROTECTS ~ SERAPHIM COMPLETE

I HAD A BABY
*****
Jeez it’s been a little while. In fact I feel like I say that every bloody time I make a post here so I’m just gonna stop haha. This time though I’ve got a good excuse as we finally had our baby boy on the 13th December. Yay!
That of course means my time has been taken up by the poo Infested cry palace of a poisonous dwarf. Sorry I mean what a joyful bundle of newborn loveliness. Anyway lets get to what you’re all here for.
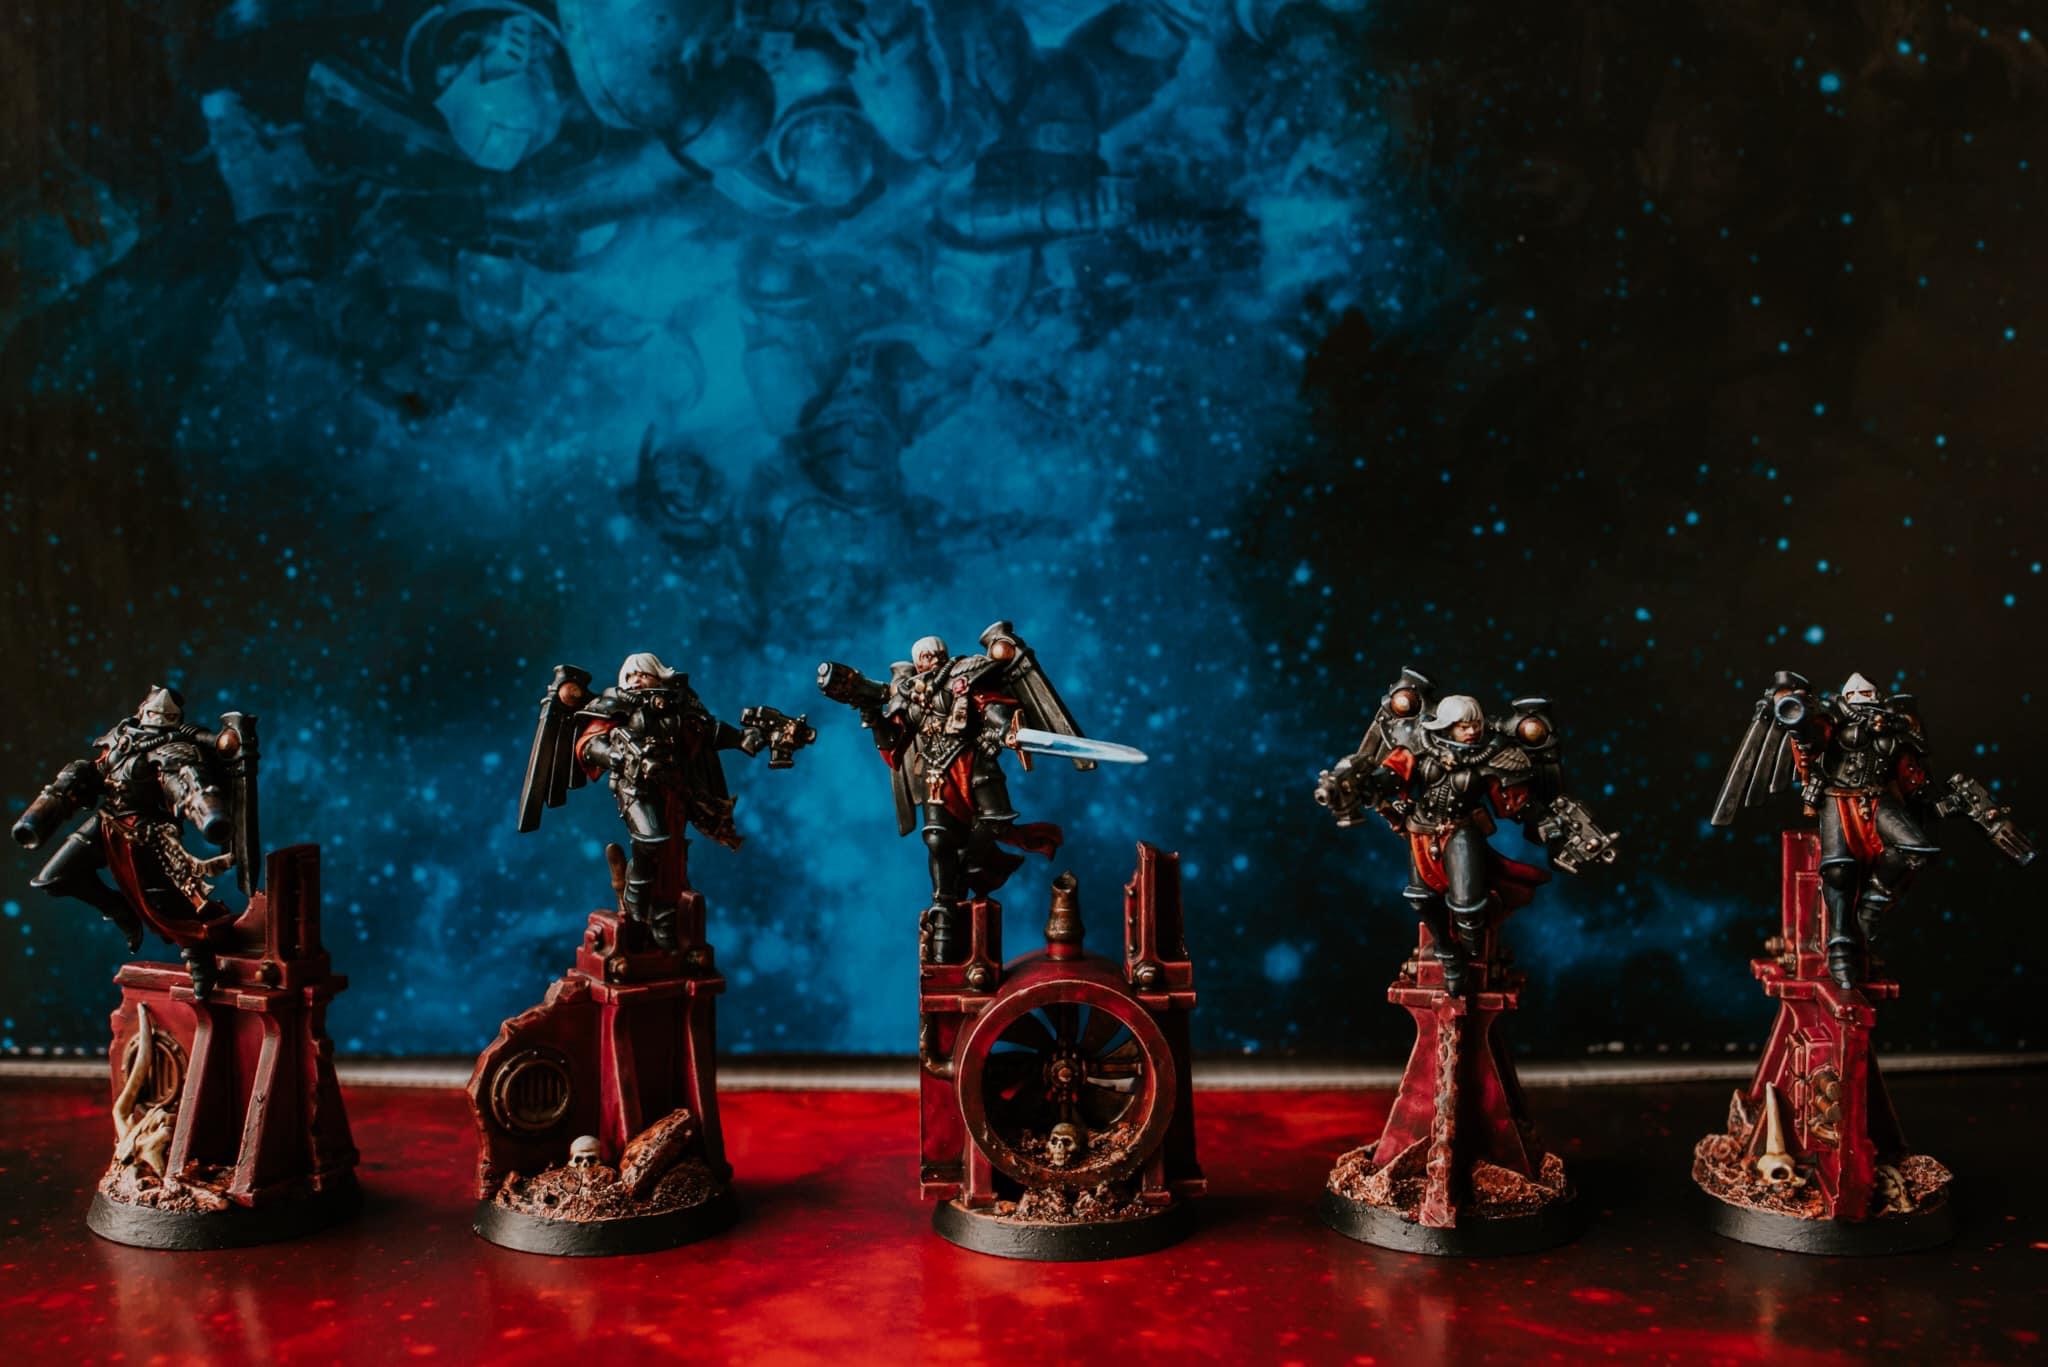
SERAPHIM
*****
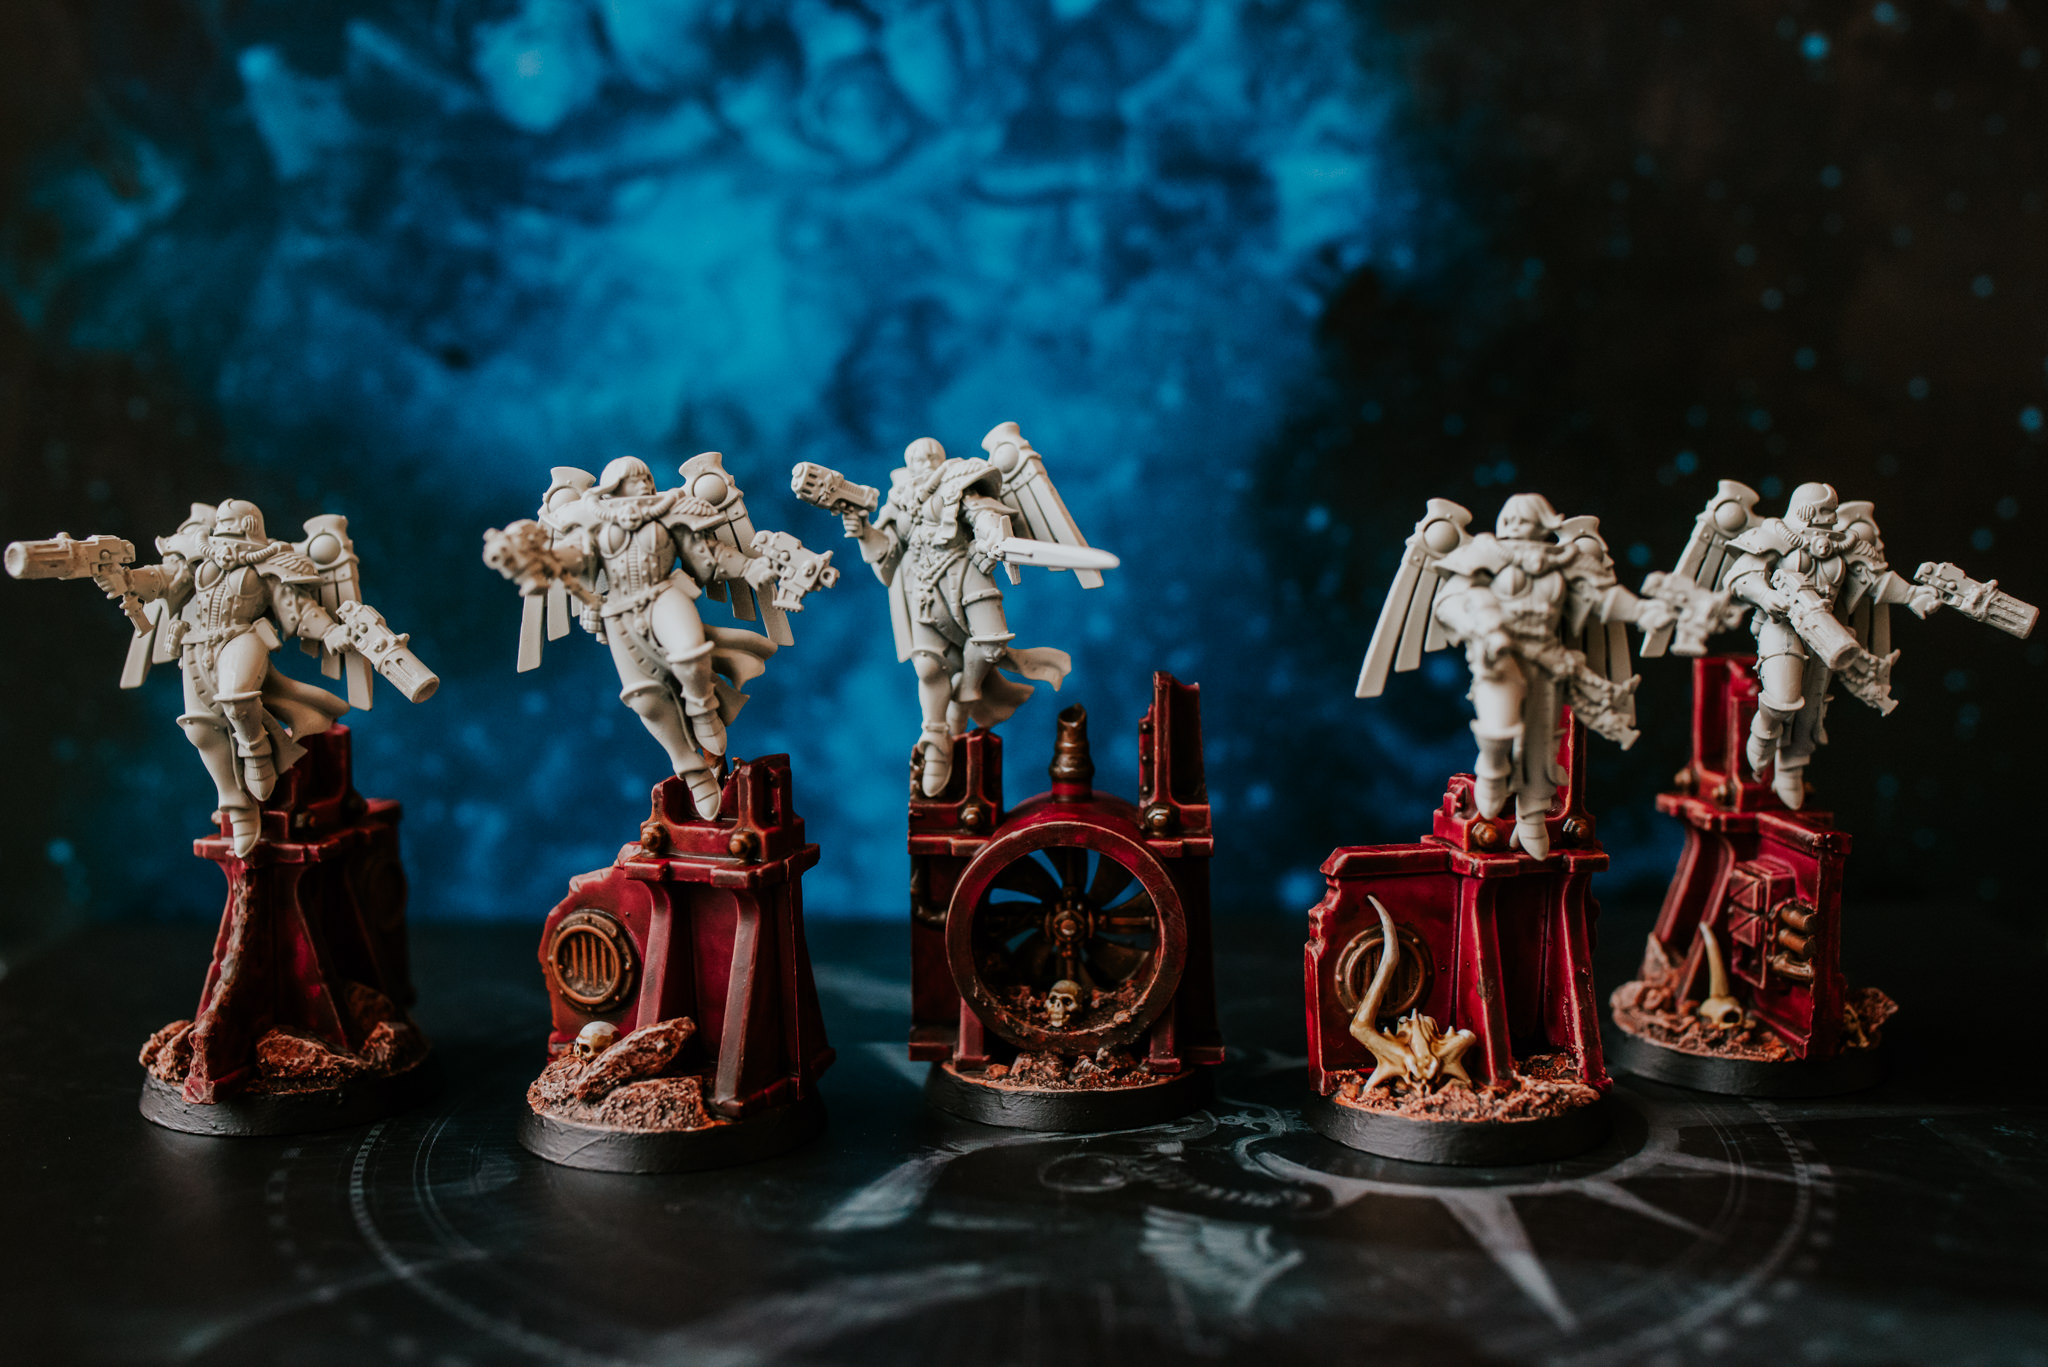
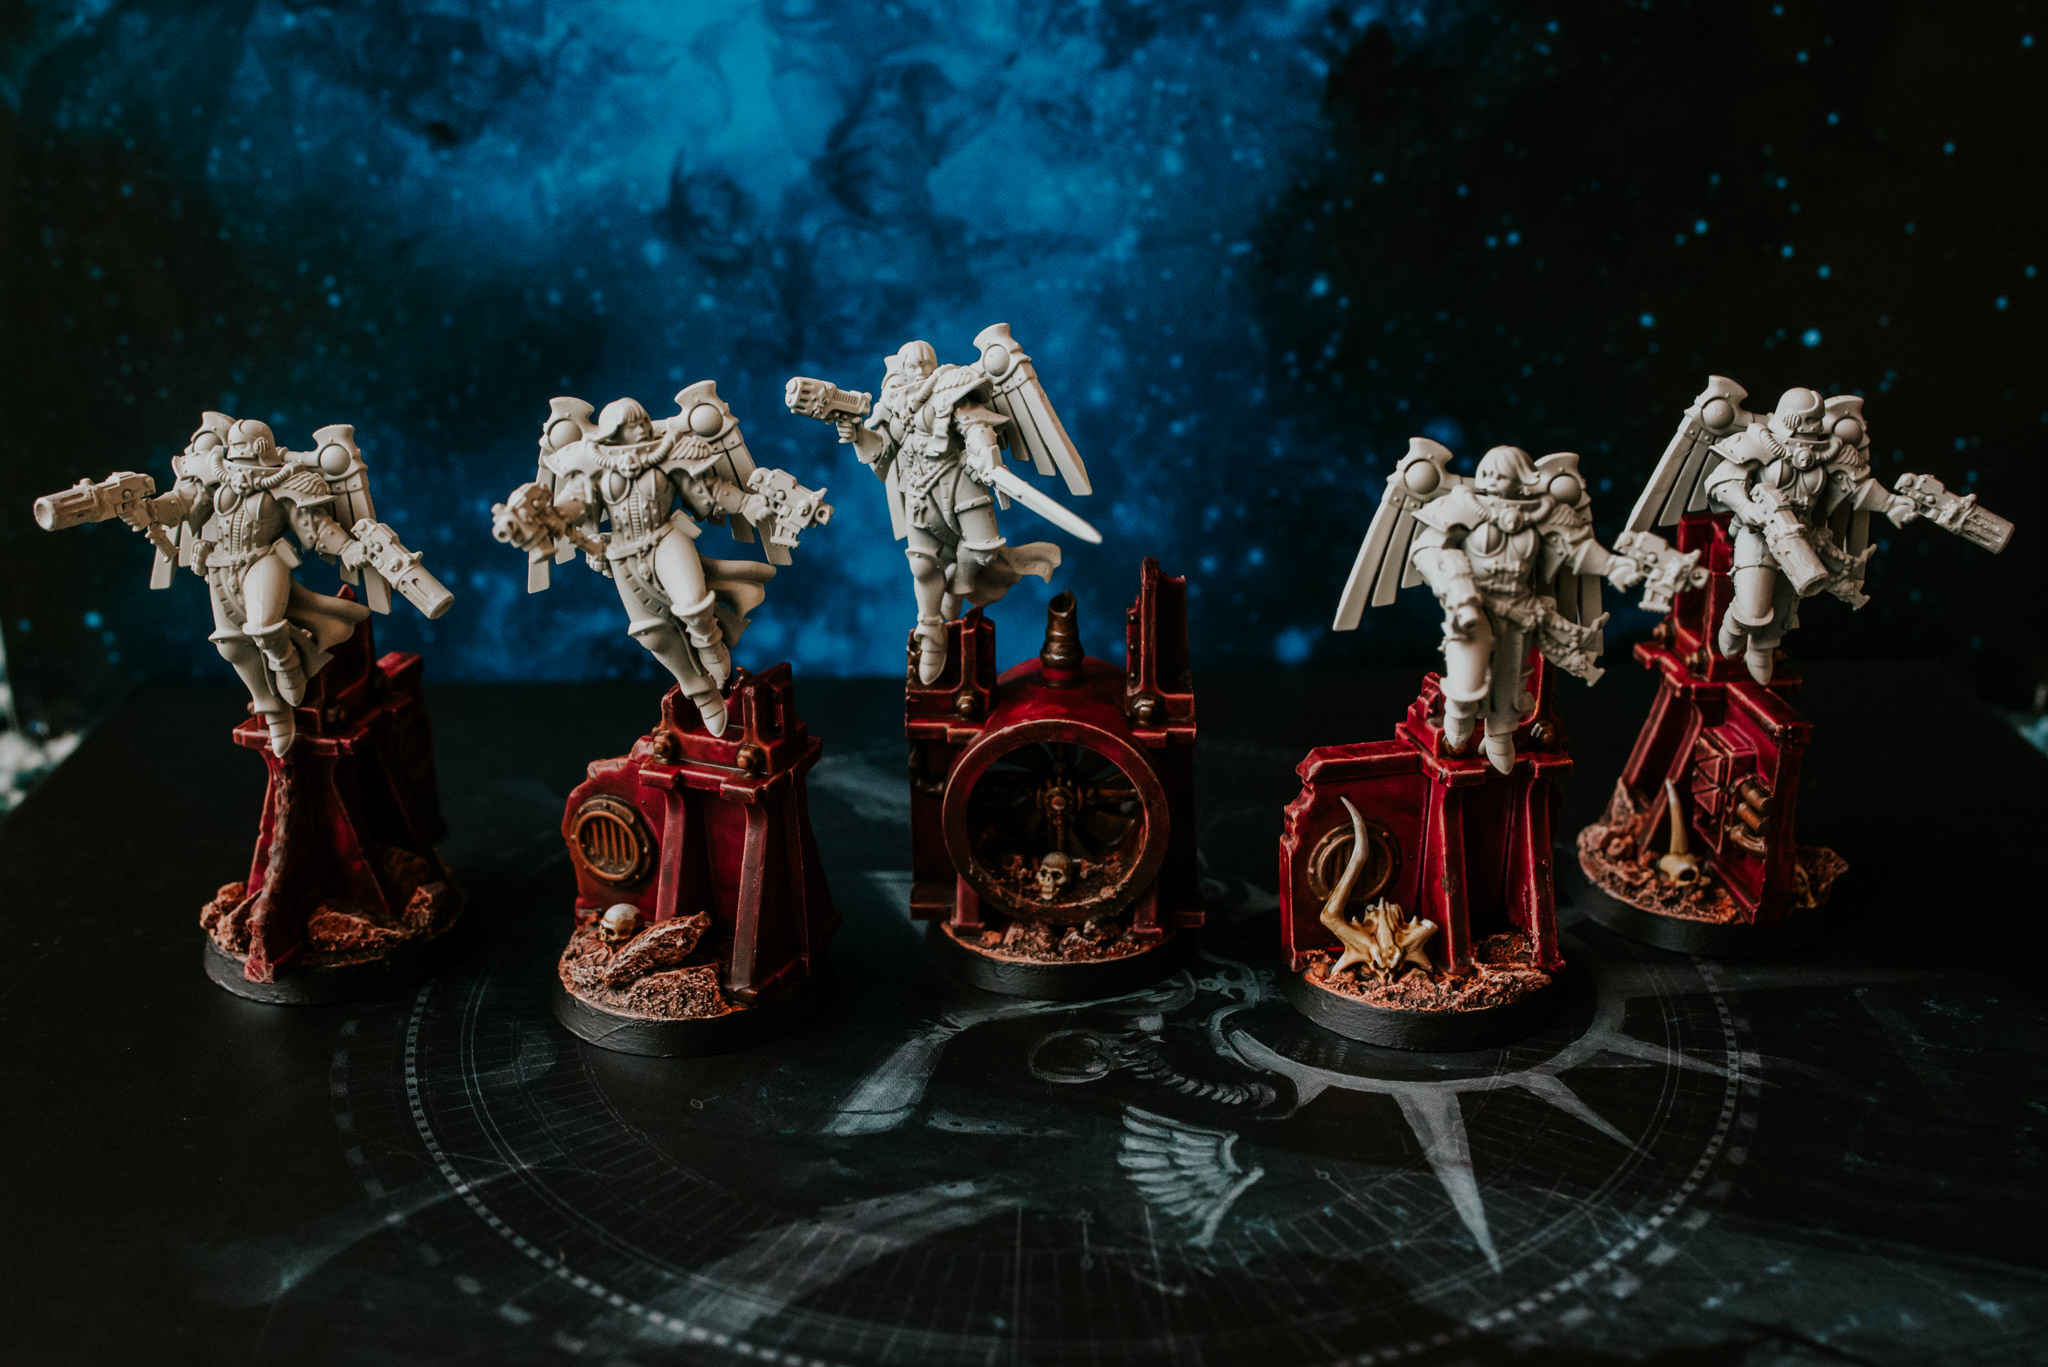
I can’t even begin to explain how proud I am of these five models right here. Every single guide and model I’ve painted up to now have been combined and put into practise on these five ladies. Heat effects on weapons and jump packs, wet blending on the power sword. Fully home made flying bases. These five flying beauties are without a doubt my all time greatest hobby achievement. Not just because of how they’ve come out but also because of what the represent.

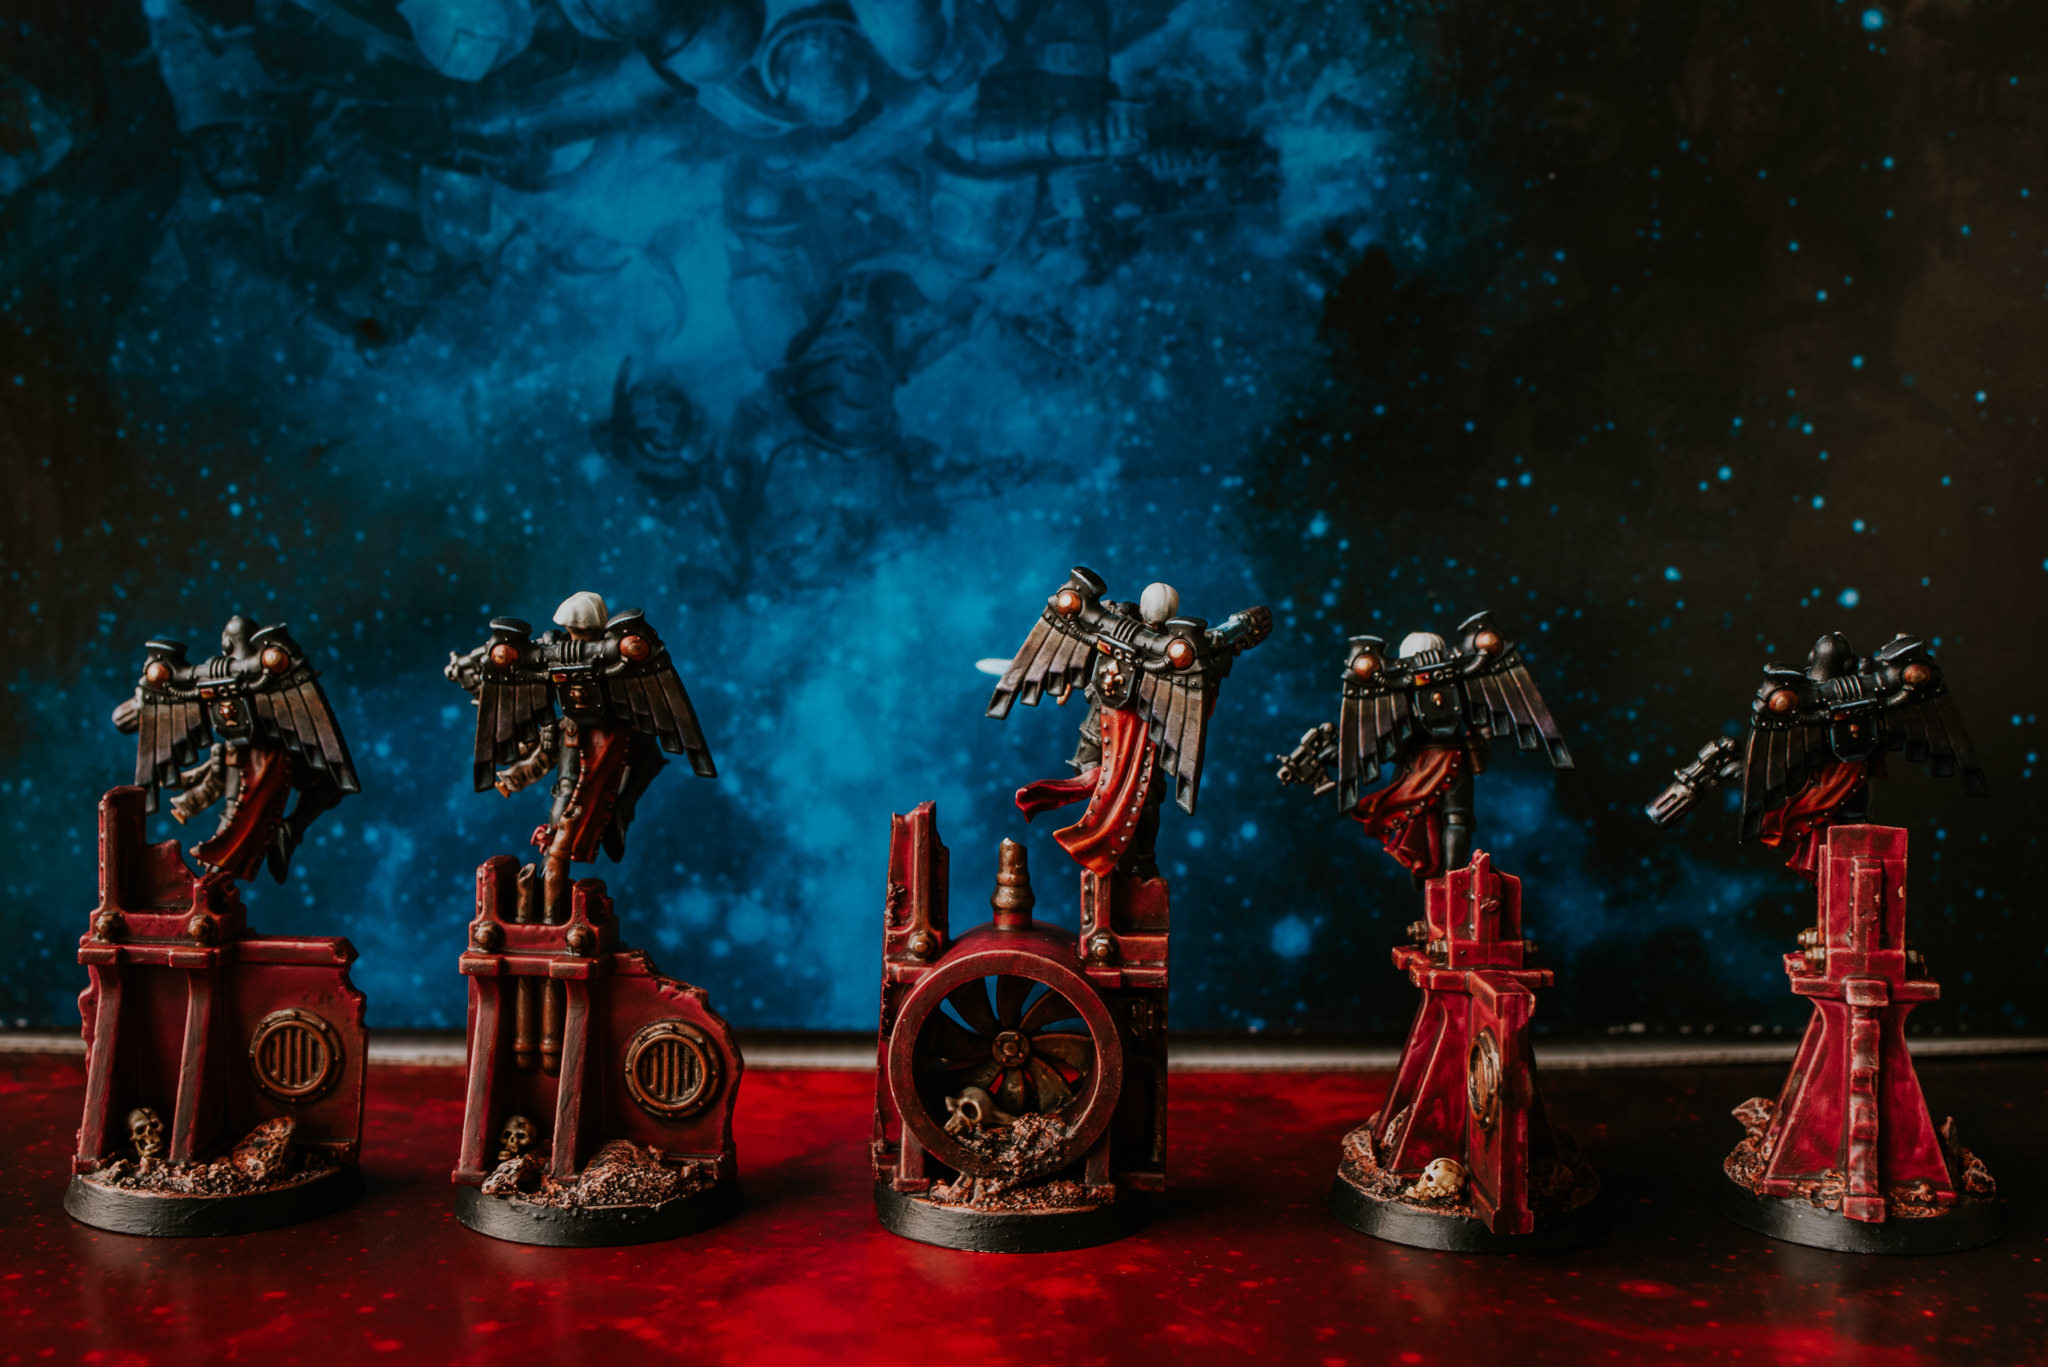


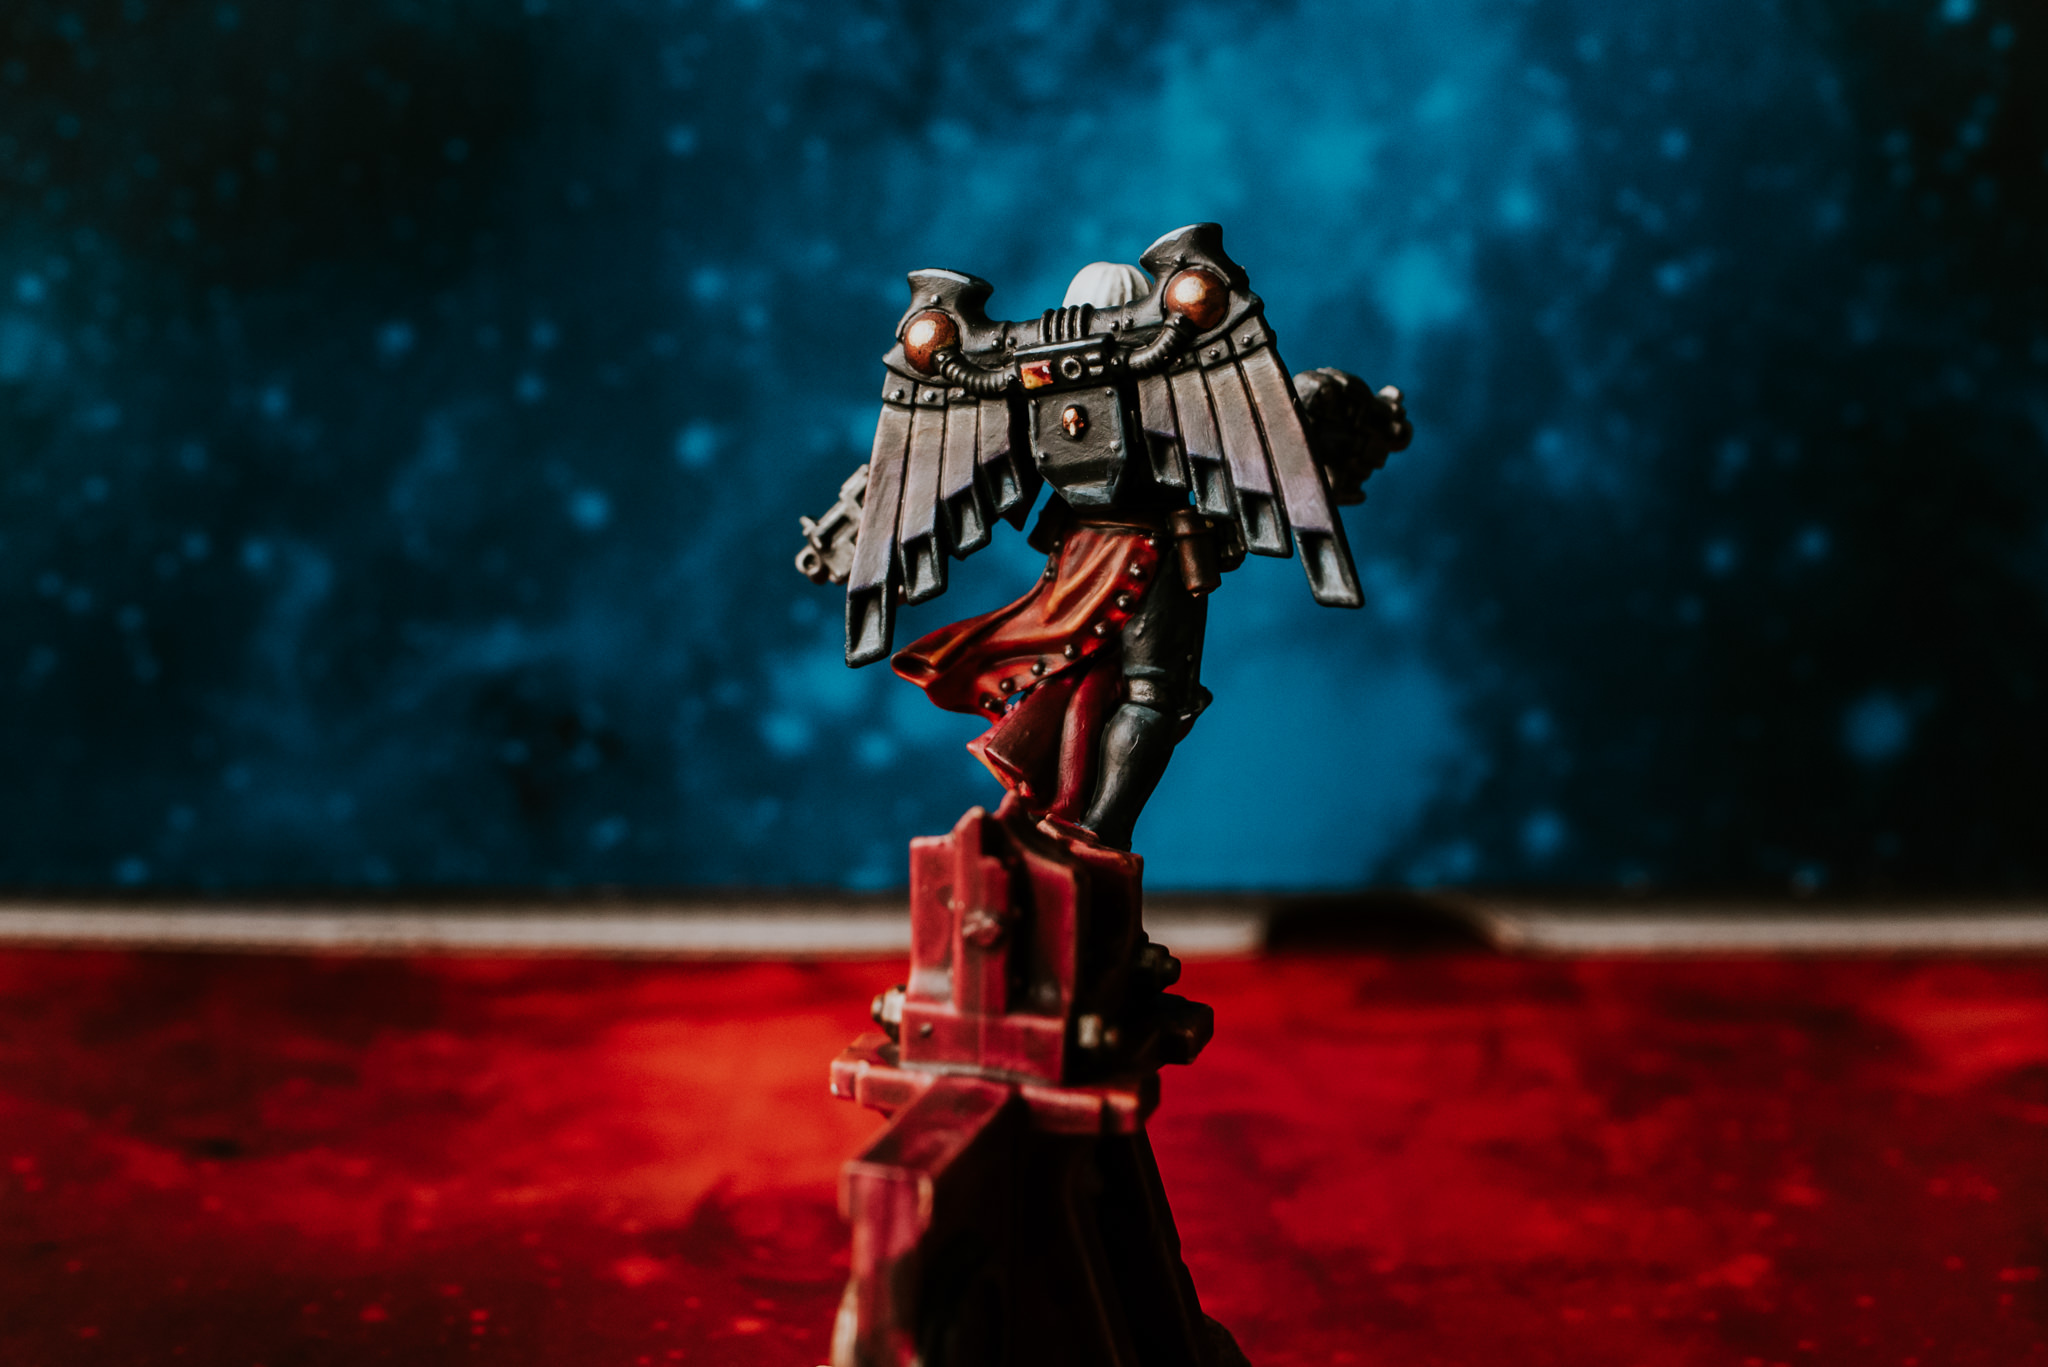

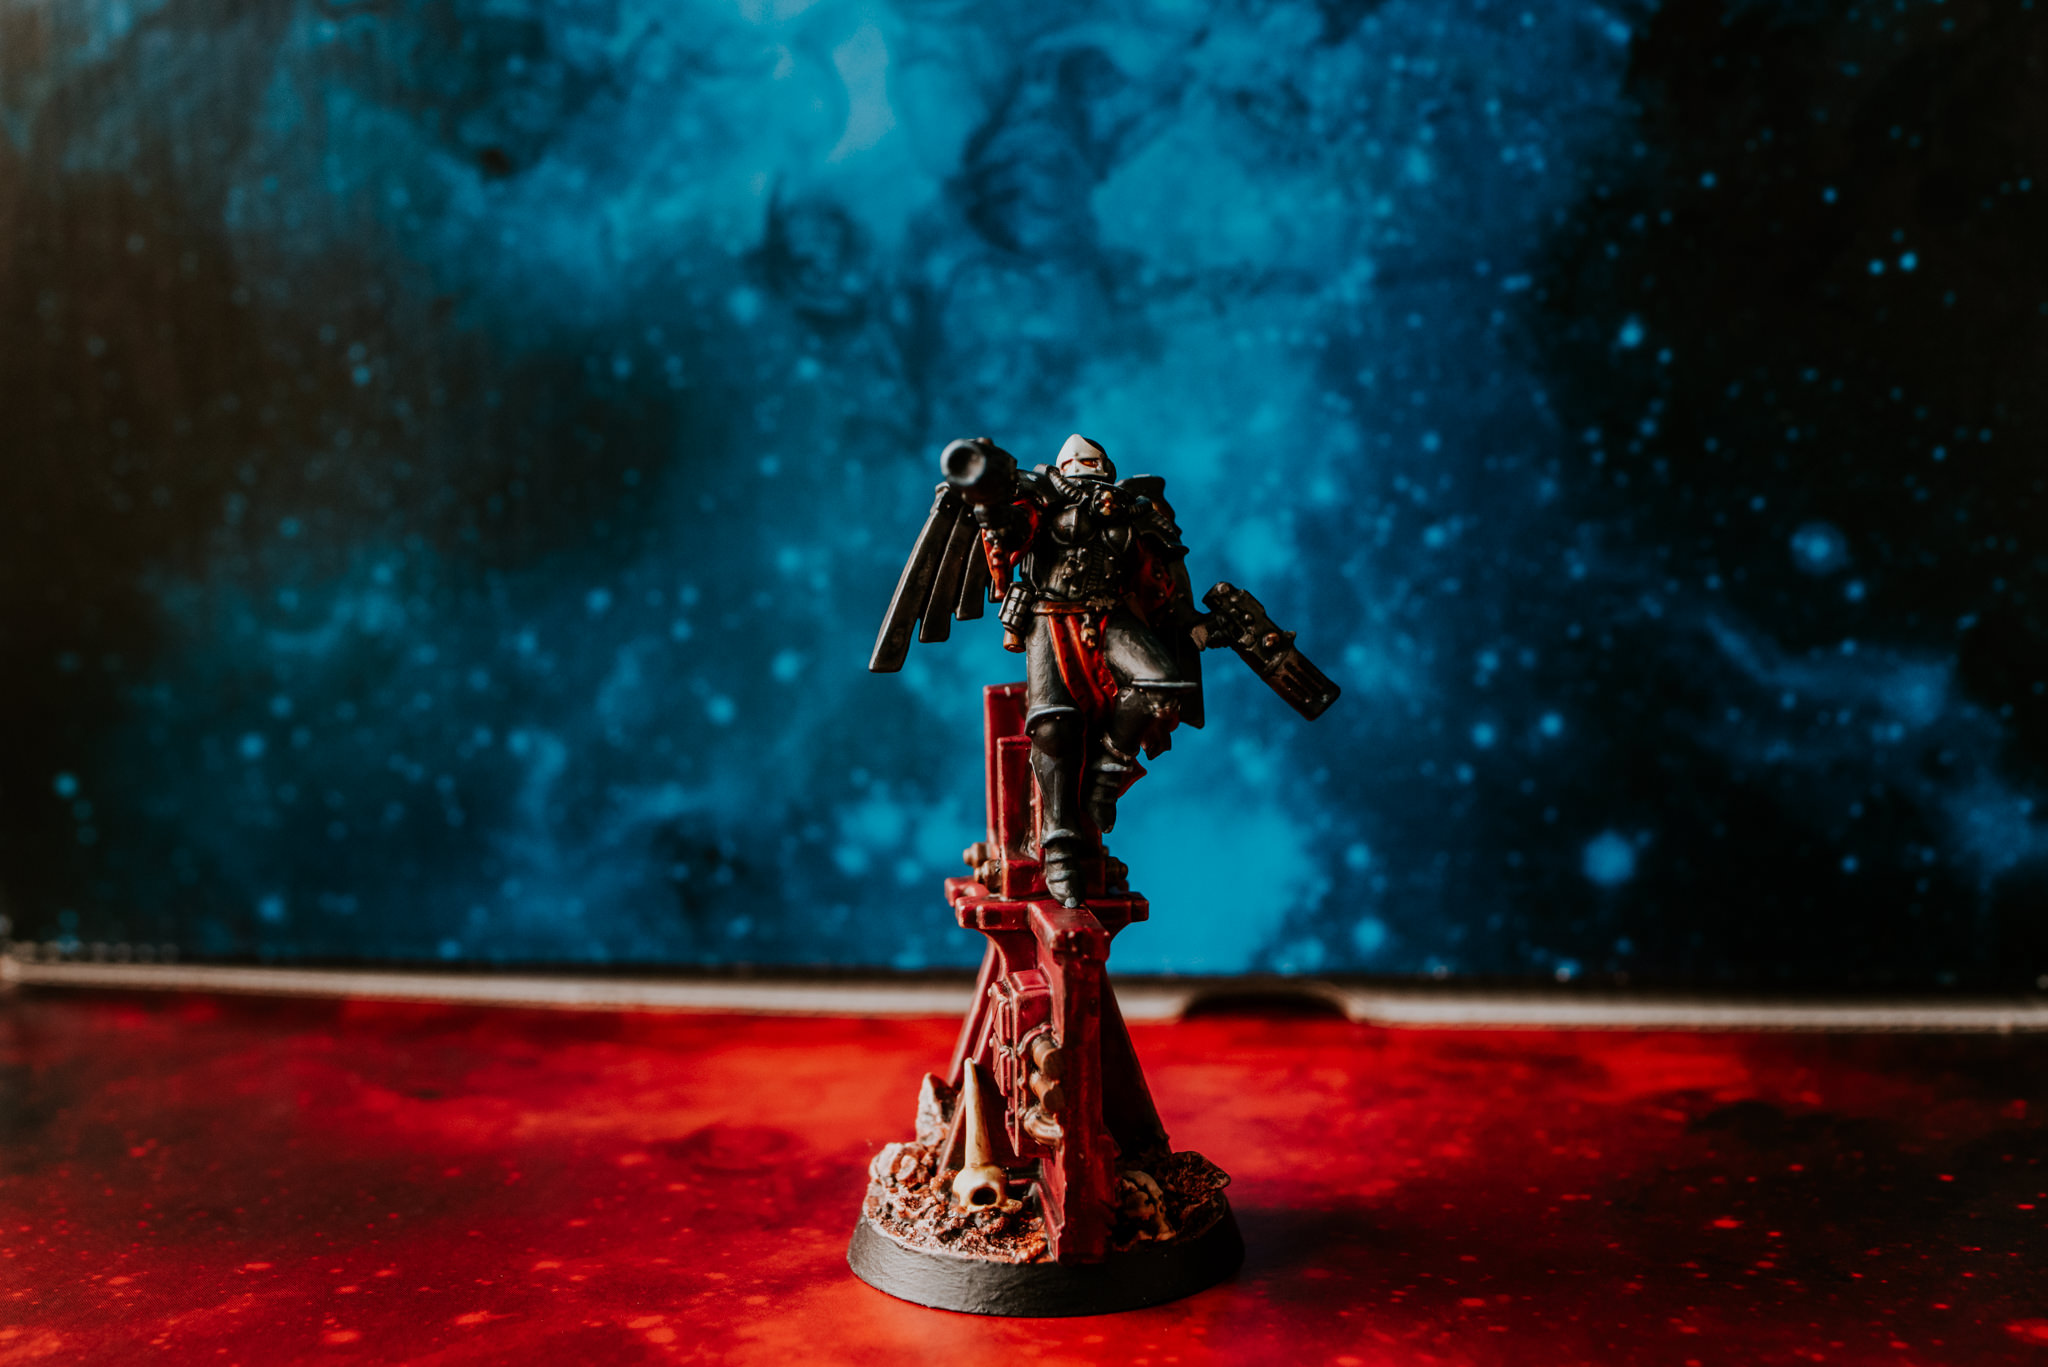
PROJECT GOAL ACHIEVED
*****
I started this project with the goal of getting my limited edition Adepta Sororitas box set painted and the Seraphim mark the completion of that goal. I’m gonna be posting a full army shot very soon but first I’ll be applying decals across the board. So does that mean this project is coming to a close. Errrrrm I’ll reveal all next post but you can be sure my pile of shame will tell you otherwise.
Here’s to more of this wonderful hobby in 2021.
***** THE EMPEROR PROTECTS *****
Much Love
ETERNITY GATE
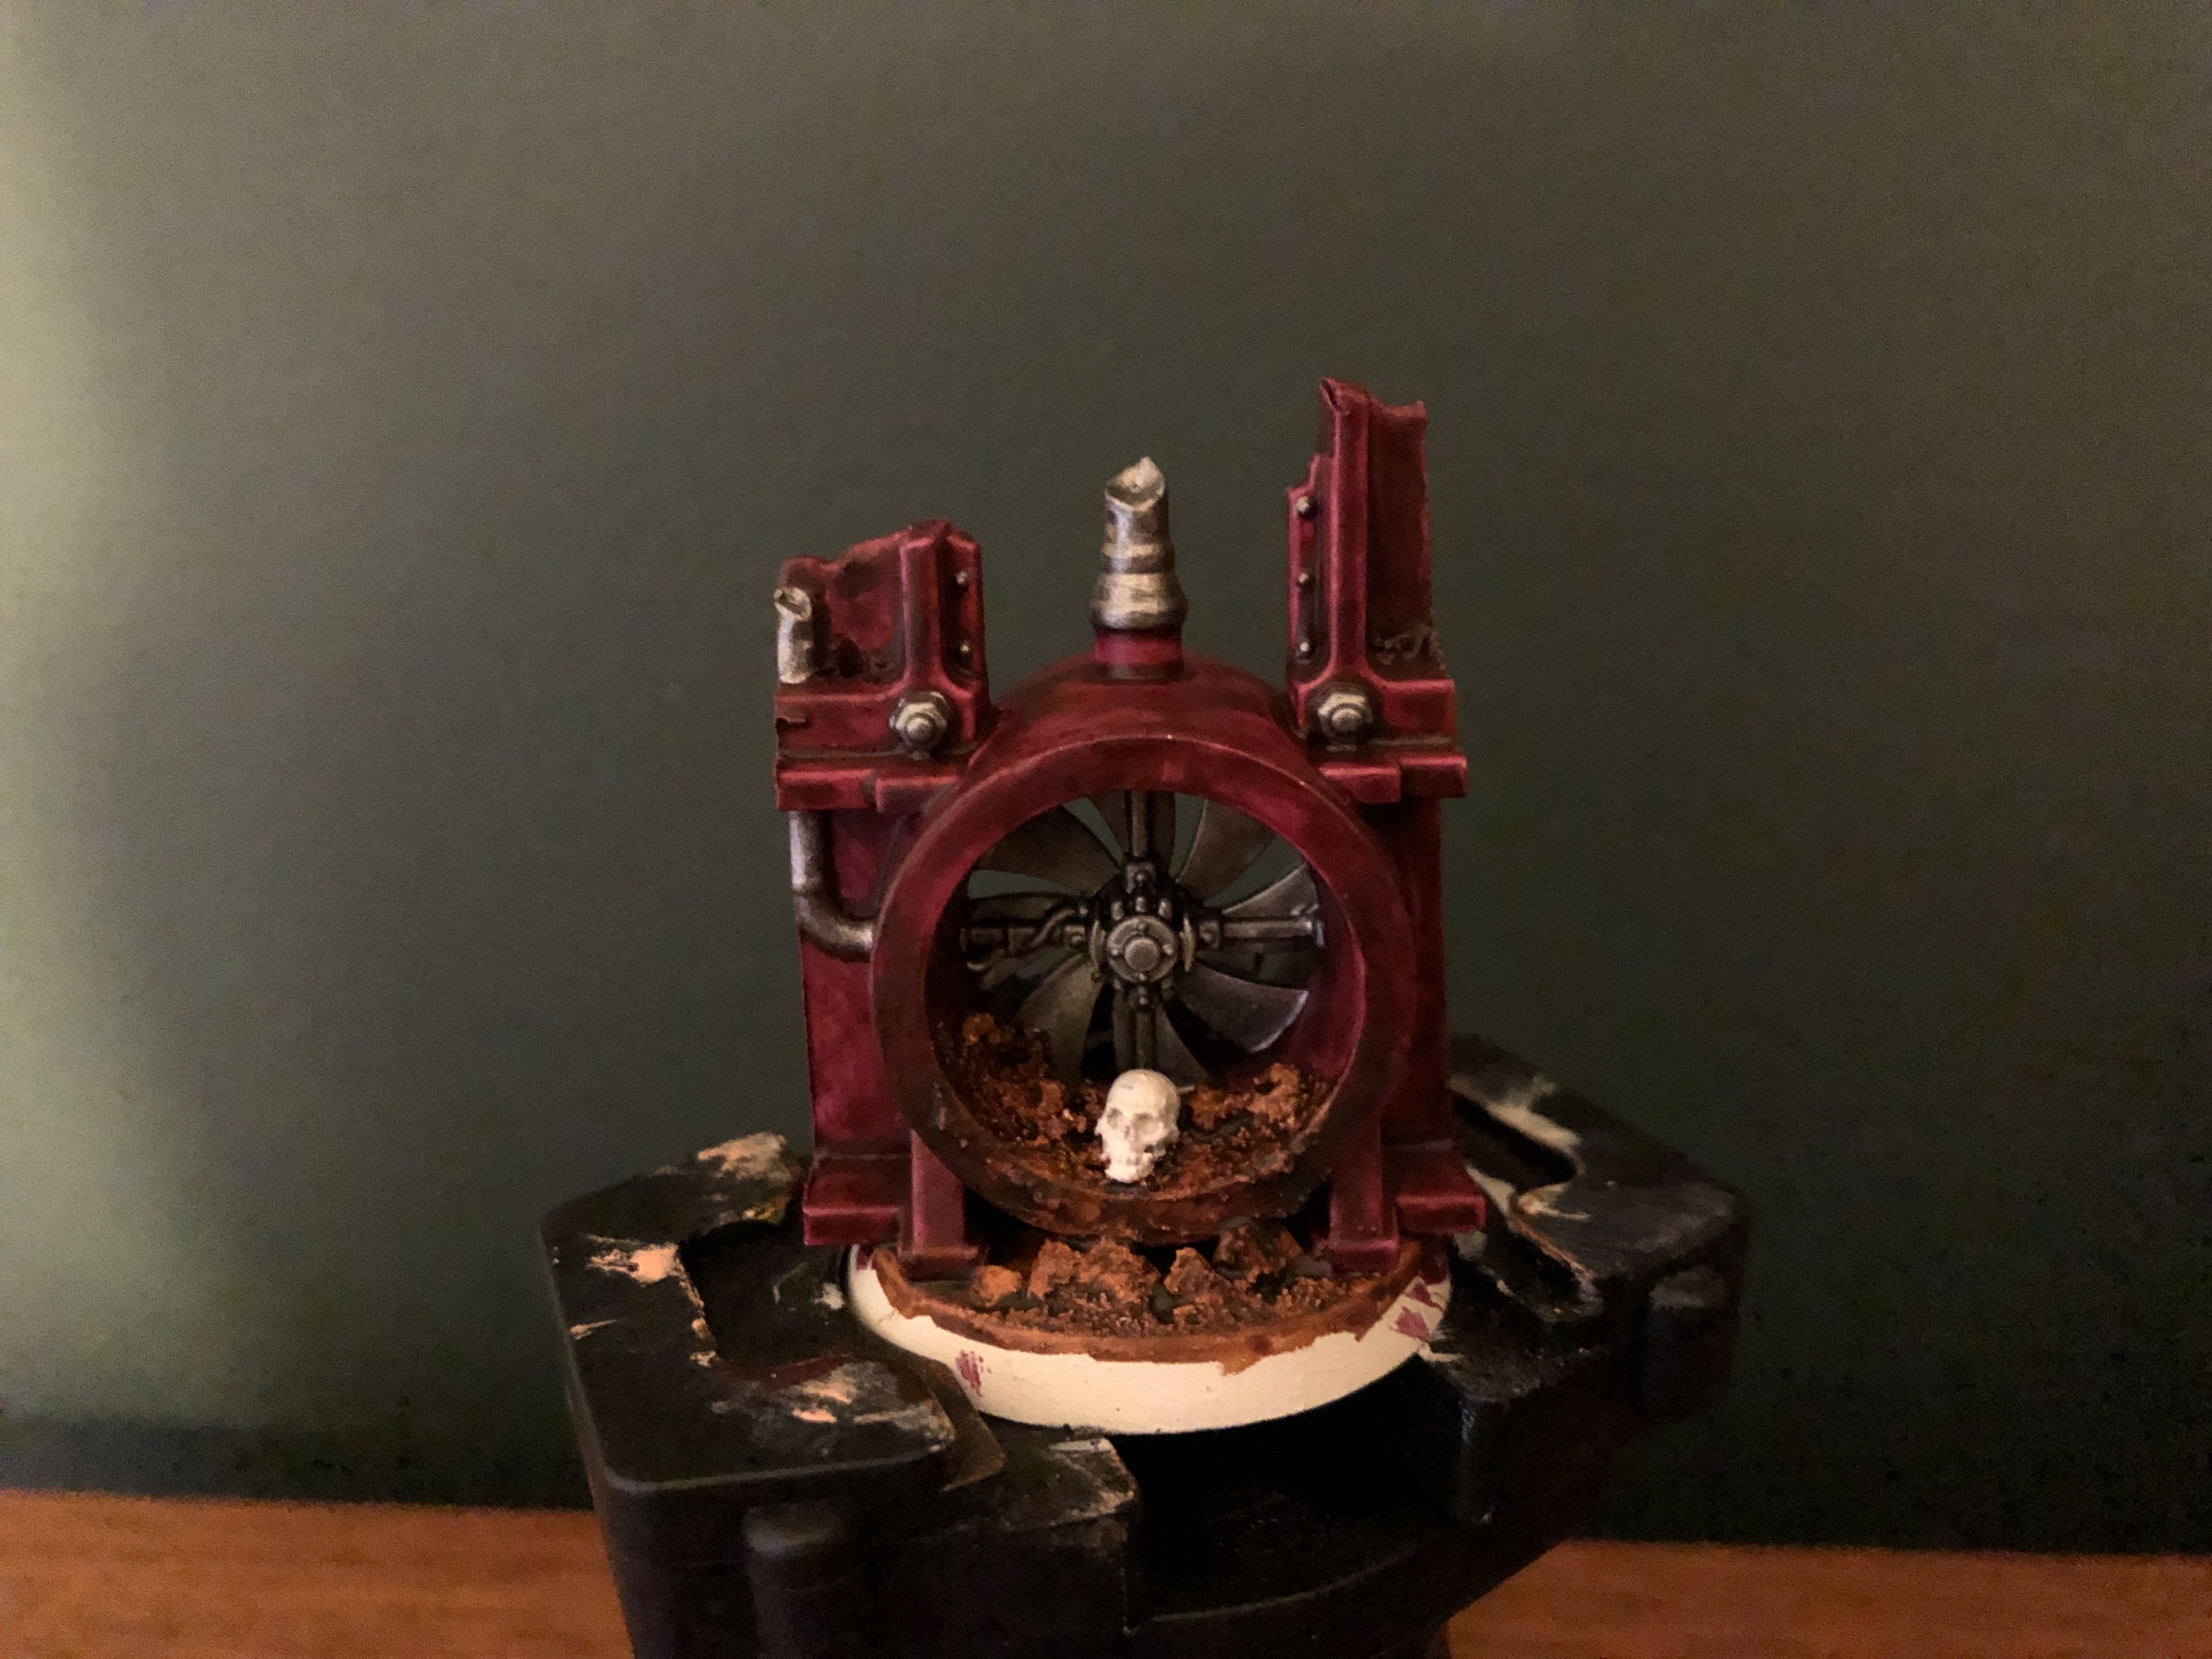
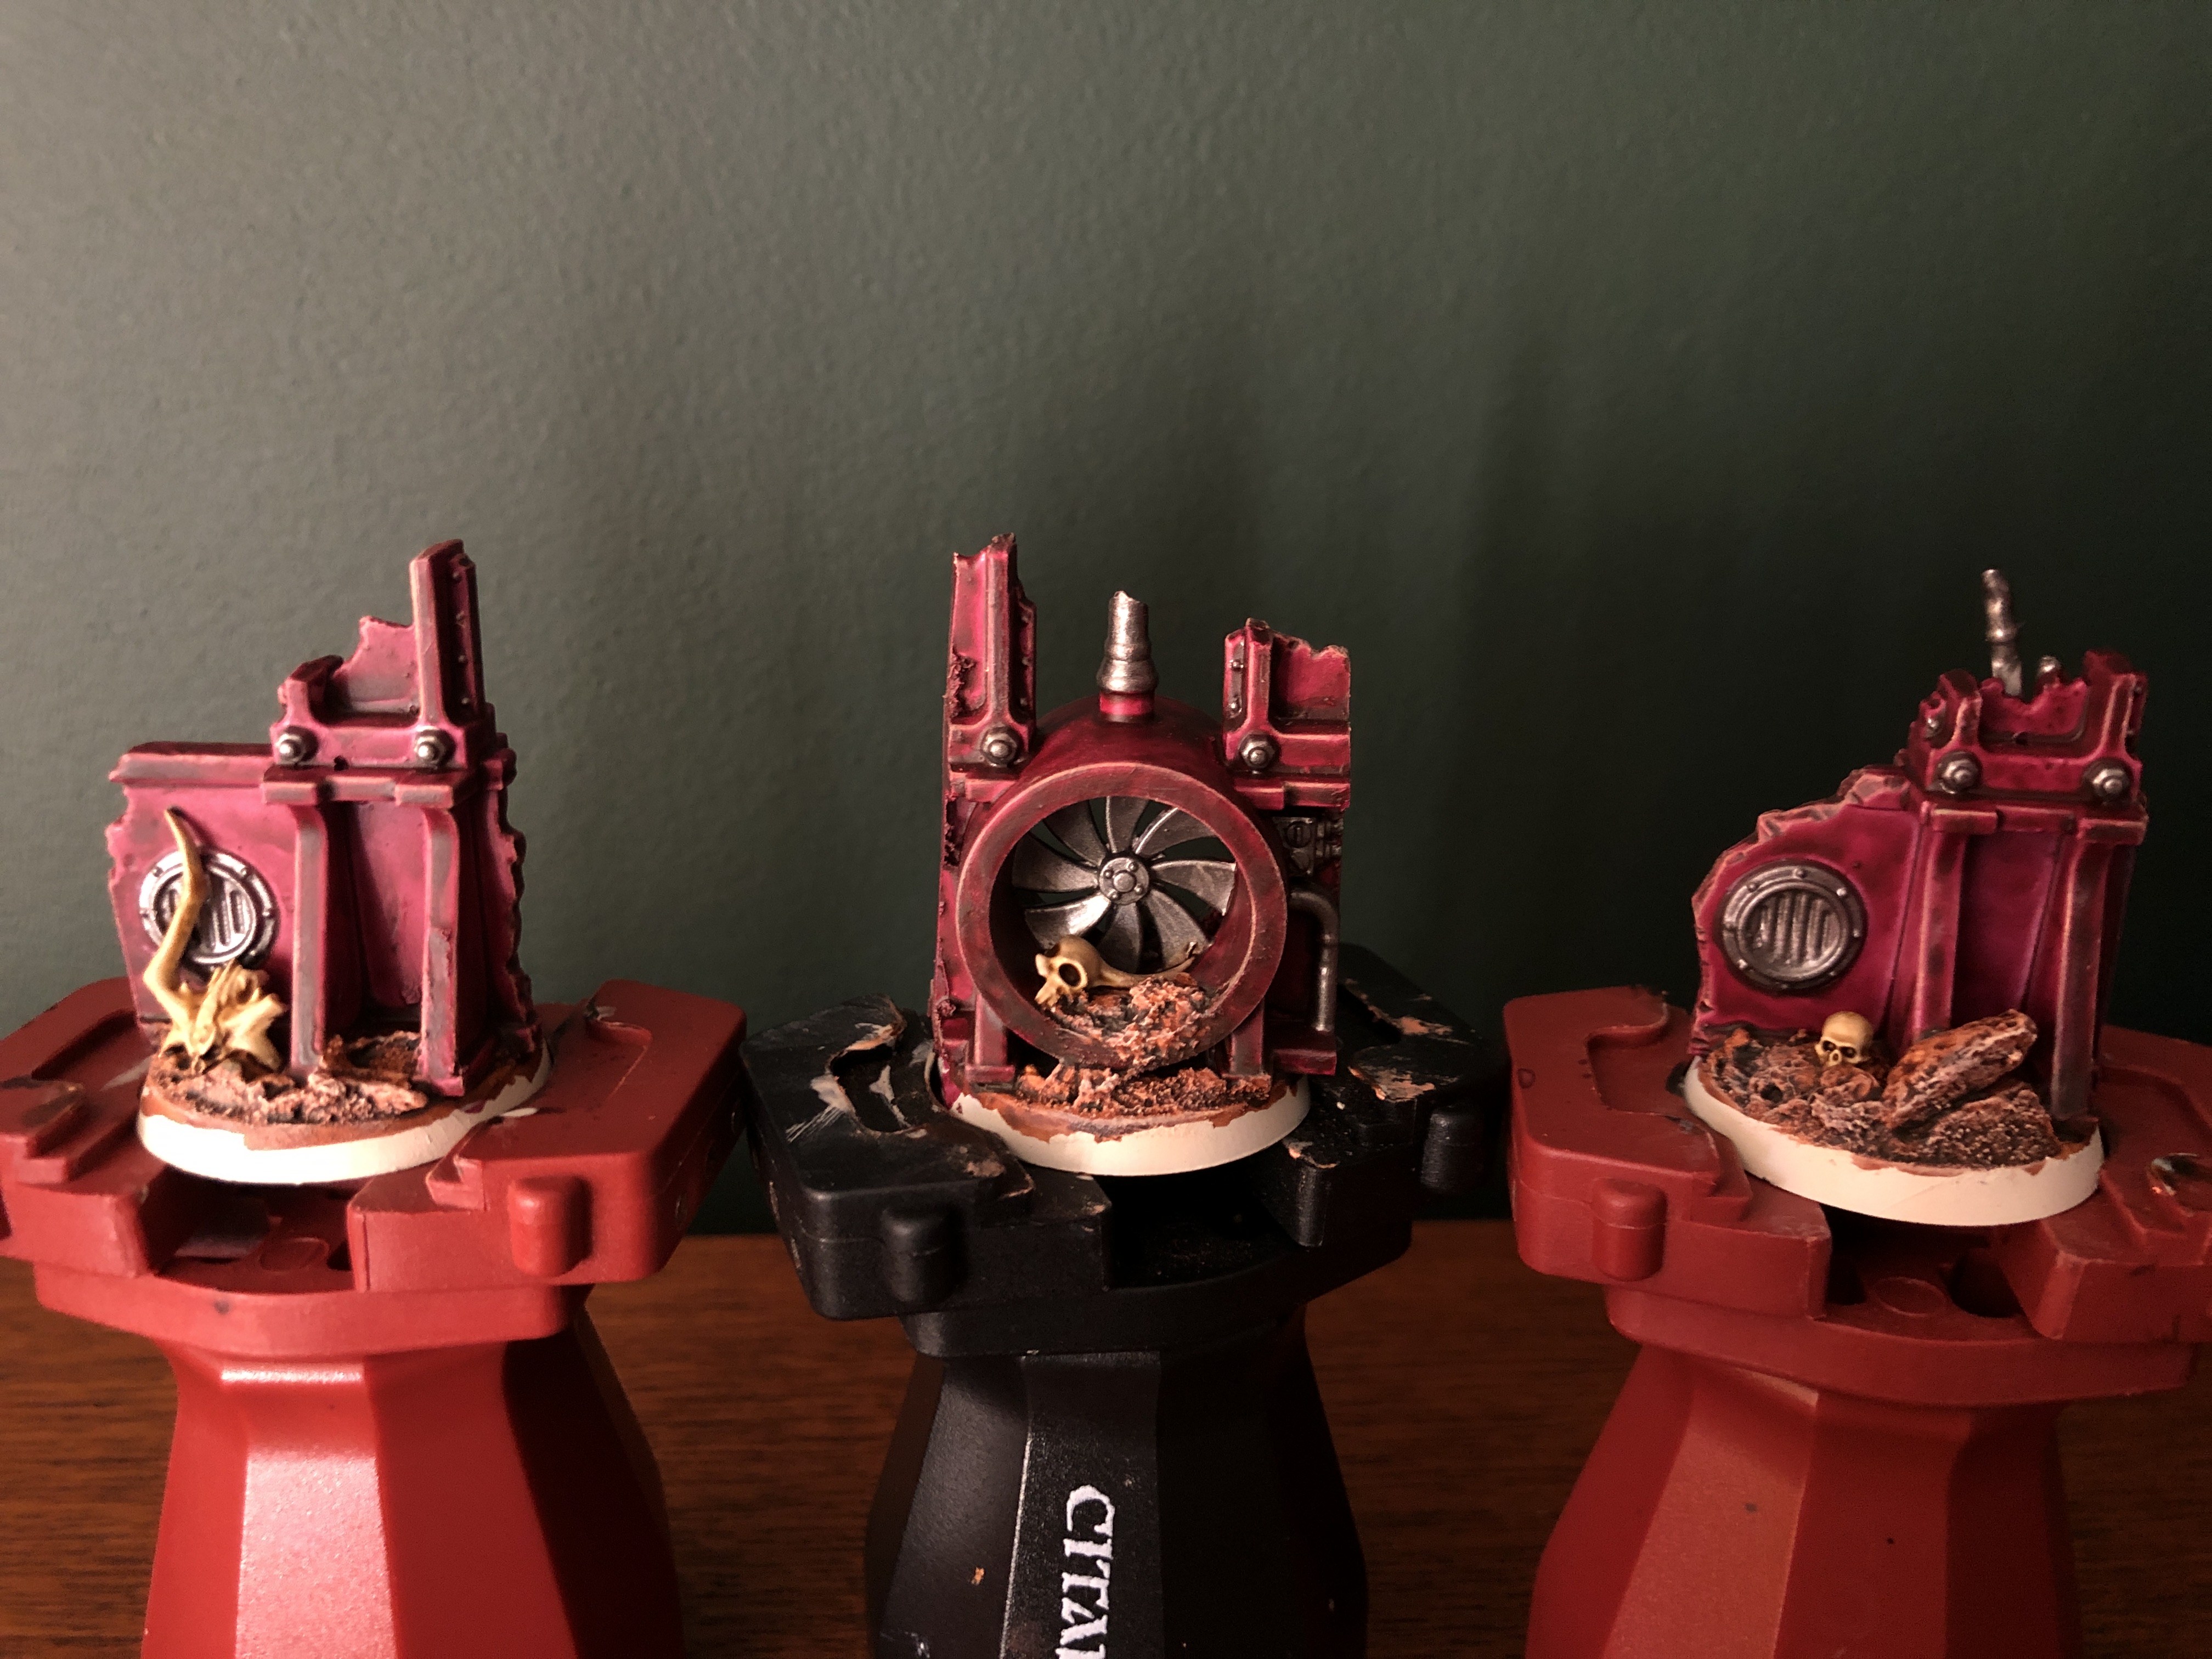
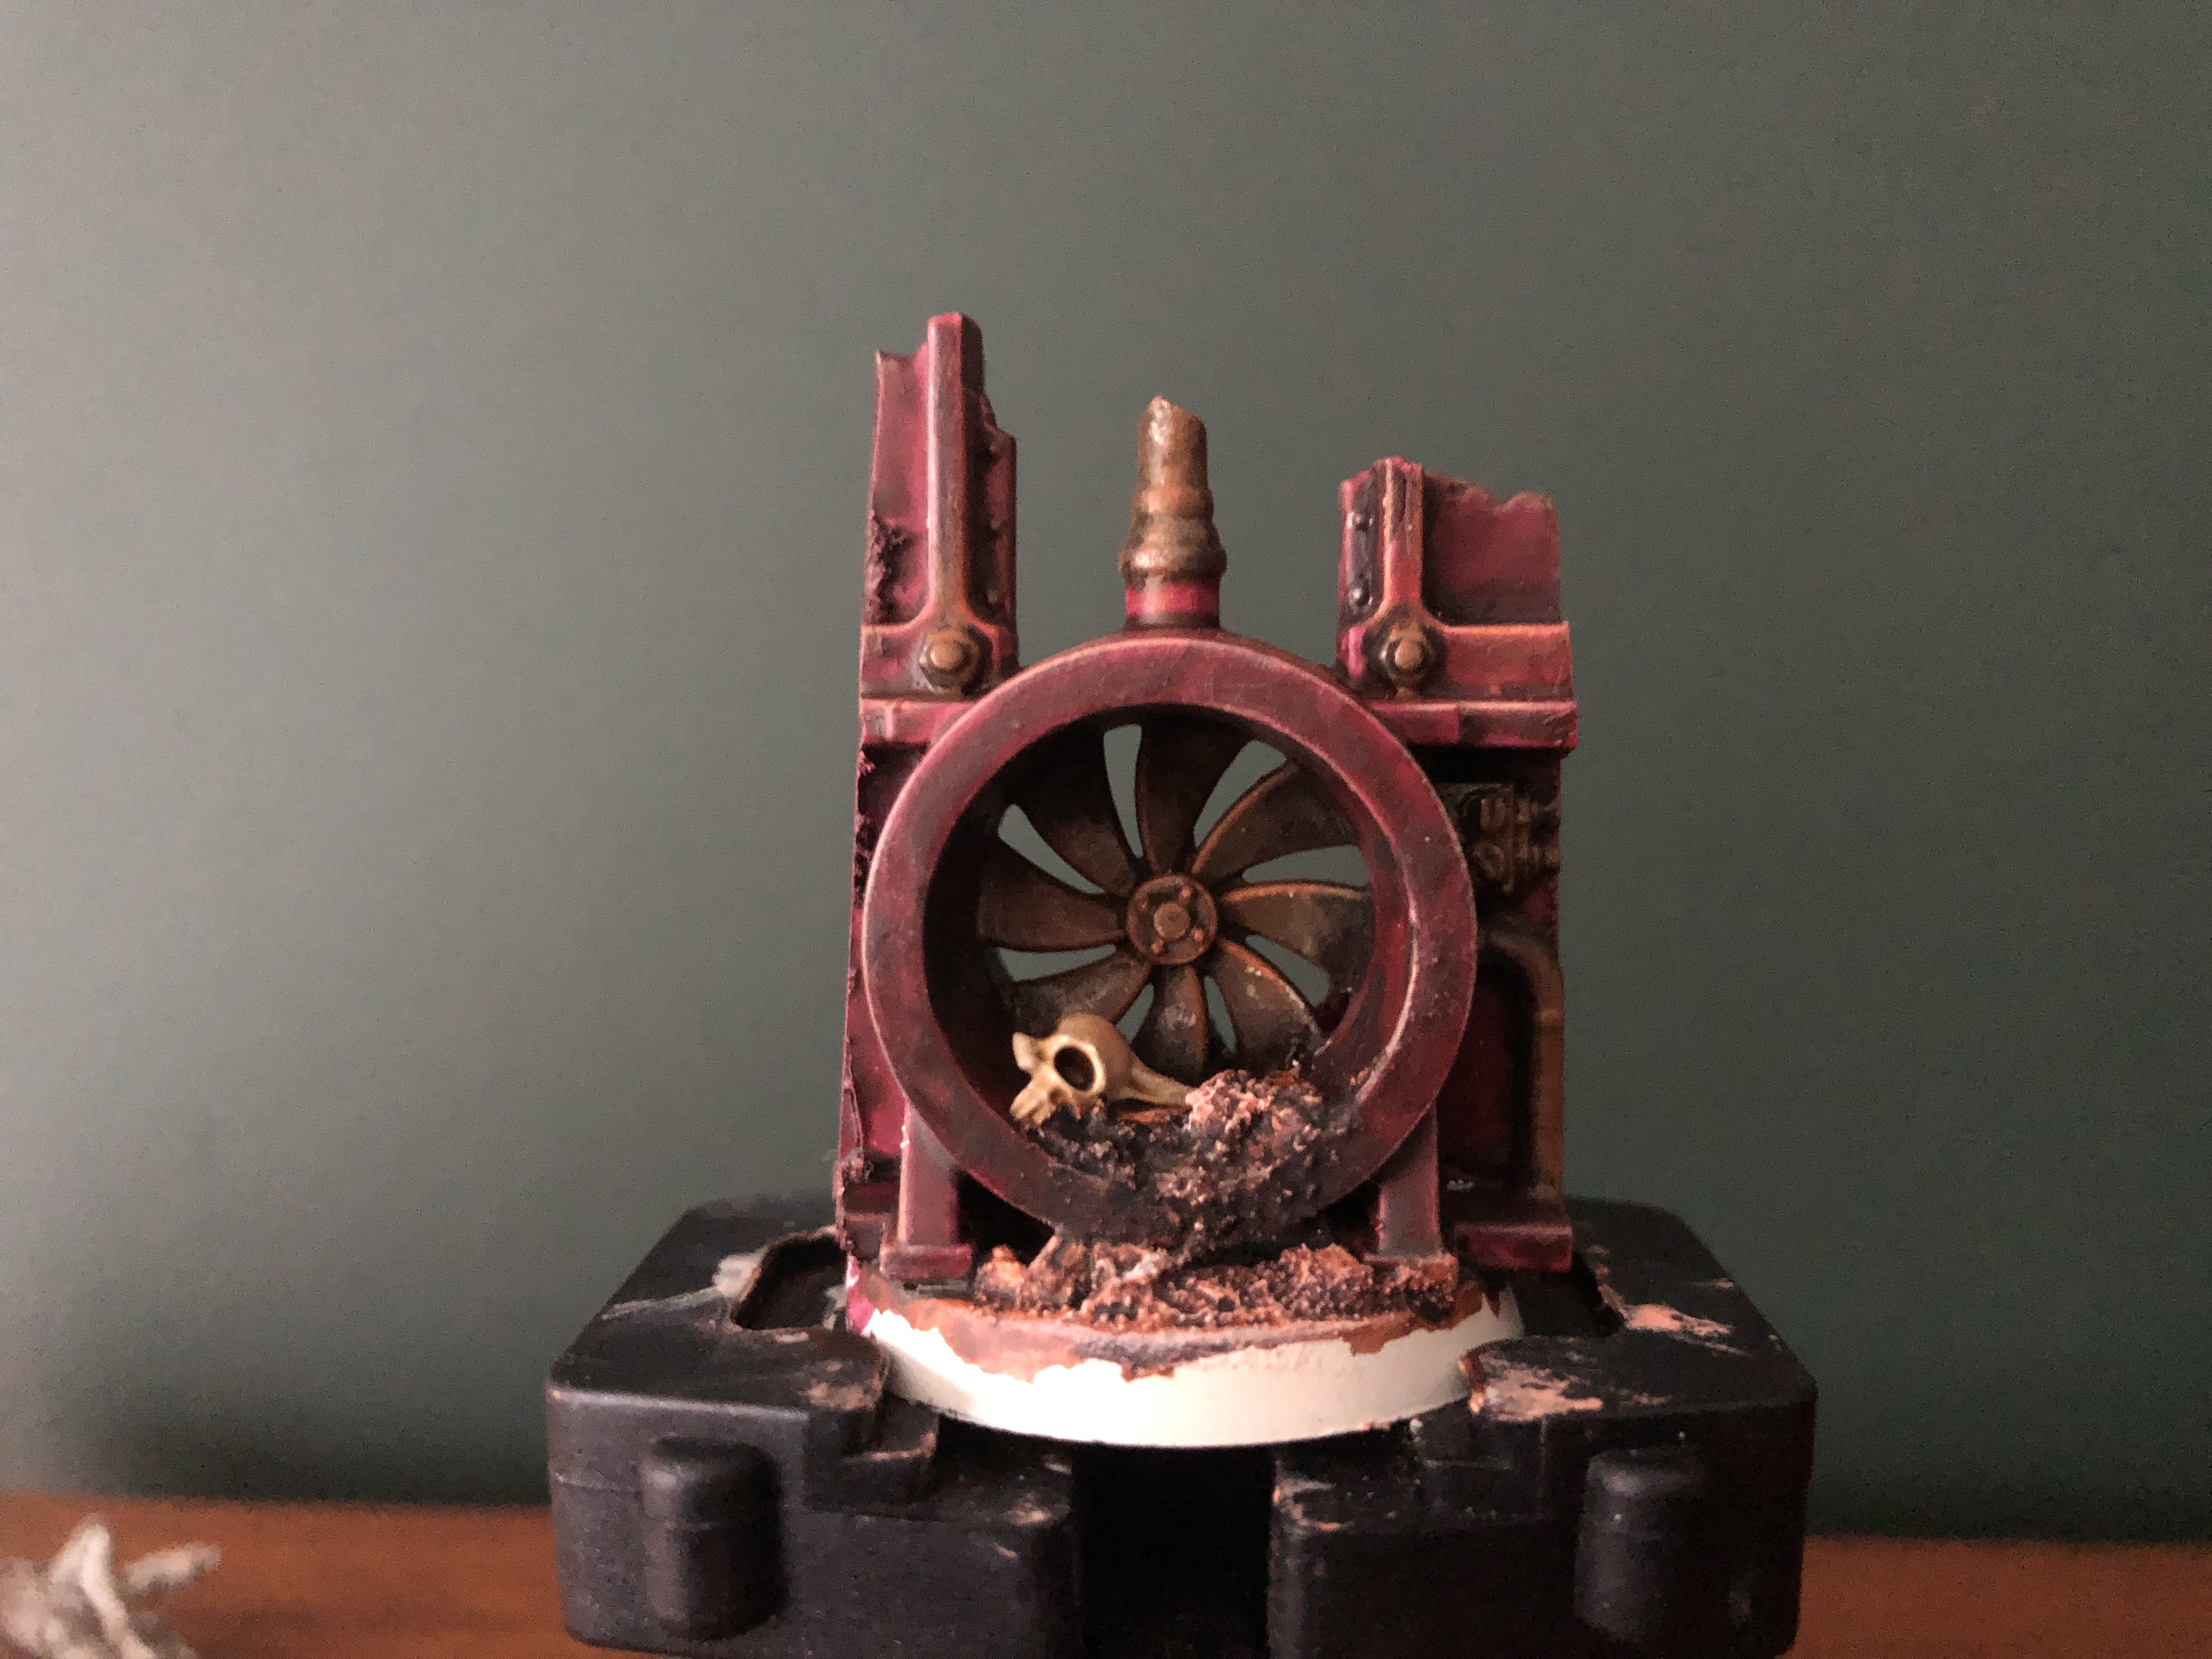
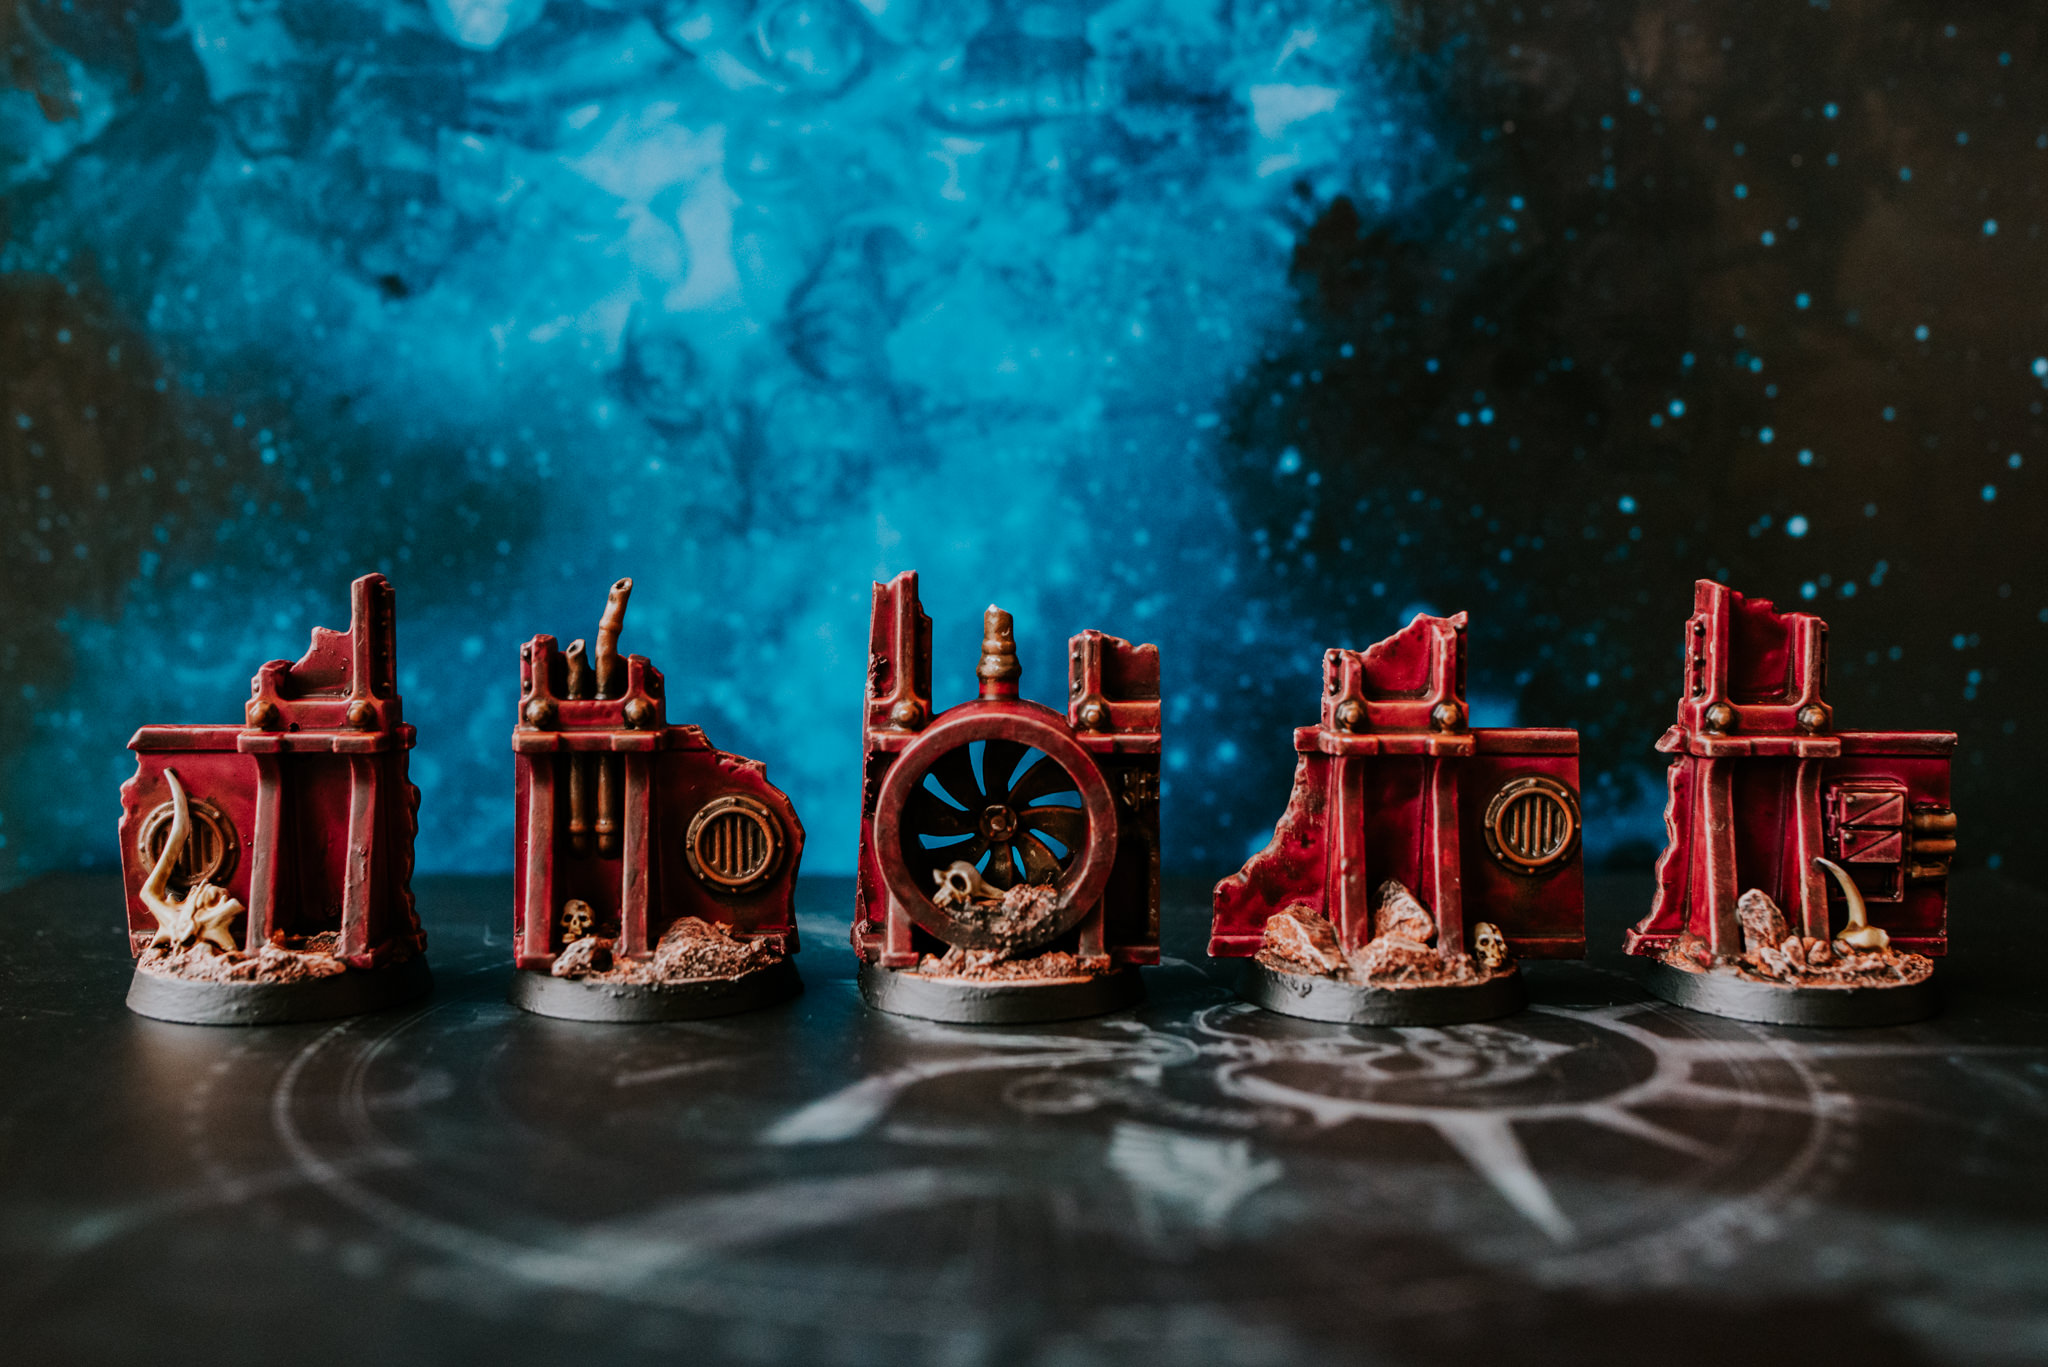
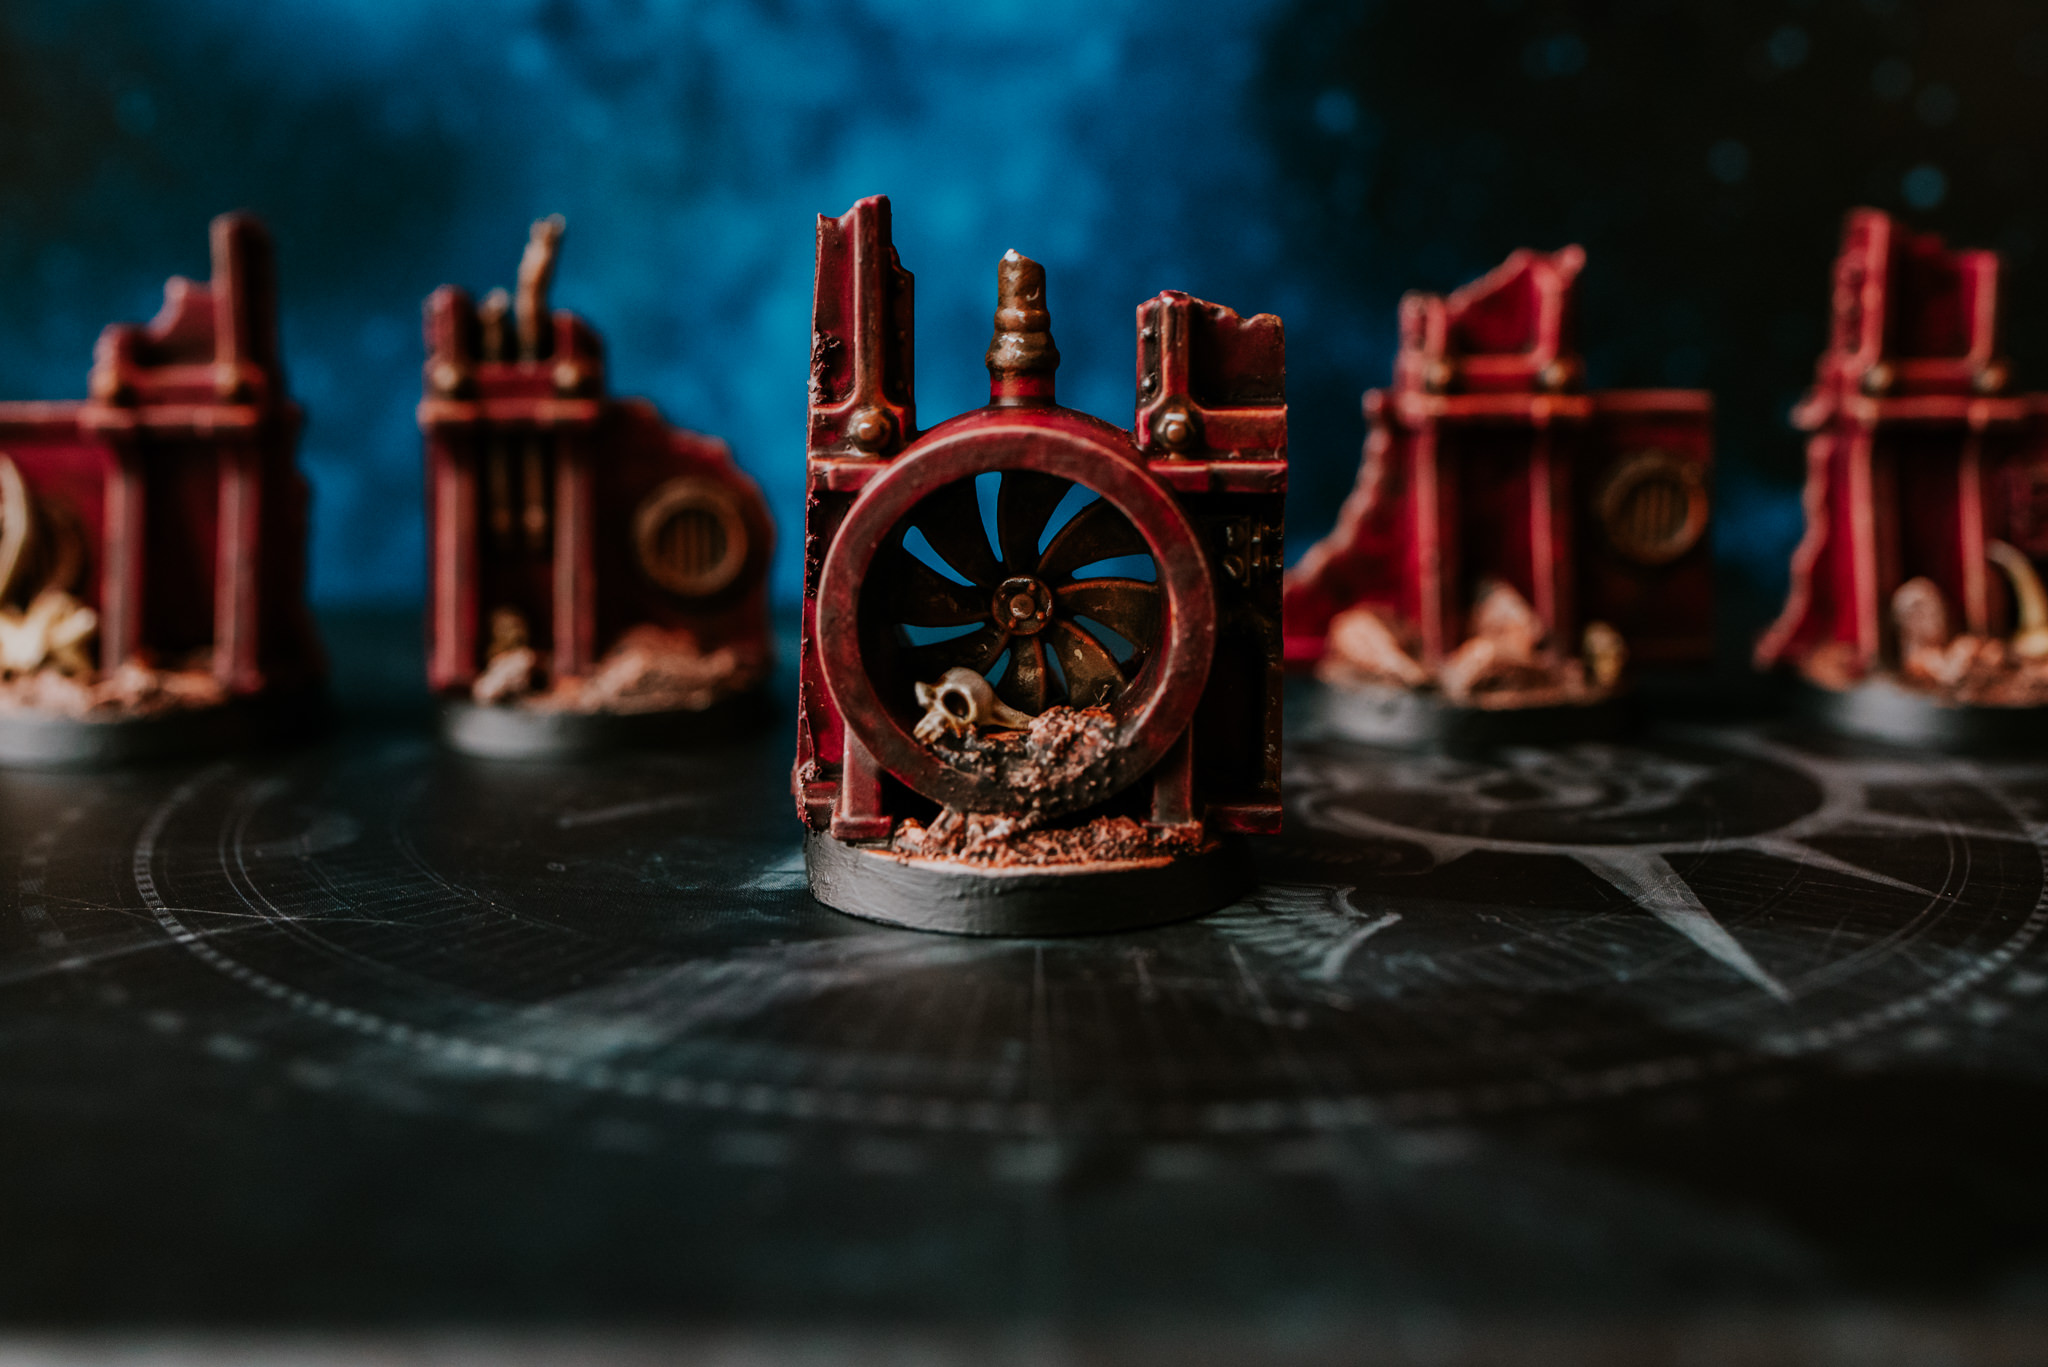
AVENGING ANGELS ~ PAINTING SERAPHIM SCENIC FLYING BASES
PINK TO MAKE THE EMPEROR WINK
*****
Man I’m banging out the hobby this last couple of weeks. Yesterday was the due date of our baby boy but still no signs as yet. I’m sure he’s gonna be fashionably late like a proper dude. In this latest guide I’m gonna be painting my Seraphim scenic flying bases. Wahoo! The main colour palette is based around Contrast Volupus Pink. Genuinely my favourite colour in the contrast range so far. In fact if was to do my sisters again I’d probably smash em all out in this colour haha.
I really wanted to combine colours that would relate to those of my non flying sisters units & I feel like I’ve really achieved that. These bases were a blast to paint & a welcome reprieve from all those delicate details of the past few units. Anyway without further ado here’s my paint list coming at ya!

PAINT LIST
*****
• WRAITHBONE
• CONTRAST VOLUPUS PINK
• CONTRAST GORE-GRUNTA FUR
• LEADBELCHER
• KINDLEFLAME
• CONTRAST SKELETON HORDE
• MODEL MATES MUD BROWN WEATHERING WASH
• RYZA RUST
• WHITE SCAR
• ABADDON BLACK
TWO THICK COATS
*****
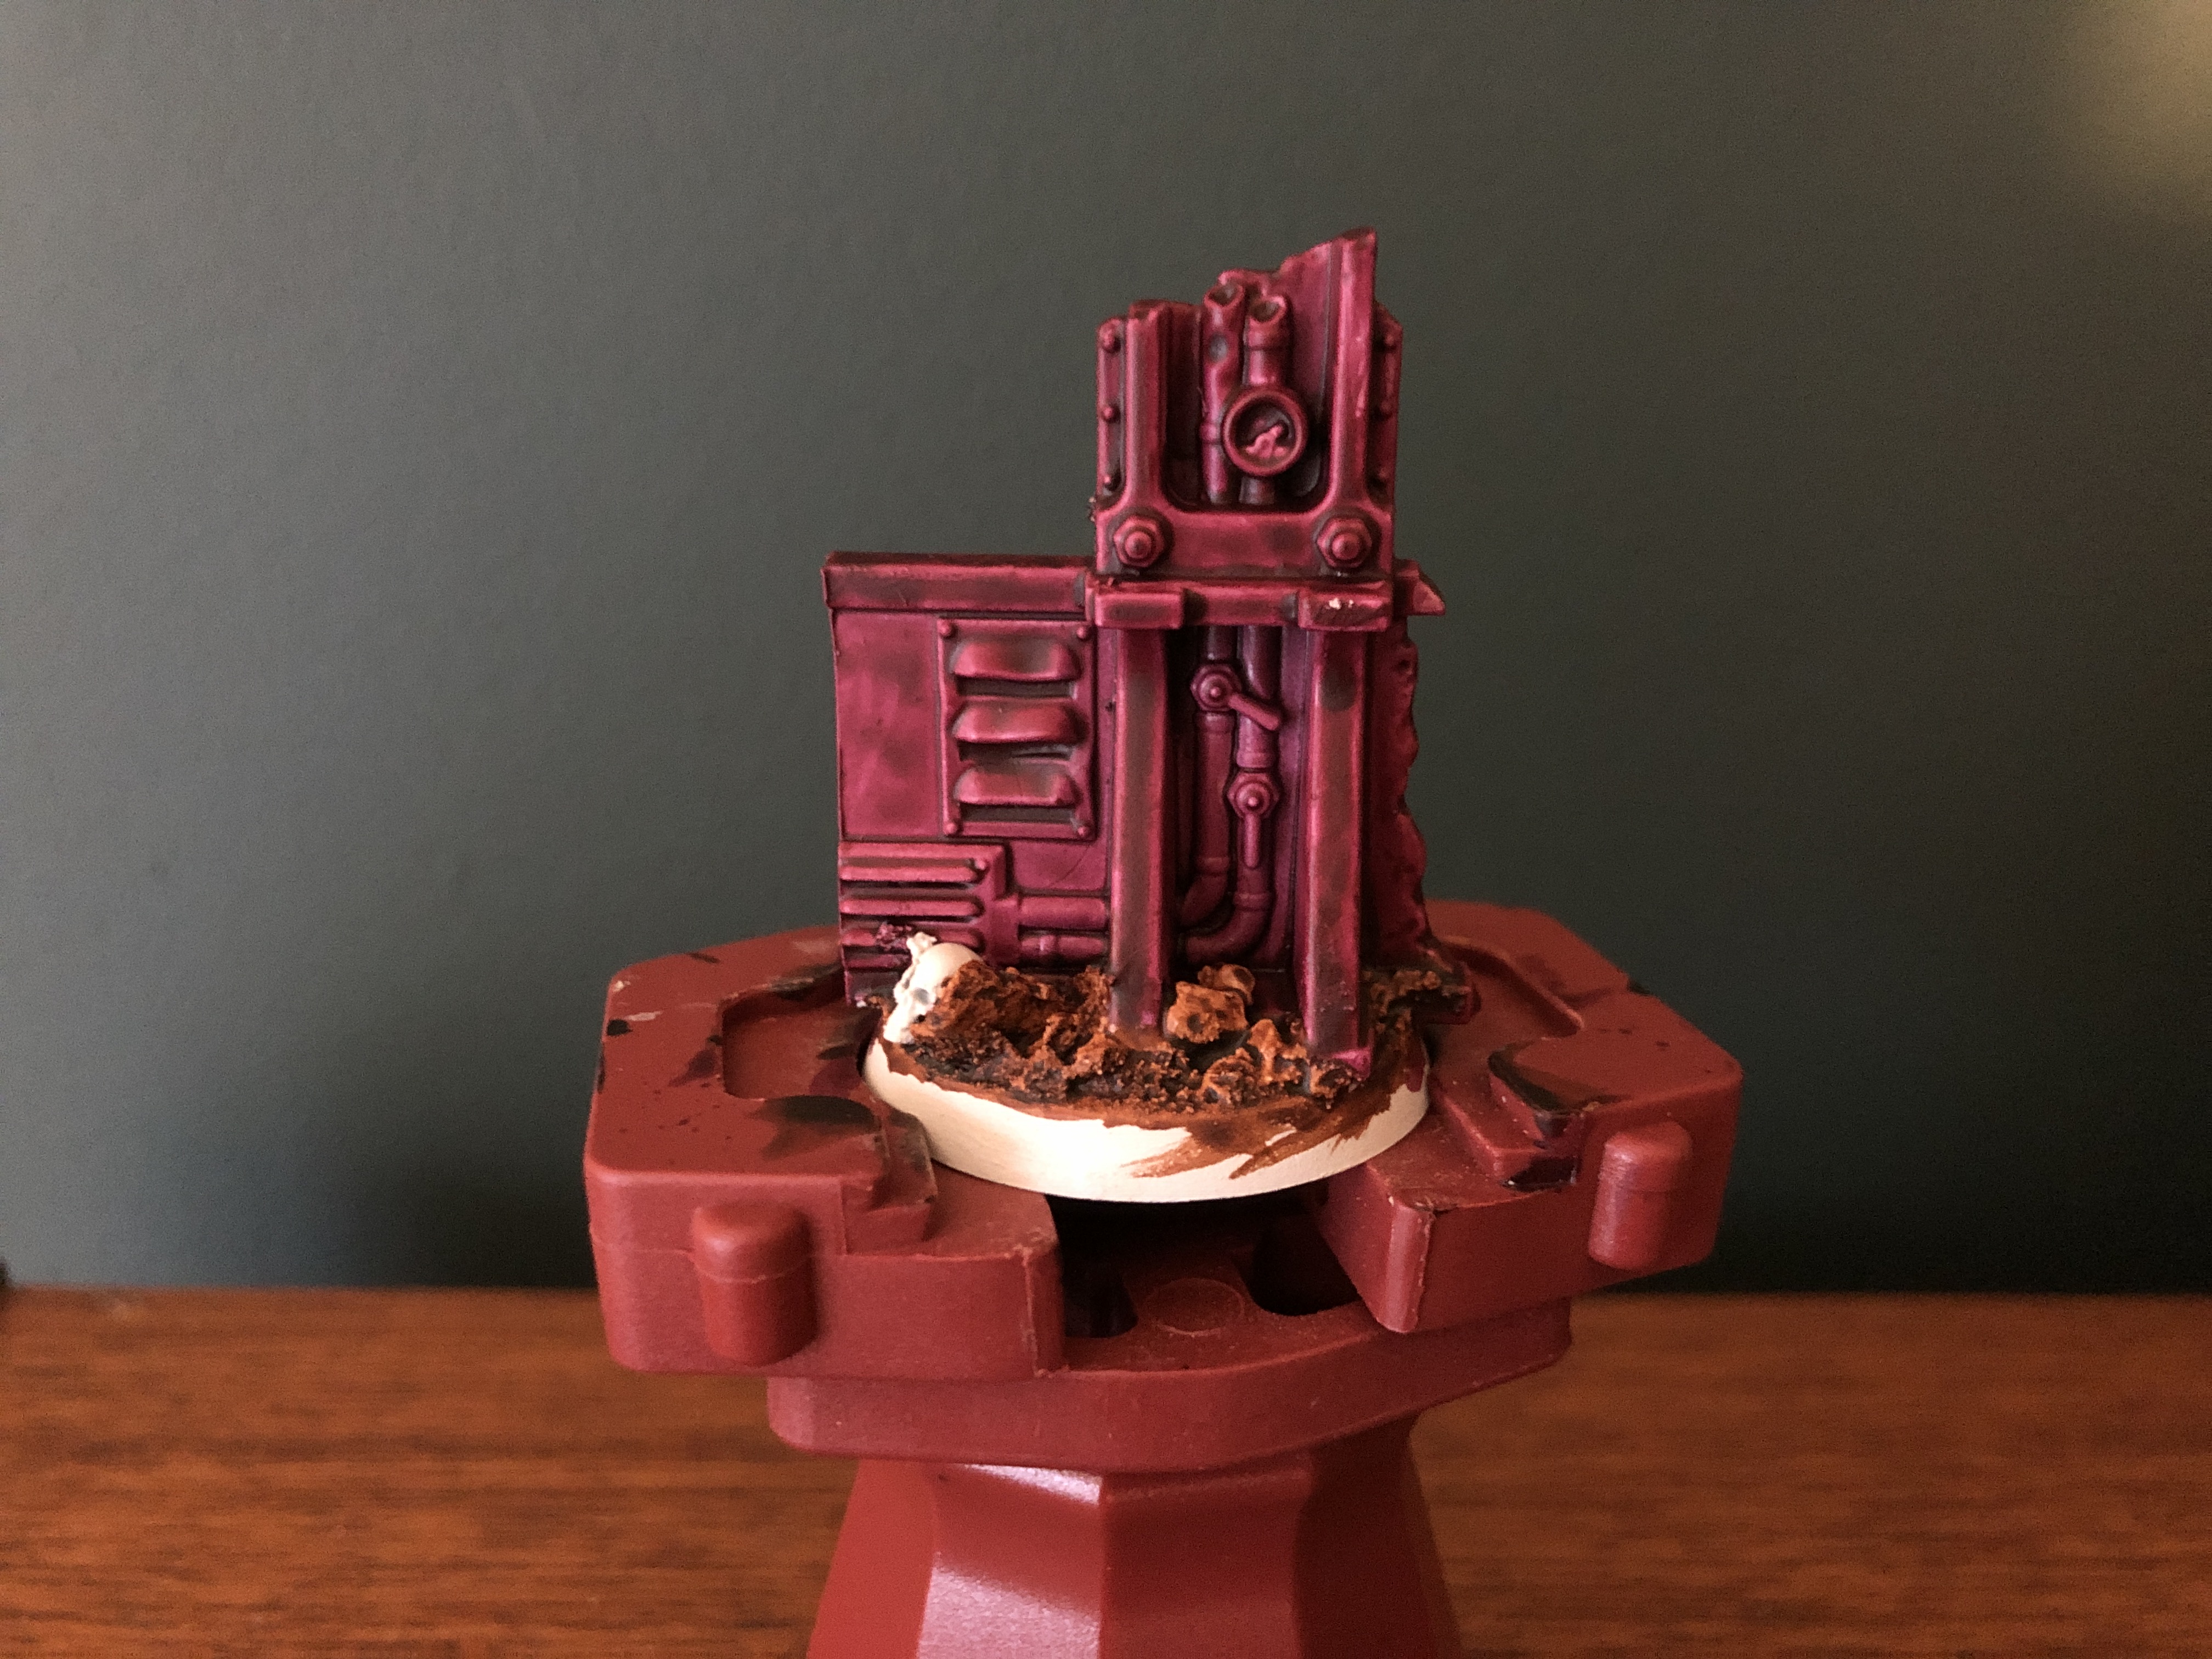
Let’s get this party started you lovely lot. All the images for the steps below are above. I began with a Wraithbone spray base coat to work from before hitting all of the structural elements of the base with two thick coats of Volupus pink. It’s important to really let the previous coat dry before applying the next one. Not gonna lie I think I let the first dry over night before chucking on the next. That will leave you with a really nice contrast base to work from. With the darker recesses pooling and giving life to all those awesome details.
After those two coats had dried I tidied up with Wraithbone before applying a single layer of Contrast Gore-Grunt Fur onto the floor level of the base including all the sandy bits & rocks. Already we can see these badass tones coming together.
While that was drying I used Leadbelcher to pick out all the vents, pipes, rebar, nuts & bolts. YES! LOOK AT IT SHINE!
With the Contrast Gore-Grunta Fur dry, I then applied a drybrush of Kindleflame over the entire base & structure. A heavier dry brush was focused on the rocks & brown elements of the base. A lighter more edge focused drybrush was applied to the edges of the Contrast Volupus Pink structure. This really tied the earth and structural elements together.
When that was dry I applied a final drybrush to the brown elements only of Wraithbone. That actually completes the earthy elements of the base. How easy was that!
I then used a single coat of Contrast Skeleton Horde on all the skulls & bone elements of the base before moving onto the weathering.
Ooh this bit was bloody fun! I used Model Mates Mud Brown Weathering Wash & applied a single coat to all the metal elements on the base. Literally painting over them completely. When this had just about dried I used a damp cotton bud to pull always some of the mud effect. I did this by gently stippling across the surface so some of the metal showed through giving it that worn aged appearance.
As a final step of weathering I used Ryza Rust dry paint and applied a dry brush to all the metal elements. I gradually built up the drybrush in several layers until it got to a badass rustiness I could be proud of. I’m over the moon with how these two techniques really brought the bases to a state I was happy with.
Last but not least I applied a highlight of Wraithbone to the topmost points of the skulls followed by a very fine highlight of Whitescar.
With the bases complete I finished them off with the obligatory victory lap/rim job of Abaddon Black. WAHOO! BASEY GOODNESS!
NEXT ON THE PAINT TABLE
*****
I’ll give you one guess? YES! Next I’ll be painting the Seraphim themselves which will complete my limited edition starter box for the Sisters. How bloody exciting! I won’t be posting a painting guide for these ladies as I’m gonna be painting them exactly the same as I’ve explained in my previous posts. But of course you can definitely expect some awesome photographs when they’re done!
See you on the next one lovelies!
Much Love
Eternity Gate
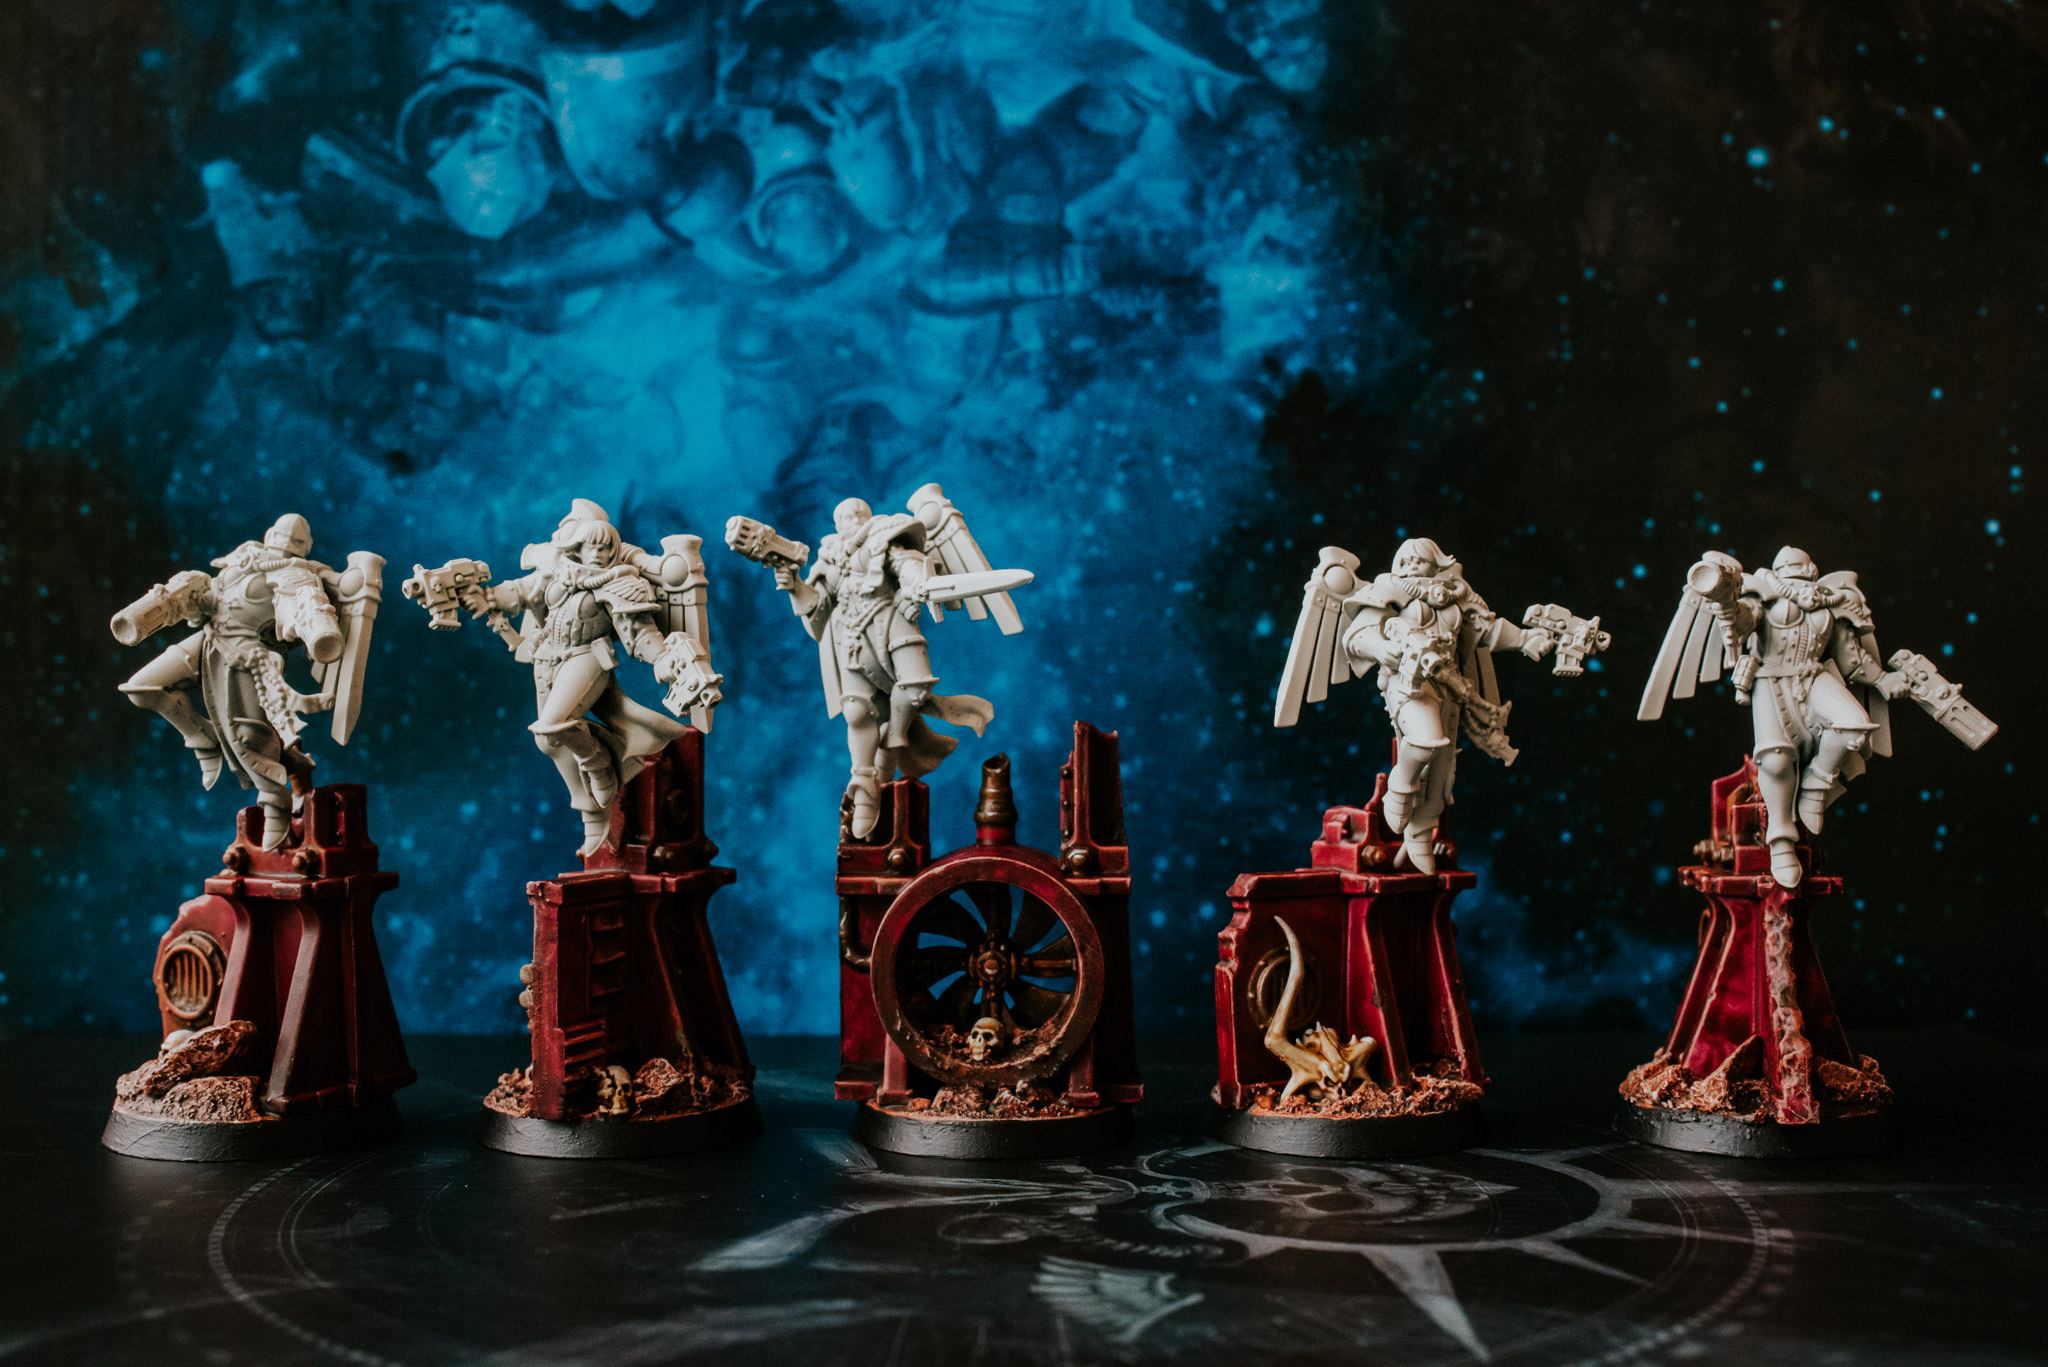
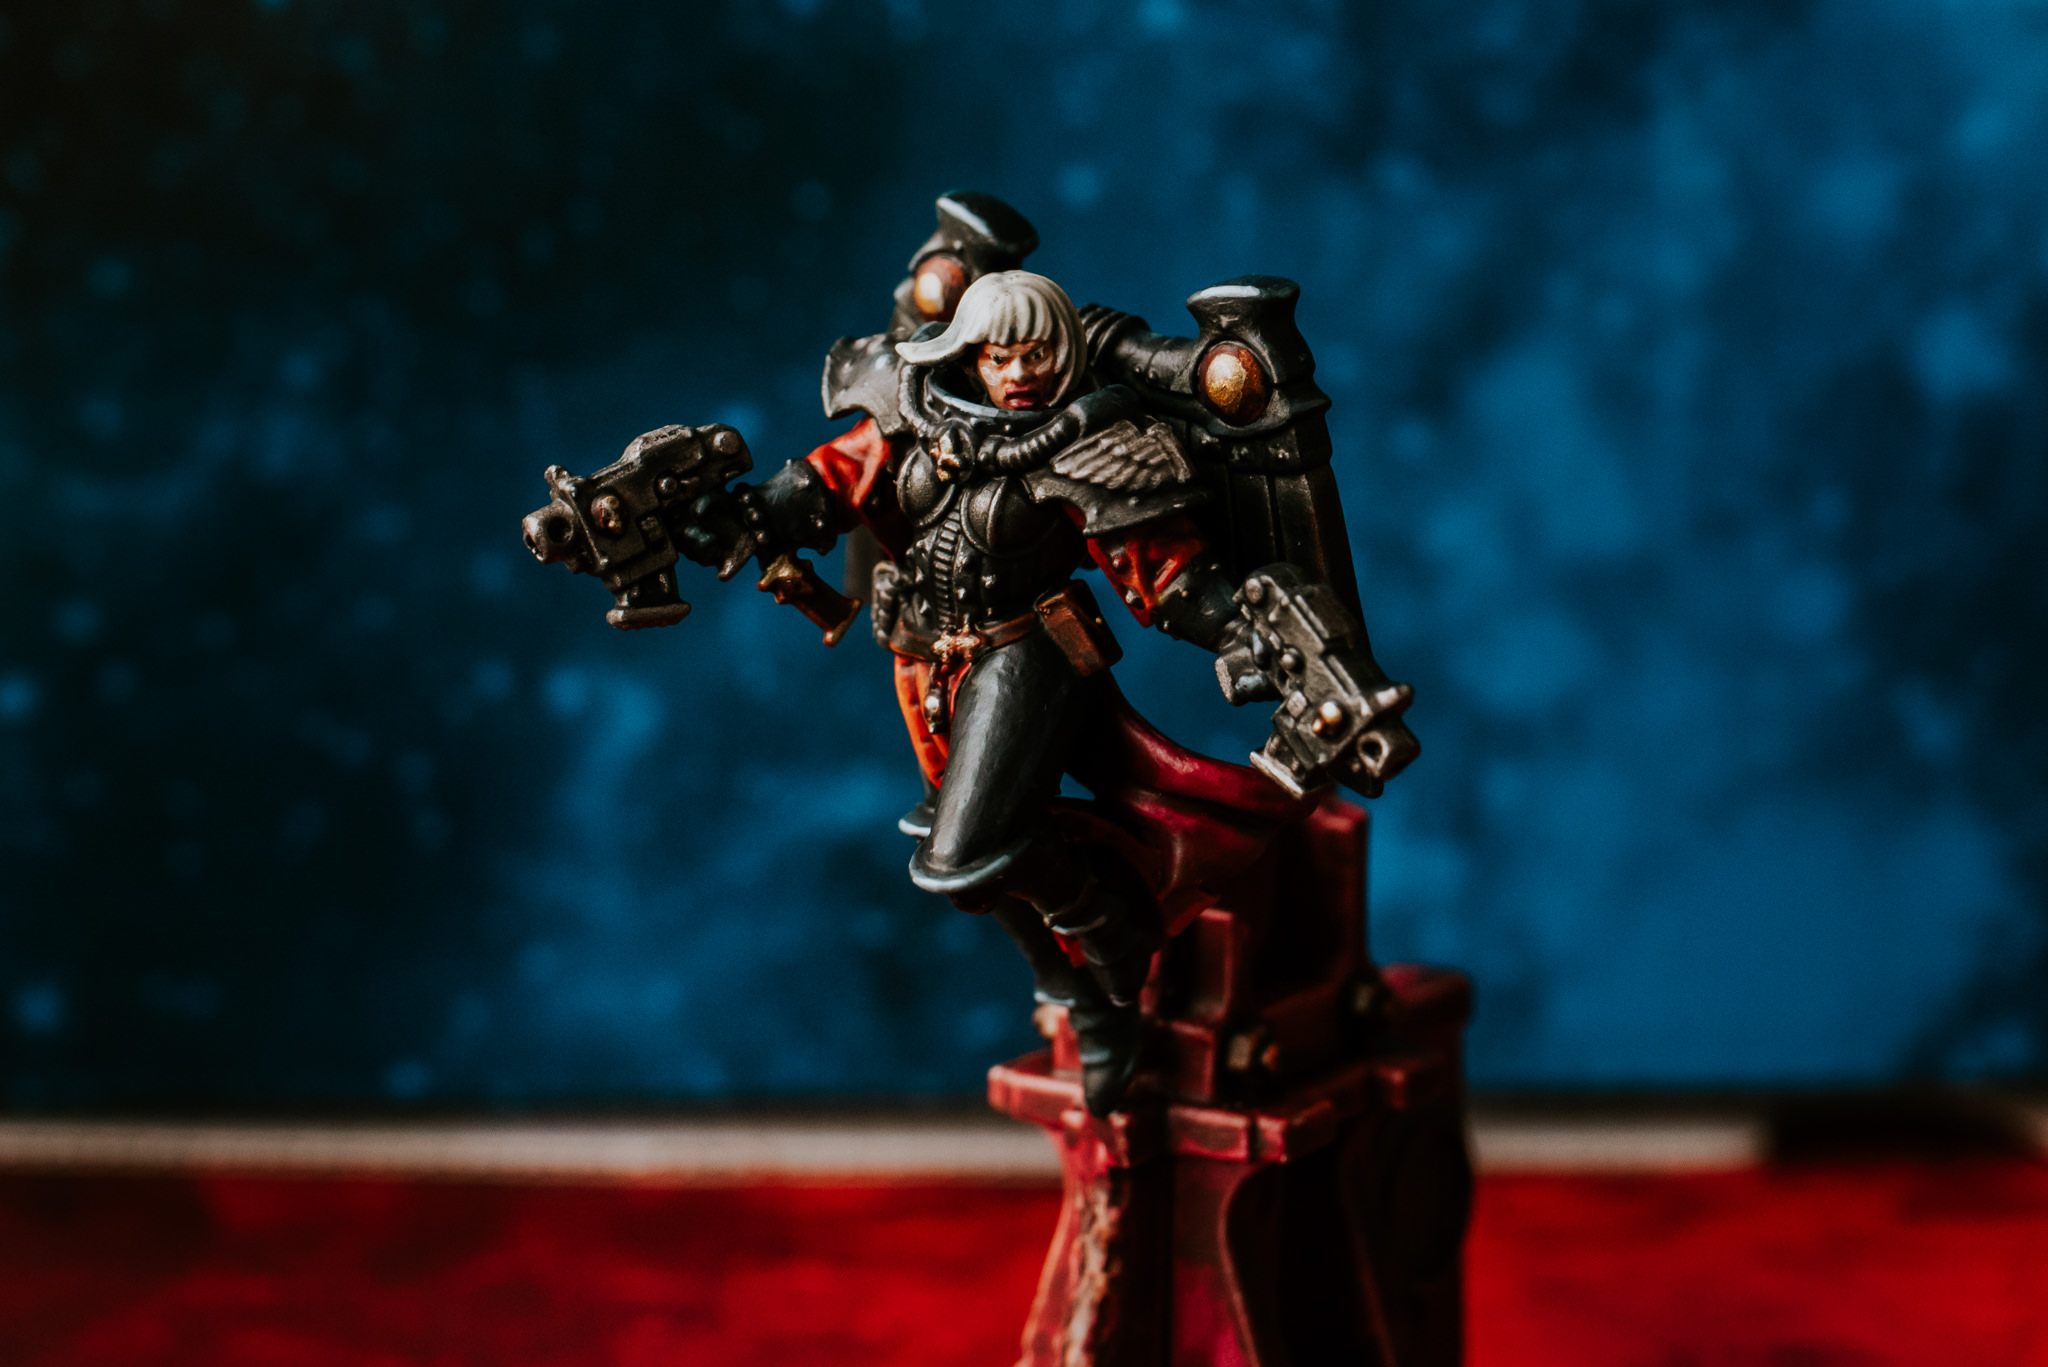
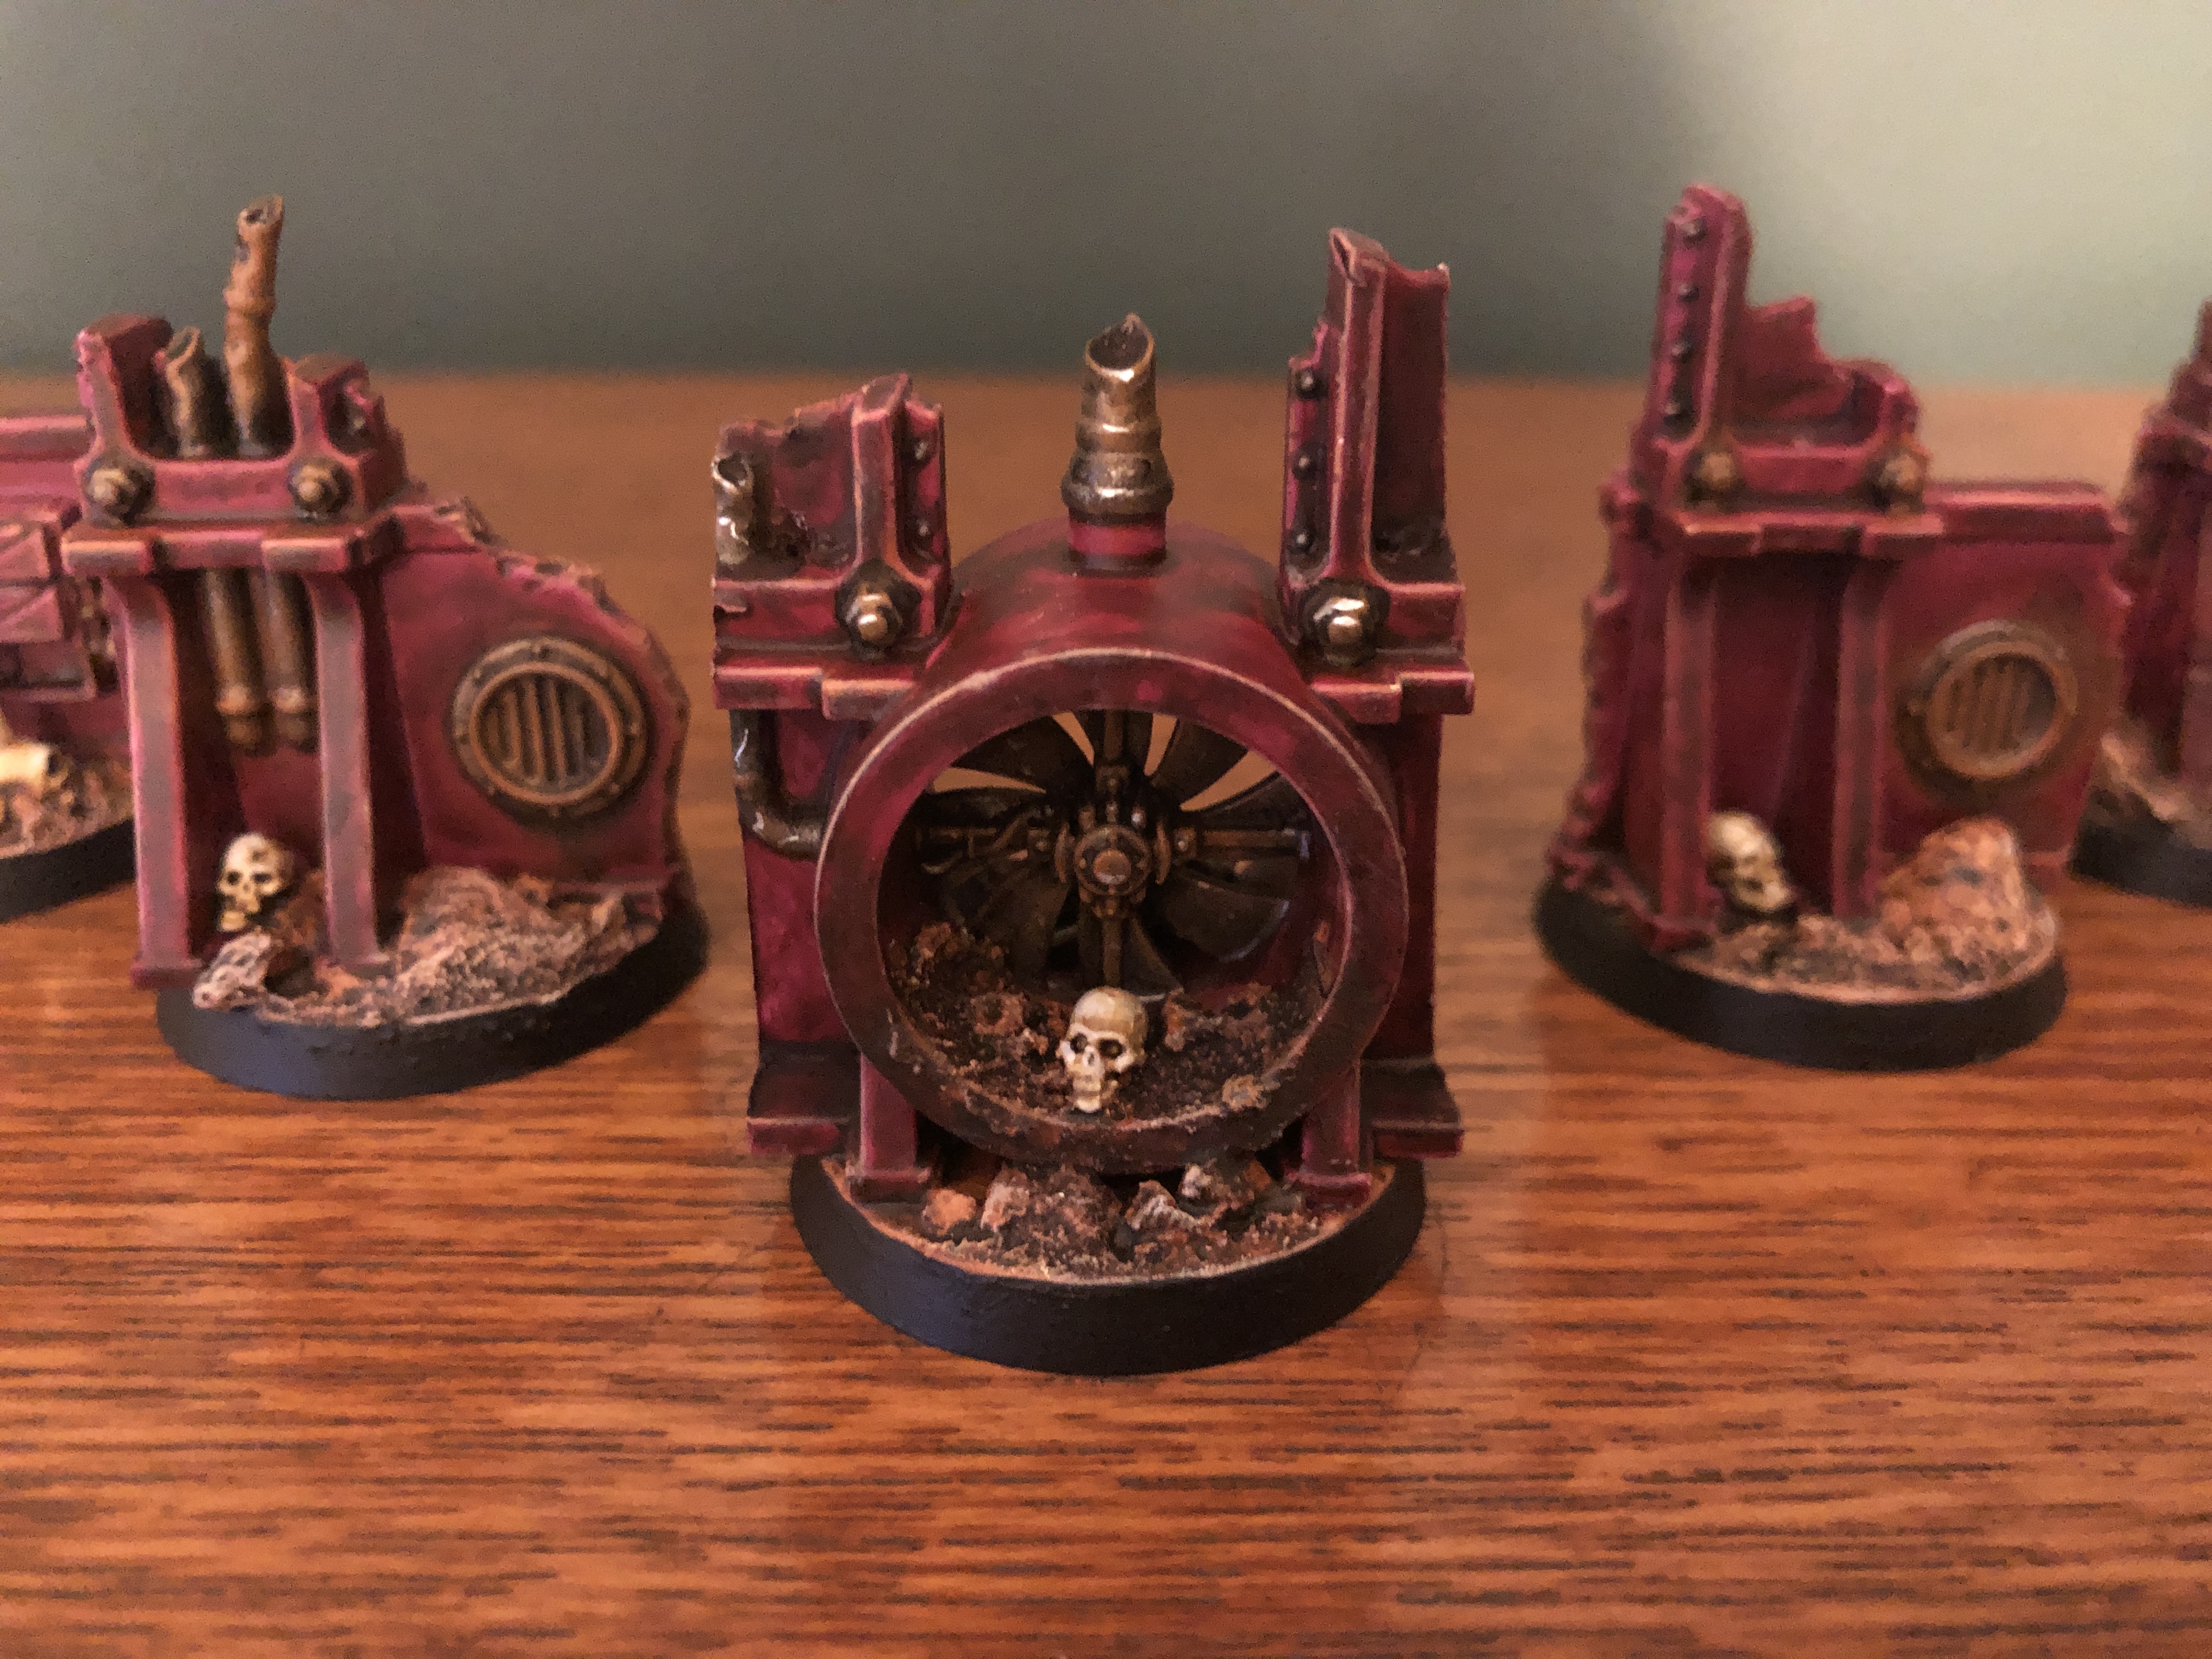
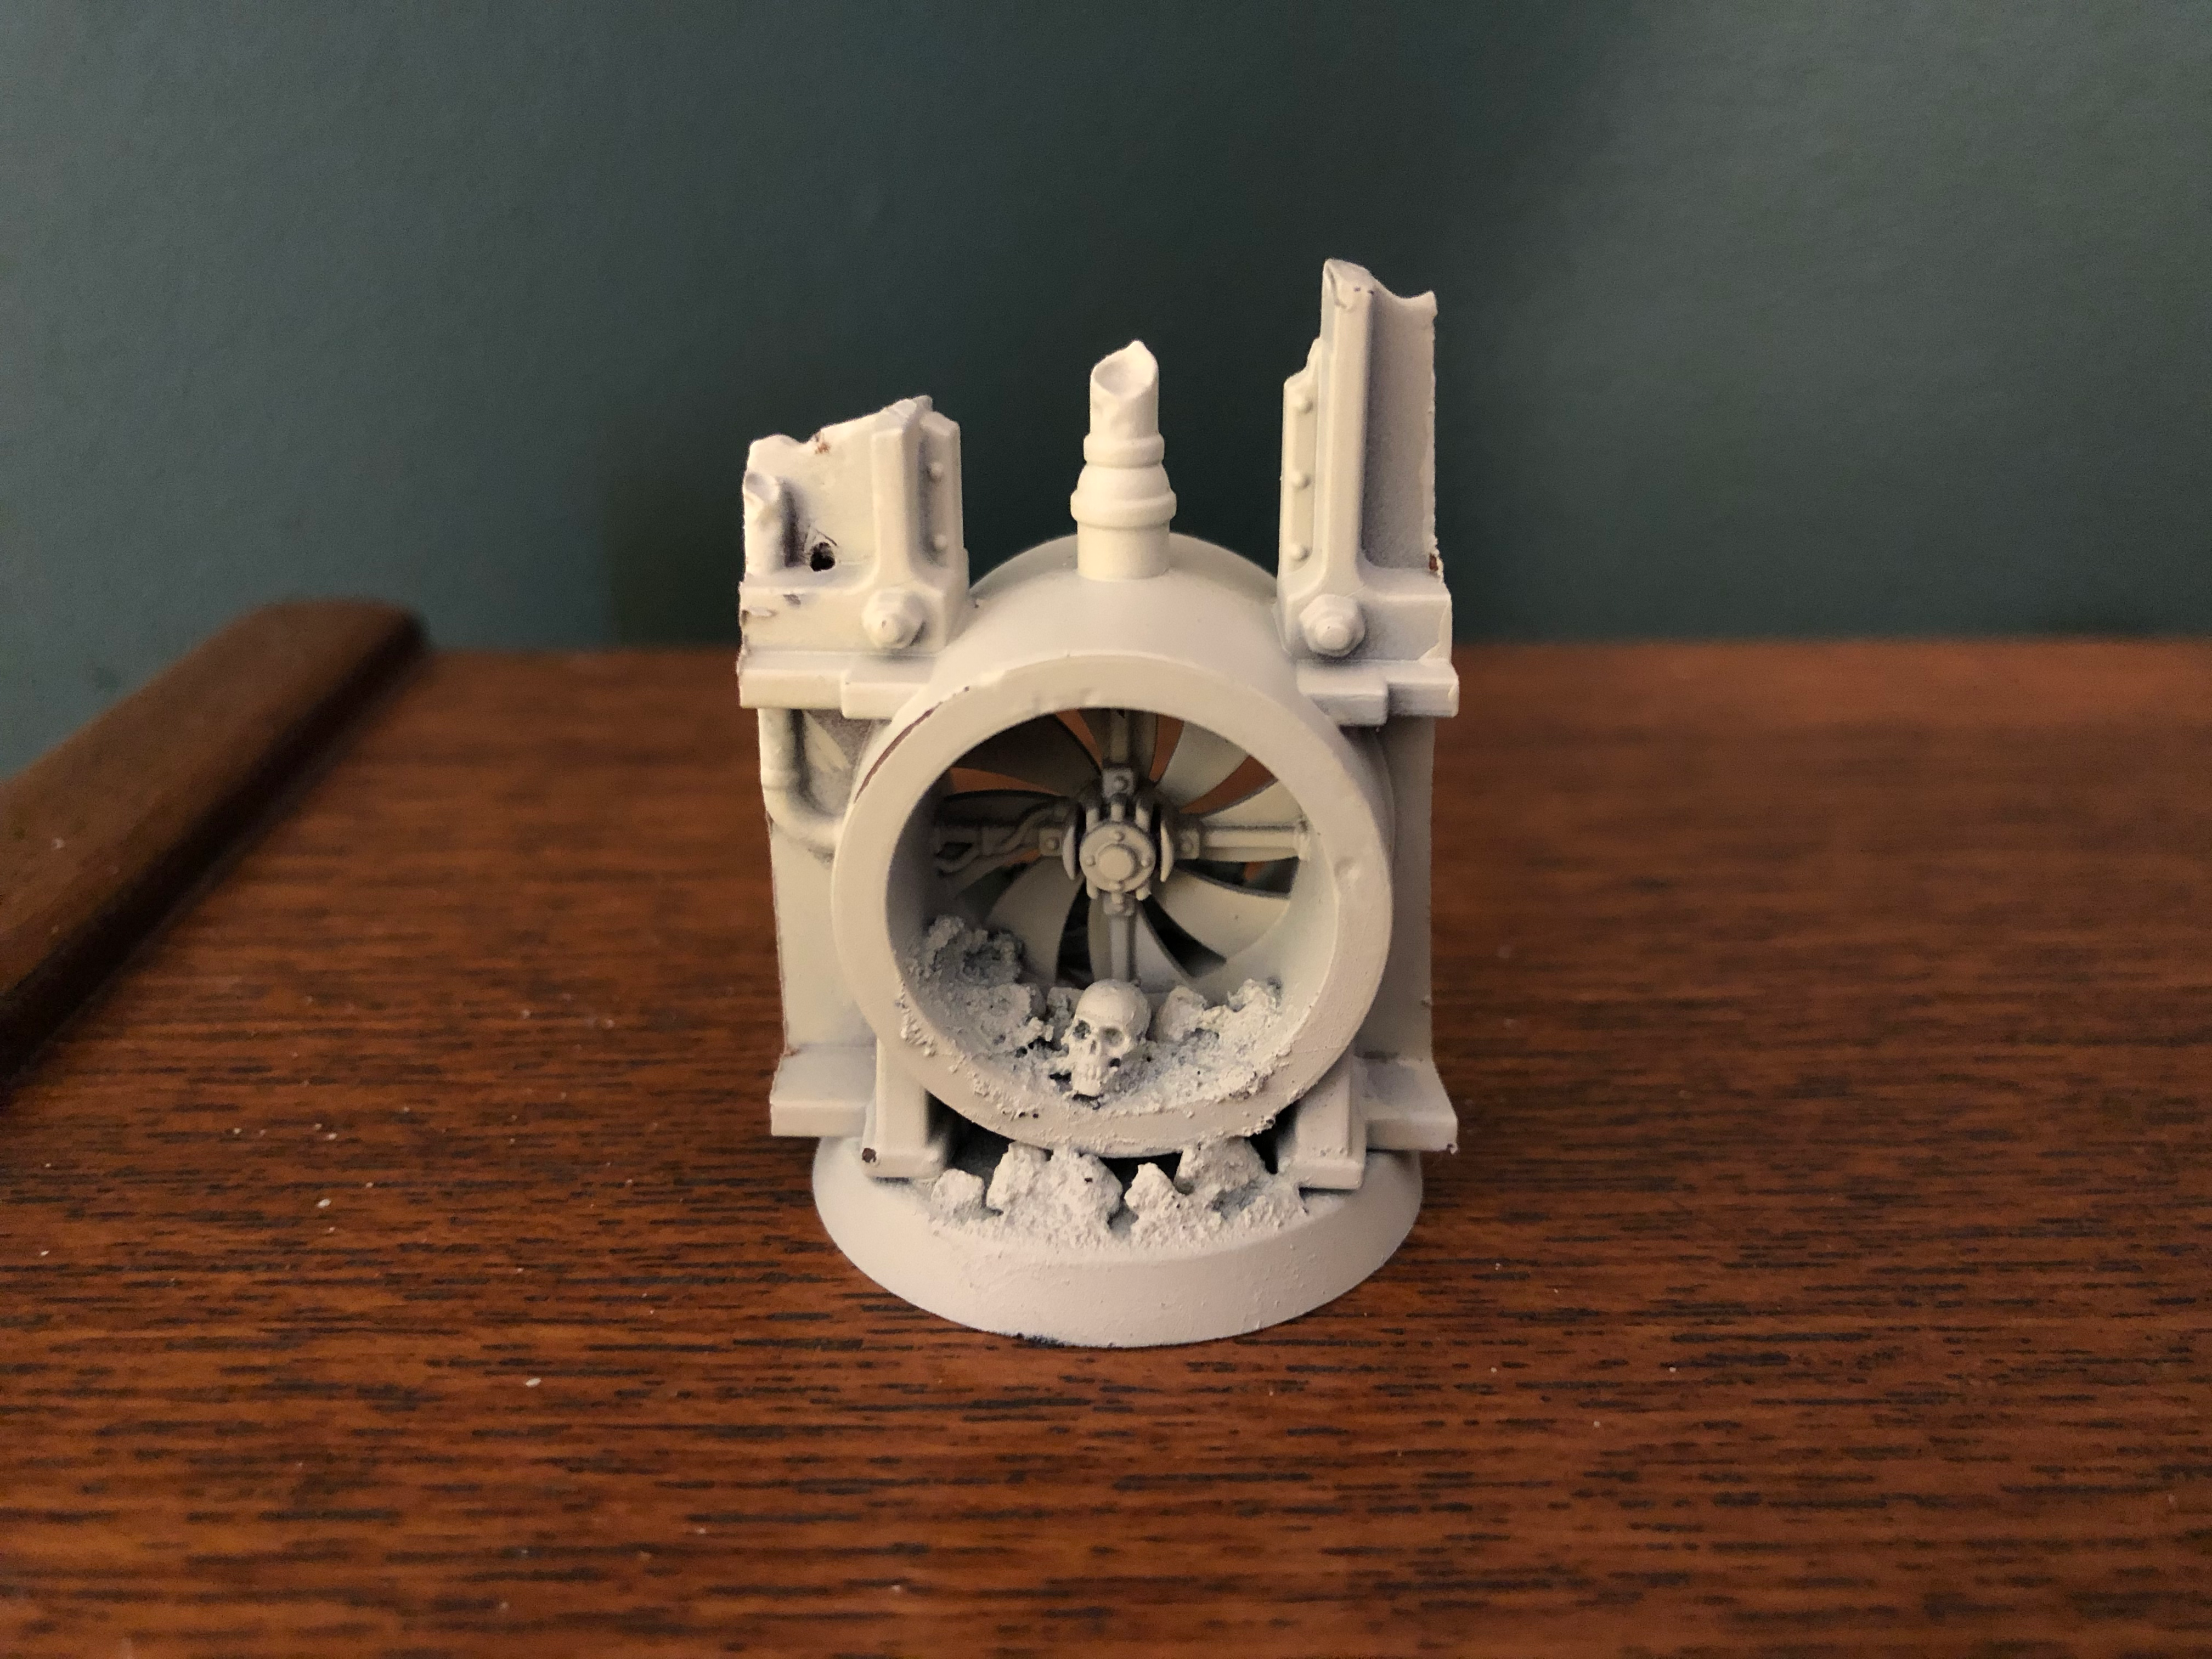
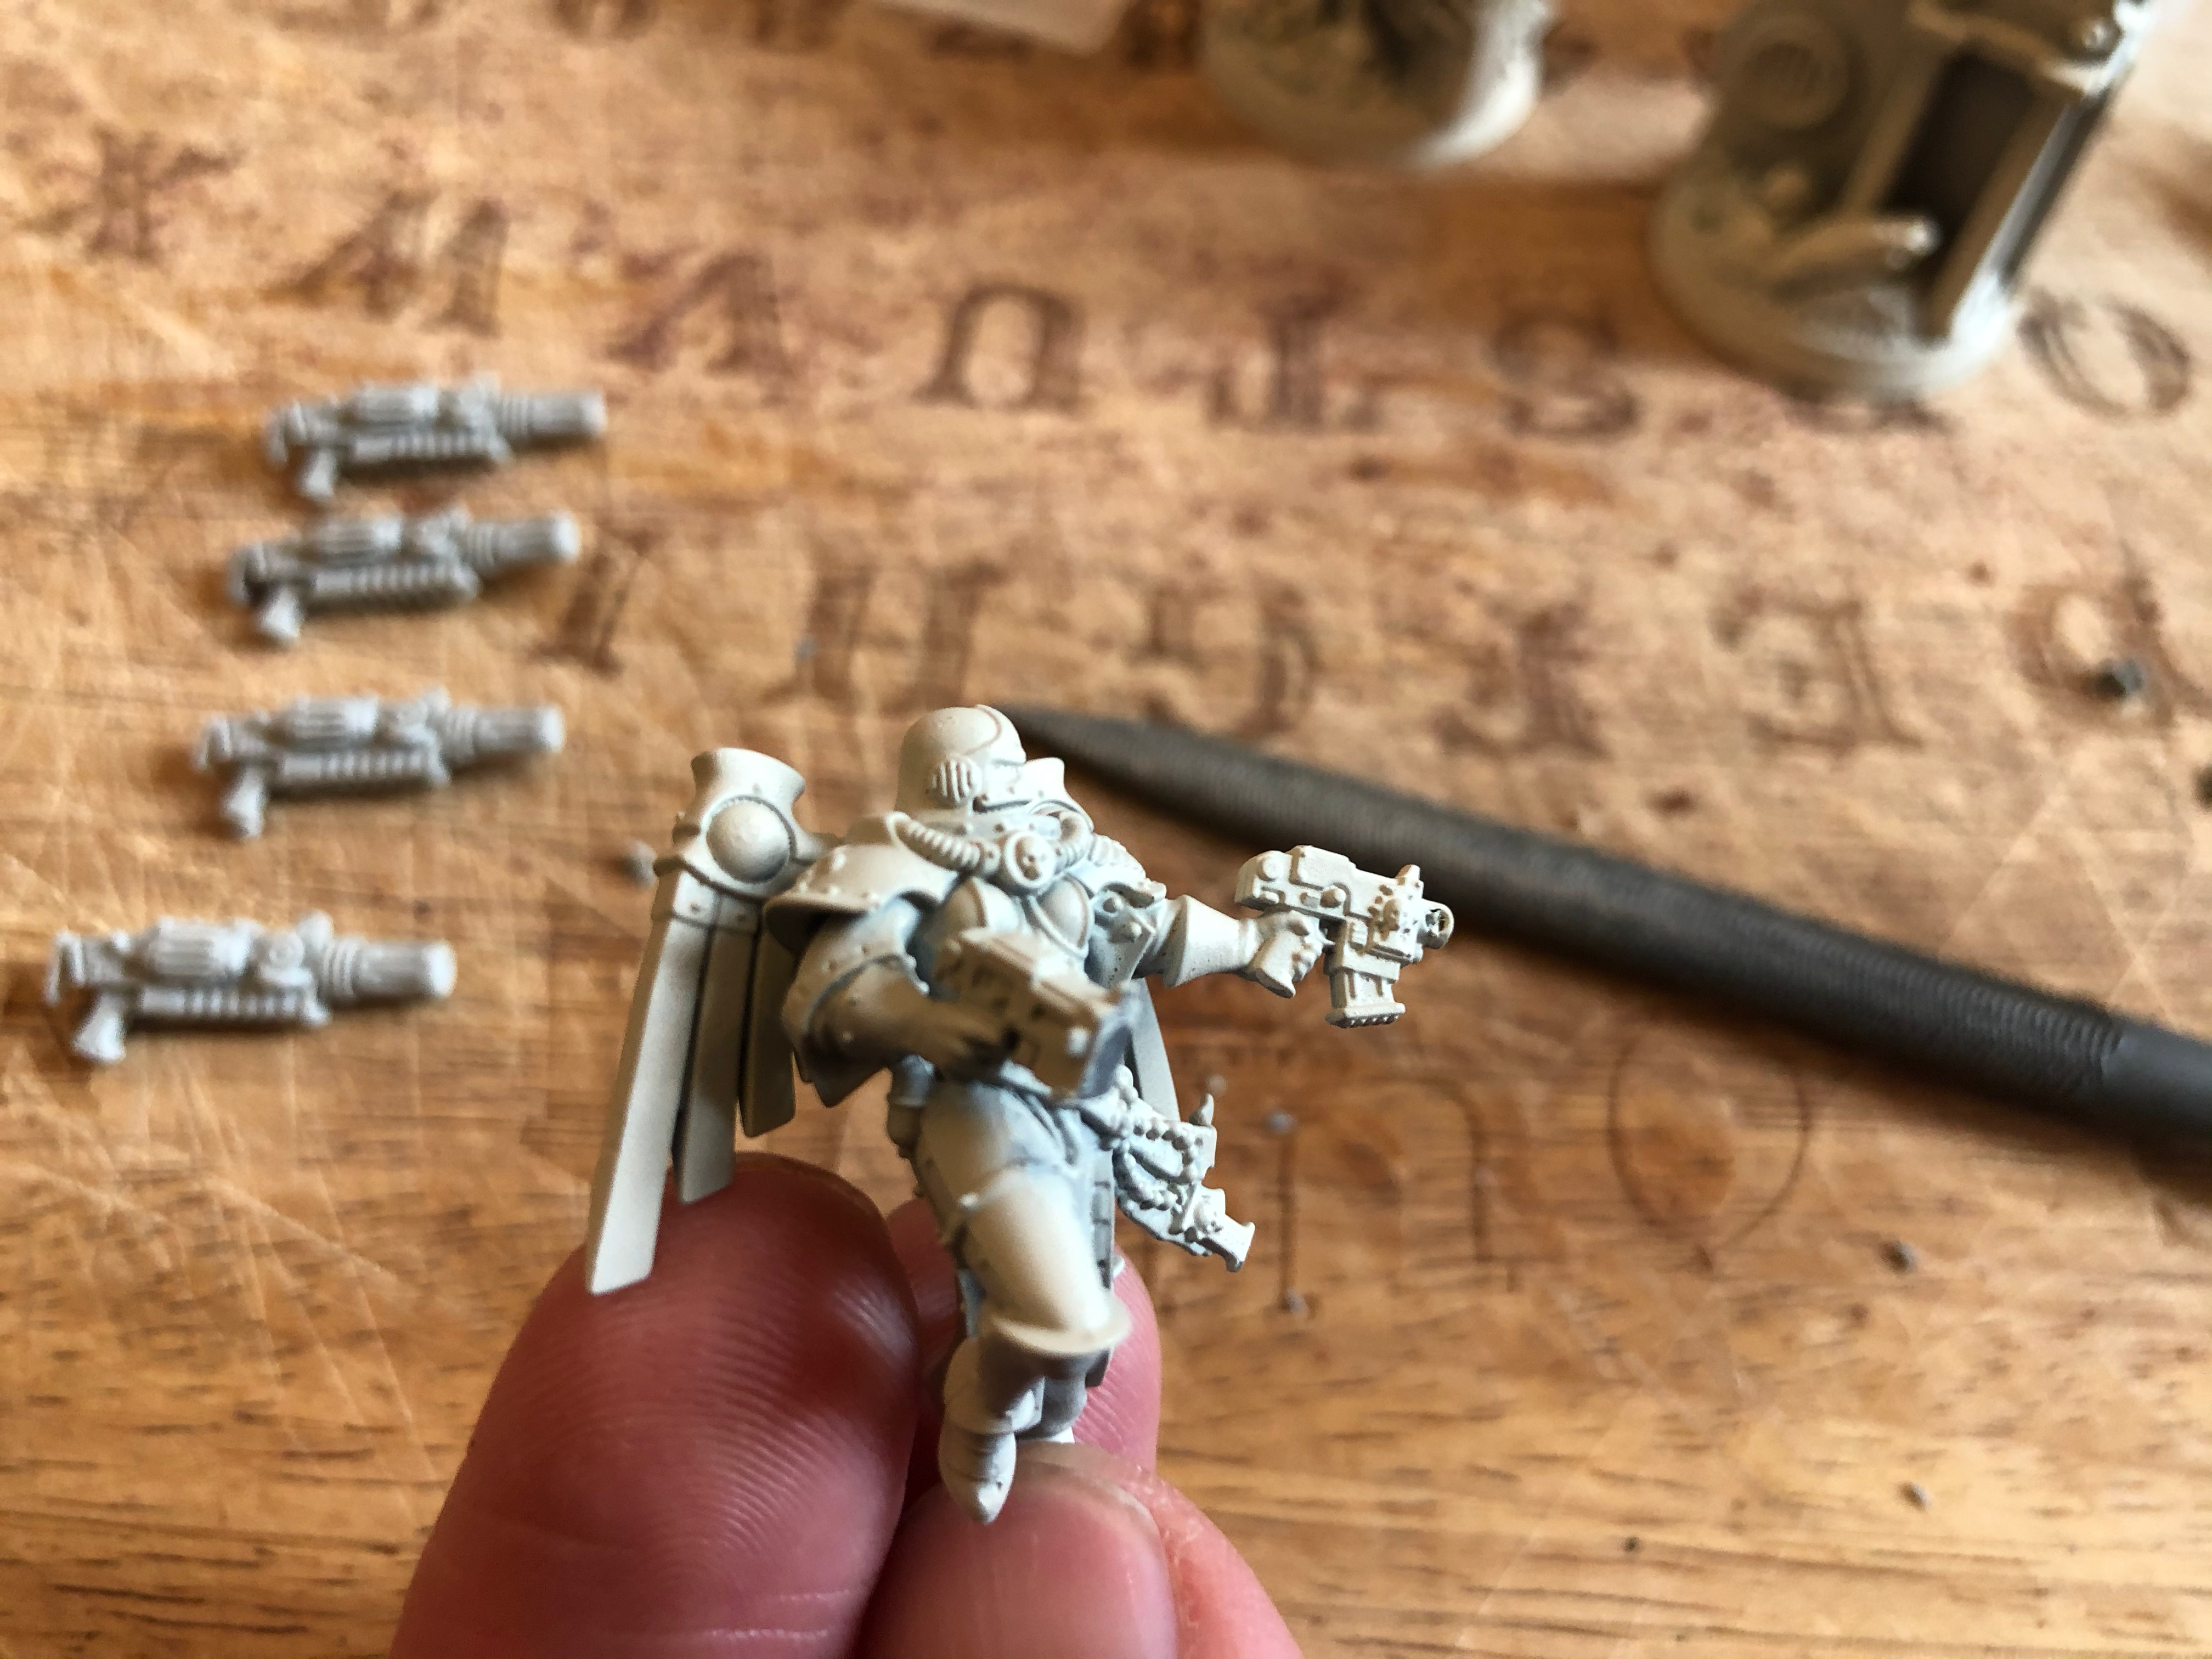
DEATH FROM ABOVE ~ MAKING SERAPHIM INFERNO PISTOLS
SERAPHIM
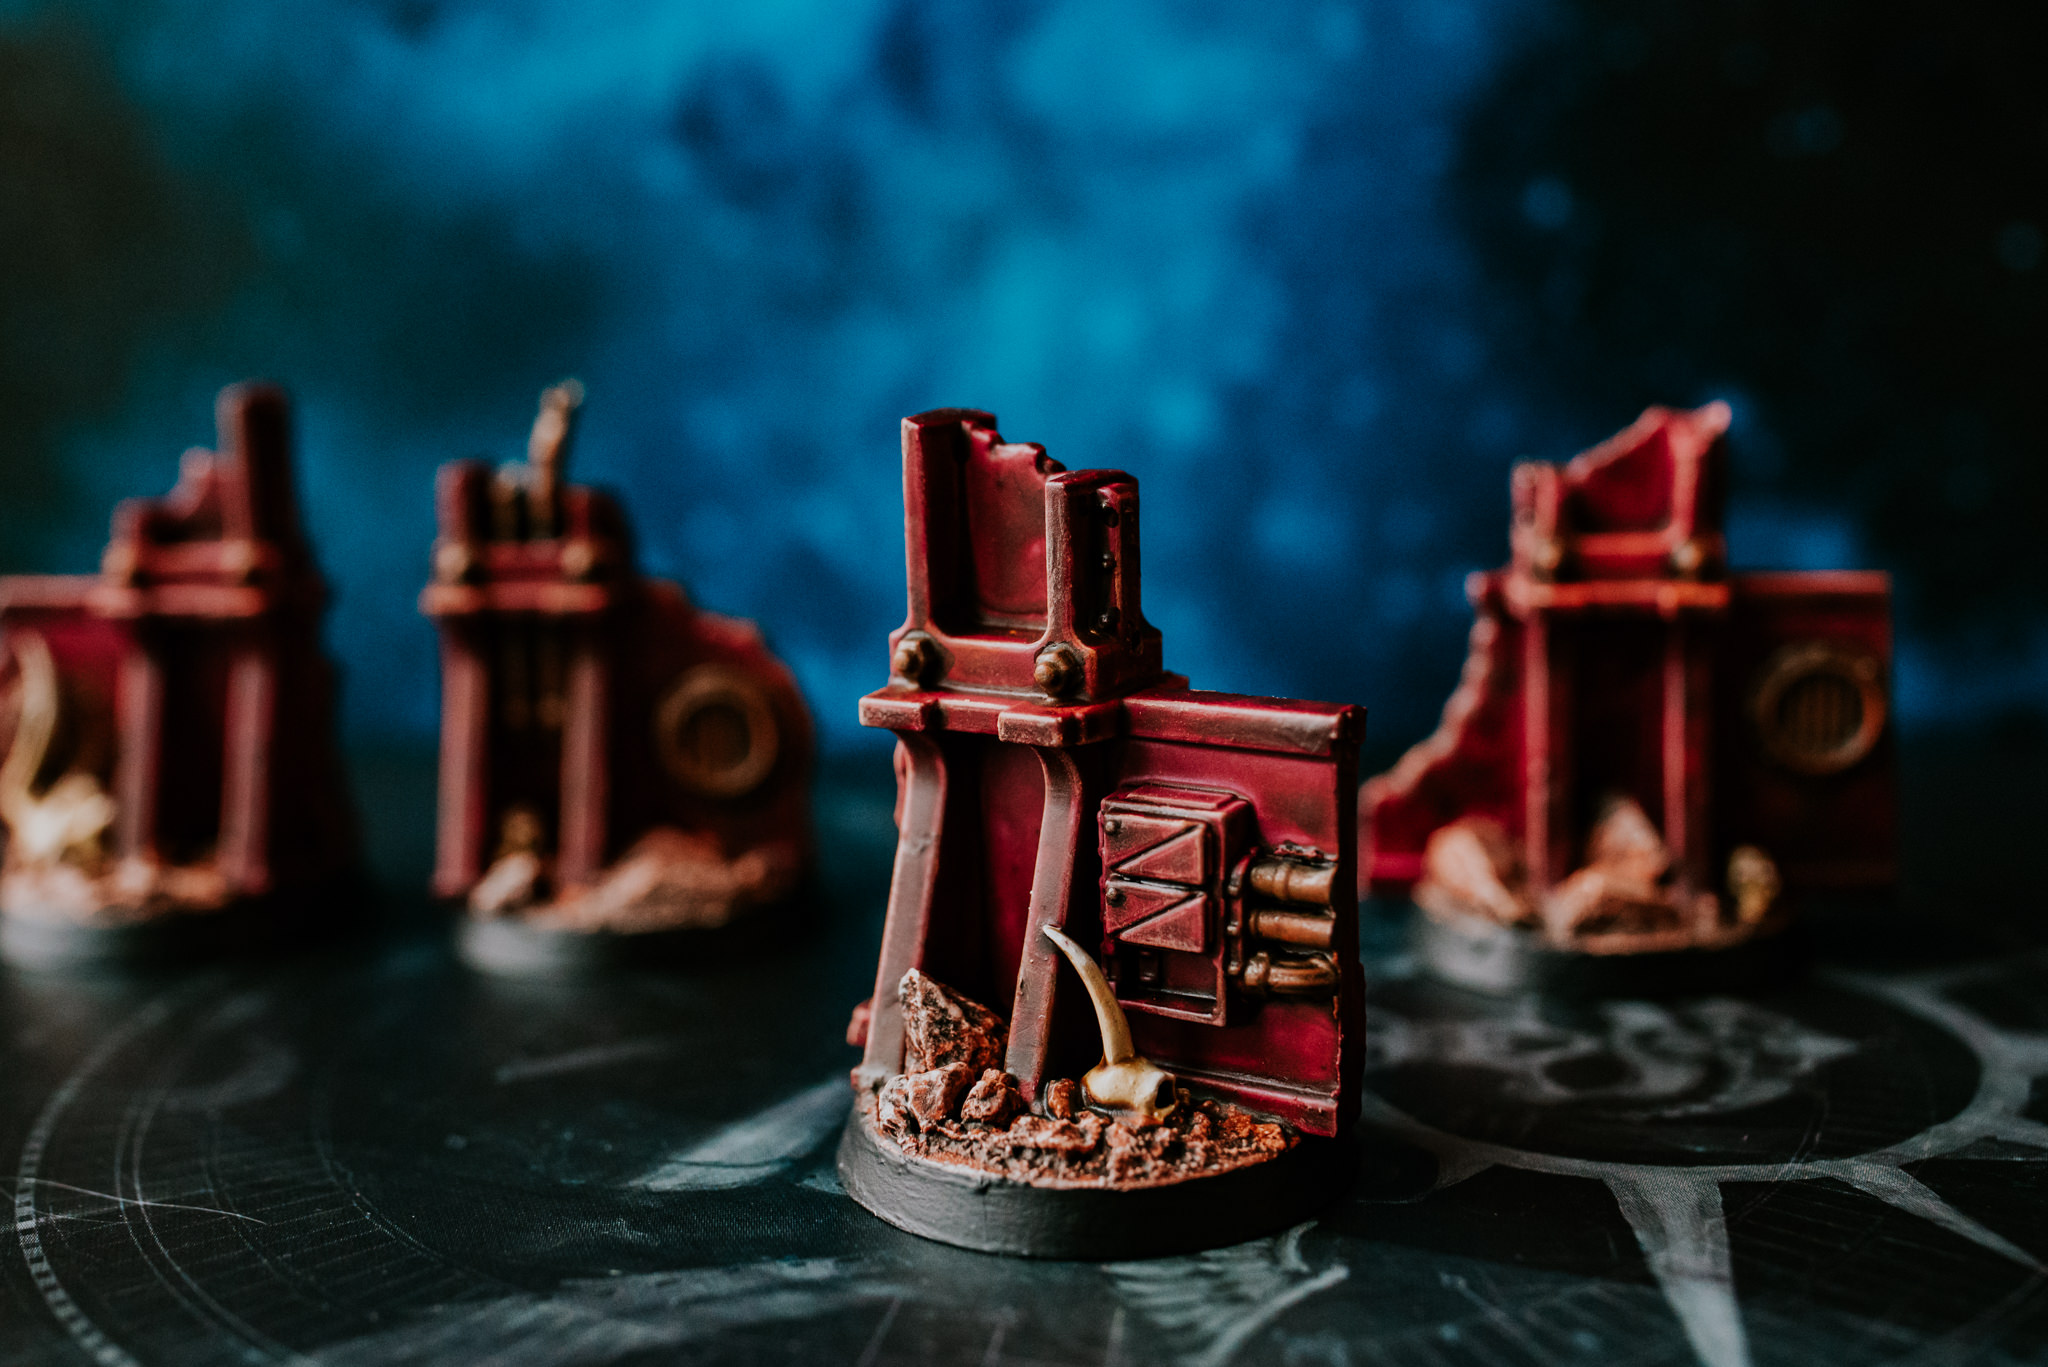
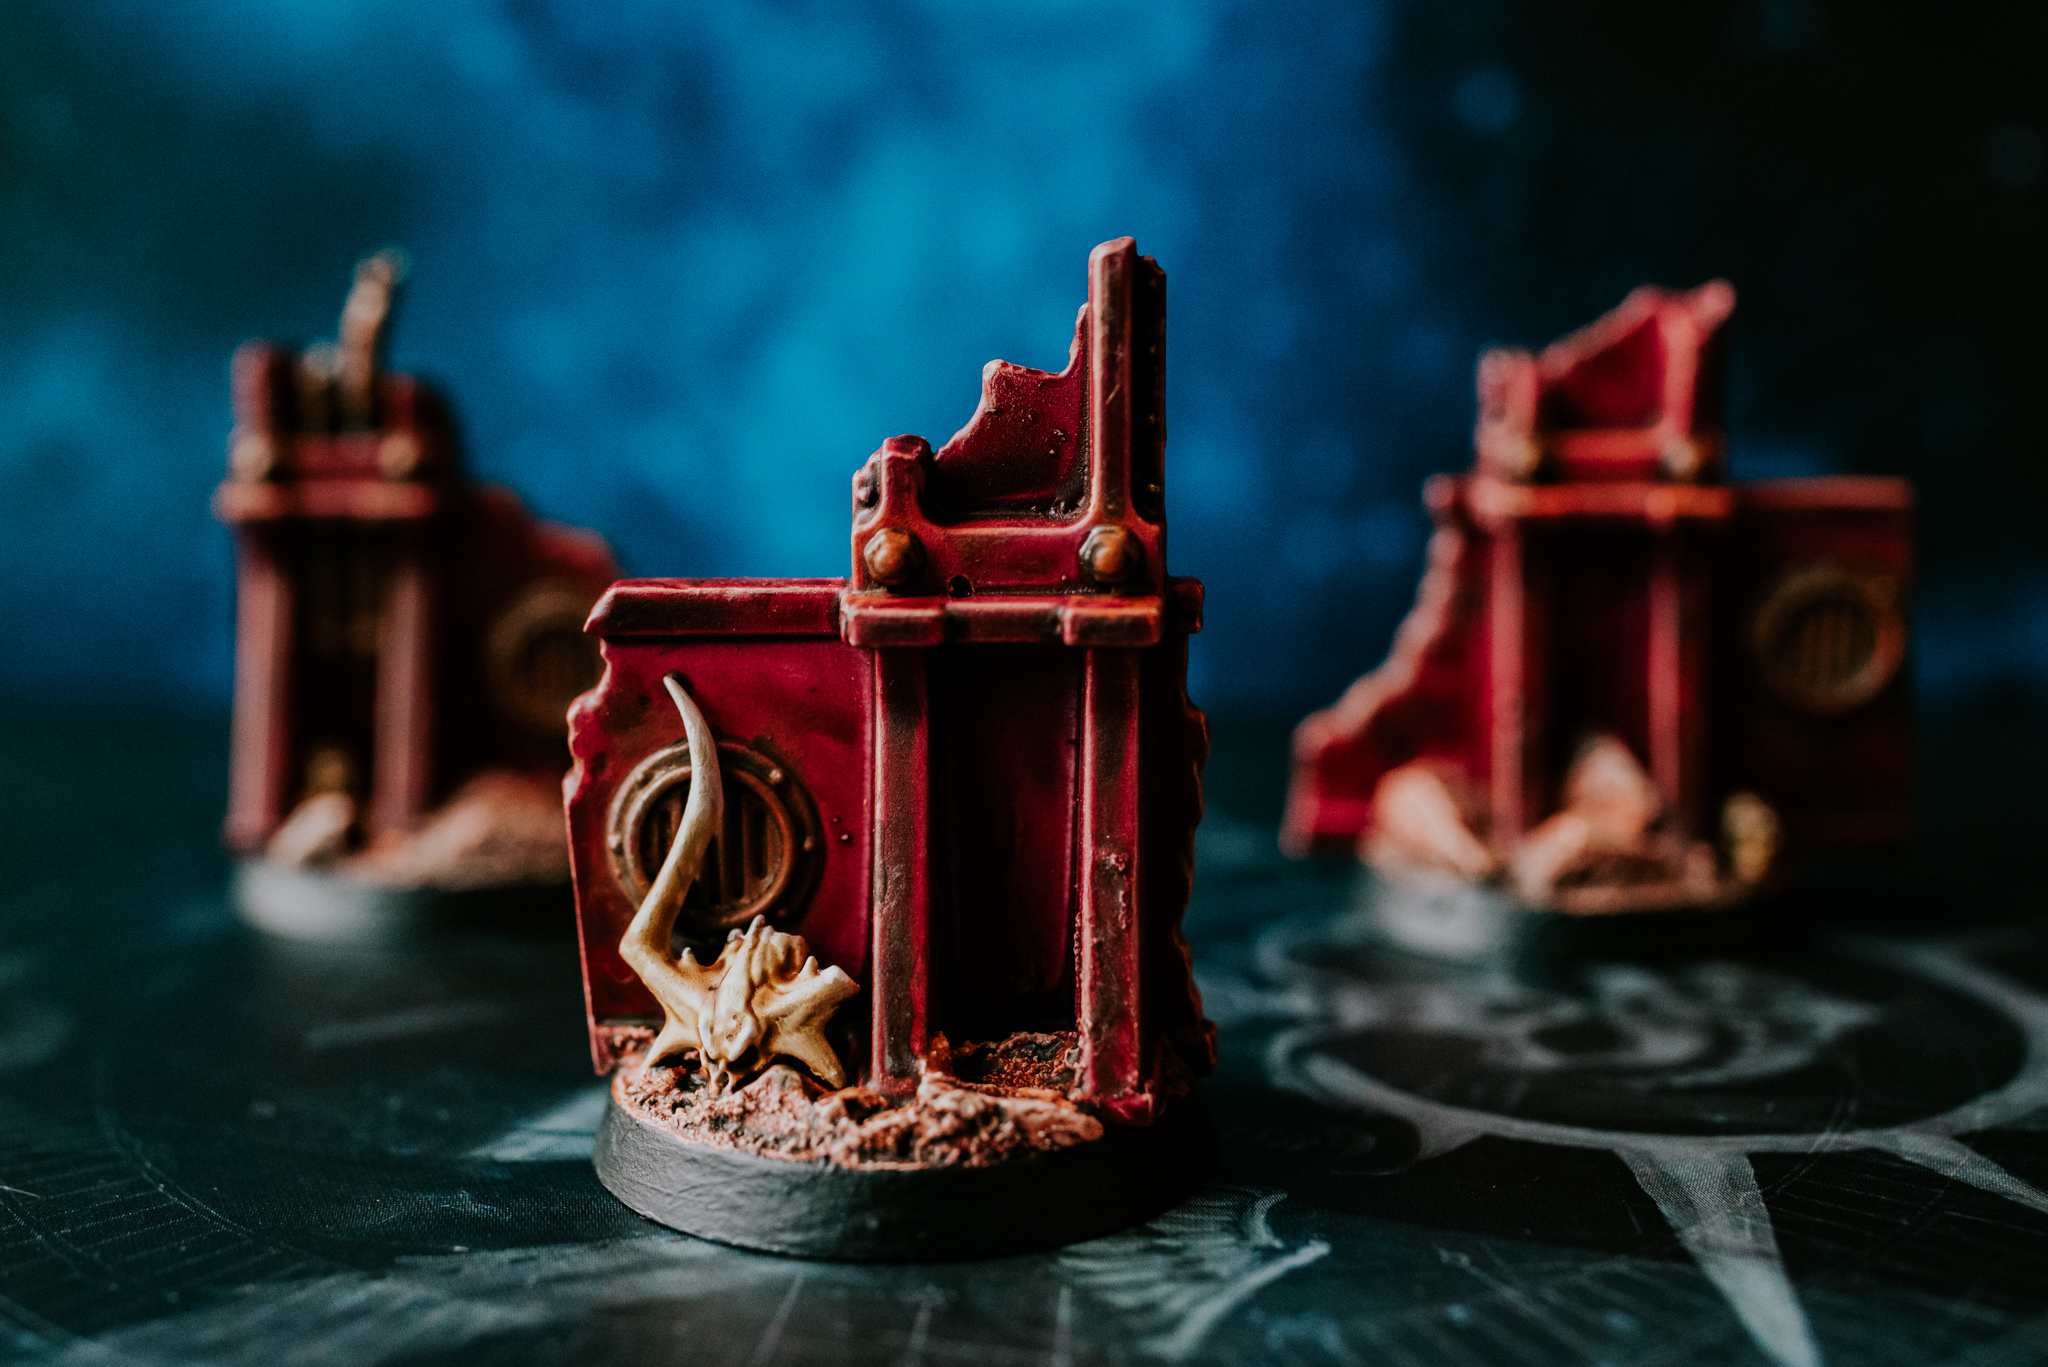
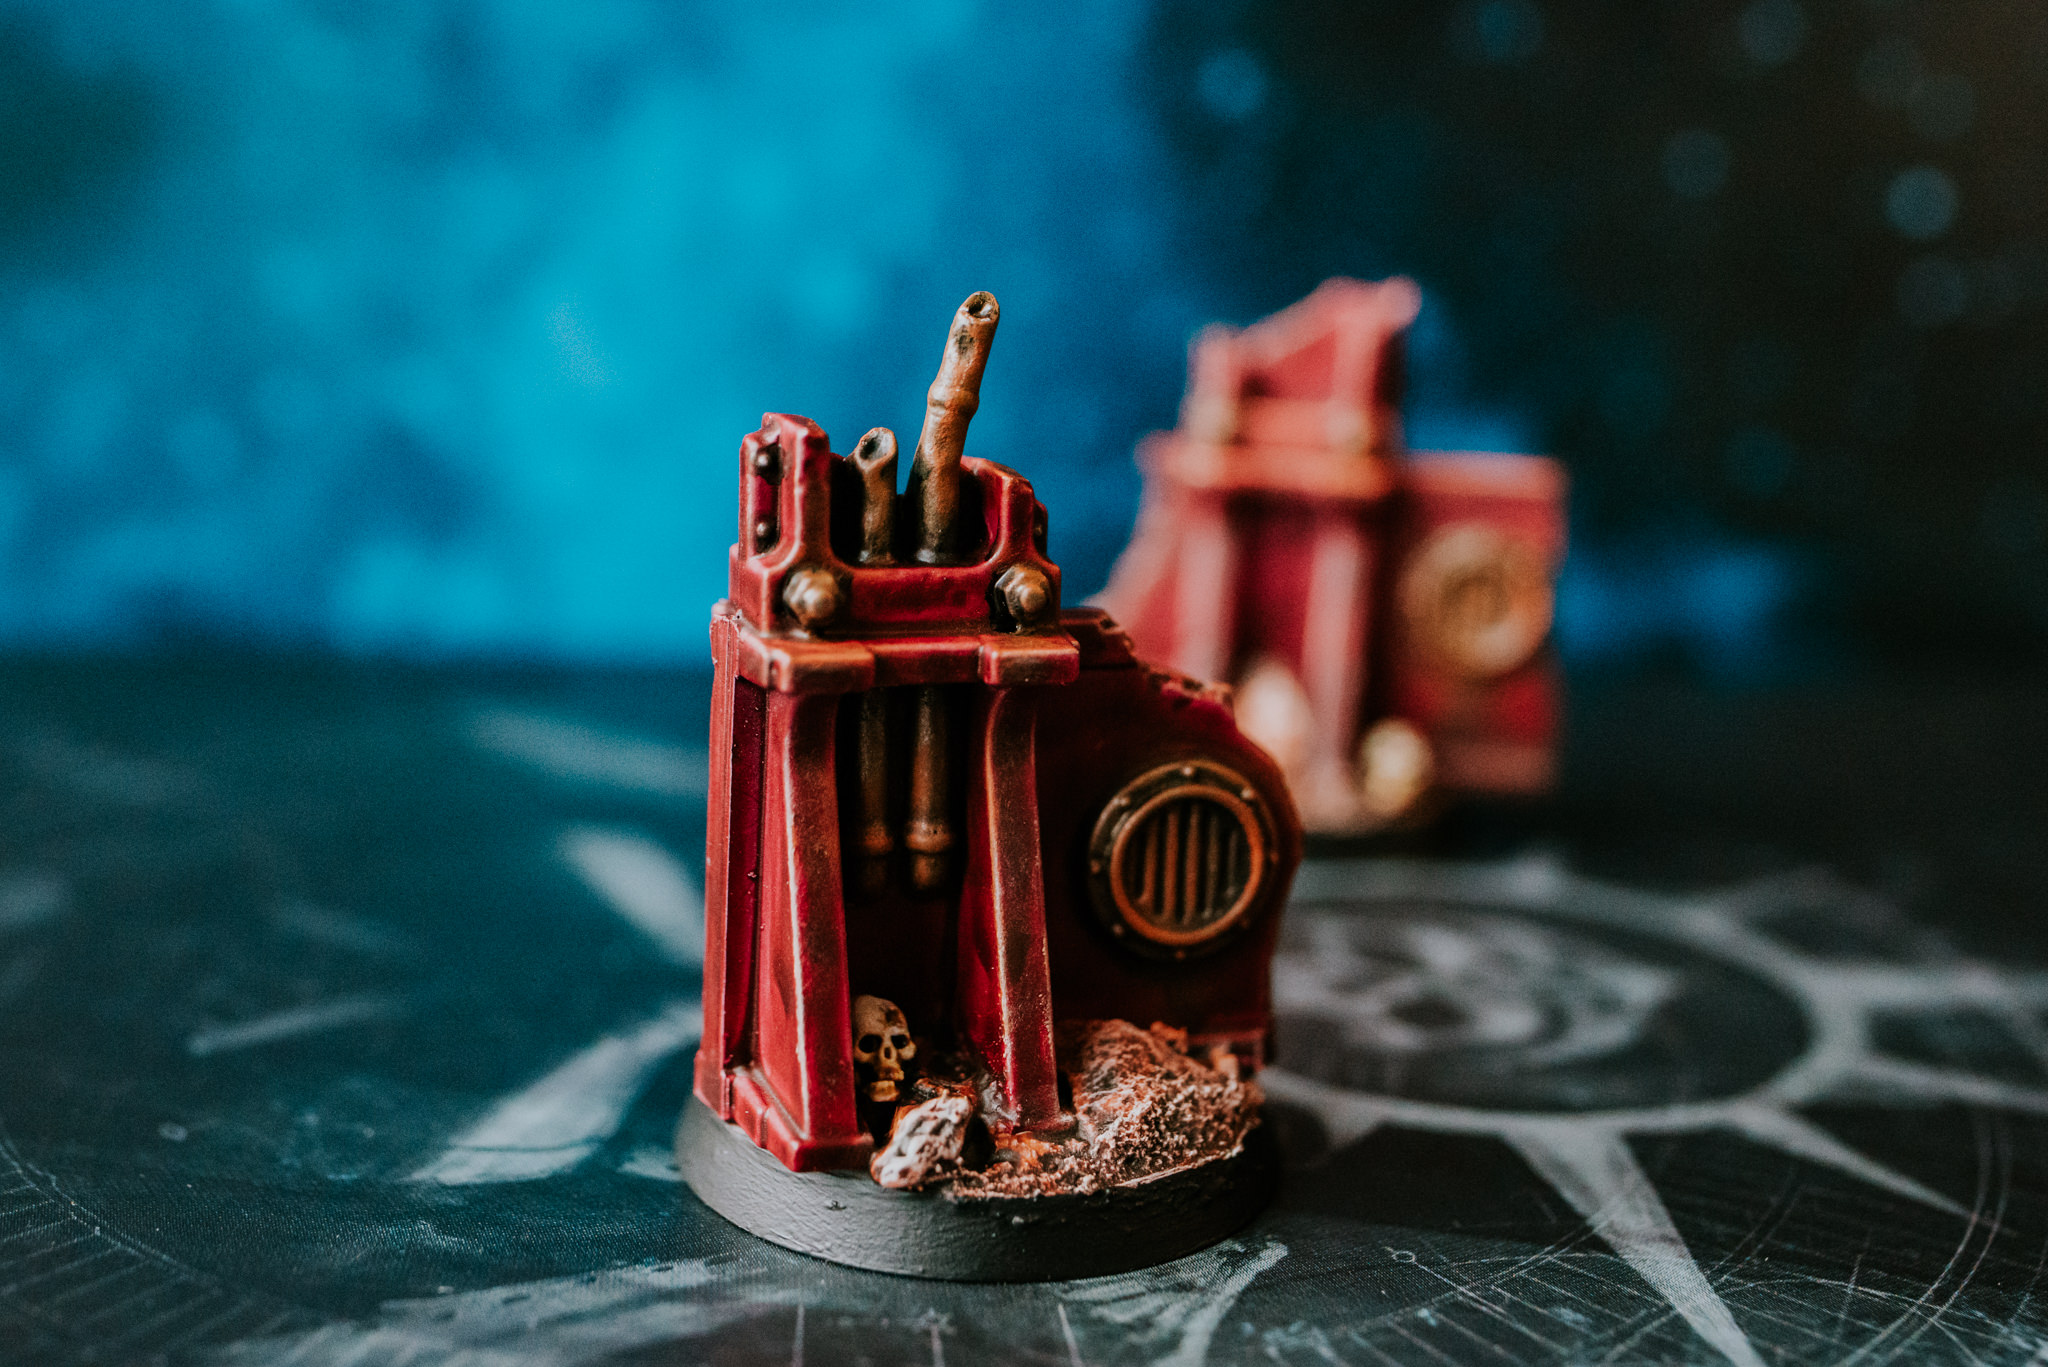
*****
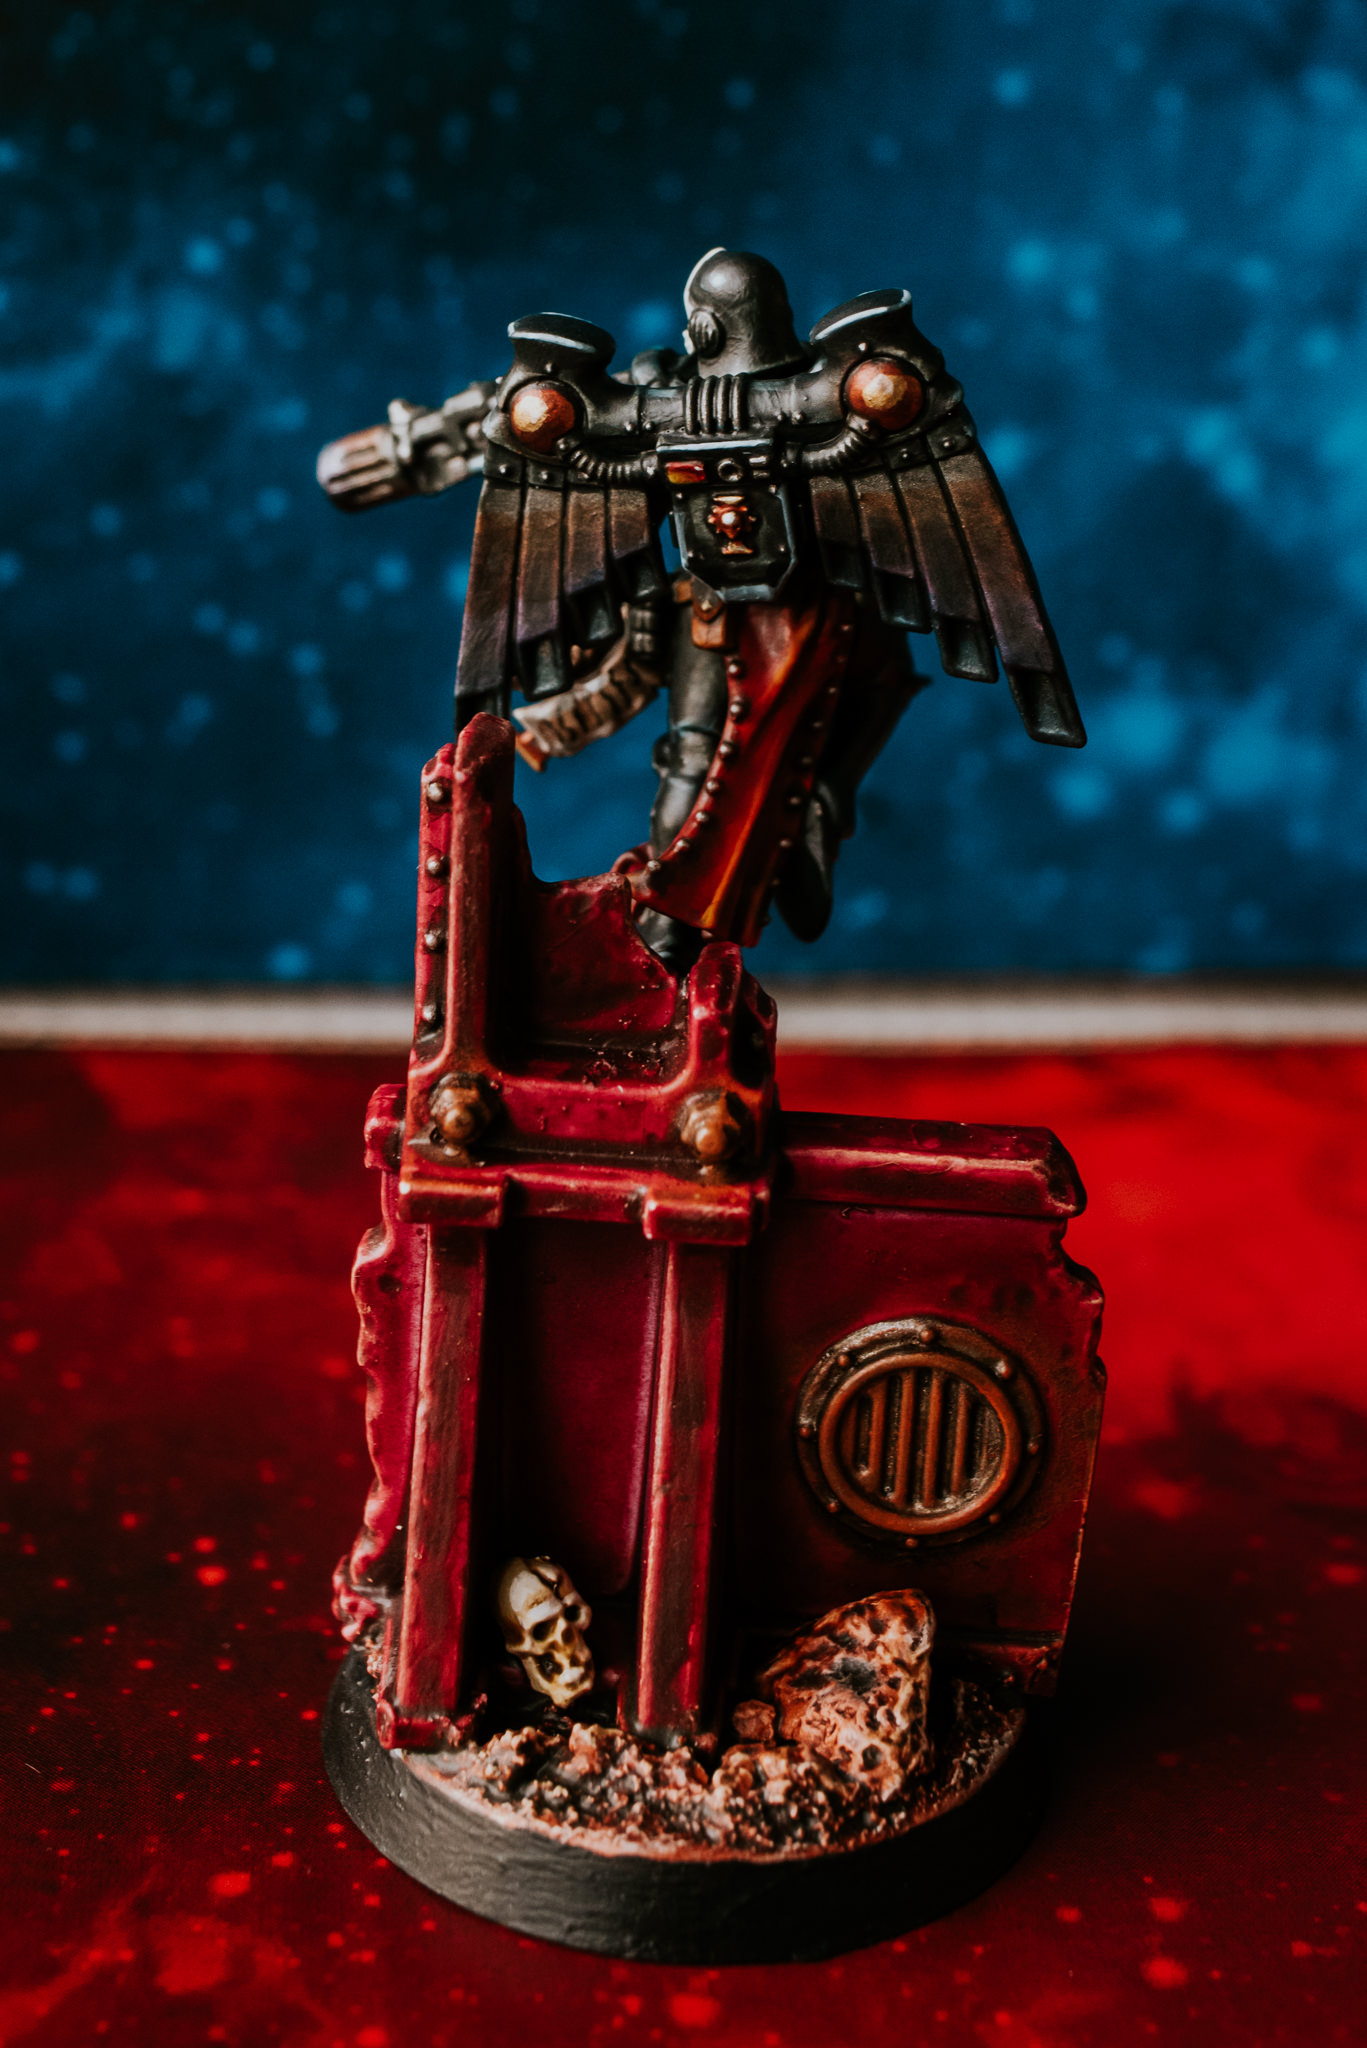
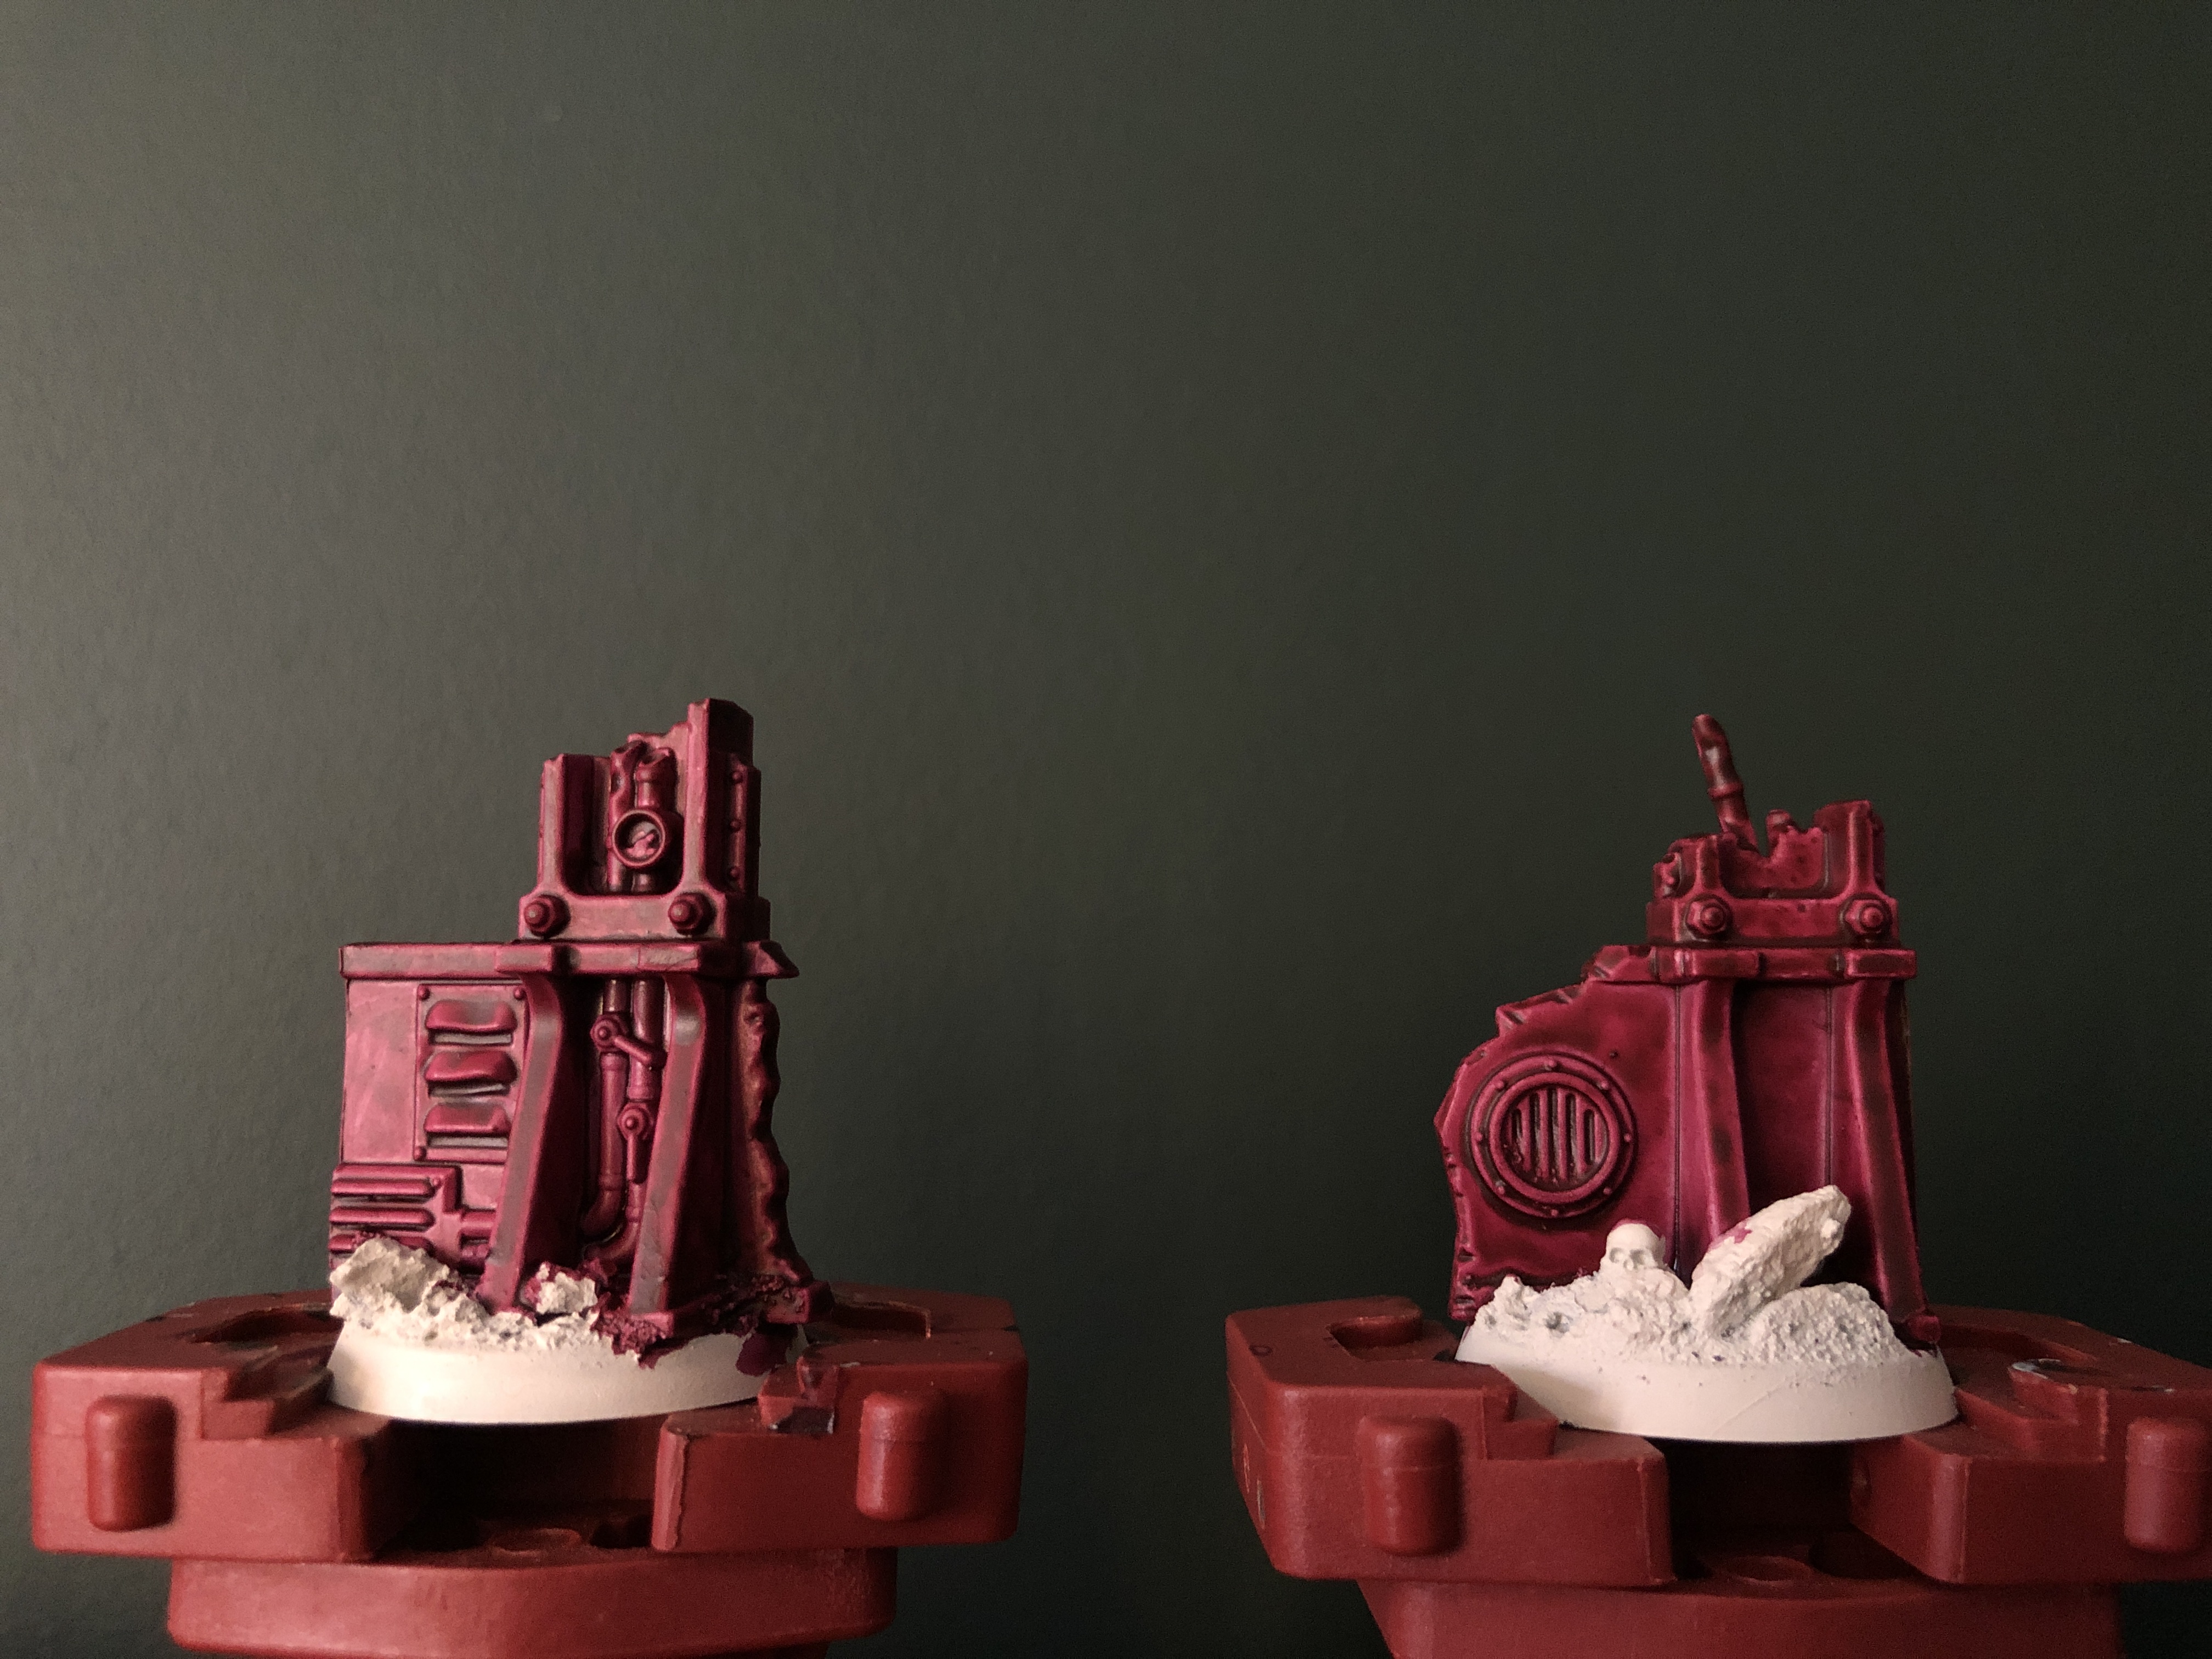
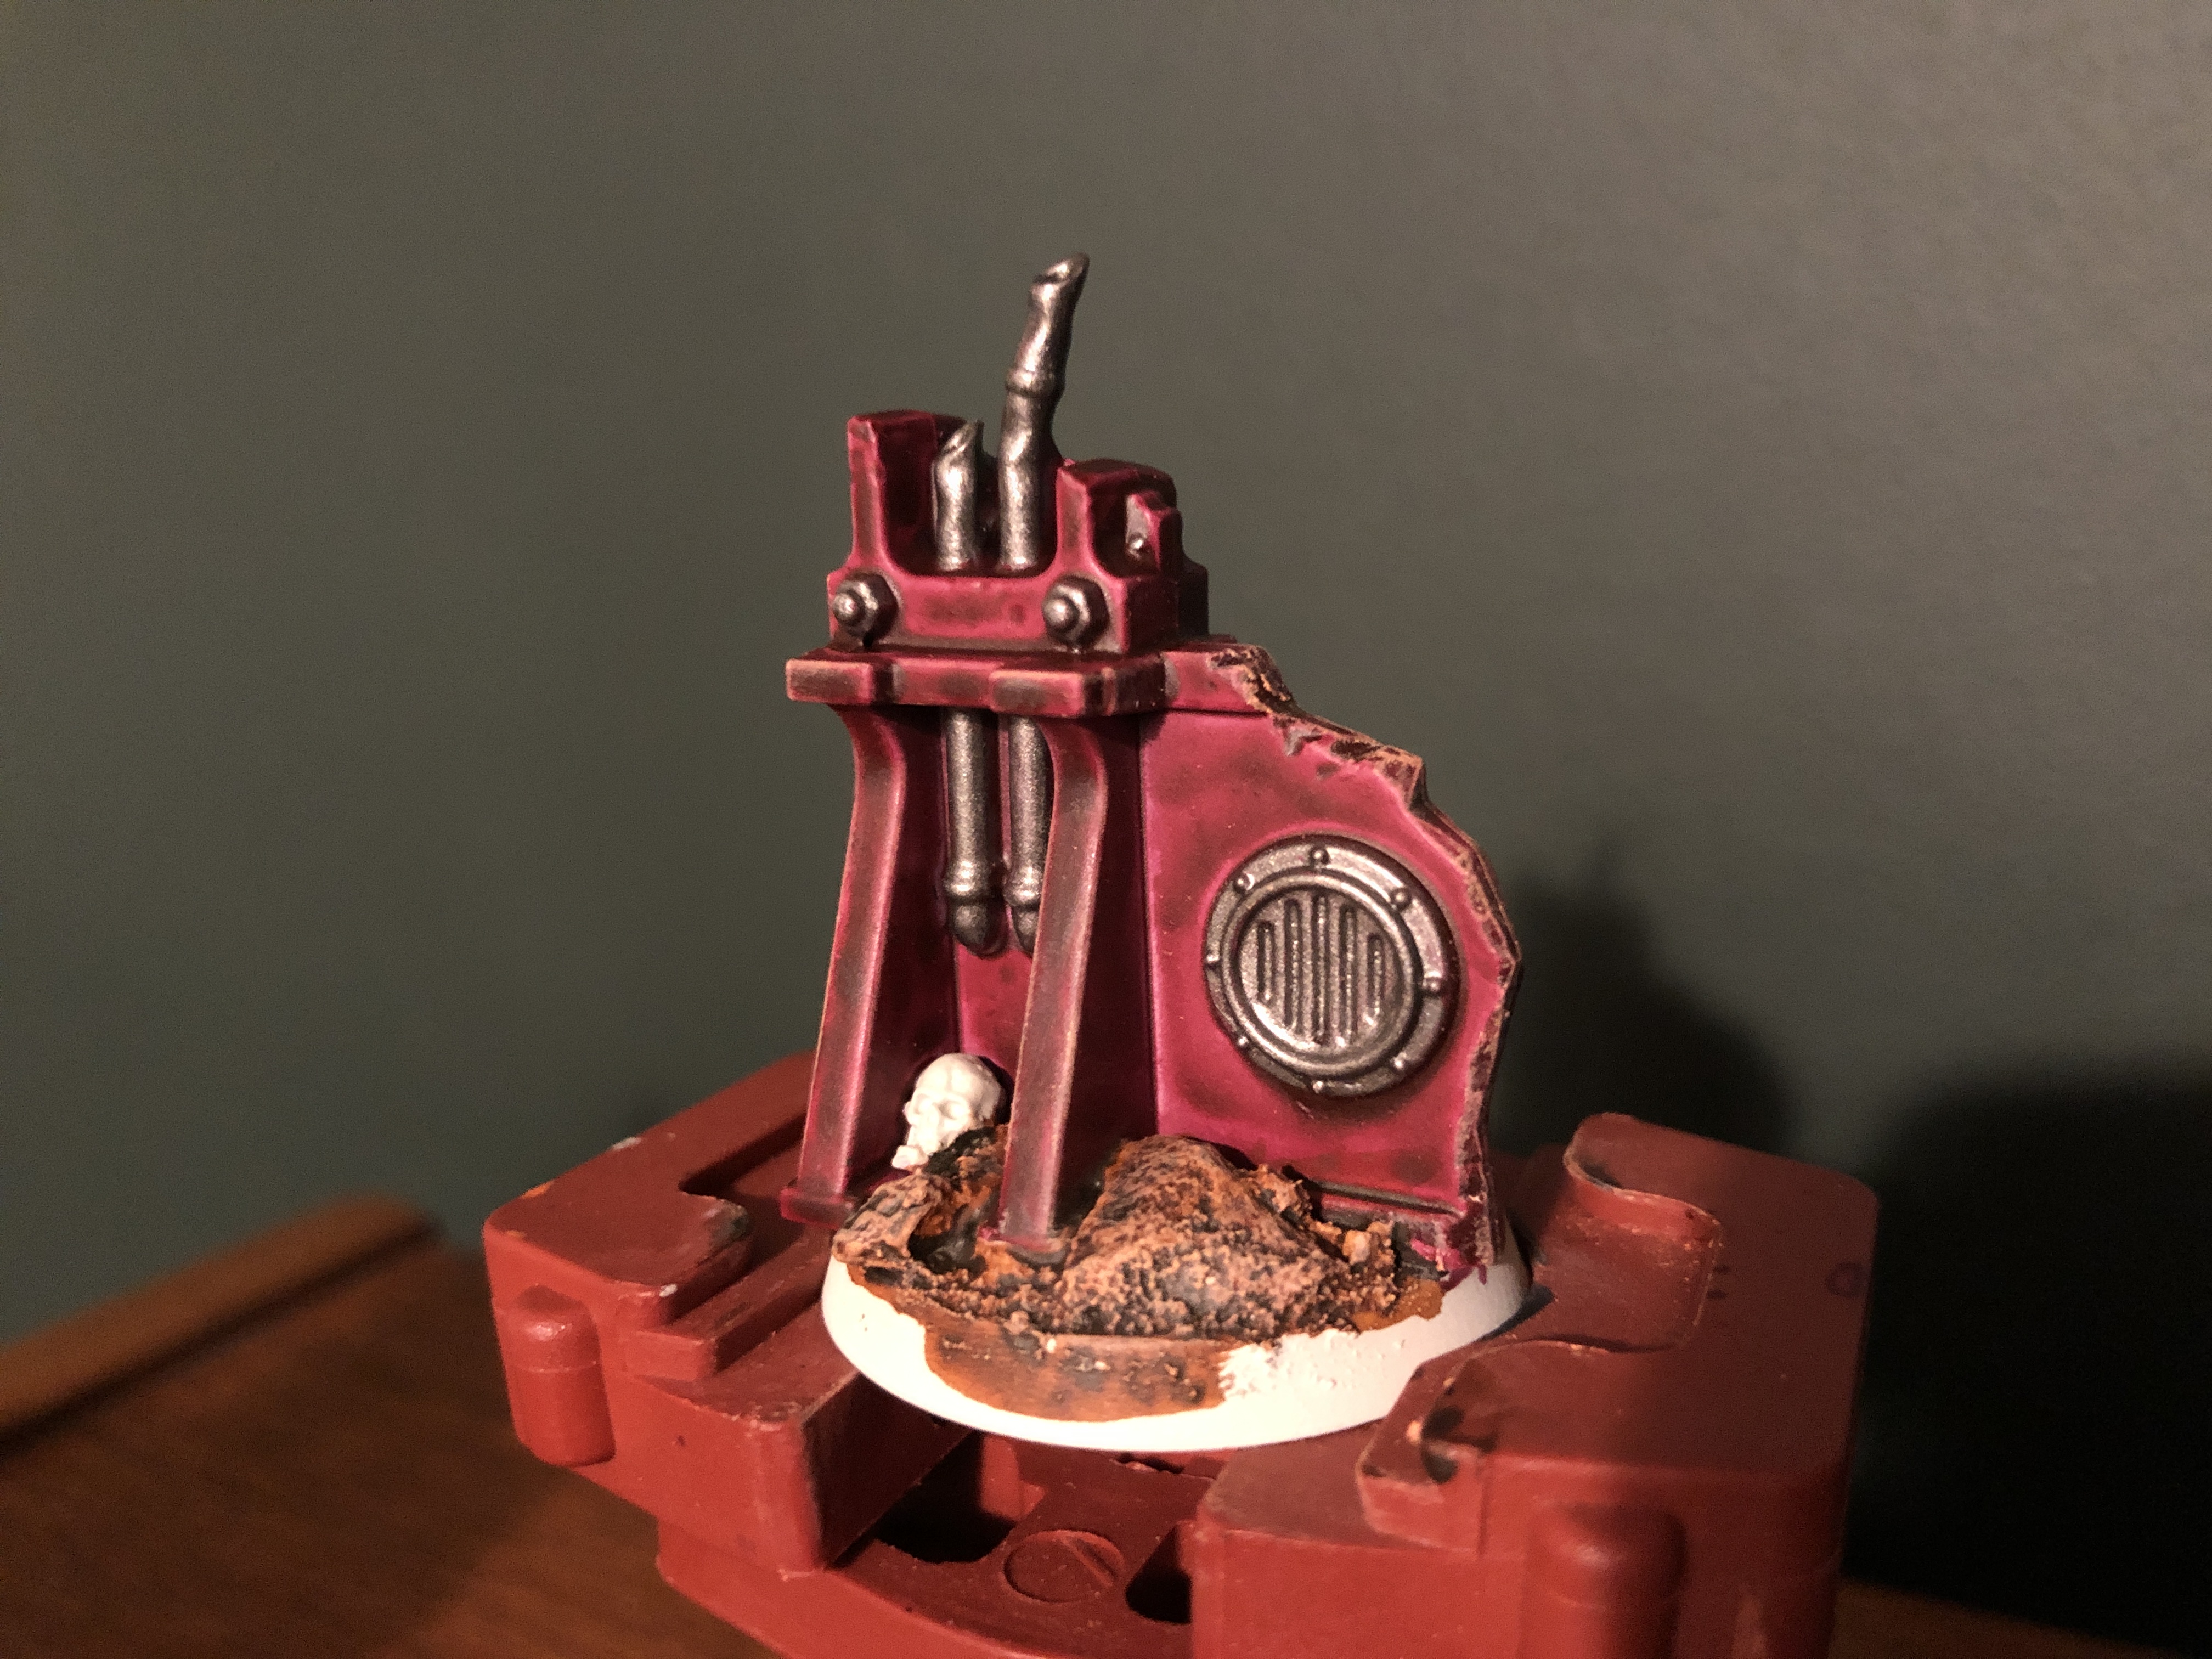
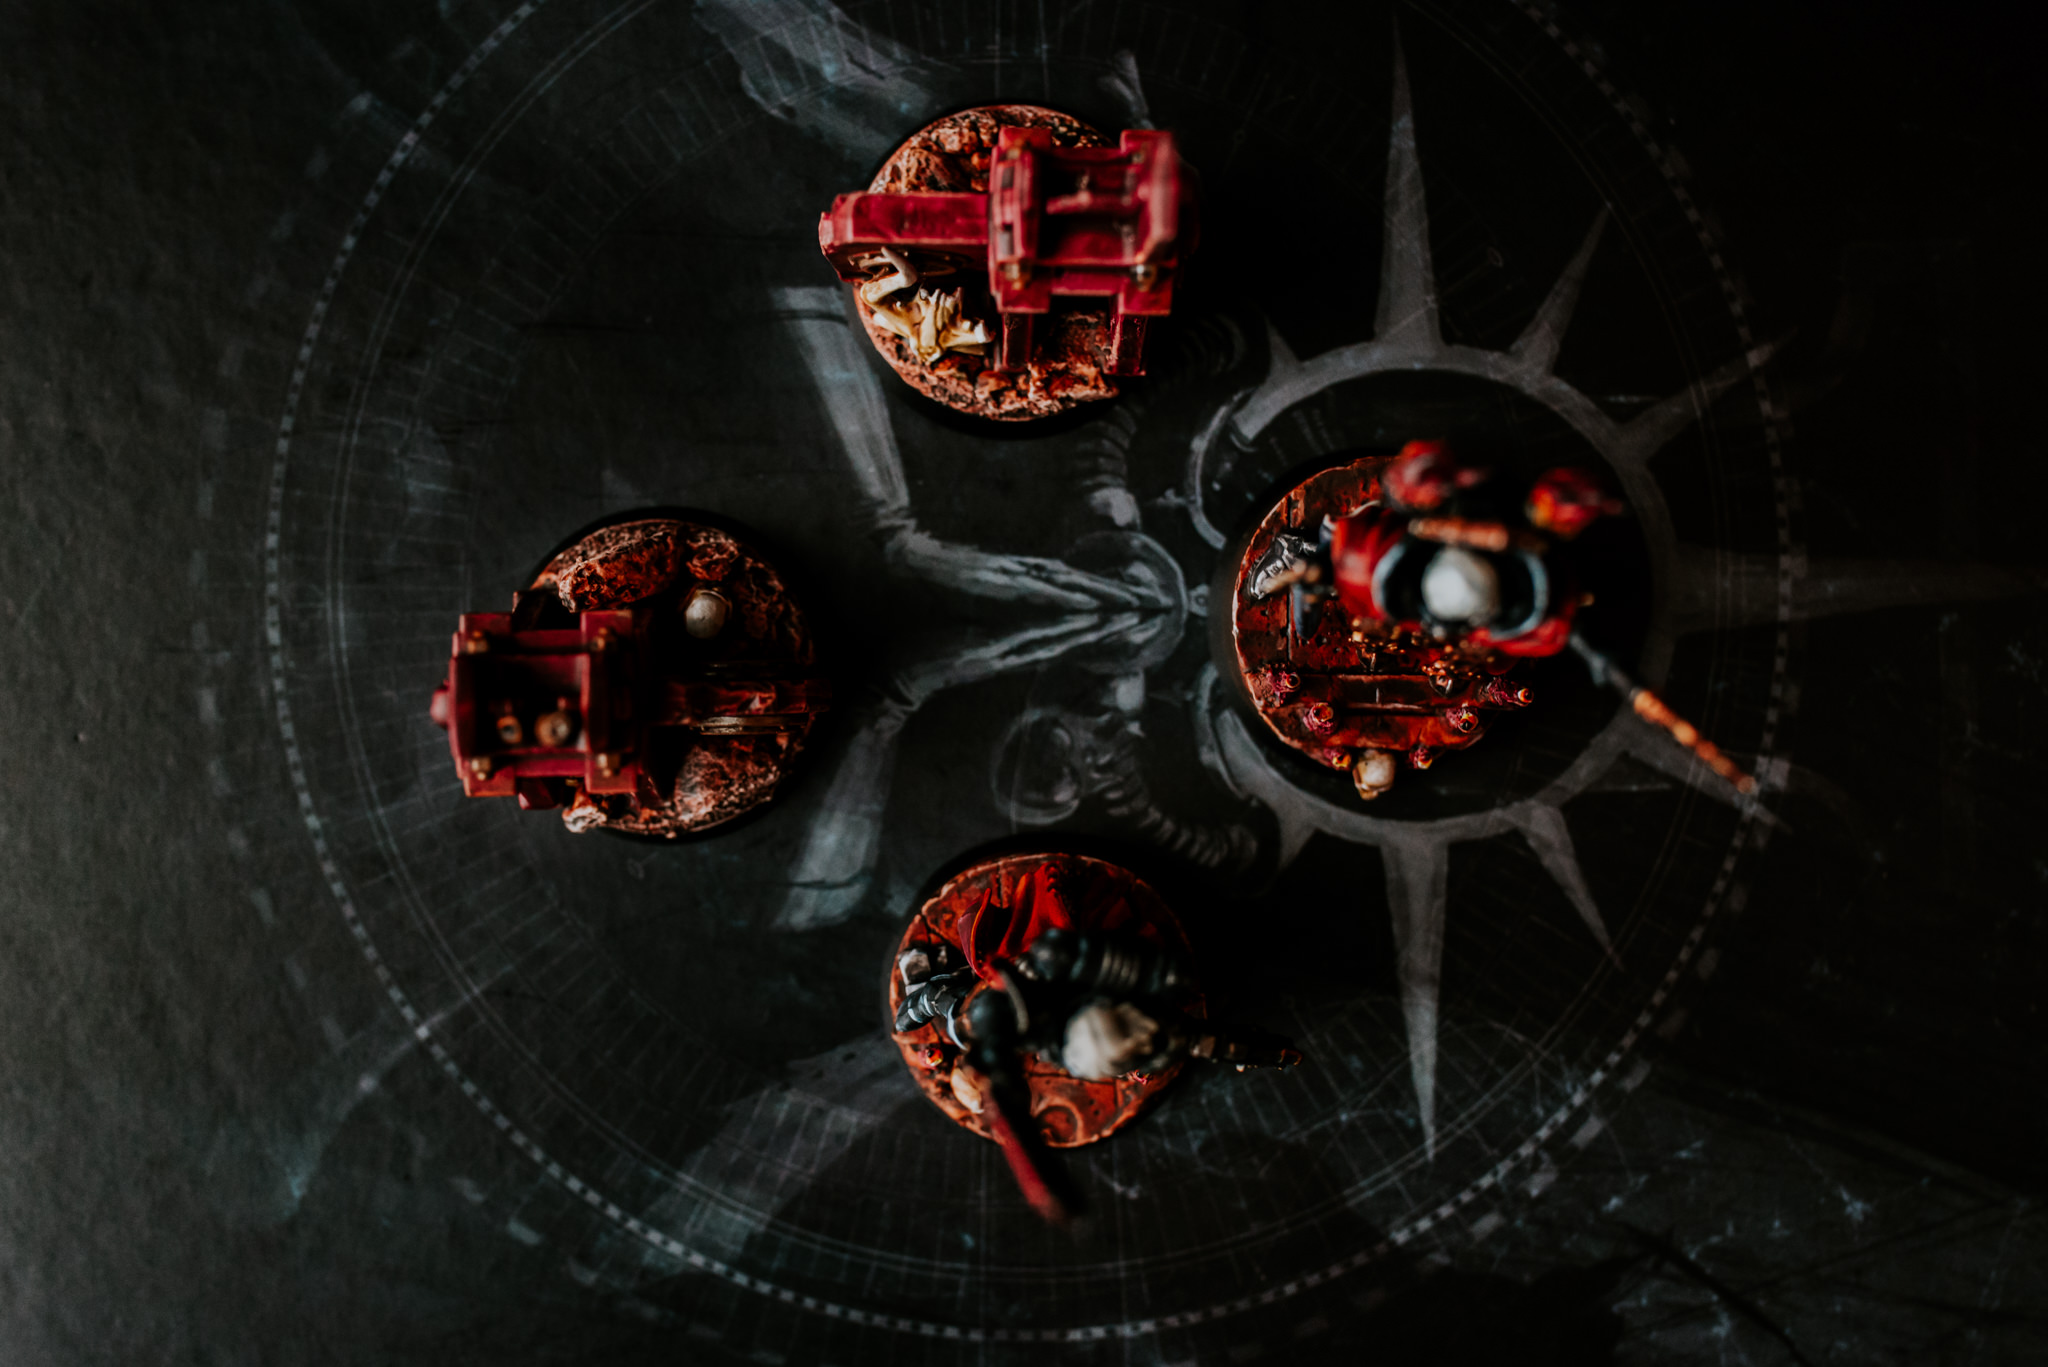
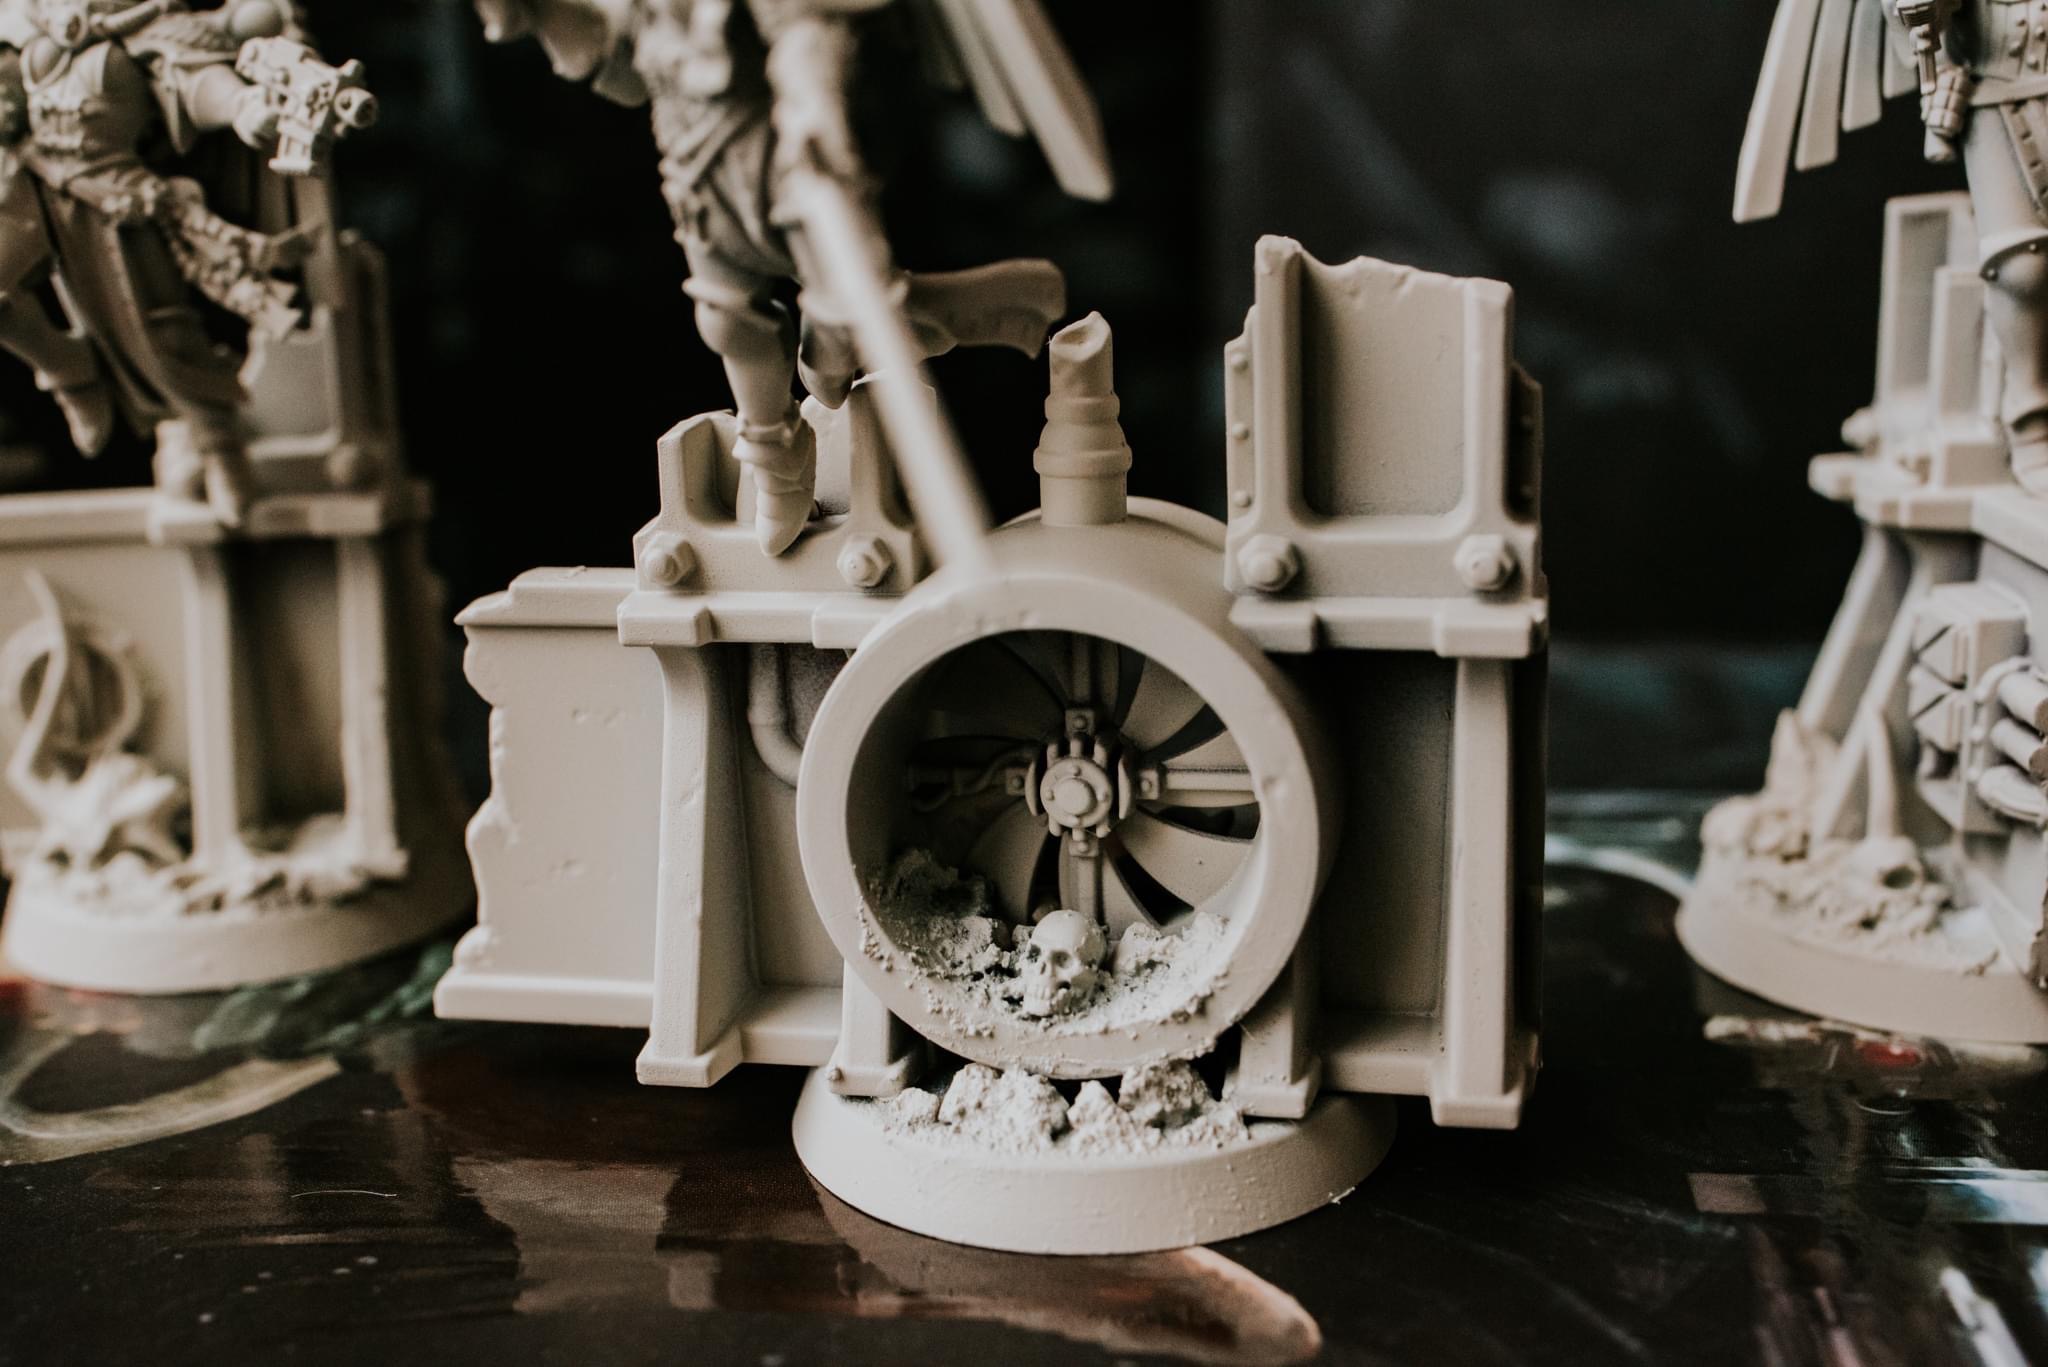
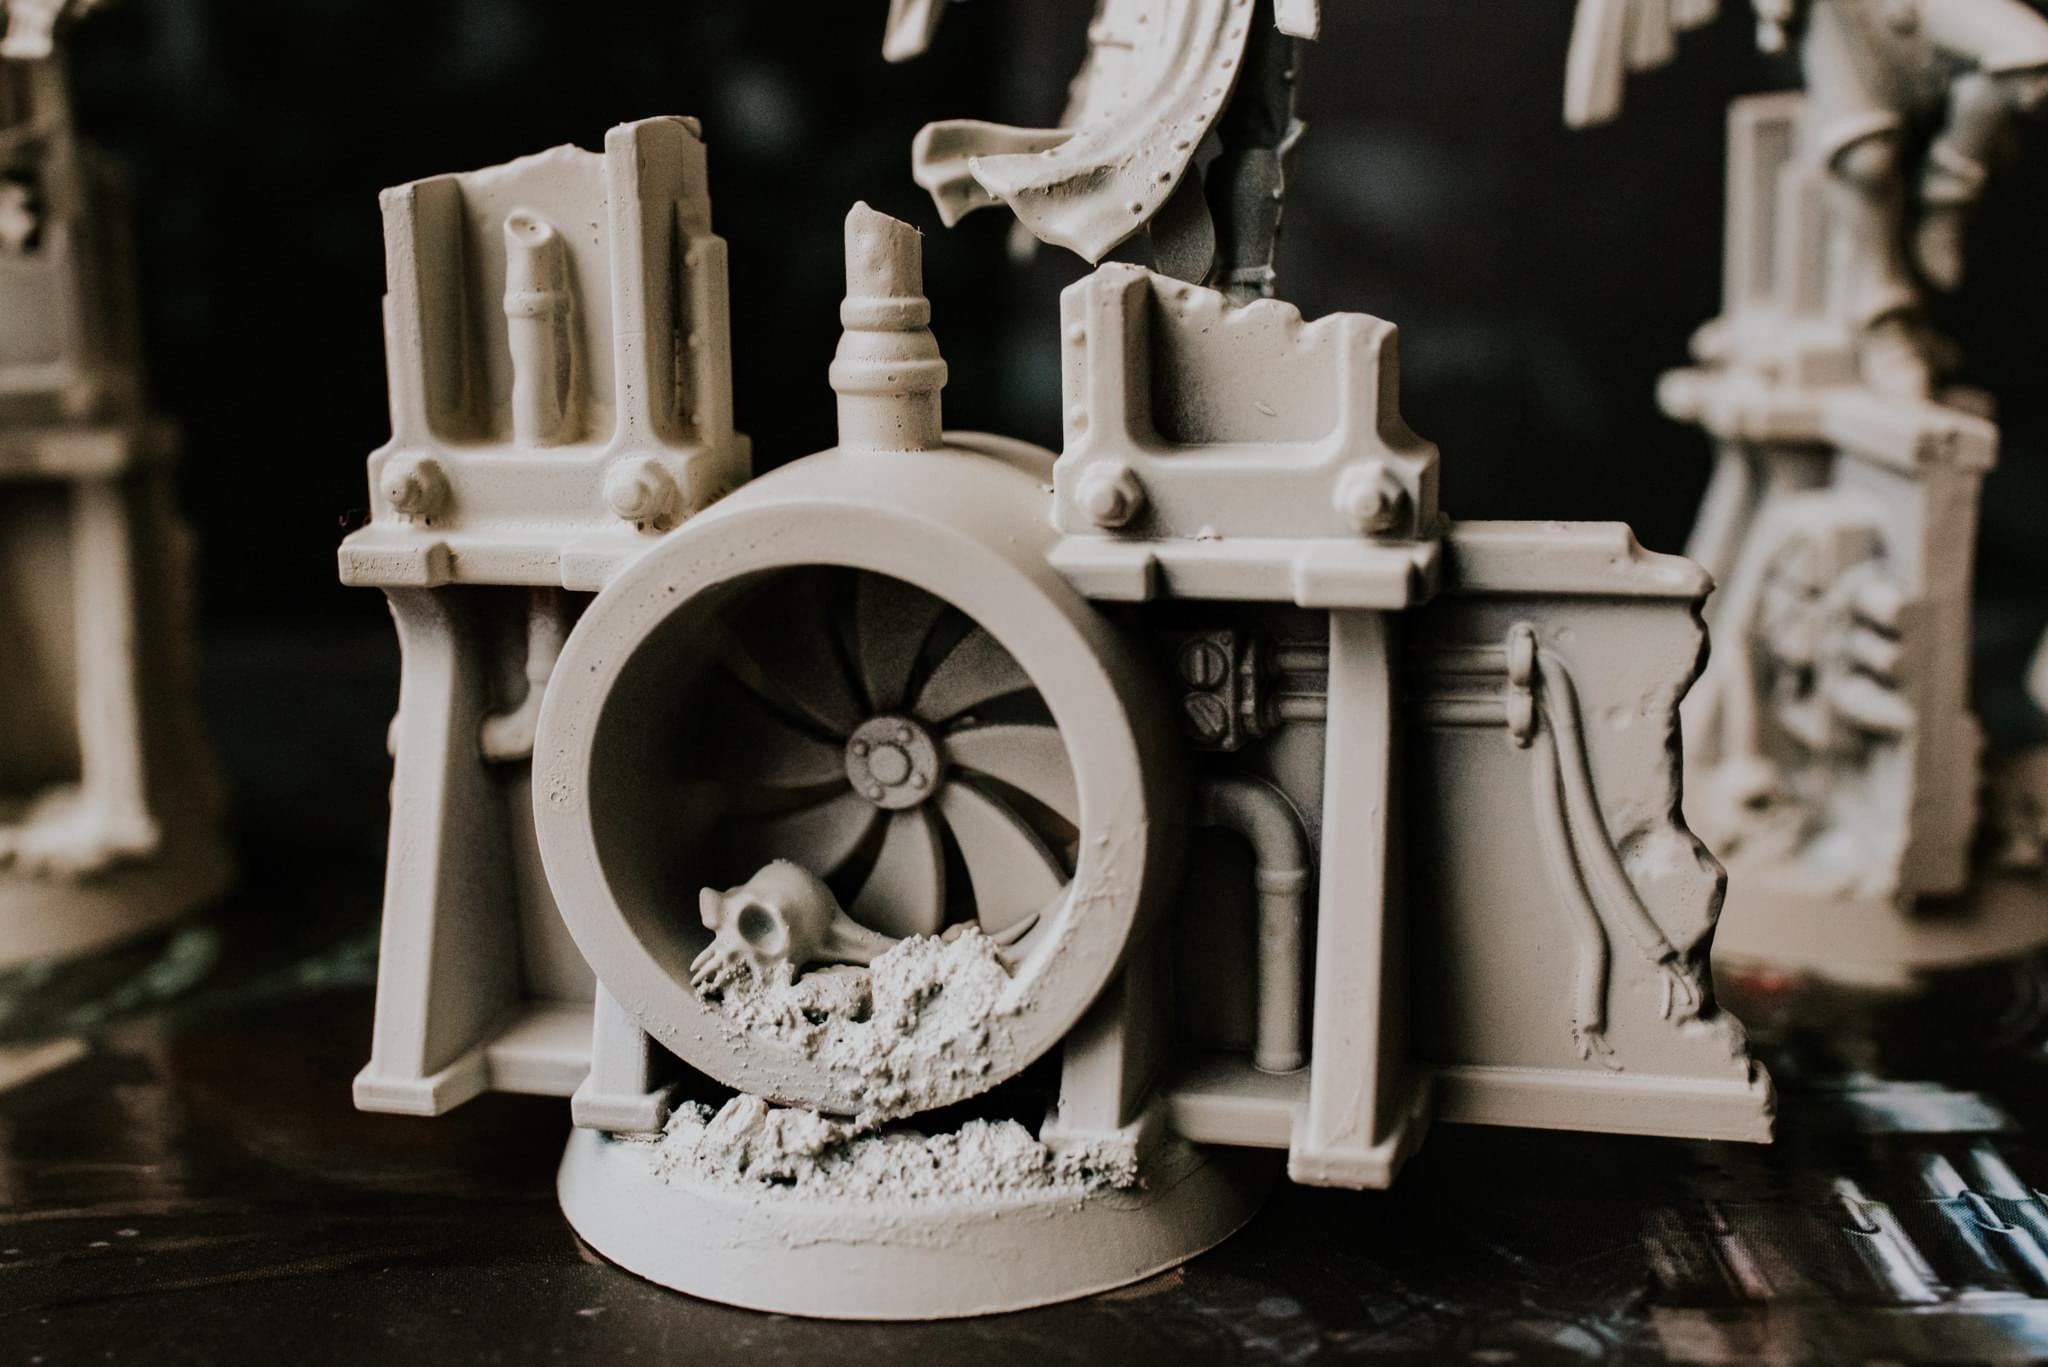
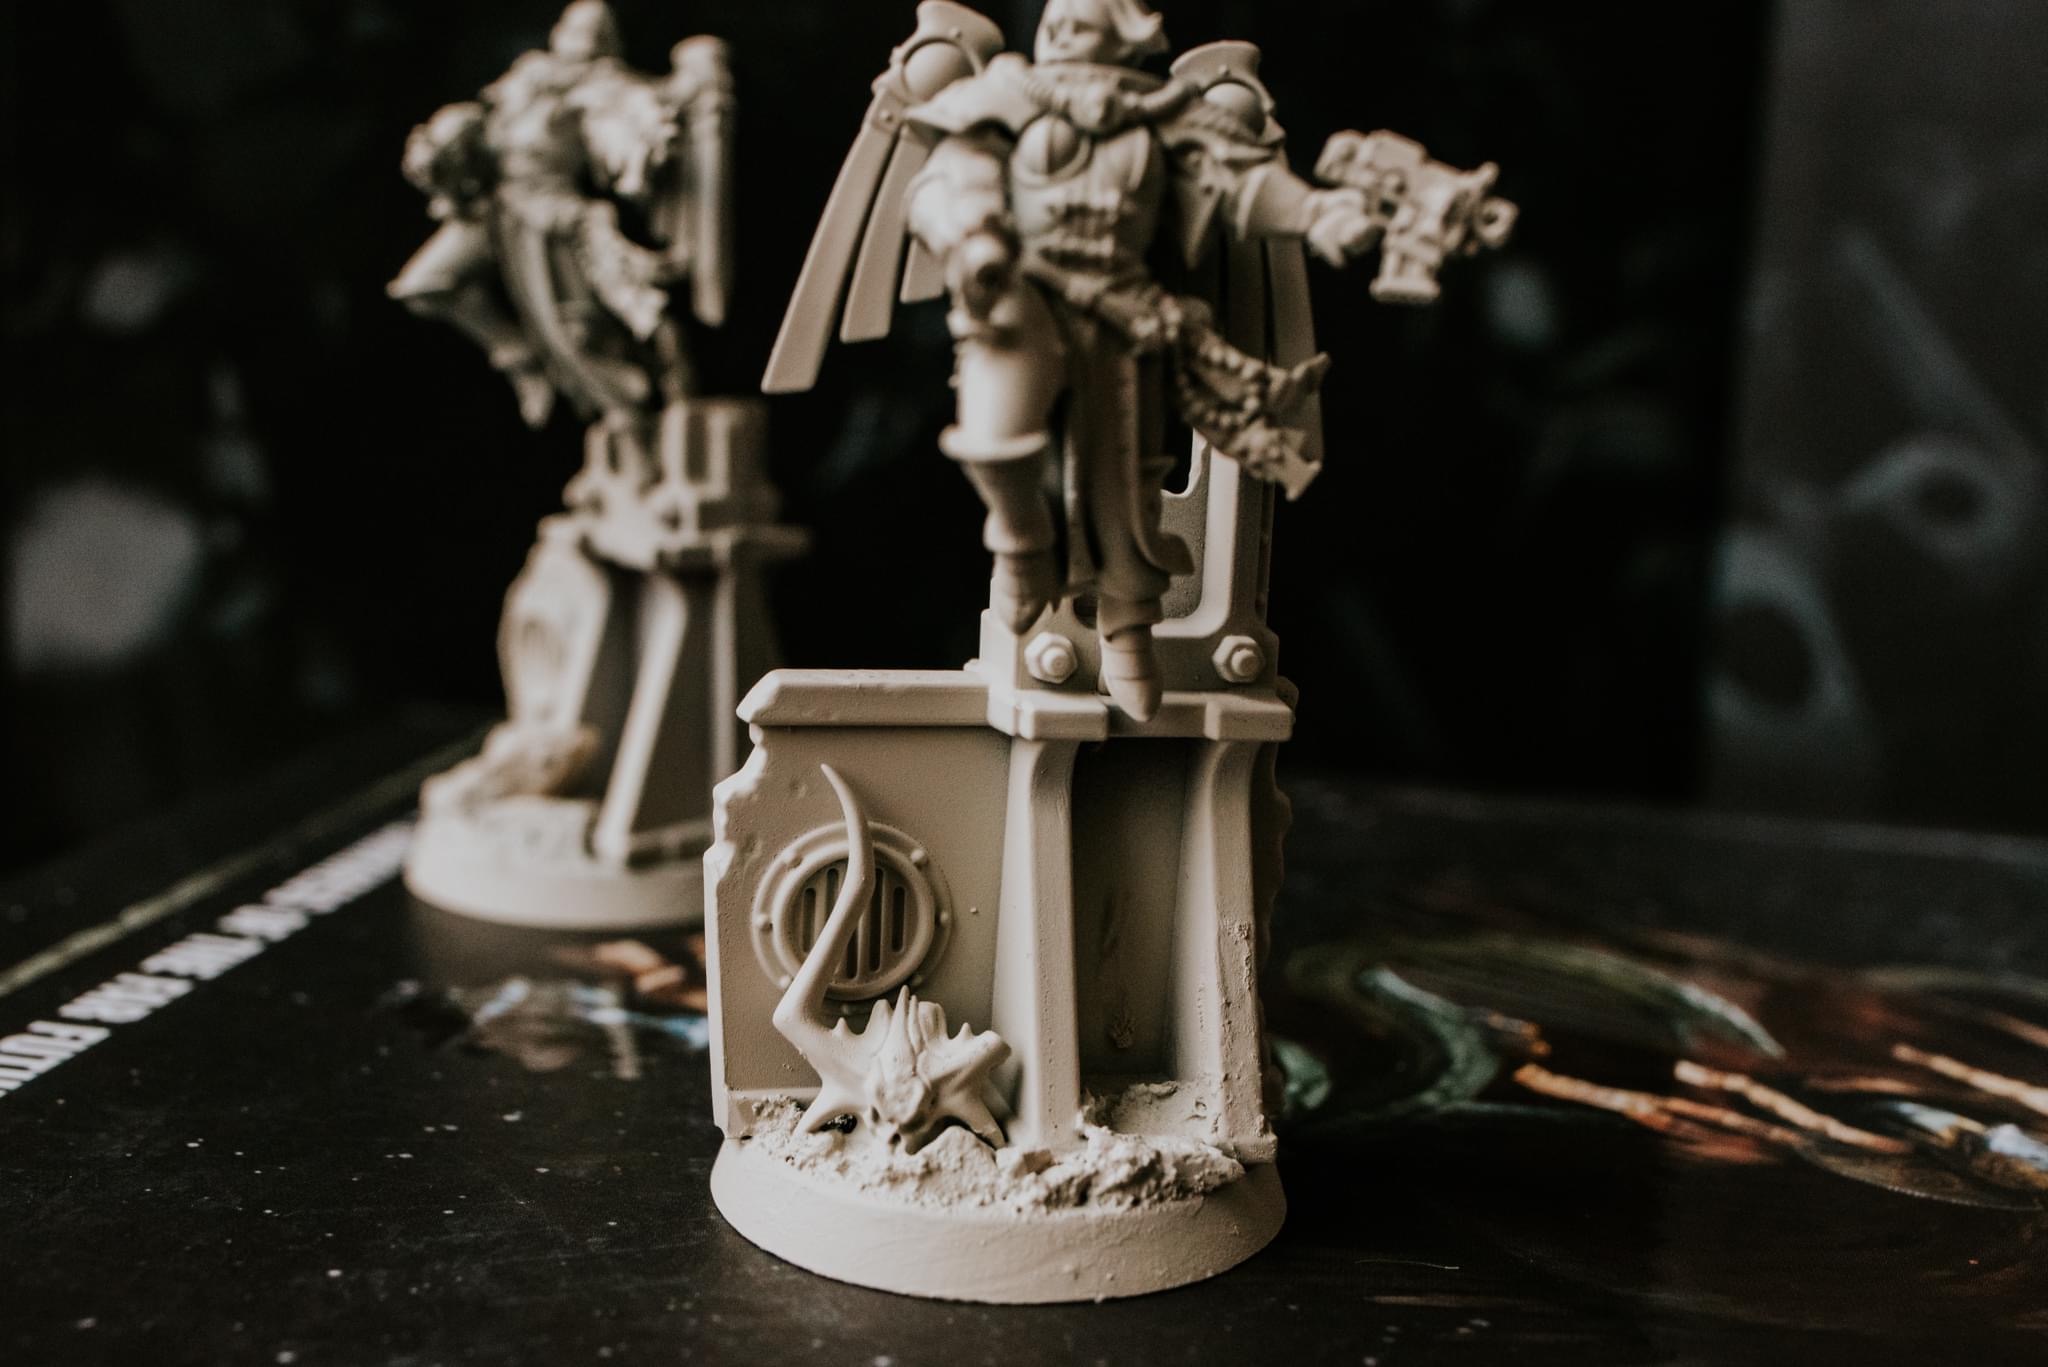
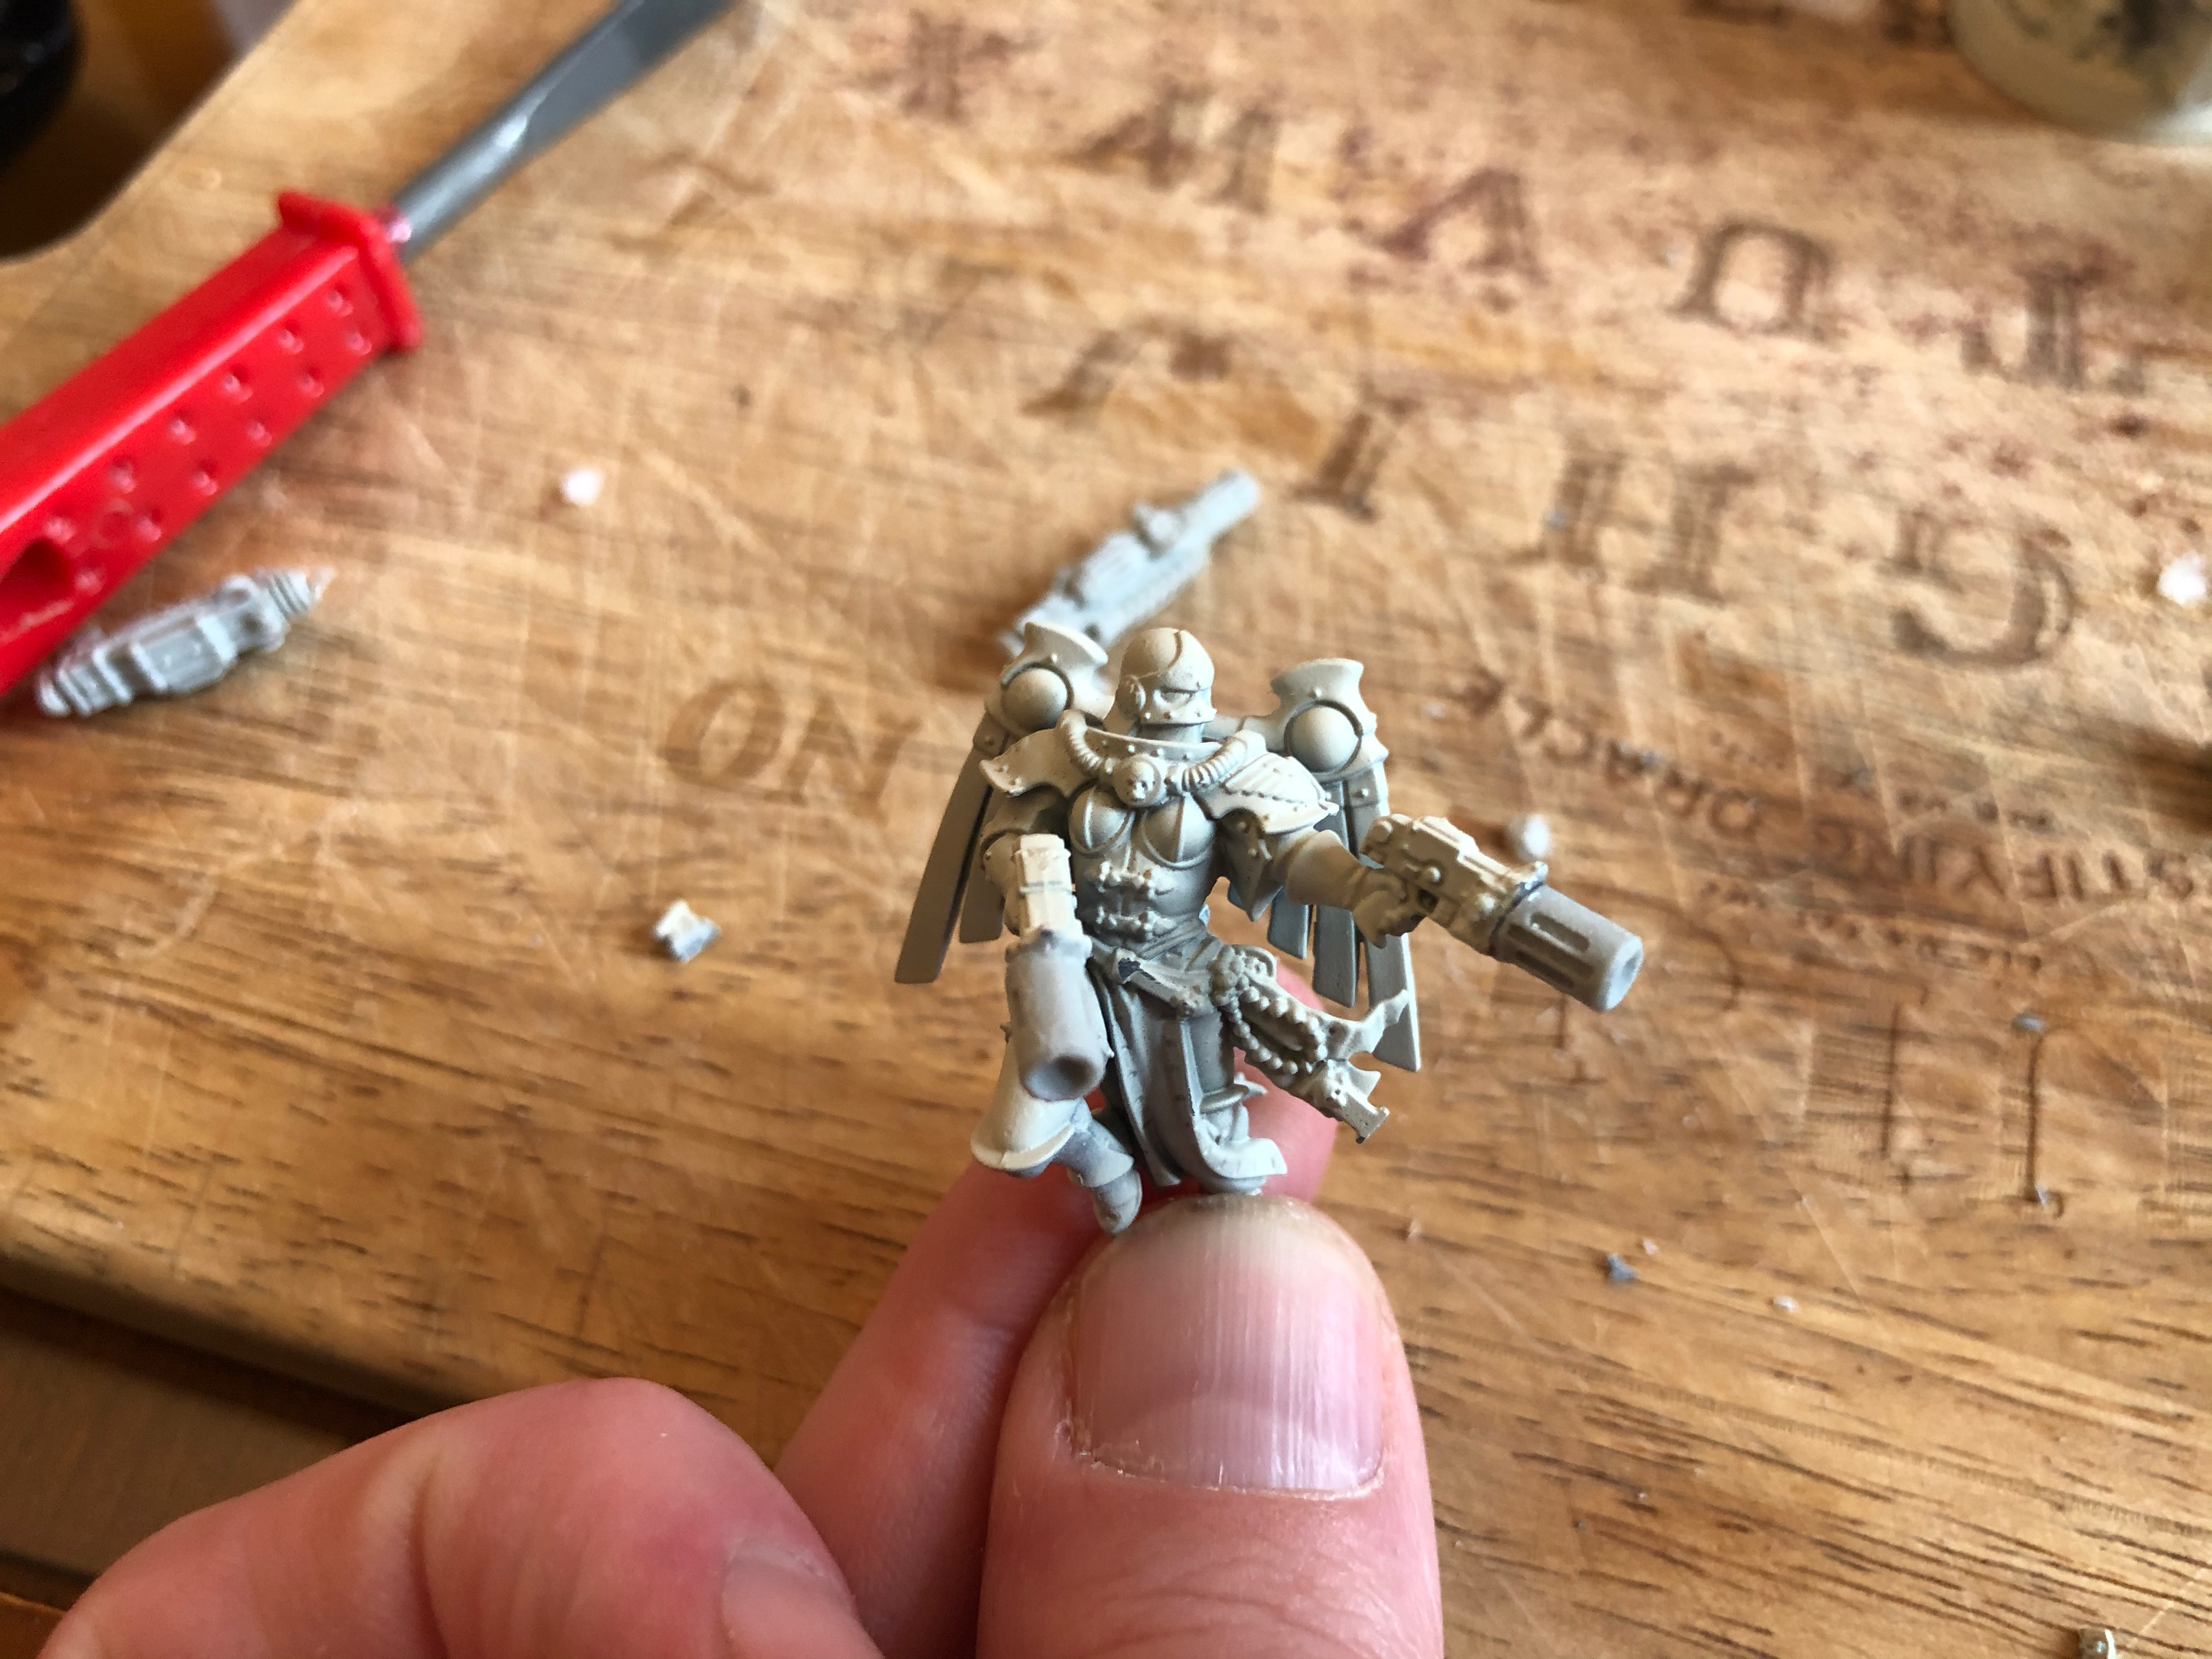
The final part of my limited Sisters box set to paint are the Seraphim. I’m not one for the flying stands so made my own scenic bases out of sawn up Ryza ruins, texture paint, bits of terrarium gravel & some Citadel skulls. I then used brass rod to mount the Seraphim to the scenic bases. They’re also detachable for easier transport. You can see that guide in one of the posts below.

LOWERING THE BASE
*****
On hindsight I have actually cut down the biggest base of the bunch as it was a little large haha (I got carried away) As much as I loved the previous version it was a little bit big to squeeze in little gaps on the battlefield when deep striking the Seraphim where they are needed most. Below is the latest altered version.
INFERNO
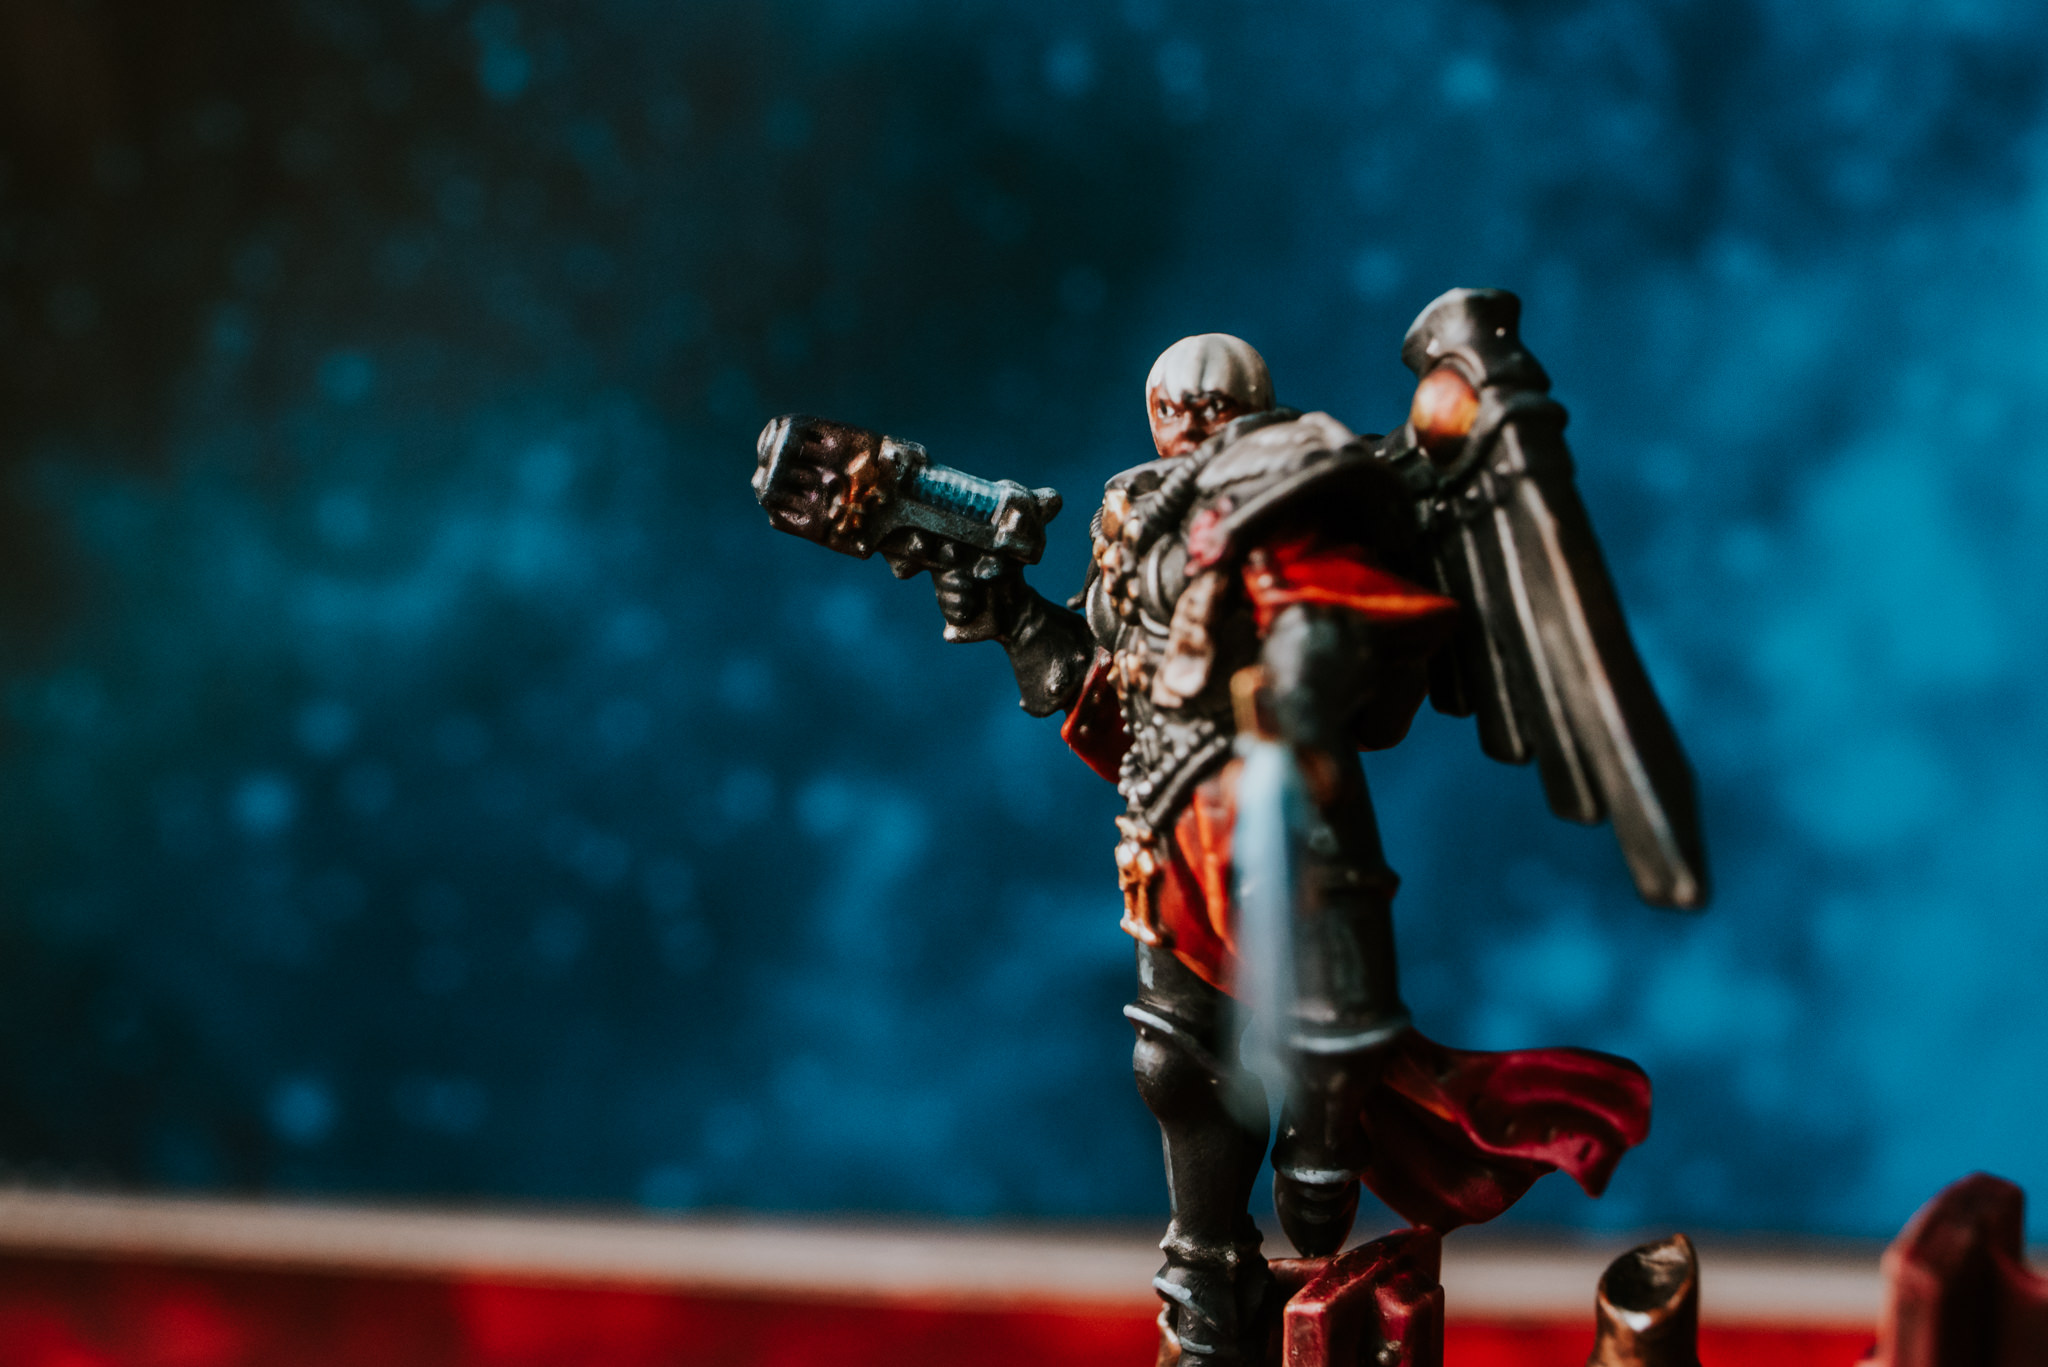
*****
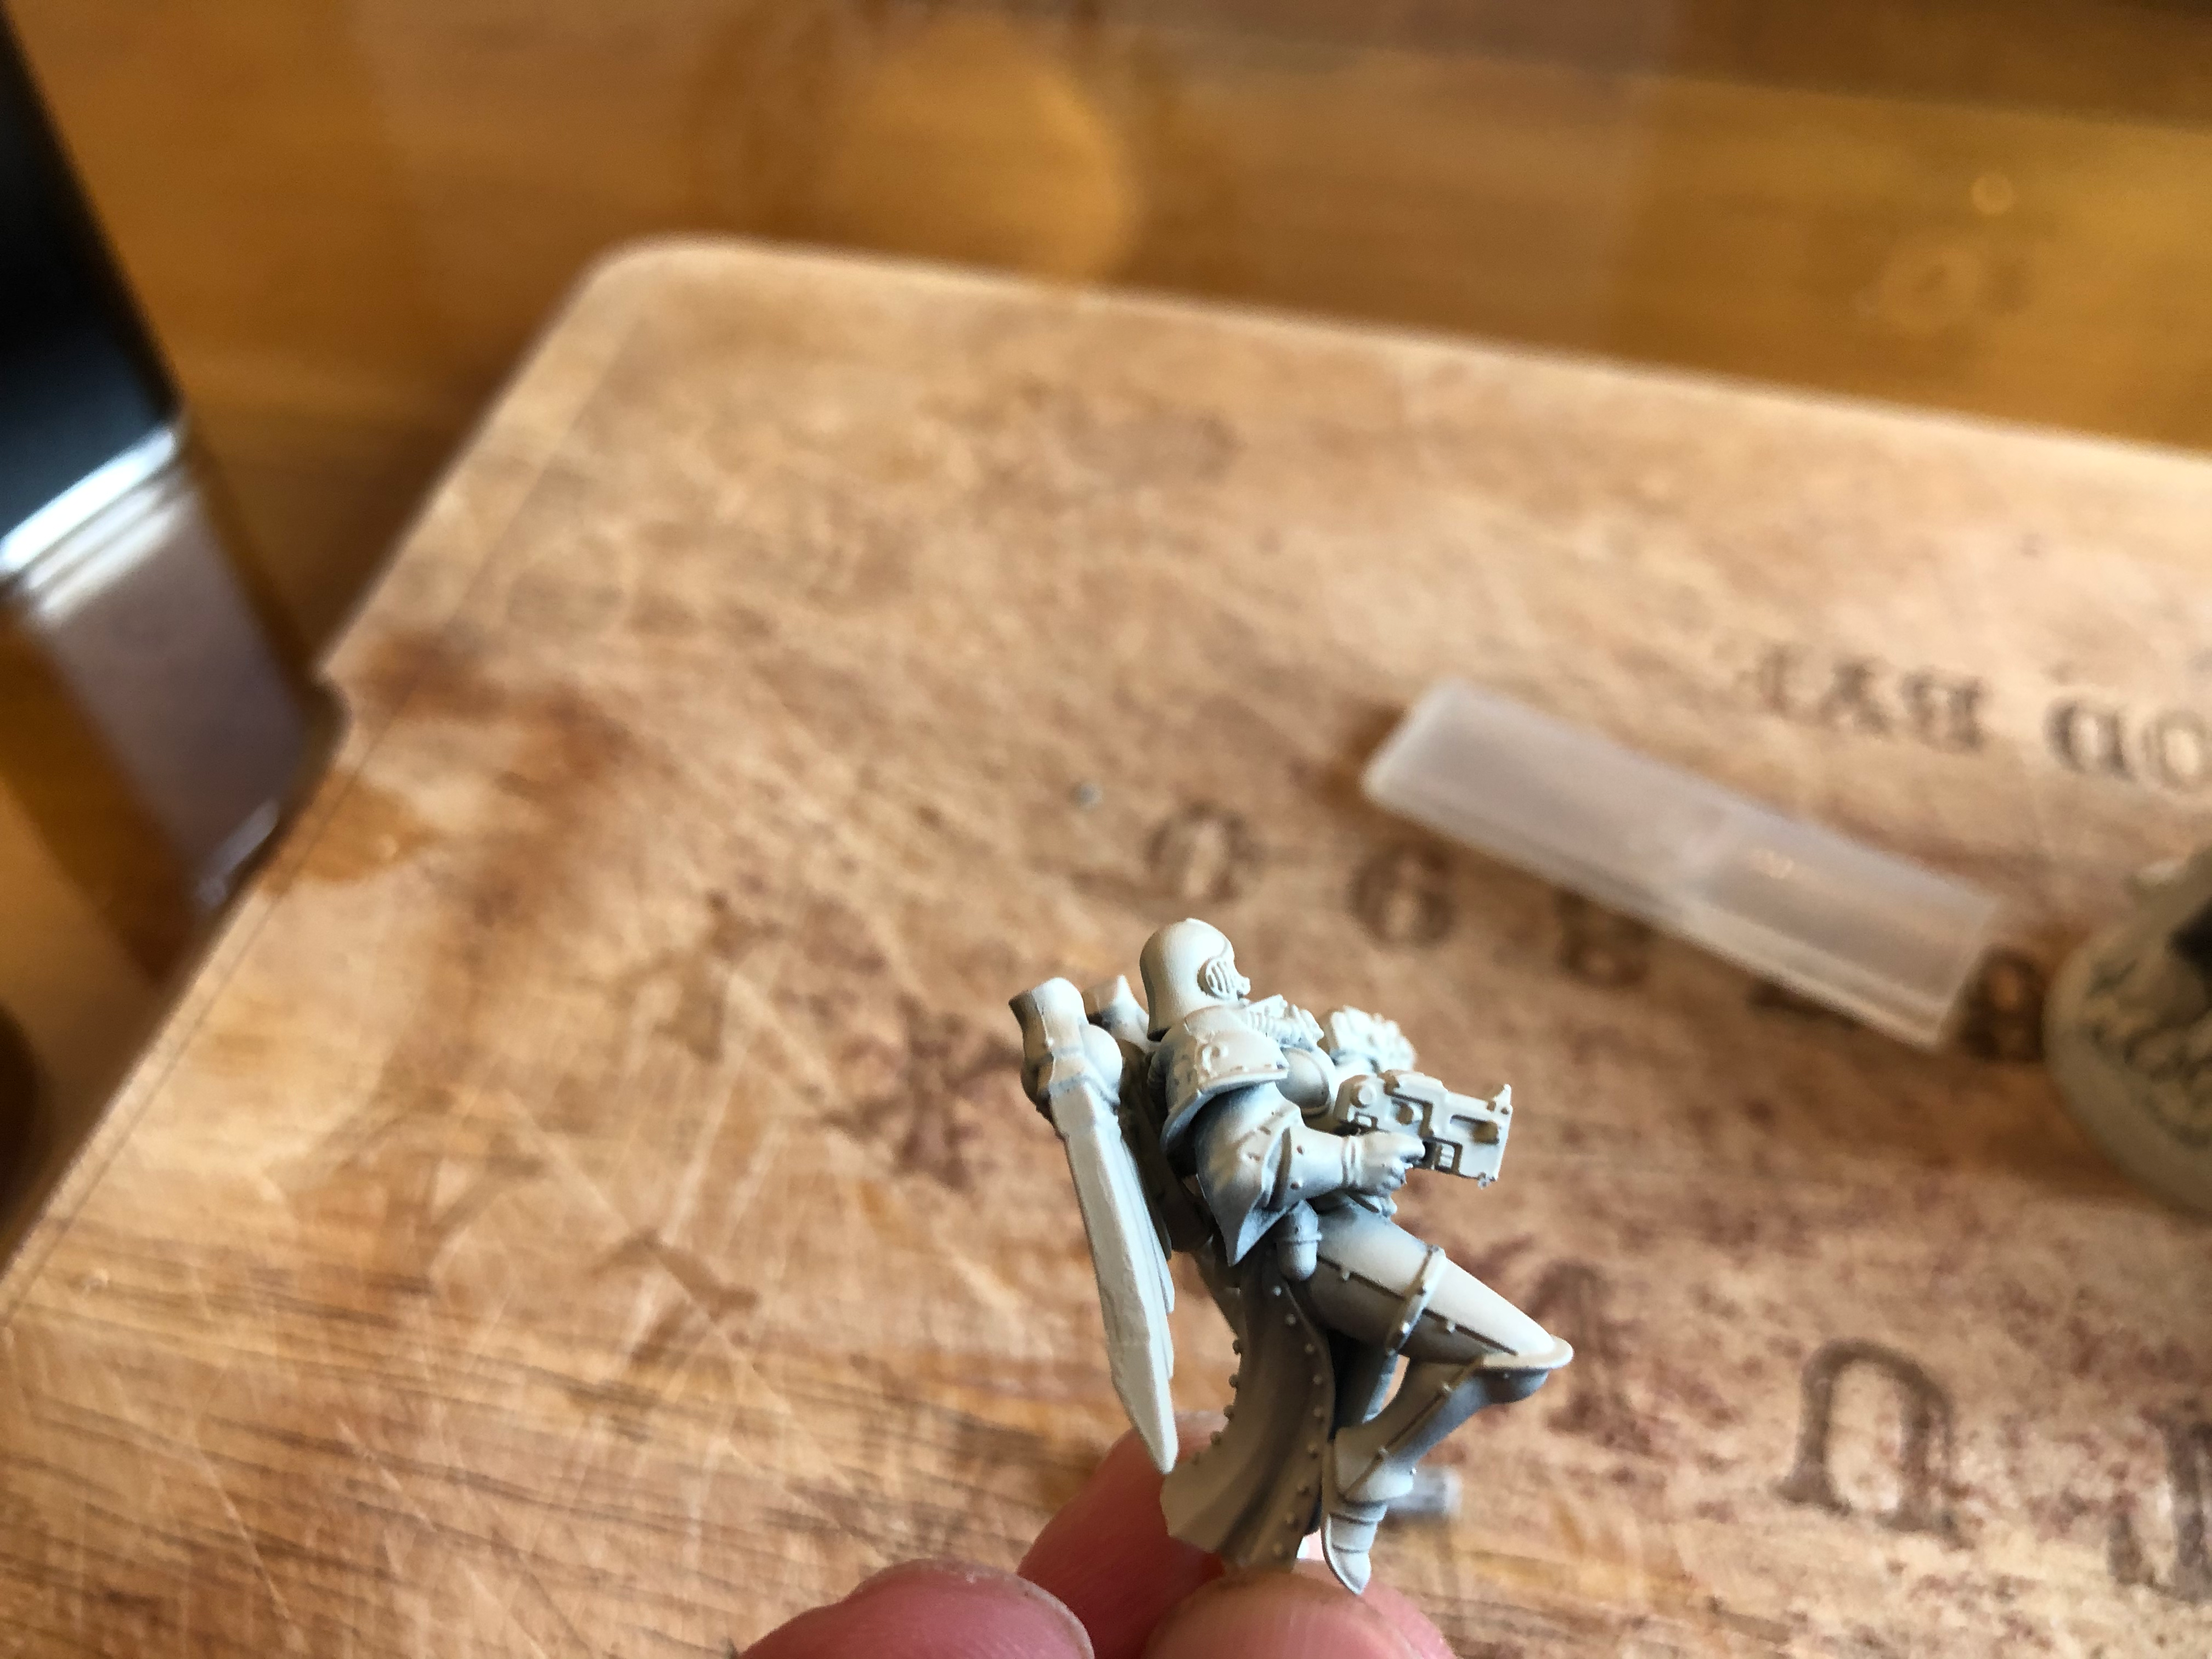
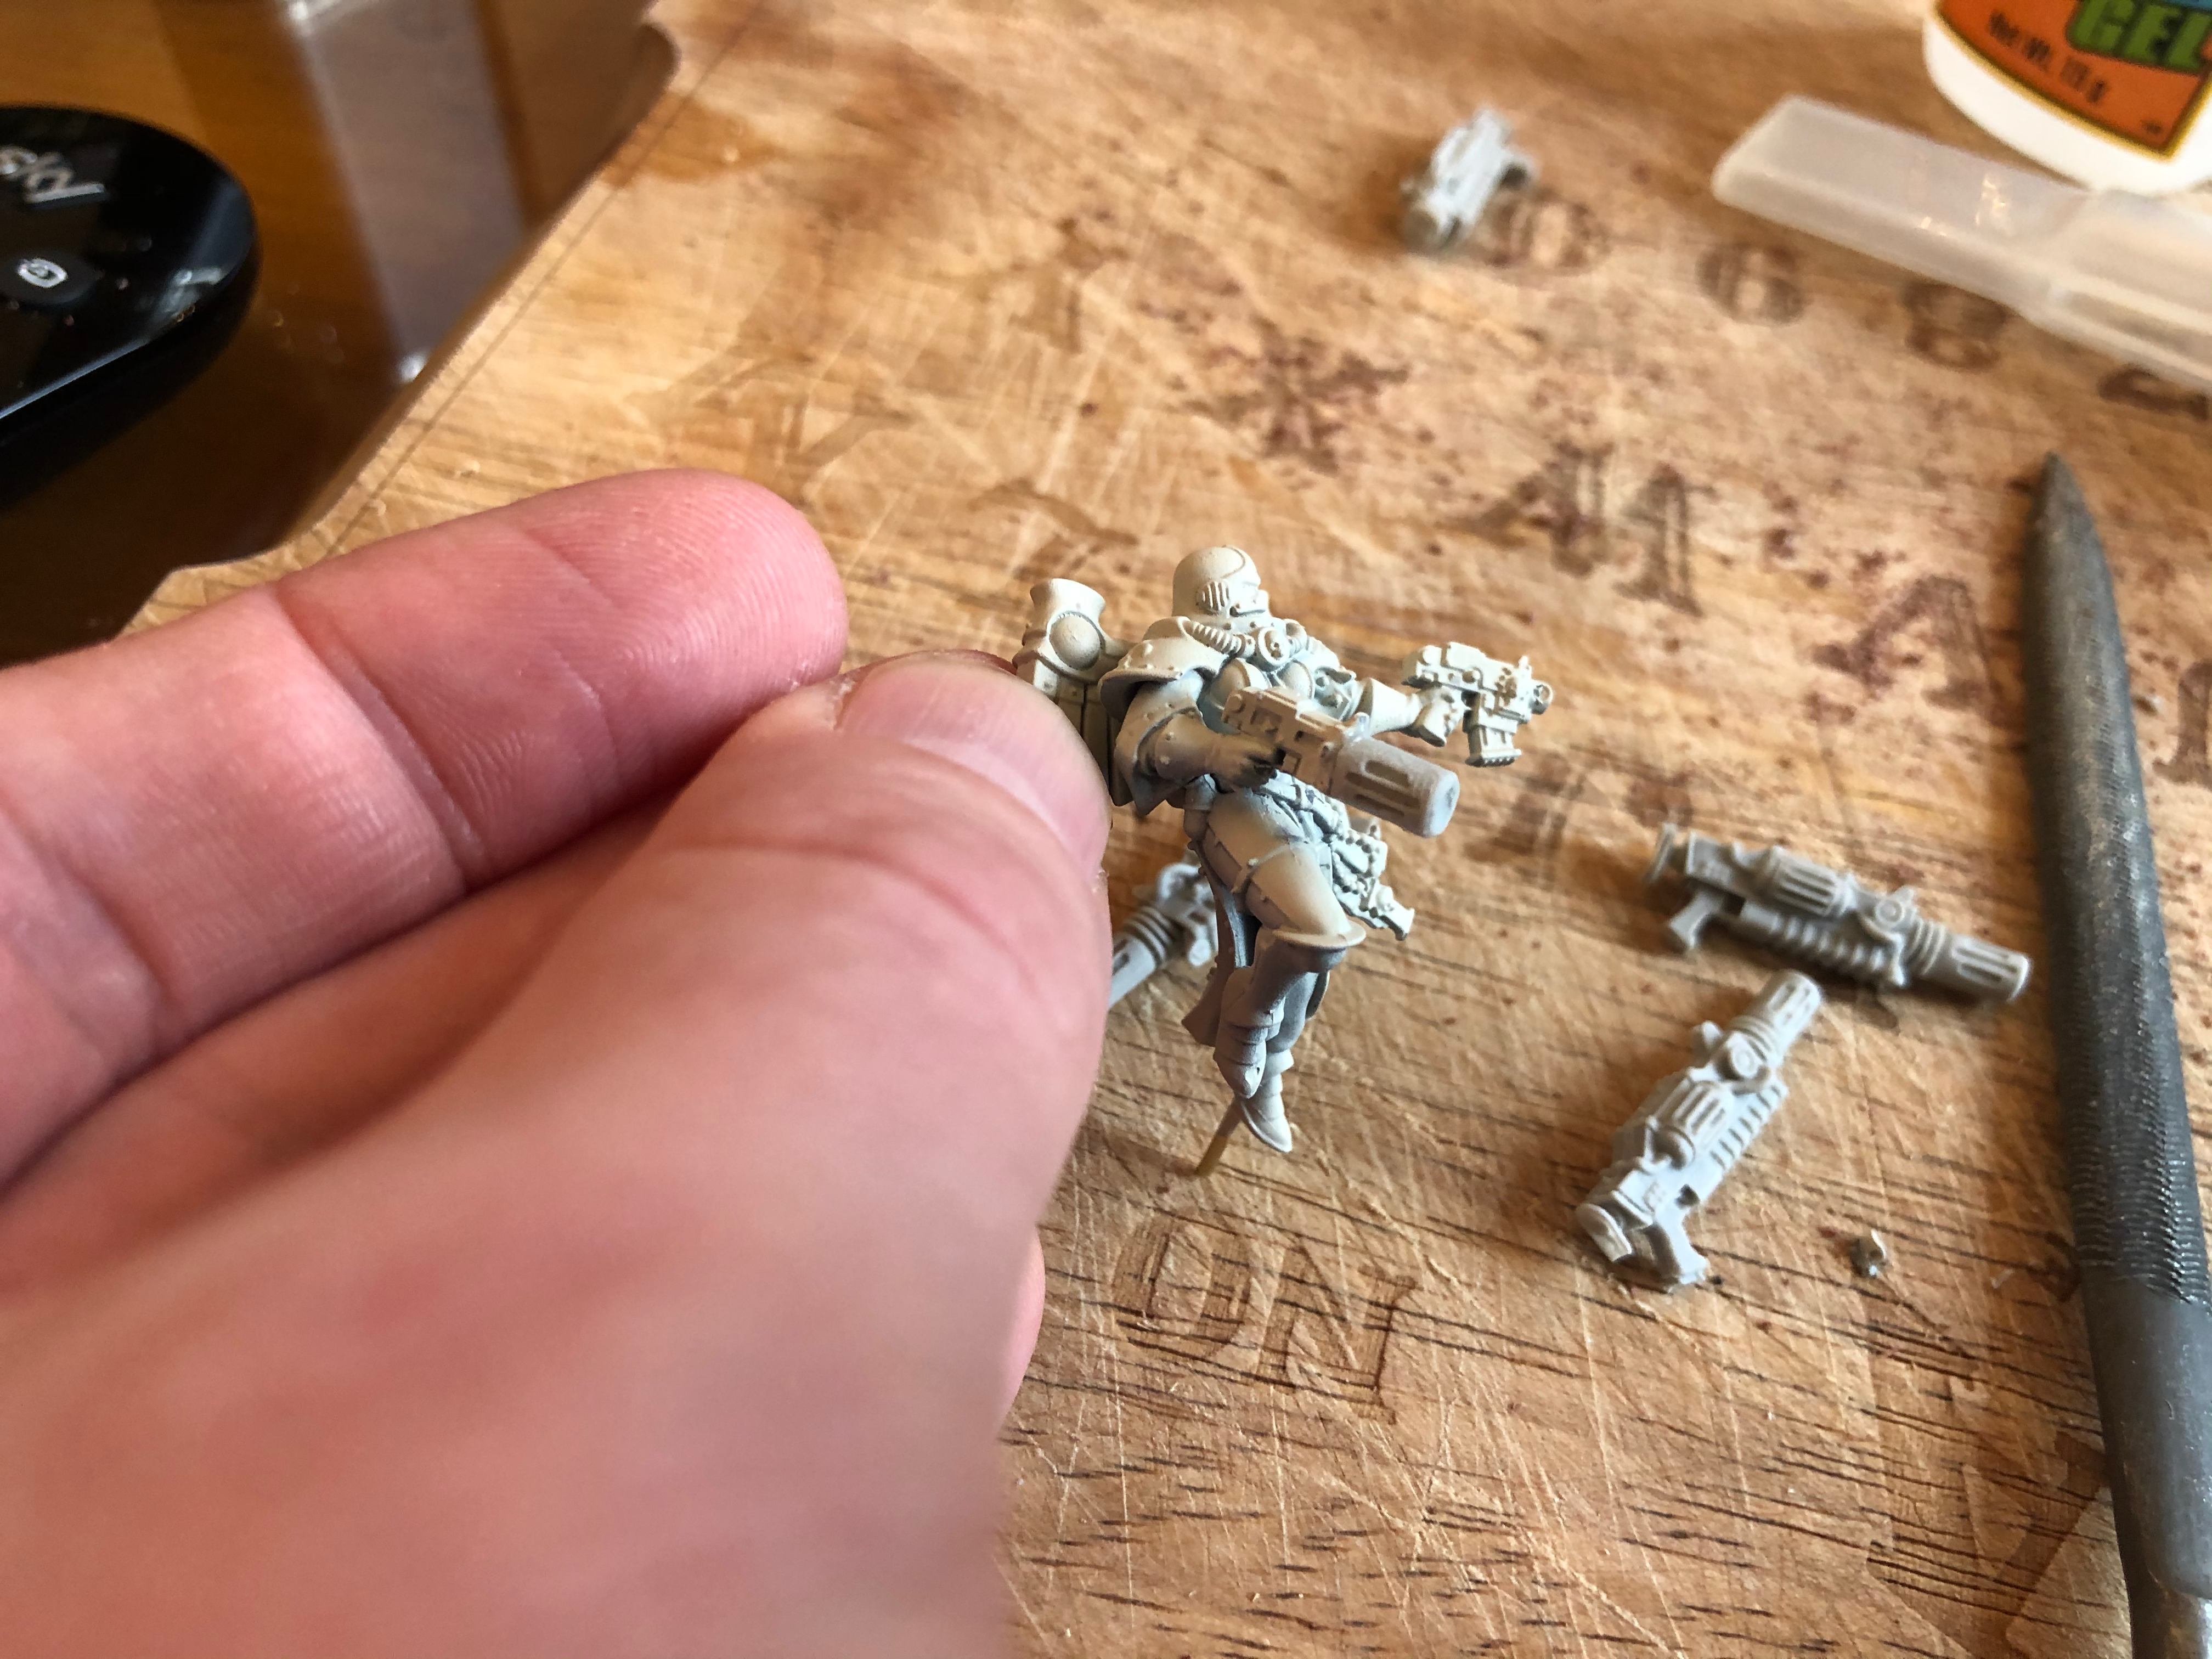
I’ve also done a quick conversion for two of the sisters to give them Inferno pistols instead of Bolt Pistols. I did this by removing the barrel & magazine from the bolt pistol and adding the end of a Meltagun. I’m really chuffed with how these came out as the Seraphim in the limited starter box didn’t have the option of Inferno pistols. Check out the series of pics below to see how it was done.
Anyway thought I’d post this quick conversion update before I hit you with the painting guide for the bases. YES!
Much Love
Eternity Gate
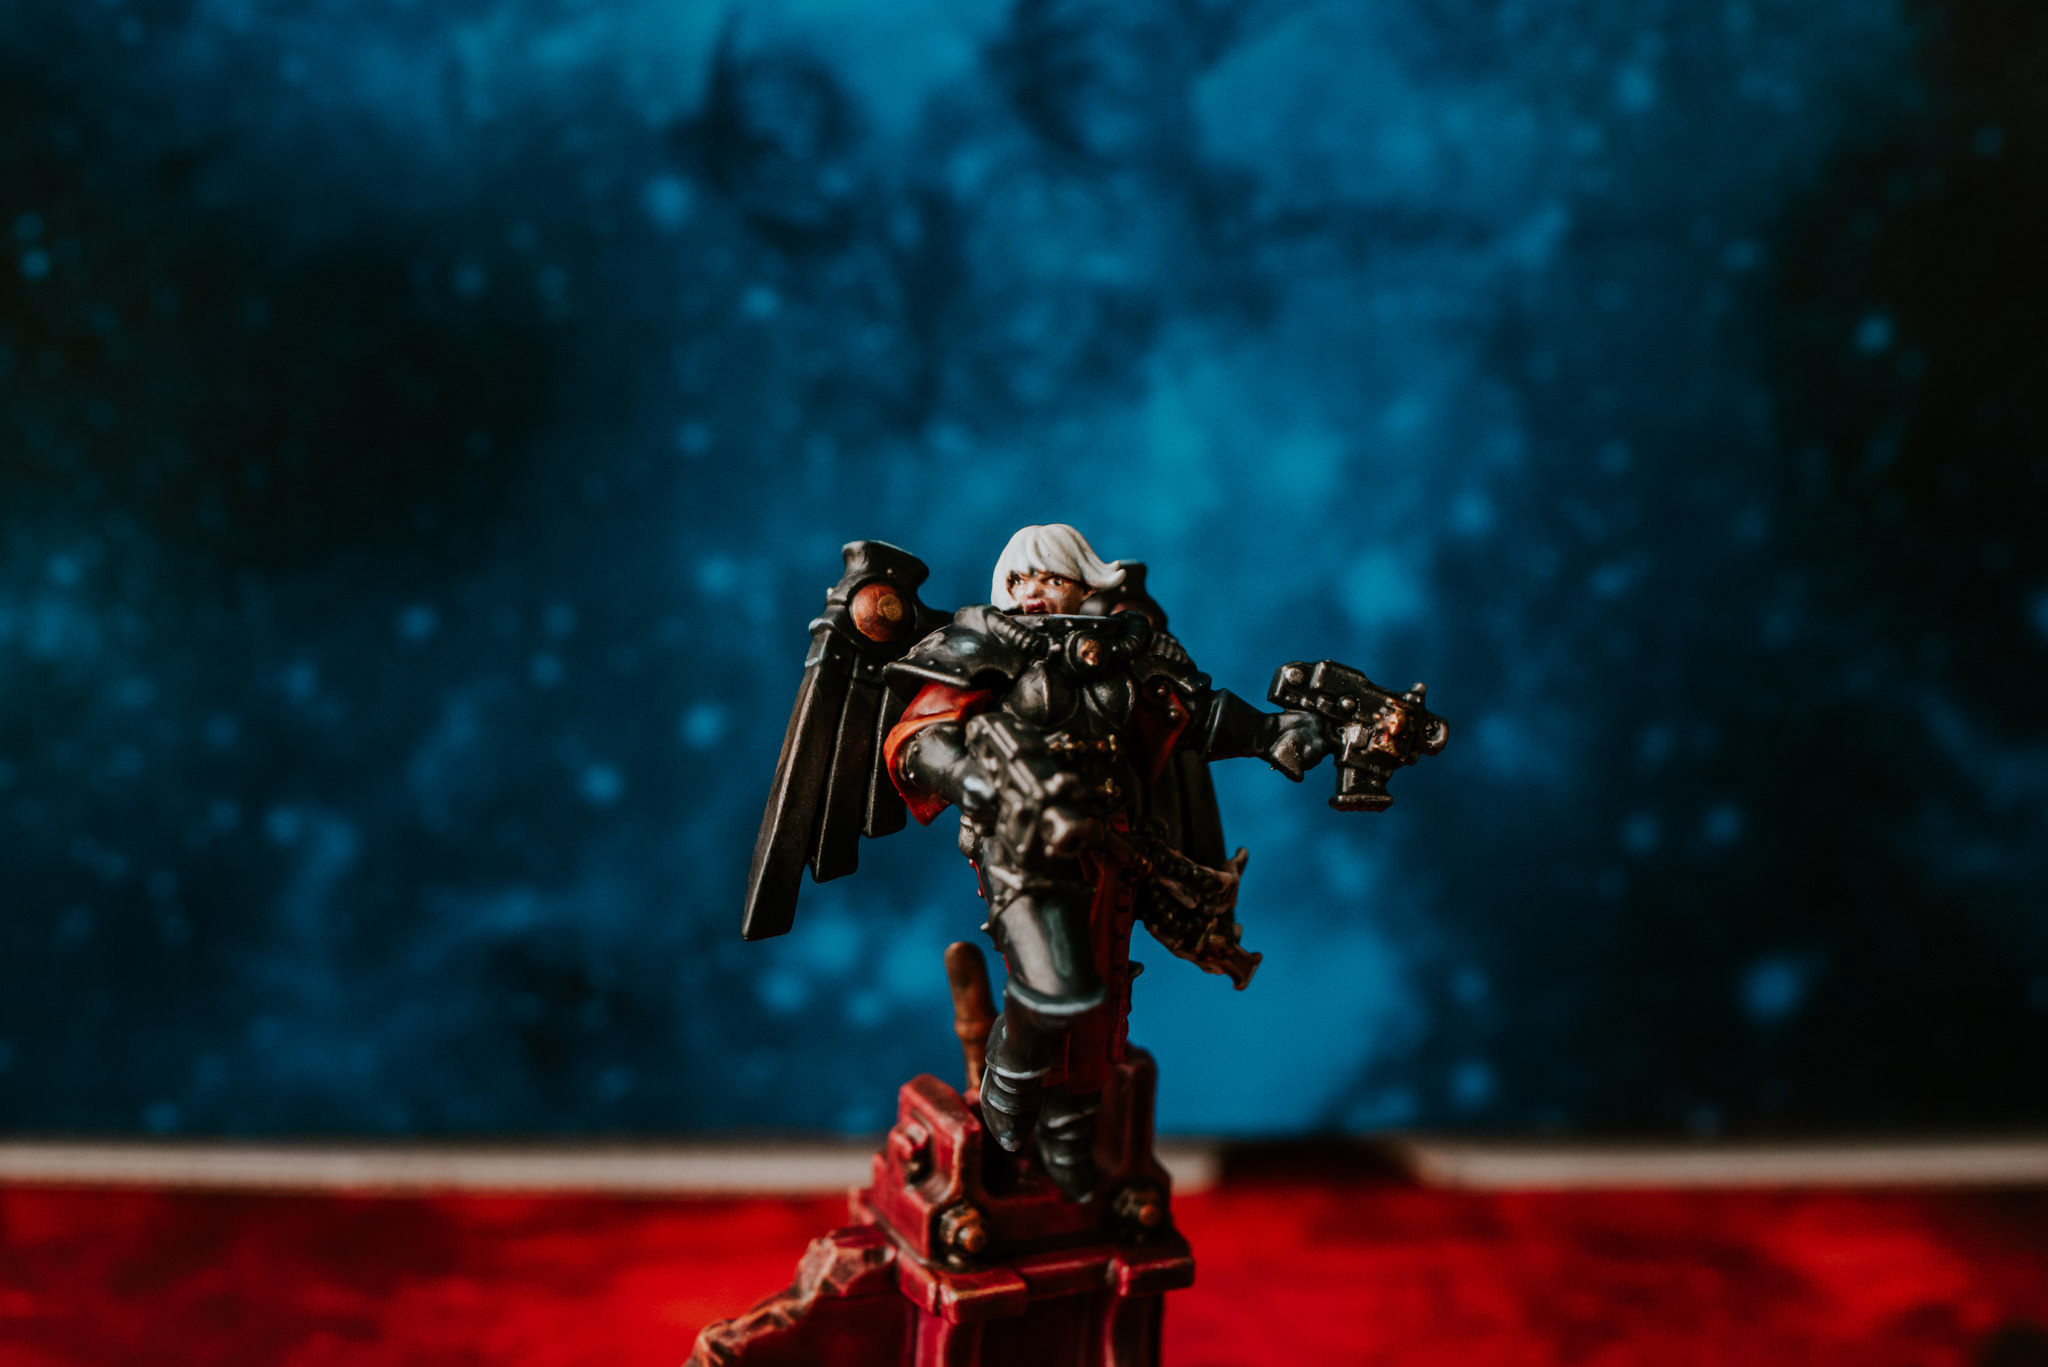
THE EMPEROR PROTECTS ~ CANONESS & REPENTIA SUPERIOR COMPLETE
IT’S GEEK TIME… KIND OF!
*****
Hello you beautiful humans I’m back after a little break with some fully painted minis. SWEET! I’ve not had much chance for hobby recently as me & the Mrs are expecting our first baby Aaaargh! So apart from getting work finished off so I can nest in leisurely pace we’ve been getting the nursery ready & generally flapping about. Literally 5 days to go until our due date! OH MY GOD!

I’M GETTING ON WITH IT
*****
Anyway you didn’t stop by to hear me talking bollocks. You came by to see some Sister based awesomeness! YES! As I talked about a while back here’s my Canoness & Repentia Superior completed for your viewing pleasure. Once again I didn’t feel the need to post any guides as all of the steps are in the posts below.
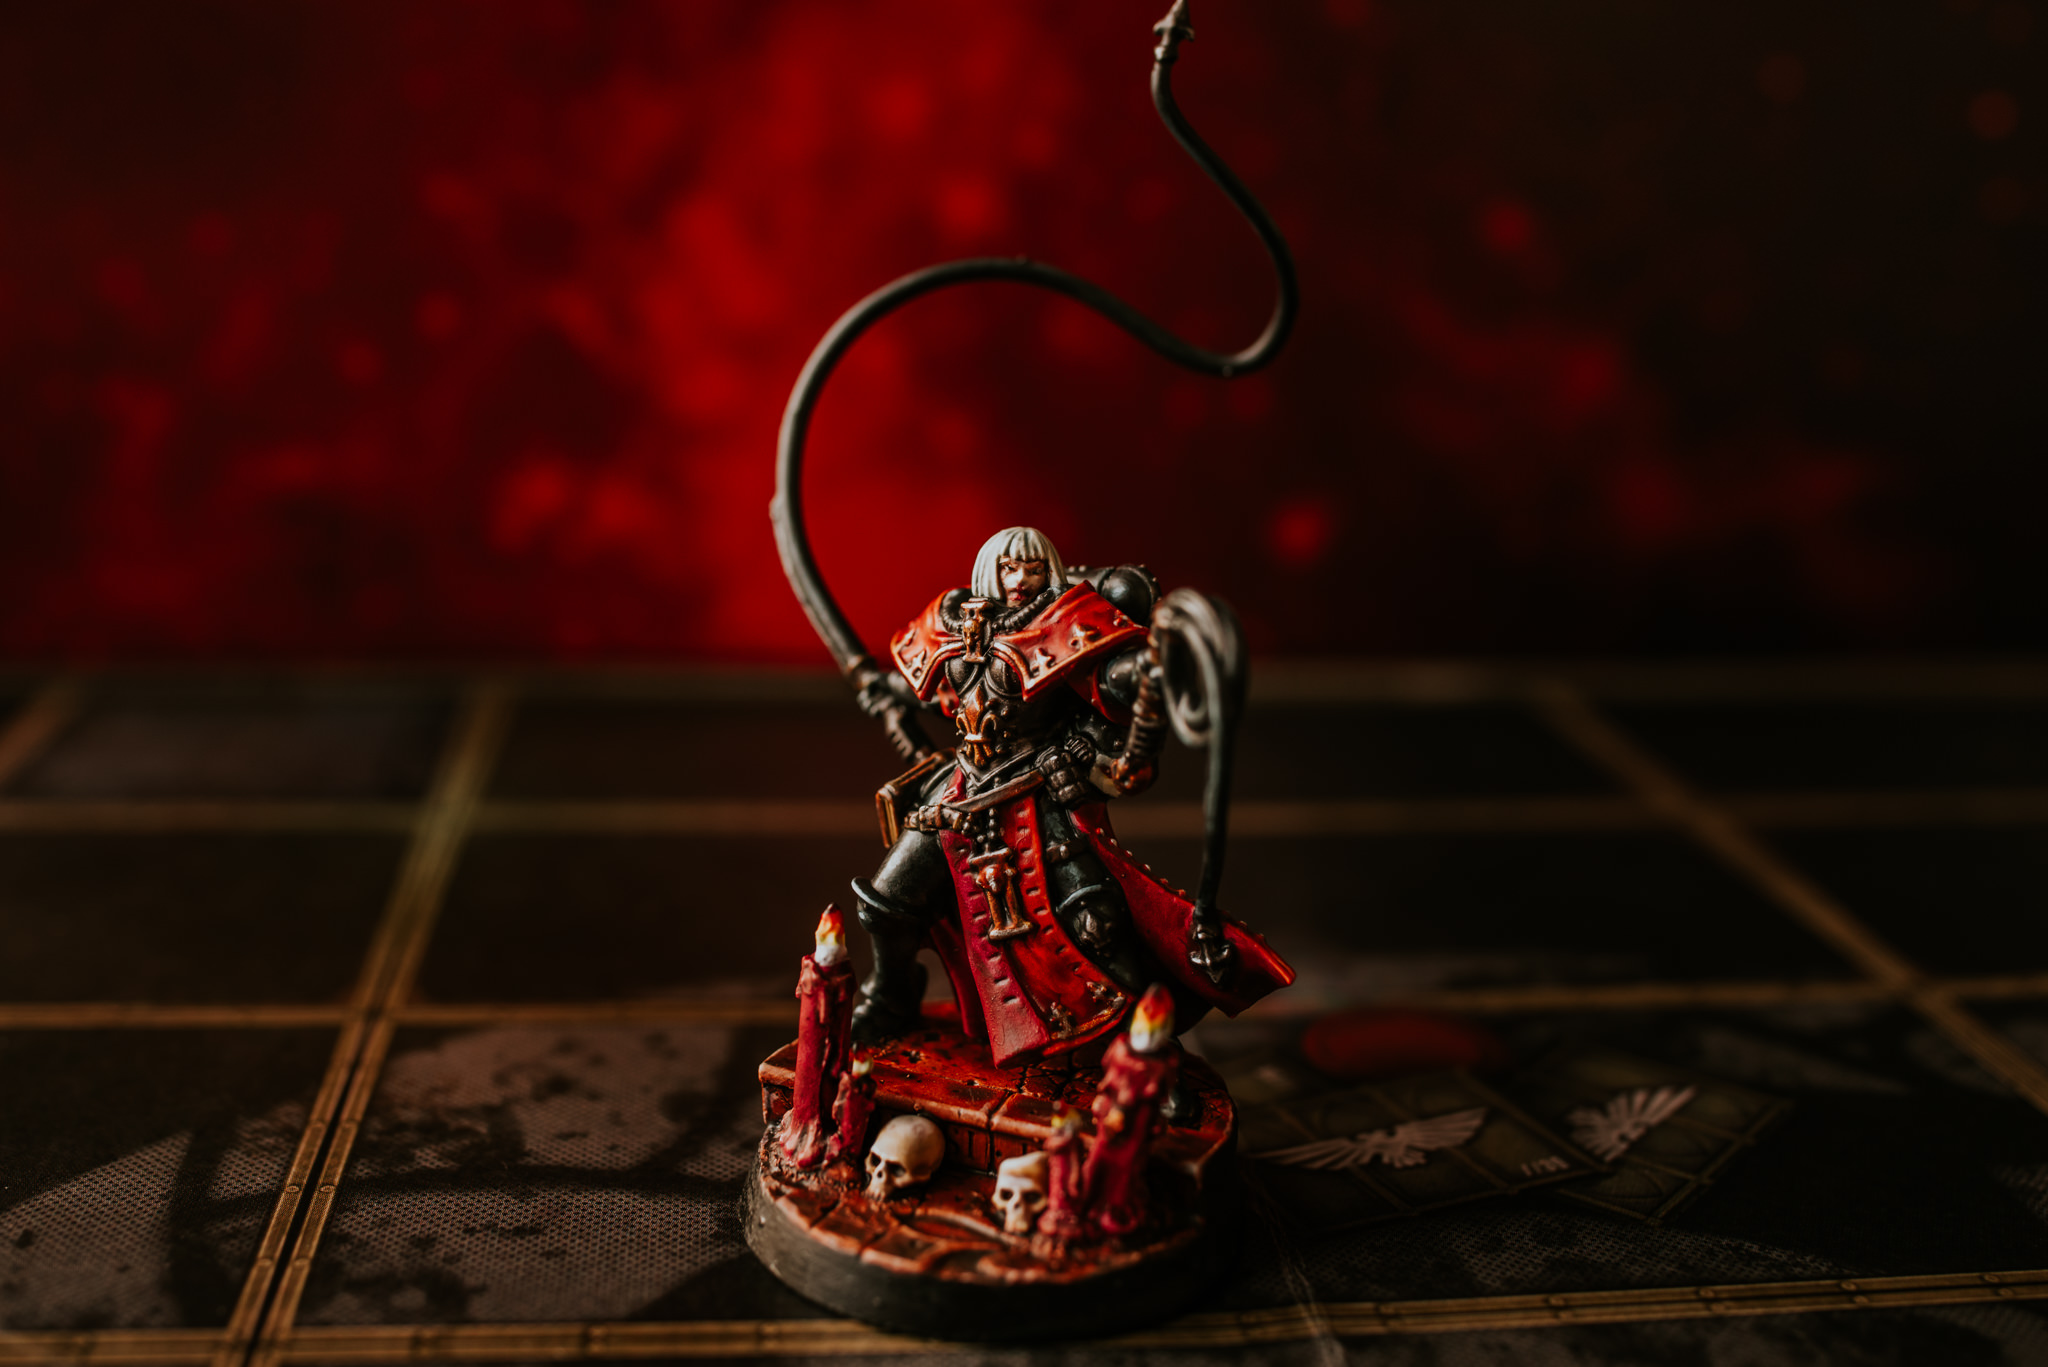
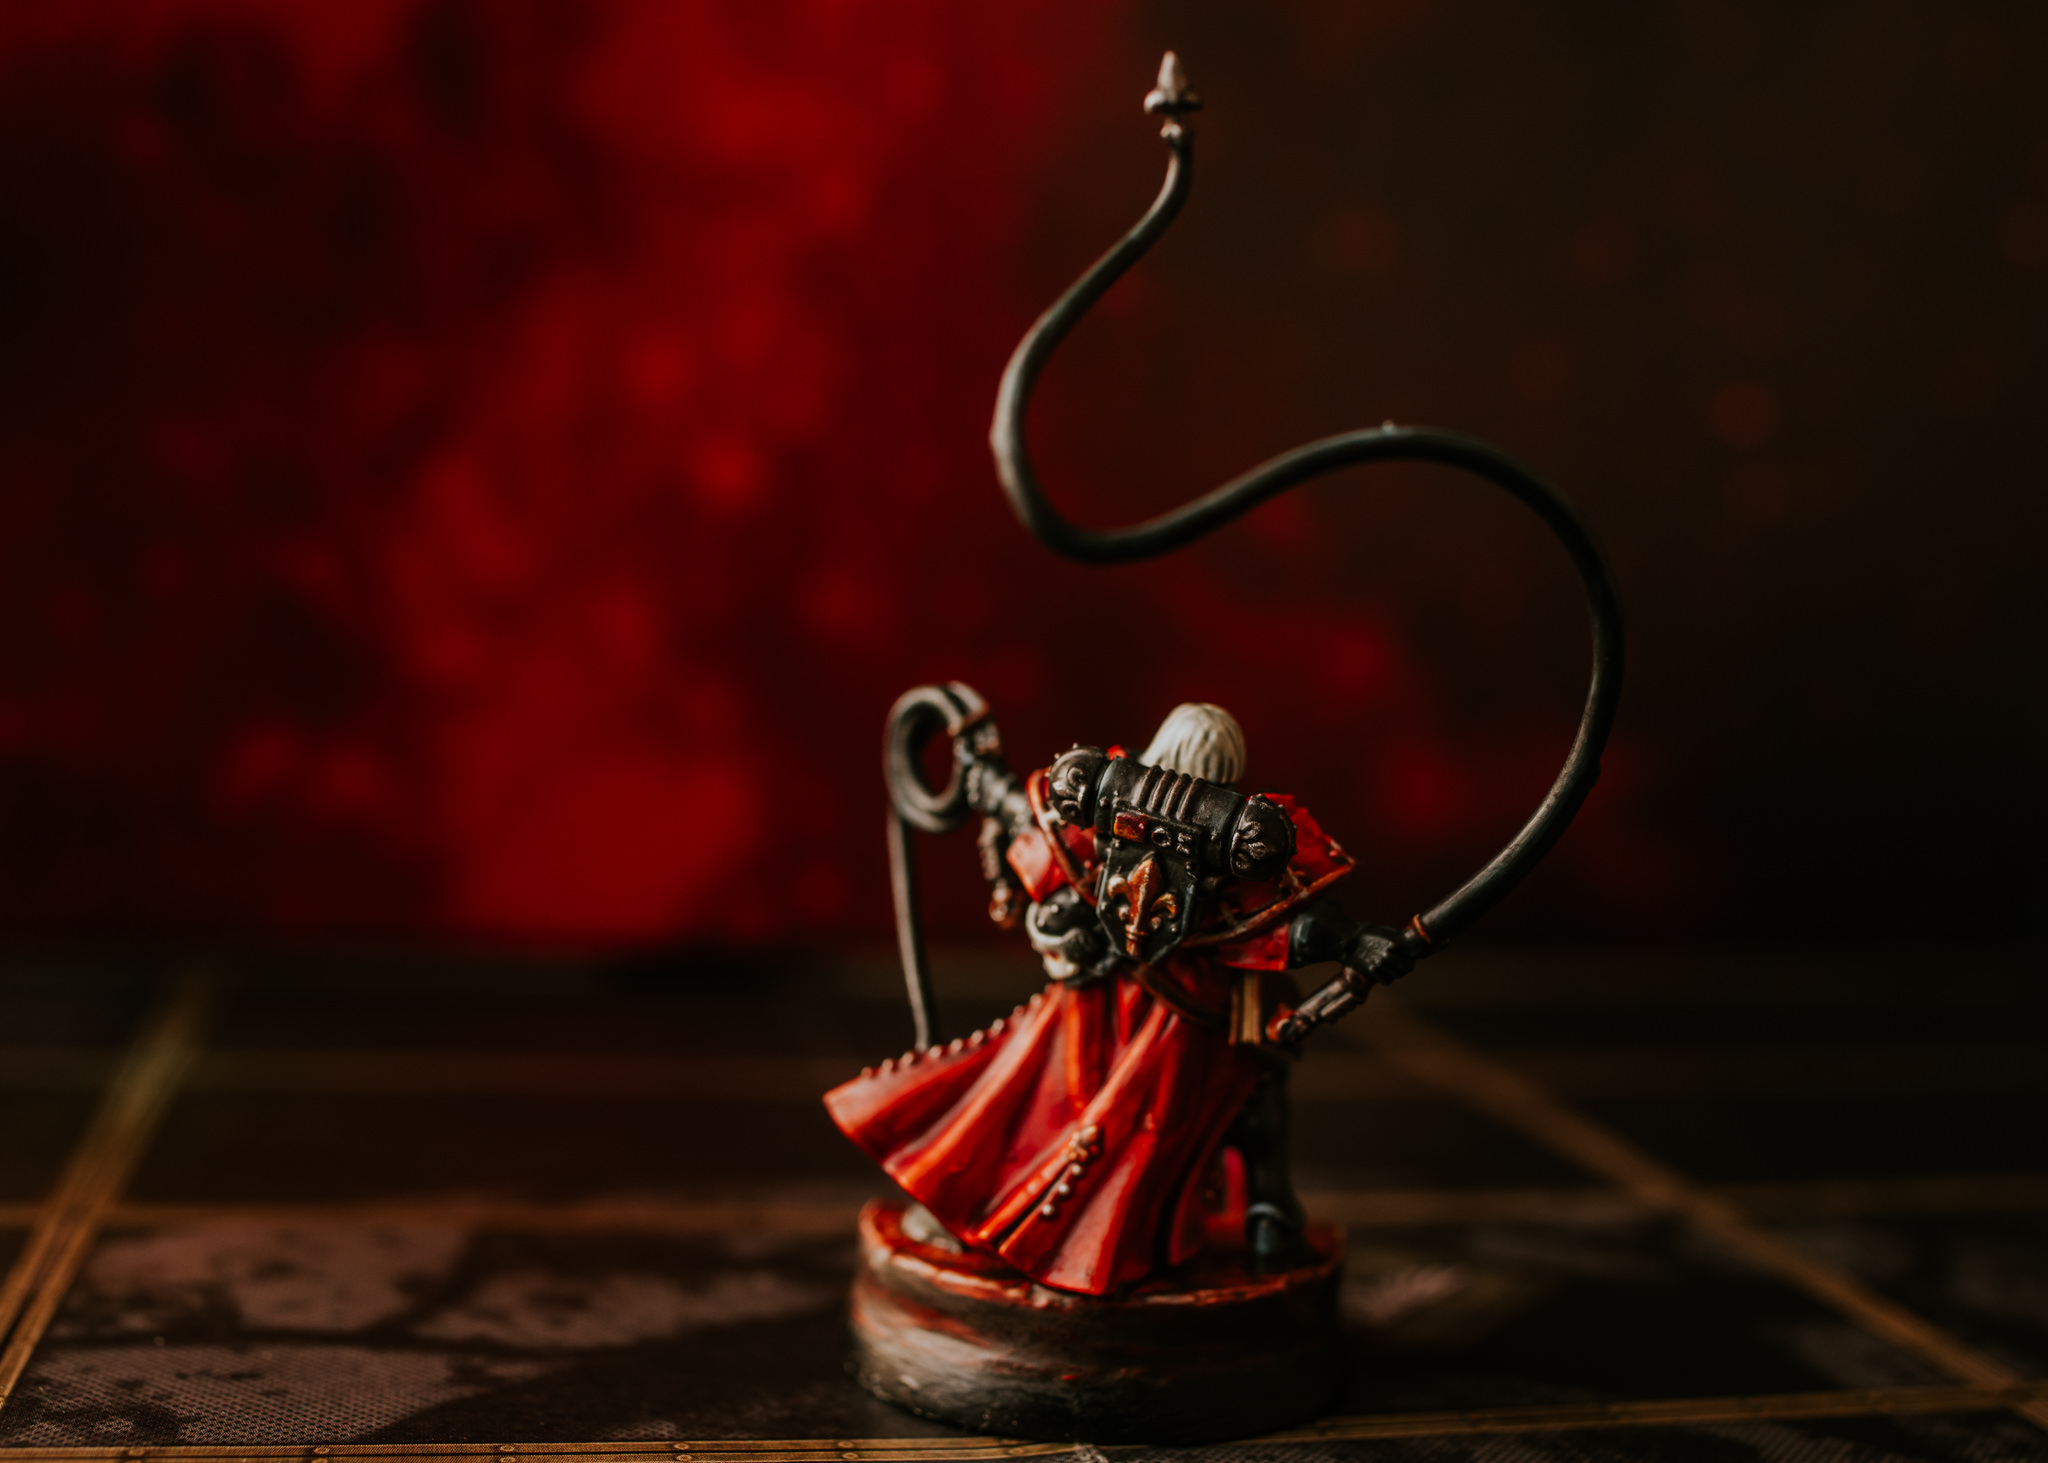
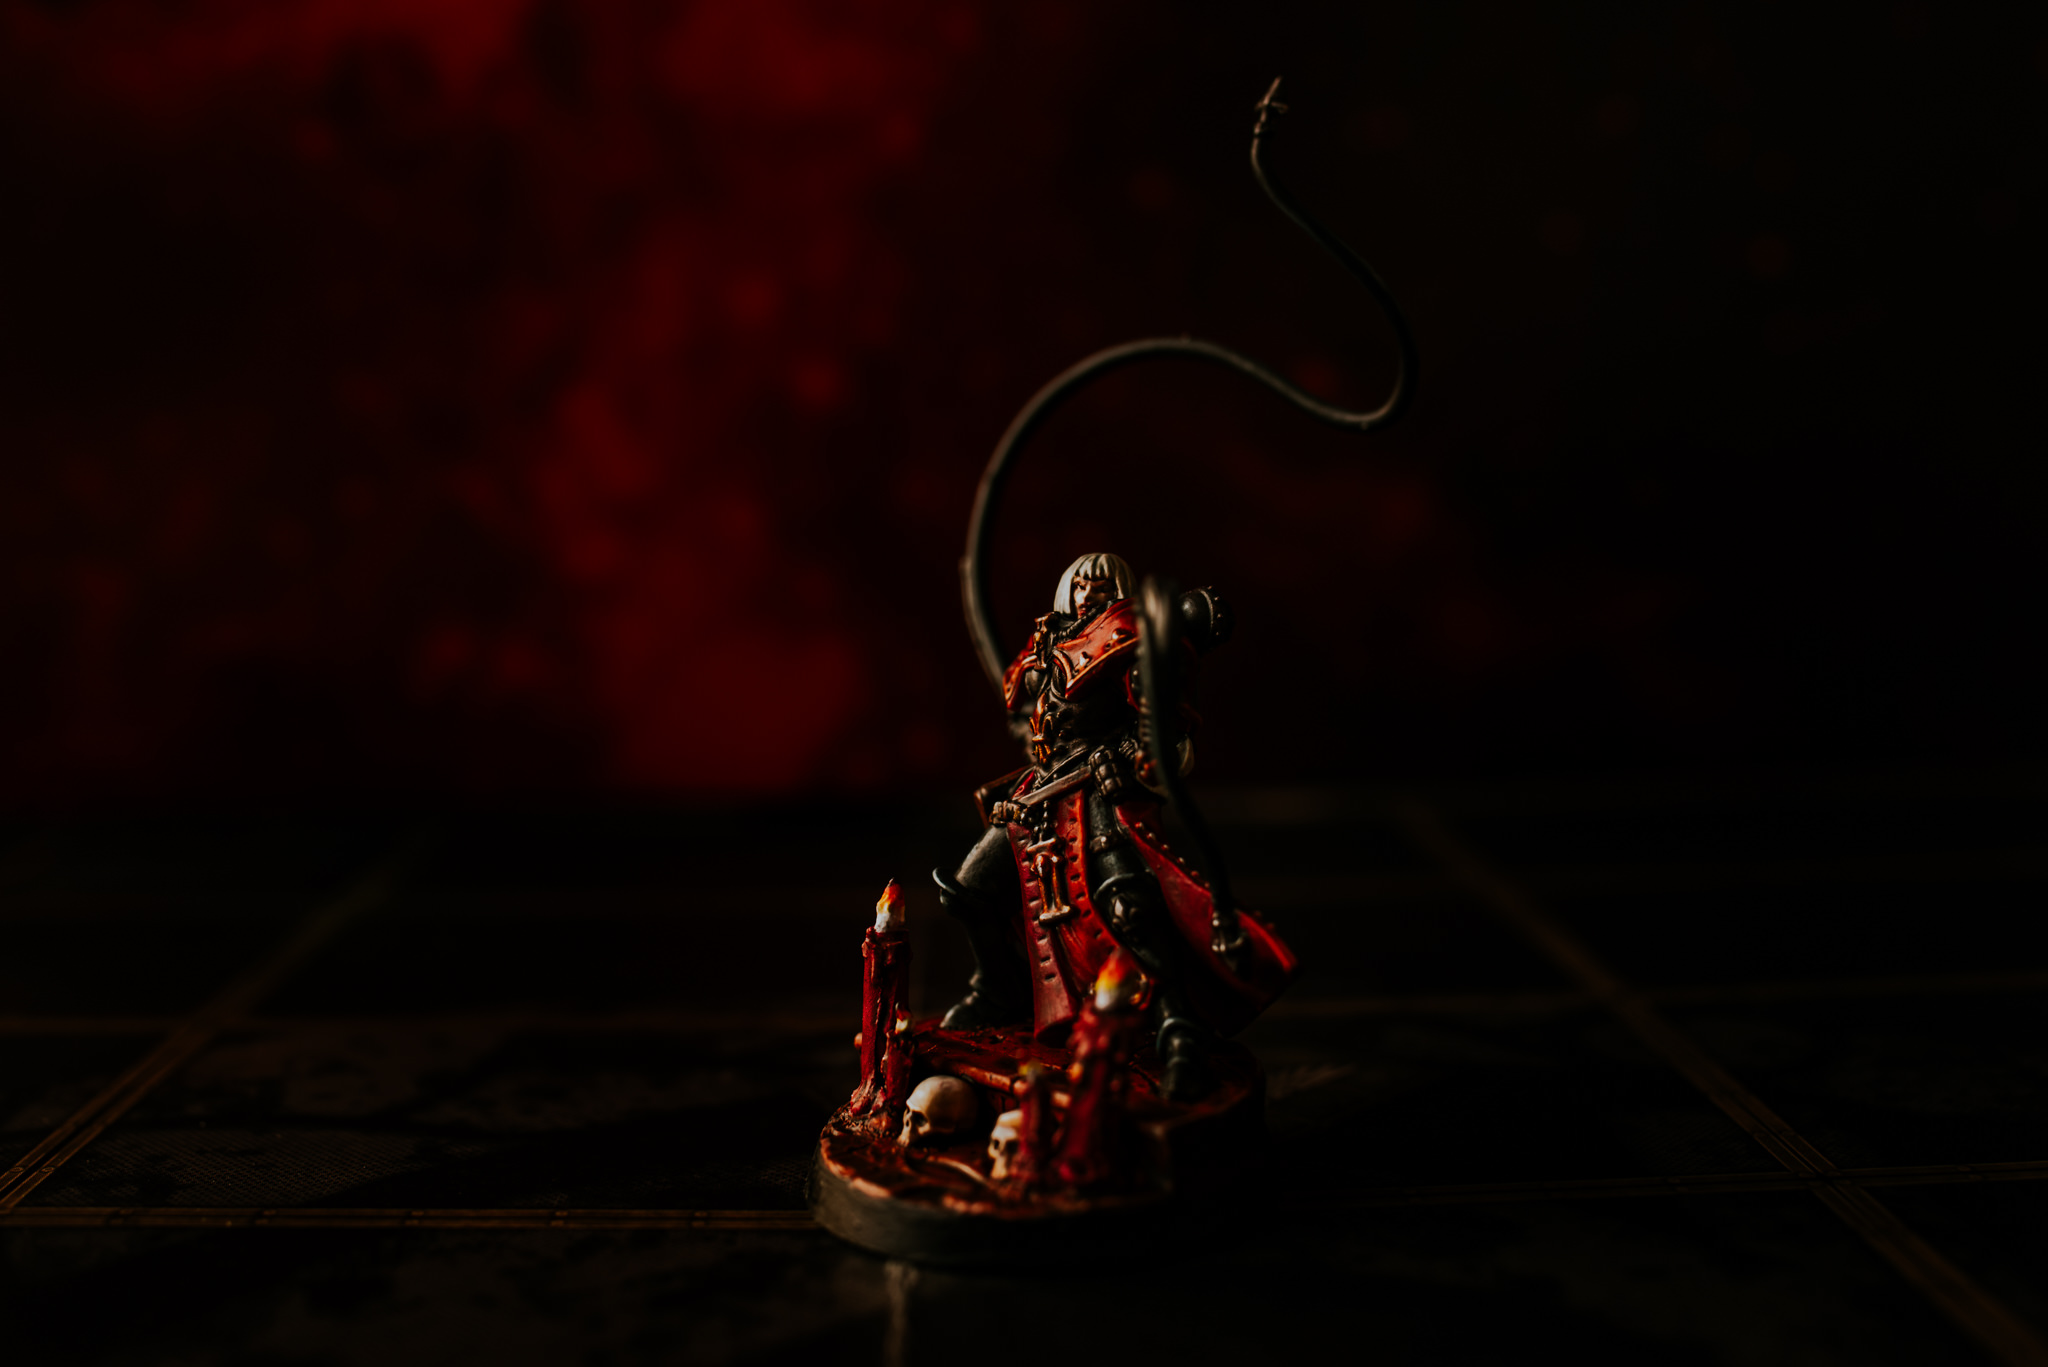
NEXT ON THE PAINT TABLE
*****
I only have my five Seraphim to go now before I finish my starter box! Holy moly it’s only taken me a year. haha. I’m actually going to be making a couple of alternations to these ladies before painting including converting their bolt pistols to inferno pistols & making the big base in the centre a little smaller. I will also be posting a full painting guide for the bases of the Seraphim. HOW BLOODY EXCITING!
Anyway wish me luck with my first born. FINGERS CROSSED YES!
Much Love
Eternity Gate