

![Perfect Call Of Duty-Style Miniatures? Wargames Atlantic’s Operators Review [7 Days Early Access]](https://images.beastsofwar.com/2026/02/unboxing-wargames-atlantic-operators-coverimage-225-127.jpg)


Stuck at Home; Keeping myself sane


Recommendations: 1015
About the Project
As of Monday 23/03/2020 I'll be stuck at home, as the schools will shut down this Friday. So I'm keeping this project to show what I'm doing to keep myself sane. It'll mostly be painting miniatures, some of which will be added to my other projects. Writing board game reviews, some painting tutorials and terrain building. Going into 2021, this project page will become more like a blog.
Related Genre: General
This Project is Active
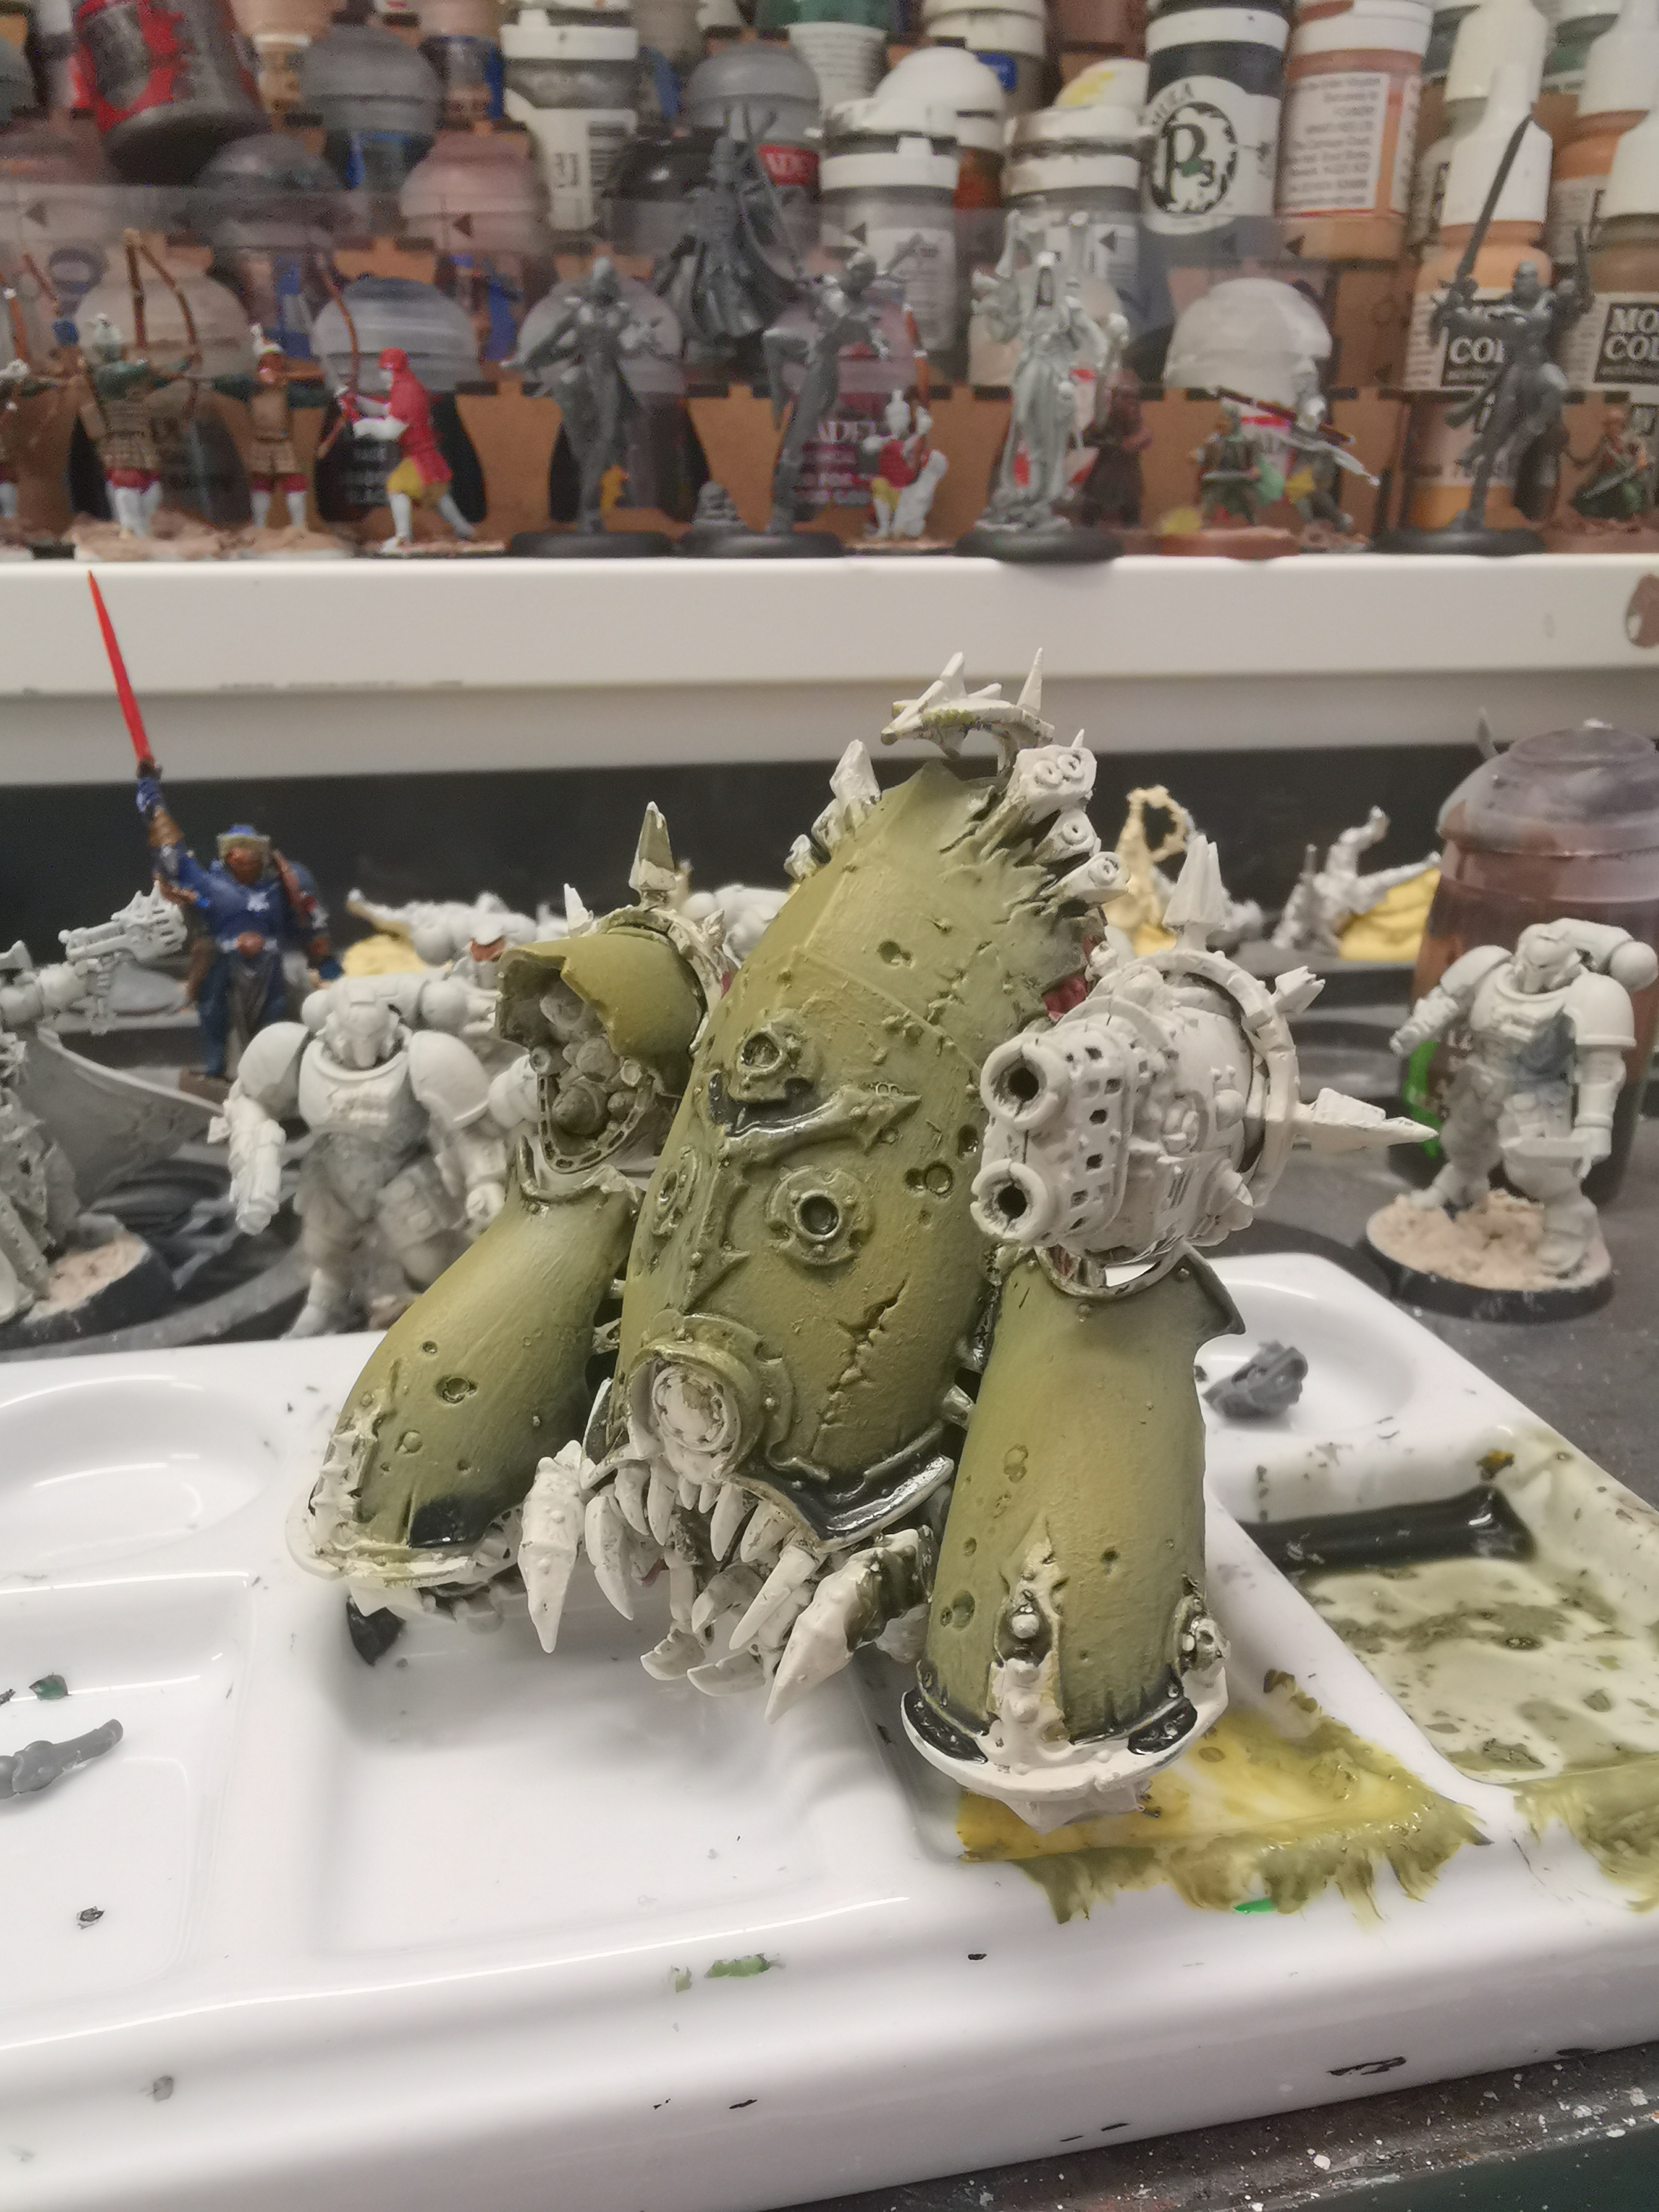
Painting the Death Guard Myphitic Blight-Hauler
The Myphitic Blight-hauler is a light Daemon Engine that provides the Death Guard with heavy firepower wherever it is needed. Resembling a Bloat-drone that has been stripped of its turbines, this strange machine has heavy weapons mounted on its carapace, and its rusting armored plates can absorb impressive punishment – as can its blubbery exposed flesh-parts, which soak up appalling trauma.
This is one of the new easy build kits from Games Workshop, it was as it should be an easy kit to build. There was very little in the way of mould lines on the kit, so clean up was really quick and easy.

The first thing was to under coat using Games Workshop Wraithbone. I’ve stopped under coating in black these days and generally only undercoat in white, grey or Wraithbone.
Next was to paint the armour
Step !; Base coat the amour with Death Guard Green by Games Workshop
Step 2: A coat of wash using Military Shader from Army Painter
Step 3: A thin coat of Death Guard Green in the areas where you don’t want the shade showing.
Step 4: A 50/50 mix of Death Guard Green and Zamesi Desert from Games Workshop for mid tone
Step 5: A mix of 25/75 of Death Guard and Zamesi to start high lighting the raised areas.
Step 6: Additional shading in the cracks and along some of the edging with a purple wash, you can either use a pre made wash or pick a purple paint and make a thin wash with a medium.
Step 7: Using the Zamesi Desert with a small drop of Death Guard,probably a mix of 85/15 for edge high lighting and anywhere else you think its appropriate.

The metal edging was done using Leadbelcher and this was washed with Nuln Oil both paints are from GAmes Workshop.

The bronze metal was painted with Retributor Armour, and then was washed with Seraphim Sepia and Seleton Horde Contrast. At this point I started adding rust on the steel coloured metal, basically dab a dark brown on. I used Rhinox Hide from GW, once dried I stippled the brown with an orange, I used an orange from Windsor and Newton. I then washed over this with a wash of brown to dull it down slightly,

The fangs/teeth where painted white and then washed with Skeleton Horde Contrast, then Agrax Earthshade both are from Games Workshop.

The light and gums were painted with a Blood Angels Red Contrast from GW. The gums were too bright so this was toned downed using Strong Tone wash from Army Painter. The gun was washed in Nuln Oil and the missiles on the other side were painted with a contrast red.

The fleshy parts were painted as follows
Step 1: A wash of Reikland Flesh shade from Games Workshop
Step 2: A coat of Carroburg Crimson from GW
Step 3: A coat of Druchii Violet from GW
Step 4: Raised areas were painted with a Red contrast
Step 5: A coat of 50/50 Mephiston Red and the Orange from Windsor and Newton

The weapon was painted with Lead Belcher and washed with Nuln Oil, then I washed the front of the gun with a thin coat of Sepia. The tentacles or whatever they are on the top of the vehicle were painted with a brown wash, then a red wash, followed with a purple wash. The tops were painted with a thin coat of green ink, with a final wash of Skeleton Horde Contrast.

The rest of the metal areas such as the tracks were painted with Lead Belcher, then washed with Nuln Oil followed by a wash of Agrax Eartshade. I then followed this up by picking out areas to paint in rust.


A quick update
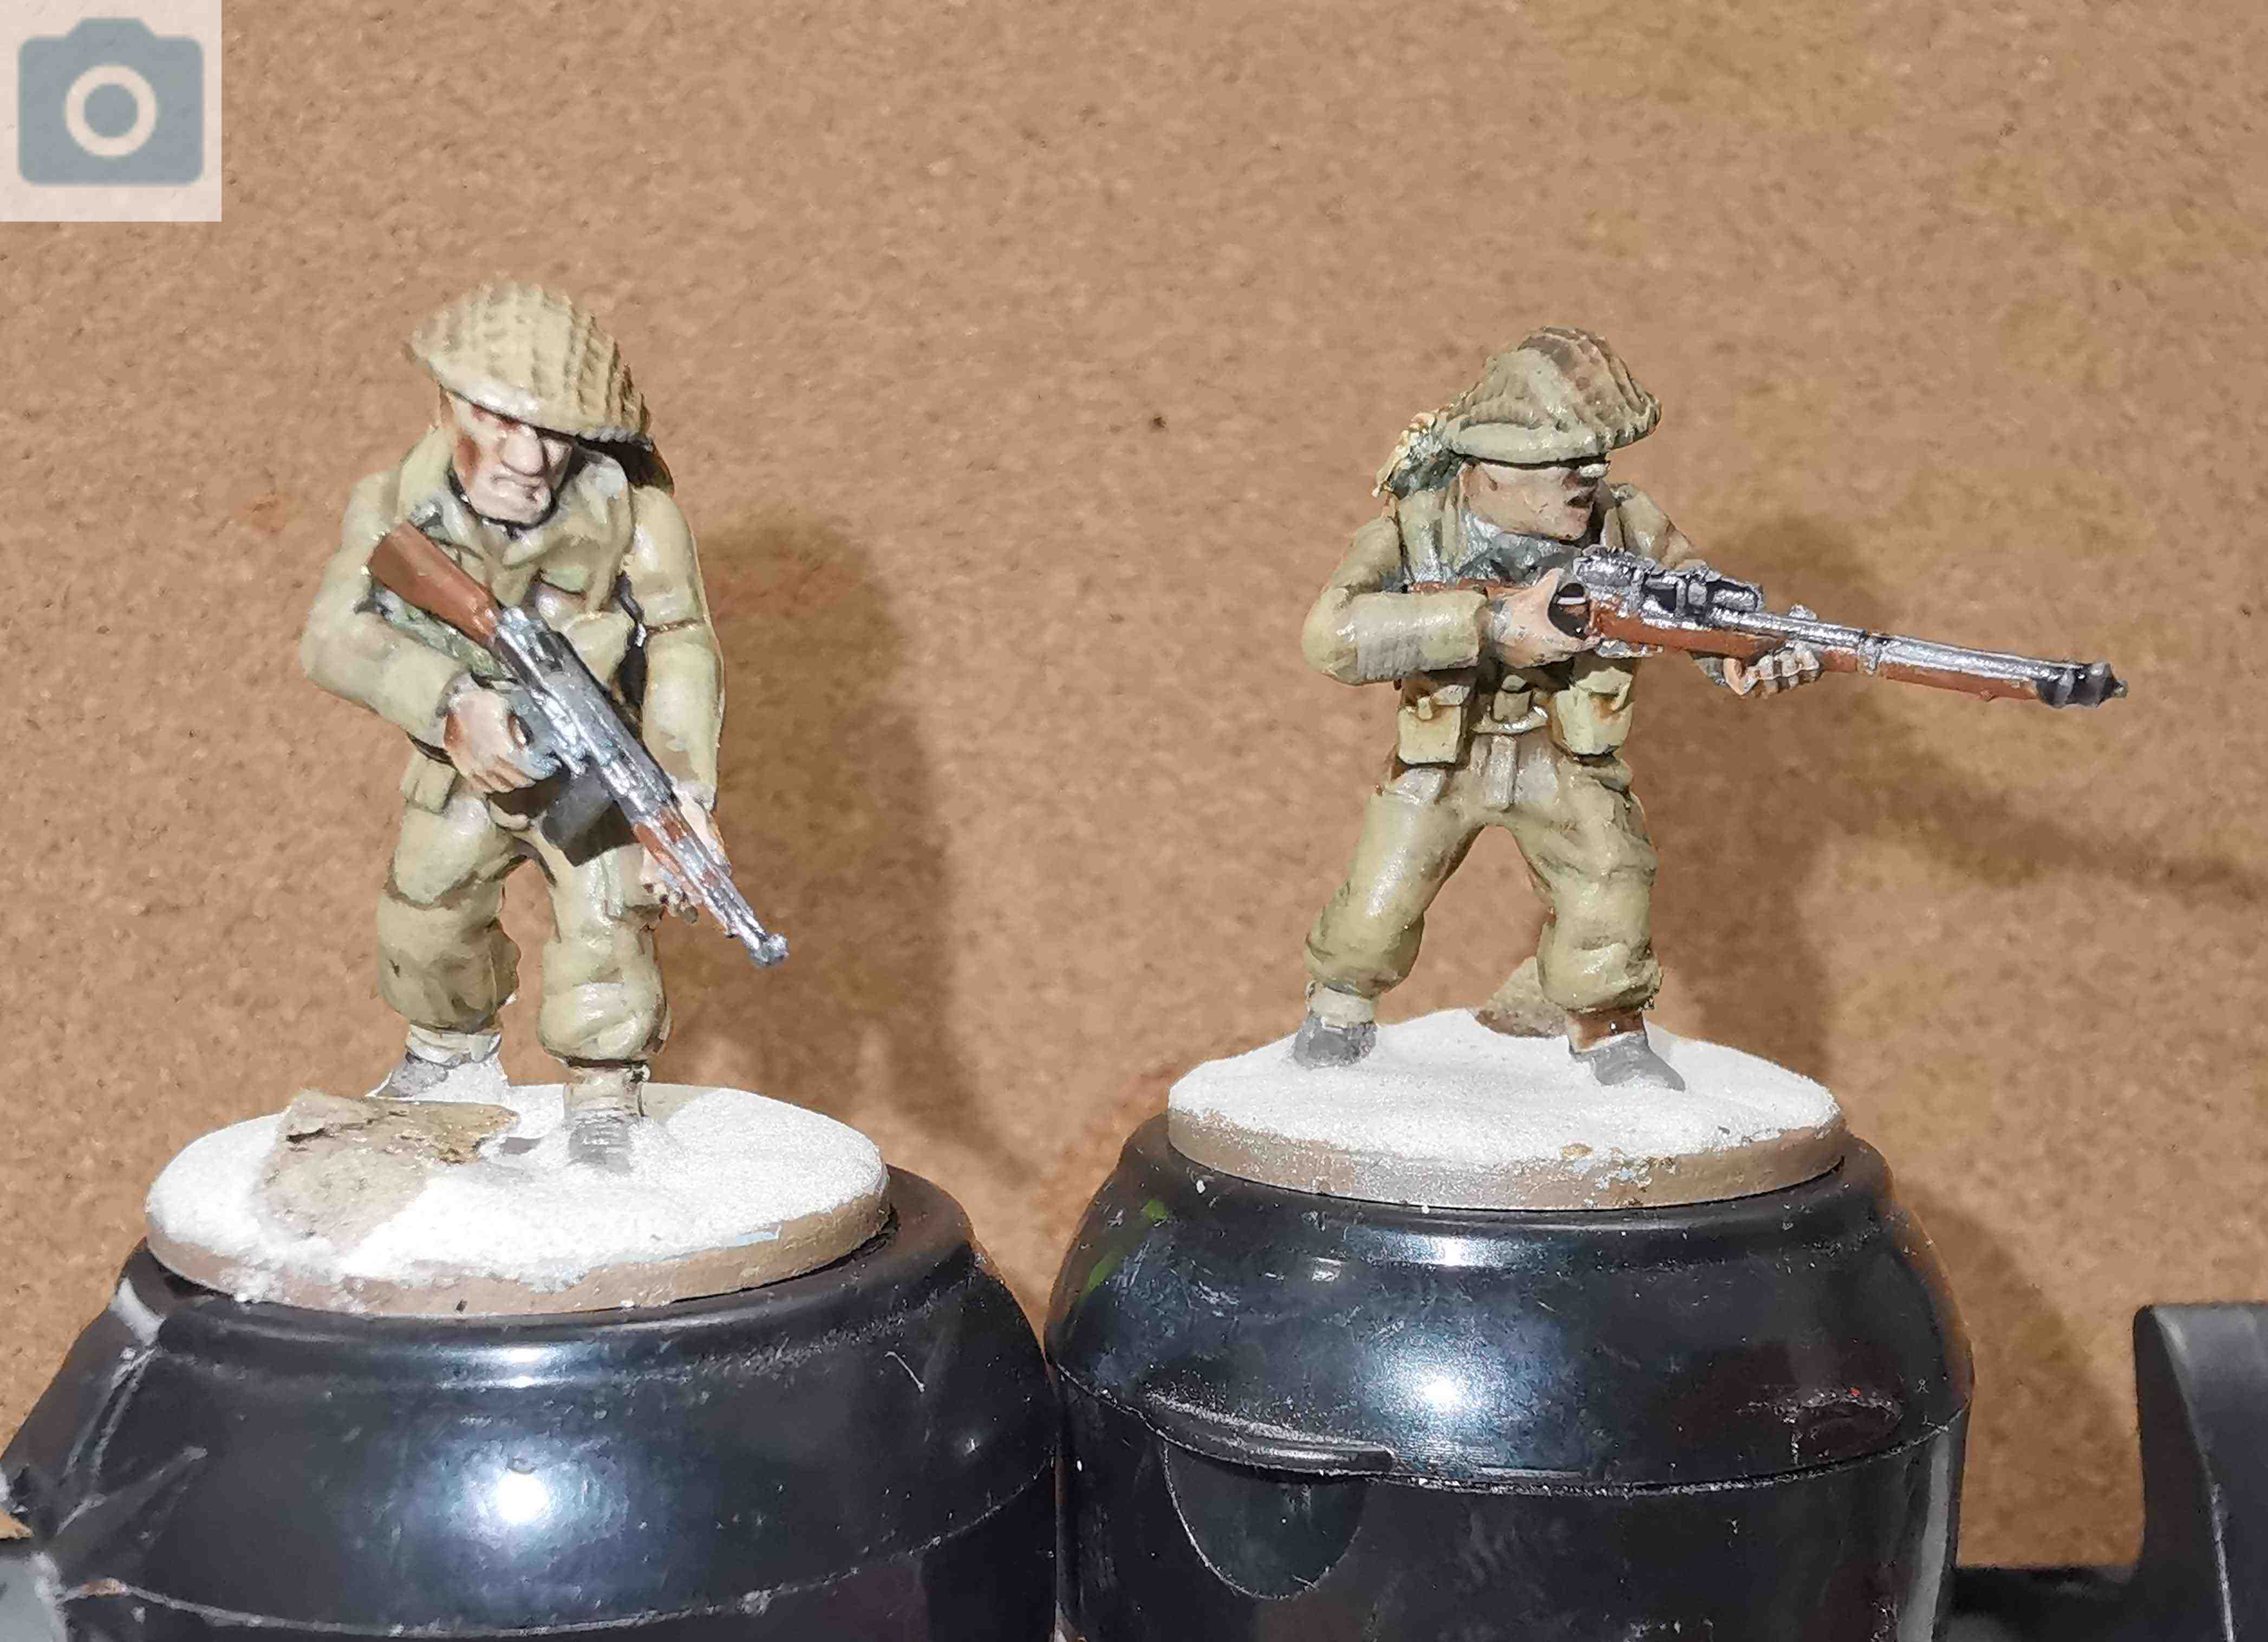
Well what have I been doing for the last few days since my last post. Well for starters I cracked open my German Flames of War army from the carry case, and decided to make a start on the infantry.
This is the first time I’ve painted figure miniatures of this scale, apart from about 5 years ago when I painted some 15 mm fantasy for a friend, and then it was a small selection of different characters/villains he was going to use for a planned RPG campaign.
So at this point I’ve not painted a 15 mm army of humanoids, in fact I’ve not batch painted an army unit in a while, those I have done have been completed over a longer period of time. Last years Spring Clean Challenge is still unfinished, as I’m that bad when it comes to unit/army painting. I became bored of batch painting a few years back when I got rid of my 40K armies (7000 pts Dark Angels, 4000 pts Blood Angels and 3000 pt Empire army). I started playing skirmish level historical games, Bolt Action is the nearest I’ve come to playing large scale historical games, but even then I’ve not built any large armies for the game.
So sitting down and painting a reasonable amount of 15 mm infantry in a couple of days was not a task I was looking forward to. I decided to paint the uniform in a light grey (Administratum Grey from GW), as my plan was to wash this with my limited stock of Nuln Oil. I initially painted up one base worth just to get an idea of the different steps I’d require to paint all of them. Once I was satisfied with this I pushed on with the rest of them. Thank god for my painting magnifying glasses as I would have been squinting throughout the process. I finally managed to get through it all and I’m happy with the result.
Once I finished these, I decided to crack on and finish a couple of my Bolt Action Tanks, Panzer III, Stug and a T-34. All of these had been previously base coated but I decided i wanted to add some weathering and dirtying them up a little, so that they look battle worn. The T-34 didn’t get too much weathering done it, as I’m planning to use it in the Korean War Campaign, and I wanted it to look like a reasonably new tank. The two German tanks I wanted to look like they’ve been on the battle field for a couple of years or more, so they needed some drastic weathering, This was done using weathering powders, and powder pads by Tamiya.
All this time off locked away at home has meant I’ve been able to catch up on a lot of projects.
 Finished 15mm Germans
  Panzer III side view
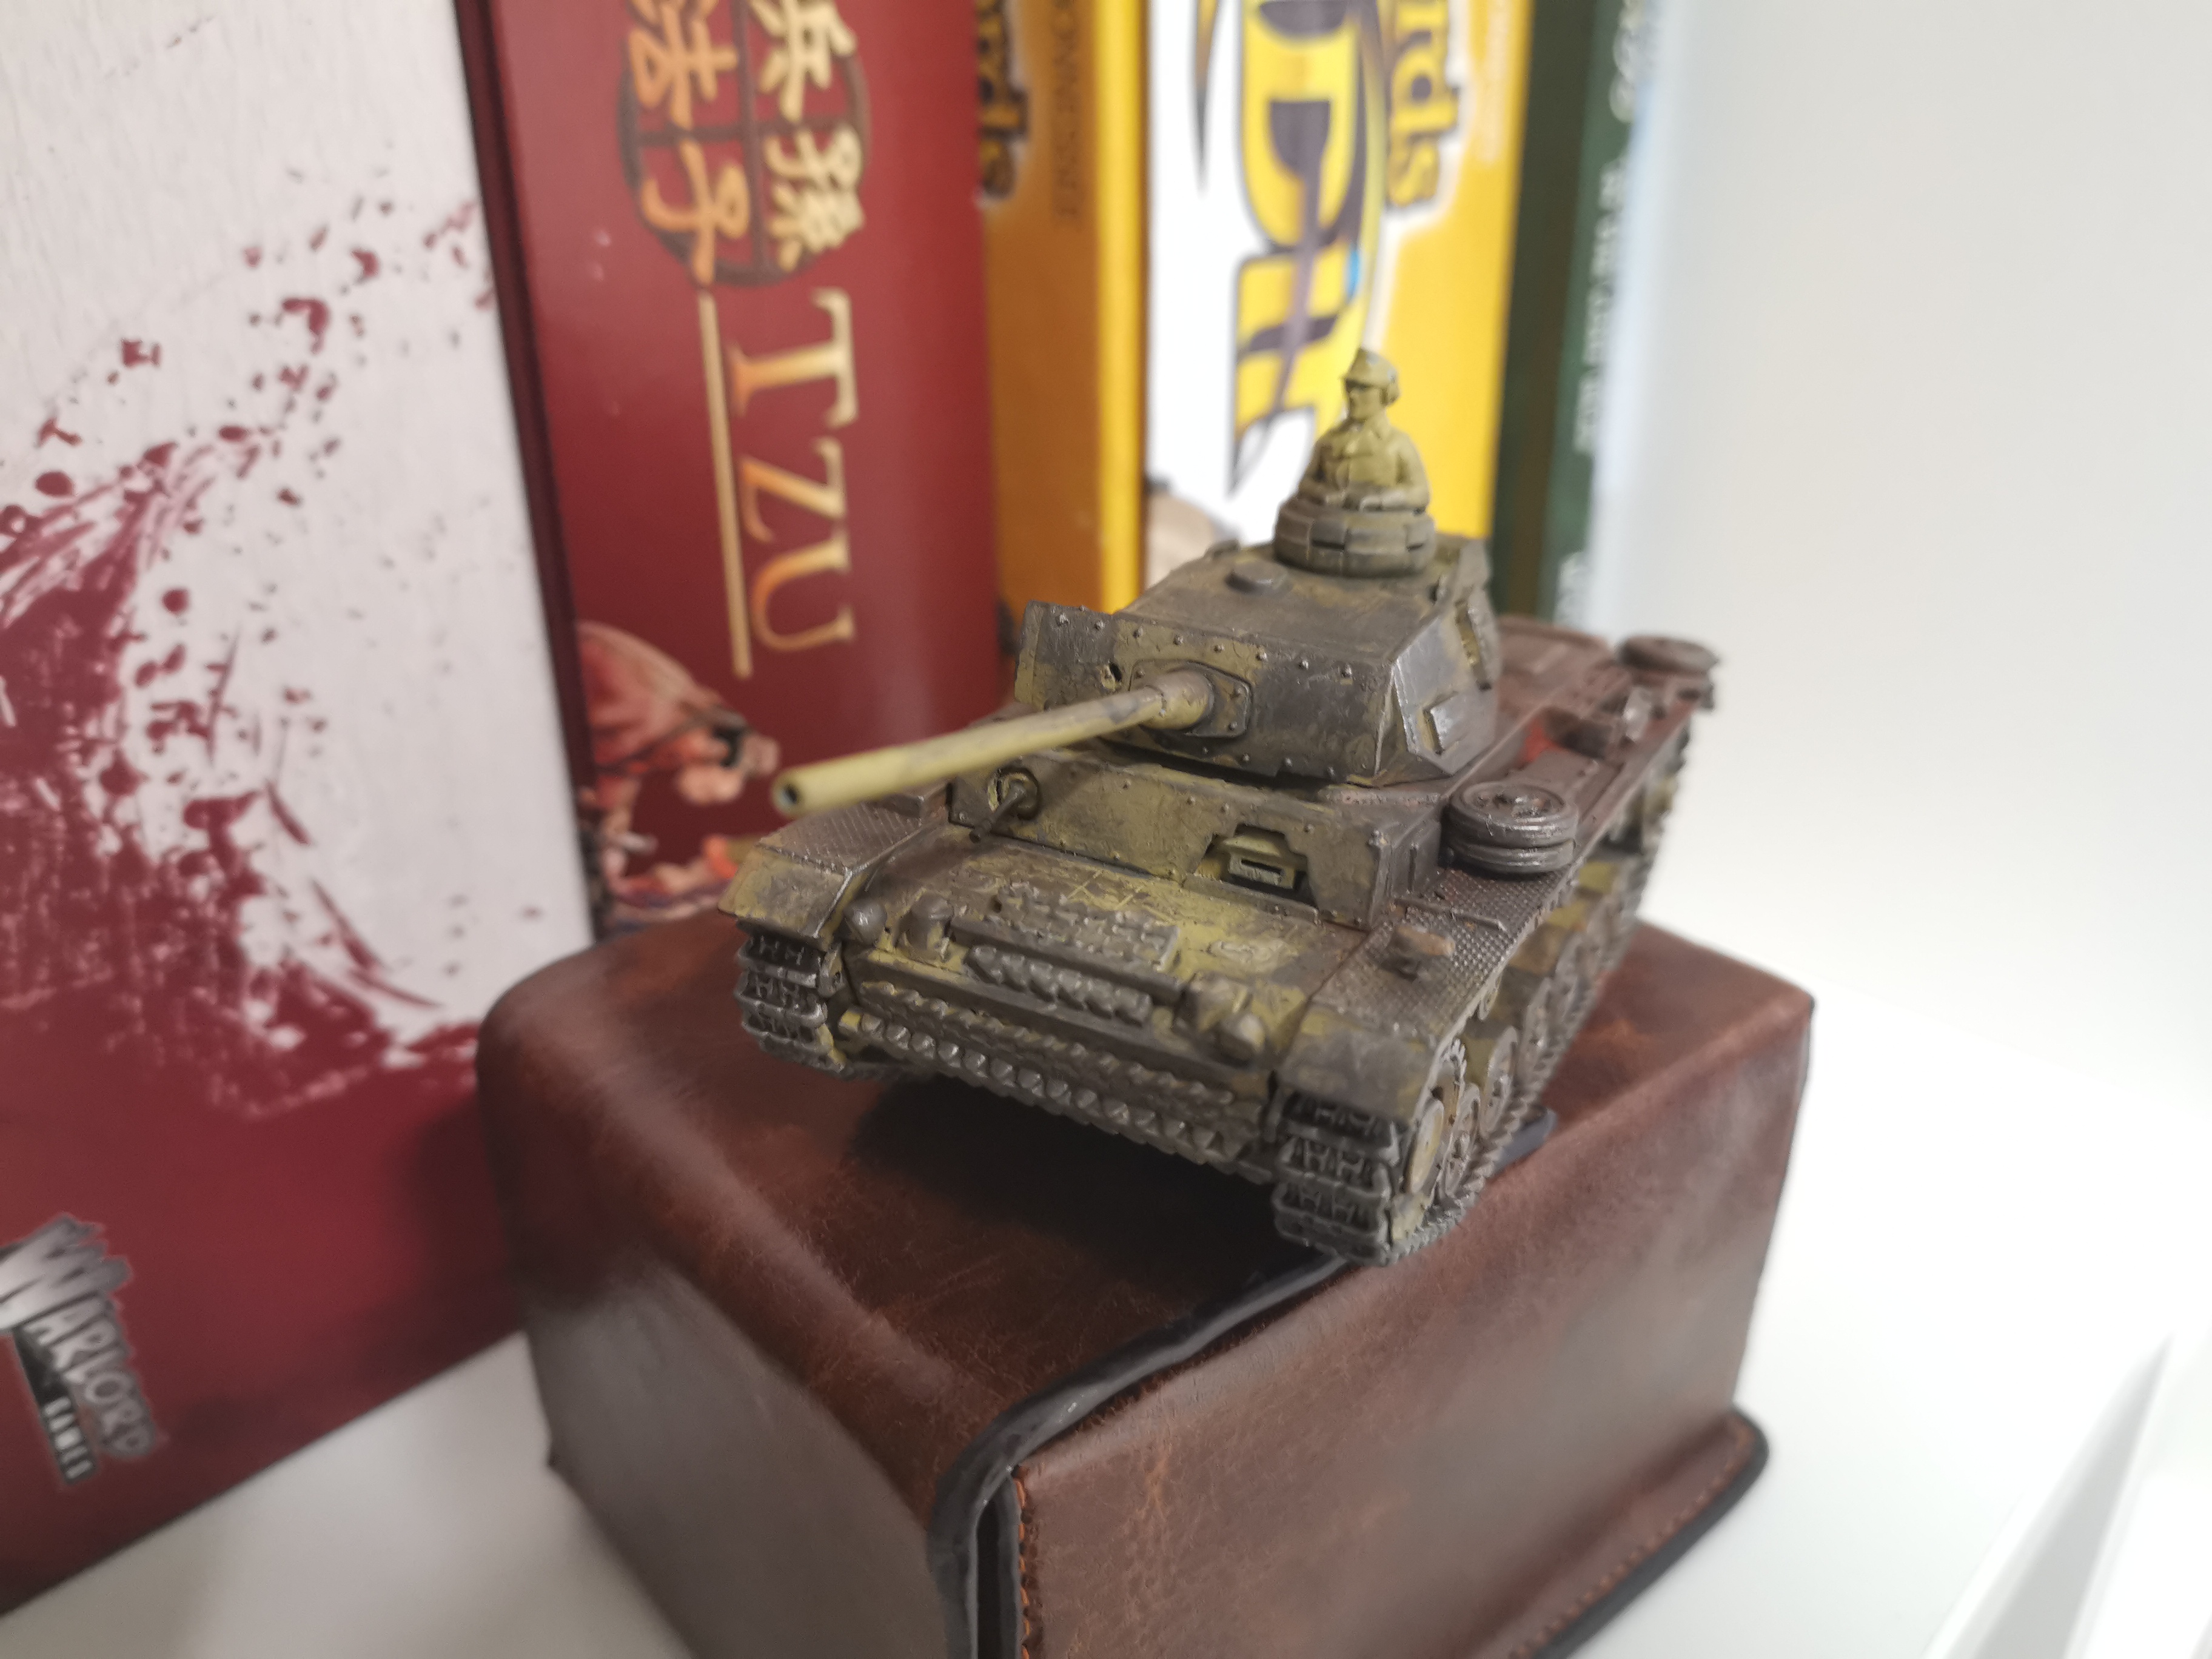 Panzer III front view
 Panzer III rear view
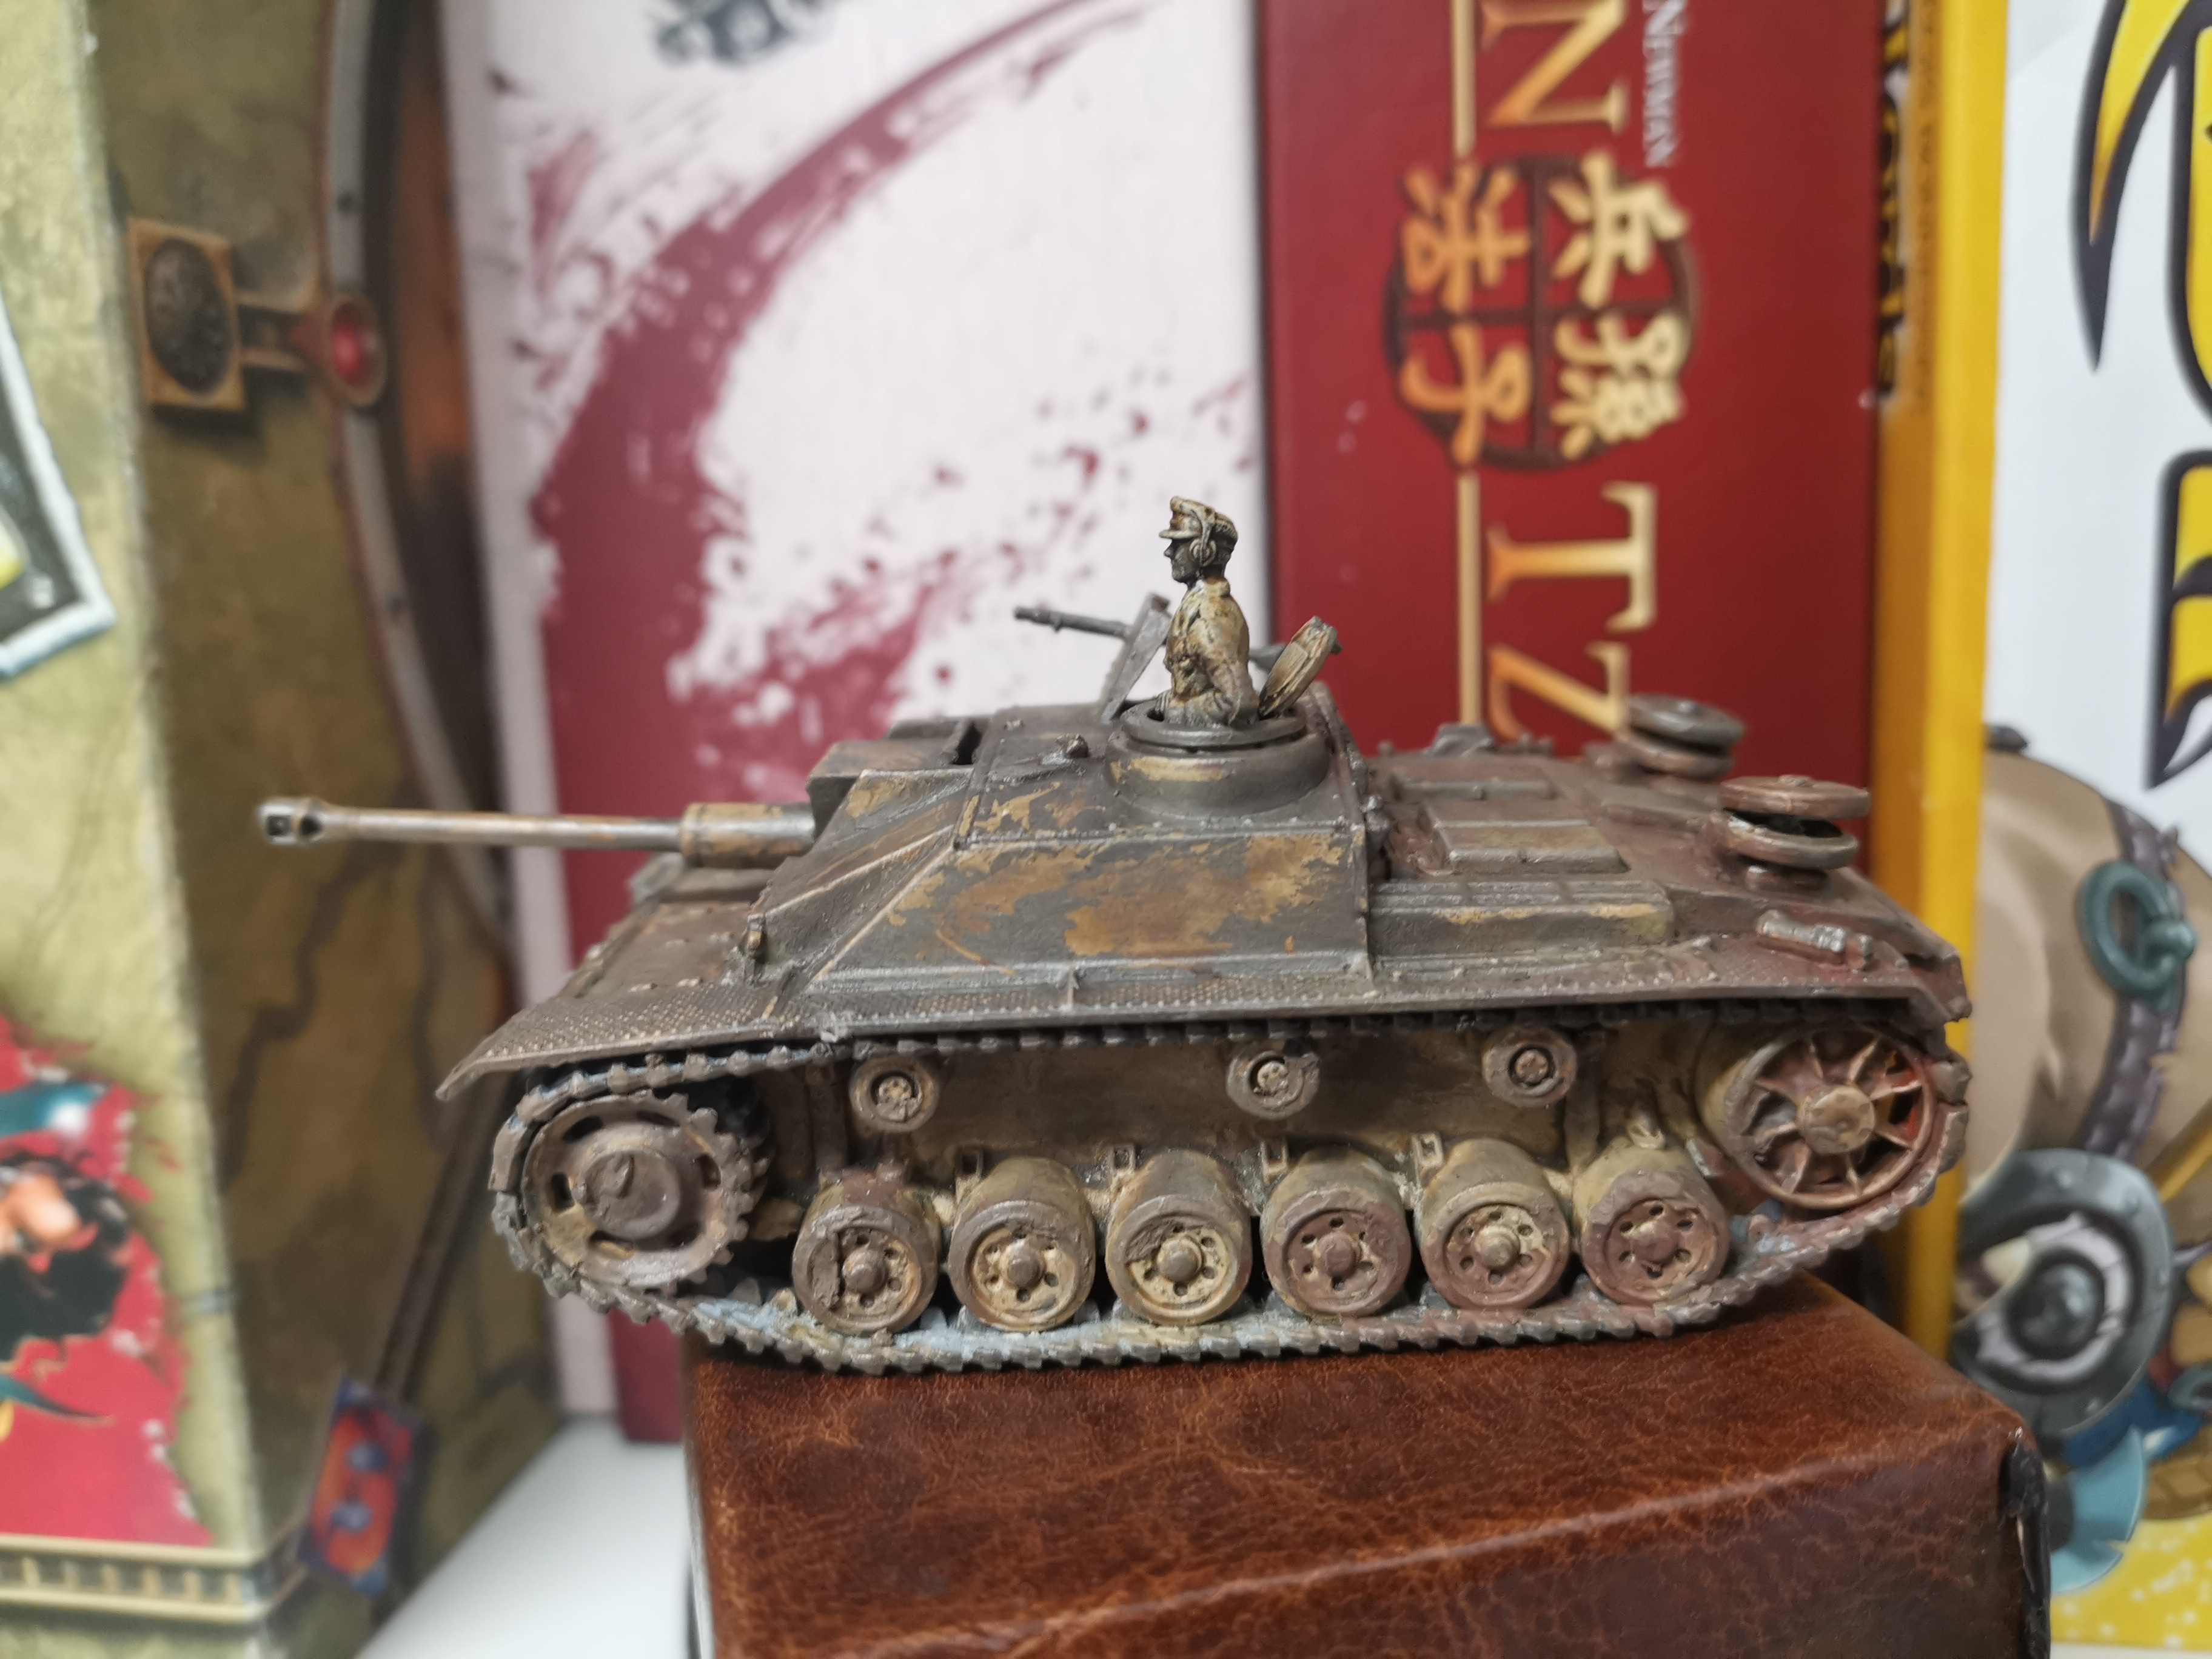 Stug side view
 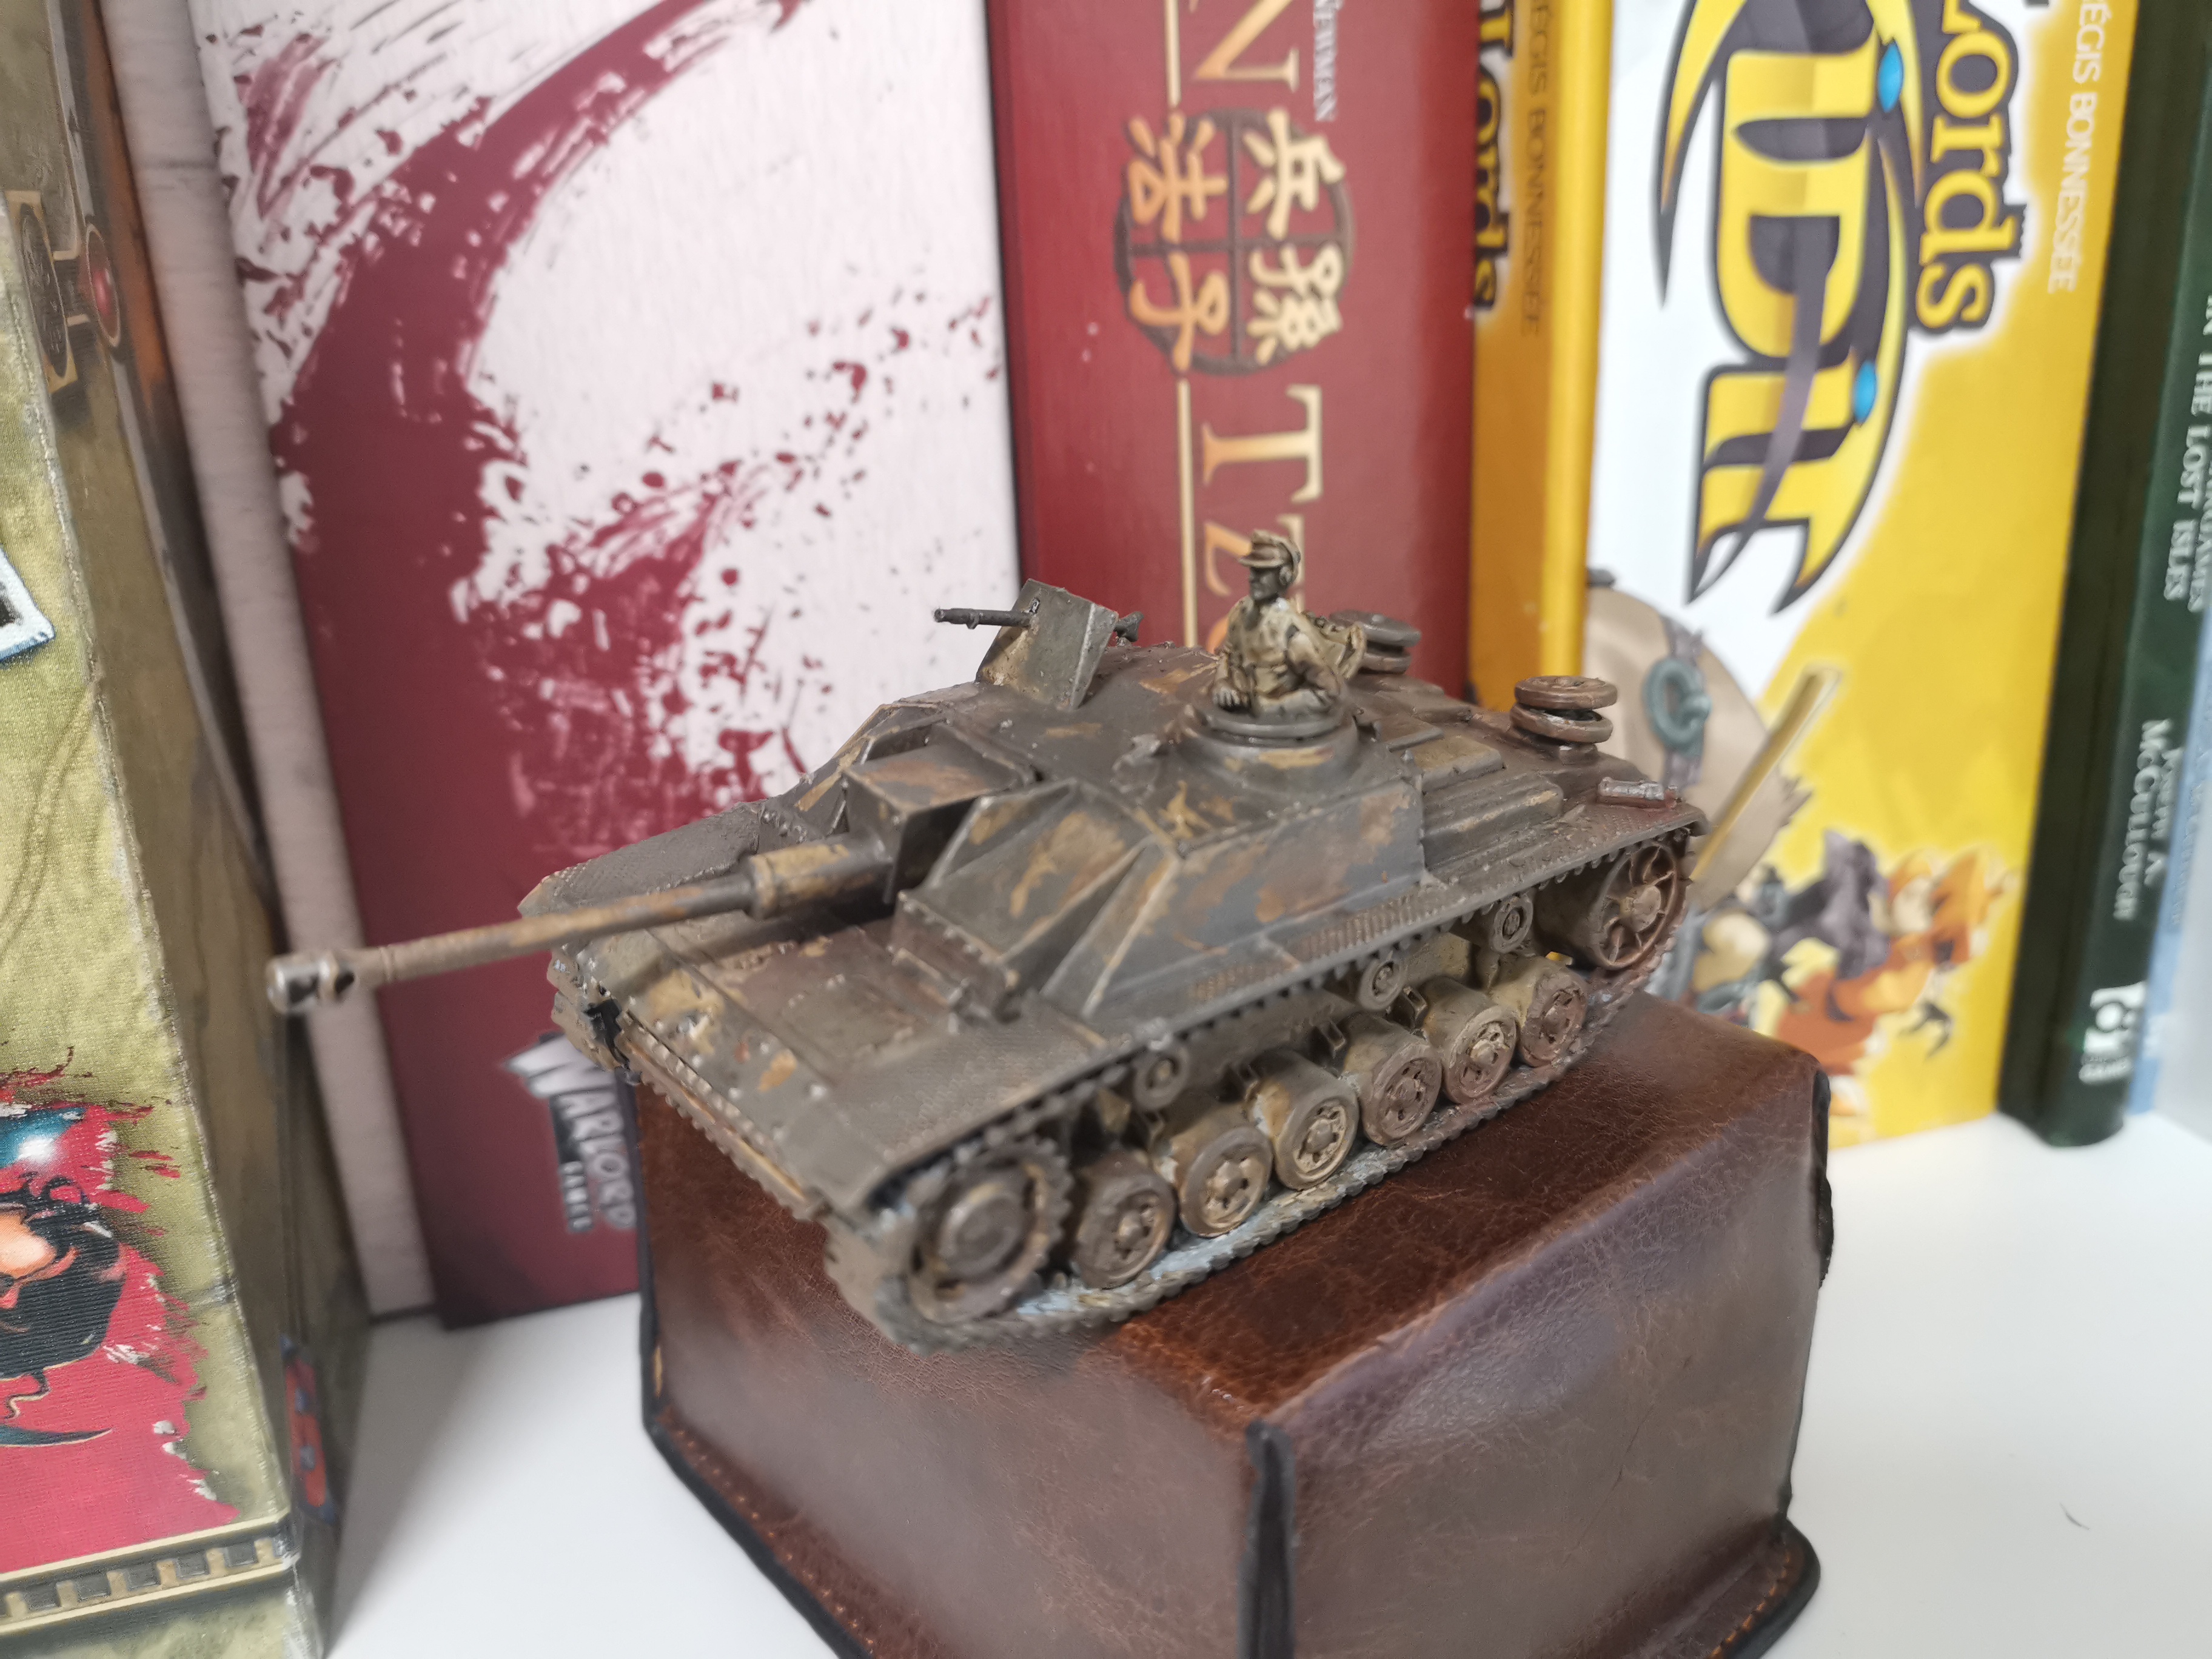 Stug
Stug 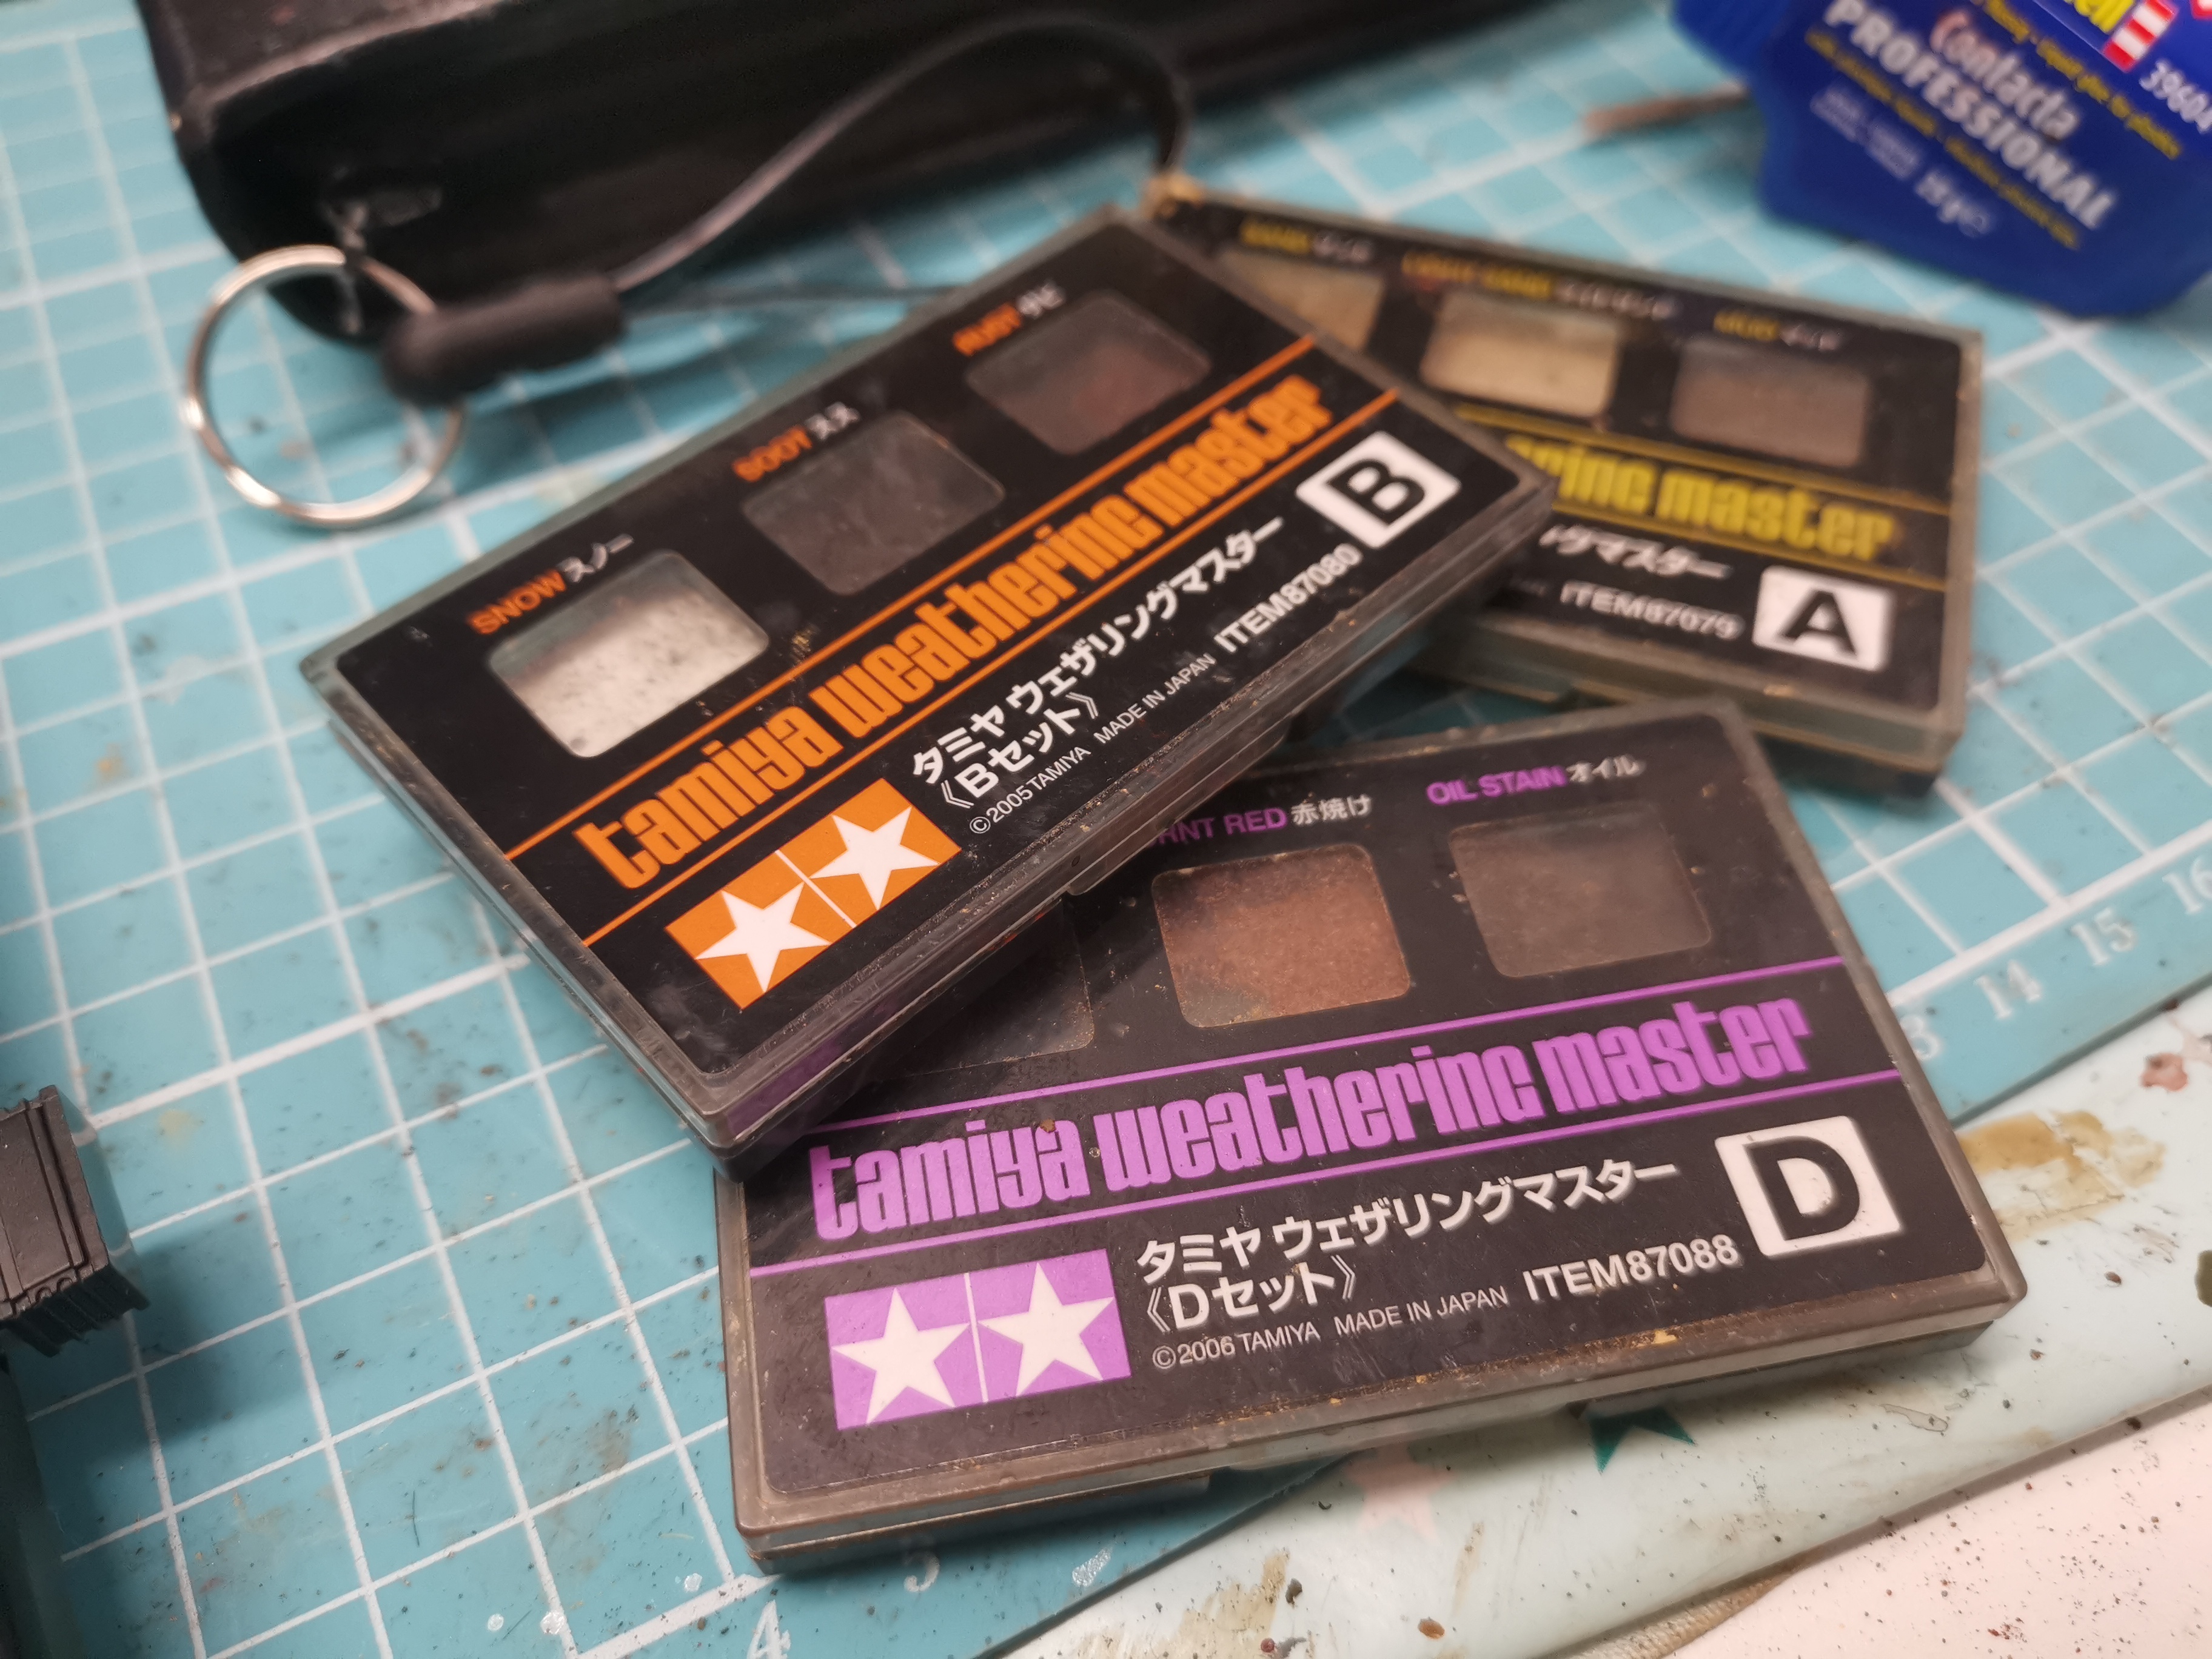 Tamiya weathering pad
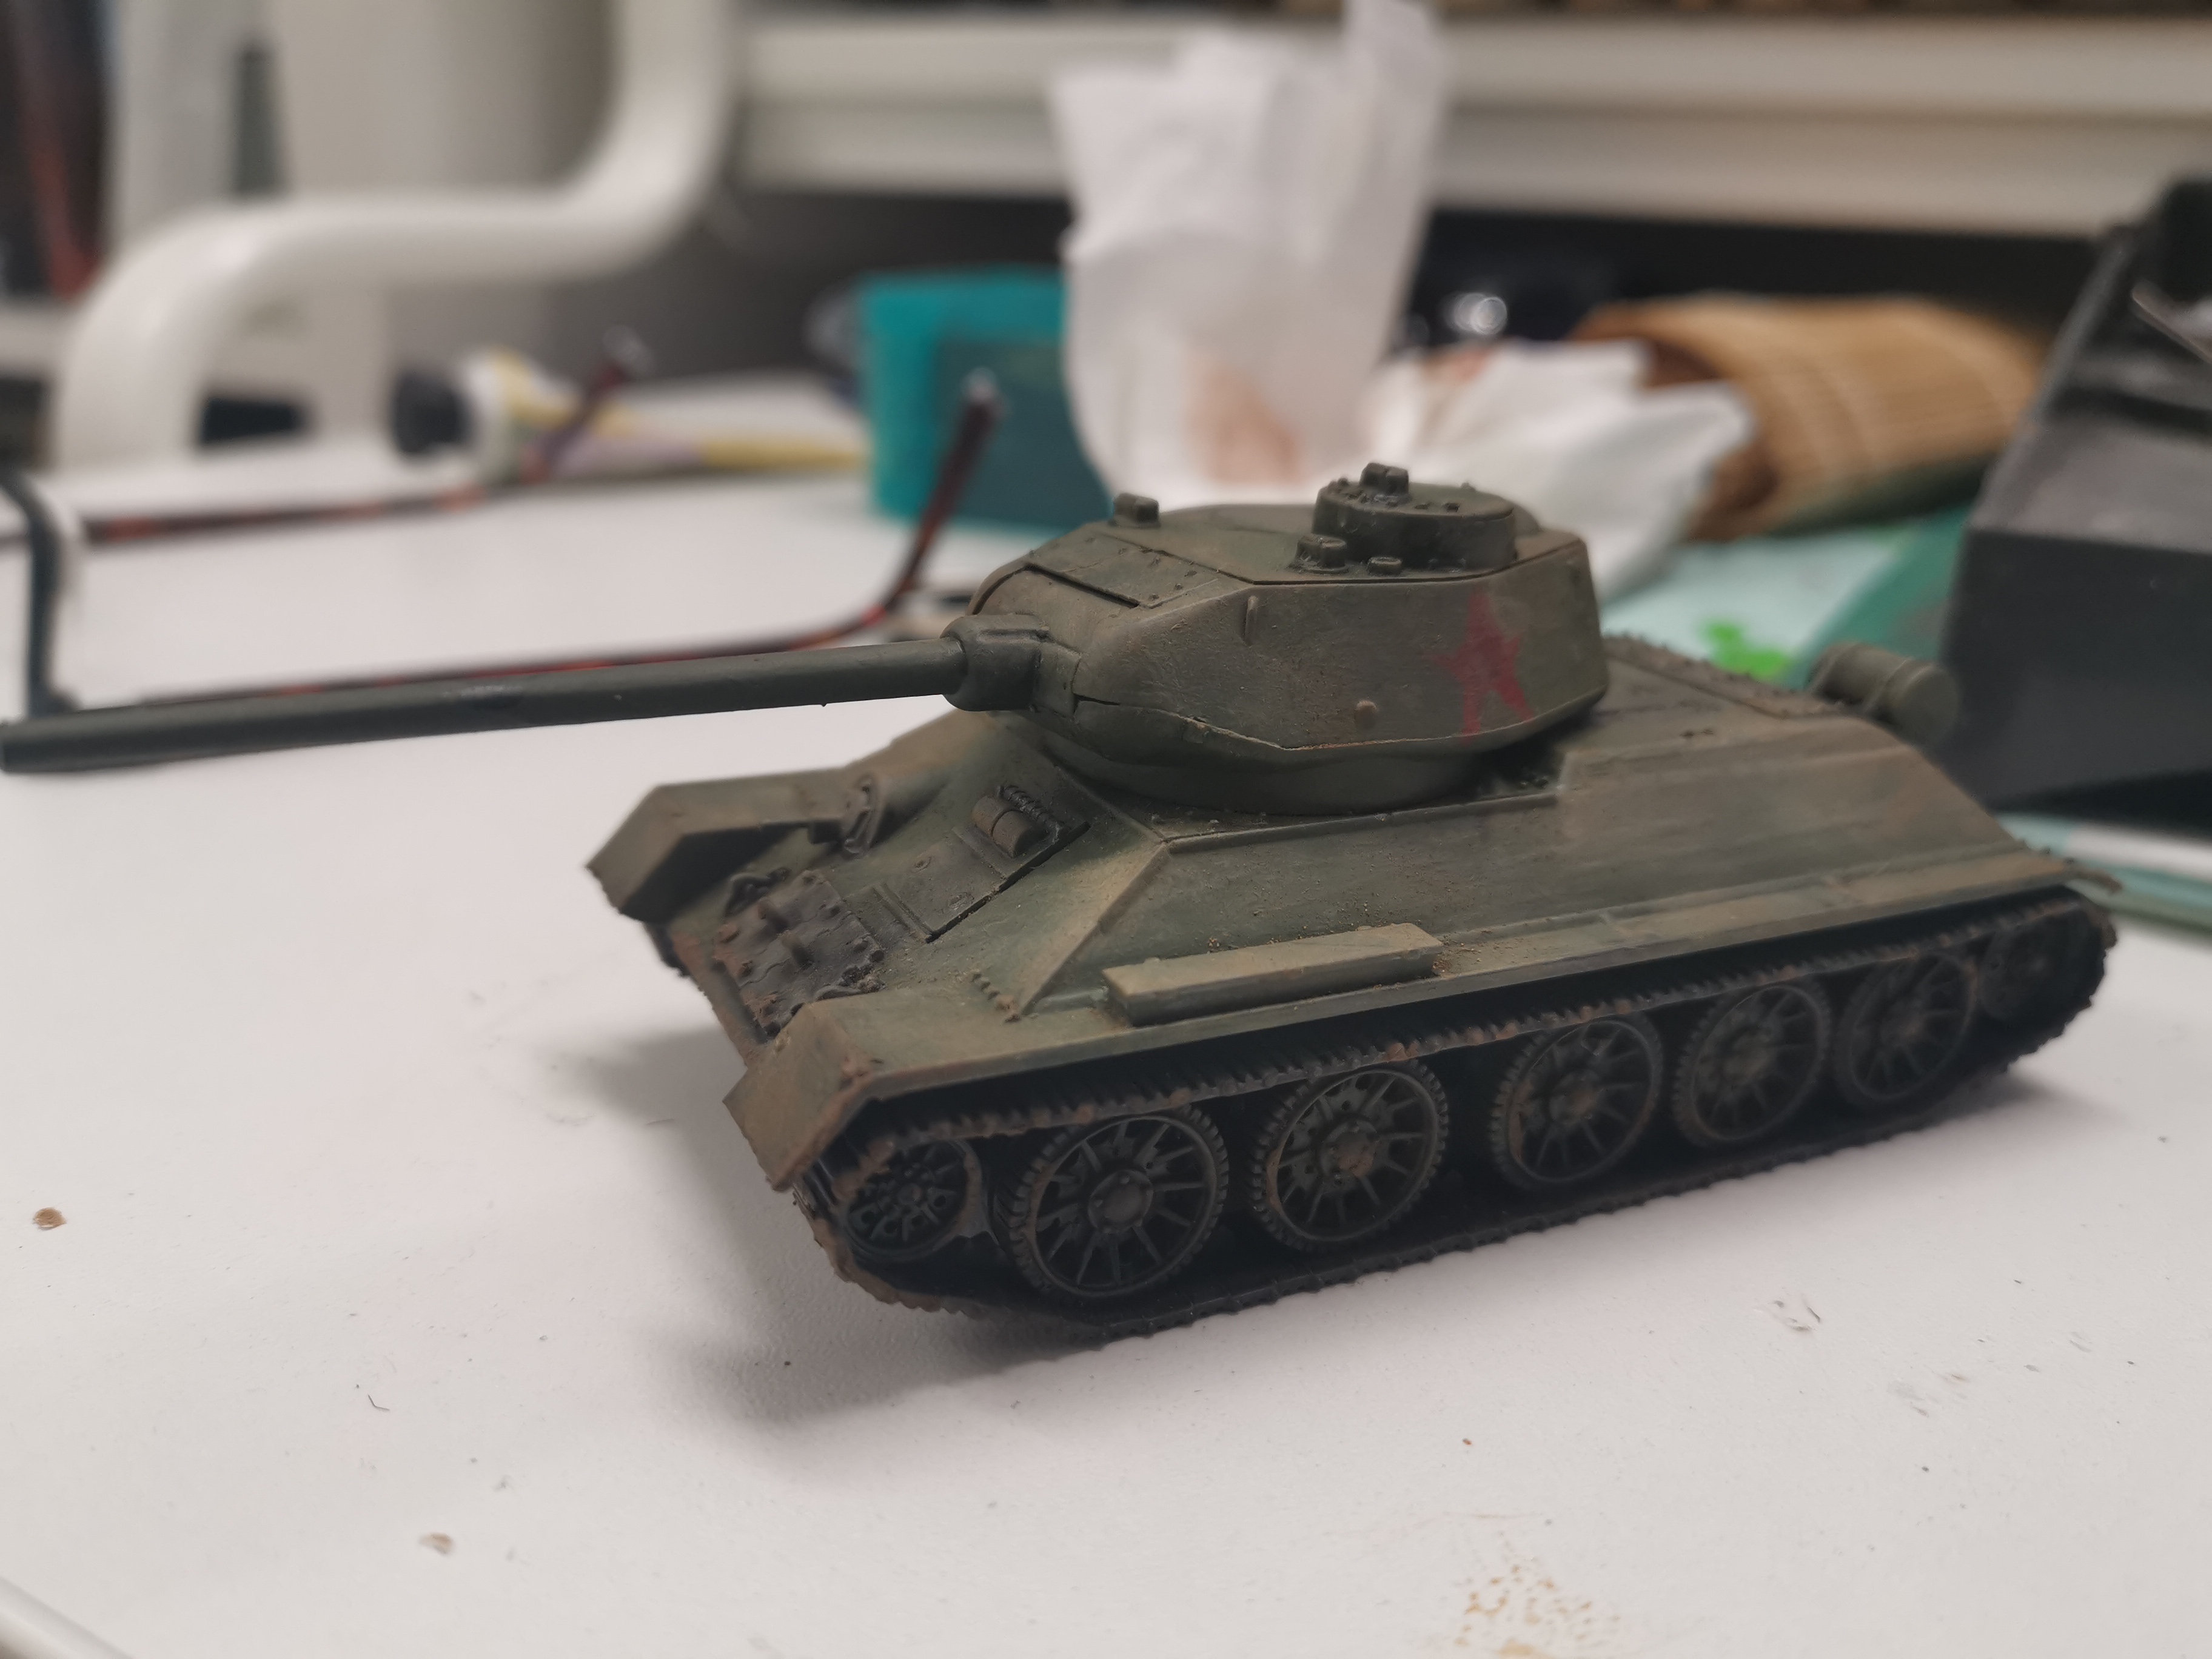
Unboxing Dreadball Extreme
The Brutal Sci-Fi Sports Game
Recently I picked up a copy of Dreadball Extreme board game from Mantic Games for a bargain price of £9.99 (approximately $12.50), this also included a free copy of the players handbook as well. So I’ve decided to carry out an unboxing.
So what is Dreadball Extreme
DreadBall Xtreme is the underground sports game of the future and the follow-up to DreadBall: The Futuristic Sports Game. In this game, two teams battle it out on the pitch to outscore each other, with all-new twists: … Best of all, Sponsors allow you to build entirely unique teams out of any player combination you like! Basically if you’re still unsure,think Blood Bowl with a Sci-Fi twist and it comes close.
DreadBall Xtreme plays very similarly to the original game. In fact many of the actions and their resolution are the exact same.
Contents:
Rubber Gaming Mat
4 Strike posts
Obstacle Posts
2 Dreadballs
65 Page Rulebook
Special Move Card Deck
Sabotage Card Deck
Counters
14 Coloured Dice
Over 30 Miniatures
10 Convict Players
10 Asterian Players
9 Free Agents
12 Yellow Bases
12 Blue Bases
The game is supplied in a tightly pack box, the artwork on the front depicts a scene from a game between the two teams supplied with the starter box. The rear of the box provides some introductory information designed to sell the game to the potential purchaser, it also includes a list of the games contents.

Once opened you’re presented with a tightly packed inside full of goodies, on top is a flyer from Mantic, which we’ll ignore. Next is the 65 page full colour glossy rulebook, this is A4 in size and is nicely designed. The rules and information are presented in a clear and precise manner, making it quite easy to read.


The next item in the box are the counters, these are all on one page. This is a boon for me, as I can’t stand games which have been flooded with counters and small cardboard parts everywhere. These are made from a good quality stiff glossy card. They pop out from the card quite easily, as there’s nothing worse than counters that need to be forced out potentially damaging them.

The next element of this game is the rubber mat, now this did surprise me as normally with these types of game the playing area is generally made from cardboard. So receiving a rubberized mat in the box make this even more of a bargain.


Once the mat is taken out, what’s below are the miniatures, dice and cards. All neatly packed into the plastic box insert.

You receive in a small bag of different coloured 6 sided dice, consisting 4 red dice, 5 blue dice and 5 Yellow dice. There is also a sealed deck of cards which contains the Special Move cards and the Sabotage cards.


Next are two bags of easy to fit together obstacles and strike posts. These push together really easily and its not necessary to glue them but I intend to glue them myself. Both of these bags are stuffed with parts giving you quite good amount of terrain pieces to place on the gaming area.


Now we’re down to the most important aspects of this starter box, the miniatures. First we’ll look at the convict team, this consists of 10 one piece plastic miniatures. These are nicely sculpted, though is some cleaning to do on these, mostly mould lines.

The Convict team is sponsored by the Warden and is made up of hardened criminals. These players have all position available in their teams; Strikers, who handle the DreadBall with bonuses, Guards, the players that can damage all opponents with bonuses to their rolls, and finally Jacks, who are able play a little of both positions, but they don’t have any bonuses.

The second team are the Asterians, these are quite slender looking aliens, very much like Elves in fantasy settings. There is some cleaning to be done on these models, and again its generally mould lines.

These are the more feral version of the Asterians from the Warpath universe and are sponsored by Blaine, a character that appears in all of Mantic Games’ universes. The Kalyshi have only two positions, Strikers and Jacks. This team is a much faster and more agile team than the Convicts, but they’re also less armored.
Finally the last bunch of the miniatures are the Free agents and the two sponsors. The two sponsors are single piece miniatures, which will as with the other minis in the box need some minor cleaning. The Free Agents are a mix of different races from the Warpath Universe, all are again single piece miniatures.

I wasn’t planning on picking this game up, though I had played Dreadball in the past and enjoyed the game, but when I saw the price I decided to grab a copy. So far I’m very impressed with my first impressions of the game, and I’m expecting this to be as good as the original Dreadball game.
Building the Stoic Arms
A couple of years ago I was awarded the prize of the Stoic Arms by 4Ground on the Beasts of War (now On Table Top) website.
I hadn’t gotten around the building the terrain piece because I knew it was quite a large building, and up until recently I didn’t have the space for it once built. It’s made from MDF and is pre-coloured. All the roofs/floors are removable allowing you to place miniatures and game inside the building. Which makes a far more interesting gaming piece than you average scenic building.


I found this at time quite a difficult kit to build, and I consider myself to rather experienced at model making, having been doing this since the early 80’s, starting with Airfix 1/72 kits before graduating to war-gaming and 1/35 scale models.


Now you can build this either with a wood glue or as I did super glue, though if you’re going to go down the superglue area you will get glue over your fingers. This will get rather dirty/discolored on your fingers from the MDF. It’s quite a pain to remove dried superglue from your finger tips.


A top tip before starting is to make sure you have enough pegs and rubber bands as these will come in useful during the course of the build. I suggest that once you’ve built one part of the floors, then whilst it’s drying make a start on the next floor. That way it won’t take as long to build. Have more than one floor on the go at any one time to speed things up.


The instructions could be a little clearer in places as it was difficult to see from the small photos they used to show you the step by step build. This took me several hours over about 4 days to build, a lot of that time was waiting for glued parts to dry. Many sections required to be left overnight for the glue to bond and dry. With it being such a large kit, this was what slowed the build down significantly.
Overall I enjoyed to the process of building this kit, though at times it was a little frustrating, but the end result was worth it. It will definitely make a spectacular centre piece on any gaming table, and could be used for both war-gaming and RPG.

I have to say thanks to both Beasts (On Table Top) and 4Ground for giving this awesome terrain piece as a prize.
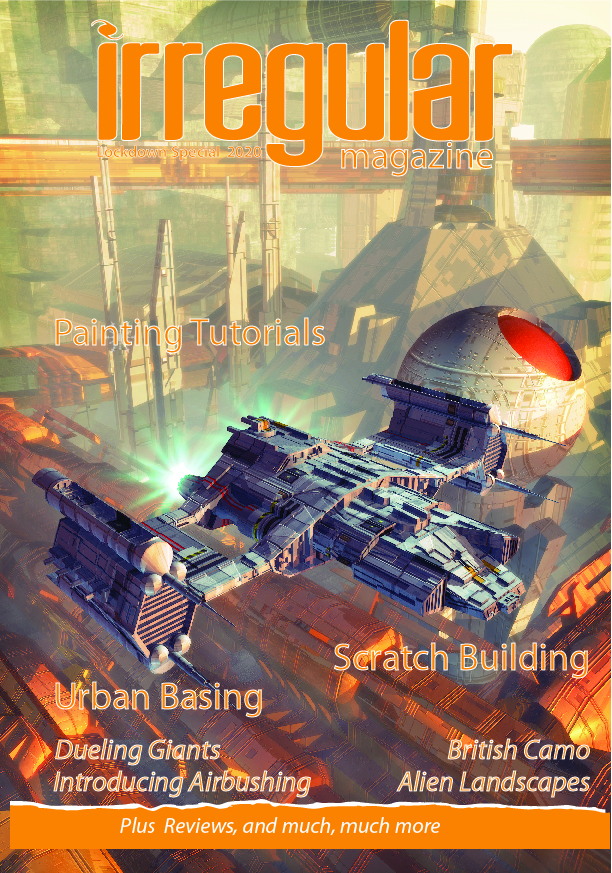
Irregular Magazine Lockdown Special Edition
Last week was spent mostly on putting together this special edition of Irregular Magazine.
This one is a little different than usual due to the changing times in which we all are living in the Spring of 2020. We know that most of our readers are locked down – some with more hobby time available due to economic circumstances; some with with less hobby time due to work commitments still needing to be met and many of us experiencing an increased need to spend more time with our families and those we live with, to keep loved ones going through these times.
But however this lockdown finds you, we hope you’re keeping well, keeping safe and doing what you can to help the medical heroes working in your area to manage the current crisis!
To help you all do this, the Editor has drawn together this Lockdown special edition of Irregular Magazine! This is a compilation of many of our painting and modelling articles that we’ve published over the more-than-a-decade in which Irregular Magazine has been going.
We very much hope this helps you either pass the time, or helps you de-stress just a little, by revisiting some old painting guides and helping to inspire the next things you want to work on in your own hobby projects.
Time to get reading – go on, download your copy now!
Contents include;
- Application fo paint
- Colour Theory
- Constructing the Dueling Giants
- Air Brushing World
- Clone Troopers 15mm
- Sculpting a Robe in Greenstuff
- Directional Highlighting
- Clothing and Zenithal Lighting
- Painting British WW2 Camo
- Scratch Build Star Destroyer
- Non-Human Skin
- Speed Painting Skeletons
- Painting Colonial Troops
- One Thick Coat
- Gore Workshop
- Painting Ghouls
- Dip Tutorial on 1/72
- Urban Bases
- Flora Basing
- Moulding & Casting Minis
- Terrain in History
- Dark Ruined Tower
- Basic Character Bases
- Freehand Design
Painting Wood Tutorial
I’ve started a 3-up Ninja Goblin which was originally sculpted by Sean Green, former Forgeworld sculptor. I had purchased this model around 2012, so I’ve had him a few years.
During that time, I’ve moved around chasing work, so I never really had time or the space to build and paint this miniature, well that’s the excuse I given myself and I’m sticking to it.

The base that comes with the mini is a large round resin with an effect sculpted on it, now I decided that I wanted a deep reddish colour wood. Below is a simple step by step of how I achieved this.
Stage 1; I under coated the base with Wraithbone by Games Workshop

Stage 2/3
I decided that the first two coats would be Flesh Wash (which is more like an ink than a wash) by Games Workshop. Now this paint is no longer in production, so I’d recommend using an reddish ink by another company such as Vallejo or Army Painter. You could just use a dark brown ink/wash but remember to do two coats.

Stage 4/5
The next colour I used was Game Ink by Vallejo and again I painted two coats of this.

Stage 6/7
As you can see the first two paints, I’ve used have given it a rich dark work appearance, but I decided just to apply another colour, this time Seraphim Sepia by Games Workshop.

As an alternative you could use different paints, a suggestion would be the following
Dark Tone by Army Painter
Strong Tone by Army Painter
Agrax Earthshade
Other suggestions could be Reikland Fleshwash by GW and Lavado Sepia by Vallejo.


Sister of Sigmar
I finally got this mini painted, I’ve had her for about 5 years sat waiting for a kick of paint. So whilst being stuck at home prompted me to finally paint her up.
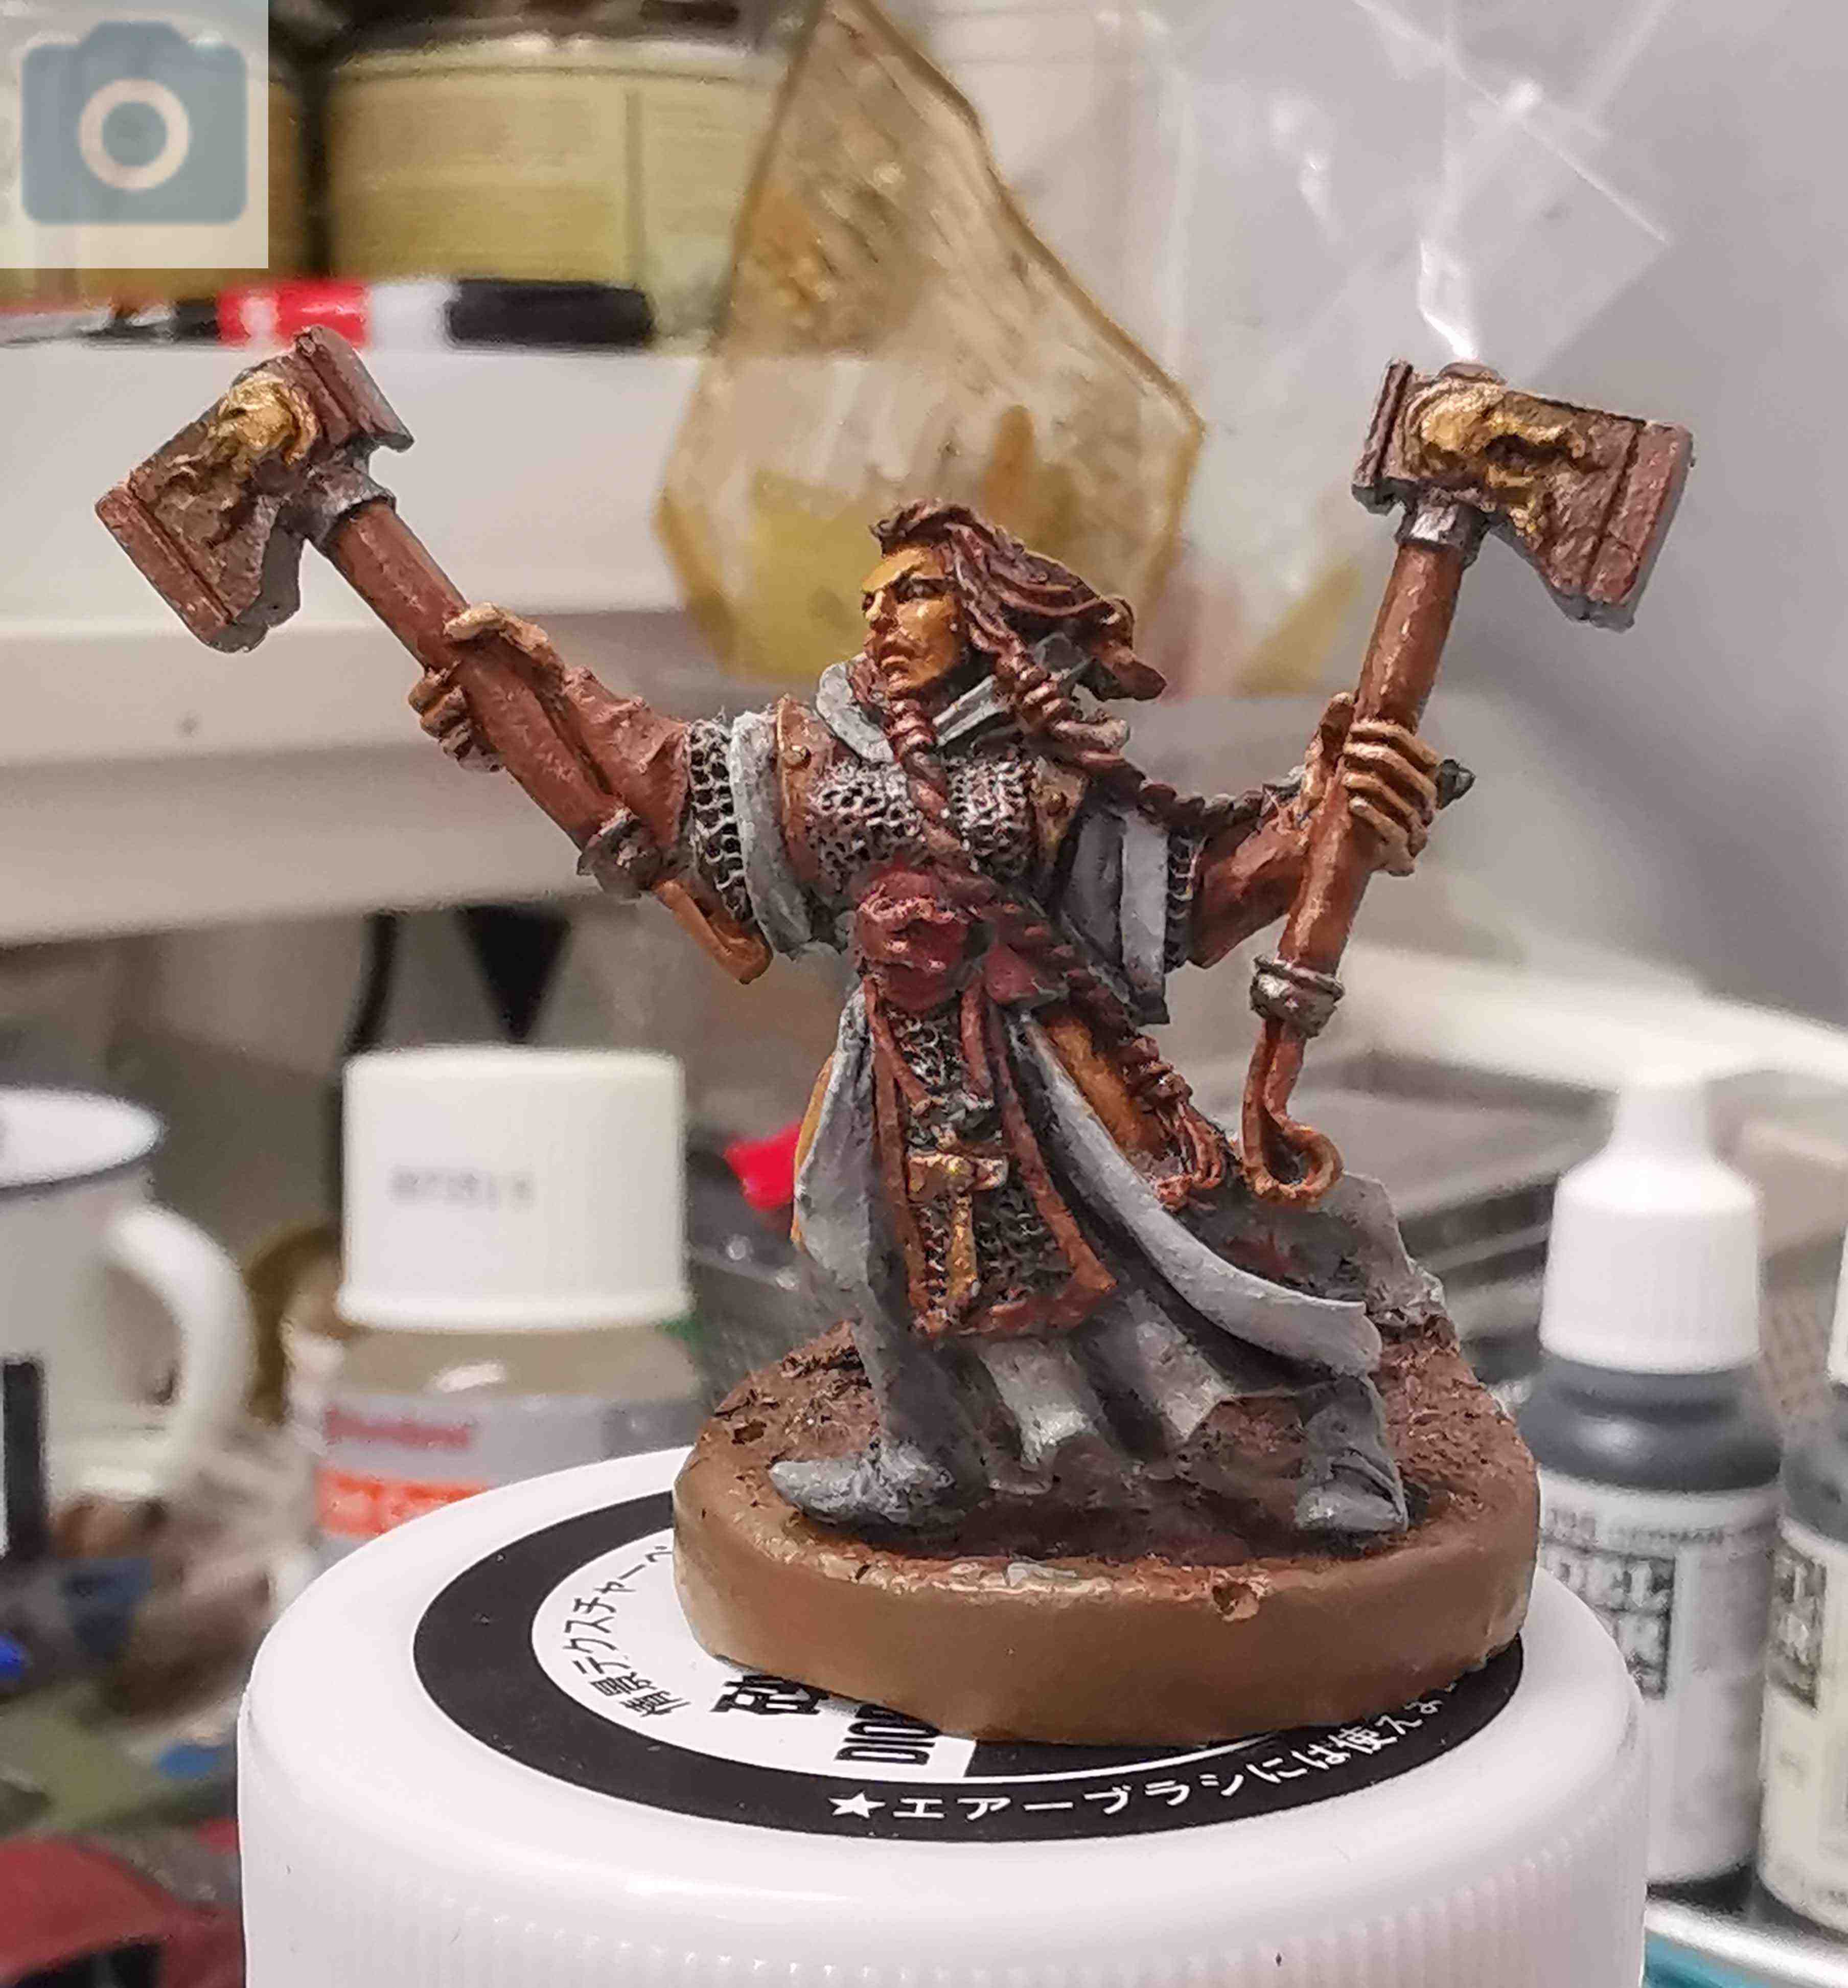 front view
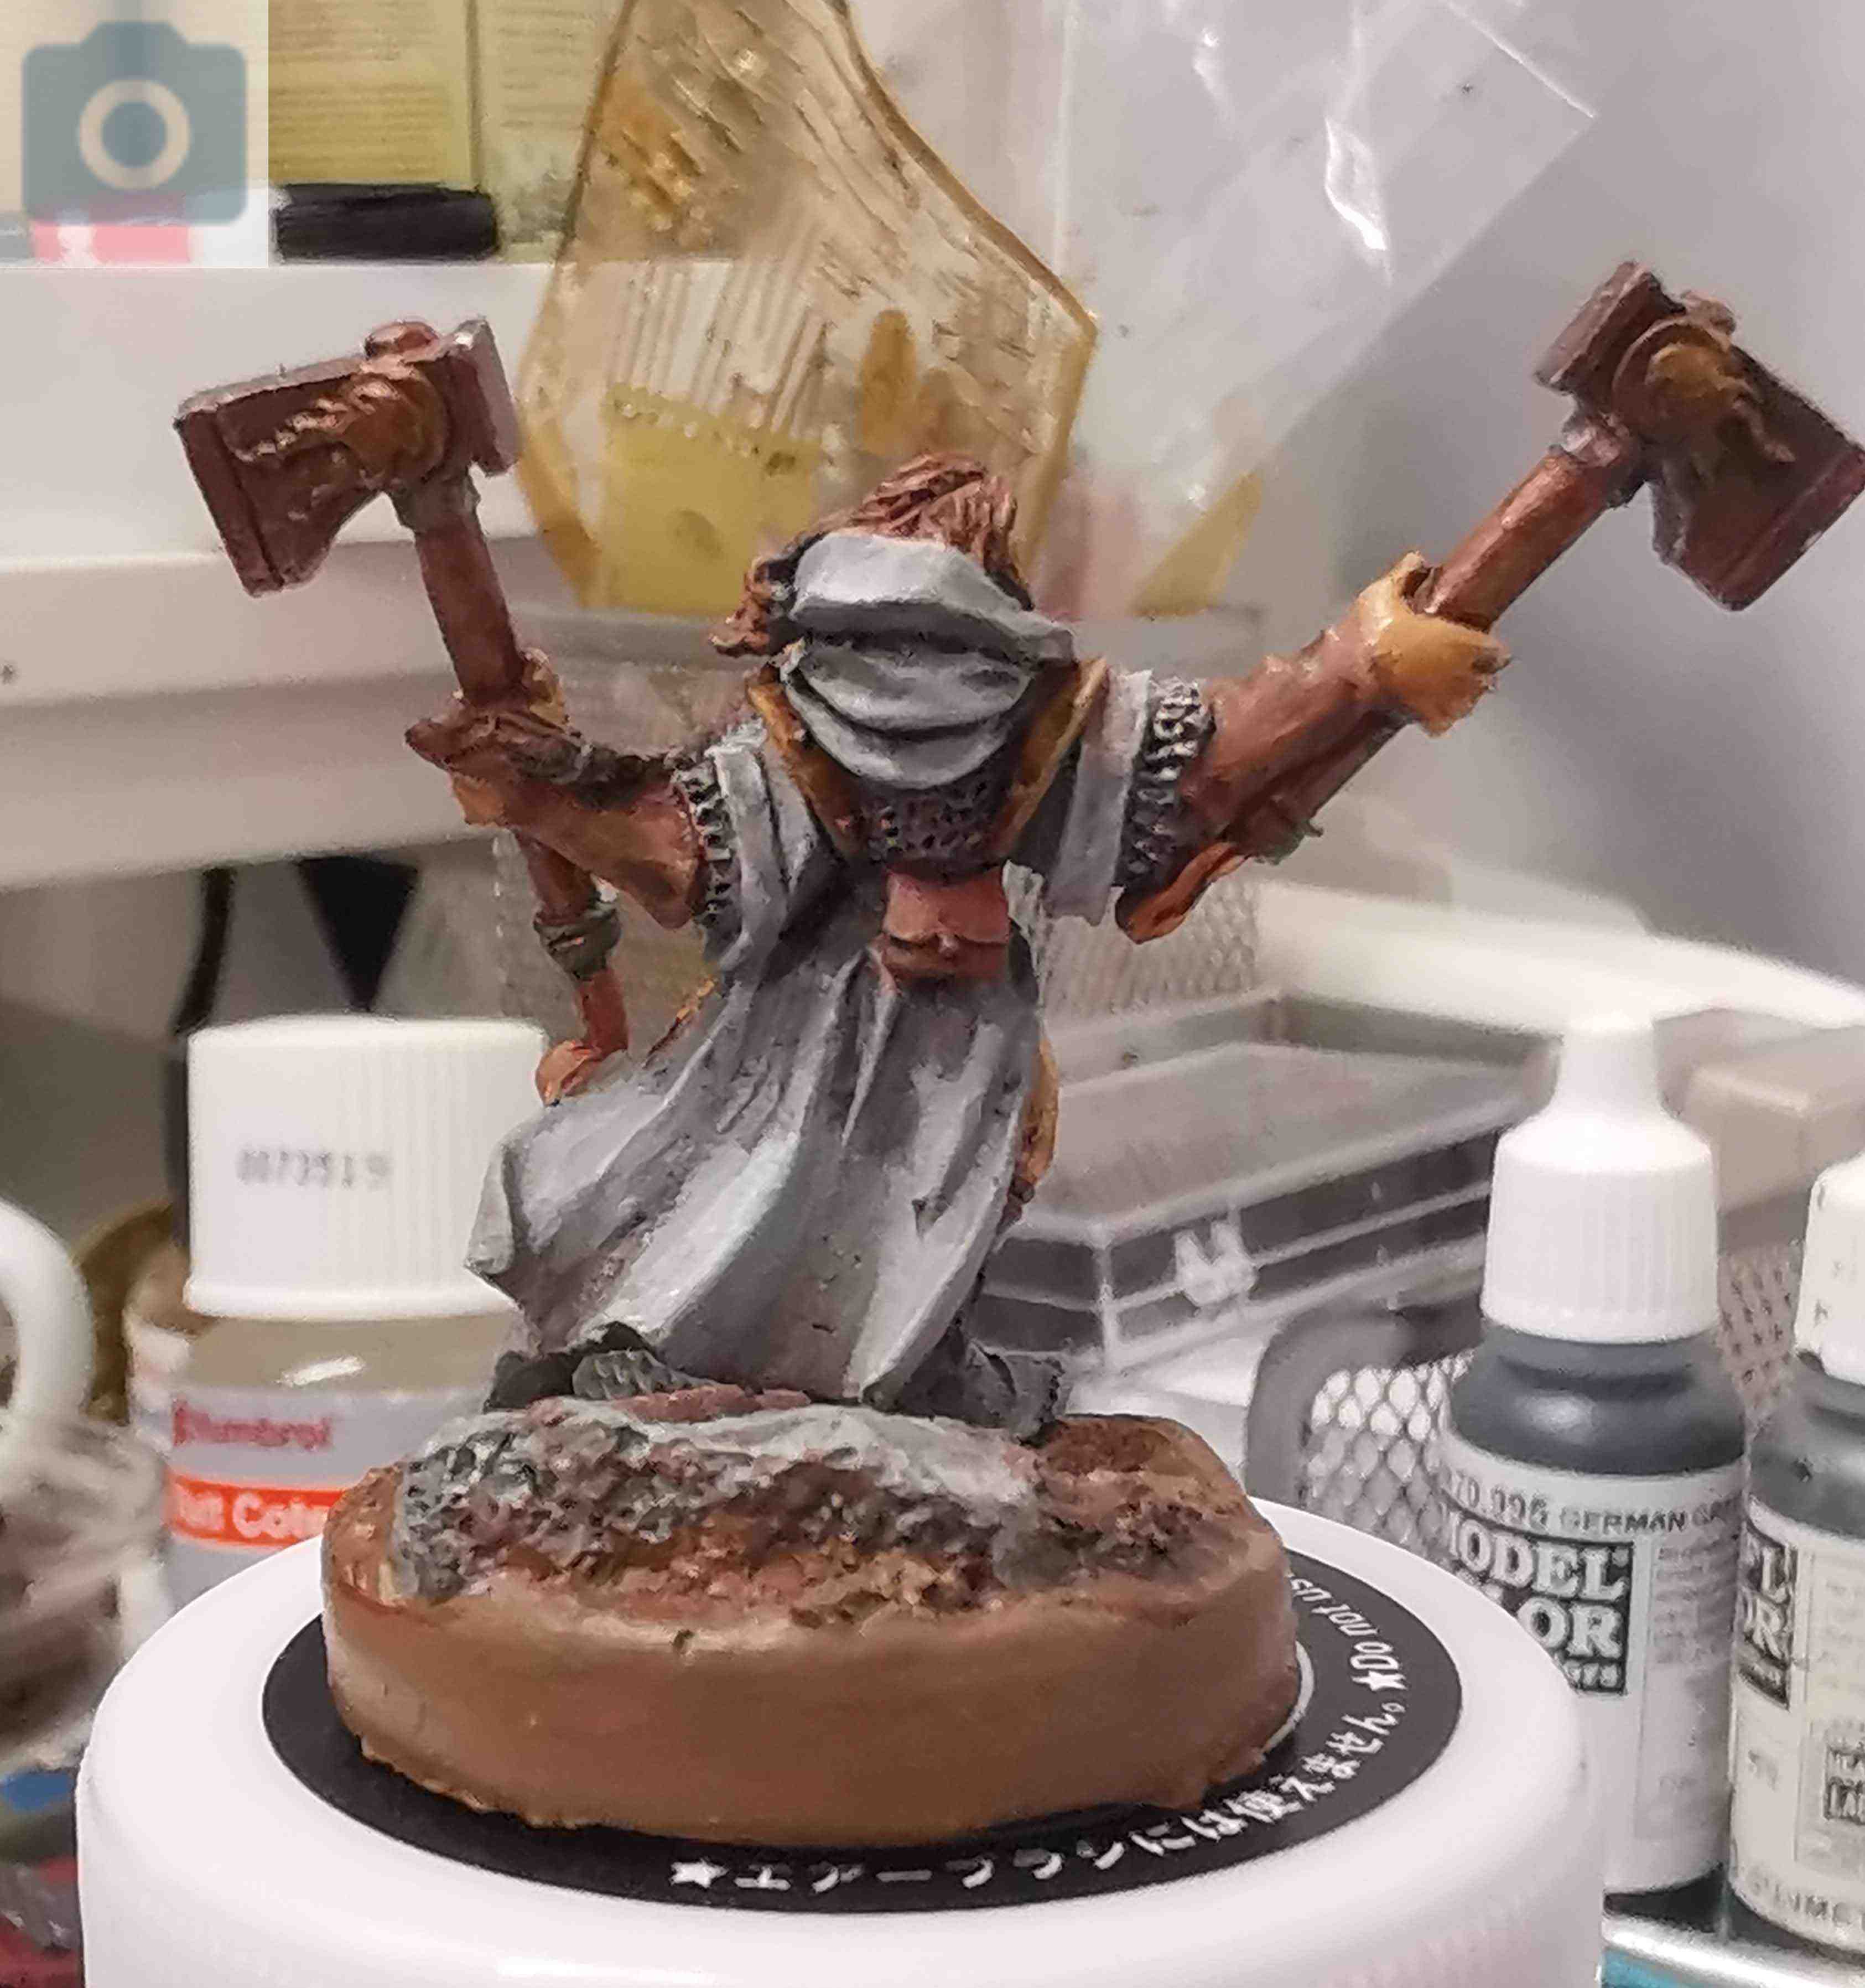 The Lloyd shot


![Zenit Miniatures’ Samurai Warlords Now Live On Kickstarter [Updated]](https://images.beastsofwar.com/2026/02/samurai-warlords-launch-main-600-338.jpg)


