


![NO Weekender Or Cult Of Games XLBS This Weekend [Updated]](https://images.beastsofwar.com/2026/03/No_Weekender_and_XLBS_this_Weekend-225-127.jpg)


Esoteric spring cleaning


Recommendations: 377
About the Project
This is esoteric cleaning, as won’t actually clean my closets of unpainted minis or unfinished terrain, here I will grapple with all the techniques, materials, ideas and inspirations I always wanted to use but never did. I don’t know what shape it will take in the end…
Related Genre: General
Related Contest: Spring Clean Hobby Challenge (Old)
This Project is Active
Slow progress
I keep painting elements of the diorama, but at the same time I was hit by drop of motivation, mostly caused by lack of idea what to actually put inside. Also, the rollers cause some problems, some details are much less pronounced then others and I have major problems distinguishing their shapes and painting them properly.
As side note, I’m not sure of that emerald green I’ve introduced in one of the scenes. Any ideas what to use instead?
Just another week
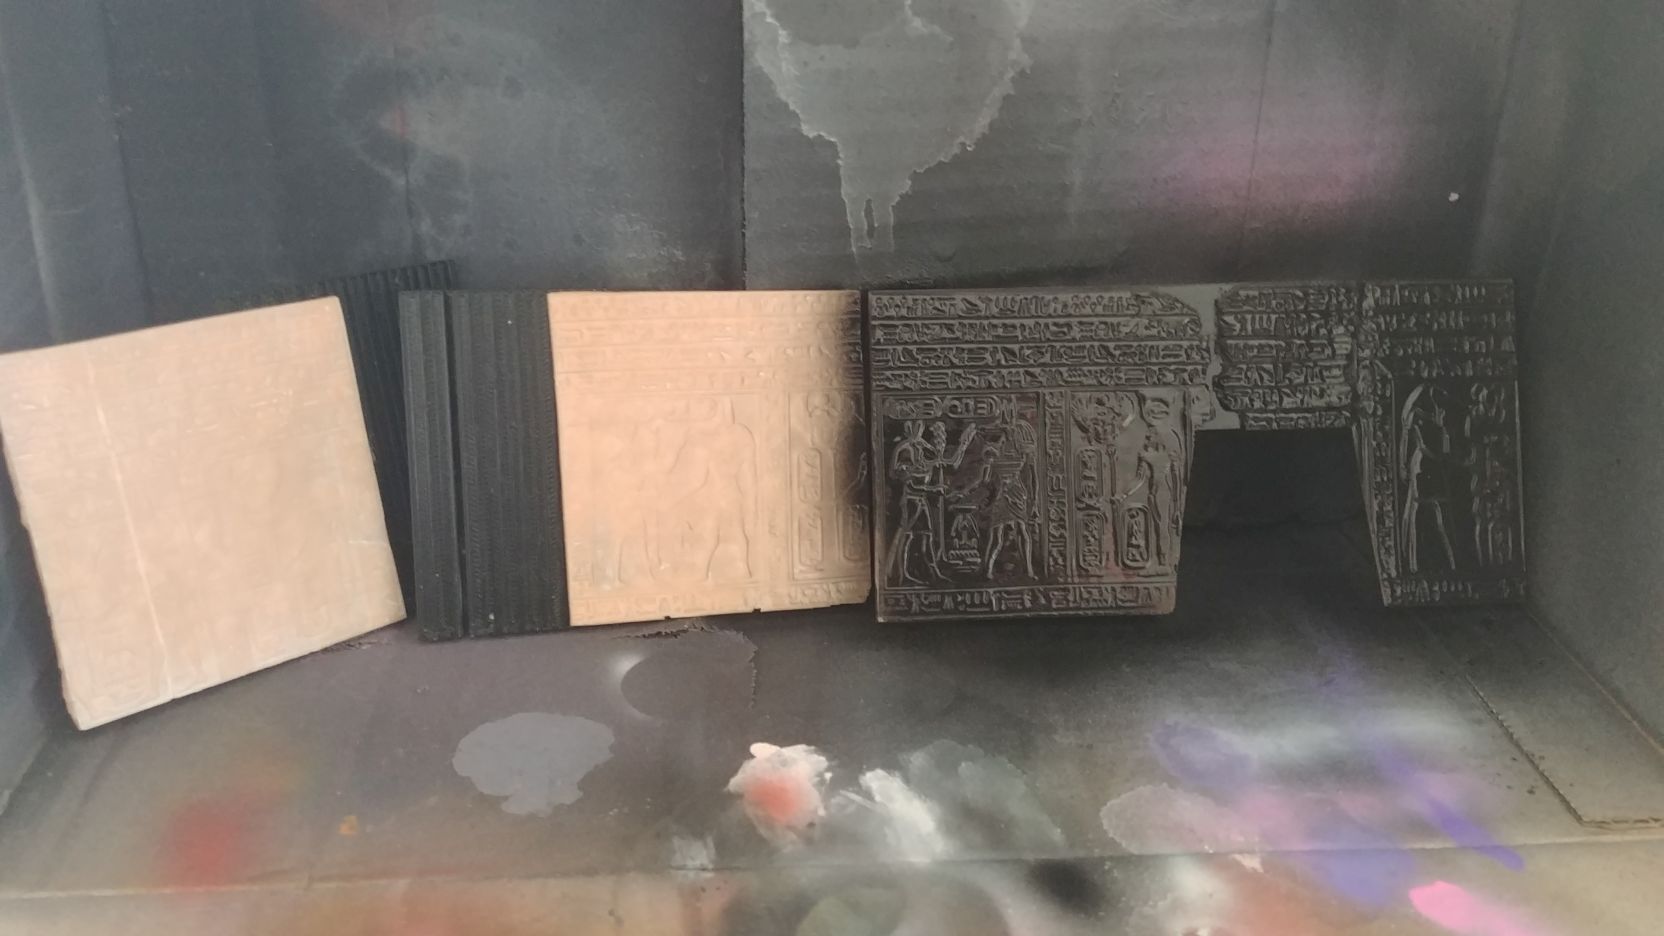
Not much was done this week. With kids off school (even the home-borne one) I did only some painting. I also printed decorations after I found appropriate figures over on Internet.
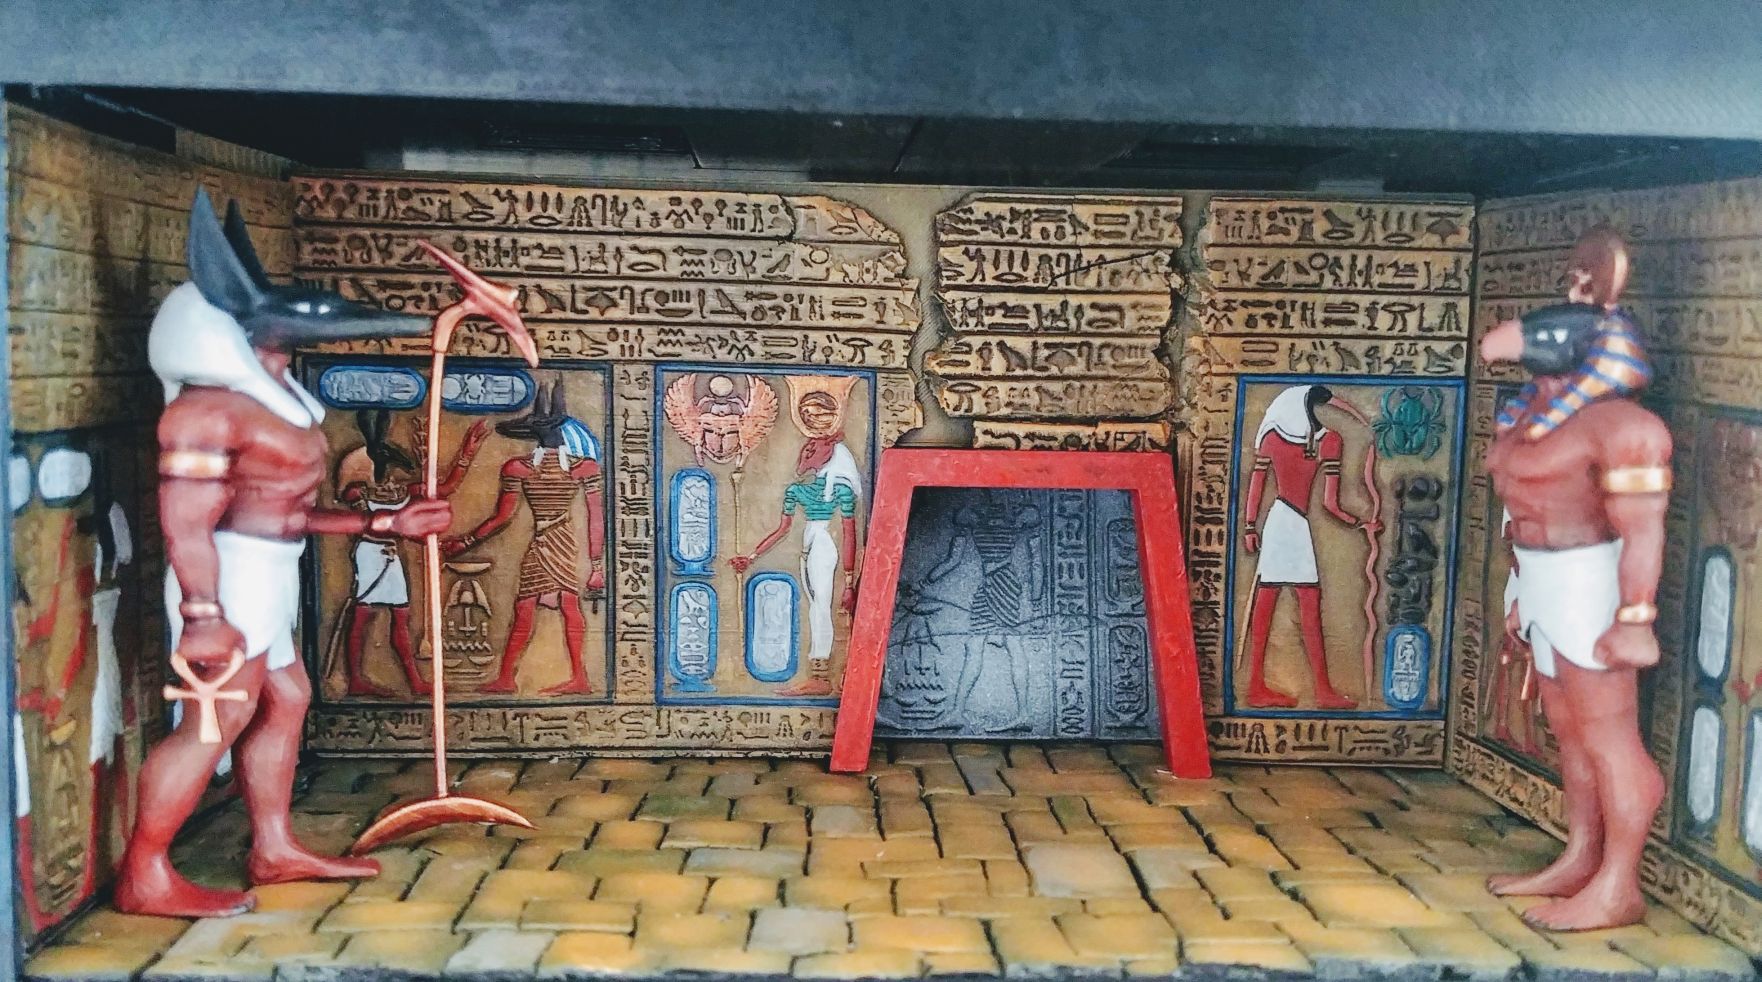
 An attempt on moody pictures. Oh and a little Egyptian sculpted by my daughter specifically to use in this diorama.
 I took some pictures showing why I had all those different holes around my frame. Descriptions bellow.
 From top to bottom: 1. OpenLock system in the works, 2. Top view of closed frame (the other hole will be closed the same way. 3. Closed frame ready to be attached to a frame above it.
 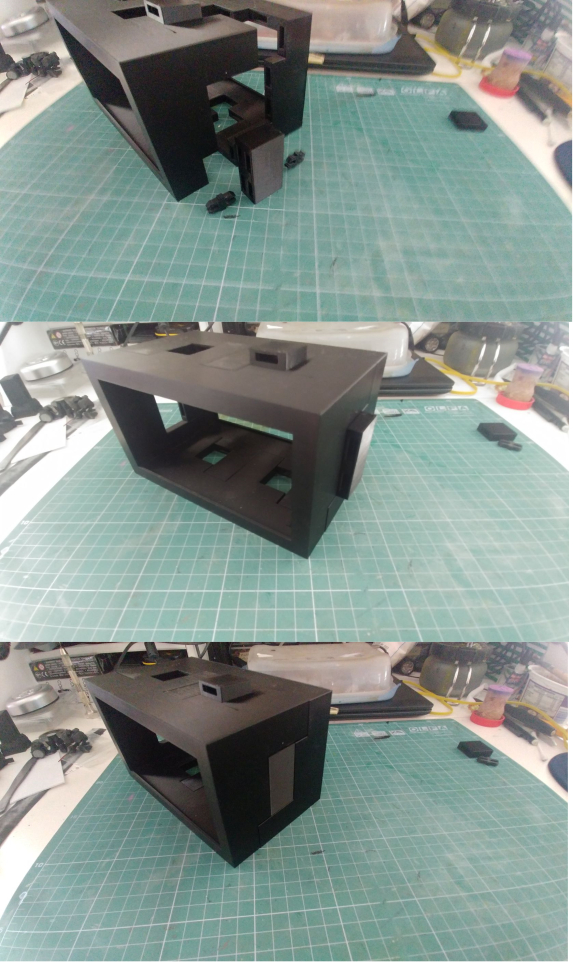 Again, top to bottom: 1. Parts attached then to the side hole, 2. Frame ready to be attached to another frame on its right. 3. Final frame in the row.
 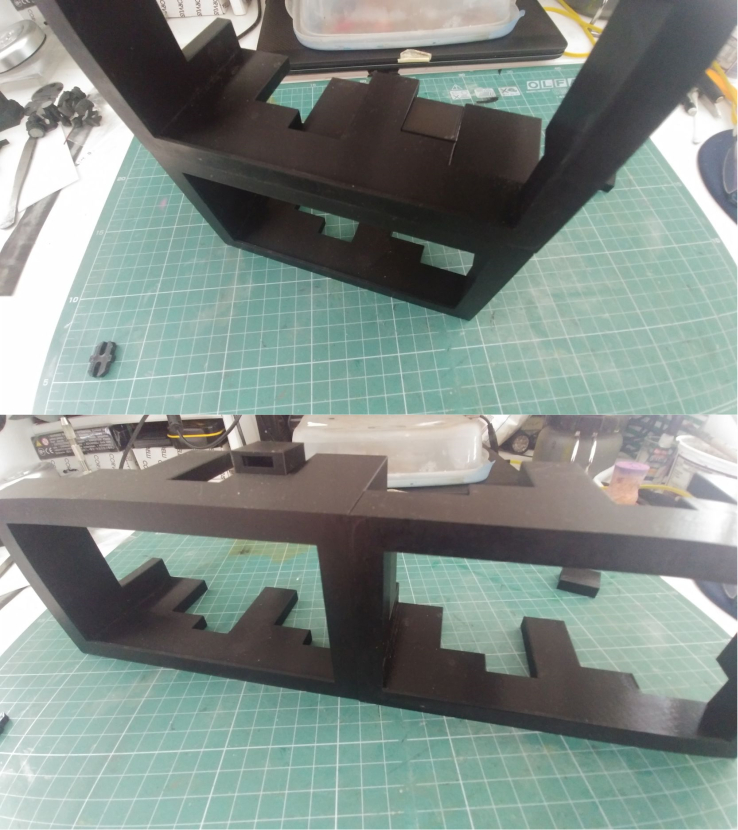 This how I intend them to look from the front after attaching one to another. I want this system to be fully modular, so I can add more and more in the future.
 Some wall painting
Title has it all.
 Black undercoat
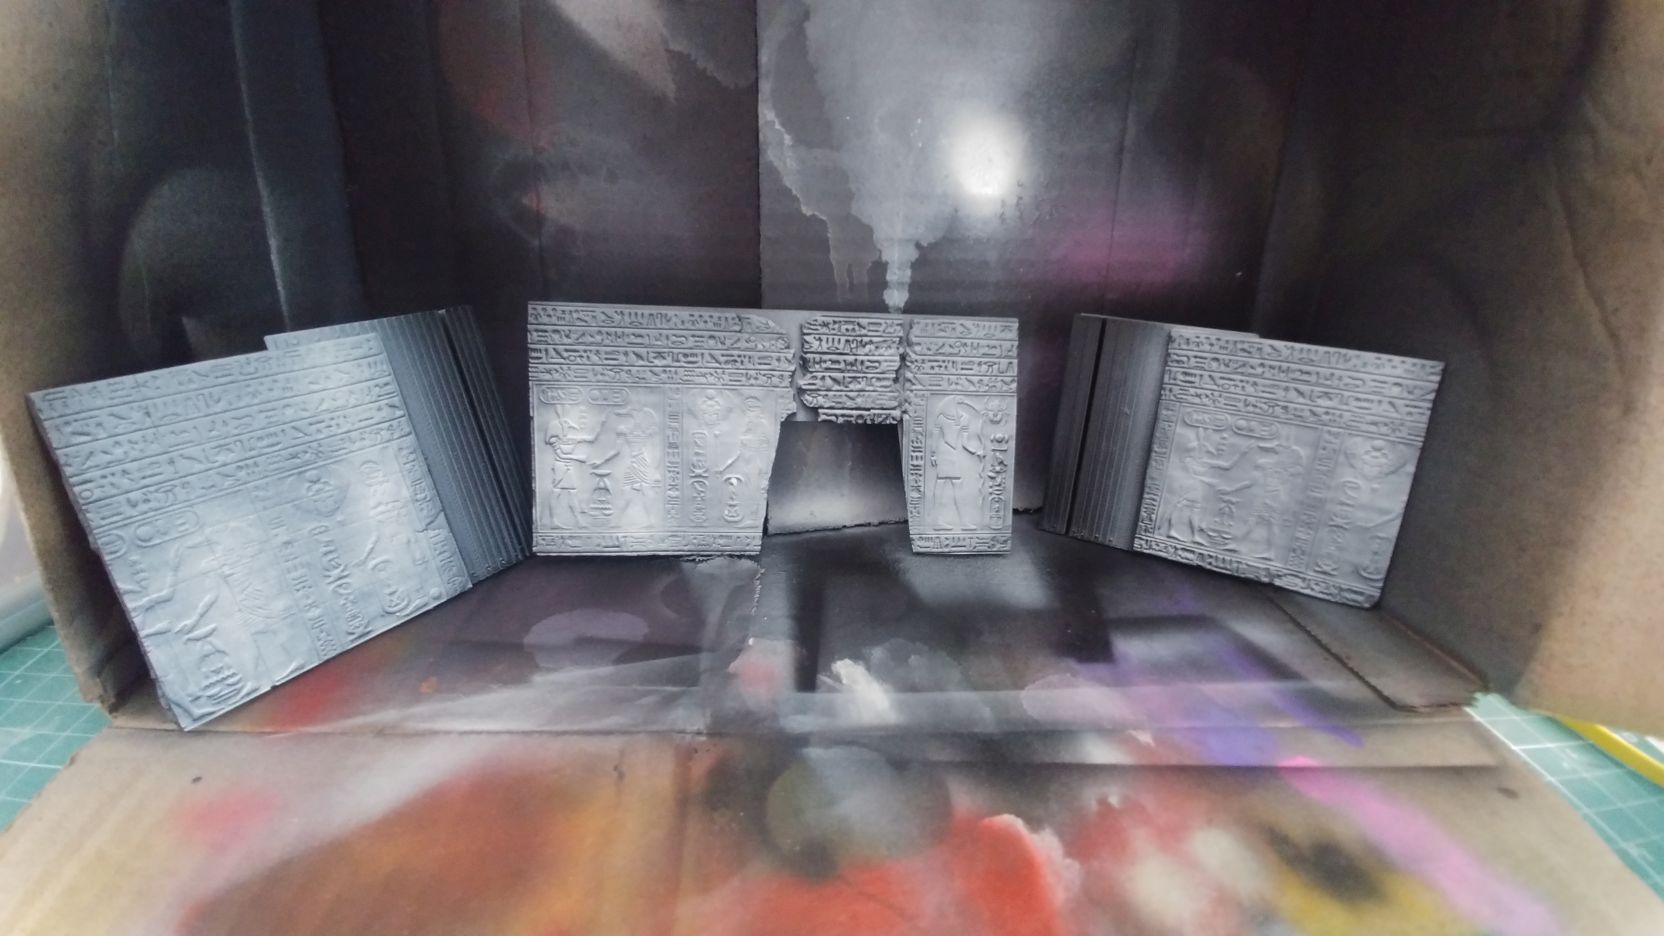 White grey zenith
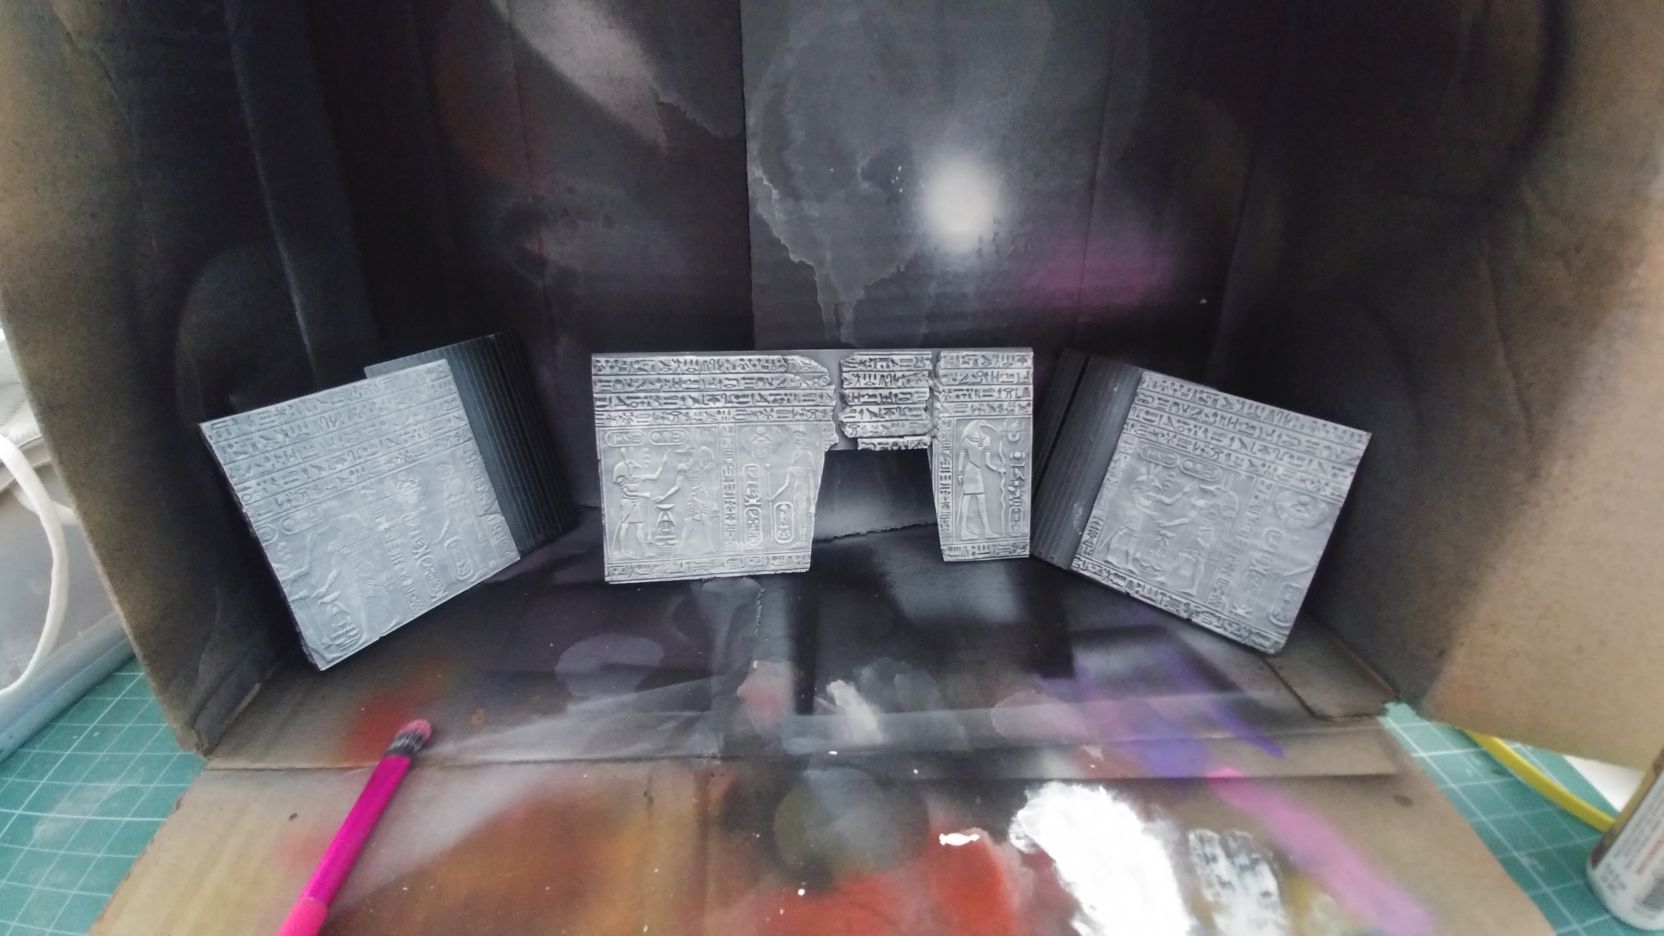 White drybrush
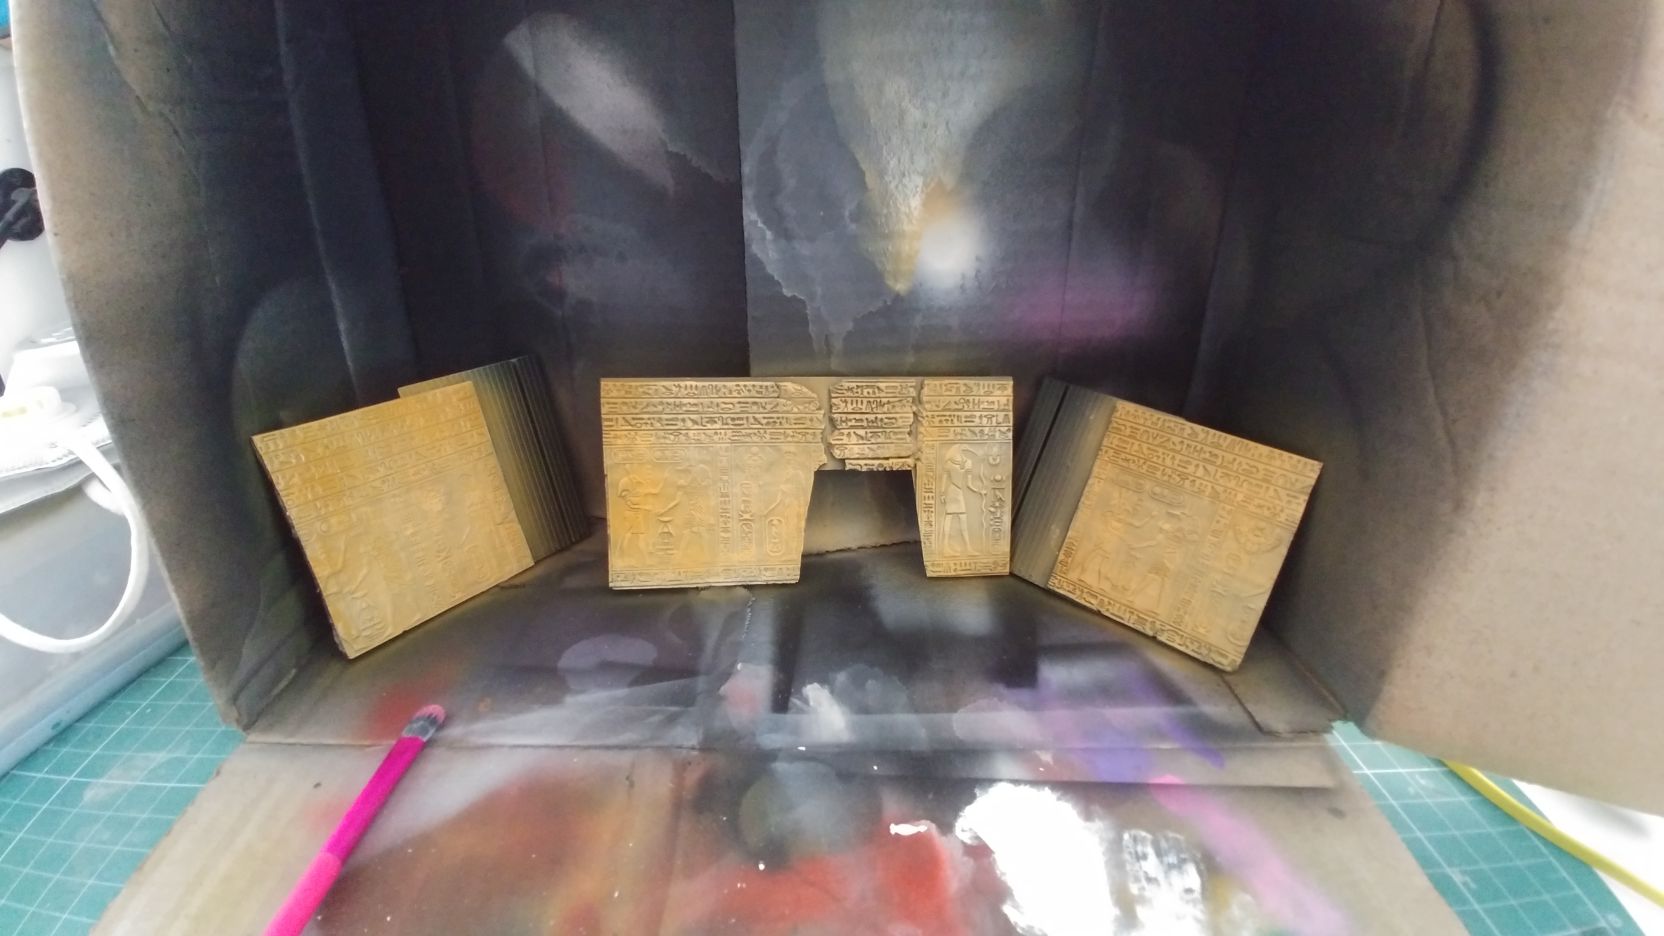 Uneven coat of VMA Wood
 Overal wash of 50/50 soft and strong tone from AP
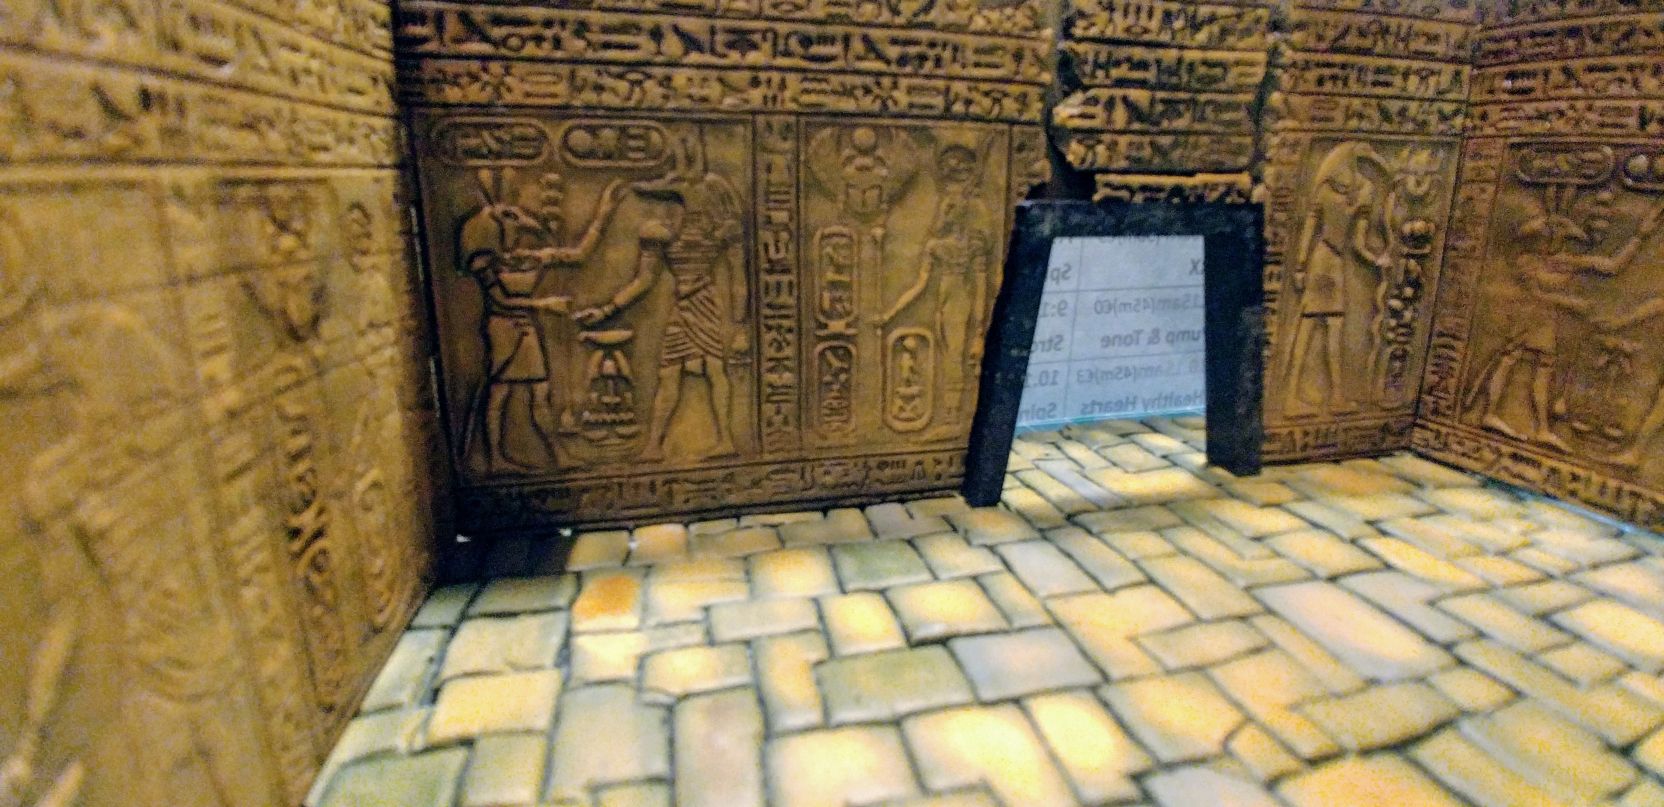 Black pinwash
Coloring the floor
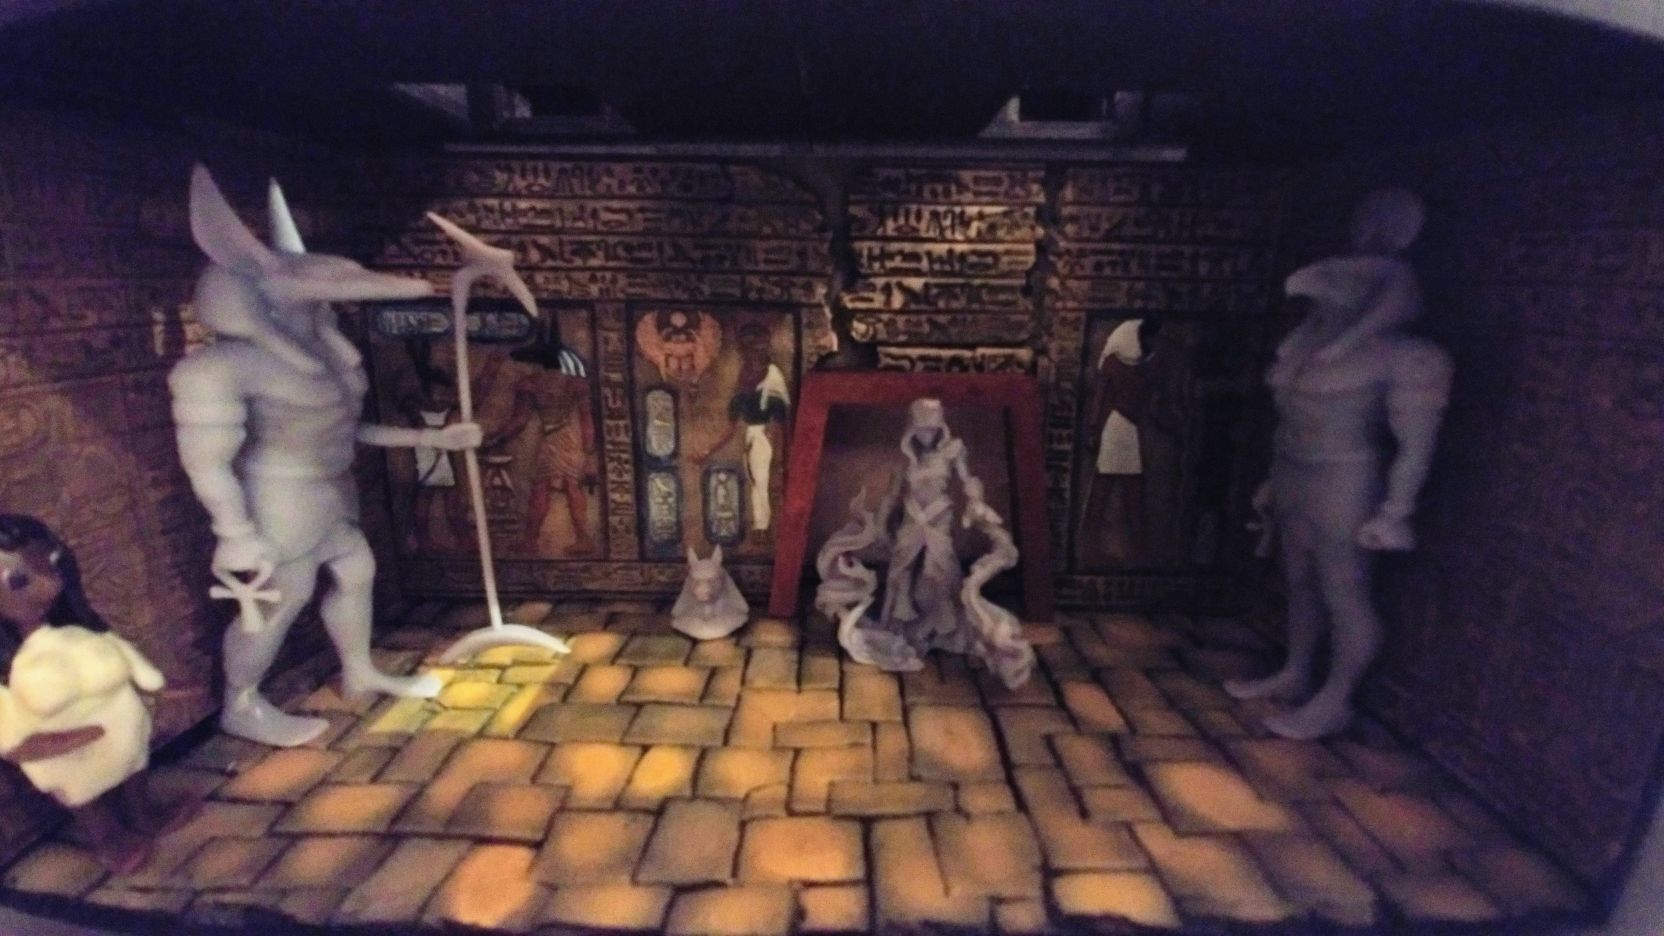
To boost my morale after seeing some other projects I dry-fitted parts created earlier.
Painting itself was quite an easy task. The process is described in steps under each photo.
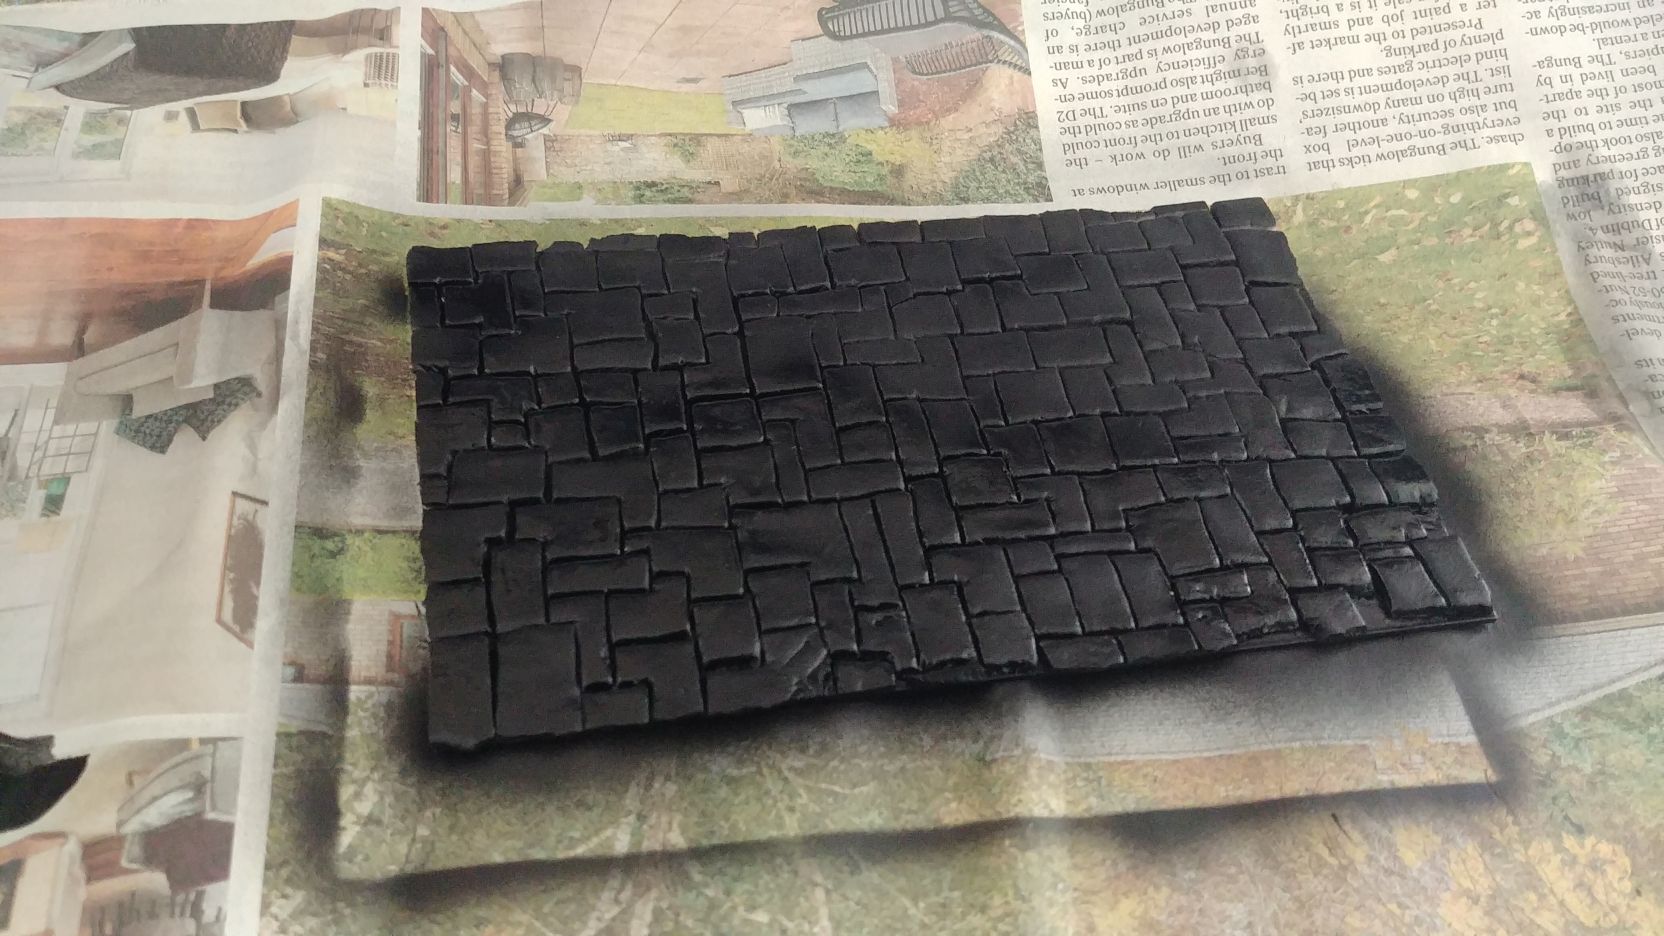 1. Black undercoat. Airbrush, Vallejo black primer (mecha line).
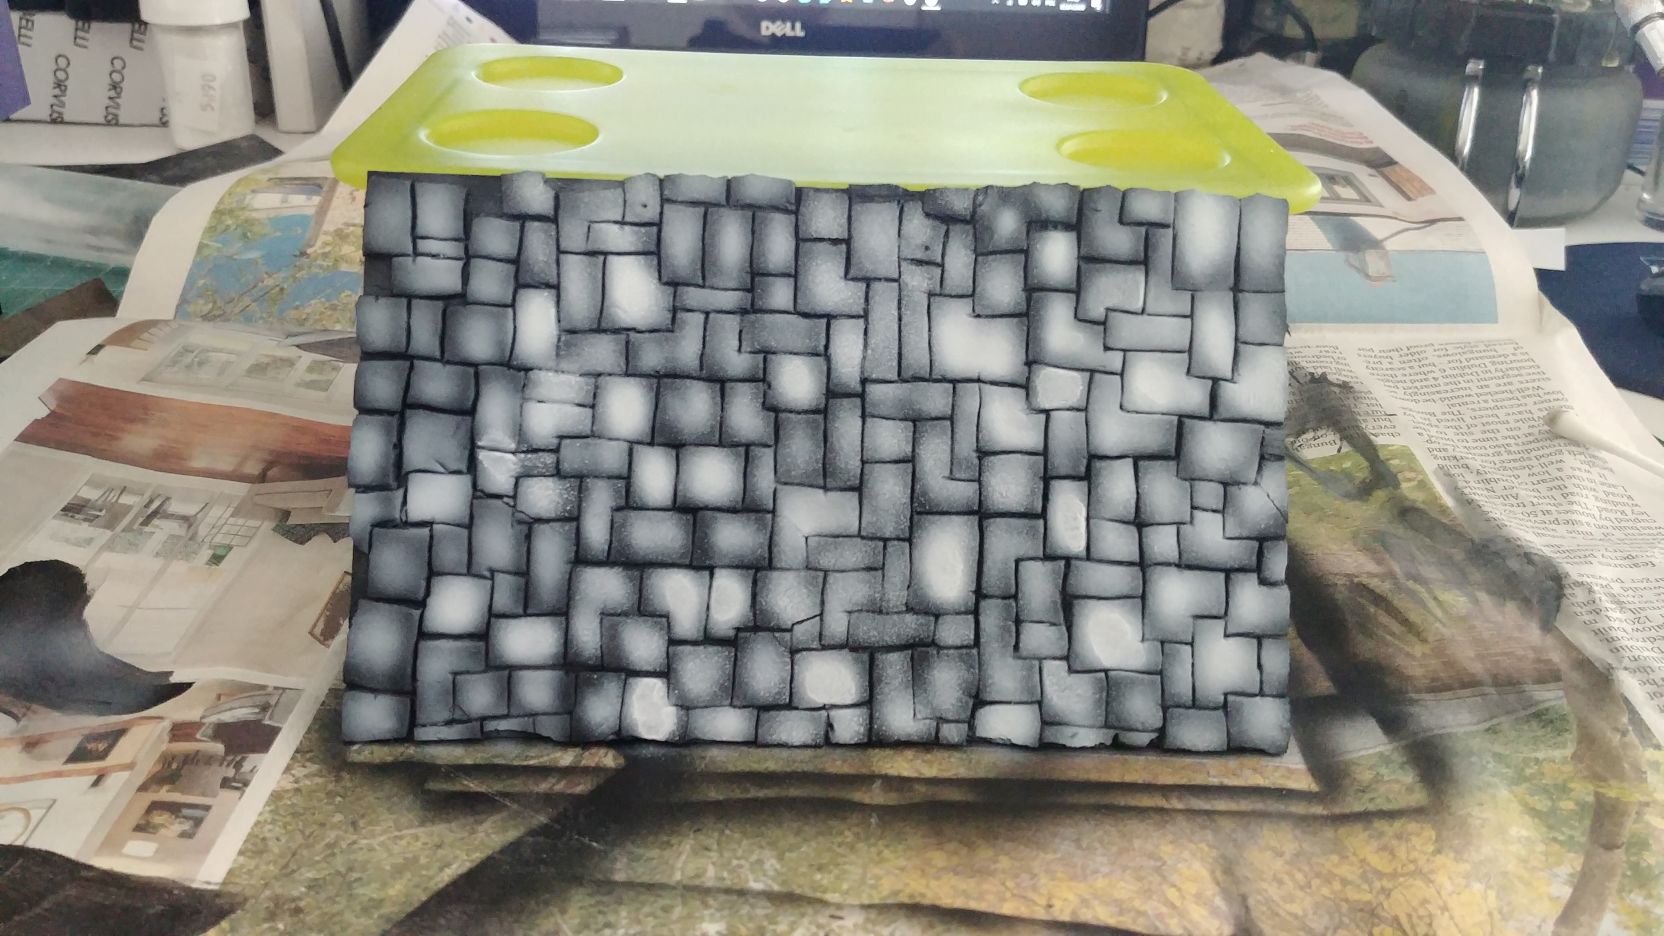 2. White highlight in the centre of each stone, I made some mistakes, as you can see, but I didn’t bother. In the end I’m going to put a lot of staff on the floor…
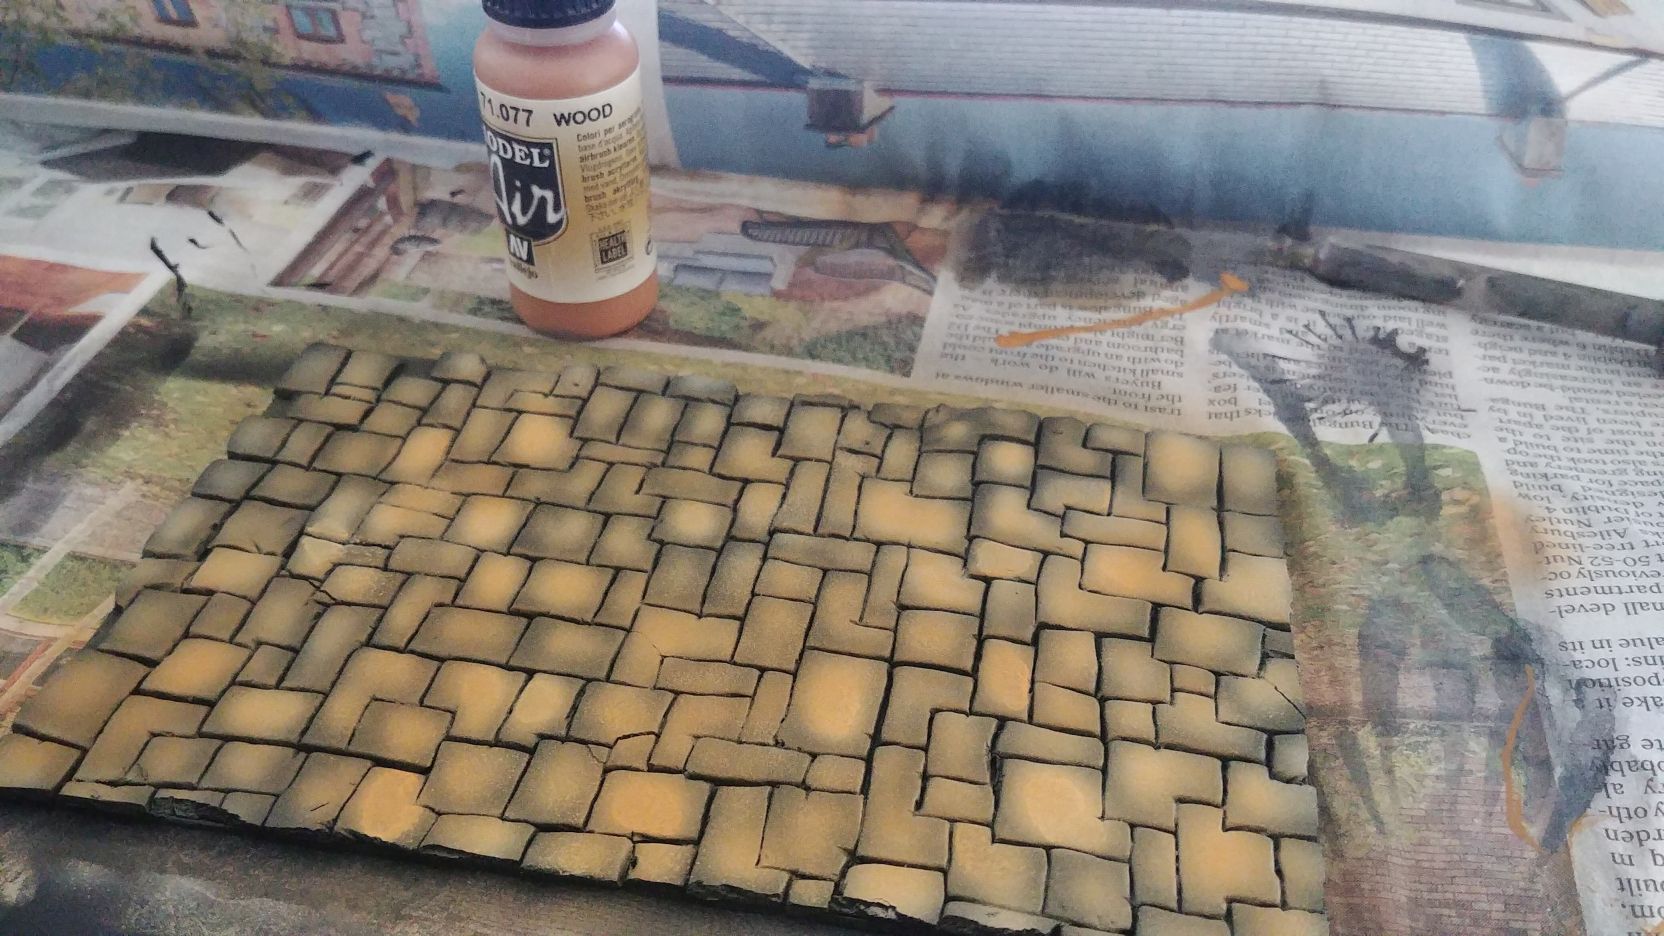 3. Thin coat of VMA Wood. I studied many source photos and colours in real pyramids are much more orangy/redish/cavalry brownish… luckily it is not a real pyramid.
 4. To add some variation I used 6 different filters – I like them and hate them at the same time. They promise great results and some of them deliver, but others are simply atrocious. Very uneven line of products, and I use them rarely enough not to remember which bottle is good.
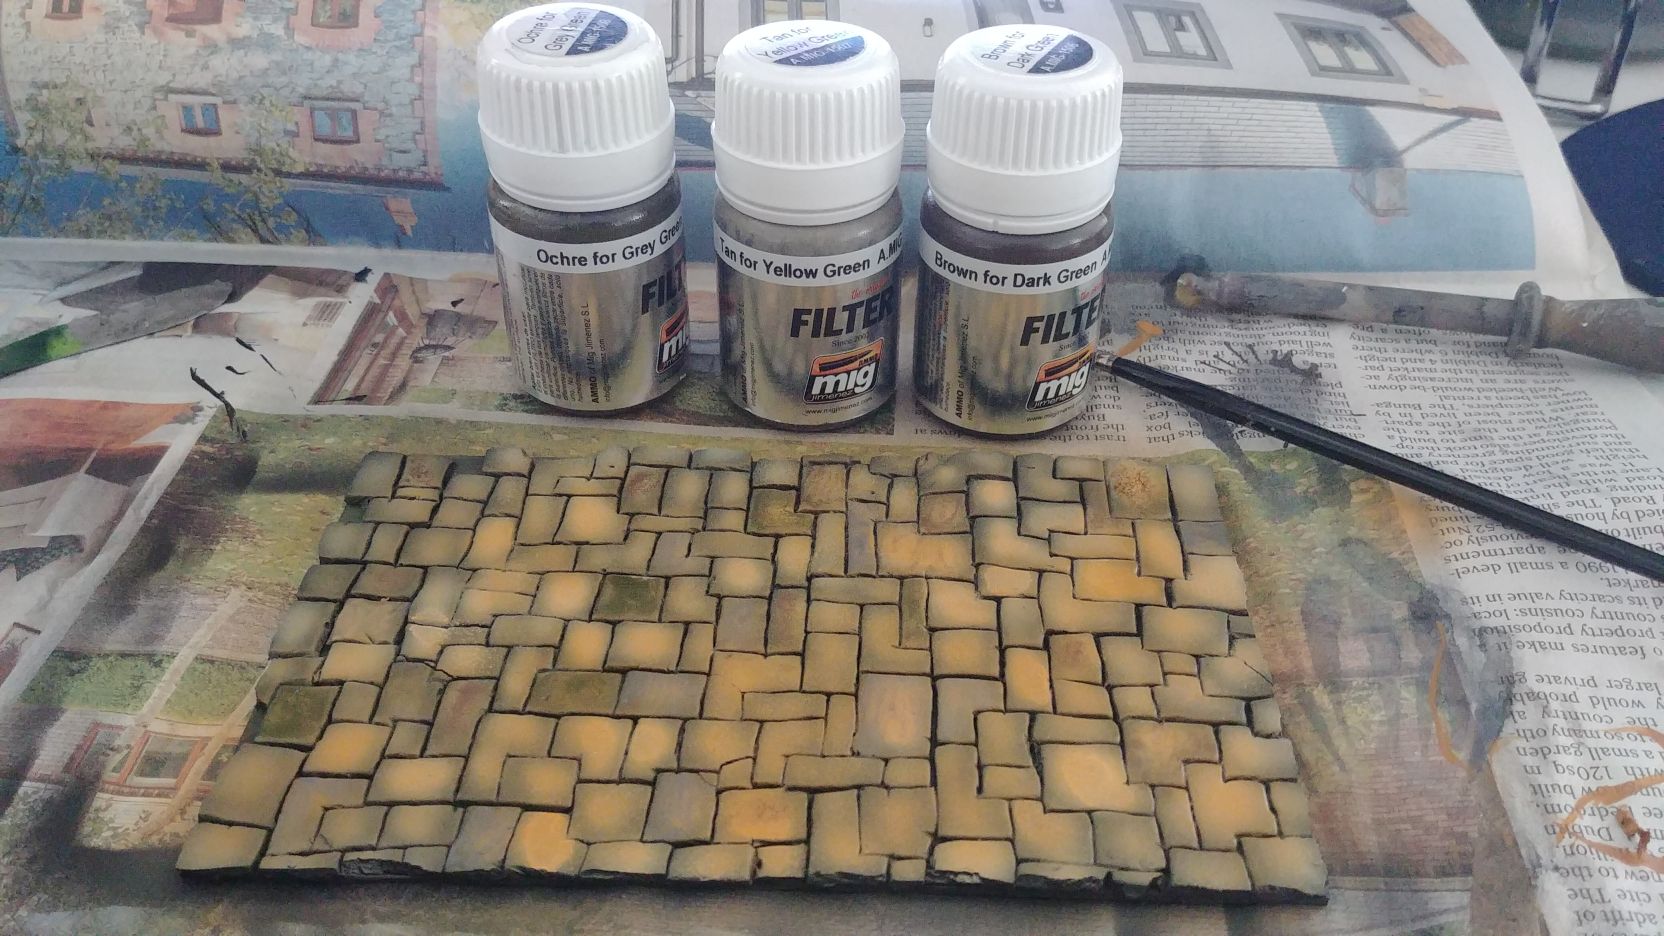 And one more set
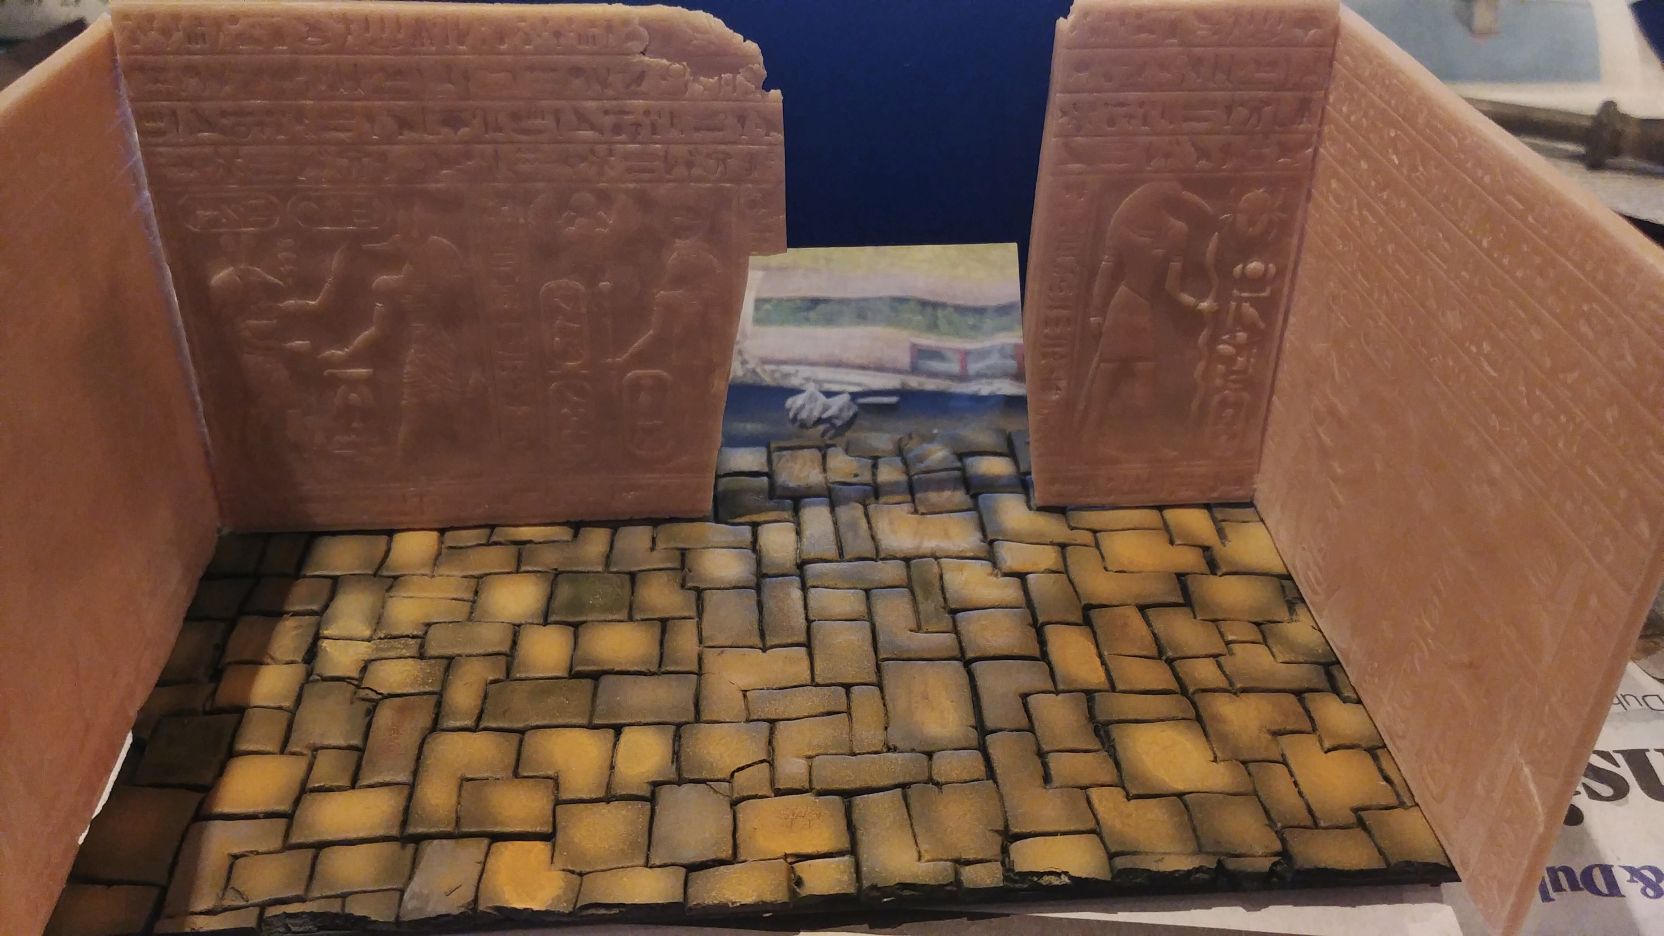 And finaly, this is where I stand today.
 Textures
I had a busy weekend.
Bellow you see photos illustrating my process of creating textures. First I did the floor. I wanted it to have rather battered, worn look, so I avoided using any rollers or other “machine” manufacture. Instated I went for some child-play heat hardening clay and hand sculpted a pattern of stones which in reality would be carved out by stone masons on site to fit any gap the artisans had to fill. That way it became very irregular in all three dimensions. But before that:
 1. I cut paper template to tell me what surface I need to cover.
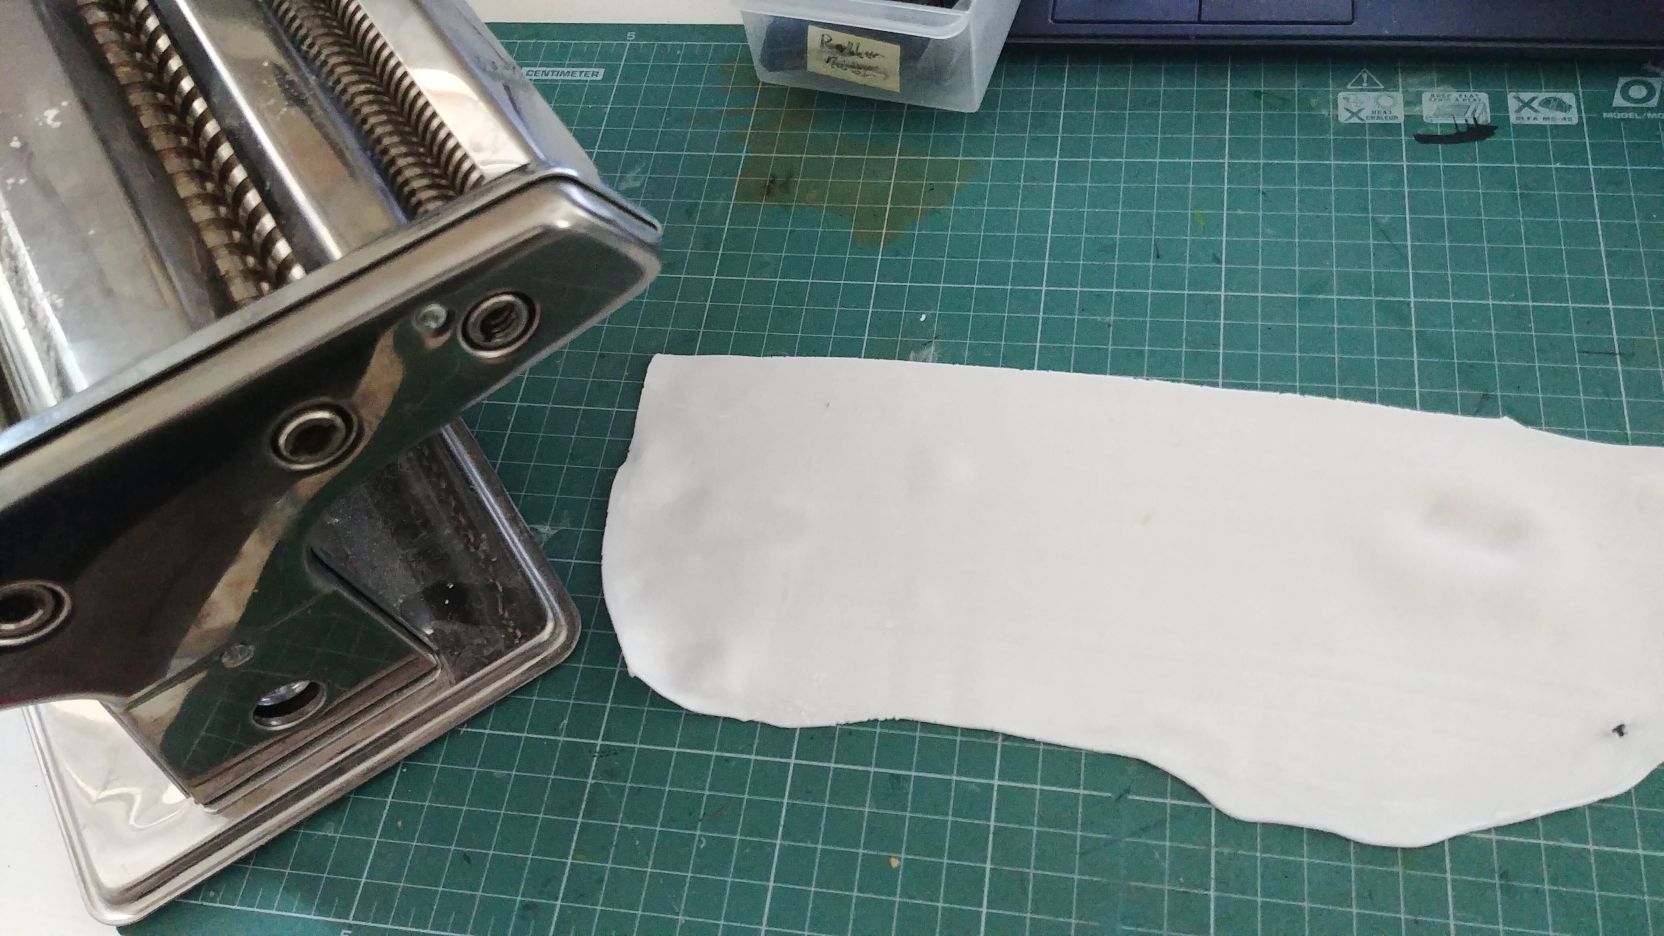 2. Prepare nice, piece of clay of uniform thickness across its width,
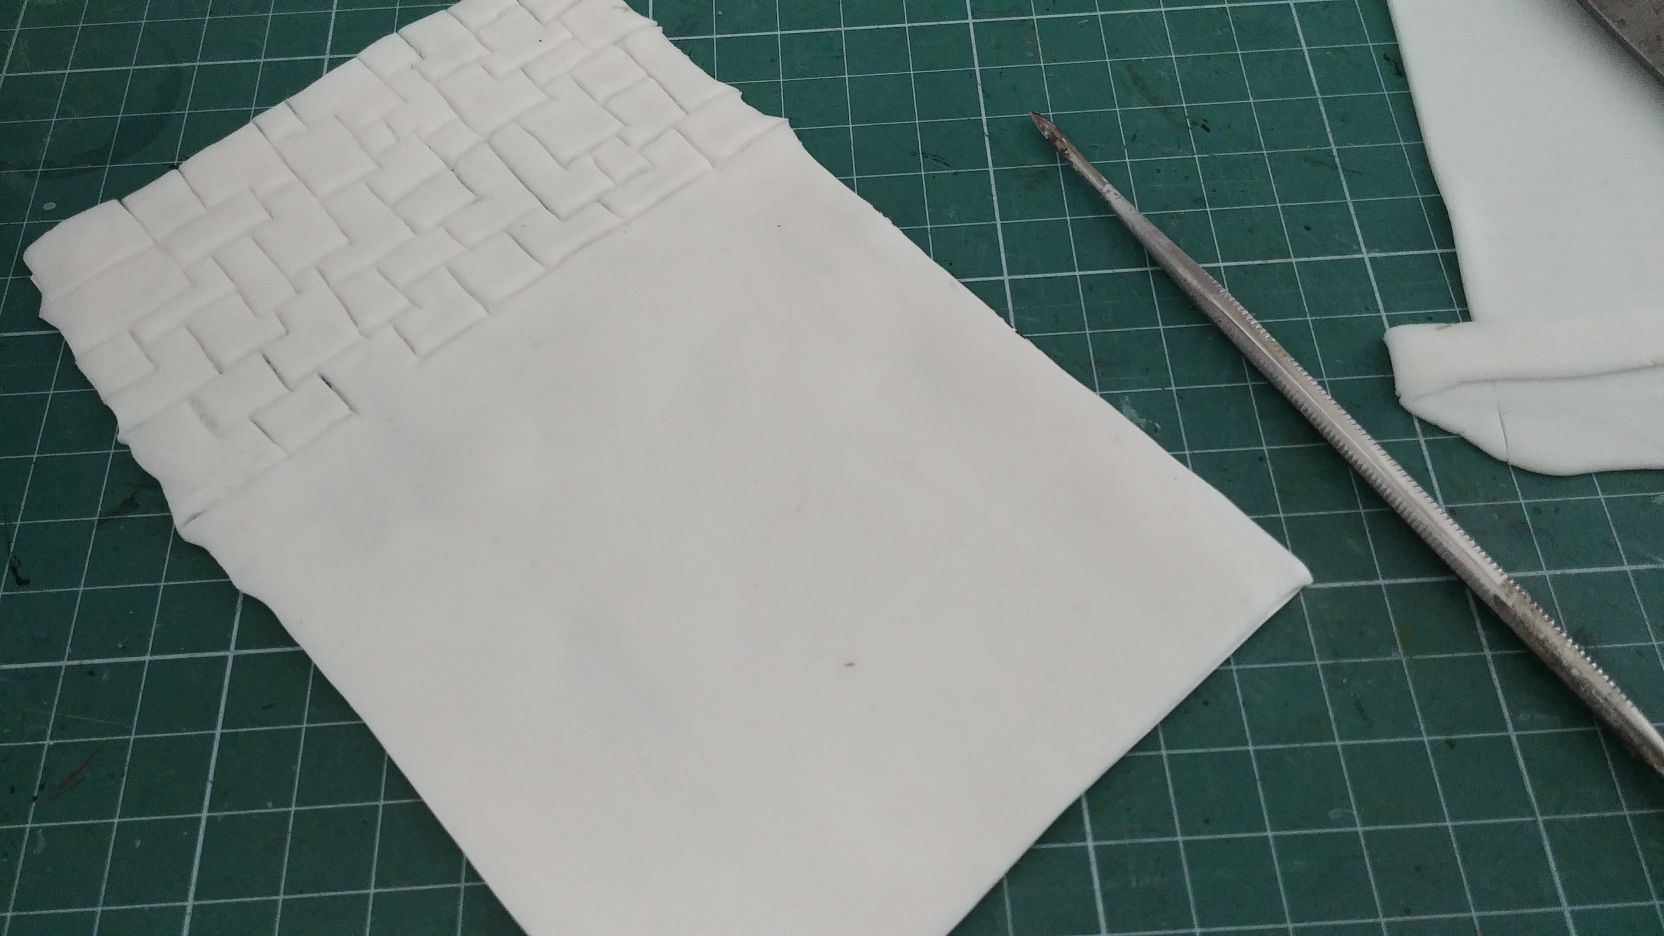 3. Carve. Sculpting 10x15 cm rectangle took me over an hour.
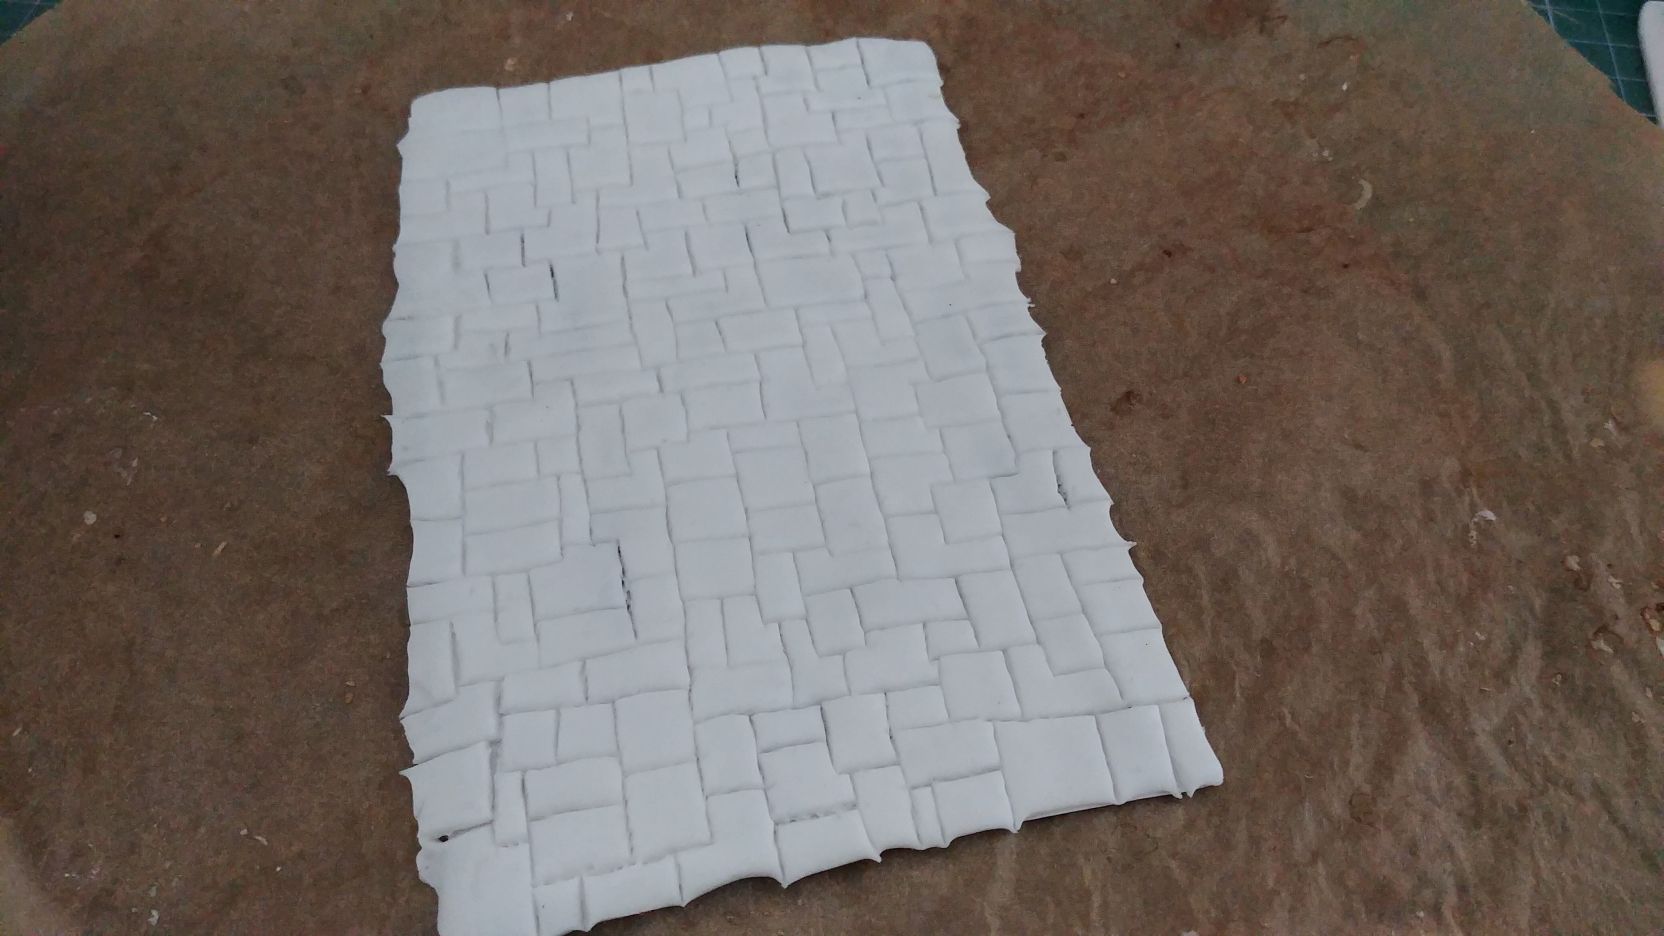 4. Bake
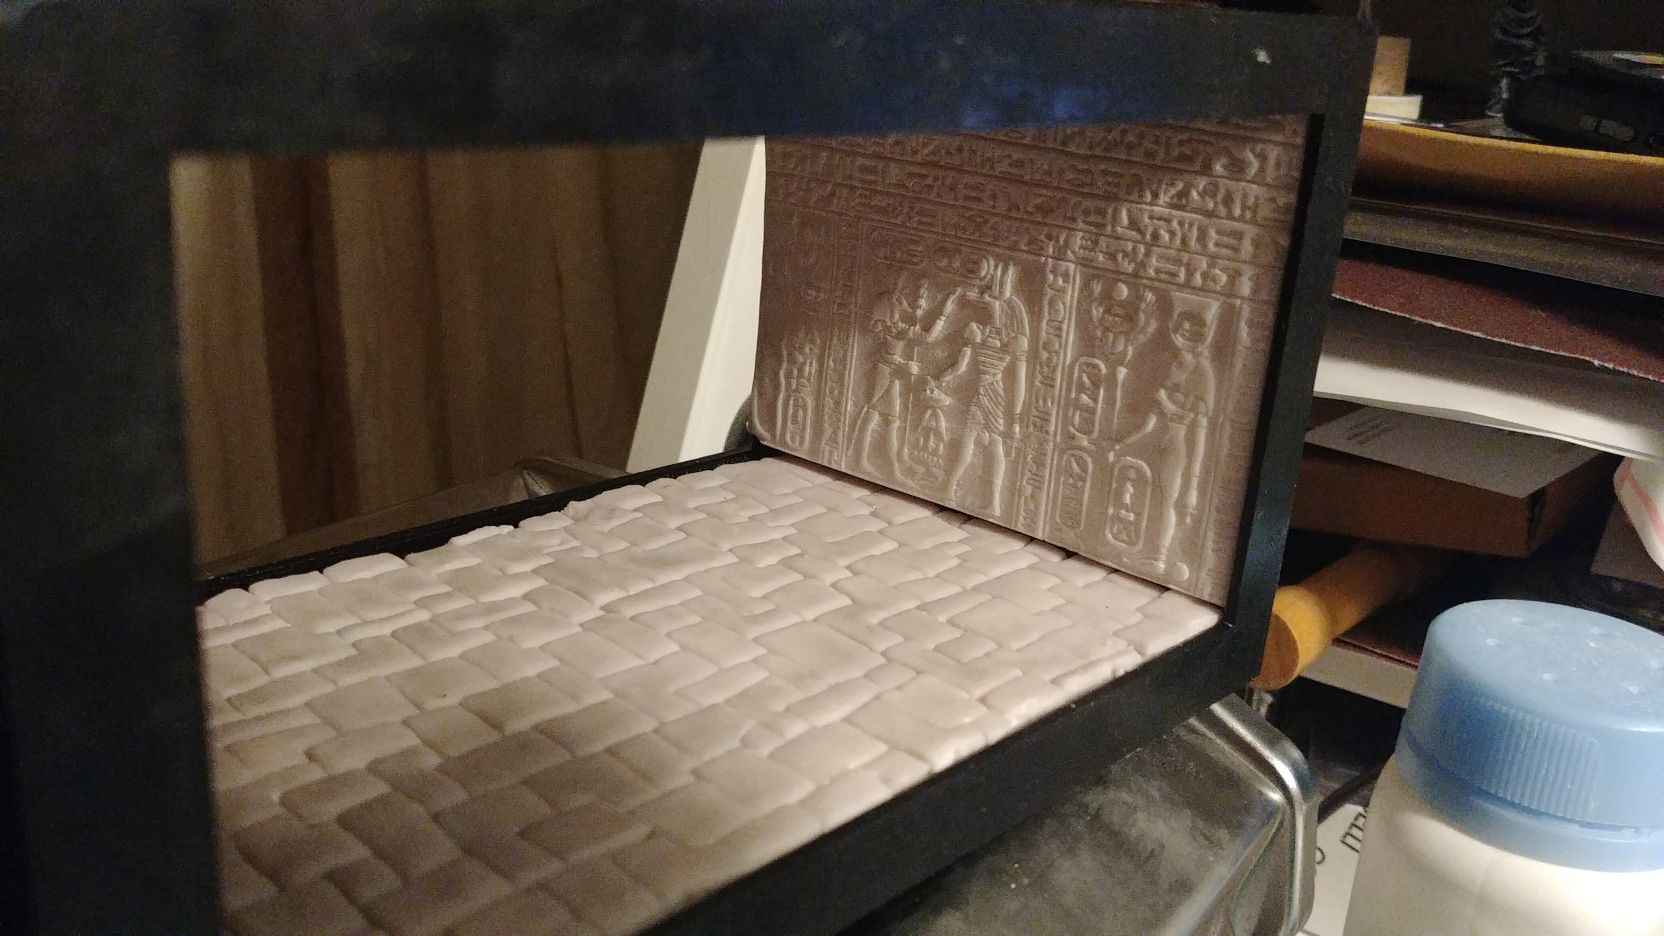
 5. After baking the clay, I cut piece of plasticard to act as a foundation for my floor. I used super glue to stick the carving to the plasticard.
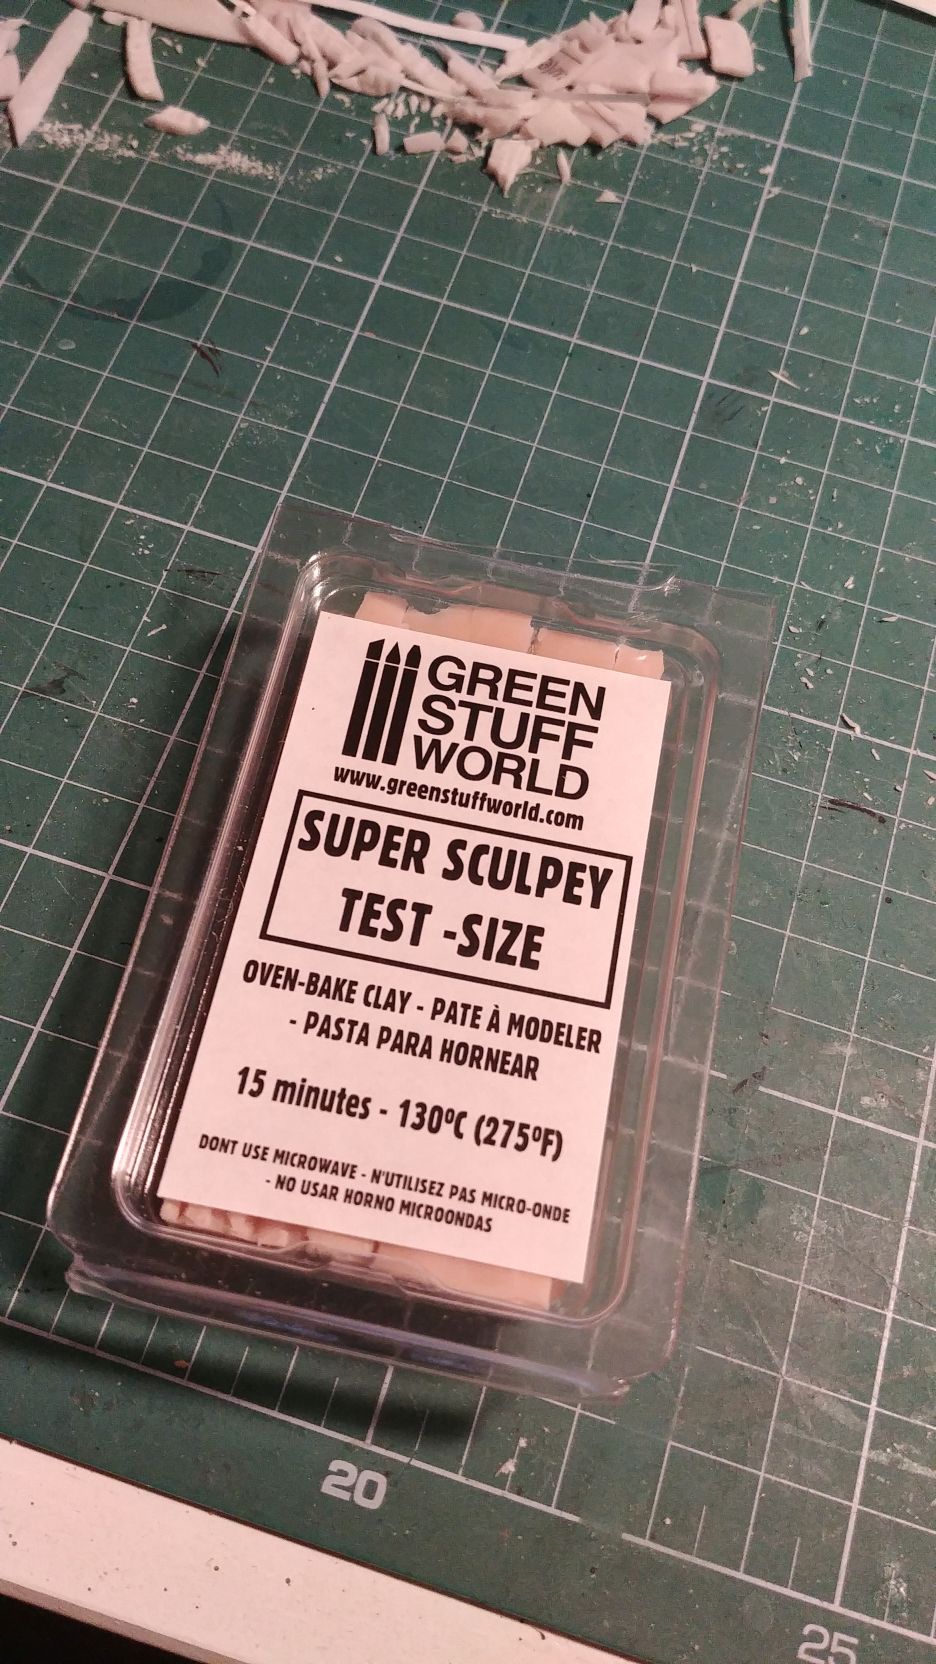
For the walls, the clue of this part of spring cleaning all the irrational ideas out of my mind , I used the GSW rolling pin. But to clean even more, I didn’t use my usual mixture of miliput and plasticine but used a sample of super sculpy, which I got from GSW as a bonus in my first order from them 6 or 7 years back. I have to admit I worked beautifully and can easily replace my normal mixture. It is less sticky (to the point where actually mixing two pieces of it together requires quite a lot of work), and transfers details equally well. On top of that , backing if much faster than waiting for miliput to cure. I have 1kg of that material stored somewhere…
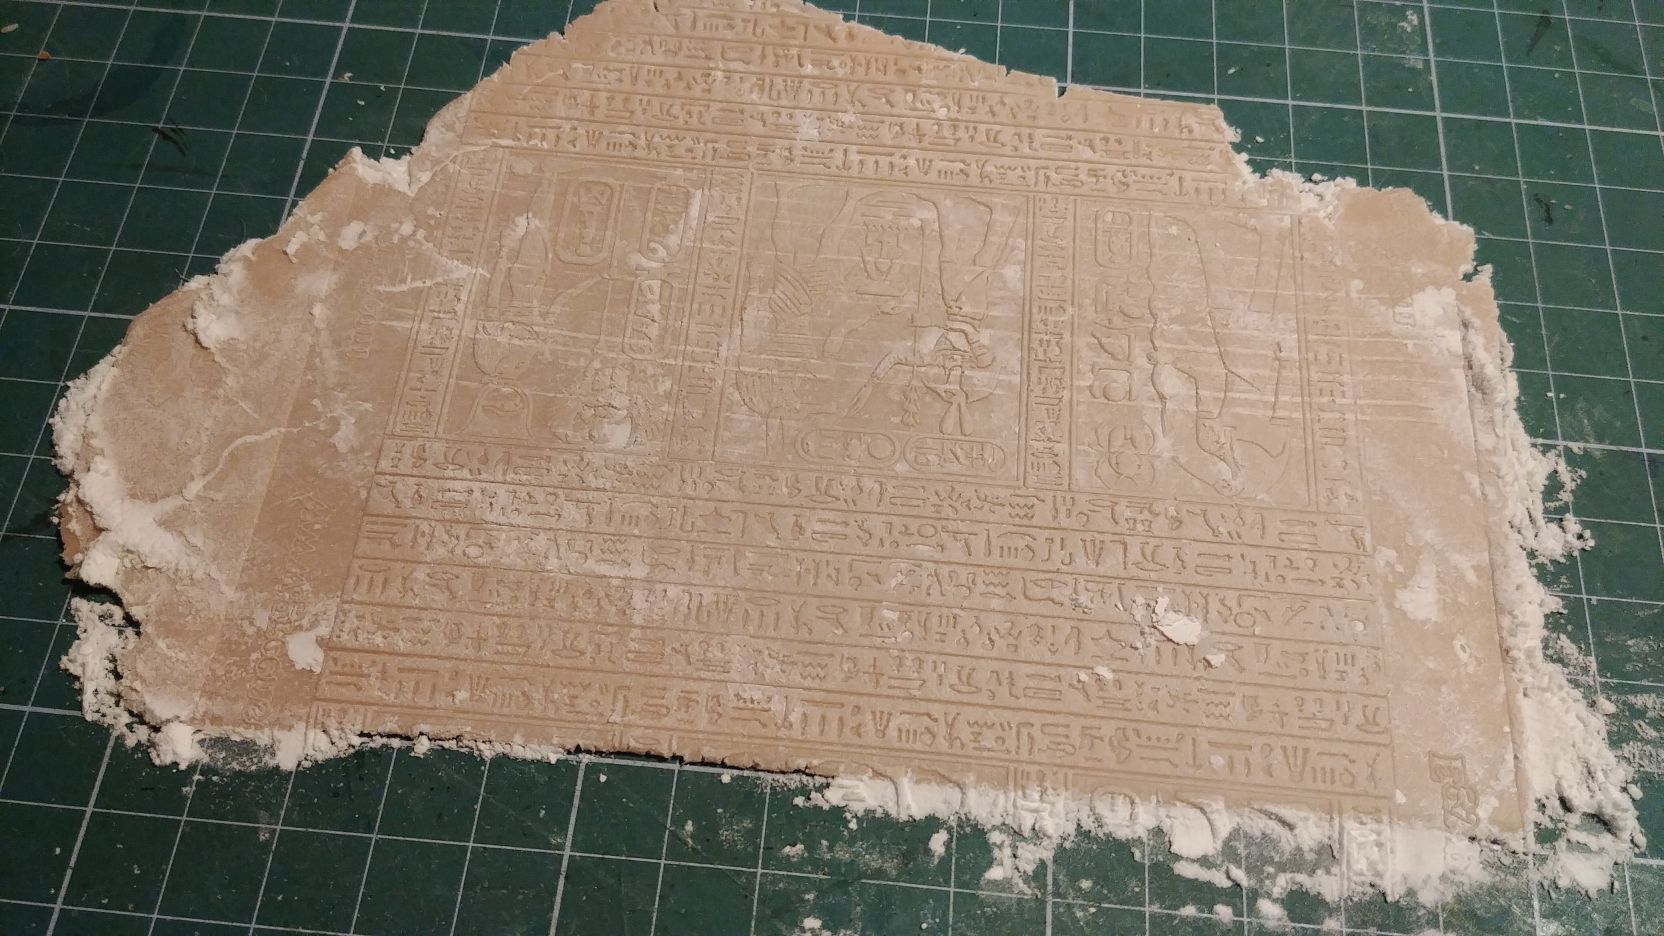
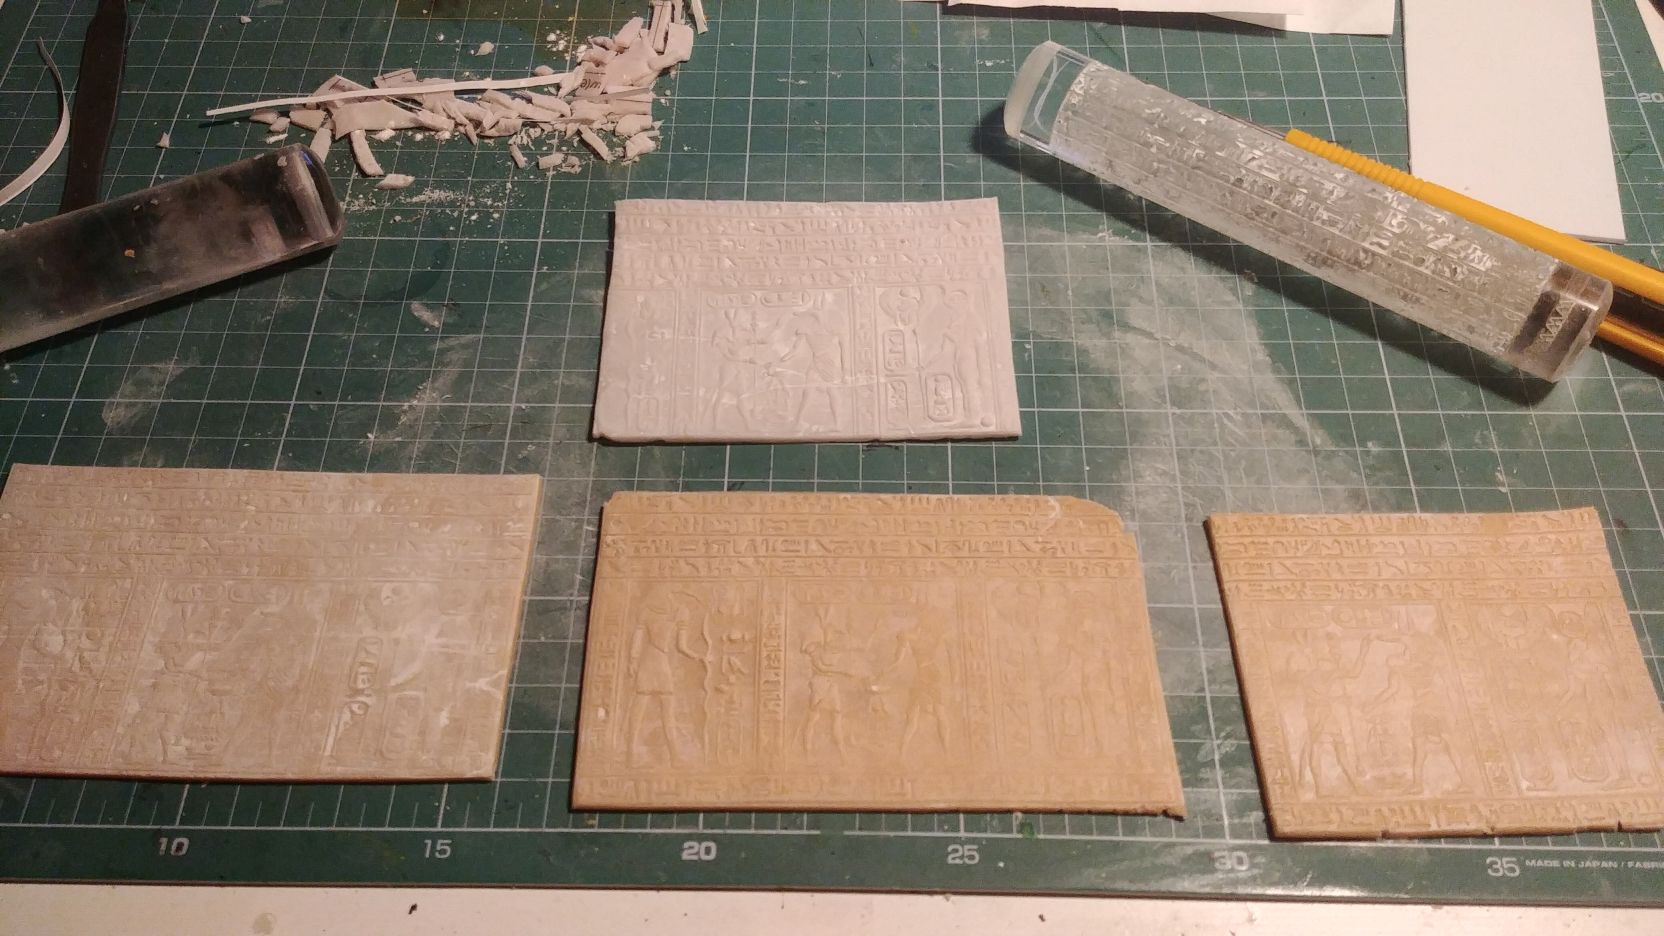
First on the menu – Egyptian Rolling Pin
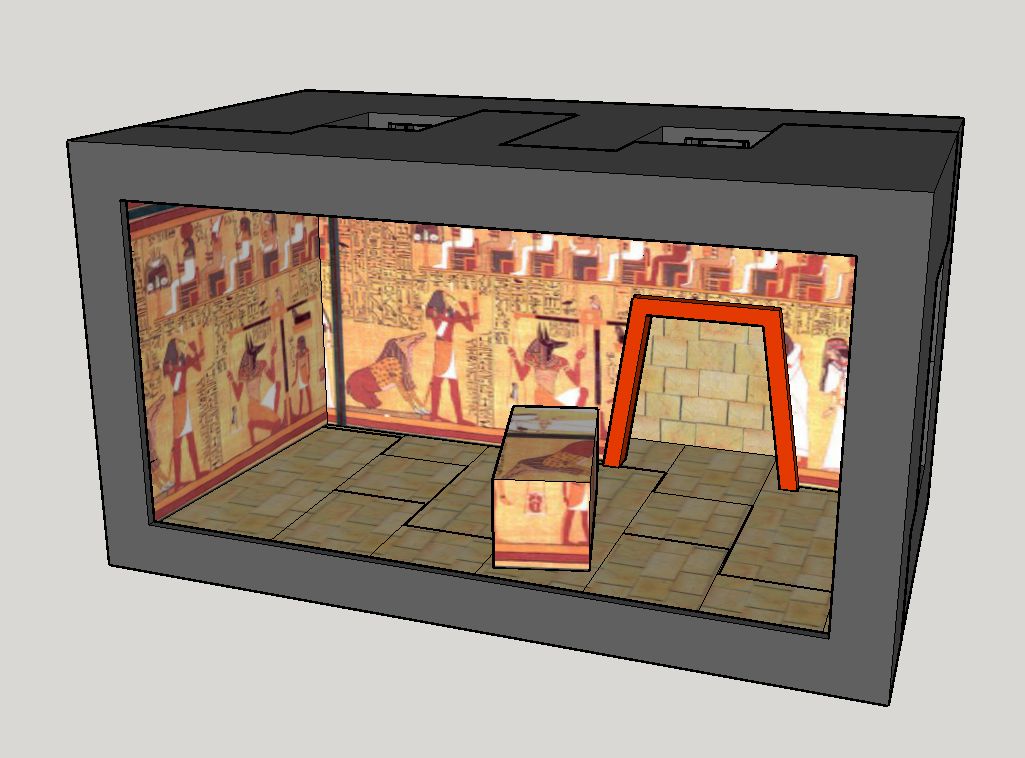
Since I already have my first frame I can start creating my 3d cartoon.
As stated in project description I want to employ as many tools and technics I never used as possible. Until now I had no occasion to use my Egyptian rolling pin, nor have I ever ventured into territories of that aesthetics. To change that, I’ll build a quasi-Egyptian tomb chamber with appropriately decorated walls and obligatory mummy. Something like that:
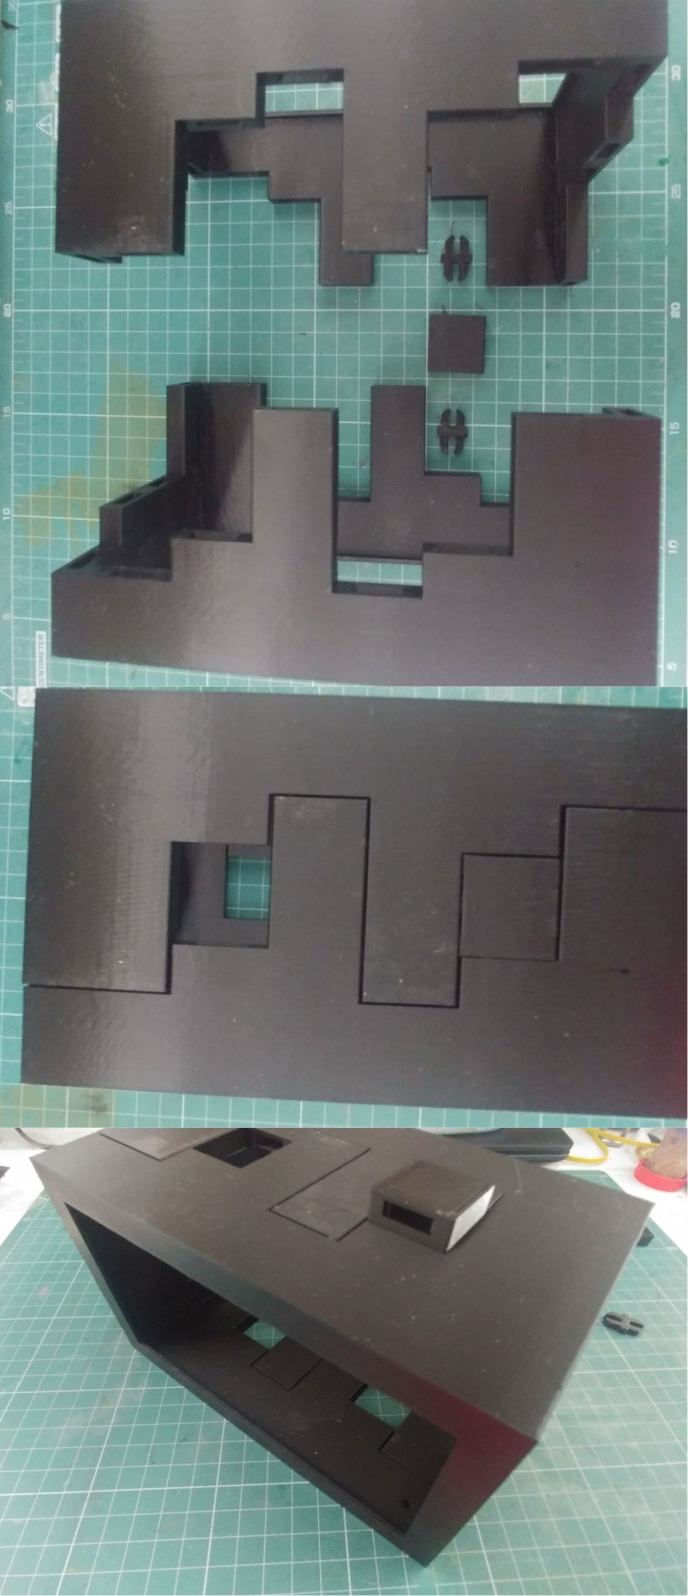
11 hours later
Yeah it takes a while to print, but after it prints it looks really good.
Just couple of words of explanation on why the shape is so weird. And why does it use all those holes. The main thing is to print it with no supports with front frame touching print bed. Second, and that is why I used OpernLock system is ease of modification and stacking capability (in different planes and sizes). The holes visible all around the shape allow to connect more modules.
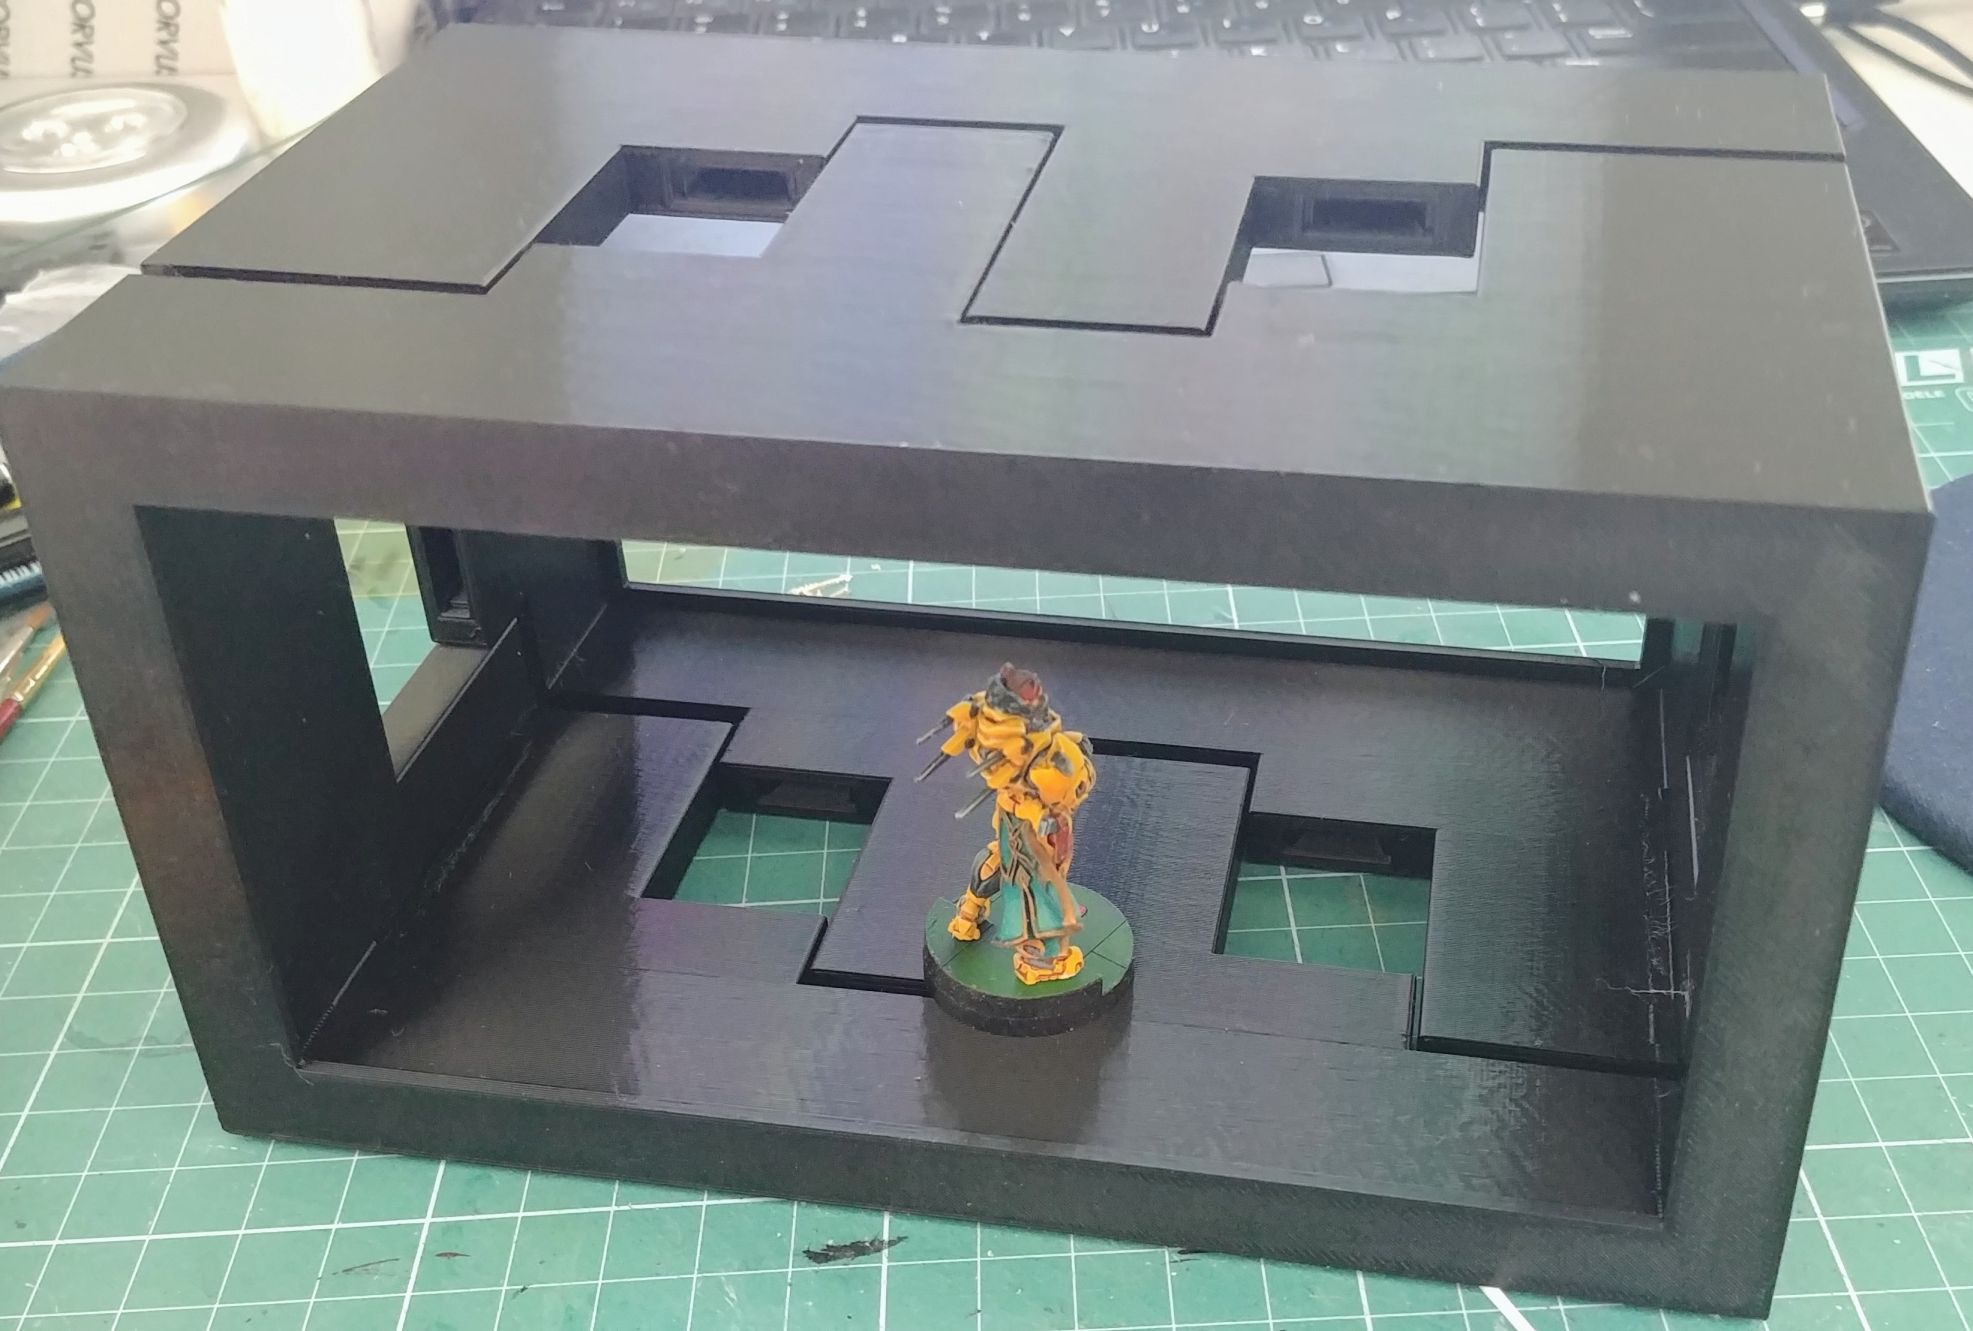
Canvas
To explore my ideas I designed a frame/box for small dioramas scenes. The idea is that it os stackable and scalable. As I write it the first prototype is printing.


