


![NO Weekender Or Cult Of Games XLBS This Weekend [Updated]](https://images.beastsofwar.com/2026/03/No_Weekender_and_XLBS_this_Weekend-225-127.jpg)


ECW – resurrection after 40 years


Recommendations: 640
About the Project
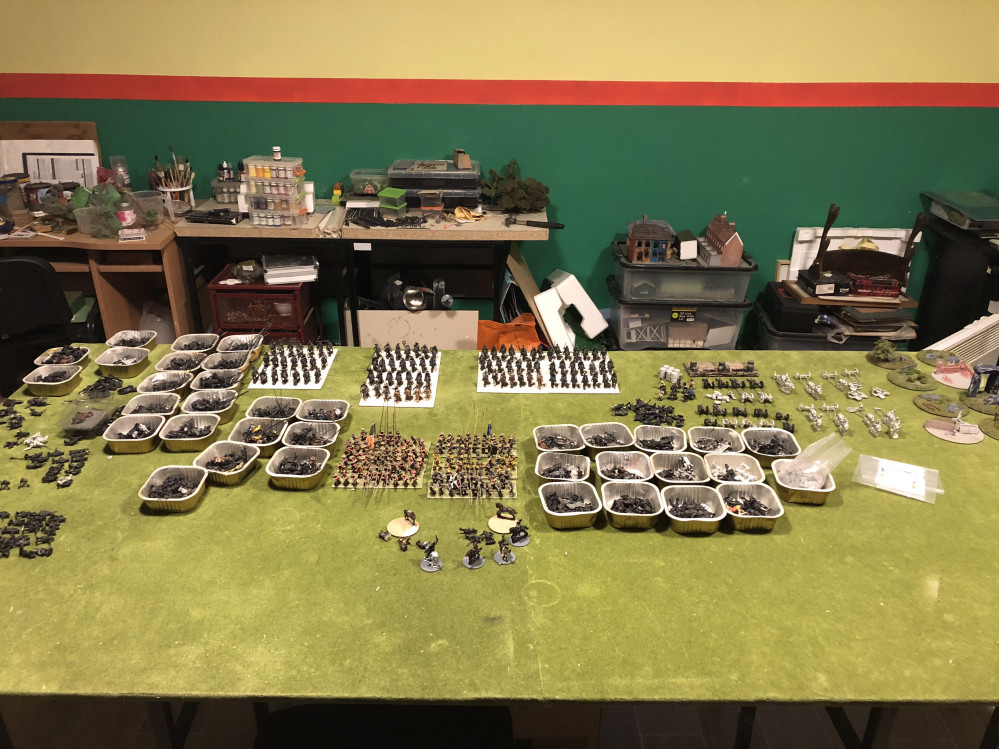
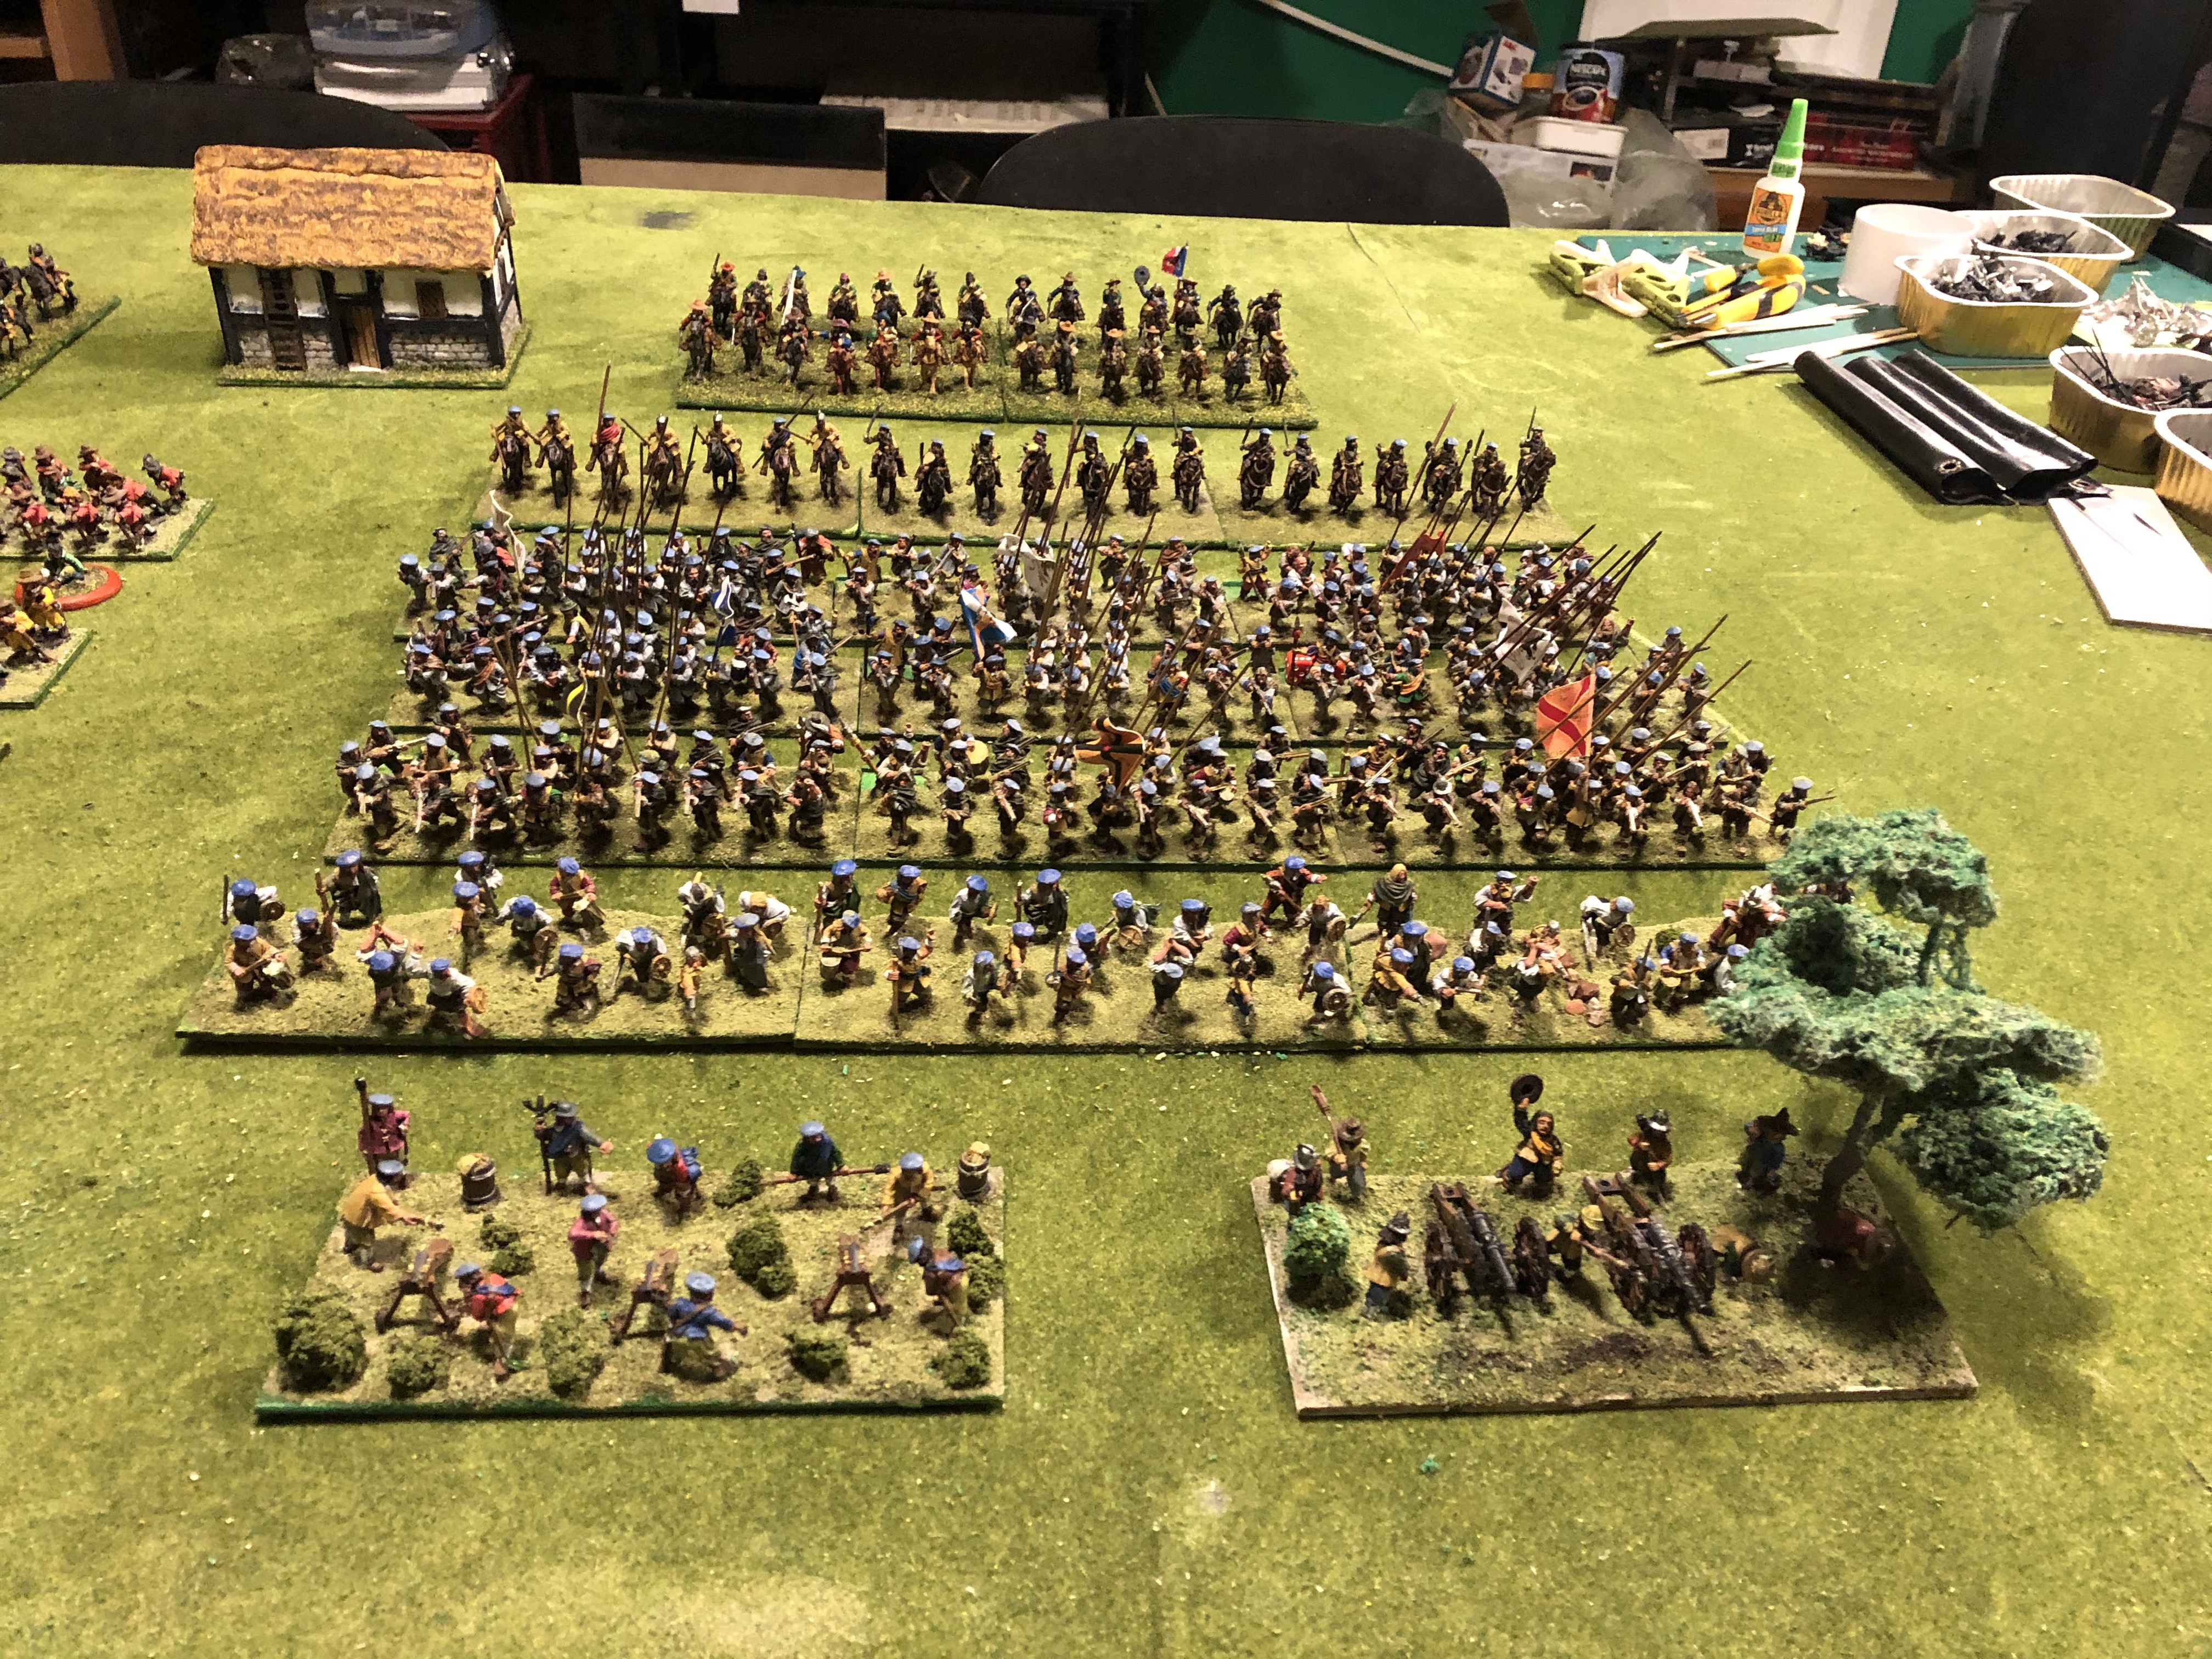
Shortly after Wargames Foundry established itself back in the 1980s, I purchased a sample pack of their ECW figures and I loved them. So, I thought, why not build two armies (I'm a solo player) and set about looking at rules etc. 40 years later in the basement of our newly built home (outwith the UK) my 10 year old says, "Dad can we play with these", pointing to the shelves of partially painted, and based minies, with the remainder still in packs. So I thought, with the OTT Spring clean challenge, maybe I'll get closer to finishing (actually, it's more like starting properly) my ECW project! This is the task: to turn the mountain of lead into something playable. What you can see in the header picture are the six paint/based foot regiments, and the variously based cavalry (for play testing) and the little tin boxes of all the other minis! Our new home has a basement, part of which will be my War-game room. Still need shelving and other assorted finalizing, but it will be where I hope I will spend a lot of time with my boy as he also develops an interest in the hobby. So, the next step is to determine my plan of campaign and what to do first!
Related Genre: Historical
Related Contest: Spring Clean Hobby Challenge (Old)
This Project is Completed
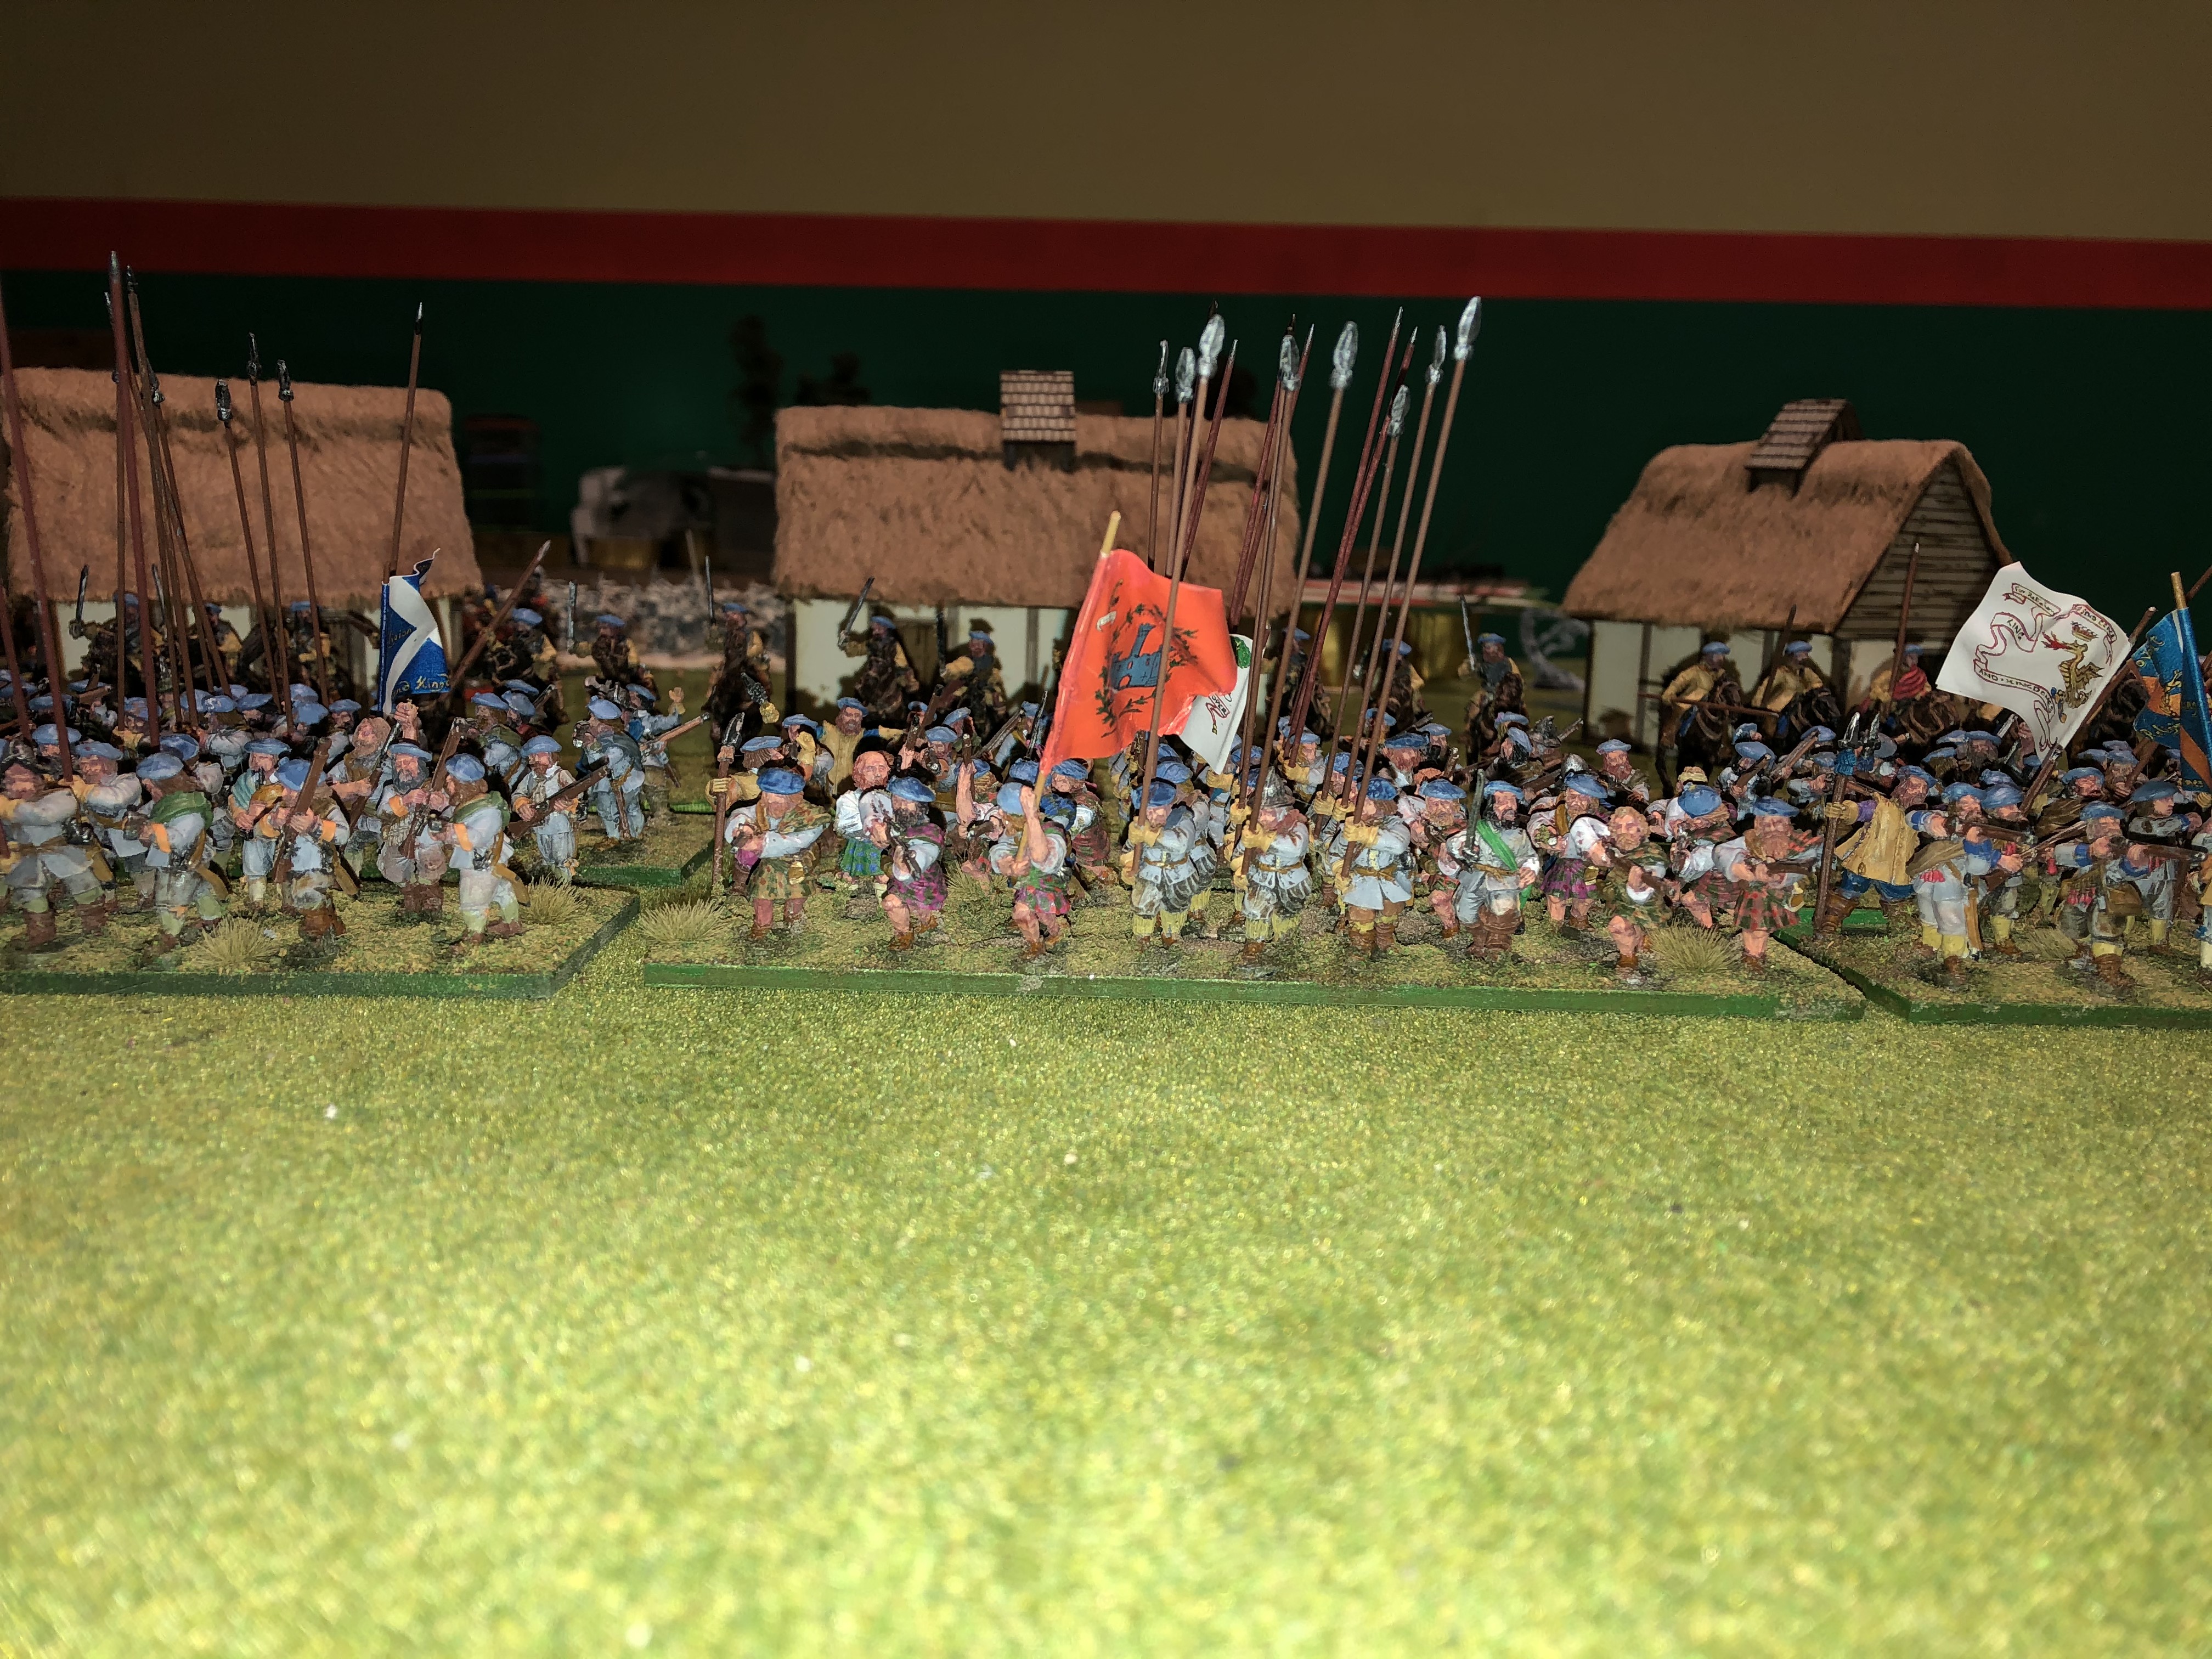
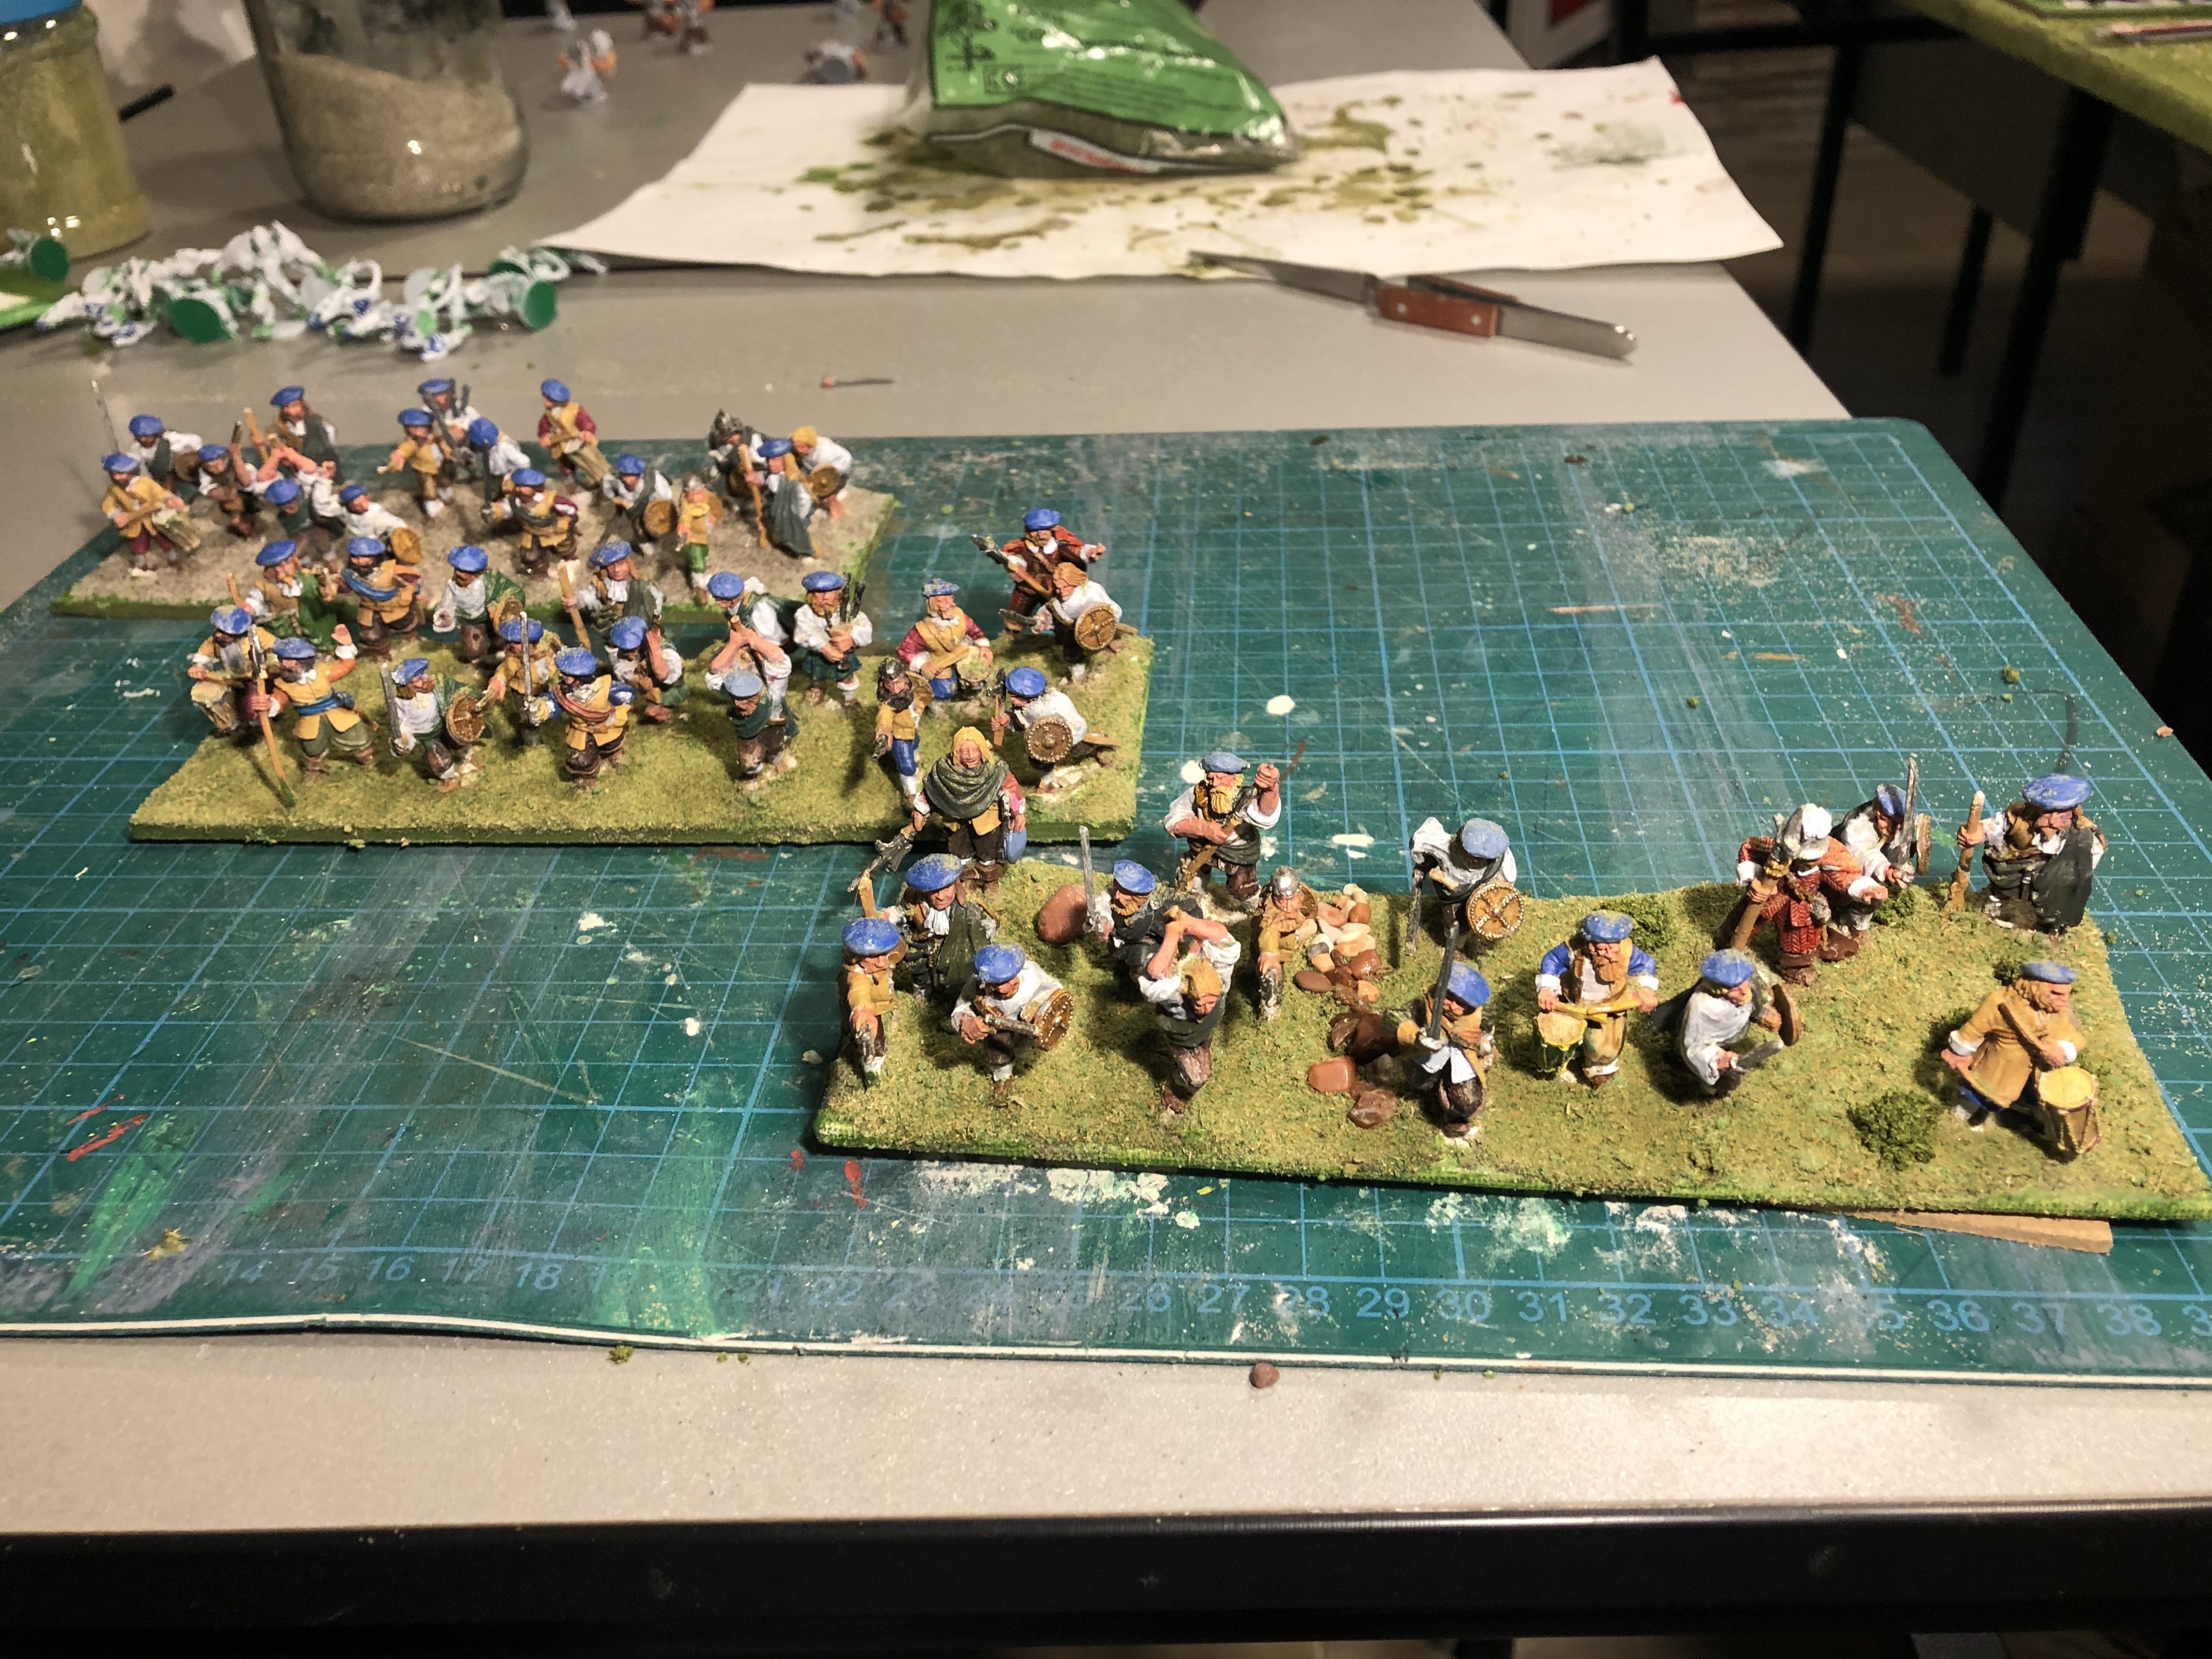
Scottish vanguard is here
So far there are six regiments of foote, three cavalry squadrons, and the single base of light guns.
The Scottish armies had limited access to cannon, but those they did have were identical to the ones used elsewhere in the ECW so when I get them done, they can be used by anyone.
There are still 2/3 foote regiments and probably two bases of Highlanders (essentially they are “mobs” in the rules with assorted weaponry, but no pike support). Of course the Highlanders means more kilts!
For these I went with a very simply approach – the single unit with kilts is front centre and all I did was paint a green base for the underlying tartan and then paint a series of thinnish lines to make a hatched effect. Where these overlapped, I added a “dot” of a deeper colour. If I feel brave, I’ll try a more complex pattern of tartan with the next units.
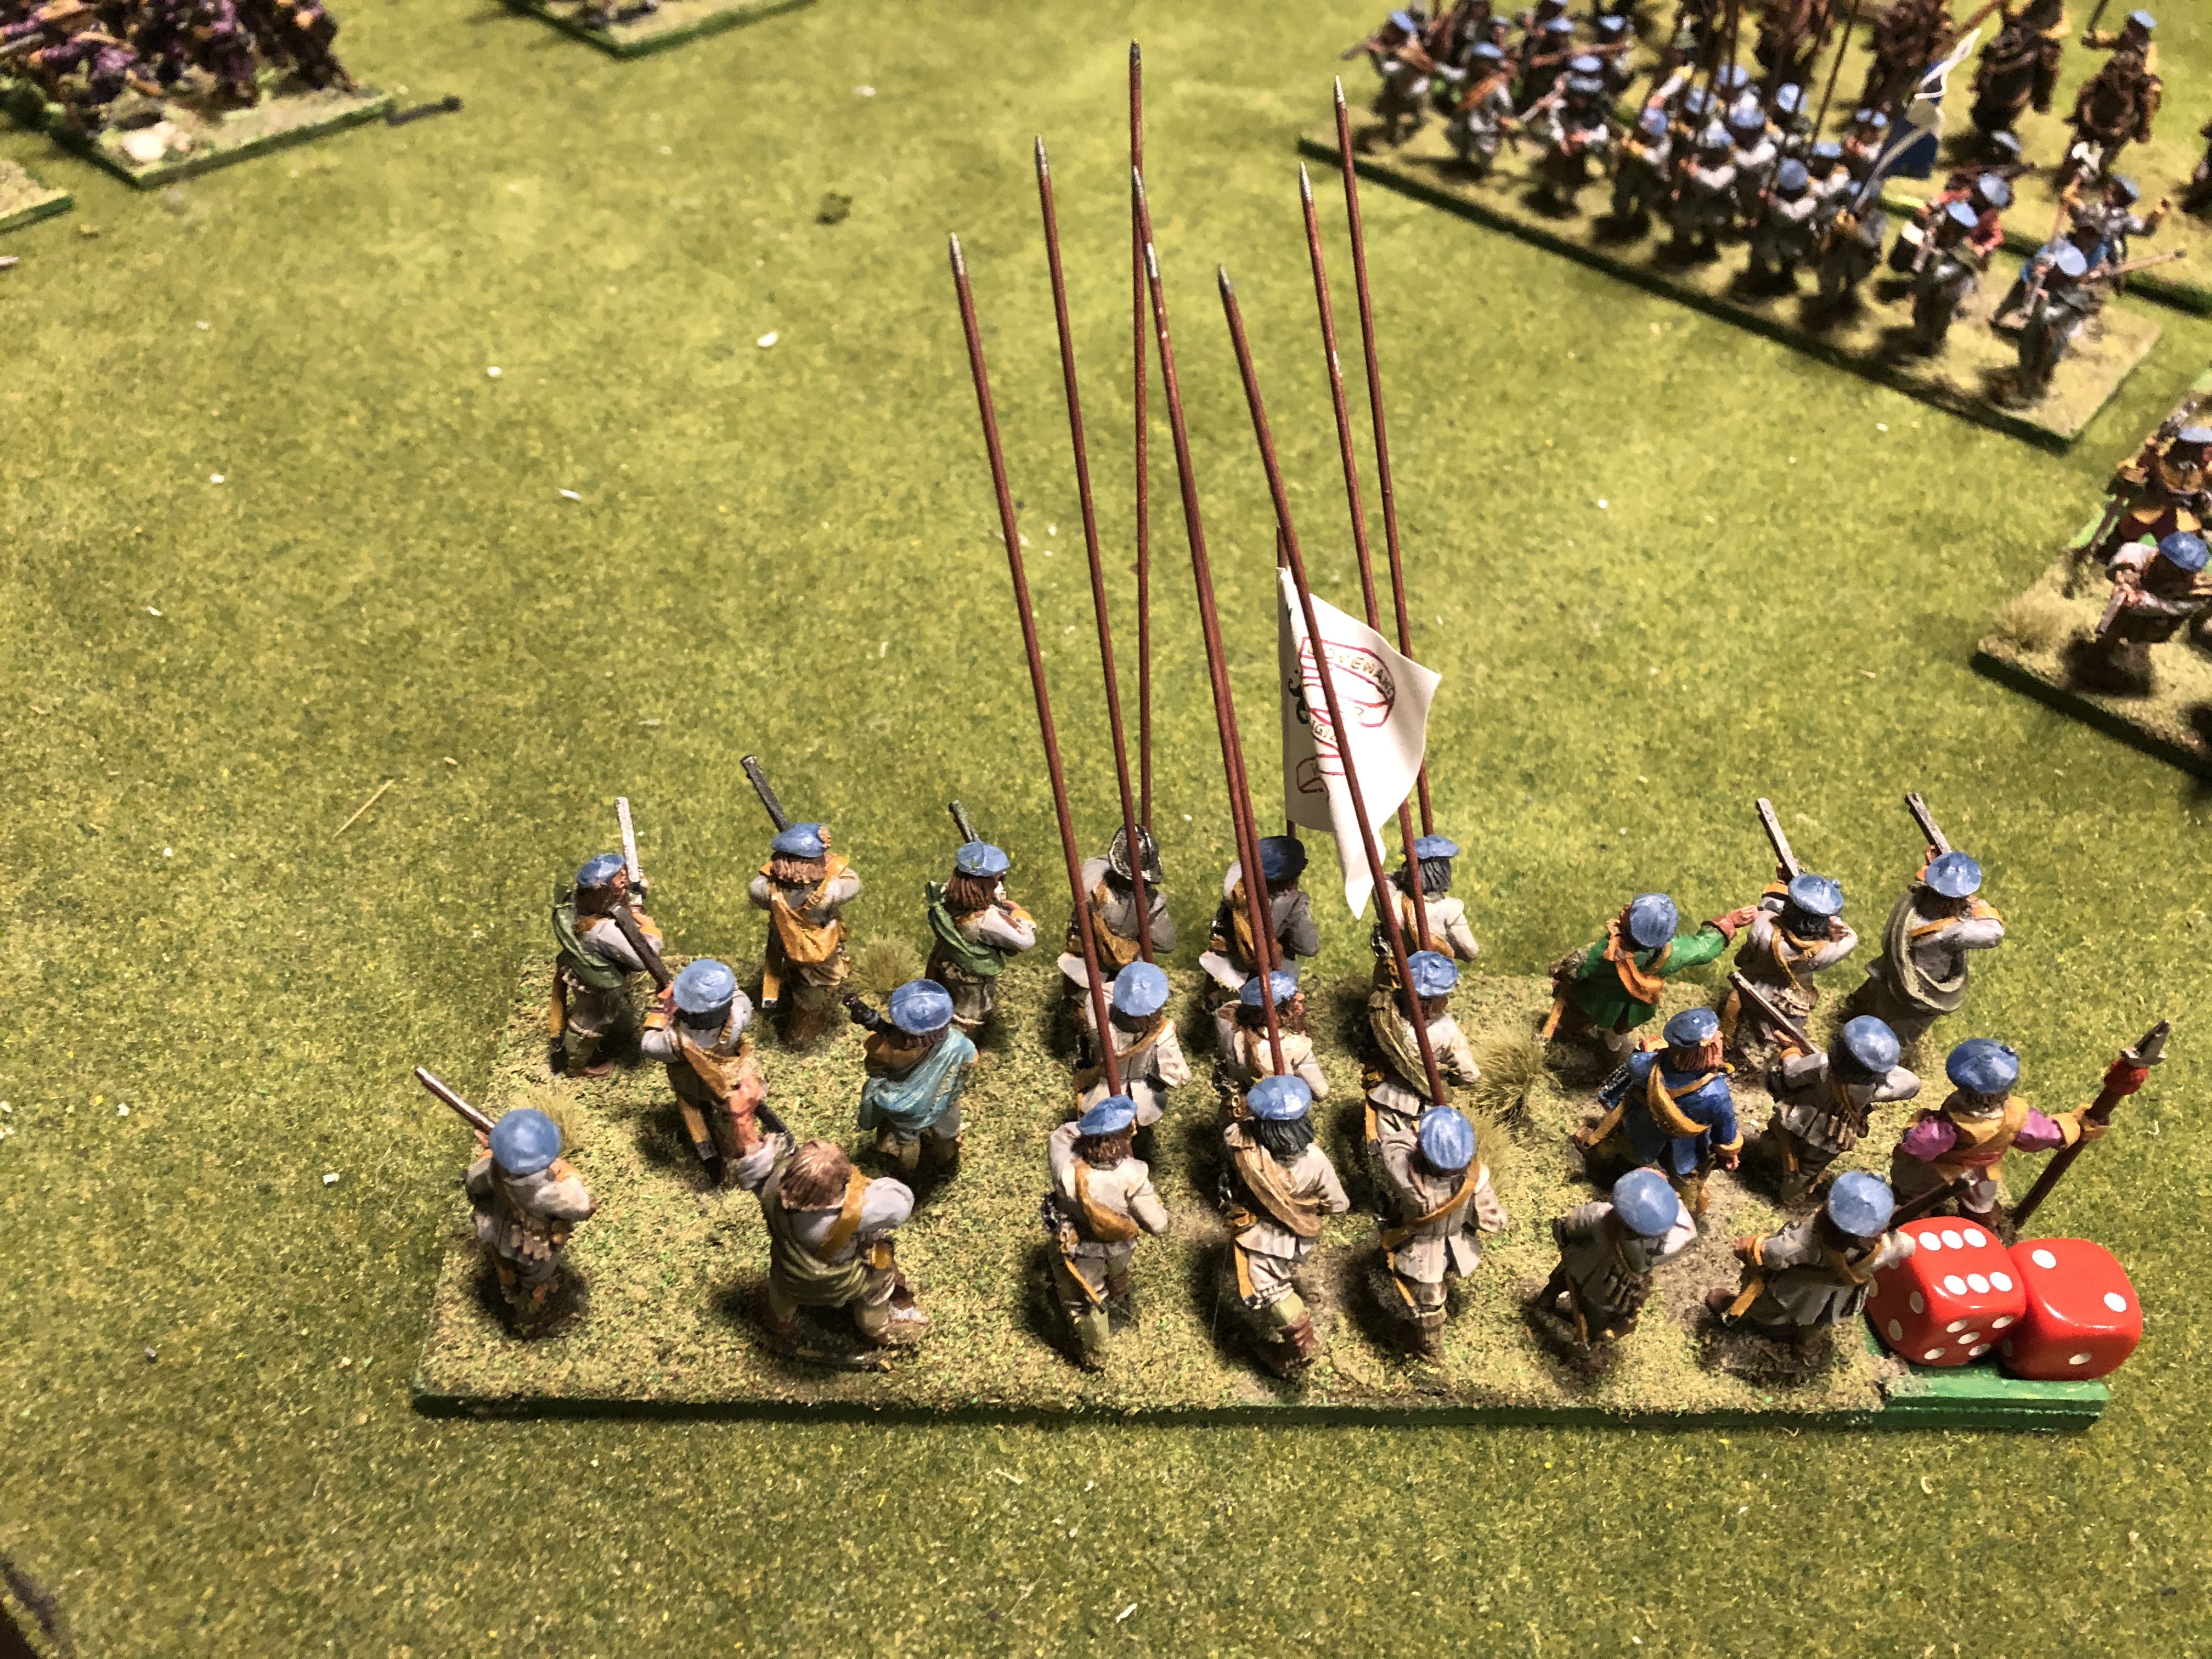 The "Ammo" dice as part of the base
In a previous post I mentioned that the more elaborate rules will have a variable of ammunition for the foote units. I was originally thinking of having a marker, but as there will already be a casualty marker and a re-load marker, (and possibly a “disorganized” marker, yet another would be too much.
So, all I did was glue a short piece of matchstick to the back of the base, and fix figures on the two sides on the base. The dice can be removed easily, and from the rear clearly indicate how many rounds are left.
So, next up I’ll move to artillery to have a break from the larger units for a while.
Artillery bases
 Base with foam core to 'mark the space'
I’ve reduced the pictures as I couldn’t get it to post with a picture heavy content, so hopefully this will still be clear.
Start with base on which general space is delineated with off cuts of foam core. On this foundation a layer of DAS air drying clay is fixed to give more form and volume.
During drying the gabions are pressed into the clay to make an initial impression for later gluing and the basis for two small waddle fences are begun by gluing toothpicks in place. Note always have an ODD number of uprights or the later weaving of thick Yarn will not work.
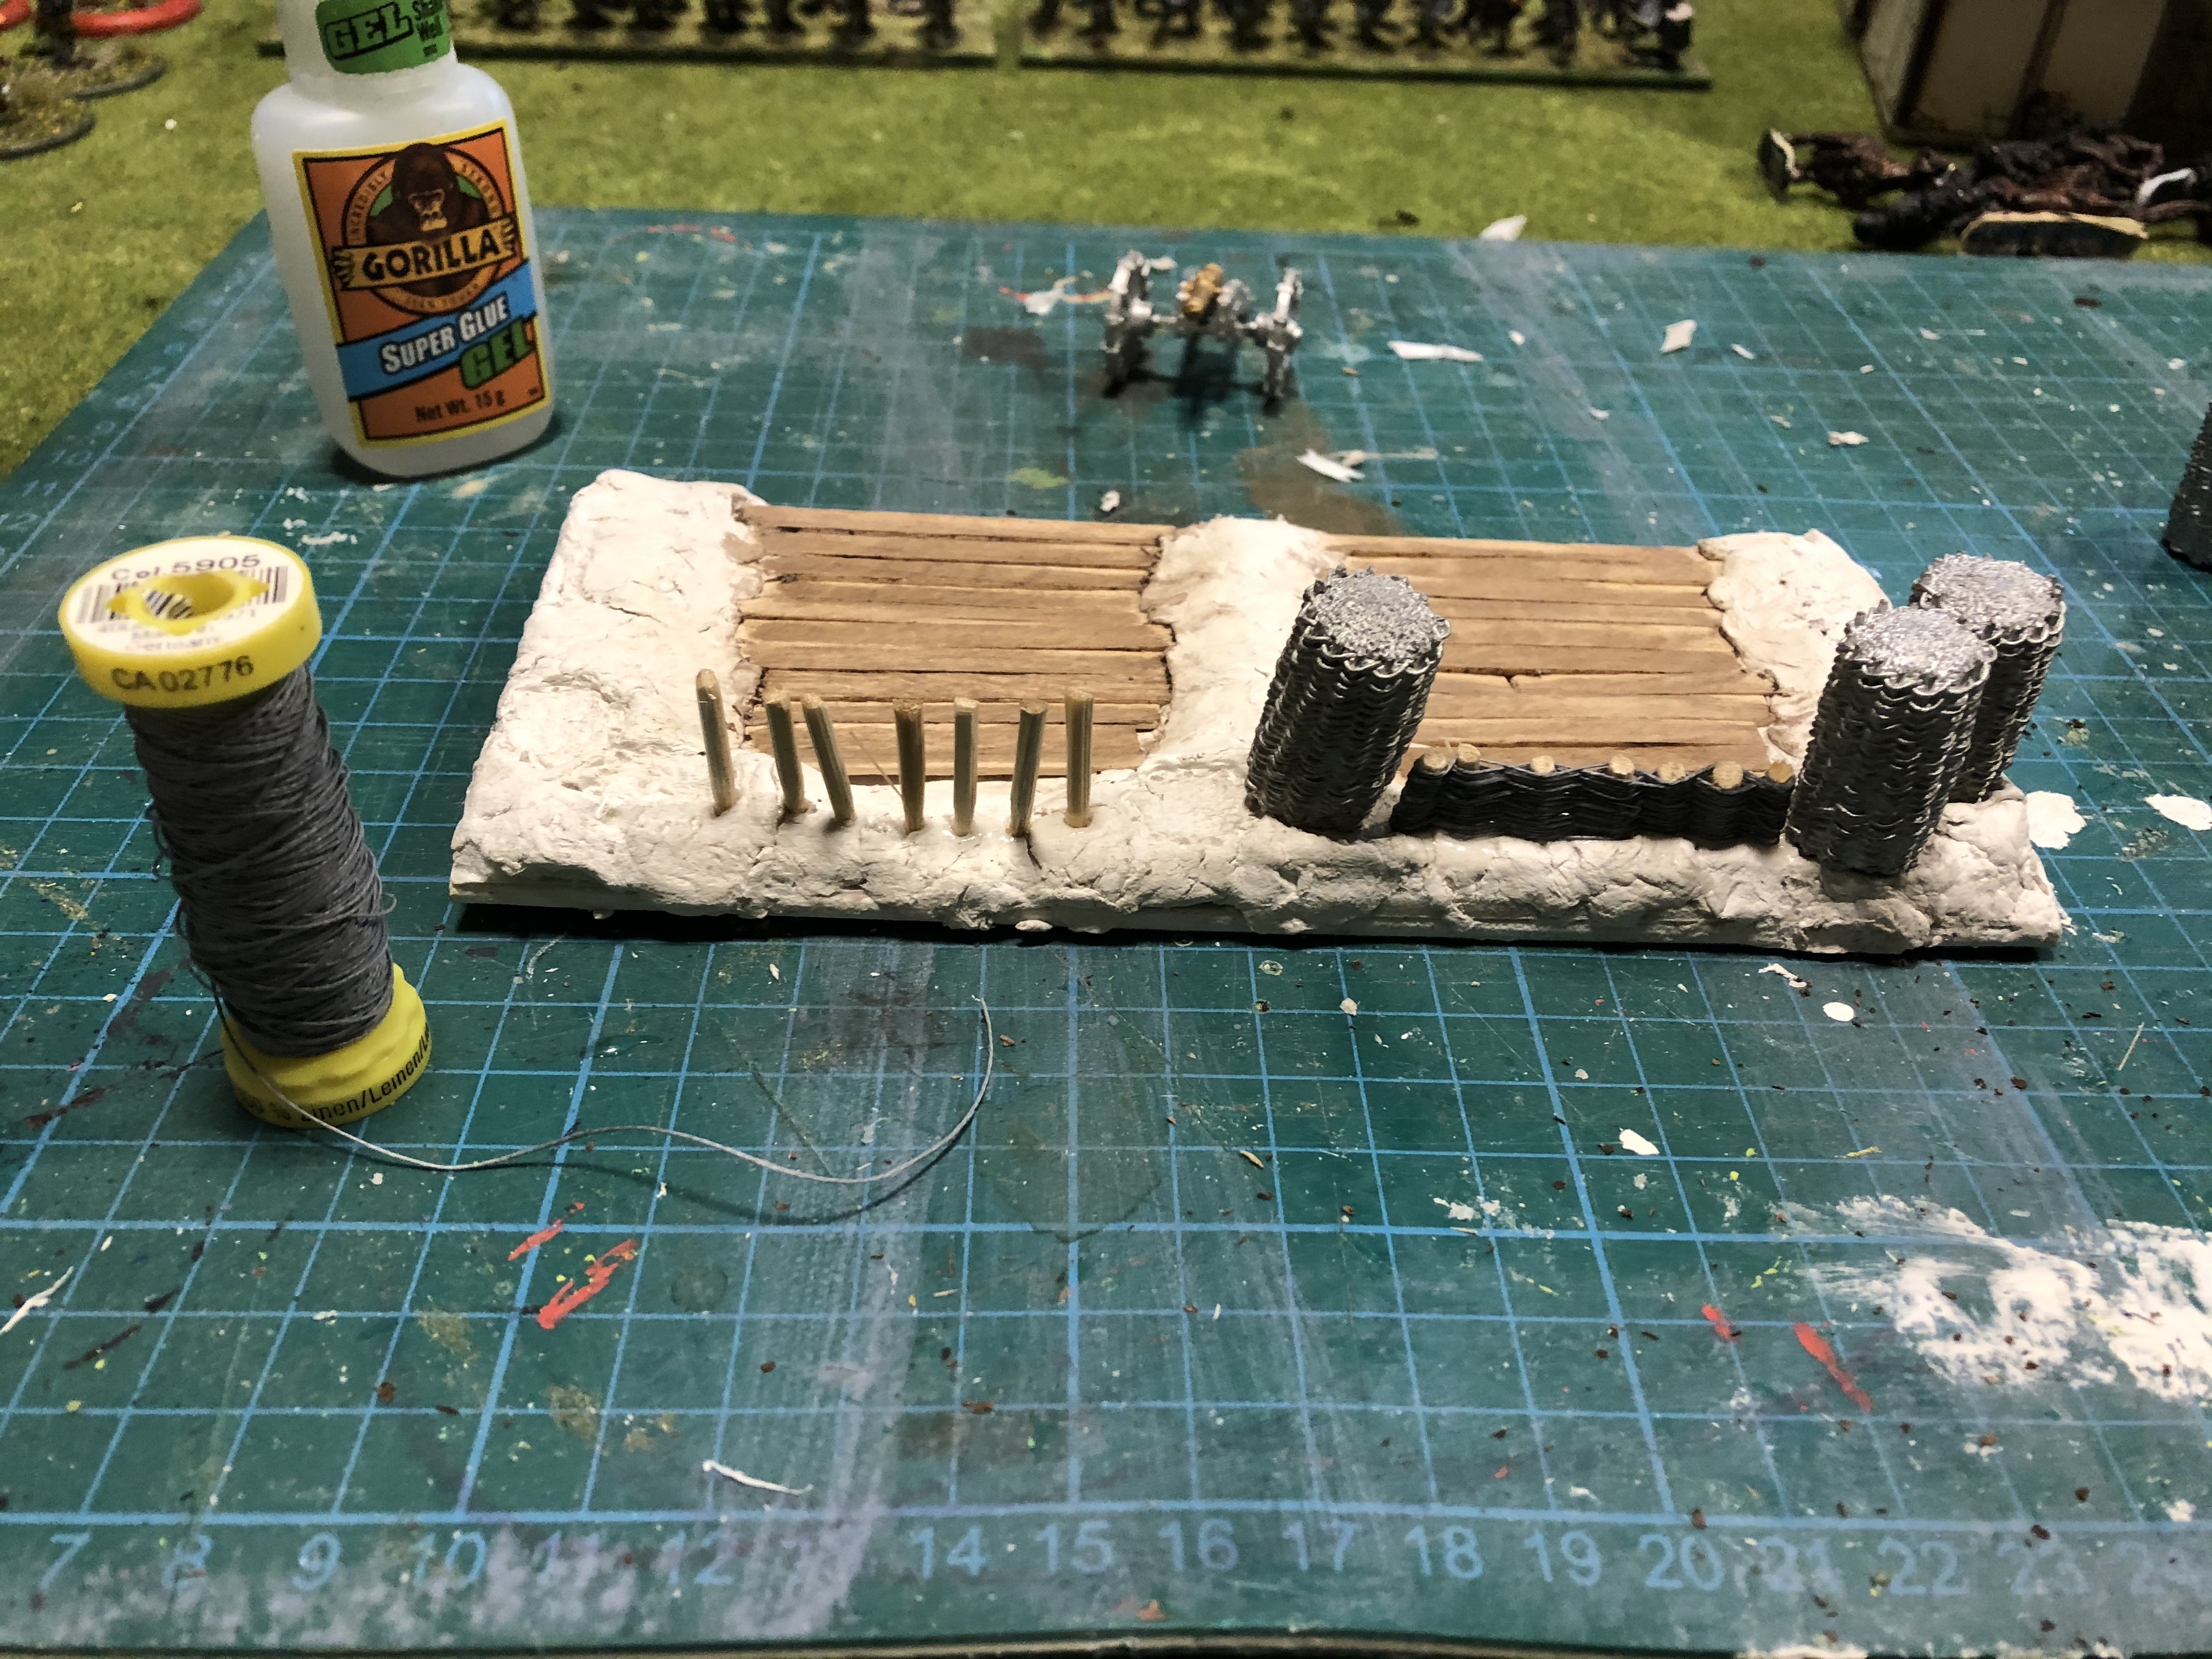 Coffee sticks are stuck down to act as planks of wood, and the waddle fence is begun.
 The image shows how the DIY fence sits between the purchased gabions. I will try to make my own gabion for the next one. I’ll use the same approach, an odd number of uprights and weave through with stiff cotton yarn.
The finished fence is ‘fixed’ with a PVA solution, about 60/40, and once dry the entire base is primed with artists acrylics, and flock.
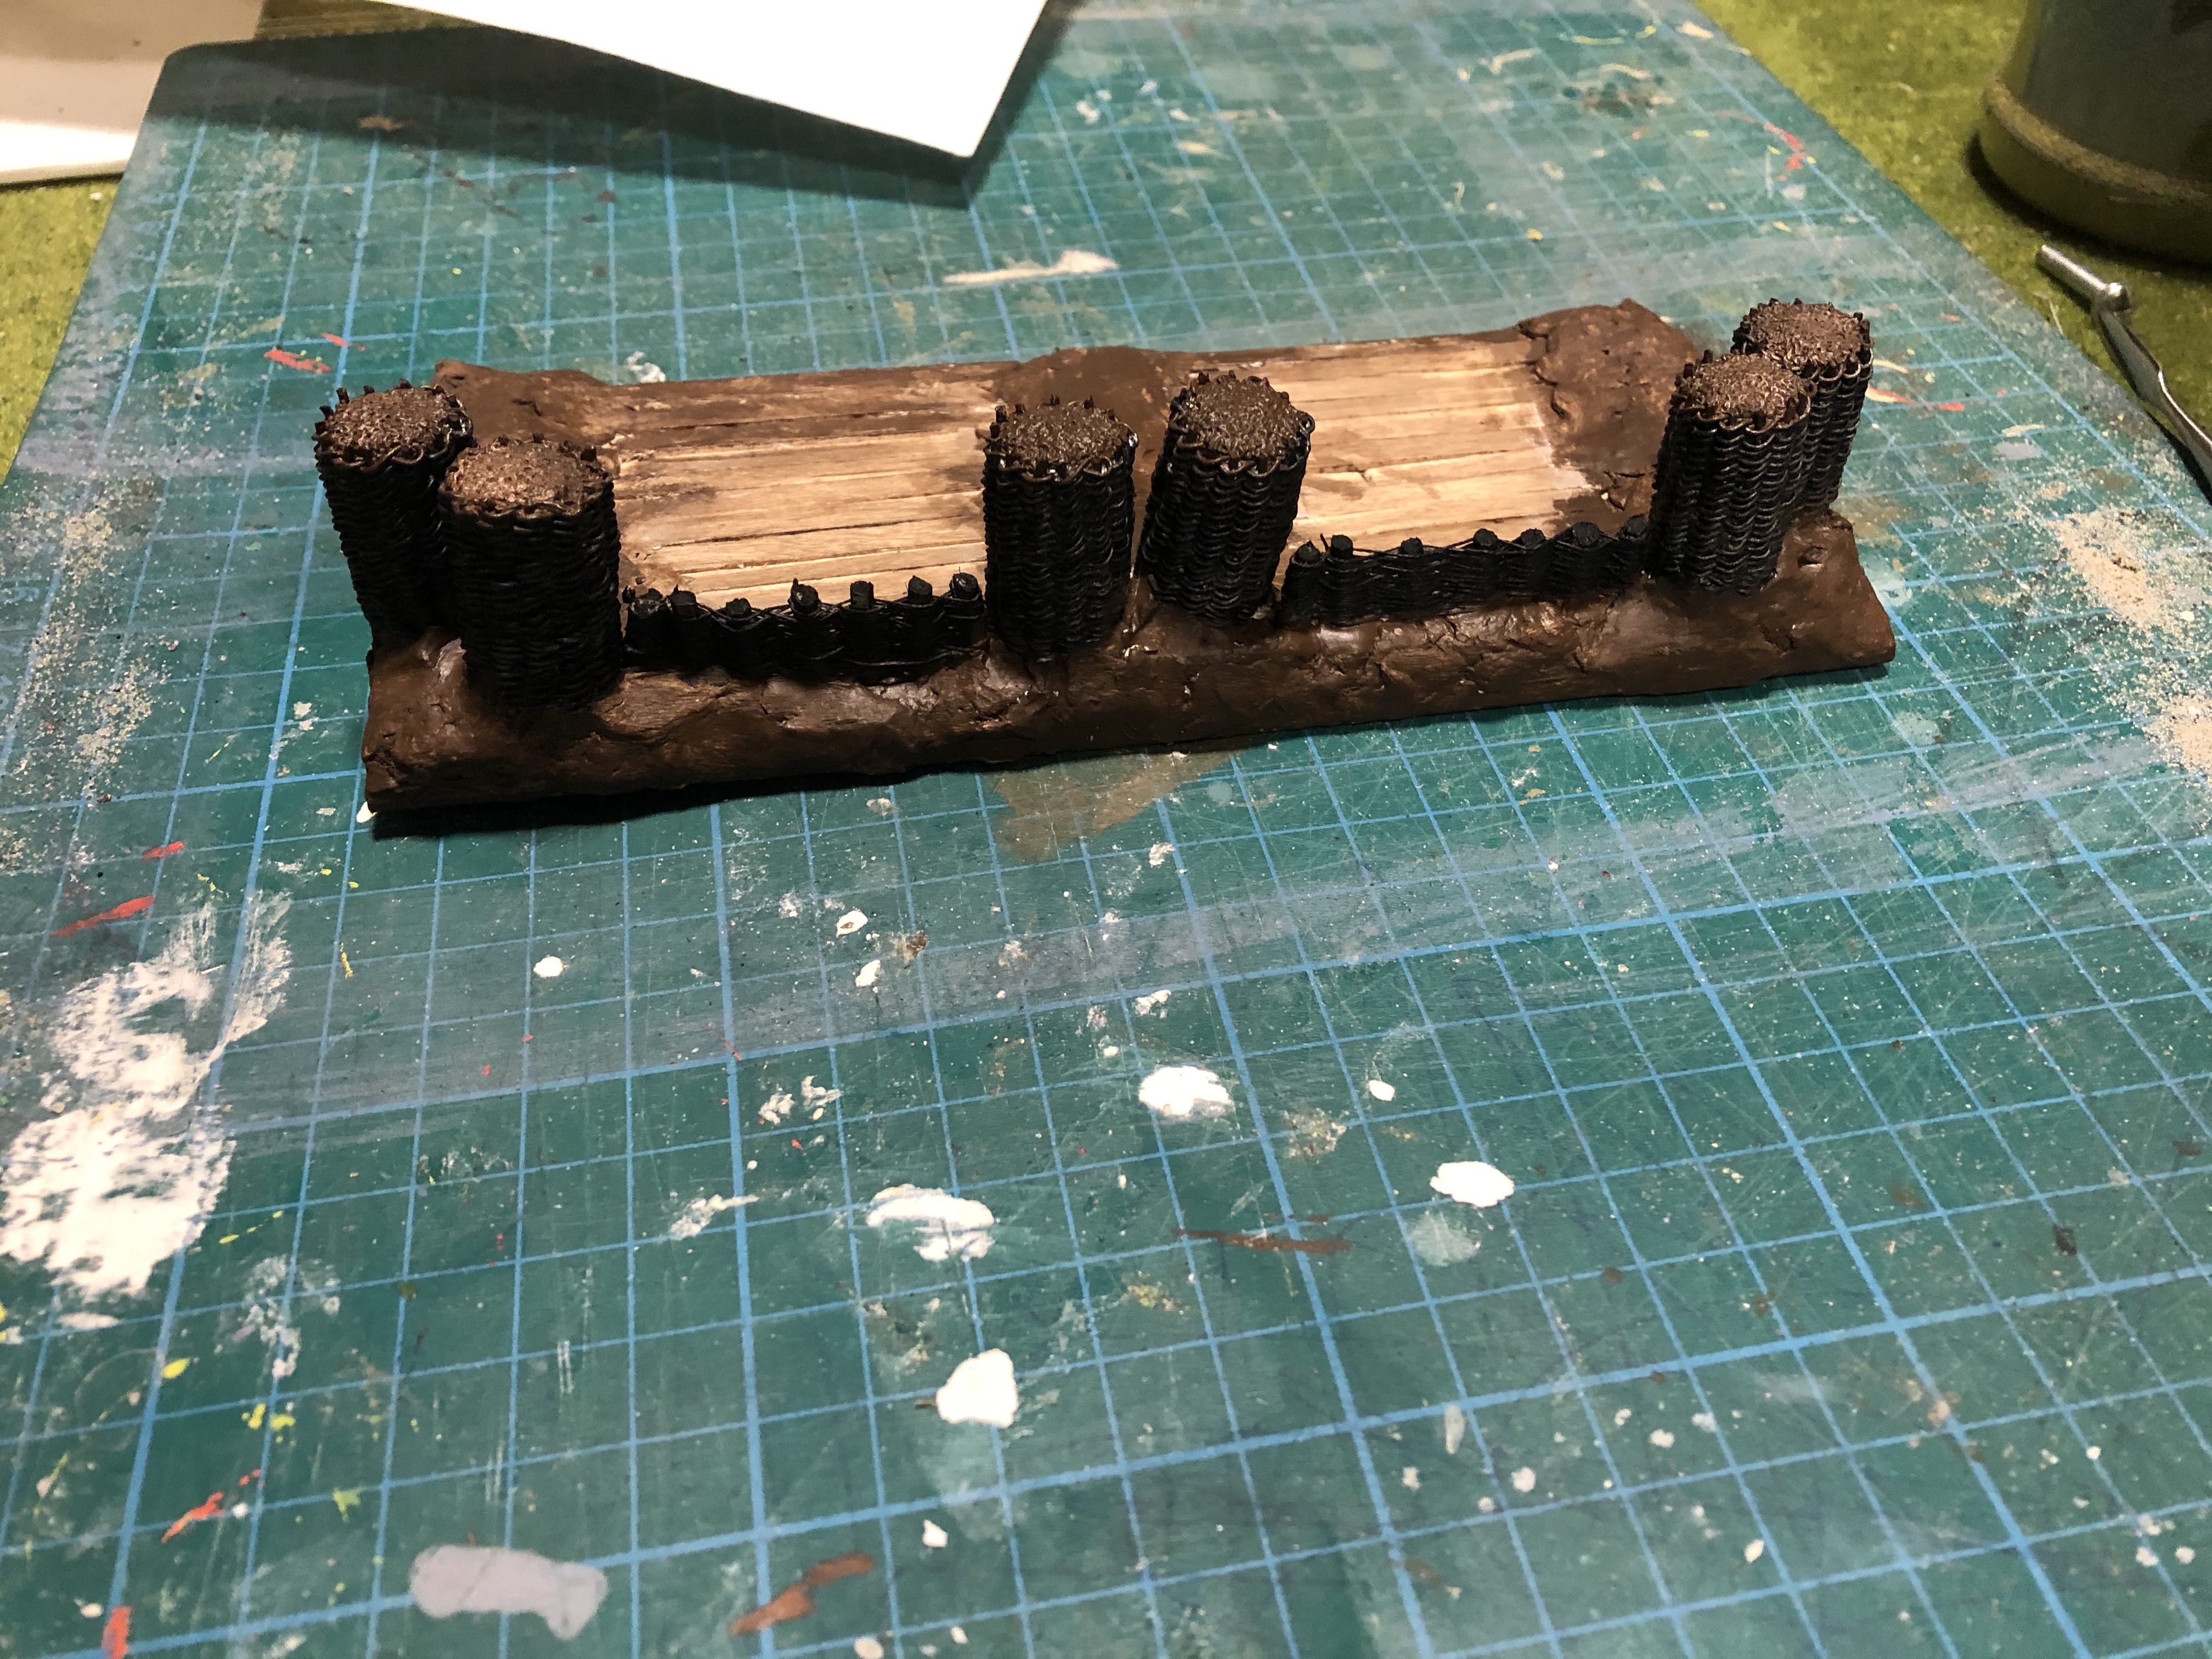 Primed and ready for flocking
 Figures fixed in place - gap for the gun
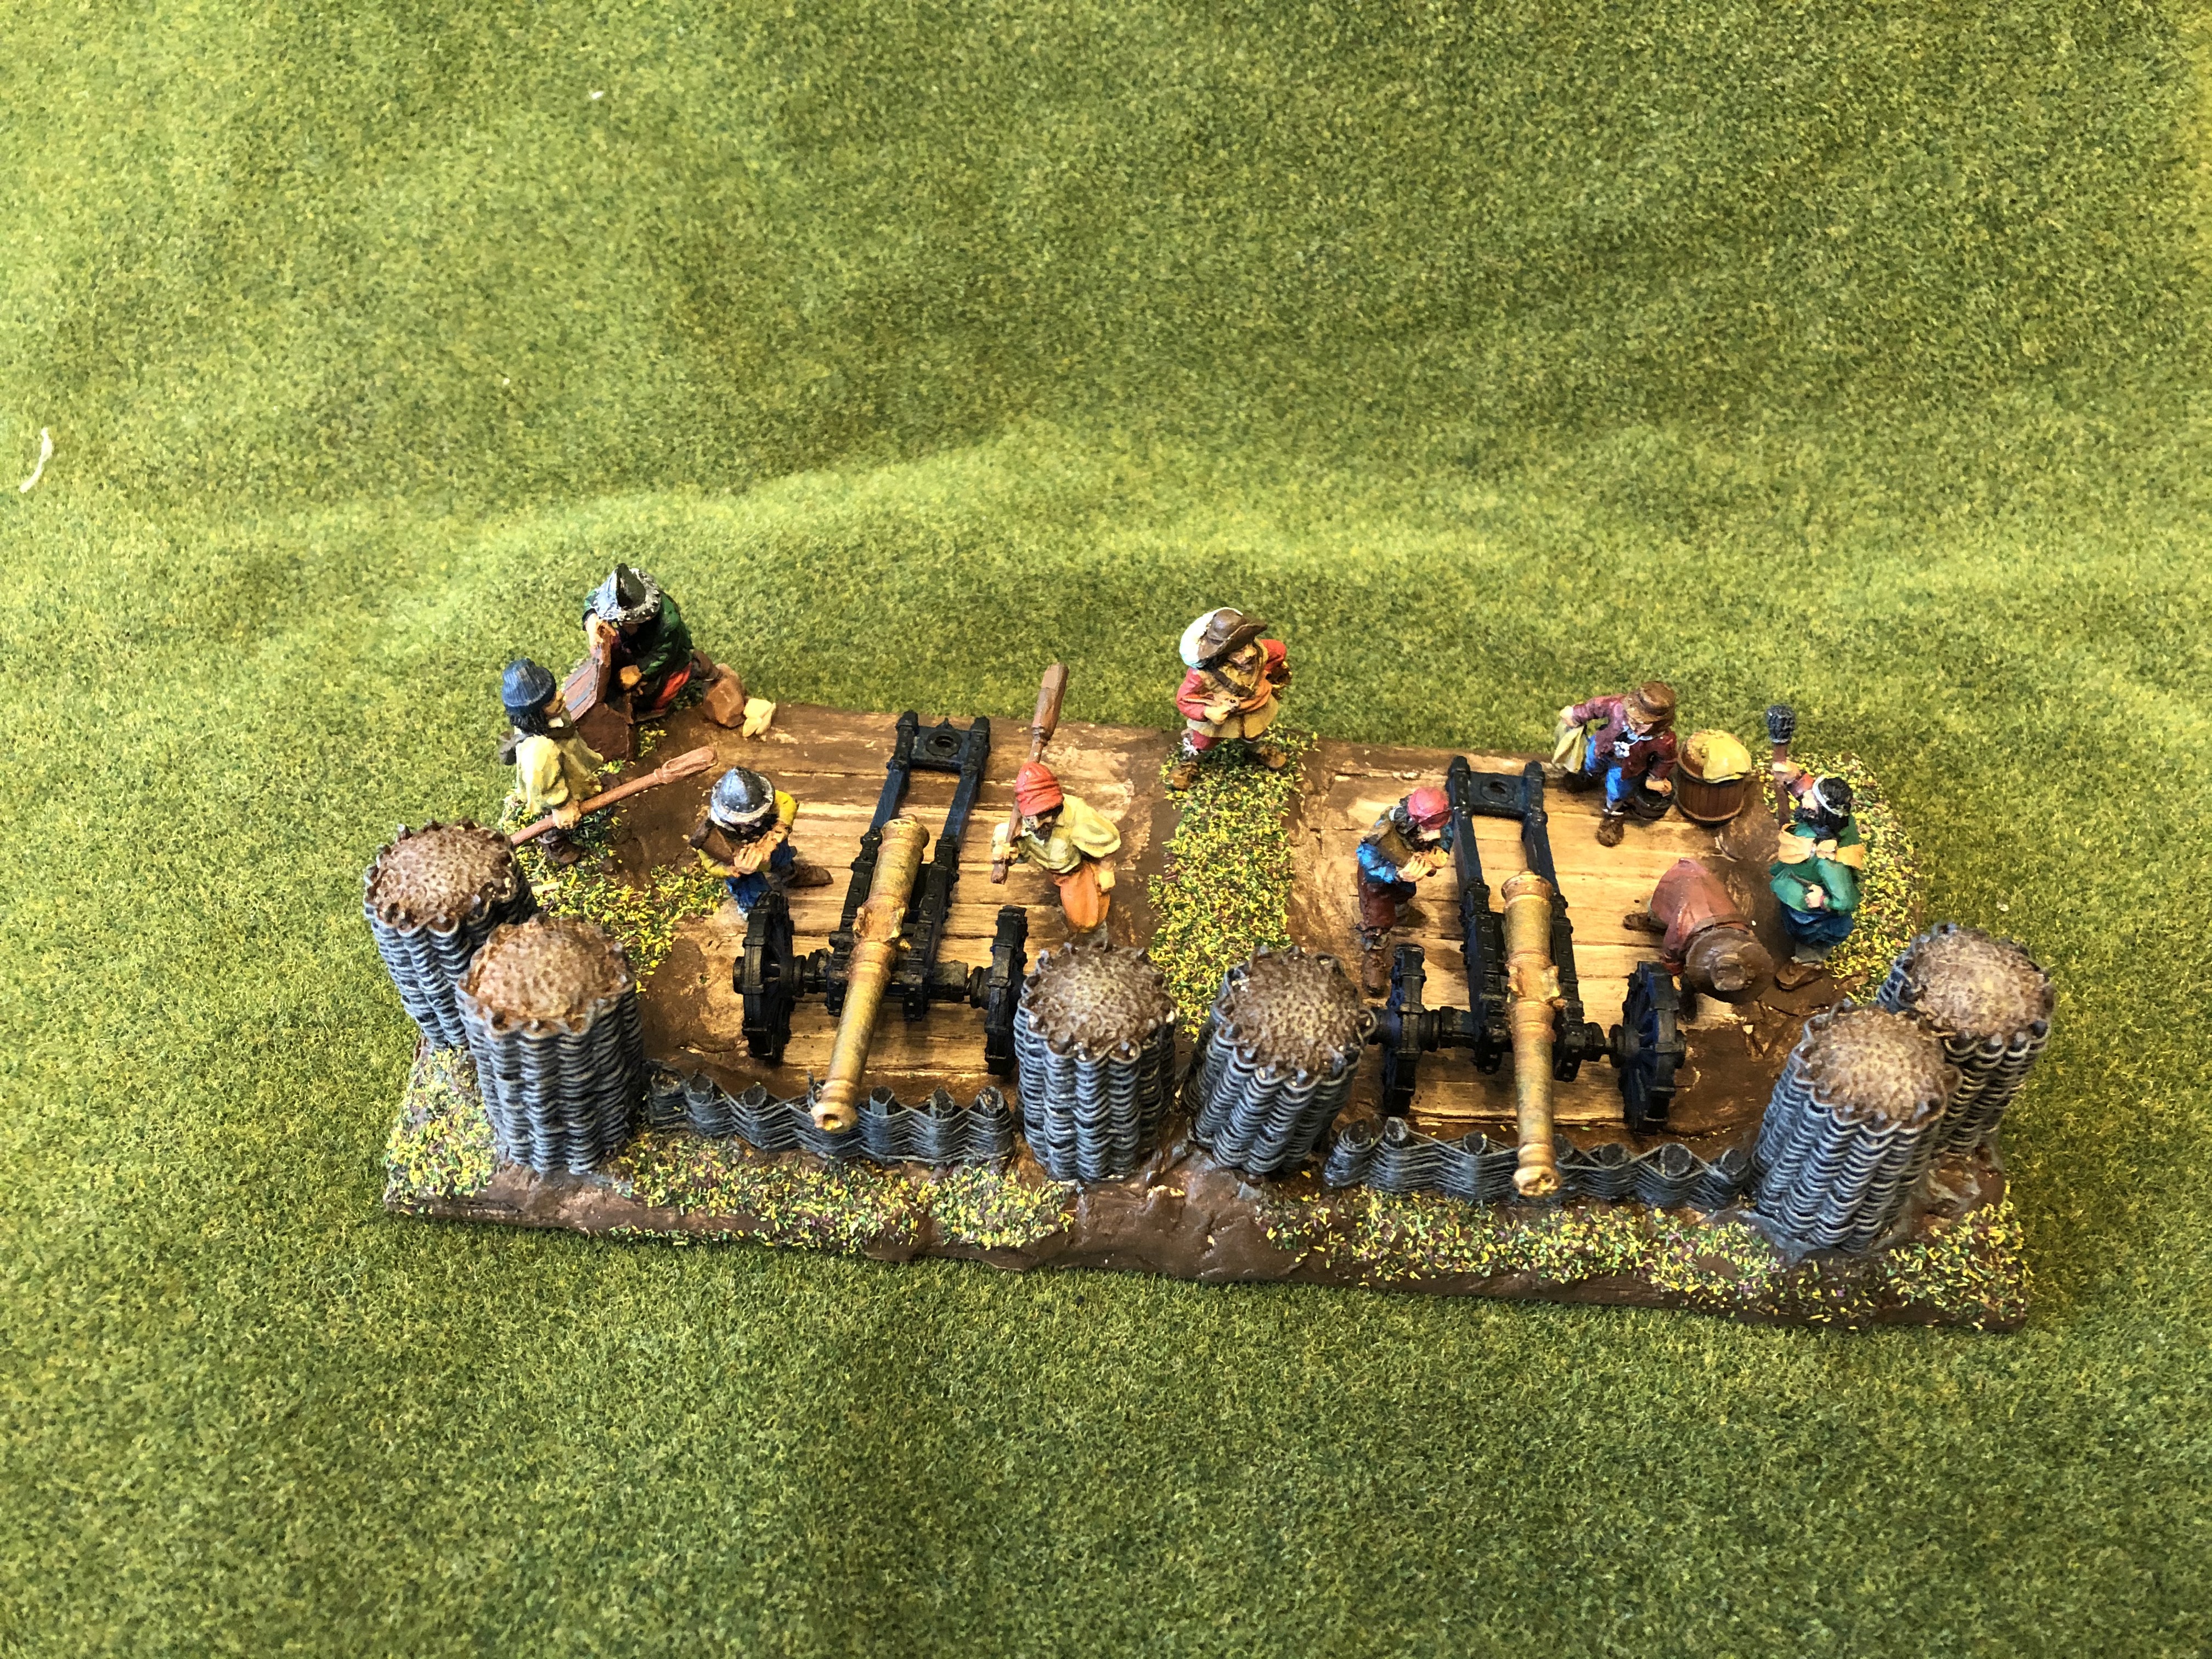 Ready to Fire!
Highlanders Bases
 Base steps: 1. Odd bits of FoamCore; 2. Attach figures; 3. Apply DAS to mould landscape
Not much to present unfortunately, been sidetracked with a number if issues, BUT, I wanted to share quickly the three Highlander bases I am working on. The steps are self explanatory, but essentially I have stuck down some random foam core to a standard base to add limited hight differences.
Figures are glued down once the foam core is set, and afterwards DAS air-drying clay is stuck down to give volume and texture to the base.
 Step 4. PvA glue and sand; 5. Flocking; 6. Assorted scatter
Likewise the final steps are as expected. Watered down PvA (about 60/40) applied to the dry DAS base and fine sand added. This helps to give some texture and also seems to set the figures in better to the base.
After that, the usual flock is applied (also with 60/40 PvA) and finally some odds and ends of bushes, stones etc. to give a little dioramic affect.
I’ll post a final summary on the 20th, but as an aside, I was sufficiently enthused that I attempted to make some small houses. Again nothing new here. Foam core walls, balsa wood roof with added DAS for the thatched effect.
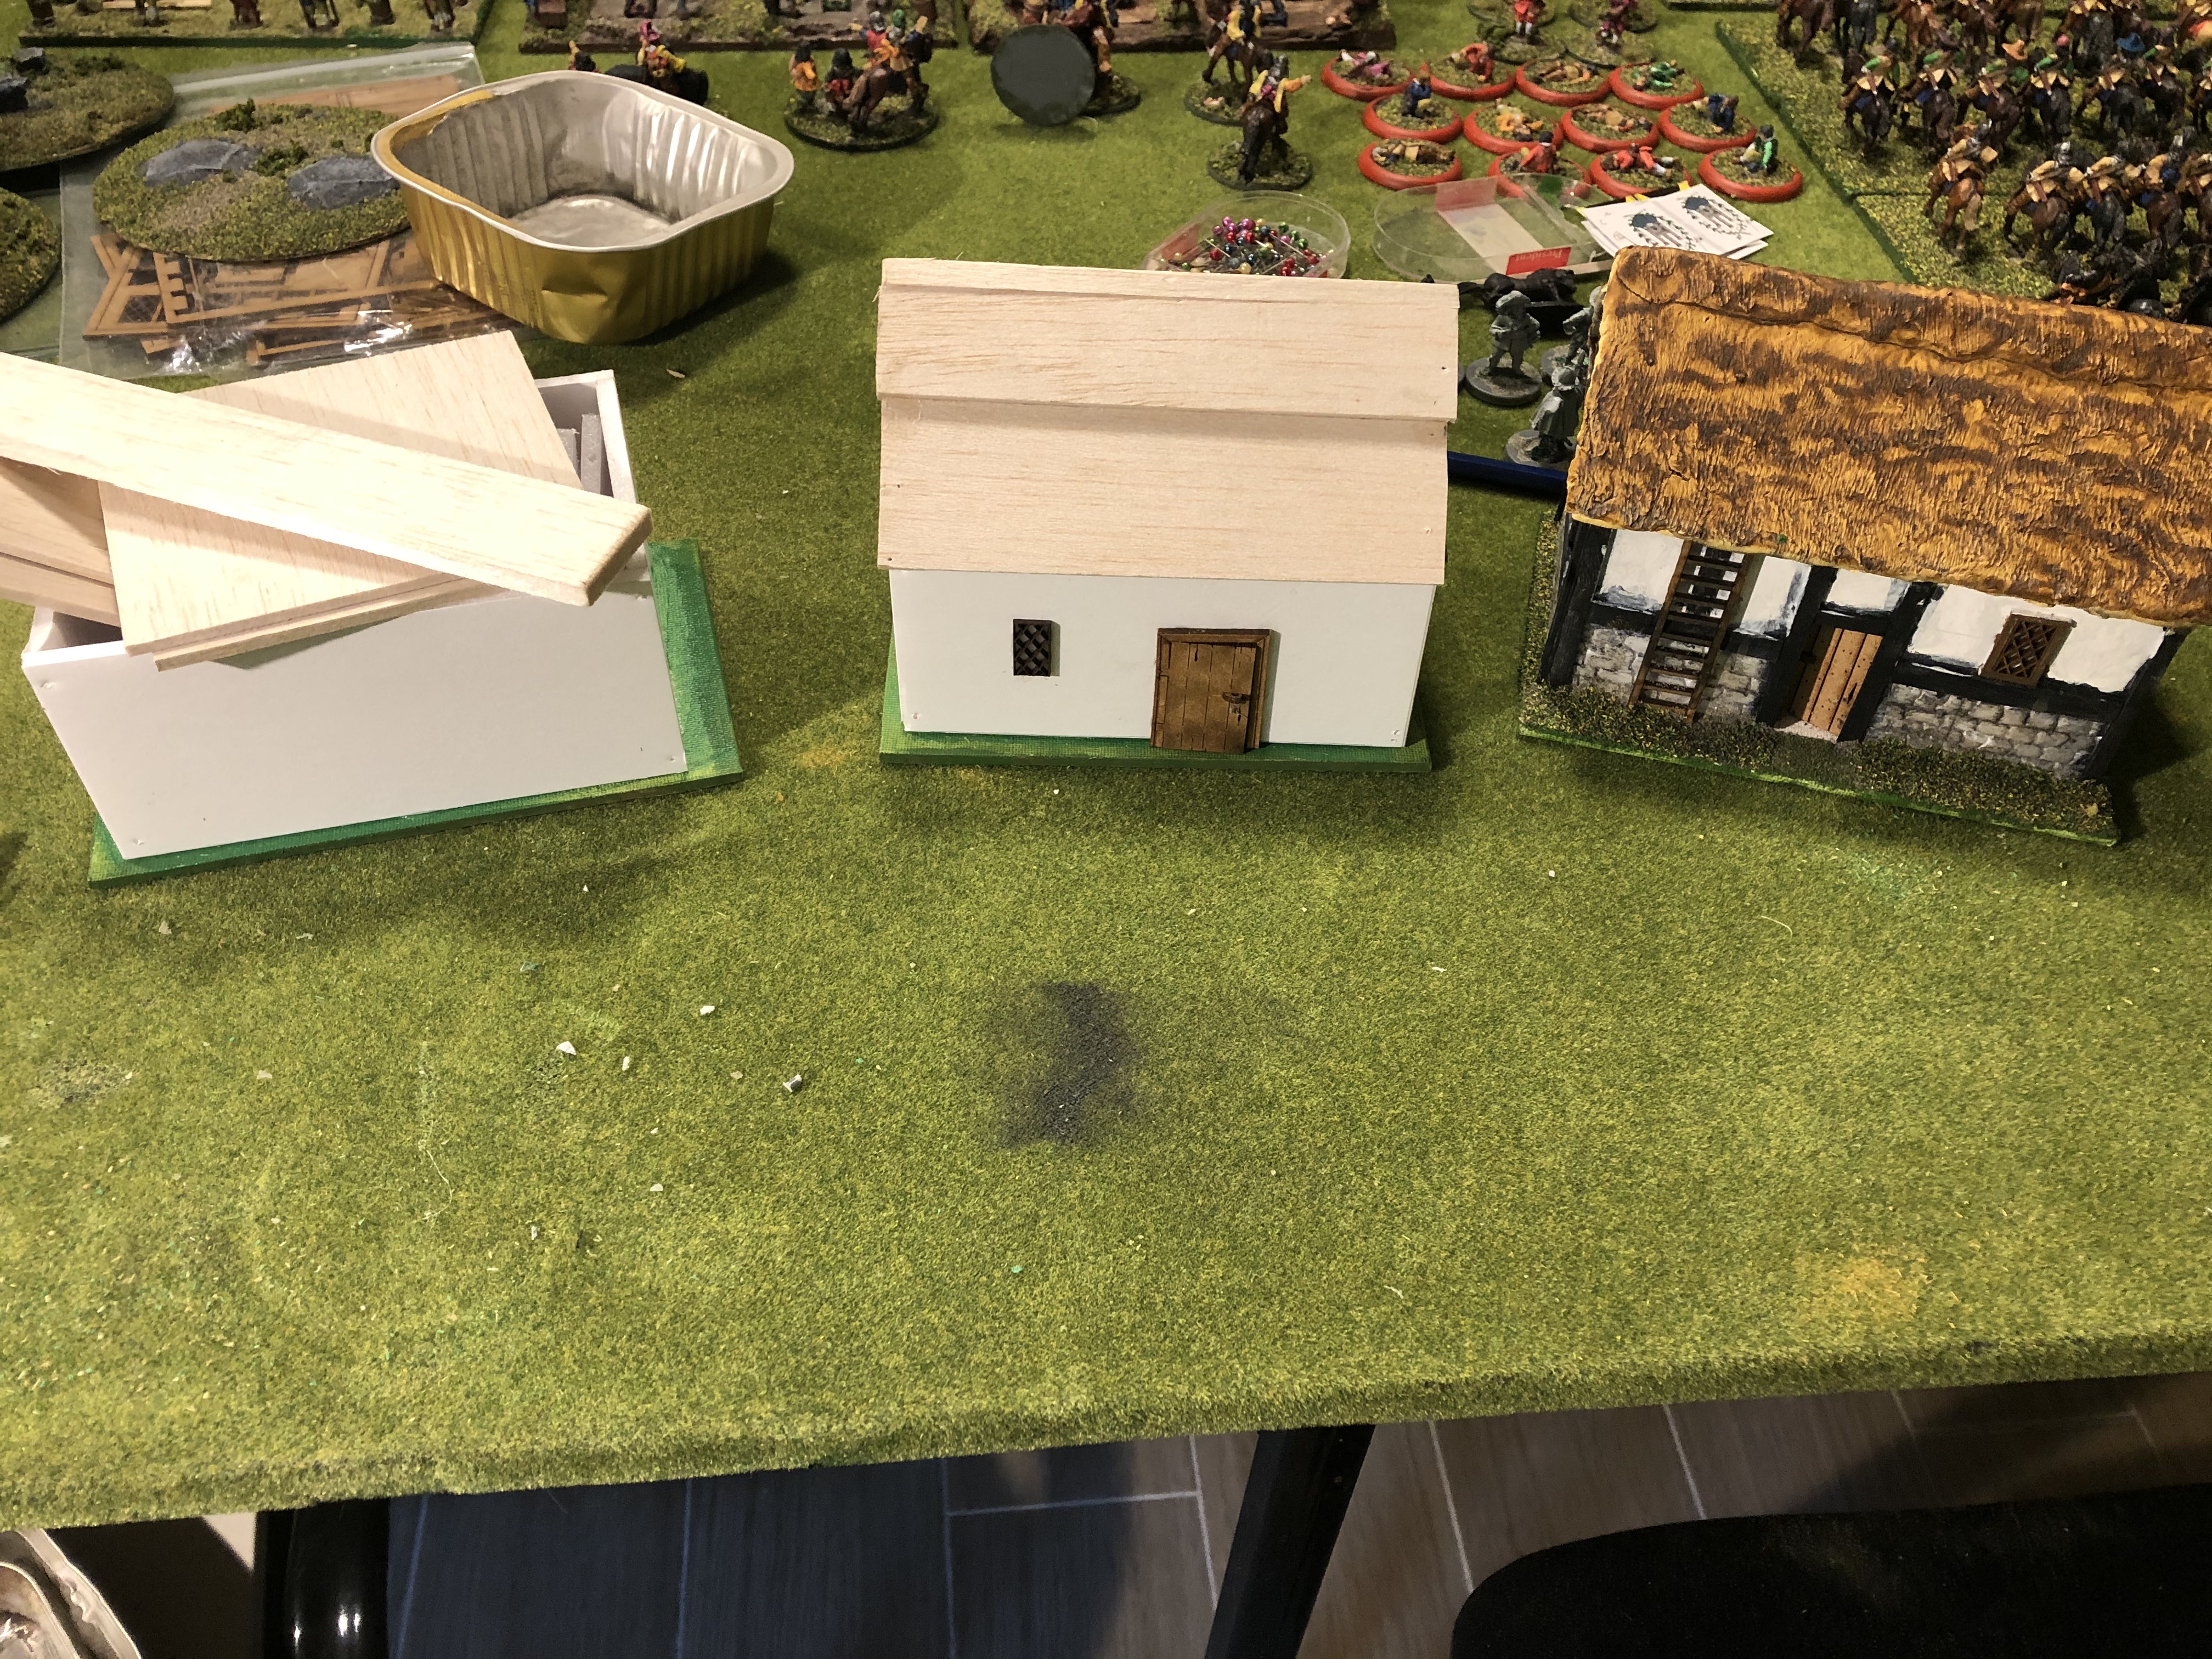 Houses "adorned" with mdf fixtures from 4ground
Spring Clean final
So, here is my final post within the time frame of the Spring Clean Challenge. First to say a thank you to those who made recommendations (quite surprised, to be honest!) and to the comments, all appreciated.
Did I do everything I hoped? No. Life sometimes gets in the way, but without the challenge, I doubt I would even have resurrected these armies, and even now there are sufficient forces for a decent game.
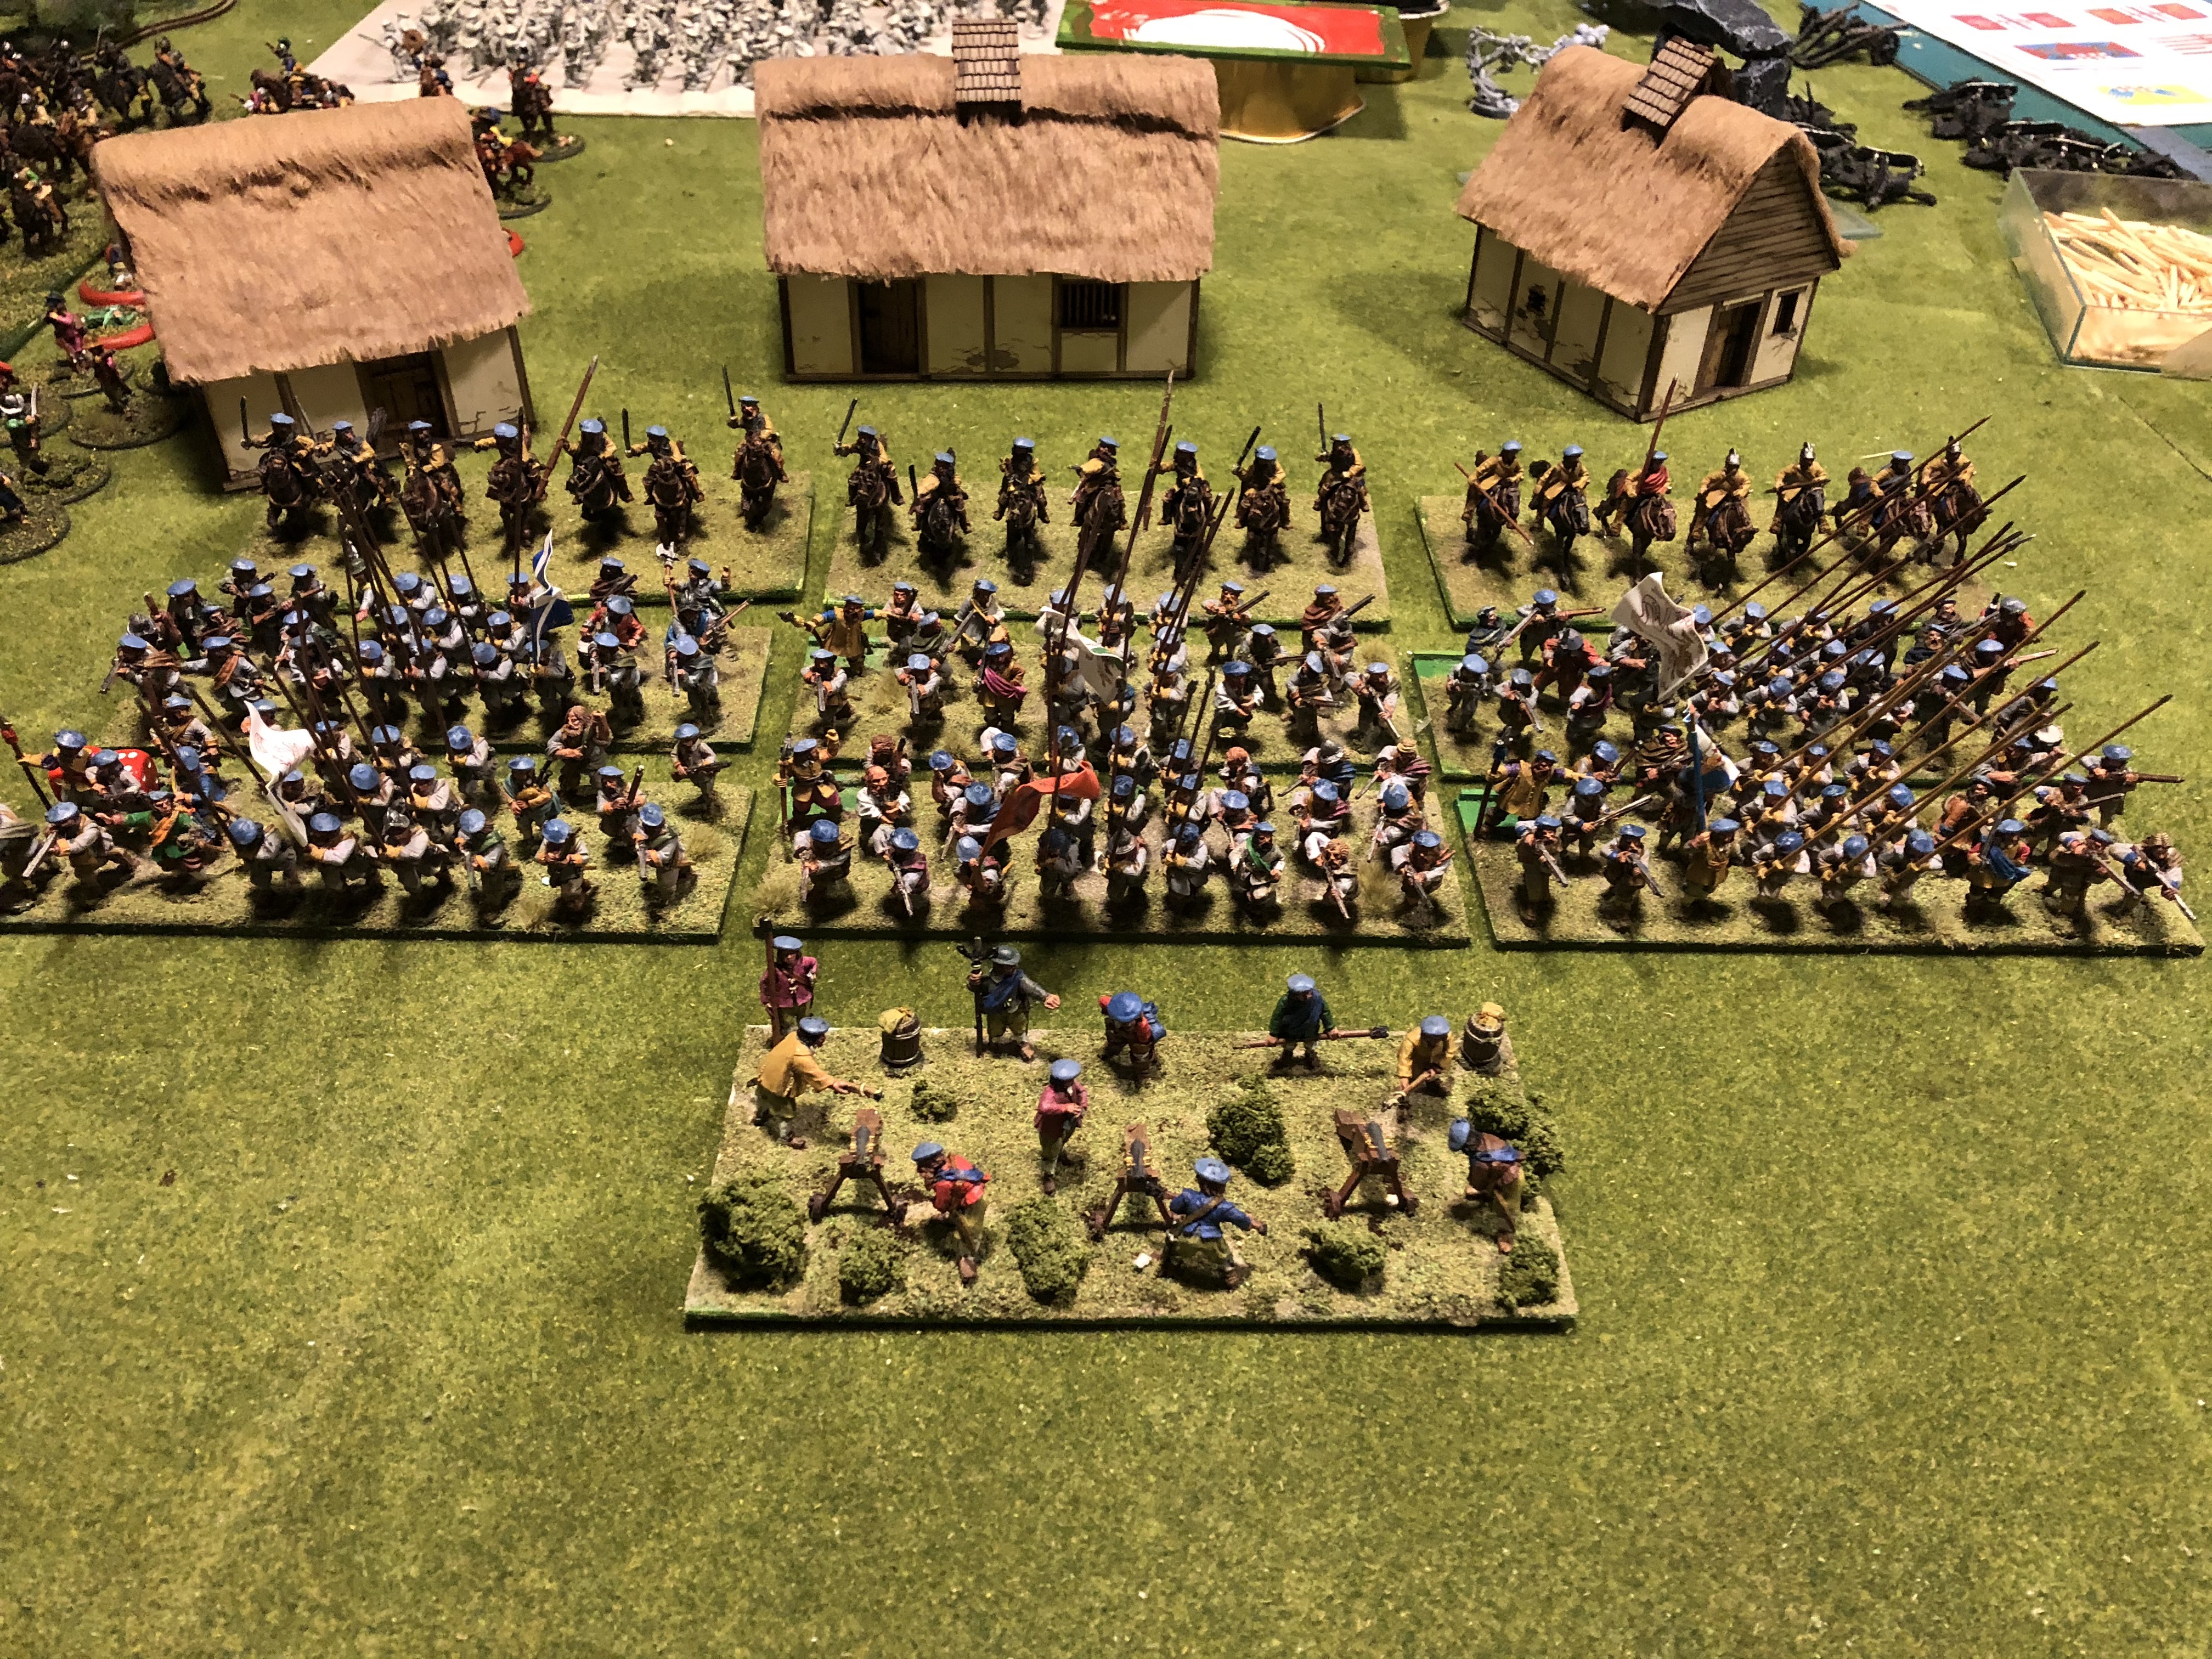
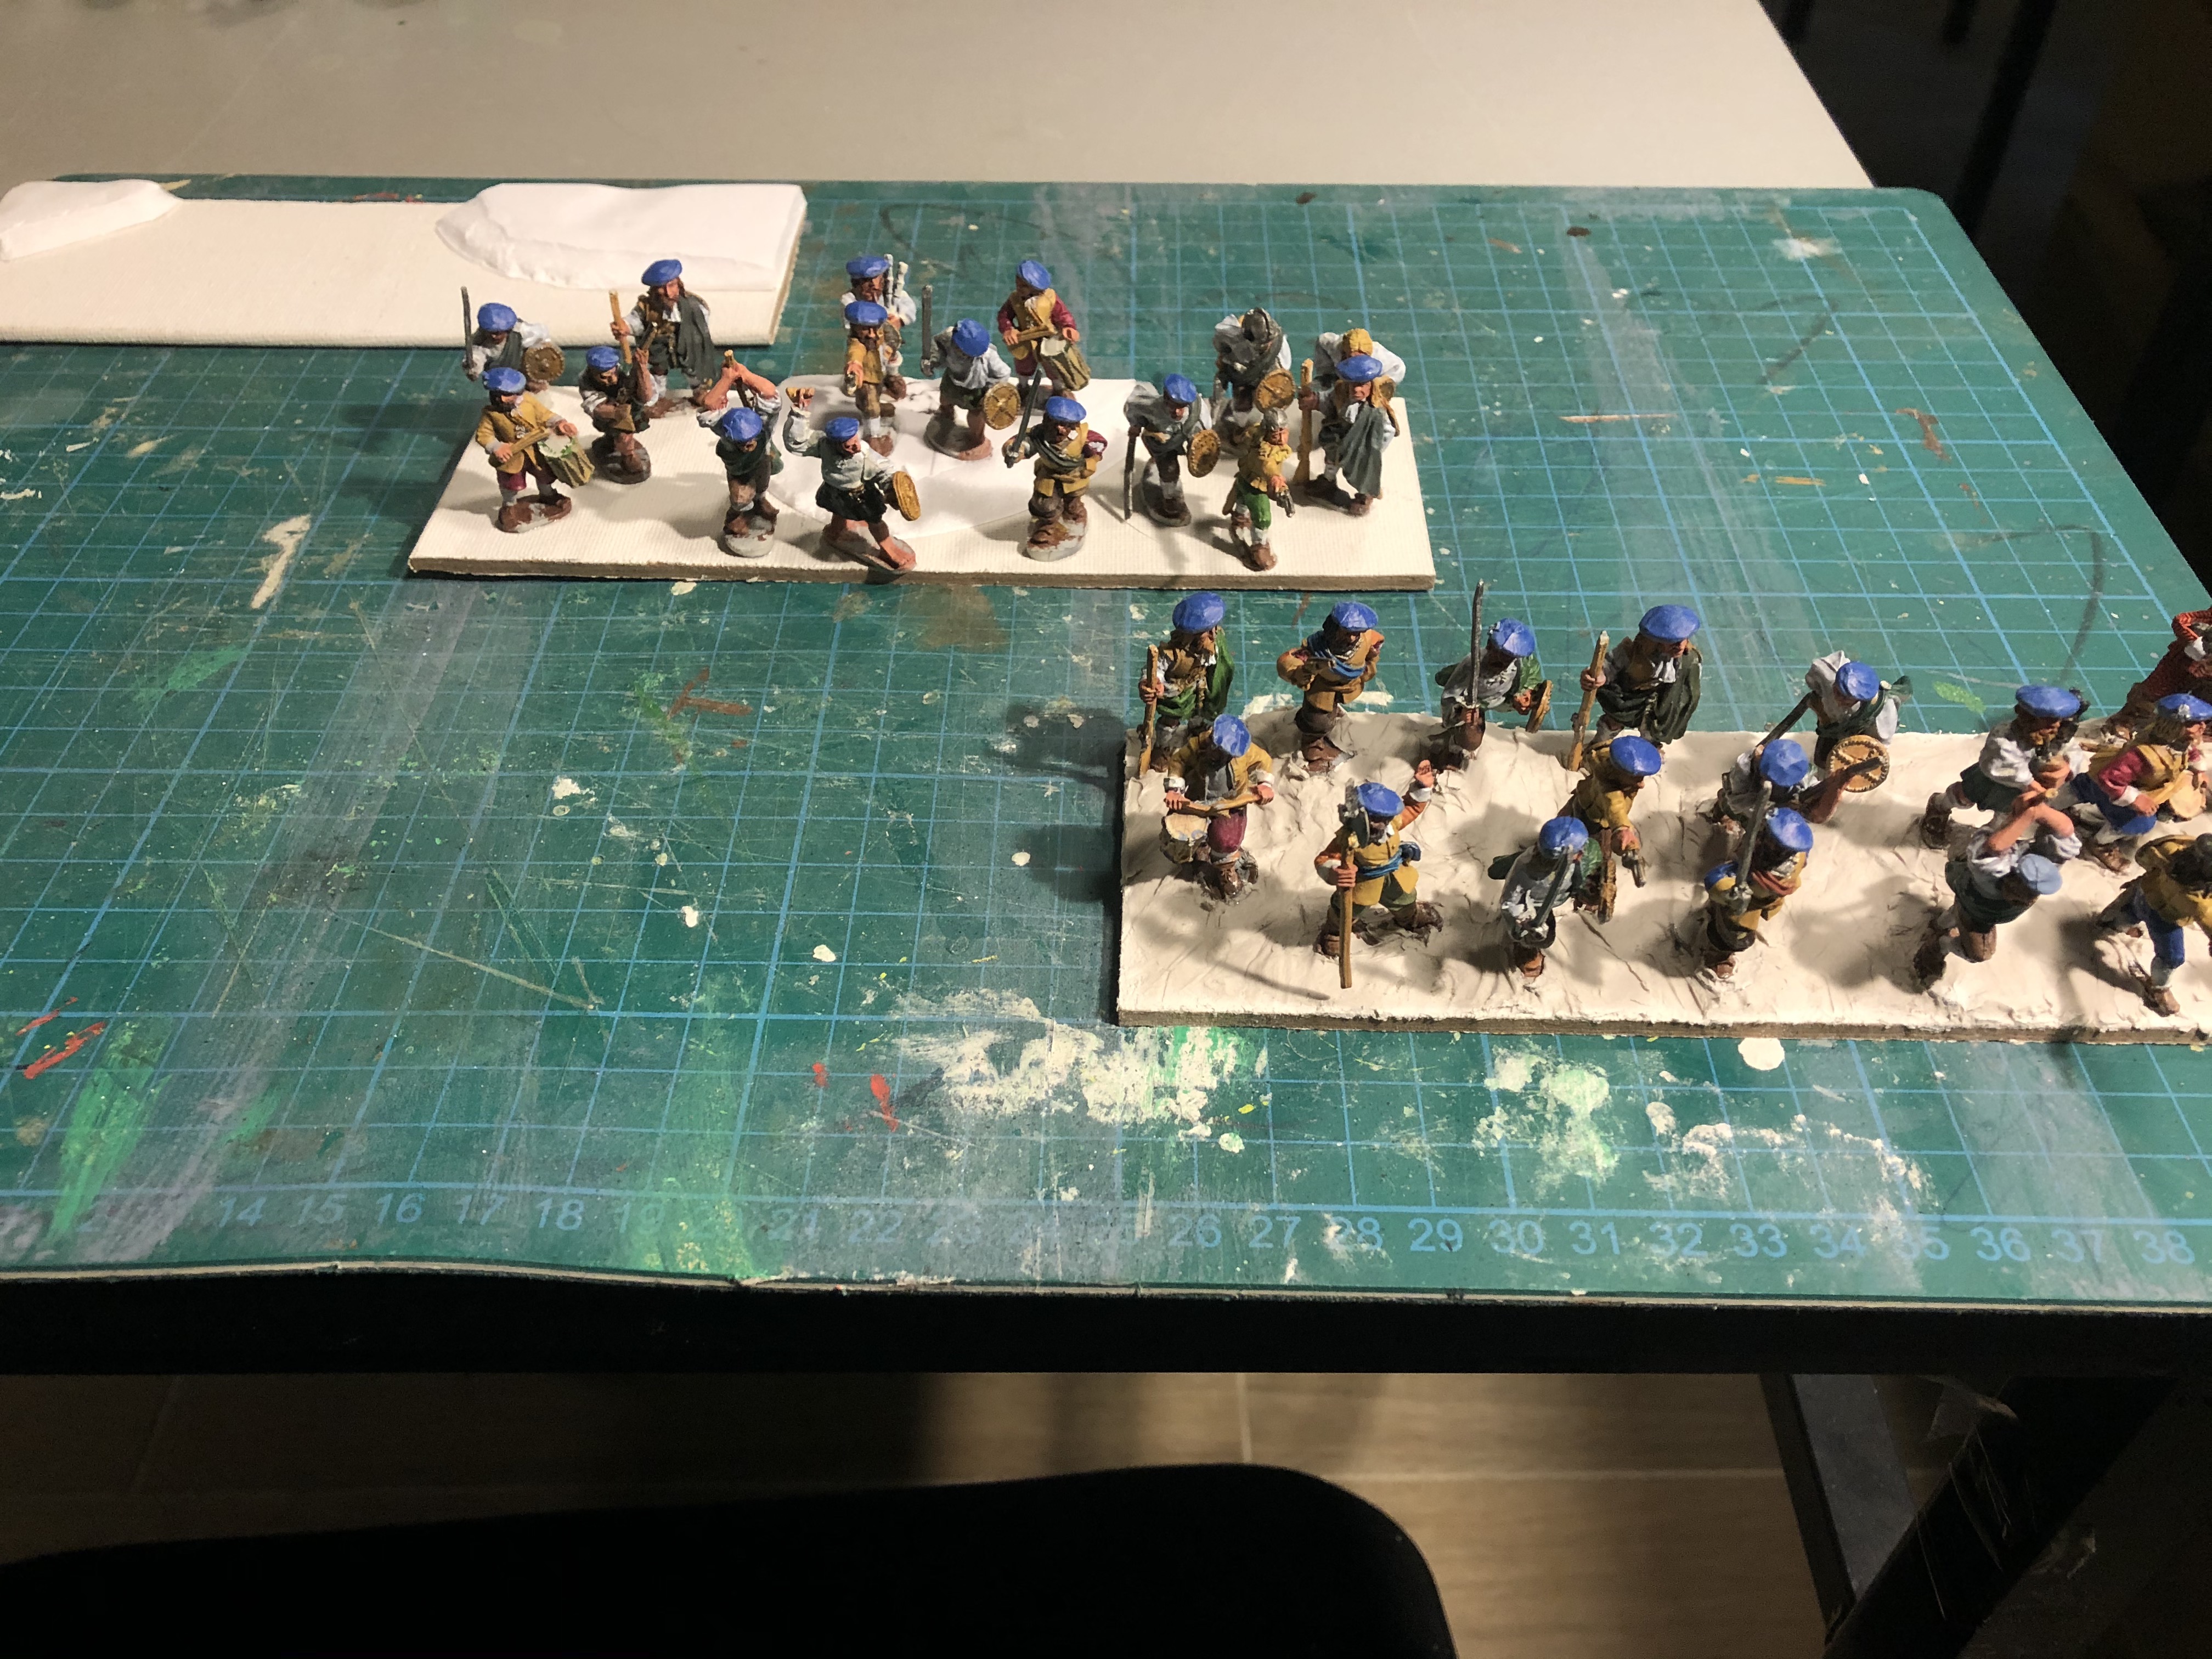
Here is a picture of the models from the rear. The Scottish are to the Left and the English to the Right. Although in the period, both sides fought within their countries and well as against each other. So it’s a flexible period for mixing up armies as both sides were similarly armed and uniformed.
 From the rear, cavalry, infantry and guns
The next two pictures show the respective nationalities from the front. As the challenge progressed, I found that I was more inclined to try out some simply “diorama” on the bases. No figure removal, so it’s possible. Works best with smaller groups of figures, e.g. Highlanders or artillery. I’ll continue to work on father bases and for the Dragoons will have a mixed base of Cavalry and Foot in a diorama setting.
And finally some work in progress. Apart from these I have quite a lot still to do. Approximately 7 infantry bases, 8 Cavalry and another 3/4 artillery. In addition I have more Command bases, and the differently base coated infantry figures will become “disruption” markers eventually. I’ve also started to make some buildings (one complete in the main picture another two WiP).
So, thanks again to all who took an interest. It was a fun project and I’ll post further pictures as units are completed
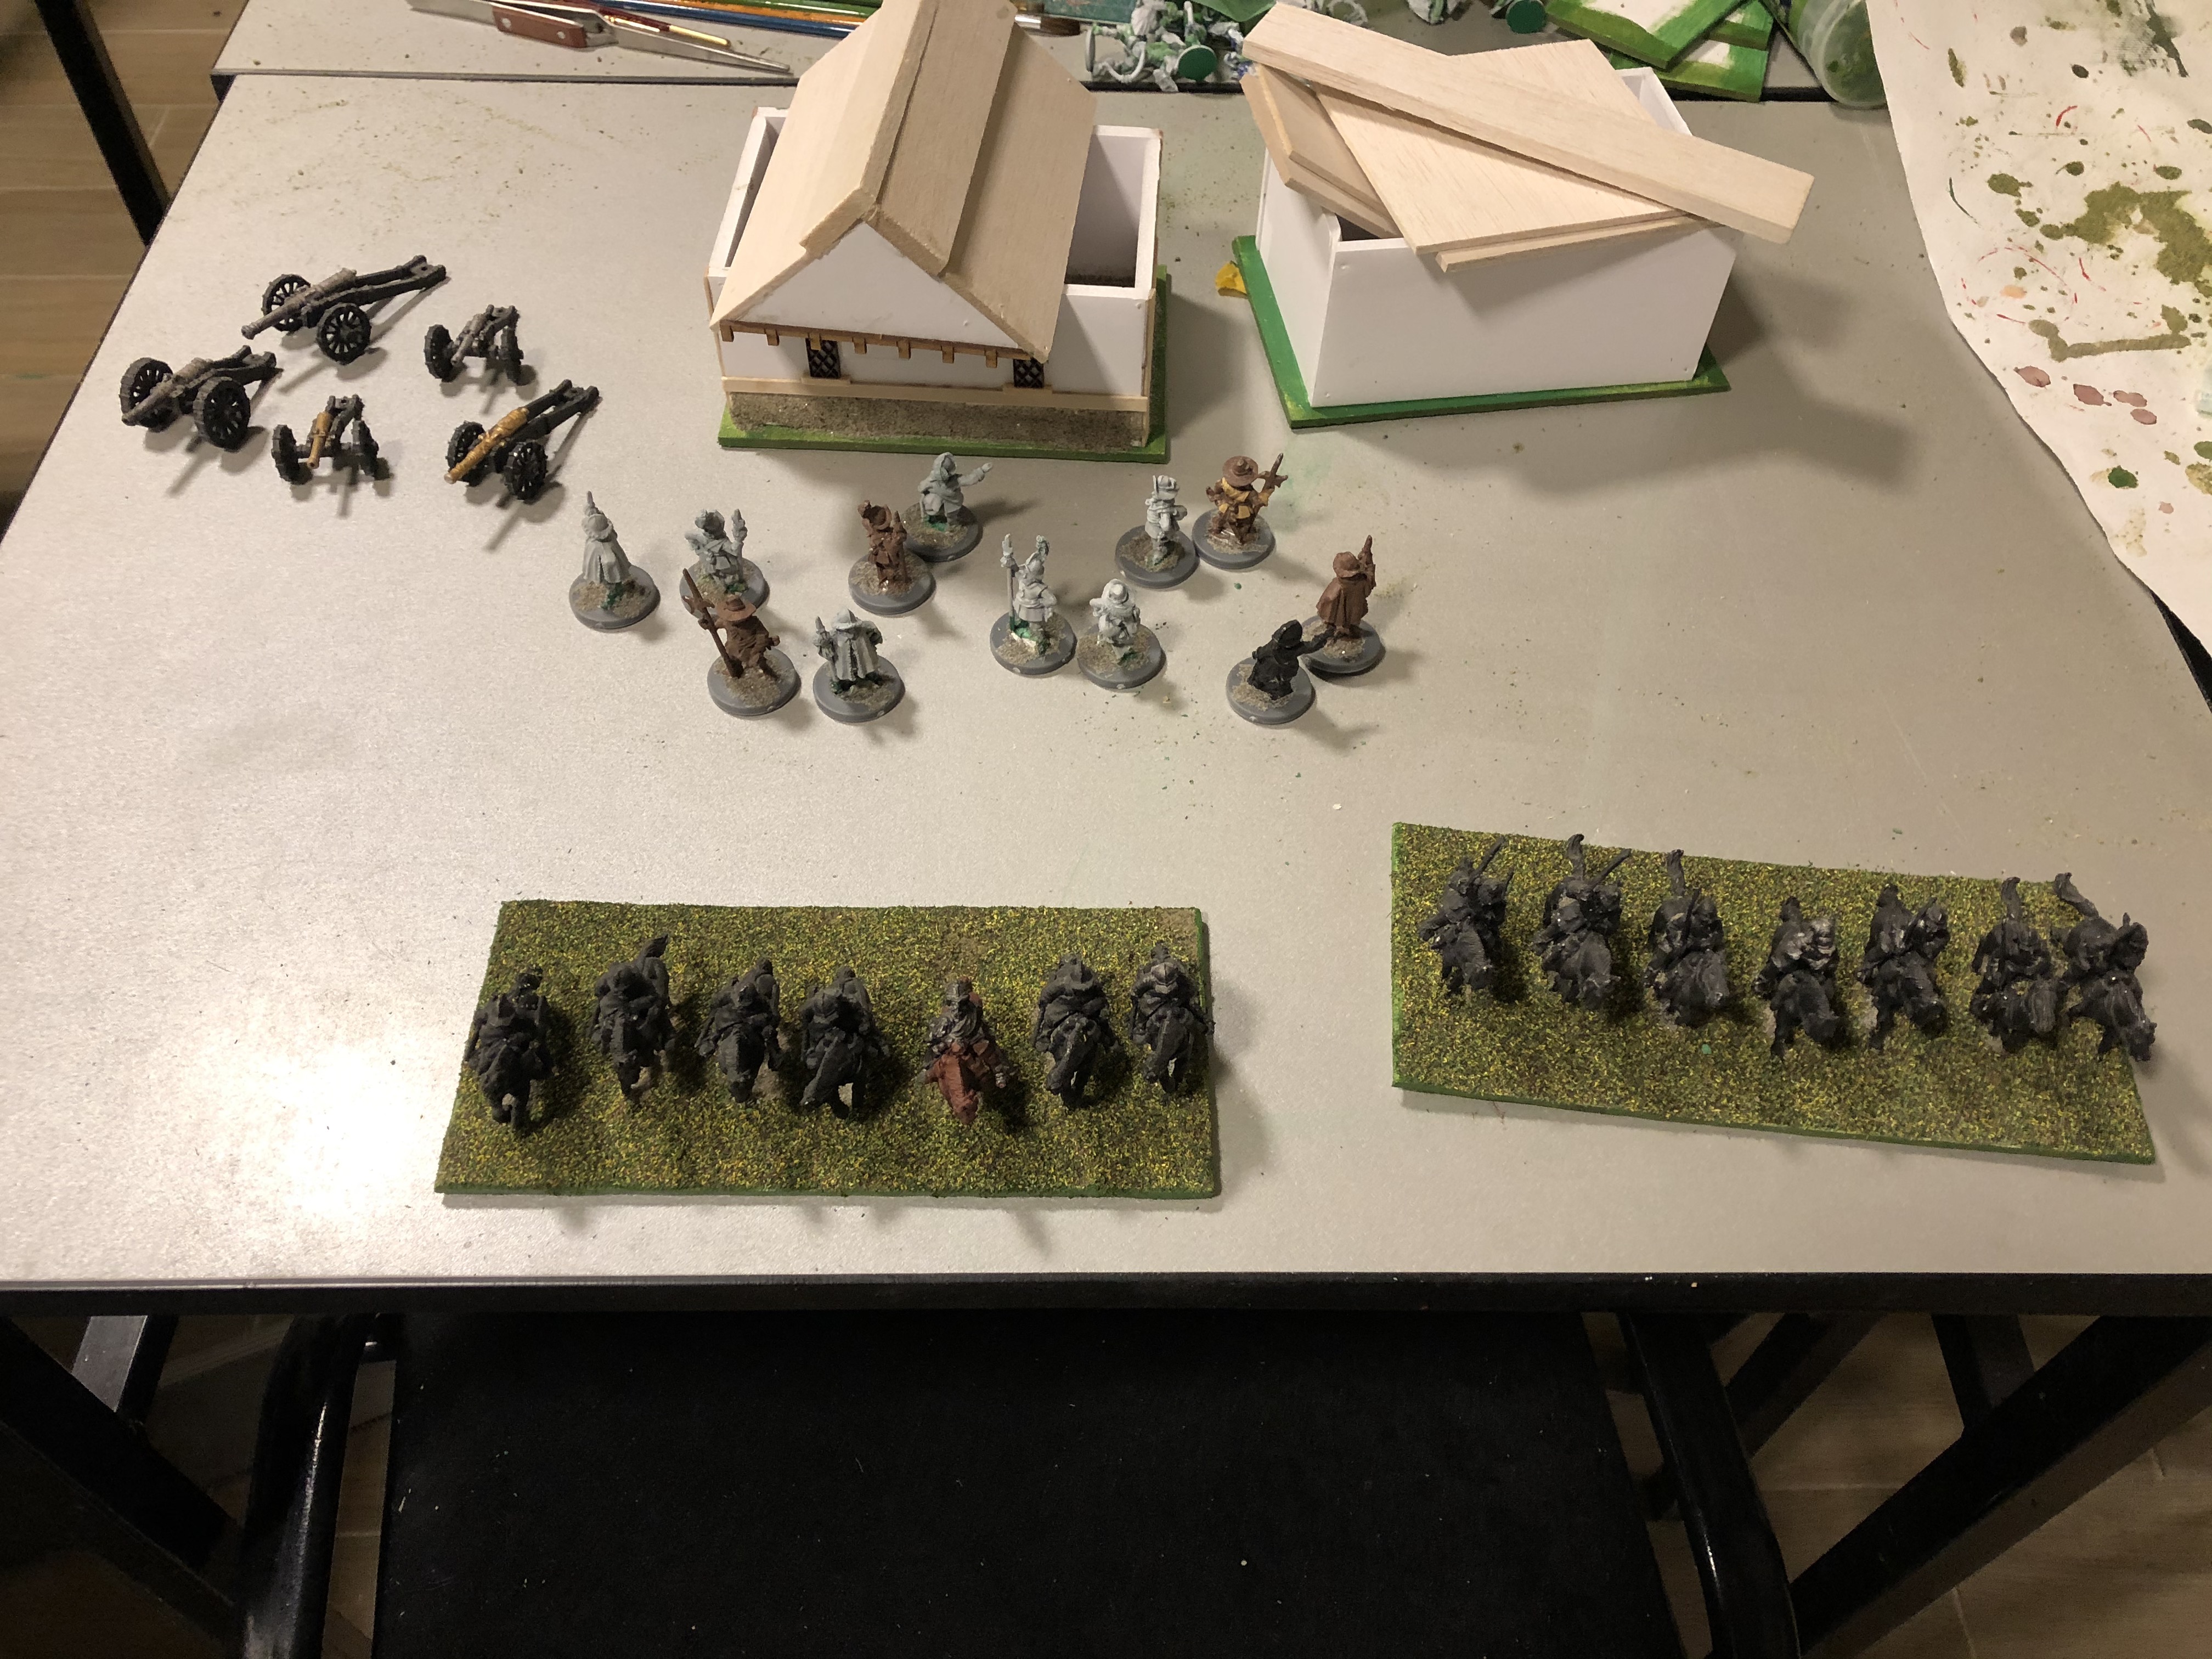 A tiny sample of the WiP
All that Basing and painting - what was it for?
As Gerry alluded to in his kind commentary on my project challenge, I still have quite a few units to finish off. Together with houses, trees, rivers, roads etc. (You know the drill).
But the point was to create a game that I could play with my young son (10 yo) and also to have a more complex game for me to play solo. So what will follow shortly will be a first play through of the simple rules below.
The Rules
The core rules are based on a combination of Principles of War: Renaissance, Give no Quarter, and some things lifted from more recent rule sets.
I’m toying with using the Bolt Action dice mechanism, but restricting this to the number of sub commanders, and the artillery. This may seem odd or daft, and we will soon see if I really am off my head. But my thinking is that in a “normal” sized battle, there is likely to be 18+ units on the table and at the time, these would ONLY act according to the relevant commander. This may require additional sub-commanders.
So, each army will comprise three distinct groups. e.g. Right wing, Centre, Left wing (or Vanguard, Main force, and Rear guard) PLUS the artillery. Typically then, 3-5 dice, but if sub-commanders used, this could double the number of dice, which may be better.
In addition, I’ll add an extra 2 Black dice. When the second one is drawn, the turn ends. So there is an element of uncertainty in whether or not you’ll get to move/act with all your units each turn.
Otherwise, a commander can instruct his group to Move, Move & Fire, Fire, Rally, Re-load, or Ambush.
Pike & Shot Units fire to hit 4+ on 6 dice. (7 dice if first volley). Once fired unit has a reload marker and loses the extra dice unless they use a turn to reload. NO saving throws.
Morale will typically be based on quality of troop (as in BA): Raw <7; Trained <8; Veteran <9. Officer within 6″ increase by 1. (e.g. Trained would pass with 9). Morale taken on any Hit. If one attack produces 4+ hits a casualty marker is placed which reduces moral by 1 per marker (THREE markers = unit routs). A marker can be removed on a Rally order.
Units become disordered when they suffer 2 casualty markers OR lose a melee fight, OR cross uneven ground.
Movement relatively slow (as per the time). P&S unit 6″ (9″ if “run”). Cavalry 12″ (18″ if “run”). Artillery is fixed once placed (so careful placement is important).
Melee decided by unit. P&S 6 dice; Cavalry 6 dice vs. Cavalry; They can NOT charge steady troops, only disordered.
This is the basic ideas. We’ll see if it works!
The BatRep!
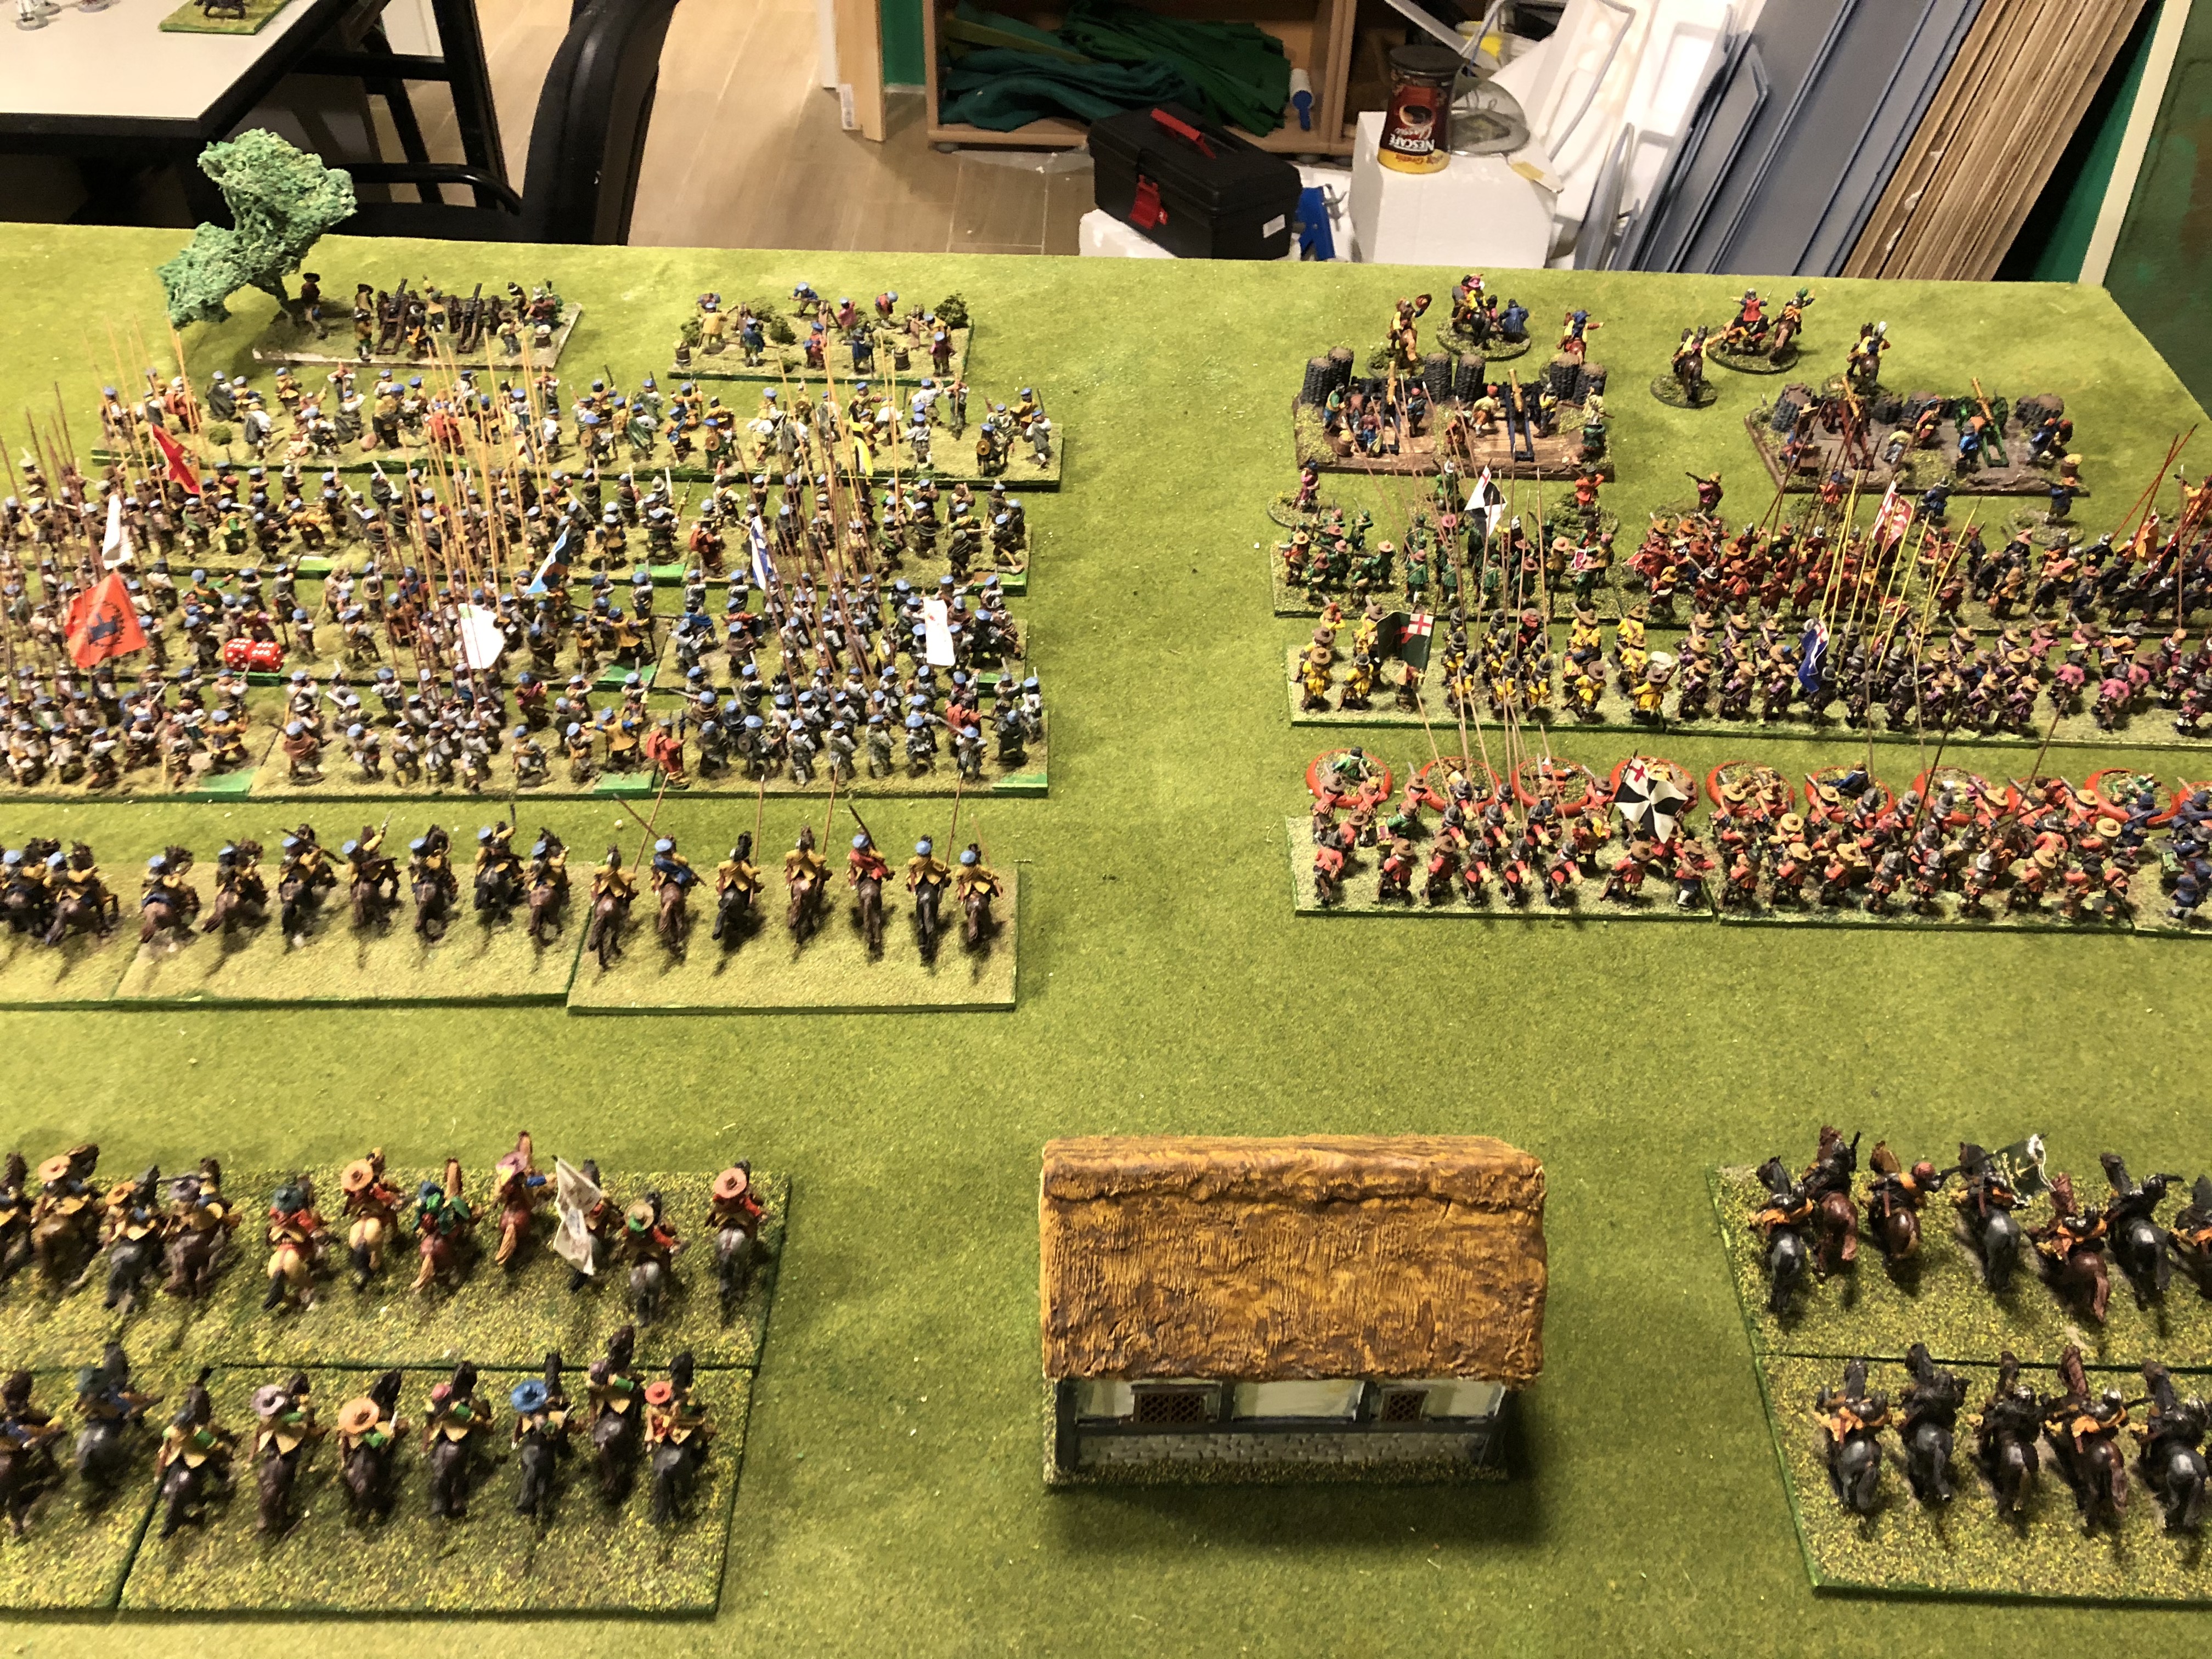
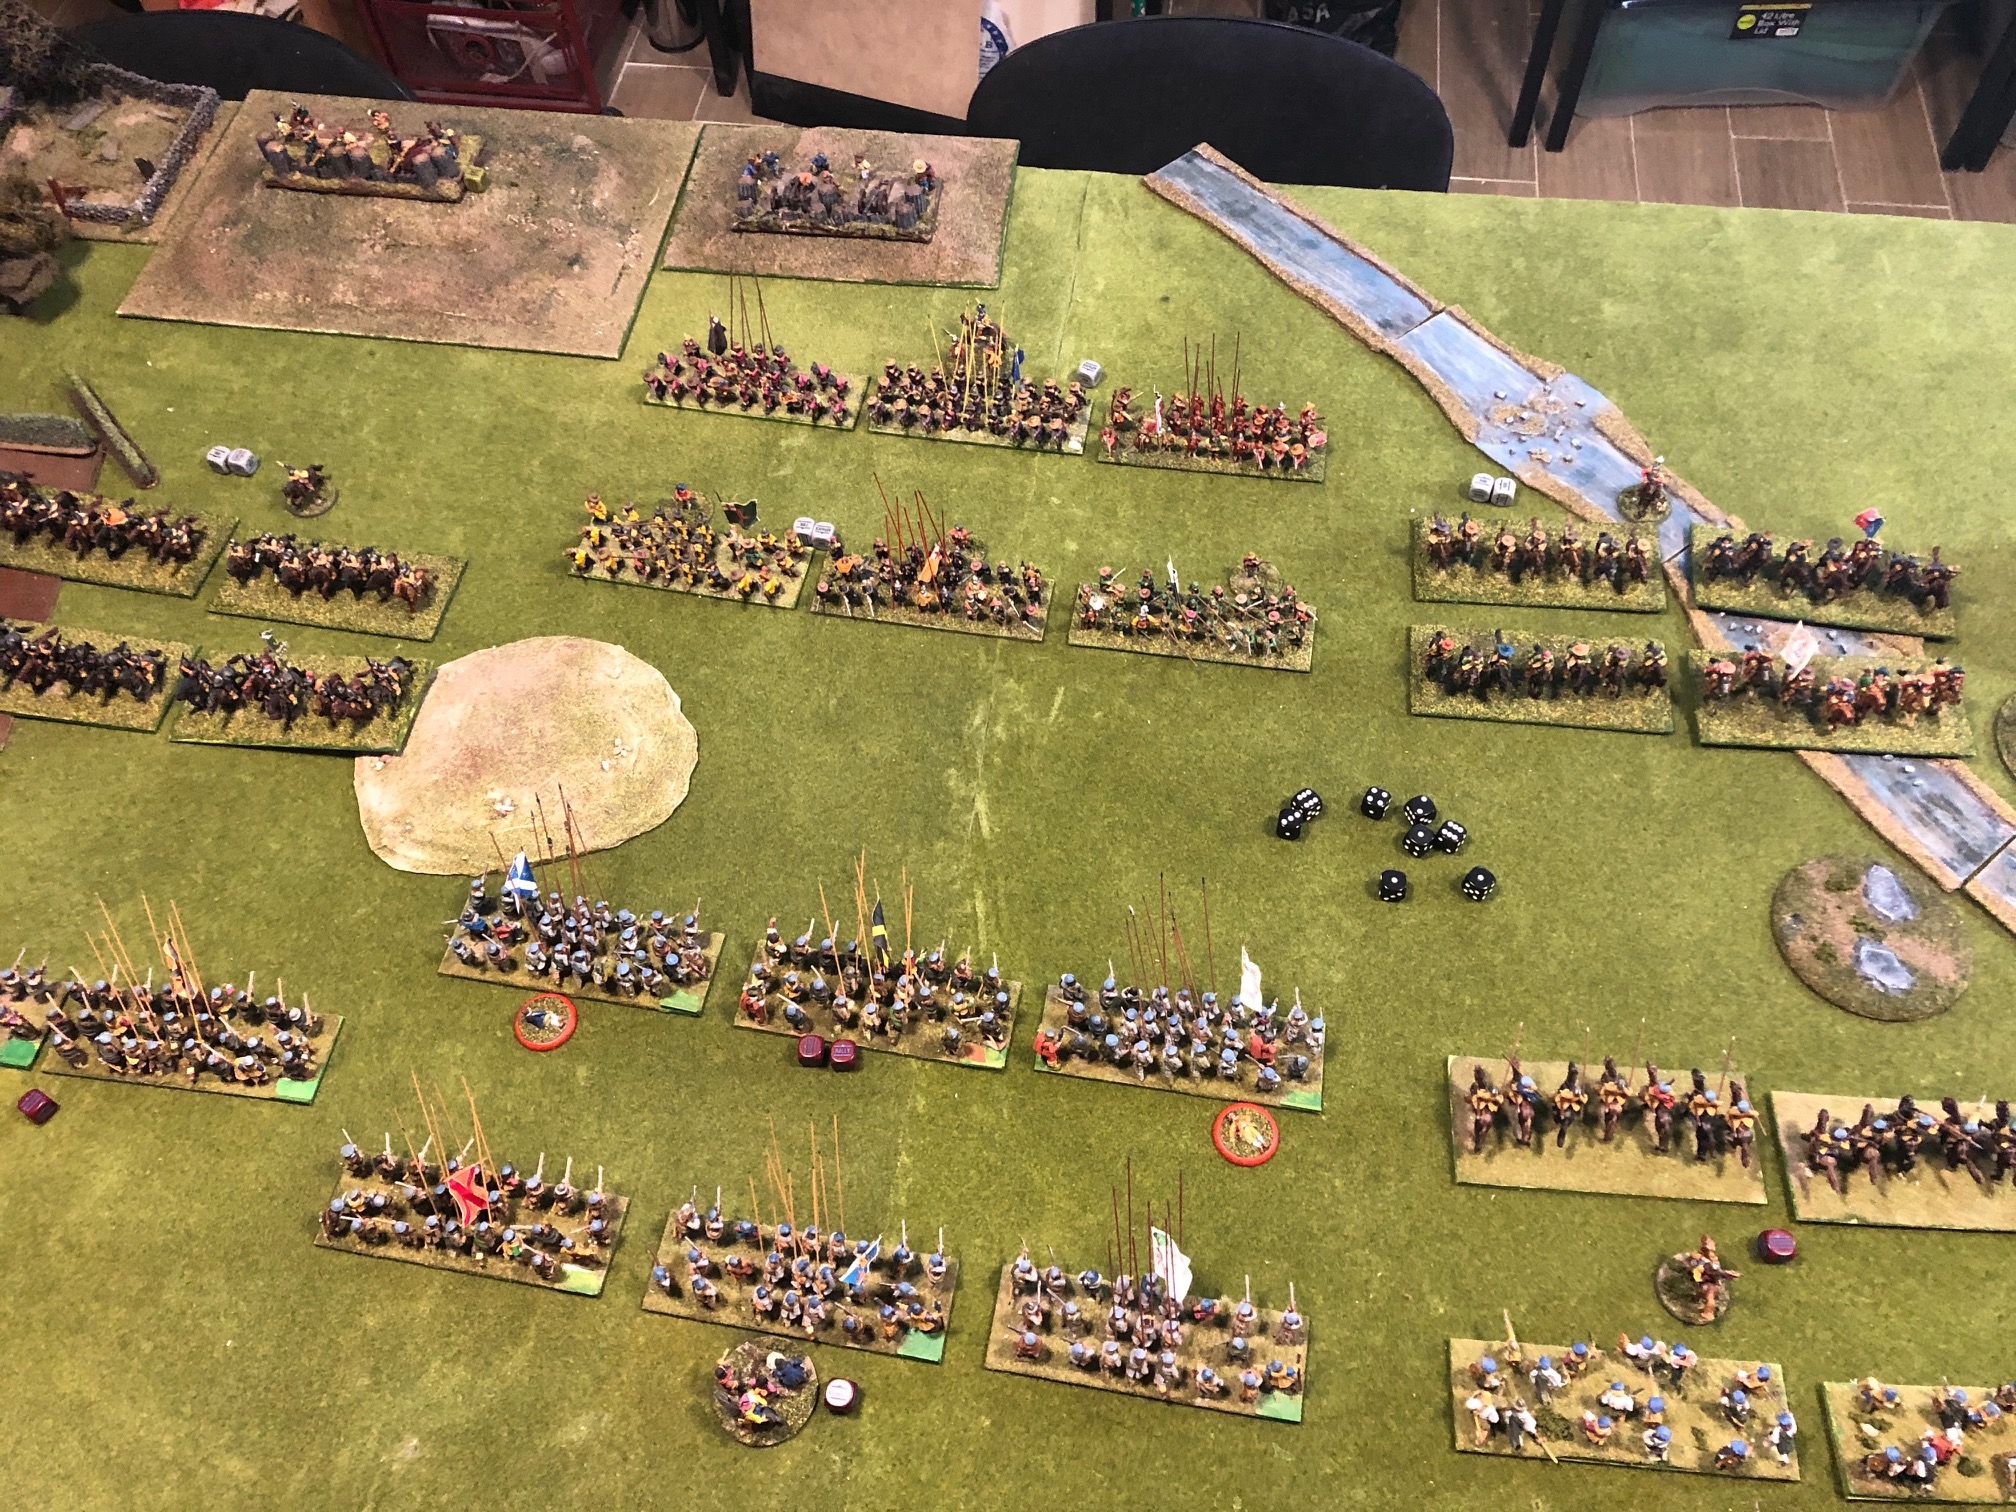
 Initial Positions
So, the Battle Report, which will be presented after each Turn “Live”. I am a solo player and ofter have hours between moves as the real world gets in the way, so trying to complete the entire game in one go should be a challenge for me!
The game is more about trying out different ideas and testing the rules, so I’m sure there will be lots of things I’ll eventually change. But as some commentators asked for a run through. Here goes.
The scenario id an uneven fight between an invading English force which has taken a town in the early years of the first ECW. A Covenanter army has been quickly raised to drive the “Auld Enemy” from Scotland.
There are no points involved, and the imbalance is deliberate. The two sides have different establishments; the English far superior Cavalry (in both numbers and quality), and the Covenanters have more infantry and a small Highland contingent.
The forces have different objectives: The English have to have at least 50% of their initial force still on the table at the end of 7 turns. The Scots have to have either driven the English from the field, or have taken at least 50% of the English army.
May the best side win!
Turn 1
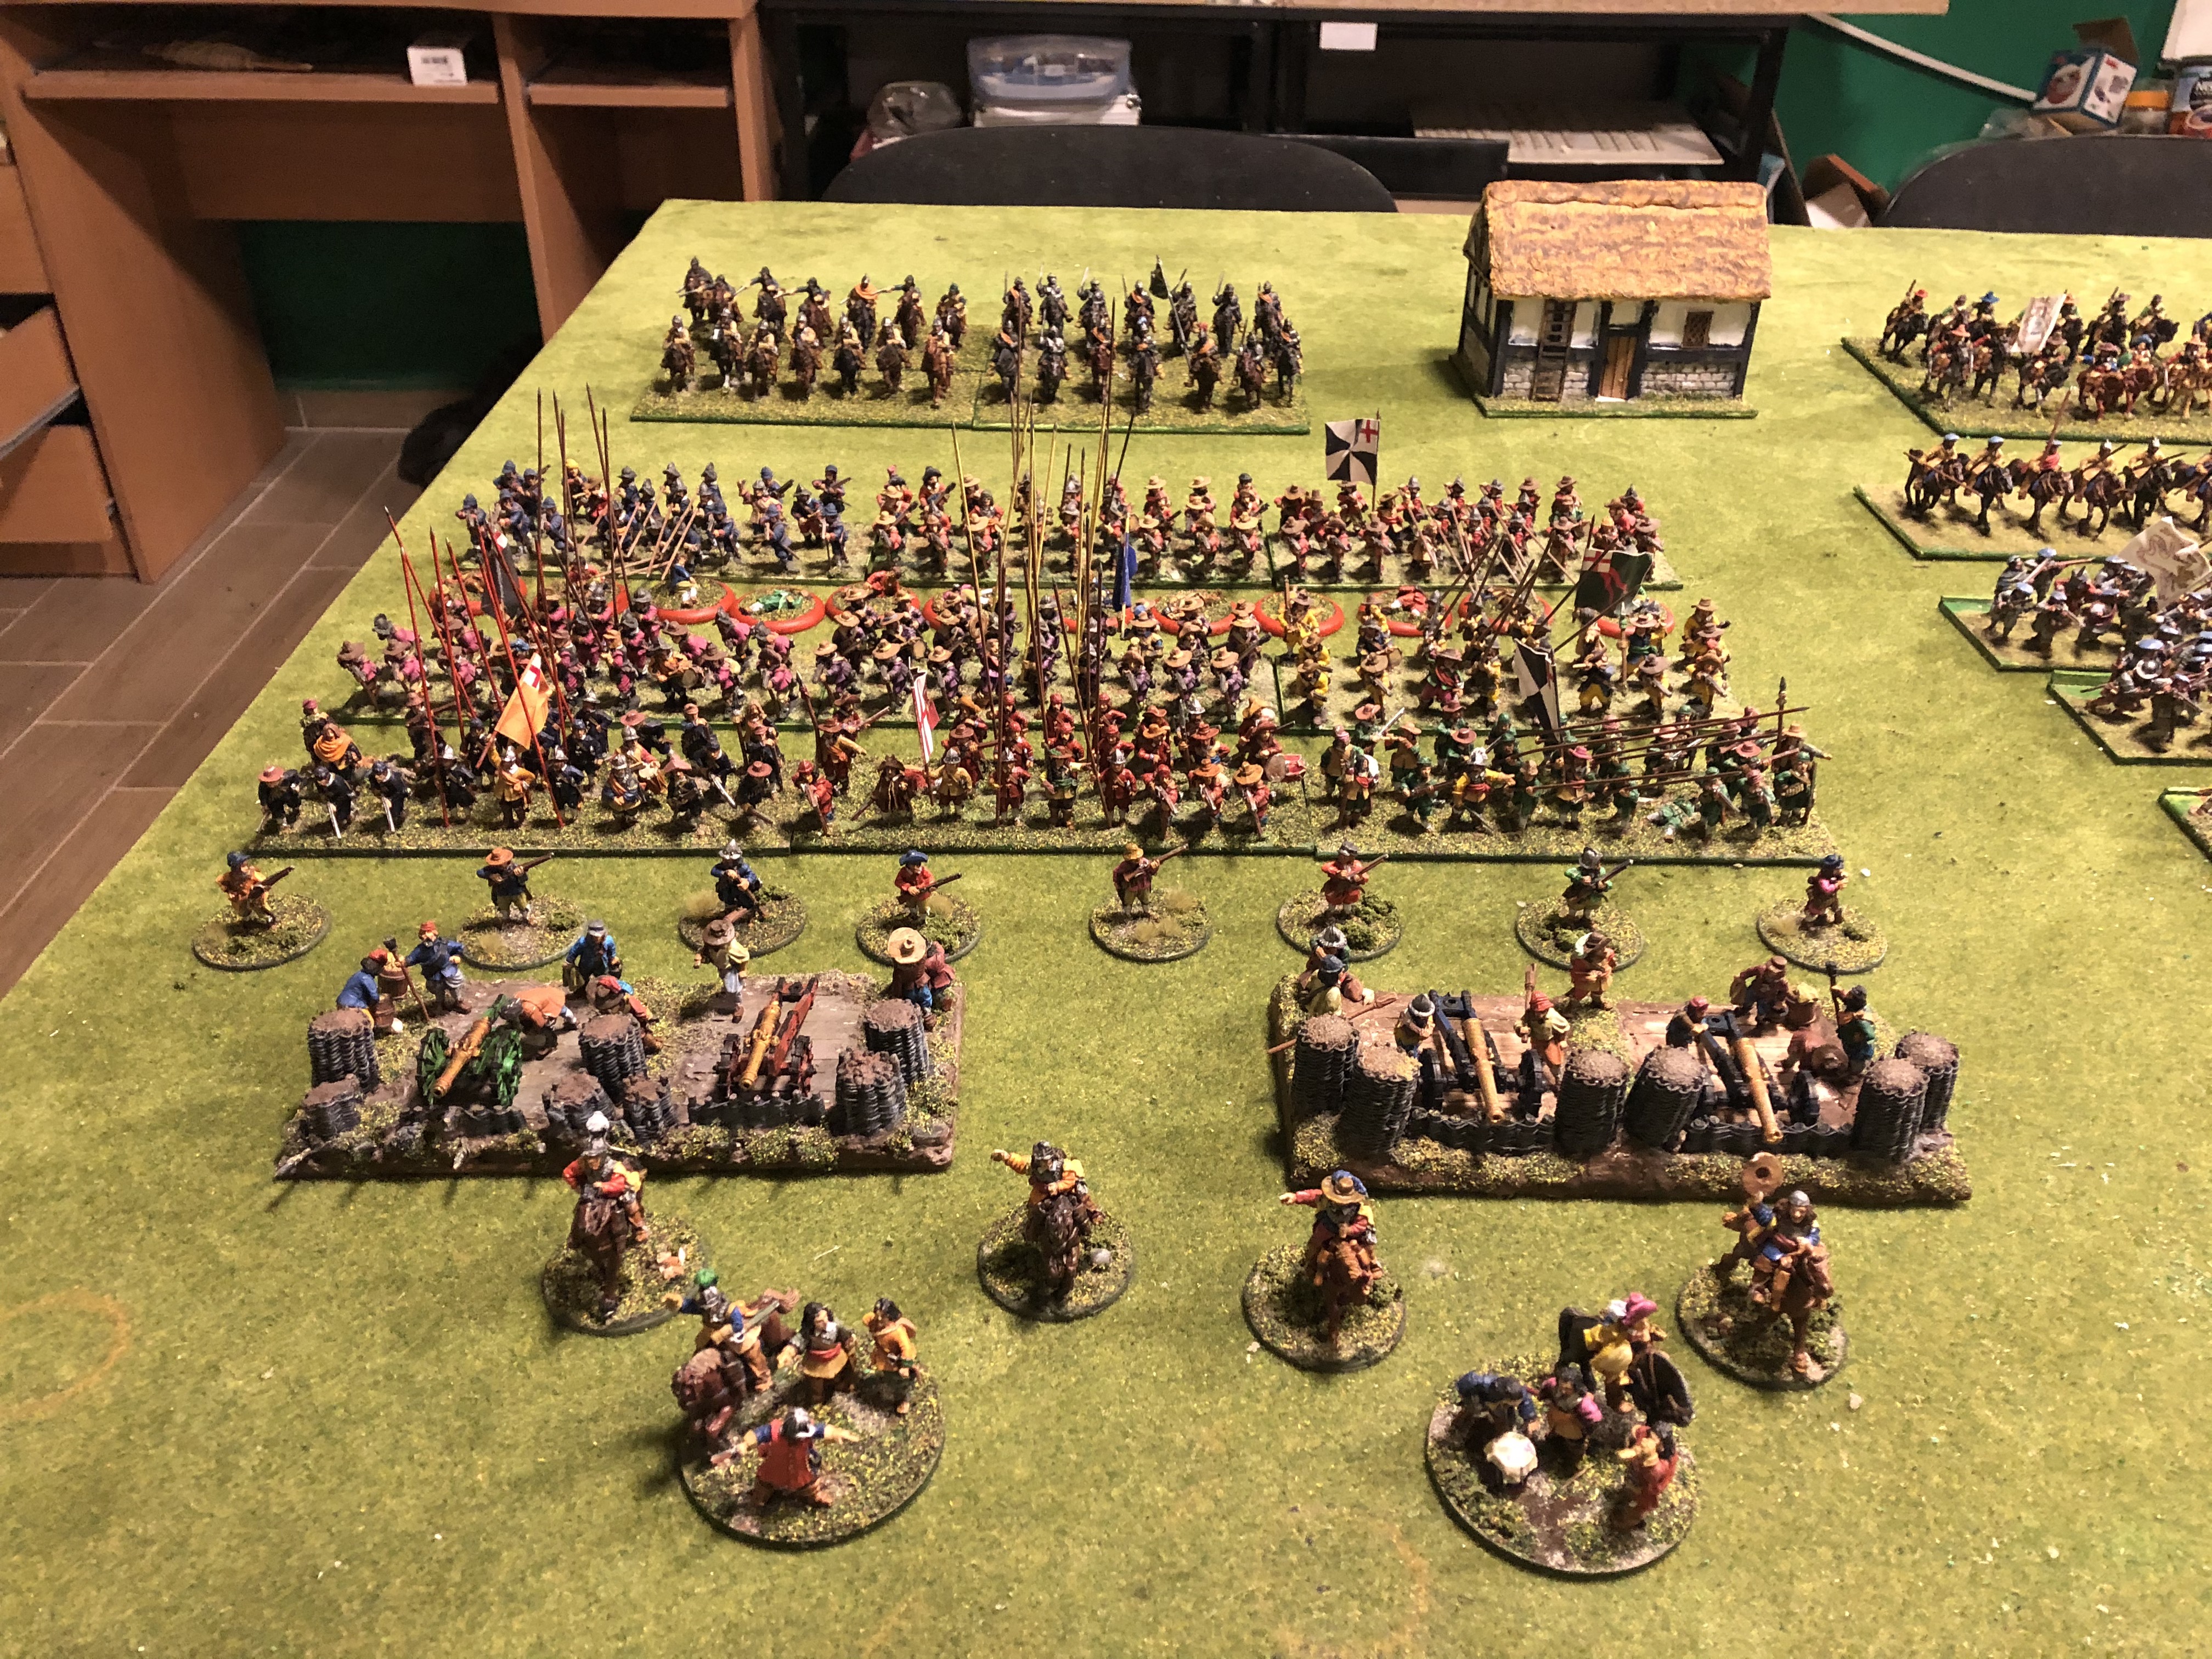
 General advance across the line
The mechanism to move is based on the Bolt Action dice principle, but with some modification. Rather than each unit having a dice, only the commanders have them, but they have a different number of possible orders based on their status. The C-in-C gets 3 dice, the sub-commanders 2 each and each artillery base has one as well. The rationale (such as it is) is that at the time units did not act independently (unlike, say, in WW2) so would act on direct commands. Also I wanted to get away from the IGO-UGO type of play (although this may well be a better option – I’ll see).
The additional “fog of war” is a further two black dice in the bag. After the second one is drawn out, irrespective of how many orders have been given, the turn ends. So Commanders have a dilemma. When your army dice is drawn, which commander gets to act, and once the first Black dice is drawn, each order after this might be the last.
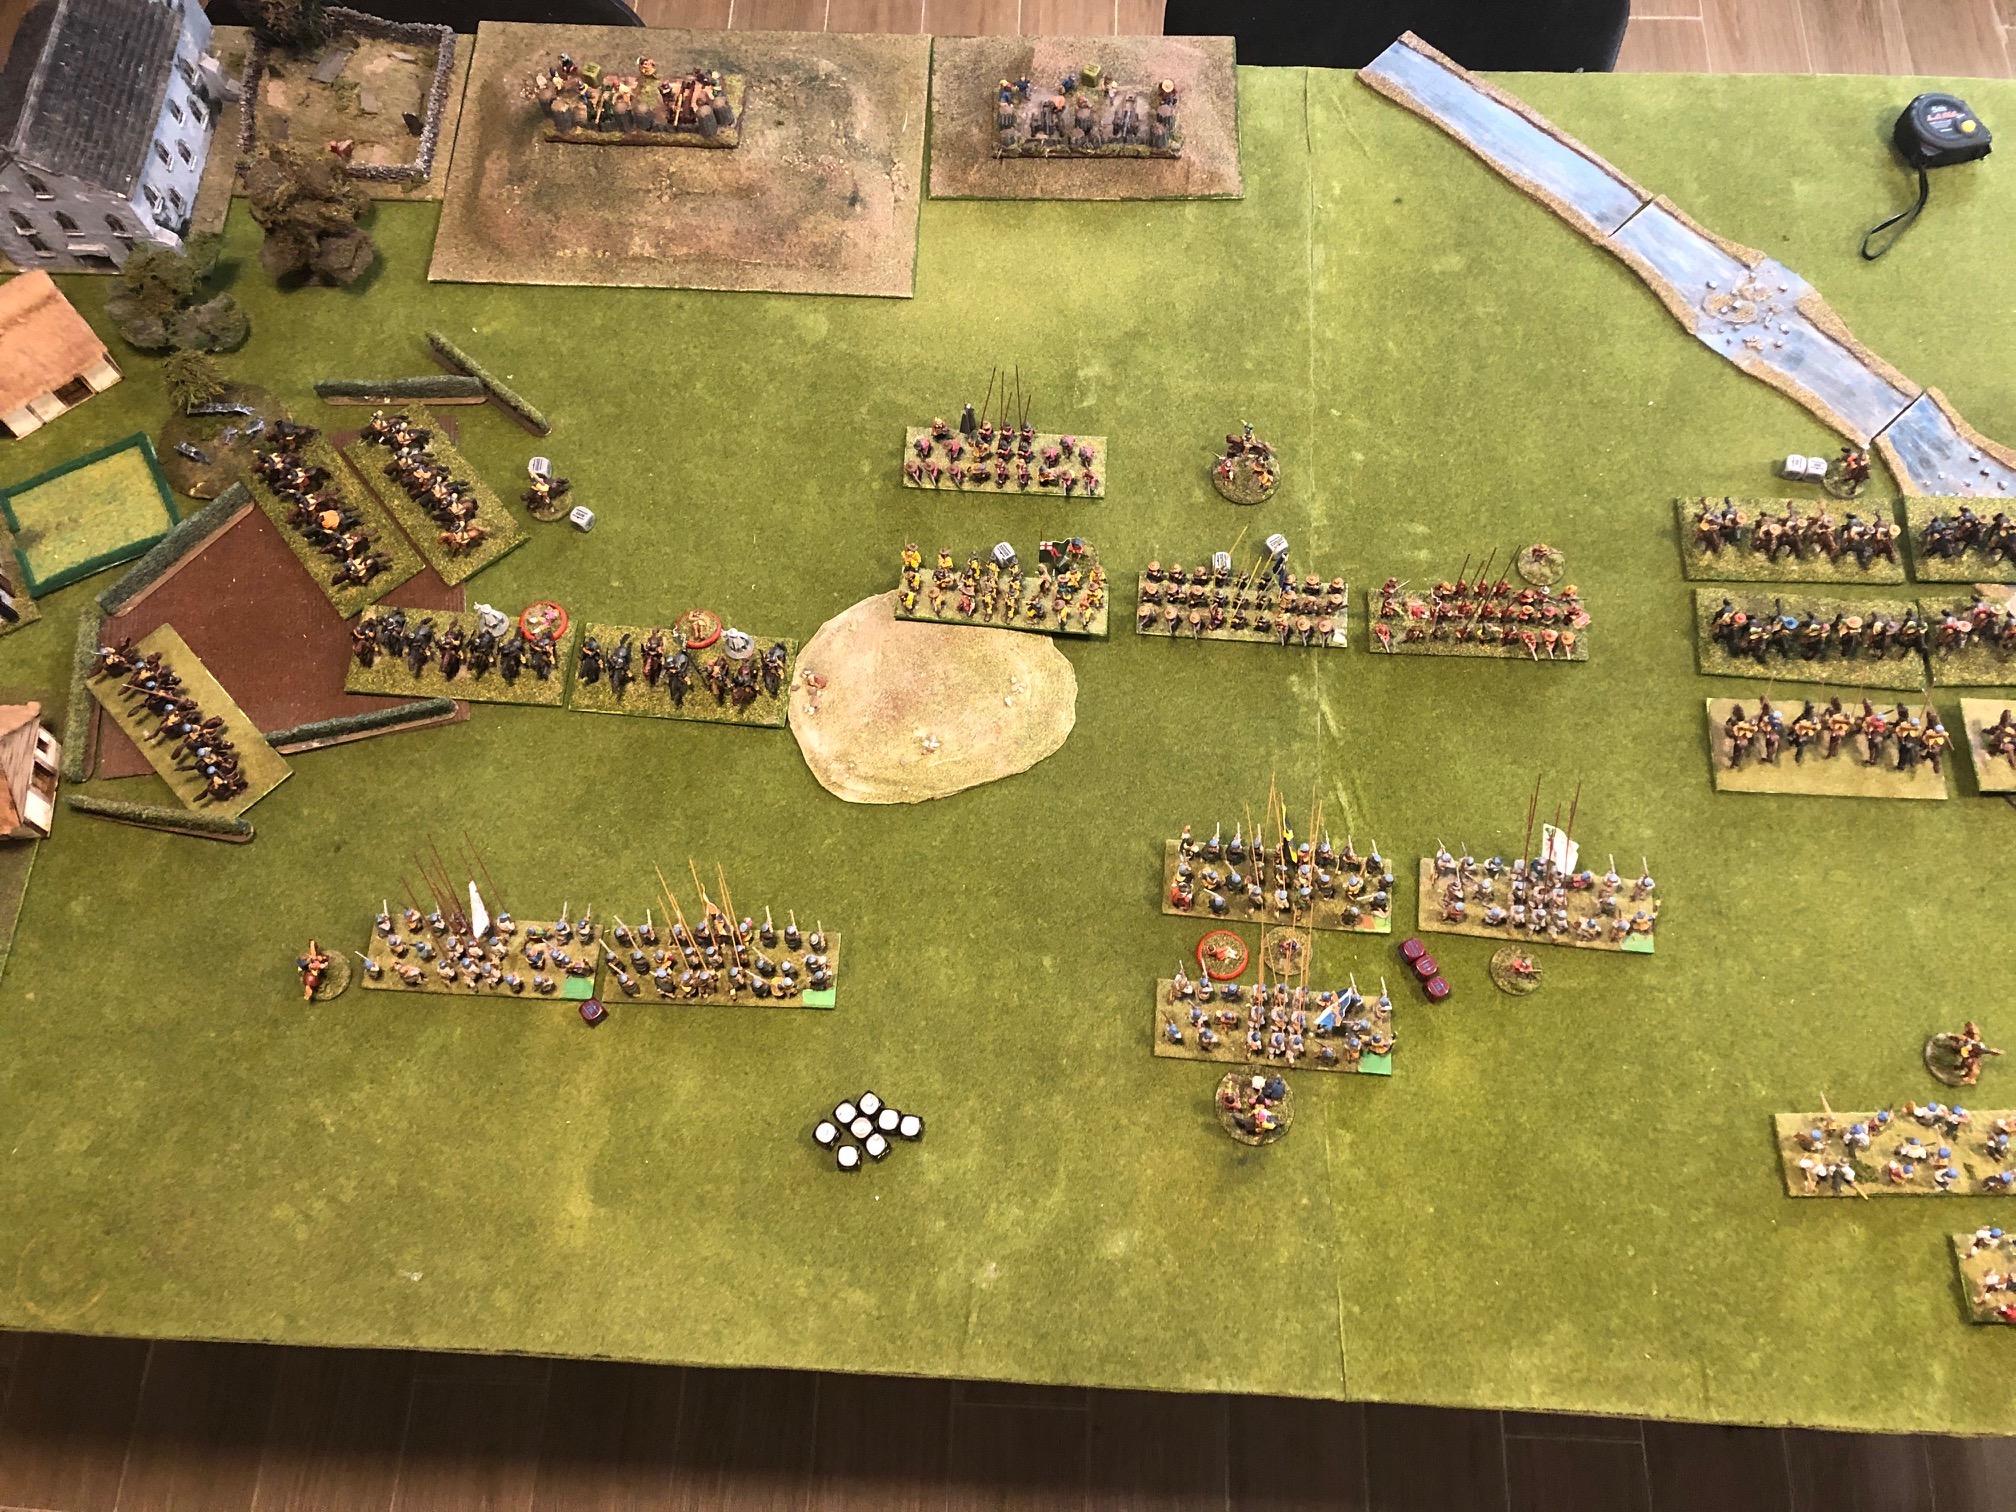
As it happened this turn there were only 2 “dead” order dice remaining. As the image shows, there was slow advance across the line. Both armies coming into range of Foot units.
Both advanced P&S have opened fire at distance and are marked with “Reload” markers. The English force was particularly successful and caused two casualty markers on two of the Covenanter units. (Each casualty marker increases the moral test by +1, so a normal 7+ for Trained troops becomes 8+ etc.) Three casualty markers = Rout. A casualty marker is added if a unit takes THREE hits from one attack and fails the Saving Throw on a 4+.
The English have come out to meet the Scots rather than be pinned on the back of the table, and both Cavalry groups have advanced to within charge distance. The Scots lancers are also in a position to charge on their Right, but on the Scottish left wing, the English heavy cavalry look about to over run the P&S units. (Note: Cavalry can not charge Steady Pike block, so some softening up will be required first).
On to Turn 2
Turn 2
 A decimation in the centre
Well! The fighting in the center of the field was brutal. Both blocks of P&S tore into each other and five units were decimated and left the field. (I think I might need to review the number of dice per unit!).
On the Scottish Right, a Cavalry Melee is ongoing with little resolved. Unfortunately the Turn ended (2 black dice) before the Highlanders could get into the action.
On the Scottish left the Heavy Cavalry was surprisingly set back by some extraordinarily lucky dice throws by the Covenanters and have become “Shaken”, thus limiting their future orders to Rally after which if they pass their moral test, they will return to Steady status and can attack again.
The artillery is having no real effect, mainly I think do to the long distance they are shooting at. The positioning of artillery is obviously important as moving them once the battle starts is almost impossible.
As things stand, if the English can break the Scottish centre I think this will give them the day. The Scots meantime will have to hold the centre and get the Highlanders into action as soon as possible.


