


![Pure Sci-Fi Nostalgia! War Rocket Review | Hydra Miniatures [7 Days Early Access]](https://images.beastsofwar.com/2026/02/unboxing-hydra-miniatures-war-rocket-coverimage-225-127.jpg)


Crazyredcoat’s Crazy Compendium of Collected Creativity


Recommendations: 1479
About the Project
Come one, come all! See the most vaguely inconsistent extravaganza that no one really thinks about but if they did they'd be mildly misanthropic about it! Slow off the heels of my last adventure comes a tale so confusing that it's not even remotely tail-like. Here I will avail you all of the many experiments and miniatures I manage to paint over the coming times, or at least some of them. Time is funny like that... Either way, stay tuned for various projects that don't fit into any one larger project like my last foray into this sort of thing. Oh, and watch out for Spiny Norman.
Related Game: Warhammer Age of Sigmar
Related Genre: General
Related Contest: Spring Clean Hobby Challenge (Old)
This Project is Completed
This post screwed up...
Triple post this time…I think…
The hamsters failed me...
Uploading issues strike again!
"Not all those who wander are lost...except the Lieutenant; he's lost as sh*t"
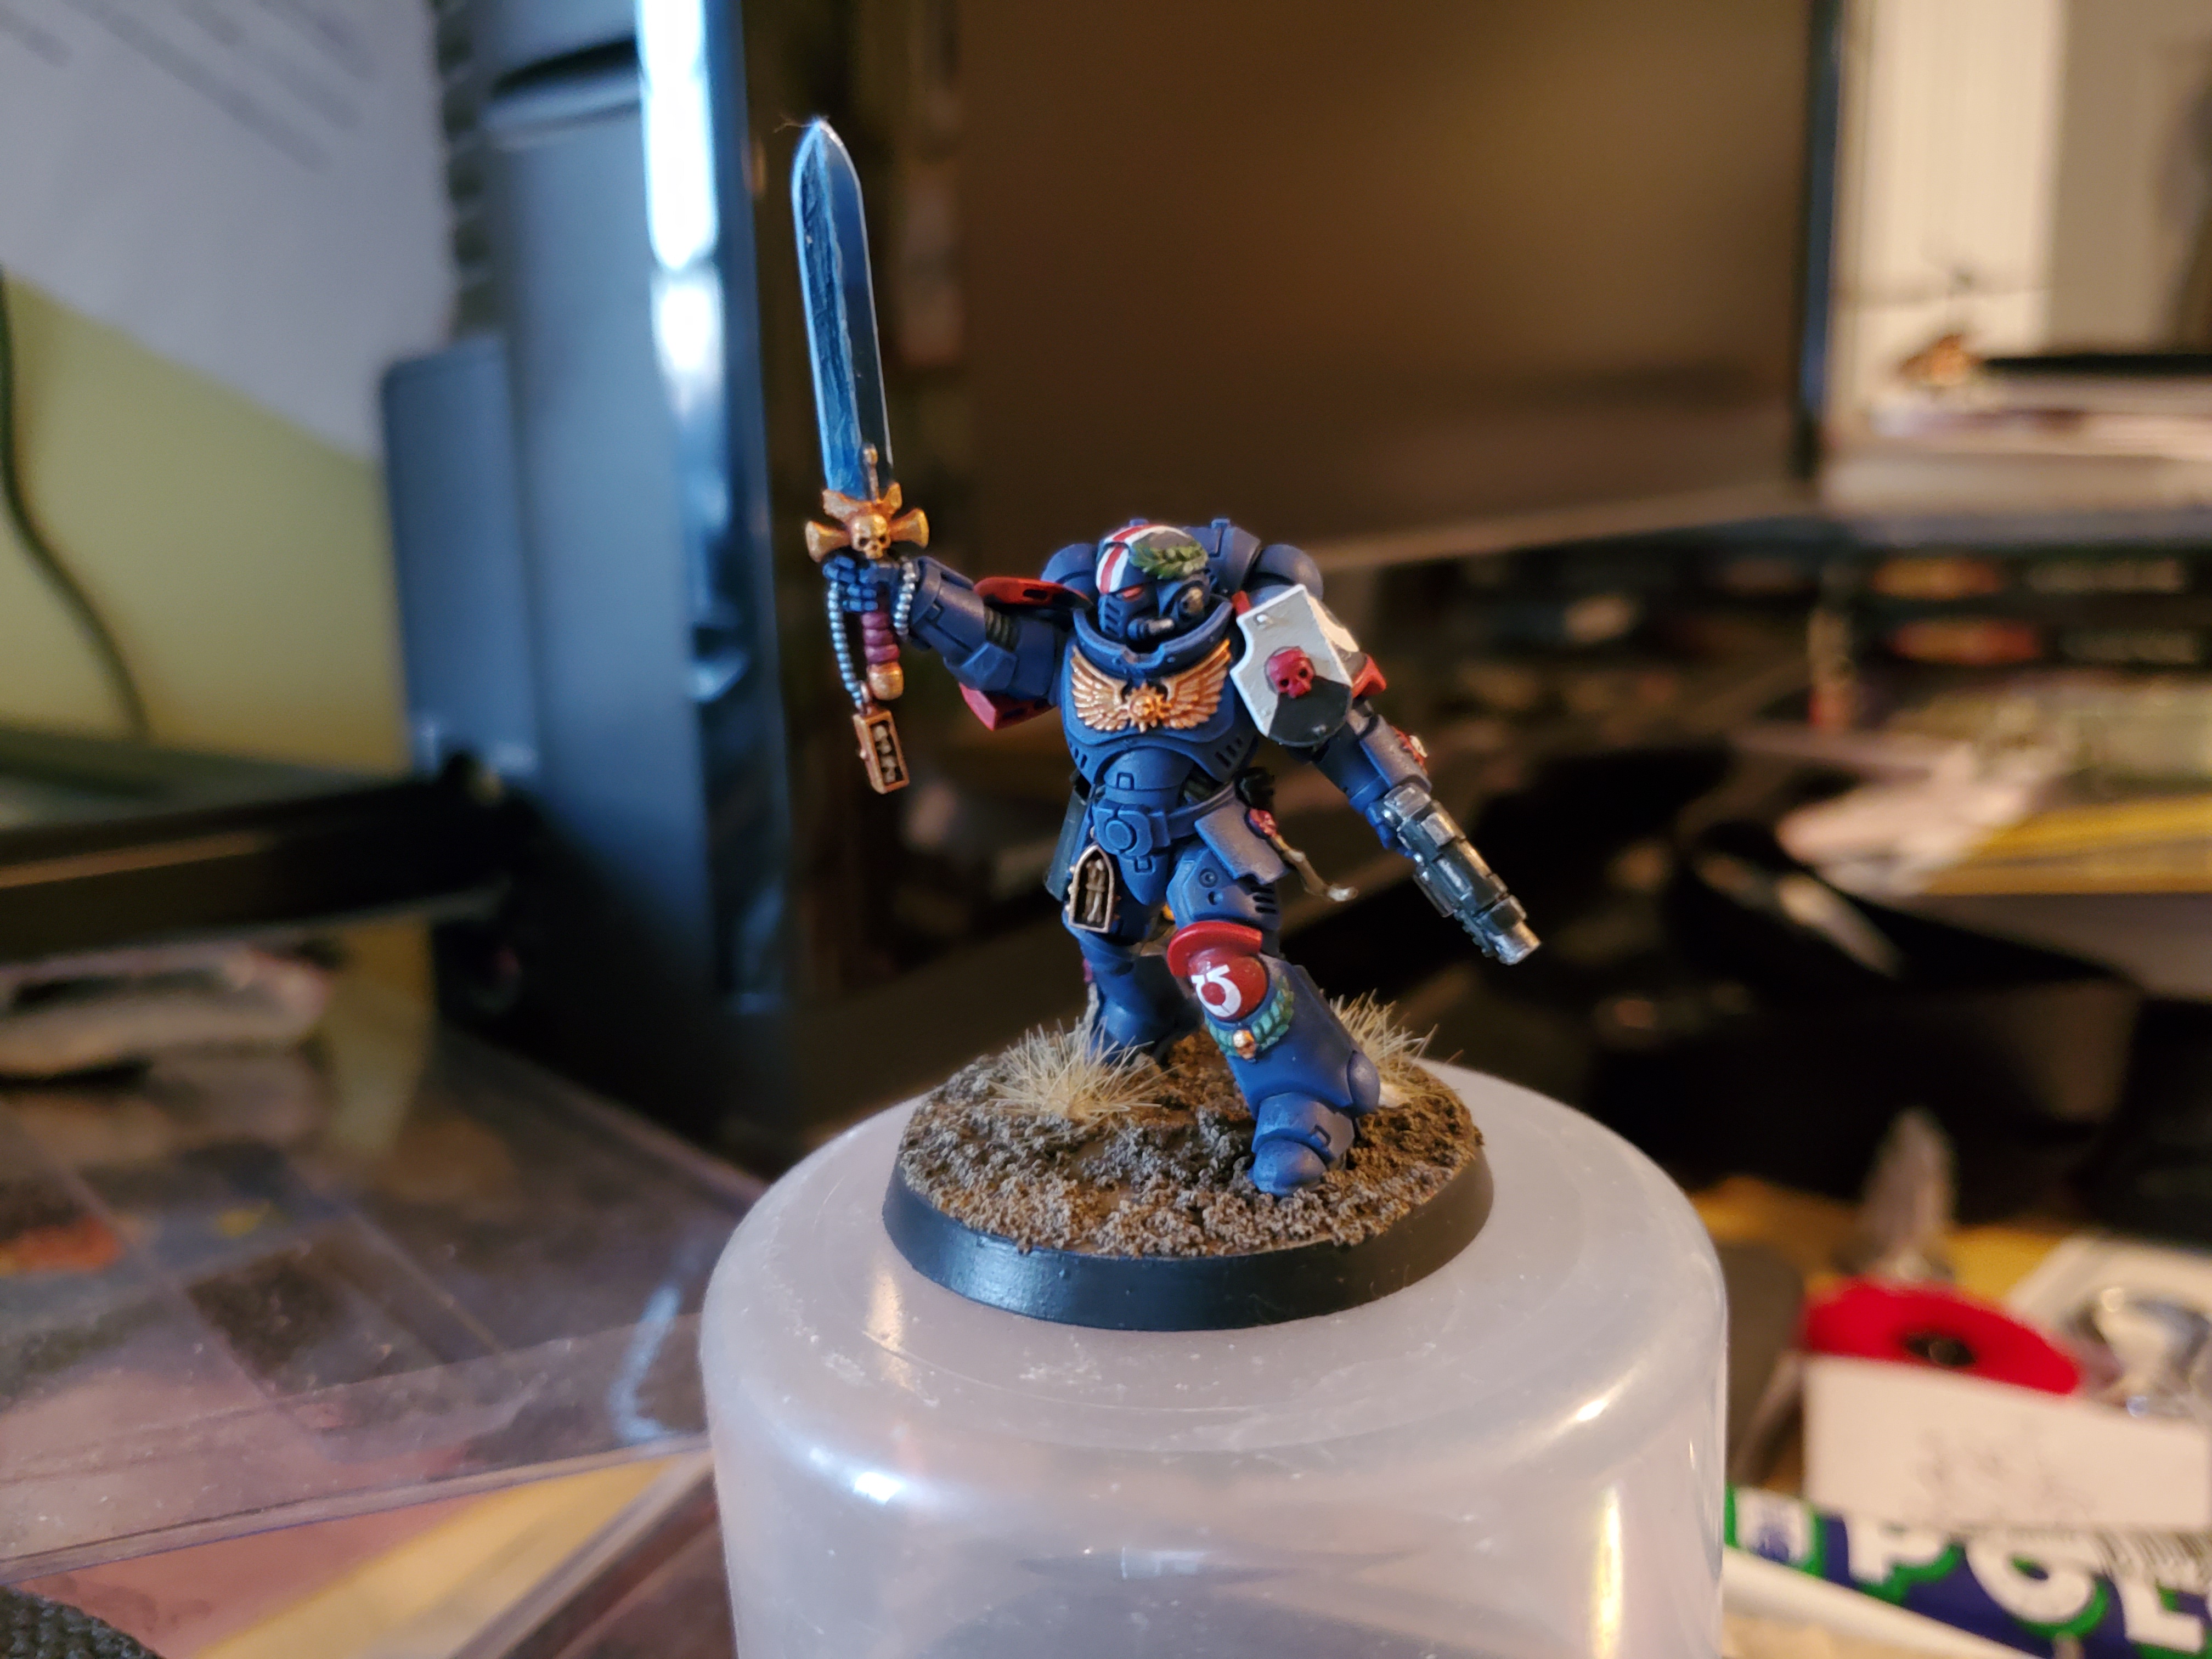
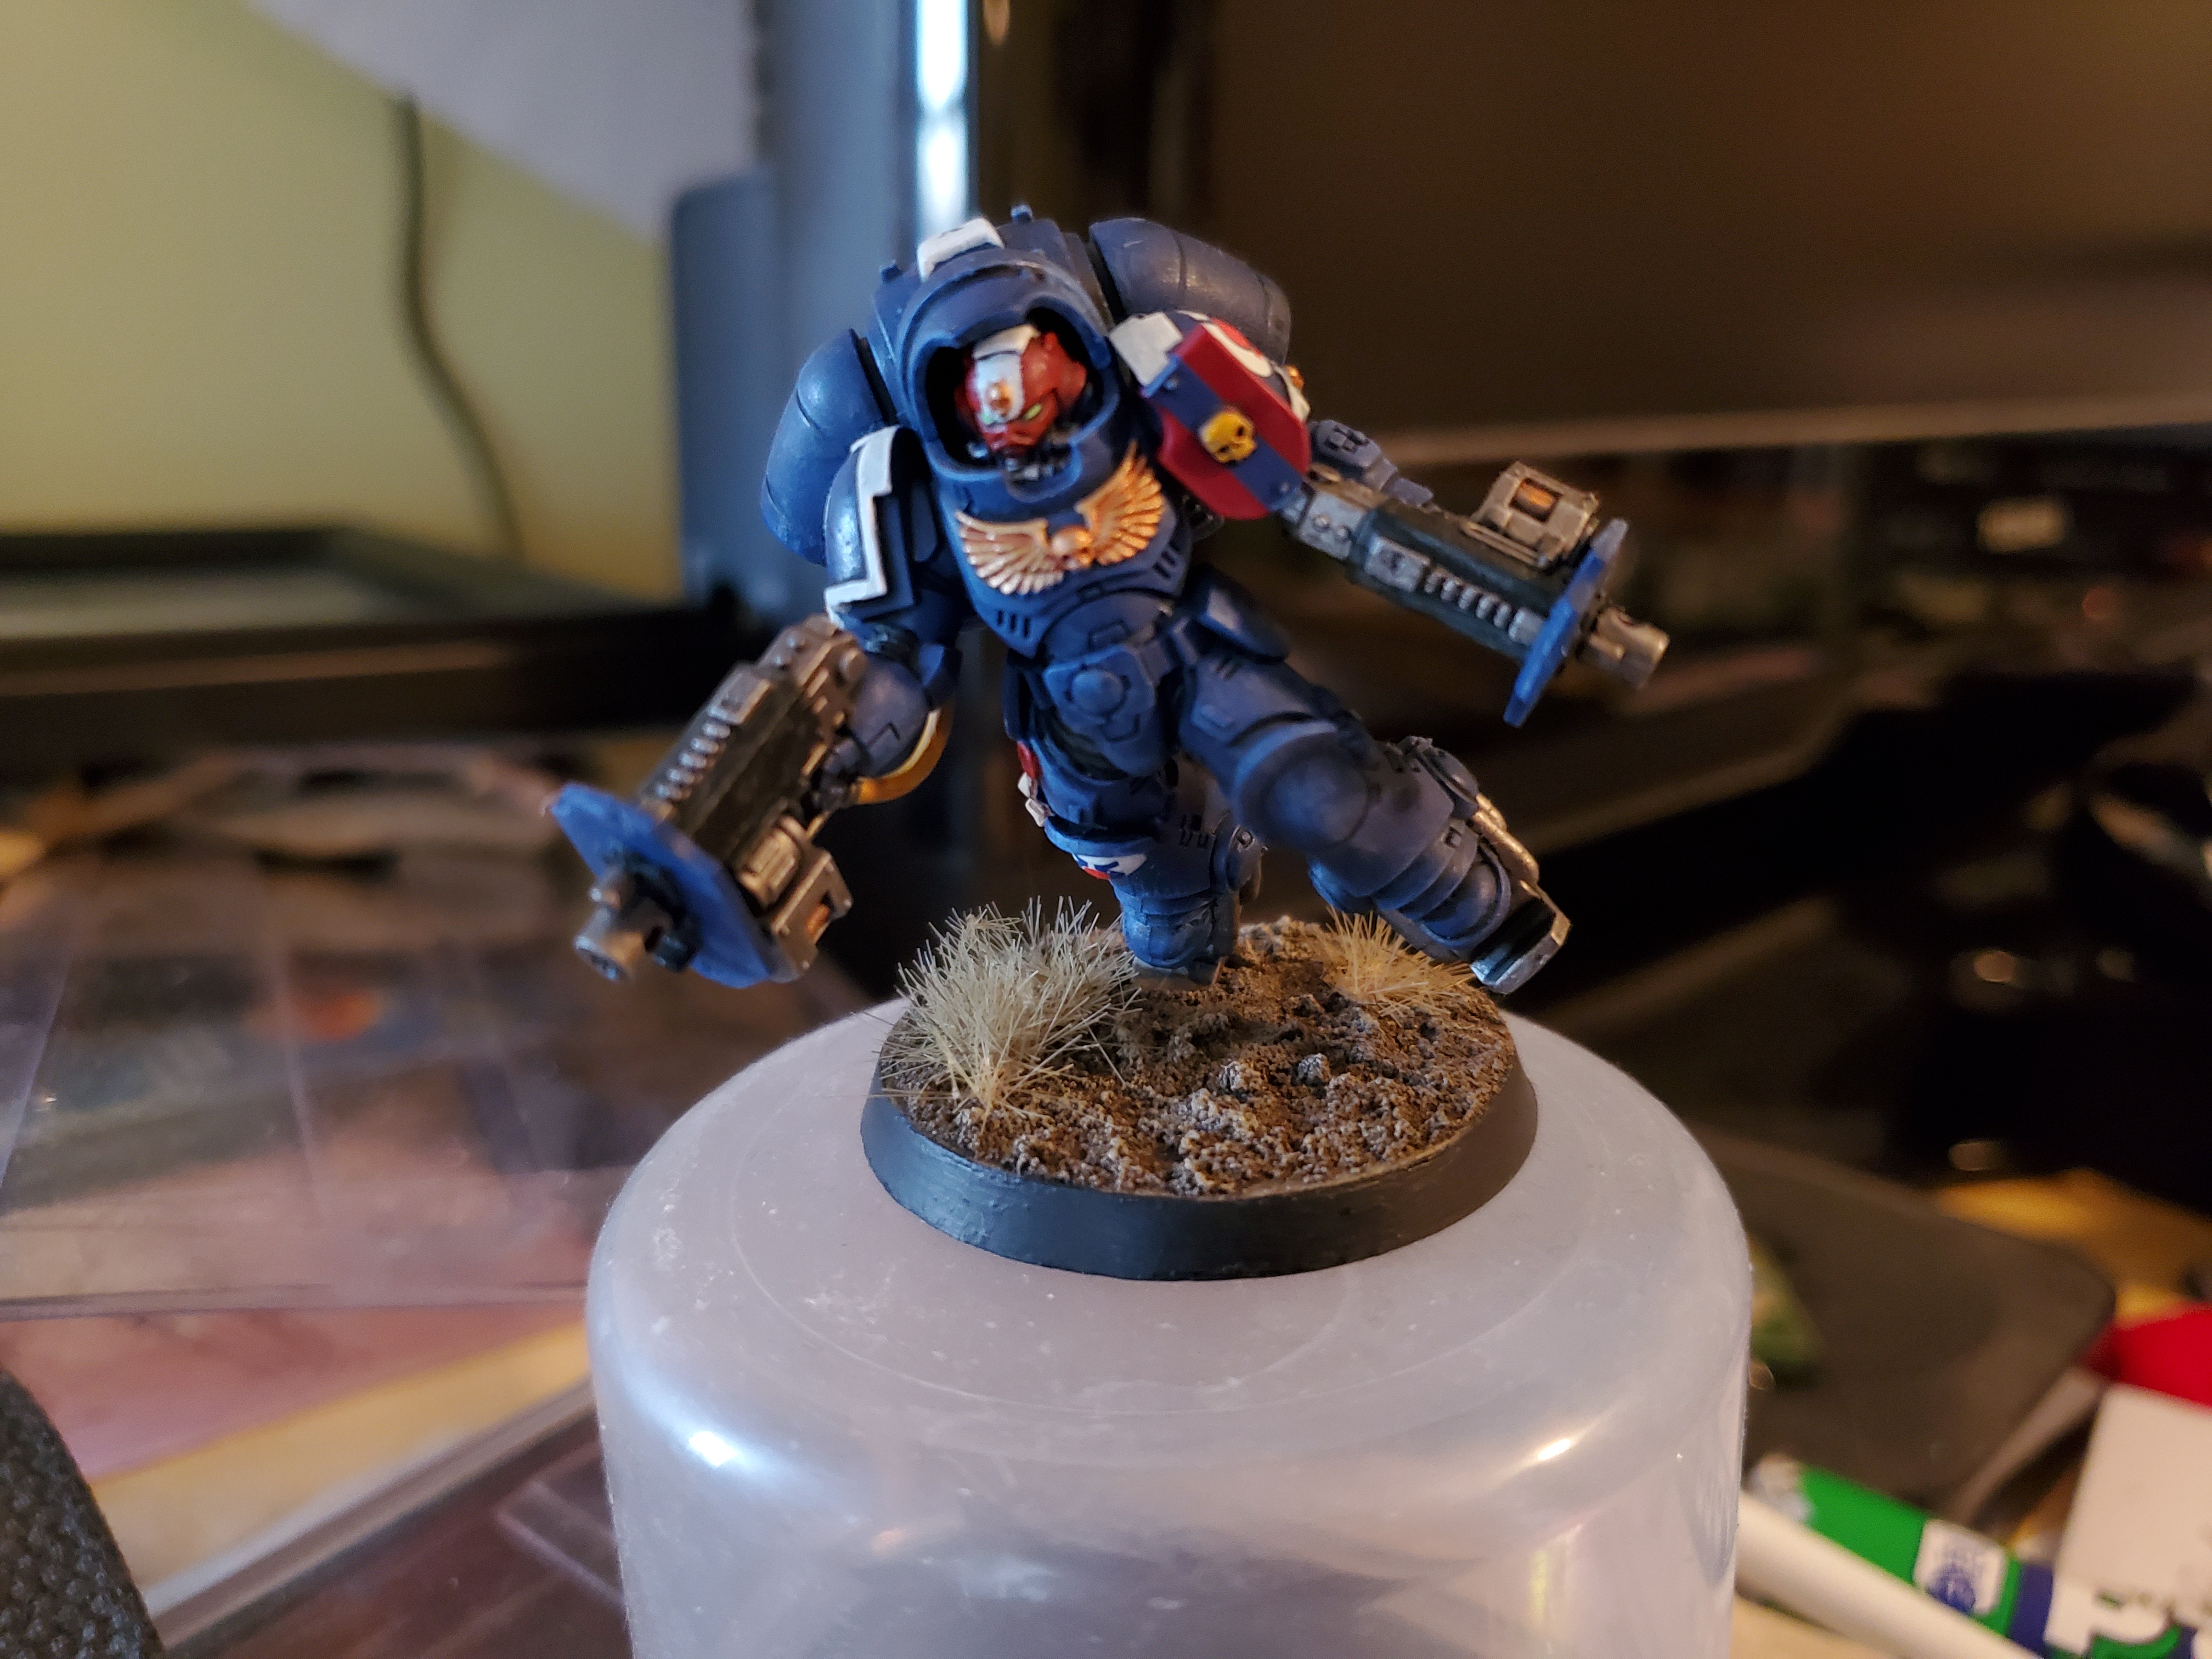
Took a bit of a break from the site over christmas, but just beforehand I had finished up a Space Marine Lieutenant for my Ultras. If anyone remembers a very old project about getting my Ultras painted that I did, then you’ll know the general methods, but I’ll briefly go over some details here. Also, if anyone is wondering, that title is a reference to a comic I saw many moons ago.
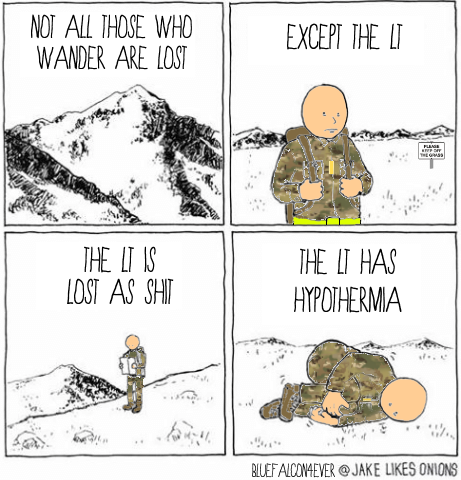 It's actually a modification of an original comic where 'Lt' is replaced with 'Tim'. The original authour and the chap who modified it have their tags in the bottom left.
And this is why Sergeants exist! Back to minis, though, he’s painted in traditional Ultra colours with plenty of flashes of red for two reasons; he’s 3rd Company, and I like red. The blue is a system I came up with to speed up painting the army and while I haven’t painted a ‘unit’ in a while the method works quite nicely.
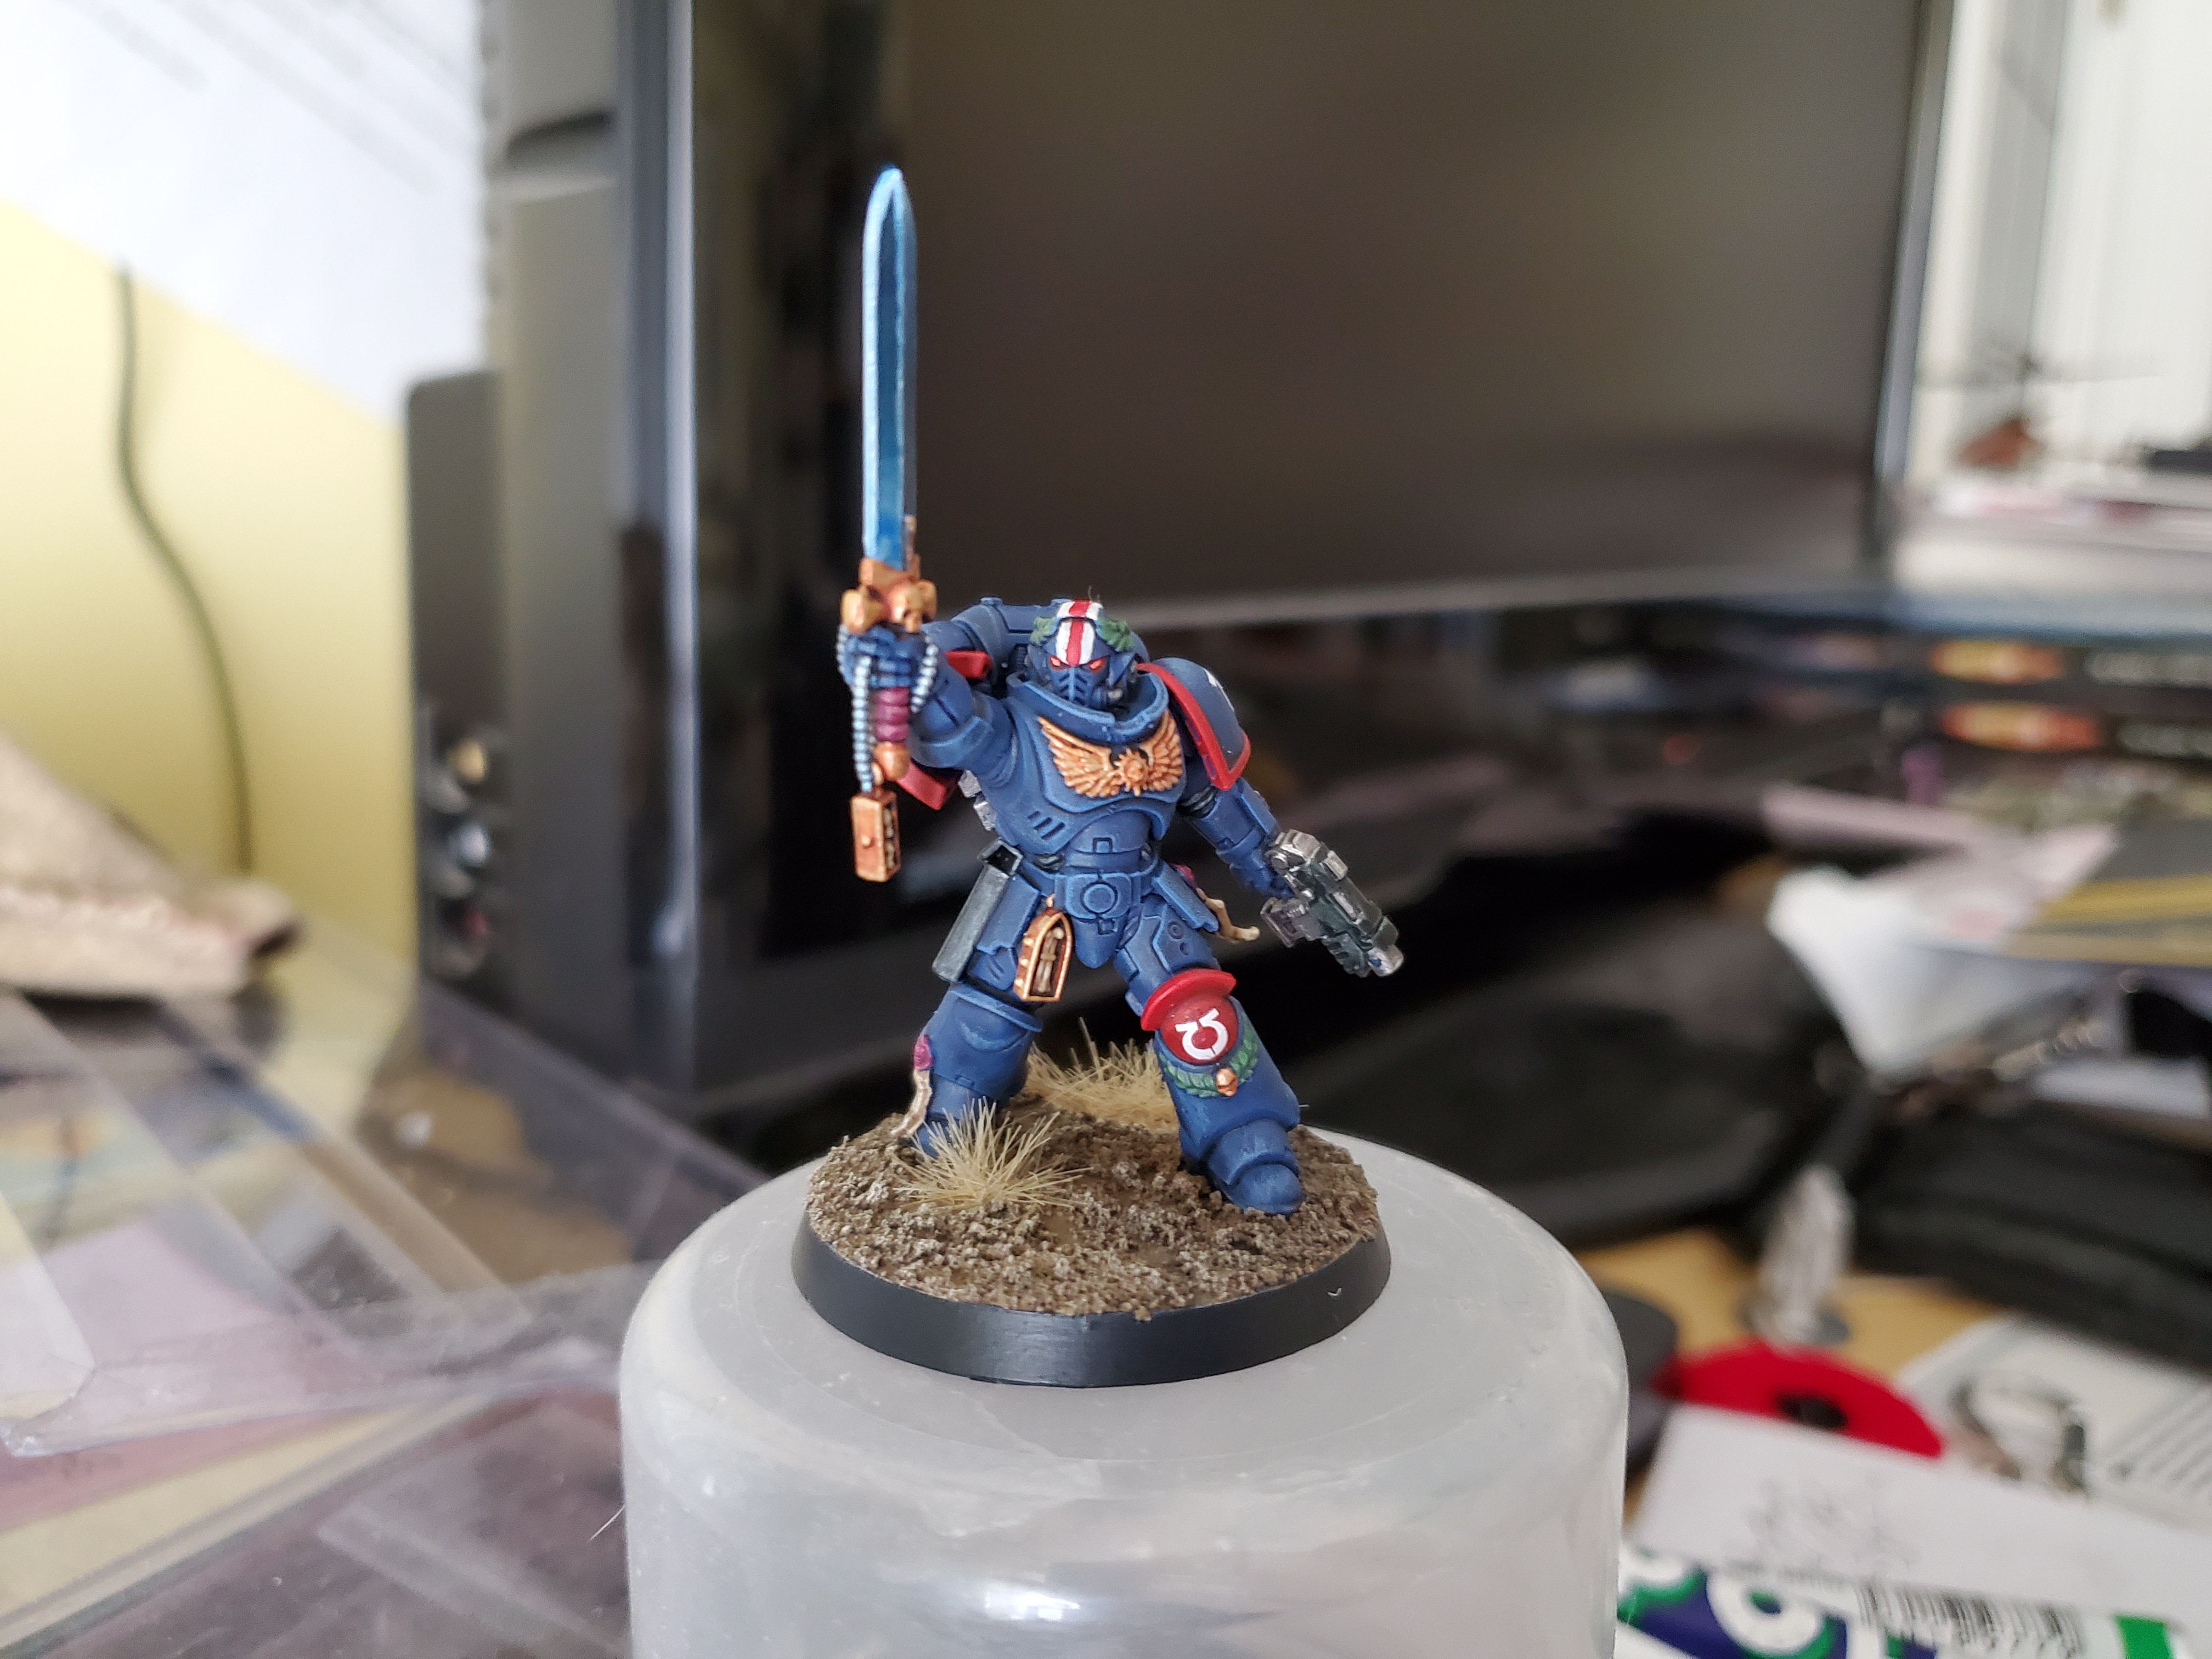 I start with a spray prime of Macragge Blue, though to be honest I do this for speed and economy. You could prime another colour and paint over the top with Macragged Blue. If you are going to do this, then a black primer will give a darker tone and a white may give something close to a 2nd edition colour (I haven't tried that, though). Over the blue I all-over shade with Nuln Oil (I use that a lot...) then heavy drybrush with Macragge Blue to lighten up (you could layer this, but that take time) then a lighter drybrush of Calgar Blue to highlight (again, you could brush highlight...but time...).
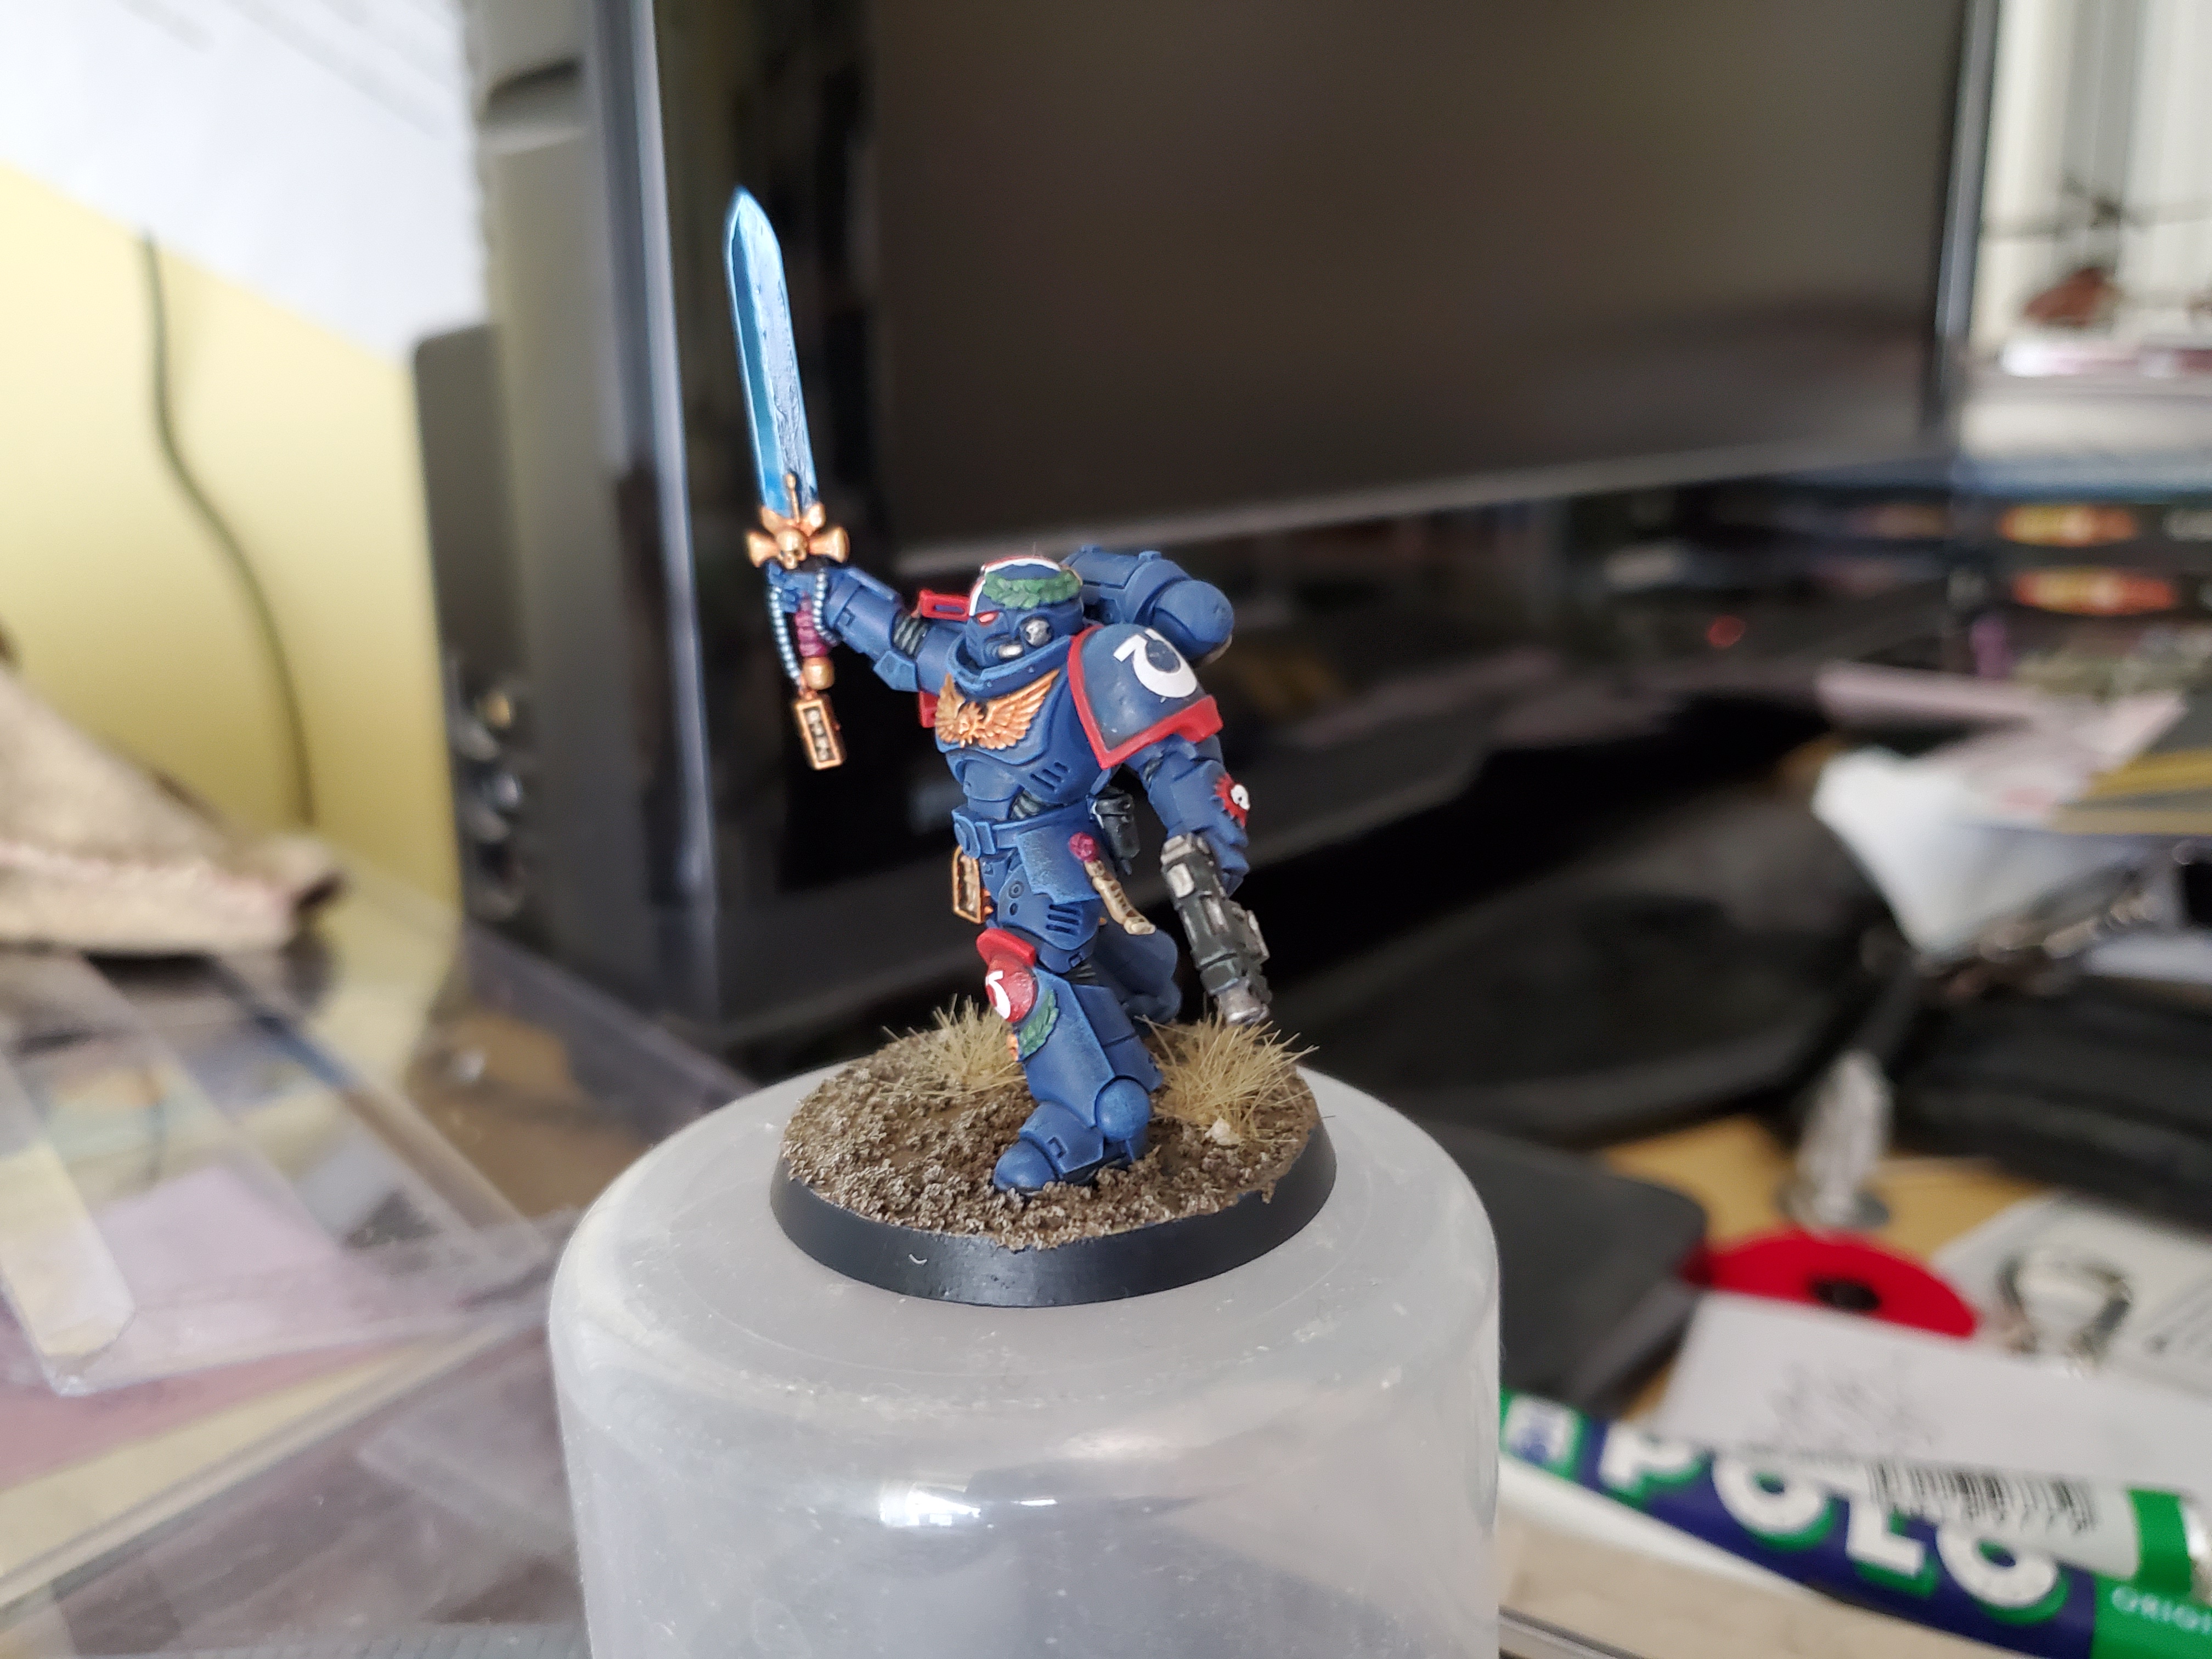 Traditionally, a lot of the decoration on these minis is done as gold decoration, but I decided to break that up a bit with the laurels. I think it's a nice chance for a splash of colour here and there and is the same reason why I like to add a bit of yellow to stray pipes here and there on these minis. The laurels are a very simple basecoat of Waagh Flesh followed by a highlight of the individual leaves with Warboss Green. You could shade them, but at this scale just the two steps does the trick.
While it’s not so much the case with this chap (I didn’t add a tilting(?) shield to this chap), I did try to add some more splashes of semi-heraldic colours. A conversation I had about the Ultras some months ago on the forums brought up a point that Ultras used to be big on Heraldry and I decided to try and bring a bit of that to my army. On this chap, though, I added a red knee pad with the chapter badge rather than the standard blue to switch it up a bit and as I add more and more heraldry to some of my chaps I will add in more than just red and blue. Maybe I’ll paint up a bunch of the shields and stick them to various chaps I already finished.
 I've taken to very specifically picking out certain details in other colours, such as the Lieutenant badges on the vambraces, as it gives a bit more character to the model, I think. As I said before, I may revisit this mini with a tilting shield in the near future alongside some other minis that I have done in the past.
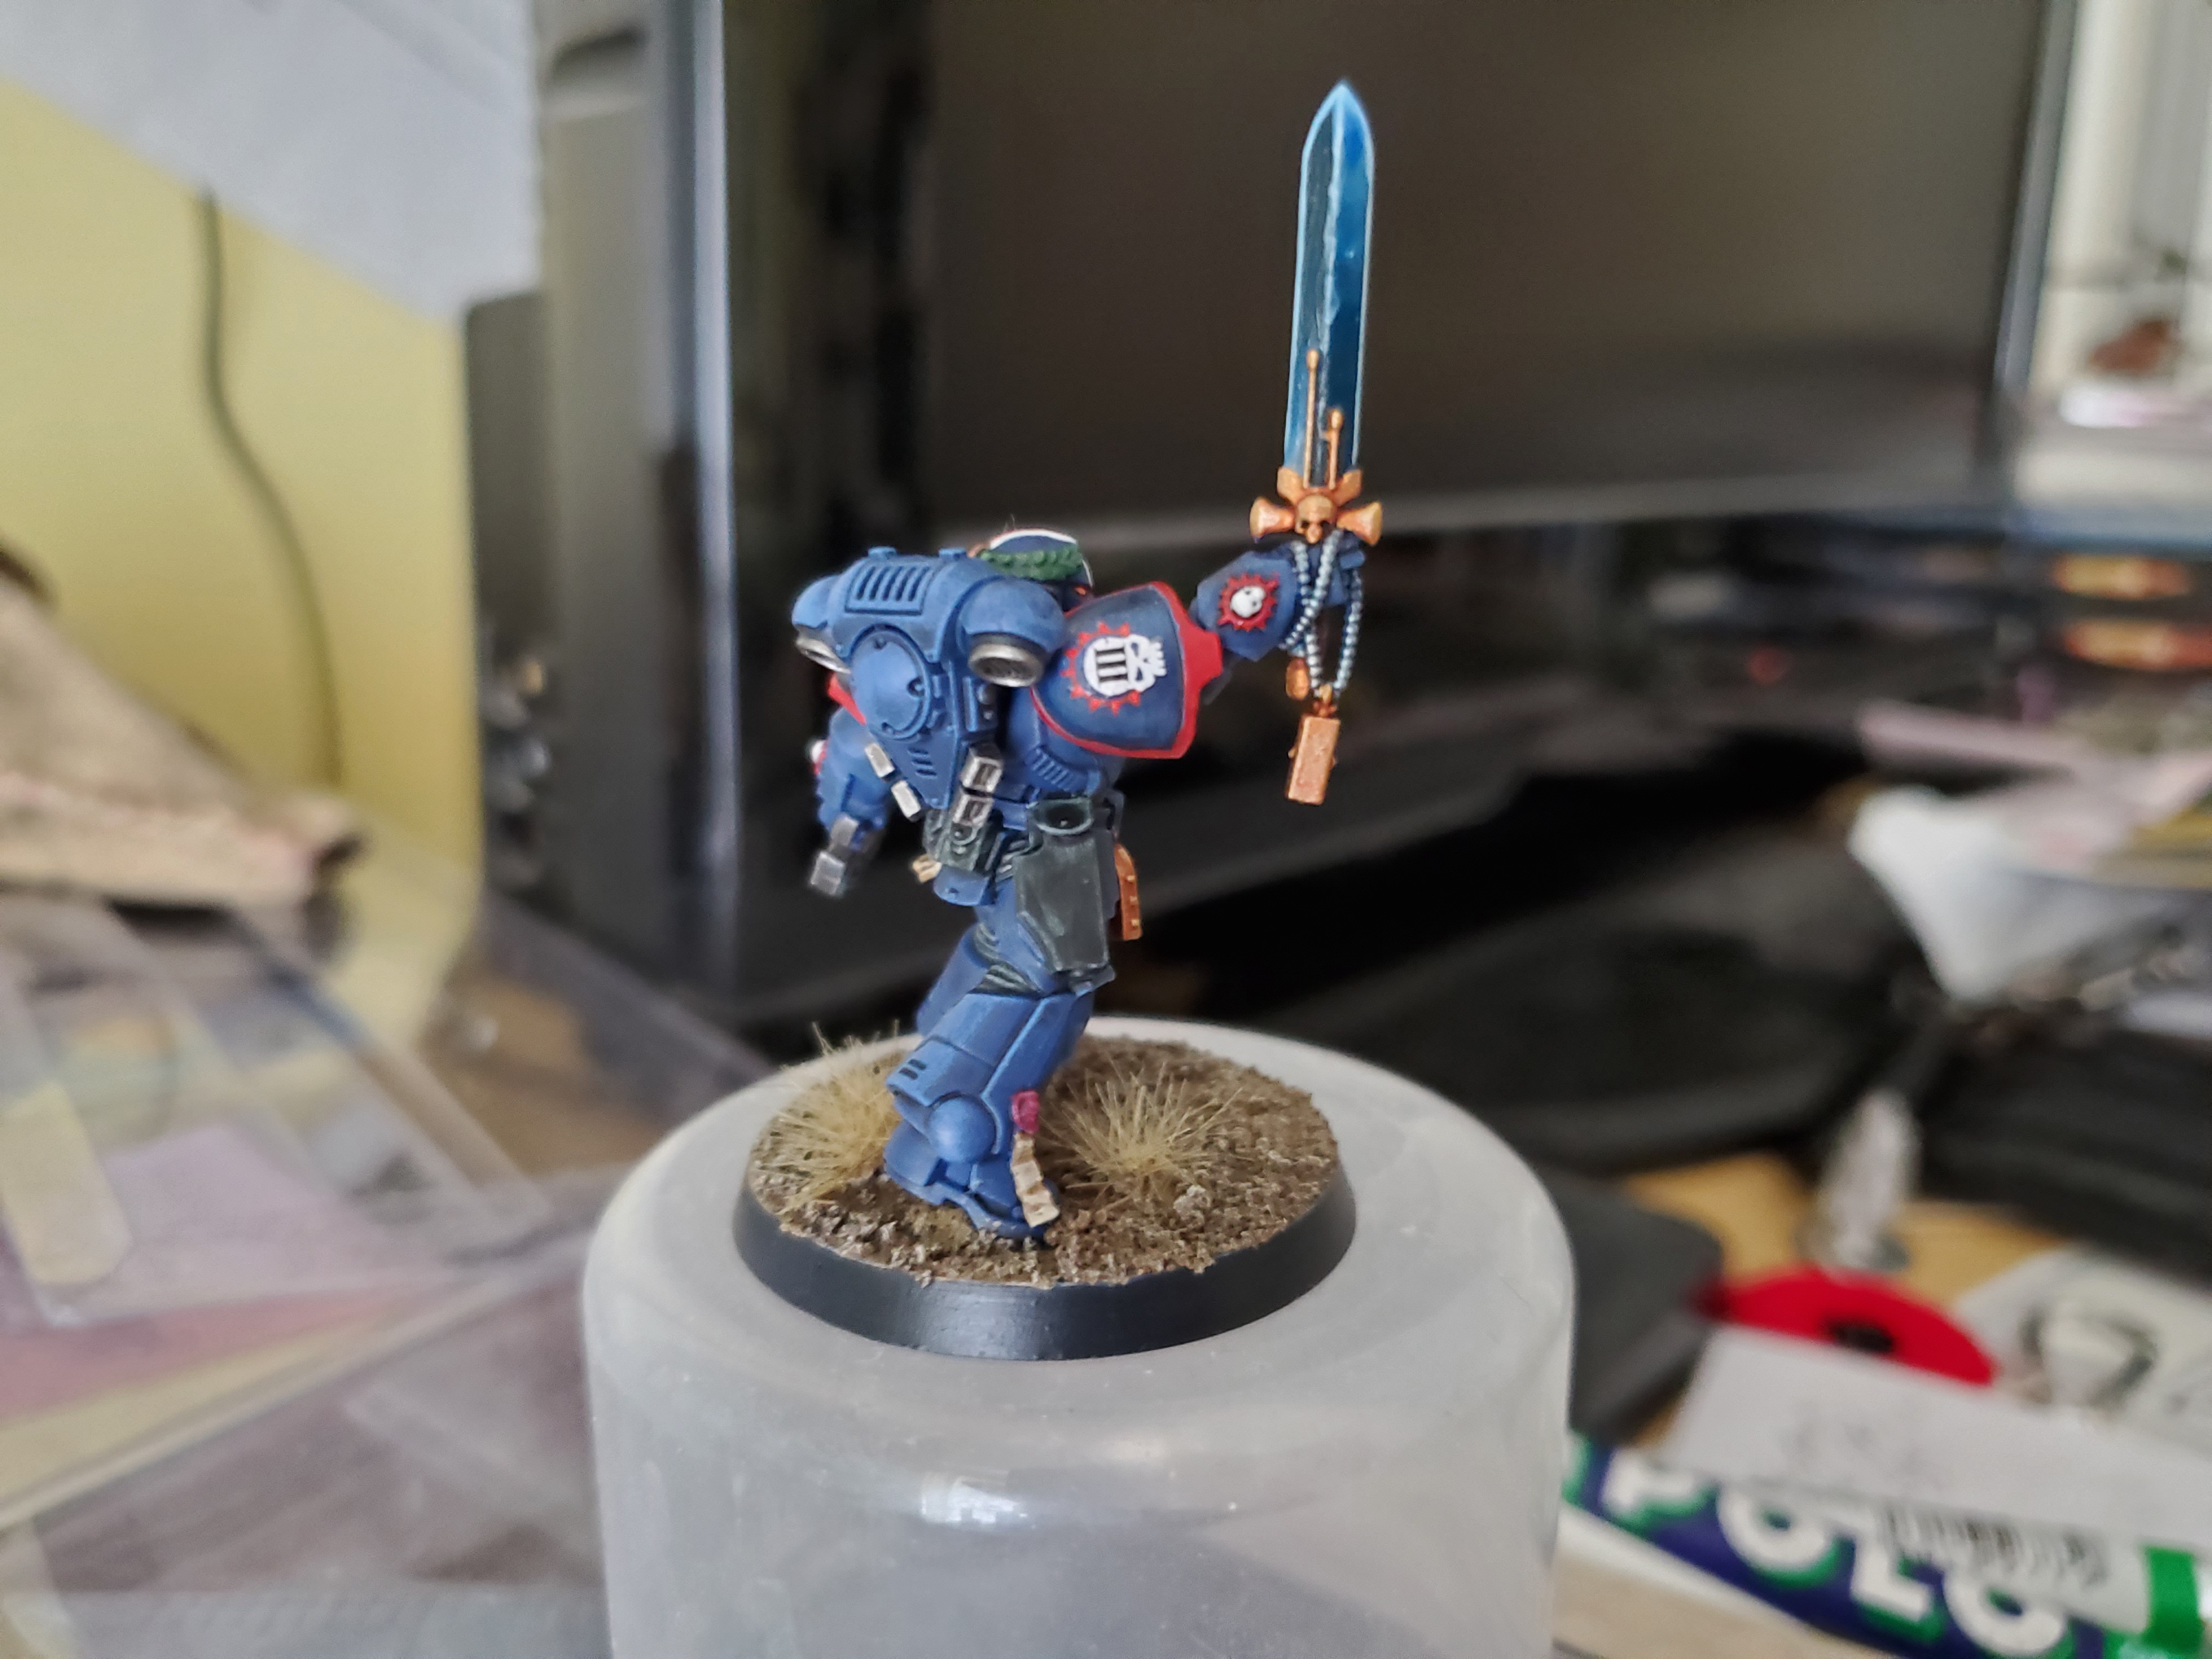
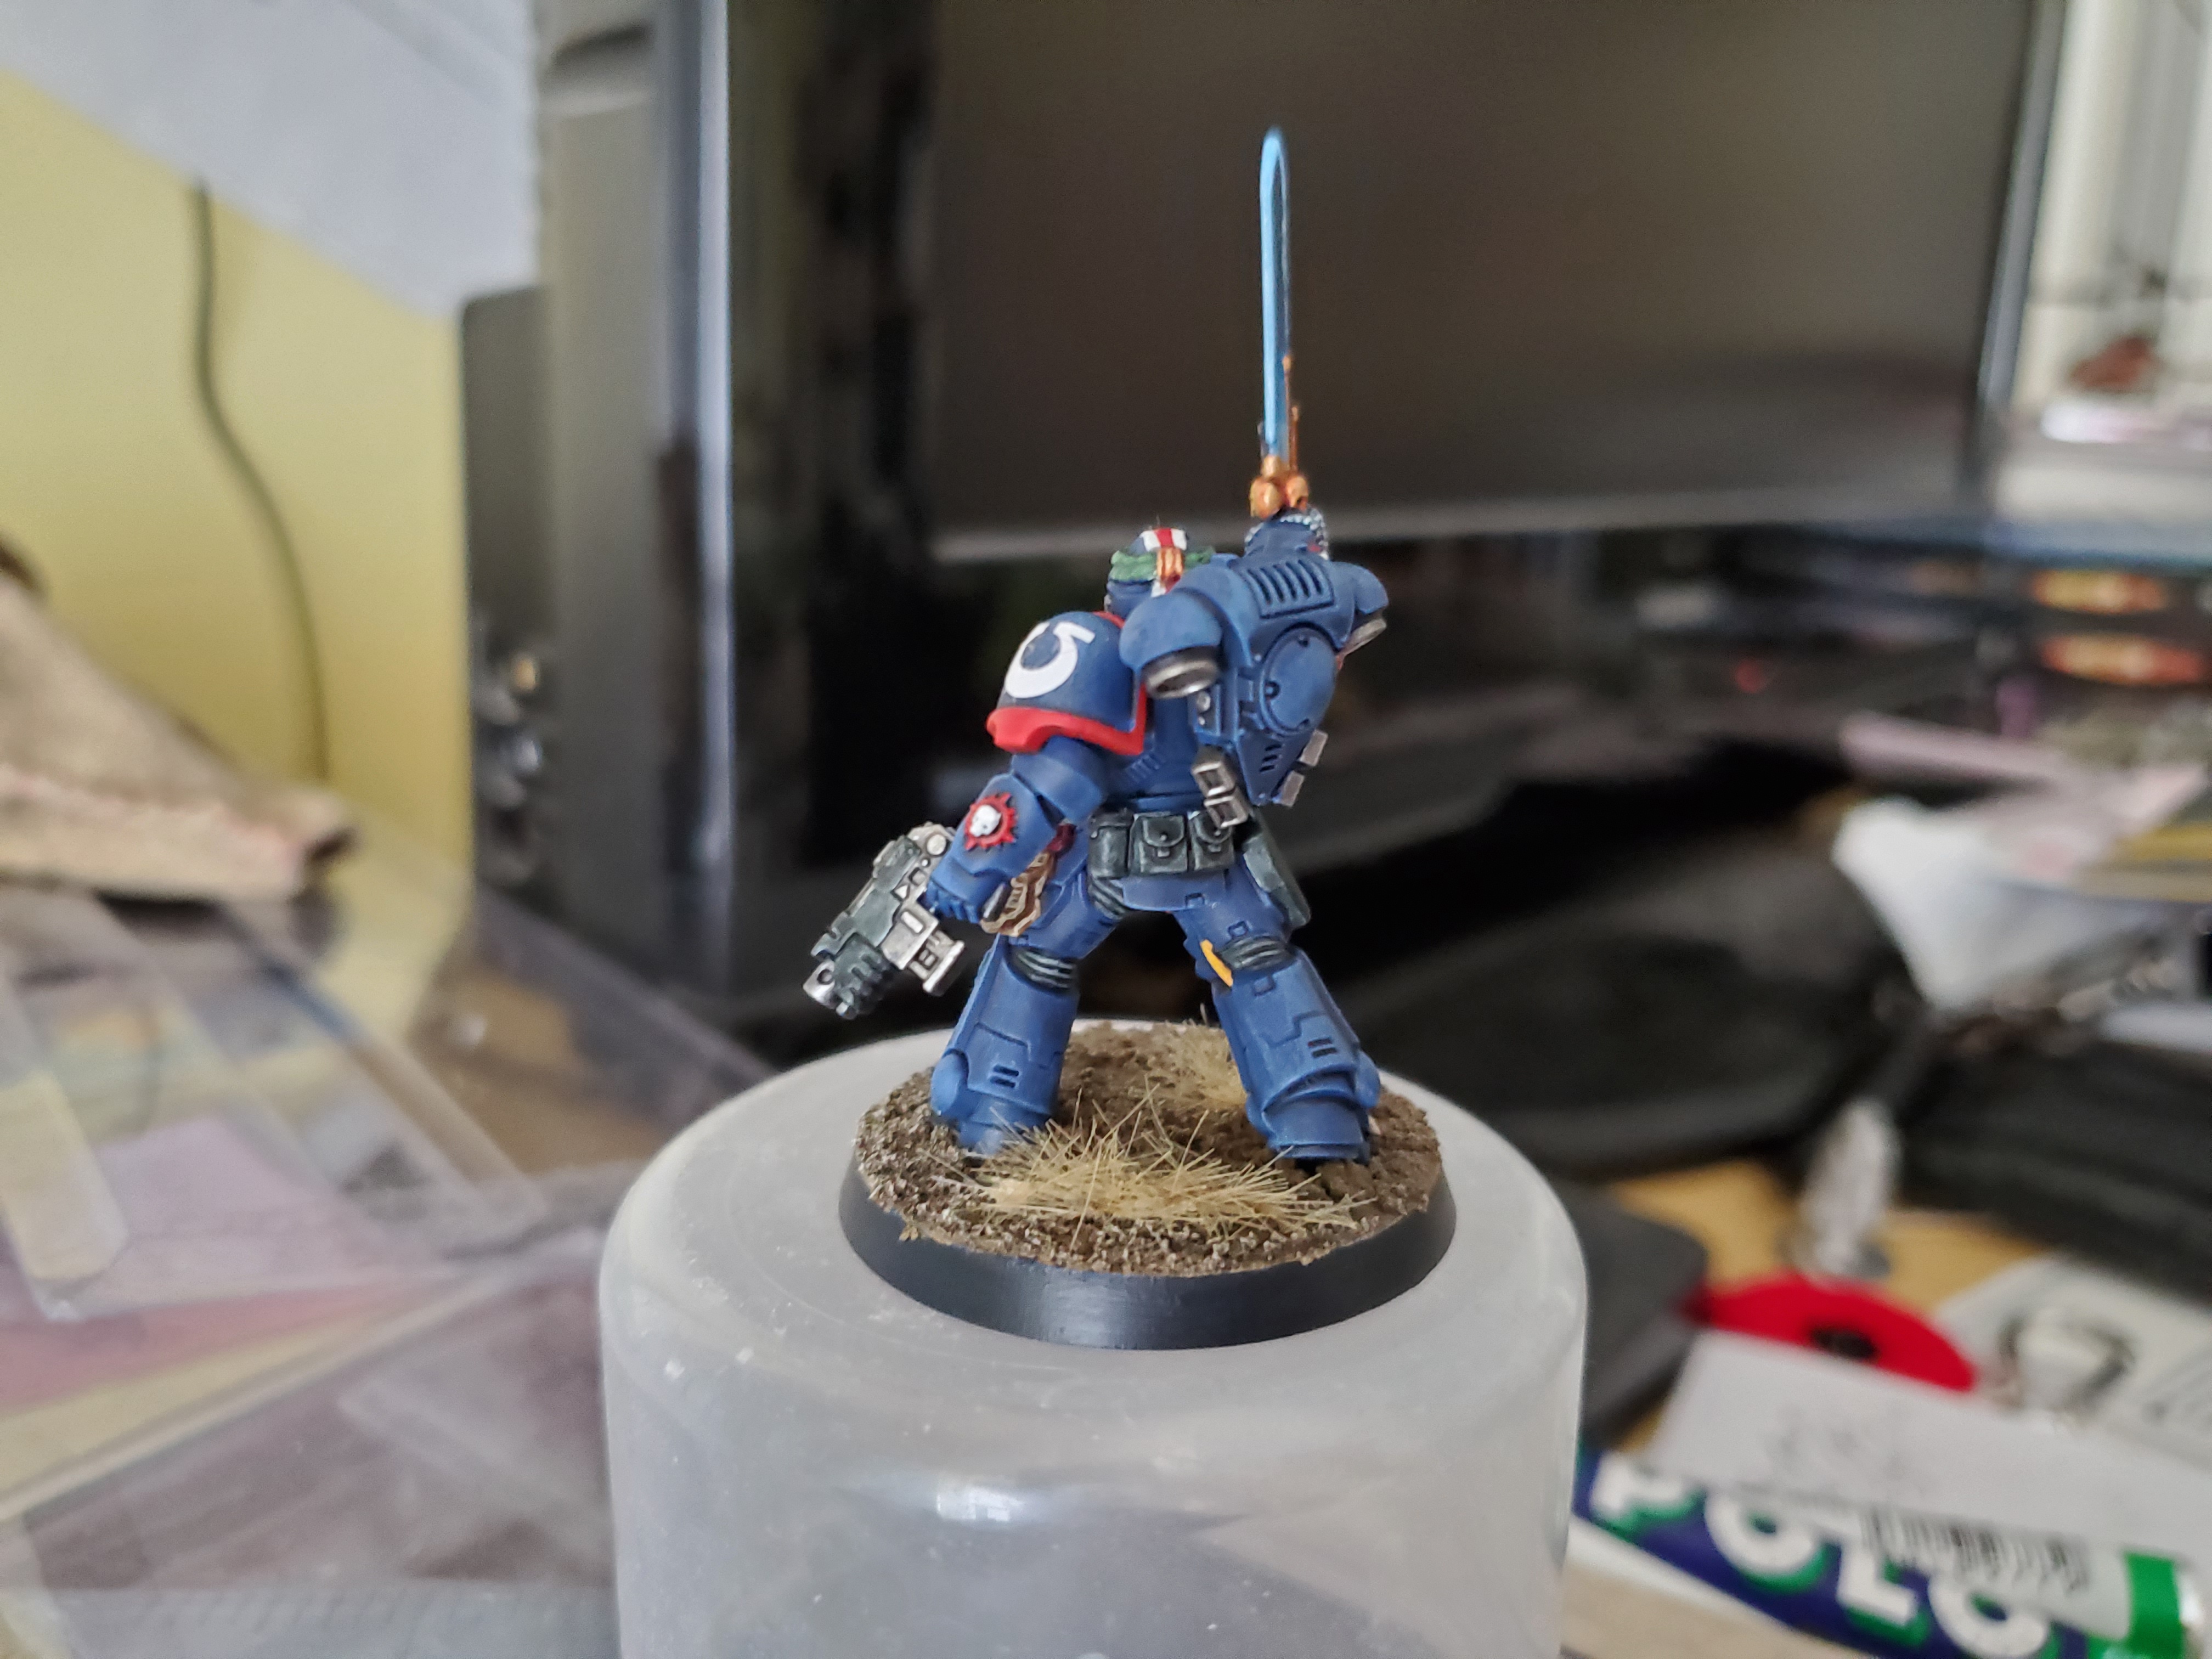 And the Lloyd shot! I'm rather pleased with the way the sword came out in these pictures. I used the many 'Painting Power Swords' videos that GW and Duncan Rhodes have done over the years with some differences. Firstly, I never remember the exact blues I used the last time in the gradient, but I also glaze the blade with Guilliman Blue before giving it a coat of gloss varnish. It looks really nice. I also did the rim of the base in Corvus Black...and I actually really like it. I might switch my Ultras from the gloss black rims they currently have. That being said; I'll wait until these lockdowns are done and I have easier access to paints than waiting for GW to send me them in the post...
Not sure what plans are up next, but I don’t go back to school until the 11th, so more should be done. Perhaps more Witch Aelves? I still have to finish that Shadespire team and my brother got me a box of them too…so much to paint…so little time. 😛
What is this? Bretonnia?
So last time I had a bit of a chat about heraldry…and then went scavenging. I got a hold of all of the spare tilting shields I had lying around an went a bit mad…
 I started by picking out 5 of the various colours I have used across the army. Some of them are only spot colours, and others show up more. In the future I may add in the green I use for the laurels, but this was a good start.
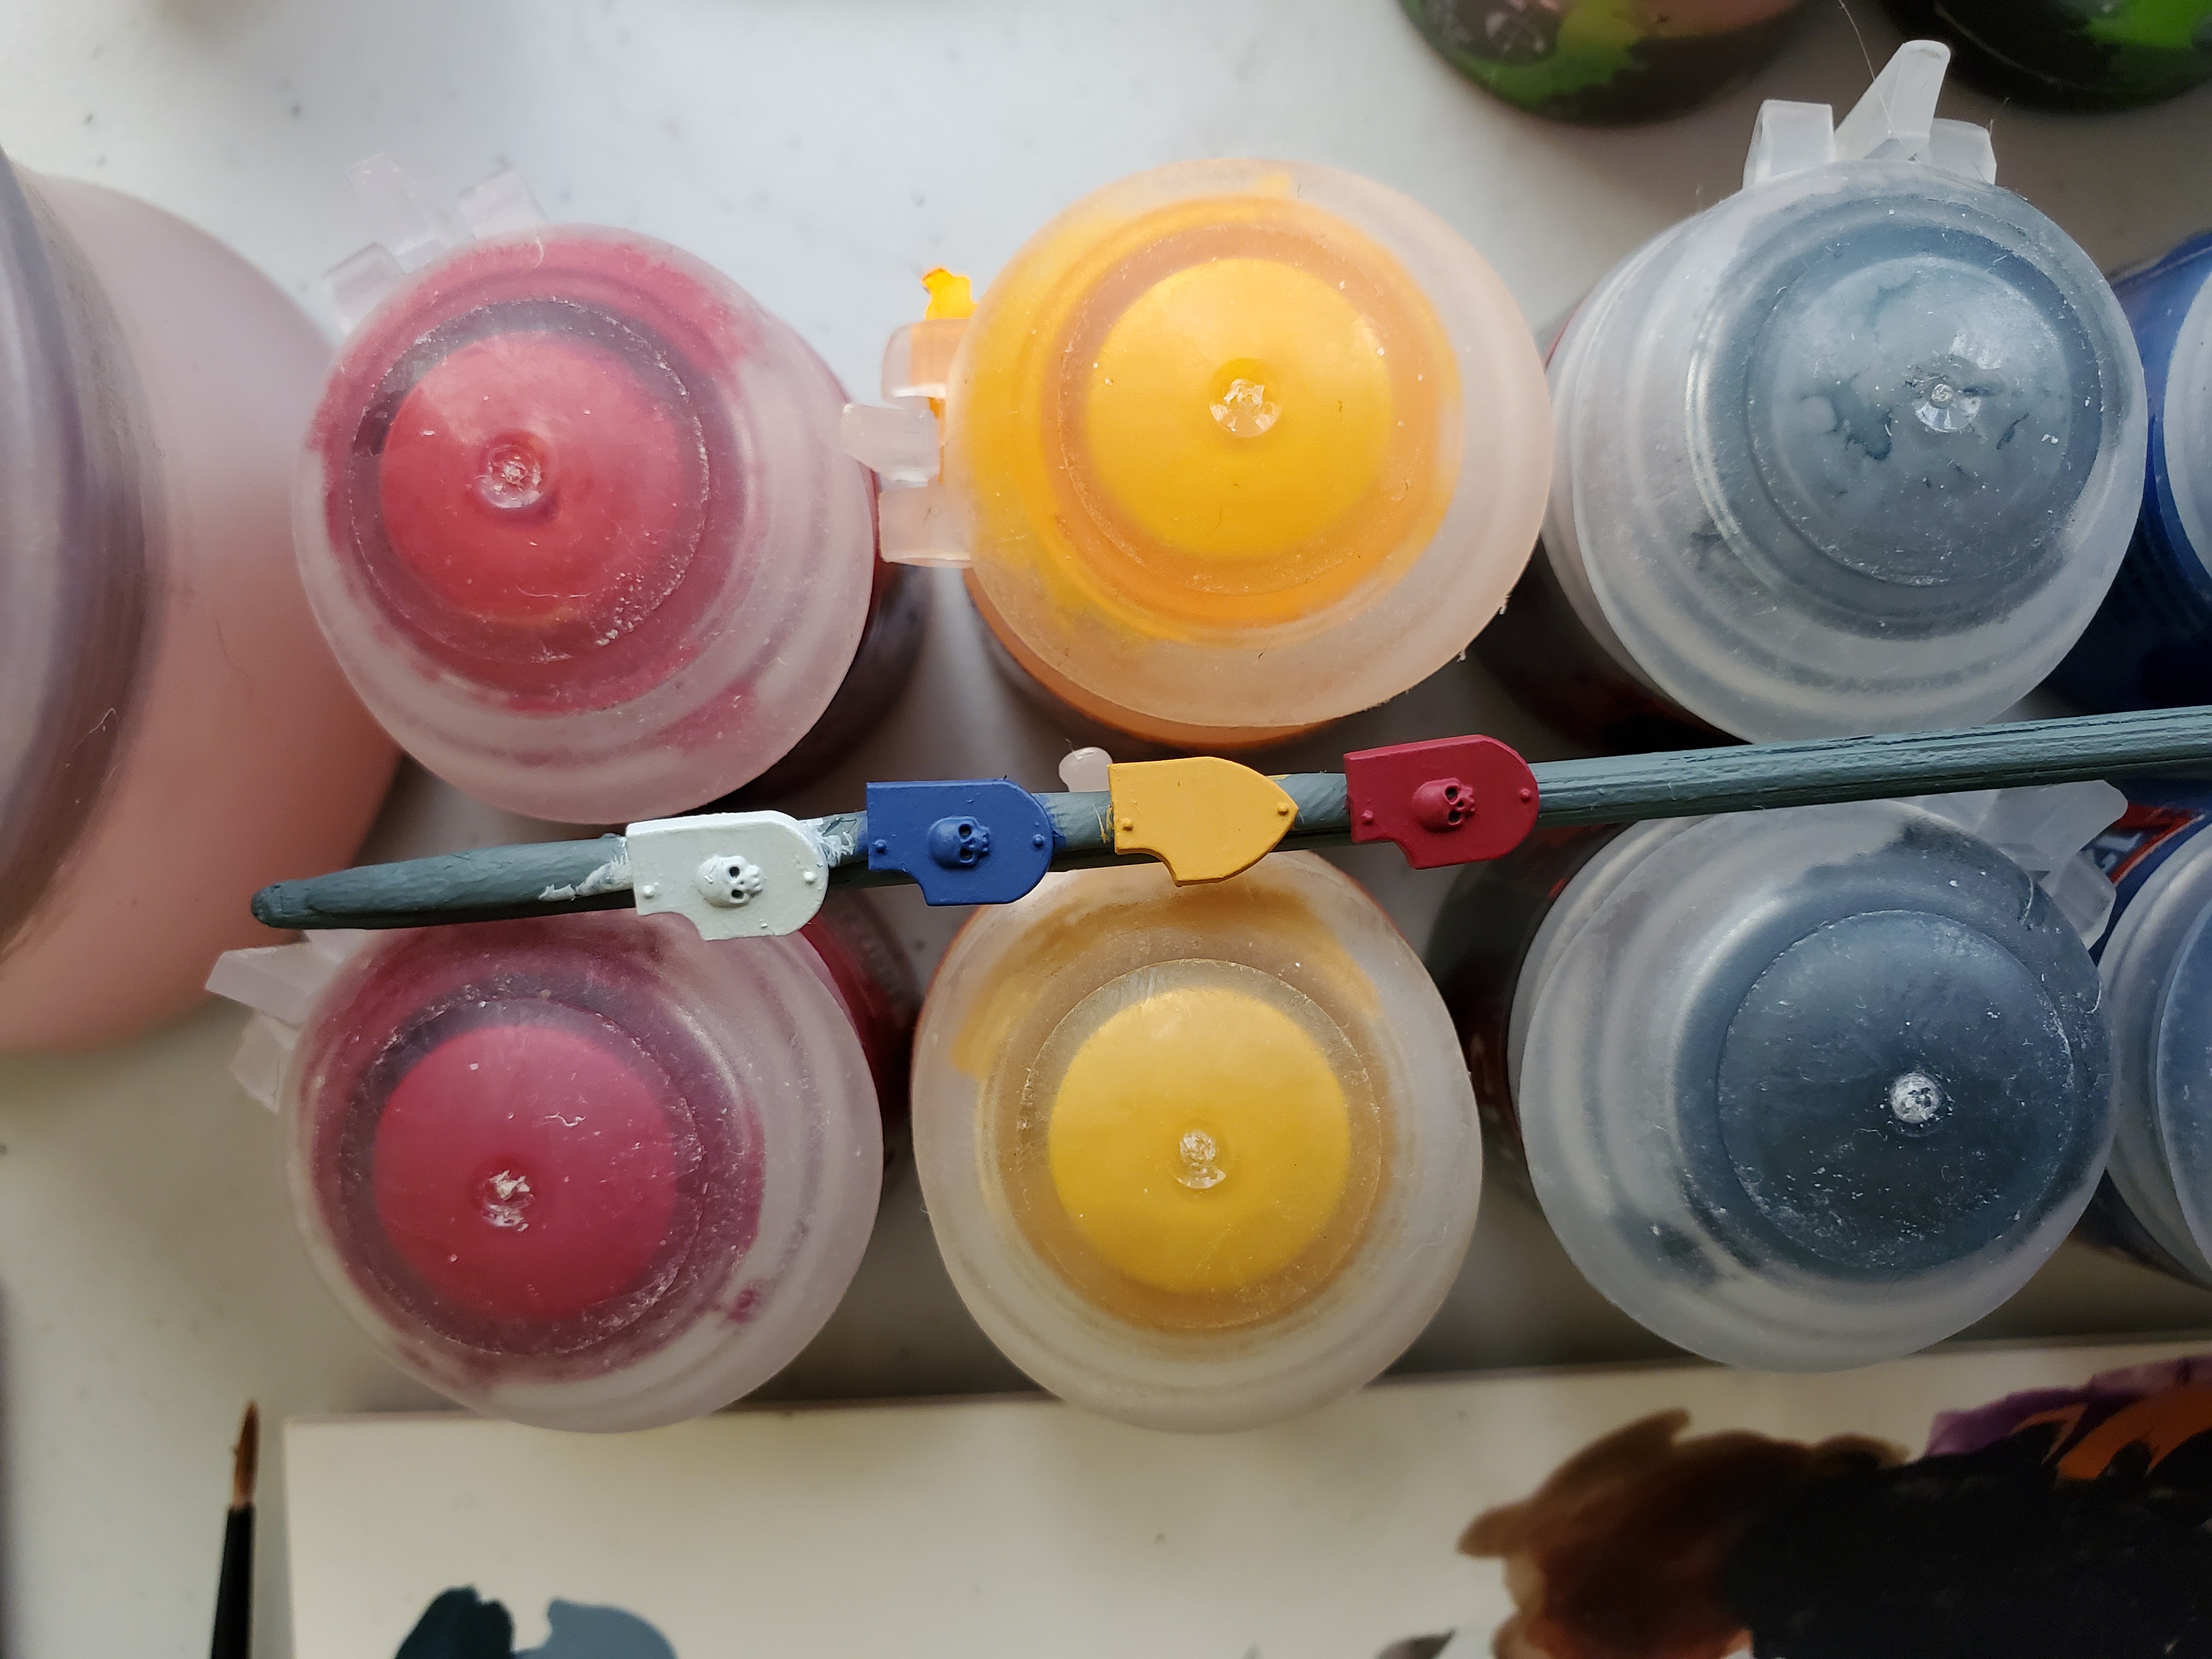 The shields were primed Mechanicus Standard Grey before each of them being given a different solid colour. I chose not to use black as a base just because it is a little hard to paint over sometimes...
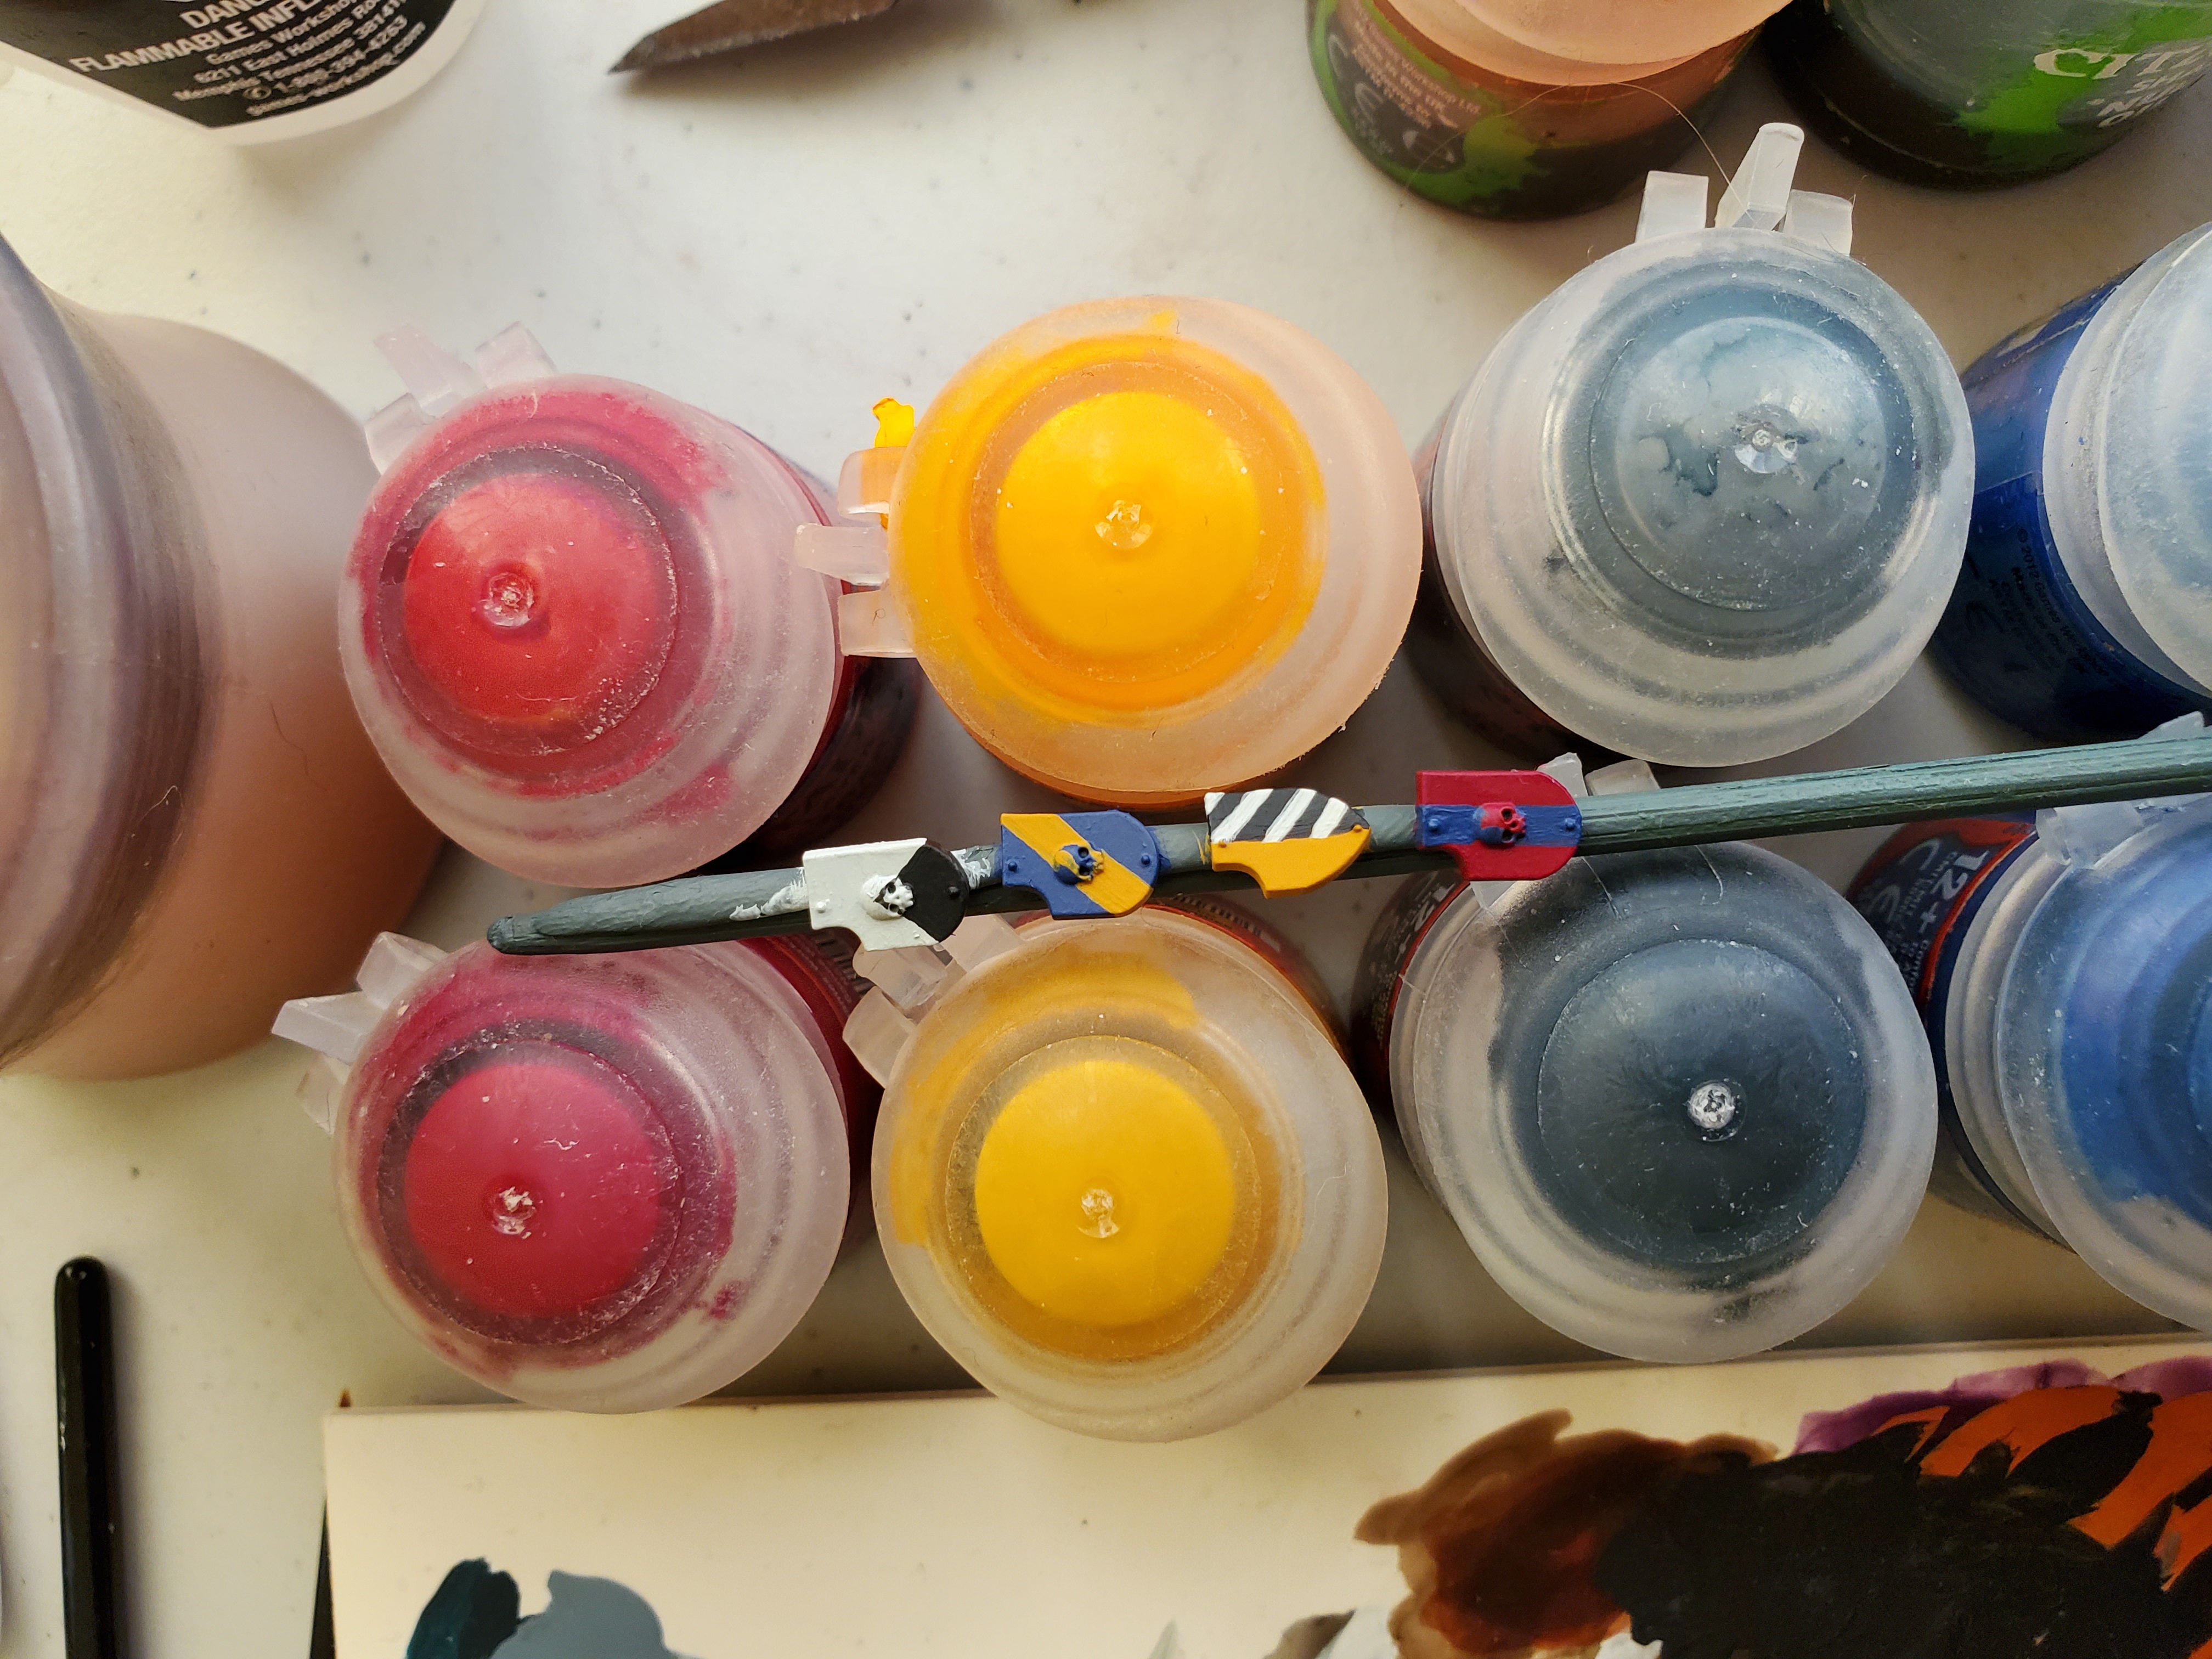 Next came the heraldic bit. These probably all have technical names, but I only know a few of them. I decided not to try adding in symbols just to not confuse the army badges, but the top (left) one is 'impaled(?)' with black, the next has a yellow bend(?) next has a halved pattern with the white stripes not being perfect, but good enough and the last one almost getting white outlines on the blue bar to make it look a little Norwegian. Thin paints and steady hands work well here. Paint the outlines then fill in the shapes and use markers on the shields such as the skulls or the rivets to guide your lines.
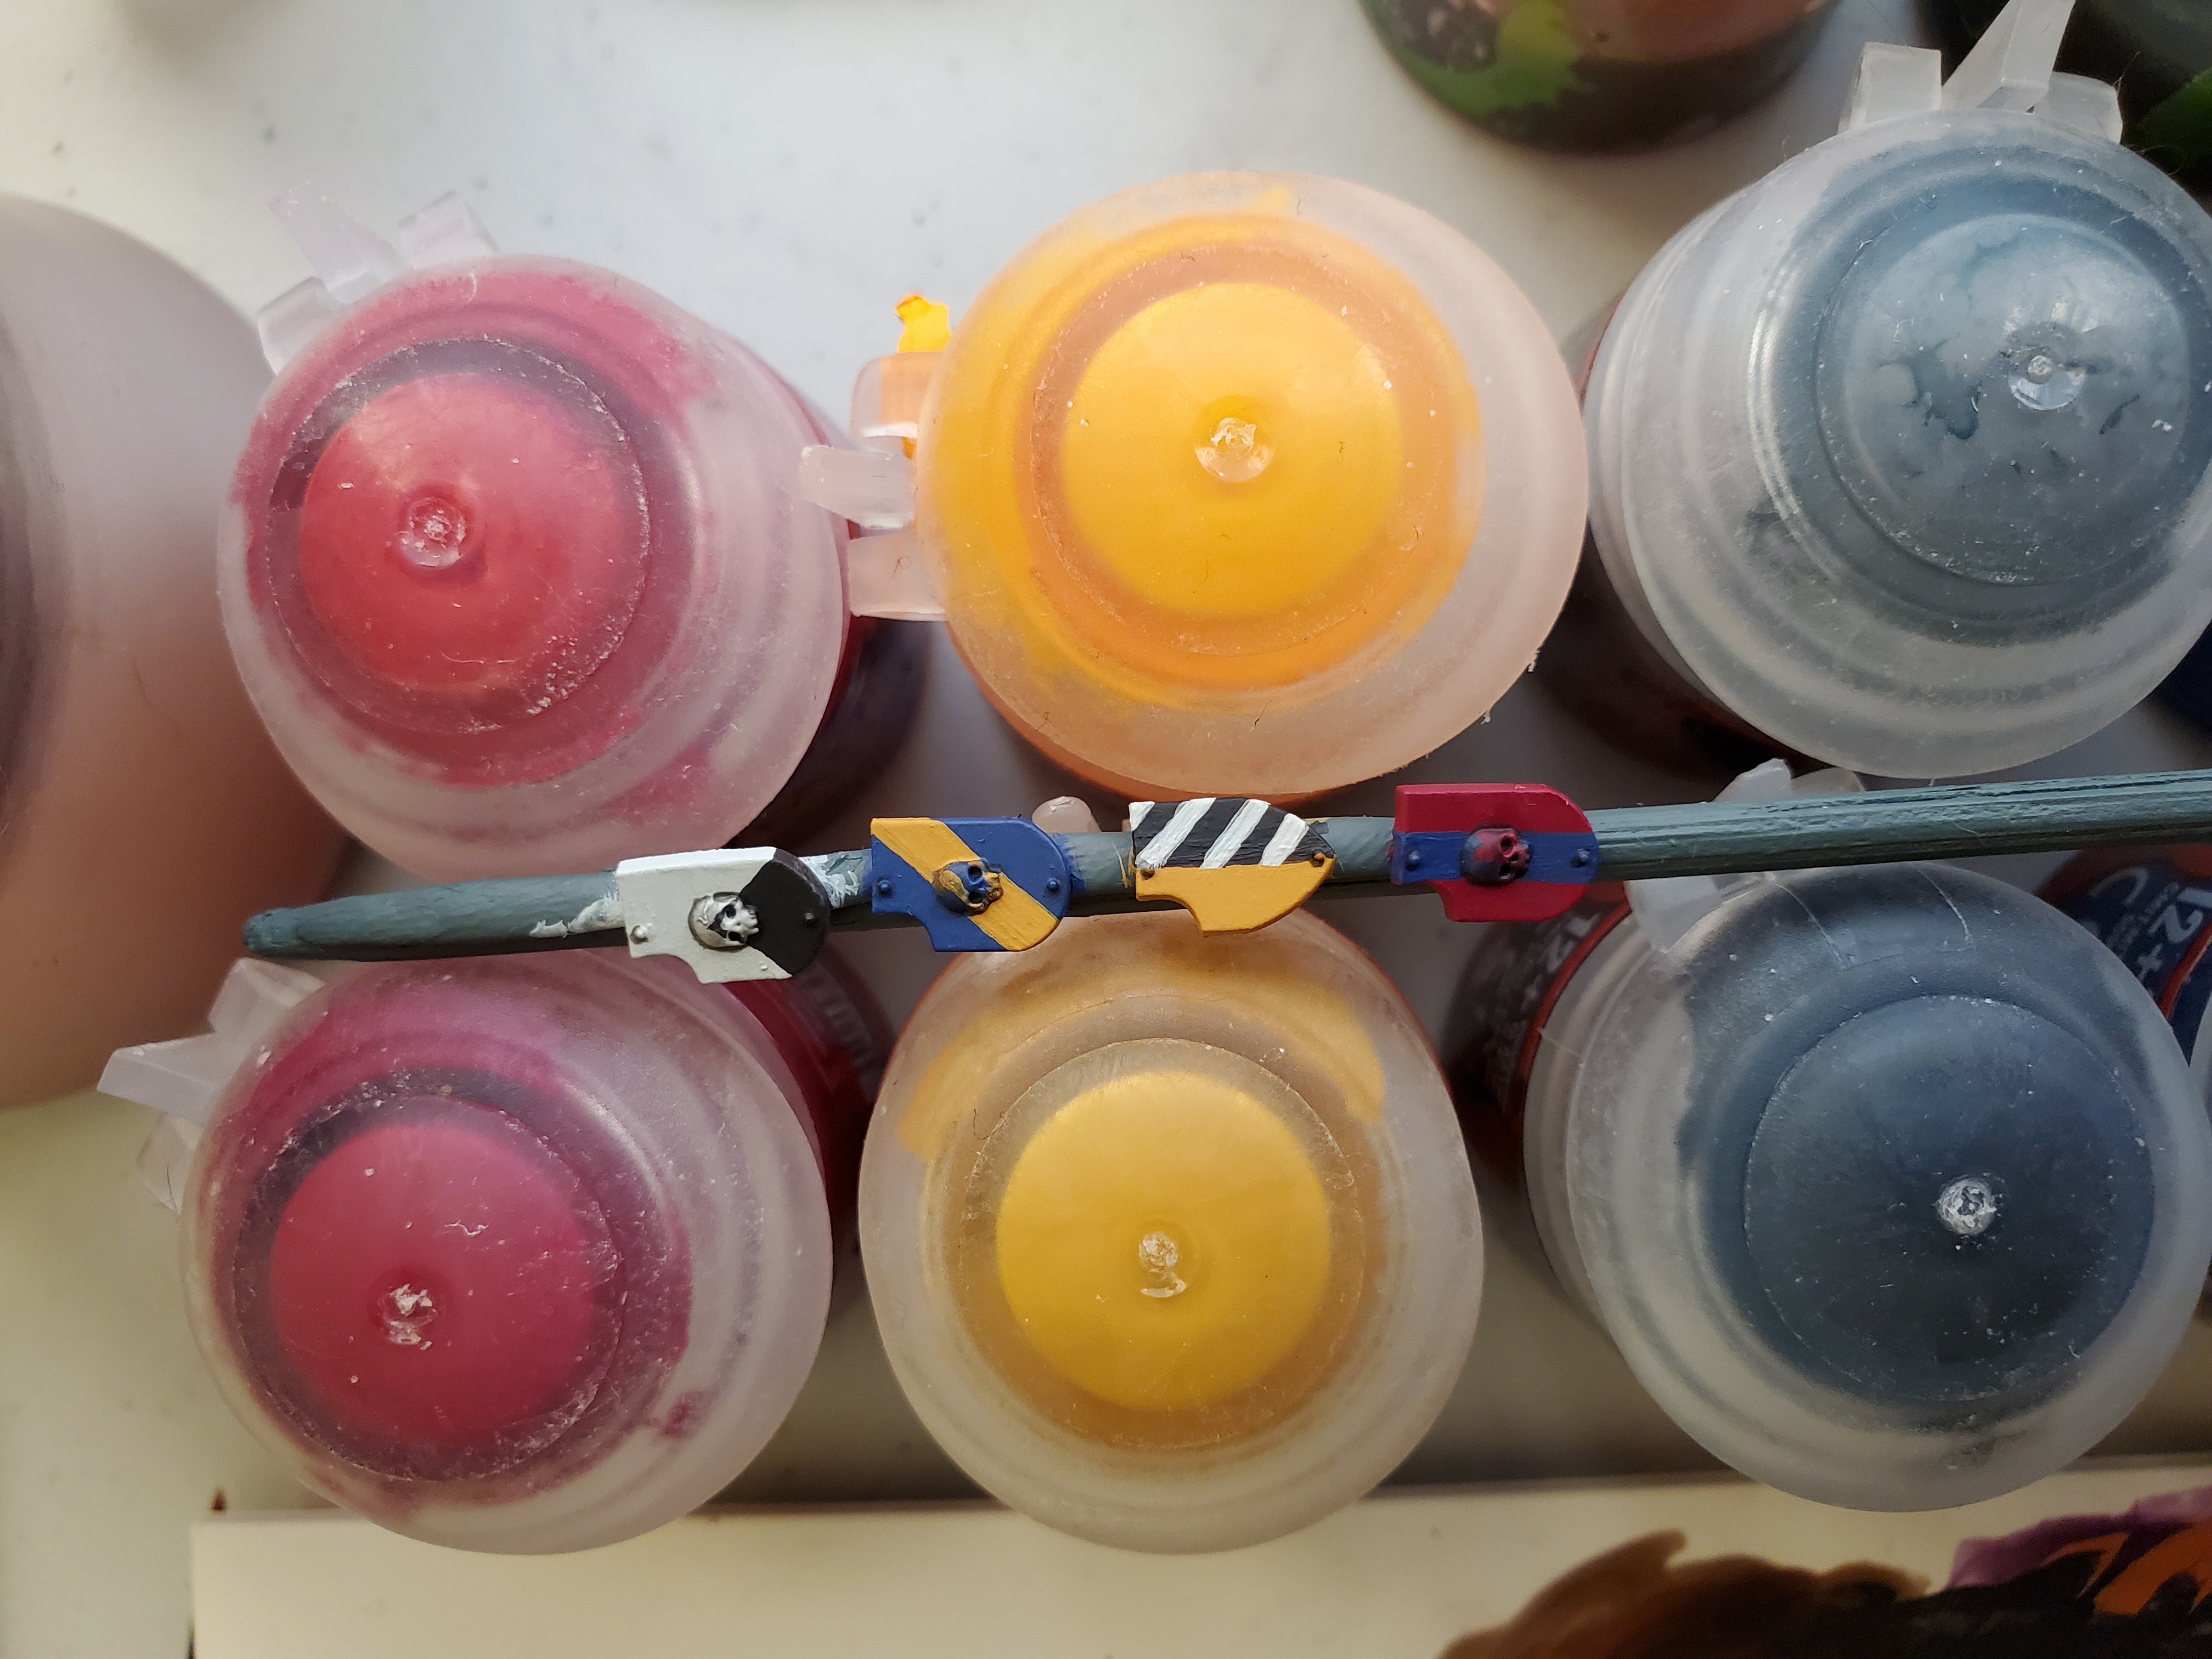 Bit of shading around the skulls and rivets. I did orginally plan on using appropriate shade colours, but in the end just stuck with Nuln Oil for everything. The only colour this was a bit odd on was the yellow, but I think it turned out alright. Agrax Earthshade would work for a more grubby appearance.
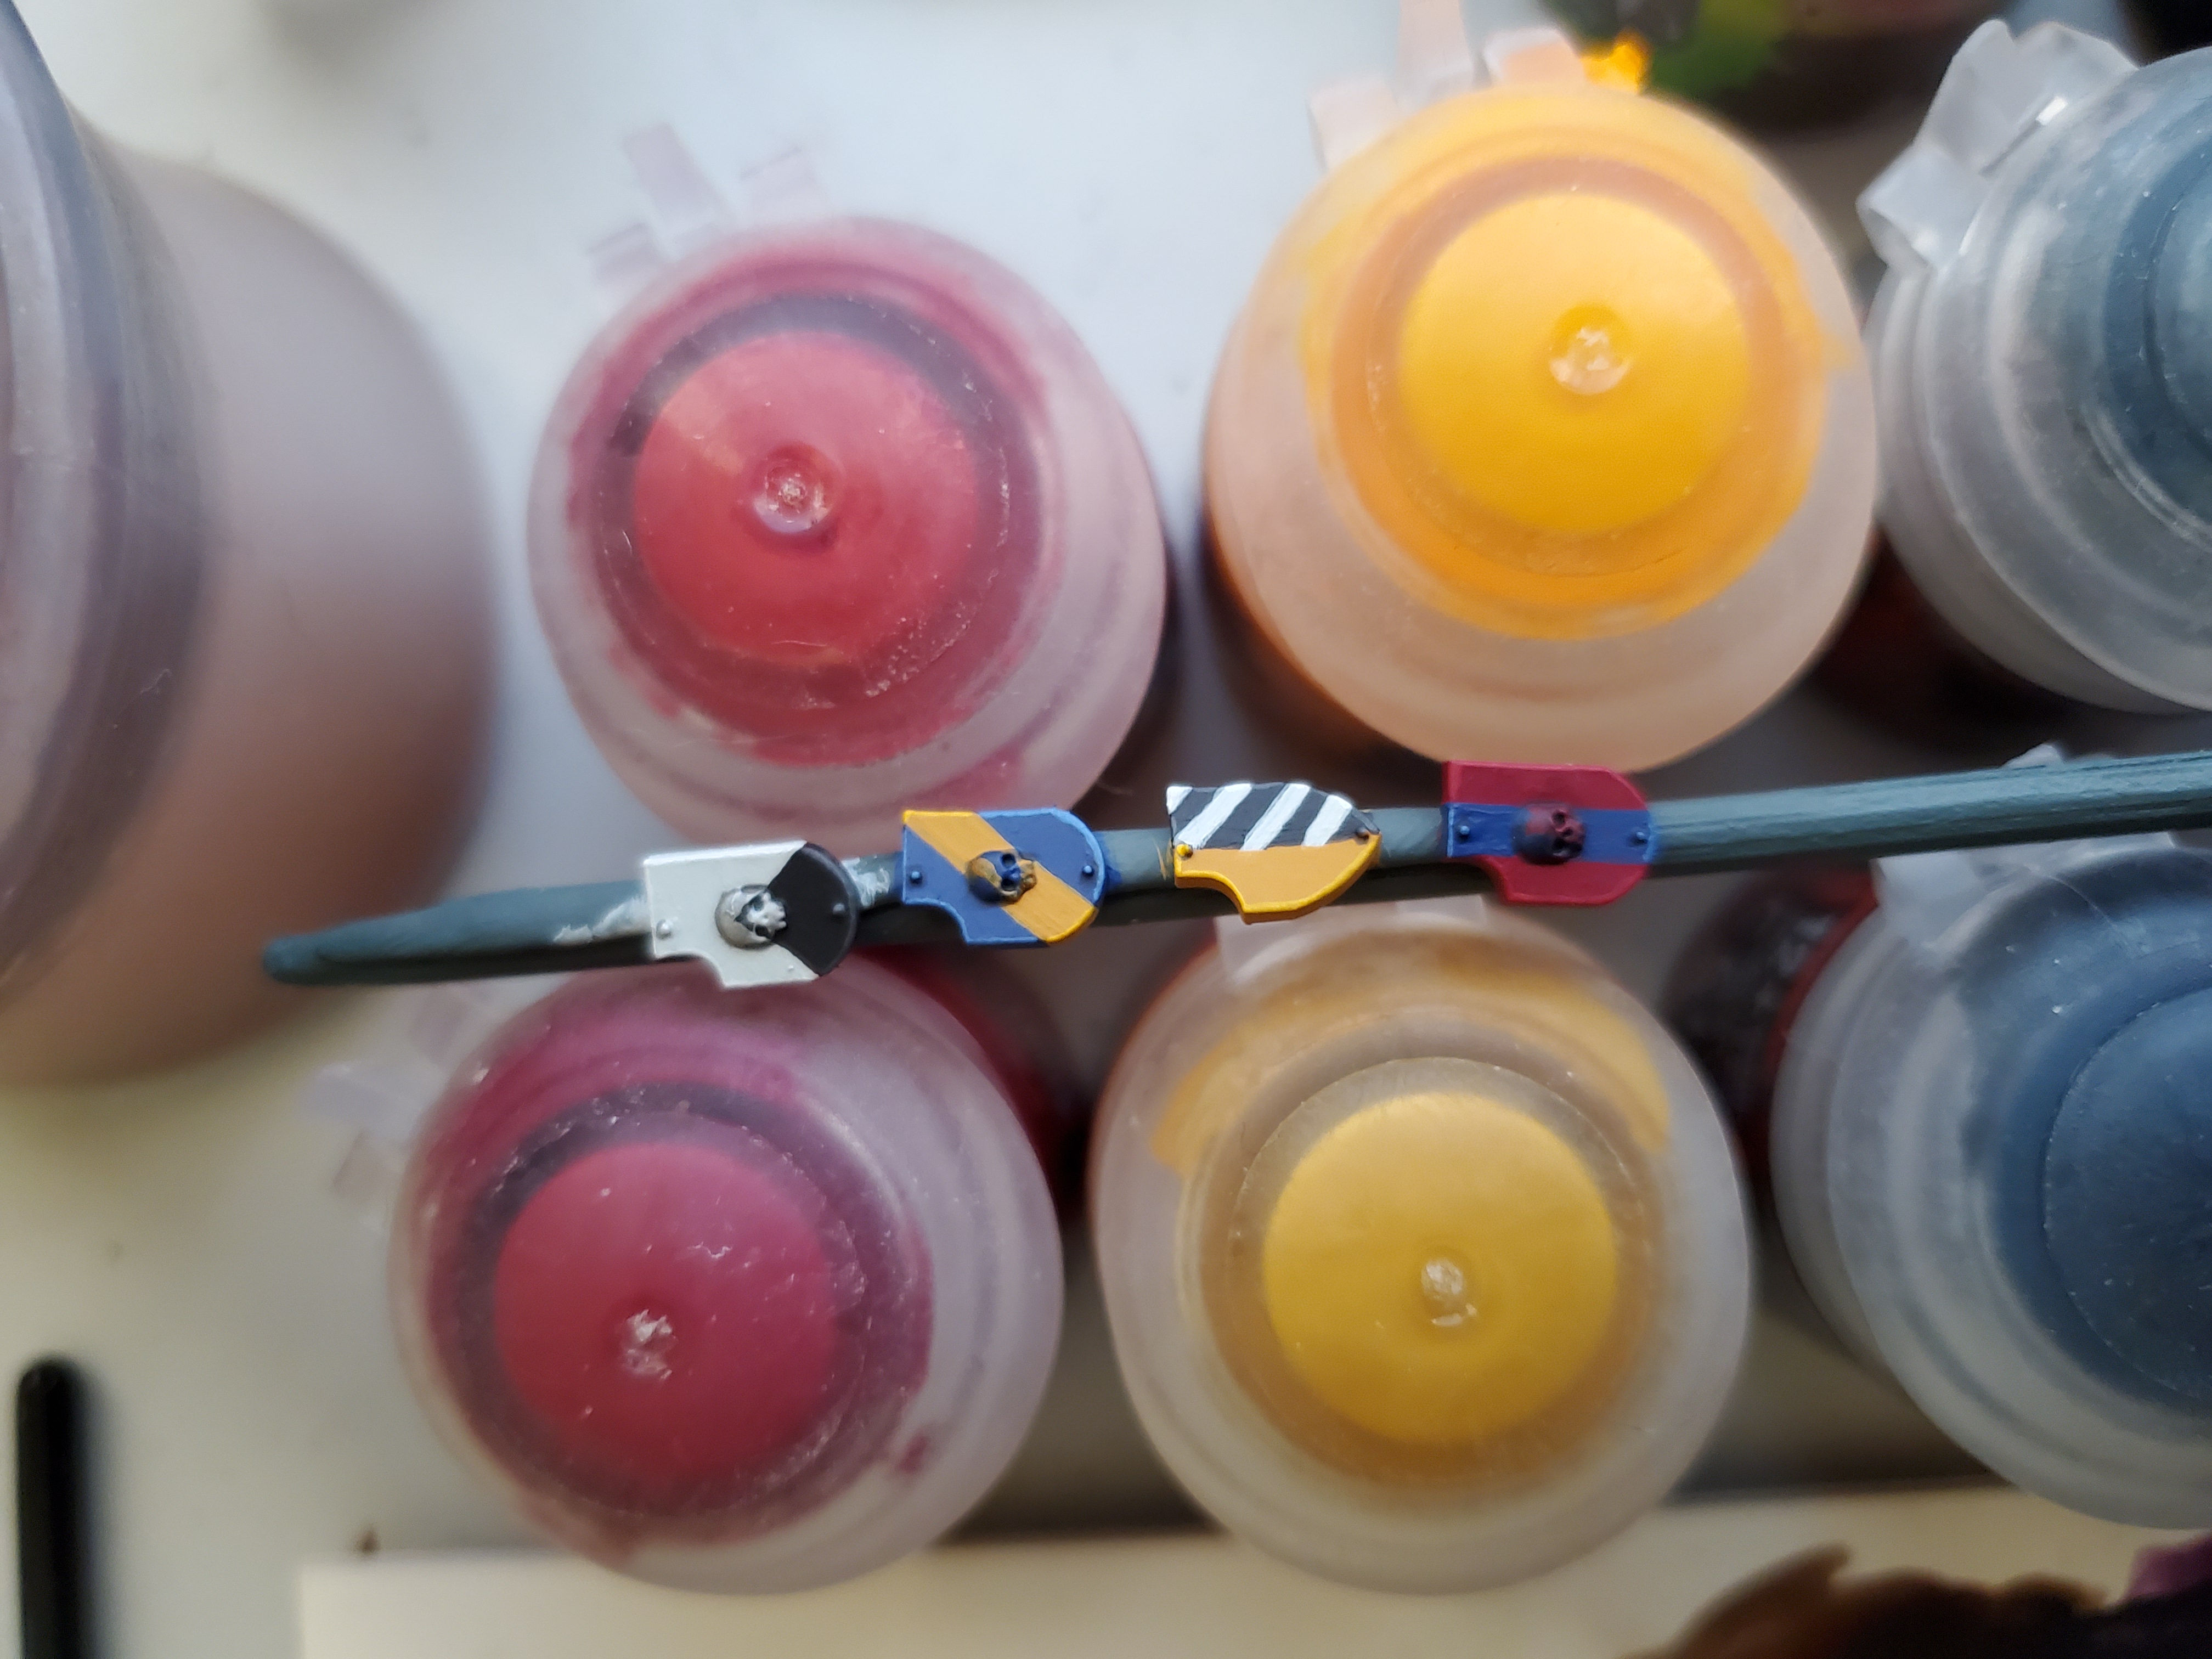 Then some edge highlights. I haven't really gone too much into colours here, because so long as it's colourful, the heraldry works. Stear clear of browns and other drab colours unless there is a good reason for them. For example, grey on Primaris Marines might show previous employ in one of the Greyshield units, for example. Something I used for a Captain mini I painted some time ago.
 Then I picked out the skulls. You could do these as metallic details, but I wanted them to feel like part of the pattern so I schose from the colour pool something that would stand out nicely on each colour. There are a lot of scultped details on the Chapter-specific pads out there, but I think the skull is mundane enough to work for any chapter, but you could always shave them off which I may do on future tilting shields that I paint.
Then we need minis to put them on! I pulled out a few including my two Lieutenants that I have finished. I realised that two of my badges look very much like Company Colours, so I decided to put them on Veteran Sergeants to show the companies they came from before induction into the 1st. The others I added to my Lieutenants.
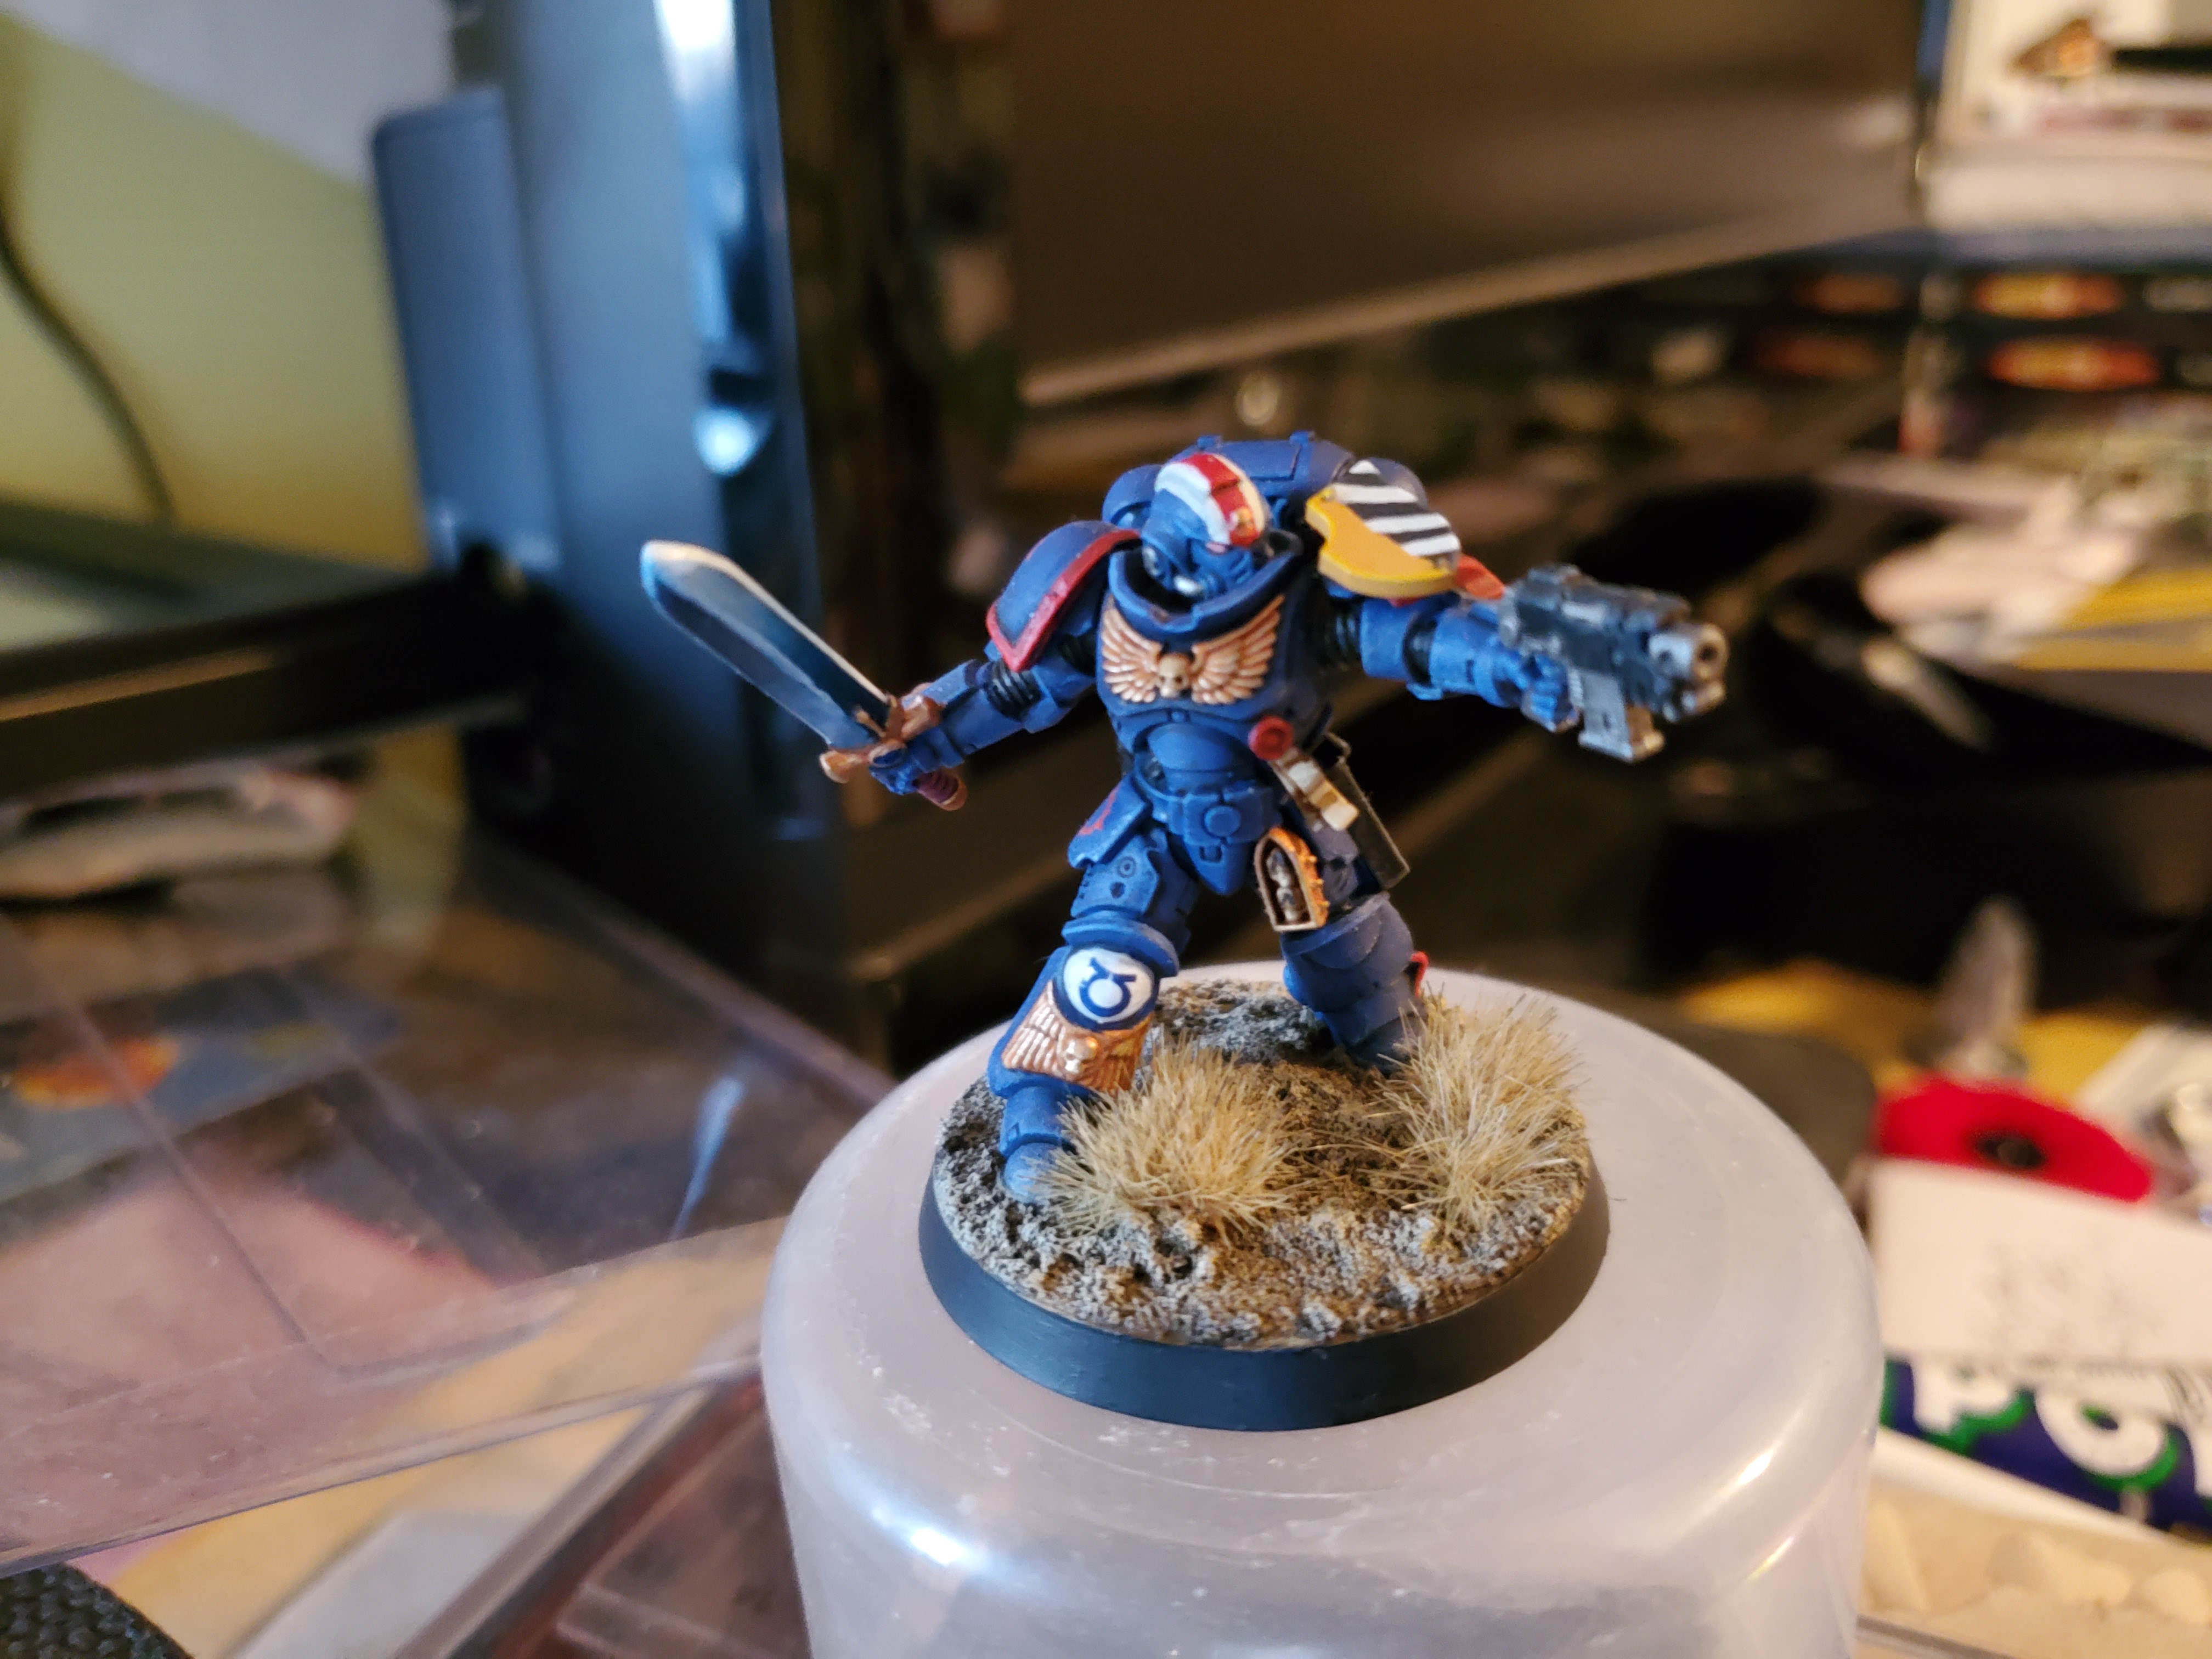
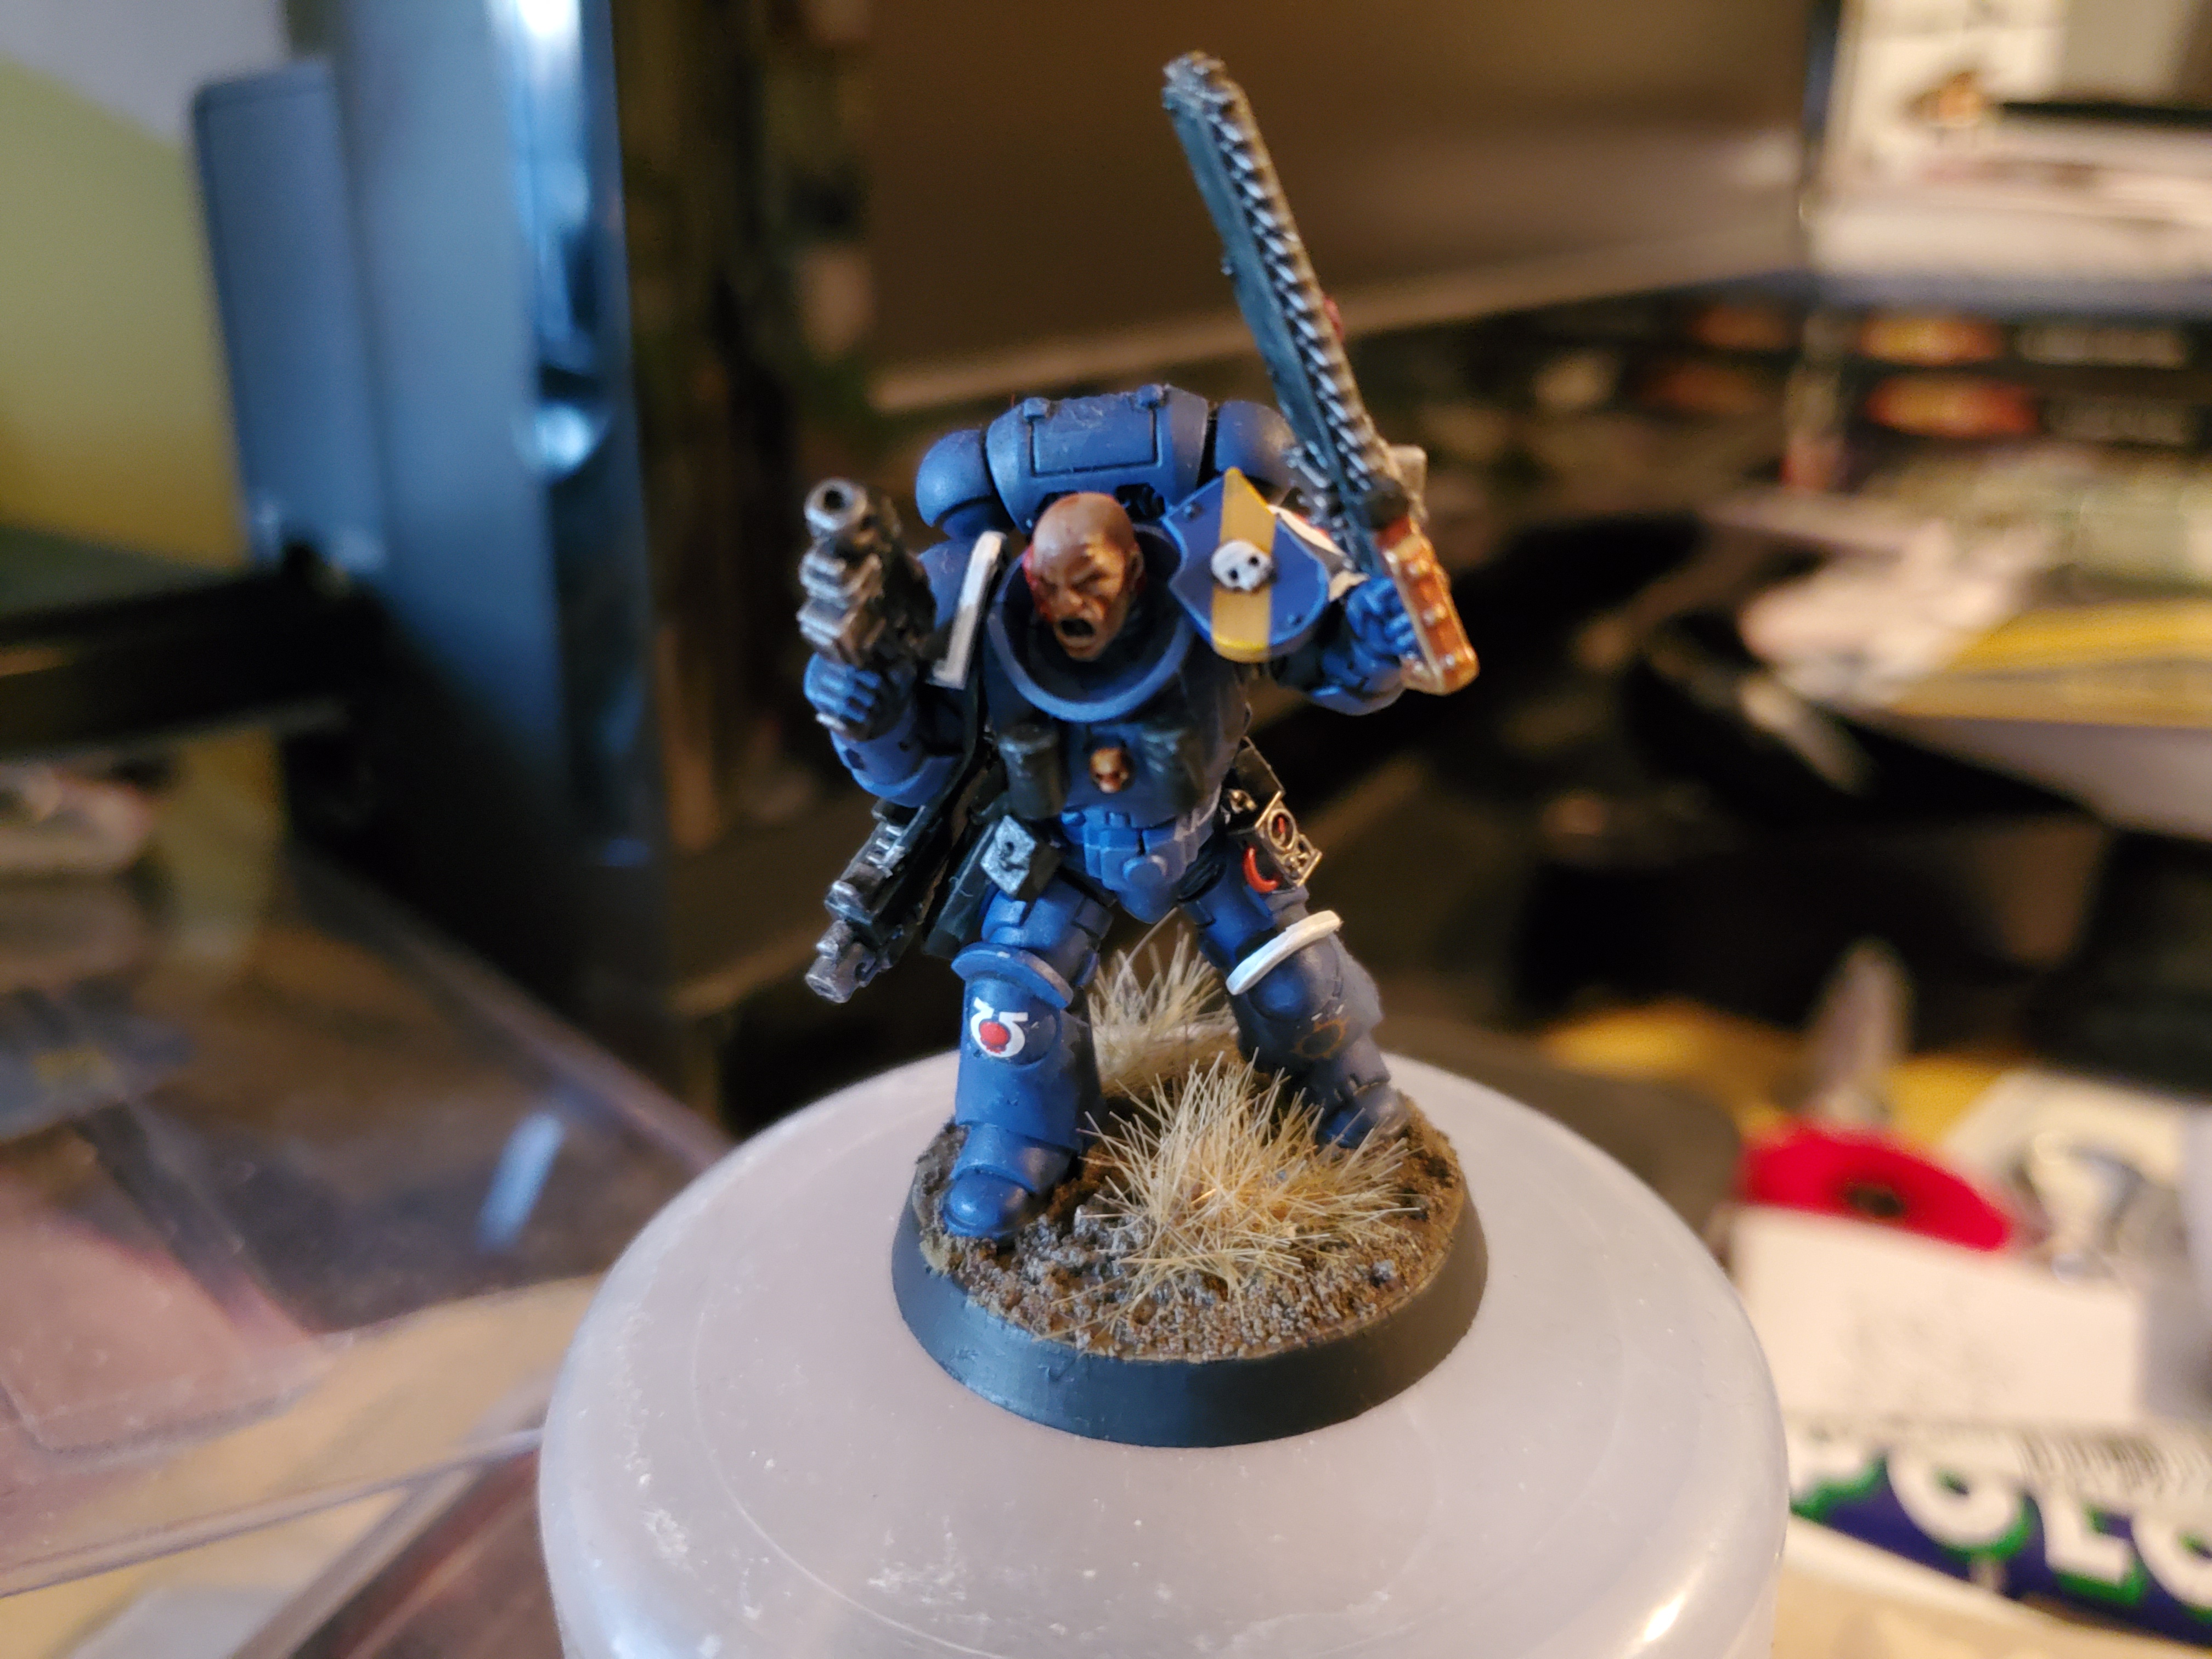
Also took the time to change the rims of these chaps to matte Corvus Black rather than the gloss Abbadon Black.
While I’m sure some of you have already had New Years, it’s still a few hours away for me, so I will wish you all a HAPPY NEW YEAR! And let’s make 2021 a little less…2020. 😛
Do brunettes have more fun?
This one has a smirk on her face, so maybe? Anyway, another member of the Daughters of Khaine Shadespire team is done. I really ought to remember the name as it would be less words to type, but I’ve never claimed to be a smart man…
 By and large, this crazy murder-hobo lady is painted the same way as the others with only one obvious difference and one subtle one. The obvious one is the hair, which we'll get too later, and the subtle one is the skin. As I mentioned in the last post, I had thought that an extra drybrush of Palid Wych Flesh over the skin would make the tone a little more pale so I tried that here. The real downside was a few areas where it became too pale, but a quick thin coat of Riekland Fleshshade in those areas brought it back nicely to where I was happy with it.
 The hair was something I hadn't really done, yet, and that was to use some pre-shading and then contrast paints. I think the pre-shading didn't really do much as there was no real difference between the colours I was using to pre-shade...my bad. I was basically playing with Palid Wych Flesh and Skull White...should have used some darker tones underneath like Zandri Dust, or something... Over the top of this, though, I applied the Wyldwood Contrast paint before CAREFULLY drybrushing with Skragg Brown. I wasn't too happy with the finish because the Contrast was a little patchy with some much darker spots in places that made no sense, and the overall colour was a little too bright. So I decided to shade the whole thing down with Agrax Earthshade to dull it down and blend it all together. Added in some extra coats near to where the hair meets the crown, too, for some shade in that area. In the end I was pretty happy with the look.
 The rest of the mini was standard to the last two I've done on this project. I really like the contrast I get from the paler skin and the deeper reds and purples. I would like to make one point about the mini, though, as GW paint her top as a metal breastplate...but there are no straps or hinges or ANYTHING to show two plates (front and back) that connect...which suggests that if it is supposed to be armour then the armour is forged onto this poor woman's body...that's going to hurt... One of the reasons I went for a studded leather/cloth look that seems a little more...practical... Also the red looks better.
 And then the obligatory Lloyd shot. Two more minis from this team to go, and one of them is part Snek...which should be fun. Might do her next, but there's plenty of other things to work on while I still have time before school starting again...
Iron Age Ancestors
At the risk of sounding mildly political, recent events have caused me to move away from my English identity and something much more broadly British, particularly with relation to my (often side-lined) Welsh heritage. I’ve had this mini lying around for a while now and I was never really sure what to do with her so she sat unprimed and unpainted. I think she is a Warlord Games mini that I got as a freebee at some point (as I have no other Celts that I would have gotten her to join). Now, she’s not exactly a ‘Welsh’ mini, because she’s got an Imperial Roman Helmet and that and the Welsh as a nation aren’t contemporaneous, but she’s a Briton and that was close enough.
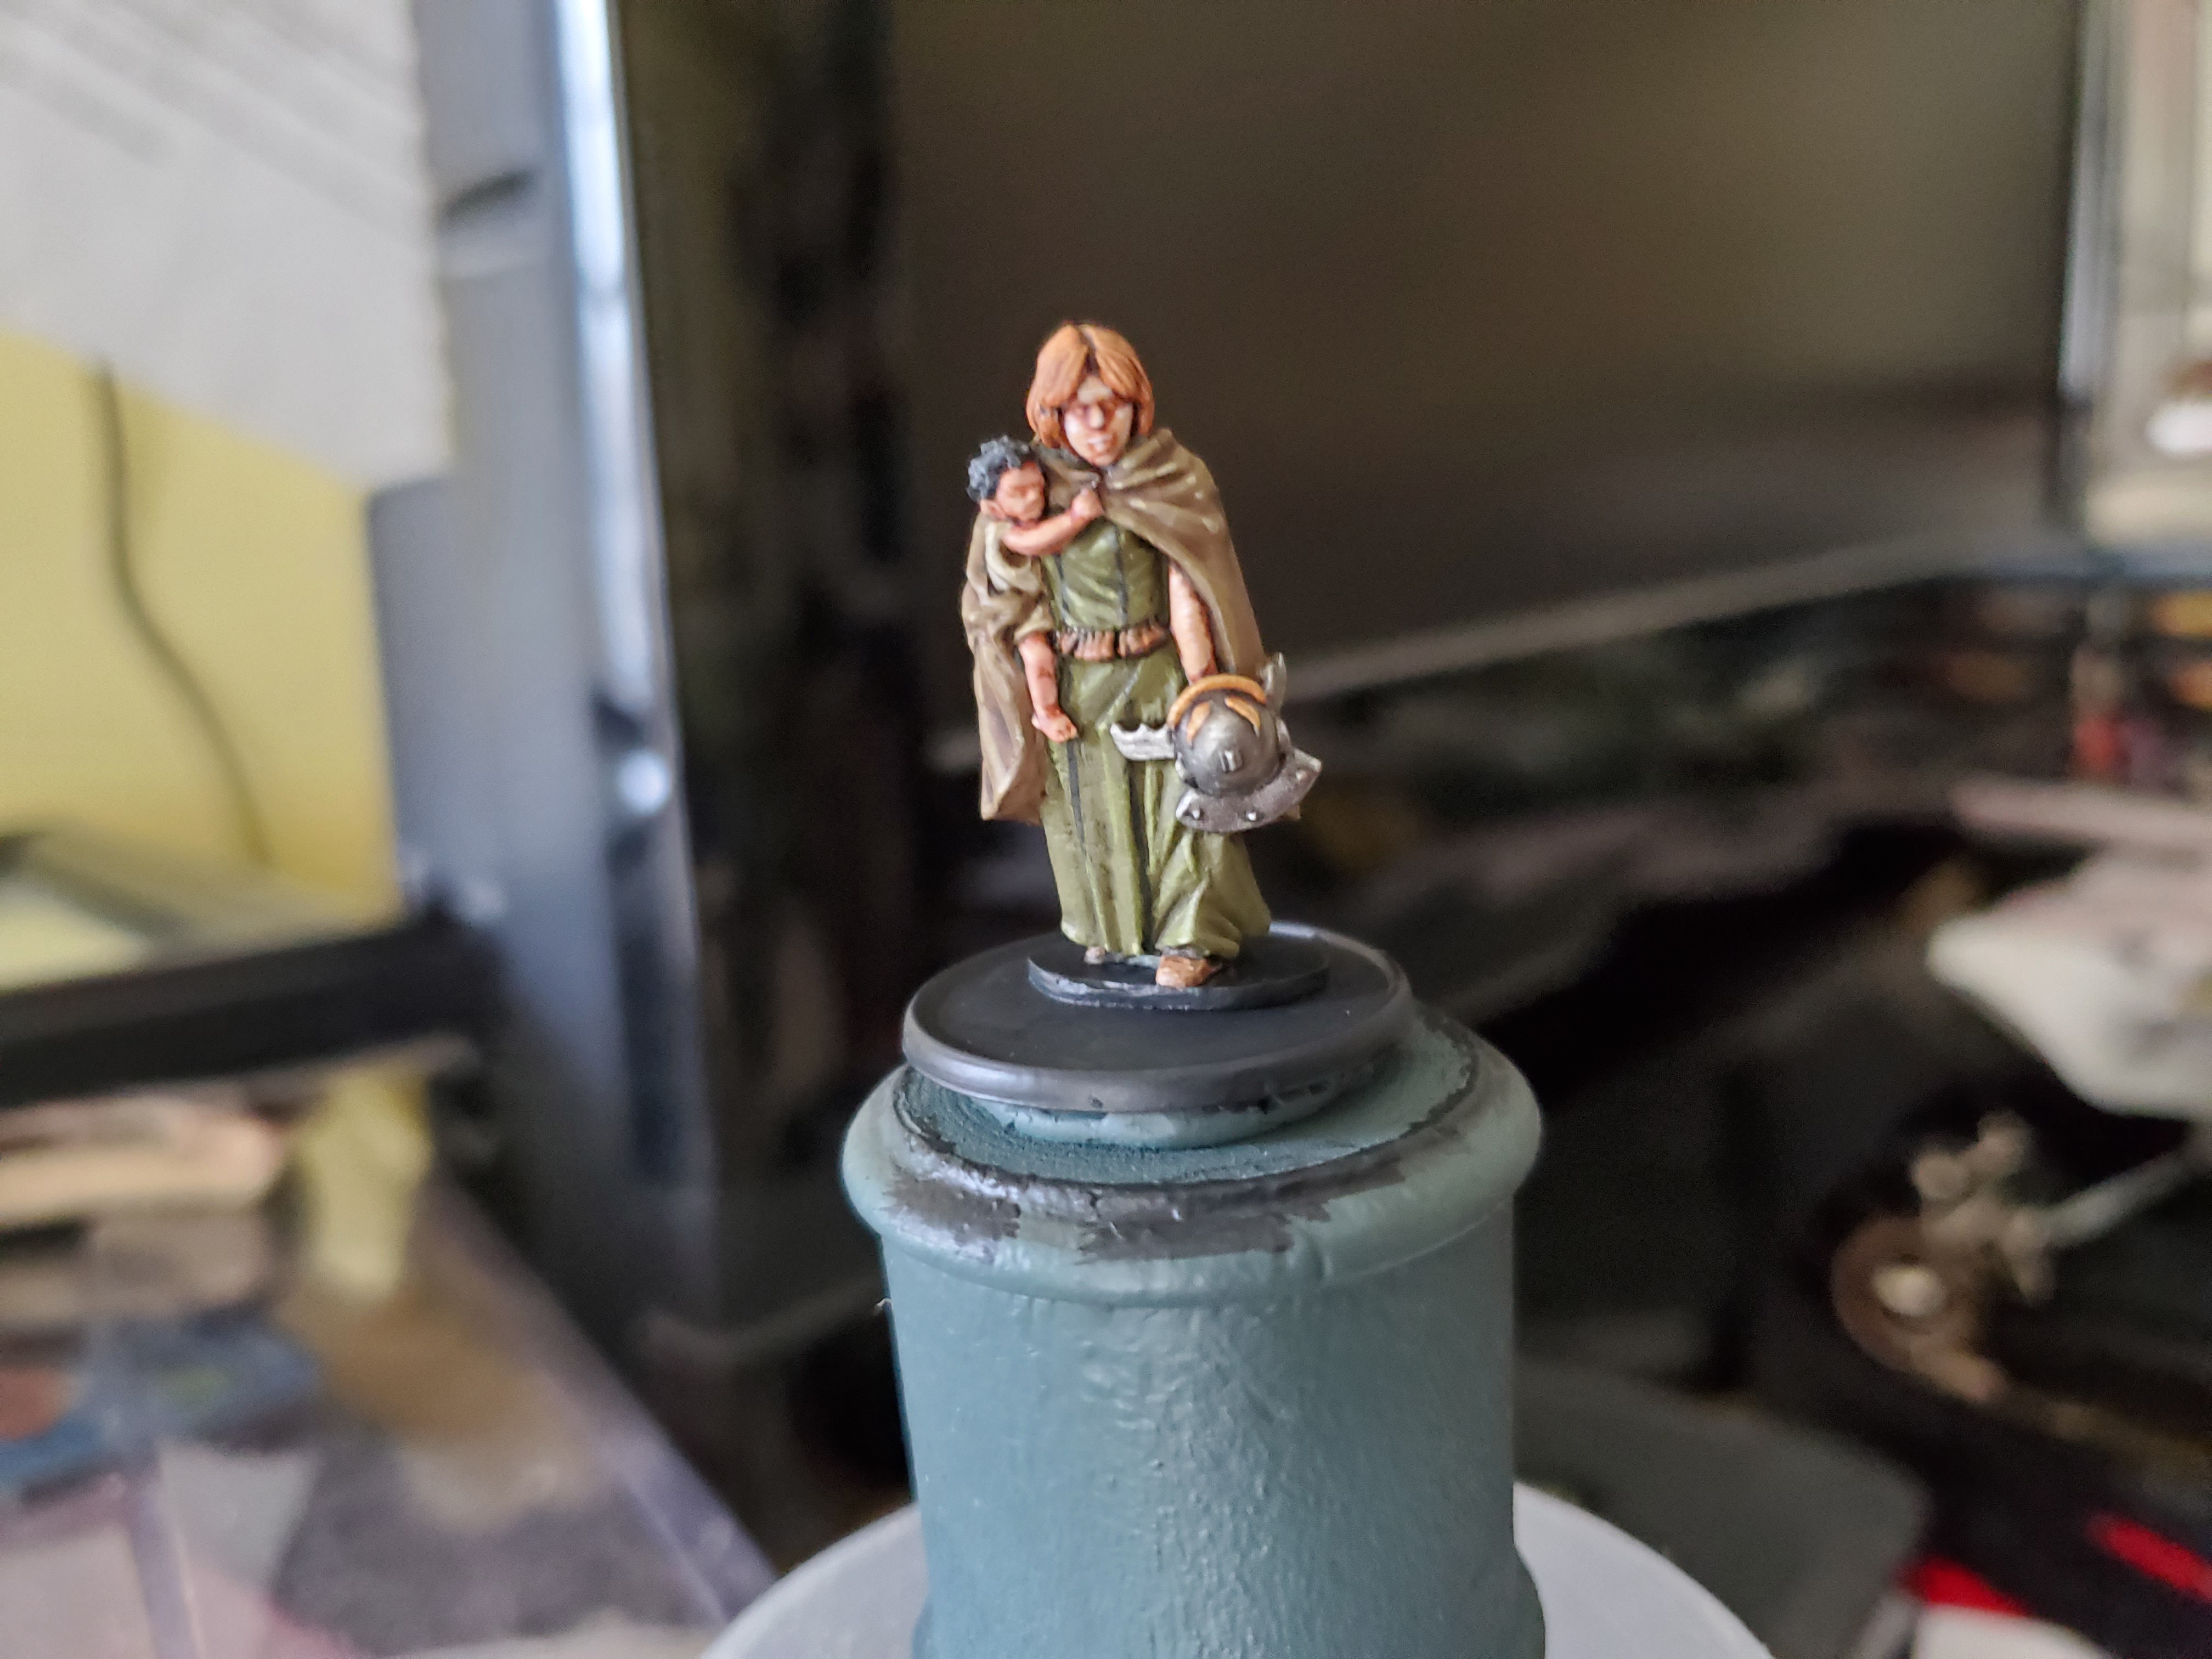 Went with fairly drab, earthy colours to represent an average woman who may be scouring a battlefield in search of her husband or just a local Briton working around a Roman fort.
Were it not for the helmet I probs would have gone for a Romano-British look as the area we now call Wales was fairly Romanised. I double checked with my brother who’s put a fair amount of academic time into Welsh history… 😛 Originally I did plan to go a bit mad with designs and patterns all over the model, but I decided quite early on with the palette that less is more for the overall look and feel of what I wanted to go for; an average person. I might actually possibly do a series of minis from Welsh history, but that is not likely to happen any time soon…maybe a Napoleonic Welsh soldier might appear at some point; you never know. That being said, if I did have a knight figure I’d probs try some Welsh Heraldry on him; I have a thing for heraldry at the moment.
 Most of the back and sides of the mini is covered by the cloak, so it is a little boring, but I tried to go into the highlights a little more than usual.
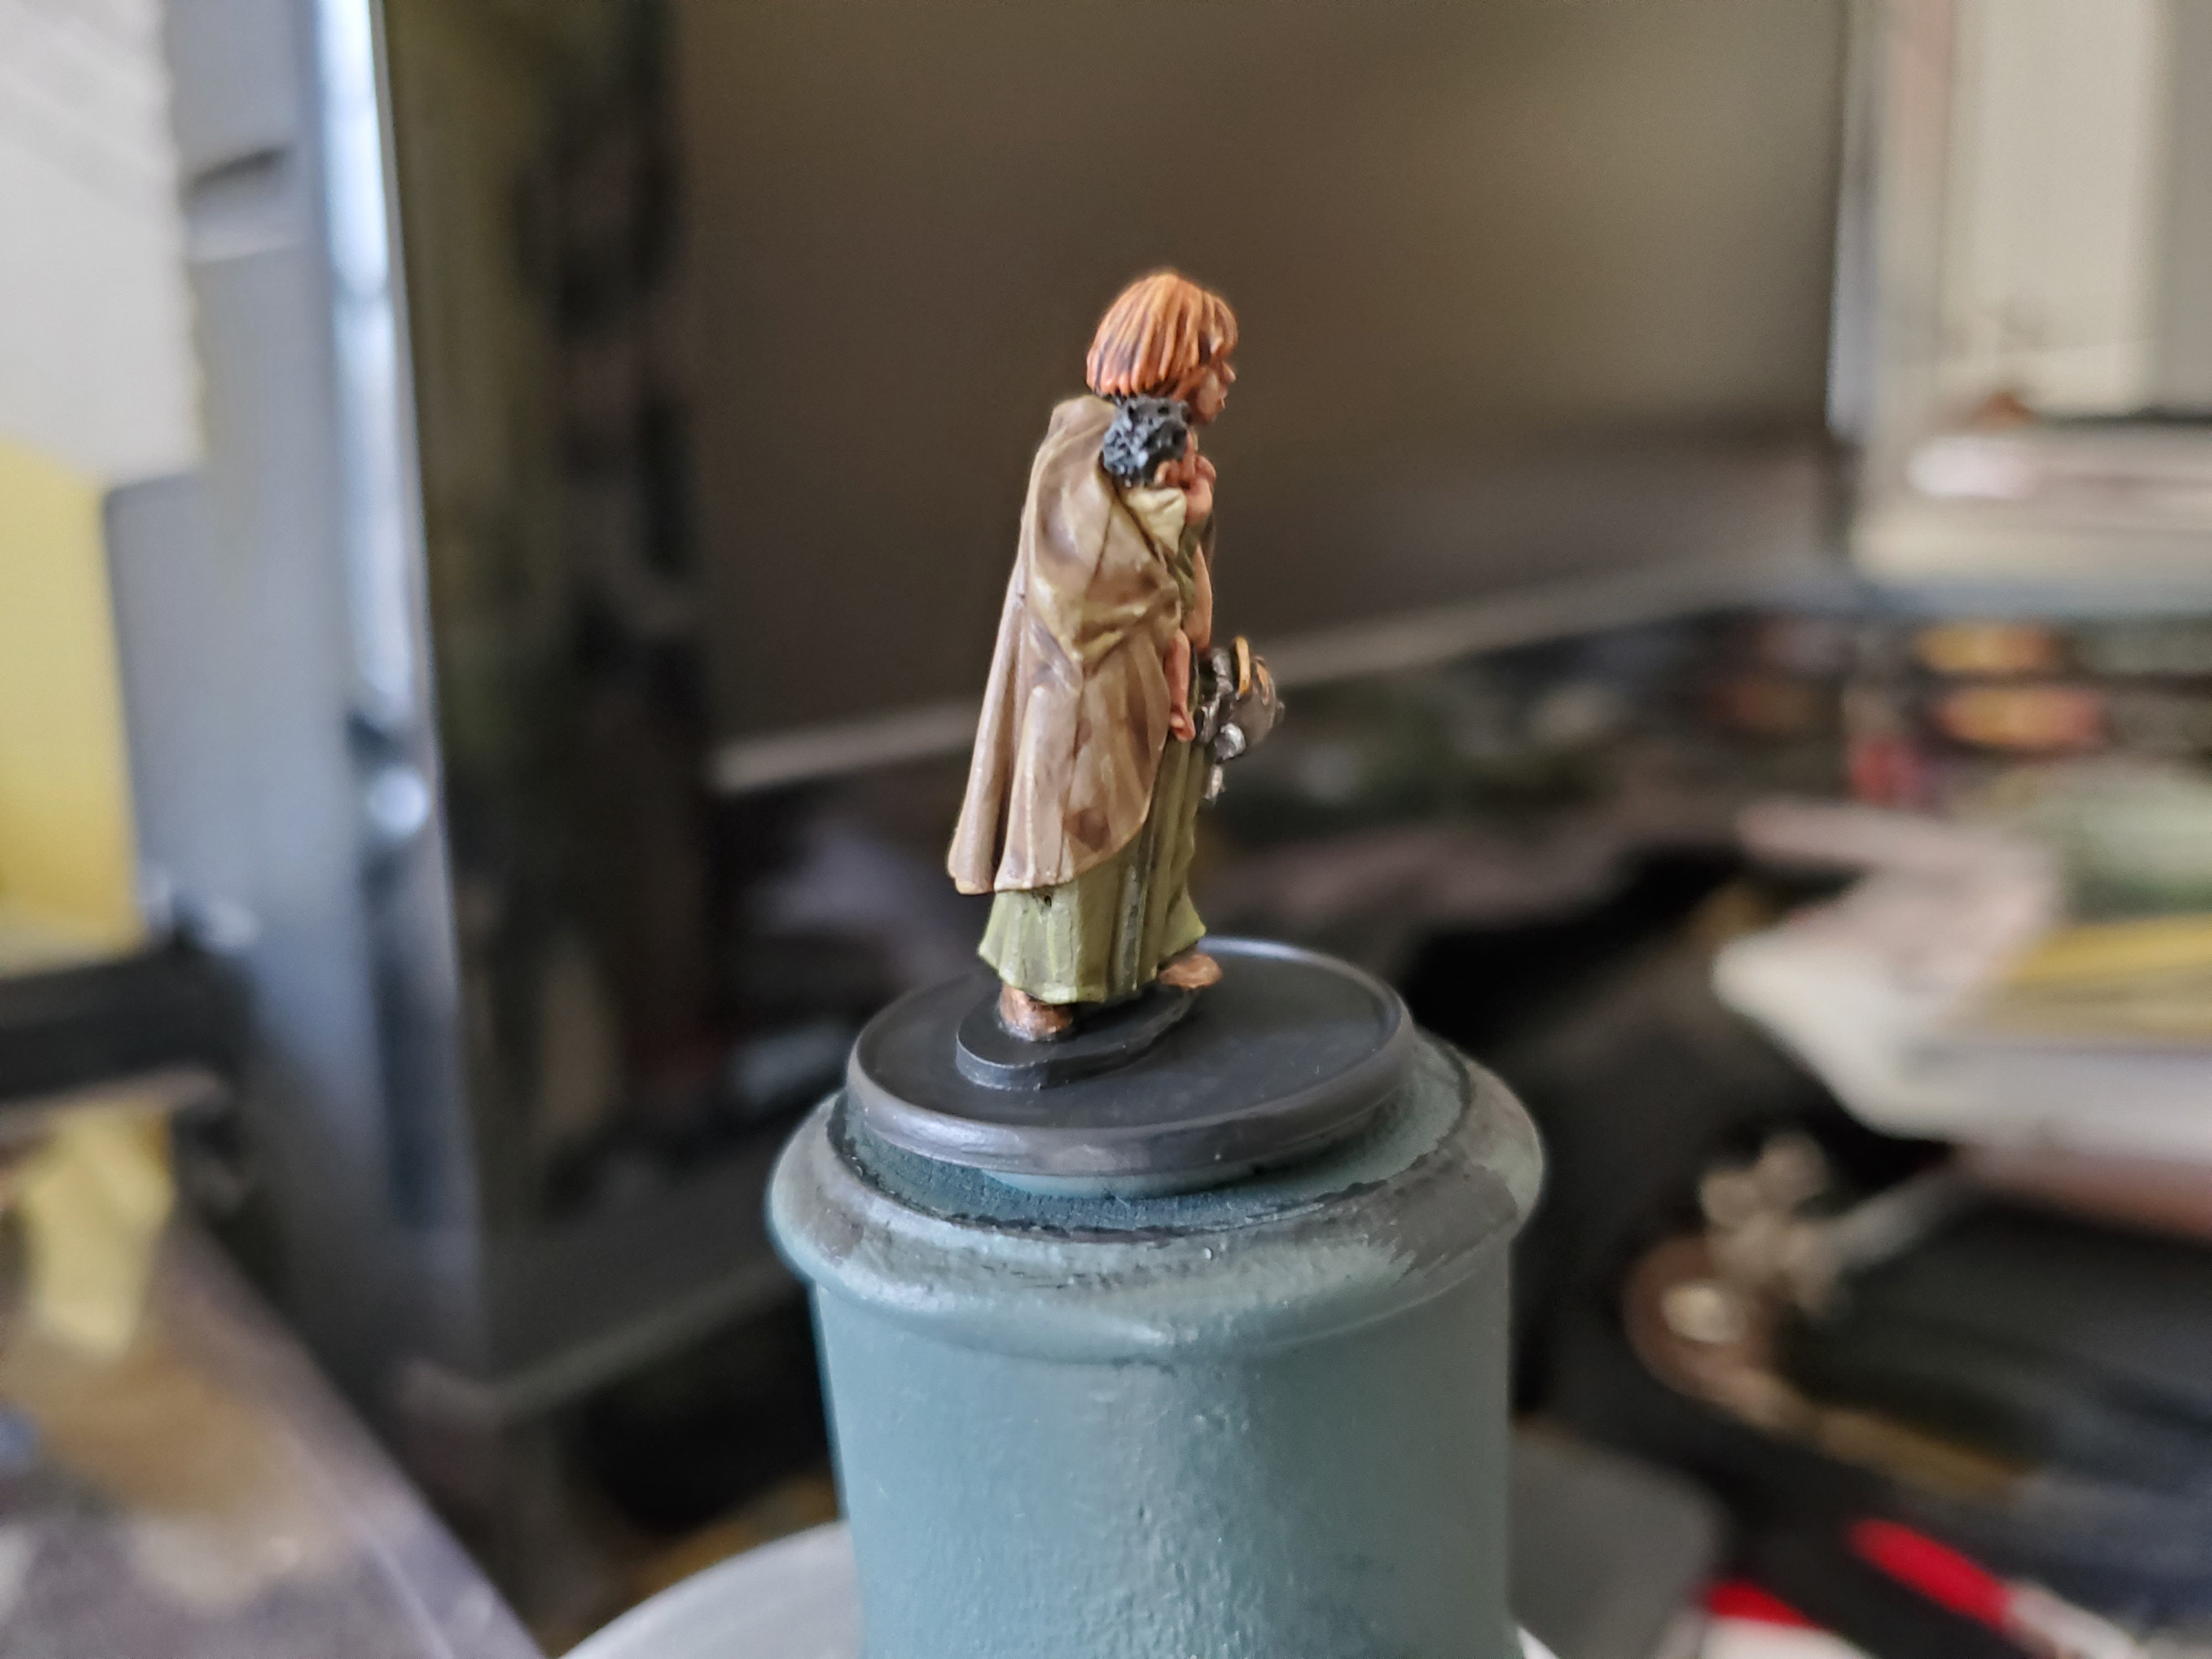 The original plan was to go for darker hair, but when I realised that the mini was looking a little dark I decided to make the hair ginger to add in a splash of colour. The helmet was also made a little brighter than I normally do for metal to help with some bright spots.
 And the Lloyd shot. A bit more modest than some of the recent stuff...
I did try to give the child a slightly rosier tone to his skin by not highlighting up to the higher colours that I used on the lady, but it is a subtle difference. I can see it in the mini, but I don’t know if it comes through on the pictures.
So a bit of an oddball mini, but I like doing that sometimes. Not sure what I’ll work on next, but school will be starting up again soon so the work may slow a bit again, we’ll have to see.
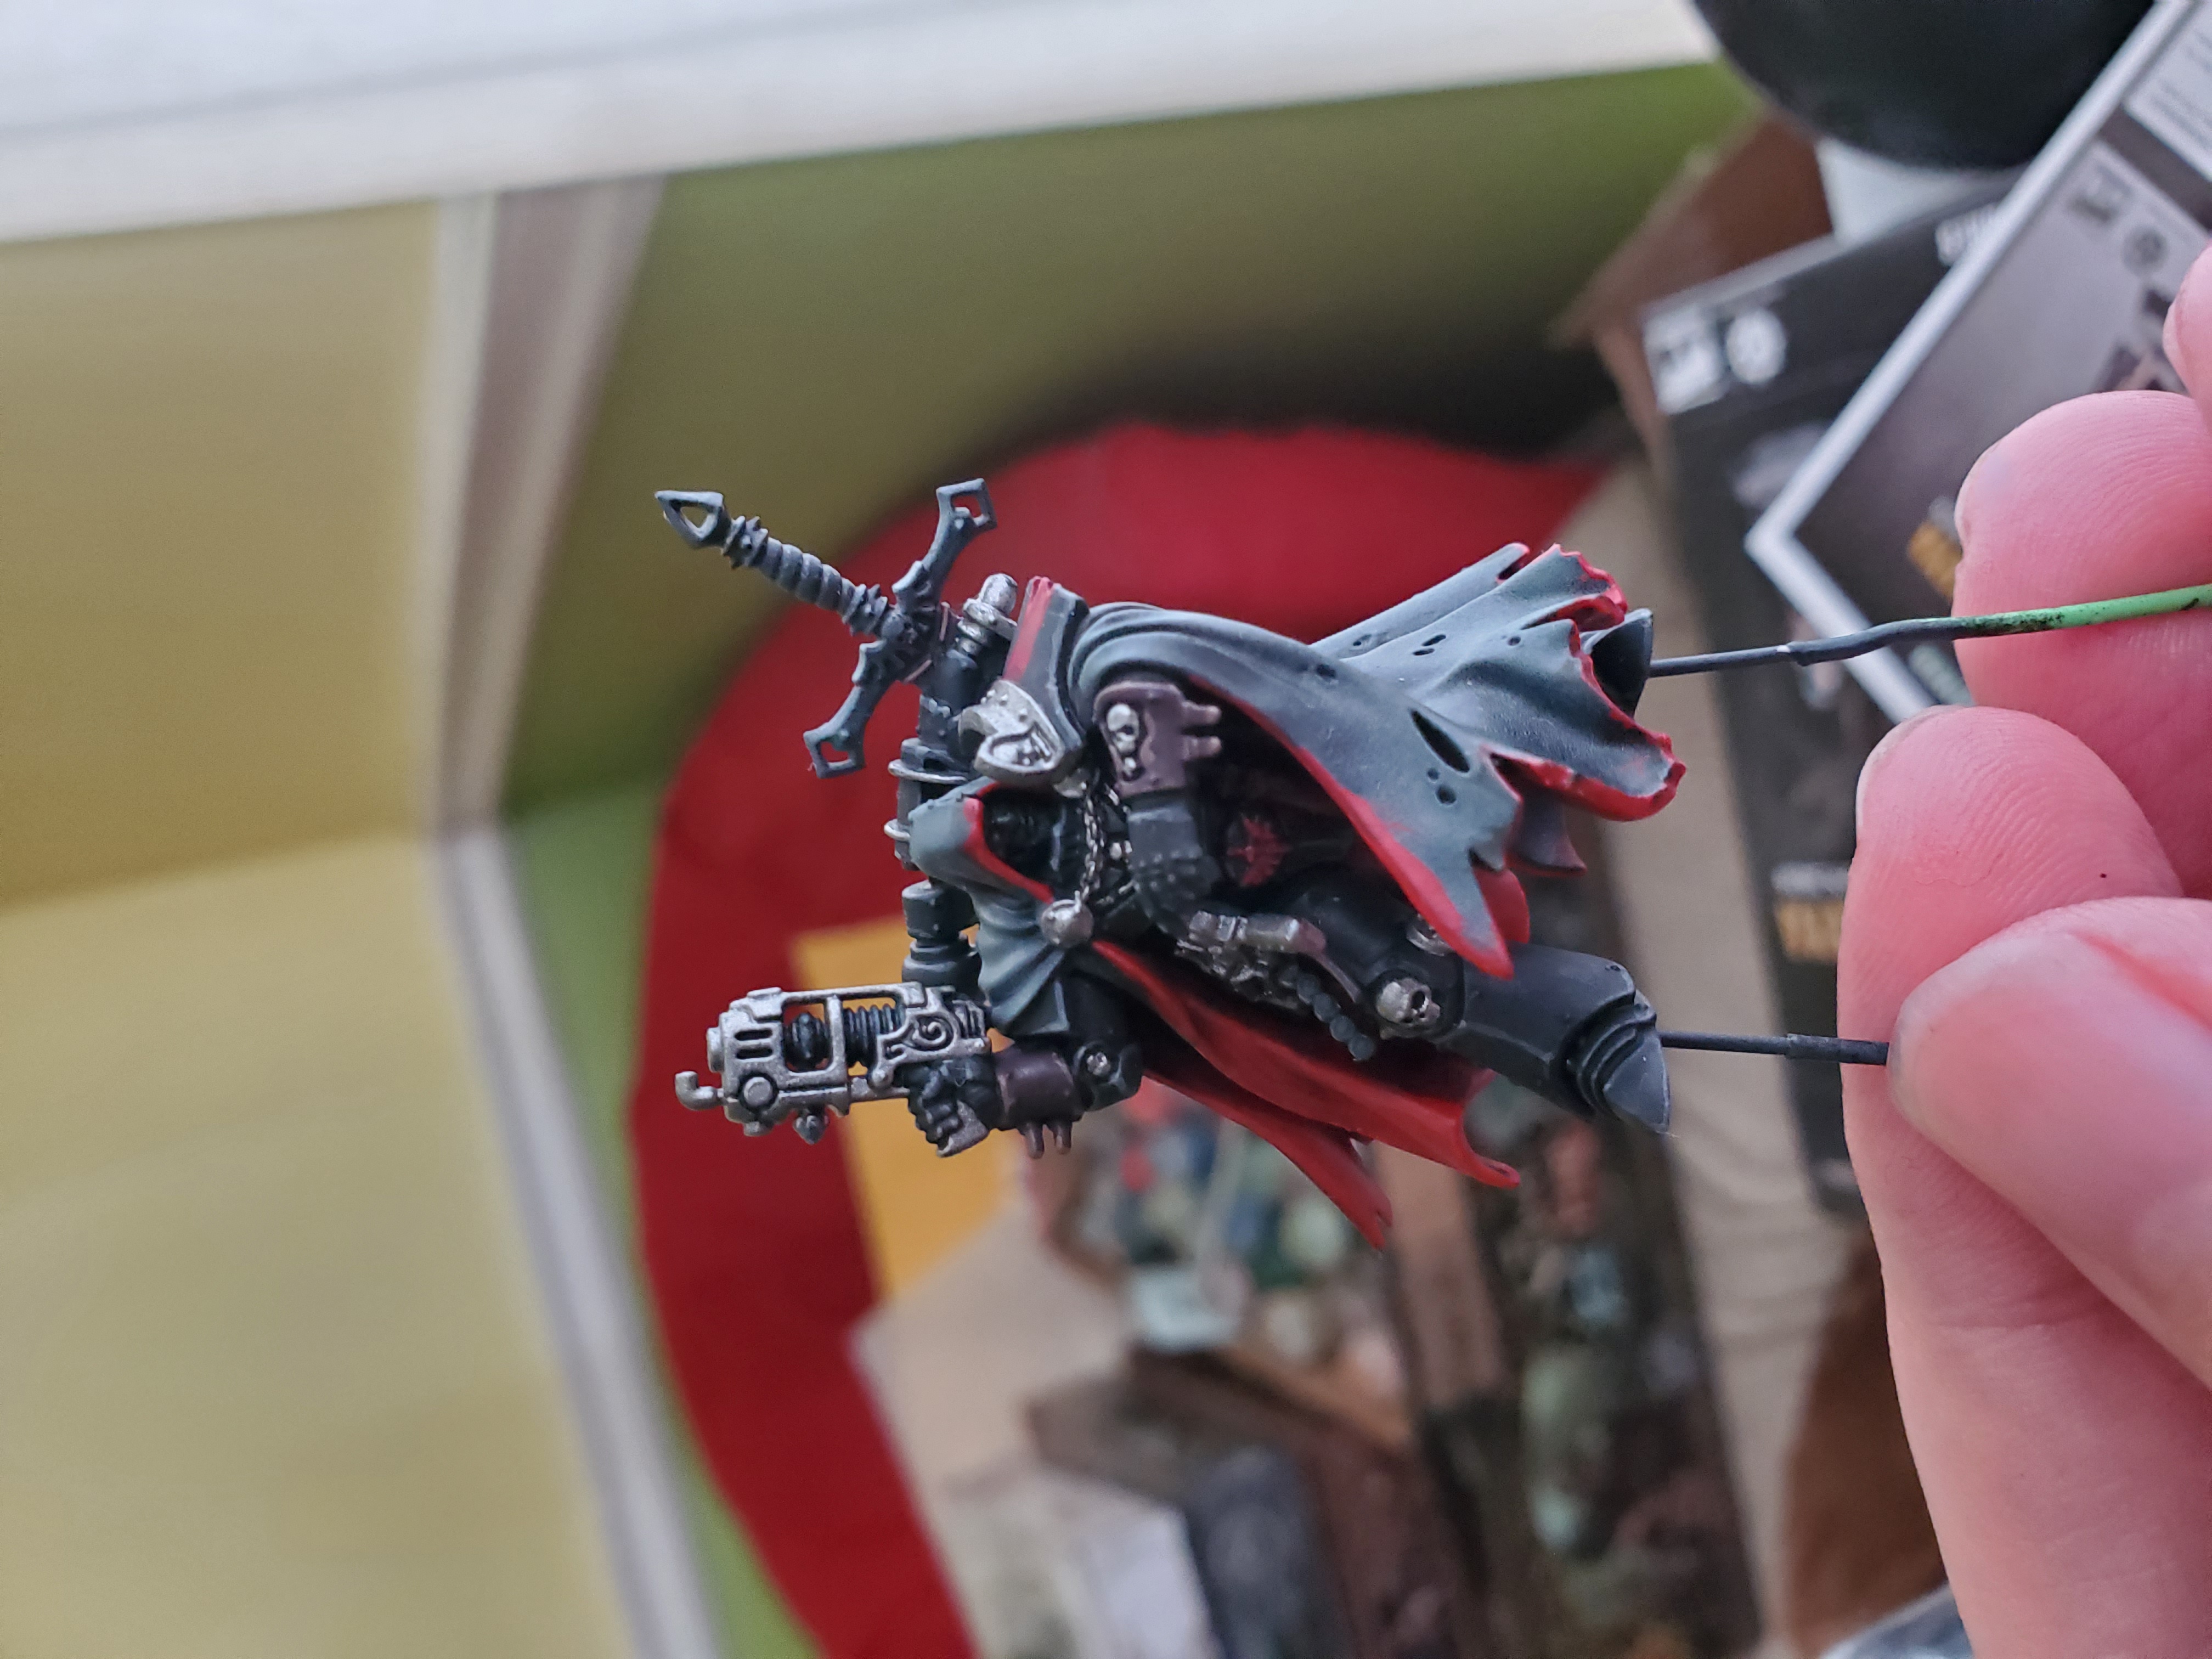
"I know not if he represents the greatest threat or greatest hope for the future of the Imperium. I only pray we stop him before we find out."
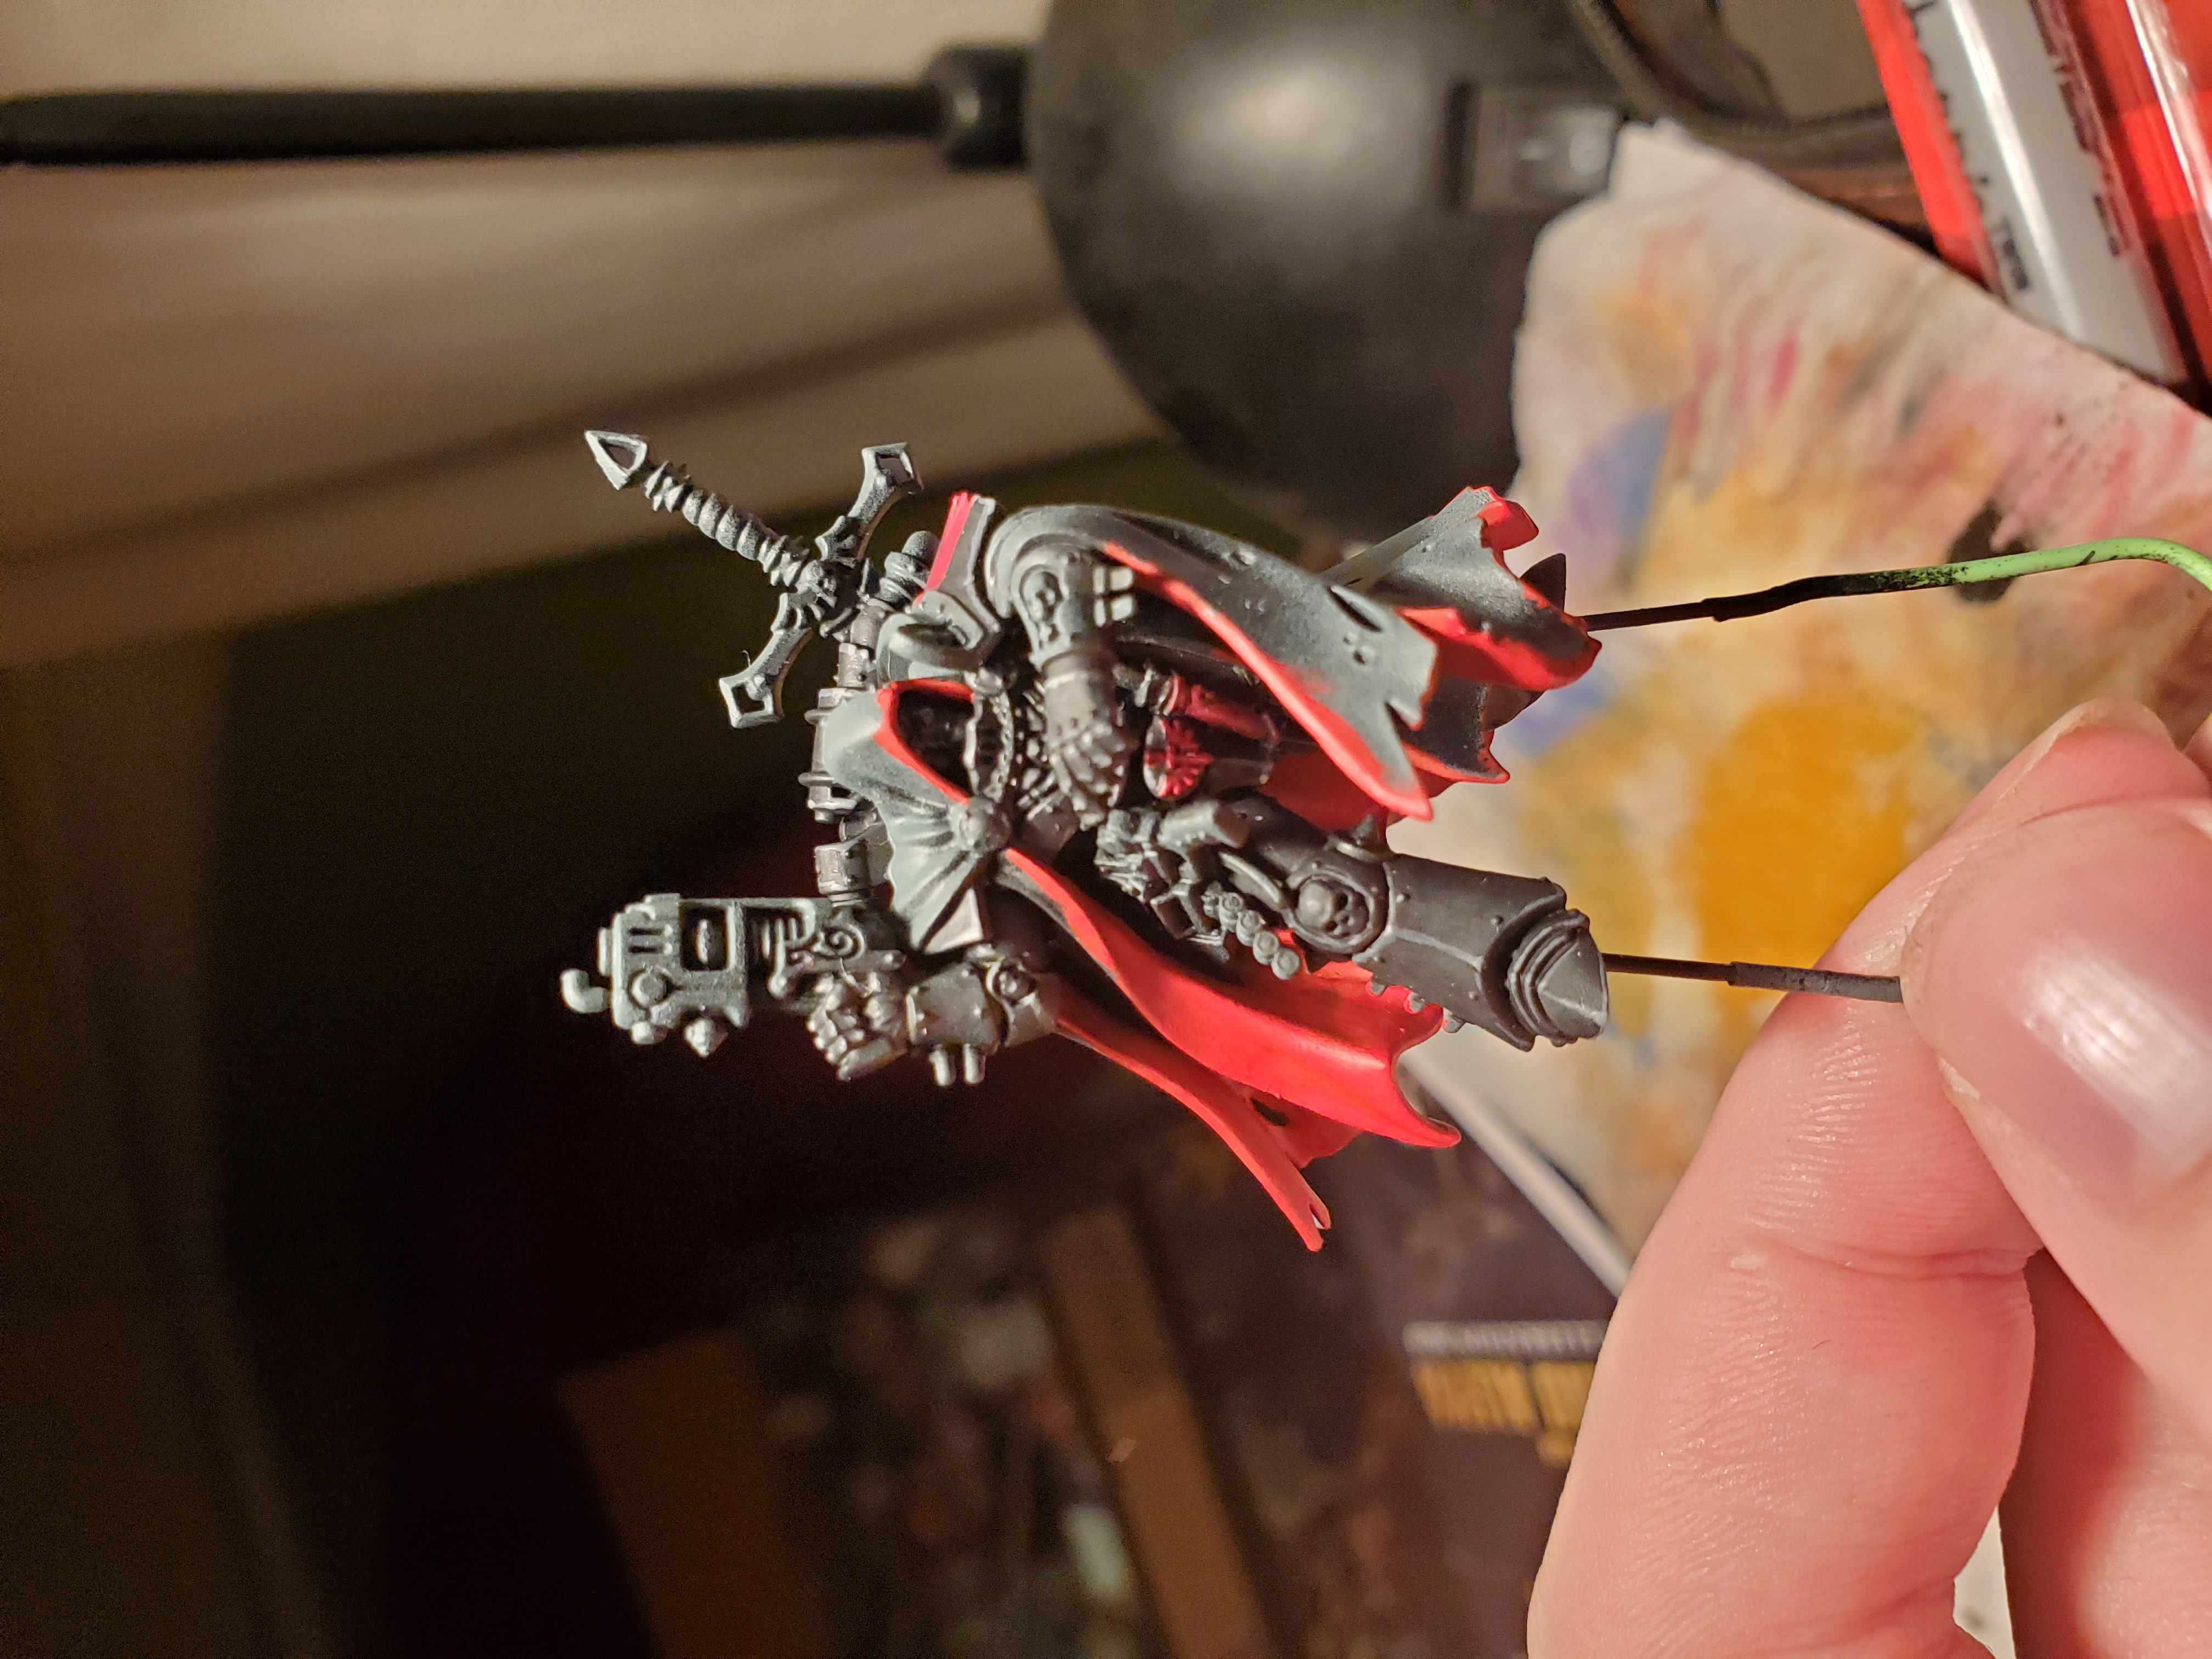
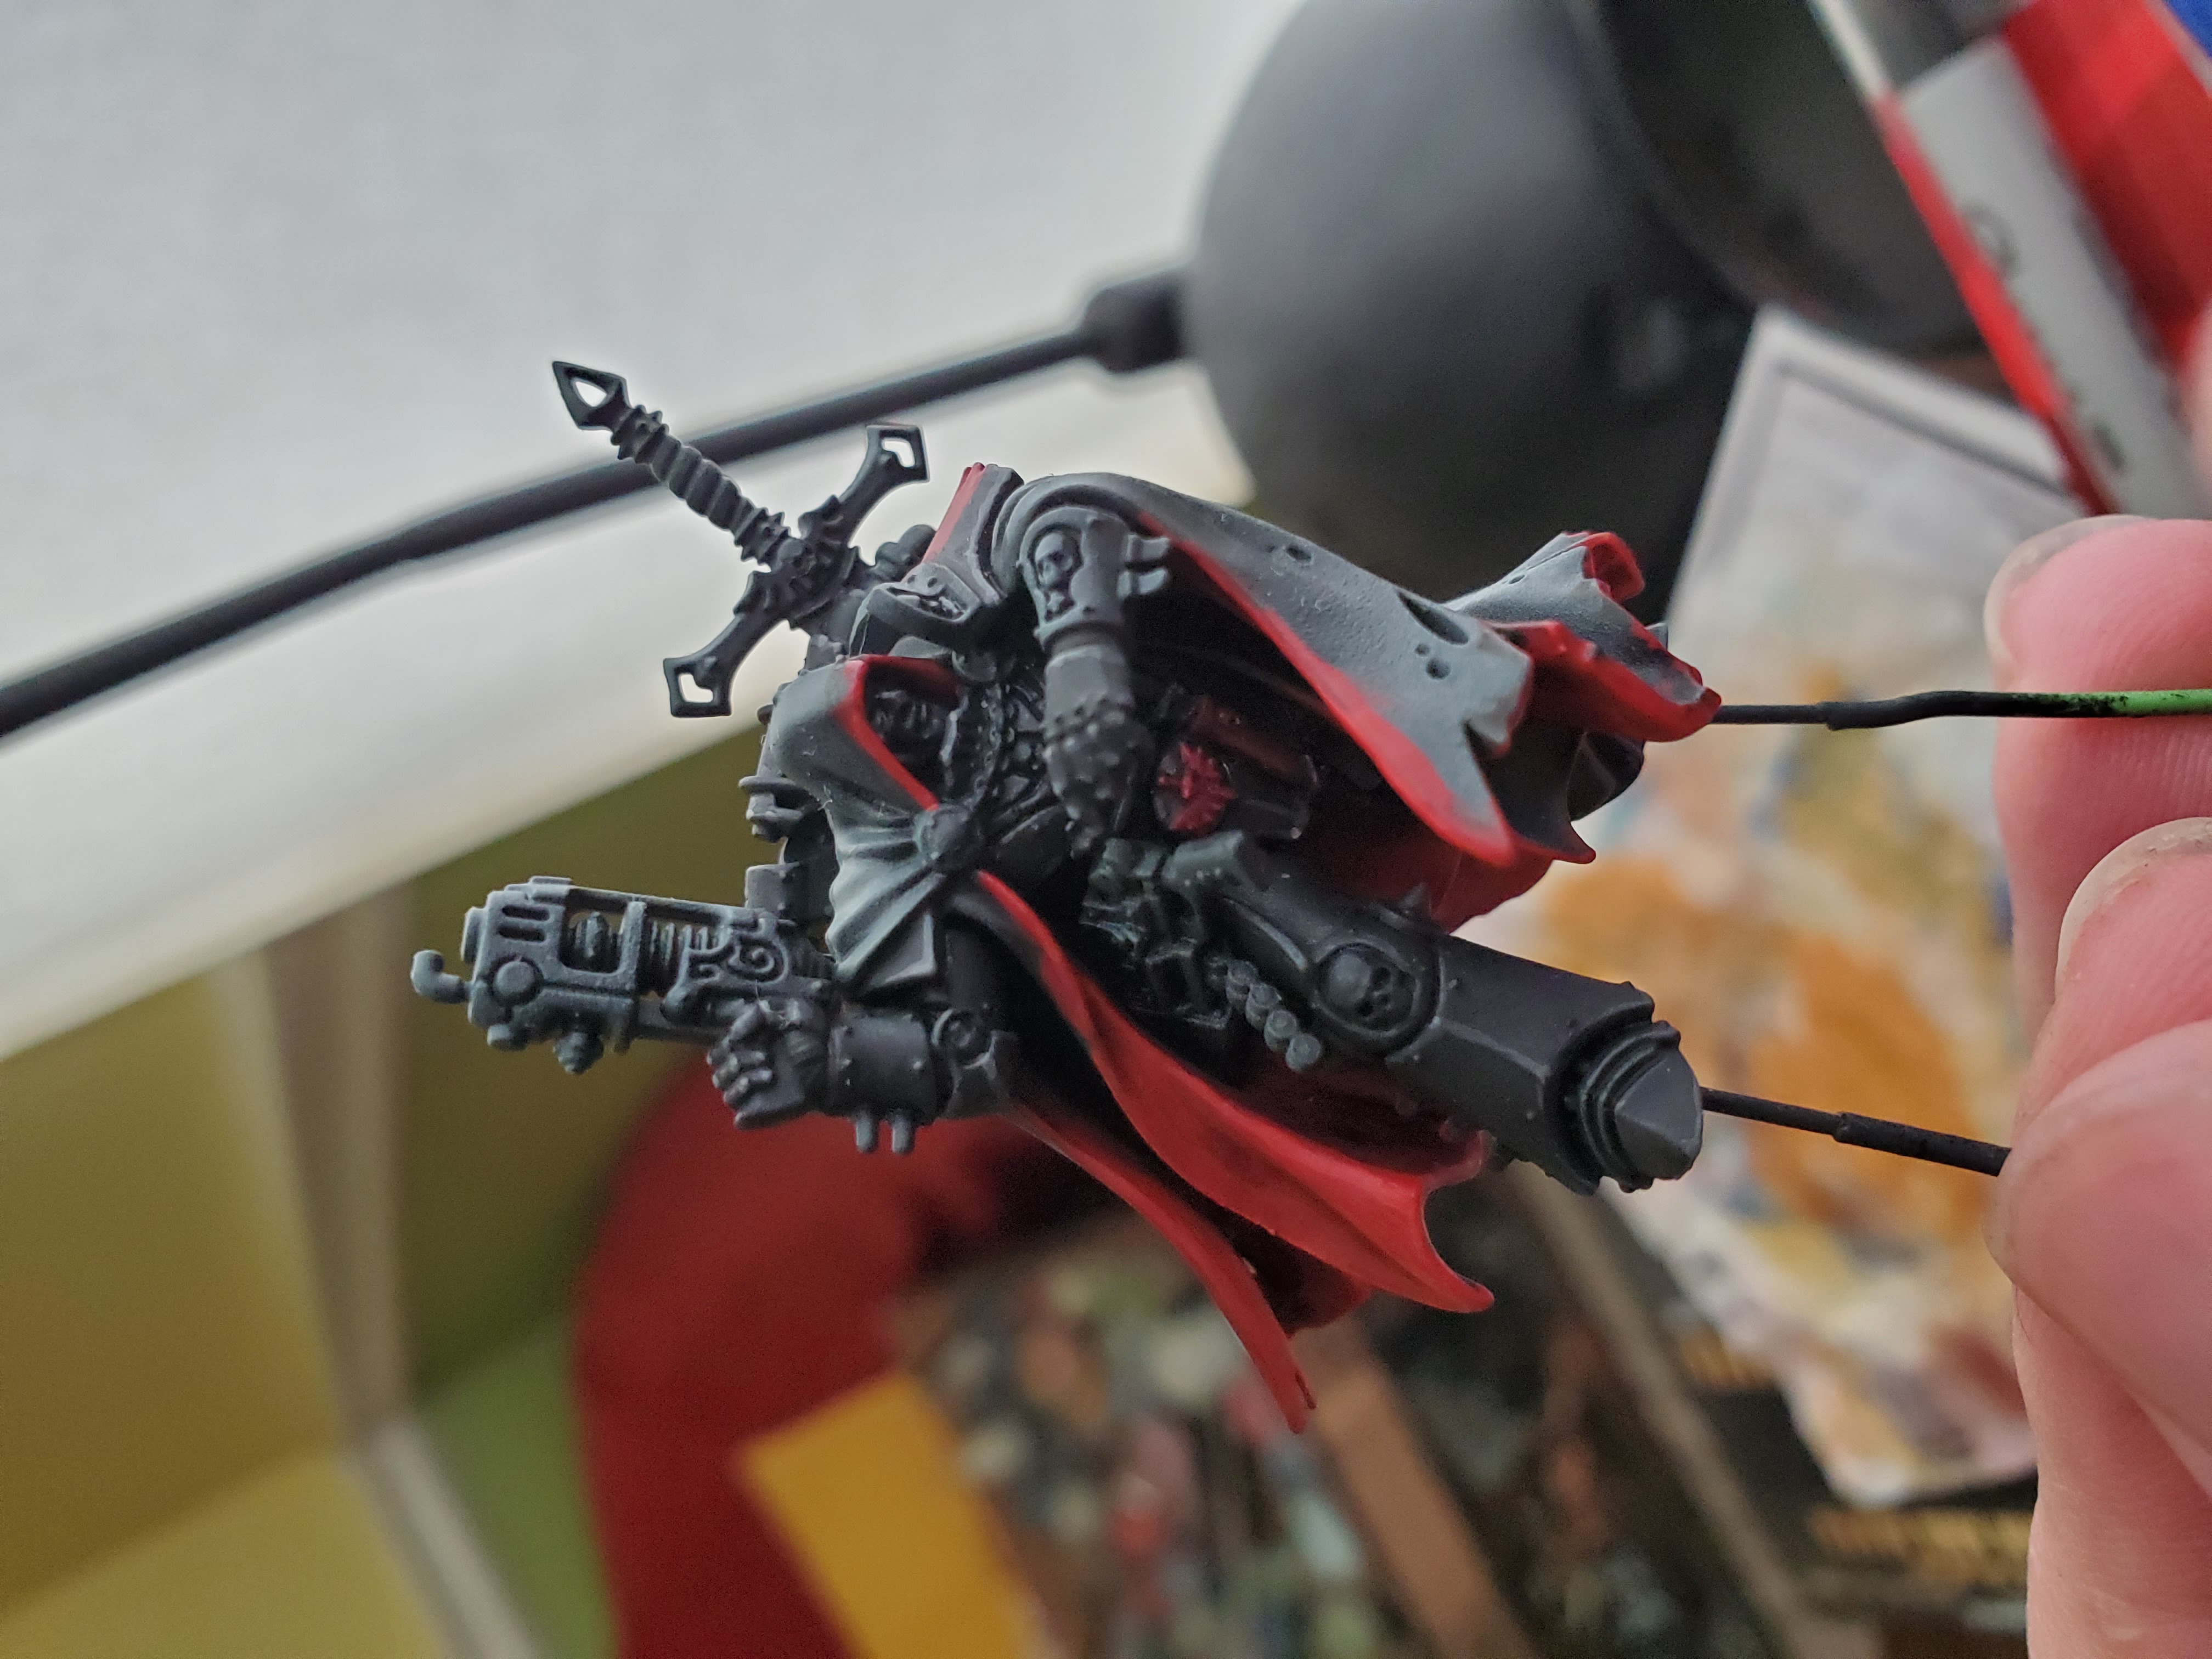
So I decided to do another ‘random’ mini that I had lying around, this time the elusive Cypher from 40k. For now I’ve only really worked on the main armour colours as this mini is really quite intricate and I probably should have thought about sub-assemblies… Black armour is a little tricky to do, so I thought I’d present the way I tried to do it. I think it turned out alright in the end even though it is a little tricky to see with the robes also being quite dark.
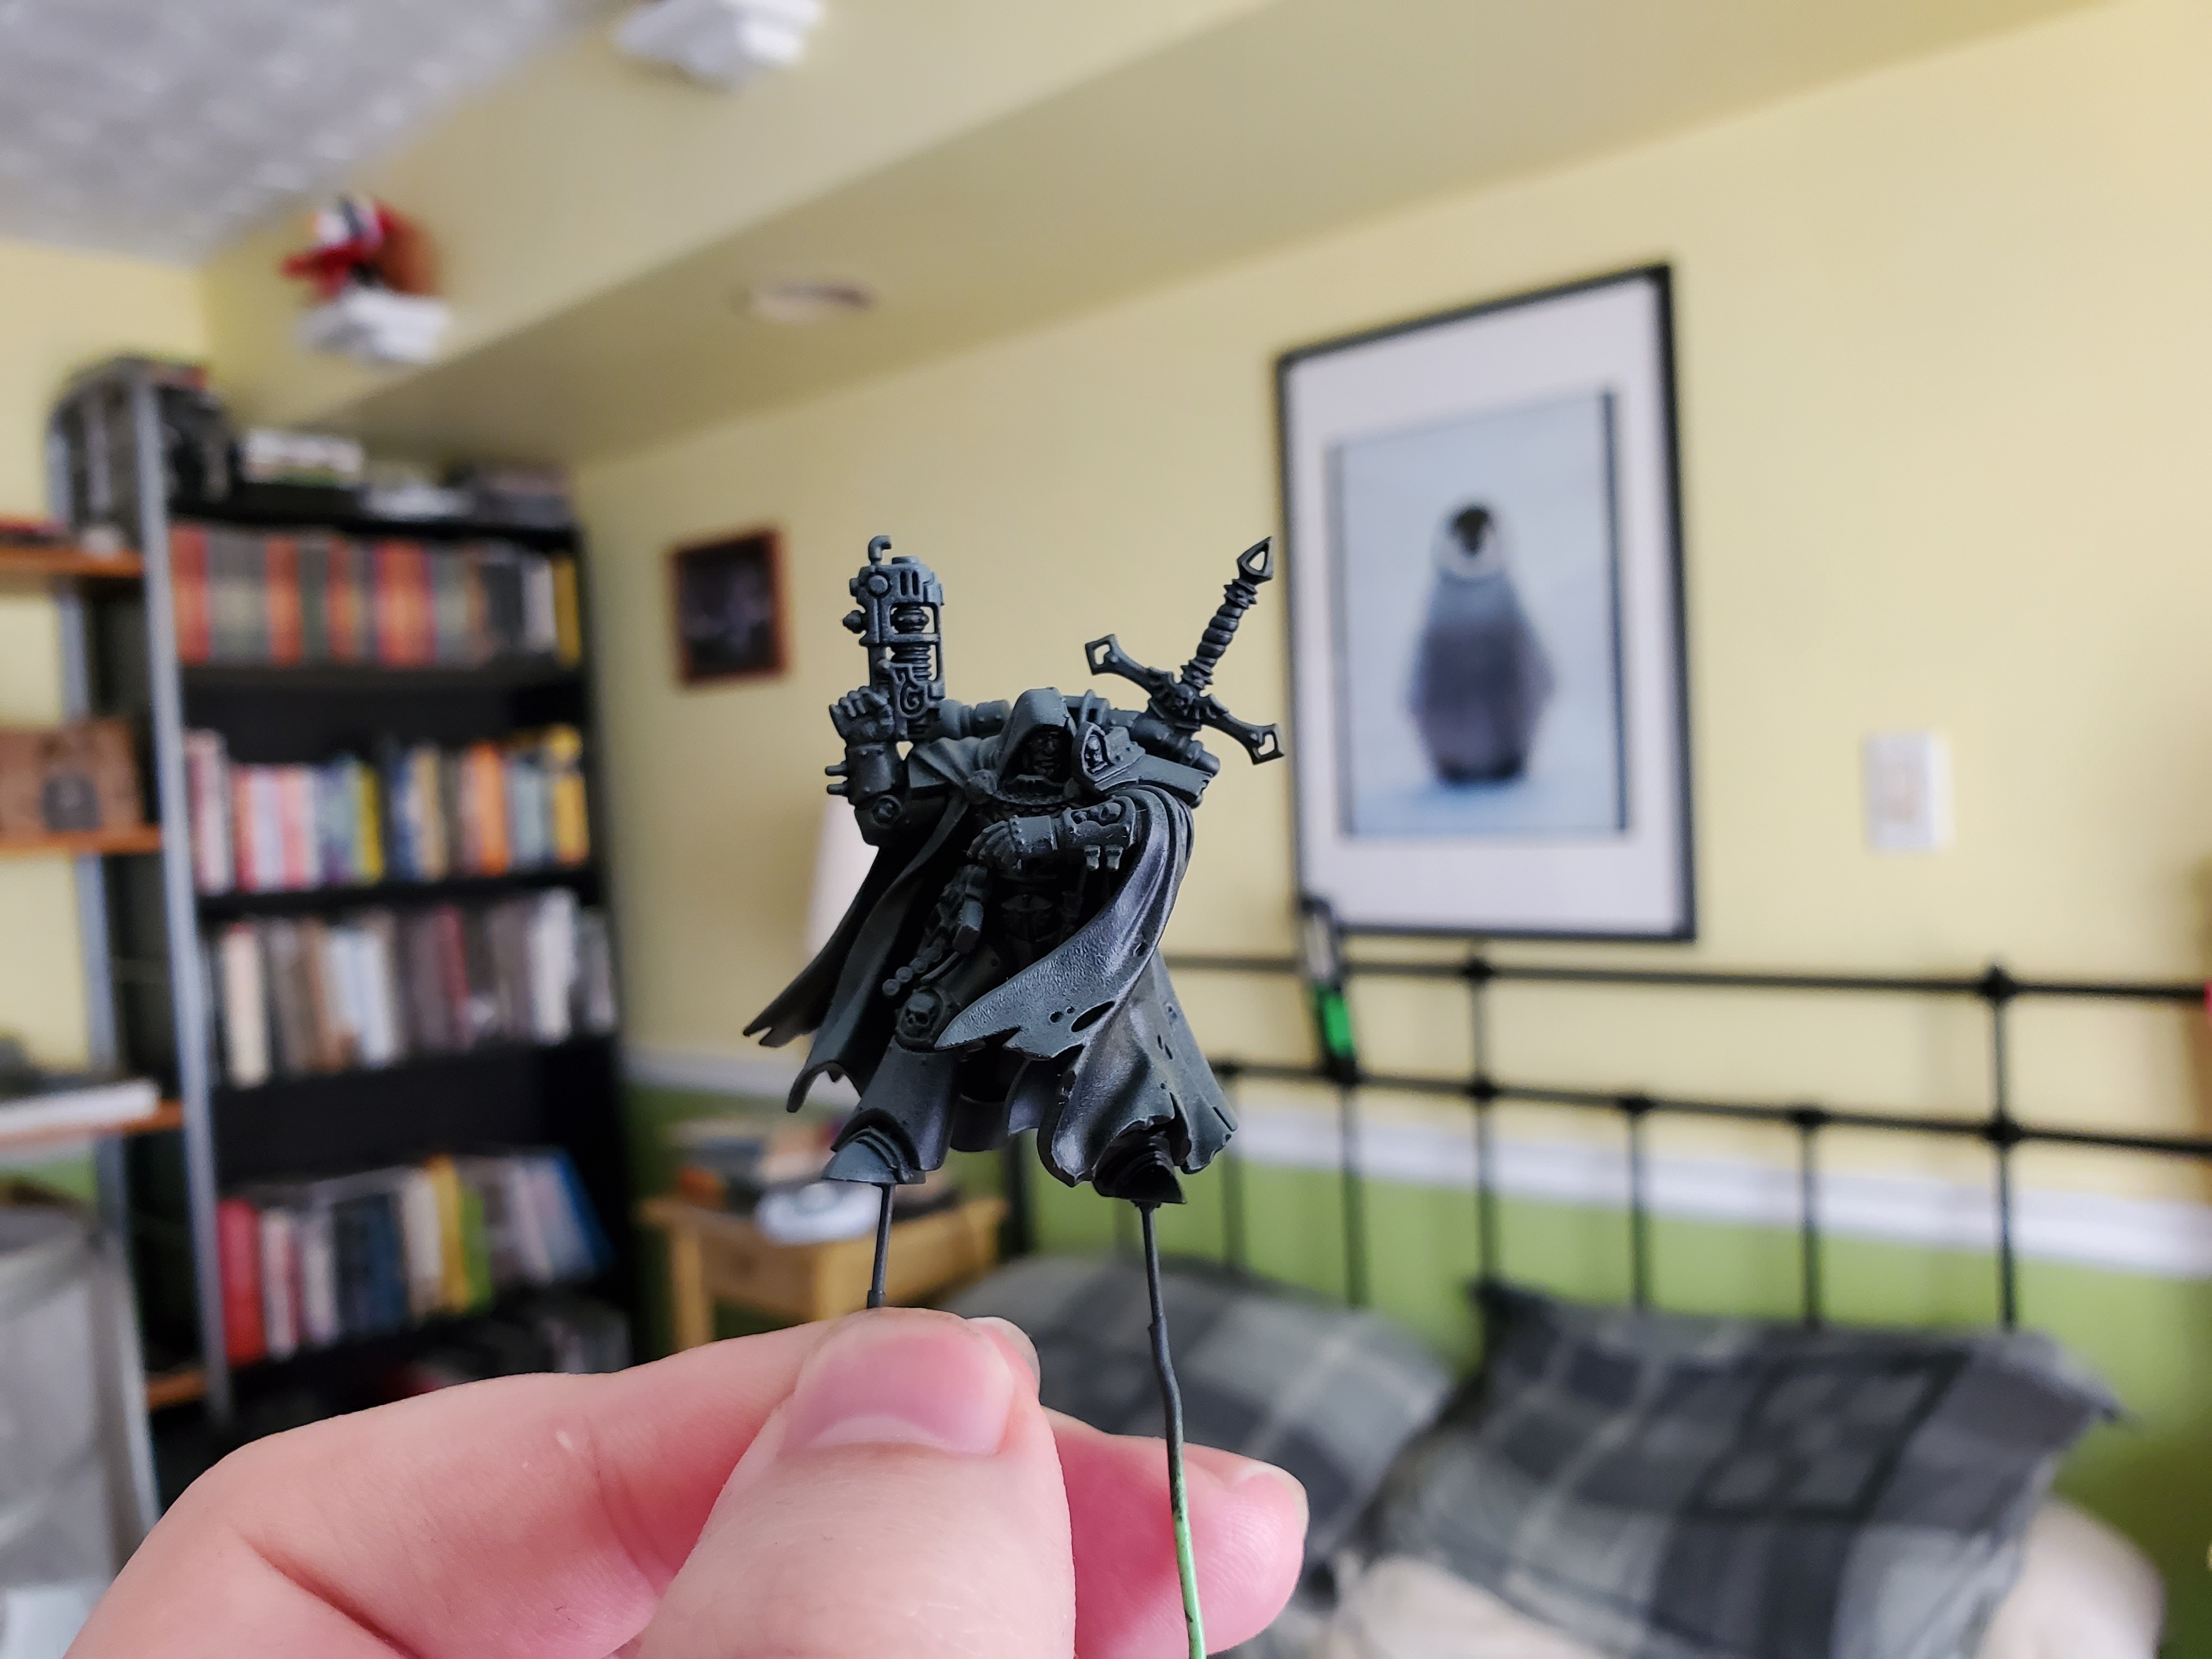 This is the first time I tried anything close to zenithal priming and while it's simplistic, it does do what I was hoping for. Because a lot of the deep recesses are tricky to reach here, it really helps to have the black base rather than the obvious grey patches that I wouldn't be able to reach.
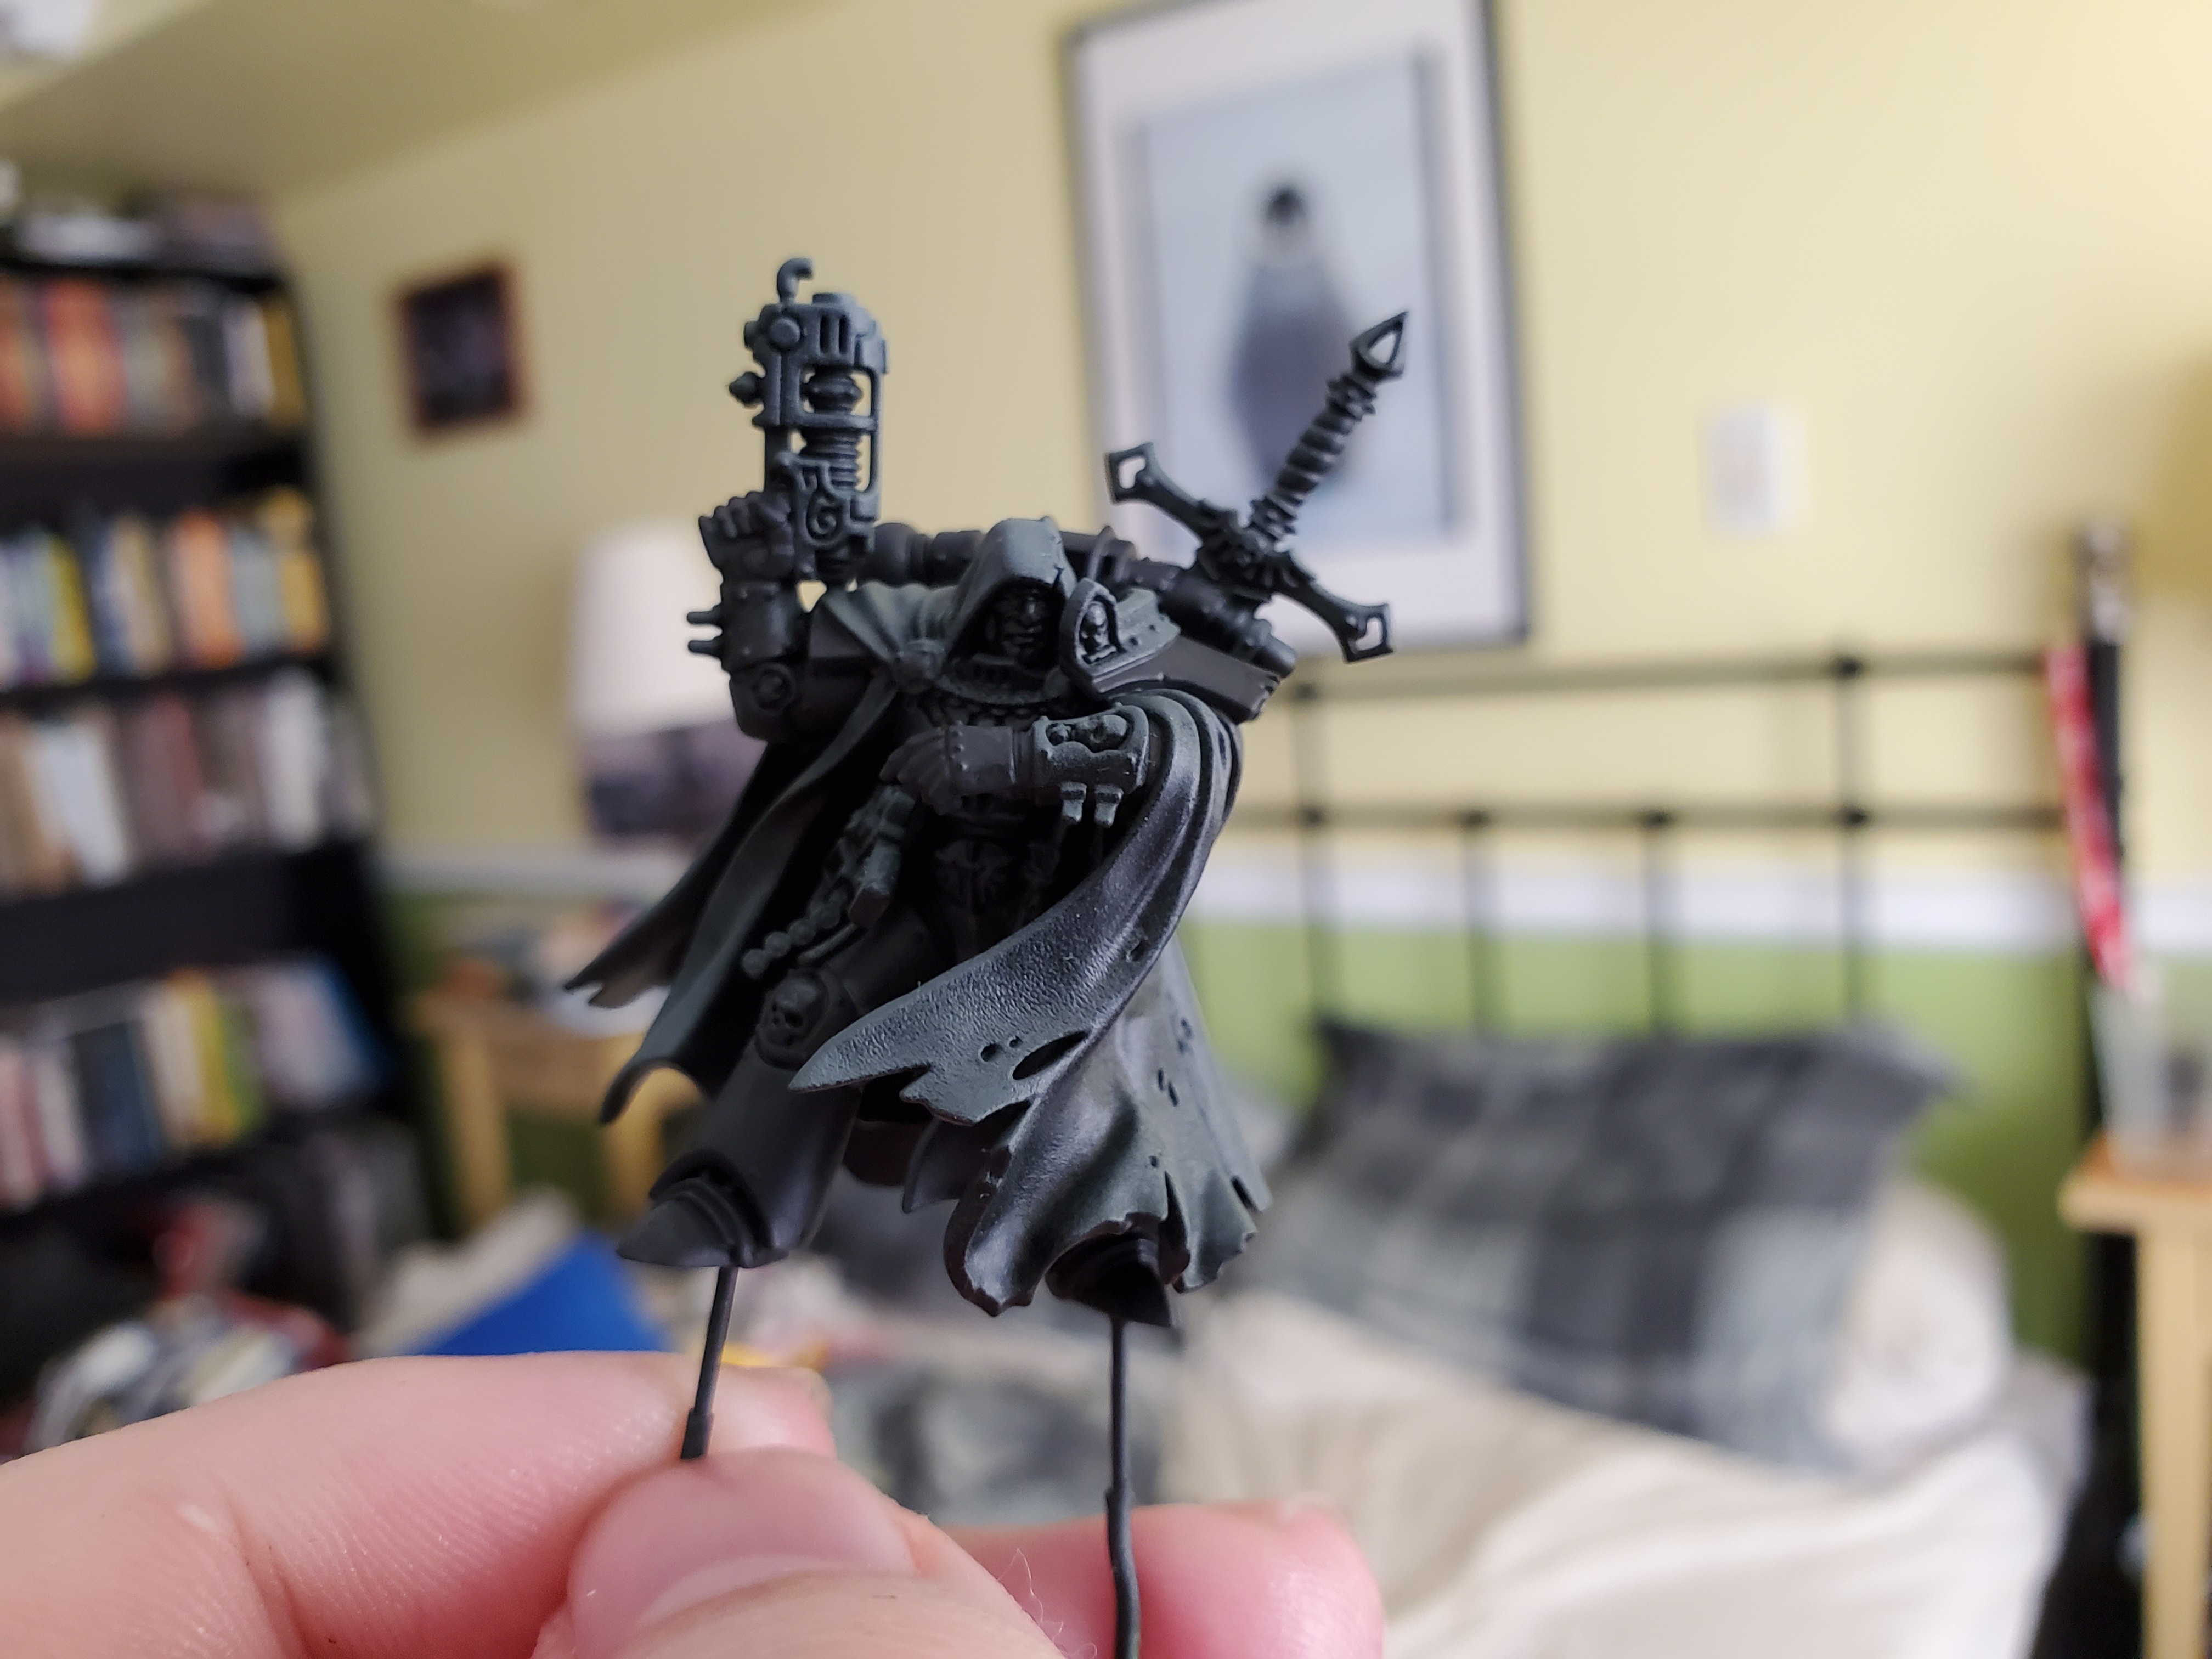 Thanks to th miracle of Corvus Black (I think Necromancer Cloak is the equivalent in the Army Painter range and is usually just called a charcoal black in general) I could base the armour and still make use of a shade. That is a really great help with minis like this that have those large blocks of black on them in a sort of opposite way that a grey-white is usful for painting white.
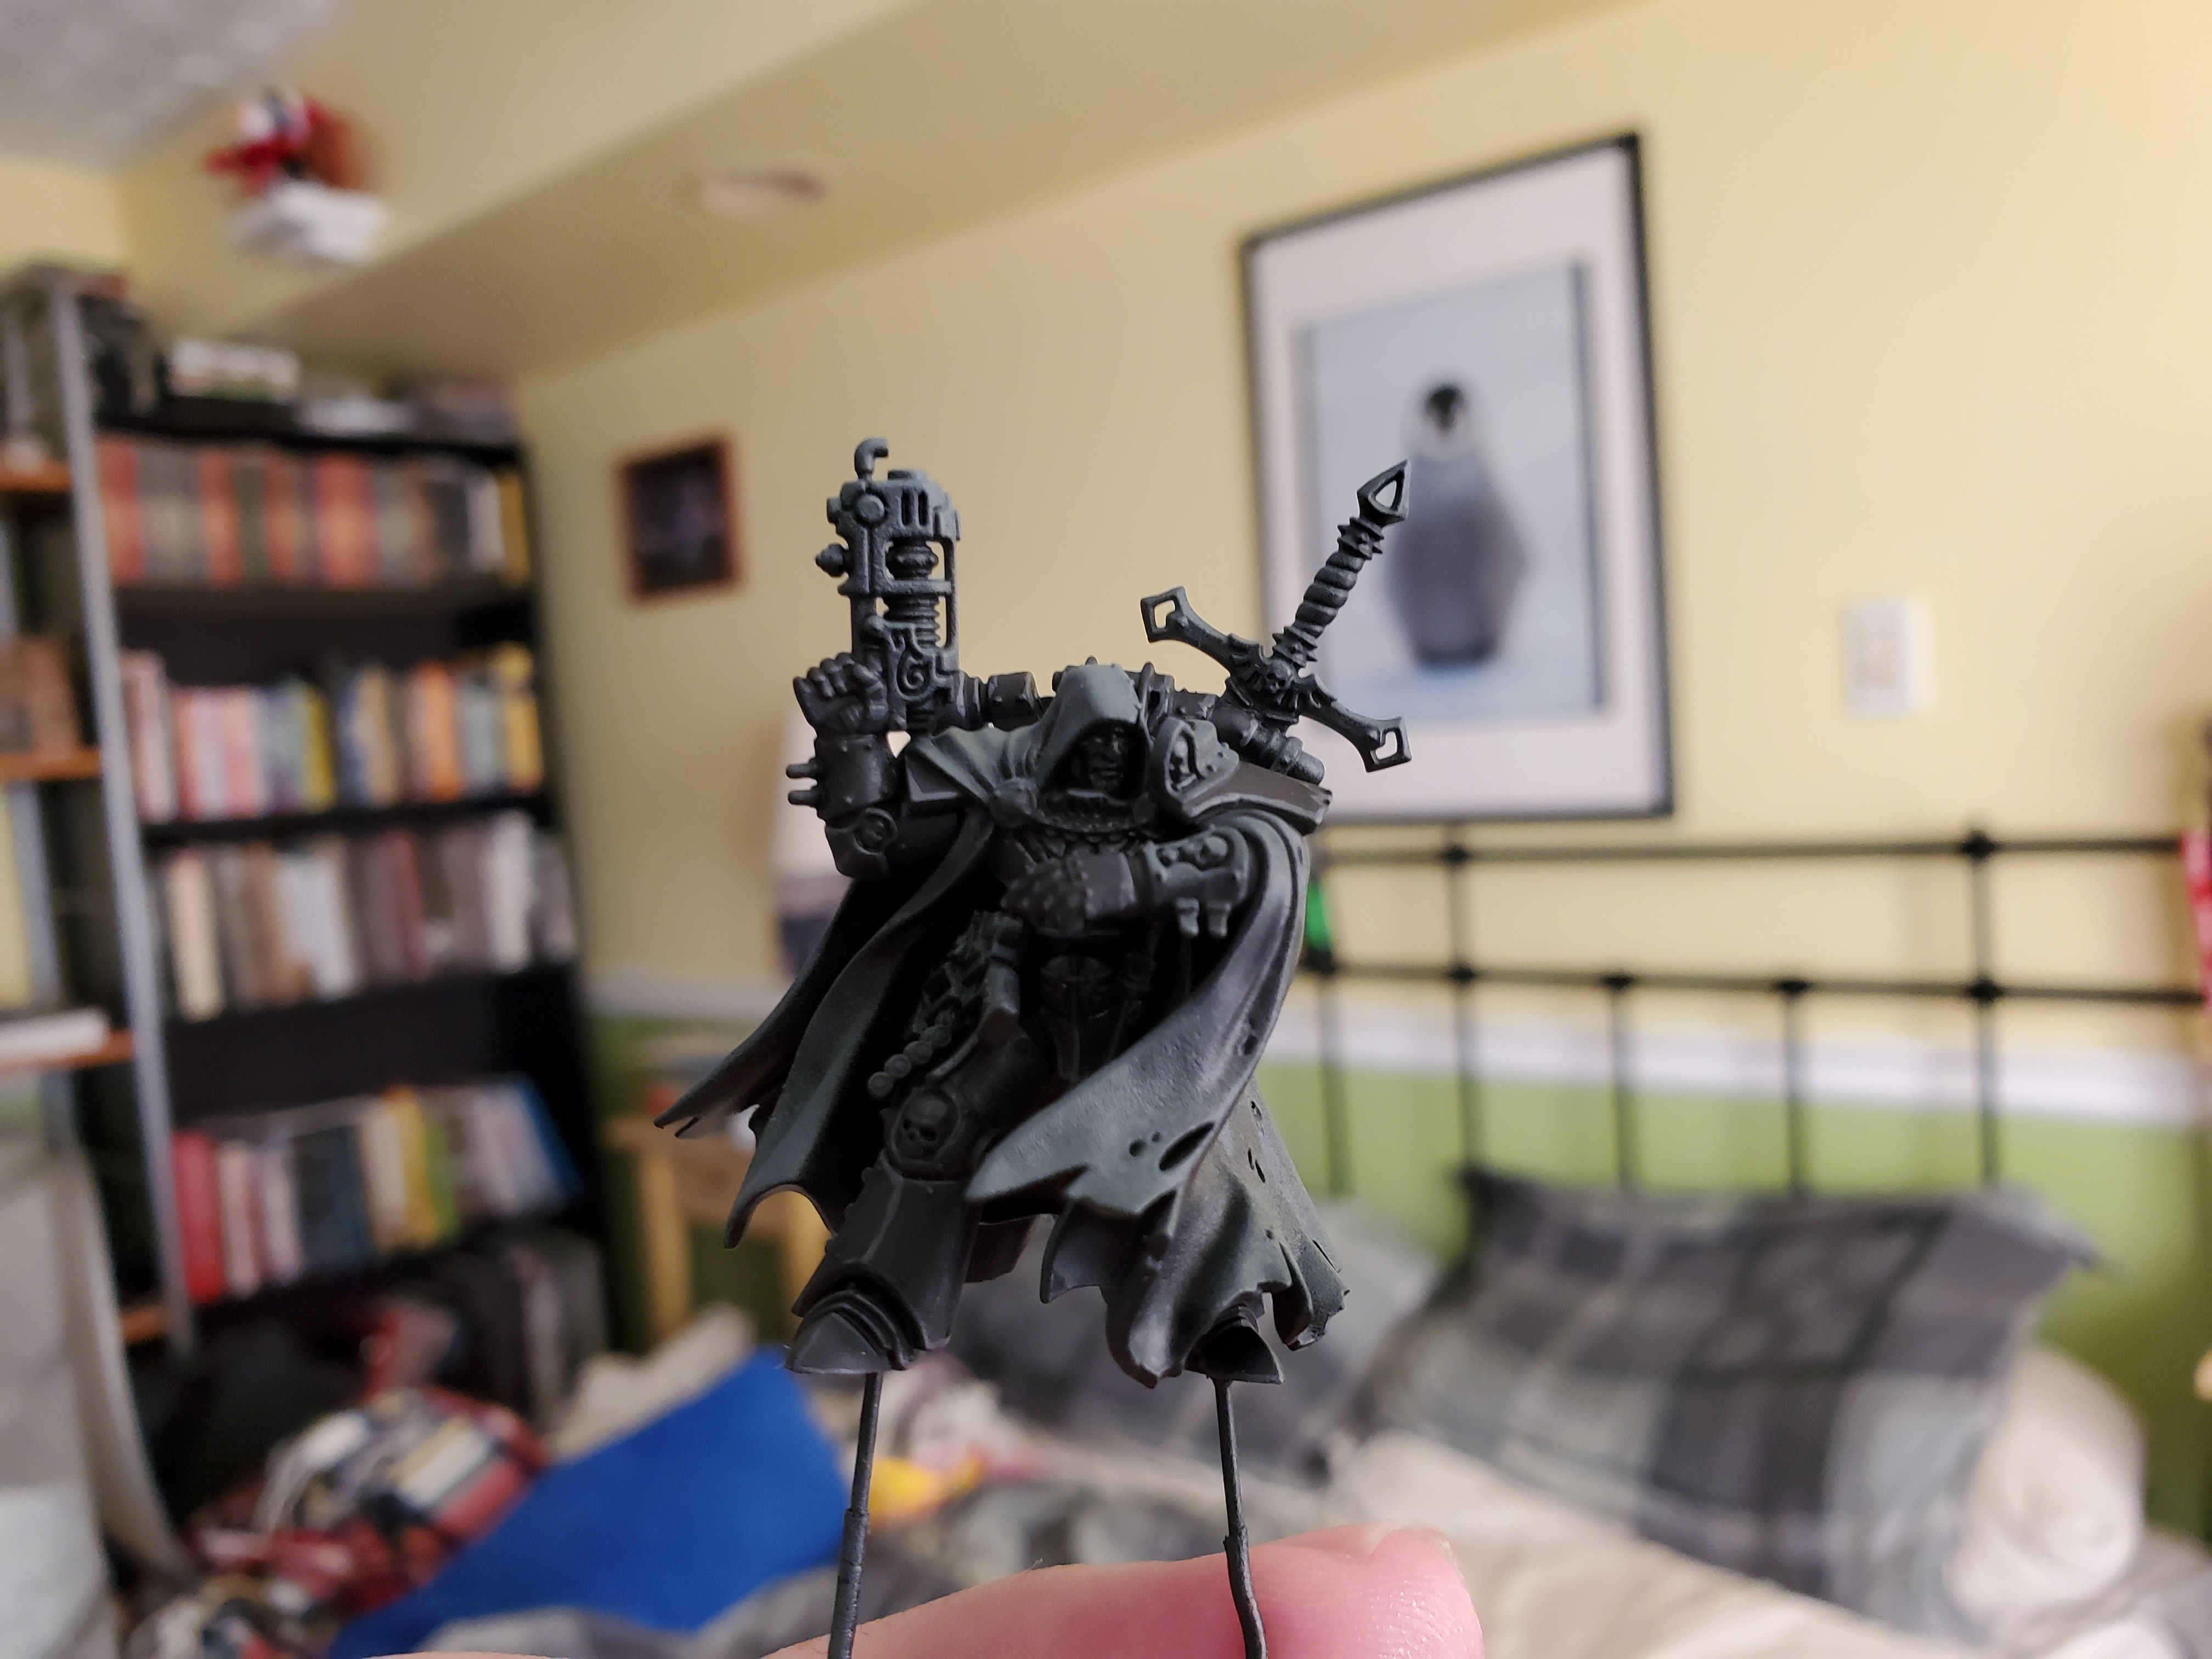 And now the Nuln Oil shade. This is very subtle. Might not even show up in the pictures, but it is there...I promise! After that I added an edge highlight of Mechanicus Standard Grey. I went with edge highlighting on the black because I tend to find that dryburshing very quickly turns black to grey, and I was trying to avoid that.You may notice that I've avoided the gauntlets, as I intend to paint them as dark leather later on...but I haven't gotten that far yet.
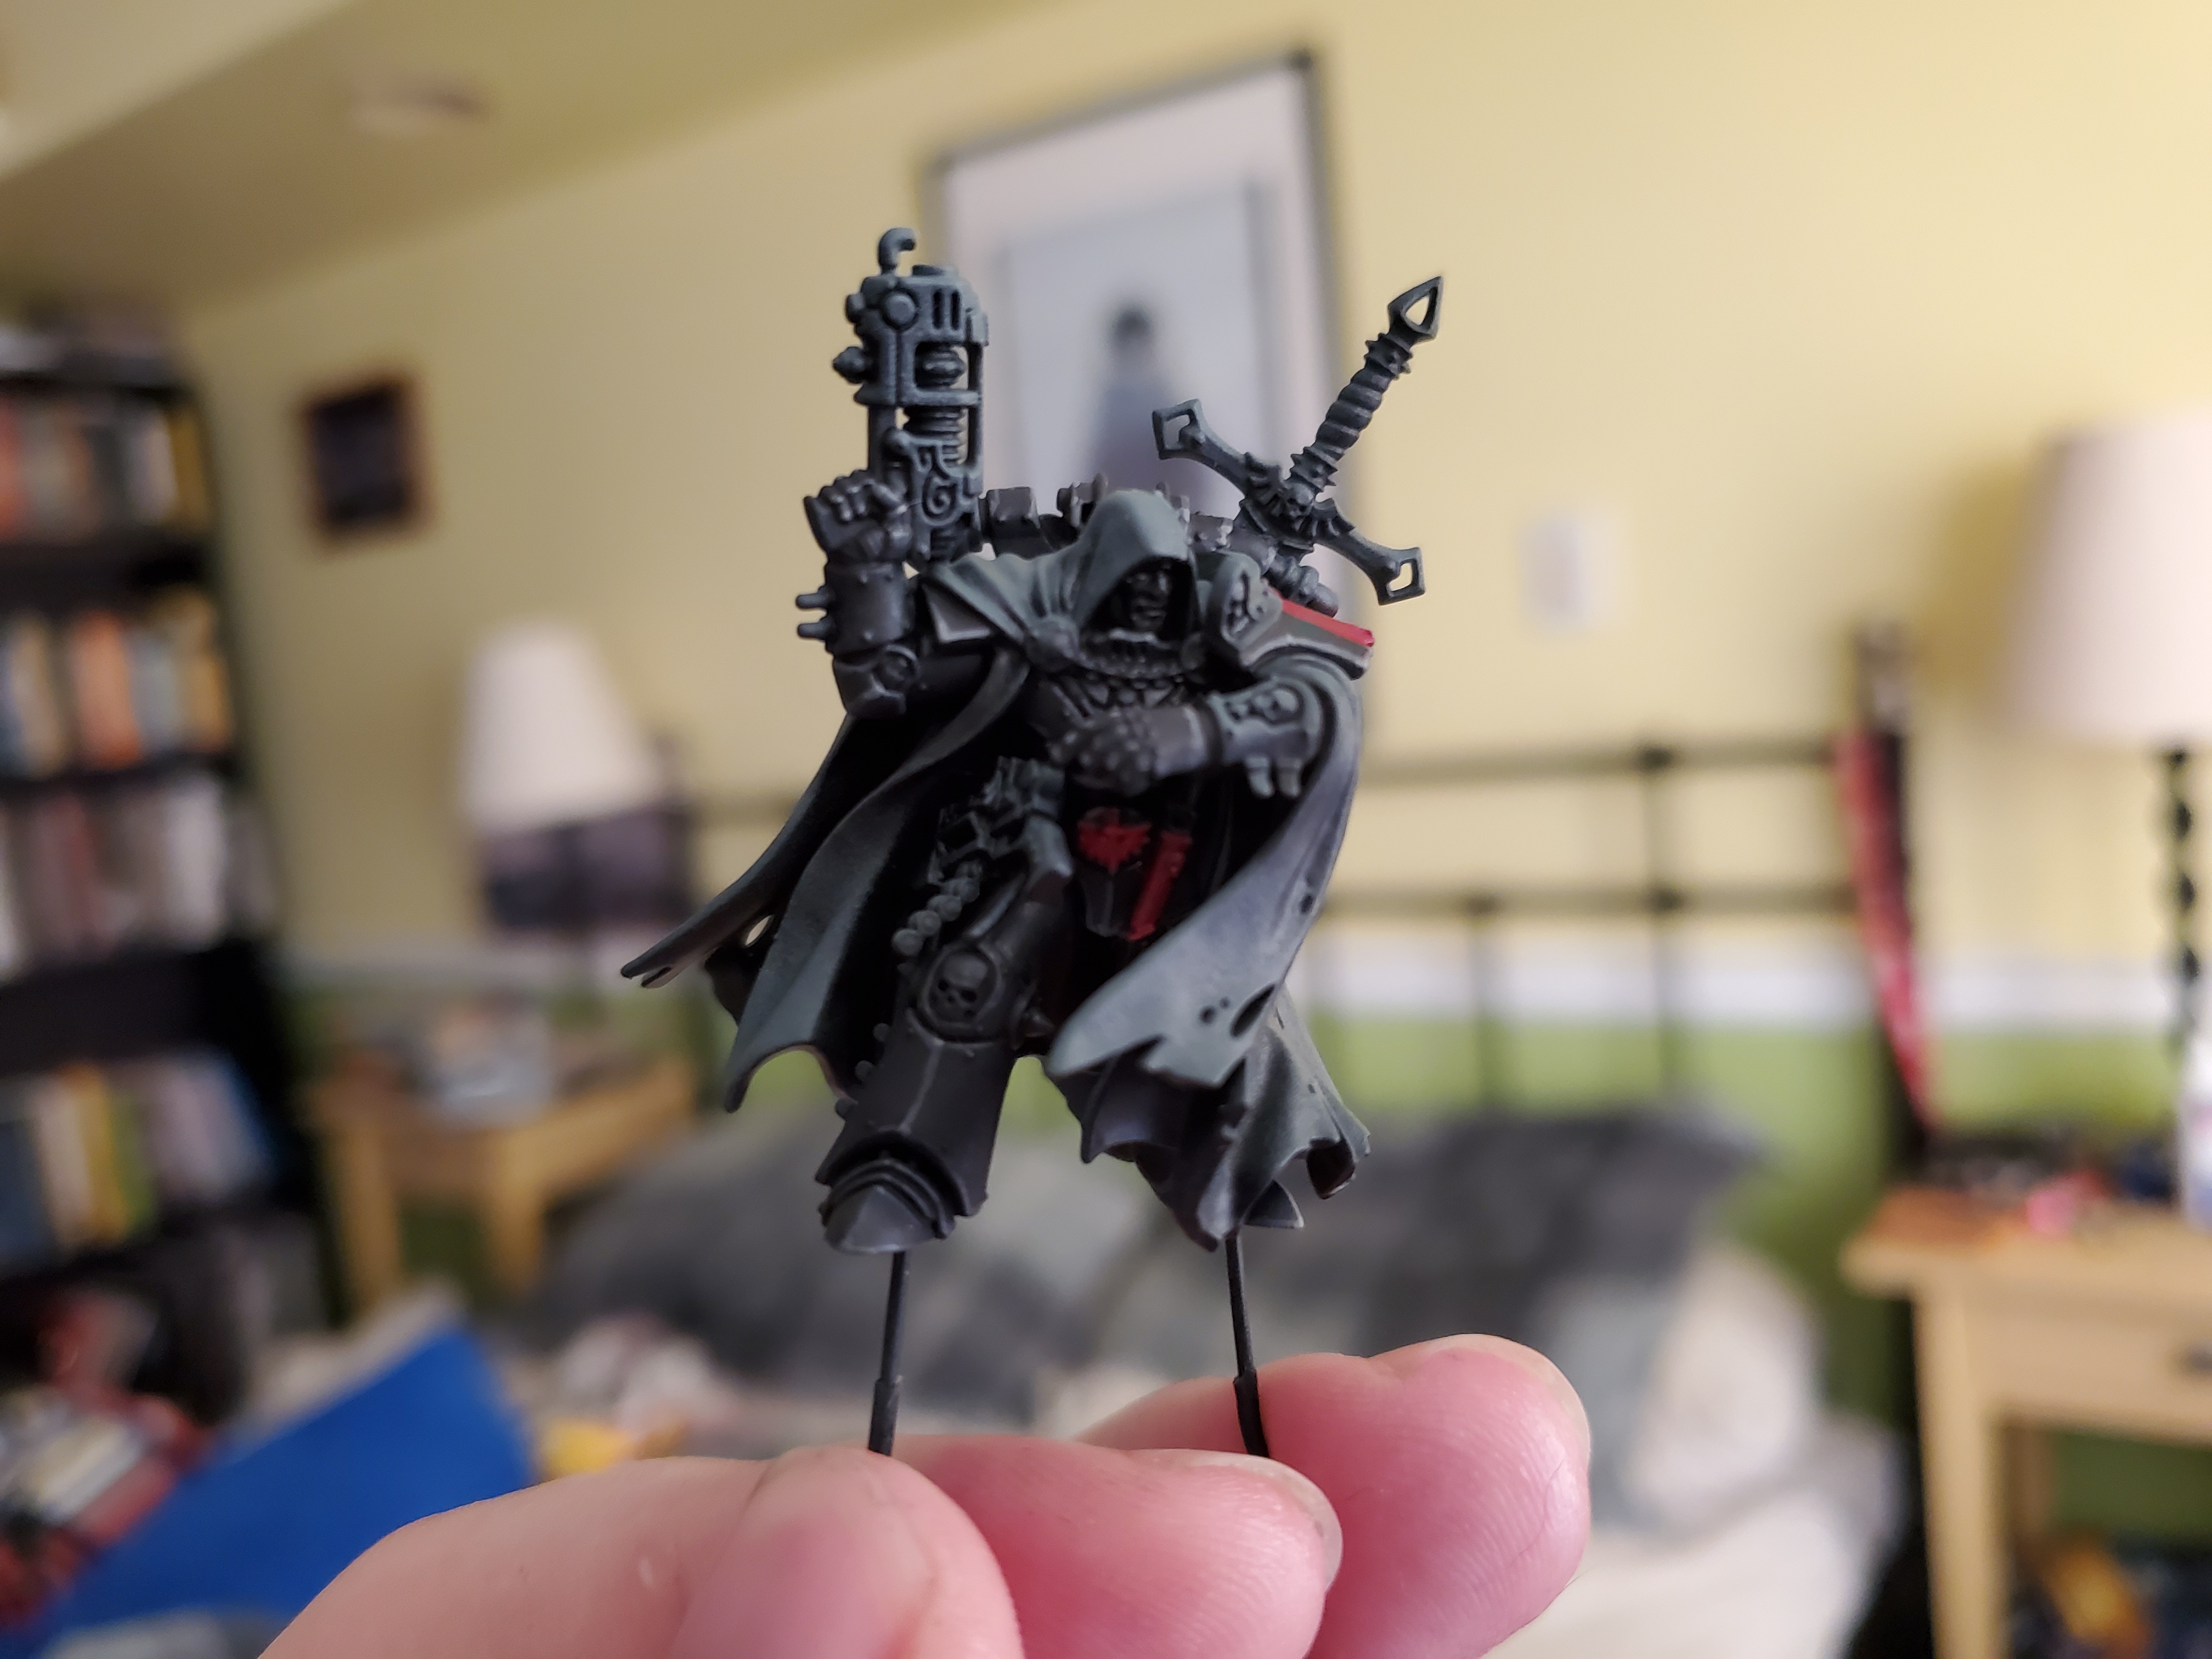 After that I 'dot' highlighted the sharper corners of the armour with Dawnstone before picking out some details in Khorne Red. Included in this is a single red strip across the shoulder pad to break it up a little and is the only real divergeance from the GW examples that I plan on making. I like red on black. It stand out nicely. I'll also be using a brighter red for the lining, so the two parts should look different, too.
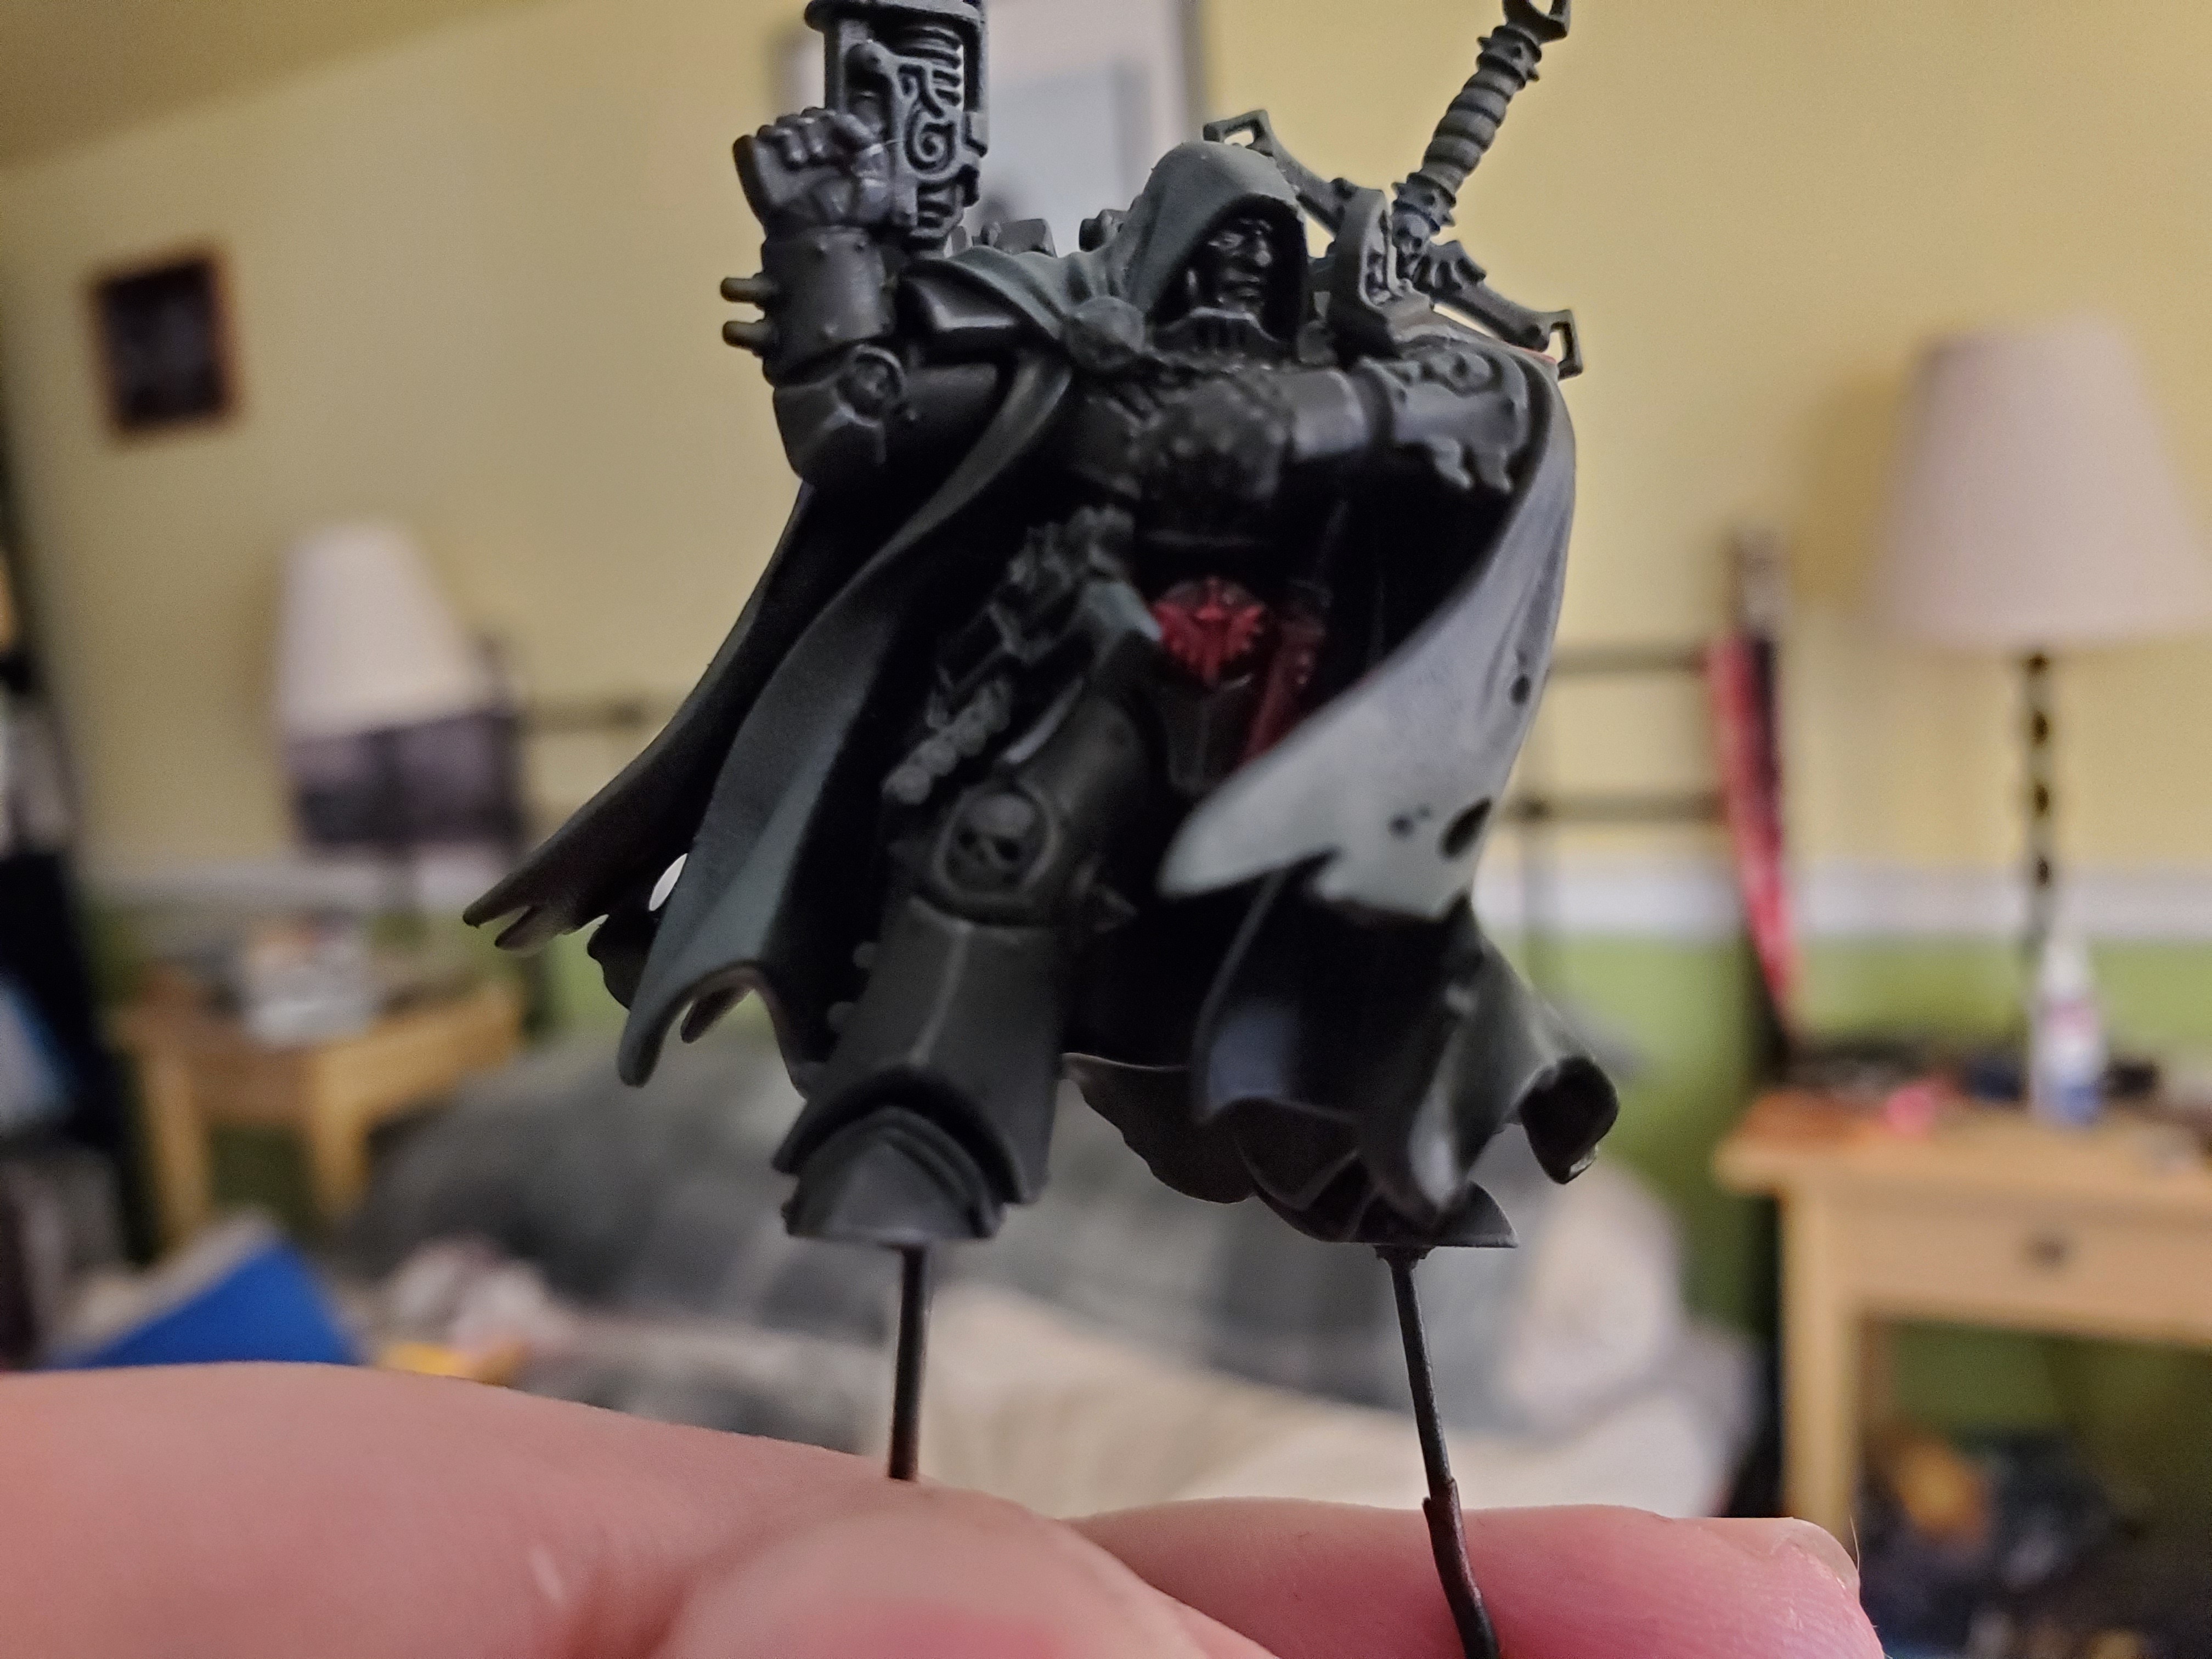 Then some washes of Agrax Earthshade over the reds (recess shade on the red stripe) followed by some simple highlights with Wazzdakka Red. I really do enjoy that red tone...
So he’s far from done, and it may take some time for him to be done with school resuming on Monday, but hopefully more work can be done on the robes soon. Once they have some paint on them I feel like the black armour will really pop, but we’ll have to see.
"Flame, hammer and blood – so is meteoric iron worked, so were the Heavenfall Blades tempered. So too shall I test the Unforgiven."
Been a while… Work continues on Cypher, albeit slowly. He’s actually getting quite close to being finished…though as the beige robes are a huge part of the mini it doesn’t really look like it. The lighting in some of these pictures is not the best, but for this step-by-step pictures it’s not too bad. Good lighting doesn’t happen for very long around here at the moment…
Where we last left off was the armour being finished, so the next challenge was the lining of the robes. This sort of had to be done this early so as to not have other parts get in the way. I must say with this particular mini that some of the connecting parts of Cypher are just blocks of plastic and while they don’t really show up once he’s on the base, if you skipped putting some sort of colour on them then they would…but that’s a small gripe.

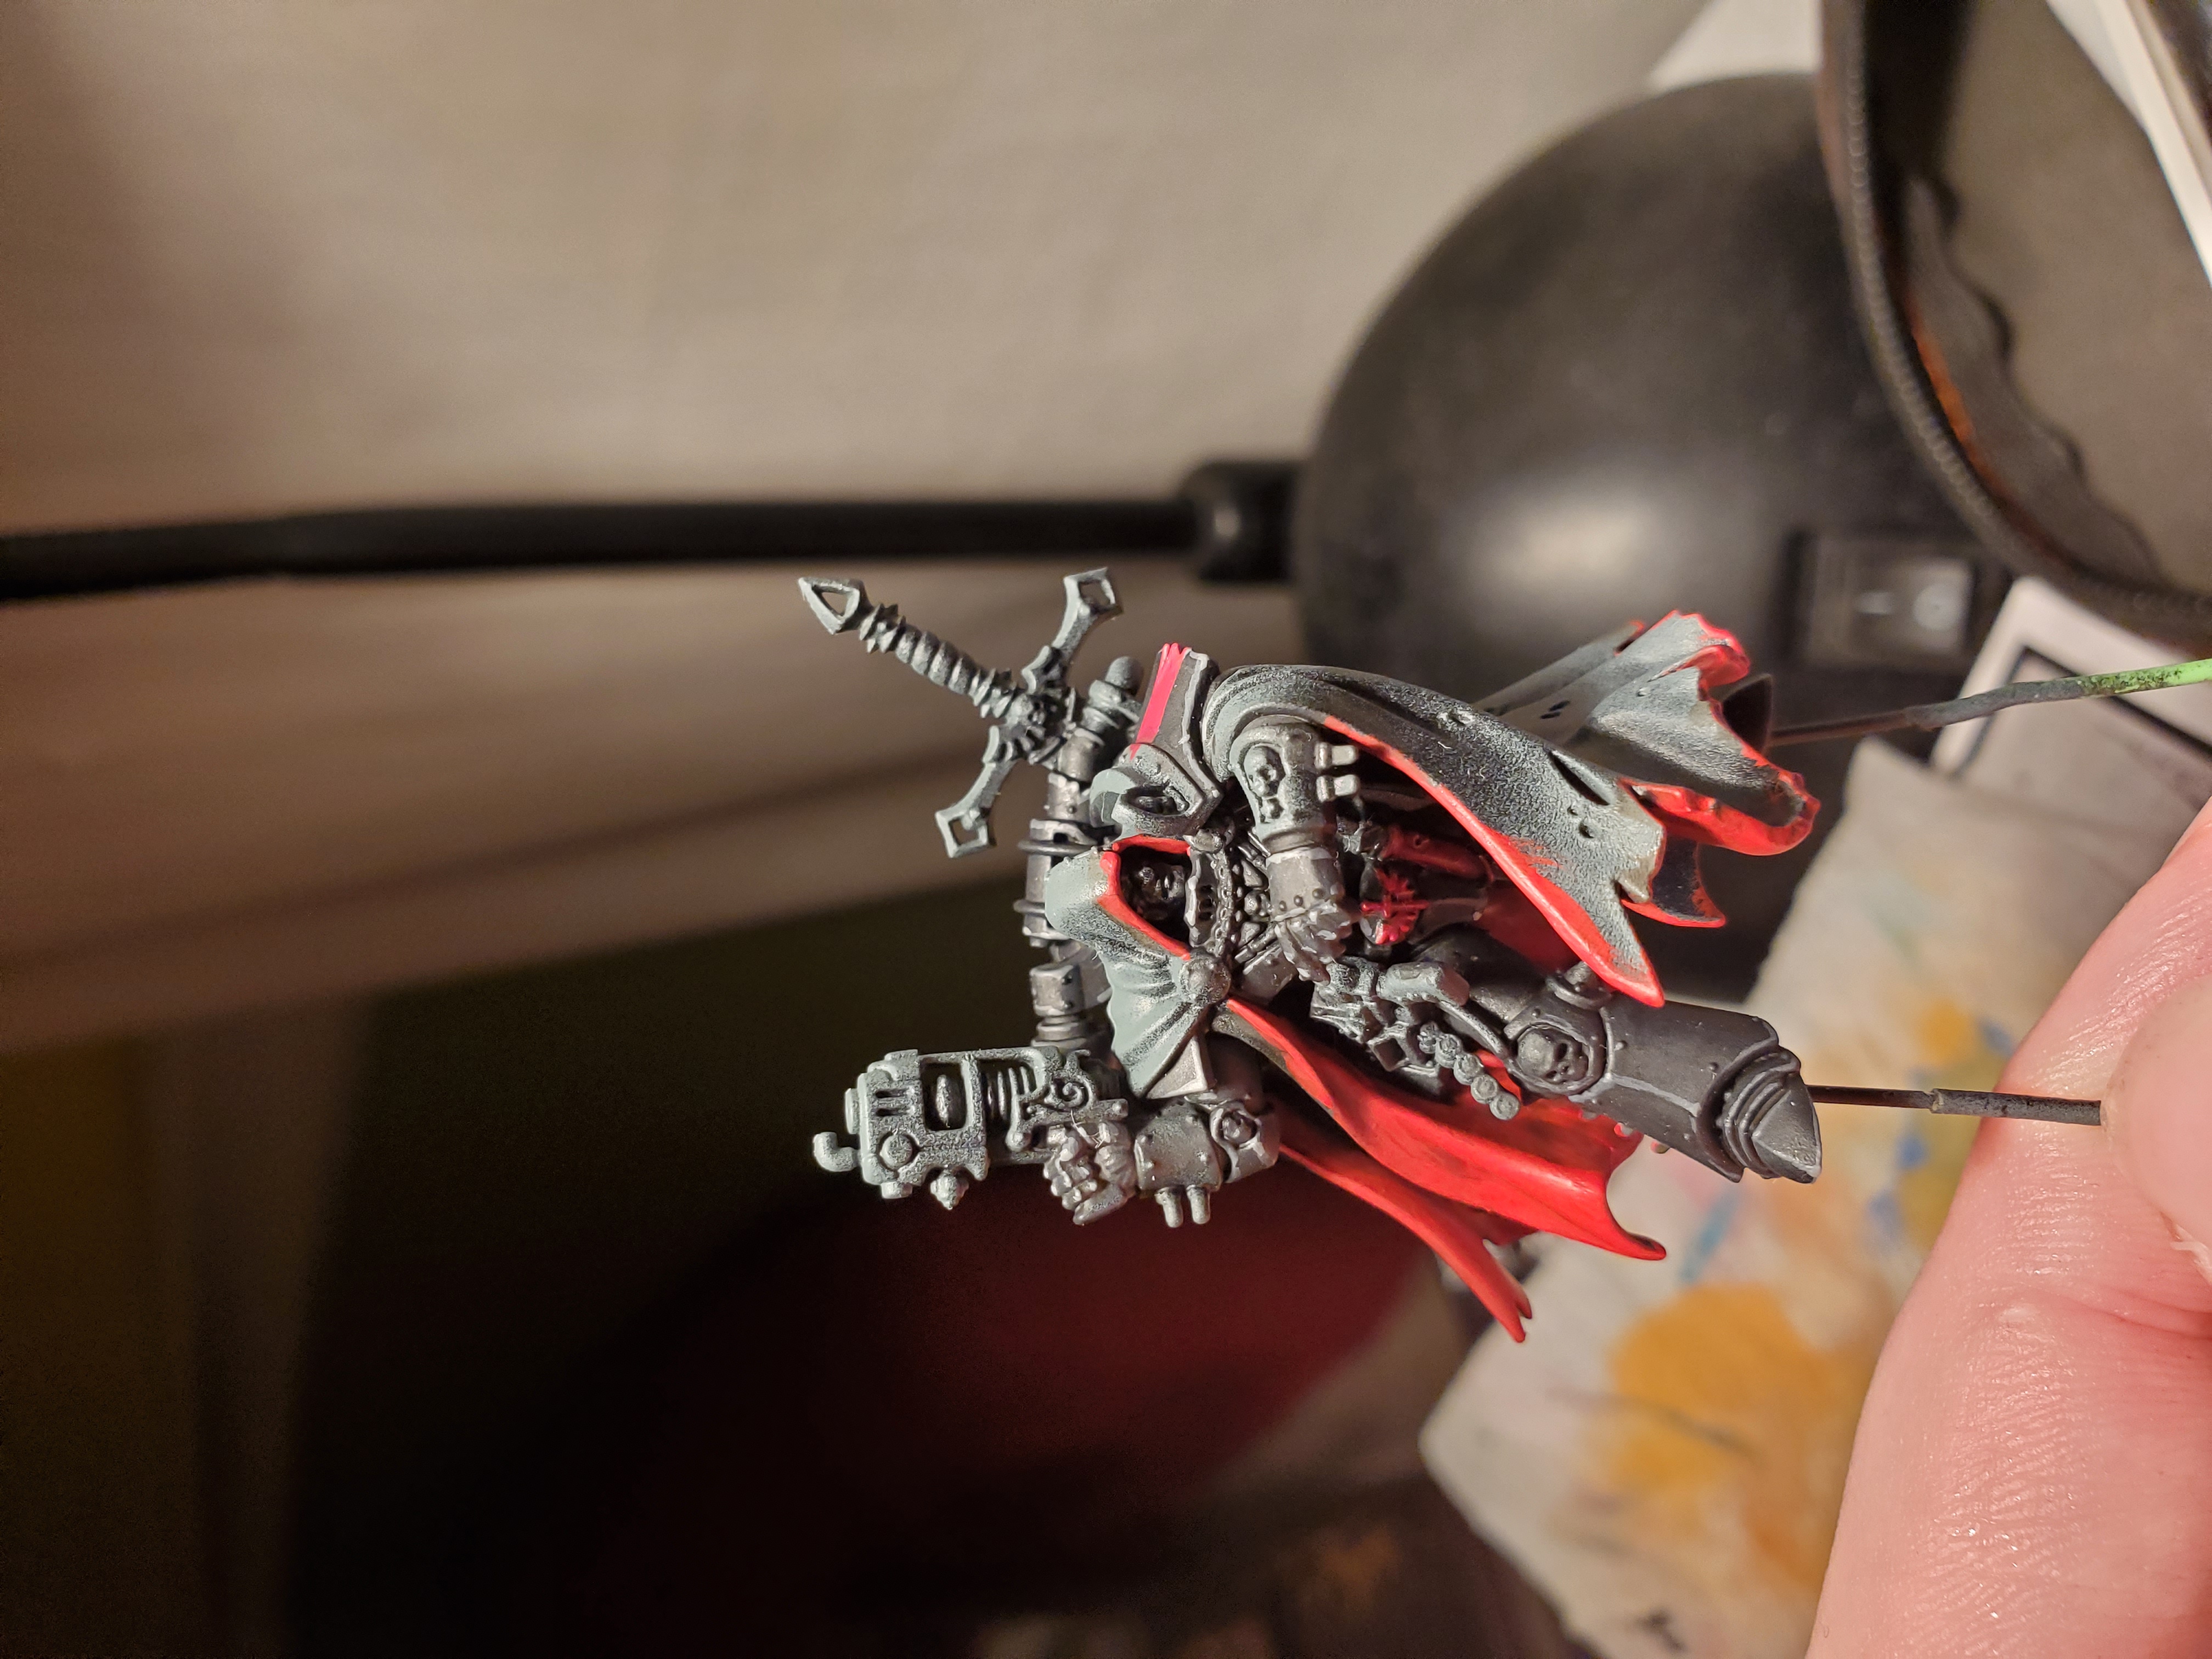
I wanted the red of the lining to have a different tone to the red on the armour, so here I used Mephiston Red as a basecoat, then shaded with Agrax Earthshade. Then a brightening up with Mephiston Red again across most of the lining but ignoring the recesses before a final highlight of Evil Sun’s Scarlet. You could add some really fine highlights of Wild Rider Red, but I decided that I wanted a slightly duller appearance for Cypher…which I think I’ve managed…

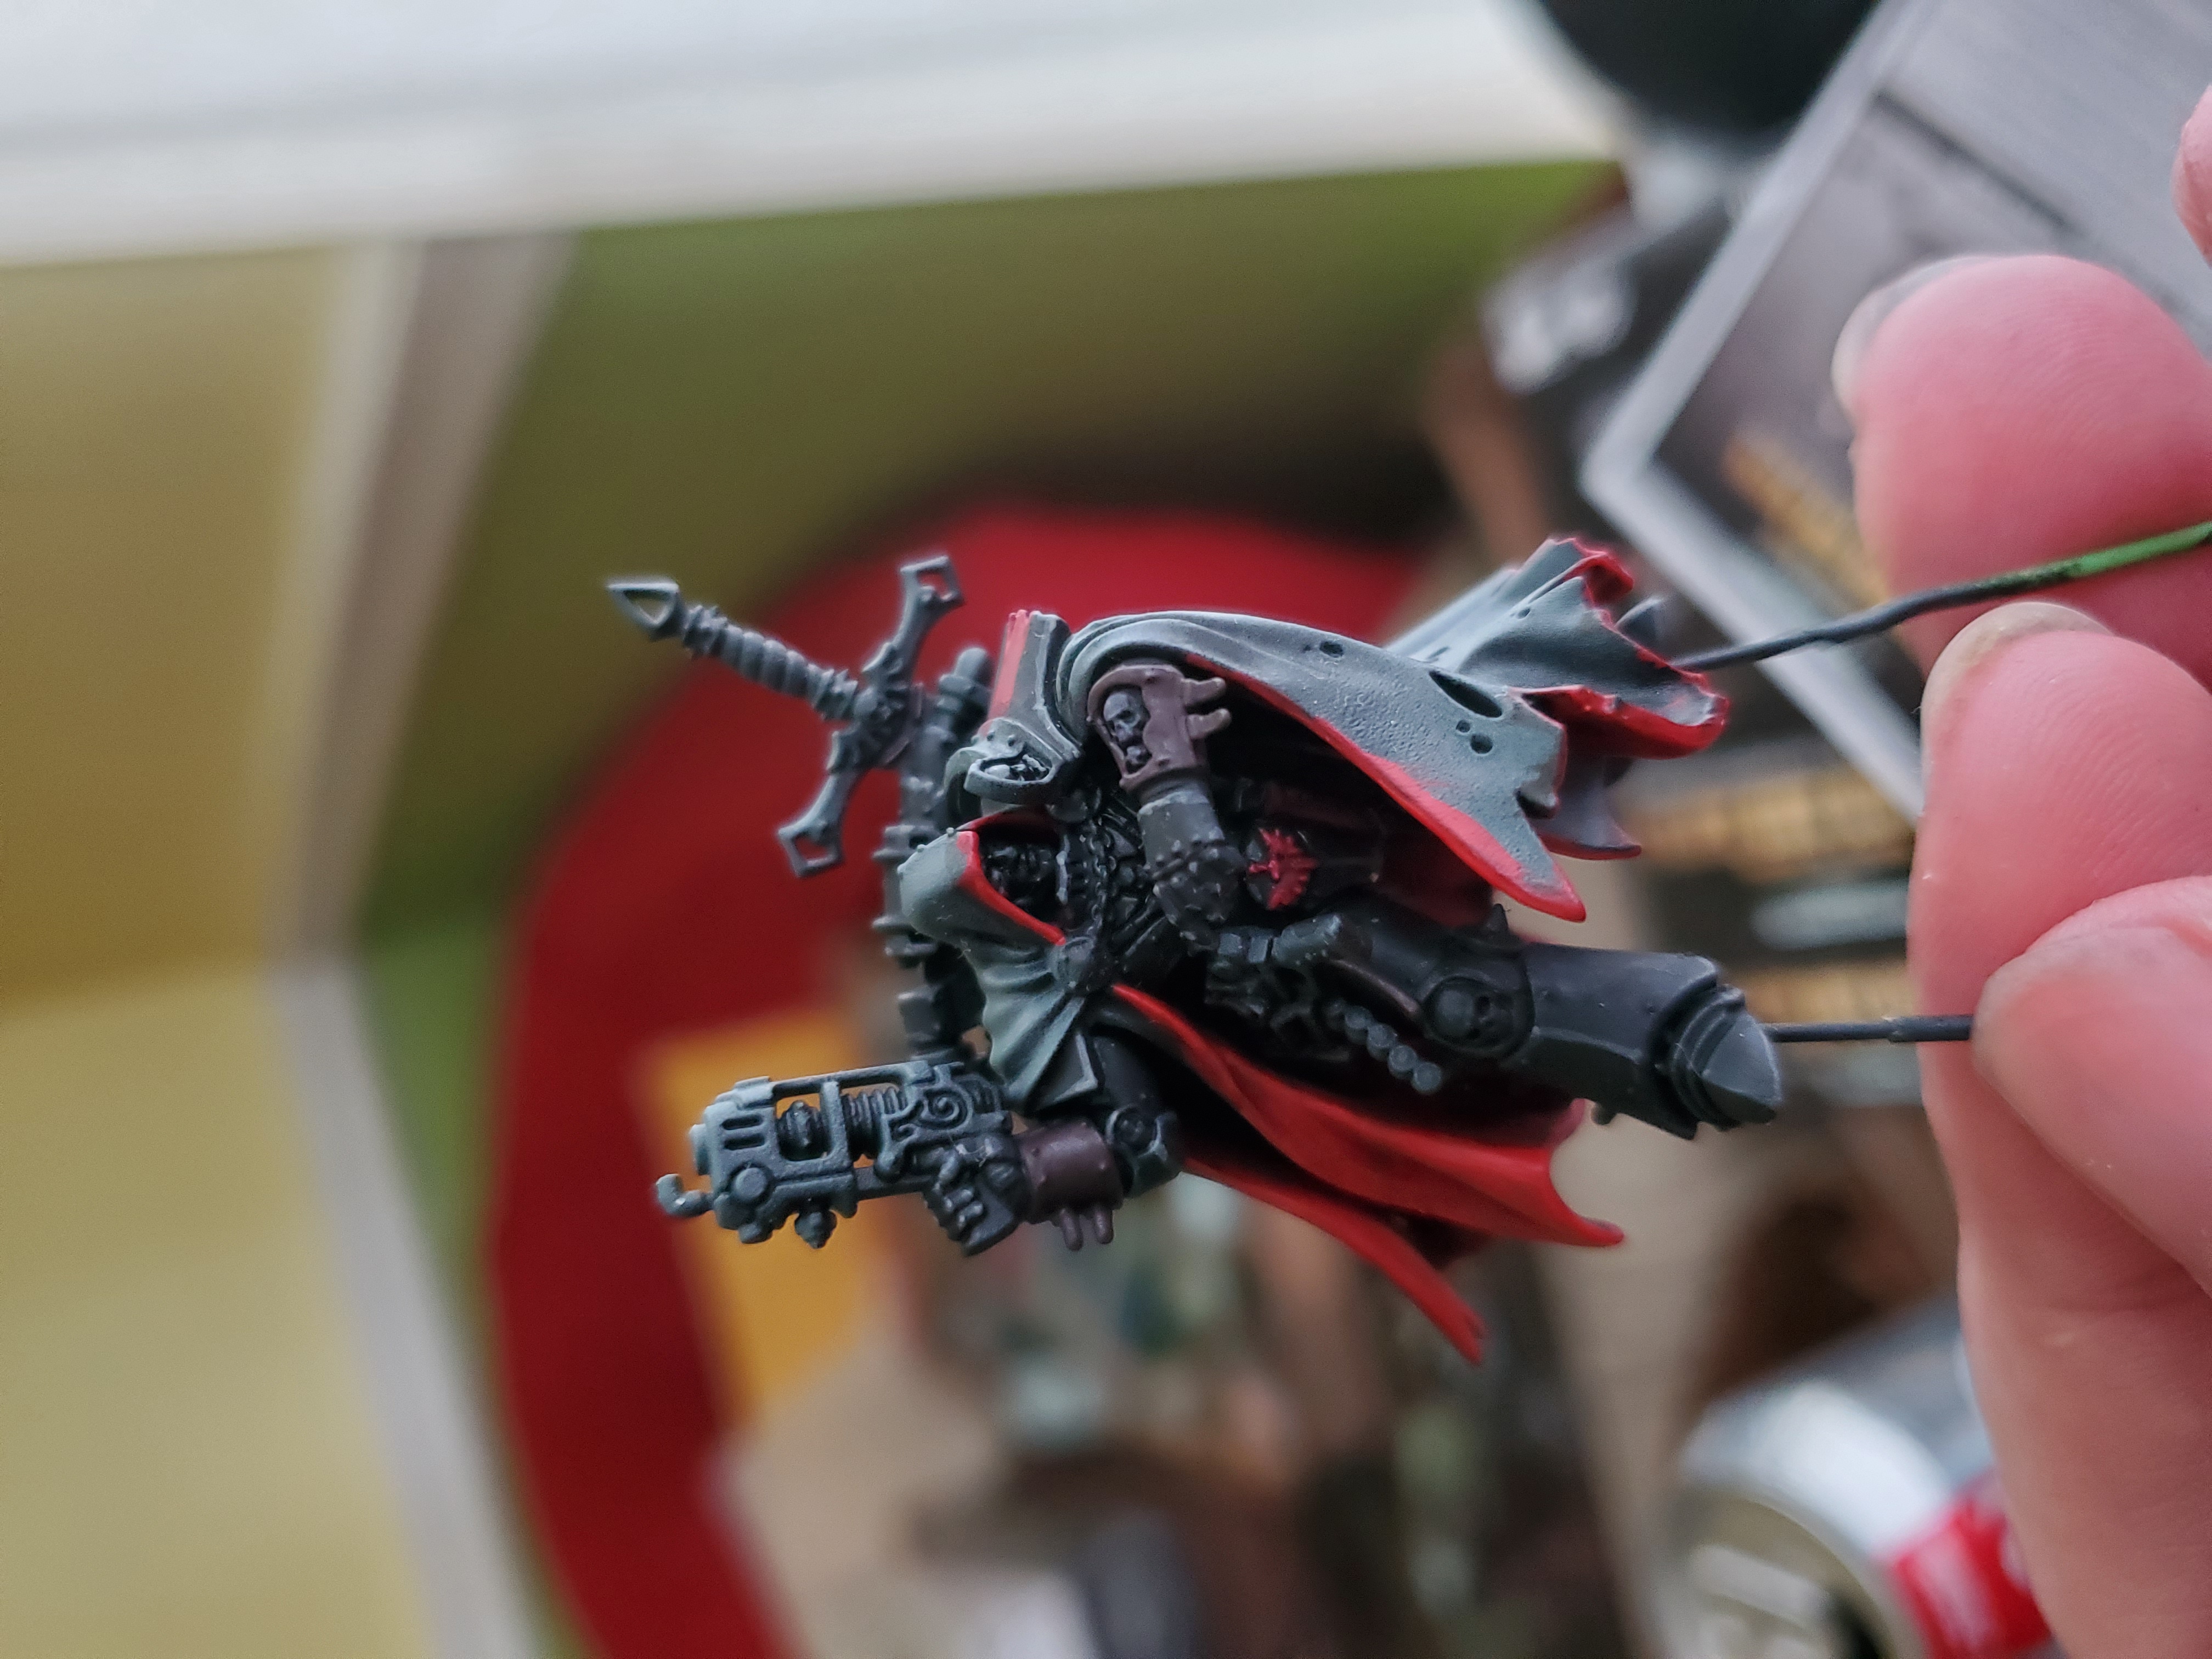

The leather parts of the mini were next. Not too many bits were done in this colour, and the leather scabbard on the hidden dagger under his cloak was done in the dark red colour from earlier. As you’ll notice, I have sort of ignored the sword on his back, but I did do the leather part of the scabbard in this colour. It’s a simple recipe of Dryad Bark, shaded with Druchii Violet before highlighting with Gorthor Brown. Nice and simple, but I like the colour it gives.
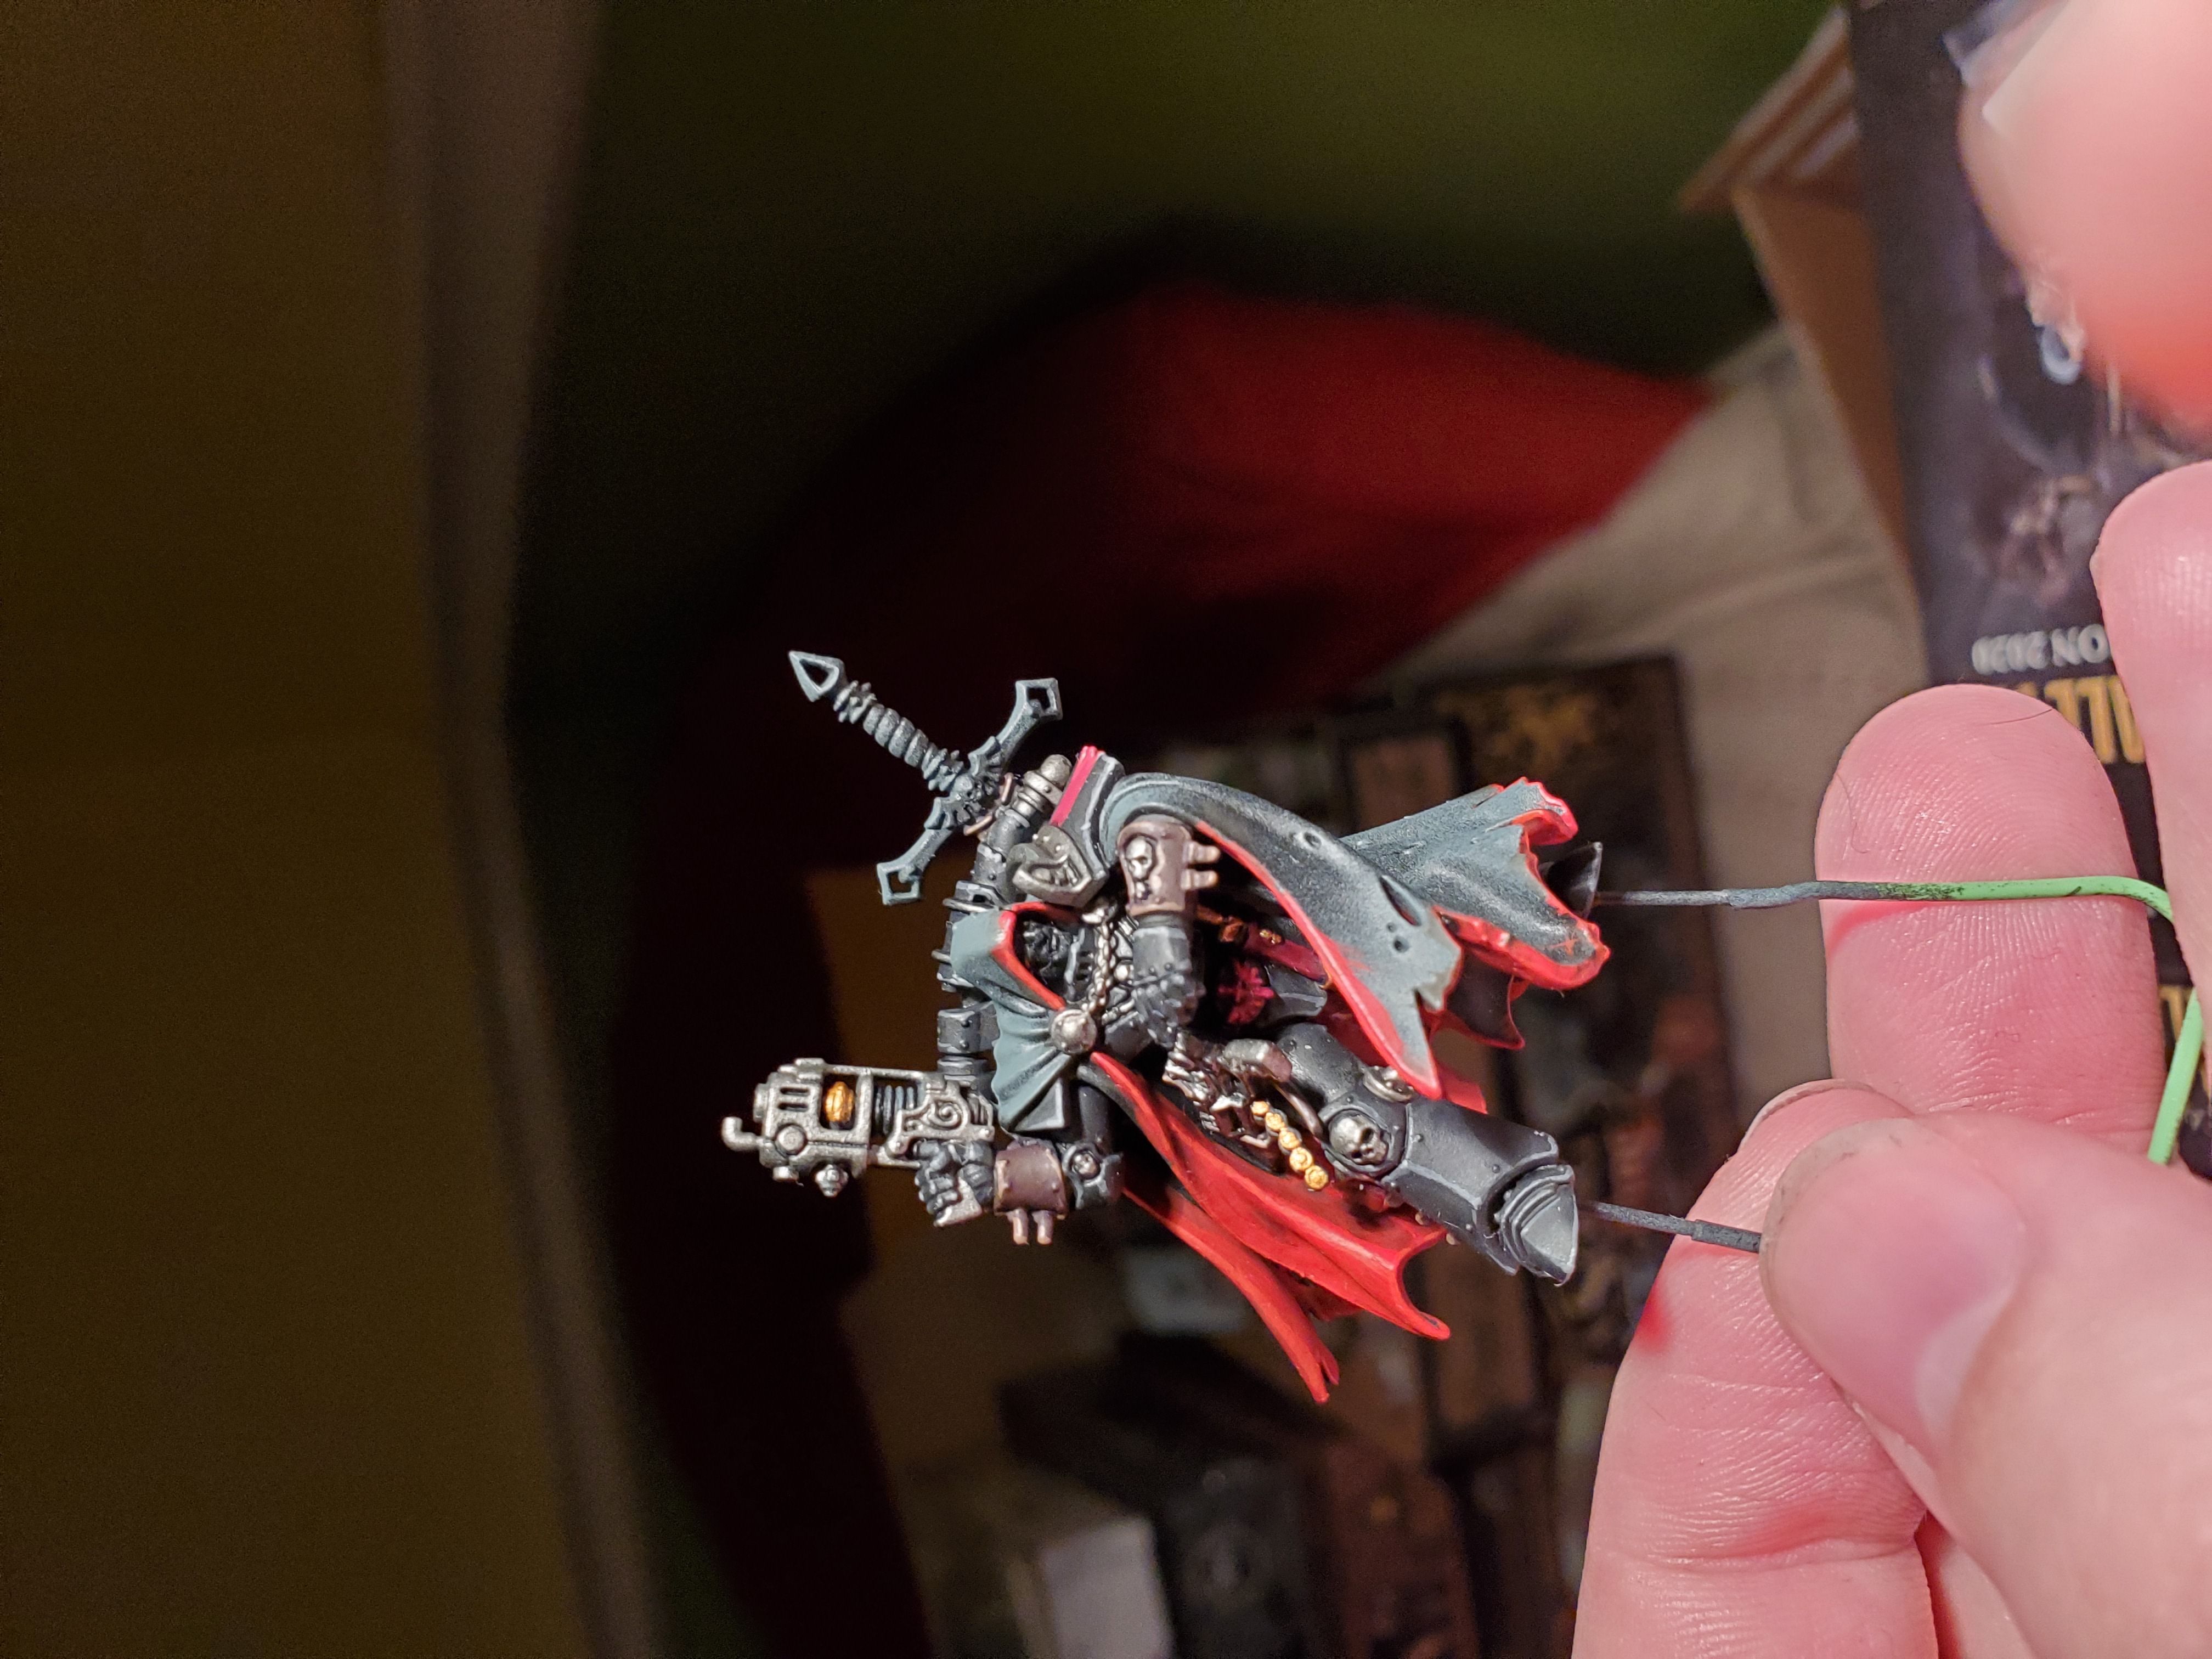

The metal details we almost all the same with one difference. I wanted Cypher’s weapons to look old, and they hopefully look that way. The Fallen may be able to find new spare parts for armour, but I like to imagine that Cypher’s pistols are precious to him so he has kept them for all this time. The main basecoat was the same; Leadbelcher. On all parts except the weapons this was then followed by a wash of Nuln Oil whereas the guns were shaded with Agrax Earthshade. Before adding this brown shade, though, I picked out the yellow metal details with Retributor Armour including a band on the backpack and the knife hilt and scabbard decorations. After these shades I highlighted the Leadbelcher parts with Stormhost Silver and the yellow metal with Liberator Gold. I also dotted in the rivets across the armour with Stormhost Silver just to give an extra kick to the armour.
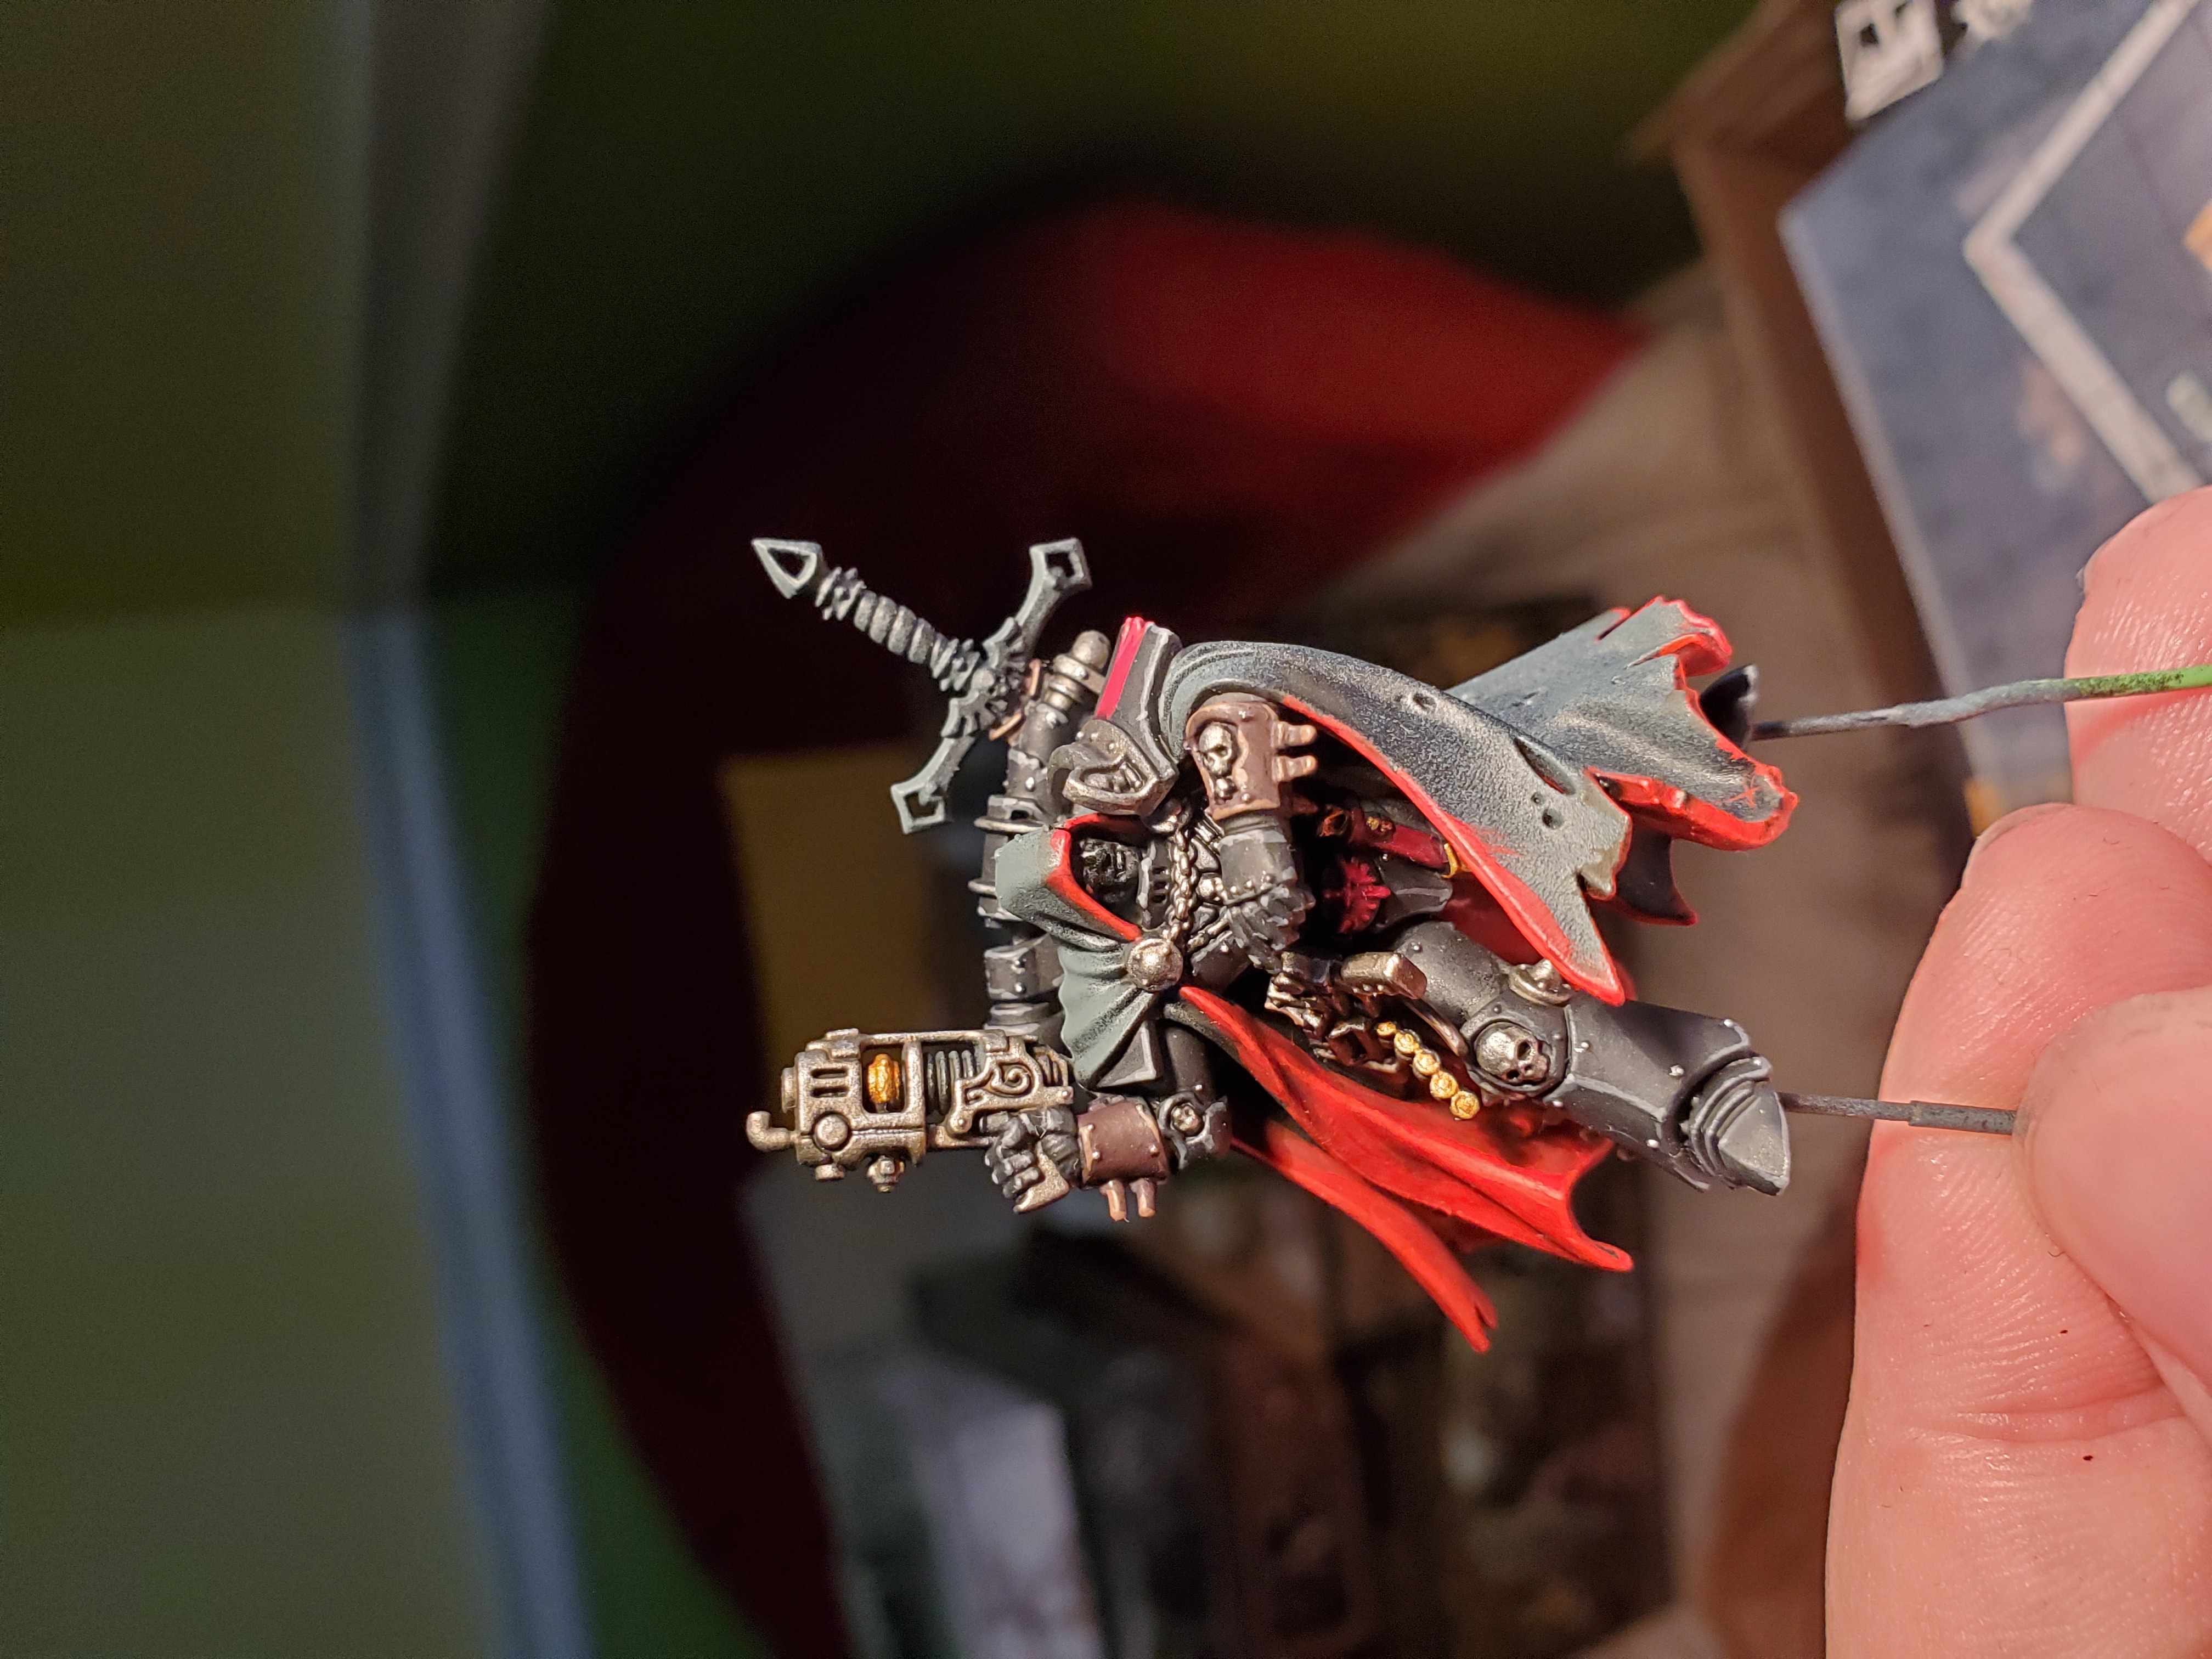
 After that I did some smaller details like the face (using the Contrast+ methods discussed in previous project logs) along with the plasma coils. My method for the coilds is nice and simple, if a bit more dull (I like to think of it as the coils prior to being charged for firing). Basecoat with Ulthuan Grey, shade with Drakenhof Nightshade, highlight with White Scar, then glaze with Guilliman Blue for as many layers until you are happy. Not the most vivid, but I like it. In the past I have also gloassed the coils, though I decided not to here.
Just the outer robes and the sword to go, so maybe in the next week they will be up. Until then, have fun!


![Zenit Miniatures’ Samurai Warlords Now Live On Kickstarter [Updated]](https://images.beastsofwar.com/2026/02/samurai-warlords-launch-main-600-338.jpg)