


![1918 Spring Offensive Wargame | Full Rules Overview with John & Gerry (WW1 Tabletop Game) [7 Days Early Access]](https://images.beastsofwar.com/2026/03/unboxing-warfulcrum-games-1918-spring-offensive-review-coverimage1-225-127.jpeg)


Rejuvenate Pre Painted Star Wars Miniatures The Easy Way


Recommendations: 198
About the Project
As I get older I find I have less time... So I'm revisiting some old Star Wars Prepaint Miniatures from Wizards of the Coast to rejuvenate them for skirmish gaming and Role-Playing Games.
Related Game: Stargrave
Related Company: Wizards of the Coast
Related Genre: Science Fiction
This Project is Completed
Can Star Wars Pre Paints be Improved?
I have always had a bit of a love-hate relationship with Prepainted miniatures. On one hand, they are very convenient and once family came along time of painting has really become a scarce commodity!
On the other hand, the quality of the minis and their paint job can be really hit and miss. They can often look a little bit goofy!

I have a bit of a collection of Wizards of the Coast Star Wars Miniatures that I hope to bring a little more up to date in their ‘elegance’ and ‘look’ but it has to be fast and easy so ideally I want it to be just one or two steps…
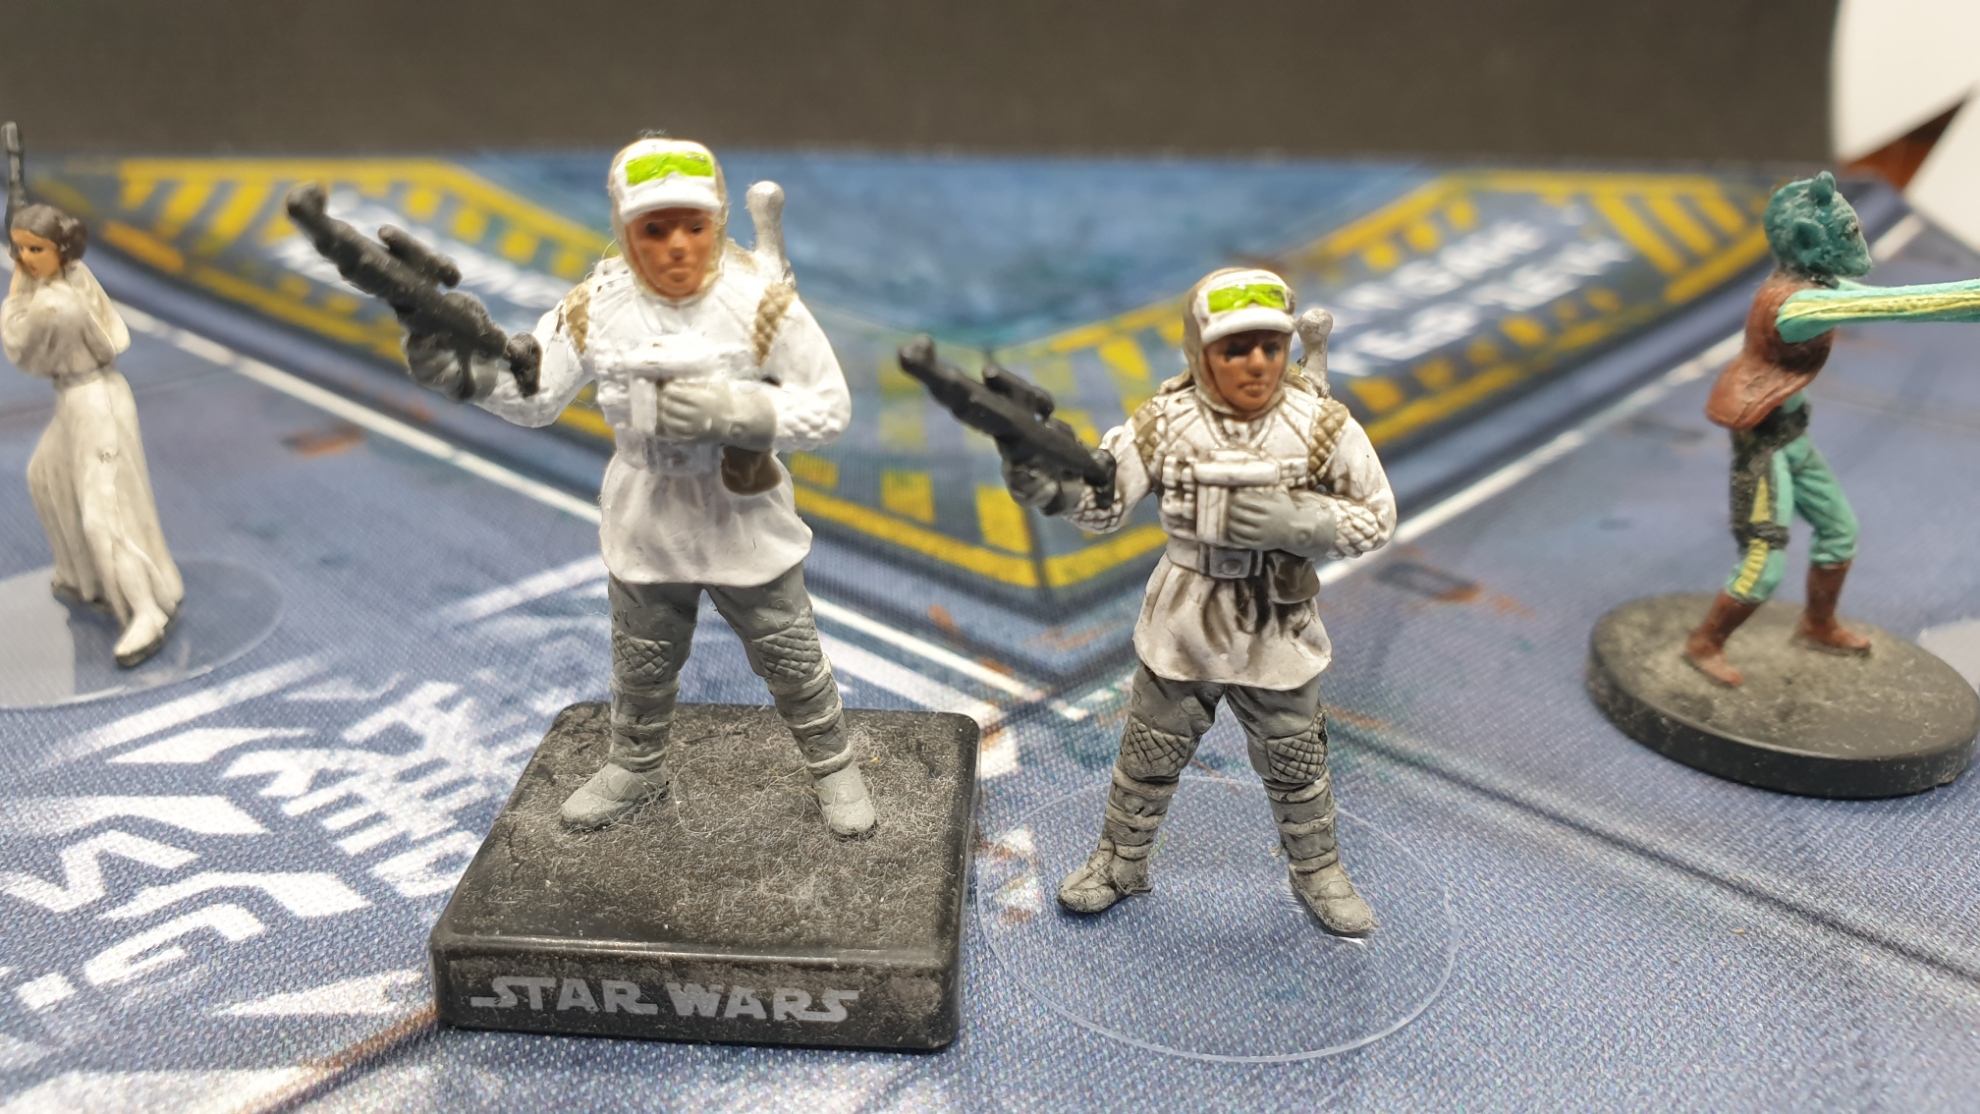
Playing With Washes
My goto solution was to add a coat of wash to the minis, to see if it could allow some of the additional sculpting work to give a little more shading (and thus realism) to the mini.
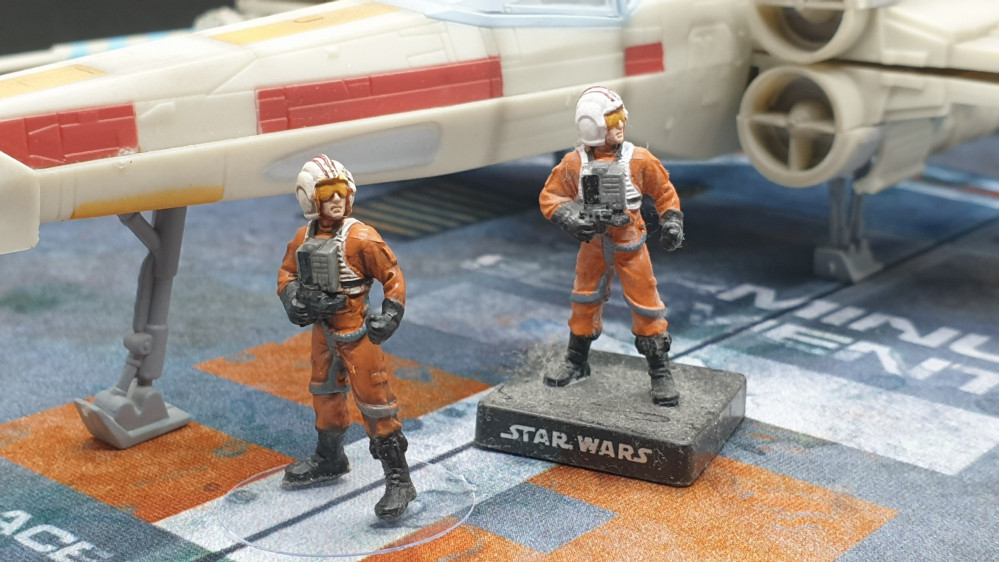
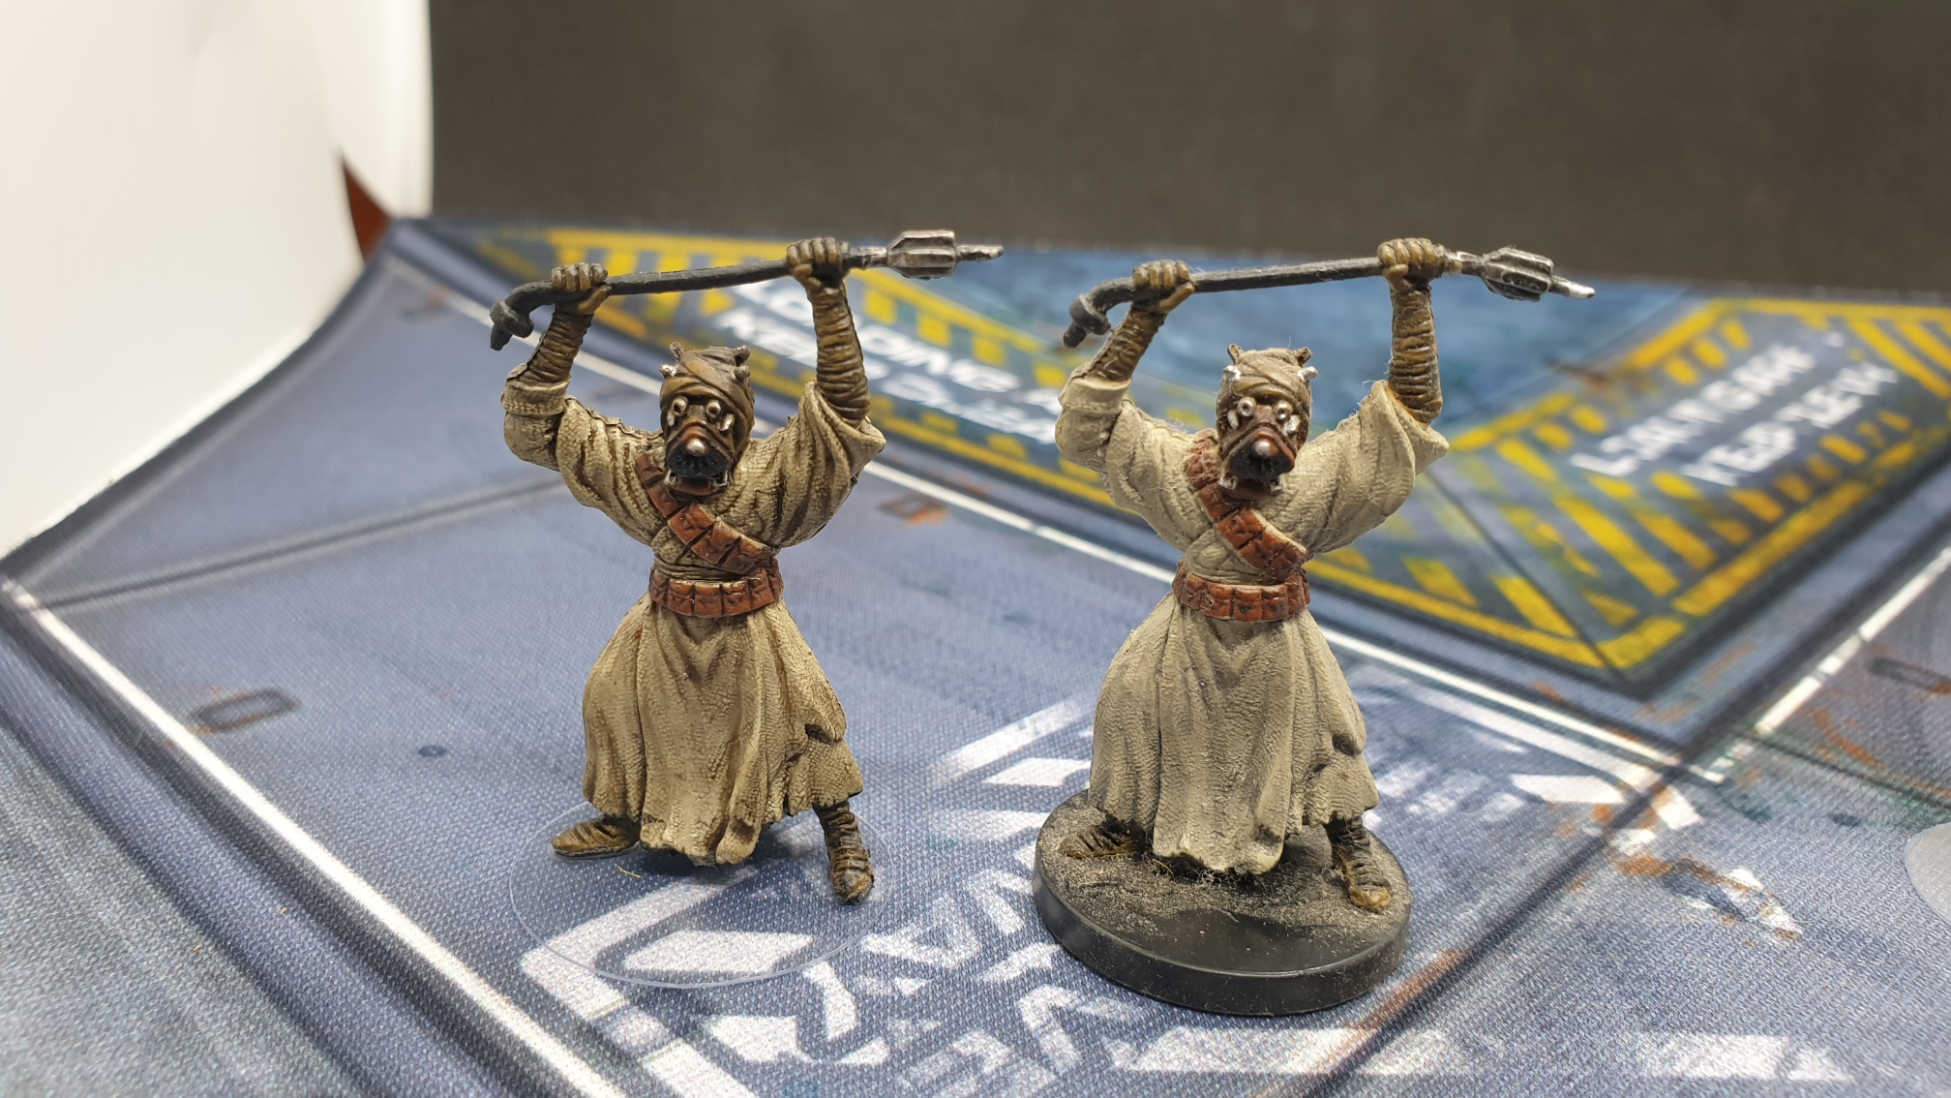
I took my Buddy Look and added 100% Agrax Earthshade from the Citadel range to him with a pretty big brush.

The end result is a little bit strong (brutal) but once I added the mini to my homemade clear base I actually started to like the result – especially when the whole process is about 2 minutes work!

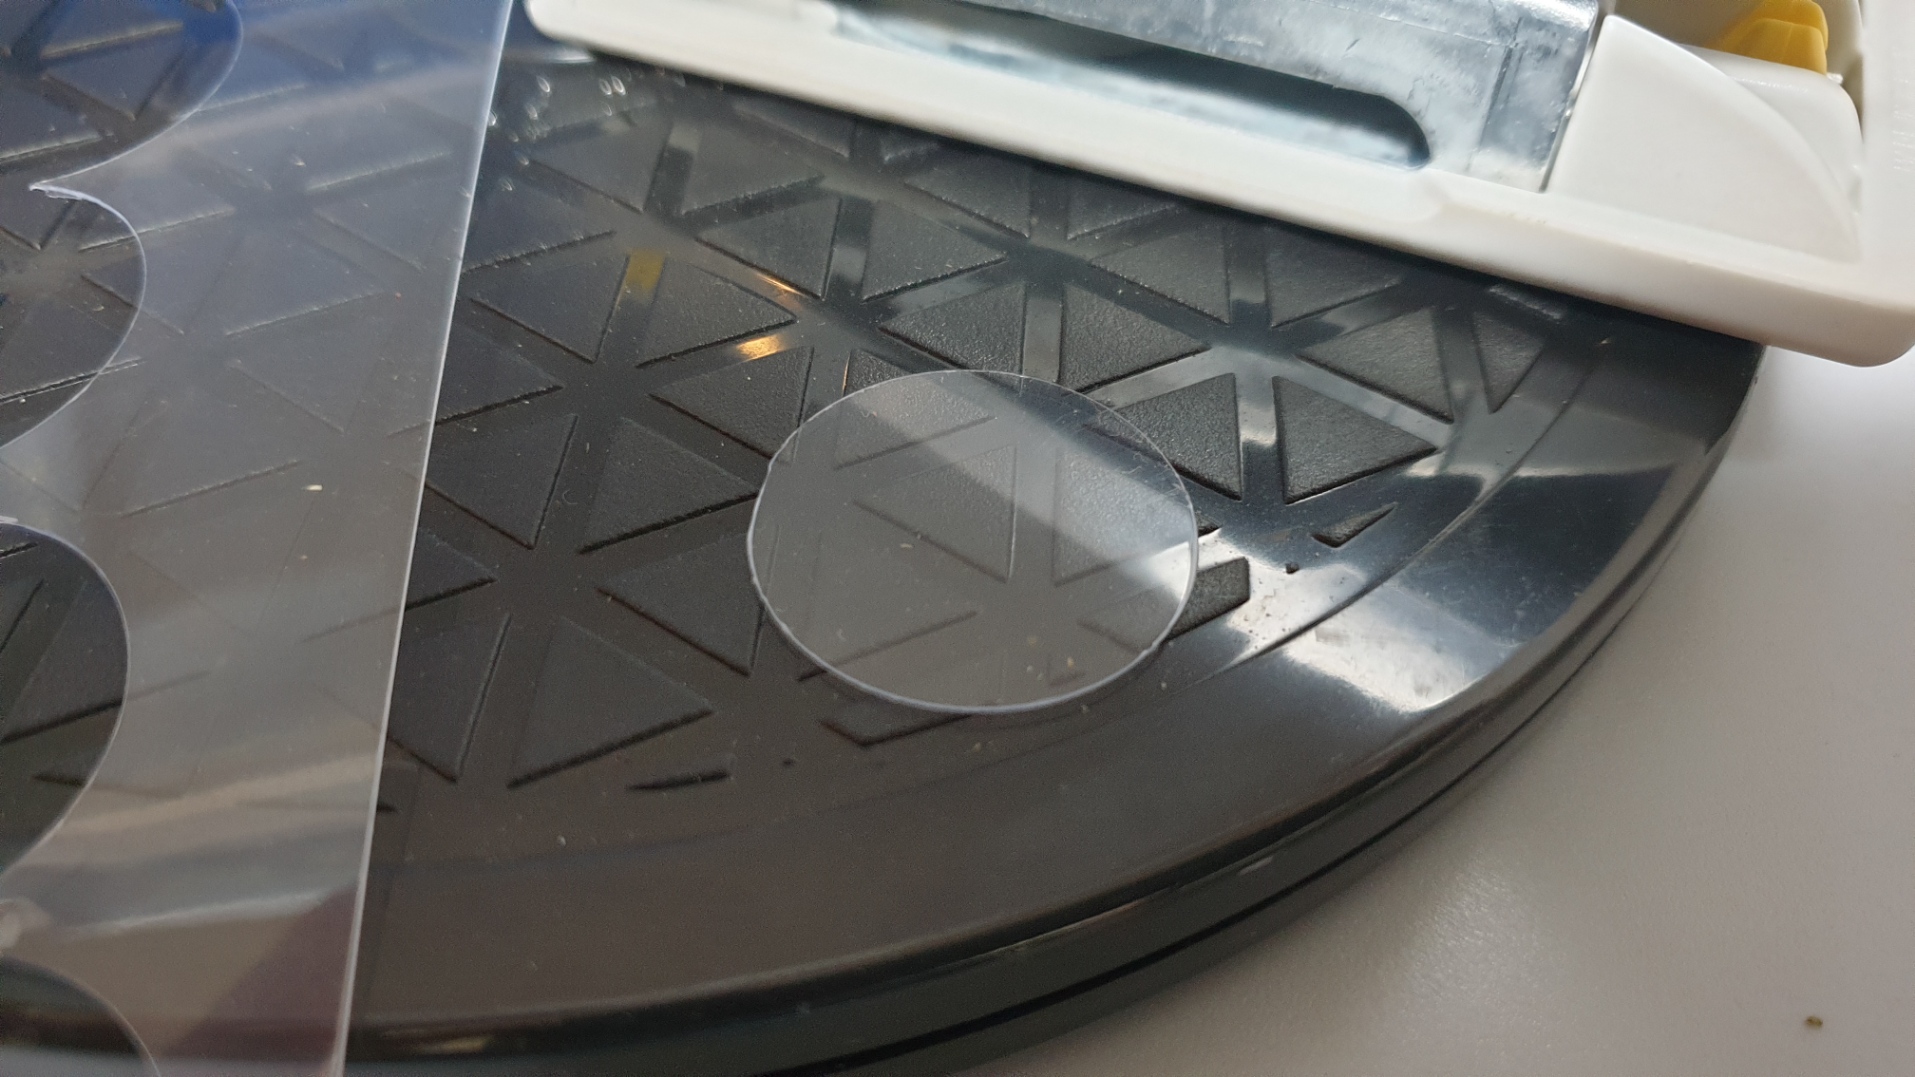
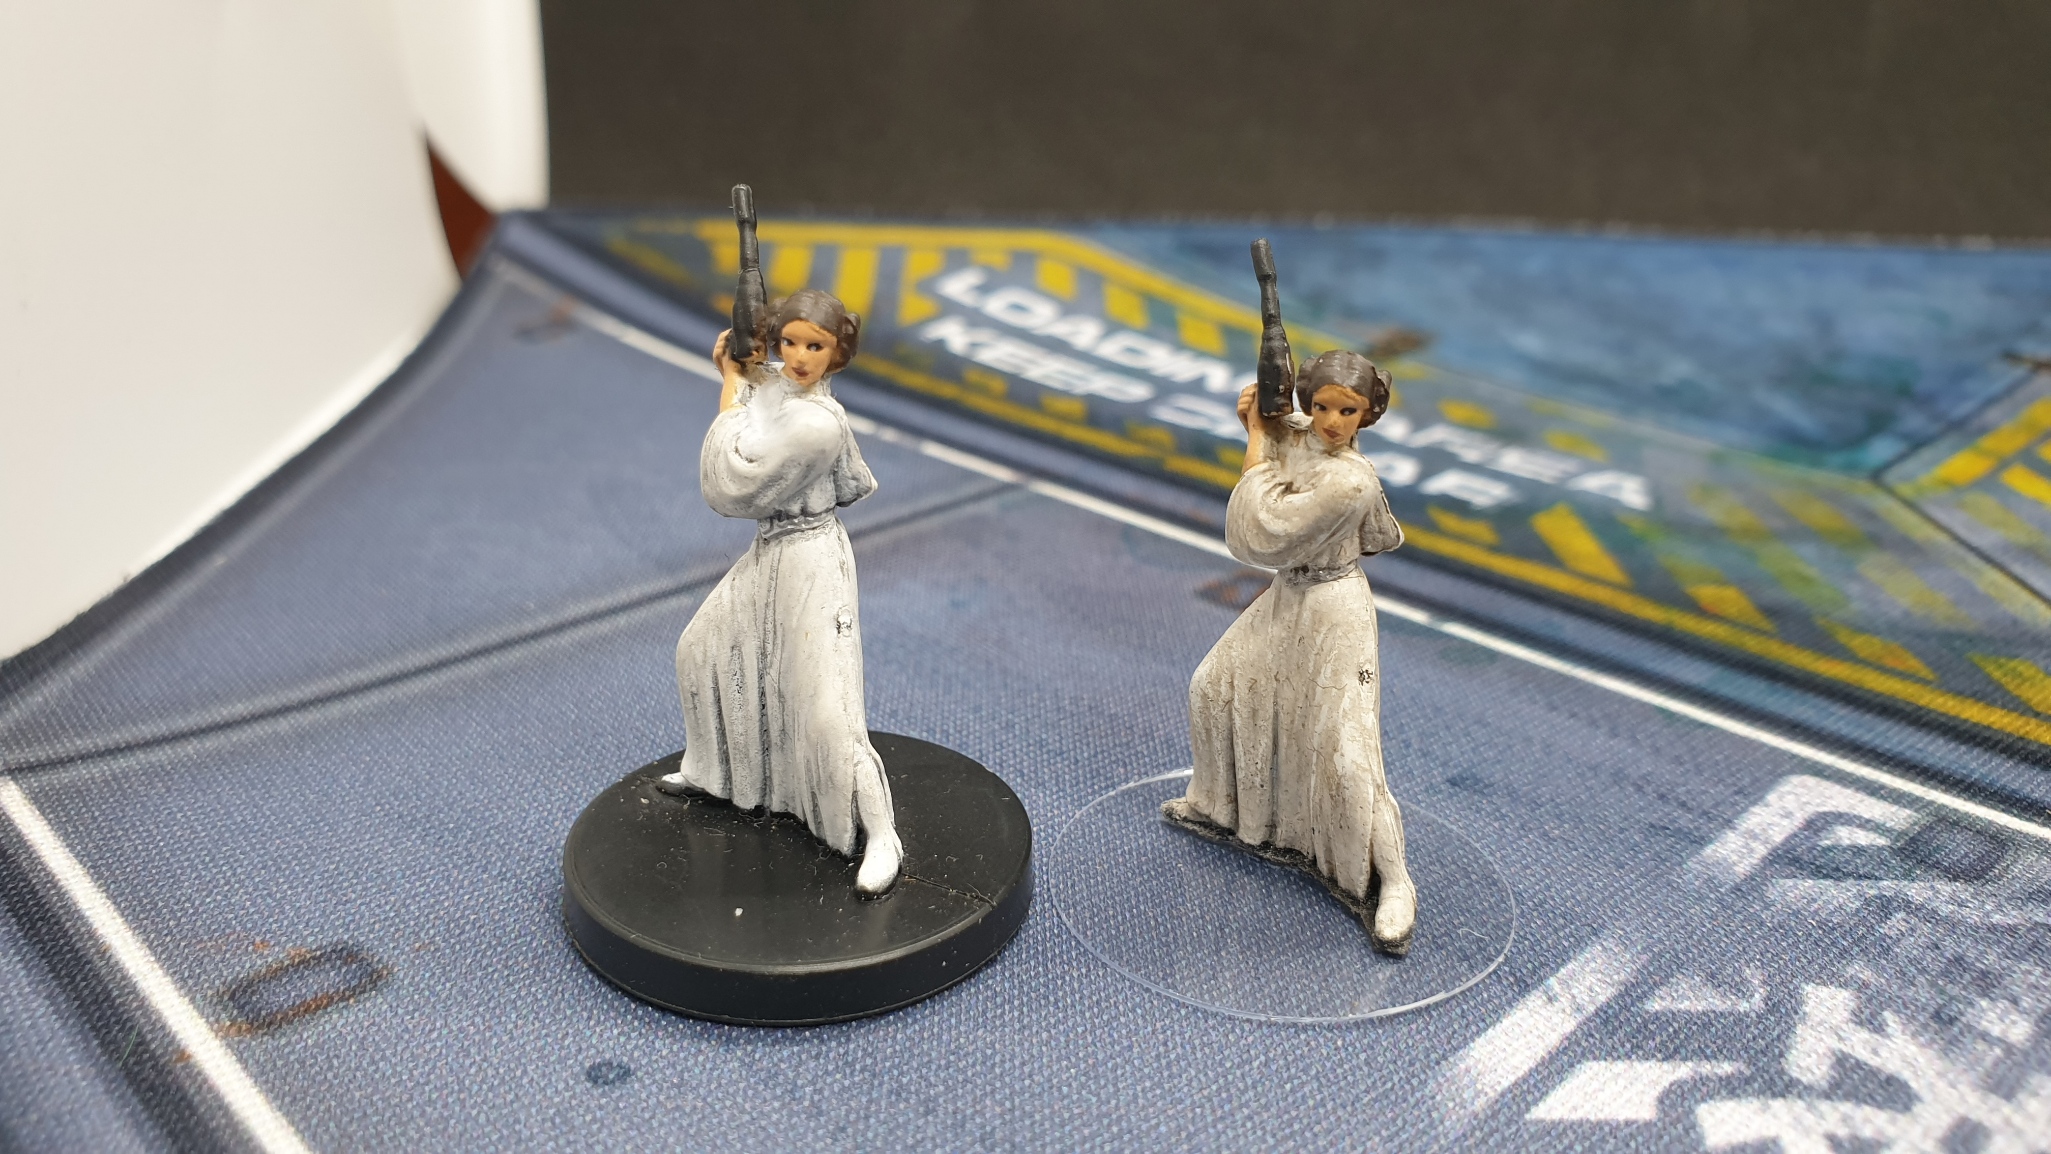
Adding a clear base to these particular minis was a must for me. Opinions on clear bases can vary quite a bit.
My own favourite type are punched Acetate bases. They are homemade, very very cost-effective and the end result for me is currently the best of the clear base options out there.
I am not a fan of thick acrylic clear bases as they don’t ‘vanish’ which to me is kind of the point of a clear base – you want it to be as invisible as possible.
Currently, the closest I can get to that ideal, is punching out discs from the Acetate sheet.
Toning it down!
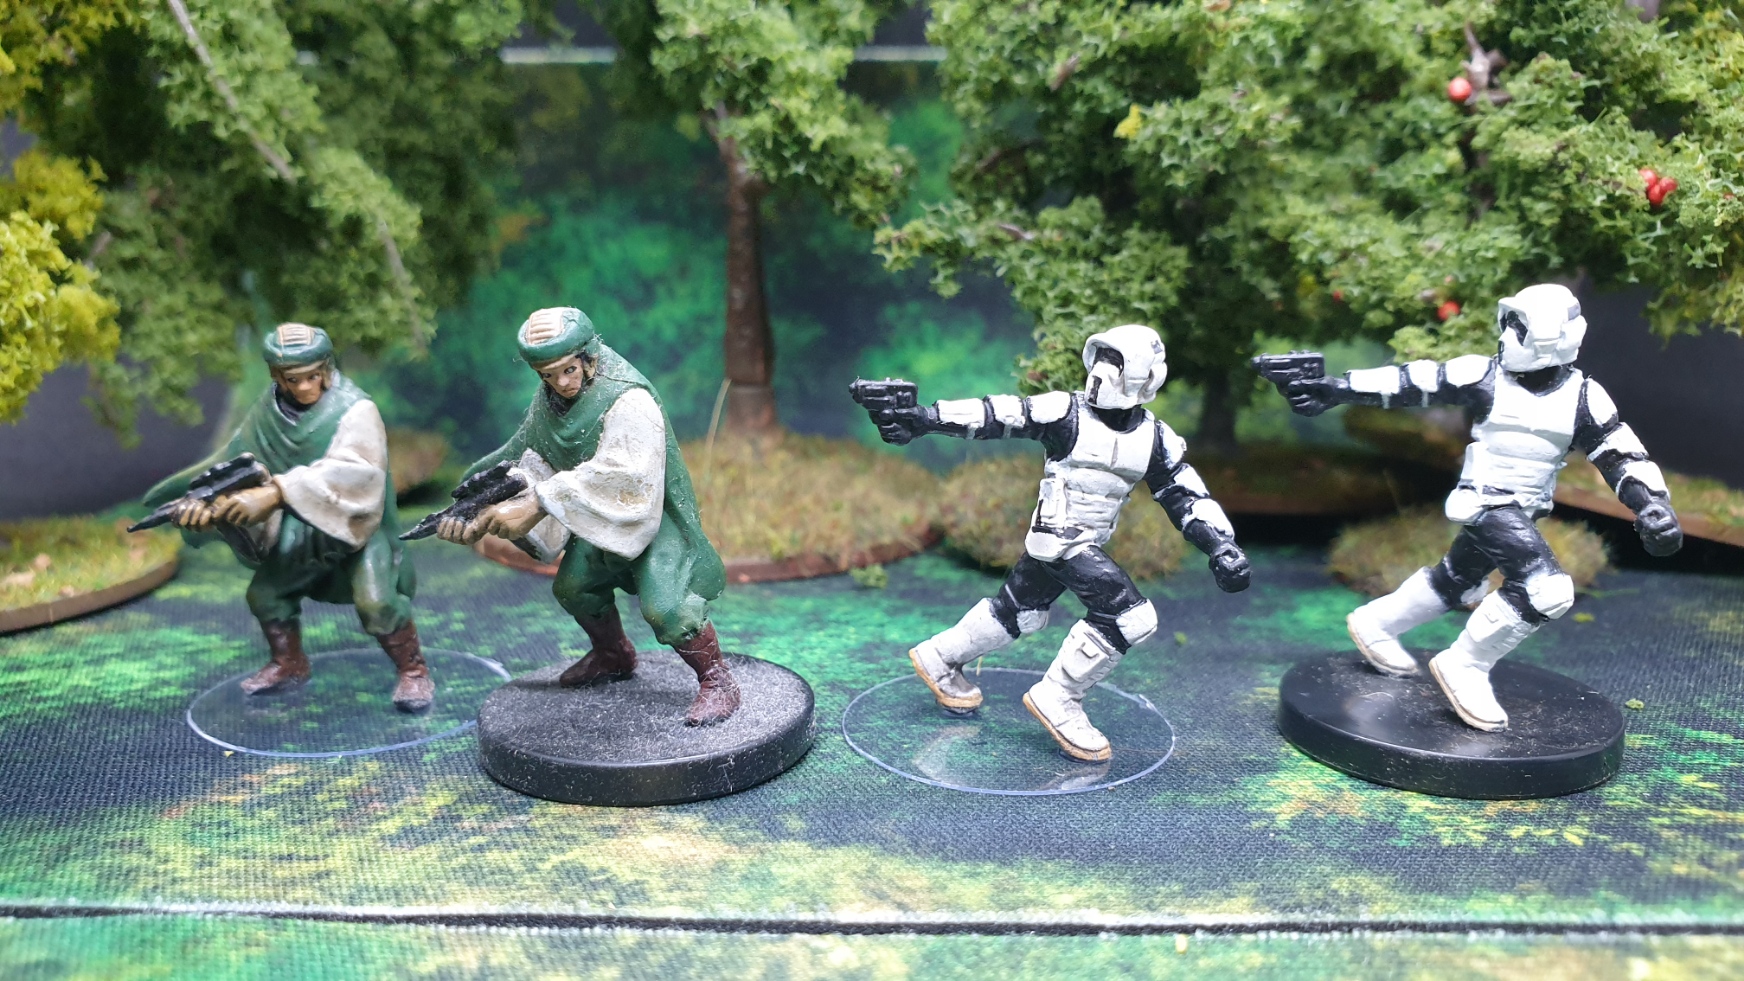
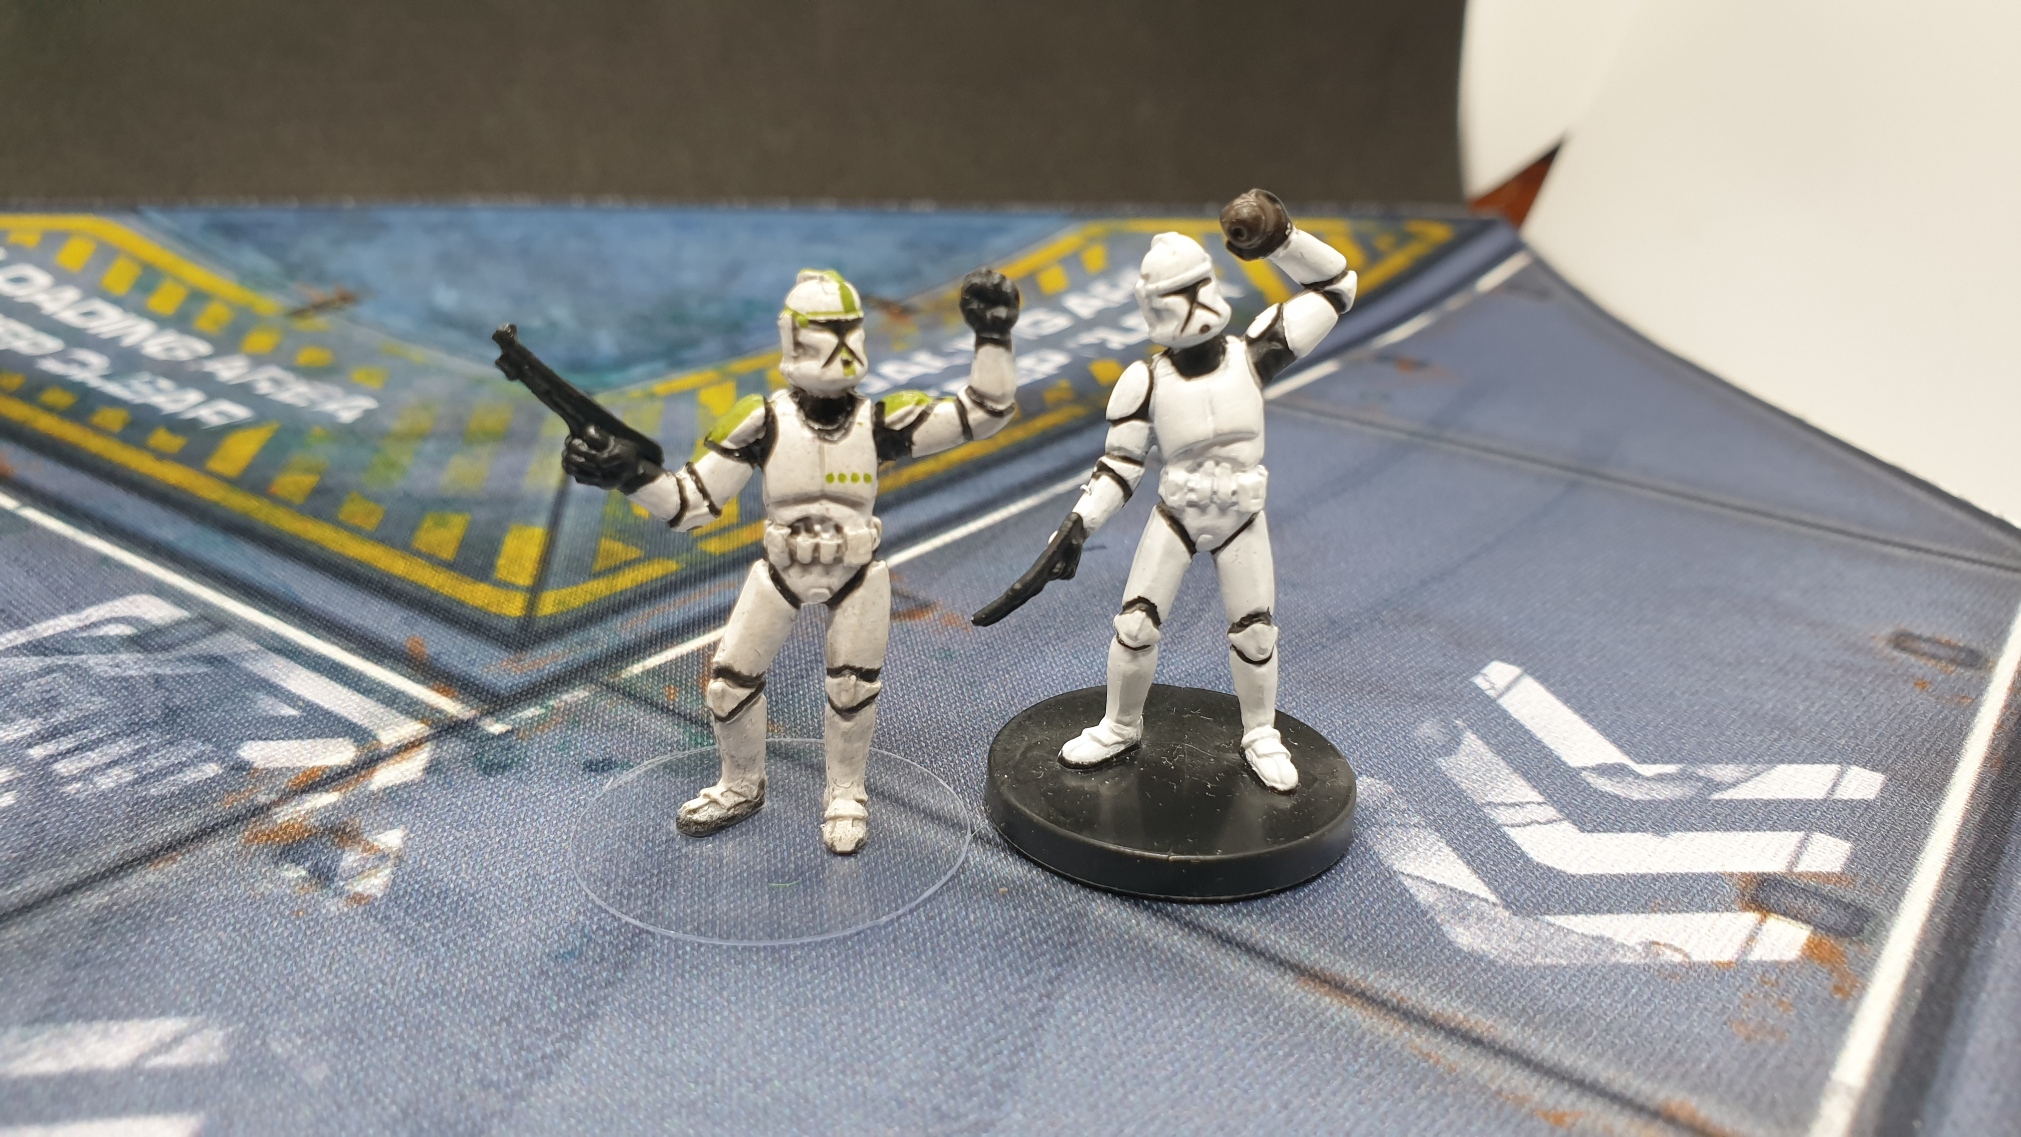
So 100% shade out of the pot is a bit strong so I decided to mix up two alternative washes.

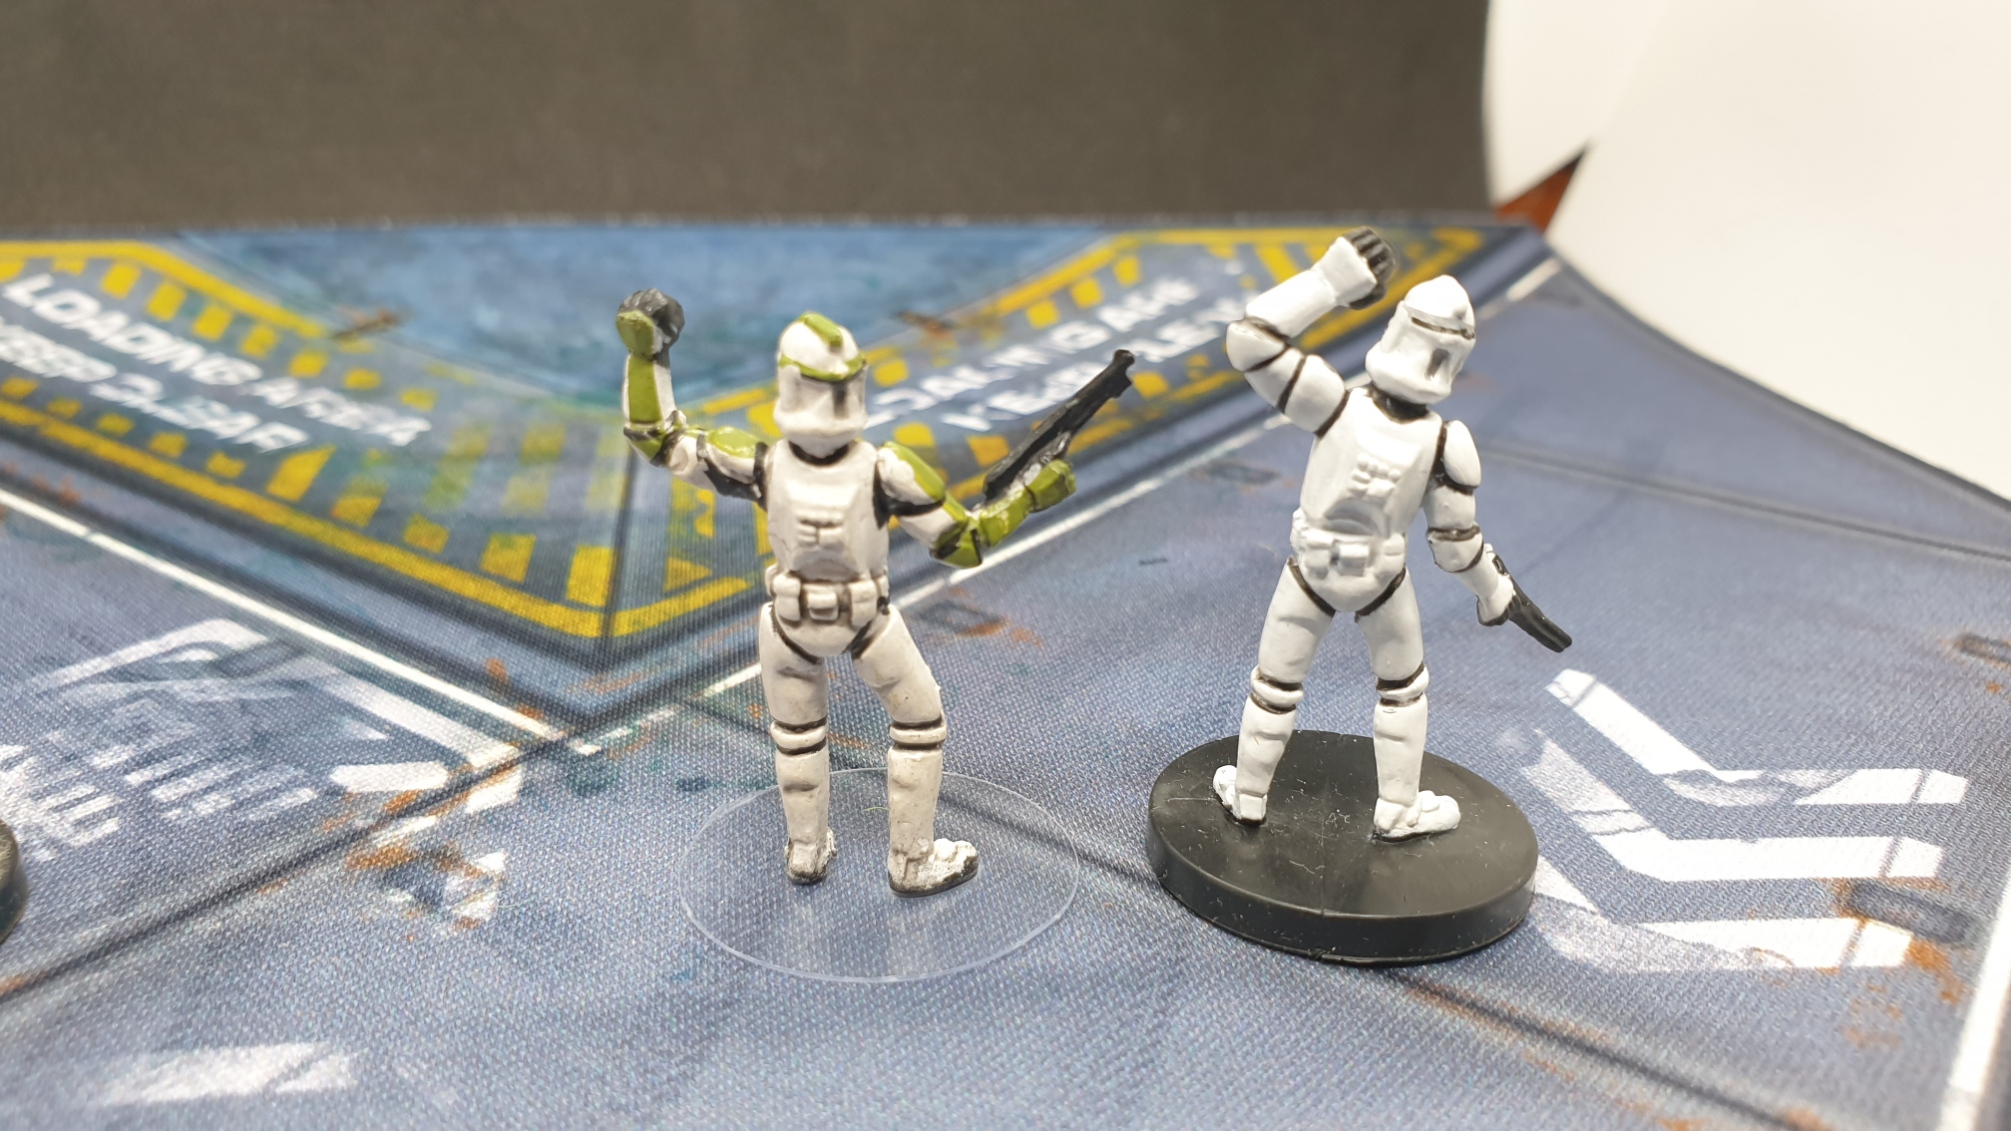
I’m happy with a kind of sepia type tone for the most part as Star Wars has always had that slightly warmer, brown vibe to it for me, but it won’t work on everything so I also mixed up a nuln oil variant to be used on select minis such as the stormtroopers.
So two washes
1) 50% Agrax Earthshade / 50% Contrast Medium
2) 50% Nuln Oil / 50% Contrast Medum
I used the Contrast medium as I want to encourage the wash to fall into the recesses as much as possible, so this option is as good as any I believe.
Time for Comparisons!
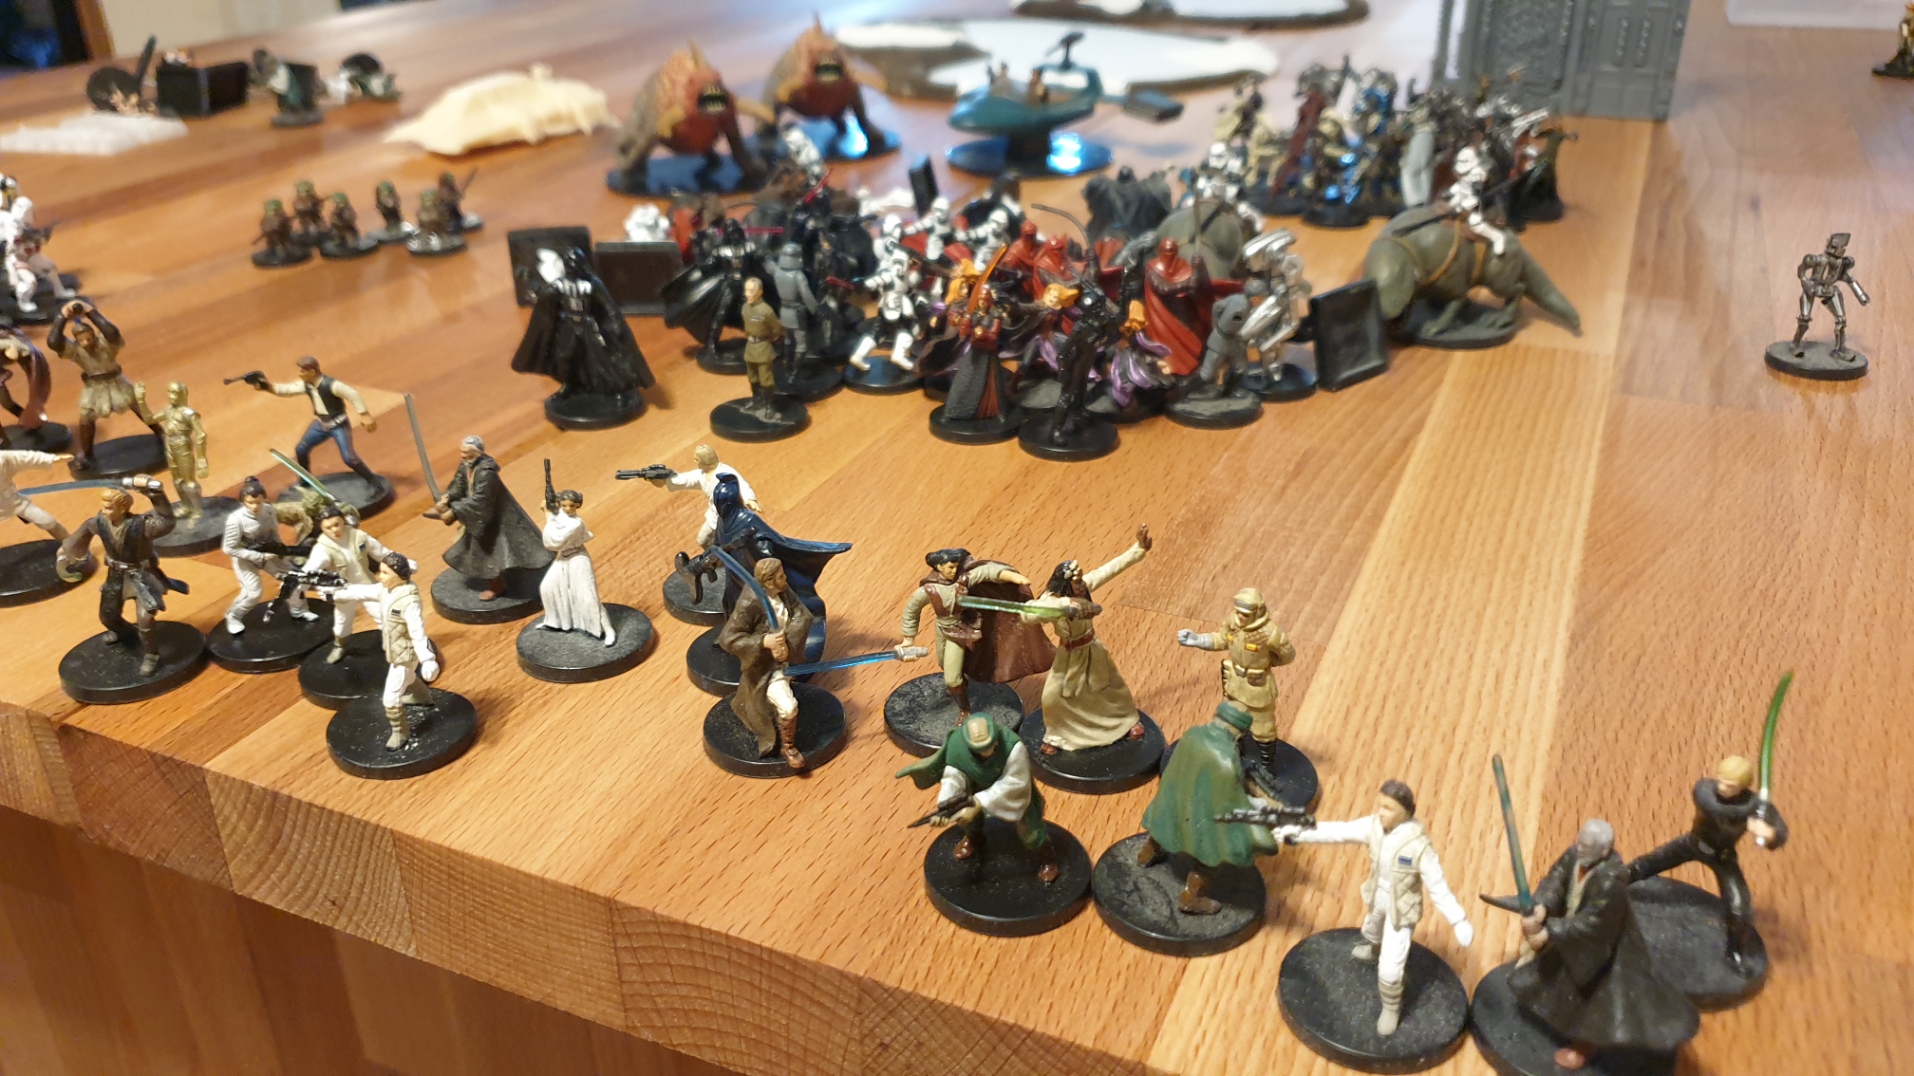
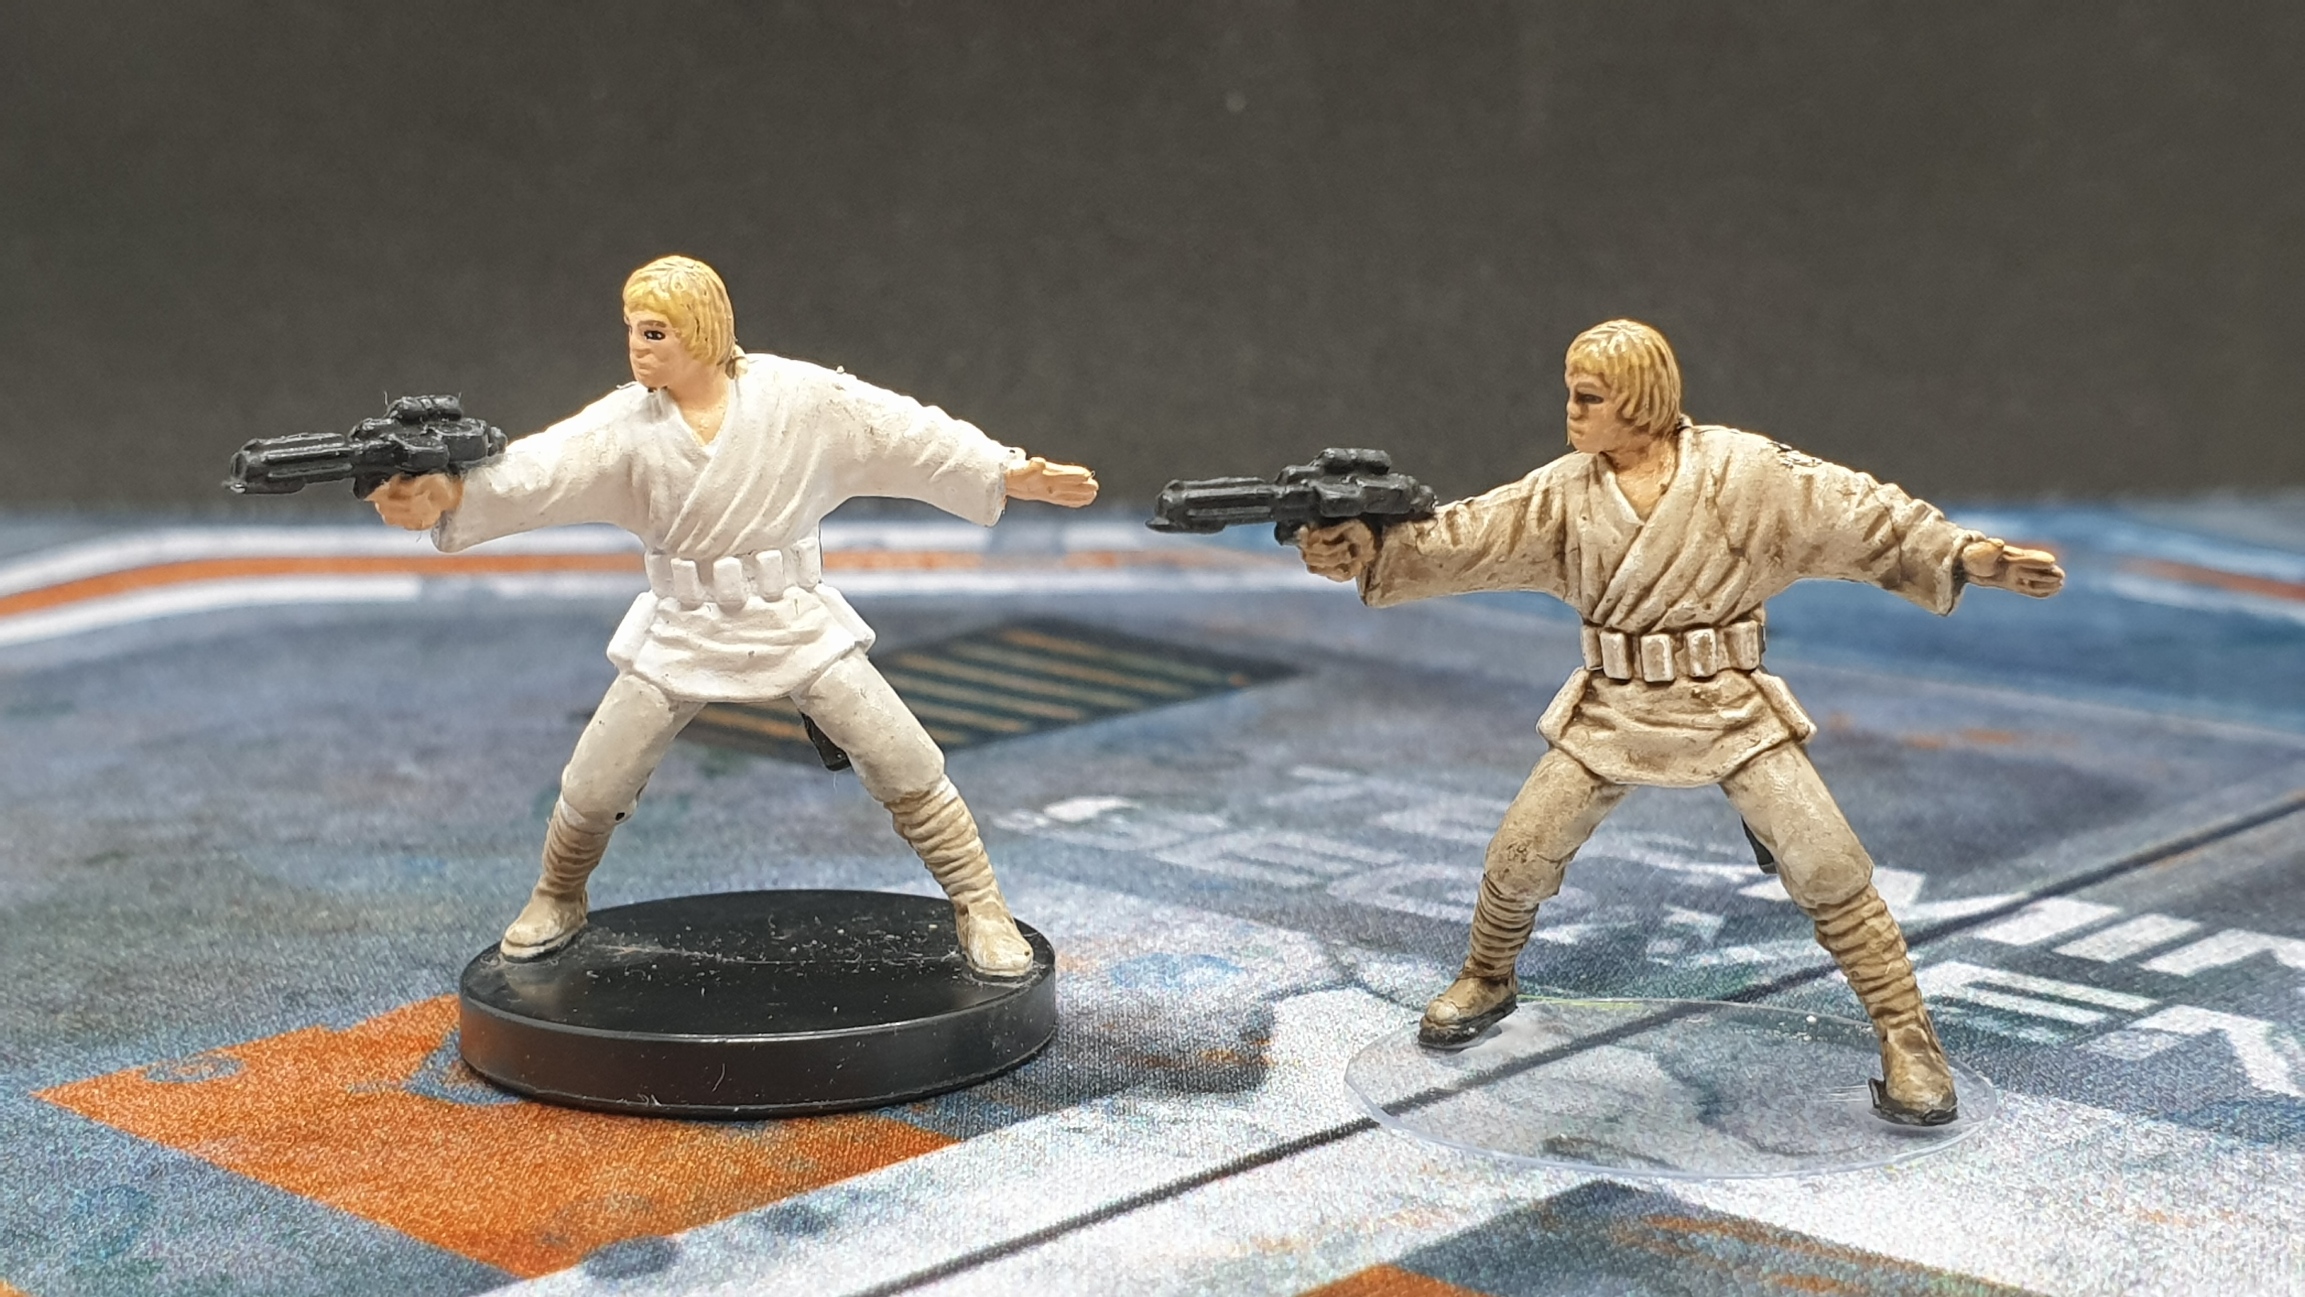
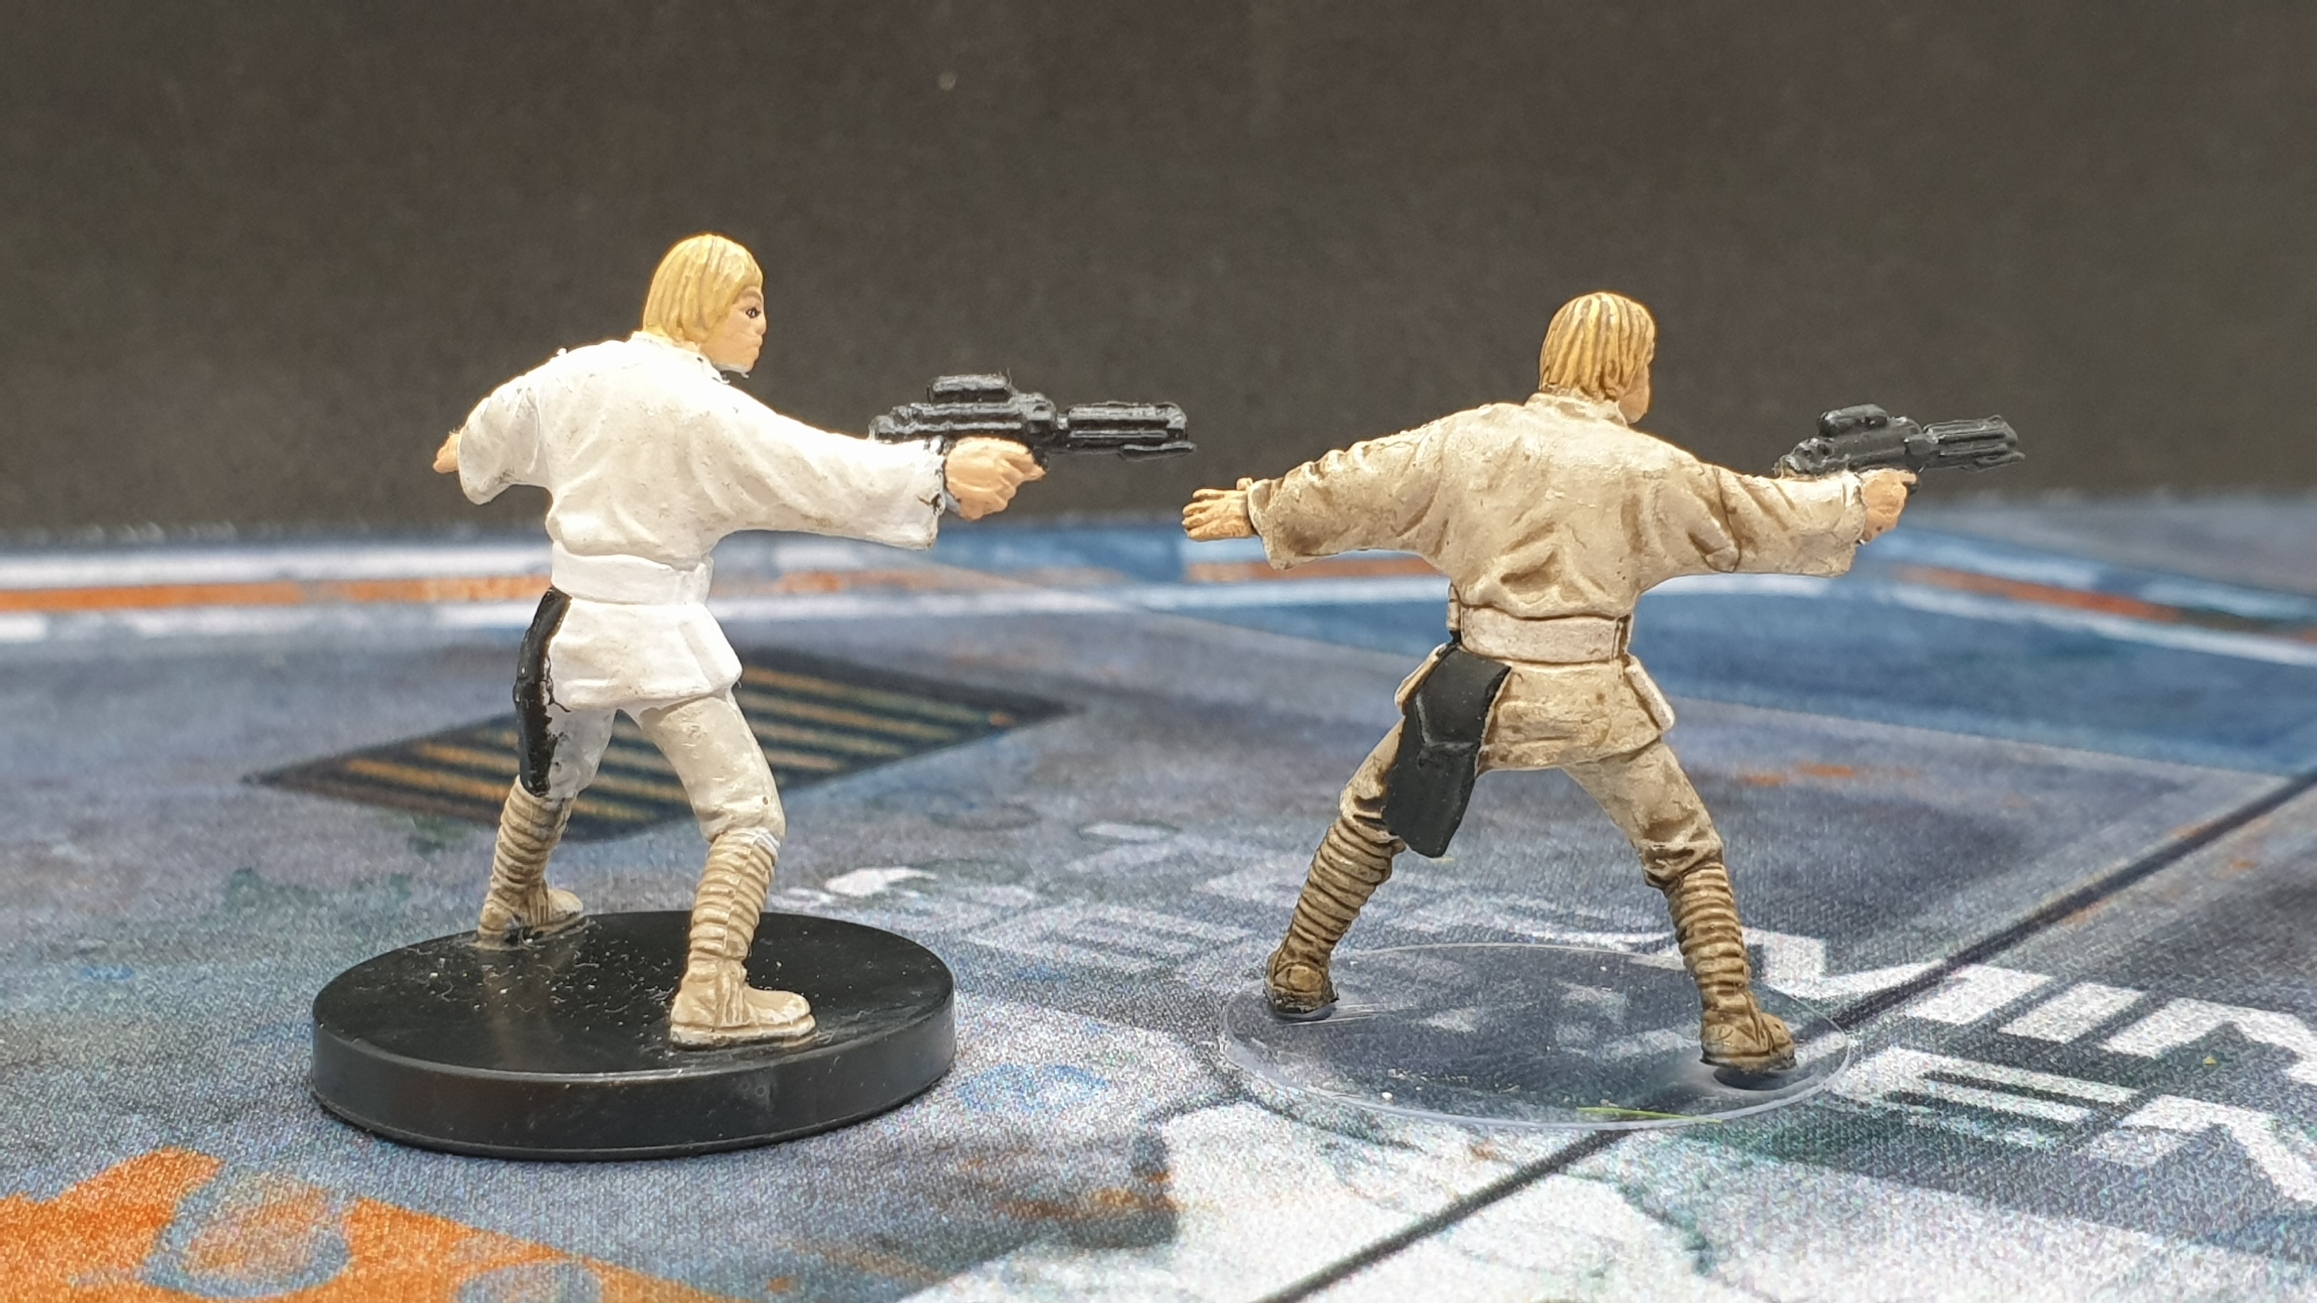
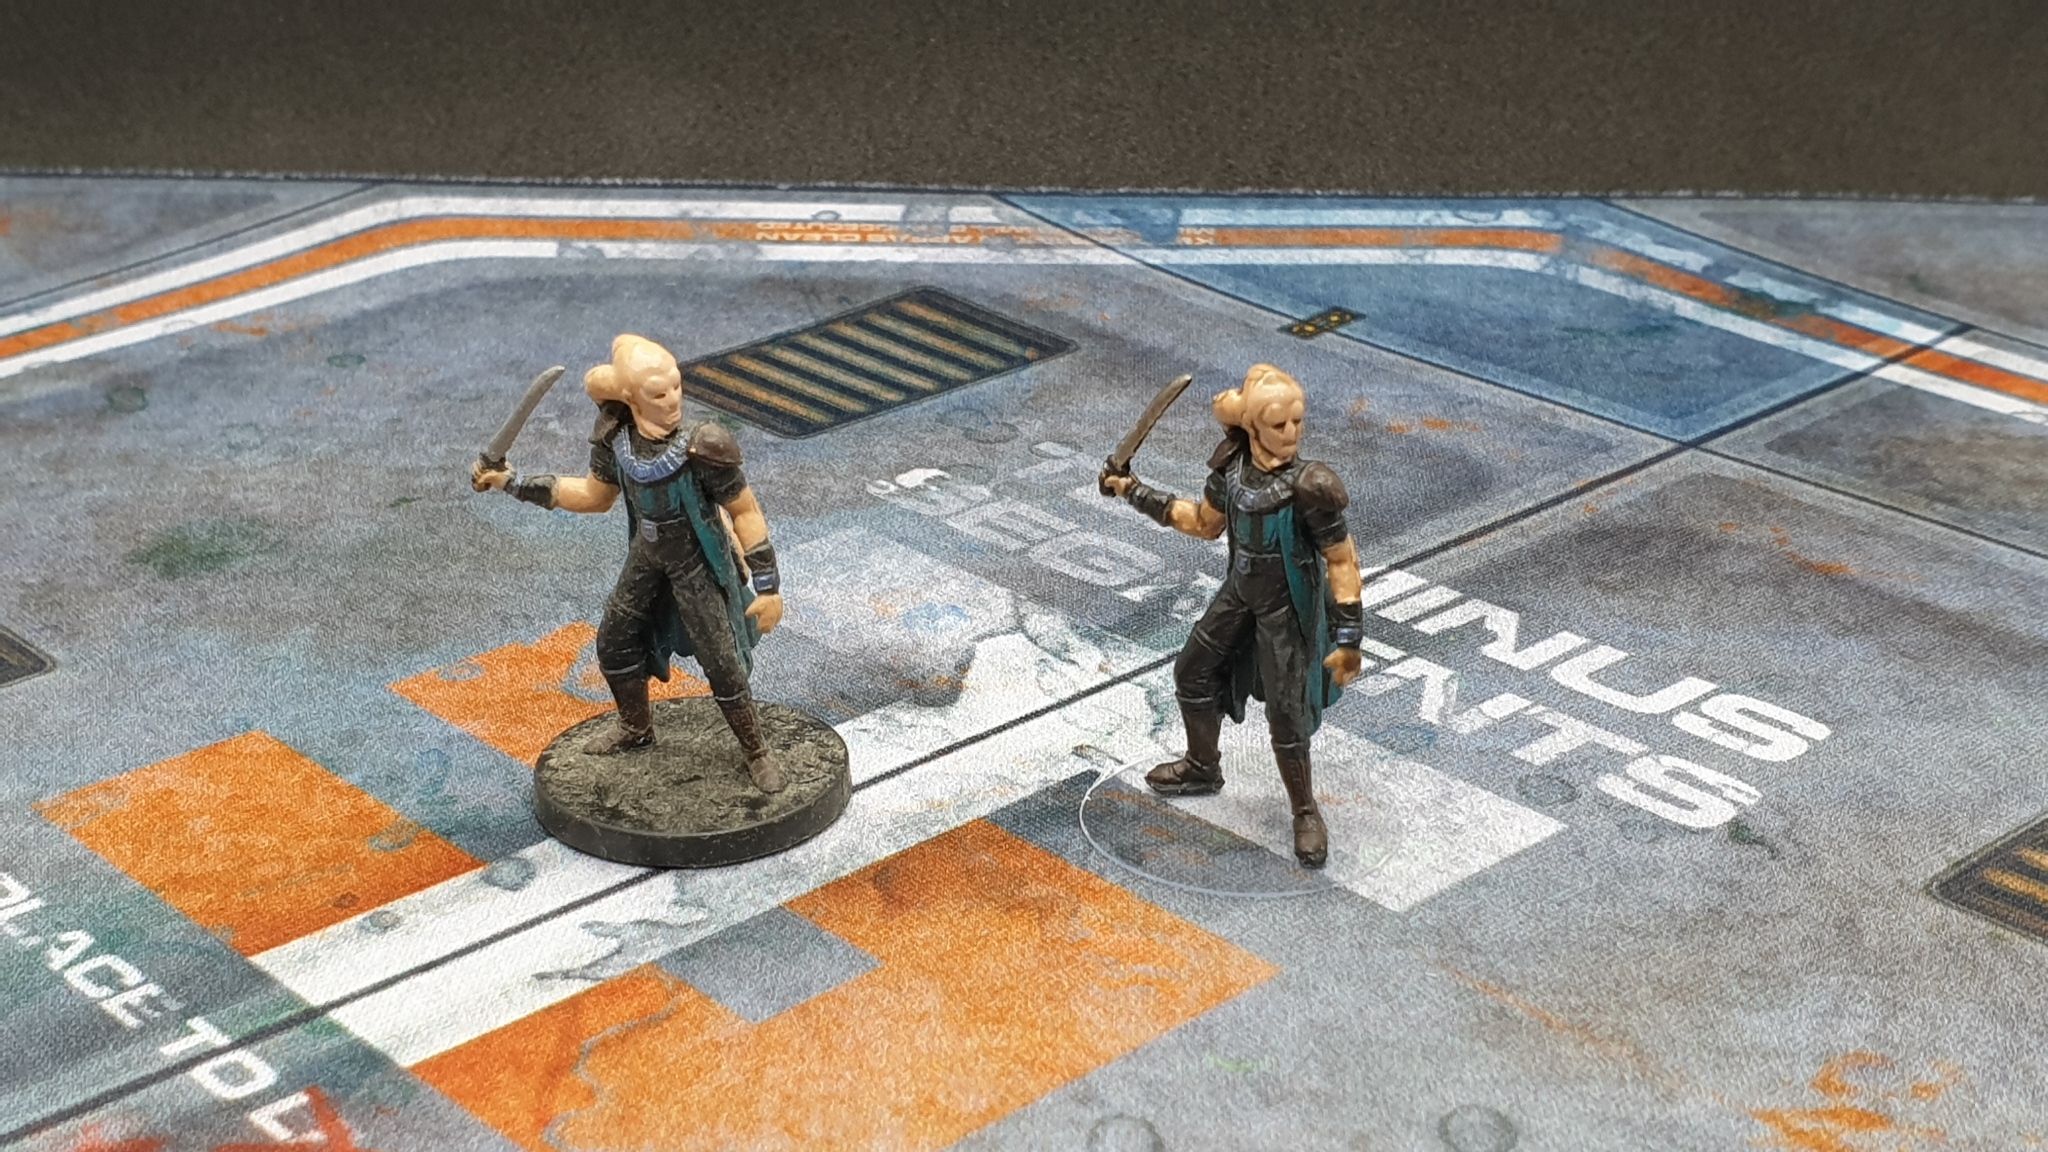
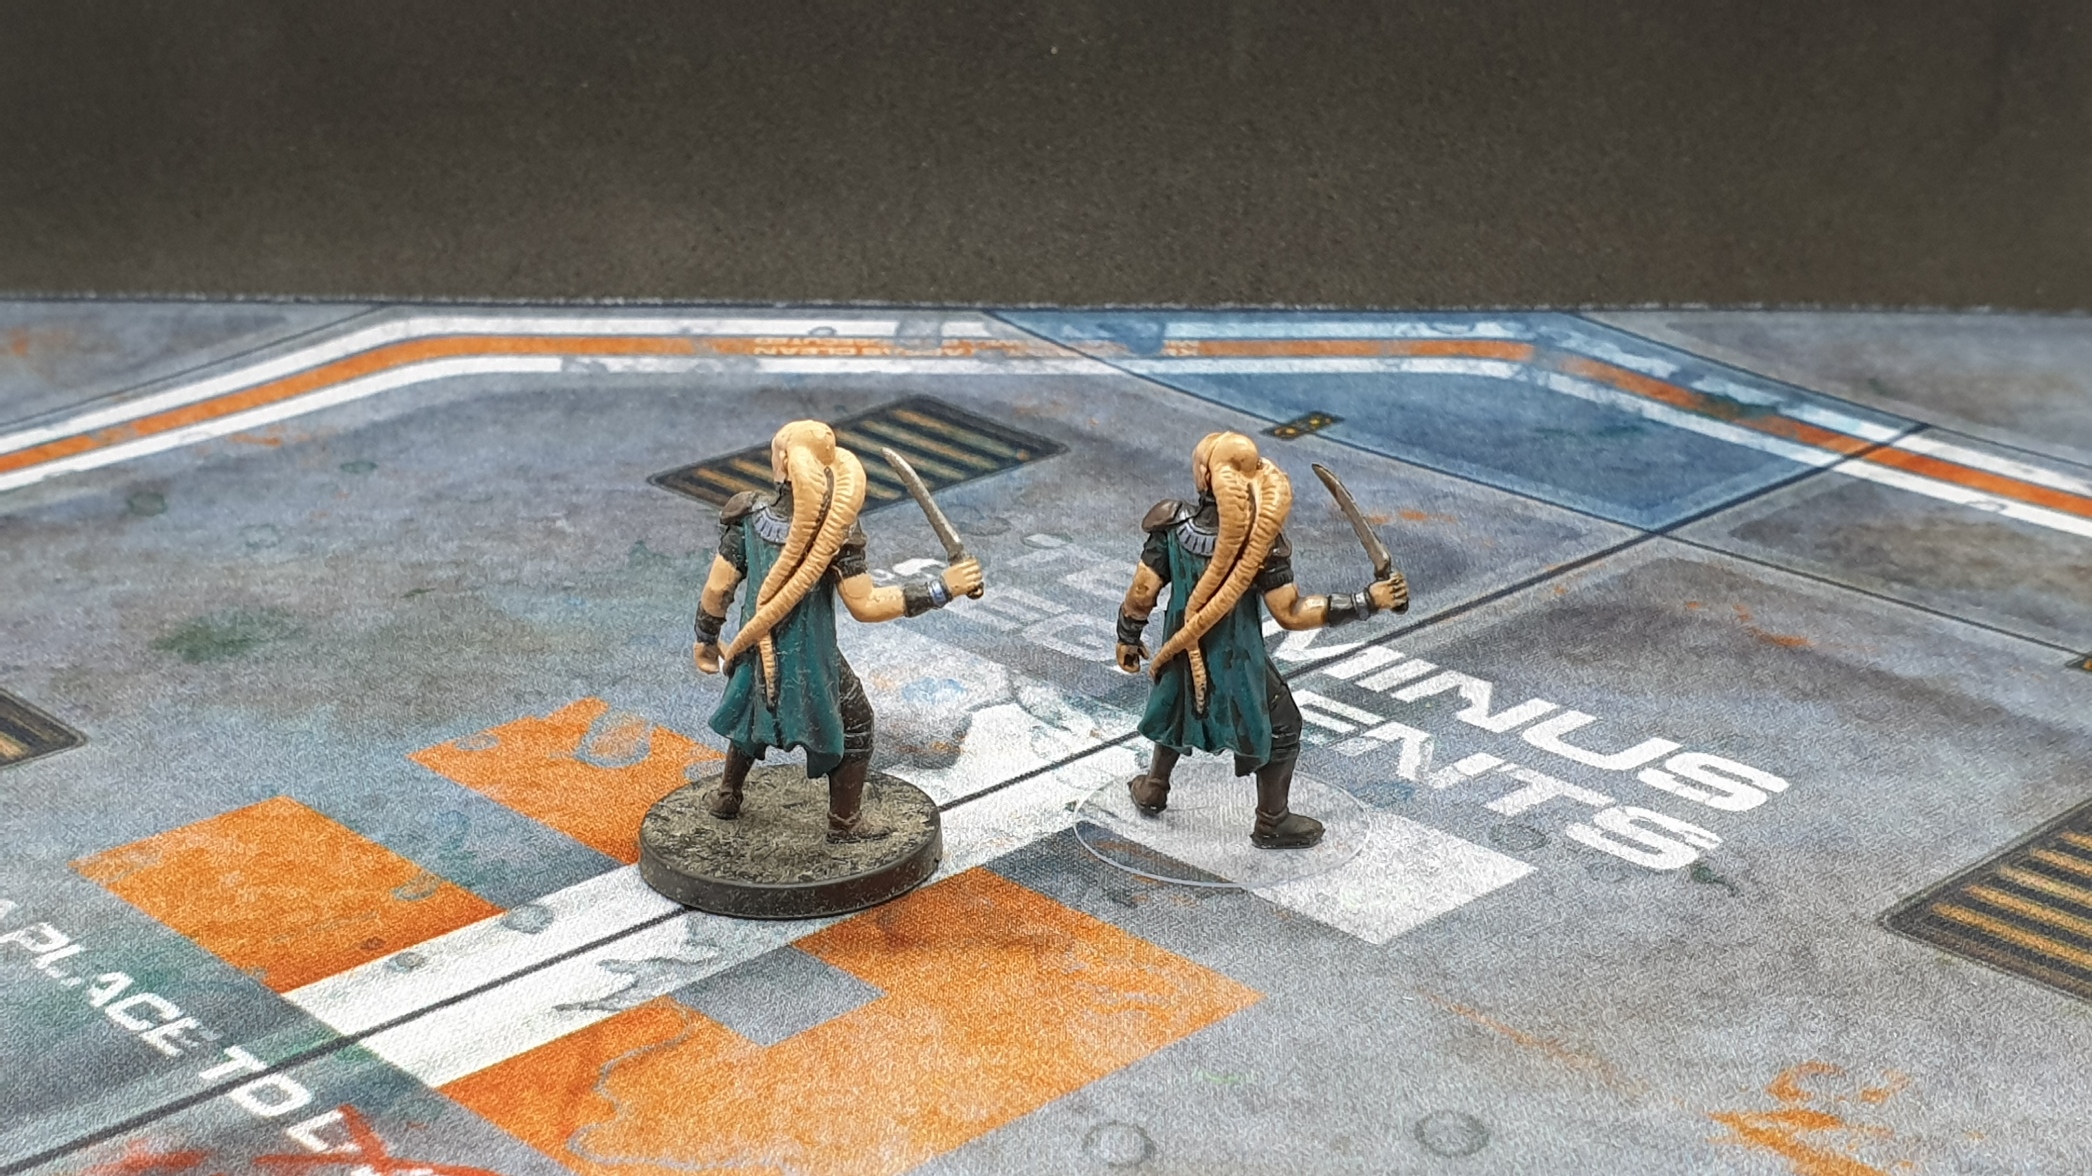
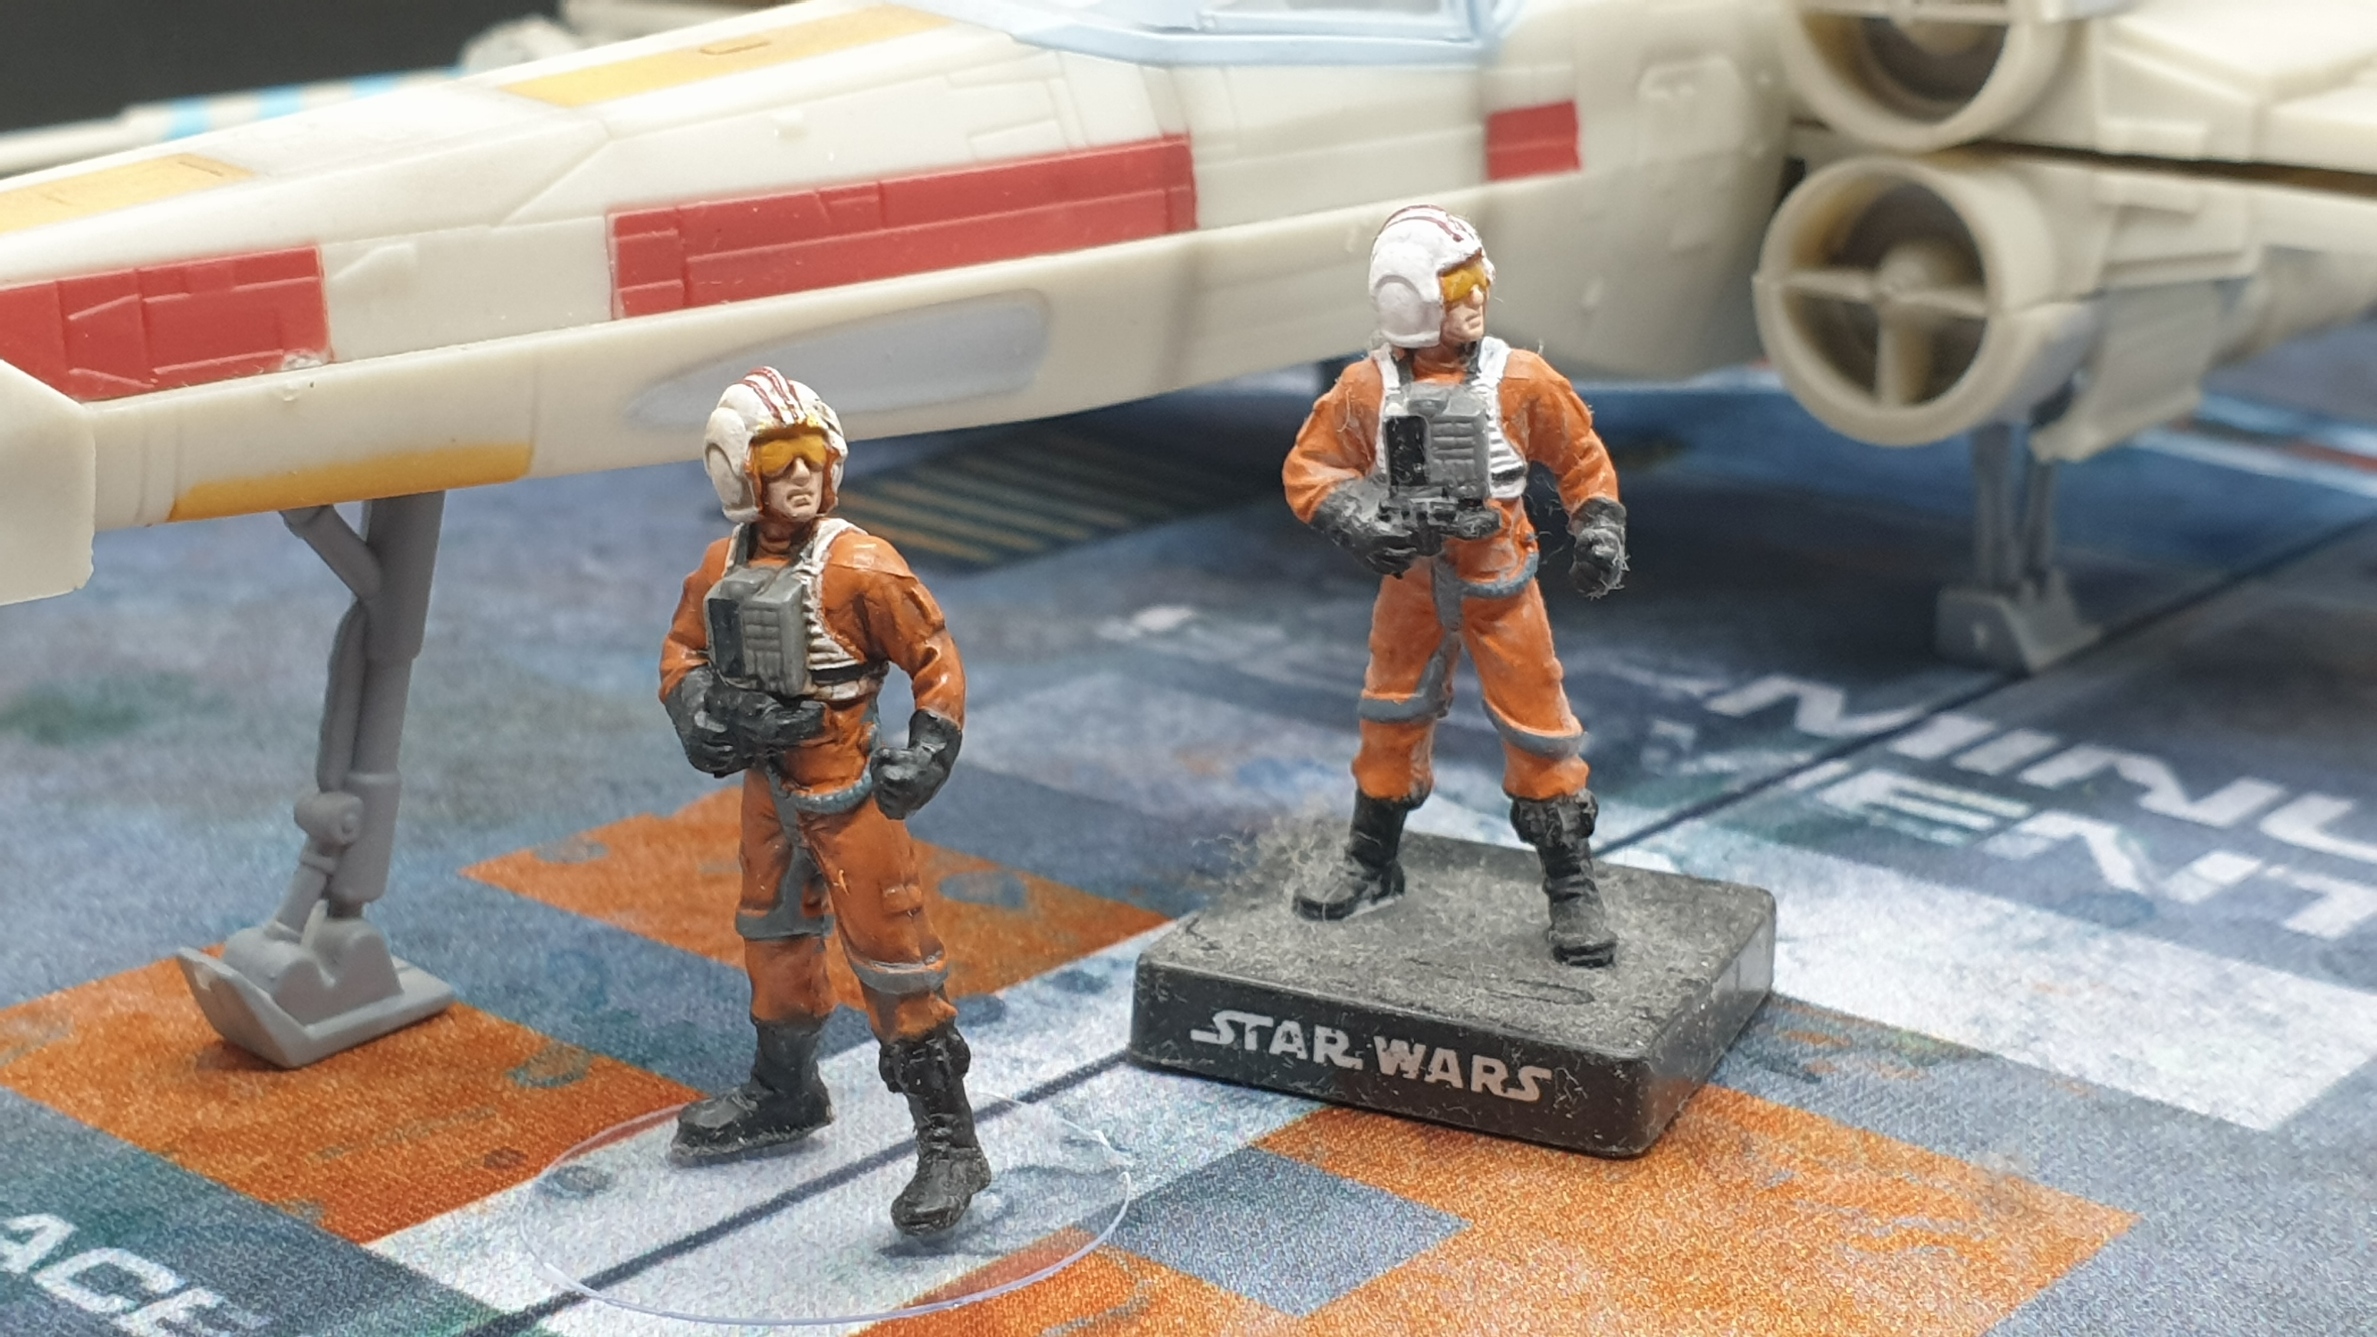
So I ran a few tests on minis I have duplicates of to see how they turn out. In some instances, the difference is very subtle, but the combination of the wash step and the rebasing step I think makes for a very acceptable result and a collection that I would be happy to display and use for Sci-Fi Skirmish games and RPGS!
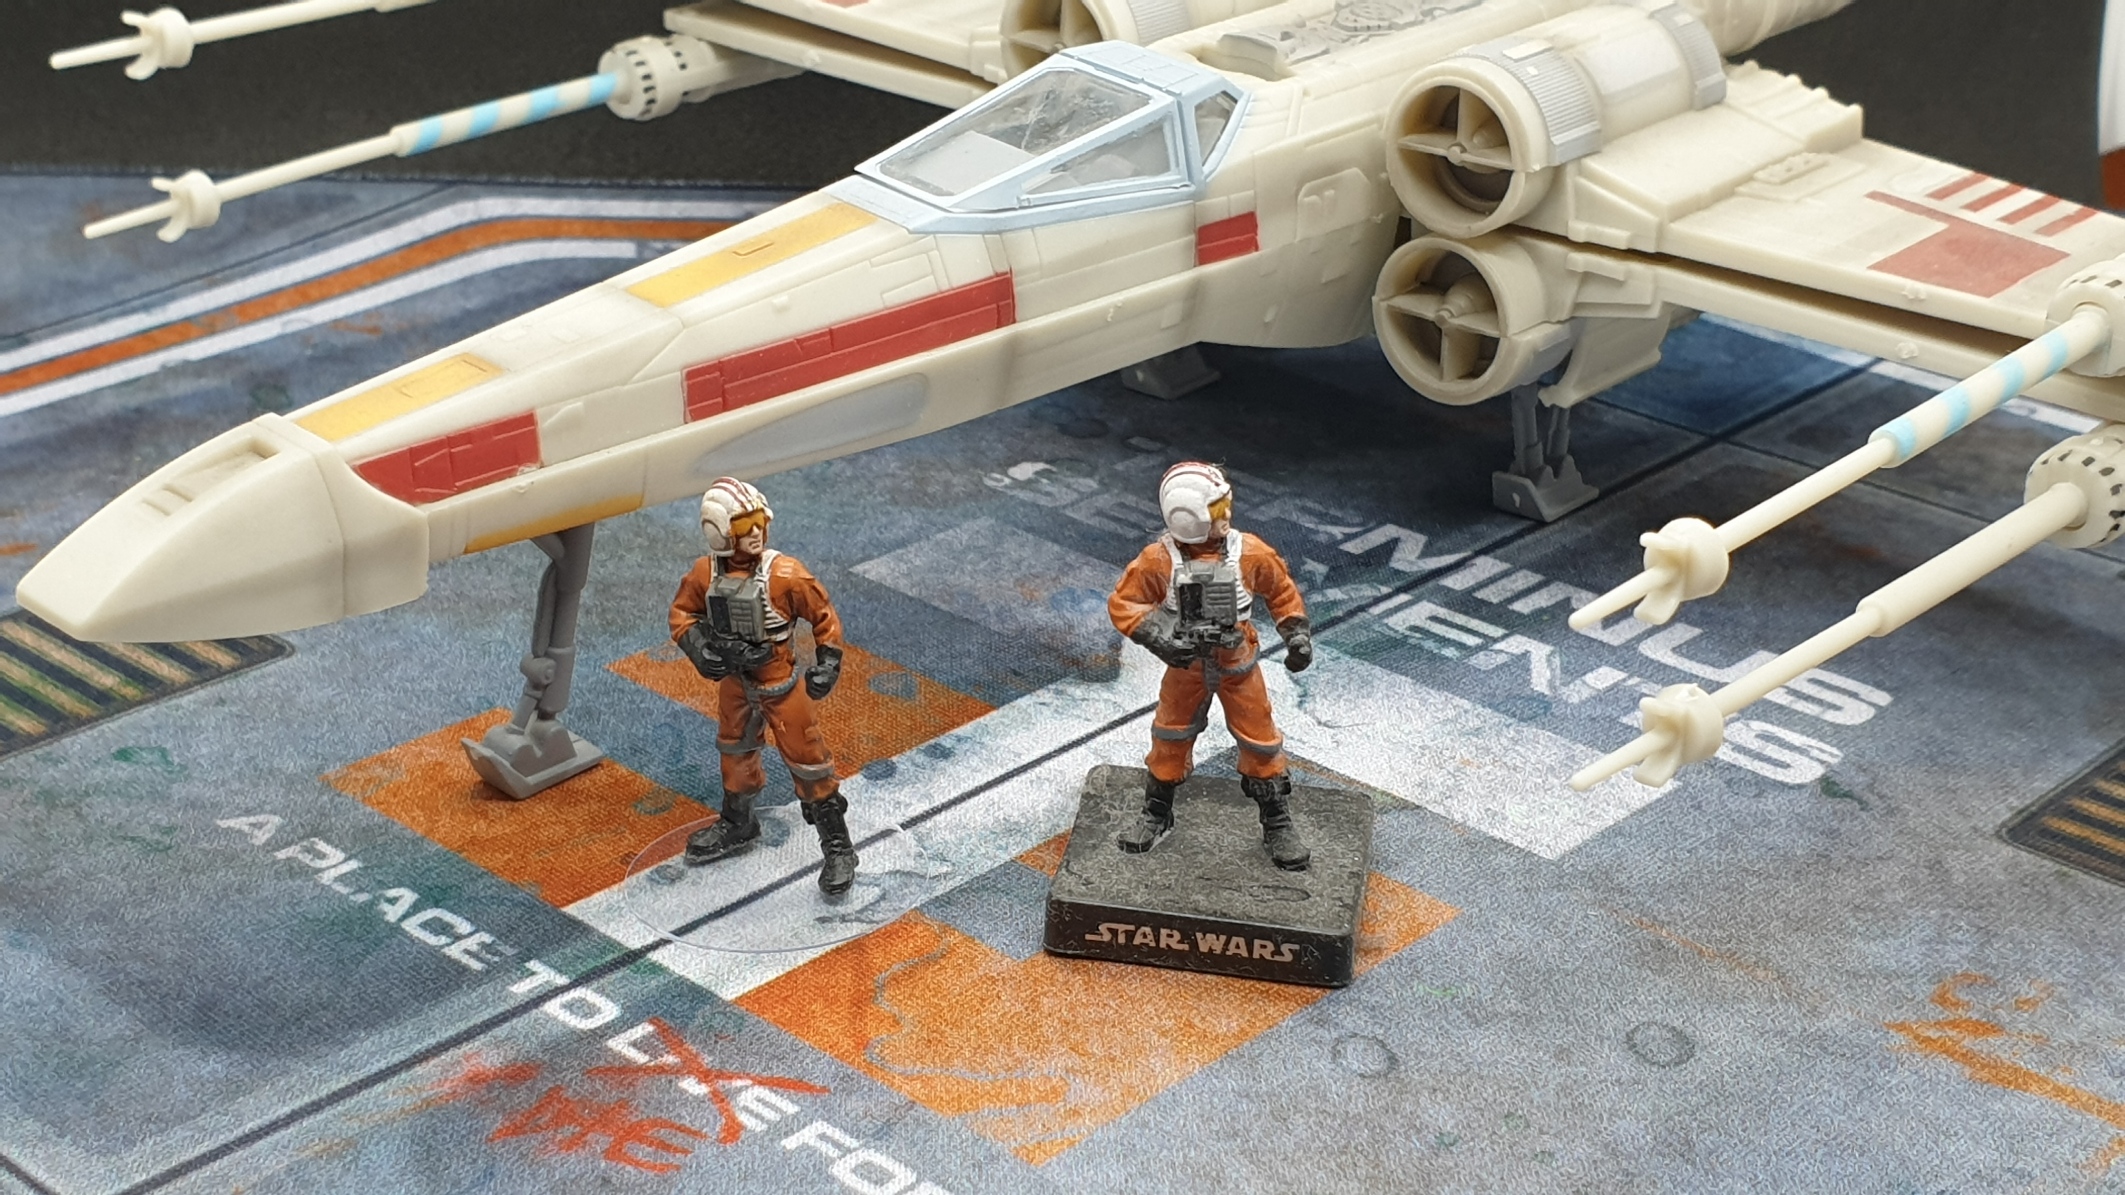

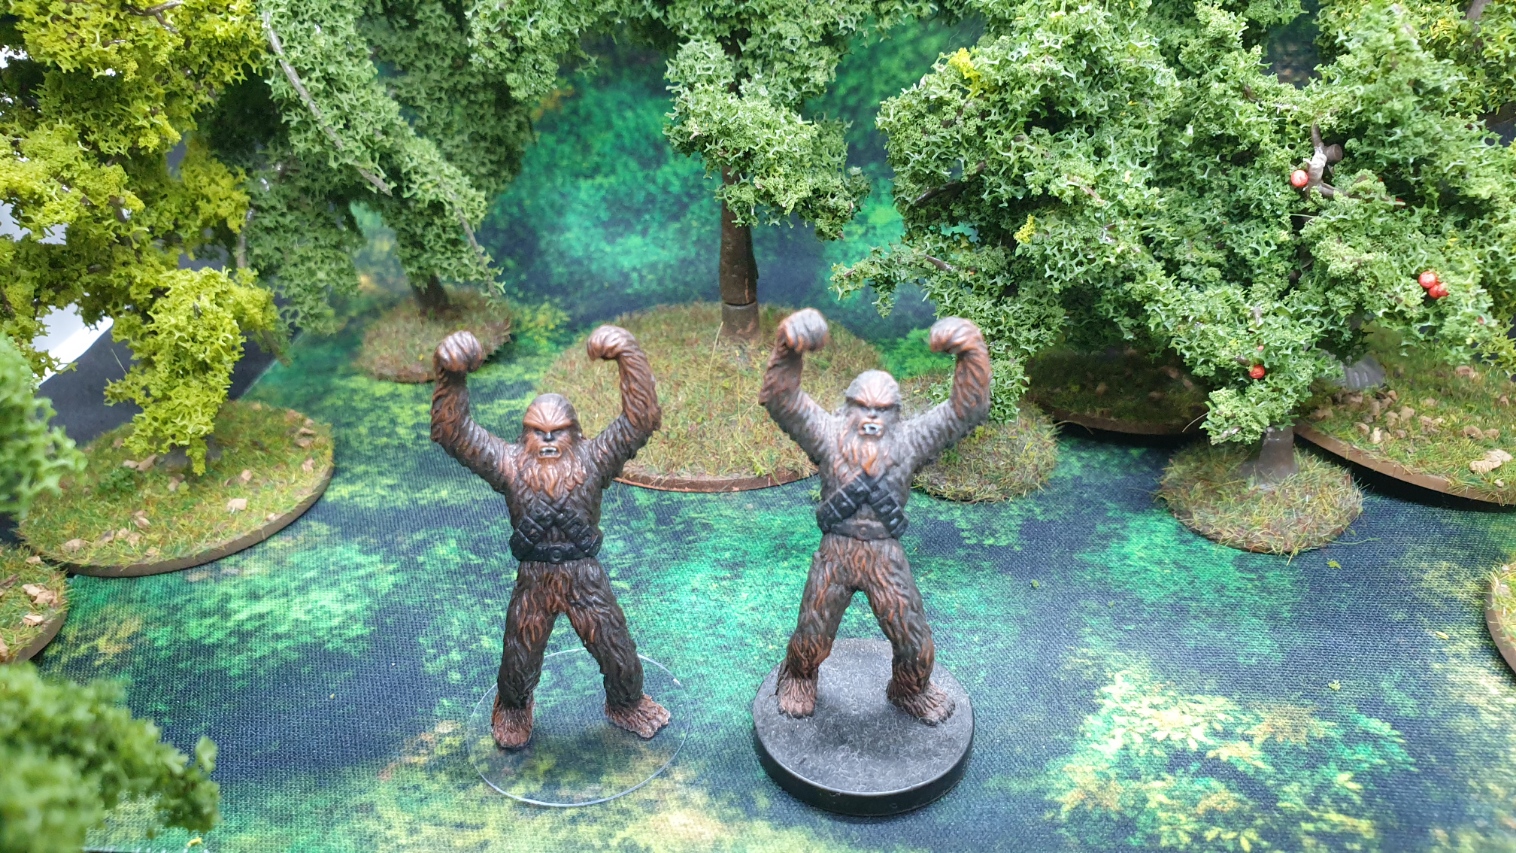


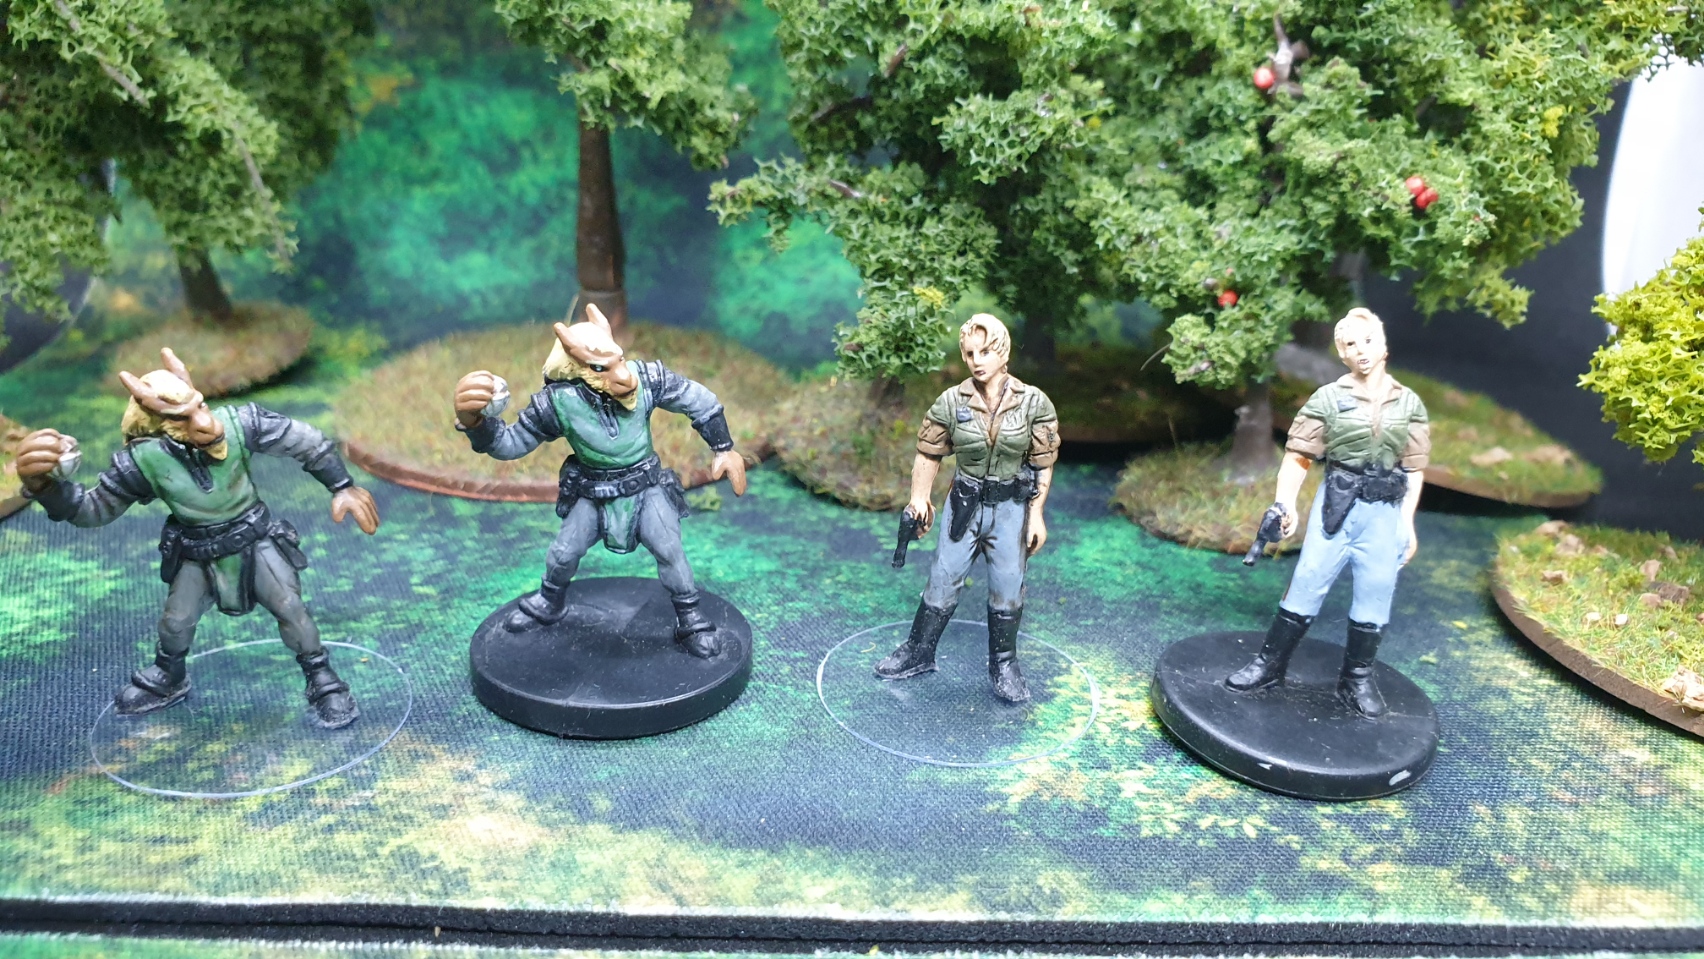
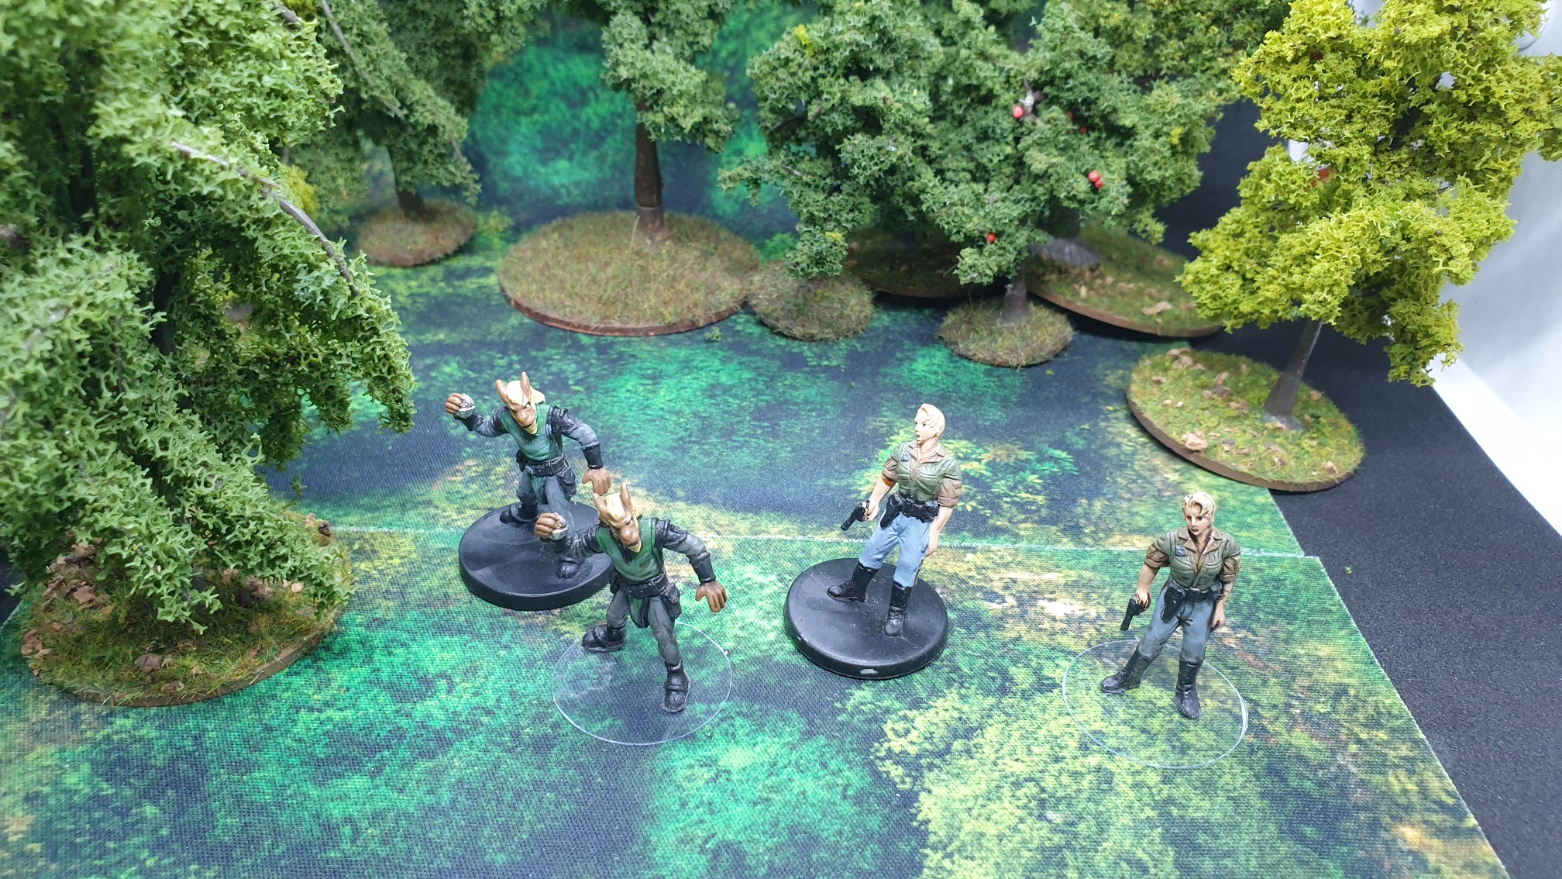
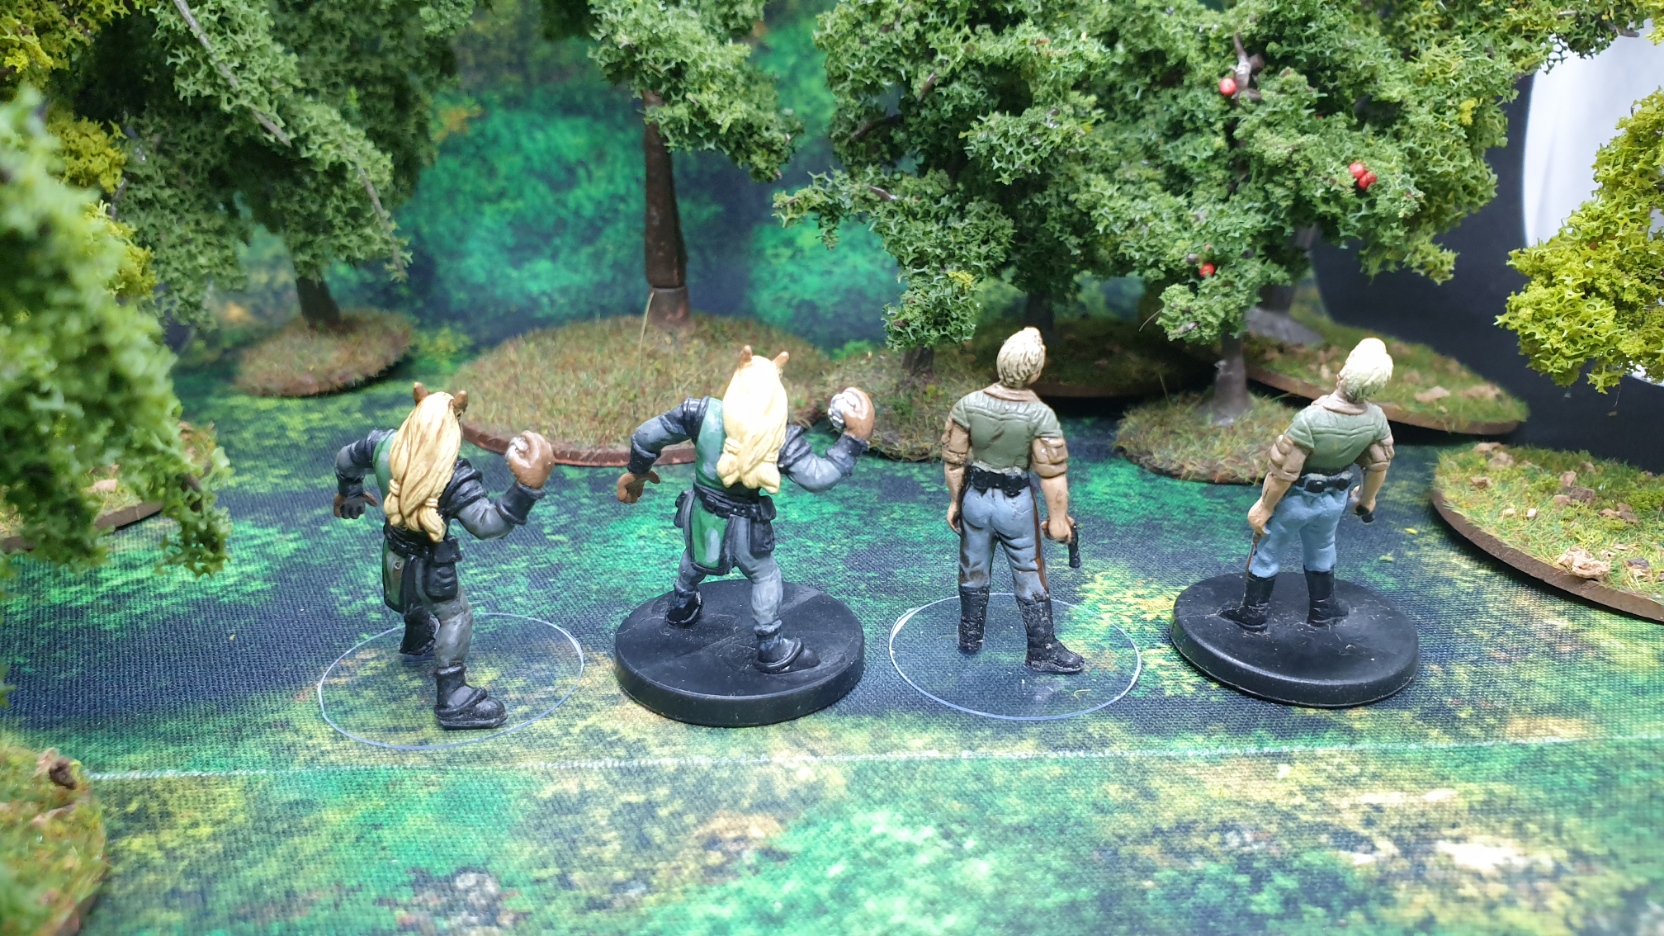


I think they will do!
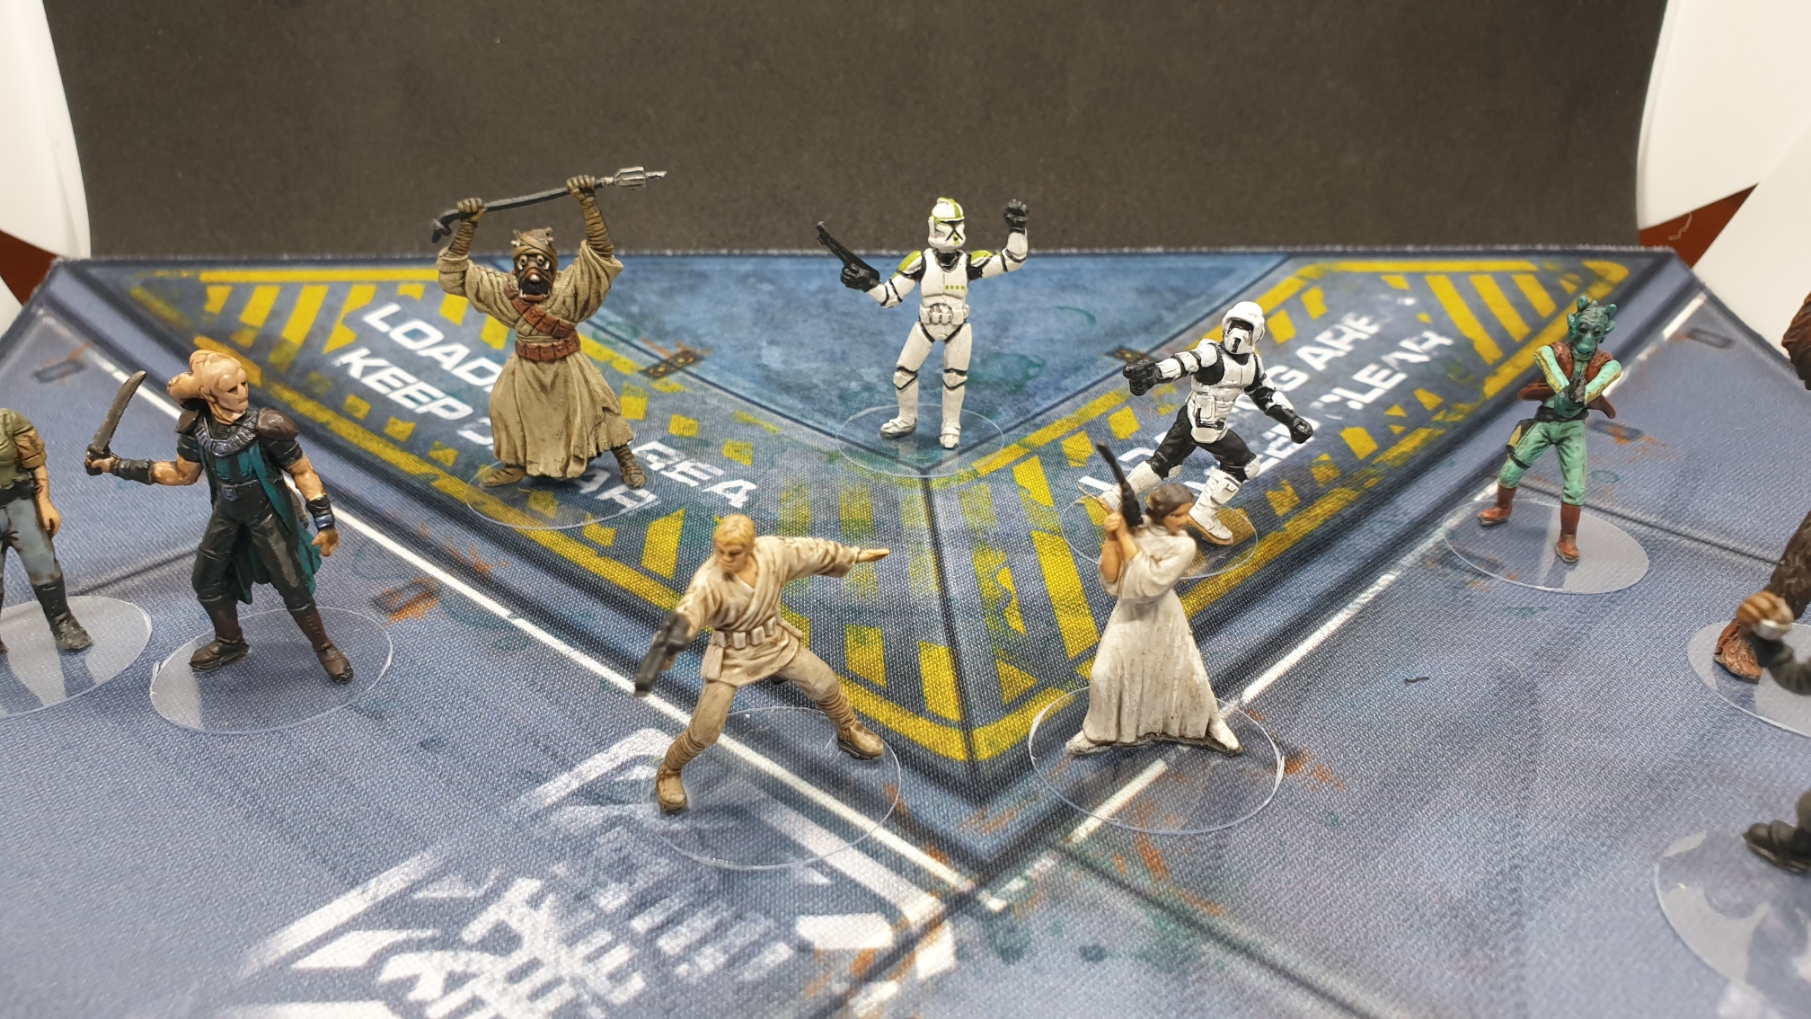
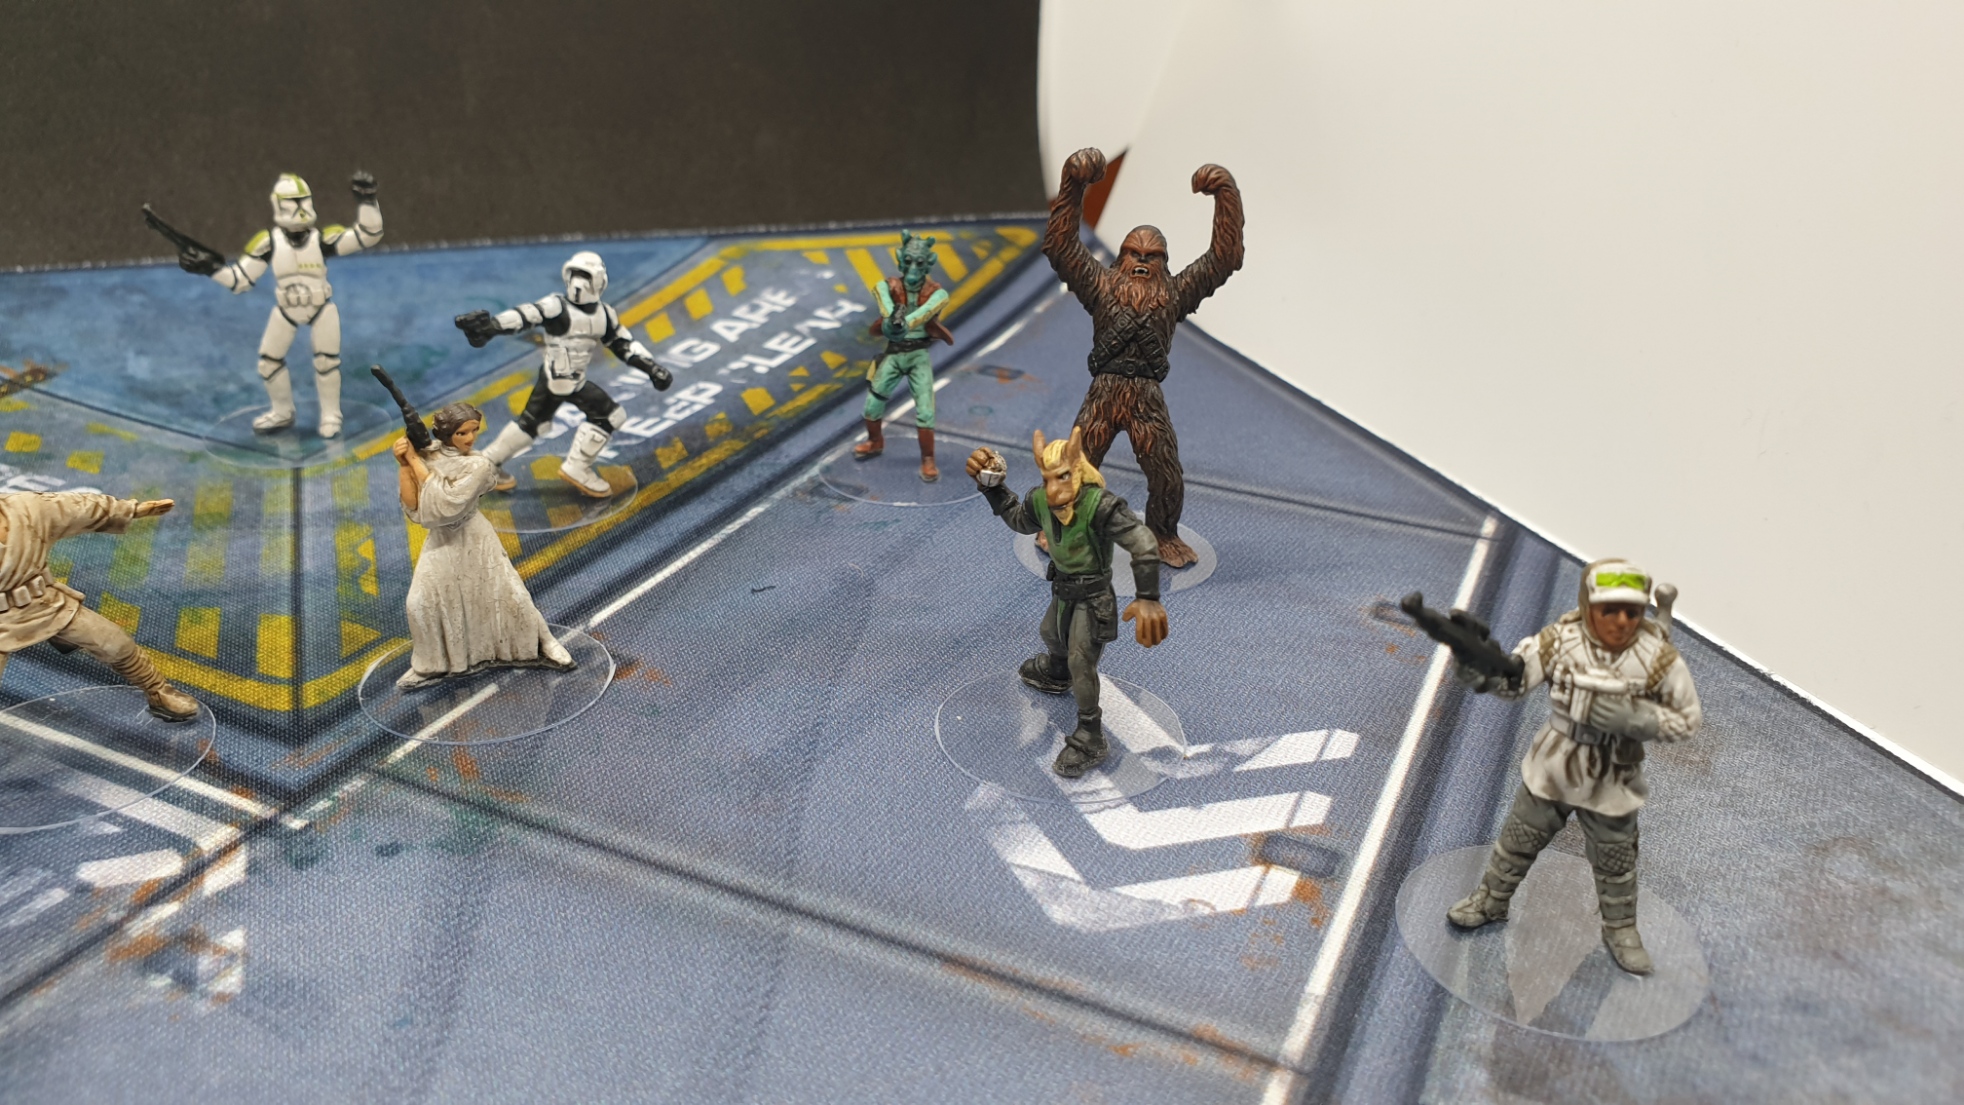
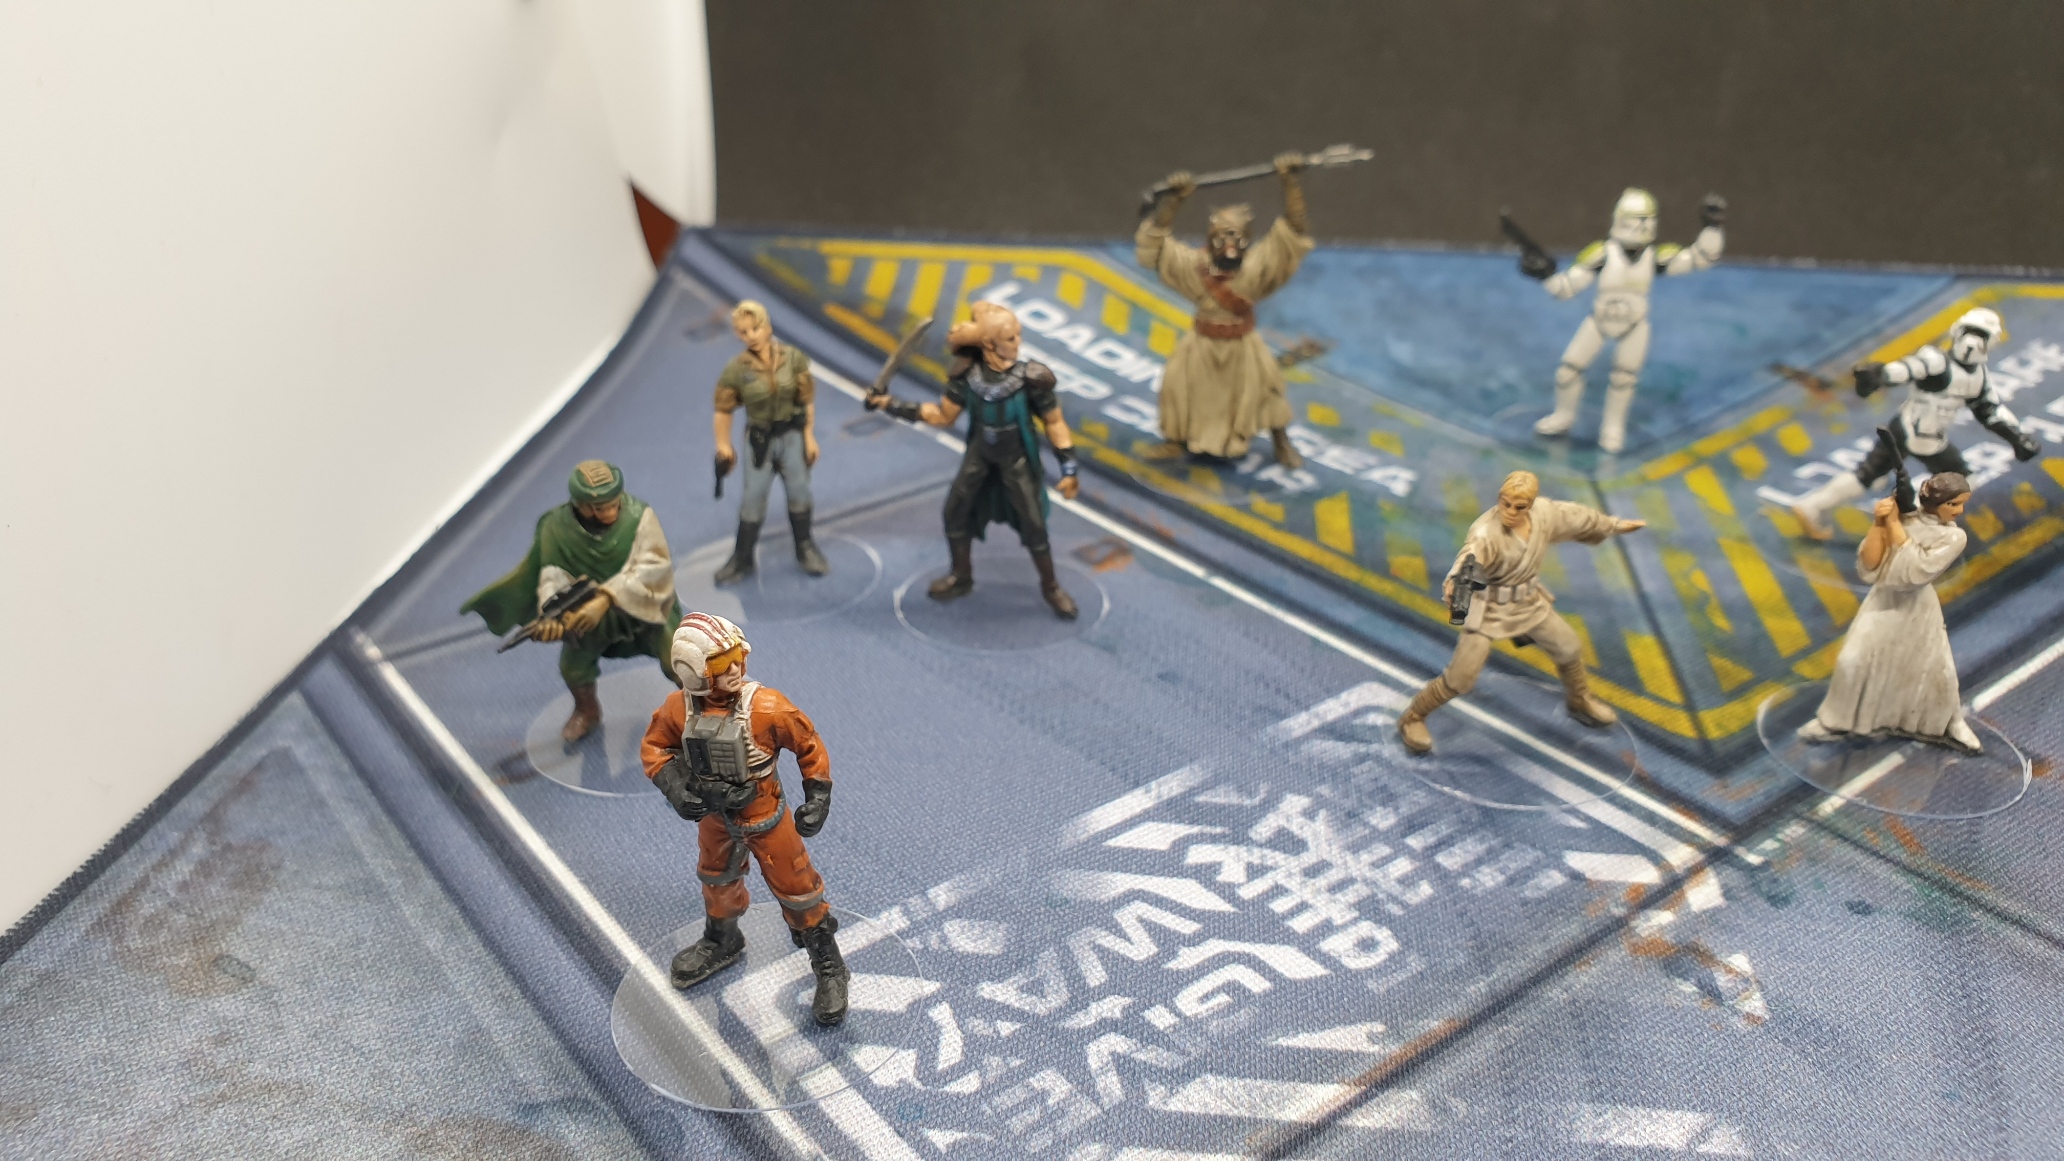
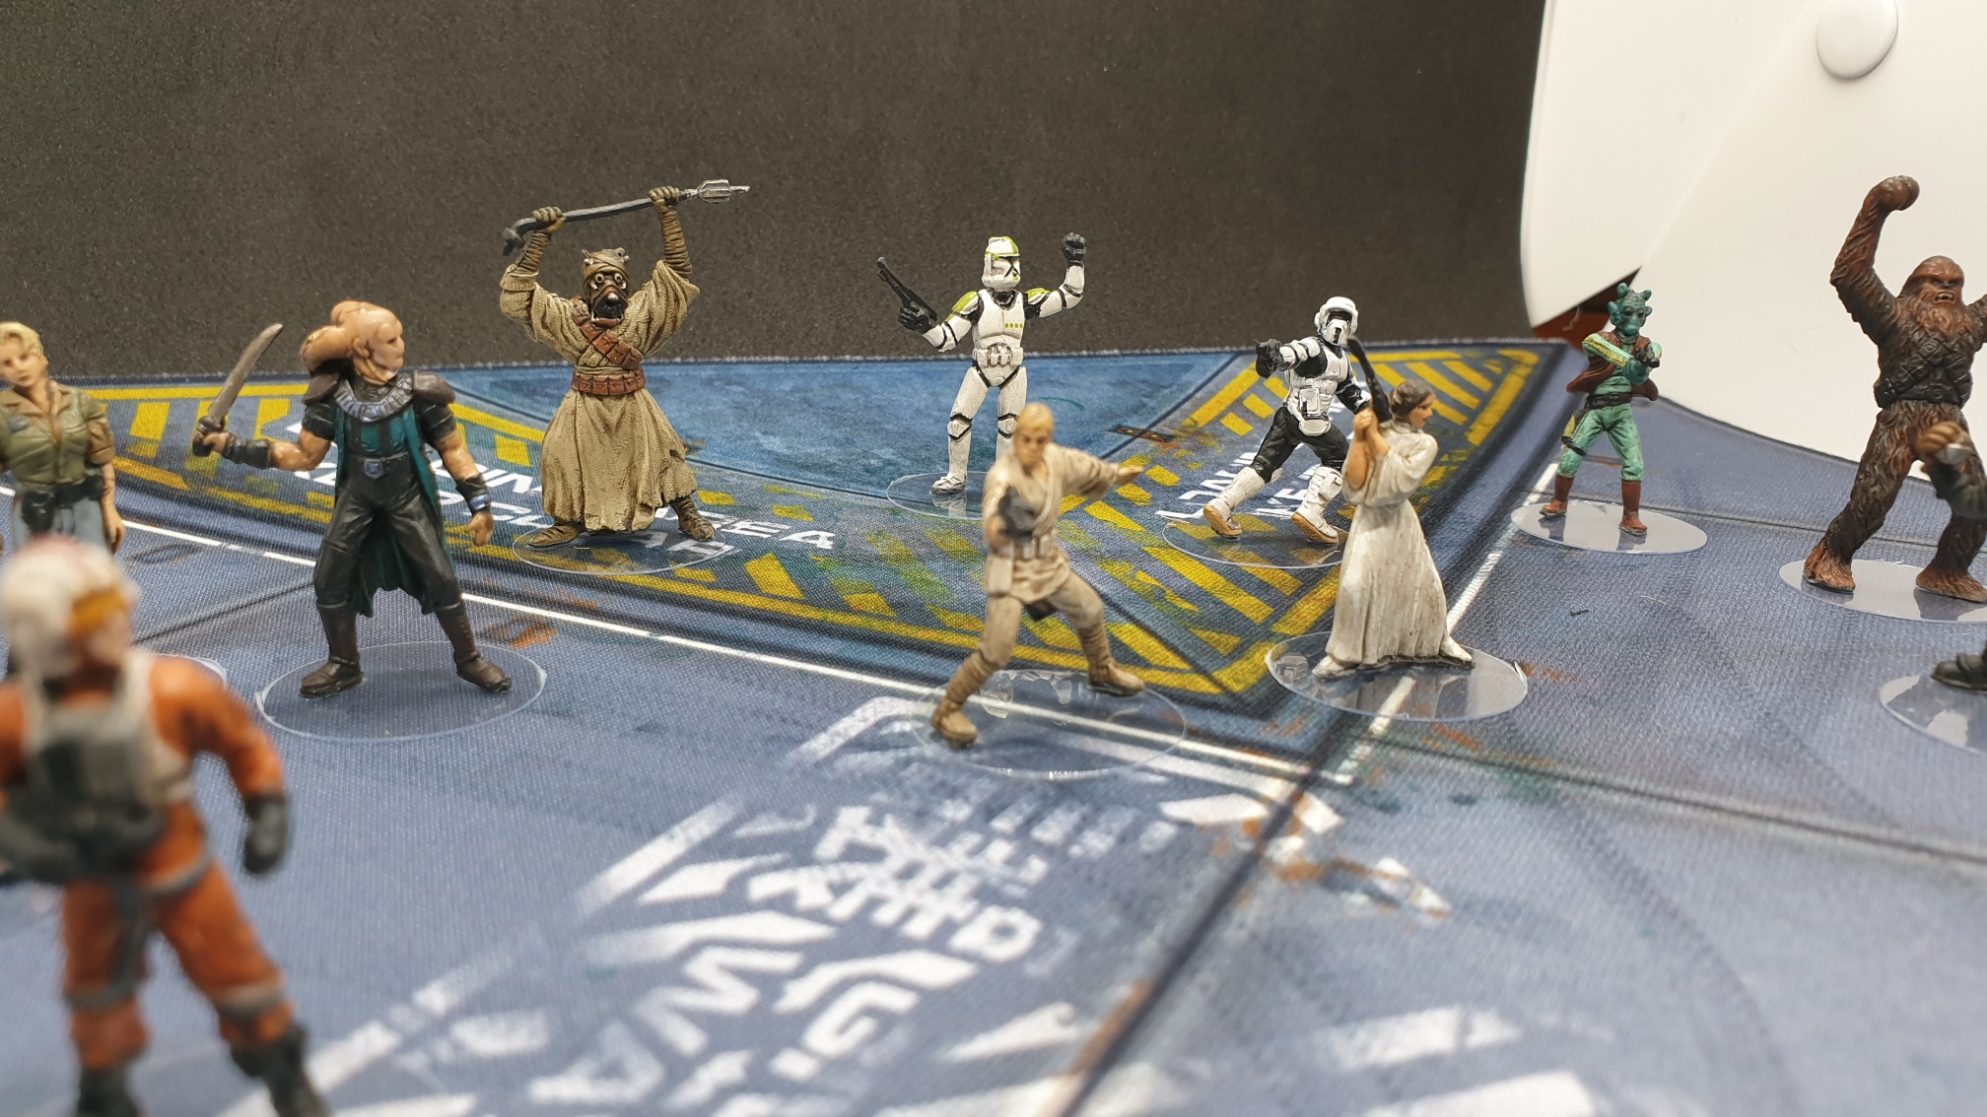
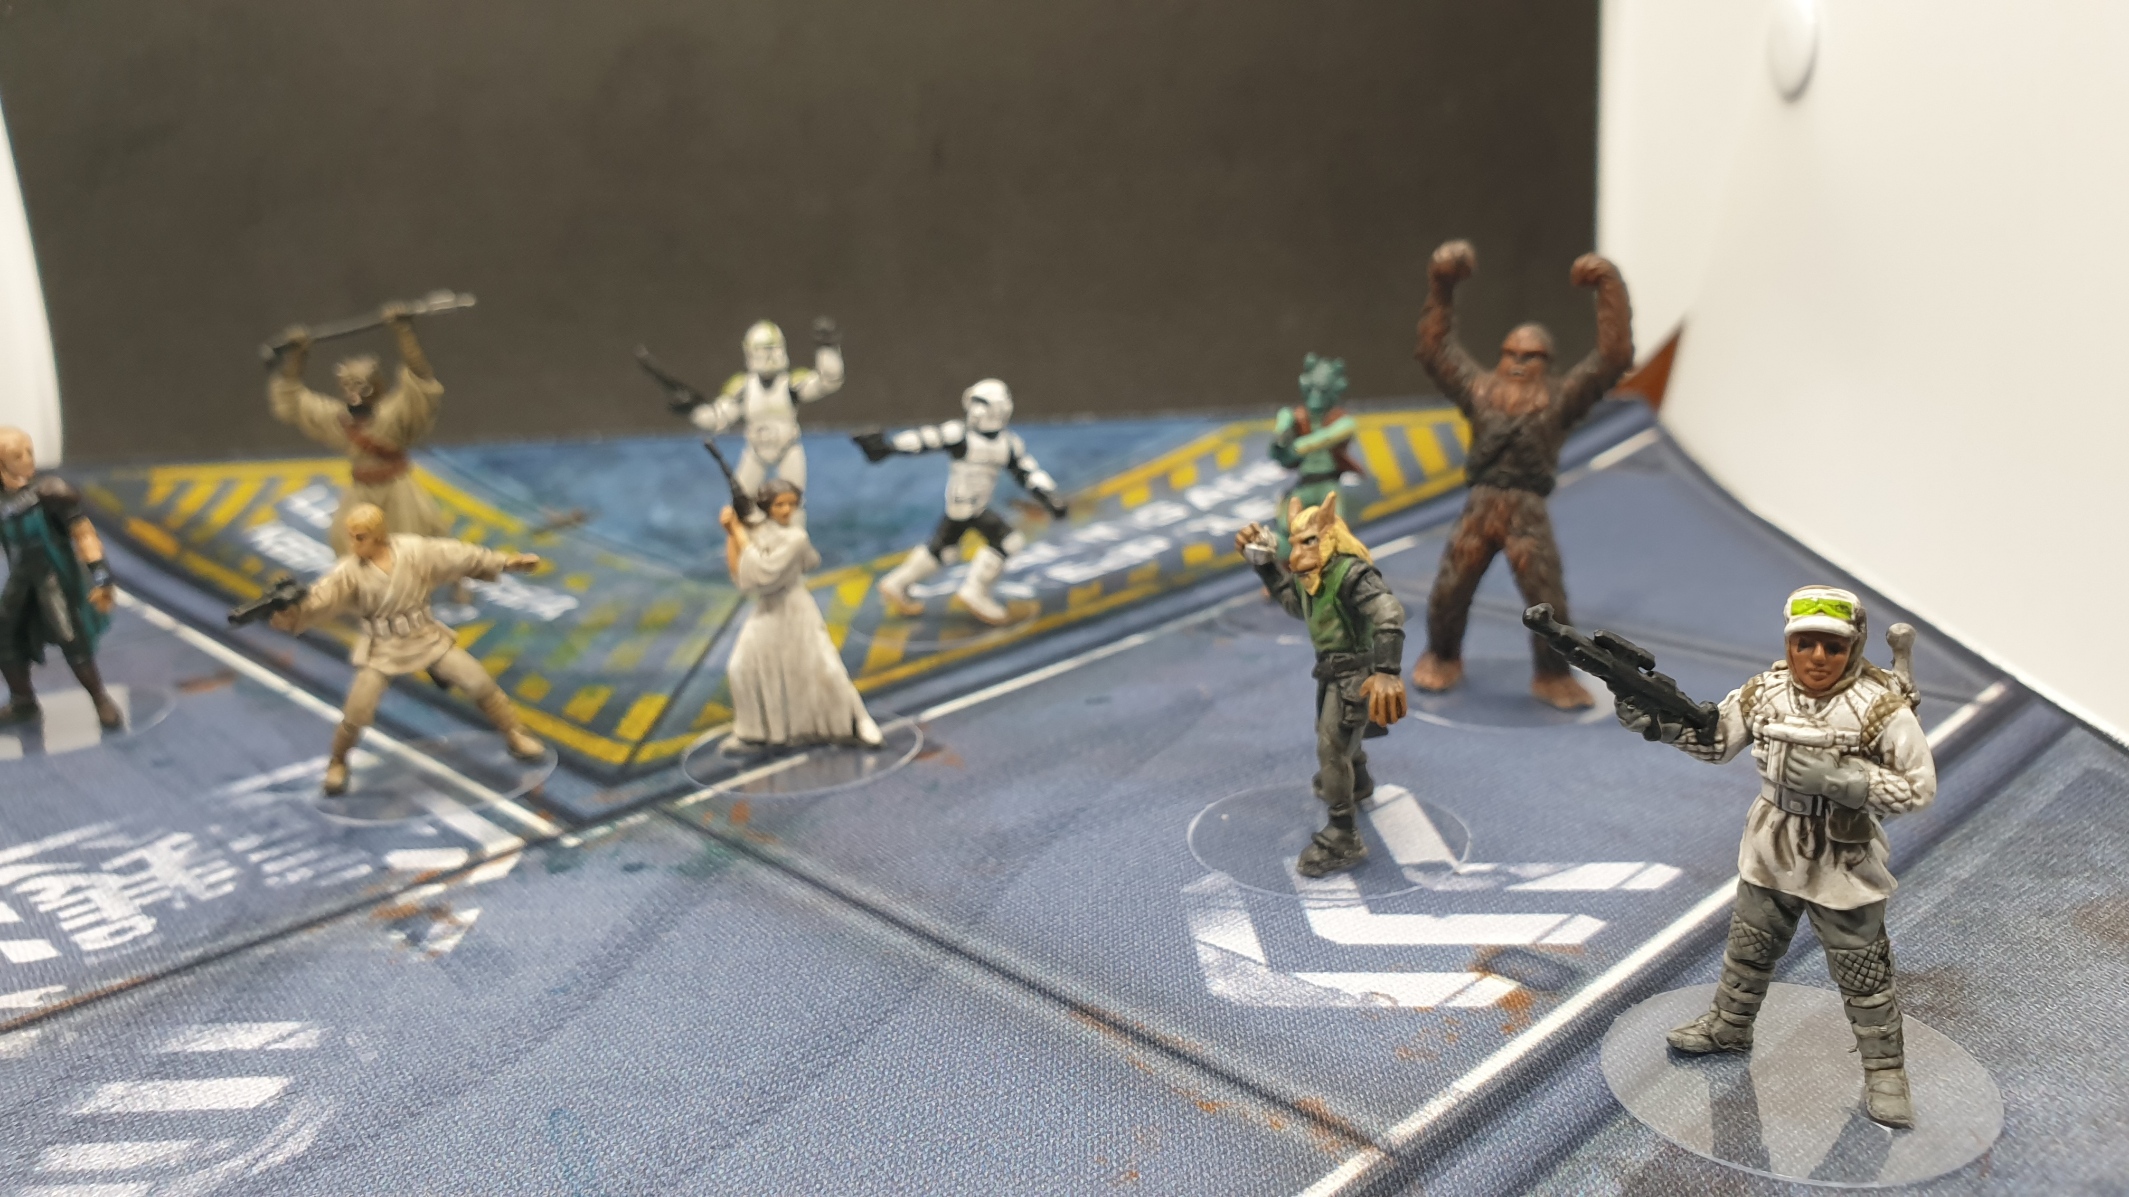
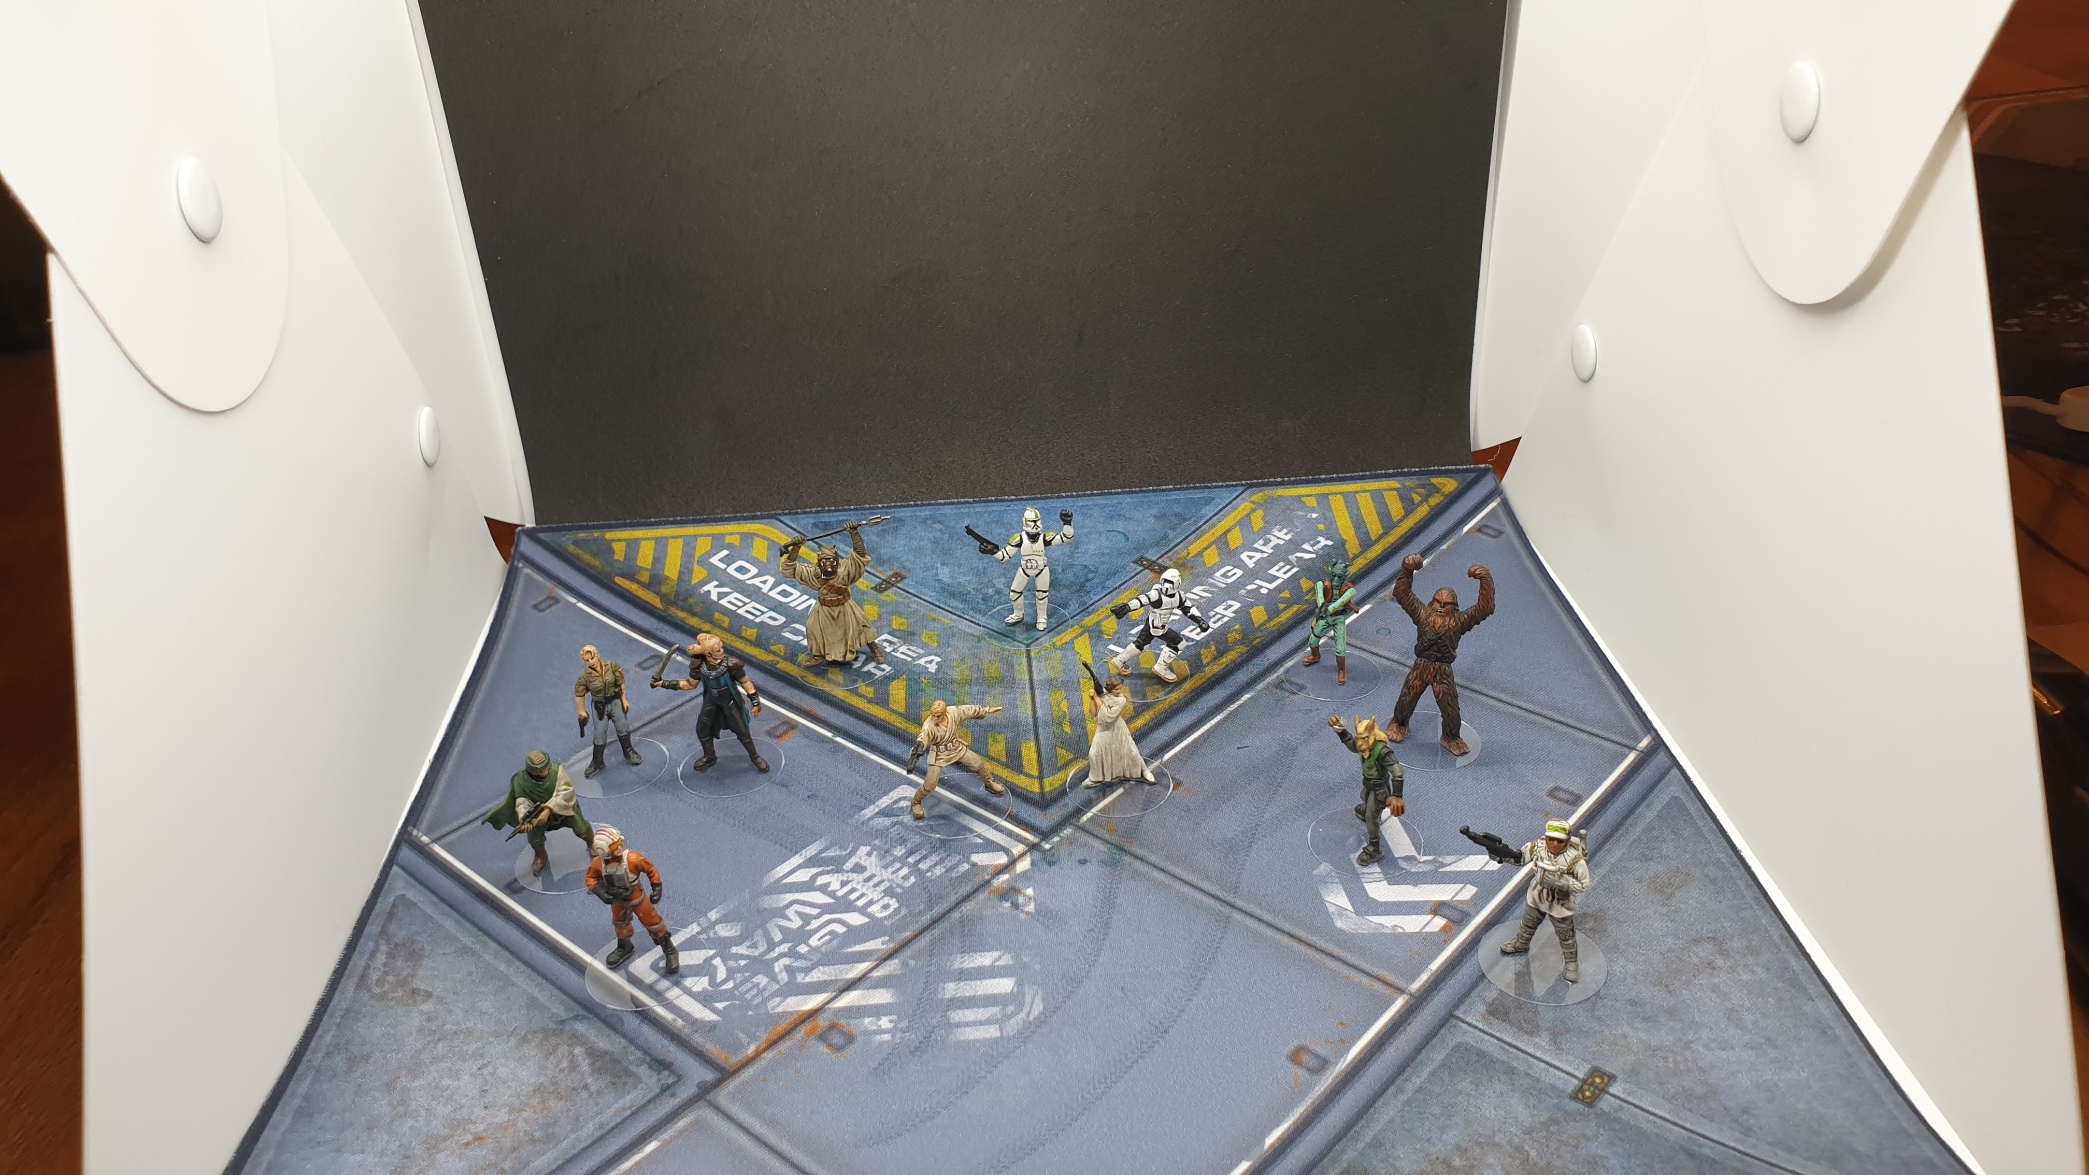
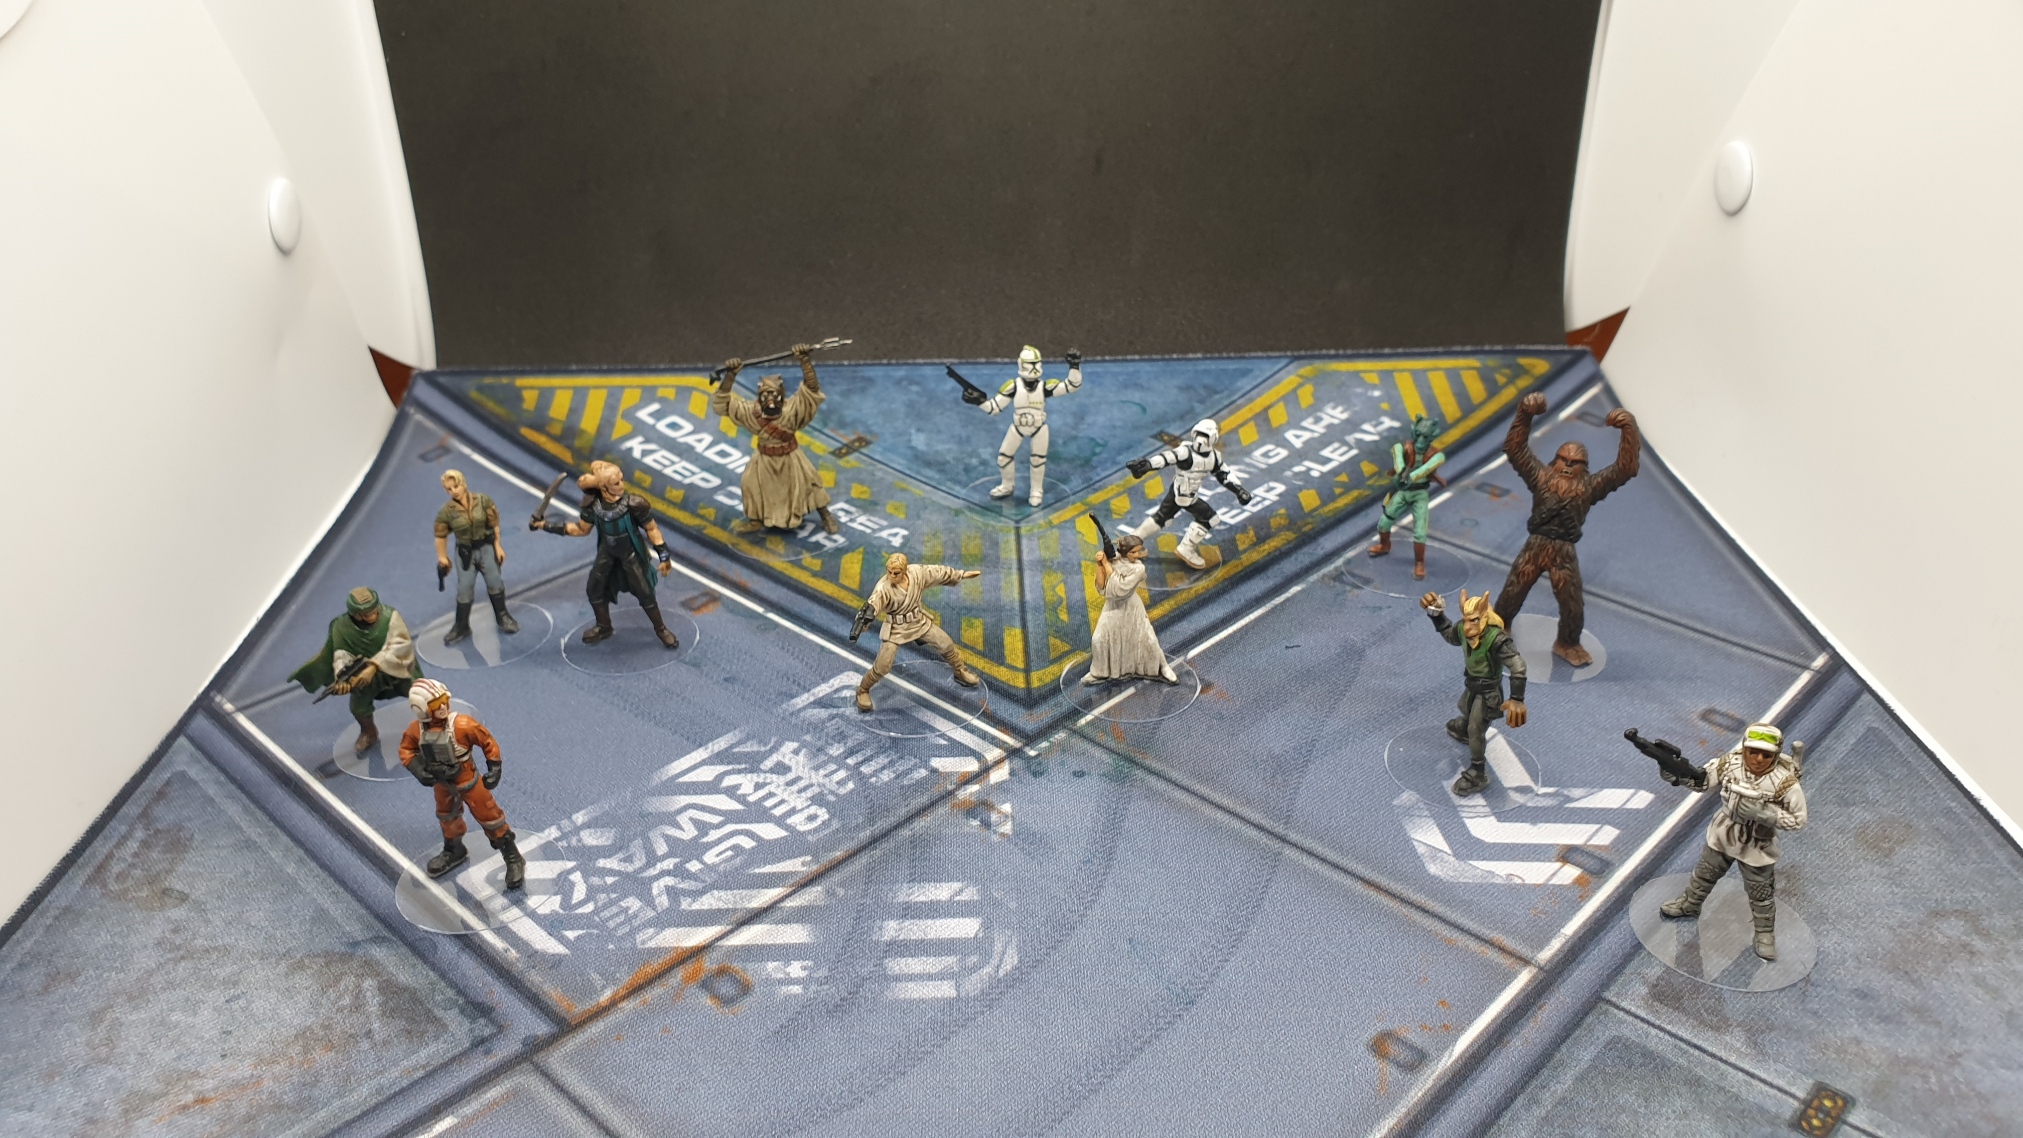
So with the tests complete, I’m pretty happy when they are plopped down together.
Like anything else you could put as much time into these as you want, but really if you are going to do more than just these two steps you would be better off buying and painting Star Wars Legion minis (Wich you can find here of course lol https://store.ontabletop.com/product-category/star-wars-legion/)
But this is a different animal. I’m not after an Army, I want a collection that has a varied range of characters and models and I want them to look just slick enough that I love looking at them and moving them around on a tabletop.
This two-step process achieves that for me, but what would you do?


![StarCraft Tabletop Miniatures Game Pre-Orders Live Now [Updated]](https://images.beastsofwar.com/2026/03/starcraft-tmg-news-cover-600-338.jpg)


![Mounted US Cavalry On Kickstarter For Dead Man’s Hand! [Updated]](https://images.beastsofwar.com/2026/03/us-cavalry-main-600-338.jpg)


