


Digital dice roller


Recommendations: 392
About the Project
This is the 21st century, not the Stone Age! Still rolling little shaped bits of bone to generate a bit of randomness in your gaming? Get with the future guys!
Related Genre: Game Aid
Related Contest: Spring Clean Hobby Challenge (Old)
This Project is Active
Building the production line
Making cool stuff with technology is great fun. But often we need to make more than one of a “thing”. Which is fine. But by the time I’m hot-gluing the eighth or ninth digital dice roller, I’m starting to get more than a little bit fed up with it!
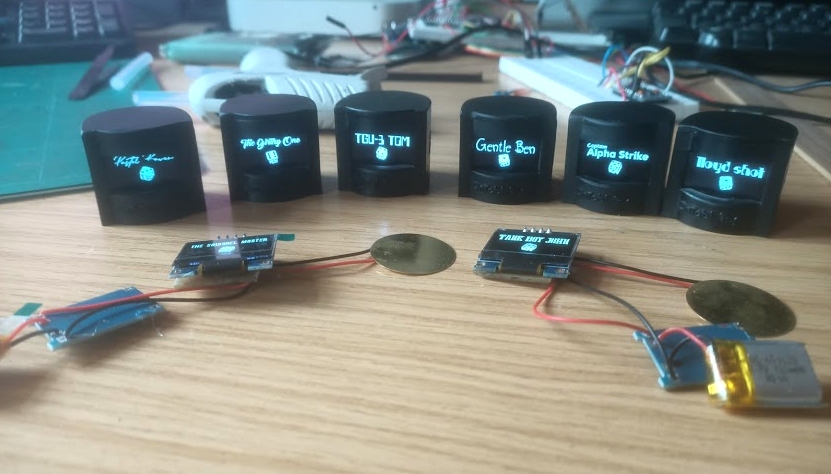
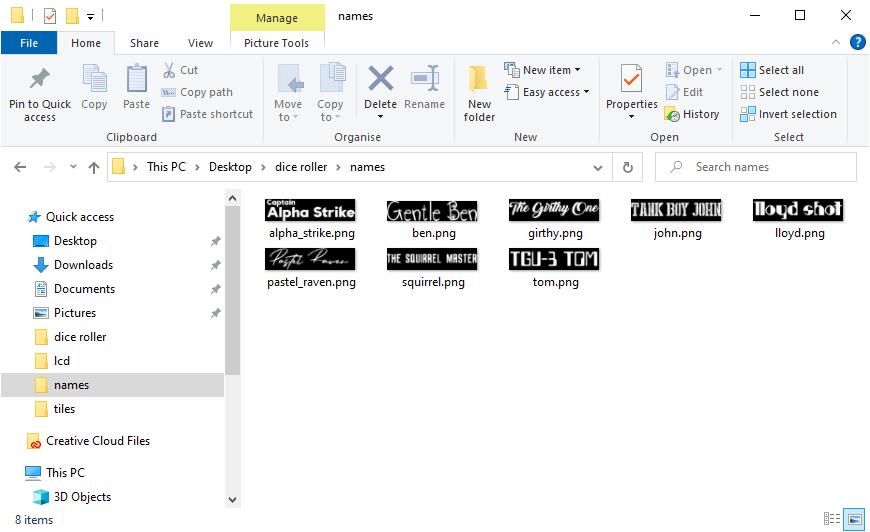
Anyway, after the new OLEDs from Amazon arrived this morning, I set about soldering up the rest of the dice roller/miniature bases.
To be honest, it does look pretty impressive, seeing all eight of them activated at the same time (the ninth is my own device, which I’ll keep for myself – I’ve yet to decide on my own name font, so it’s not shown here)
Bzzzzzzt! Who let out the smoke?
There are a few smells that are instantly recognisable. Nobody can mistake the smell of burnt toast. Hair on fire has a unique smell you can’t mistake for anything else. That hot asbestos-y smell as the clutch of your car gives out, or that acrid stench of burning rubber are other examples (laser-cut lasagne absolutely stinks like nothing else, but I’m not sure there are many people who could testify to that one).
Another instantly recognisable smell is one of burning electronics. At first, it just smells “warm”. It’s hard to describe. But it’s a smell that says “something (that isn’t toast or hair or rubber) is getting *very* hot”.
And then, inevitably, the electronic component gives up and lets all smoke out. (you know that’s how electronics work, right? Magic smoke).
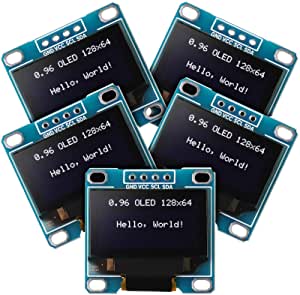
It all started when when my latest order from Amazon arrived – replacement OLED/LCD screens to replace the ones that have driven me crazy over two days, by remaining resolutely hidden (despite my turning the workshop upsidedown – twice – trying to find them).
I’d already built the circuit, tested the code, made the circuit boards (the ones I ordered from China *still* haven’t turned up yet) and built a working prototype; https://www.beastsofwar.com/project-entry/1634402/ – it was just a matter of repeating a known, working sequence.
But as soon as I completed my second circuit and hooked up a battery, nothing happened – the screen didn’t light up. There was no evidence of anything actually working. I left it connected while I looked at my circuit on screen….
…. and that familiar smell of “getting hot” wafted across my desk. Sadly I was too slow disconnecting the battery – the fizz-pop as the magic smoke was released was as disheartening as it was inevitable.
This is the OLED I used for my (working) prototype:
And eventually I got the new screen working. But there was one major difference…

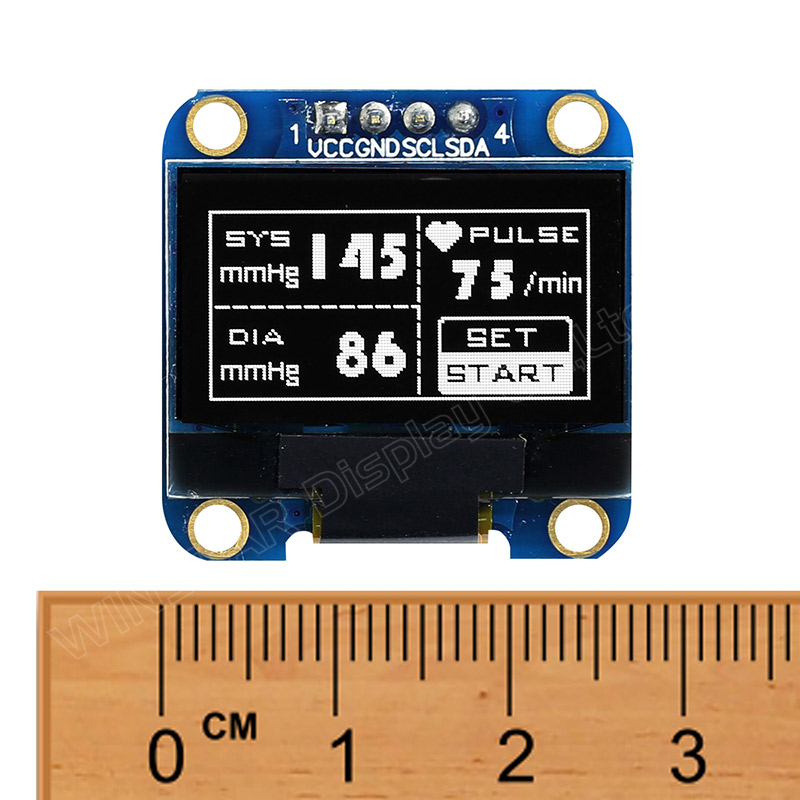
If you look really, really closely at the labelling of the pins you might spot that the power and ground pins have been swapped around! Which means using my original design, somewhere in the circuit, I was creating a “dead short” to ground. And that made things go fzzzt pop!
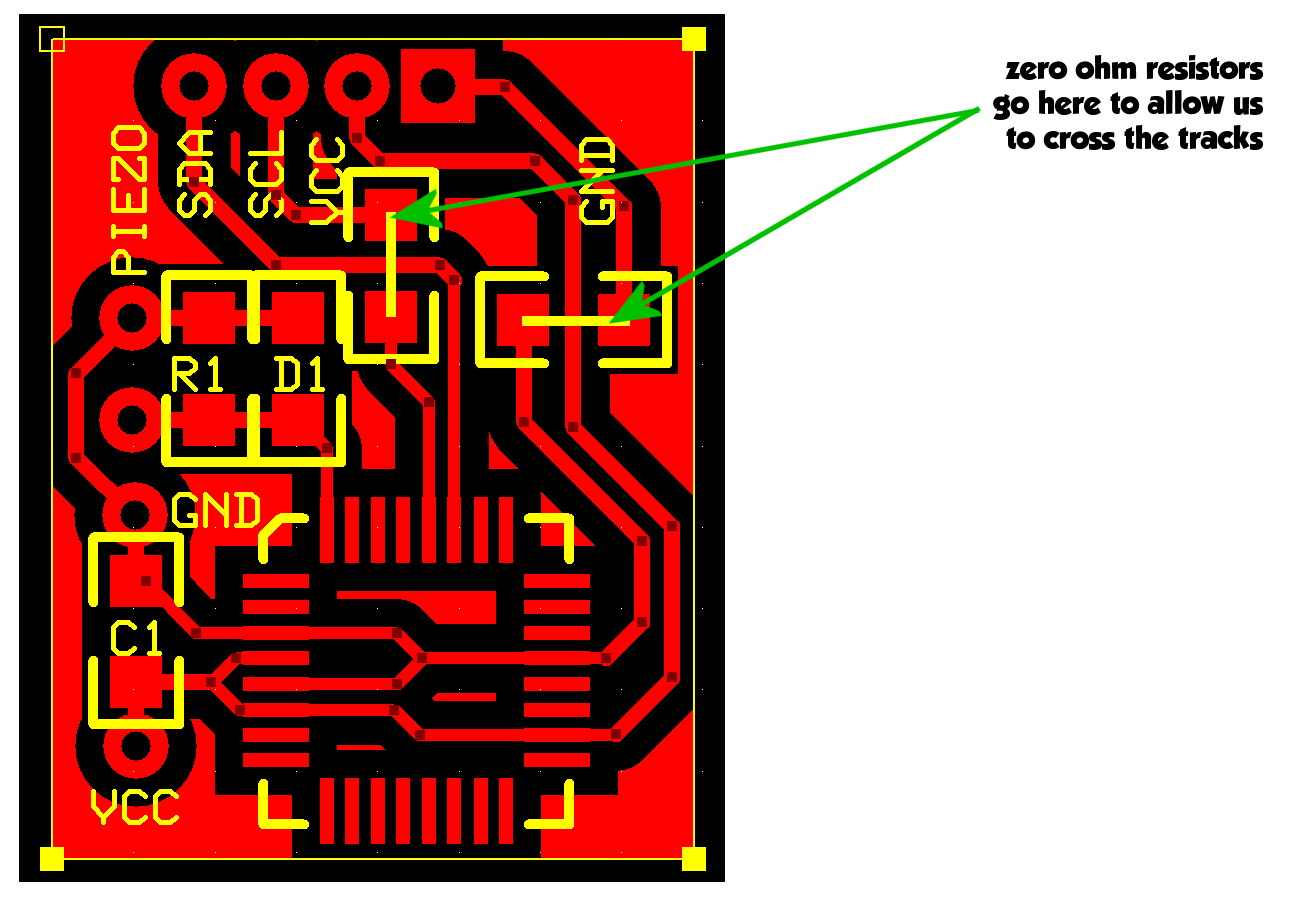
Fixing it was easy enough. But it also means I’ve had to create a second design of the PCB for these OLEDs.
All of which means, it’s time to crack out the ferric chloride again.
And that’s another of those unmistakable smells – overriding the thermostat on your tank heater to heat the ferric chloride, then forgetting about it and going for a brew in the garden for half an hour… don’t ever do that! (again).
More font images
I really liked the custom font on the first digital dice roller, and while I’m waiting for the other OLEDs to arrive from Amazon (I’m sure I bought a dozen a while back, but for the life of me, I can’t seem to find them anywhere!) I had a play about some “logos” for the other characters

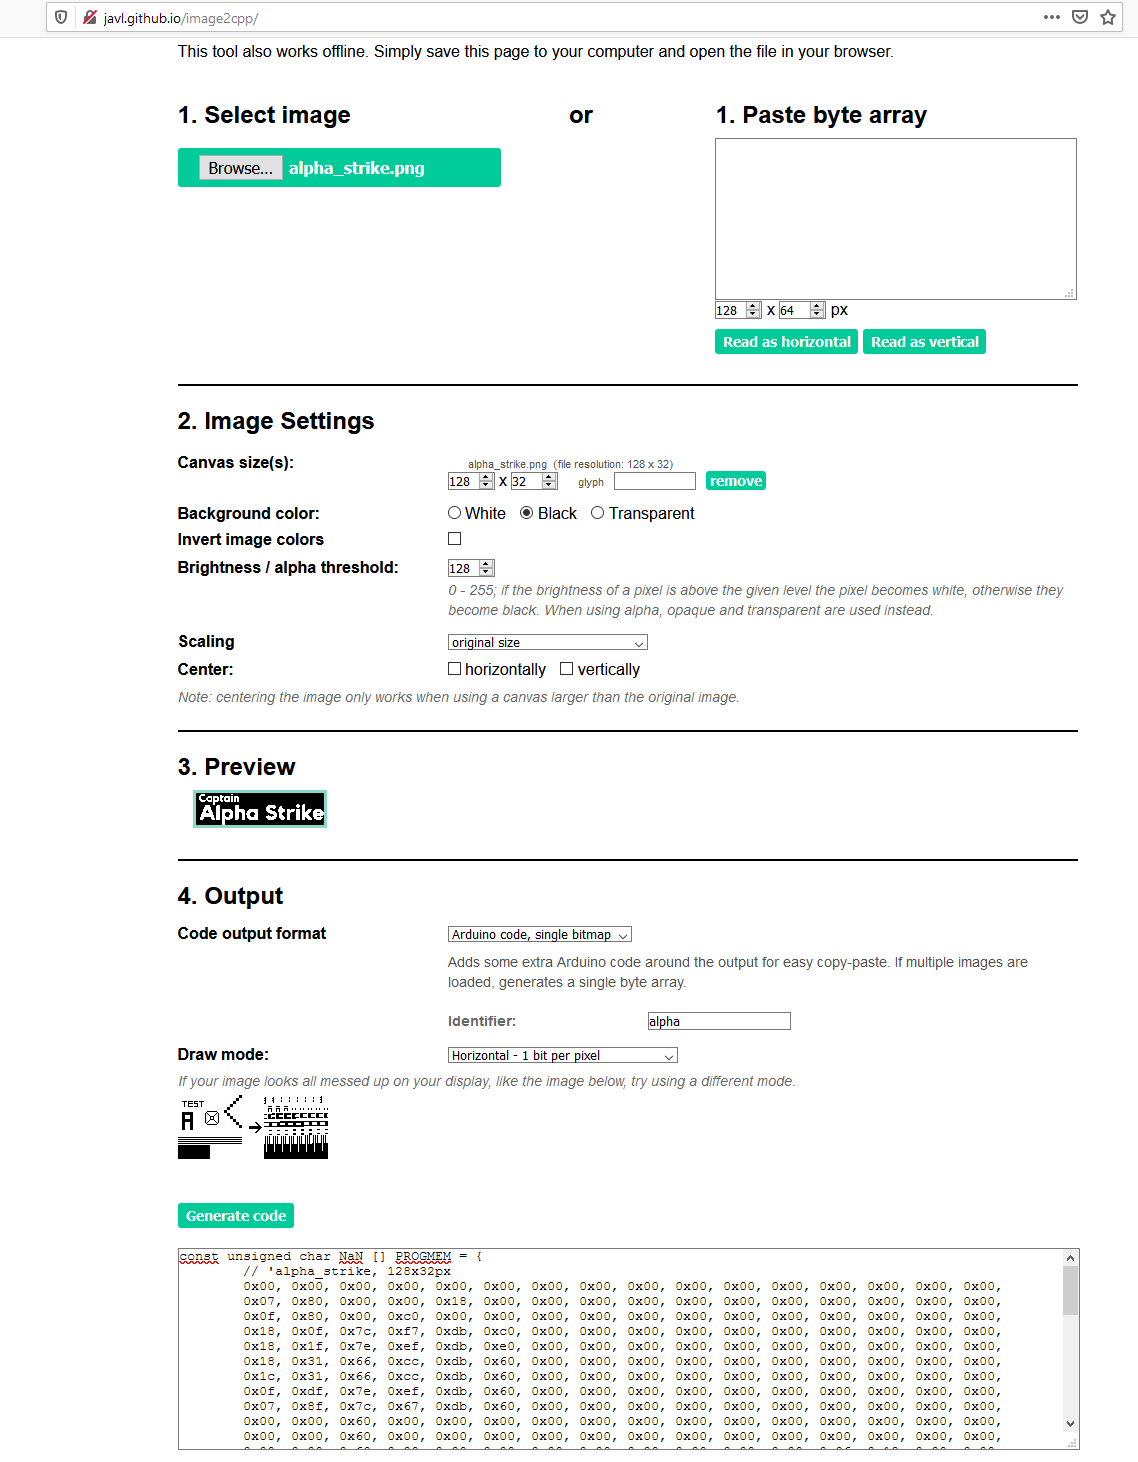
I hit 1001fonts.com and simply used the preview screen to see how the names would appear in different fonts. When I found one I liked, I took a screenshot, imported into Paint Shop Pro (yeah, yeah, pipe down – some of us still us it, ok?) and resized to 128 x 32 pixels.
Then uploaded each image into an online bitmap-to-byte-array editor to generate the appropriate byte array to make it appear on the LCD
So now I’ve got all my character names drawn out as bitmaps, it’s simply a case of amending the firmware code, just prior to uploading each one to the microcontroller(s).
But of course, until those other OLED/LCD screens arrive, there’s not really much to test….
First full test - success!
I decided on some last-second changes to the code before committing to the circuit board (it’s easy to change the code on an Arduino prototyping board, but less easy to do on a custom PCB with “raw” AVR atmega328 chip with none of the serial programming pins exposed).
I thought it would be cool to personalise the displays for each of the characters. So I grabbed a few free fonts and played about making a “logo imge” for each of the character “toppers” for the dice roller devices. I created an image of the character name then, using an online bitmap-to-byte-array tool, I created the code to make a different name display on each separate device.
To conserve battery power, each device goes into “deep sleep” after a period of about two minutes with no activity. To wake the device up (and activate the screen when it’s showing blank) simply bang it down on the table!
(the shutter speed of my phone camera means you can see the scan-lines being drawn on the OLED as it refreshes: these are not evident in the actual device!)
This is the base for “The Pastel Raven”. I forget which font was used, but the end result – I think – looks pretty nice!
To roll your dice is easy – simply tap the base onto your desk or tabletop once for for D6 or twice for two.
But what if you’re one of those quirky D&D players who insist on using D10s or percentile dice? We’ve got you covered:
Three taps on the base and the dice go out – chaning the set-up from D6 to D10. Now, when you bang it down, once rolls a single D10 and twice rolls two D10. Let’s not get into the whole argument about how to read percentile dice here and who is and who isn’t doing right or reading it wrong…. that can be for another day – this is supposed to be a bit of frivolous fun, right?!
And, to be honest, if D10s are going to get you all hot and bothered, simply bang the thing three times once again, and it’ll revert back to D6.
Now all I need to do is make another seven of these and glue the miniatures on the top…..
Crack out the ferric chloride!
While everything had been proven on the breadboard and the code tested to destruction, it was finally time to push everything together and see if it actually worked as a final, completed, assembled “thing”.
Which meant home-etching a few PCBs to try things out (the PCBs I’d ordered from China are still nowhere to be seen – perhaps stuck onboard a ship wedged horizontally across the Persian Gulf I’ve no doubt).
So I dropped the PCB layout onto my laser cuttter and etched the car-paint mask off the copper clad surface and threw it into some heated ferric chloride. The result was a nice, shiny-looking circuit board:

Using a fine soldering iron tip, some tweezers, and some ever-handy blue-tack (to act like a third hand and hold everything in place) I soldered the AVR microcontroller onto the PCB and added in the 1206-sized discrete components
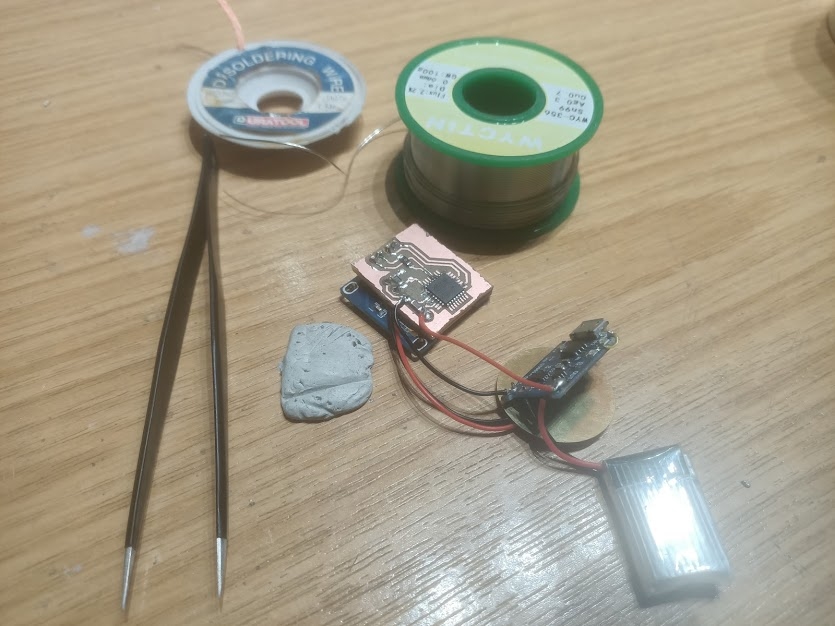
Then I jammed the whole lot inside my 3d-printed enclosure and filled with copious amounts of hot glue, to stop anything from moving around inside. The piezo was hot-glued to the underside and the device then plugged in to a phone charger (micro USB, 5v) supply and left for an hour or so to fully charge up.
Lloyd Shot
Brother Lloyd gets the full Horatio treatment with this mini. I mean, I can just about understand the bard/troubadour reference. But the James-Hetfield rock-star pose, I’m less sure about?
 (replace with painted mini when complete)
TGU3
Another member of the team often overlooked, is the half-man-half-computer-brain that keeps the website and all the clever tech running, Tom.
I reckon Tom does dream of electric sheep. I reckon he closes his eyes and constantly has to remind himself:
01001001 00100000 01100001 01101101 00100000 01101110 01101111 01110100 00100000 01100001 00100000 01110010 01101111 01100010 01101111 01110100 *
 (replace image with painted mini when complete)
They say you should add a “back story” to your miniatures, to “bring them to life” on the tabletop. I had the opportunity to design this miniature (Horatio Noseblower having designed the rest of the gang) so I thought I’d design him with a backstory in mind.
See, it’s a Friday night, it’s around 10pm and Tom is already on his way out to the local nightclub (that explains the hotpants and the dog collar at least). But he’s had a last-second call from OTT Towers – there’s a server down and nobody can access the latest weekender video! So Tom grabs his laptop, his futuristic no-brand Android tablet, rucksack filled with wires and test equipment and a dirty great big spanner to give something a whack, when all else fails.
Don’t let the shy demeanour fool you – they say it’s the quiet ones you need to watch…
*clever you, if you deciphered the message!
Tank Boy John
Poor old John is often missed out or forgotten about, simply because he doesn’t get as much screen time as the others. So I was determined not to miss him out.
Due to the lack of screen time, I also don’t really know much about John. Other than he really likes tanks. And almost every time I see him, he has a respirator clamped to his face, like some face-hugger out of Aliens, and there’s always an airbrush never too far away…
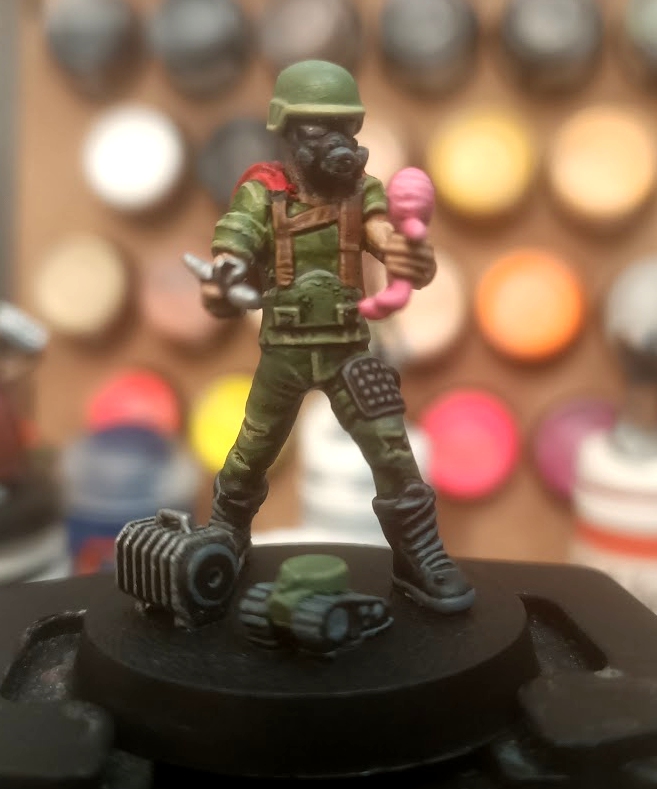
Originally this mini had a quill in his hand; I hacked it about in Blender to create a rudimentary airbrush, then built a compressor out of cubes and cylinders. I’ve yet to decide what to use for the hose between the two (or – like the bow strings on elven archers – even whether to bother including it at all!)


