![NO Weekender Or Cult Of Games XLBS This Weekend [Updated]](https://images.beastsofwar.com/2026/03/No_Weekender_and_XLBS_this_Weekend-225-127.jpg)


CRC’s Crazy Compendium 2; Eclectic Boogaloo


Recommendations: 687
About the Project
Welcome to the next season of the "most vaguely inconsistent extravaganza that no one really thinks about but if they did they'd be mildly misanthropic about it"! Following along from my last project, here you will find an array of things I'm working on from various games and companies. Hopefully we can manage a bit more variety than last time, but I have been slowly working through a significant backlog, so we get what we get. We think we finally got away from Spiny Norman, but we can never be too sure, so strap up and buckle in for the most ambivalent ride of someone else's life! For those who missed it, the last project can be found here: https://www.beastsofwar.com/project/1533345/
Related Genre: General
Related Contest: Spring Clean Hobby Challenge (Old)
This Project is Active
More .gif experiments and some spinning!
 Click to start the .gif.
Tried seeing what more pictures in the .gif does to the smoothness of the final piece. Works nicely. Also made some rotating pictures with SPINZAM that you can drag to spin them around! Hopefully the embedded one will work, but if not I’ll add the link.
<iframe src=”https://spinzam.com/shot/embed/?idx=377890″ width=”640″ height=”640″ scrolling=”no” style=”max-width:100%; max-height:100vw;”></iframe>
Link: https://spinzam.com/shot/?idx=377890
Playing around with .gif files.
I’m a bit taken with photography at the moment…so I’ve been playing. All using free software (IRFAN for batch resizing and GIMP for .gif generation). Took me a while to get the frame speed just the way I wanted it, but it’s actually really simple to put together. Thought I’d use my finished Eliminator Squad that I started a while back and took a few pictures on a turntable as I rotated it (about 45 degrees each time to give me 8 pictures.
I manually cropped the images to the same pixel counts, but IRFAN can do this for you as well, but I haven’t played much with it. I used IRFAN to reduce the size of the images to about 30% of their original size (which is also a good size for uploading them, I find) then loaded the images as layers into GIMP, used the ‘animation’ options under the ‘Filters’ tab to optimise for .gif. You can look at a playback afterwards under the same options. Following that you Export As, making sure to change the filetype to .gif in the name (it defaults to .png), then fill out the export options that pop up after hitting the ‘Export’ button and your .gif is done! Really quite simple. Here’s what mine ended up with. Not bad for a first try!
 Click on the .gif to get it to show.
Bit of a catch up...
Been away a fair bit with school and future plans, but I’ve been able to borrow some photography equipment for my Photogrammetry class, so I’ve been taking some nice pictures of minis I’ve finished. Here’s a few:
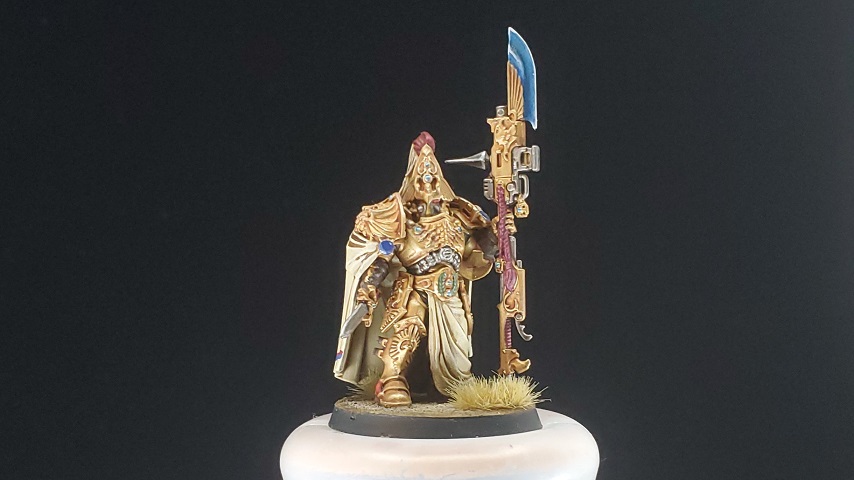
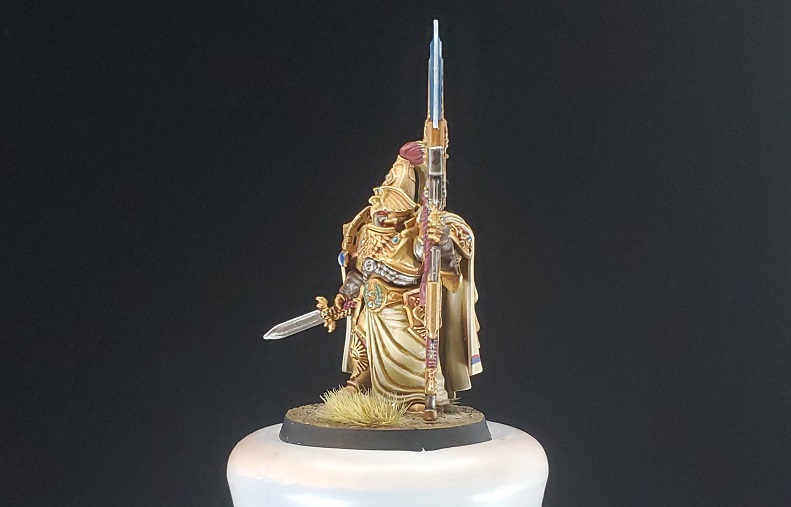
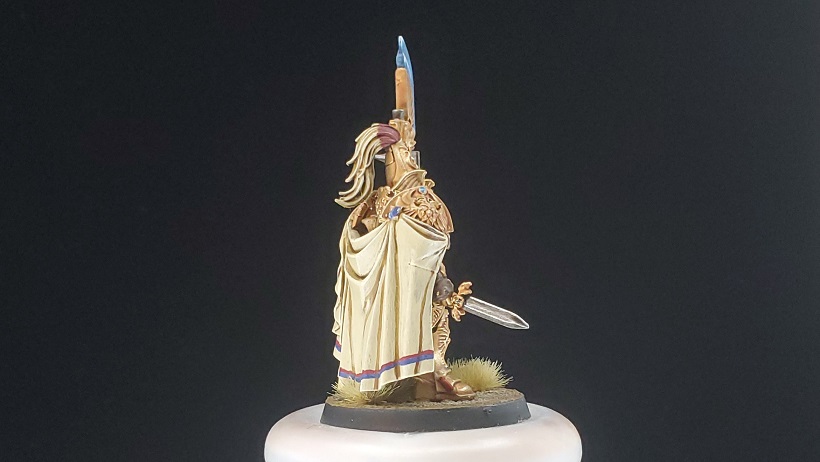
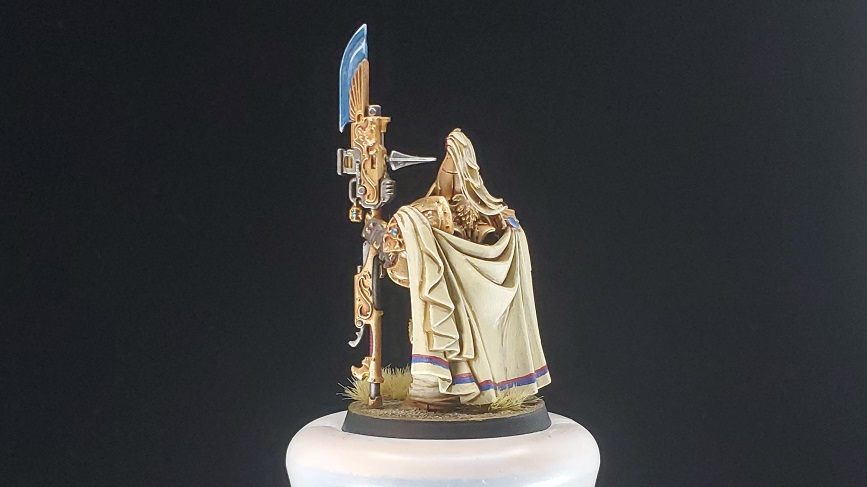
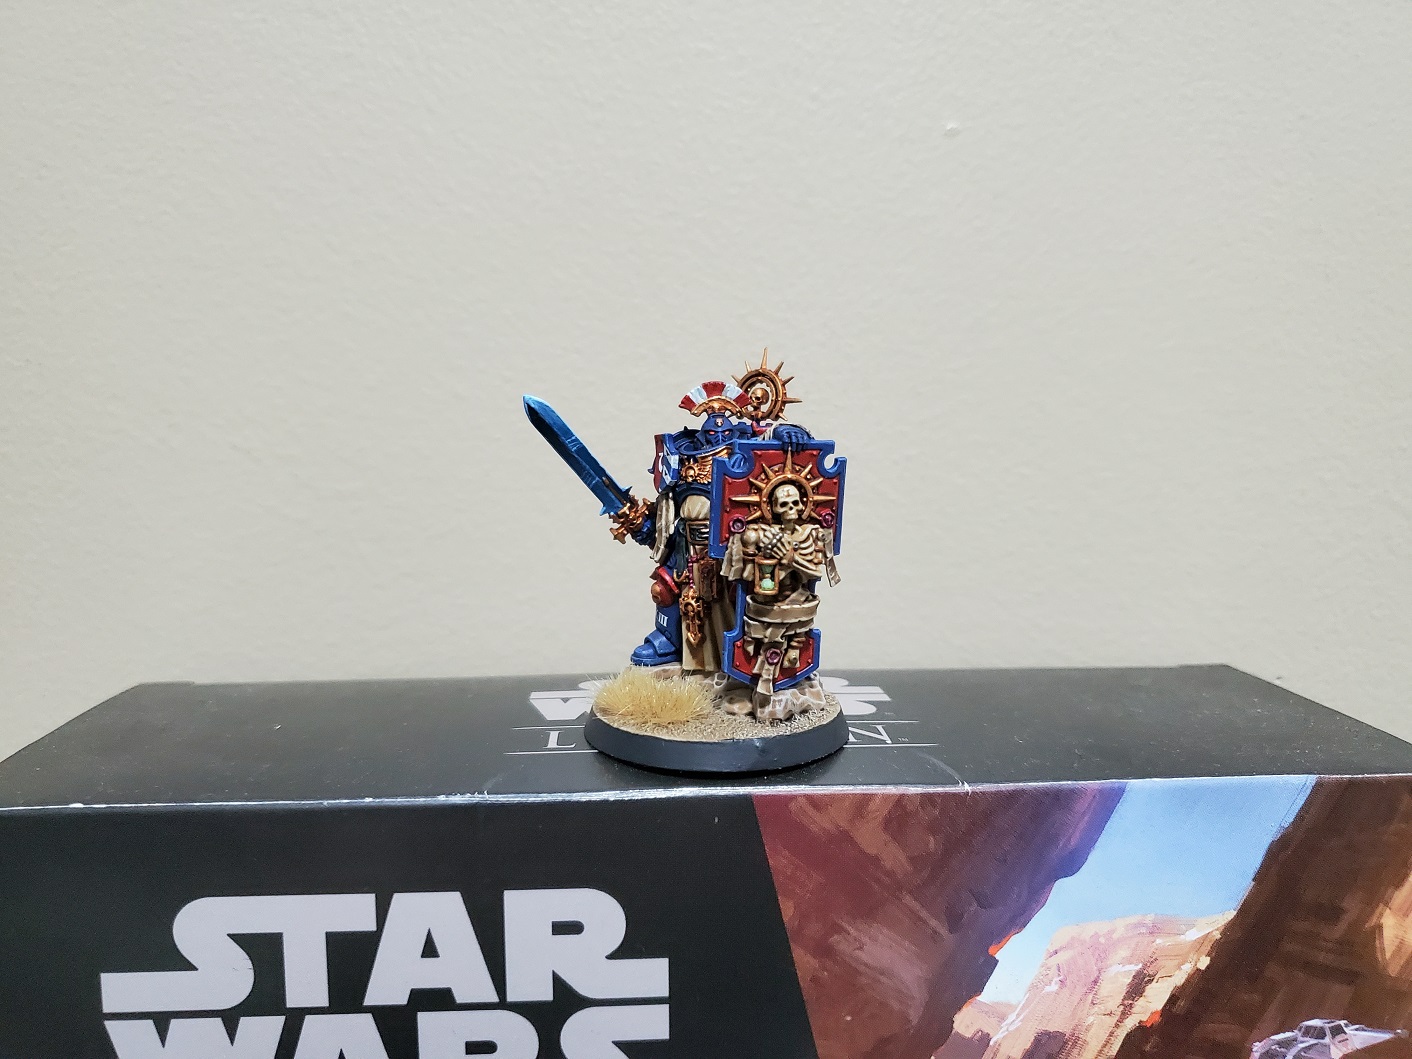
Adeptus Custodes Shield-Captain! These were some early lighting experiments. Lighting for photogrammetry is a bit different from just picture taking, but I was rather enjoying playing around with things.
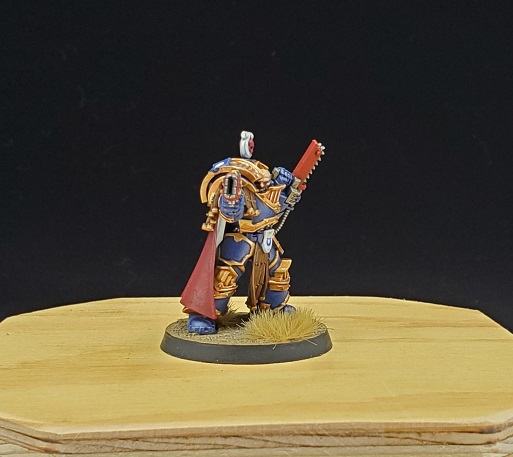
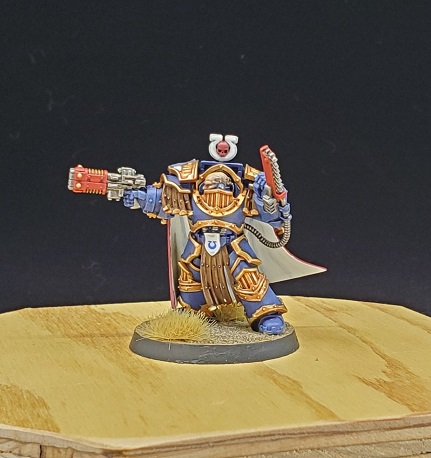
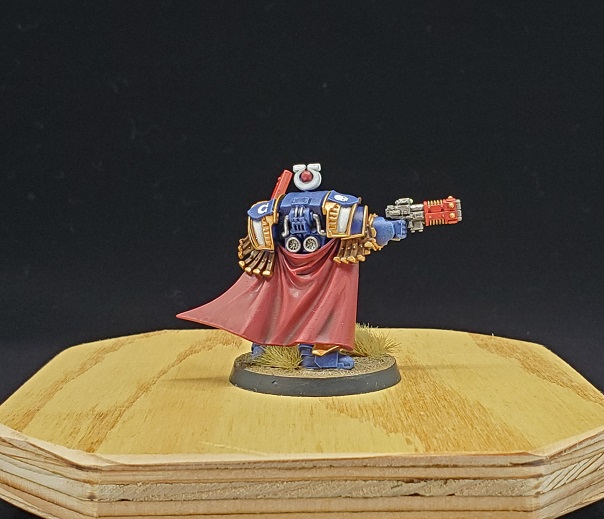
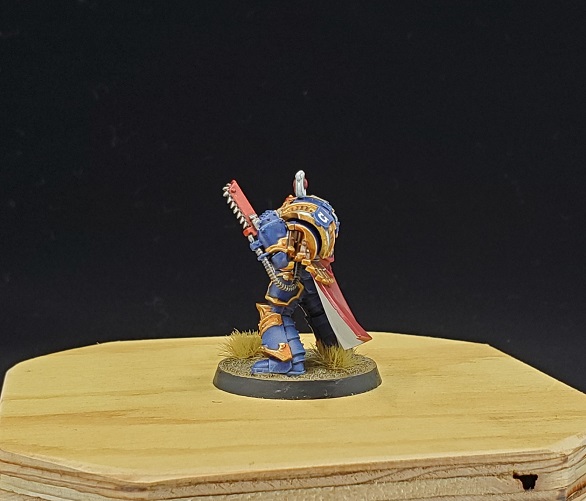
Heresy Ultramarines Praetor! Went with a bright red for retro reasons, and I’m glad I did. It also meant that I had to redo another thing that I planned to use for Heresy…or at least the weapon casings…
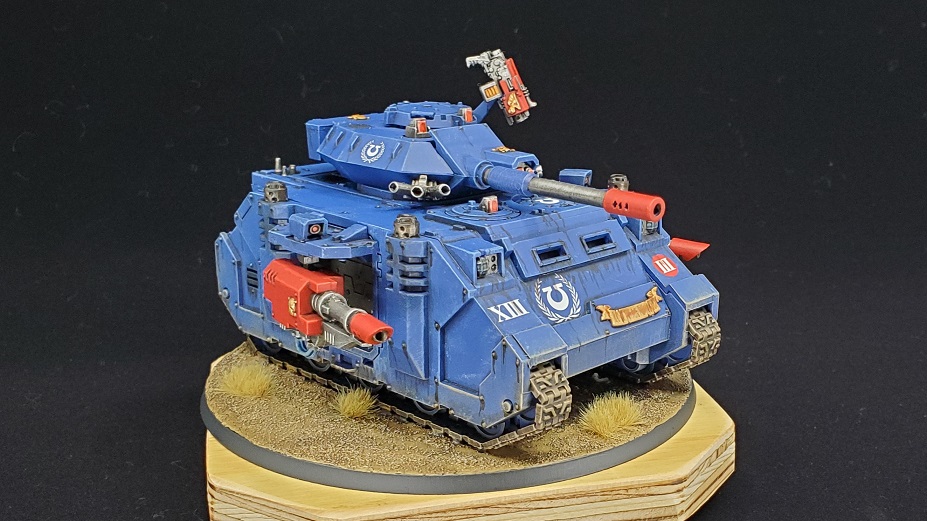
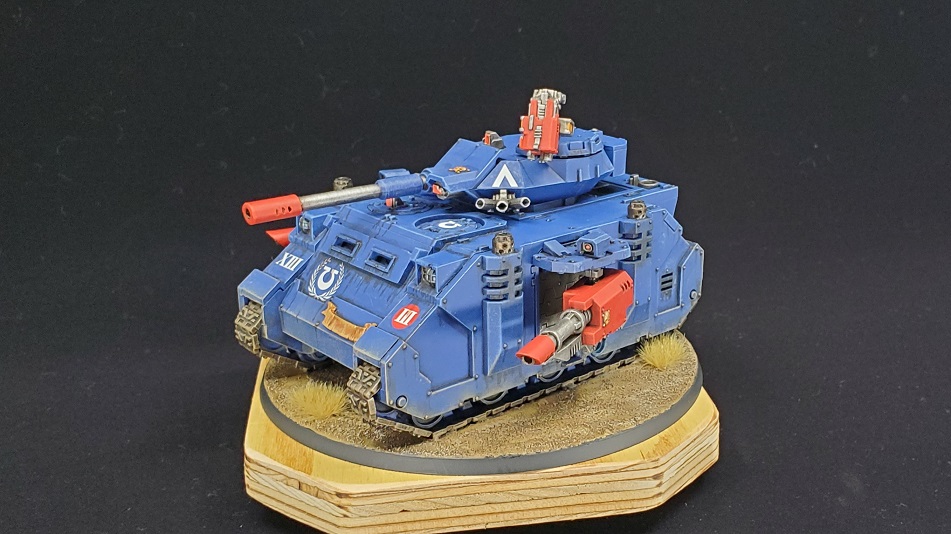

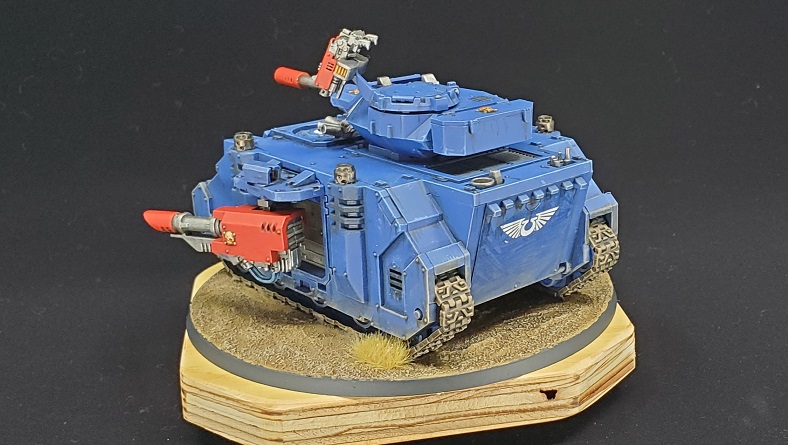
This SHOULD be the last change I make on this Predator…maybe…
Updates may be sparse; I’ve been very busy with school and such, but I’m enjoying the use of the equipment, so I might be taking some more shots of minis with it in the near future, so we’ll see what happens!
Back to doing hobby rather than schoolwork!
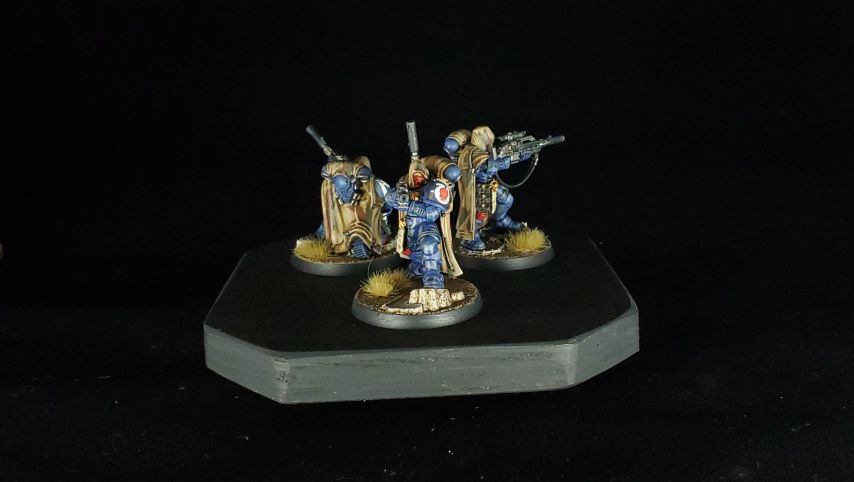
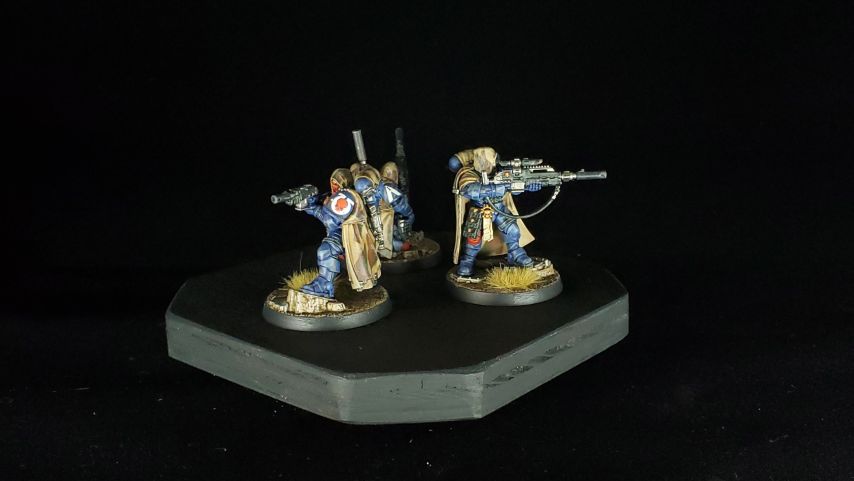
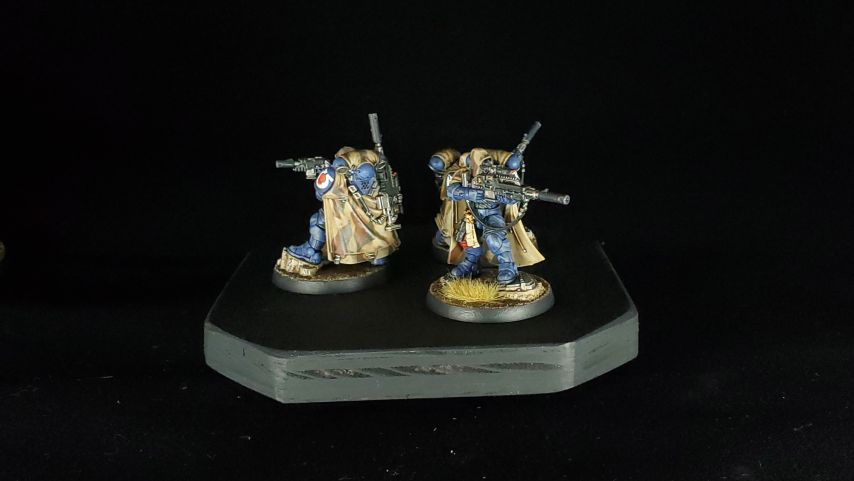
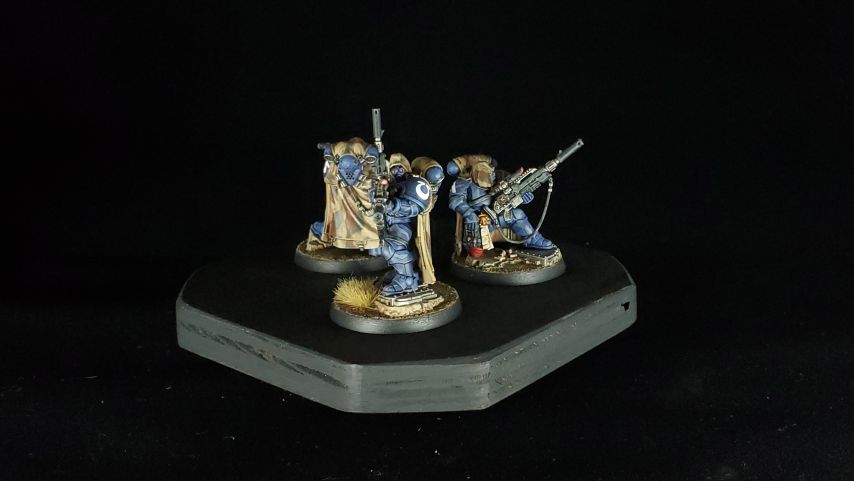
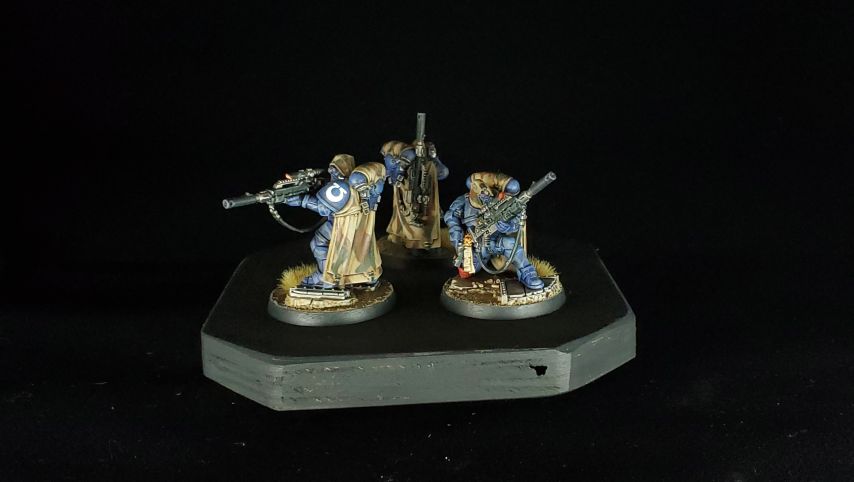
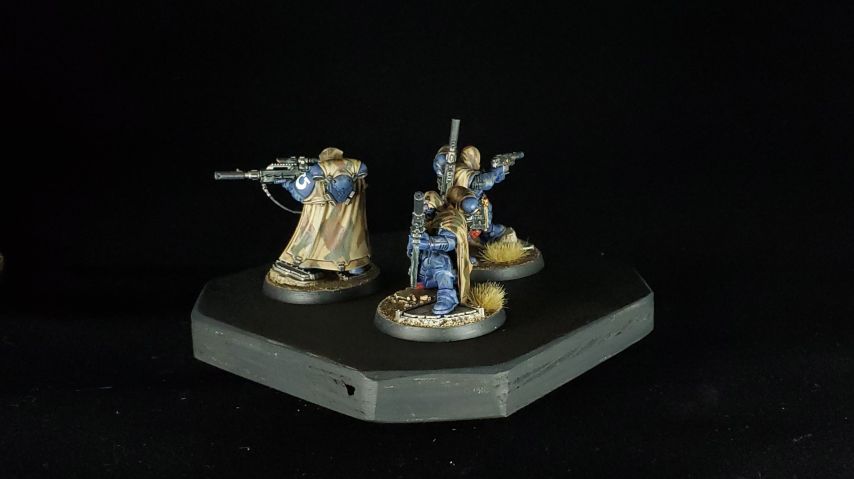
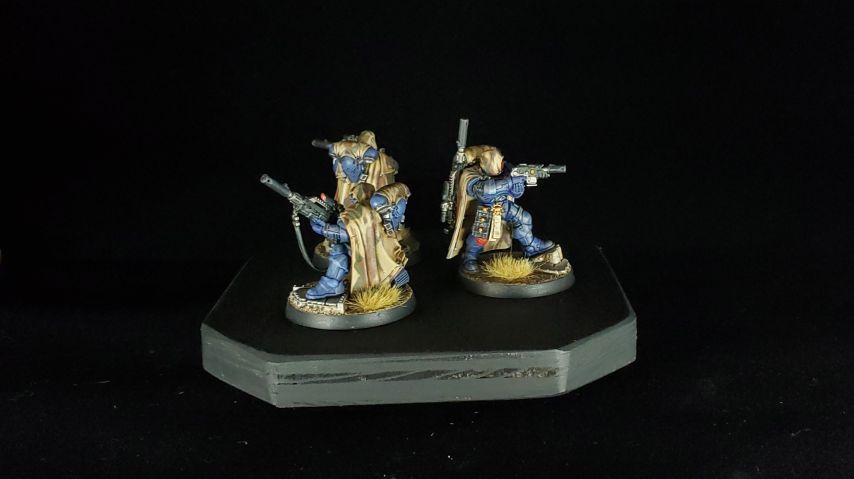
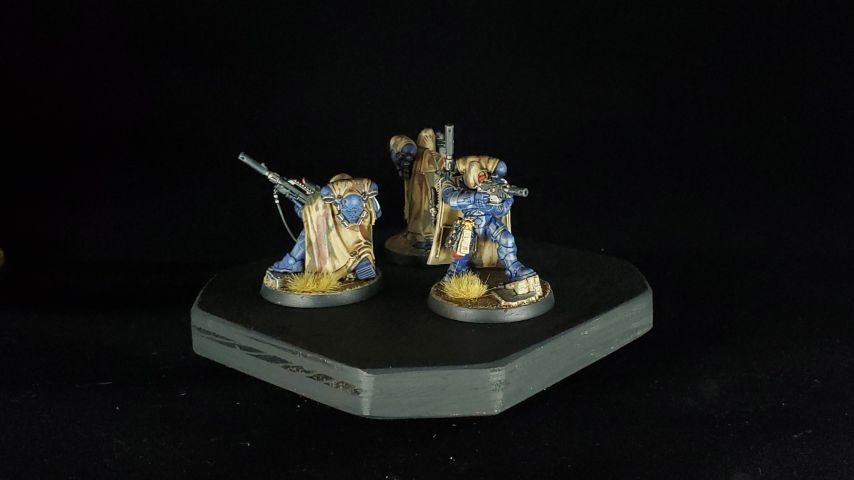
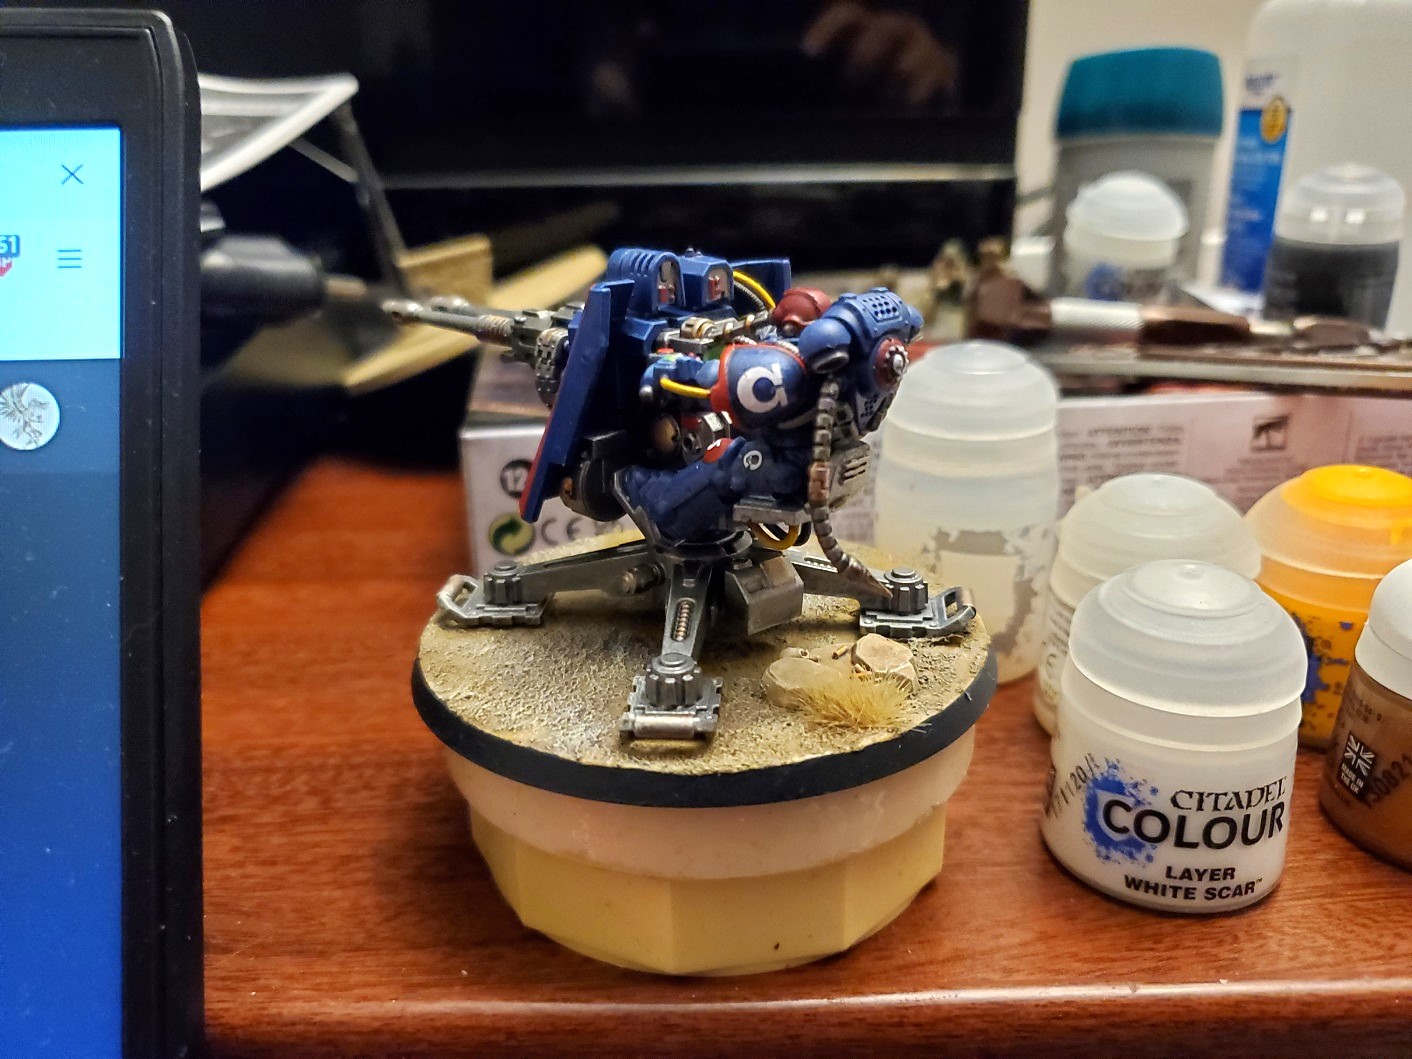
Been a while… I spent the summer on the Canadian Shield doing fieldwork…so no hobby got done until I was back. Haven’t been focusing too much on the forums because I’m just getting generally distracted by everything, but I’ve gotten some painting done. I’ve even played a few games, too! So here’s the latest that I’ve gotten done; a Firestrike Servo-Turret and an Eliminator Sergeant (the rest of the squad is sort of half done…). The Techmarine has his ‘Mars markings’ picked out in Khorne Red (GW) where the 3rd Coy. markings are picked out in Mephiston Red (GW) to differentiate the two colours. I think it works ok. The Eliminators are something a bit different as I ‘camo’ed’ their armour as well with a nod to the camo patterns of old Rogue Trader era, but still holding to the colours of modern 40k. I’m pretty pleased with how he turned out…though the decals caused me enough problems that I ordered some Microset and sol so I don’t have to find other ways around the decal problem…
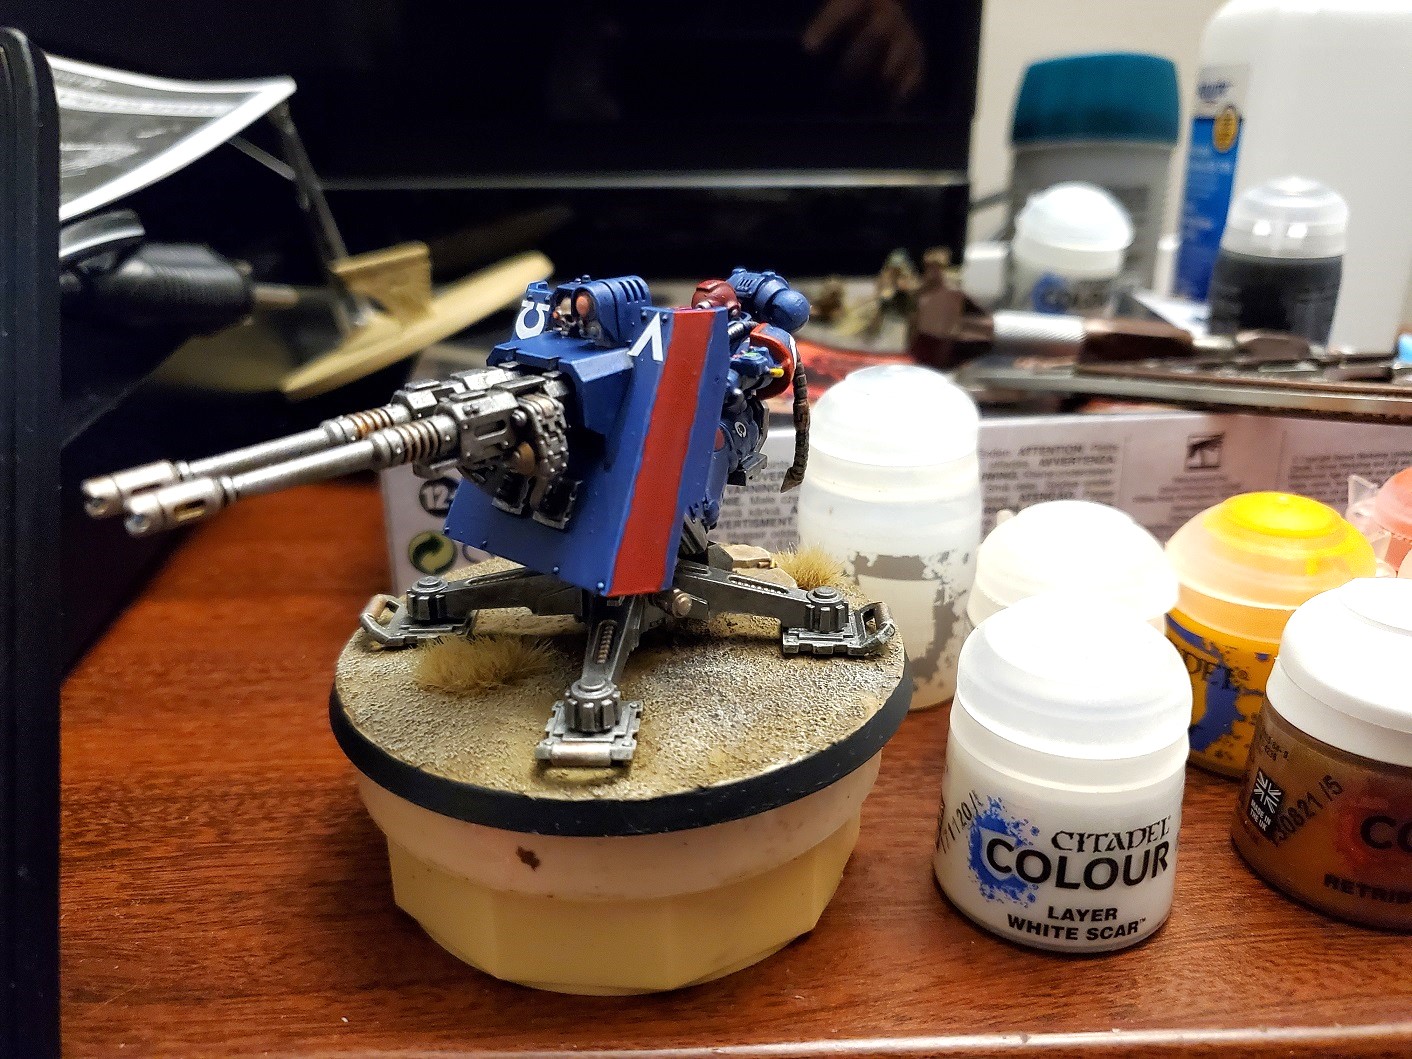 Techmarine Laius on his big gun 'Bombardus'. Faux Latin is fun, and he's also called Laius because the snap-fit kits from GW are not even close to easy to build...I ended up clipping off most of the pins...
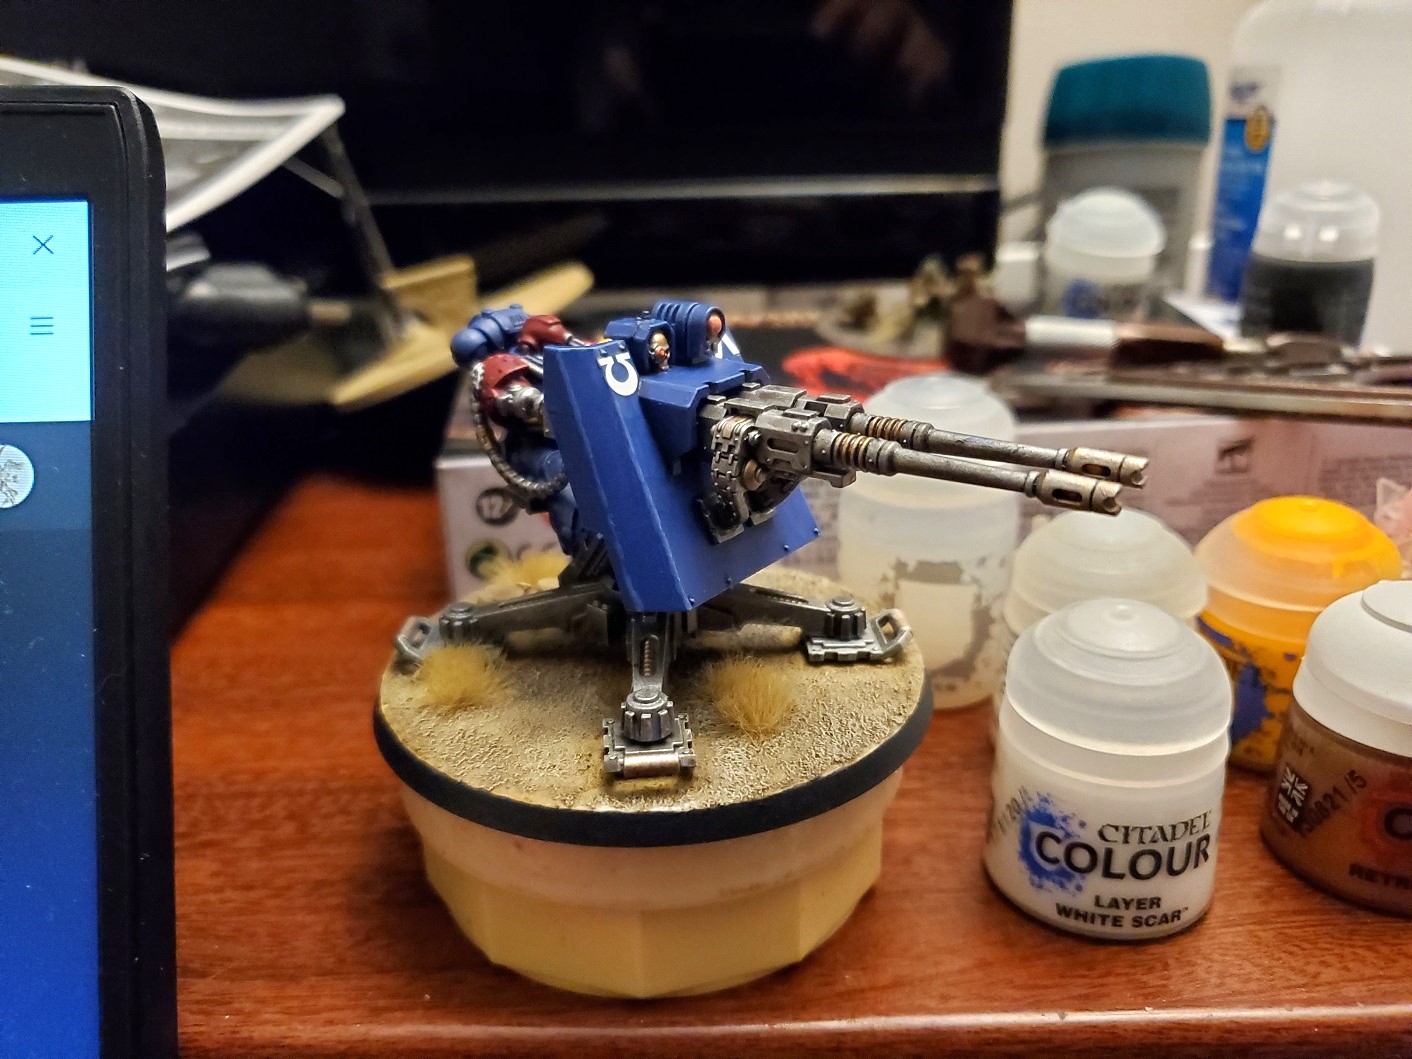
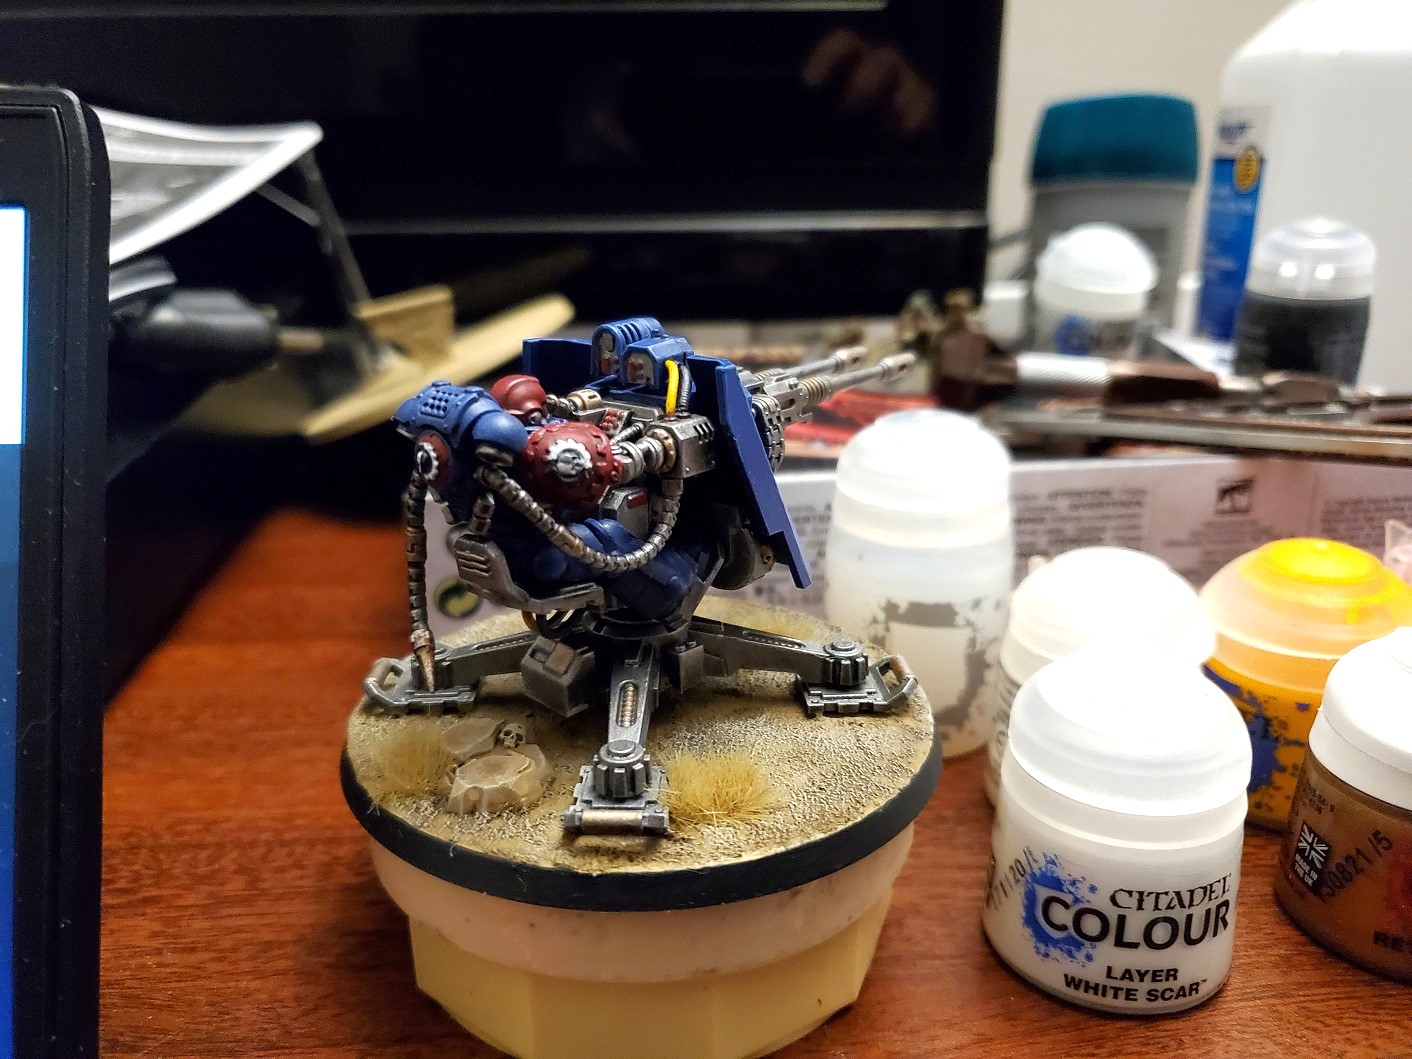
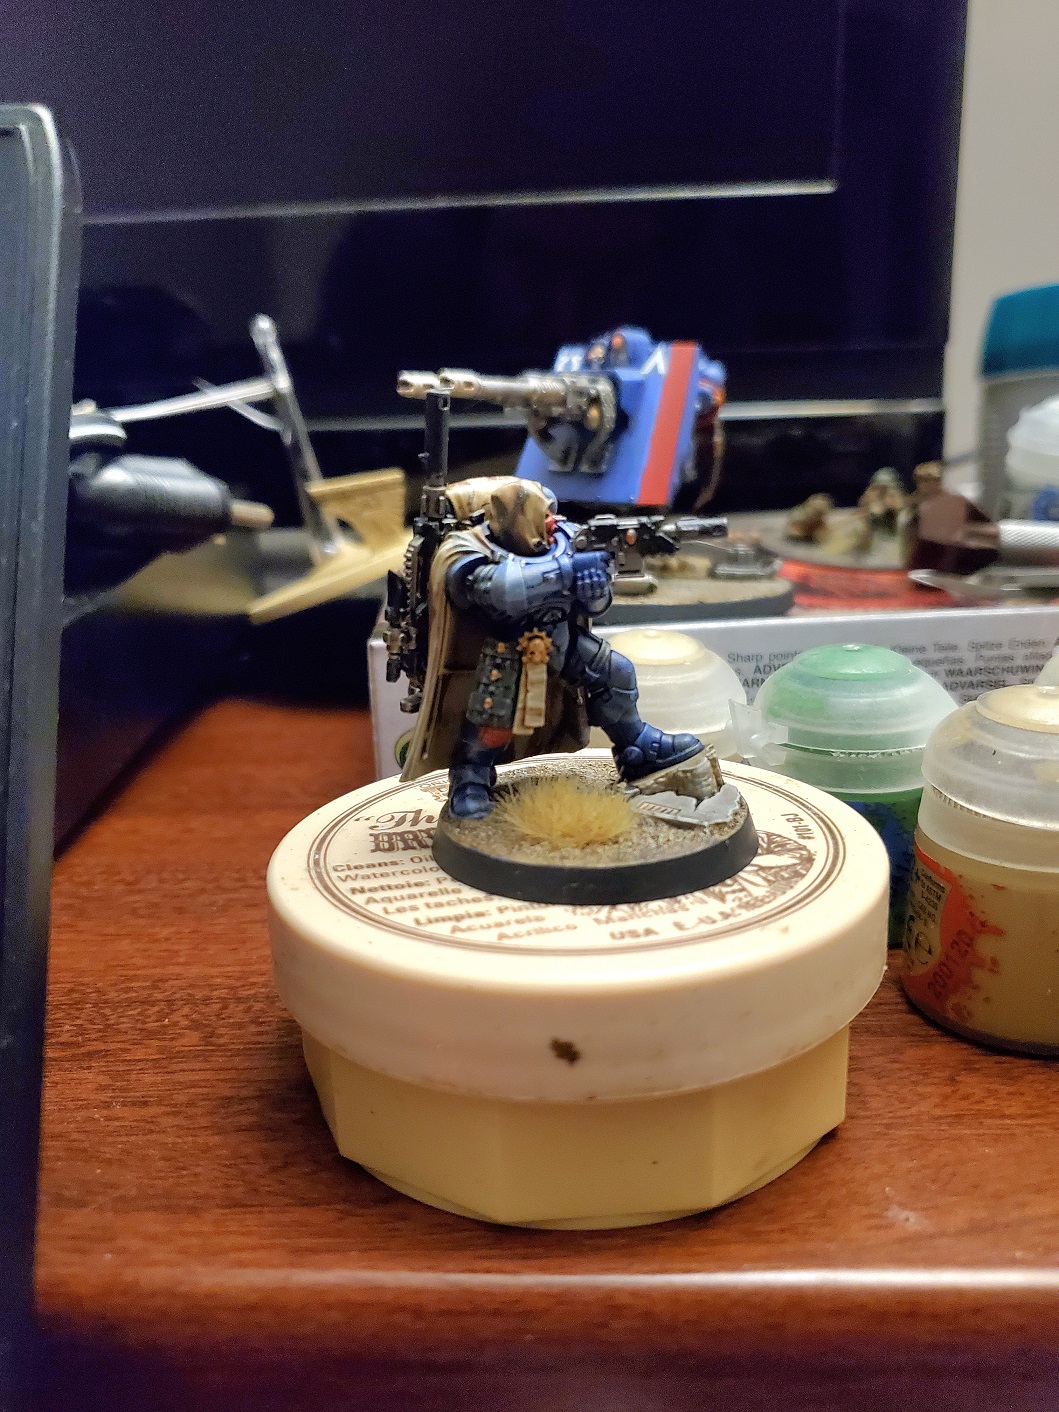
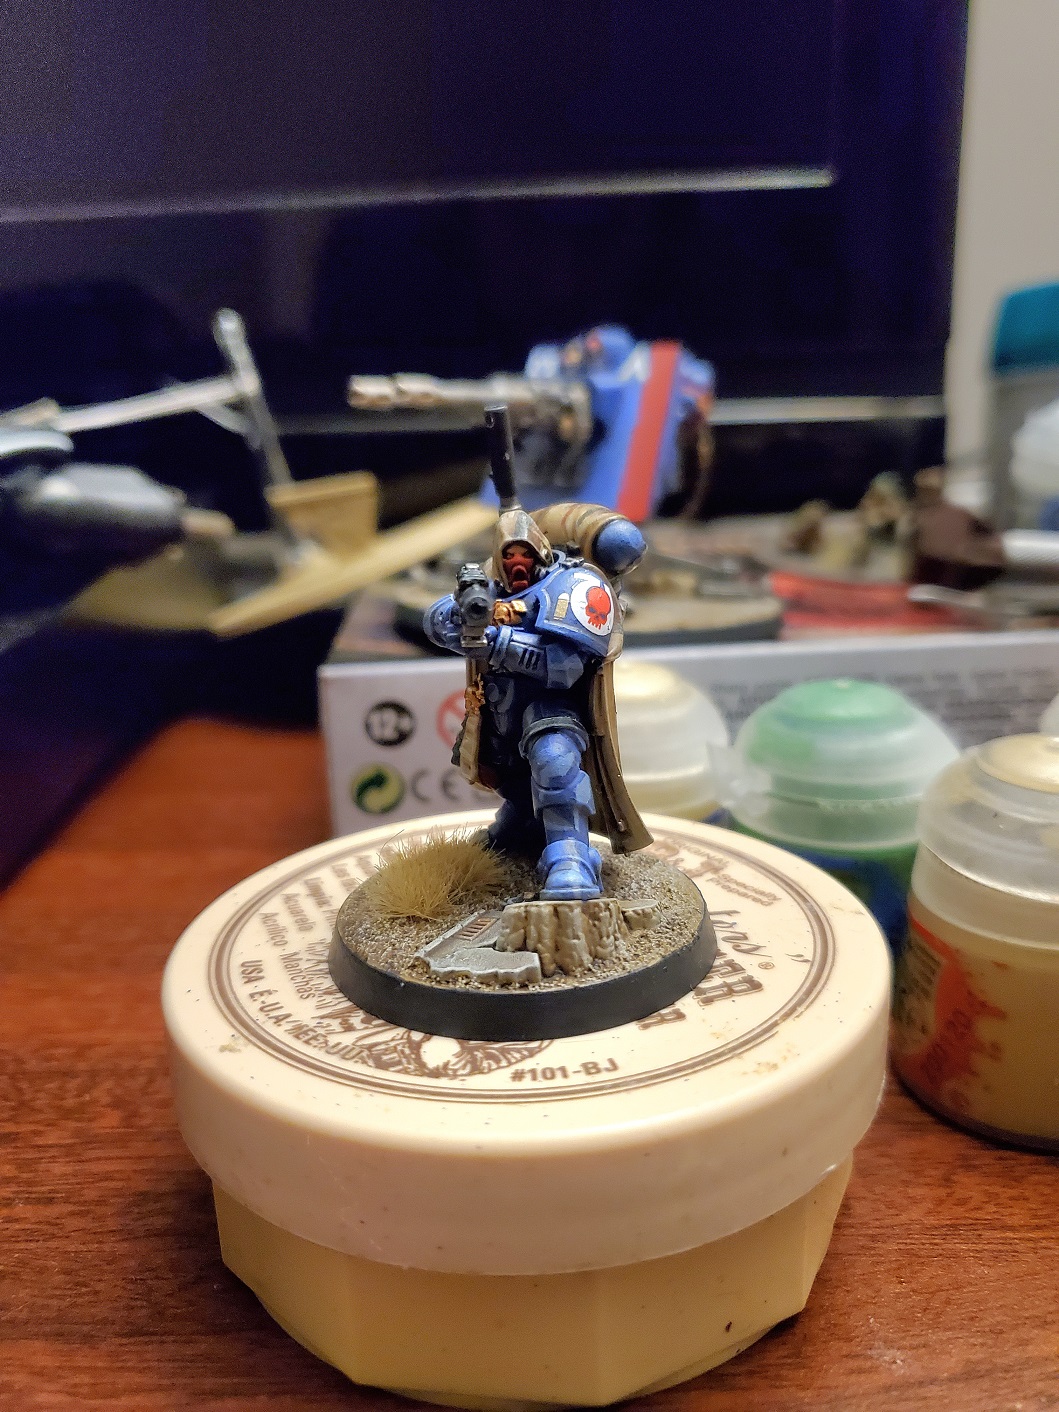 Very pleased with the camo on this guys. The decal on the shoulder is a bit patchy...but not bad considering it torn into about 3 pieces while trying to apply it...
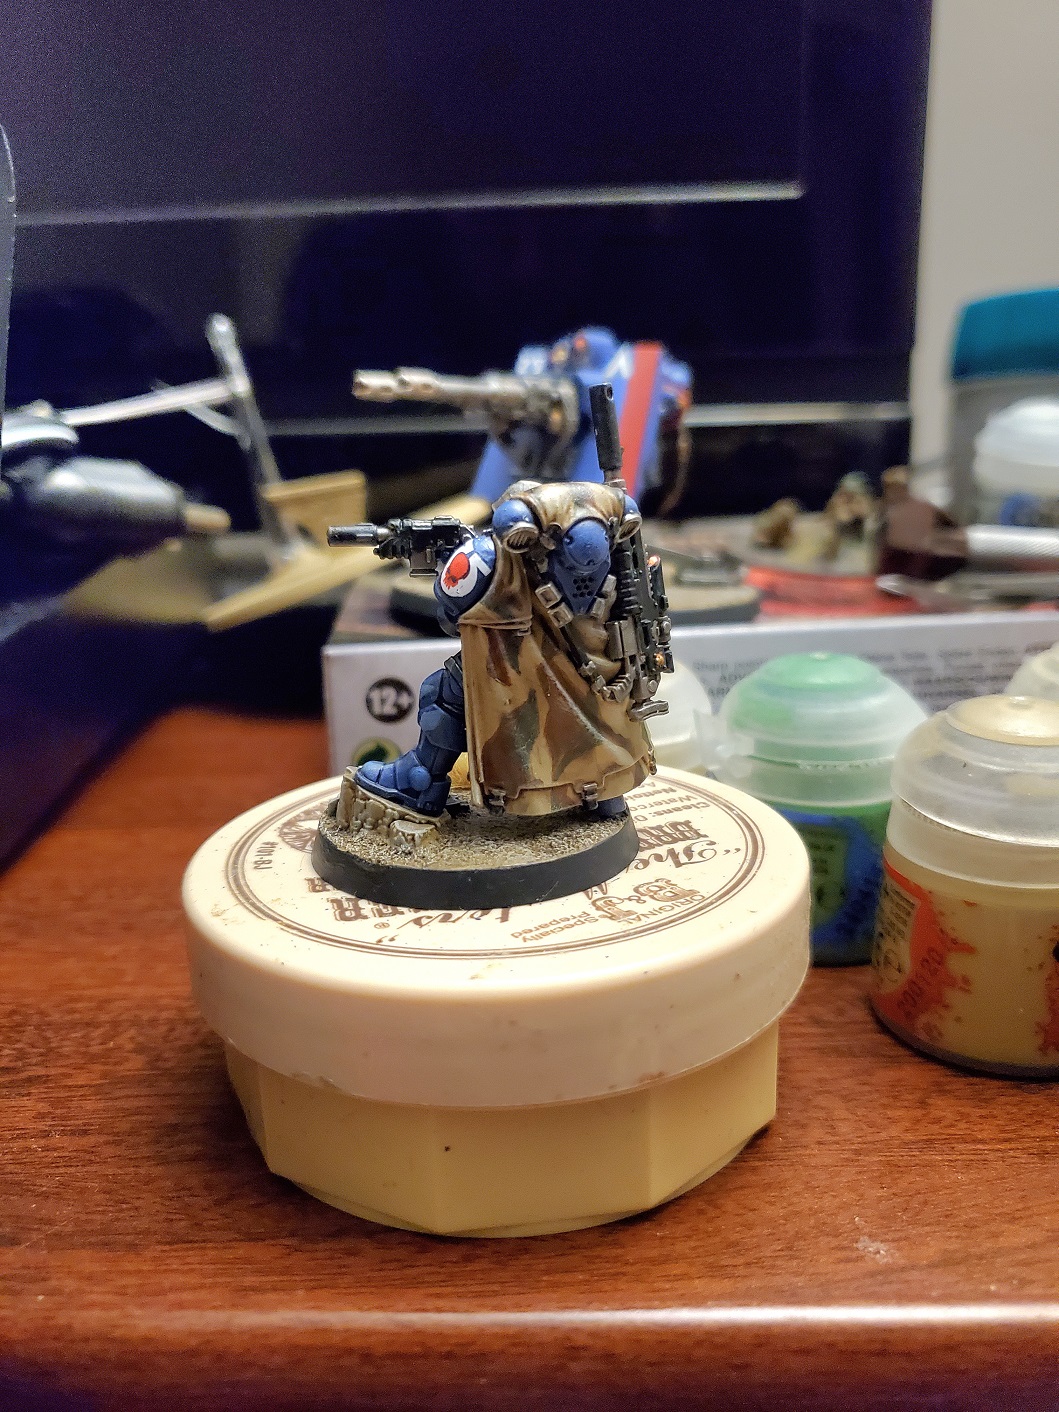

Still got 2 more Eliminators to finish up, and 20 Tommies so I can have a full platoon painted ready to actually game with… Not sure how regular updates will be happening, but we’ll see.
So, I went with grey in the end...
The camo pattern on the top is done, and I even finished off the little bits and pieces on the mini, too…minus the glass; wasn’t sure what to do with that…I’ll get back to it later.
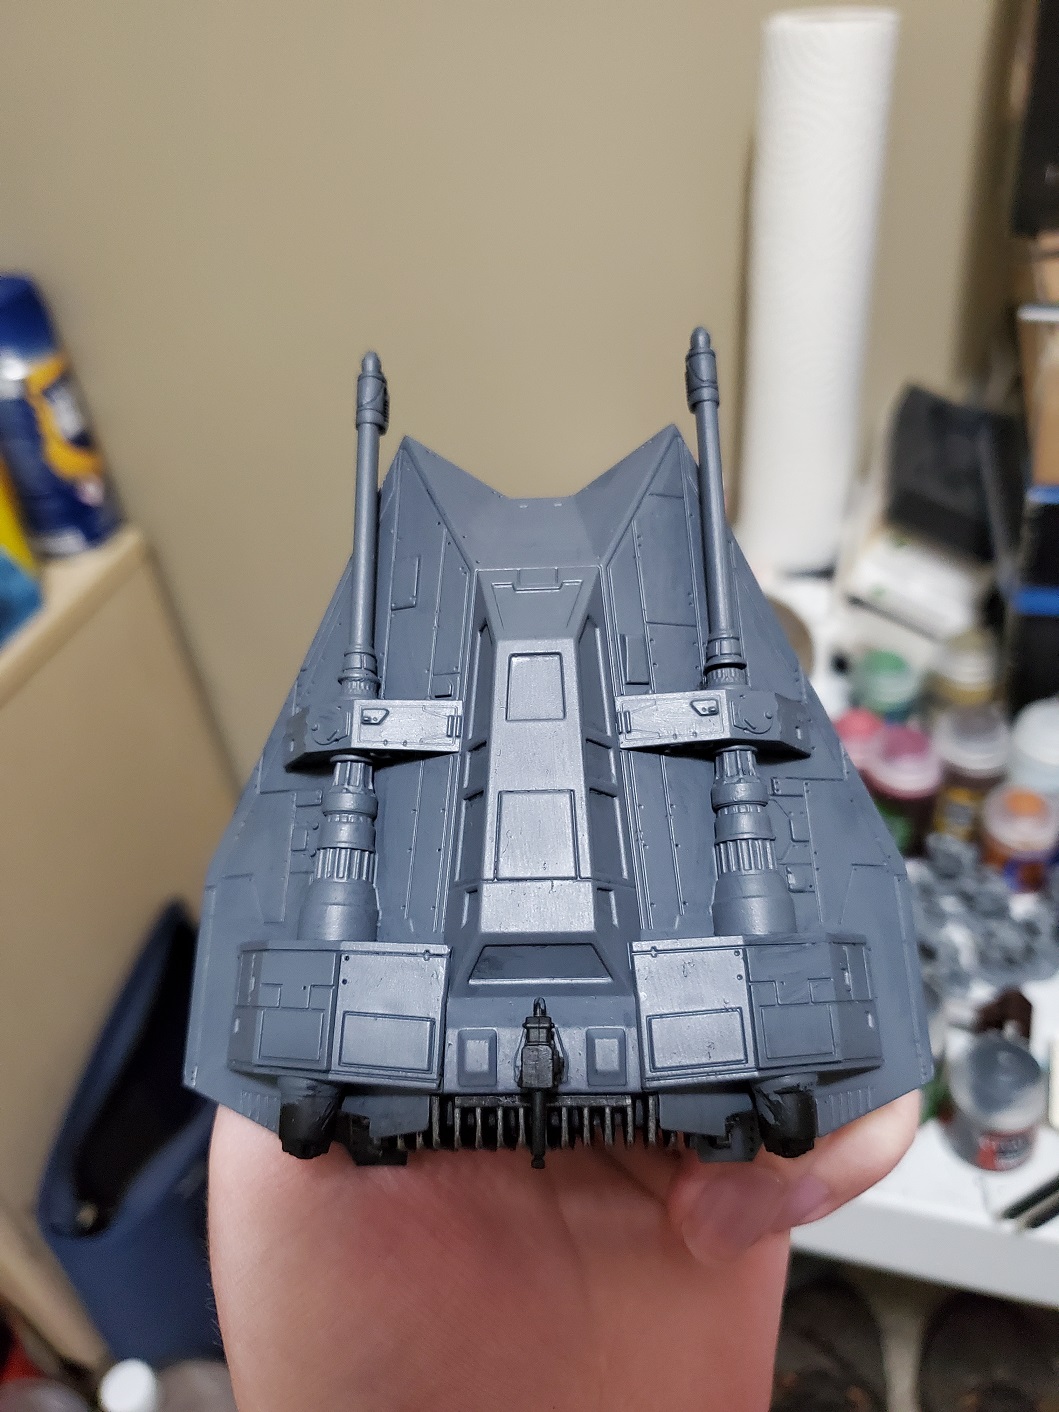 Started with a basecoat of Mechanicus Standard Grey (GW) because it's a pretty close approximation to the colours used on the Spitfires. I think it technically needs to be a little more of a green-grey to be accurate, but this works well enough for me.
 Then I took some Waaargh! Flesh (GW) and thinned it down a tad bit more than normal to block out a rough shape of the green pattern. I decided to have a general trend of diagonal wobble across the fuselage, which works quite well, I think.
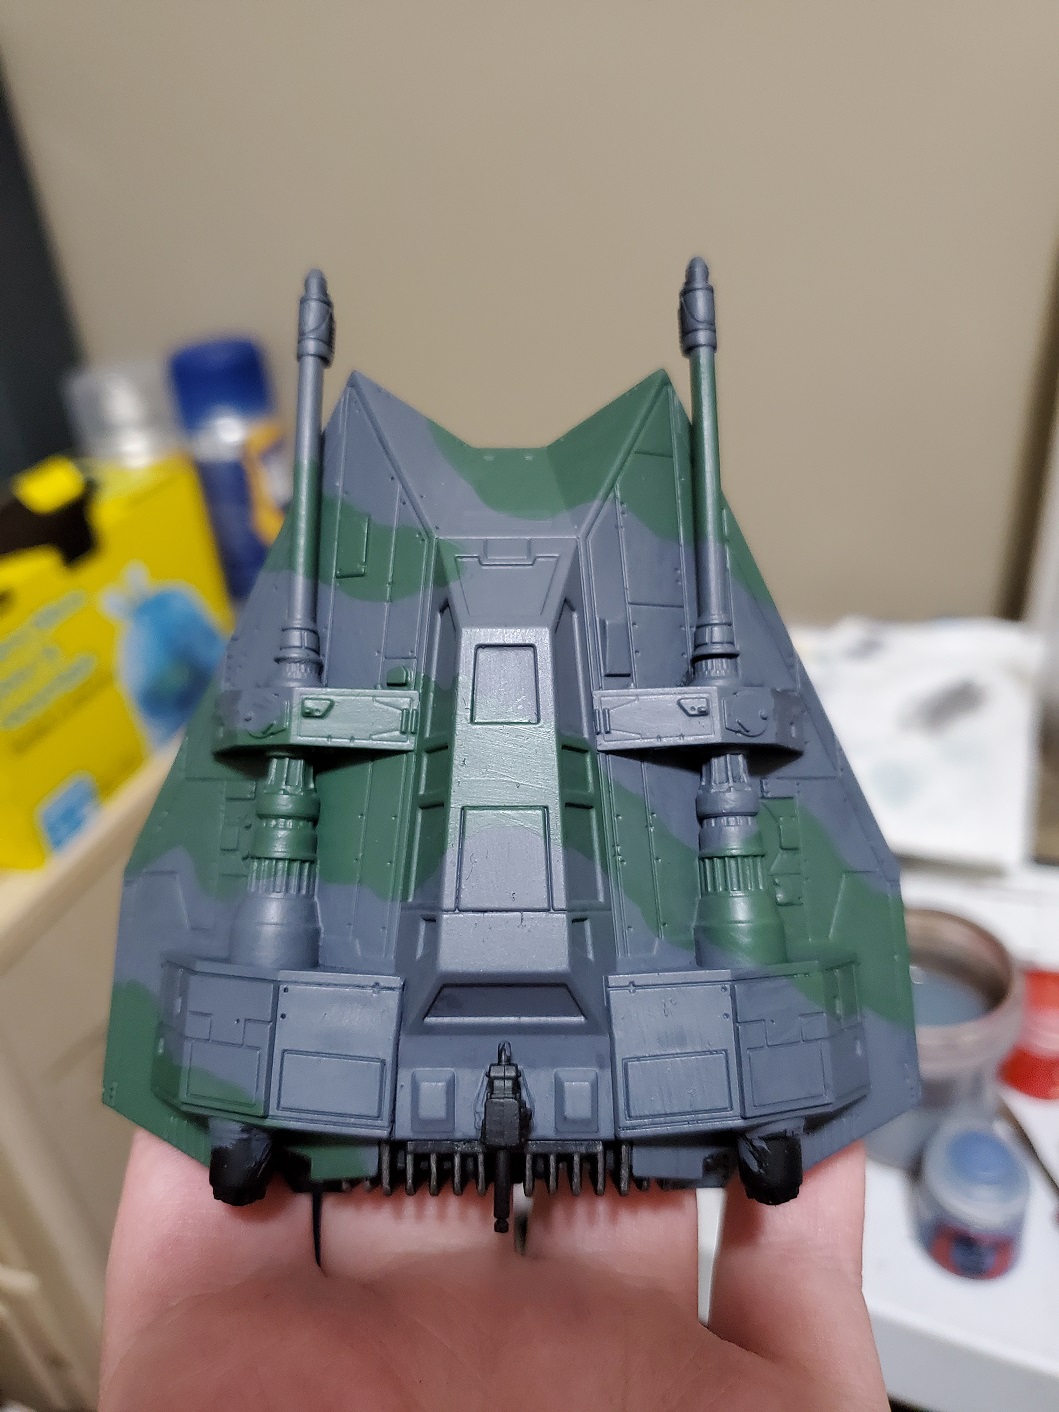 Then fill it all in! I had to do a couple of thin layers and had to really get into the gaps around the gun barrels in places, but I'm happy with the pattern.
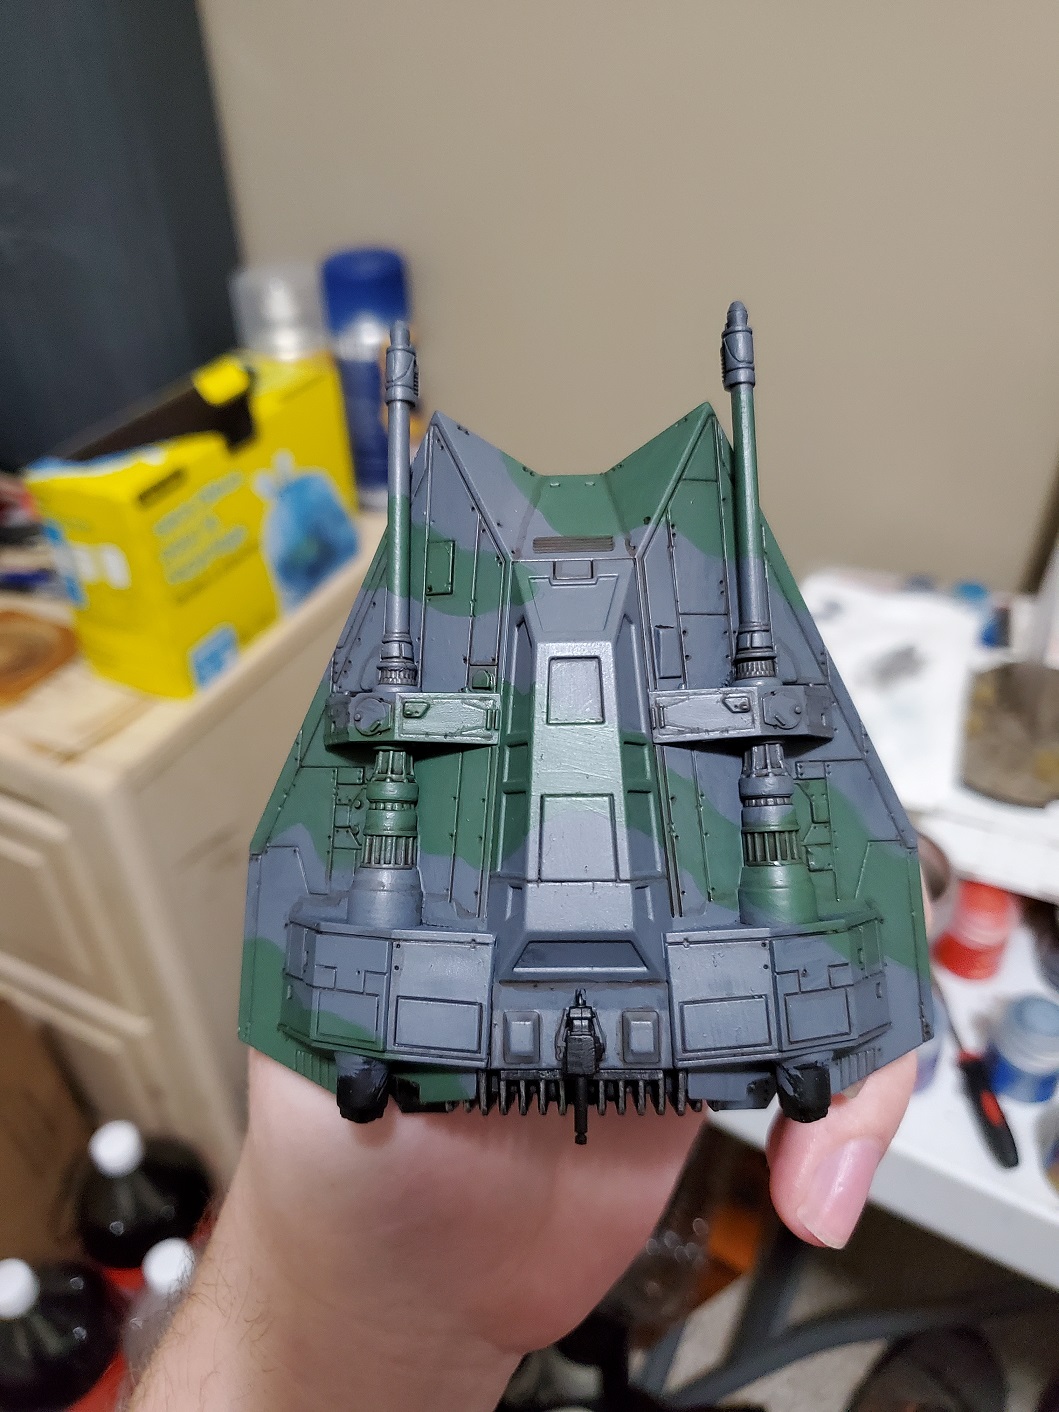 Then the recess shading with Agrax Earthshade (GW). I swear there are double the panel lines on the top of this thing... I ended up having to take a break before I finished up the 2nd 'wing'. It does take time, but I swear it's worth it!
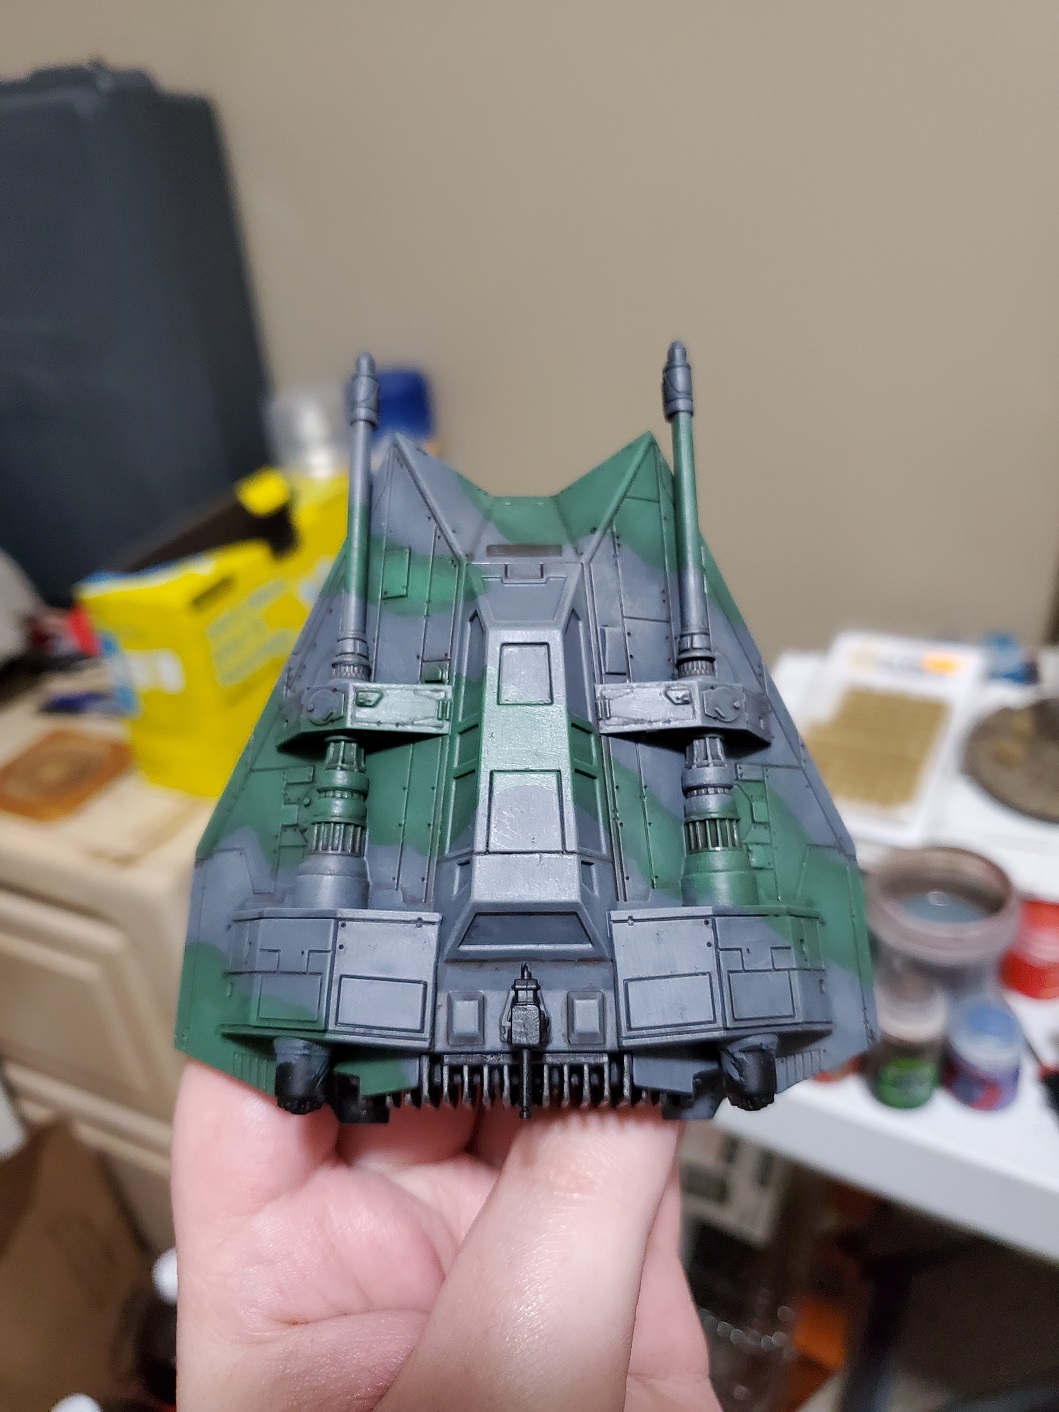 The carefully drybrush Dawnstone (GW) across the grey and Warboss Green (GW) across the green to brighten up the edges and such. Use a small brush and circular motion to keep on the colour you;re working on.
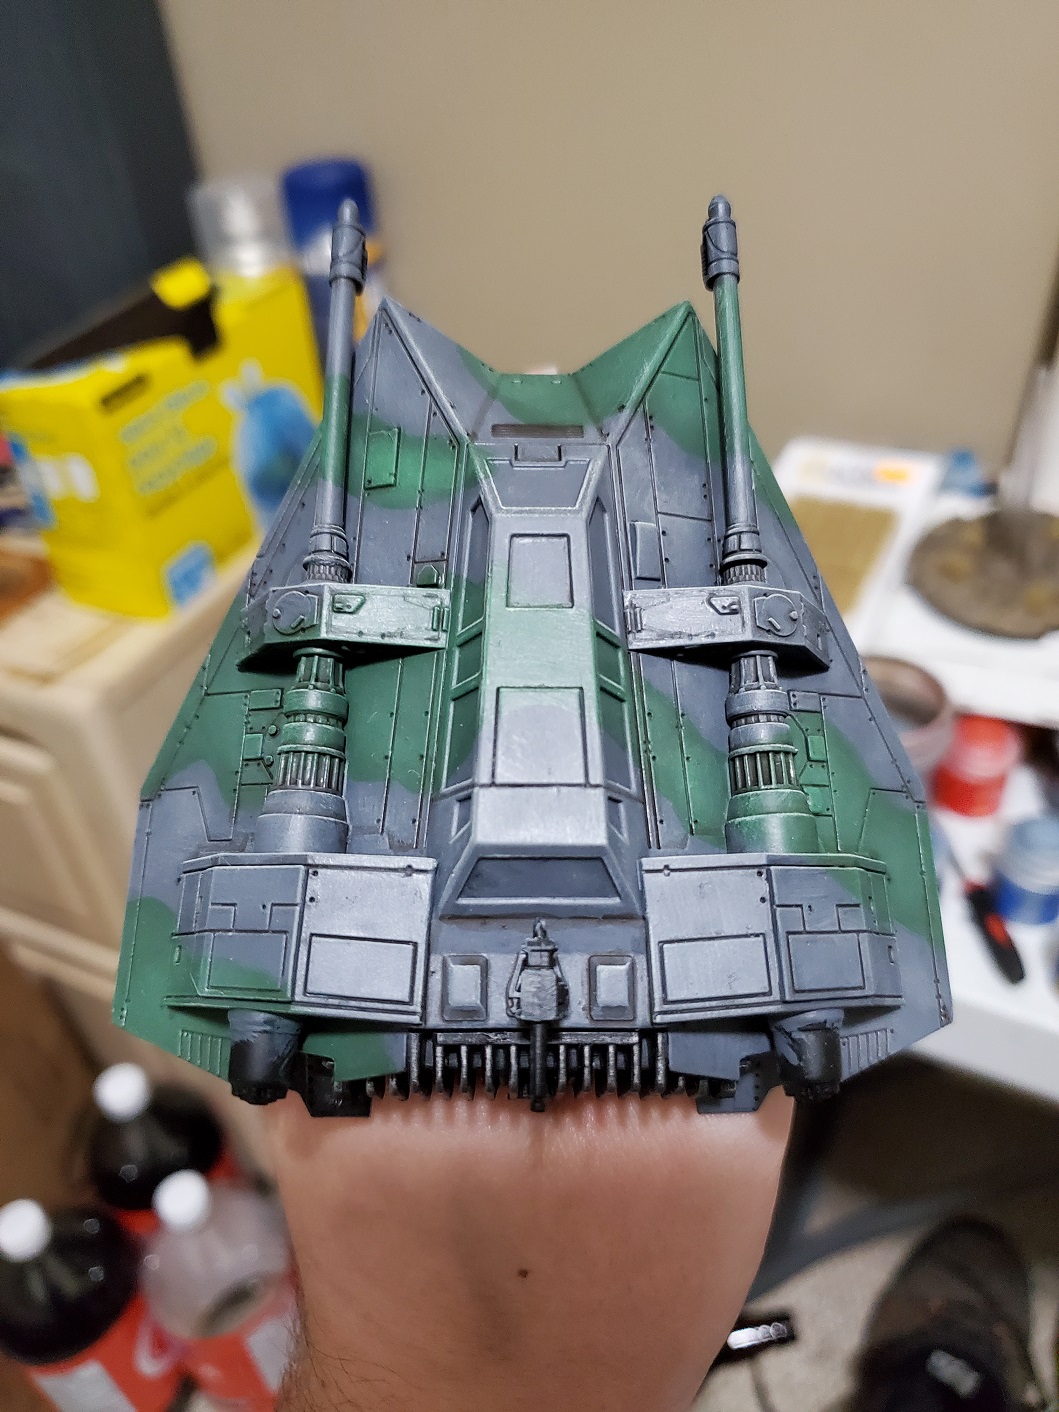 Then I did a light drybrush of Screaming Skull (GW) across the whole hull to get some sharper highlights. You could probably skip this part, but if you do then less truly is more here...
Then I picked out some extra details to finish it off. Red on the wings to mimic the red bands near the machine guns on a Spitfire, also a read casing on the end of the blasters just for a flash of colour. The little rectangle beneath the cockpit was too perfectly flag shaped to not do SOMETHING. The metal was based Leadbelcher (GW) and either coated in Black Templar Contrast (GW) or Wyldwood Contrast (GW) then drybrushed with Stormhost Silver (GW). The canopy glass was just blocked in with Stegadon Scale Green (GW) for now, as I’m not sure what to do with it. I was going to gloss it, but I want to do a bit more work, so I left it for now. I’ll get to it later, but for now she’s done.
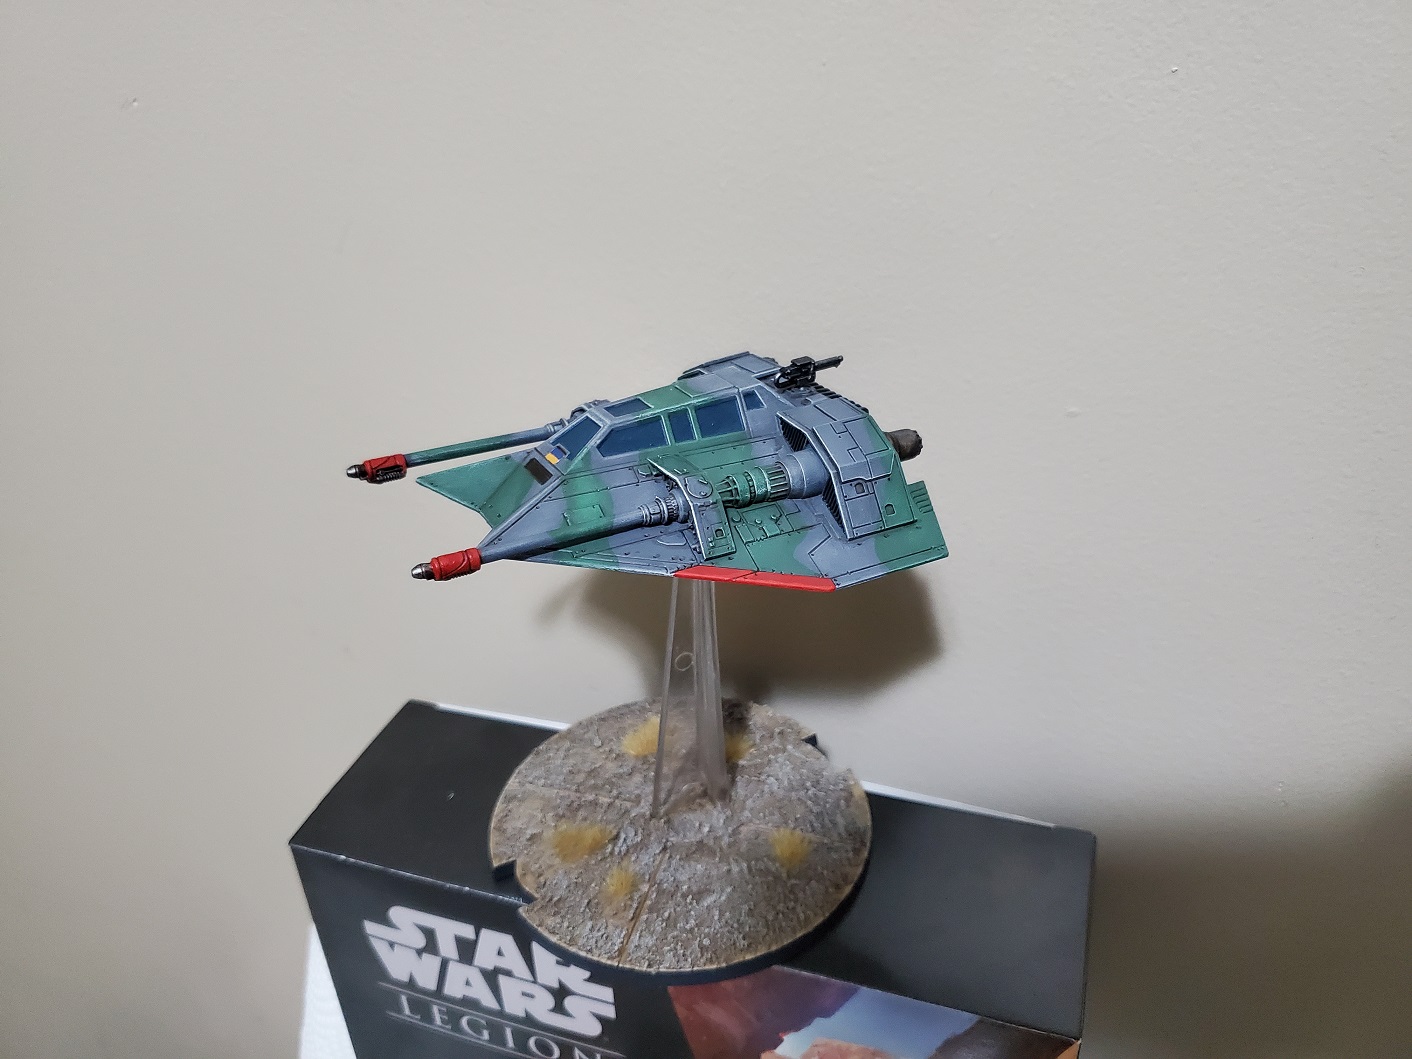 Now it can be on its own box!
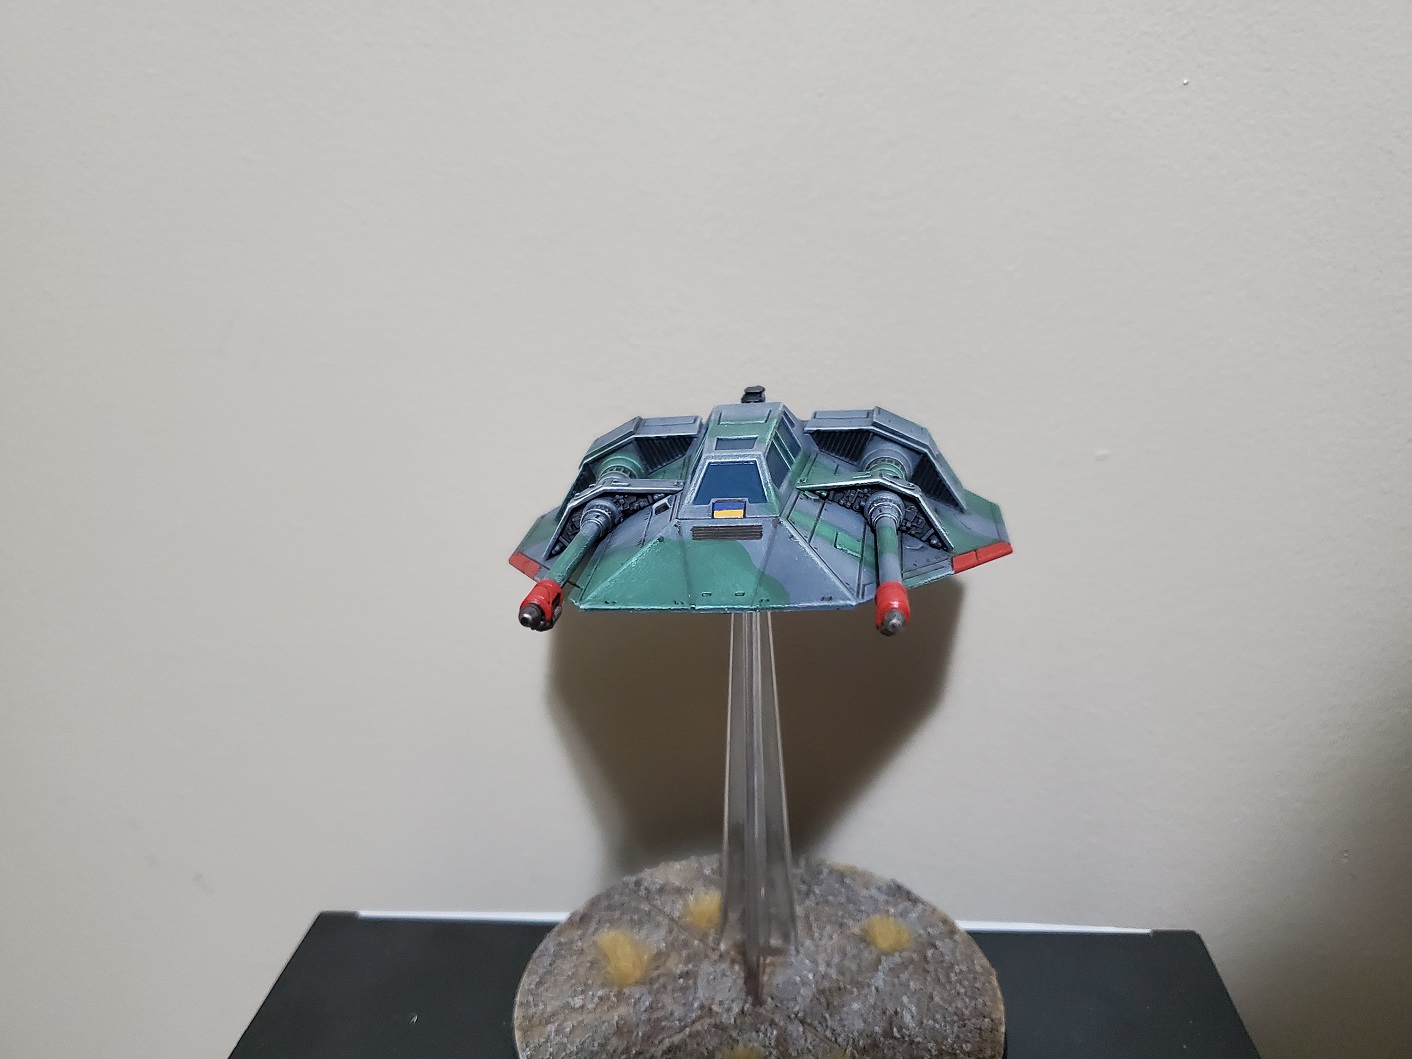
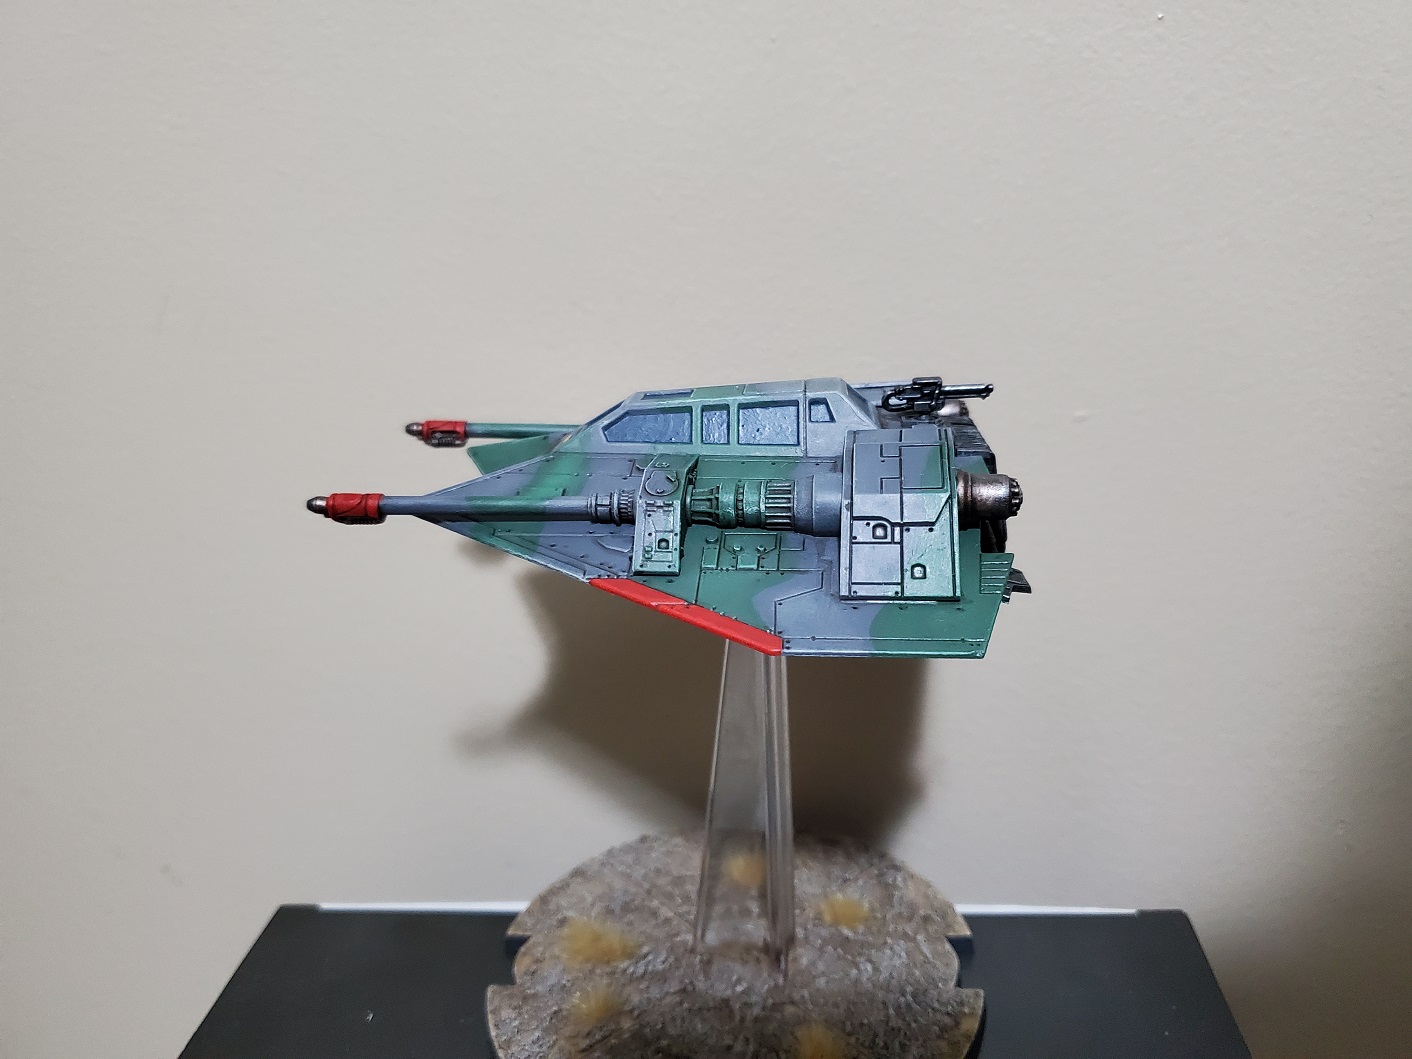
Bit tricky to take pics of the underside once she’s on the stand…but I covered that below pretty well. 😛
Not sure what’s up next…maybe more Marines? We’ll see…my Macragge Blue spray is getting pretty low…
It's happening, Reg! Something's actually happening, Reg!
I’ve been using the box as a stand long enough! The Age of the Marine is over*; the Age of the T-47 has come!
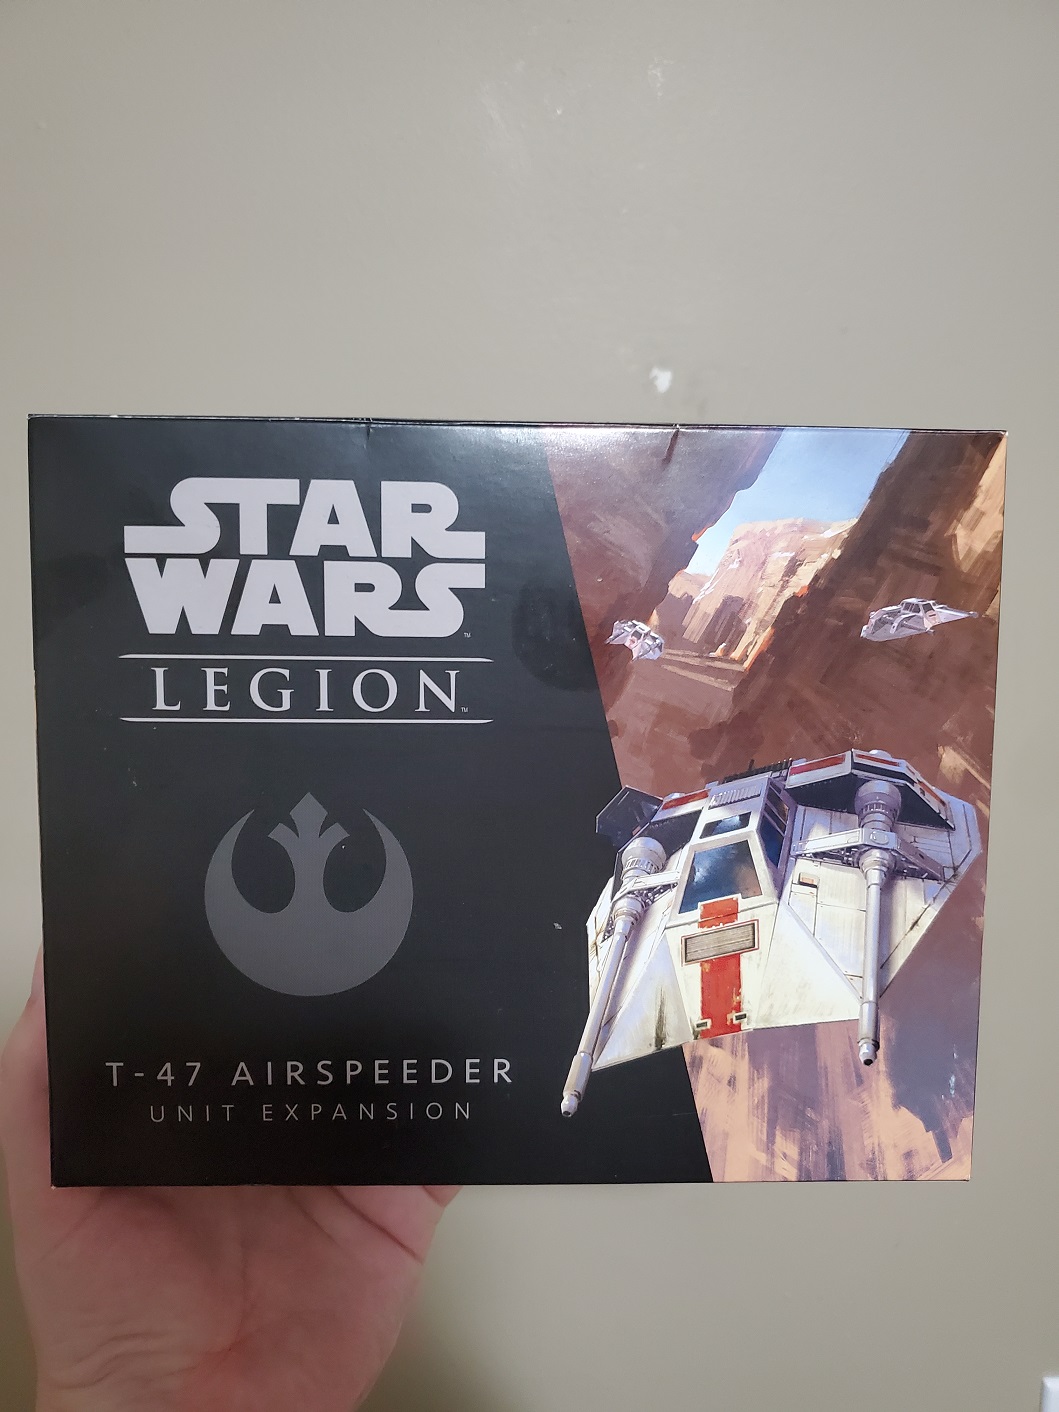 *Until I paint another one, of course...
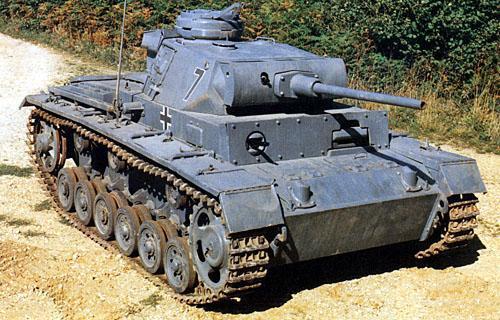
The basic plan for my T-47 is to mimic old WW2 camo that’s often used on things like Spitfires, but I started with the underside first. That being said, lets have a quick look at some reference images.
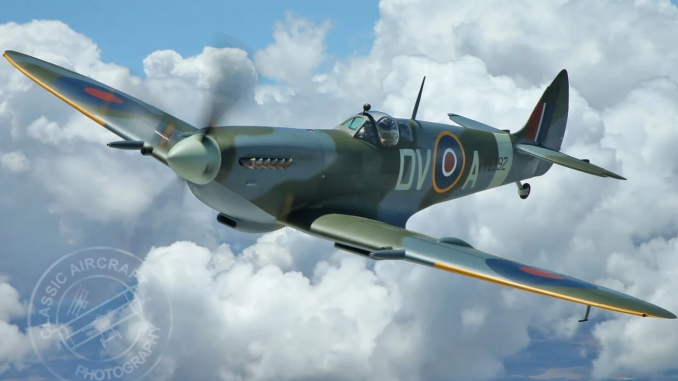
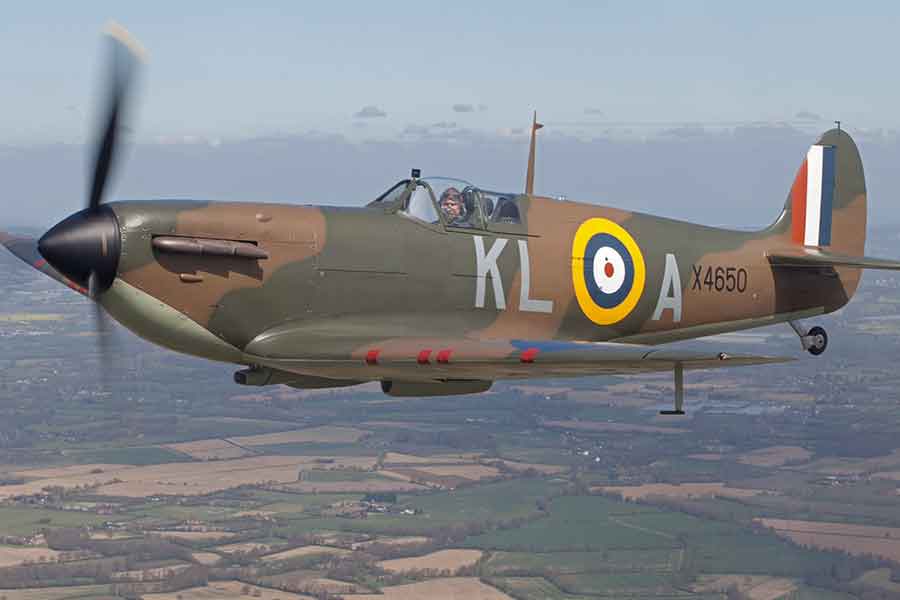

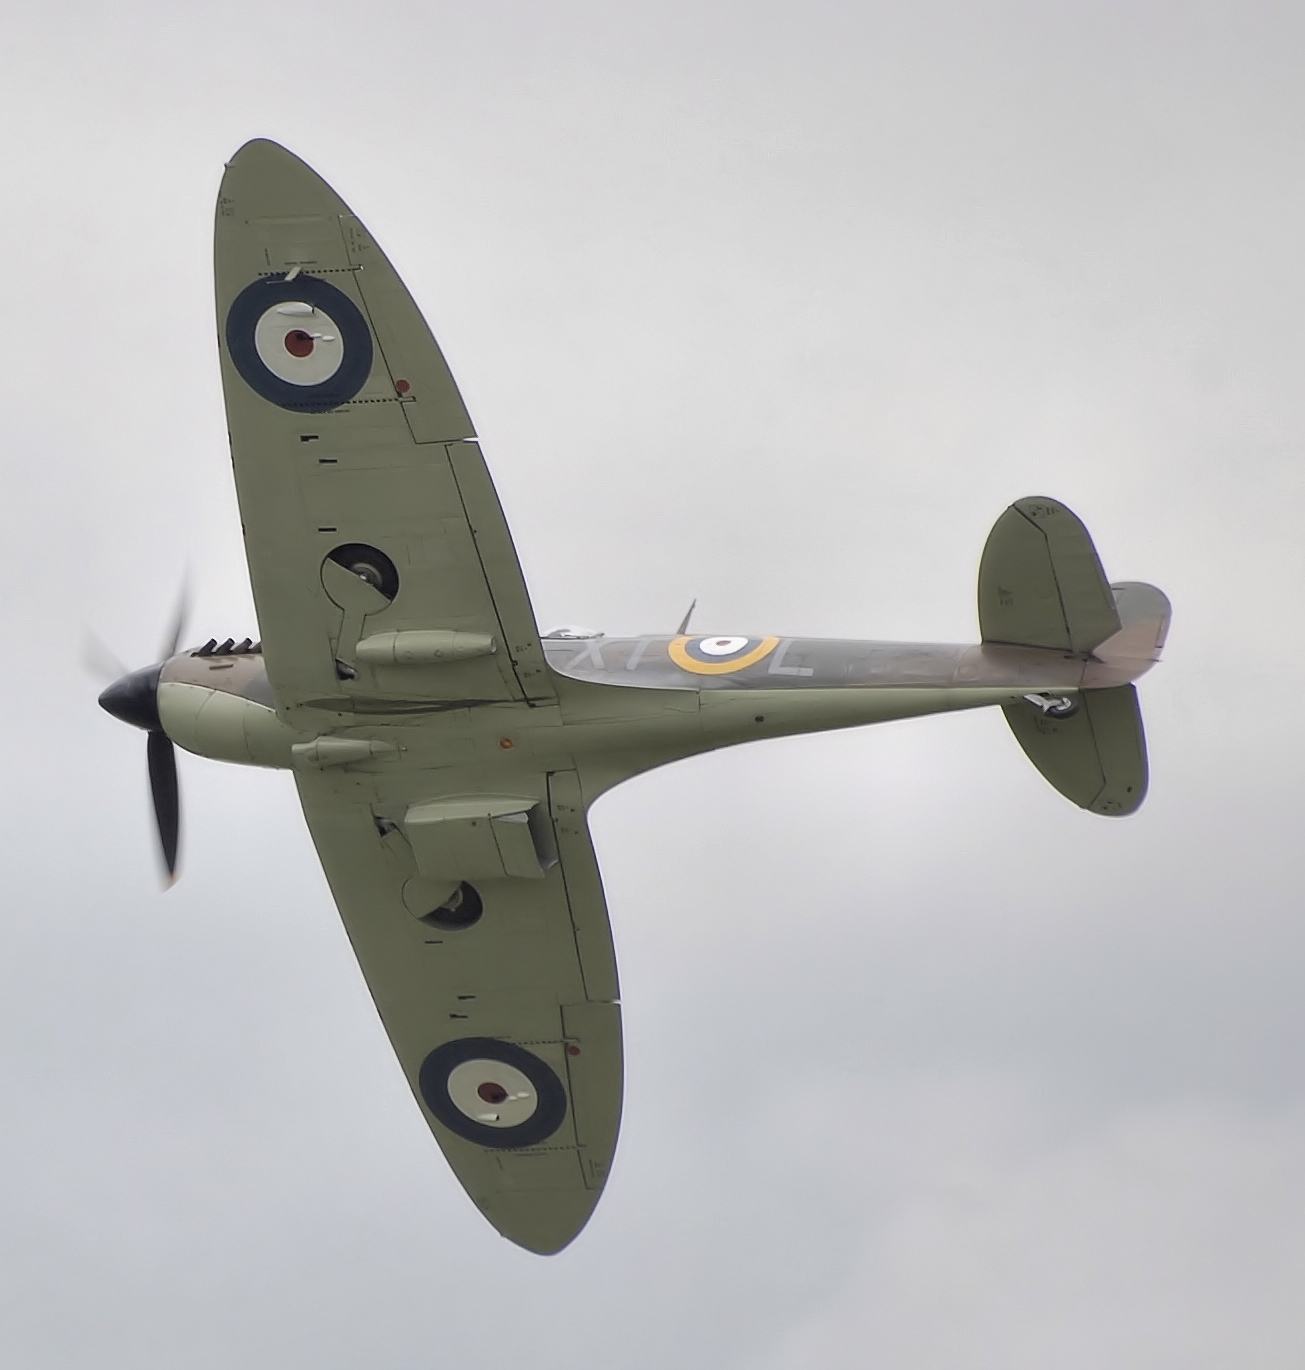
Still not sure if I’ll go with the Early War brown and green or the later grey and green, but for now I started with the underside. Now, the reference pictures show a bit of variation in the ‘blueness’ of the colour, and I think the colours I chose are a little too far into the blue for an ‘accurate’ colour, but my brother and I were discussing it earlier and he has an alternate method that he’s going to try on a Spitfire he has lying around that I think sounds pretty good.
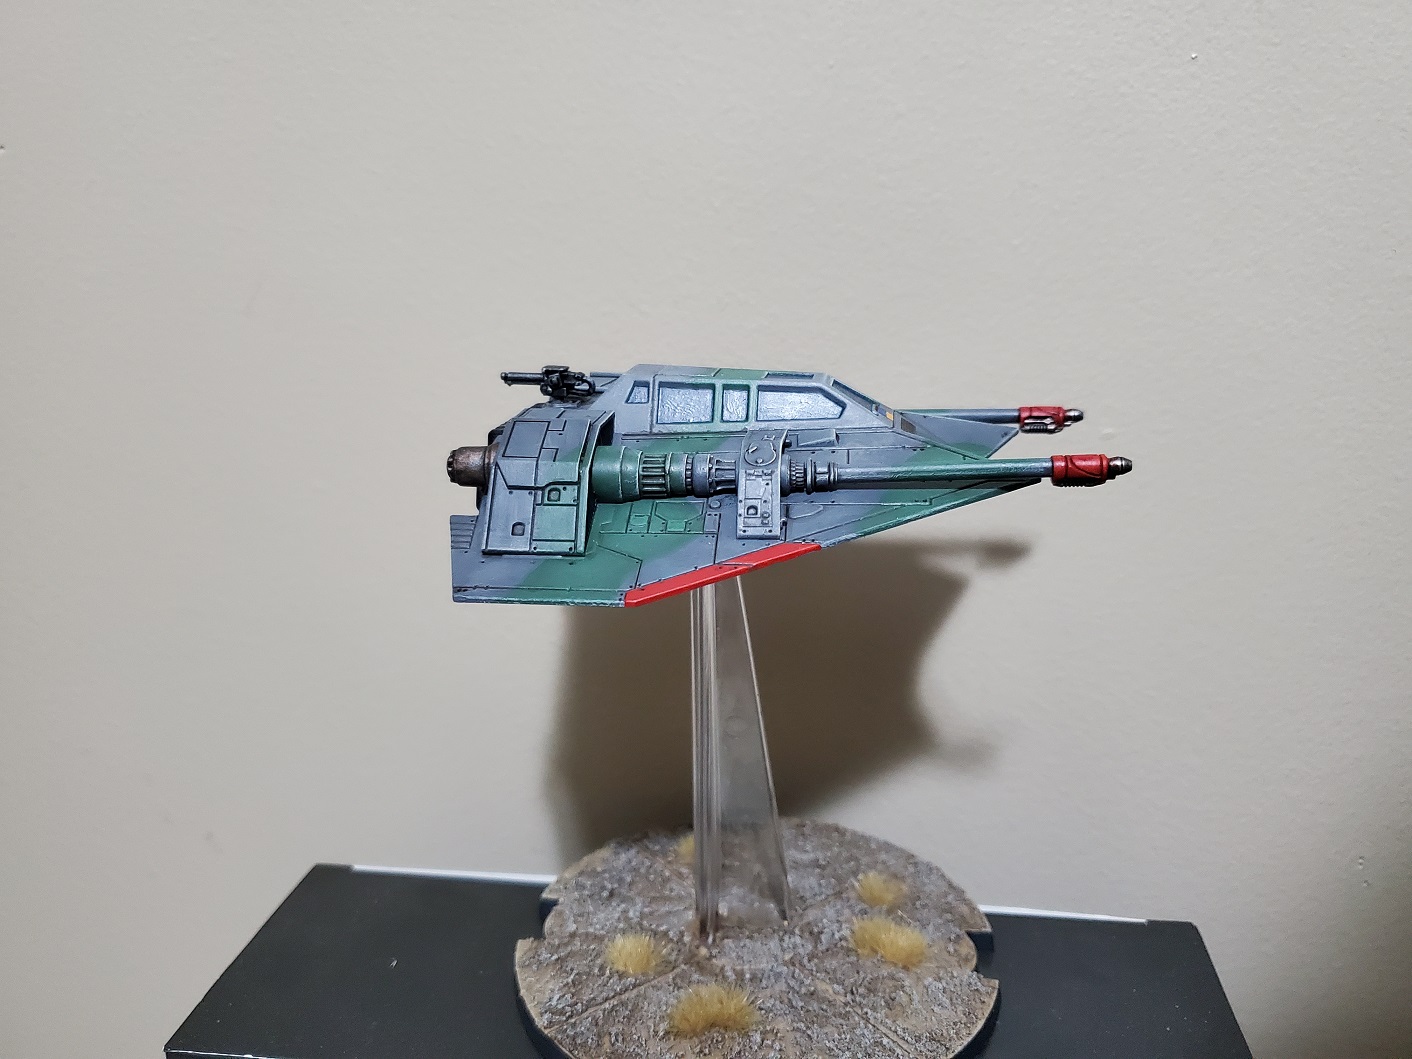
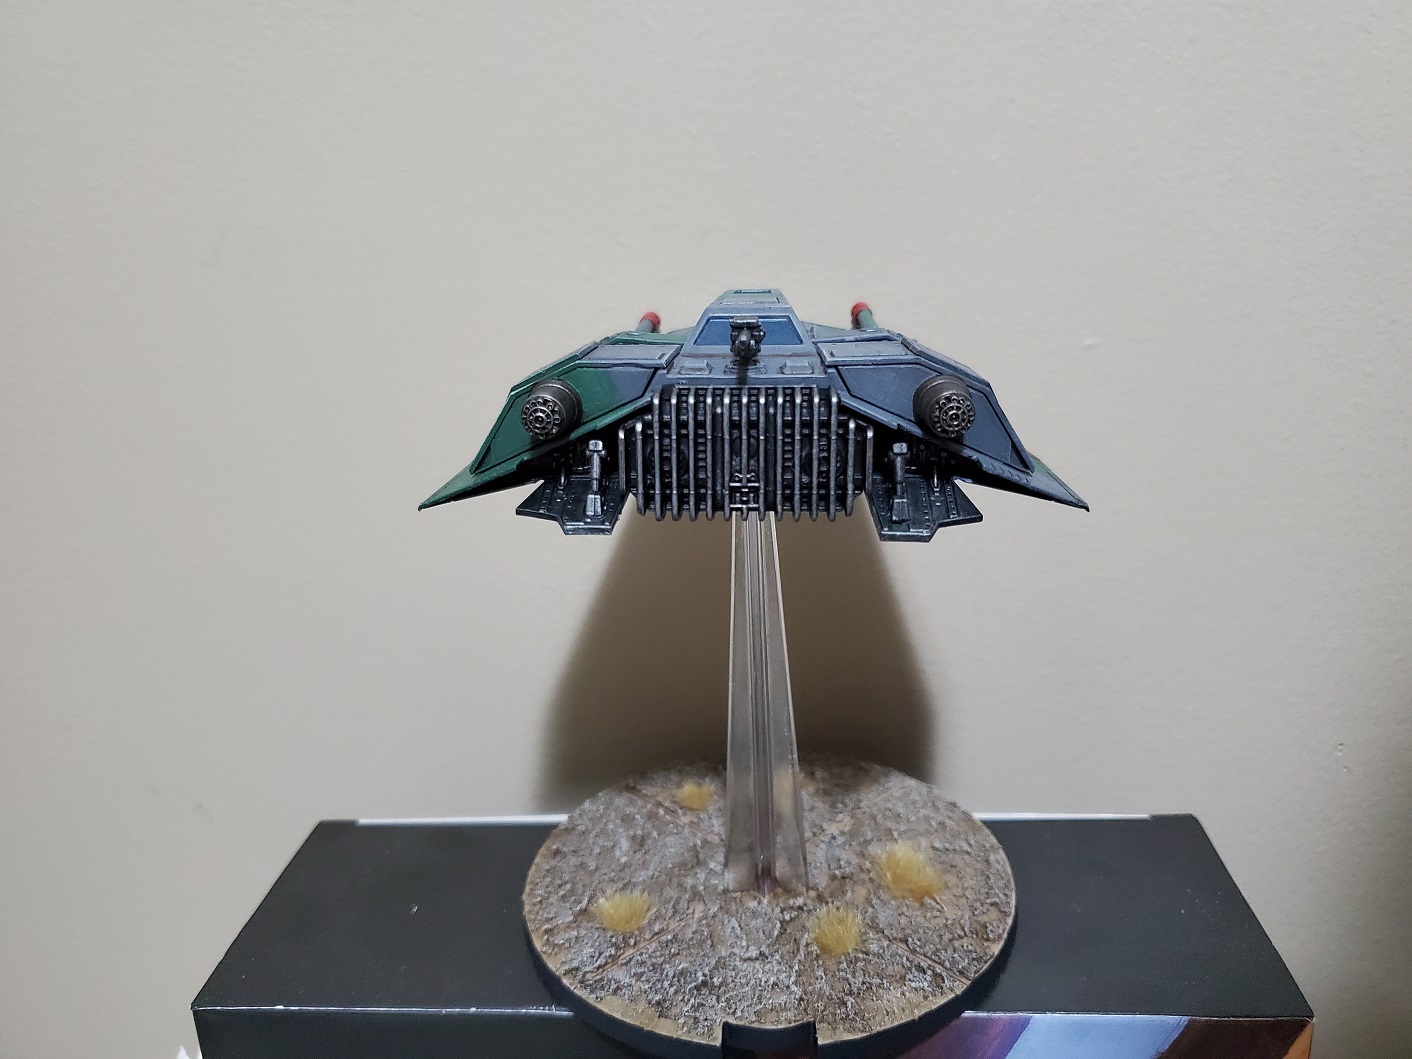
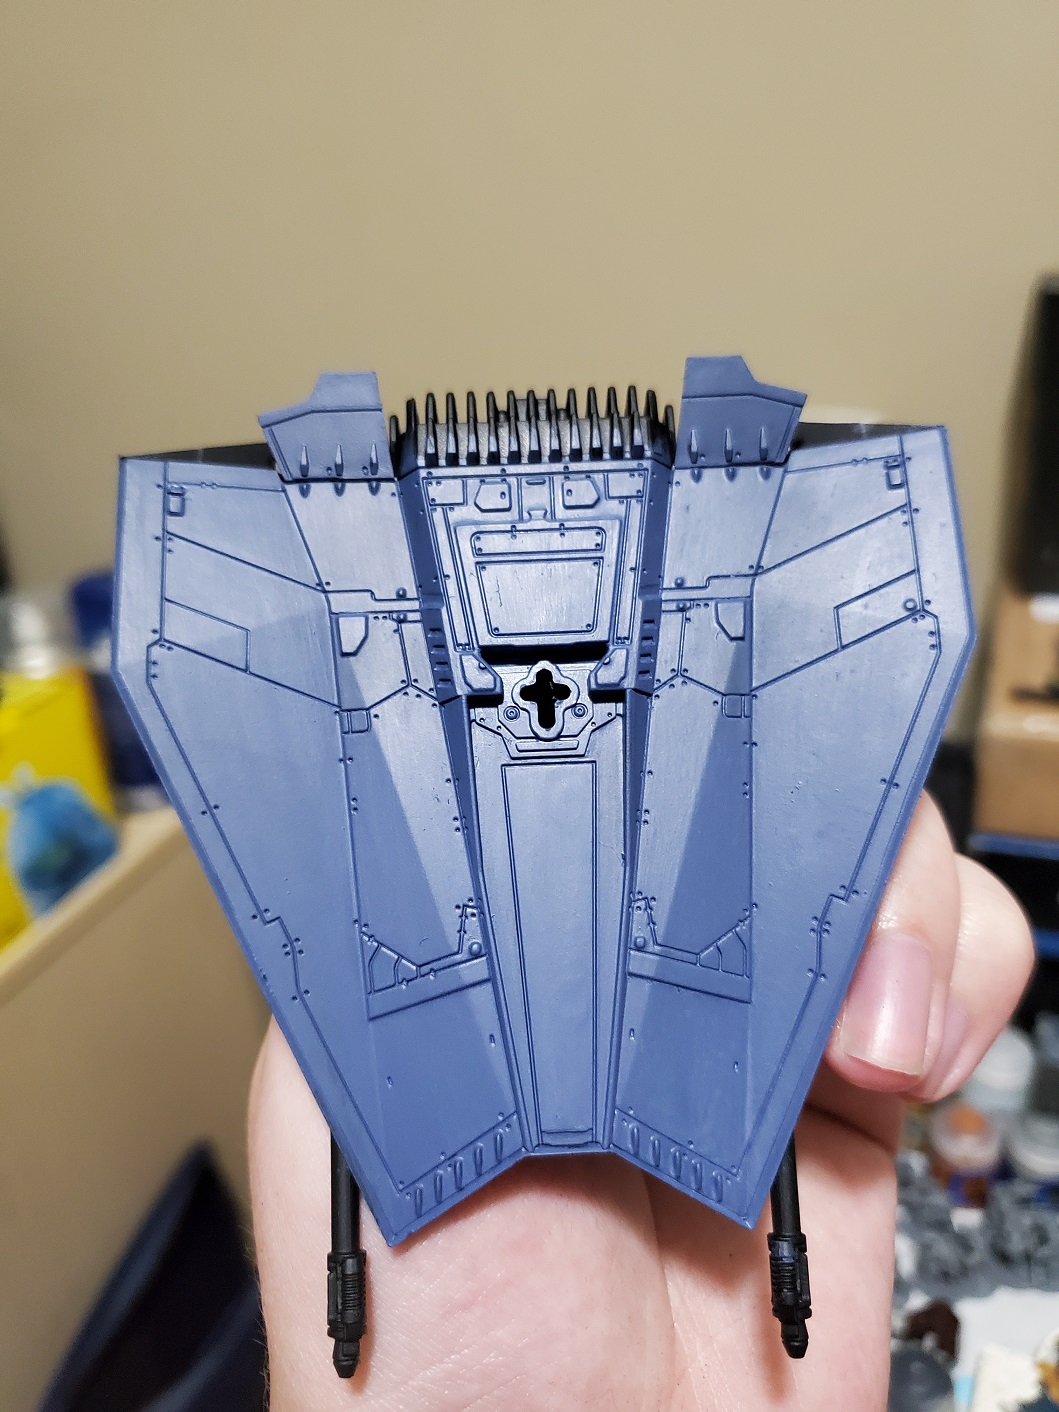 Started with a basecoat of The Fang (GW) and I think this really was too dark of a base colour for the 'accurate' colour on the belly of a Spitfire, and Russ Grey may have been a better start point for that.
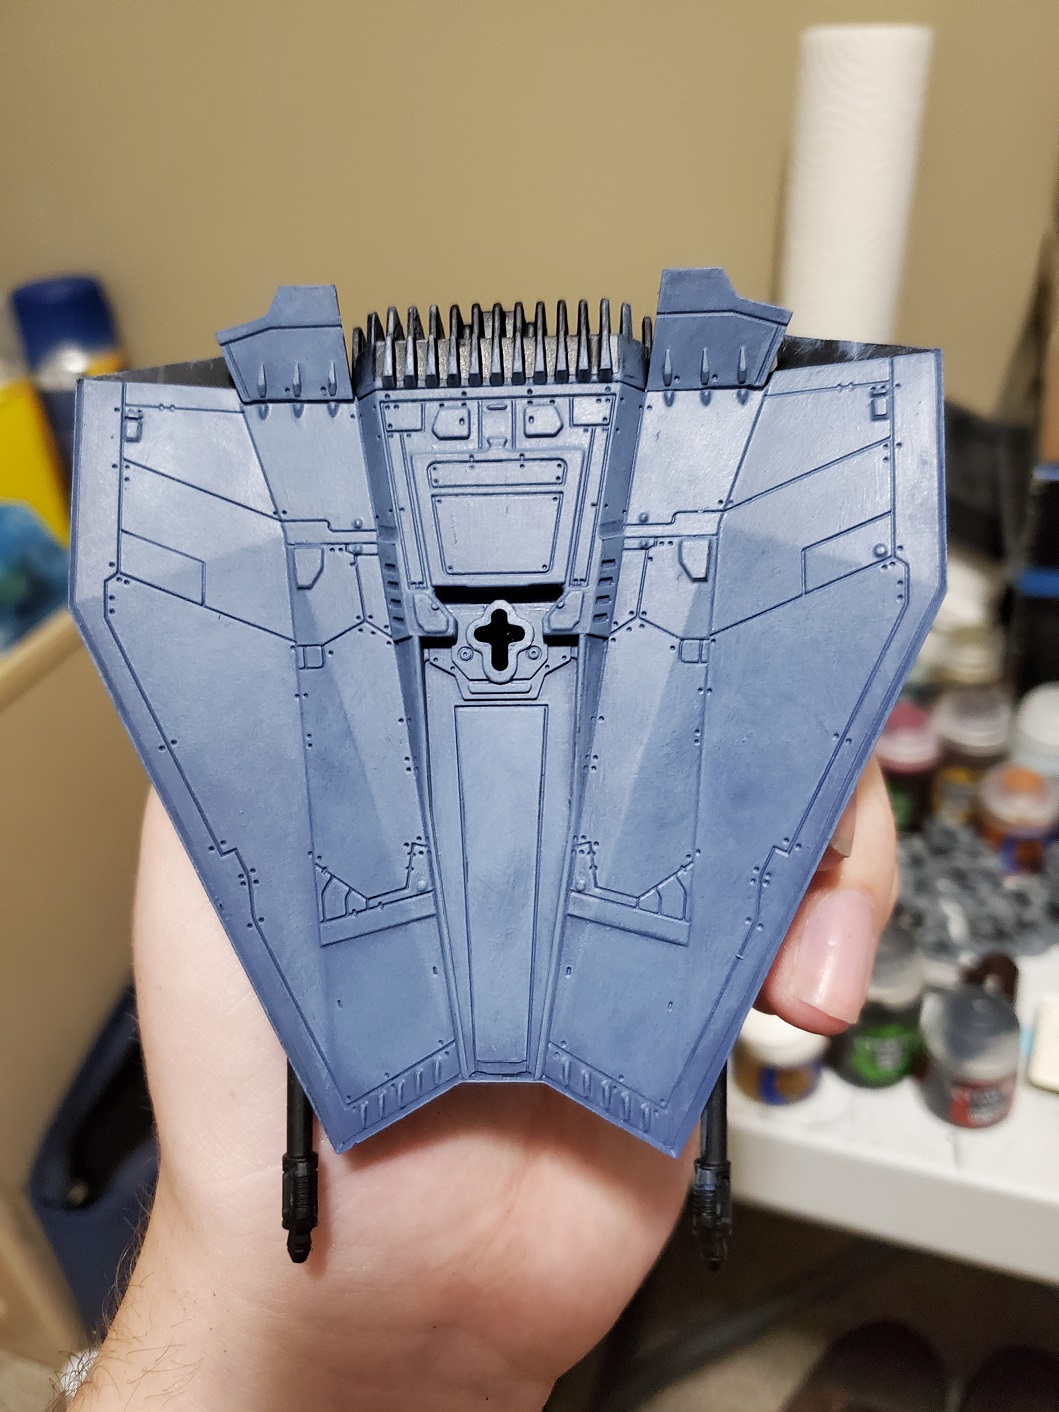 Next came an overbrush (heavy drybrush) of Russ Grey (GW) to brighten it up a tad. You could easily use this as a basecoat, though from a black undercoat like I have here a base layer of The Fang wouldn't be a bad idea all the same.
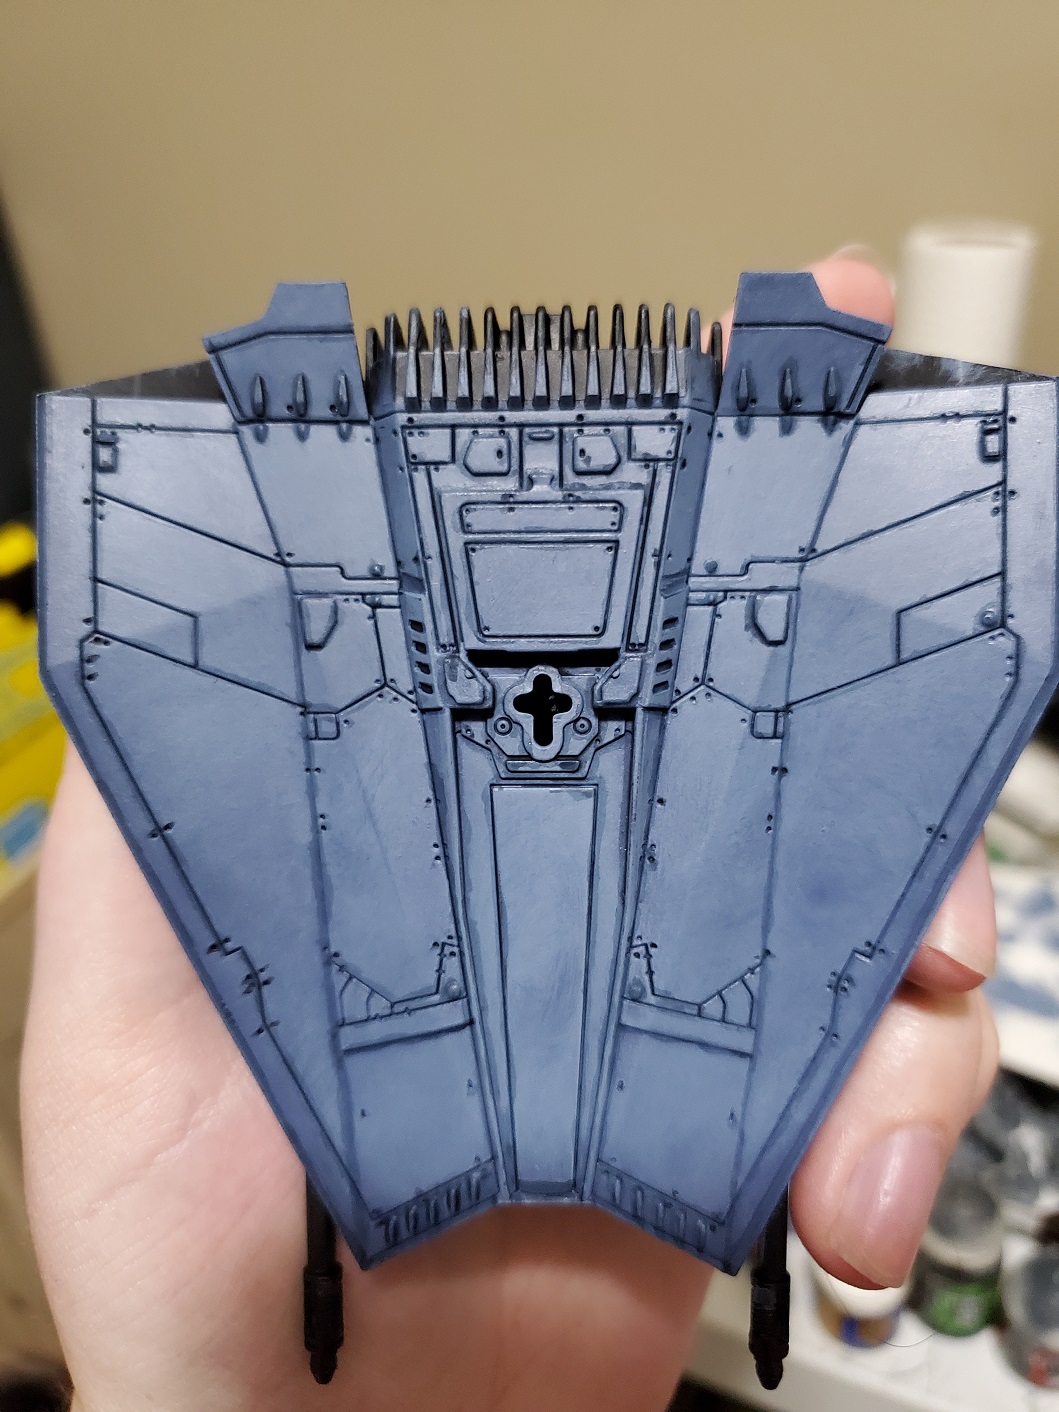 Then the recess shade! The more arduous part of mini painting... I used Drachenhof Nightshade (GW) here and it took me the better part of 30-40 minutes to get all the panel lines done... It's worth the effort, though!
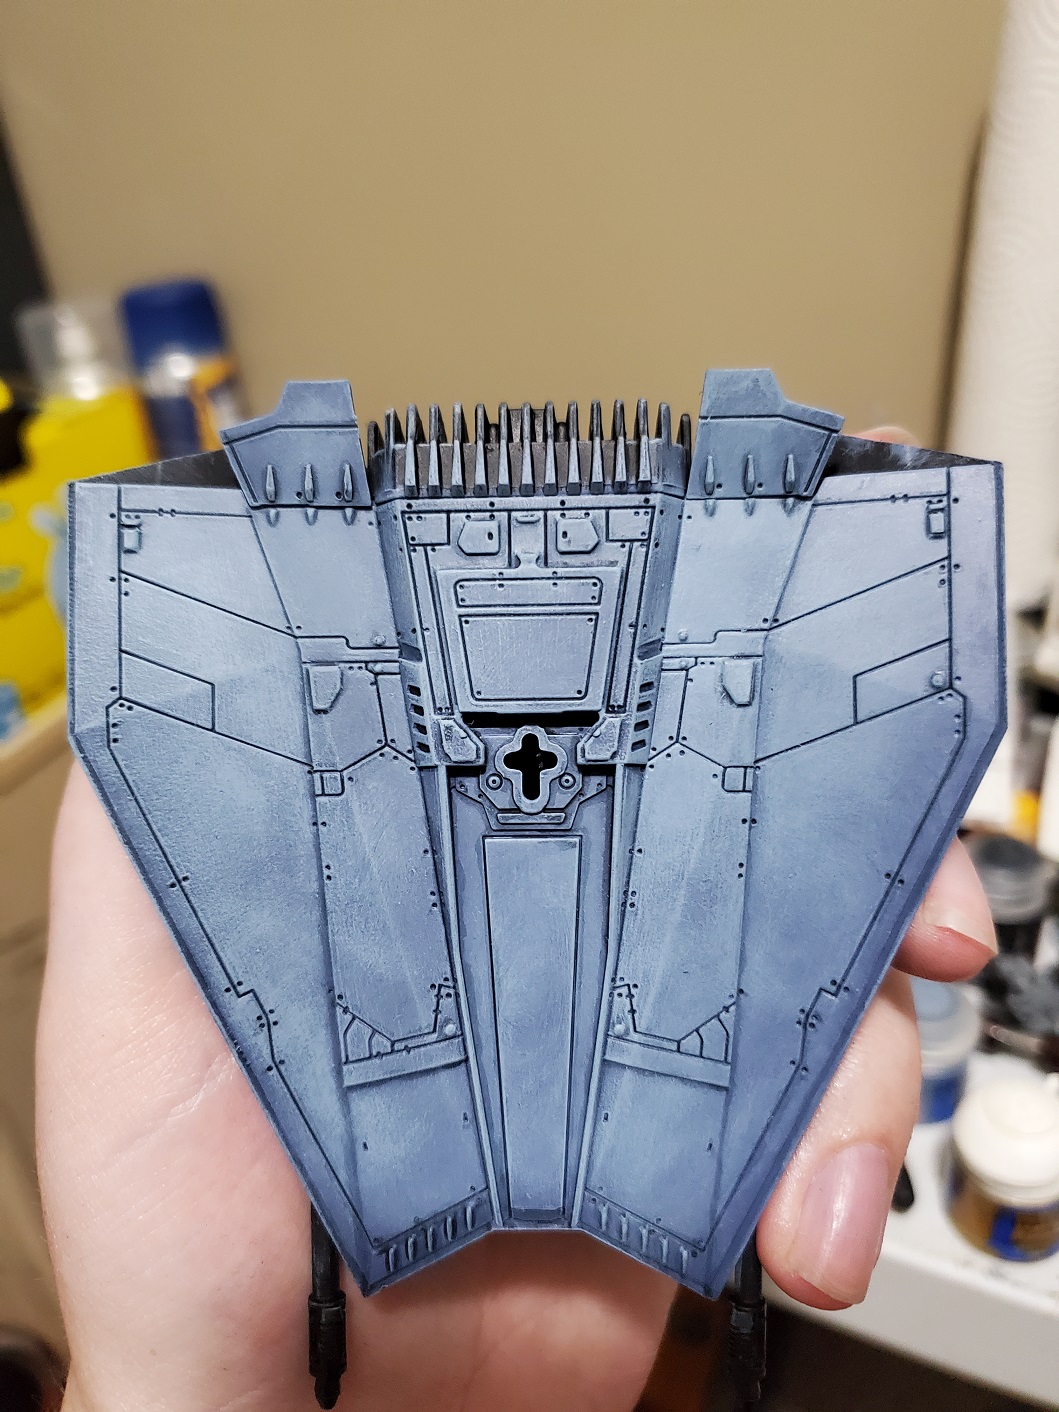 Then a lighter overbrush of Fenrisian Grey (GW) over the top of that. For this and the other overbrushing I used circular motions as much as possible to cover the flats of the panels as well as the edges.
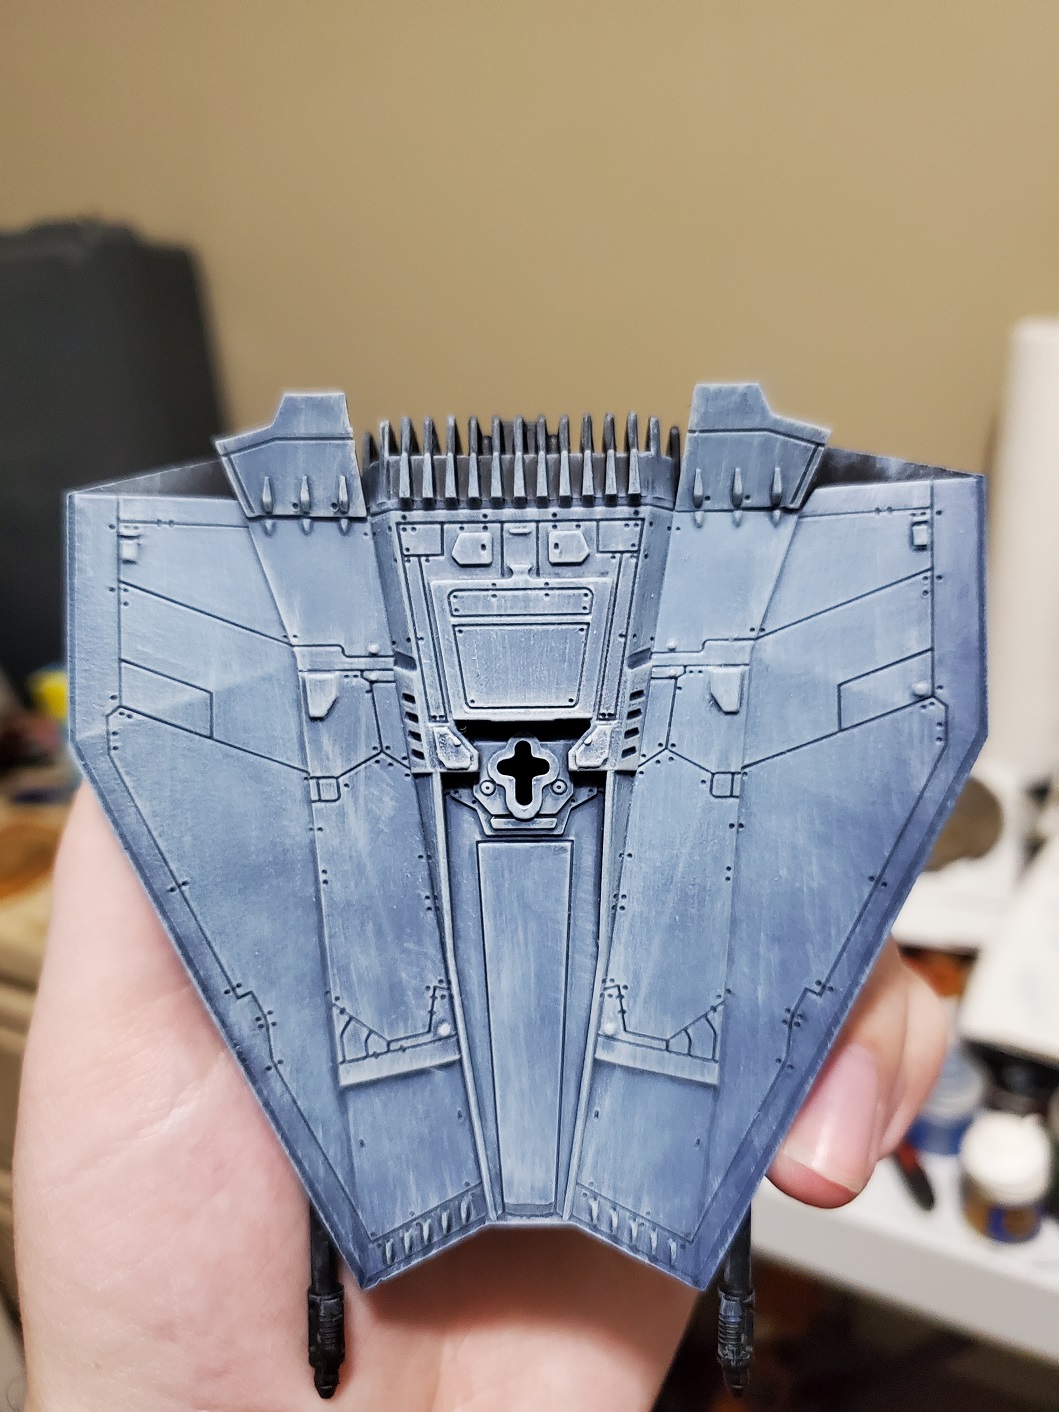 Then a final drybrush of Ulthuan Grey (GW) going from the front to the back of the mini as much as possible. This got a little streaky which I don't mind as a look of something that flies about, but it's probably because my brush was still a little damp from cleaning, so beware of that!
And that’s the underside finished! Maybe I’ll get to the topside this evening…and I’m leaning towards the grey, I think…
The system my brother is going to try, though, it is to basecoat with Grey Seer (GW) maybe with some Fenrisian Grey (GW) mixed in, then a thinned down (pretty much to a glaze) coat of Gryphound Grey Contrast (GW) before highlighting (probably drybrushing) with Fenrisian Grey again. I think it should look good, but we haven’t tested it yet!
A surprise to be sure, but a welcome one!
 I'm glad you guys like the tanks!
I’m supposed to be writing a paper, but I got distracted and went to check on the forums to this week’s Community Spotlight and I was very surprised to see my work alongside the fantastic work of FOGH and henrileite. Go check out their projects, if you haven’t already; they are both fantastic displays of skill! Is this just a vapid ‘I got a Golden Butt Butt’ post, though?

Ben mentioned that he liked the idea of updating a paintjob and I hadn’t really had much time to put into the actual project log for the Puma and Churchill, so I thought I’d use the opportunity to add a little extra…and of course to procrastinate on the paper I’m supposed to be writing. Win-win, right?
First tip I will give is before you start a ‘glow up’ project is to consider any decals you may have used. I was pretty lucky in that I have quite an extensive collection of decals that I’ve kept over the years (I have some of the decal sheets for GW kits from the mid 2000’s, I think…) but depending on how extensive your repaint is you might end up needing to reapply some of them. As you can see from my Puma I actually ended up adding more than I originally had, but even though the vehicle number is the same from old to new, I did have to paint over those places and add new decals. Important to consider.
Second thing is that you can do this in stages. The whole glow up on the Puma started because I painted the Jerry Cans the same sandy colour as the rest of the vehicle and this is where realism and artistic license begin to mix. It’s accurate that Jerry Cans were painted in the dunkelgelb colour, but that doesn’t mean that was the only colour of paint they had!
 Early war tanks were dark grey, which stands out quite nicely against sandy colours
Usually, if you have something that works, you keep using it, so I decided to pick them out in a dark grey, then thought, ‘now they are all grey…’ so added in some green then thought, ‘I have the green out, may as well add some camo patterns…’ and the whole thing grew from there! I’m sure anyone who is a perfectionist with their minis understands the pull of ‘just one small change’ and then realising they’ve painted a whole mini again… Originally, I wasn’t going to make the sandy colour a bit brighter, then decided ‘why not?’ after I finished up the green.
A mini is never 100% finished with me, I guess. 😛
Another thing I’ve talked about in previous projects is weathering, but weathering is always one of those things I never truly do the same way twice (which is probably a good thing!) and I like to experiment with what I can get a paint to do. With the Churchill I went a little heavier with my weathering, whereas I was a little more subtle on the Puma. I try to use 2 tones of brown paint for the mud. Usually I use Tallarn Sand (GW) and Dryad Bark (GW), but anything really works and soils are all sorts of colours! I tend to find that the initial pass of the lighter brown drybrushed in a circular motion against the lower half of the tank works for dried mud and dust that is thrown up, whereas a stippling motion of the darker paint on top give a nice fresh mud look. You could use texture paints to add a bit more, but at the scale of Bolt Action tanks I find that’s a bit much (would work well for the slightly bigger 40k stuff, though!).
My other favourite thing to do with weathering is using watered down contrast paints. I haven’t tested with the new Speed Paints, but in theory it should work the same way. The trick is to water down the paint a lot with water and not medium; you kind of want it to make the paint a bit odd. Then take this paint and run it into recesses or under bolts and plates and such. Give it a short time (like maybe 20 seconds) to start to dry then pull it down a bit to give a streak effect. It’s far from perfect, but I also have these paints lying around and I don’t have pigment powders. It might take time to get the mixes down to where you want them, so I’d suggest testing this technique out on a test mini, or event a piece of scenery or something like that.
Hopefully this adds a little more to the process of painting my Puma and Churchill, and thanks again for the appreciation from the team!
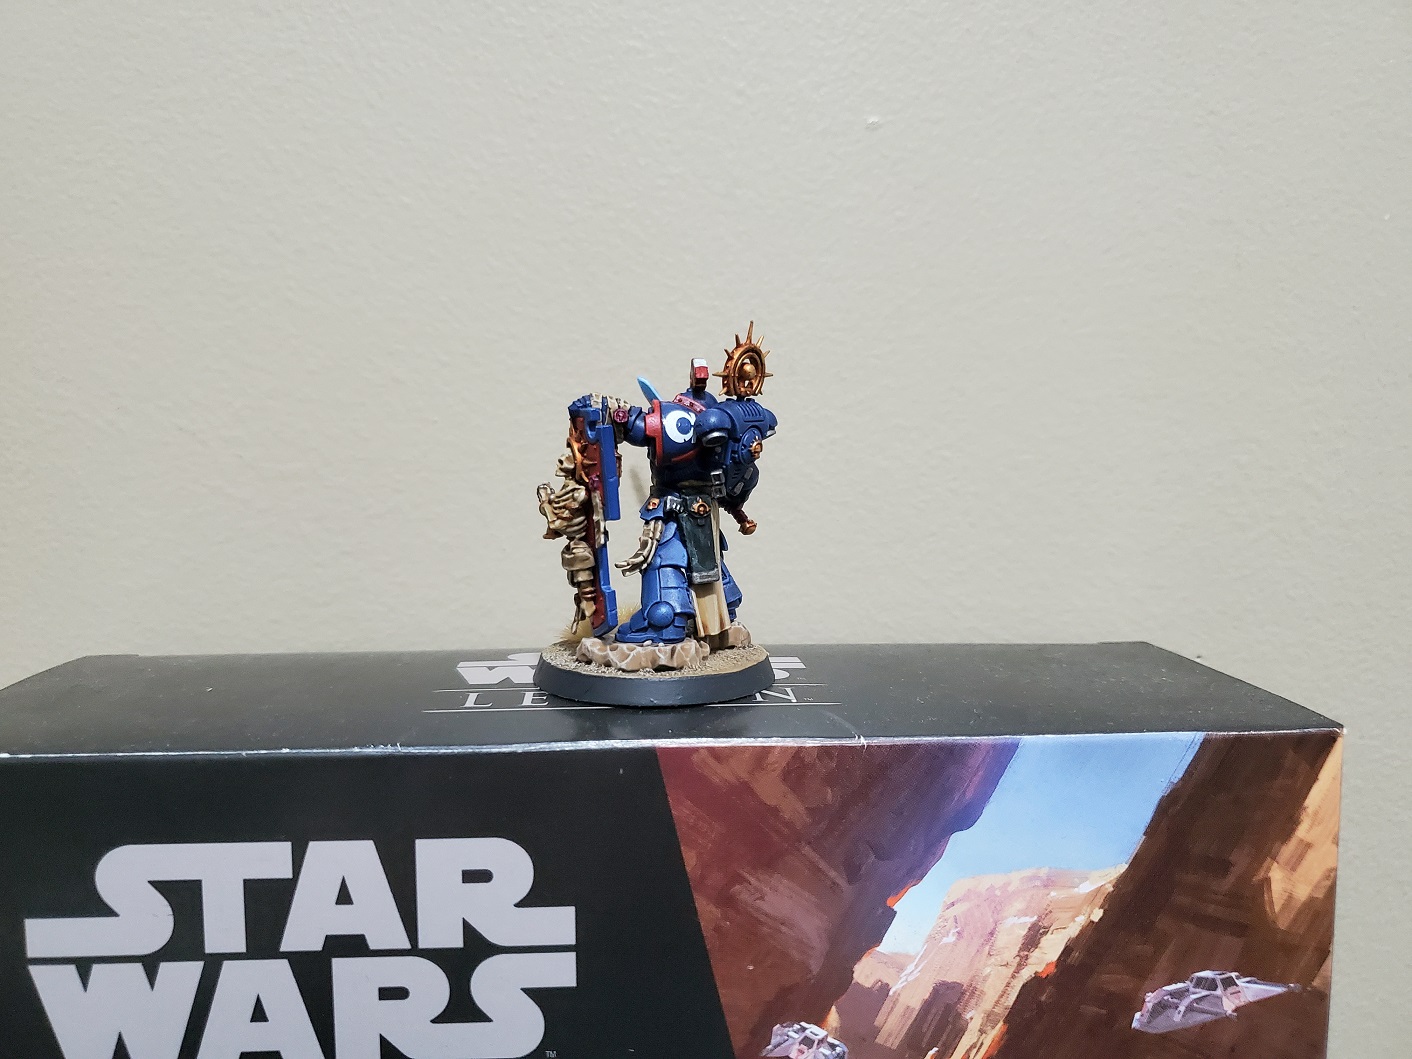
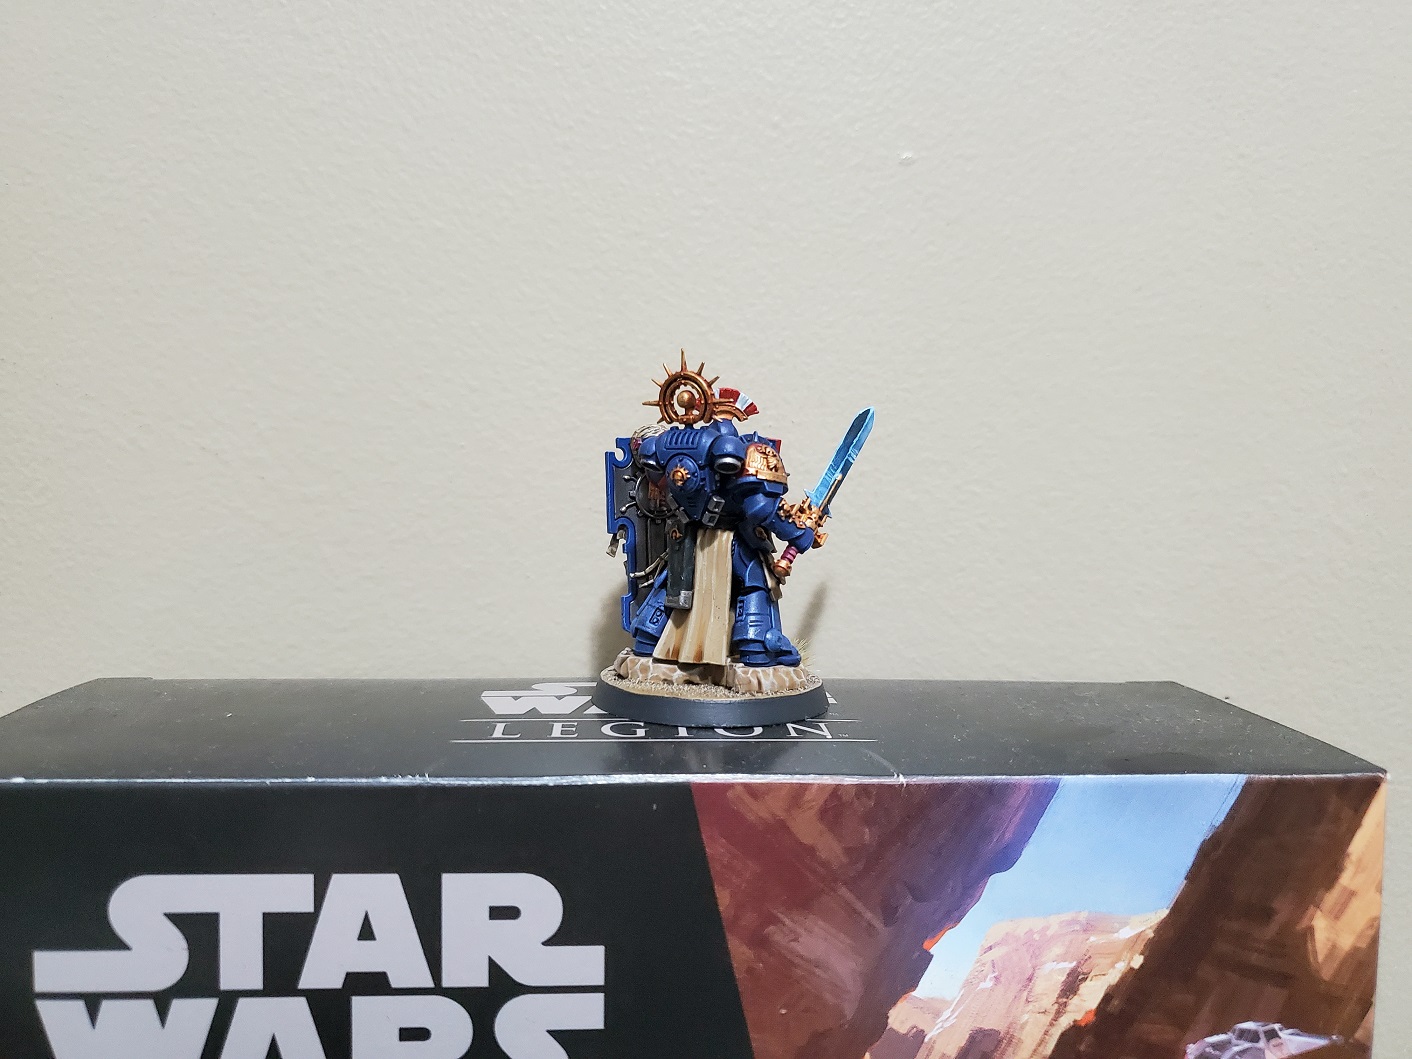
Primaris Fabian...because I bloody can!
So the odd colours on the left shoulder and the shield are because my Ultras are 3rd company and their Captain, Fabian, has personal heraldry that switches from the standard blue field and red trim to red field and blue trim. I just made the decision to make a Primaris version for my Ultras because no book says he hasn’t crossed the Rubicon yet, and because I don’t care anymore if it upsets people that hate new GW lore. Not much else to add because I should be packing/writing and not doing this…