


![How To Paint Moonstone’s Nanny | Goblin King Games [7 Days Early Access]](https://images.beastsofwar.com/2024/12/3CU-Gobin-King-Games-Moonstone-Shades-Nanny-coverimage-225-127.jpg)


CRC's Crazy Compendium 2; Eclectic Boogaloo


A surprise to be sure, but a welcome one!
 I'm glad you guys like the tanks!
I’m supposed to be writing a paper, but I got distracted and went to check on the forums to this week’s Community Spotlight and I was very surprised to see my work alongside the fantastic work of FOGH and henrileite. Go check out their projects, if you haven’t already; they are both fantastic displays of skill! Is this just a vapid ‘I got a Golden Butt Butt’ post, though?

Ben mentioned that he liked the idea of updating a paintjob and I hadn’t really had much time to put into the actual project log for the Puma and Churchill, so I thought I’d use the opportunity to add a little extra…and of course to procrastinate on the paper I’m supposed to be writing. Win-win, right?
First tip I will give is before you start a ‘glow up’ project is to consider any decals you may have used. I was pretty lucky in that I have quite an extensive collection of decals that I’ve kept over the years (I have some of the decal sheets for GW kits from the mid 2000’s, I think…) but depending on how extensive your repaint is you might end up needing to reapply some of them. As you can see from my Puma I actually ended up adding more than I originally had, but even though the vehicle number is the same from old to new, I did have to paint over those places and add new decals. Important to consider.
Second thing is that you can do this in stages. The whole glow up on the Puma started because I painted the Jerry Cans the same sandy colour as the rest of the vehicle and this is where realism and artistic license begin to mix. It’s accurate that Jerry Cans were painted in the dunkelgelb colour, but that doesn’t mean that was the only colour of paint they had!
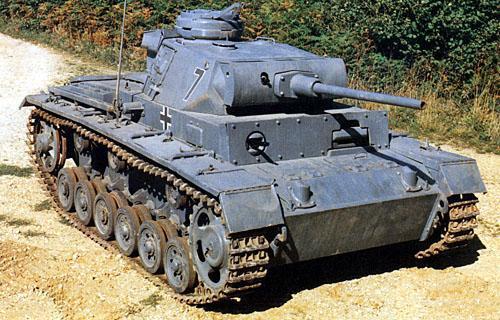 Early war tanks were dark grey, which stands out quite nicely against sandy colours
Usually, if you have something that works, you keep using it, so I decided to pick them out in a dark grey, then thought, ‘now they are all grey…’ so added in some green then thought, ‘I have the green out, may as well add some camo patterns…’ and the whole thing grew from there! I’m sure anyone who is a perfectionist with their minis understands the pull of ‘just one small change’ and then realising they’ve painted a whole mini again… Originally, I wasn’t going to make the sandy colour a bit brighter, then decided ‘why not?’ after I finished up the green.
A mini is never 100% finished with me, I guess. 😛
Another thing I’ve talked about in previous projects is weathering, but weathering is always one of those things I never truly do the same way twice (which is probably a good thing!) and I like to experiment with what I can get a paint to do. With the Churchill I went a little heavier with my weathering, whereas I was a little more subtle on the Puma. I try to use 2 tones of brown paint for the mud. Usually I use Tallarn Sand (GW) and Dryad Bark (GW), but anything really works and soils are all sorts of colours! I tend to find that the initial pass of the lighter brown drybrushed in a circular motion against the lower half of the tank works for dried mud and dust that is thrown up, whereas a stippling motion of the darker paint on top give a nice fresh mud look. You could use texture paints to add a bit more, but at the scale of Bolt Action tanks I find that’s a bit much (would work well for the slightly bigger 40k stuff, though!).
My other favourite thing to do with weathering is using watered down contrast paints. I haven’t tested with the new Speed Paints, but in theory it should work the same way. The trick is to water down the paint a lot with water and not medium; you kind of want it to make the paint a bit odd. Then take this paint and run it into recesses or under bolts and plates and such. Give it a short time (like maybe 20 seconds) to start to dry then pull it down a bit to give a streak effect. It’s far from perfect, but I also have these paints lying around and I don’t have pigment powders. It might take time to get the mixes down to where you want them, so I’d suggest testing this technique out on a test mini, or event a piece of scenery or something like that.
Hopefully this adds a little more to the process of painting my Puma and Churchill, and thanks again for the appreciation from the team!


Leave a Reply