


![NO Weekender Or Cult Of Games XLBS This Weekend [Updated]](https://images.beastsofwar.com/2026/03/No_Weekender_and_XLBS_this_Weekend-225-127.jpg)


Morituri te salutant


Recommendations: 278
About the Project
Introduction. Many years ago, there was a set of Gladiator Skirmish rules simply titled; ‘Gladiator Skirmish Rules’. They were simply produced and easy to learn and provided fun little games to simulate gladiatorial combat. The game played on a simple hex grid and the fighting was done in the style of ‘Rock, Paper, Scissor’ where each player would pick an attack and compare it with each other to determine if the attack was easy, medium, or hard to pull off. This was then converted to a separate table where dice would be rolled and compared with the armour value of the target and the difficulty of the attack to generate a level of wound. Wounds would accumulate so that three nicks would become a cut, three cuts become a wound and so on. I really enjoyed that dated set of rules and was looking for something that I could play simple quick games, mainly with the kids, but with friends also. I wanted to keep the rules as simple as possible whilst keeping the feel of the original rules, or at least how I remember them to be. This is my homage to those rules. Some bits will be similar, some bits completely different (mainly because I can’t remember how they were originally) and some bits will be vaguely familiar. I intend to do my best to create a fun little self contained project using the little knowledge of our hobby that I have picked up over the years.
Related Genre: Historical
This Project is Active
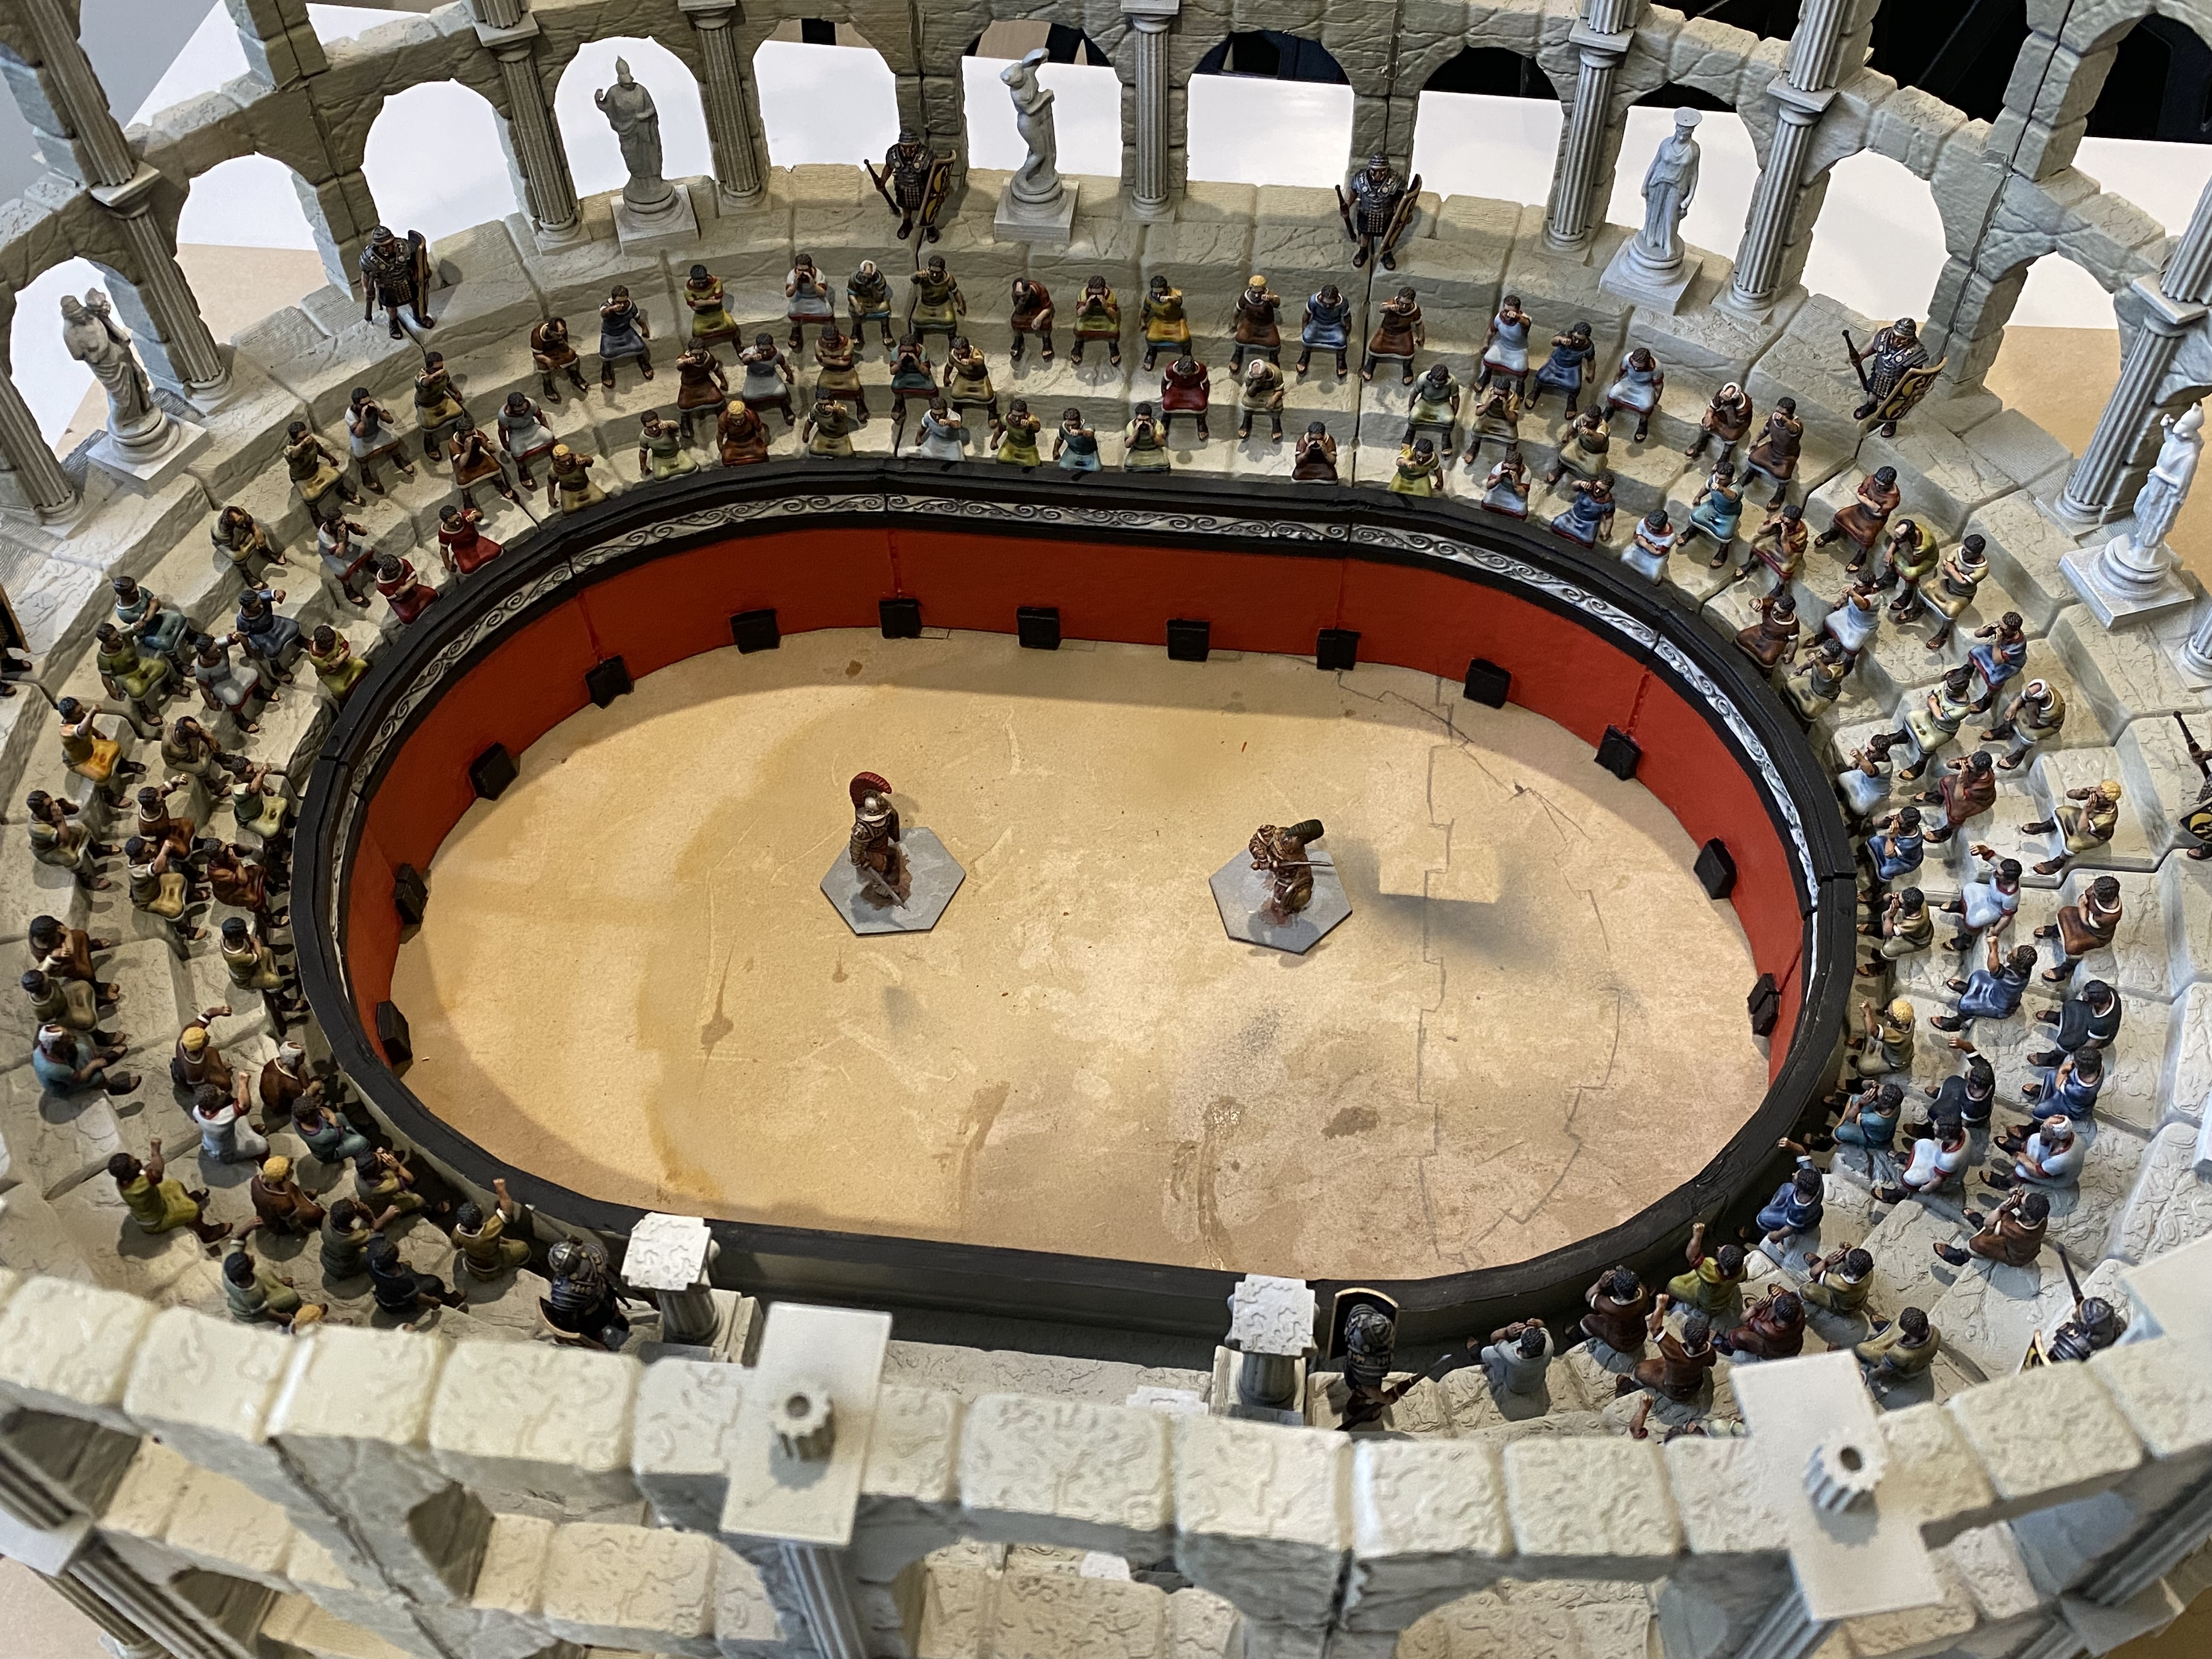
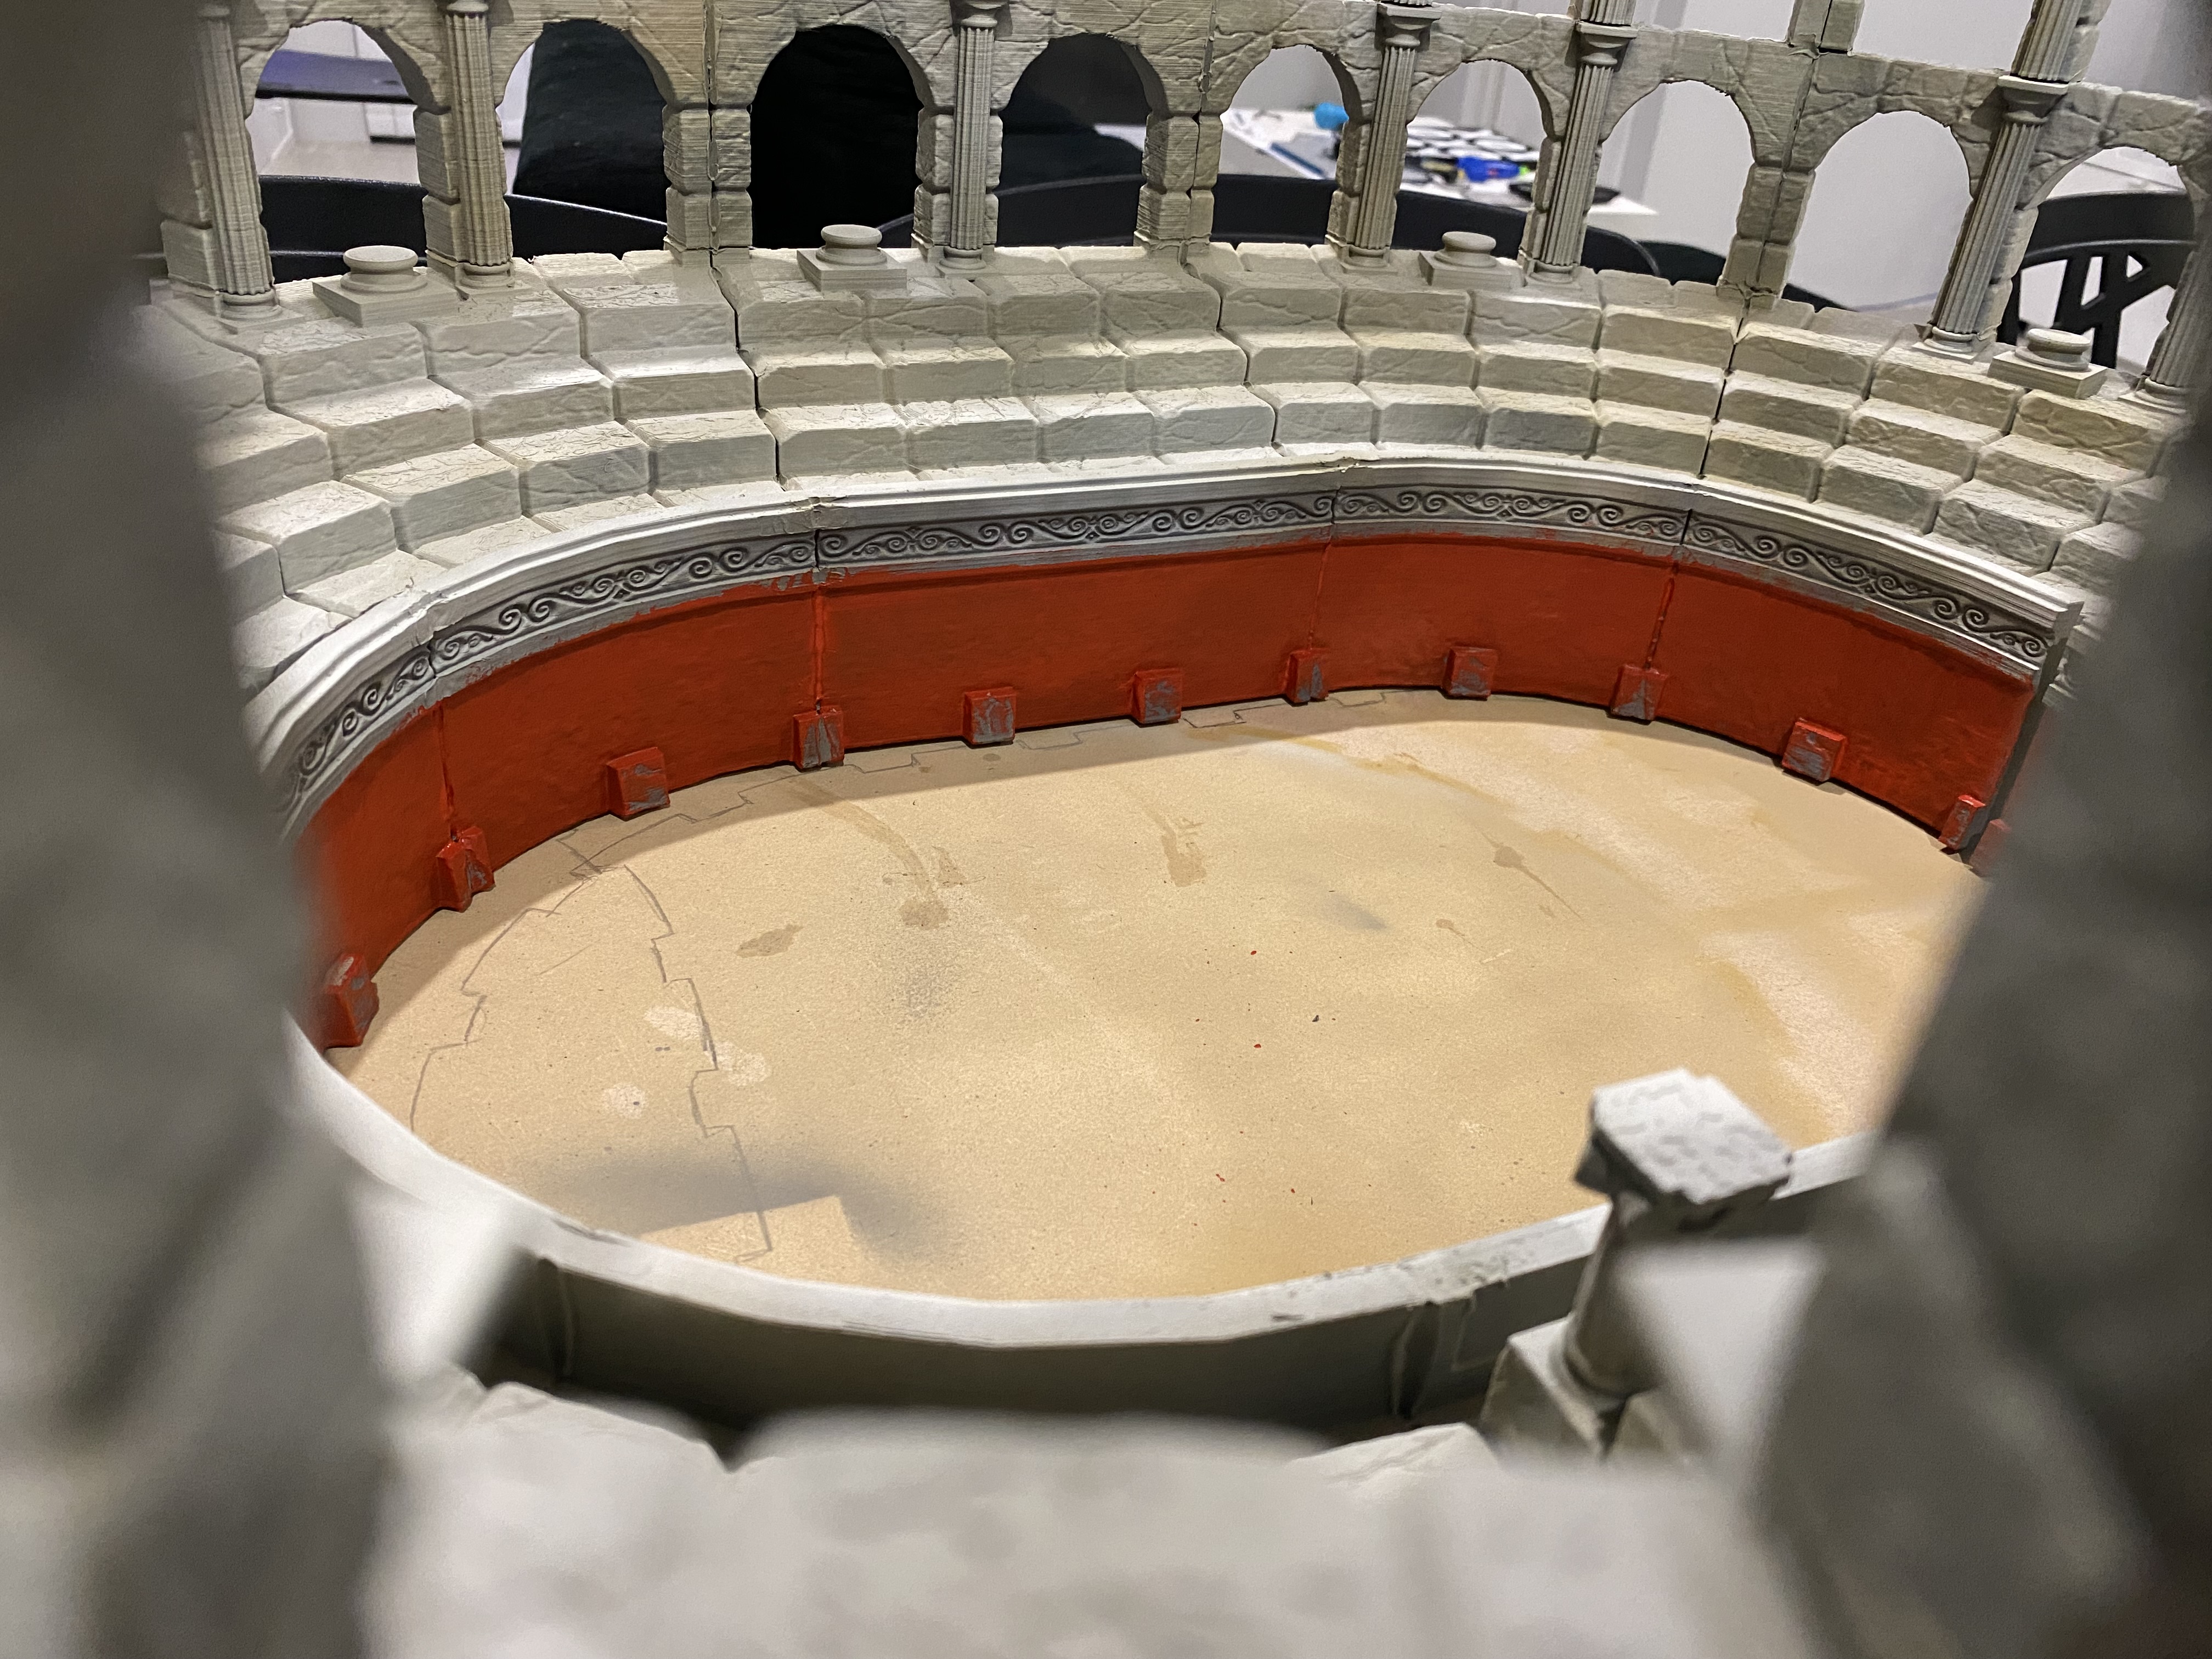
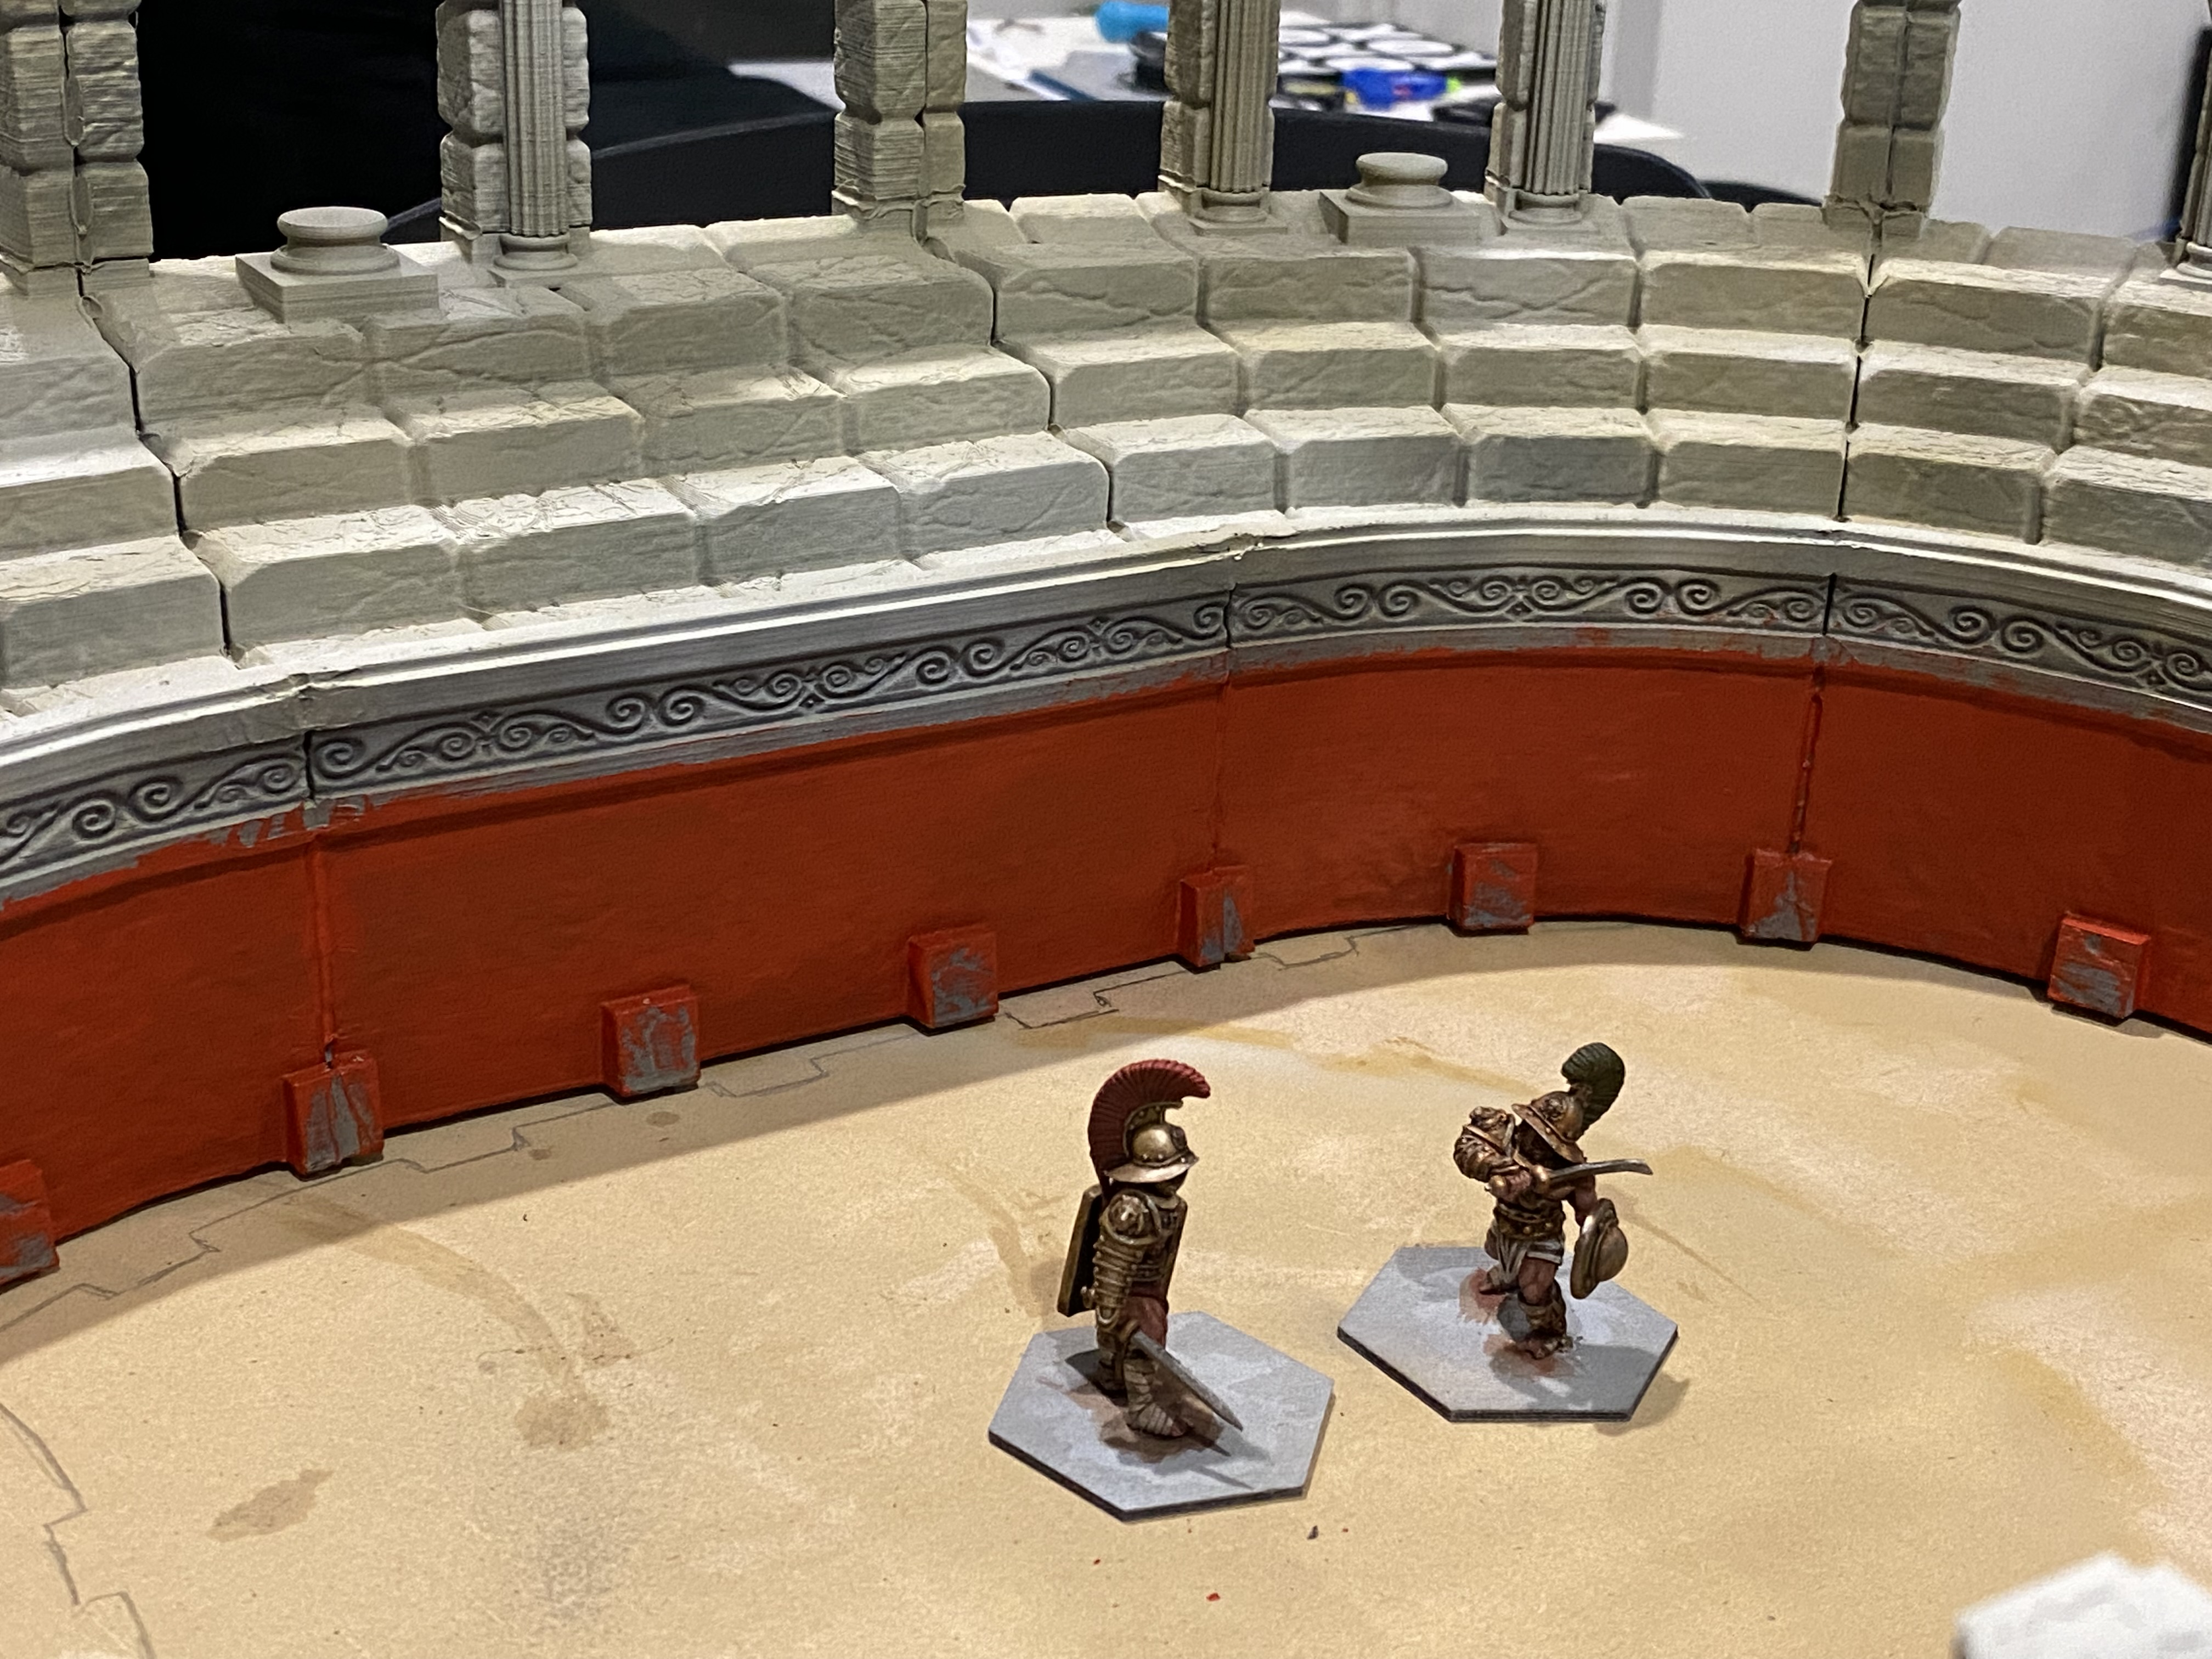
Hexes
For the arena floor I used thin hexagonal MDF bases glued to an oval of MDF. I then lightly covered the surface with sand and painted it to match the rest of the ground covering.
I then based up some Gladiators to use so I can start play-testing my version of the rules.

The fighters are mounted on 40mm Hexes, and the arena floor is slightly larger at 45mm.
I have kept the actual fighting area reasonably small, just 8 hexes at its longest point. I will add some scenery elements to separate hexes so that they can be moved around and add extra strategic elements. The scenery should come in handy when fighting against Sagittarius (Bow armed) gladiators.

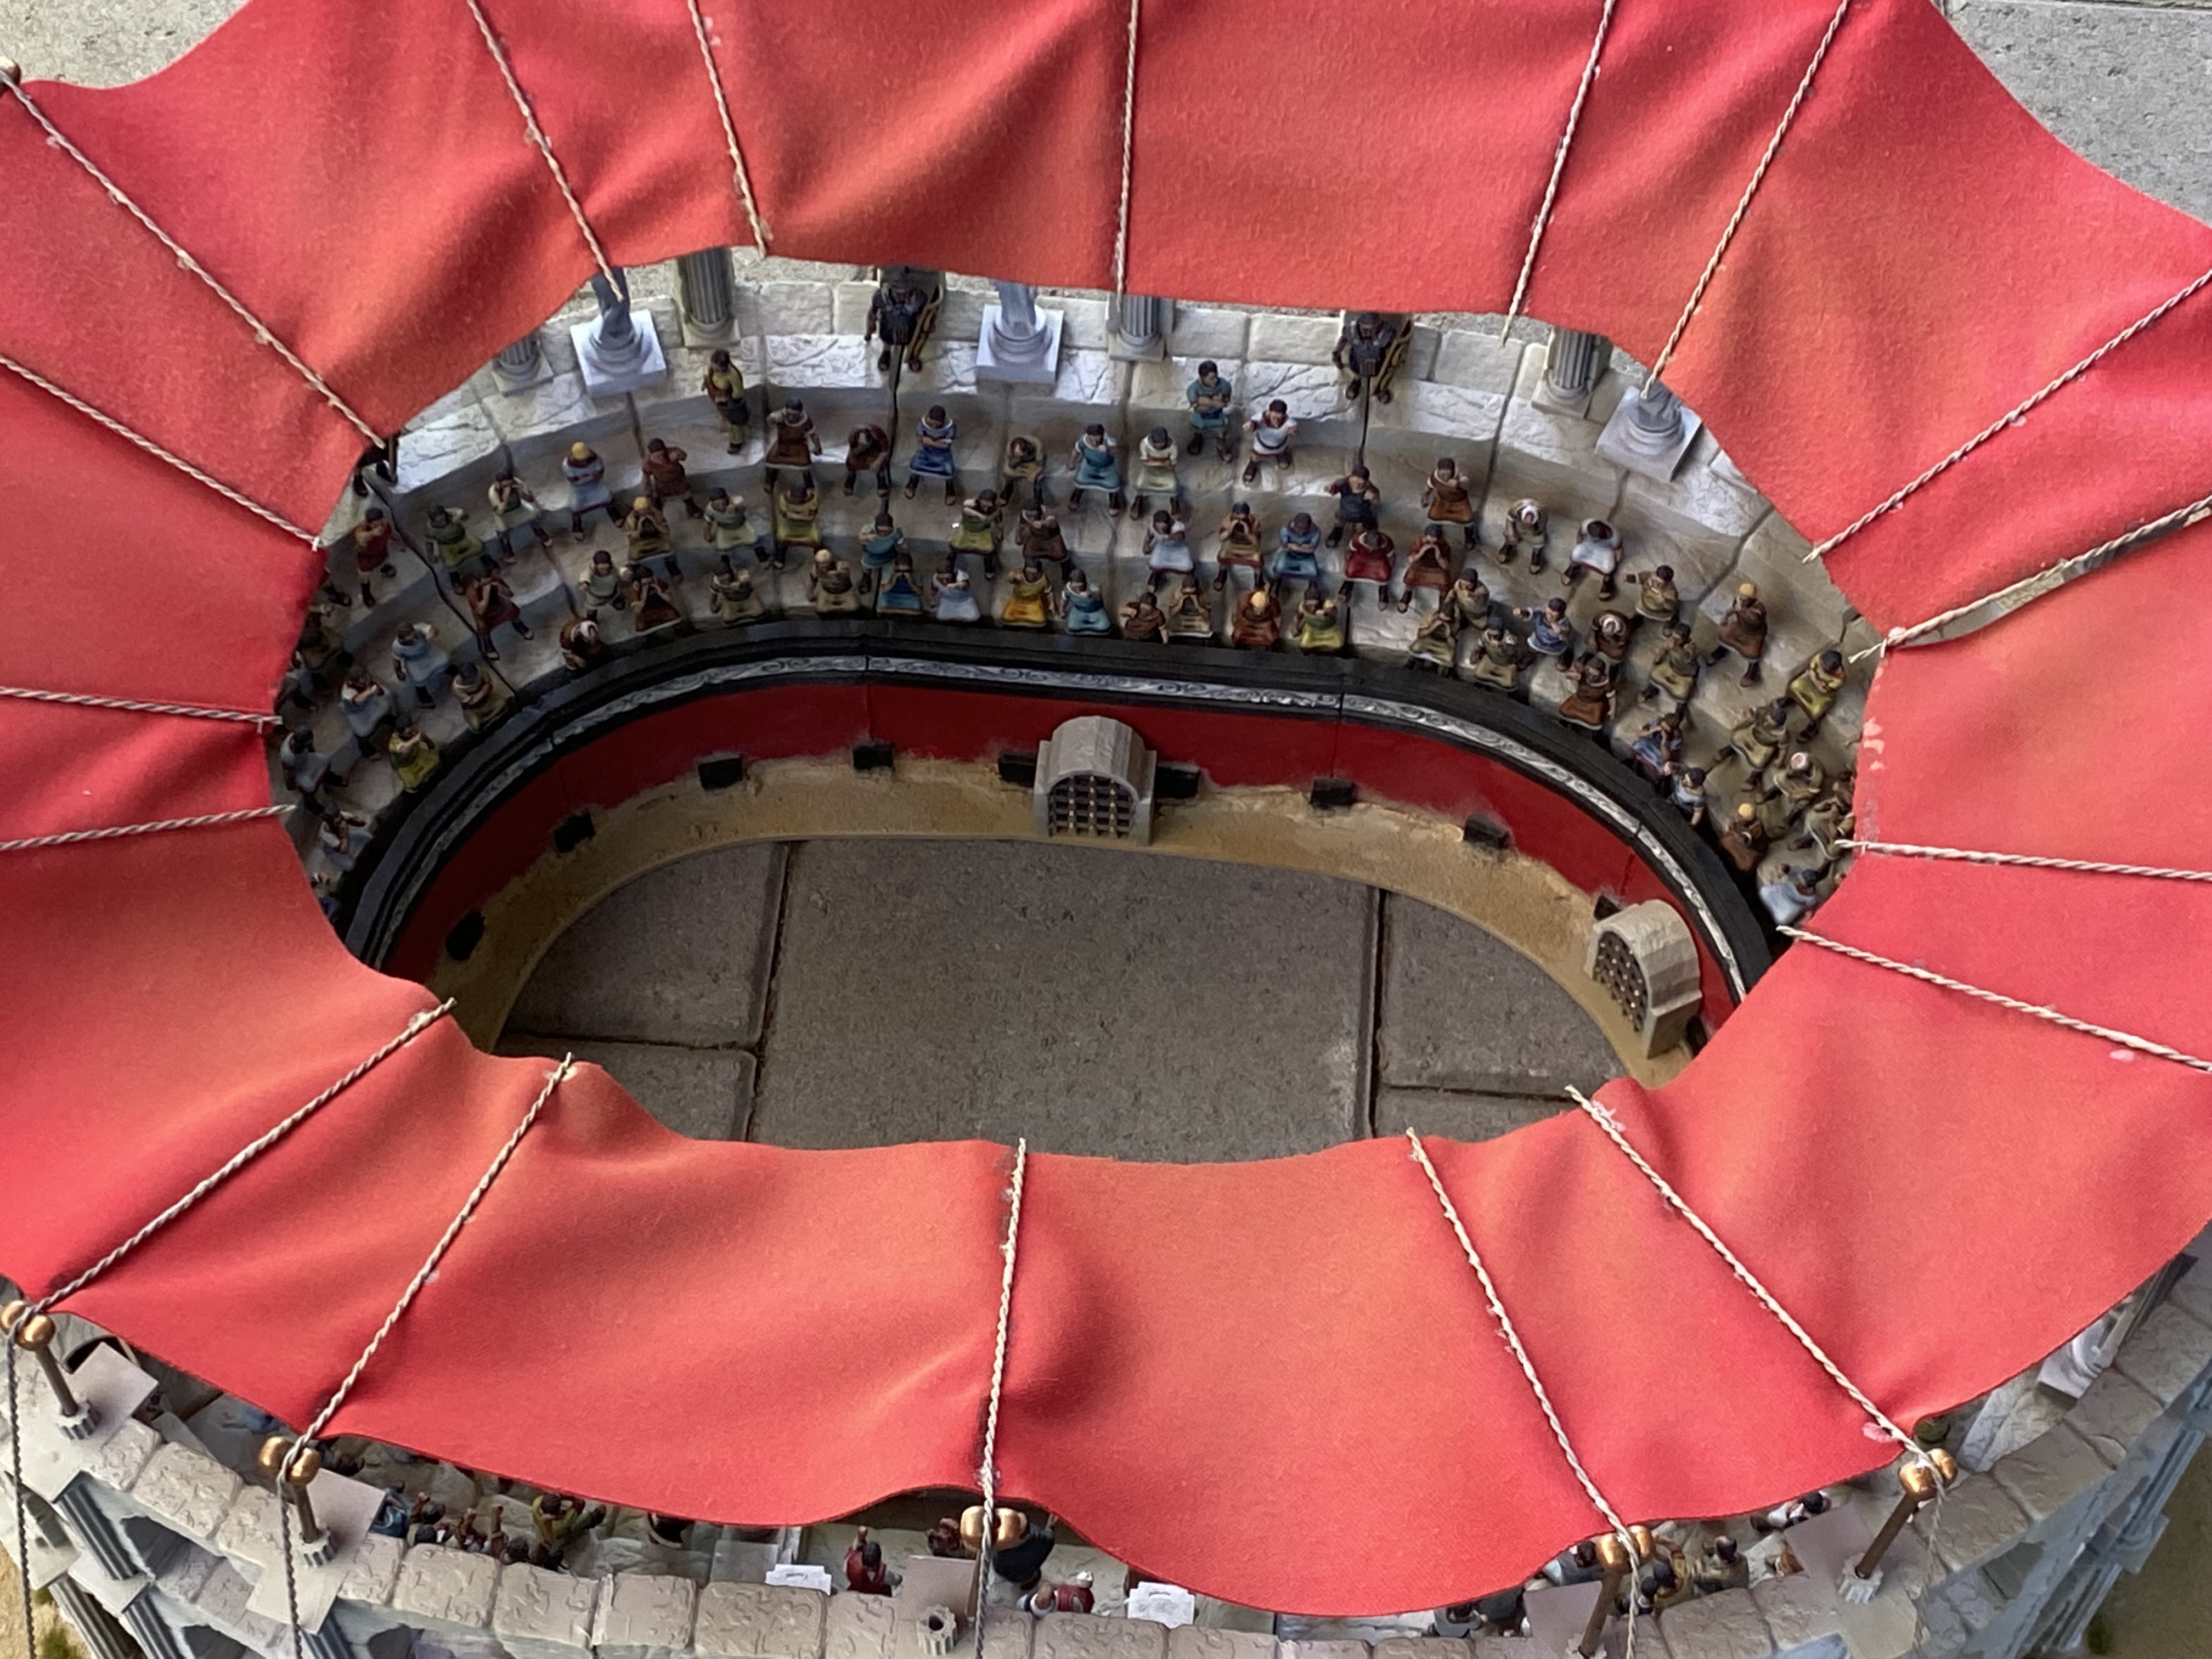
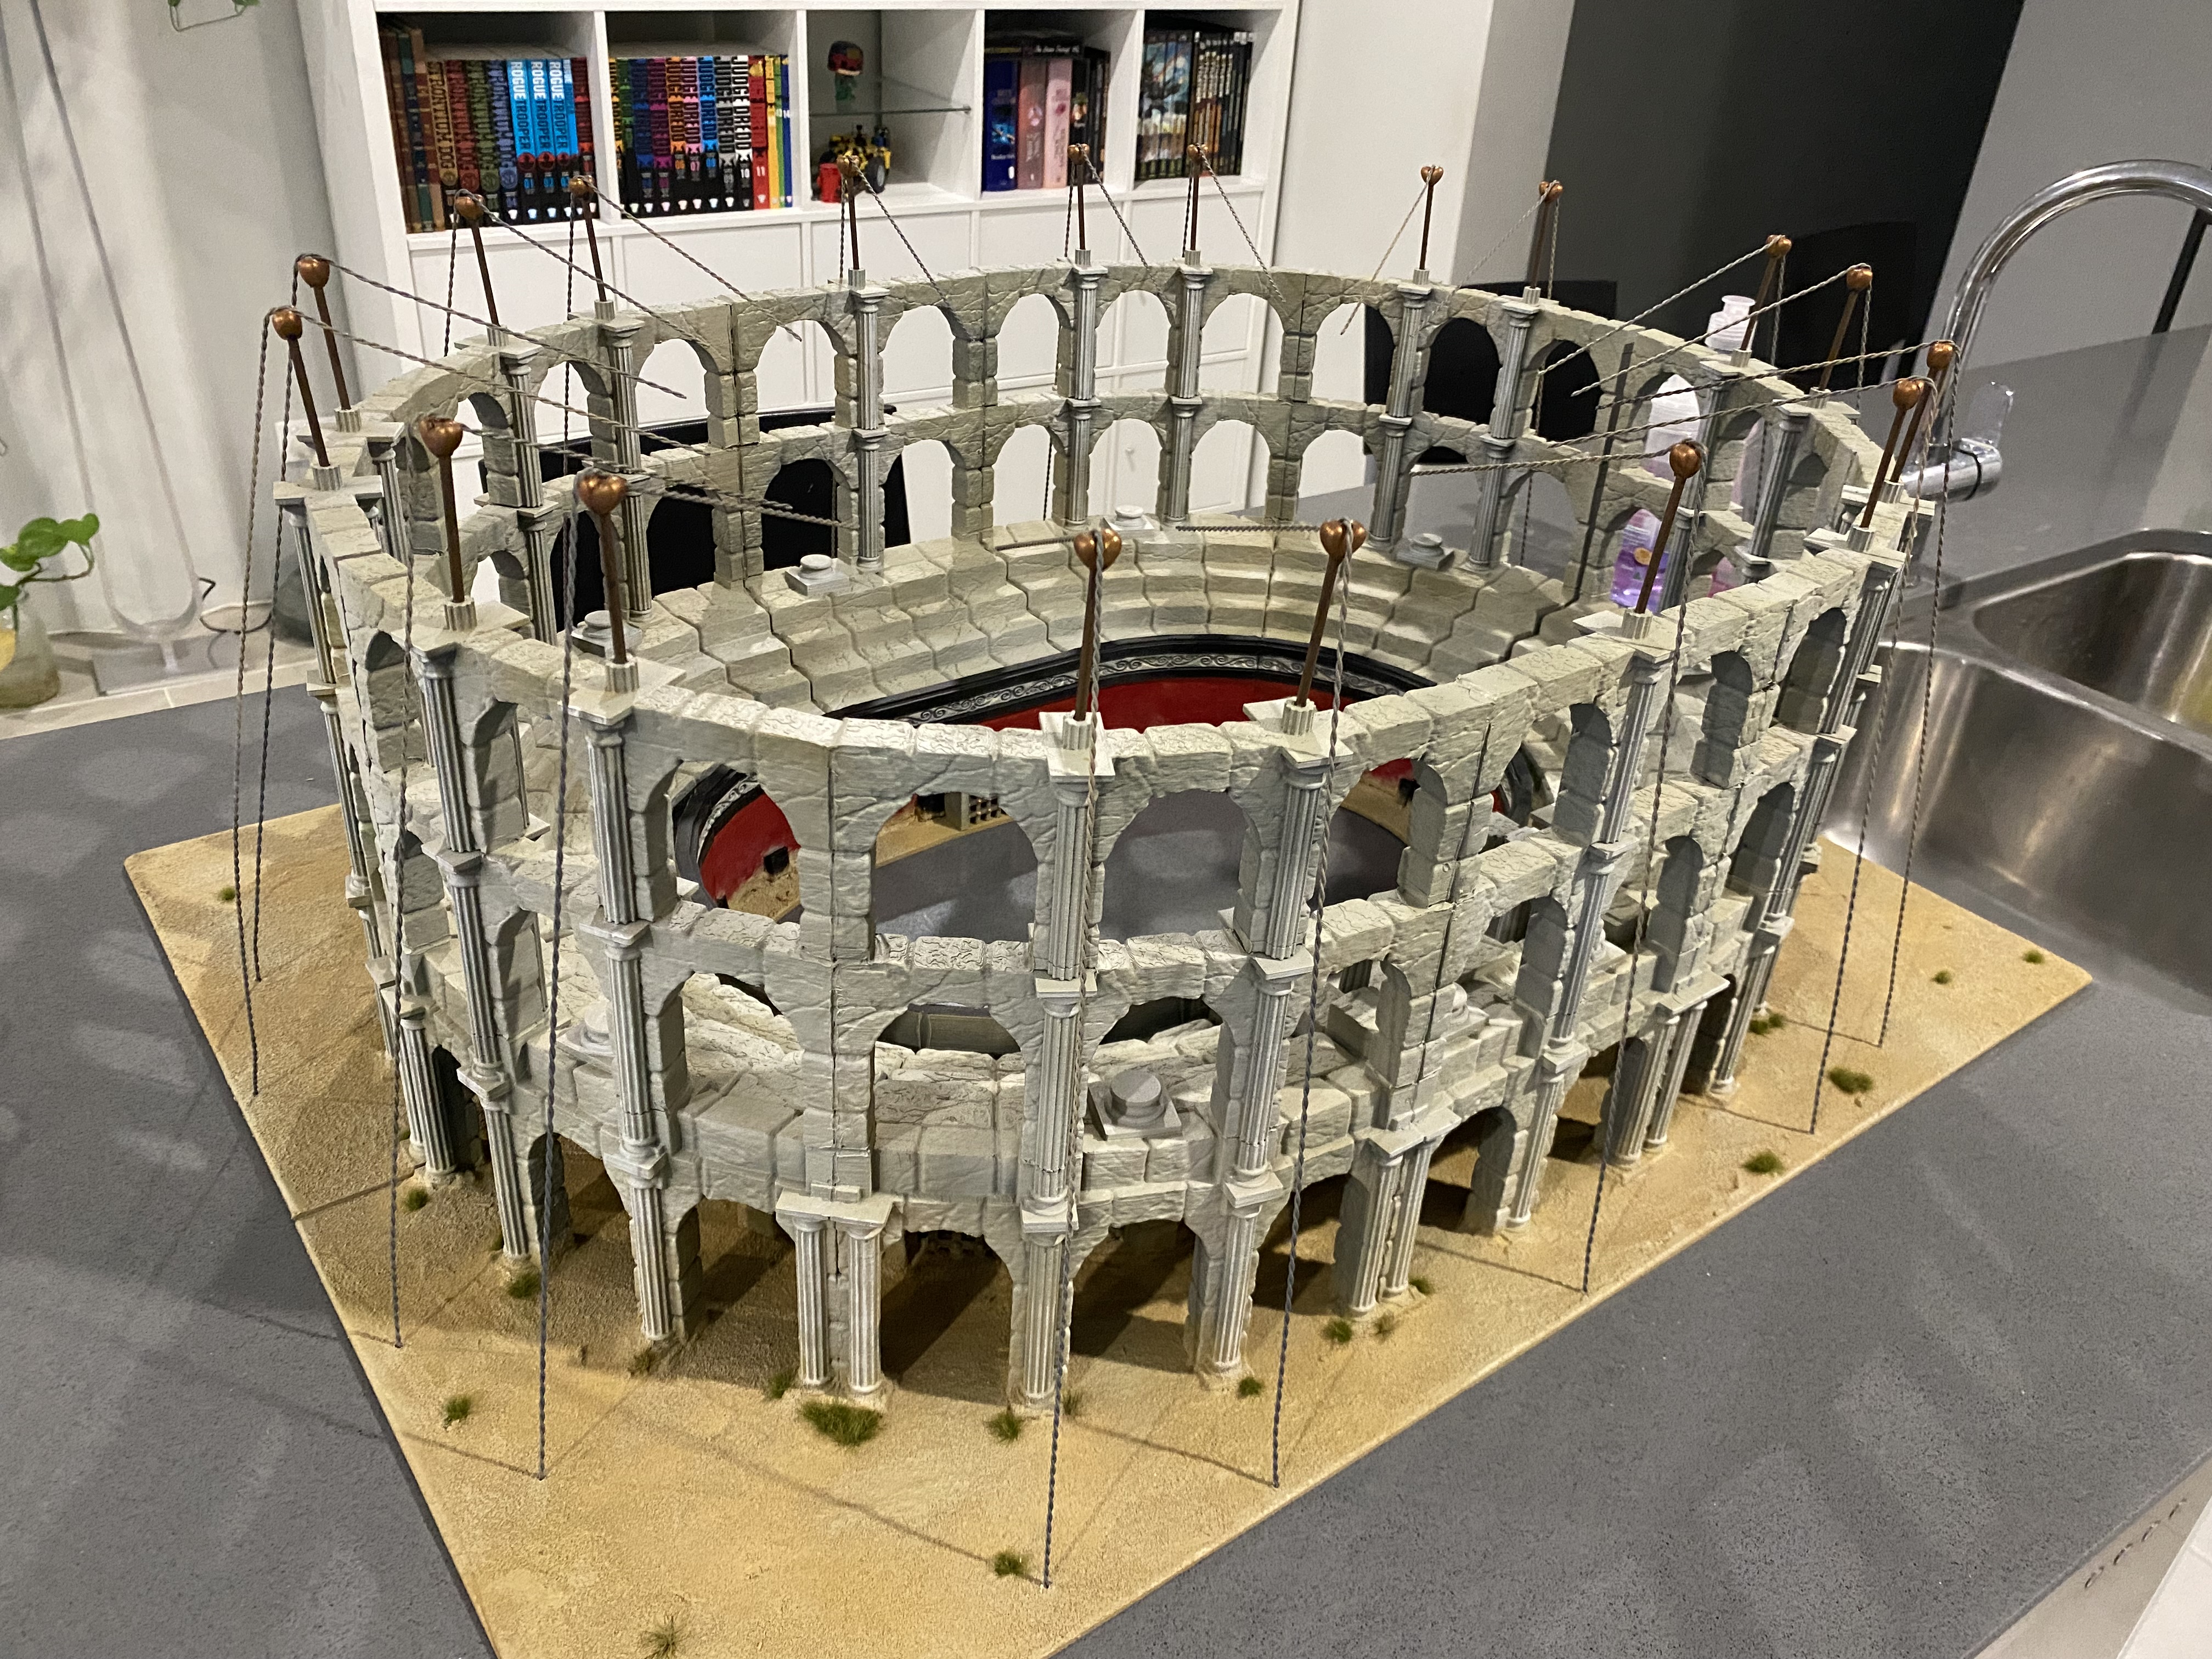
Velarium
Initially I bought some nice deep red cotton fabric, however I found that it frayed a lot. I toyed with the idea of using fabric glue to hem around the edges, but figured I was just too lazy to do that.
A trip back to the haberdashery and I found an alternative material that I was reliably informed would fray less.
With that I cut 4 sections of material to fit around as awnings.
2 longer pieces that would be firmly and permanently attached and 2 smaller pieces that I would hide a small wire frame beneath that could be removed to take the Colosseum apart.
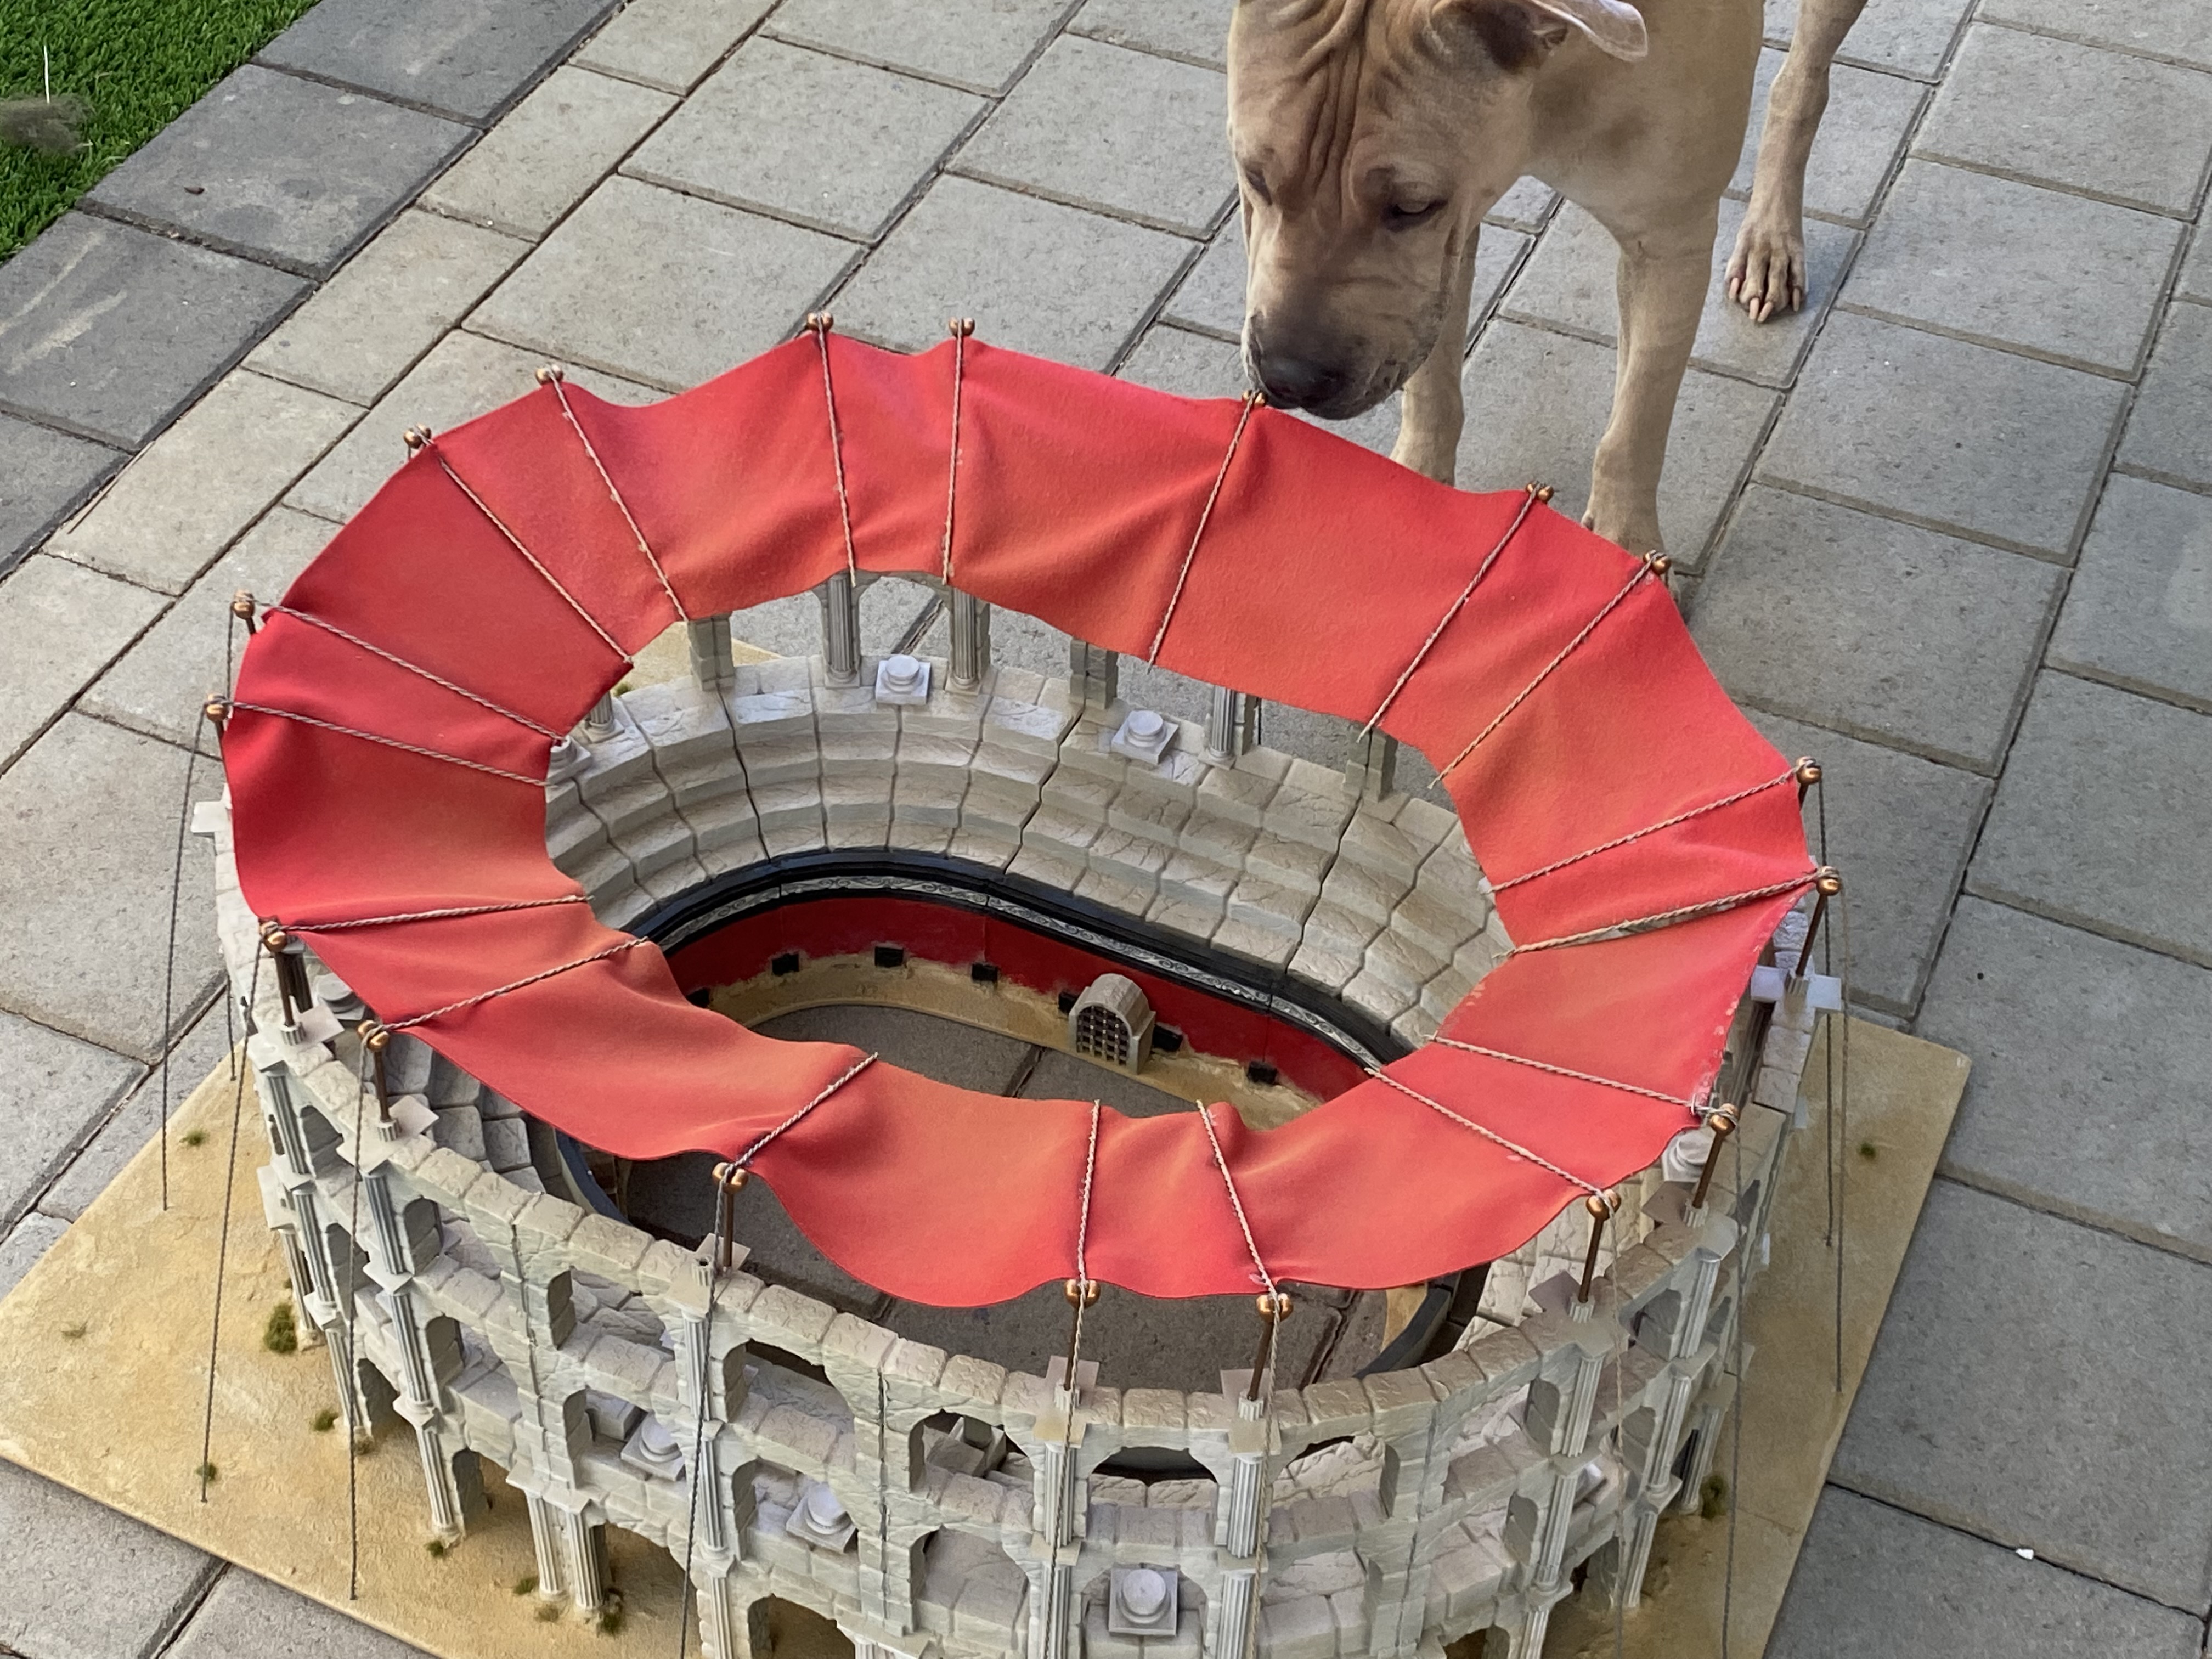
Once in place I used the same rattle cans that I had used to paint the base to lightly dust over the red cloth to act as weathering.
Awning
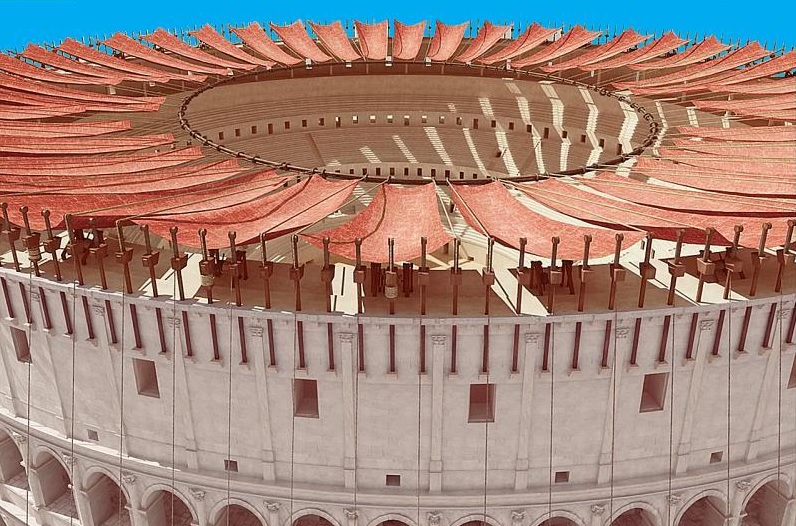
I really wanted to add sunshades or Velarium, to my Coliseum but because I also wanted to be able to split the model apart it would not be possible to have a weighted ring acting as a counterweight.
I looked back at the rigging I had done for my Blood and Plunder ships and decided to twist lengths of wire together to imitate rope. From those I could simply attach material beneath it to look like a shade cloth.
I used small heart shaped beads and BBQ skewers, cut down to size, to bend the wire ‘ropes’ over.
I anchored the wires to the base by drilling holes and screwing the wires into place.
The base was finished with sand and painted with sand coloured paints from rattlecans.
A few scattered grass tufts and a couple of figures finished the base off.
Dice
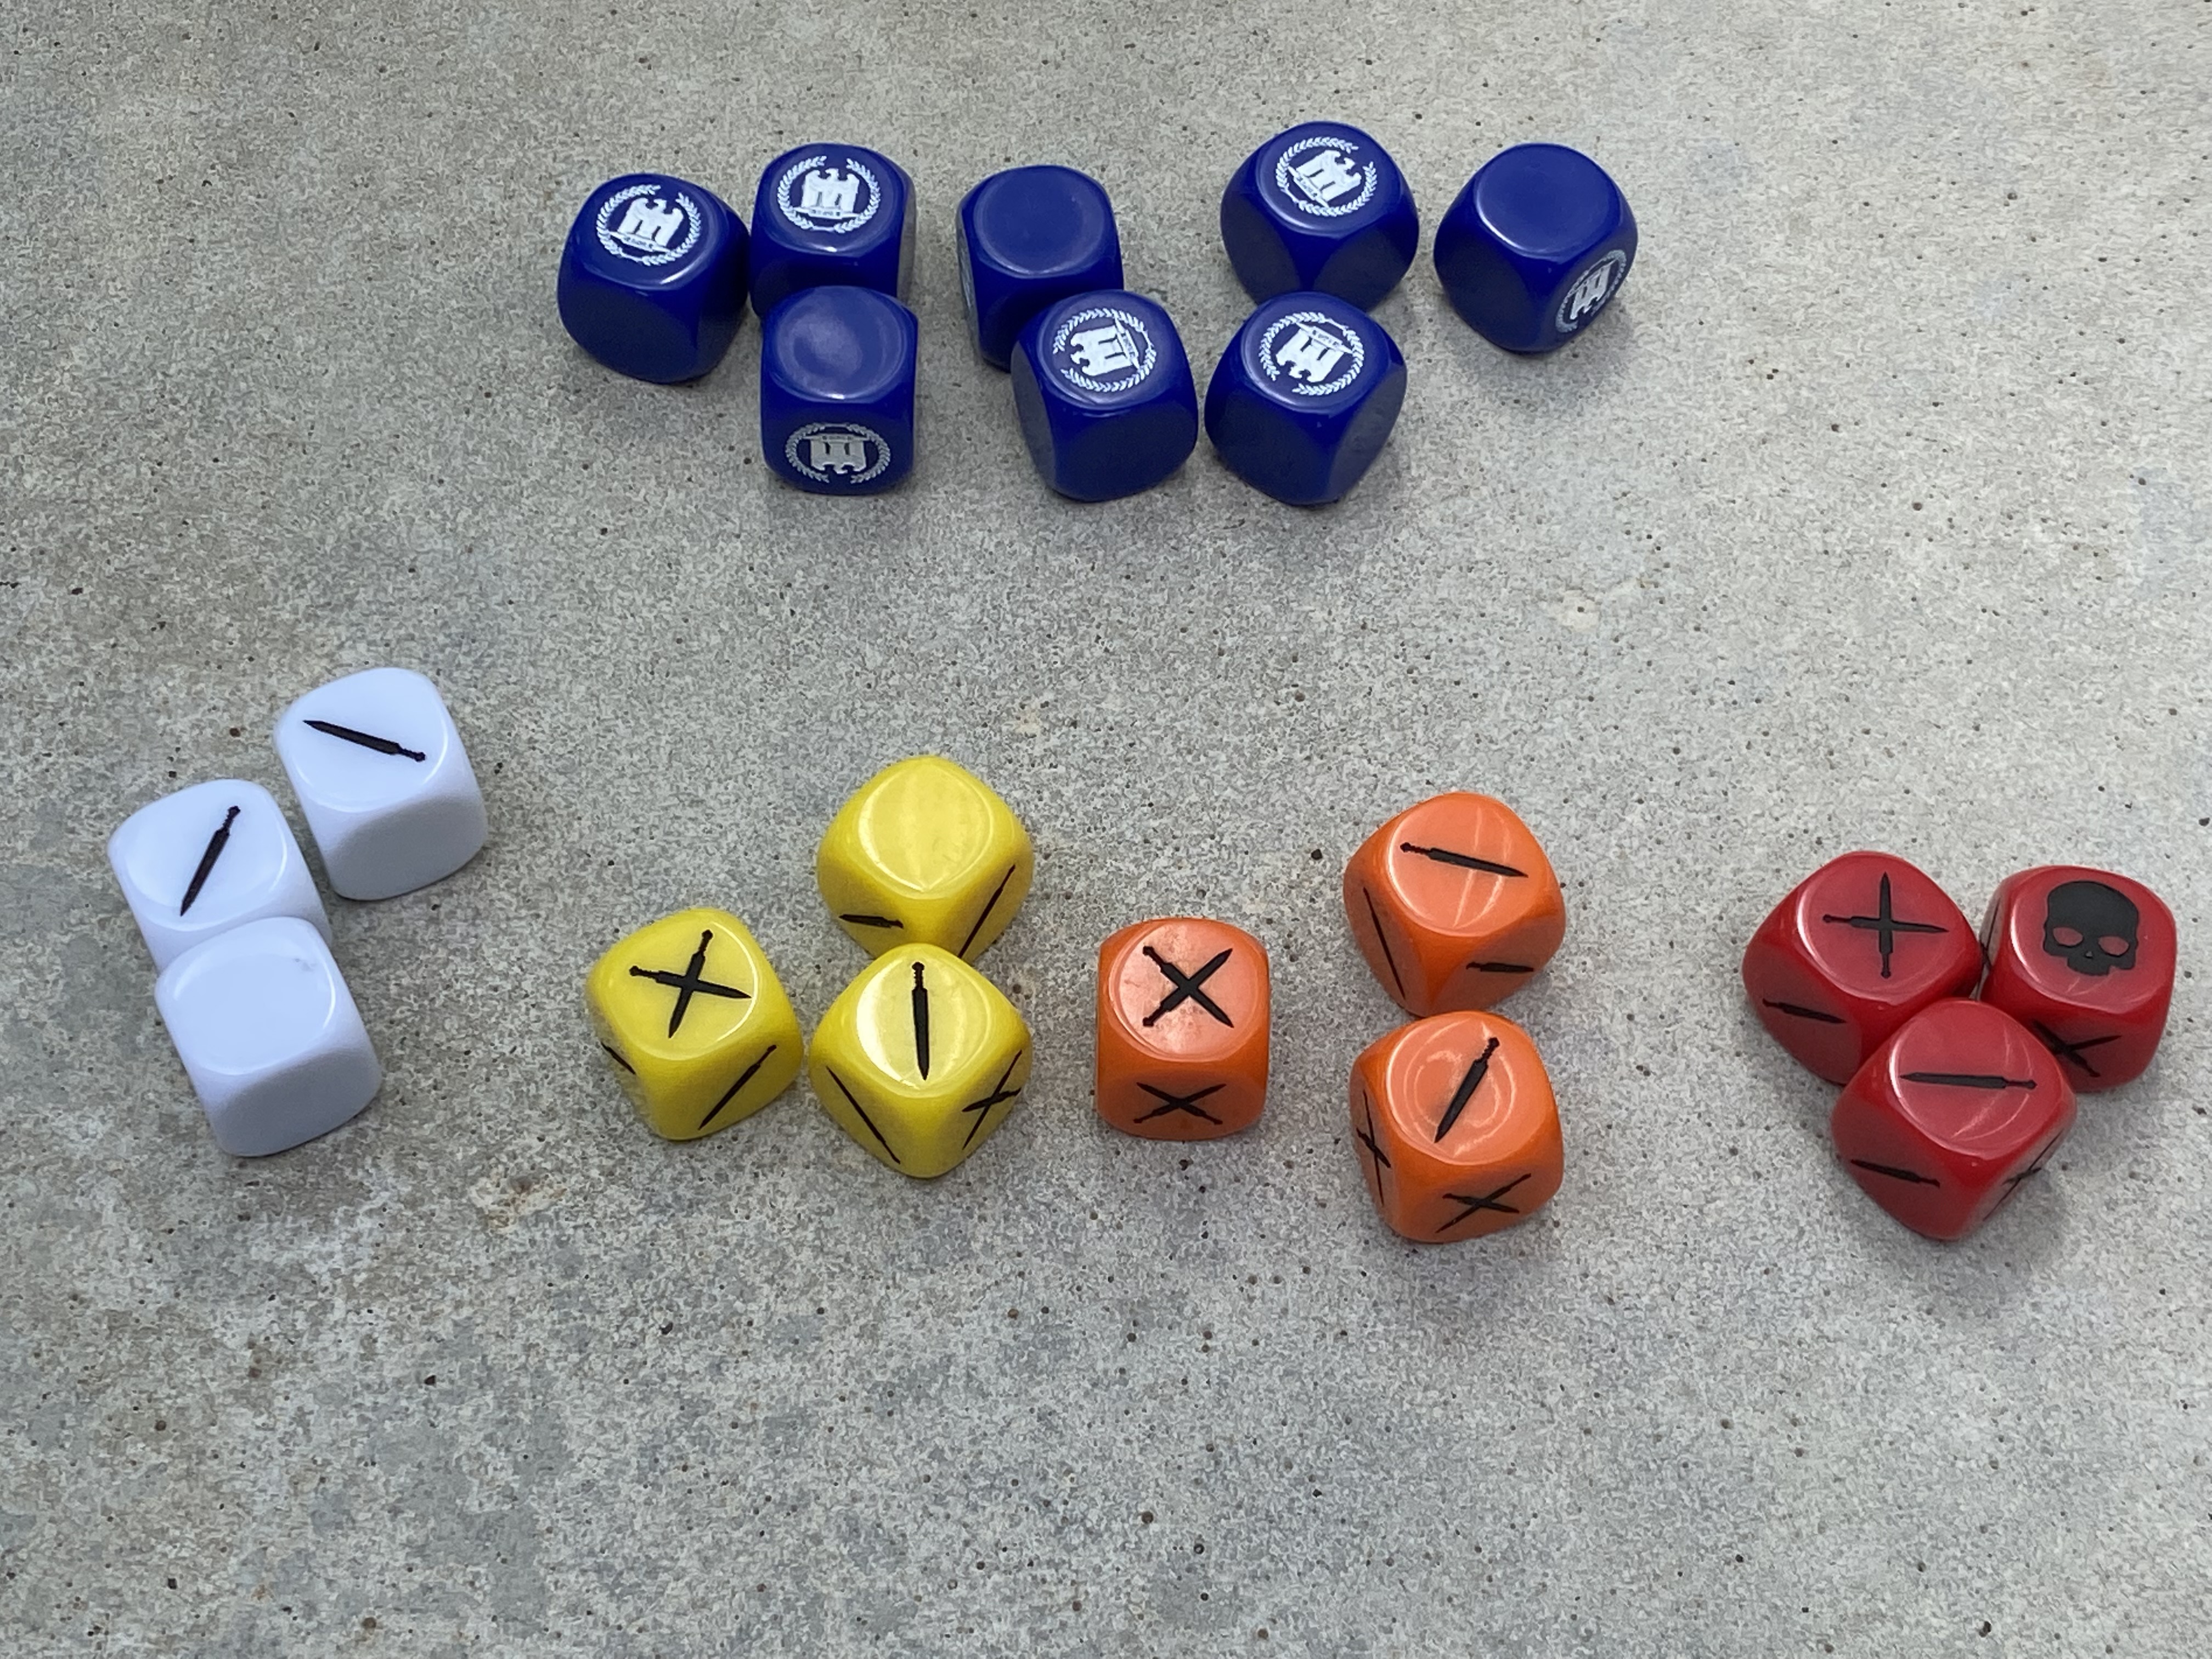
Dice are done and I must say I am really happy with them.
I have gone with 3 of each of the combat dice and 8 armour dice.
Although the maximum armour dice I currently have on any gladiator class is 5, I wanted scope to increase that during campaign play.
Sample rules page
Of course each style of gladiator would need its own range of attacks, manoeuvres and other identifying abilities.
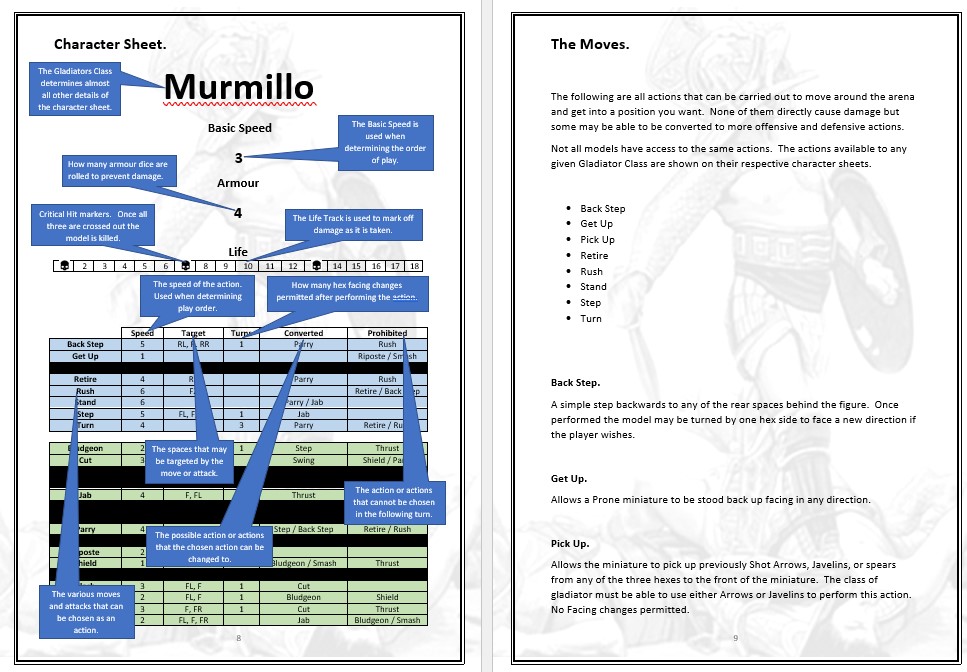 Sample pages from the rules.
The character sheets would show the speed, armour, life points, available actions and a whole host of other details needed to play each class. After all I am aiming for a simple set of rules where as much as possible can be contained on one sheet of paper.
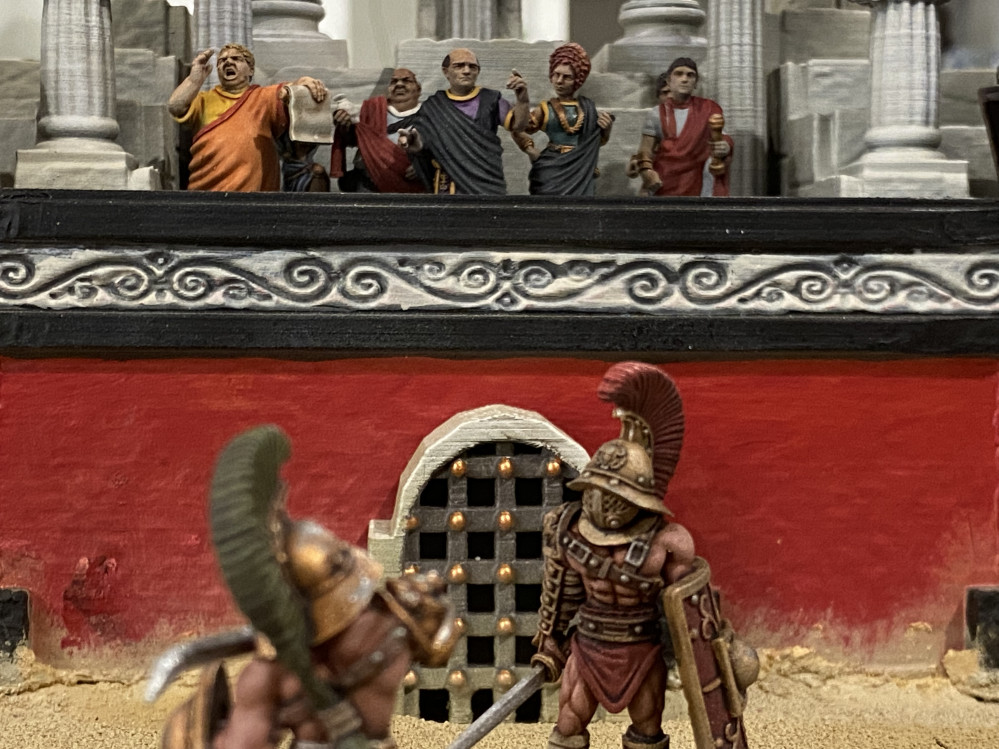
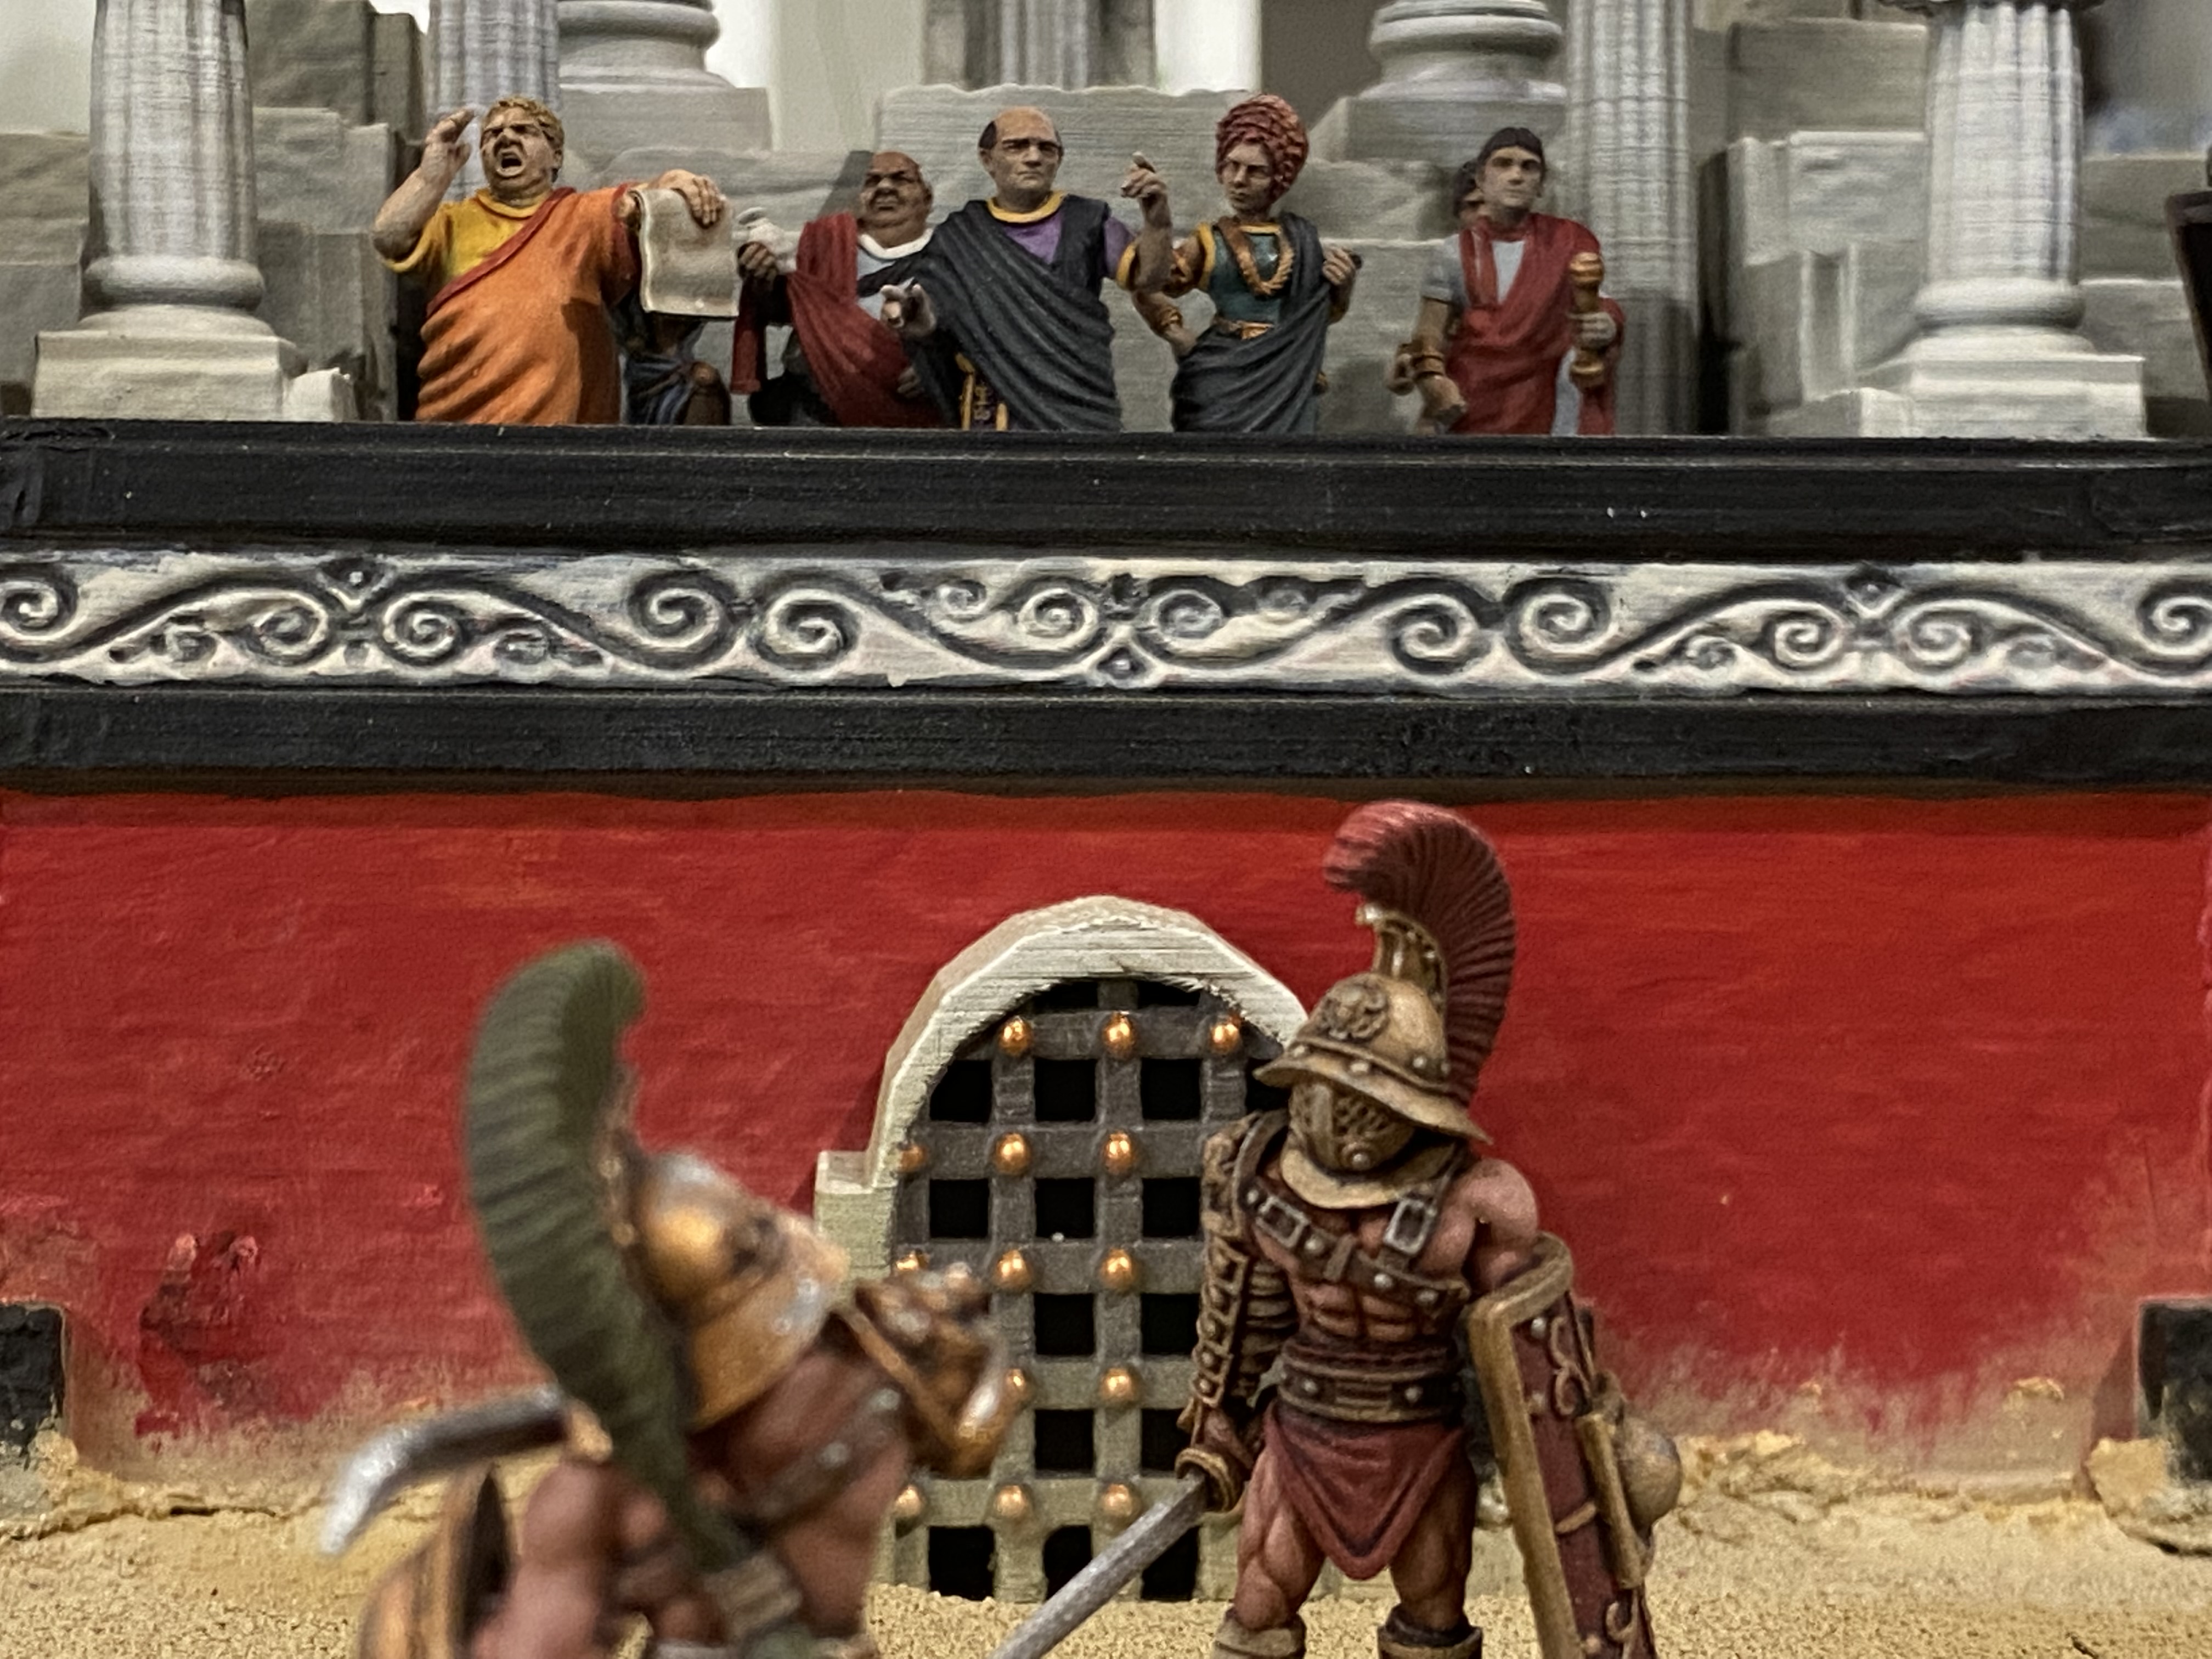
Plebs
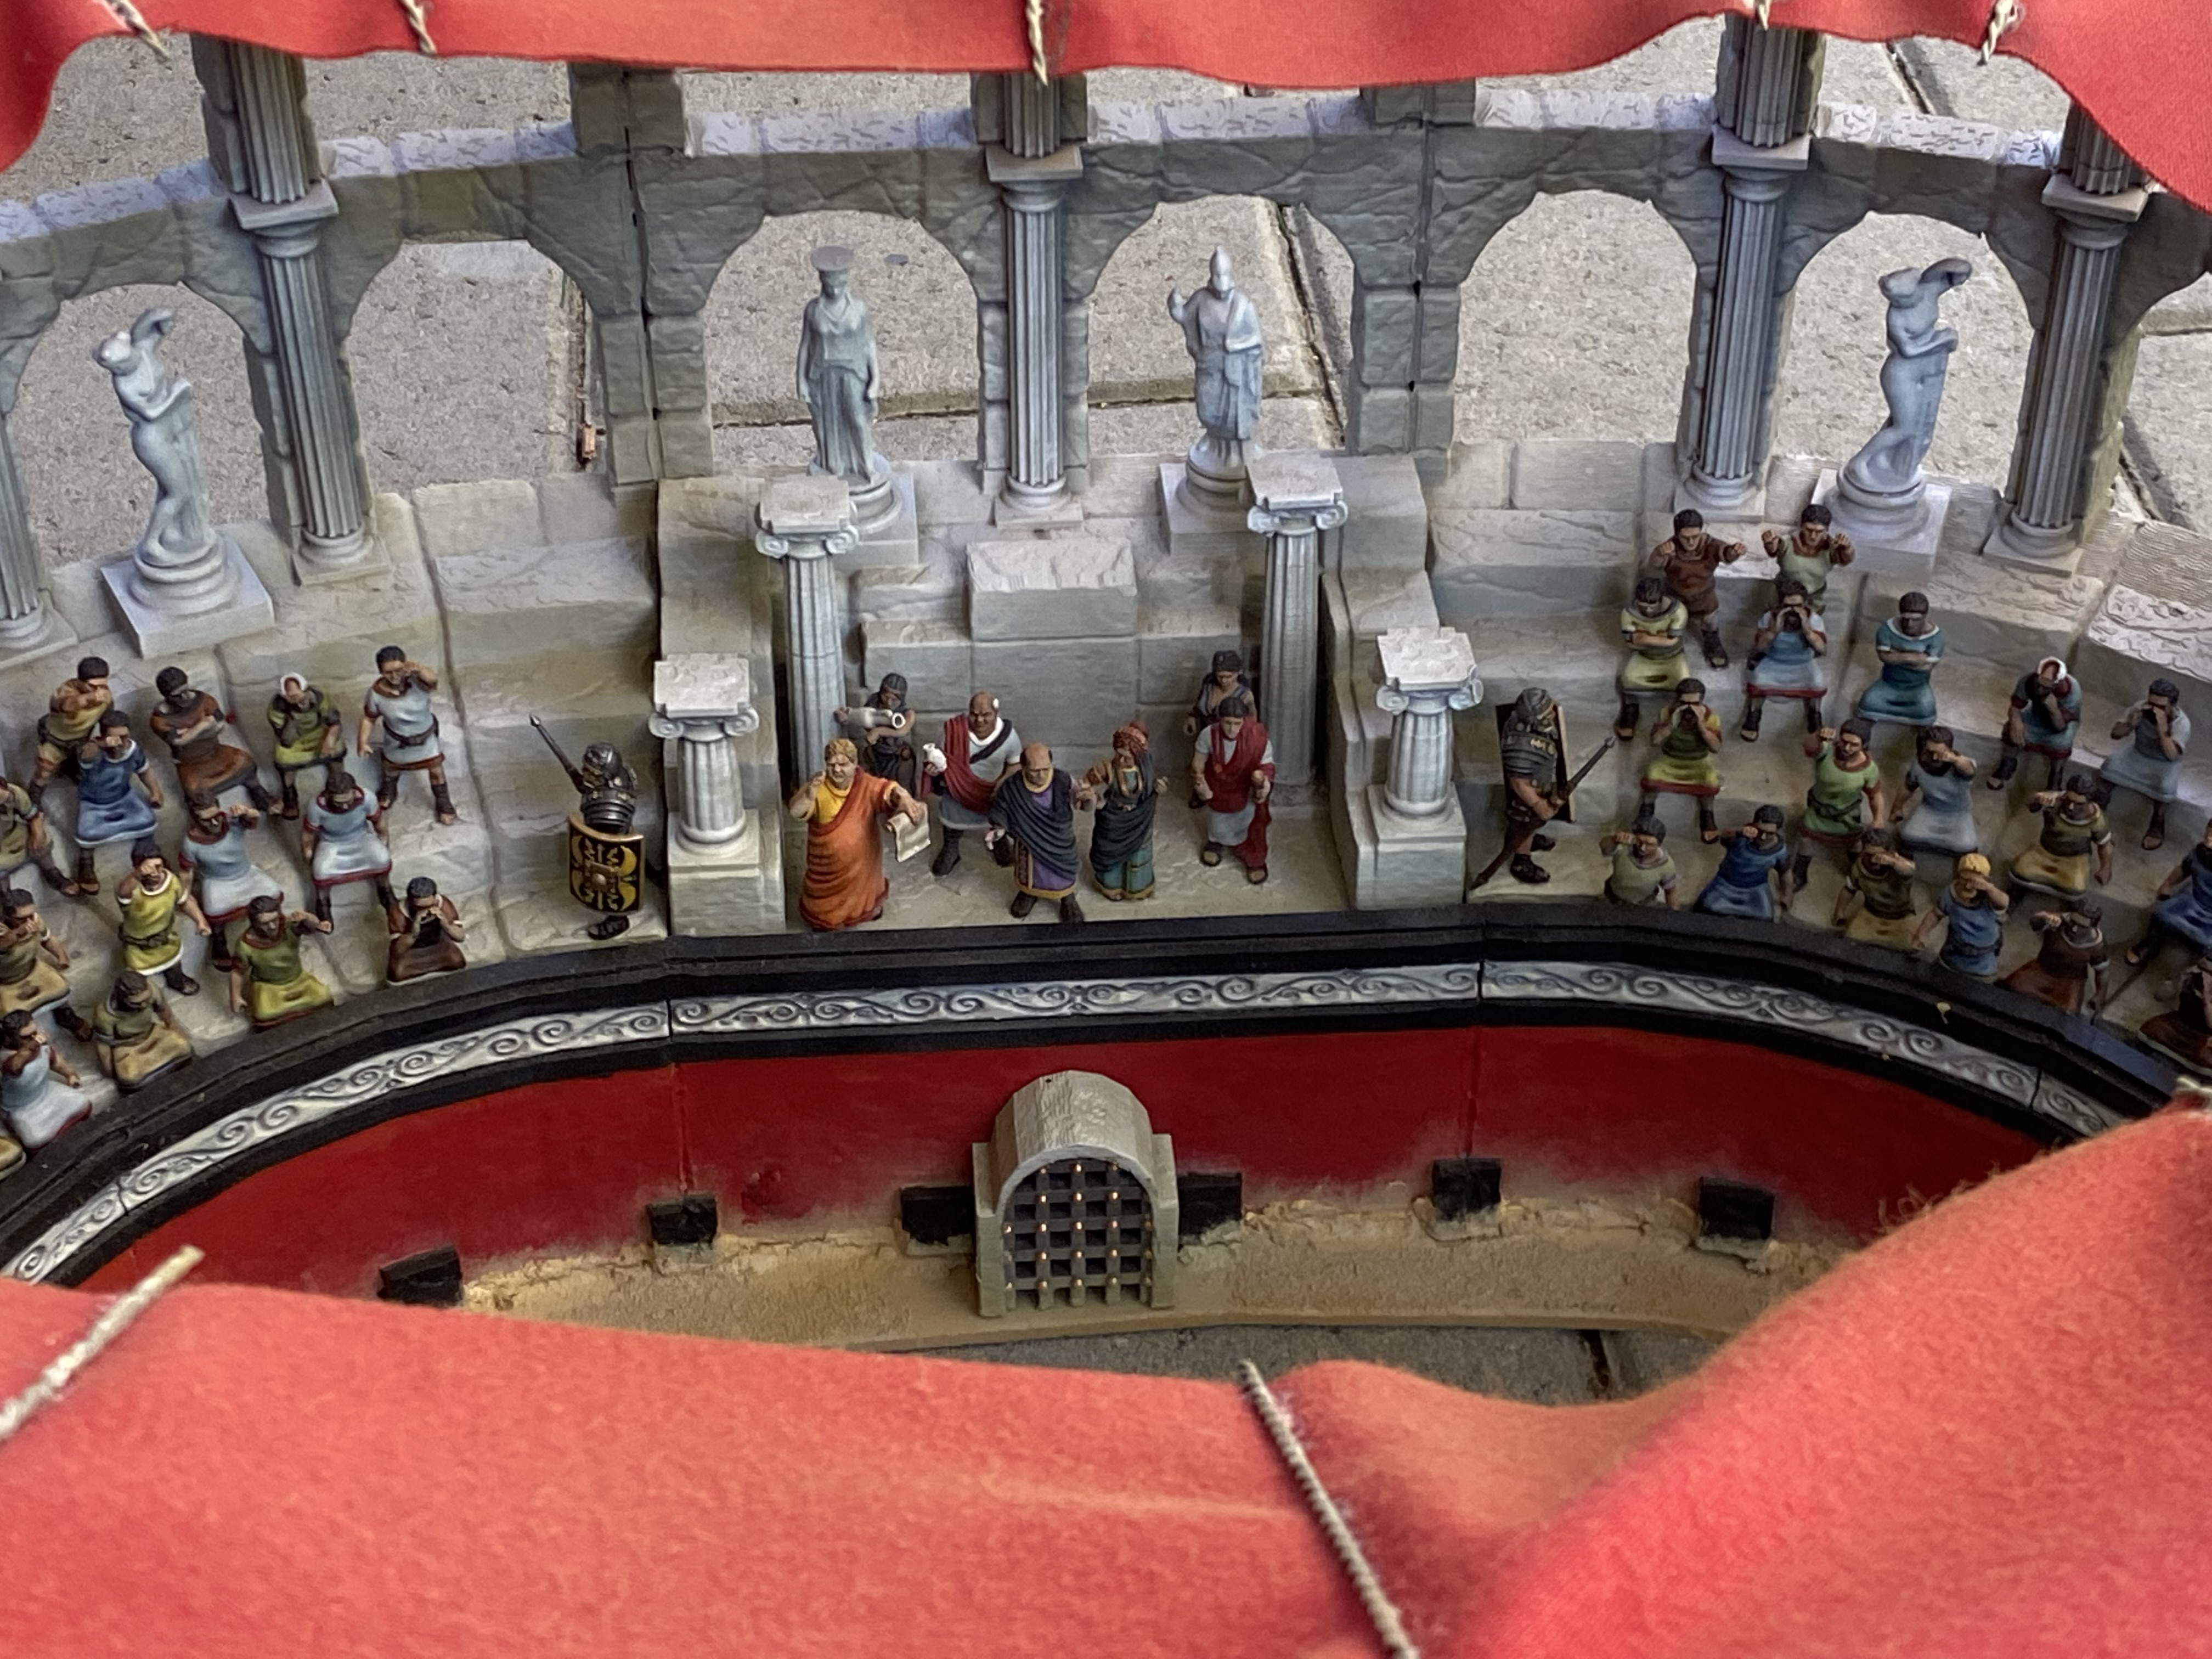
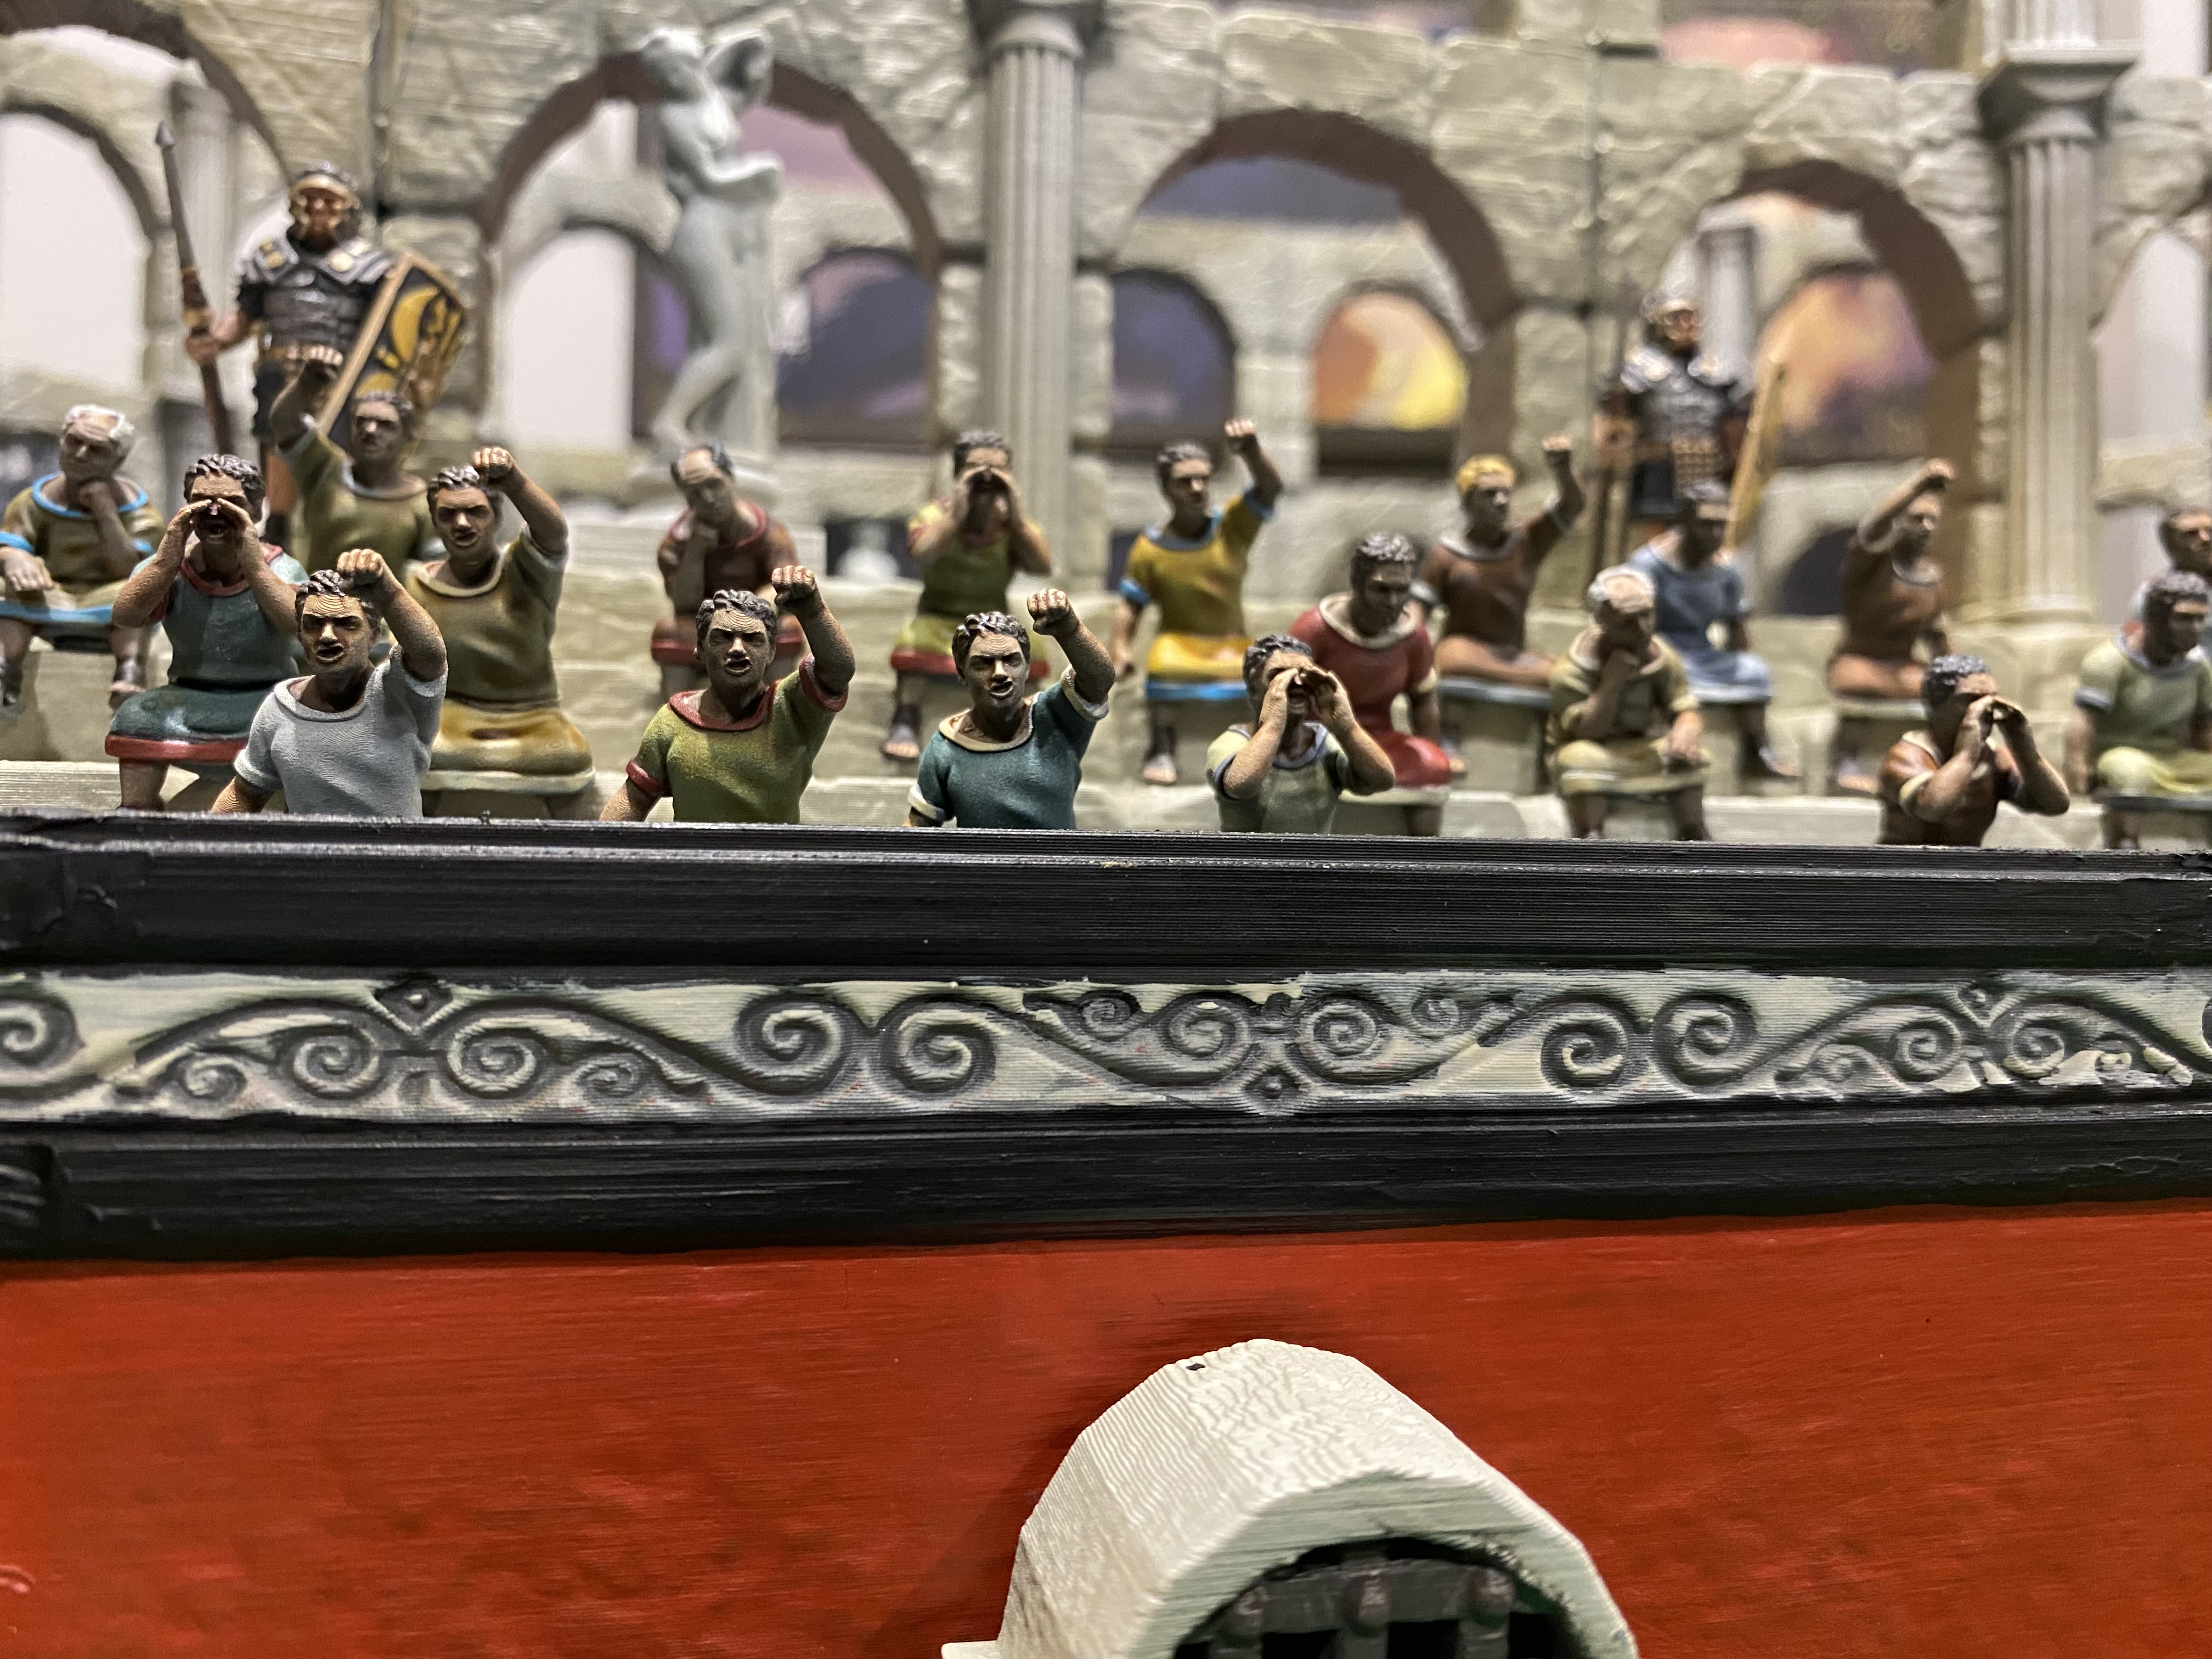
With the stonework pretty much finished I set about painting up the many spectators.
I used grey primer with a zenith highlight in off white. I then painted the entire crowd in a mixture of contrast paints and ink washes.
I didn’t go in to too much detail with these models as they would likely be seen slightly out of focus in the pictures anyway.
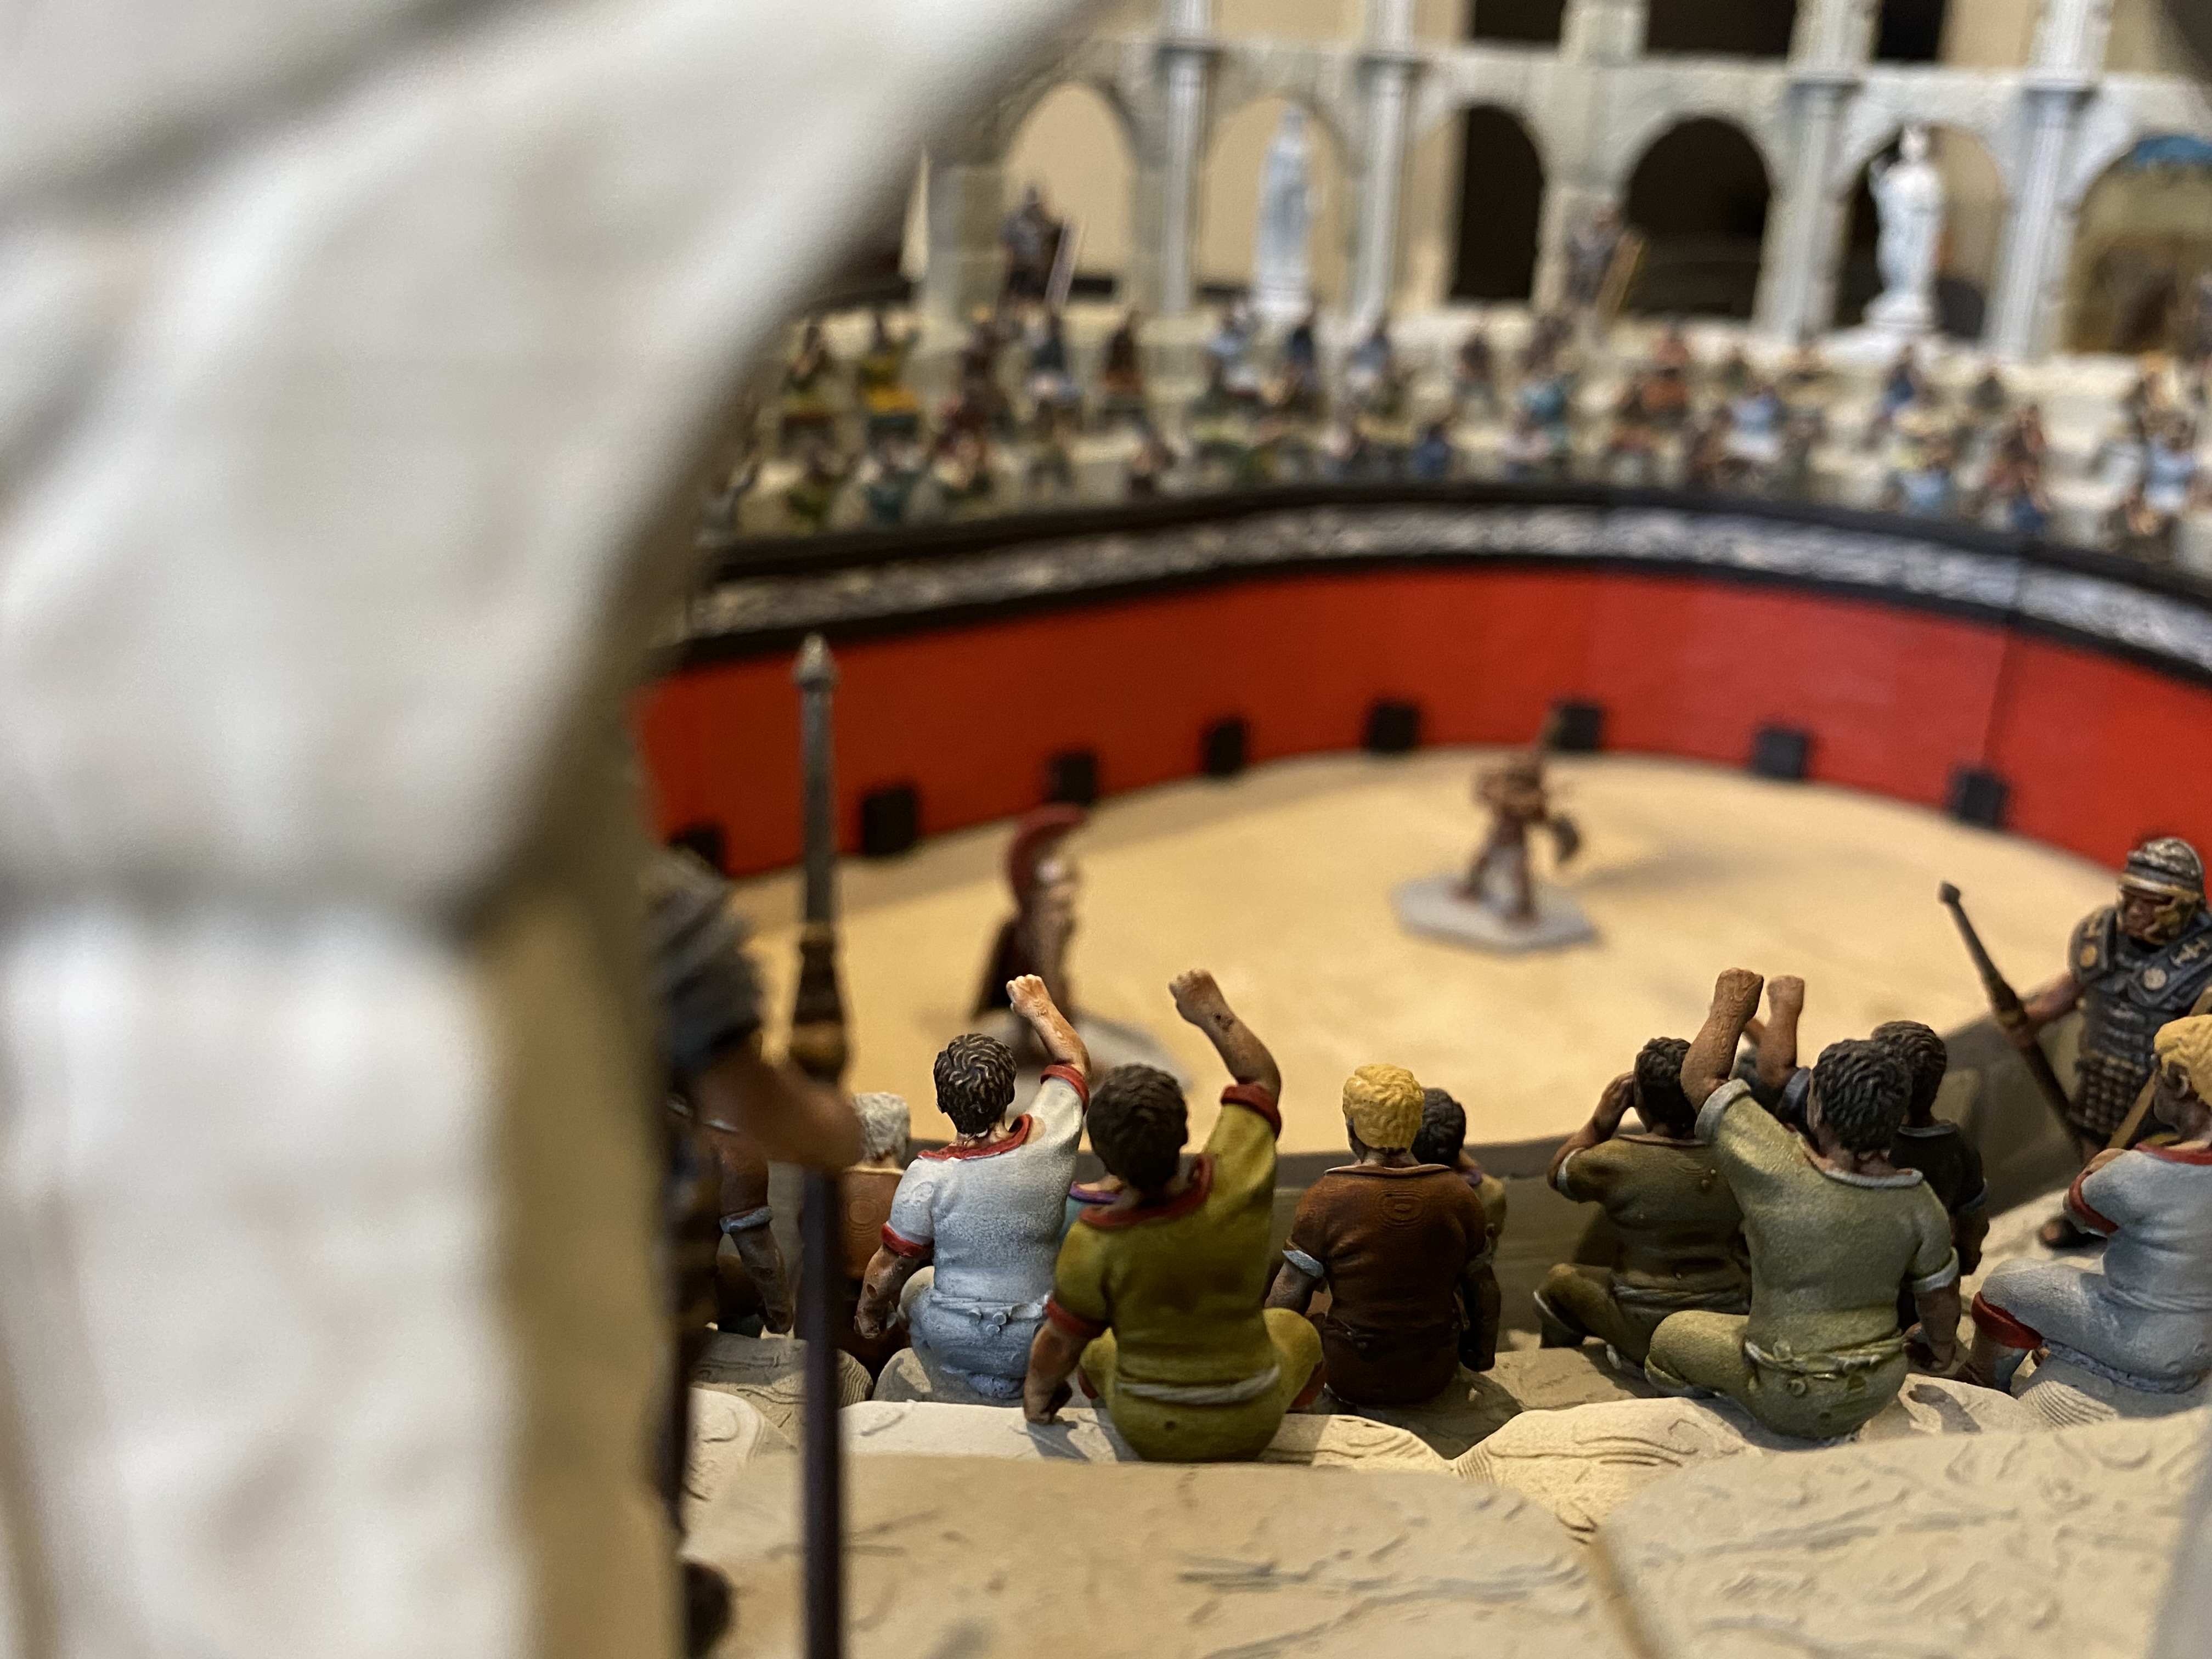
I stuck with a pretty limited Palette for the majority of the Plebs but added a few other colours for the occupants of the Imperial box.
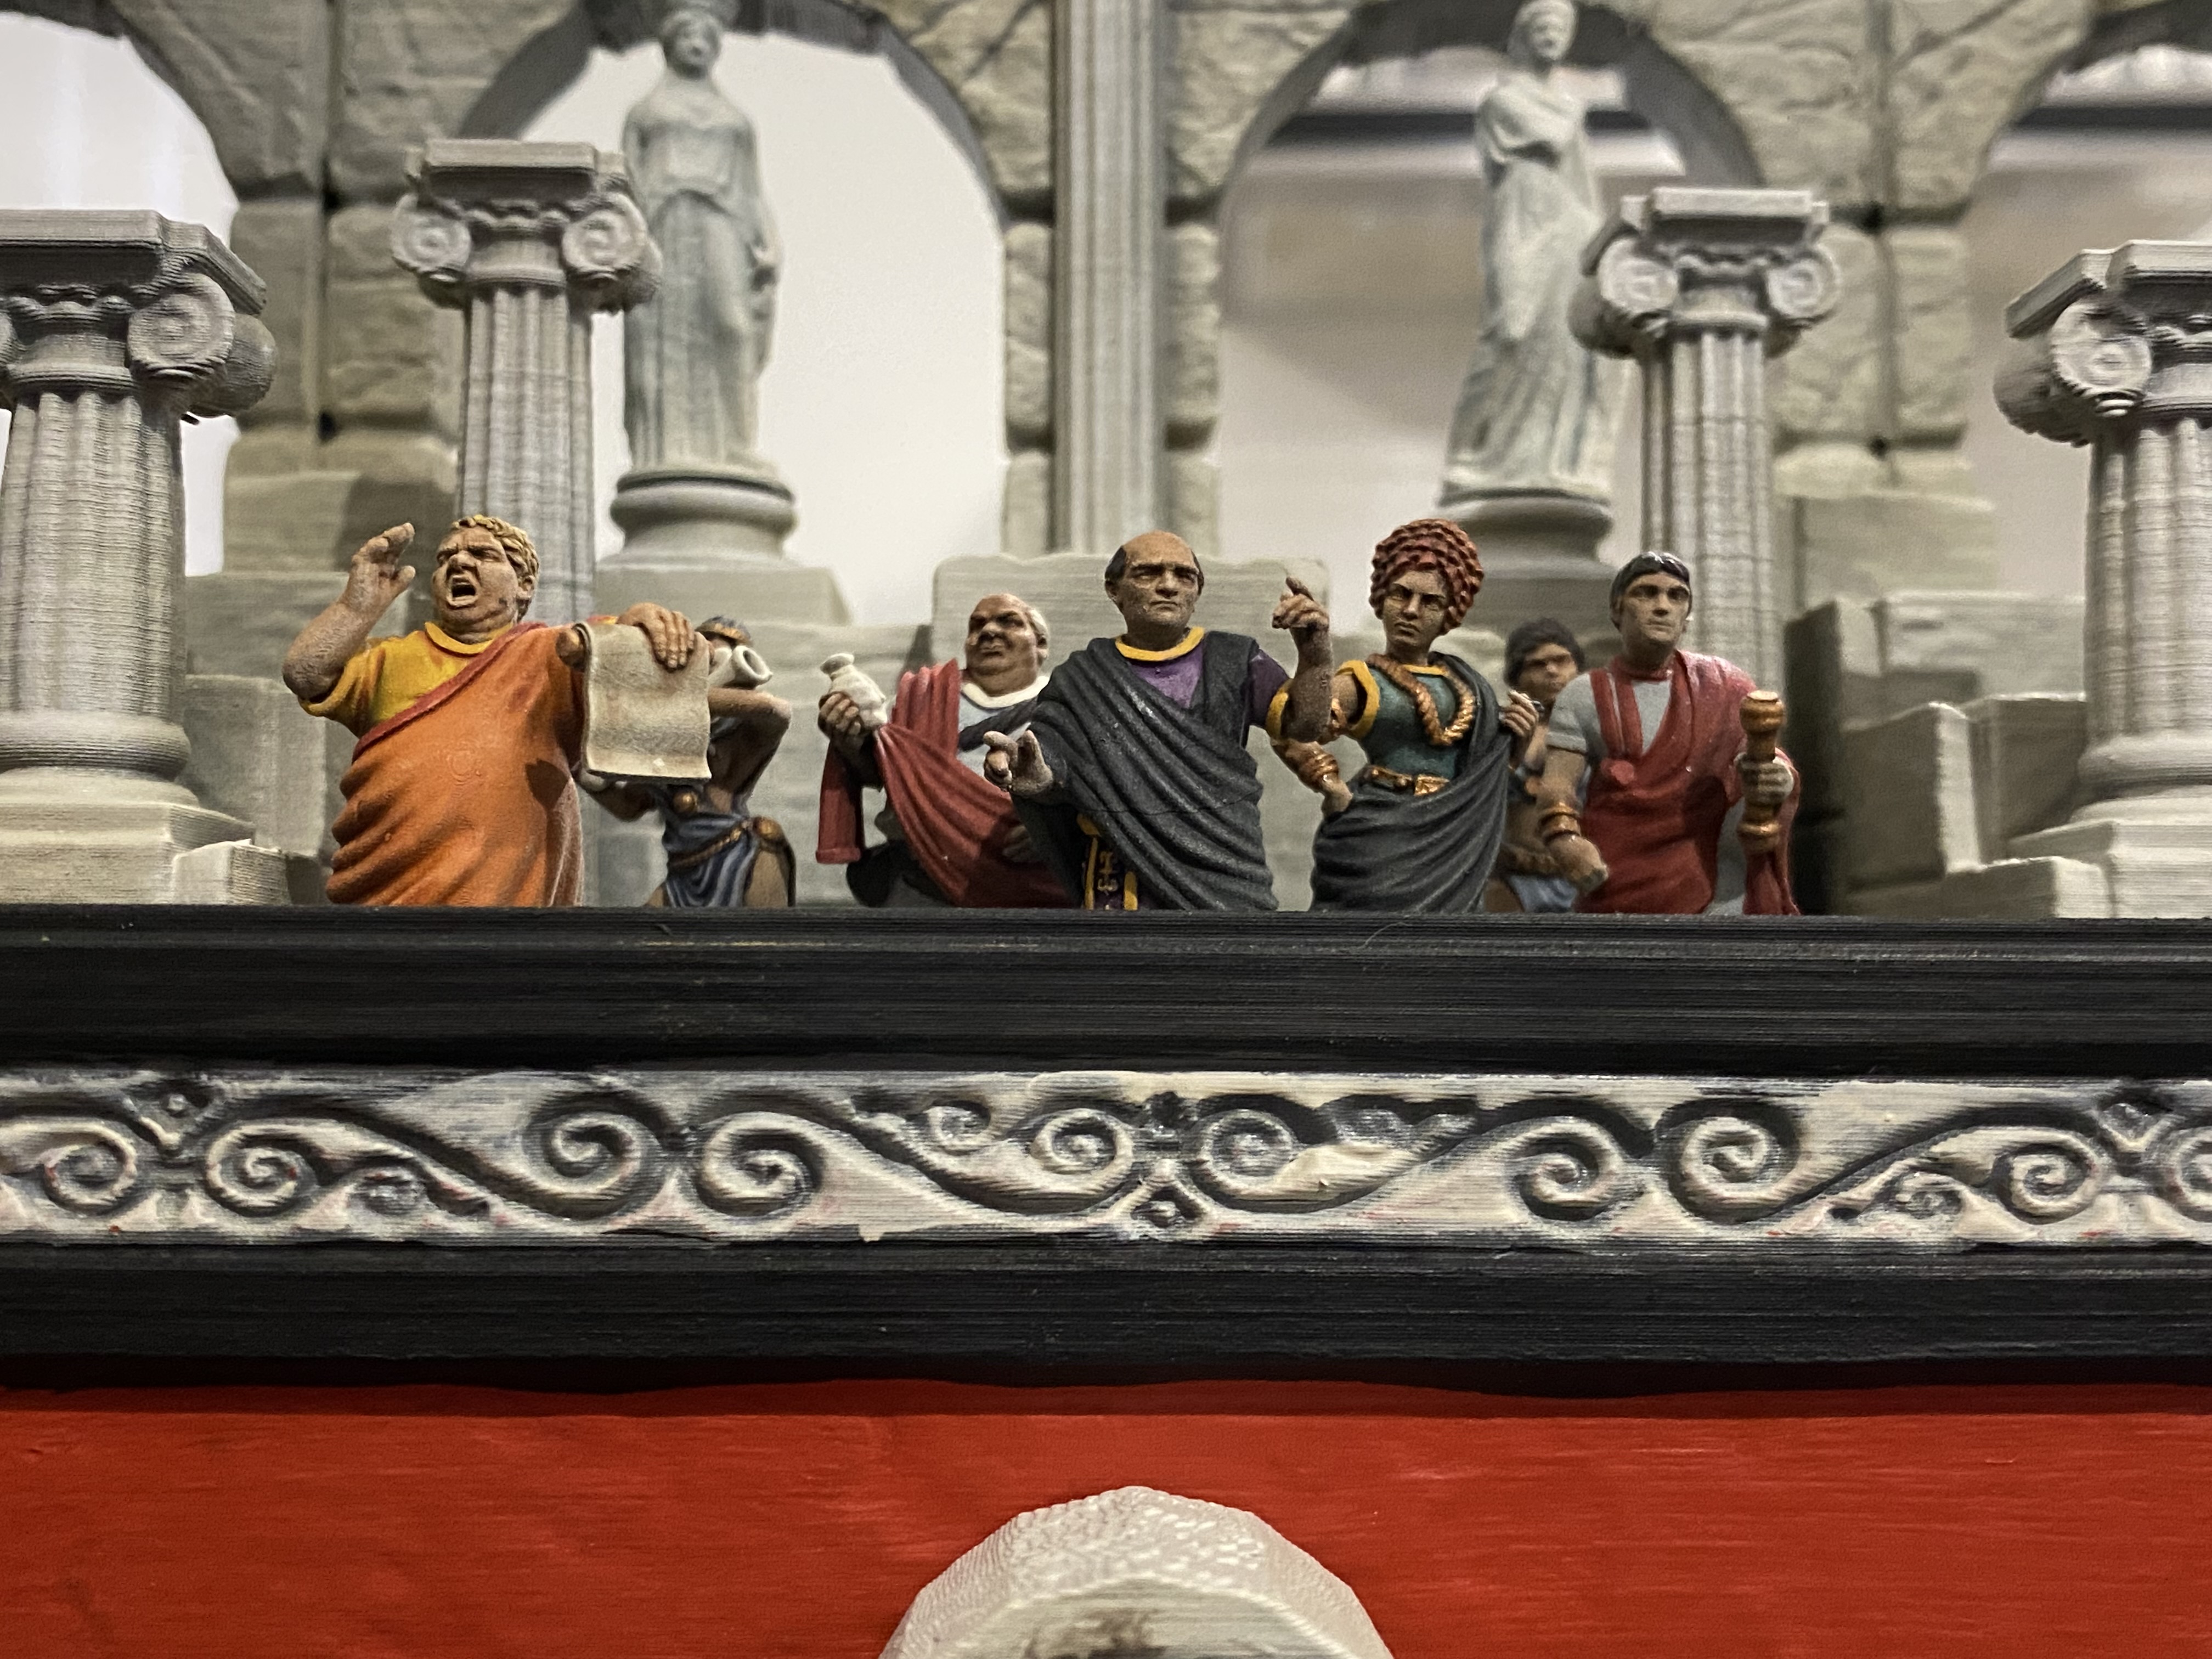
I was quite happy with the overall effect once the crowd had been added.
Dice


I started going over the rules I had in my mind and decided that I wanted to simplify how damage was worked out.
In the original rules the process was that each player would select an action. Those actions were then cross referenced which would give a difficulty. Then that difficulty was compared on a separate table and a D20 was rolled which would then cause a category of injury dependant on the defender’s armour level. The lowest wounds were Nicks. 3 Nicks became a Cut, 3 Cuts become a Wound and 3 Wounds would result in death.
I wanted to change all that to just one chart and one dice roll.
I decided that I would use colour coded dice to represent how likely the attack was of causing damage and how serious the damage could be.
With my version each fighter still choses an action which is cross referenced to give both a colour and a number.
White dice are the weakest, through to red dice which are the strongest.
Then the defender rolls defence dice (blue) to try to mitigate damage.
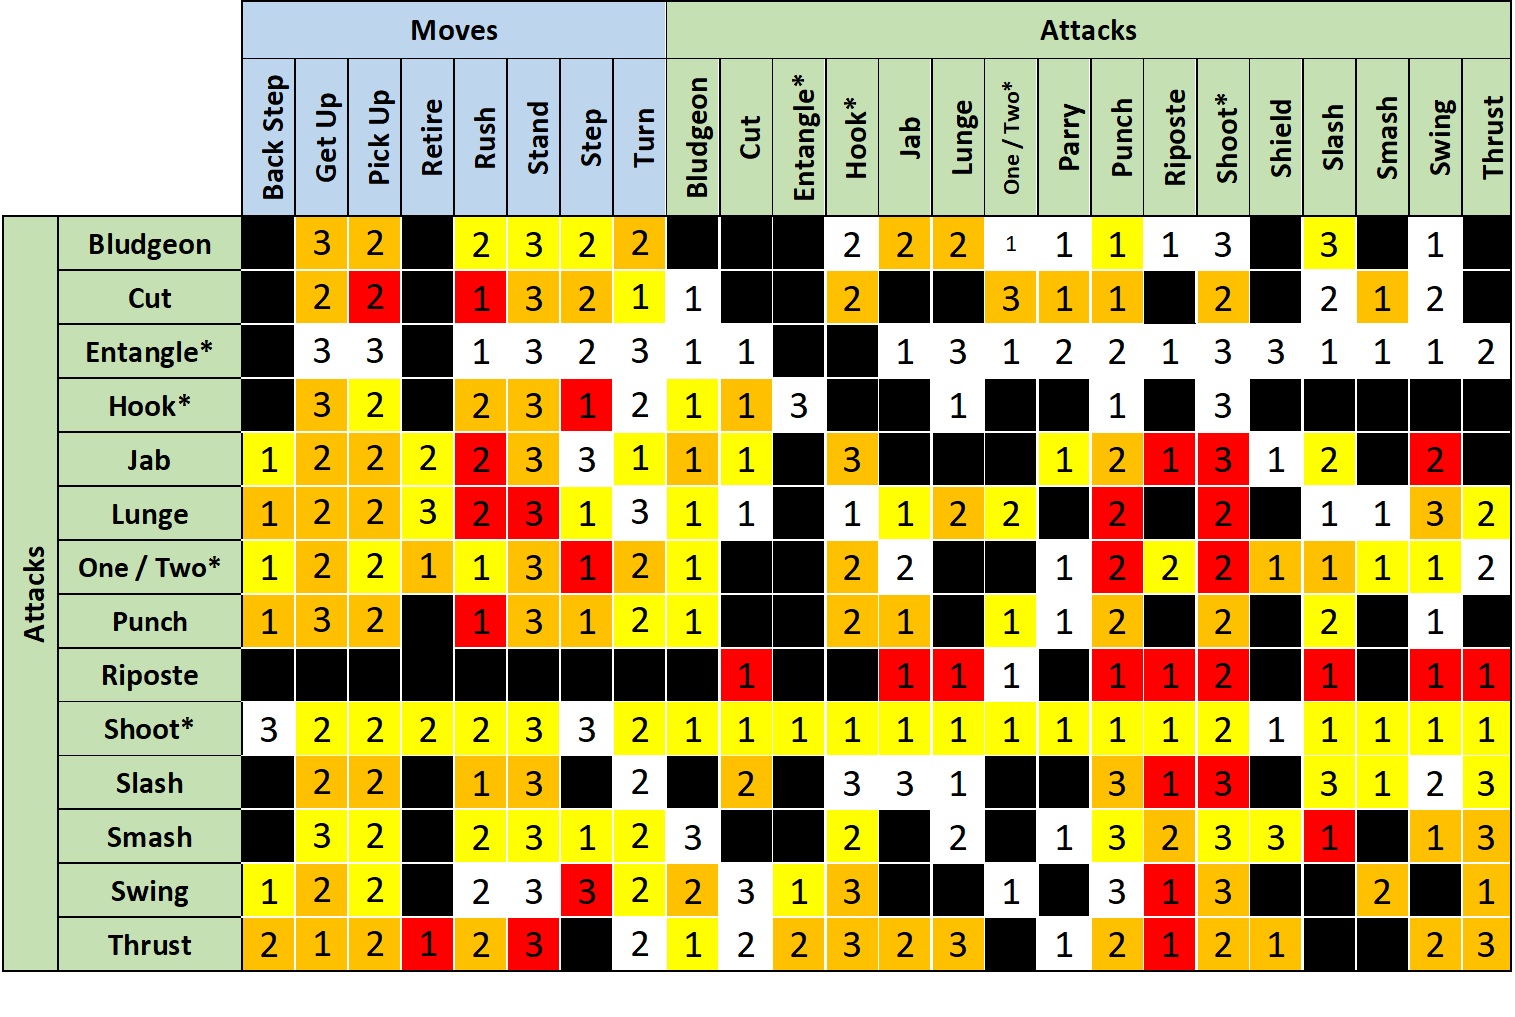
For example, there would be a matrix like this to cross reference each players chosen action which would in turn dictate how many and what colour dice are to be rolled. Some actions would have blacked out sections to show that those actions automatically fail against certain actions.
Of course this is not the final combat matrix, but should give some idea of how it will work.
Adding Colour
I used simple rattle cans to paint the stonework. I started with a cheap grey primer from the local hardware store and then used sand-coloured sprays to build up highlights.
I finished off with a light zenith highlight with an off-white spray.
Painting the stonework took less than 30 minutes thanks to the ridiculous Perth heat.
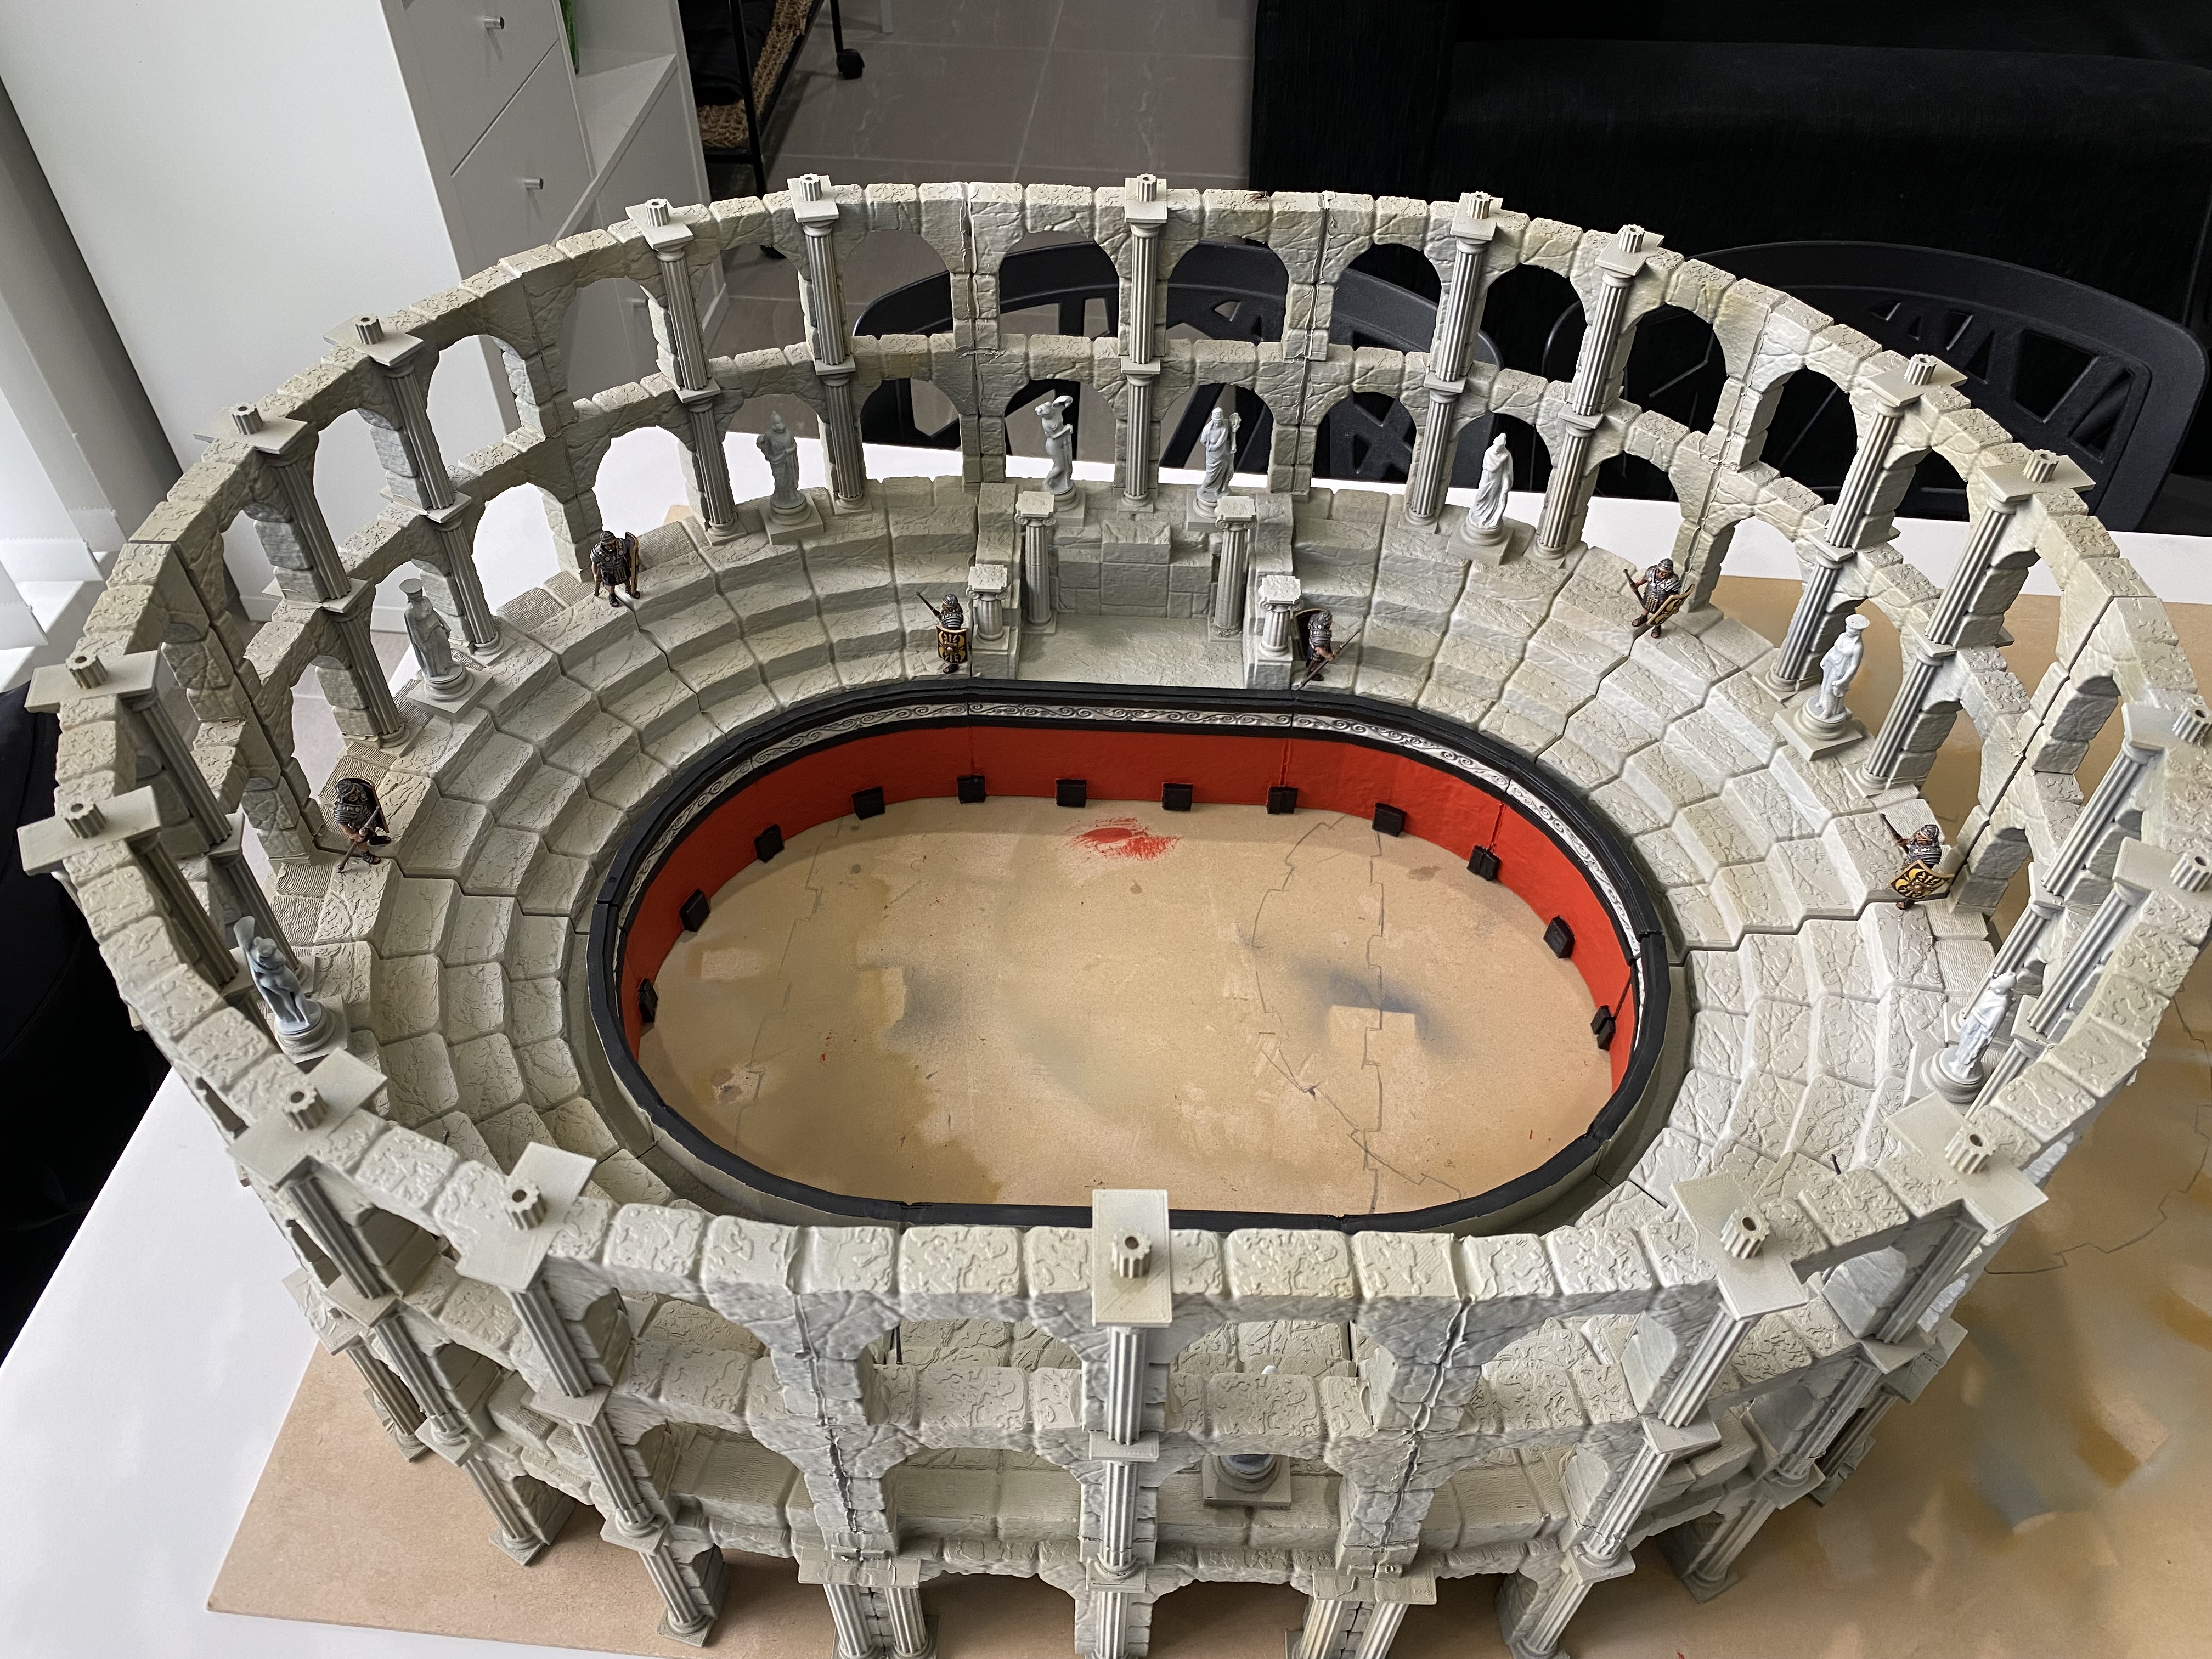
The inside wall of the arena was painted red with a black trim. Again I used cheap paints from the local hardware store.
For the many statues that adorn the walls I again used rattle-cans, starting with a blue-grey and working up to white.
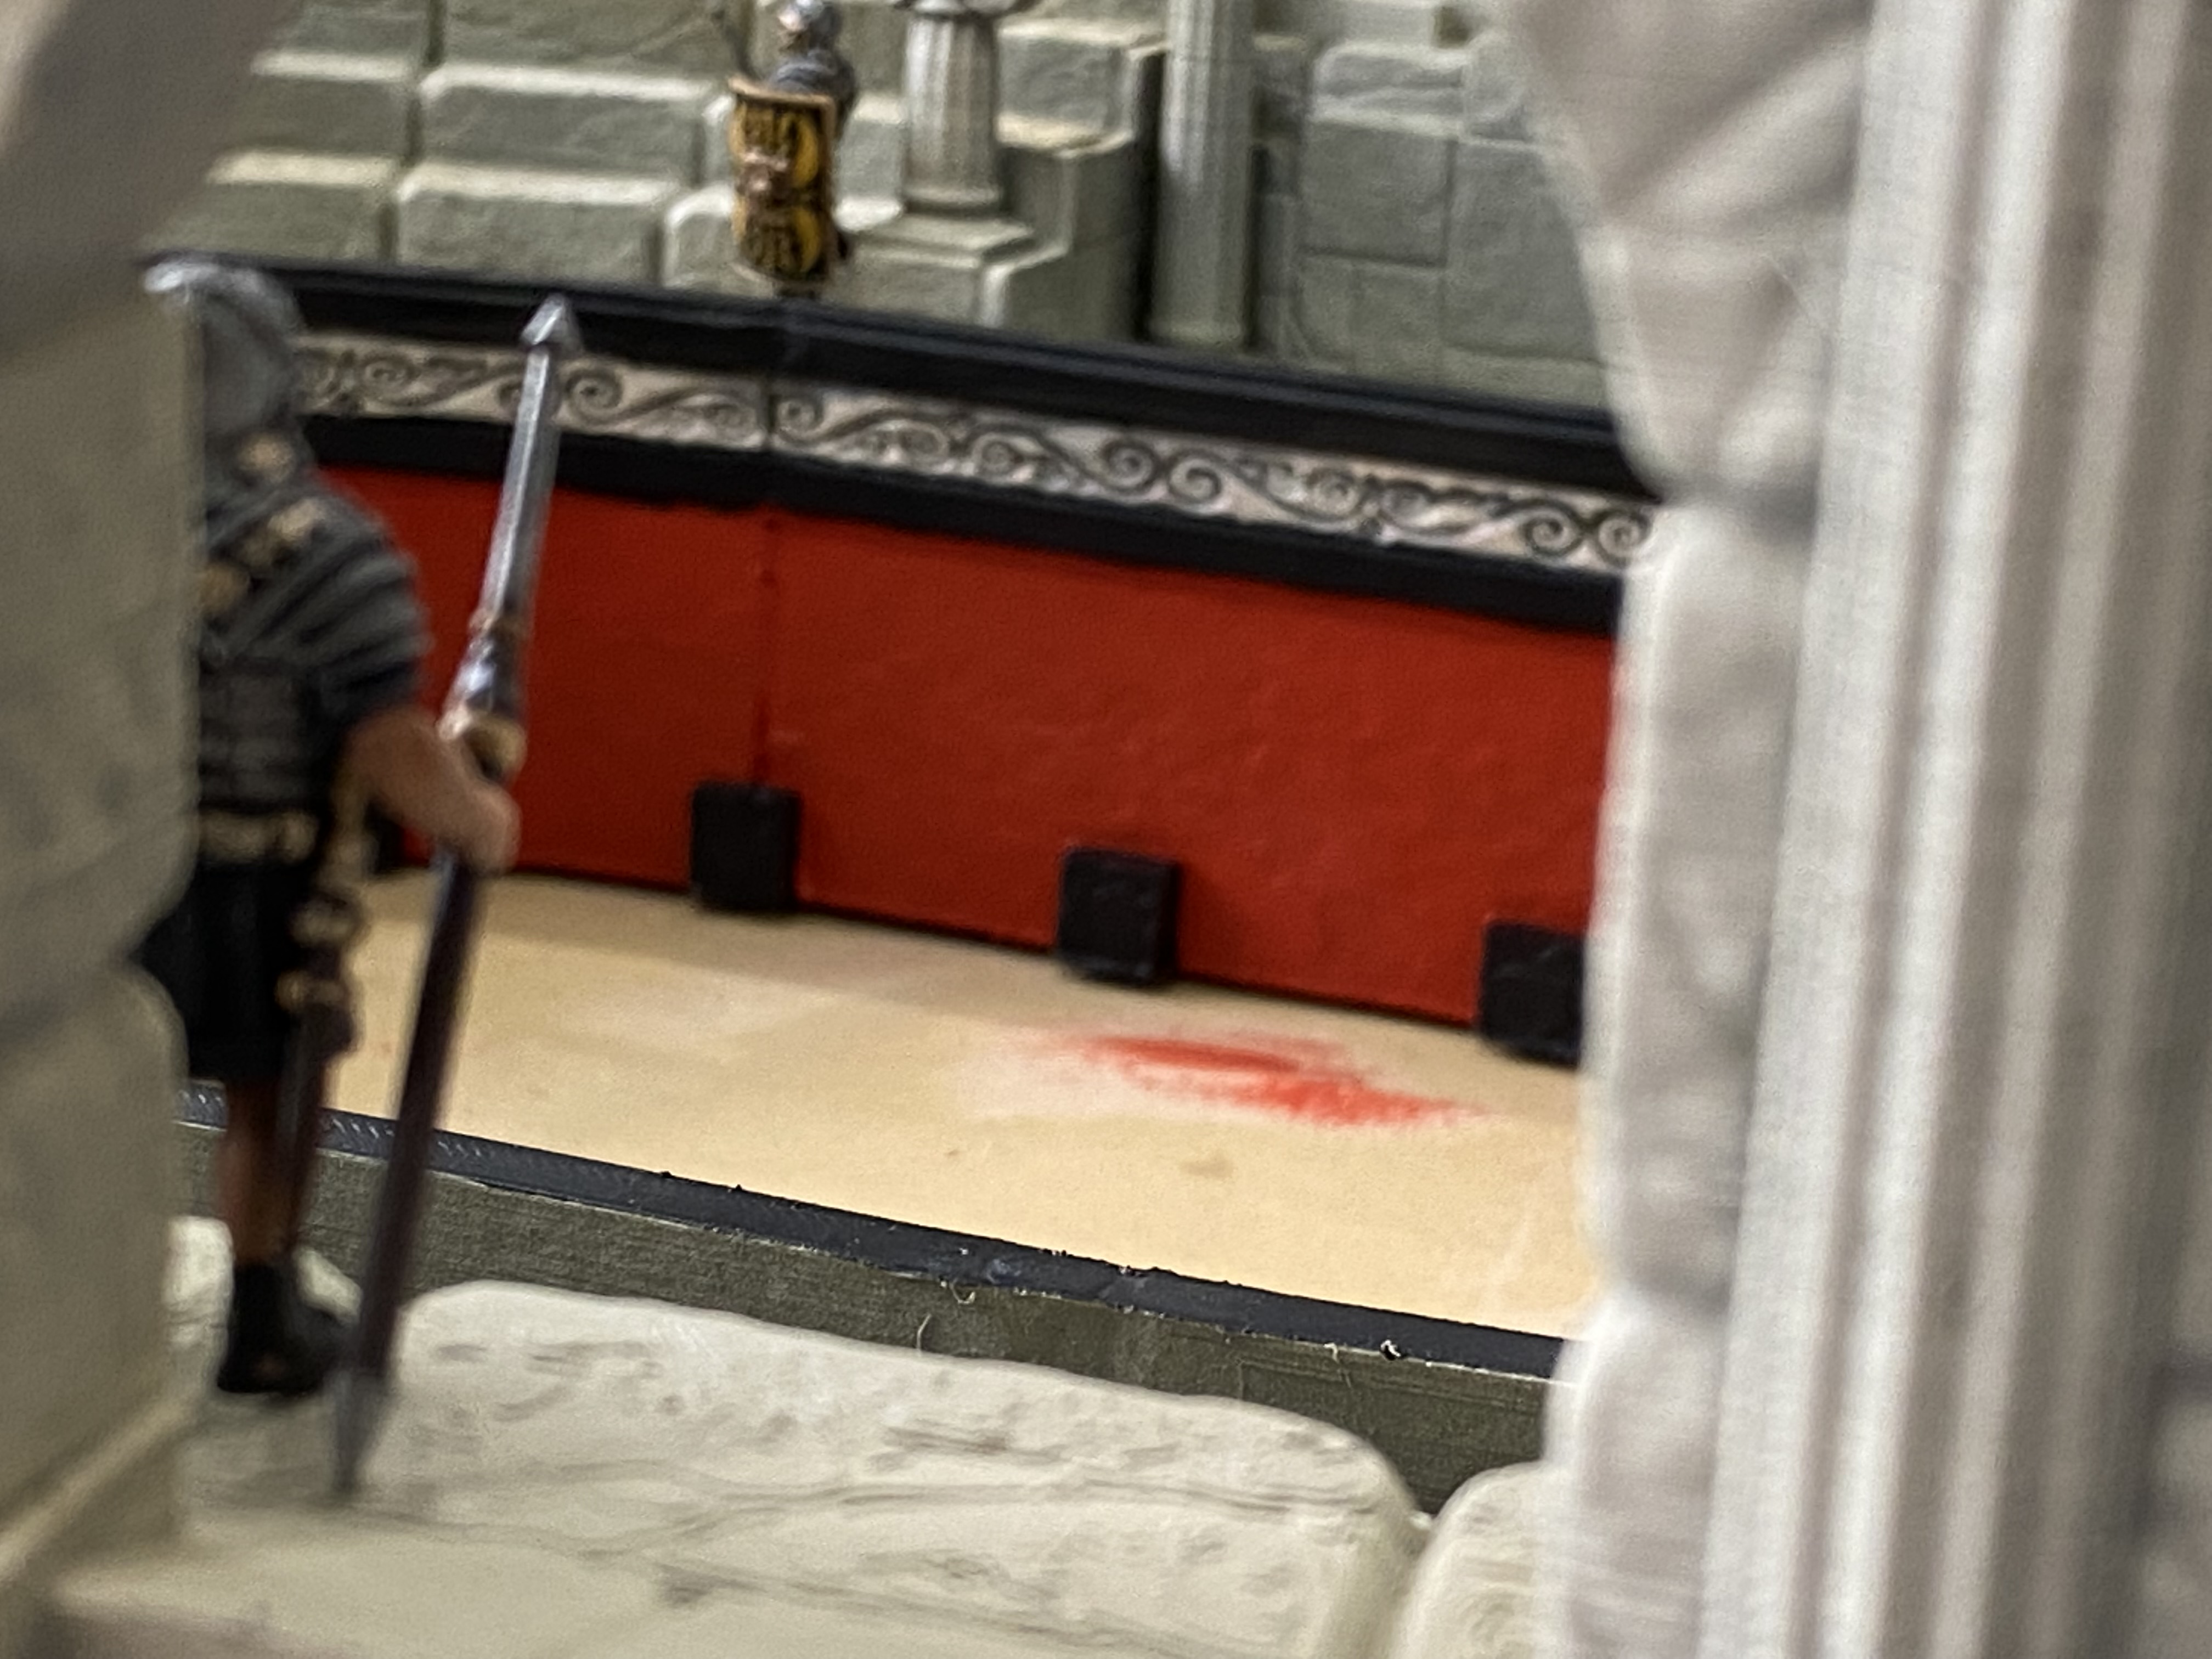
I then Painted up 10 Roman Legionnaires to act as security for the Colosseum. I used colours more akin to Pretorians because I figured that regular legionnaire would not have been used.
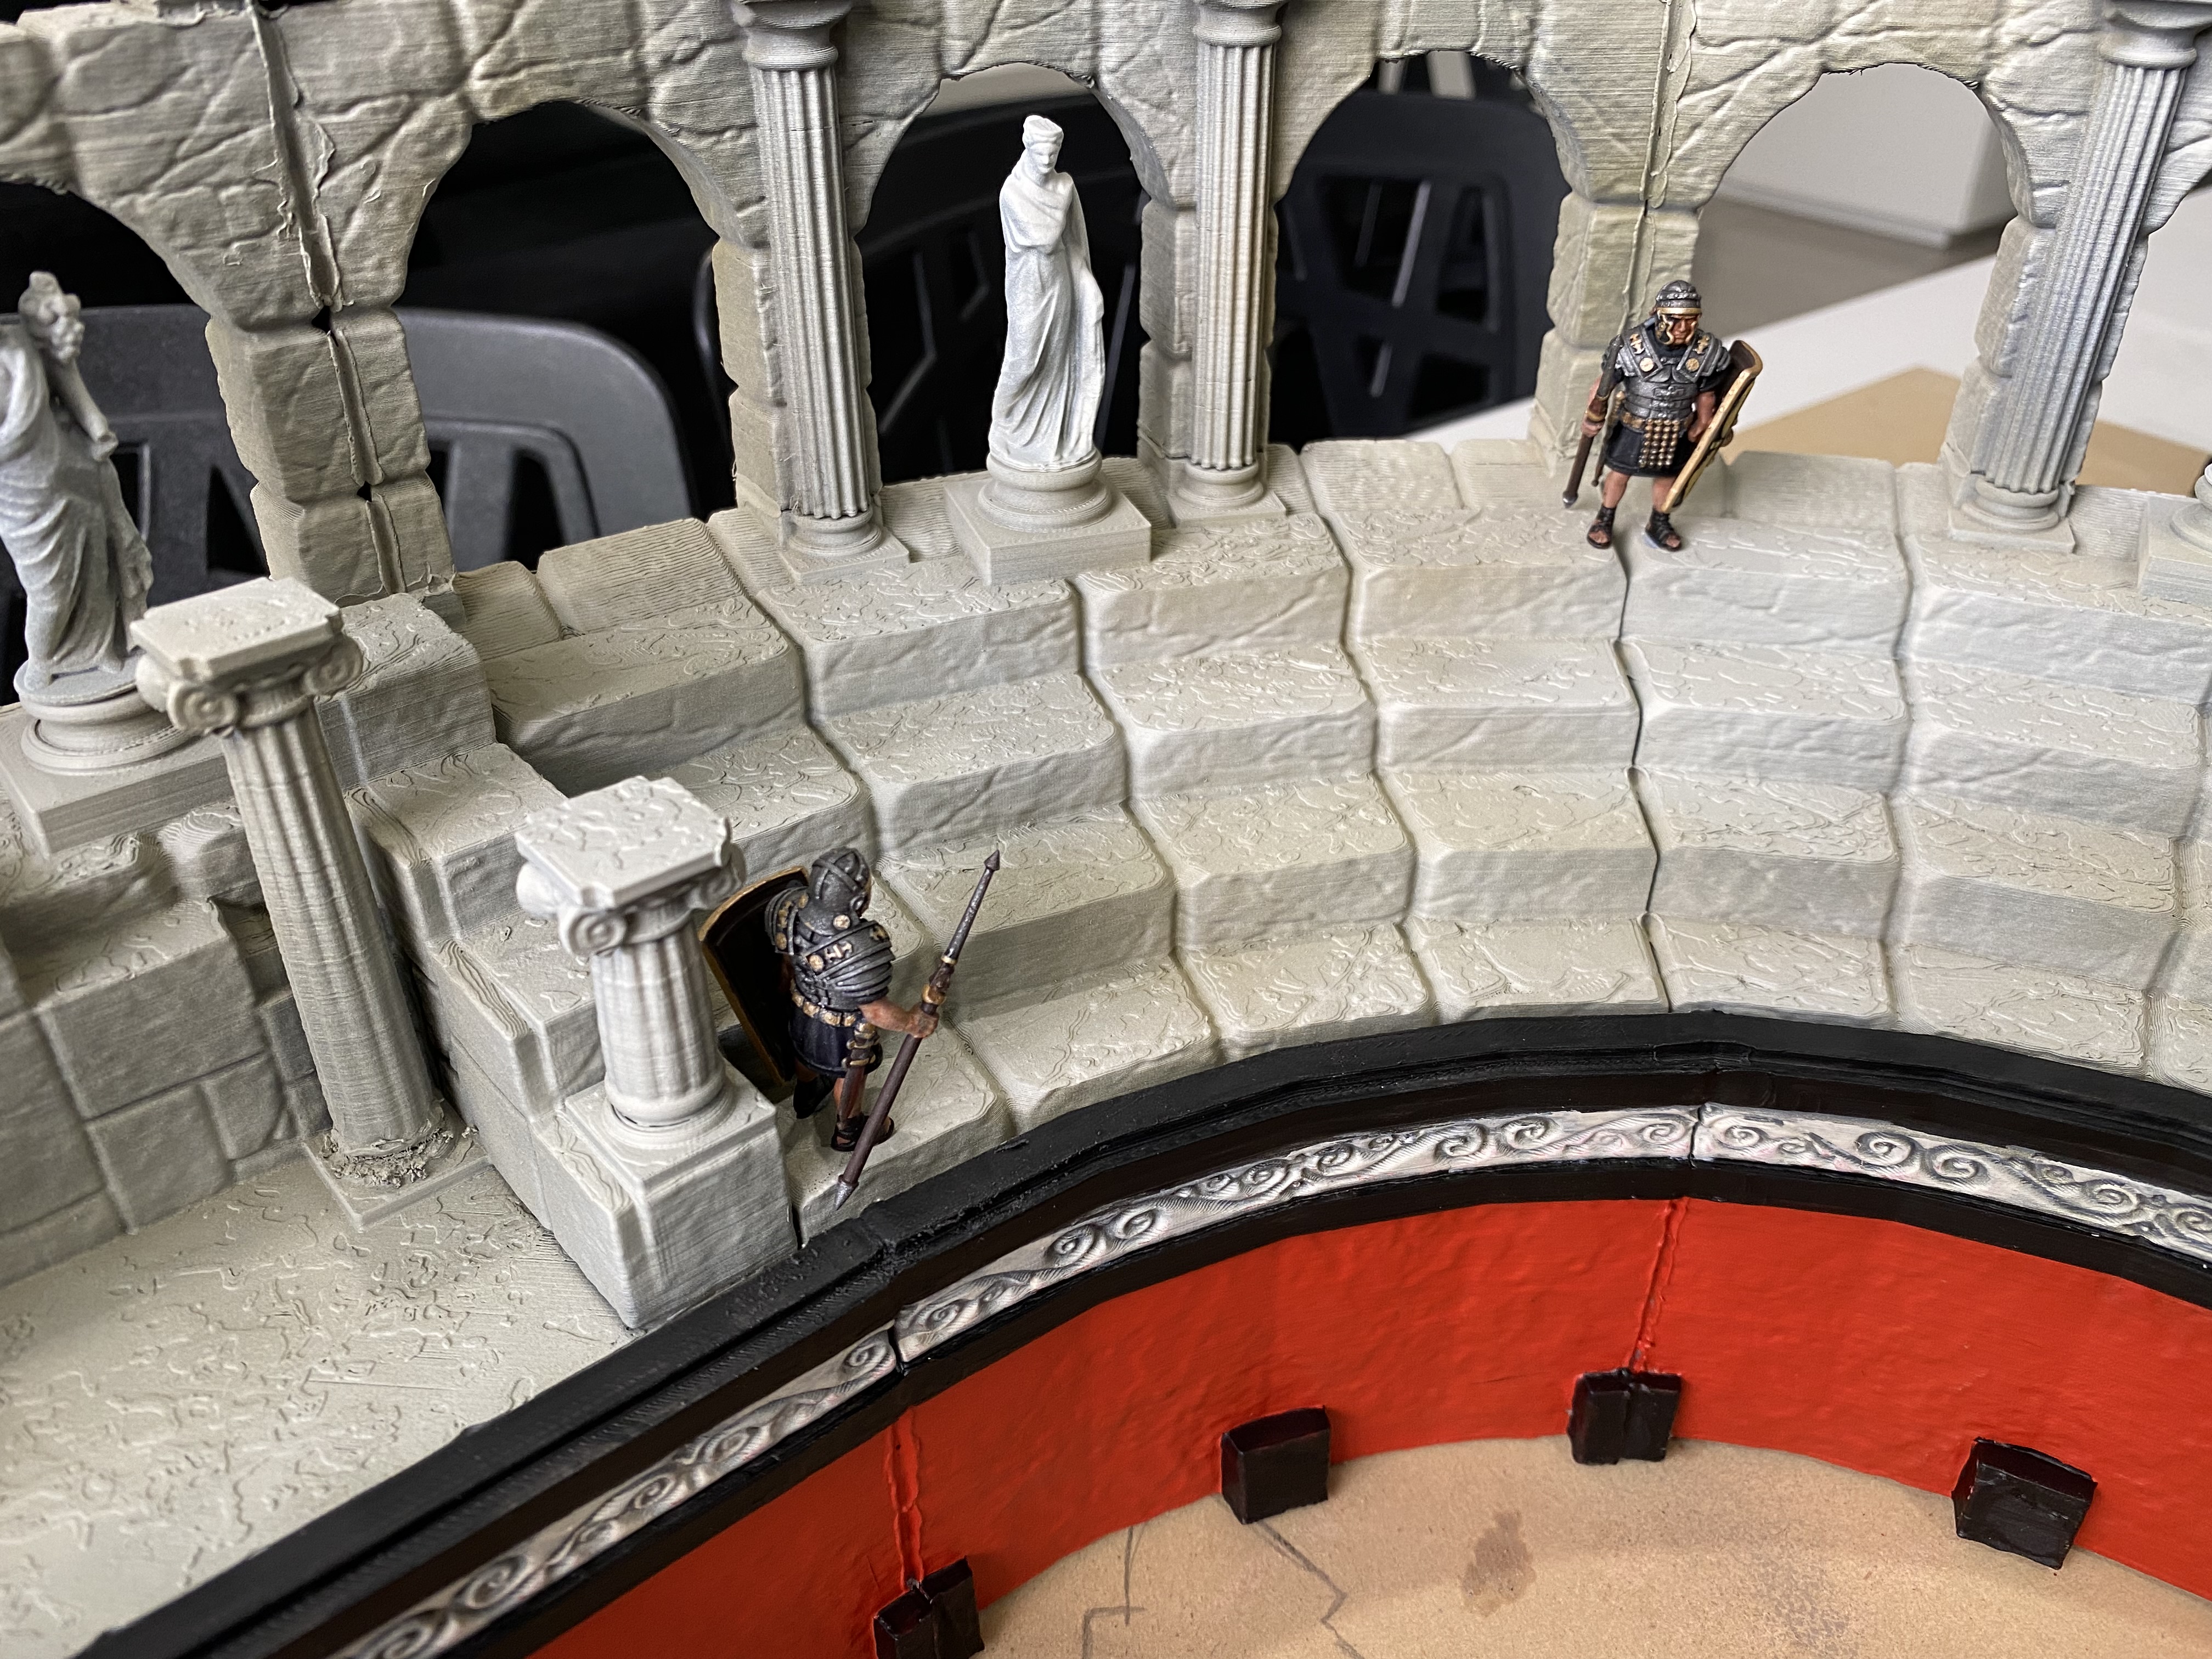
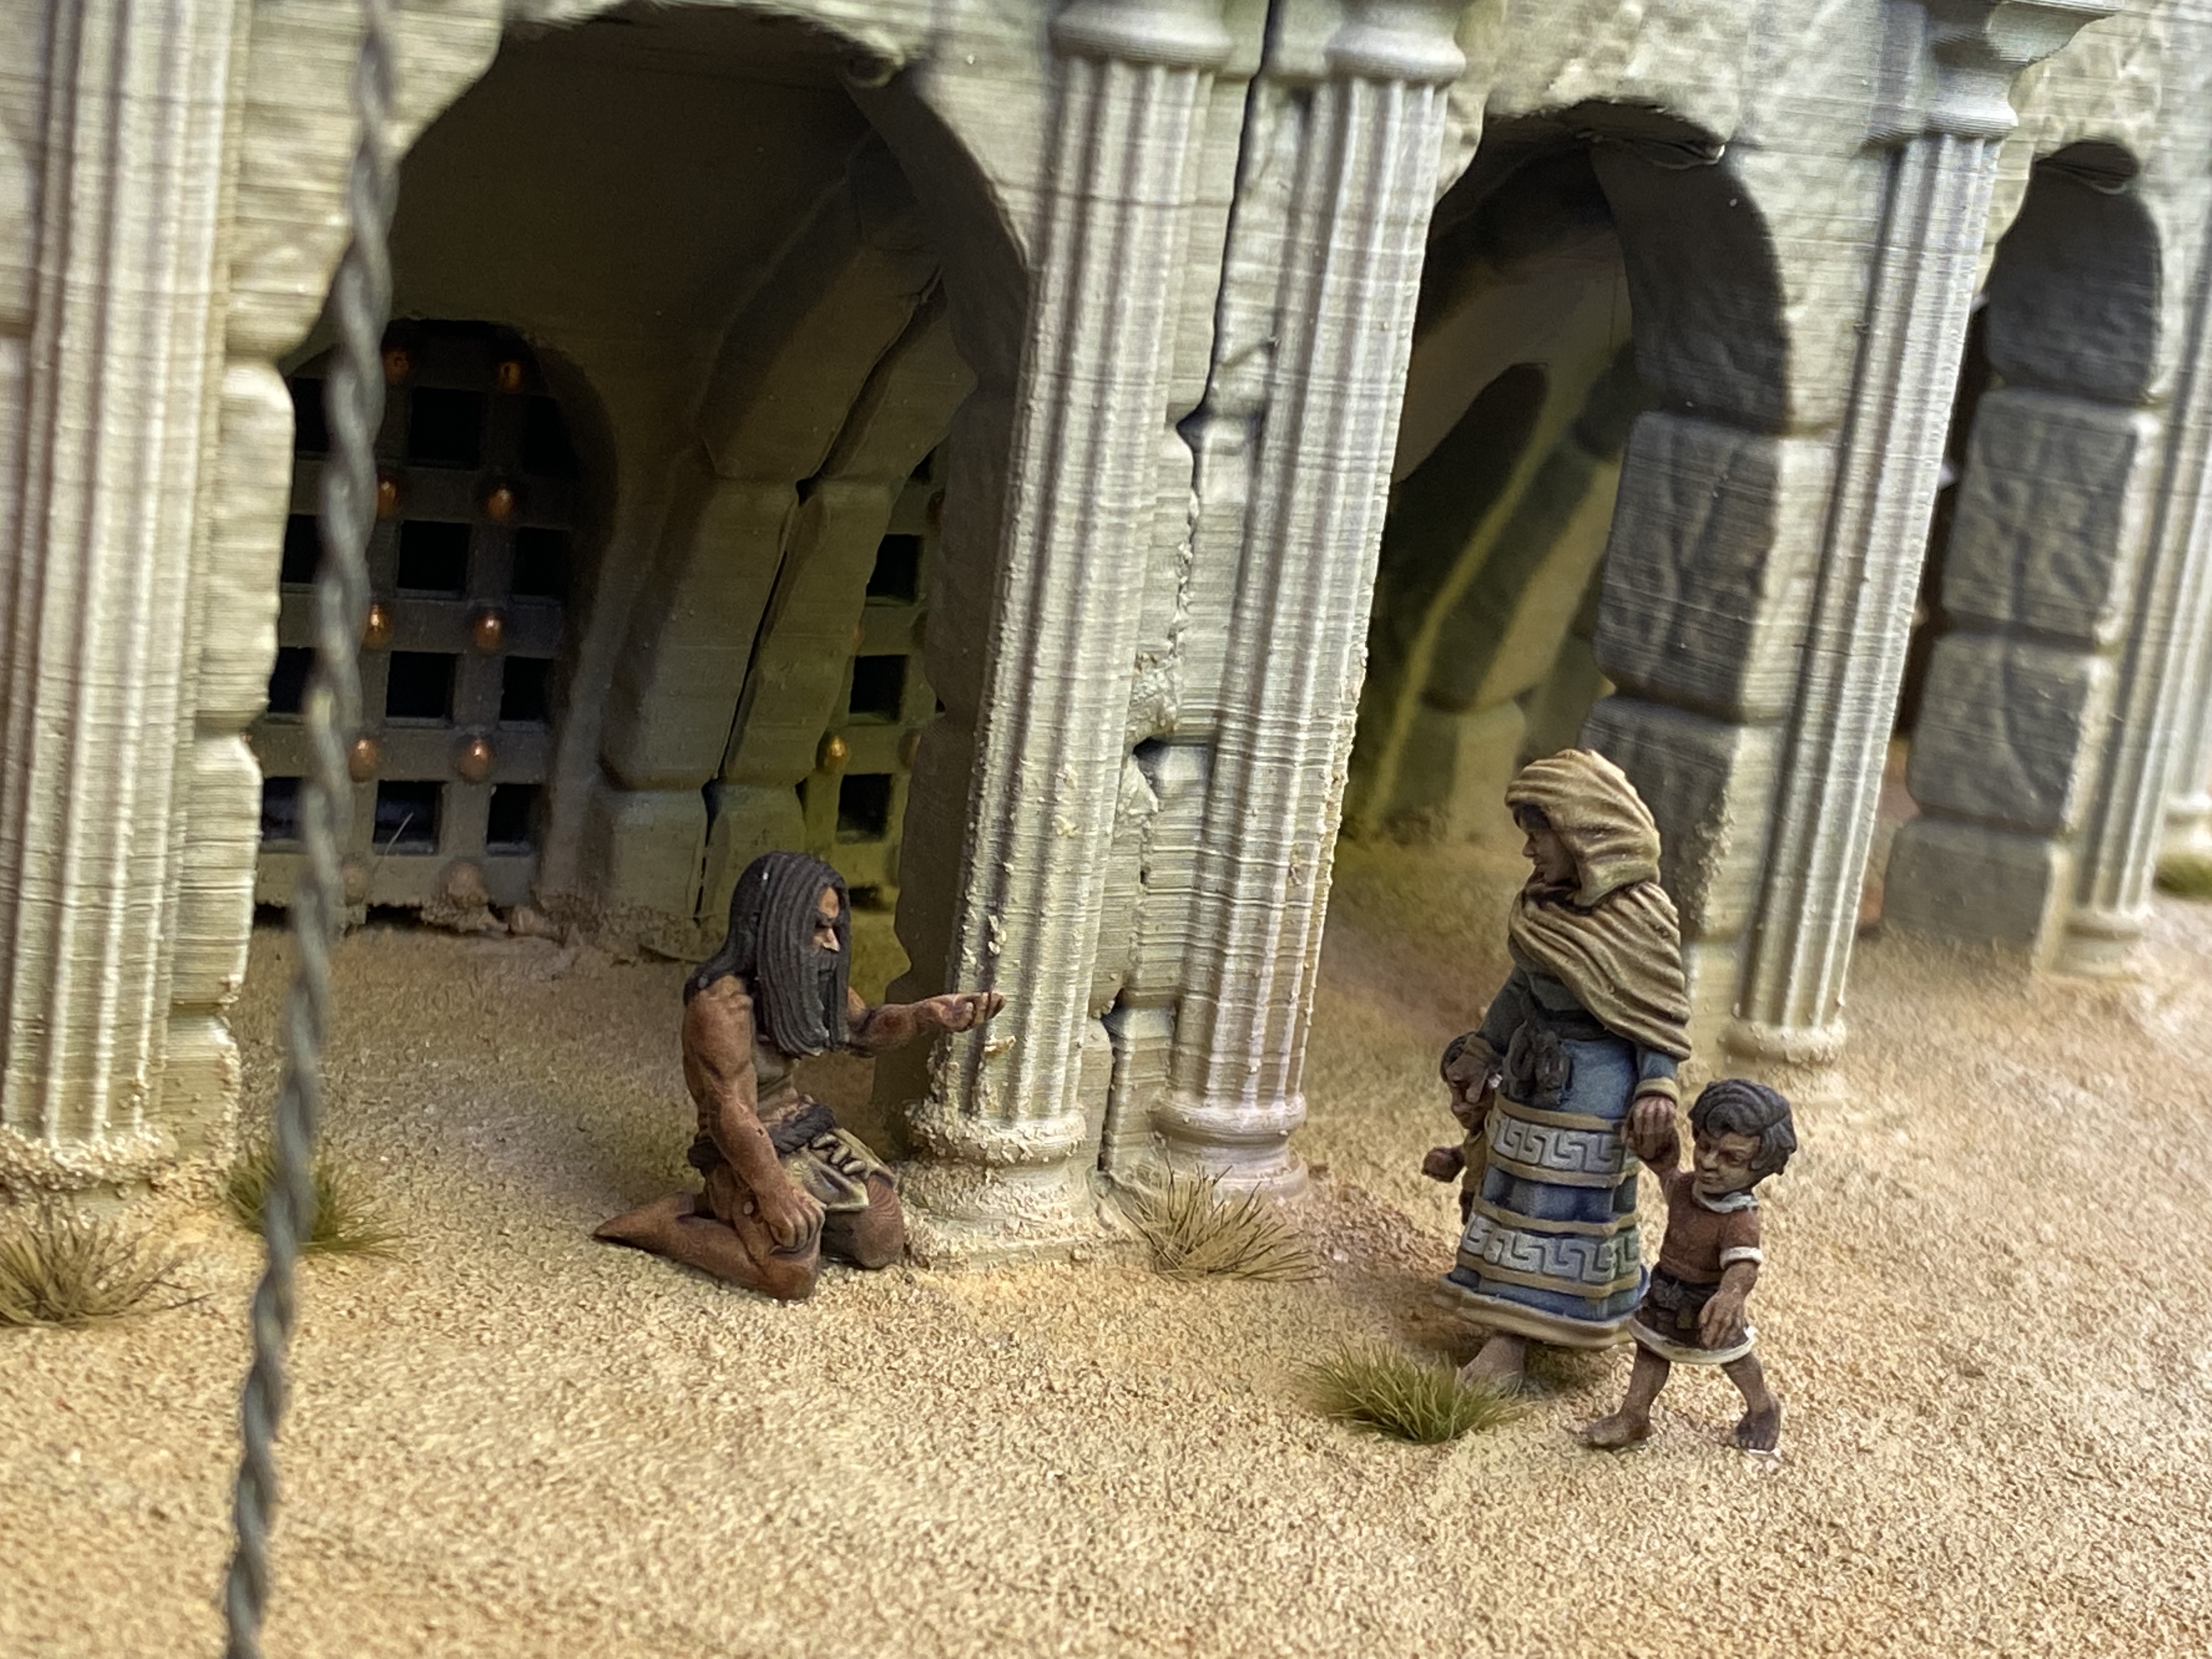
I added entranceways so that the combatants could actually enter the arena.
And of course I couldn’t help but paint up a couple of Gladiators, just to keep me motivated.


