


![NO Weekender Or Cult Of Games XLBS This Weekend [Updated]](https://images.beastsofwar.com/2026/03/No_Weekender_and_XLBS_this_Weekend-225-127.jpg)


Mordheim (sort of…)


Recommendations: 1134
About the Project
A collection of ruined buildings and terrain for a custom skirmish game. It's not for Mordheim per say, but it can offer some inspiration for Mordheim, Frostgrave or similar setting.
Related Game: Mordheim
Related Genre: Fantasy
This Project is Active
The Beast Completed!

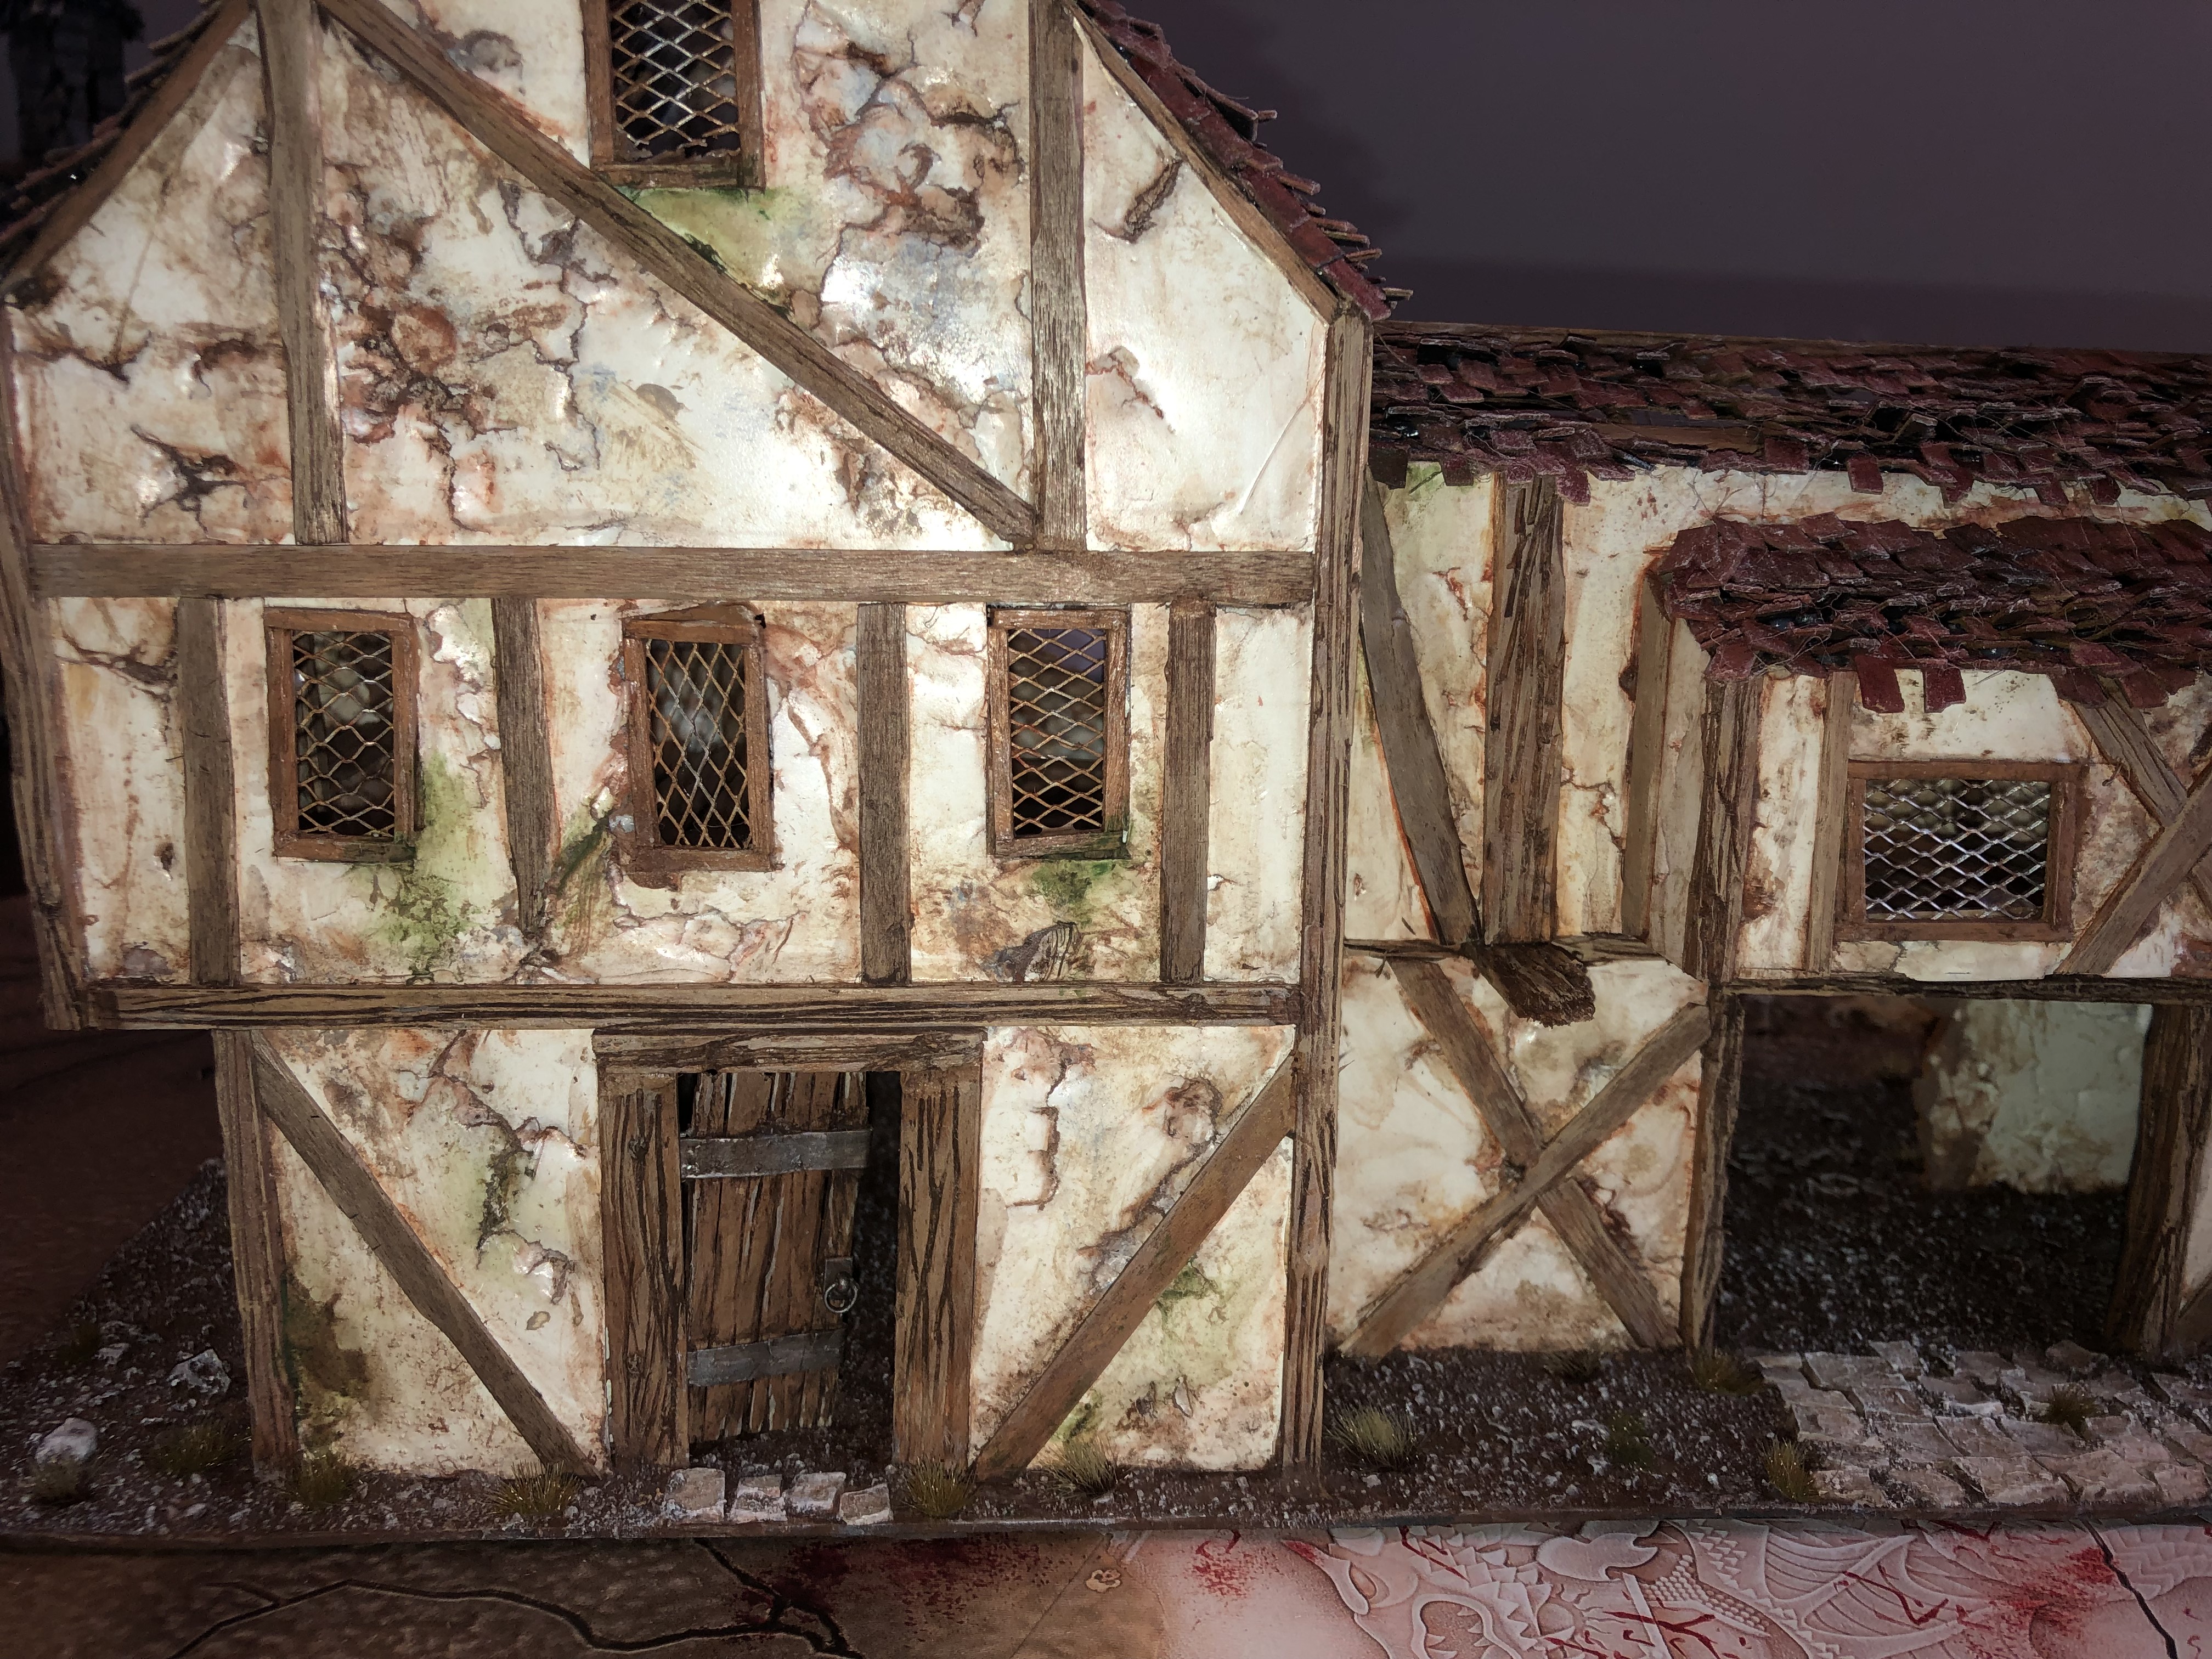
And the Beast is finally done! (I may come back to fix a few things in the future, but for now it’s done).
Took about two months to complete (could only worked for an hour or two at a time).
Came out differently than how I expected, but still very happy with the end result.
I will probably post more pictures later with miniatures and list of tips/things I learned through out the project 🙂

6 - Oil washes
Just tried oil washes for the first time. Very fast learning curve and it was fun to work with.
I used the oil washes for most of the weathering effect and overall wash. Will definitively stick to oil washes for terrain in the future!


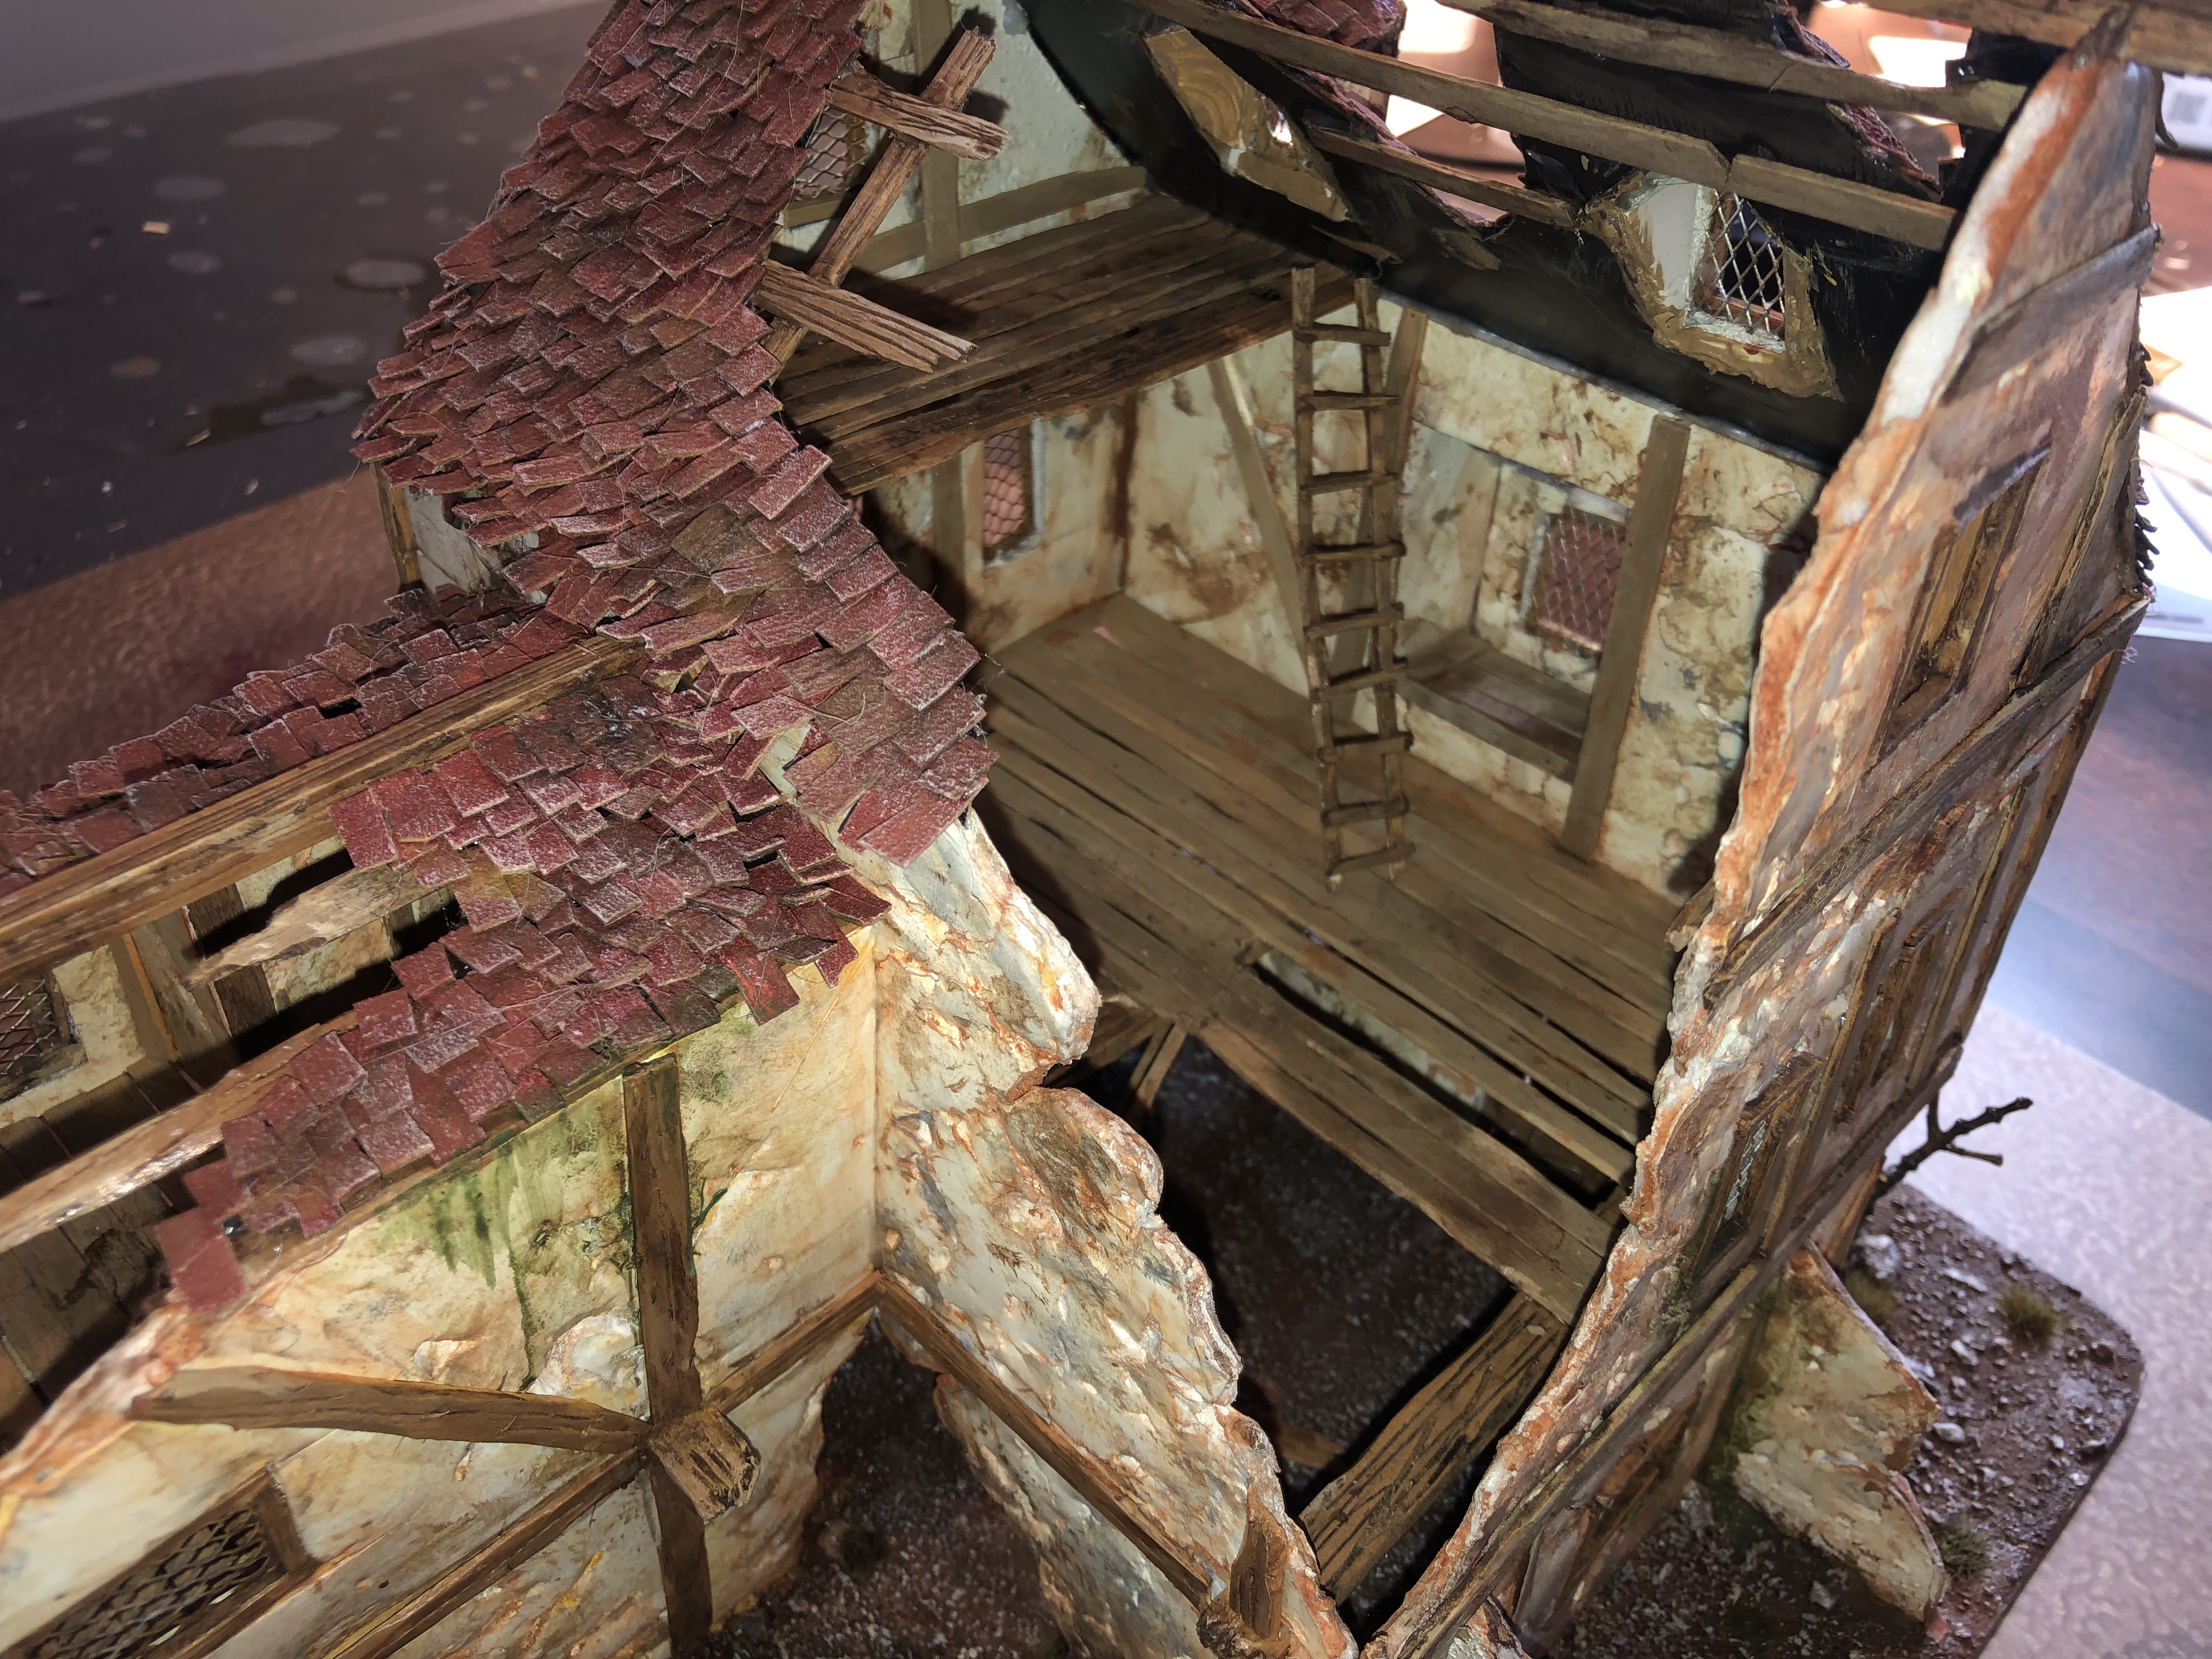
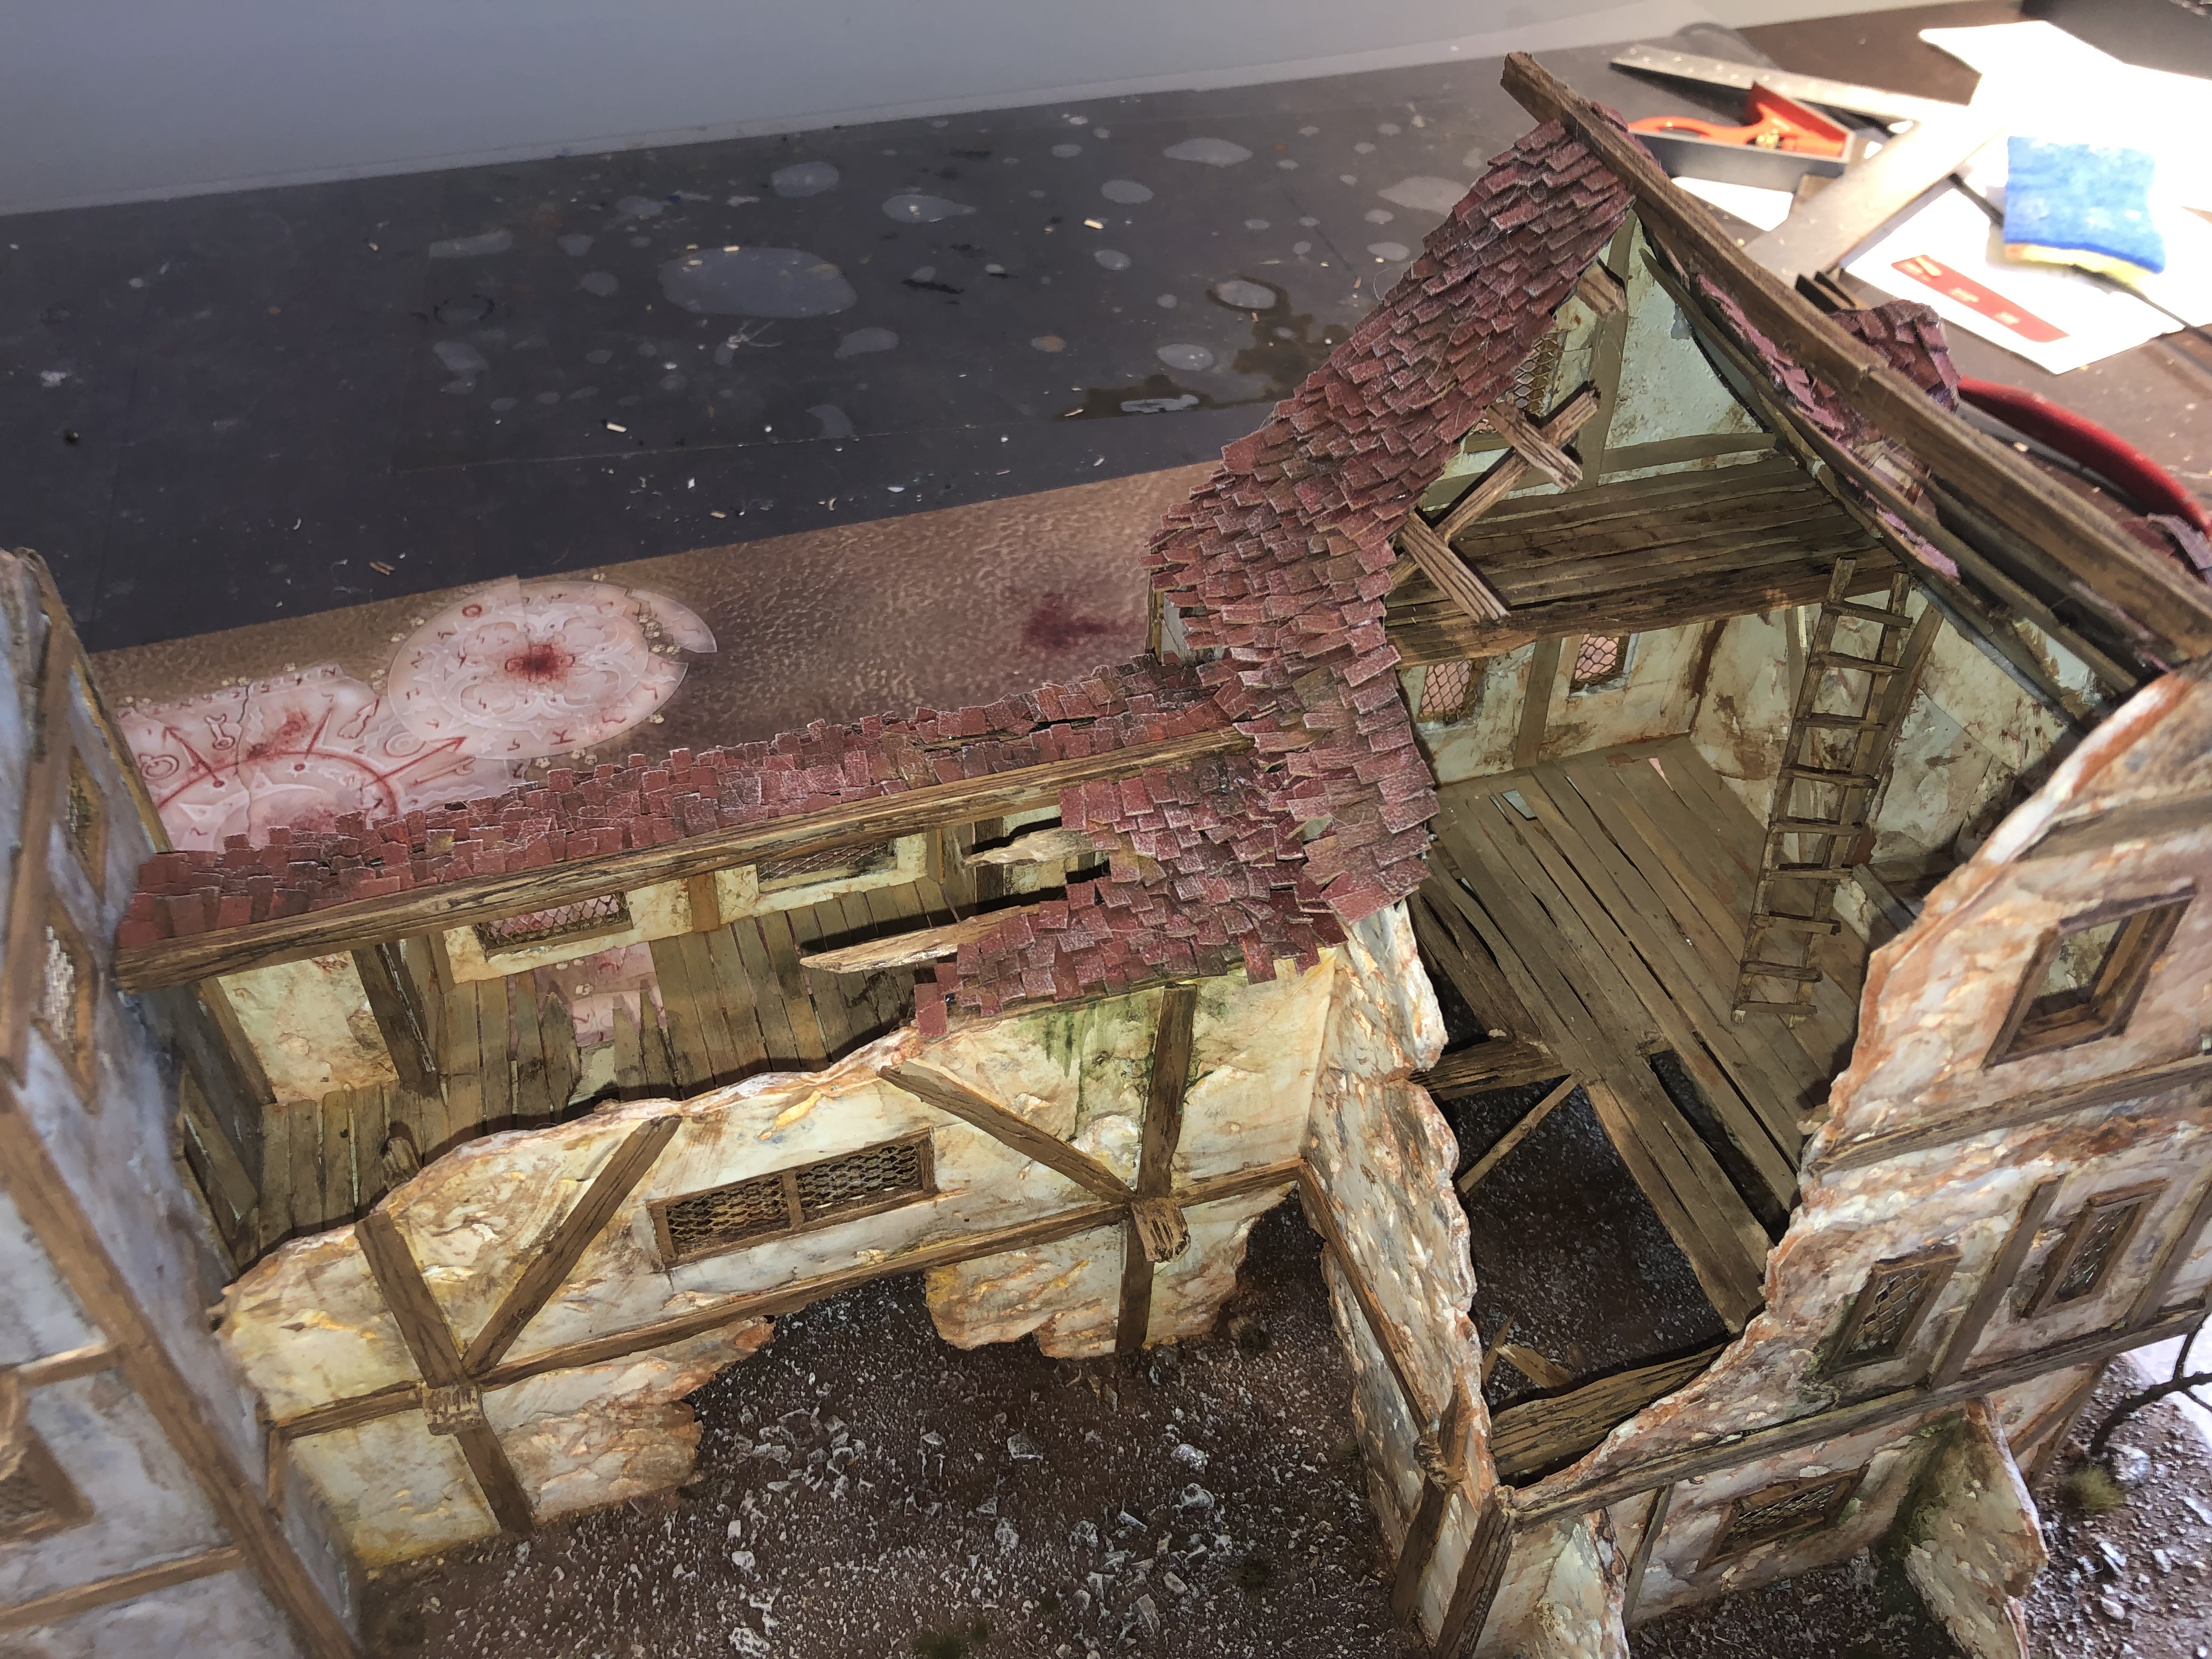
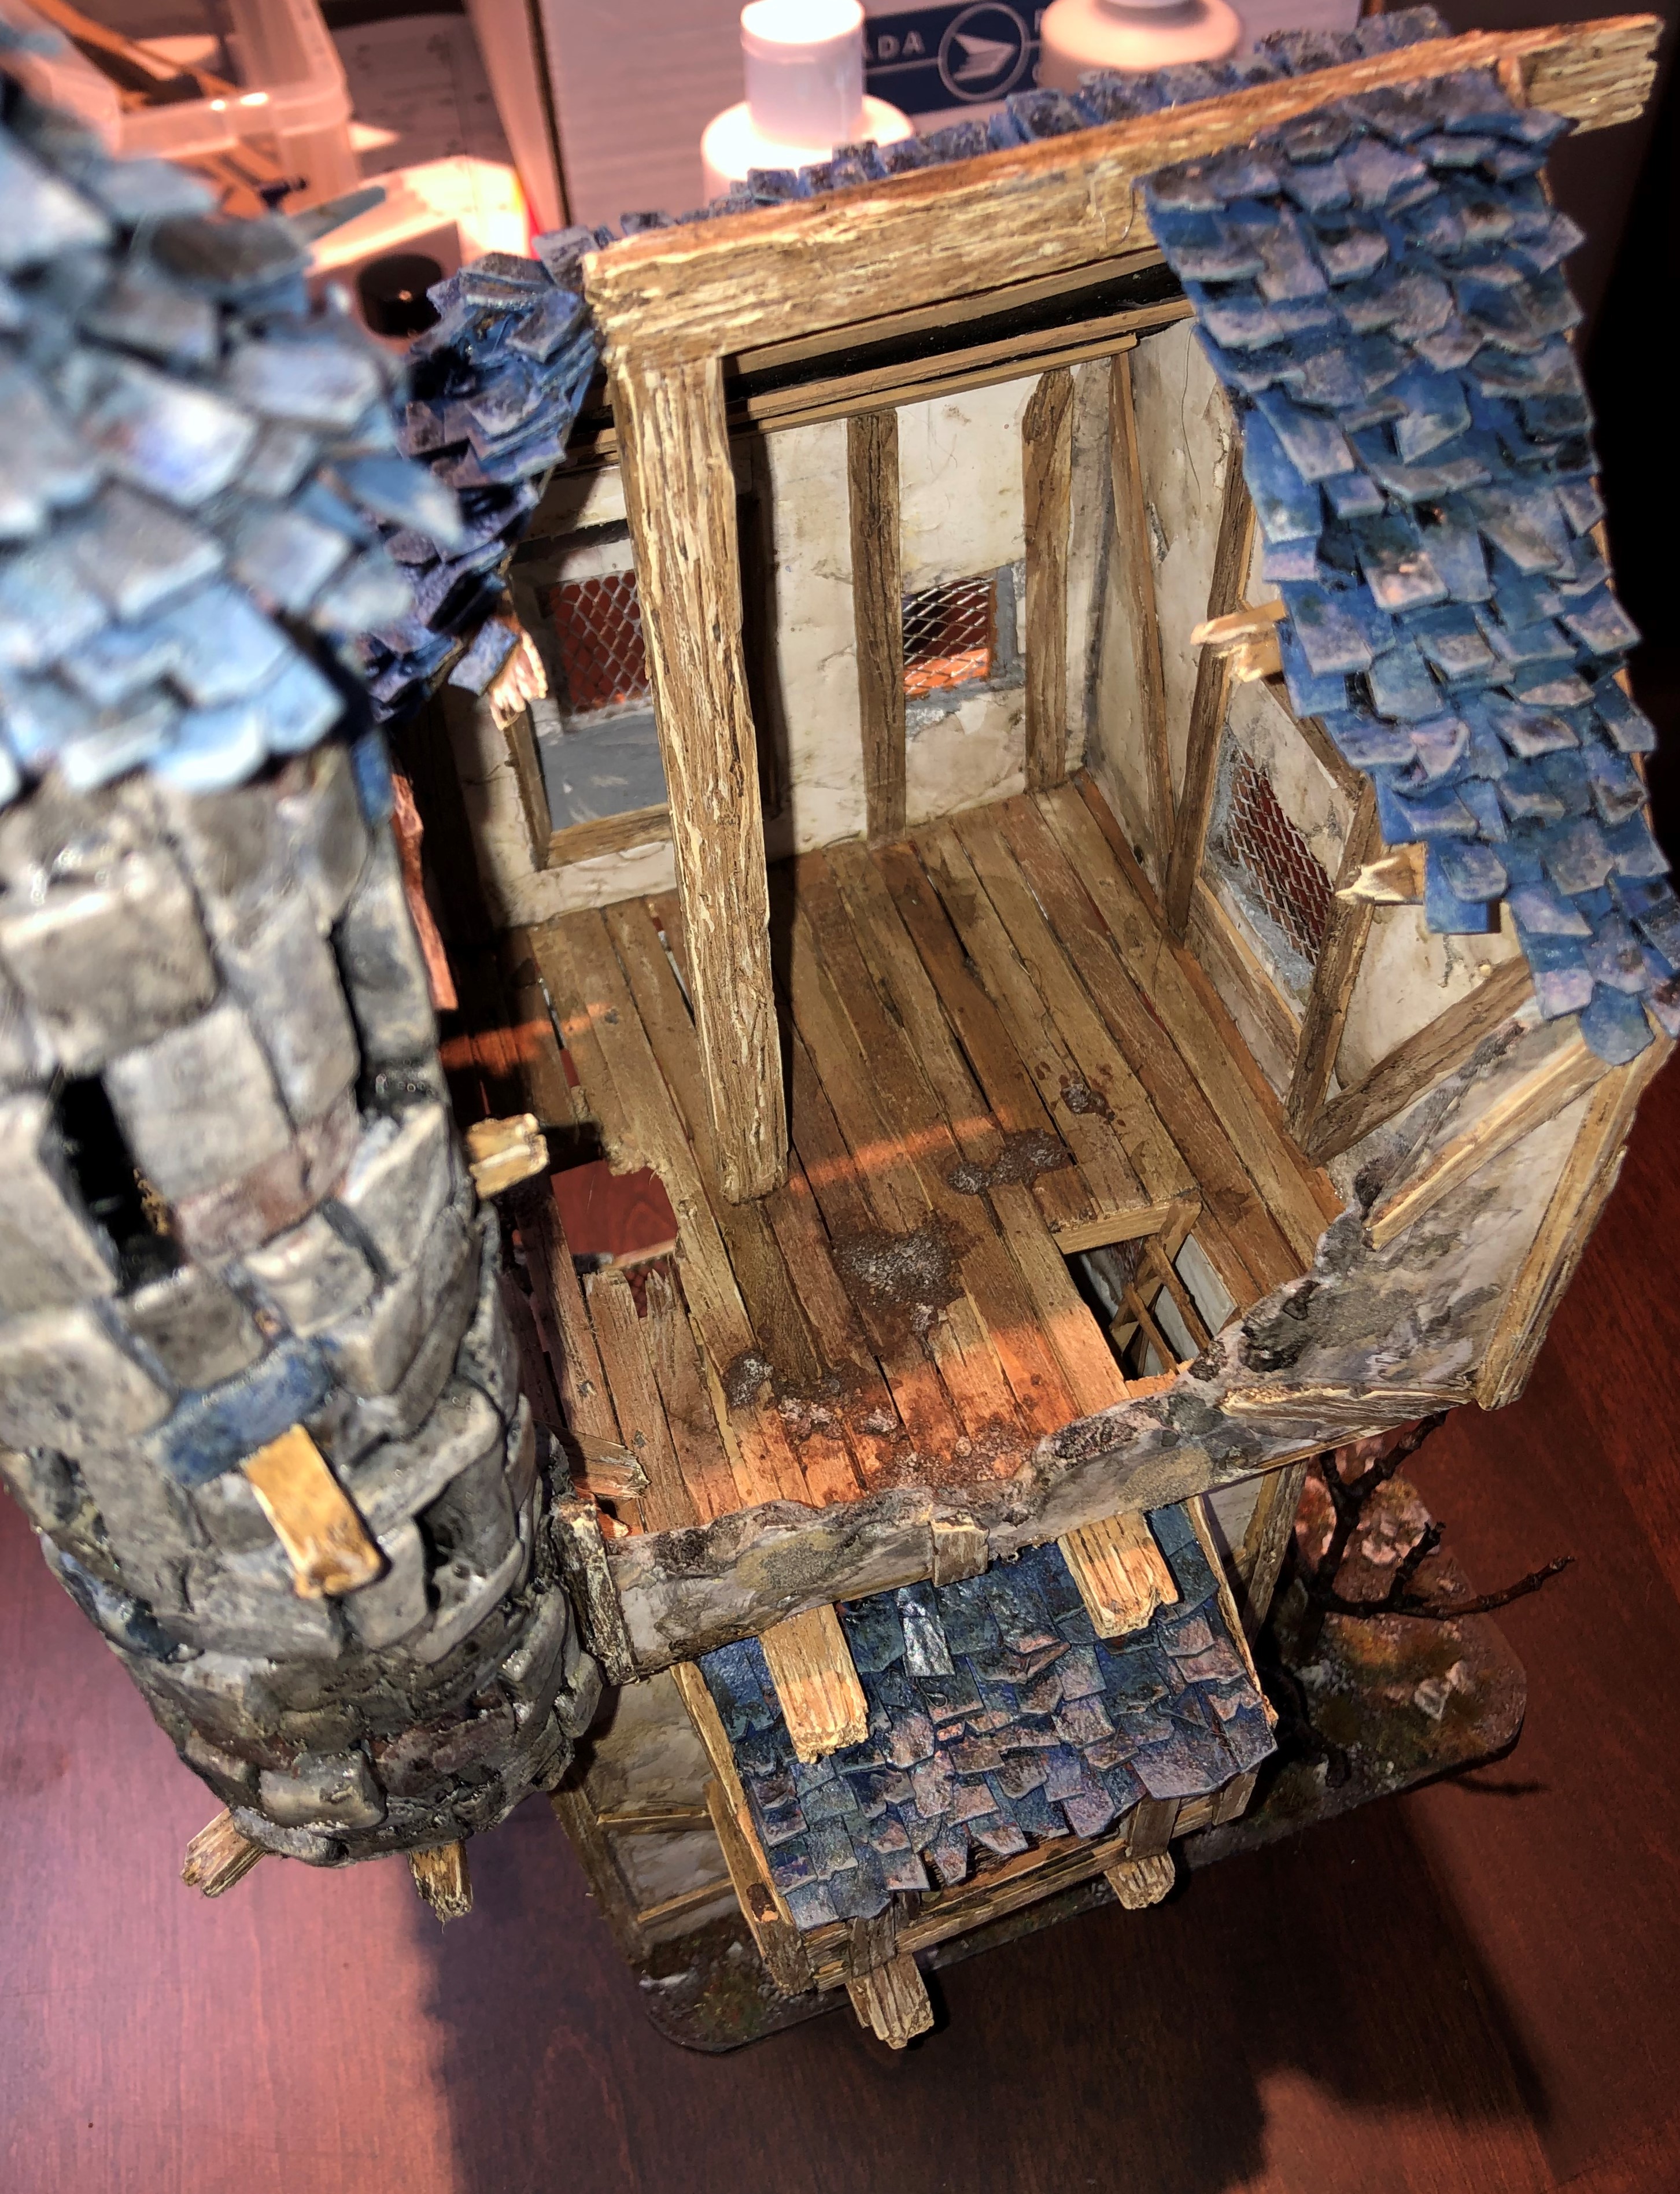
4 - Flooring
Balsa wood as support beams before adding the floor itself.
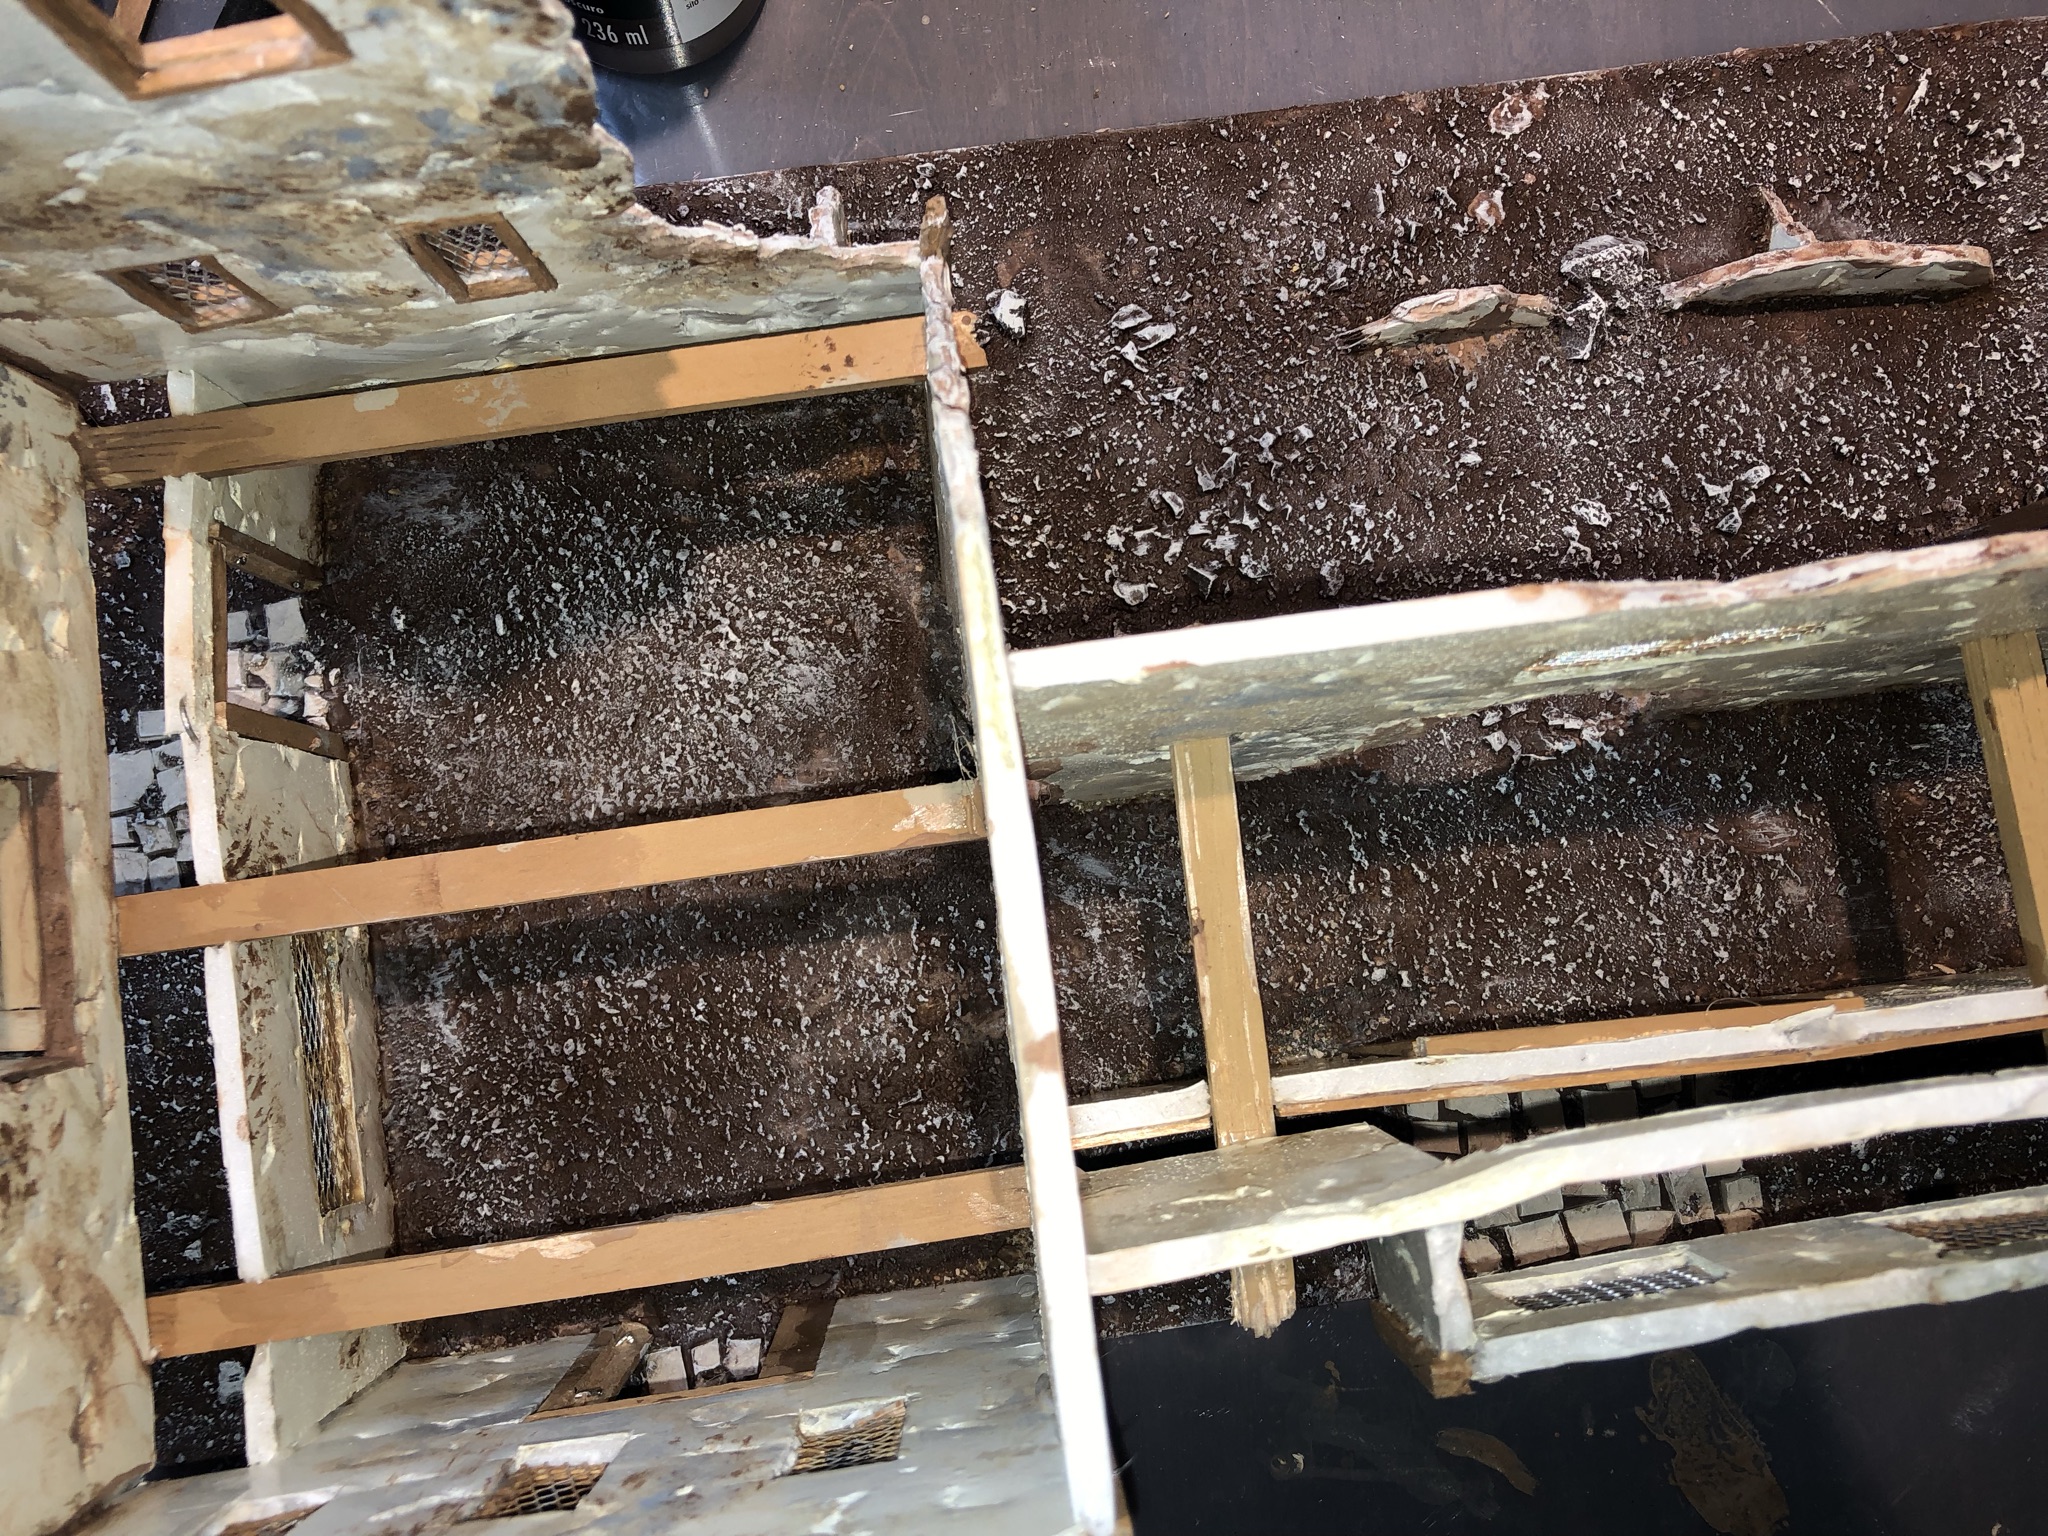
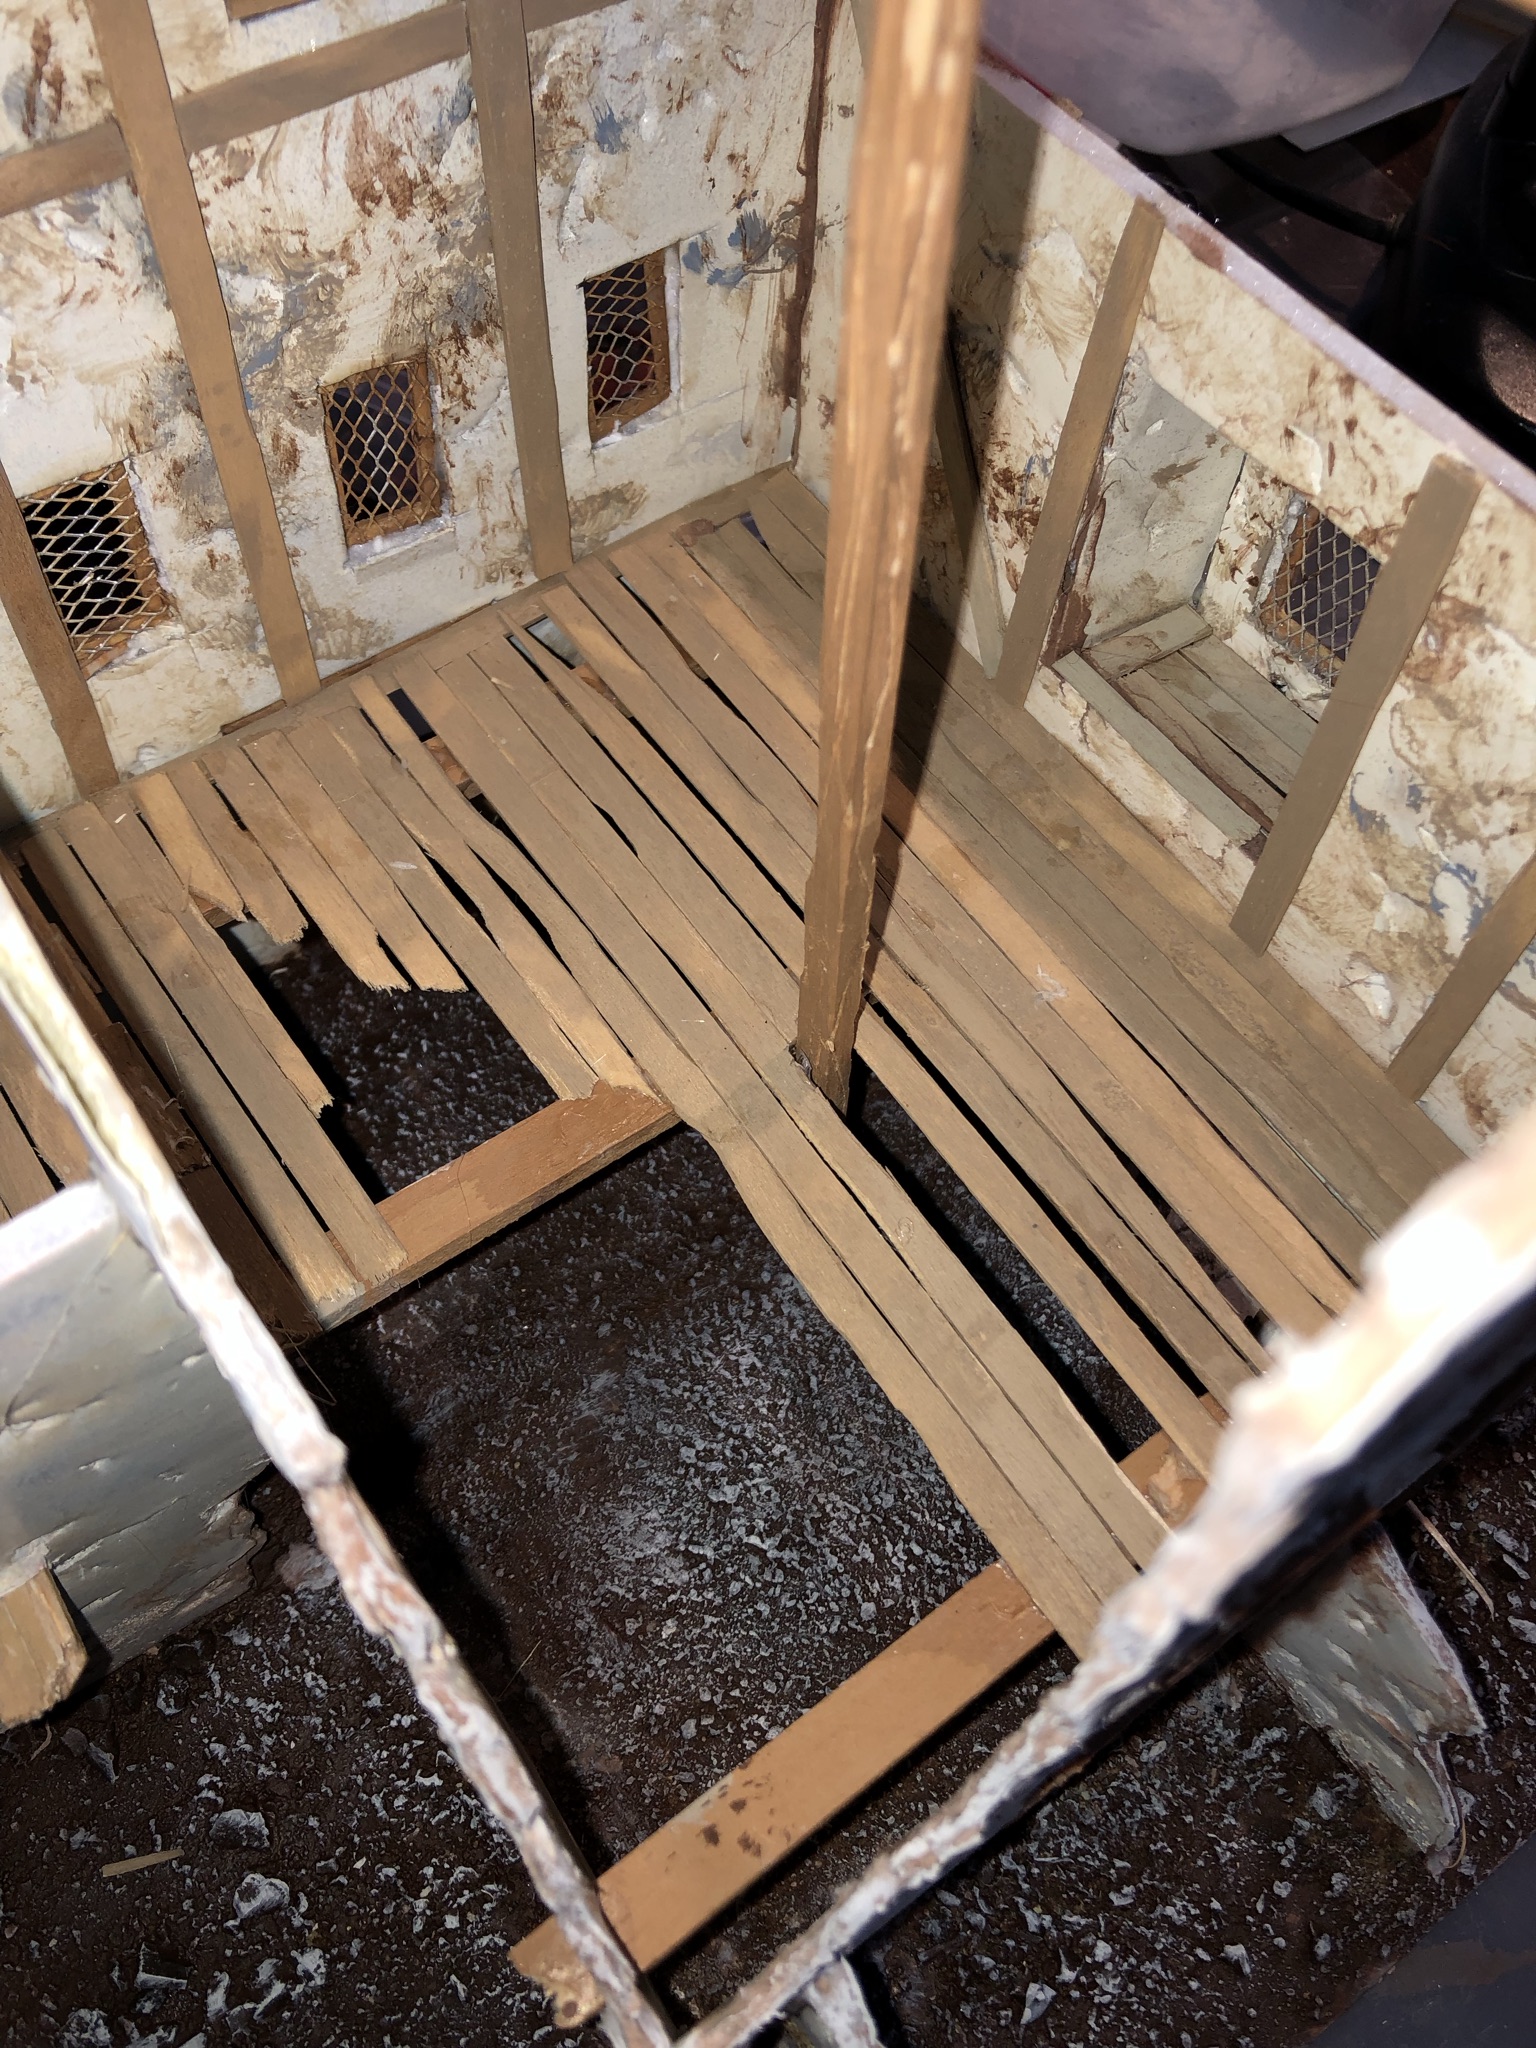 Coffee stir sticks for the floor
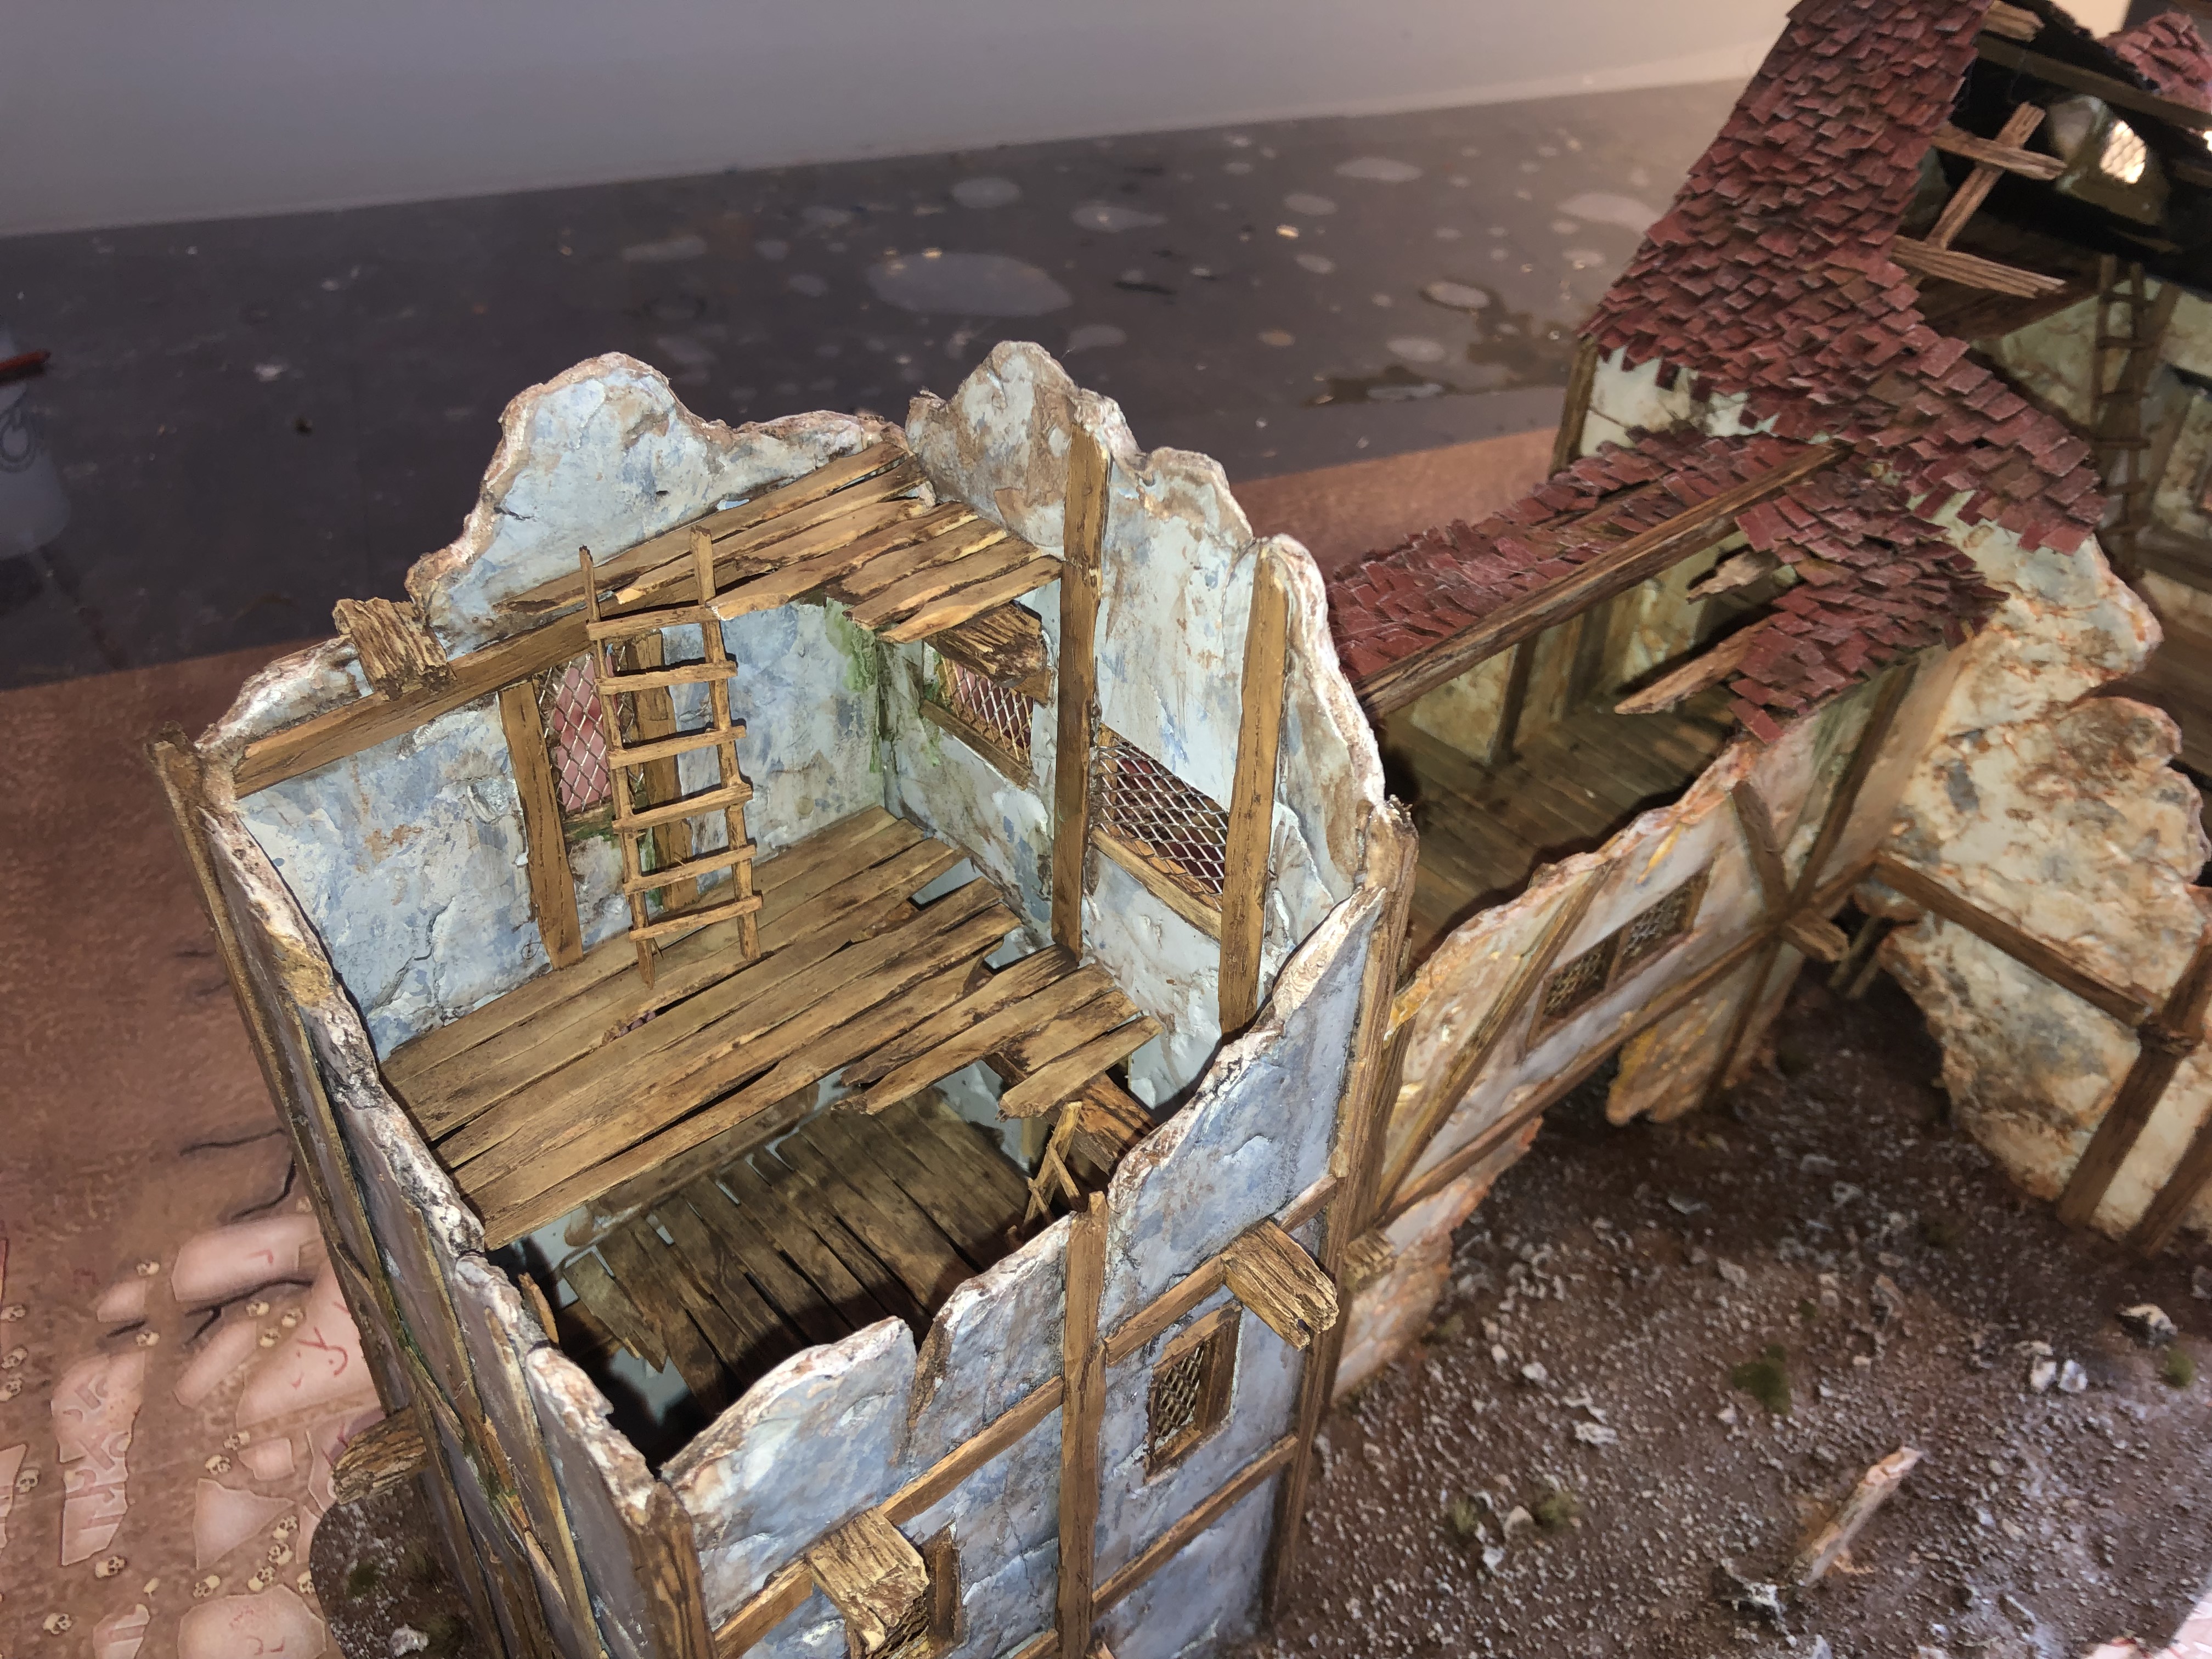
 Paid a lot of attention to the “flooring design” for the tower: since there is three levels, I had to make sure there was enough space to place a model and move it around the tower.
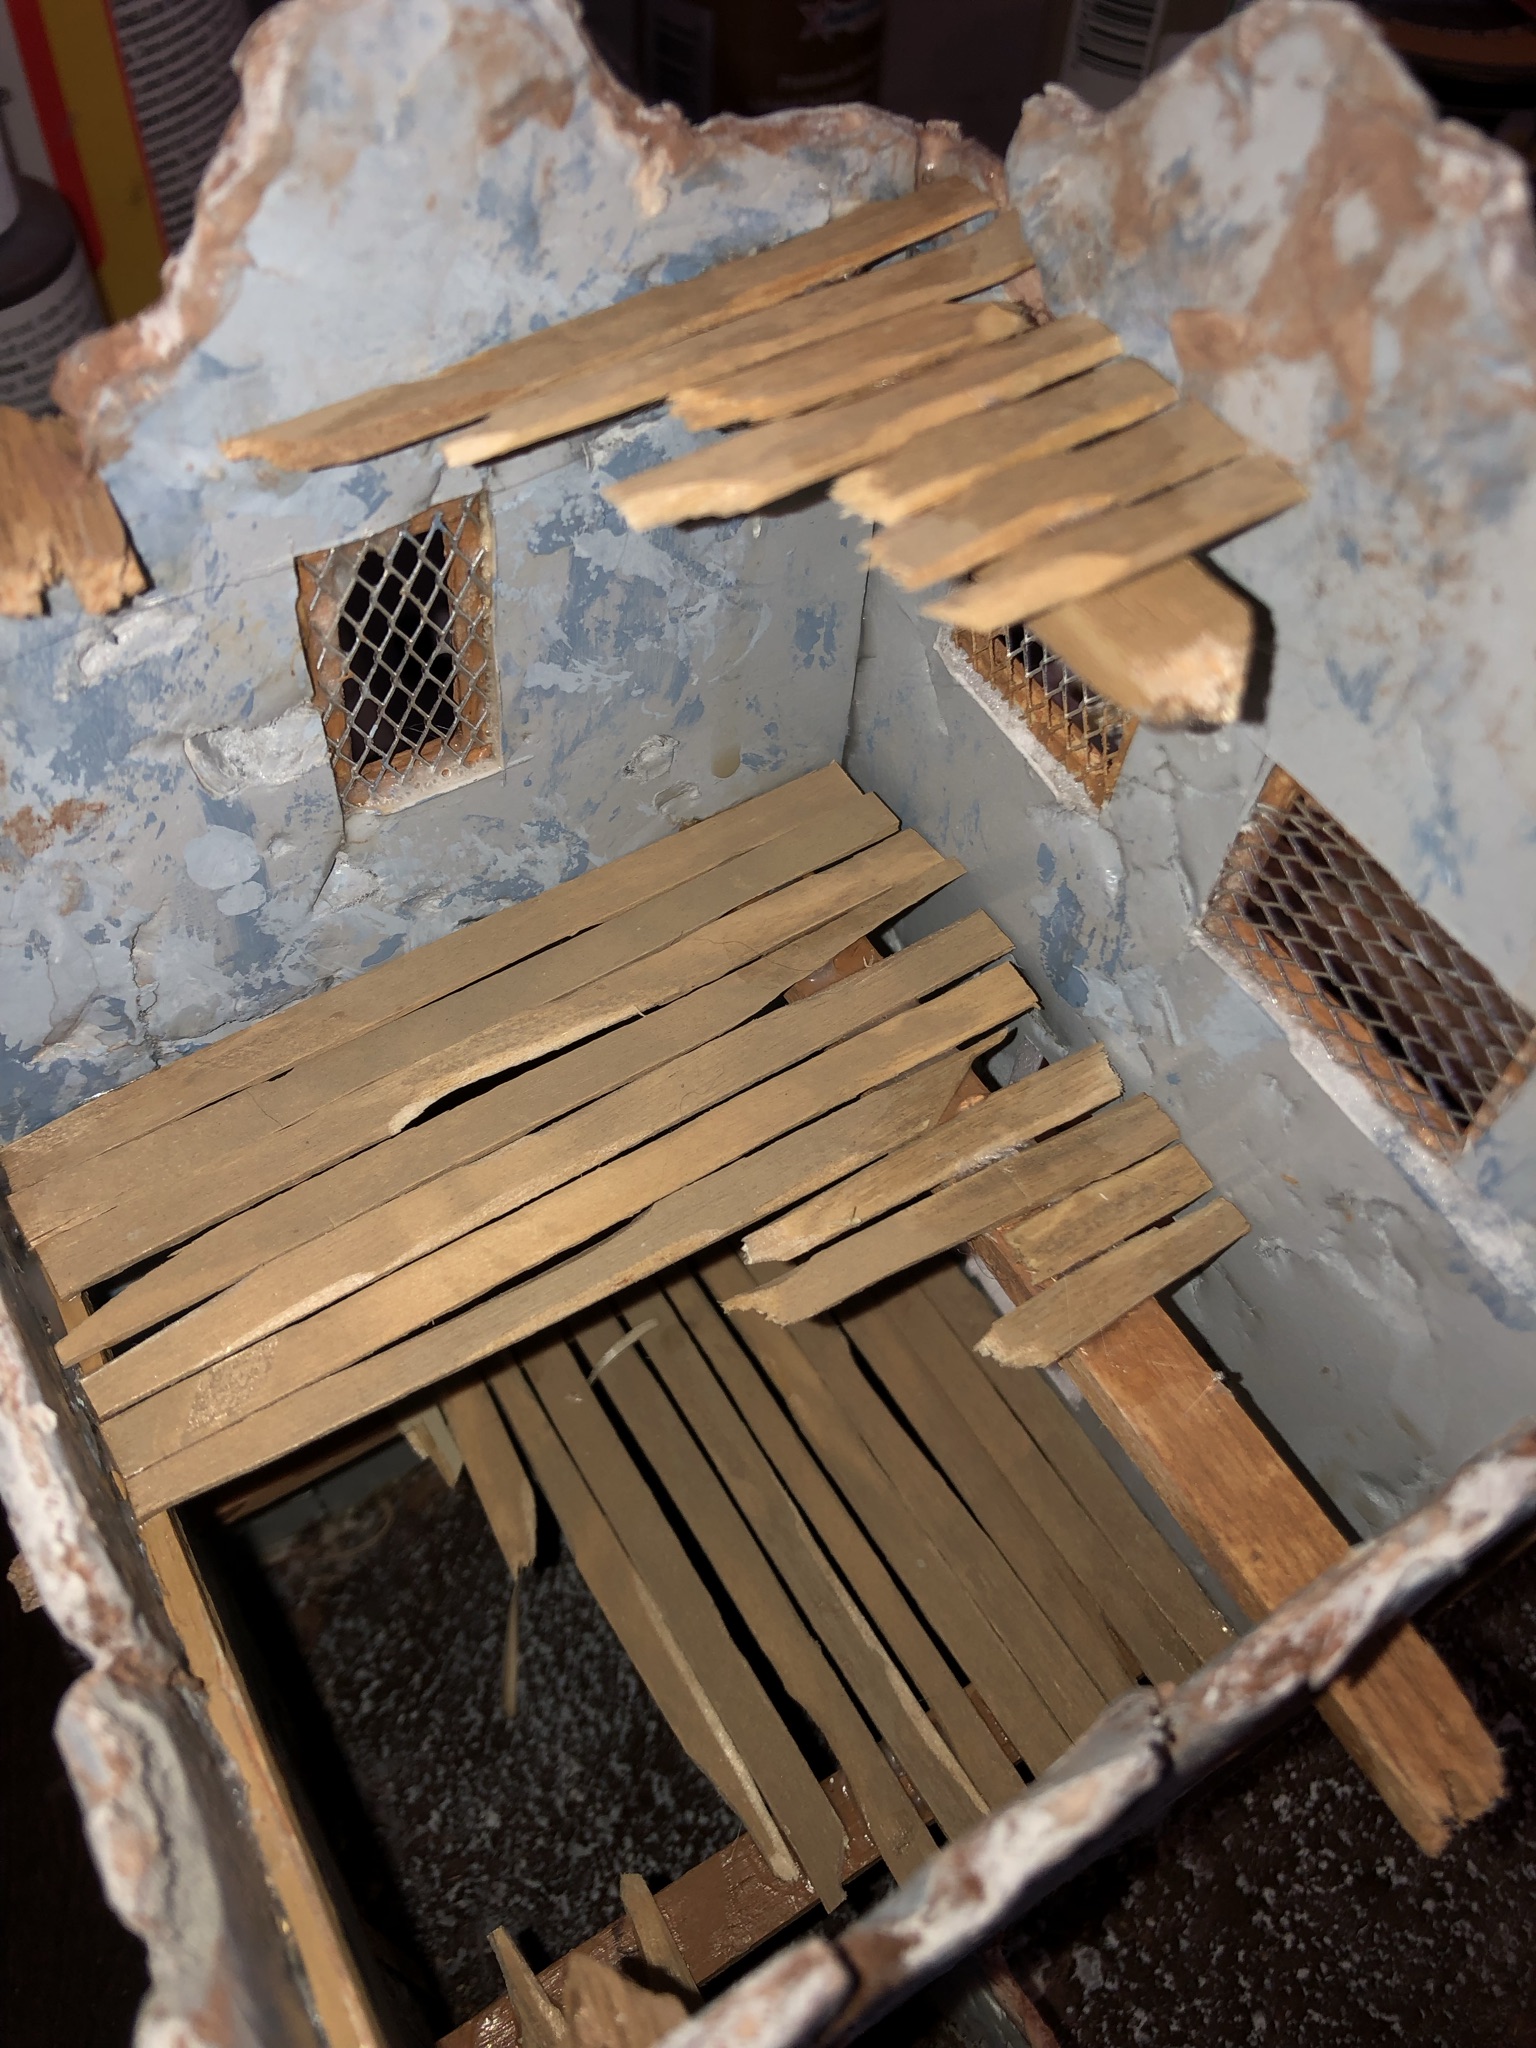 The tower has three levels
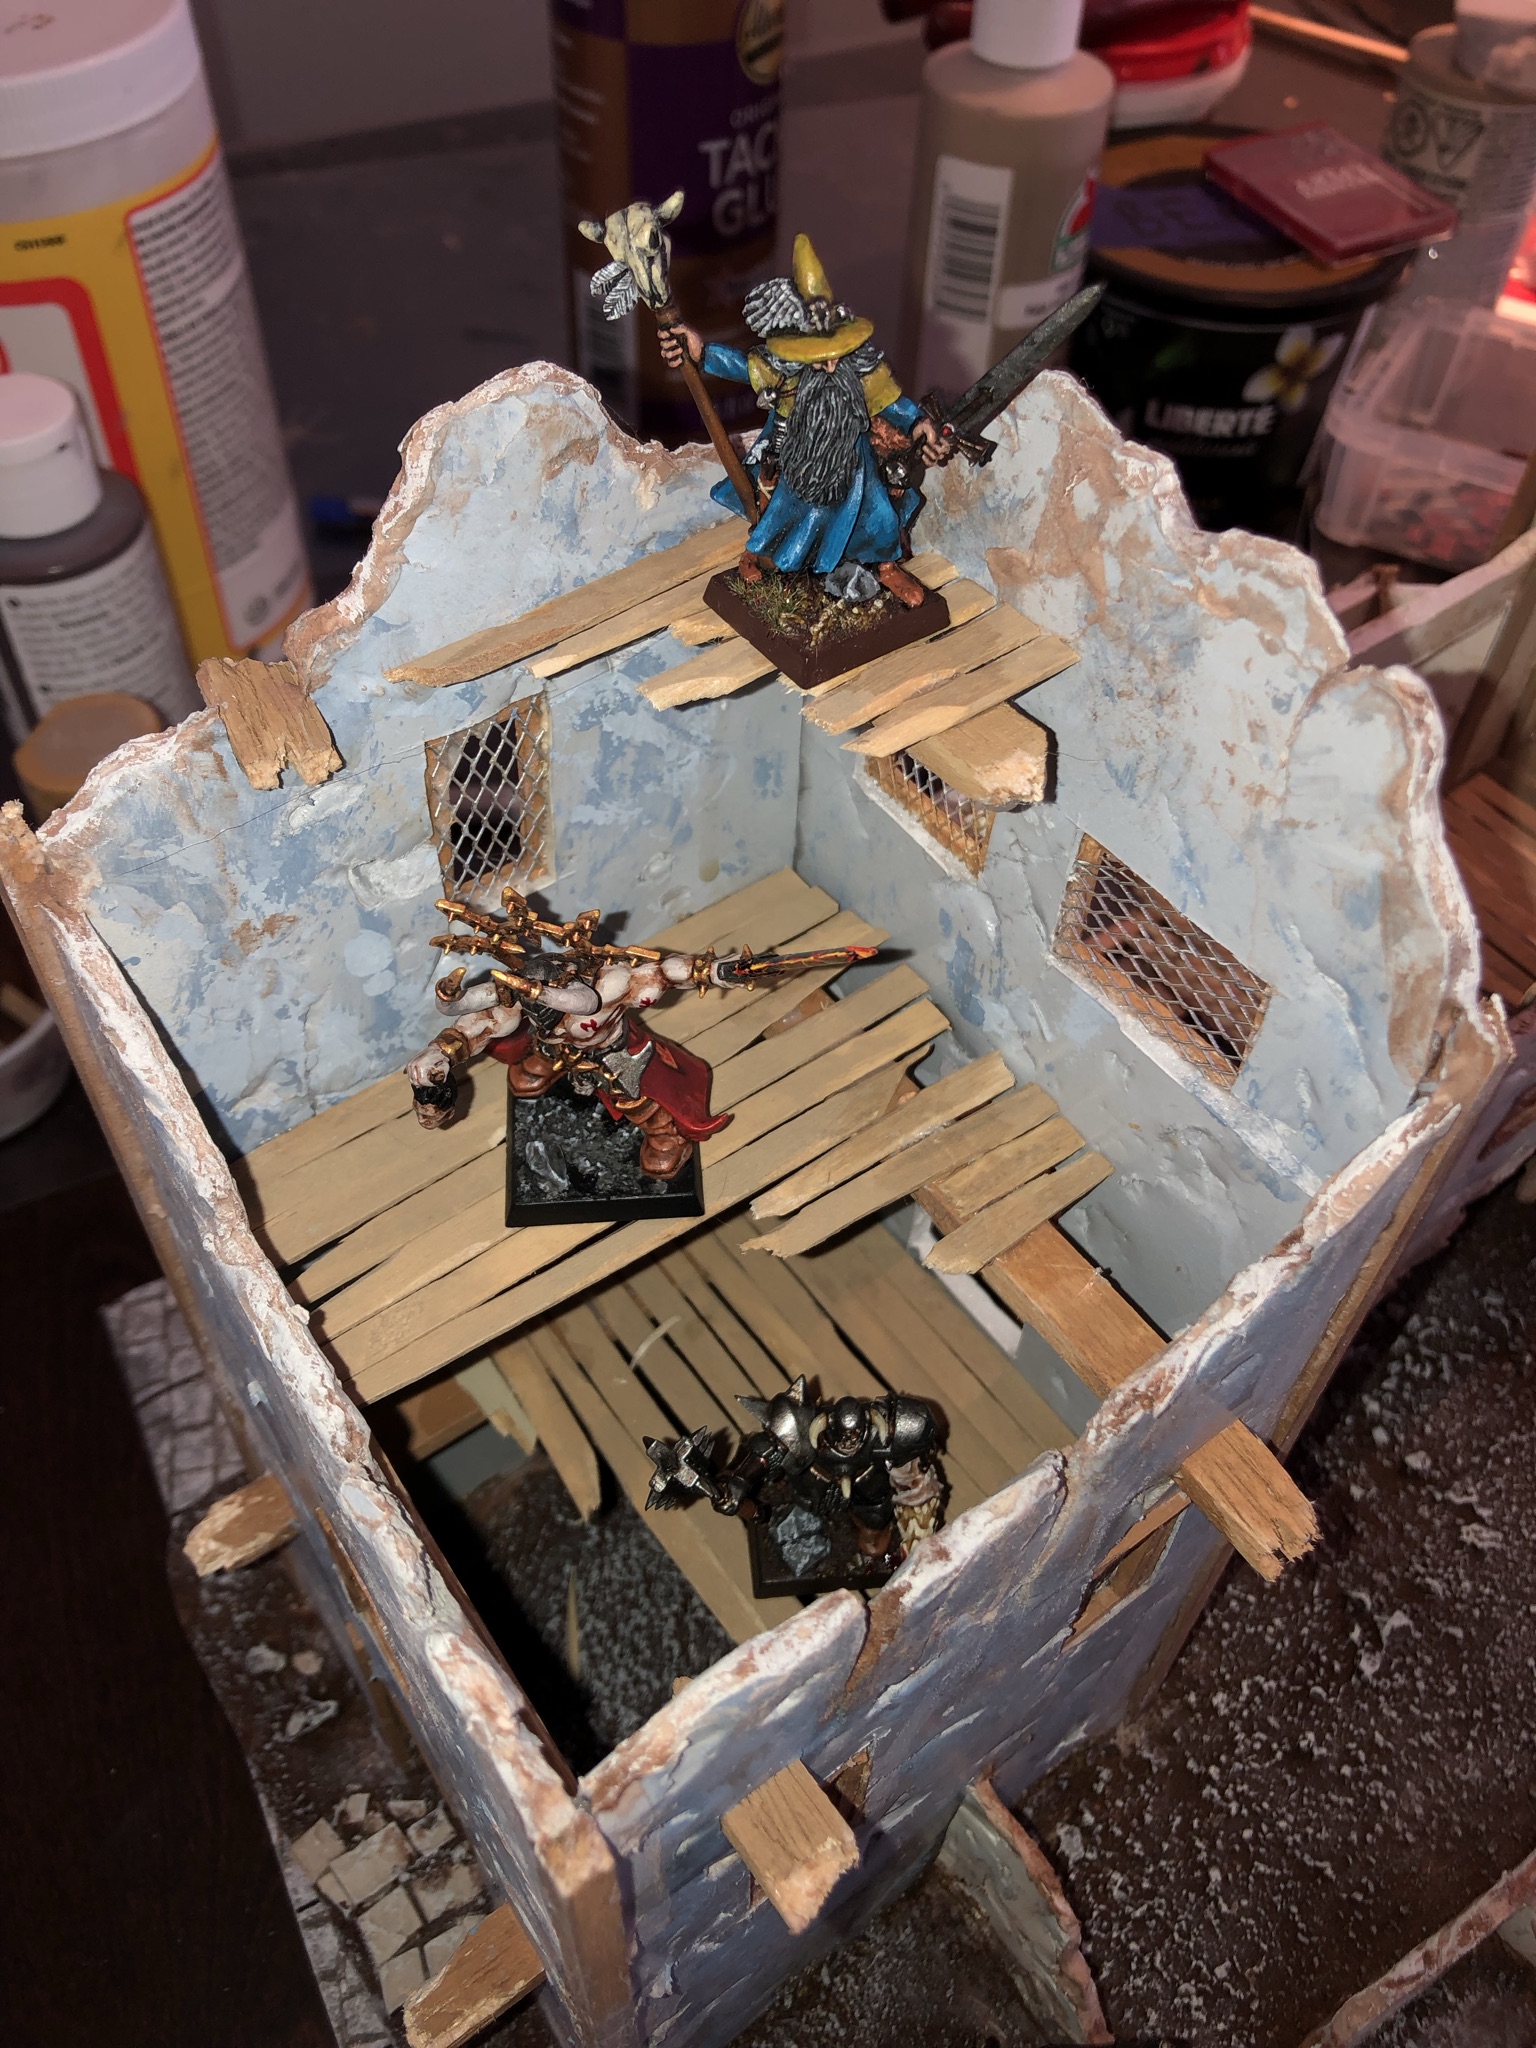 Some minis to show the three levels
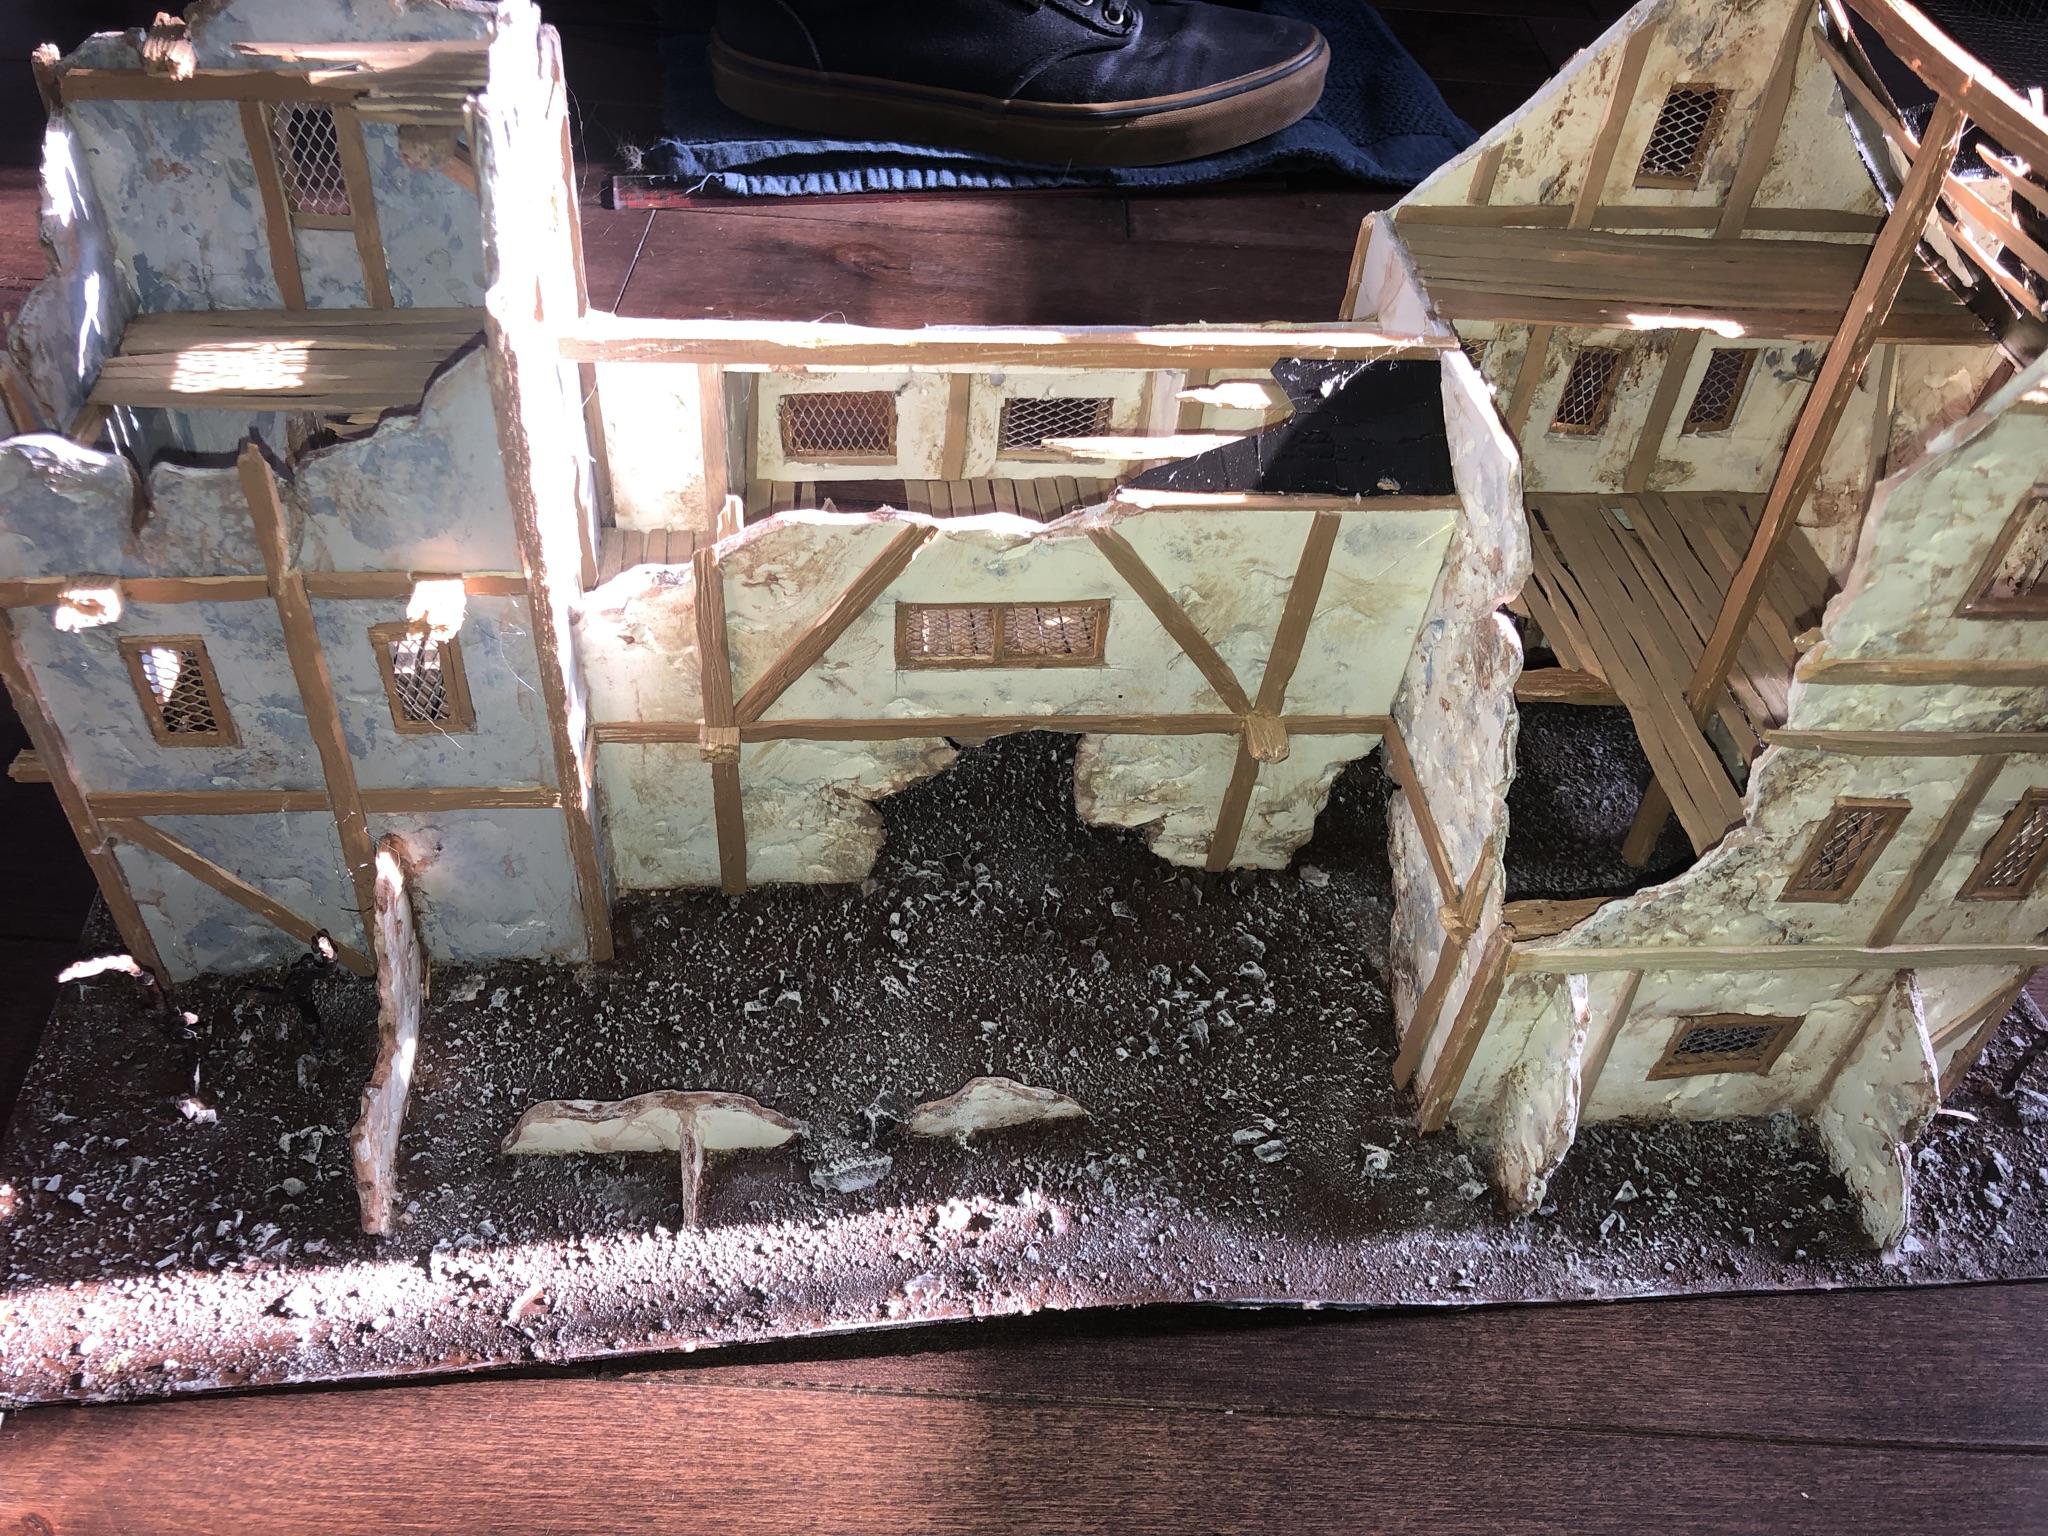
3 - Basing the Beast
I laid down some tiles made from cheap clay (same as the Wizard Tower project).
I painted the base dark brown before laying down the tiles as I found painting between the tiles afterwards to be a painful and long process.
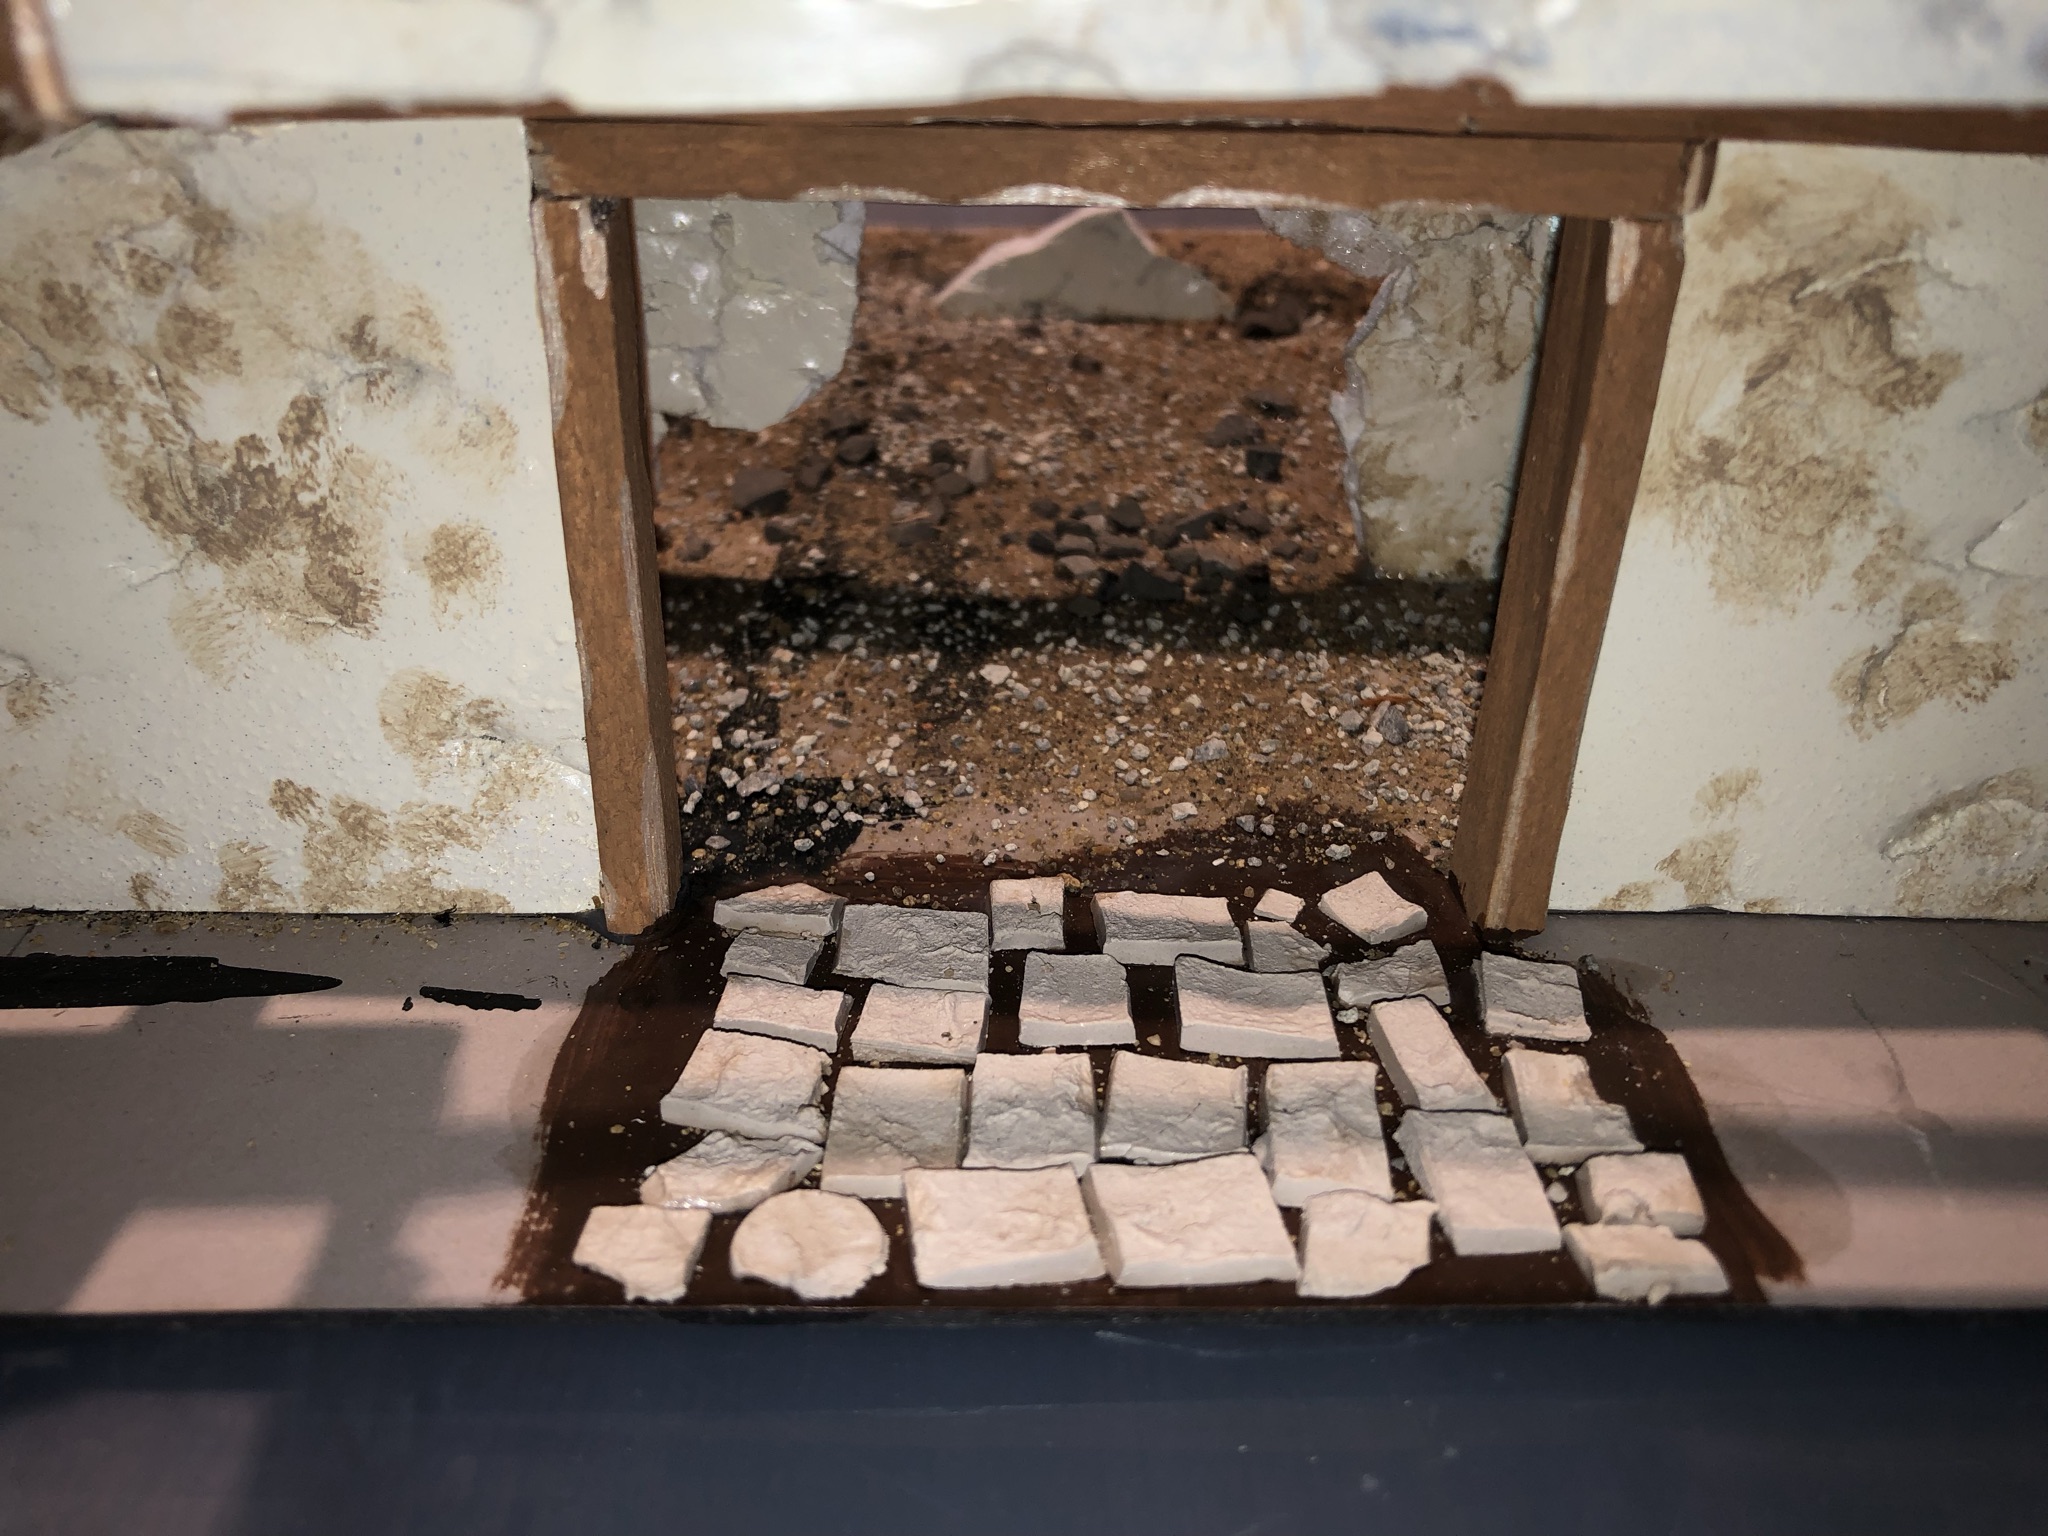 Tiles made out of clay
I sprinkled a lot of small rocks and coarse sand all over the base with PVA glue.
To make sure that the sand really sticks to the cardboard, I like to apply a second coat of watered-down PVA glue all over the sand. I tried a slightly different approach this time. Since this is a very large project, I need to speed things up: I apply a coat of watered-down PVA glue mixed with Burnt Umber paint. This would act as a basecoat for the base.
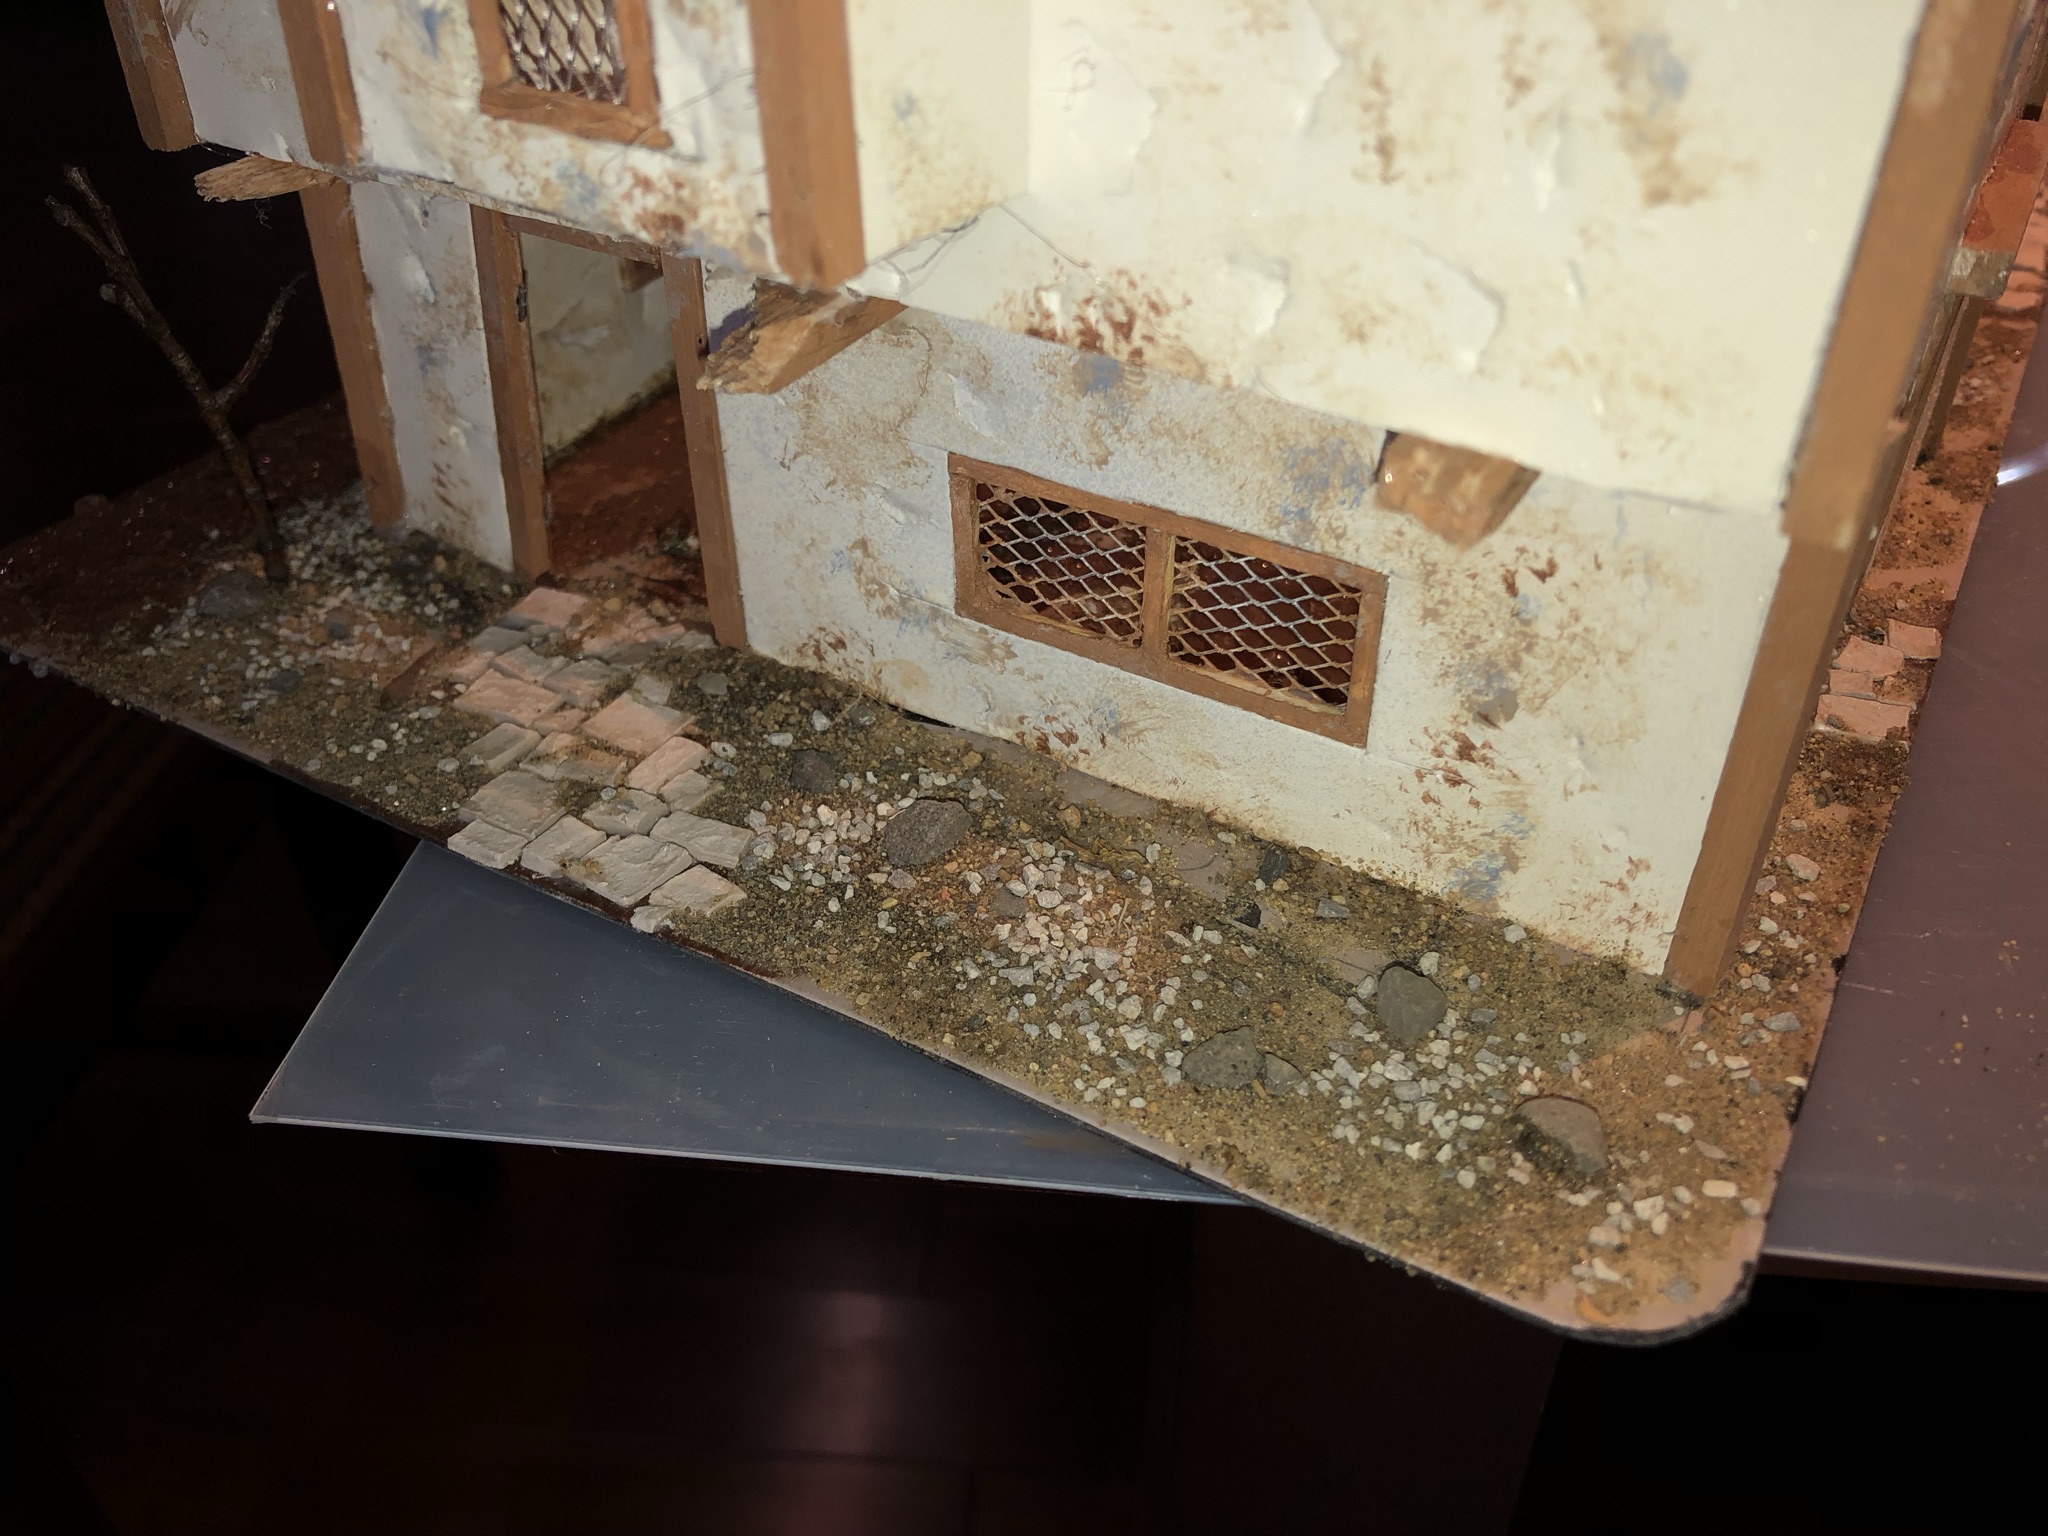 Sand and gravel
 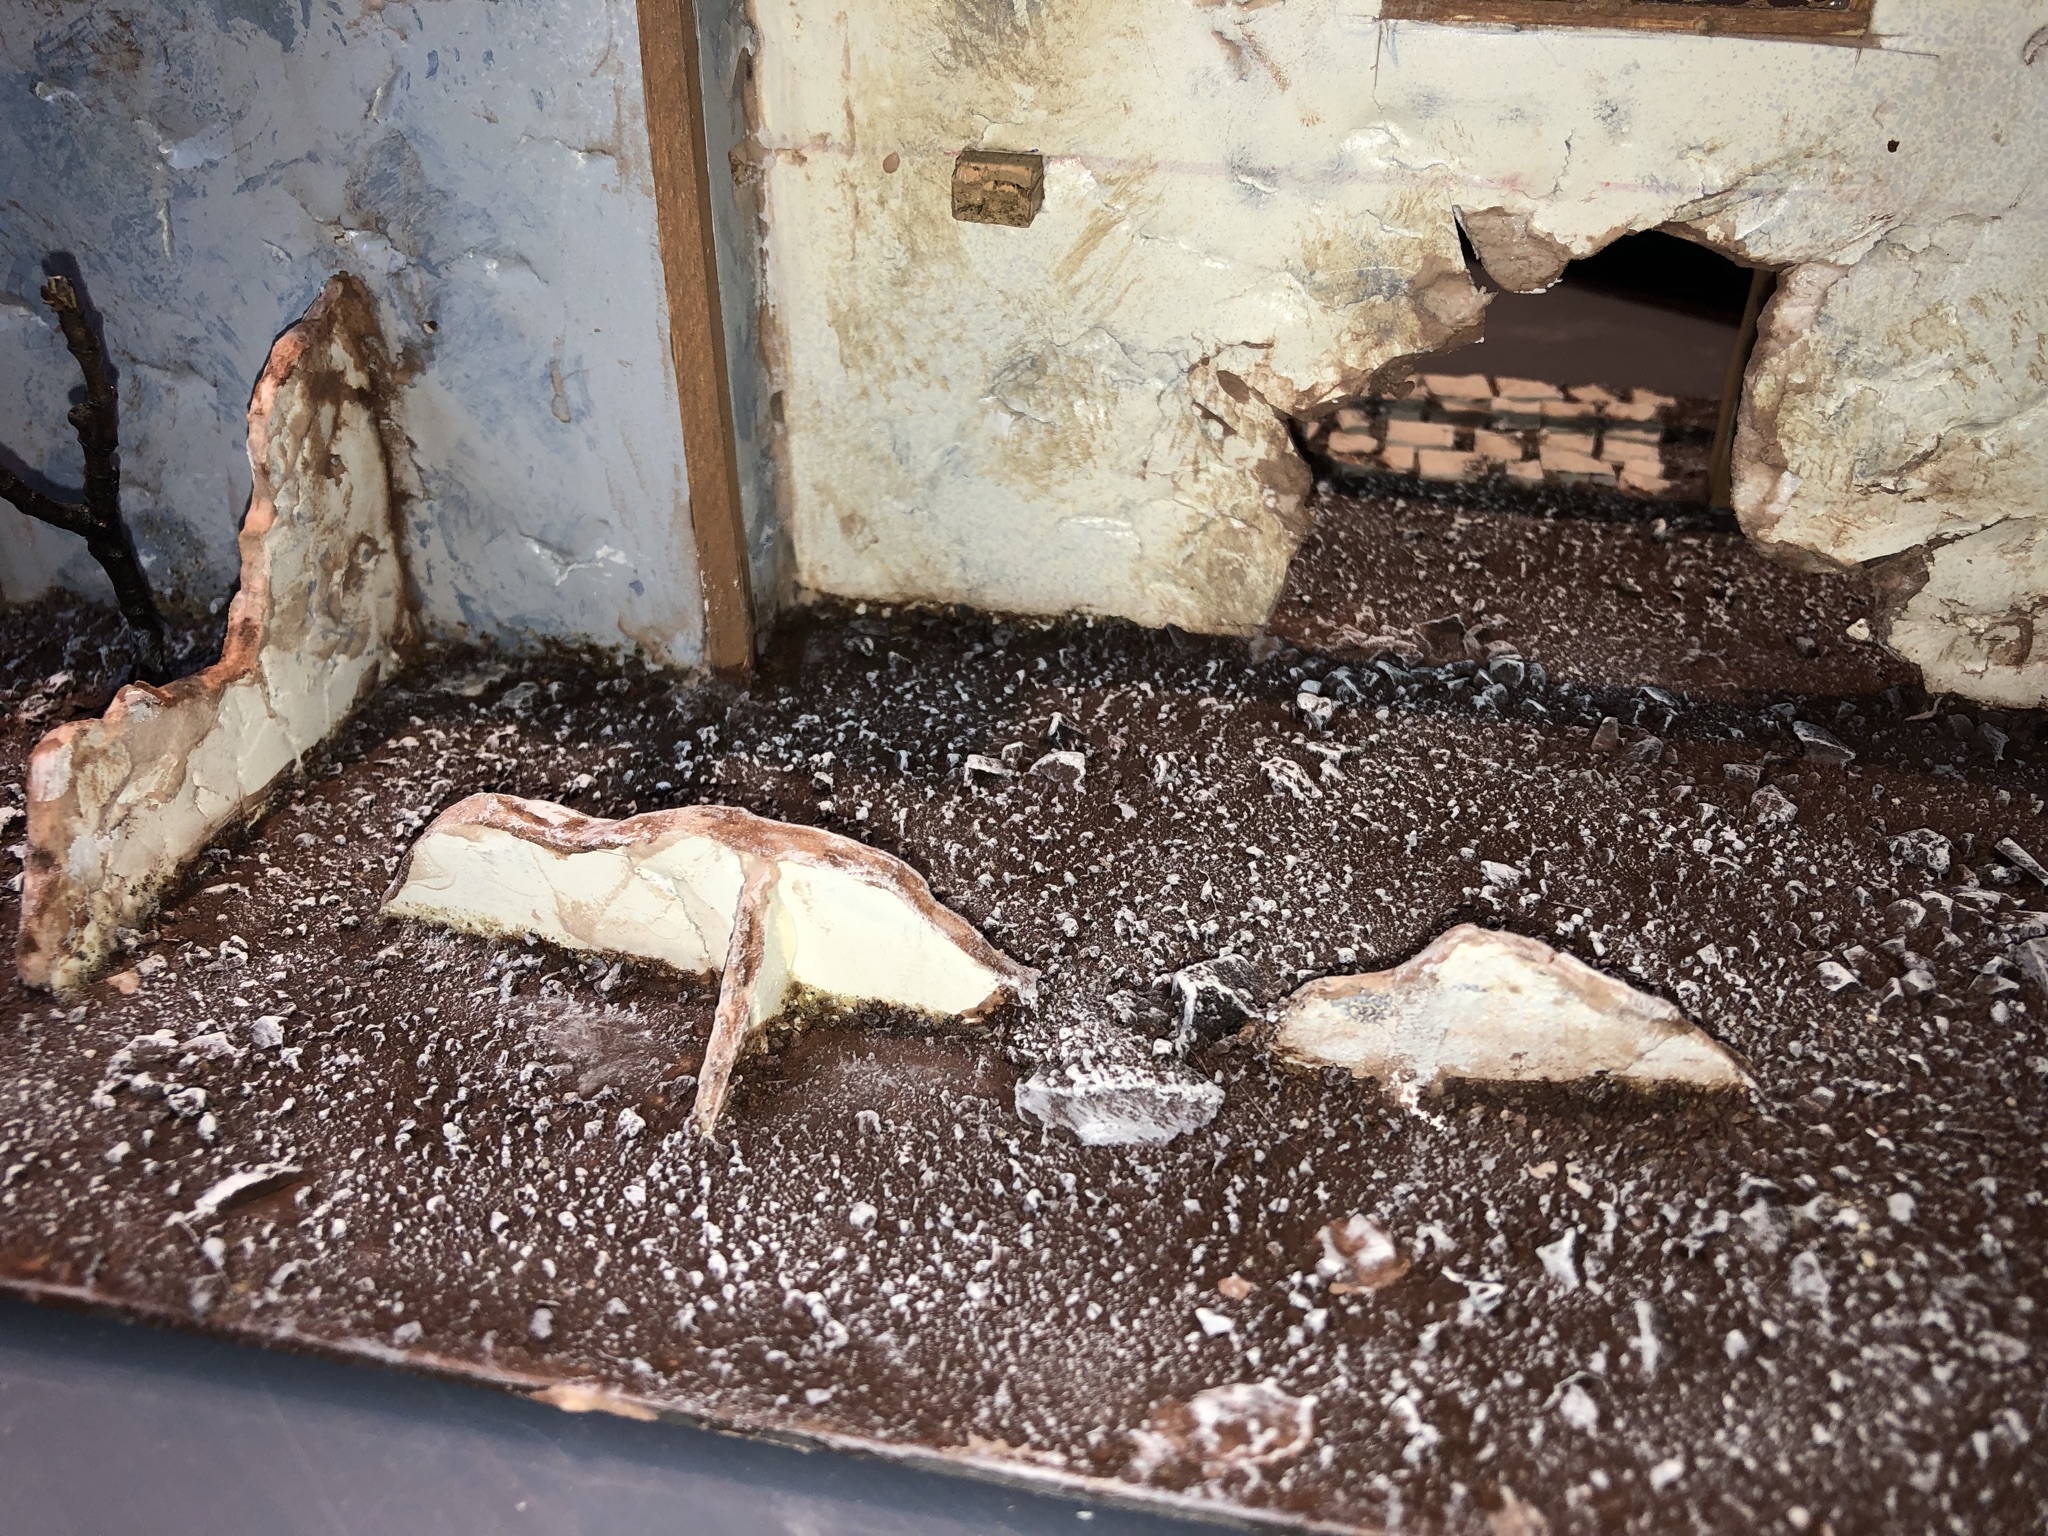 Base painted brown, than drybrushed
 2- The Beast Assembled (WiP)
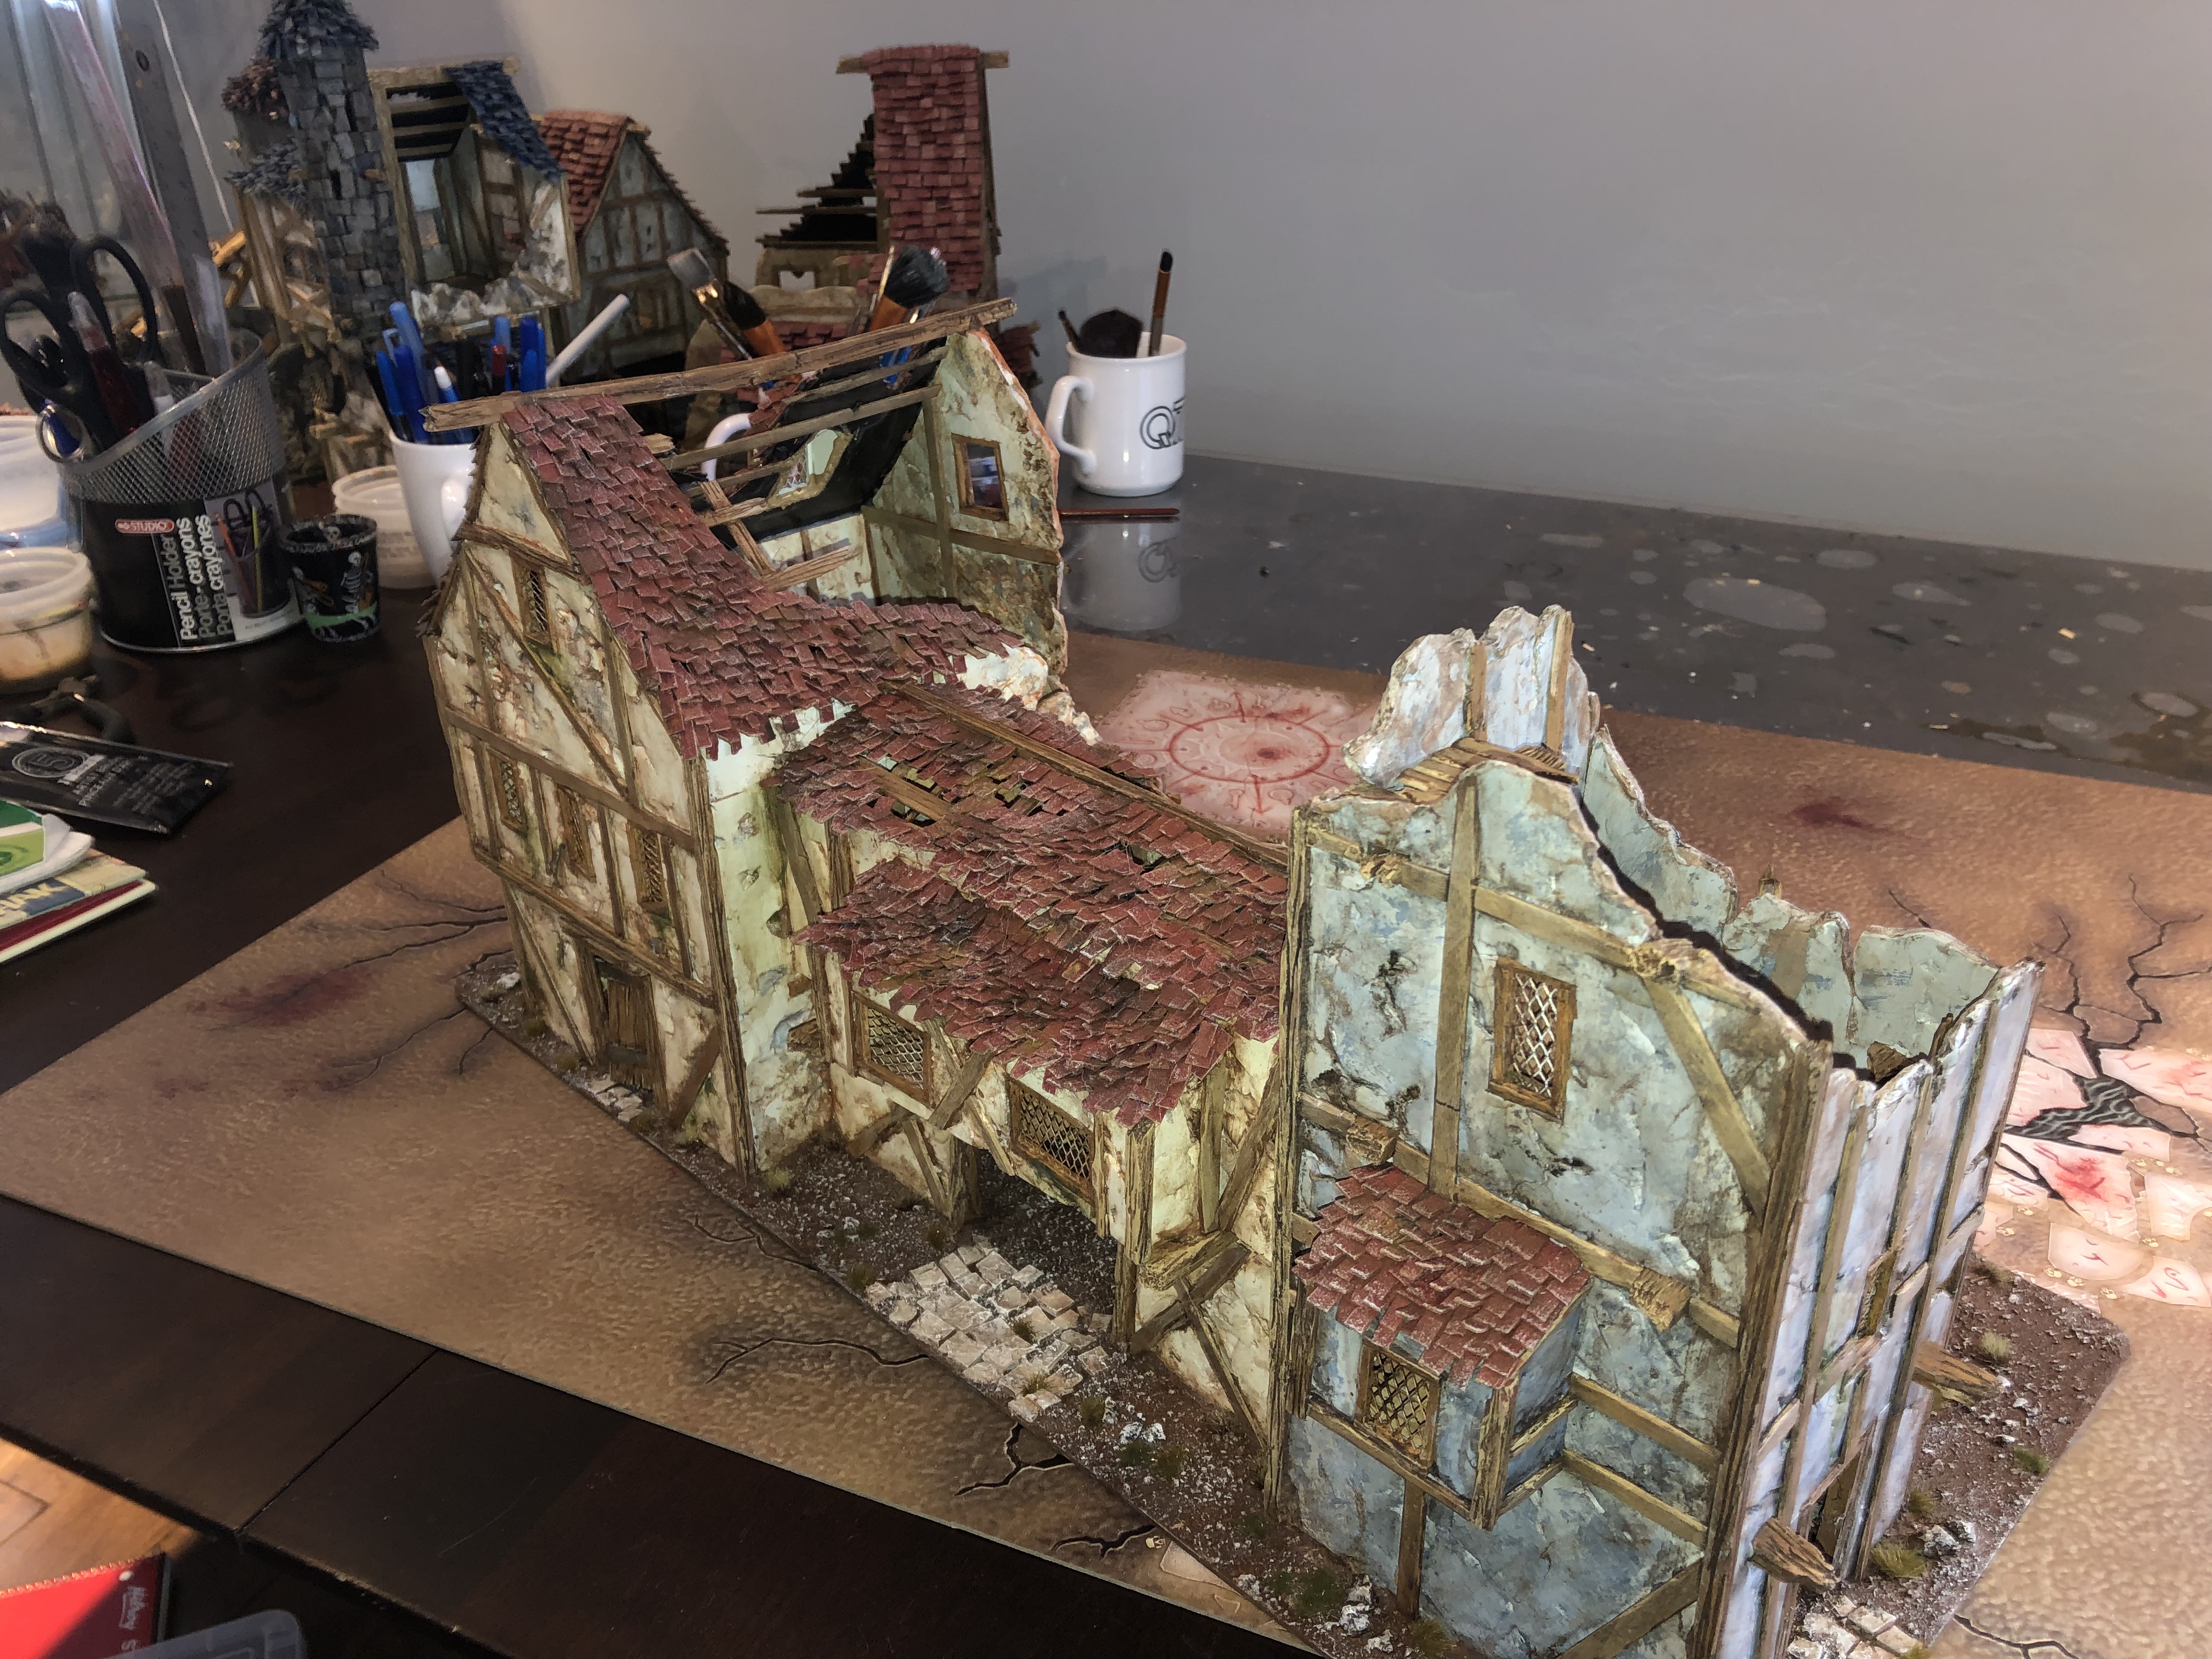
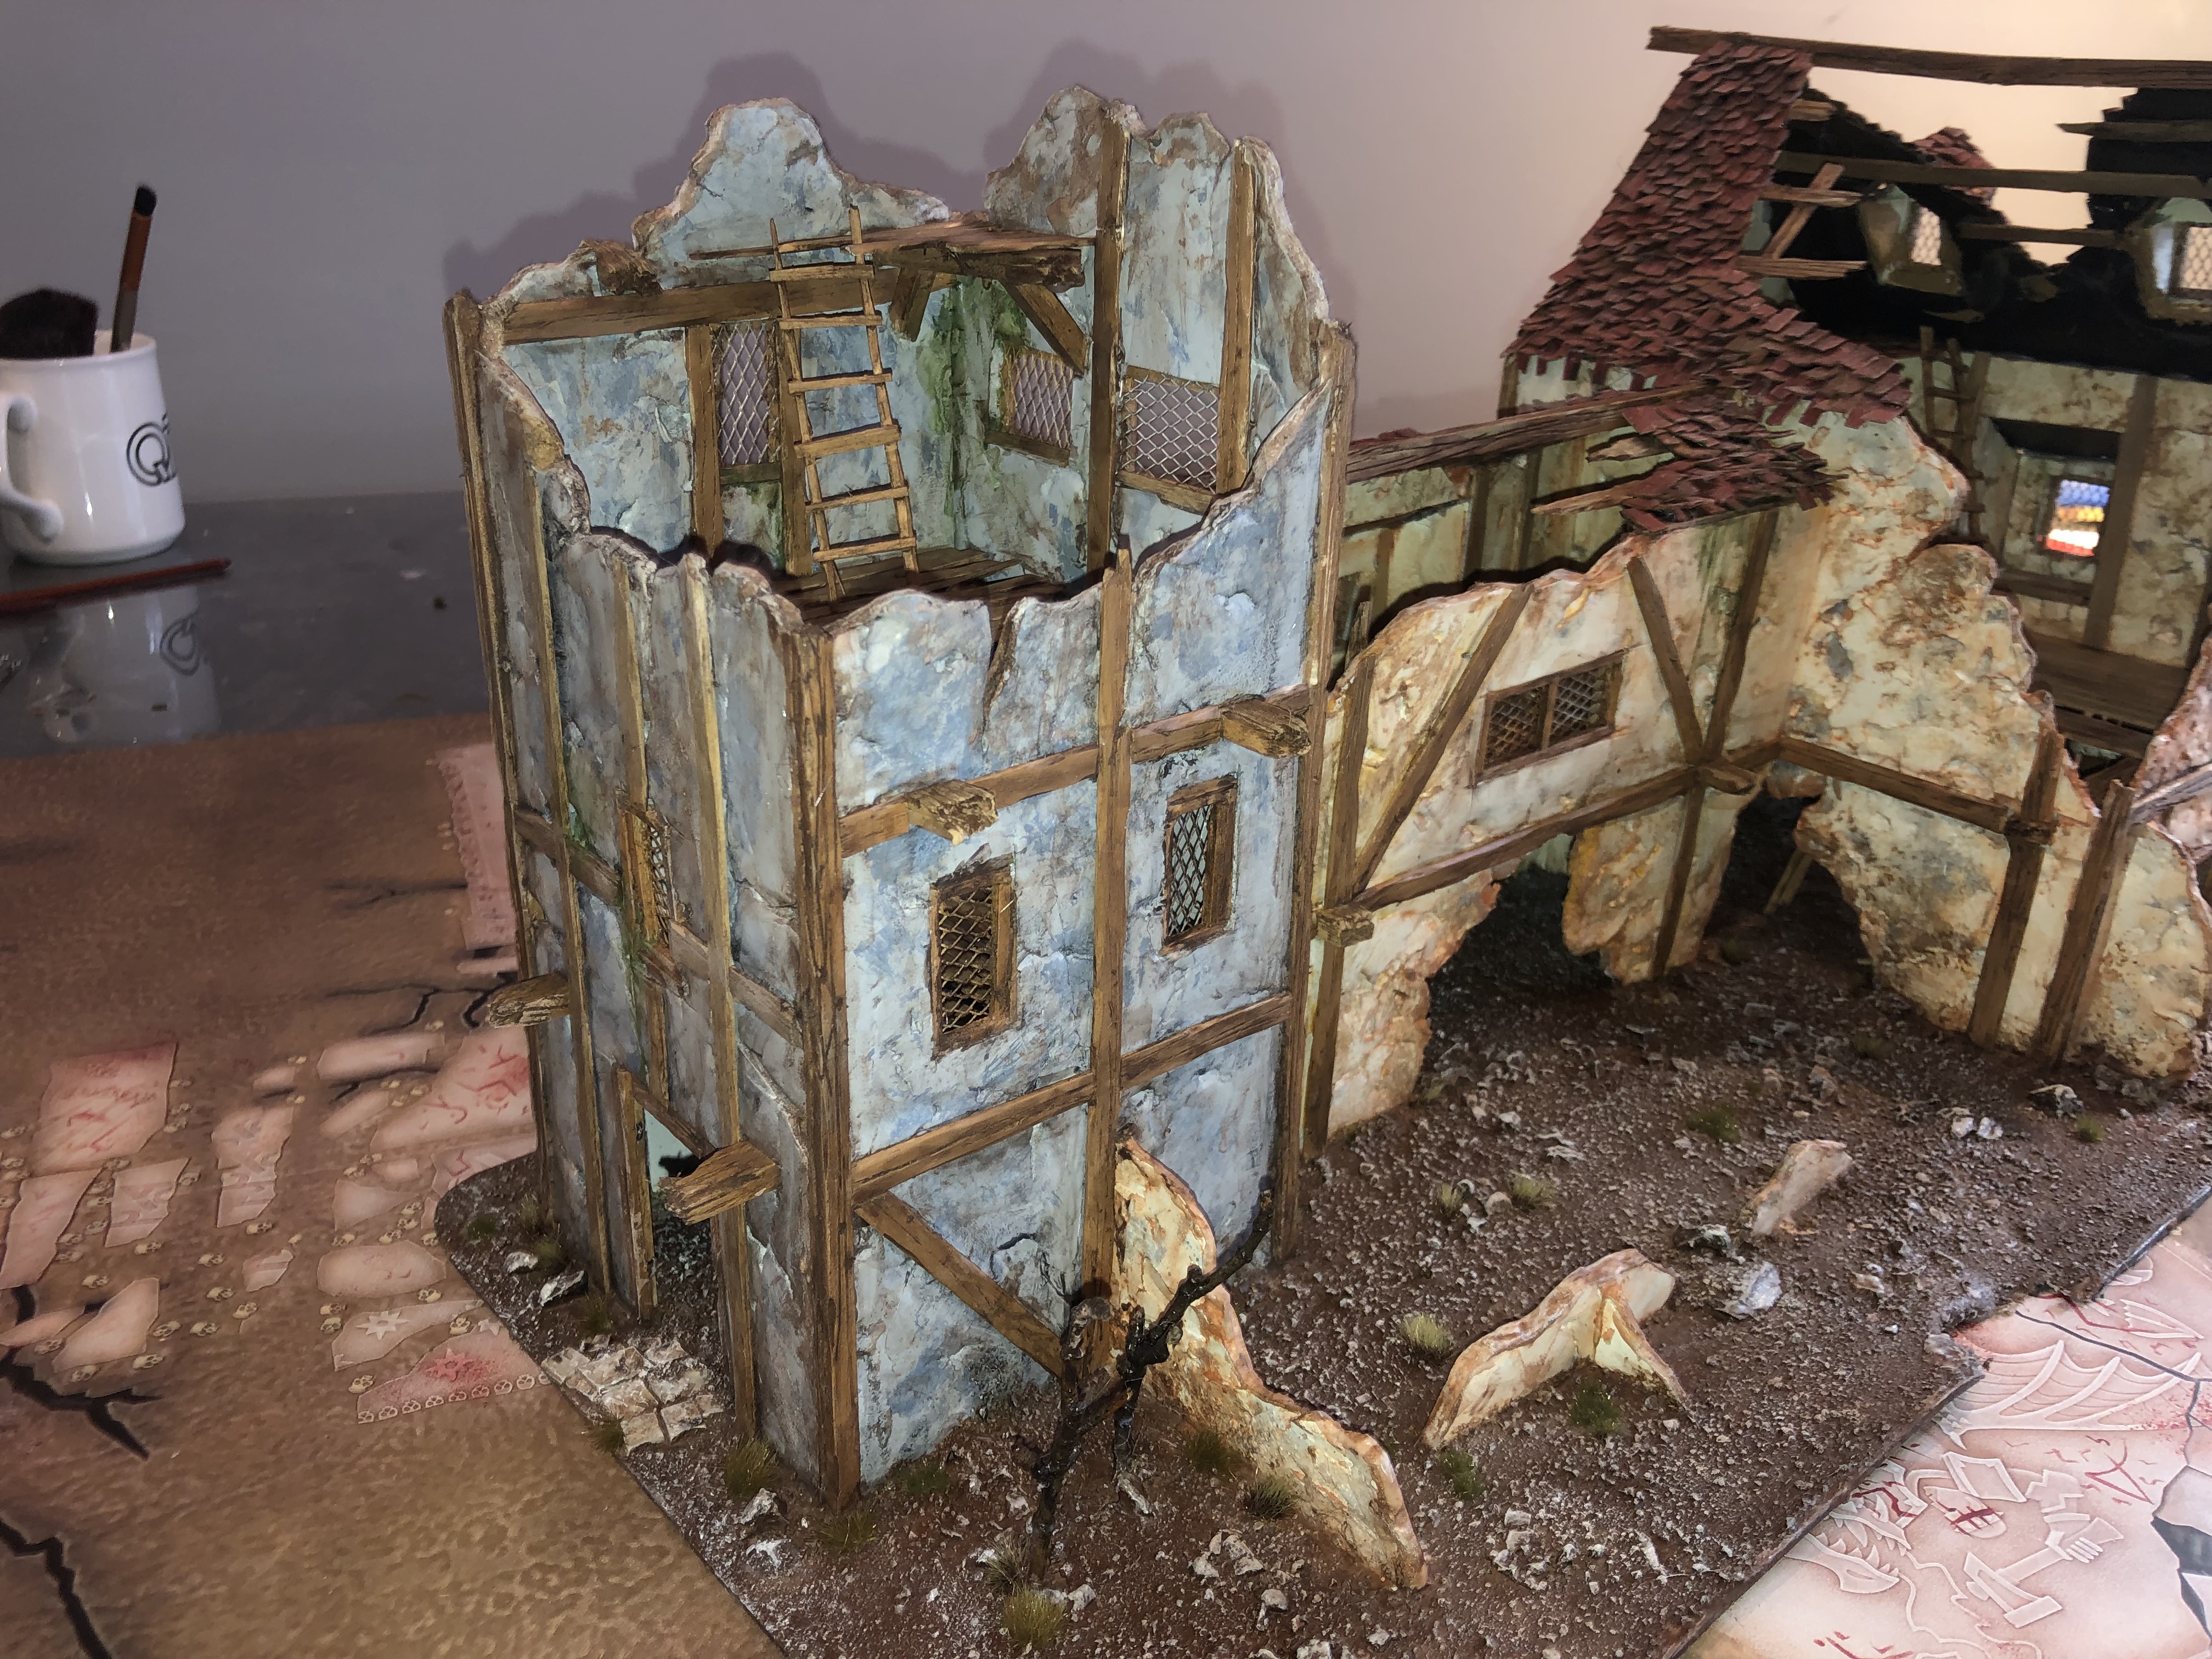
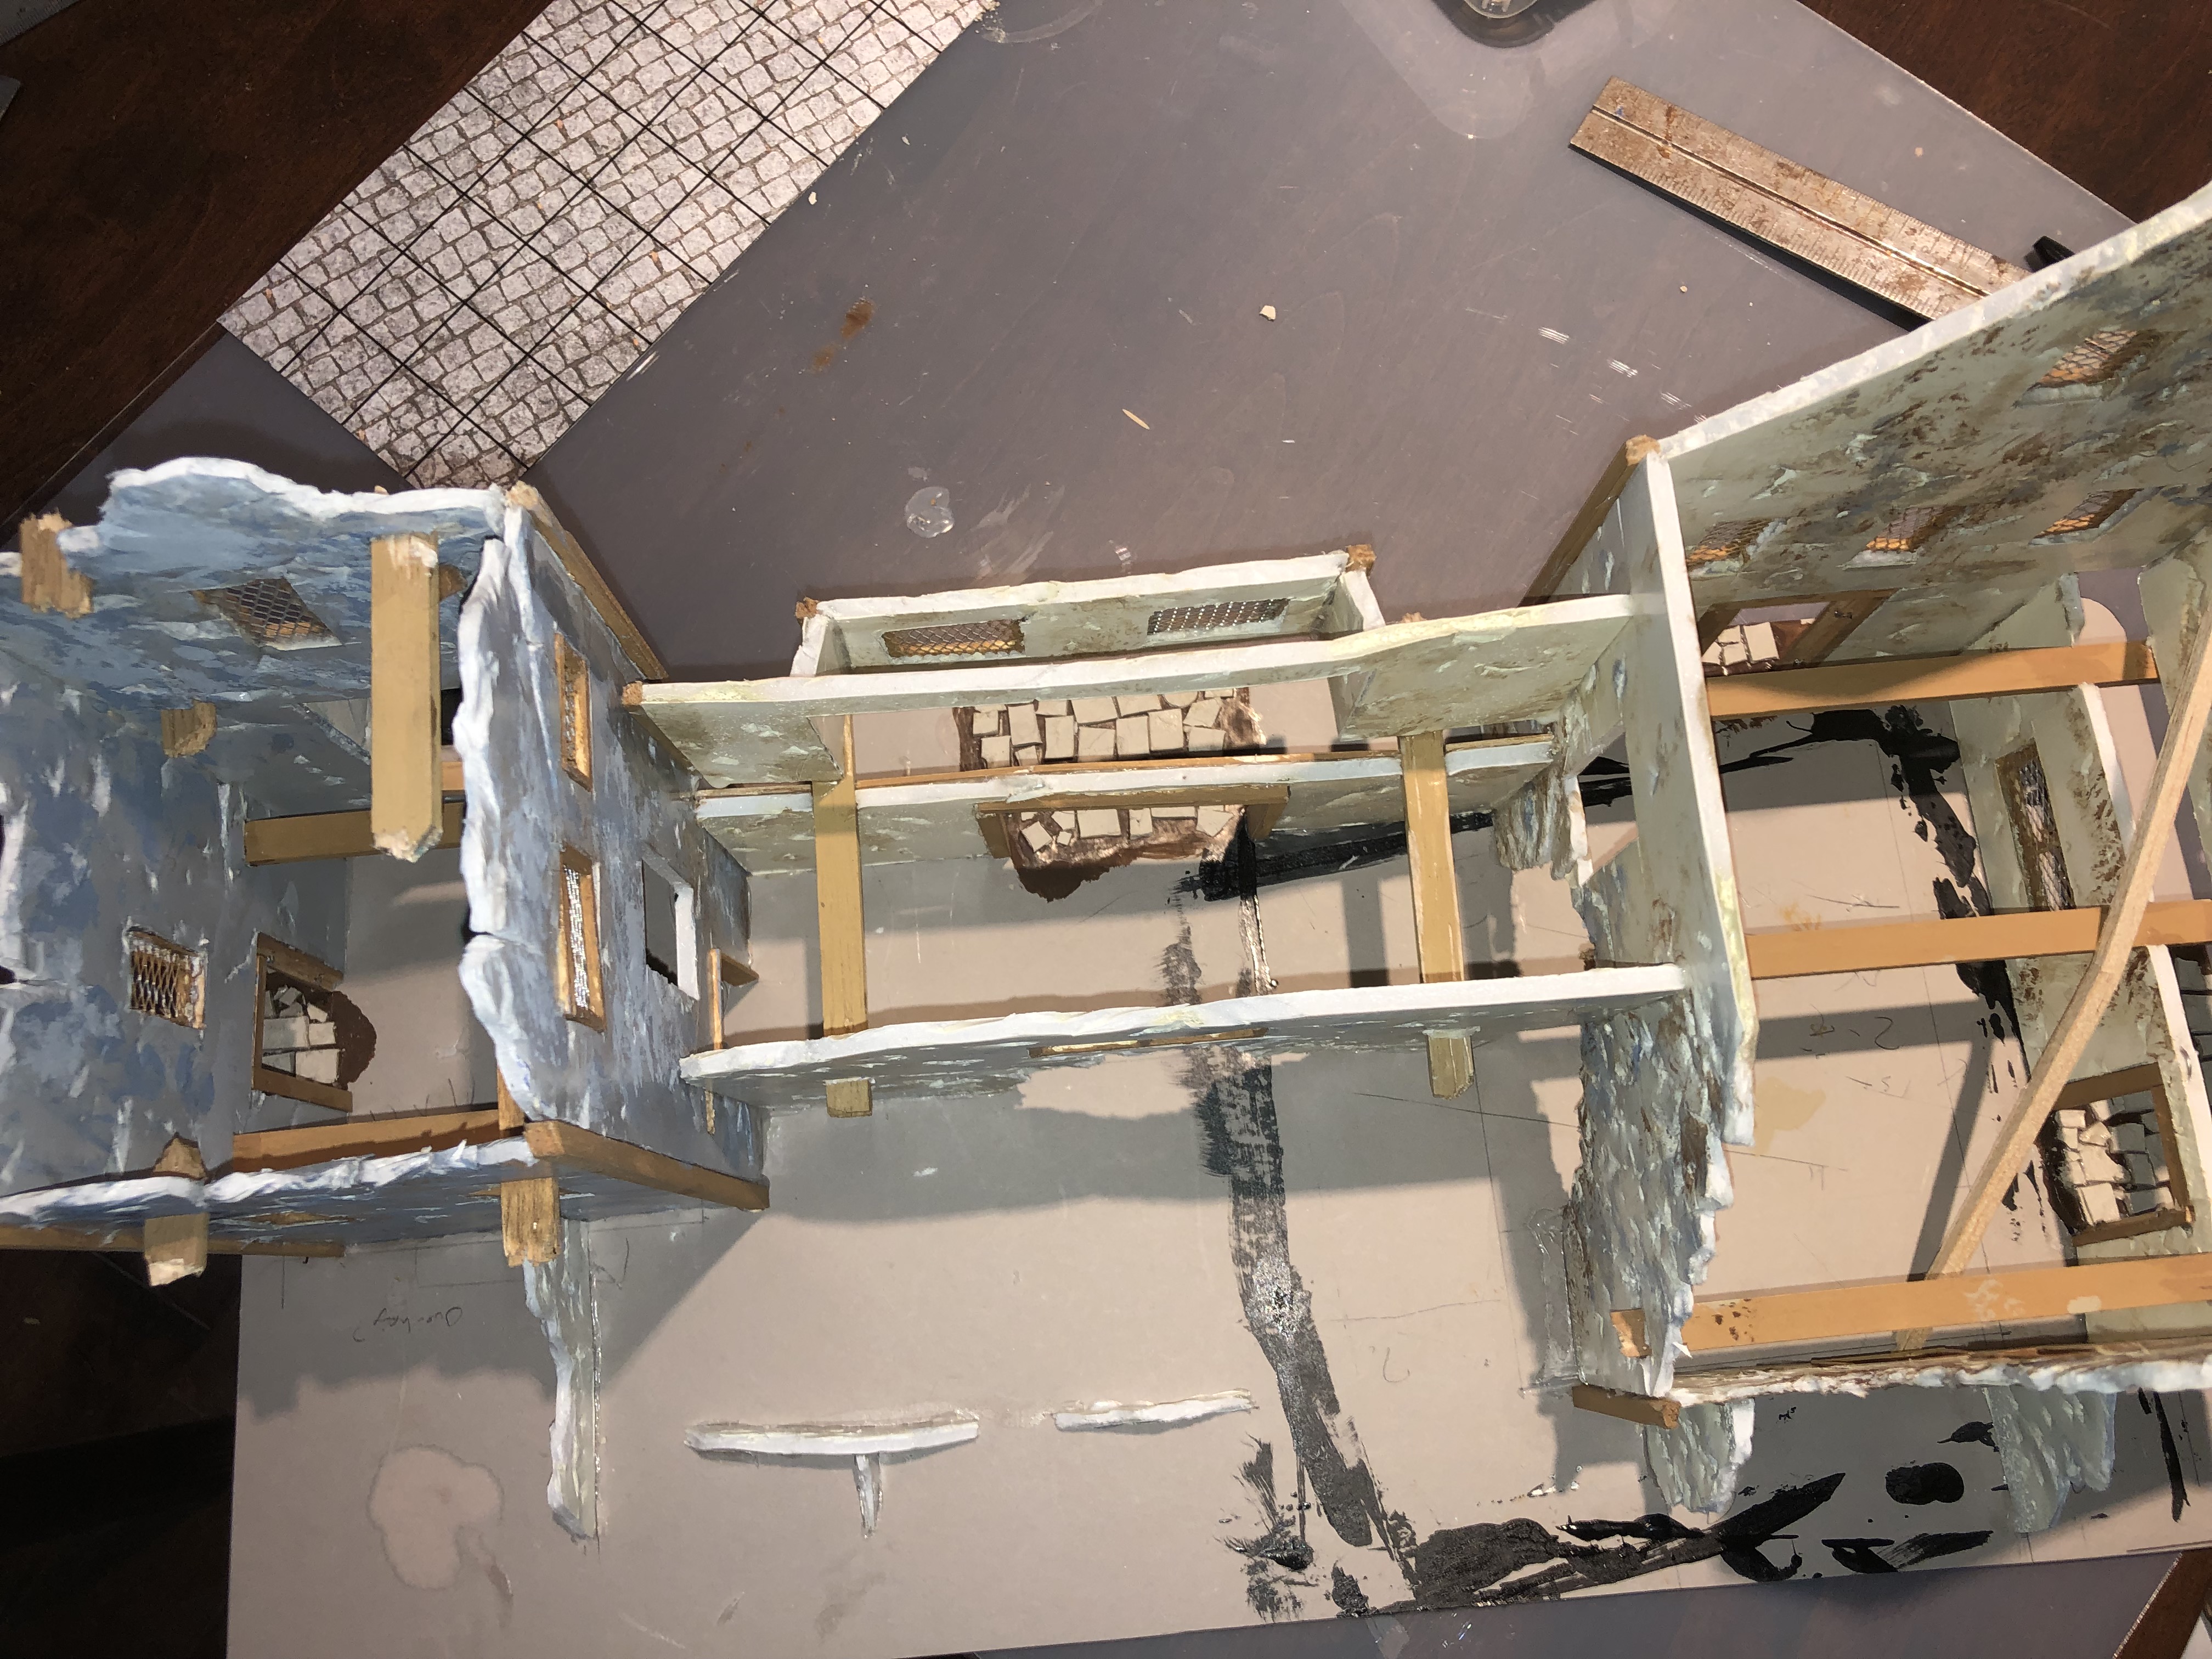
The three parts were assembled on a base.
Playability is a very important concept when designing buildings. I made some nice terrain before that do not see very much use on the game board as they don’t have enough access point.
For this big project, I made sure, they were would plenty of ways to enter/leave the building.
The house on the left has two doors that lead outside, plus an entry towards the middle junction.
The middle junction part has a huge entry in the front and in the back.
The tower on the right has a door and it leads to the other parts of the complex.
 Front view
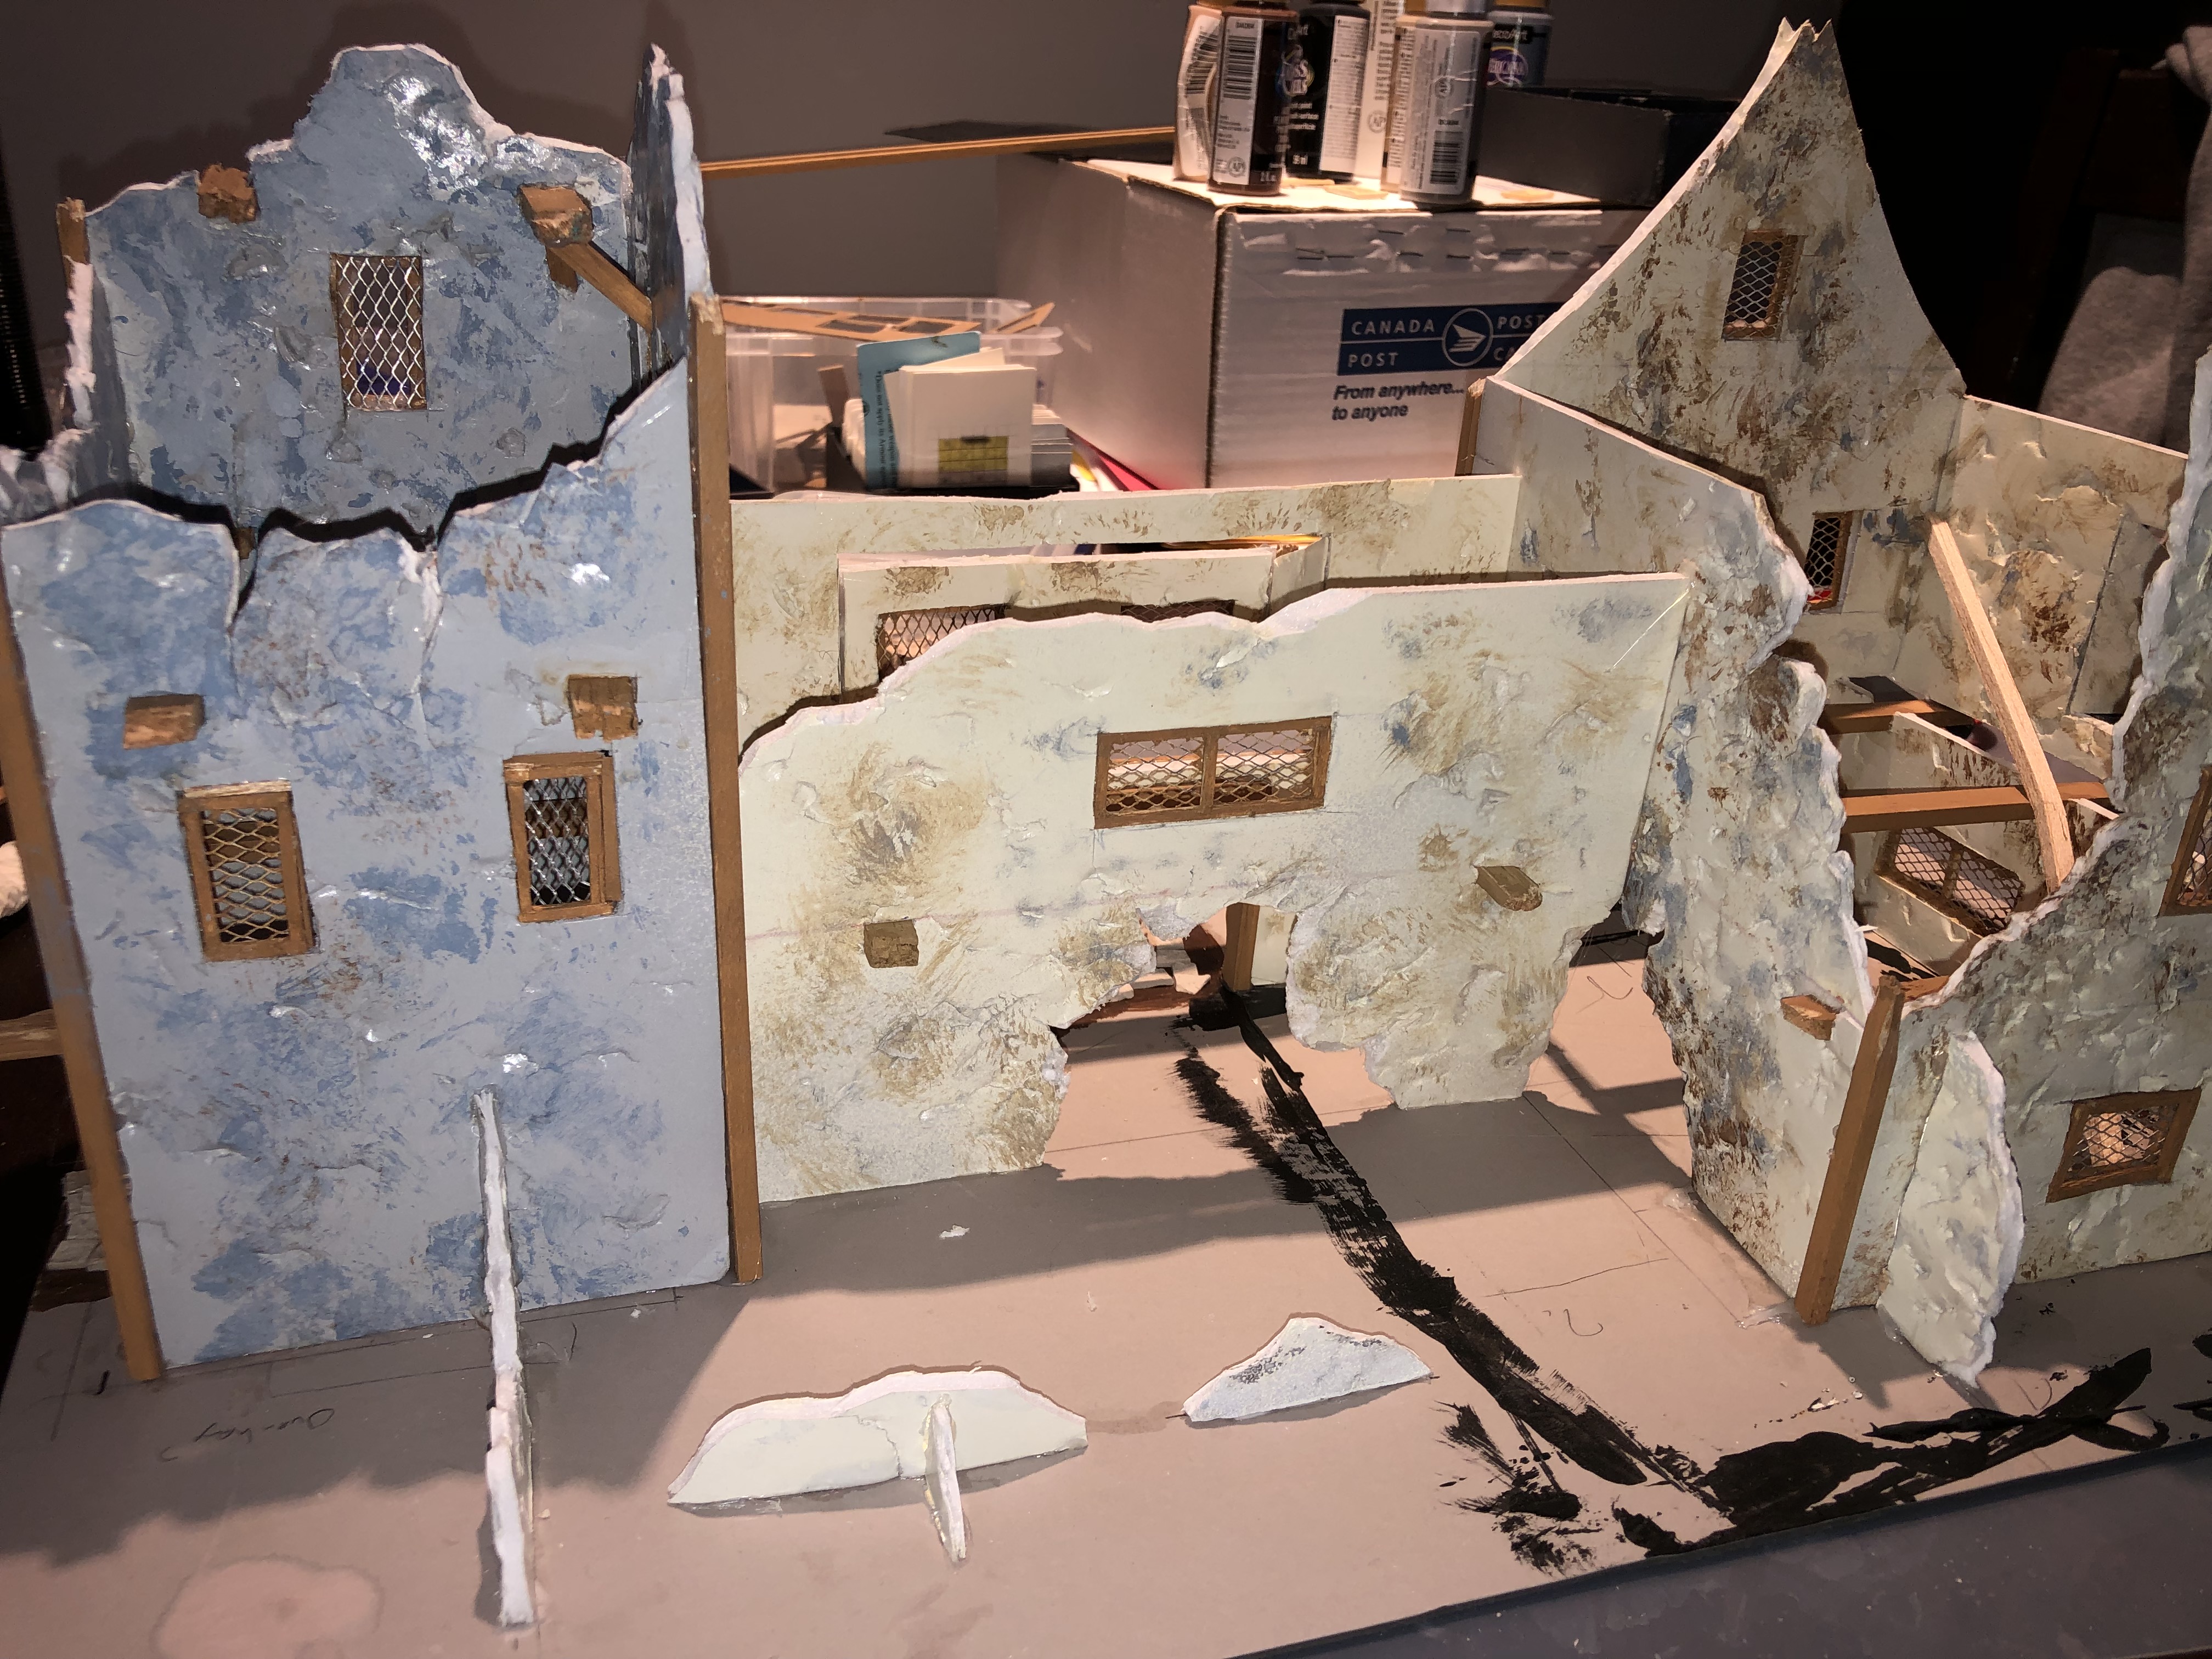 Rear view
WiP: the Beast
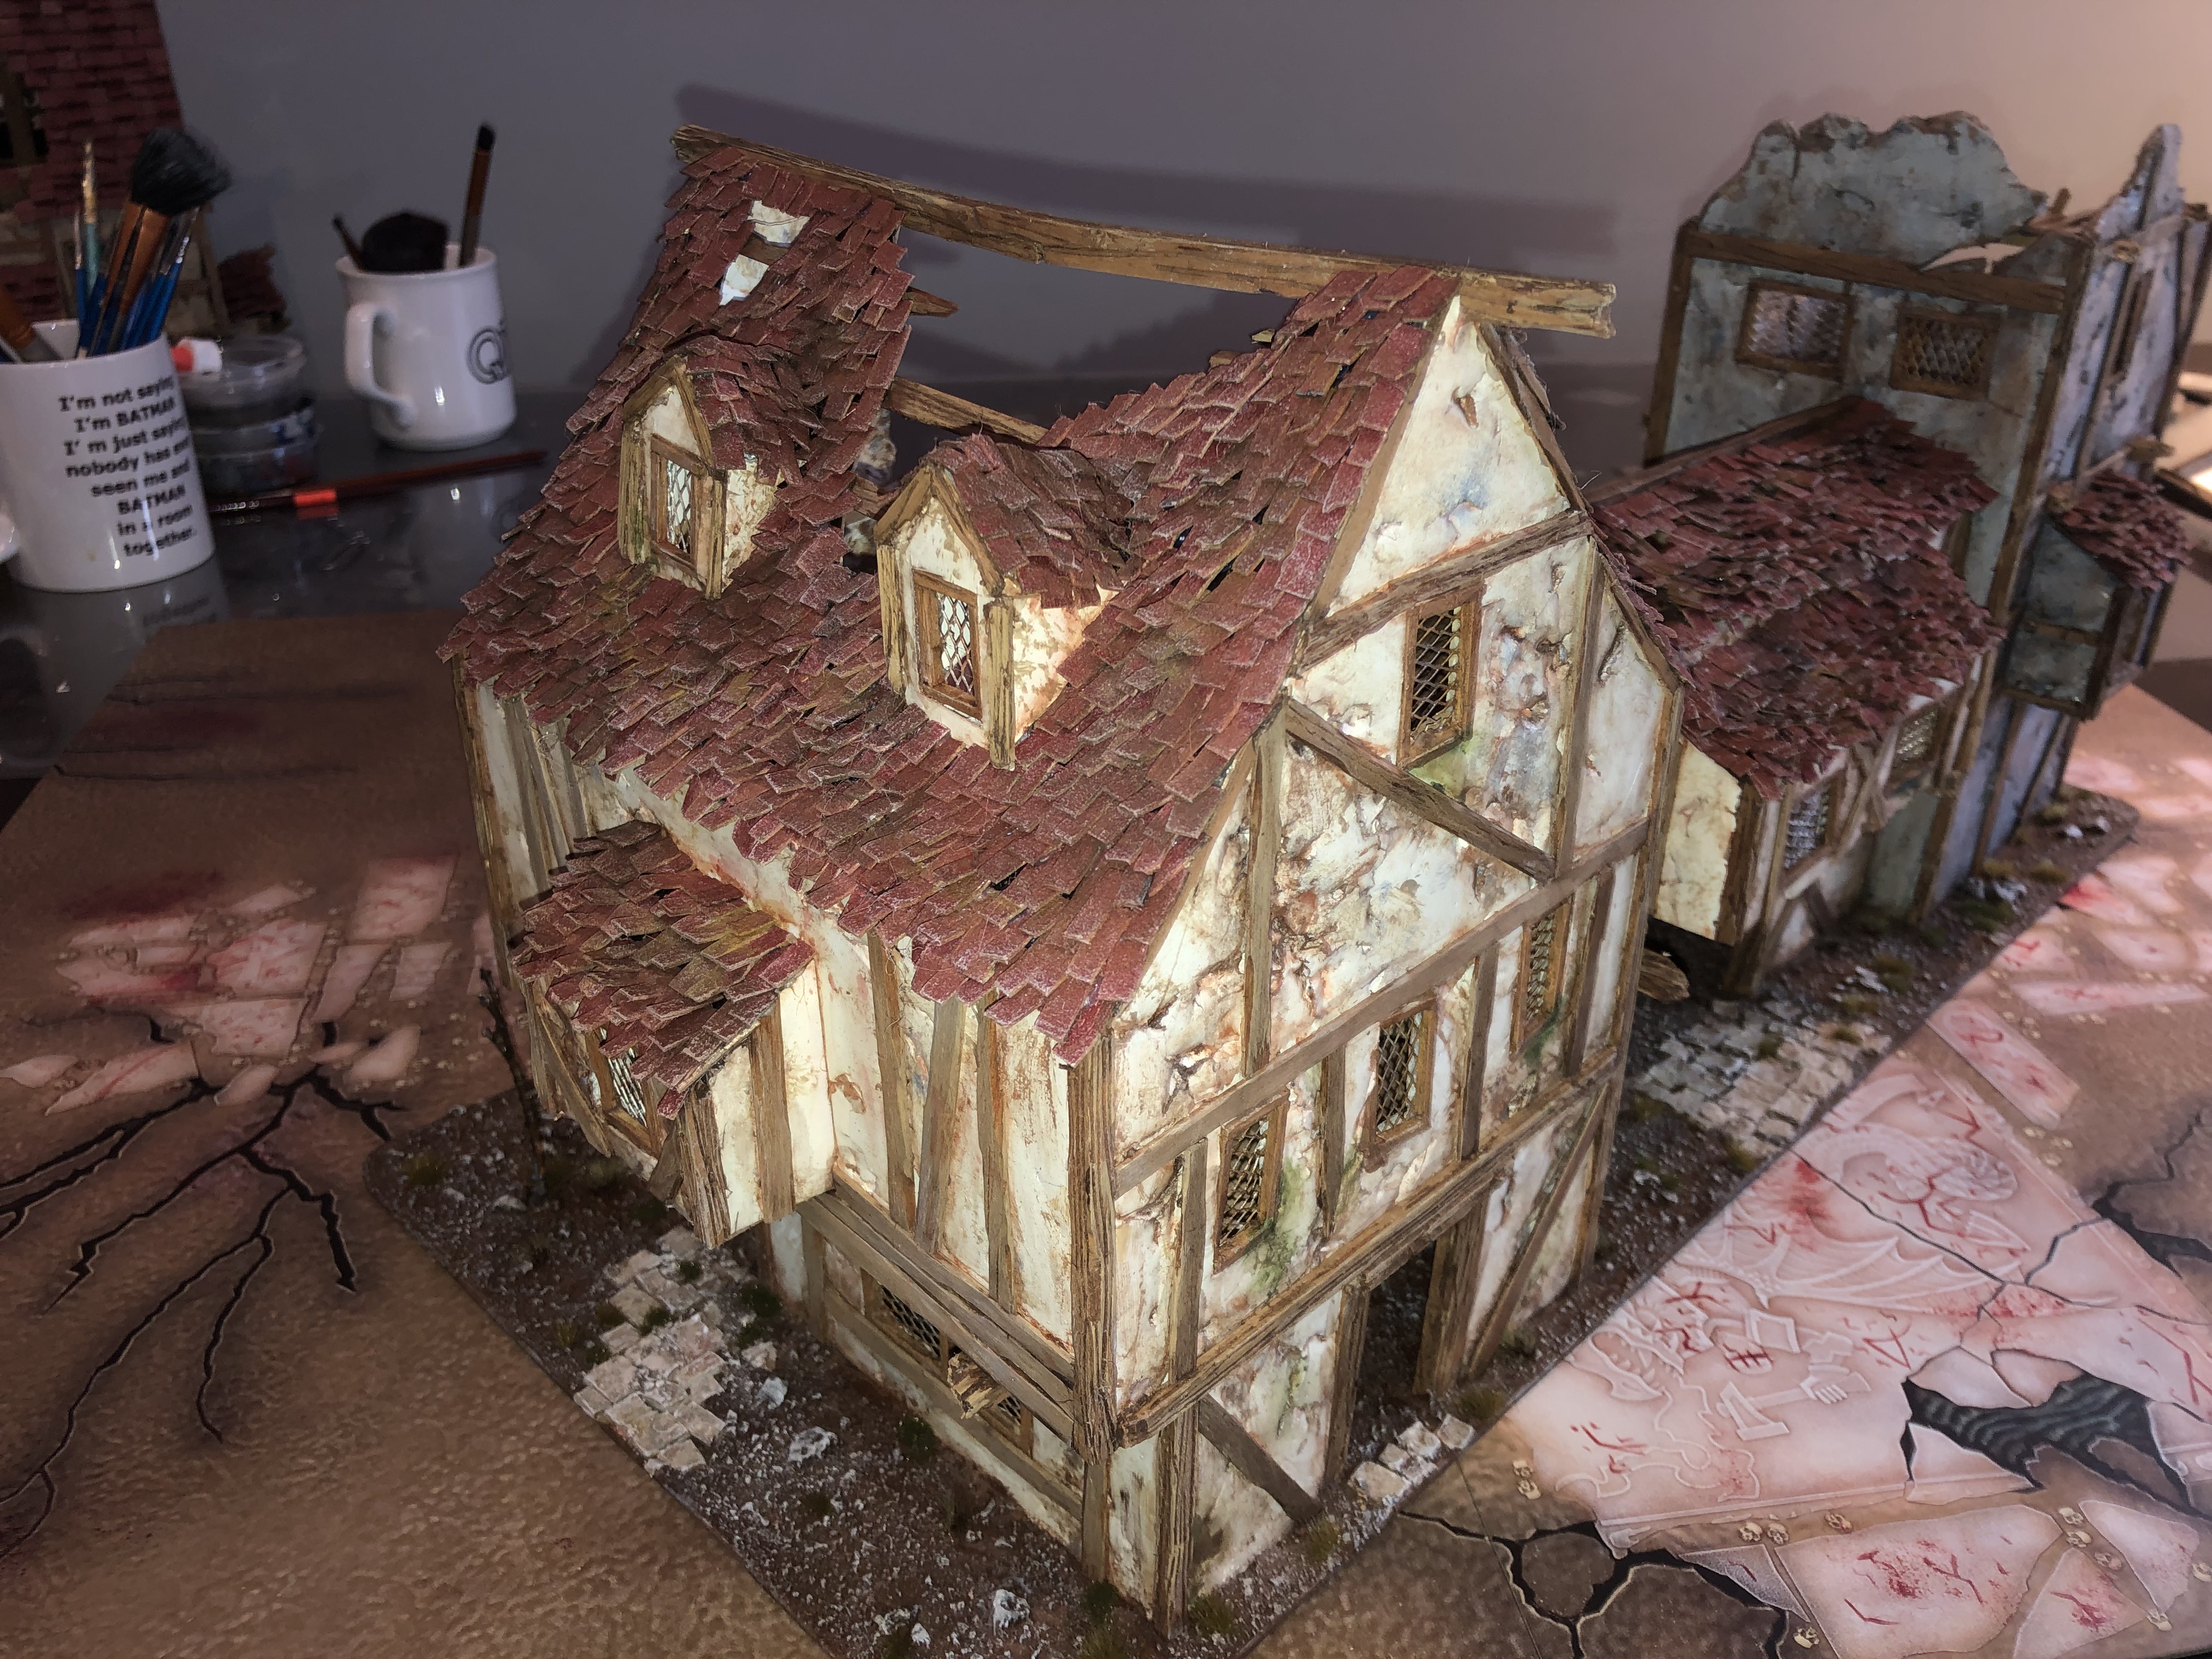
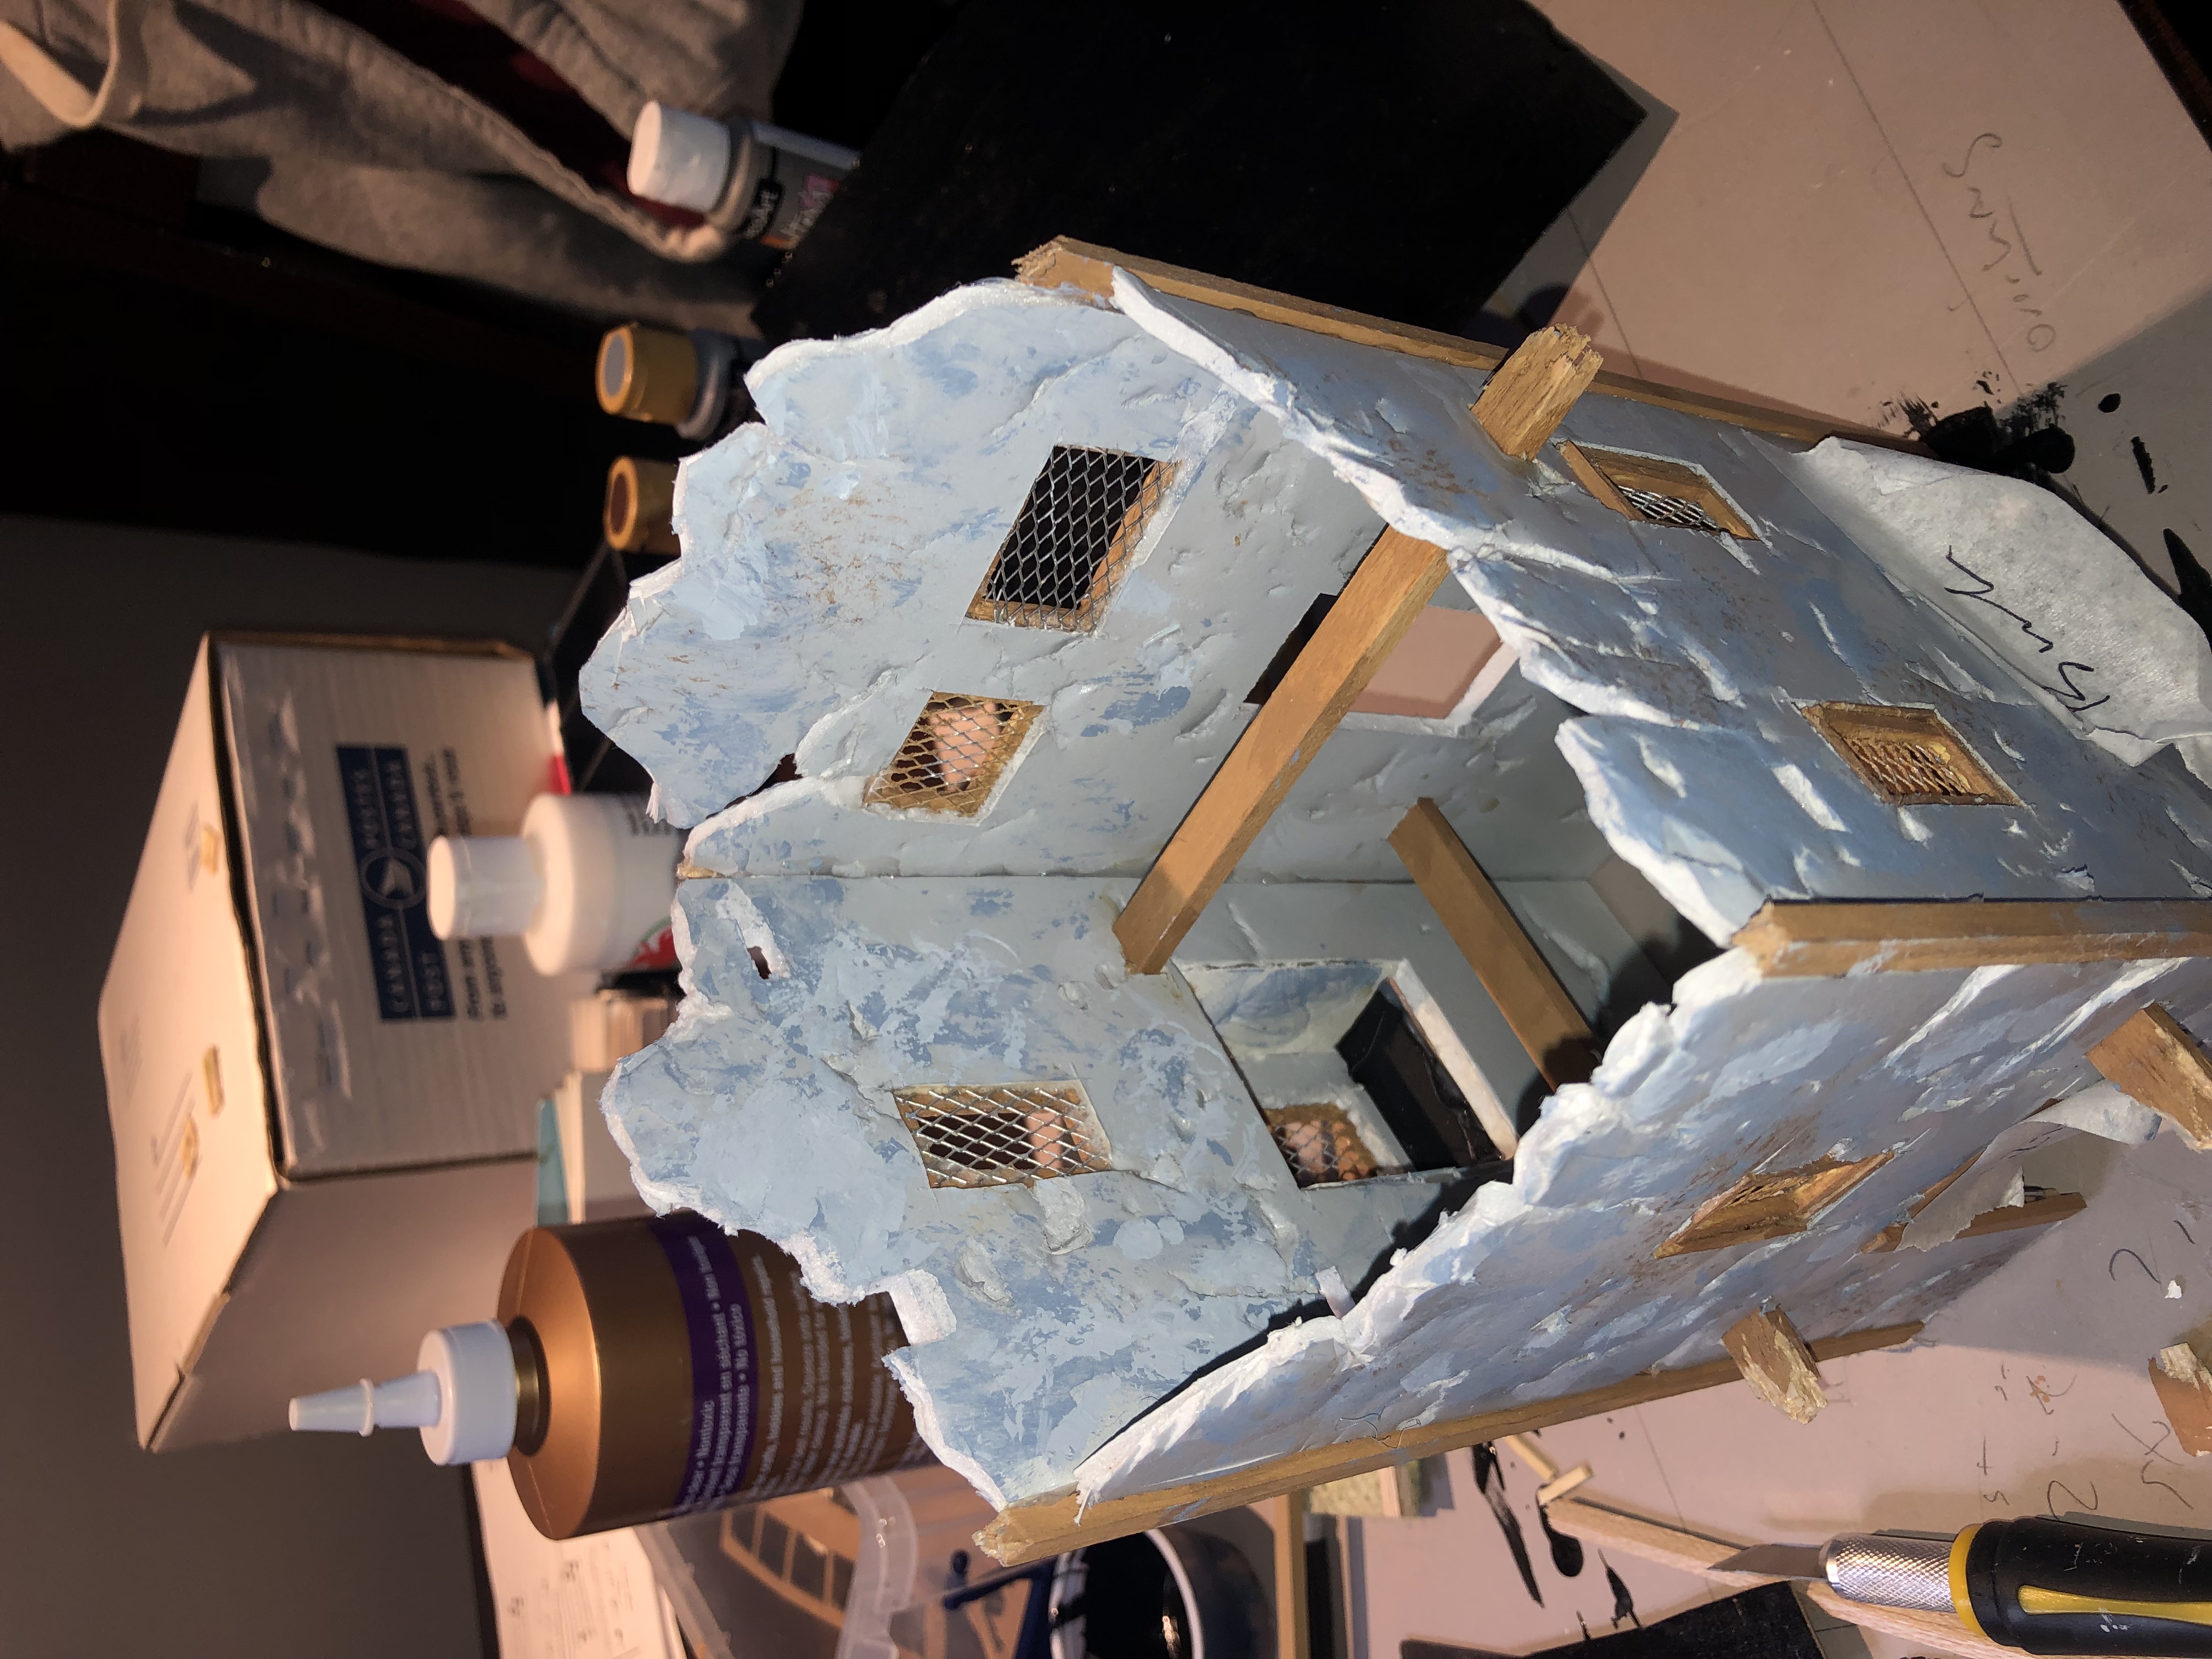
Three-part giant building I am currently working on.
The whole structure is foam board.
To speed things up, I won’t use any XPS bricks as they are nice, but time consuming.
I don’t have an airbrush yet (shame on me), so to facilitate the painting process, I like to paint all the sections separately before assembling them.
I sprayed the foamboard/walls with an off-white.
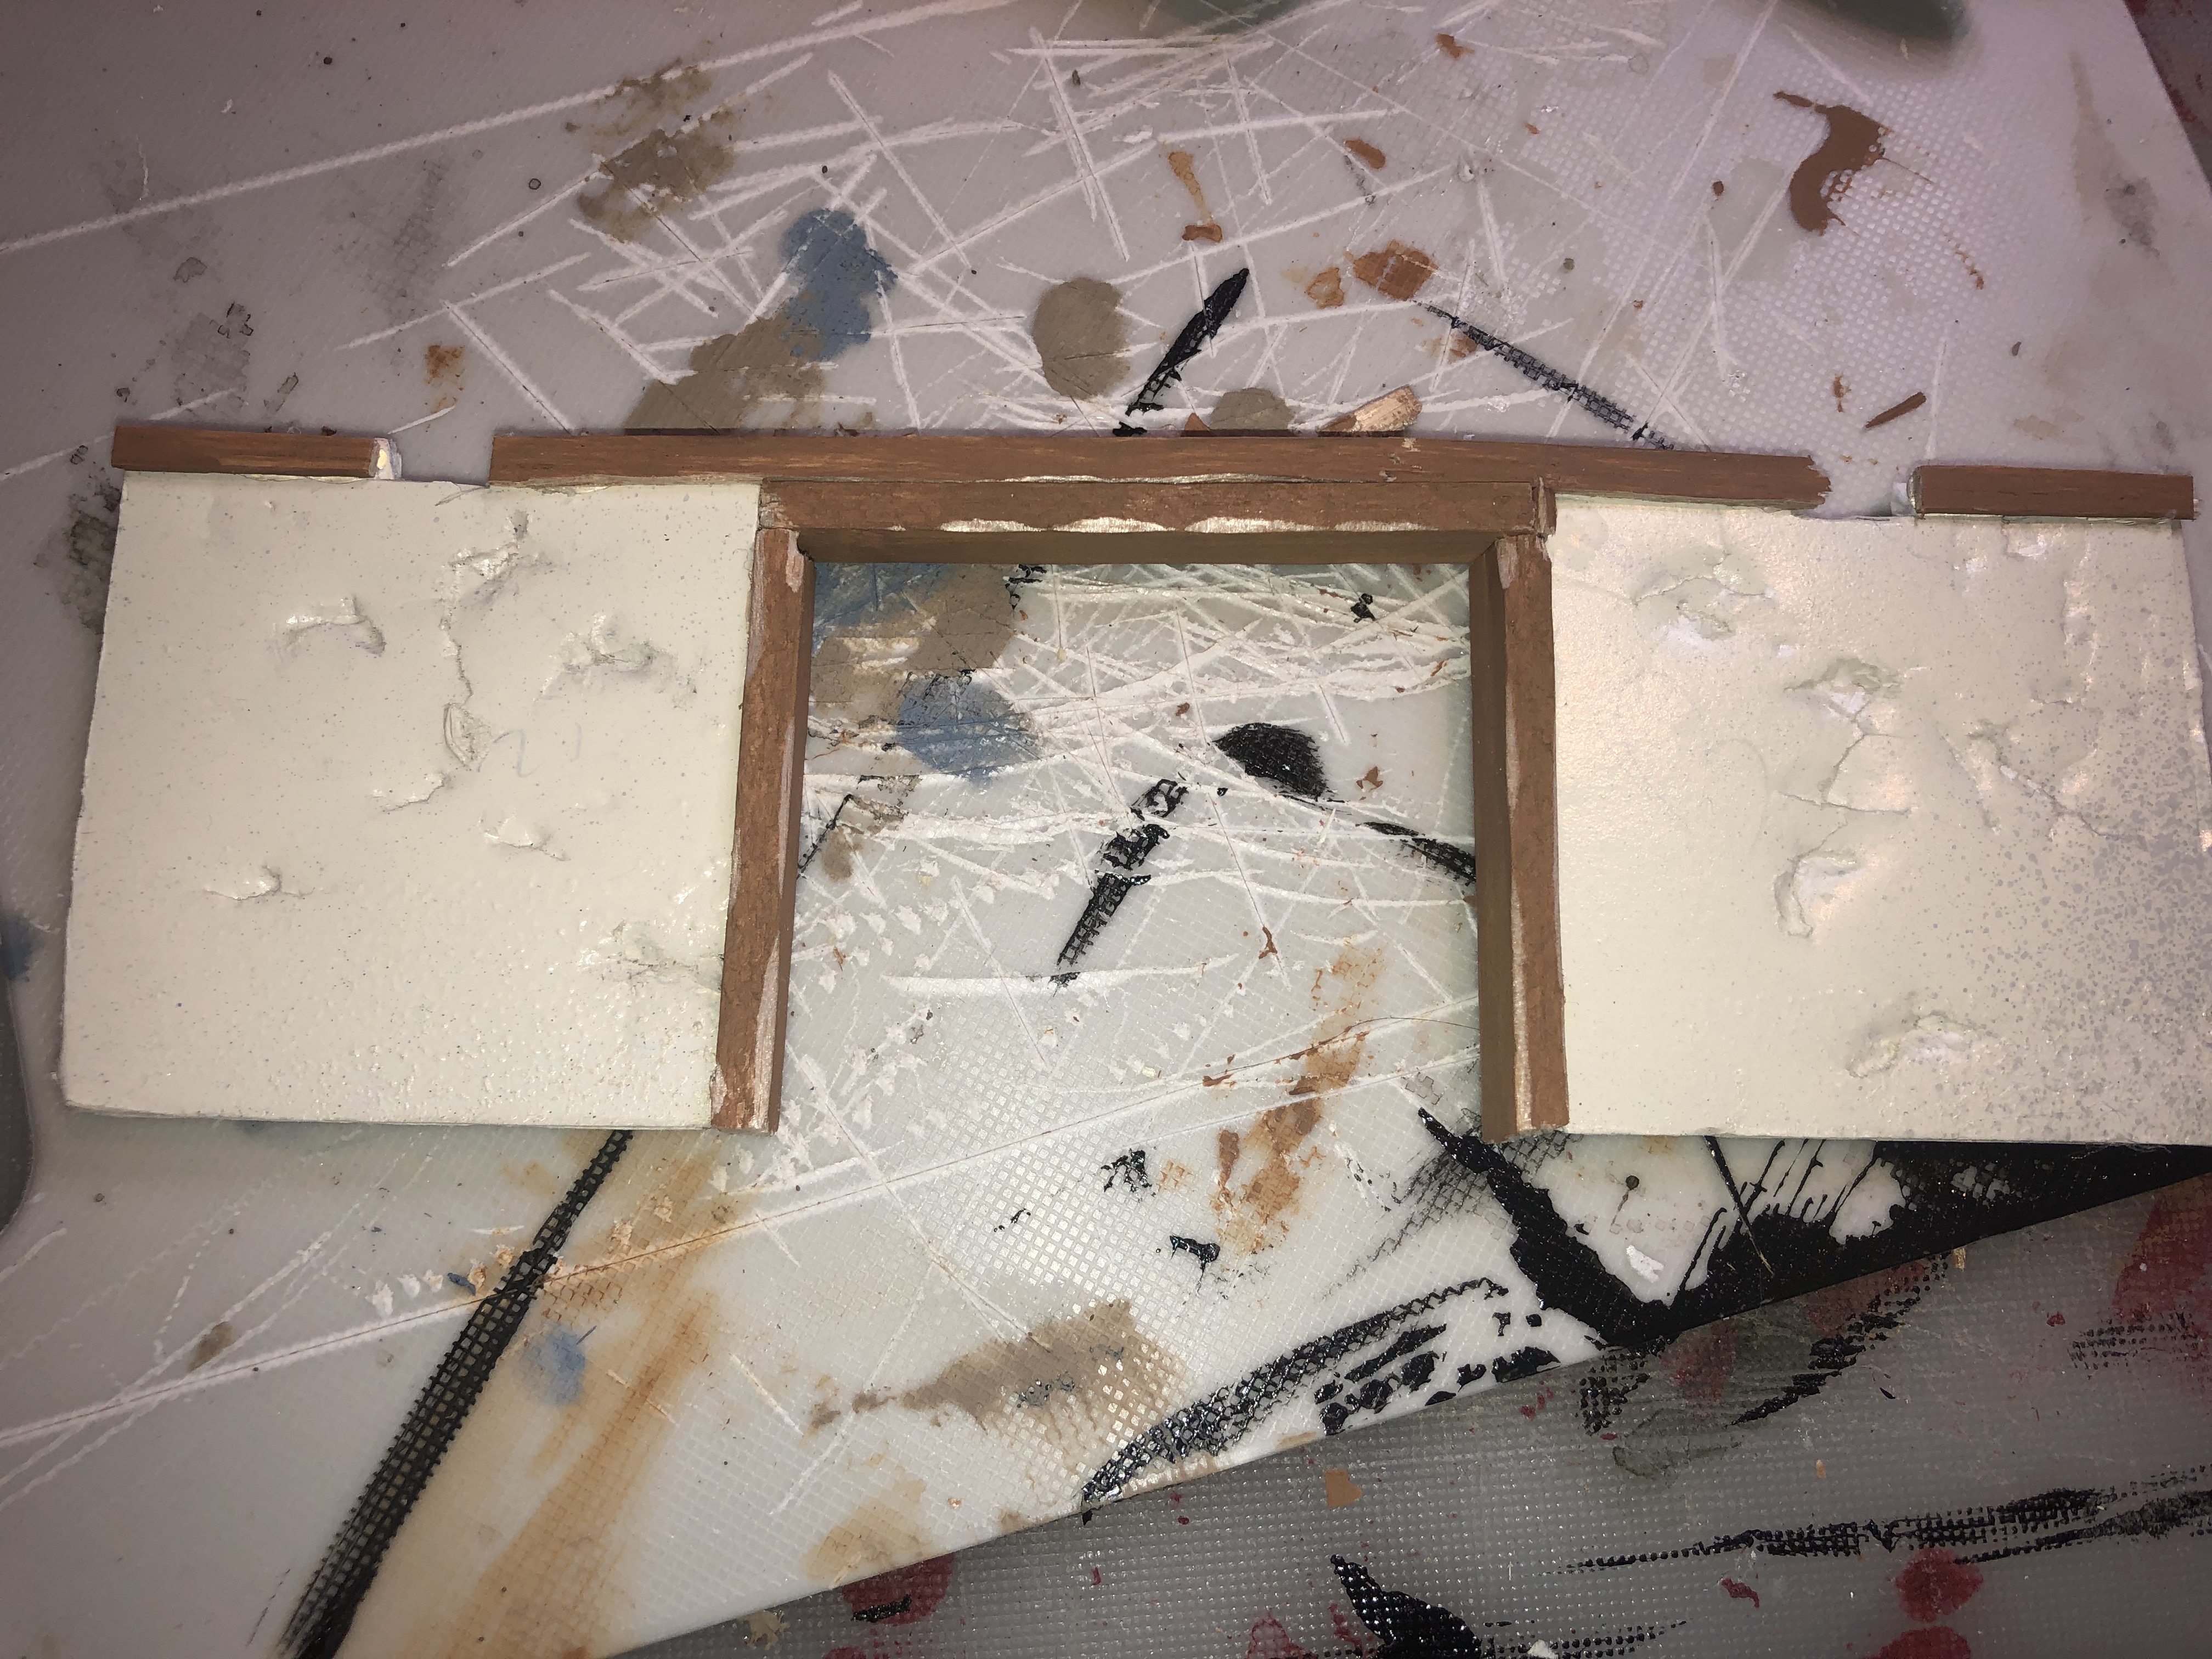
I assembled separately the window frames from matchsticks and painted them with a tan colour (coffee lattee from Folk Art or a similar colour). I then glued the wooden frame over some meshwire with tacky glue.
At the end of the project I will apply some washes to blend all the different elements.
 Piece of foamboard
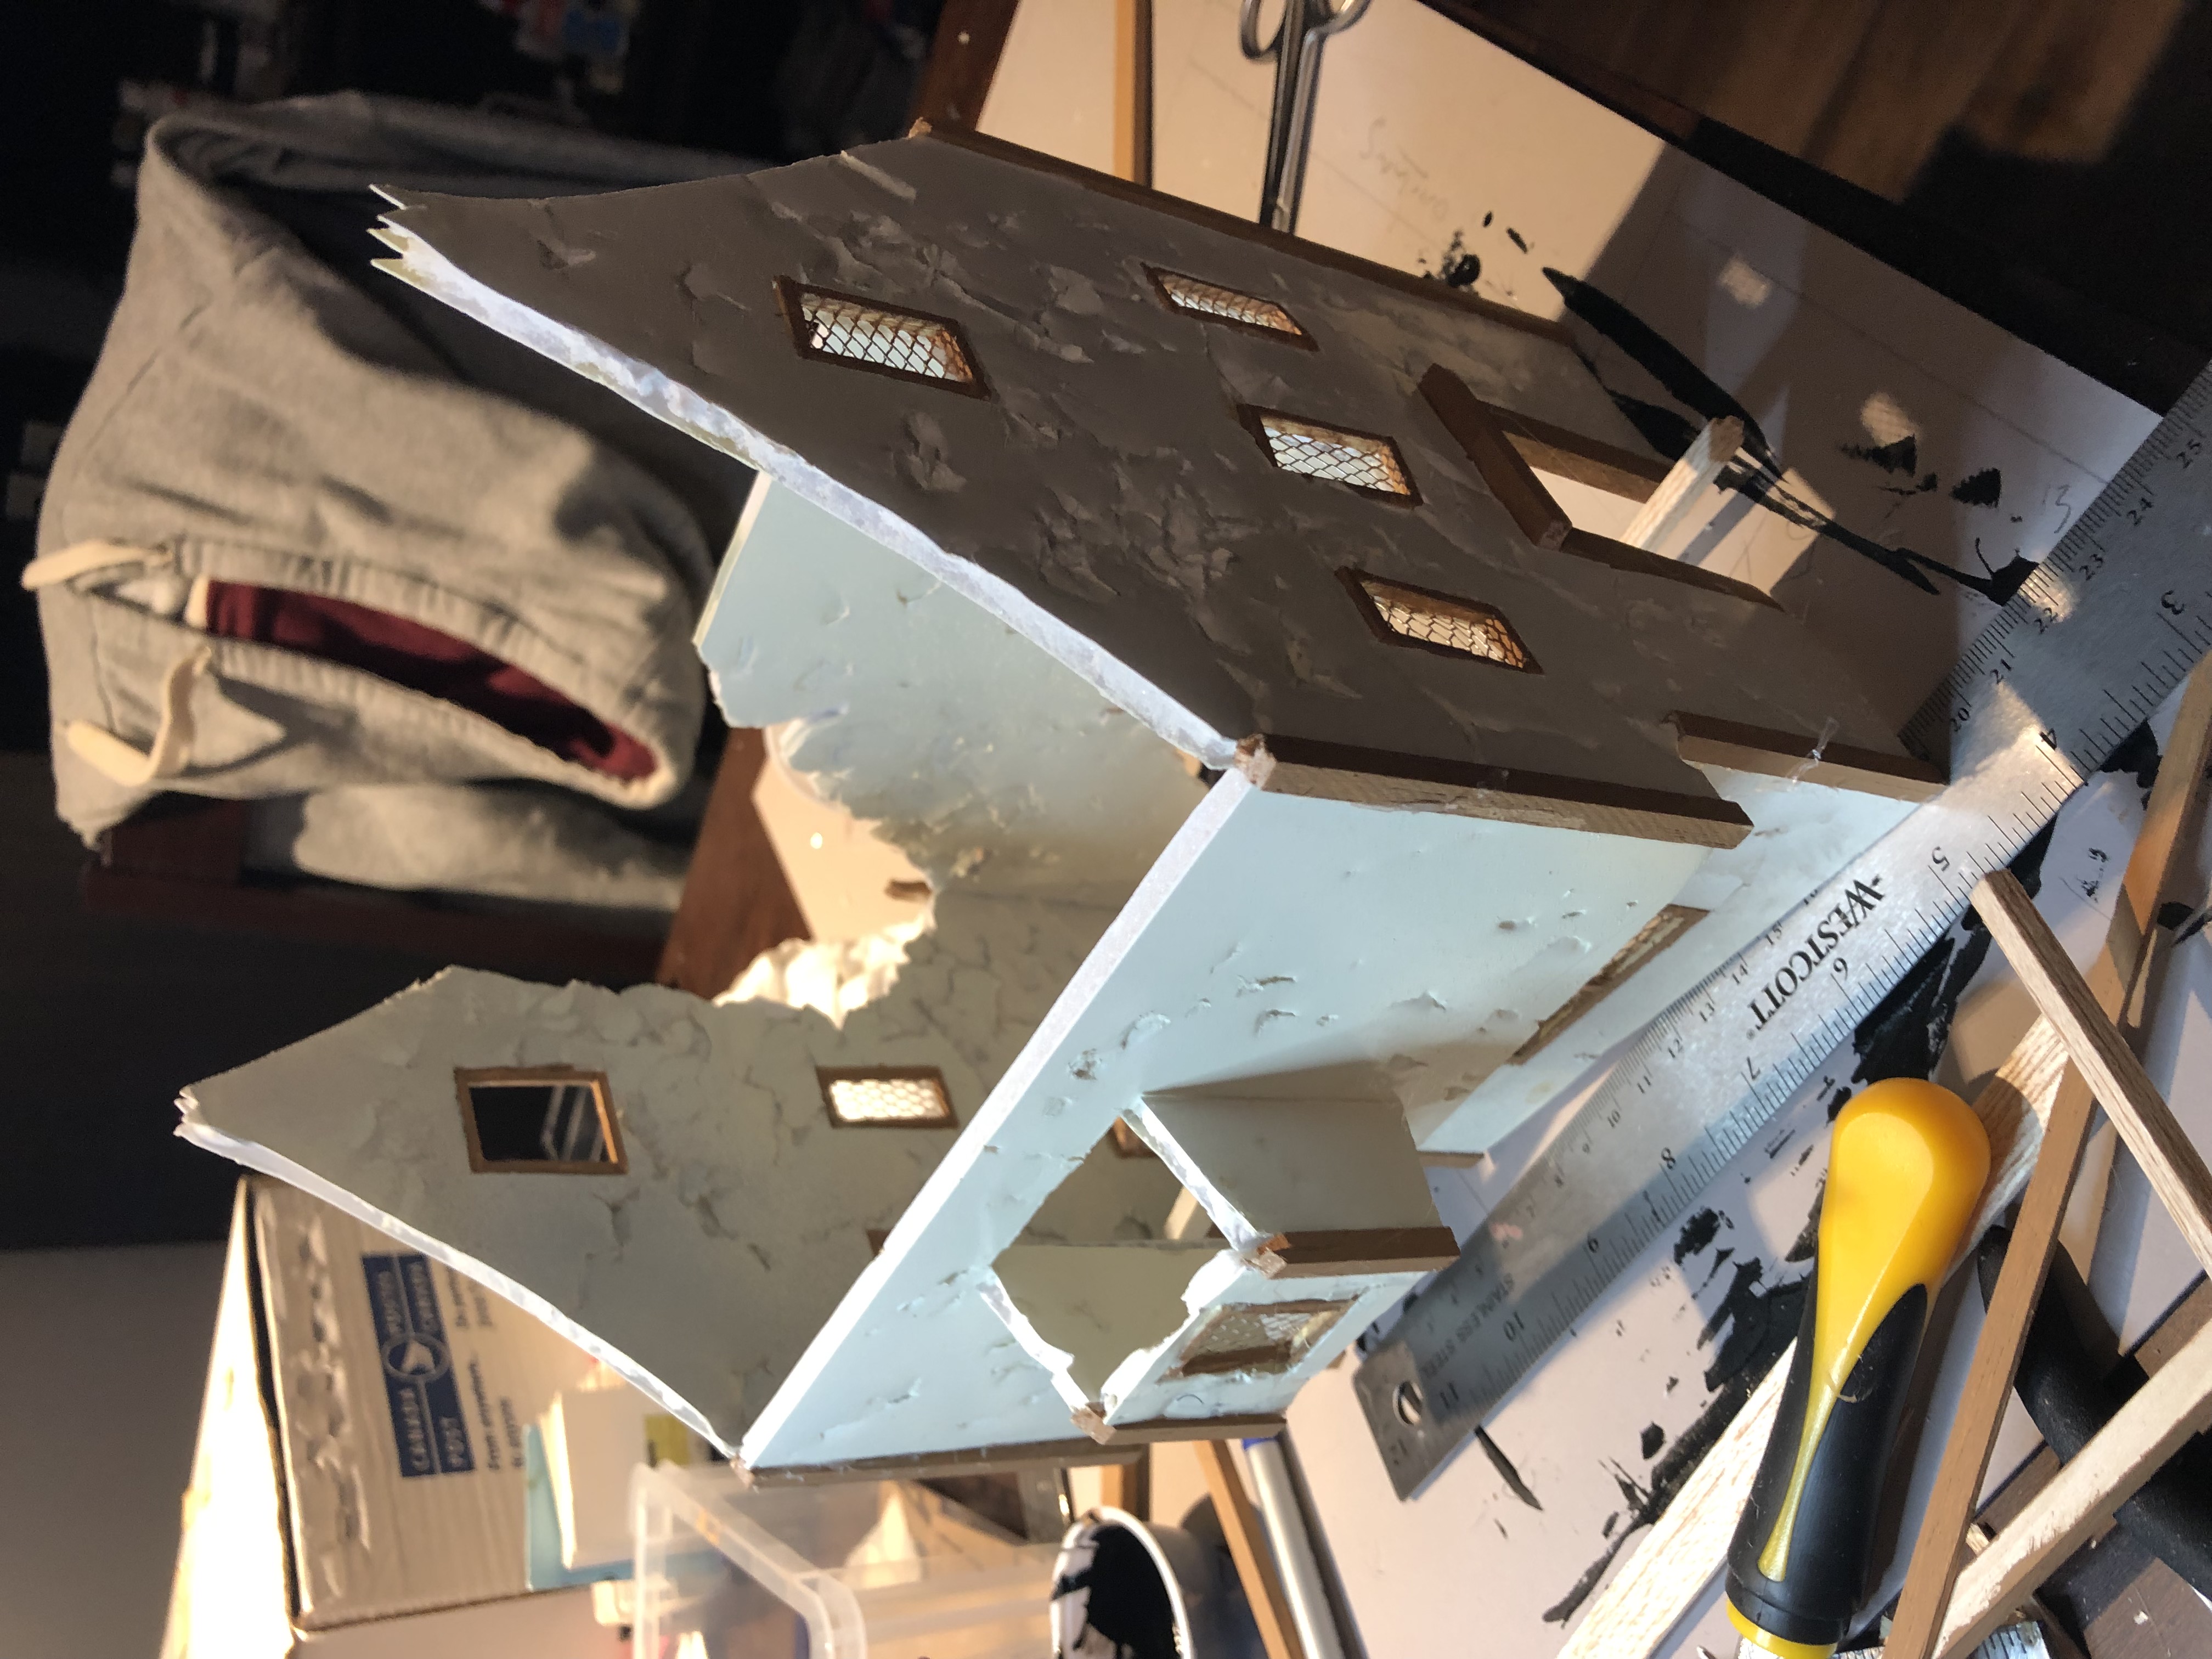 One part of the giant complex is a simple house
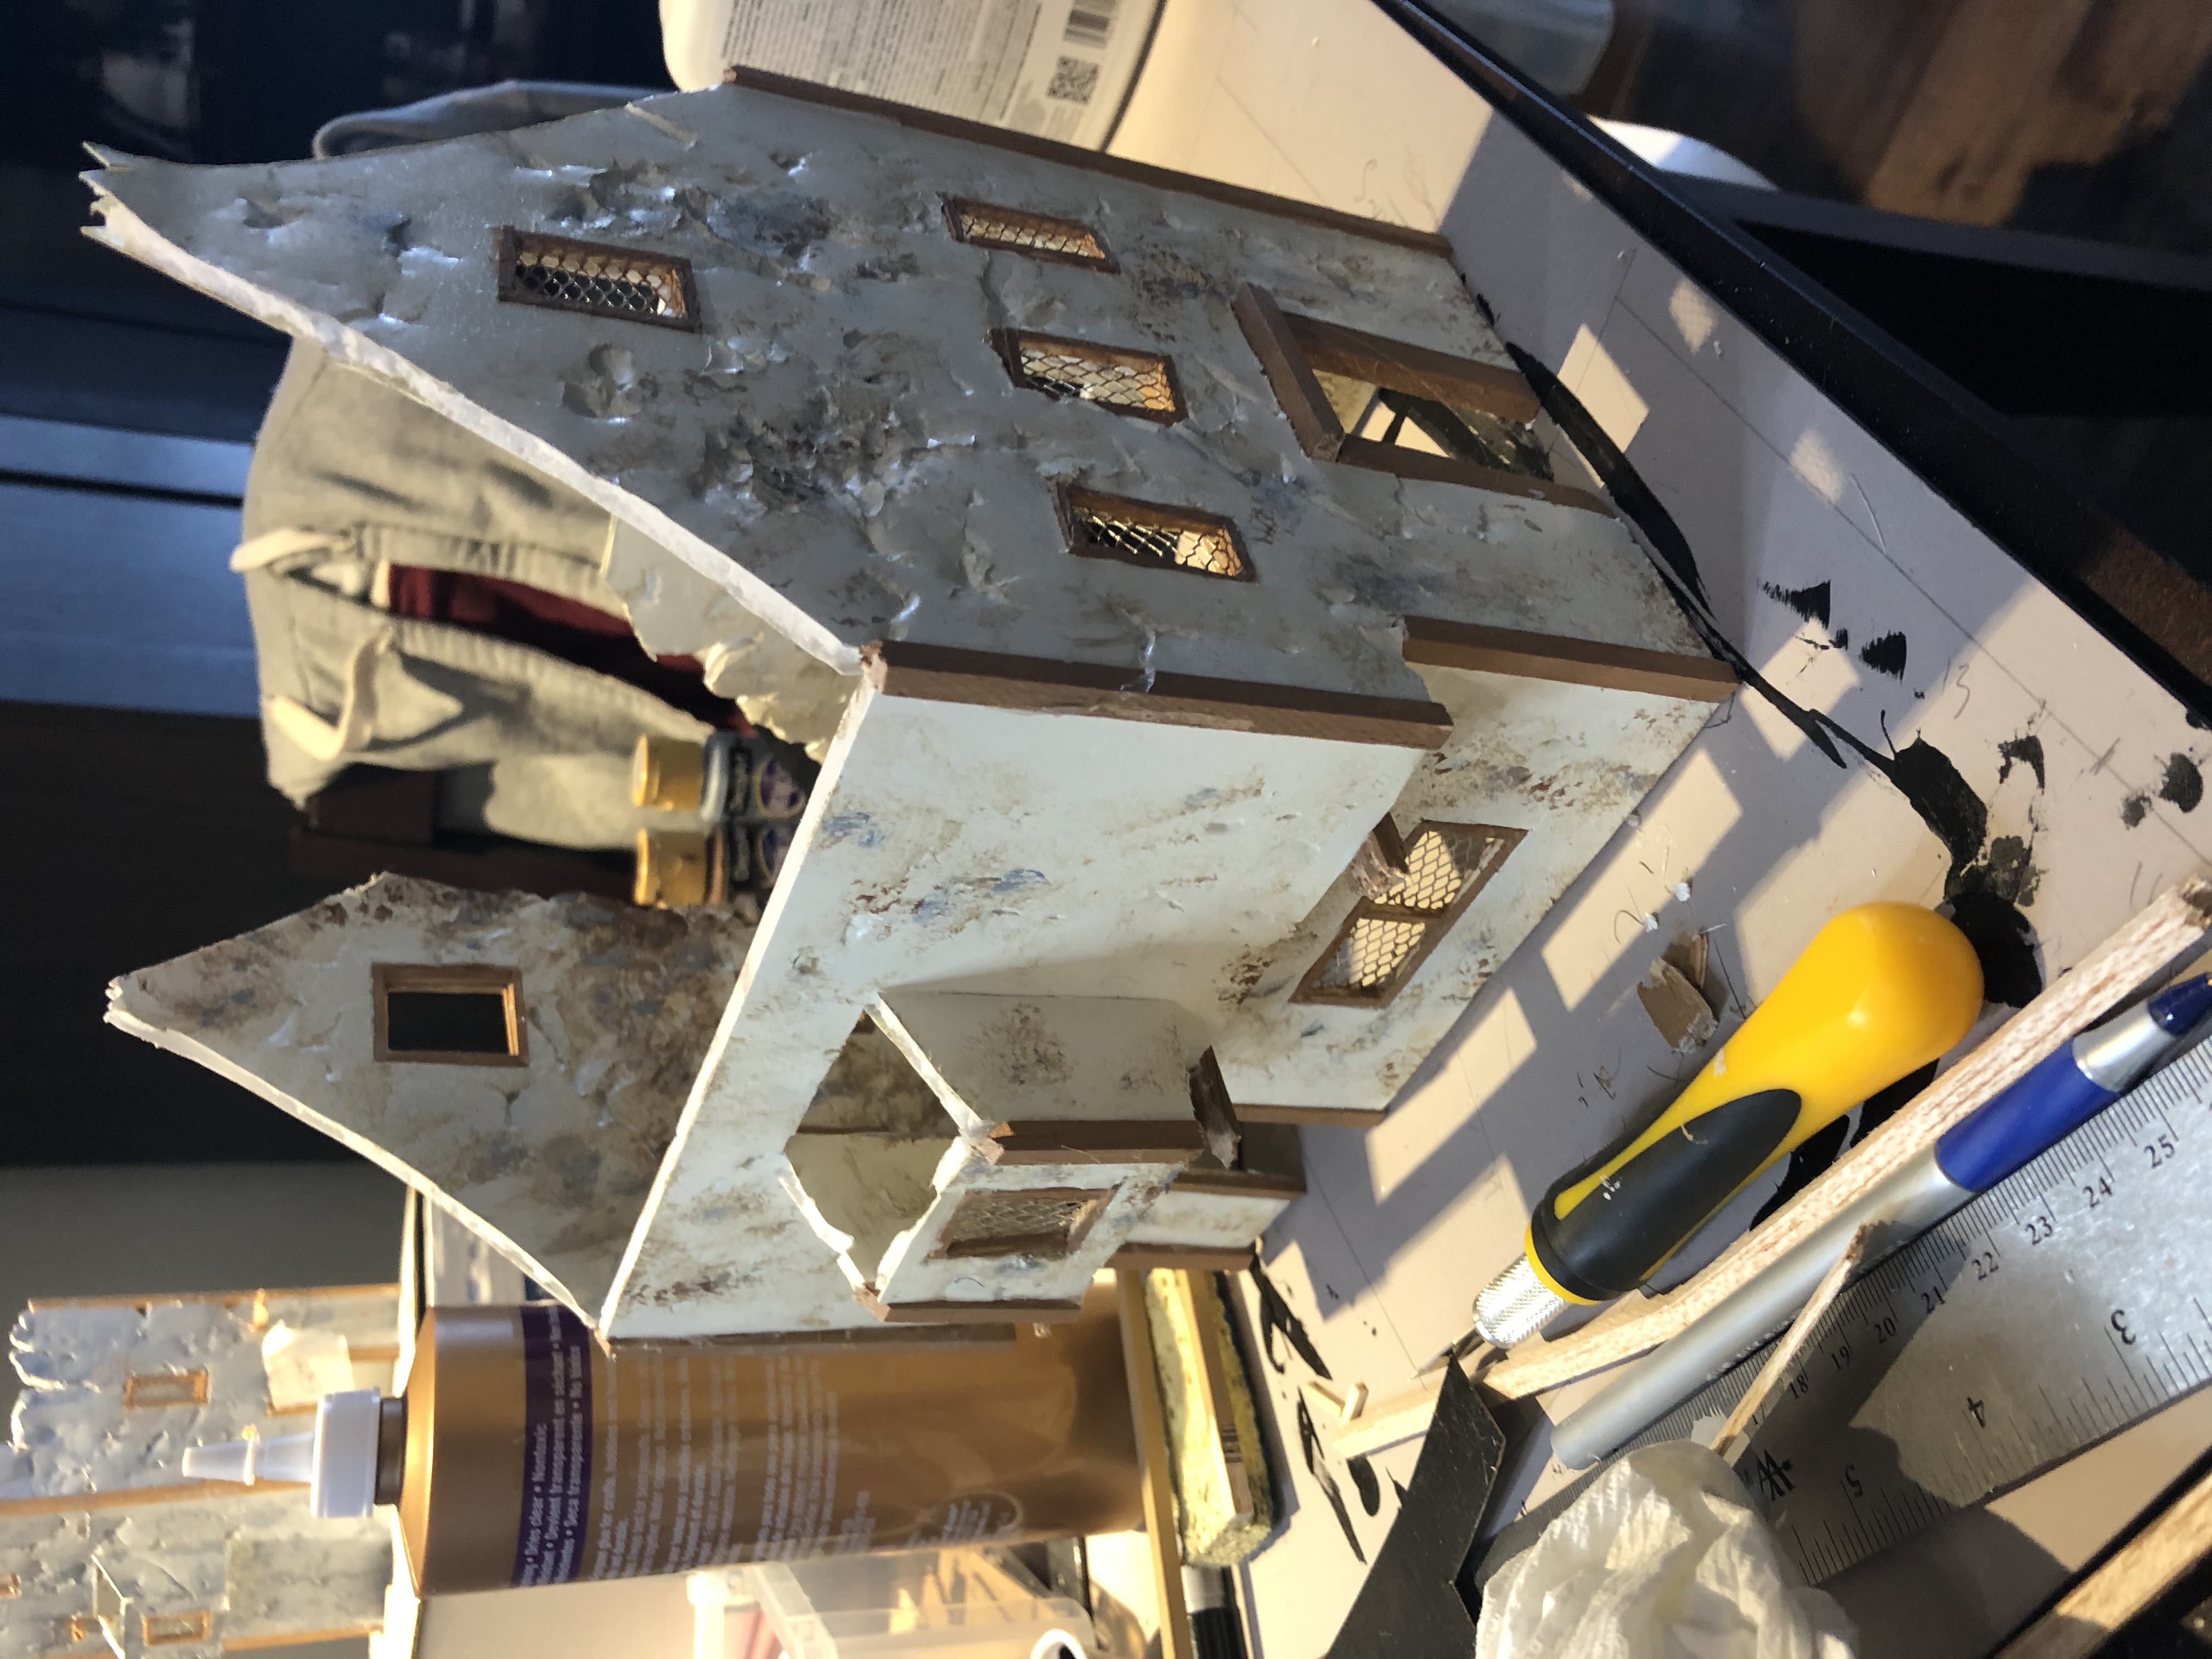 Same structure with a bit of sponge weathering
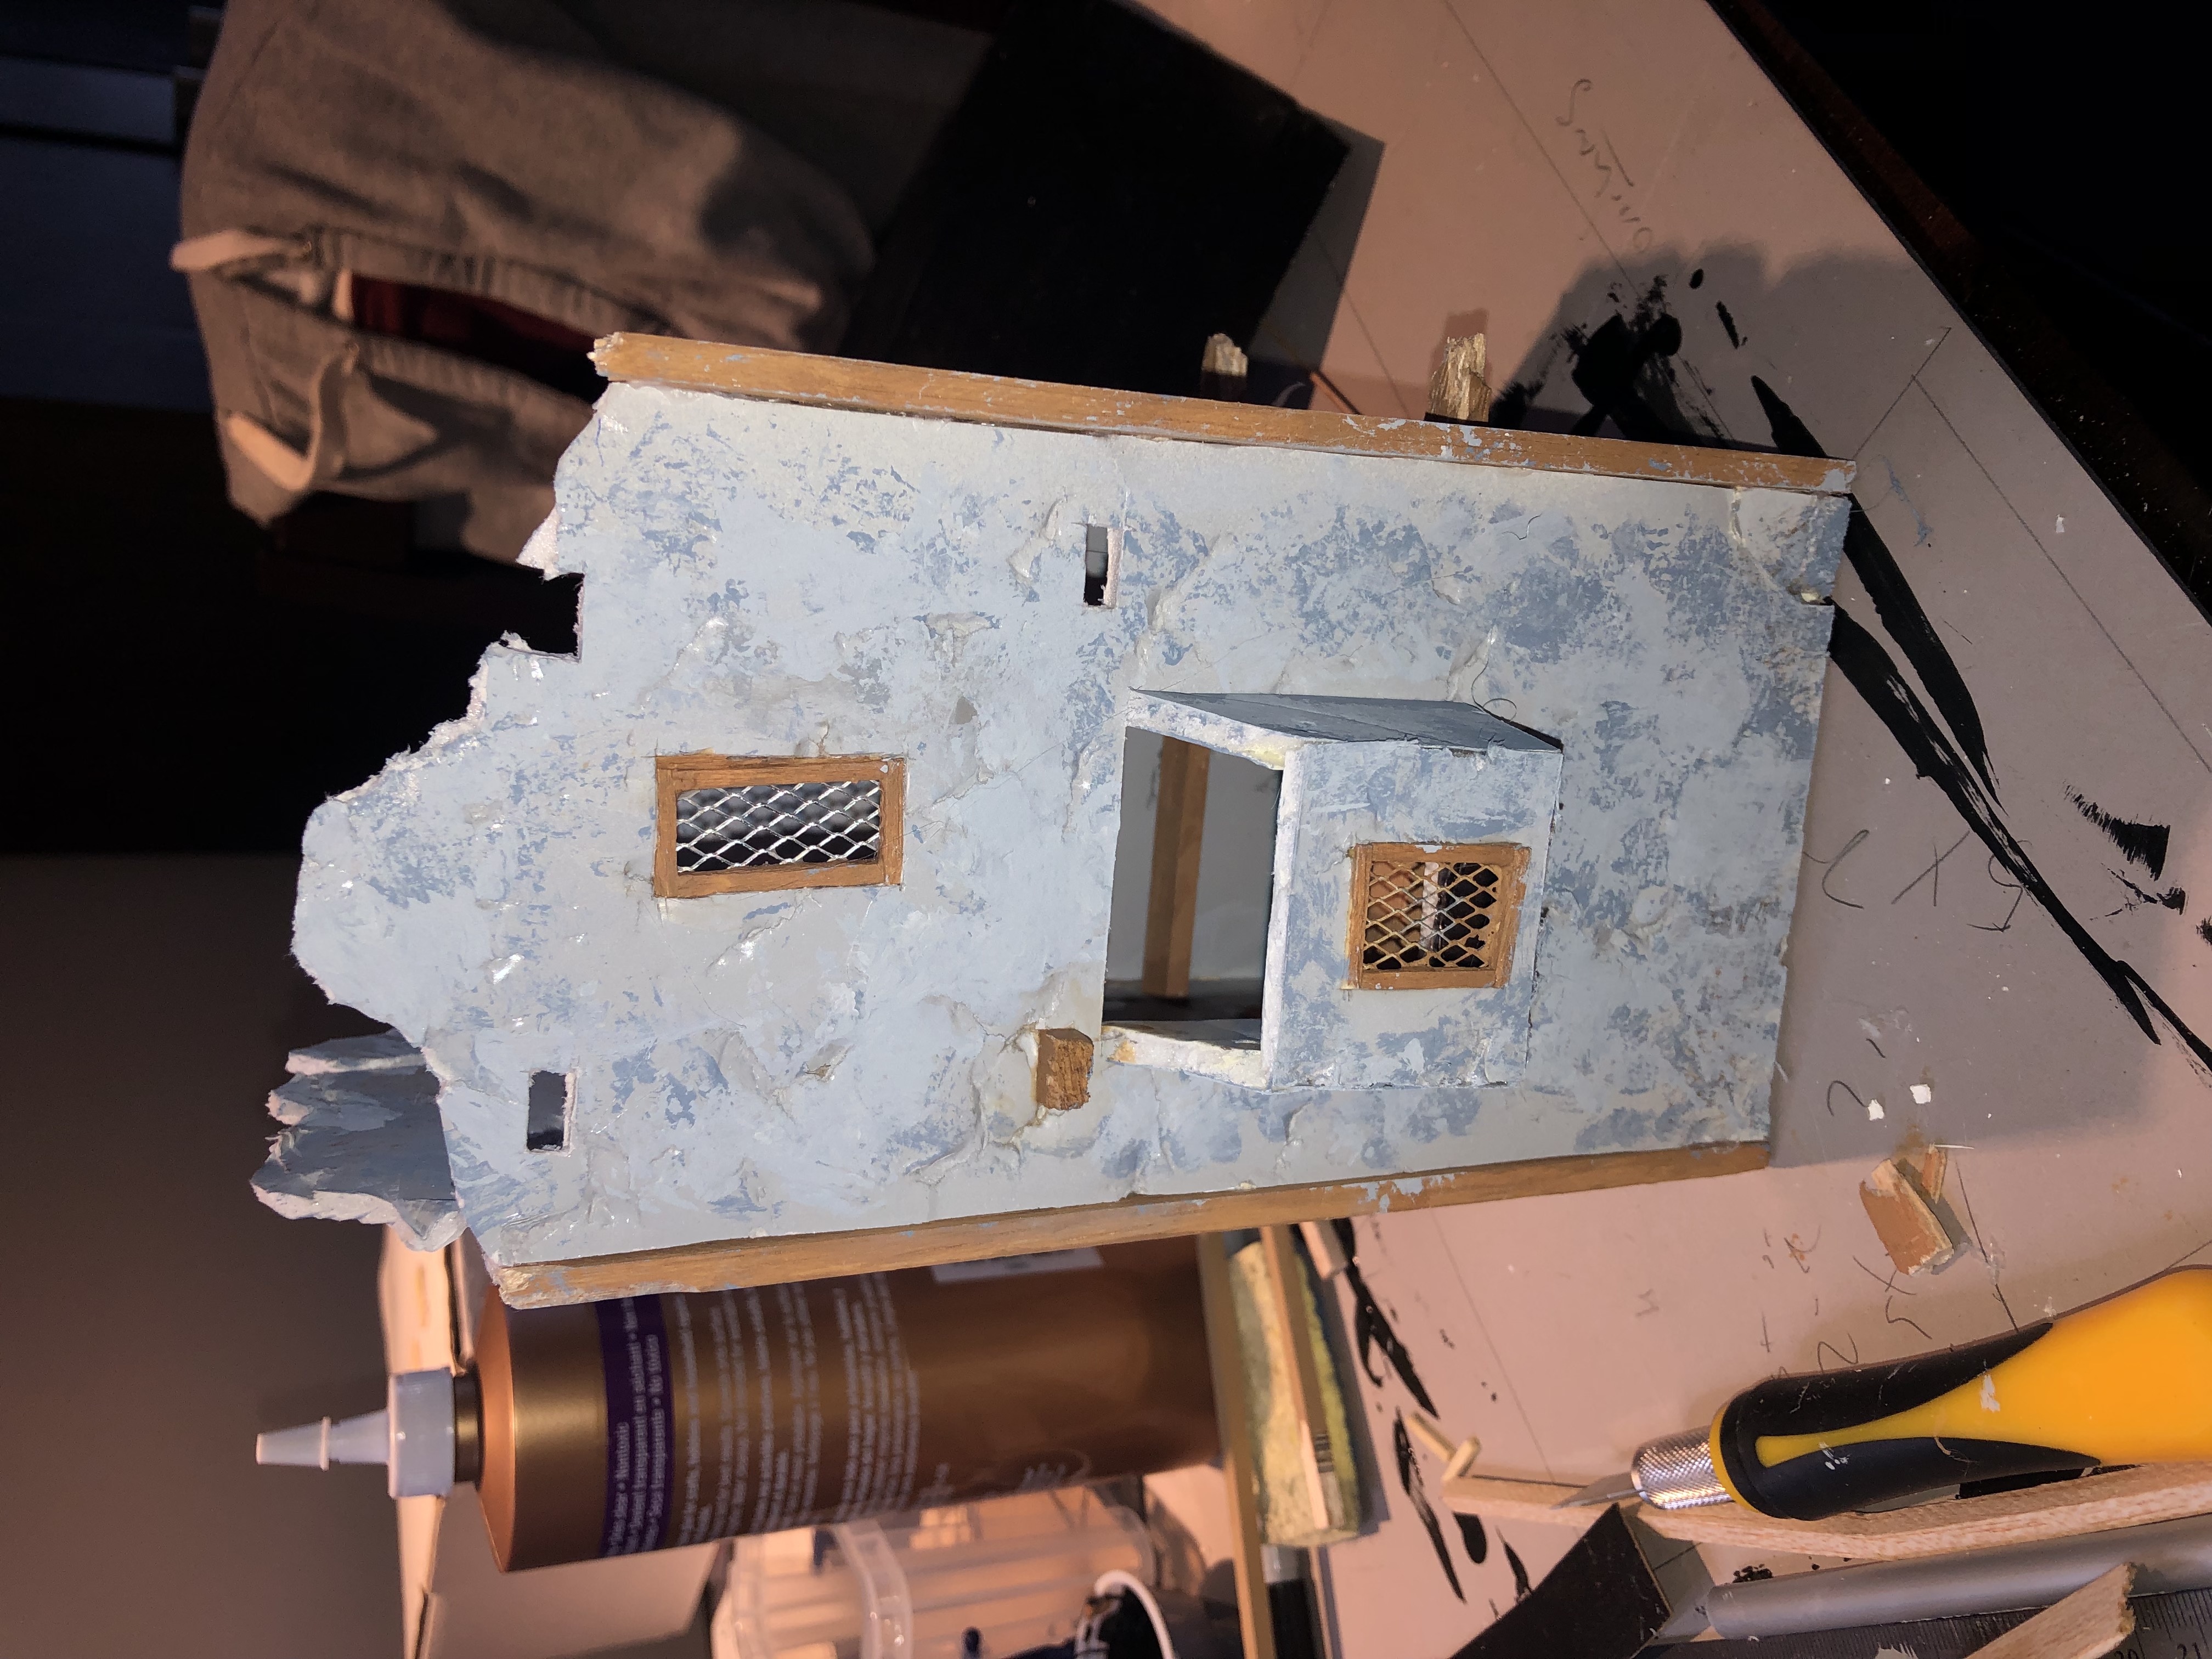
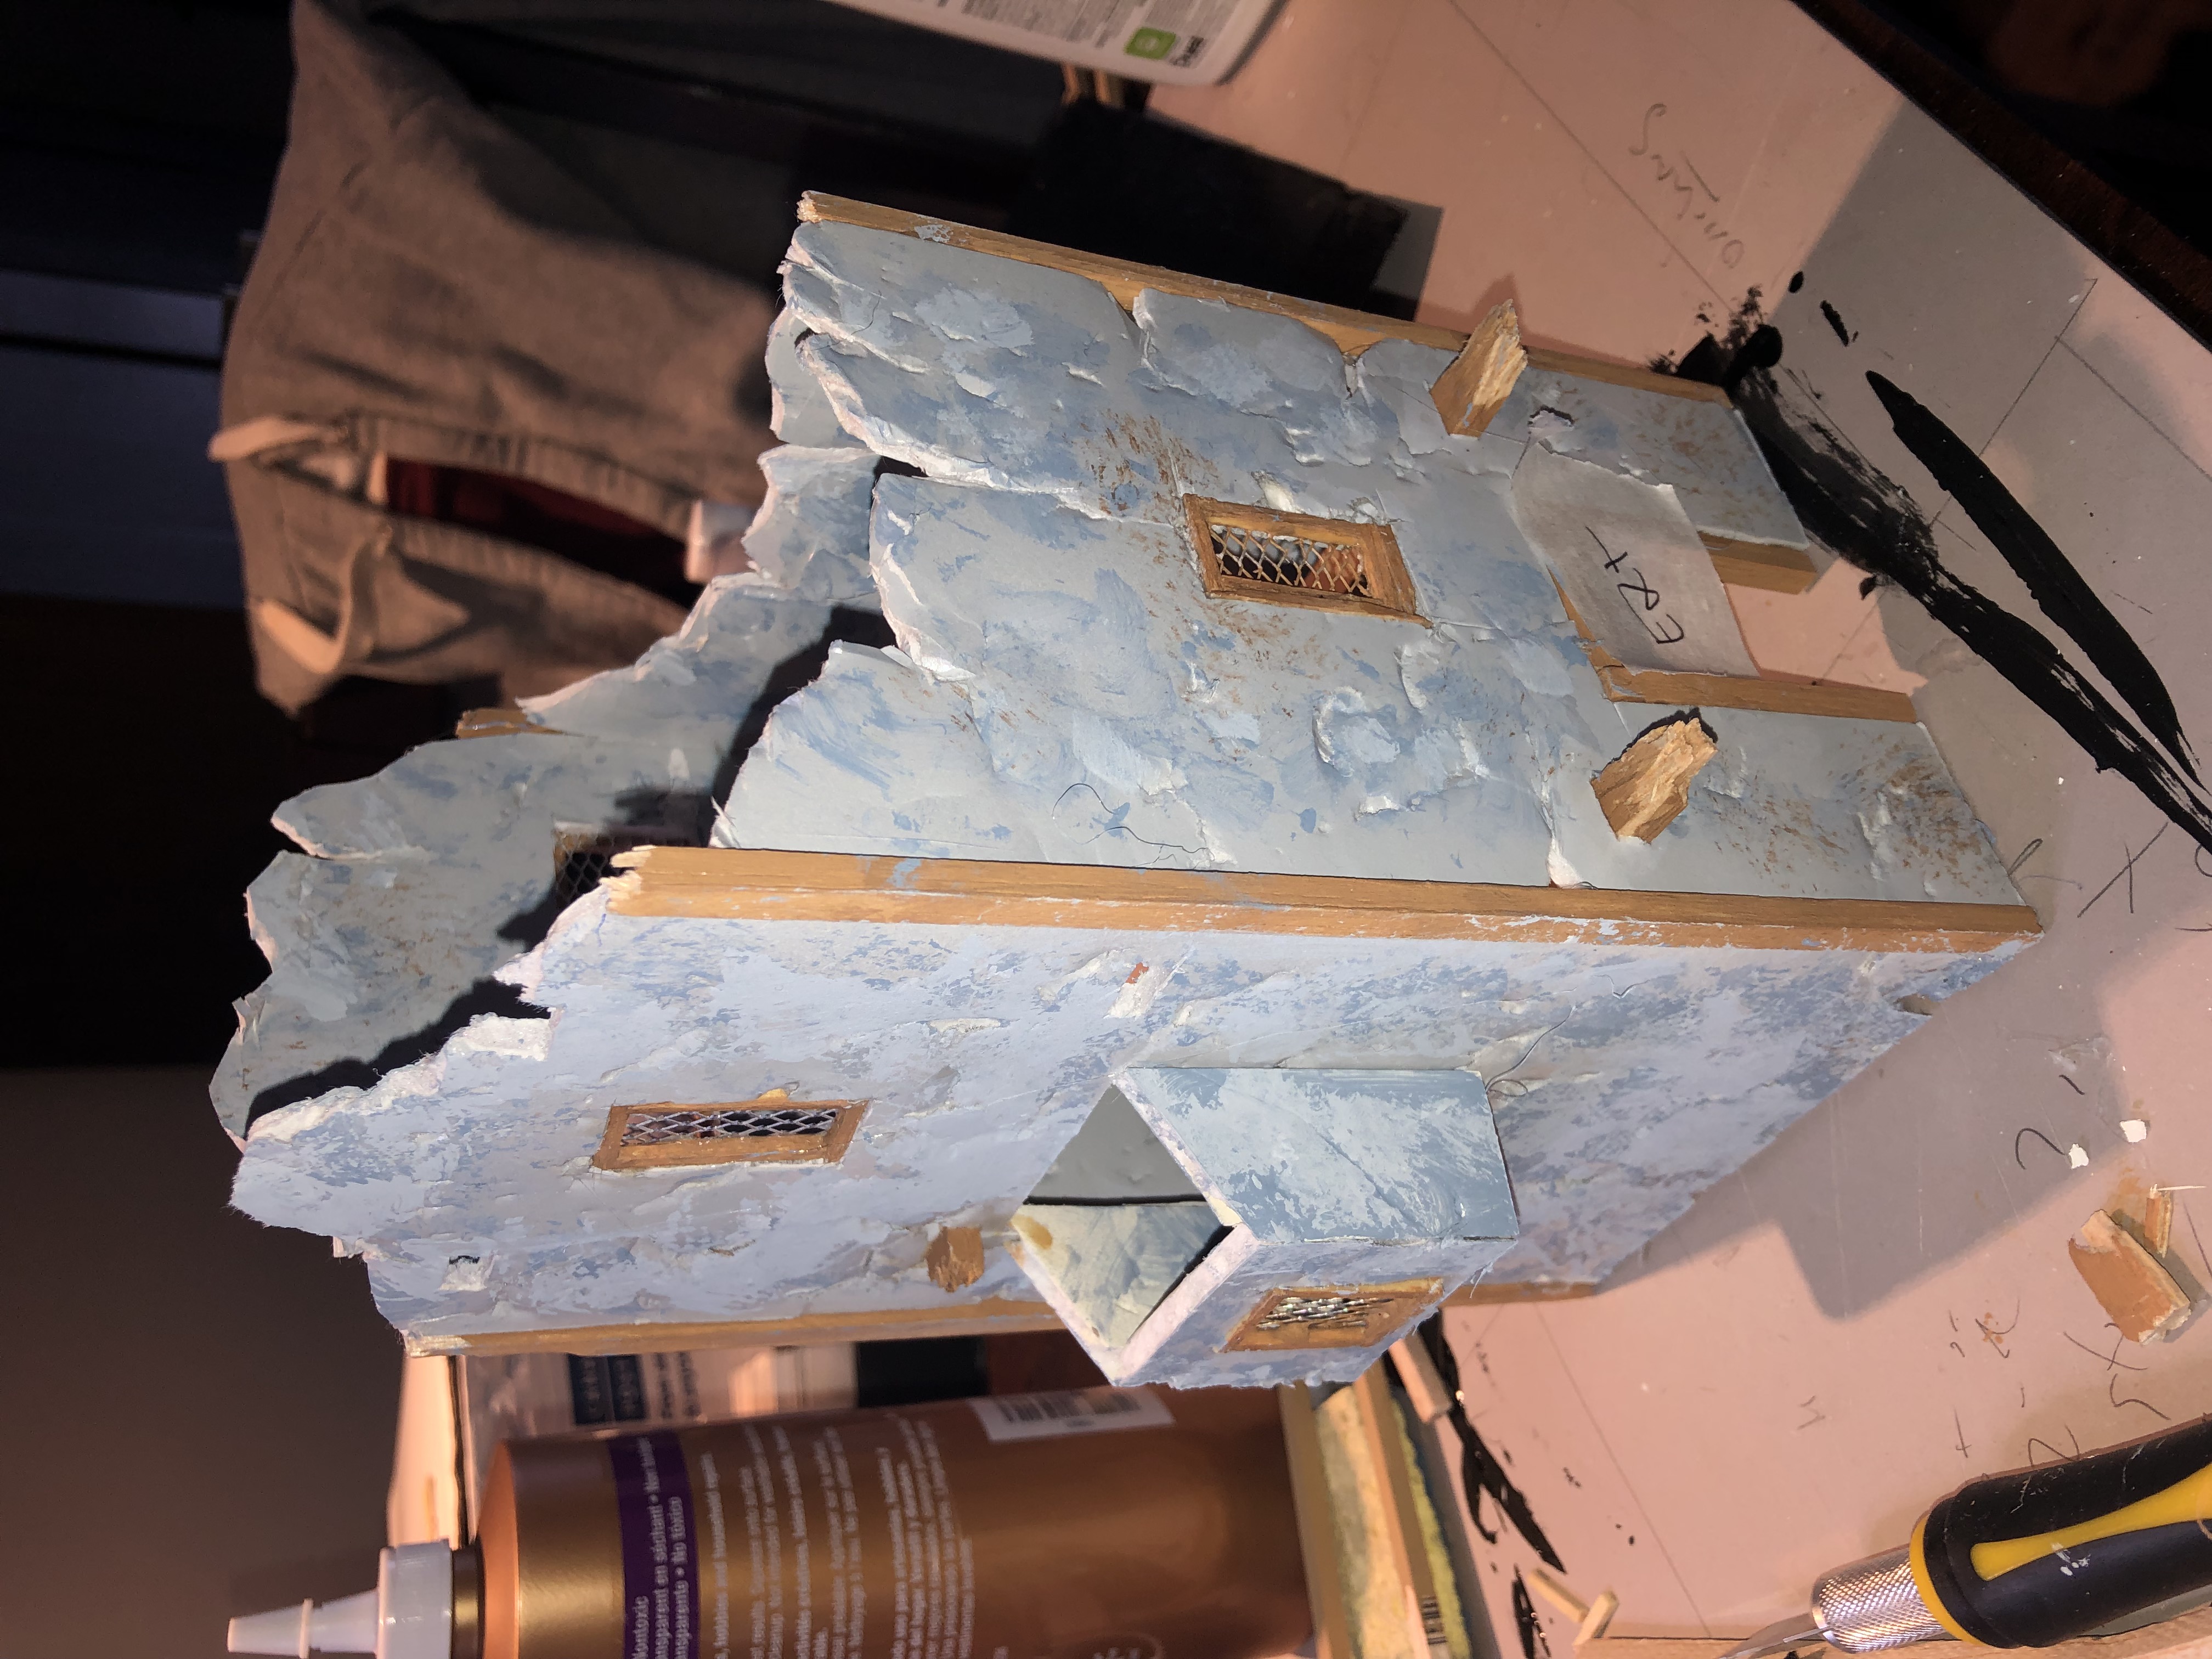
A simple square tower will be the other end of the building complex
Large Tower
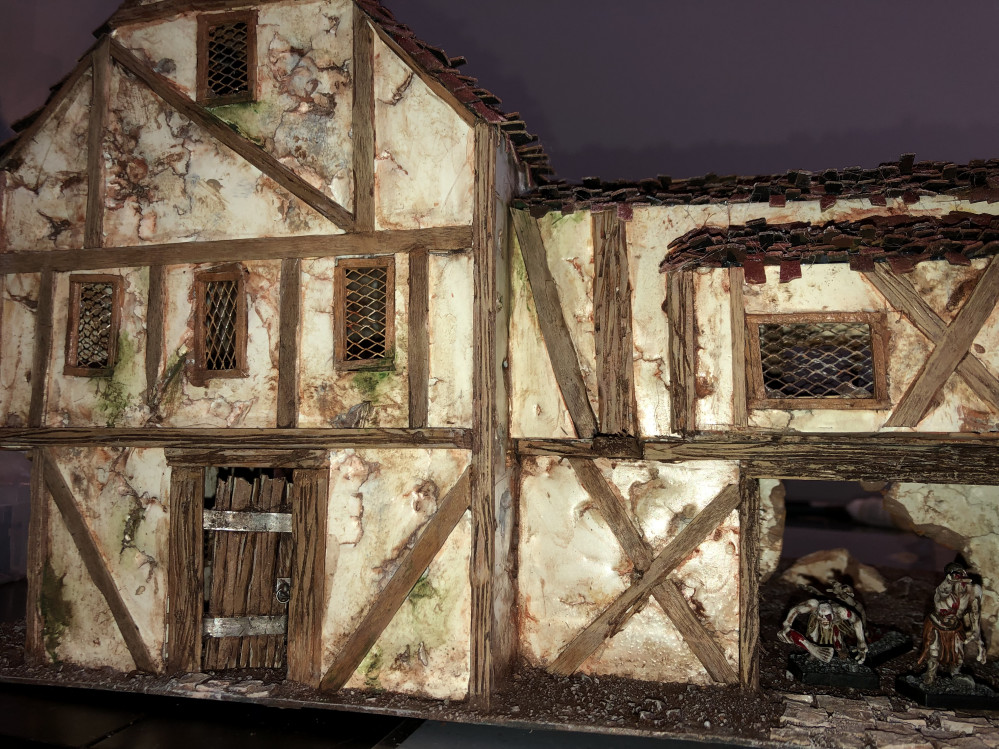
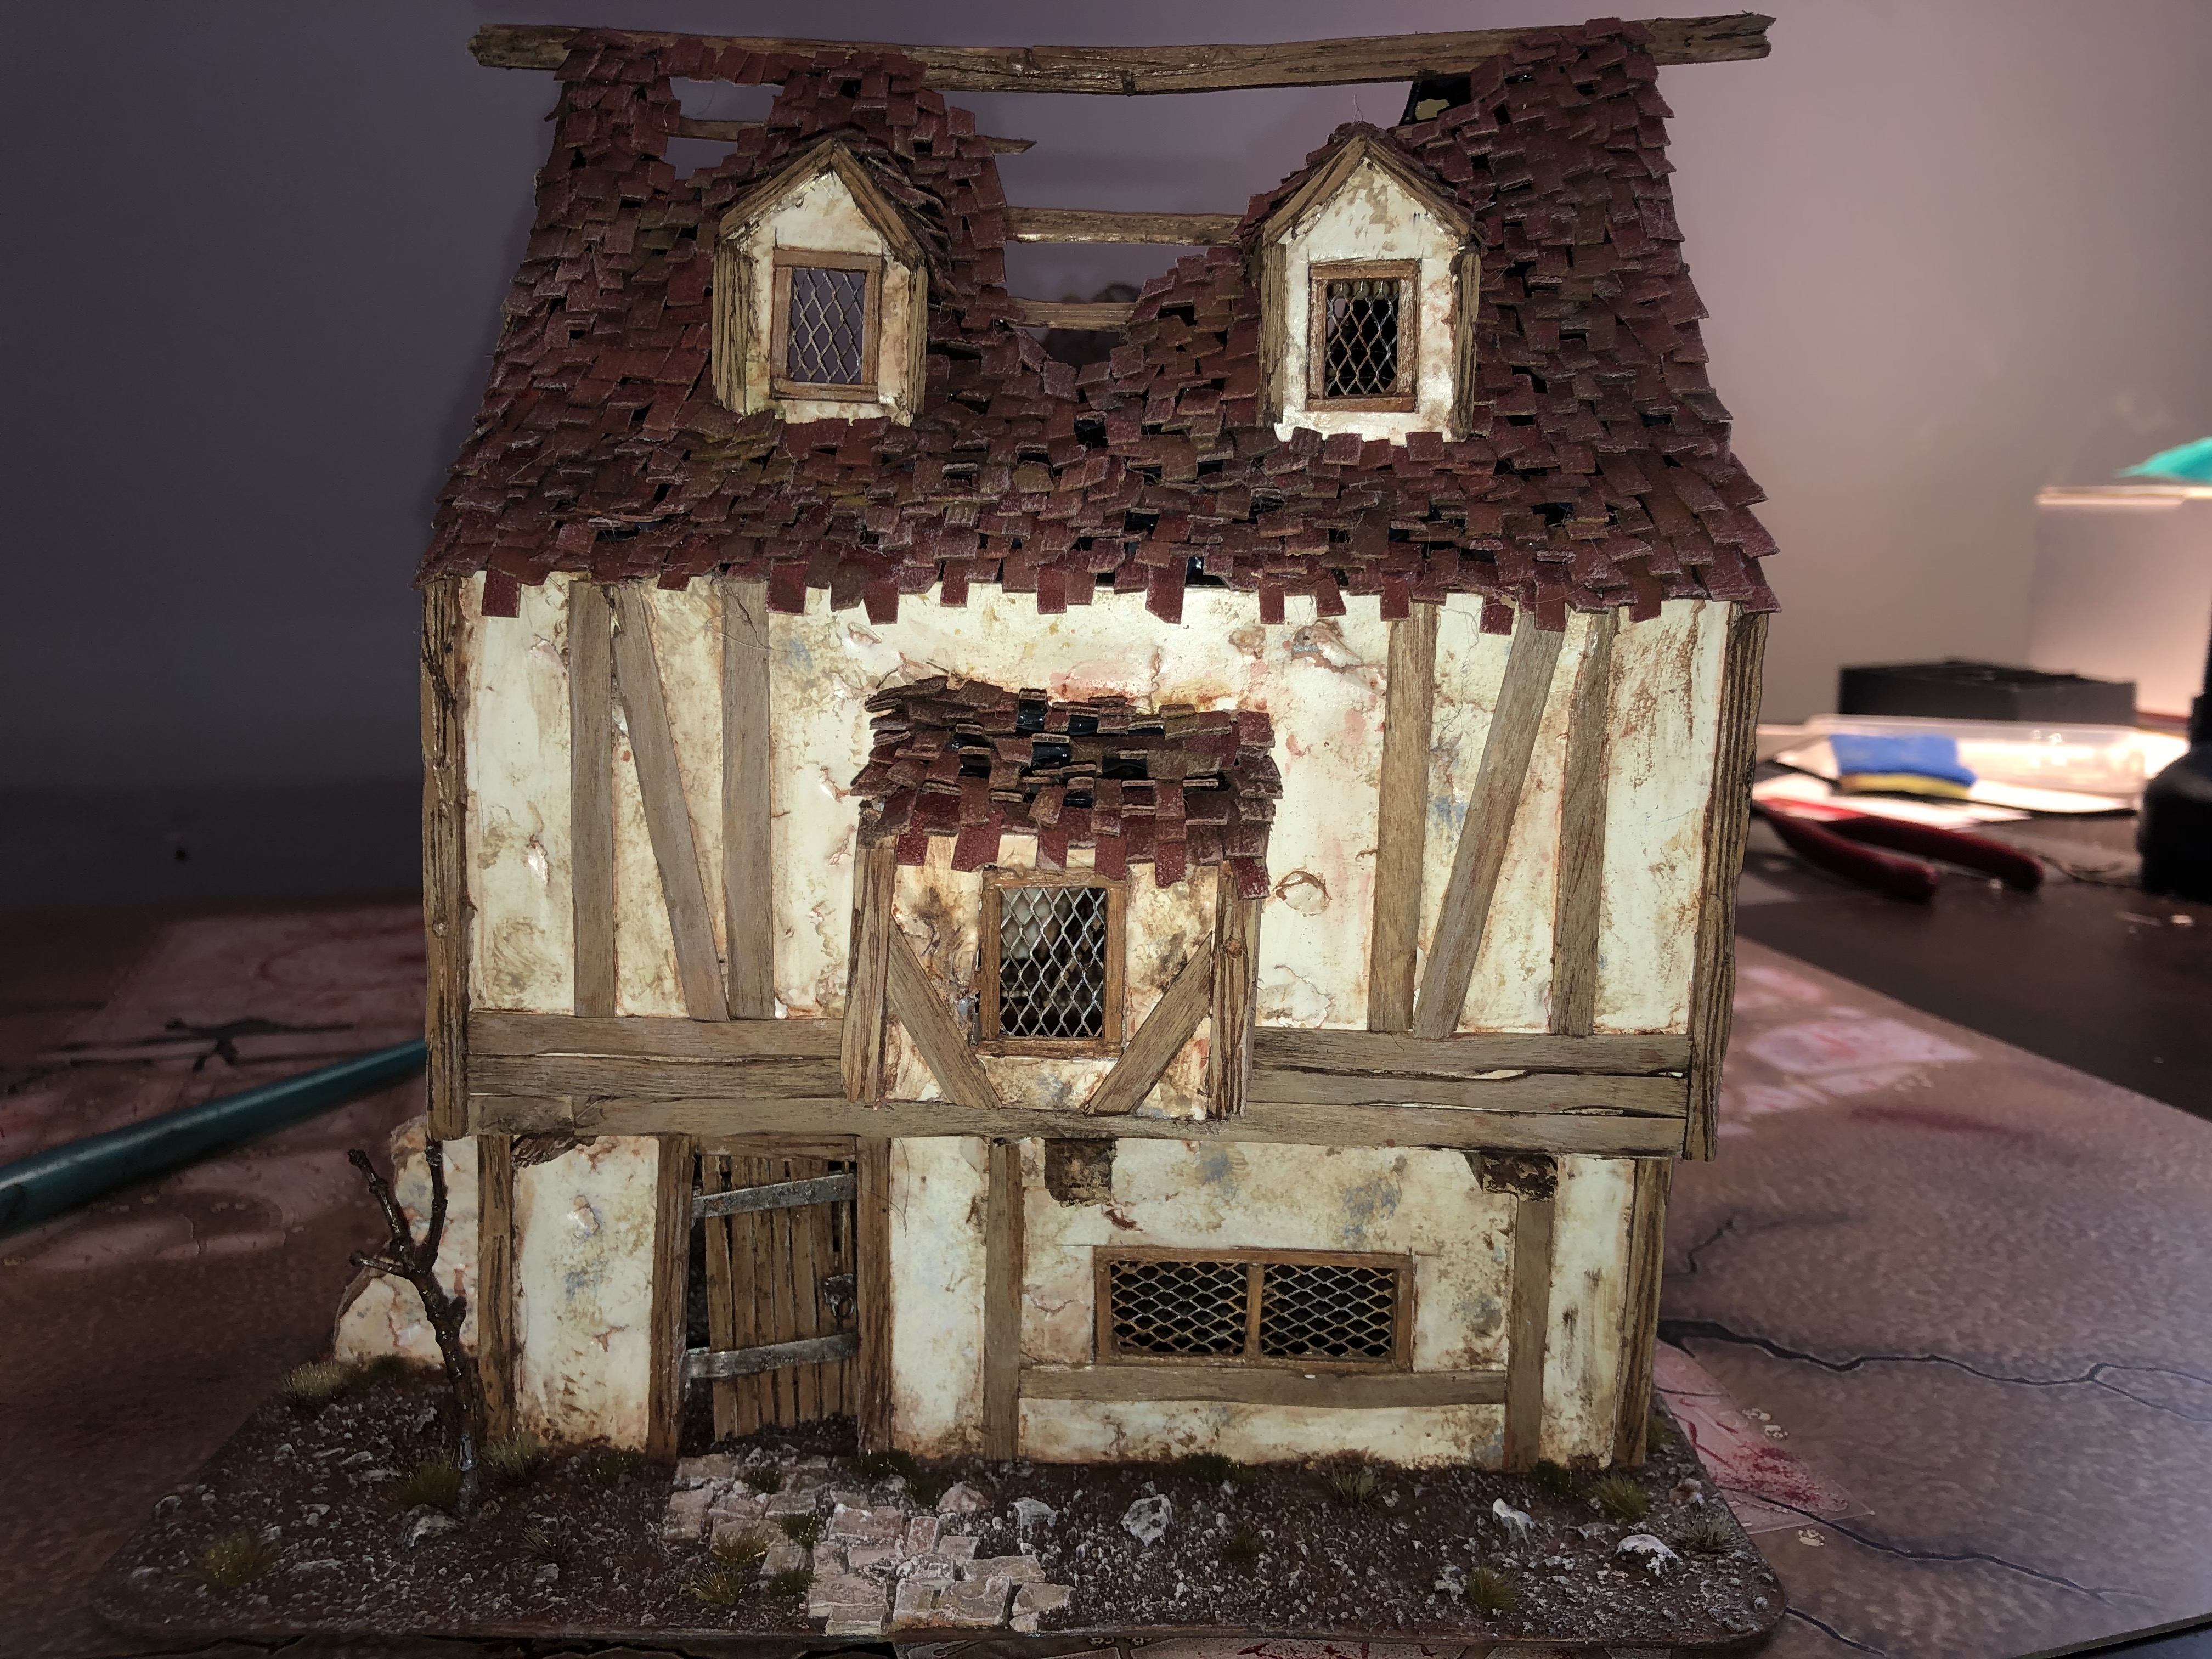
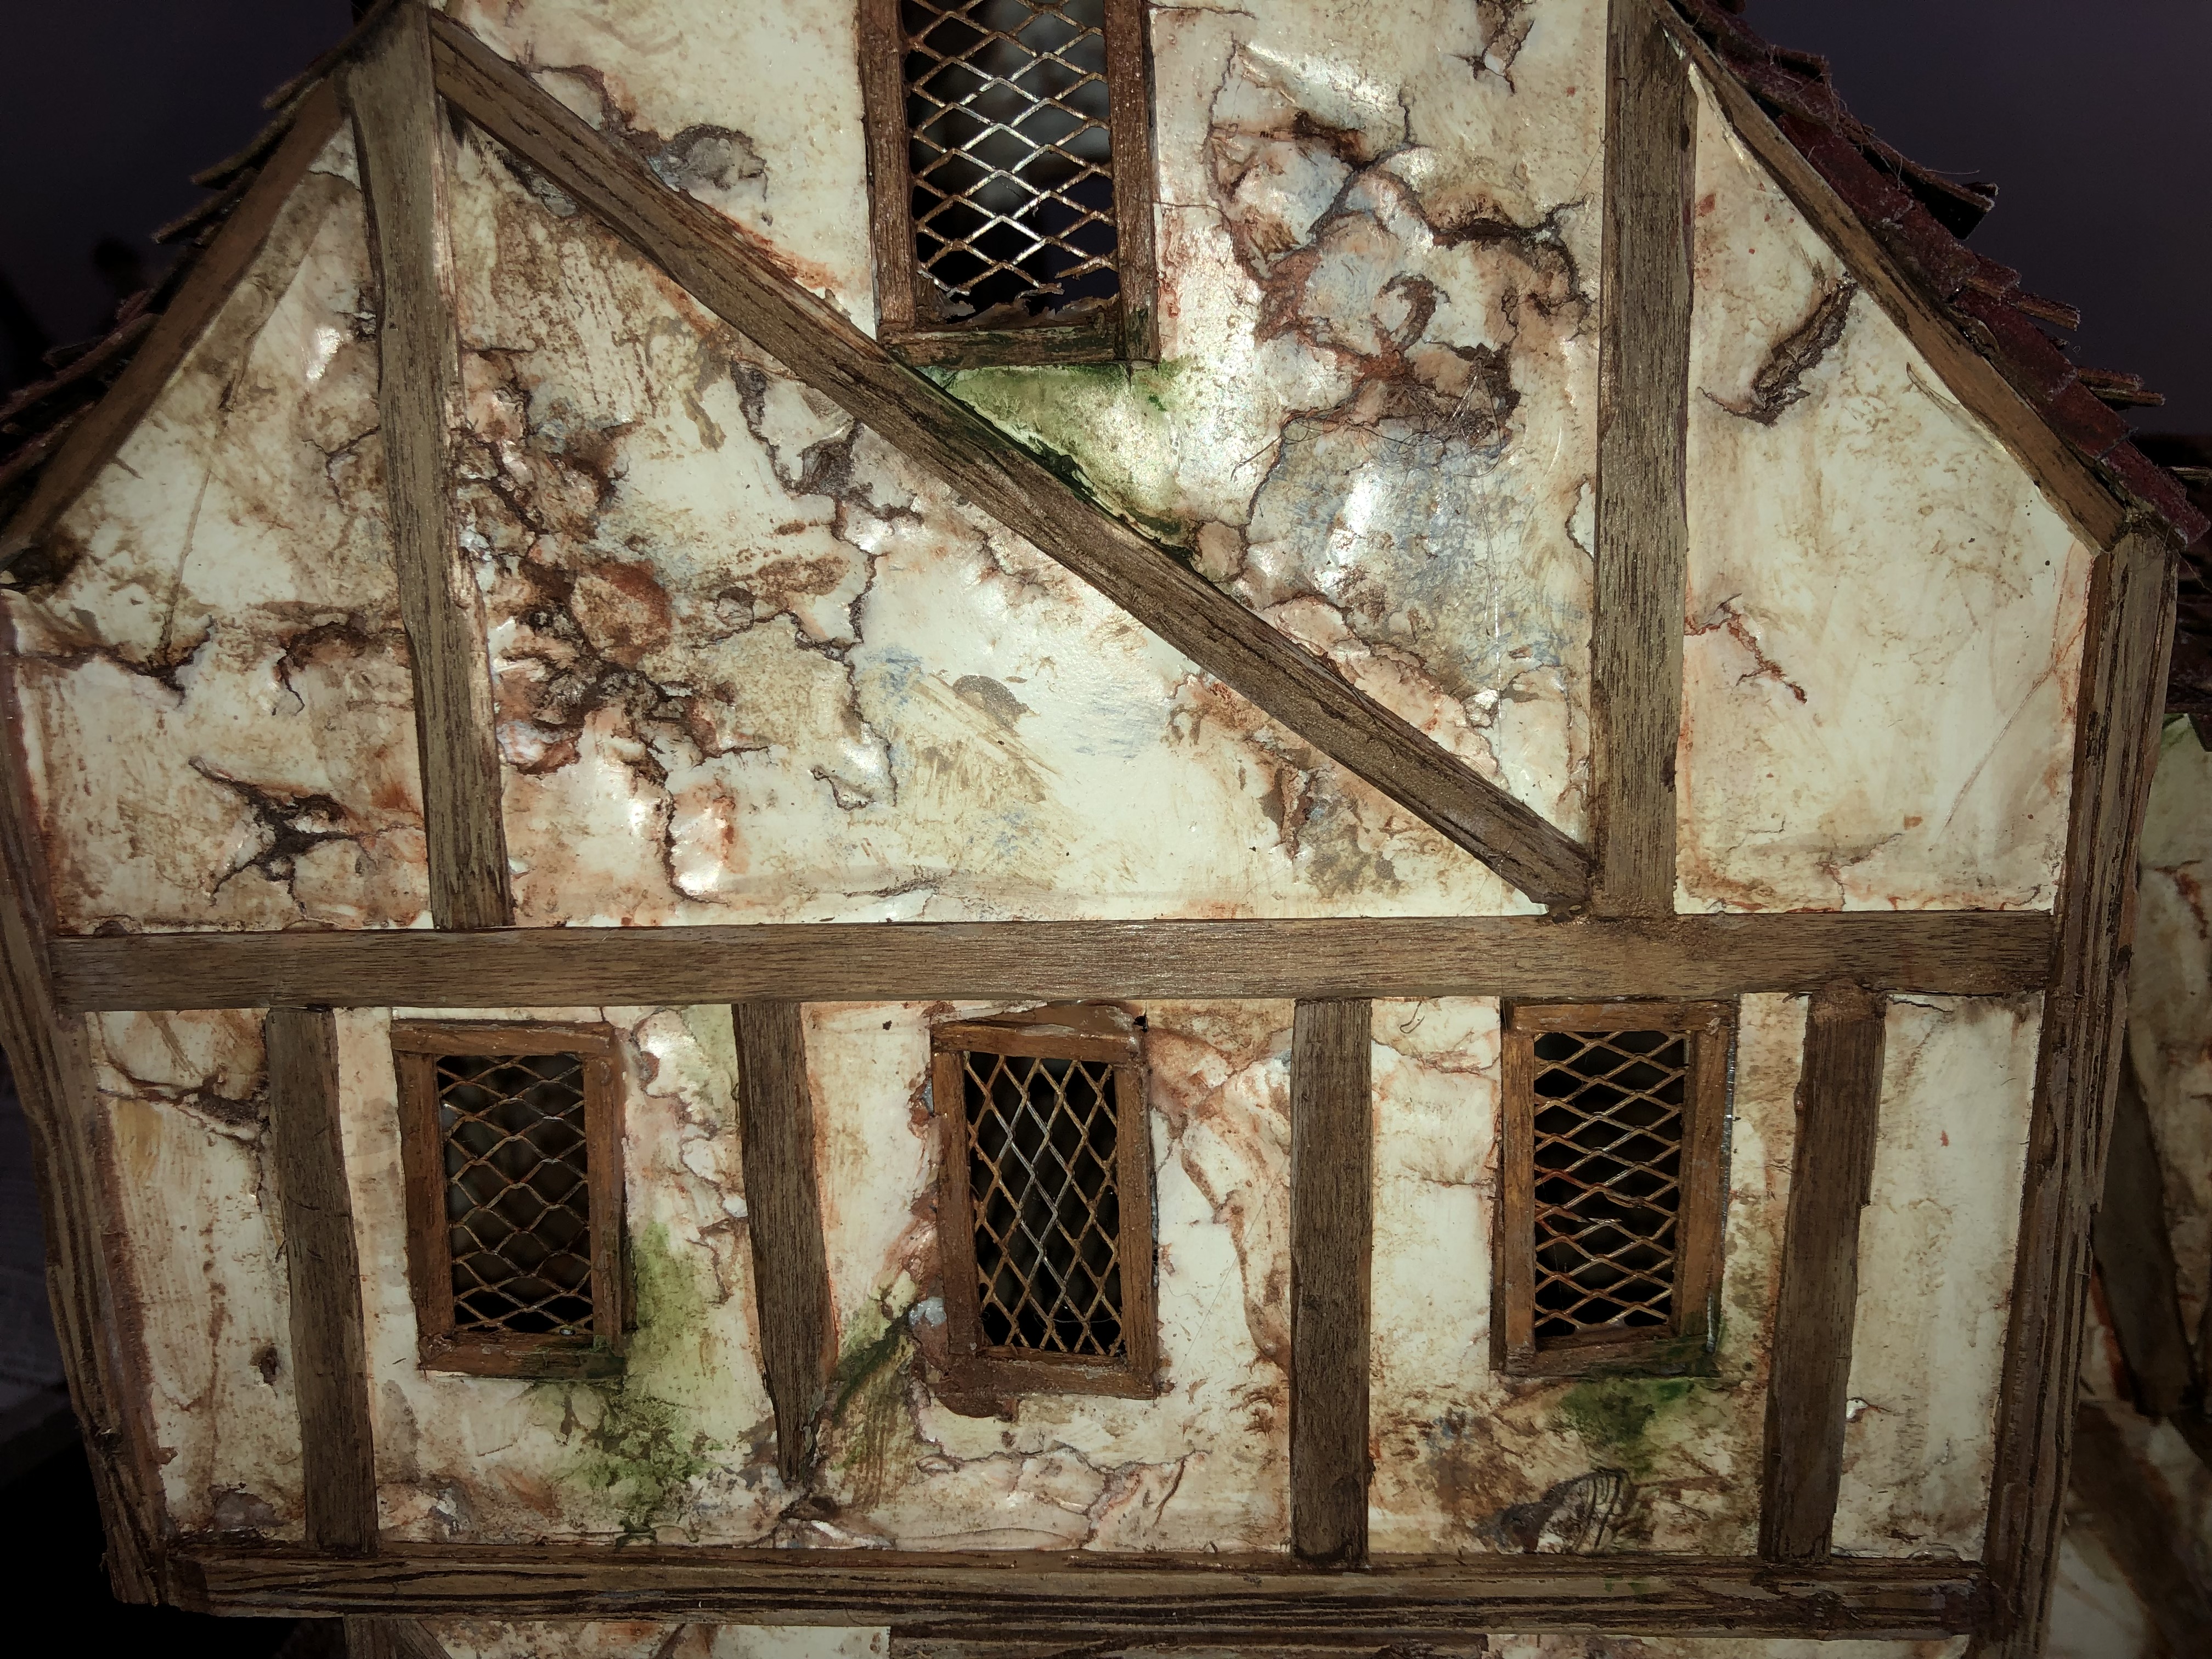
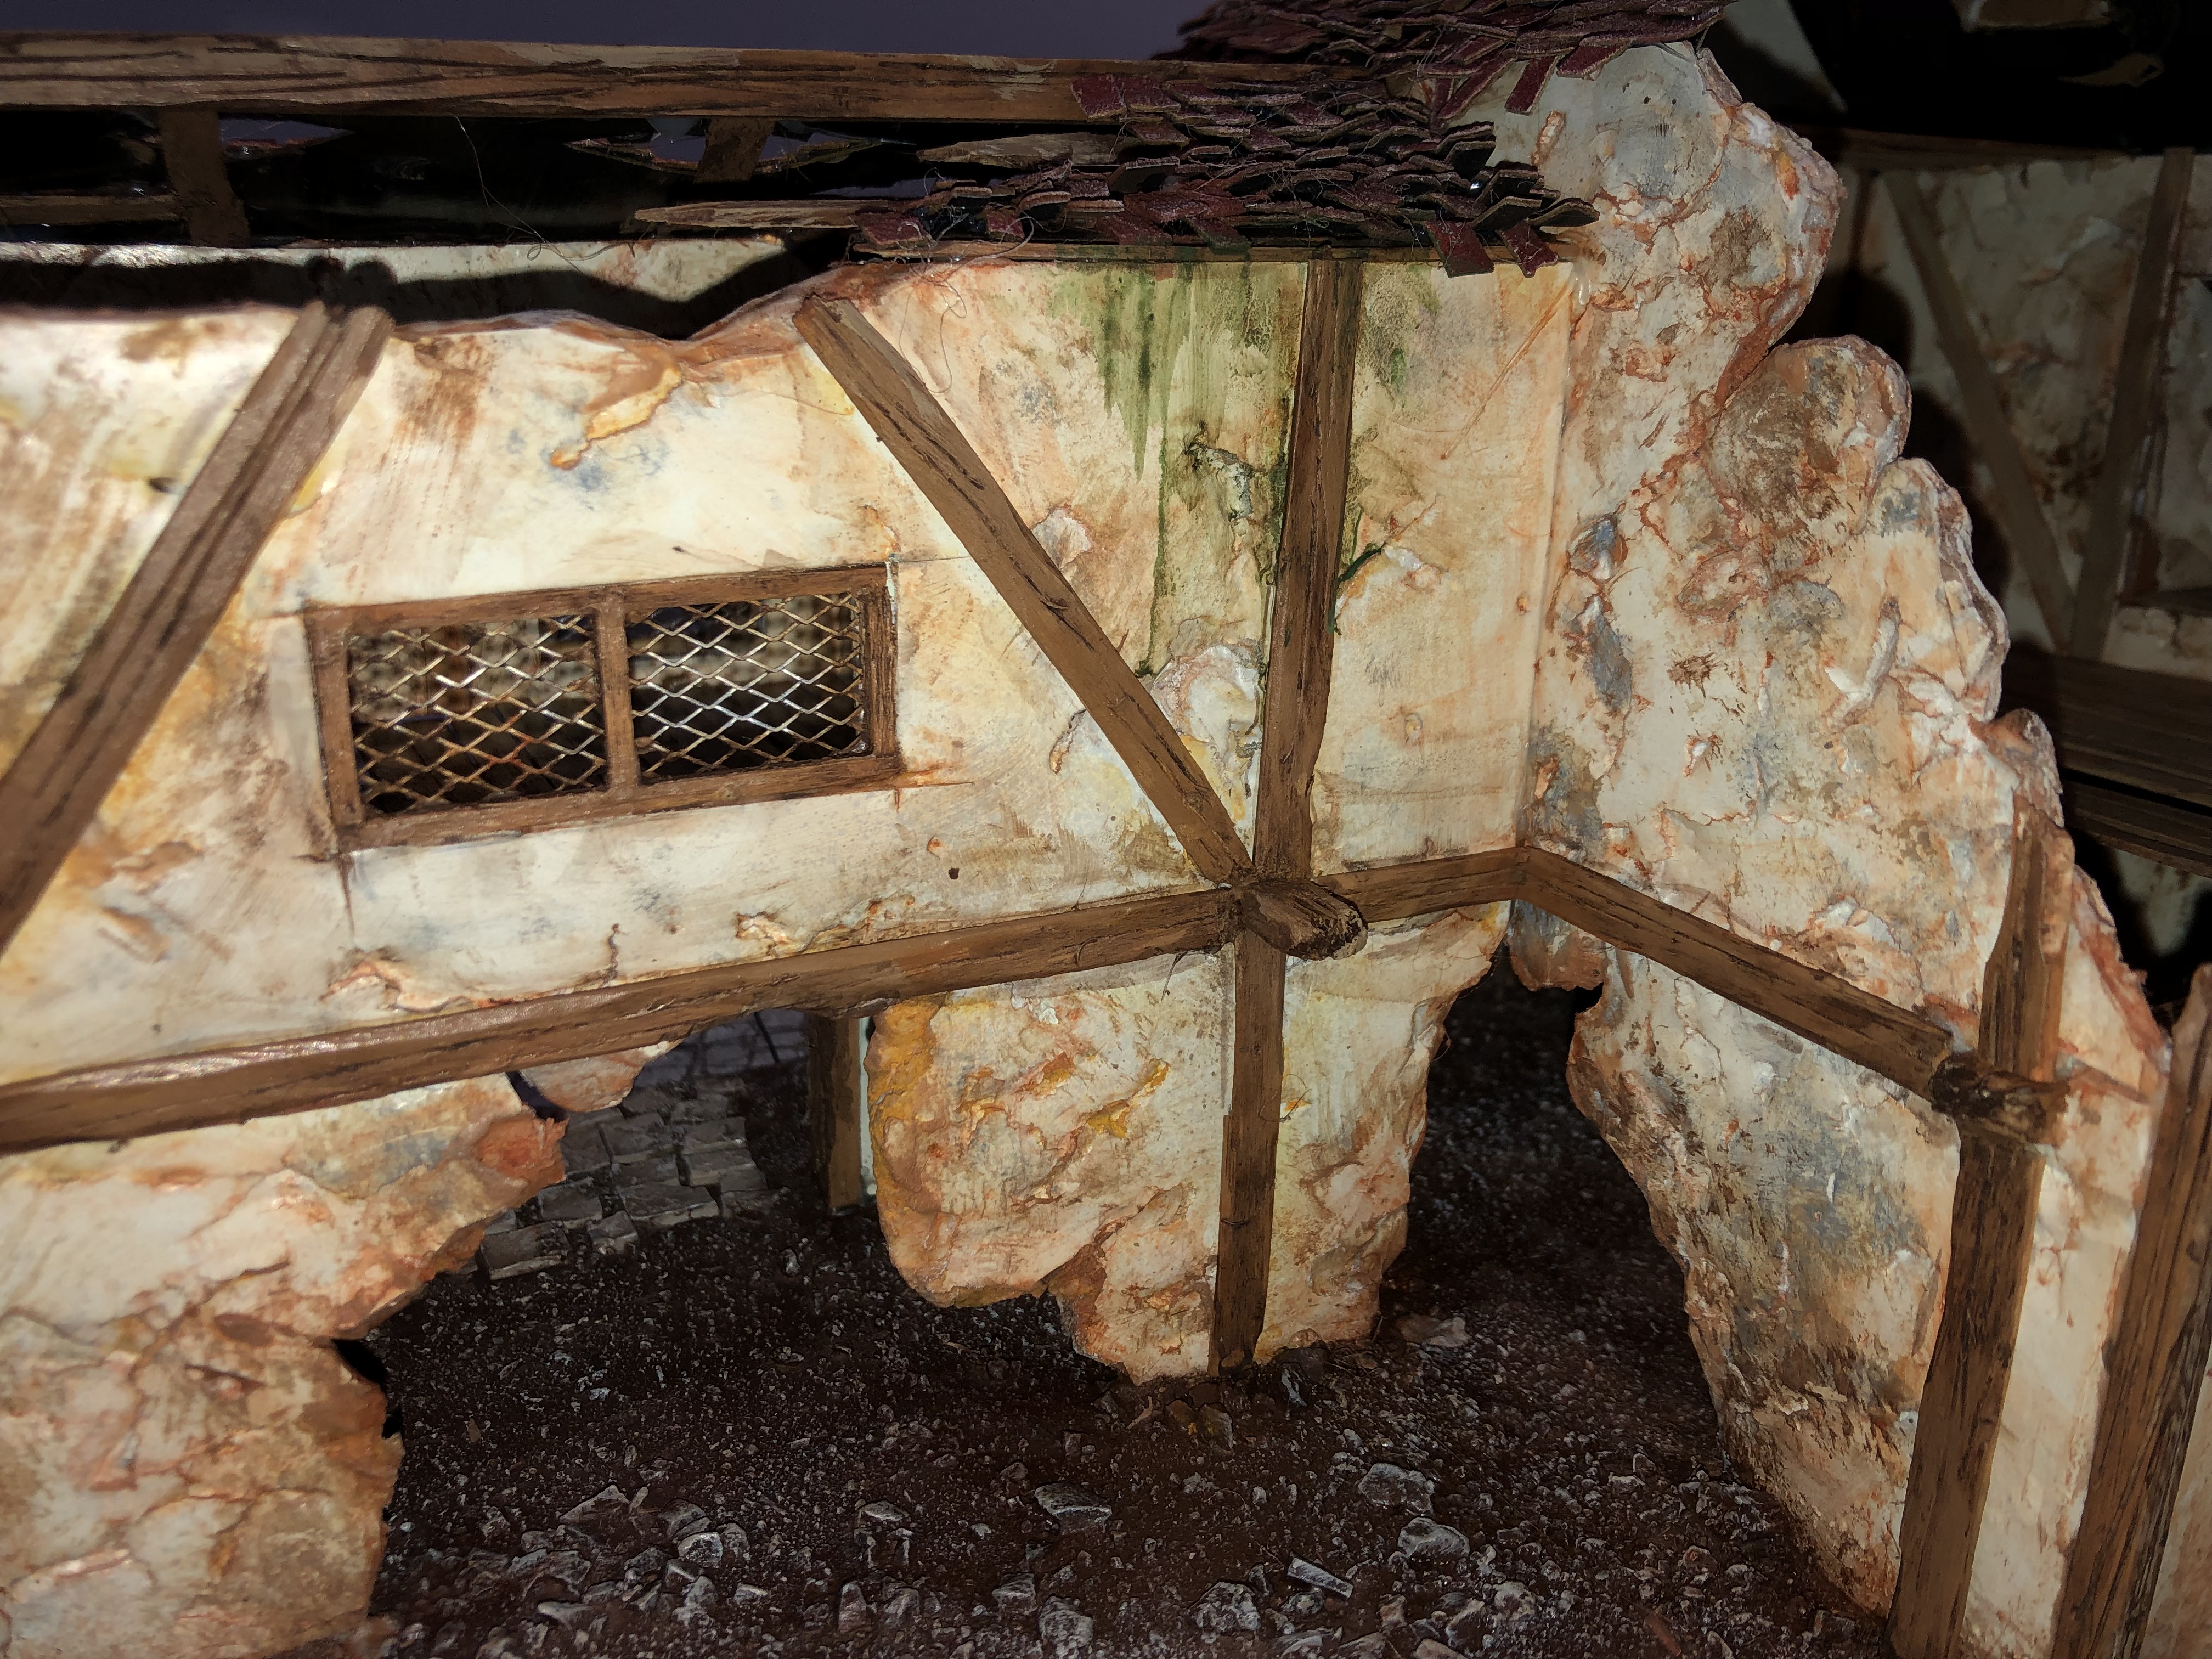
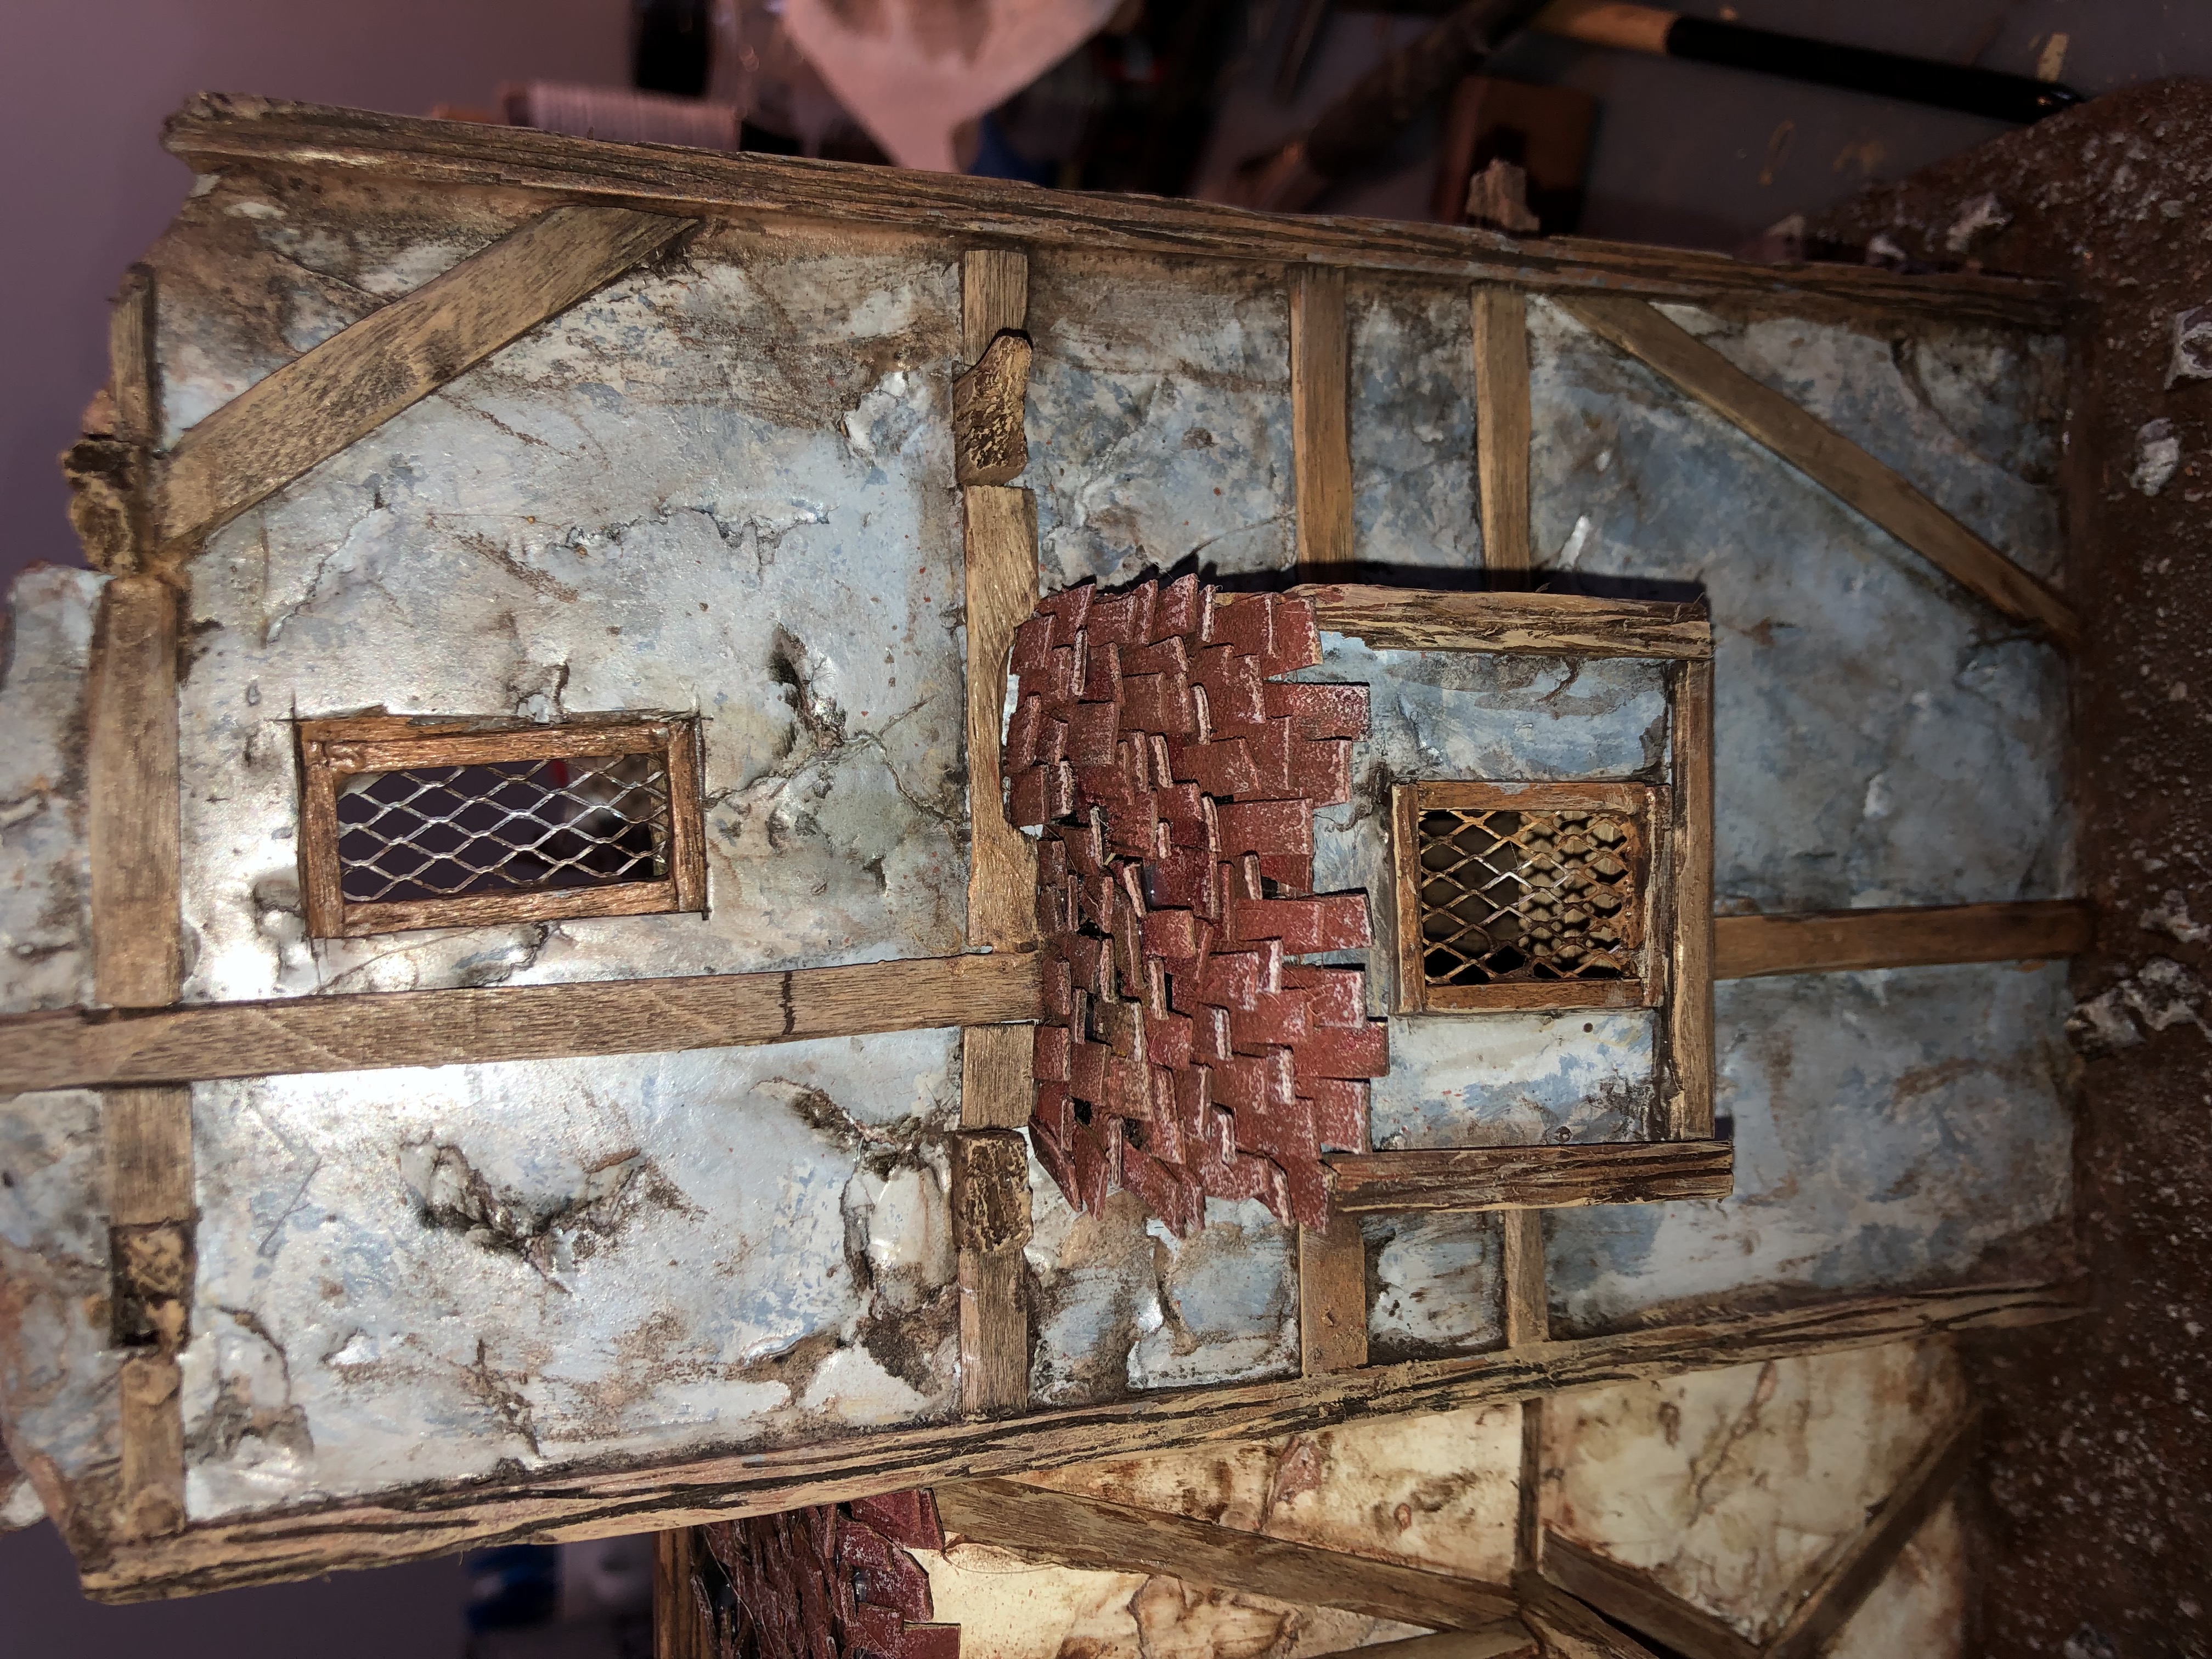
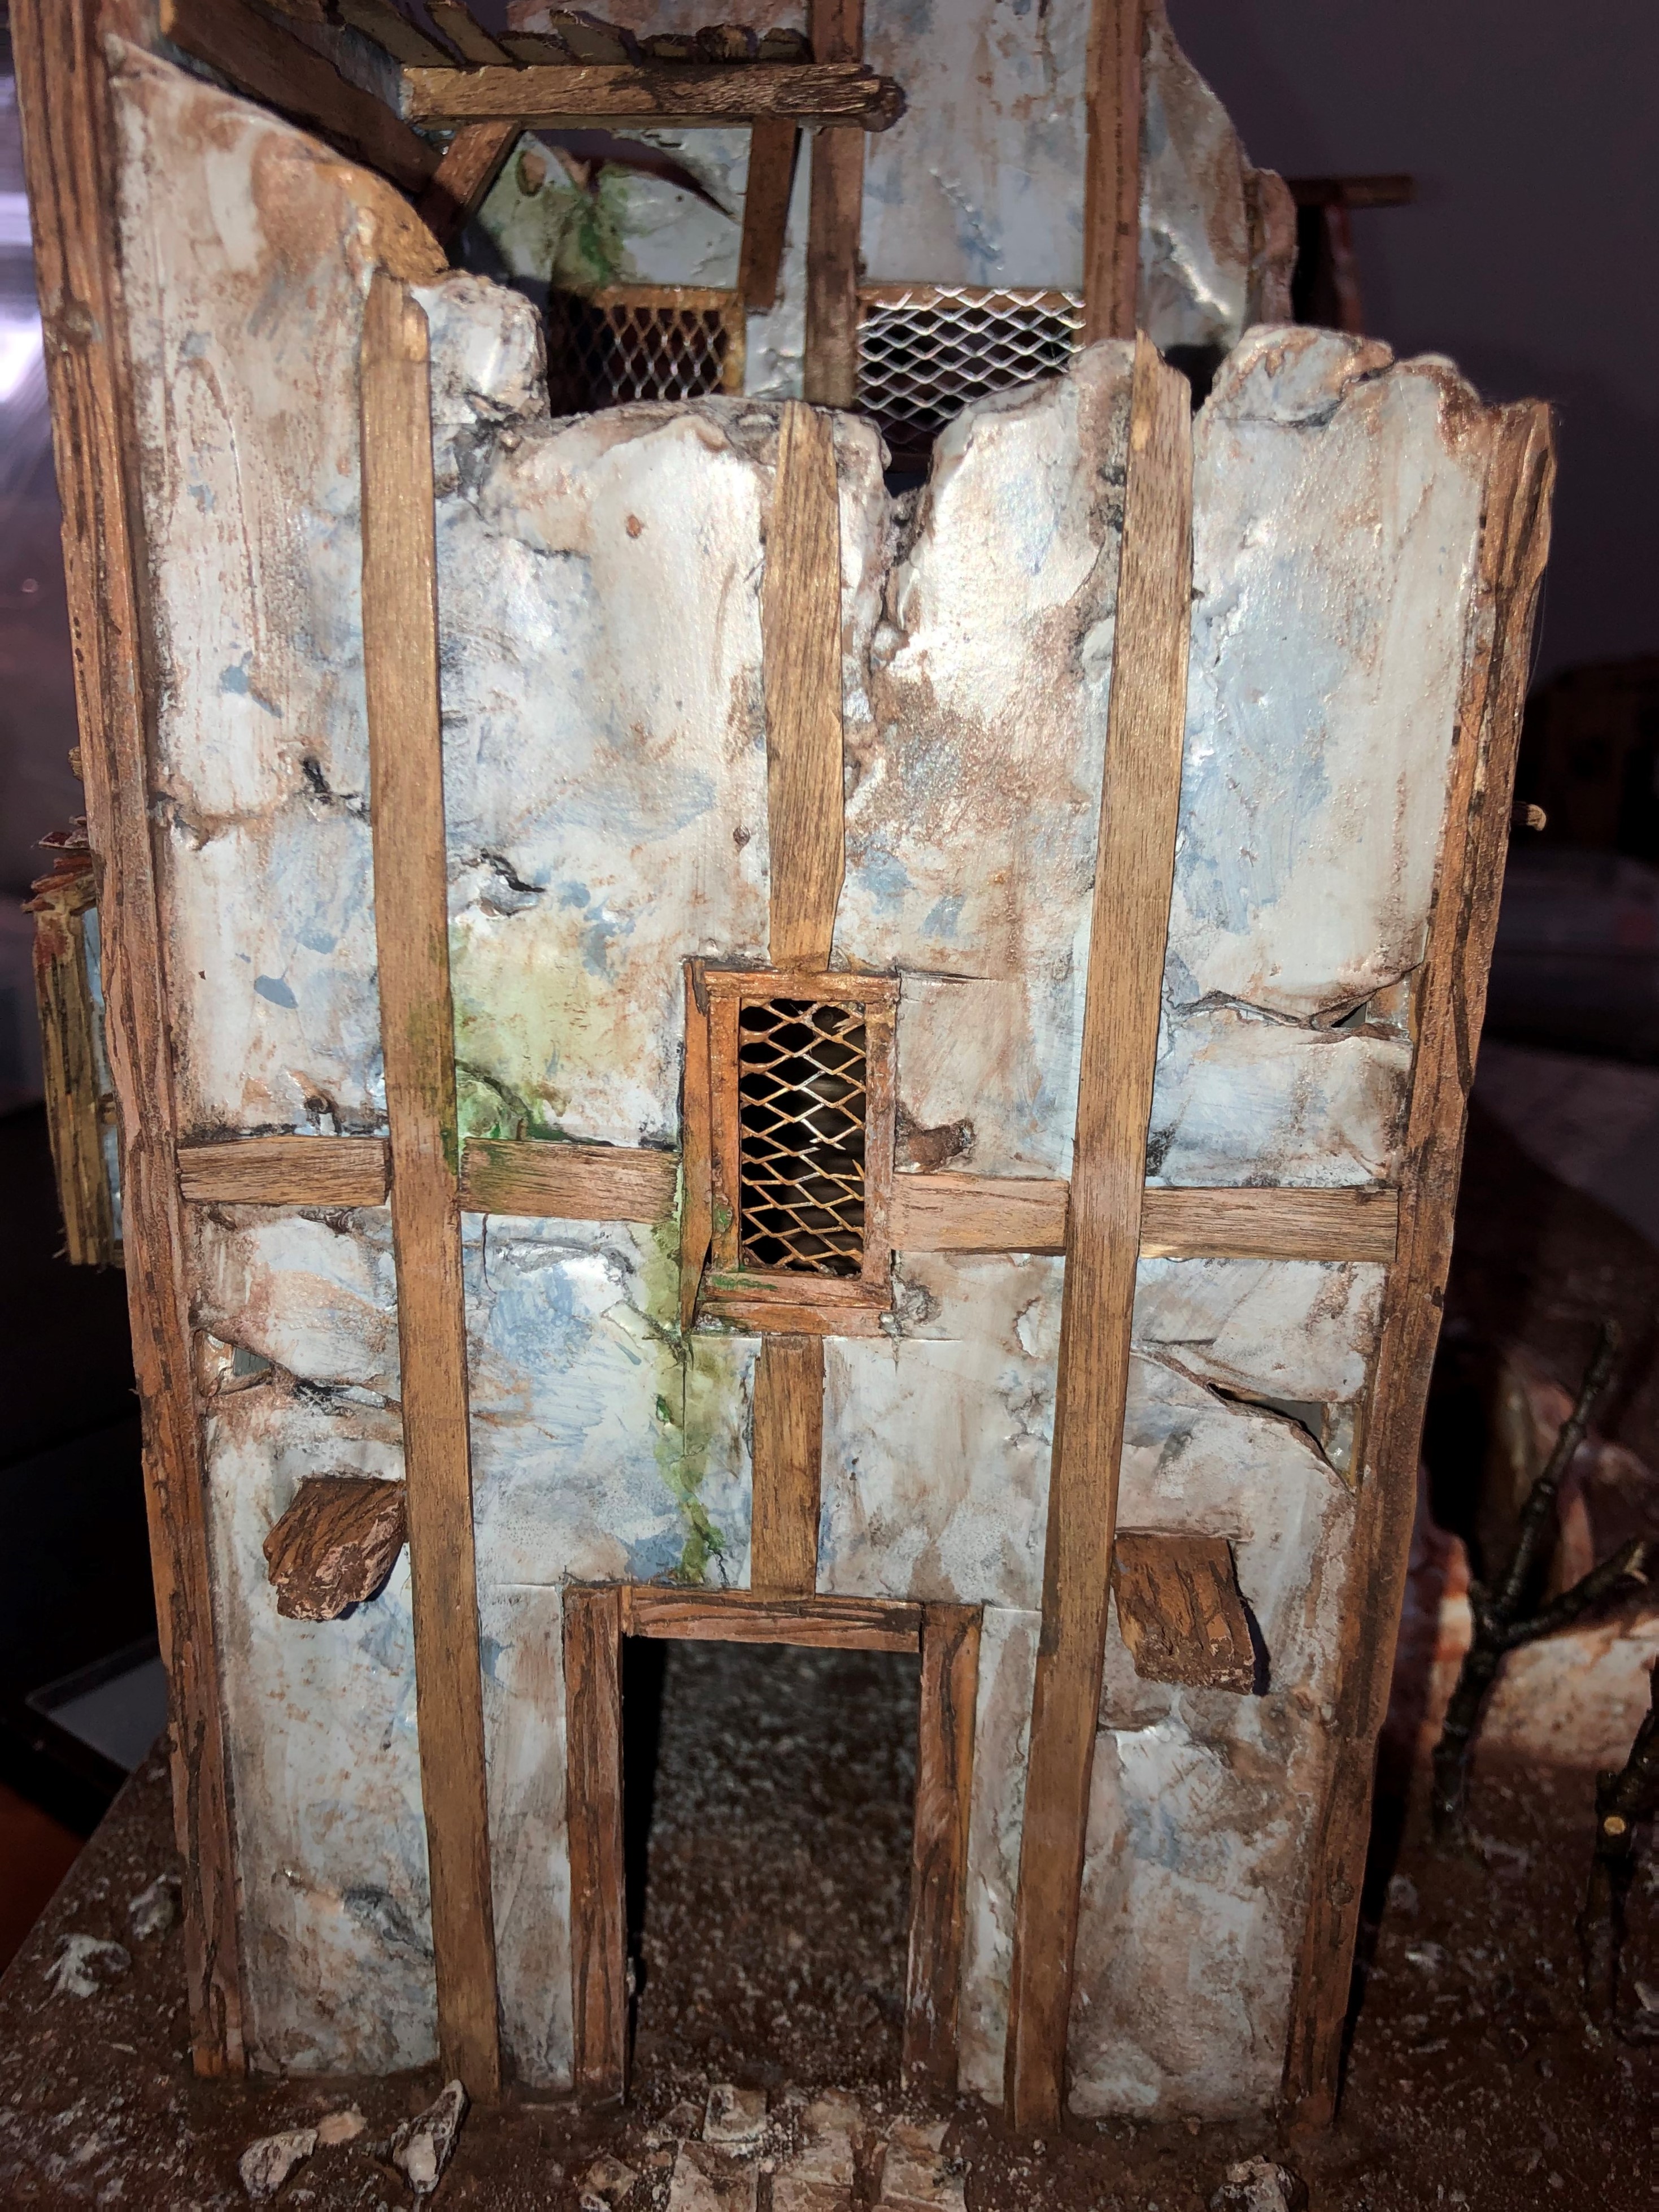
My favorite piece so far: it has a classic Tudor feel to it, although it is clearly a fantasy building. It is ruined, but not too much.
The walls were painted an off-white with a lot of weathering over it. I think it looks better than a beige primer.
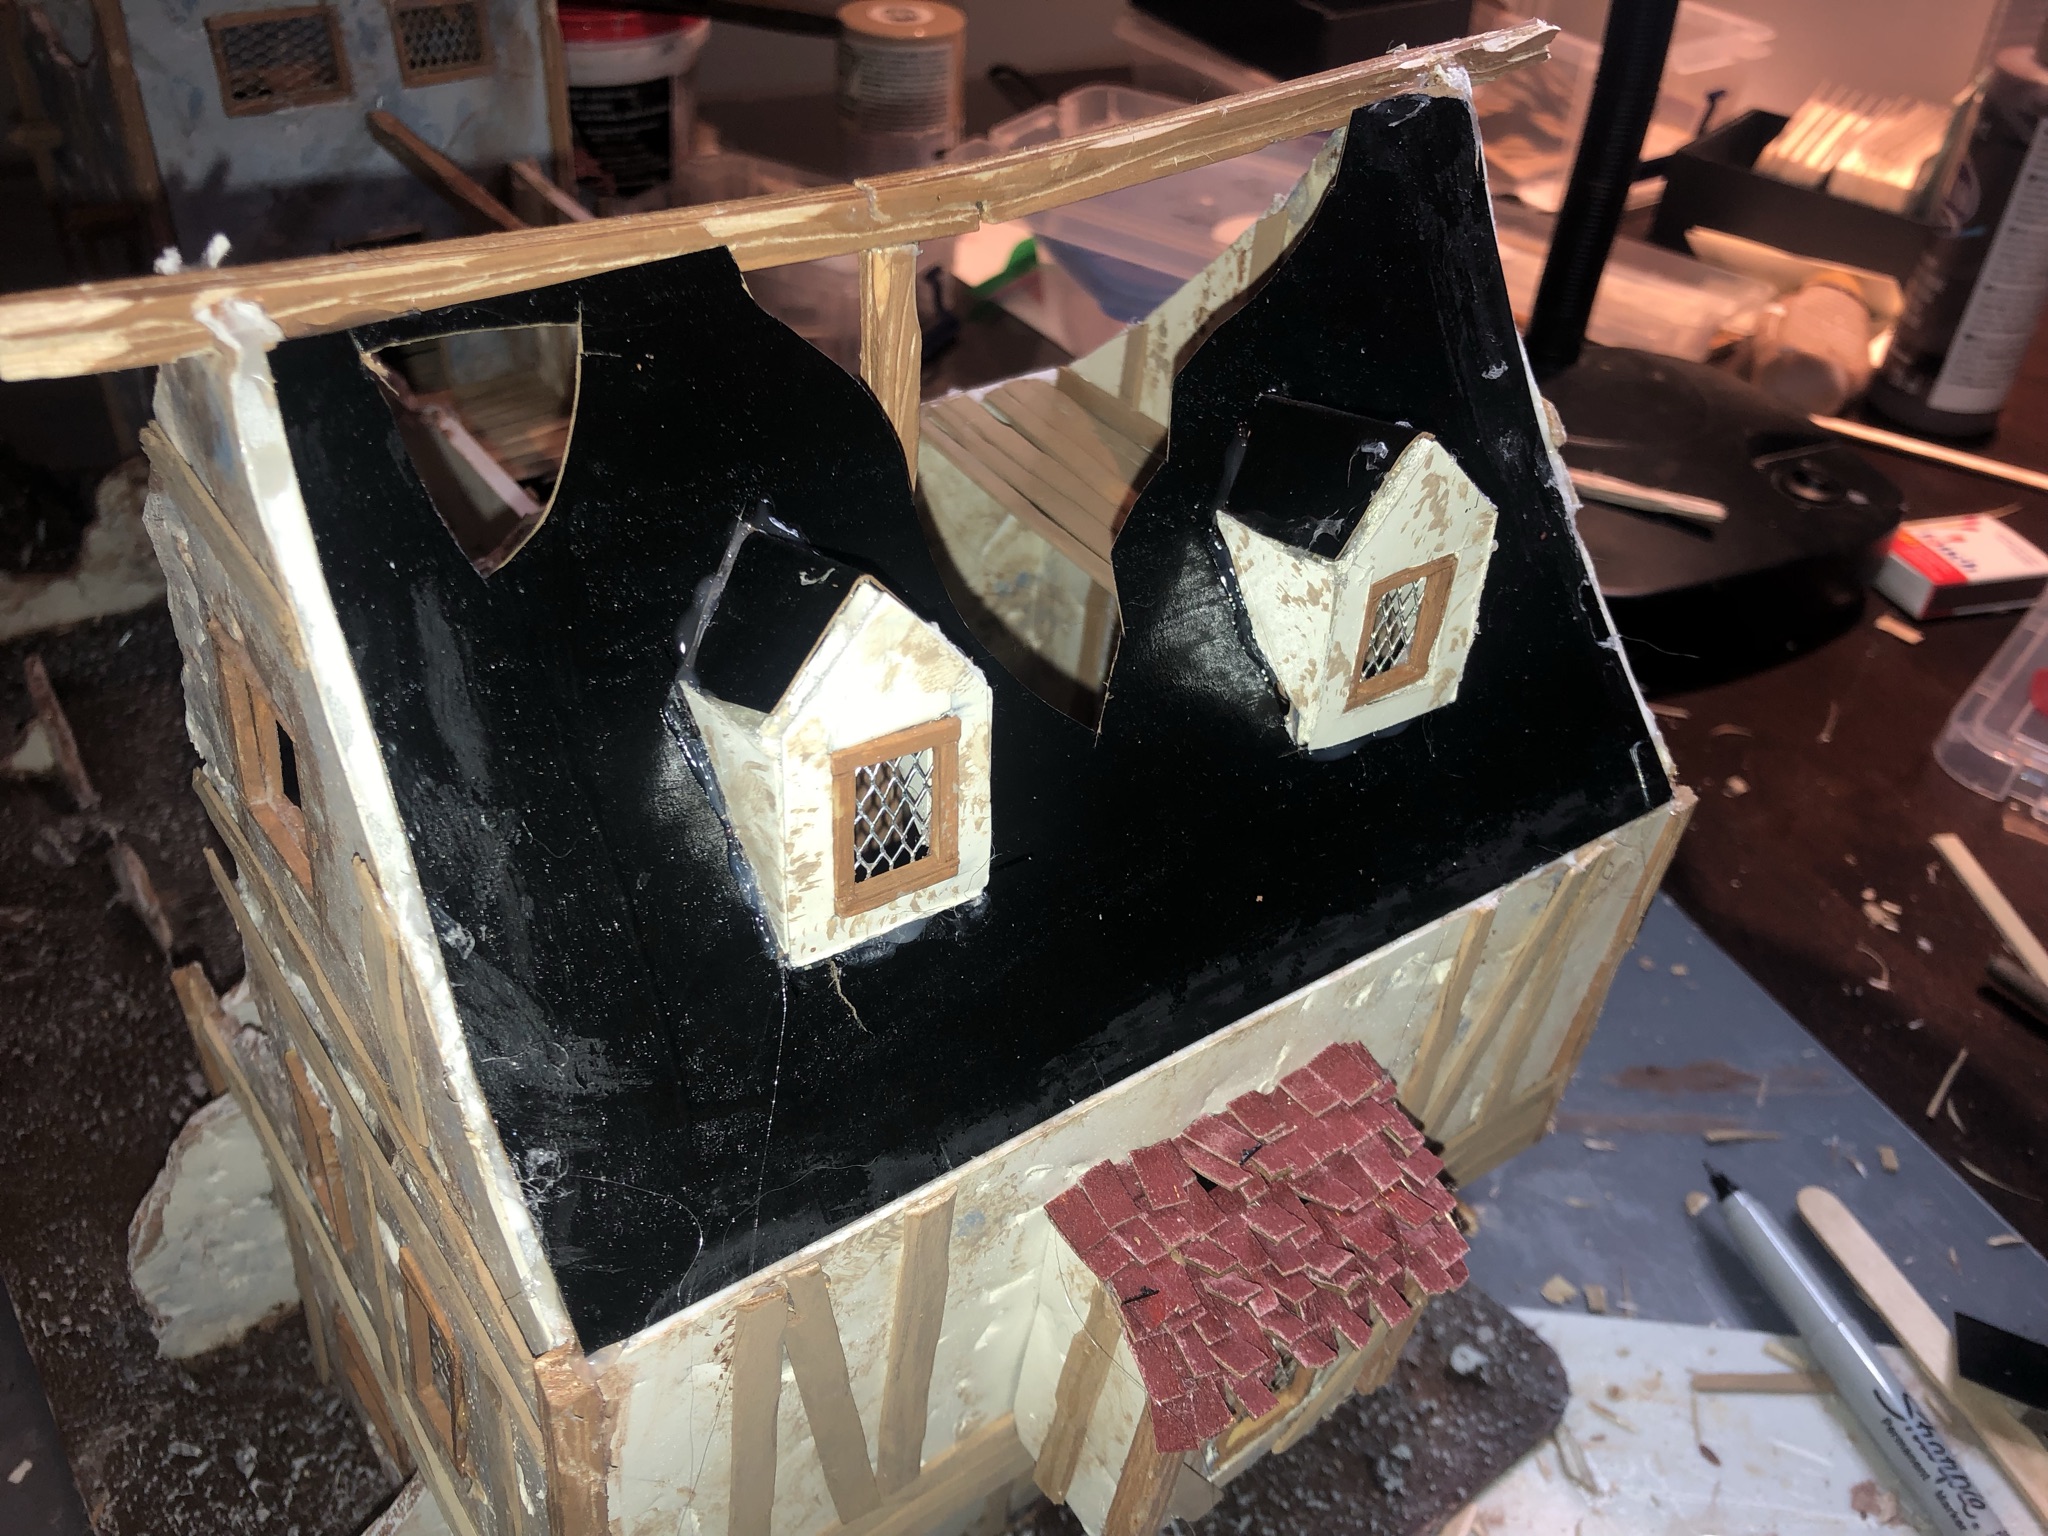
The roof tiles are smaller than my first two buildings and I added some backing soda/mod podge mix to add a bit of texture to it.
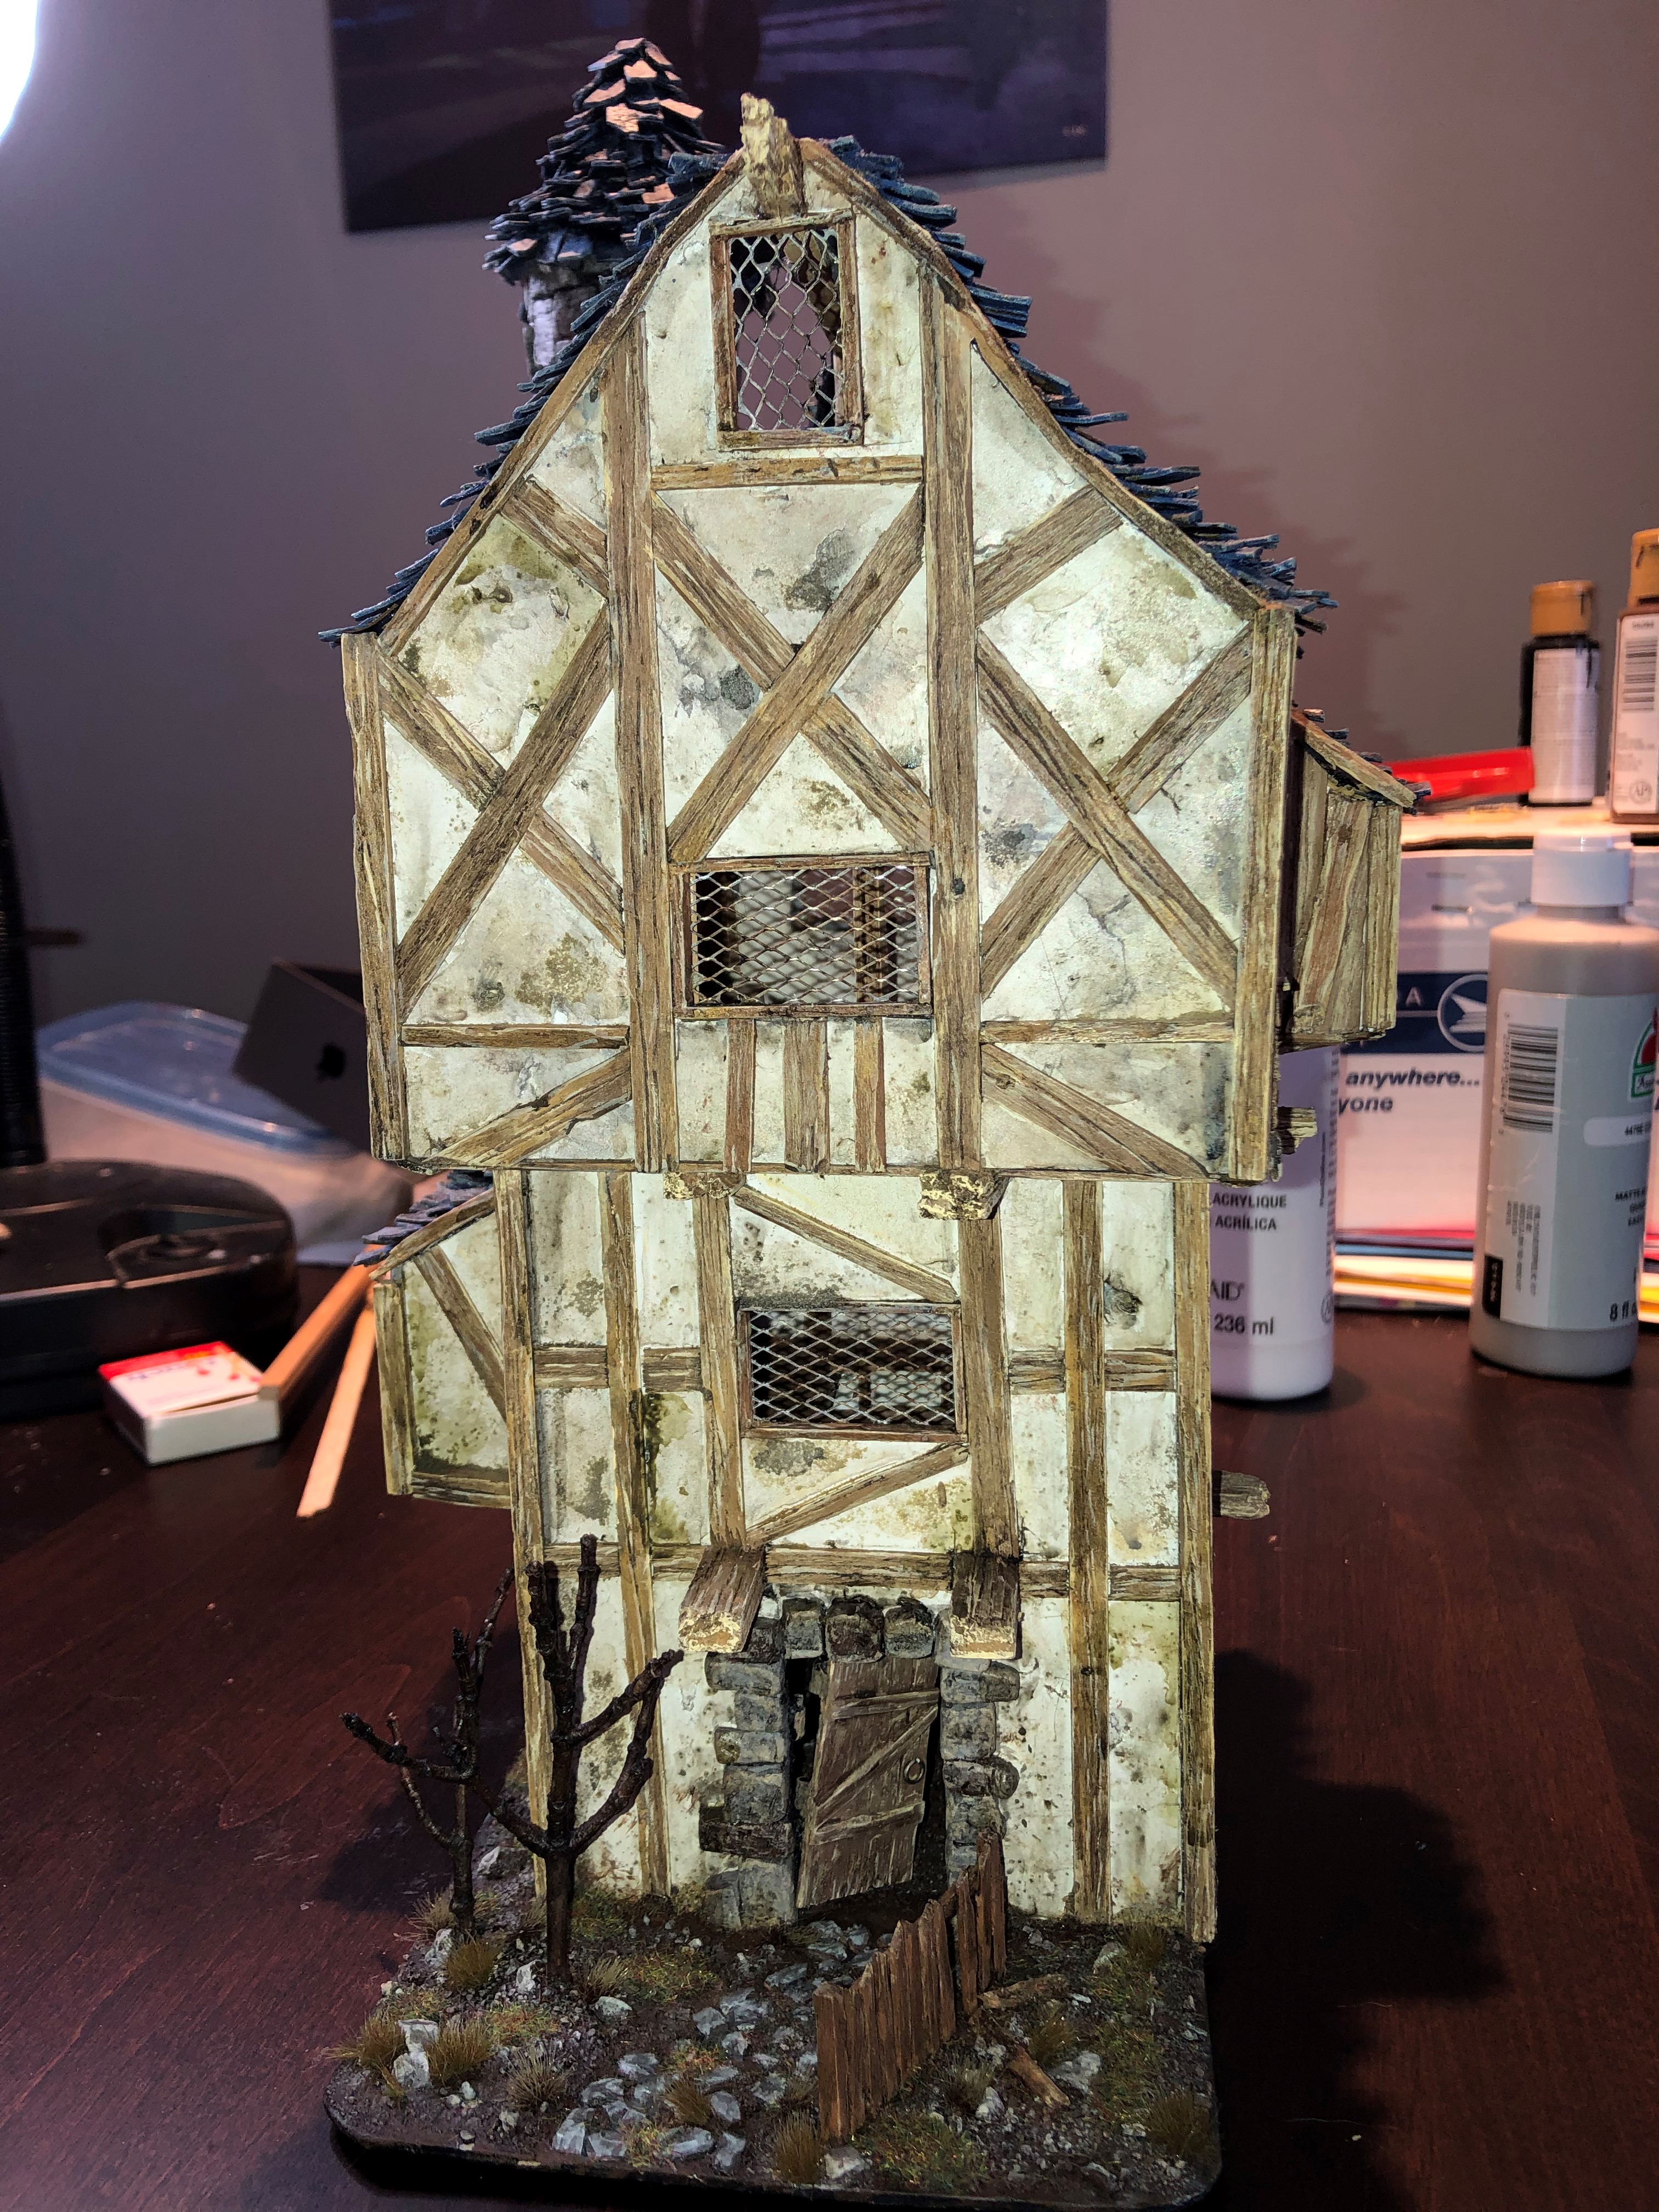
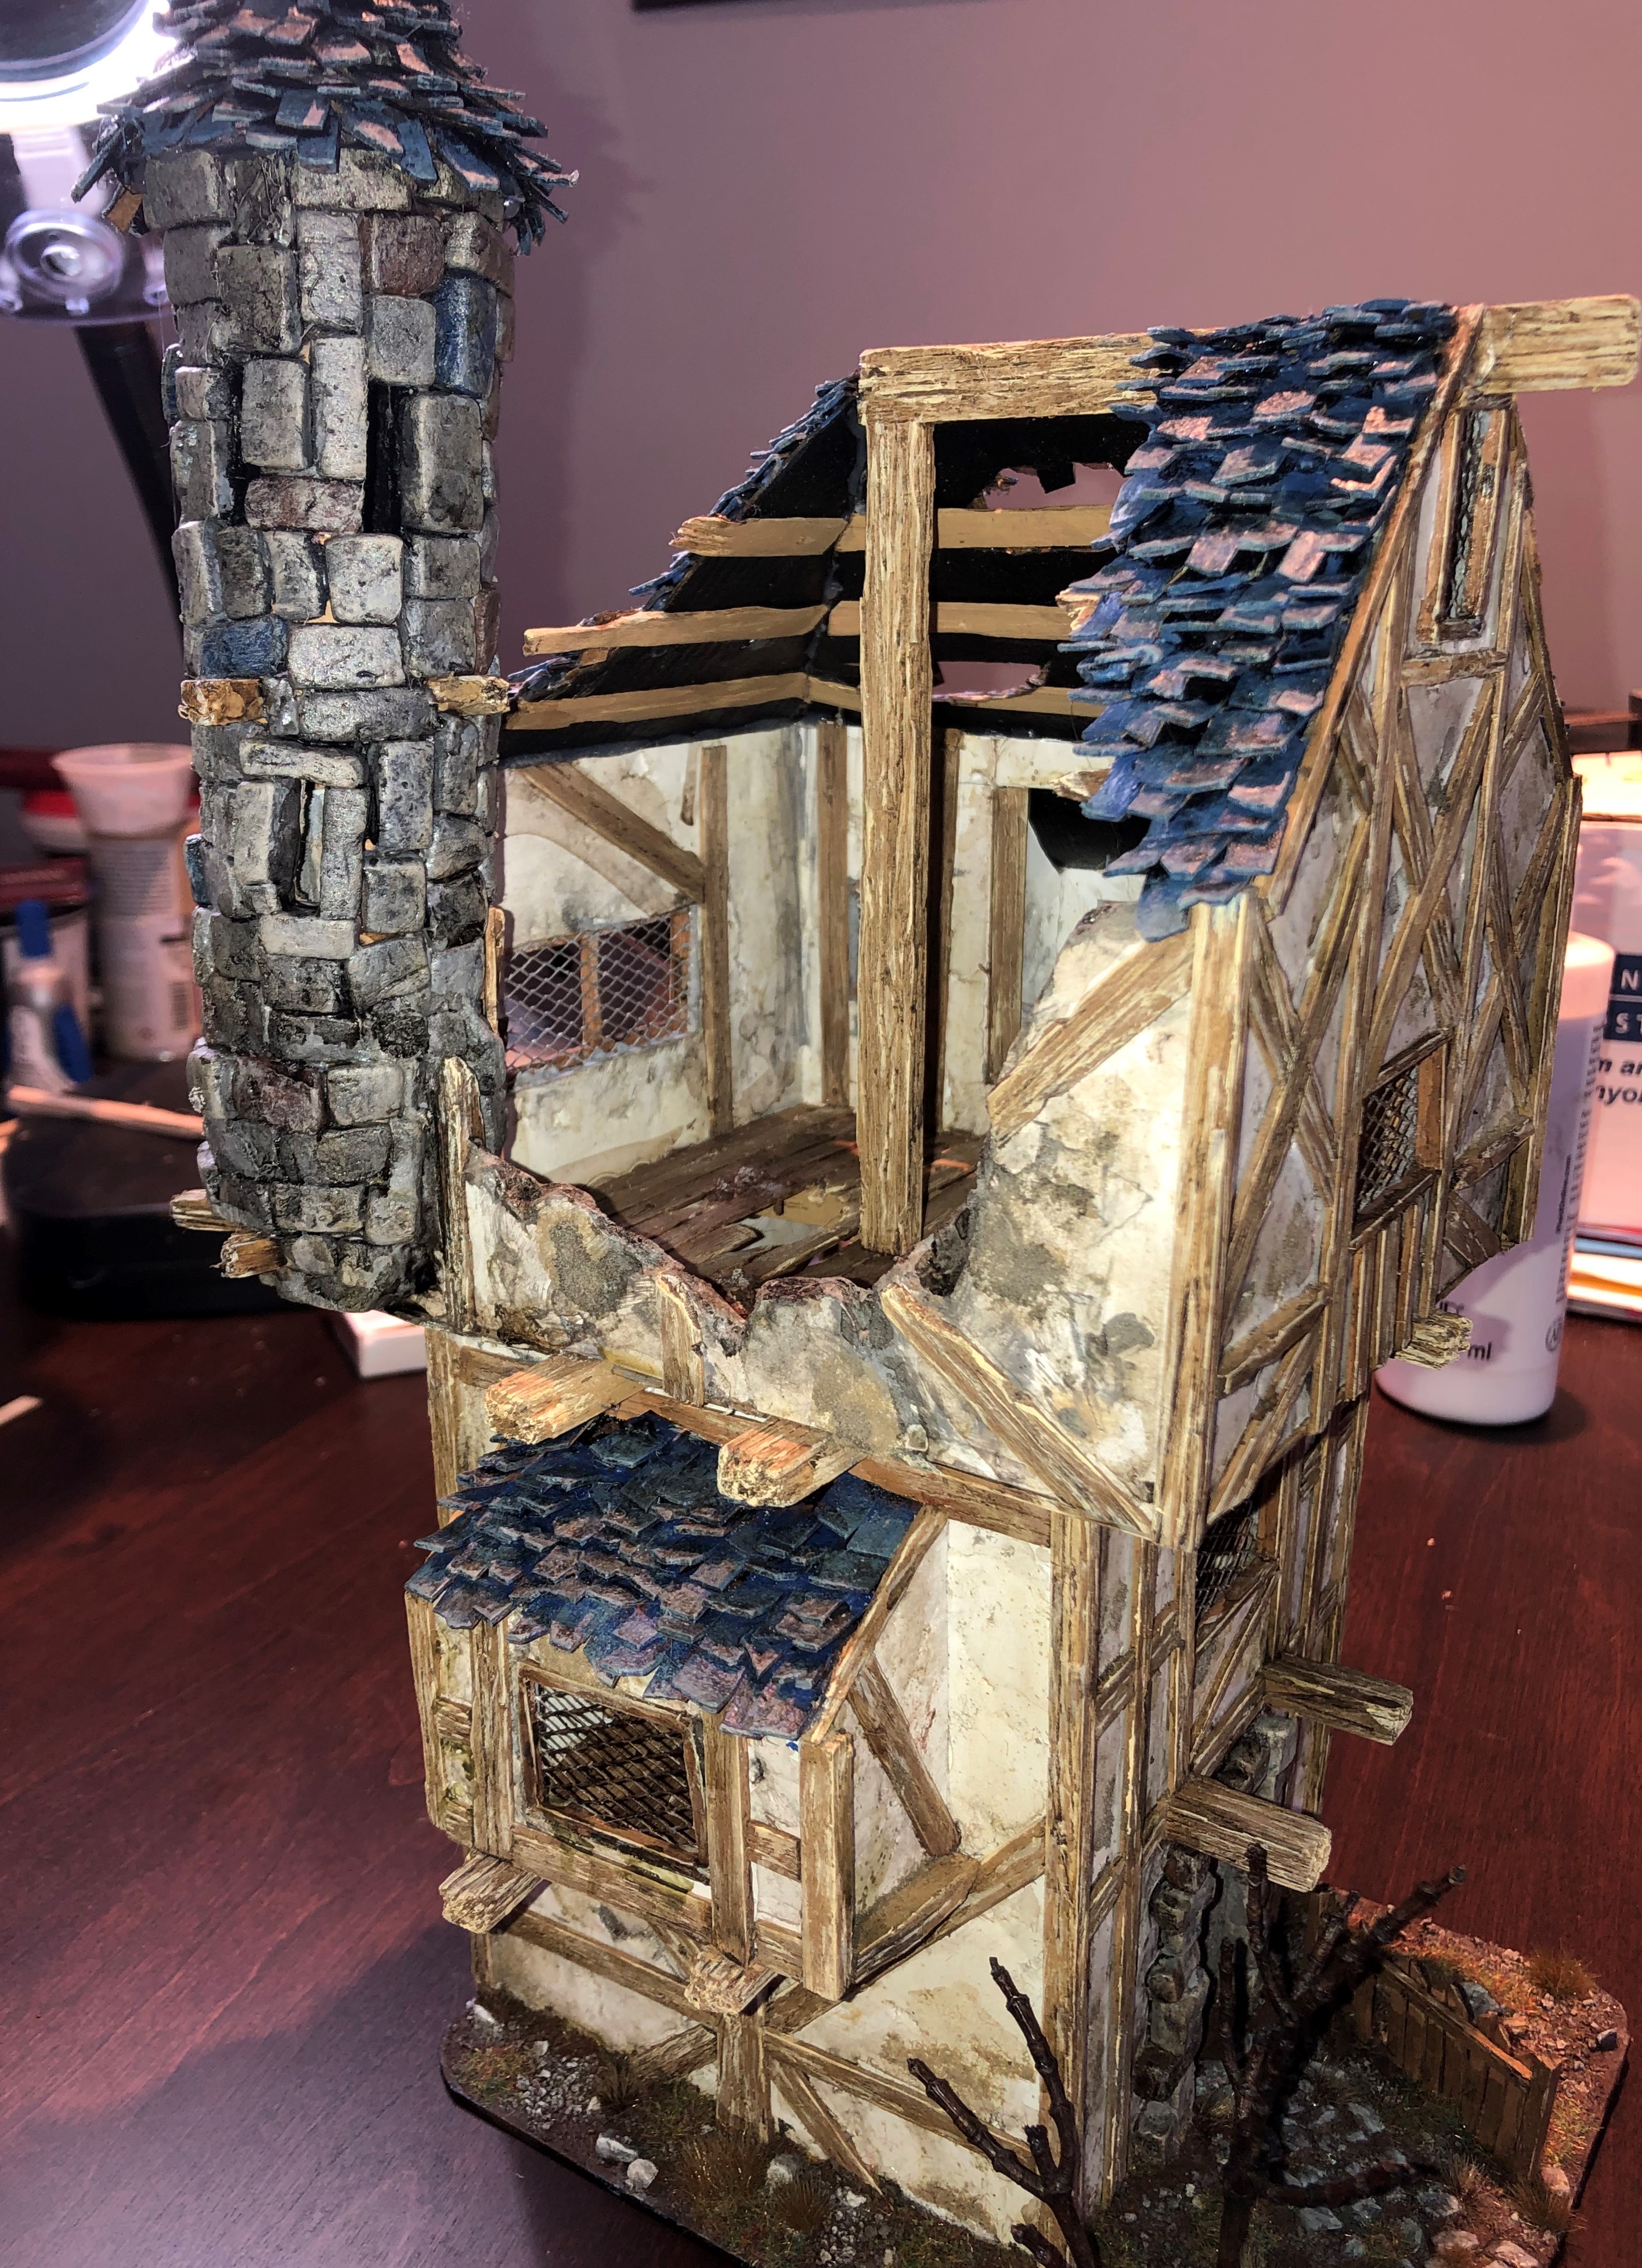
Playability-wise: the first story can easily be accessed by a small ladder. There is enough room to place and move models anywhere within the building.

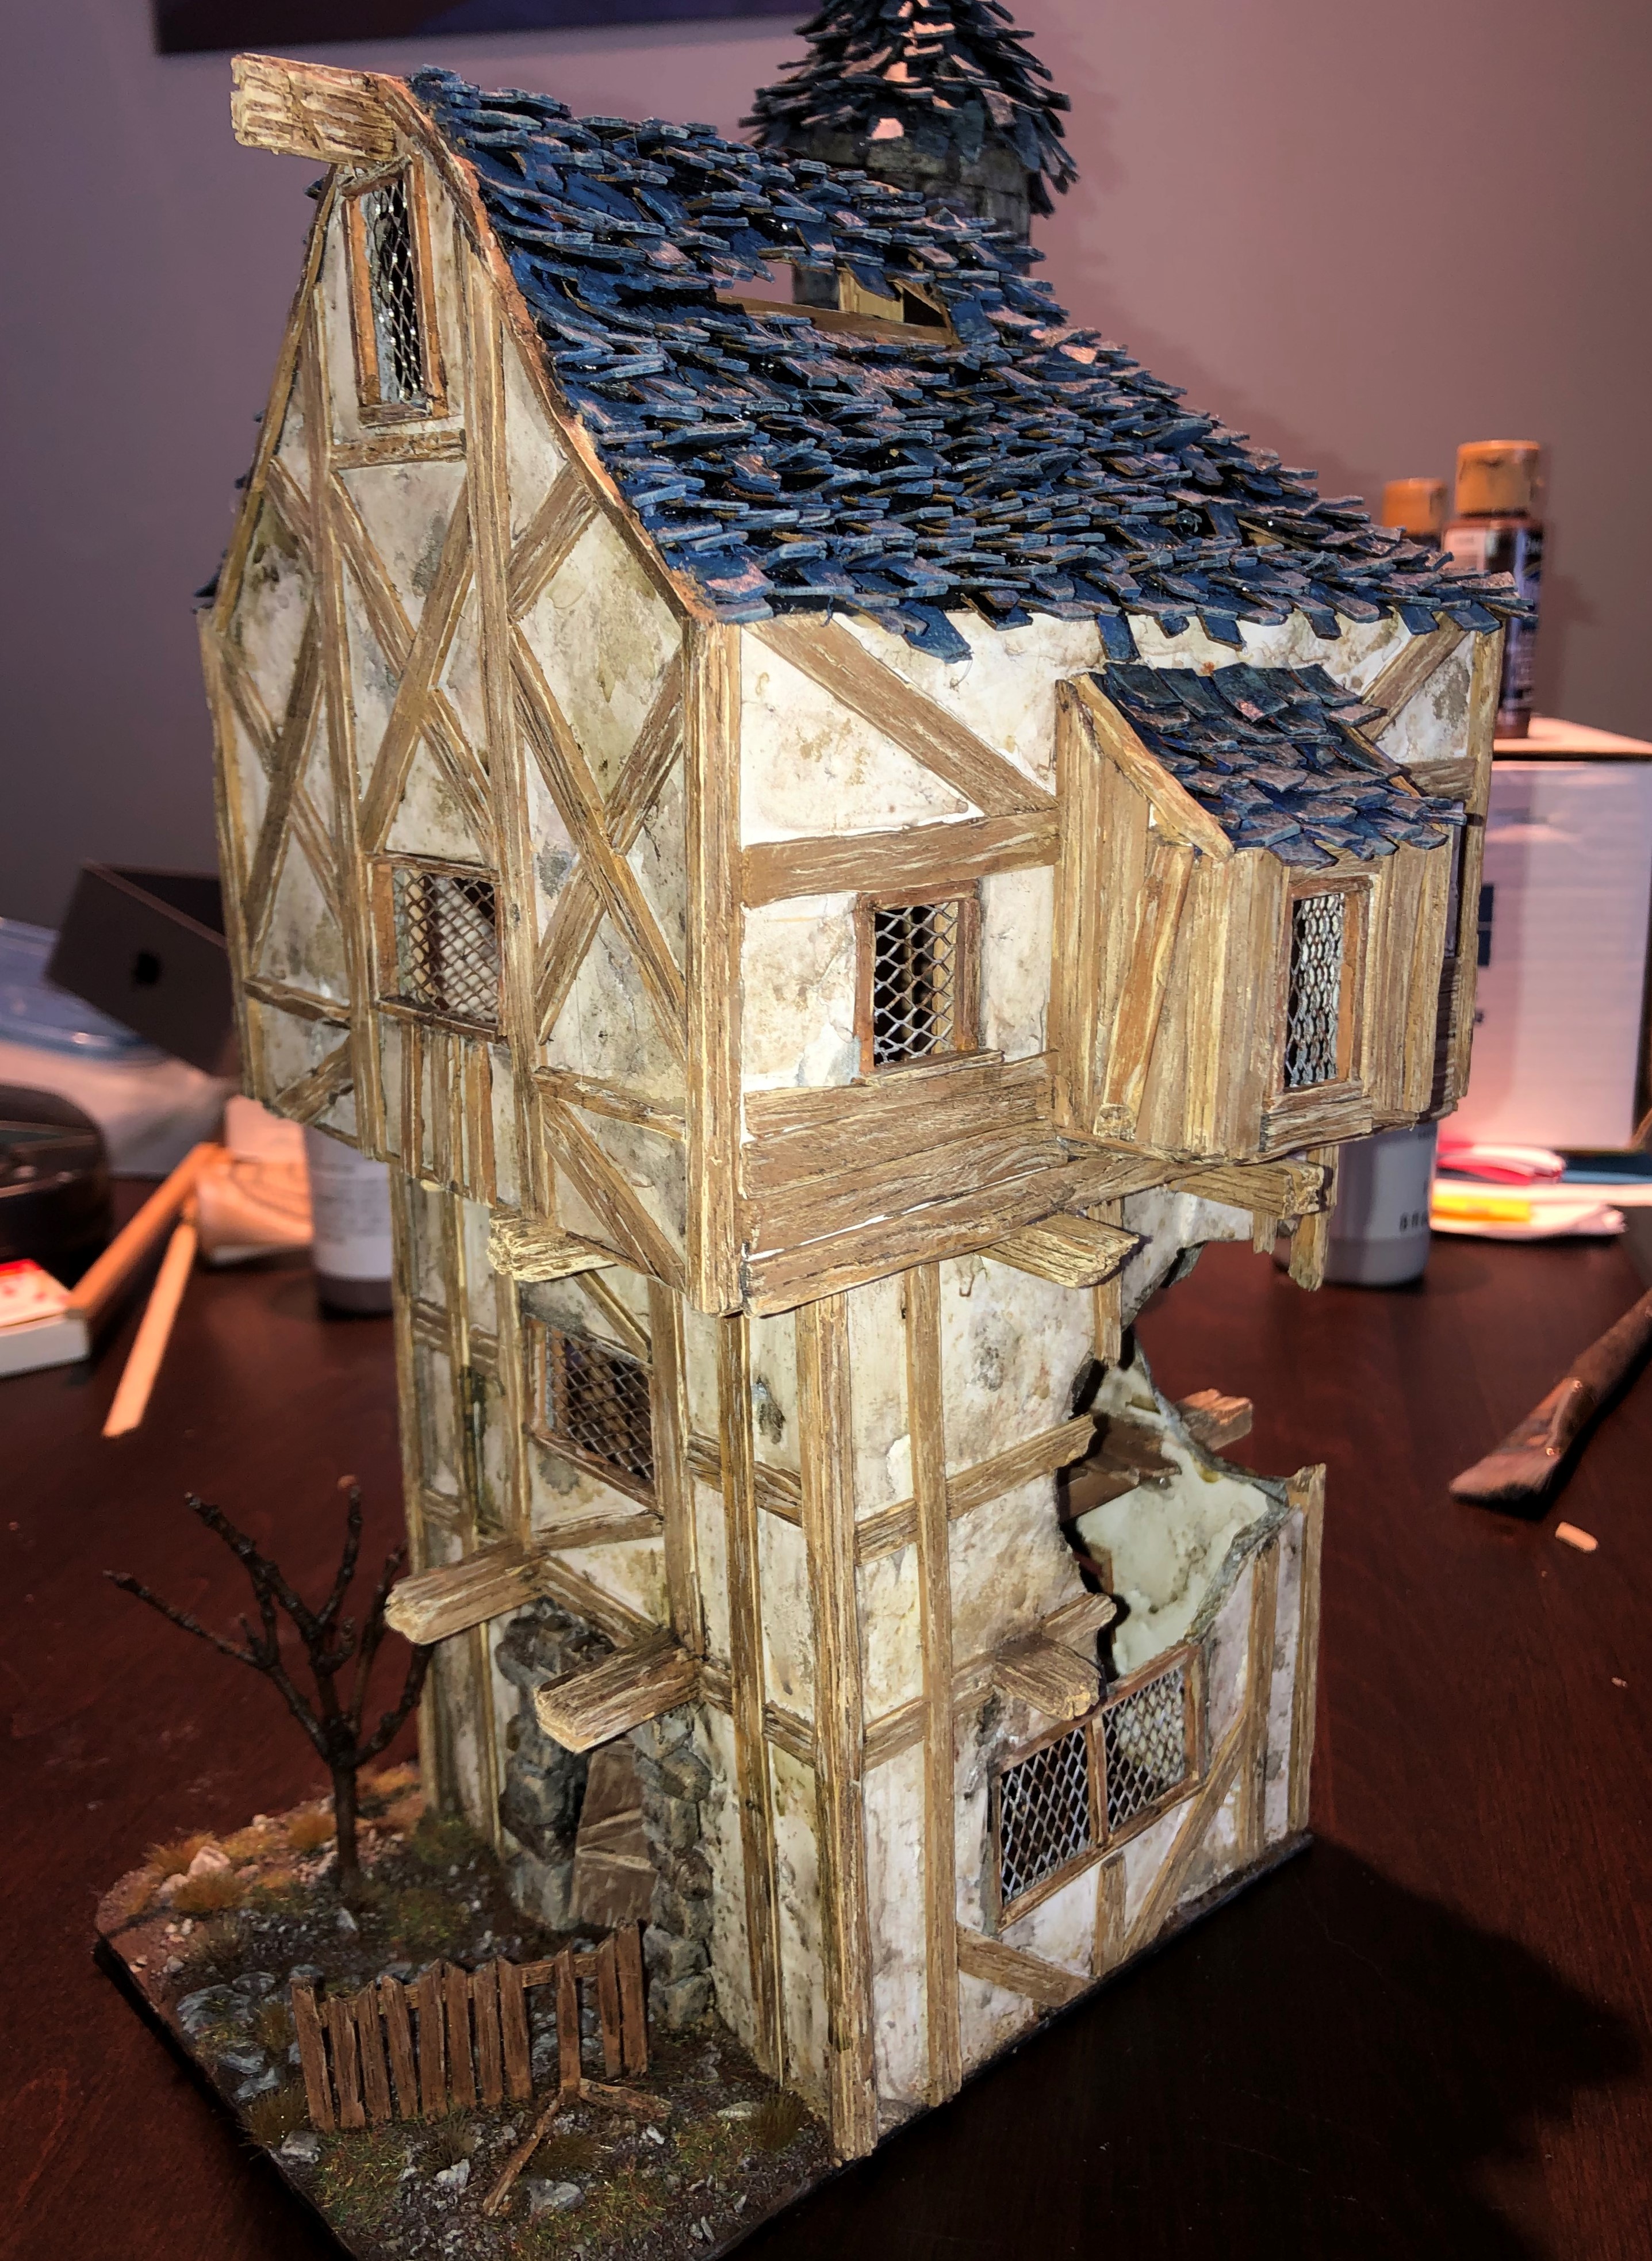
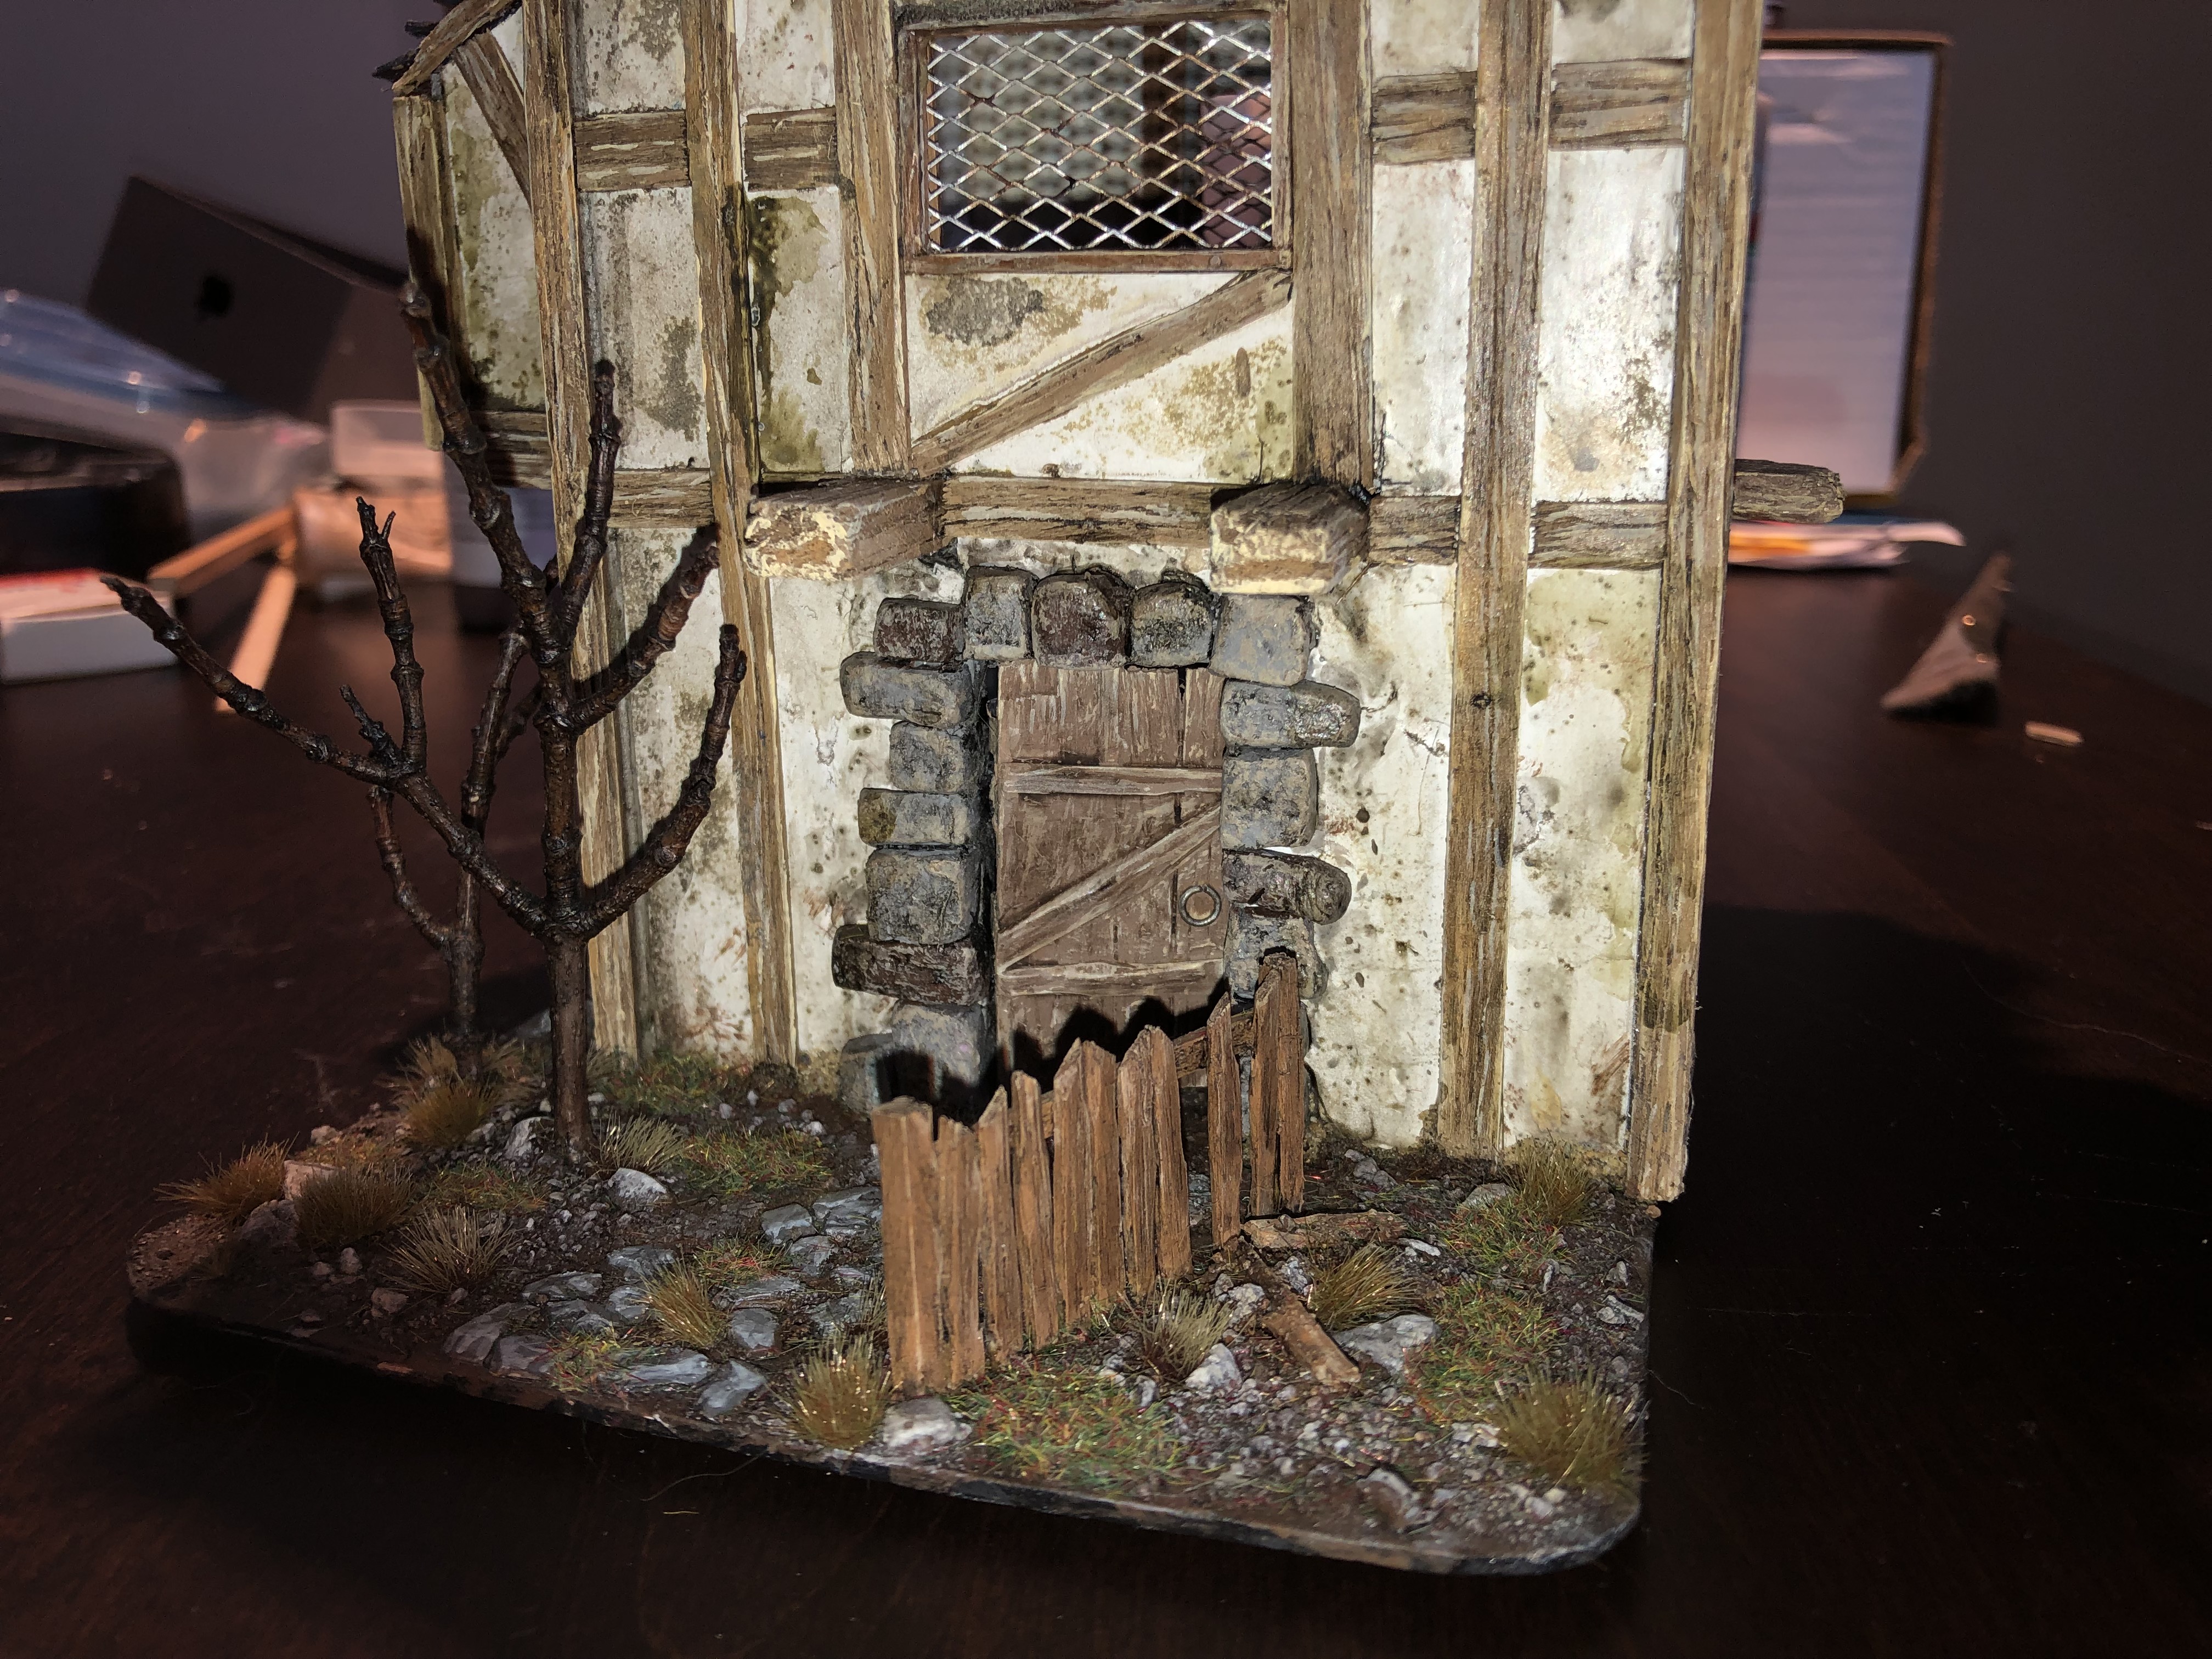 Once again, the trees and the wooden fence that is falling apart adds an interesting gloomy feature.
My next blog entry should be about my current work-in-progress three-part giant building ?


