Seldon9 Is Painting HeroQuest


Recommendations: 642
About the Project
A friend asked me to paint up his HeroQuest set. I foolishly said yes.
Related Company: Hasbro
Related Genre: Fantasy
This Project is Completed
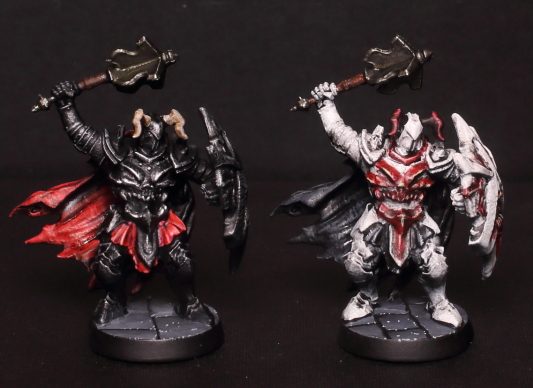
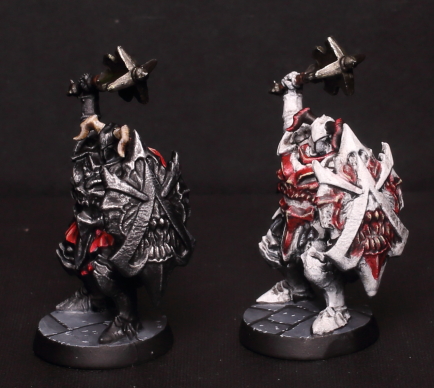
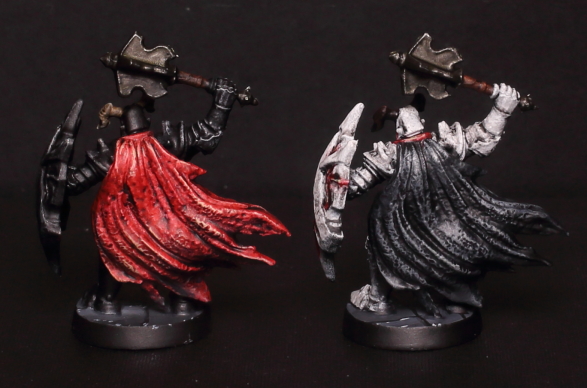
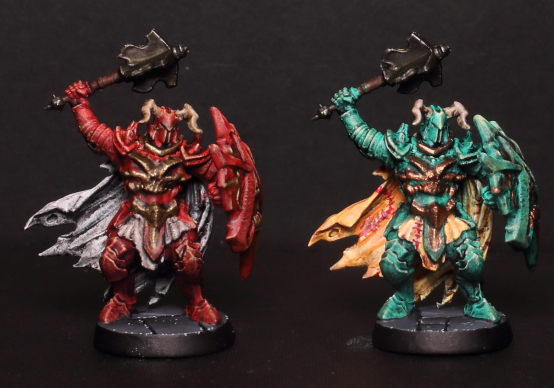
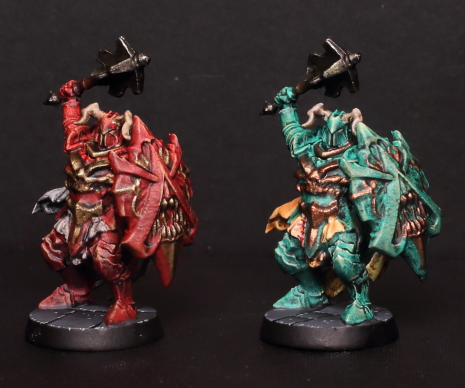
Dread Knights
I thought I’d try to personalise each knight so I came up with a scheme for each.
Black knight: black armour, dry brush silver with red cape.
Red knight: red armour, gold highlights and a white cape.
White kinght: white armour, red highlights and a black cape.
Green knight: green armour, copper highlights and a cape made of sewn flesh patches.

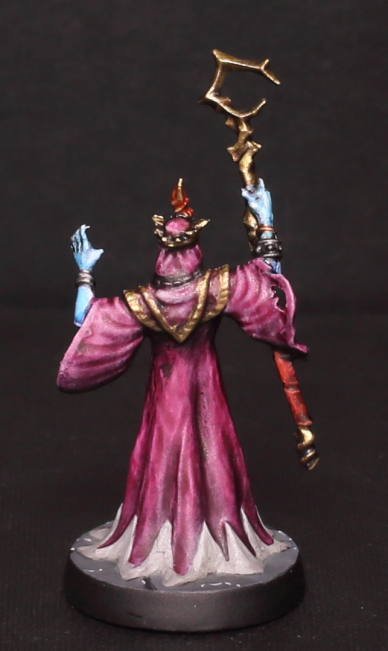
The Evil Lich
Well I think he’s a lich. I haven’tread the rules. I used the same blue skin tone as the zombies. Magos purple contrast skintone over the preshaded robes.
I tried to give the edging on his robes a pearlescent look by mixing Vallejo silver metallic with white. It’s ok but doesn’t really have the ffect I hoped for unless you look closely.
I tried to give some of his gold trim a boost by going over it with Blood Angels red contrast and re-edging with gold. I’m pretty pleased with the result. Progress was straightforward.

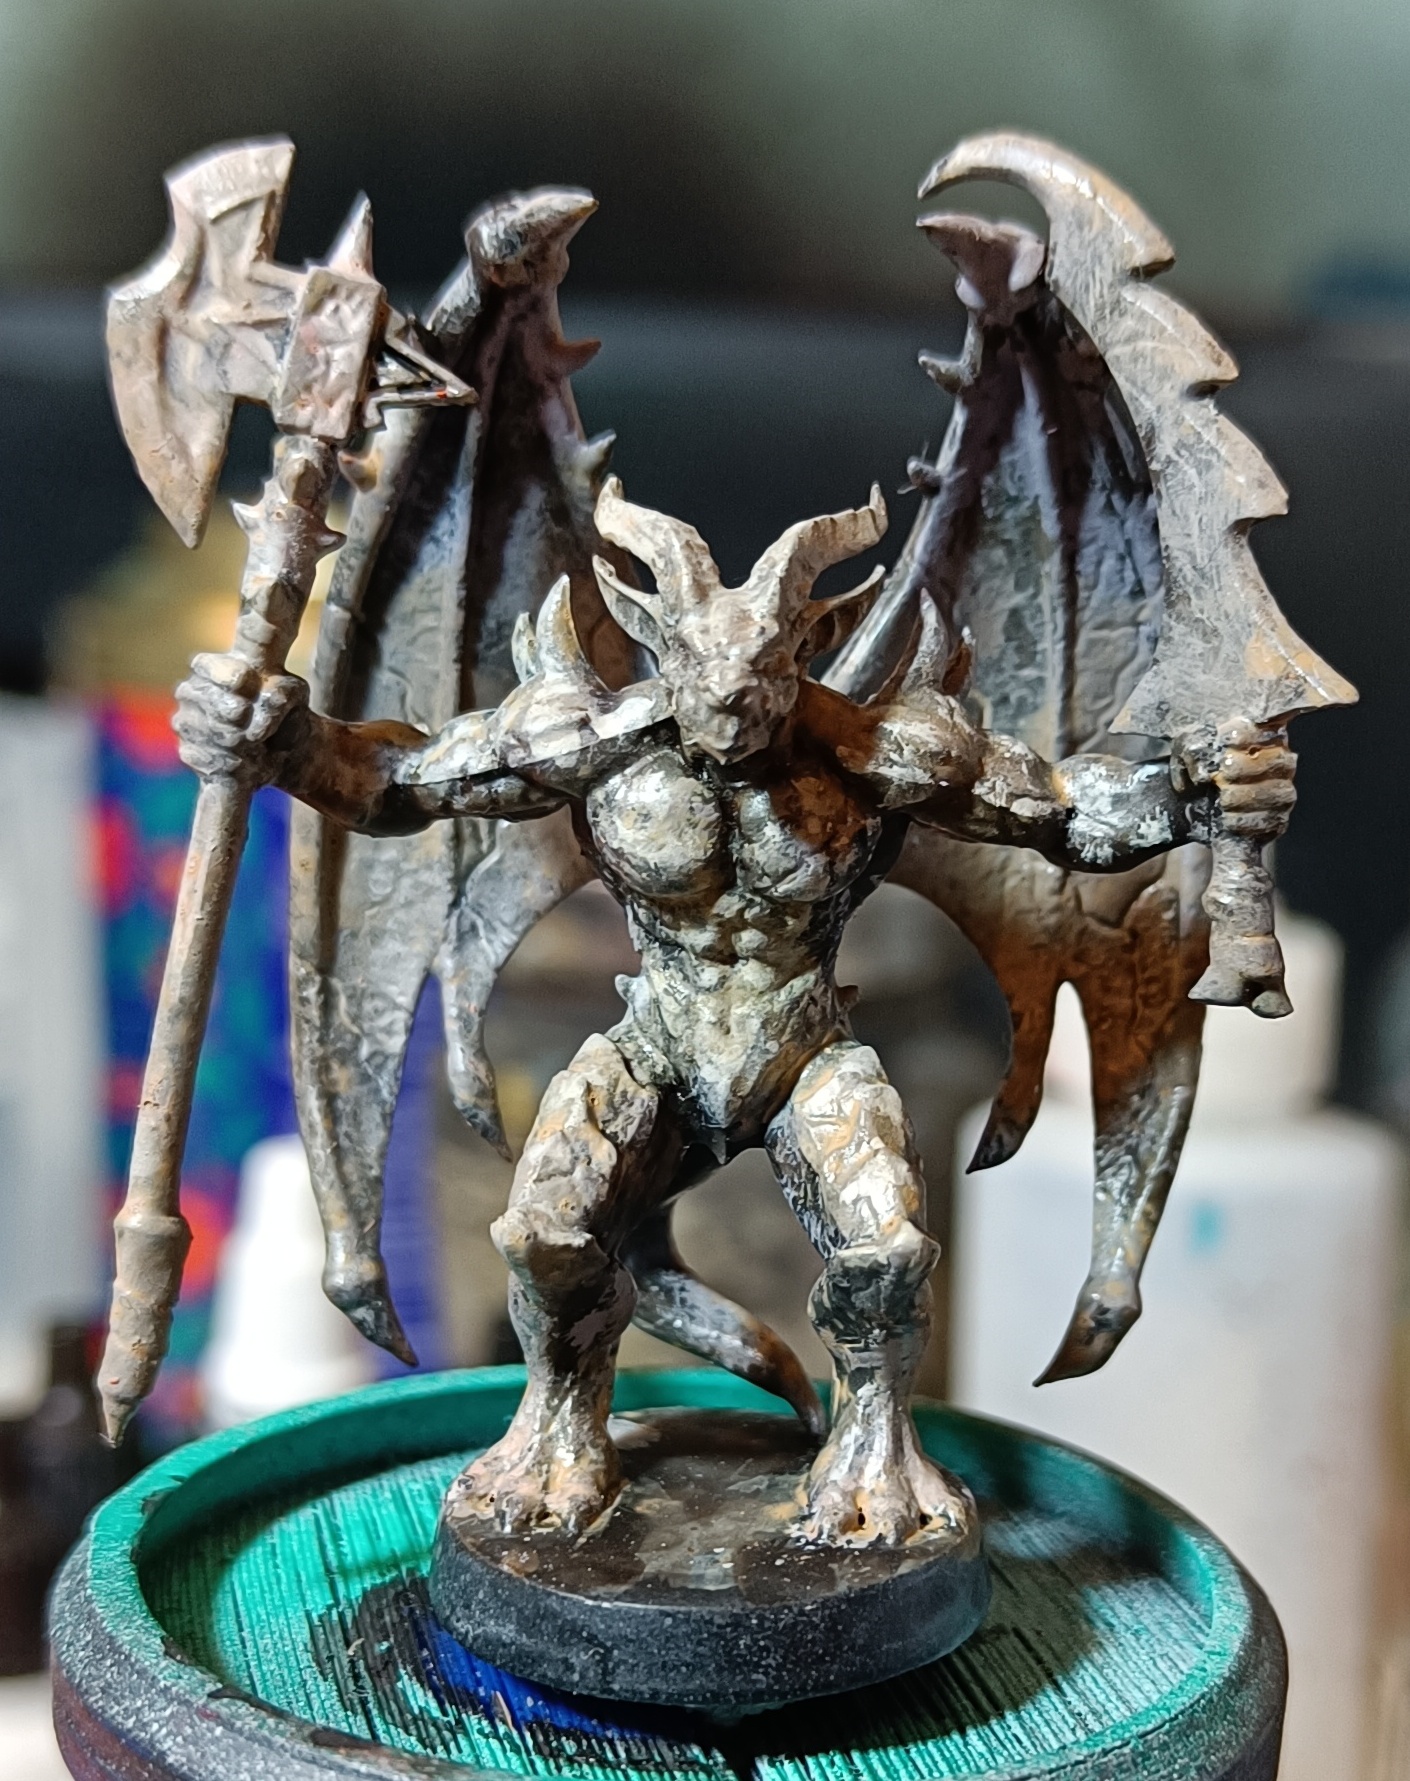
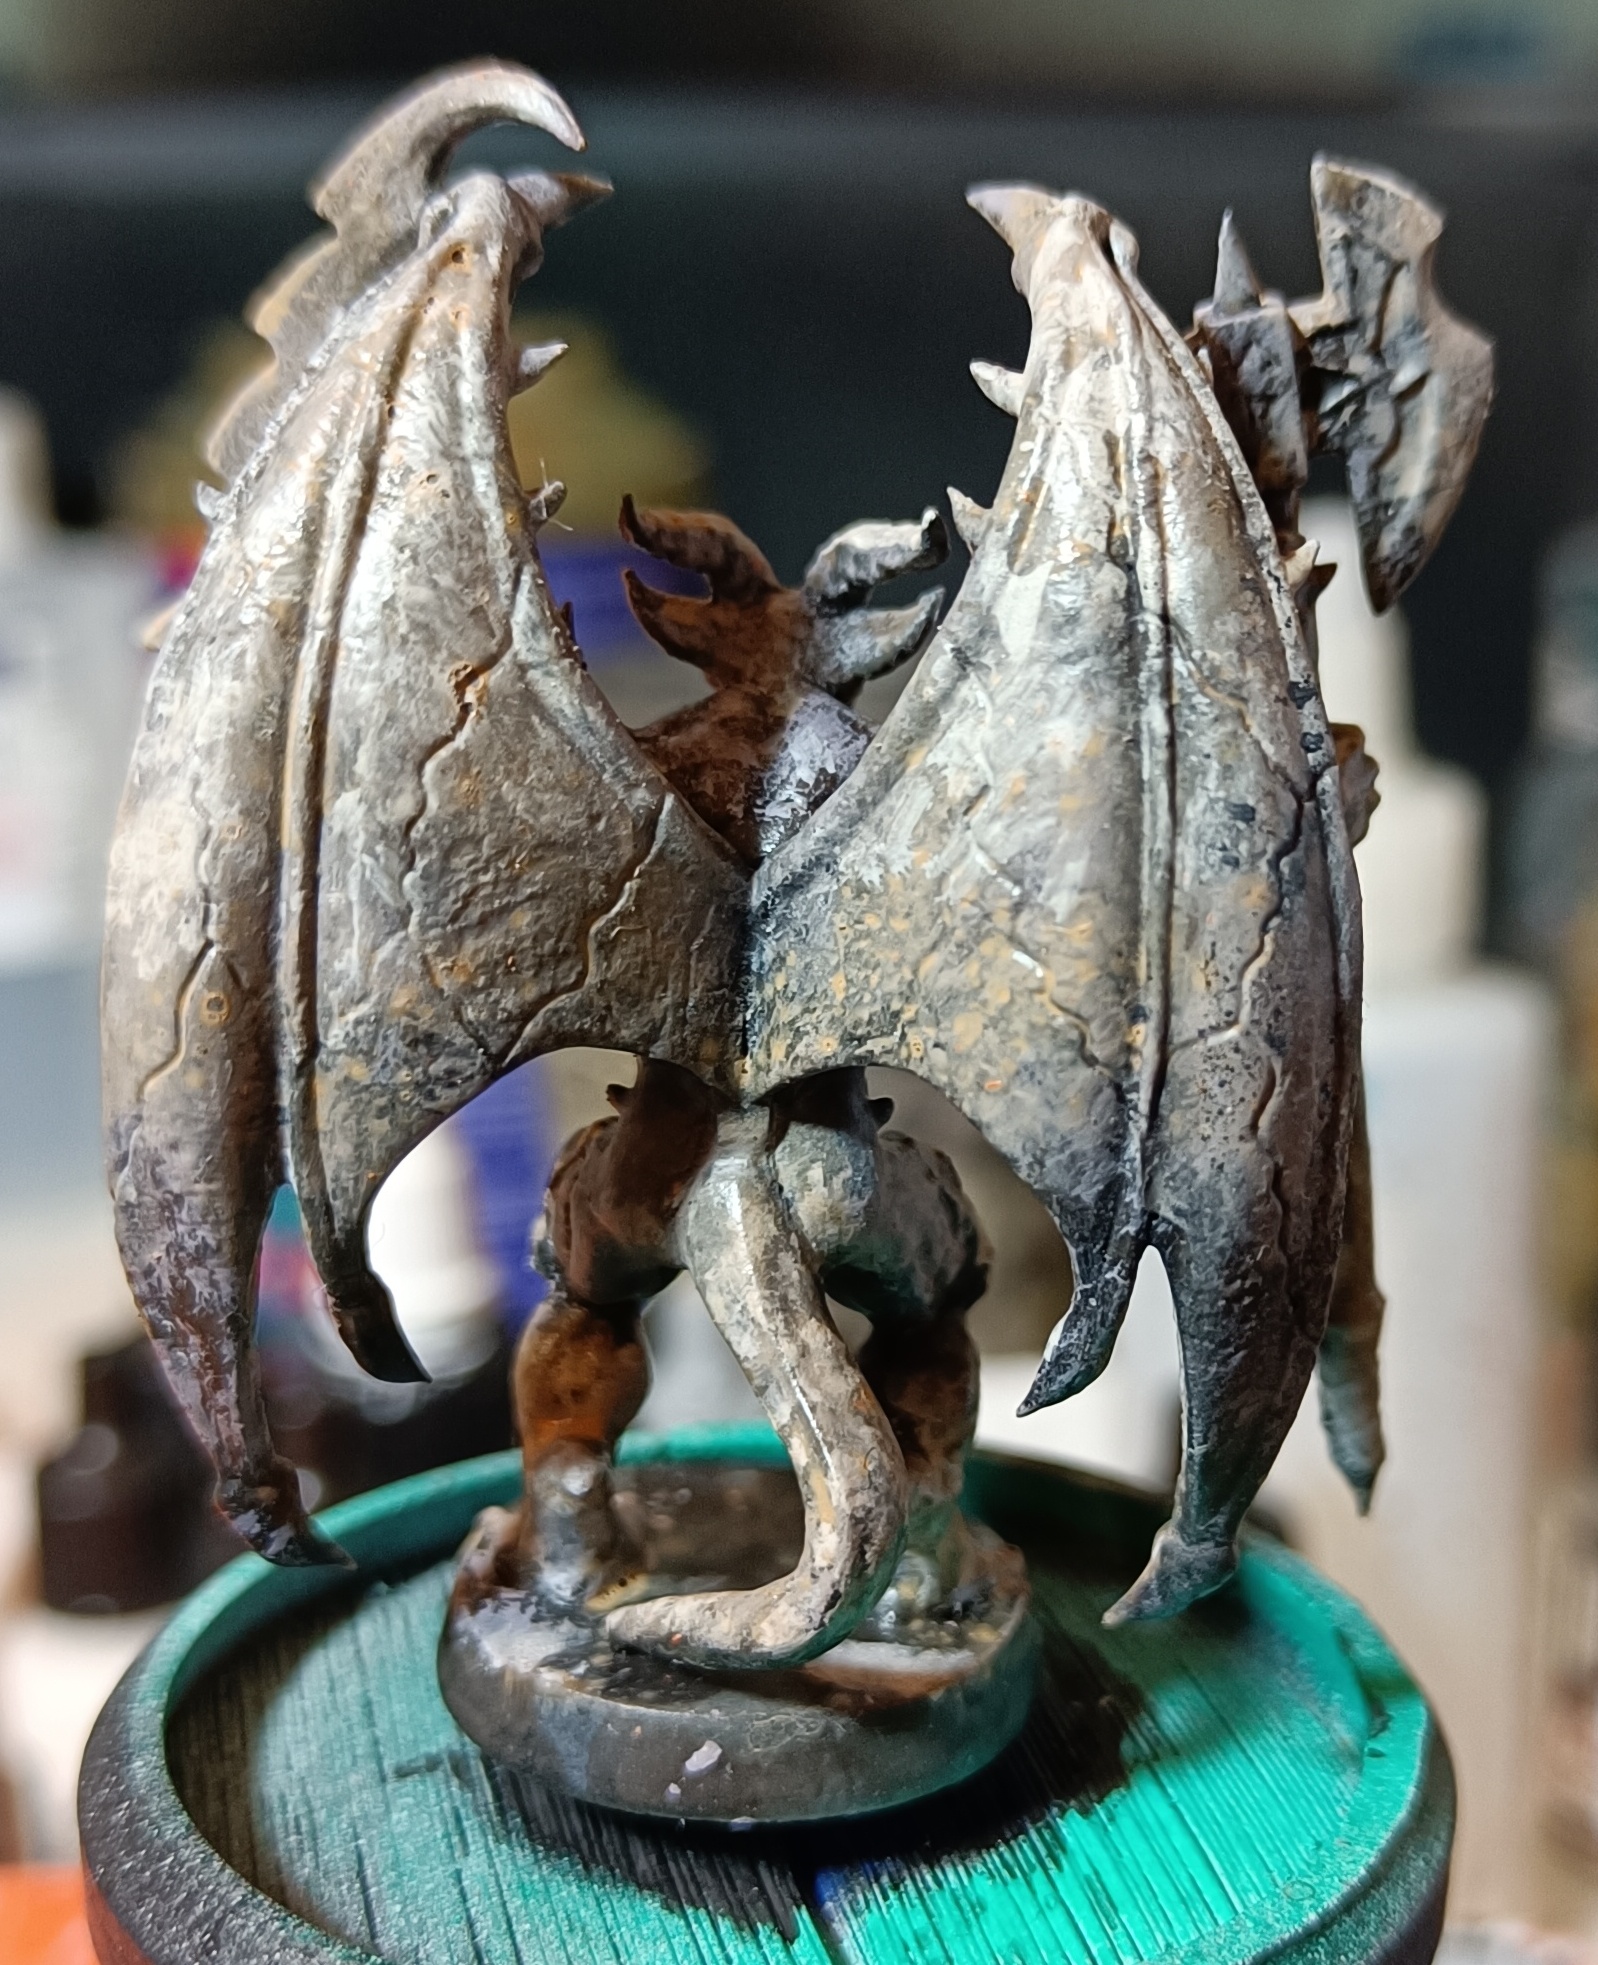
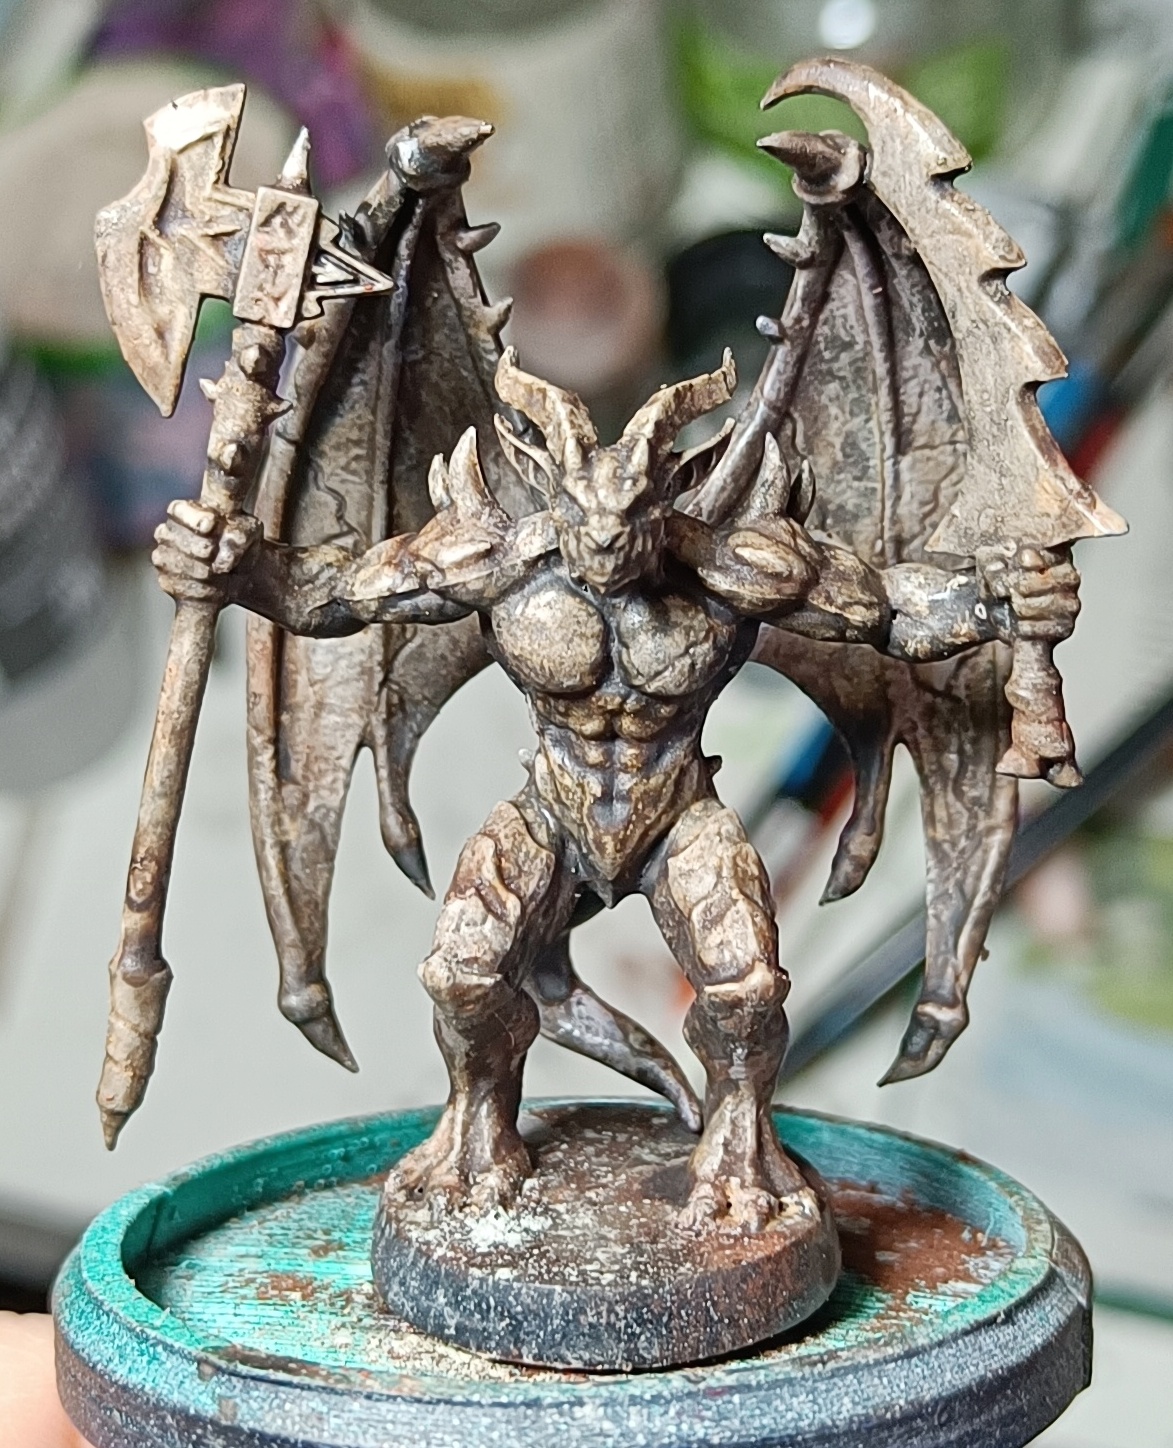
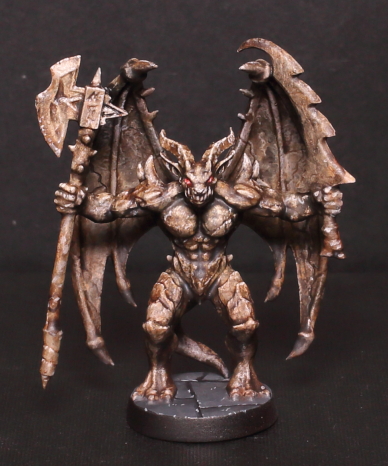
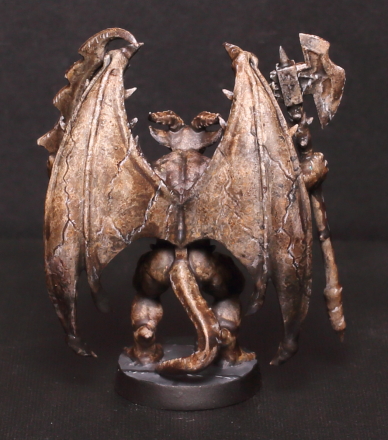
The Gargoyle
I was stuck on how to paint this and cast around for ideas. Progressively lighter, stippled tones was the approach I chose.
Using a rough brush I stippled the following tones going closer to the highlight with each.
– GW Slaanesh grey
– GW Rakarth fleh
– VMC Medium fleshtone
– Pallid Wych flesh
The result was good but the crevices needed defining. I used a wash of Army Painter strong tone and tried one of Gerry’s Gerry Can tricks for painting stone. Add some pigments and squadge them in with a brush.
After that a bit of painting to bring out the teeth and eyes and some stippling of the highest points and all was done.

Furniture Part 1 - Stone
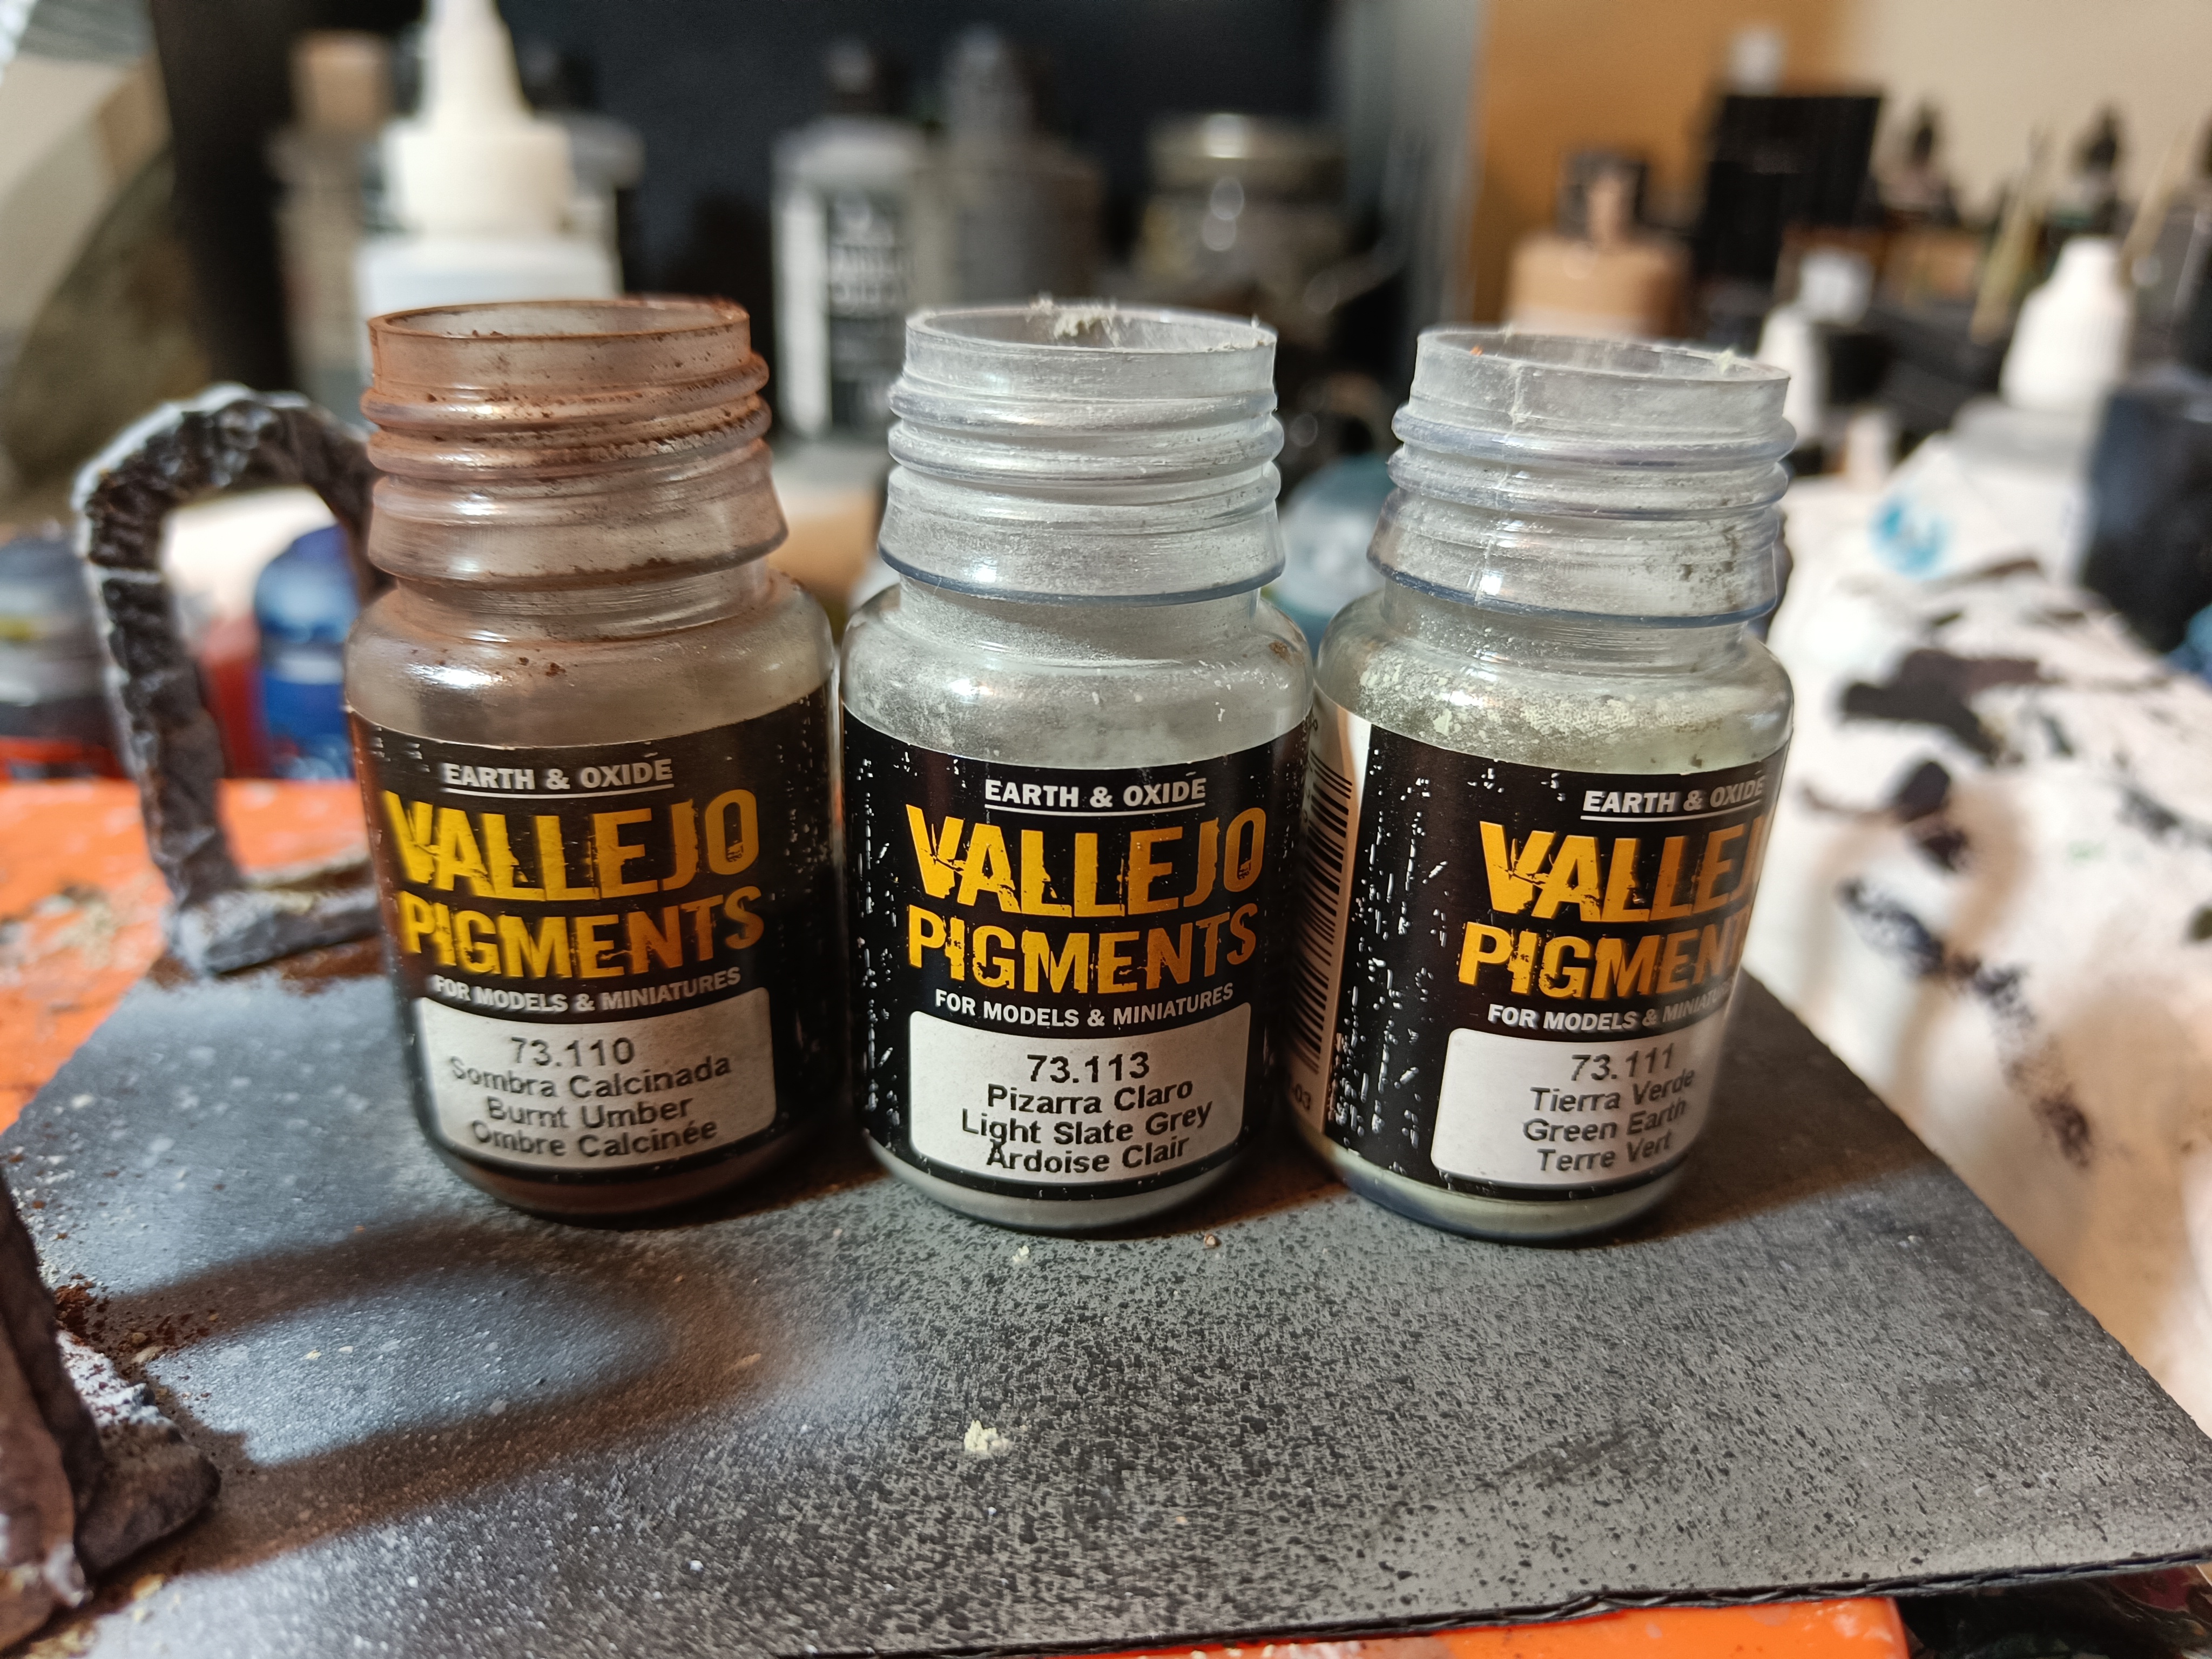
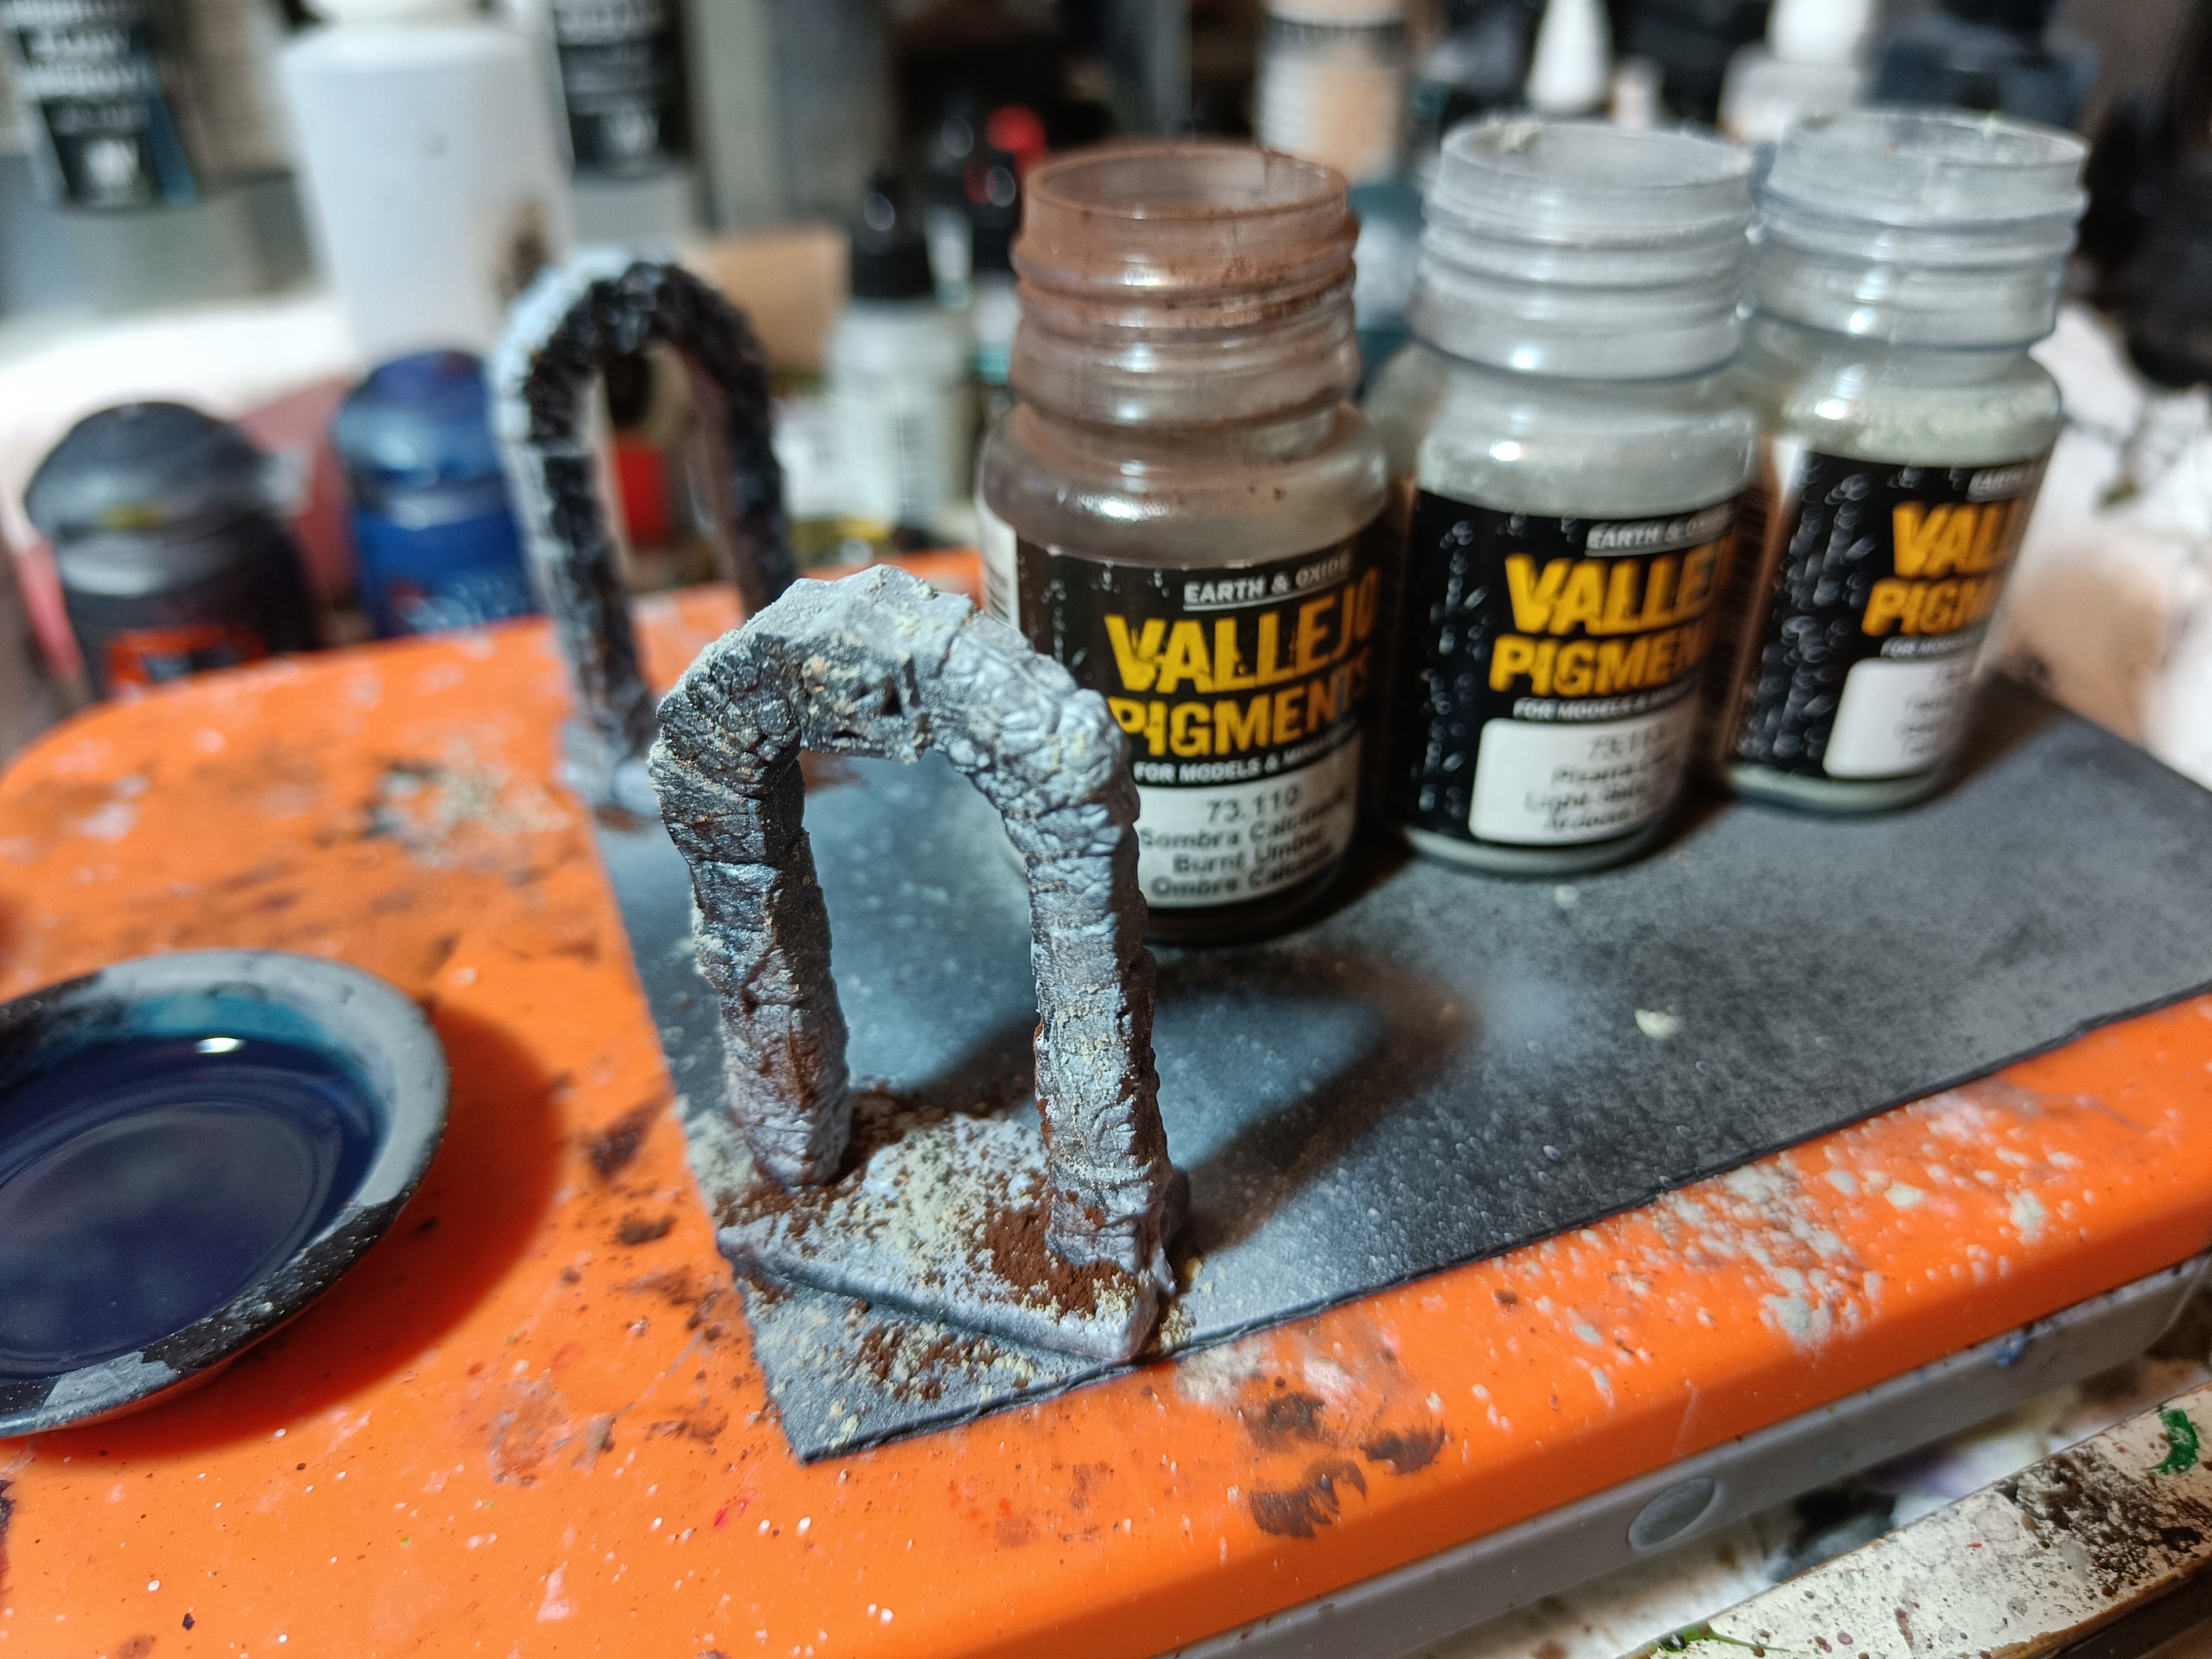
I needed a reasonably quick was to make some interesting stone effects. I’d seen a rather good GerryCan which I wanted to try out using pigments.
First up preshade the mini. I added higlights from two, opposite corners.
Next makea mix of Talassar Blue and Black Templar contrast pants. I needed to tone down the blue so I slightly favoured that over black in the mix. Not quite 50/50. Then I thinned the mix to make sure the preshade would show through.
Next I applied some pigments broadly by going light at the top and darker towards the bottom. I mainly used Vallejo Burnt Umber, Light Slate Grey and Green Earth. To bed them in I applied the contrast mix using stabbing motions with the brush. Typical brushstrokes would wash them pigment out.


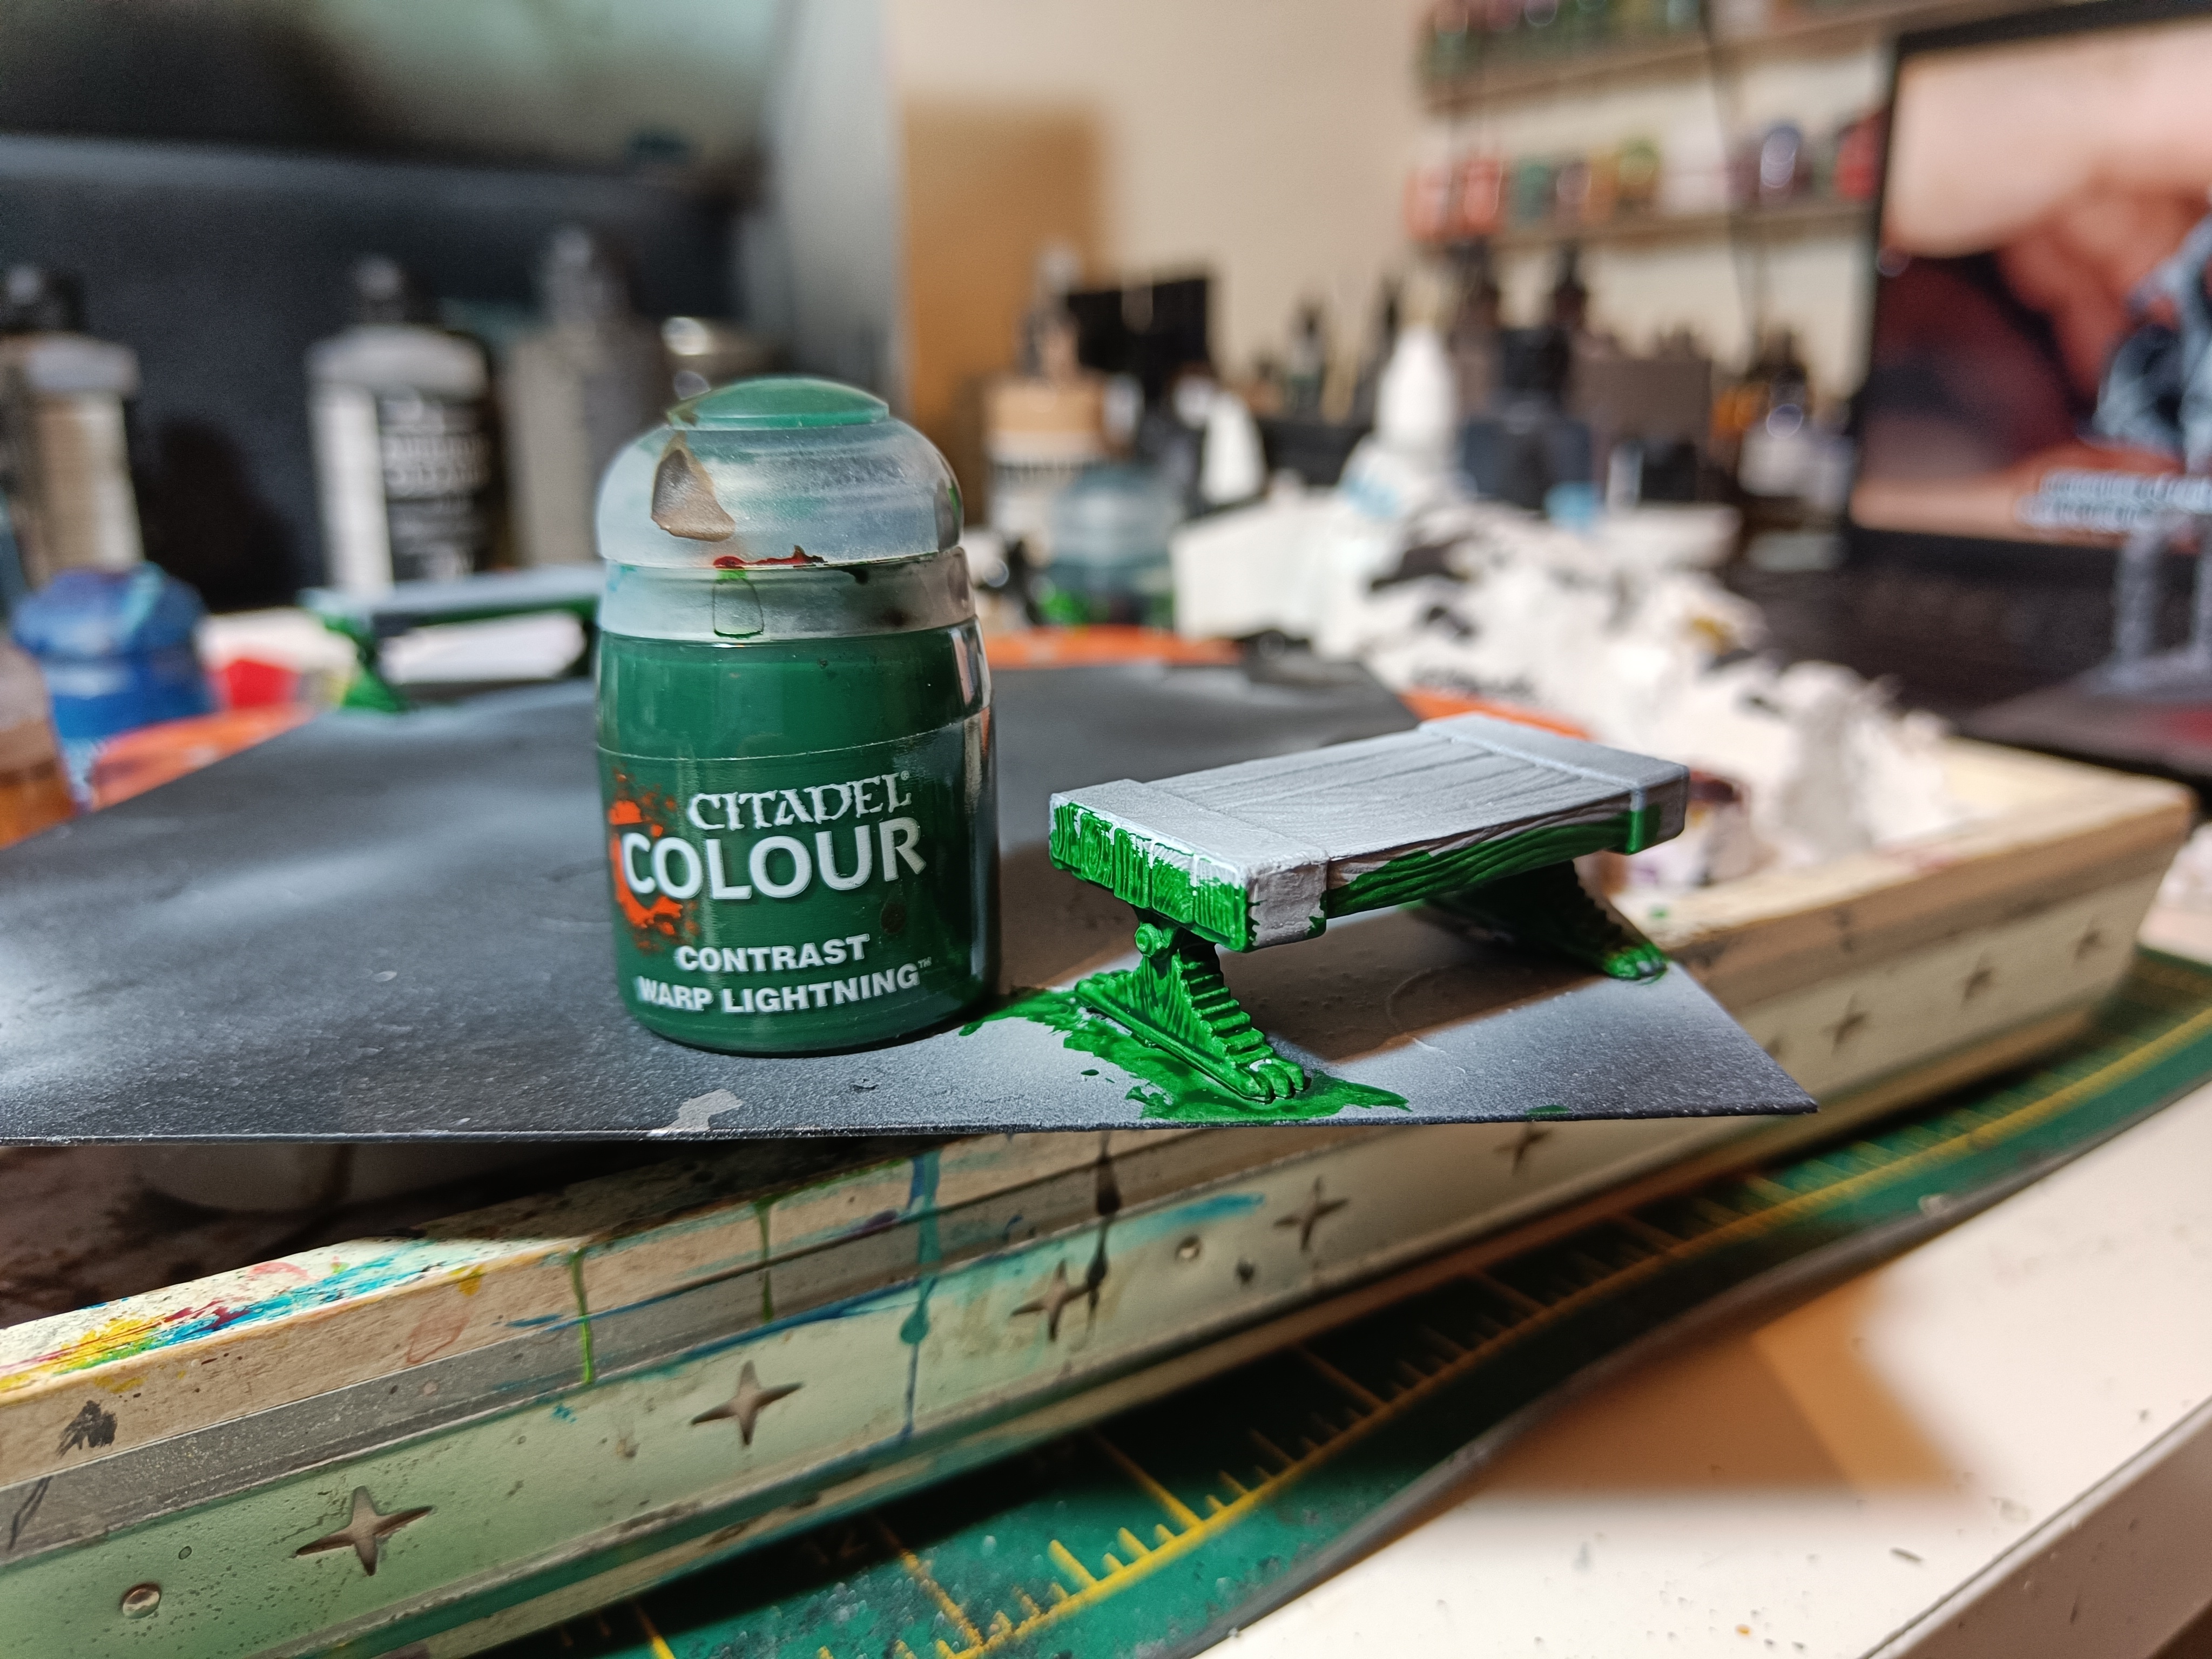
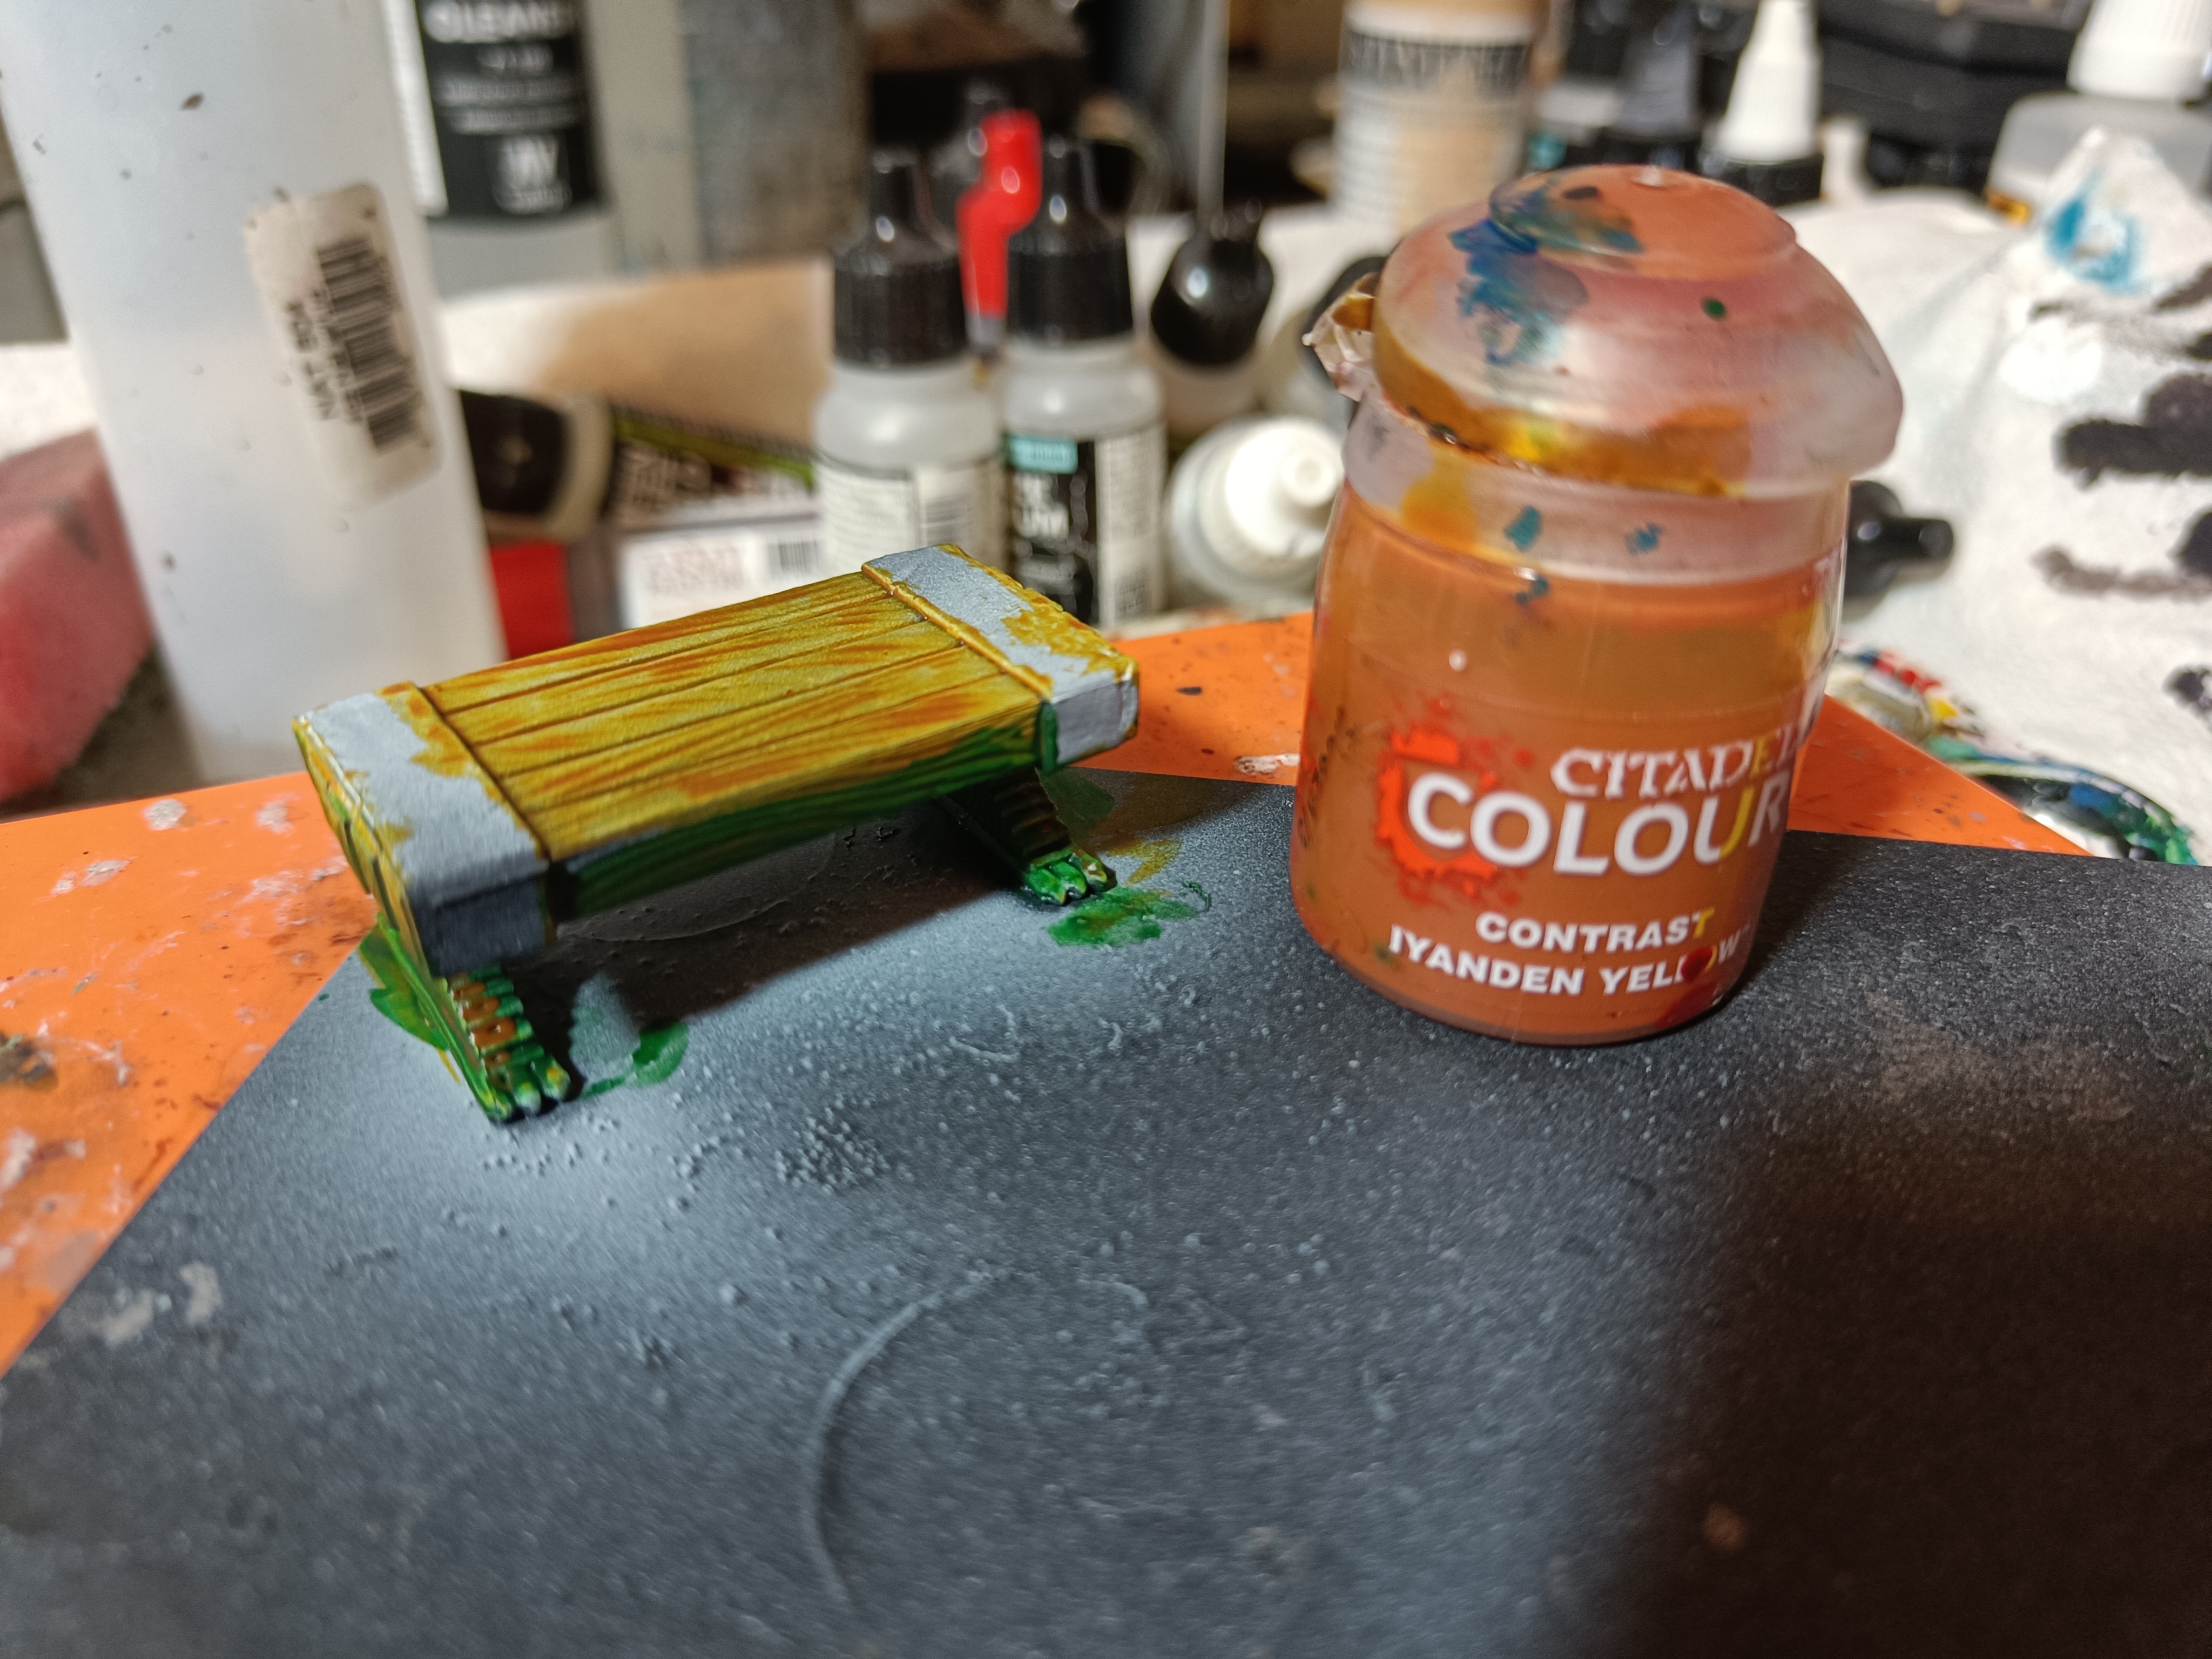
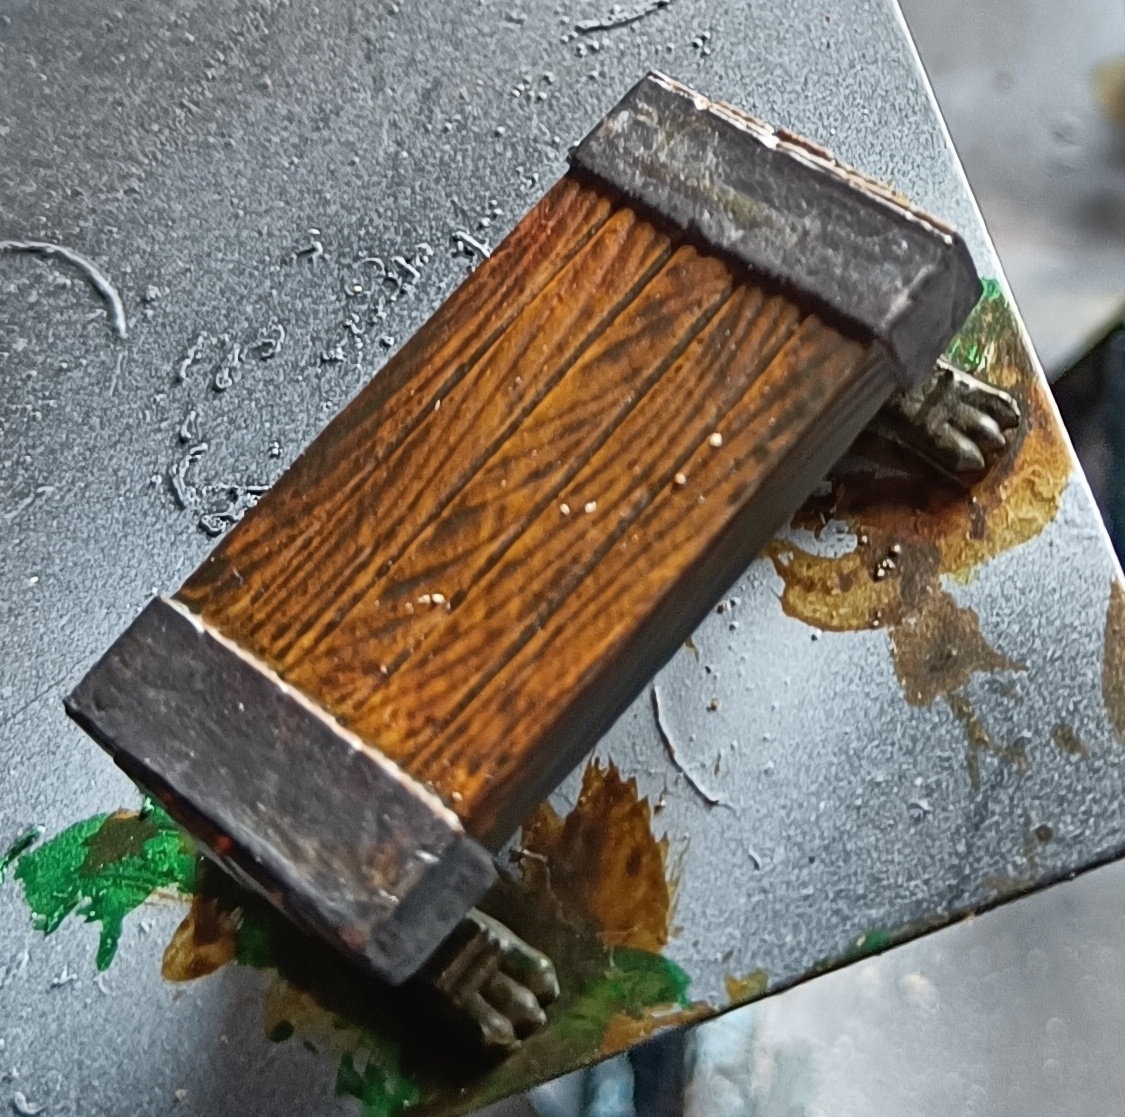
Furniture Part 2 - Wood
Once again I needed something simple. Start off with a preshade adding highlights from opposite corners.
Paint thinned Warpstone Green in the shadowed areas.
Paint thinned Iyanden Yellow in the other areas.
Go over all of it with a brown of your choice. I switched between Aggaros Dunes, Skeleton Horde and Snakebite Leather depending on how dark I wanted the colour. Thin the paint to make sure the undercoat shows through.
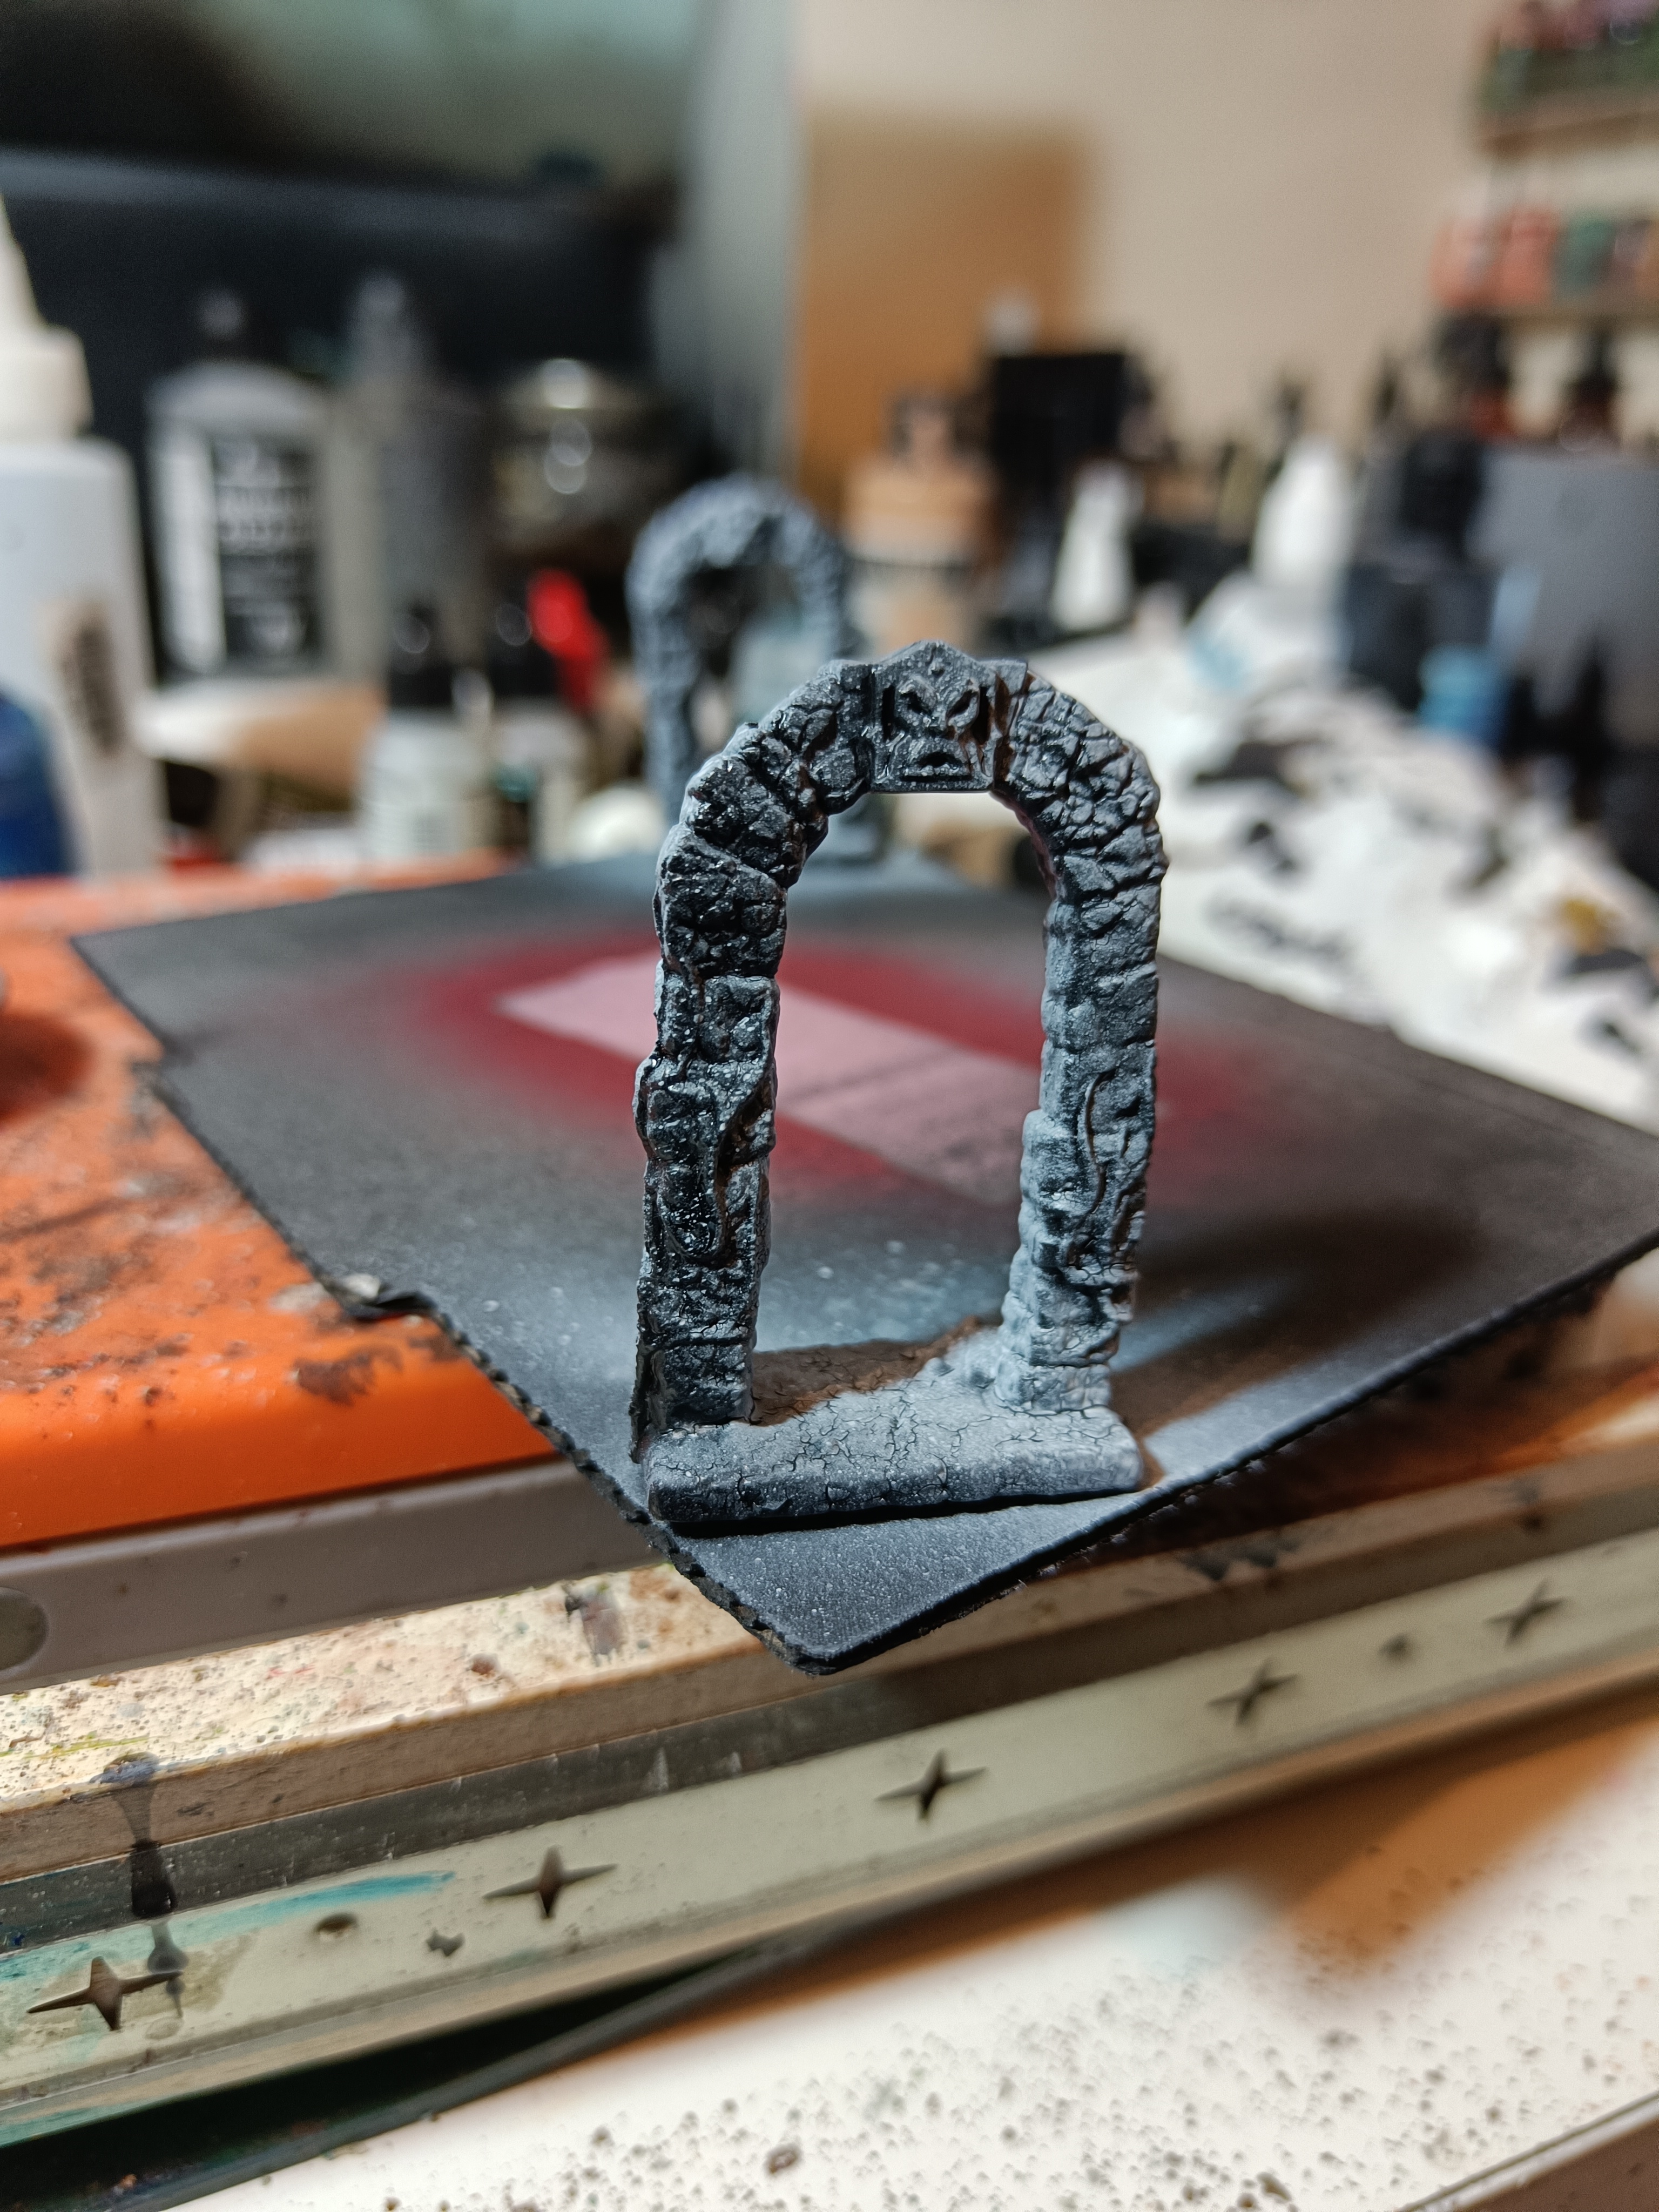
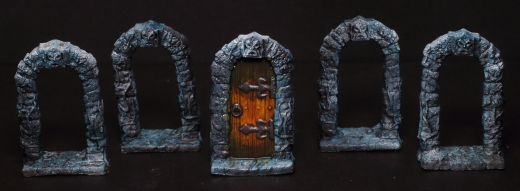
Archways and Doorways
My friend I was painting this for askedif I could get what I’d done out to him quickly. I hadn’t started these so no time for faffing about. The stone and doors were done using the techniques described in the stone andwood sections.
In an effort to get stuff done fast I didn’t dilute my paints. No time for lots of coats. Warpstone Green went on more heavily that I liked and I rather regret that. I still liked the finished pieces though.


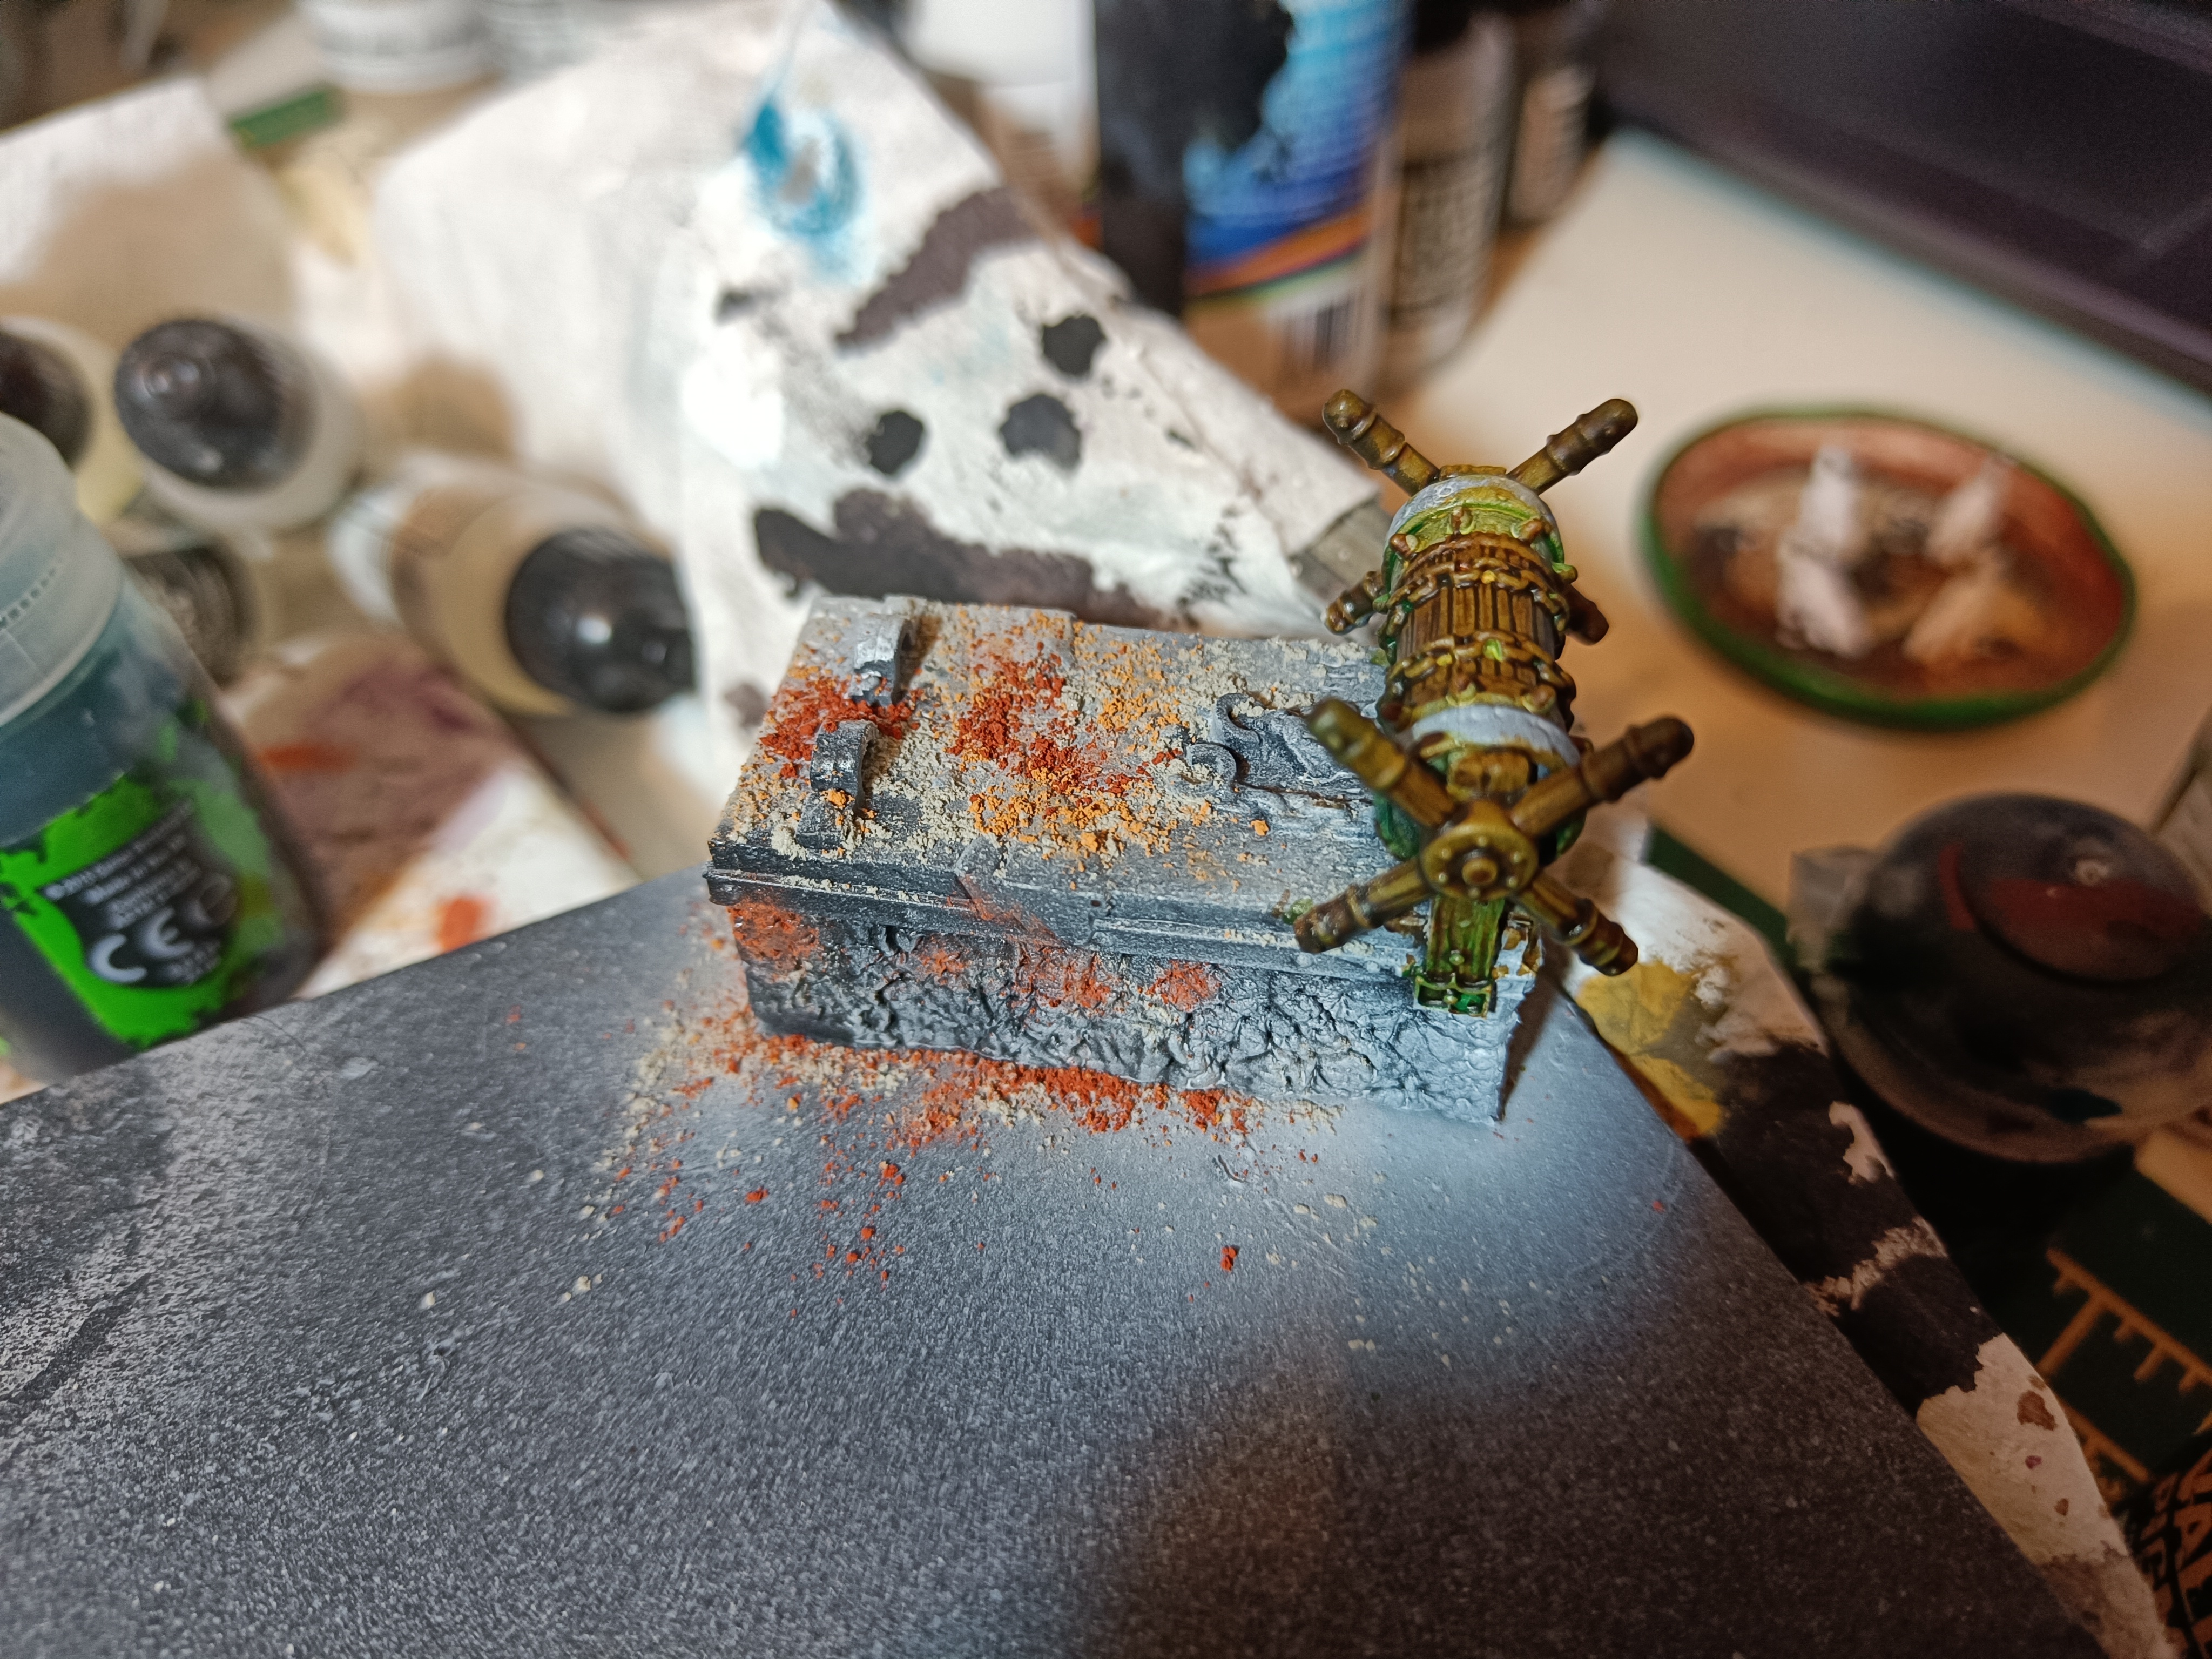
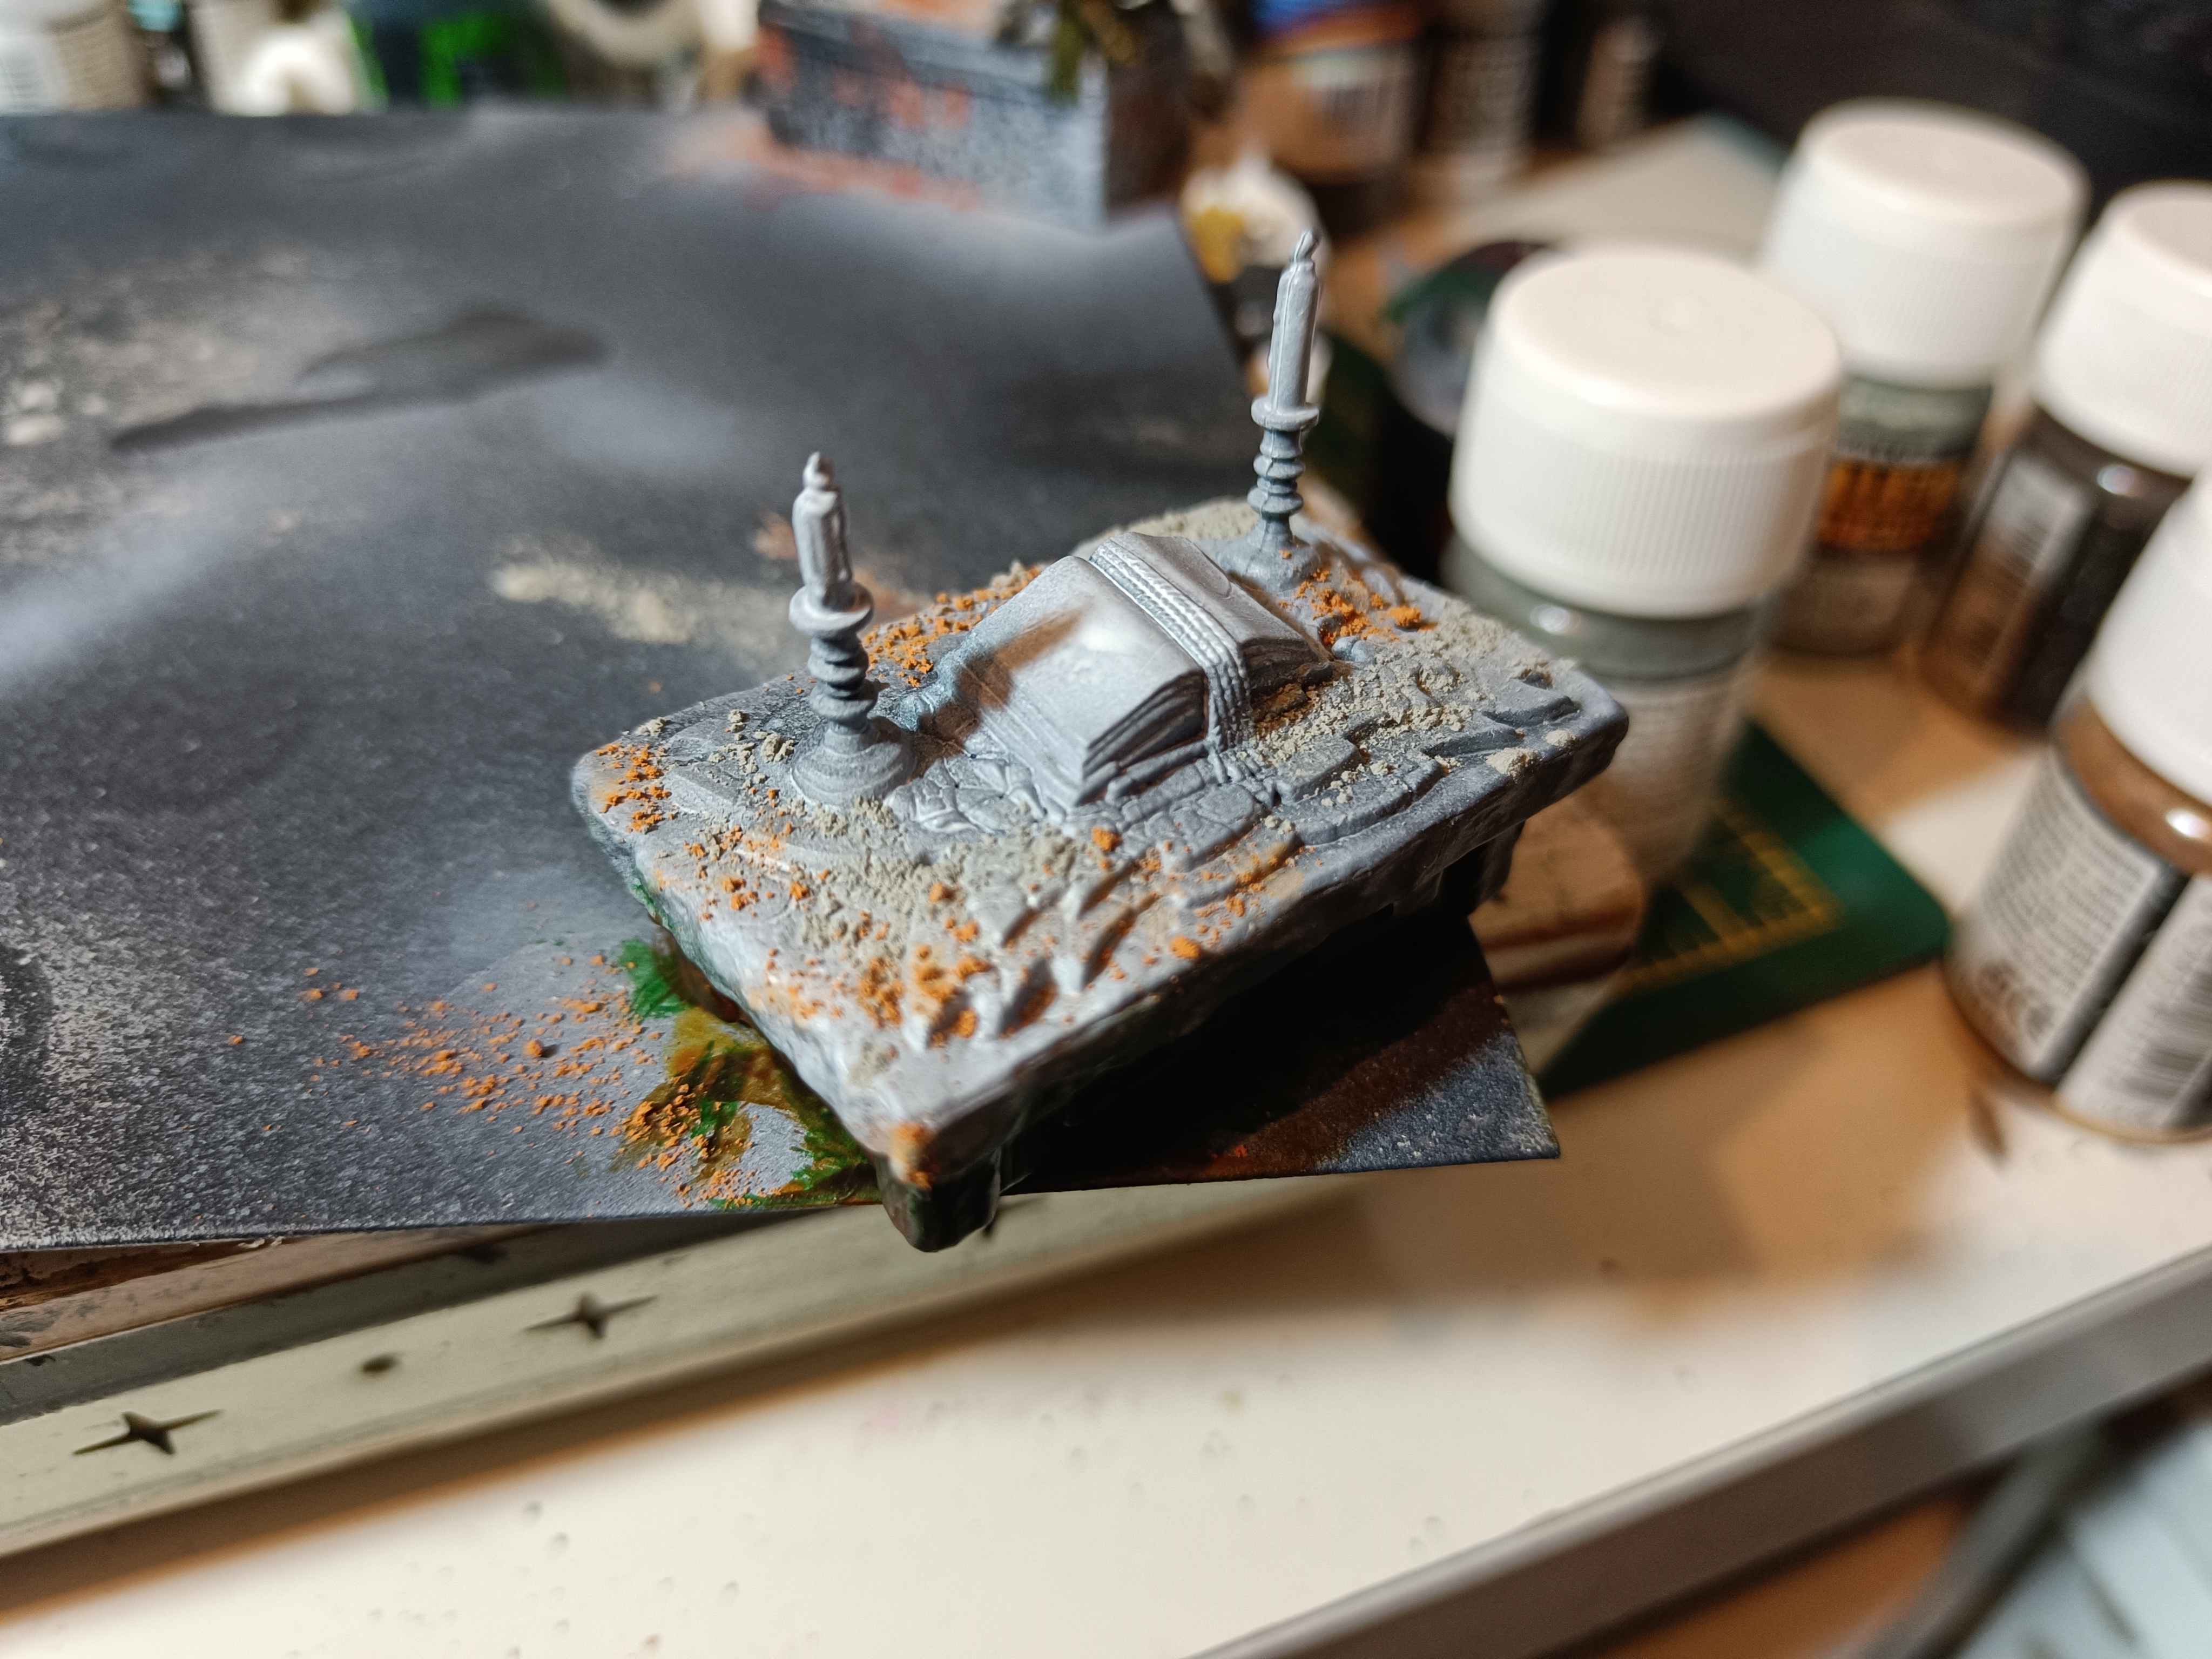
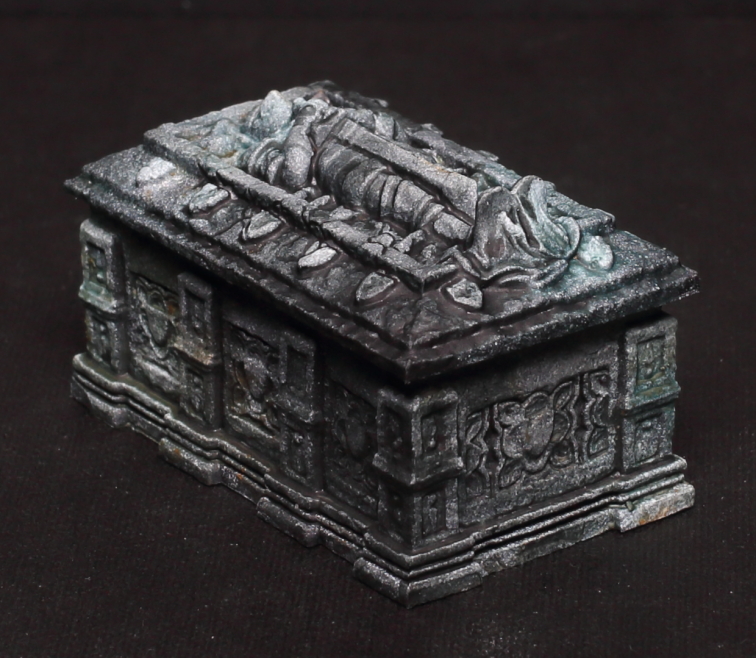
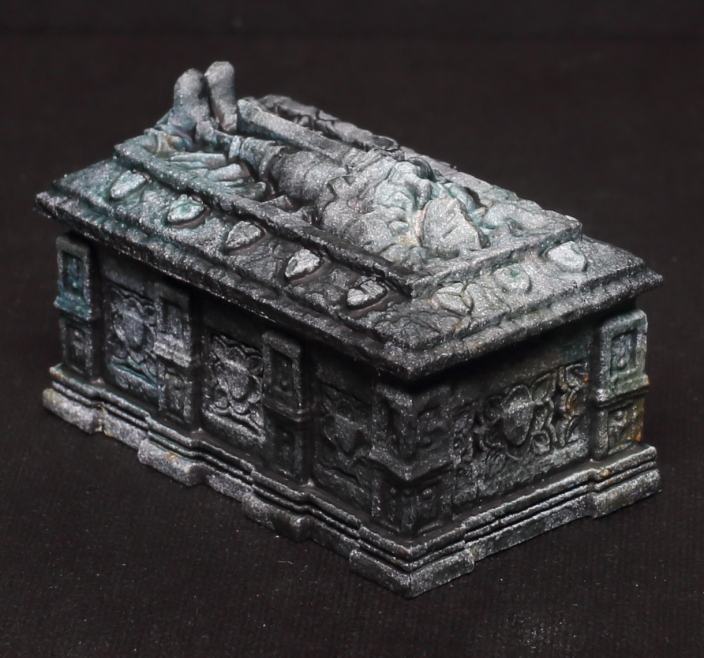
The Sarcophagus
Really simple piece. I used the stone technique as described with a view to doing a bit more. But I liked the finish enough to just leave it. Don’t think I would have improved it any more.
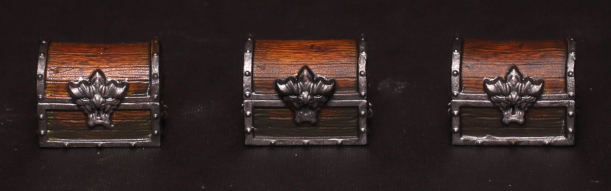
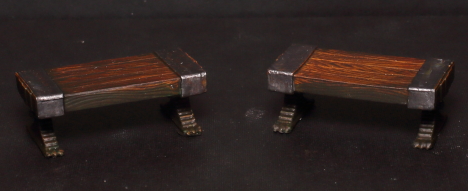
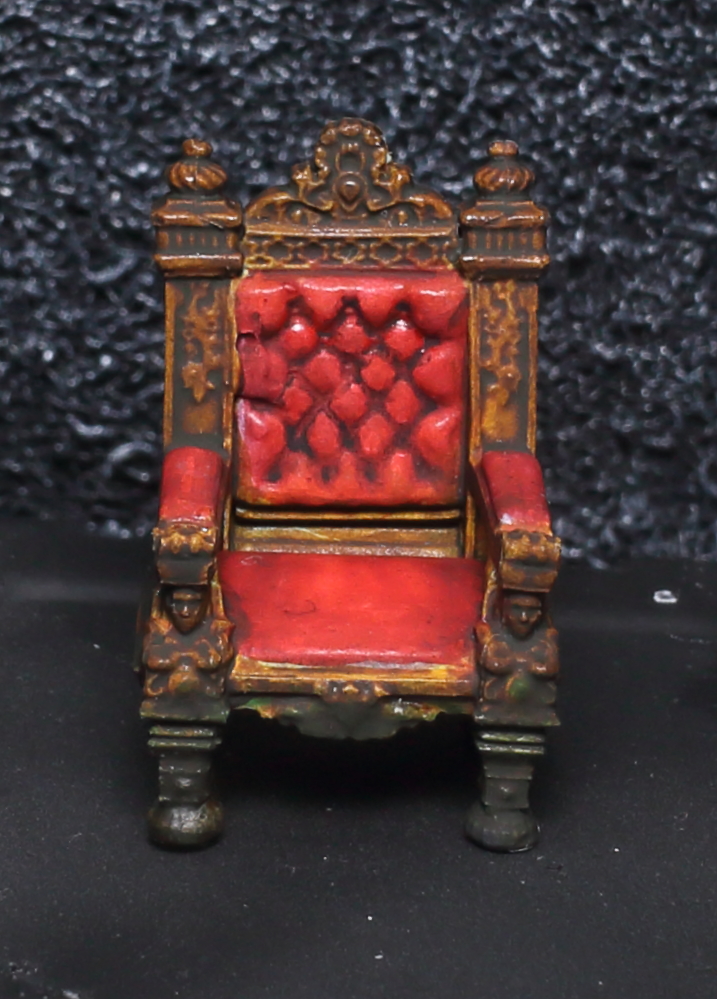
Treasure Chests, Benches and a Comfy Chair
Nothing clever on these. I used the wood technique along with a metallic.
For the chair’s padding I preshaded highlights and went over with thinned Contrast Blood Angels red. I used purple contrast in the shadow areas but it barely showed. I strengthened the grooves in hte back padding with a black oil wash.