


![Alternative Trench Crusade Miniatures? Trench Missionaries Review | Wargames Atlantic [7 Days Early Access]](https://images.beastsofwar.com/2026/03/unboxing-wargames-atlantic-trench-missionaries-coverimage-225-127.jpg)


Warcry: Red Harvest – a self motivational project blog


Recommendations: 494
About the Project
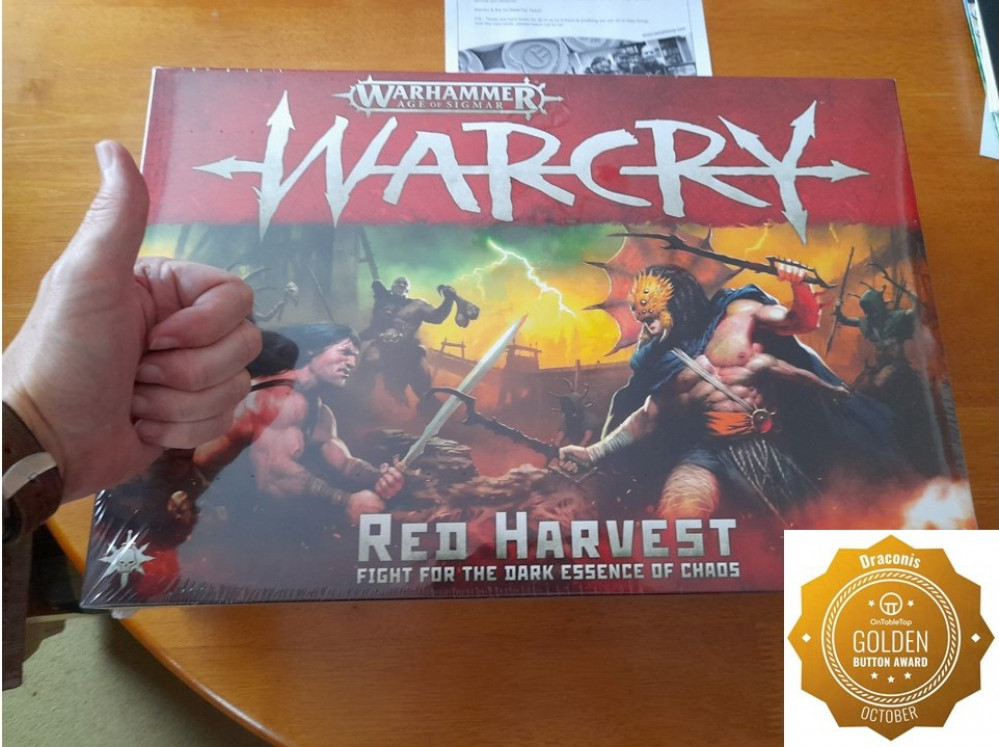
This will be my first project log here, and I am hoping that it will be a good motivational tool for myself in order to make some positive progress. I’m a hobbyist in my late 40’s, having started with GW (WFB 3rd ed, Rogue Trader, WFRP) back in the golden era of the mid/late 80’s. Recent years have seen my hobby progress wain for various reasons, but I have continued to be interested in all aspects of our hobby. Part of that has been watching the content put out by OTT (BoW) – and after entering the competitions many times (including the very enjoyable Heroforge 'design a mini' ones) I was lucky enough to very recently win a copy of ‘Warcry: Red Harvest’. Let me state first - I’m not sure how often I will be making updates here. As said earlier I hope this will be a motivational tool for me, and lead to other projects. Additionally, my skills are moderate at best, so this will be more akin to a progress diary rather than a ‘how to’. I downloaded the new force list info from Games Workshop and a few days before my birthday, the rather large box arrived. So, cracking open the box to release the mystical ‘new box smell’, this is where the project begins.
Related Game: Warhammer Age Of Sigmar: Warcry
Related Company: Games Workshop
Related Genre: Fantasy
This Project is Completed
Three is better than none....
Don’t have my painting area clear yet, so I was going to leave things….. but then I decided I would put together some of the Darkoath minis.
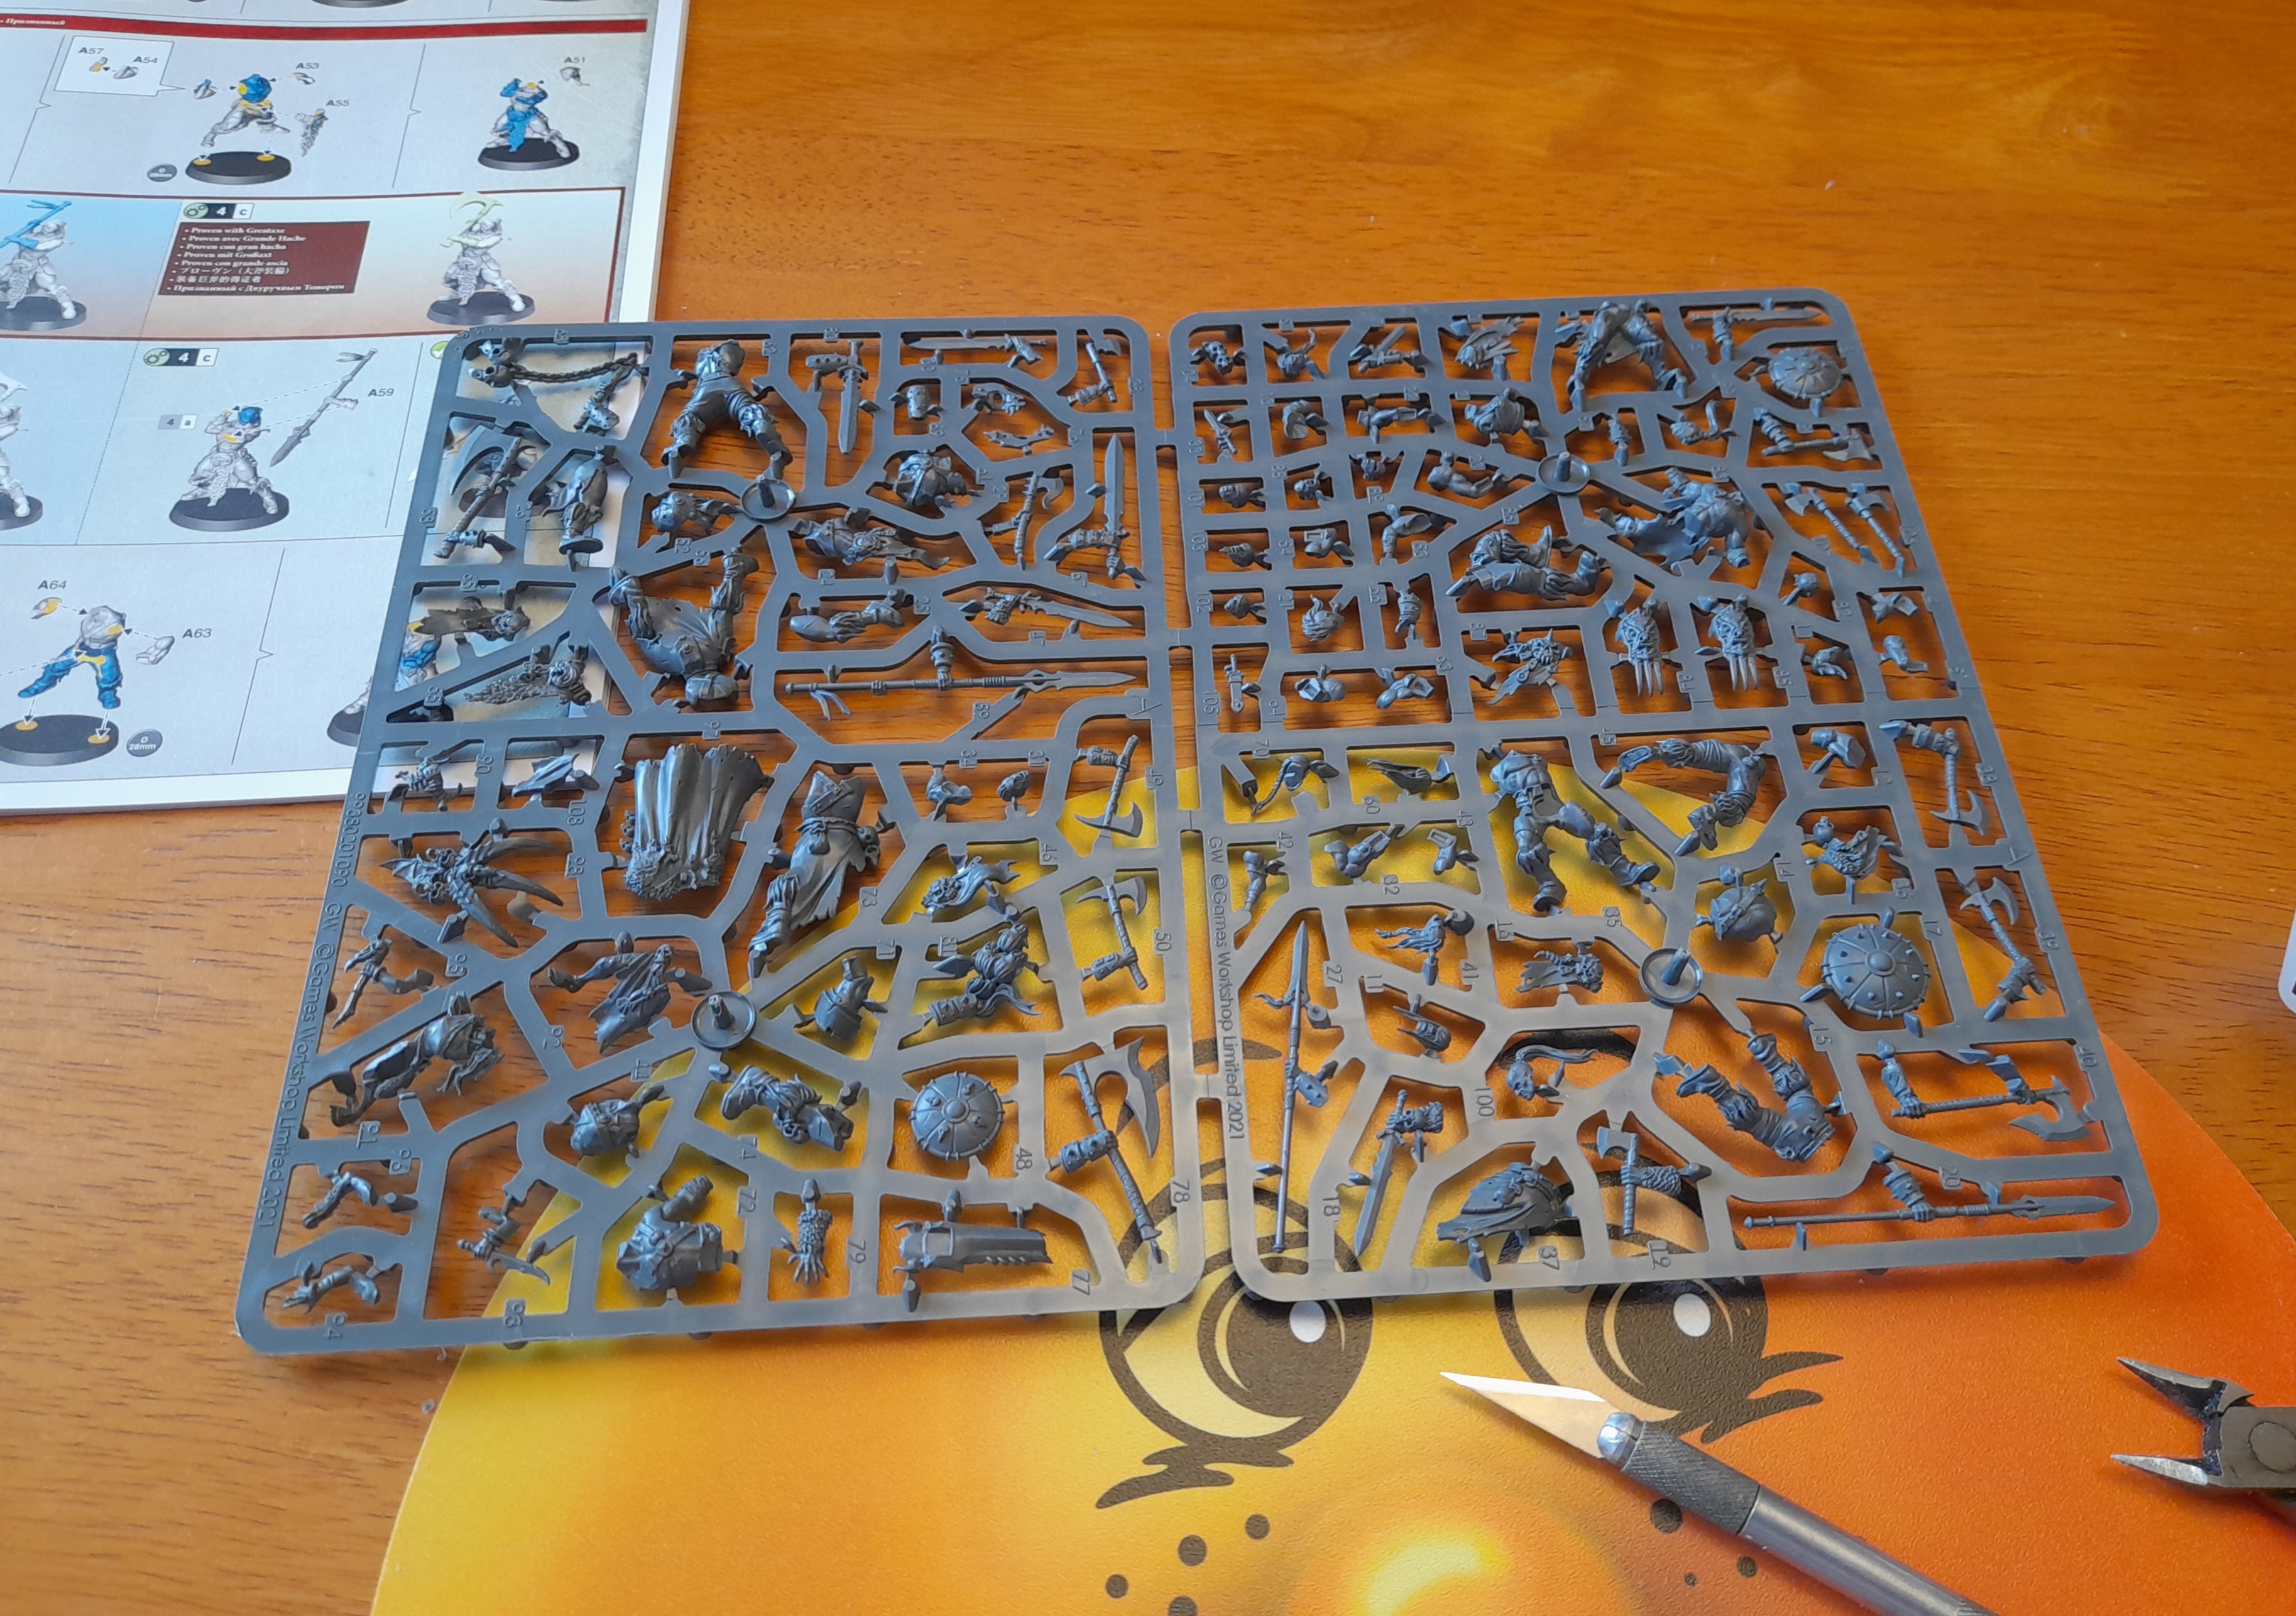 Darkoath sprue ready to go
I put a fresh blade on my knife for this, as the other one was getting a little blunt – and using a slightly blunt blade can be more dangerous sometimes, as you may apply a little more force and can slip.
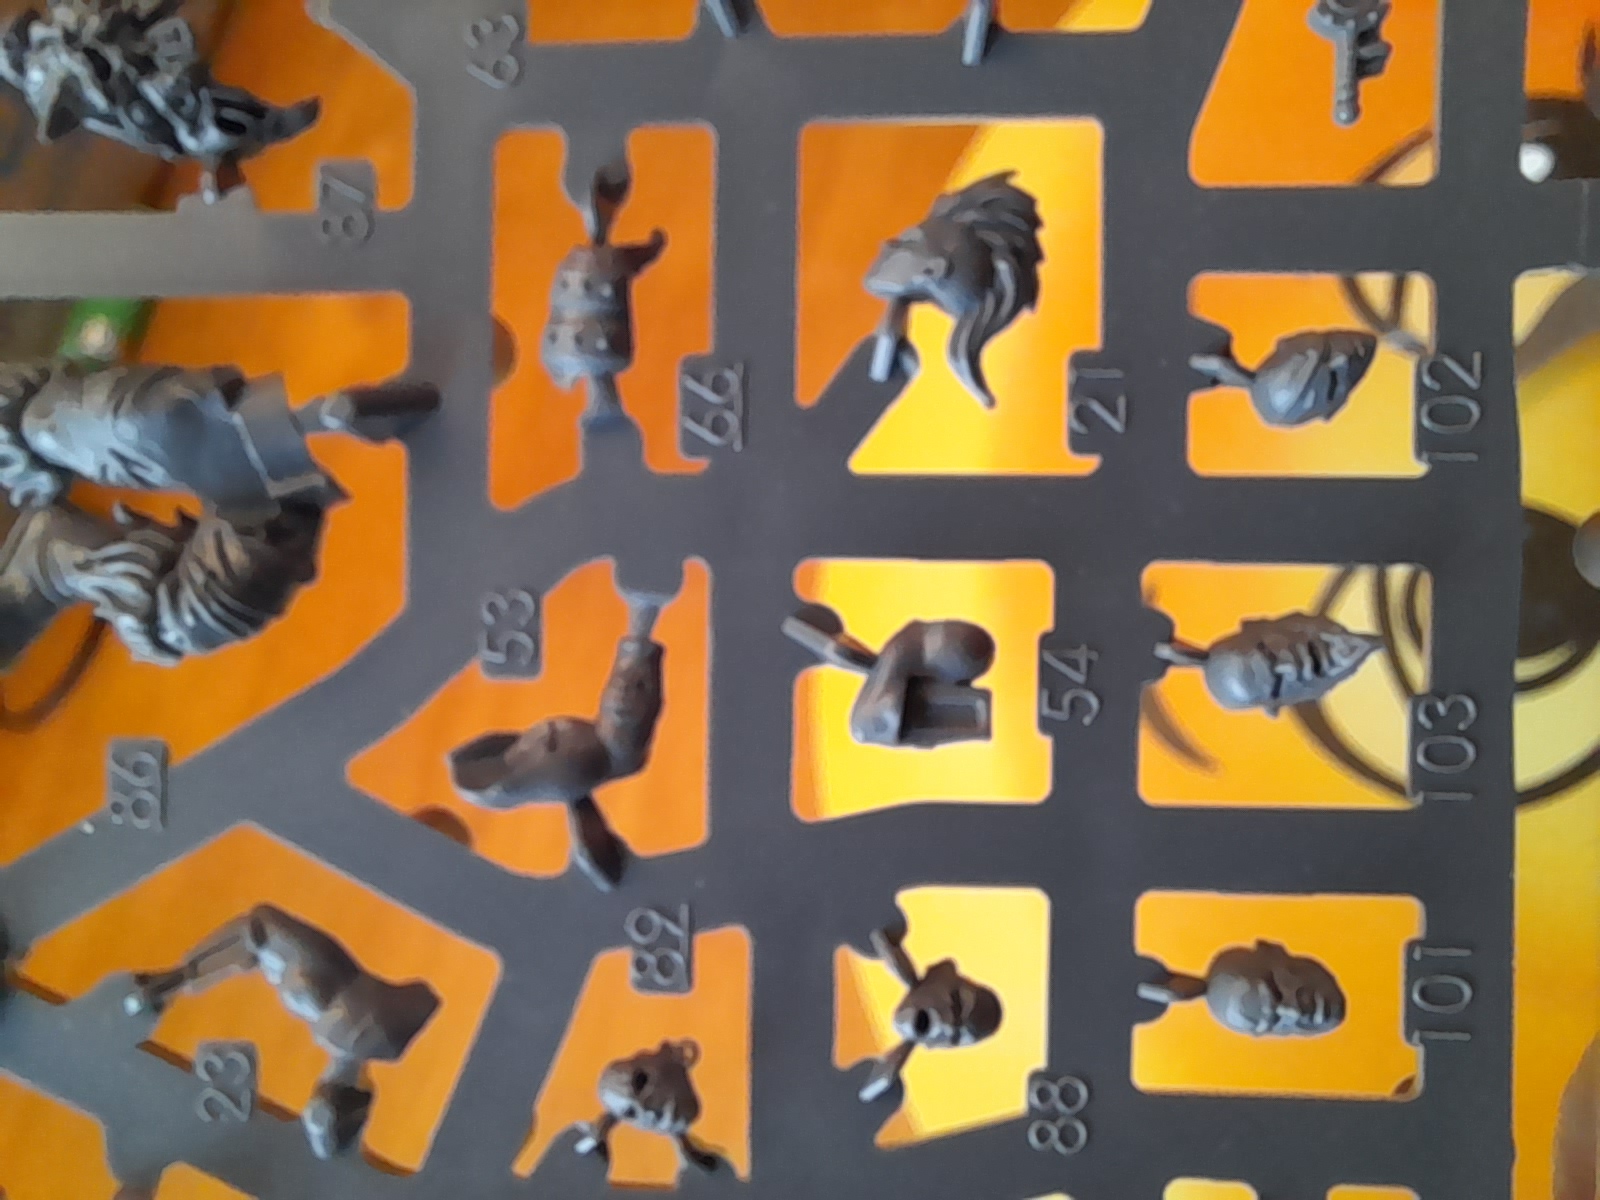
Looking over the sprue, I noticed that the part numbering is a bit ‘all over the place’. So begins the quest for the correct parts.
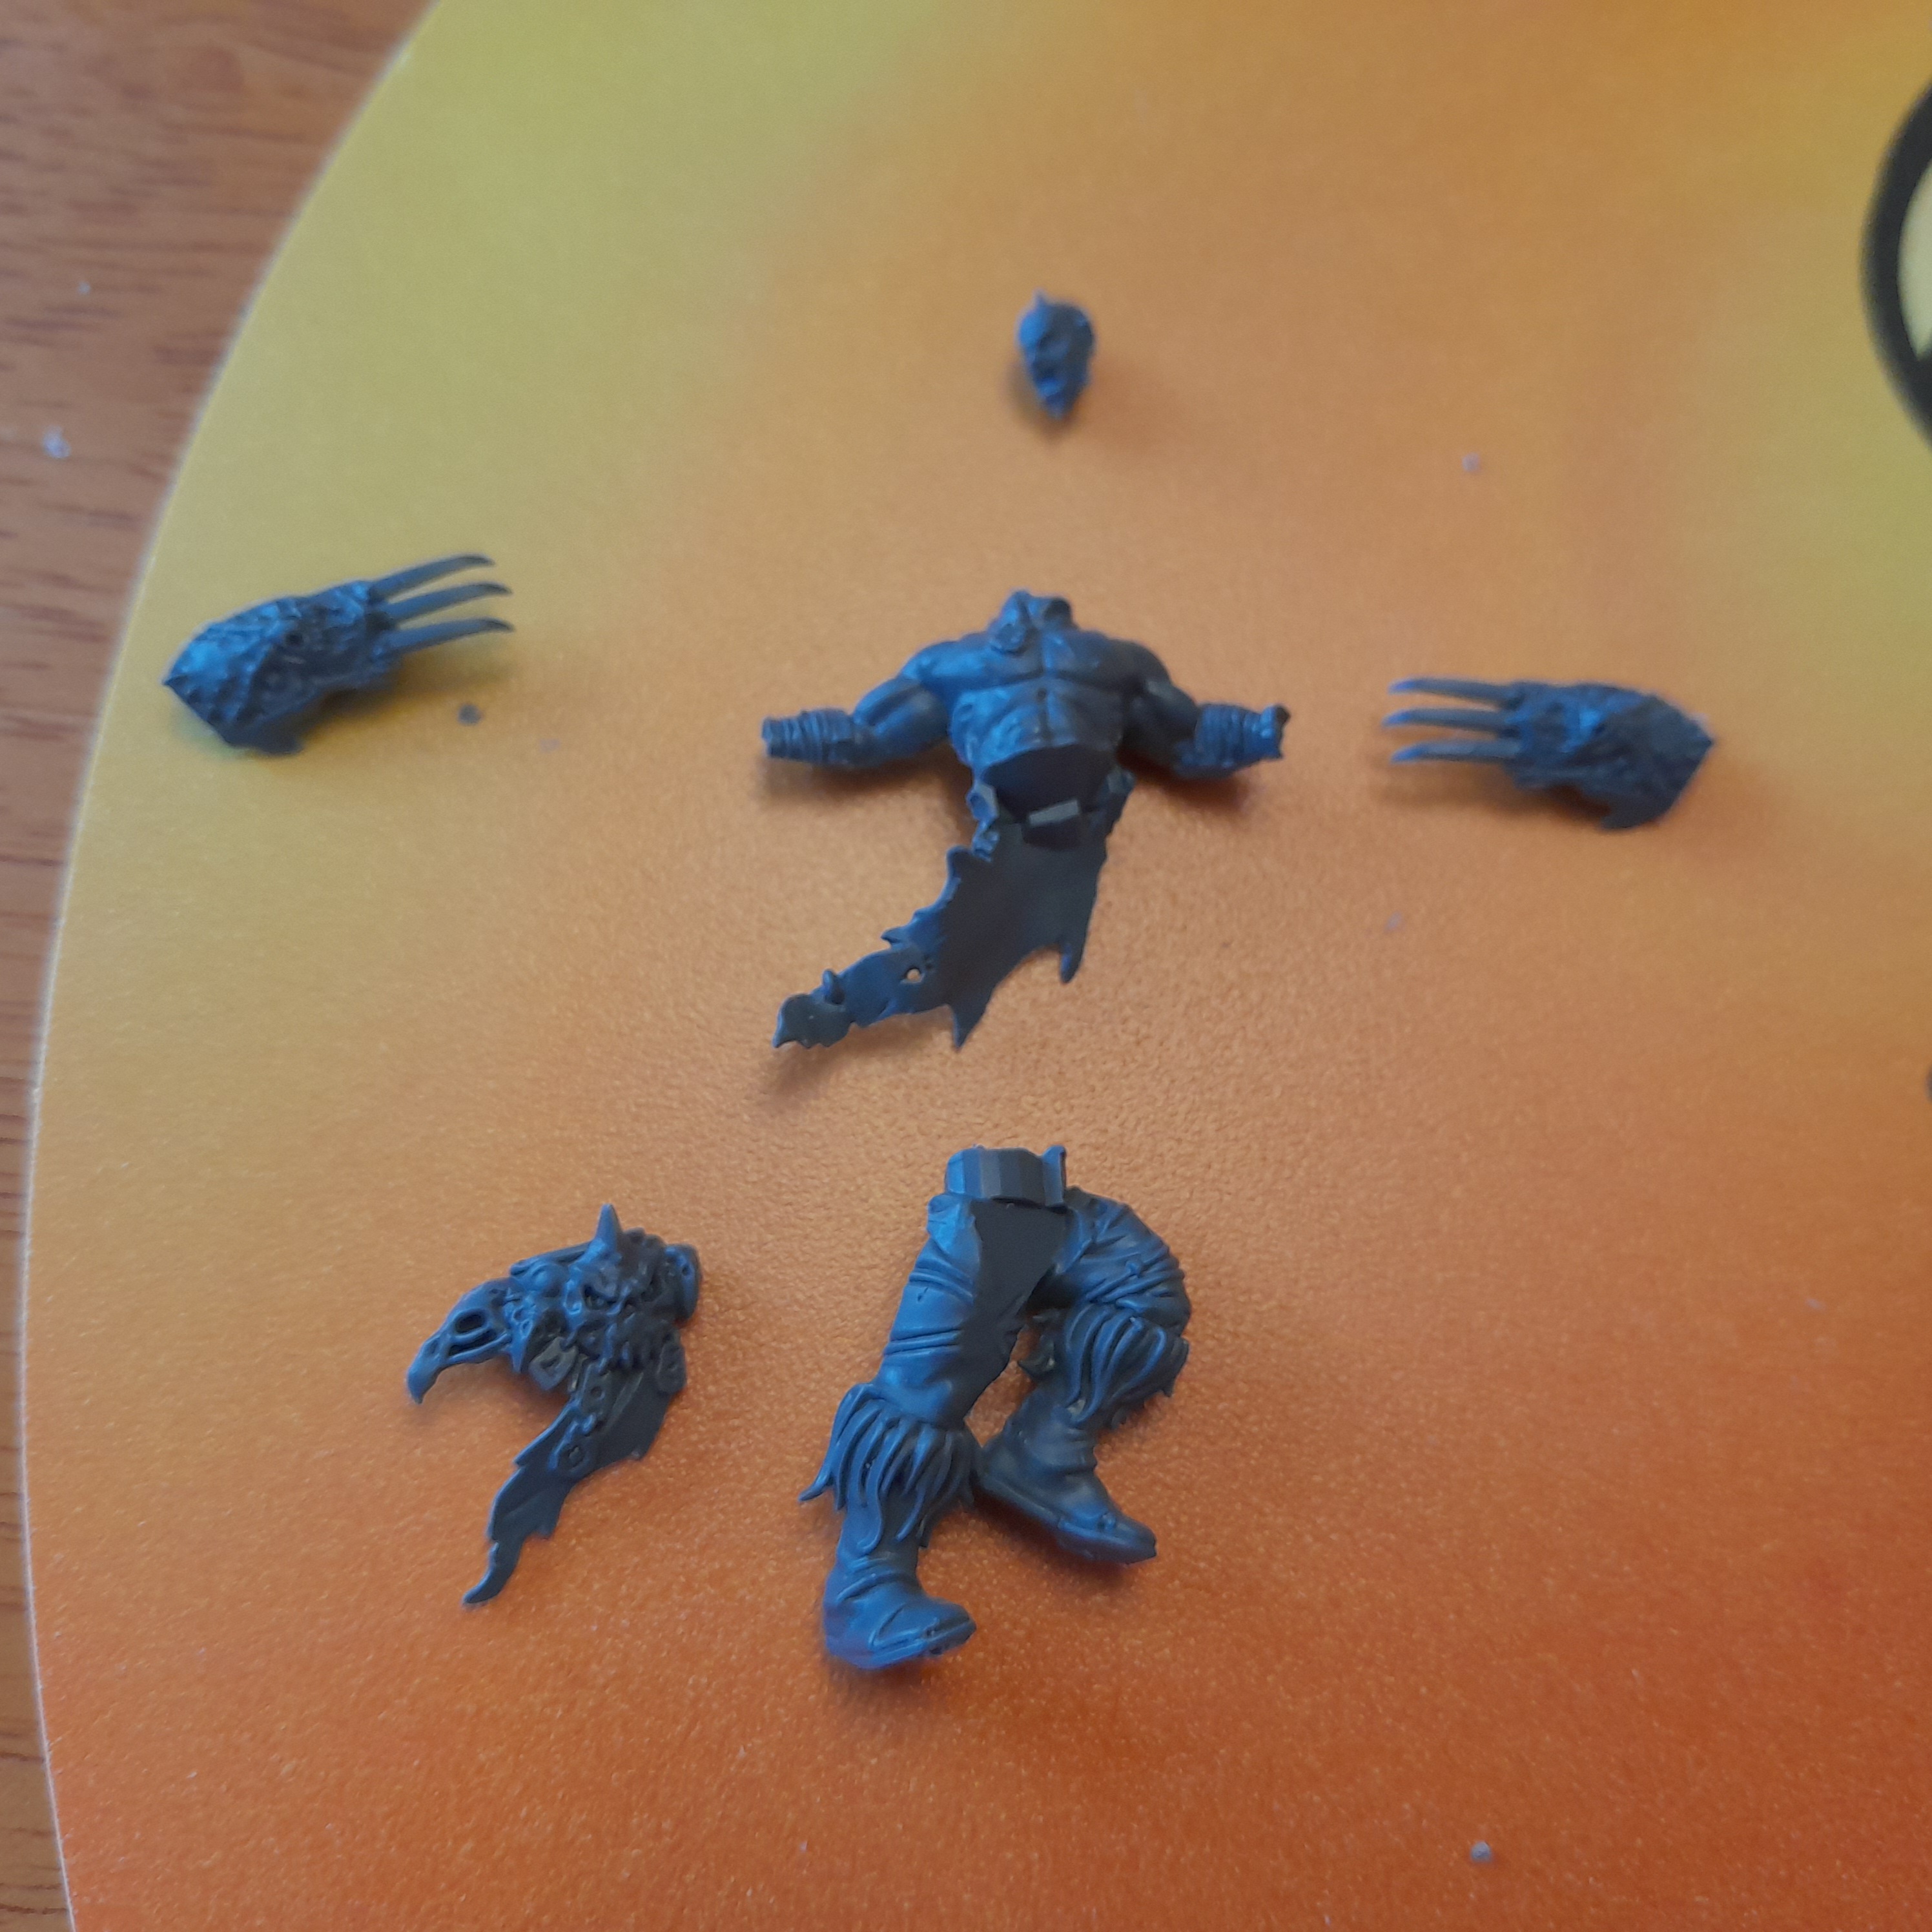
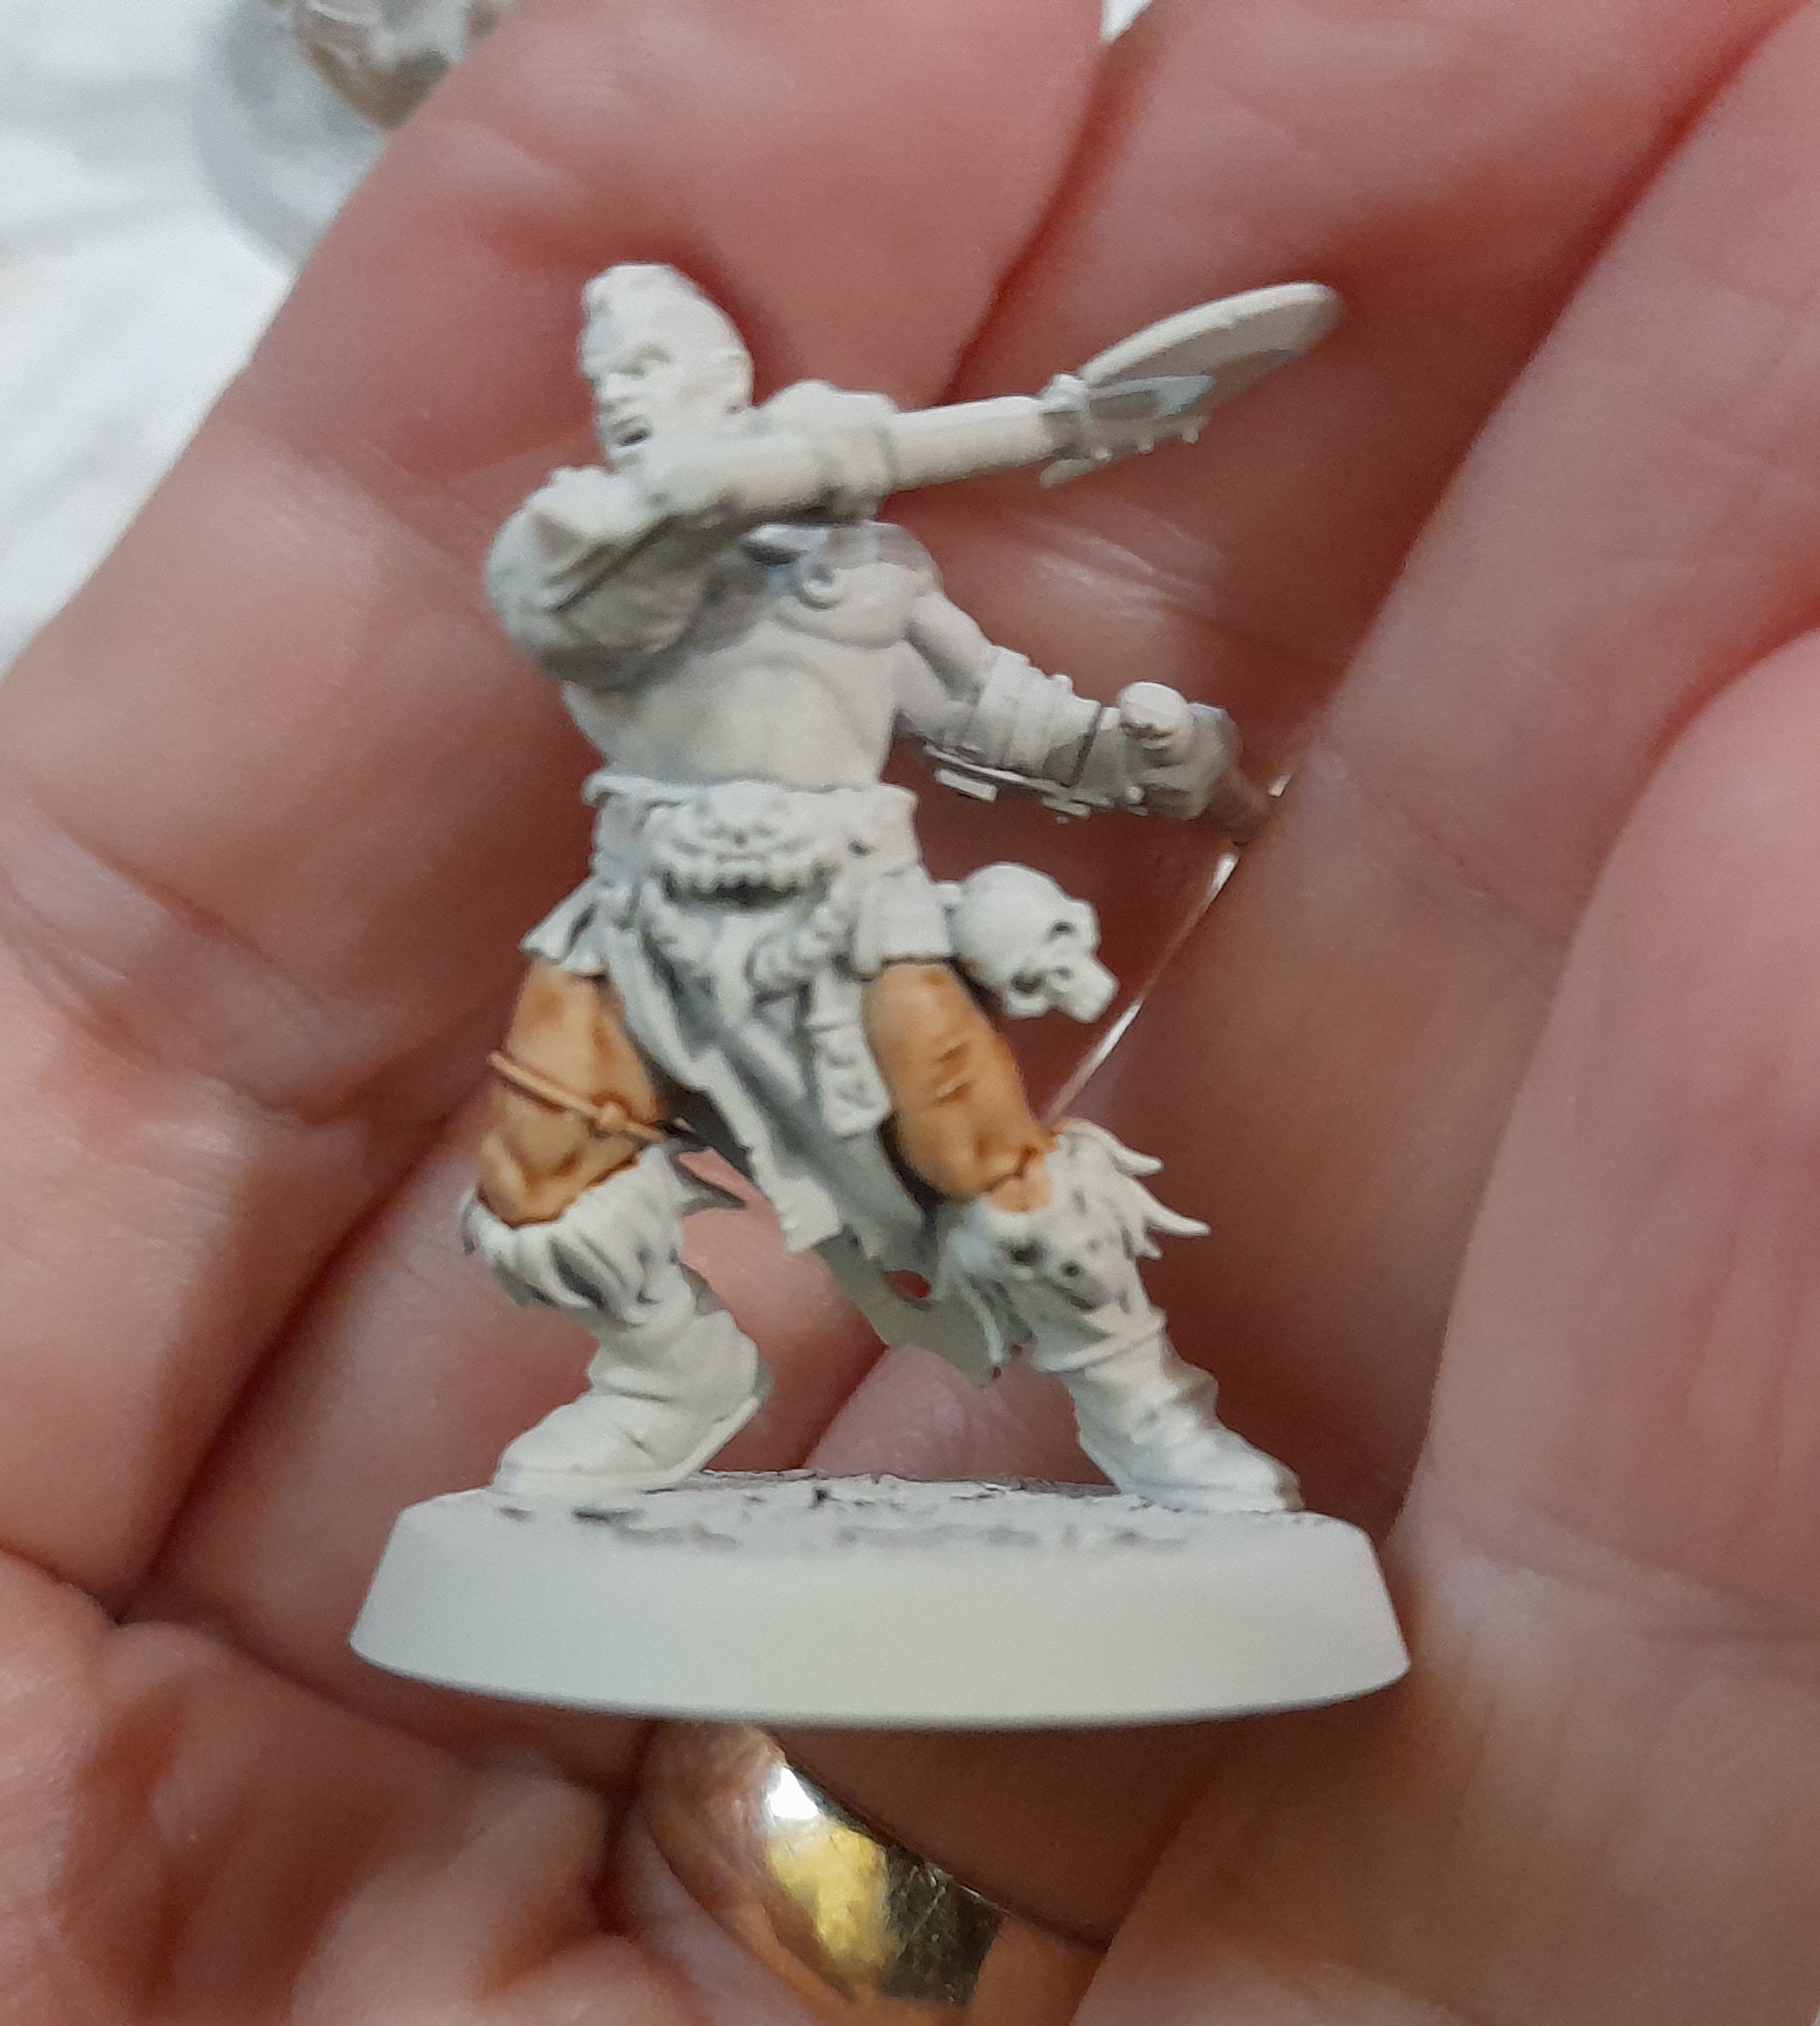
I started with the two claw guy, as there weren’t alternate components for him.
Then onto the witch/shaman. I chose the hand holding the eye, as it reminds me of an old Greek myth film.
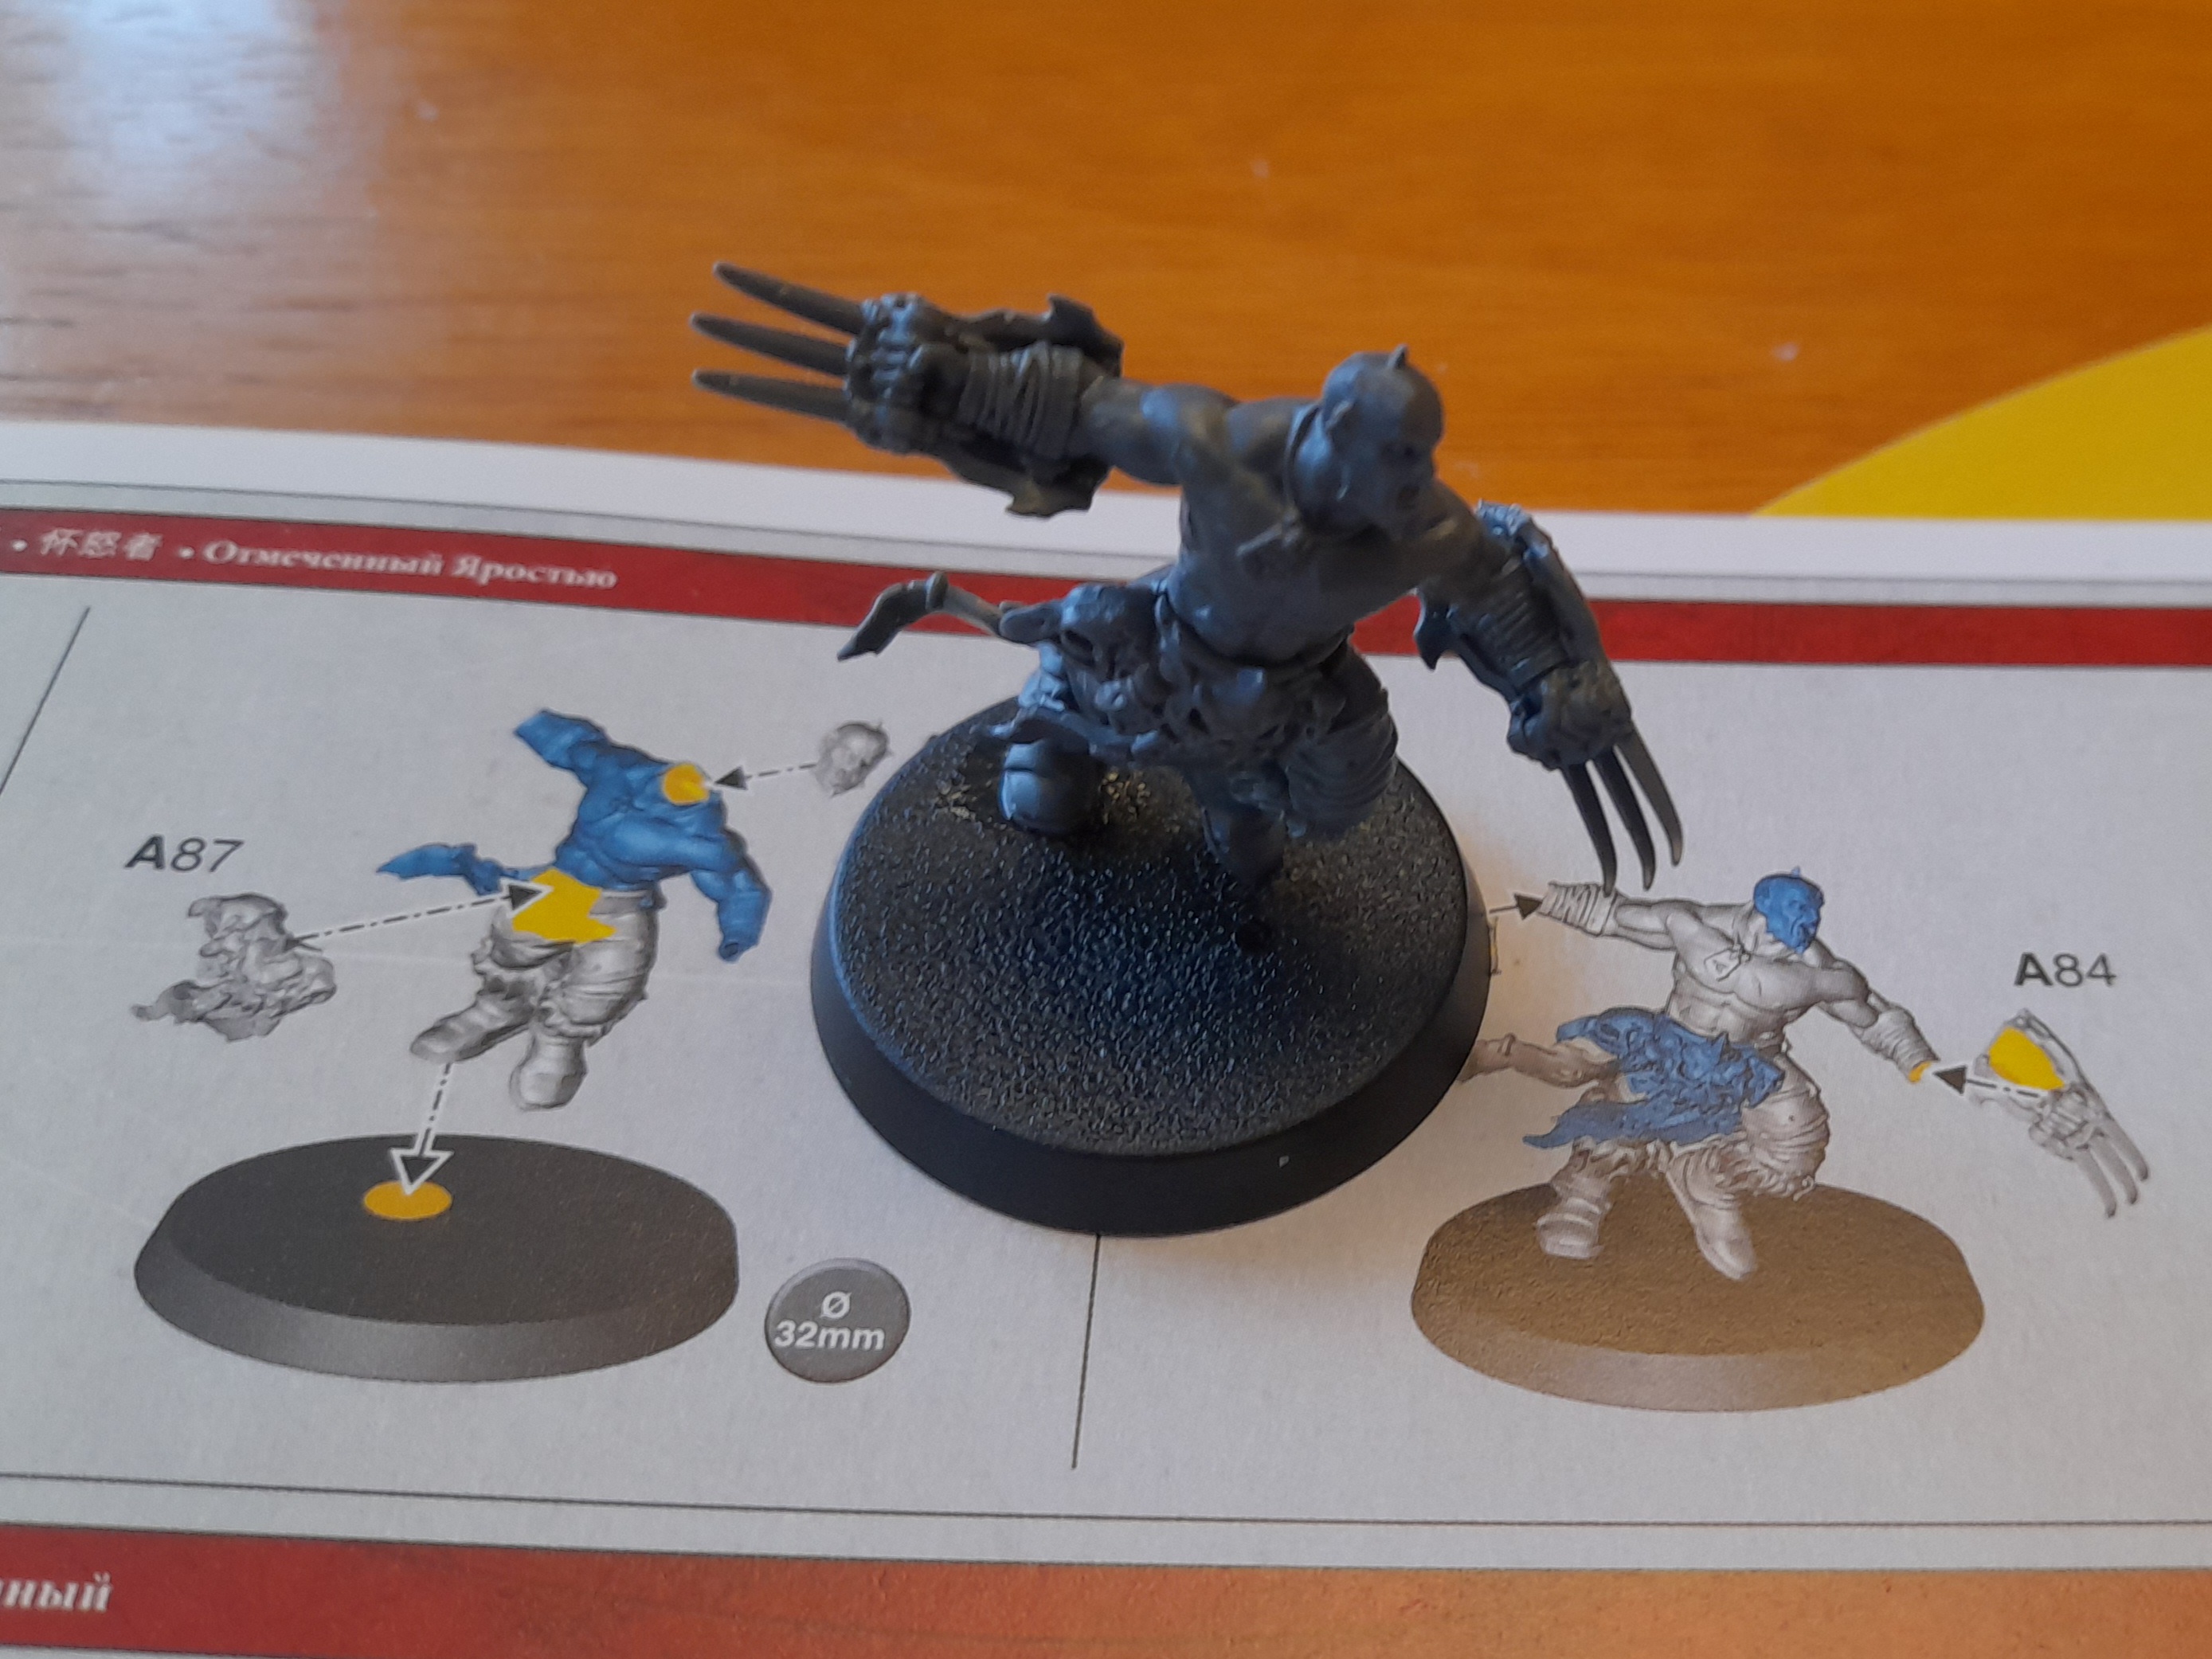
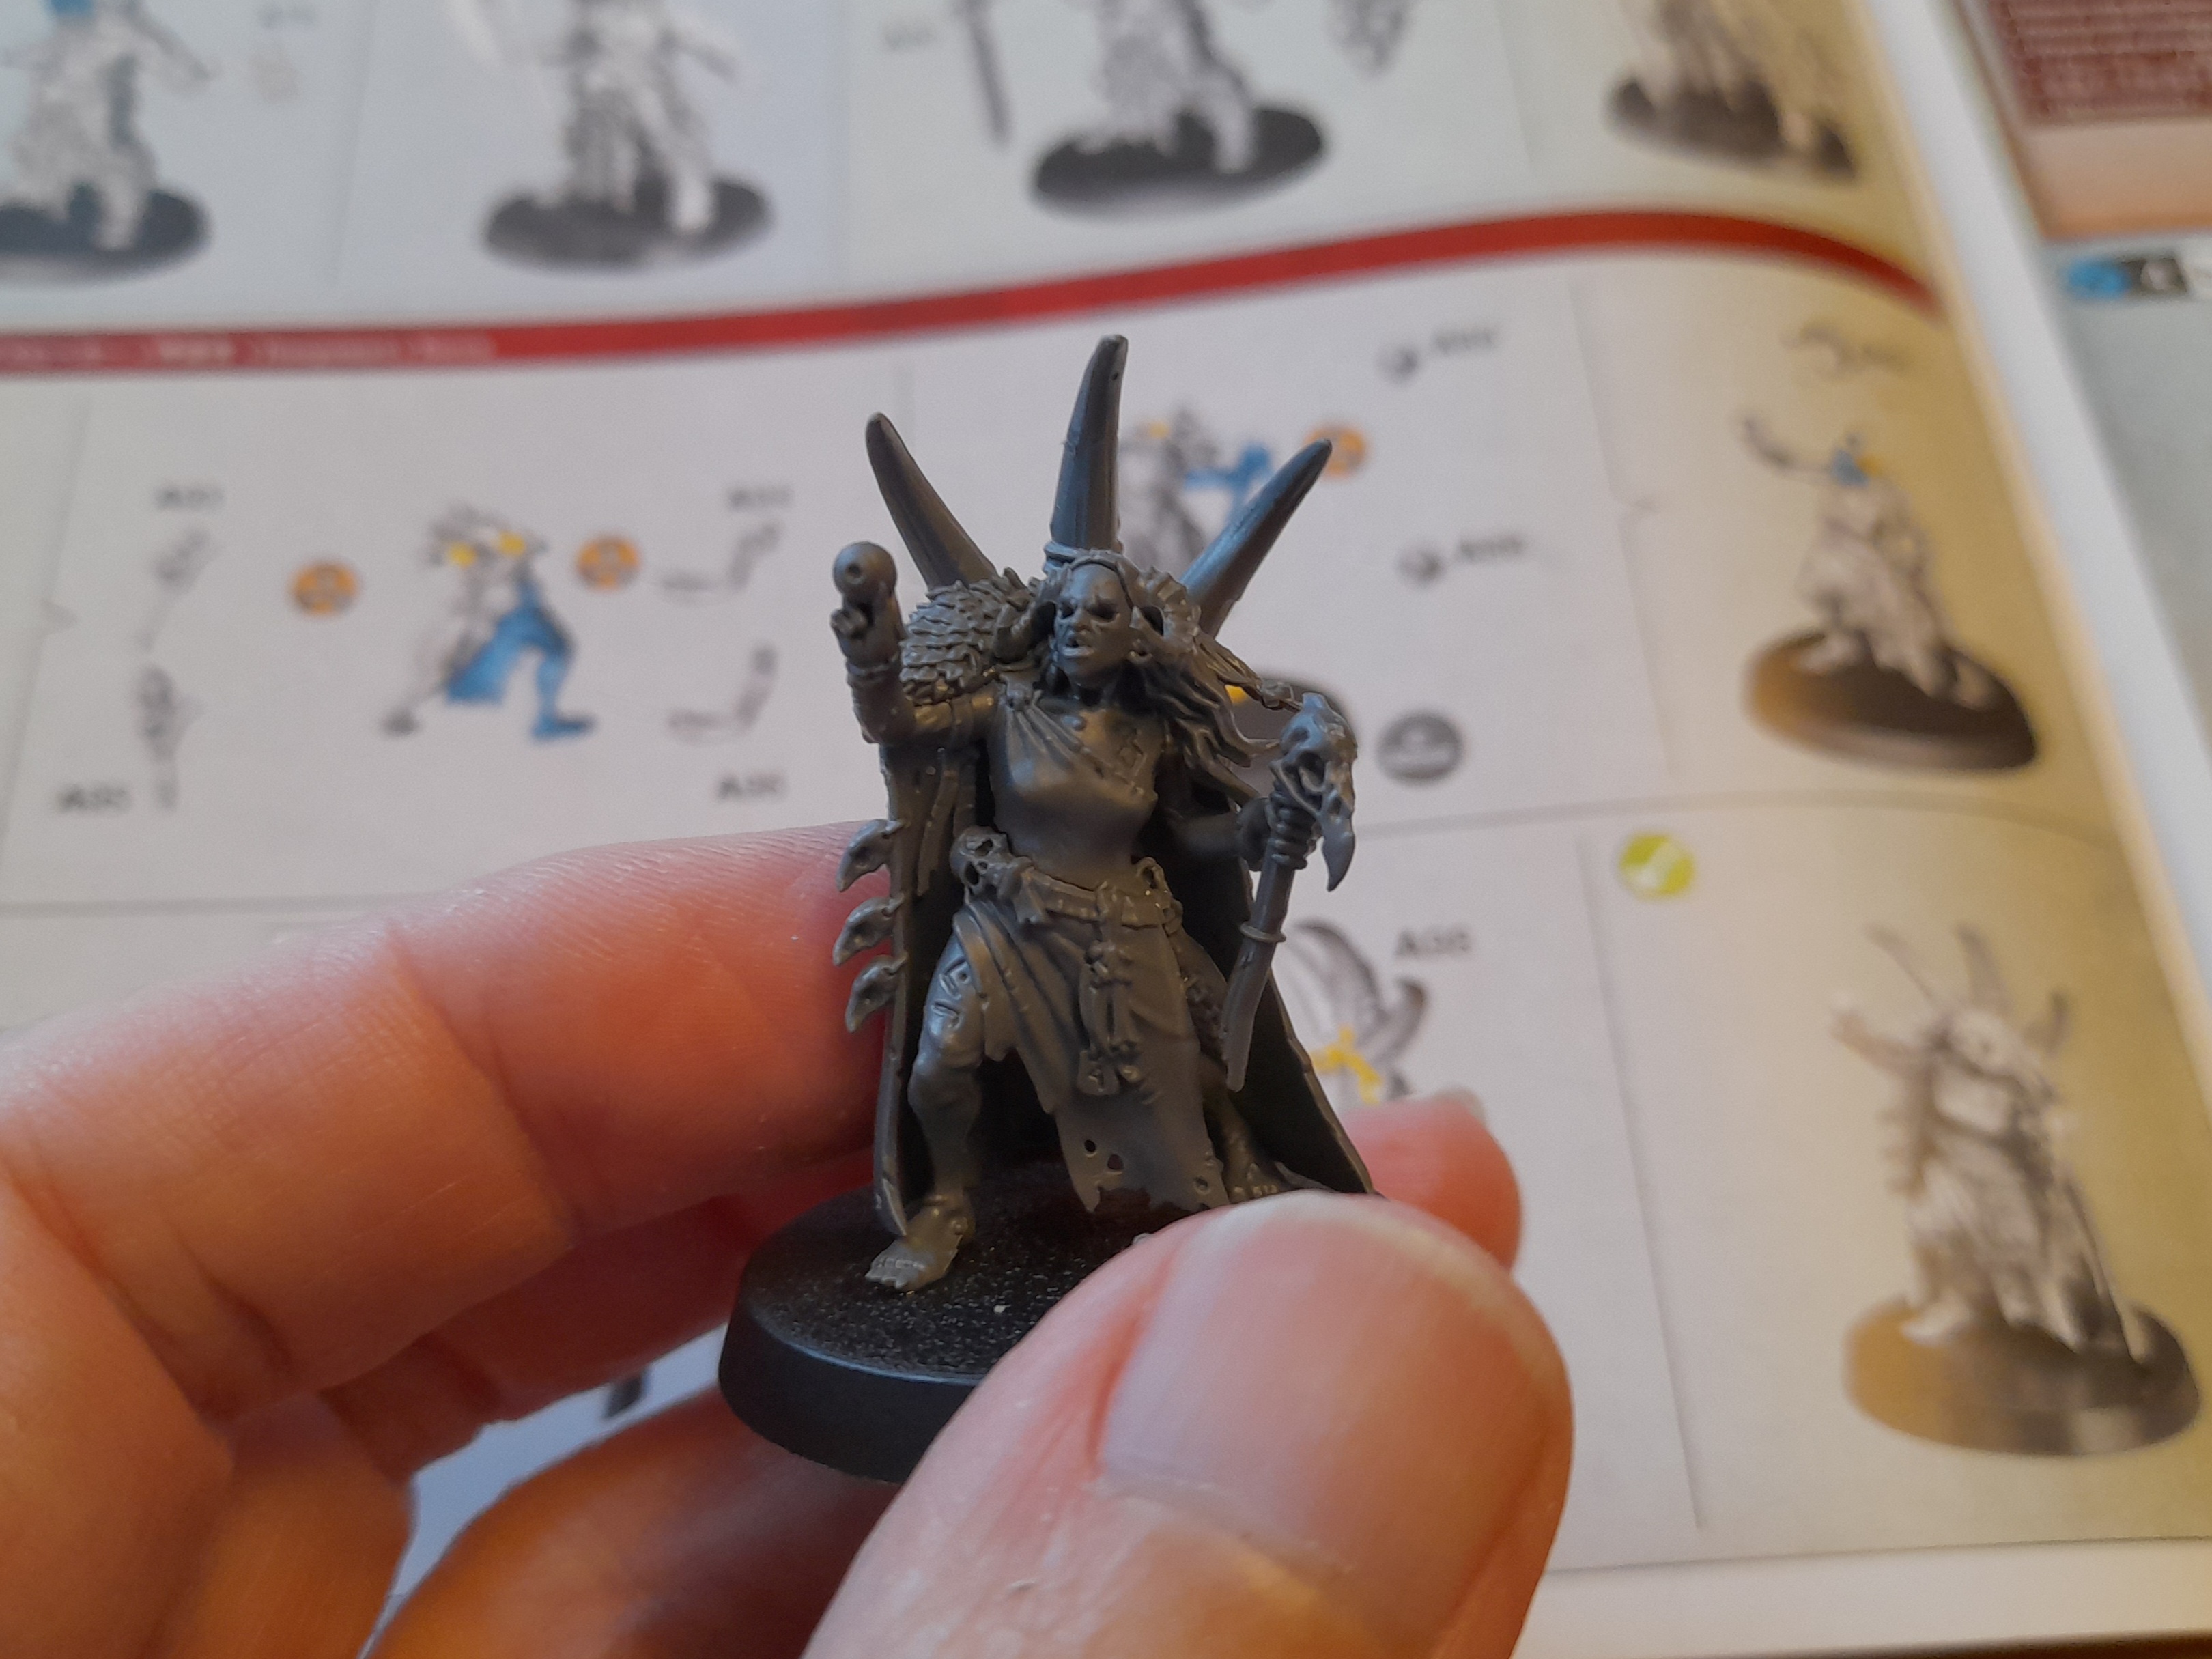
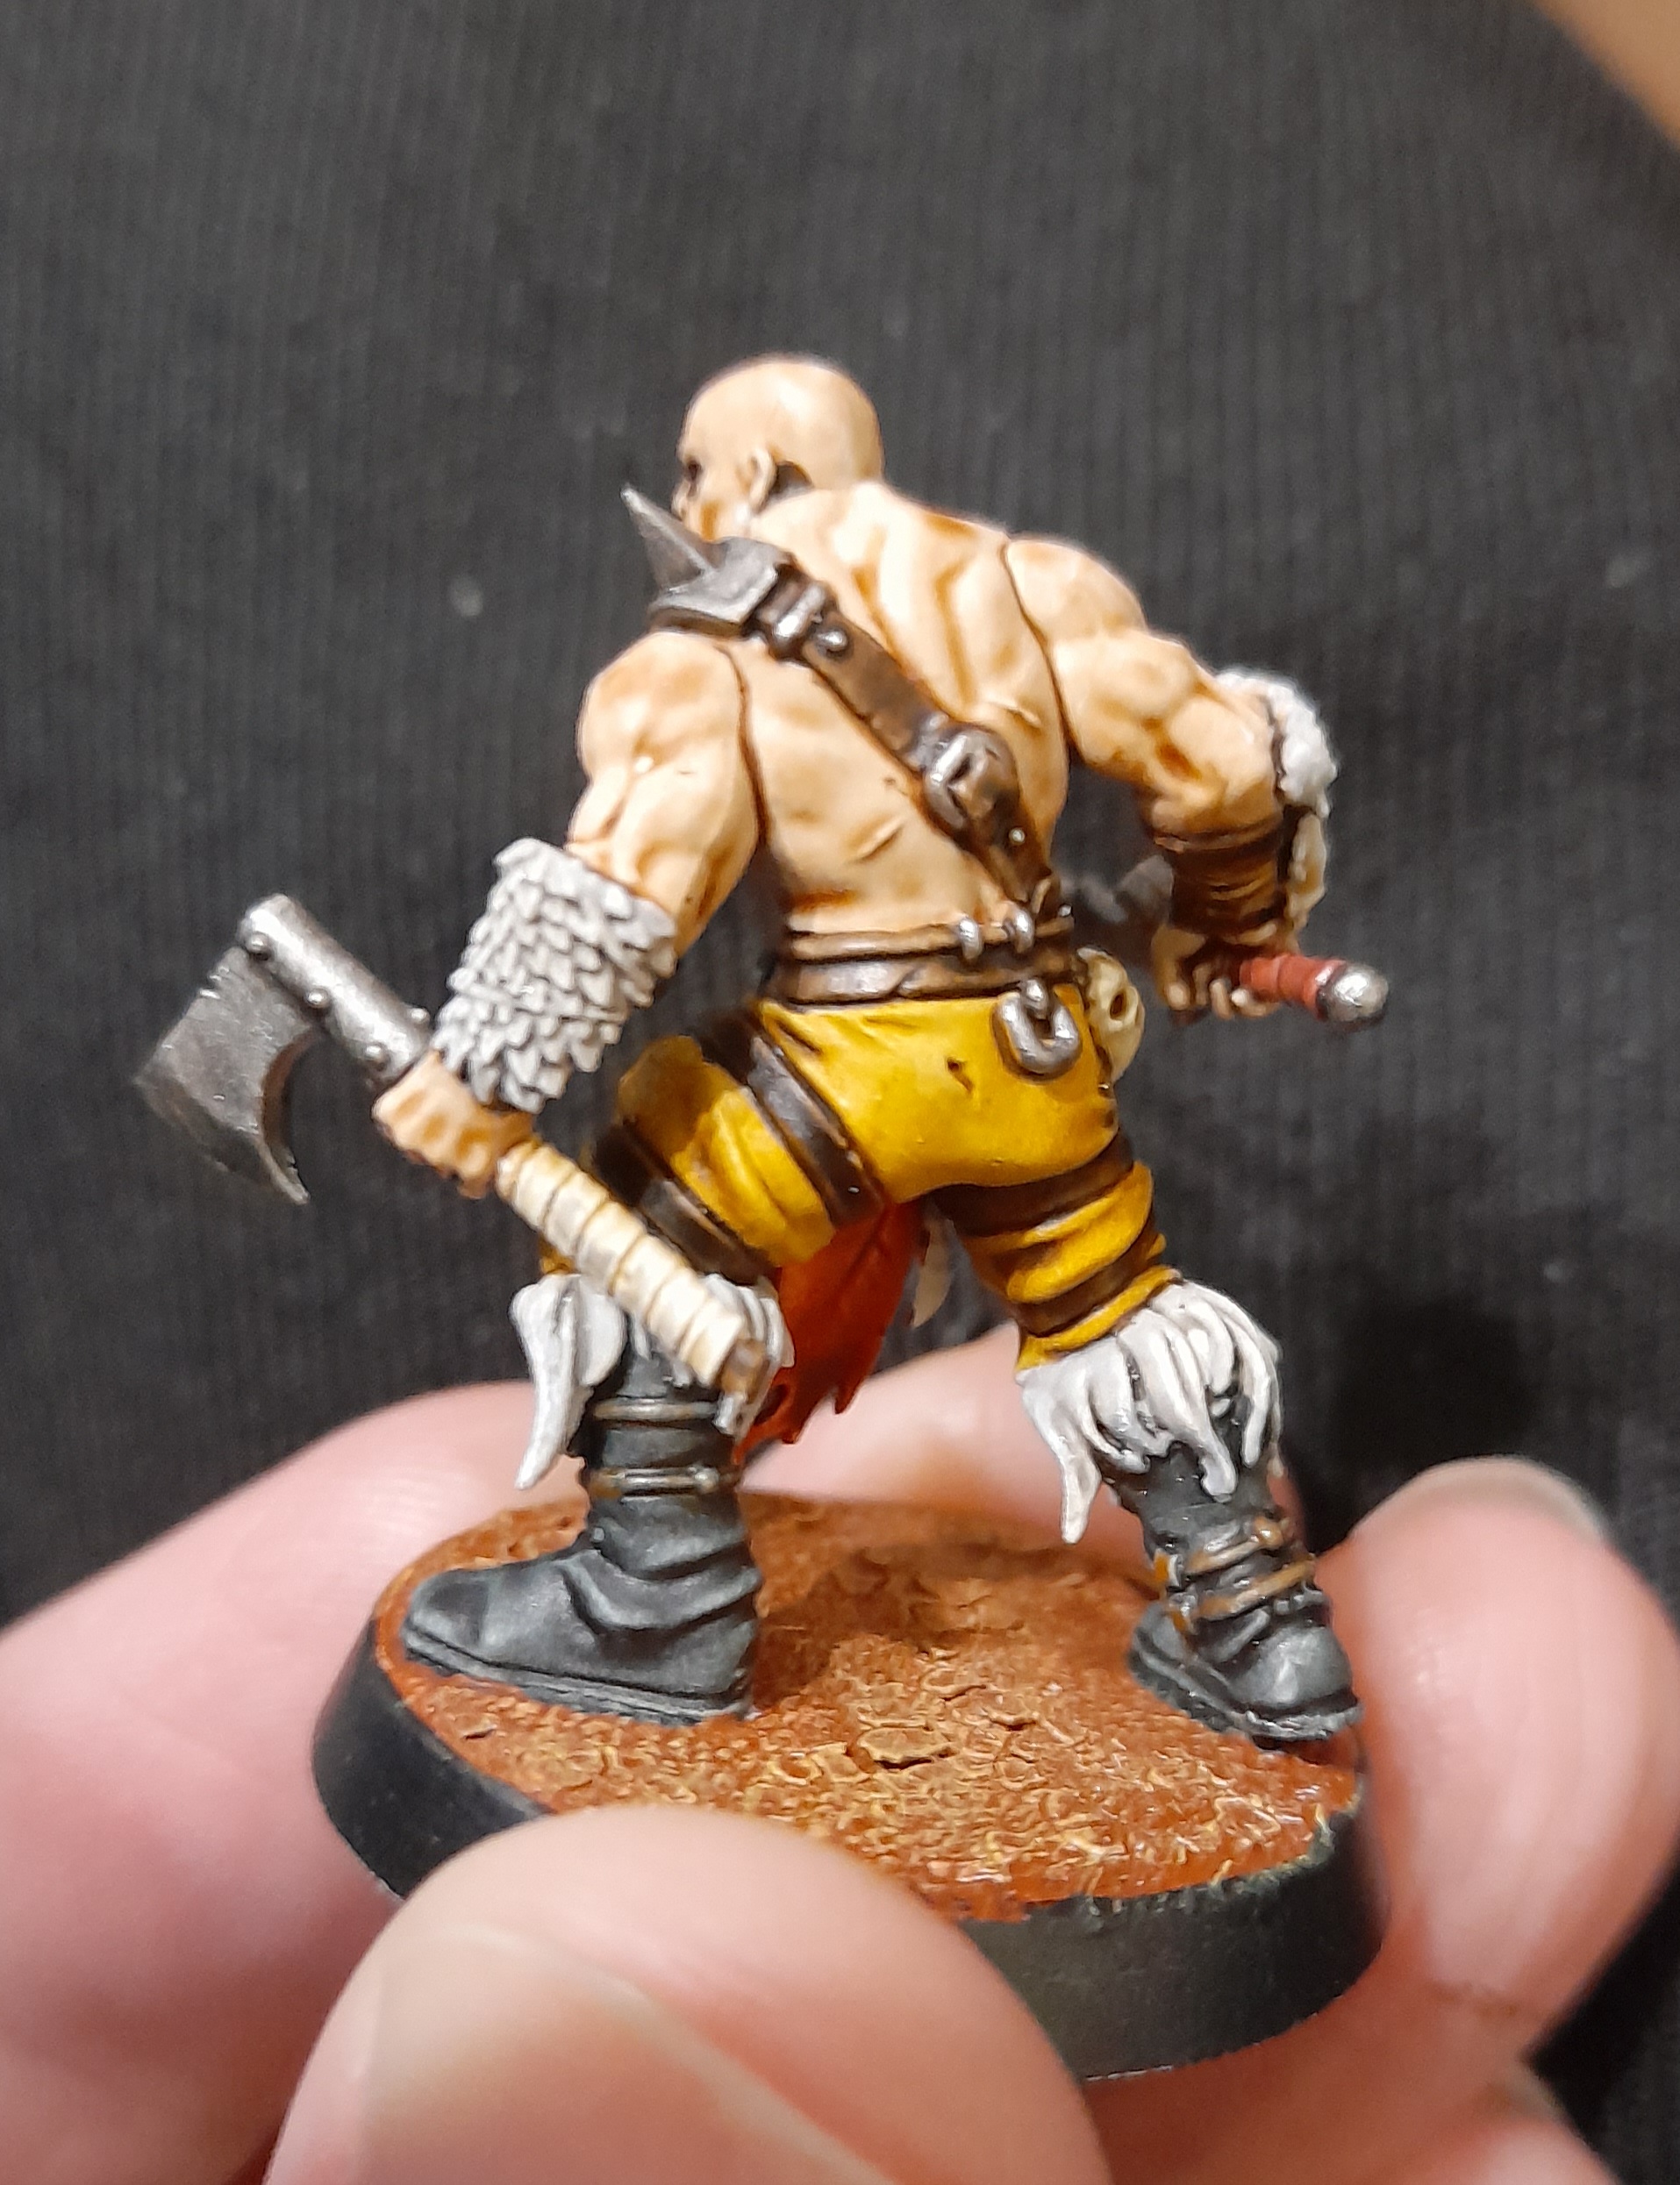
Then finally the boss!
I built him without weapon first, as I wasn’t sure which would be best. In the end I decided to go with the axe as I think it looks cooler.
For friendly games we can always use the other stats if we want to.
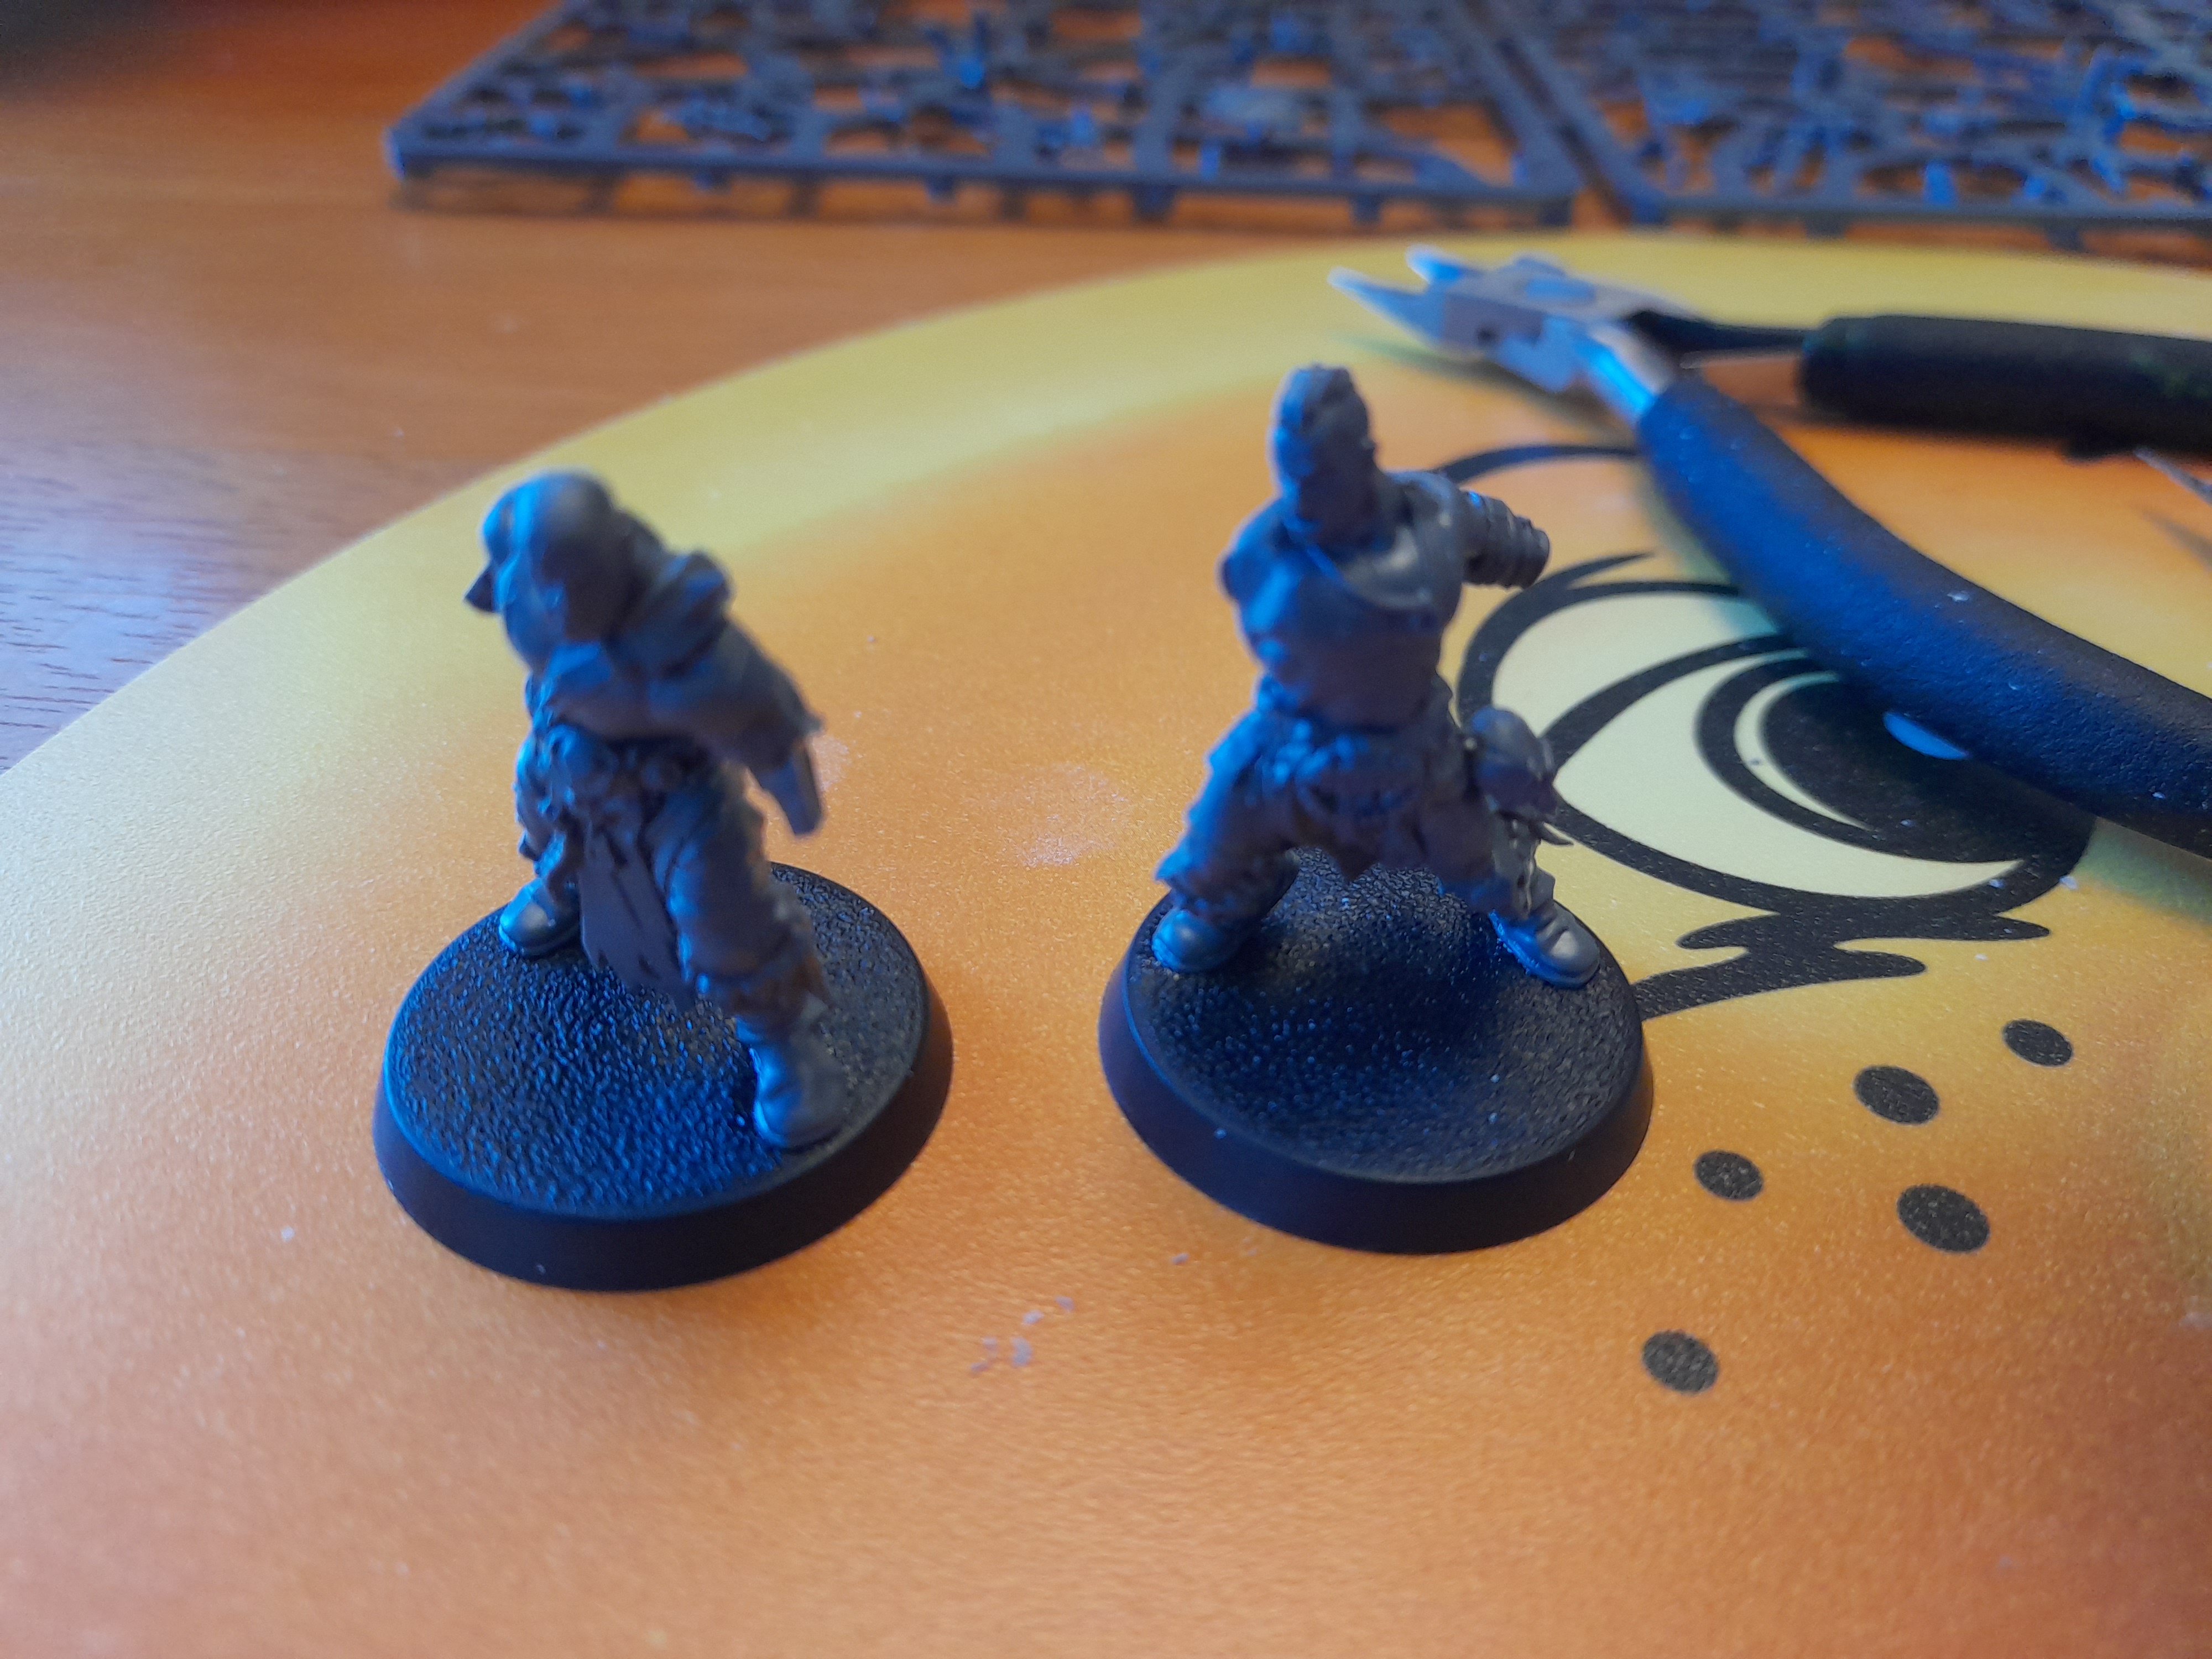
 The three amigos
Still progressing....
Third time trying to update my project today….
Filled it out twice and published, only to find nothing showing 🙁
I haven’t posted for a few days, but I have managed to get in some hobby each day still though.
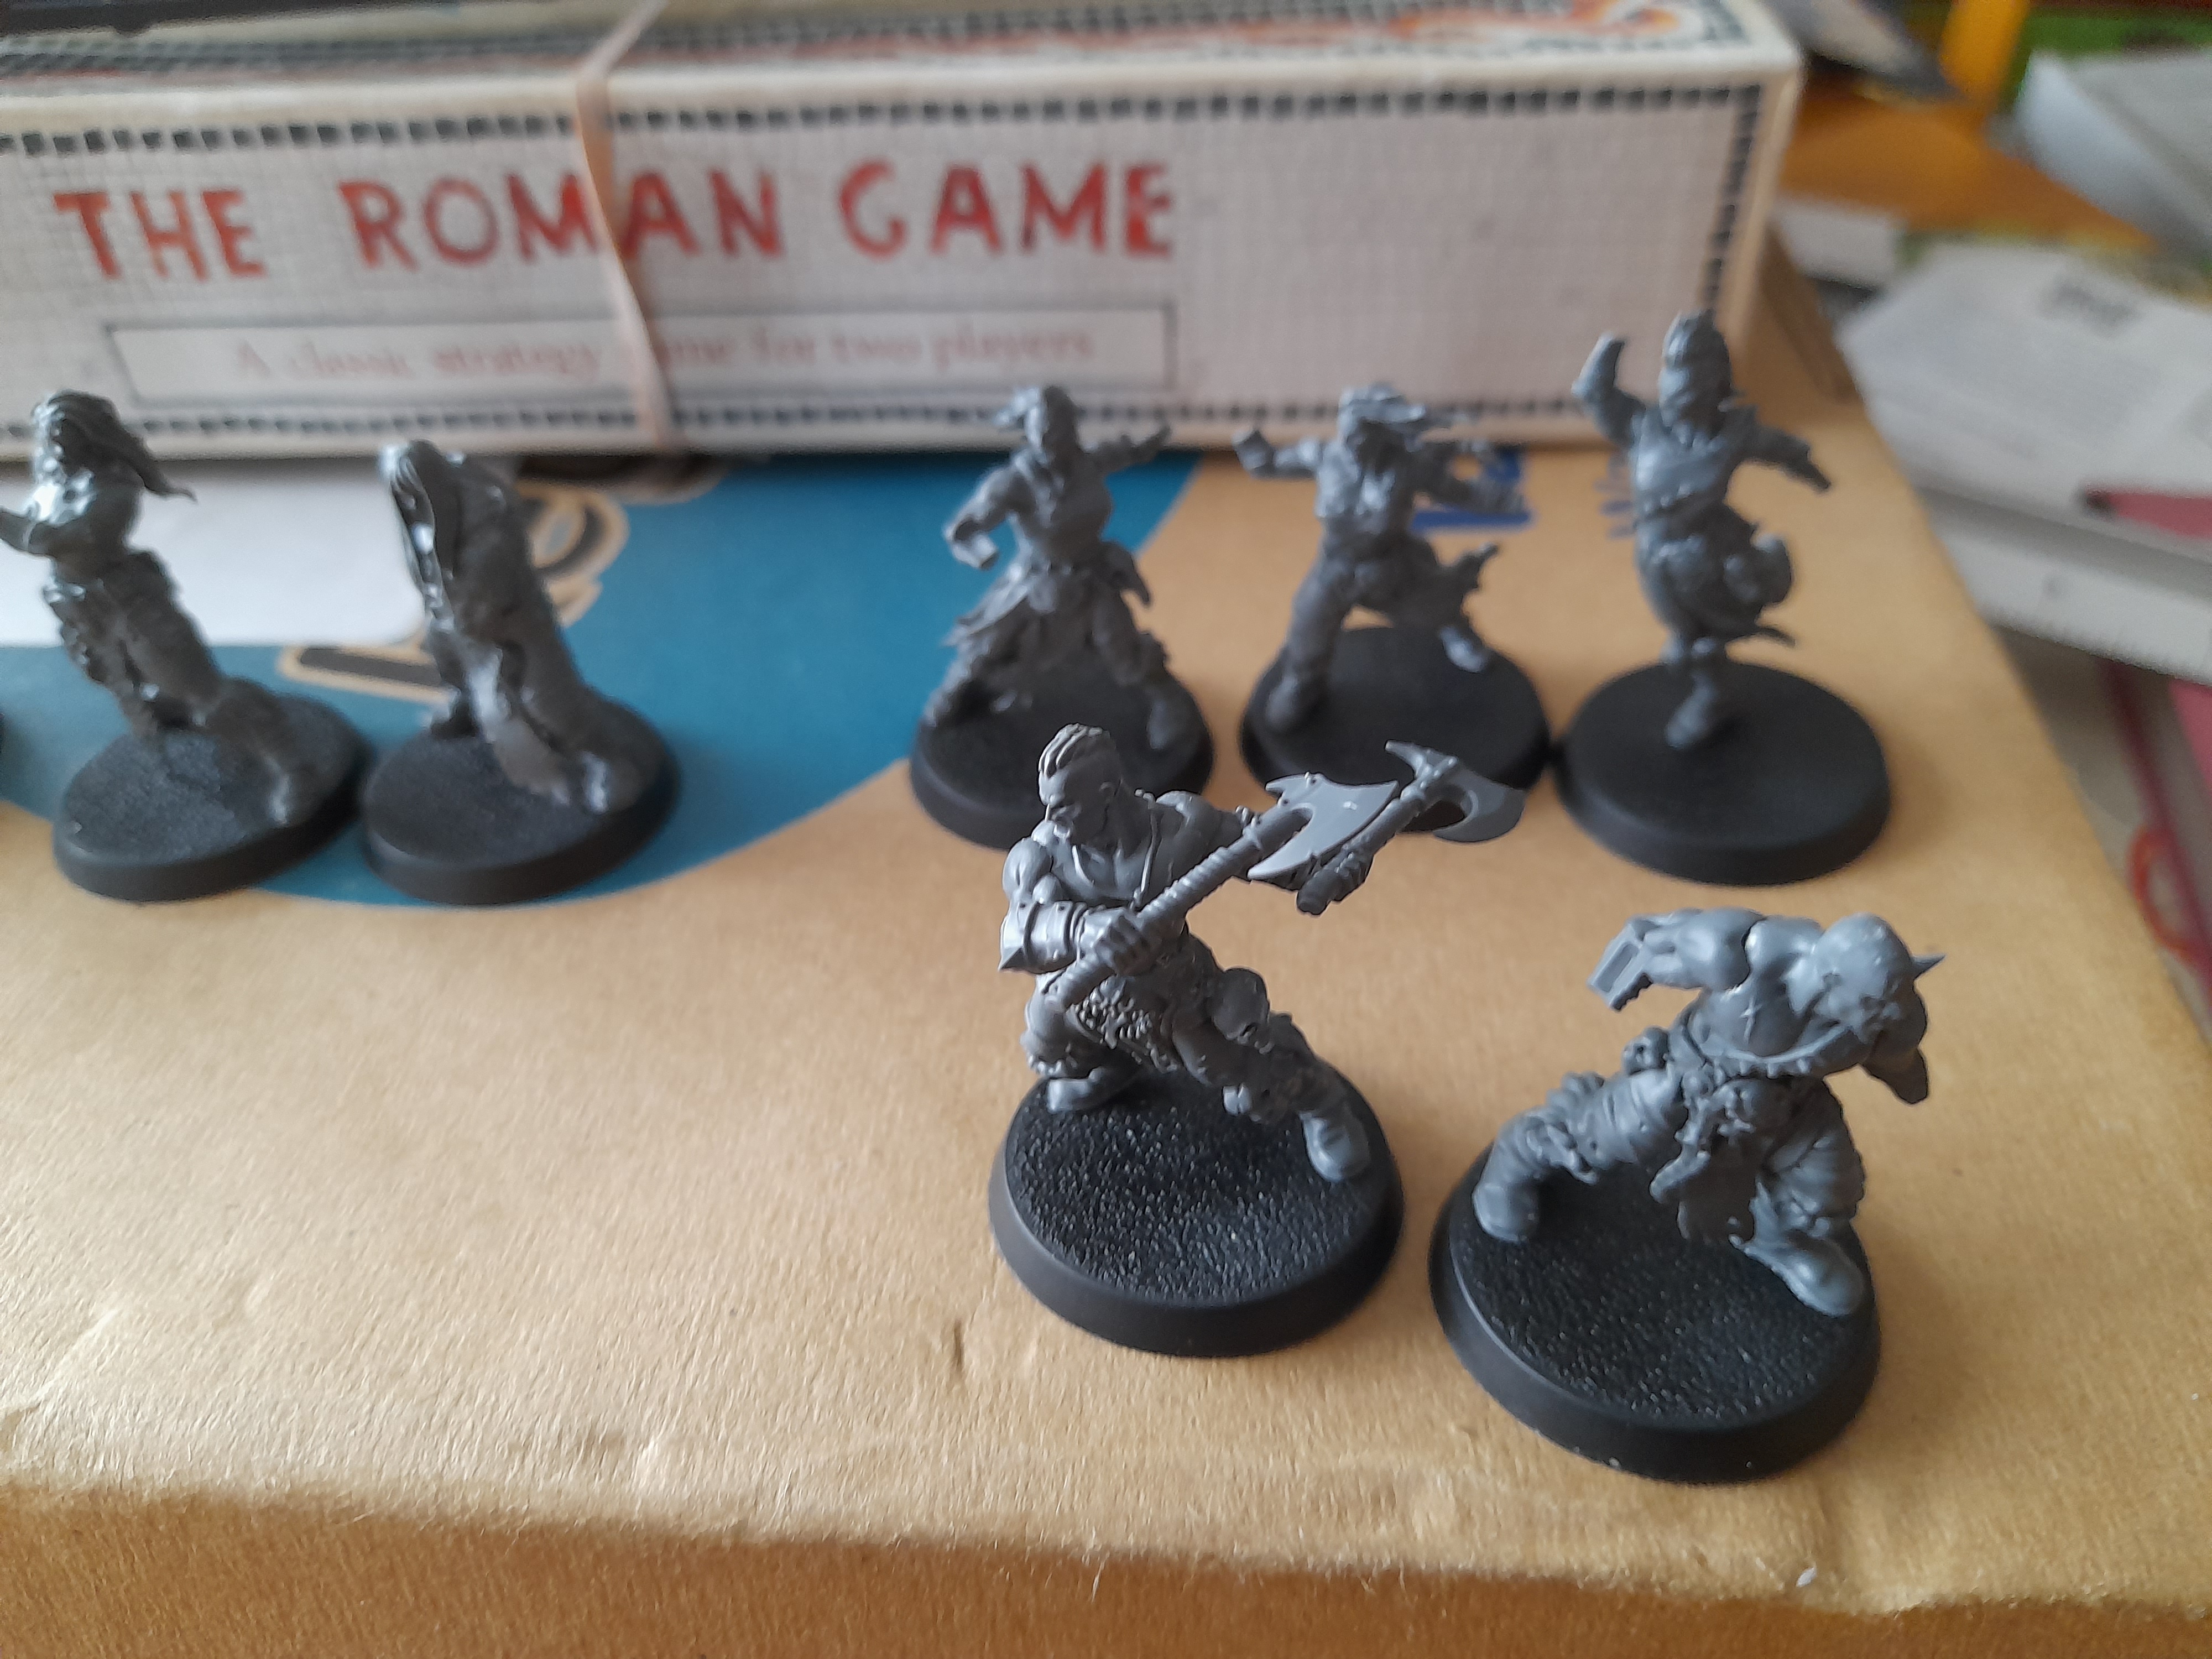
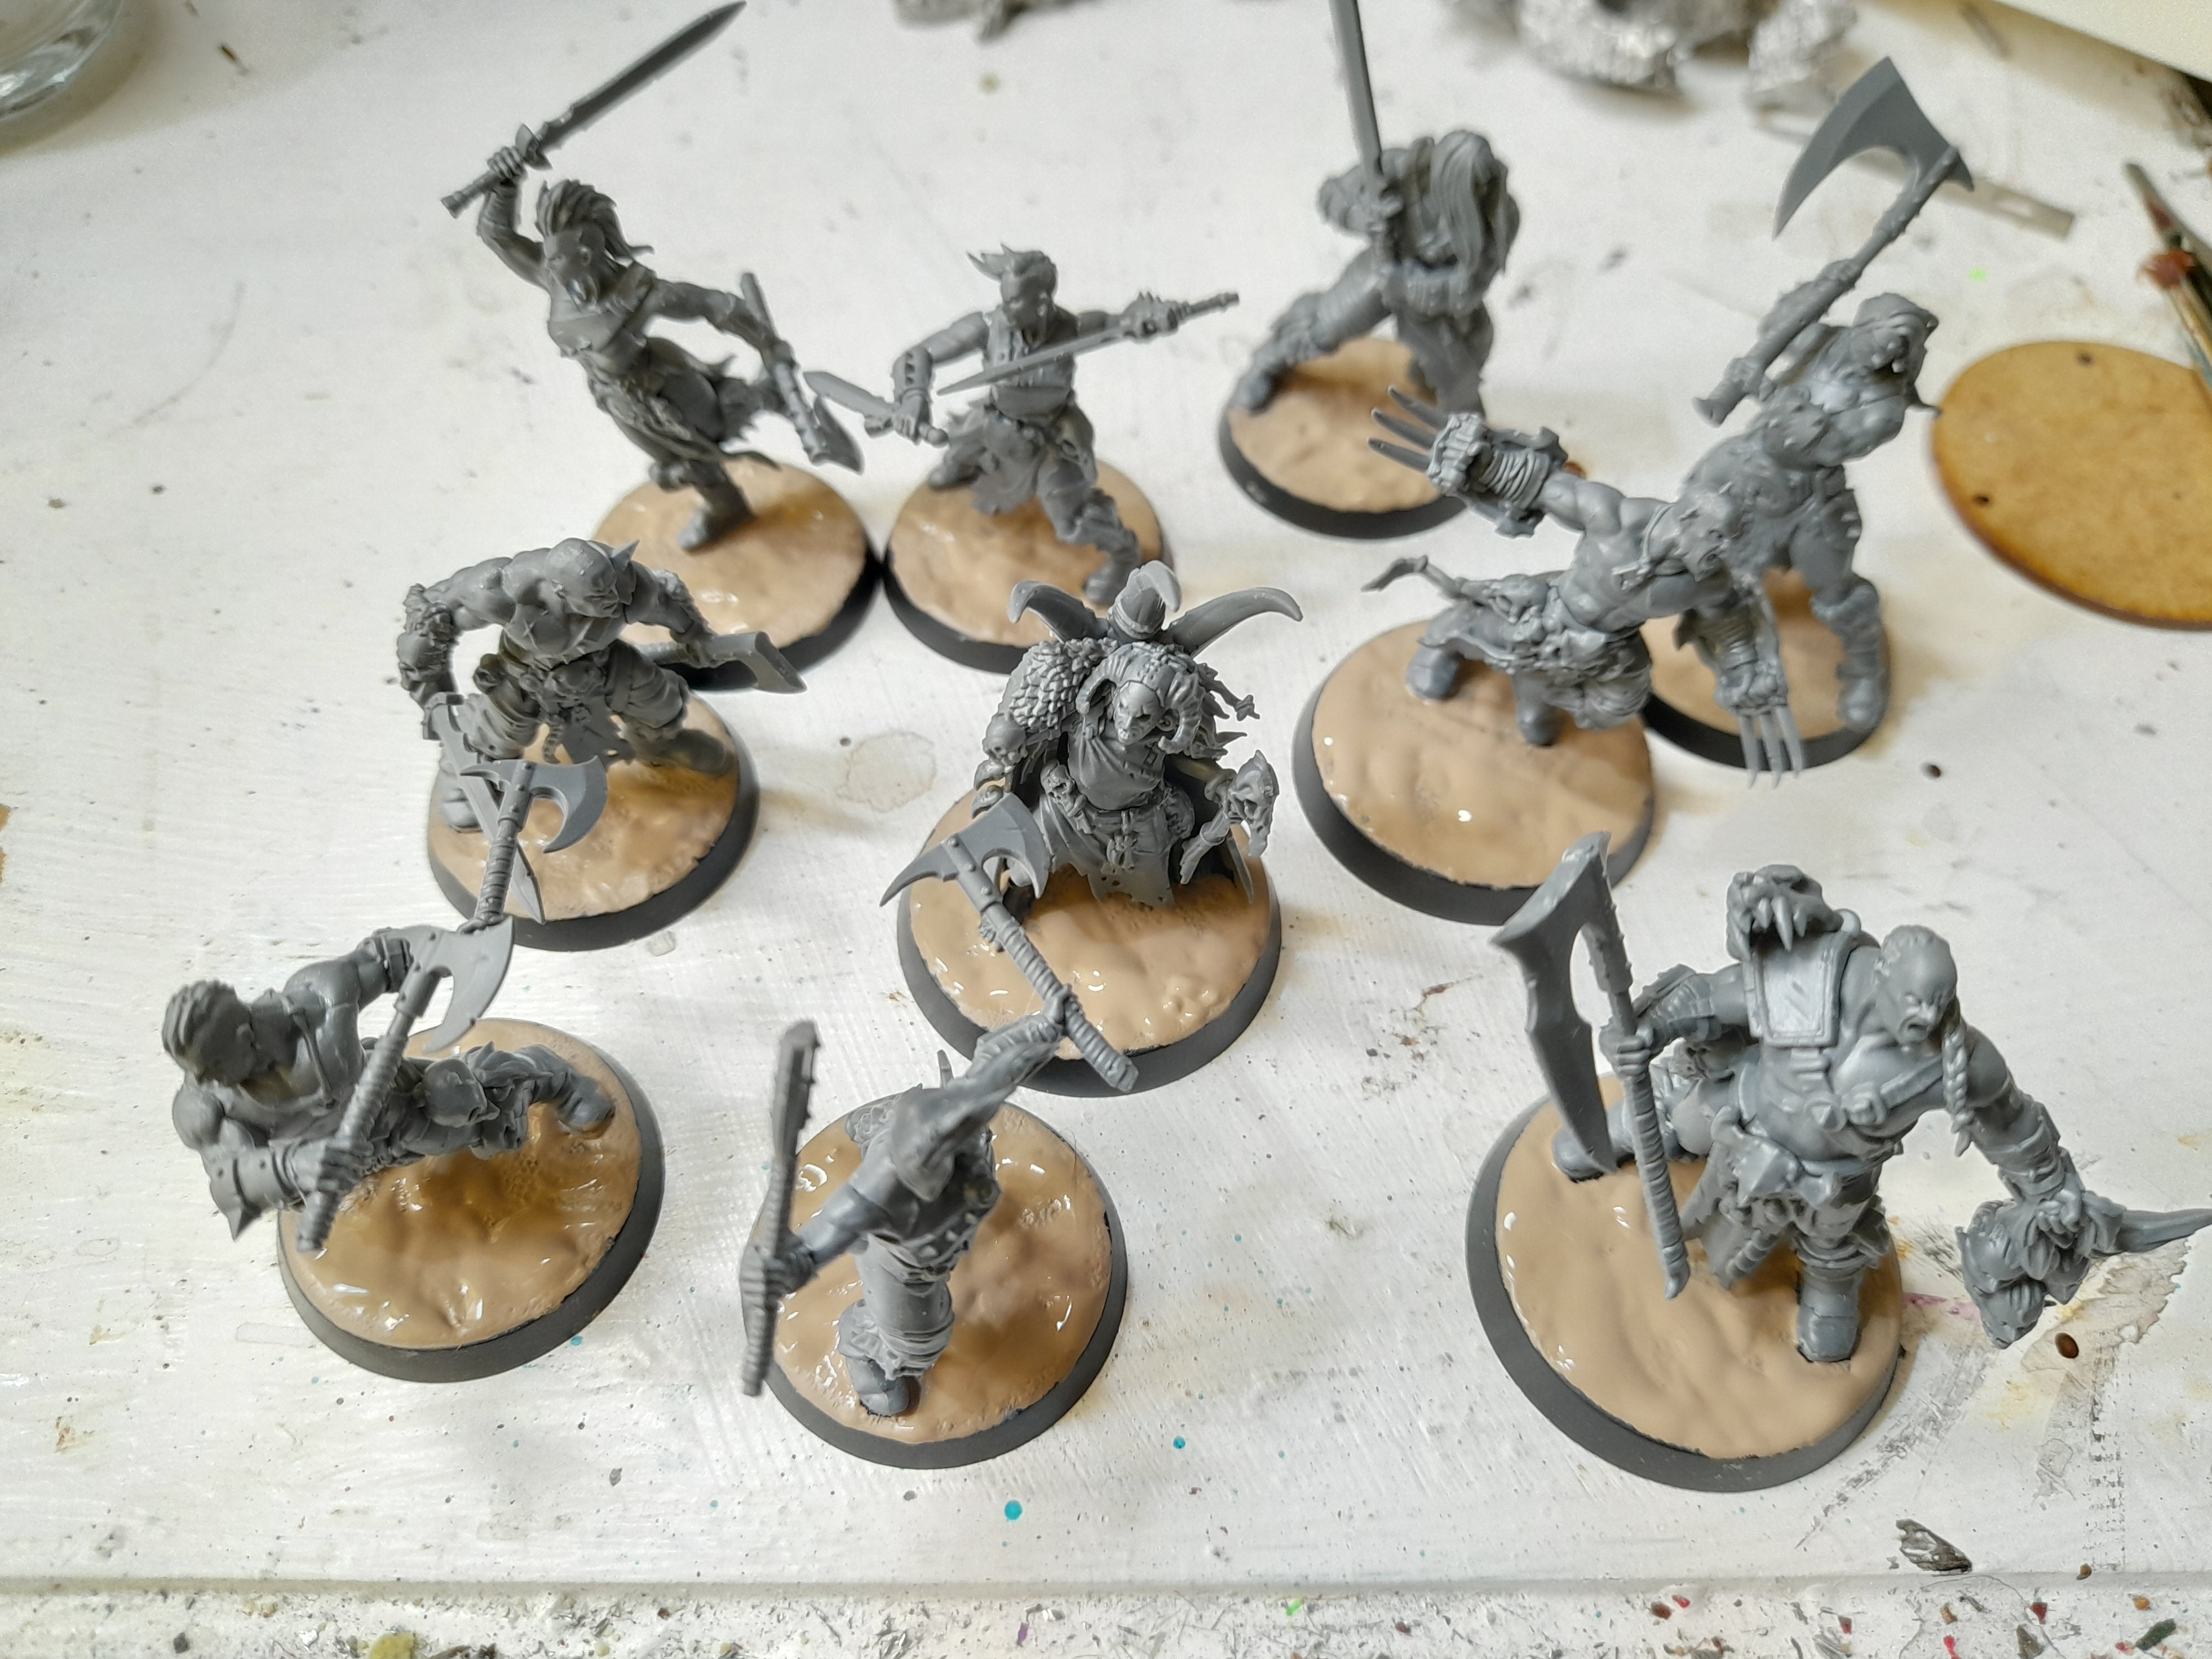
The minis
I have now ‘built’ all of the Darkoath Savagers. Just need to sort out what weapons I want to give the currently unarmed ones.
The Conan looking one is going to have a great sword, and quite a few of the others will likely have paired weapons.


The drybrush cometh....
Then it was onto the scenery.
I decided to go for a pale colour and drybrush on, to hopefully make it look like sun bleached wood.
While drybrushing I found that the dusting of brown that I applied was in some places just that – a layer of brown dust! As I drybrushed, the brown was just brushing right off…
I decided not to let this get me down, and chose to think of it as variations in the undertones.
For some pieces I did add a drybrysh of bestial brown first, for a little more variety.

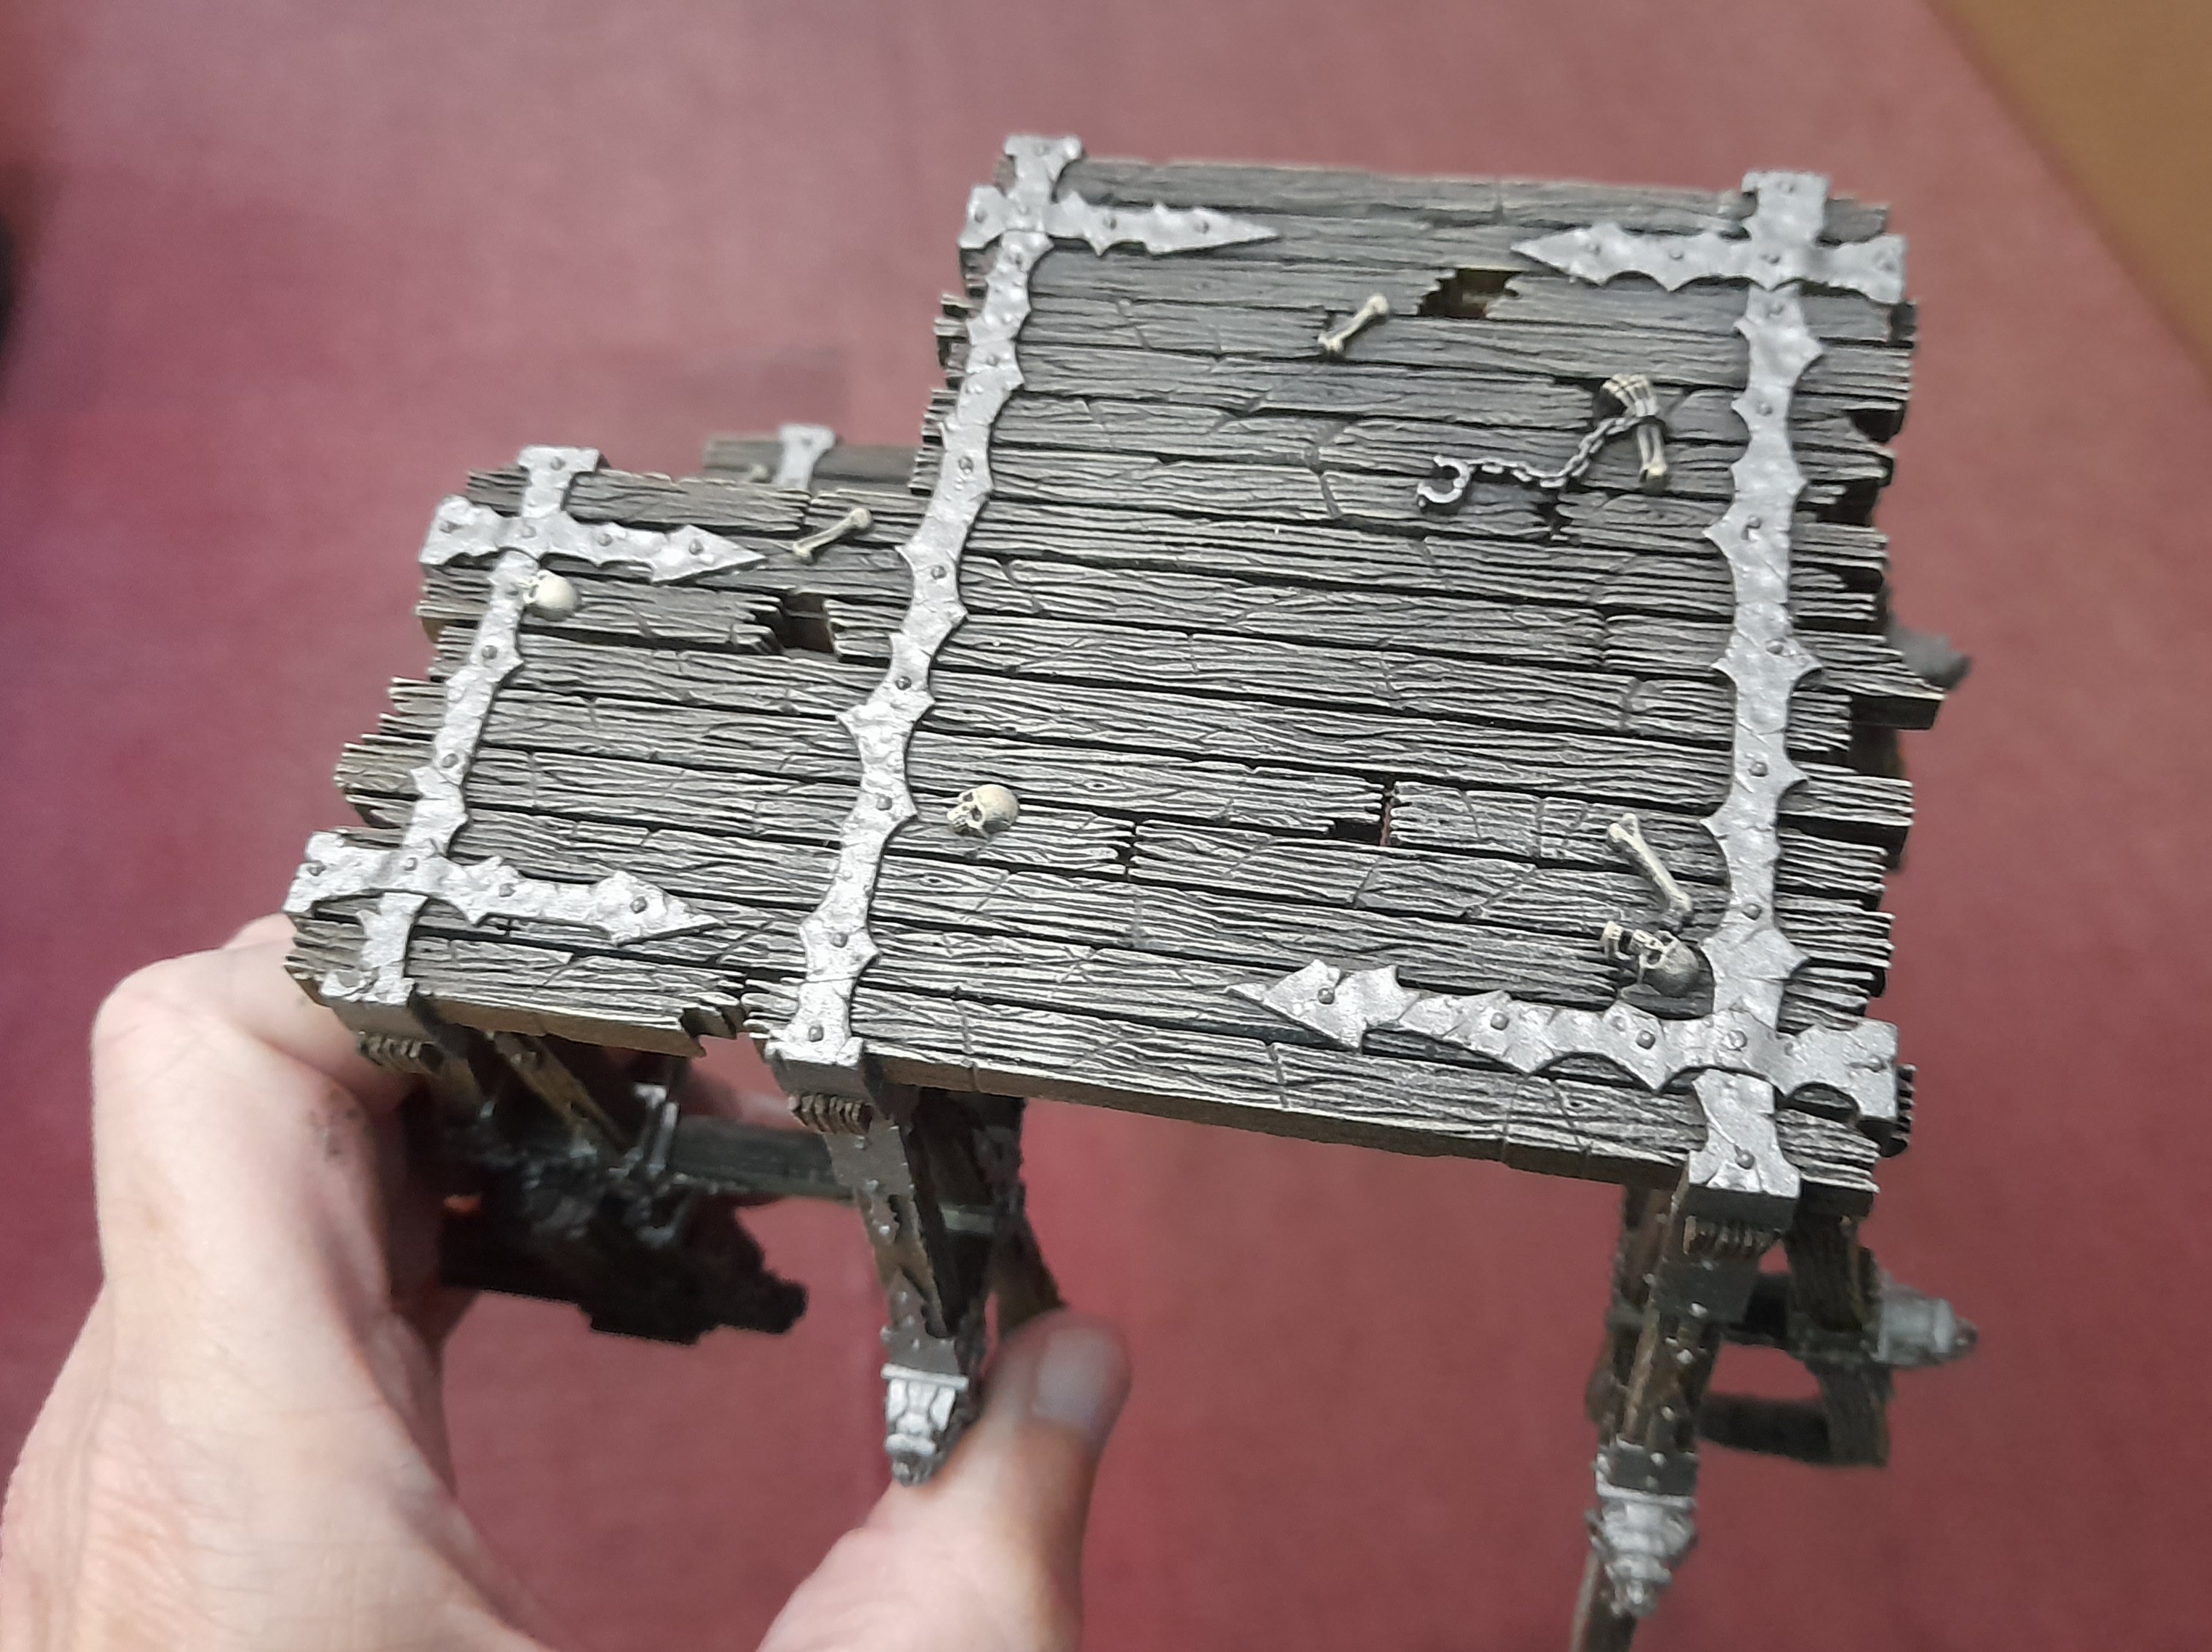
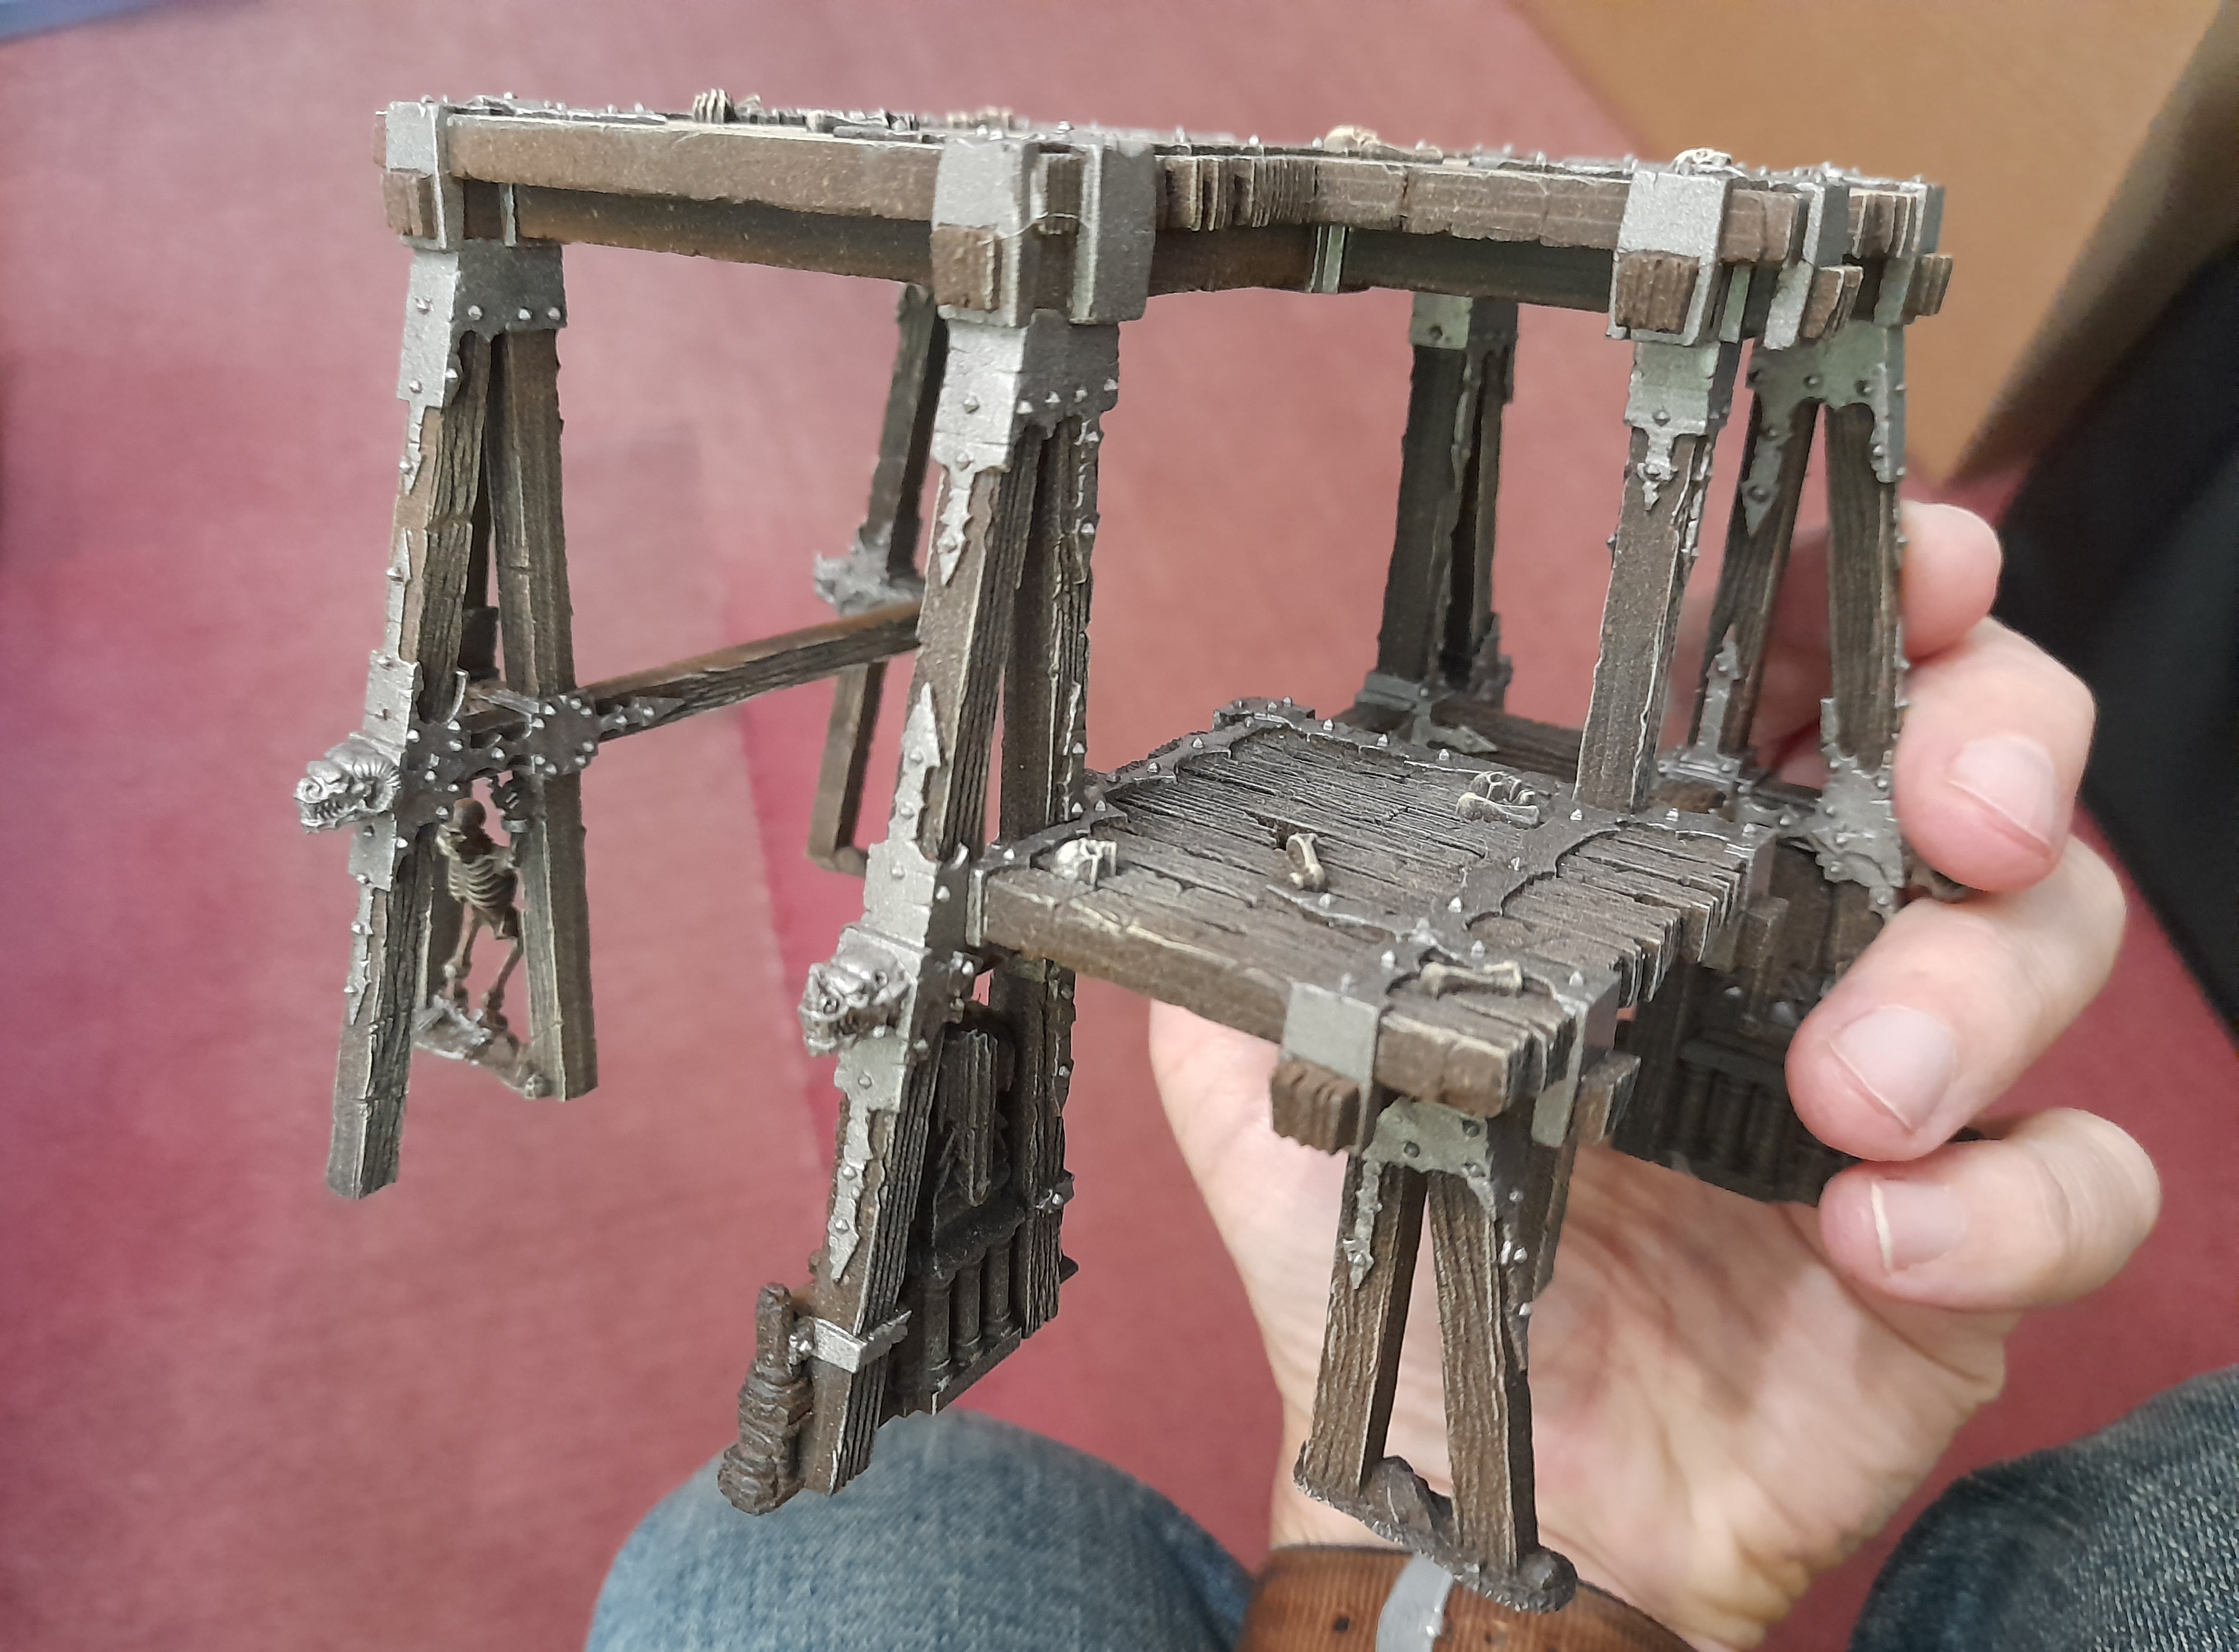
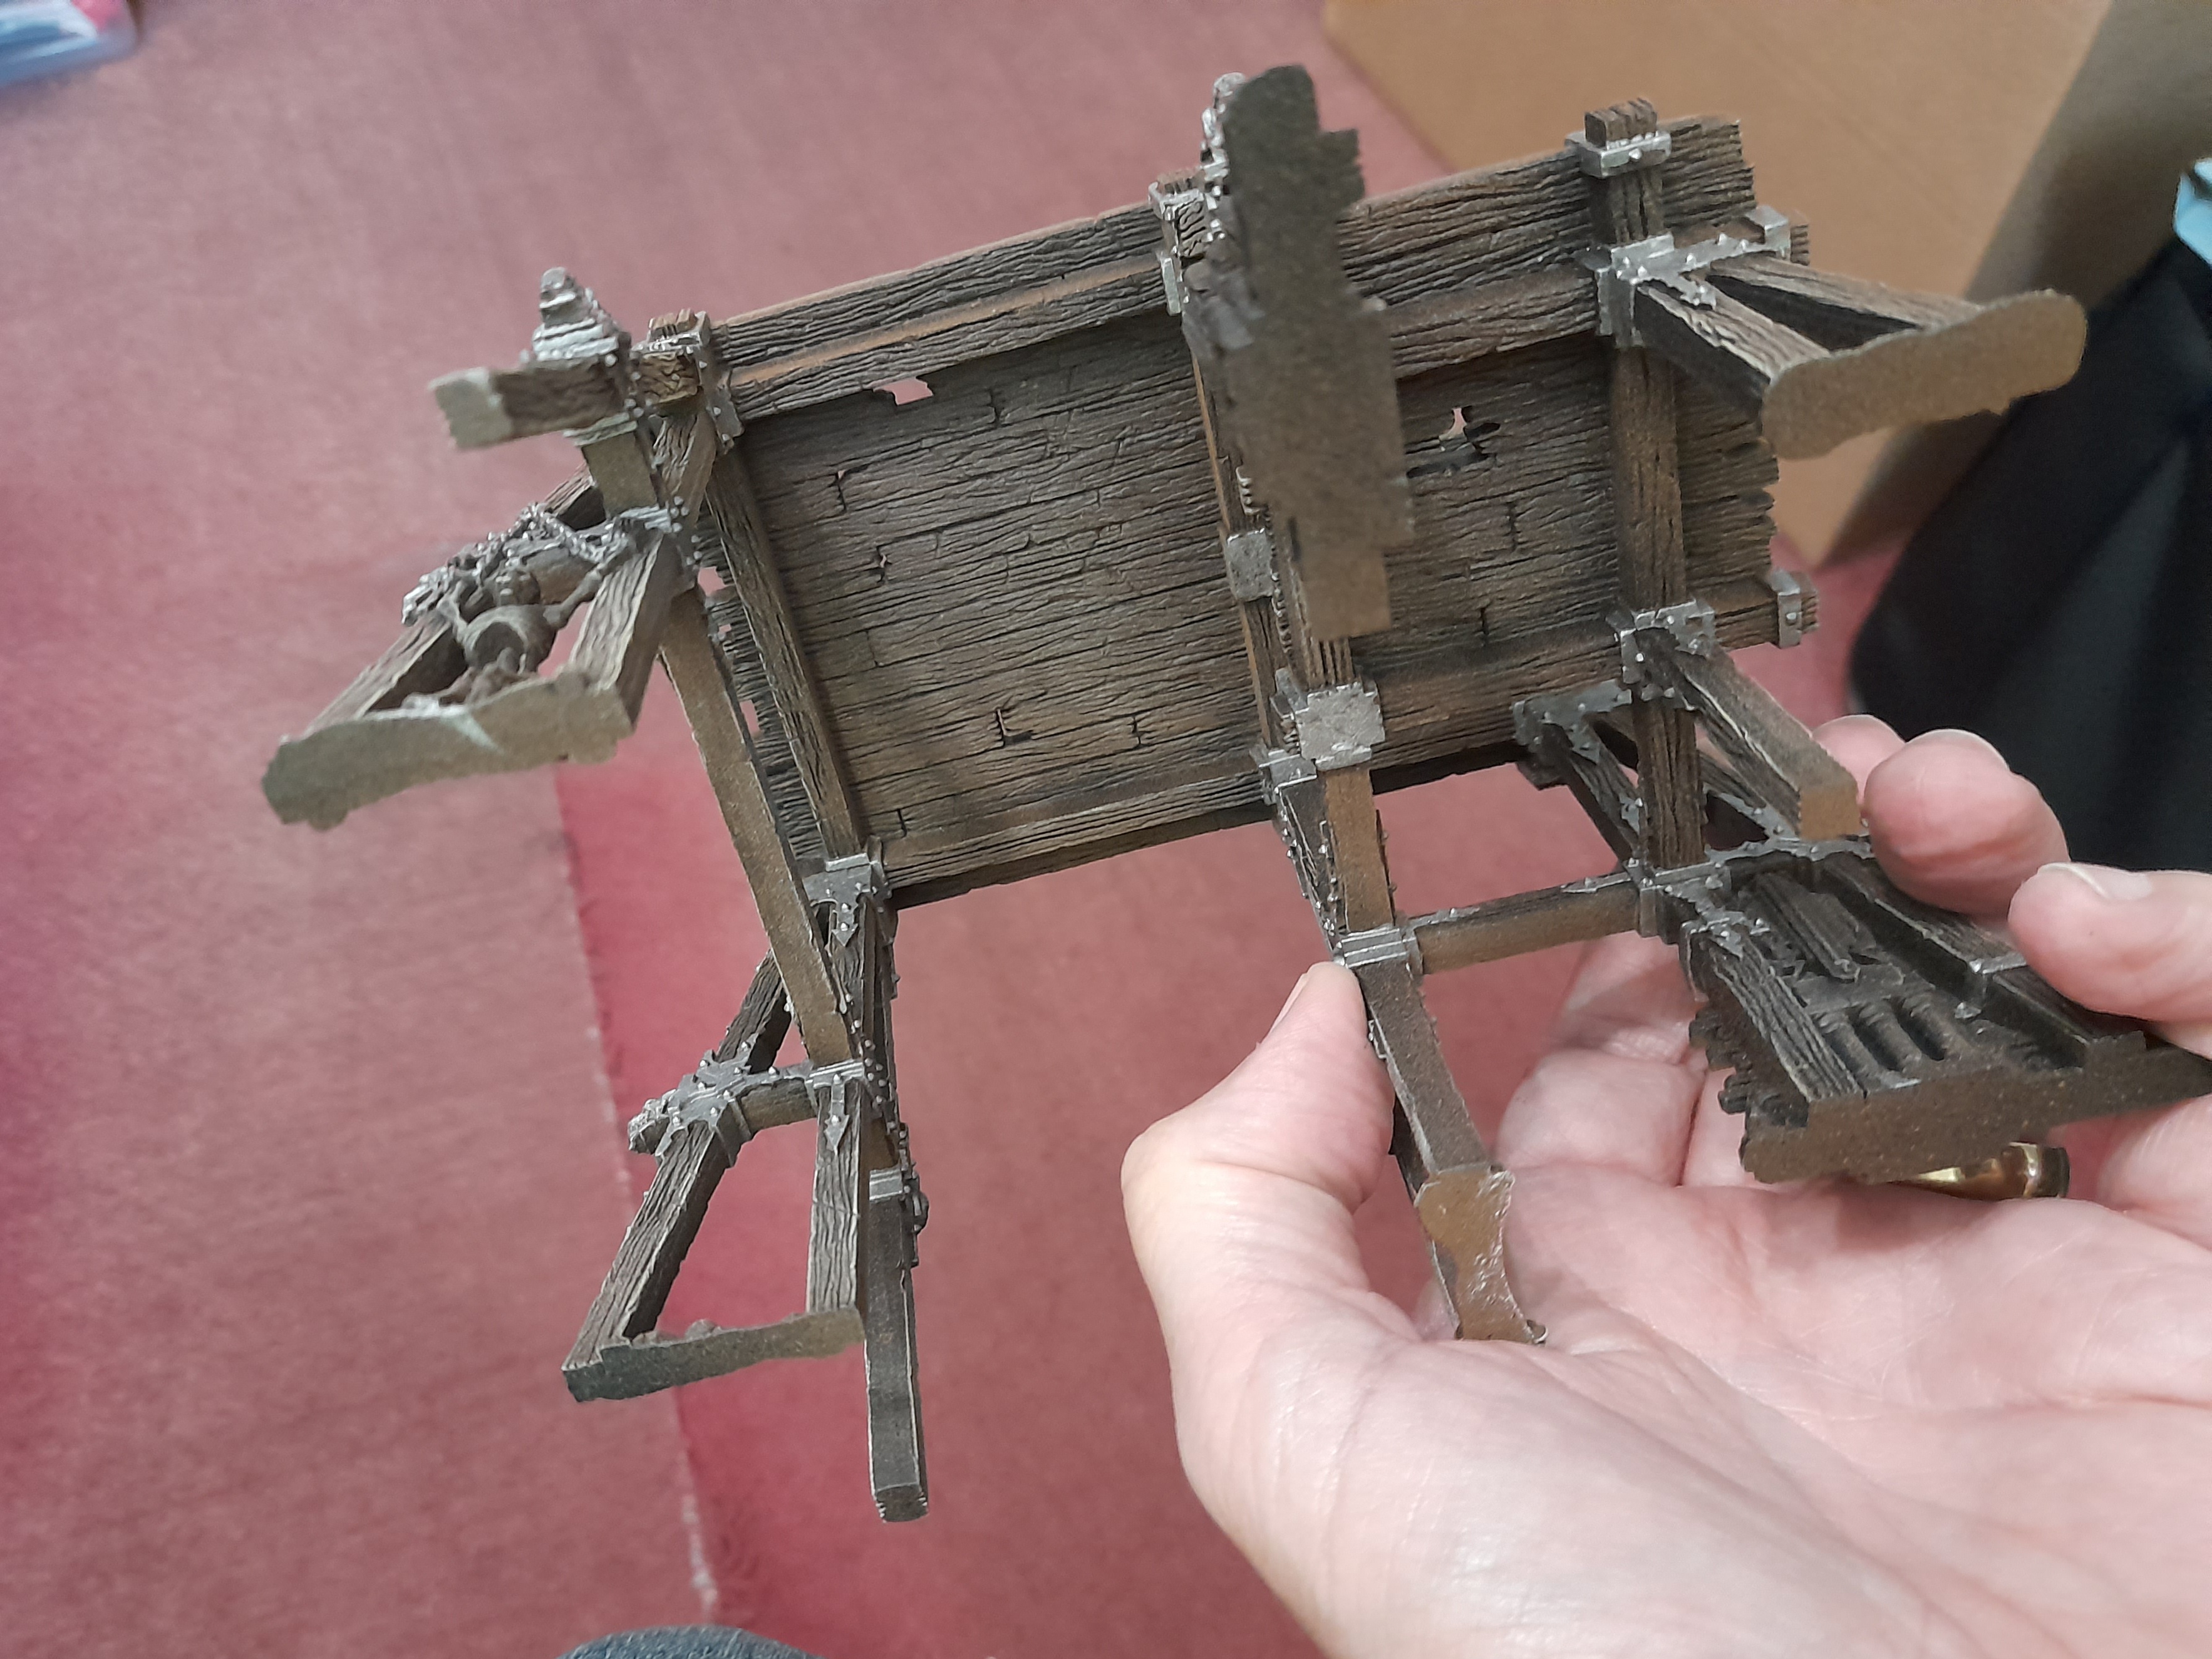
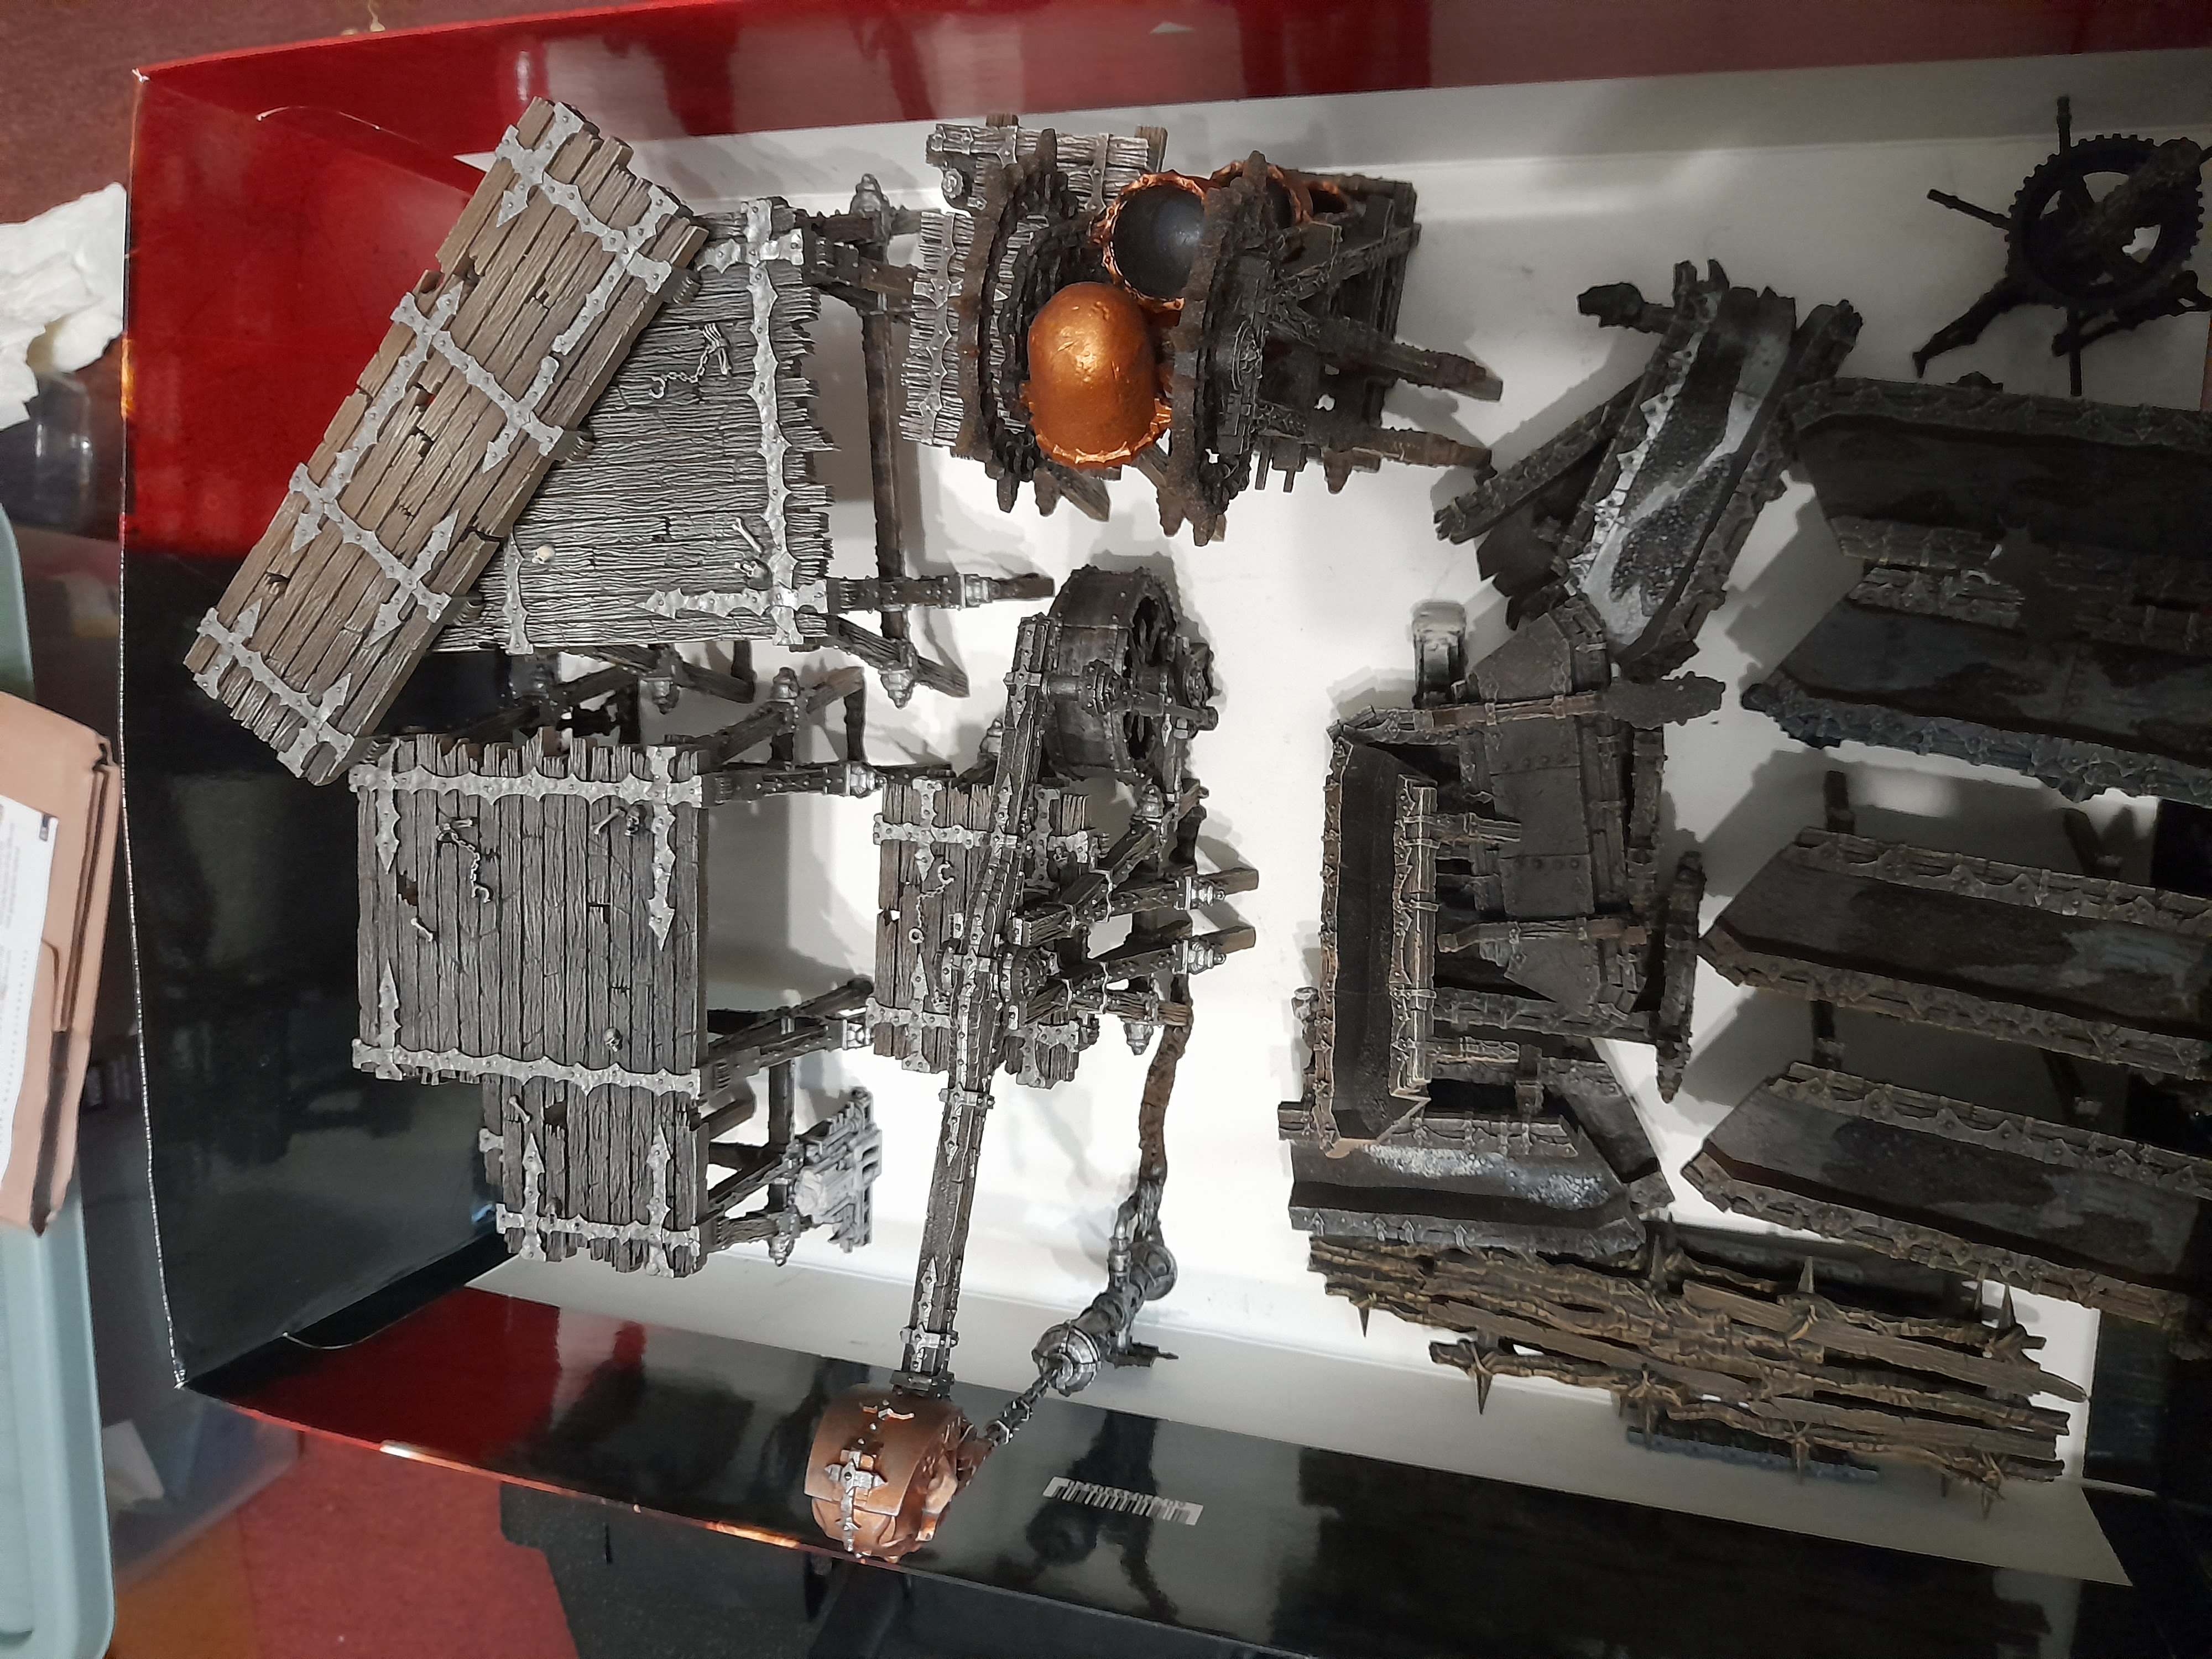
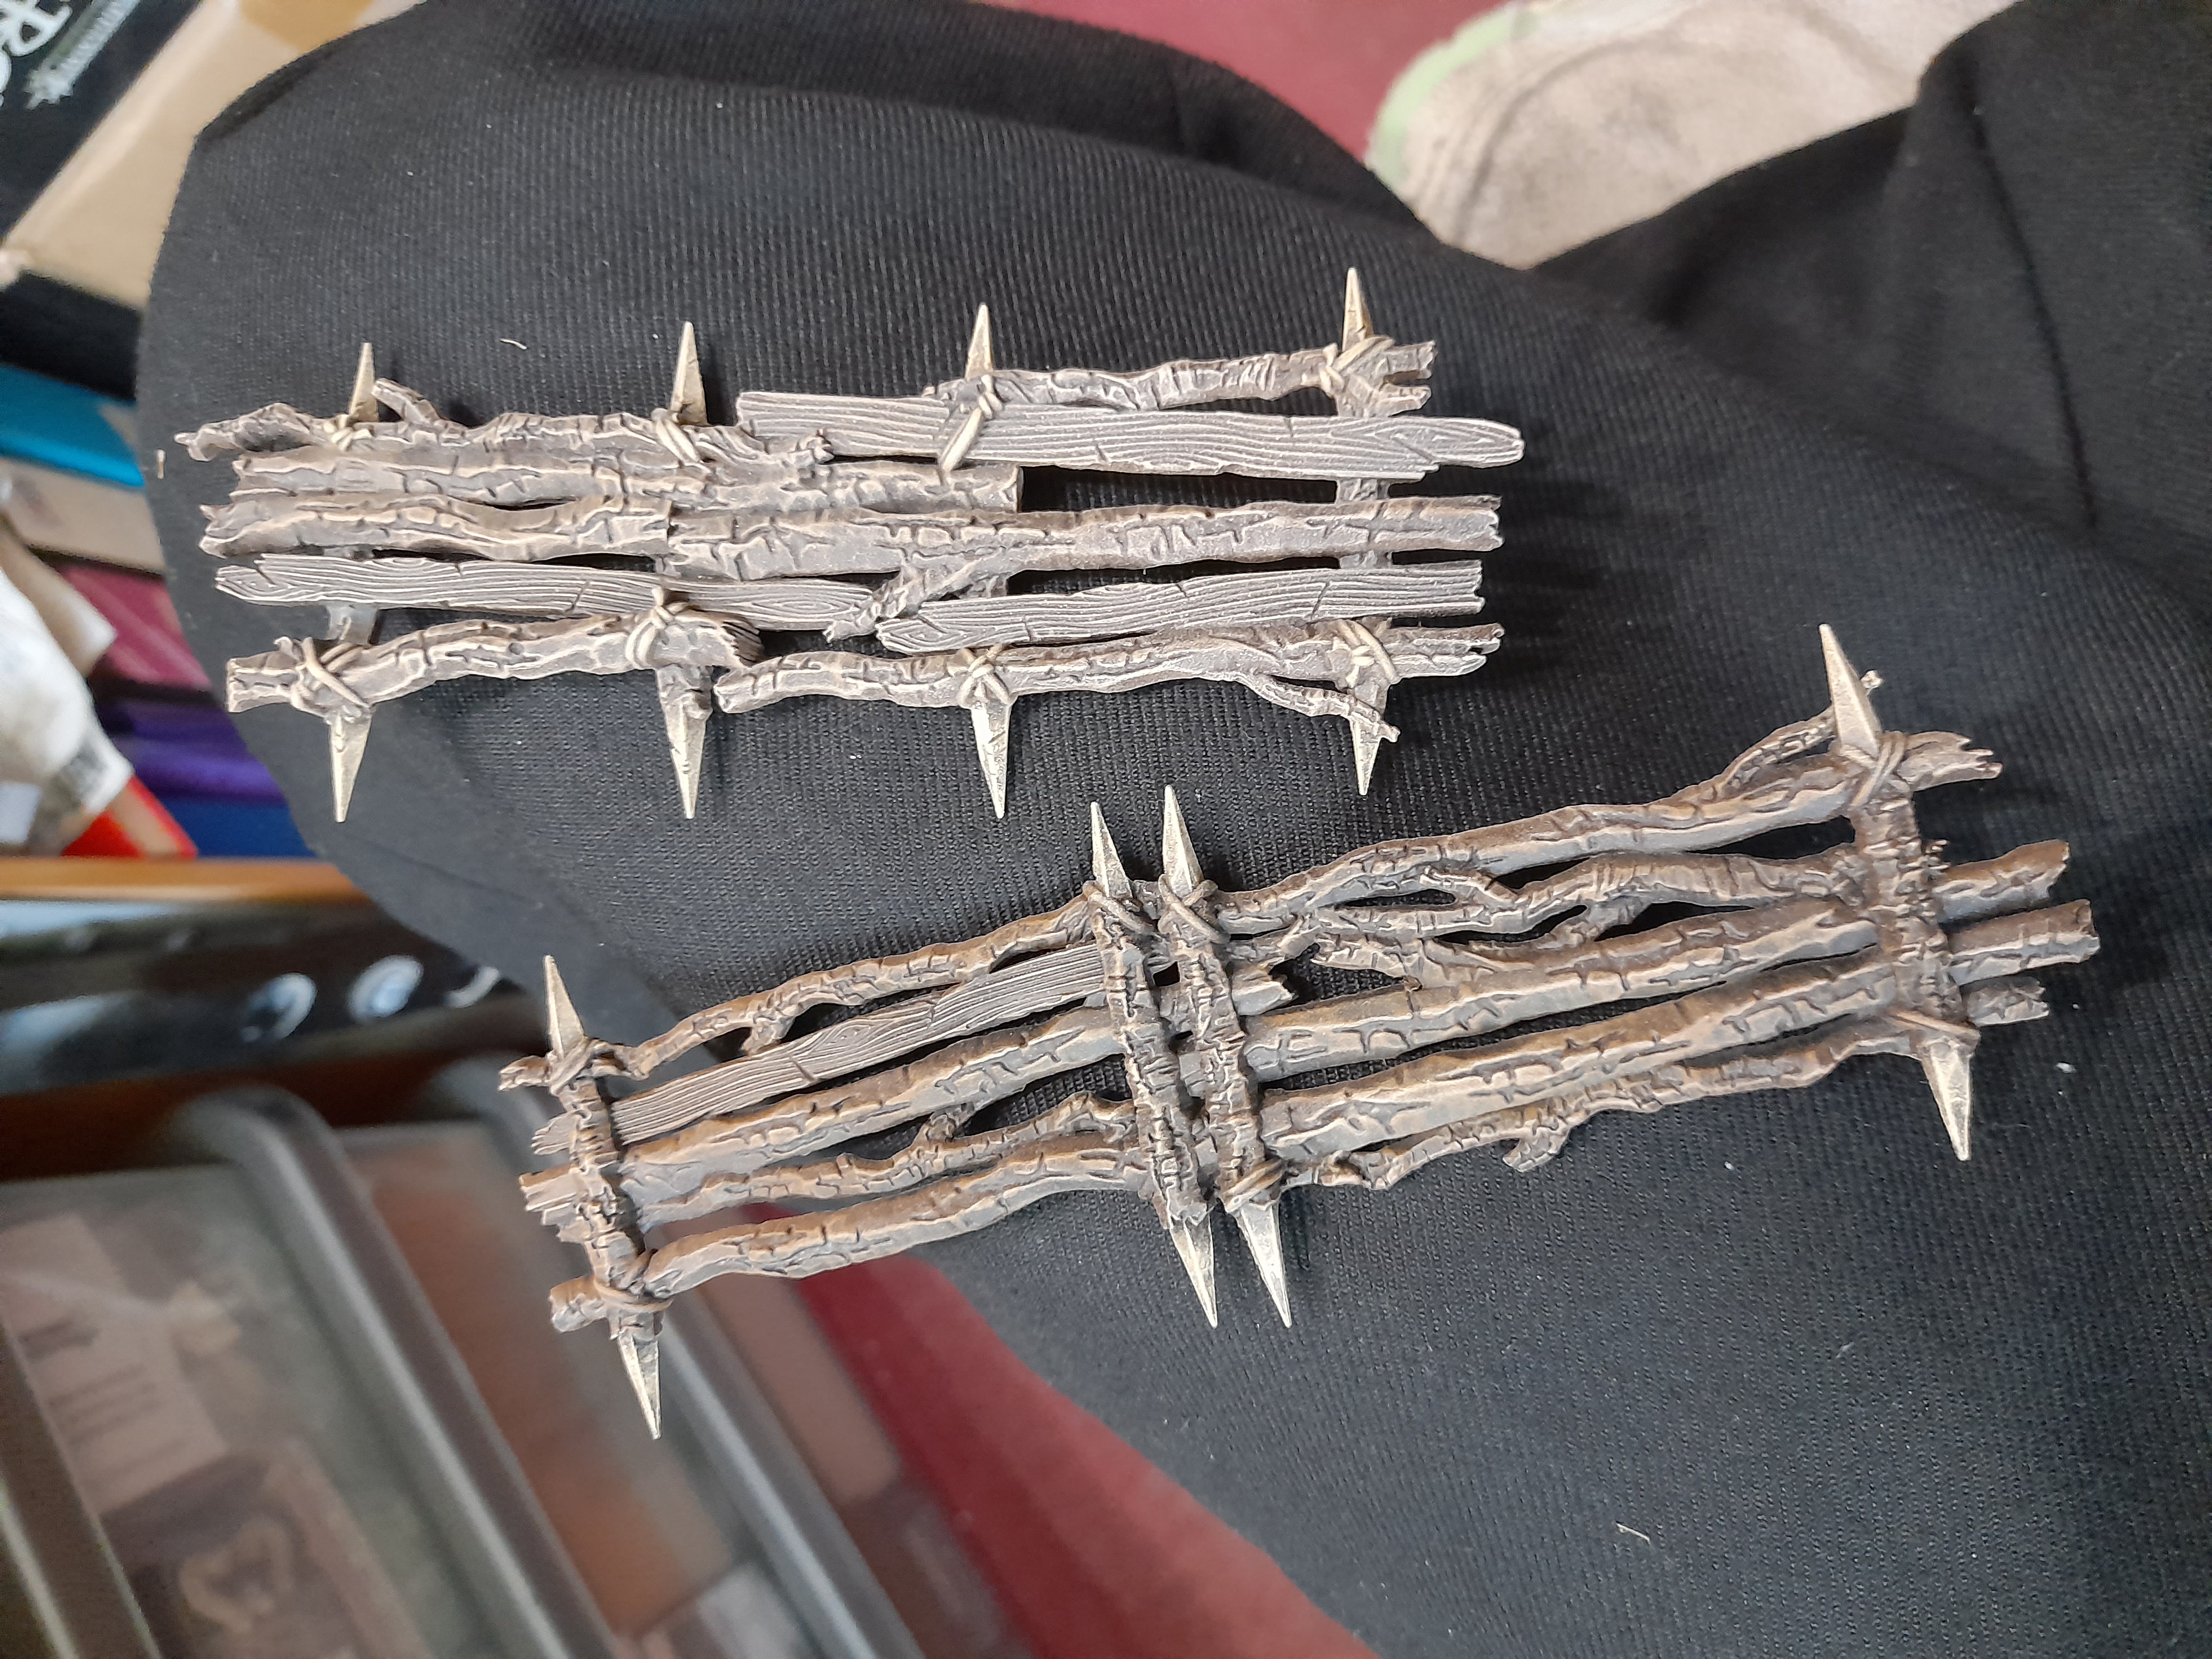
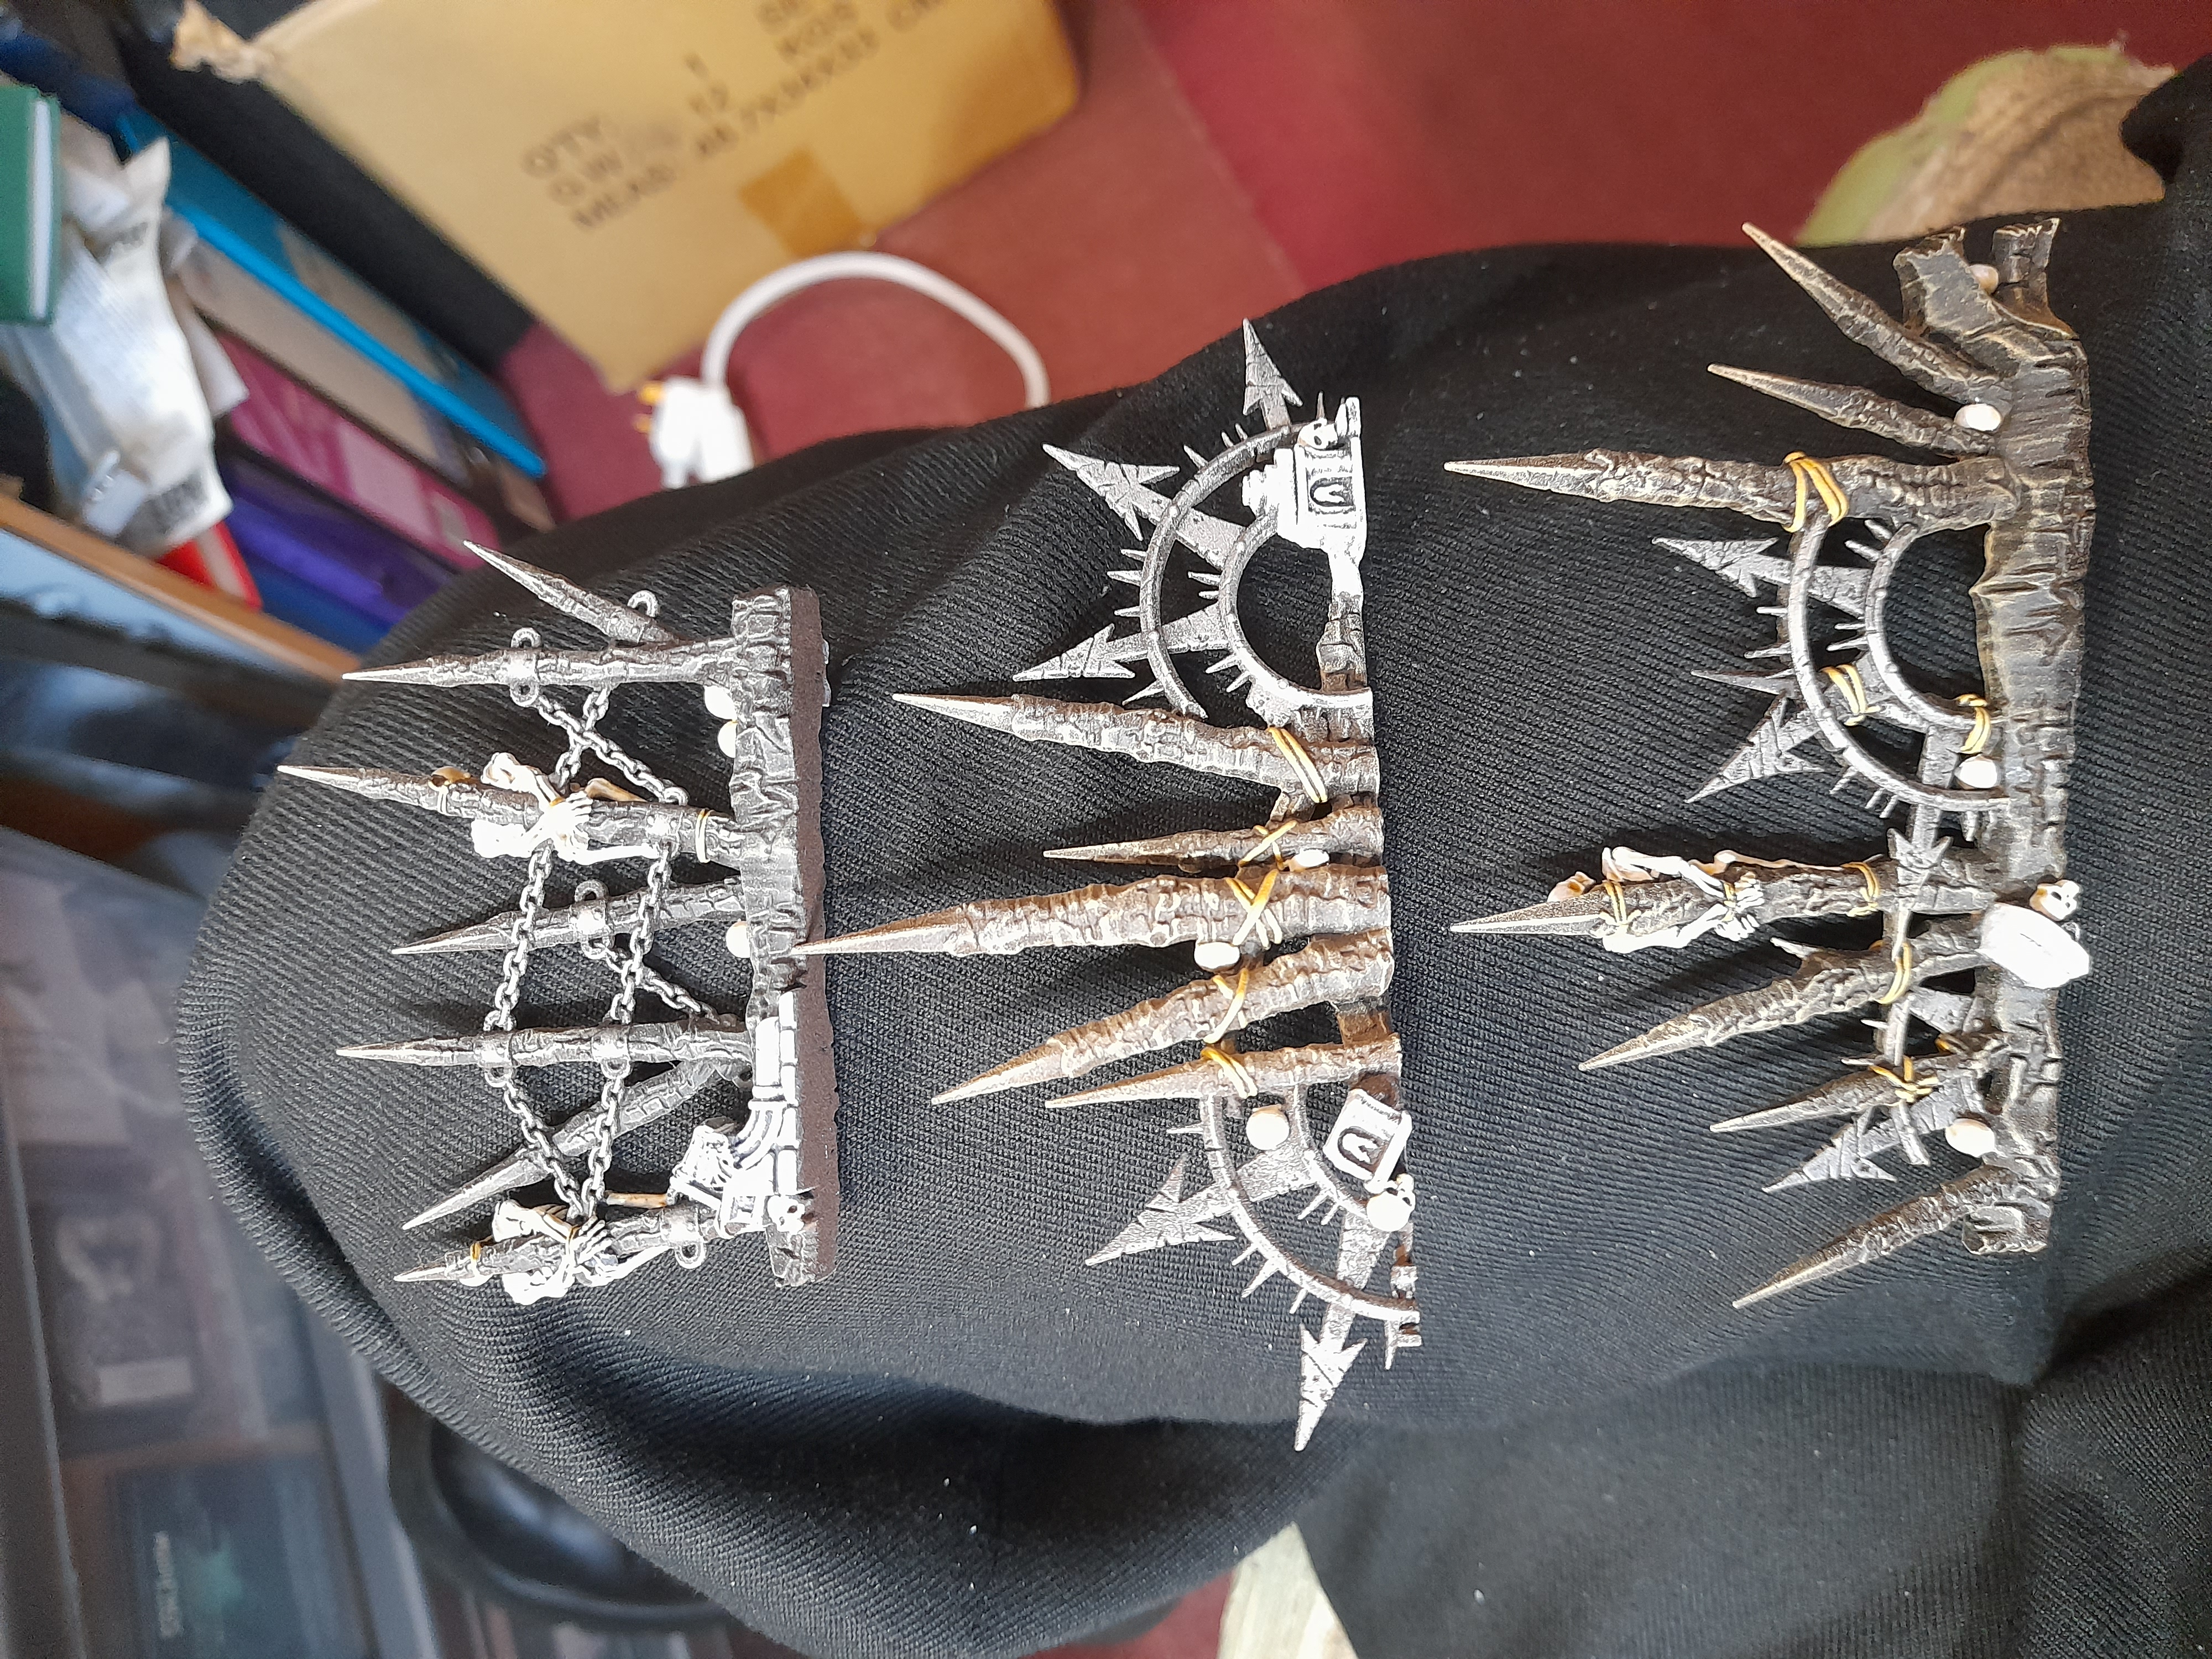
And the scenery so far….
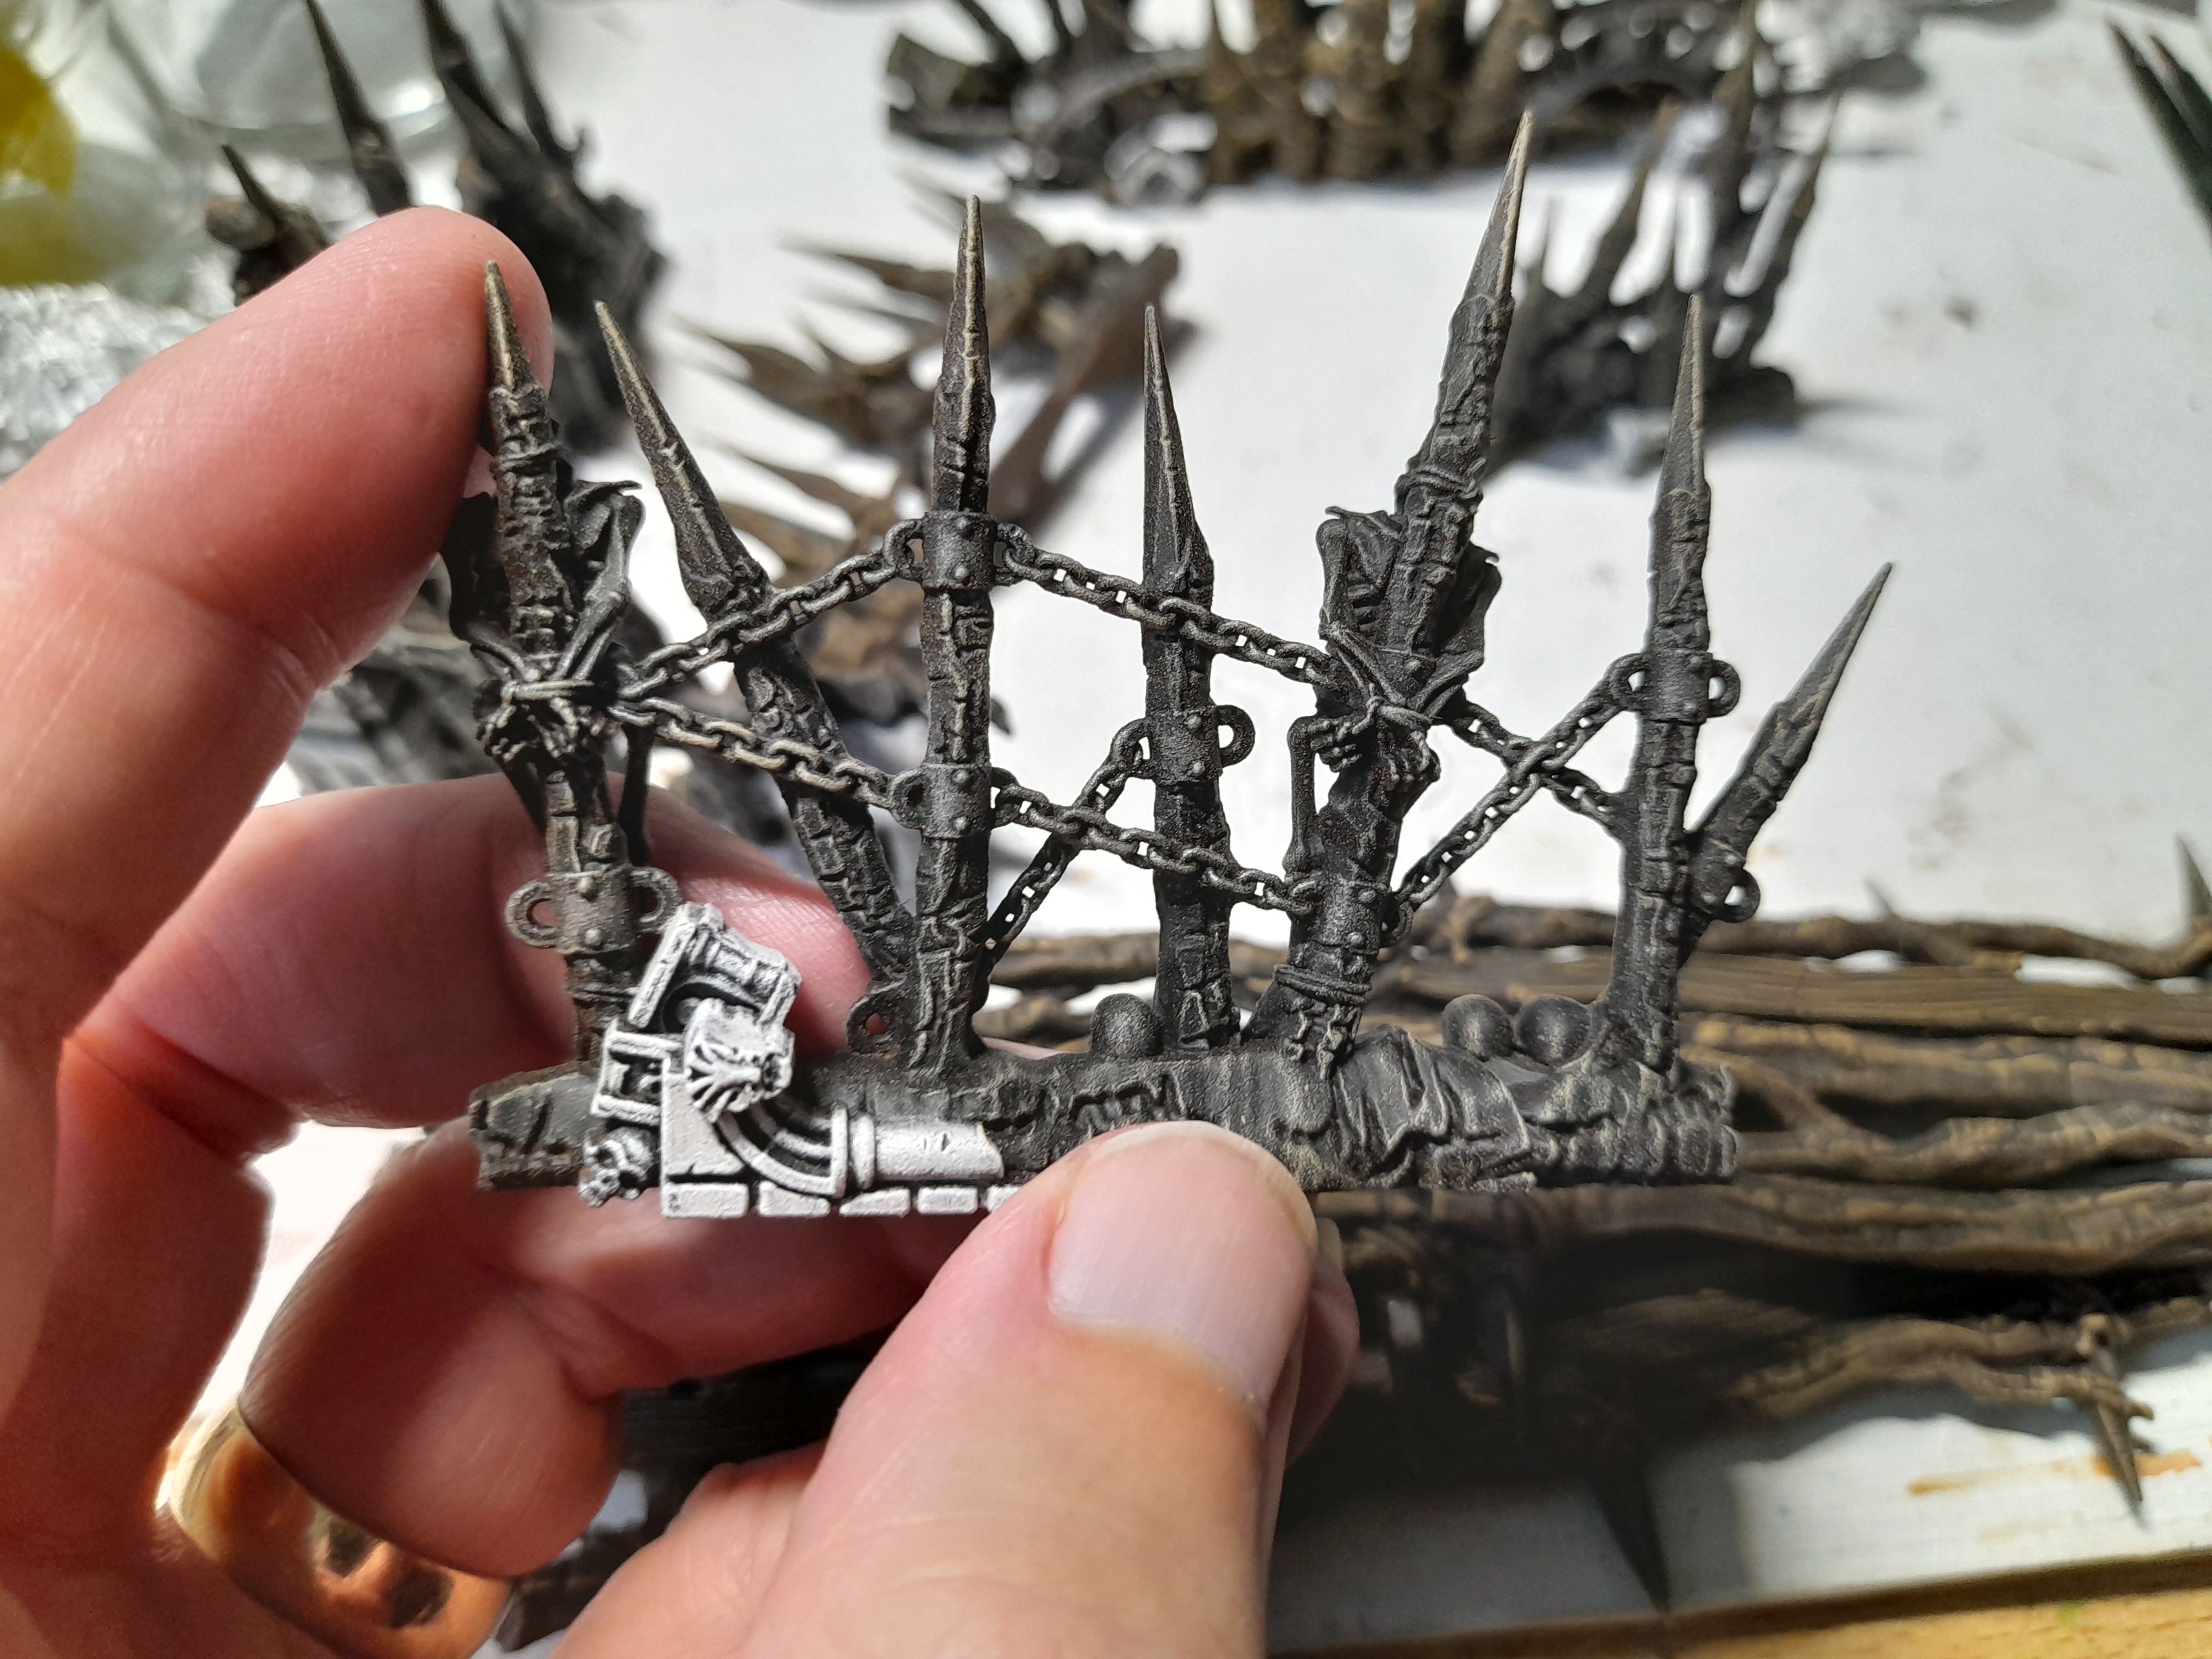
(The spike barricades are upstairs awaiting work)
Next up maybe adding weapons to the barbarians, or, if I can face it, working on the metal on the terrain….
A hard day....
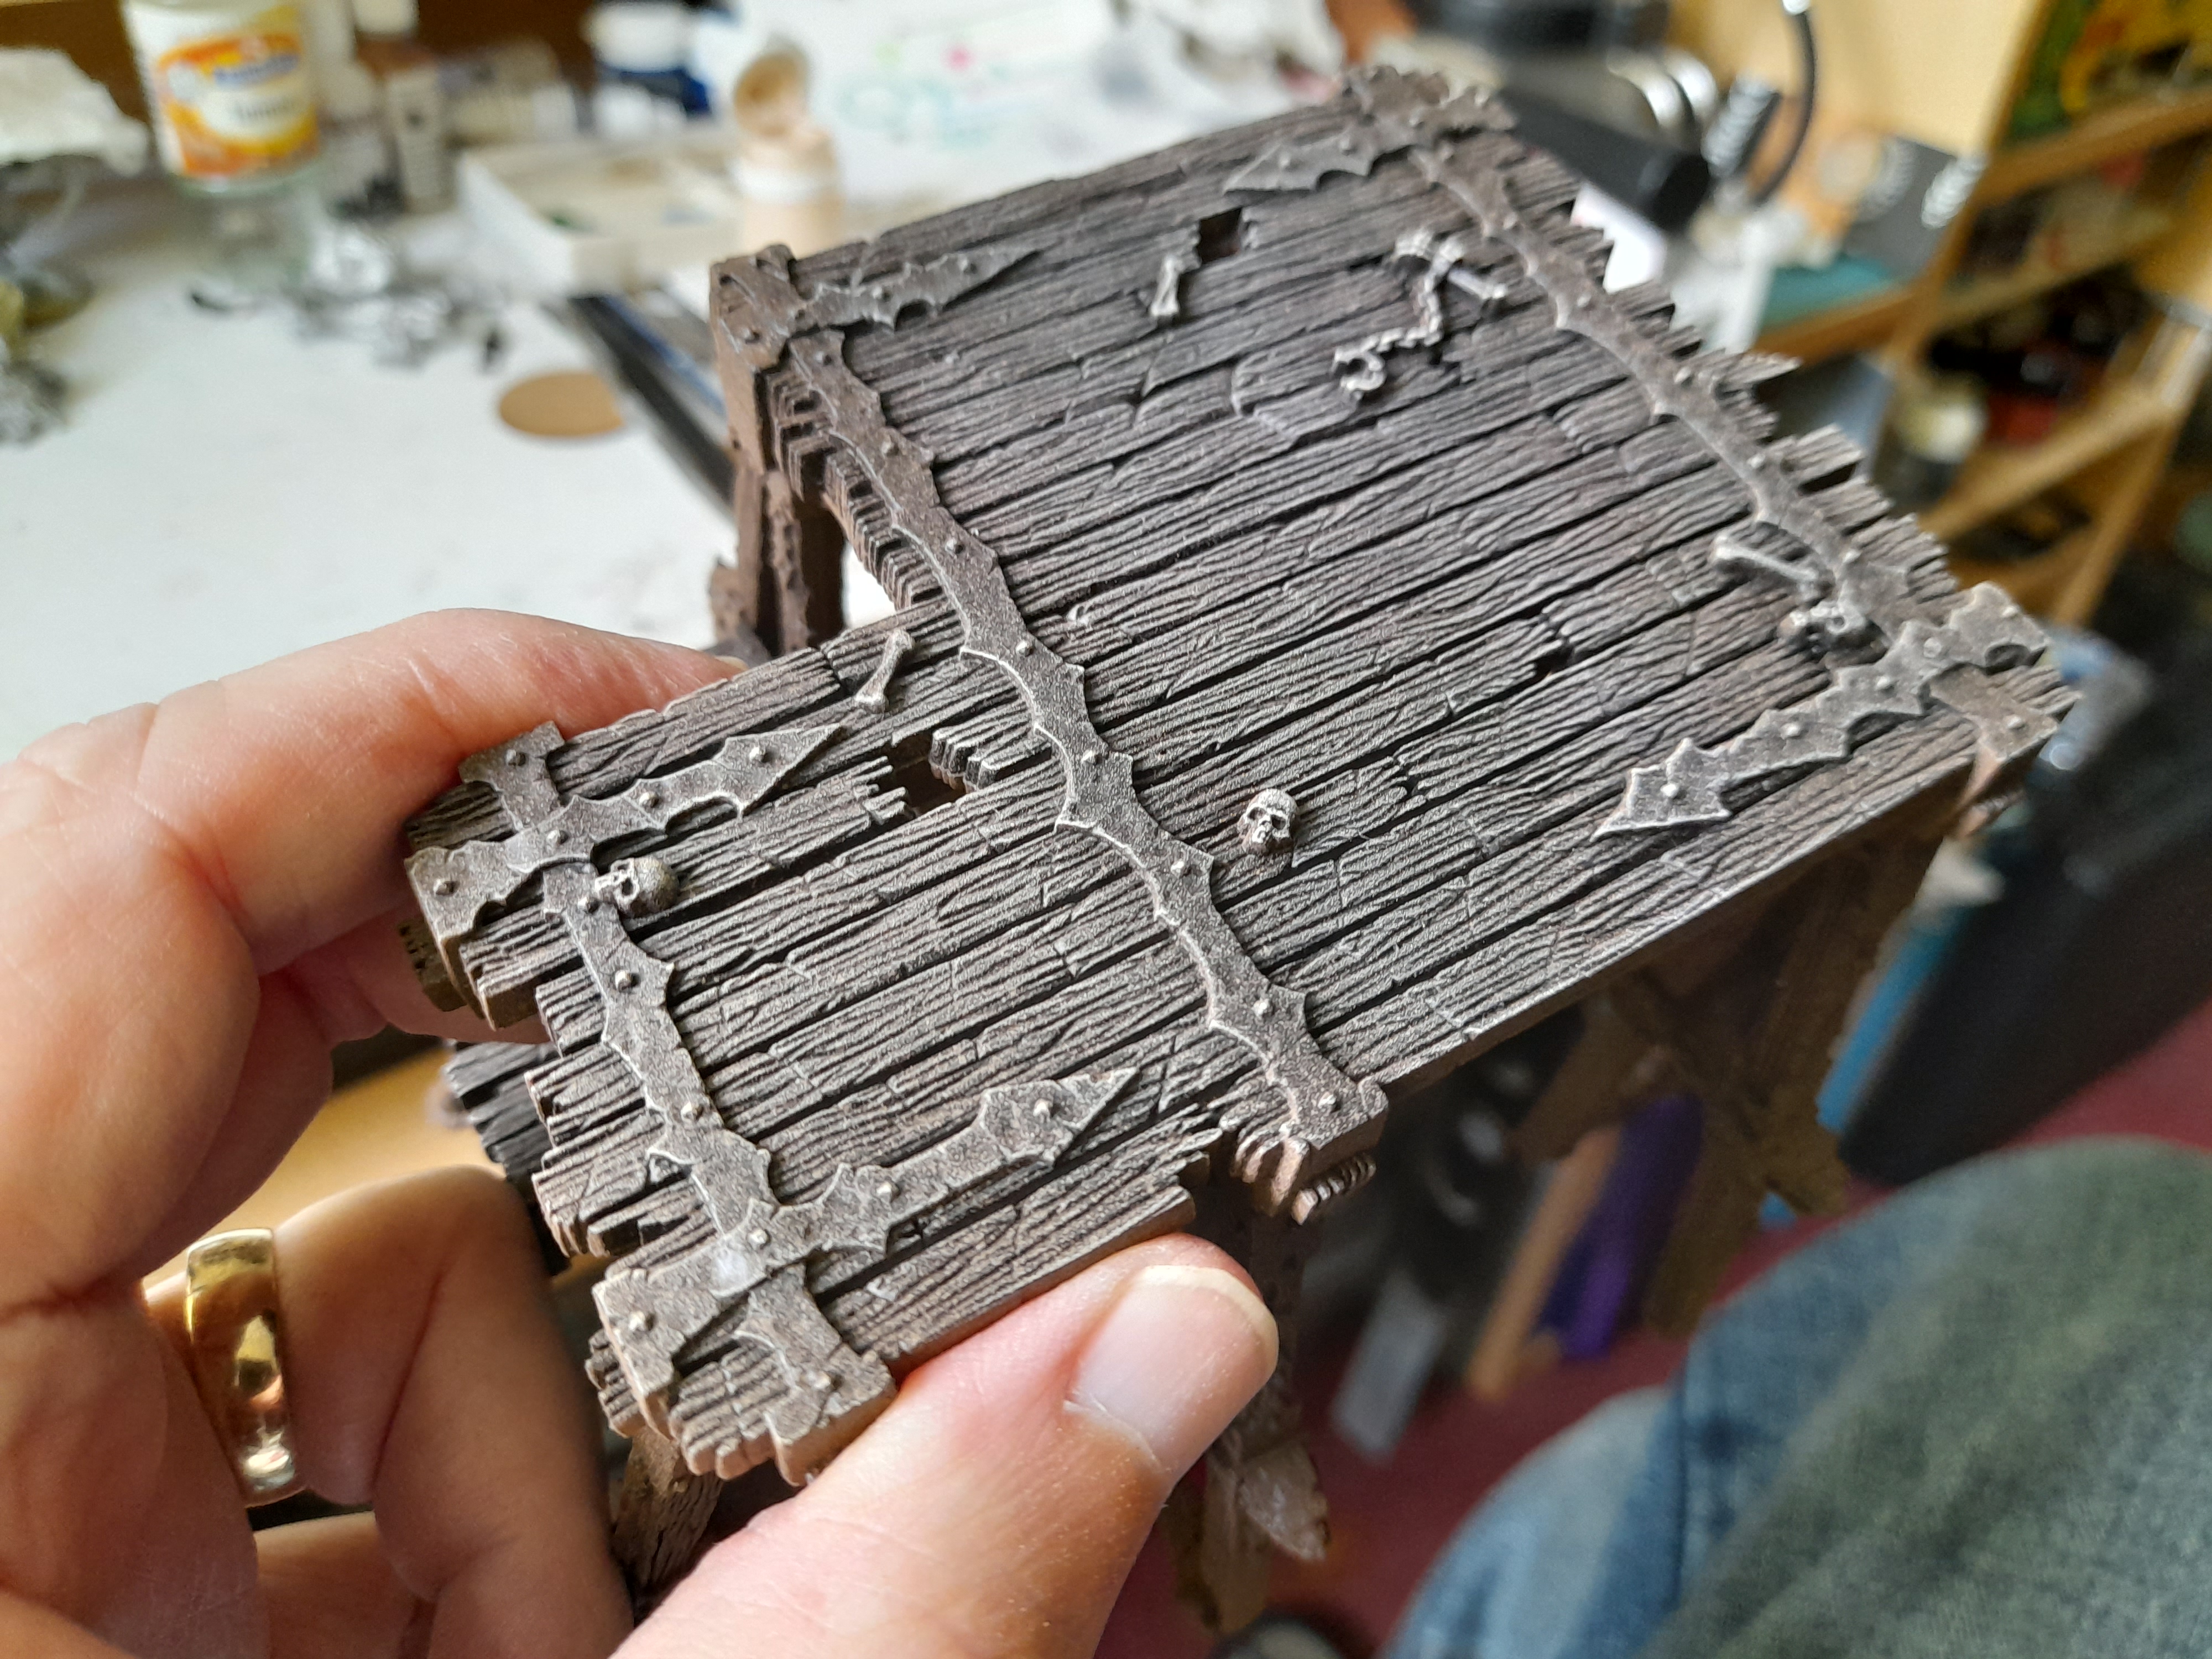
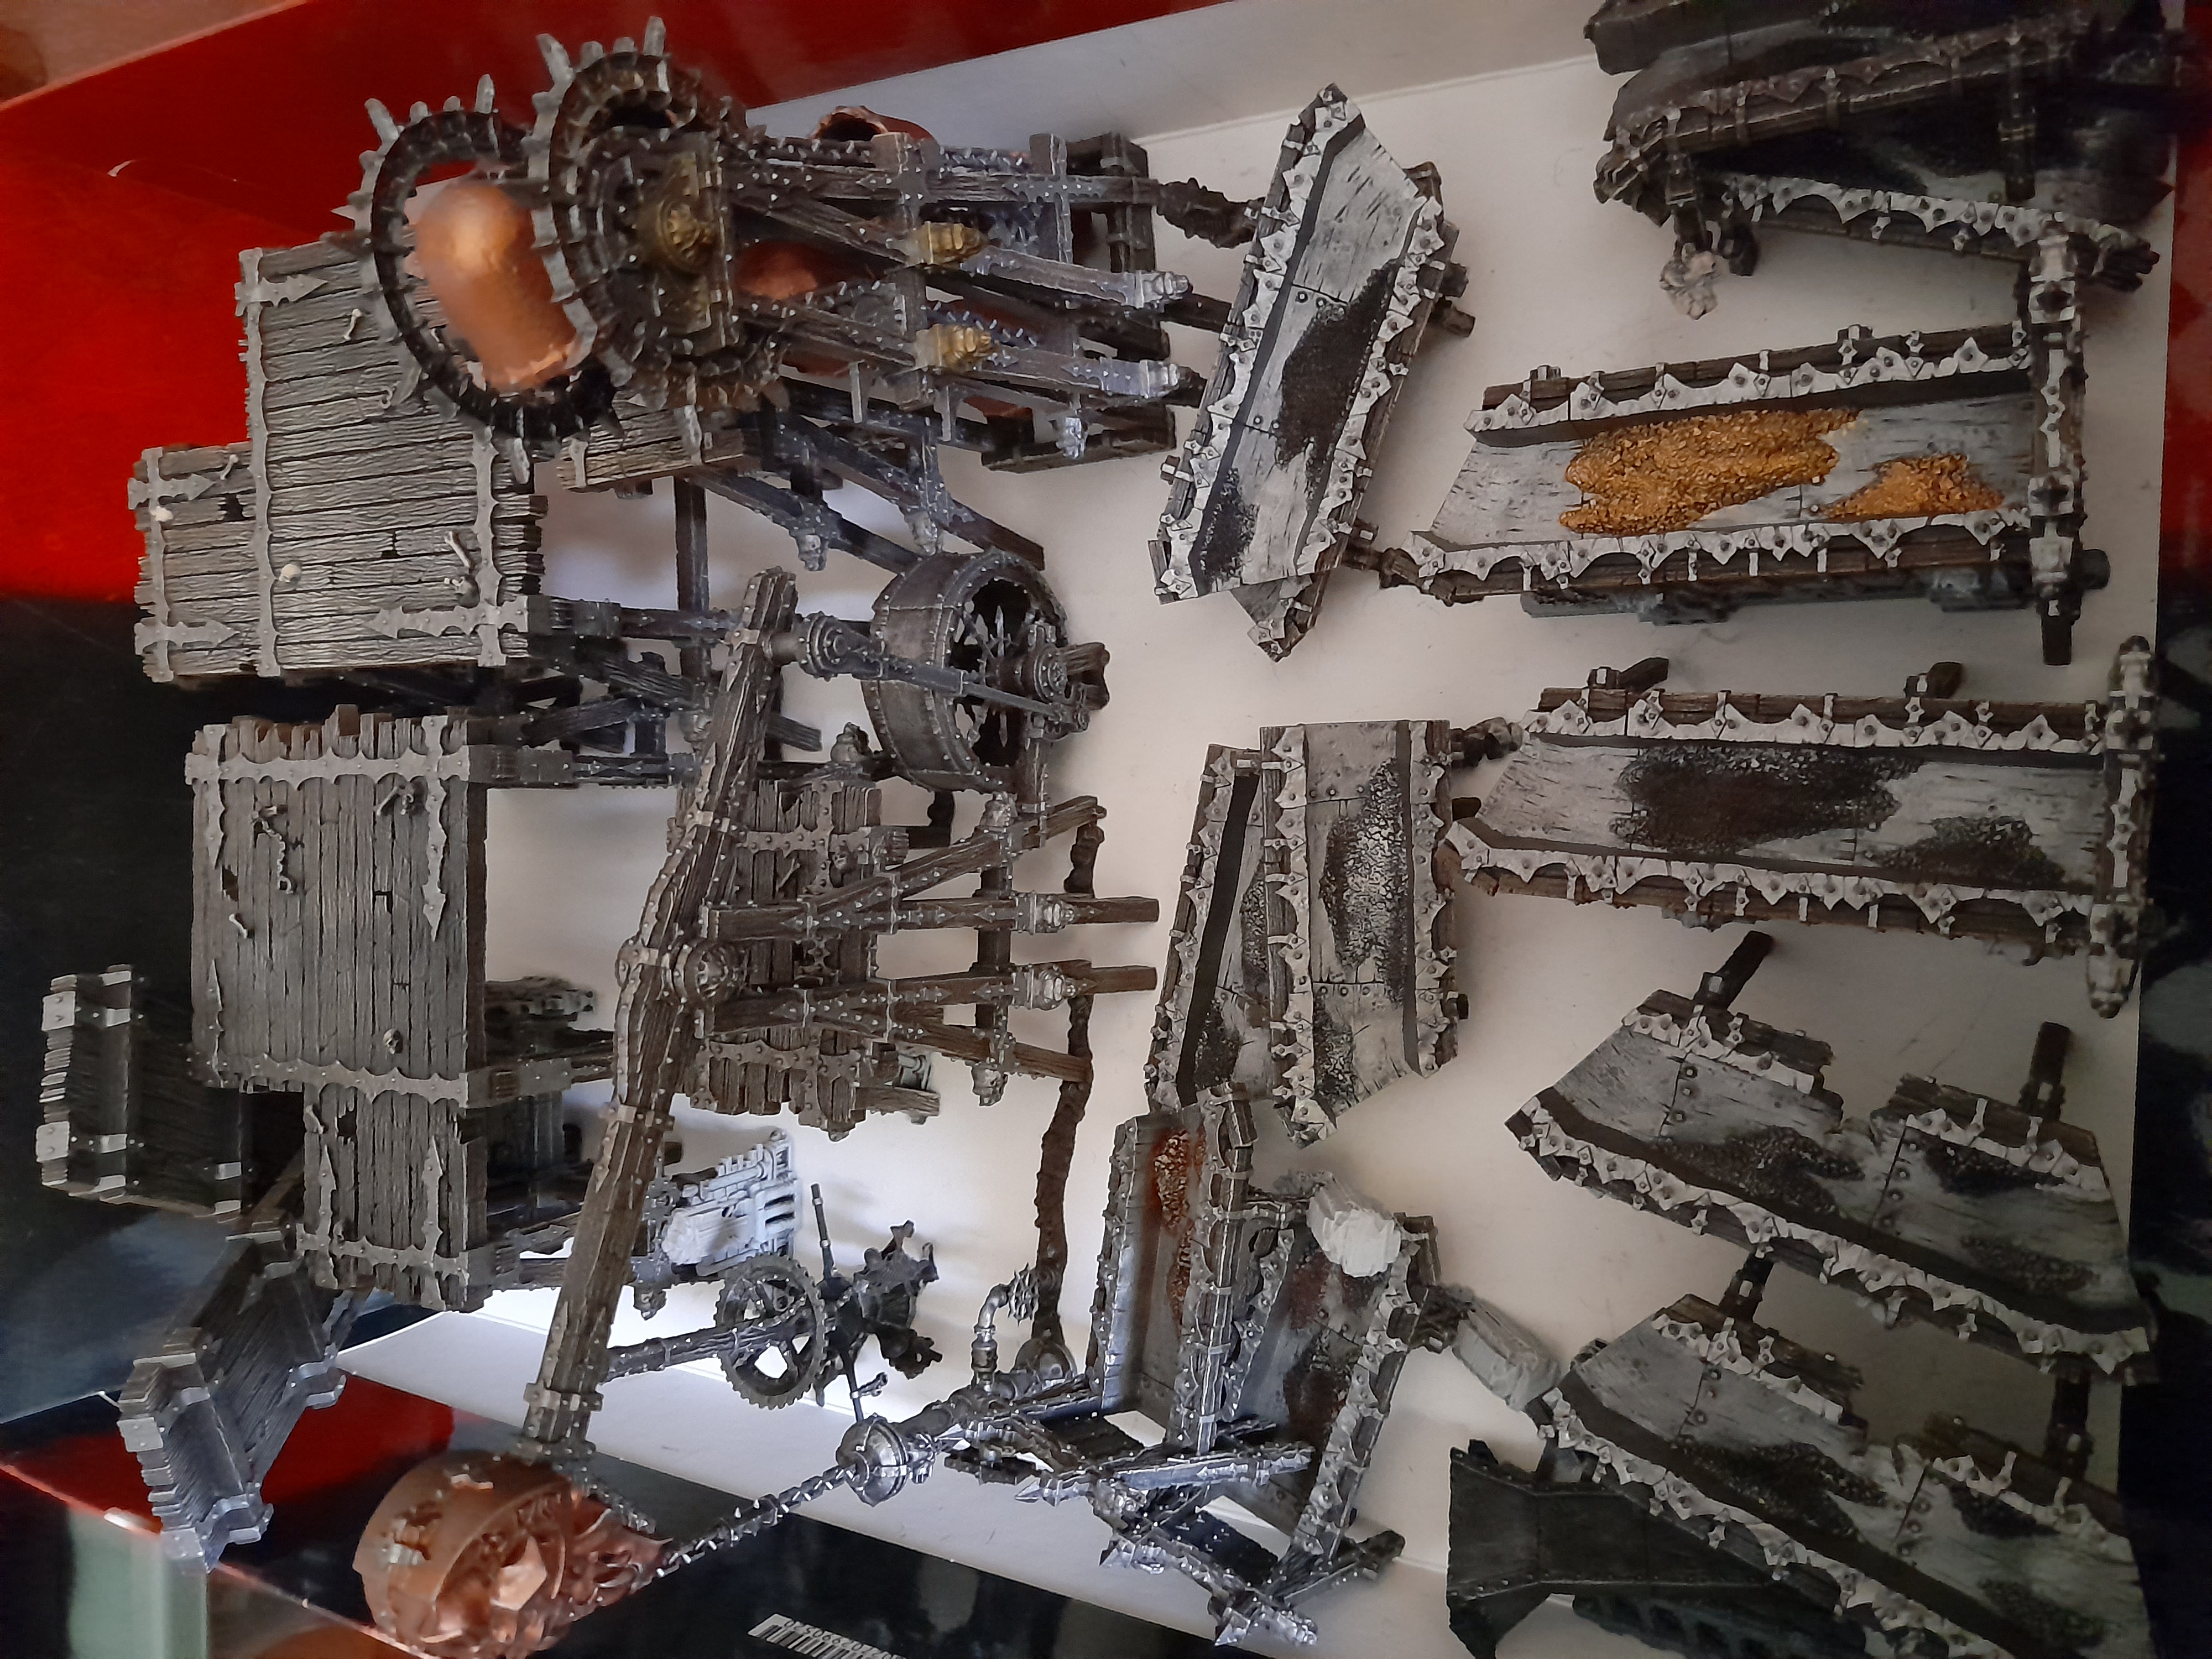
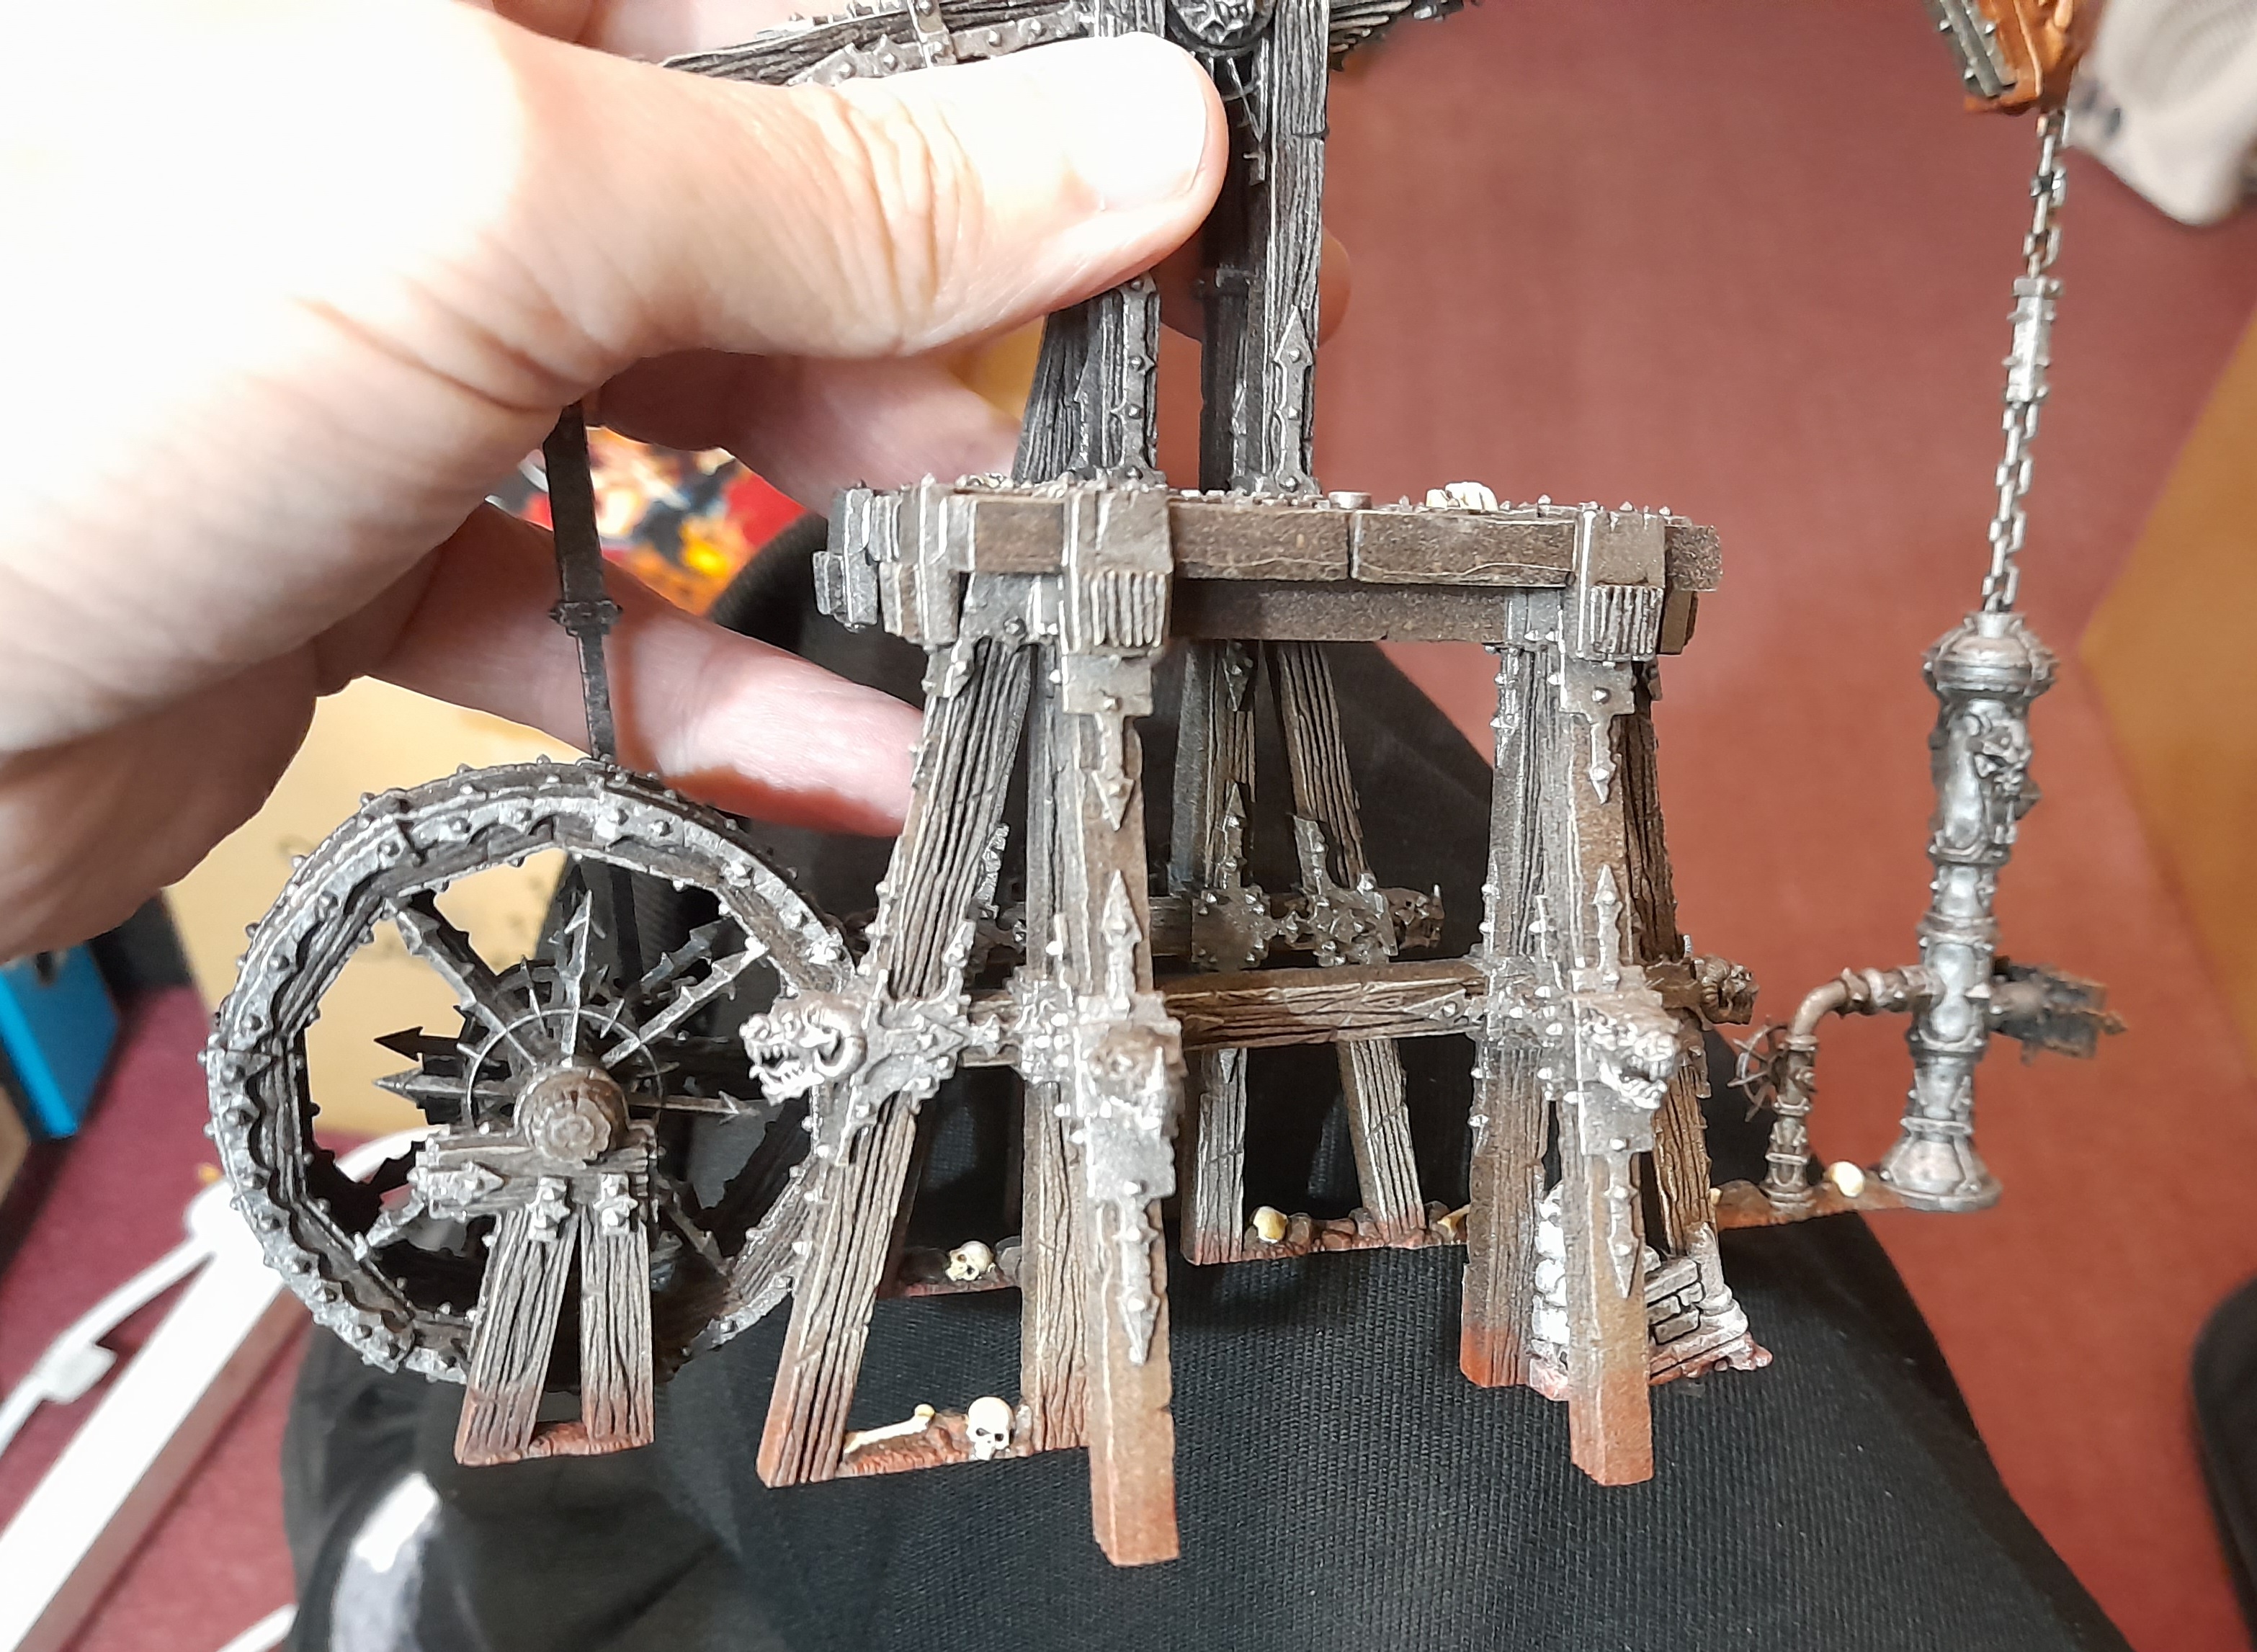
Had an hour or so to spare today, so I thought I would see how many pieces of terrain I could basecoat the metal on.
I started with one of the large platforms, and 1 hour 45 mins later I had managed to base coat the metals on one large platform…. yep, that was it, just the one I started on 🙁
To be honest I found it rather soul destroying, and I’m not looking forward to the rest.
However, I do take some solace in the fact that I chose one of the largest pieces to start with. And that I know roughly how long the next one will take, when I can face it…
Plus, the smaller pieces should be quicker ✅
Still have to paint the stone, skeletons and rocks, then apply some washes to bring it all together.
Not sure when that will be though, this session took its toll on me…
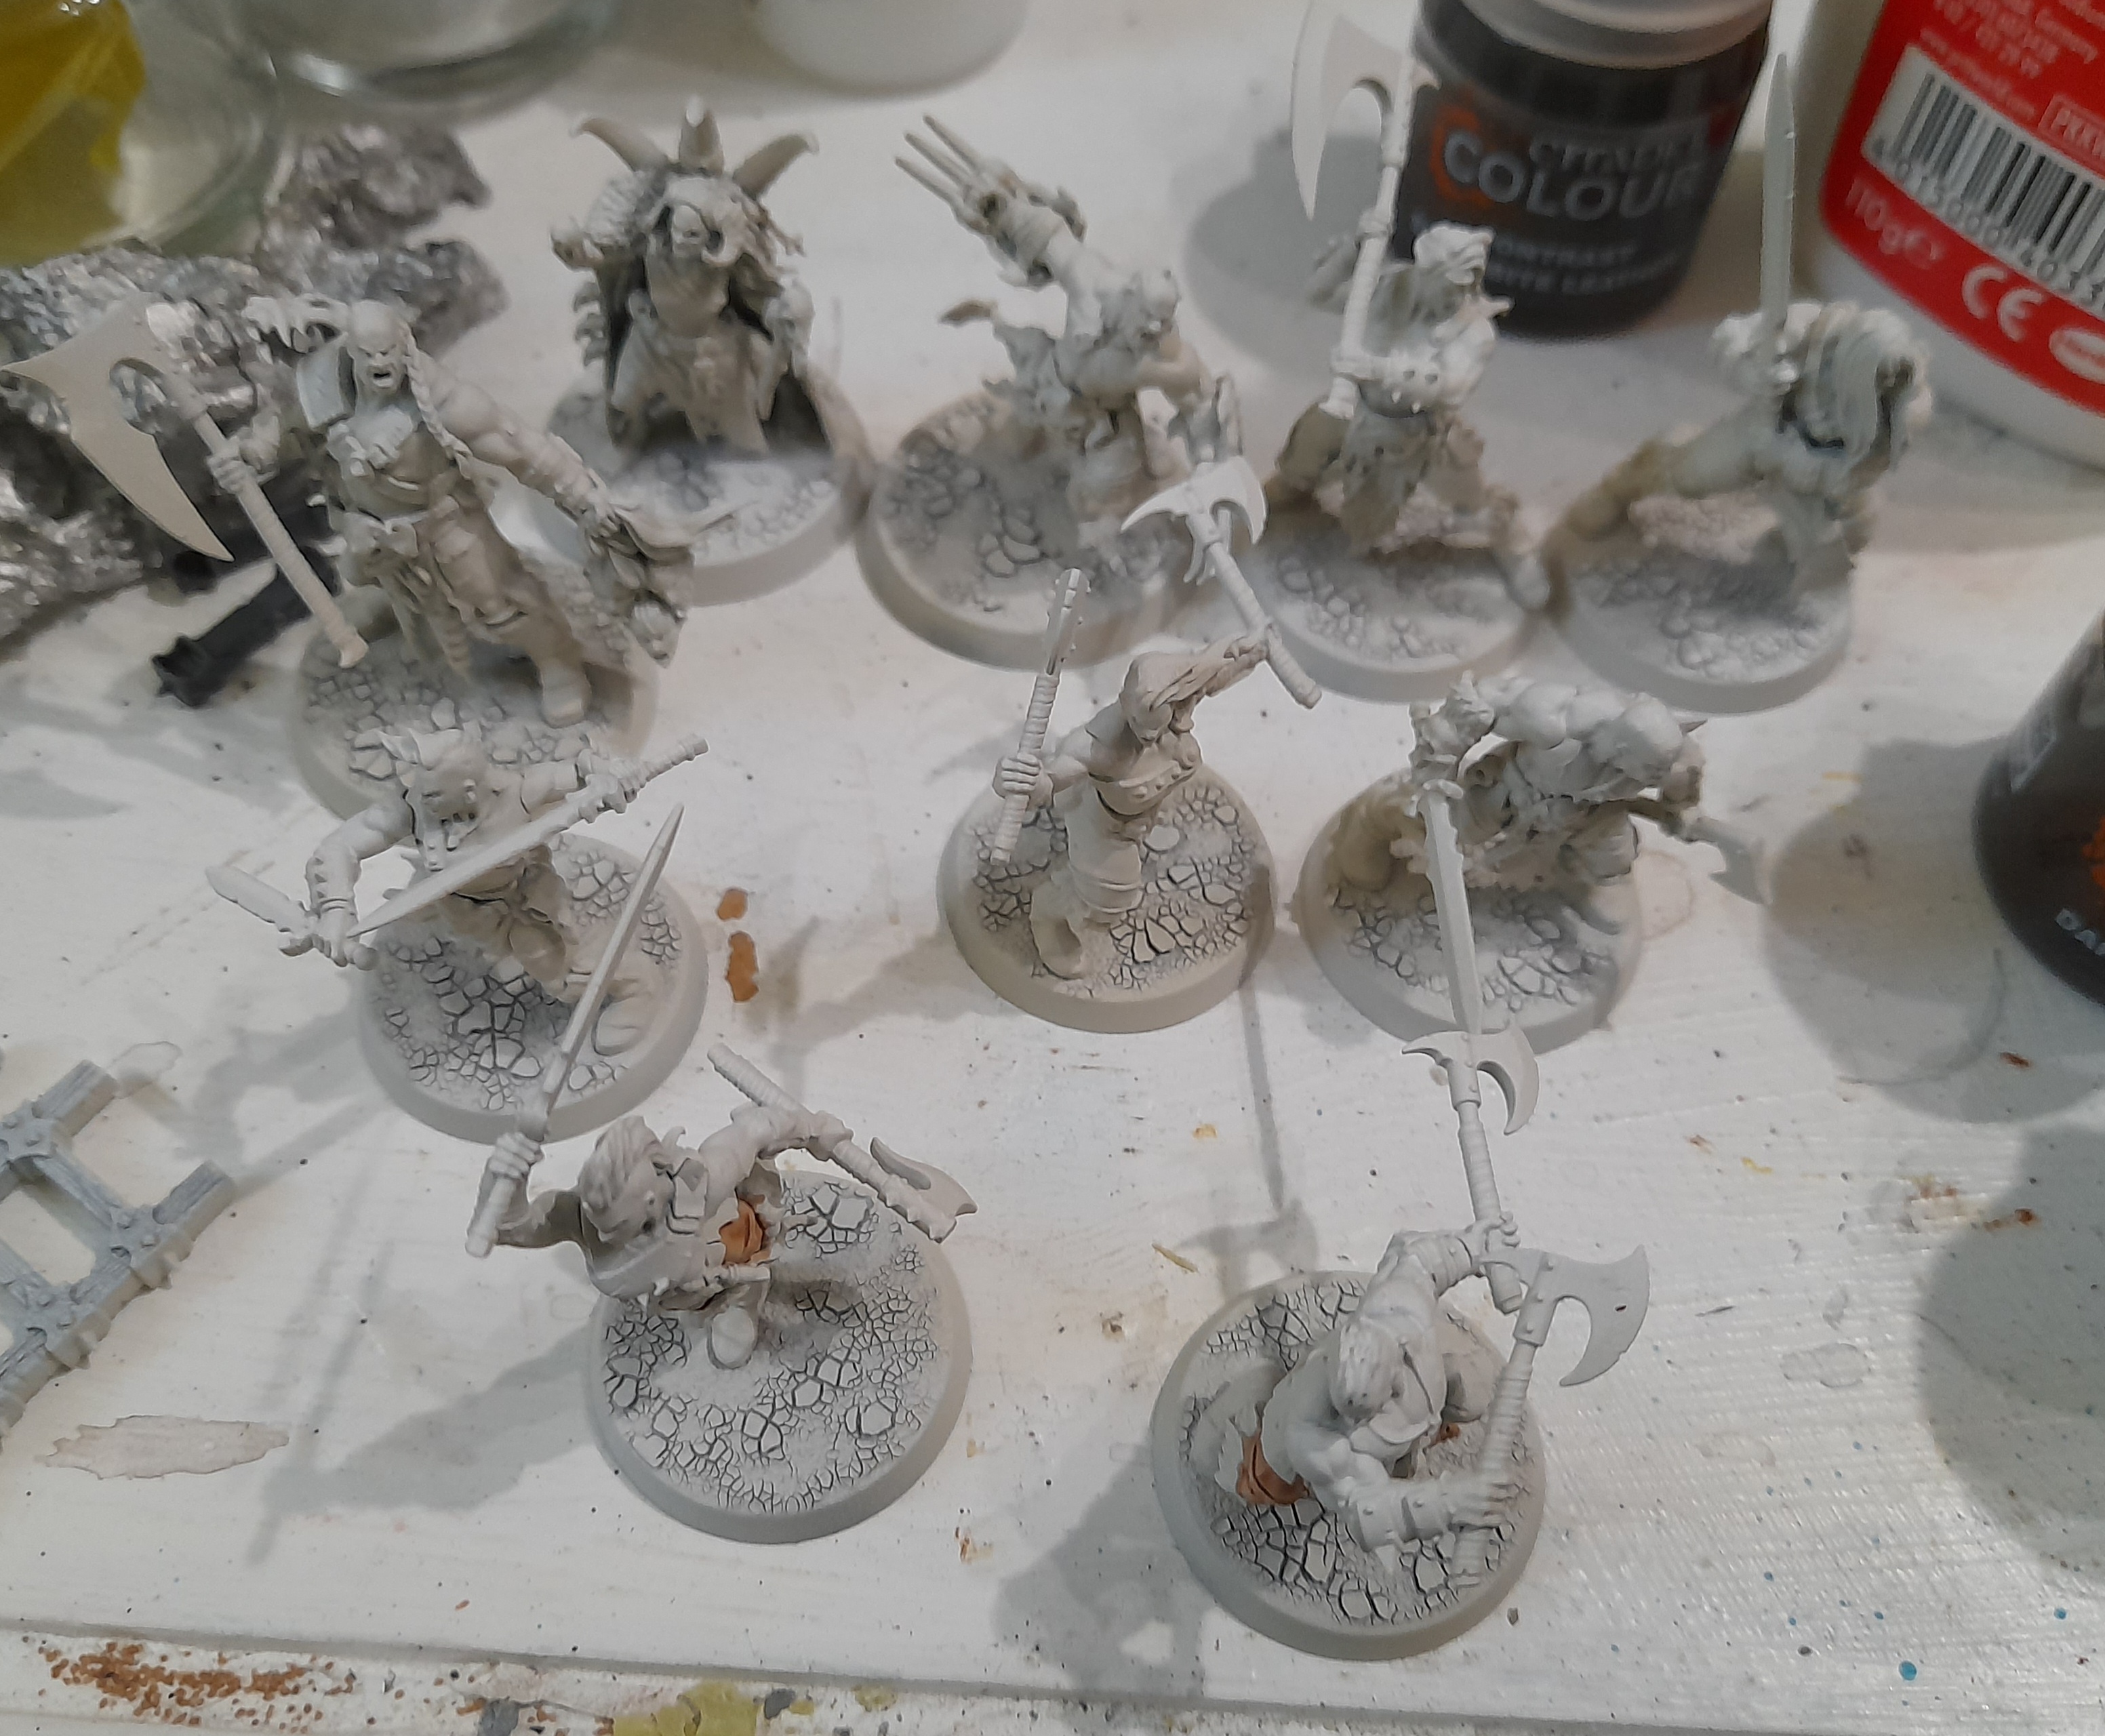
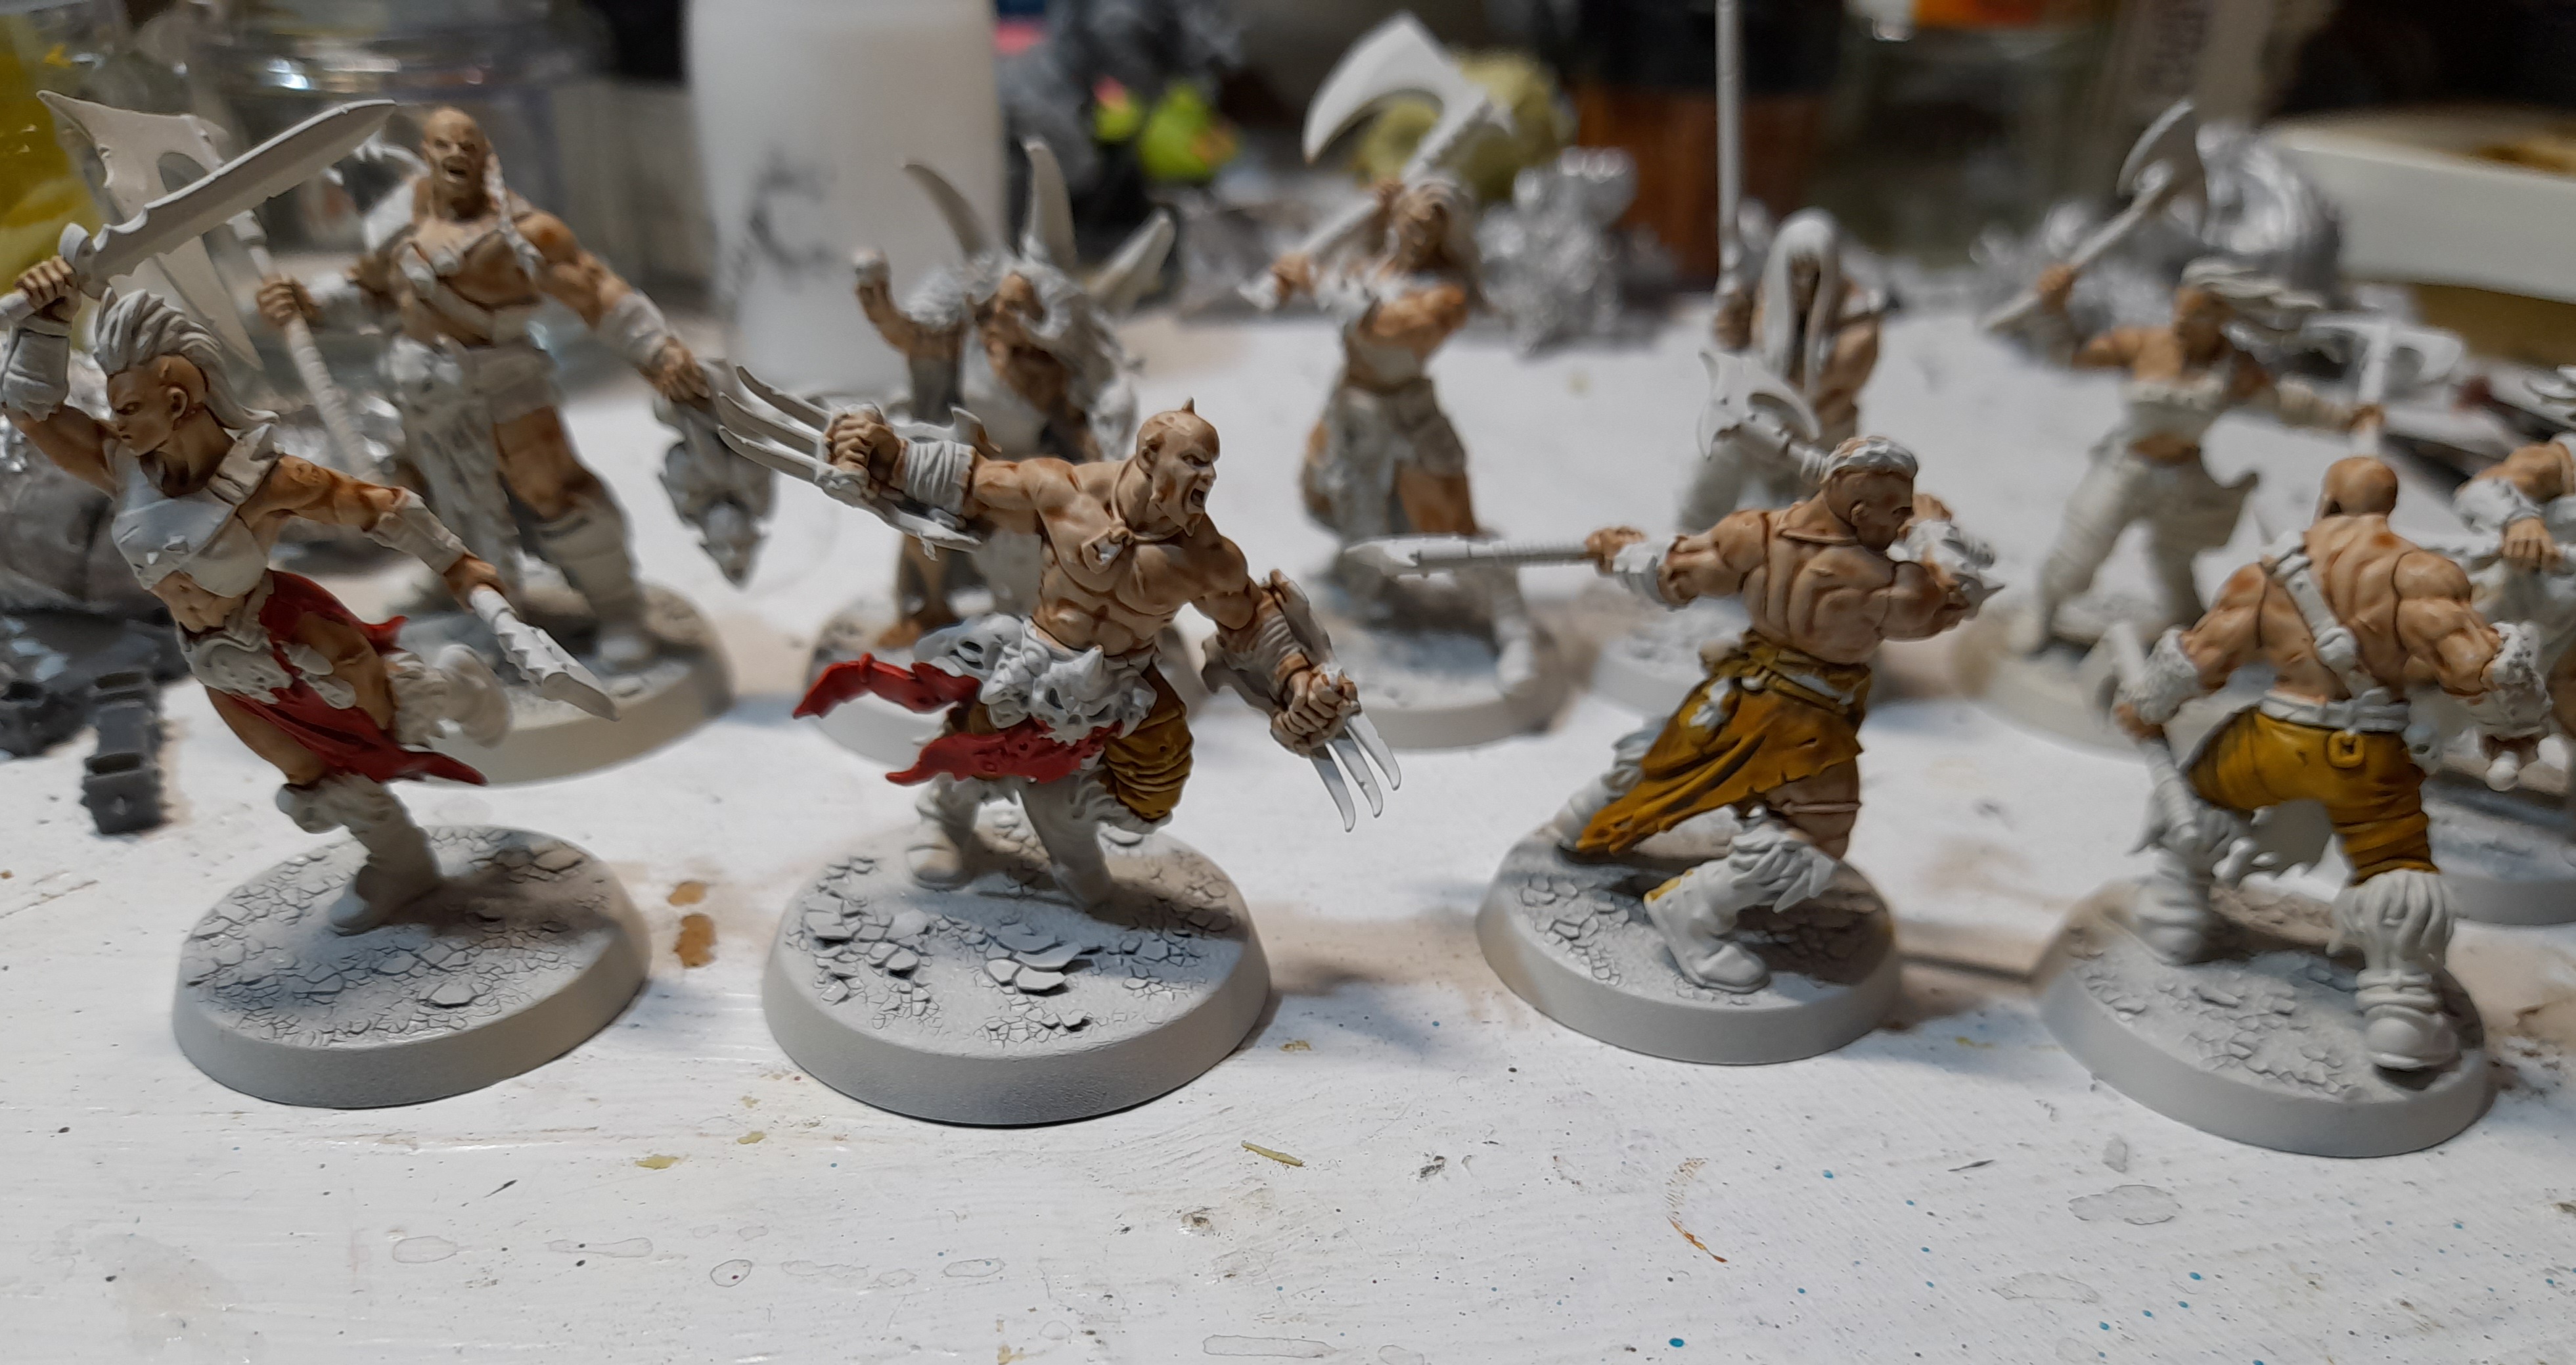
Gladiators ready!
Well, Darkoath Savagers getting ready anyway.
I dithered around on what to arm the rest with, concerned about making the wrong choices (having never played).
In the end I went with the ones that seemed best fit.

Mostly paired weapons as it turns out!
So that’s all 10 armed now.
As a final thought on it, I figured that since I will only be playing friendly club games (not going to events) then I could perhaps mark some of the minis with the spare components if I decided to try a different load out on some of them – as in the image below.
A glory seeker with paired weapons, marked to be ‘proxy’ as armed with shield instead.
Tedium, thy name is 'metal strapping'
It’s now September 3rd 2022.
I have been managing to get in at least some hobby each day still – sometimes just 30-45 mins, but it’s all still going in the right direction.
I will likely just post up now when I either complete a part of the project or when a week has passed, and show how things are going.
So, what have you been up to Draconis?
The majority of the work has been painting terrain – pretty much exclusively the seemingly never ending metal strapping!
Still not enjoying it tbh, but working through ?

Anything else?
Yep ?
On a couple of evenings I didn’t have much time, so I chose to work on building the Tarantulos Brood gang.
Same issue about deciding on the weapons though. Speaking with a friend of mine, he reminded me I should actually look at the points cost ?.
The Darkoath I have built come in at 985 points (target 1000pts). If I build the Brood as specified it comes to 1000 exactly.
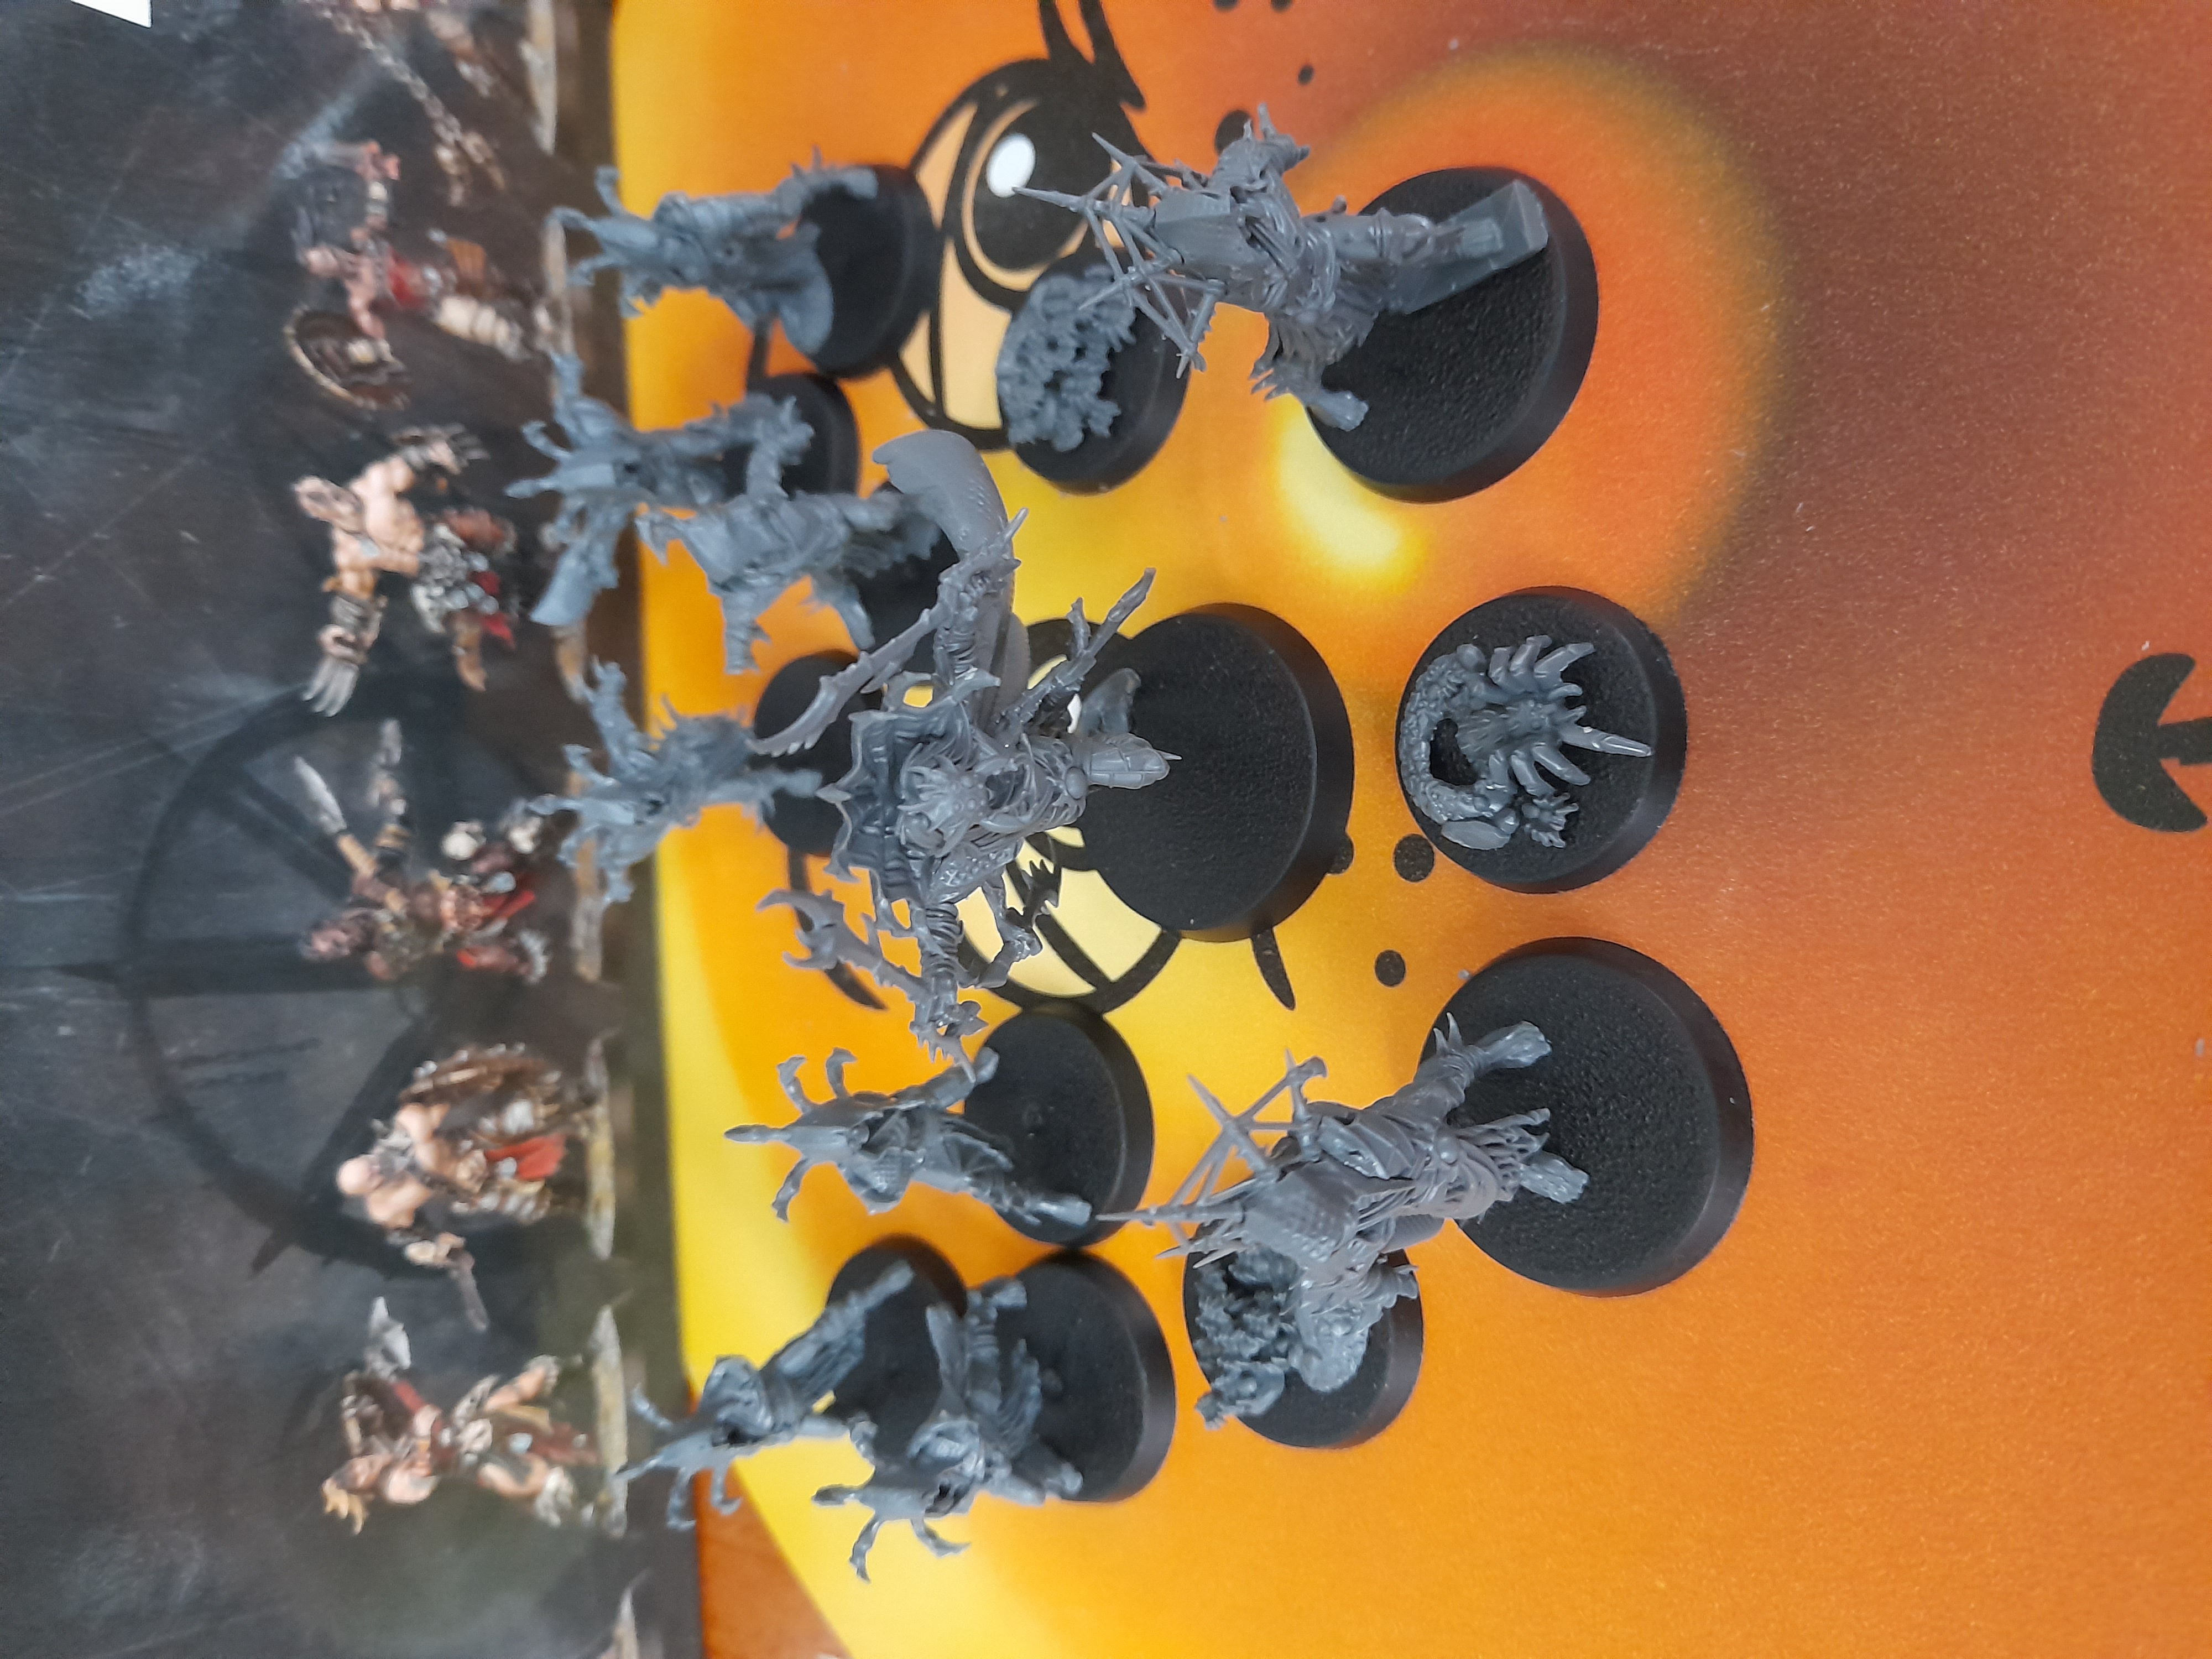
However, I am debating converting two of the scythe and claw chaps to have Sai (there are spare). Doing this would mean I would have to drop one of the broodkin, and create a new spider swarm. Luckily there are some small spiders on the sprue to go on as base adornment – I will use these, and see if I can find an old spider from warhammer quest or suchlike.
I am on standby for work (alongside normal working week) for a week now – so will fit in some hobby if I can.
Cheers all ?
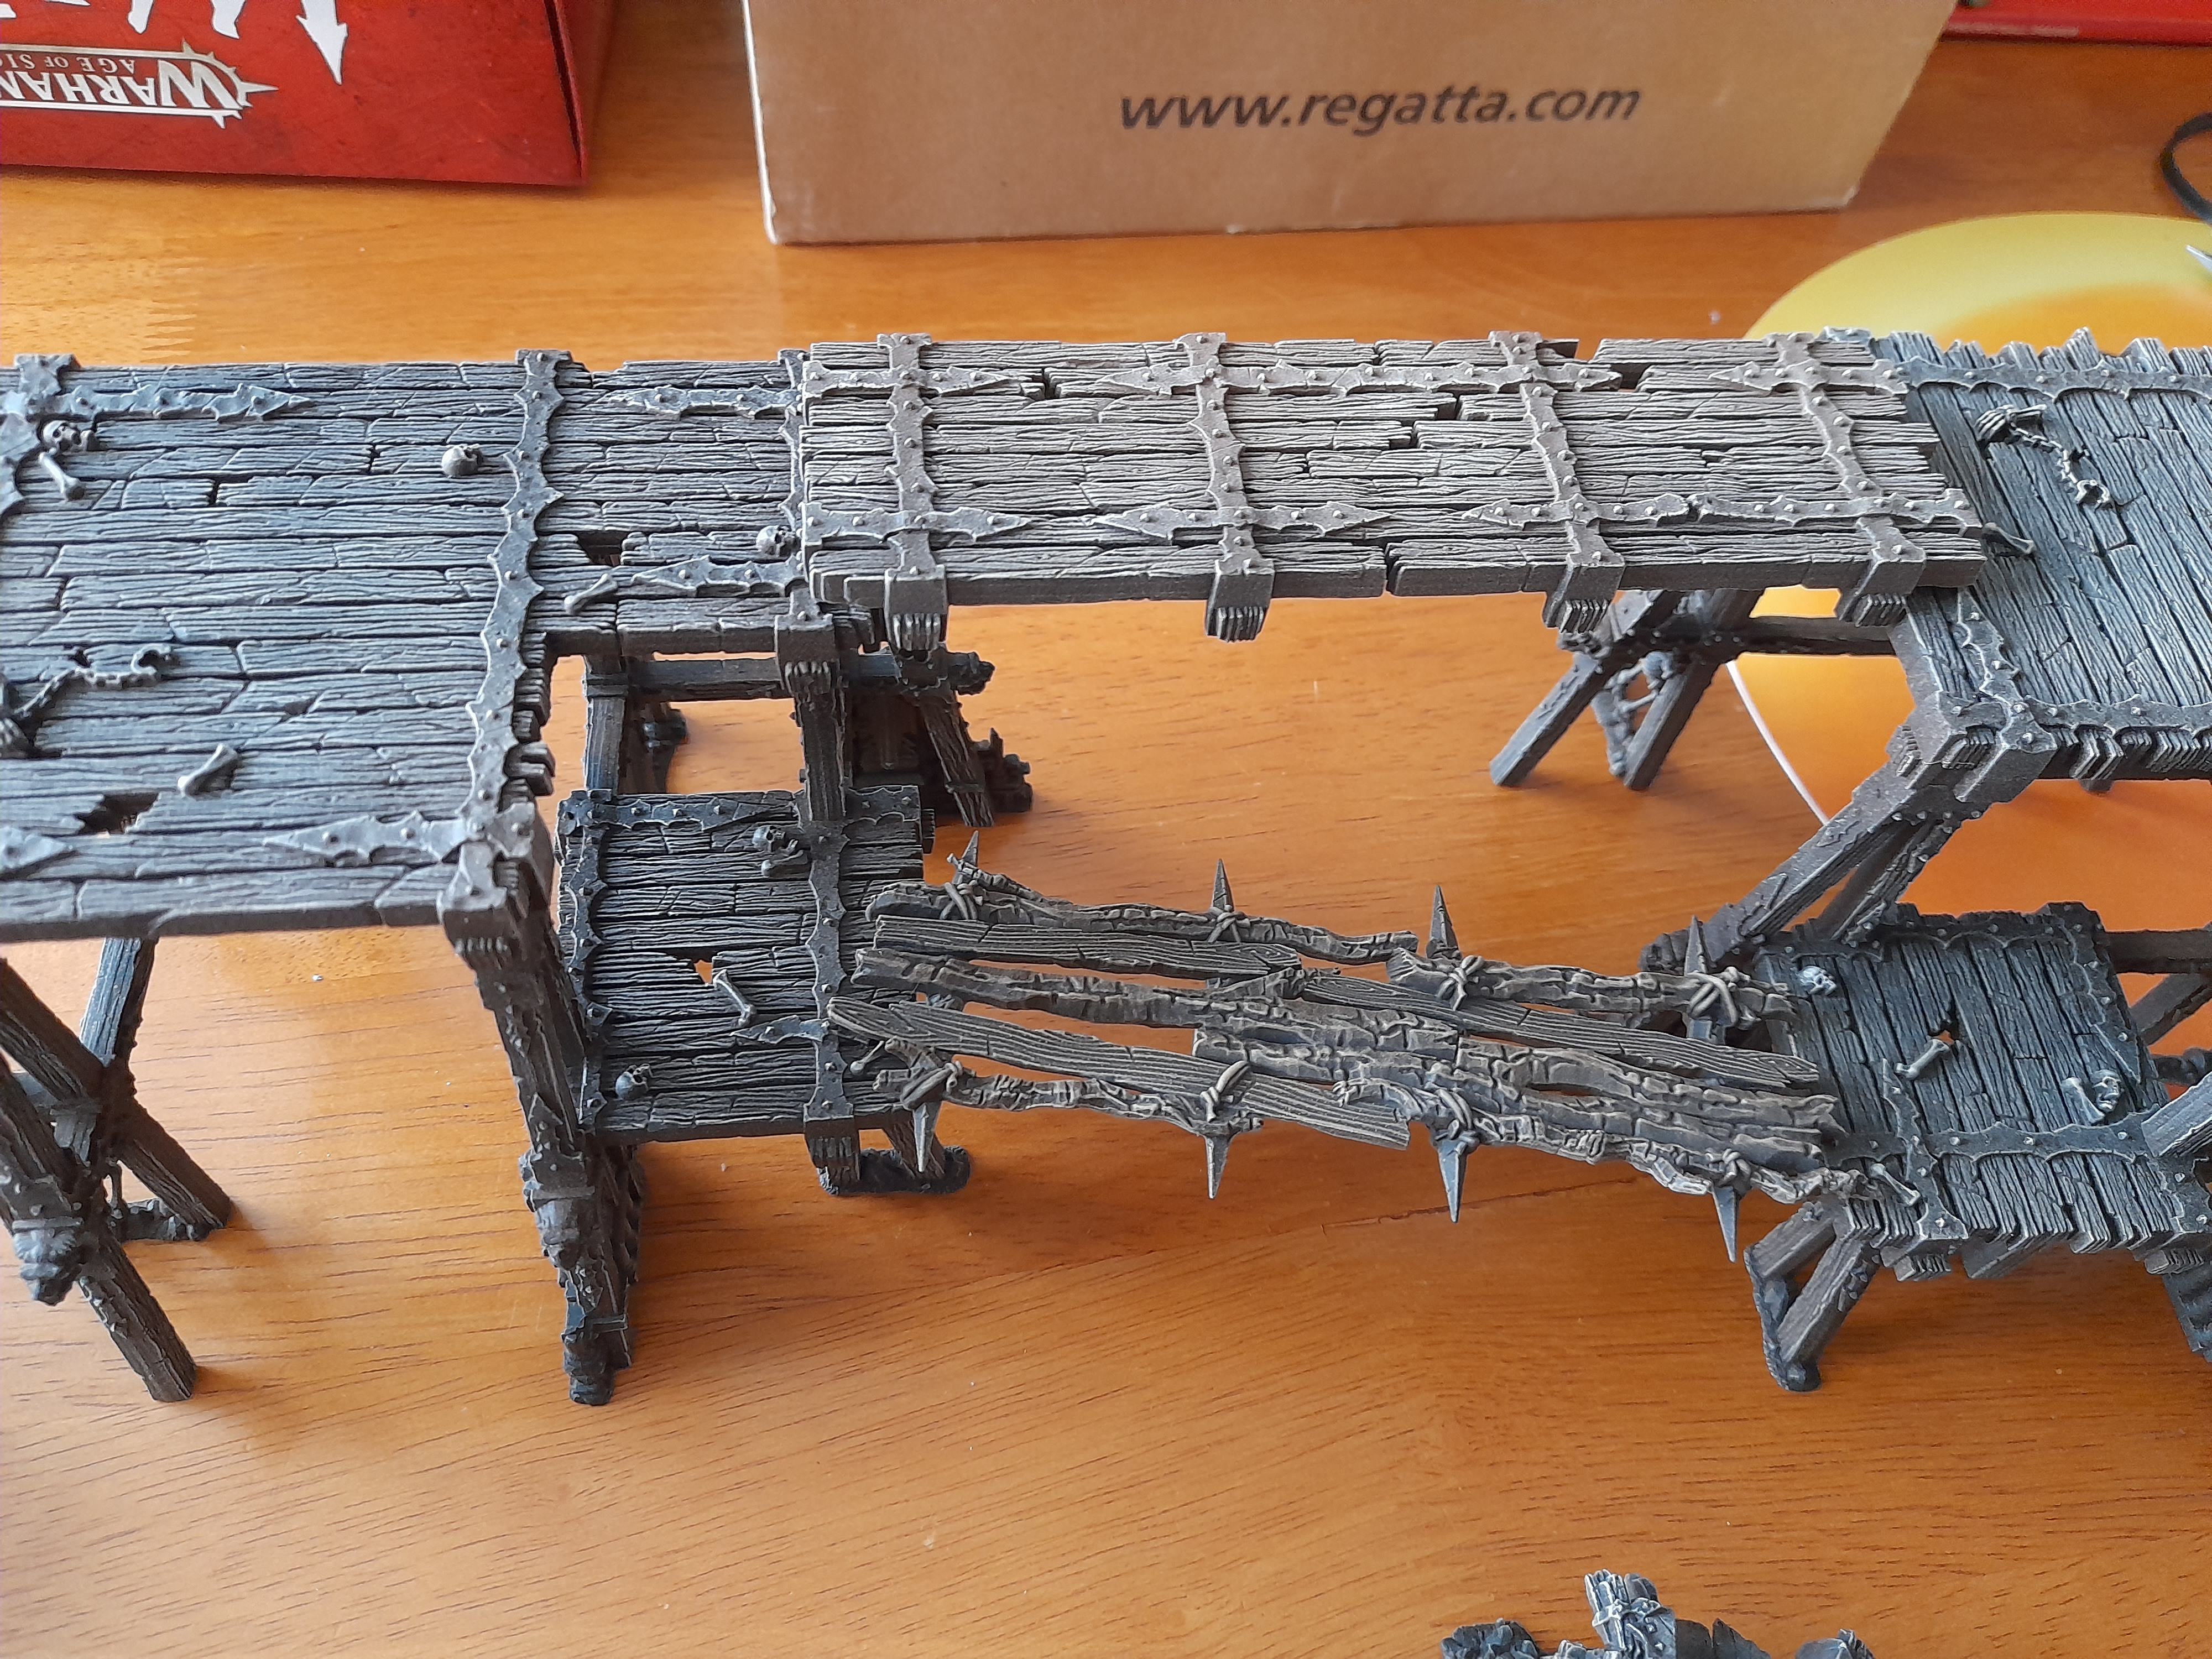
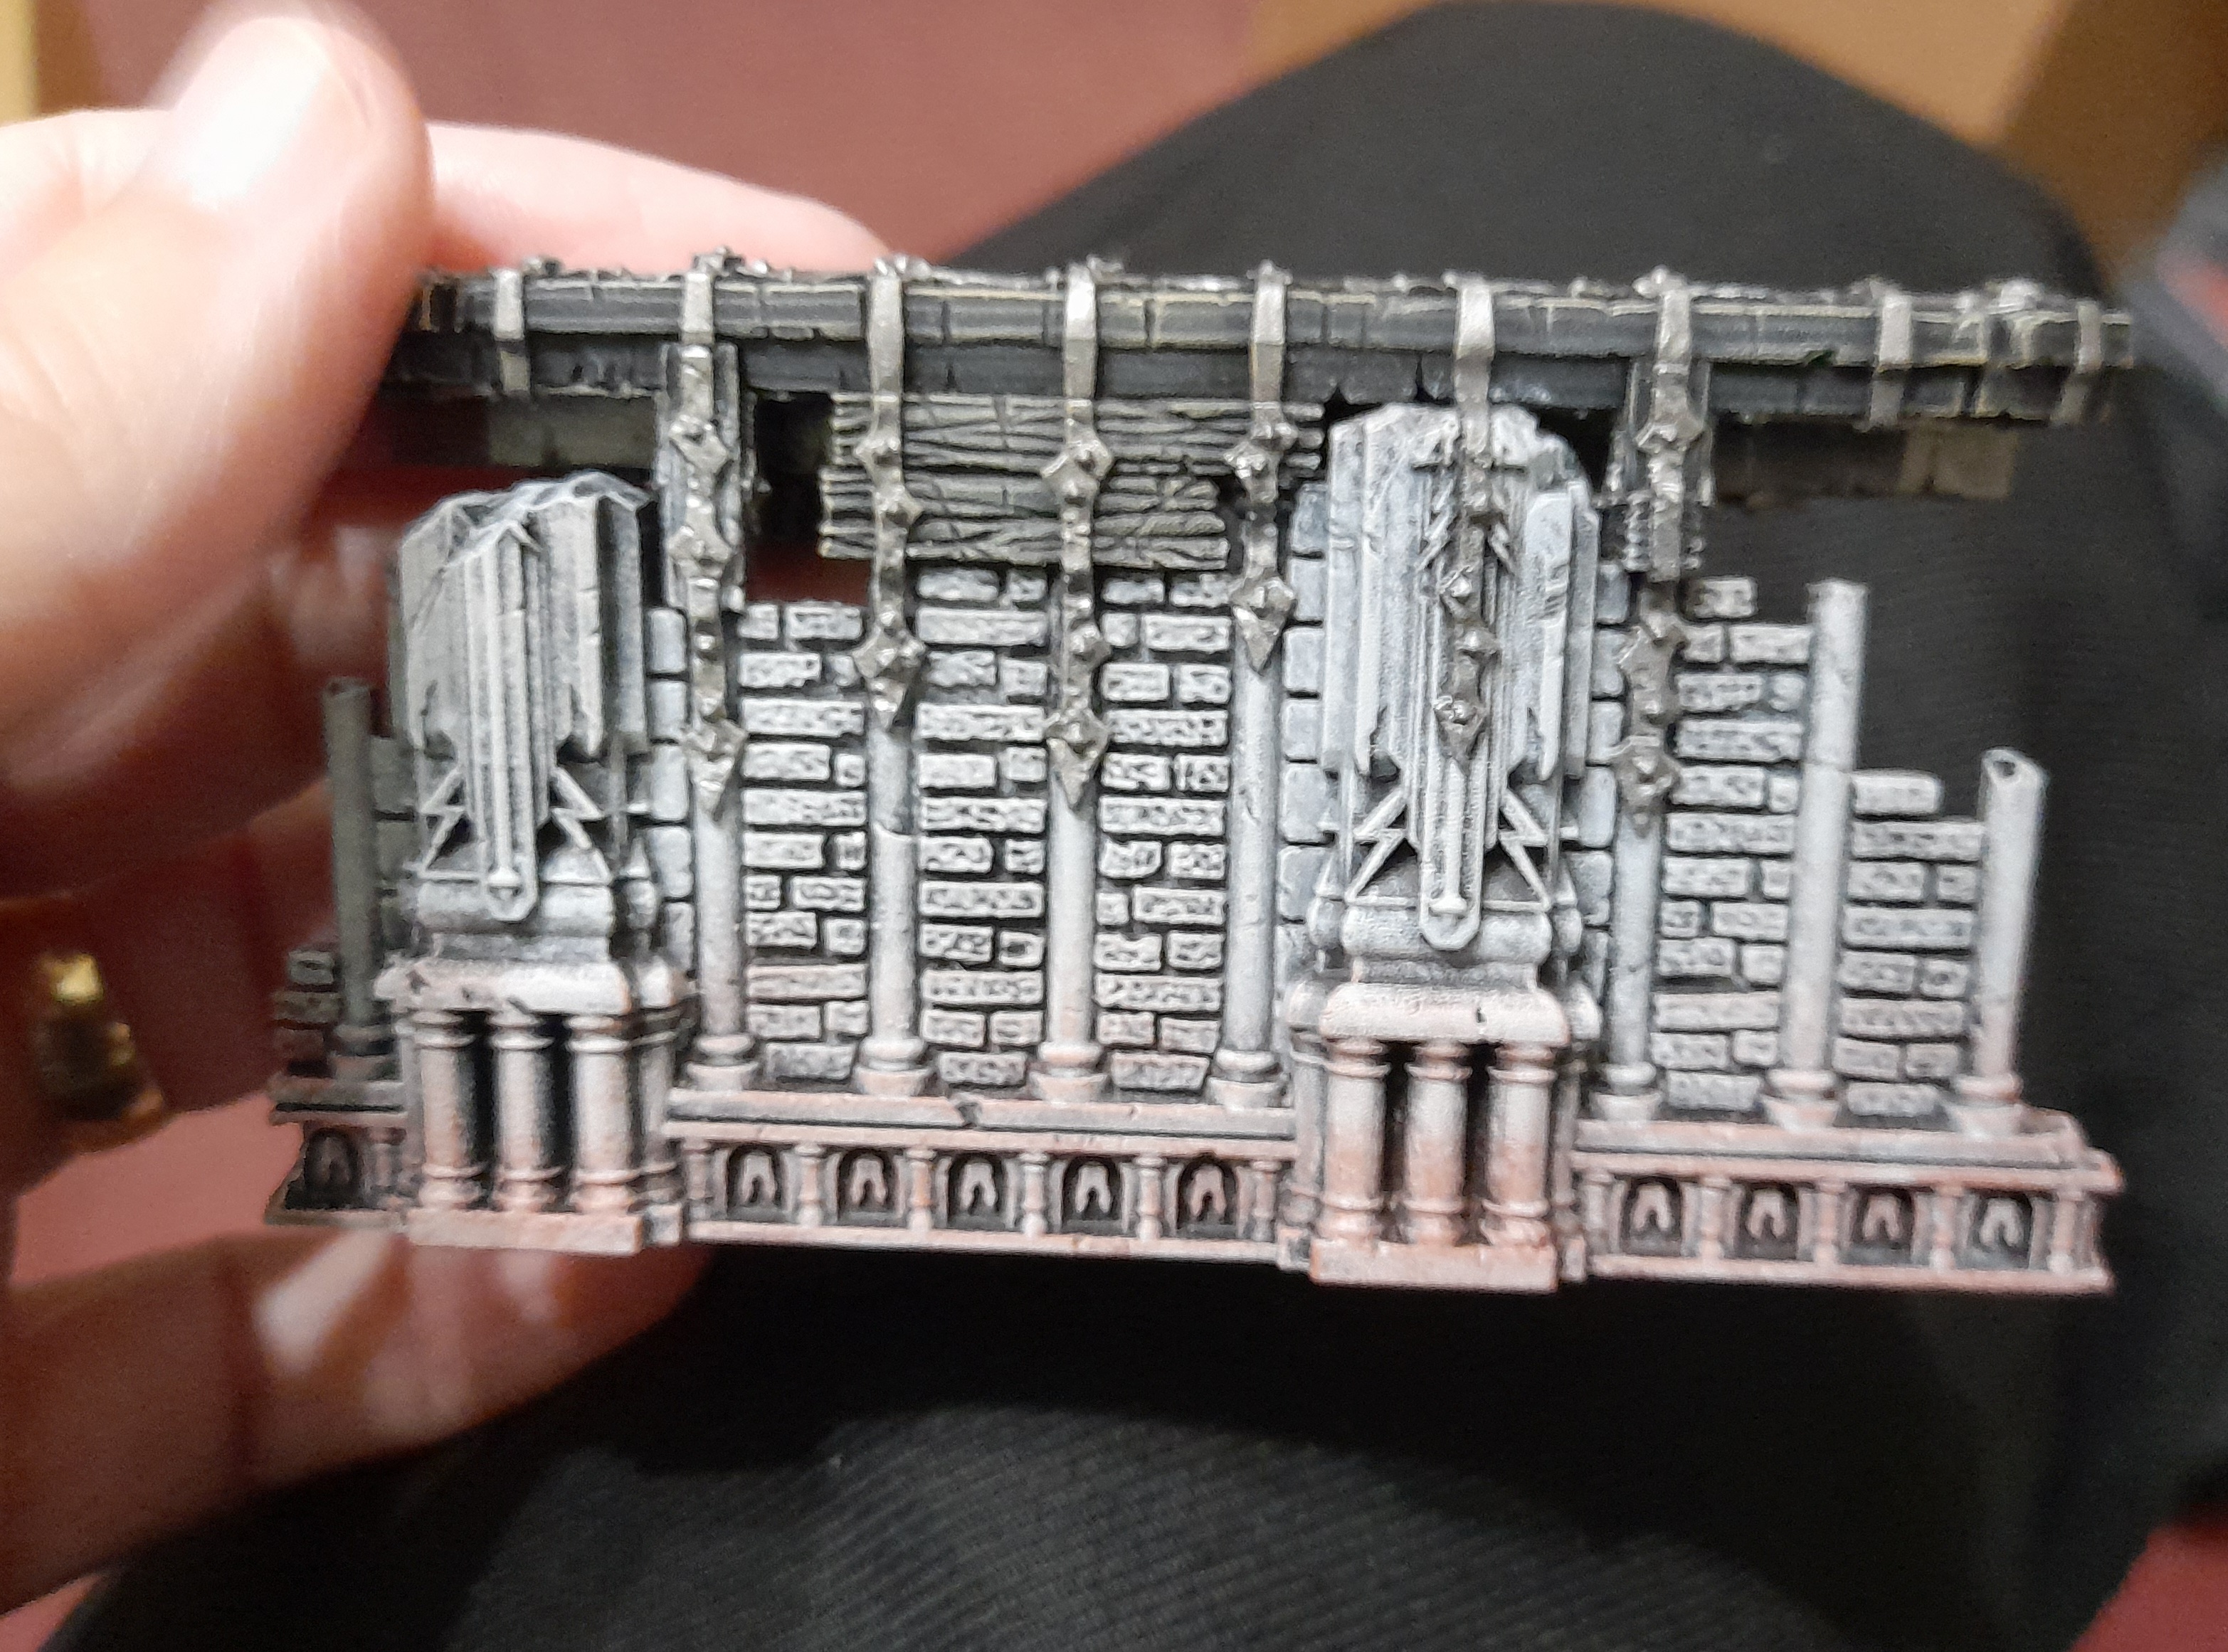
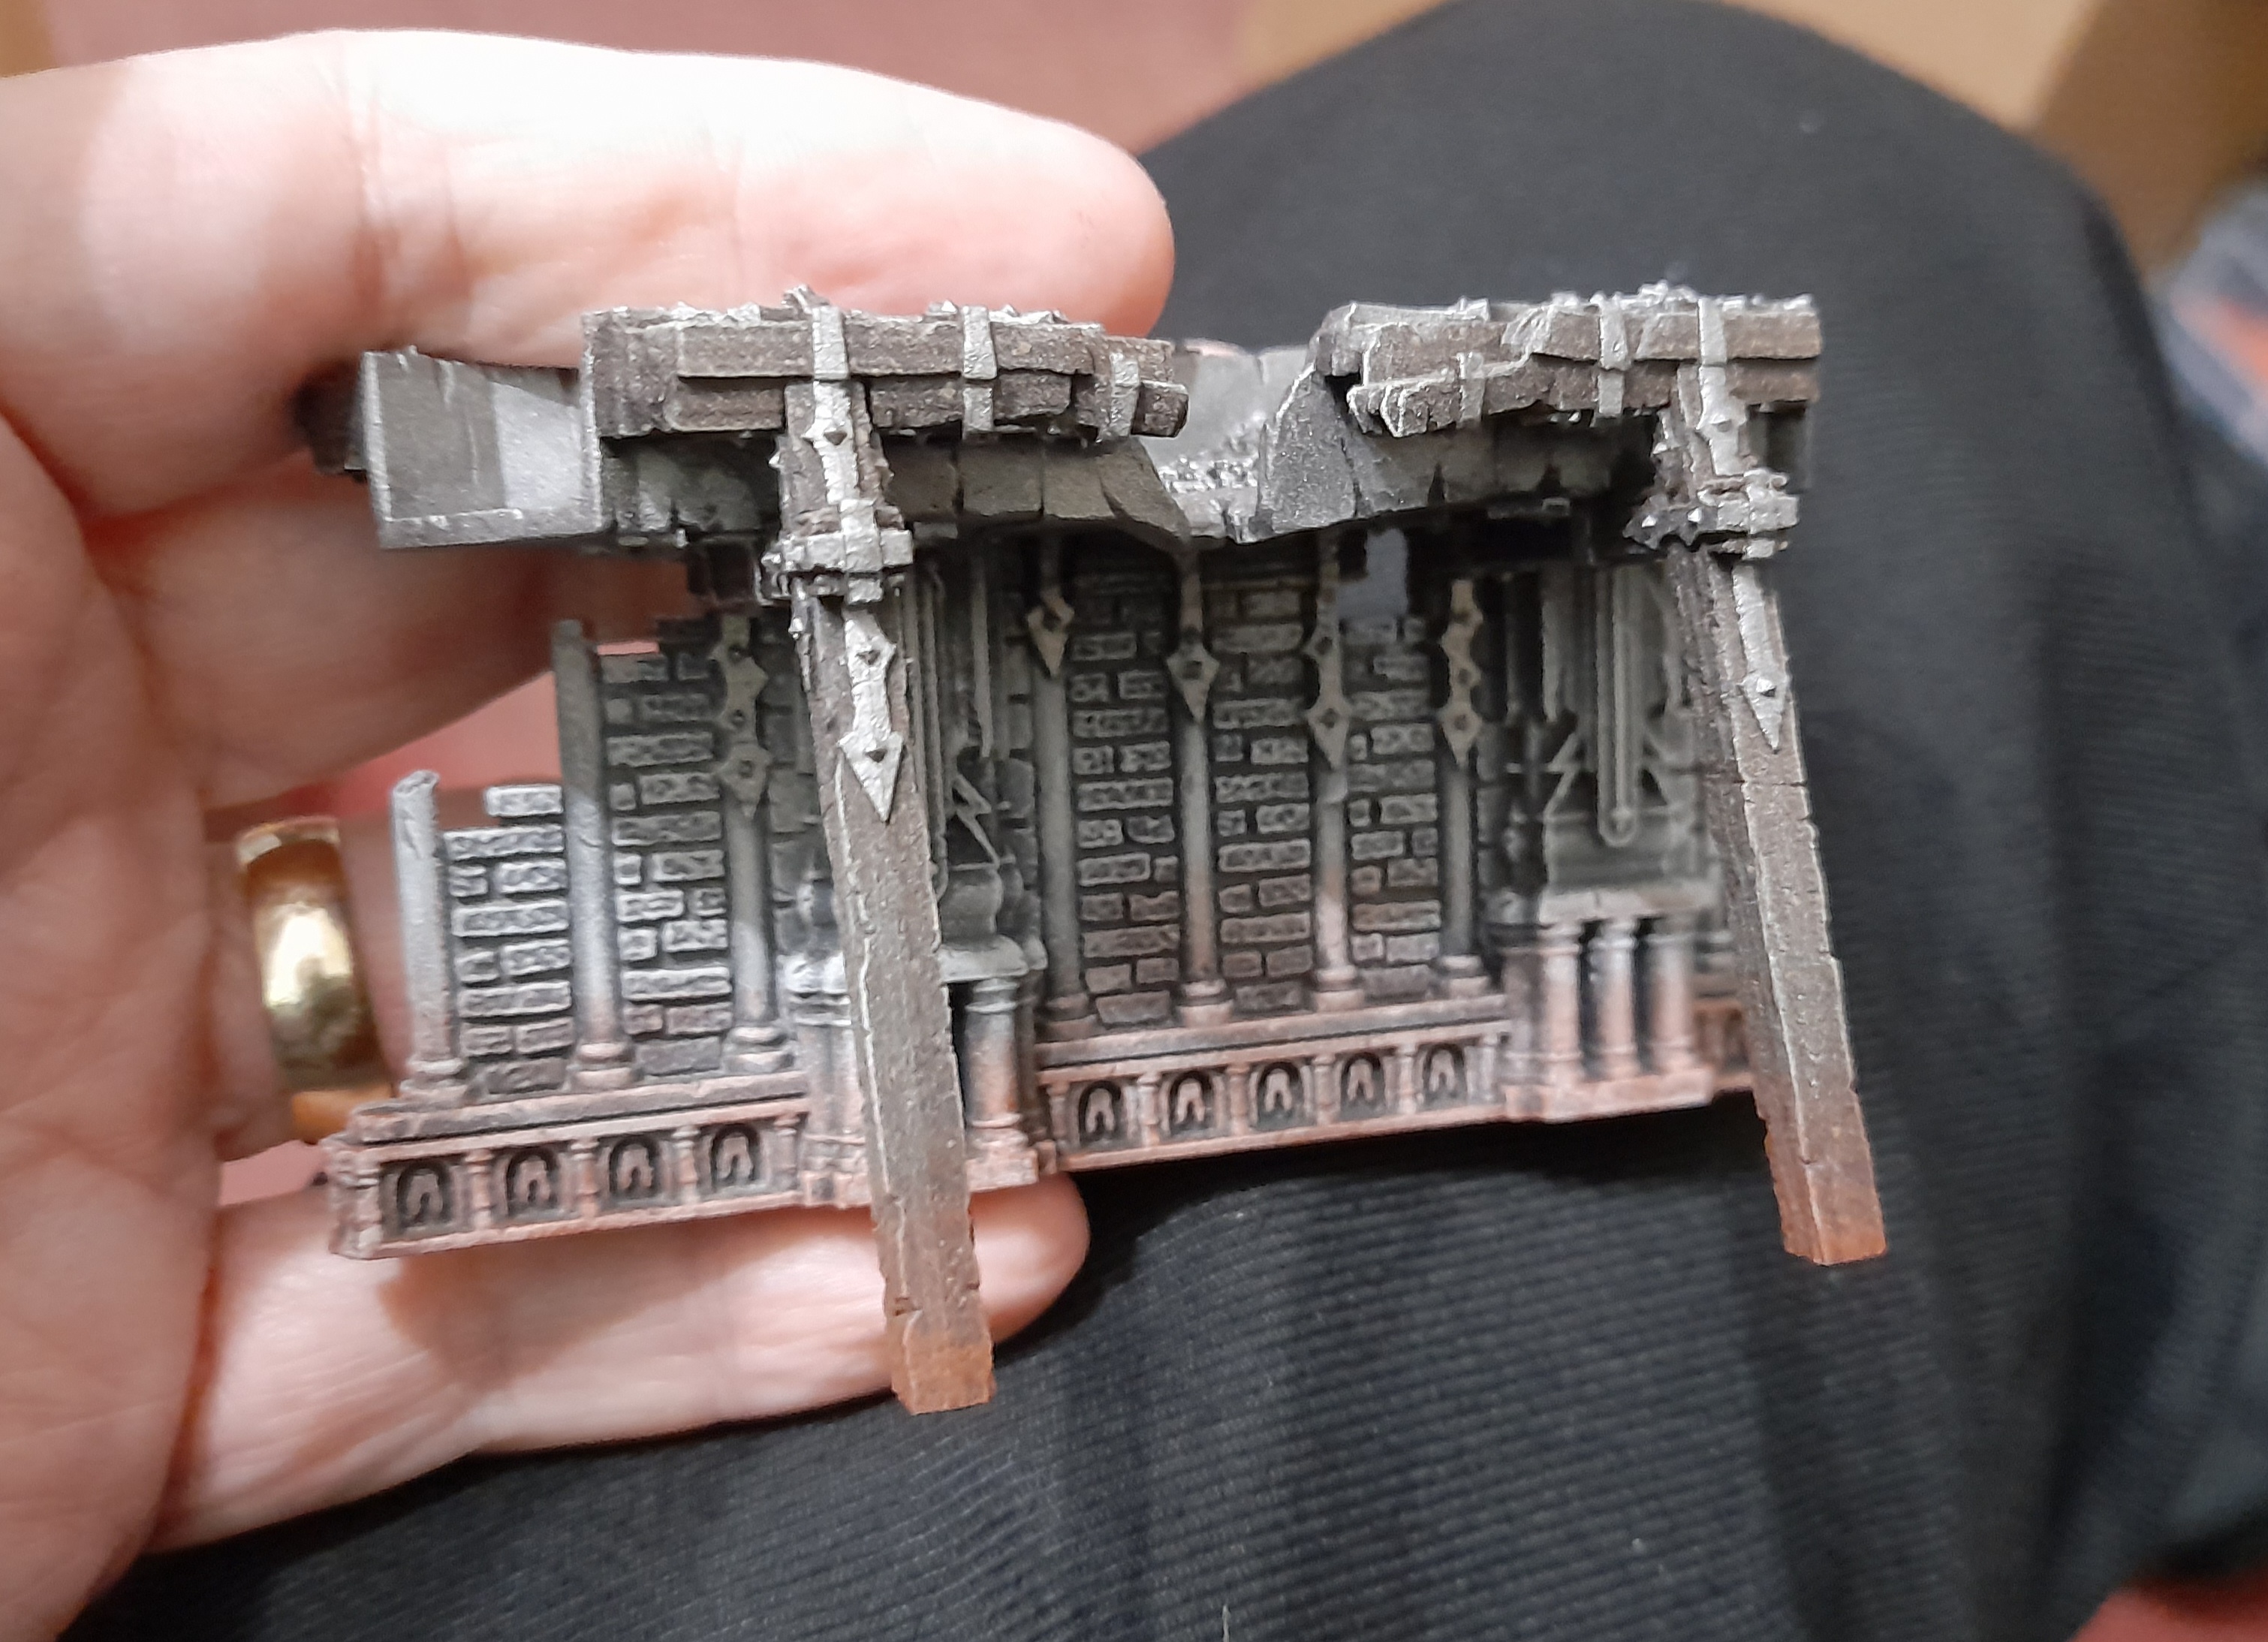
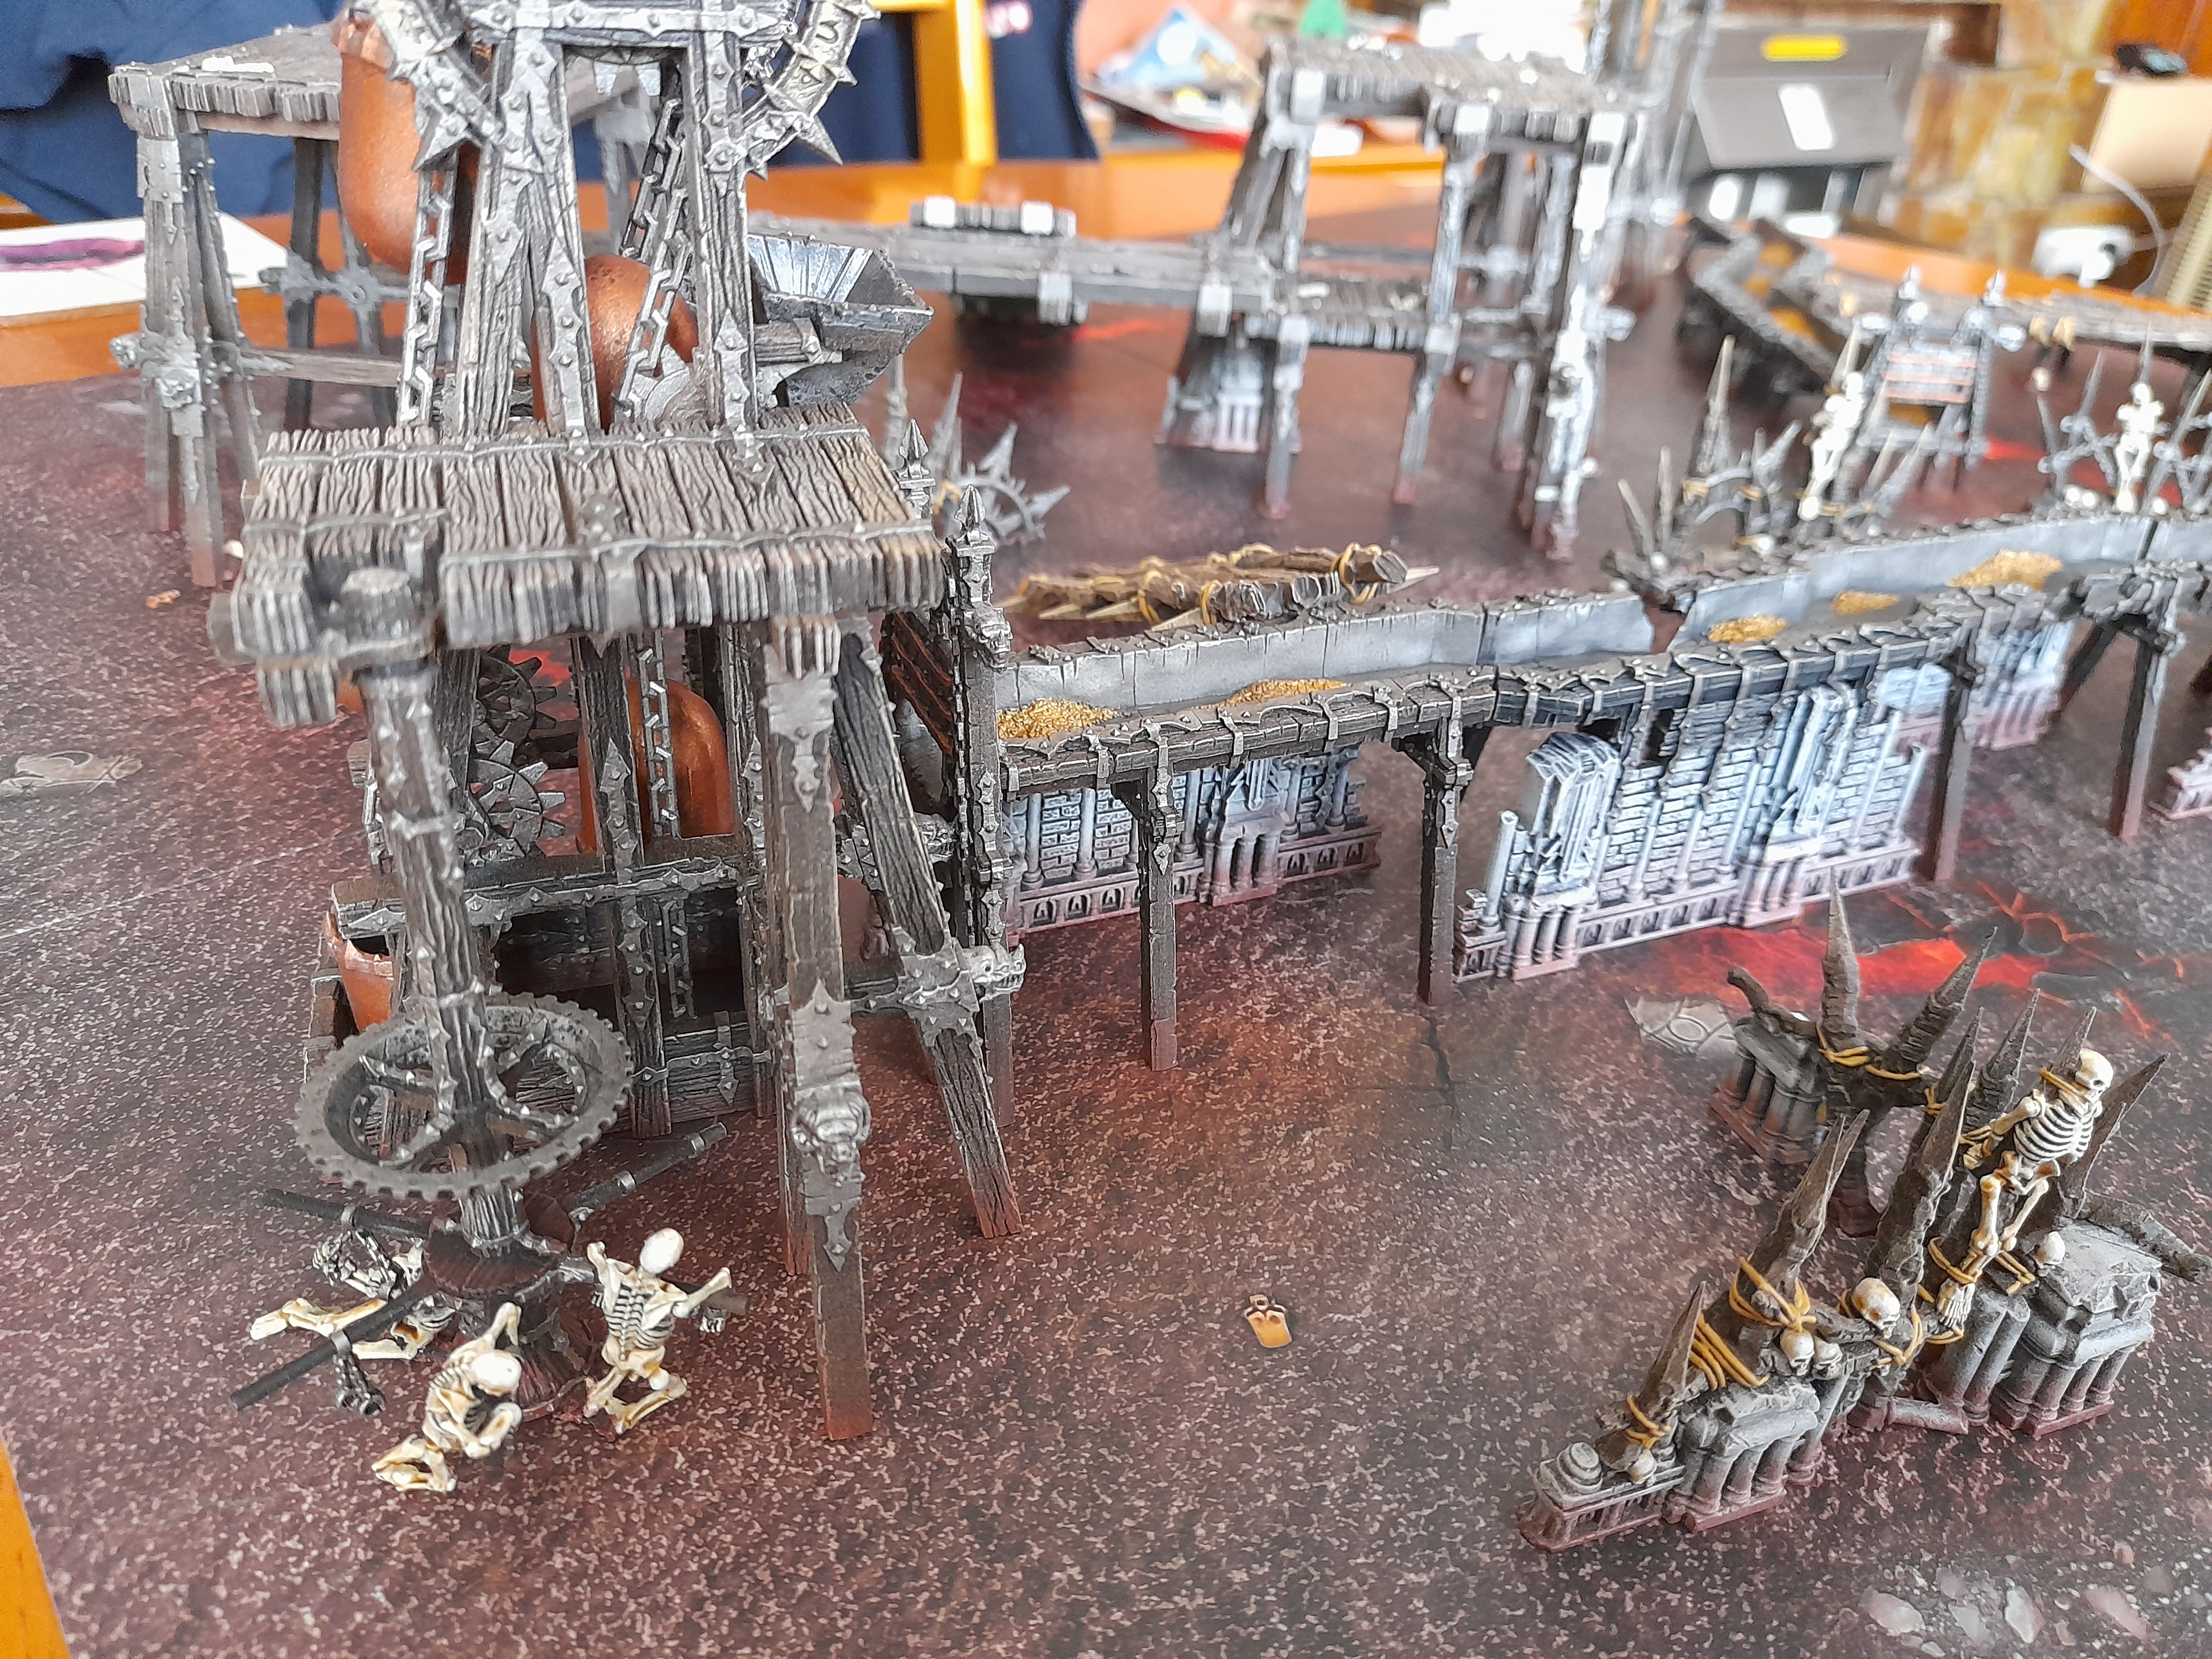
I can see the end (of the scenery)
Sept 12th 2022.
Been quiet on the posts, but I have again managed to get in at least 30 mins of hobby each day – meaning things have continued to progress.
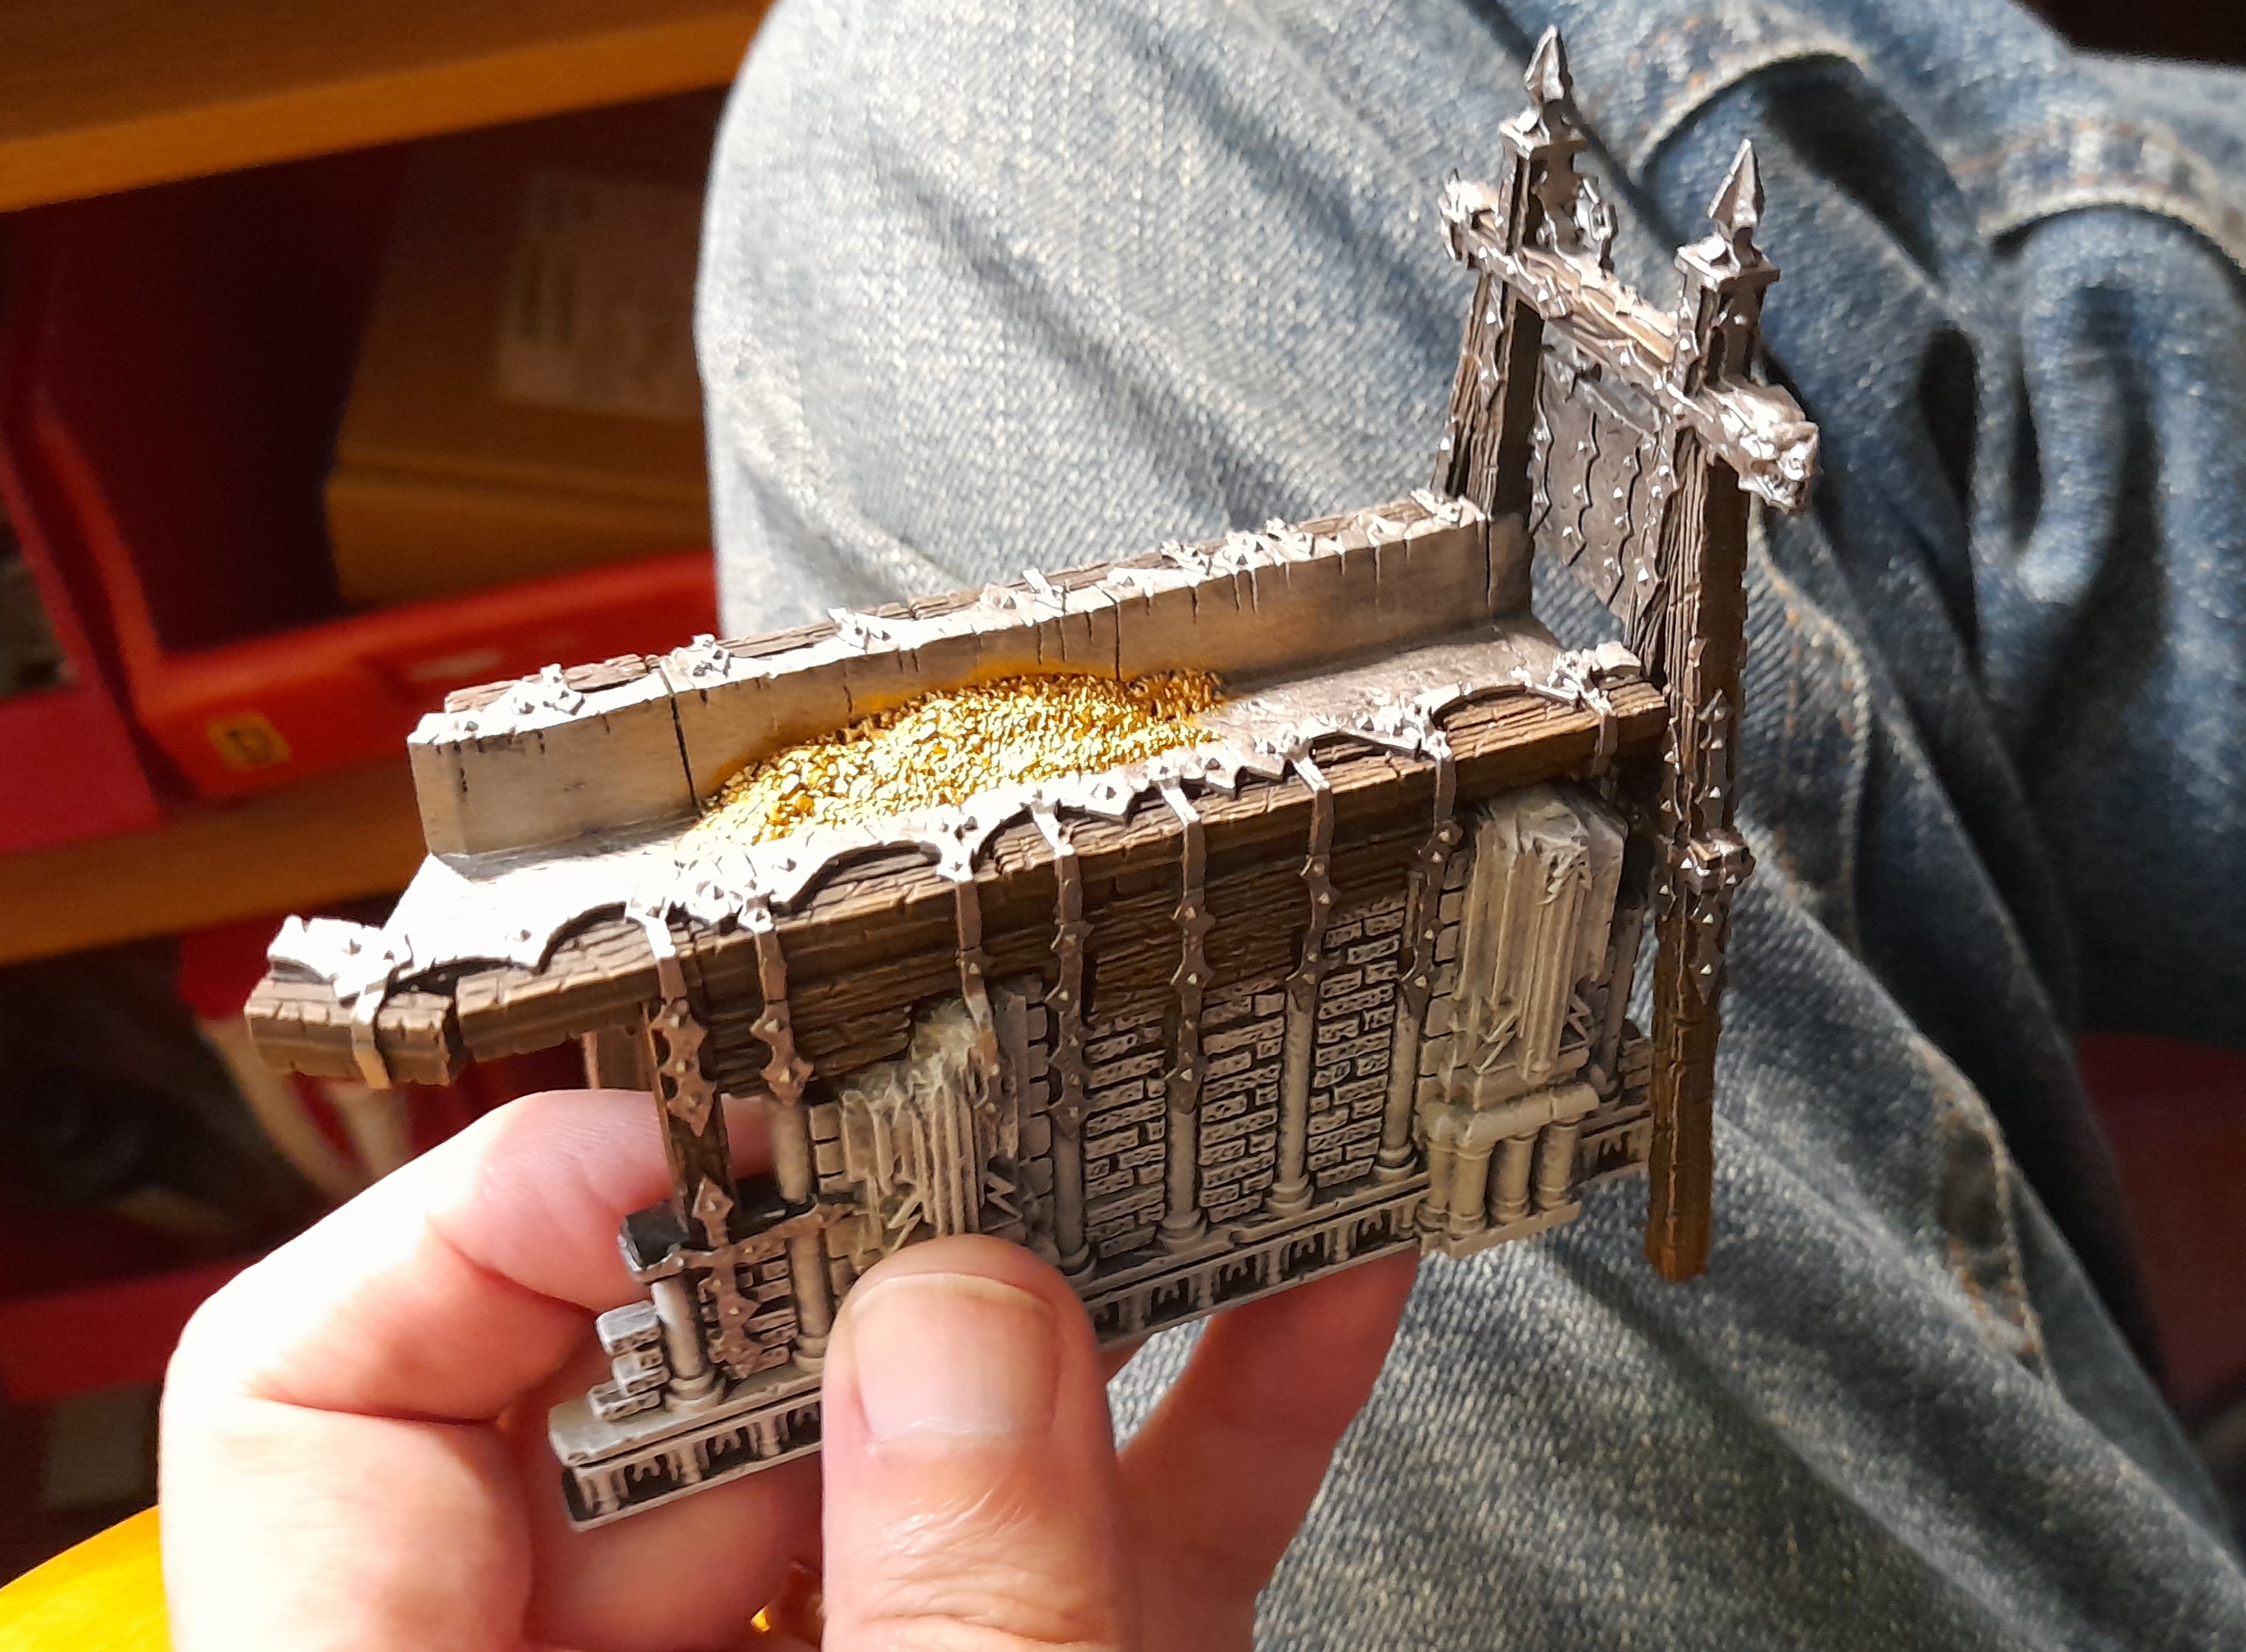
The main focus (after finishing base coat on all the metal straps etc) has been on painting the stone parts on the terrain, and then working on the skulls and skeletons
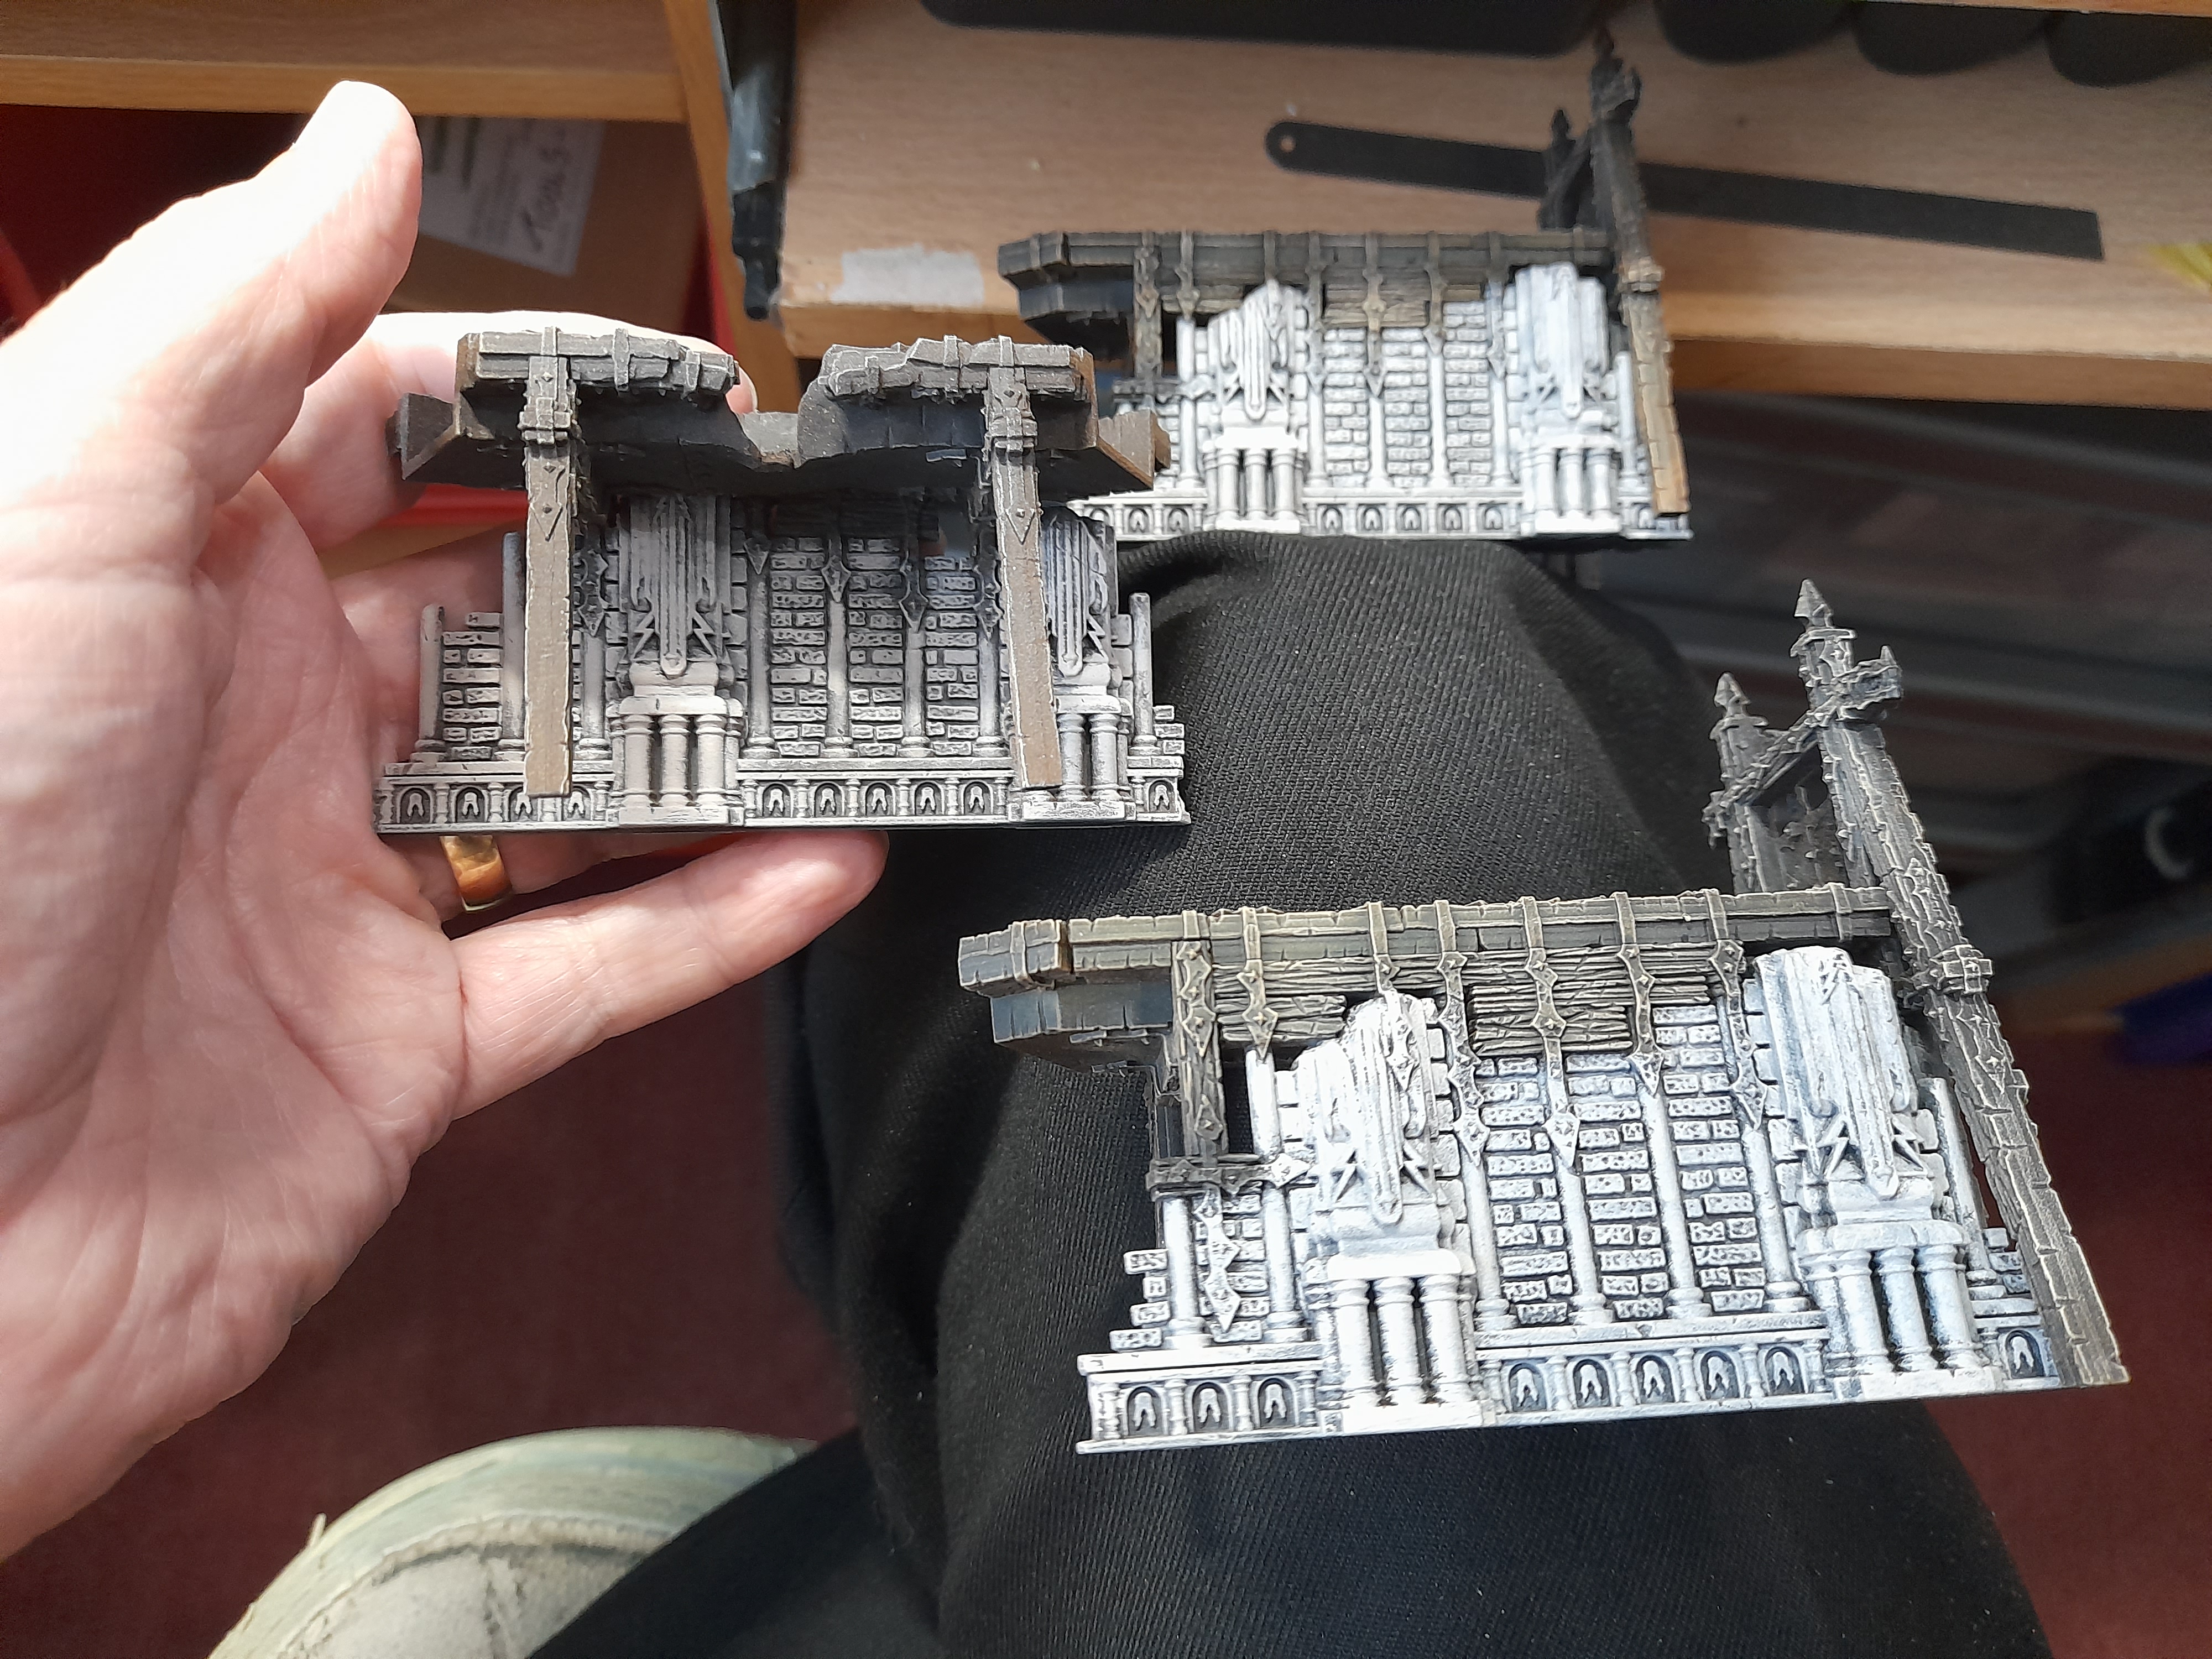
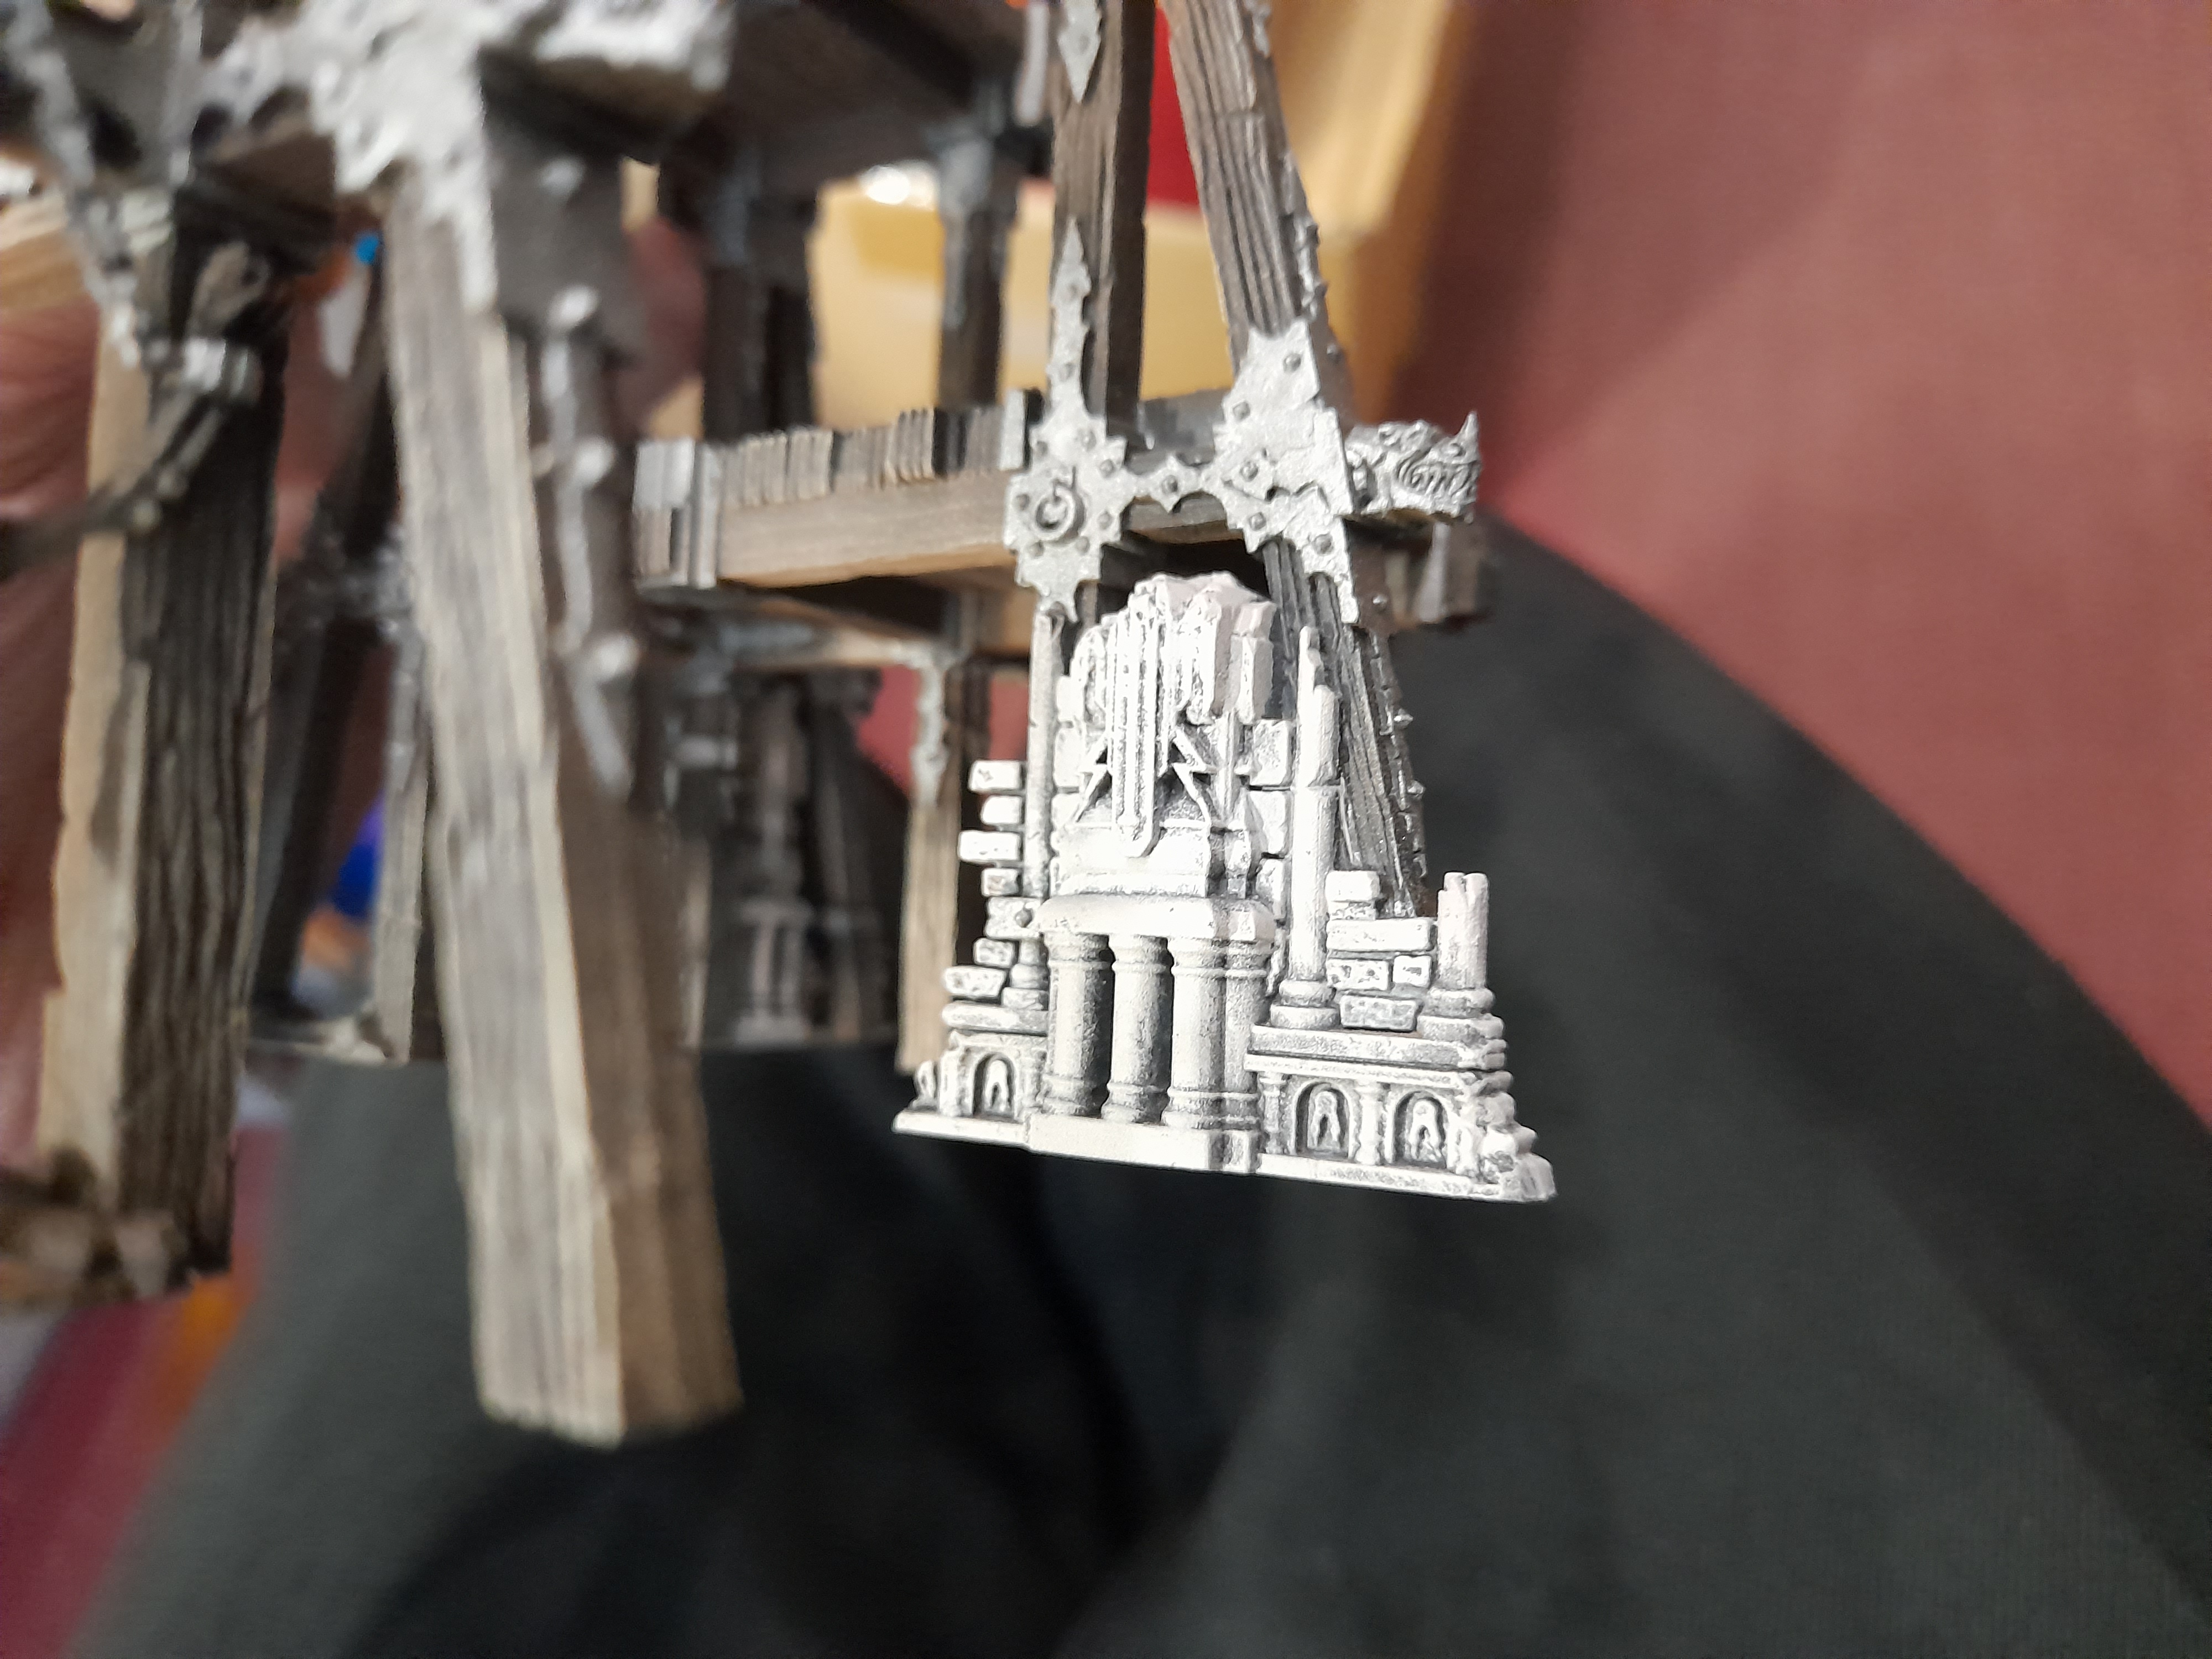
The stone parts were hit first with the old foundation paint ‘Deneb Stone’, then I drybrushed some parts and highlighted others with a basic white.
Then I finished off the last of the metal straps with a base coat of leadbelcher.
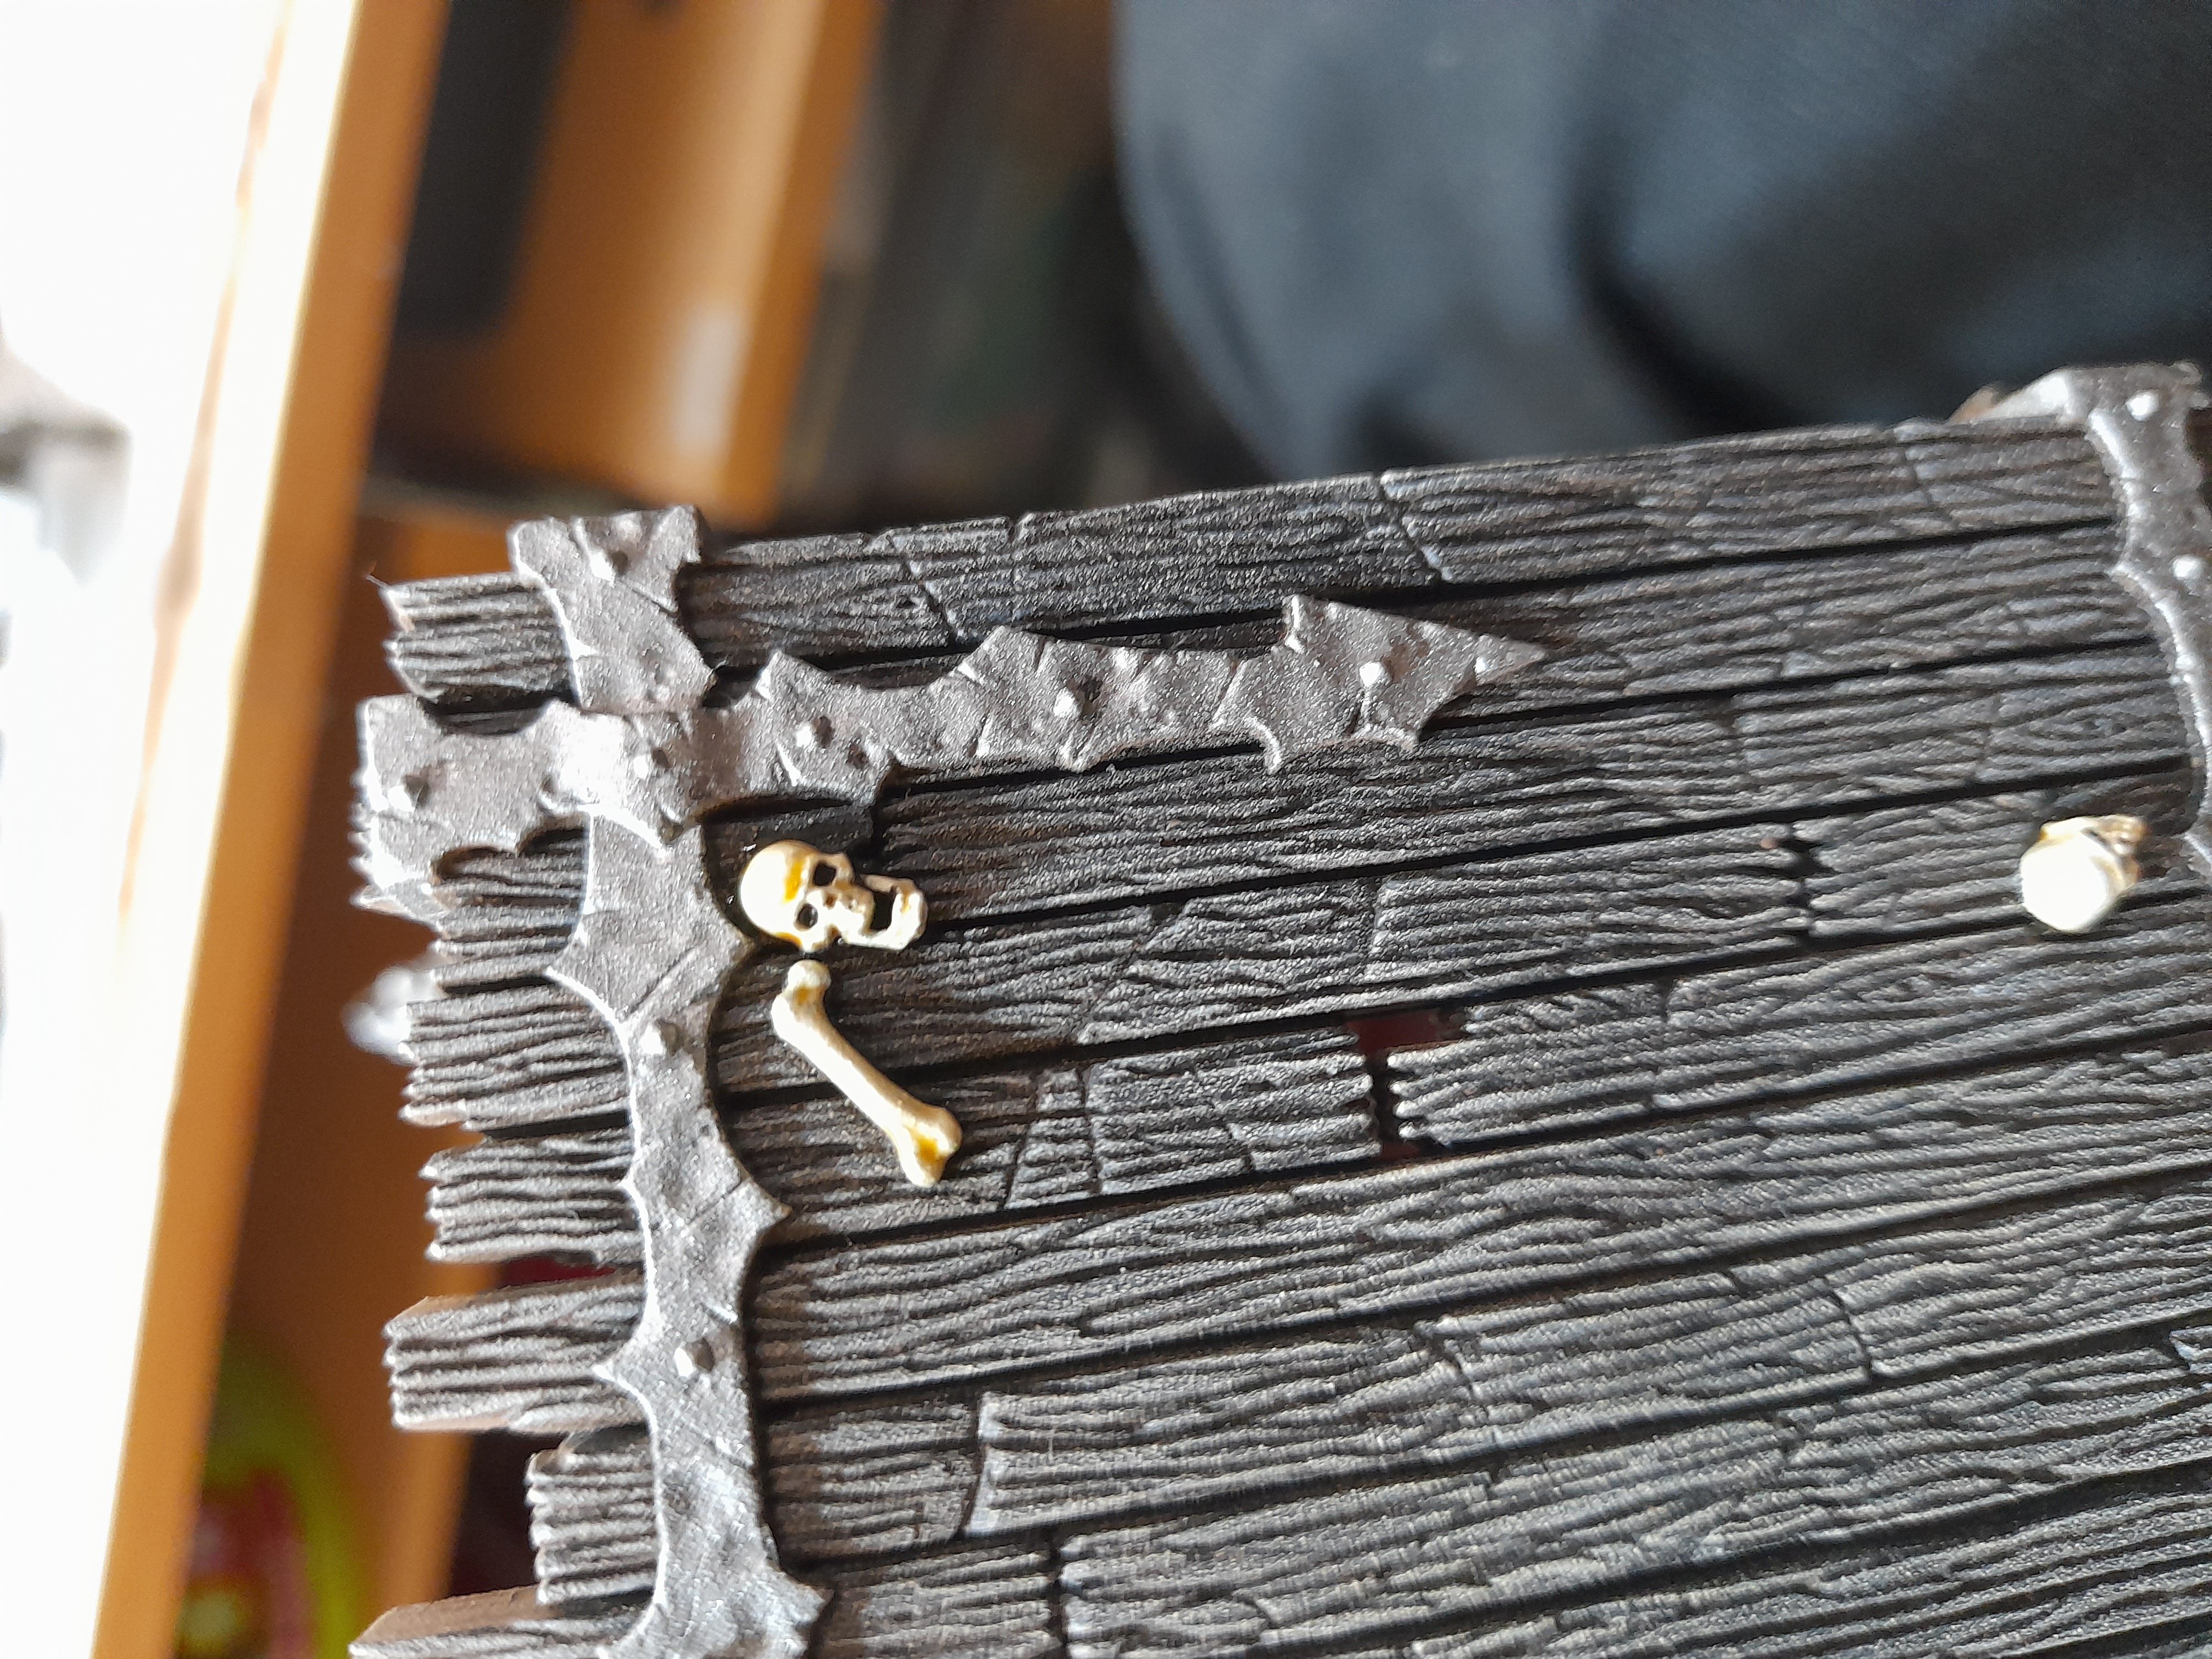
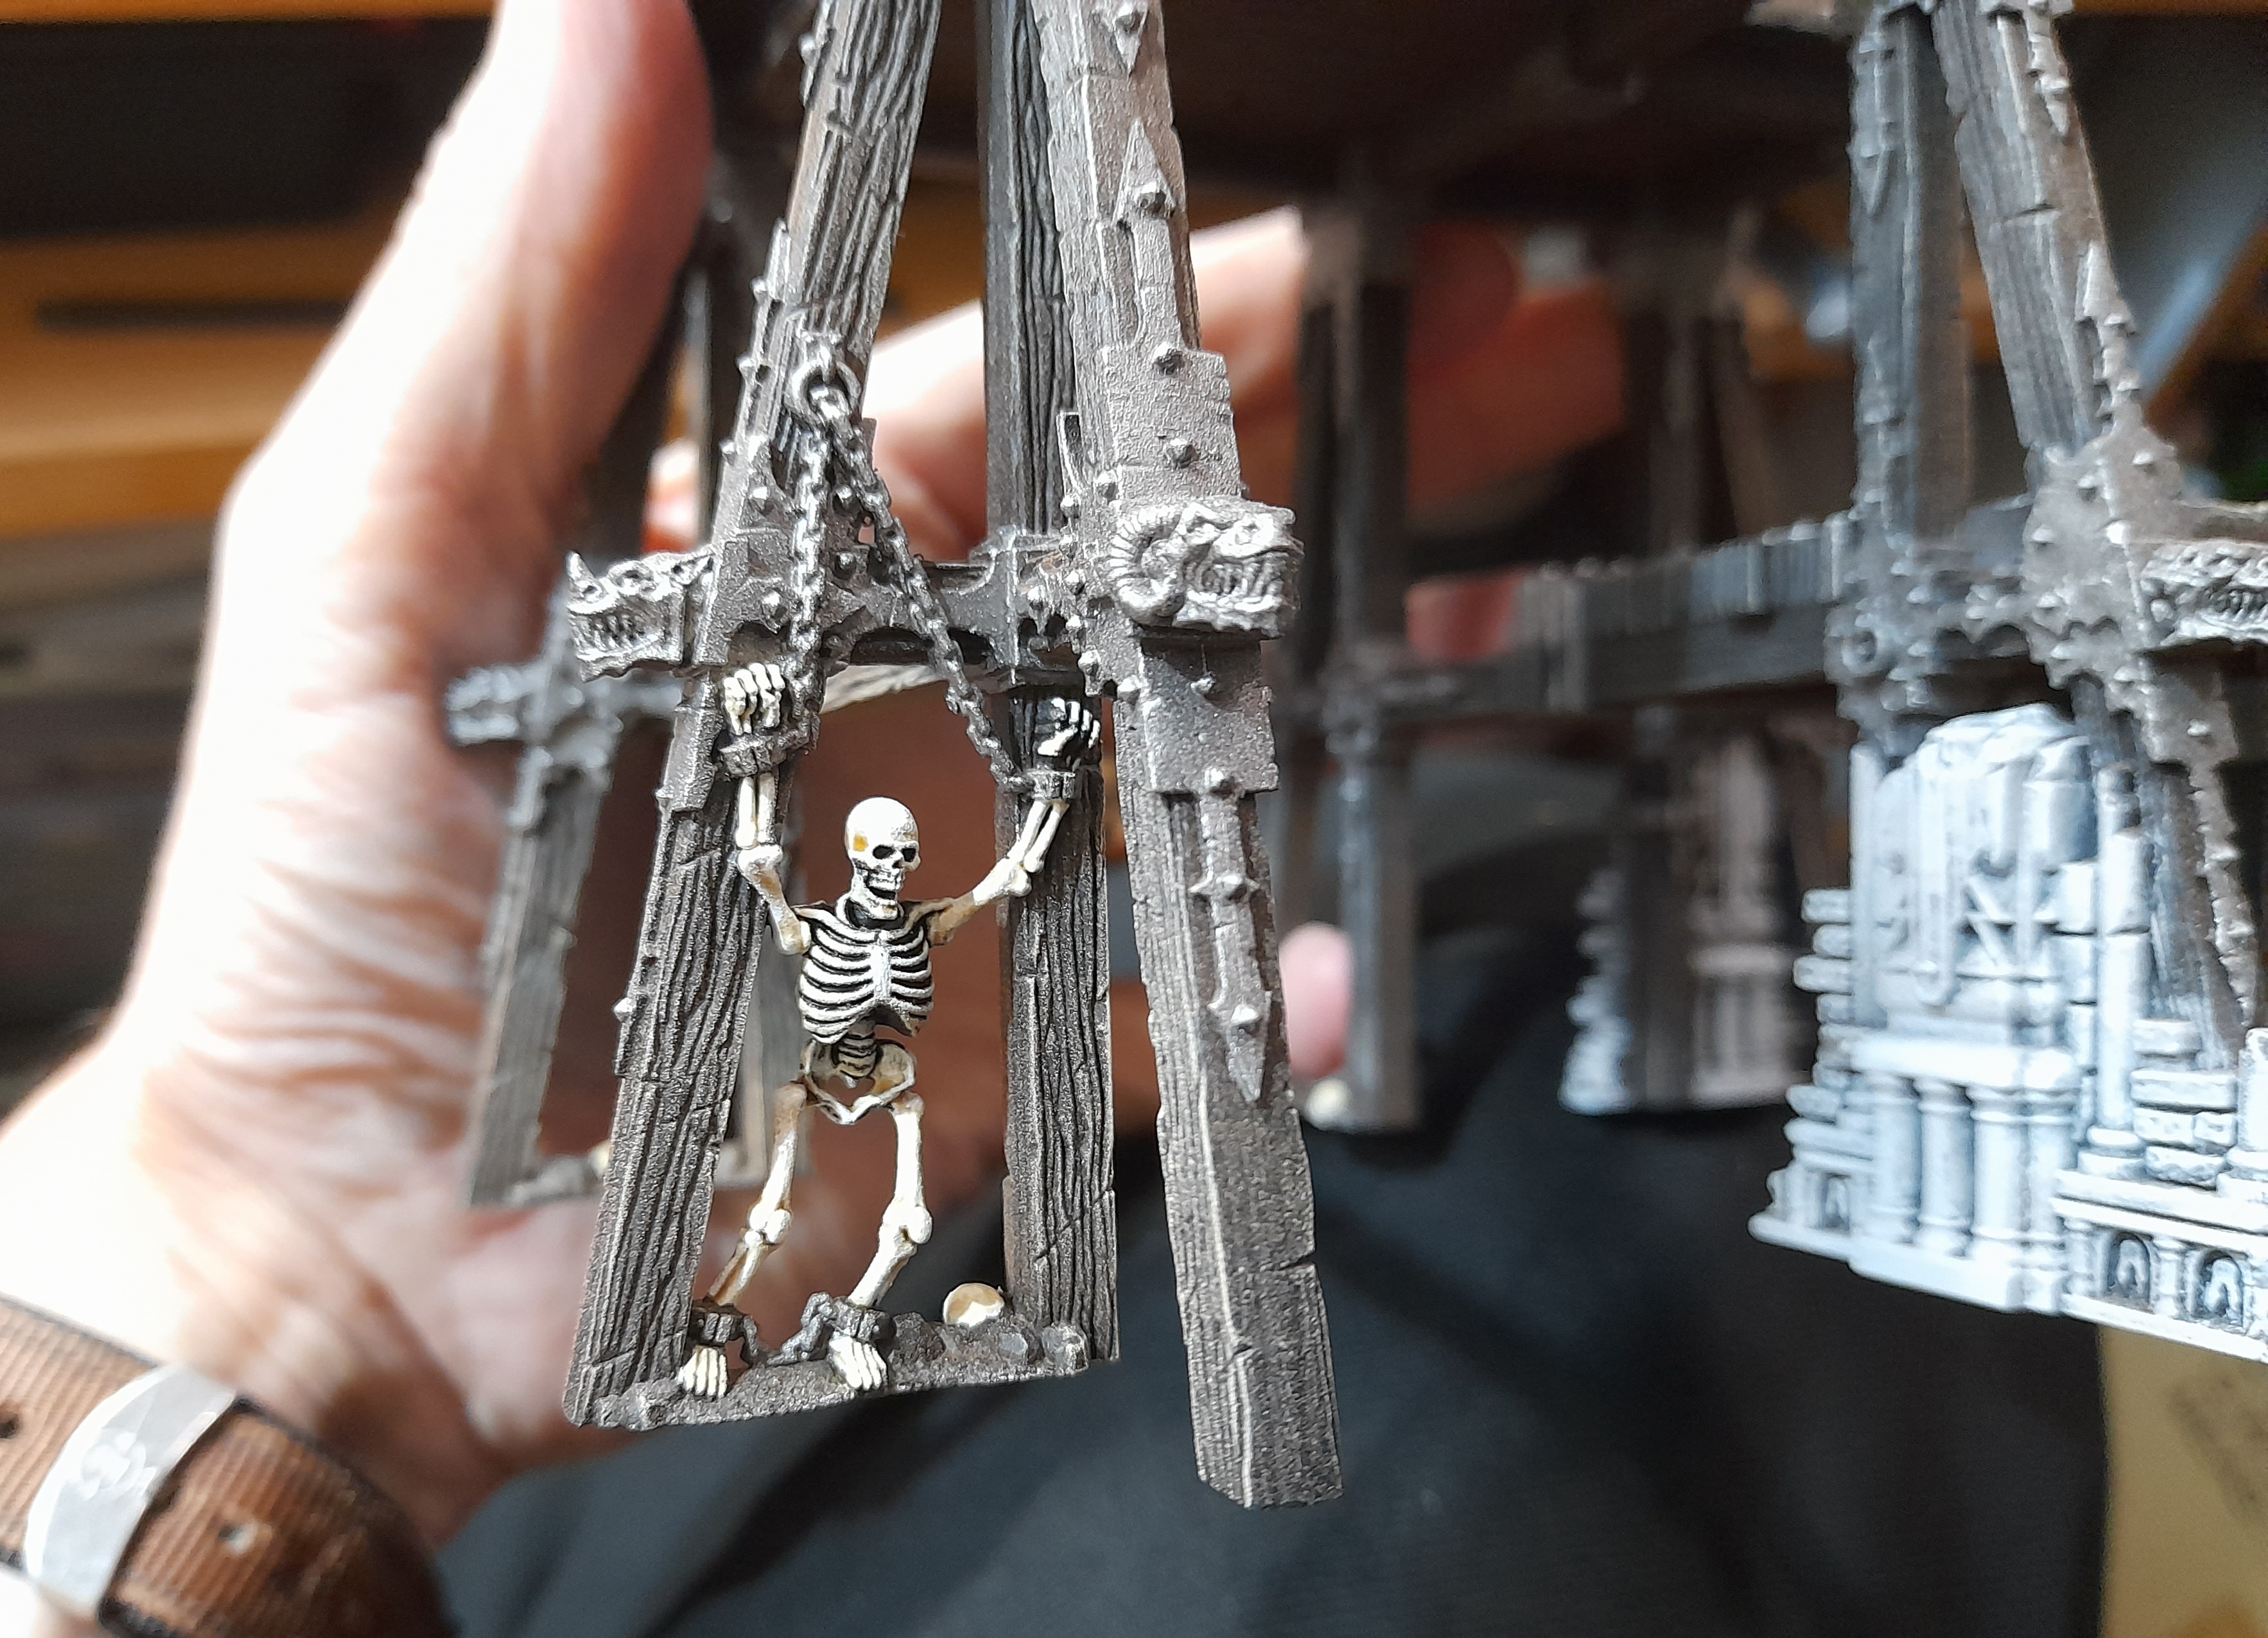
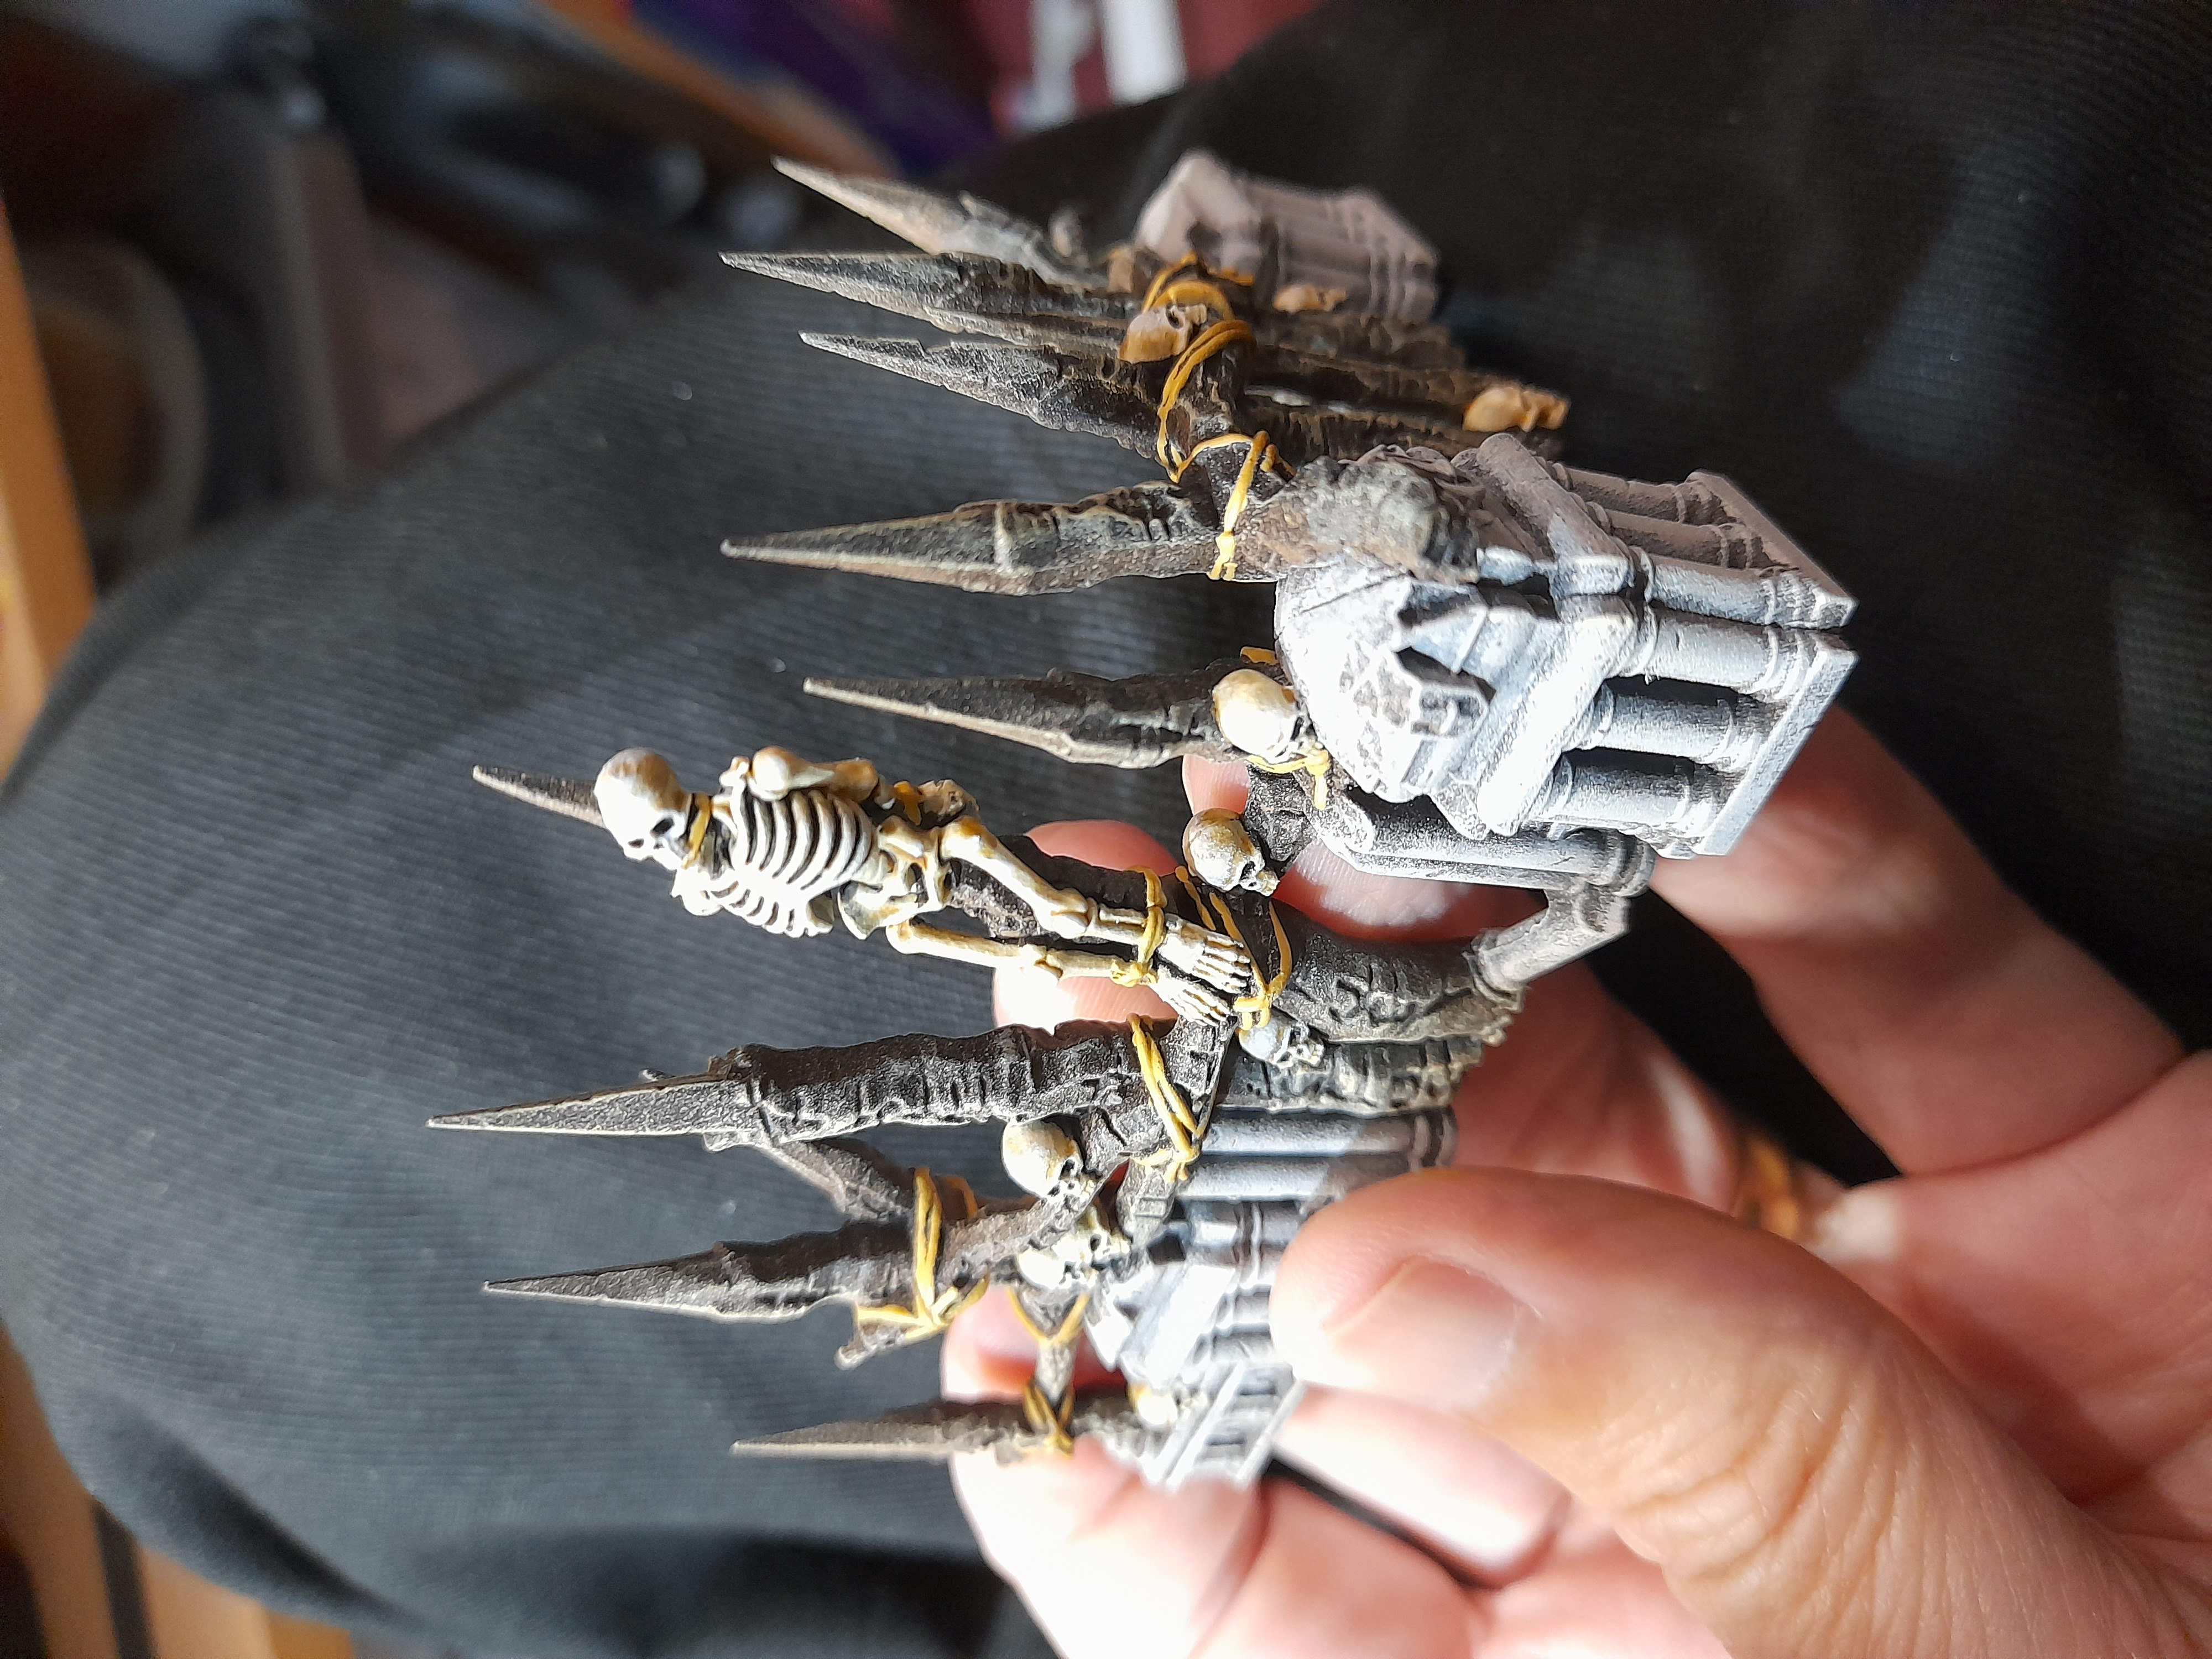
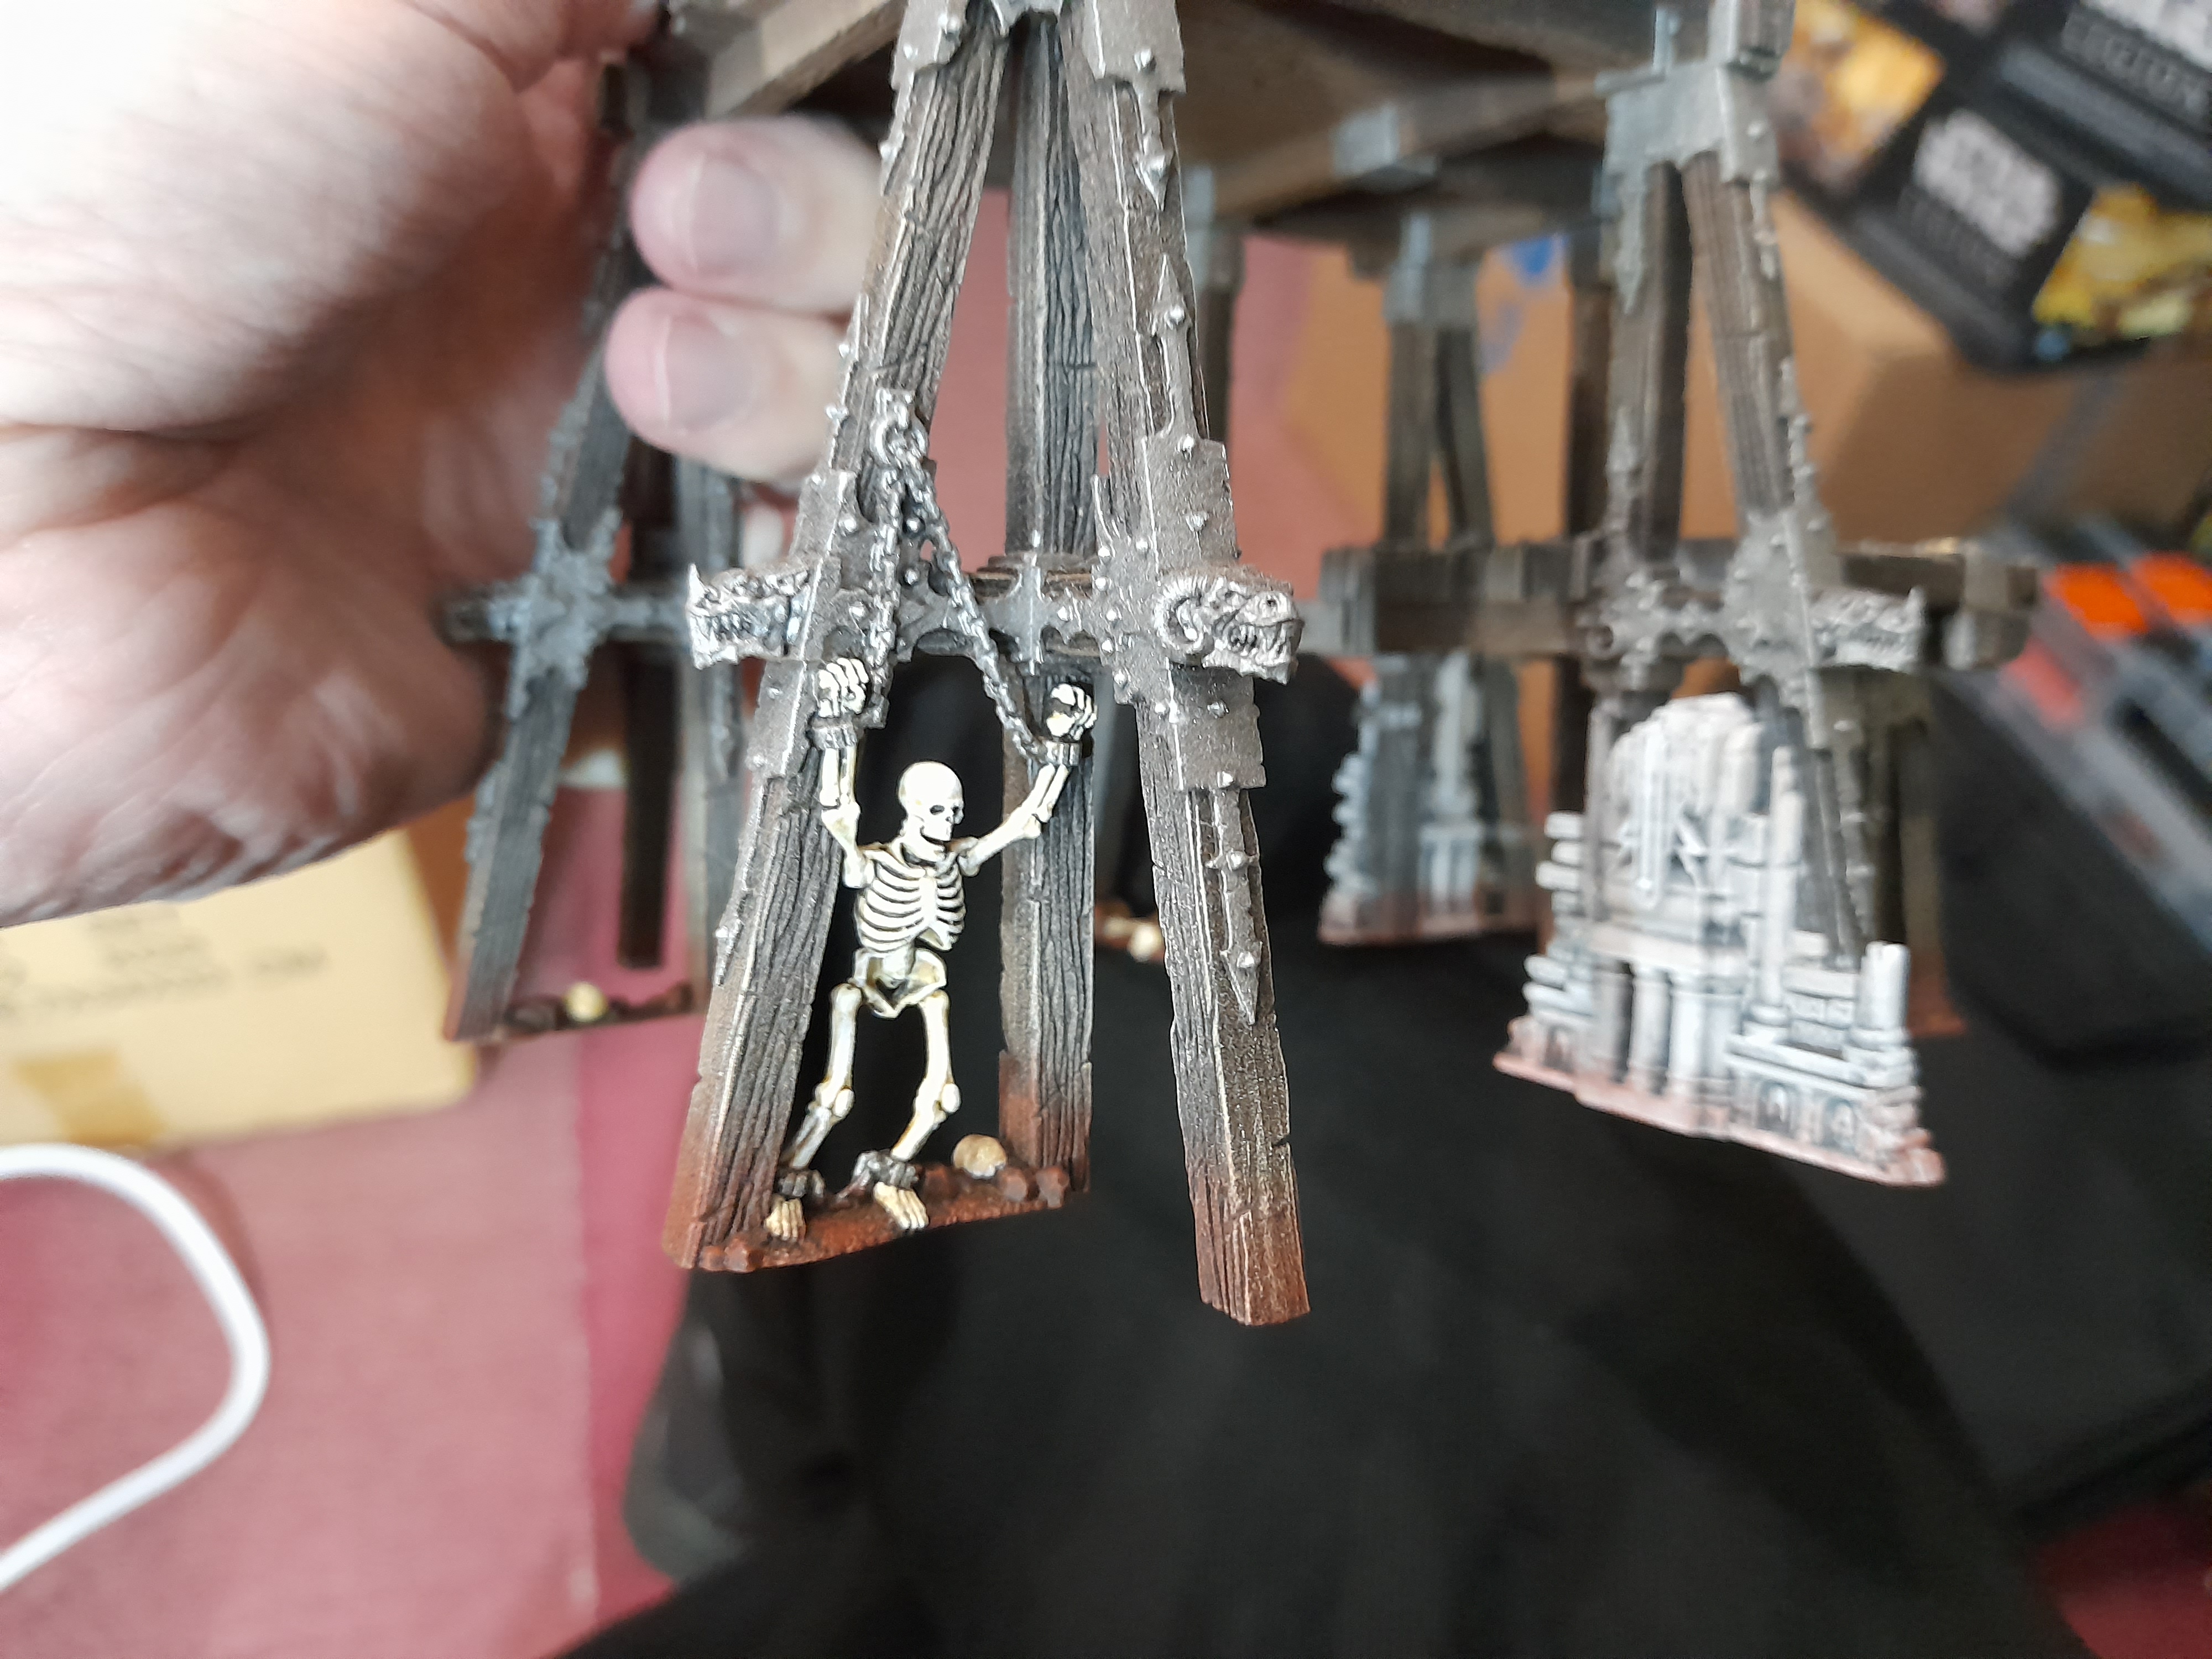
Then next I worked on all the skulls and skeletons, including on the spiked barricades.
I picked these out with white, where possible trying to leave the brown in the ribs, eye sockets etc for shading.
Then I hit them with a thinned skeleton horde contrast, wiping some of it away as I went. Lastly I went over them with a drybrush and highlighted the skulls.
And I have been working on the last bits of scatter too.
Looks like I have a lot of rope to get working on….
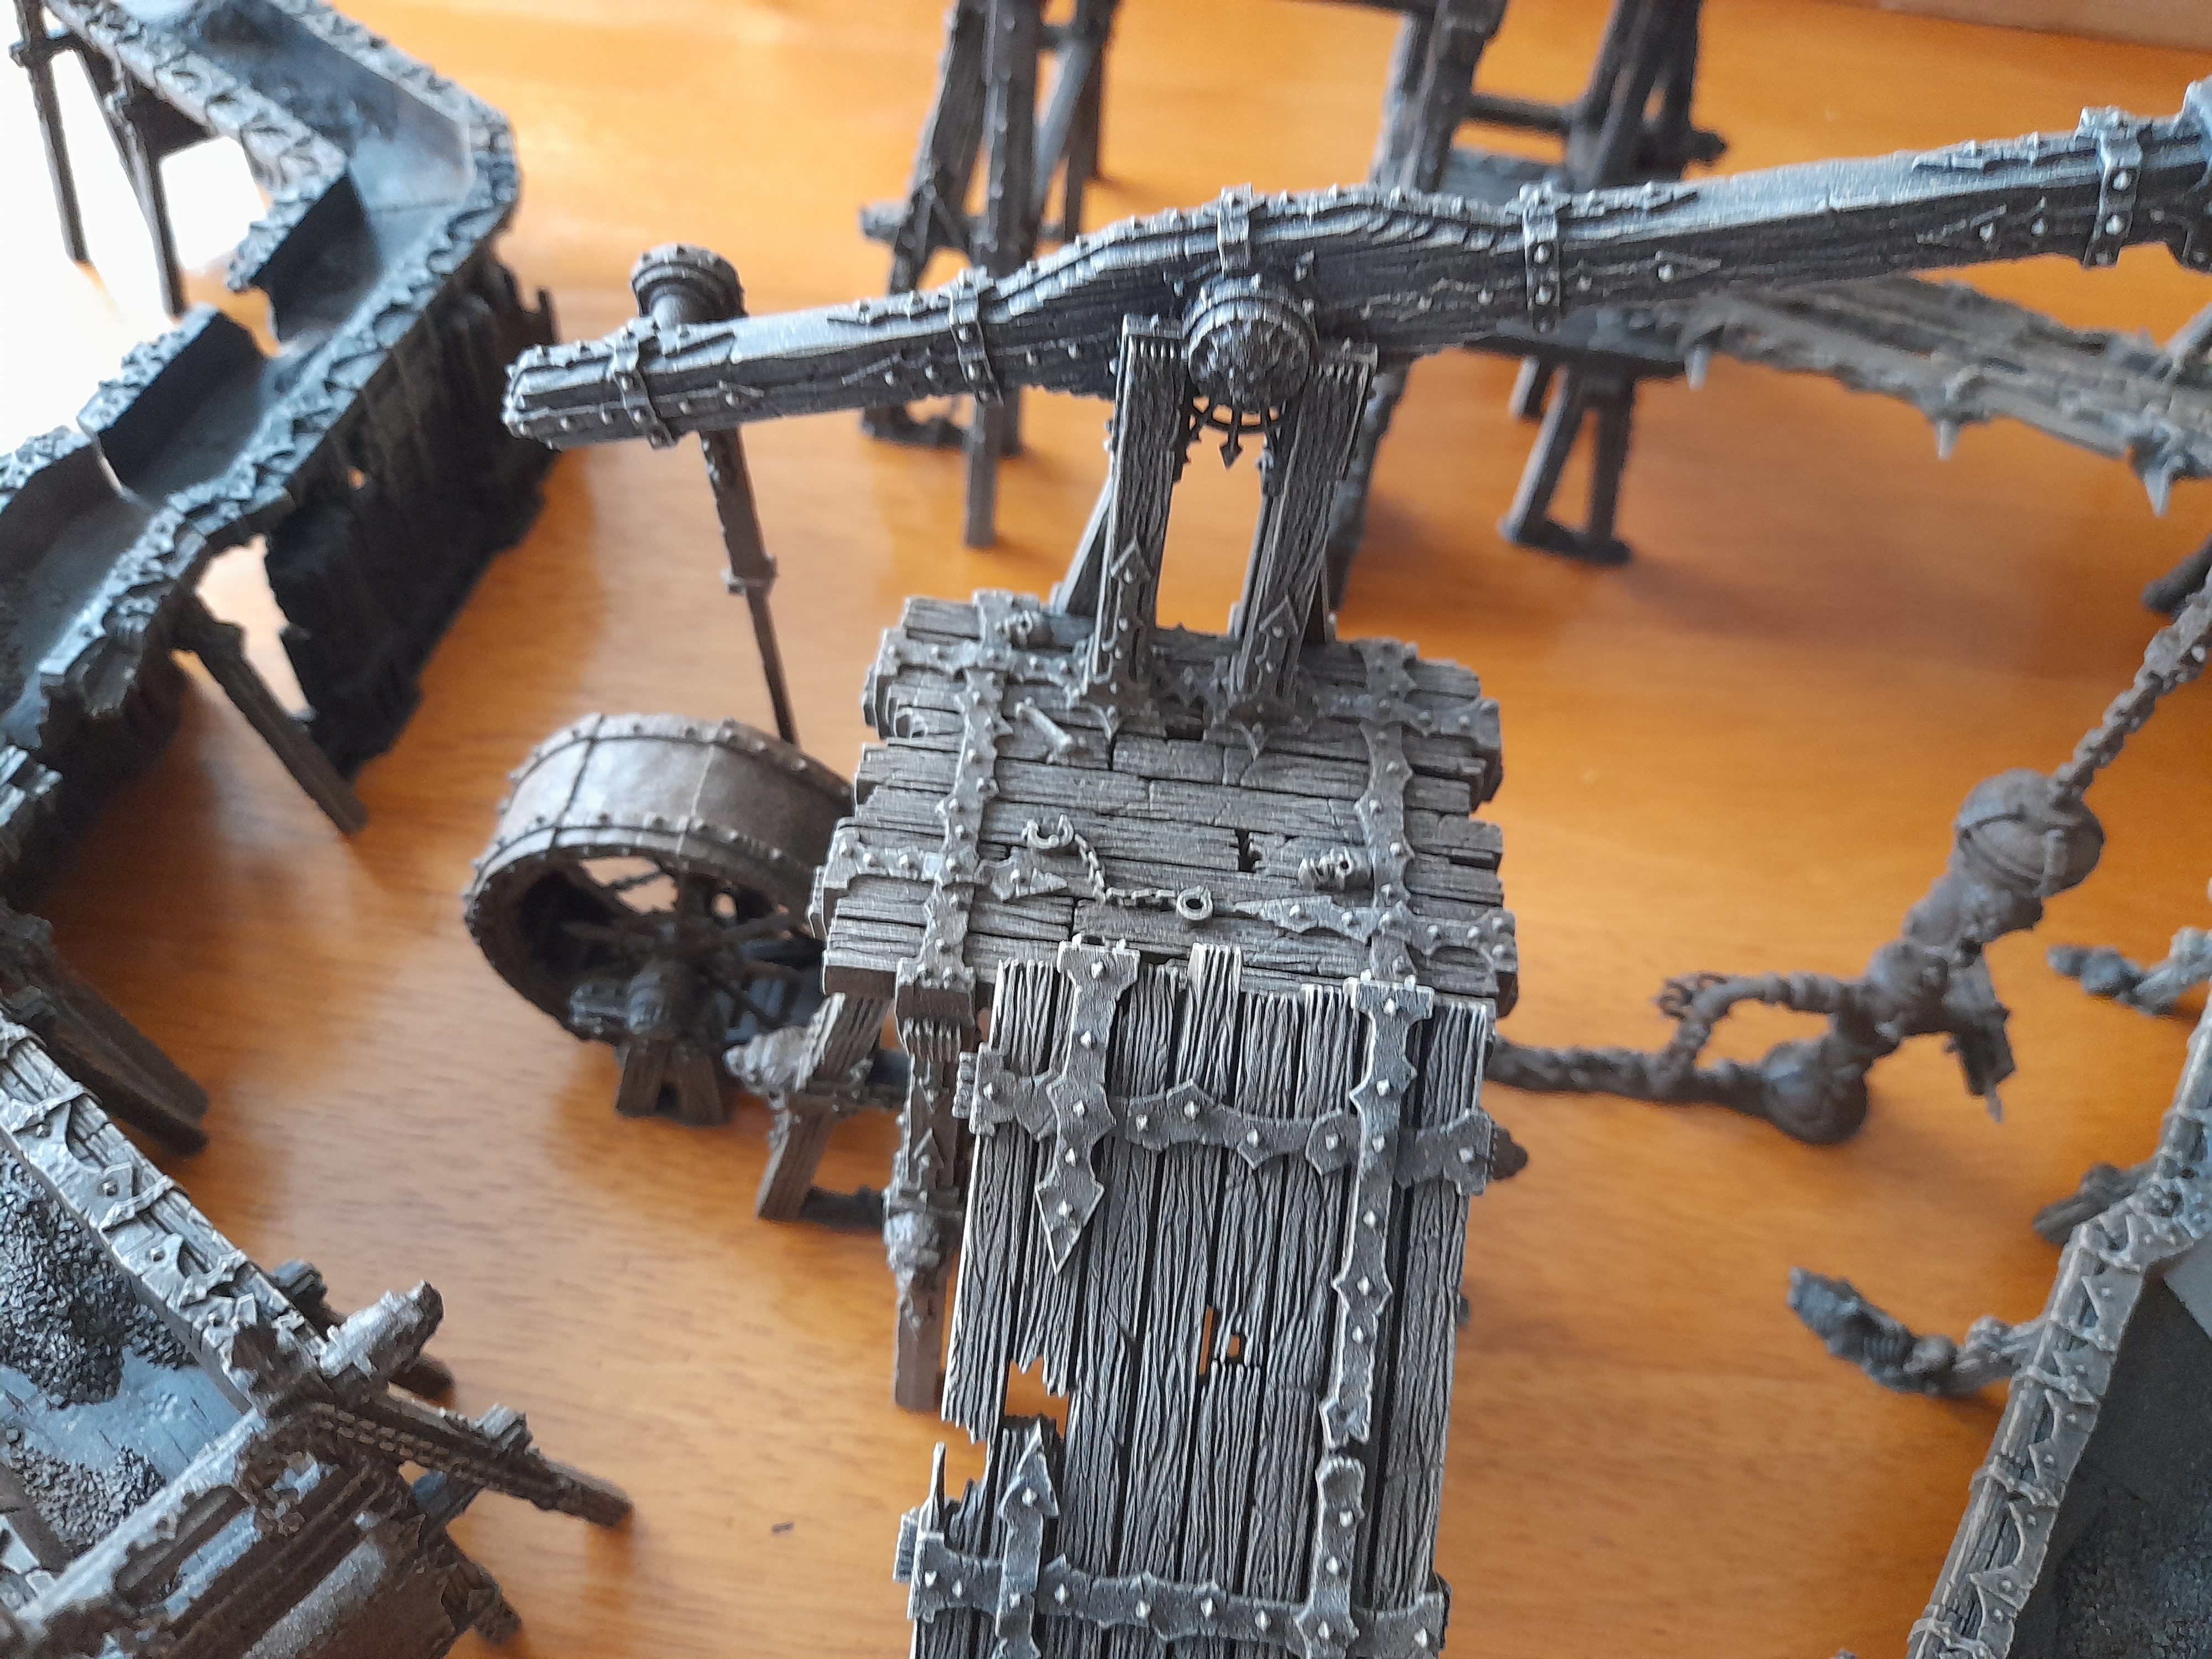
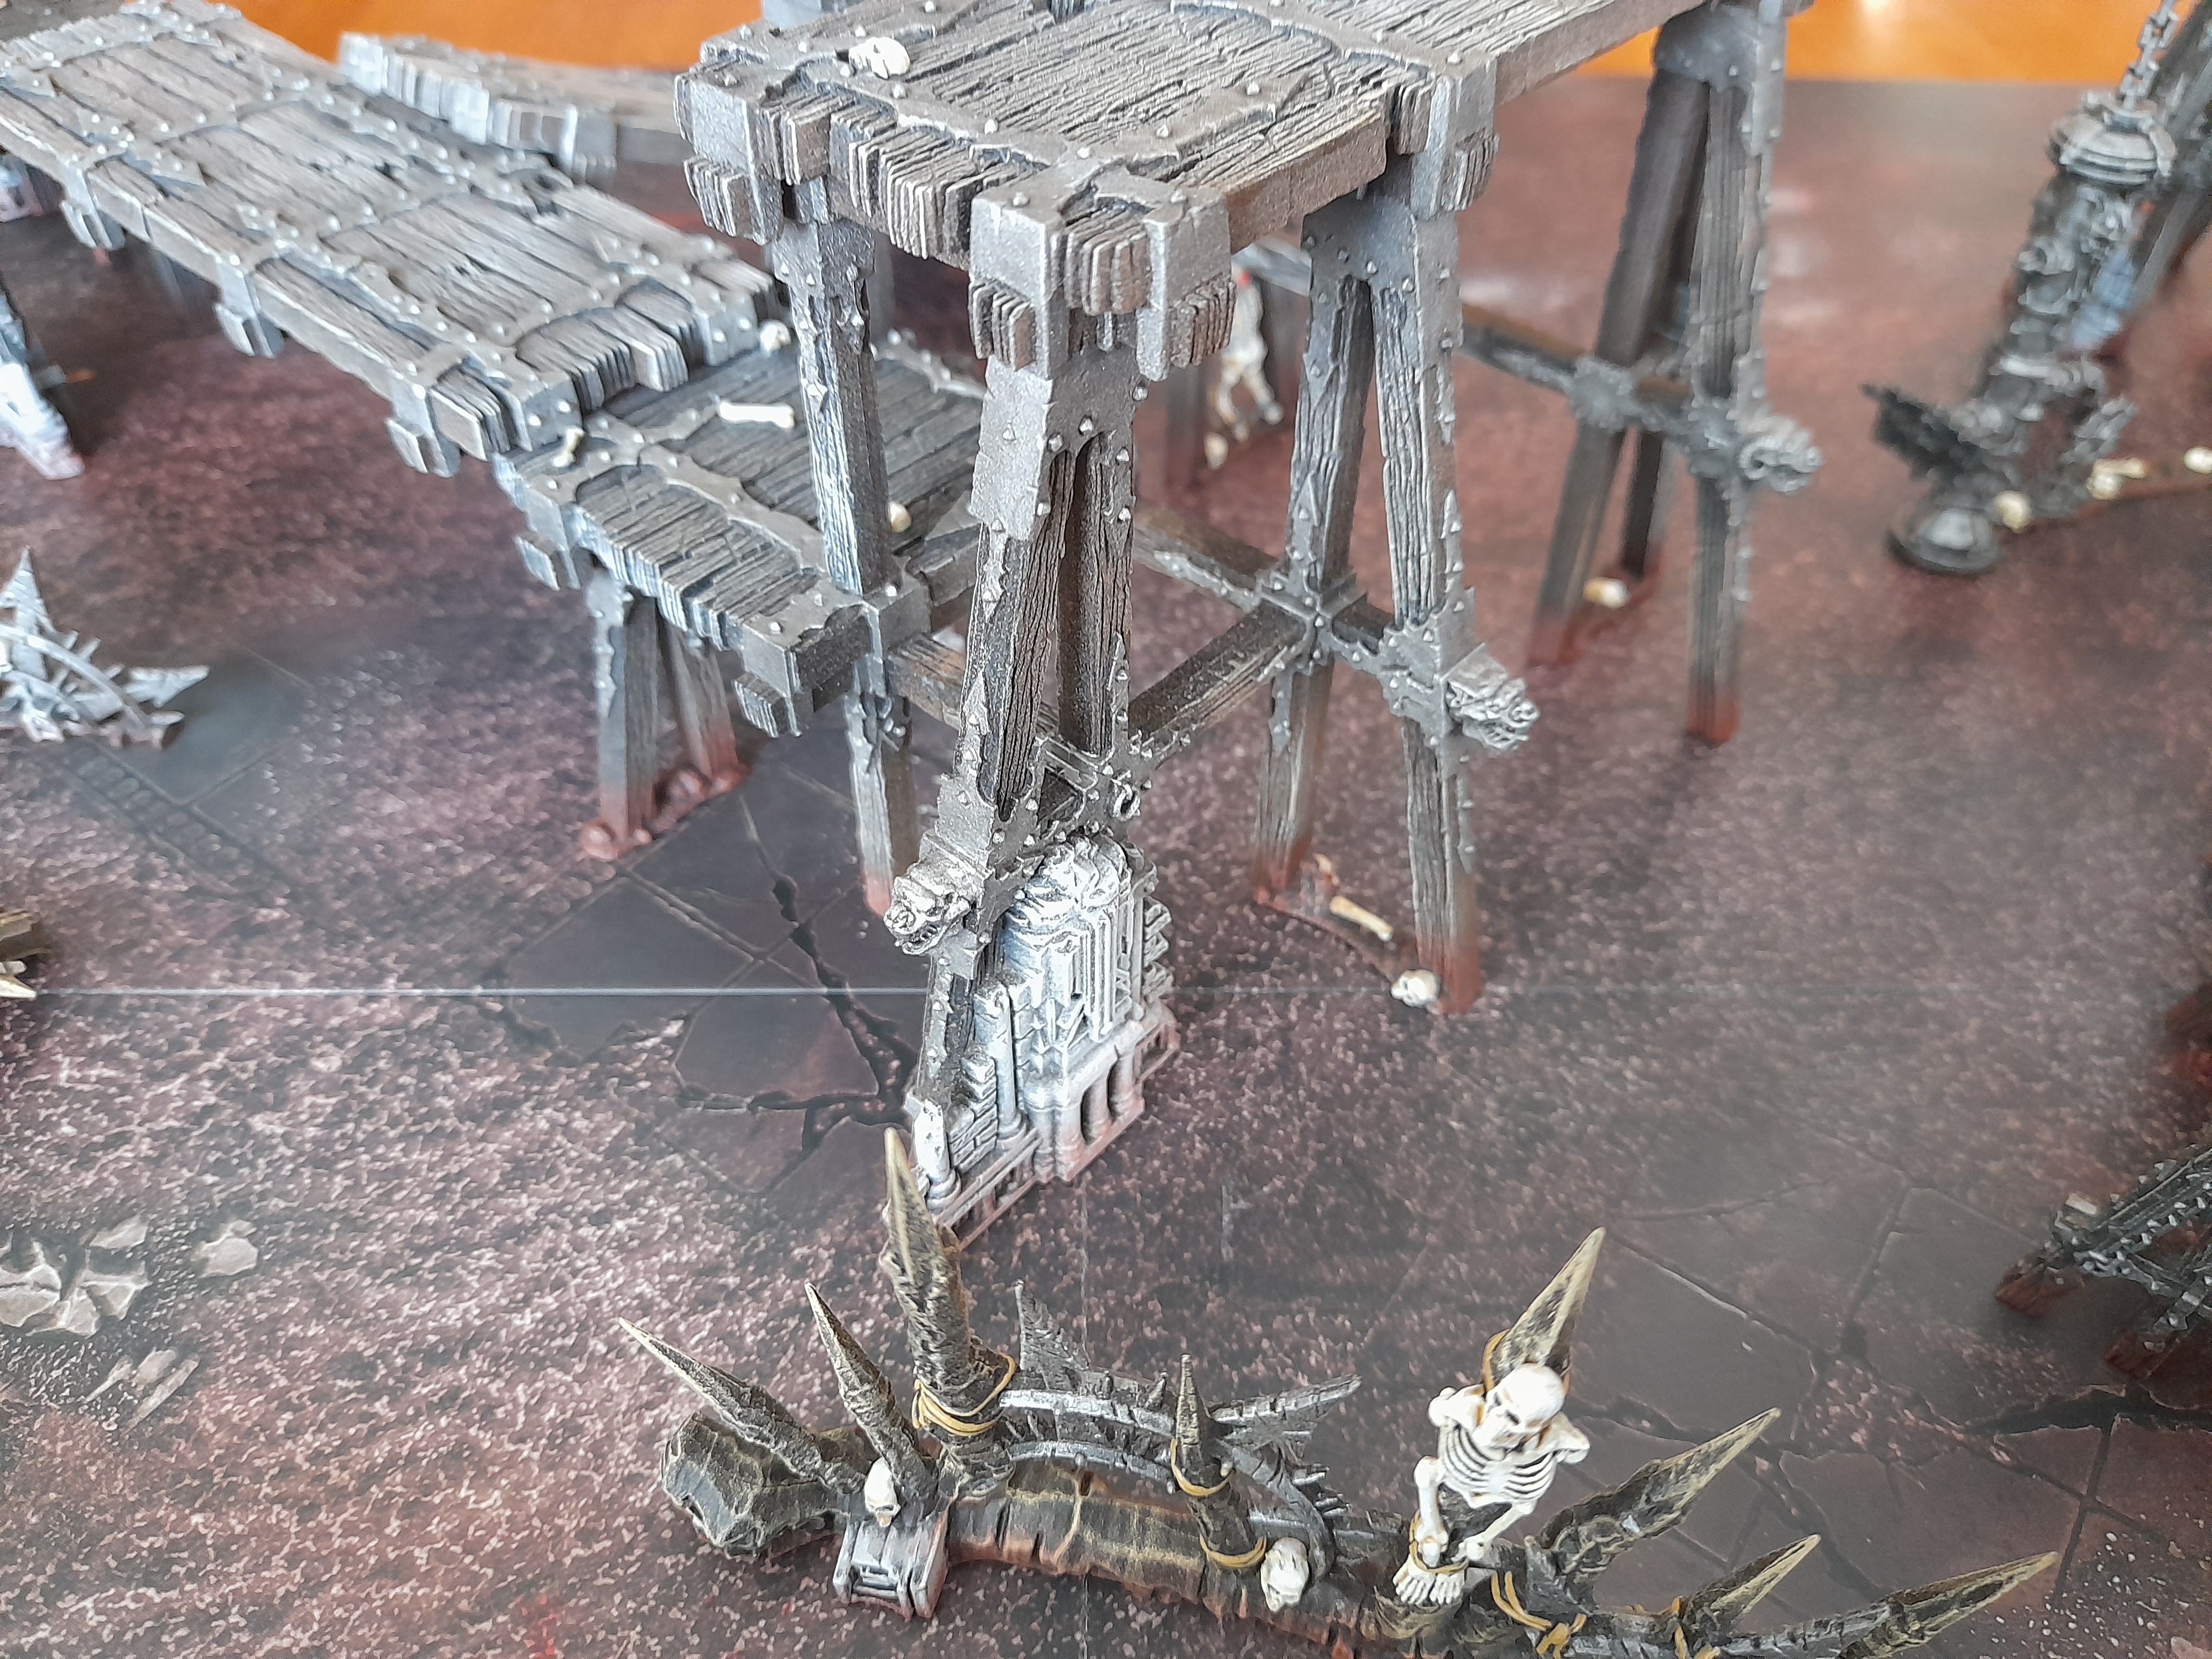
The first milestone
18th September.
I have continued to get in a bit of hobby each day, so this project/log has definitely been a motivational help.
So, from last post I carried on with the scatter terrain pieces, painting lots and lots of small ropes. Hard work on my old eyes at times, but I think that once done it really helped the pieces to ‘pop’
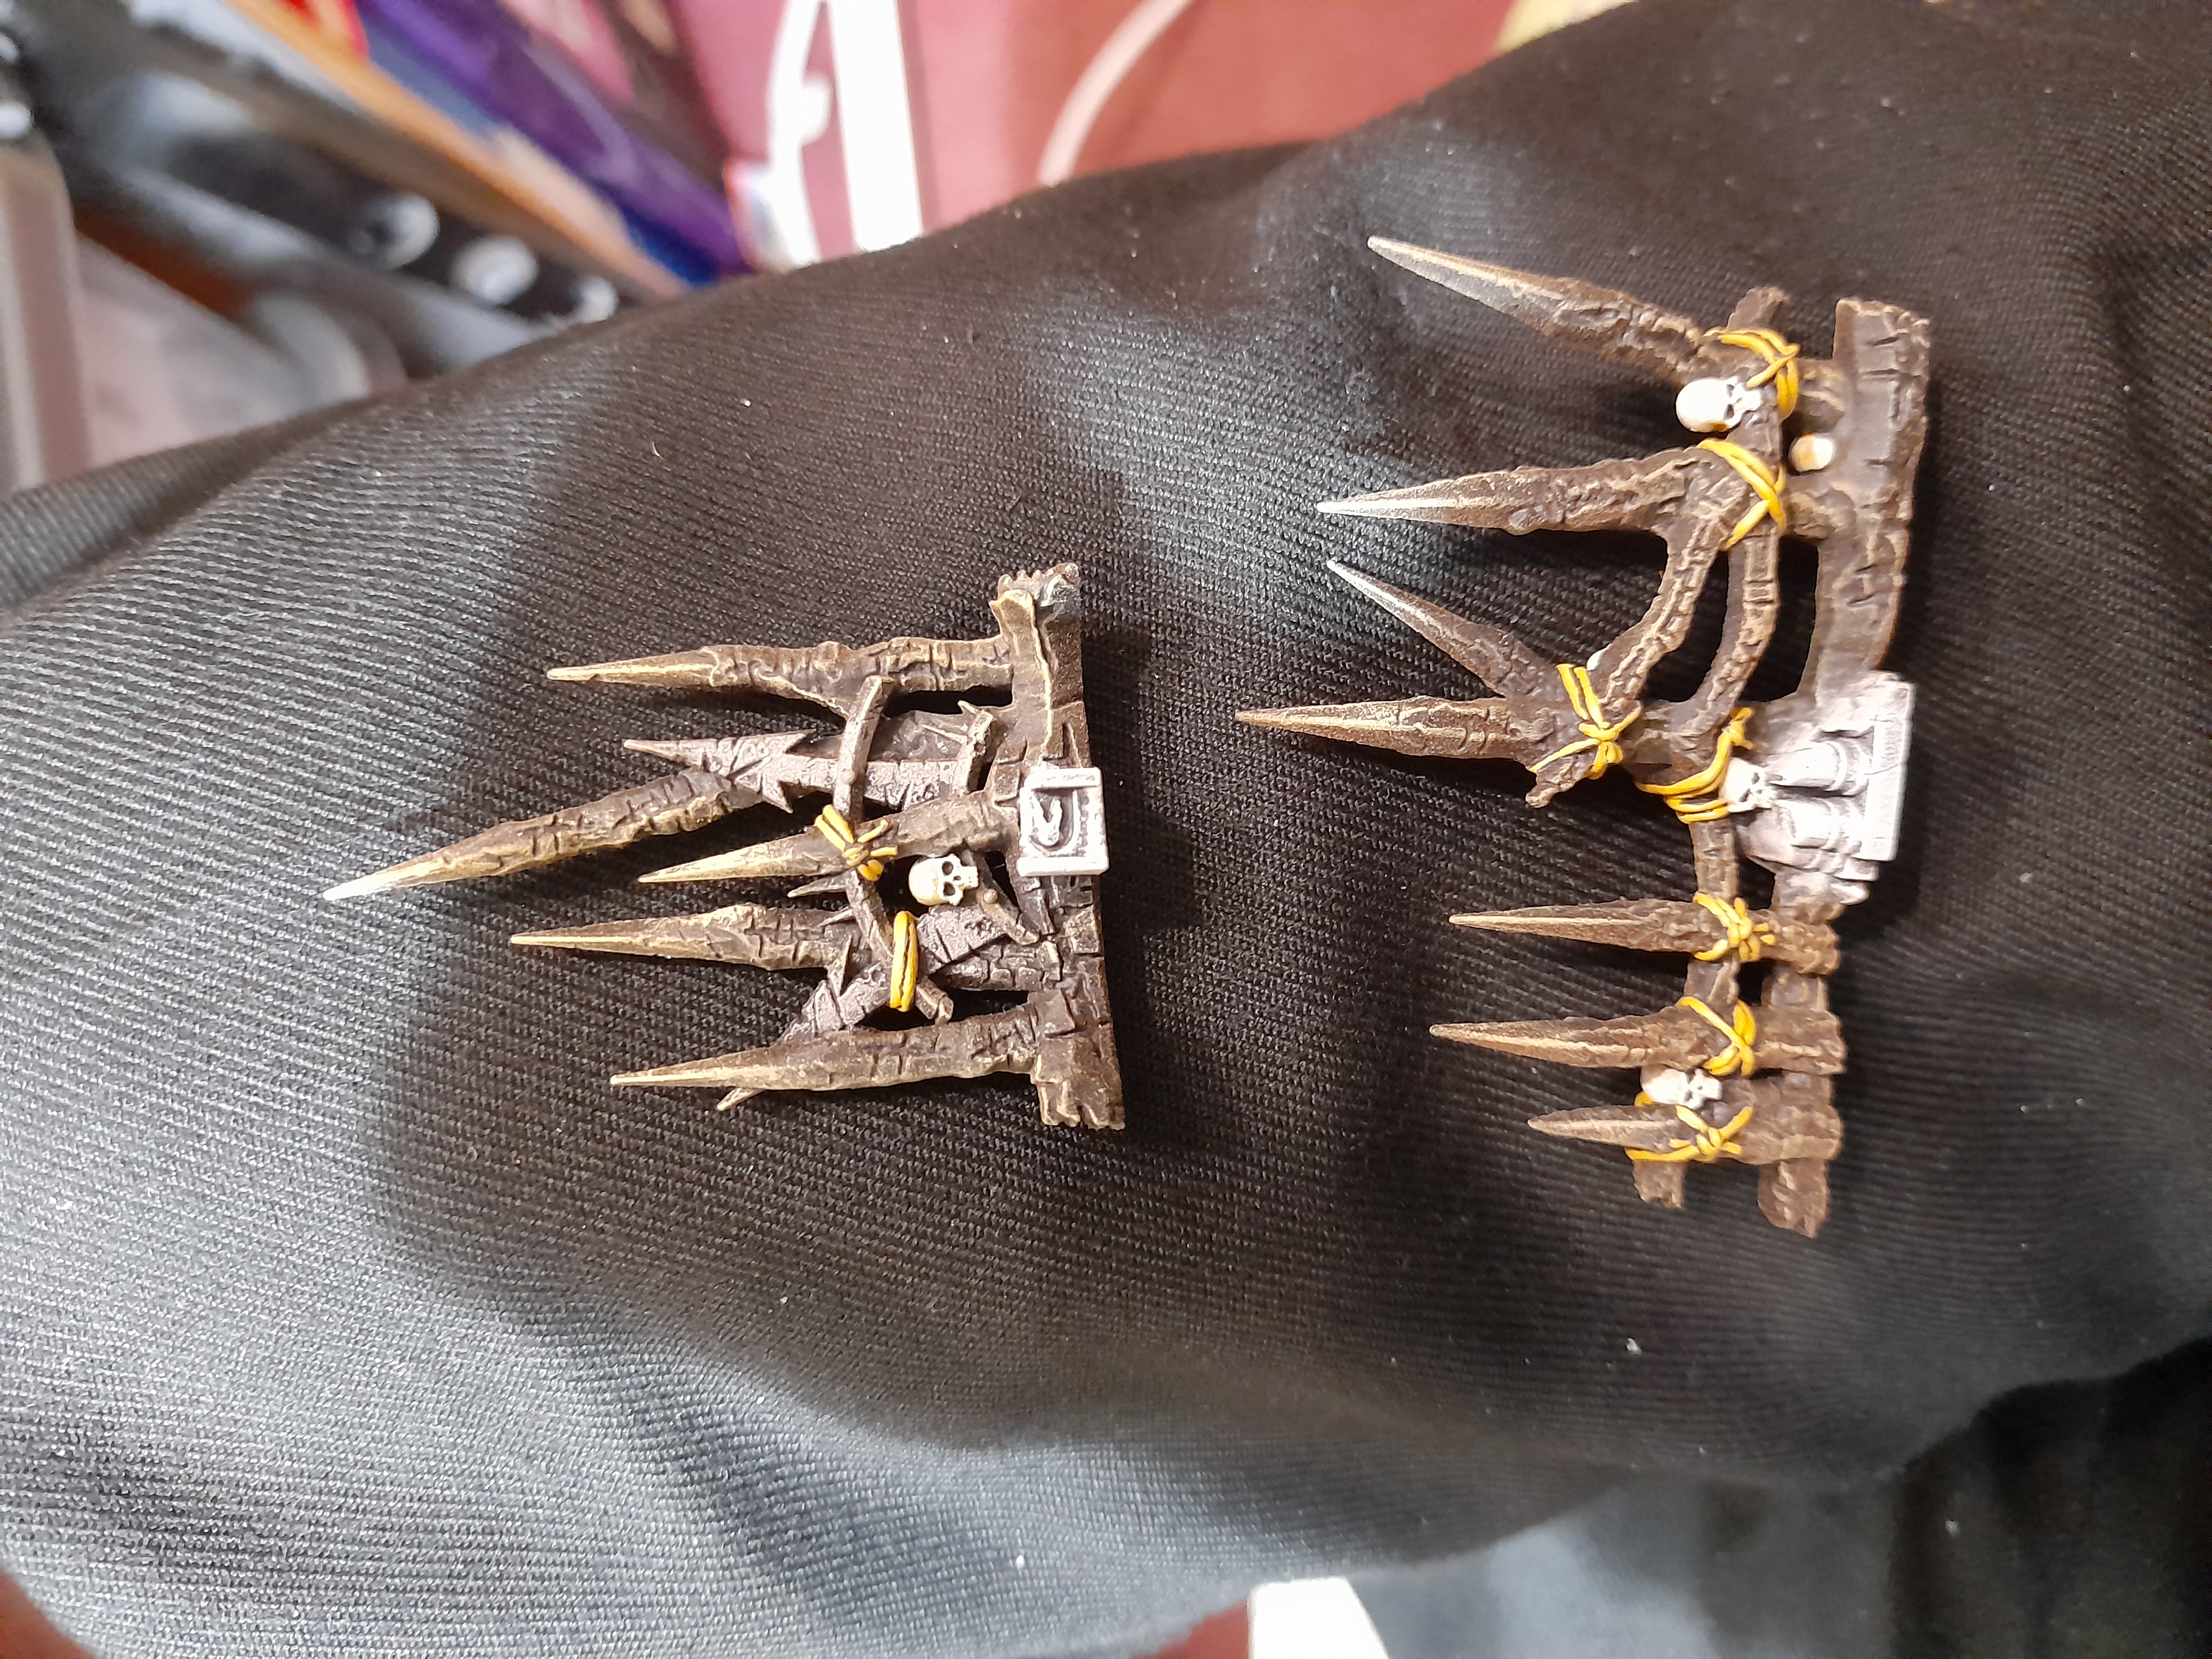

Next up I decided to add a bit of weathering. My intention with this was to try to ‘tie-in’ some colours to that of the base board. So, looking at that and then going through my paints I ended up choosing an old GW Terracotta paint.
To endeavour to add some realism, I applied a drybrush of this on to the lower parts of all of the terrain pieces, slightly heavier at the very bottom.
Pretty happy with how it came out (Some pics a little washed out)
 Such a happy skellie!
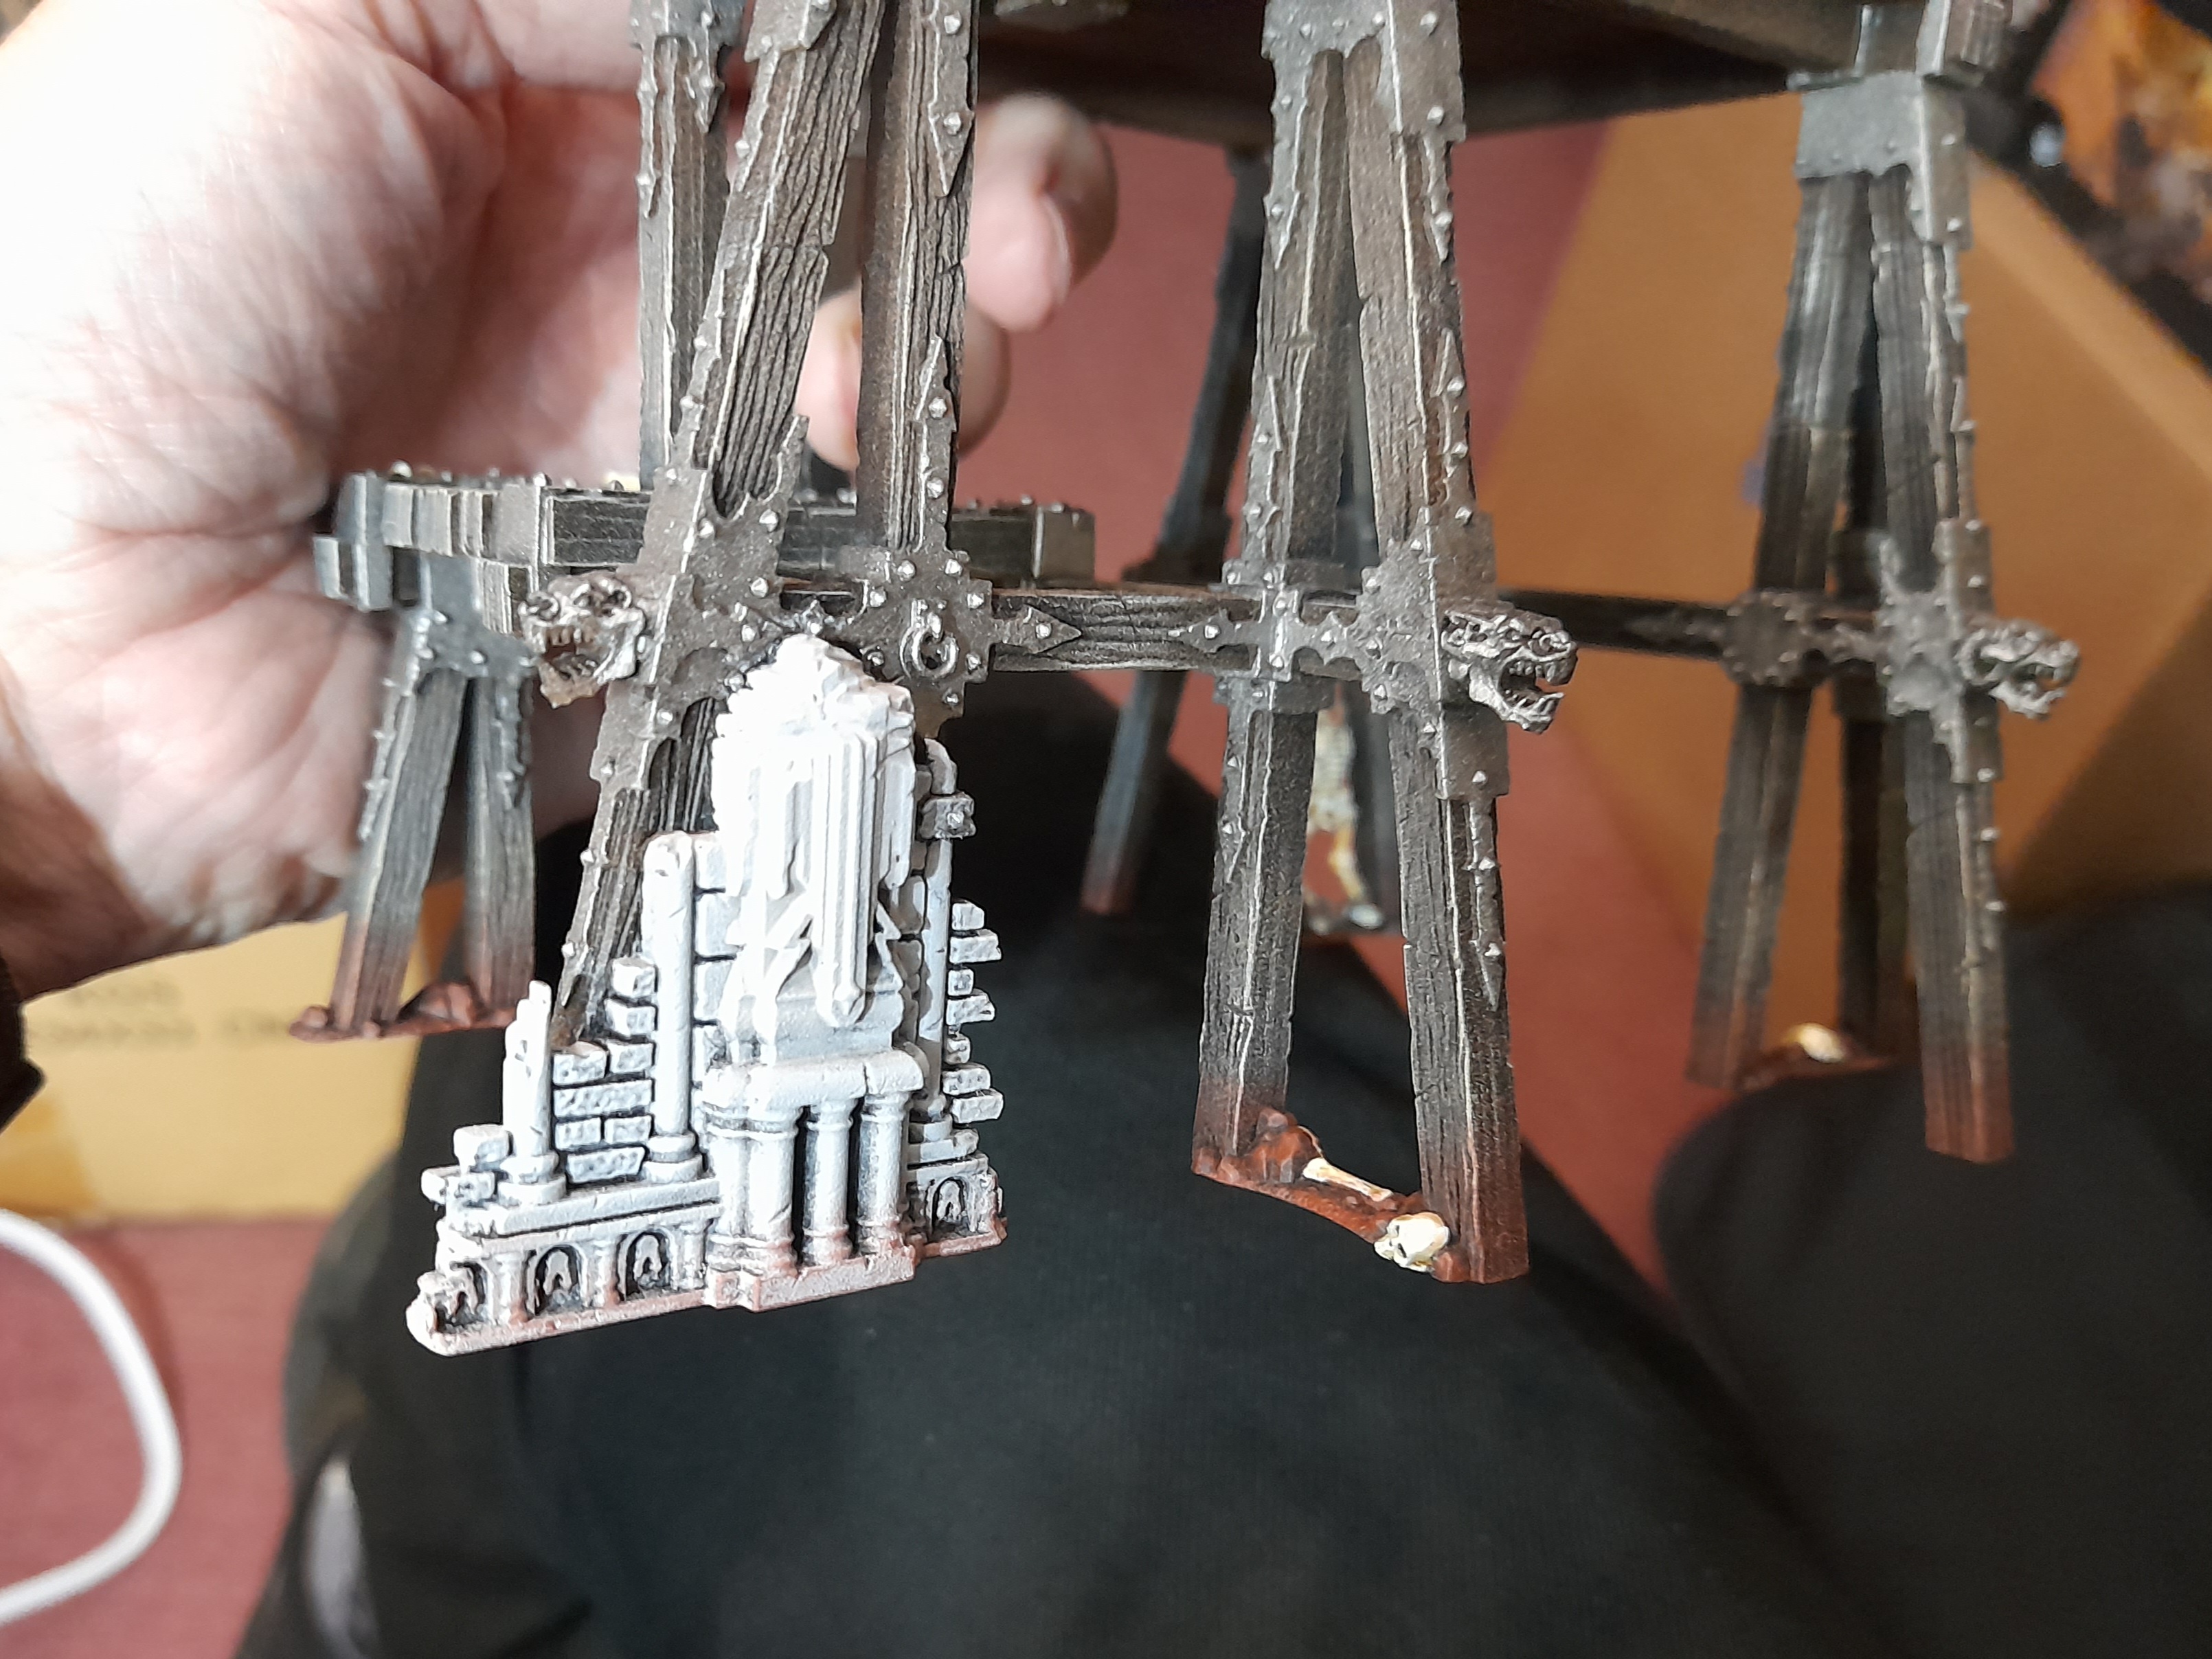
With that weathering done, next up was a liberal application of good old Nuln Oil, doing its stuff ?
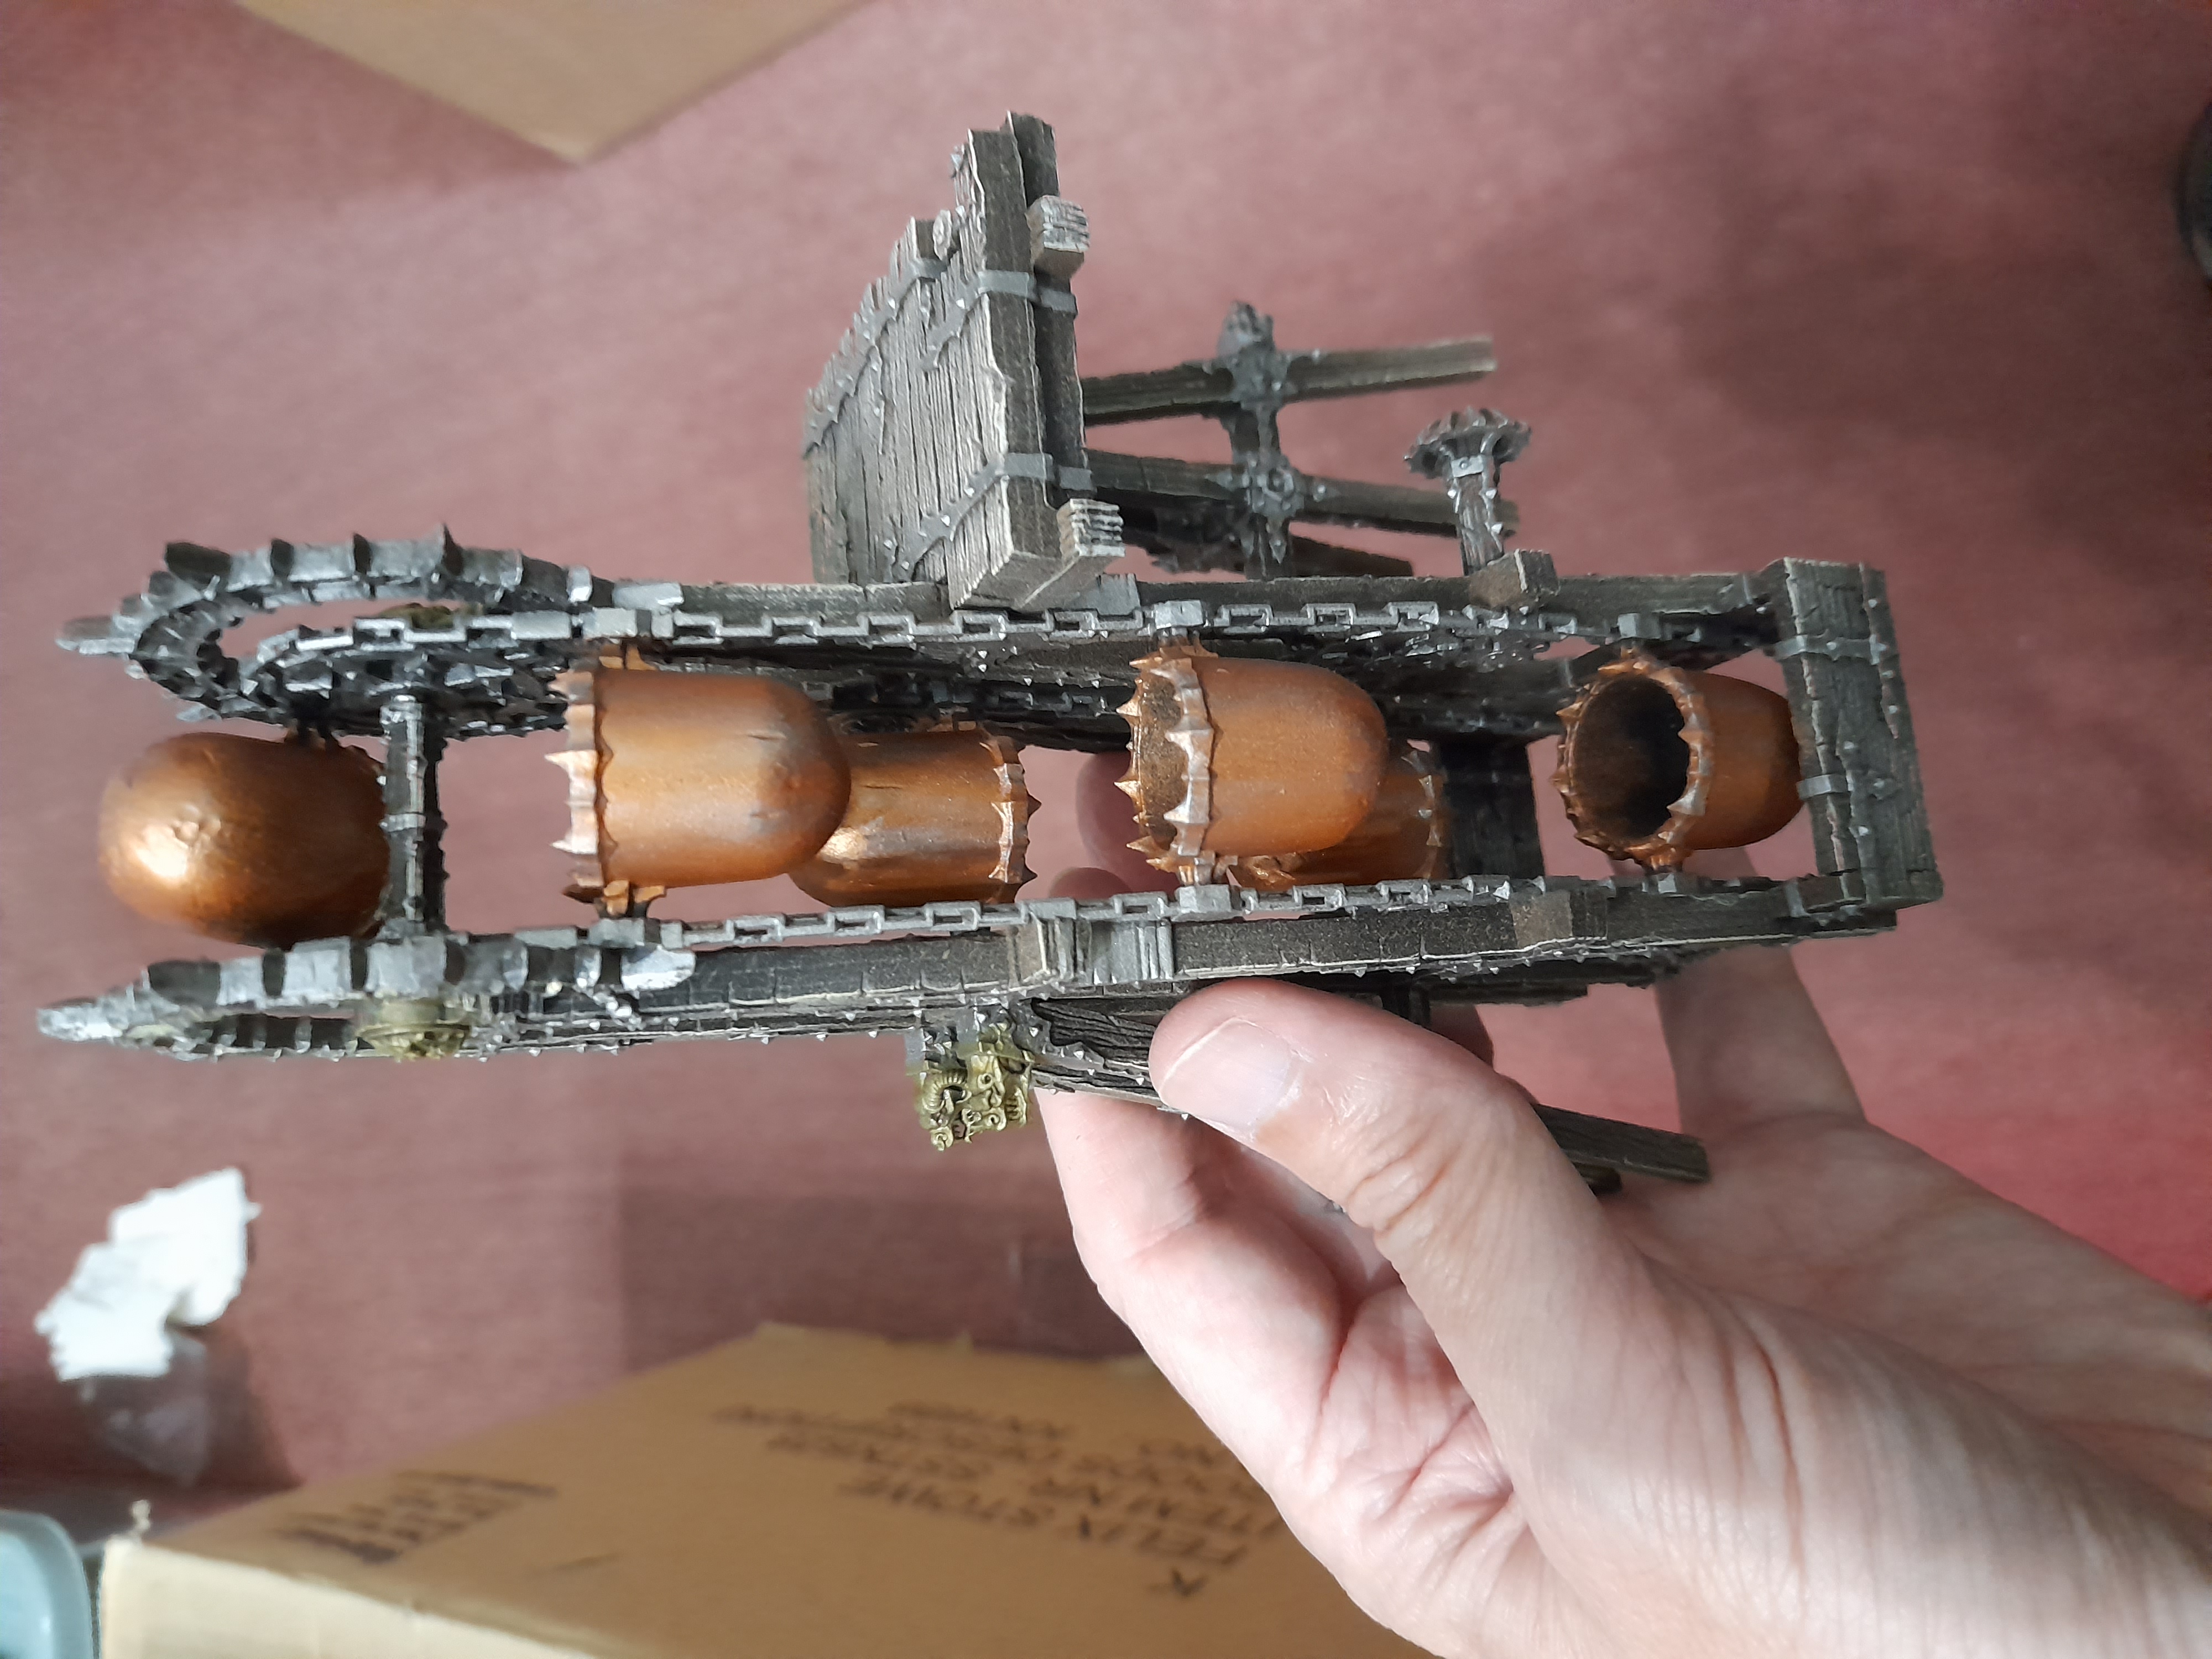
Once this was dry I went back in and drybrushed some chain mail silver on the various gargoyle heads, certain strap junctions, chains, gears and such like. Plus some copper rails on the gate type ducting parts.
I wasn’t really sure how to handle the Varanite, and after some tests with reds and yellows I ended up going with a gold base tone. This may change in the future, but for now I’m calling the terrain done.
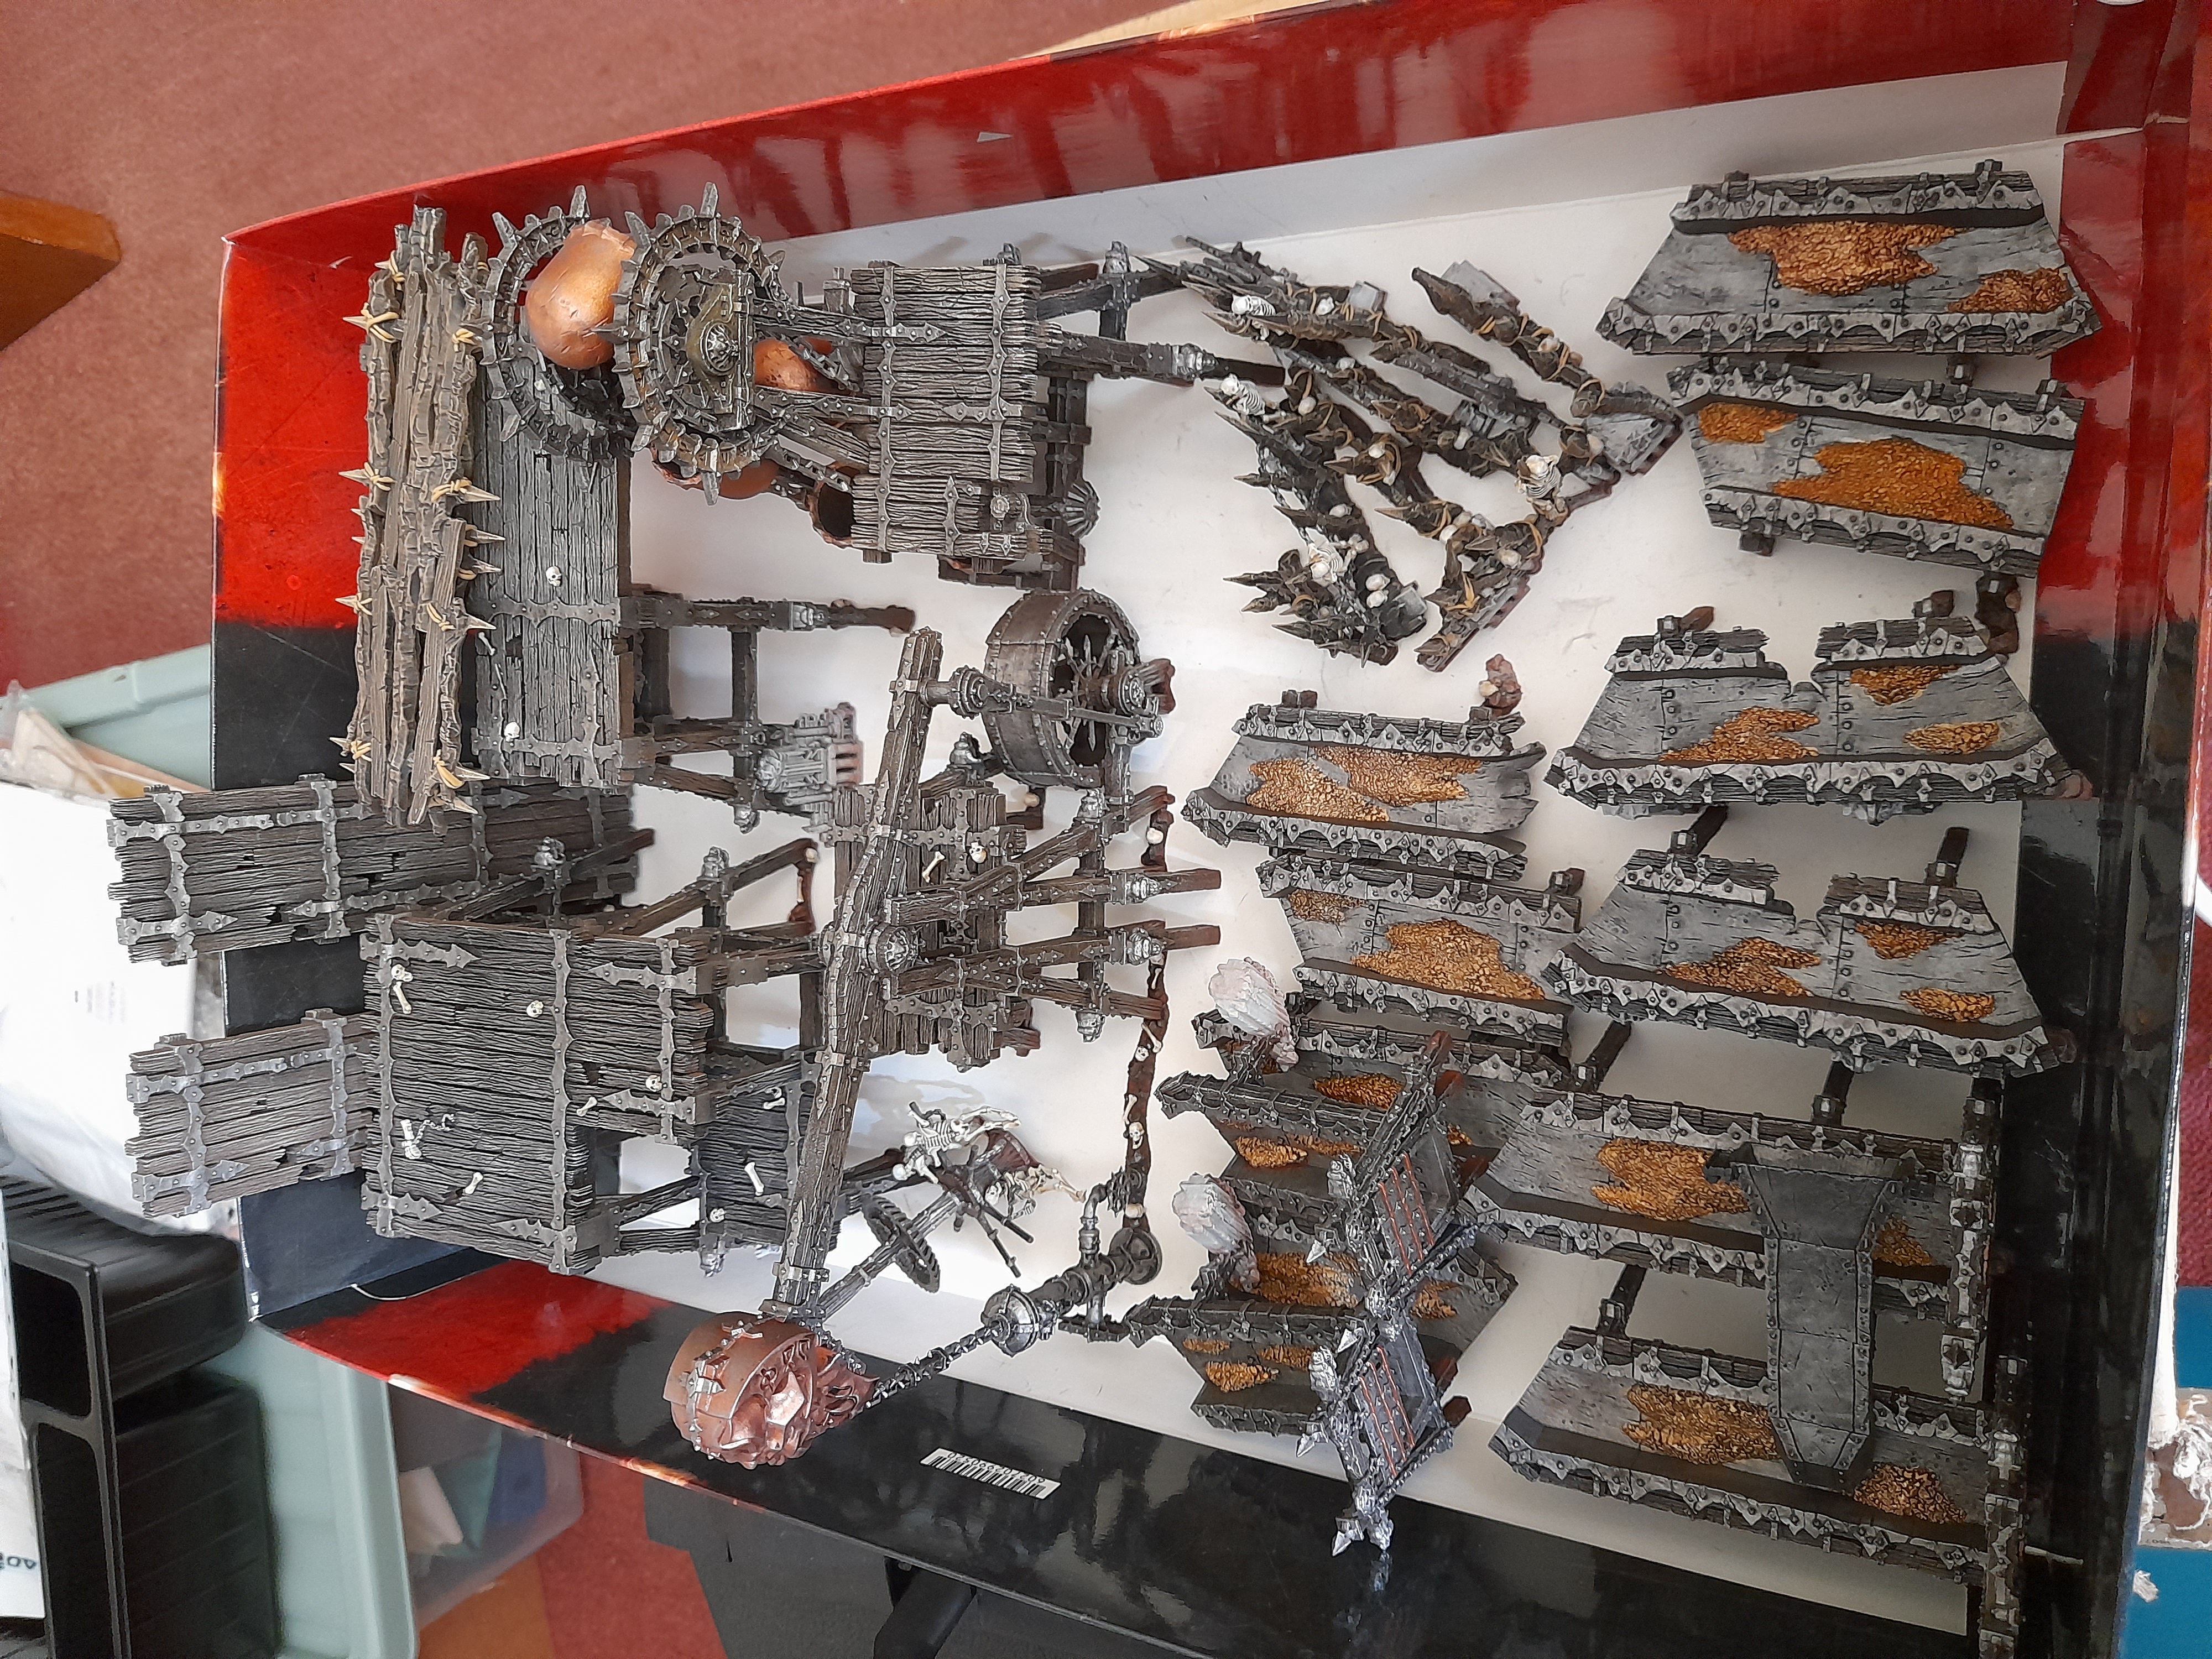
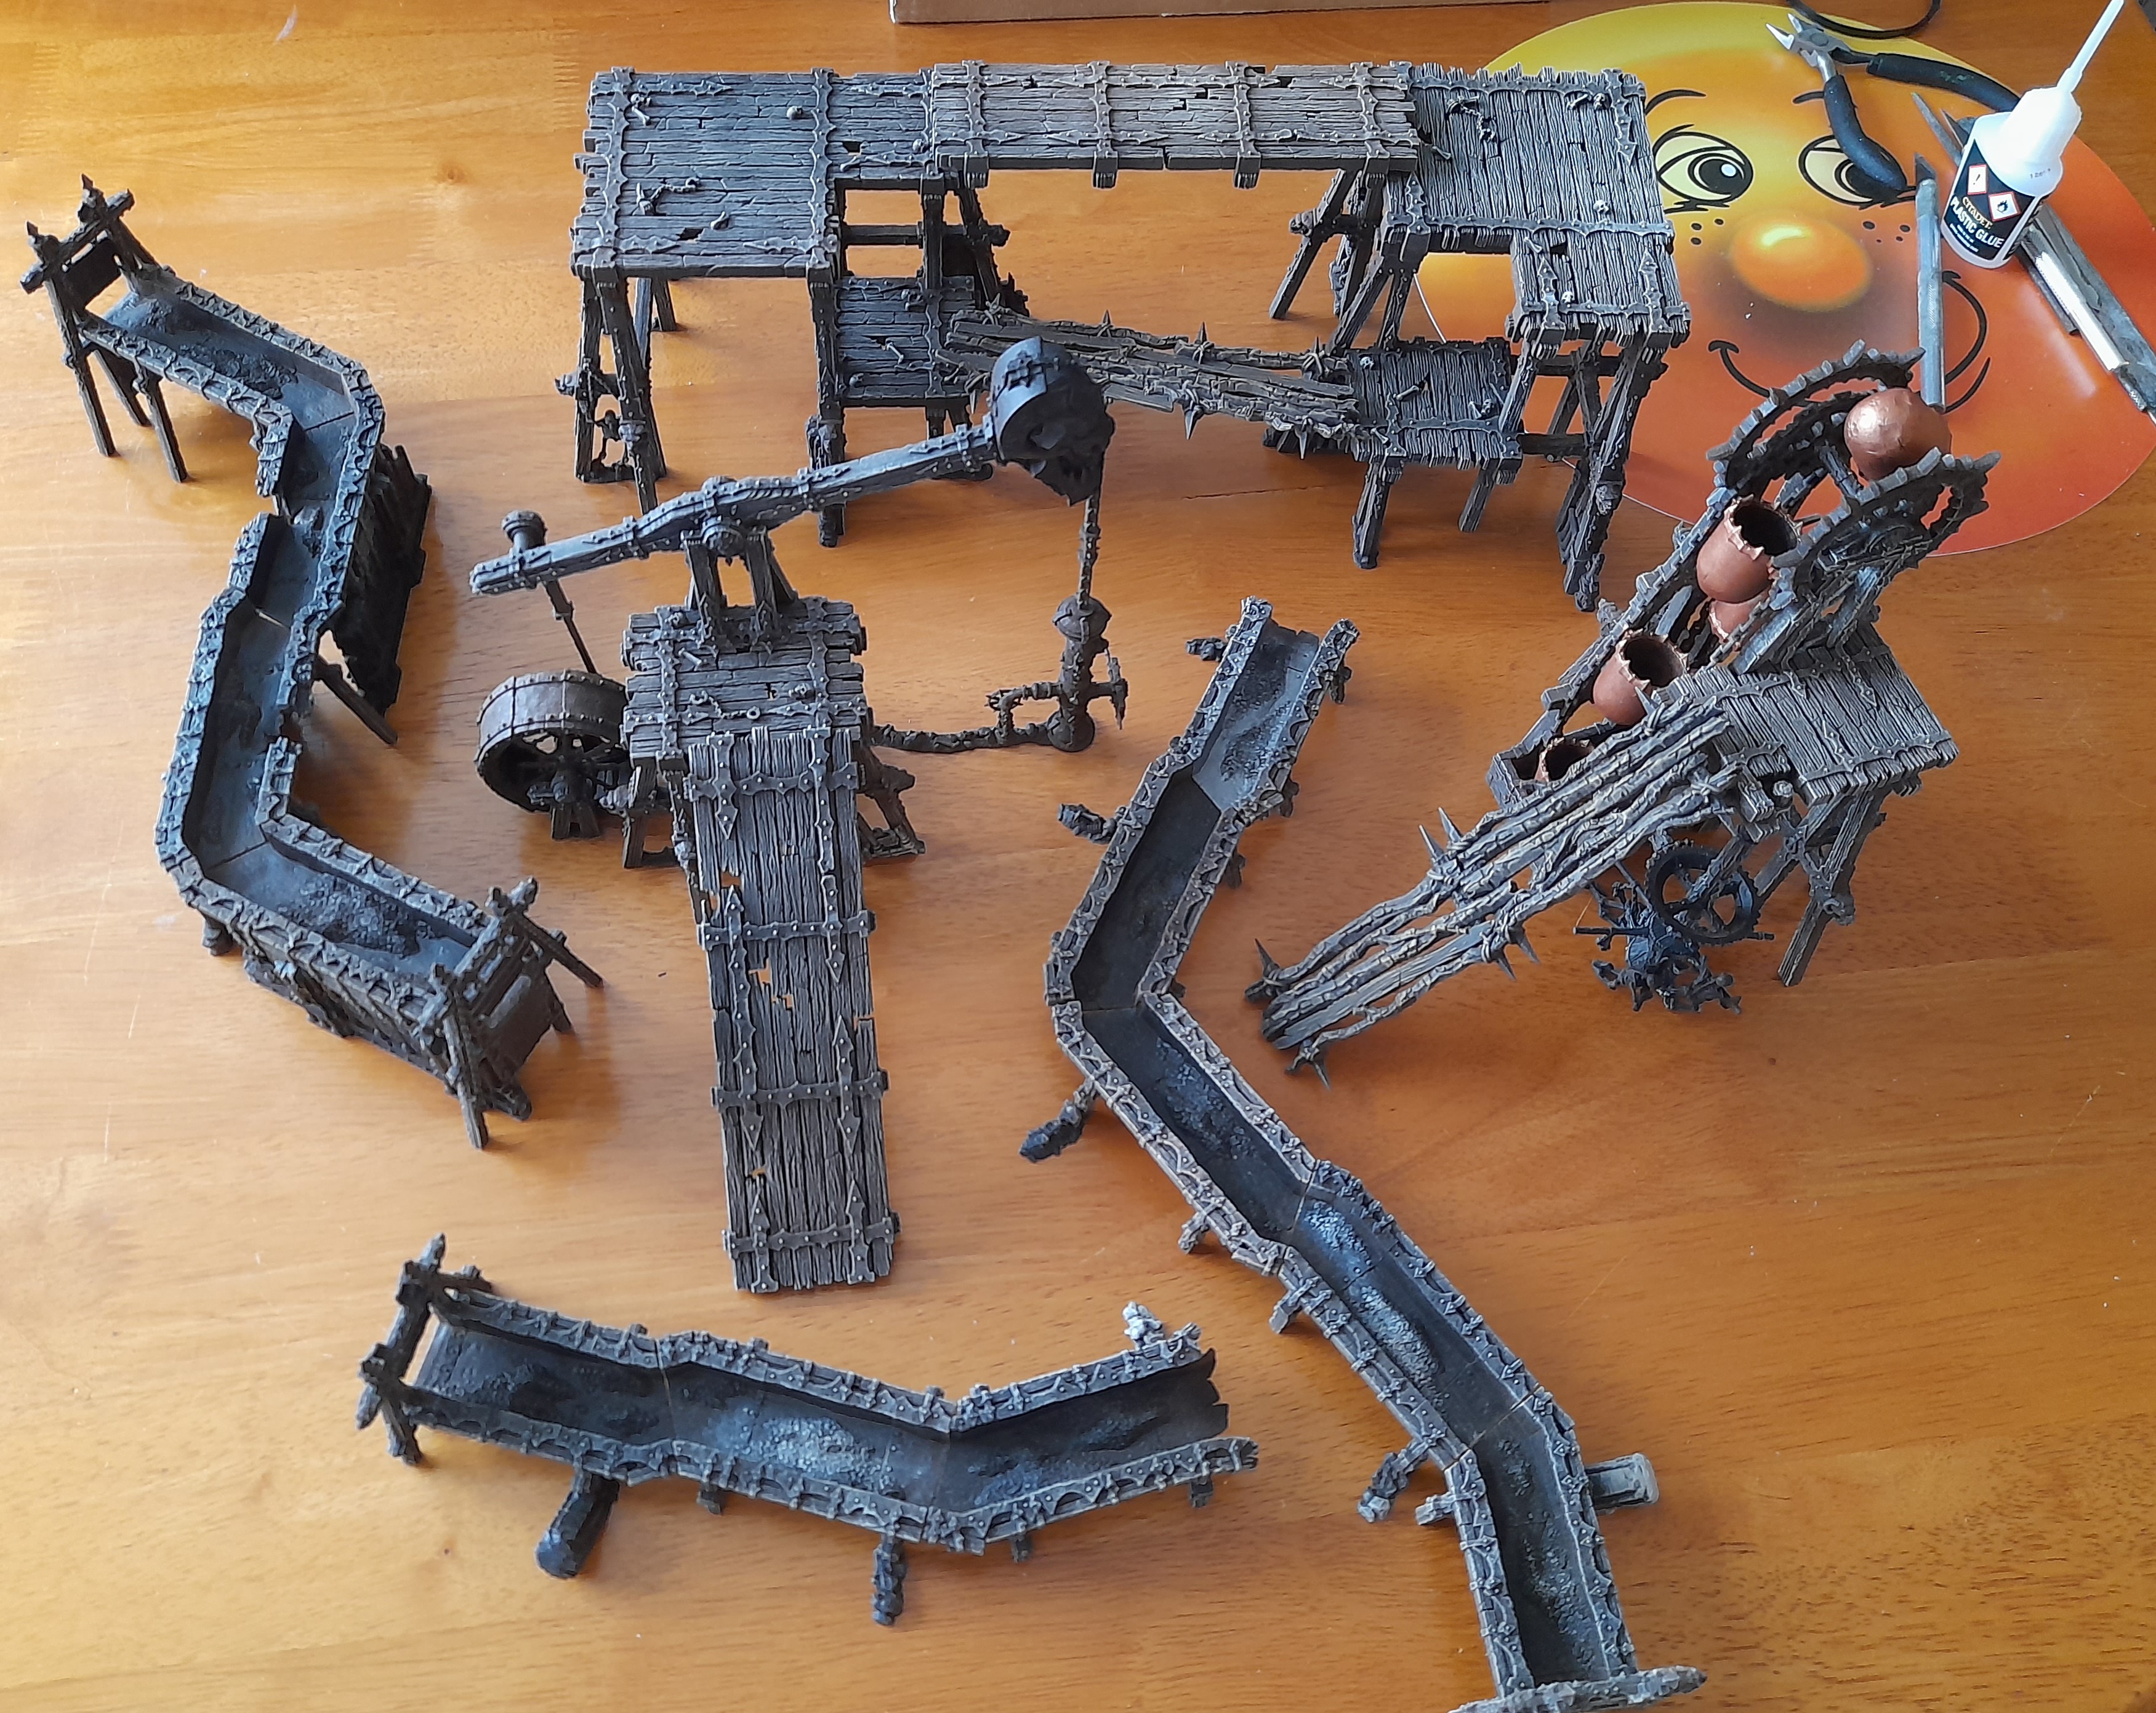
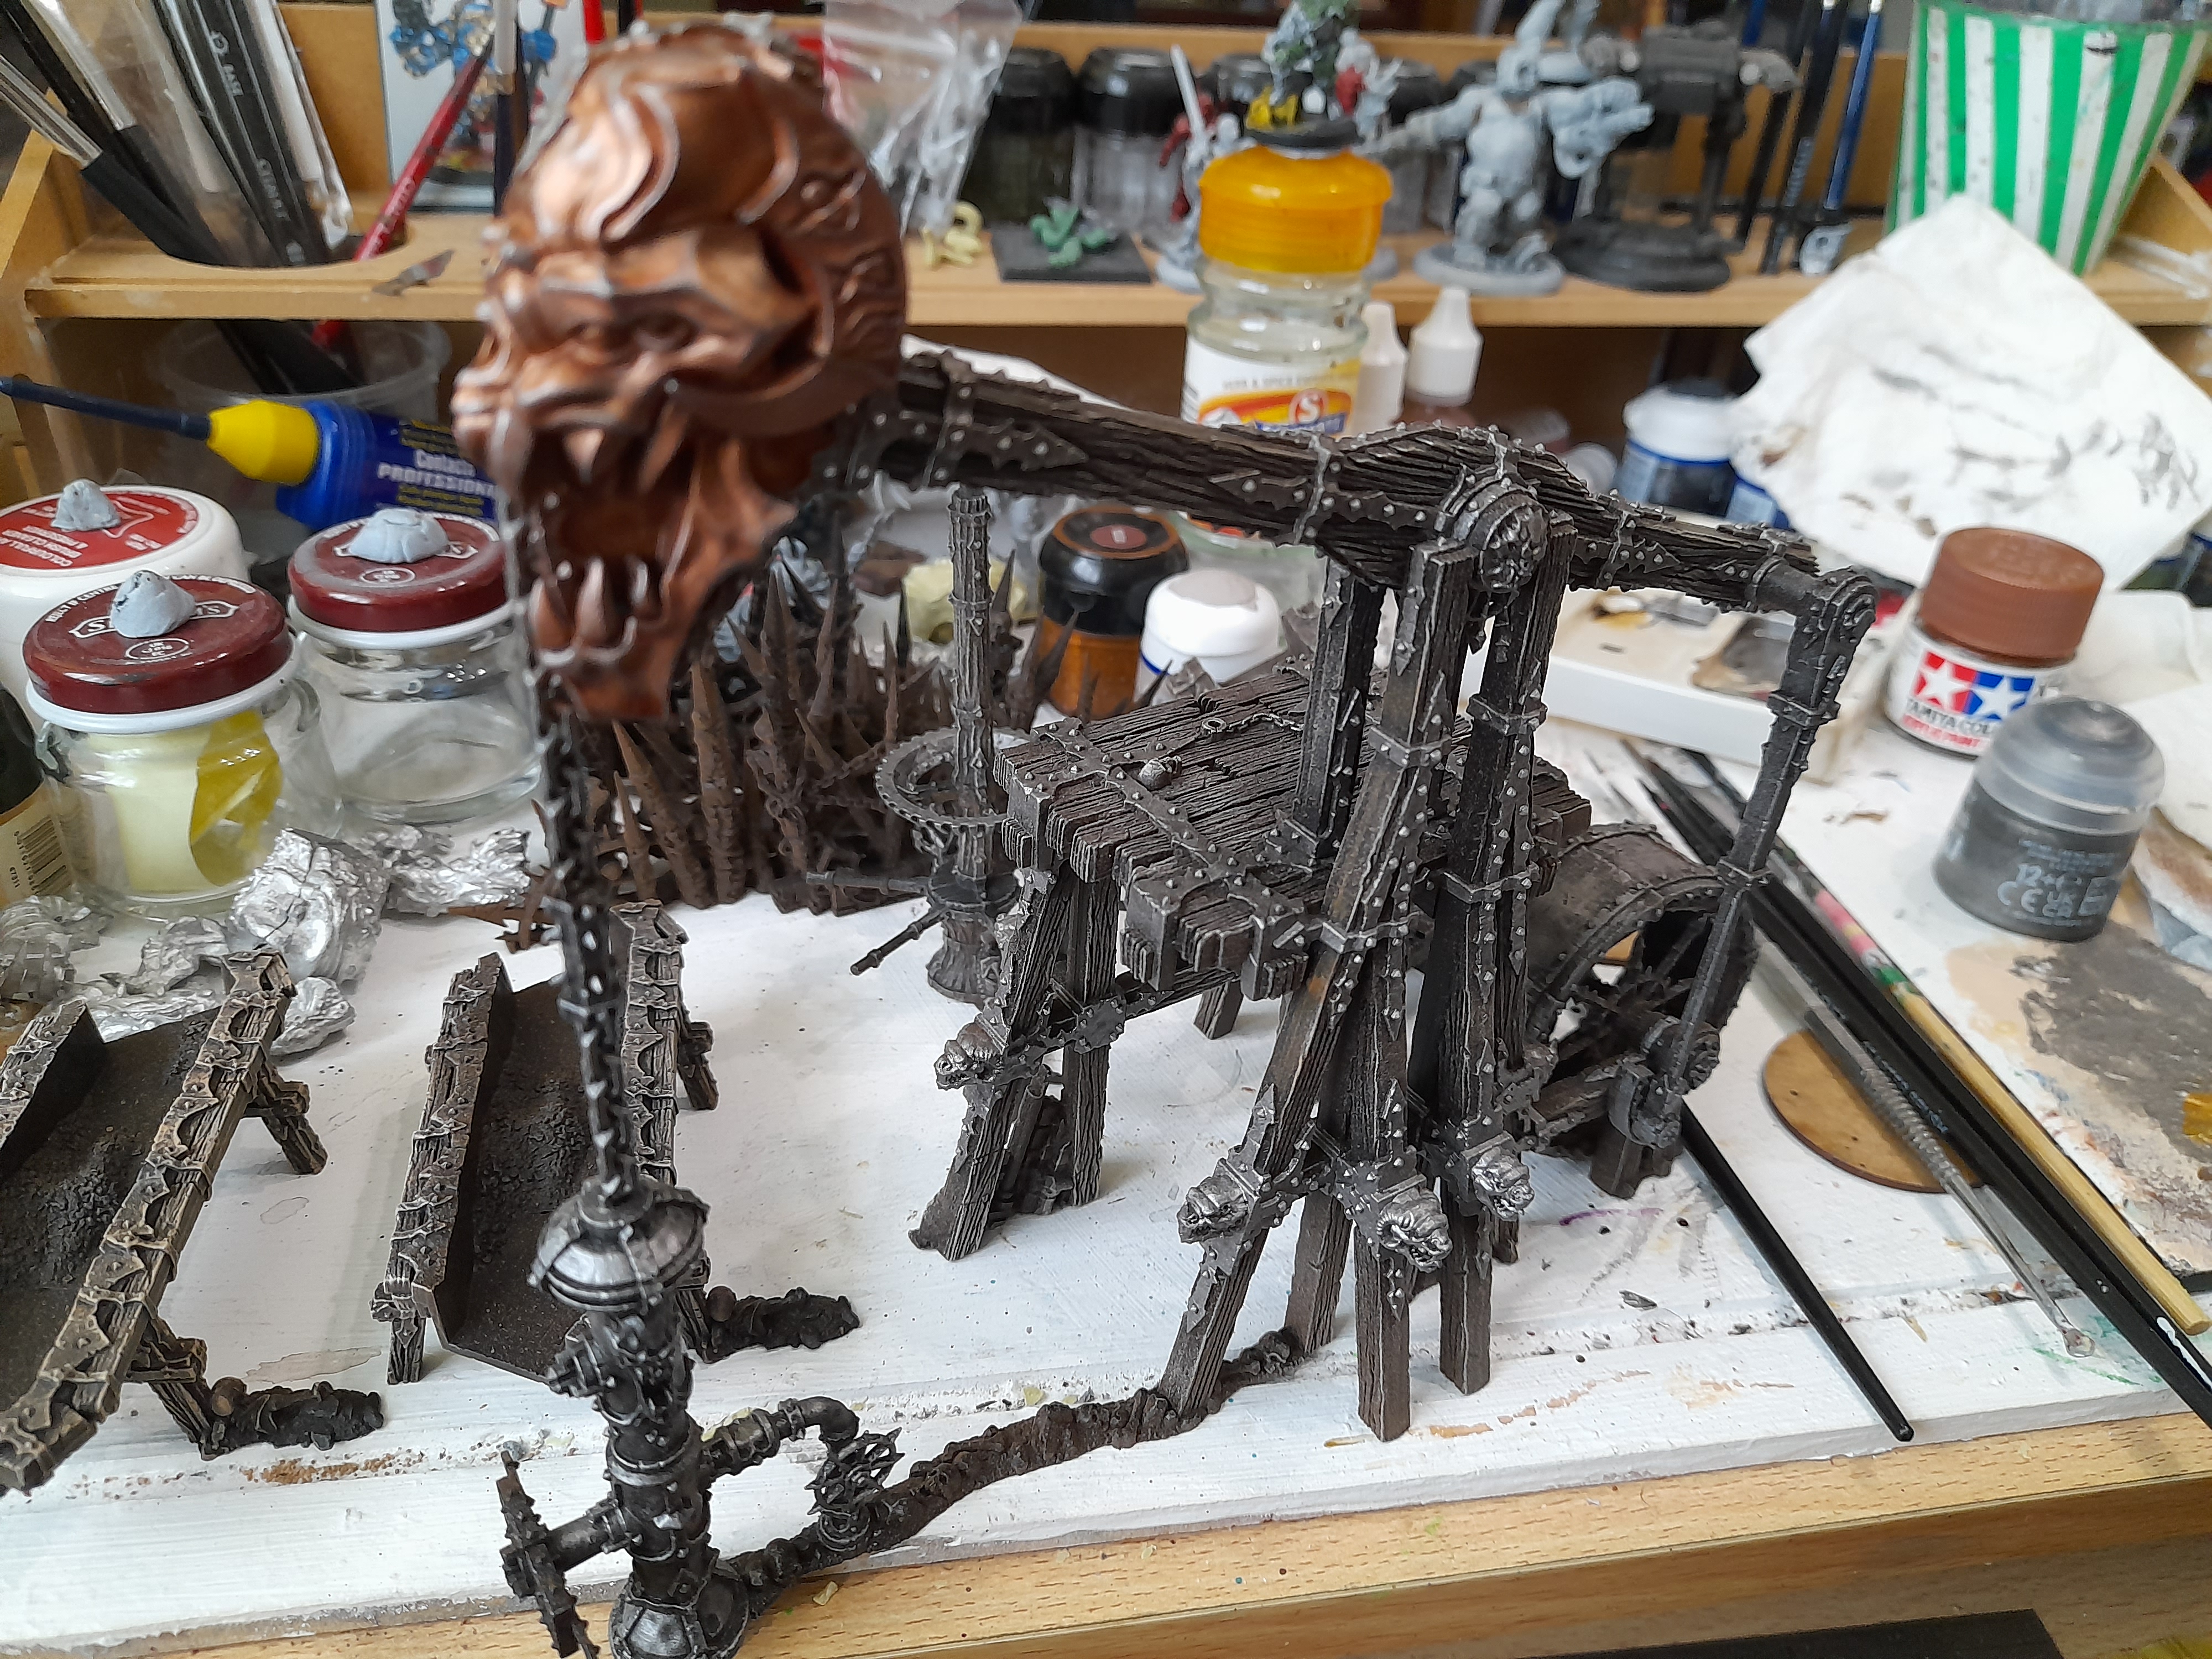
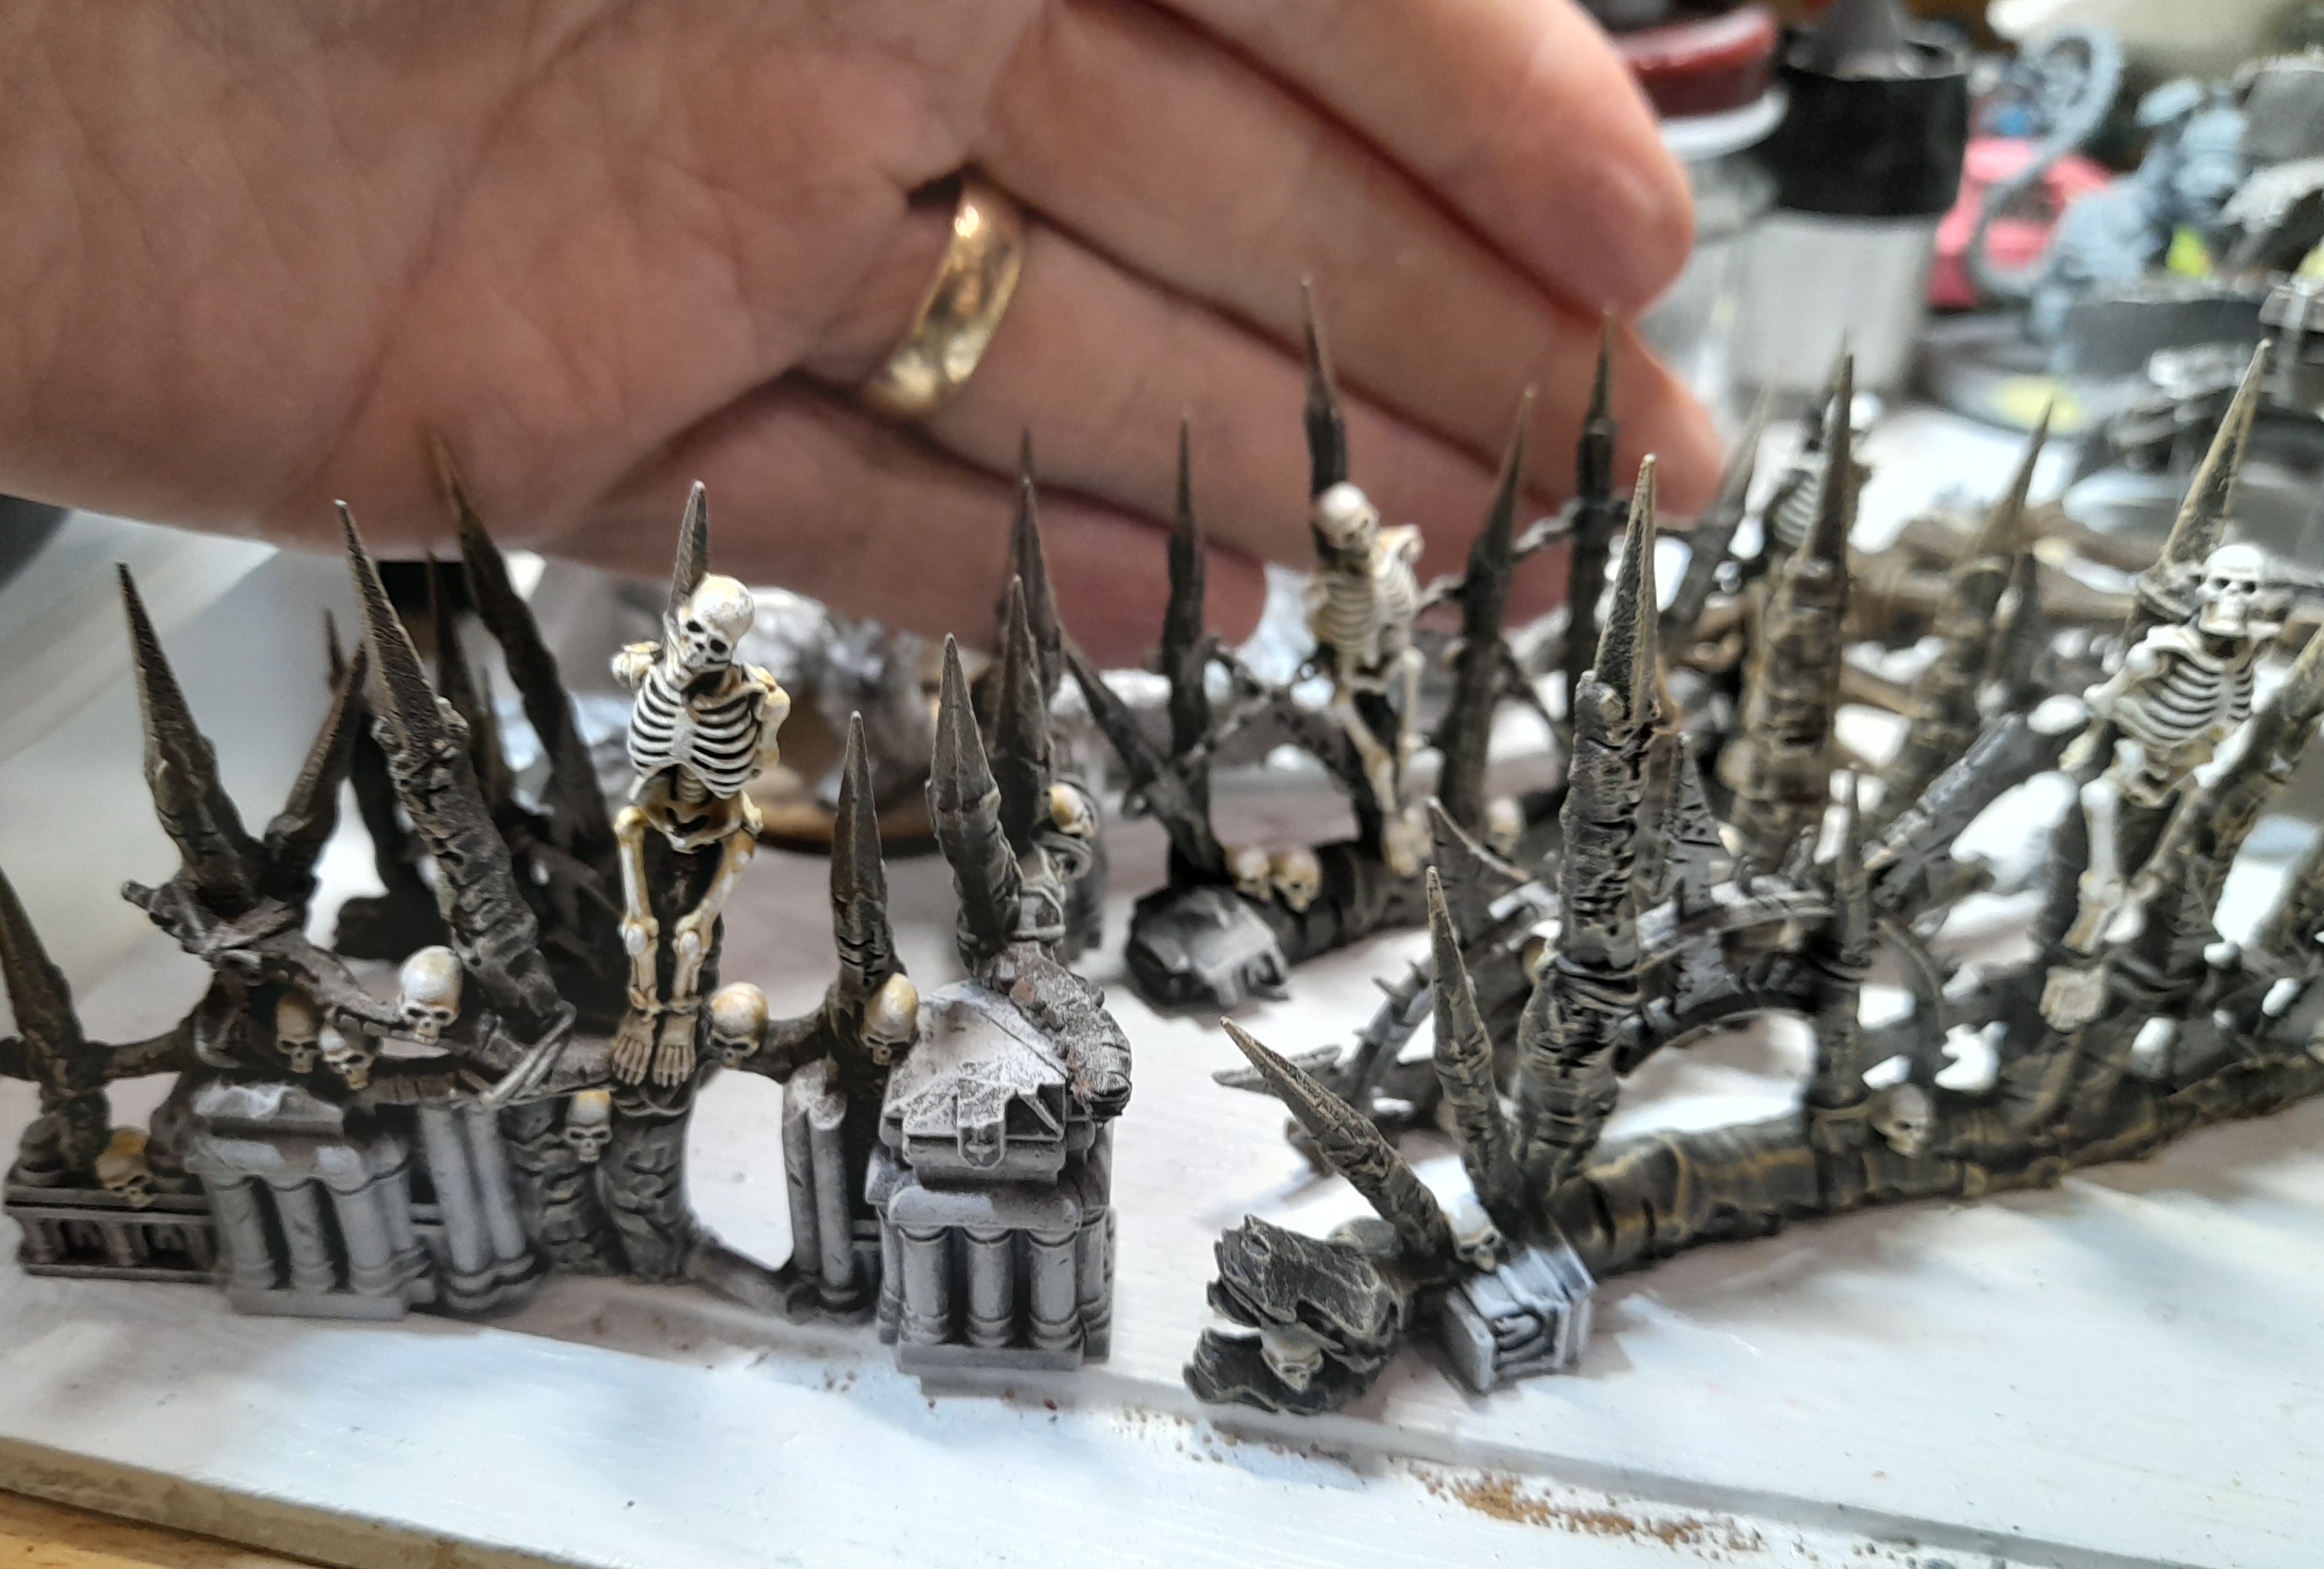
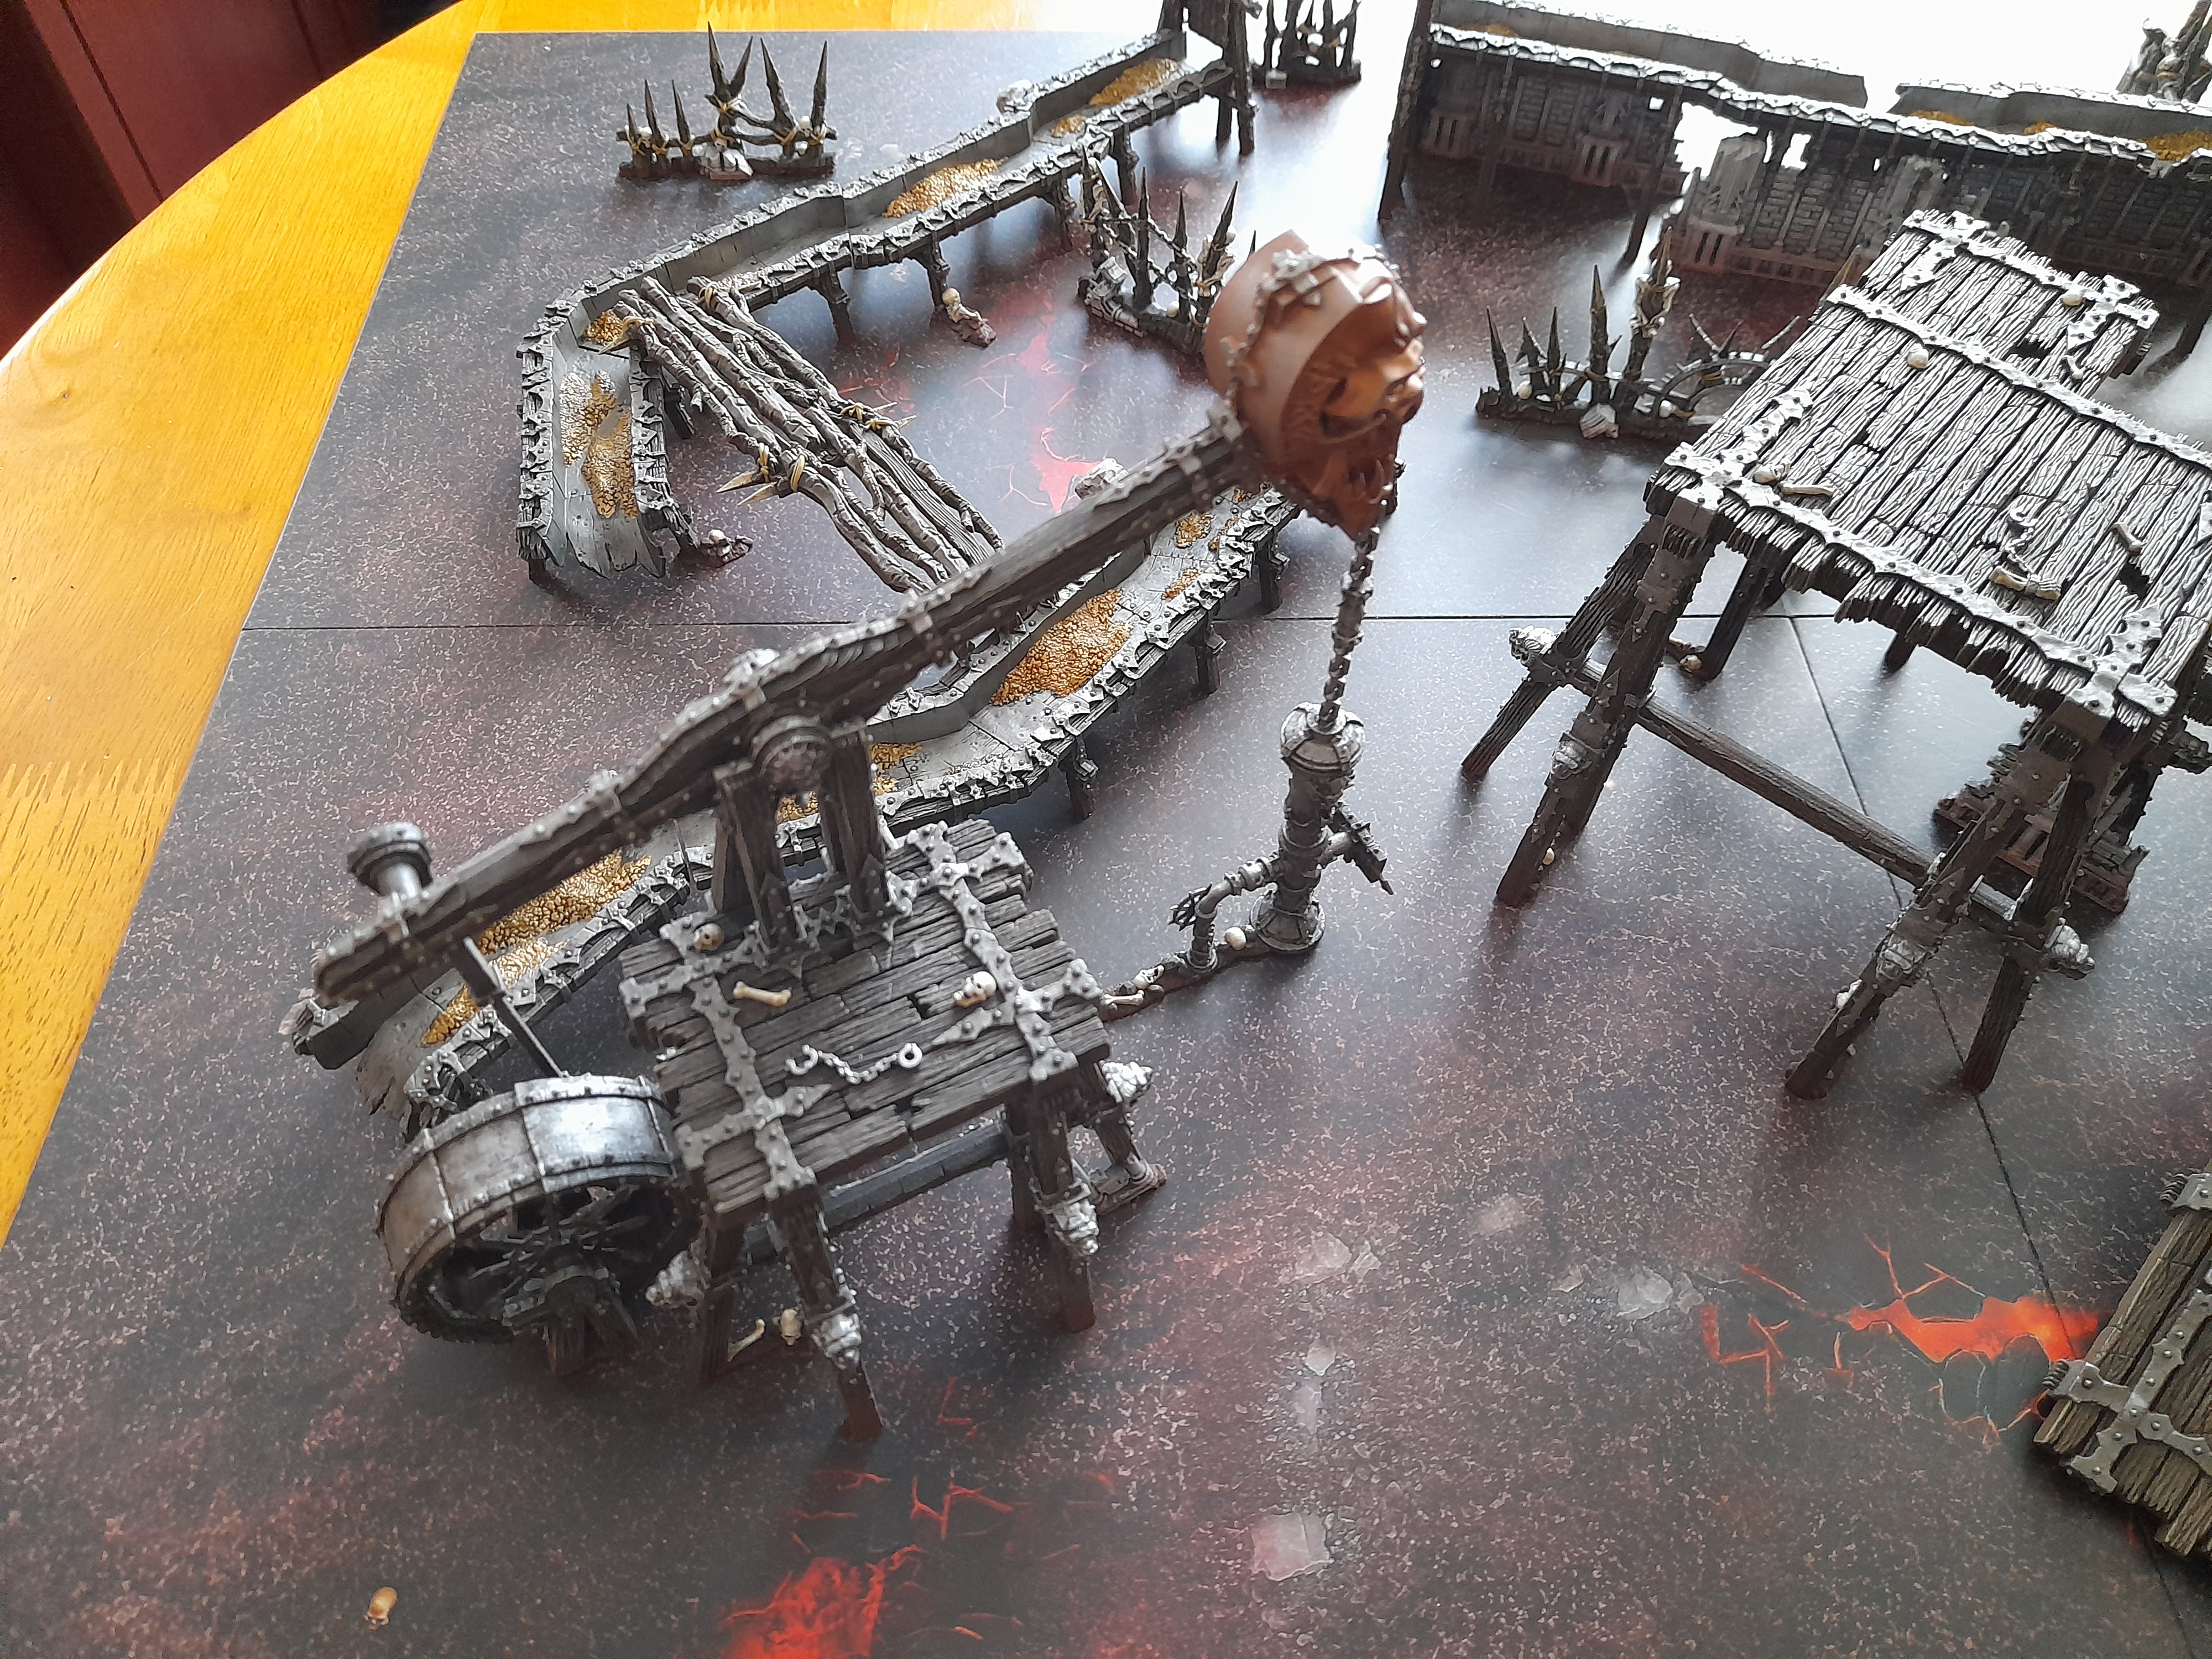
And of course I then had to lay it all out on the base board to see how it looked
 The completed terrain laid out

The Warbands are underway
7th October 2022
Been a while ?
My wife and I had a short break to North Wales, but before and since I have still been getting in small amounts of hobby time, almost every day.
This work has been on the Darkoath Savagers warband.
I started off by applying some basing paste (Agrellan) to make a cracked earth effect.
Then it was onto spraying undercoat for them.
I started off with Wraithbone, as I intended to use a mix of contrast paints and regular paints on them.
I followed this up with a spray of Vallejo white through my airbrush (still a novice user) from directly overhead.
I hoped that this would add to the contrast effect (but I’m not sure that it made much difference really – probably would have been more impactful if over a grey)

Next it was on to getting some paint down – I started off with the (aptly named) Darkoath Flesh contrast.
I found this a little too heavy initially, so added medium to it when I rolled it out across the warband.

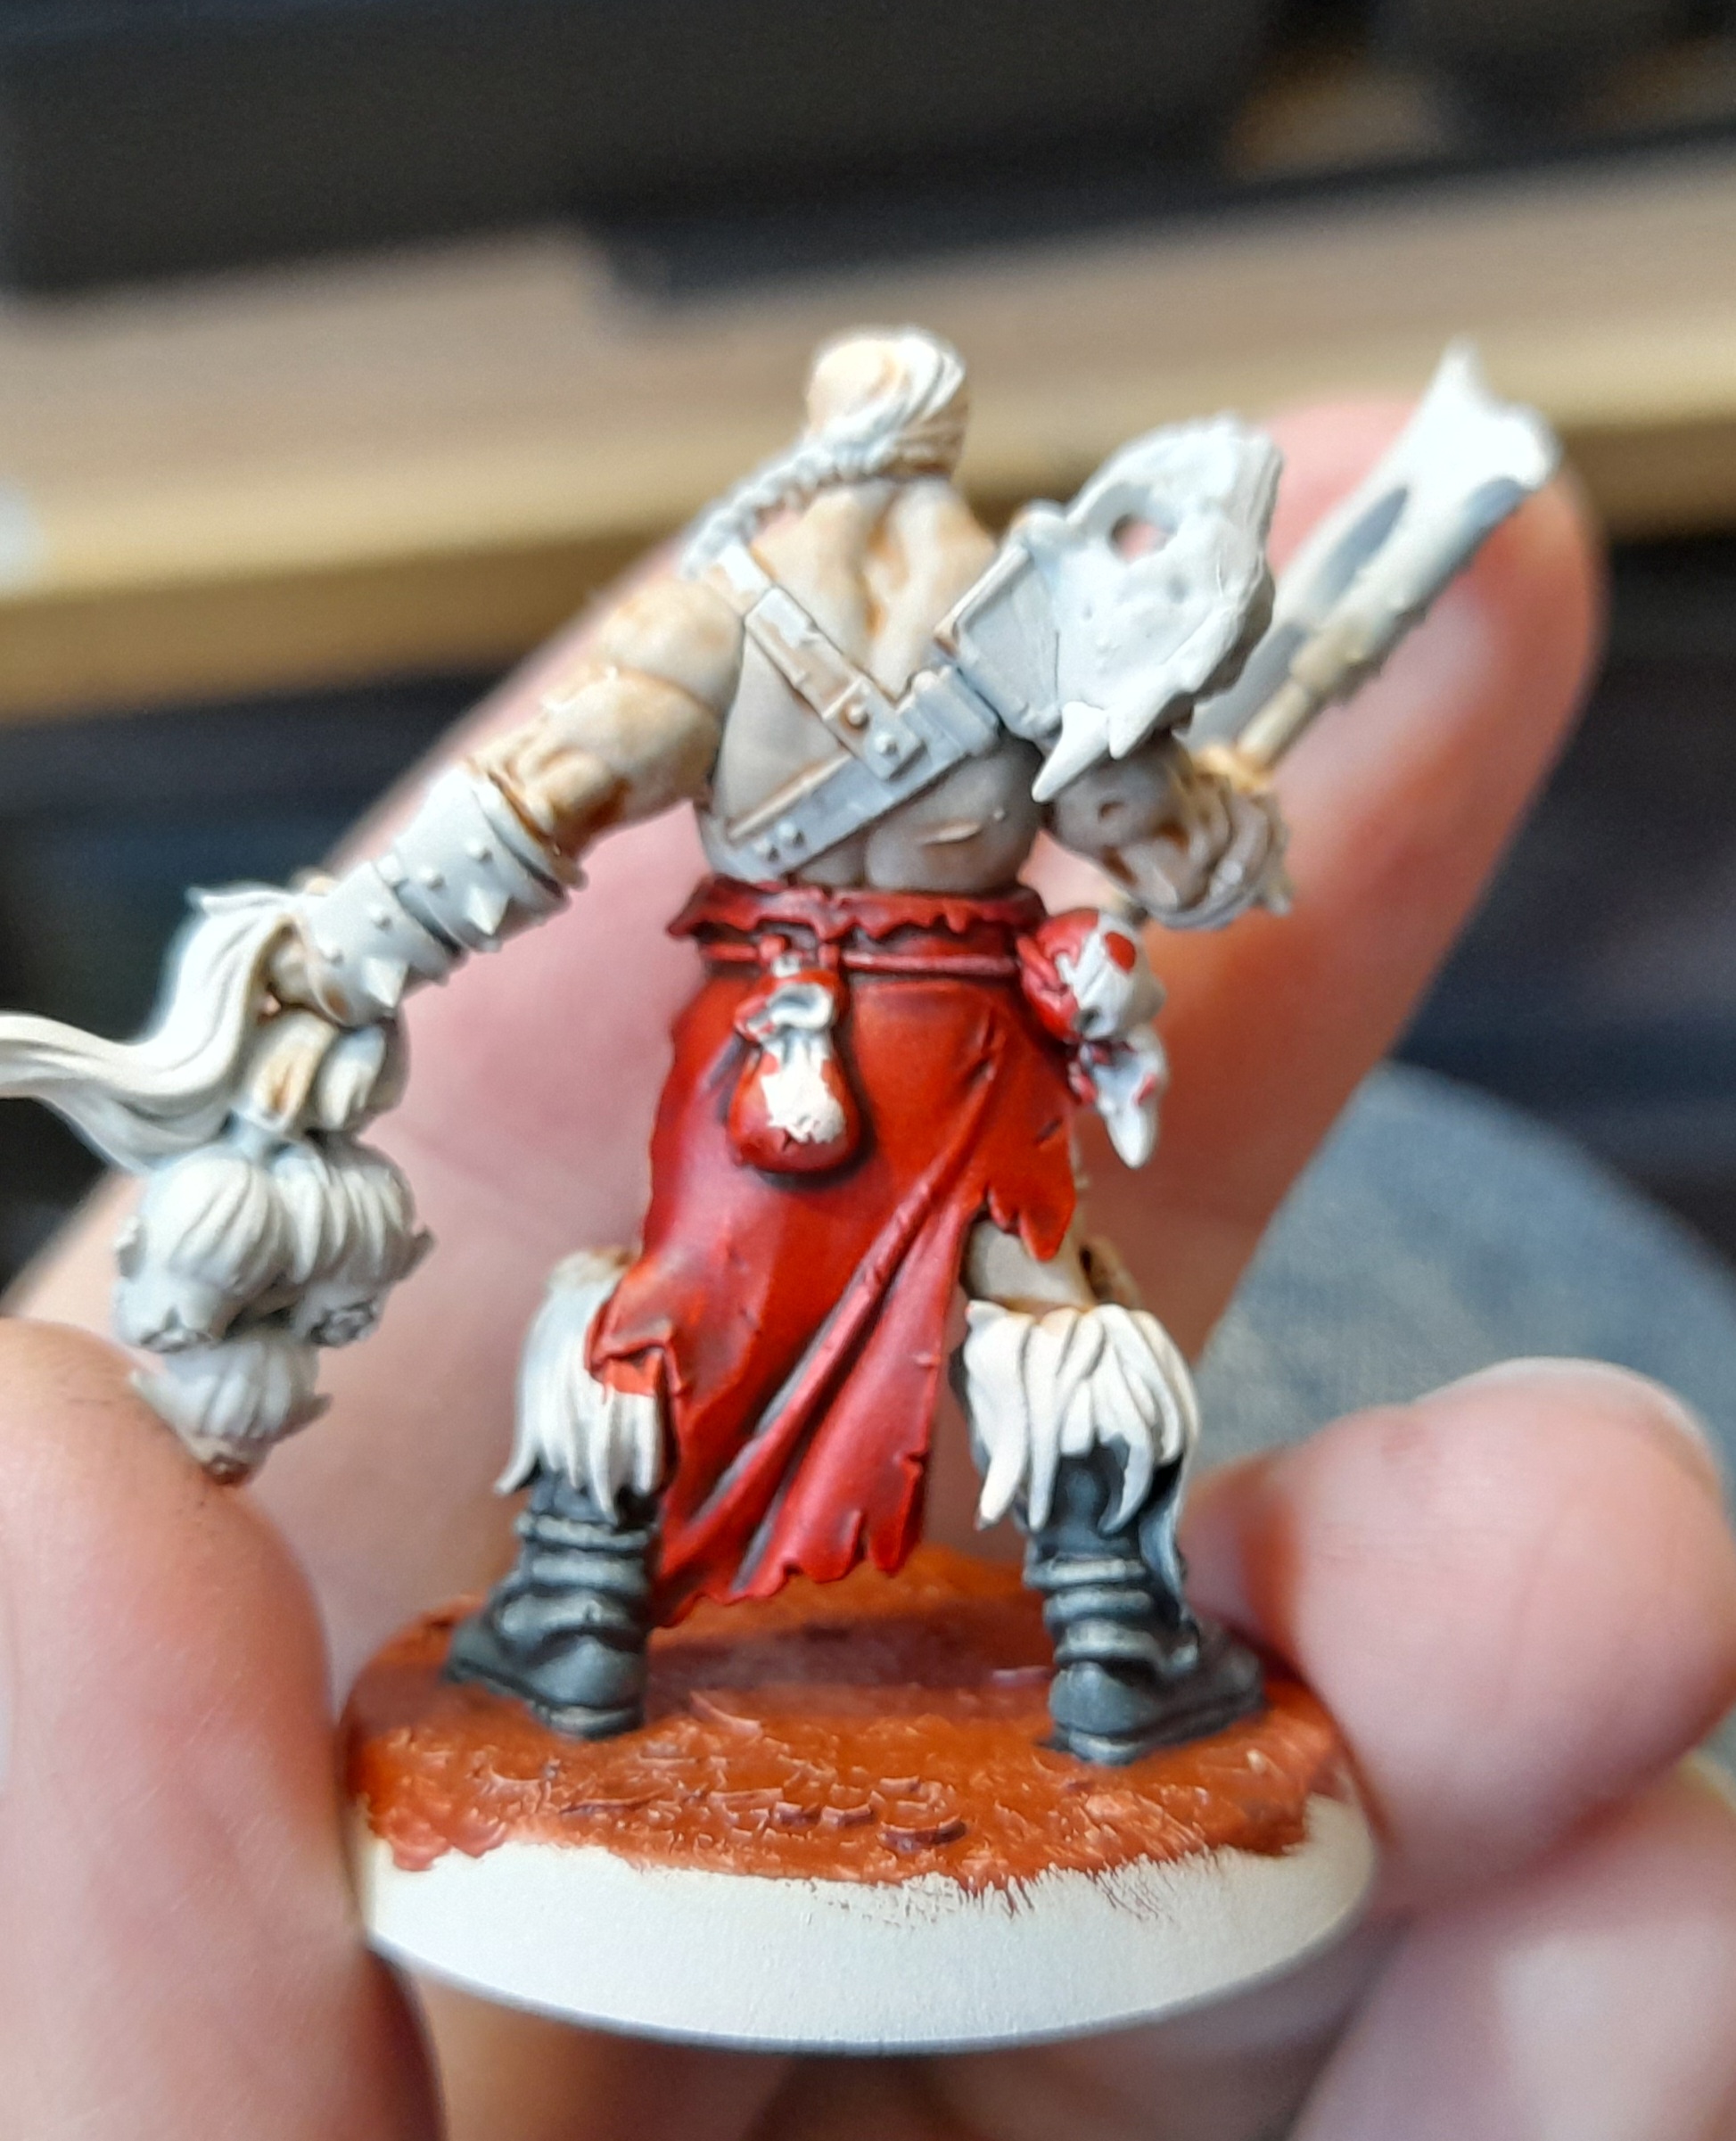
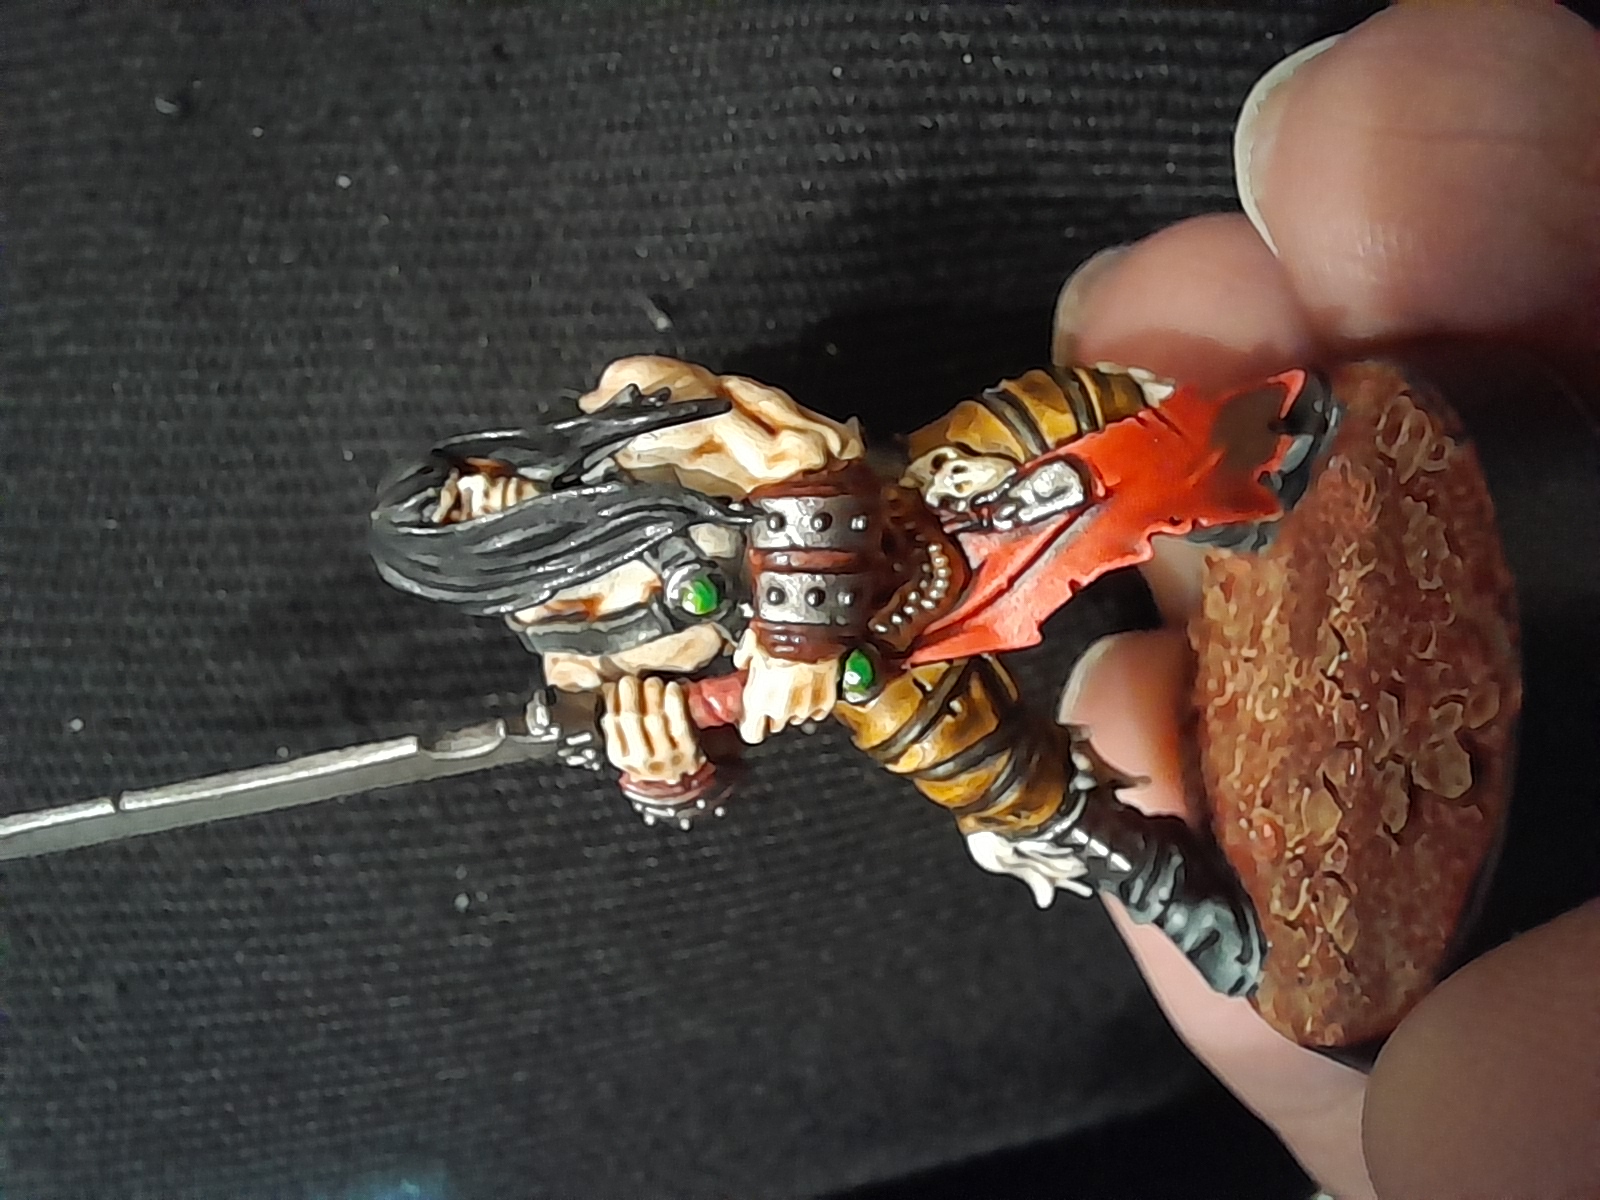
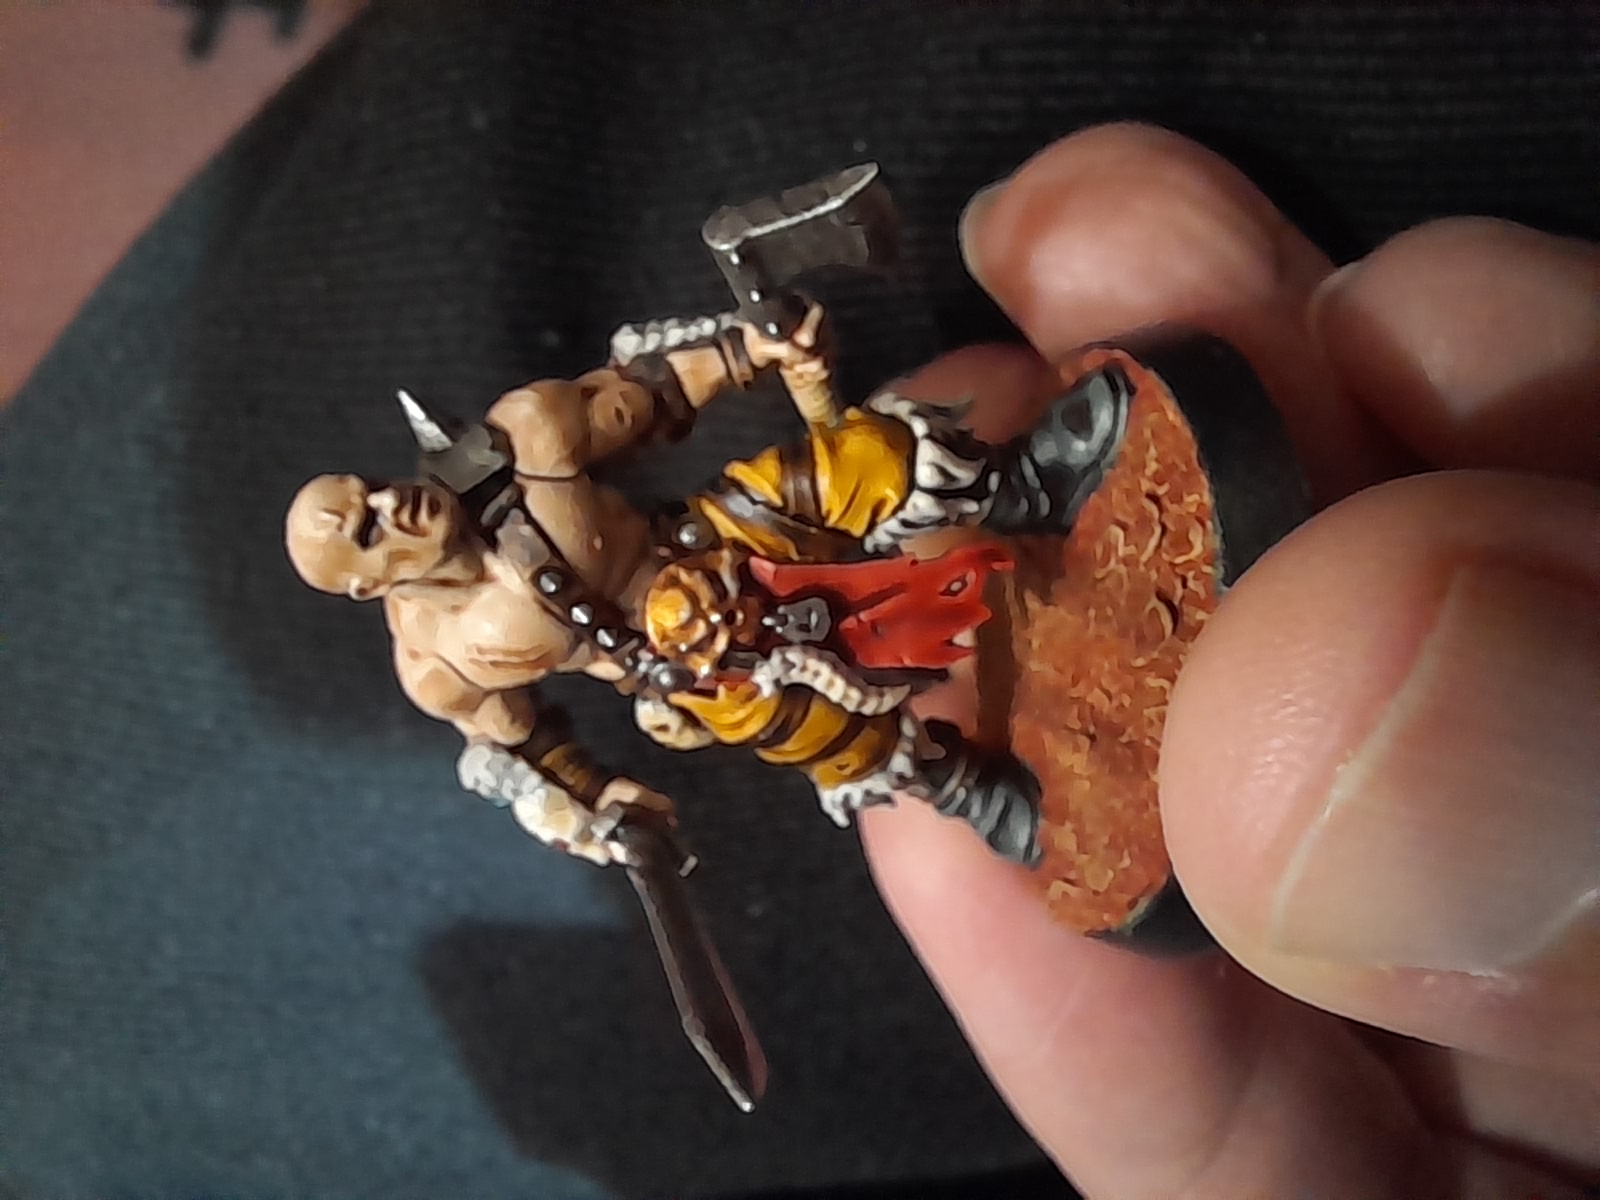
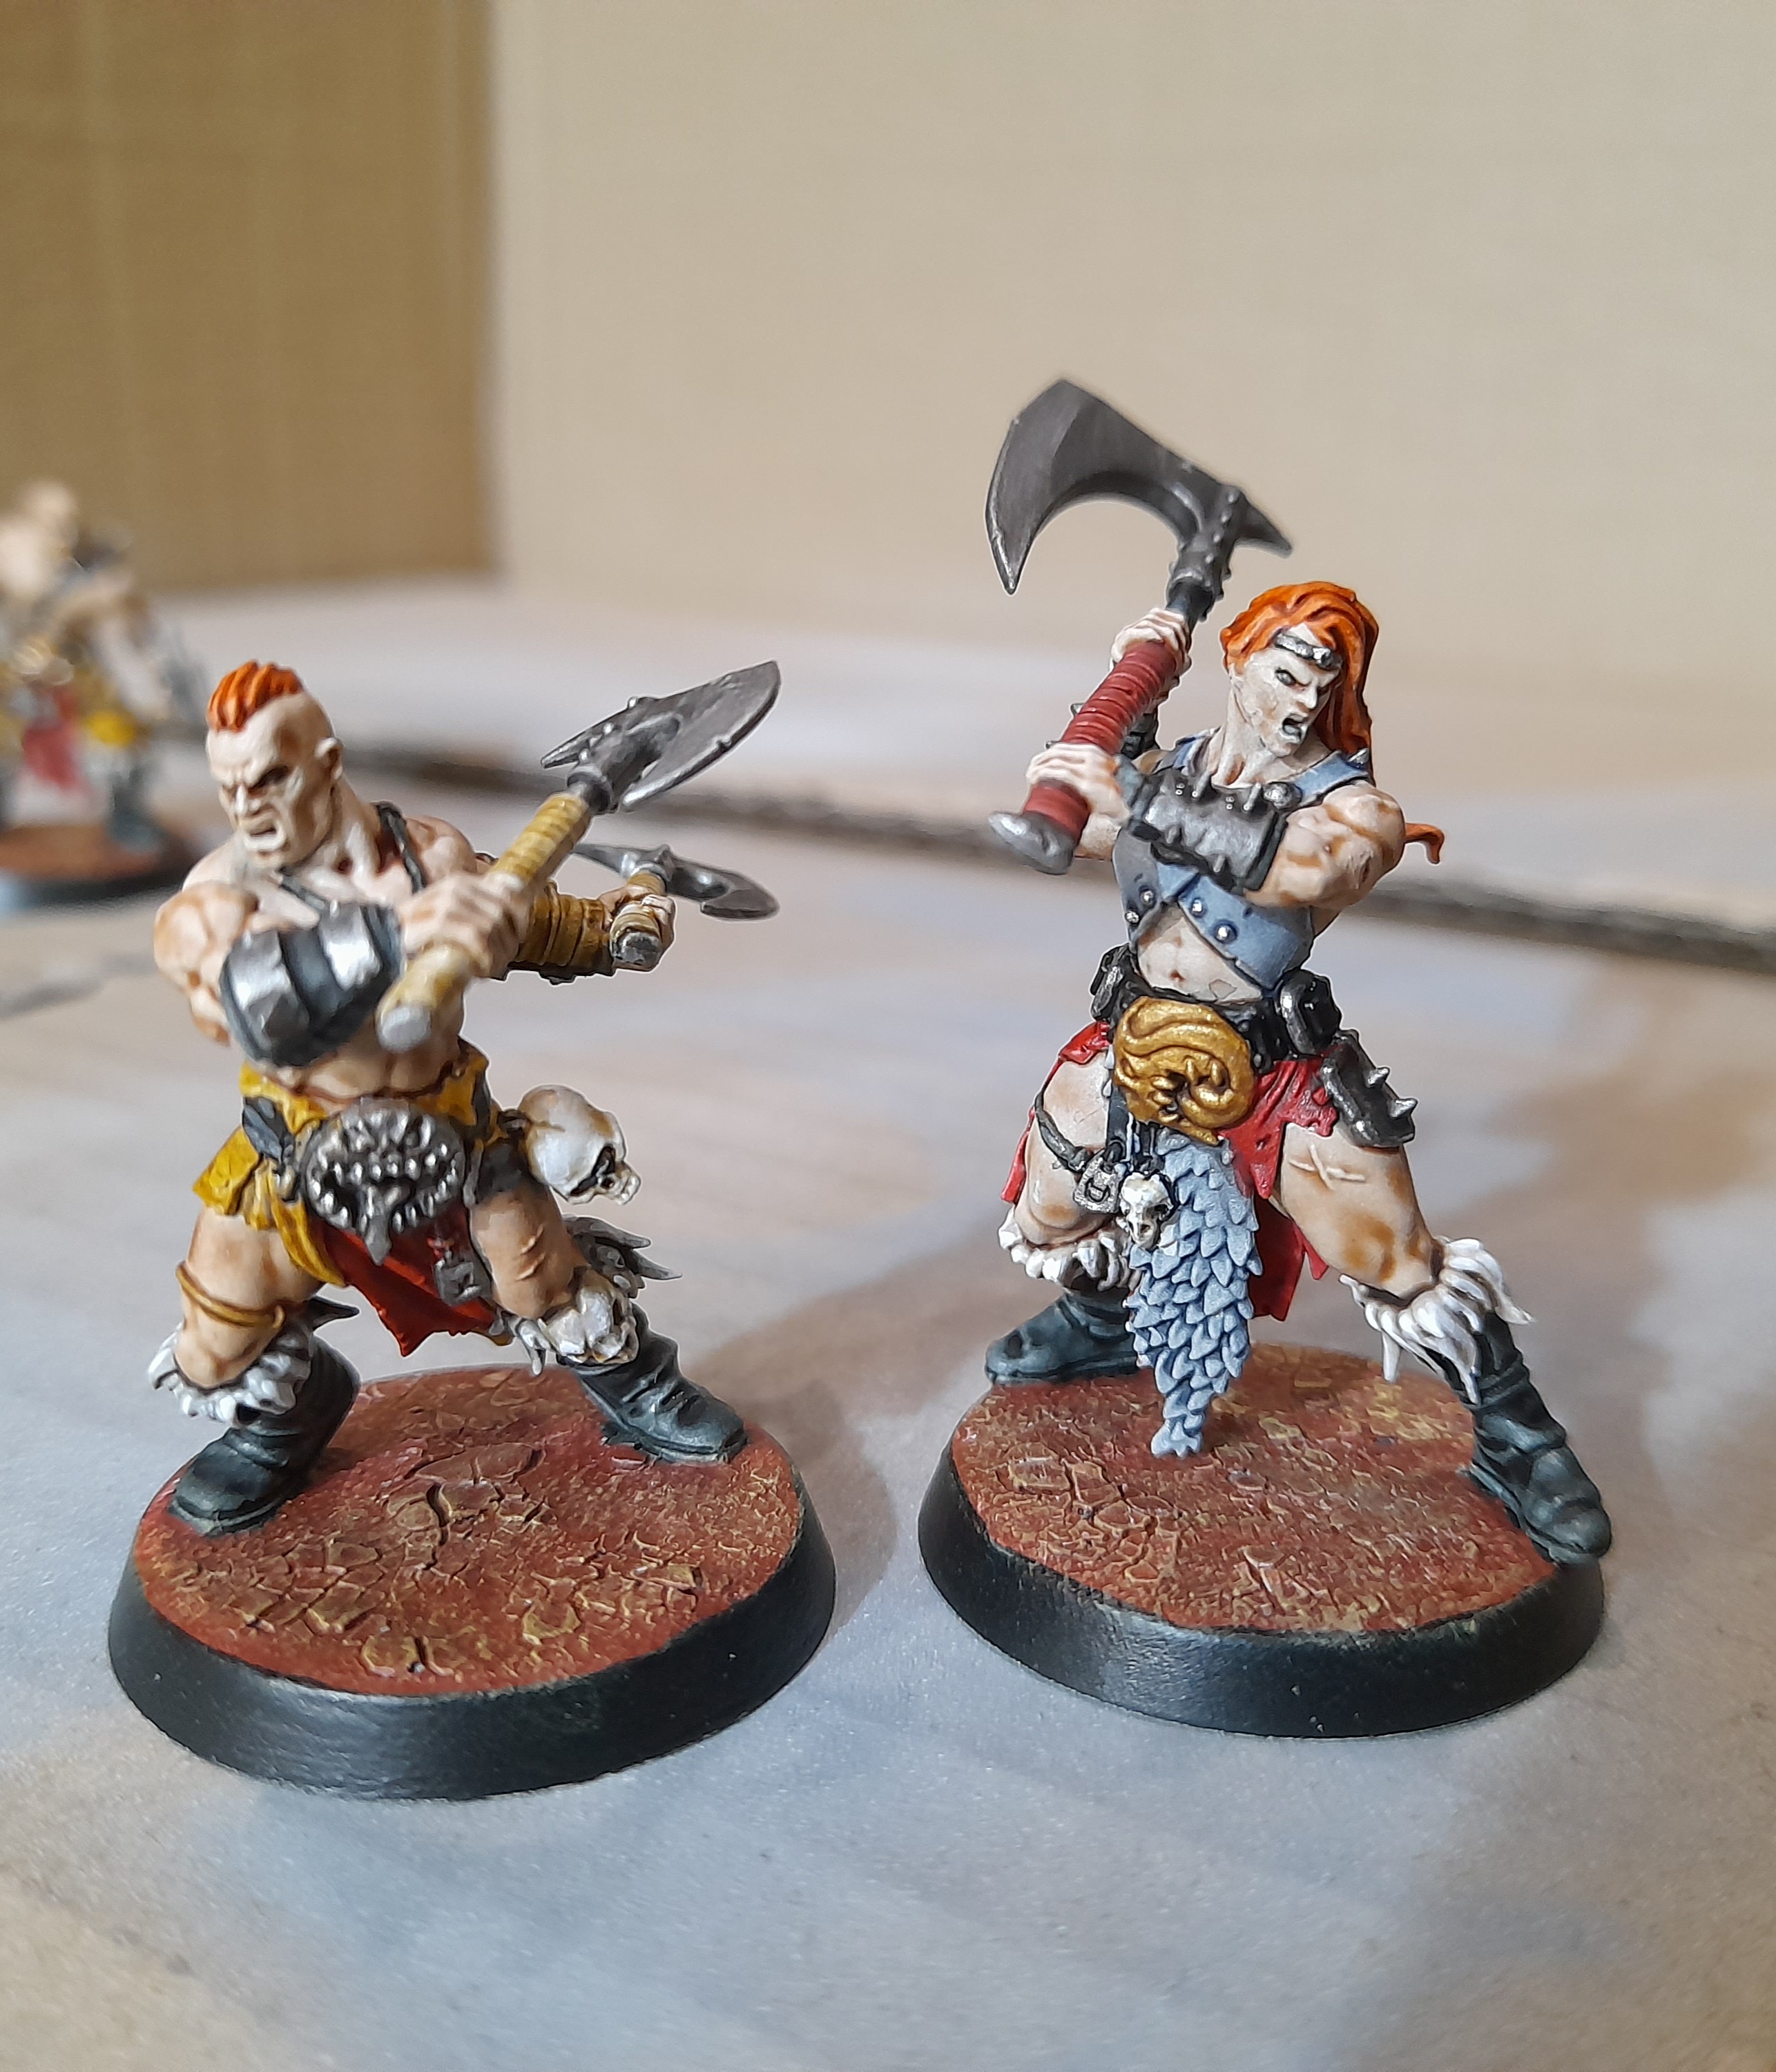
Following this I proceeded to pick out a few key colours for use on the warband, and picked a base colour.
I went with Terracotta for the bases (since I used this to weather the scenery pieces, I was hoping it would tie in well).
For the gang I went for various leather tones (created using mixes of pure snakebite upto pure Wildwood, plus some greys and blacks), golds and silvers for the metallics, and red for the tabards.
The base Blood angles red contrast was a little too vibrant for what I wanted. So for the couple I had already applied it on, I took it back a little by giving it an agrax earthshade wash.
For the rest I mixed a little wildwood into the red to take the edge off it.
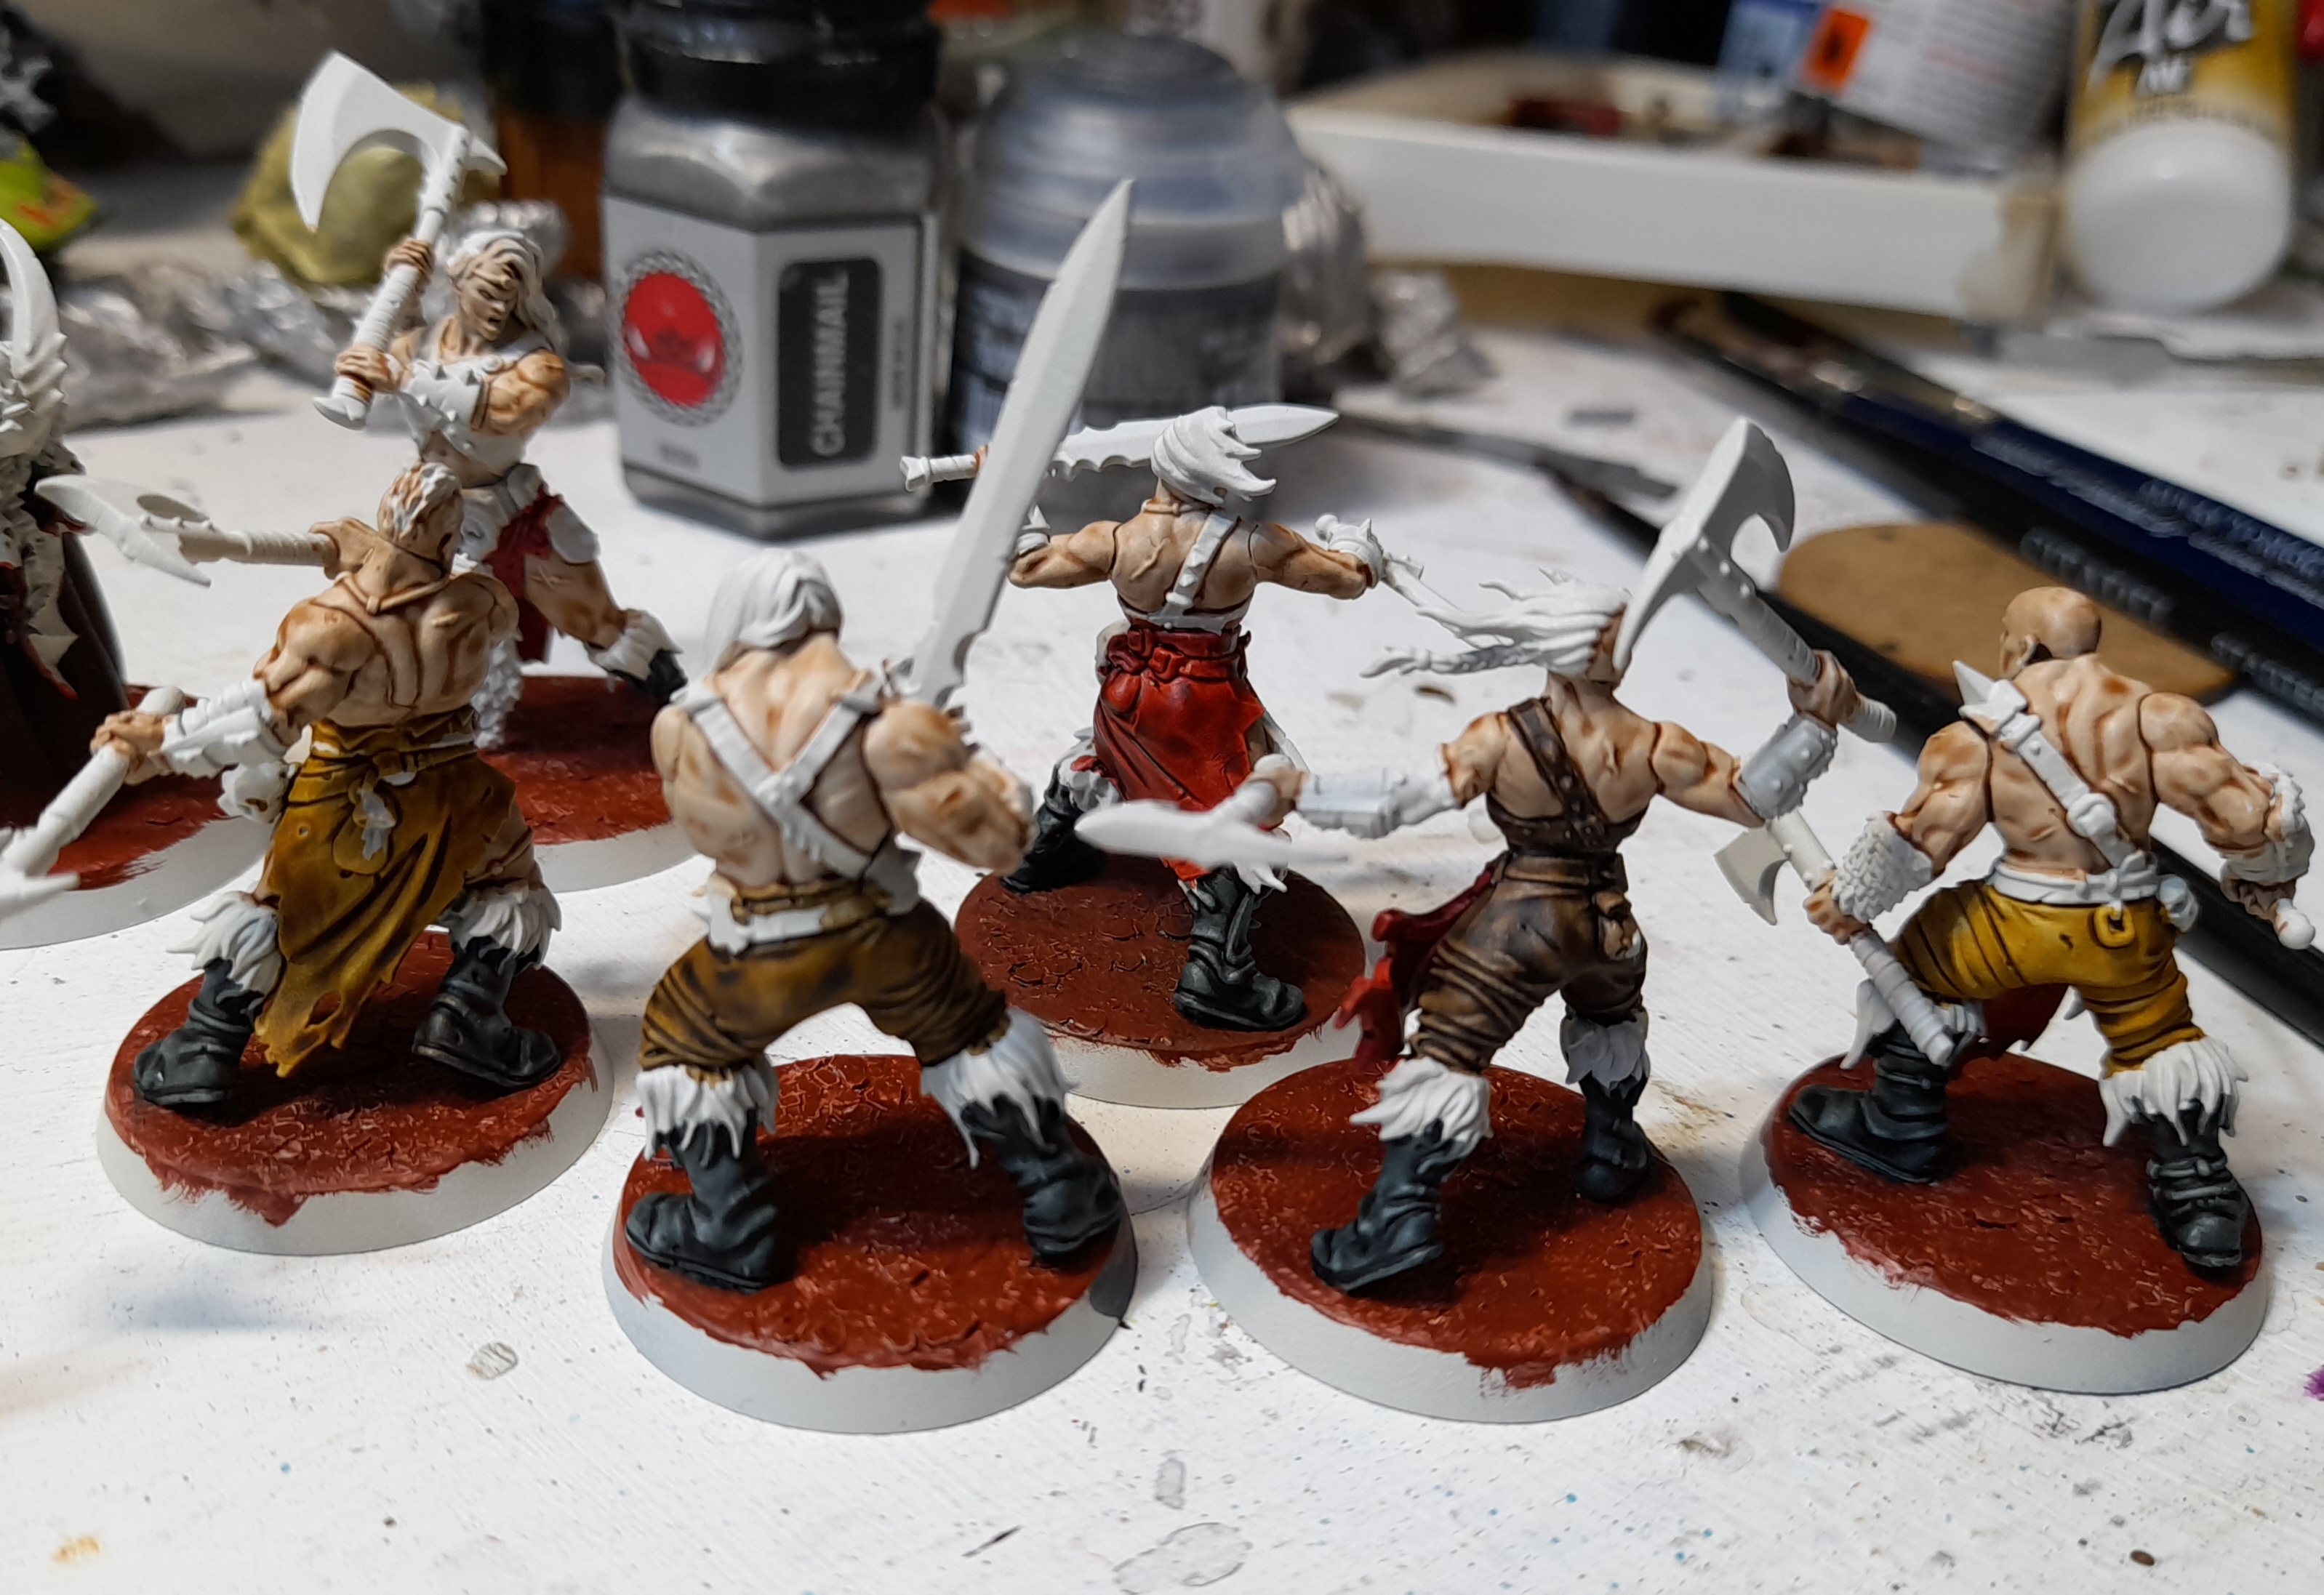
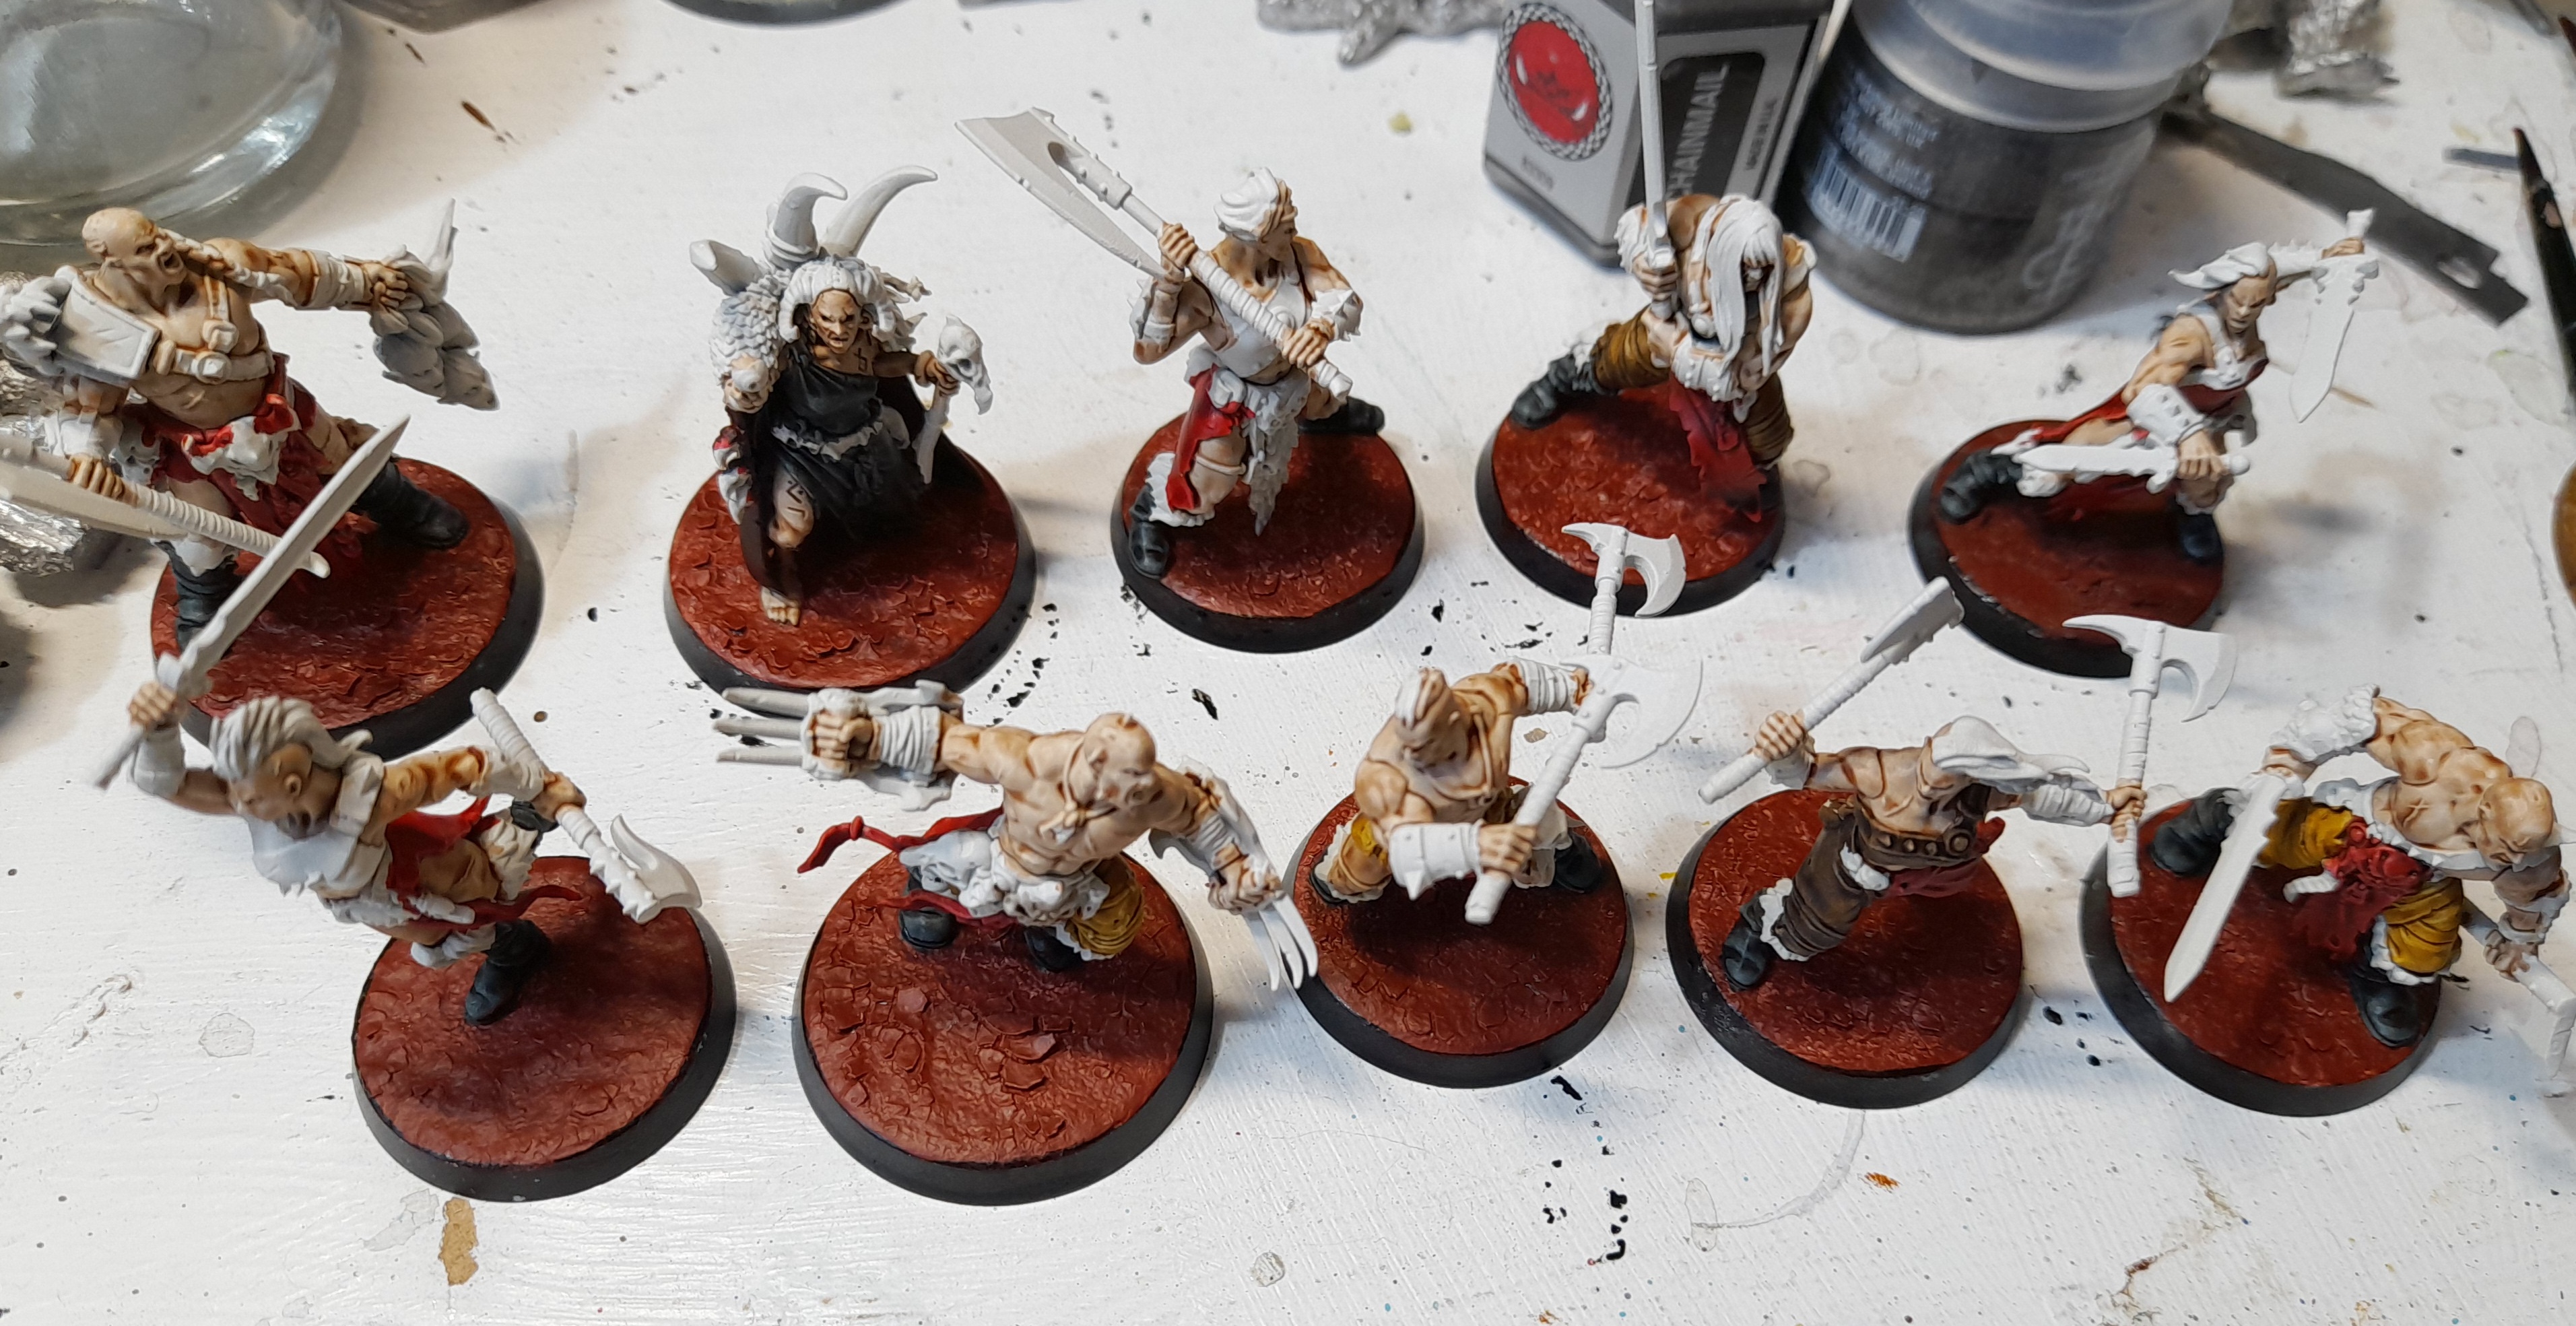
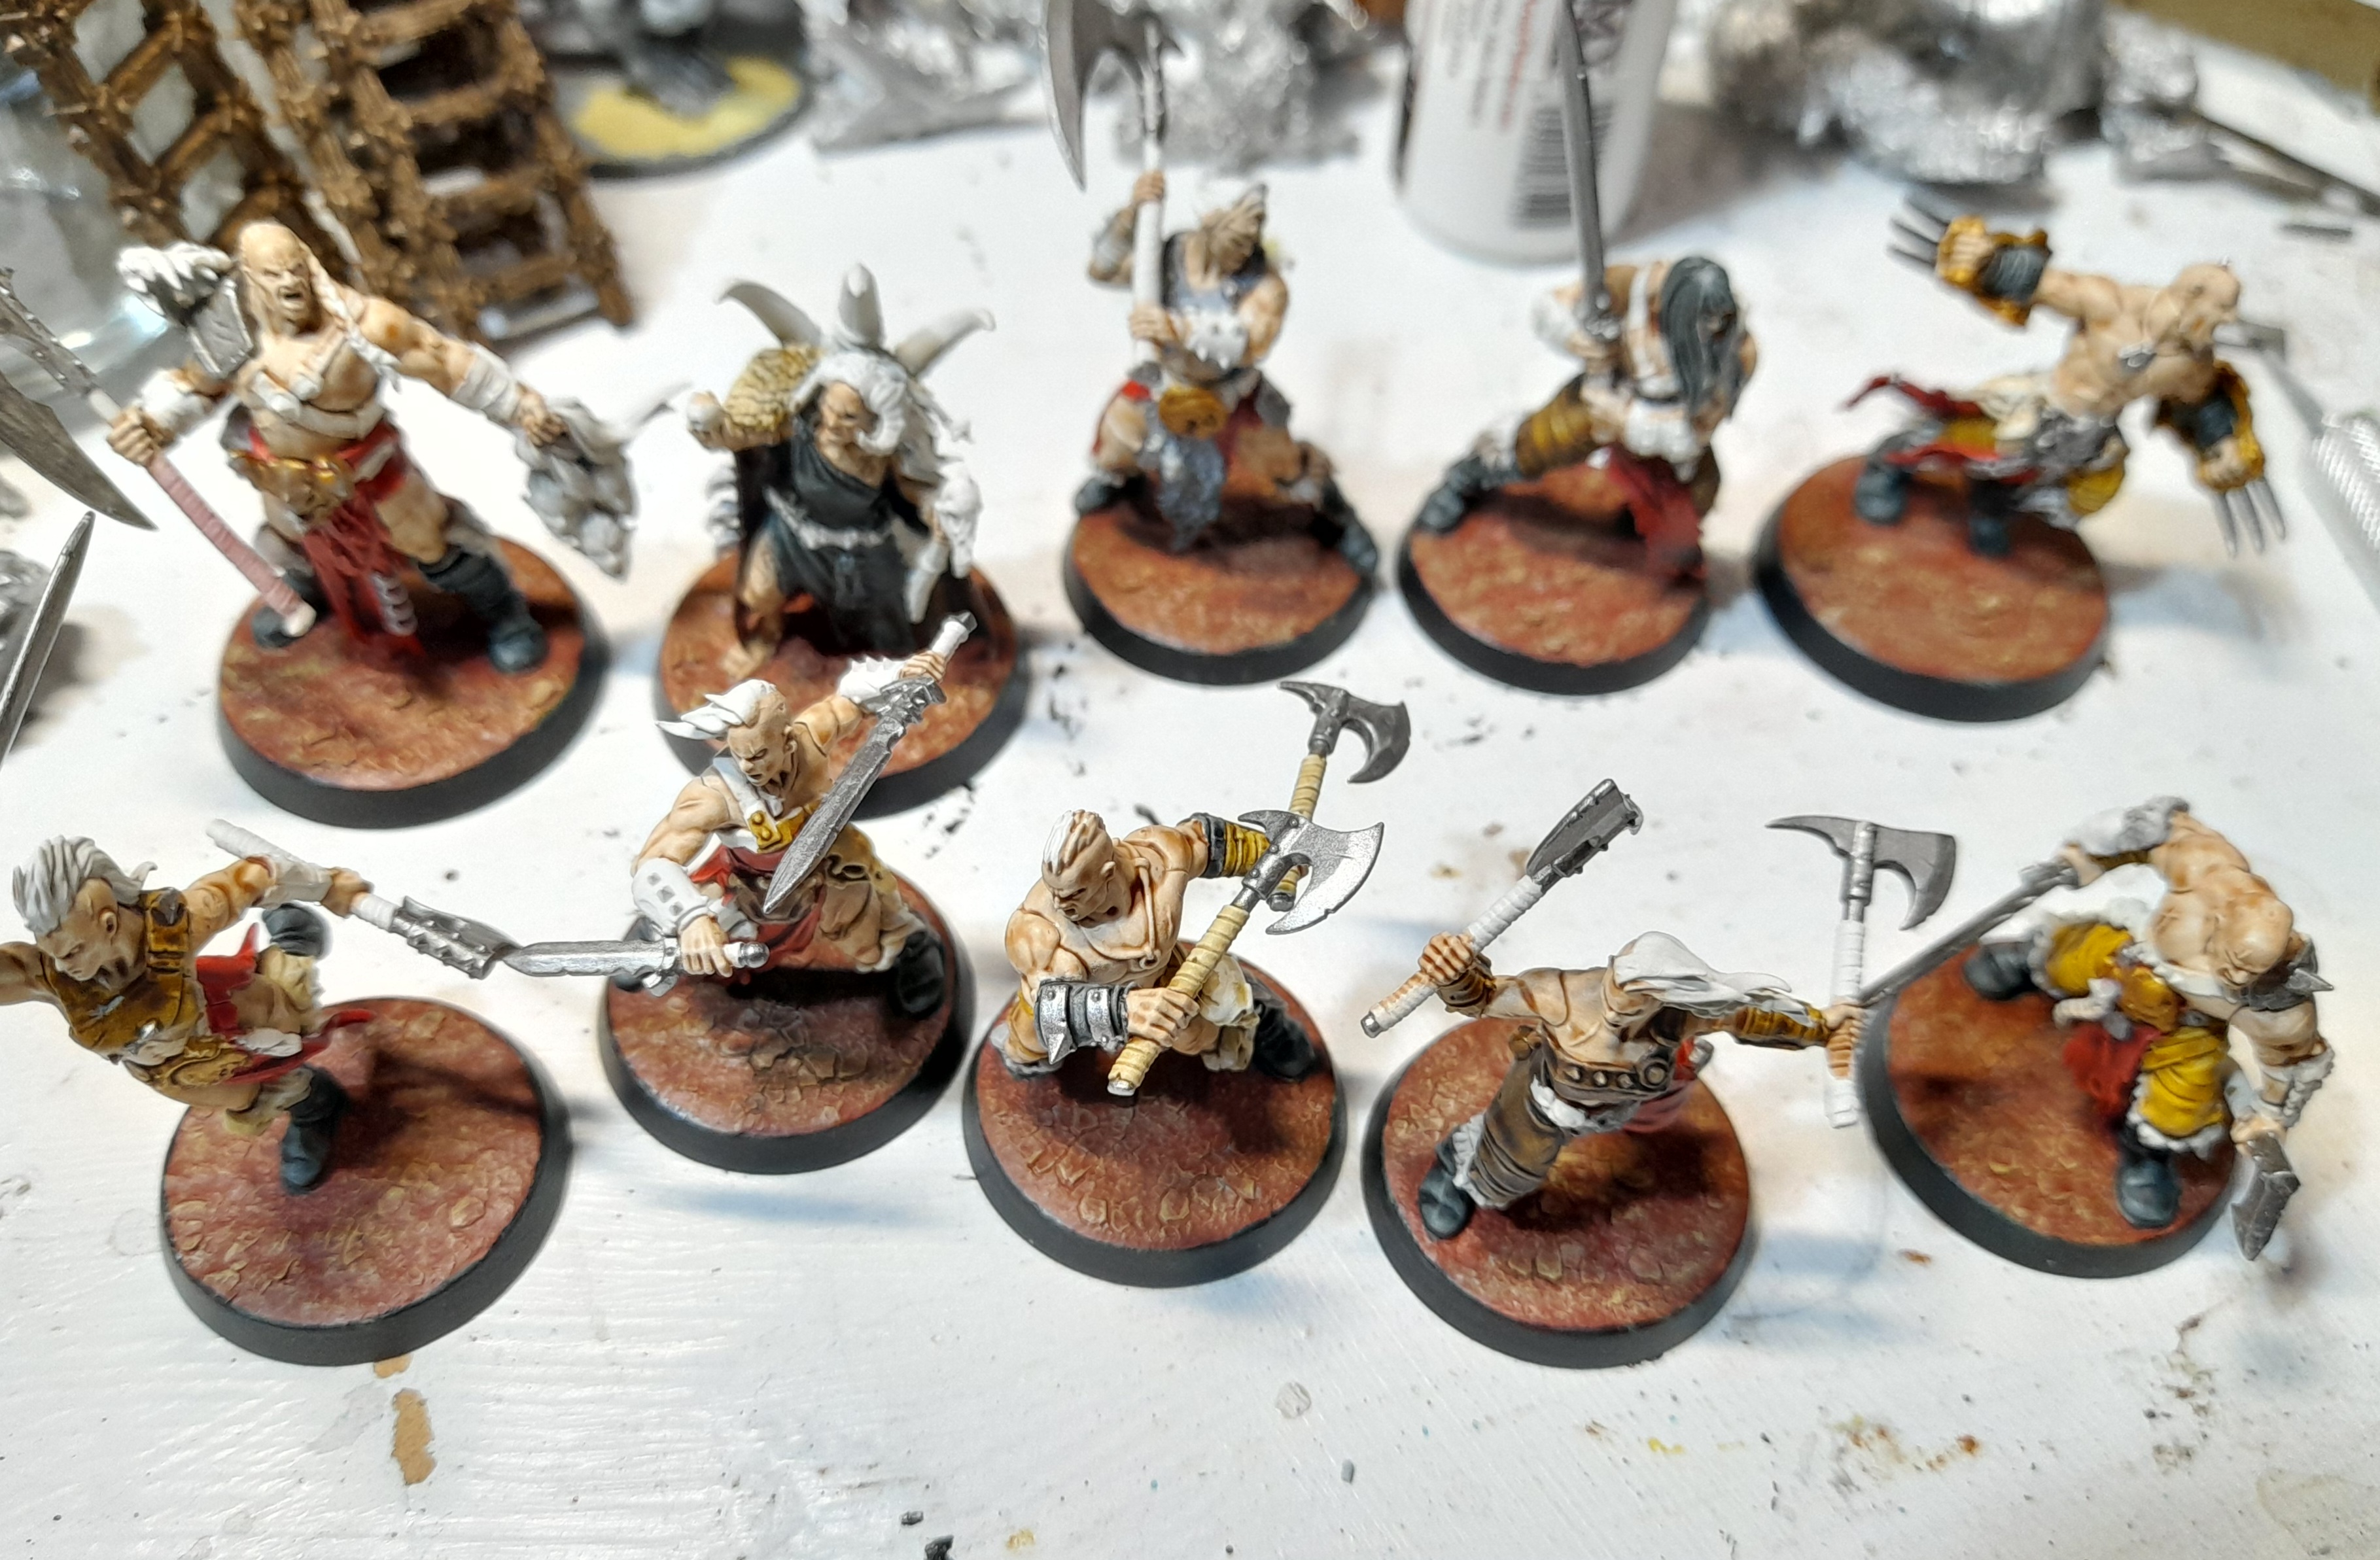
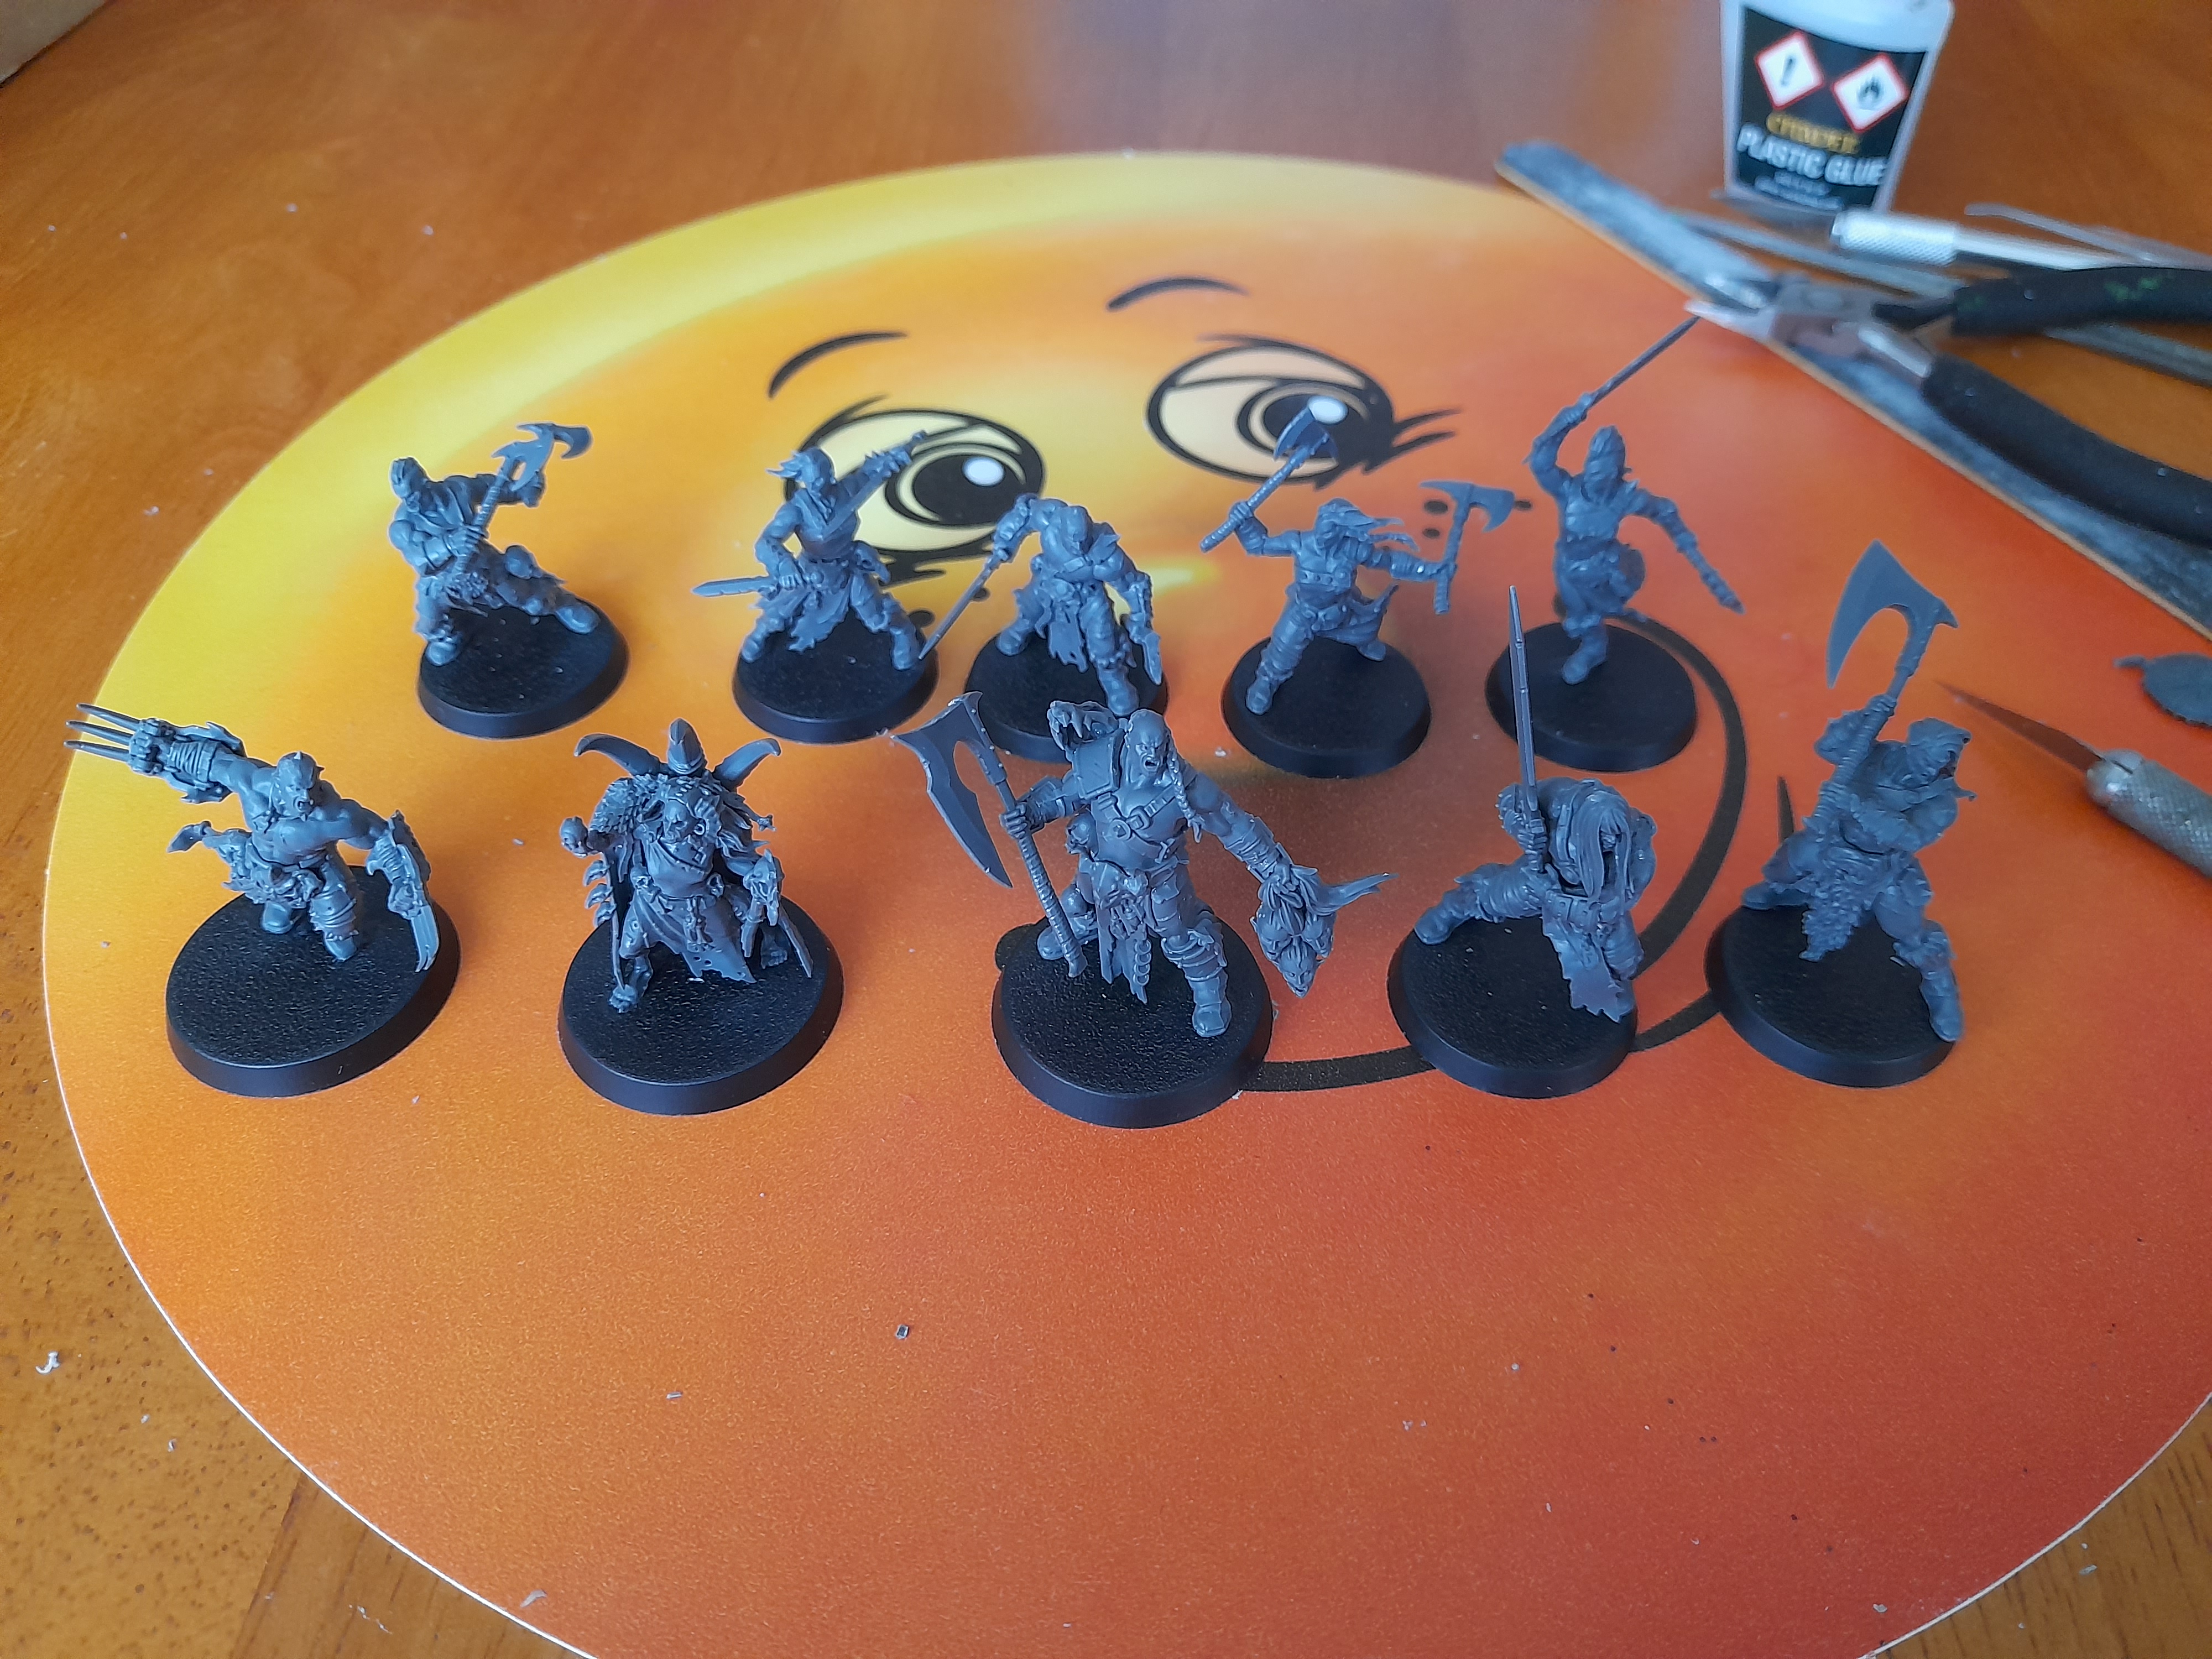
So, at this point, I had ten models all part done ?
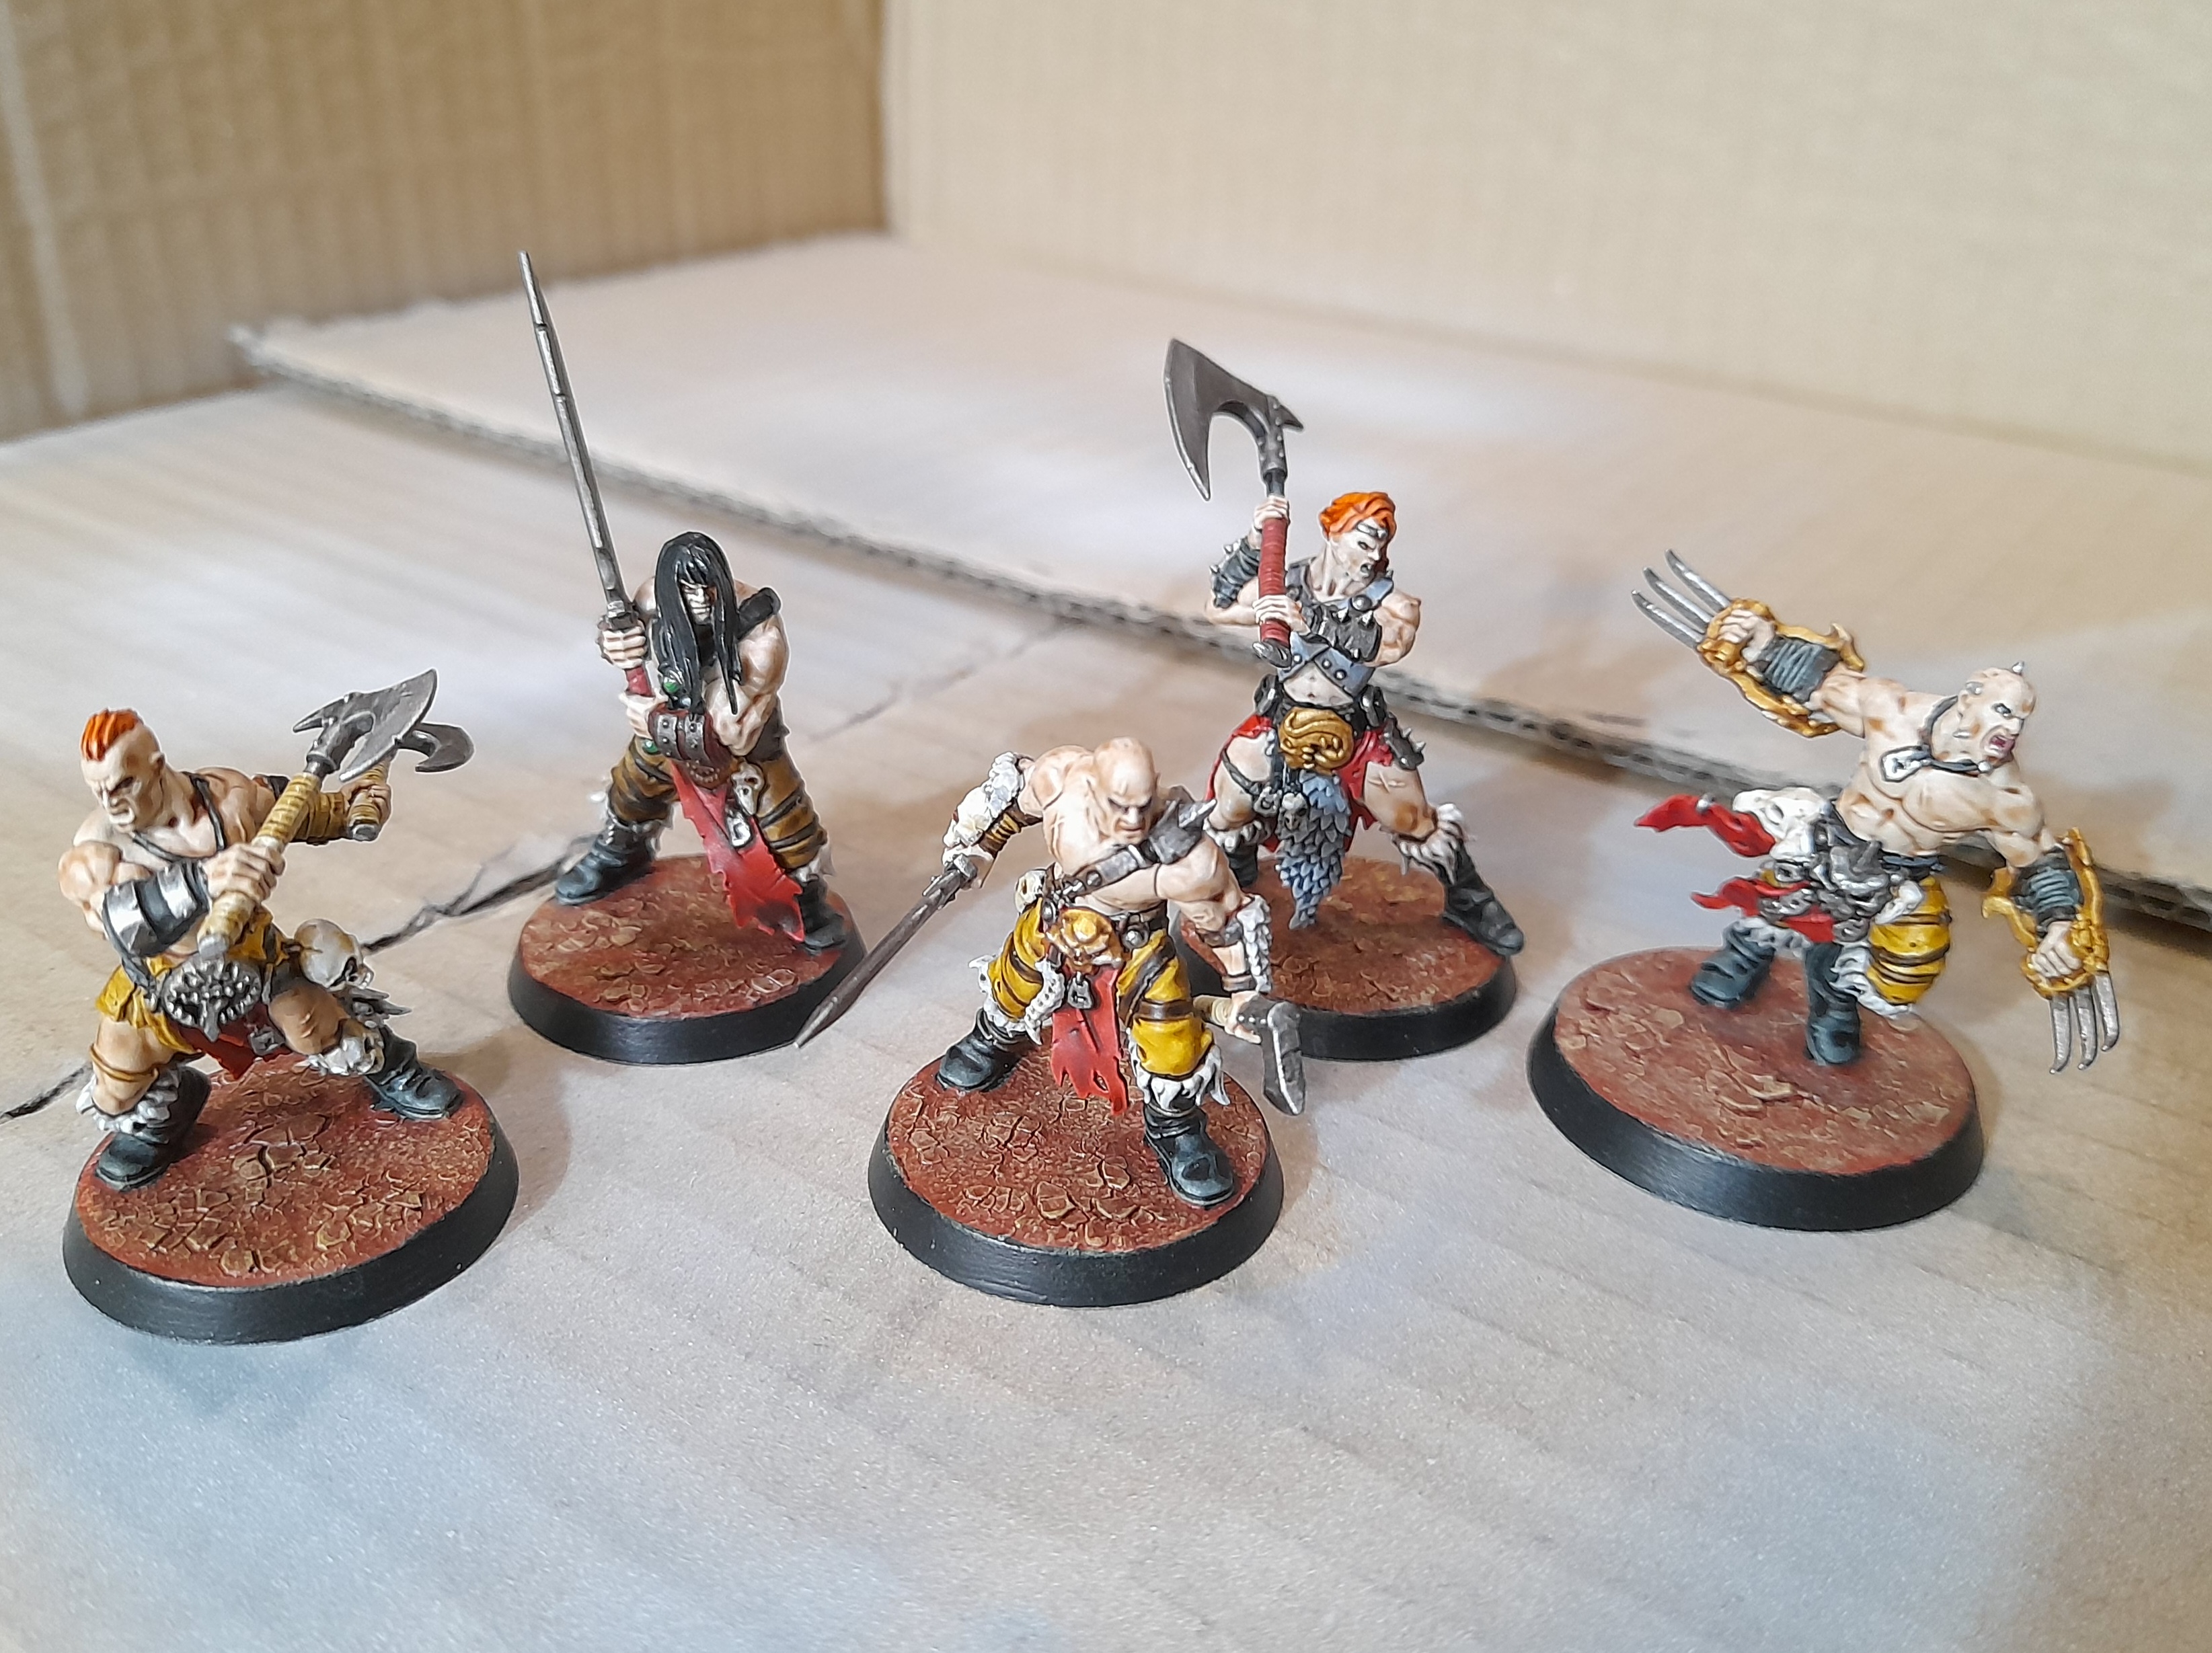
I decided next to focus on smaller groups, aiming to pick out some more details, add a little shading and highlighting and getting them to a point I call as ‘ready for the table top’……
My eyesight combined with my hand control is no longer good enough to paint eyes on the minis – so I tend to just put a shade into the eye socket and hope for the best ?
I may treat myself to a new fine brush to see if that will help with the situation a little.
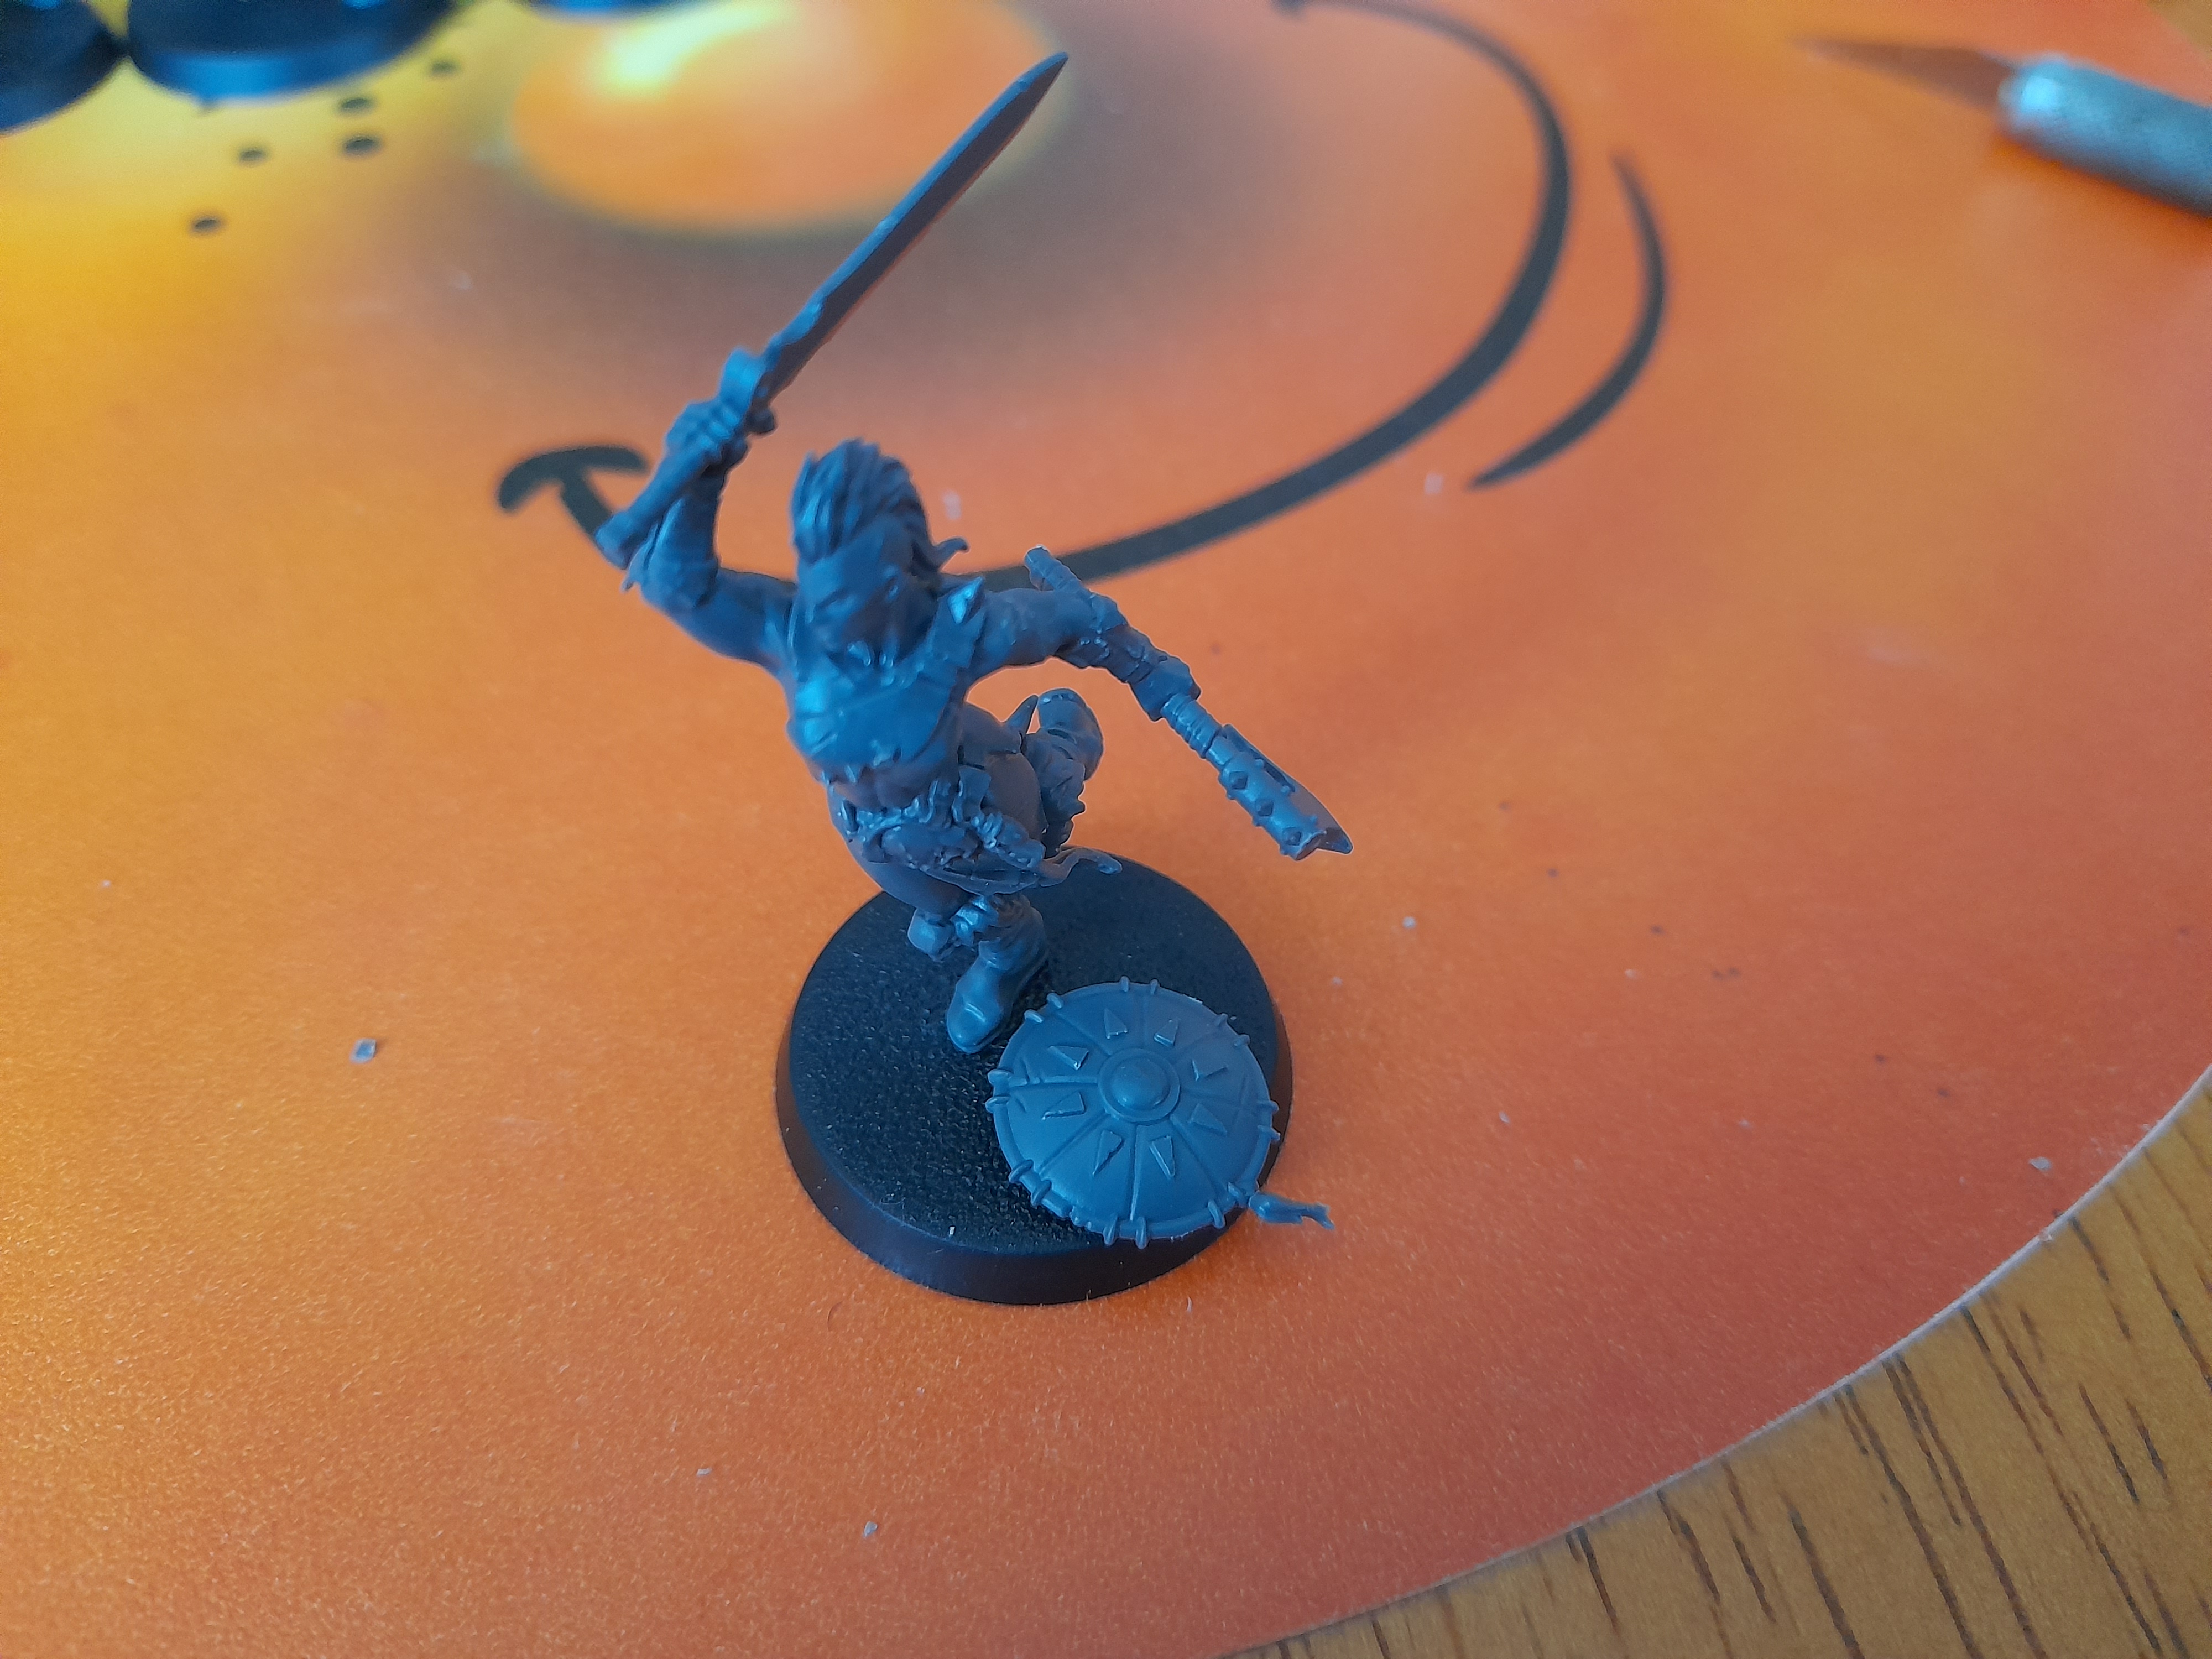
So here are five of the gang ready to see some action:


![StarCraft Tabletop Miniatures Game Pre-Orders Live Now [Updated]](https://images.beastsofwar.com/2026/03/starcraft-tmg-news-cover-600-338.jpg)


![Mounted US Cavalry On Kickstarter For Dead Man’s Hand! [Updated]](https://images.beastsofwar.com/2026/03/us-cavalry-main-600-338.jpg)


![Play WW2 Commando Operations With Butcher & Bolt [Updated]](https://images.beastsofwar.com/2026/03/relaunch-600-338.jpg)


