


![Pure Sci-Fi Nostalgia! War Rocket Review | Hydra Miniatures [7 Days Early Access]](https://images.beastsofwar.com/2026/02/unboxing-hydra-miniatures-war-rocket-coverimage-225-127.jpg)


Aeon Trespass Odyssey


Recommendations: 223
About the Project
This project is going to track my journey with Aeon Trespass Odyssey. My goal is to play through cycles one to three in 2023, and cycles four and five in 2026. I'll cover thoughts on the game, model painting, battle reports, and anything else related to the board games as I work my way through it.
Related Game: Aeon Trespass: Odyssey
Related Company: Into The Unknown
Related Genre: Fantasy
This Project is Active
Cycle 1 models
I thought I’d finished painting all the models needed in cycle 1. Then I found I need to battle another monster next turn. That’s the problem with a game like this which is full of secrets. There’s no easy way to look ahead to know what will happen to know what to paint.
Anyway…
I just went for a simple contrast paint paint scheme. They look good enough on the table for a board game.
Gold/blonde hair: iyanden yellow
Trees: ork flesh
Roofs/tabards: blood angels red
Sea: terradon turqoise
Stone: skeleton horde
Grass: militarum green
Dark flesh: darkoath flesh
Brass: gore-grunta fur
Steel: basilicanum grey
Wood: wyldwood
Titan studs: black templar
Pale flesh: guilliman flesh
Slug flesh: volupus pink
Sail clothes: apothecary white
Wings: syish purple and apothecary white
Pink skin: 4:1 apothecary white:volupus pink
Sea marker rims: mordian blue
Land marker rims: rhinox hide
Cycle 1, turns 13 and 14
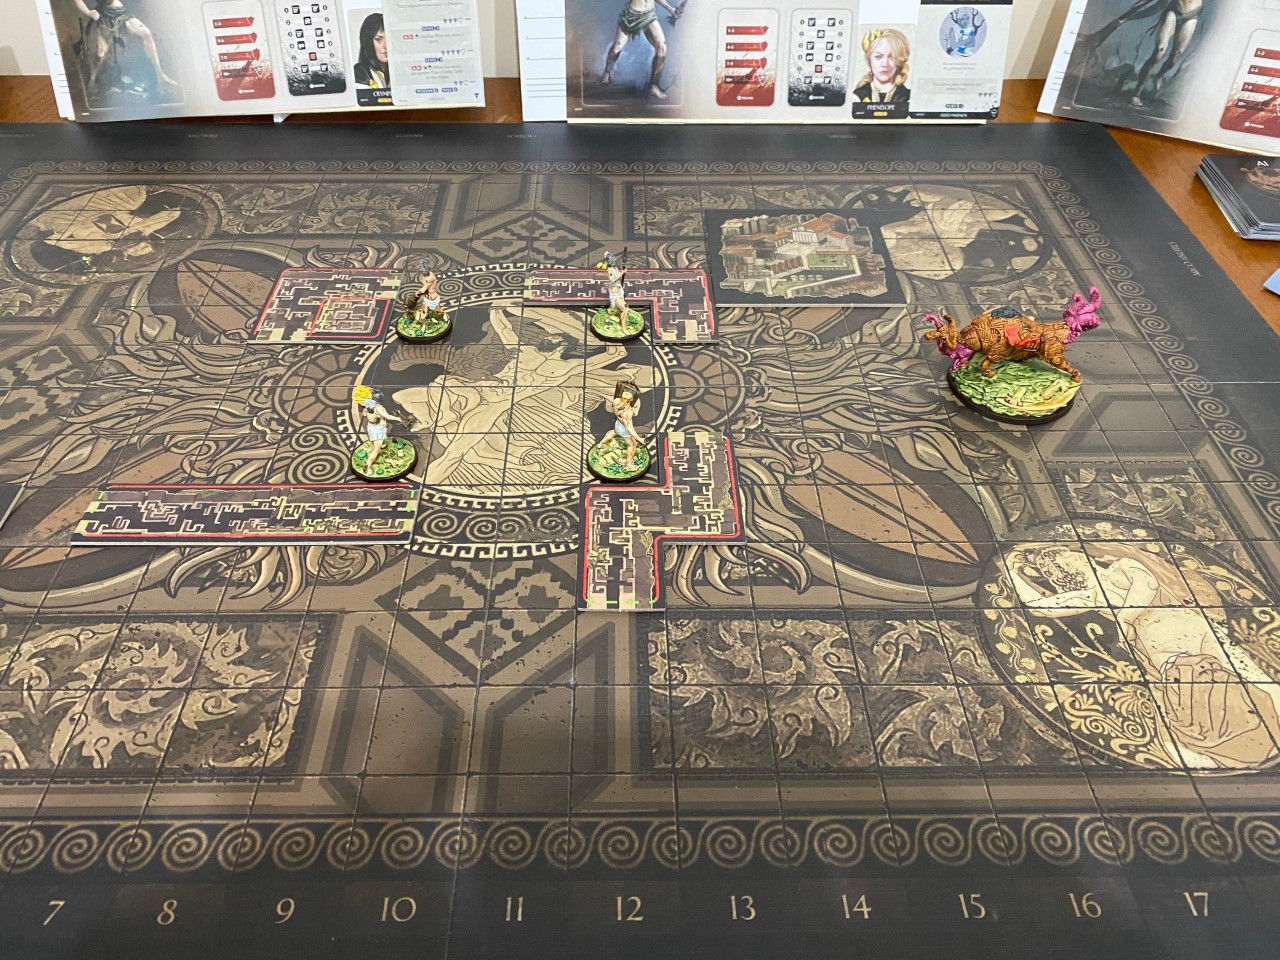
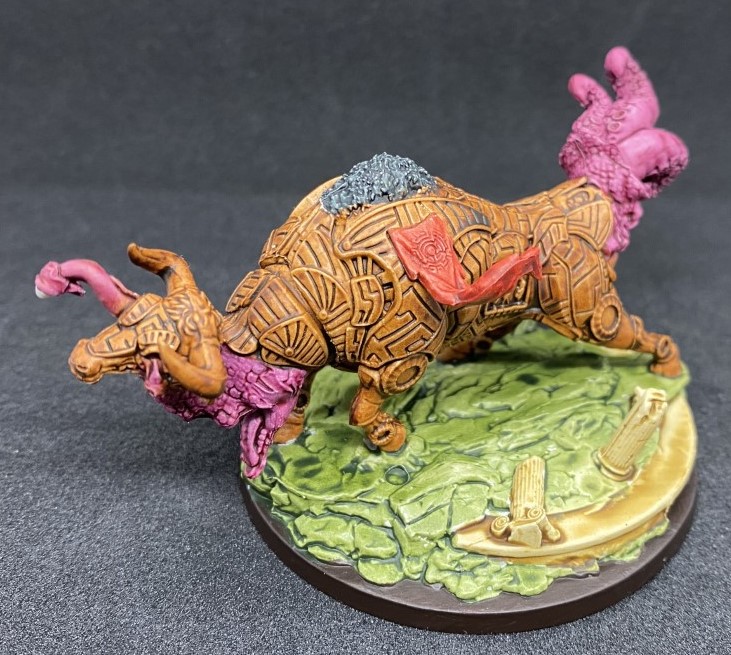
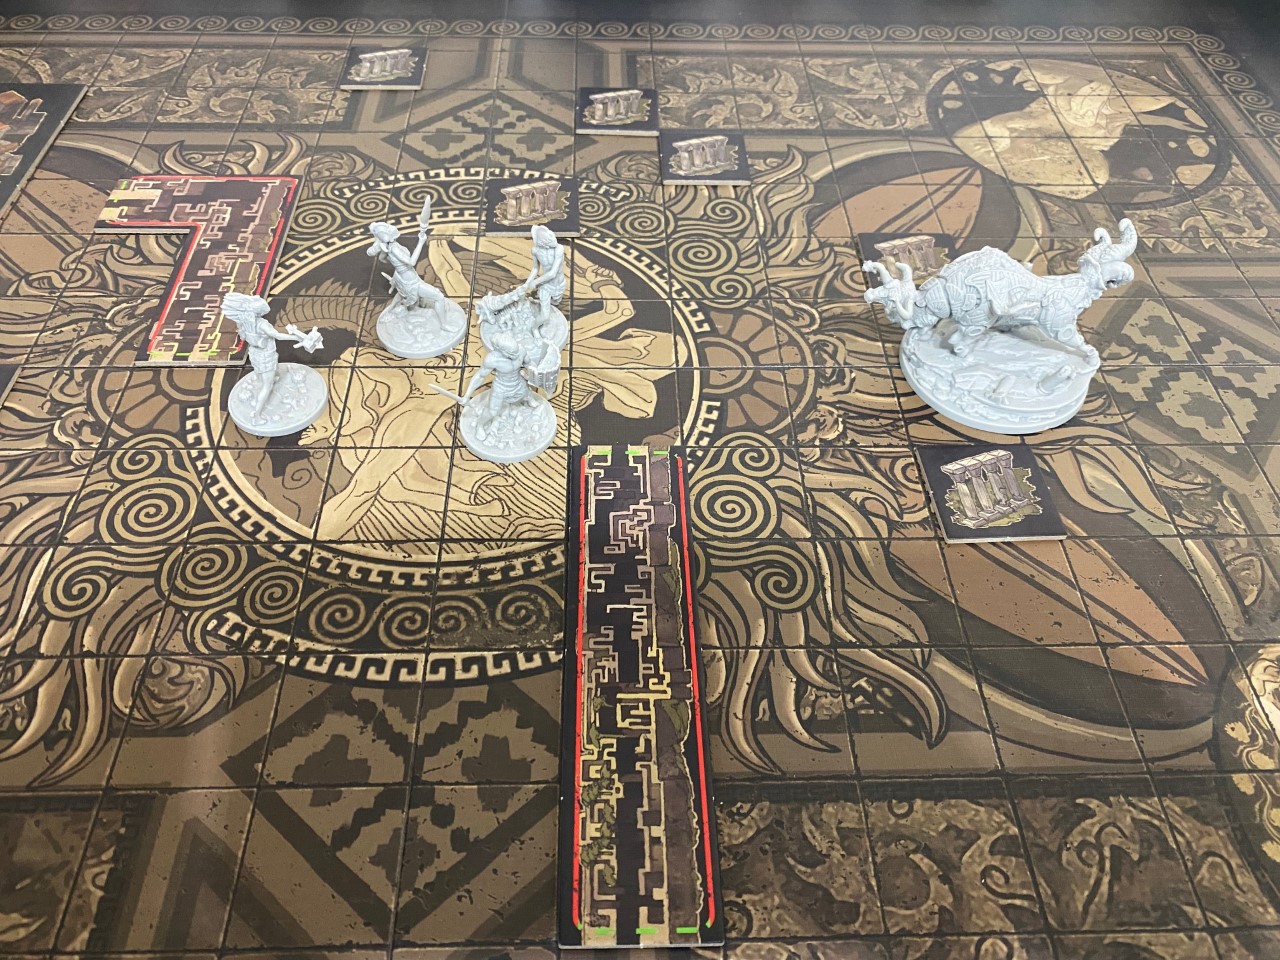
Turn 13 say my first “normal” battle against the Labyrinthauros. Having fought it once in the ambush battle I knew to correctly ignore its trample ability while it is still only level 1.
I was unlucky fairly early on and drew a “Heroic Death” card for one of my Titans in round 2. This meant they died much earlier in the battle than you would normally expect.
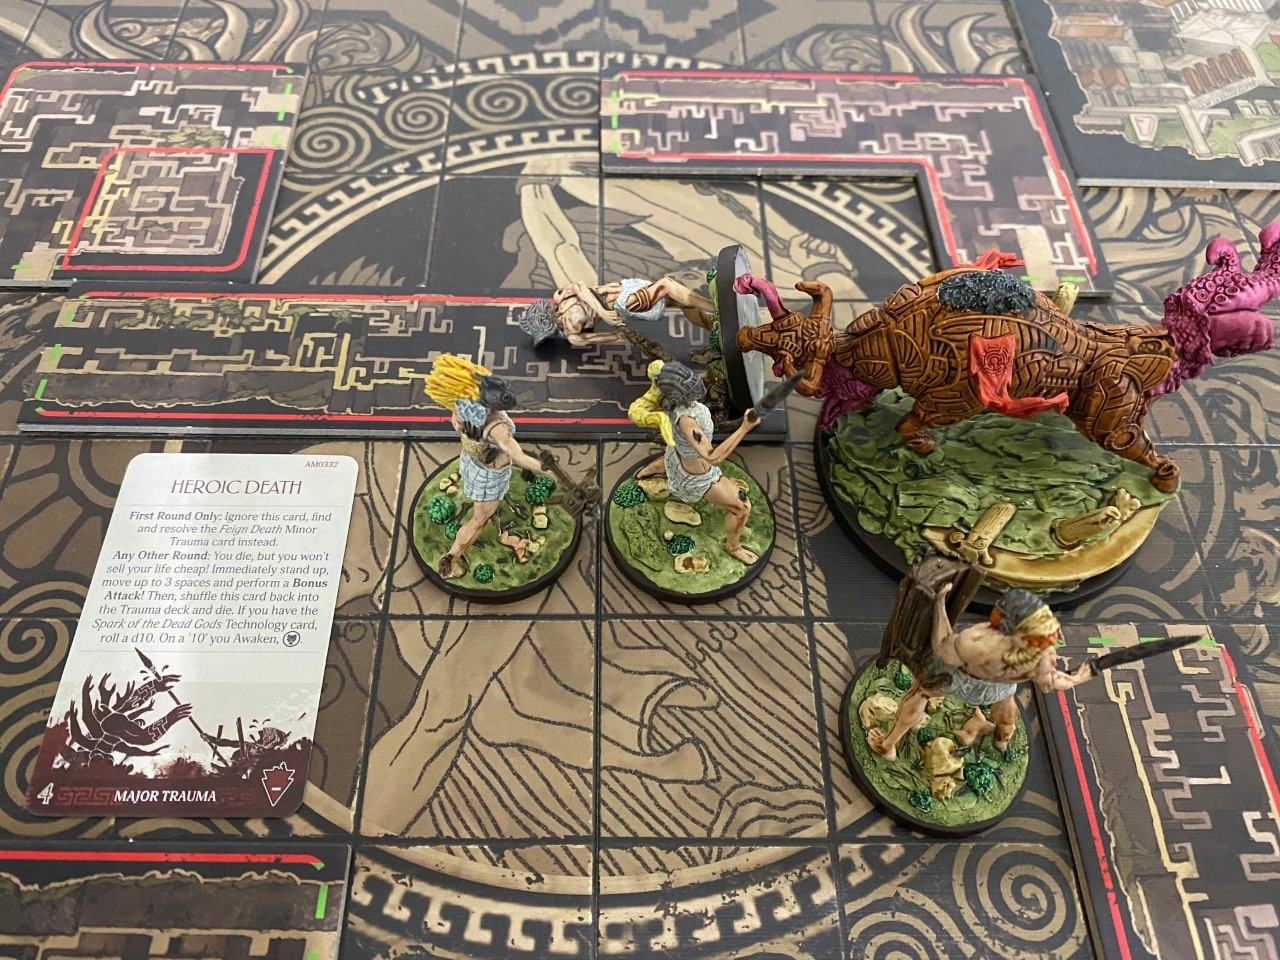
I quickly made up for that by being able to score a critical hit and open up a vulnerable spot. This allowed one of my Titan’s to mount the monster. From here their hits can gain a bonus to wound and the Titan can ignore any monster responses to their blows. The Titan was able to remain on the monster’s back until the end of the battle and do a lot of damage while they were up their. They were even able to use another critical hit to tear off one of the monsters tabards which has given them a “secret” special gear card.
Overall I was able to handle group tactics a bit better now that I’m more or less on top of the core combat mechanics rules.
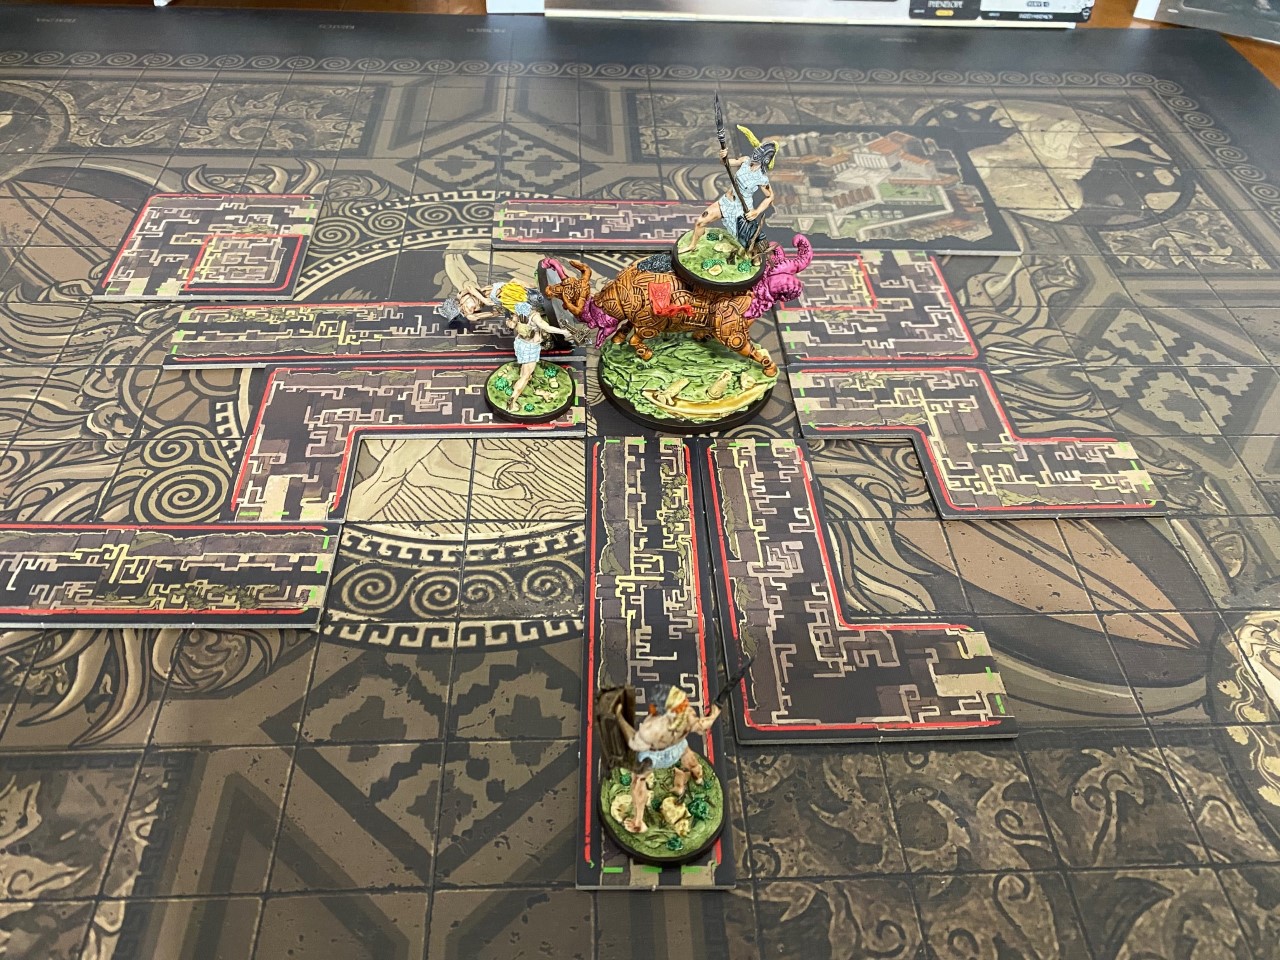
I was all set to spend another hour or so exploring the map before the next scheduled monster fight, but on turn 15 the adversary made a two tile advance and caught up with me. I stopped playing and will have to battle the monster at the start of my next session.
Cycle 1, turns 9 to 12
I got to do lots of exploration in this session. As it turned out my pursuer didn’t move much so I didn’t have to do that encounter. I made enough progress exploring my ship to unlock the ability to summon nymphs, which is great as the only reason I got interested in this game is the fact I’d already bought and painted most of their nymph models.
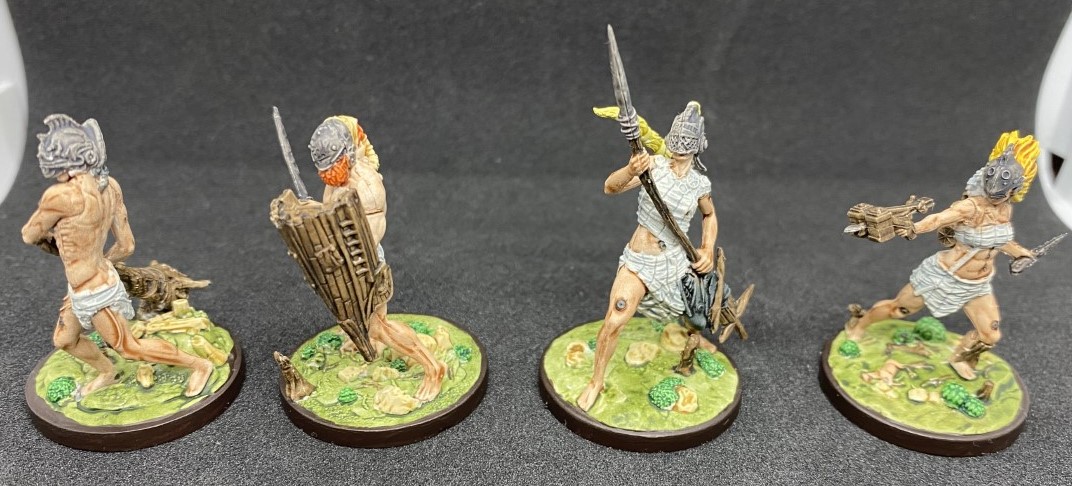
I also progressed the “doomed” side of the story to trigger a major negative effect, which in this case was a battle with the Alpha Temenos again. This time I was definitely supposed to do it and I was a little bit more prepared. Not only had I been able to equip all my titans with armour and a weapon, but I’d painted them up too.
I managed to inflict three wounds, enough to declare a victory in this tough fight. I also managed to do so without loosing any titans, though two came very close and were only saved by their new armour.
Overall a good session with both multiple exploration turns and a battle, played in two hours 40 minutes. A full monster fight would have taken longer but still doable in a reasonable evening session.
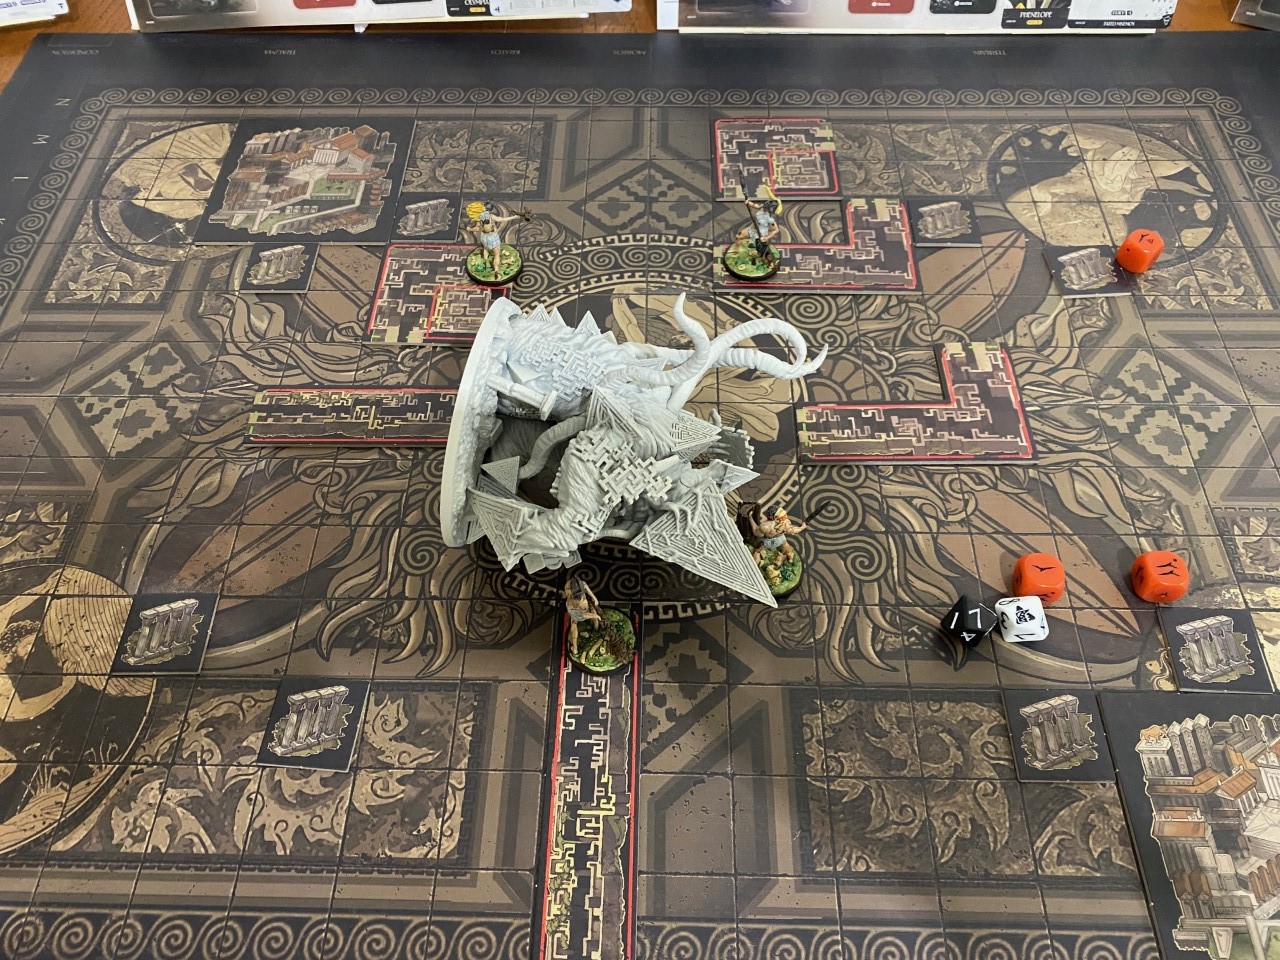
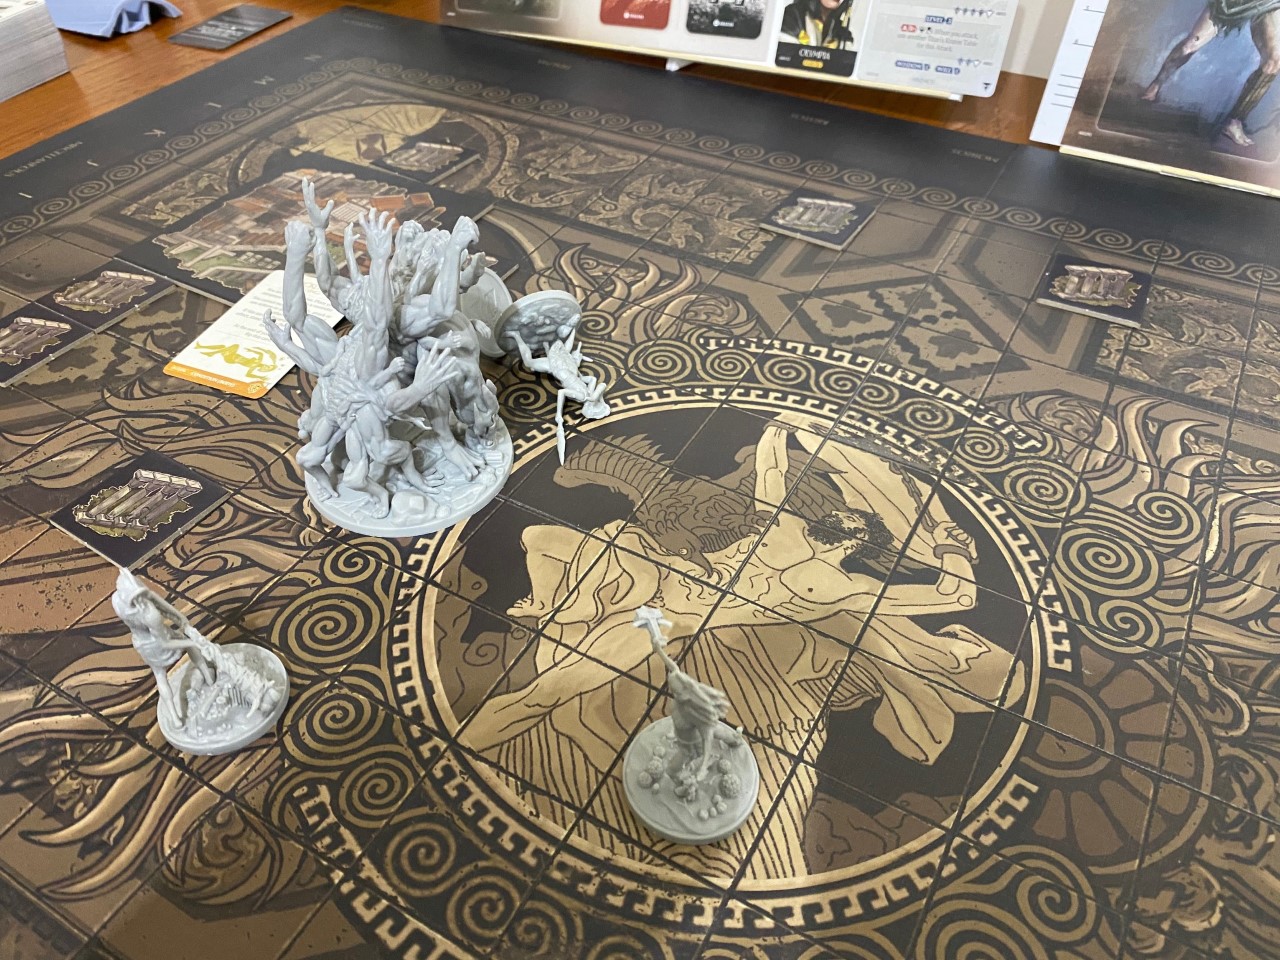
Cycle 1, turn 8 ambush!
In turn 8 I drew the ambush card, which meant I had to fight a battle with the labyrinthauros for the first time. The couple of fights I’d had against the hekaton had been frustrating because it knows my titans over a lot. They seem to spend more time on the floor than fighting.
It turns out the labyrinthauros’ signature ability is trampling, which knocks you over, or if you’re already knocked over has a 50:50 chance of killing you.
 The start of the battle. Being ambushed, all my titans were all nicely lined up for a charge, which knocked them all over, then being trampled.
The other problem with the trample ability is that it often triggers after an attack and give the labyritnthauros an extra move. For the first half of the game I was spending most of my time chasing the monster around the board with three of my titans, while the fourth was being repeatedly knocked over and trampled.
Then I happened to look at the level two abilities for the monster, where it states that a level one (which I was fighting) does not have the trample ability. I have no idea why the game designers felt that information needed to be in the level two area and not the level one area. At that point I started ignoring the trample ability whenever a card said it should trigger and the battle became a lot more manageable.
 In the end I still lost two titans. They died in the last couple of turns. One had weathered all the monsters attention for the first half of the game. The second just had an unlucky trauma card draw.
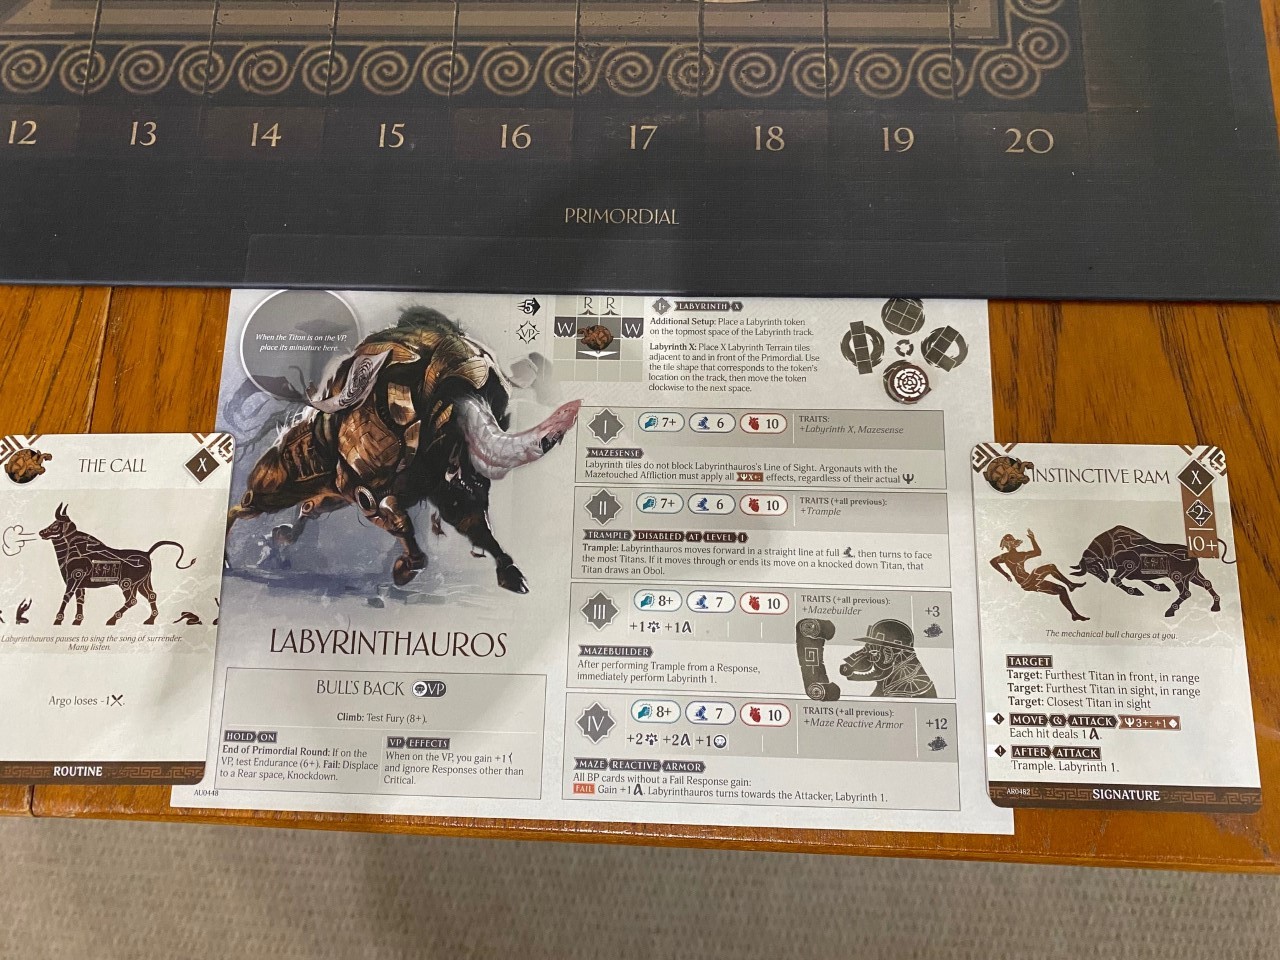
Cycle 1, turns 7 to 8
I knew turn 7 had a battle, so got stuck right into it. It started well. I felt I had a good grasp of the rules by now and it did well right until I’d done 8 of the 10 required wounds. Then I utterly failed to inflict those last two wounds and all four of my Titans got wiped out.
 End of turn 1. A couple of Titans knocked down but not a bad start.
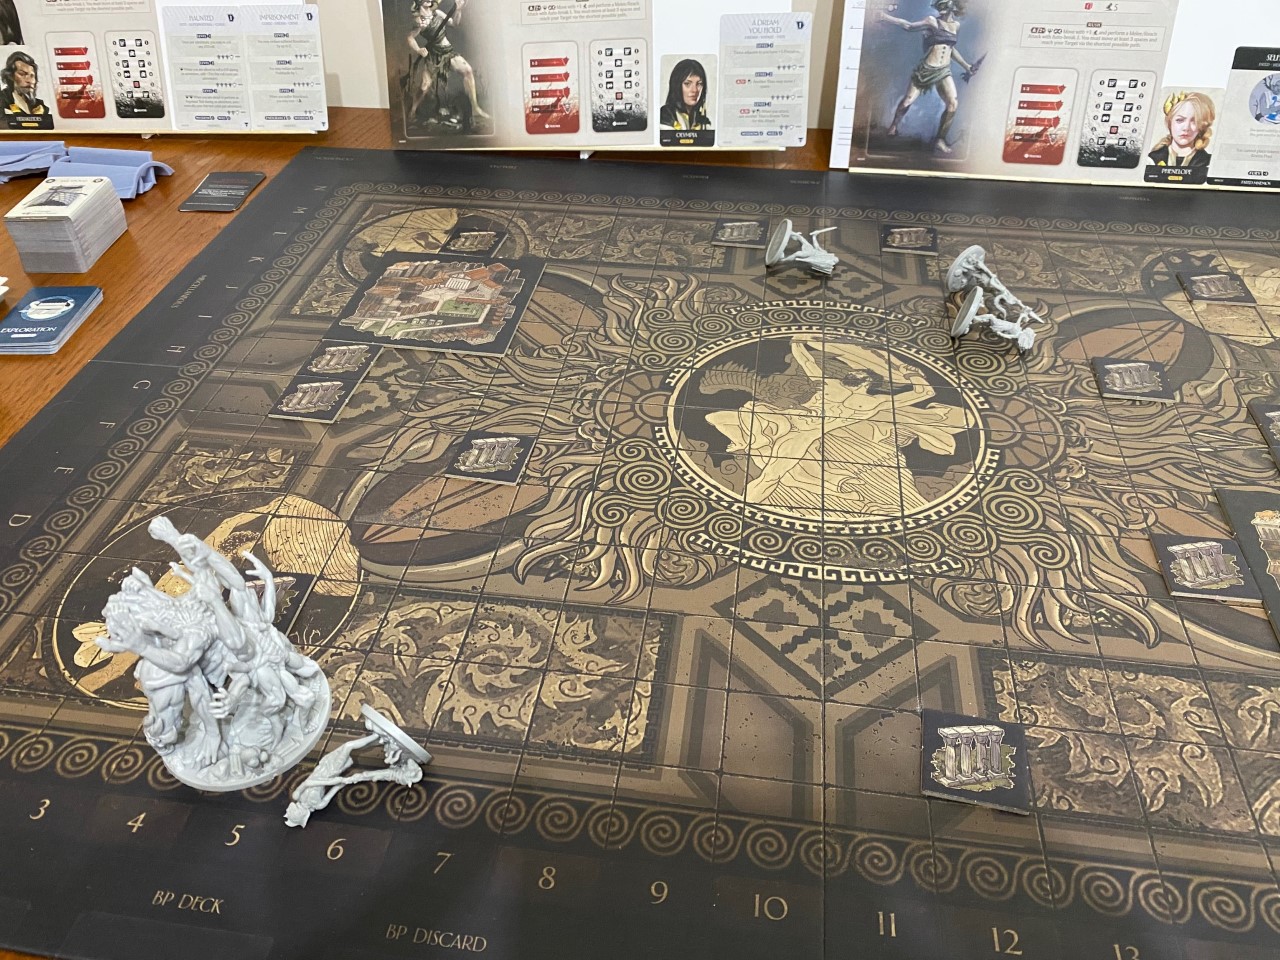 About 10 turns later, everyone's dead.
So moving on to campaign turn 8, I randomly drew an ambush battle (which only happens once per game, then the card is removed from the game) and the adversary is only one tile away. Looks like I’m in for two more quick succession battles.
Cycle 1, turns 1 to 6
I had my first “normal” battle in this session. It played out much faster this time as I only had to look up a few rules.
ATO has some interesting combat mechanics that make fights escalate, rather than having your fighters wear down.
Each Titan has a rage stat. It goes up by one very time they attack. If it reaches 9 they die, but up until then it unlocks more combat abilities as the fight progresses.
Similarly Titans have a fate stat which starts at zero. They can re-roll dice during combat which also increases the stat. Again if it hits 9 they die, and many monster attacks are more powerful when they target a Titan with fate above a certain value.
Finally Titans have danger, which replaces a hit point mechanic. The monsters hit the titan and raise the danger level. Then you draw a trauma card depending on your danger level. Half the cards are bad while half are good (i.e. a flash of insight lets you look at the top card of the monster AI deck). When your danger is above 9 the deck only has two cards. One is you live, the other is you die.
The result of these three mechanics is that your Titans get more dangerous in the later stages of the fight and it actually accelerates the pace of battle.
In the end I lost one Titan. My poor “tank” was killed just one round prior to the monster falling.

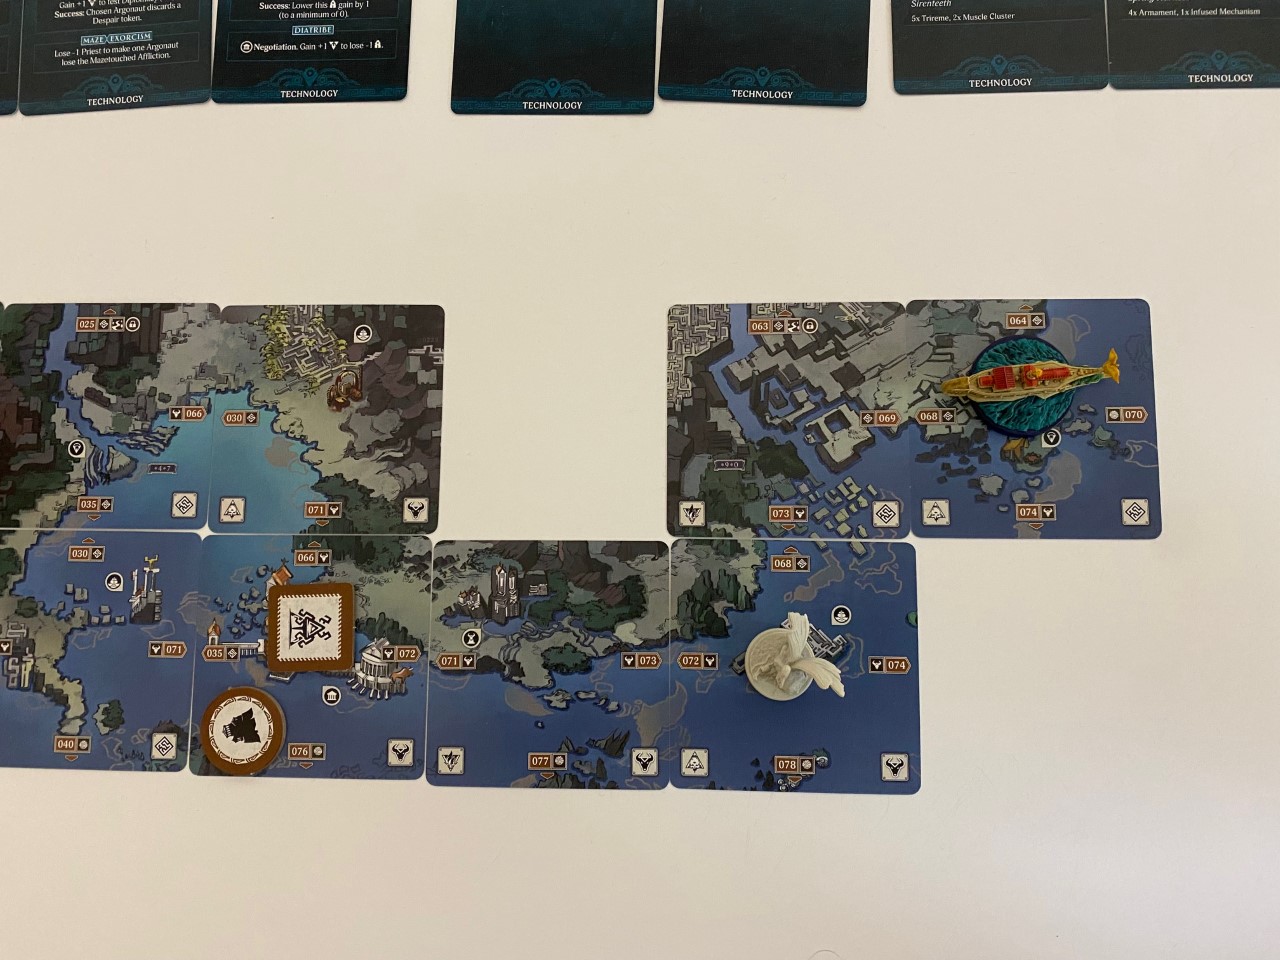
I re-arranged the gaming table. My four Argonauts each have a stand I made from fibre-board. I glued matchsticks to them to create small shelves that cards can sit on. These are placed at the back of the table and I can see nearly all their stats very easily without loosing table space. All the cycle 1 cards are now out the box on the table too.
As I was playing the narrative sections I came across and event that instructed me to add a new event to the cycle 1 random event deck. This was odd as the card was already in the deck. It wasn’t until about 30 minutes later when I was going through my first story adventure that I realised where I had gone wrong. At the very end of the tutorial I somehow missed the instruction to get the main campaign story card out. This had instructions to setup the random event deck with a very specific subset of cards. The rest get added later as the story evolves. This explains how in my last session I drew and encounter with the end of cycle boss. That card should not have been there. The deck is fixed now but I’m not going to try and undo the stuff I’ve done wrong. It’s all part of the story…
Exploration of Crete is now well underway and the monster that will be chasing me around the map has arrived. Just like last session, the map exploration mechanics were all new to me so I was doing it quite slowly. But I’m sure it will speed up as I learn from my mistakes and find the best way to ensure I don’t forget stuff.
Cycle 1, turn 0
ATO is split into three cycles, each of up to 80 turns. In most turns you will just explore the map, but in about 1/6 turns there’s a scripted fight. Story events can also add fights on other turns.
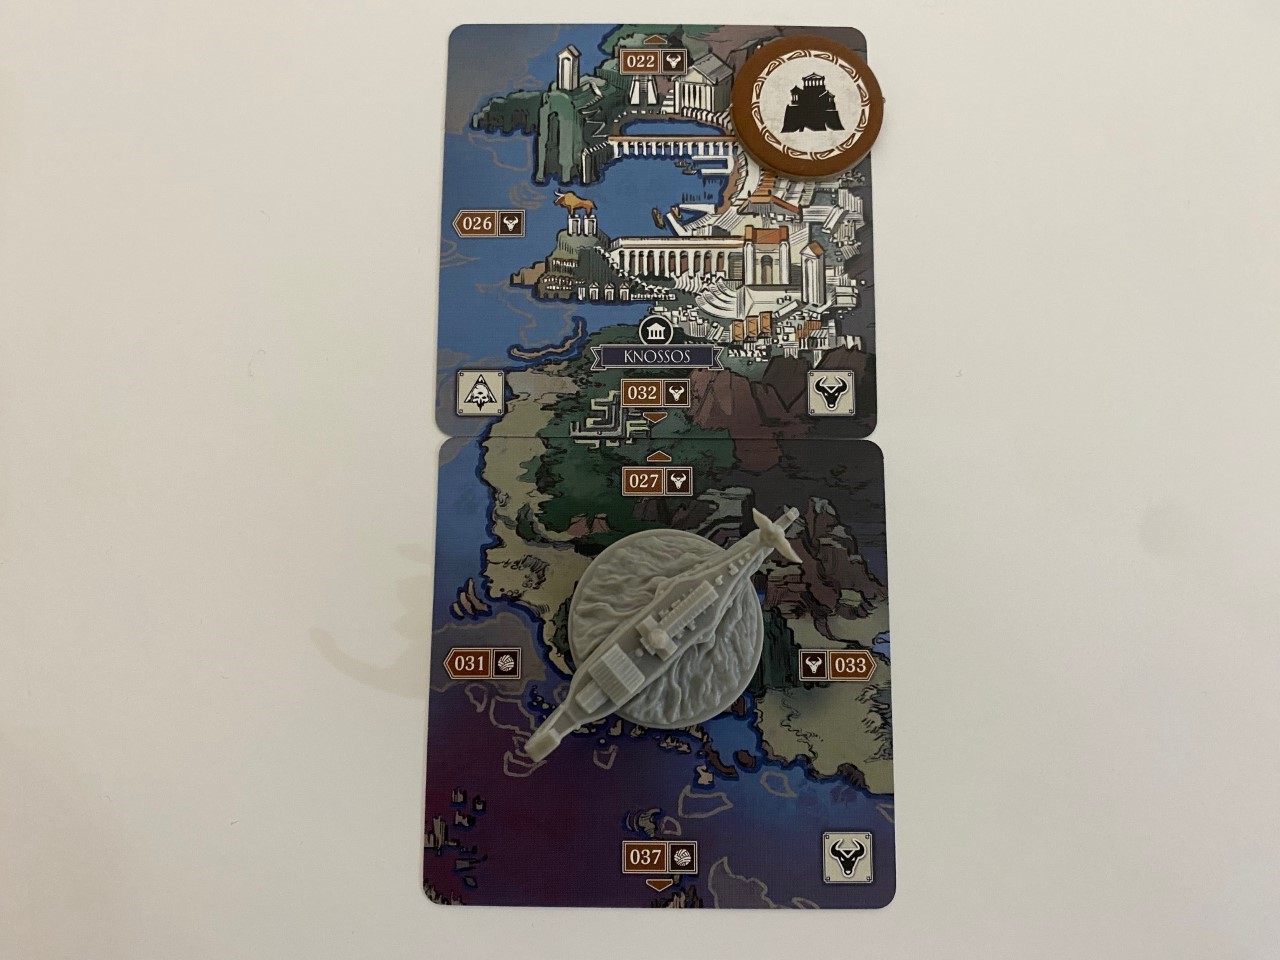
Following from the tutorial where the Argo ended up in Knossos, I decided to sail south in my first turn. This tile had no special actions or story events, so the only thing to do was the random exploration deck which always happens every turn.
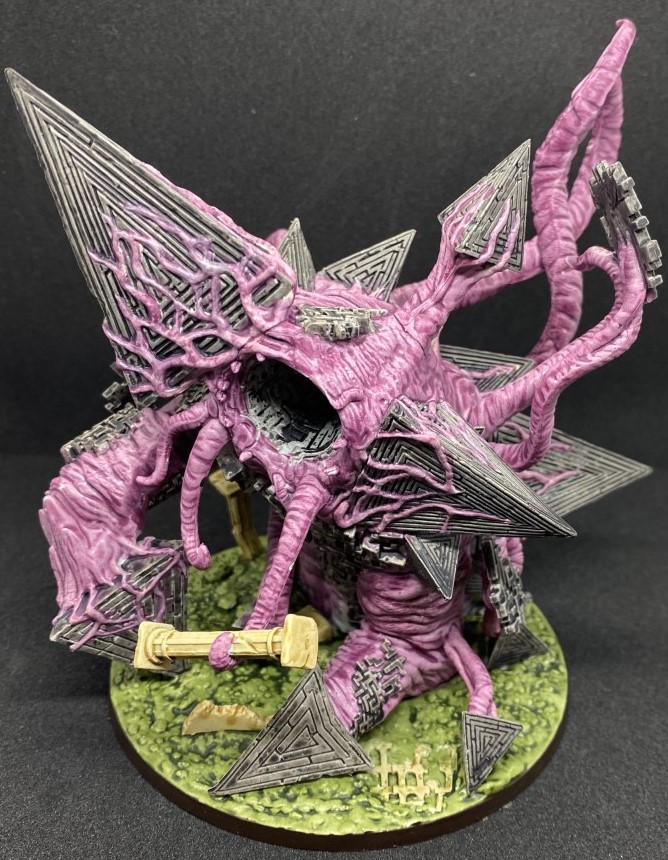
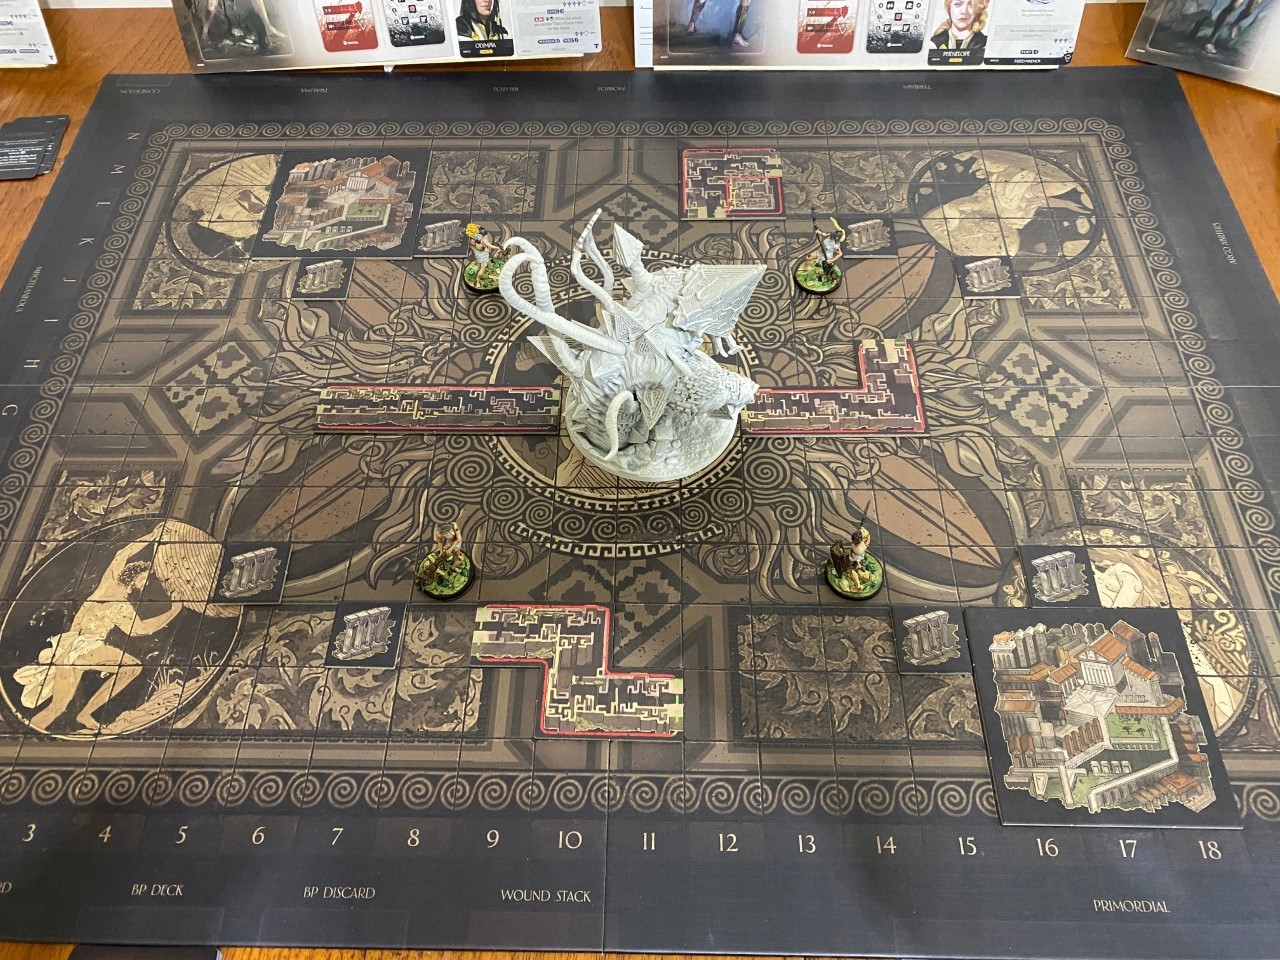
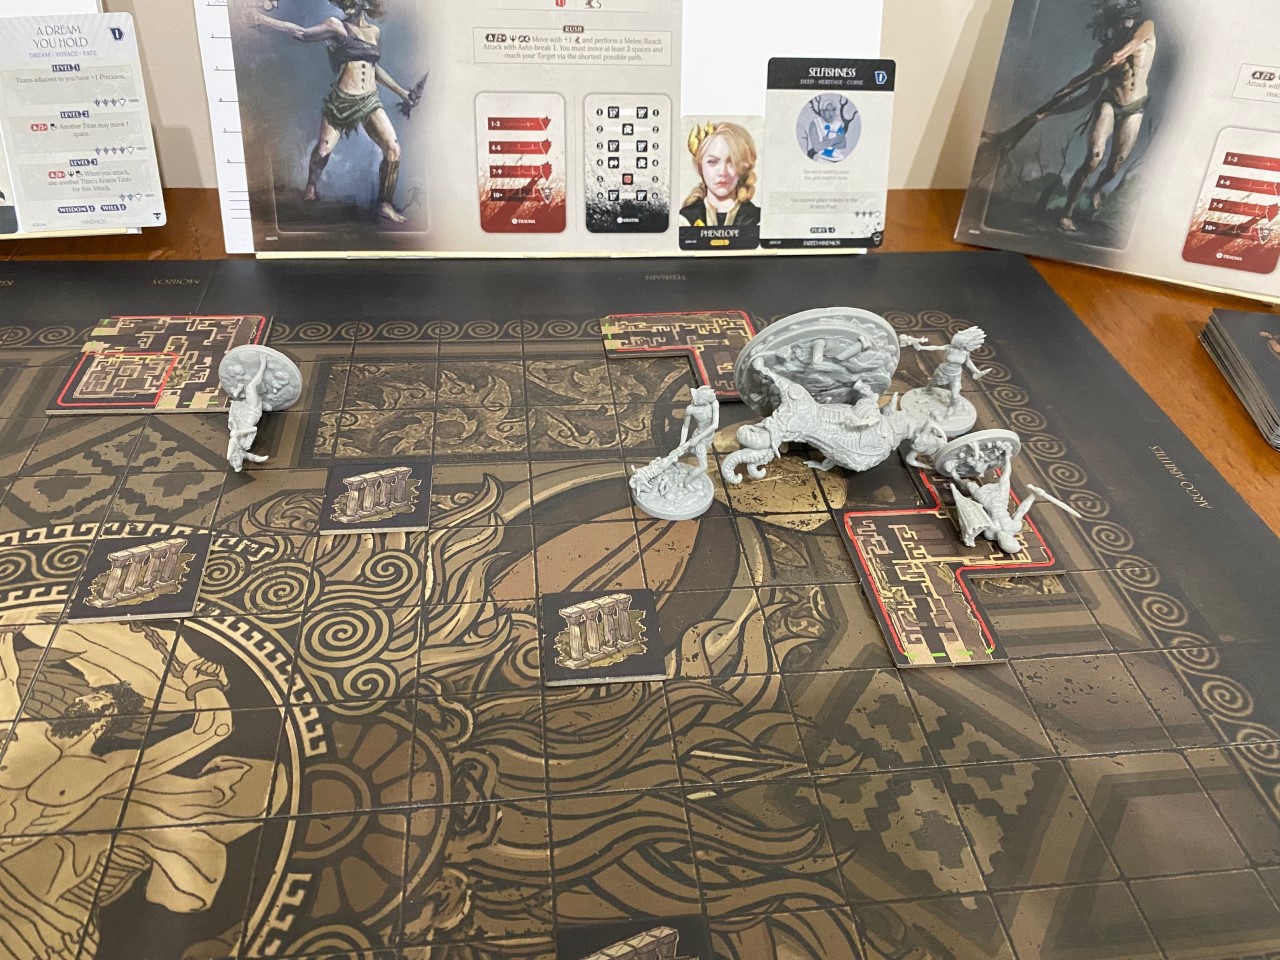
I managed to draw a once-in-a-game event where I had to battle the end of cycle boss. In other words, the monster I’m supposed to be able to take on in about 80 turns time. The card is removed from the game after being drawn, but the damage was already done. I got to fight this guy with my almost-naked Titans.
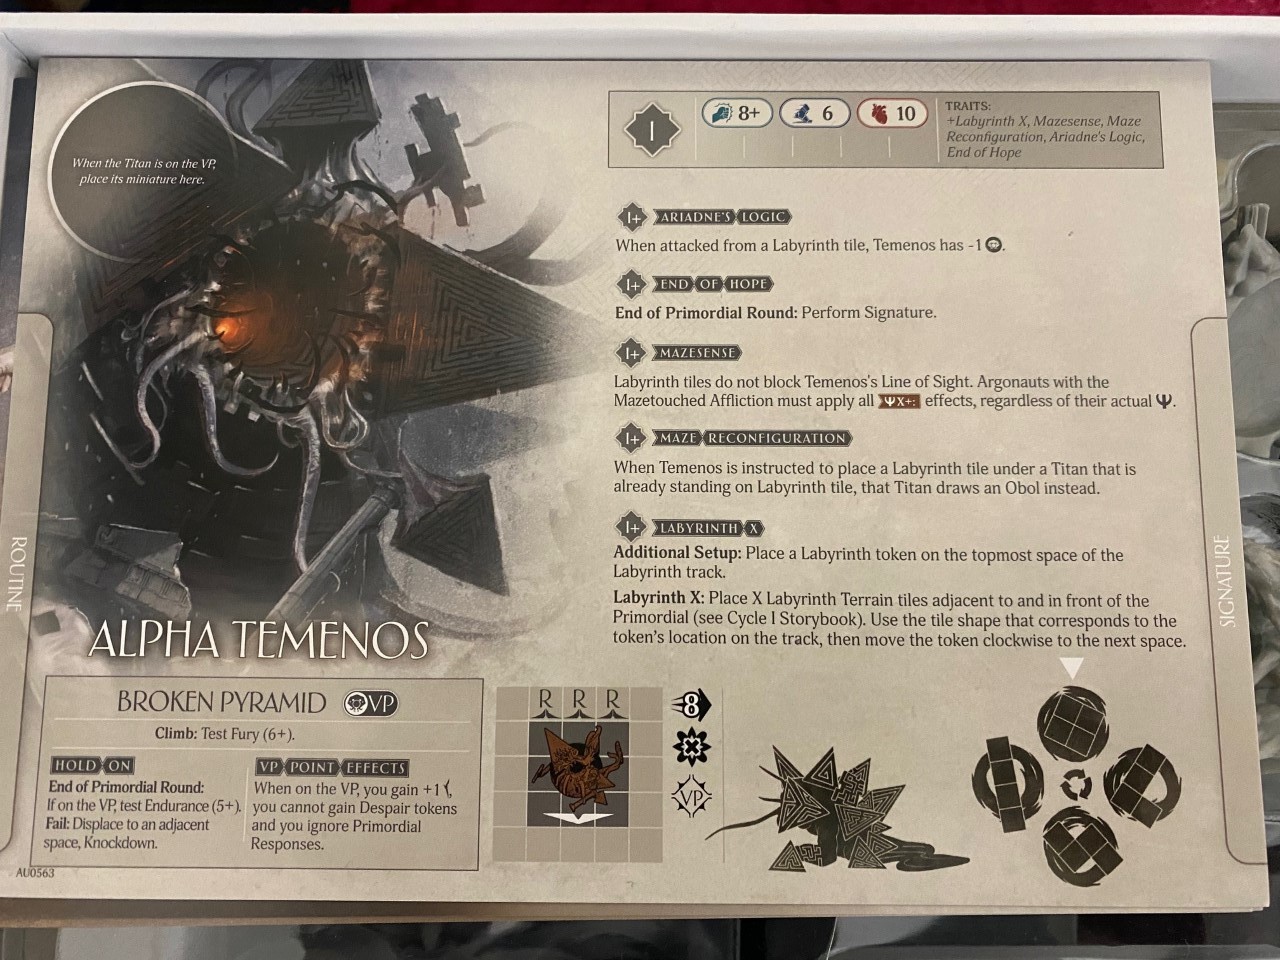
The battle was painfully slow. Having left it a couple of weeks since doing the tutorial I’d forgotten all the combat basics and it seemed every action required me to look up a new rule or keyword in the rulebook. It didn’t help I was fighting an end of cycle boss who is clearly intended to be fought by more experienced players.
This guys specific mechanics are interesting, in that he slowly fills the board with a labyrinth causing your Titans to become more lost as the battle progresses.
In the end though my four Titans were doomed to die horrible deaths. My four Argonauts survived, although one suffered a mental trauma and became selfish (unable to provide teamwork bonuses to the others) and the other has become scared of labyrinths (a story effect likely to kick in later). Argonauts remotely “pilot” the Titans, a bit like a fantasy version of Mechs being remotely piloted by a cyberpilot.
However just fighting this guy automatically unlocks access to cycle two, meaning I could bypass the first third of the game. I’m not going to. I’m playing this game for the journey not just to get to the end.
The whole session took two and a half hours, which wasn’t bad considering how much rules looking up was required. I reckon going forward I can easily do several turns of map exploration and a battle in a few hours.
Before my next session I’ll sort through the box again and separate out the cards and tokens I now know I’ll need in cycle one. That will also speed up the gameplay.
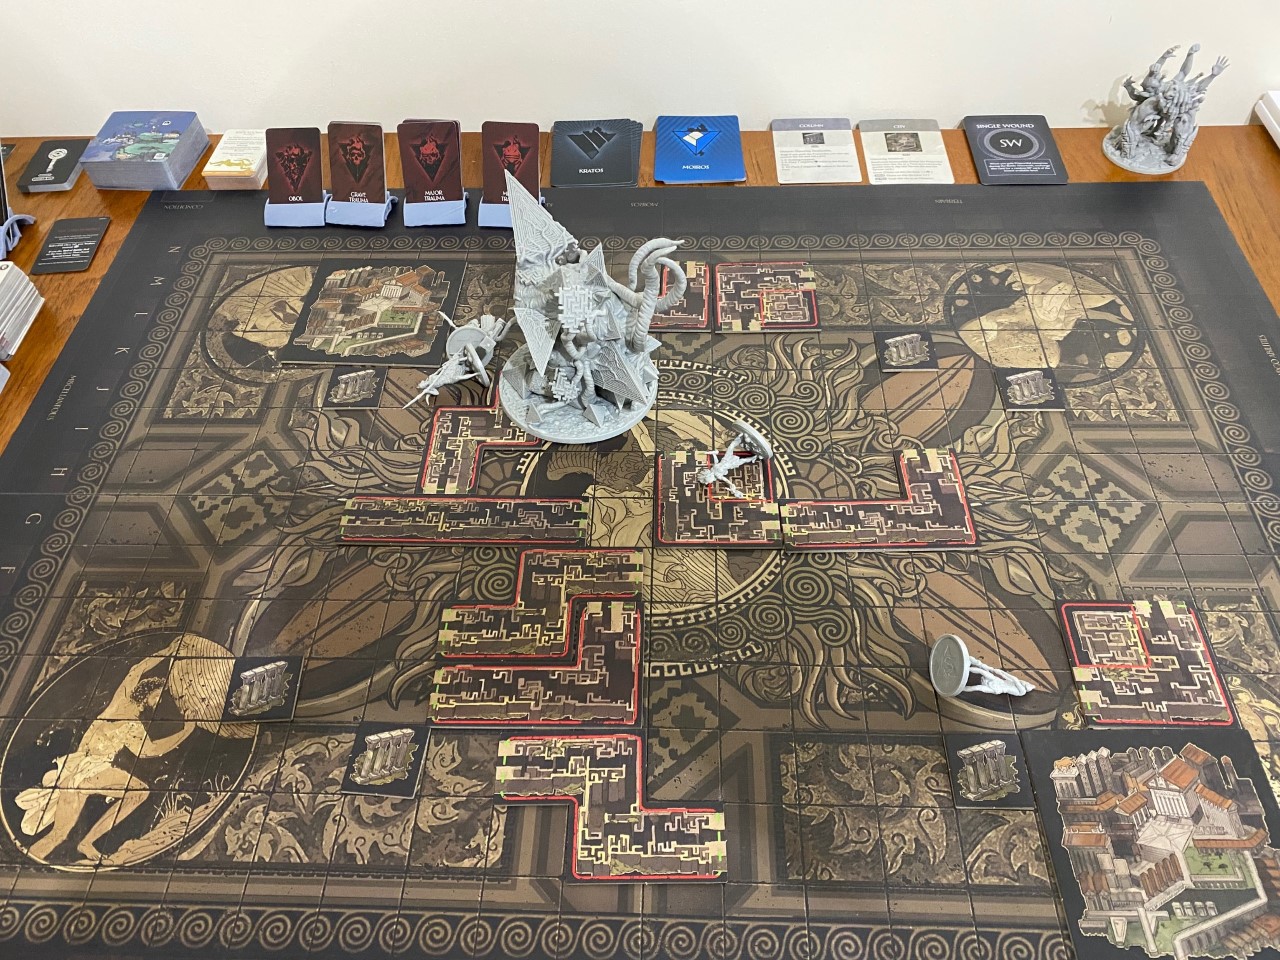
Here’s the final scene where Temenos has killed all my Titans.
Saving space
A quick look on Etsy revealed various storage solutions and character trays that could save space, but I’ve been down this path before. I could easily spend £100 to £200 on accessories which would look cool, but even if I do manage to play ATO through once this year, there’s a good chance I’ll never play it again.
I decide it would be better to go for some more generic solutions that I can re-use with other board games in the future.
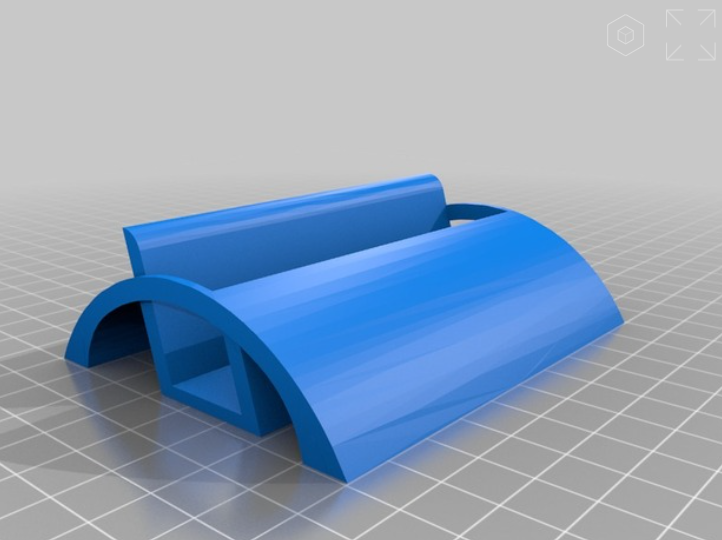
Step one is to get some deck holders so I can hold the decks upright. This will save desk space, make it easier to grab the cards, and keep the decks together. When they’re just stacked in a pile on the table you can accidentally knock them, forcing you to keep decks a certain distance apart.
I found this file on thigiverse (https://www.thingiverse.com/thing:623008). I rescaled it to be 65mm wide (which should work for the normal sized cards) and resized it again to be 45mm wide (which should work for the small sized cards). After printing these off I should be able to store most of the combat decks nice and compactly.


![Zenit Miniatures’ Samurai Warlords Now Live On Kickstarter [Updated]](https://images.beastsofwar.com/2026/02/samurai-warlords-launch-main-600-338.jpg)