
![Perfect Call Of Duty-Style Miniatures? Wargames Atlantic’s Operators Review [7 Days Early Access]](https://images.beastsofwar.com/2026/02/unboxing-wargames-atlantic-operators-coverimage-225-127.jpg)


Rooting Around – Turnip28 Spring Clean Challenge


Recommendations: 337
About the Project
Kitbashing together a few models for Turnip28.
Related Game: Turnip28
Related Genre: Fantasy
Related Contest: Spring Clean Hobby Challenge 2023
This Project is Completed
It Begins...
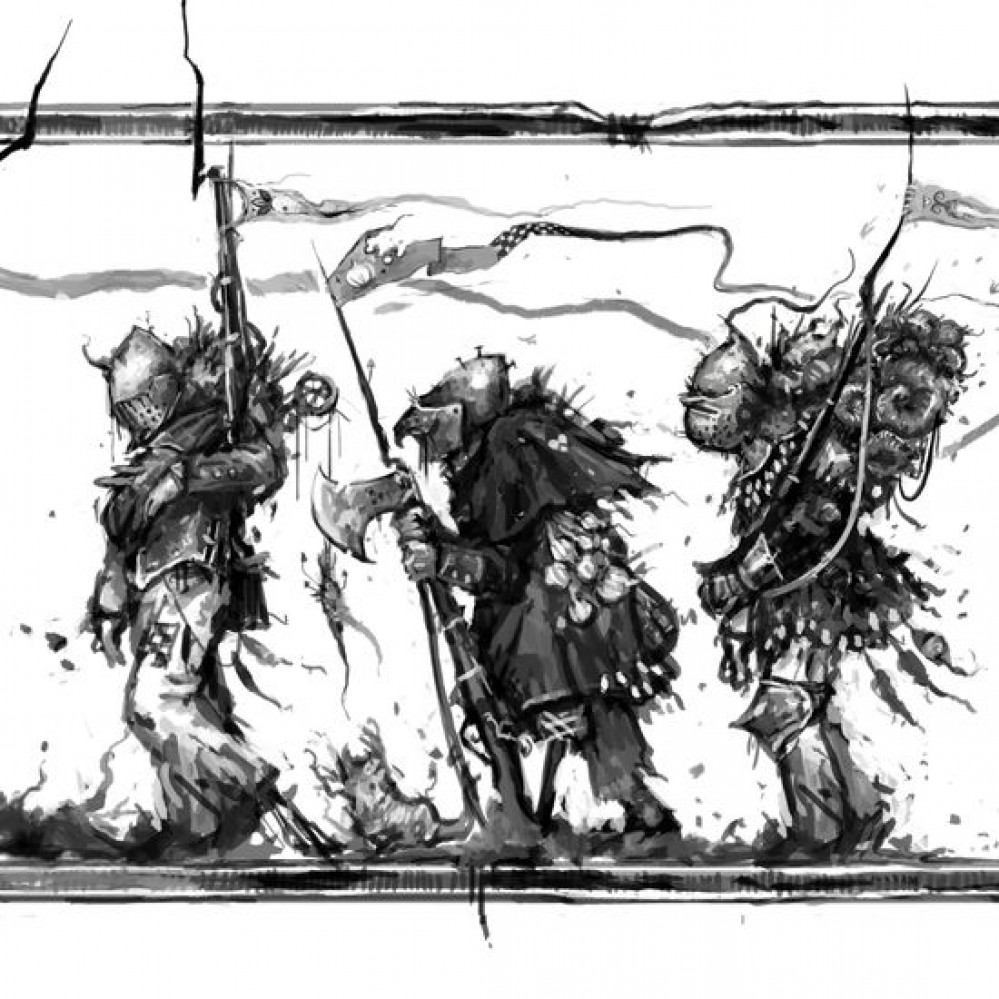
Churned mud and swampland stretches out into the gloom. Thick fog hangs heavy in the air. Rolling barrows loom out of the murk. A strange root writhes underfoot. A thousand years after the defeat of Napoleon at the Battle of Austerlitz, the world has fallen into decay. Endless war has led to technology stagnating, and beautiful countrysides have been ground to a thick ruin under the boots of a million dead men.
Now, nothing grows. A bizarre and horrible root covers the land; strangling the life from the trees, poisoning the water, and filling the sky with an acrid mist. Humanity barely endures by harvesting this disgusting tuber. It twists their bodies and minds, infesting their thoughts with divine visions of lost vegetables. Bizarre religious orders have formed. They stockpile abandoned weapons unearthed by the twisting roots.
Marching in column under fluttering banners, brandishing mud-clogged muskets and rusted bayonets, they are cruel parodies of long-forgotten armies on the march.
Gather your troops. Fix bayonets. Devote yourself to the roots.
Turnip28 is a weird postapocalyptic wargame that combines Napoleonics with root vegetables, created and developed by Max FitzGerald (with free rules available at his Patreon – https://www.patreon.com/Turnip28). It is a setting that encourages and embraces players to kitbash together odd, root-tangled soldiers.
Kitbashing is not something I’ve done a lot of in the past. I had a lot of fun building some Napoleonic French zombies for the Silver Bayonet, and wanted to try something else, with the setting of Turnip28 grabbing my attention the most. So I picked up a few things around Autumn last year with the intention of getting going, but I stalled due to other ongoing projects.
Enter the 2023 Spring Clean Challenge – a perfect time to revisit the idea.
The Main Ingredients
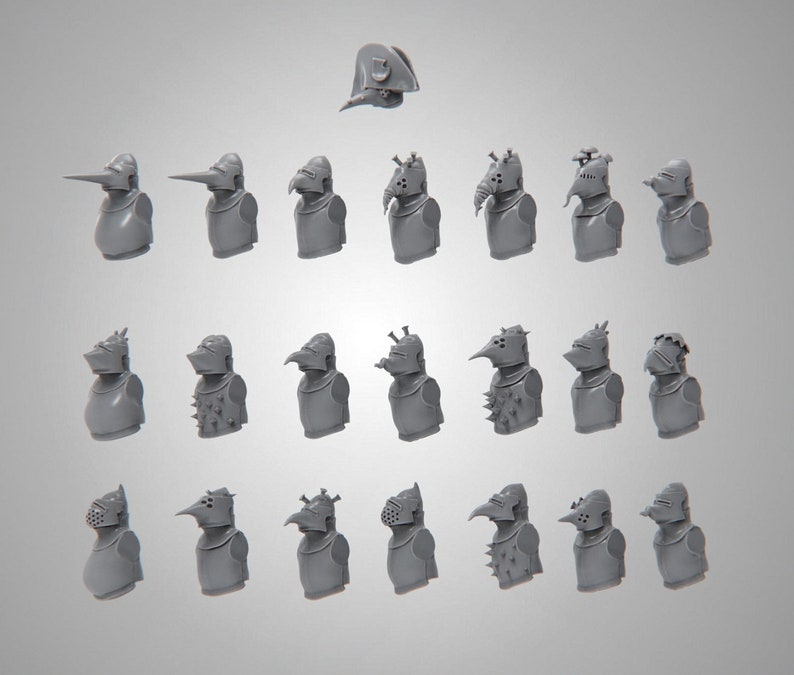
I’m aiming to bash together about 20 or so figures. There’s two main components – some plastic Napoleonic infantry, and some 3D printed torsos and heads designed by saint_decent. The basic idea is to slice off the Napoleonic infantry legs, stick on the torsos and heads and then add the arms and muskets, plus backpacks and whatever else suits.
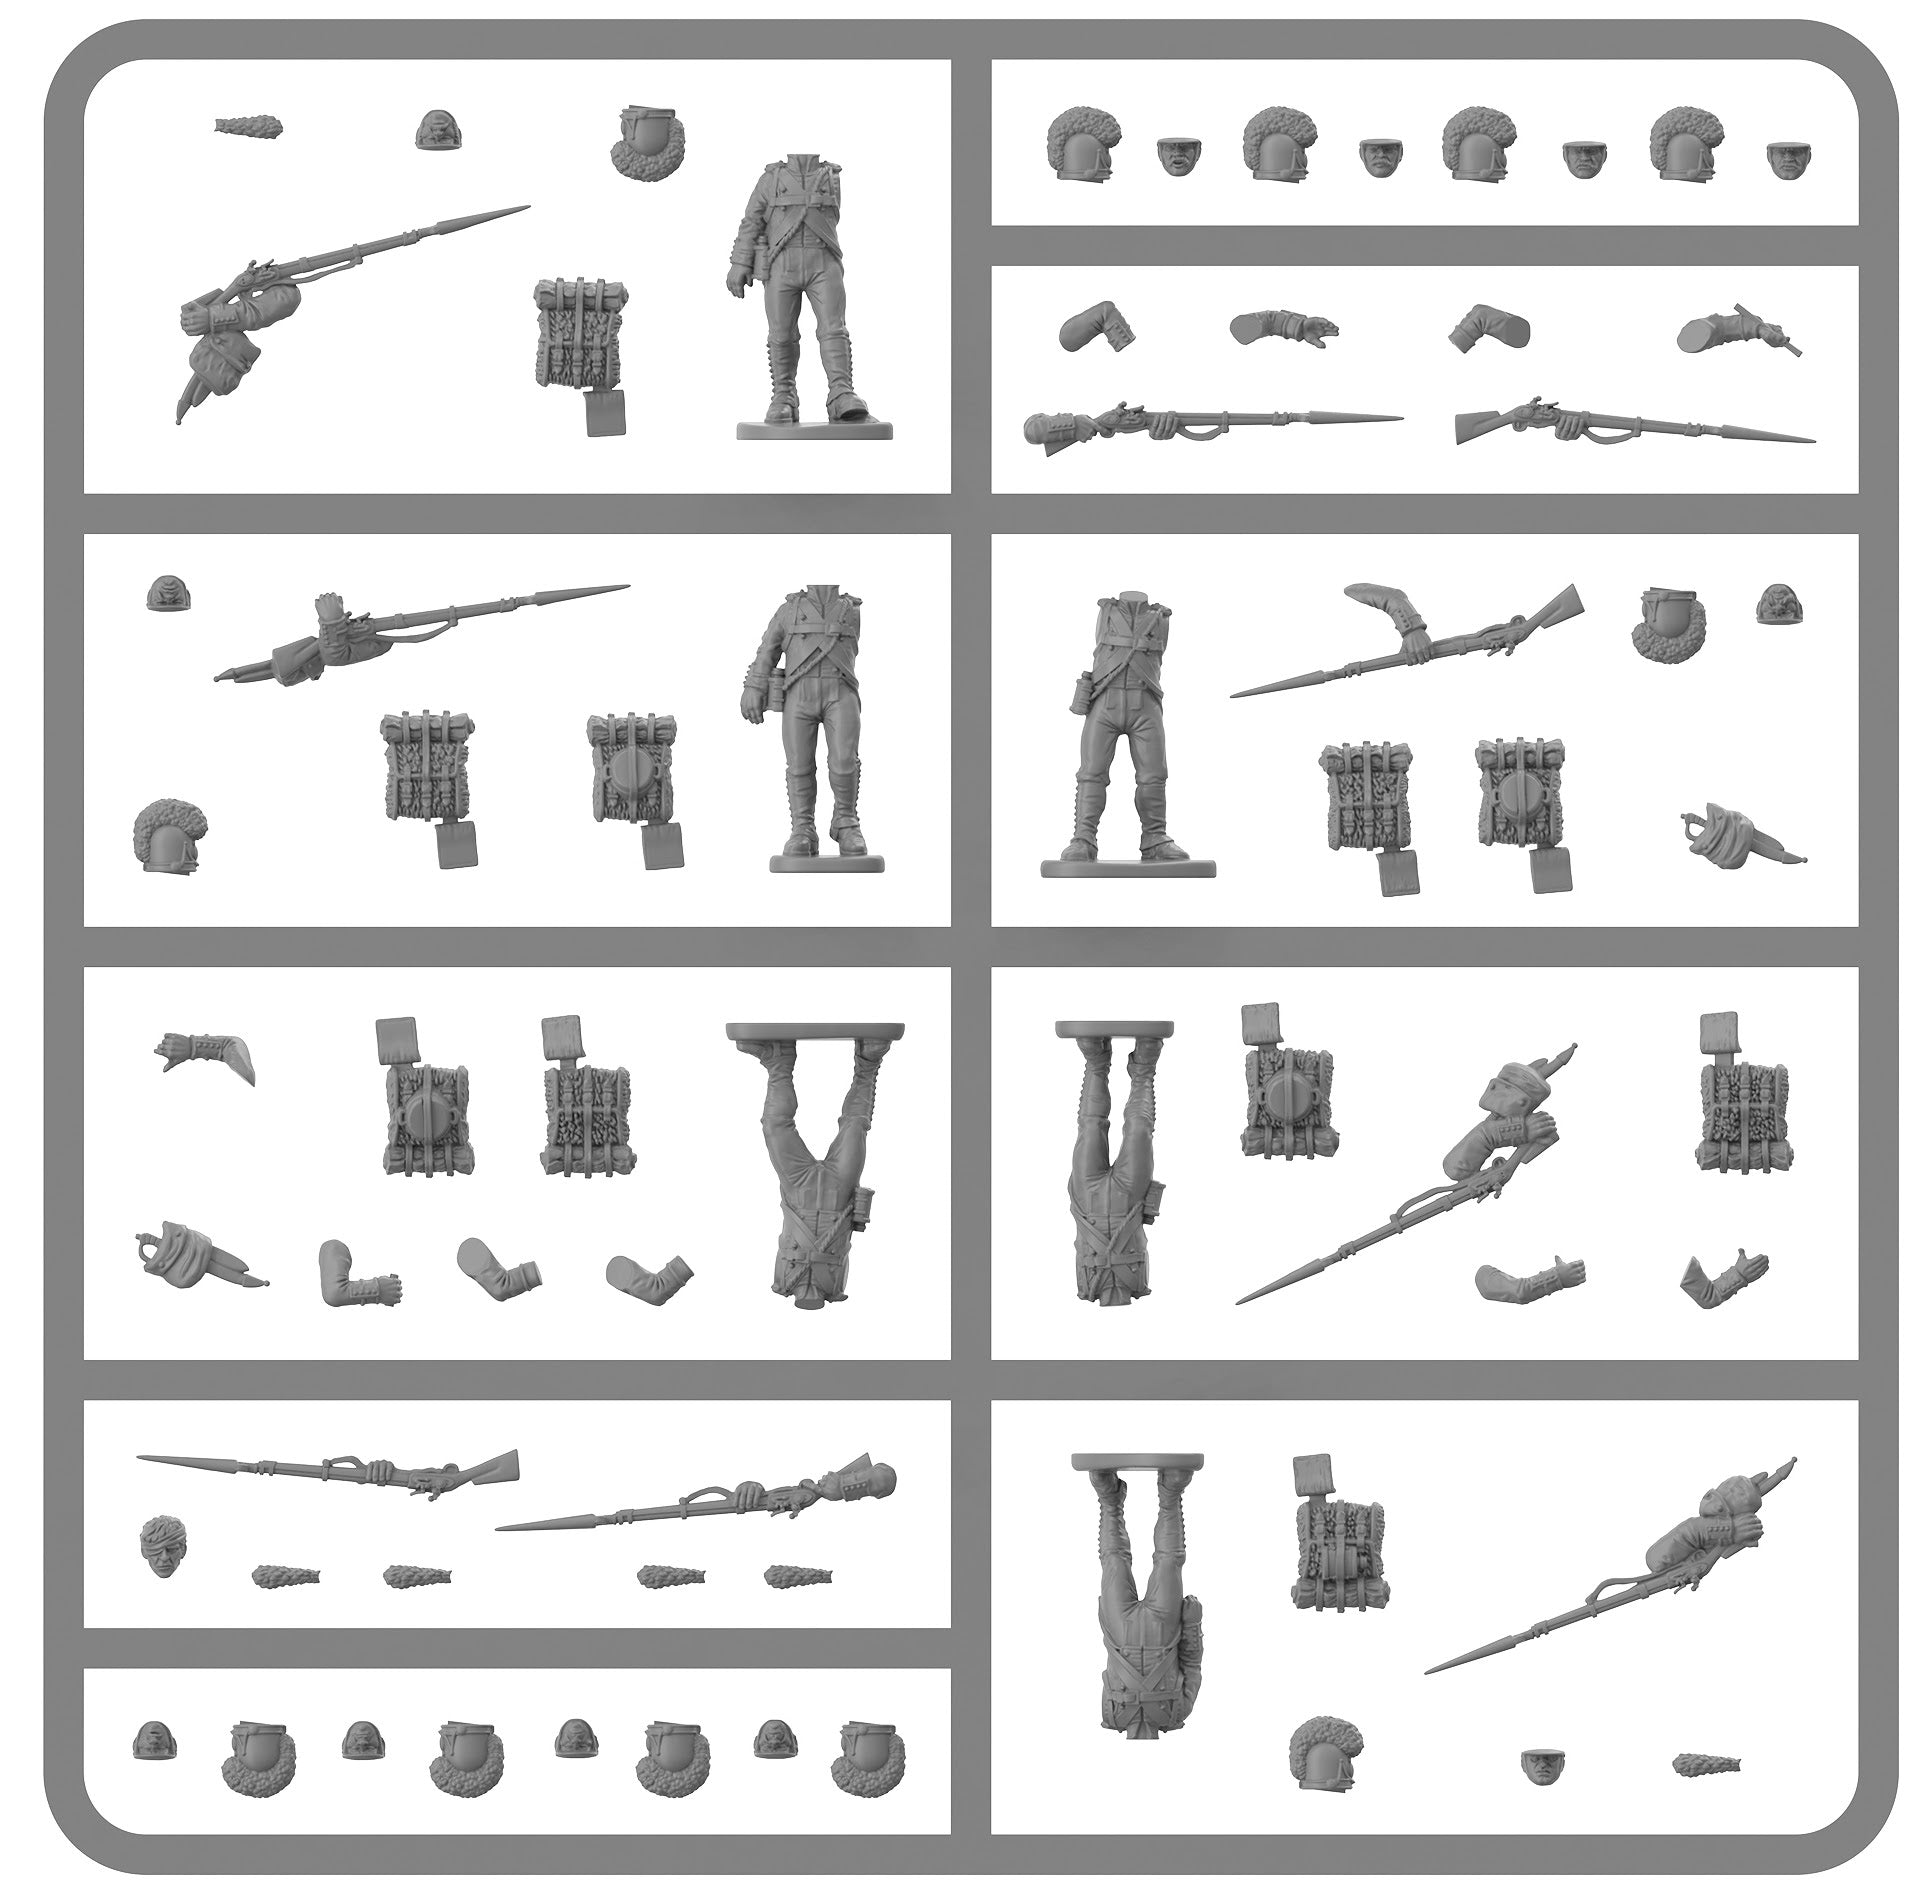
For the Napoleonic infantry, I went for Victix’s Bavarians, one of their newer releases. These have both marching and firing poses on the basic infantry sprue, plus a mounted officer who should be an interesting prospect to put together. I also have a few spare arms and weapons from some Perry’s French Line Infantry left over from my Silver Bayonet zombies.
Images of the main ingredients below.

Putting Together the Chaff
Before starting to put any models together, I had a quick skim of the Turnip28 rules to see the types and sizes of units. There are three different sorts of infantry – Fodder, Chaff and Brutes, being your general foot sloggers, skirmishers and heavy melee troops respectively.
I decided to start with a unit of Chaff, which are only four figures in size. Grabbing a pair of clippers, hobby knife and some superglue, I got going.
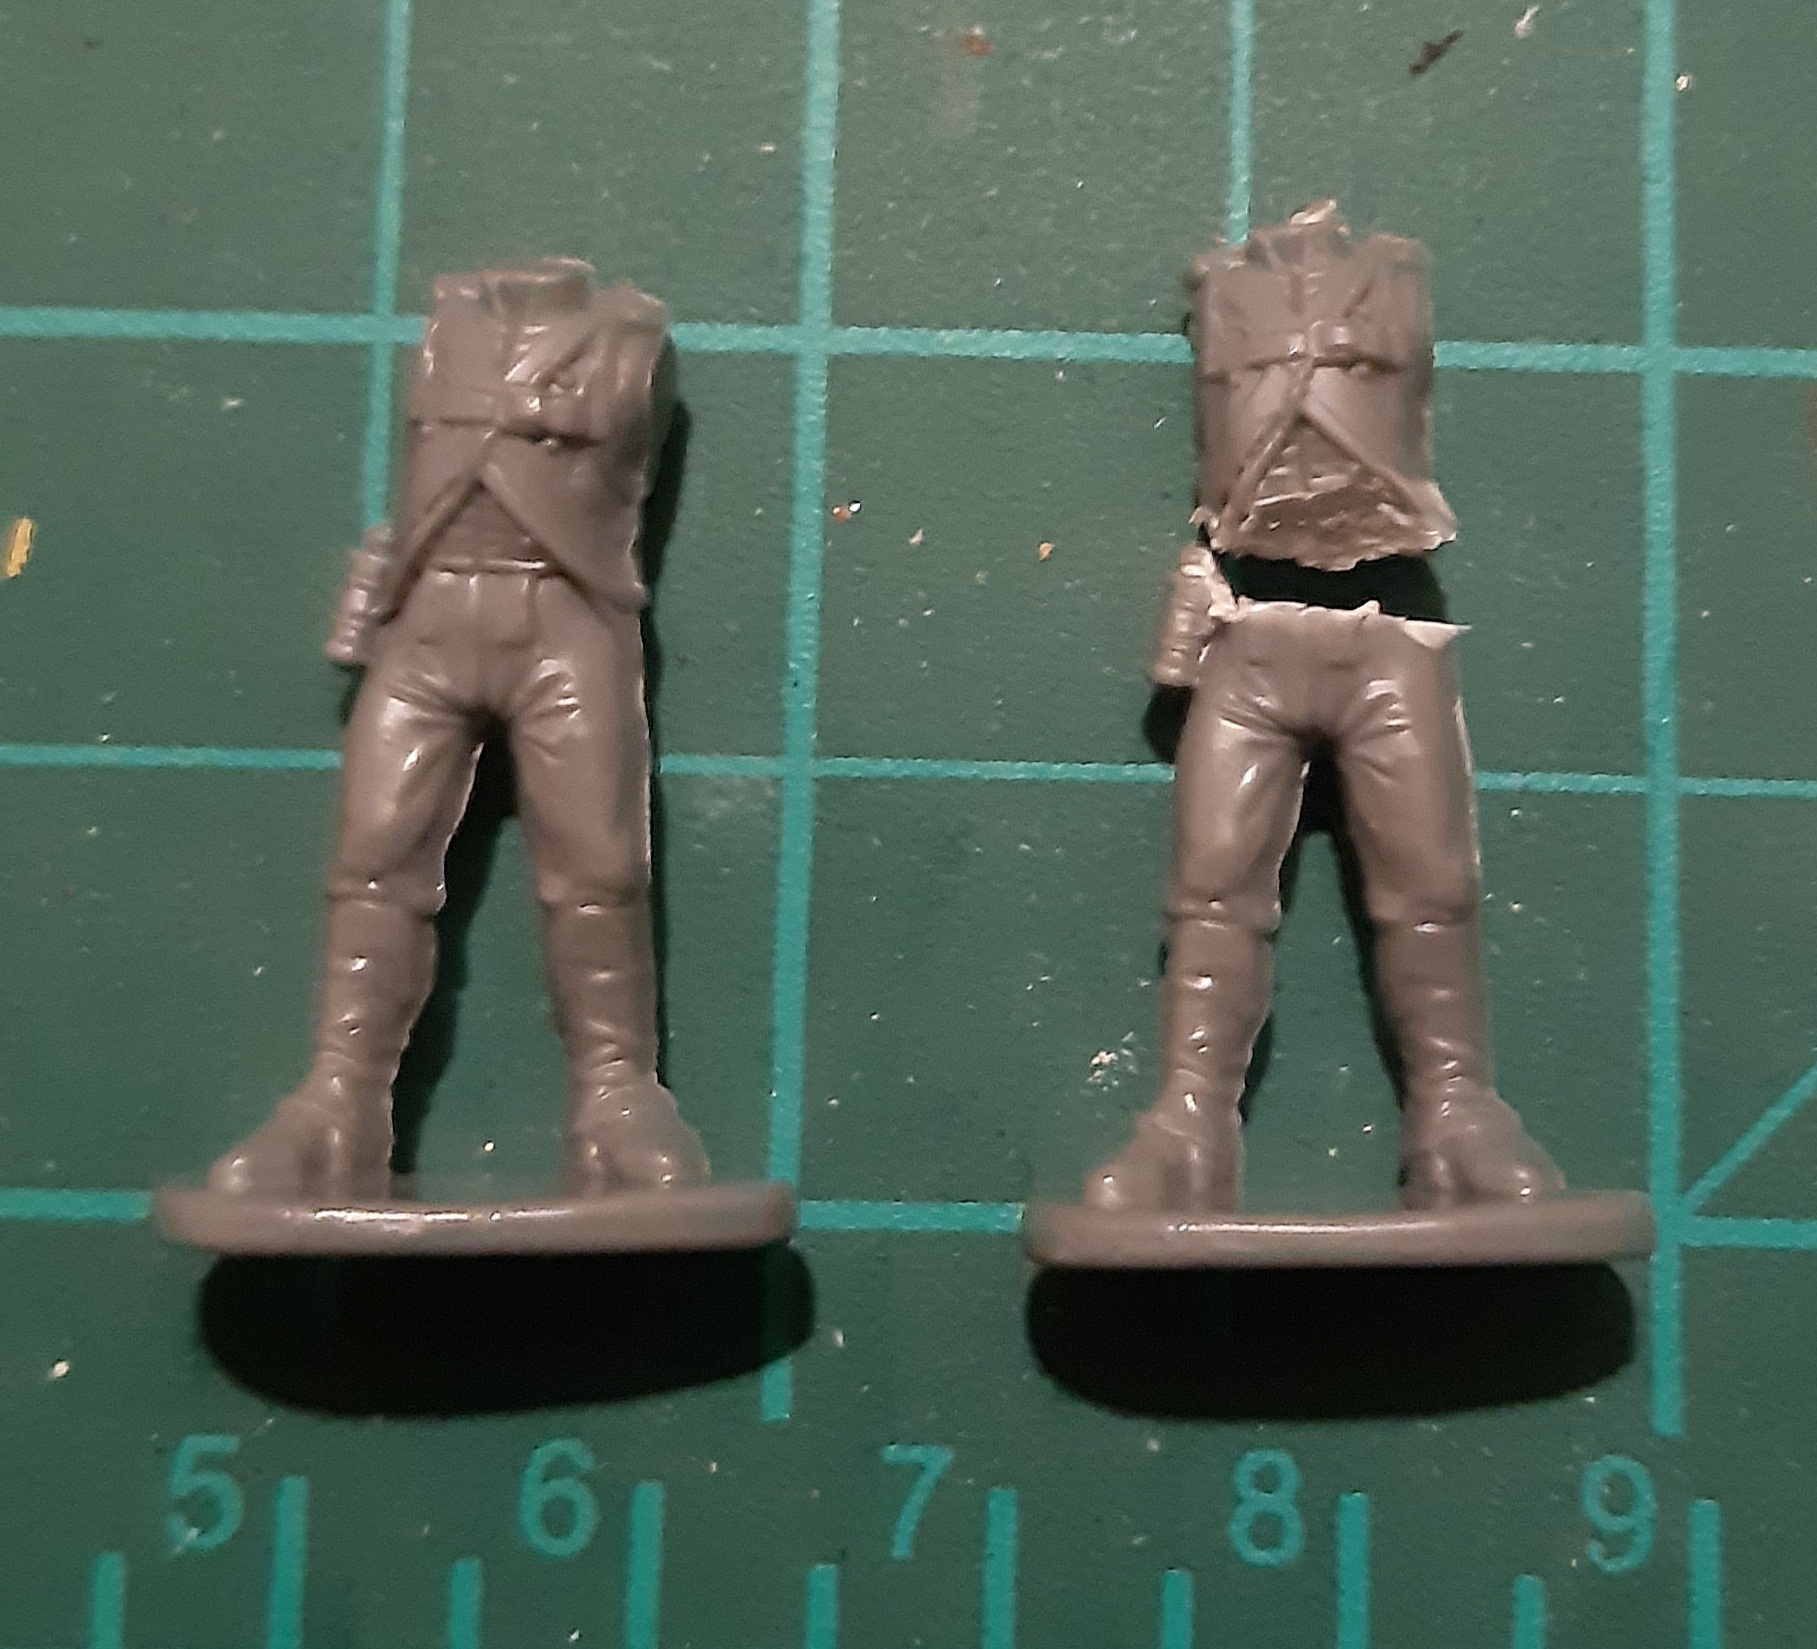 First step was snipping the legs from the torsos of the Bavarians. I made a quick check to see how the 3D printed torsos matched up, just in case they aligned in an unexpected way, but fortunately there were no surprises.
 Next it was a simple case of gluing the torso on, and picking some appropriate arms. As these were going to be Chaff, I picked out some of the arms for firing and loading figures. Backpacks were added, and I thought plumes would be a nice addition to mark them out as elites.
As far as kitbashing goes, this is pretty standard stuff. The 3D torsos were a bit more rotund than the Bavarians, so trying to get arms to match nicely around the body was difficult. Lots of gaps are present, which would normally be avoided by careful dry fitting and trimming of parts to get better joins. However, one of the joys of Turnip28 is the dirty, rooty grim dark theme – gaps in the joins are opportunities to work in roots and tufts and general grub. Basically, lazy kitbashing is absolutely fine, possibly a boon.
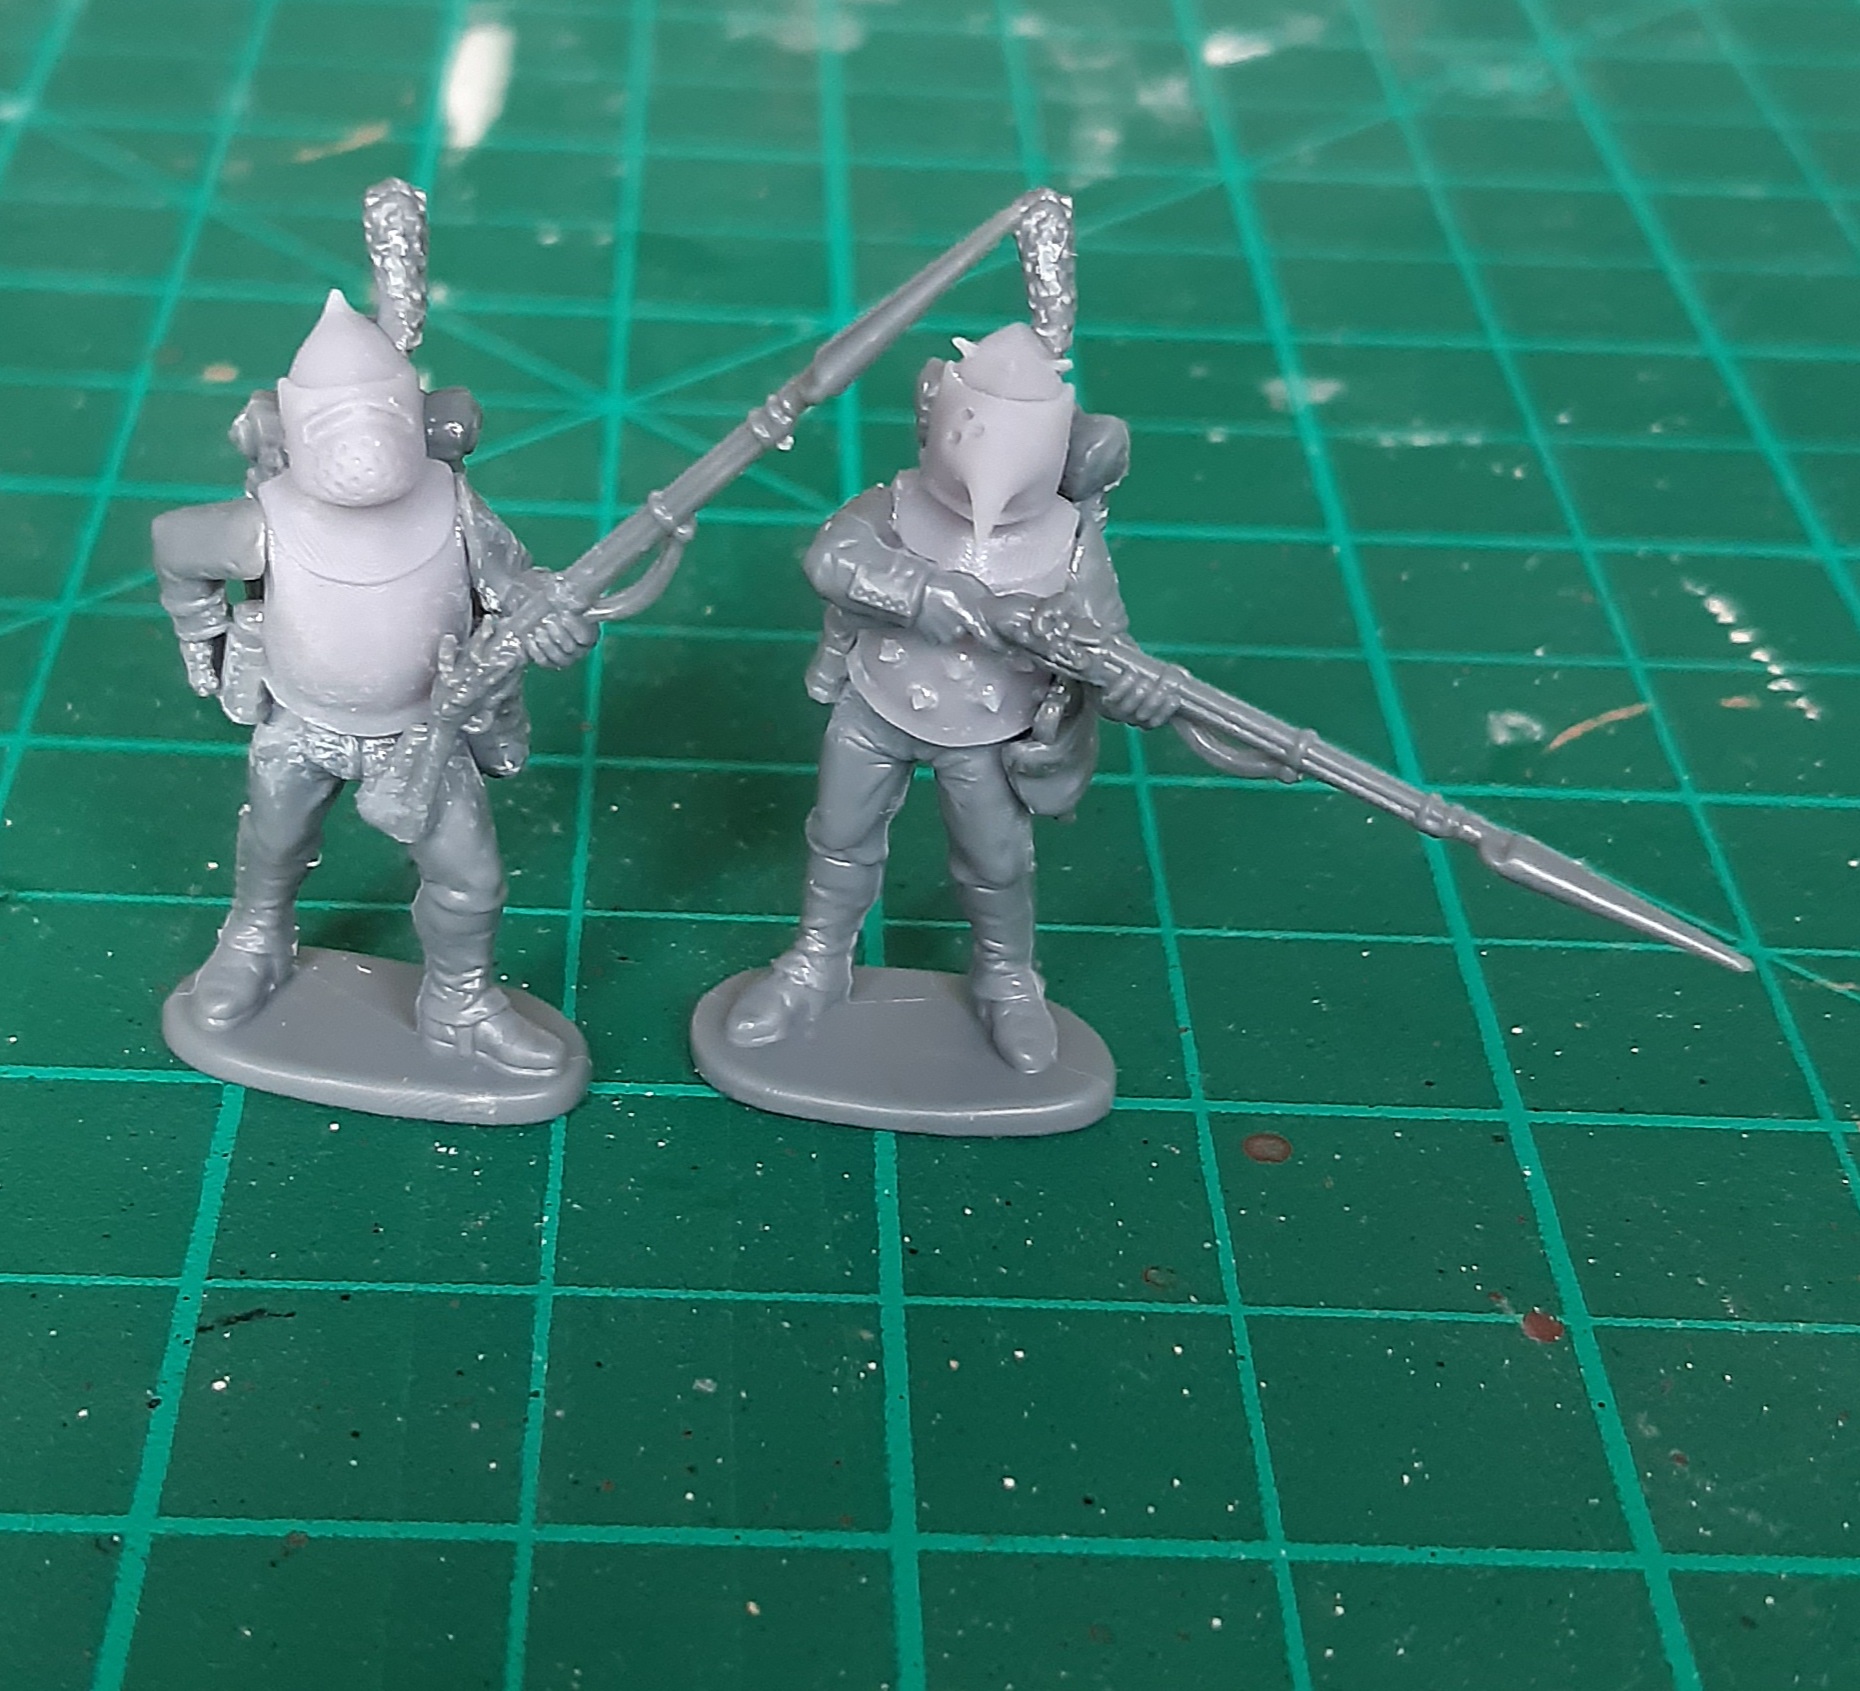

Although Chaff reckon themselves to be quite the dangerous marksmen, they are in fact terrible shots. I quite liked making one of them look pretty awkward in firing as a nod to this.
Putting Together the Fodder
In Turnip28, Fodder are the mass group of the lowest troops. They come in units of 12, and I wanted to have a lump of these in traditional Napoleonic marching poses as they trudge onwards.
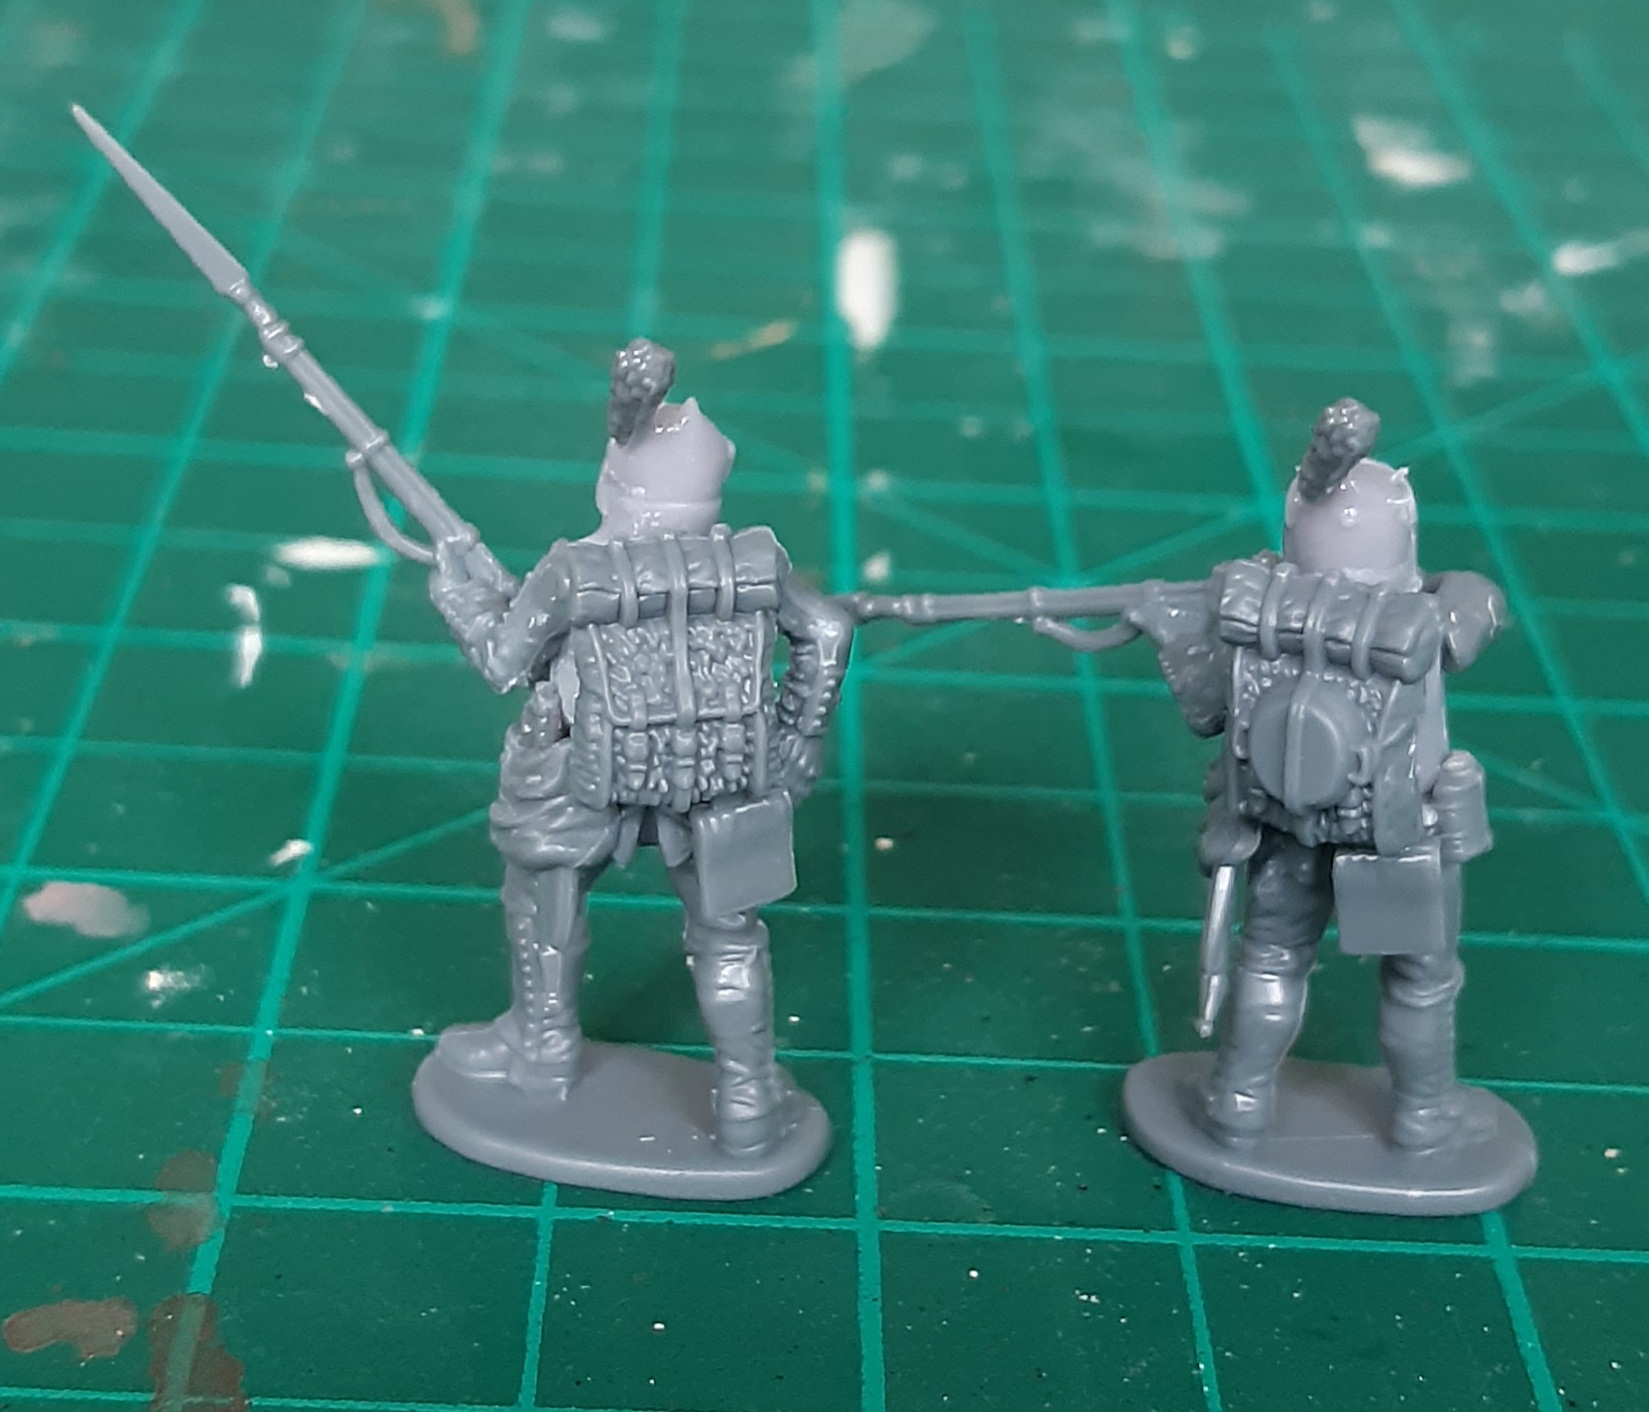
The process was basically no different to the Chaff – slice legs from the torso, replace with a nice 3D torso, add arms and backpack. Two main differences were I sliced the legs at a bit of an angle to give the Fodder a more hunched and slumped over look. Secondly, I found carving a little concave nook into the back of the blanket/coat roll helped fit the backpack onto the more rounded shape of the torso.
The wise among you may have spotted a potential problem with some of the Bavarian bodies. Half the infantry on each sprue have their right arms already attached, with no additional straight arms present. This potentially meant having to carefully remove the arms before slicing off the legs, nothing too difficult, but a bit of a pain. Fortunately, I had some spare arms left from a Perry’s 1814 French Line Infantry kit, so I had options beyond removing all the arms from the bodies.
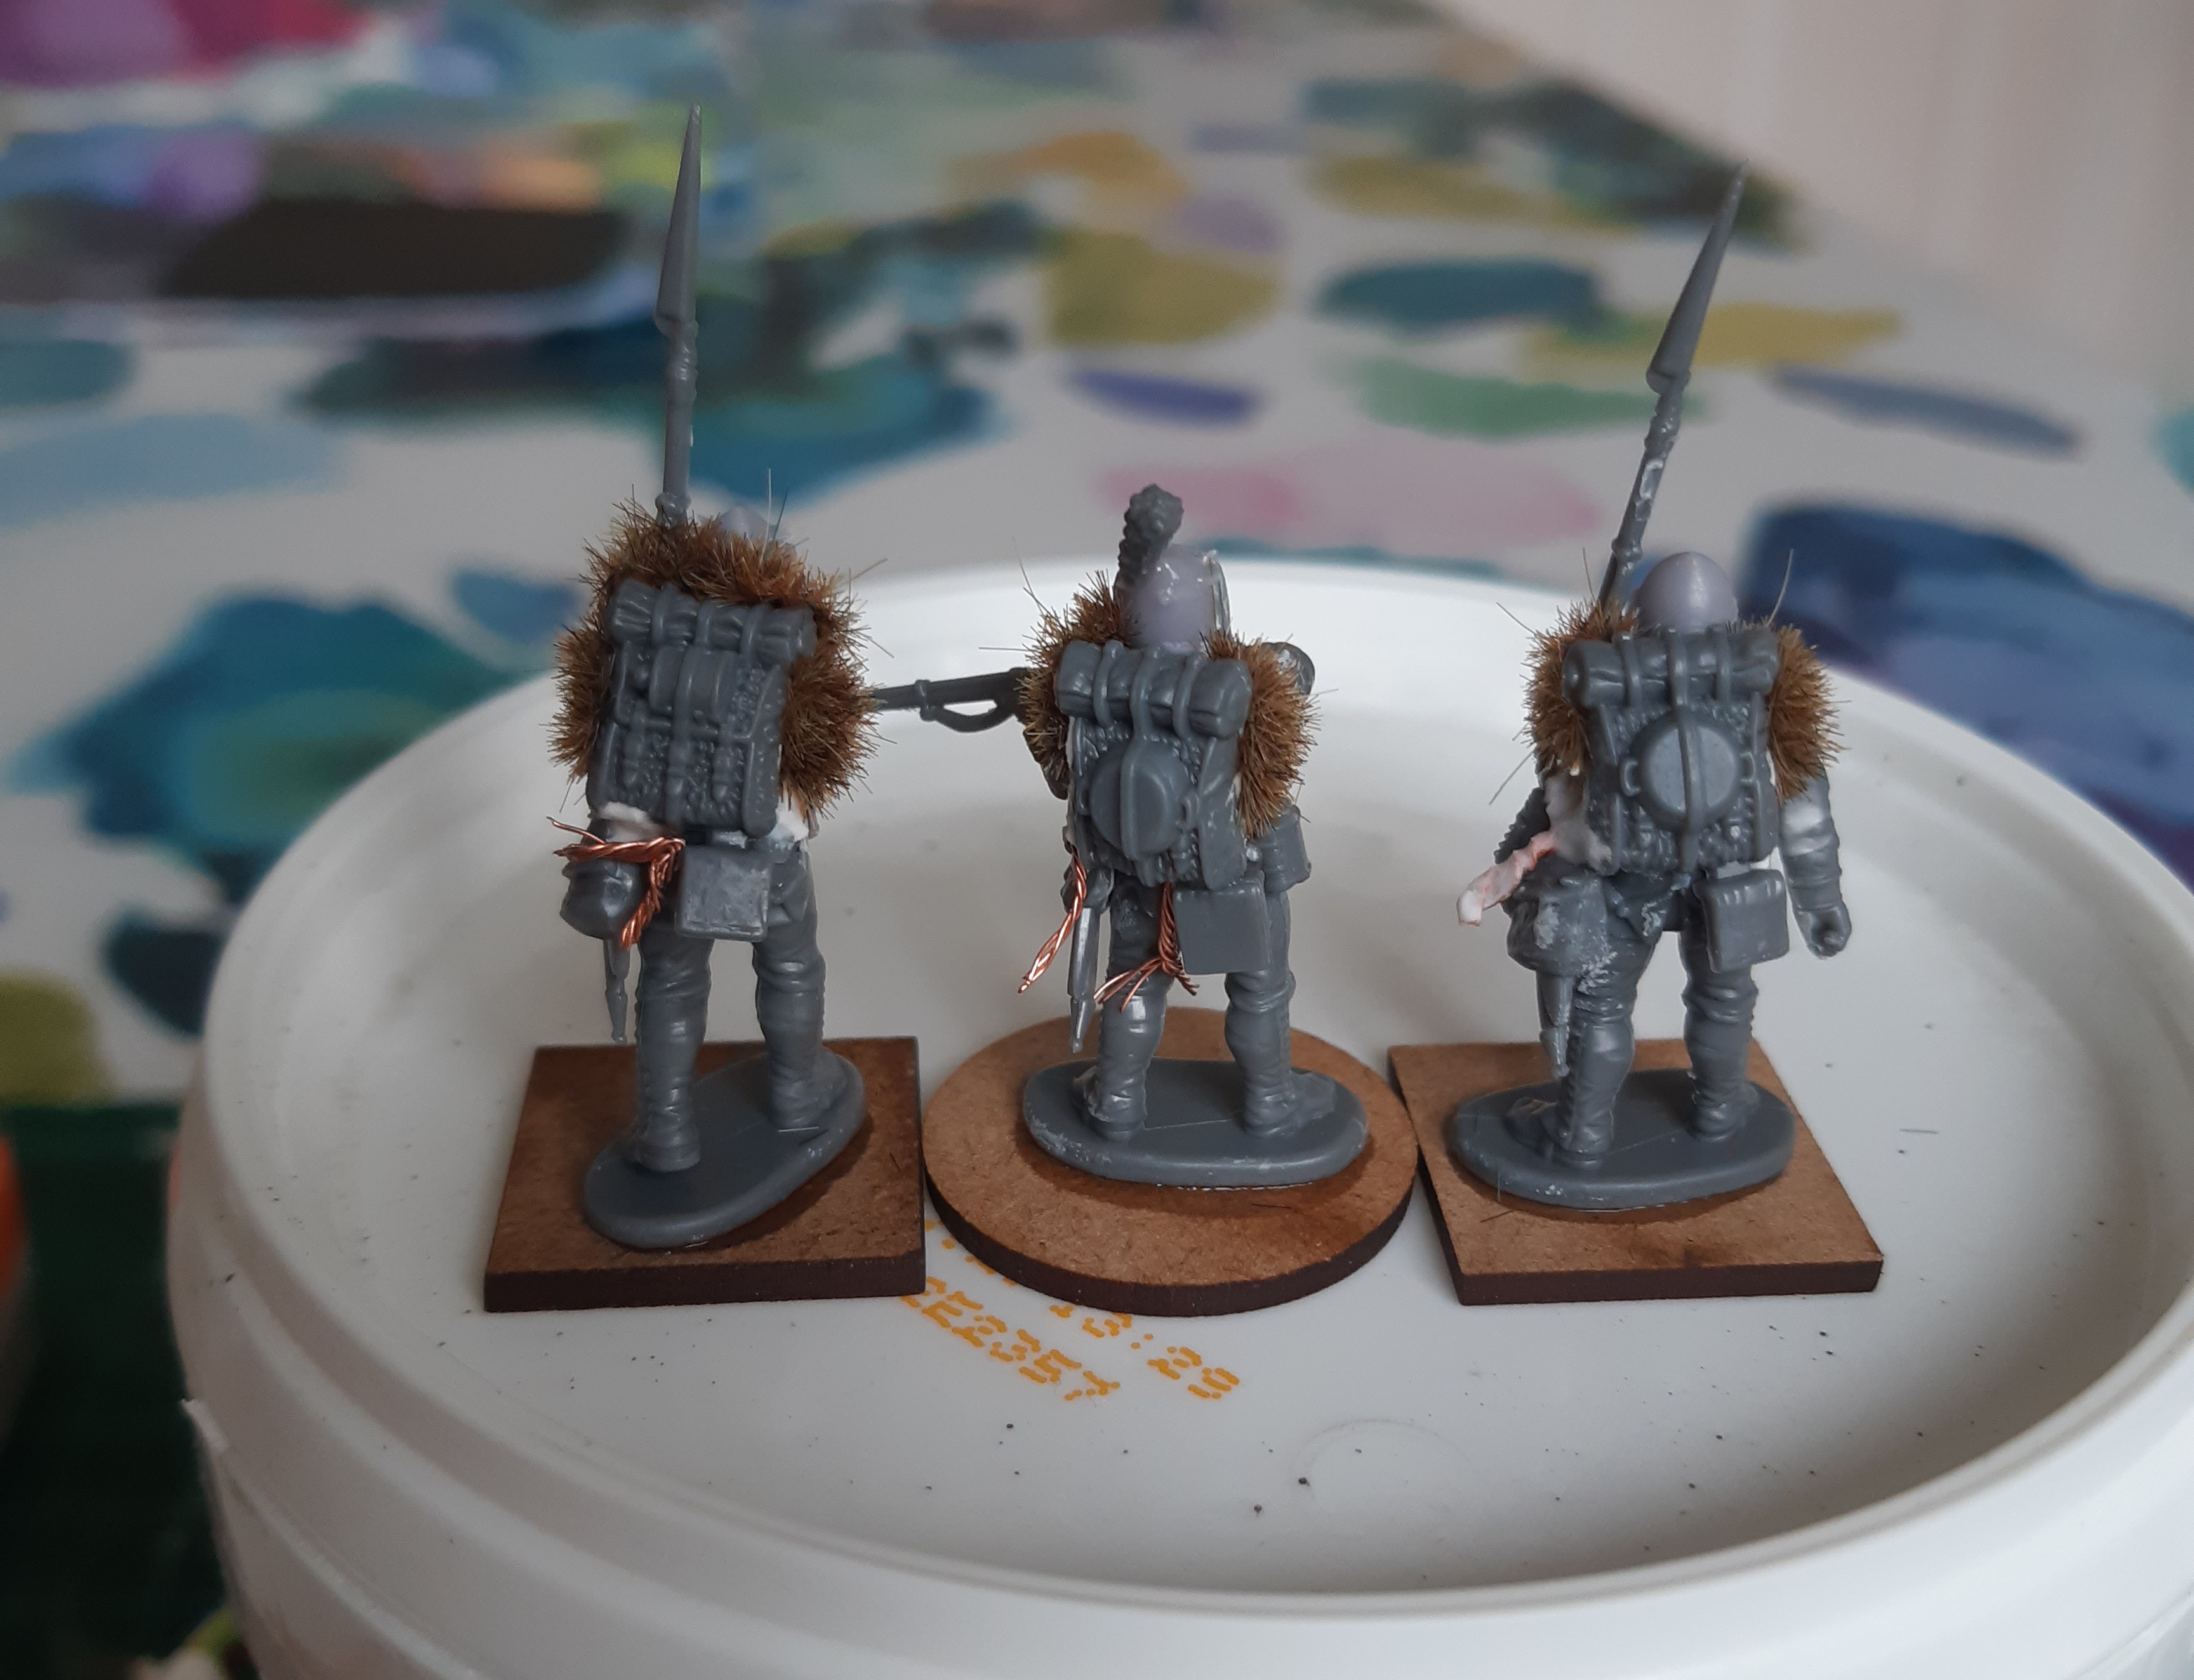
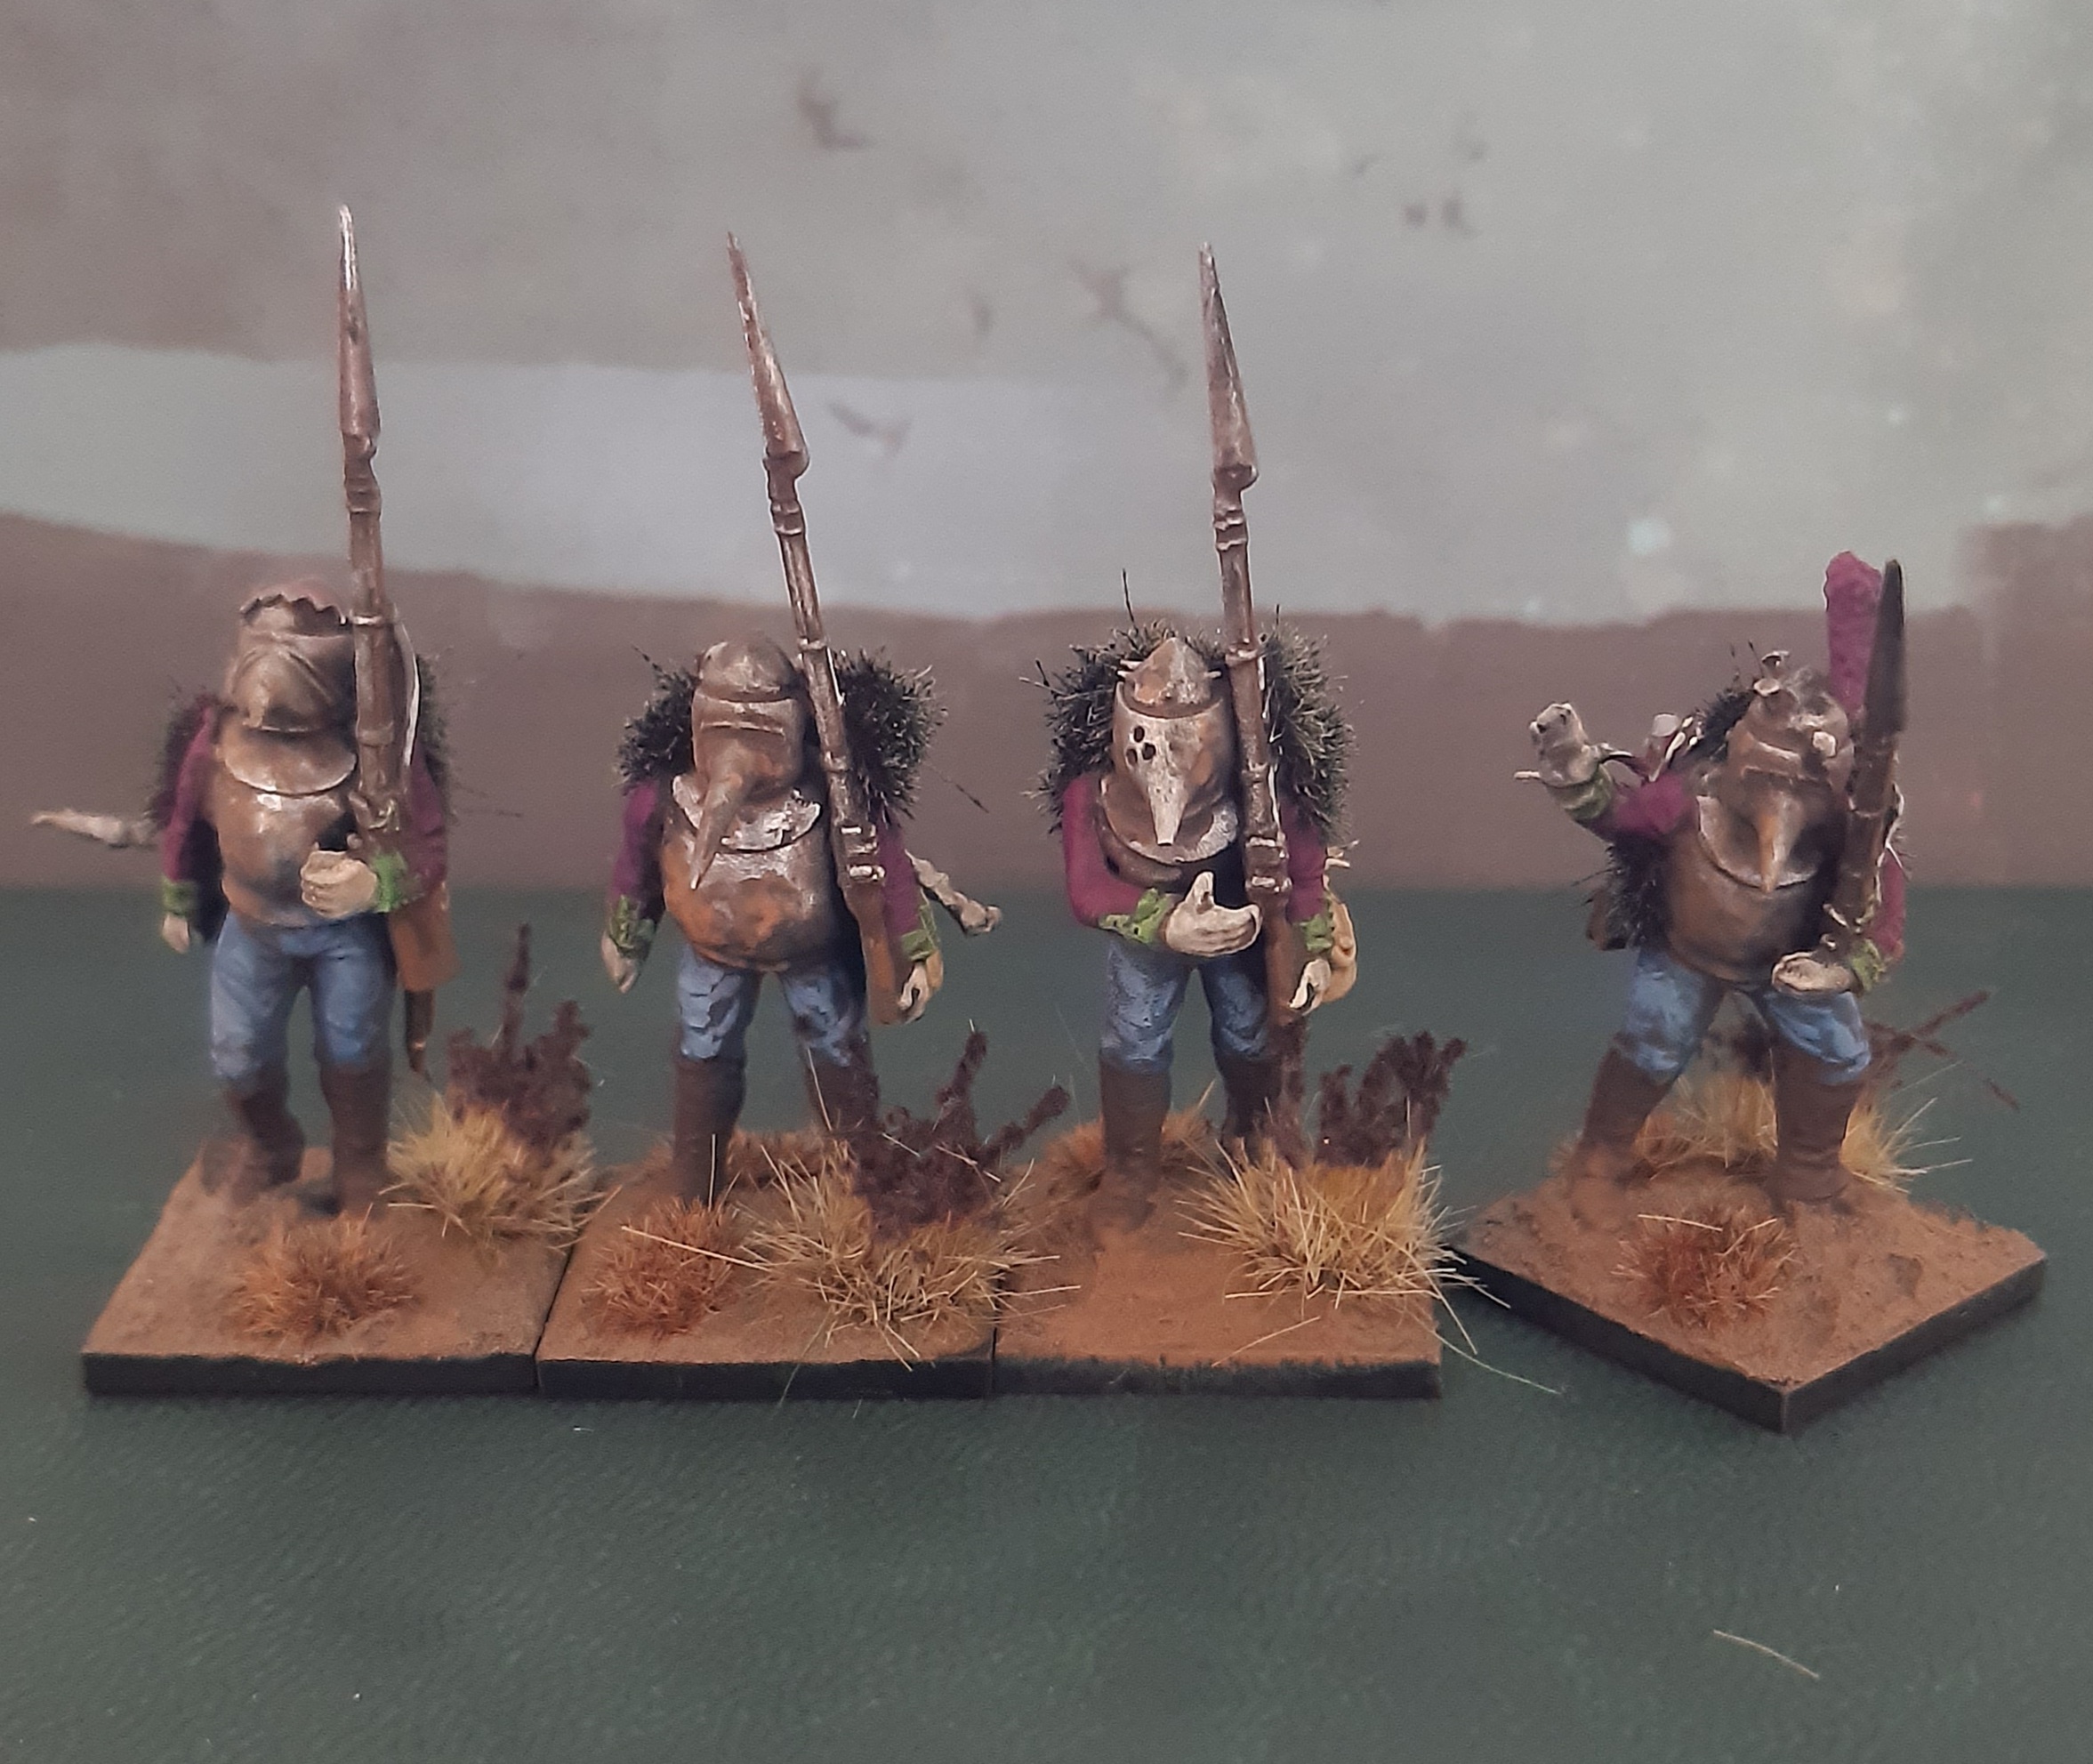
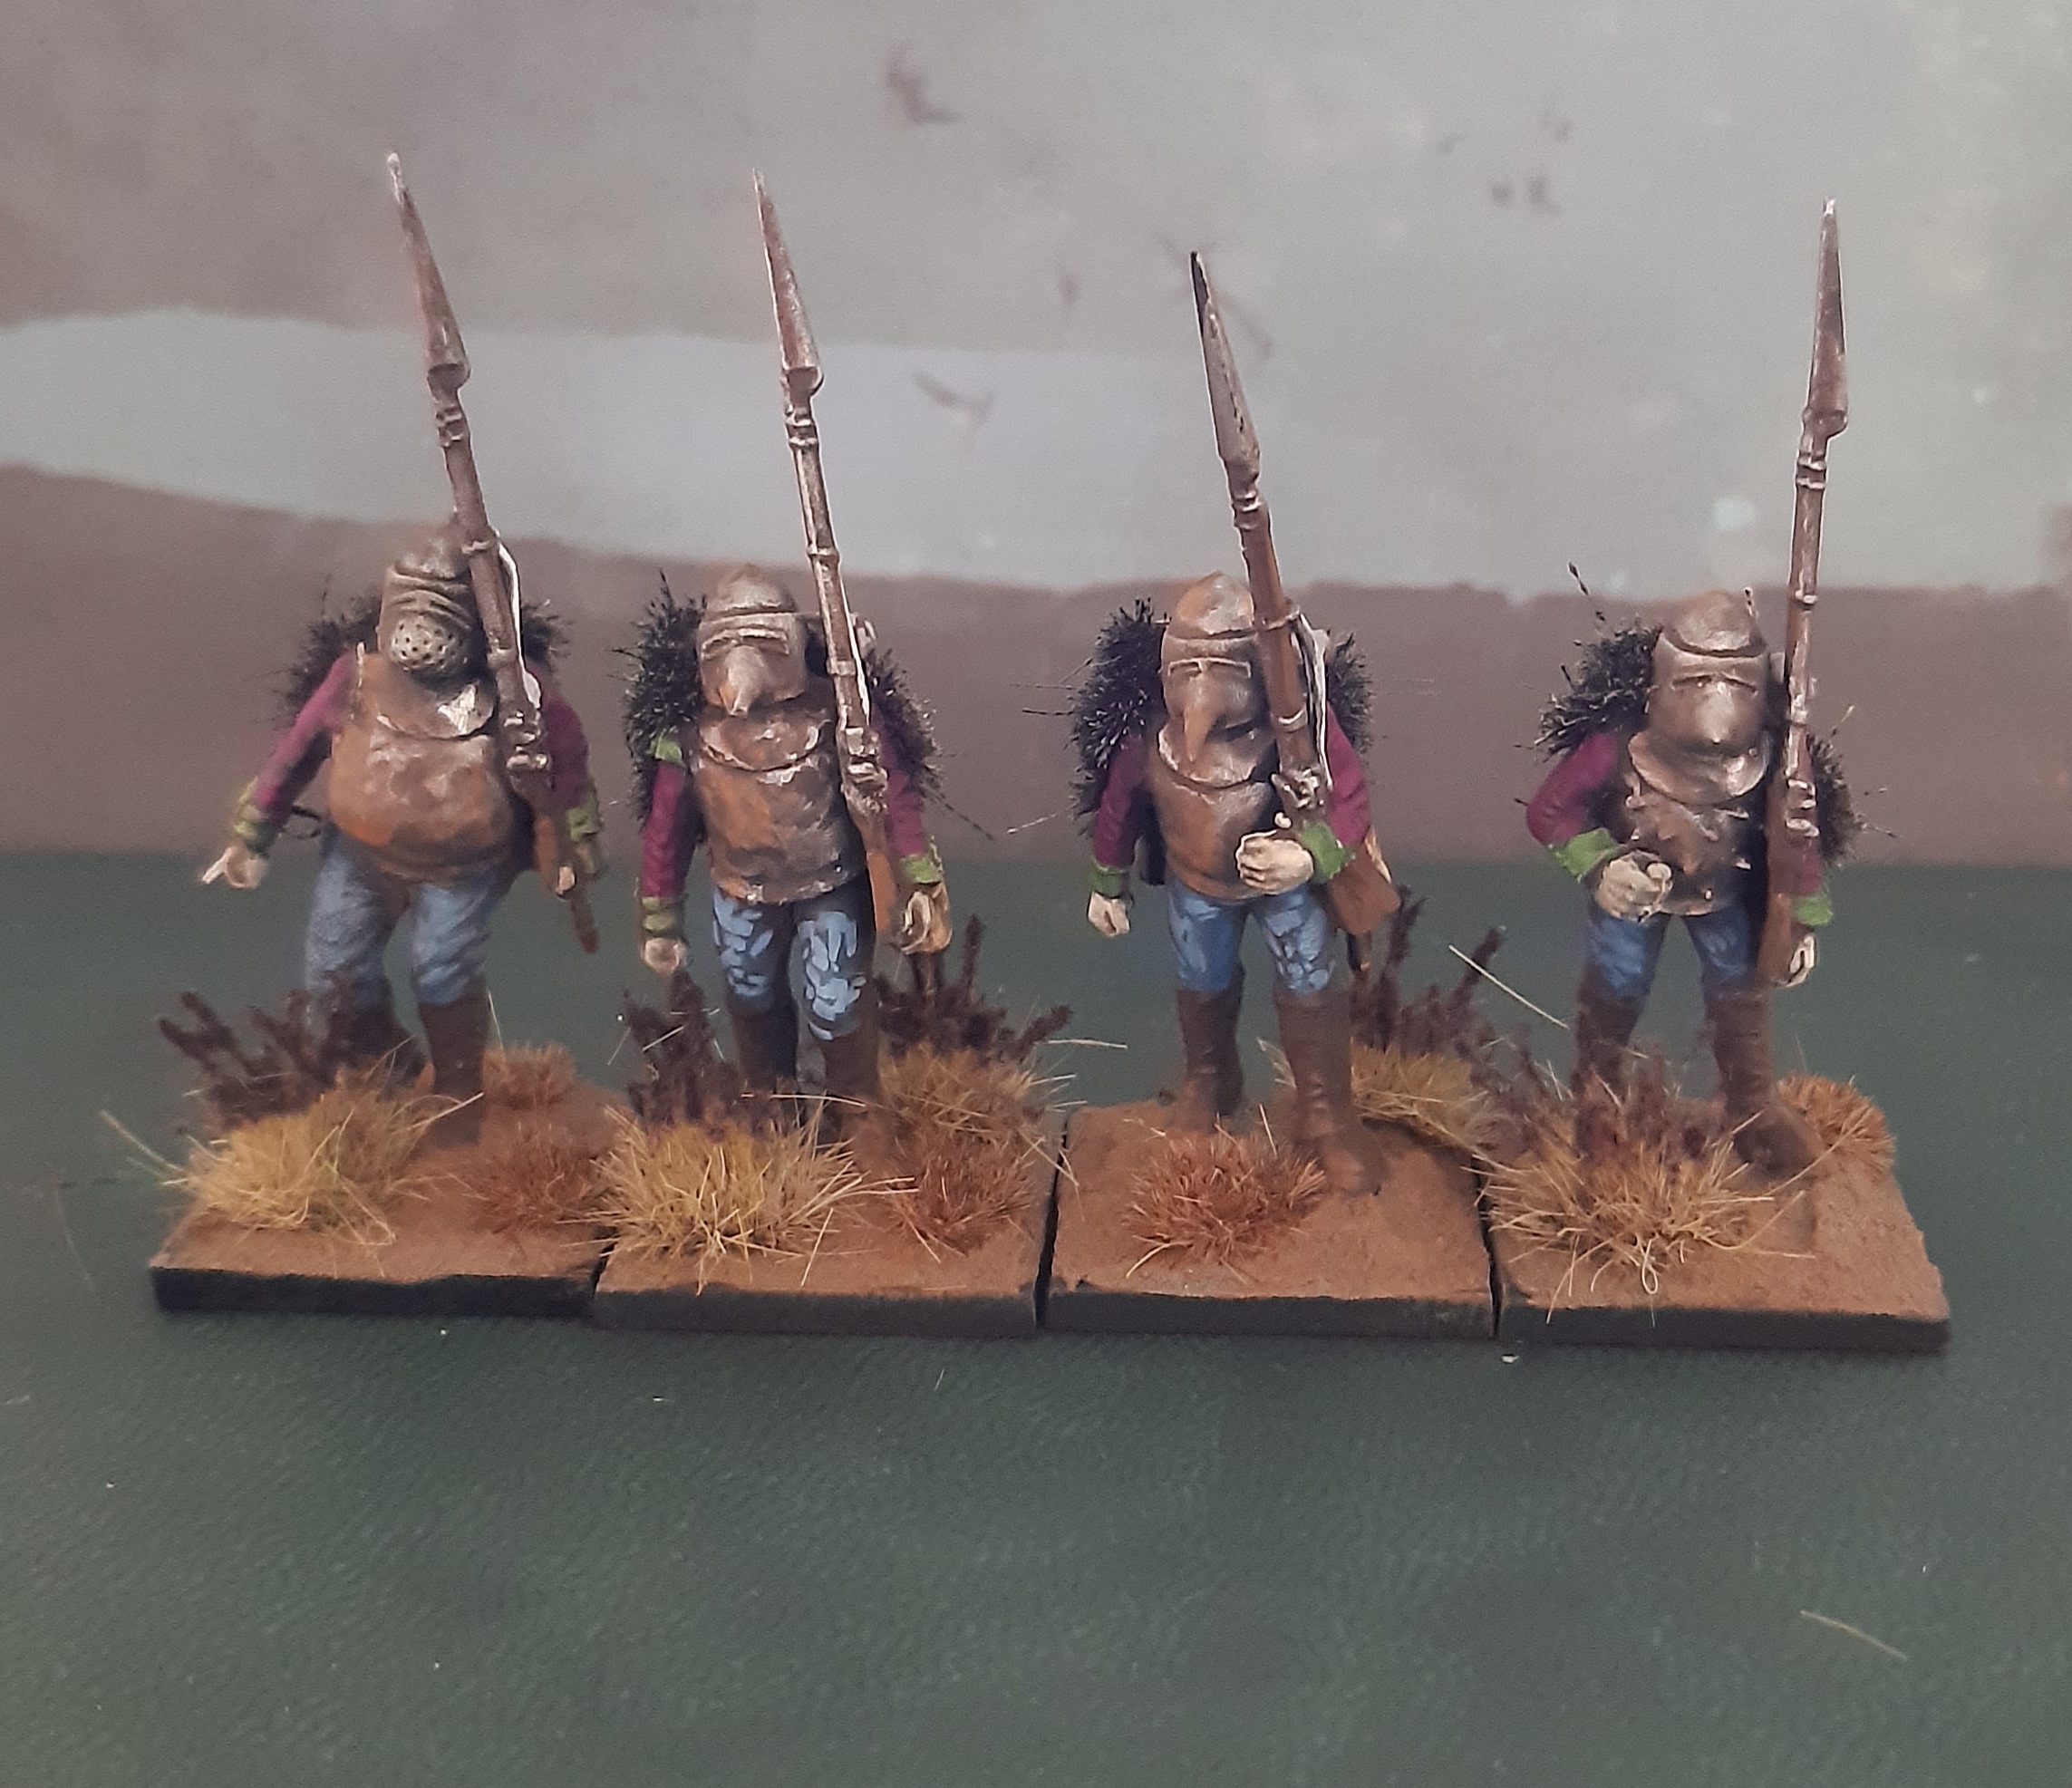
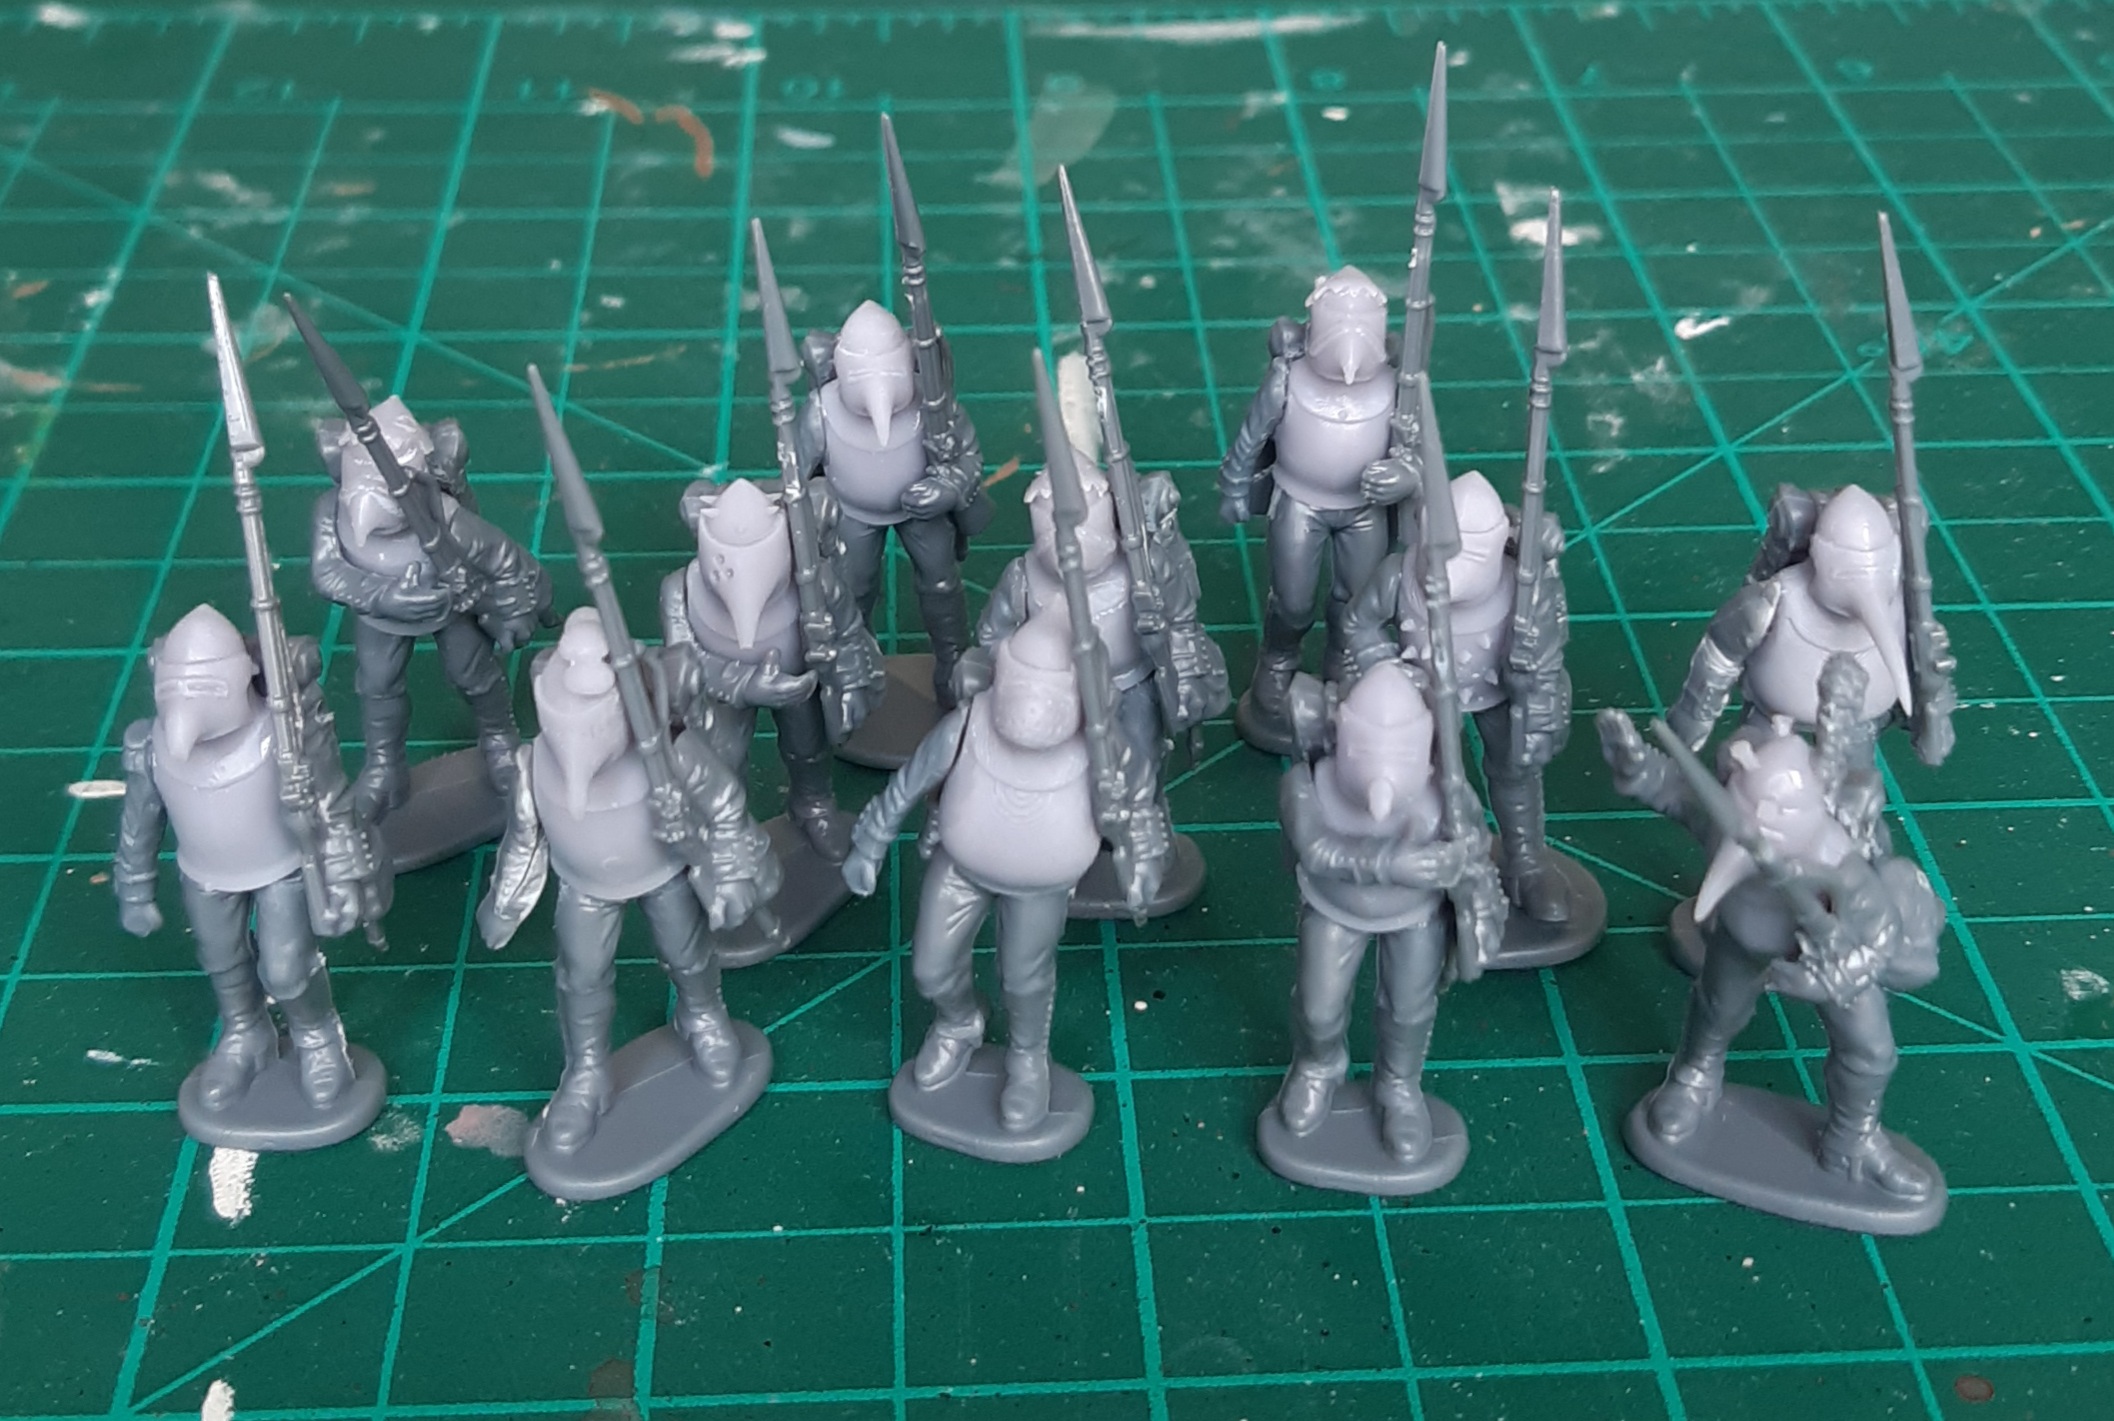 Here's all twelve Fodder. As with the Chaff, plenty of gaps to be sorted out with roots and dirt.
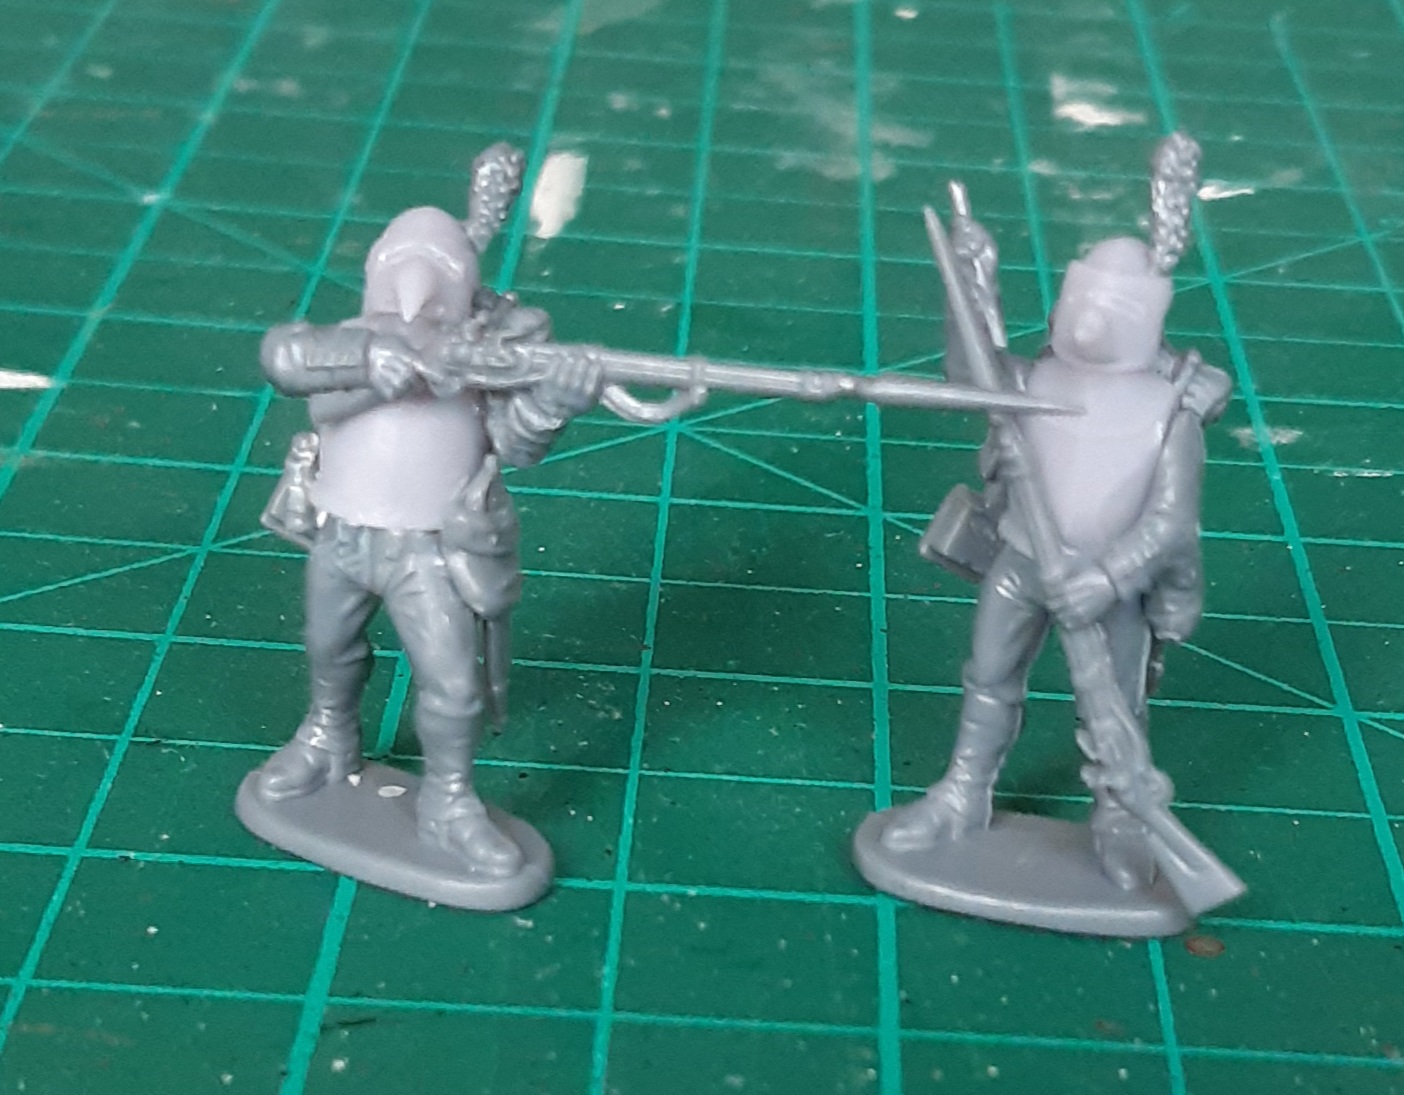
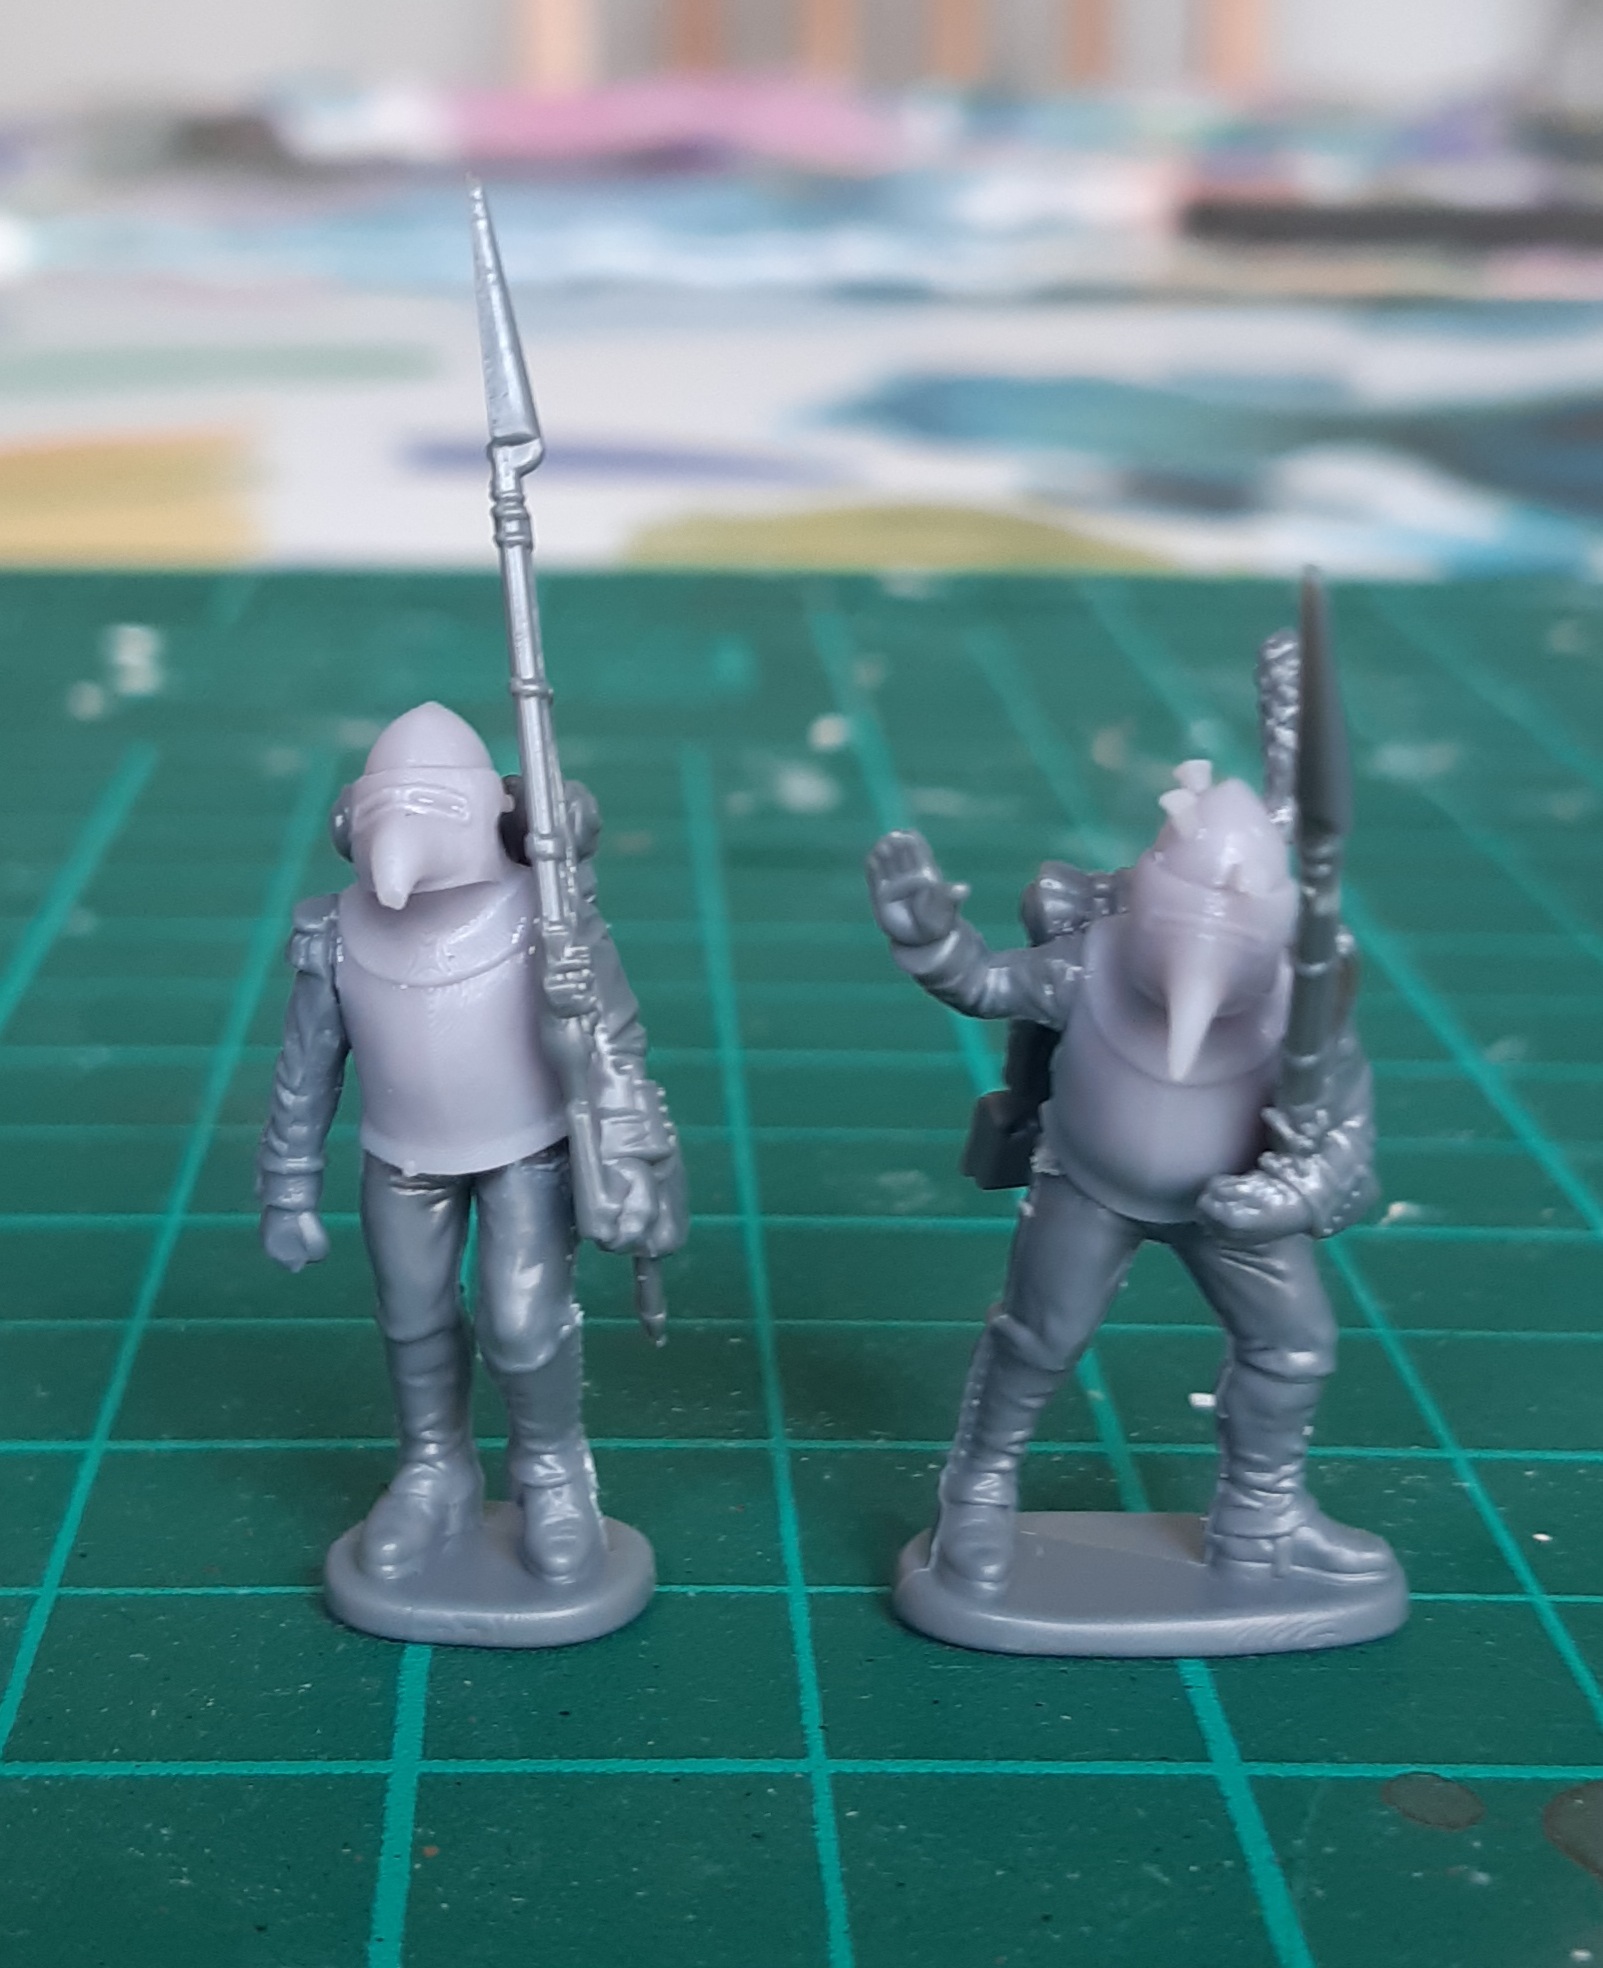 A couple of close ups of a few Fodder. I gave one a plume and a signalling hand, representing a NCO.
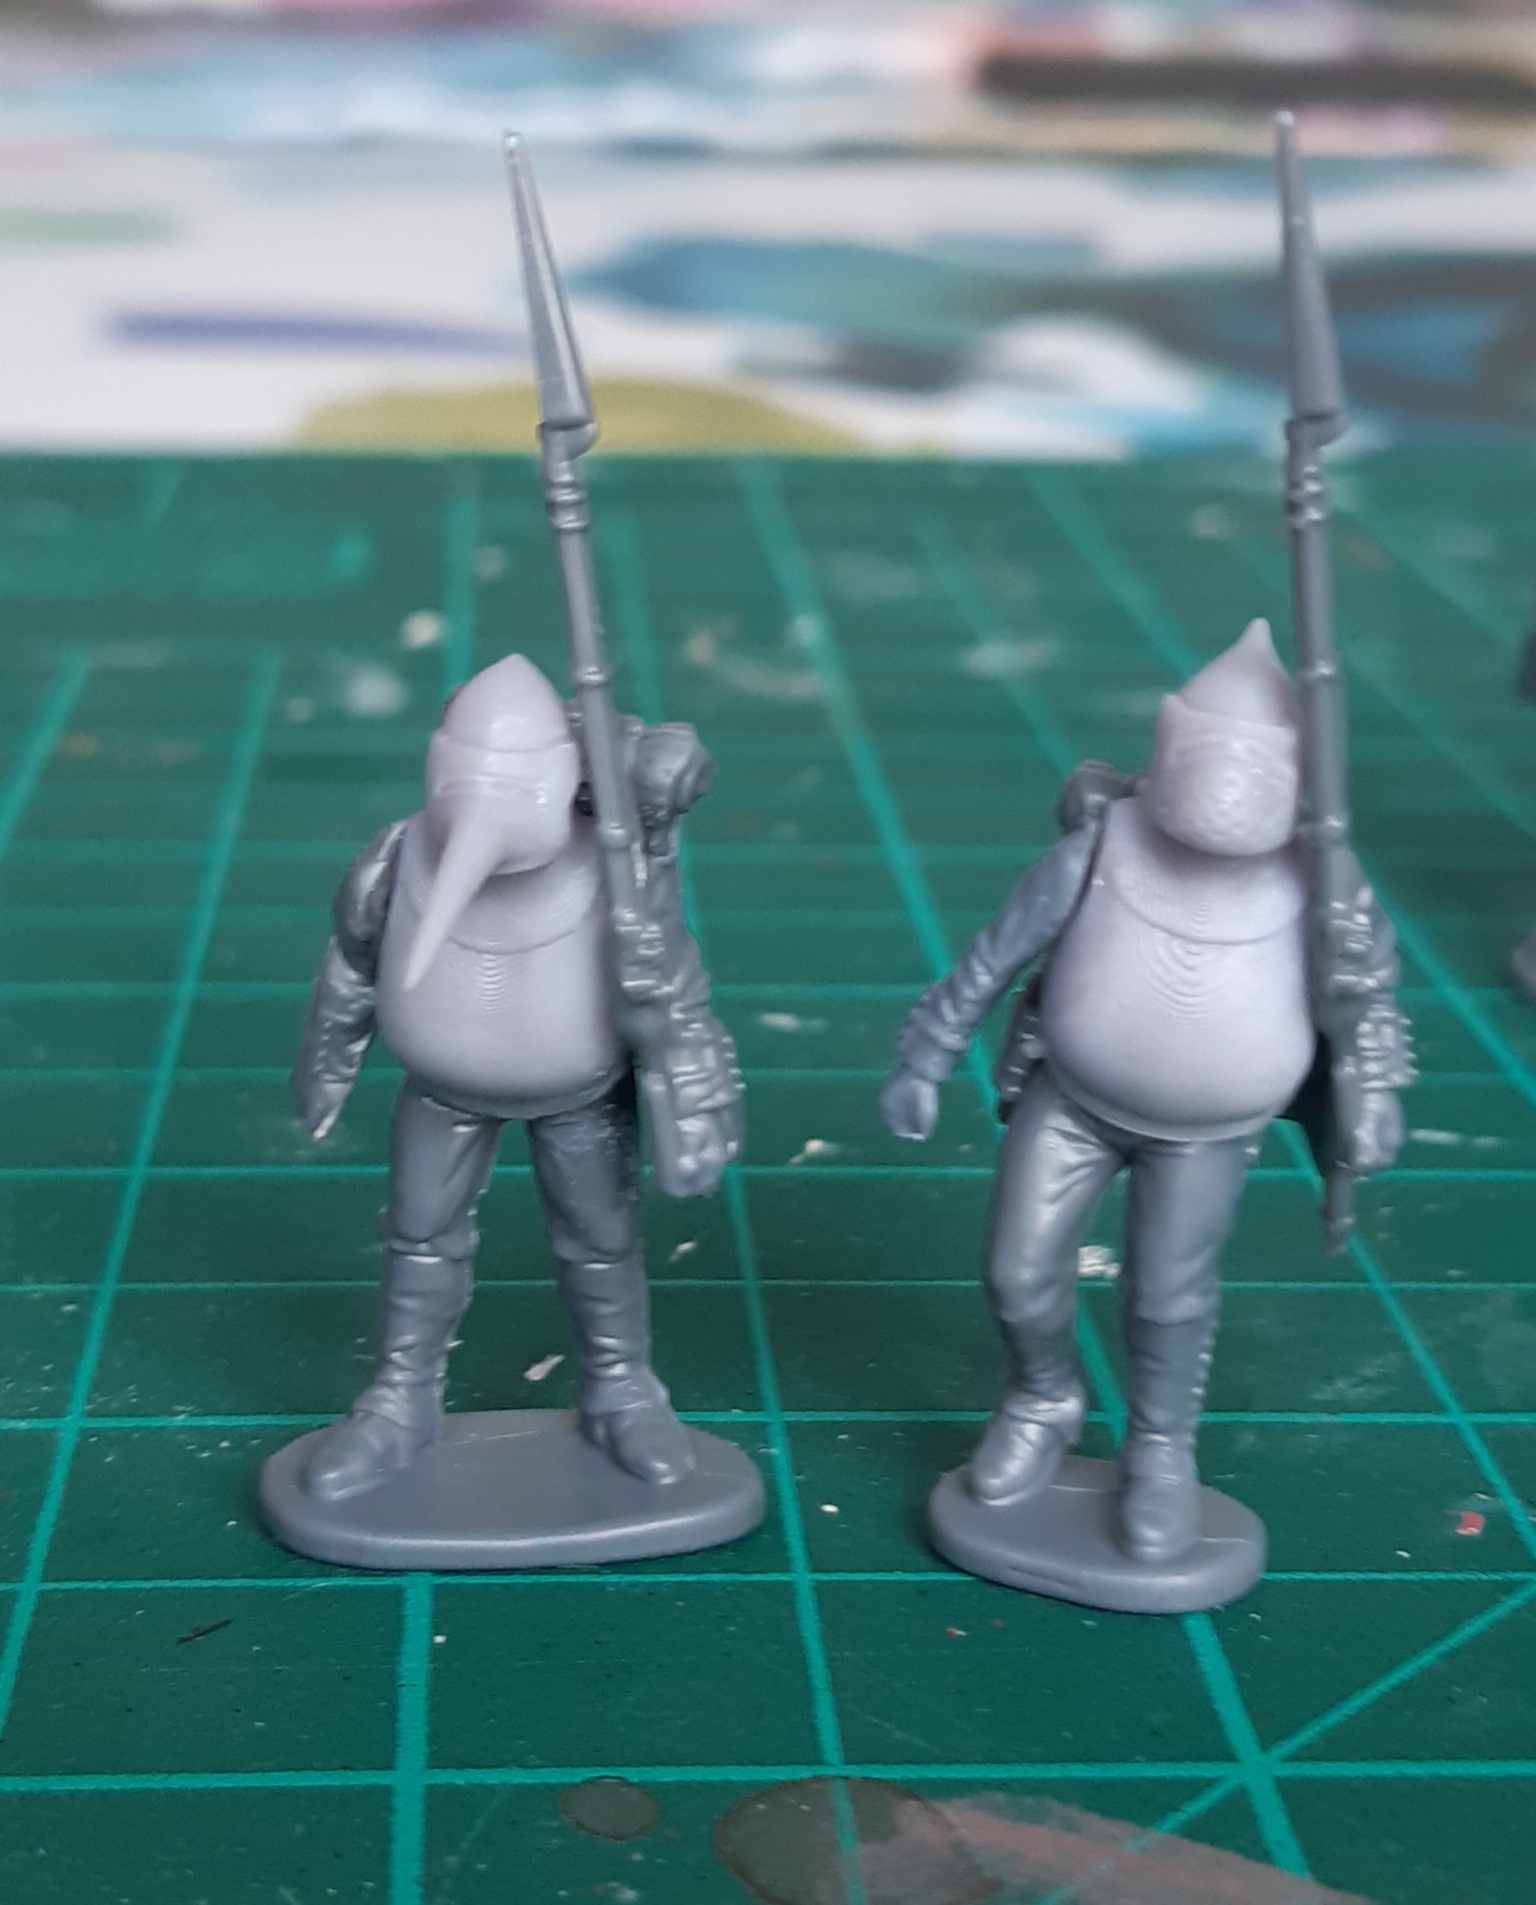 I quite liked the swagger I got on the chap with the larger gut.
Finishing Touches
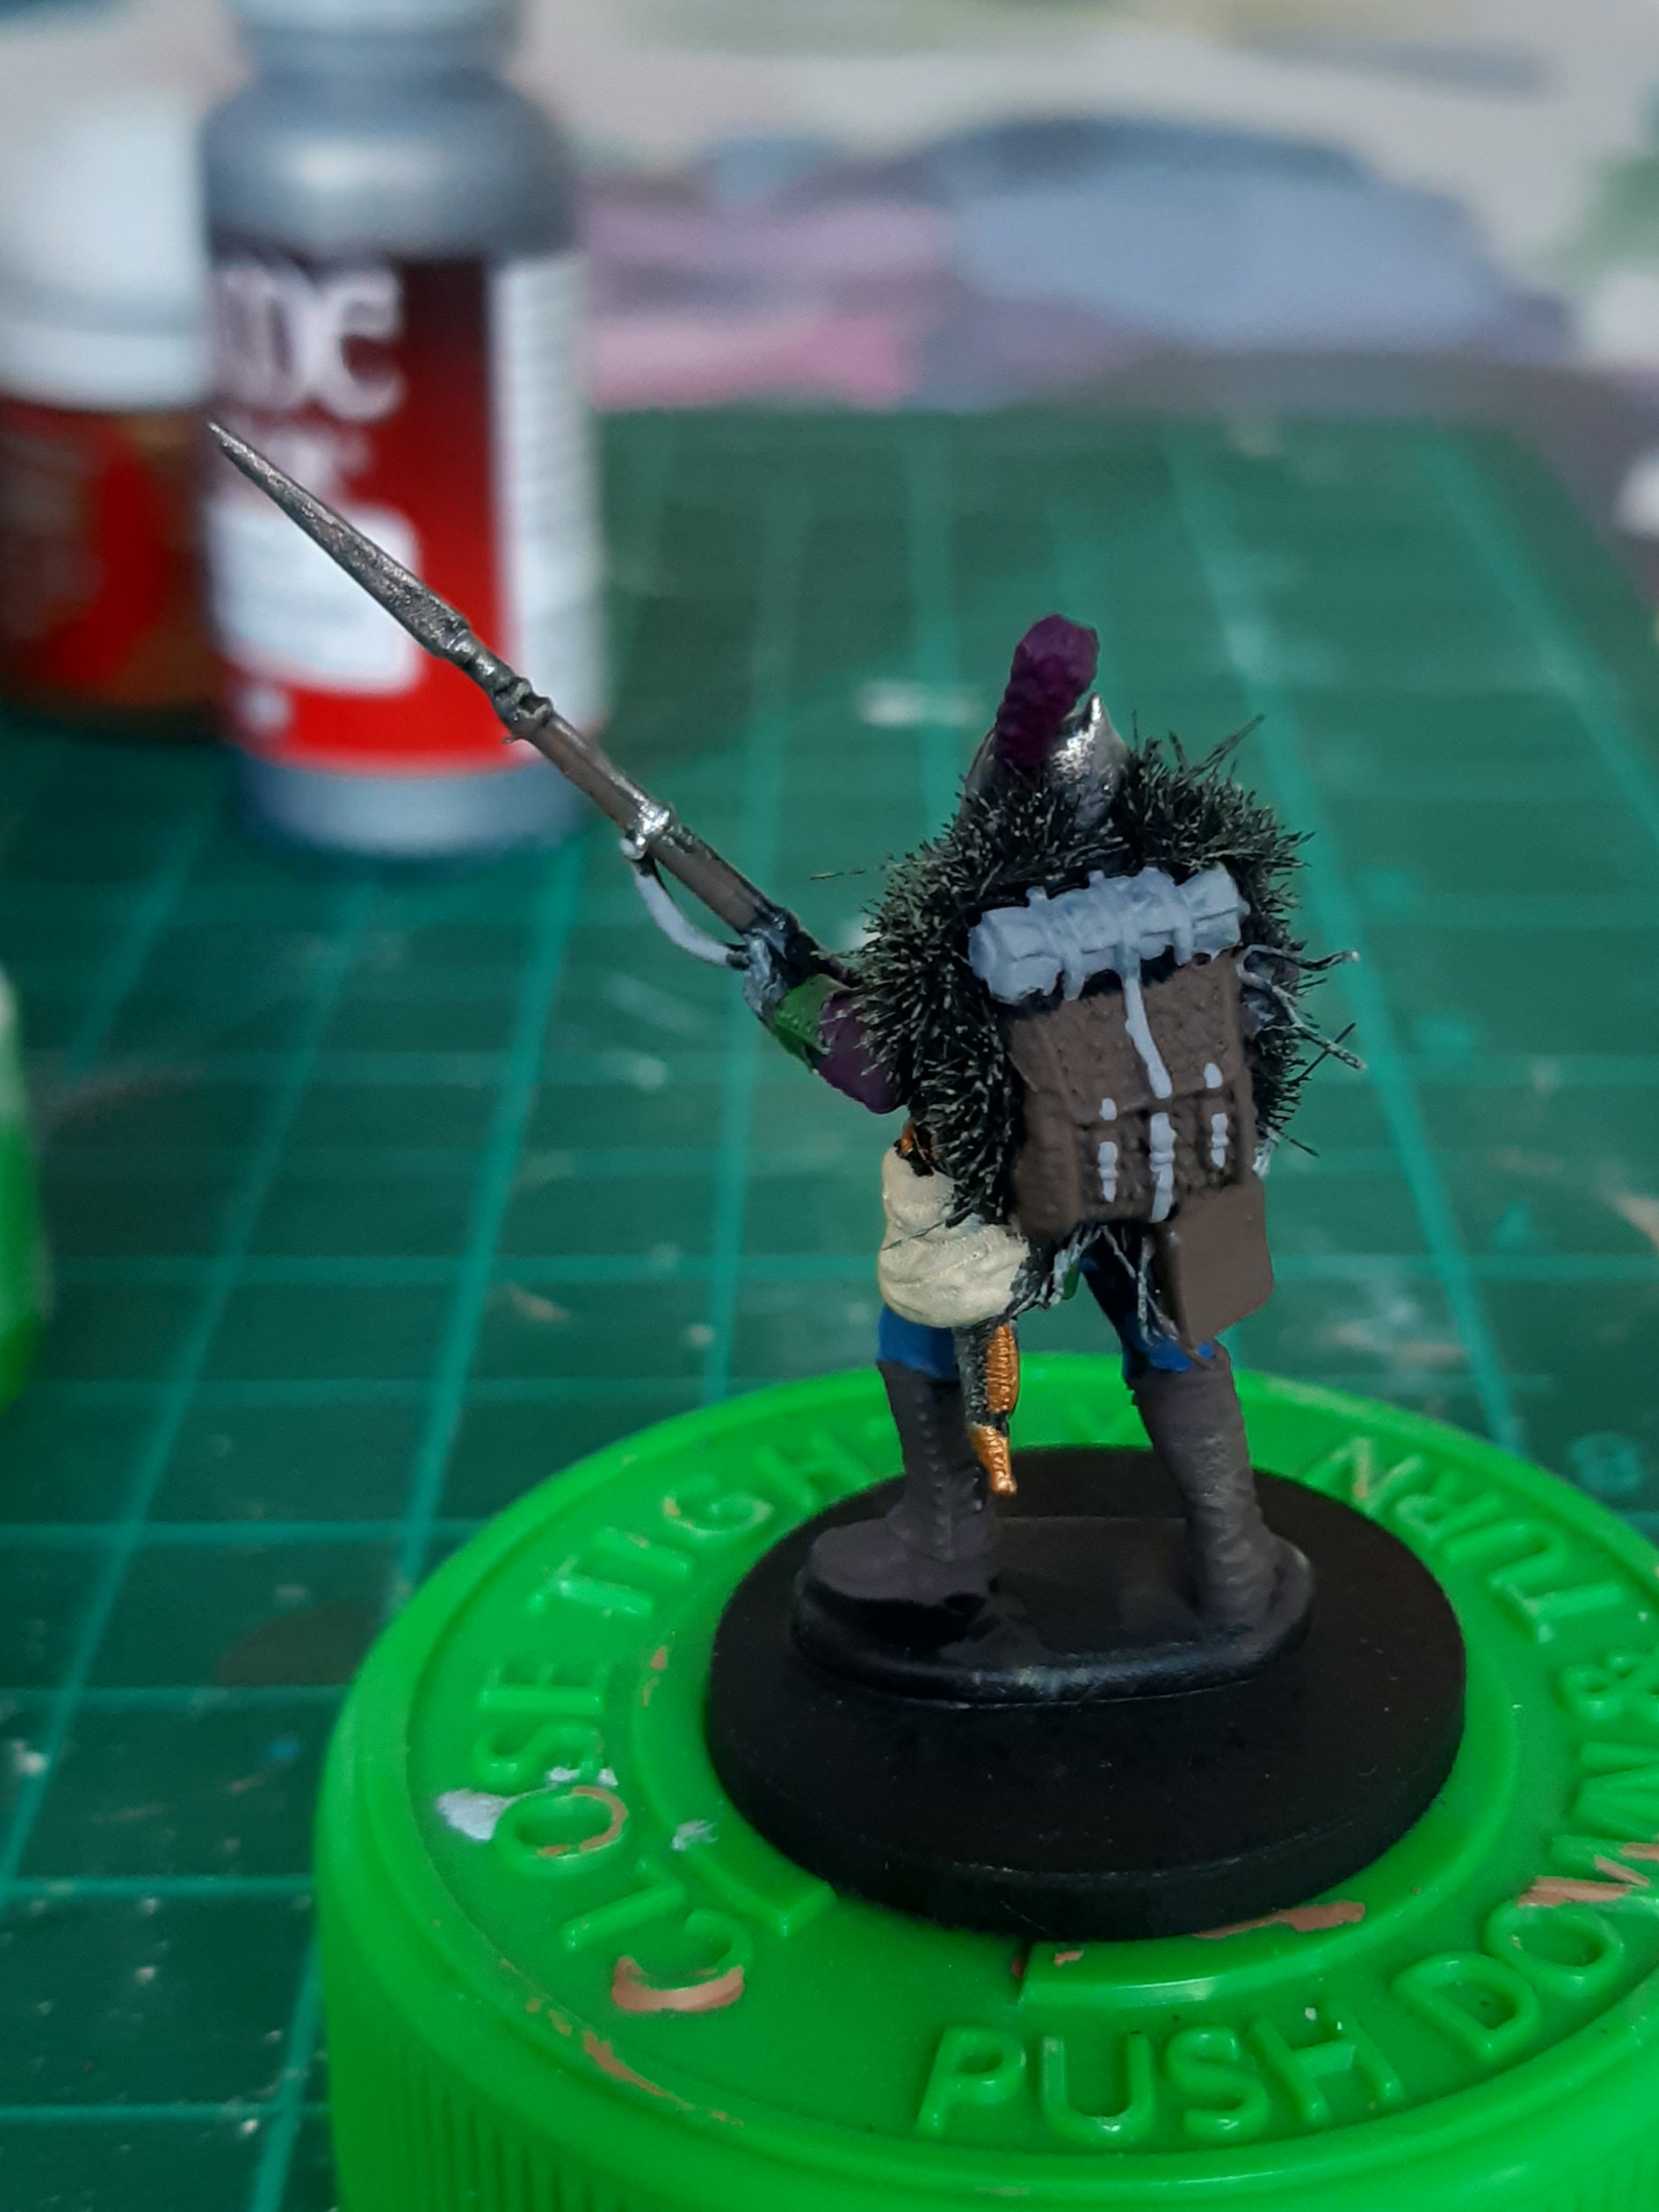
With the figures put together, the next step was to fill in some gaps and add various bits of vegetable material indicative of the root infused theme.
Materials used included tile grout, some scrap wiring, a few small patches of tufts and superglue.
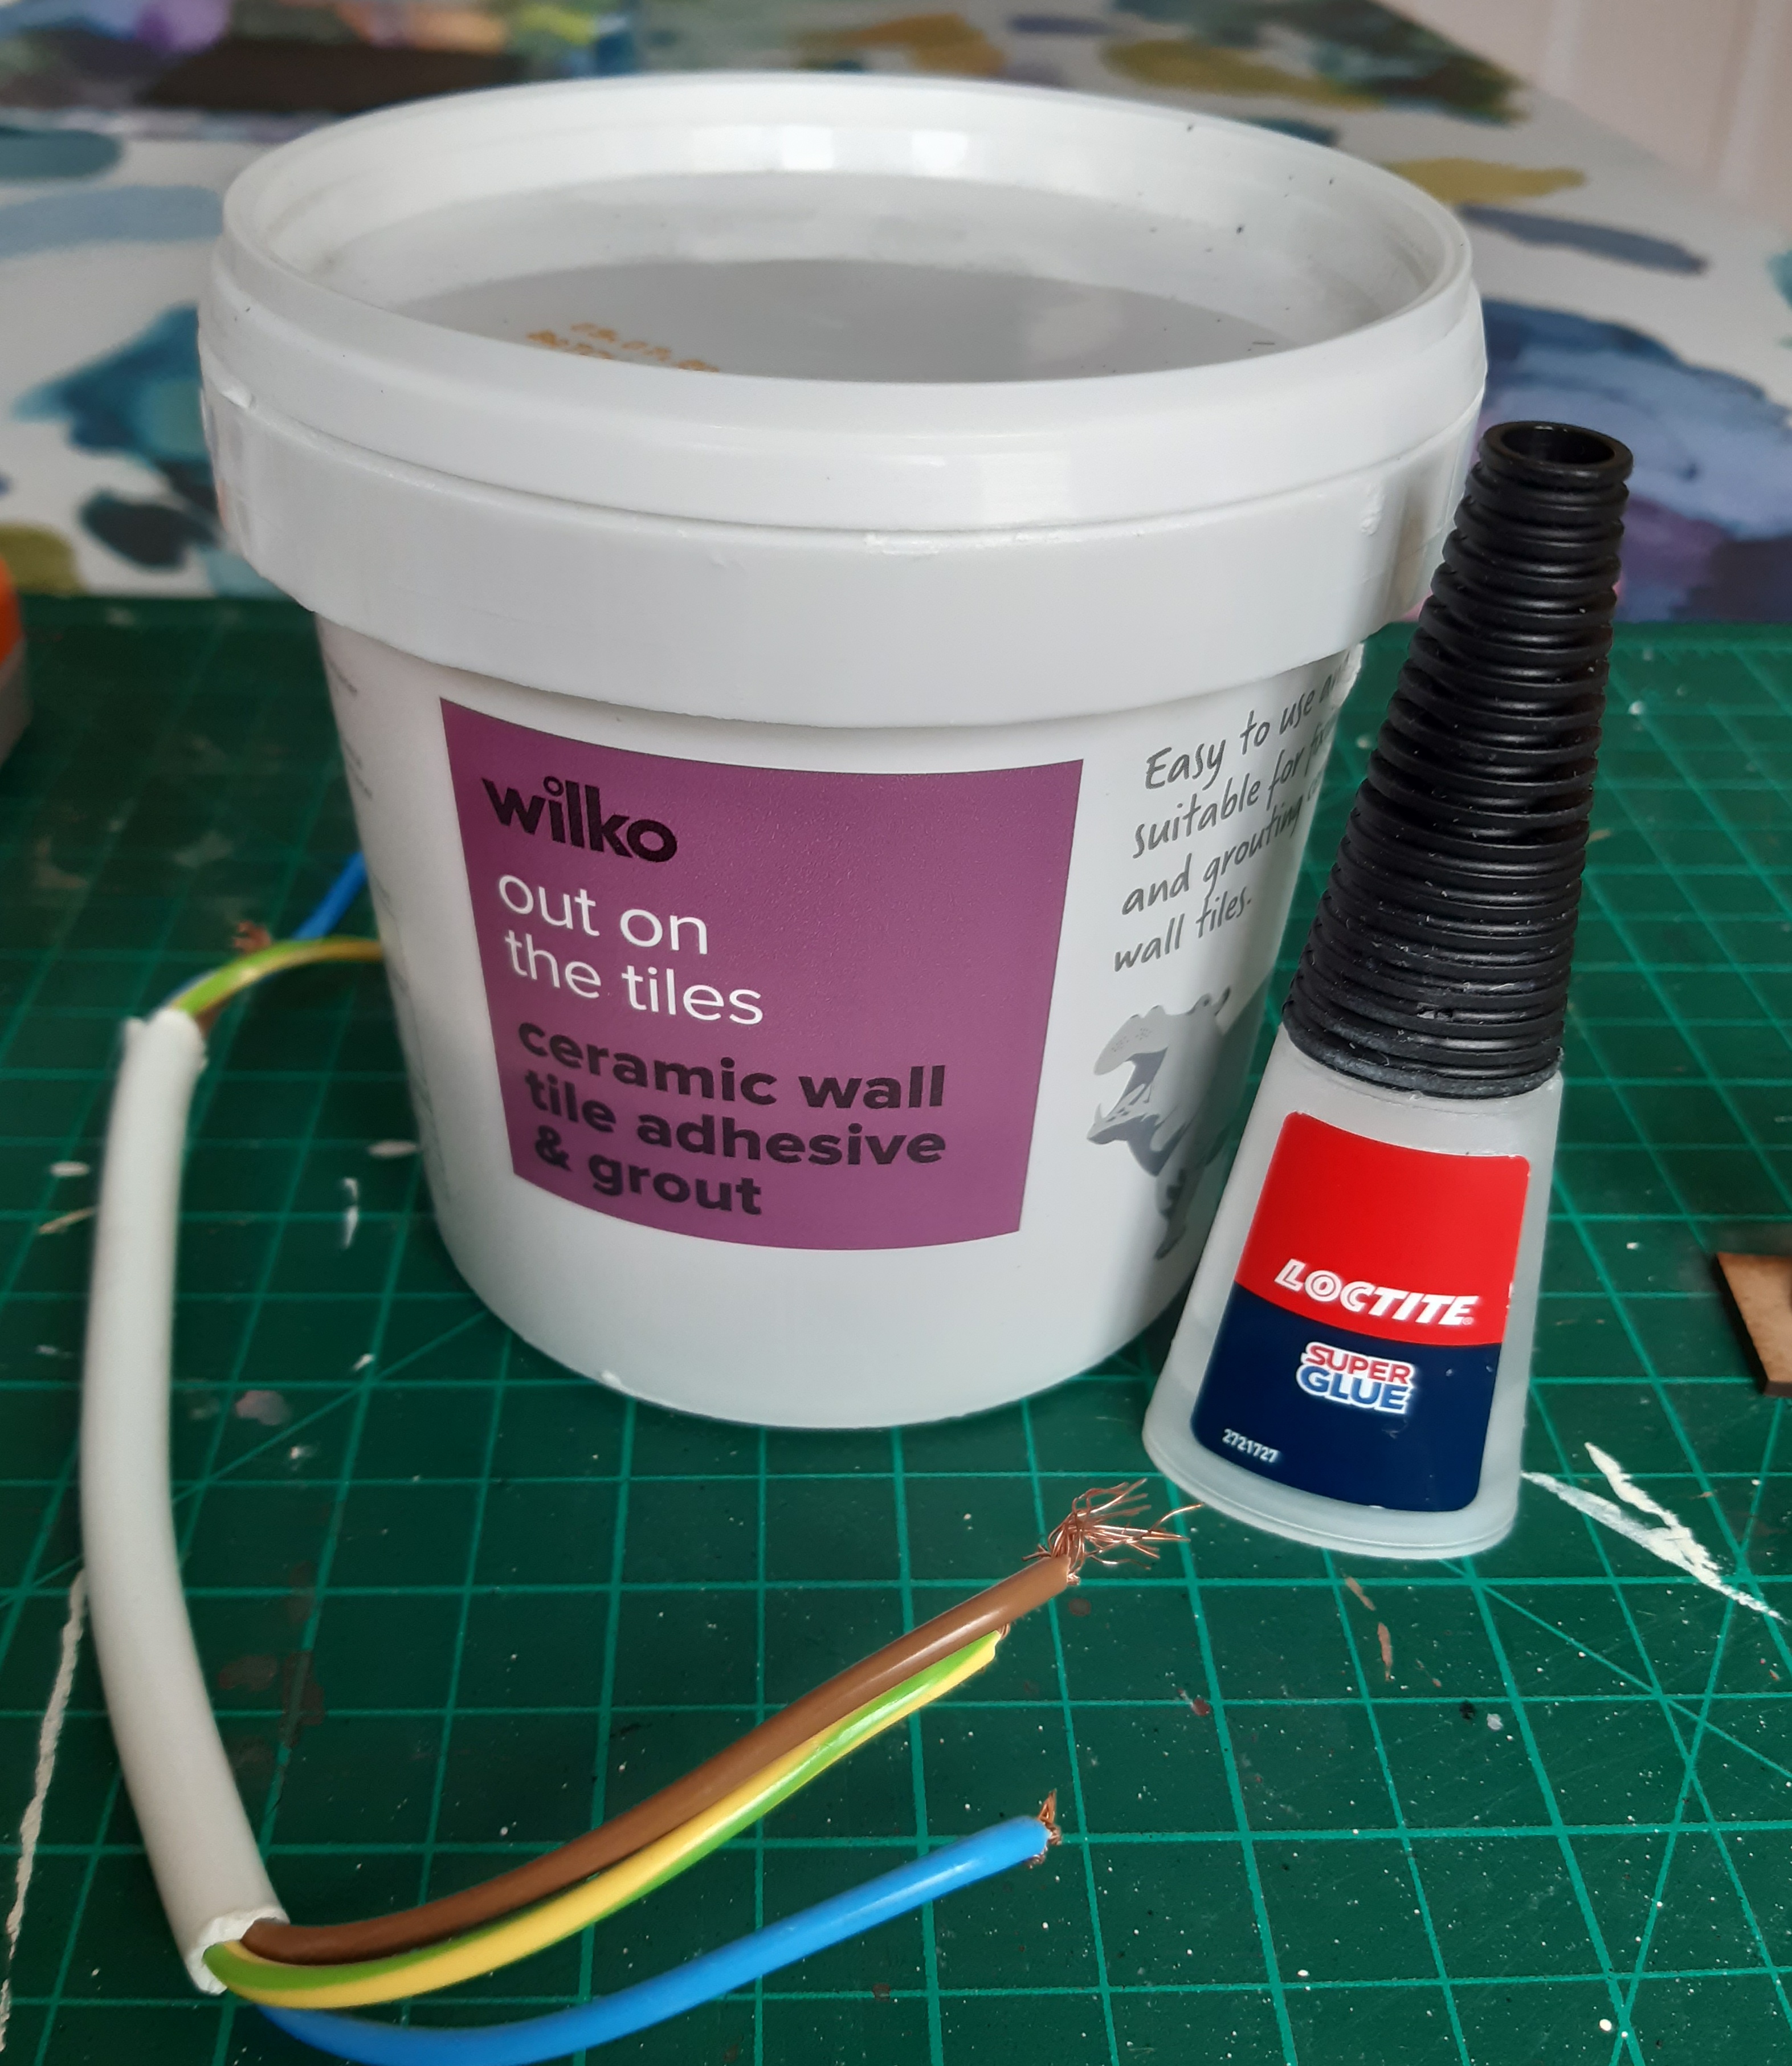
The grout was used to gap fill. For this style of kitbash, the rough finish and any overspill just adds more earthy texture.
I used a bunch of small tufts from Tajima1 (a small company based down in Cornwall that do some really nice tufts and patches of mixed flowers and grasses – highly recommended), placed around the sides and top of each figure’s backpack.
For roots, I ended up using stands of wire twisted together into interesting shapes that were superglued in place, mainly towards the bottom of the packs. I experimented with coating some of the wire twists with grout, and with hindsight, I’d probably have done that with all the roots.

I was tempted to try using some natural organic materials for the roots, but was nervous about ensuring that it was preserved properly. I’d be interested if anyone has advice on how to keep locally gathered organic modelling materials like twigs and lichen from breaking down.
Painting next…
Painting up the Chaff (Part 1)
The end goal was to have some grimy, dirty figures, but I also wanted some of the colourful flare from Napoleonic uniforms still present.
First step was to prime in black, followed by a very quick and light drybrush with Citadel Nurgling Green. The drybrush was mainly to make details more easily visible after the black prime, with the added benefit of the green highlighting the tufts.
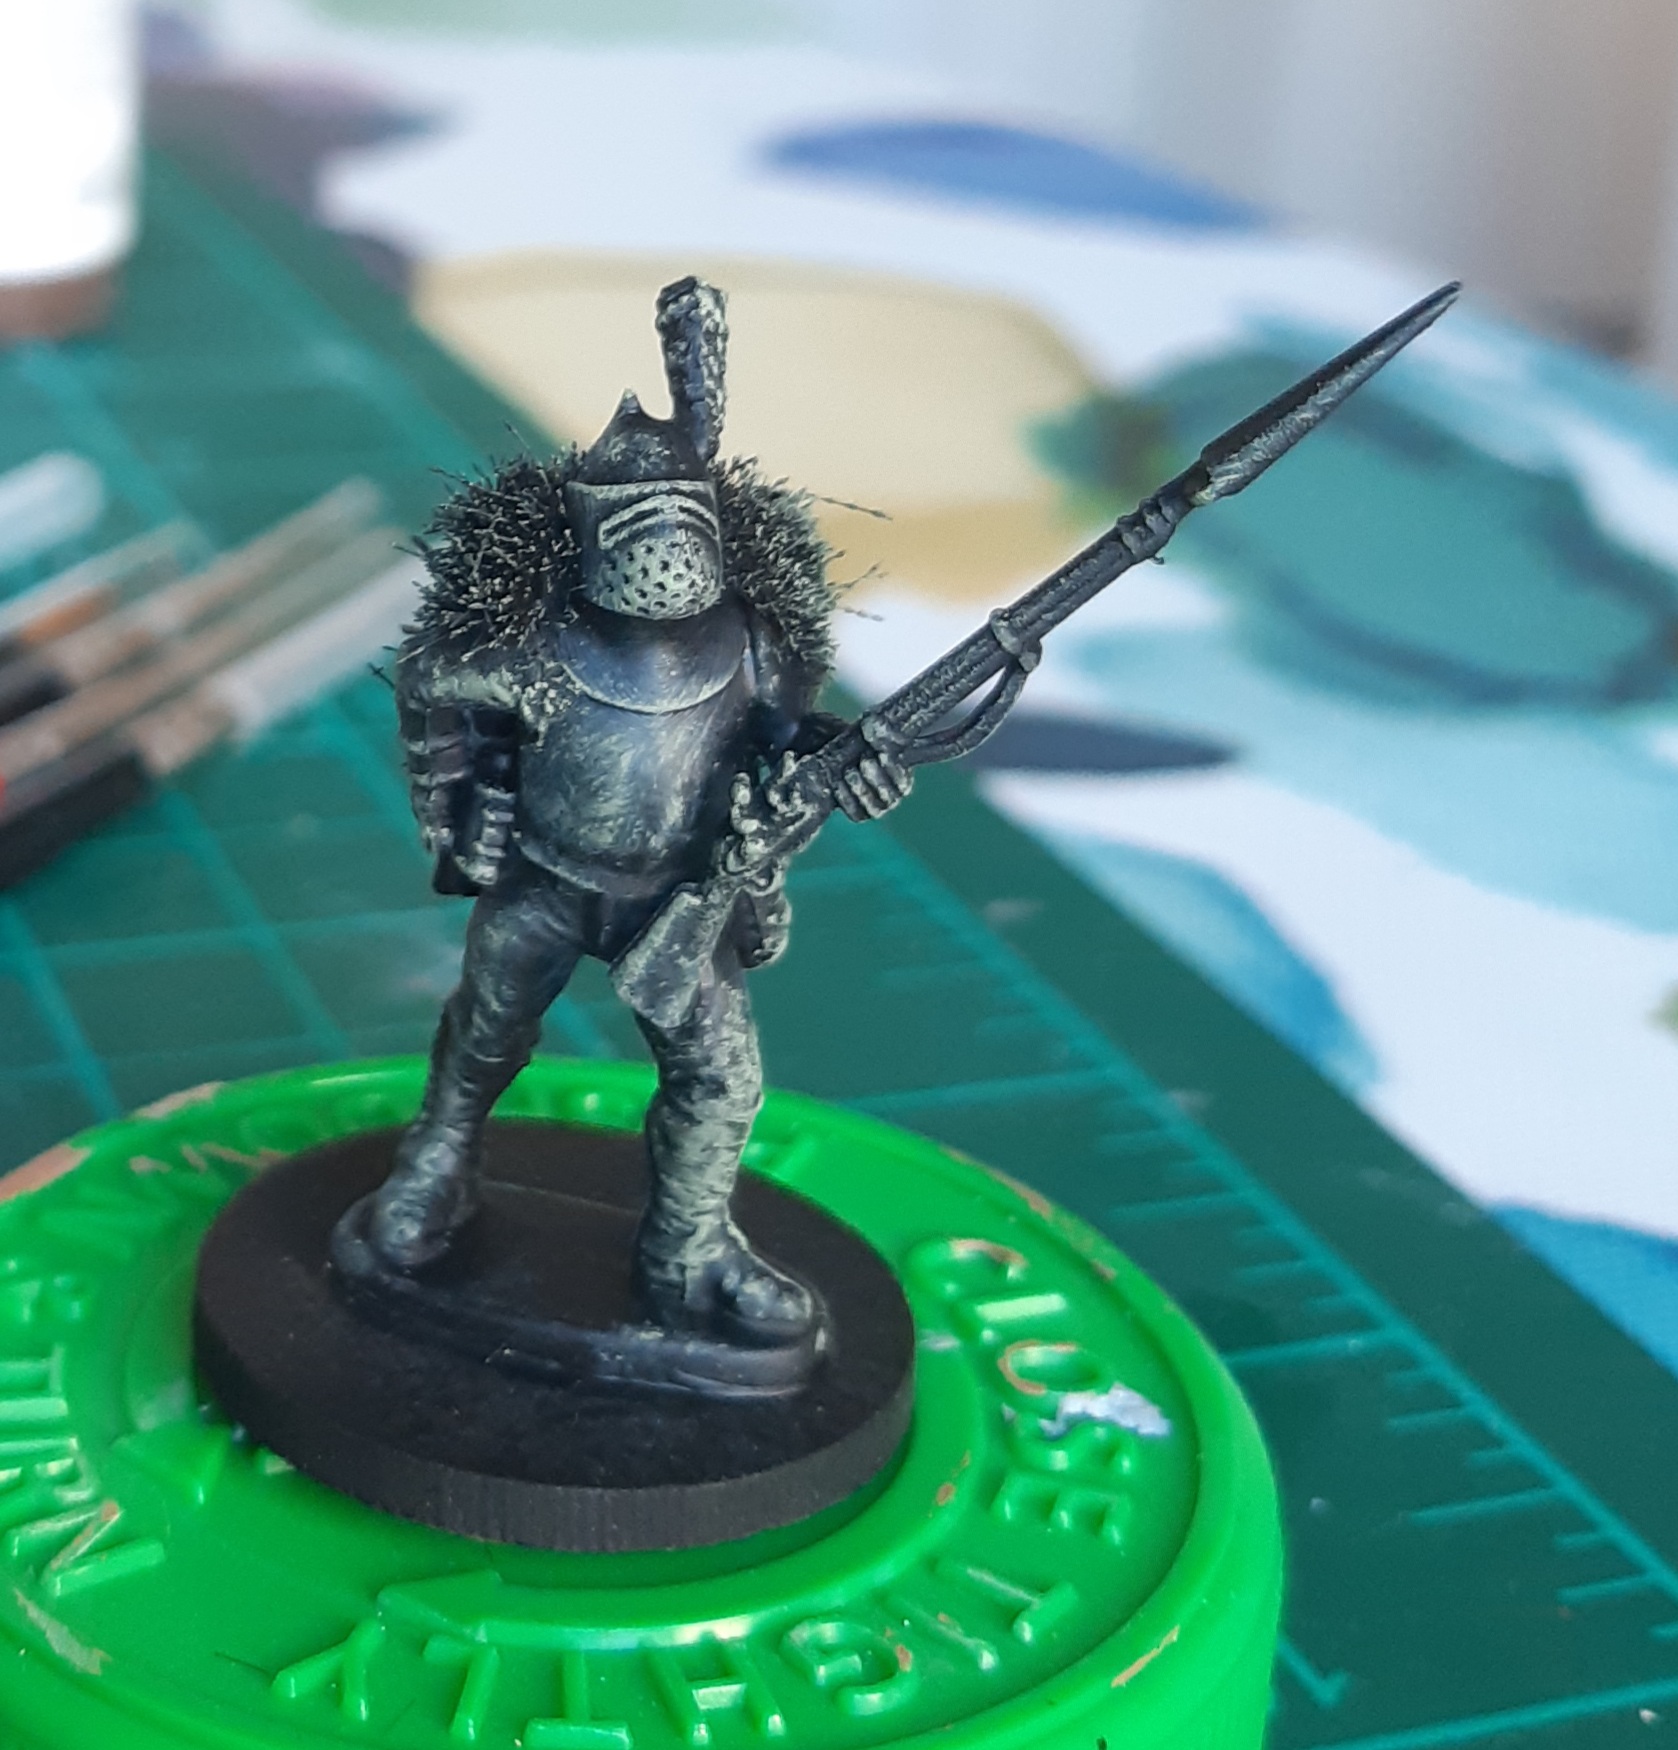
A quick base coat next, just a single thin coat to let the black prime tone things down. Colours used were as follows (VJGC = Vallejo Game Colour; VJMC = Vallejo Model Colour)
- Metal – VJGC Gunmetal
- Jacket/ plumes- VJMC Violet Red
- Trousers – VJMC Prussian Blue
- Musket/ Backpack/ Ammo pouch – VJMC Burnt Umber
- Boots – VJMC German Camo Black Brown
- Bread Bag – VJMC Buff
- Greatcoat / Straps – VJMC Medium Sea Grey
- Cuffs/ Turnbacks – VJMC Flat Green
- Flesh/Roots- Citadel Deepkin Flesh
(Considering the theme, having the roots and flesh the same colour felt appropriate!).
Painting up the Chaff (Part 2)
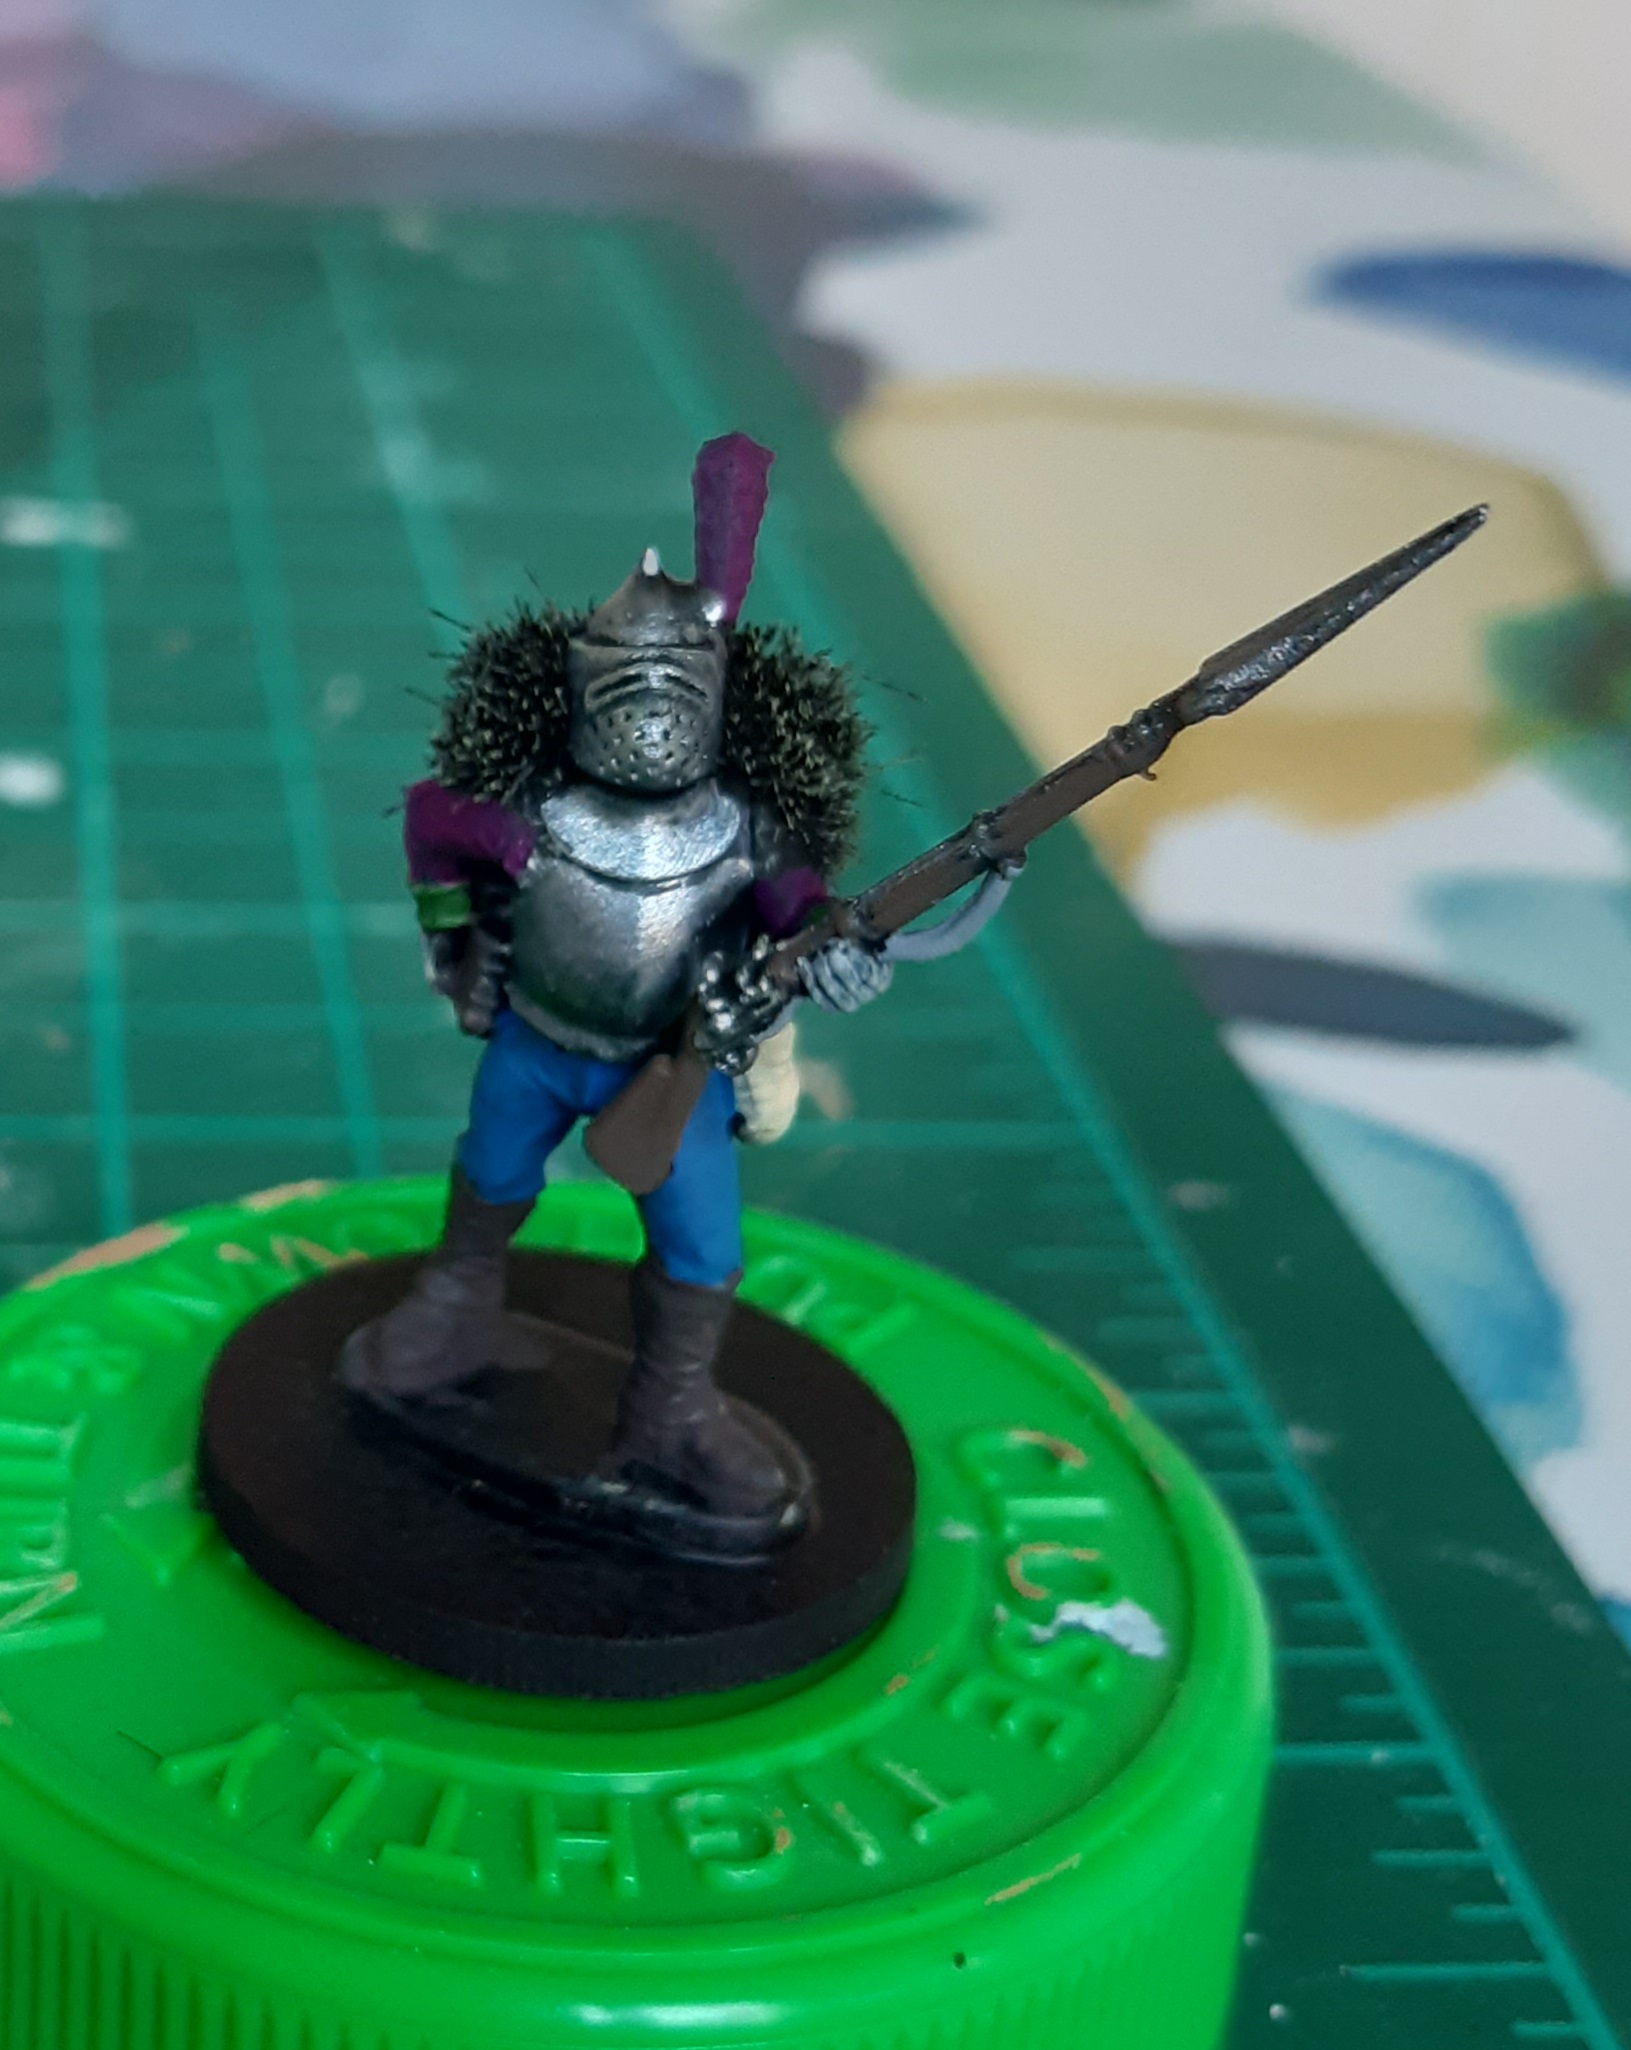
Next step is to tone back the base coat colours and to add the dirt and grime – quickly achieved with a heavy wash of Vallejo Umber Wash.


Could call it done at this stage, but some selected highlights help lift the figure. For most areas, it is a case of going back in with the base colour and picking out raised parts, but I did use a few lighter colours in places, whilst ignoring some things entirely:
- Musket/ Backpack/ Ammo pouch – VJMC Flat Earth
- Jacket/ Plumes – VJMC Violet Red
- Cuffs/ Turnbacks – VJMC Olive Green
- Trousers – VJMC Prussian Blue mixed 1:1 with VJMC Pastel Blue
- Greatcoat – VJMC Medium Sea Grey
- Straps – VJMC Off-White
To add some more grime to the armour, I stippled some patches of VJMC German Camo Black Brown over selected areas, followed by some VJMC Orange Brown over the top, giving a fast rust effect with little effort.

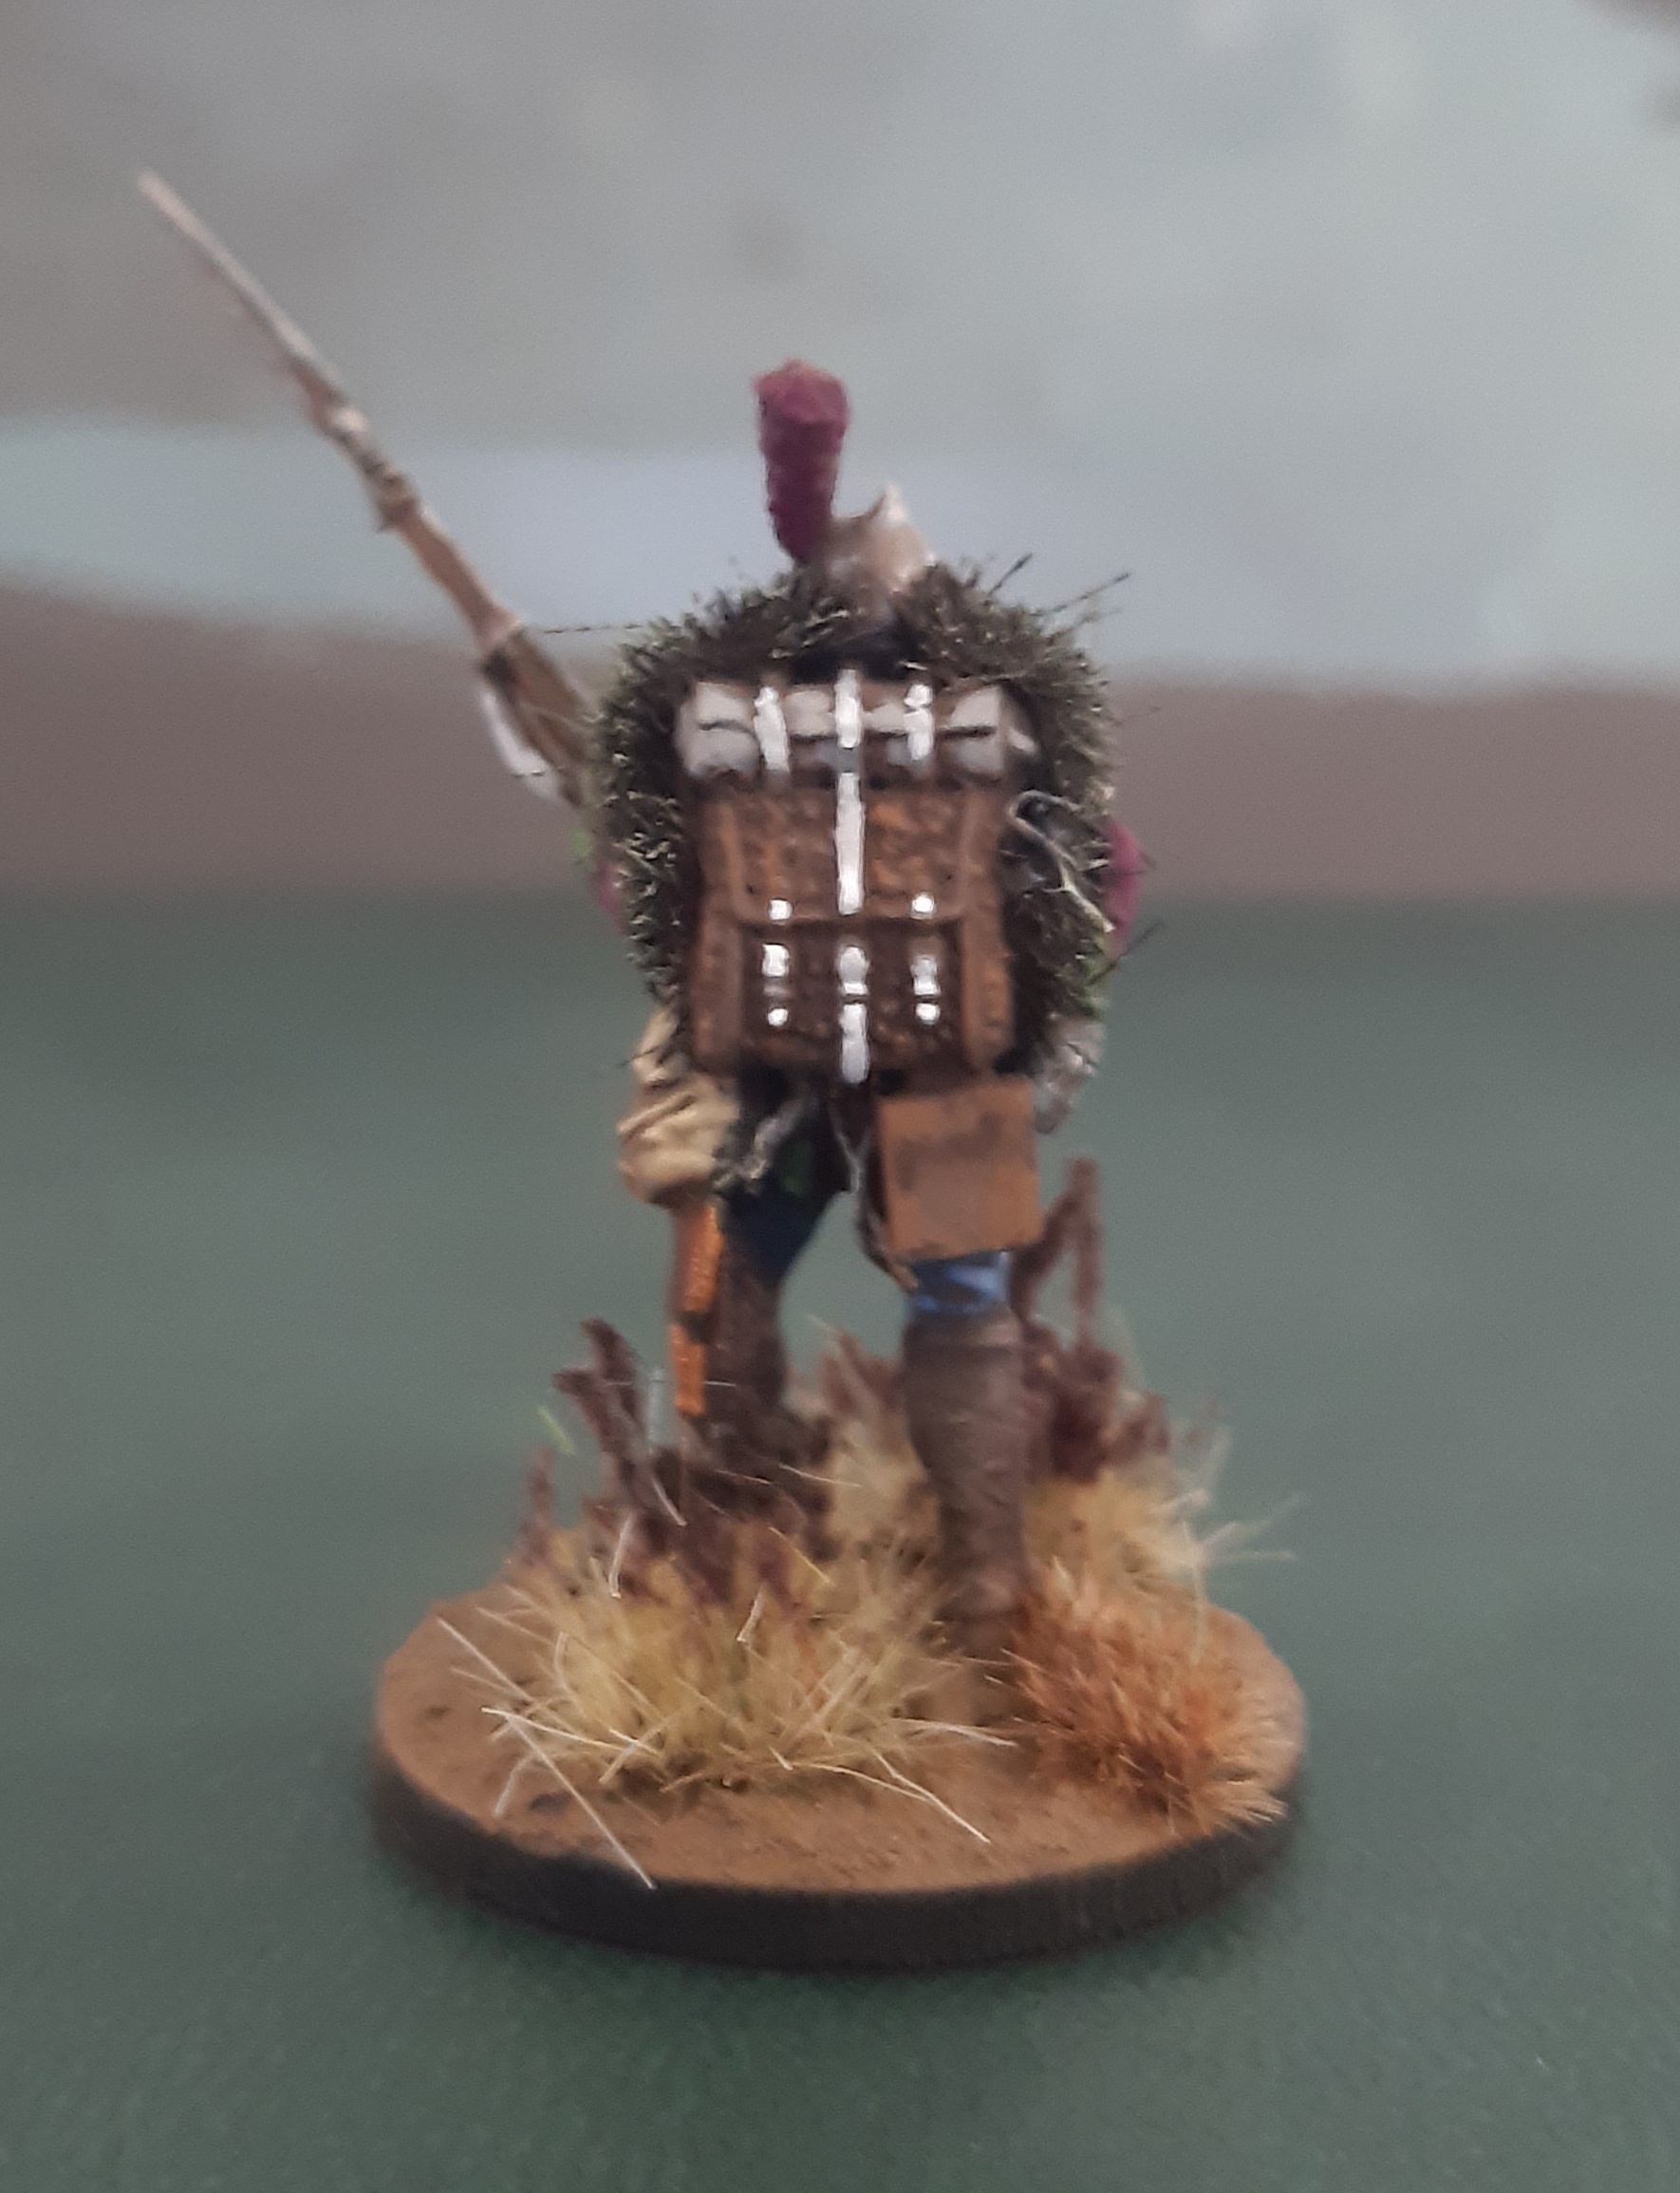
For basing, I used Vallejo Dark Earth texture paint, drybrushed with VJMC Flat Earth. I added bullrushes and small brown tufts from Tajima1 to finish them off, with the colour of the rushes intended to echo the jackets. I left the base rims black.
All in all, a pretty quick and dirty paint job, but I am quite happy with the end results.


![Zenit Miniatures’ Samurai Warlords Now Live On Kickstarter [Updated]](https://images.beastsofwar.com/2026/02/samurai-warlords-launch-main-600-338.jpg)


