


SAGA Challenge


Recommendations: 505
About the Project
The game SAGA has been of interest to me for years, but I’ve never taken it beyond just an interest. My young son (just turned 13) is now expressing a desire to do some wargaming more seriously, and has a liking for Vikings. So, this challenge comes at the right time to both prepare two armies, but also to build some relevant terrain and scenery. This is our journey together.
Related Game: SAGA
Related Company: Studio Tomahawk
Related Genre: Historical
Related Contest: Spring Clean Hobby Challenge 2023
This Project is Completed
The Armies
So it begins with the two armies. I purchased two Victrix backs of 60 soldiers from their Vikings and Anglo-Saxons range, as these seemed to us to be the most typical for the scope and feel of the games we want to play.
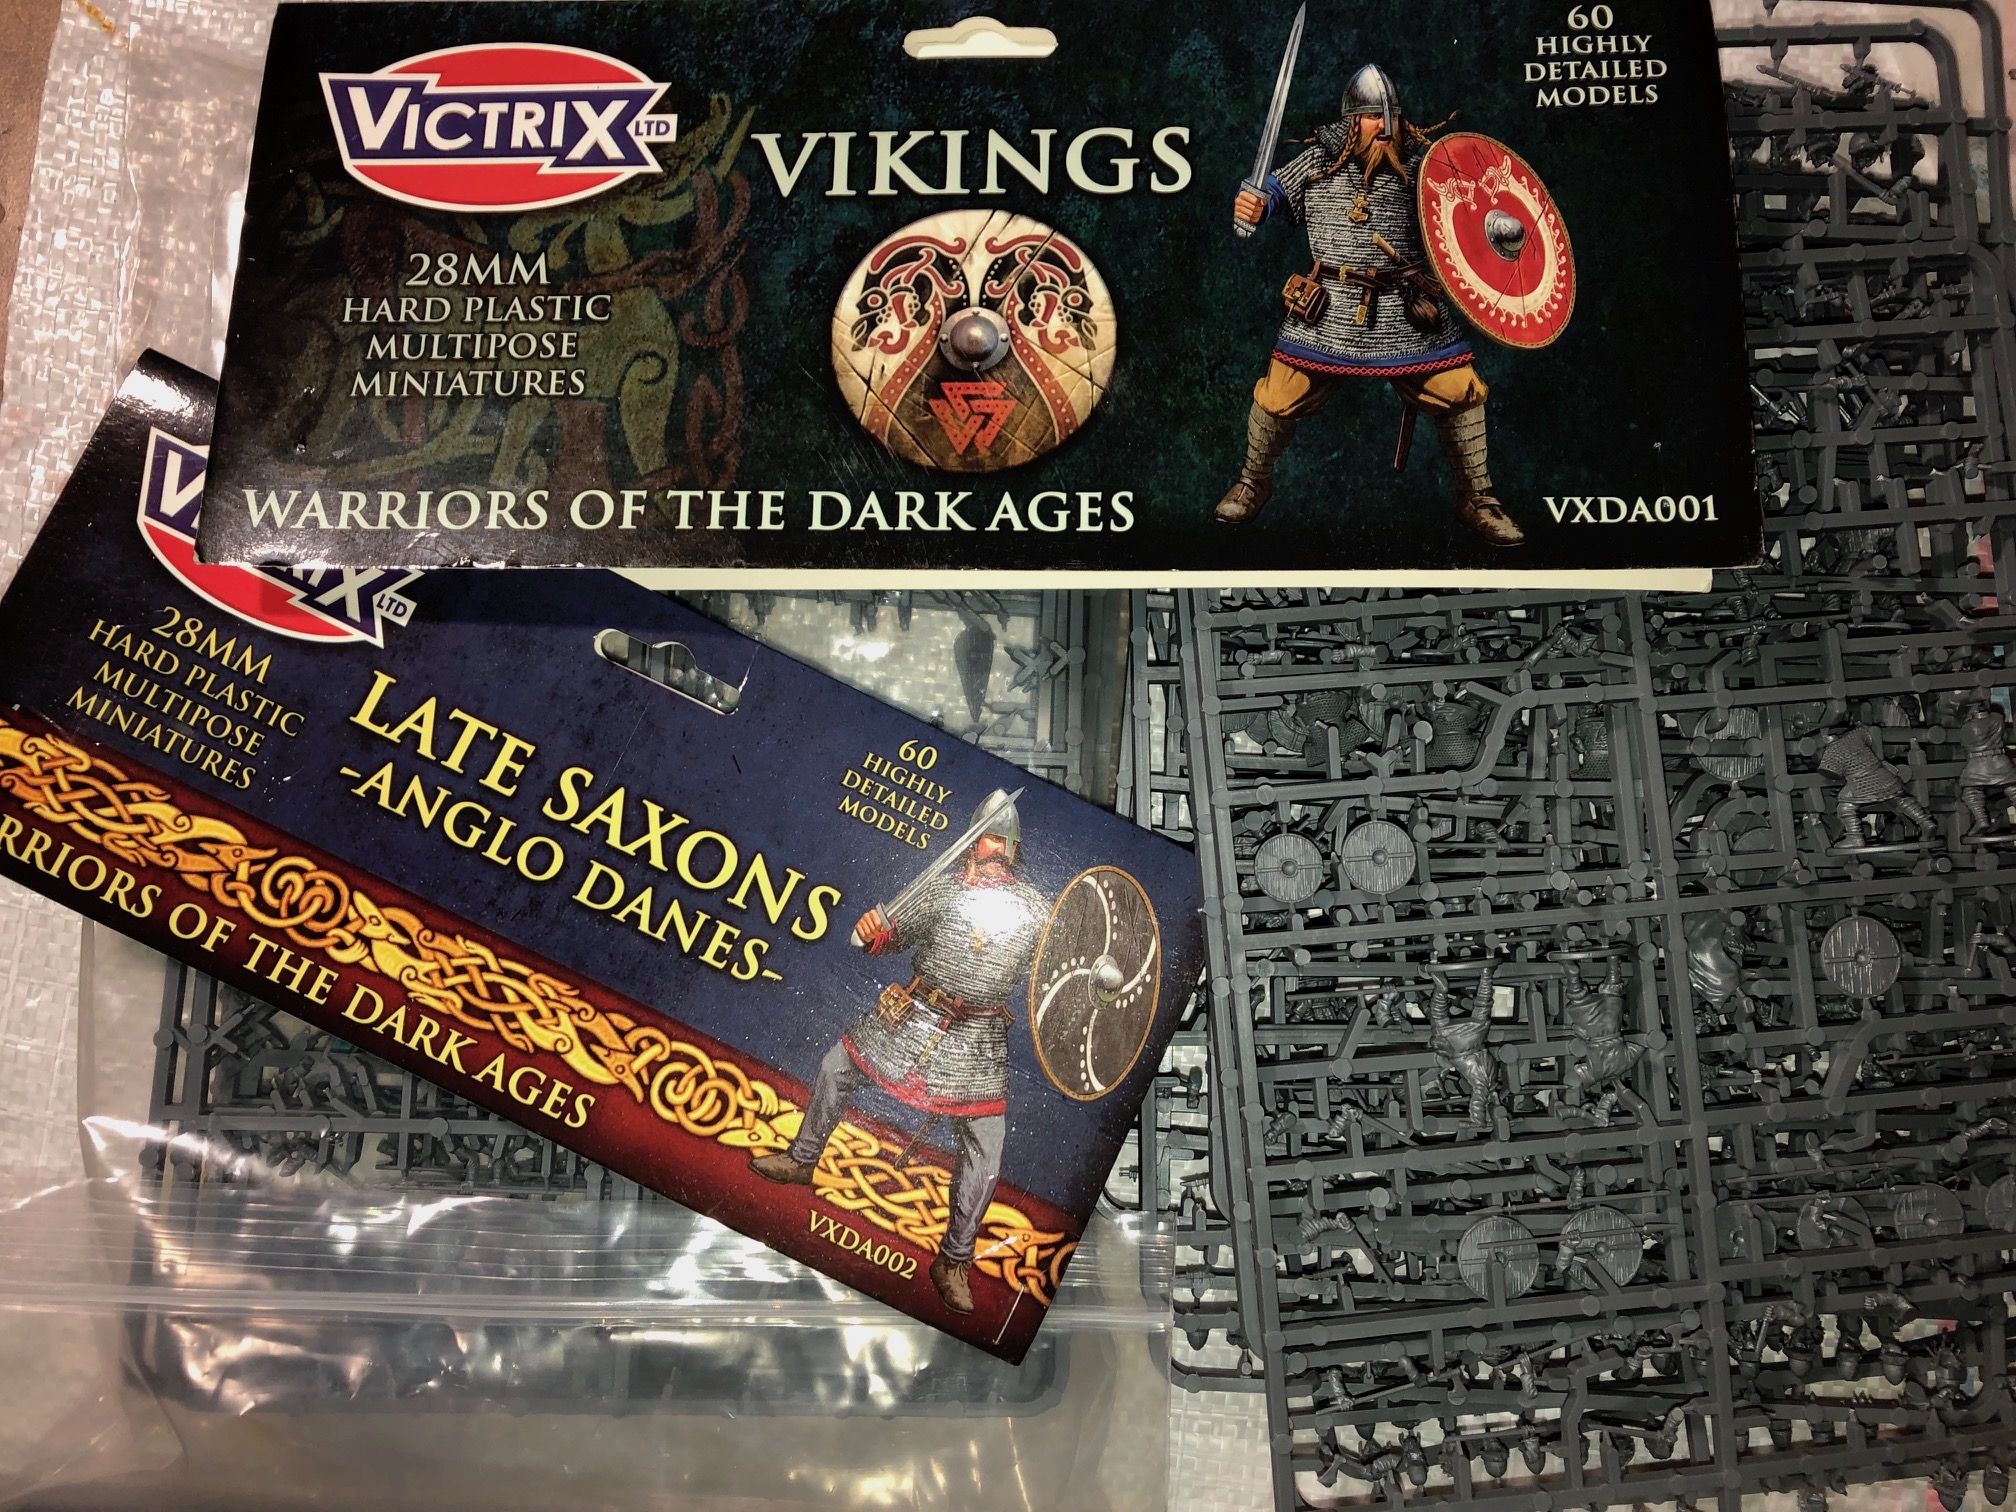 Victrix packs are great
The building of the armies will use most of the figures available in the Victrix packs.
My idea is to allow some flexibility and so I will make 1 x Leader and 2 groups each of Hearthguard, Warriors and general Levies. This should allow me to create 6 points of an army which I think gives the ability to field different types of forces as I expect we will usually play 4 point games.
This left a few “extra” men which included priests and standard bearers. I might “flex” the rules to attach one of these to my Leader, although the recommended base size seems a tight fit. More on that later, I think once building starts.
My son went a slightly different route and is thinking of his Leader, then to make 3 x Hearthguard, 2 x Warriors and 1 x Levies. Now, this might change during the building, so we’ll see.
Lots of glue and mild frustration to come as we work our way through the mildly confusing Victrix building steps!
Week 1 - The figures
I will try to add an update each week, but as my son is at school Monday – Friday (and after school activities/homework etc.) we’ll only really get to grips with this challenge at the weekends.
So the yesterday we started to put together the figures. As I briefly mentioned last time, the Victrix sets are great value, but unlike, say the Perry miniatures, there is limited flexibility in how the figures can be put together.
There are two different types of sprue; a standard (warrior) set, and the “Command” set, which includes the possibility to make “heroes” standard bearers, and other figures.
The combinations available are describes on the reverse of the Victrix packs header.
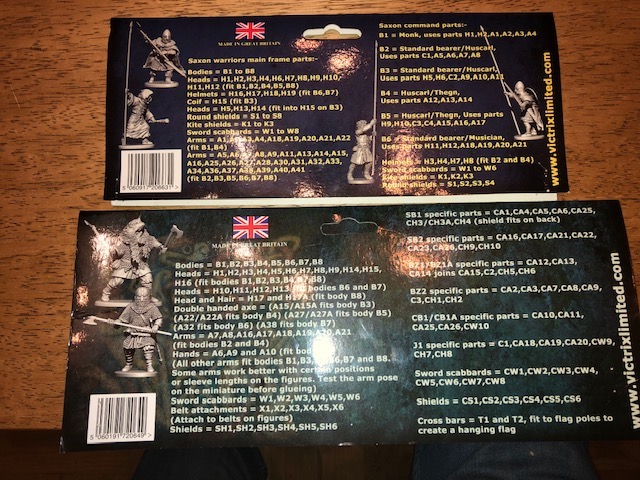 Reverse of Victrix pack with instructions of what fits what
In putting the figures together we chose different options. I chose to make all of one type of figures at a time by clipping off, say Figure B1, and mixing all the options for head, shield arms, and equipment based on my objective to produce 2 of each class of troops in the SAGA game. Hearthguard, Warriors, and Levies.
My son (Anton) went a different route having decided to make 3 x Hearthguard, 1 x Warriors, and 2 x Levies. How that will work in our battles we will see. But as I said before, I expect we’ll primarily play 4 point games, so this does allow for some flexibility.
If we both enjoy the game as I hope we will, of course additional forces ca be purchased to fill out our armies.
We both chose to build a Leader figure from the command set.
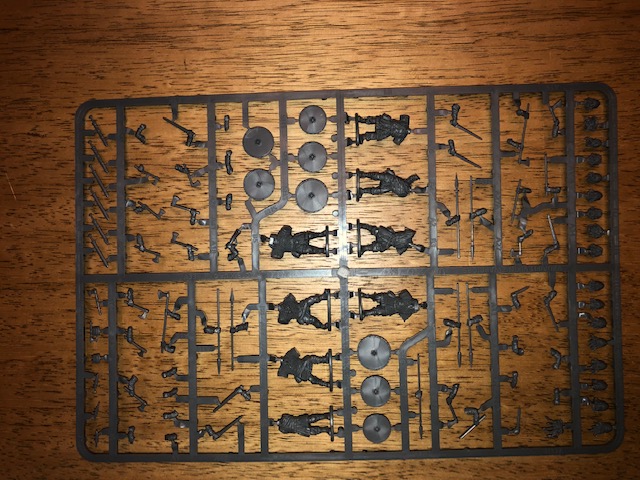 A standard Viking sprue. There are 8 figures possible with a variety of equipment
So construction is underway.
My idea is to make the paining as simple as possible, and with that in mind I will try Zenithal highlighting and painting with Contrast paints. I hope this will be a simpler introduction to painting these miniatures than a more time-consuming and complex approach such as the 3 step painting or using washes etc.
There will be some “spare” figures, which I can always use in other games, or variations of SAGA. I think their “fantasy” adaptation allows magic so these figures could be adapted accordingly.
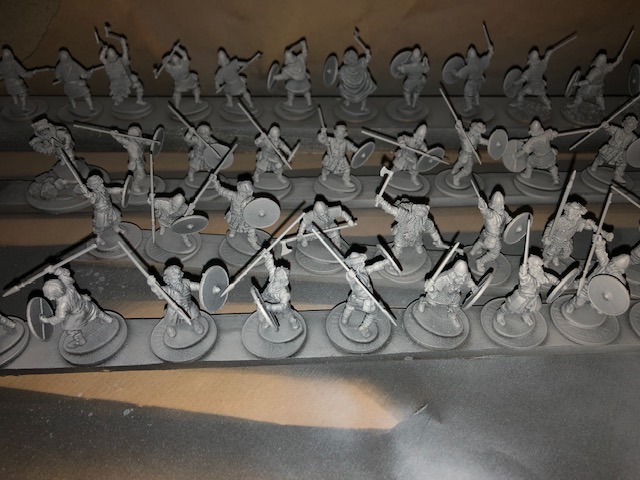
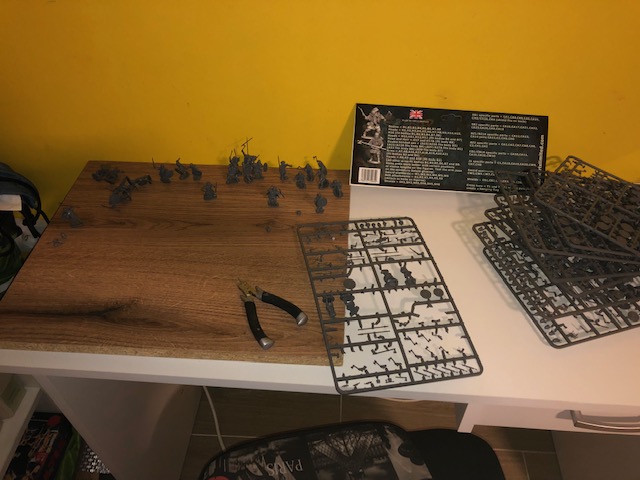 The Vikings are gathering
Next update I hope we’ll have at least completed assembly and based the figures, and ideally at least have them base painted.
Happy gaming!
Week 2 - Basing
Well, we’re slightly behind where we thought we’d be, but good progress is being made. The Anglo Saxons are all built and most of the Vikings. Only 18 Levies to complete and both armies will have been made up.
Anton has taken a more “adventurous” route that I expected and is making his models the way he wants them, and isn’t too fussy about having each group of warriors exactly armed throughout. Personally, I’m good with that, the important thing is for him to enjoy the process. We’ll not be entering competitions, so exactly what they look like isn’t really too critical.
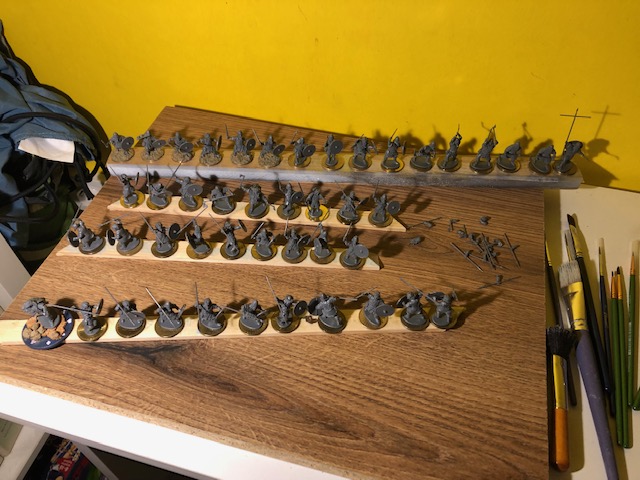
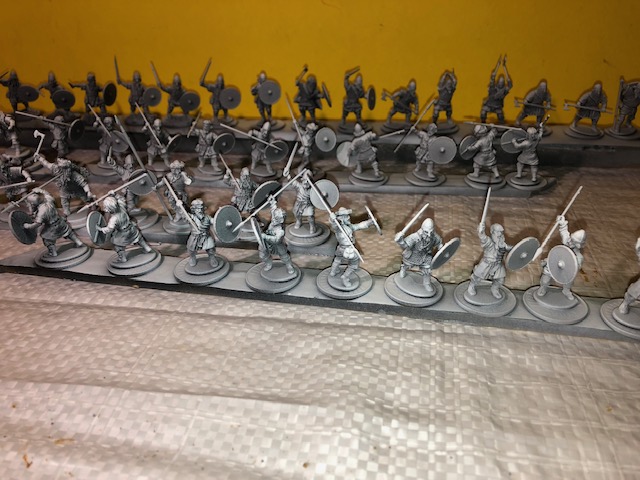
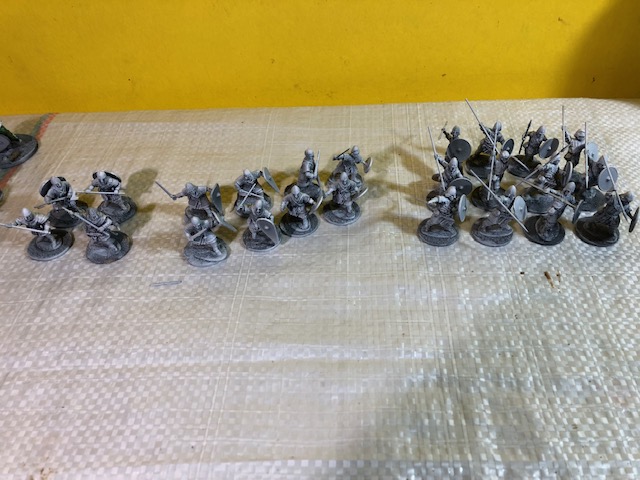
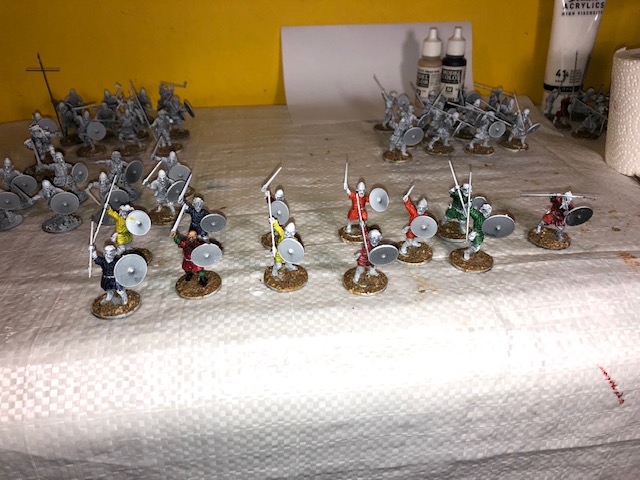
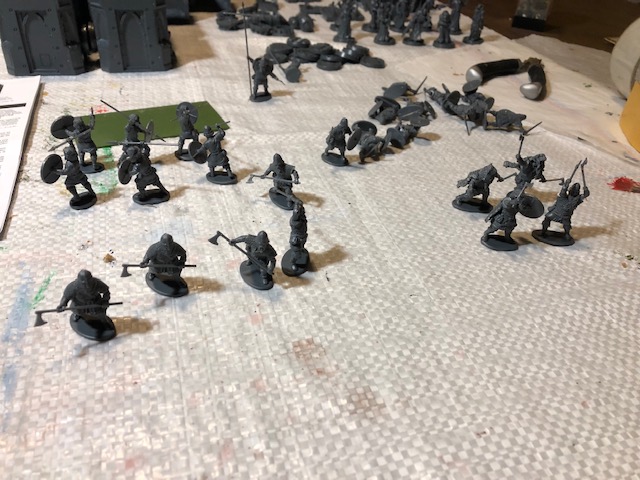 A look at the completed Vikings to date
Next up is putting the plastic figures not bases. Personally I have always liked the “heft” of metal figures; as these will all be individuals rather than based collectively, I wanted to give them some weight. I could have gone with washers, but as I had a handful of local currency, I went with these instead.
Size-wise they’re almost exactly 25mm, so for the purpose of the figures this is ideal. To base them all (60 figures) the actual cost is less than €1, so that works for me.
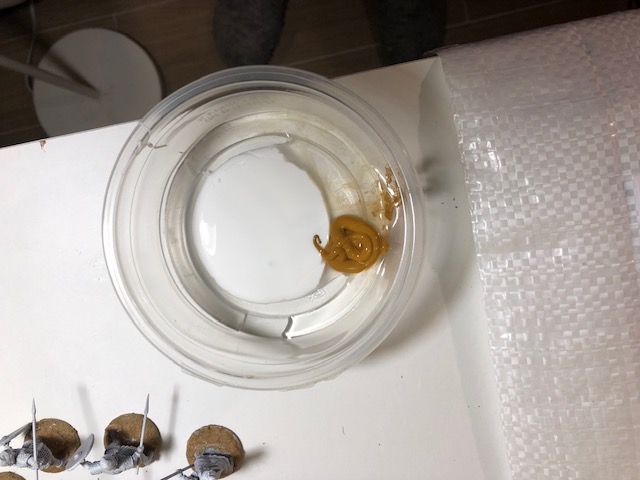
The figures are glued down suing a local glue which is very similar to UHU.


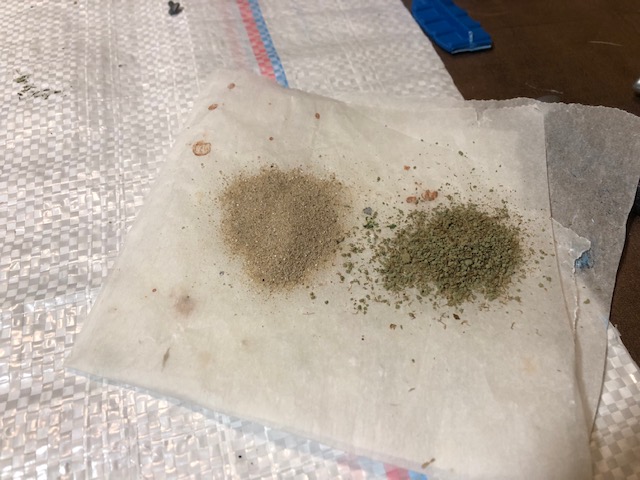
When the glue had set, I made up a kind of paste made of PvA glue and two types of sand. One was extremely fine and the second more course.
There are two main reasons for going this way. Firstly the paste adds a bit more strength to the model/coin joint. Although I have never had any issues with the glue alone, I think the additional paste mix helps to make the figures “handle-proof”. (I often drop my figures!)
The second point is that once dry, the paste adds some additional texture which should make the painting more straightforward. At least that’s the idea. I haven’t use this method for years – in fact probably the last time was 30+ years ago!

So next week is finishing the Vikings and basing so they can be base coated and I’ll be attempting Zenithal highlighting on these to hopefully make the actual paining easier!
Happy gaming
Week 3 - Base paint
Slow progress this week, but we did at least get to the point where the figures were built and ready for base coating. I have for some time now been using wooden slats and double-sided sellotape – other brands are available 😉 – to hold my figures for this process.
As I previously mentioned, I mount the plastic figures onto coins of the right appropriate size to add some weight and secure them with a UHU type of glue. So far this has worked without any adverse issues, so this was the option I chose for this game as well.
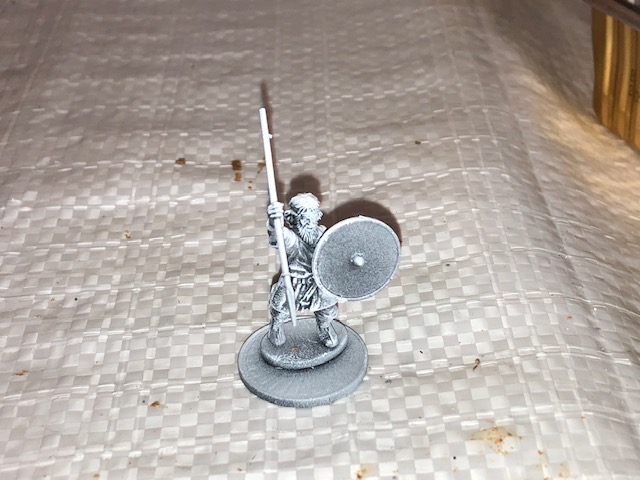
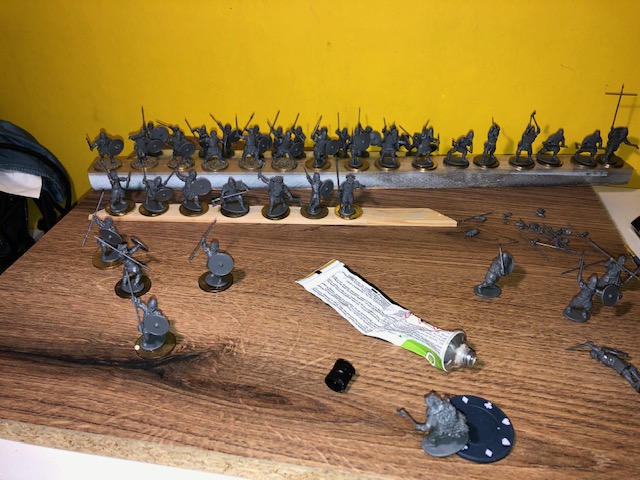 Figure meets coin
The preparation of the paint job is straight forward, although I will be trying my hand at Zenithal (spelling?) highlights this time in order to seed up and simplify the painting process for my son. I am no great shakes at figure paining and these are not intended for competition, so as simple and quick a paint job as necessary is the name of the game.
The pictures are simply the steps from mounting through Black > Grey > White undercoating. I think I might do a little dry brushing in white especial around the faces before we start to paint.

One thing we notice after last week where I mentioned making a kind of ground paste for the figures was that this might be missing a trick, in that the paste was a natural ground cover in its own right.
So I stopped applying the paste and instead took the dried figures (post base coating) and mixed some PvA glue and Raw Sienna acrylic paint with some fine and rough sand (with a little water) to make a paste which had a light brown tint.
I will experiment with different acrylics, but the idea is that once dry this ground cover will only need some limited application of grass and tufts and then done.
We’ll see hw that gets, but initial pictures seem to be interesting.
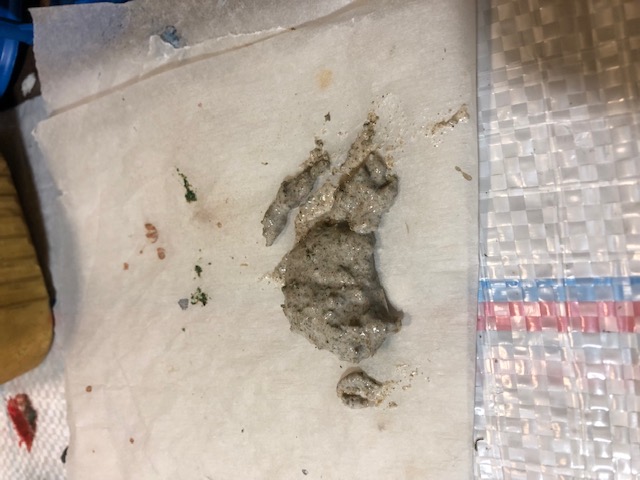
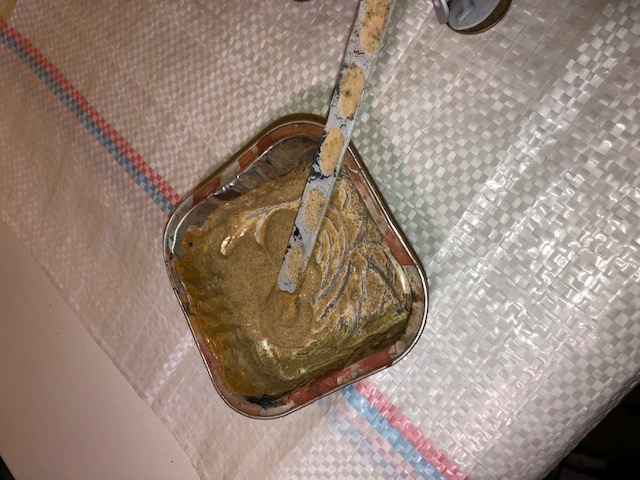 The ground cover of PvA, Paint and sands
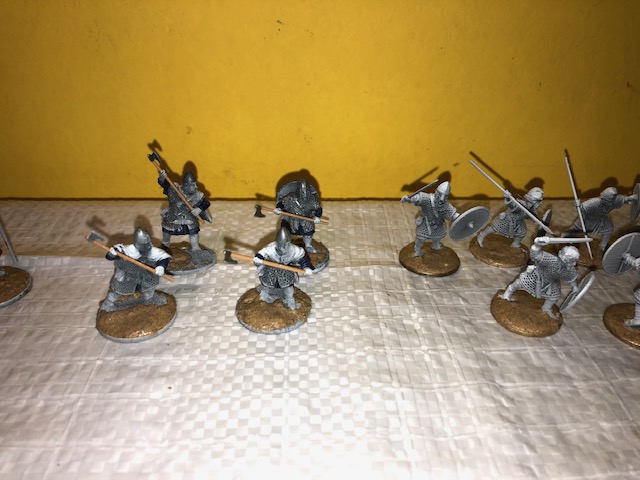 Test models with colored ground added
So, that’s it for now. Next weekend we hope to start painting, but the weekend after we are off for a break, so probably no update then.
In the meantime: Happy Gaming
Week 4 - Ground cover
It’s the Orthodox Easter weekend here so not much done. BUT, we did manage to finalize the basing of the figures with the addition of the ground cover I mentioned last week.
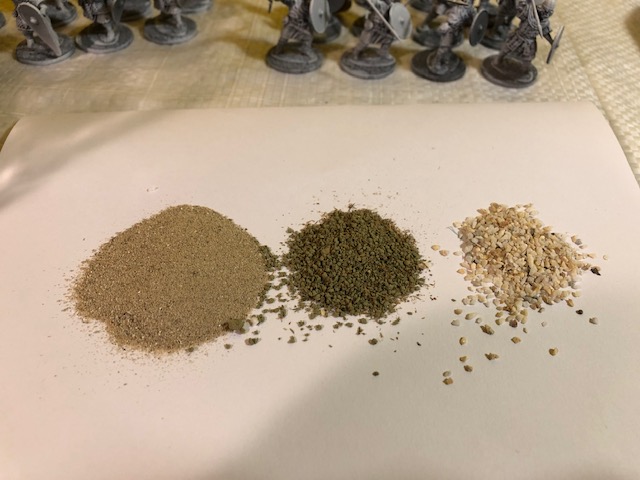
If you recall, I made a textured paste comprising PvA glue (basically a white wood glue) a little water and some Raw Sienna acrylic paint. I just eyeballed the mixture, but I’d say PvA/Water/Painting in roughly 5/3/1 proportions.
To this was added three types of sand/stones. A very fine sand which seems to have the effect of making the basic paste itself and then a coarser sand for the main effect and a smaller amount of tiny grit for more variety. Again eyeballing this as a mix of fine/course/grit I’d say 3/2/1 approximately.
The ground cover was applied with a metal wax crafting tool but obviously anything else could be used. The main purpose is to level the ground to cover the lip of the existing plastic base of the figures so there is as little evidence of the figures’ original bases as possible.
To be honest this isn’t absolutely necessary, but I prefer the look (I’m old but not completely “old school”!) and like to see the figures apparently walking on the ground, not standing on a bit of plastic.
The images below give some idea of the effect I’m aiming for.
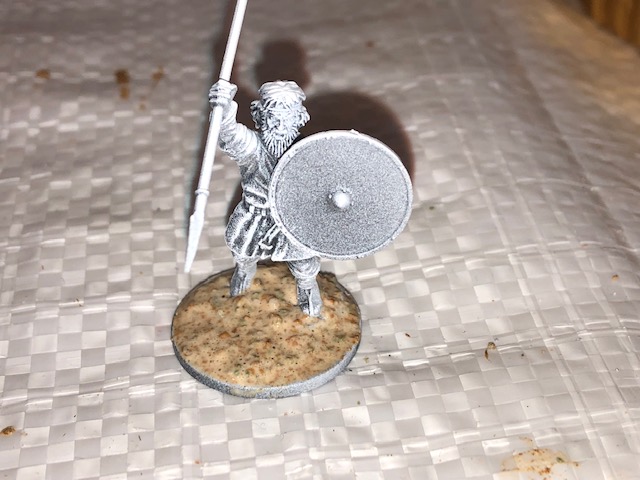
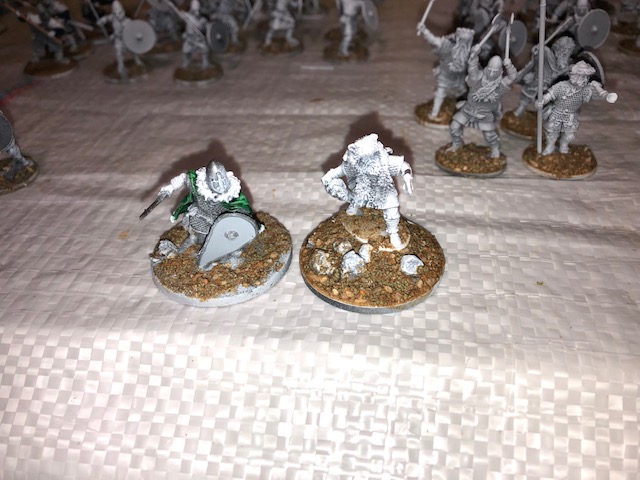
The picture of the two Hero/Leader models perhaps shows up some things better.
The one of the Left is my Anglo-Saxon Chief. Nothing fancy on the base, just the figure mounted on a larger base – actually a plastic gaming chip from a “poker” set which came with these “gambling” chips in different colors. They are a bit thicker than the standard bases (or the coins I am using) but I think this is OK for the Chief figures.
The Righthand one is Anton’s Viking warlord and is a bit more fancy. He is raised even higher with the addition of a couple of layers of thin cork sheets (I forgot to take a picture!) and the “rocks” are a few bits of “Cat litter”. This is actually an interesting resource as the type I have here comes in a wide variety of sizes in the same package and makes for decent looking rocks.
The final two pictures show the “Before and After” figures on their bases. You’ll notice a few figures with the bases painted in the base paint, these were already done before we rethought basing them AFTER the base paint. So these will require some additional painting now.
The final step with the ground cover will include some highlighting – probably “Iraqi Sand” (Vallejo) or similar and some grass/tufts to add a bit of greenery.

So, hopefully we will start painting next weekend. (Those with sharp eyes may have noticed that I have started on the Anglo-Saxon Lord already).
Happy Gaming
Week 5 - Well, not really
We are away on holiday for a week, so this isn’t really an update, but a broader explanation of the painting approach I plan to take with my son.
In order to make it as soft an production to painting miniatures, I think that using contrast paints “should” be easier than more traditional methods. That said, in any case I’m going for a fast table top finish depending on the 3′ view being paramount.
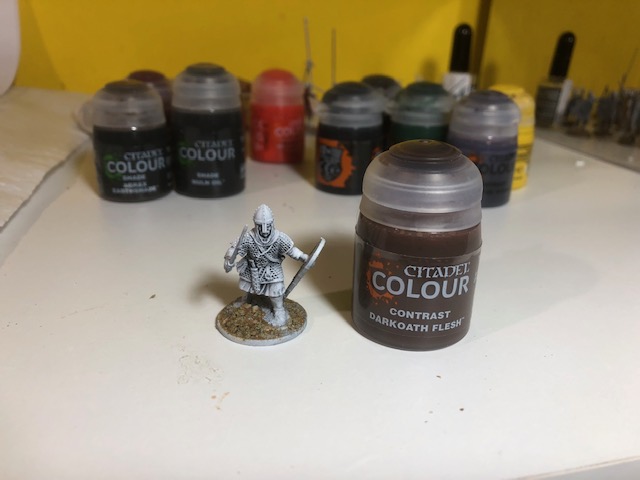
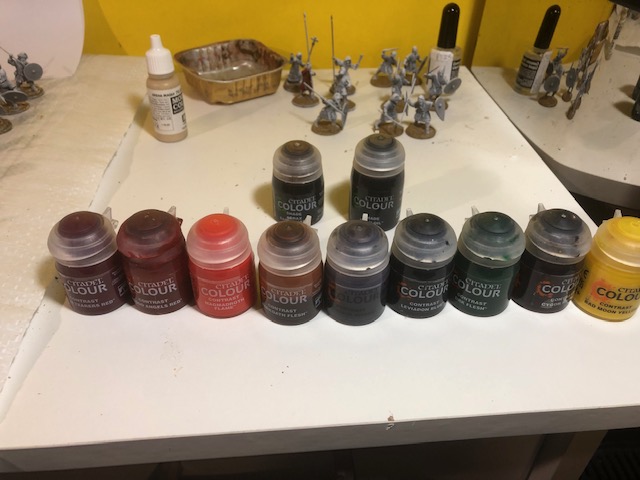 My small range of Contrast paints - I hadn't realized I had three different Reds!
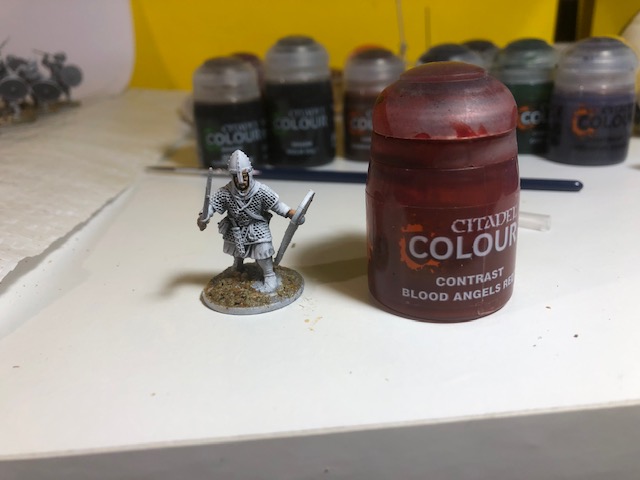
In the following images I show the figure with the appropriate paint. Everything is simple, just apply the paint and hope the Zenithal highlighting together with the contrast paint does the business for me.
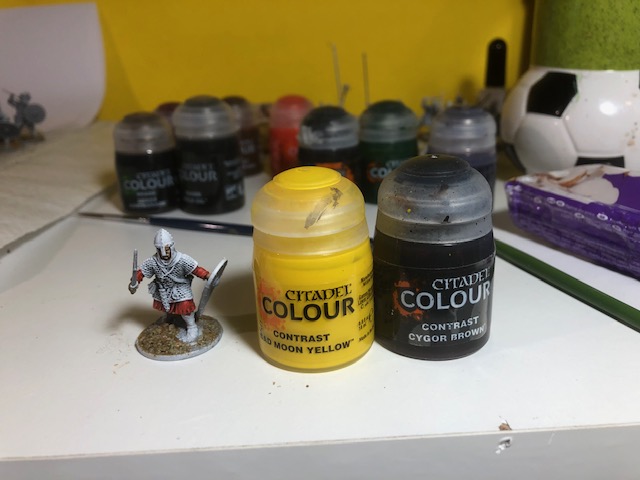
The last image with the two paints – yellow and brown – resulted in a poor finish. I had hoped that applying the yellow first (as an additional undercoat) than the brown would result in a muted brown. But it didn’t really work that way. later on I added another coat of yellow, but I don’t like the result, and will probably use an ordinary paint to simulate cloth.

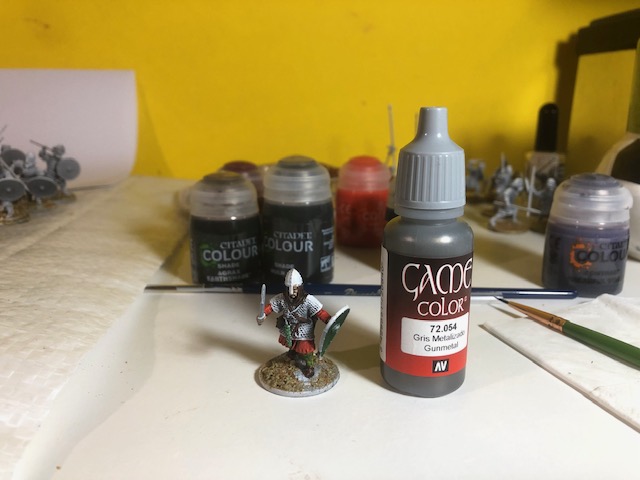
I don’t have any metallic contrast paints (actually I don’t even know if they exist!) so I used “Gunmetal” from Vallejo. This I applied straight onto the metal parts, but for the chainmail, I diluted it to more of a wash and will probably dry brush this later with silver to bring out the high points.
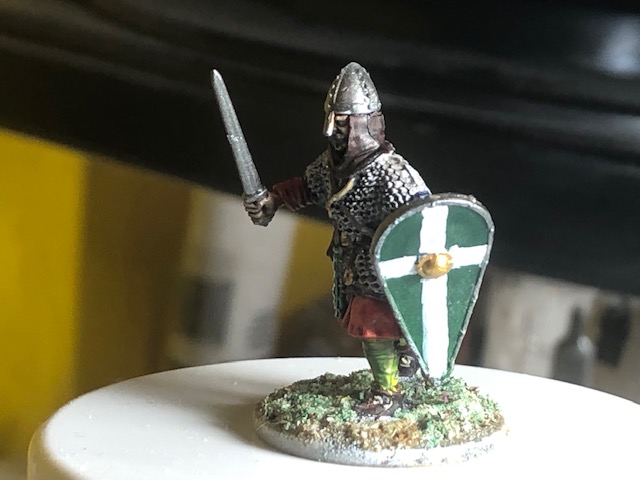
I used white on the shield to make a cross (a bit “wobbly!) and may have to touch this up later. Brass for the buckles and crucifix, and Iraqi Sand for the strap holding the crucifix and as a dry brush on the ground cover. The final touch of blue on the chain mail is probably unnecessary so I may leave that out for Anton’s paint scheme.
The final pictures are the finish quick paint job. It’s a bit like a paint-by-numbers approach. But en masse I think they will do. The non-chain mail figures will just have a block of one color or another using the contrast paint to form he necessary highlights and shadows.
So, in ten days or so, I hope we’ll have some painted troops to share.
In the meantime, Happy Gaming
Week 6 1/2 - Getting back to it
So, short holiday over and time to try to catch up with the challenge. Son has school work to do (that’s the priority) but he wanted to “paint something” so he started on his Levies. Only just got first contrast paint on the tunics, but it’s a start.
 The Levies with random tunics. Painting has begun!
I managed to make a bit more progress with the warriors based on the “step-by-step” or “painting by numbers” approach I talked about last time. Basically, using the contrast paints as the one-step base coat.
I think I will probably add some highlights and more differentiation later, but I’m an average painter at best, and the idea s not really about painting superb models, but in getting Anton interested n the wargaming hobby.
I hope in the next 6 weeks or so, we will have enough decently painted models to play a few games. But before that, I also want him to try his hand at building an Anglo-Saxon dwelling or some other terrain features (walls, fences etc.).
A short update this week, a few pictures of the so-far panted warriors. Finishing off, highlighting and basing still to do.

Until next week, Happy Gaming.
Week 7 - Progress with the Anglo-Saxons
Mainly working on the Anglo-Saxons this week and some good progress made (pictures to follow). I have mainly use Contrast paints, but for some of the smaller details and where I don’t have an appropriate paint, I used Vallejo and other paints as necessary (some older “Foundry 3-set” paints for example).
This week I wanted to get the Warriors and Hearthguard done, the general levies will follow shortly. My son is still slowly working through his levies and warriors; hopefully they’ll all be done by next week. (I suspect he’d rather someone else did the painting so he could get straight to the tabletop and gaming, but painting is also a necessity unless you’re exceptionally wealthy and can get someone else to do it for you!)
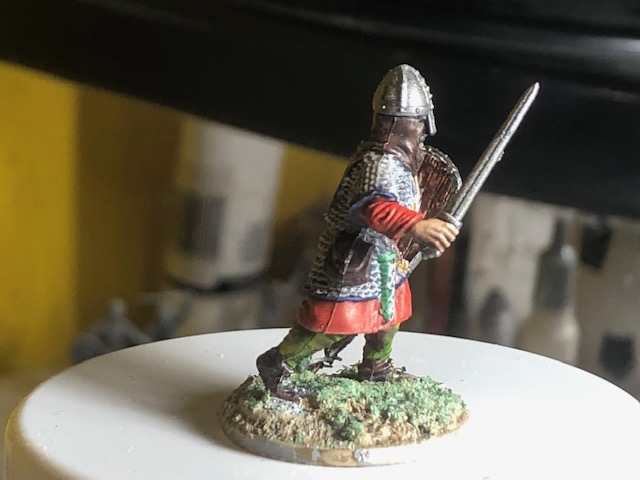
Some small points to mention on the pictures; I will probably do some additional highlighting on the figures at some point once all of them have their initial painting completed. For example, the sword or spearhead edges could be highlighted with silver or similar to emphasize these, but there is plenty of time to consider this once we can at least get the whole army on the table and play through a few games.
The metallic elements were painted with Vallejo paints, while the other areas of cloth etc. were all done with the Contrast paints. Overall I like the way the Contrast paints work, but I’ll probably be more selective in their use going forwards as there seems to be a wide variable in how they look afterwards.
I also want to experiment a bit with painting the Levies who will be randomly painted to reflect their simple, inexpensive backgrounds, so with that in mind I’ll try preparing them with different coloured undercoats on different cloths. If I’m right, this “should” result in a different finish to the same Contrast paint over these different base coats. I guess we’ll see by next week.
The bases are completed to tabletop standard, and here again I might go back and add some “grass tufts” or similar to make the bases more interesting. I like to paint the base edges in green to fit in better with the table, but other options are well known (e.g. Black edging) but to me I just prefer the look of the green edges.
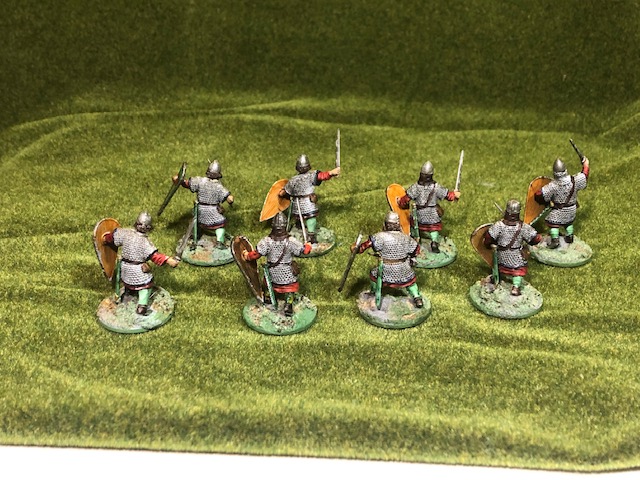
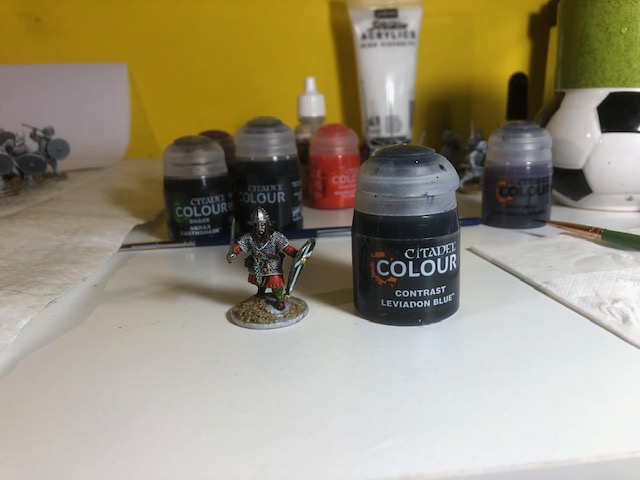
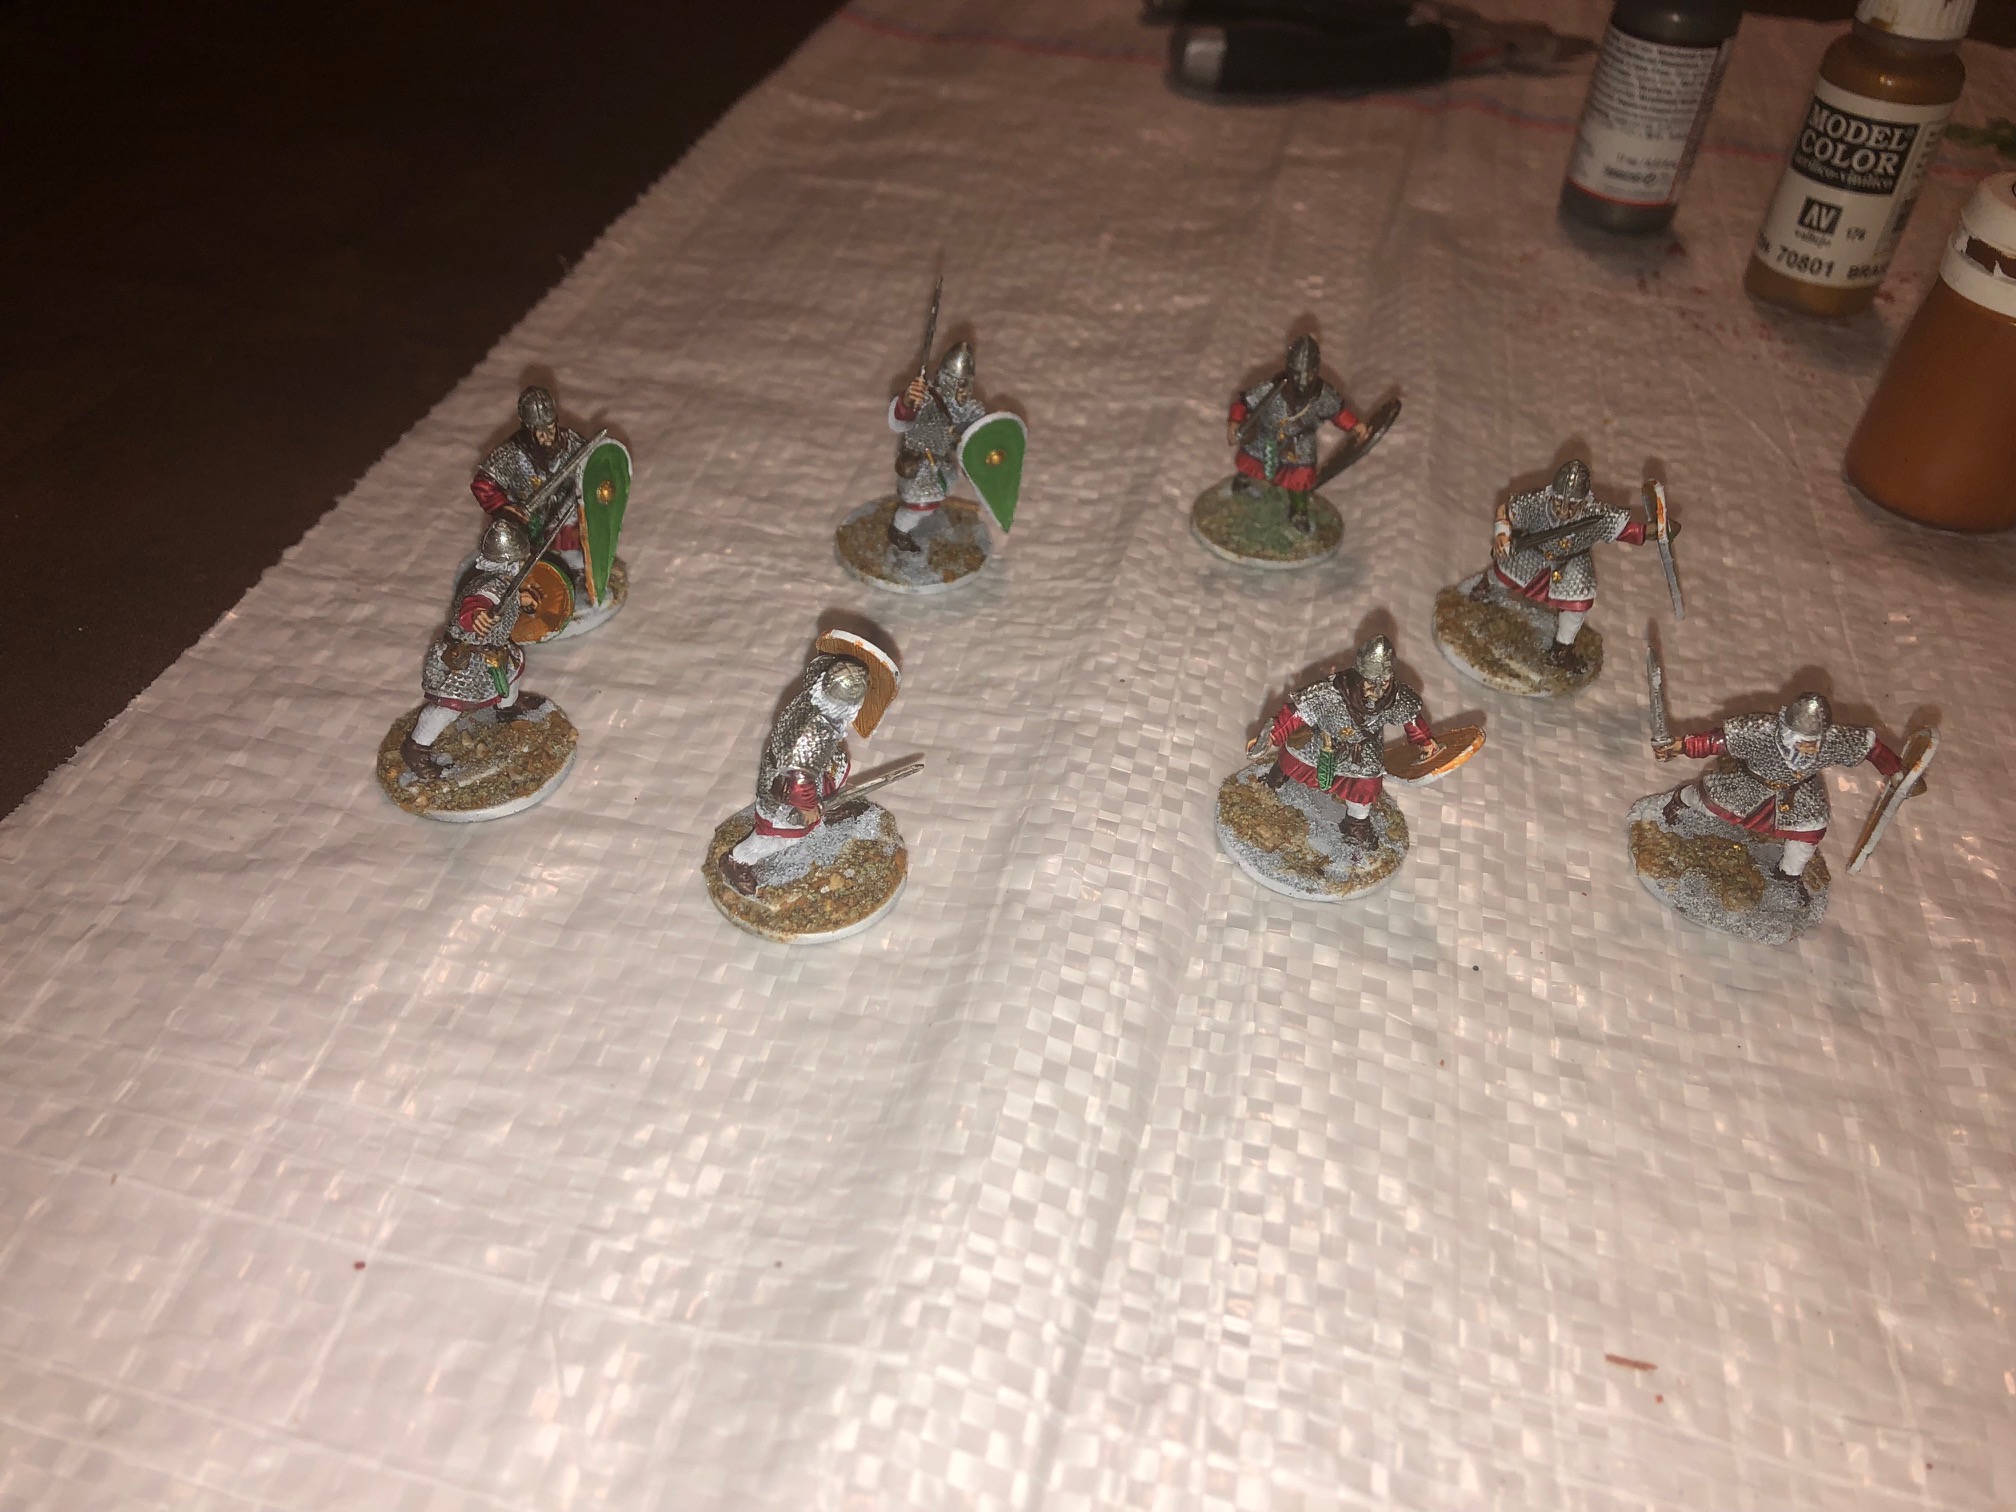
These Warriors were painted with these Contrast paints: Darkoath Flesh (actually I’ll use this for all the flesh tones on the Anglo-Saxons); Flesh Tearers Red for the tunics (Why does GW have such idiotic names for their colors?); and the blue trim was Leviadon Blue.
I later added small highlights to the flesh parts with Foundry Flesh 5B.
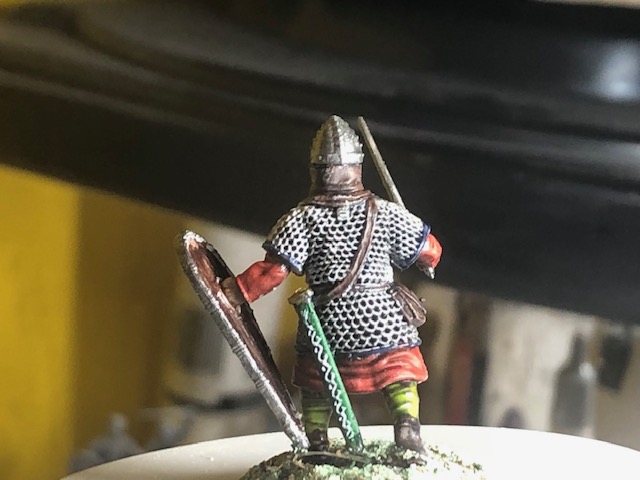
All the metal parts – swords, shield trim were pure Vallejo Gunmetal (72.054), which I diluted slightly as a wash for the chainmail shirts.
All the leather belts, bags boots etc. were the same color Contrast Cygor Brown. It’s a bit dark and I decided to use other leather paints for the Hearthguard (see below).
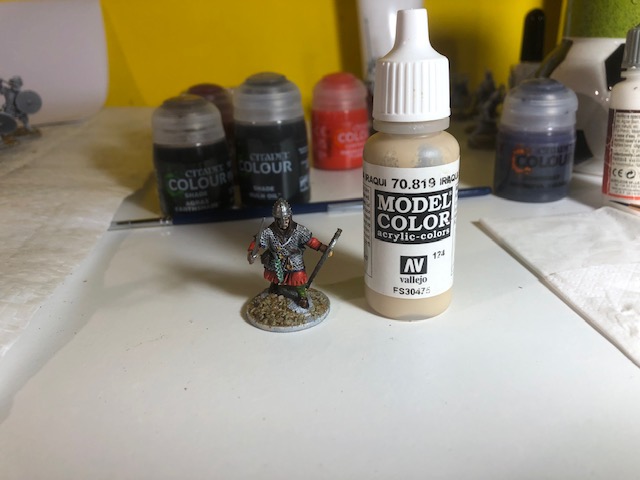
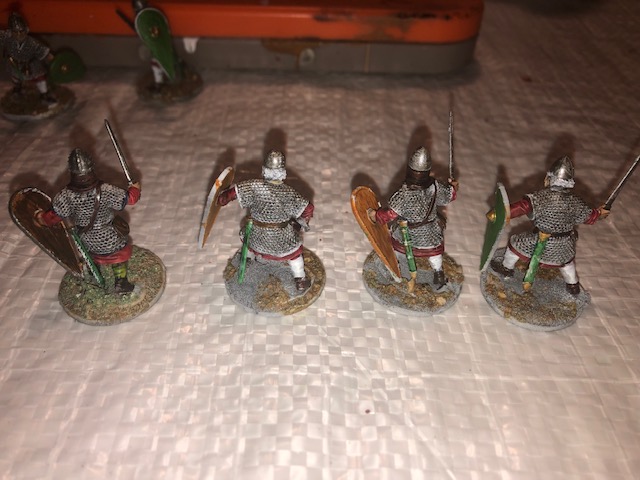
The highlight on the scabbards was either white or Brass depending on the engraving and the cross strap was Iraqi Sand, Vallejo 70.819
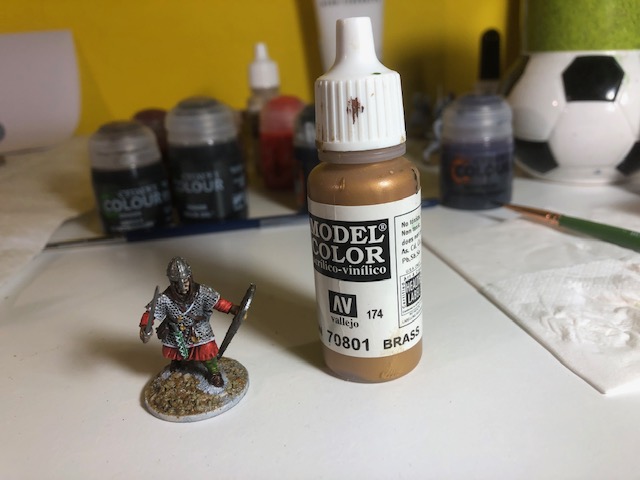
The green on the sword and dagger sheaths was Contrast Ork Flesh (I’ll use a different paint next time) and the brass trims for the Cross and shield boss was Vallejo Brass 70.801. The shield was painted with Vallejo Camo Bright Green 70.833 and the cross in Coat d’arms Blood Red.
Finally the base rim (as with all the others) was Vallejo Bright Green

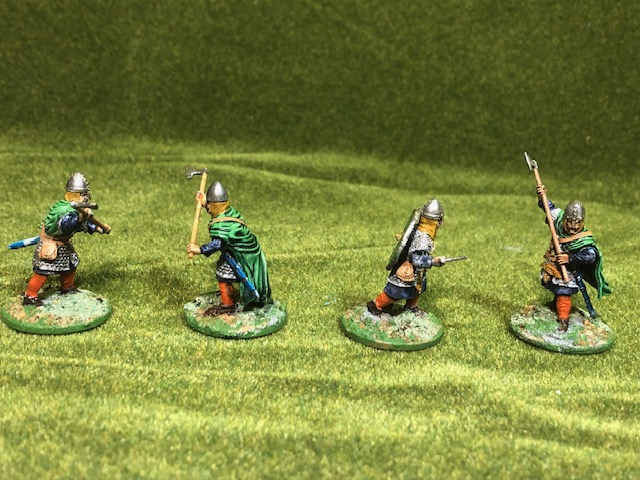


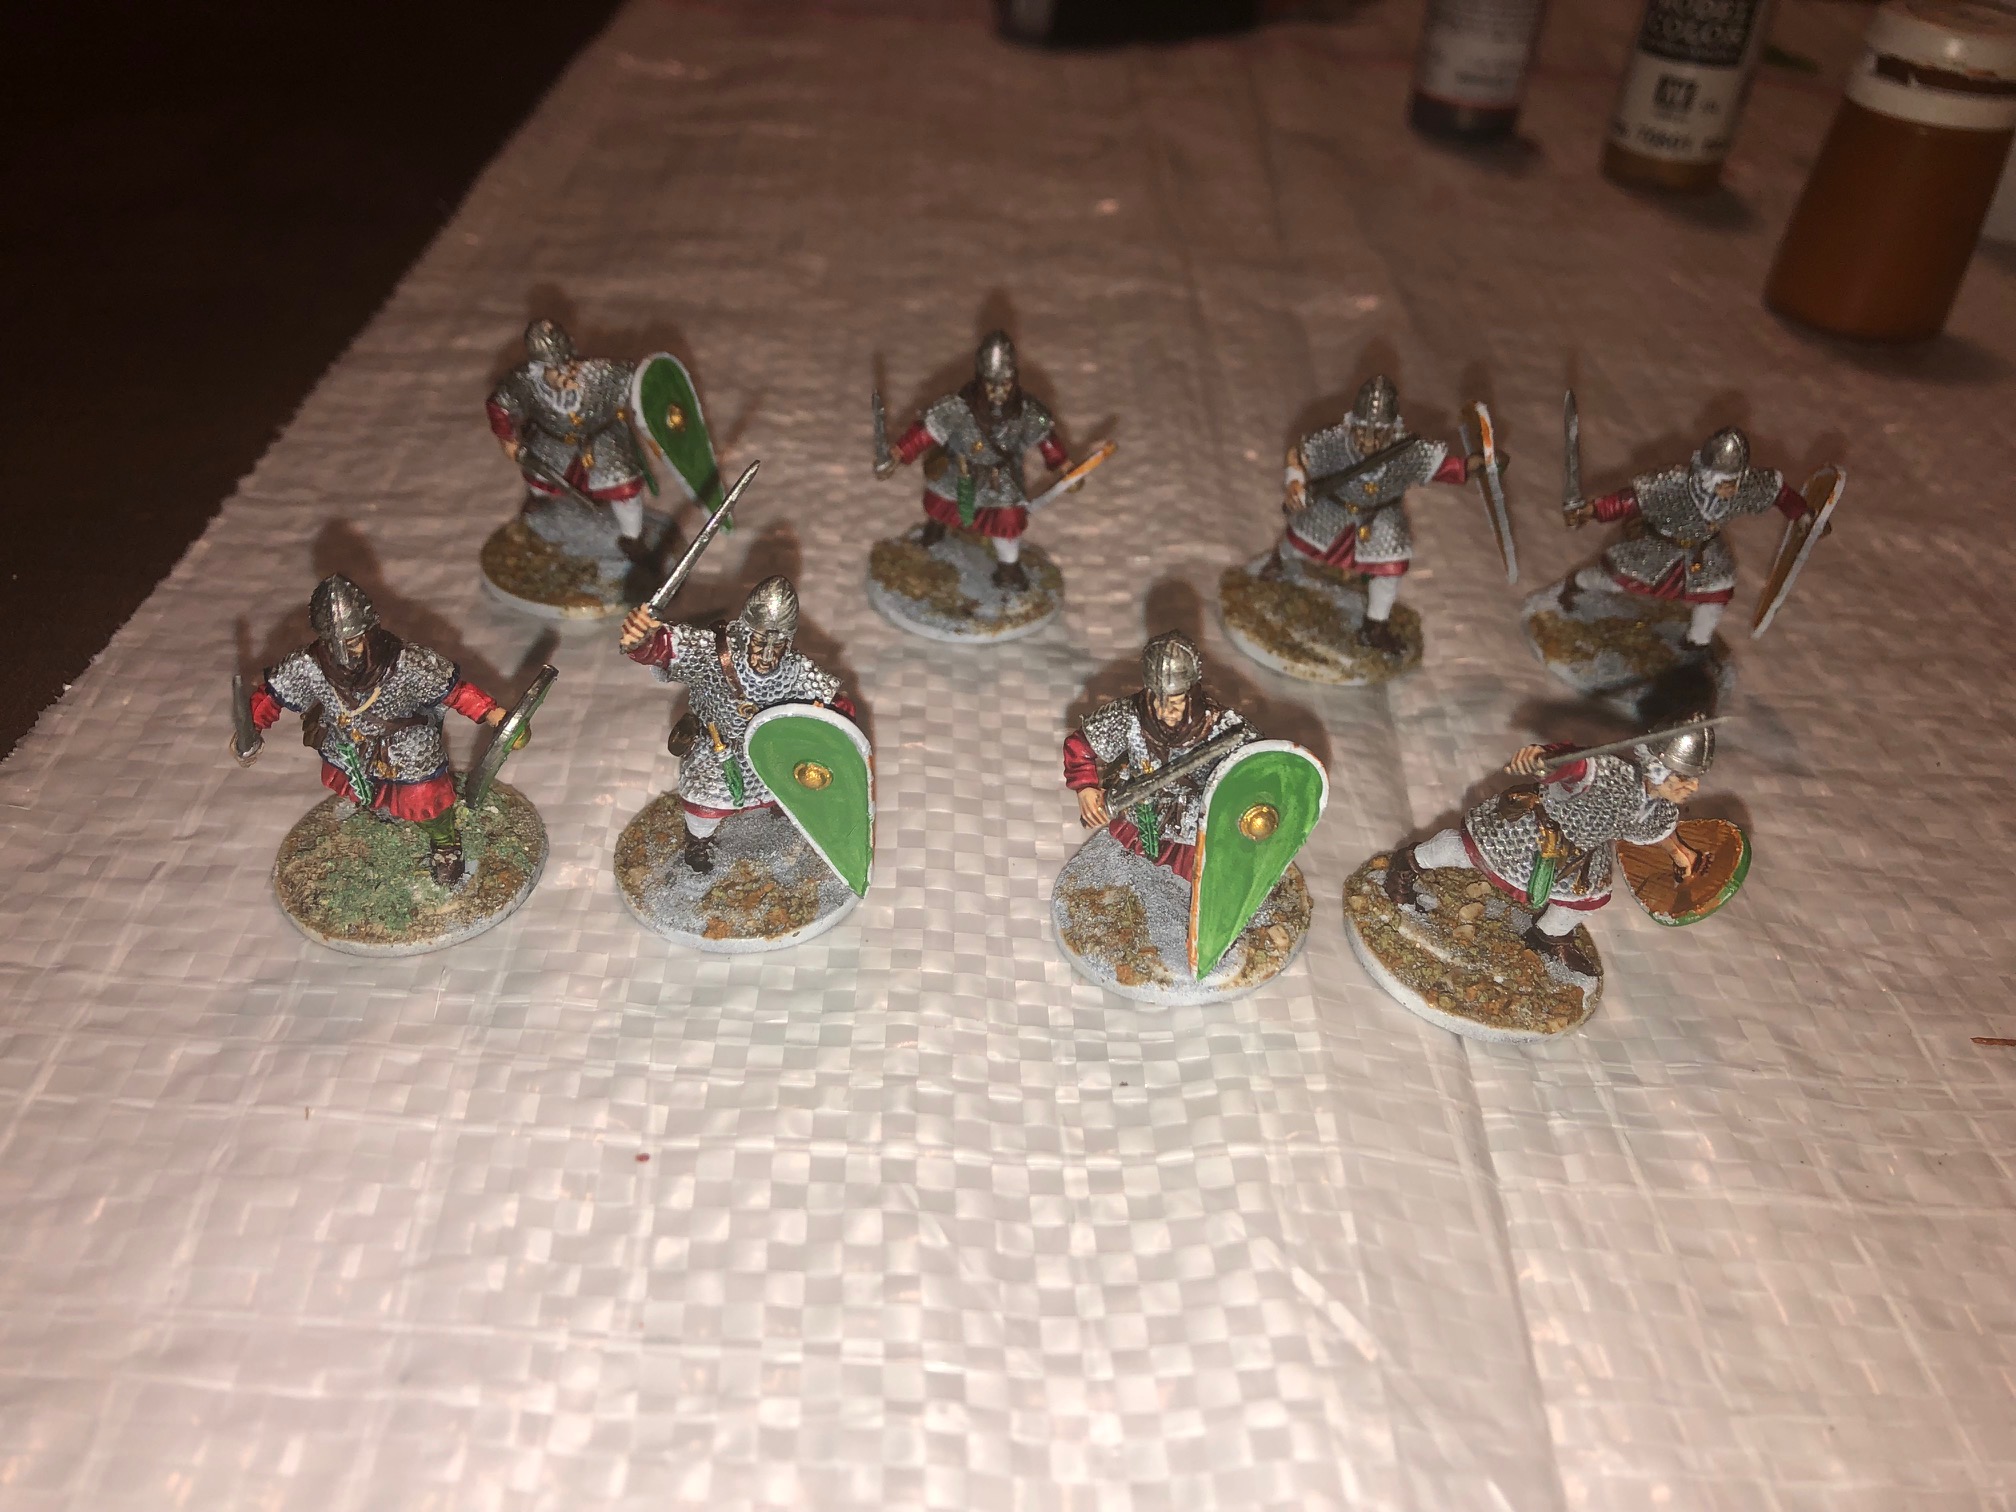
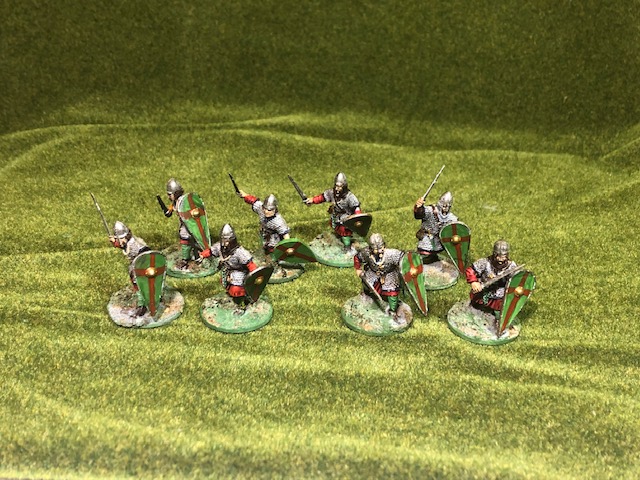
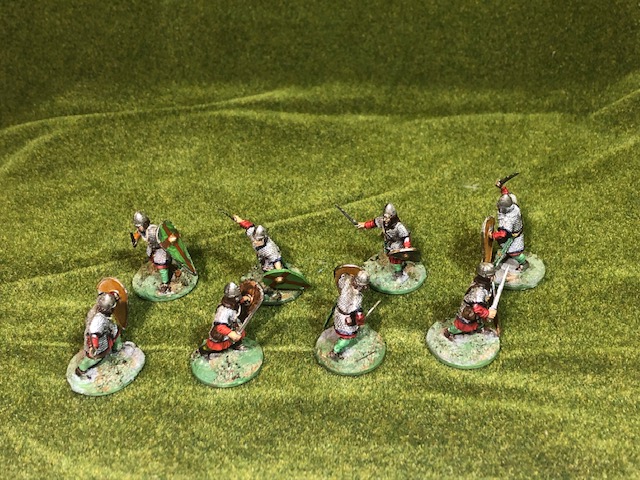
There are two groups of Hearthguard which have both been painted the same way. I followed a similar path as I had with the Warriors, but used more variety of leather and odd additional colors here and there.
Tunics used the blue Contrast paint as above, but for the red leggings I used Contrast Magmadroth Flame. I am disappointed in how that went on as it shows little contrast at all, but that might be me not quite getting used to how the paint works best. I might give it some additional highlights later.
Metal parts as I did for the Warriors. The large axe handles were painted with another Foundry paint Spearshaft 13C. Brass for the little metal piece, eg. belt buckles etc.
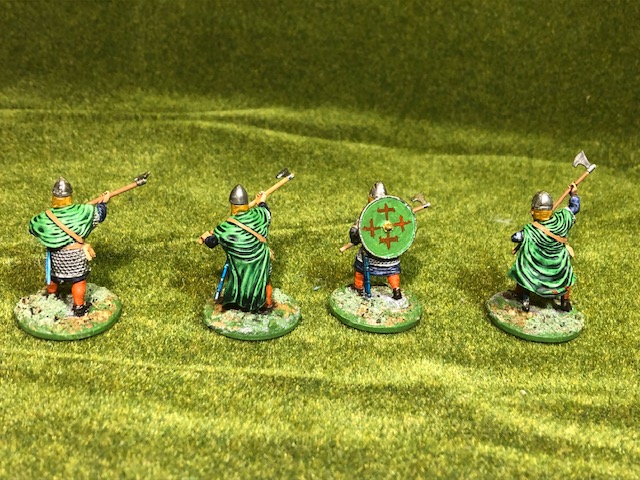
The cloaks were all painted with Contrast Ork Flesh and again I’m not super happy about the finish, but revisiting that will be for another time.
I used a variety of leather paints from the Foundry range to add variations in the look of the models. So Tan 14B and 14C and Buff Leather 7C for the belt bags. I over painted these with a wash of the Contrast Cygor Brown, but any dark wash would do – maybe Agrax Earthshade?
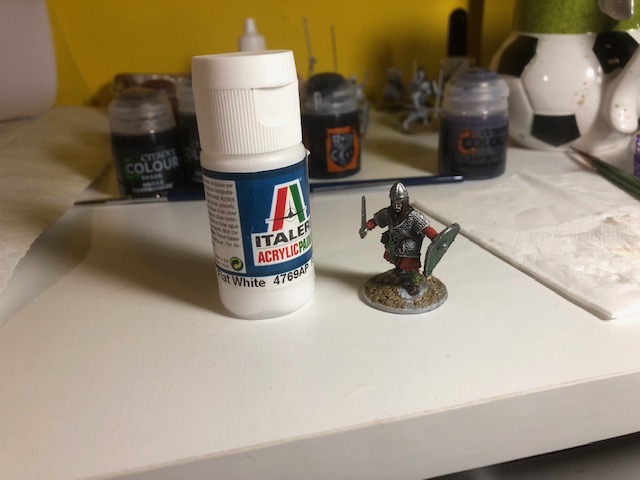
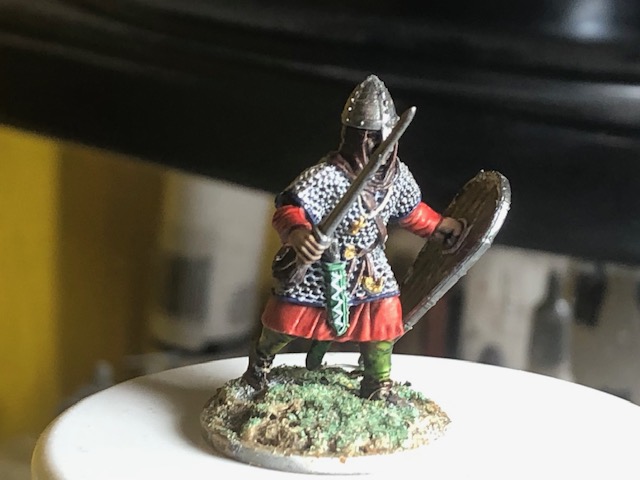
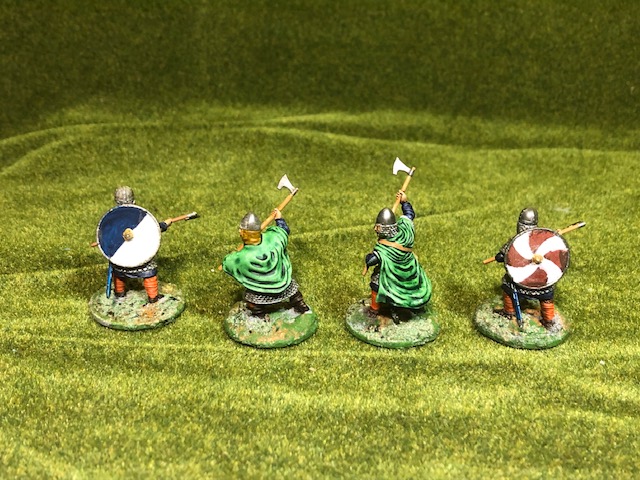
I painted three shields using a variety of paints. The simple shield (Blue/White) was first. The white was a base of Italeri Flat White 4769AP (a local shop has started to sell Italeri paints, which is great) and Foundry Deep Blue 20A.
The red/white shield was actually a base of several layers of Contrast Flesh Tearers Red (next time I’ll just use an ordinary paint) and many layers of white. In retrospect I should have done this the other way round!
The final green/red shield was a base of Vallejo 70.833 Camo Bright Green and overpainted in Coat d’arms Blood Red.
So, some progress. One set of Warriors and the Levies to finish. My son tells me he’ll be on to the painting asap, so we’ll see how that goes.
So that’s where we are.
Happy Gaming.


