


![Alternative Trench Crusade Miniatures? Trench Missionaries Review | Wargames Atlantic [7 Days Early Access]](https://images.beastsofwar.com/2026/03/unboxing-wargames-atlantic-trench-missionaries-coverimage-225-127.jpg)


3D Wolsung Terrain (spring cleaning challenge 2023)


Recommendations: 452
About the Project
Back around 2017, after watching BOW-OTT demoing Wolsung steampunk skirmish game i was hooked. I back their first Kick starter and started playing some game with what hero and henchmen i could get on Ebay. I always love the Wolsung terrain but it was hard to find here in the US. 2017 I also got my first 3D printer and try to create some terrain to match the MDF terrain from Micro arts studio was a disaster for the start. The PLA filament i used cause a lot of issue with the 3D model i made in tinker CAD. Clogging and under extrusion made my first prints weak and unusable. My plans to make the interior of an Airship were dashed :(. Fast forward to today i have desided give this project another go and see what i can do.
Related Game: Wolsung SSG
Related Genre: Steampunk
Related Contest: Spring Clean Hobby Challenge 2023
This Project is Active
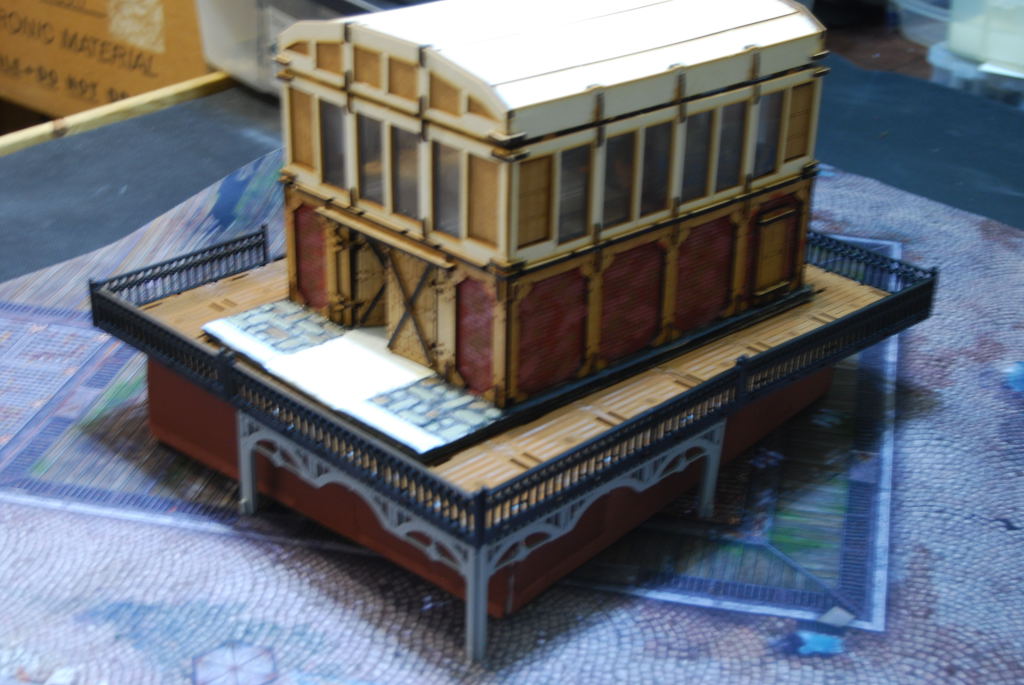
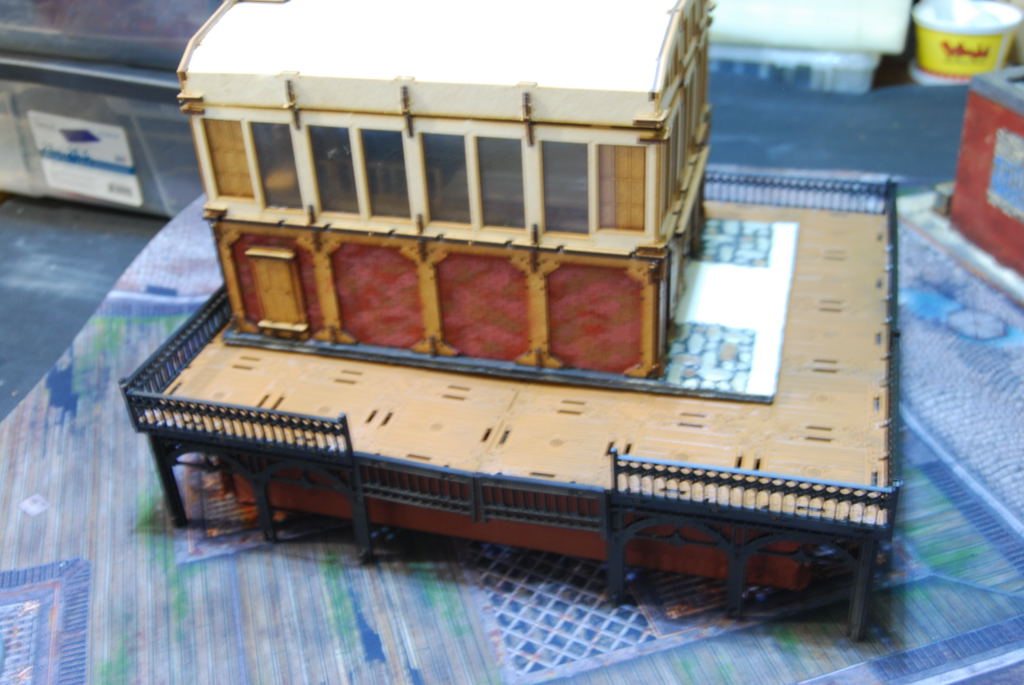
Testing interior walls
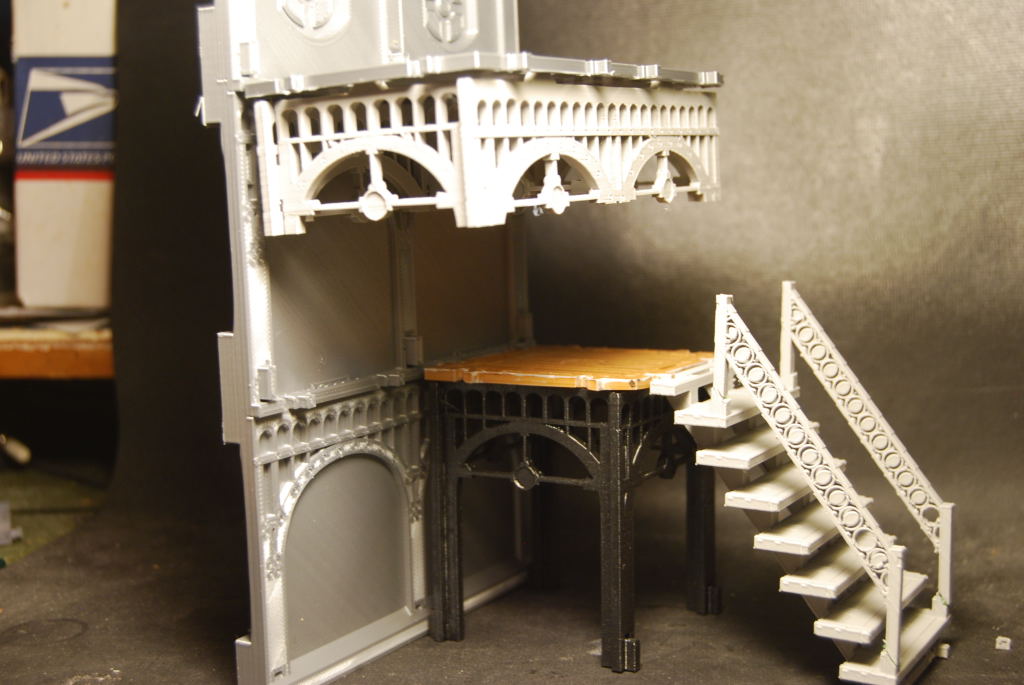 After printing a test walls, i check the look and fit of the my design. First i notice a gap.
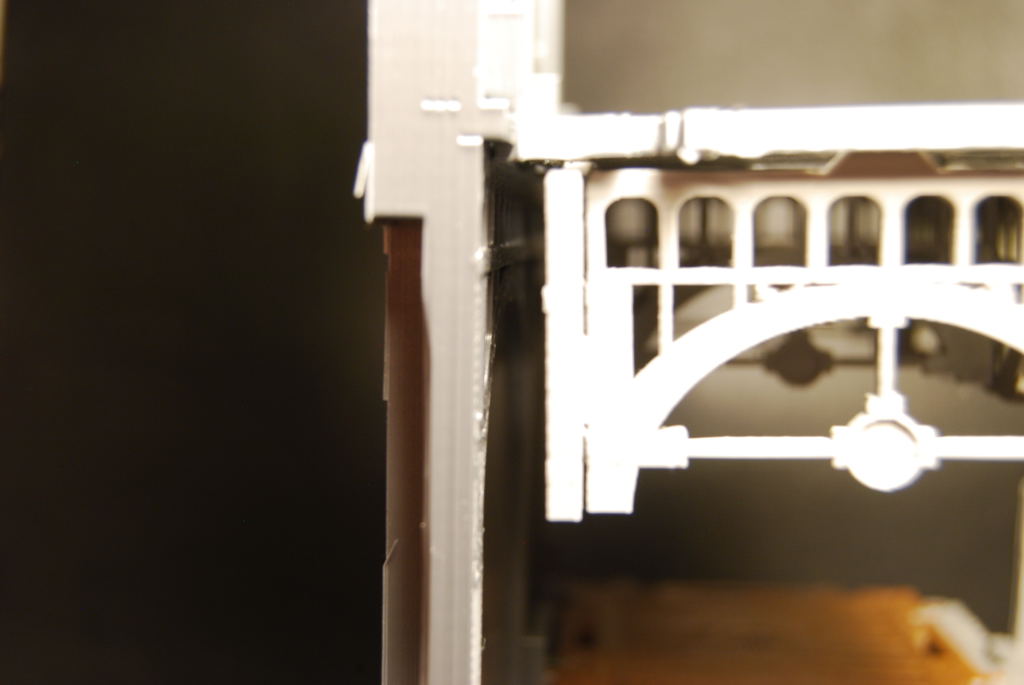 This gap is an easy fix back to TinkerCAD.
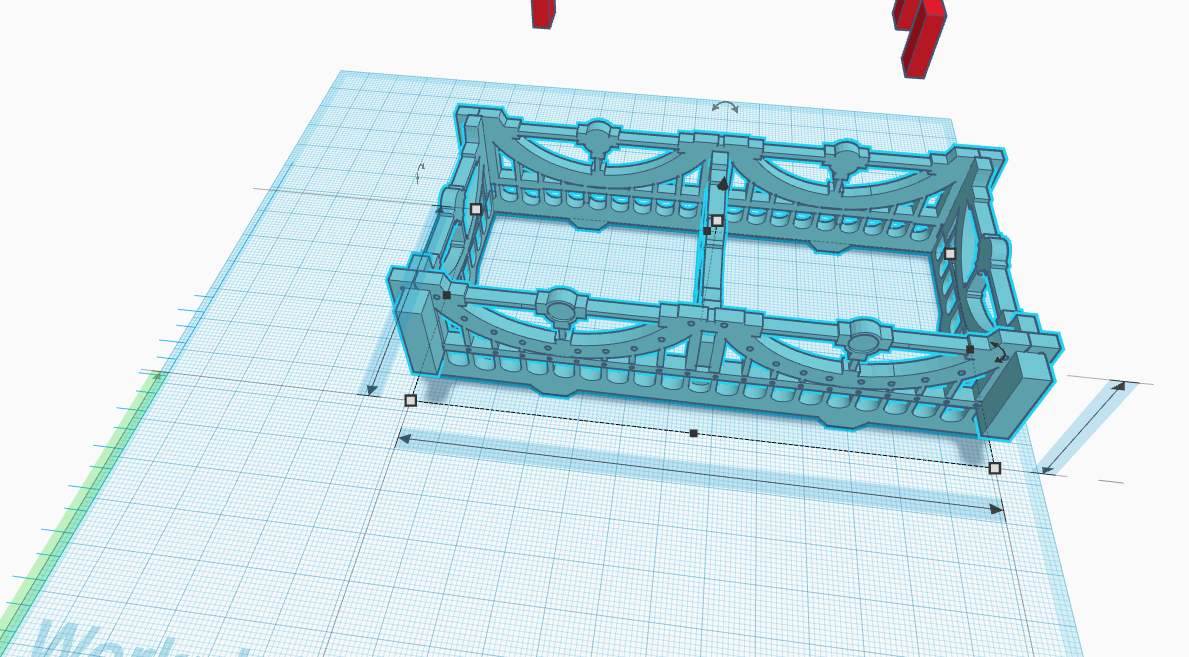
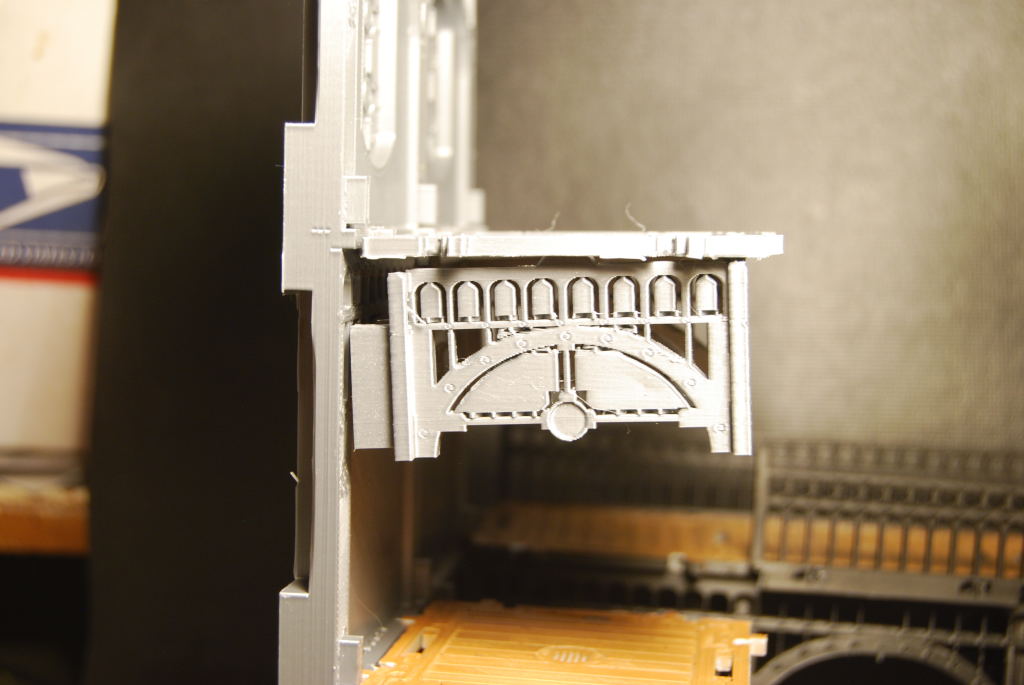
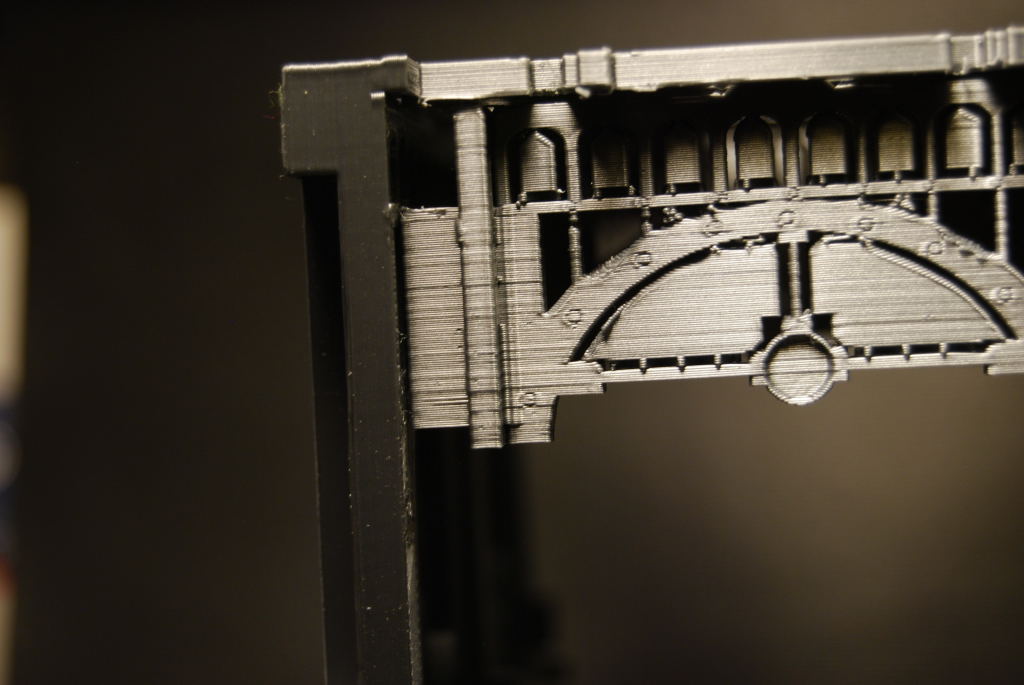 After a few adjustment i got a fit i am happy with.
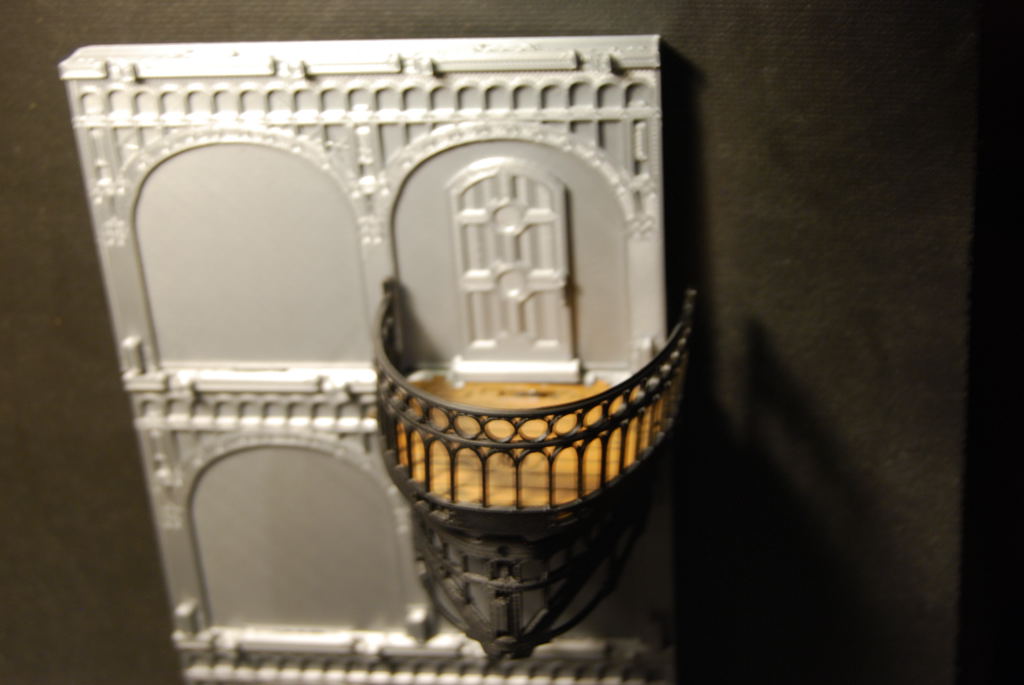 The curved balcony design was the only one i didn't need to change.
Airship interior
Ever since i watch the demo of Wolsung on Beast of War(On table top). I have an idea of rival clubs fighting for control of an airship or Dirigibles. On the inside, fighting through the hanger, cargo hull, engine room and finally the command center. I abandon that idea 6 years ago because i could not afford buy all the MDF kit i would need to see it to completion. The later that same year i got my first 3D printer and i stated to flesh out some idea in tinker CAD. The process was slow and yielded some poor result. Now armed with some experience in both Tinker CAD and 3D printing i can show you the start of what i want to do so long ago :).
 This is the basic interior wall i started on. (the pipes would be a problem so i remove them on future designs)
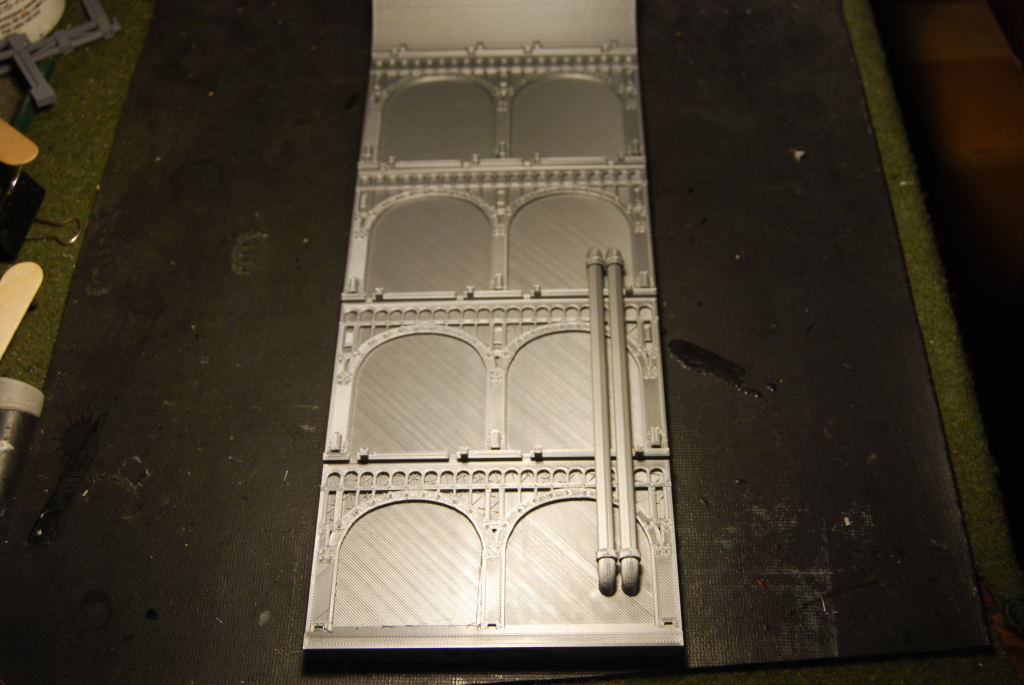 Soo Big, that stands about 13.5 inches (34.5cm) and took 26 hour to print
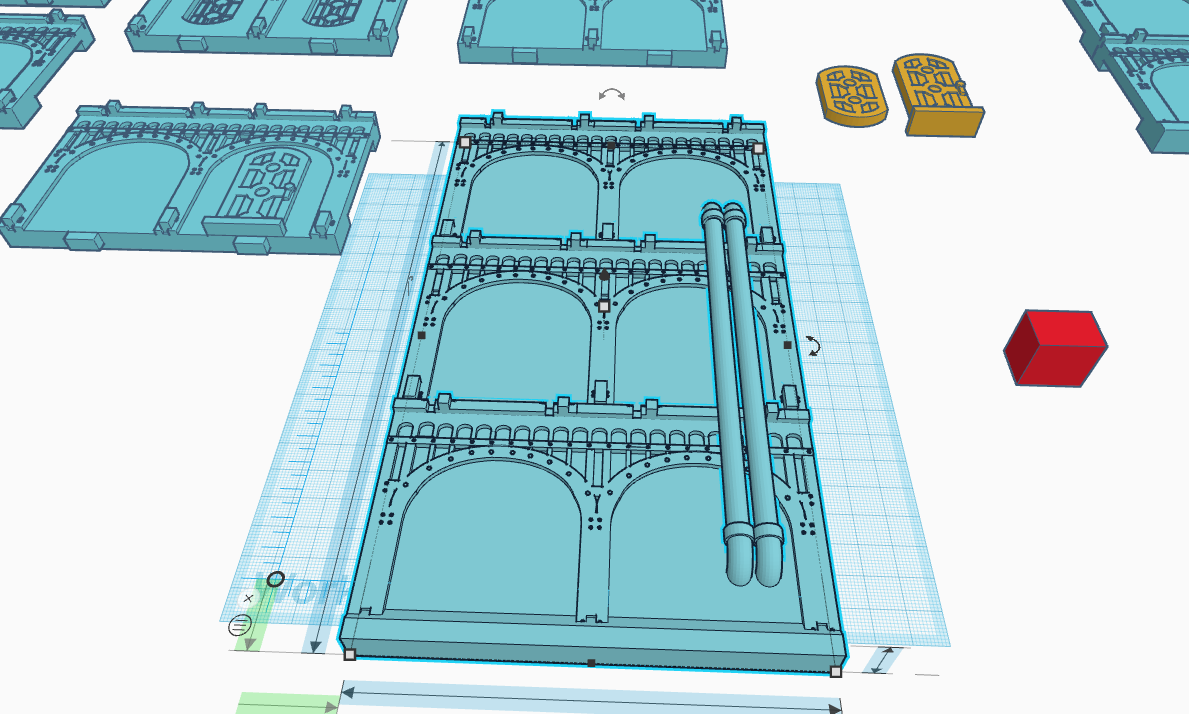
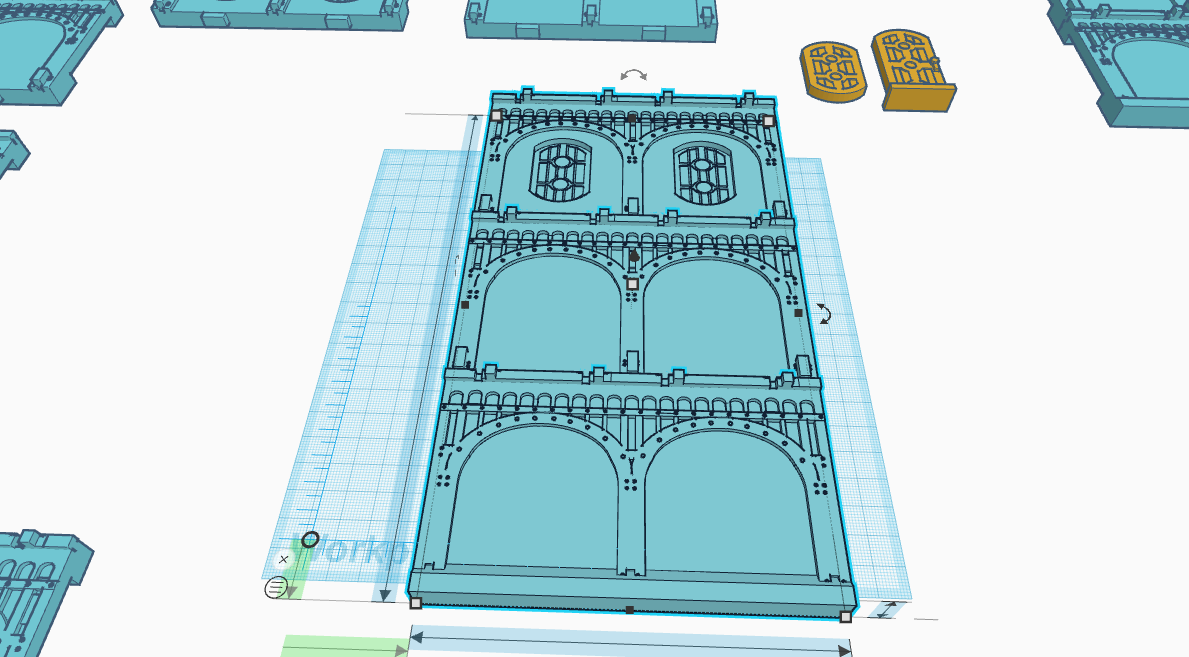 2nd design i remove the vertical pips and added some windows. (also i just printing the lower half to save time and filament. I use up more than 4kg for filament since i started this project).
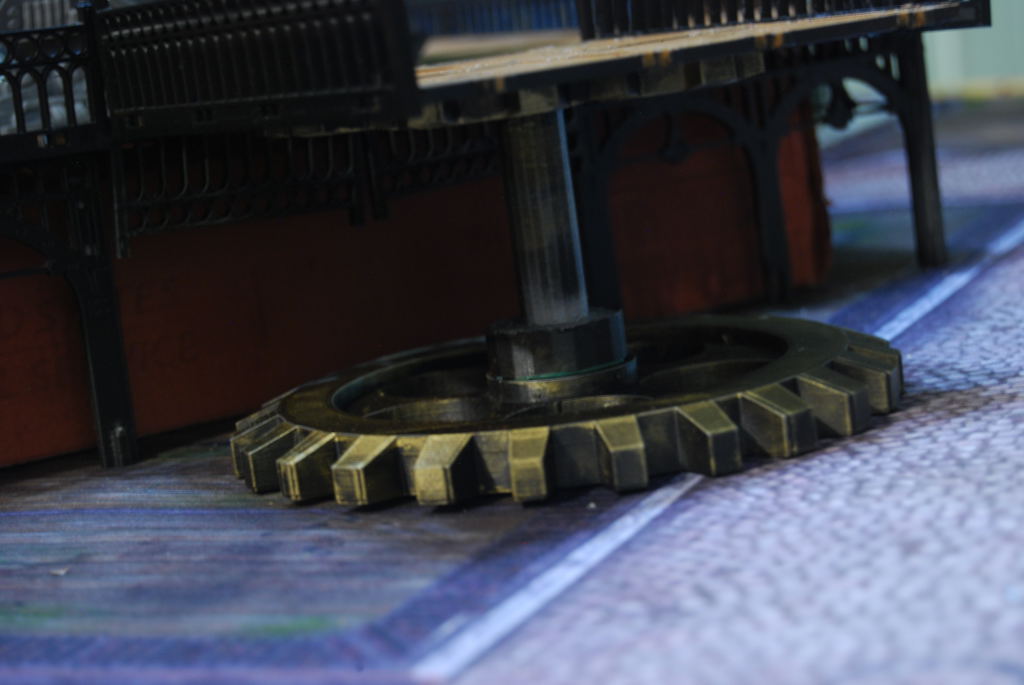
Elevator
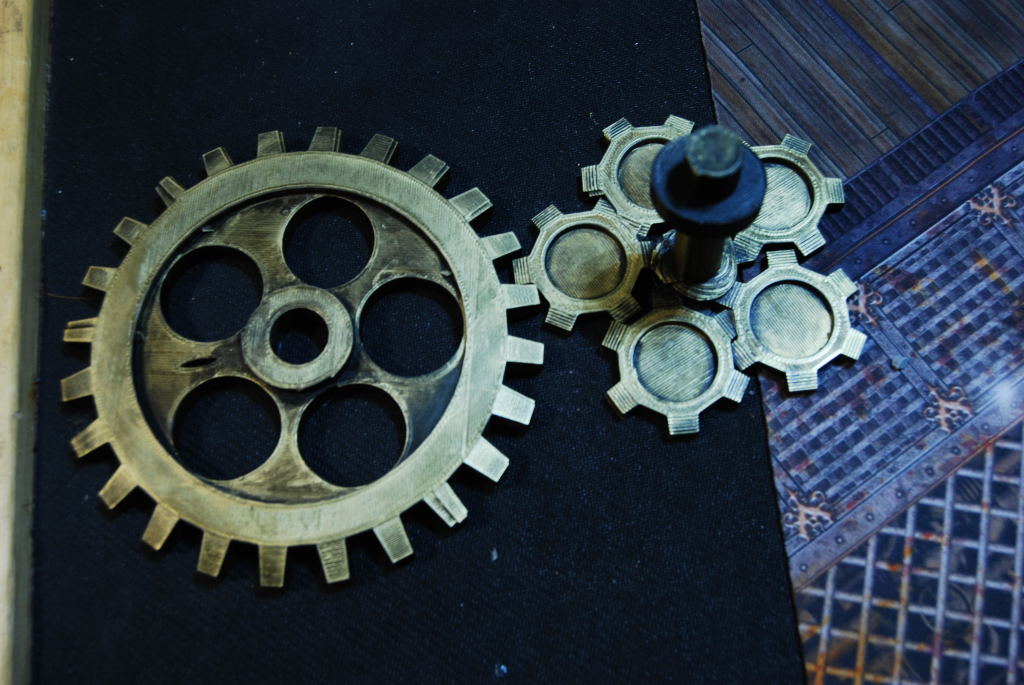
 Sometime i get inspiration from designer on Thingiverse. I found this thing by Jokerdesigns.
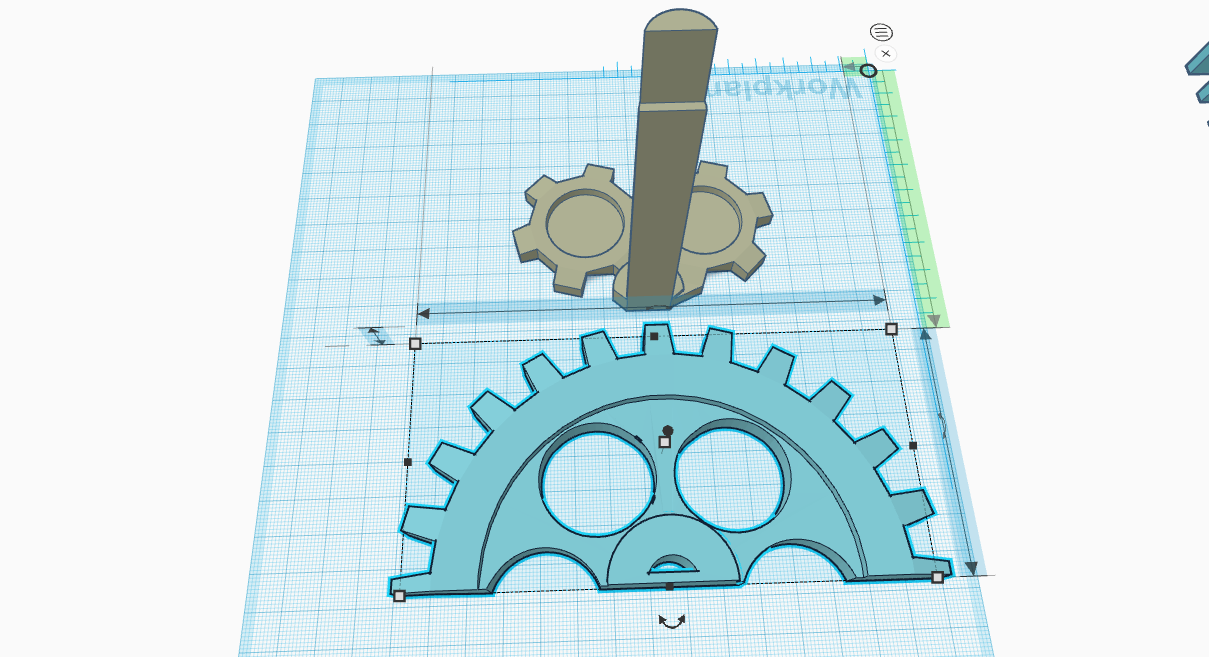 This is a tooth brush holder by Jokerdesigns.
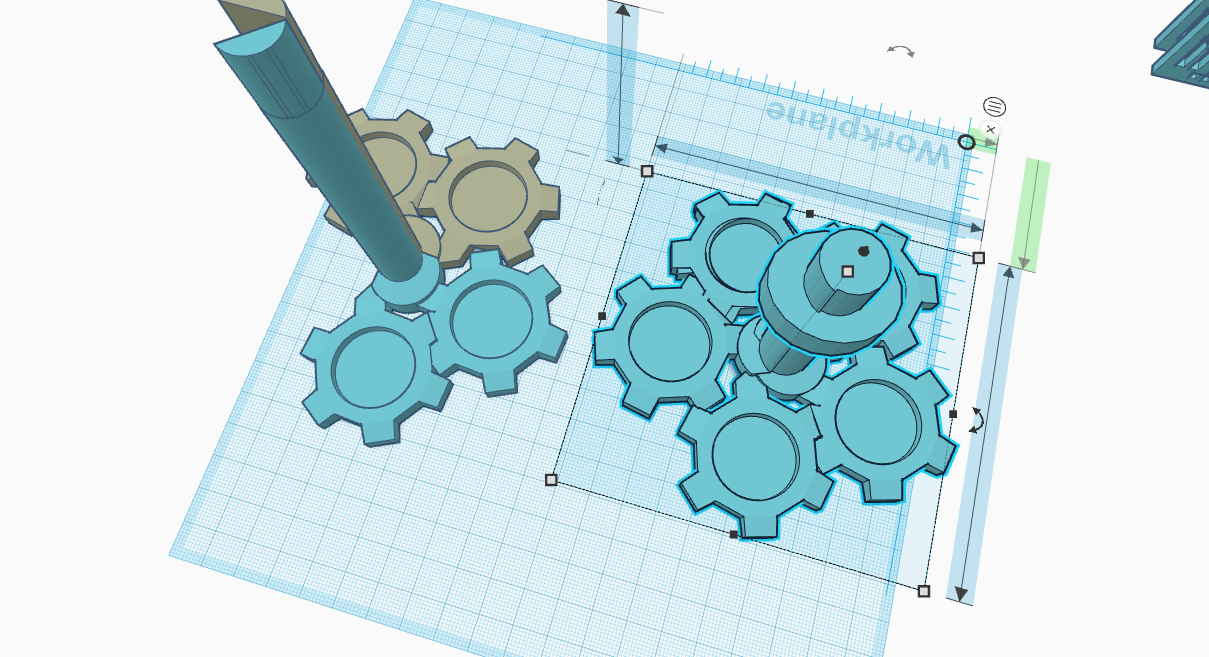 I imported these files into TinkerCAD to be copied and rotated to create a new image on the right.
 i did the same with the larger gear.
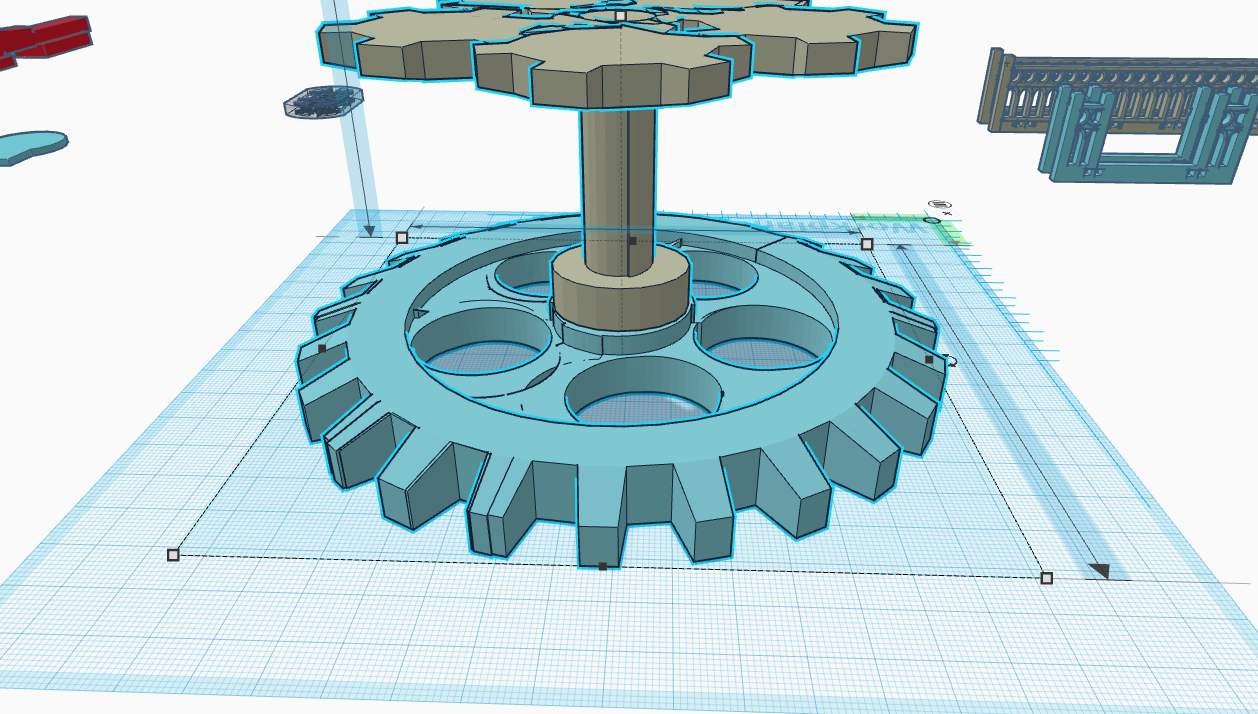 This is the final design i would be using. Off to the slicer for printing.
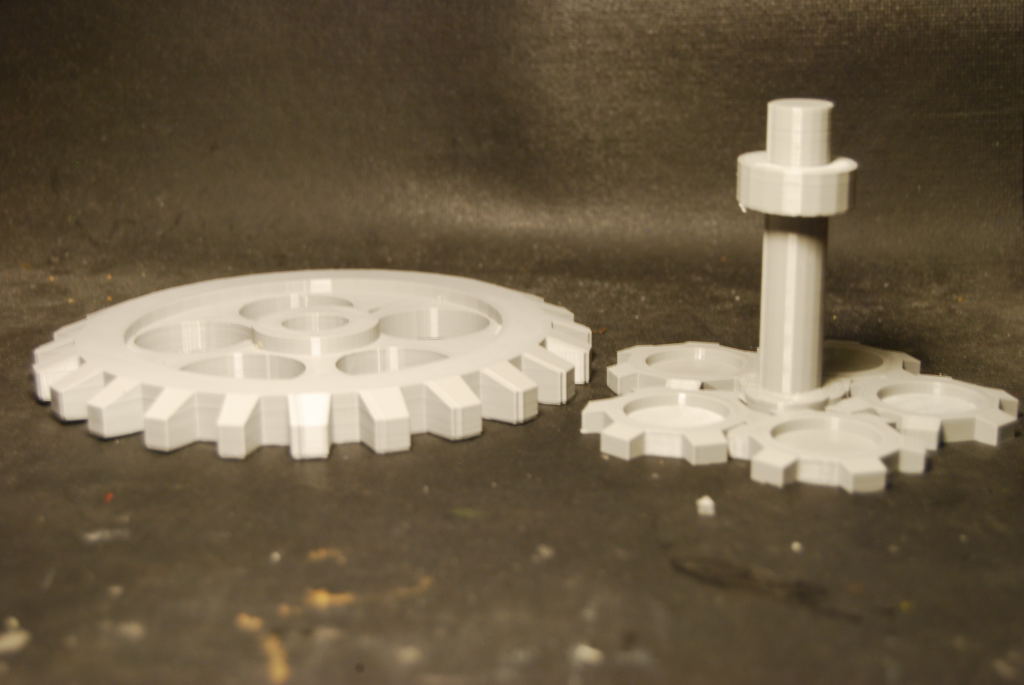

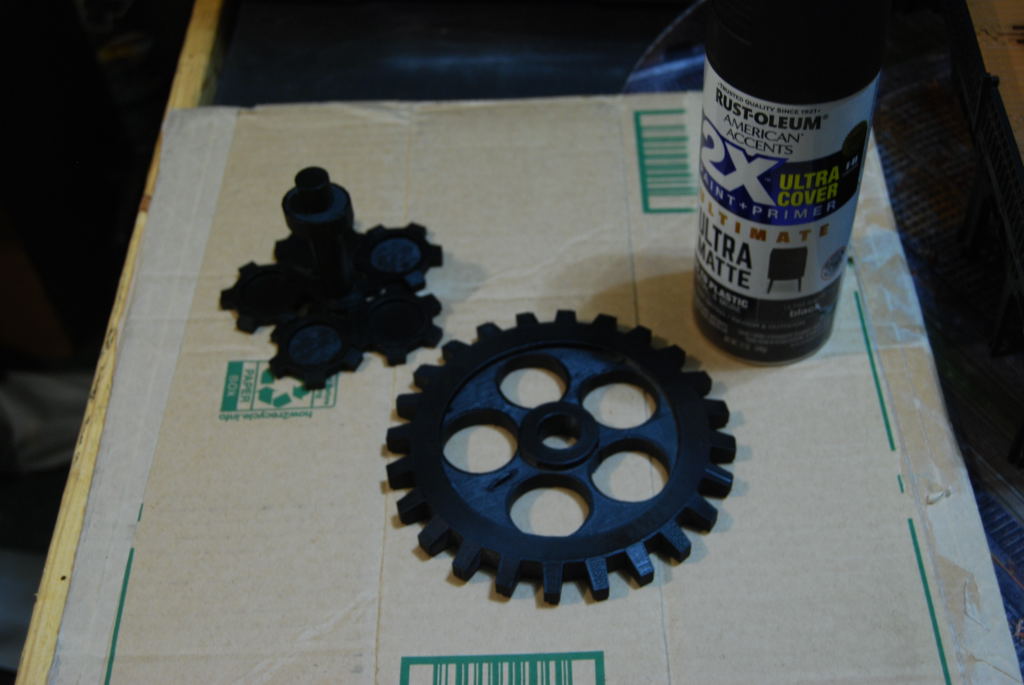
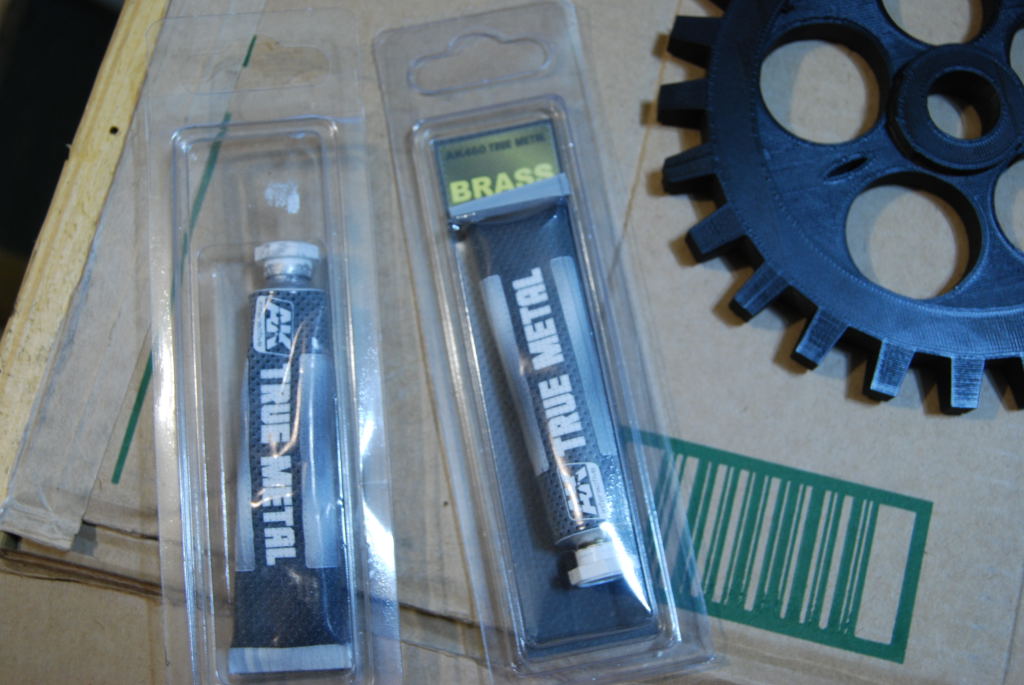 I decided to try some brass pigment. It is like a rub and buff product.
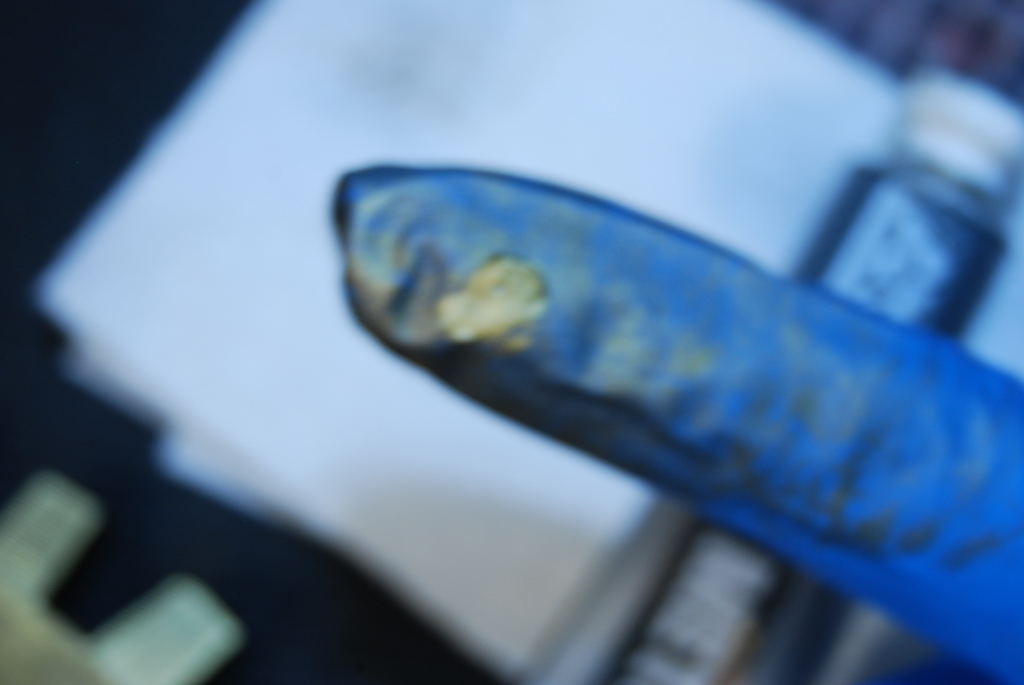
 I am satisfy the end results:).
Landing Pad
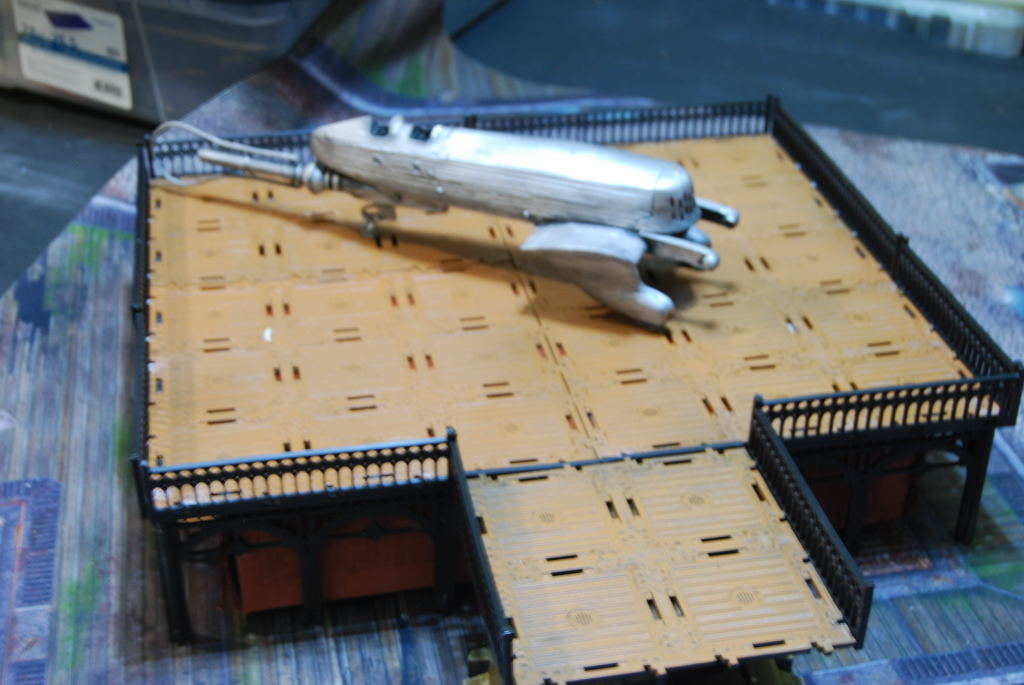
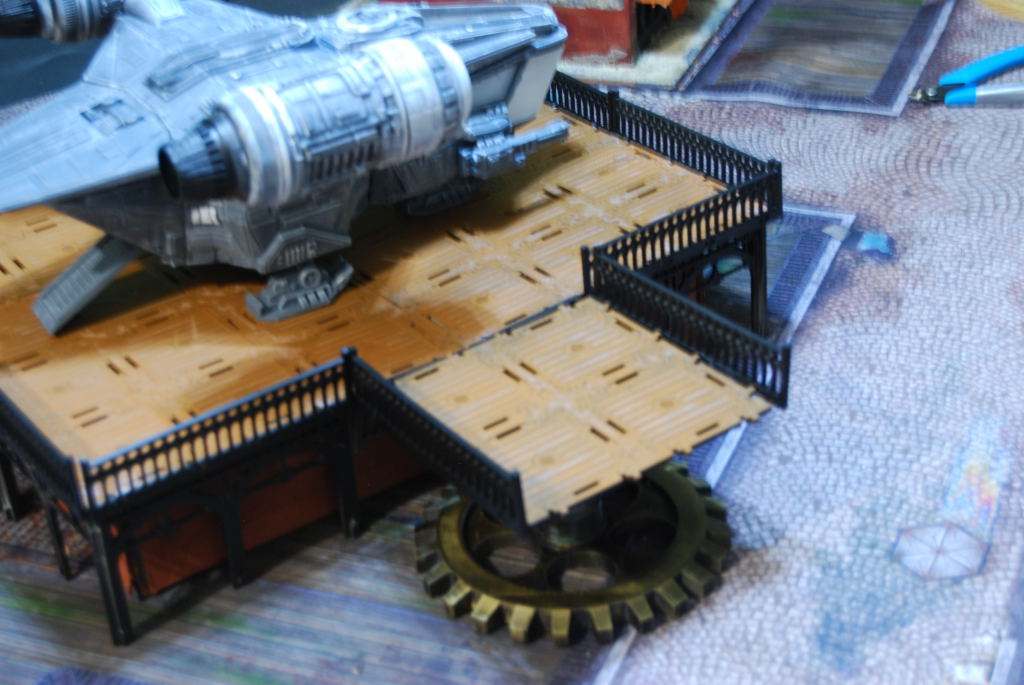
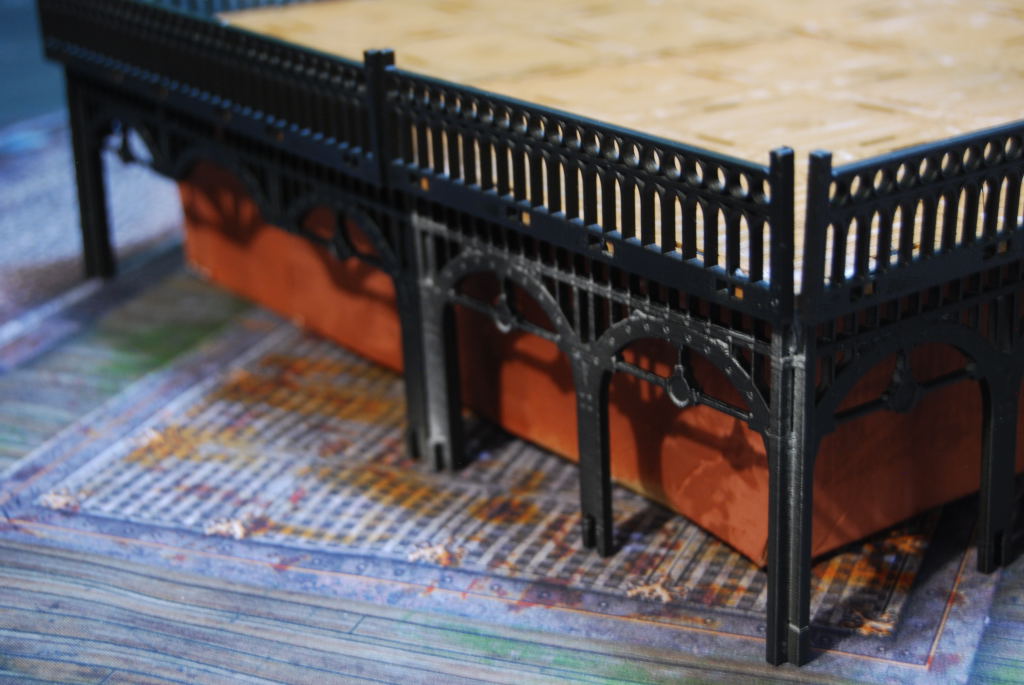
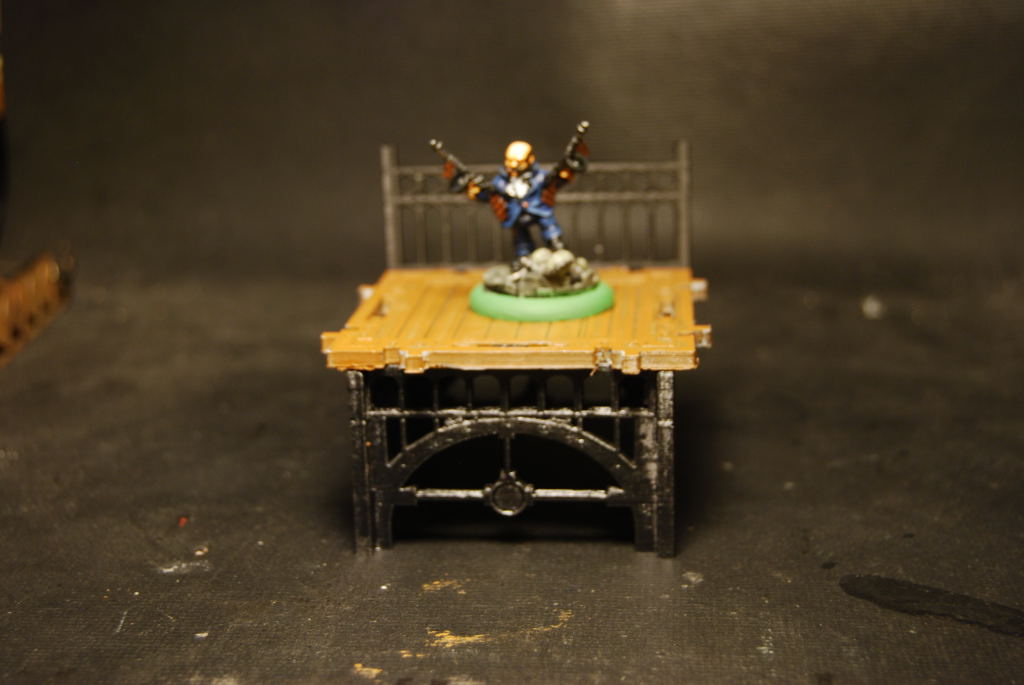
 I decided to create a landing pad for incoming aircraft. (It ended up measuring 33.5cm by 40cm) roughly 13.25in x 15.75 inches.
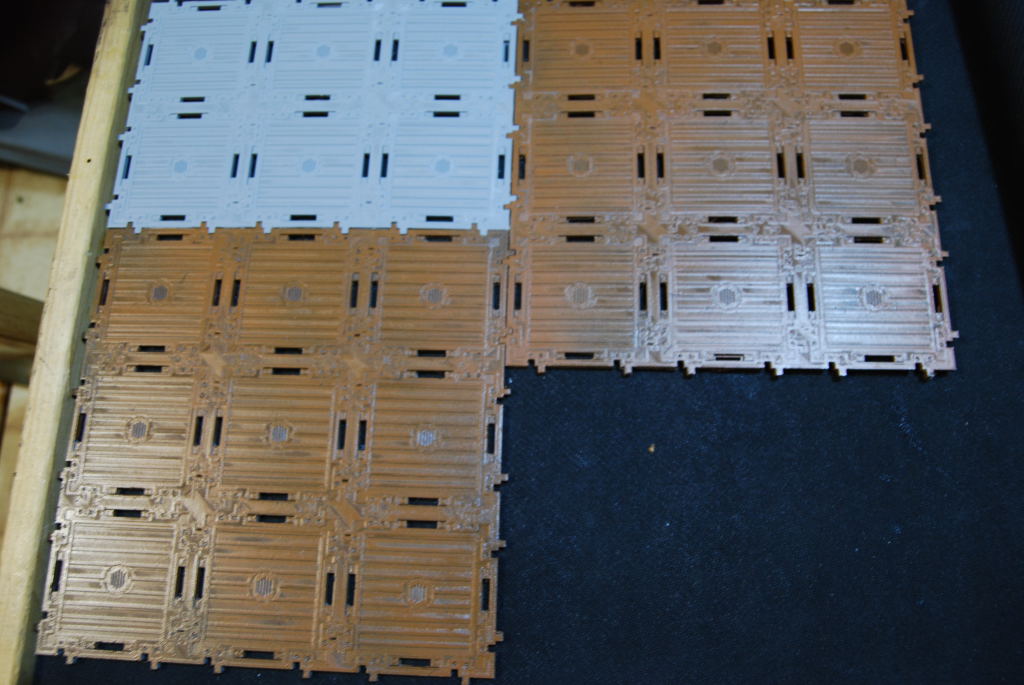 I started by printing 3x3 decks and combining them to make a larger platform.
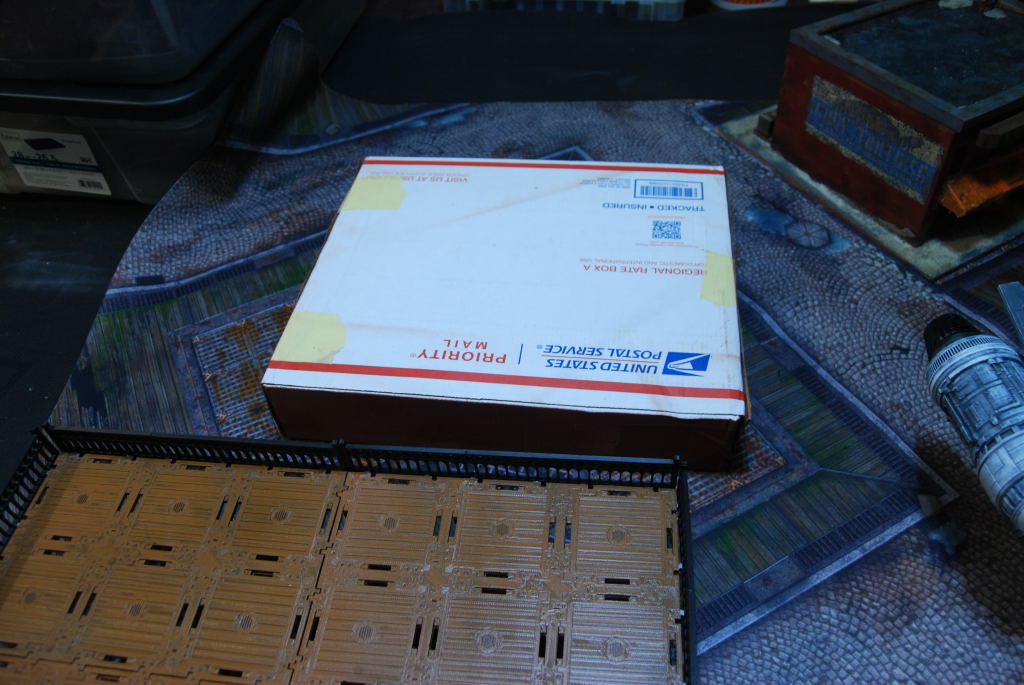 I sized my platform around a 11x13x2.5 in shipping box.
 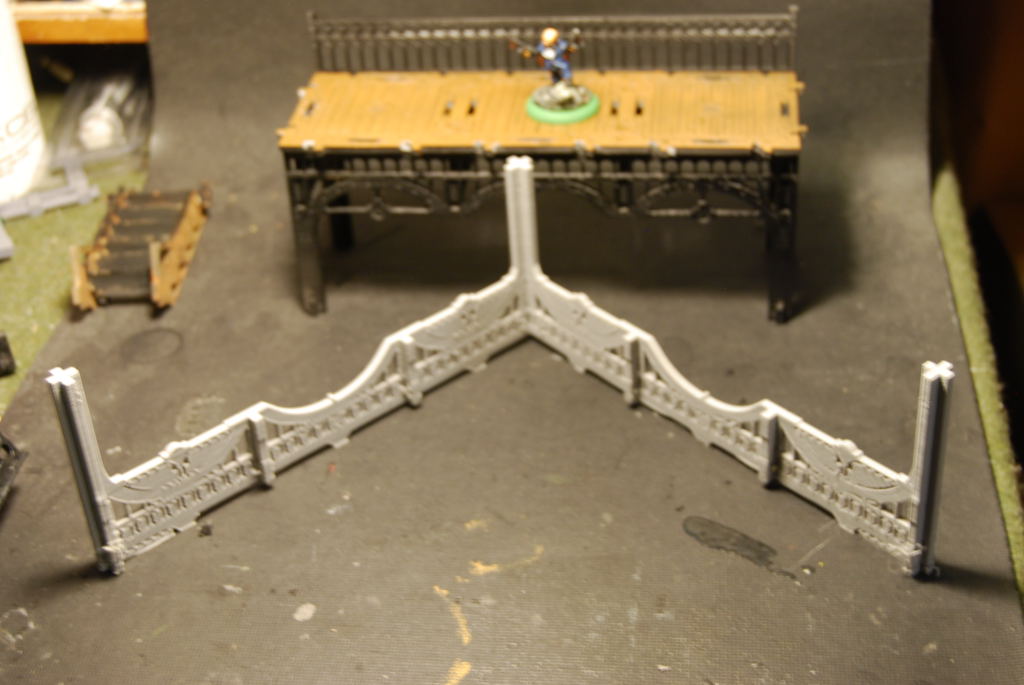 I added some decorative trim.
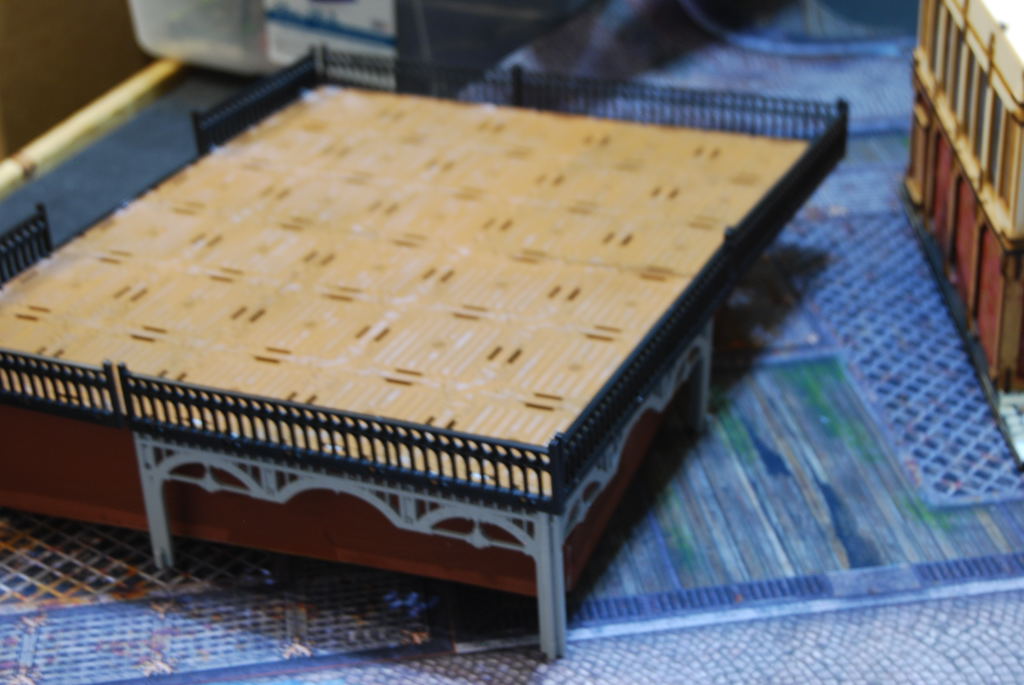
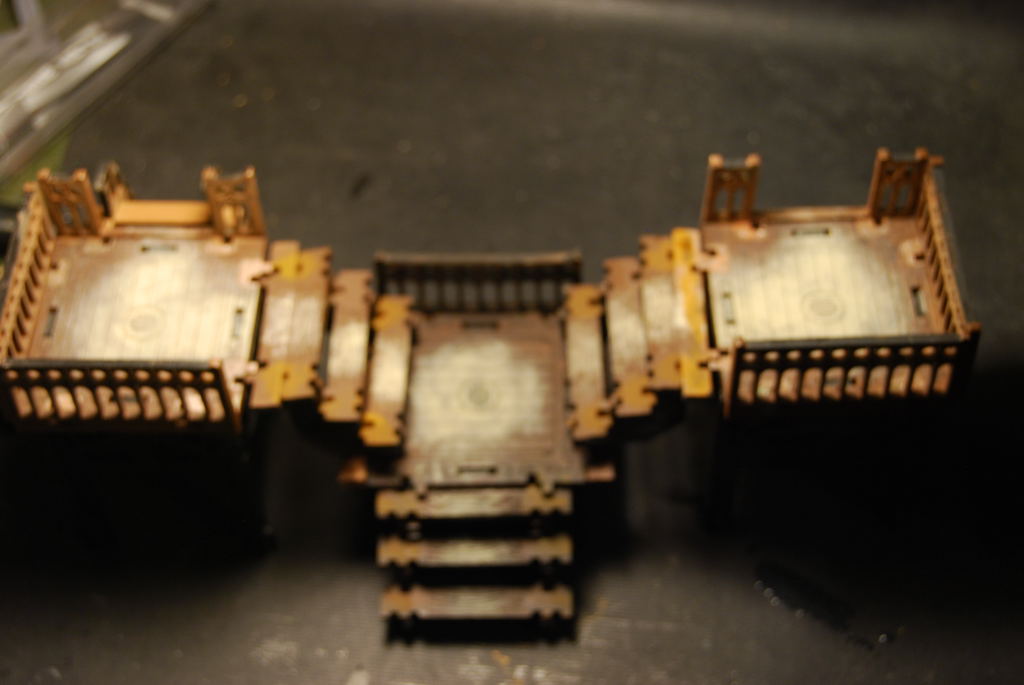
Stairs
Started working on some stairs design base on the Mirco Arts studio MDF version. It didnt fit what i wanted.
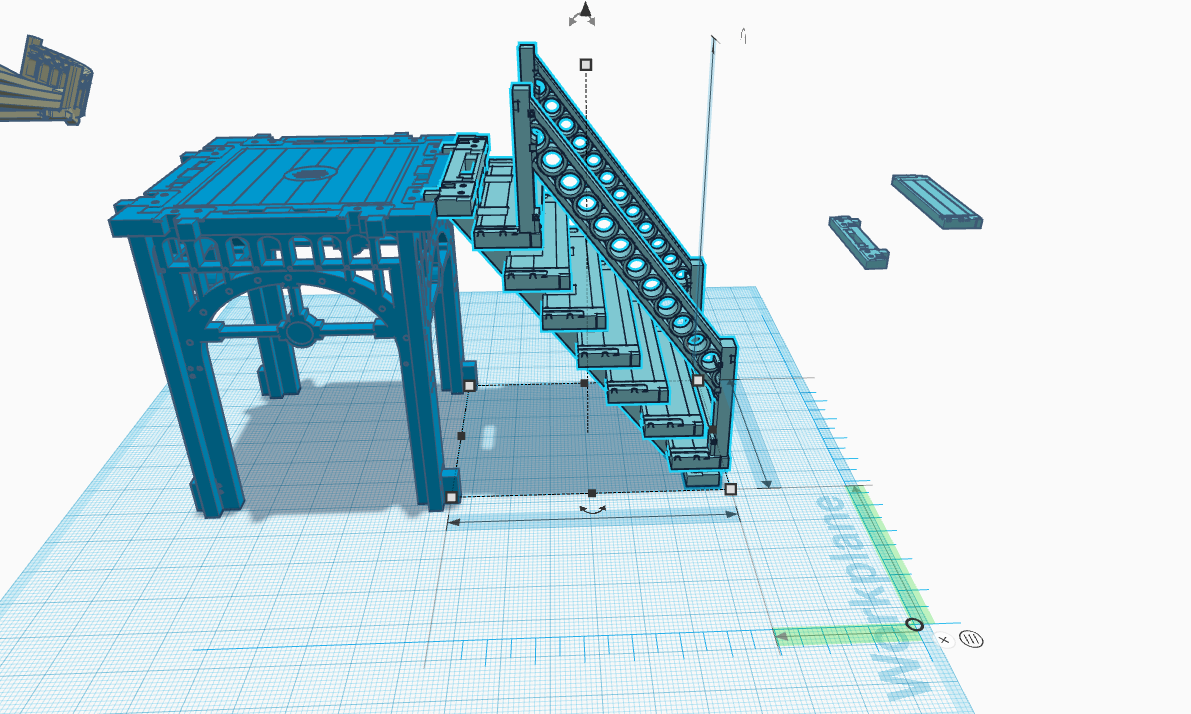 This is the design i came up. Off to the printer :).
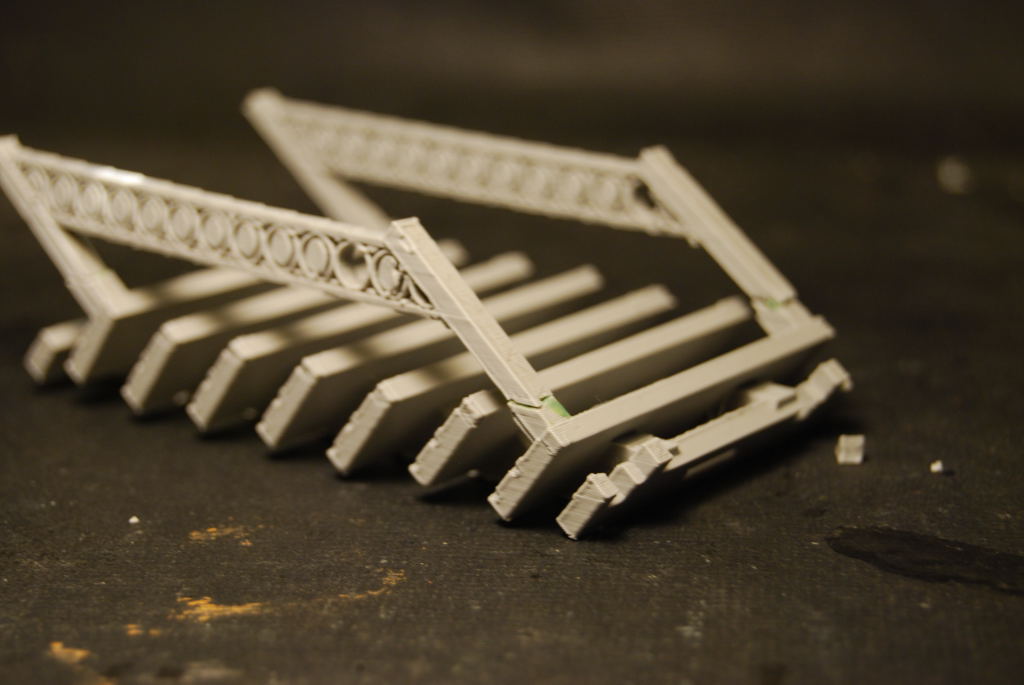 Trying to remove the supports, I have broken the rails. Back to Tinker CAD.
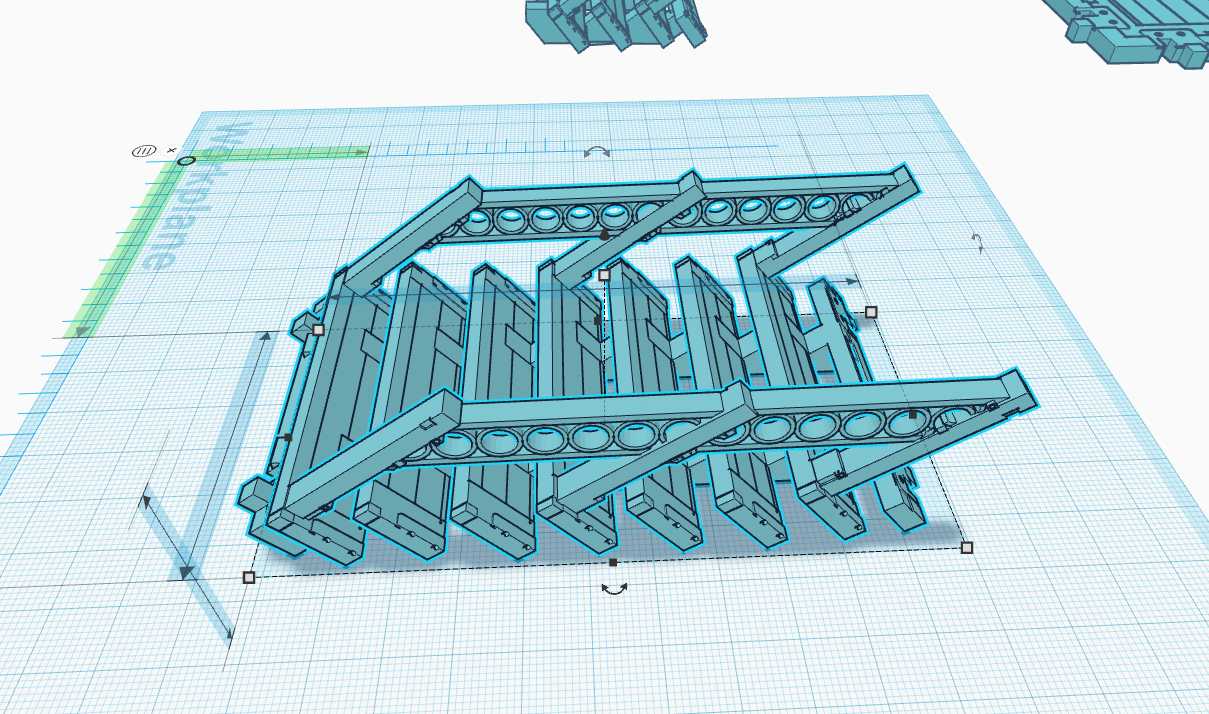 I added an extra support. Easy Fix (i change the orientation to print faster).
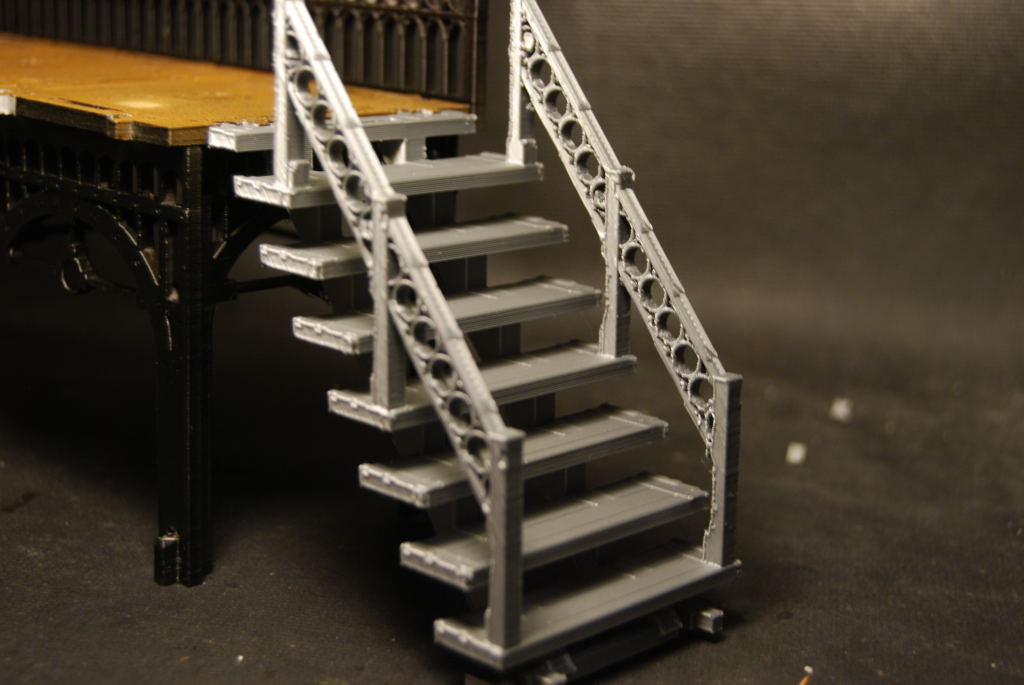 Job Done.
Ladders
I made some ladders design base on the MDF ladder found in Wolsung.
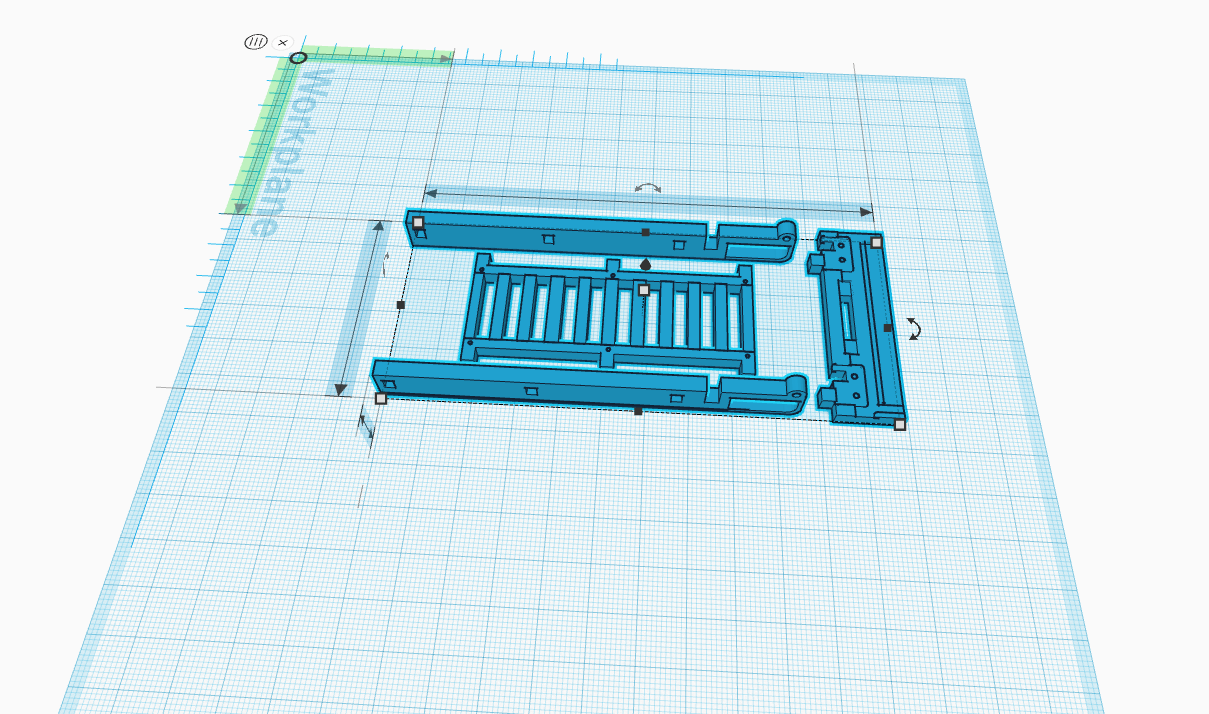
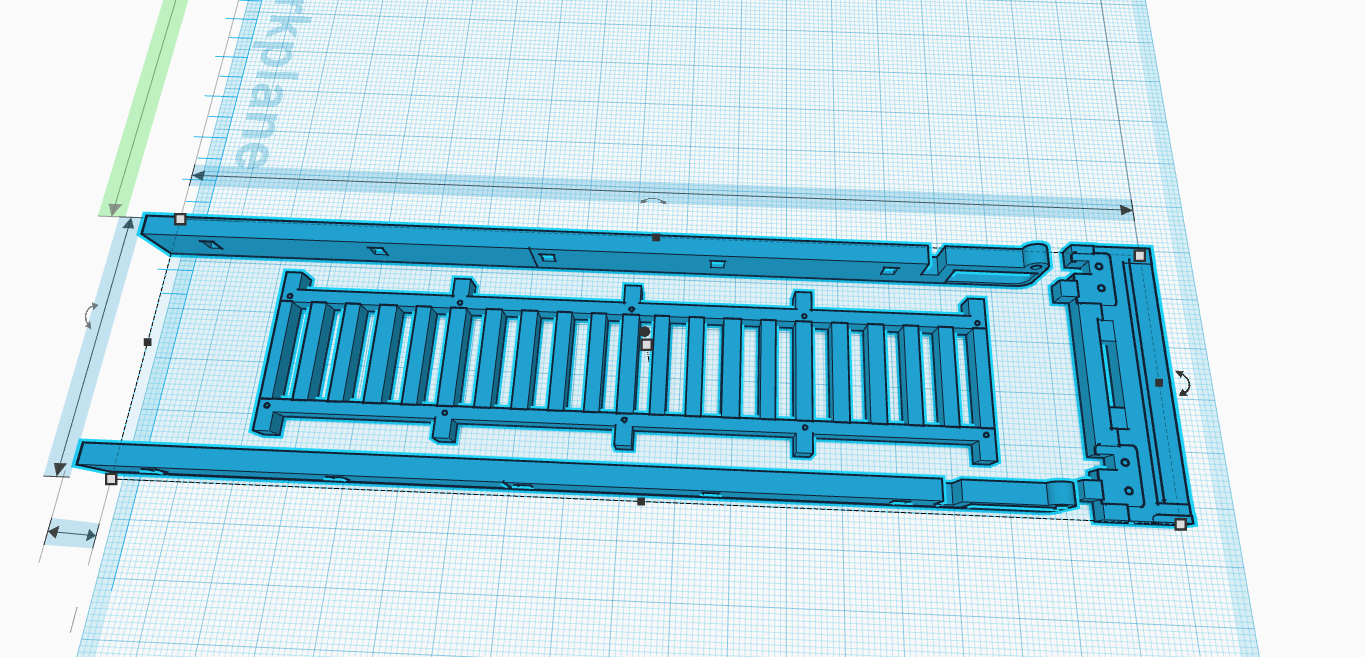
 Hot off the printer with some tight tolerance. i had to trim to fill each tab on both ladders, at least i didnt need to glue them together.
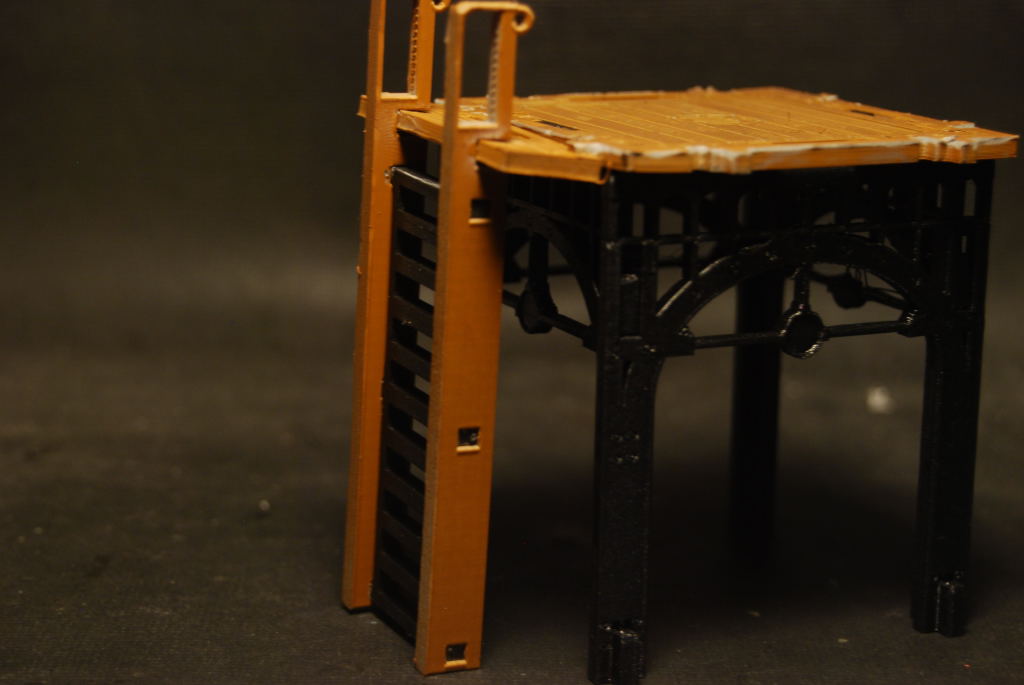 the standard ladder was a prefect fit. i made test sample about 3 years ago, and i knew it was good.
 I made a longer version and it 3.5mm to short. Back to Tinker CAD
grand stairs case complete
 This did not come together as plan. Mirroring the left side change the location of the tabs and i had to print it again :(.
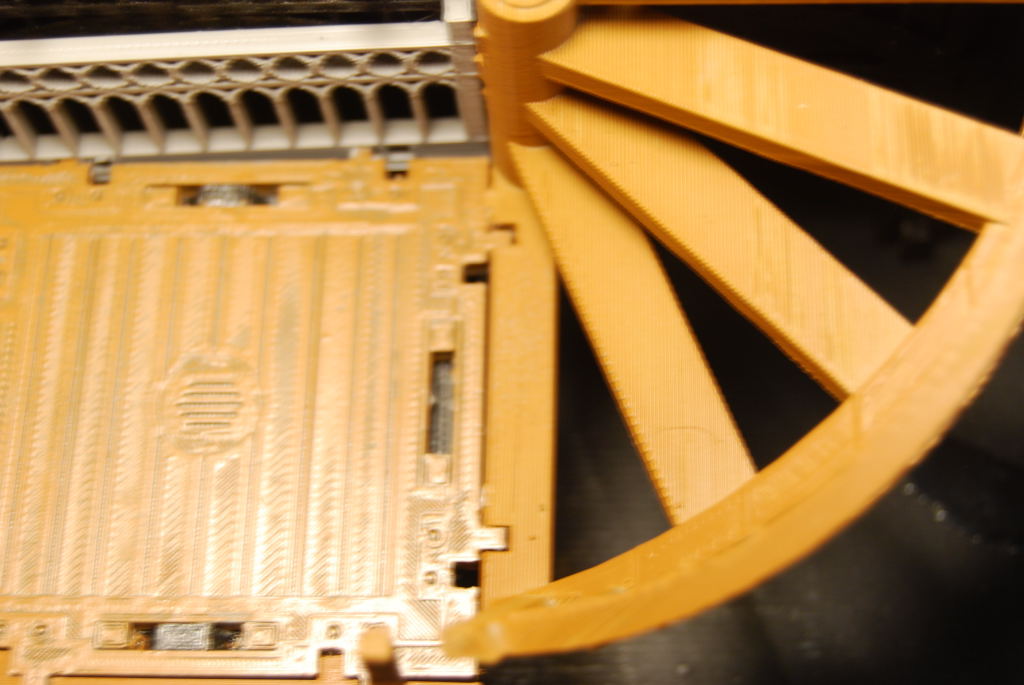 I had issue with fit after i print the second version to correct the mirror.
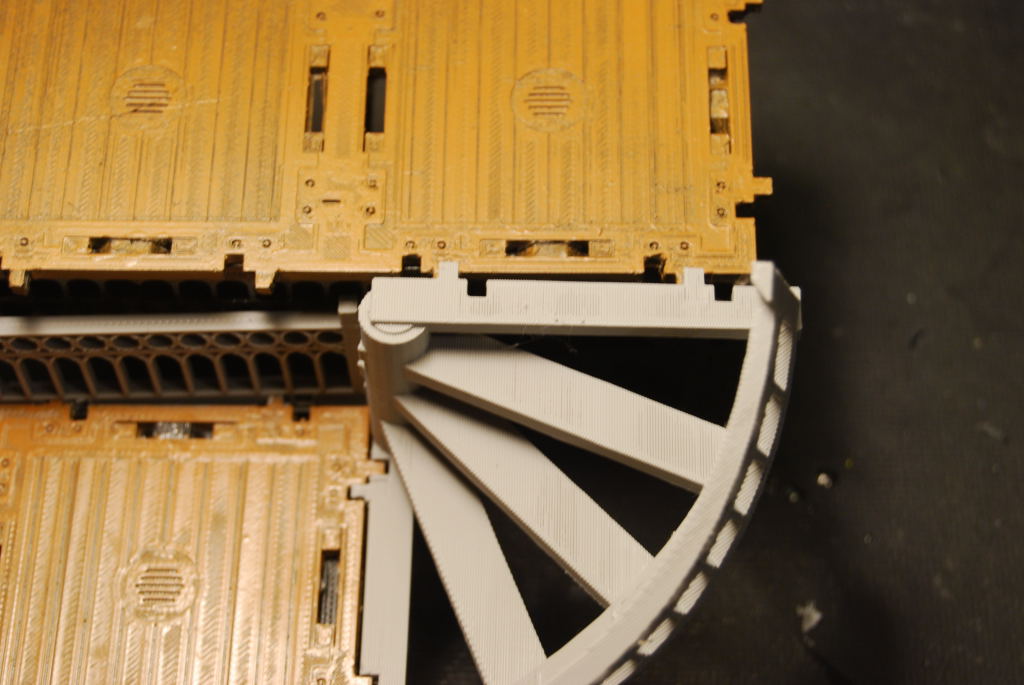 Off by about 3 mm. Back to Tinker CAD yet again.
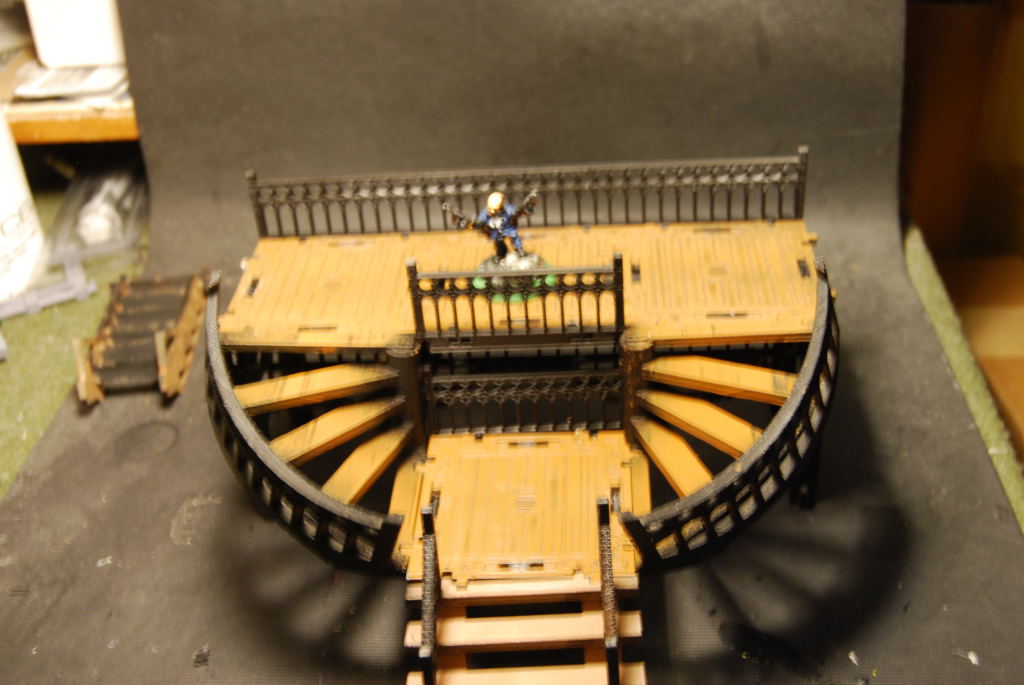 Finished oops forgot to fix the short stairs
Grand stair case
I have tried to make a grand stair case out of MDF ,but it wasnt quite grand enough:).
 This is what i came up with using MDF, and this is what i did in Tinker CAD.

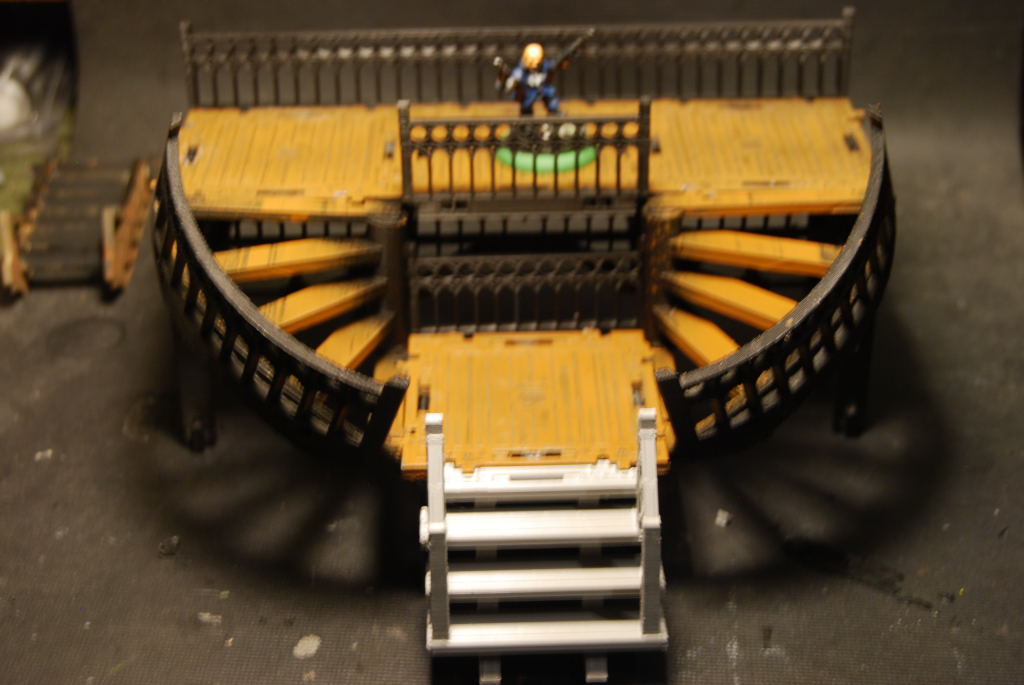
 i started by print this short walkway. Its half the size as original .
 Overall i am happy with the look. I just had a issue with alignment of the short stair not matching up.
 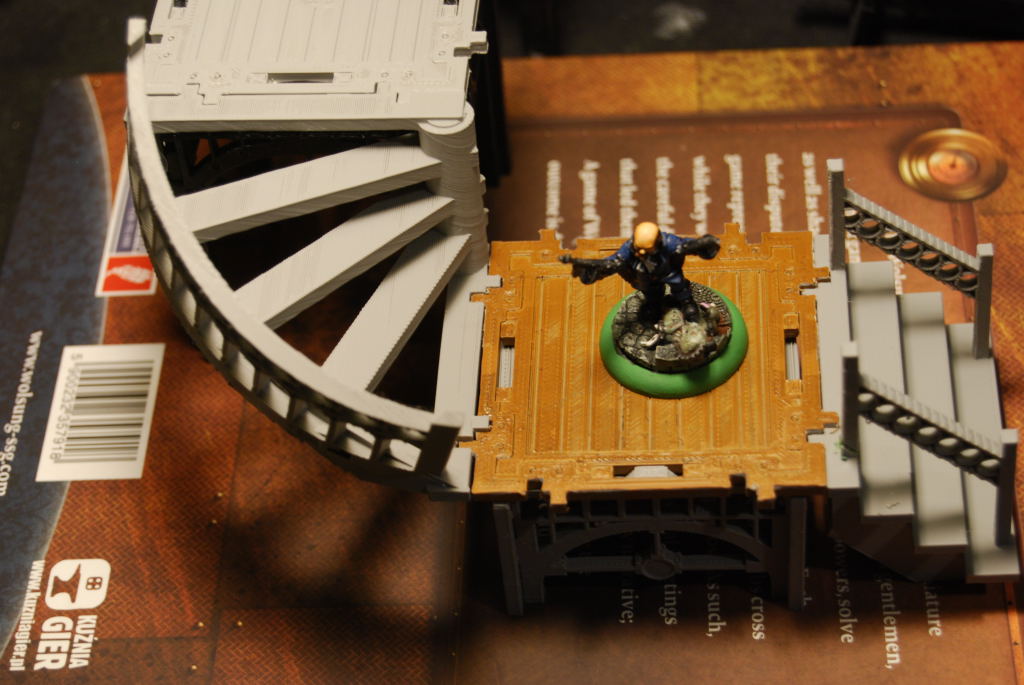 Printed the short stairs again, and i change the angle of the image to print faster and got sawtooth hand rail :(. I will try a redesign at some piont.
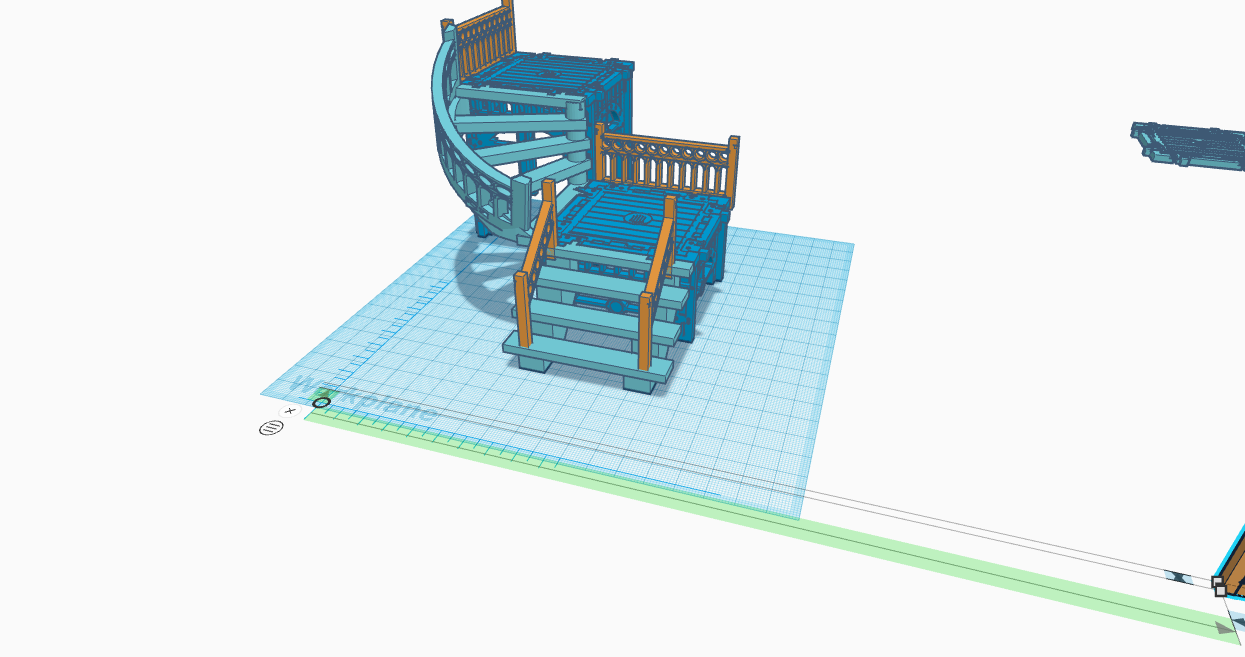
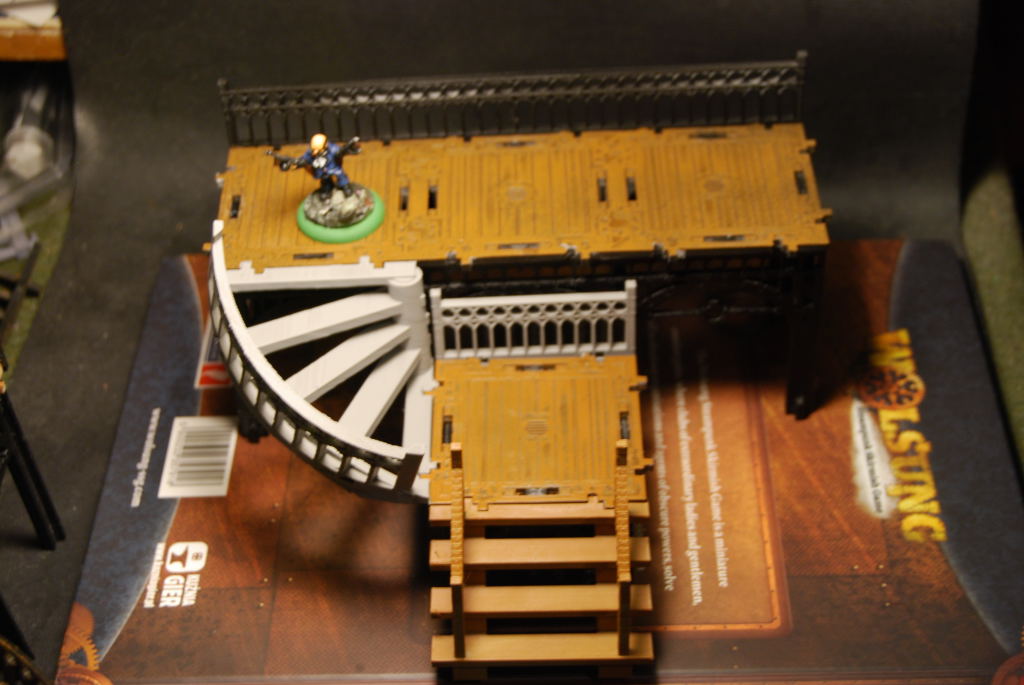 Awesome progress so far. I mirror the image of spiral stair case and sent it to slicer for printing..
![StarCraft Tabletop Miniatures Game Pre-Orders Live Now [Updated]](https://images.beastsofwar.com/2026/03/starcraft-tmg-news-cover-600-338.jpg)


![Mounted US Cavalry On Kickstarter For Dead Man’s Hand! [Updated]](https://images.beastsofwar.com/2026/03/us-cavalry-main-600-338.jpg)


![Play WW2 Commando Operations With Butcher & Bolt [Updated]](https://images.beastsofwar.com/2026/03/relaunch-600-338.jpg)


