Redvers and Son Get Into Bushido


Recommendations: 1218
About the Project
My son and I were looking for a new game to get into. Something that was low on models, fun and reasonably quick to play. We decided on Bushido.
Related Game: Bushido
Related Genre: Fantasy
This Project is Active
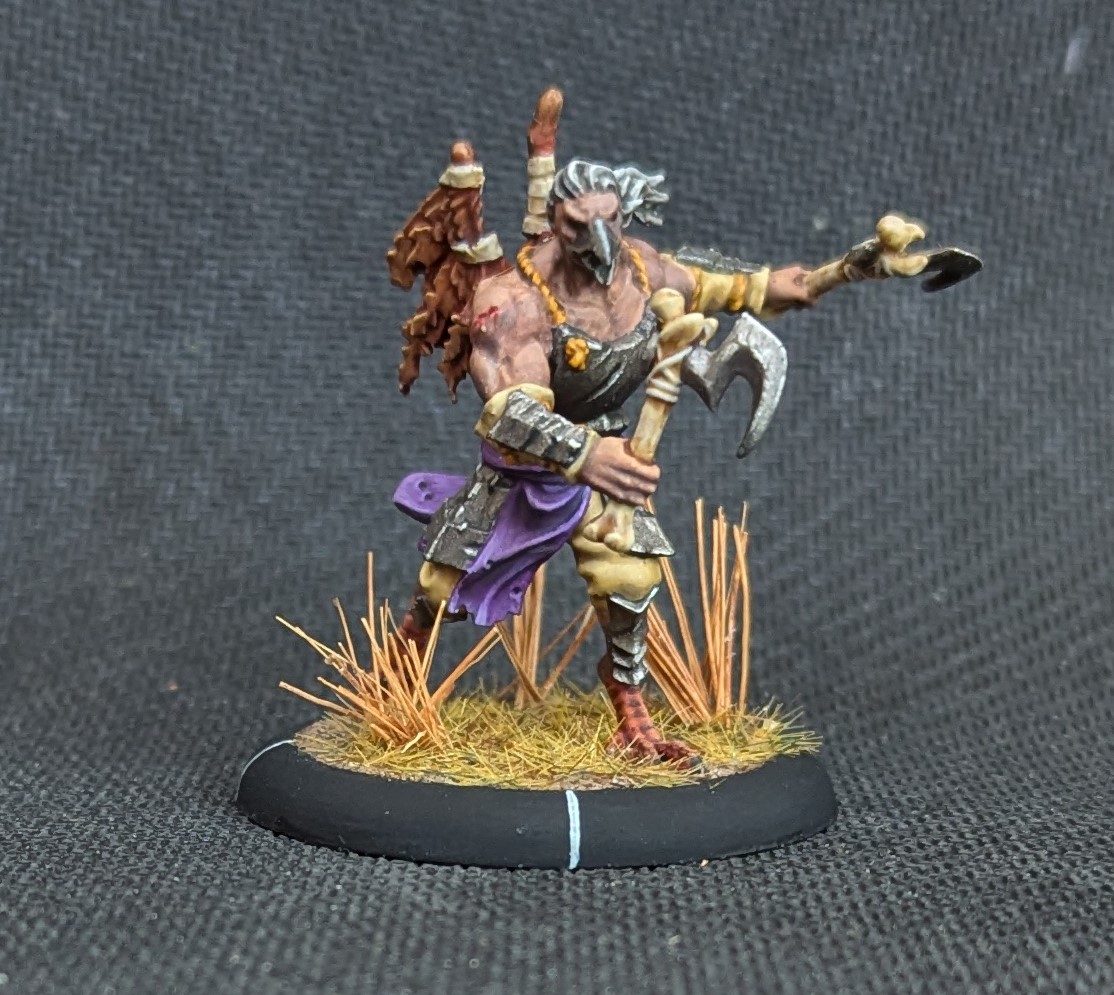
Rokuro
Rokuro is a tengu who has fallen in with the cult. He (I’m assuming Rokuro is he) comes with two axes which can be used as ranged weapons (just two shots obviously) or in melee where he gets the brutal and bleed special rules while he still has the axes. He’s not bad in combat and the brutal rule definitely adds to his ability. He’s also a bigger model and based on a 40mm base rather than the standard 30mm.
Painting wise, the skin was based upon the darker tones in my skin paint set, using the ‘Indian shade’ extensively to darken it down. This was applied as a glaze to try and smooth over the transition. I’ve used a khaki on the trousers, using an off white khaki mix for the highlights and a shade of khaki and dark brown mix applied as a glaze. The purple sash was imperial purple mixed with black/off white for the highlights and shades.
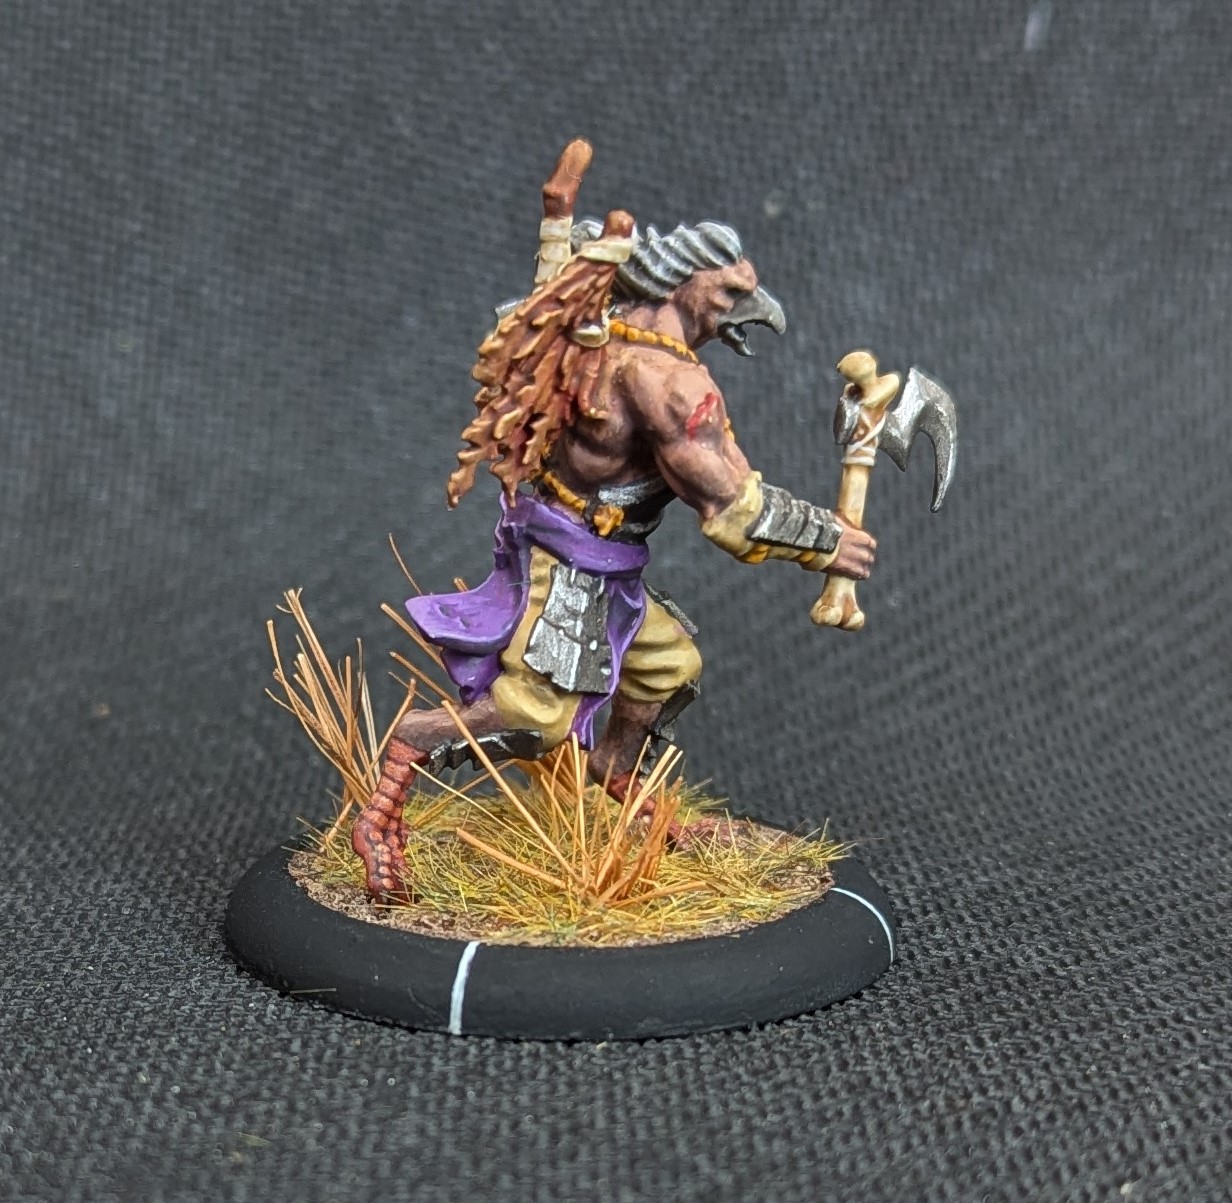
The armour and axe blades is gunmetal and I’ve then applied a couple of black washes over the shaded parts, building this up into the darker areas. I’ve then used gunmetal to highlight back up and finished off the edges with a polished metal.
The axe handles are bleached bone with a wash applied whereas the hair is Luftwaffe grey with a black wash and then a light grey dry brush.
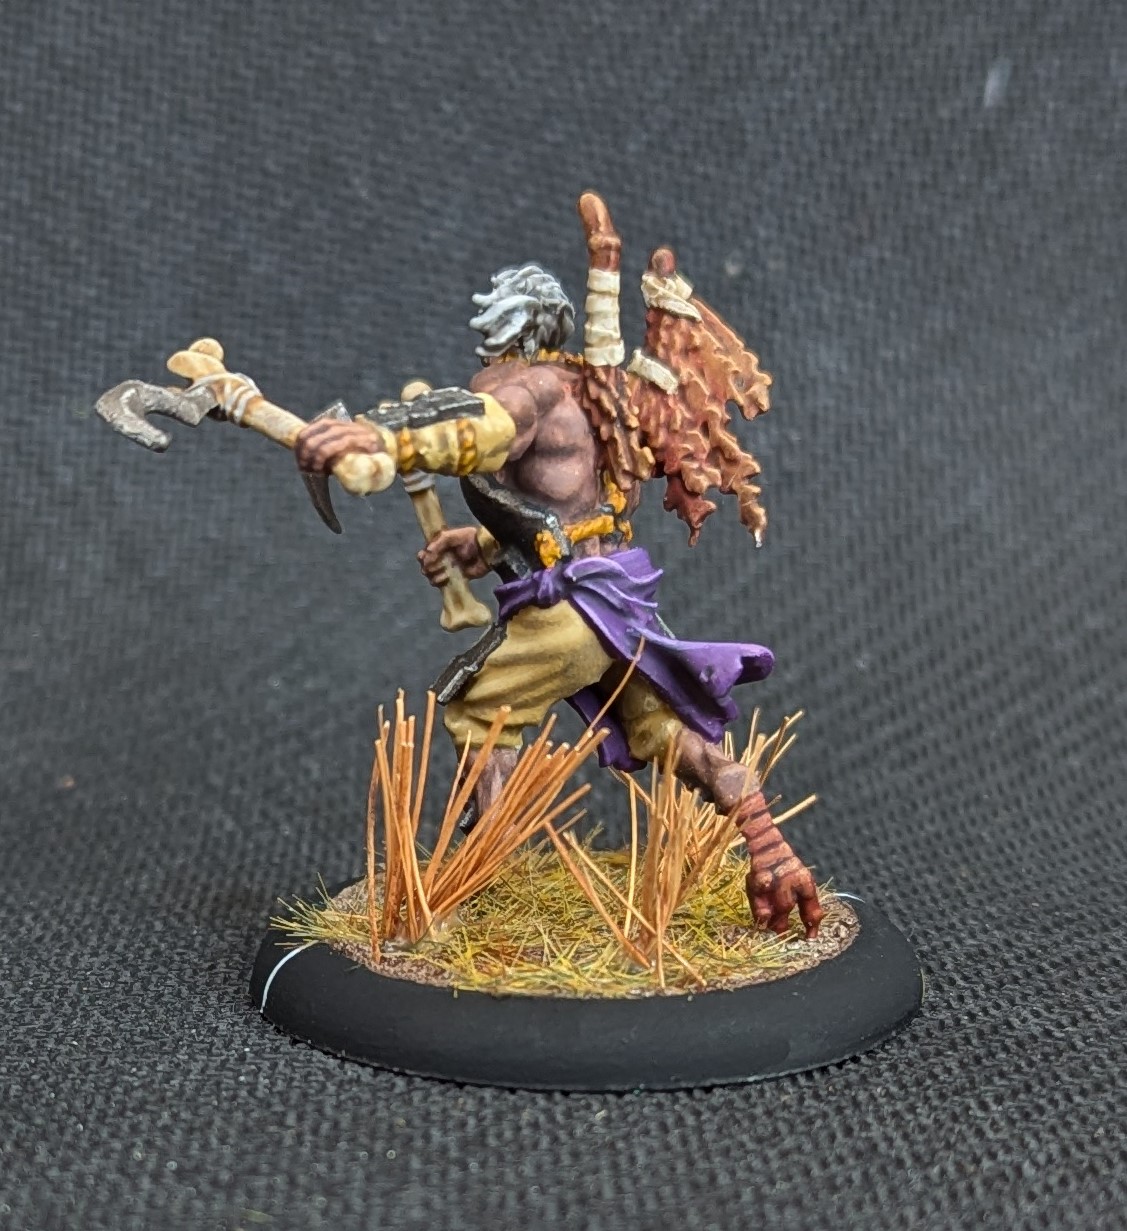
The wings were a combination of browns, including cavalry brown as the base and a highlight of light brown. Similar for the feet.
For the basing, I’ve used the usual approach as I have for my other cult models. I’ve also stuck some brush bristles on for some height in the vegetation.
Job done, and ready for the gaming table.
 Rokuro and his axes
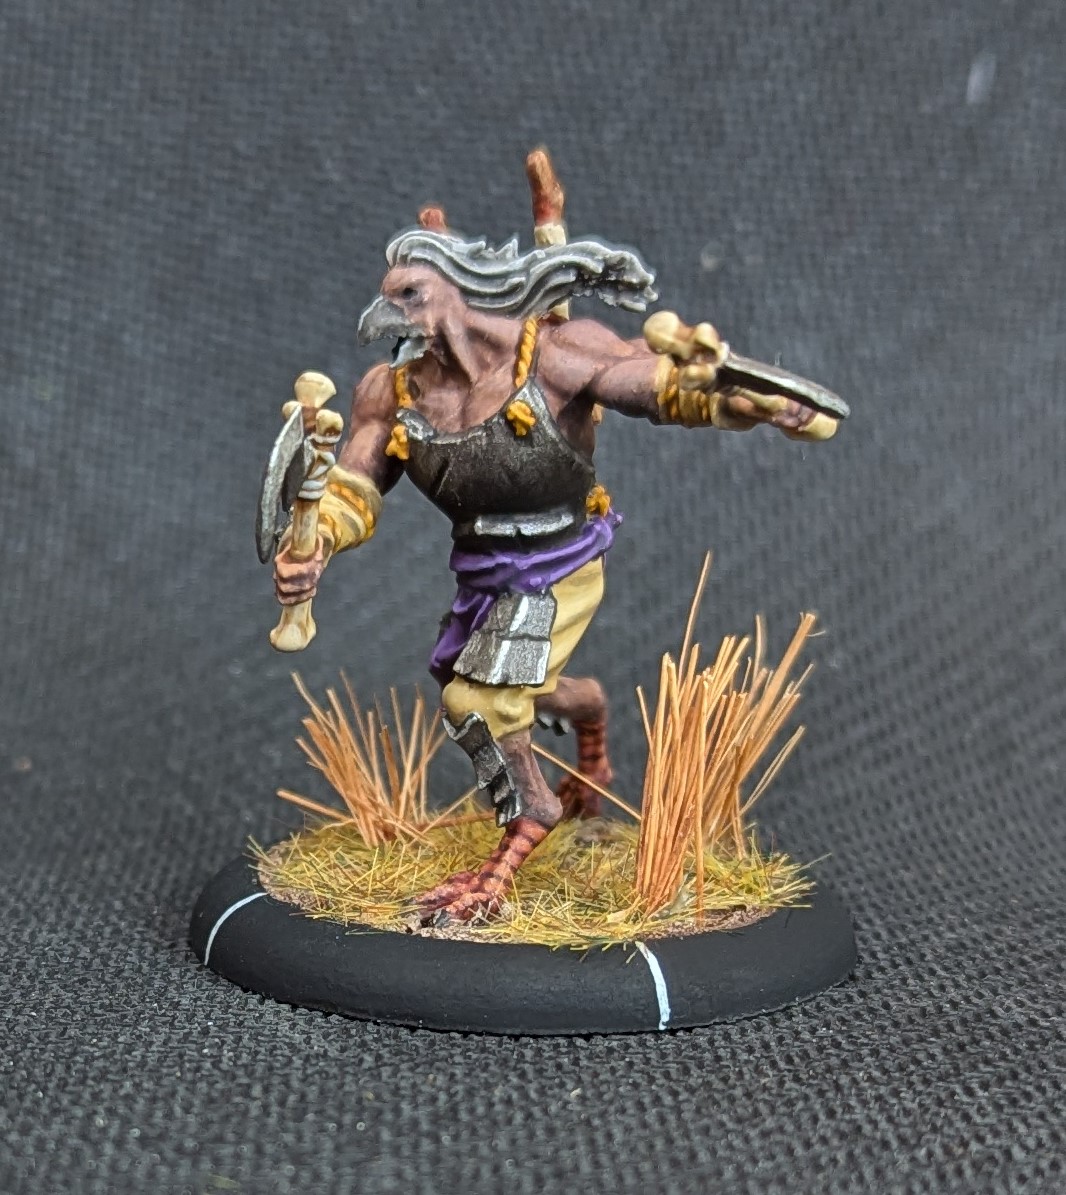
Update on my Son's Painting
My son and I made our inaugural visit to Salute earlier this year where we made a direct line to the GCT Studio stand. My son wanted the Kinshi Temple faction which is a fairly new addition to the game. It’s a small faction where all but two of the models are within the faction starter set, so my son picked up all of them. He also picked up two of the Kami of the Empty Mind which can also be added to a Kinshi Temple warband.
He’s now managed to paint them all, so below is the complete Kinshi Temple faction painted and ready for battle. Painting is not something he really enjoys and he has quite a shaky hand, so he finds the finer details quite challenging and frustrating. He used the Army Painter speed paints and because they are very easy to use, he was able to complete the models quickly and, as a consequence, gain some motivation in getting them completed. By the end, he was quite enjoying the painting process and pleased with his results.
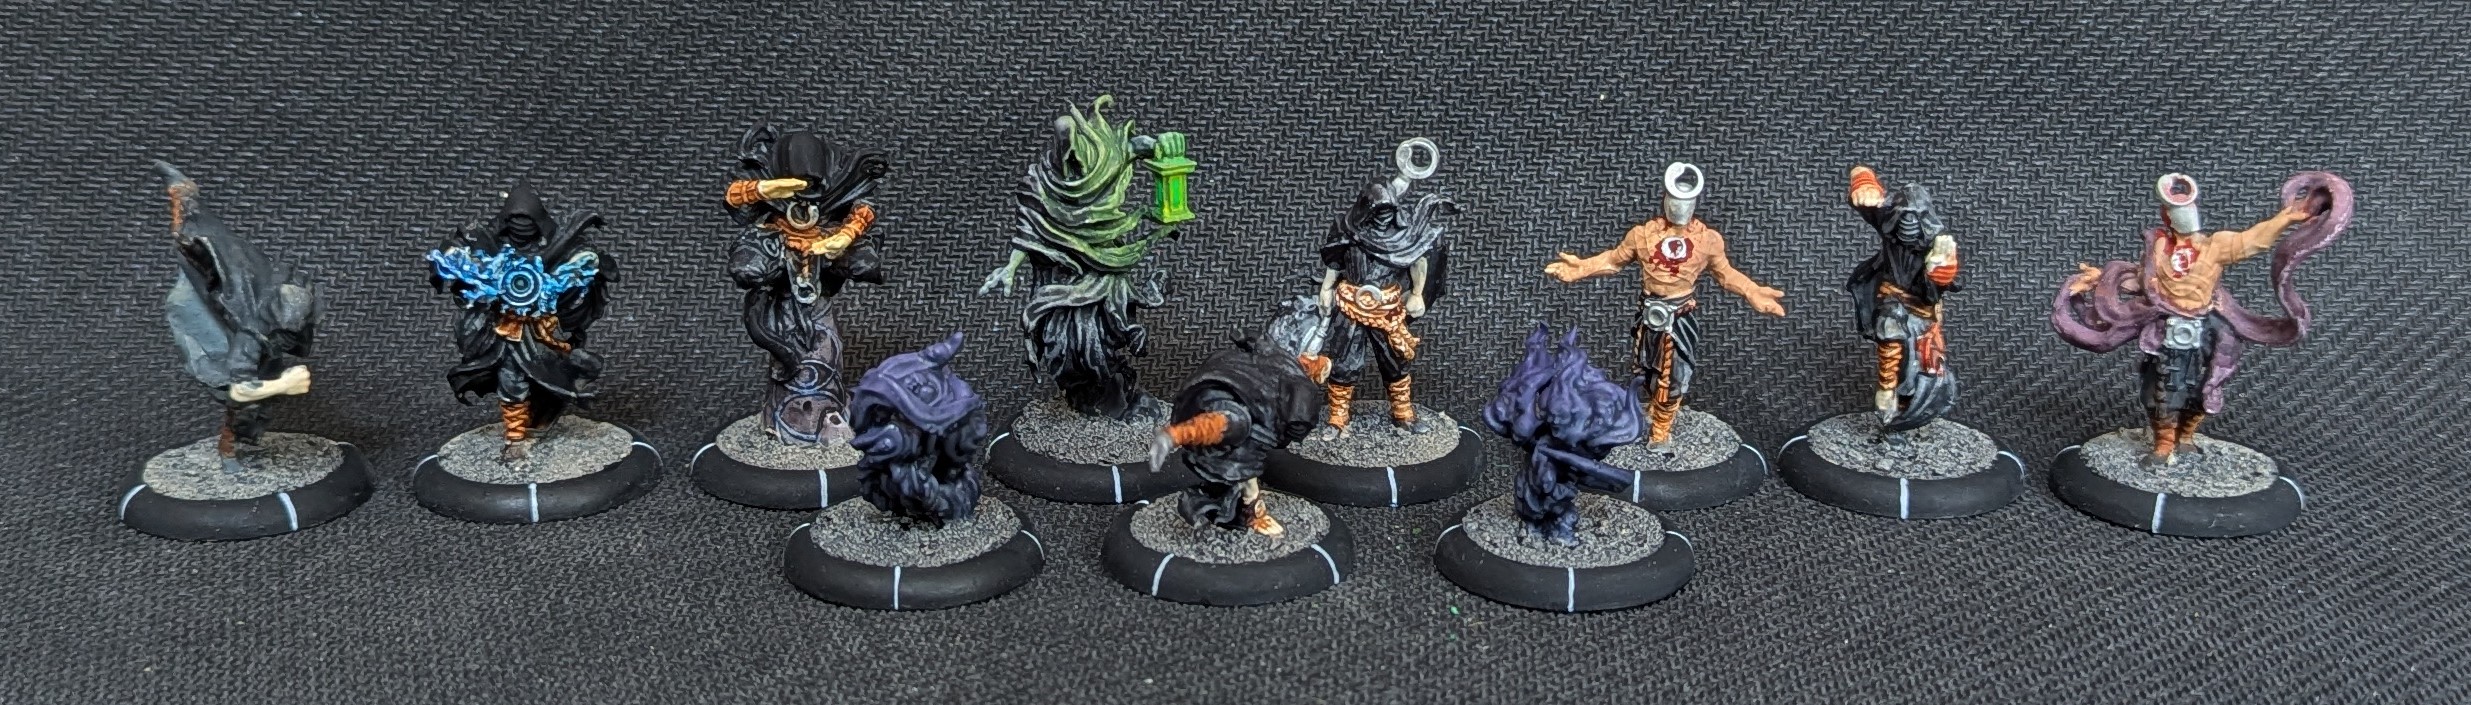 The Kinshi Temple faction including the two Kami
Having completed the above, he also tackled Ashinaga Tenaga. This model was a feature of a previous update here as it is a real pain in the backside to put together. It’s a metal model and the contact points are very small and therefore some very careful pinning was in order. It took several hours just to get it ready for painting.
My son again used mostly speed paints for this except for the skin, which was an acrylic from my skin paint set. I think he painted this in an hour or so and then left it to me to base it up. He’s a lot quicker at painting than I am.
Dohyō
At Salute this year, while wandering past the TT Combat stand, the Eastern Empires mdf terrain called out and when I got home, I found that I had purchased a dohyō ring. Not sure how that happened.
The model took some time to build but went together fairly easily. The one area that I did want to change was the actual ring. The model has some small mdf plugs to mark it out but real sumo rings have rice straw bales, so I will replace the plugs with string instead.
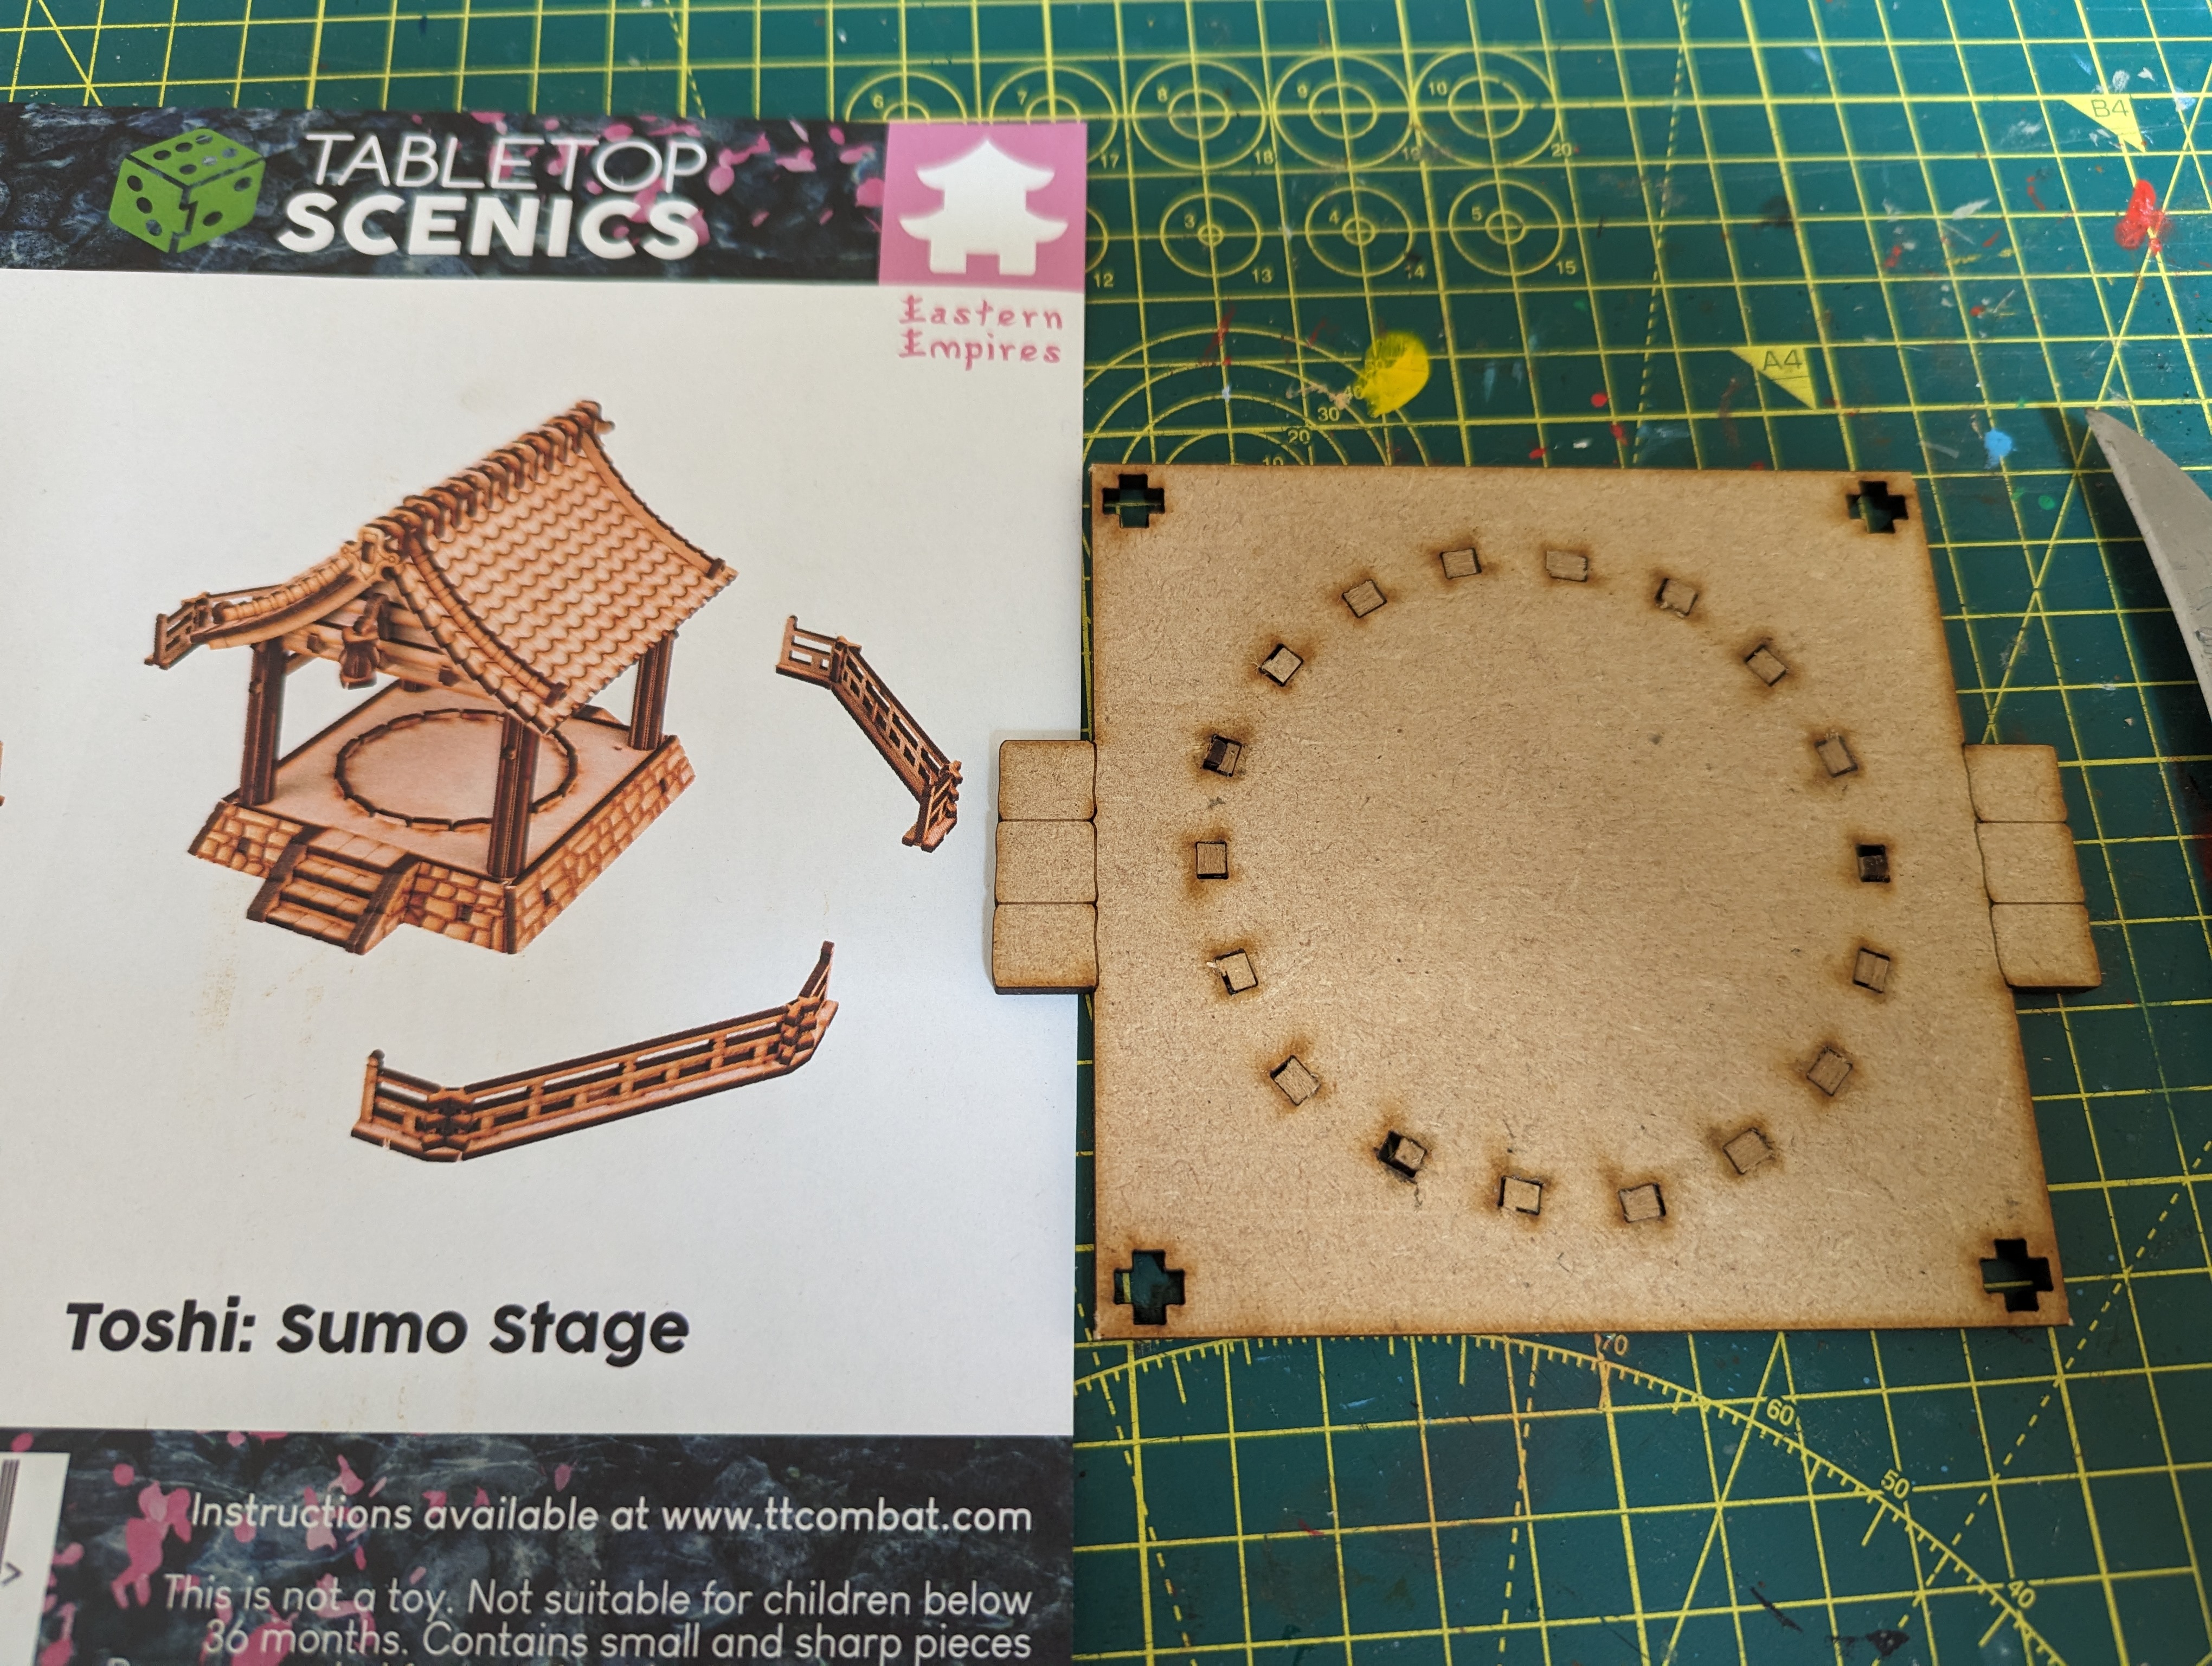 The offending piece
Once built, I sealed the whole lot with two coats of mdf sealer before applying a primer.
The stones making up the base were flat and required some texture. I blobbed on some artist gesso for this which is fine enough to not look silly but has enough texture that it will dry brush well.
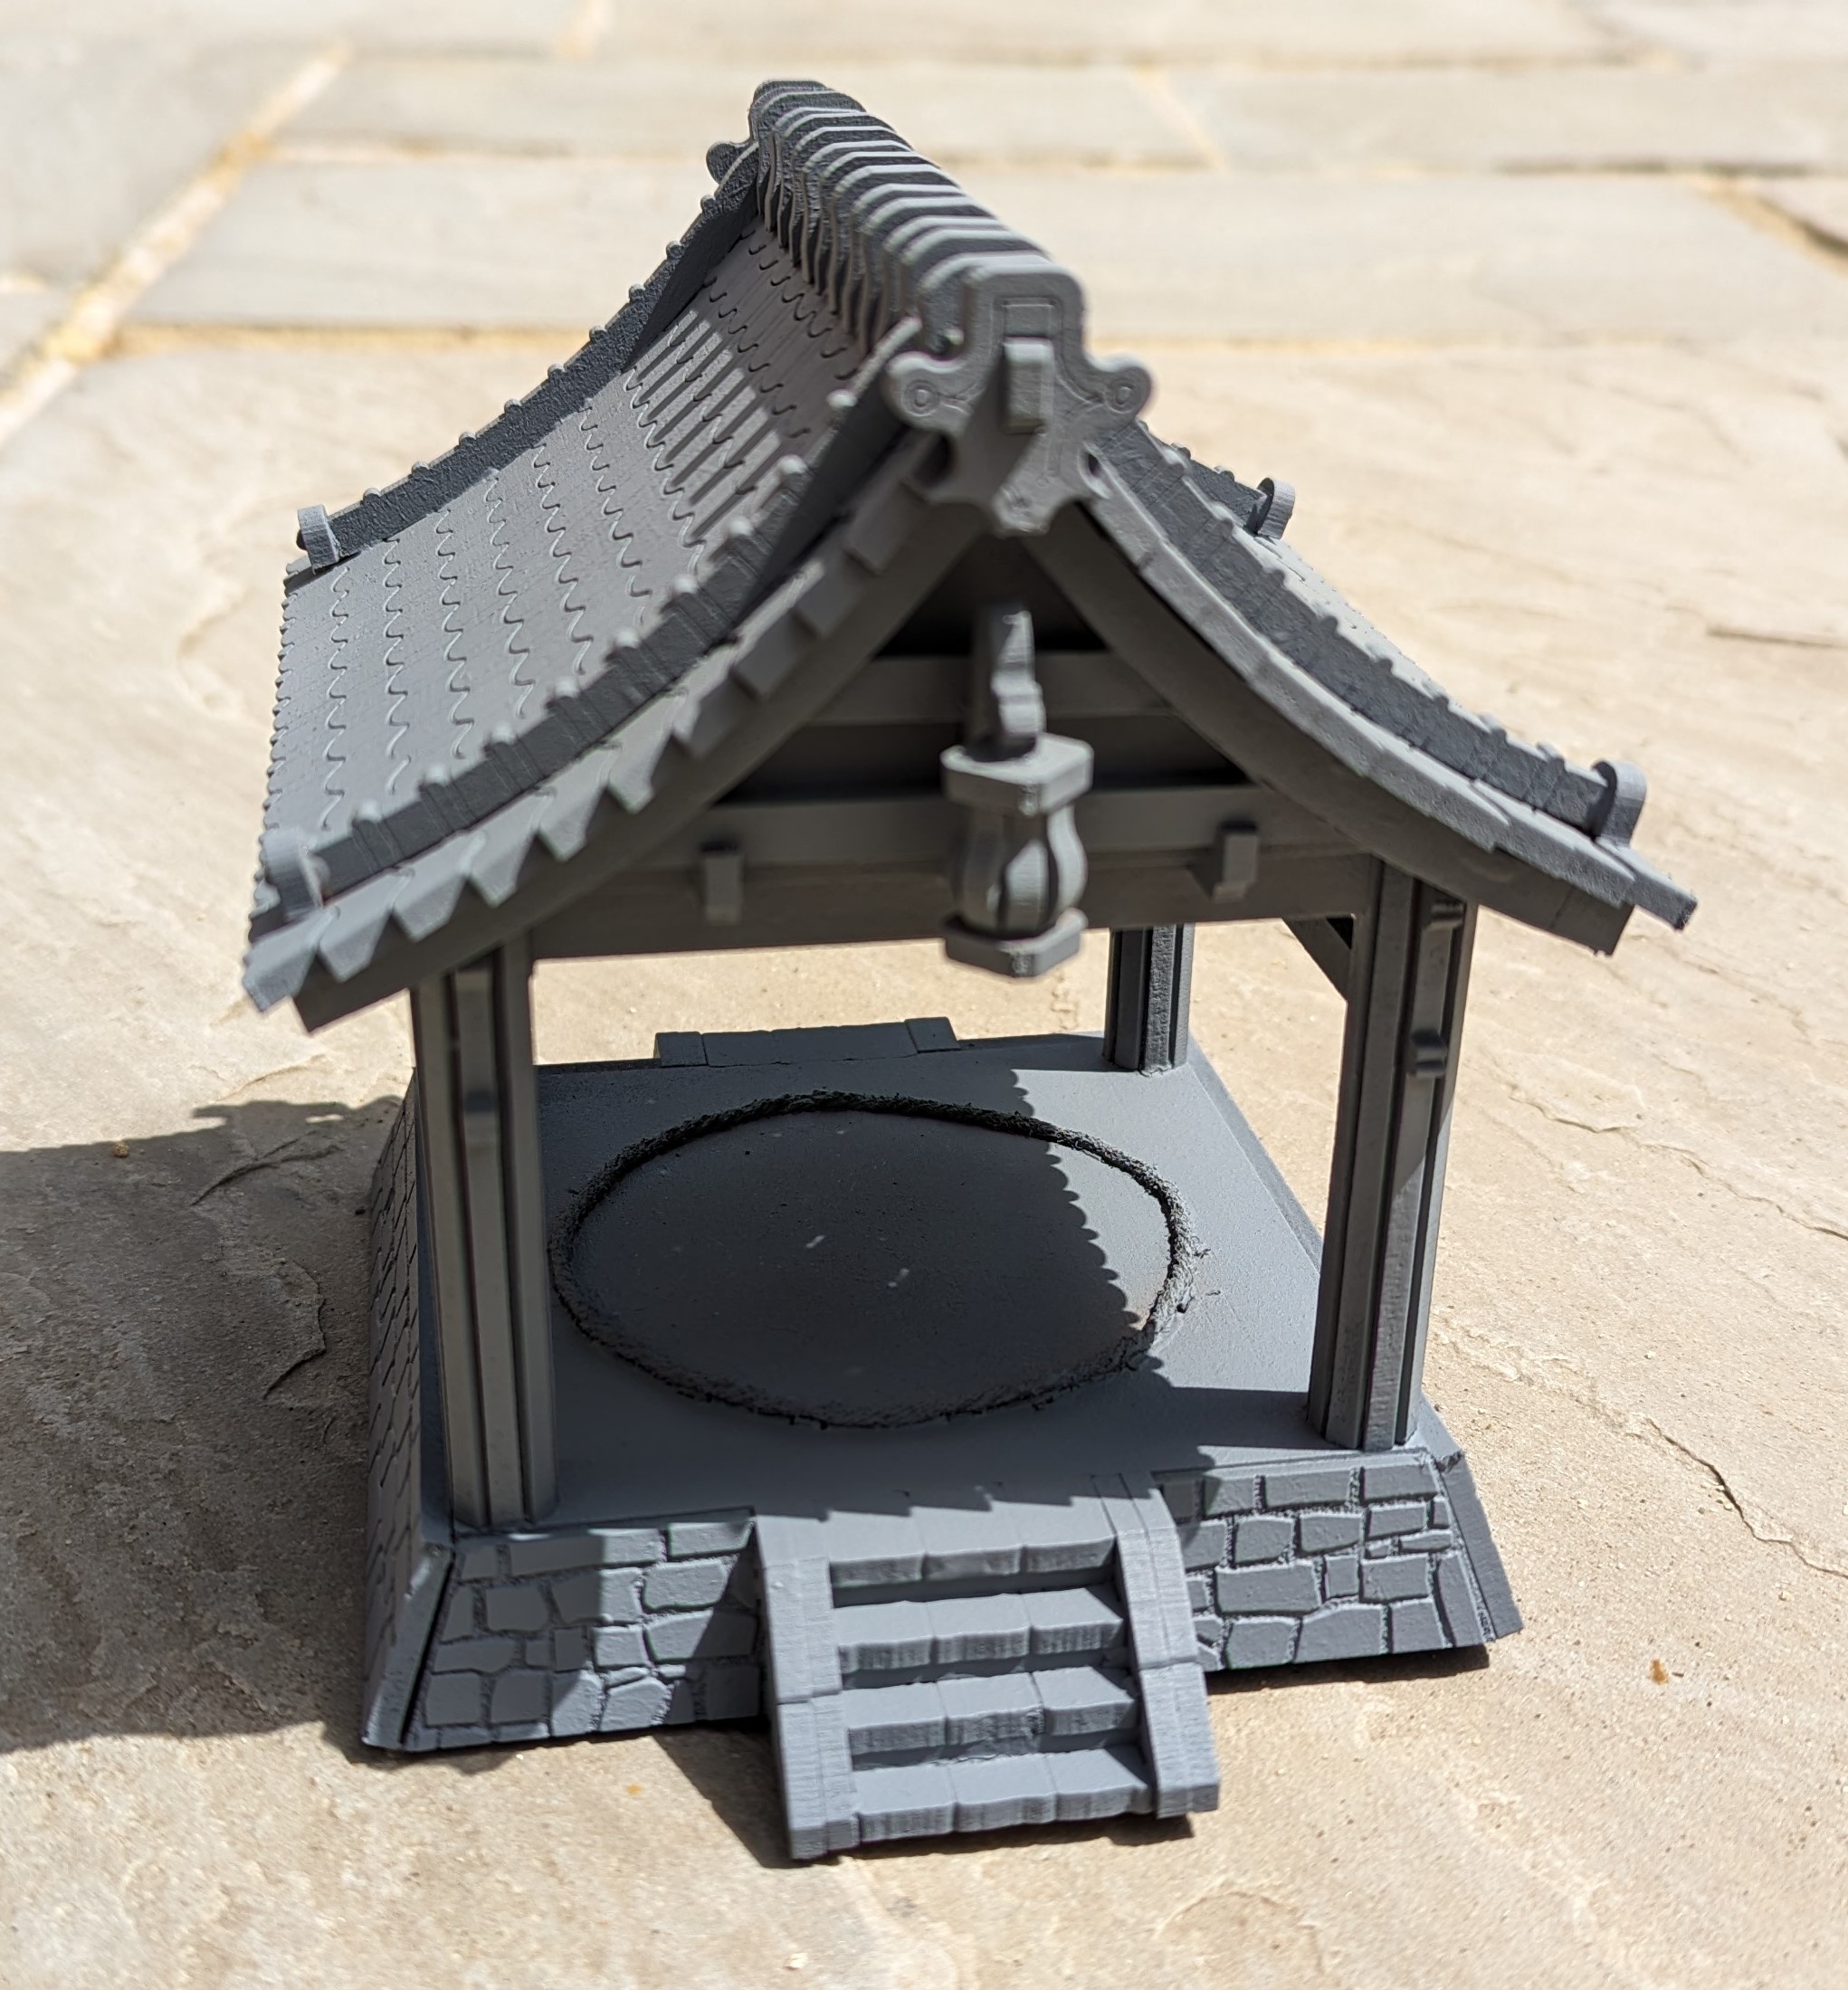
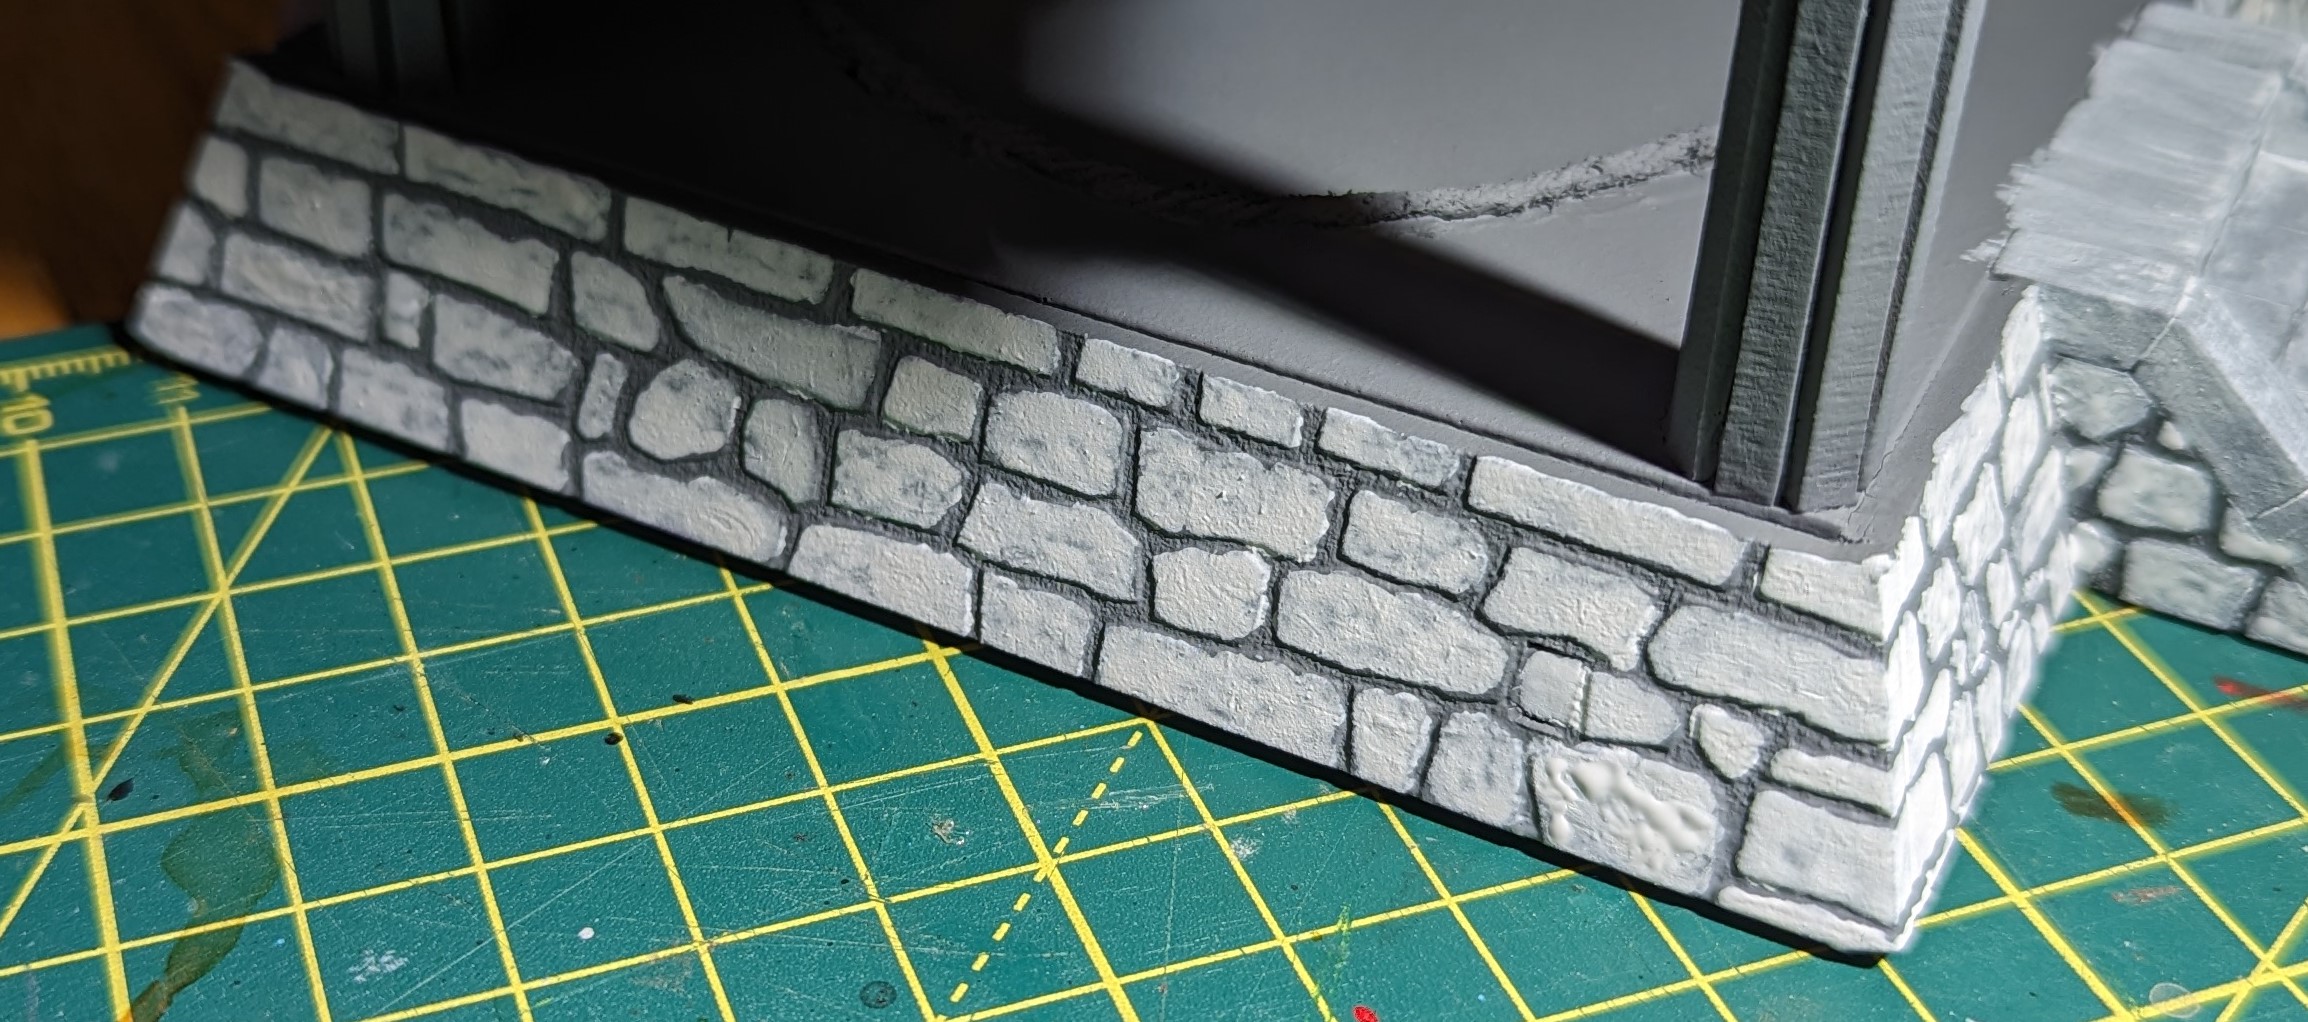
Painting wise, as terrain, you want to make it look good, but not spend ages on it. The stones round the base were Luftwaffe grey and then dry brushed with a light grey. The mortar was painted Iraqi sand (as was the actual sumo ring) and then given a brown wash. Given the large expanse of the roof and pillars, I used cheap acrylic paints on these to save some money.
The roof is flat but I wanted to create a ridged tile effect. The tiles had been engraved onto the roof but without any profile, it looked a bit off. To create the profile, I’ve painted what would be the ridge with a lighter green and where the ‘valley’ of the tile meets the ridge, a darker green. I’ve varnished the roof with a gloss to further try and recreate the glazed tiles found in Japan and China. The last step was to airbrush some sun yellow around the lantern to try and create a glow effect.
A bit of flock to recreate moss around the base helps set the terrain onto the table.
The fences were very quick, no shading and I couldn’t be bothered with dry brushing – life it too short.
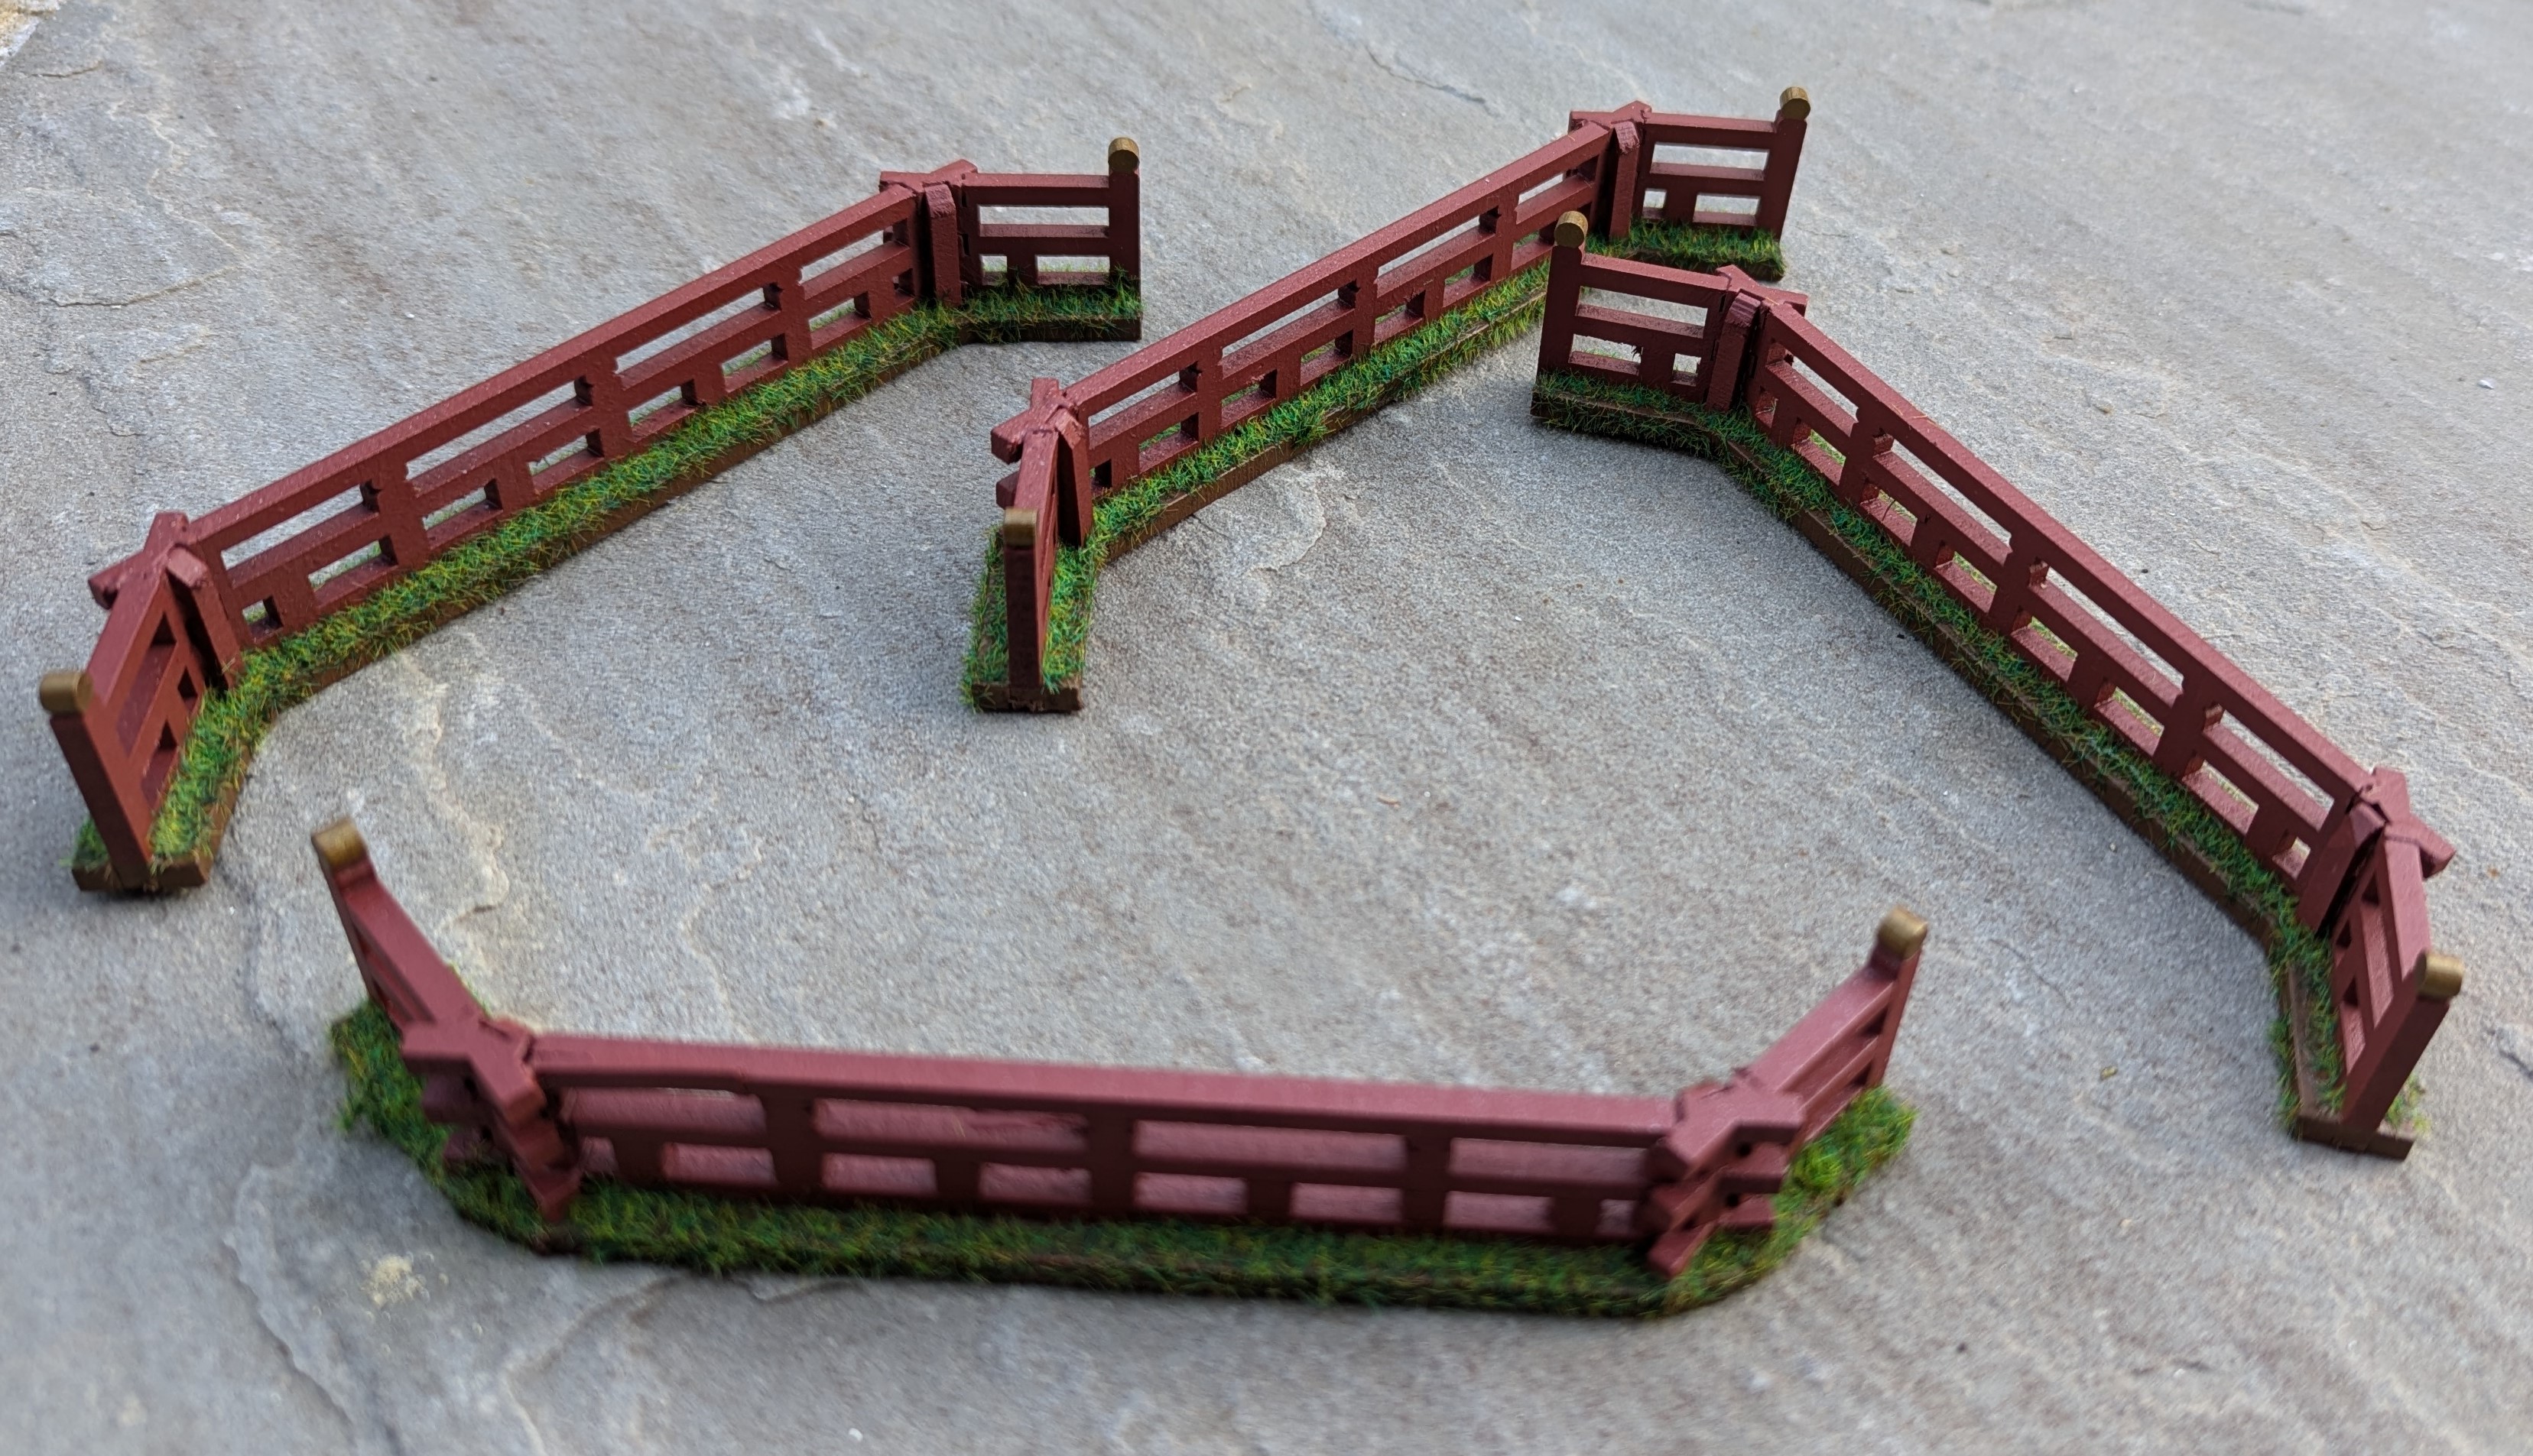 Fences
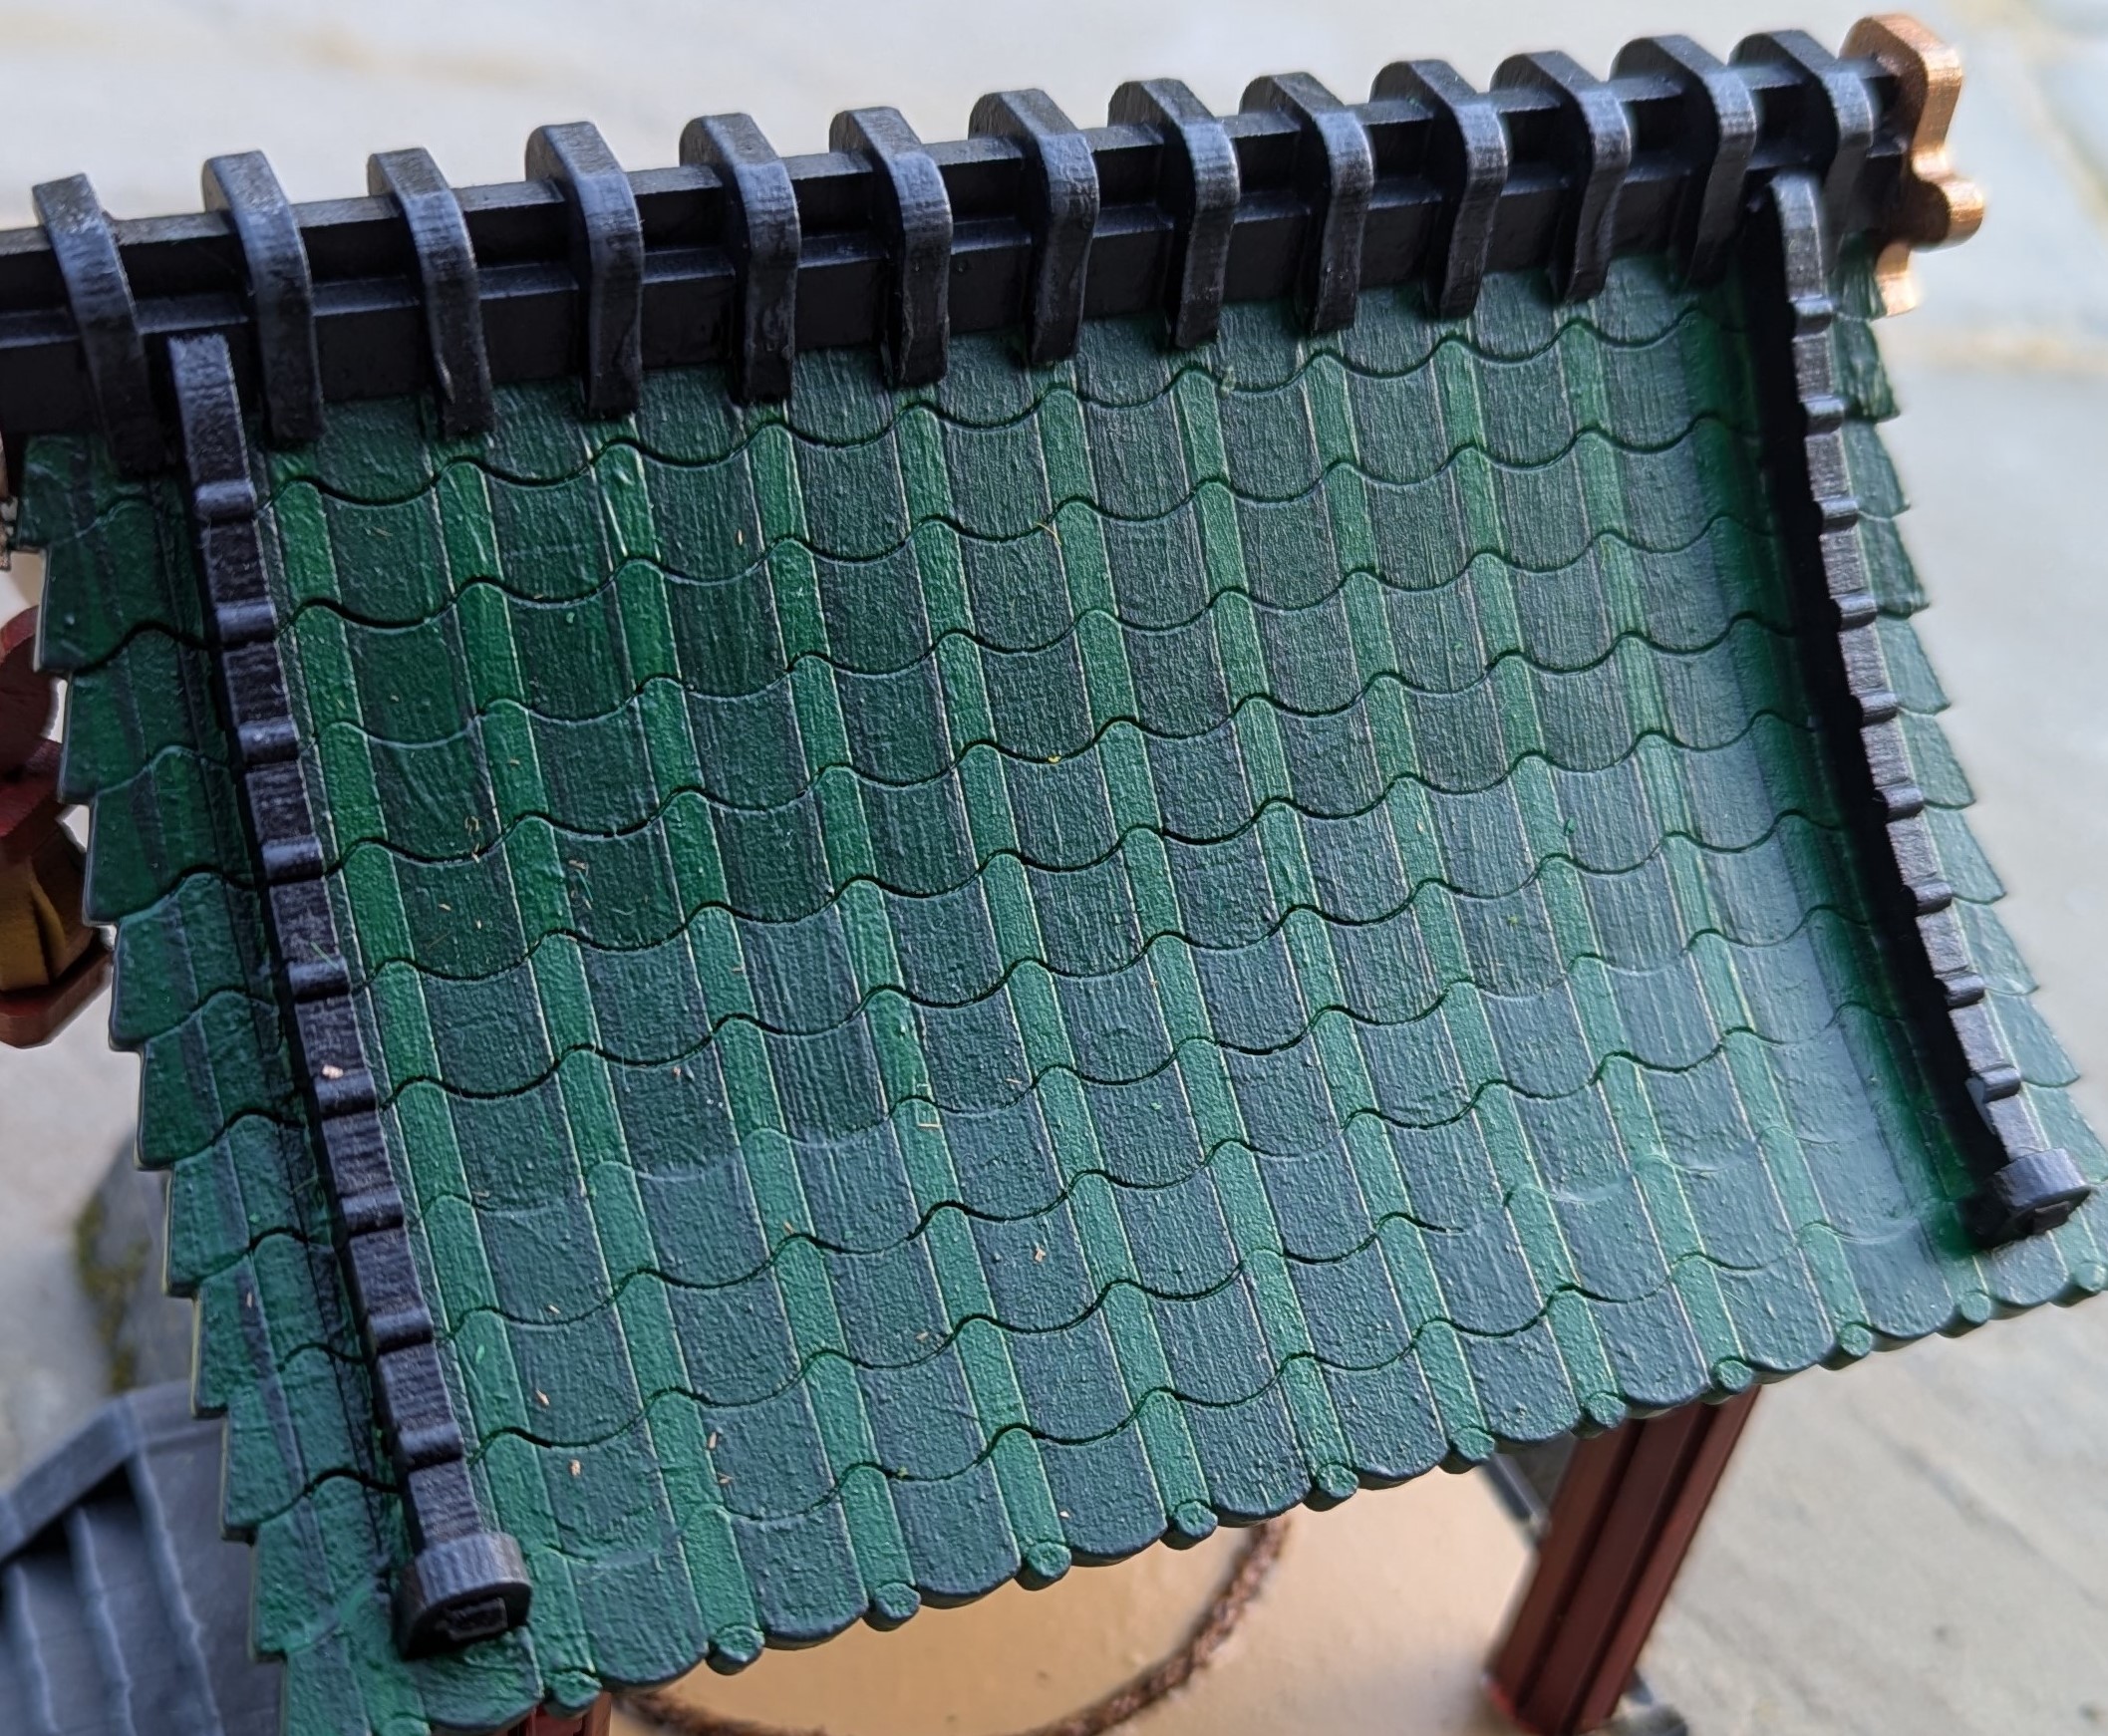 The fake roof
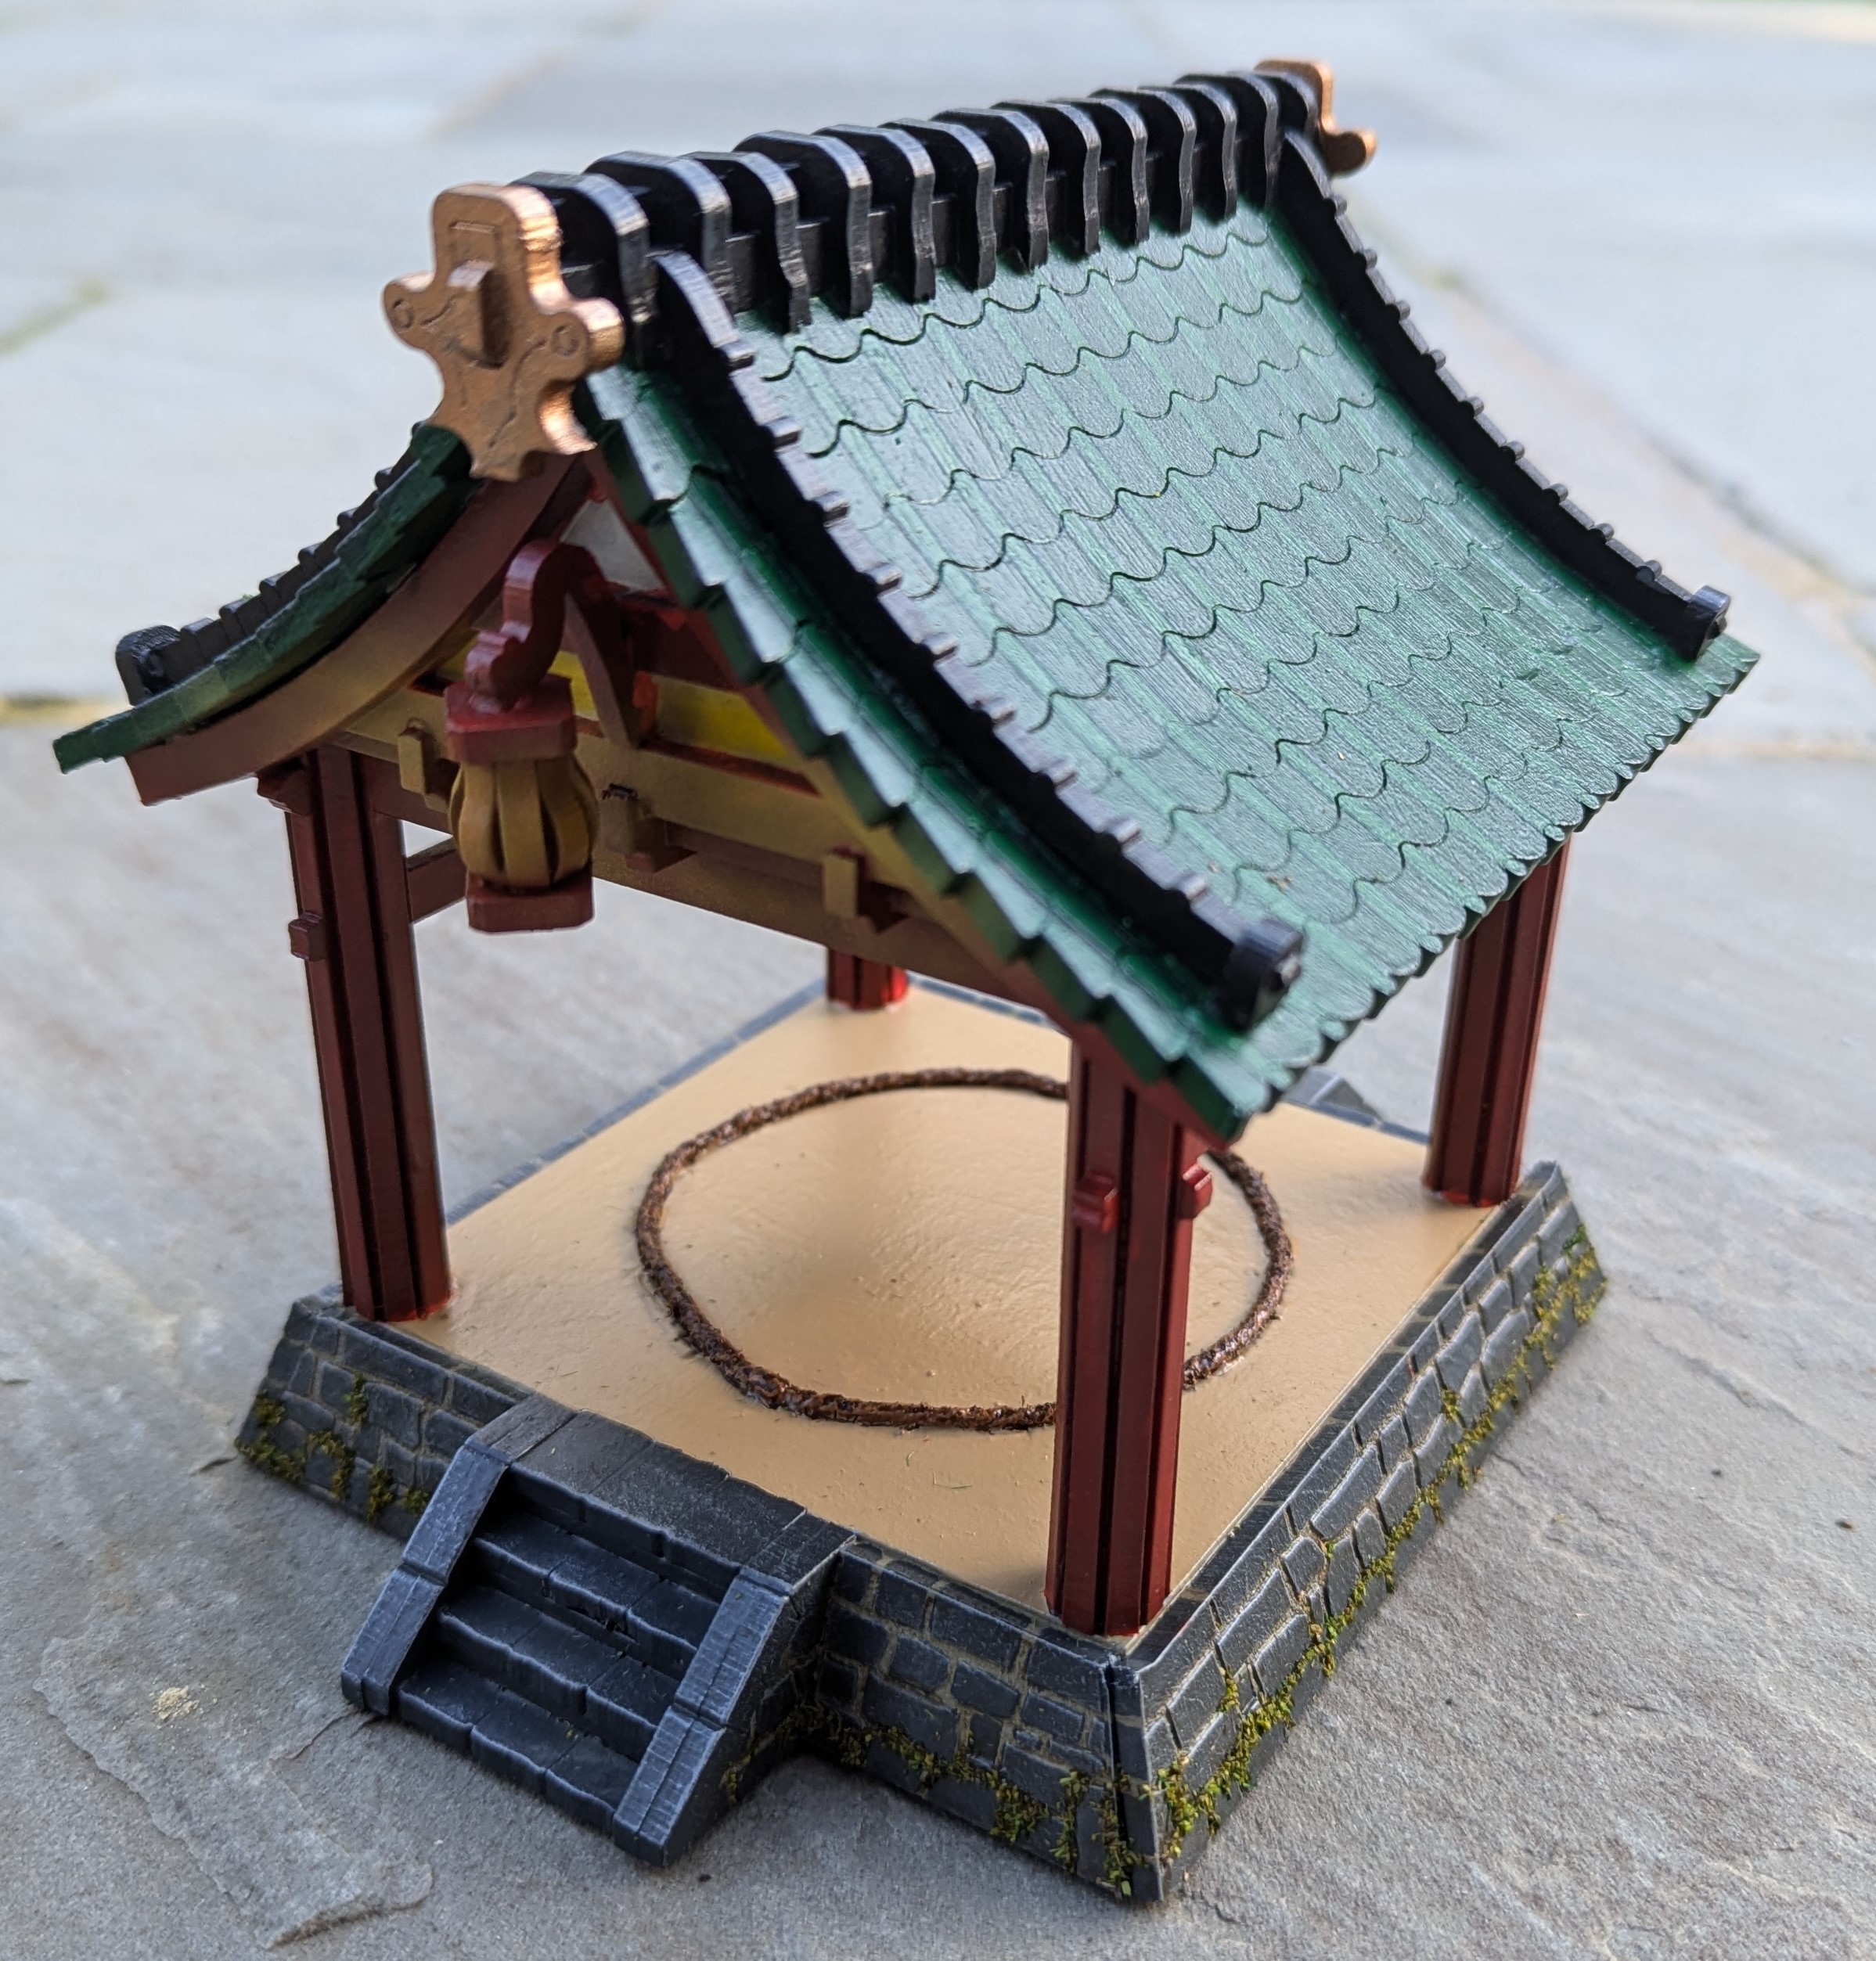 The finished terrain piece
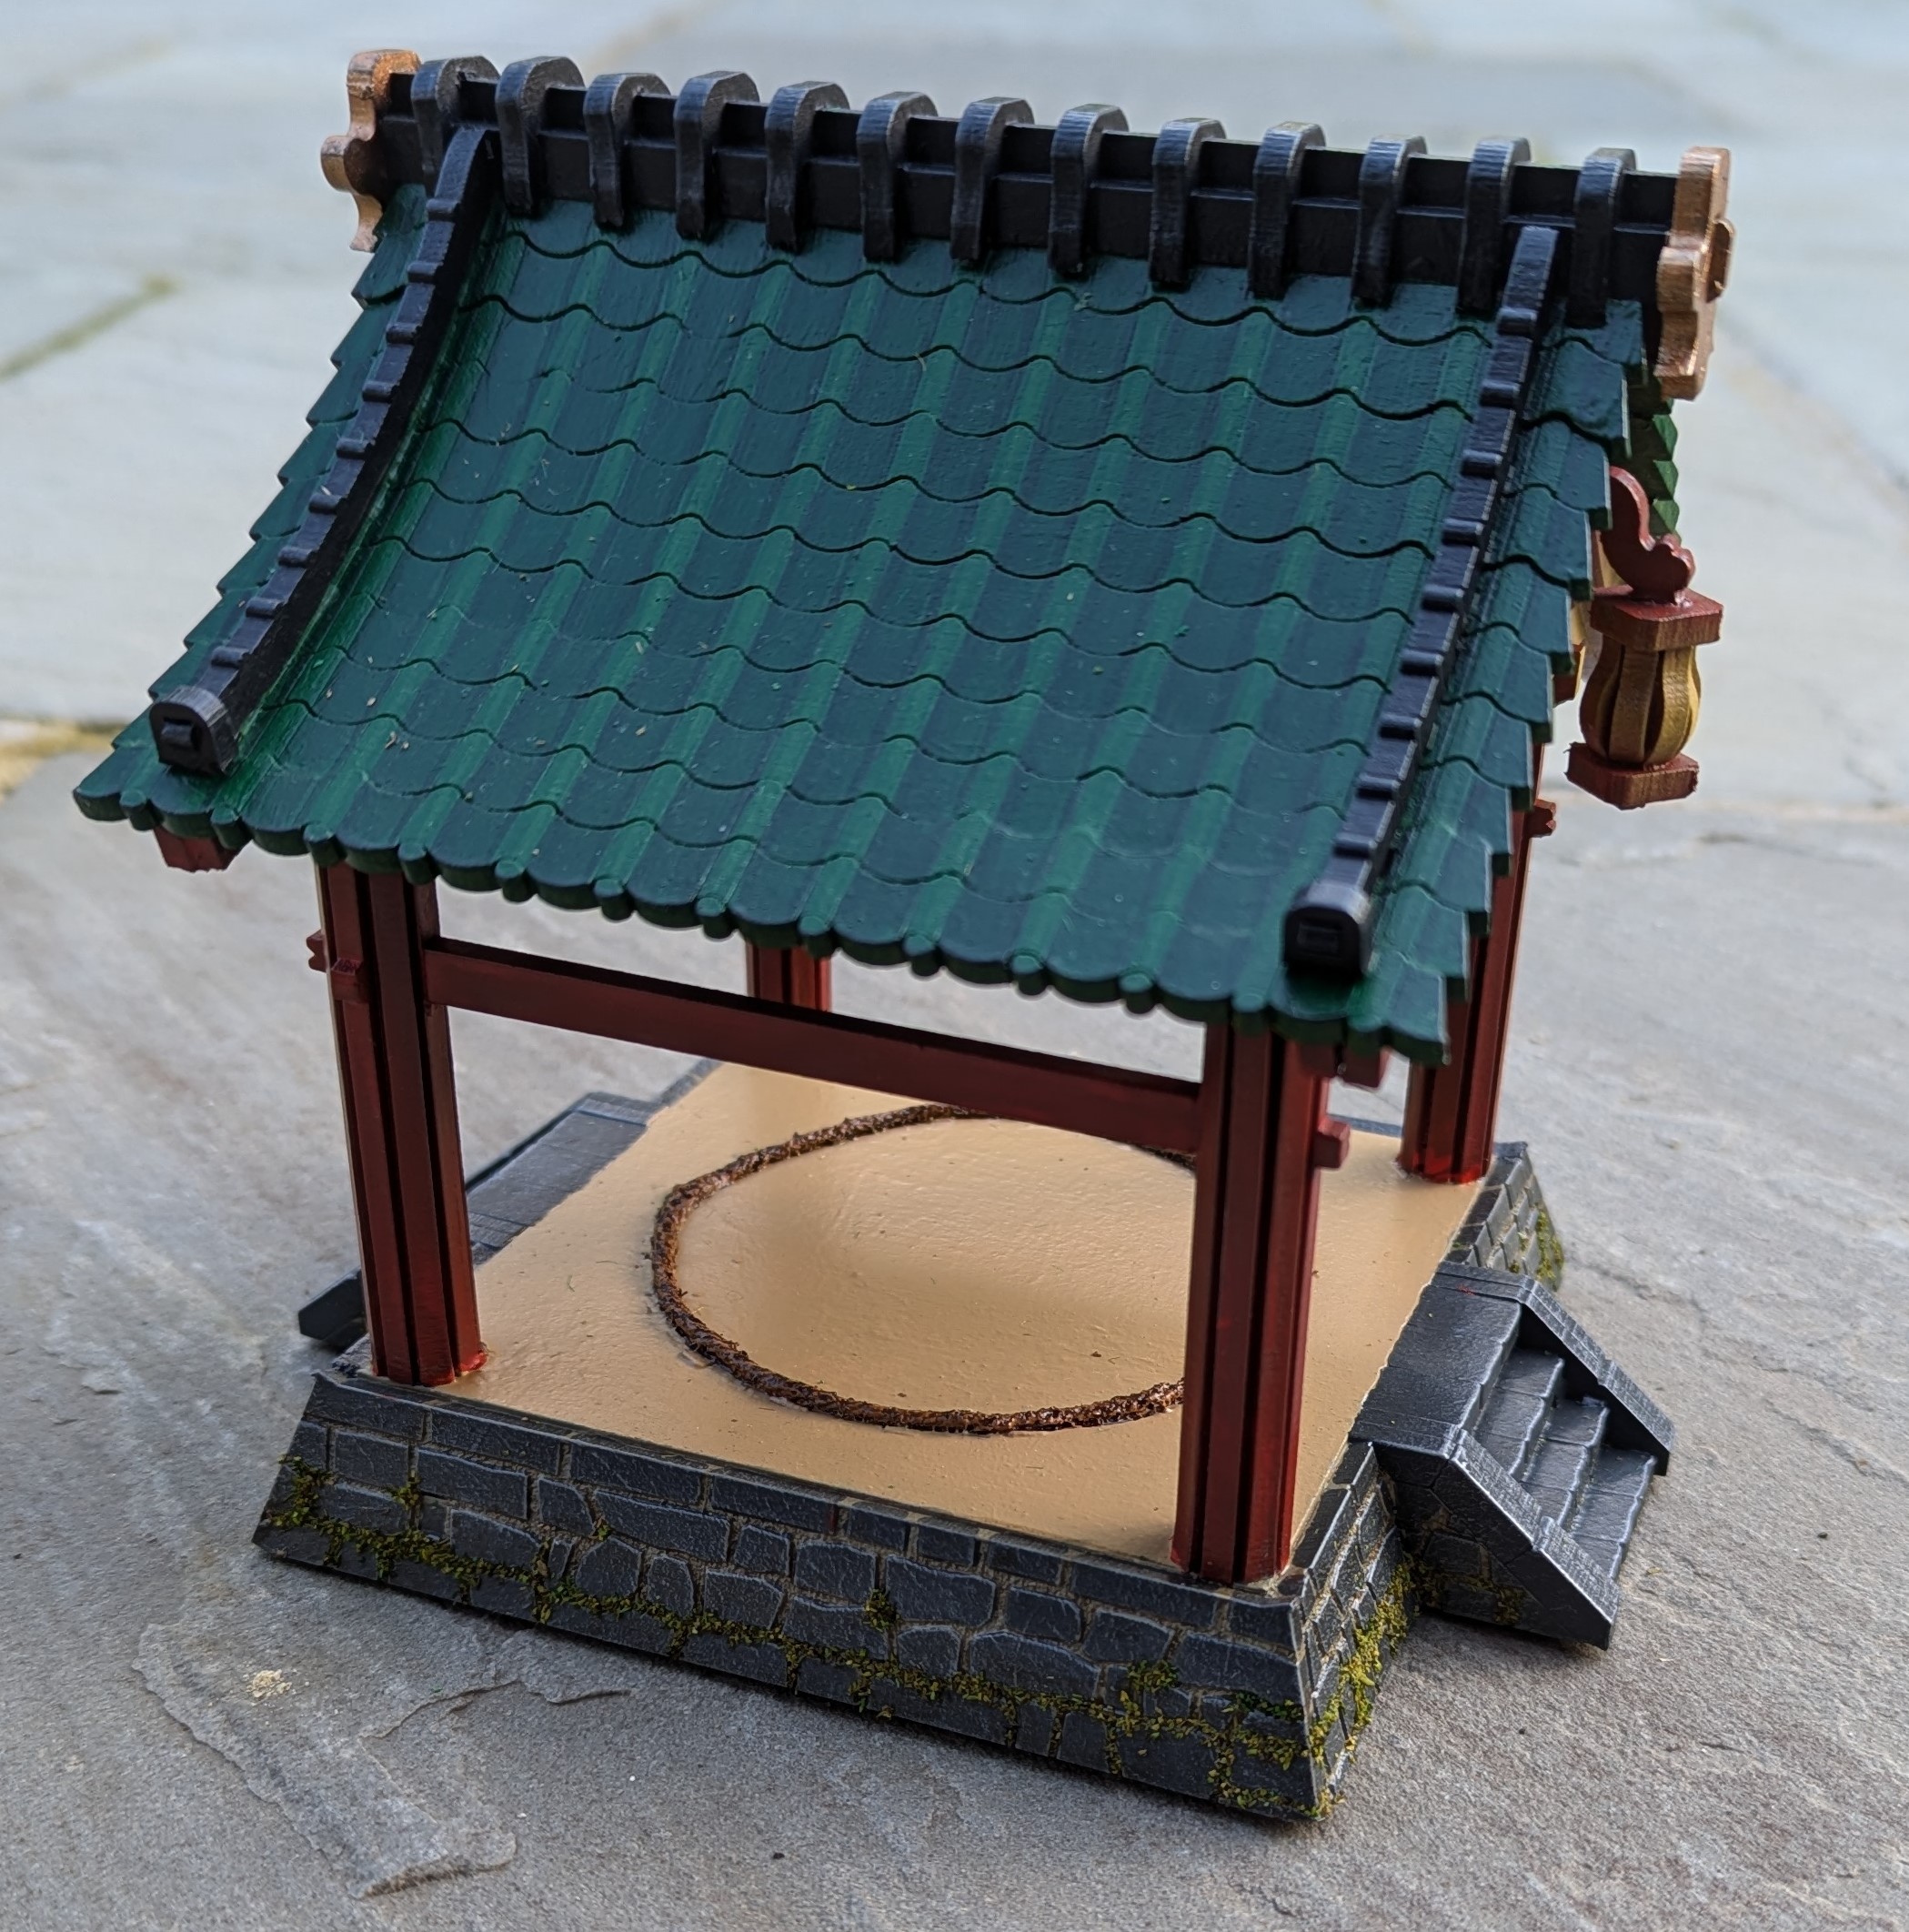
Two Lone Swordsmen
Taking the Two Lone Swordsmen (TLS) in the game gives you two models. Points wise, they aren’t cheap, potentially being a quarter of your warband but they are very annoying for your opponent. In game, they are fairly average at combat and movement but do get to activate as a pair but are treated as two separate models. You need to be a little careful as you have to assign the same activation to both of them but this just encourages you to keep them together. In combat, they gain an advantage with their Coordinated Attack which gives them an extra attack dice, this in itself ups them from being average, to being good. They also have the Prowess special rule, which allows them to re-roll a melee dice each combat should you not be happy with the result. Their armour of 2 also reduces the damage coming back in return.
But the real bonus is their special rule of Linked. If a Lone Swordsman is killed, at the start of the next turn, you may place them back on the board in btb with another Lone Swordsman and with full wounds. Therefore, the only way to kill TLS is to kill both models in the same turn. This is quite hard to do and results in the delightful effect of having them respawn.
The small downside to all of the above is that they are Ronin and to recruit them into the Cult of Yurei I need to give up a Themed list option and the benefits that this would have given me. Still, it will be worth it to see my son’s reaction when they keep coming back after being killed!
Painting wise, I’ve gone simple and quick. After the standard zenith highlight base, I’ve used a black speedpaint for the robes. The armour is a gunmetal given a nuln oil wash and then a gentle chrome dry brush. Skin was a light skin tone with a wash applied and then highlighted back up. I applied a blue sash to provide some colour and was a mid blue followed by a blue wash. I’ve then highlighted back up. The cord was scruffulous brown with a wash applied.
I wanted to make them look a little road weary and so once the paint and varnish had dried, I applied a couple of thin coats of enamel dust over the lower parts of the robes, with each coat being applied over less of the robe to try to fade it down to the bottom. It wasn’t overly successful but I’m fairly new to the enamel washes, so you lie and learn. To round out the model, I based it in pretty much the same way as my other models to try and create some uniformity across the warband.
All in all, a quickish job.
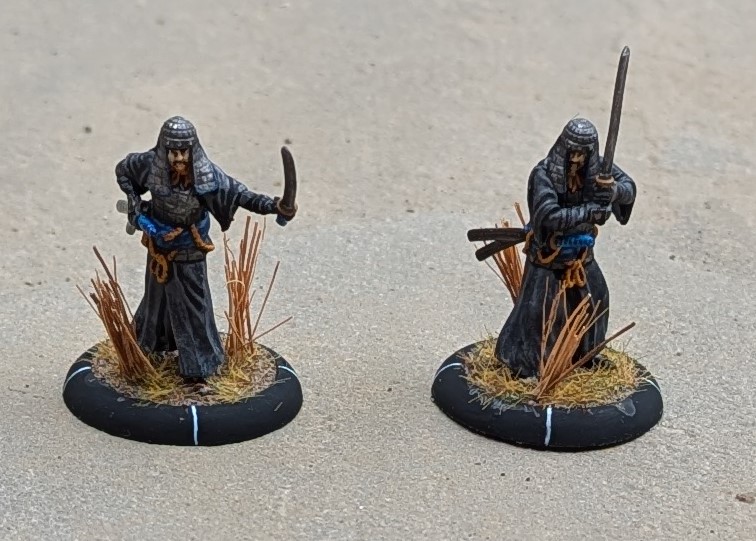 Two Lone Swordsmen
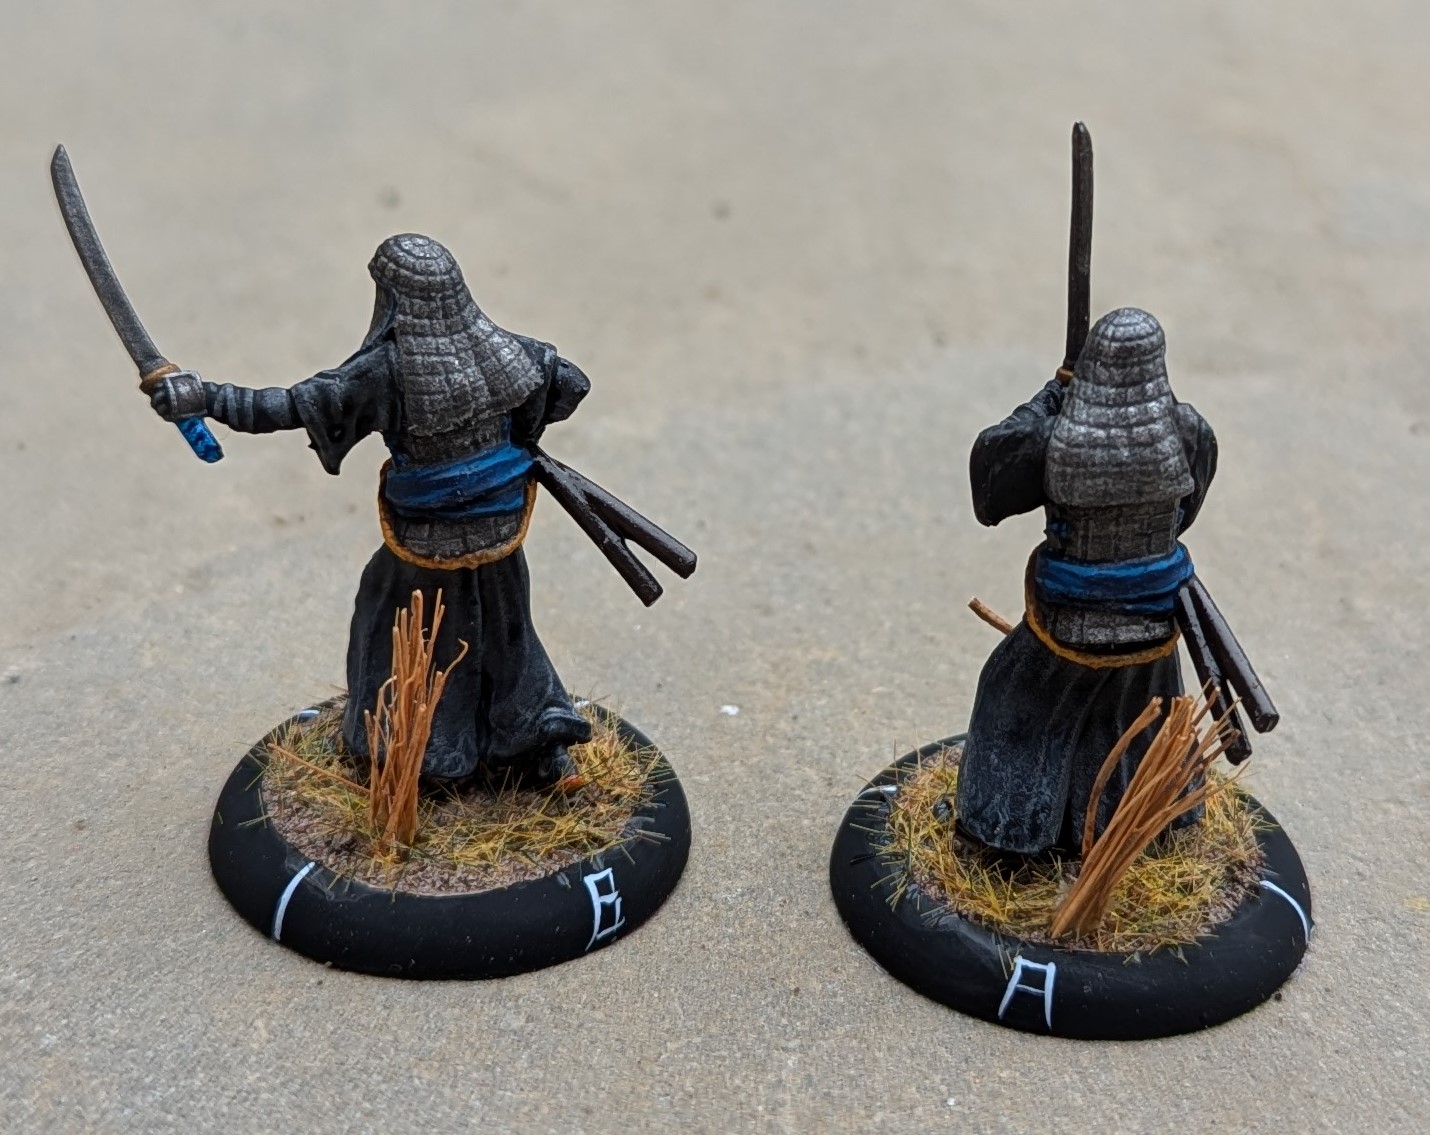 Double Lloyd Shot
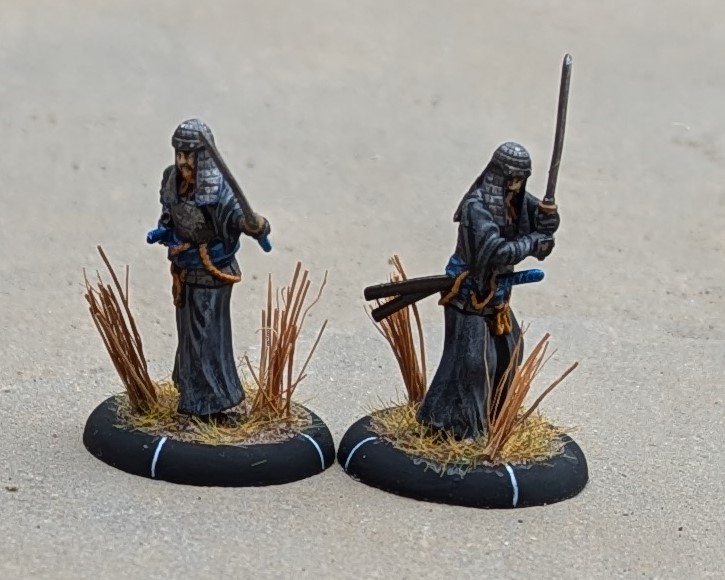
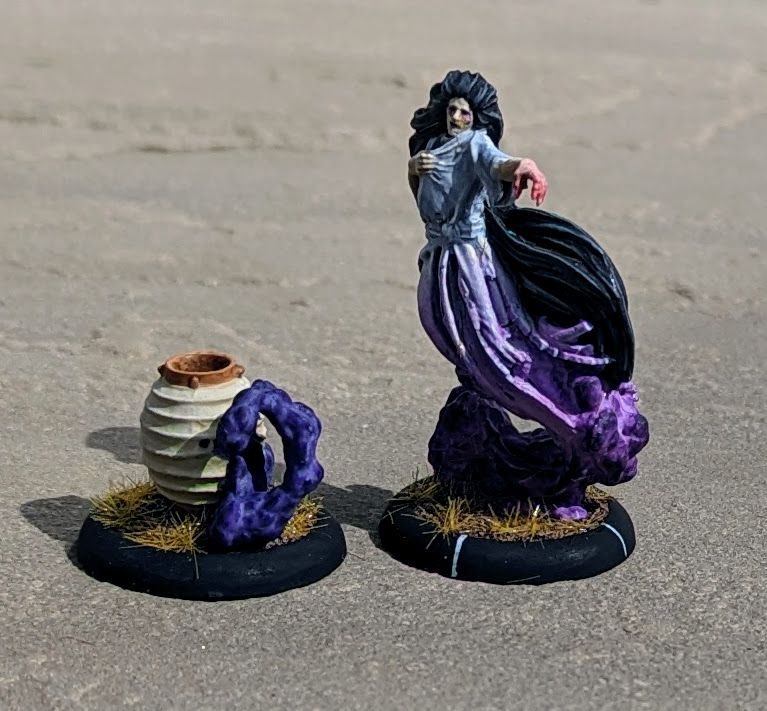
Fuwa Kaidan
Kaidan in Japanese is two words, kanji, that means mysterious apparition and dan, which means a narrative. But generally, it relates to horror and ghost stories and the creatures in those stories. In this case, Fuwa Kaidan is a ghost and the model comes with a terrain piece, the Tsuridourou or pot. You get to deploy both in game.
FK has some drawbacks, notably speed which is only 3″ but this can be boosted by spending 1 Ki for each extra 1″. FK also only gets to roll 1 melee dice, which is frankly dire, so you don’t really want to be getting into combat. The model is also a Kami which means that FK doesn’t have a wound track but instead it’s Ki is effectively its wounds. It always deploys with full Ki (in this case 4) but of course any Ki feats it uses burns up this Ki (and therefore its health!).
So why take FK? Well there are plenty of upsides here. Firstly, when FK reaches zero Ki, she re-deploys in BtB with the pot or any friendly scenarion objective. Only if the pot is destroyed, can FK be destroyed. So she is a gift that just keeps on giving. She also has a 4″ ranged attack that, if successful, removes a Ki from the target and FK gets it. She;s Durable, meaning that she can only ever take 1 wound per damage roll and is intangible, allowing her to move through terrain and leave BtB without penalty.
But you really want her for her Ki feats. Firstly, if she does get engaged in melee, she can spend 2Ki to cast Mirage that, if successful on the die roll, she gets to deploy 2″ away and the attacking model finishes its turn. She can cast Blind – normally, such Ki feats require an opposed roll but not here, it’s automatic. The enemy model gets a Blind marker which means that it should be surprised by any incoming melee attacks and will therefore lose 1 melee dice. So a great way of debuffing an enemy model before you bring in your heaver hitter.
I’ve saved the best to last though. For 1 Ki, you can cast Ire on an enemy model within 4″. Like Blind, this is automatic, with no dice rolls! The enemy model gains the Impetuous and Berserk traits. Impetuous requires the model be activated before any other model on the enemy warband. Berserk requires the model to attack the nearest enemy model, but here’s the good bit, Ire makes all models on the table enemy! Assuming you get your positioning right, the berserk model will attack one of its ‘friends’, so both models will lose an activation and you have the possibility of one causing damage to the other. And the fun doesn’t stop there, any damage caused, FK gets to restore 1 Ki! FK is rapidly turning into my favourite model.
Painting wise, the pot was fairly straightforward. I’ve used a silver grey as the base and then applied some light brown glazes under each rim to create shadow. The smoke was painted a very light purple (to tie into the faction theme colour) and then I’ve layered increasingly darker purple over the ‘thicker’ parts of the smoke. Smoke should be highlighted in reverse. The rim is brassy brass.
For FK herself, I wanted to try to create a translucent, ghost like look by trying to have the robes fade into the purple smoke. For this, I painted the smoke as above and then used off white and grey to paint the robes, with the grey creating the shadows. This was applied as thin glazes that I reduced in frequency as it got closer to the smoke or where the robes were thinnest, to try to create a fade.
The hair was a simple dark grey given a nuln oil wash and then dry brushed. The skin is a pale skin tone mixed with a light grey and then shaded with grey – I don’t want it looking too lifelike! I’ve finally added a red glaze around one of the hands and some purple glaze around the eyes.
Overall, a fairly quick (for me, it still took a couple of evenings) paint job. I’m a little annoyed that the purple of the pot is not the same purple of FK, but that’s what happens when you paint them separately. The fade looks OK but something that I definitely need to work on.
 FK and her pot
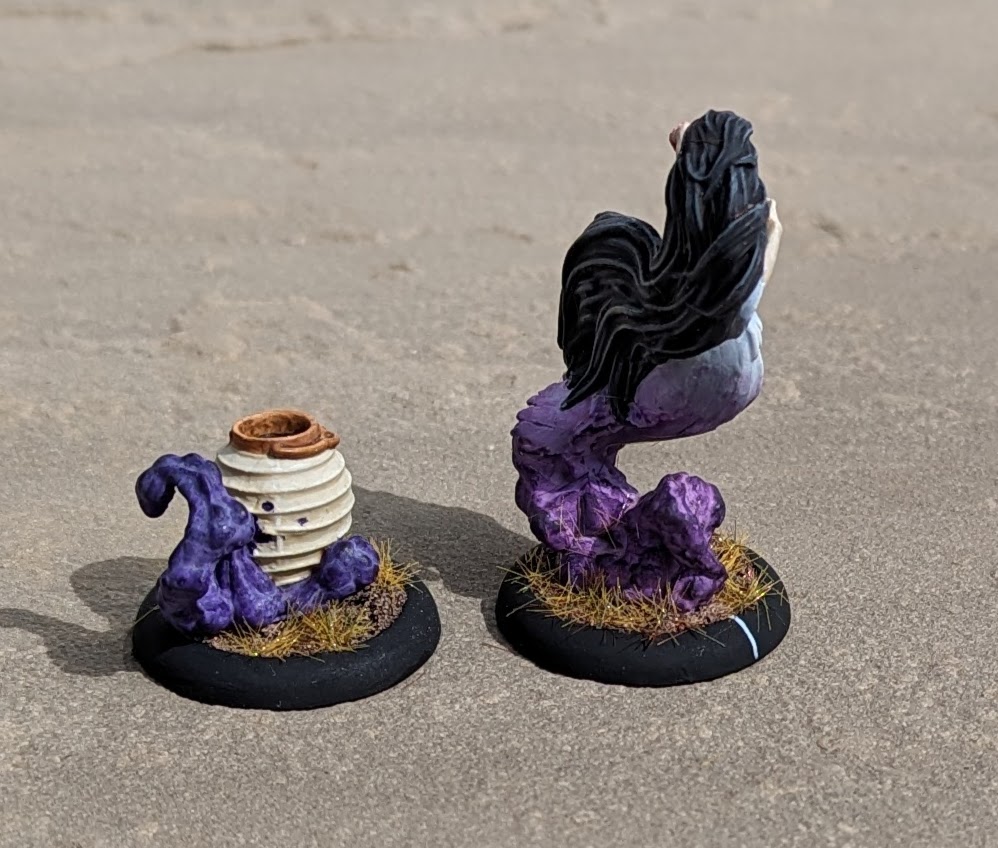 Ethereal arse
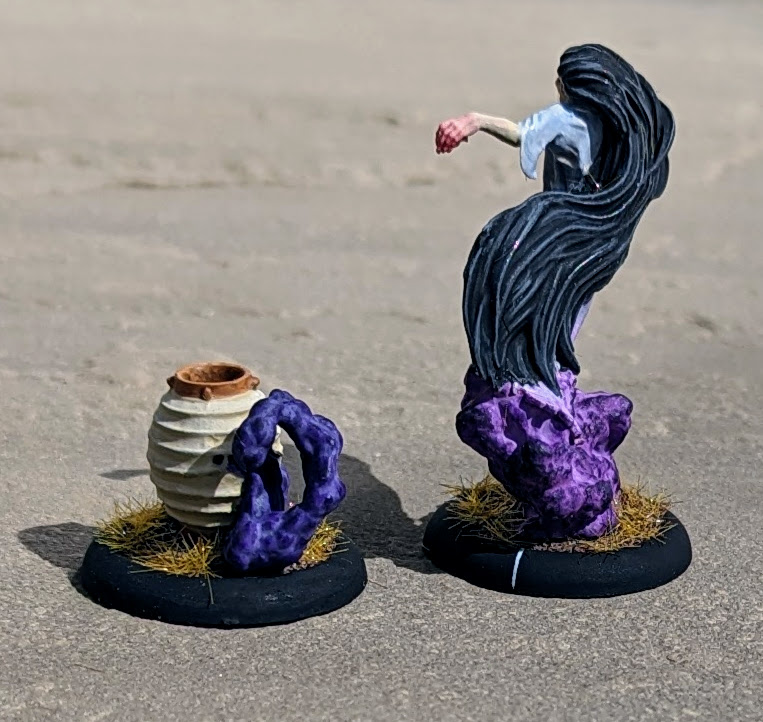
The Grey Pilgrim
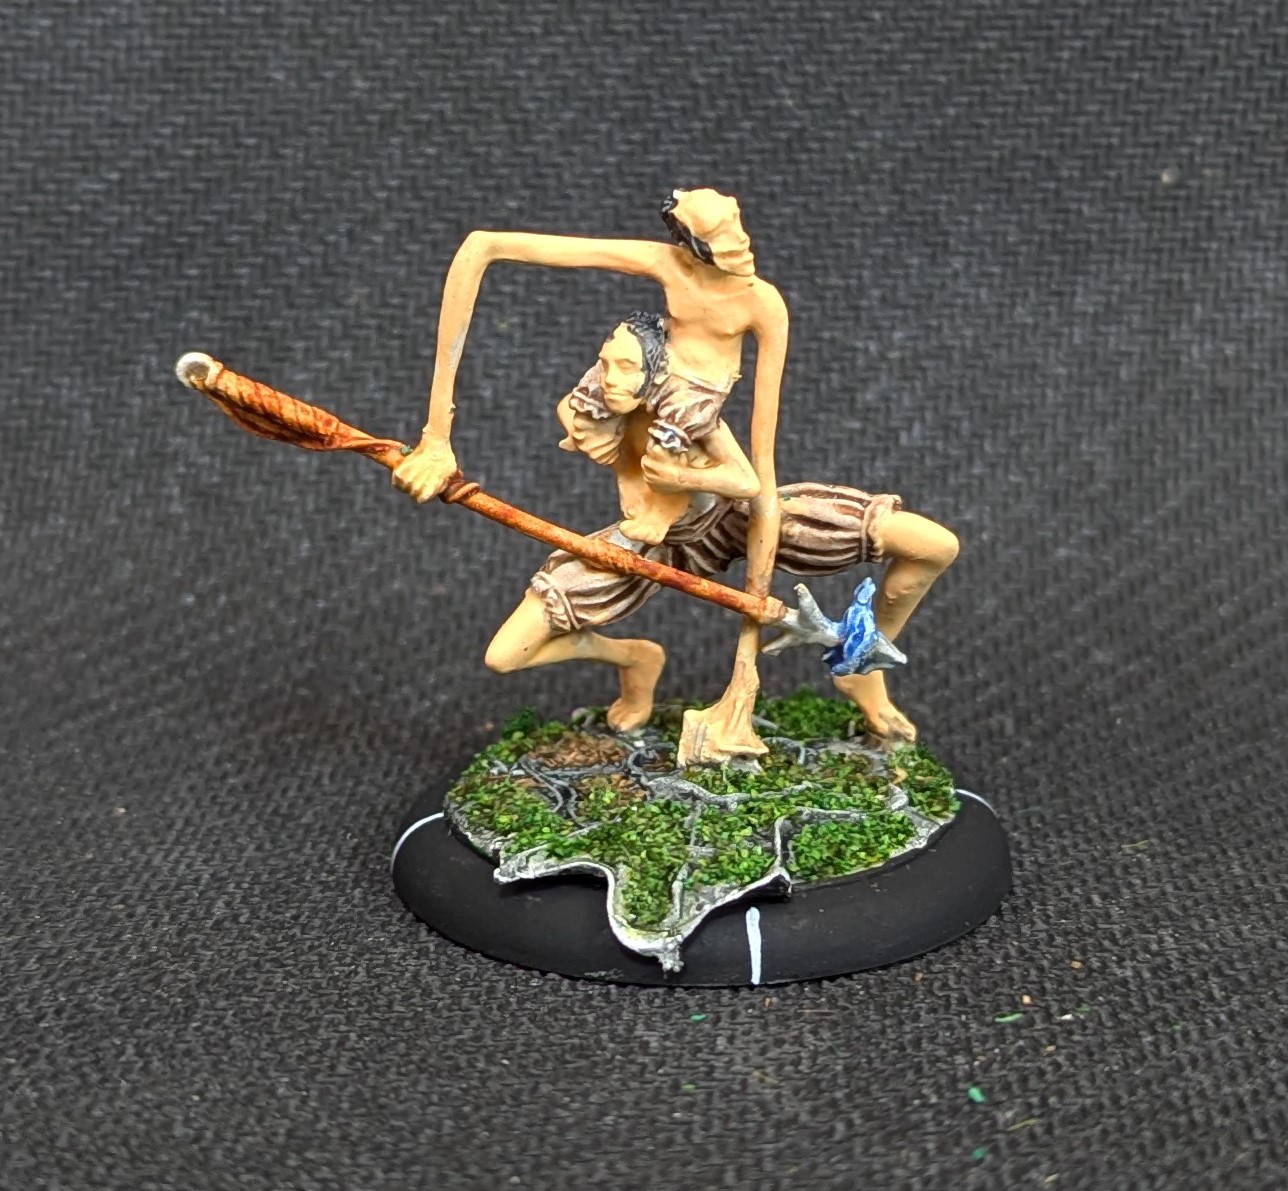
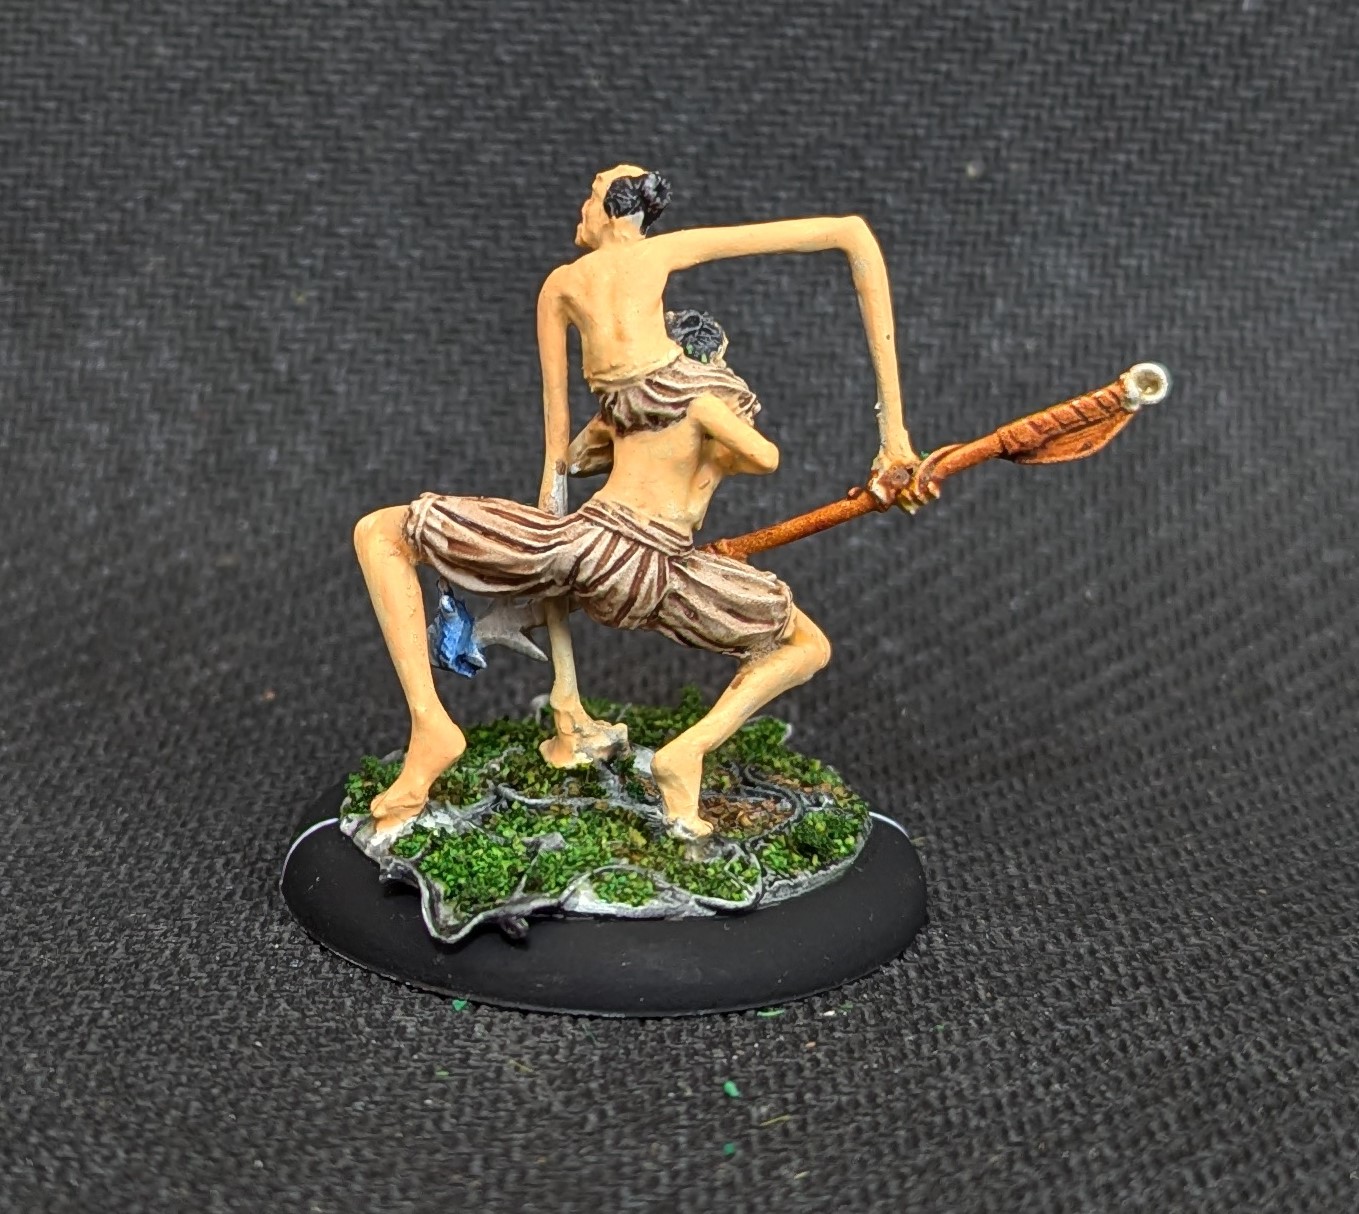
The Grey Pilgrim is a ronin in Bushido and therefore not part of any specific faction but available for selection by a number of factions. My son has selected her for his Temple of RoKan faction a number of times, to great effect. In game, she’s handy with her spear and is quick around the battlefield, having a 5″ move rather than the more standard 4″ (trust me, on a 2ft x 2ft battlefield, in a game where placement is key, that extra 1″ is a huge boost). She also has a very handy ranges attack, Call Lightening, which, coupled with her 3 ranged dice, makes this quite a dangerous attack. She also has a Ki feat, Raijin’s Rage, that when activated, on any successful ranged attack she is allowed to make a second ranged attack on any model with 3″ of the first. This second attack ignores cover which makes this quite powerful. She’s certainly been a pain in my side every time I’ve faced her.
Painting wise, I wanted to do this quickly and try out the speed paints. So after the zenithal highlight, I set to work. The robes were painted Gravelord Grey, which I later gave a very light dry brush of a light grey over the top. The sword handle was highlord blue, the hair Dark Wood and the spear shaft Bony Matter. The metal was painted using normal acrylics. I don’t have a skin tone in speed paint, so this was painted using my Scale75 skin tone set but done very quickly with a light skin tone/golden skin tone highlight/base and with a thin wash after. I think that was it and completed in an evening.
Basing was a simple acrylic mud and then given some static grass. Job done.
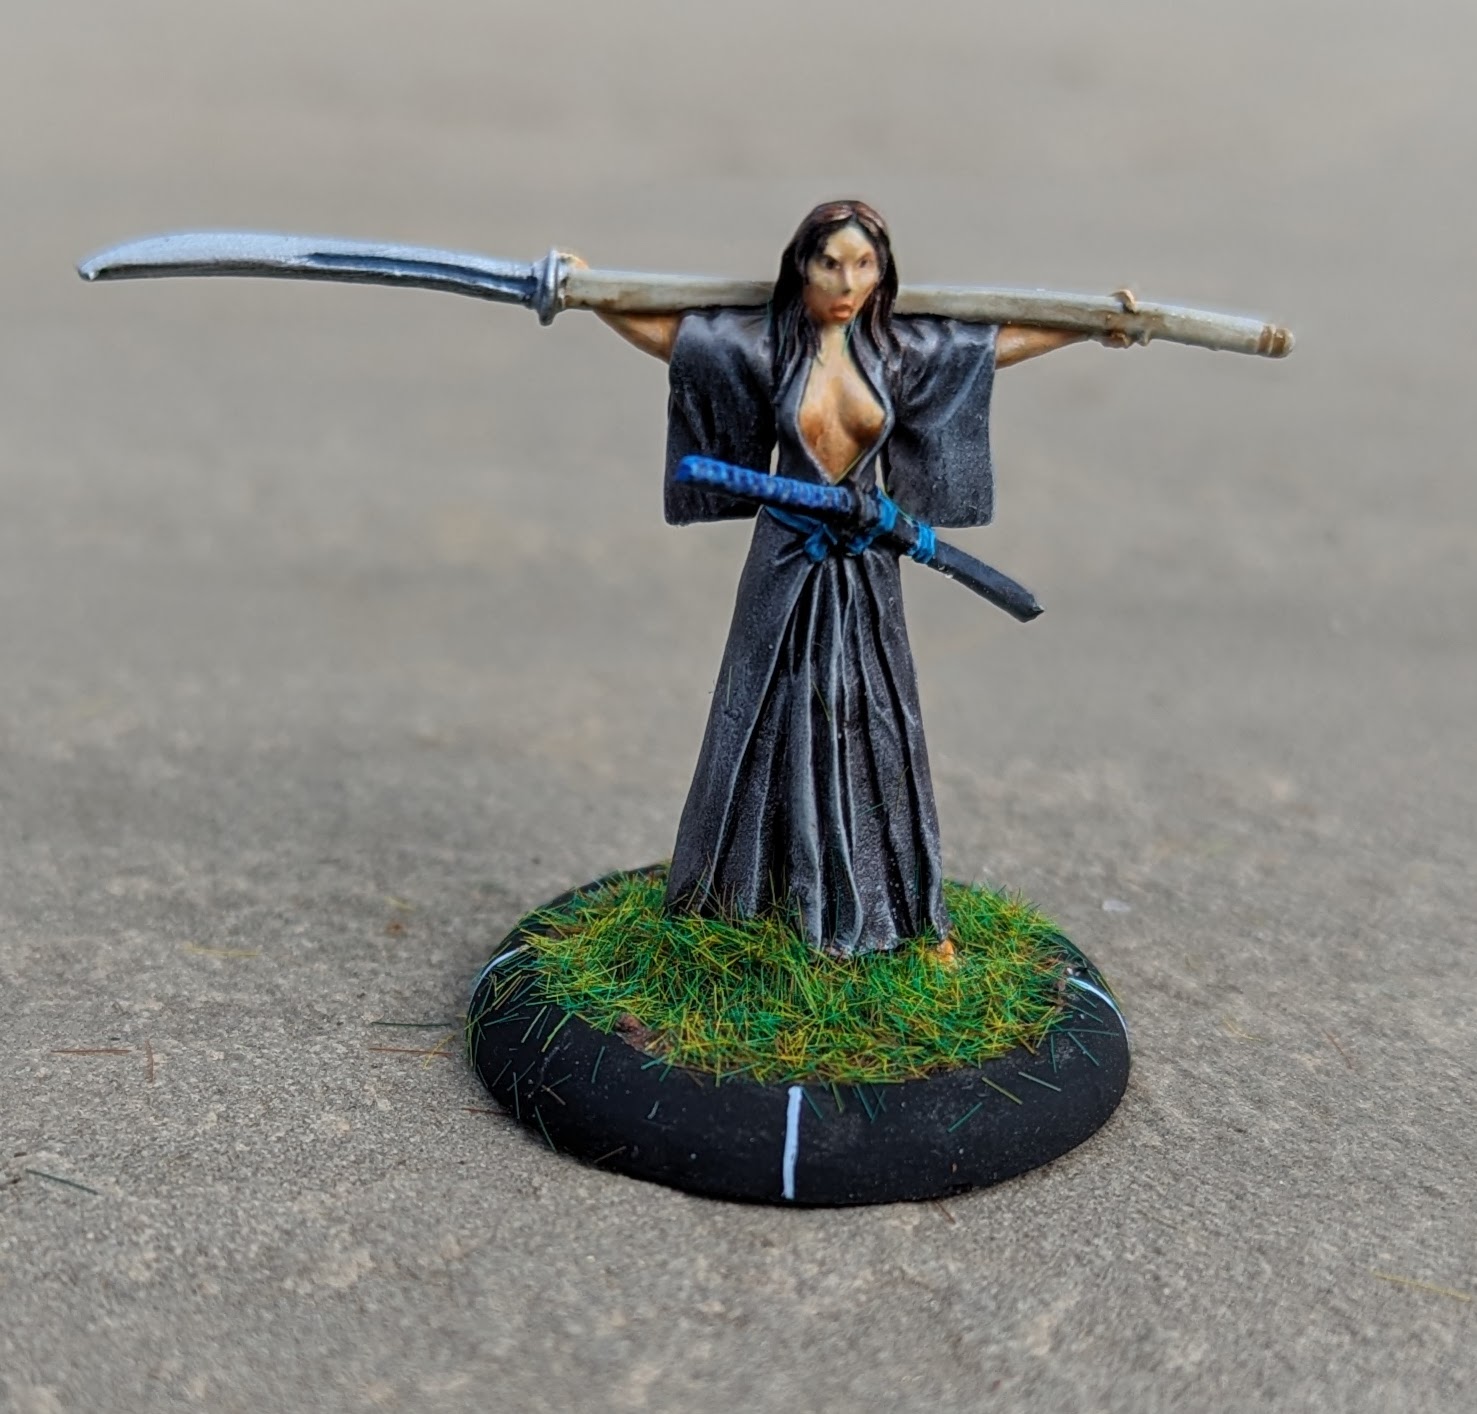 The Grey Pilgrim
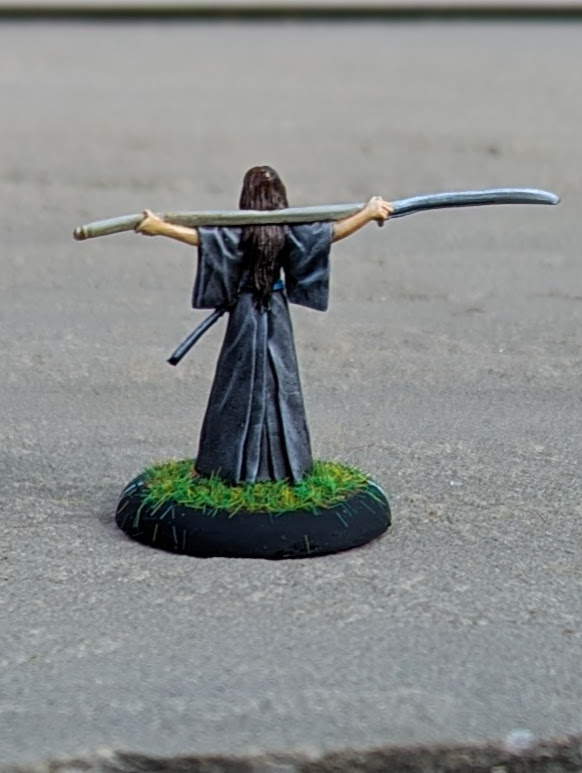 The Grey Pilgrim's behind
Battle Report No. 8
Game 8 – Kinshi Temple vs Cult of Yurei
At Salute, both my son and I picked up some more shiny Bushido stuff. I was quite reserved, and got the new Animated Warriors blister while my son went for a whole new faction, The Kinshi Temple. We were both keen to get these to the table to see how they played.
For my son, the Kinshi Temple are a small faction, with most of the models available coming in the starter set. They are tricky to play but can pull off a lot of powerful moves. Much of the game play of this faction centres around the Void Communal card which any model in the faction can draw from. As events or acts take place in the game, counters are added to this card unlocking increasingly more powerful options, so that in the end game, the models become very difficult to handle. This is somewhat countered by the fact that many of the models are fairly weak to start and some of the easiest ways of gaining counters is by taking wounds or losing models.
My new models were some skeleton warriors. These tie in well with my Christmas present which was the Yuta of Yurei boxed set. Once of the Yuta (witch) works very well with the skeletons, giving them health regeneration. The Animated Warriors are a very cheap option but come with the weakness that if an opponent makes a damage roll (made on 2d6) any double kills them outright. On the plus side, as with all skeletons in the game, they have the special Durable trait meaning that no matter how many wounds the opponent causes in any attack, it is never more than 1. So they take some beating to remove, especially with health regeneration!
We played this game about 6 weeks ago. It’s taken this long to get round to writing it up, so I’ll keep things short.
For this game, we went for a scenario with 6 objectives, arranged in a ‘hex’ pattern in the middle of the board. The two closest to each player were ‘friendly’ to them while the ones in the middle were neutral. Scenario points were scored at the end of round 2, 4 and 6 based upon how many friendly objectives you had. Additionally, models can take an activation to pray at an objective in BtB. This can be done 5 times in the game with 1 scenario point for praying at a friendly objective, 2 for a neutral and 3 for any enemy objective.
We deployed as in the pictures below. The empty bases are Void Rifts that the Kinshi Temple can use. They’re effectively dimension doors for them as well as points to gain LoS and measure range. It gives them a lot of flexibility.


Turn 1
We both pushed up the table hard, trying to get to the two neutral objectives. I was largely successful, securing the right hand objective with my choking fog Kami. On the left, we both got close. One of my Yuta also has a Ki feat to summon another skeleton, which I did. This is a once per game ability but gives me a free model. Happy days.
Photos below.
- End of turn one
- My right flank with the swarming skeletons around the objective
- My left flank
- My son’s half of the table


Turn 2
A real scrap developed on the right, as my son launched a ‘scorched earth’ Ki feat, which dishes out fire damage to all models in the AoE. Fortunately, my skeletons can regenerate their damage so, while annoying, not debilitating. My son also summoned a void rift and had one of his monks appear through it behind my lines on the right. So I had to deal with this with my Animated Warriors. On the left, Eiko, a skeleton, managed to frighten a Kinshi monk and batter him with his axe.
Photos below
- End of turn two
- Eiko (metal model closest to the saki racks) violates a Kinshi monk
- Skeletons mobbing up on a monk
- A scorched earth AoE


Turn 3
It was at this point that things really started to unravel for my son. In a previous round, he had sacrificed one of his models to get some Void counters on to his communal card and now, with a model short, he was struggling to hold off the skeleton hoard. To his credit, he did manage to kill one of my Yuta who was loitering around in my back line (the Yuta aren’t very tough and really need to keep out of trouble and his smart use of void rifts allowed him to target my Yuta).
On my right, my skeletons overwhelmed his models. With each attack, both the attacking model and the defending model uses up an Activation. Once out of activations, you start to lose melee dice and with the extra models that I have, that really hurts. Couple to that all the skeletons being Durable, and only taking one wound per damage roll, I can choose not to roll any defence dice and put them all into attack, knowing that my skeleton can’t die. This gives a very tough choice for my son. Despite some sterling defence, outnumbered and exhausted, the Kinshi monks perished.
On my left the story was fairly similar although it was Eiko who dealt the damage. Armed with an axe giving him the brutal special rule, he made short work of his opponent. And with one model left, my son conceded the game.
Wash up.
It wasn’t my intention to batter my son as it can be quite disheartening but we had a good chat after the game about what went well and what could have gone better. He admitted being too gung ho with the models and leaving them unsupported. And also being too keen to gain void counters to unlock the more powerful aspects of the communal card to the detriment of his overall game. But he’s keen to try again at some point!
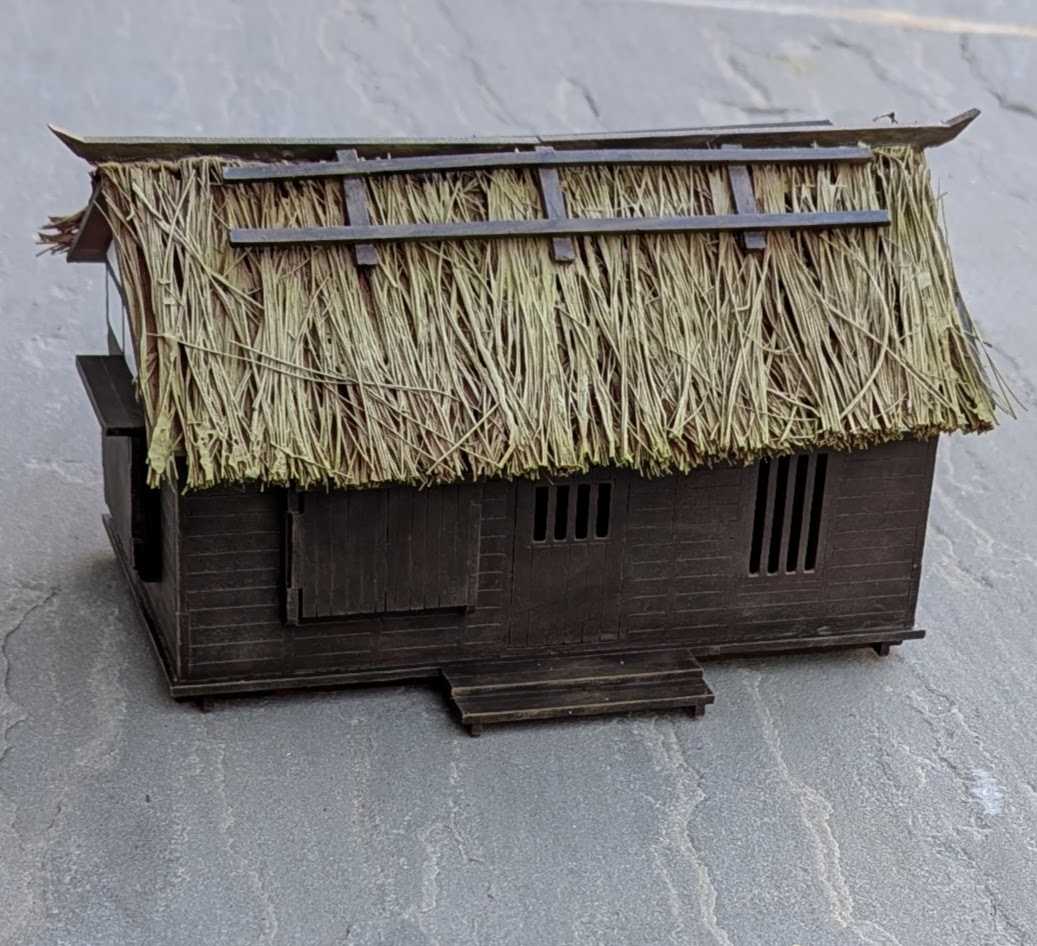
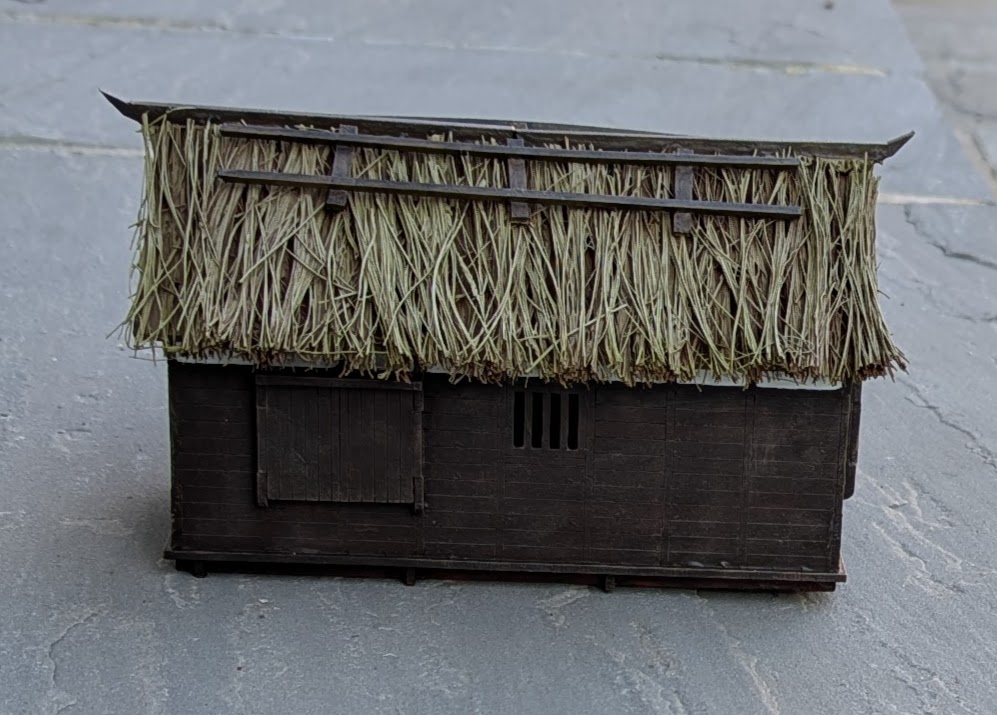
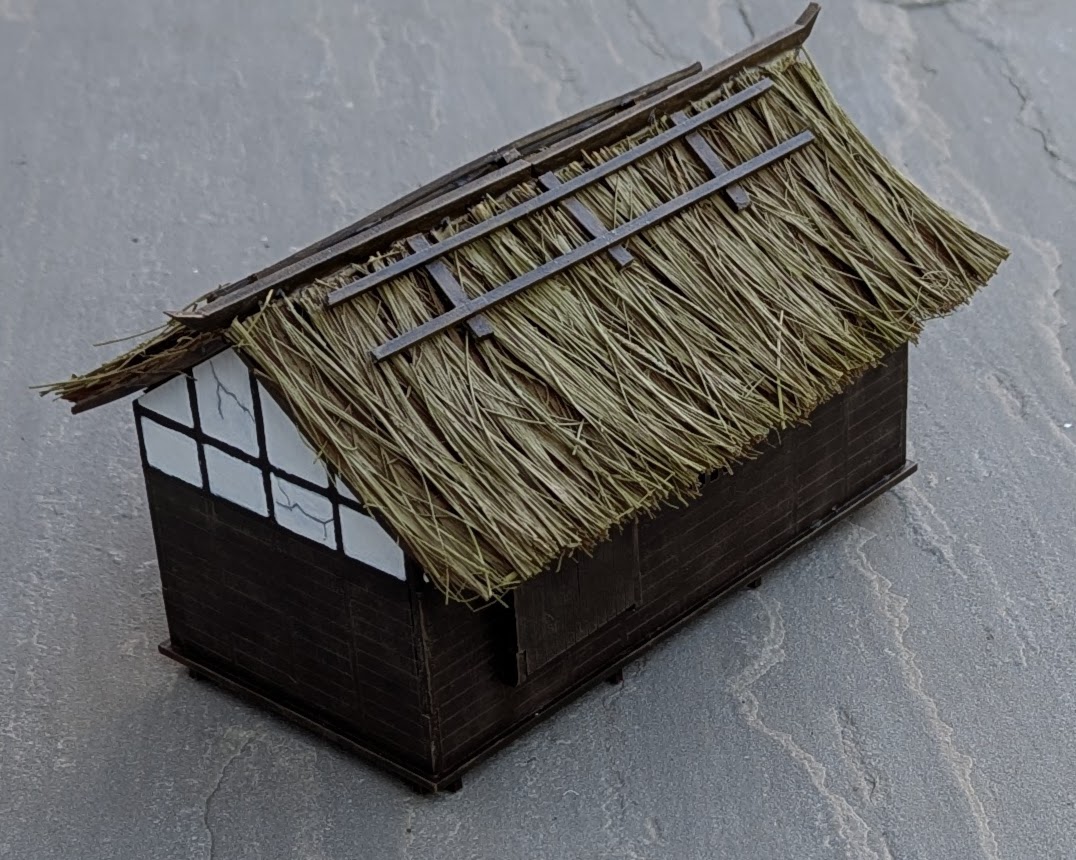
More Terrain
Way back when I started this project, I bought some MDF kits, one of which was a farmer’s house. I built all the kits quickly but then got distracted with all the other terrain stuff and some of them languished. But, time to address this.
With terrain, I’m a believer in making it look decent, to provide the immersion, but you don’t need to spend hours on it. After all, the models are the main draw. With this in mind, I set about painting the farmer’s house.
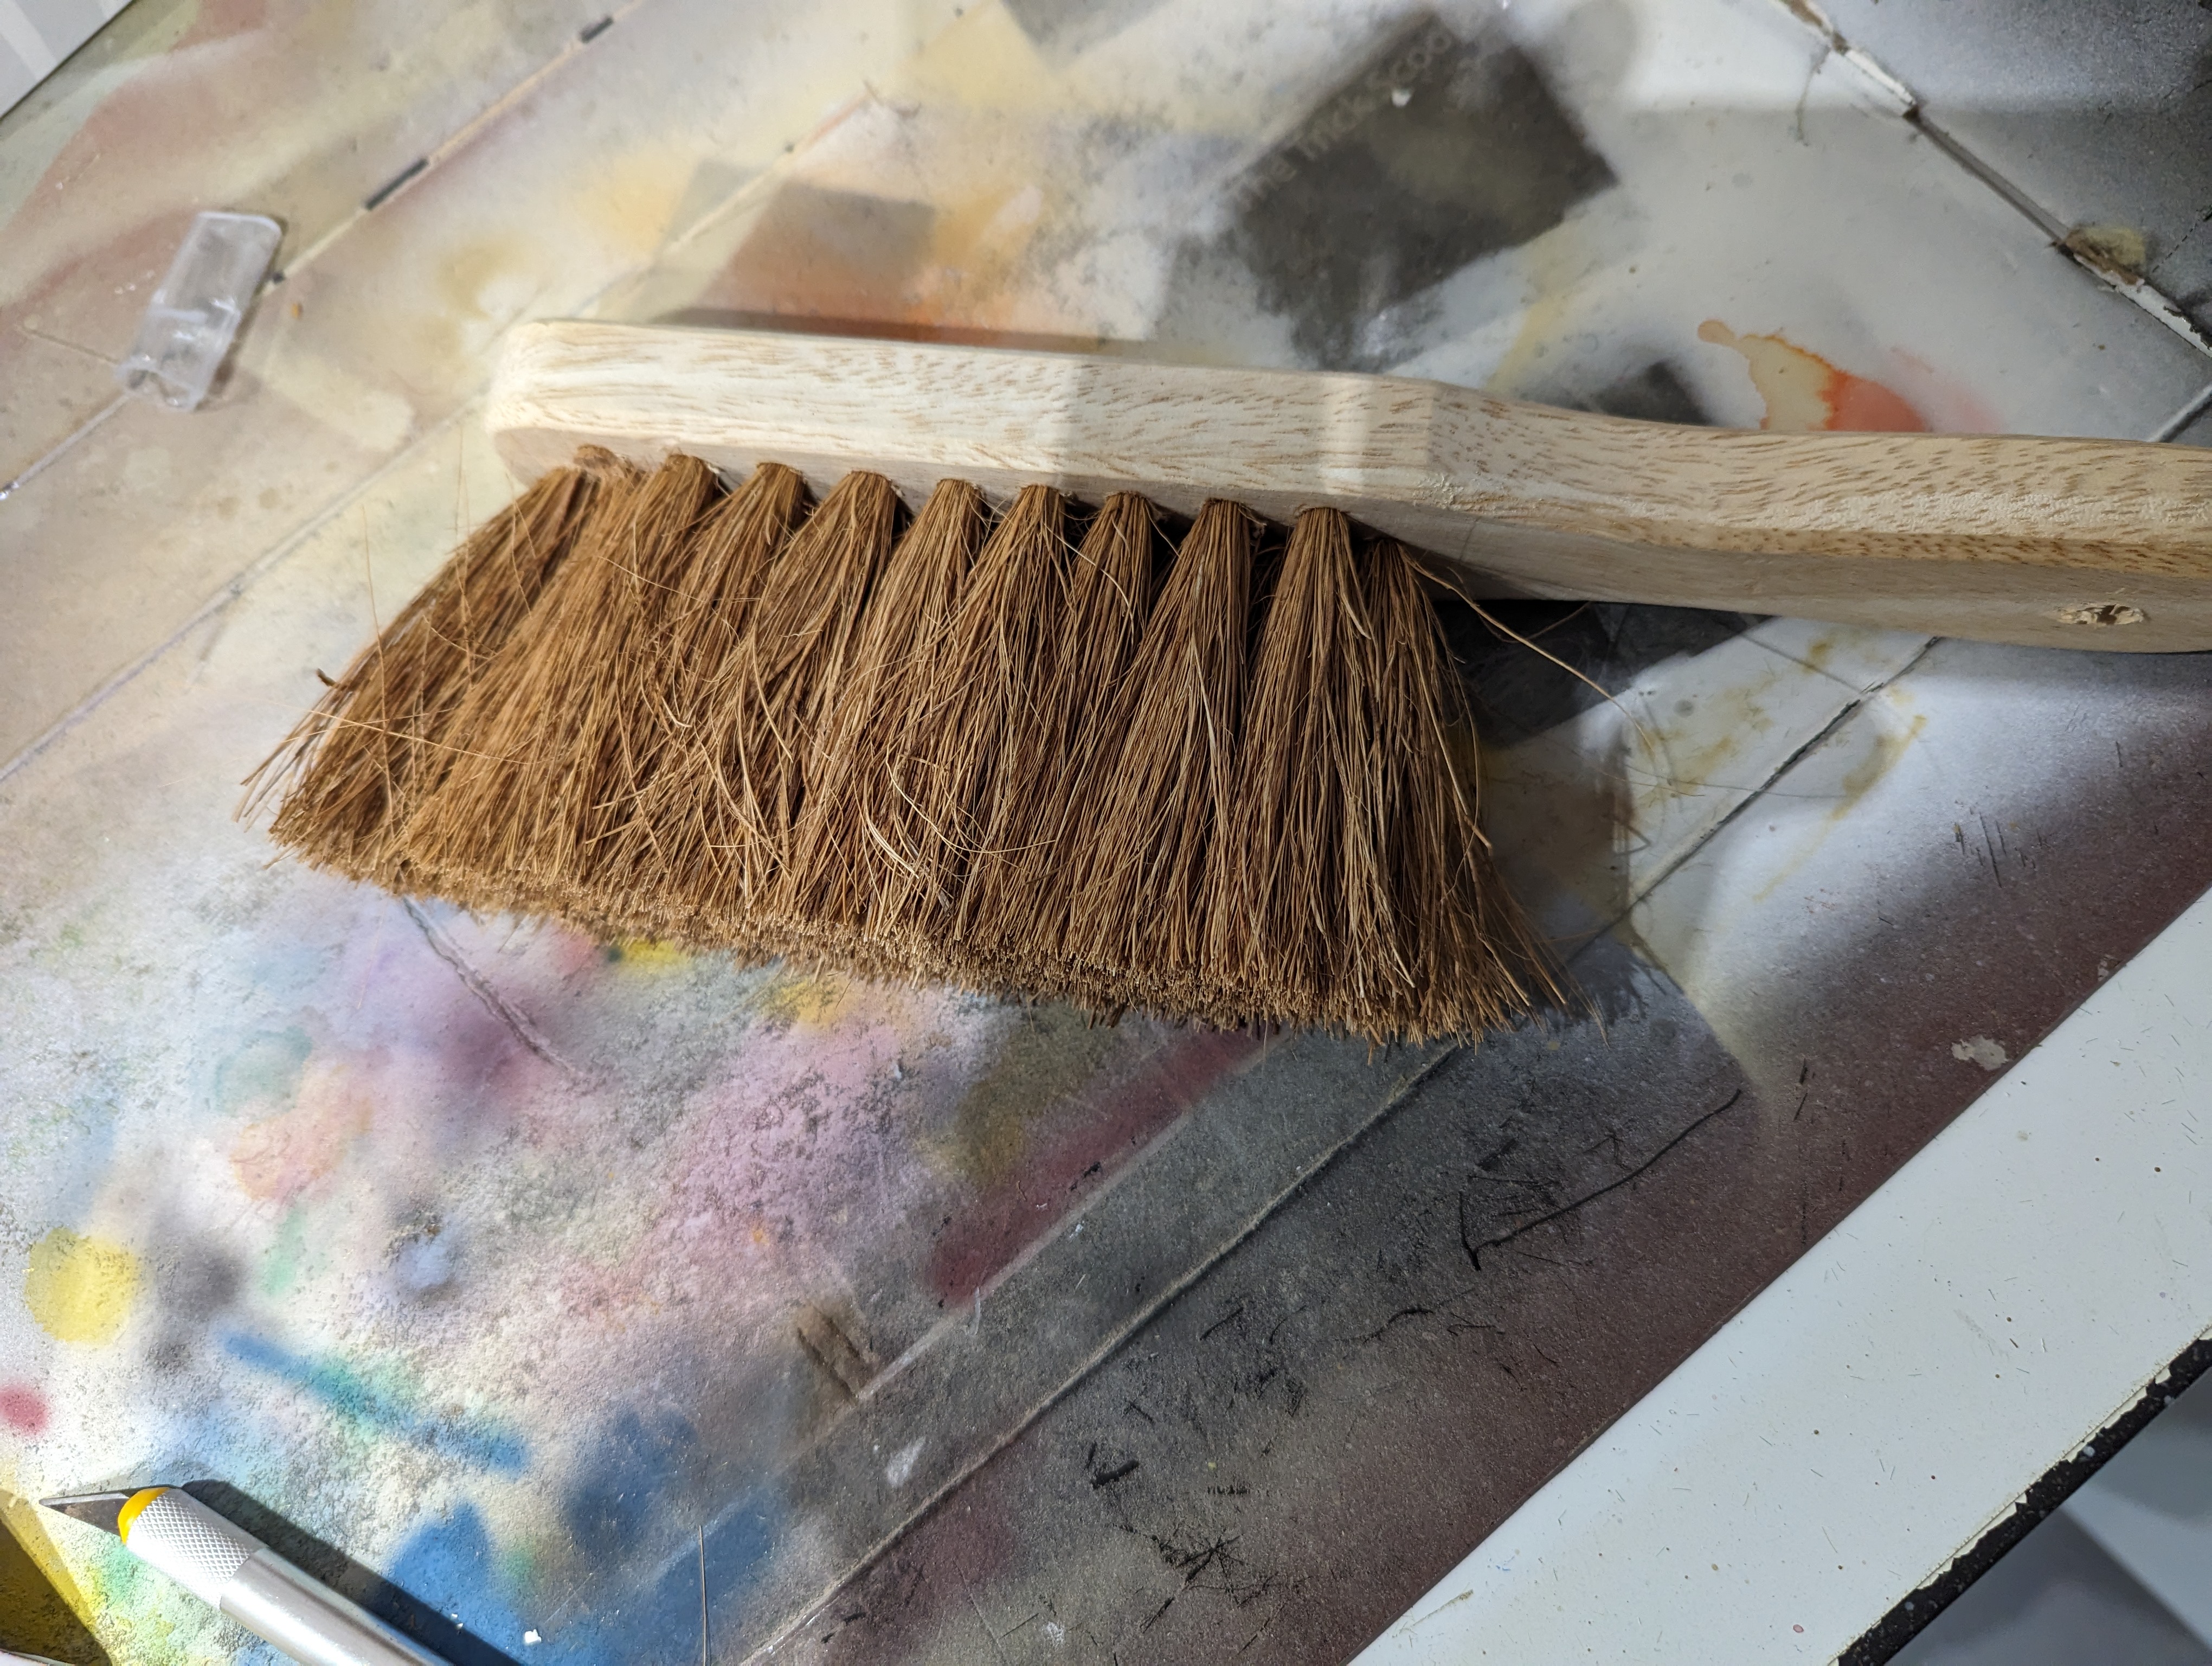
After sealing the MDF, it all looked a bit boxy and needed something adding to it. Earlier in the project, I thatched some rice storage huts, so decided to do the same here. The brush I had used for the previous thatch wasn’t big enough so a trip to the hardware store yielded a coconut fibre brush, which should stick better than the plastic brush I had been using. After a lot of pva, I managed to glue the fibres to the roof. Not the neatest job, but it works.
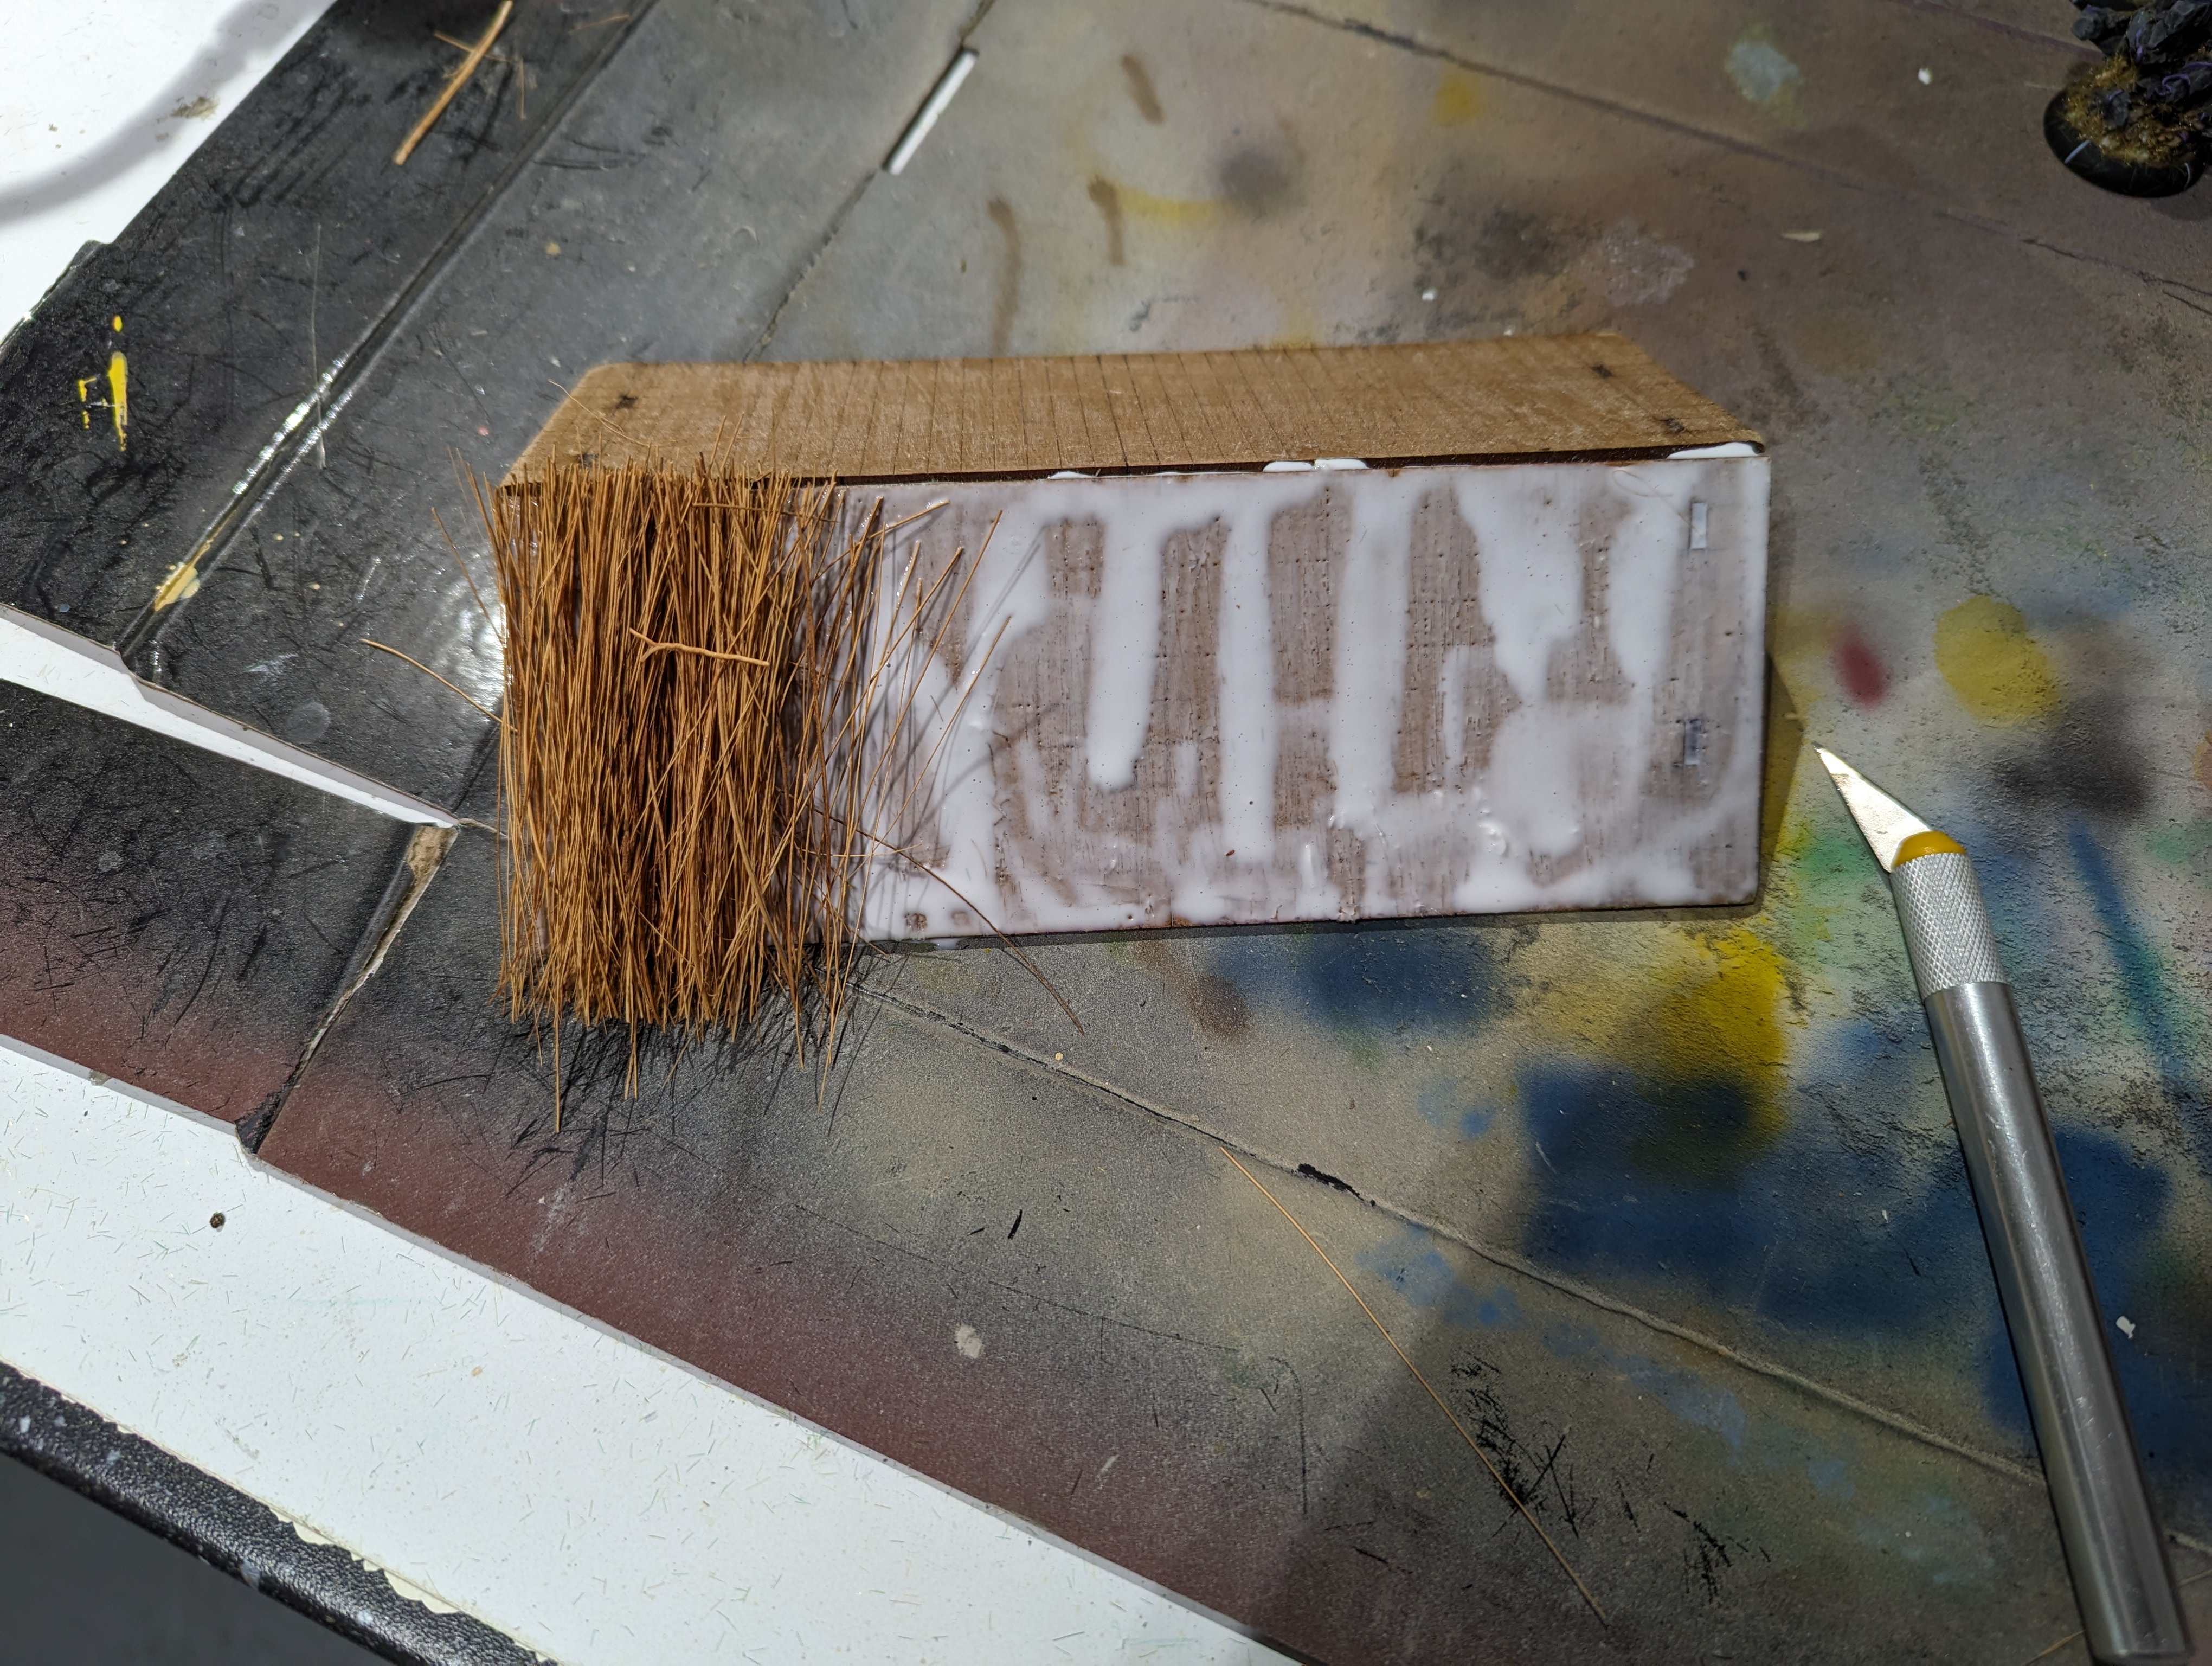
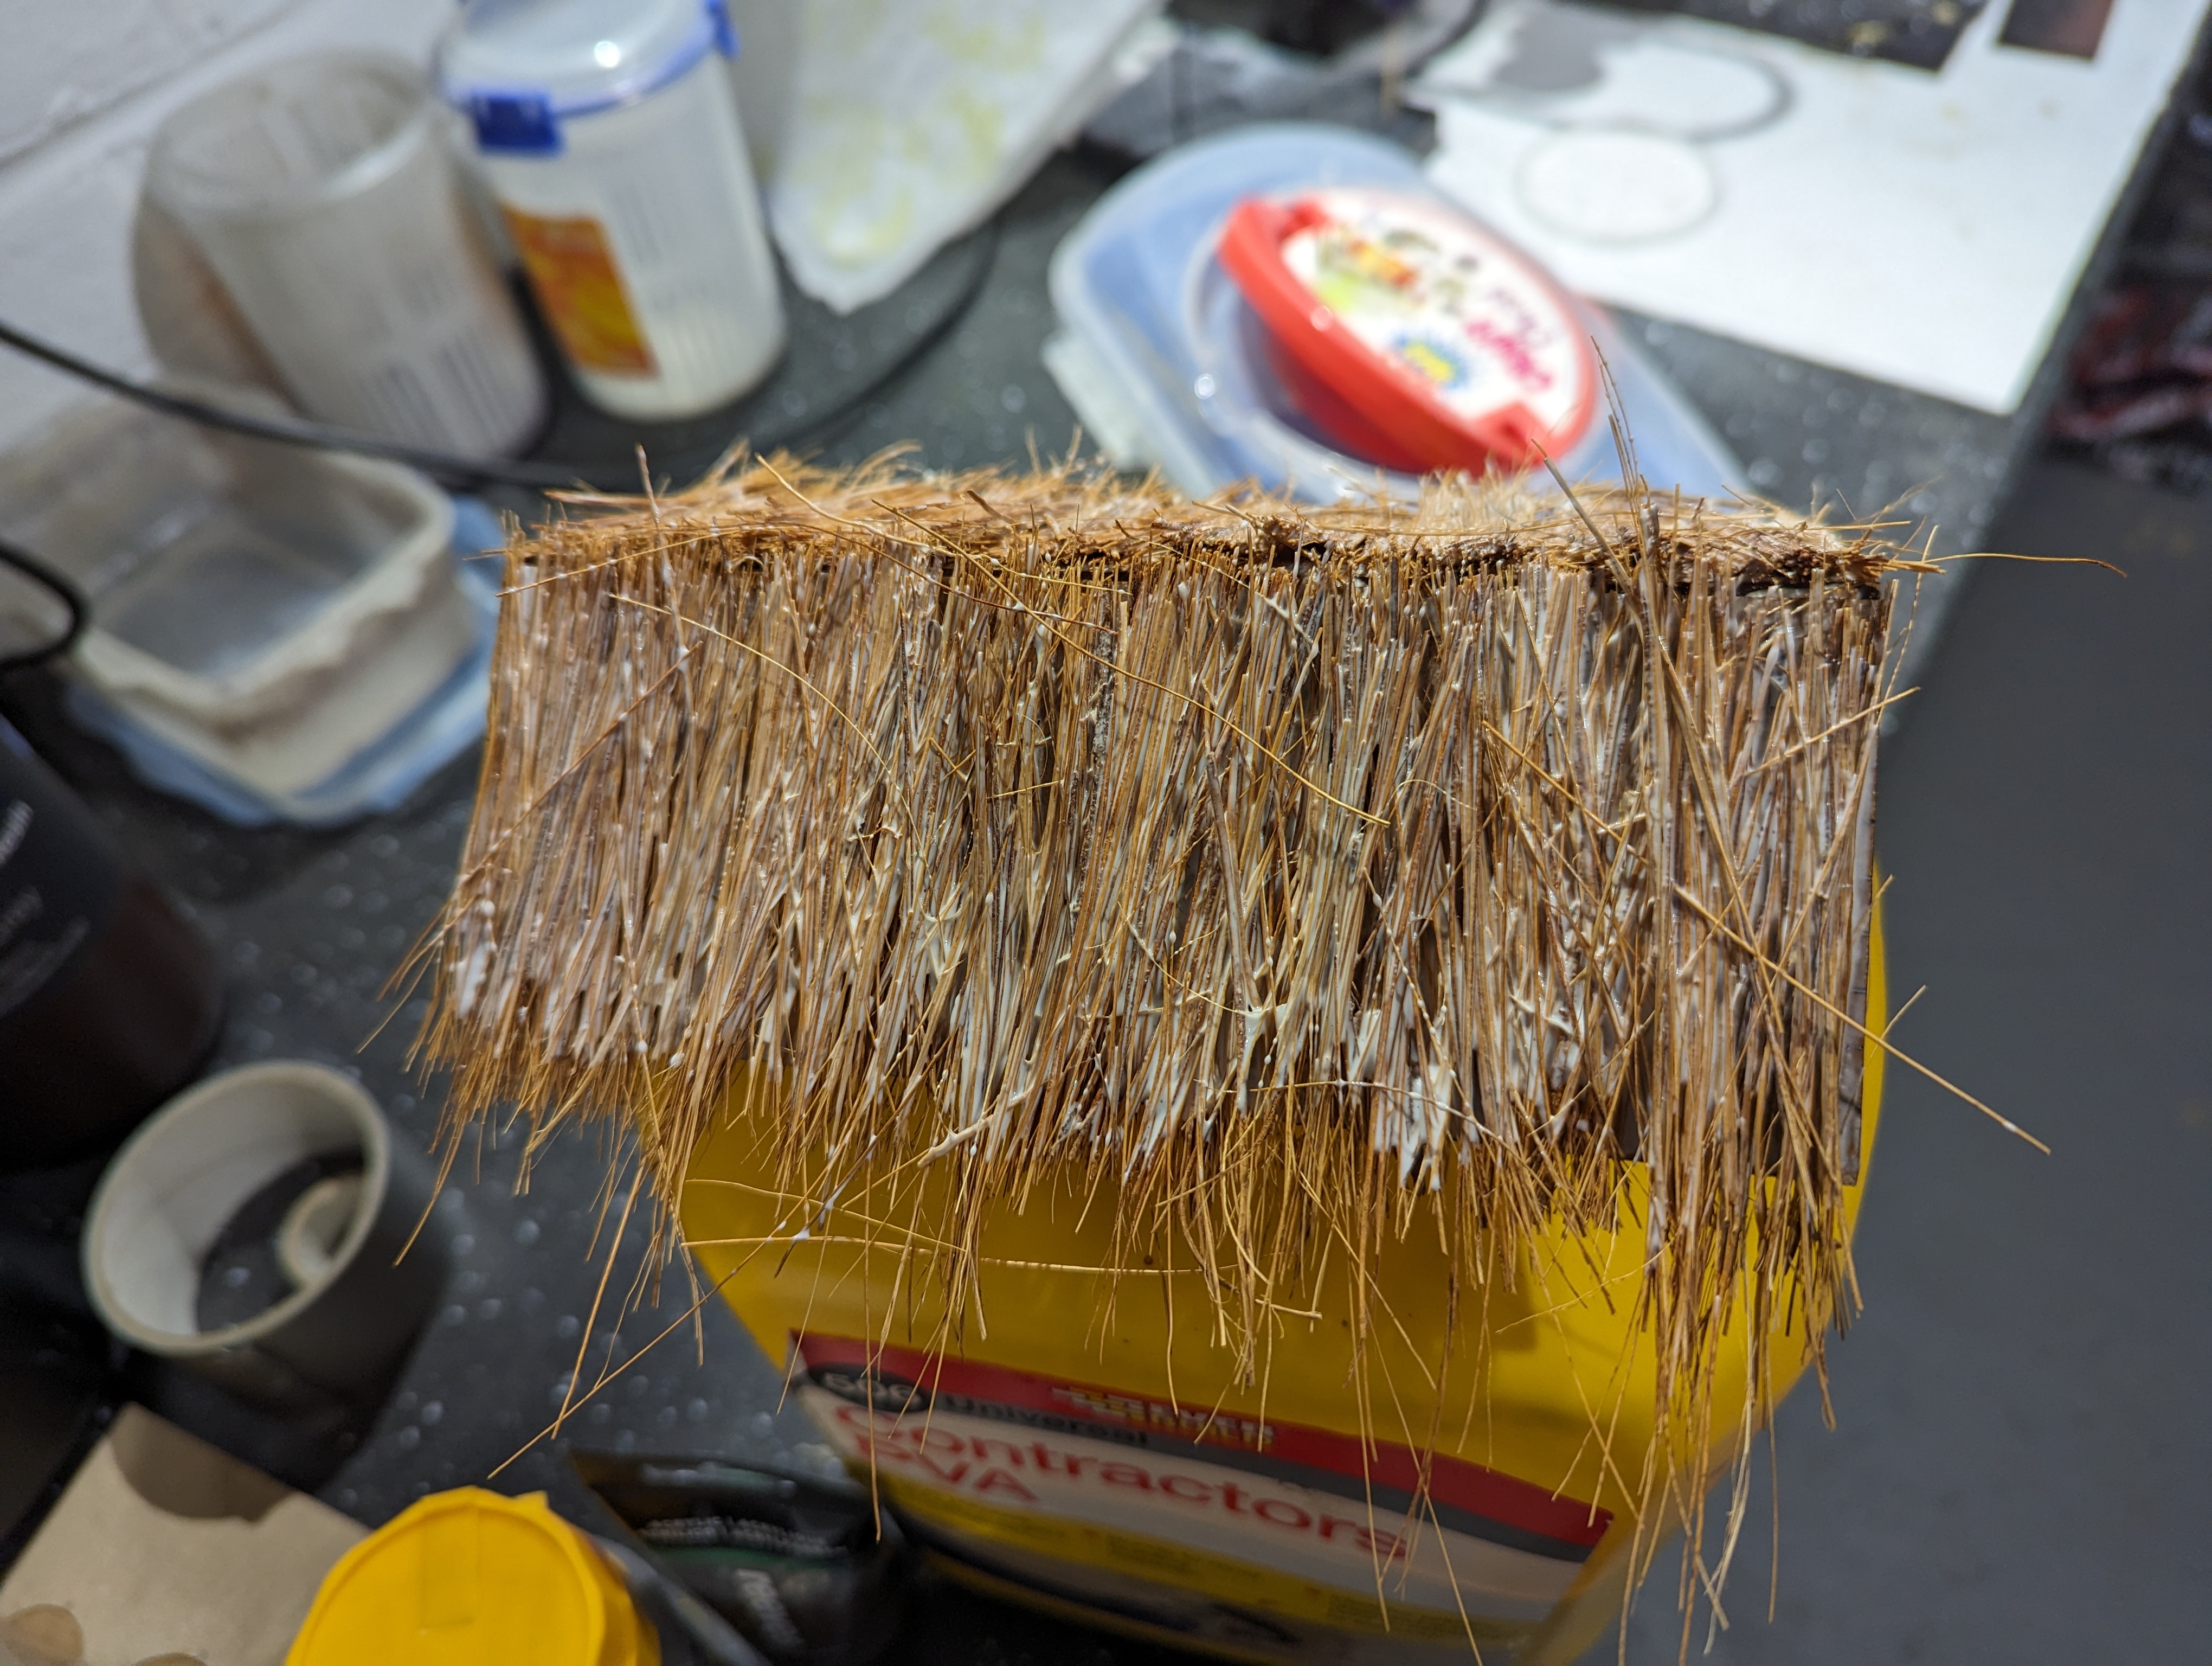
Looking at reference photos, many thatched buildings had wooden beams in place across the thatch to keep things in place. So using the left over MDF sprue, I cut some to size and glued these in place. I also picked up an MDF sumo ring at Salute and it had some interesting off cuts which I was able to use as the ridge line of the roof. I trimmed the thatch and then gave everything a prime with a reddish brown.
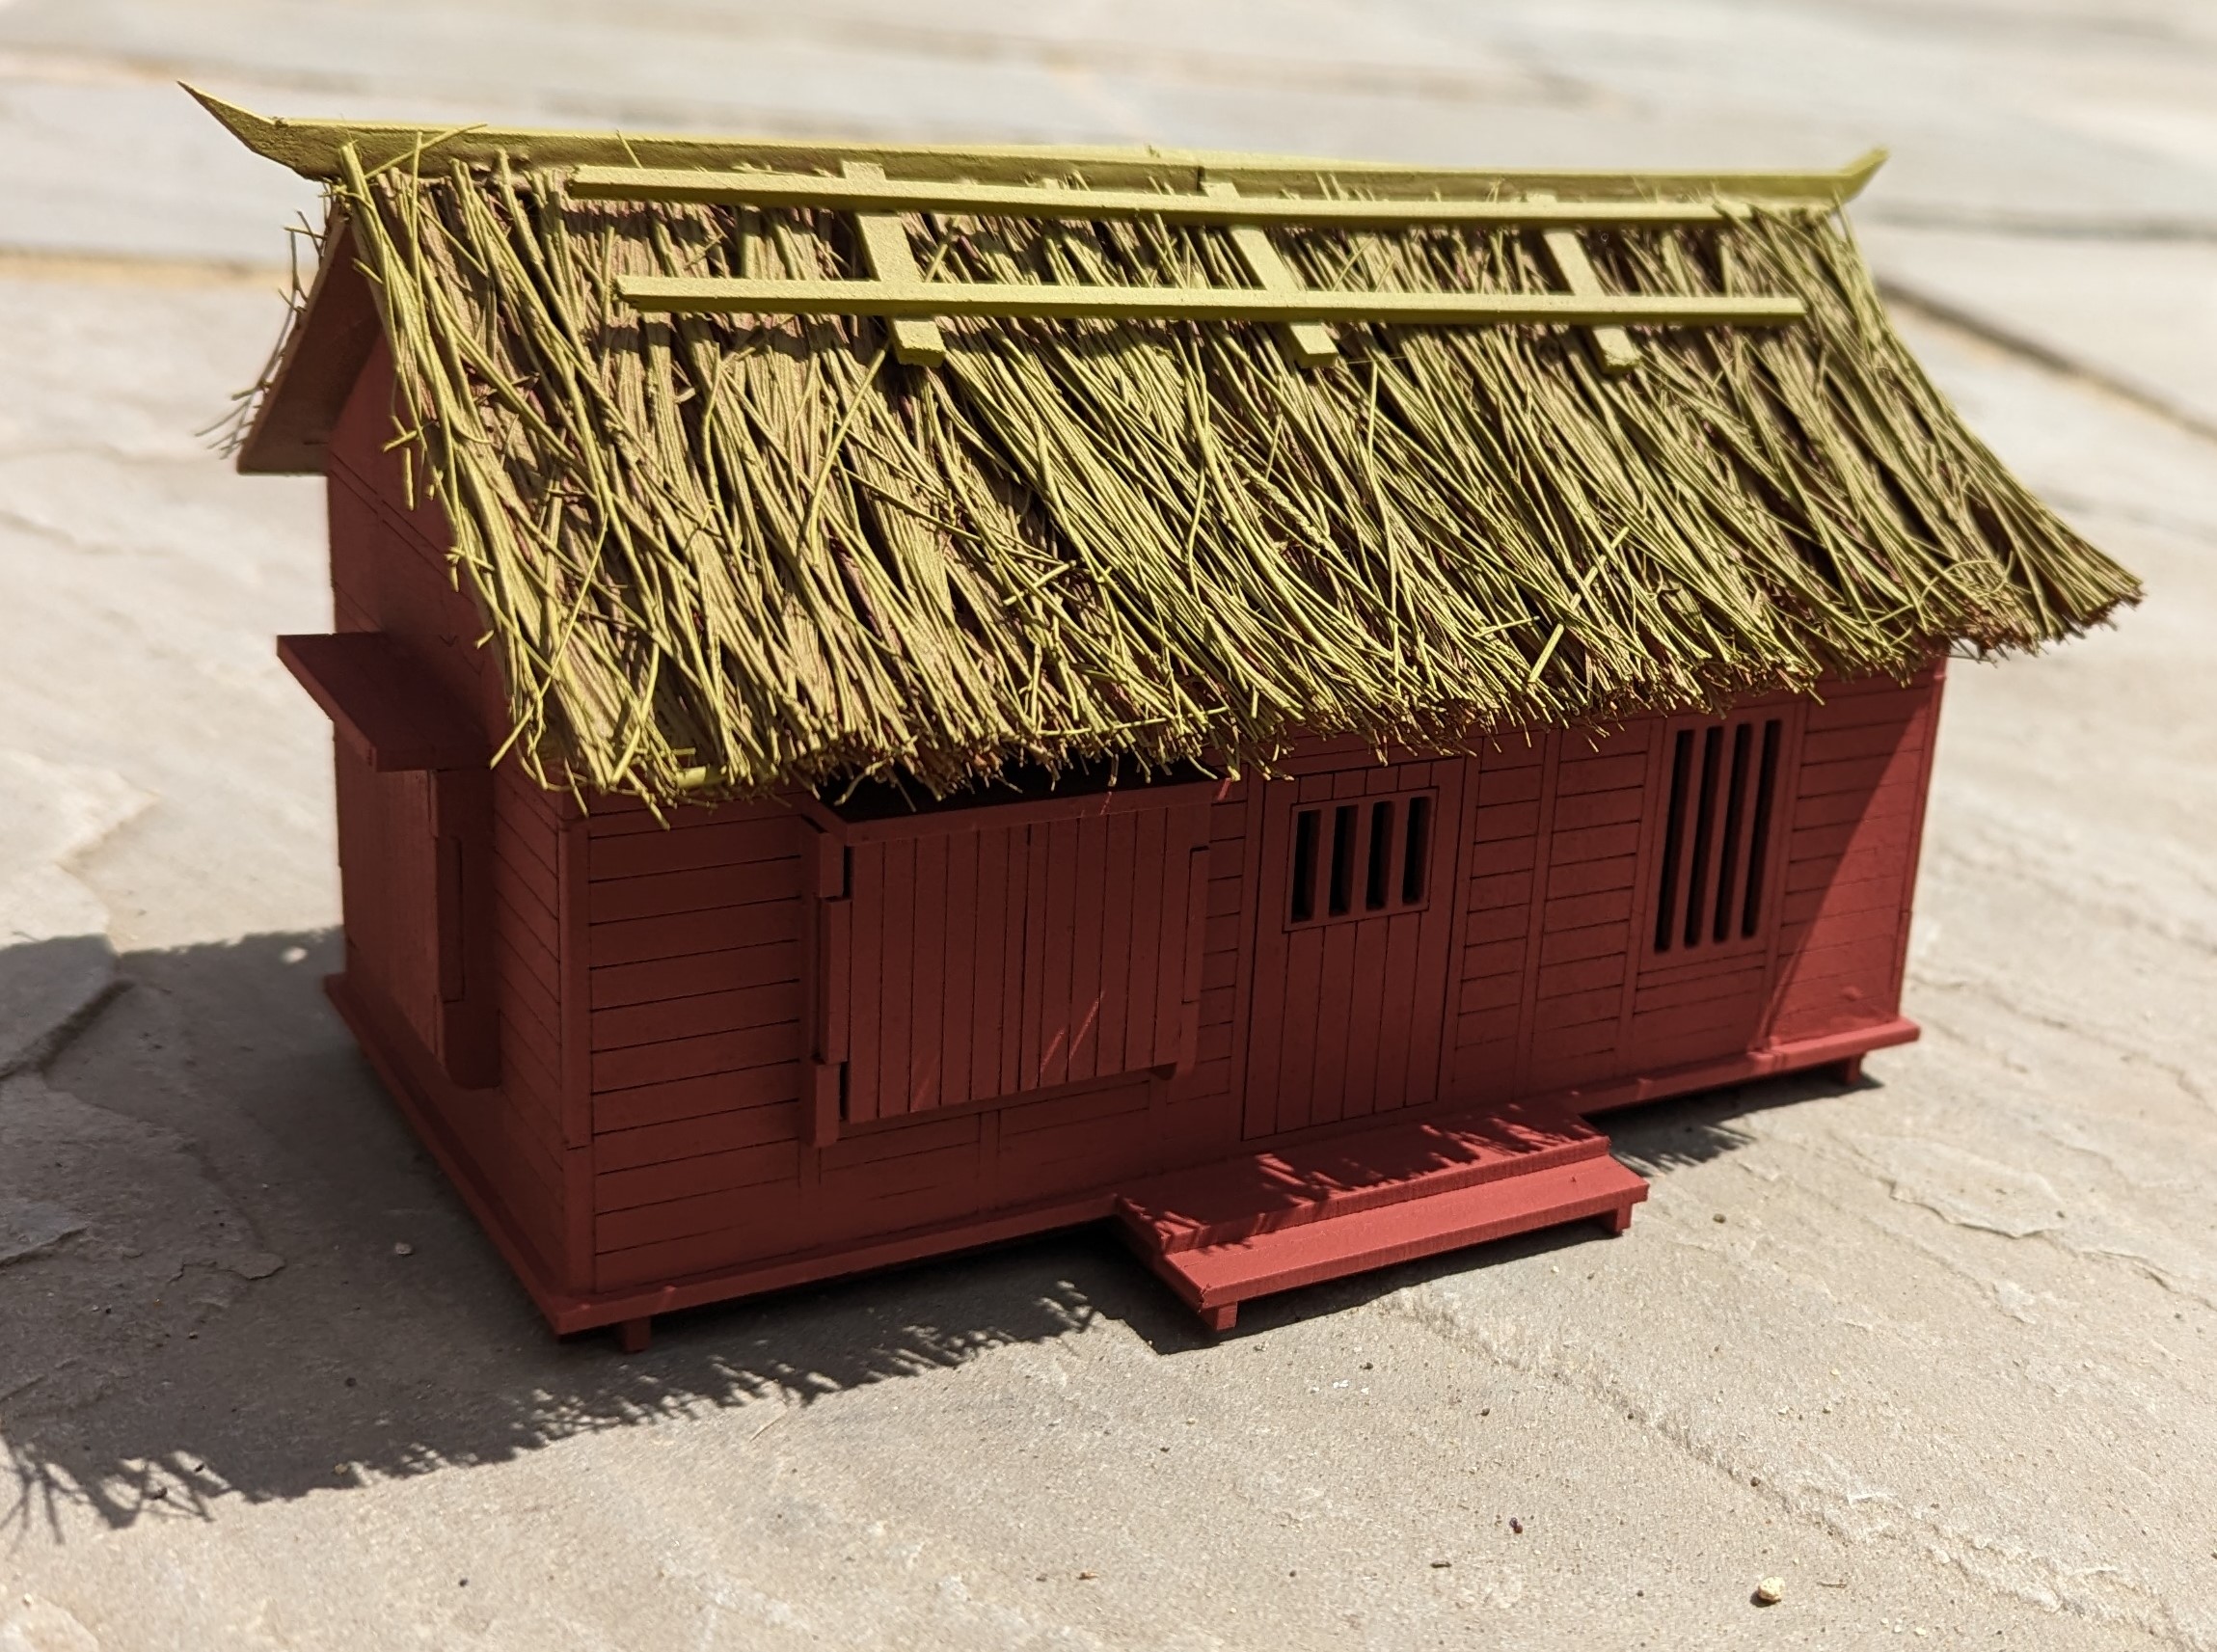
I simply dry brushed the thatch with light brown and then Iraqi sand.
For the wood, I dug out some cheap brown acrylic. This paint tends to streak which is fine when painting wood as it can create a grain effect. But it did take several coats.
The plaster at the top I picked out firstly with gesso, to provide a little bit of texture and then off white.
Finally, I dry brushed the wood with light brown and gave everything a coat of varnish.