


![Alternative Trench Crusade Miniatures? Trench Missionaries Review | Wargames Atlantic [7 Days Early Access]](https://images.beastsofwar.com/2026/03/unboxing-wargames-atlantic-trench-missionaries-coverimage-225-127.jpg)


Redvers and Son Get Into Bushido


Recommendations: 1218
About the Project
My son and I were looking for a new game to get into. Something that was low on models, fun and reasonably quick to play. We decided on Bushido.
Related Game: Bushido
Related Genre: Fantasy
This Project is Active
Building our Christmas presents
Both I and my son wanted to add to our factions and so both asked for Bushido stuff for Christmas. For me, I opted for the Yuta or Yurei boxed set which is a themed box around 4 witches (or Shugenja). They were all given an offer of power by Yurei with the catch that all four sisters had to agree. Three did, one didn’t, so the box contains the three living witches, each with their own powers and the fourth witch who is now a kairai (or zombie). It also contains a couple of skeleton warriors. The witches can synergise with a skeleton build, a kairai build or some of the other servants of Yurei, so gives plenty of options.
My son wanted to expand his Temple of RoKan force with the new Kitsune models. These play differently to the monks that he currently has, being fast around the battlefield but a little more fragile. He also wanted the Ashinaga Tenaga model, which also fits into his faction. This model is based up a Japanese myth around two men, one with long legs and one with long arms, who worked together to catch fish. In game, the model provides a useful harpoon and net which allows Ashinaga Tenaga to move opposing models around the battlefield. Very handy for getting the enemy out of position
 More shiny stuff
I’ve spent the week building my son’s models. This ranged from easy to downright nightmarish. The Kitsune went together very well with only minimal clean up. They are quite fragile though, so we’ll have to see how long they last….
Ashinaga Tenaga took me the best part of two hours to get together. It only came in four parts – the metal net base, the chap with the long legs (Ashinaga), the torso of the long armed chap (Tenaga) and the harpoon. The problem is that everything never quite lined up and it all needed to be pinned. This was hard given that all of the bits were often thinner than my usual pinning wire I use, requiring the use of 0.5mm and 0.3mm wire.
 Mostly built Kitsune
 Bloody Ashinaga Tenaga (who still needs some gaps to be filled)
These, coupled with some one off purchase made back in November by both of use, means that the arms race has well and truly started!
More terrain
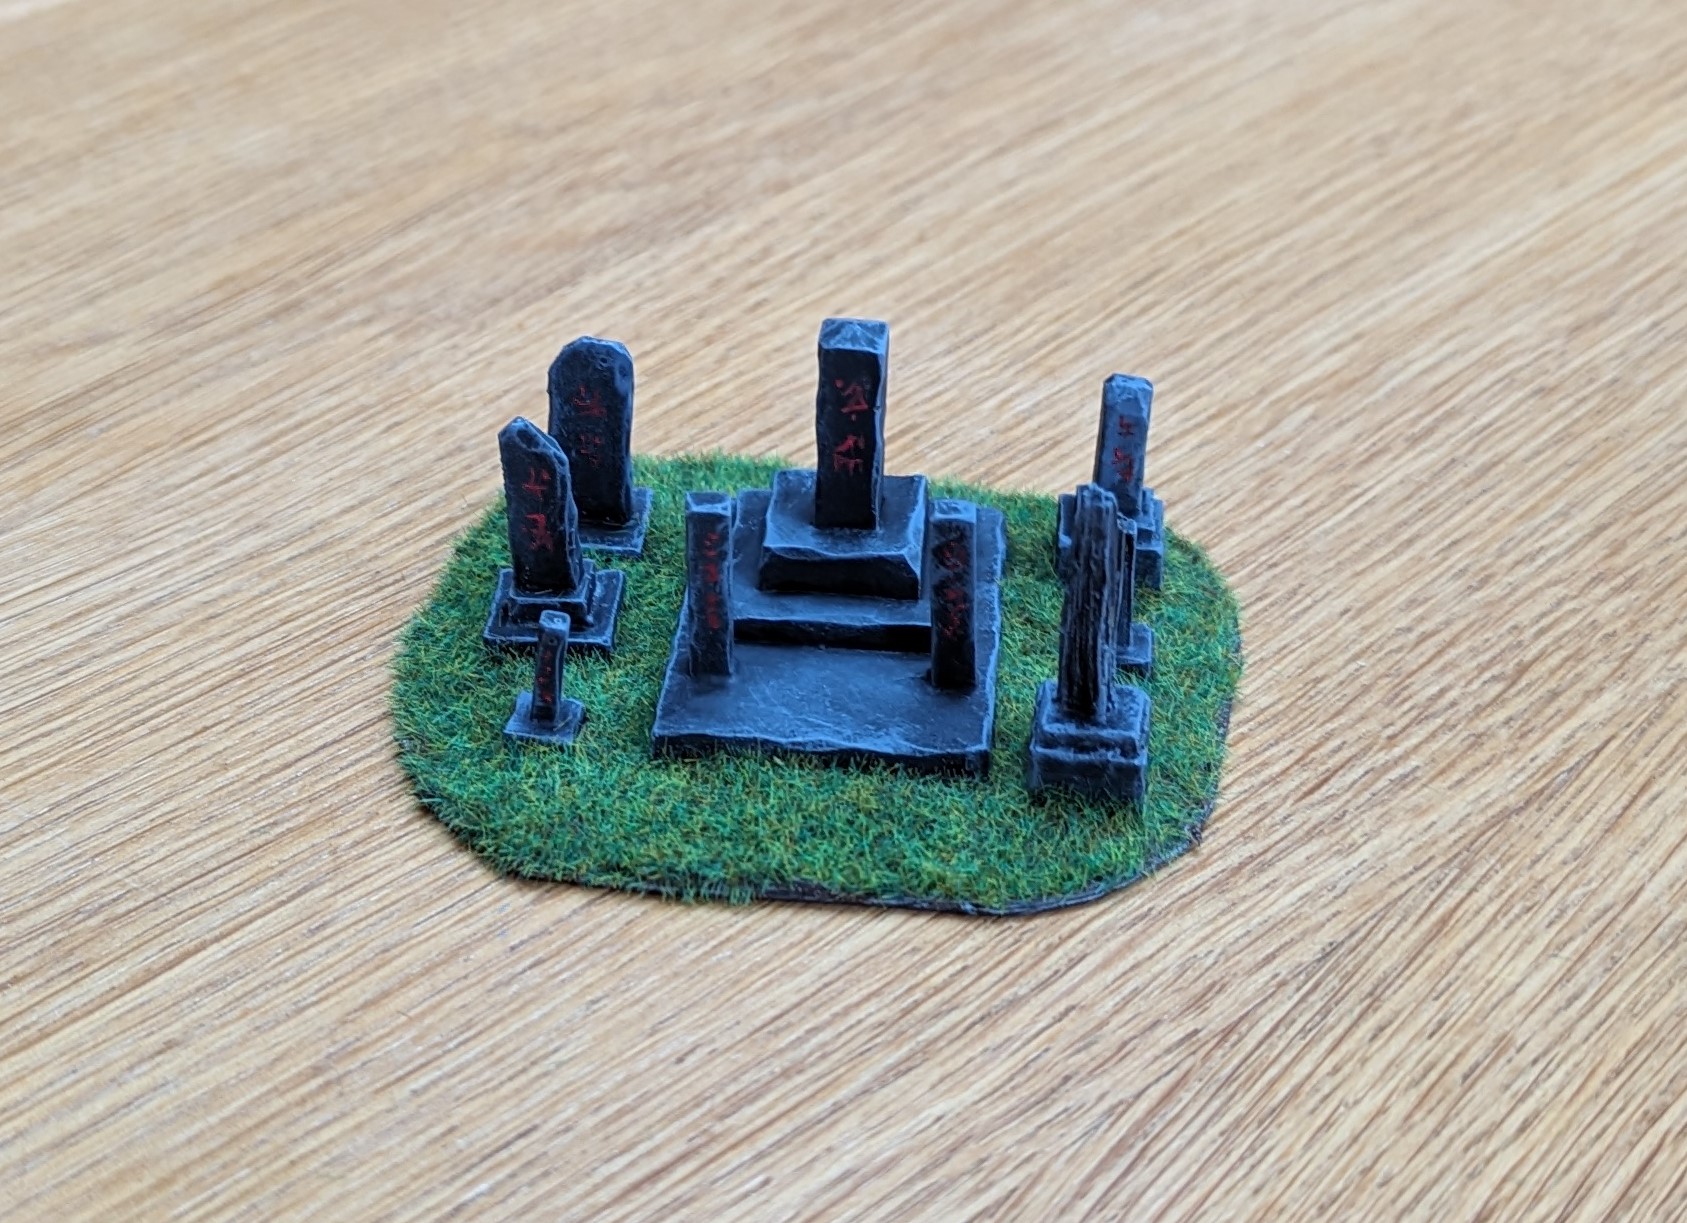
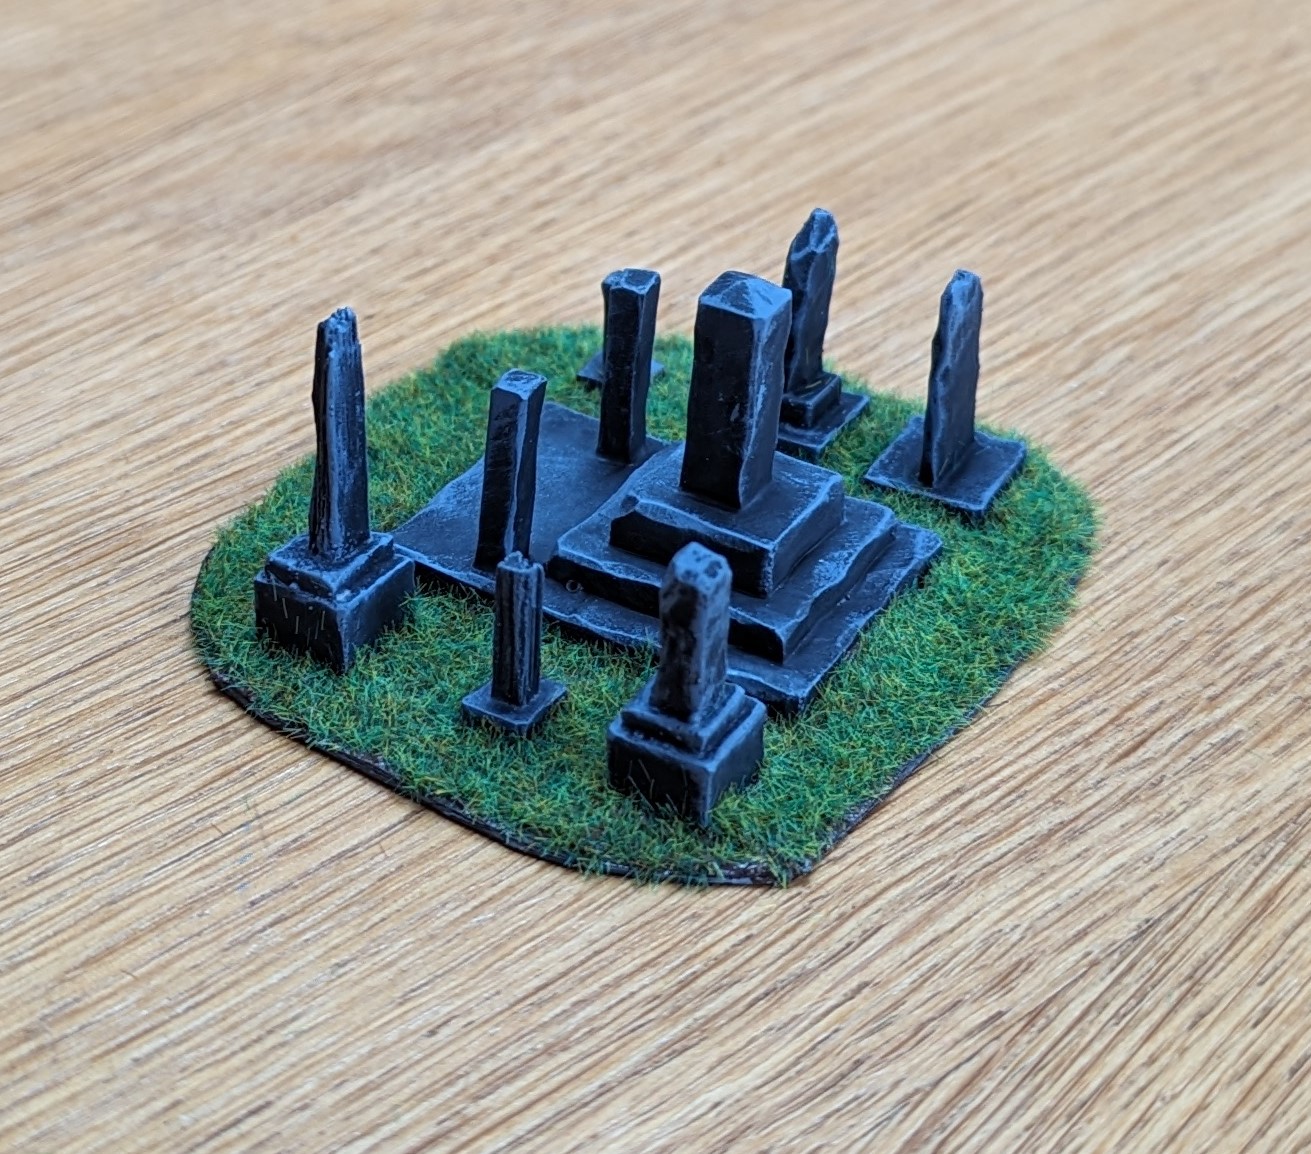
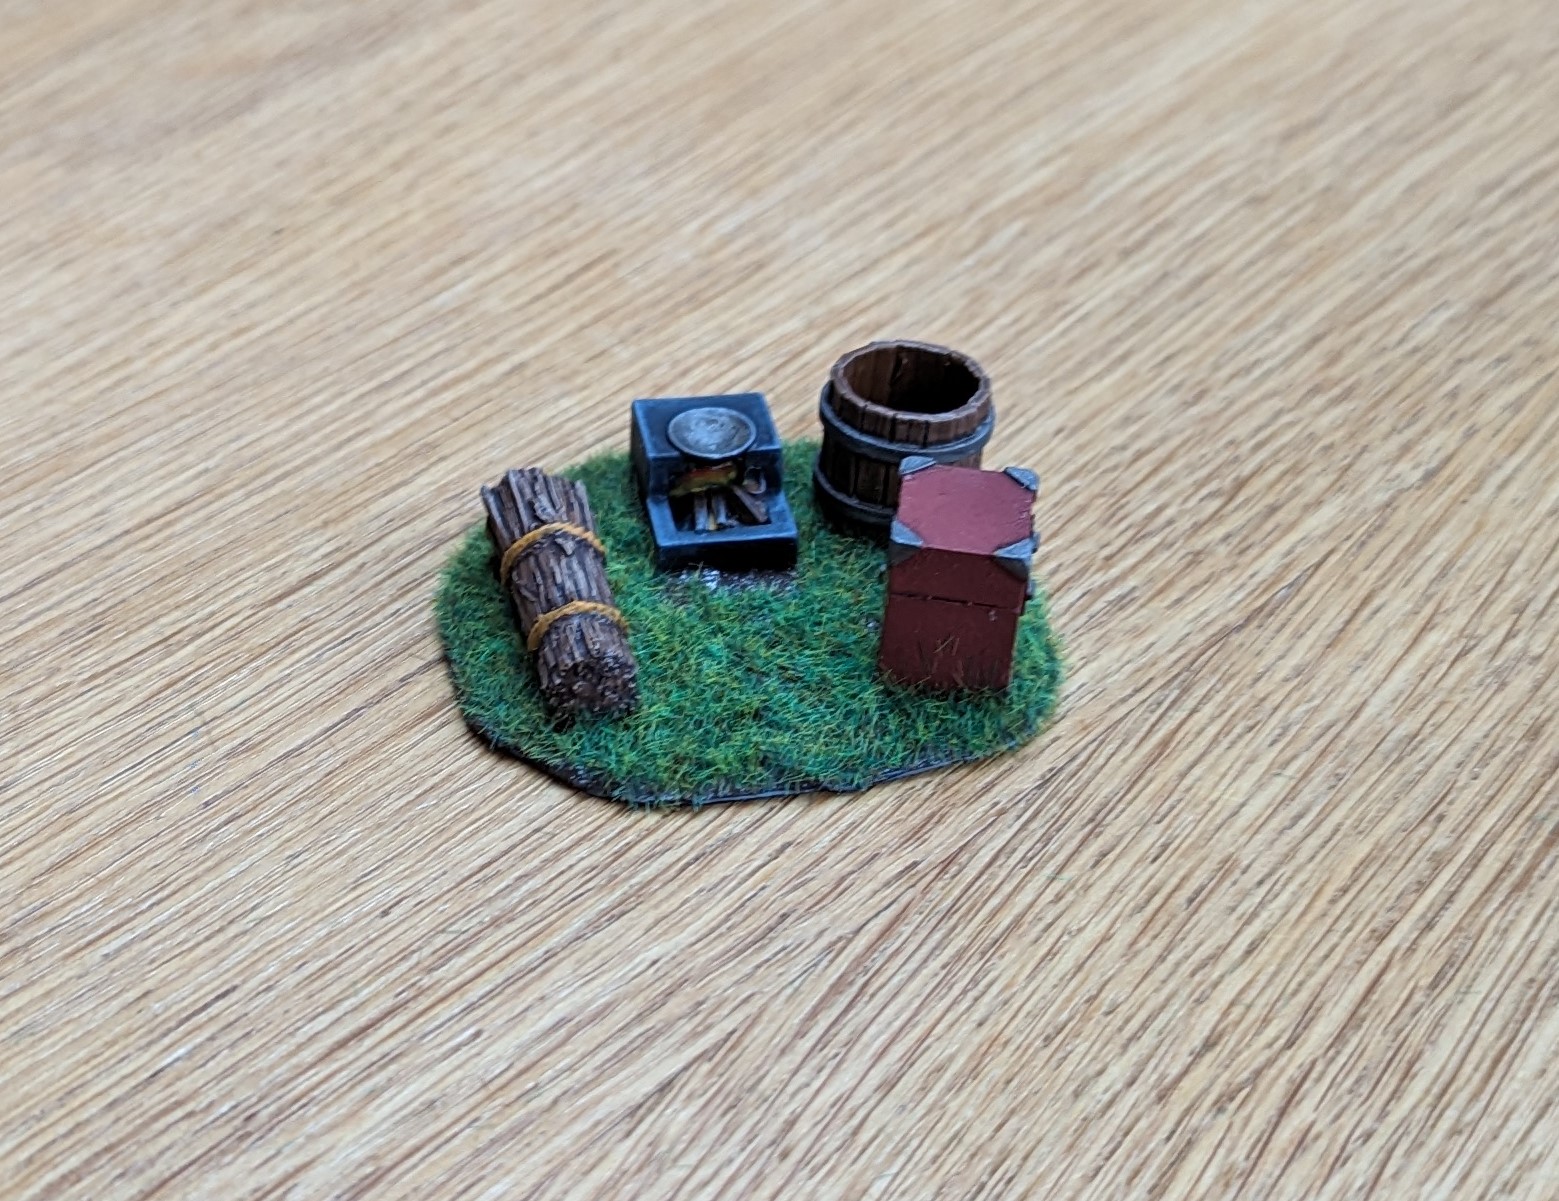
In the last update, there was a desecrated grave with a grave stone that came from Oshiro Models. This was part of a set of grave stones and it seemed a shame to not paint up the rest and make a bigger terrain piece. While I was buying the graves from Oshiro, a cooking station and a hand wash also fell into the shopping cart.
For the grave stones, these were exactly the same paint job as the desecrated grave (luftwaffe grey, nuln oil and then a dry brush). These were all mounted on a plasticard base and then smeared with acrylic mud. Once dry, it all got covered in static grass.
The cooking station is a simple little set of 4 resin pieces and will add that ‘lived in’ feel to the table top. This is all mounted on plasticard as the graves above.
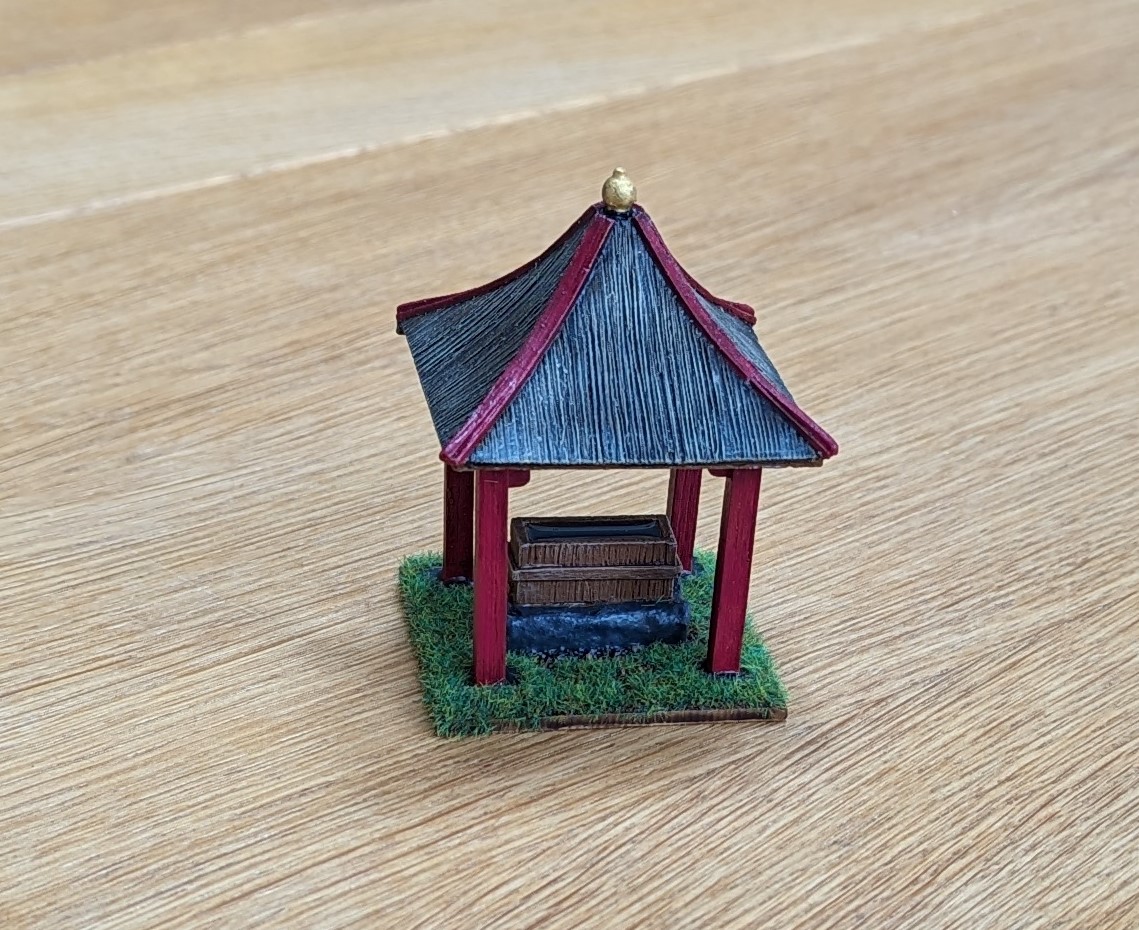
The hand washing station is a 6 piece resin set and I had ‘fun’ pinning the supports to the roof and then to the base. I’ve opted for a grey with black wash for the reed roof as this will tie in with the rice huts that I built early in this project. I’ve also opted for the same red as used in the other terrain pieces to again tie this all together. In the water trough, I’ve poured some of the resin water that I used for the pond, just because I could.

Faction Terrain
I’ve put together a few faction specific terrain pieces and time for some more. In this case, more Cult of Yurei terrain that you can purchase into your warband to provide enhancements.
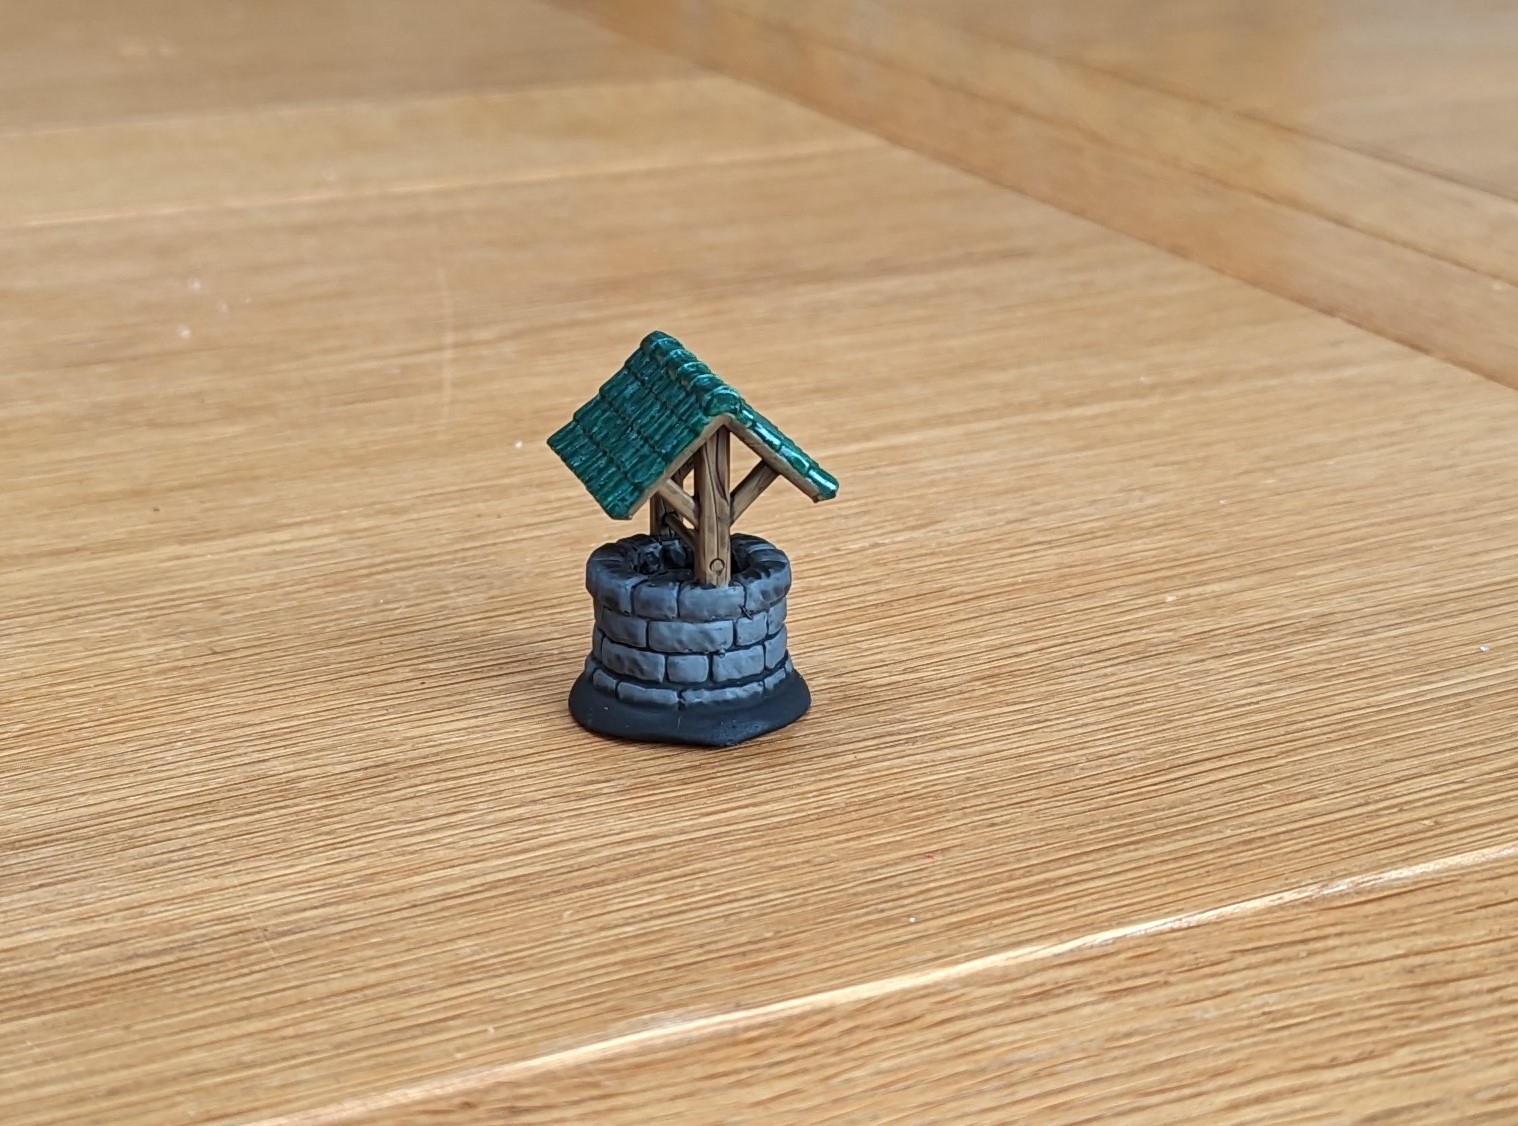
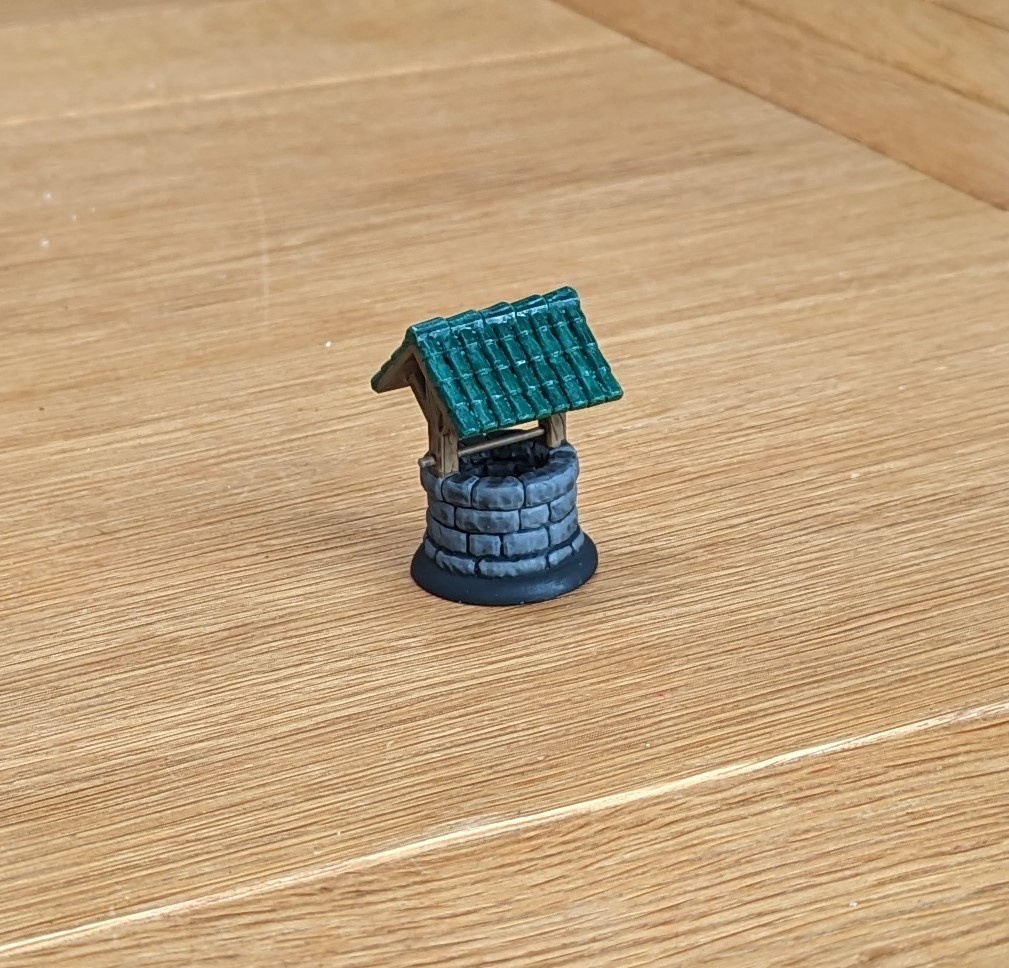
First up, we have a Haunted Well. In game, this removes the Courage, Bravery and Leadership skills from opposing models, so particularly handy if the Cult really wants to double down on the fact that many of the models have the Fear trait.
For this model, I just searched the usual 3d printing sites for a suitable option. I looked hard for a suitable Japanese flavoured well but didn’t find anything that would sensibly fit on a 30mm round base, which this terrain requires. So I ended up with a more western flavoured well. I thought about how I could make it ‘haunted’ but drew a blank, both in the 3d modelling perspective and the the painting perspective.
Once printed, this got luftwaffe grey for the stone, a nuln oil wash and then a dry brush. The wood was flat earth, dark brown wash and then an Iraqi Sand dry brush. The tiles were a cheap green acrylic (as I’ve used on some other terrain) followed by a green ink wash and then a dry brush highlight of goblin green. I usually varnish everything in matt but in this case, I used a gloss on the tile for that far Eastern glazed look.
The Cult can also have a desecrated grave as deployable terrain. This is particularly handy if you want to run a Kairai (zombie) warband as it allows you to deploy your Kairai next to the grave, rather than on your back line. So a great way of catapulting your forces forward.
Rather than 3d print this, I found some great resin models through Oshiro Models. And while I was on the site, it seemed a shame not to buy some of their other stuff, but that’s my next post.
So this was an easy build. Grey for the stone, nuln oil wash and a dry brush. This was then stuck to a couple of 40mm (base size for this terrain) plasticard discs (to give it a little height). The grave was glued to the base and then some acrylic mud was smeared across bottom. To make it ‘desecrated’, I created a hole at the front of the grave as if it had been dug up. Some brown and then red was stippled on to create a blood effect. And then the whole lot got flocked. Easy
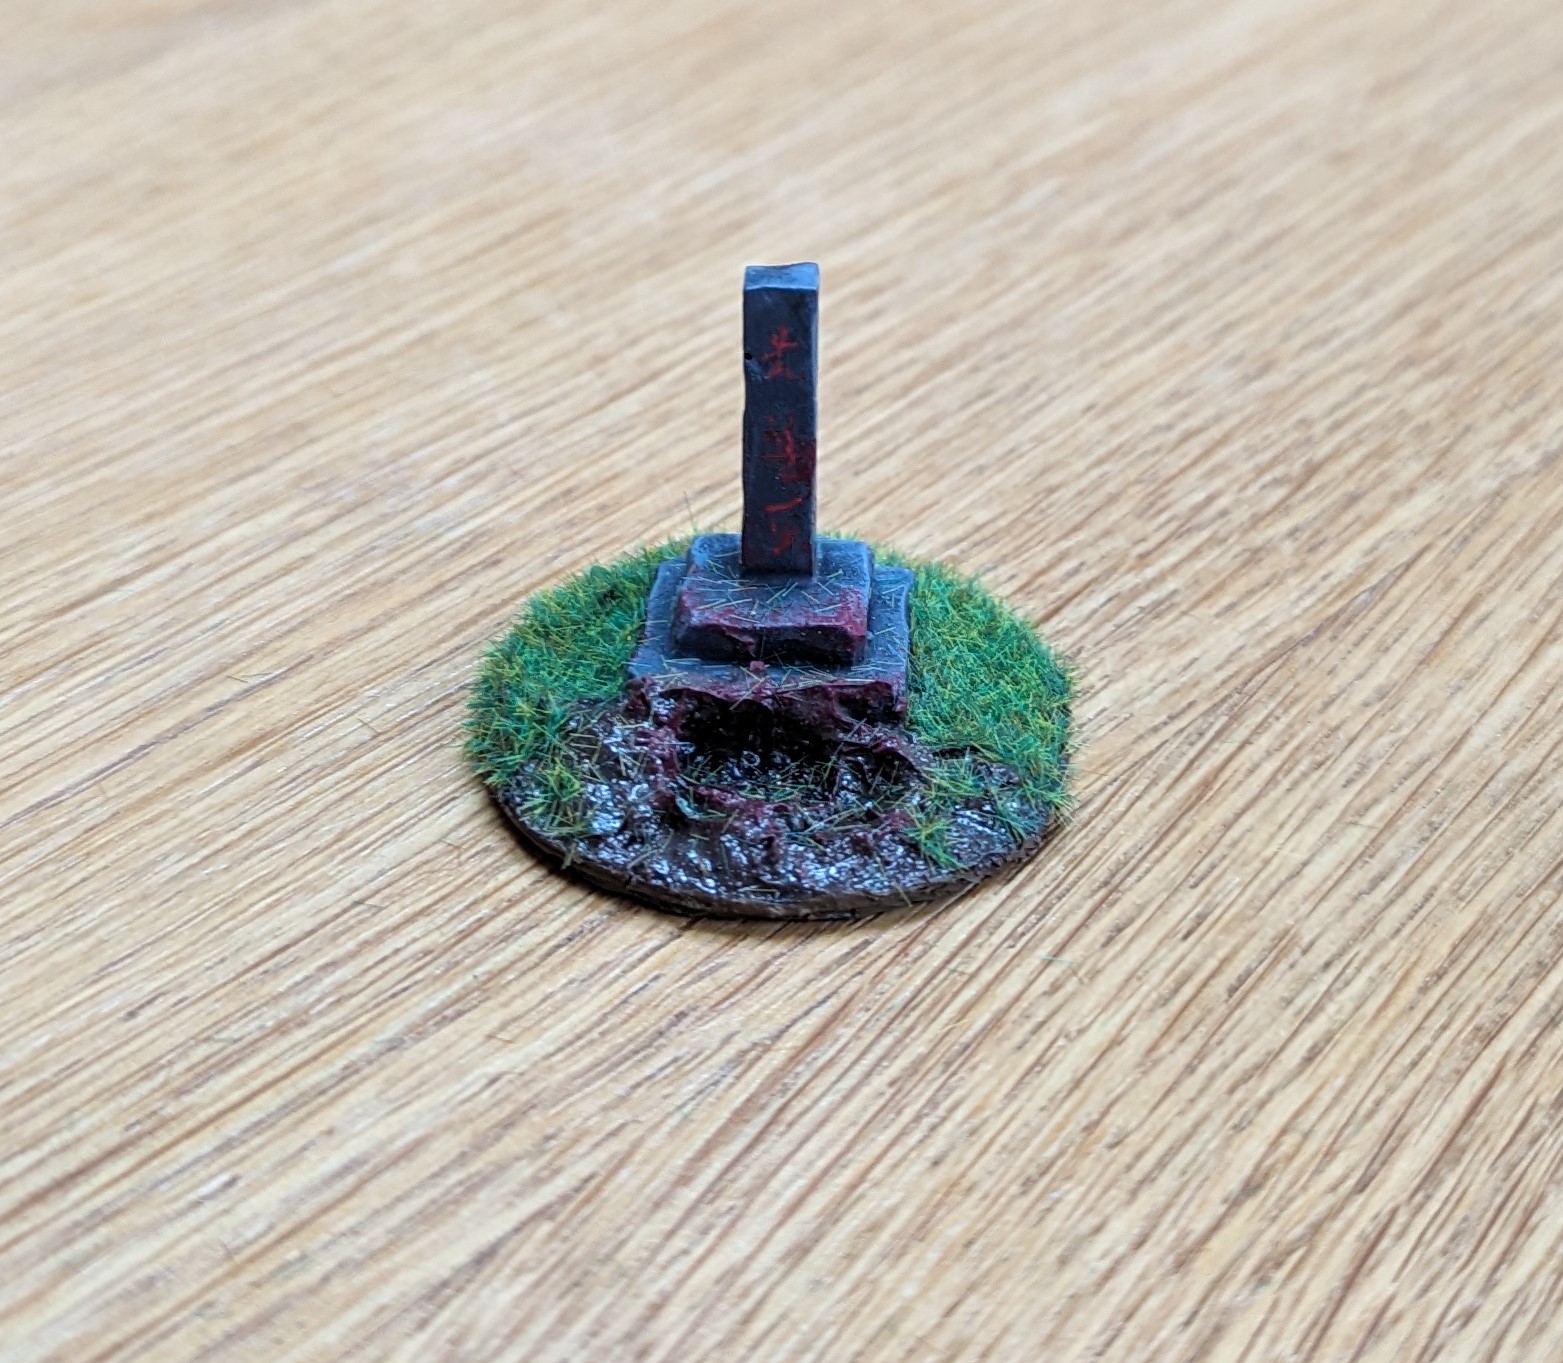 A grave, that has been desecrated
Ponds
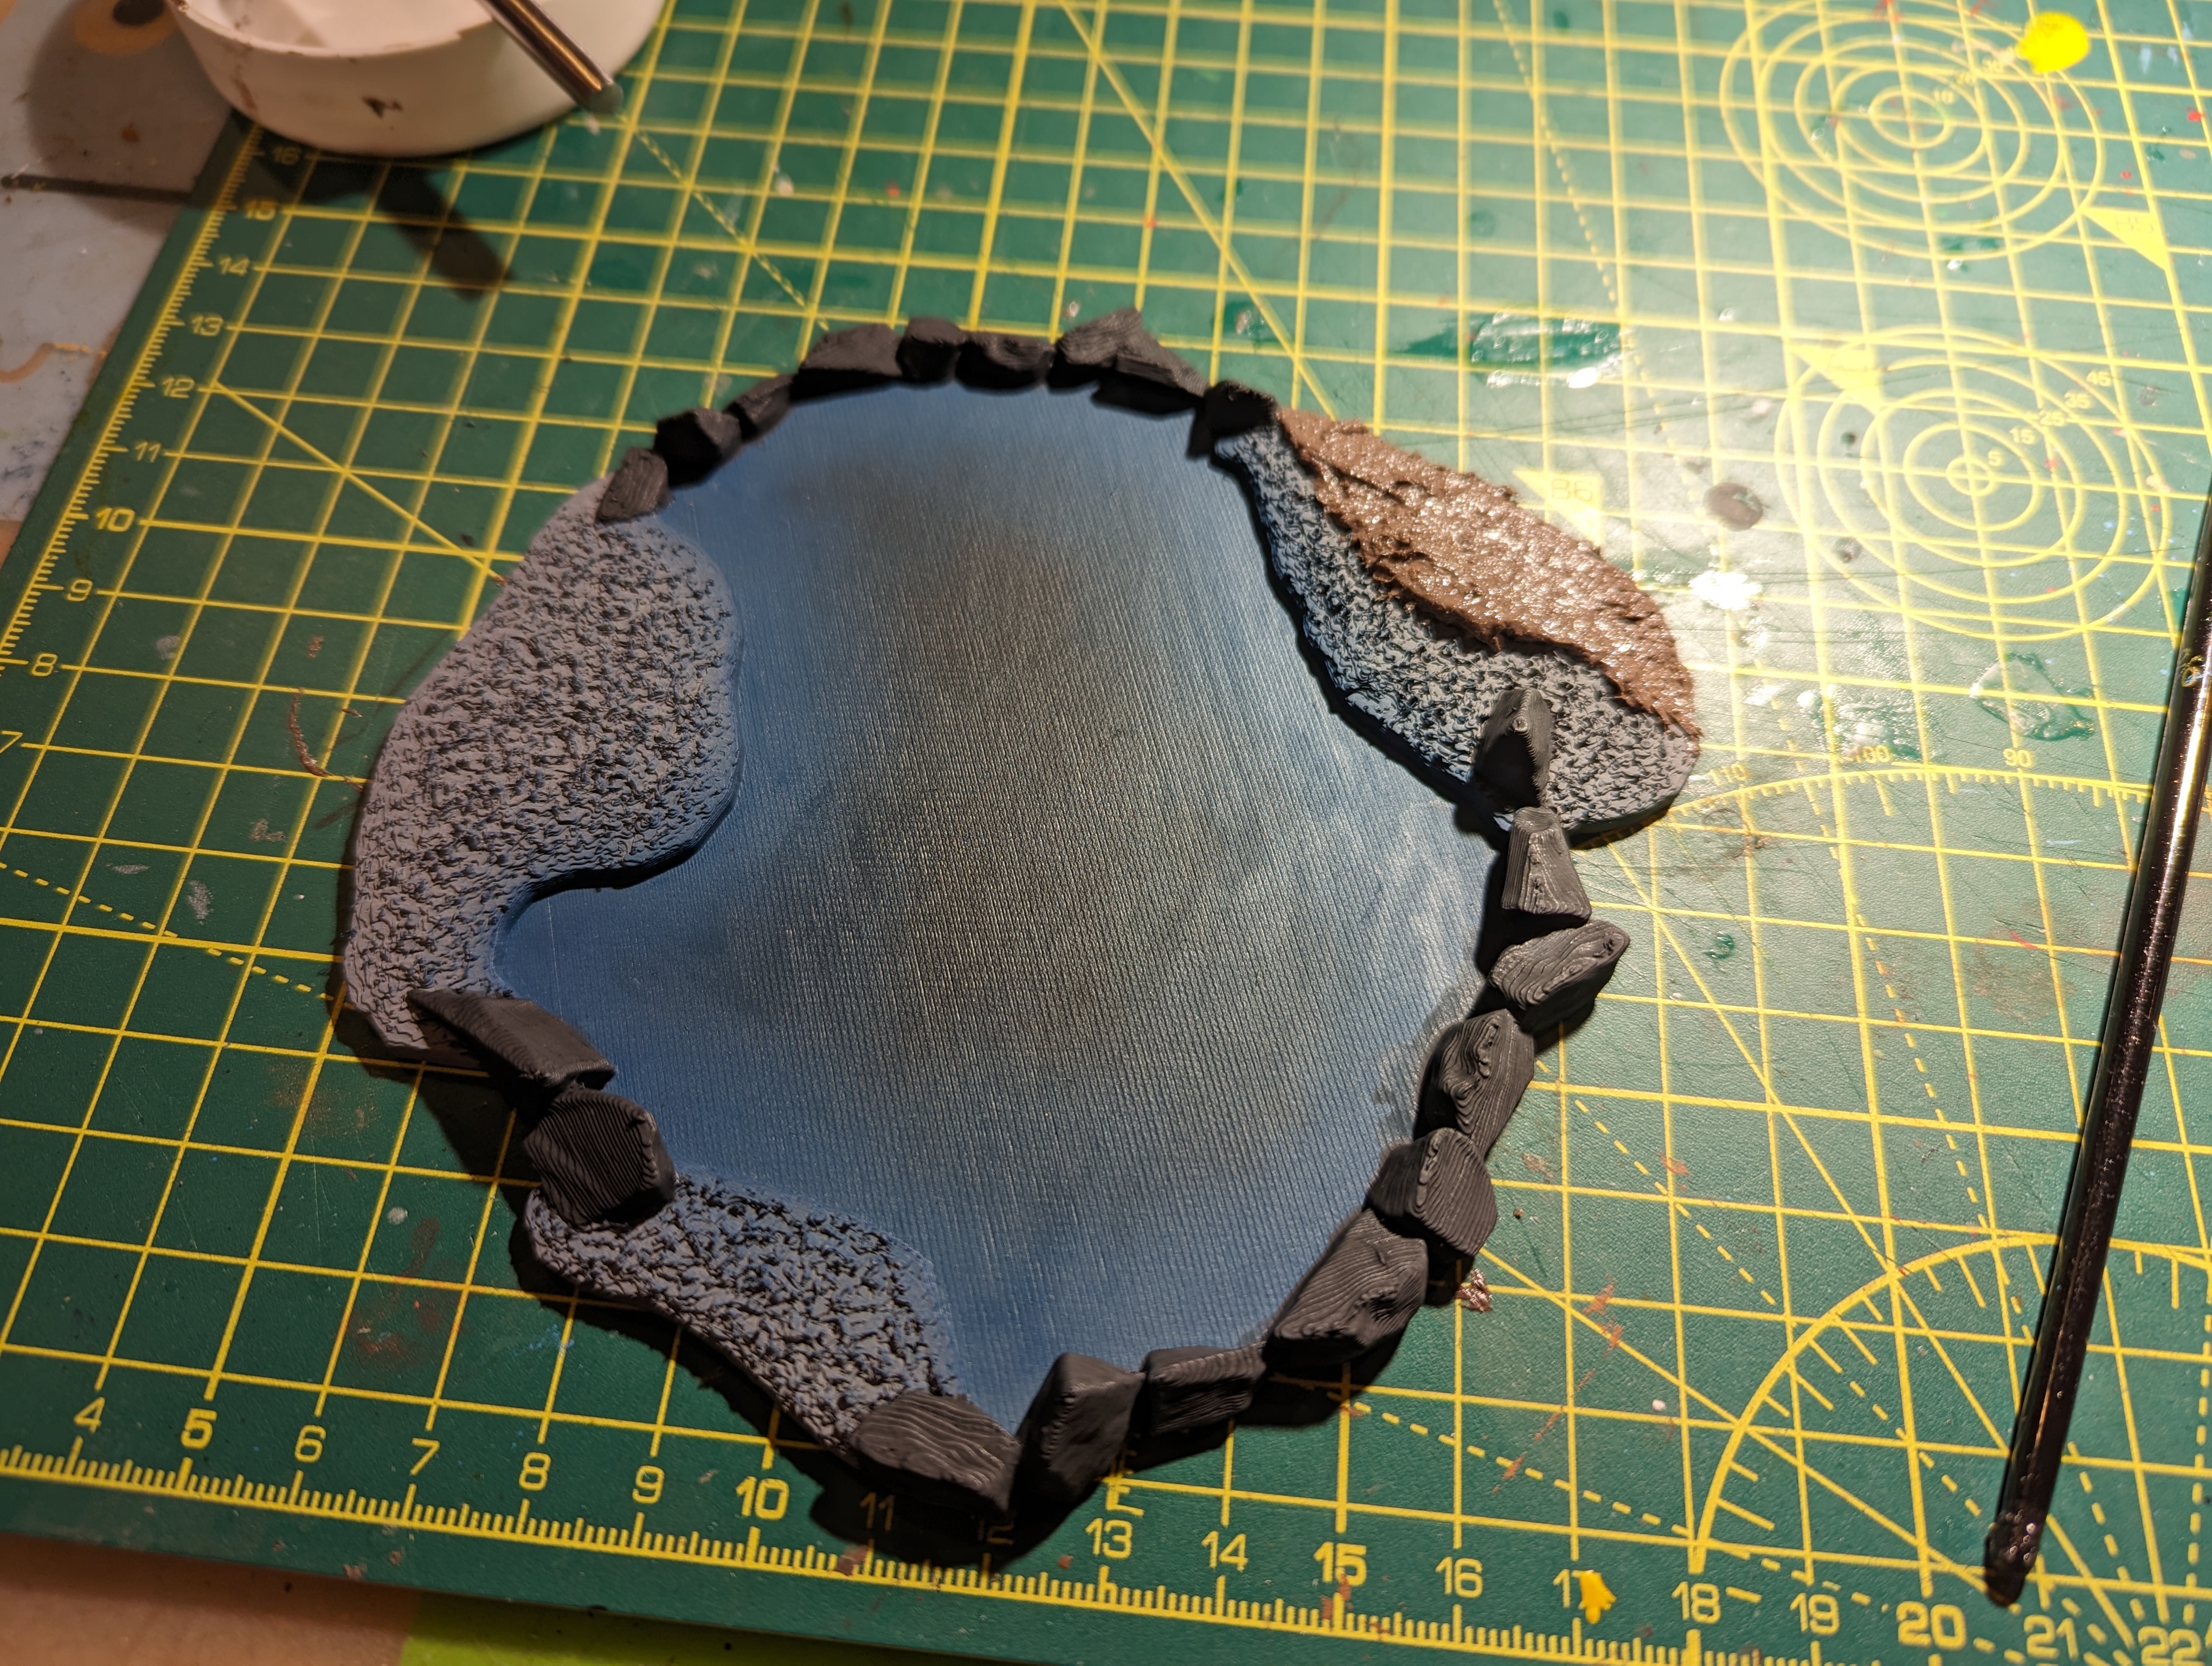
I’ve always wanted to try creating a watery terrain piece using resin and Japanese ponds give me the perfect excuse, especially as I found the below 3D printed option for sale. It also came with a bridge that for some reason didn’t make it into the picture.
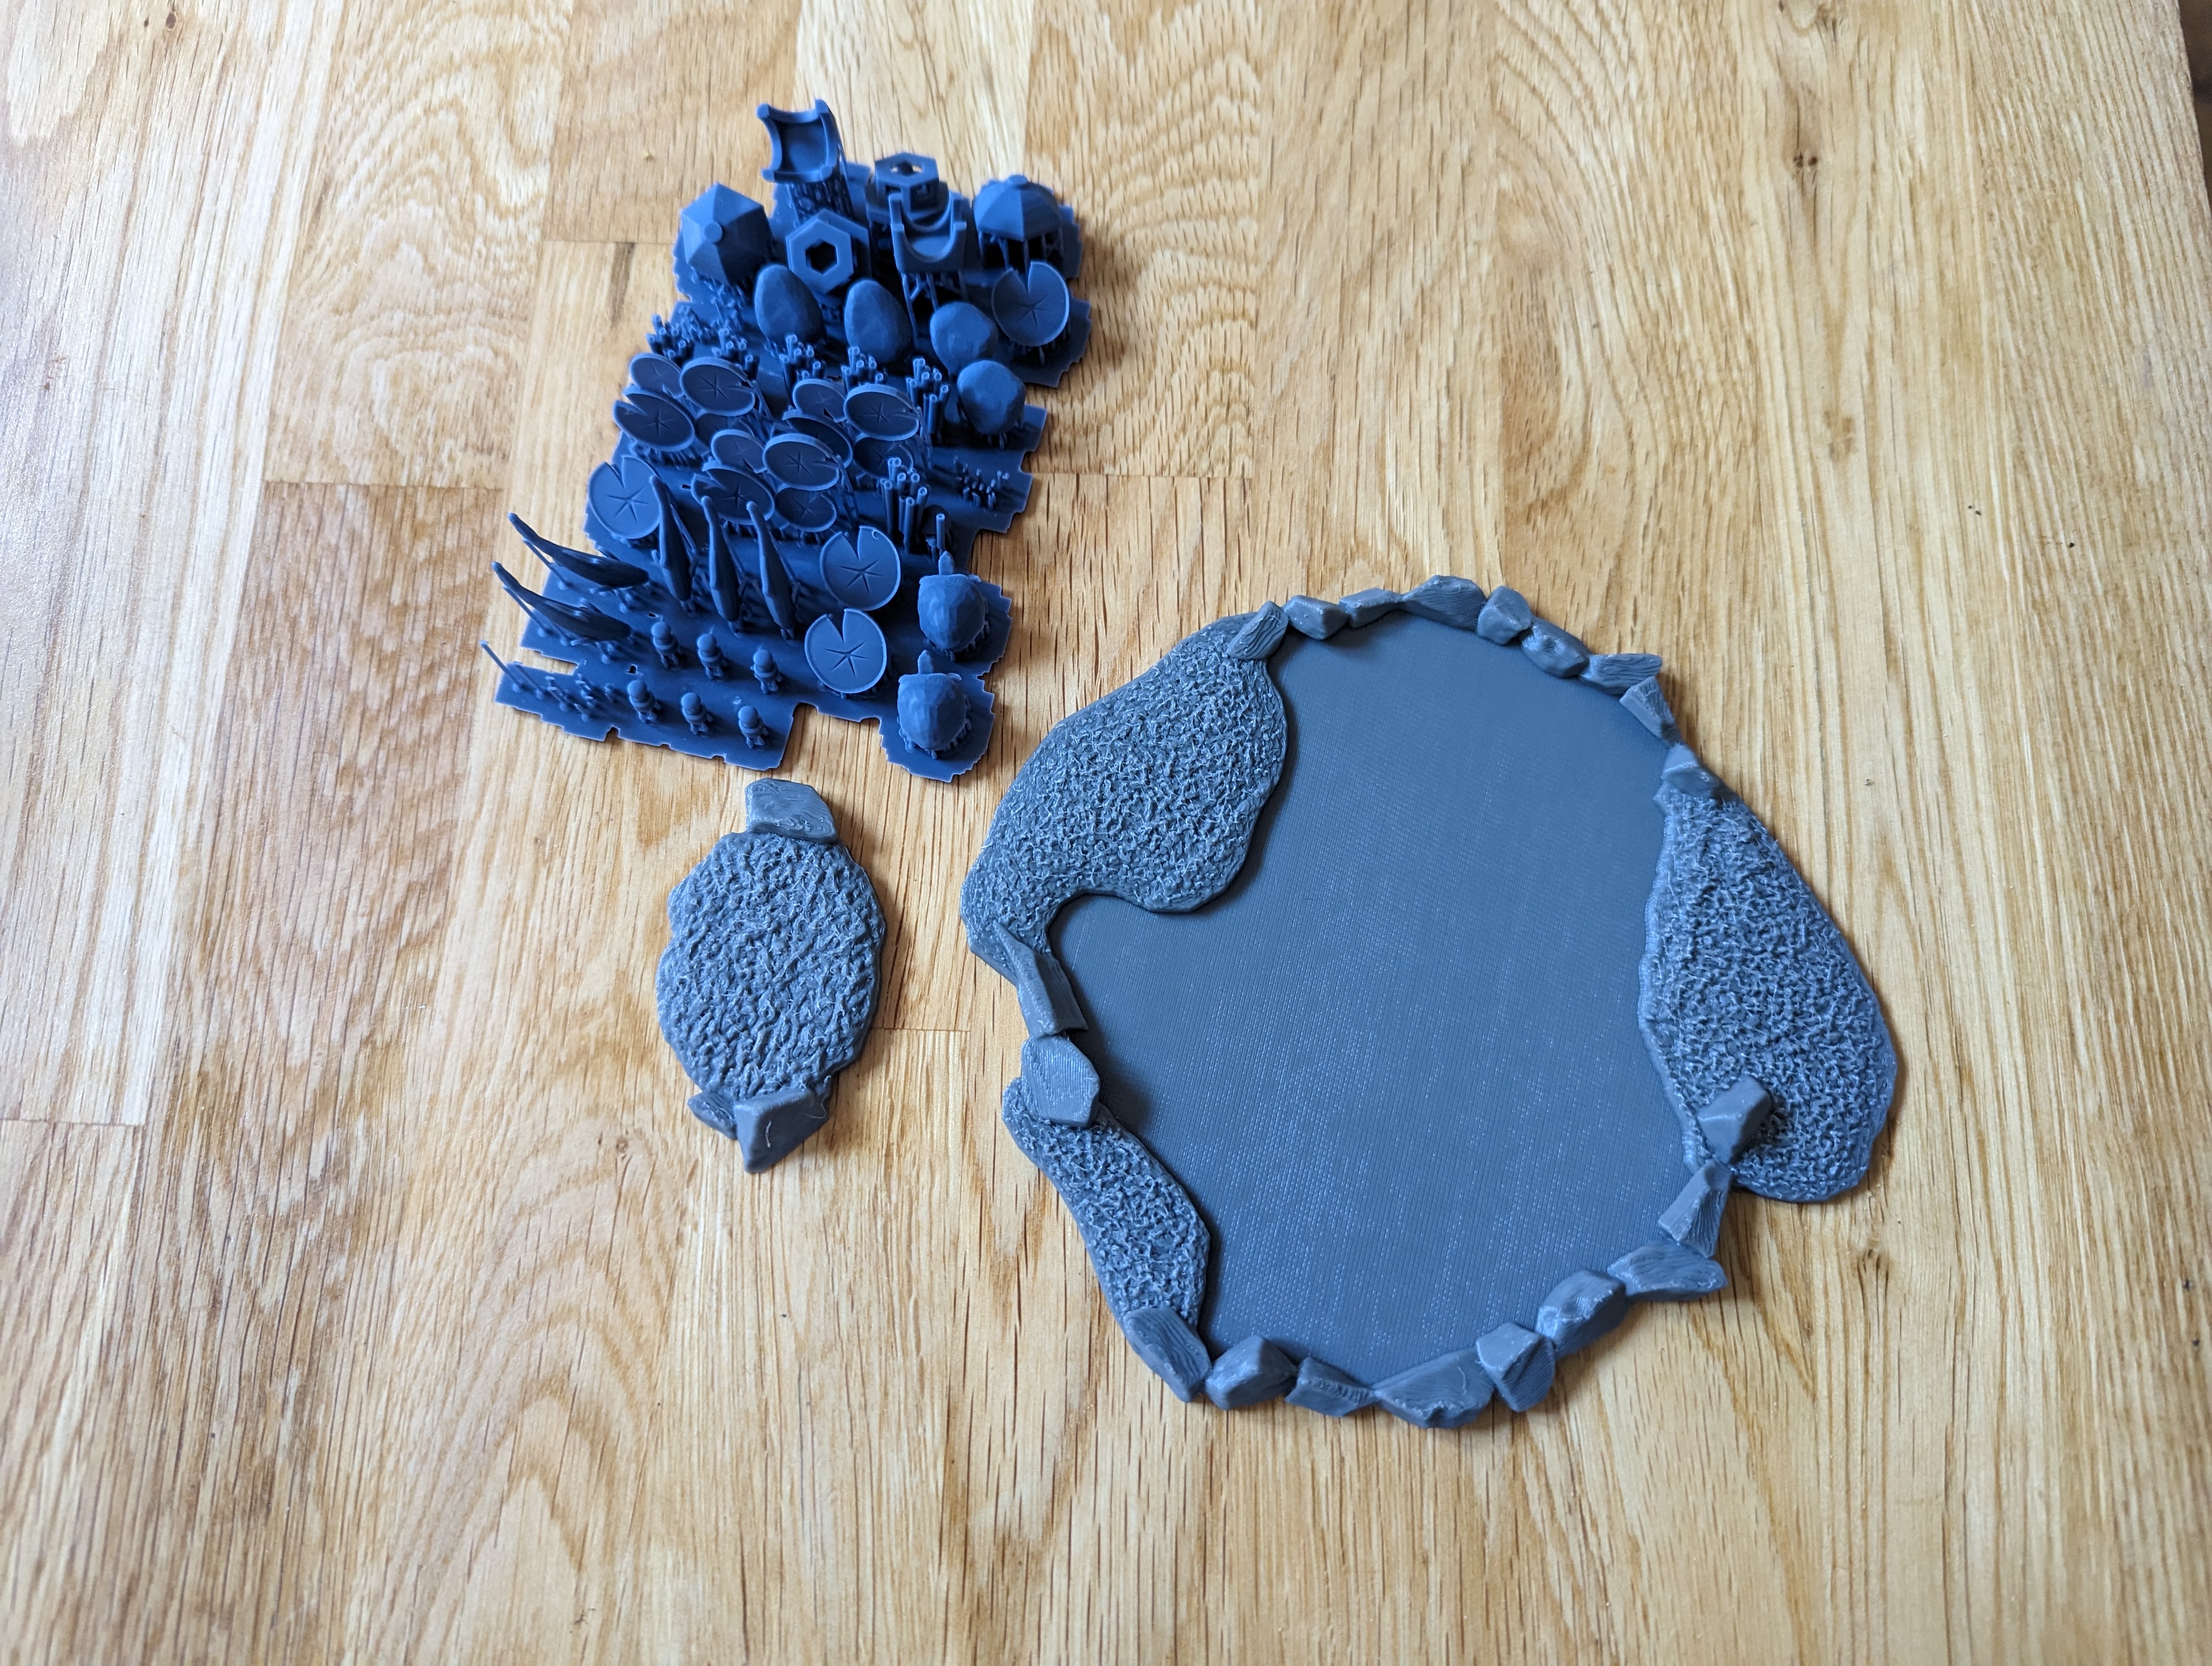 A pond, an island and some extra decoration bits, like fish
After a quick prime, I thought long and hard about the water colour. Ponds near me all seem to be a muddy brown, which isn’t very appealing and doesn’t shout ‘Zen Japanese garden’. Using the air brush, I eventually went for a black in the middle, over sprayed with a dark sea blue. Toward the edges I’ve opted for t a lighter tone to try to create the image of depth. I’m aiming for a clear or very lightly coloured resin, so the base needs to do all of the work here.
I didn’t like the grass effect, so covered this with an acrylic wet mud affect and also spread this into the water area to try to mimic the bank disappearing into the water.
I painted up some of the decorations. The lily pads were goblin green, a green ink wash and then a quick dry brush. The bamboo/reeds were Iraqi sand given a brown wash and the fish were given a silver base and then a very thinned down orange was applied for the gold fish and orange and red splotches for the koi. These all got stuck down before the resin pour (apart for the lily pads).
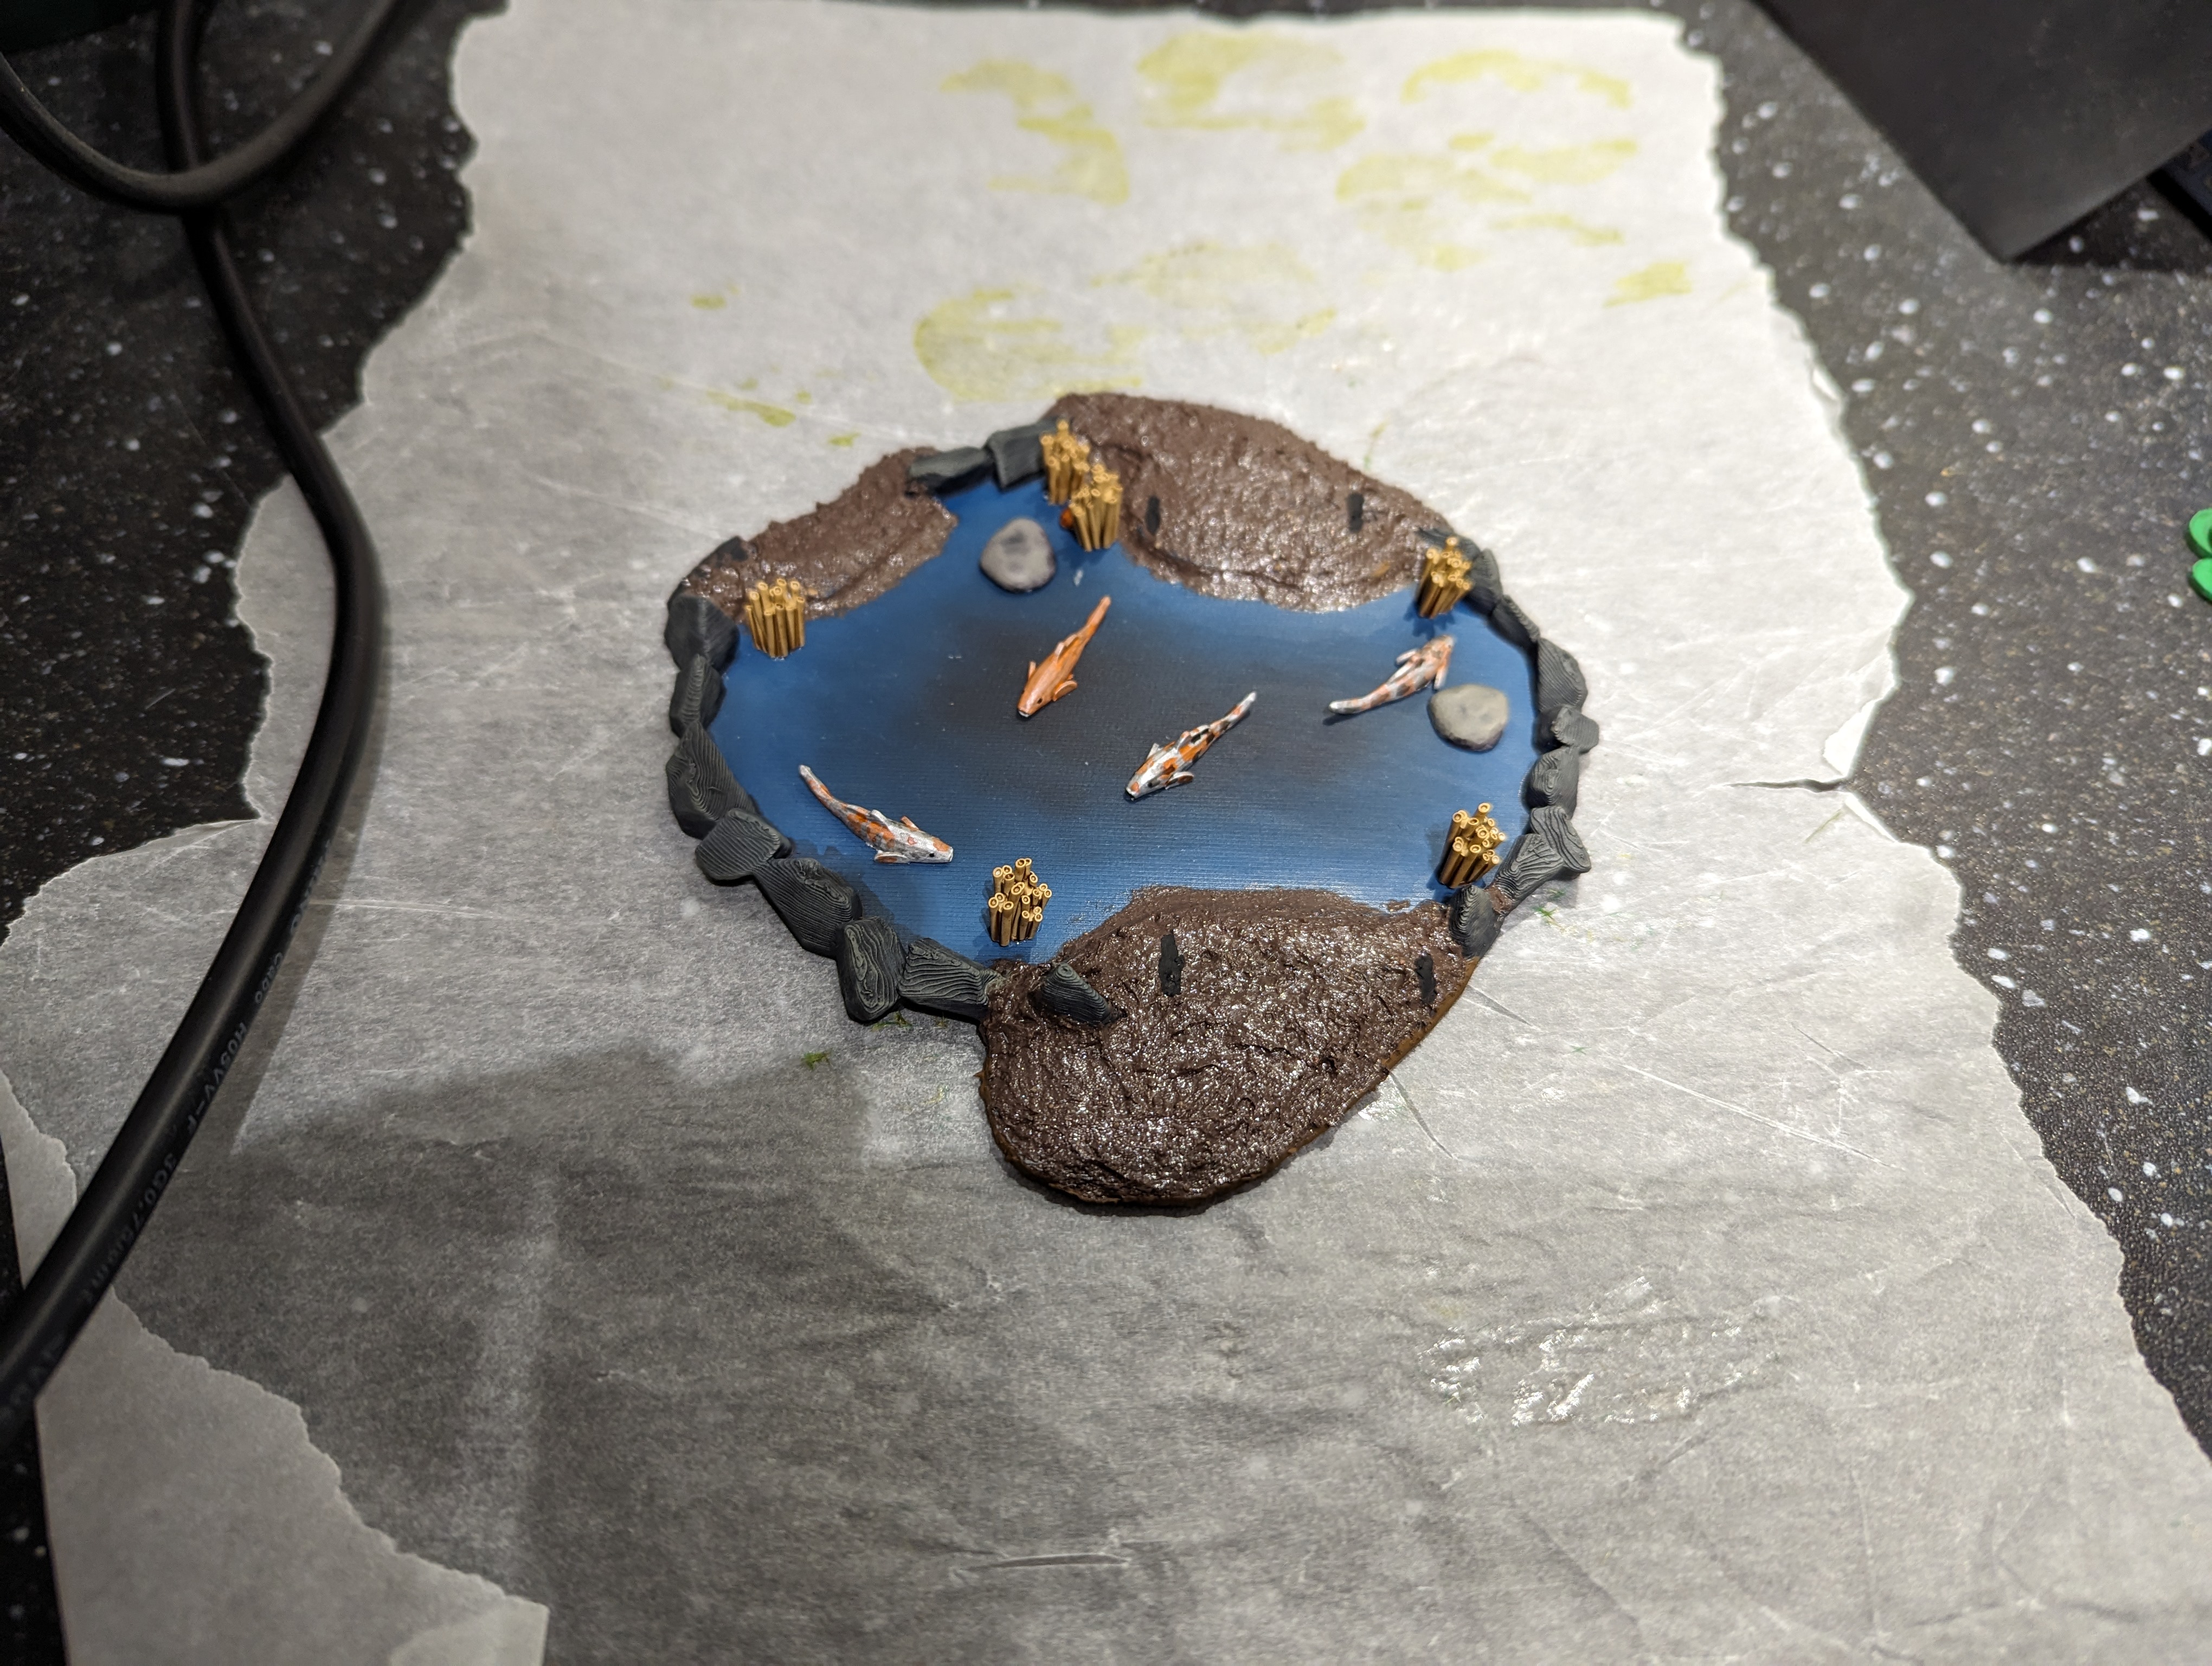
Everything was now ready for the resin. I purchased a two part resin and mixed it with a couple of drops of blue ink and tried a test pour. This worked surprisingly well. I then measured some water into the pond to see how much resin would be needed and to check for gaps. With the correct measurements, I mixed up the resin/ink and poured away. Once set, I noticed that I didn’t quite manage to remove the surface tension along some of the bank and the resin ‘folds down’ but otherwise, I was quite pleased with everything.
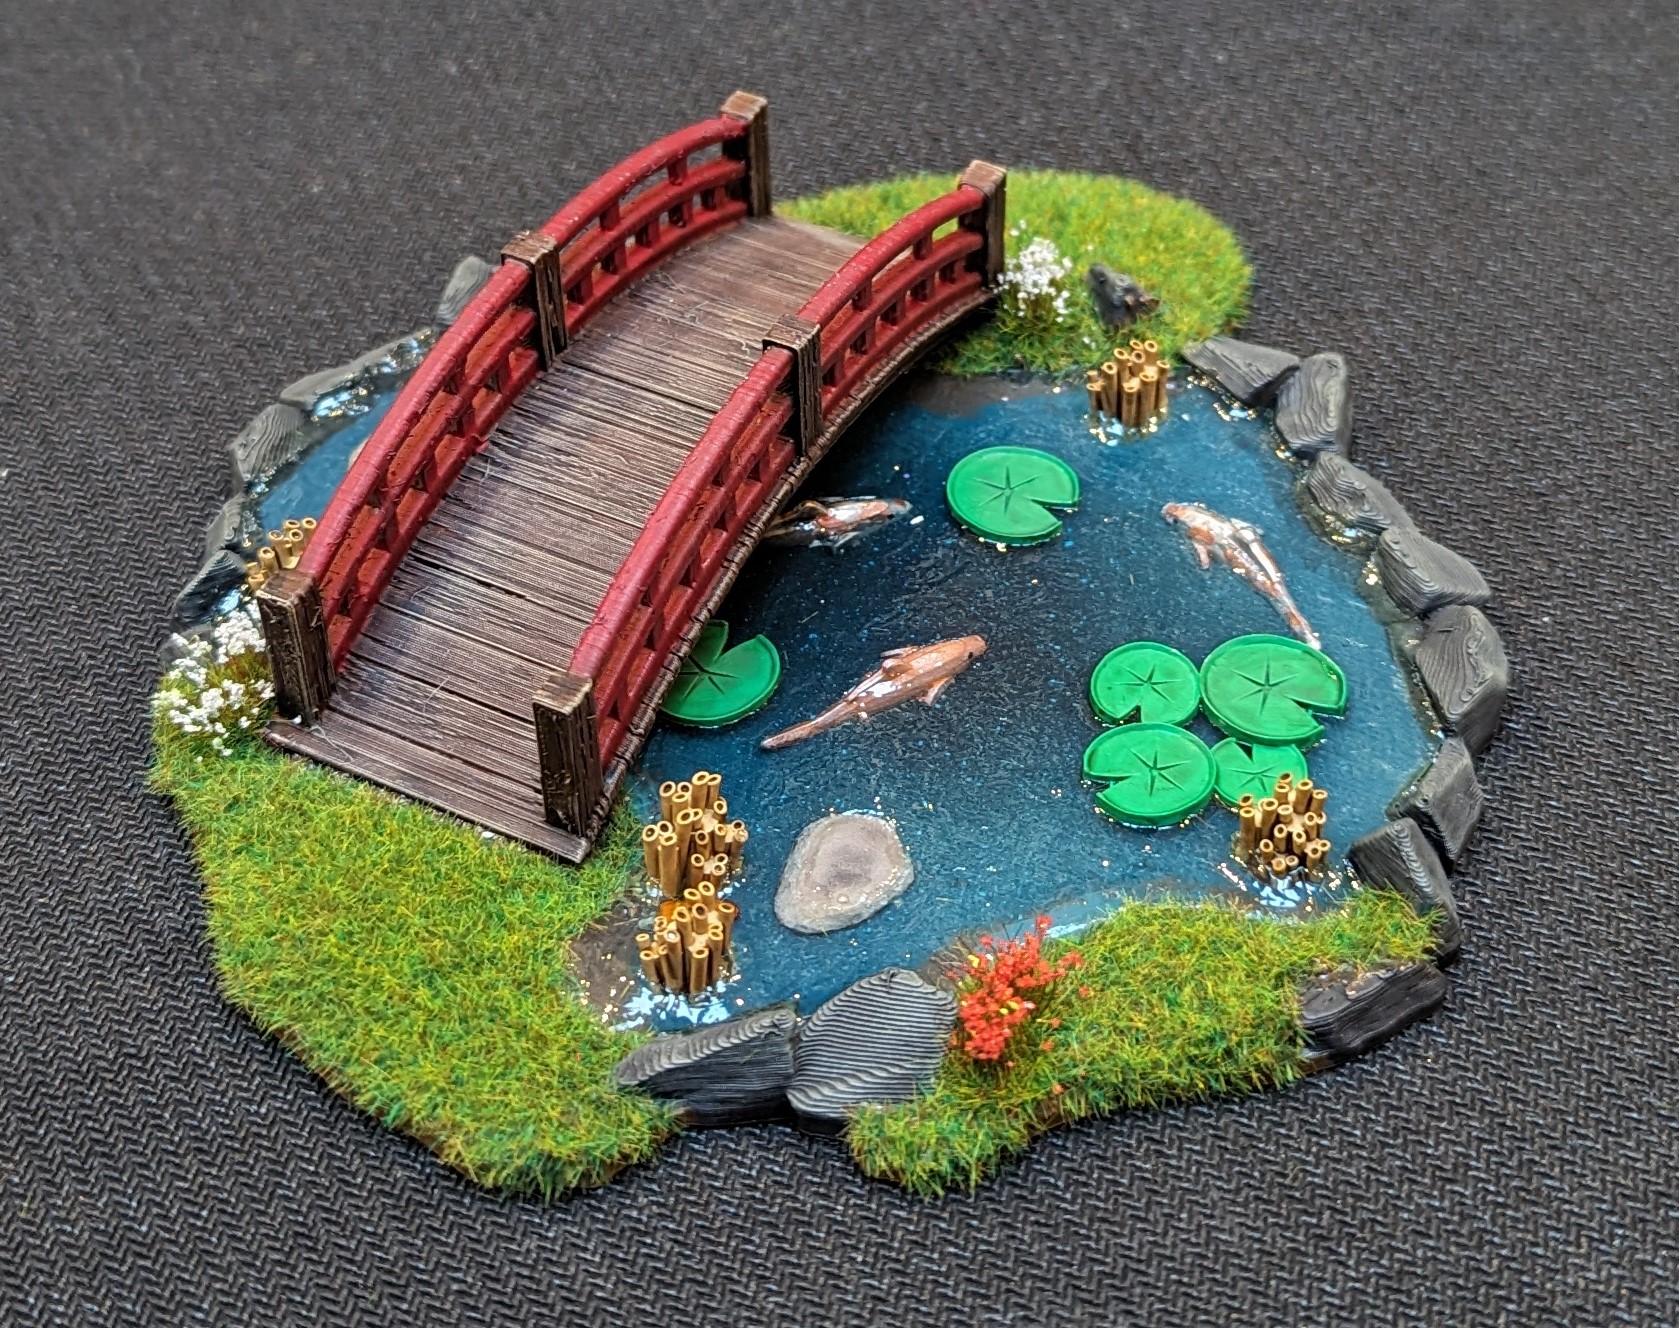
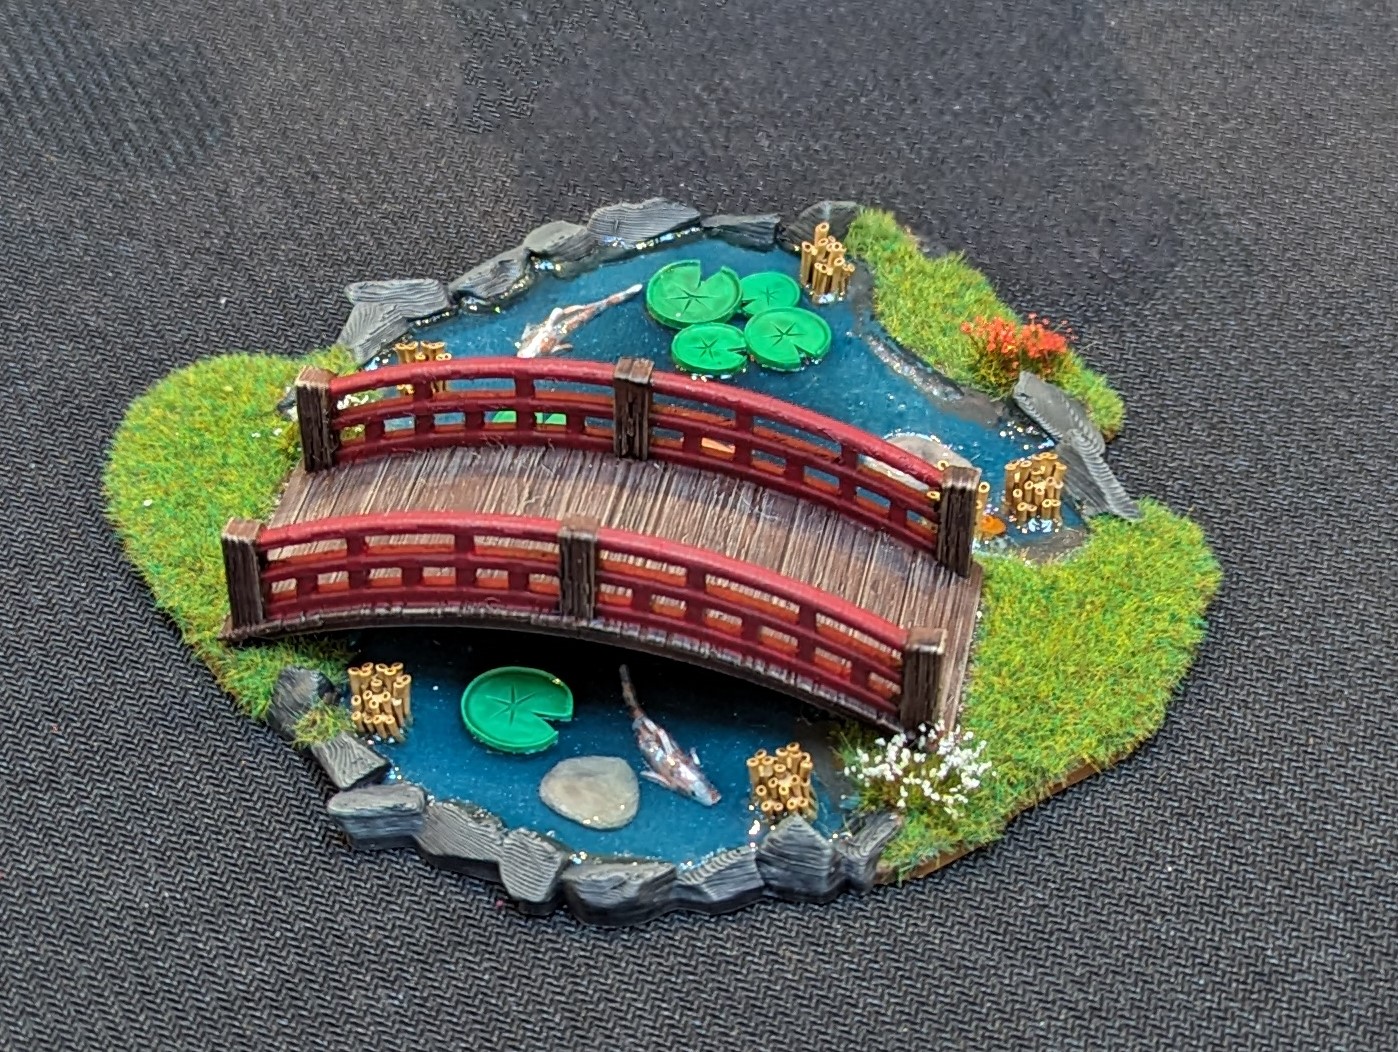
I then got hold of some water effects to make the ripples and carefully applied a thin layer, including trying to make a wake effect for the fish. I didn’t want to apply too much as this is a pond and not the North Atlantic.
I then needed to paint the bridge (Flat Earth base, heavy brown wash and then an Iraqi Sand dry brush for the wood, a scarlet for the hand rails). Before this could be put in place, I marked out its position and flocked the ground before putting the bridge in place.
Overall, I’m quite pleased with the effect. (And yes, for those that hate stepping from 3D printing, you can see this on the rocks, but I’m ok with it)
 Lloyd shot
Completed Starter Factions
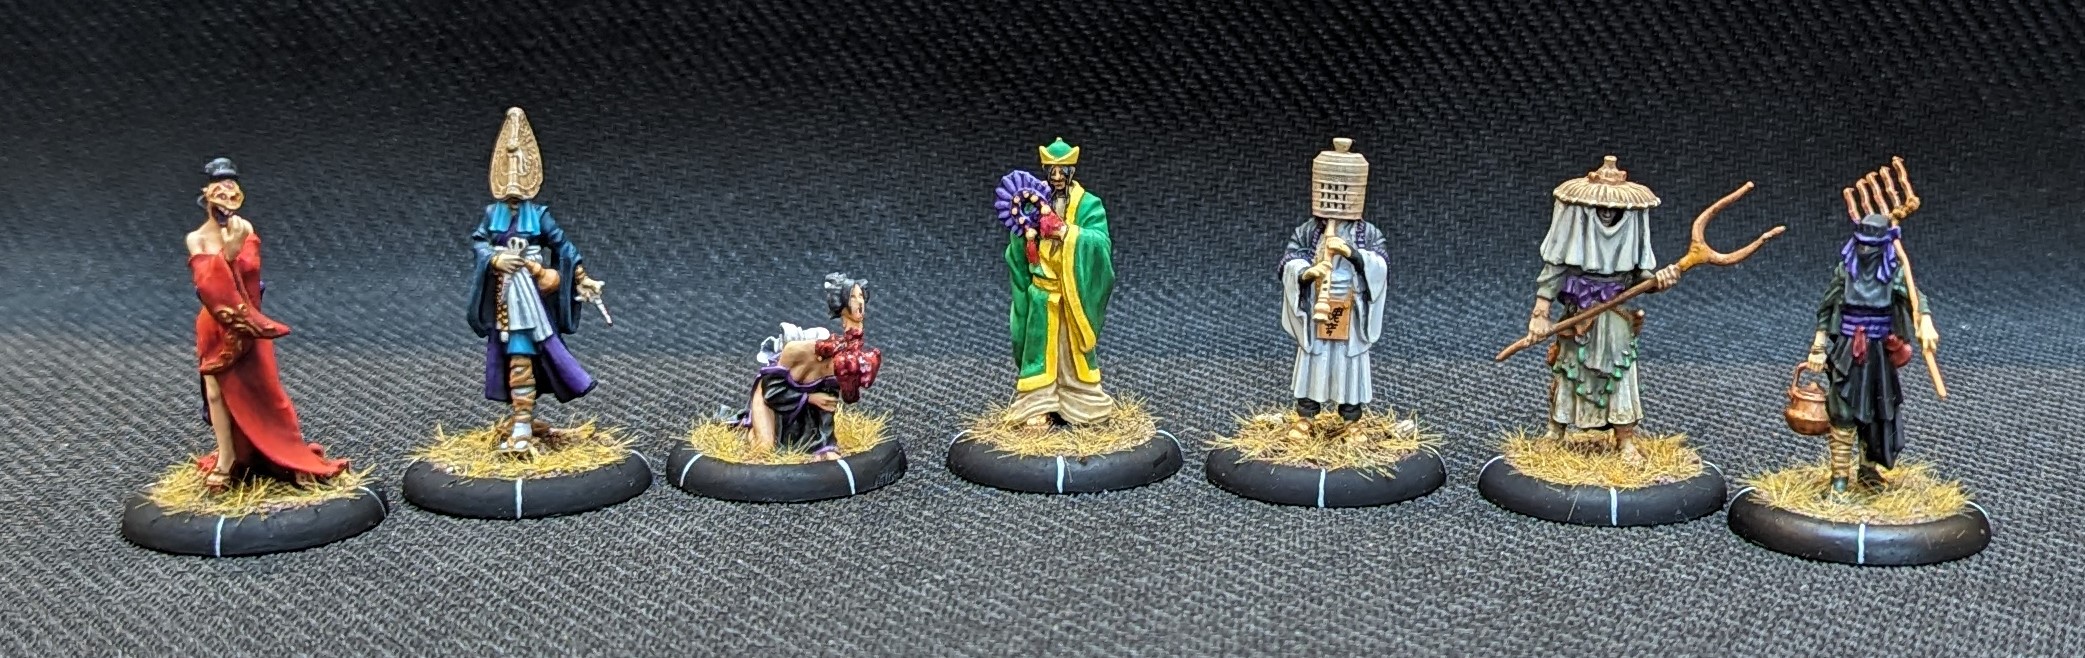
Just in time for Christmas, our starter factions are complete. First up, here’s my Cult of Yurei starter set in all of its resplendent glory
 Team photo
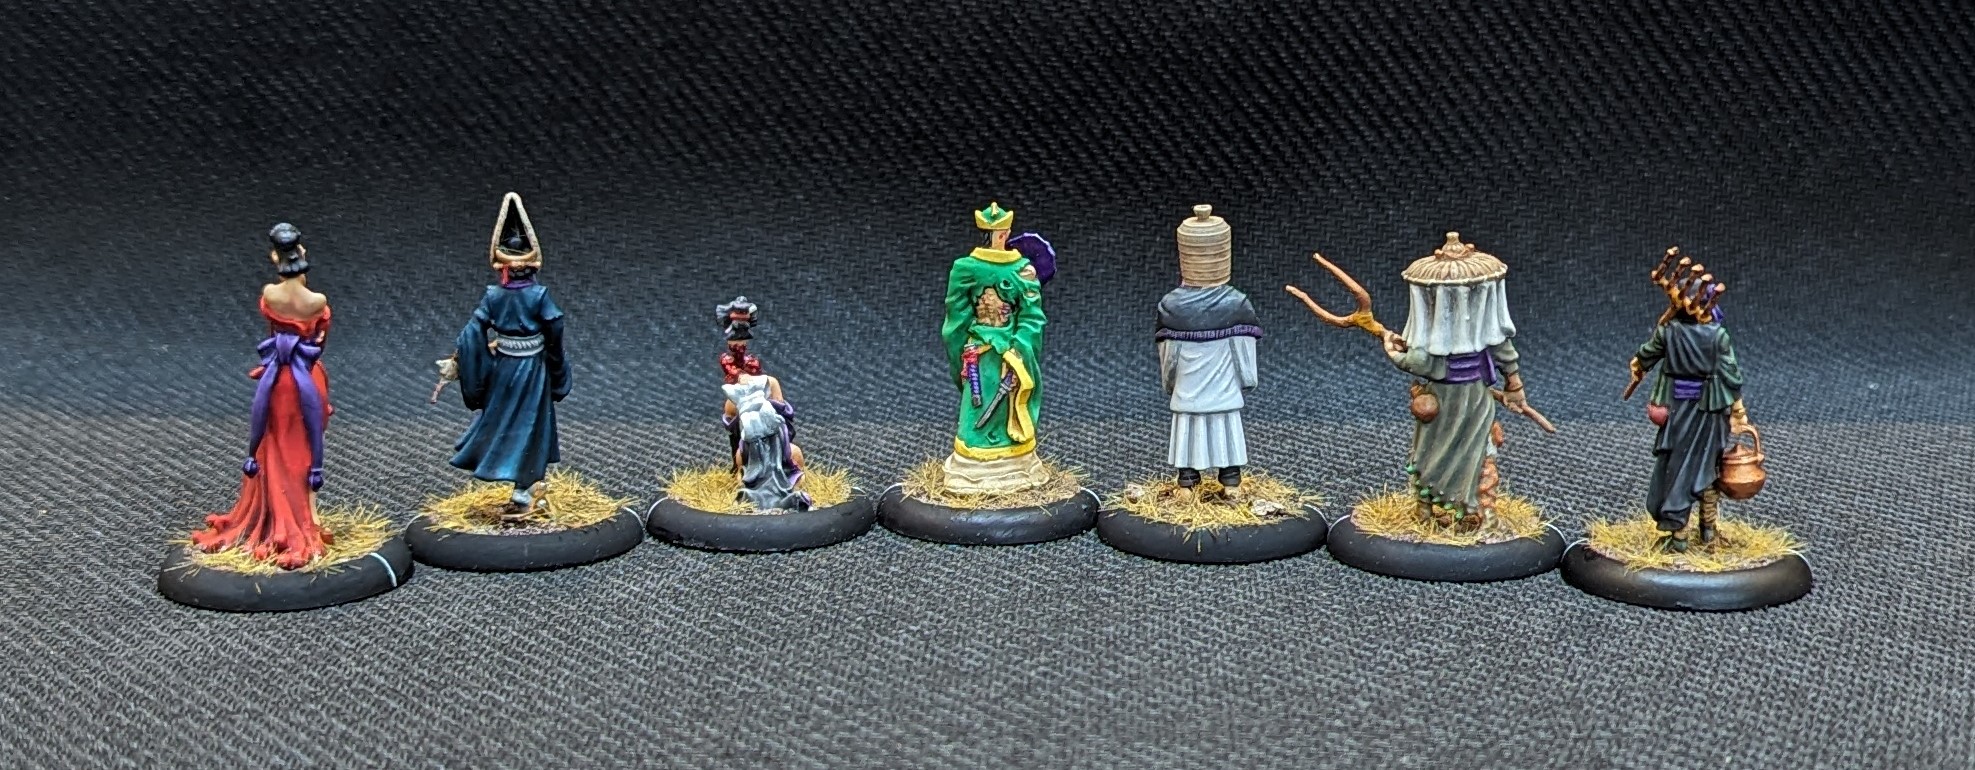 Lloyd Shot
My son has also completed his Temple of Ro-Kan starter set. By his own admission, he doesn’t like painting models that much and to this point, I think he’s only painted 3 in his life. He finds it quite challenging and much prefers reading the cards, meta gaming and playing the game. But, he was quite keen to get stuck into these and I also bought some speed paints for him to lower the entry level for him. He actually started a couple of them before I had even primed them, painted straight on to the bare metal. Those got several coats of varnish to try to protect them as much as possible.
I think he’s done a great job with them
 Temple of Ro-Kan
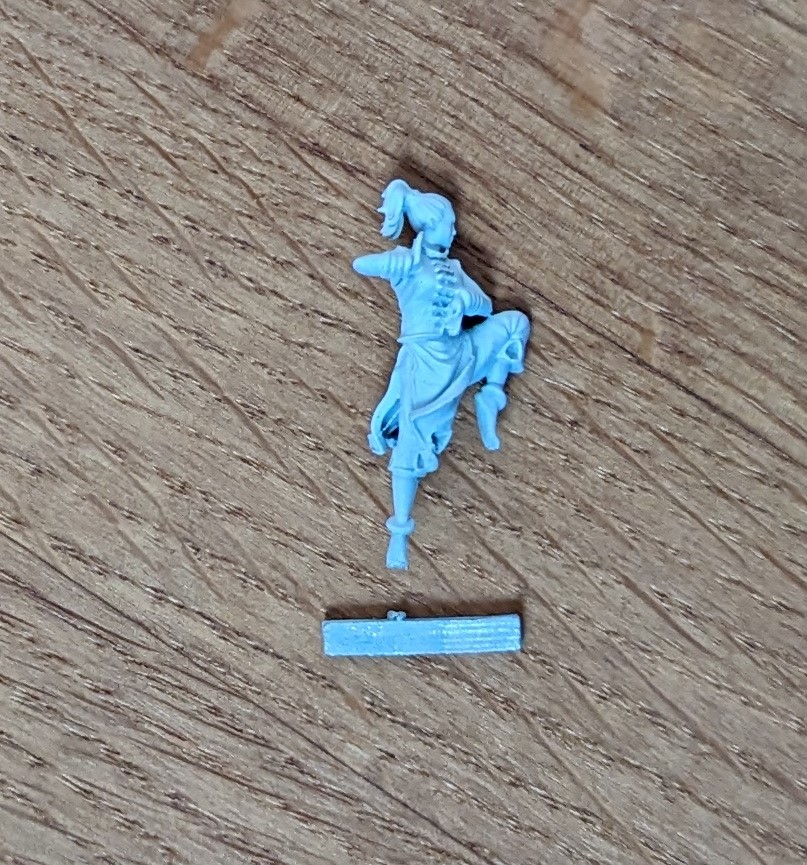
We did have one casualty of war. The sculpts for the game are lovely and the Temple of Ro-Kan models really have a dynamic look. However, a number of the models are balanced on one foot. I’m not a big fan of this, especially for gaming pieces and GW have been doing this for some time now with their BB models. They get broken easily. In this case, not only are some of the Temple models on one foot, their on tip toes as well. This particular model eventually just fell of the base slot. I’ve no idea how to get her back on as her leg is very thin and pinning will be a challenge. Maybe a tactical rock or something…..
Starting the arms race.
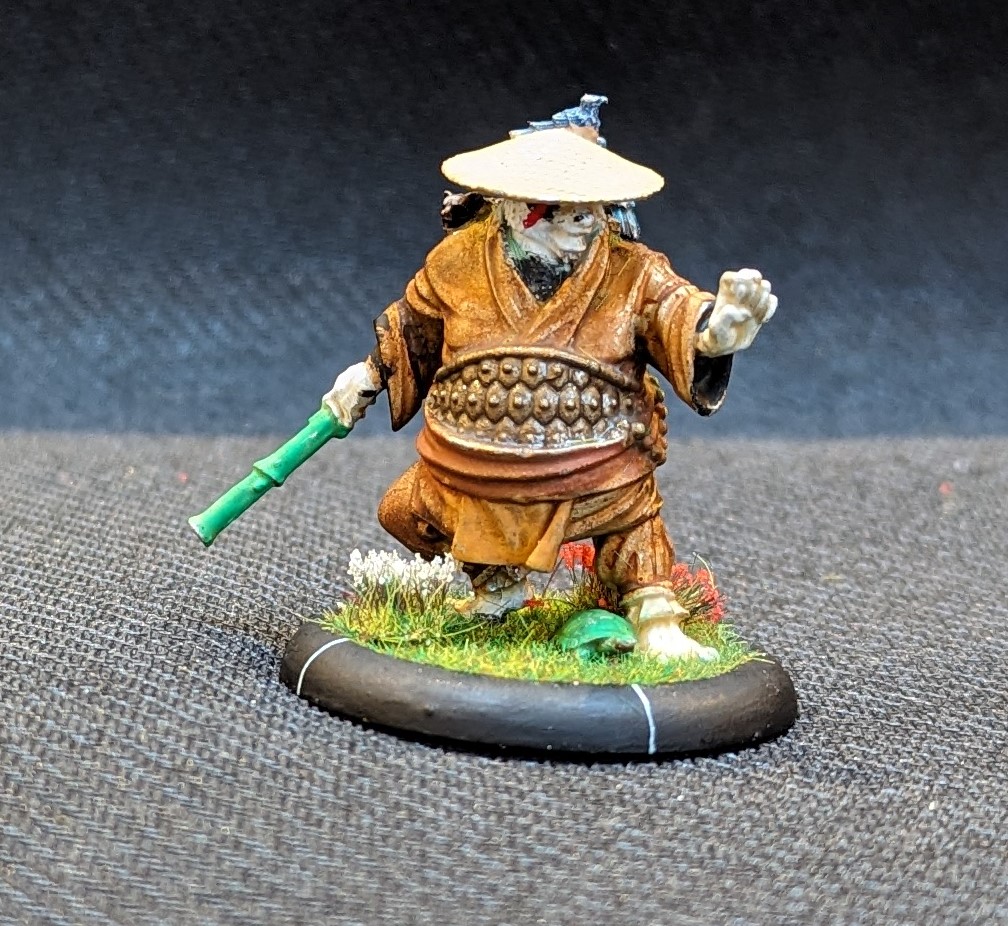
Not part of the Temple of Ro-Kan starter set but one of my son’s favourite models is Kuma, the bo staff wielding panda. This is also the start of the arms race. Everyone knows that starter sets are just that, a starting point. Kuma delivers a big punch and coupled with my son’s other recent purchases (Master Po etc), he’s wiped the floor with me in the last couple of games (more battle reports to come!). I have some models up my sleeve that, once painted, will get deployed into the fight.
We both have additional stuff on our Christmas list, so as long as we have been good this year, the 2024 arms race is well underway.
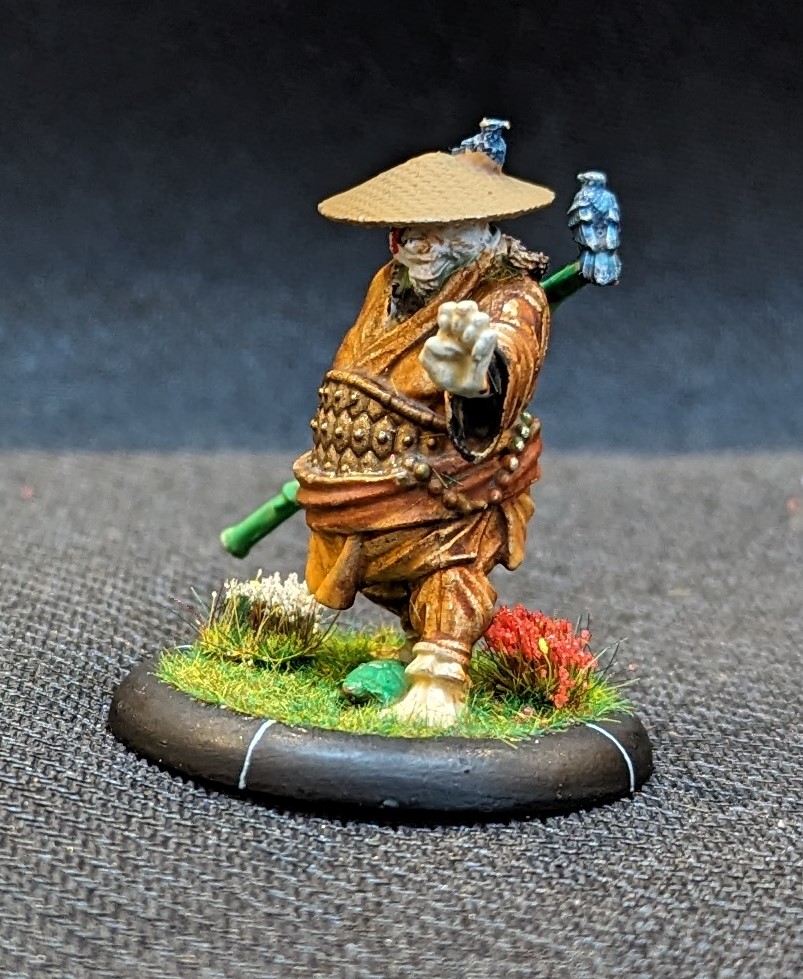
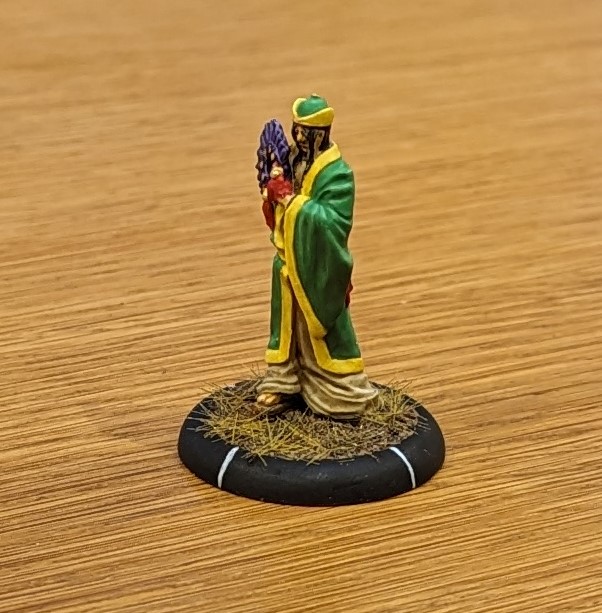
Cult Starter Set: Mo Ises
Last, but not least, we have Mo Ises. He’s clearly made some poor choices in his life given that his skin is hanging off his back but he still seems well up for the fight. In game he has the disguise special rule, making it hard for him to be targeted early on. He also has the assassin rule, making surprise attacks he might make just that little bit more deadly. His Ki feats allow him to drain Ki from opposing models (handy), gain control of opposing models (very handy) and force them to move toward him (good for manipulating the battlefield).
I wanted to add some colour into the warband and Mo Ises seemed the perfect choice to do this, especially with his court robes. The green is a goblin green that has then had a number of dark green glazes added to try to create the shadow. The yellow started as light brown and then I’ve used a sunburst yellow to gradually build up the highlight. The under robes were a khaki given a brown wash. I picked out the fan and the scabbard in purple for the warband theme colour.


And that is the starter set fully painted. I’ll set them up for a group shot and load that here.
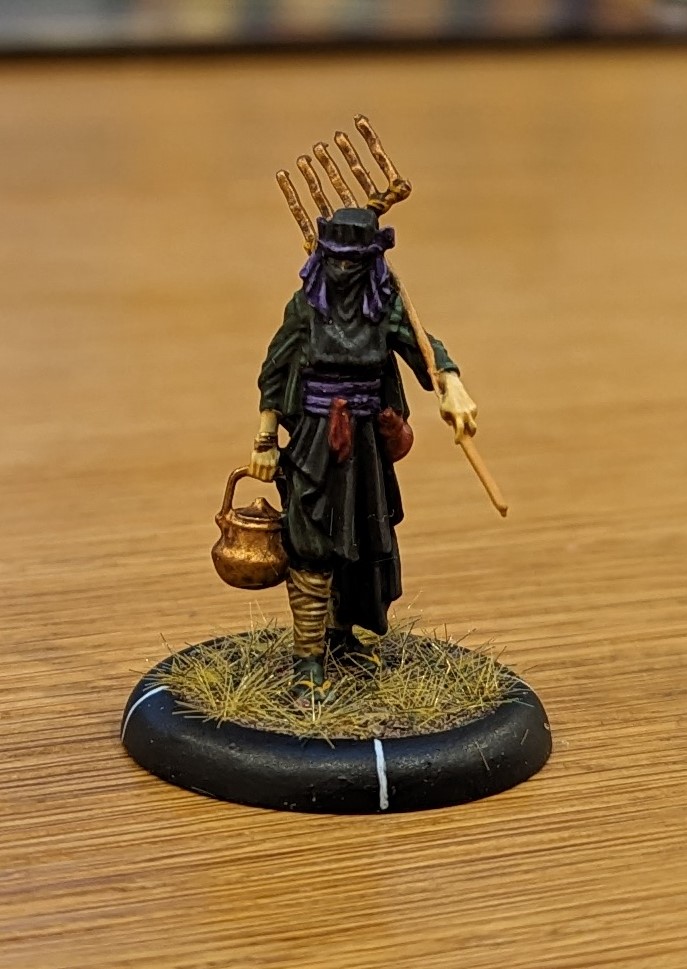
Cult Starter Set: Ibara
The game is a little sketchy on what or who Ibara is. But given the face covering and robes, perhaps he or she likes it that way.
Within game, they’re quite a cheap model to take and provide an average combat ability. They’re main weapon is their Ki Feat that allows them to blast fire markers onto enemy models from afar. When used with the Crush the Oppressed event card that the Cult of Yurei can take, you can double any markers in play. Double the fun!
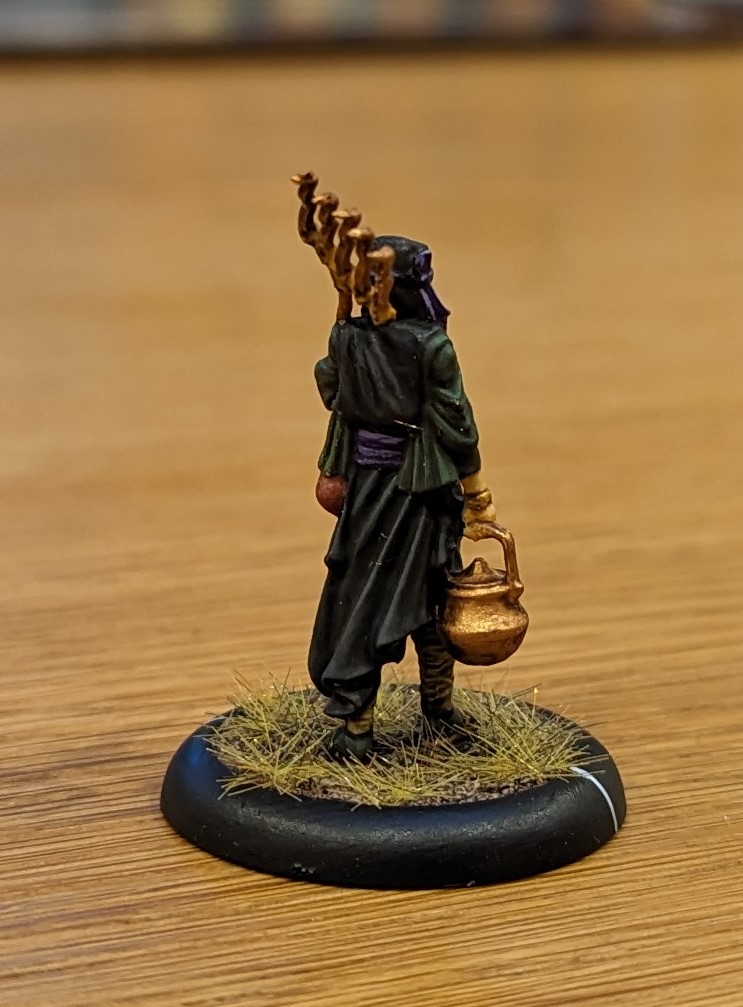
I wanted Ibara to be very muted. Given the face mask and low key clothing, they’re clearly not trying to draw attention to themselves. So I’ve opted for a black and dark green. The black is my usual approach, a base of dark rubber with a nuln oil wash (times 2). I then highlight up the raised areas using dark rubber and then a mix of dark rubber and luftwaffe grey. The green was a base of German Fieldgrey with a grey wash for shading. I’ve then highlighted up using fieldgrey mixed with elf green.
The headband and belt I’ve picked out in the warband theme colour of purple. Leggings were a simple bone given a wash and then highlighted. I’ve used a shiny bronze for the pot and the prongs of the farm implement. This was given a strong tone wash and then just left as it was as it looked fine.

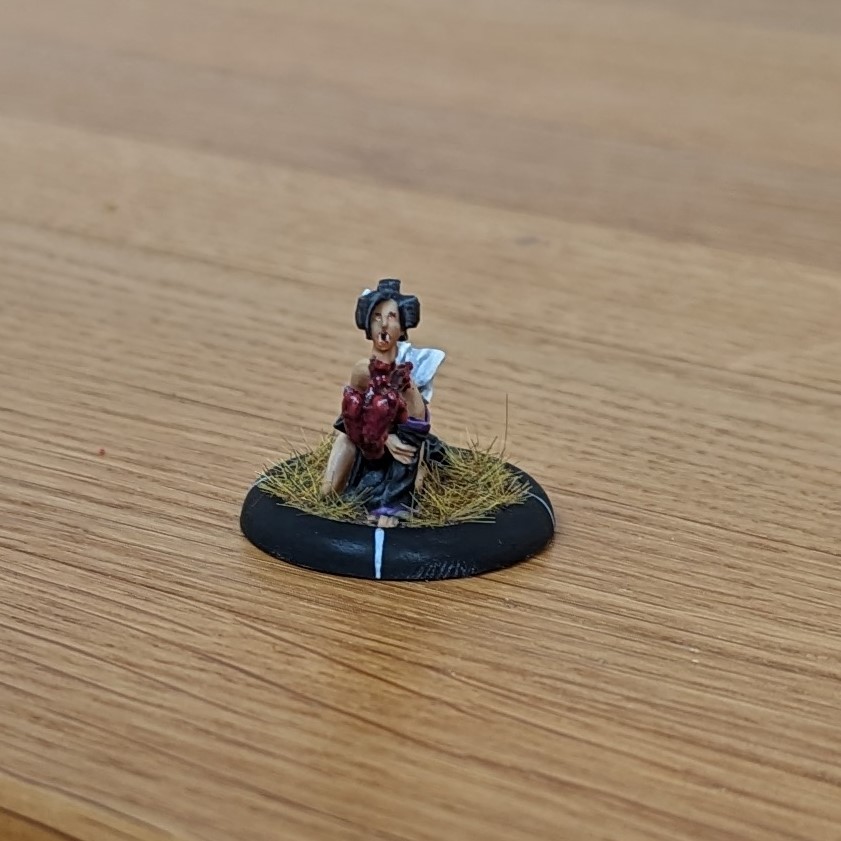
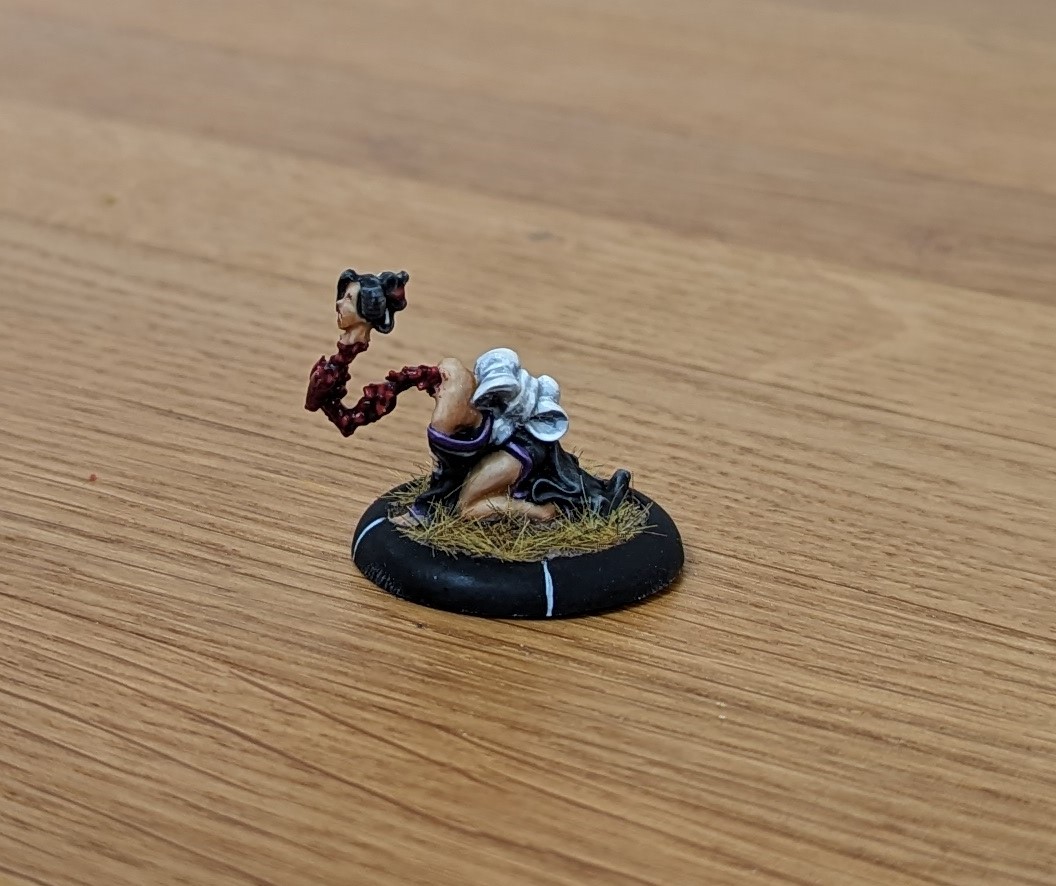
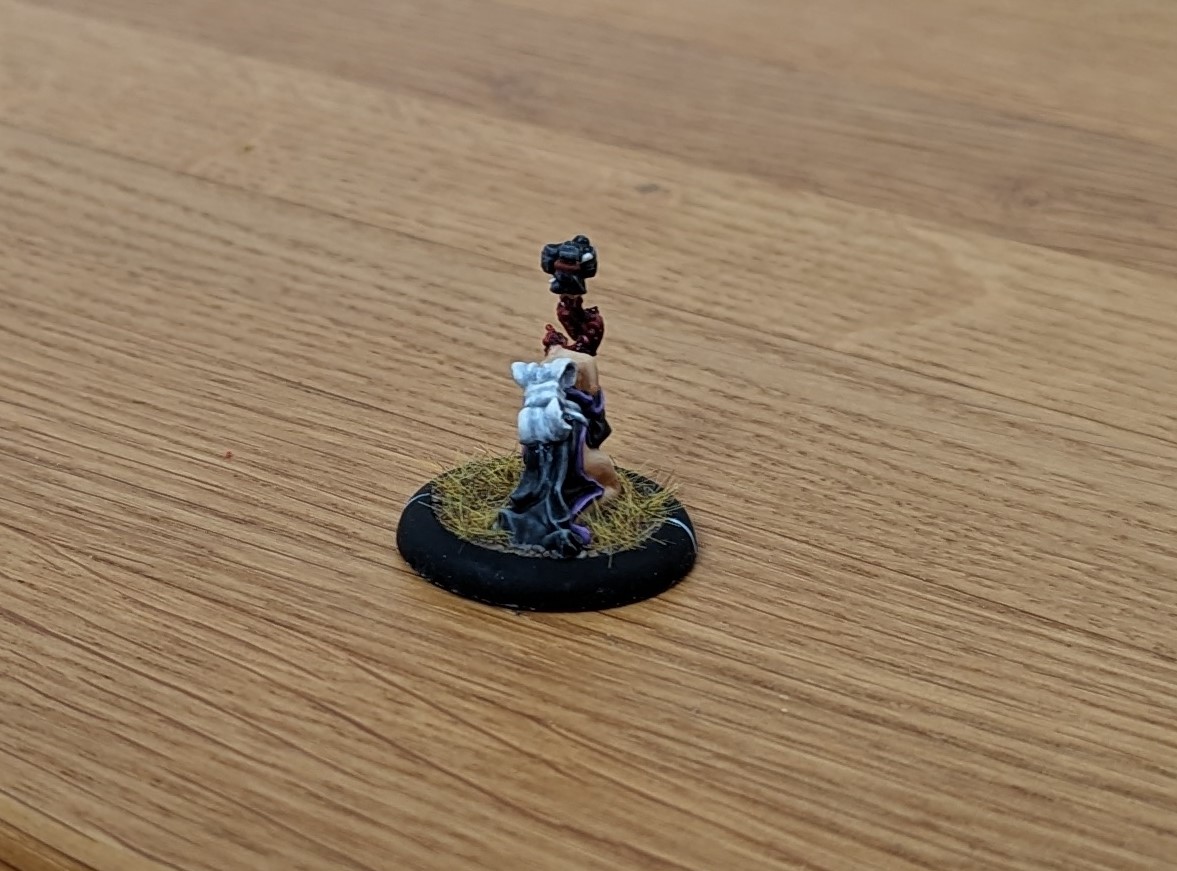
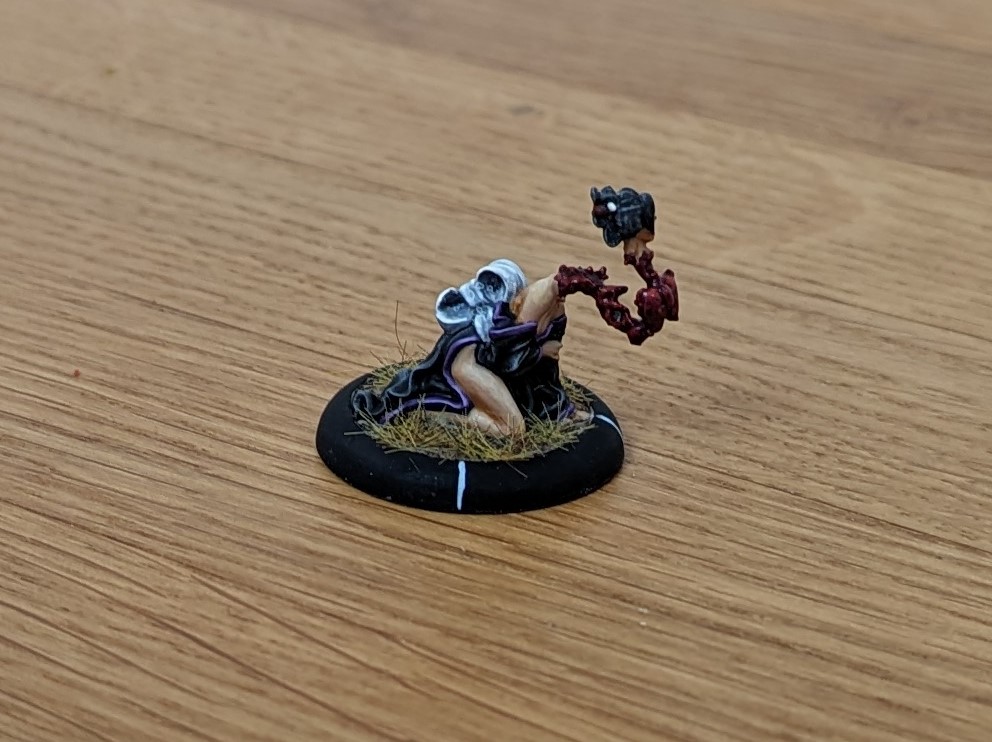
Cult Starter Set: The Penanggalan
Bushido draws upon a lot of Japanese and Far Eastern culture. It seems that vampires are not just confined to Romanian castles but are also part of the mythology in the form of the The Penanggalan (or Penny, for short). This was a new one on me so I did a little bit of reading. Penny is a dismembered head complete with the entrails and bodily organs suspended from its neck. It roams around looking for pregnant women and young babies to feed upon.
In game, Penny has the usual vampiric traits. In combat, if she hits, she gets to hold the opponent model. This is handy, as a held model becomes much easier pickings in combat. She also has a couple of handy Ki feats, one being able to ‘hypnotise’ an opponent so that they lose an activation counter, which is very debilitating. Finally, if she is holding on to someone at the end of the turn, she deals 2 damage and regenerates 2 herself.
The model is a two piece build, with the neck/head being separate from the body. I though about just using the head/neck as the mythology says this is what they look like. But after some thought, I decided to use the the whole model as the neck is quite flimsy and would be difficult to mount. As it happened, pinning the neck to the body was quite challenging given its size….
I decided to keep the paint job simple. A dark rubber base coat was given a couple of nuln oil washes. I then picked out the highlights with dark rubber and then dark rubber/luftwaffe grey mix. The bow is an off white and then I’ve used luftwaffe grey glazes to gradually create the shadows. I’ve edged the dress in purple as my warband’s ‘colour’.
The skin is made from the Scale 75 Skin colour set. I start with a base skin tone and then glaze accordingly. The entrails started with a cavalry brown base and then I’ve highlighted up using various shades of red. I’ve left the entrails with a satin varnish to create a ‘wet’ look. The rest got a matt varnish.

![StarCraft Tabletop Miniatures Game Pre-Orders Live Now [Updated]](https://images.beastsofwar.com/2026/03/starcraft-tmg-news-cover-600-338.jpg)


![Mounted US Cavalry On Kickstarter For Dead Man’s Hand! [Updated]](https://images.beastsofwar.com/2026/03/us-cavalry-main-600-338.jpg)


![Play WW2 Commando Operations With Butcher & Bolt [Updated]](https://images.beastsofwar.com/2026/03/relaunch-600-338.jpg)


