


Redvers and Son Get Into Bushido


Recommendations: 1224
About the Project
My son and I were looking for a new game to get into. Something that was low on models, fun and reasonably quick to play. We decided on Bushido.
Related Game: Bushido
Related Genre: Fantasy
This Project is Active
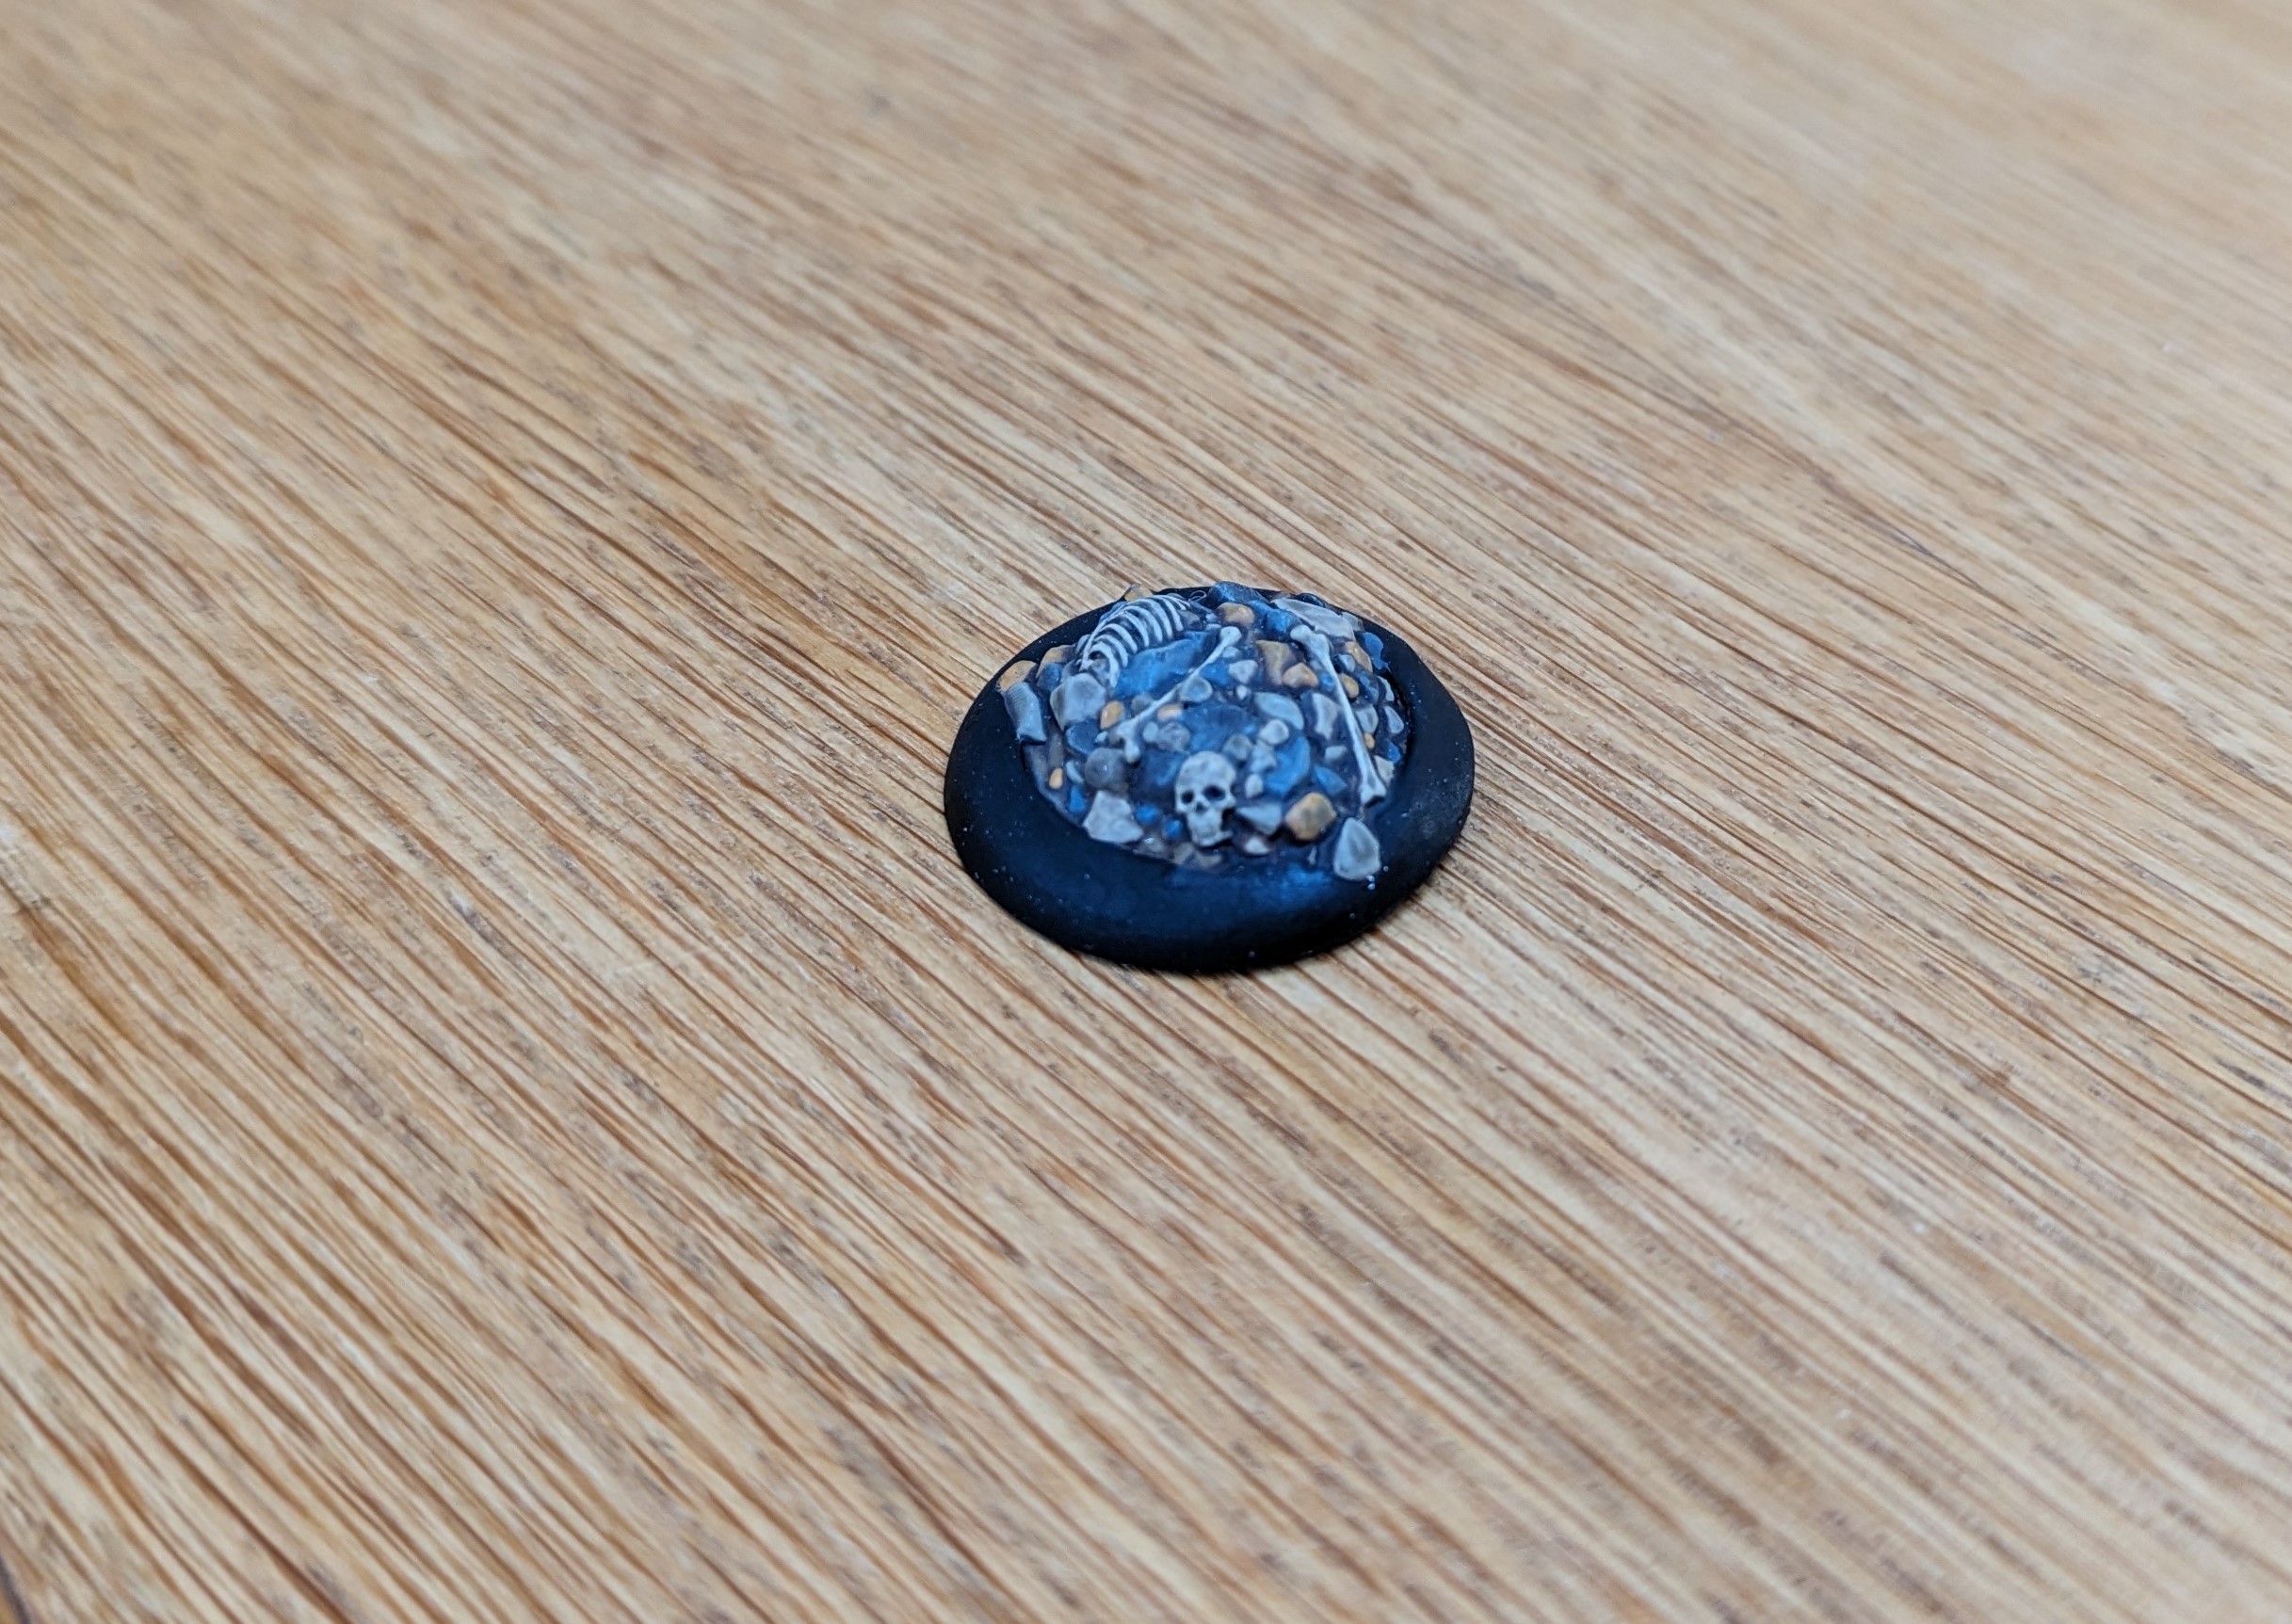
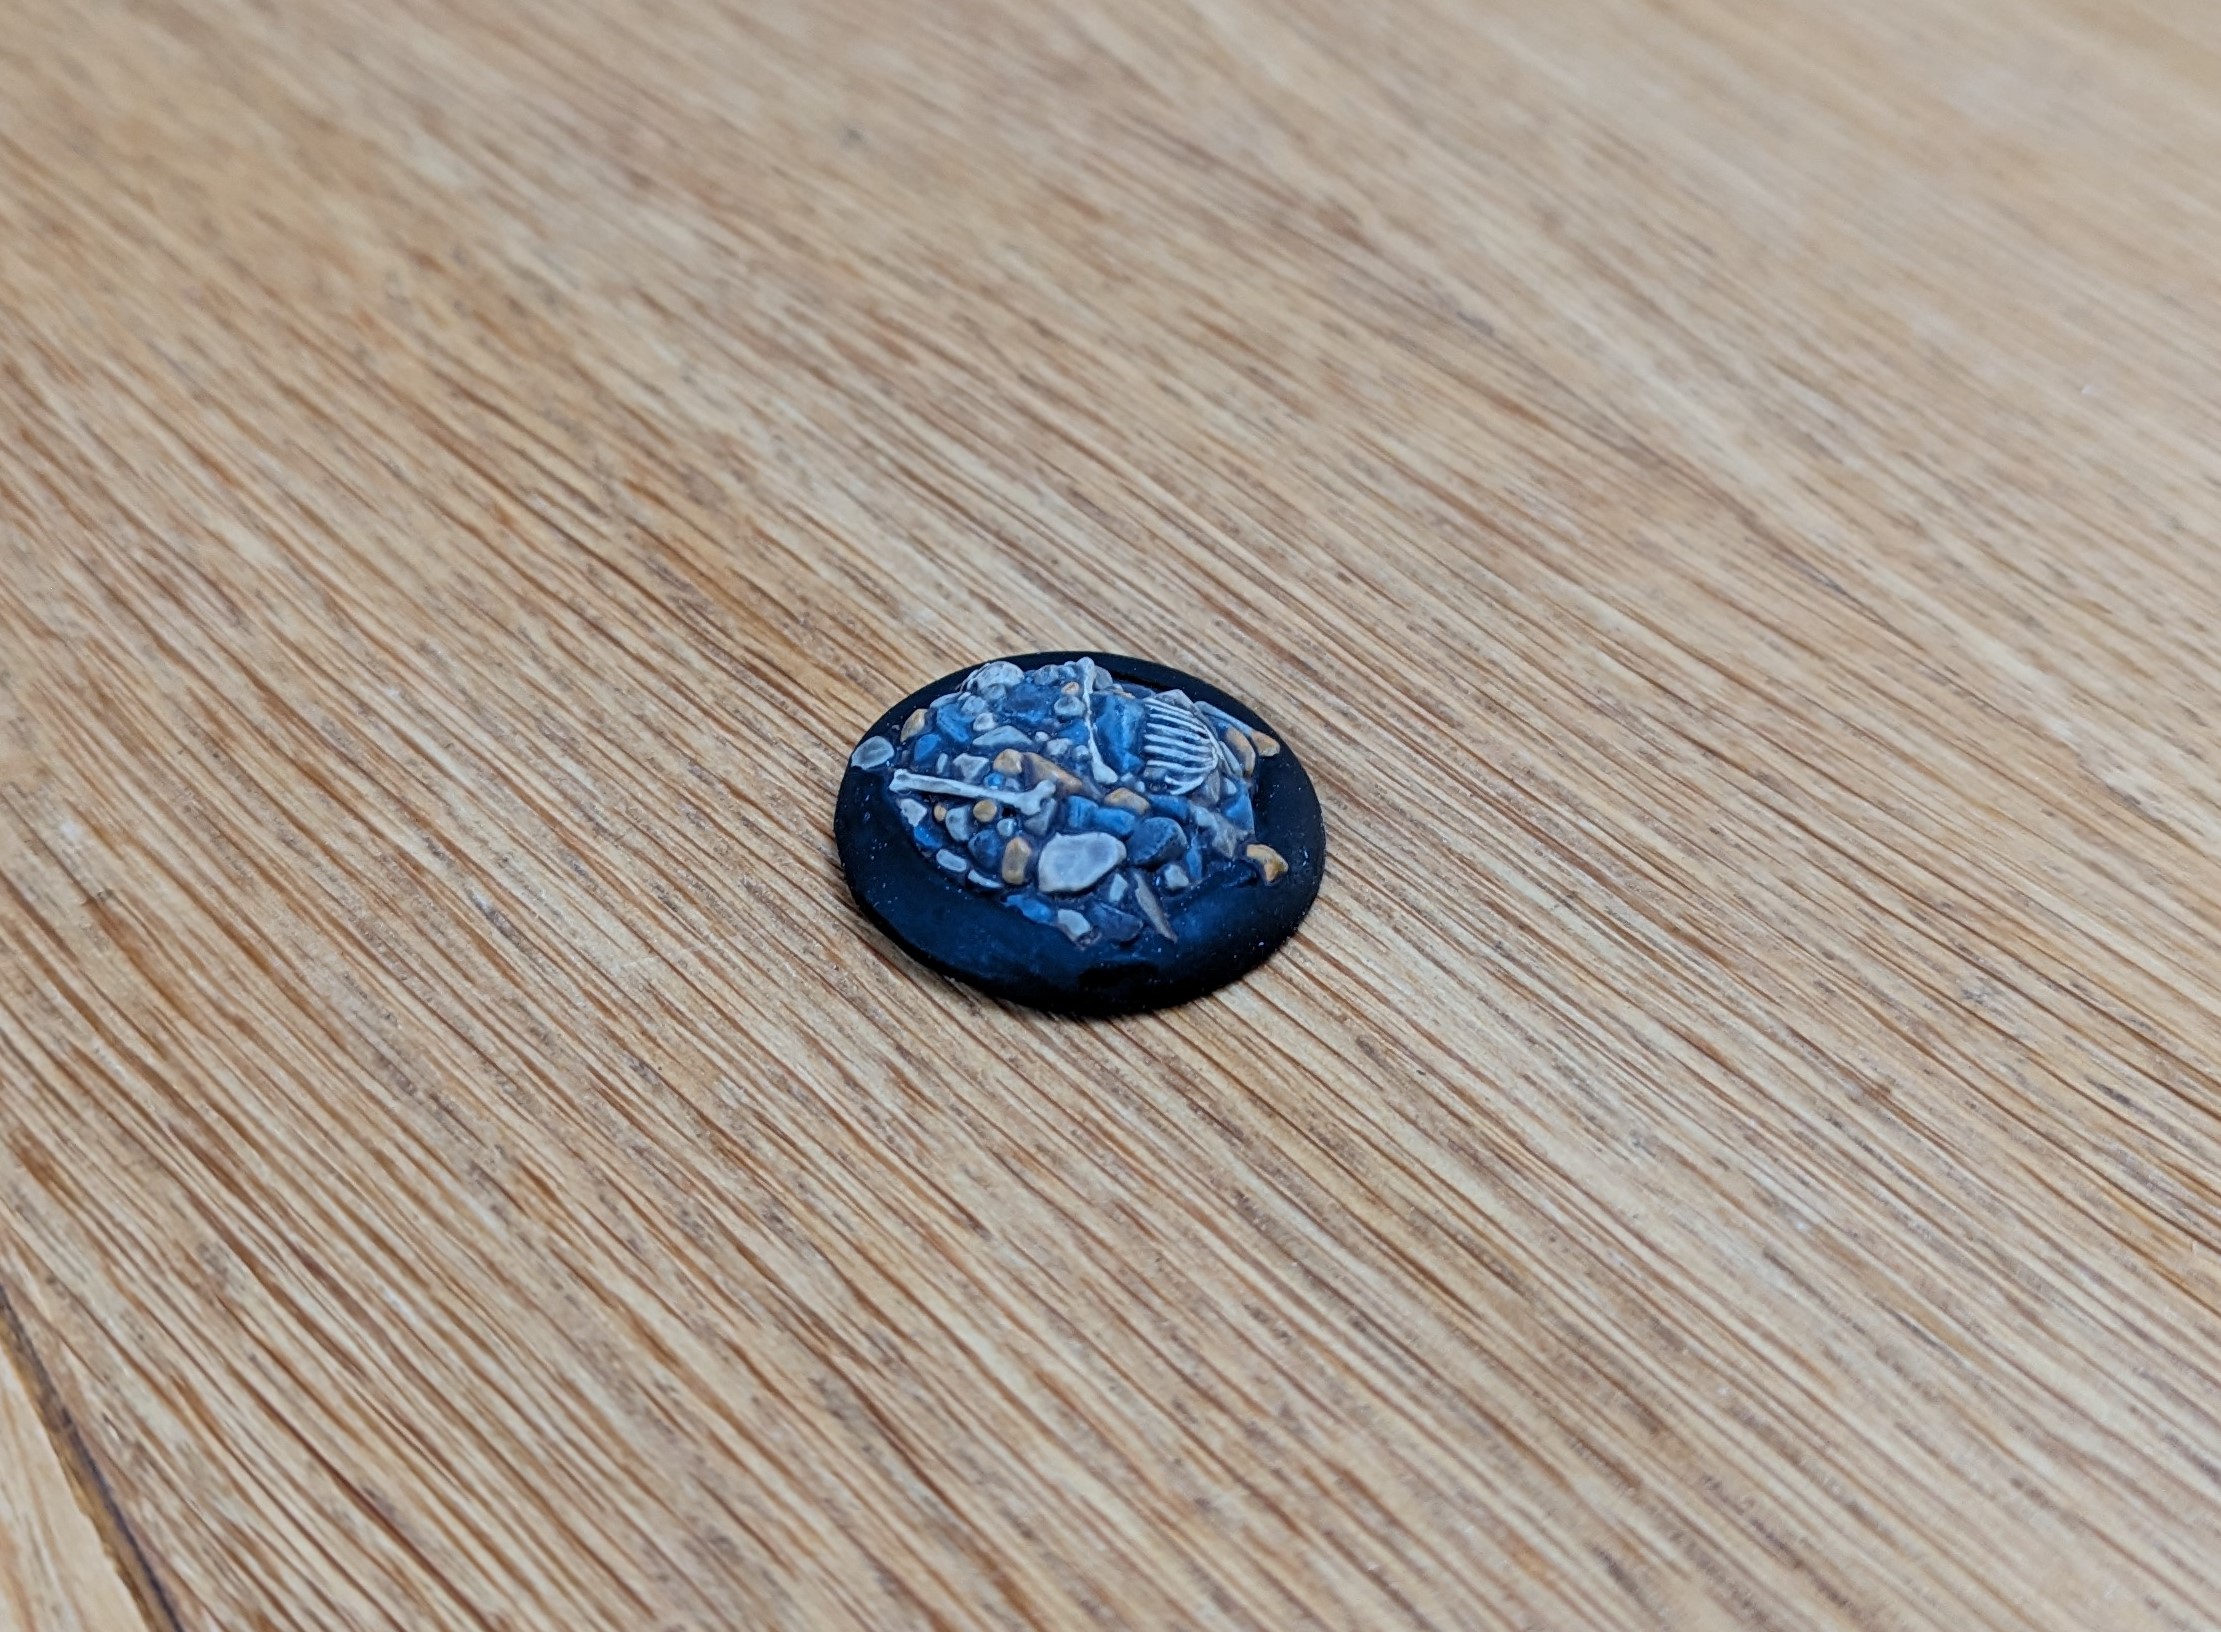
More Deployable Terrain
As my son has a couple of terrain pieces he can buy into his warband that provide him with a boost, I thought it was time that I added some options to my force. The Cult of Yurei have a few options that they can use, two of which look fairly easy to put together. Firstly there is a rubbish pile, which in game generates a small rat swarm for free every time a victory point is scored. The other terrain piece is a cursed honden. In game, this allows me to drain 1 Ki from any enemy model within 4″, which should come in quite handy against the Temple of Rokan who just love their Ki feats.
For the rubbish pile, I’ve searched the 3d printing sites for a small pile of rubble which I’ve digitally attached to a 30mm base and then printed out. I’ve picked out the various rocks with differing shades to provide a bit of contrast and then just given everything a heavy wash. It took less than half an hour to complete.
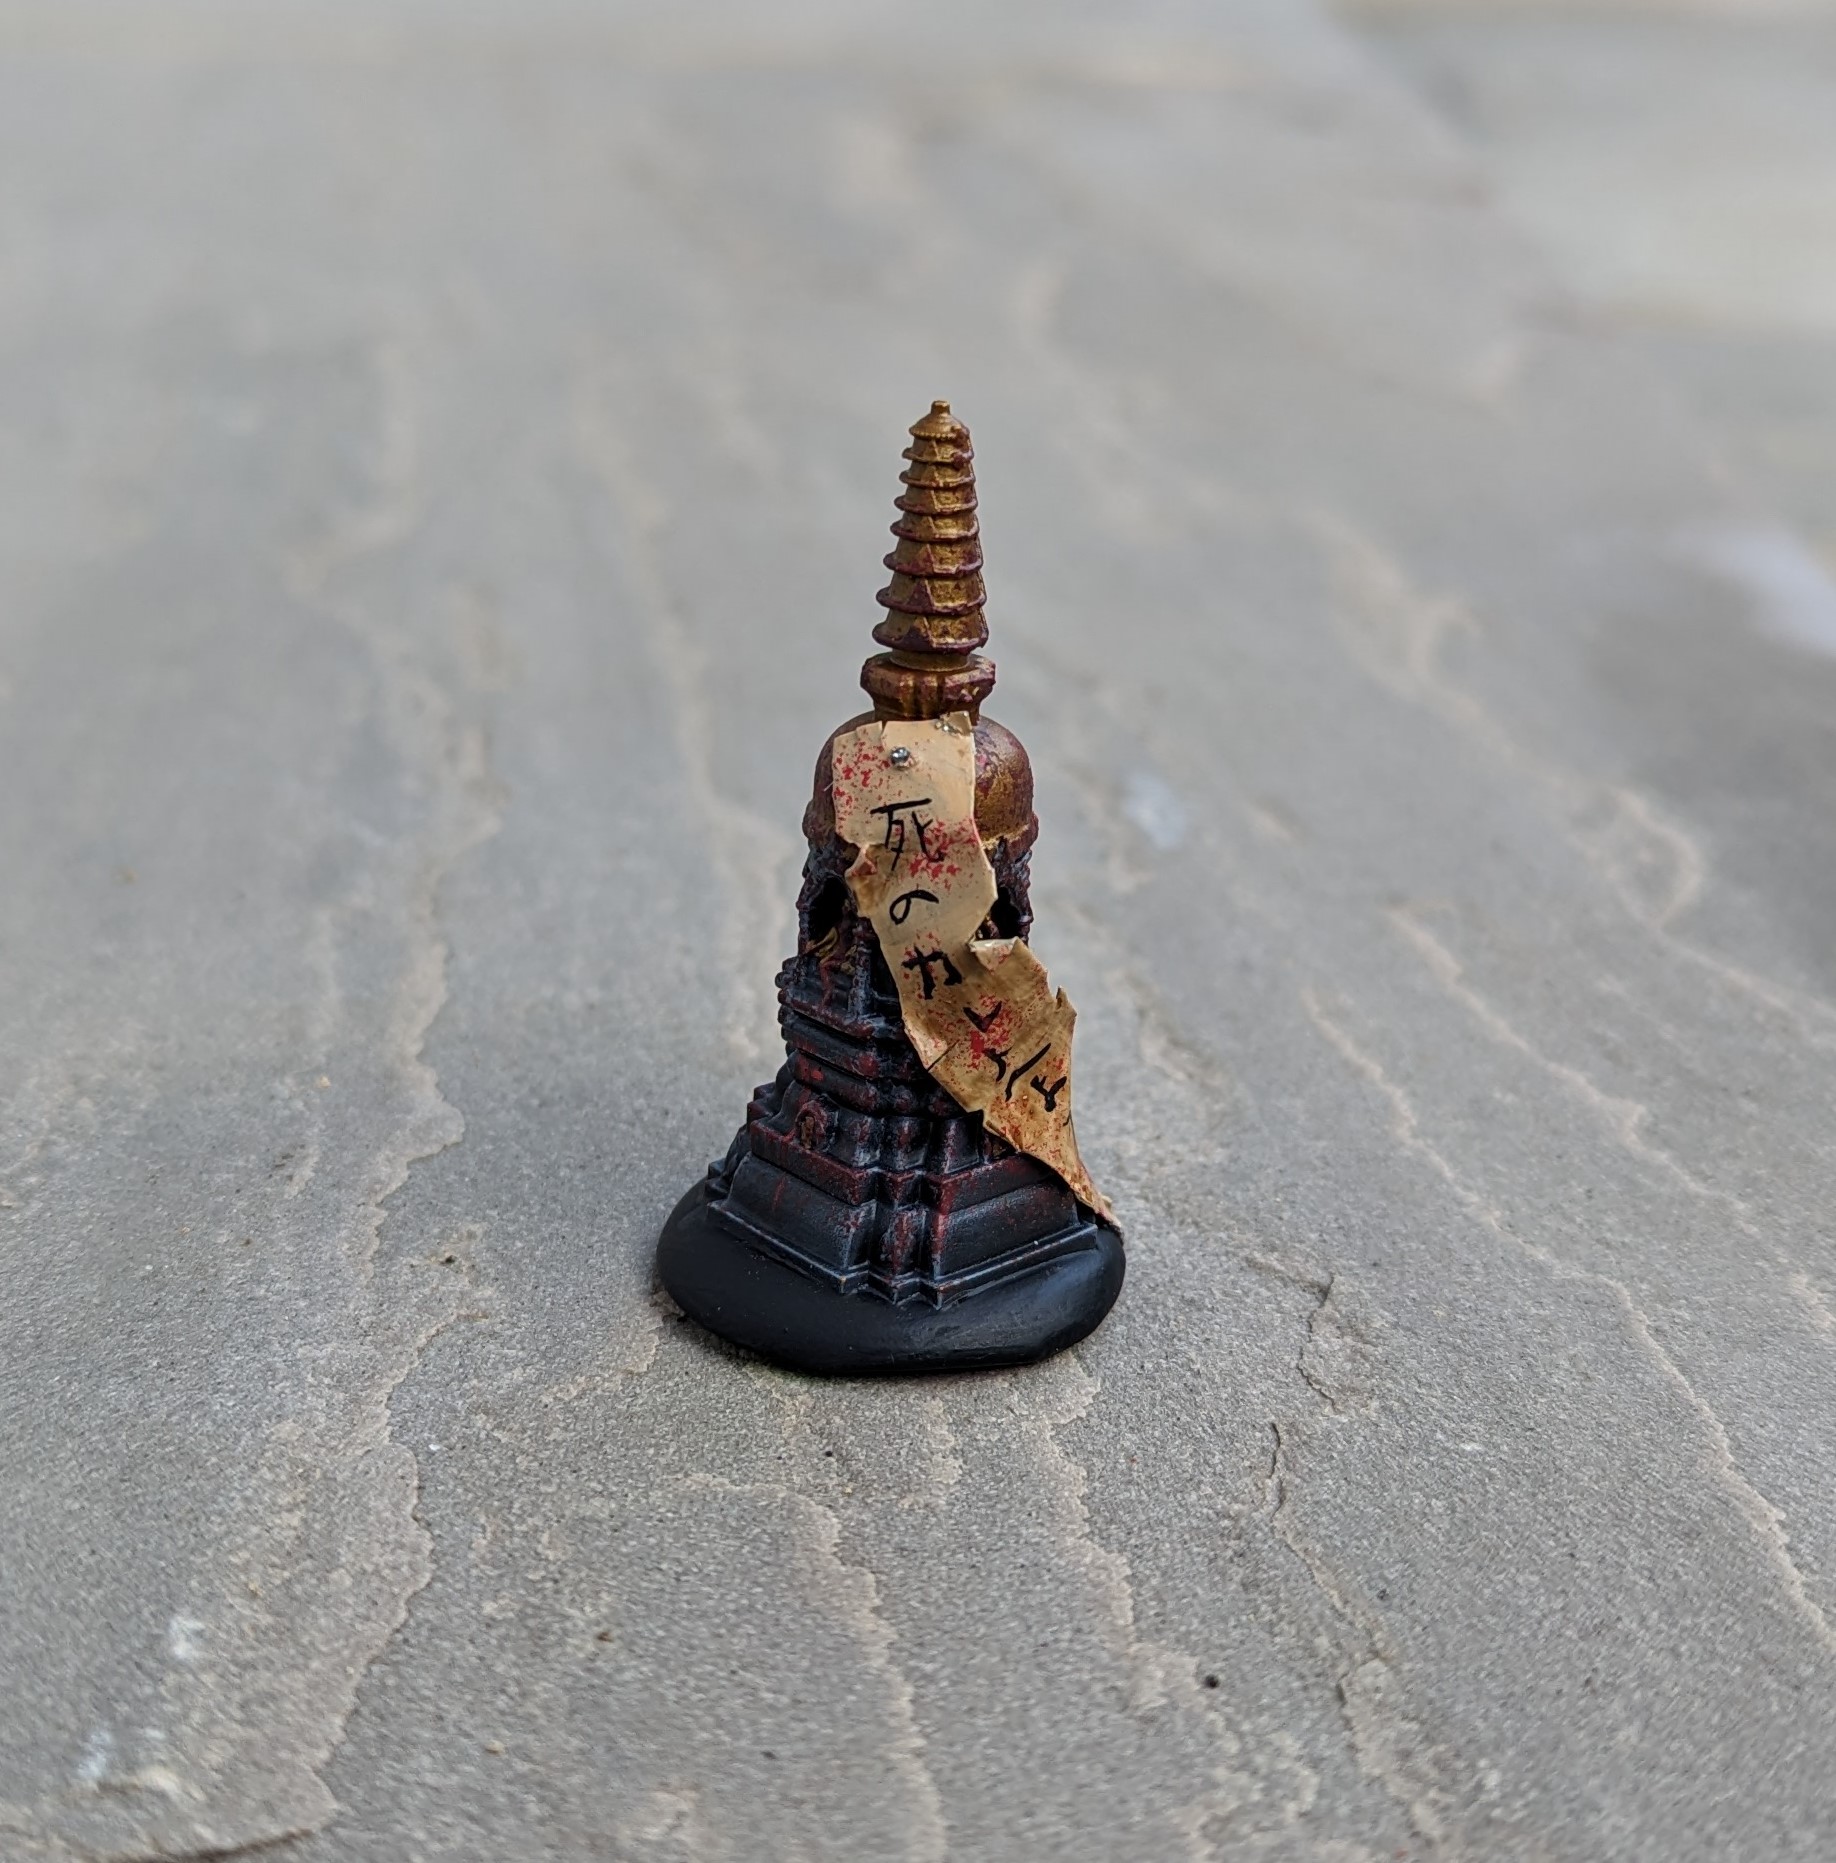
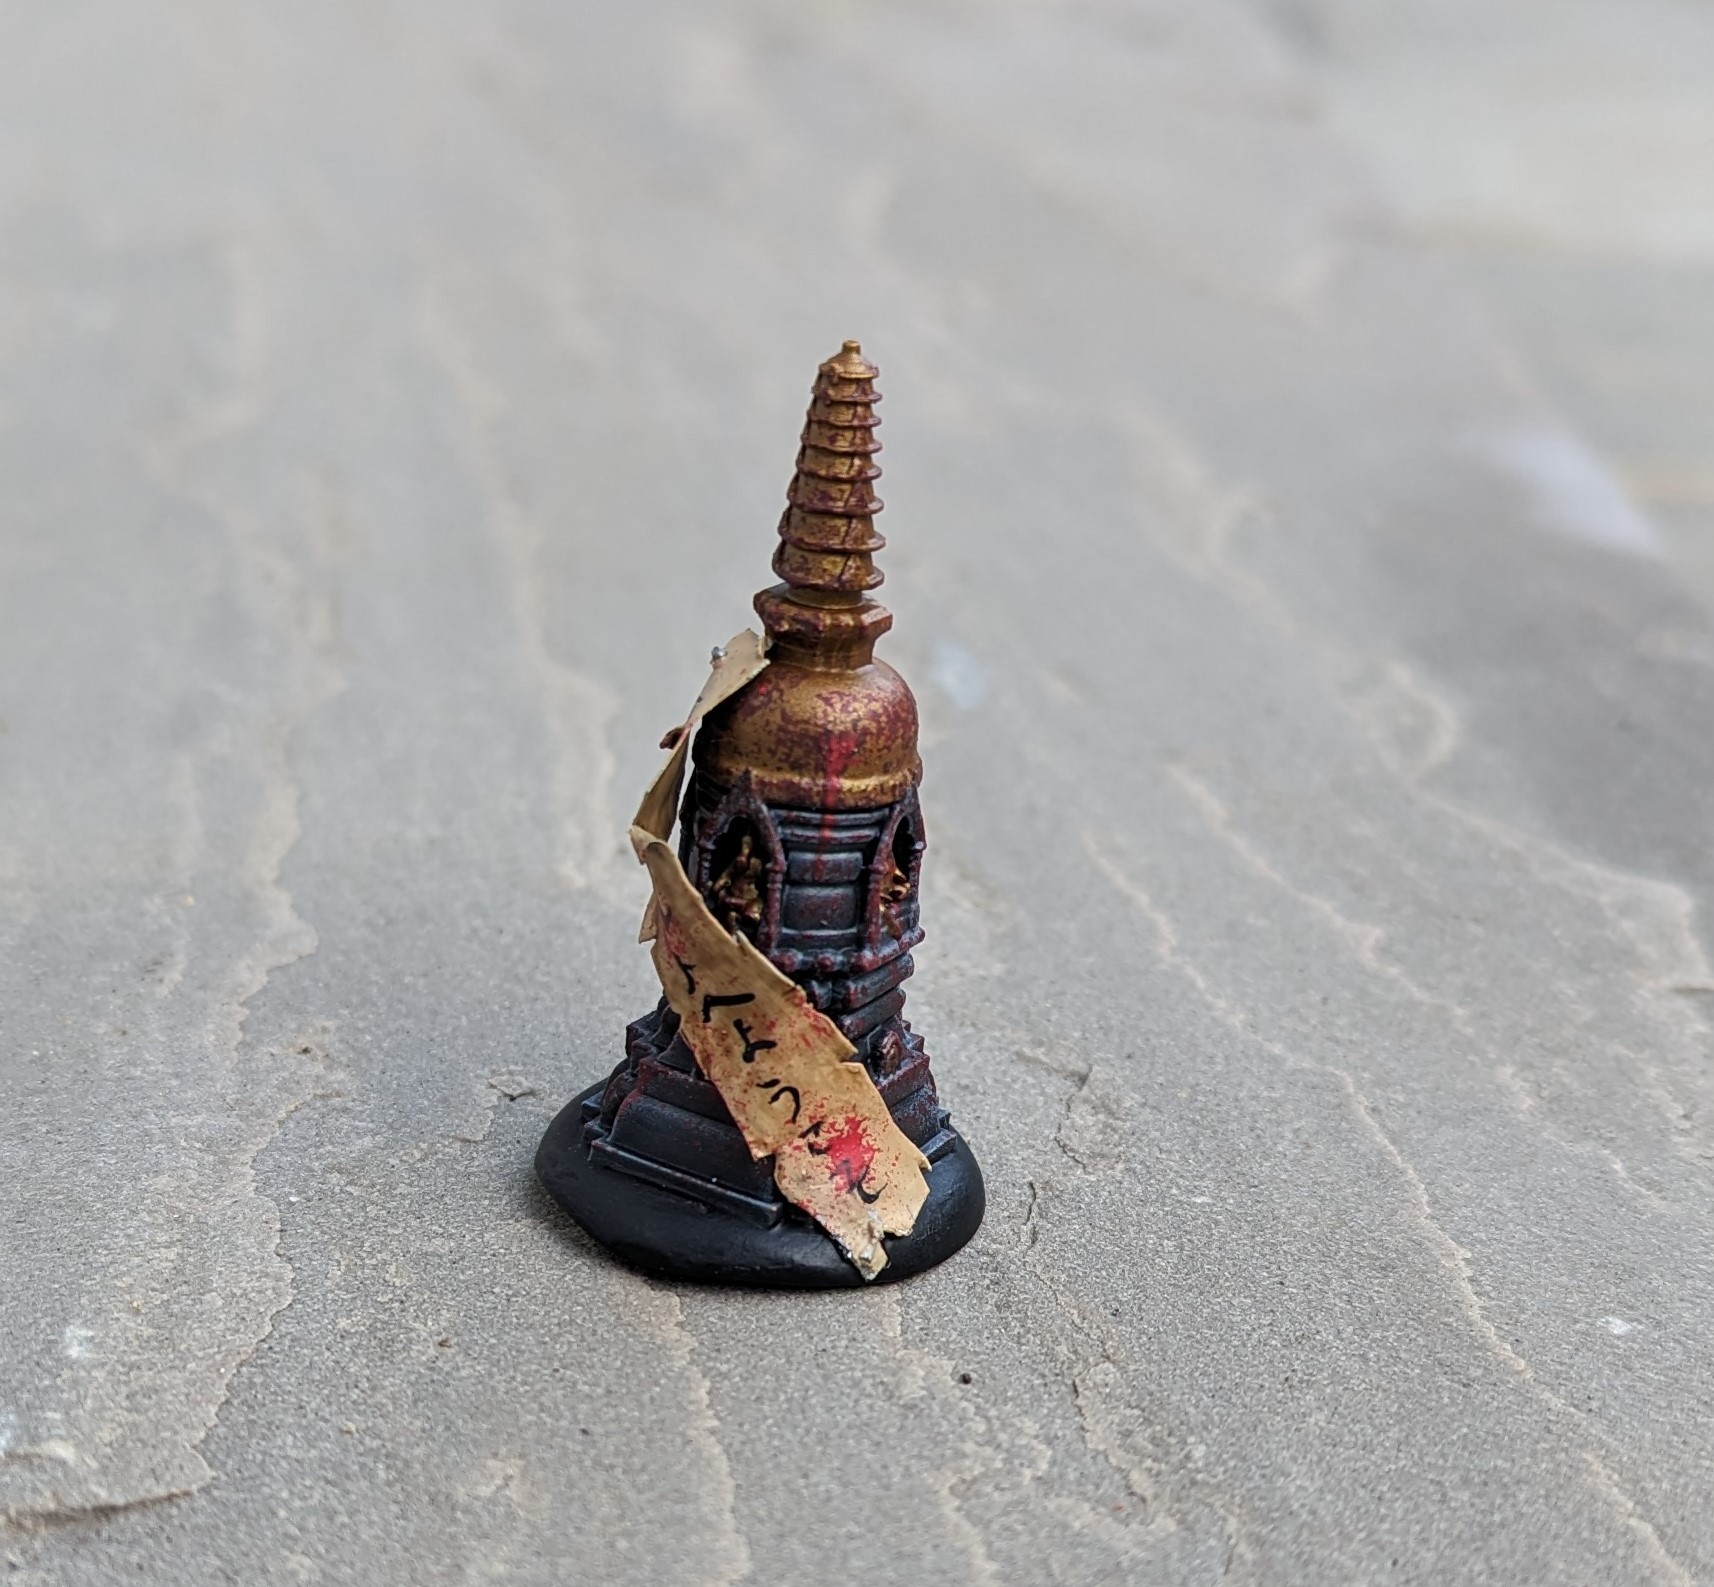
A honden is the centre of a shrine and the most holy place within it. It is usually represented by a mirror or often a statue. In this case, I’ve chosen to go with a stupa that has been digitally captured from a shrine and then turned into an stl file. I’ve not opted for a statue as there are other terrain pieces that are represented by statues and I wanted this to look a little different. Again, I’ve opted for a simple painting approach. A dark grey for the stone which I’ve given a wash of black and then a dry brush. The top is shining bronze which I’ve then gently dry brushed a grey over to take the shine off a litte.
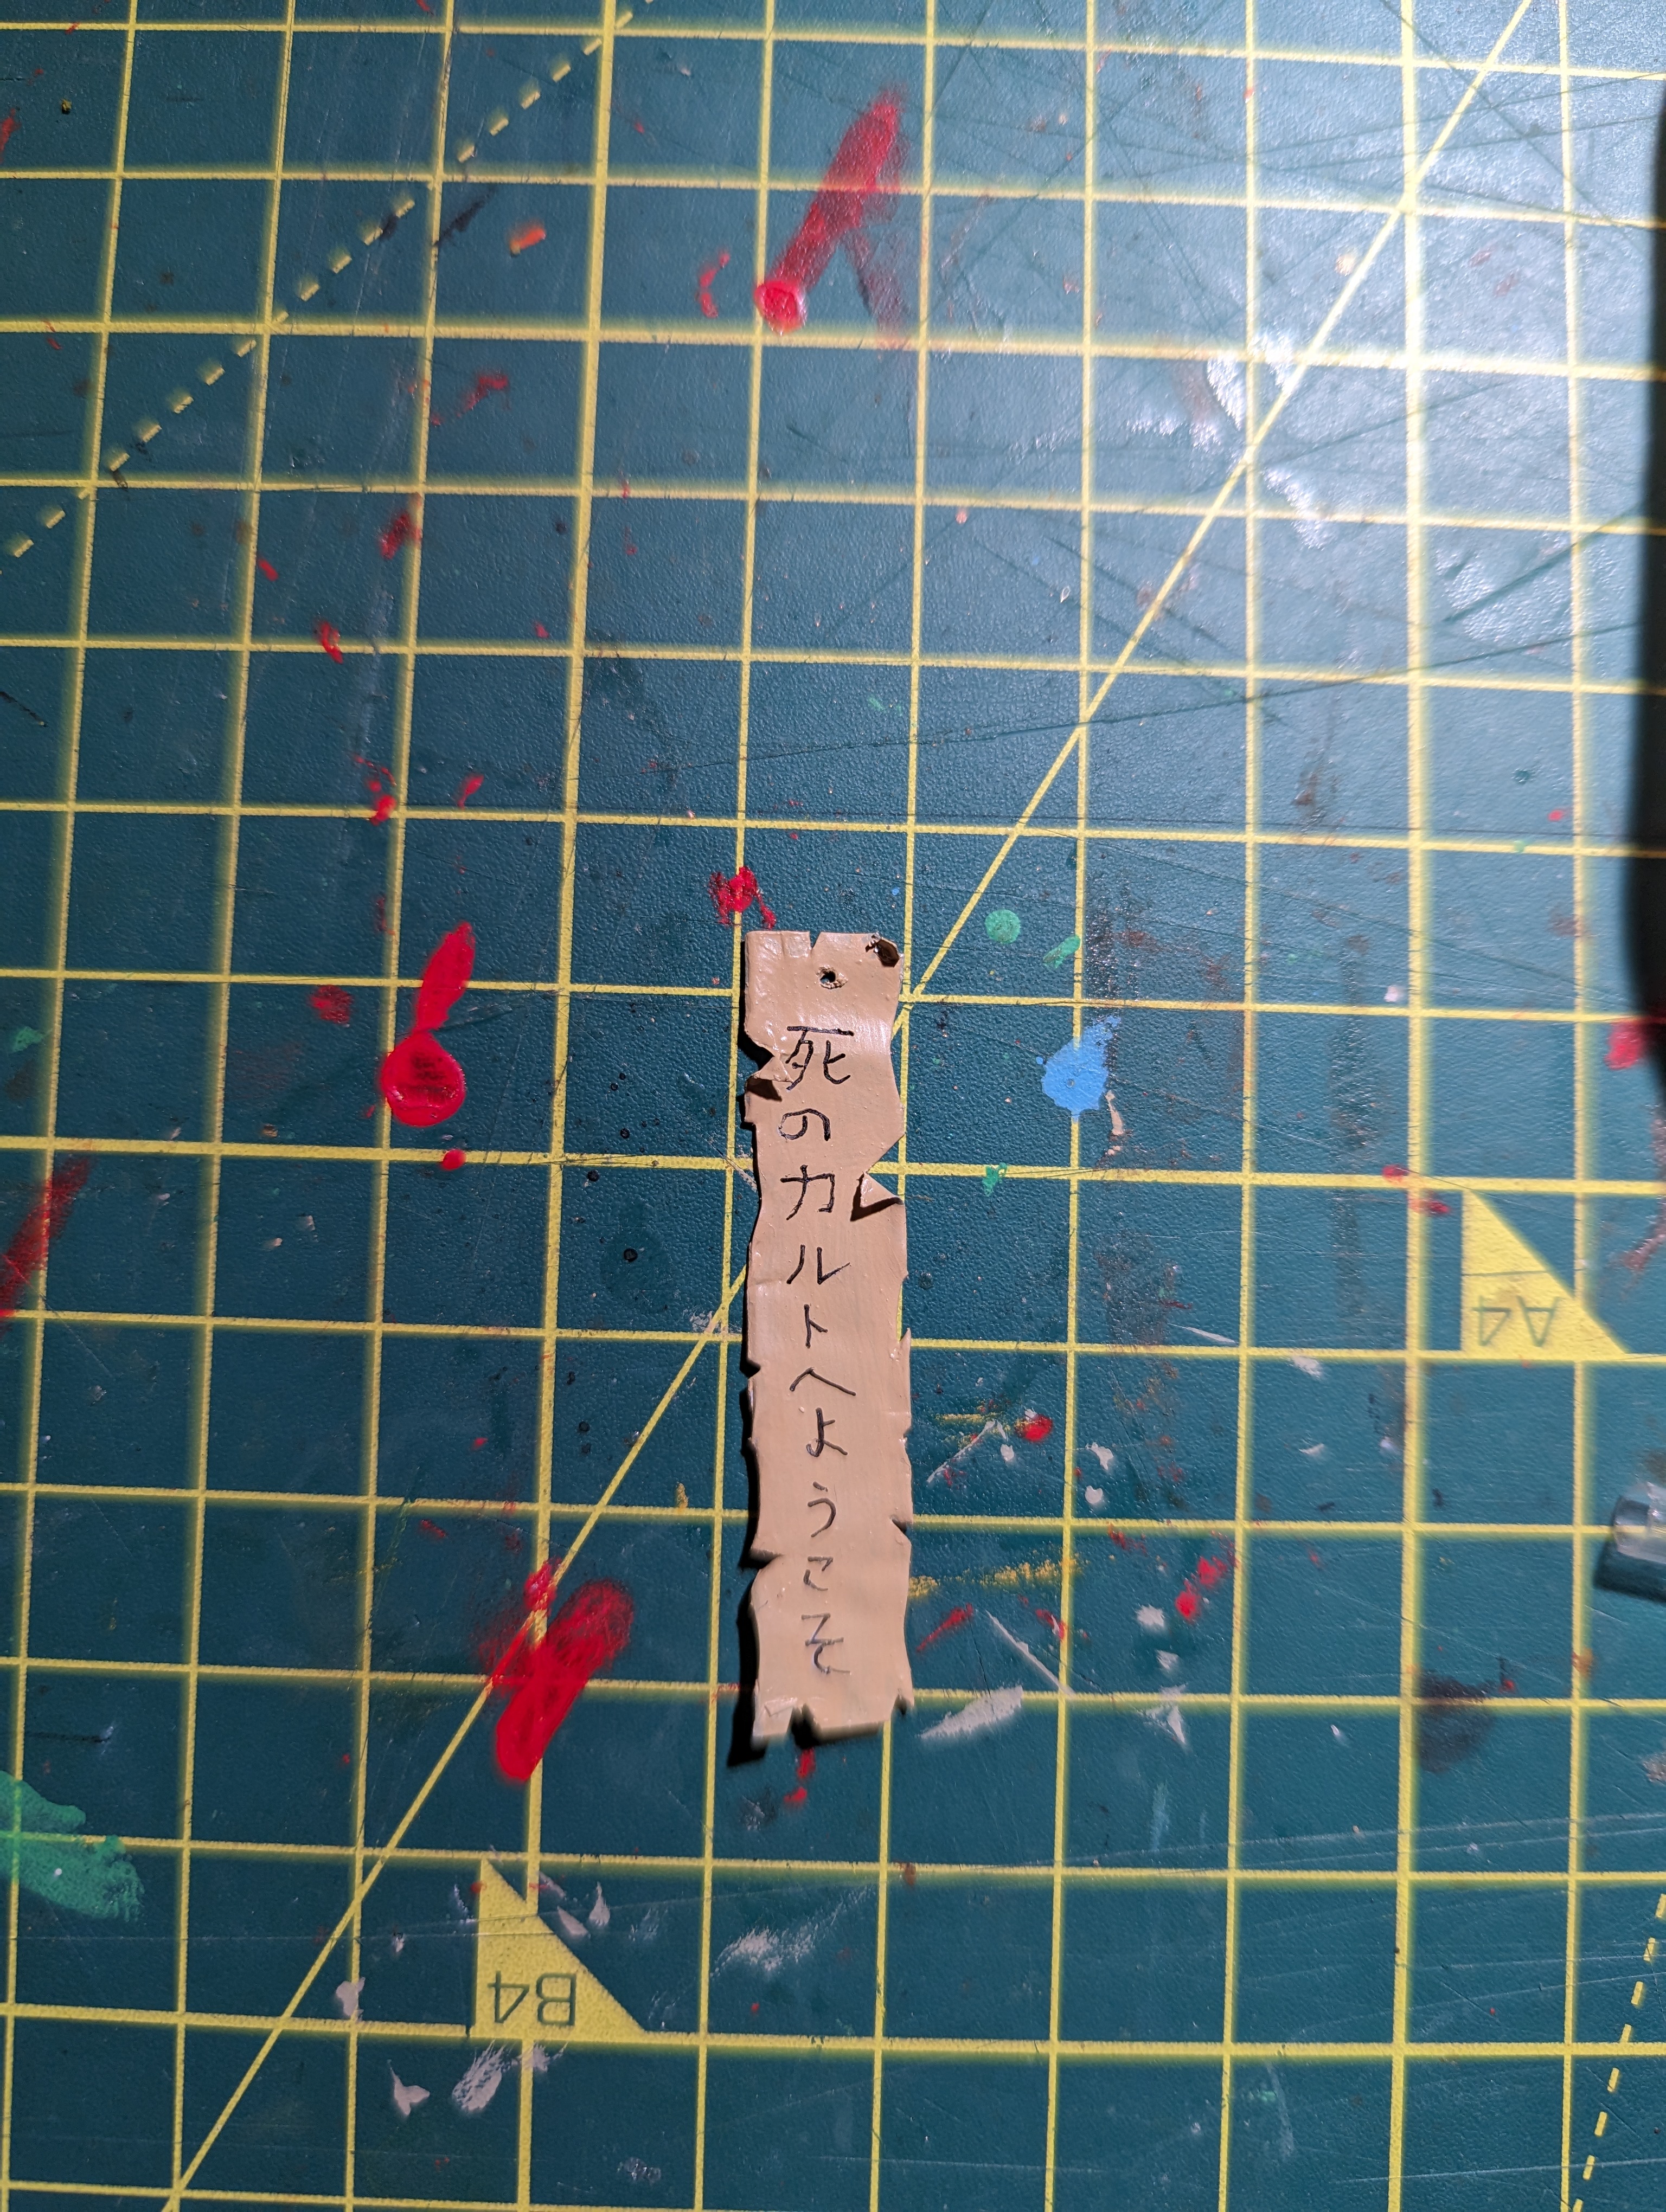
To make it cursed, I’ve stippled a reddish brown over the model using a sponge to represent dried blood followed by a lighter stippling of red as the ‘fresh’ blood. The banner is cut from the metal foil found around the top of wine bottles. This did of course mean that I had to drink the bottle of wine first, but I was prepared to make that sacrifice. After cutting the foil to the correct shape, I’ve broken up the uniformity of the edges to make it look more battered and ripped/torn. I used Google translate for the lettering, it’s supposed to say ‘join the cult’ but I’ll settle for not insulting any Japanese who read it.
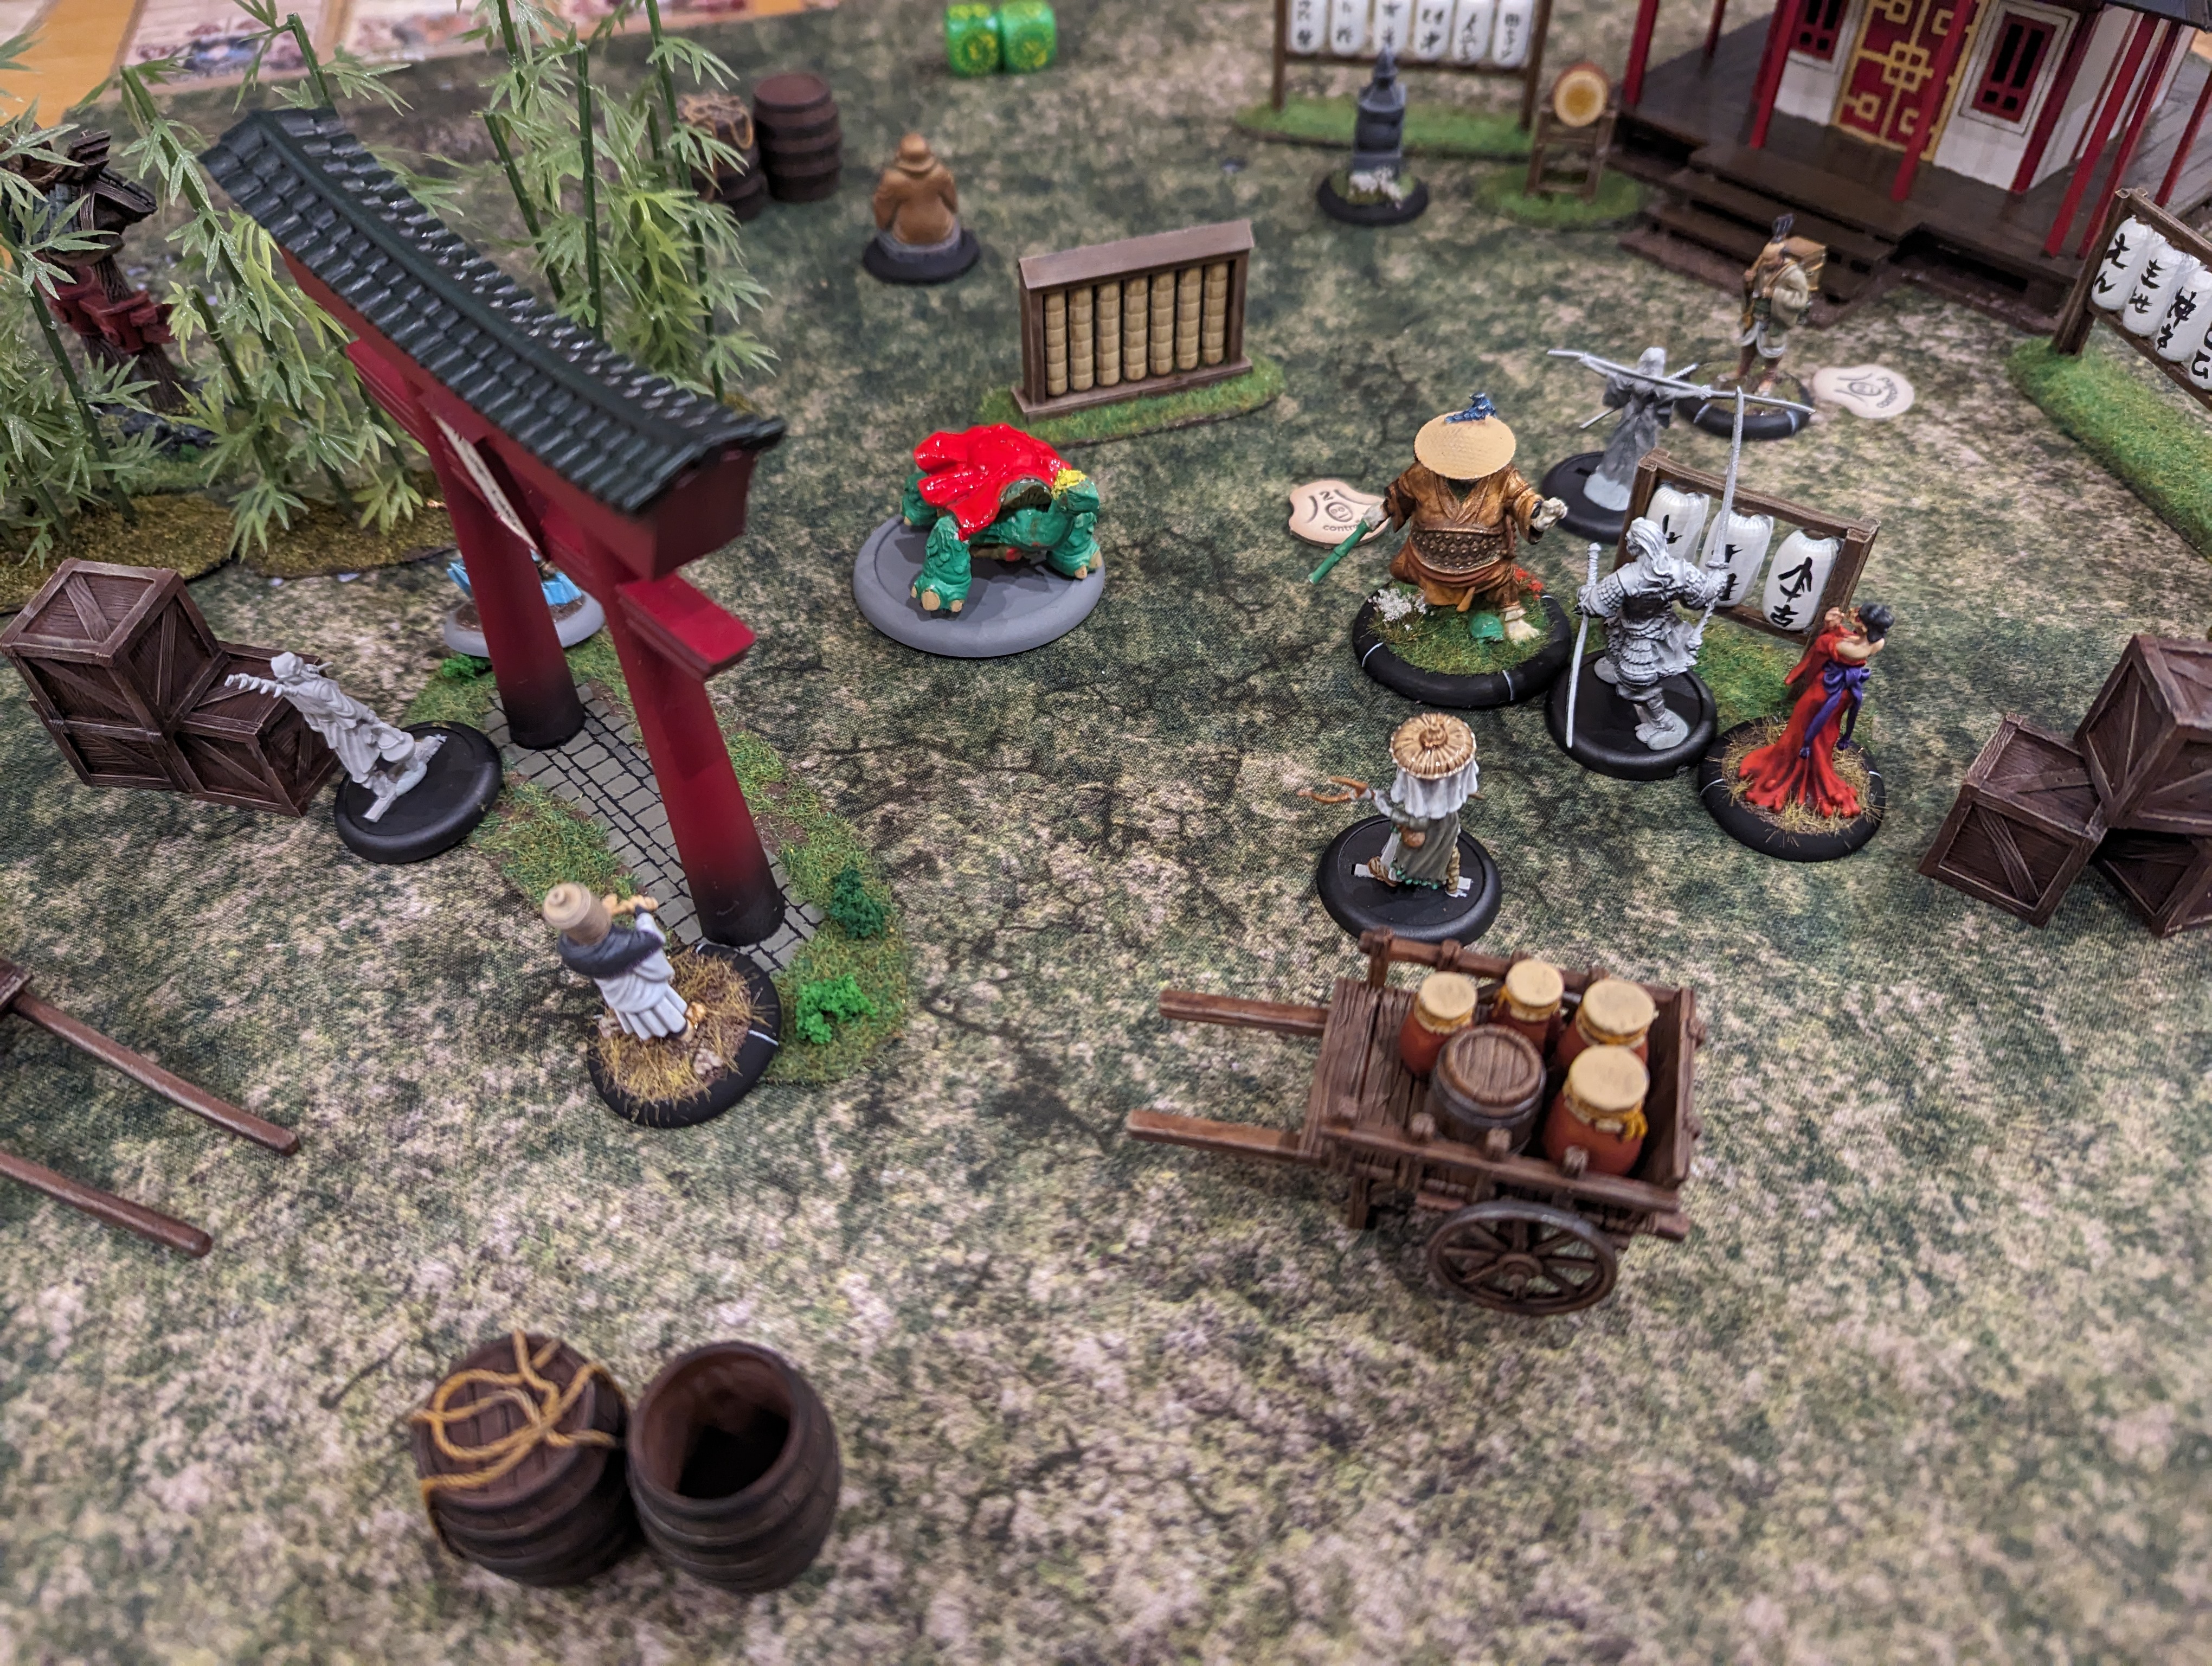
Battle Report No. 4
Game 4
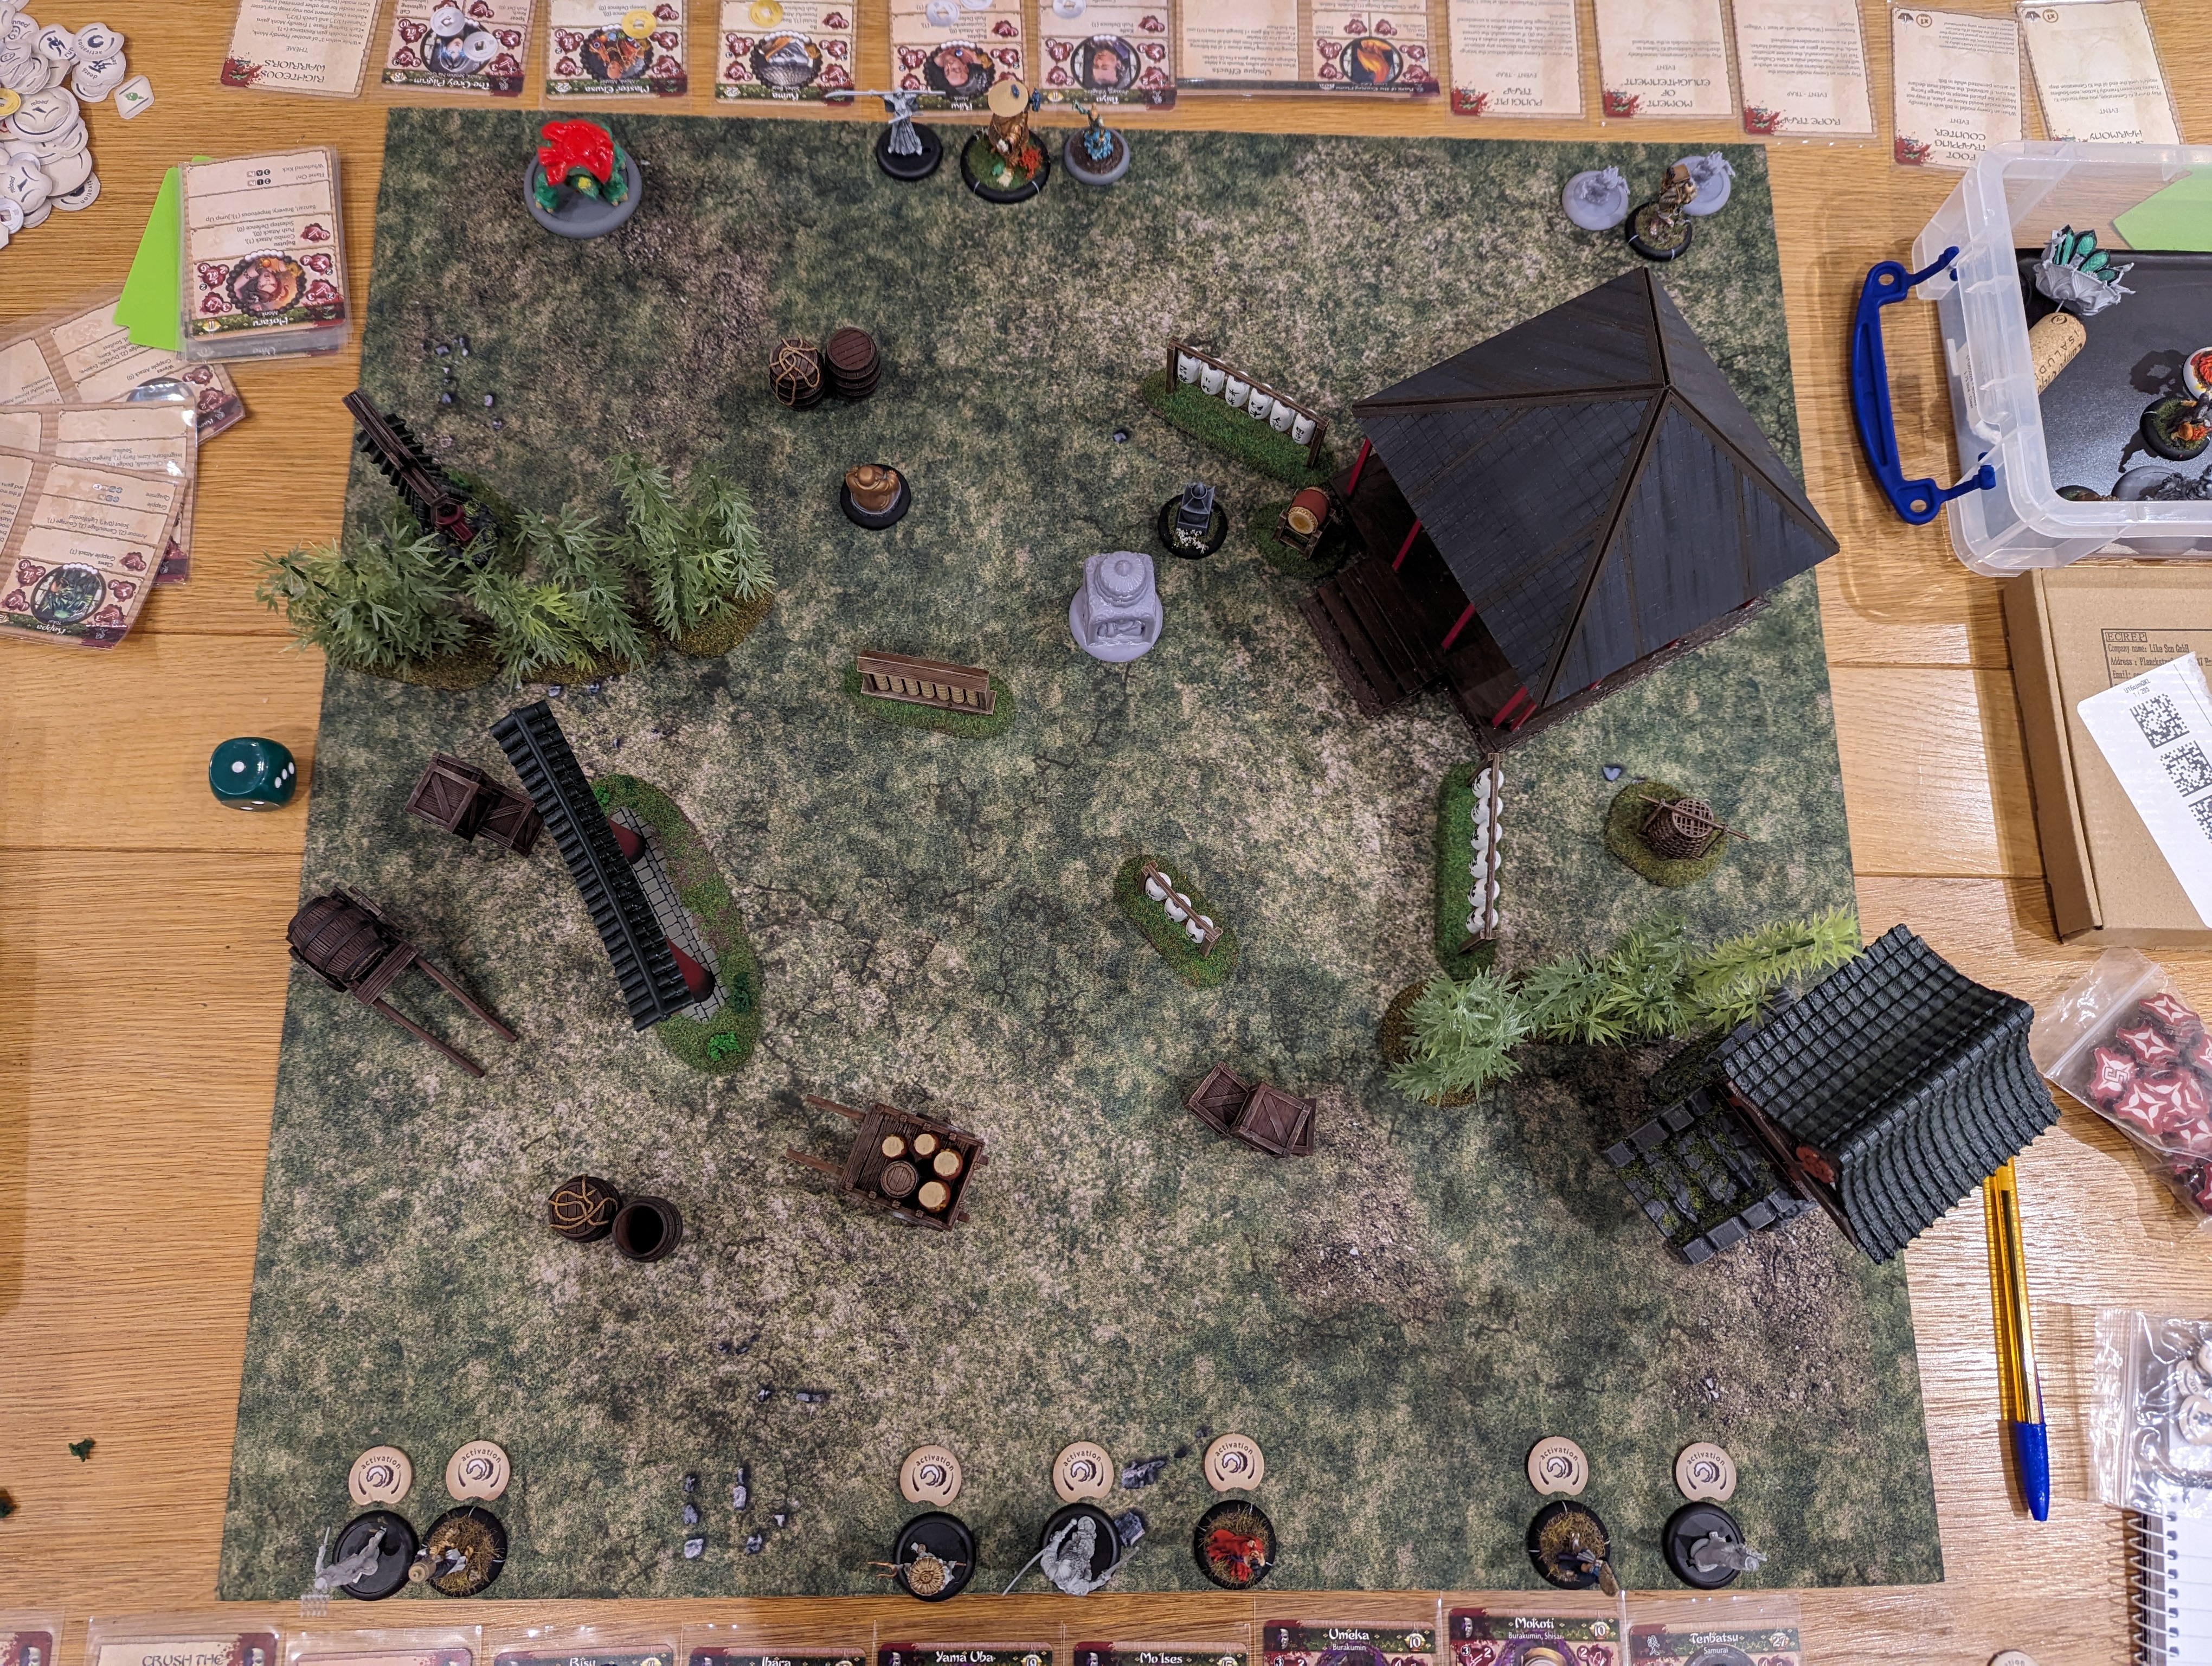
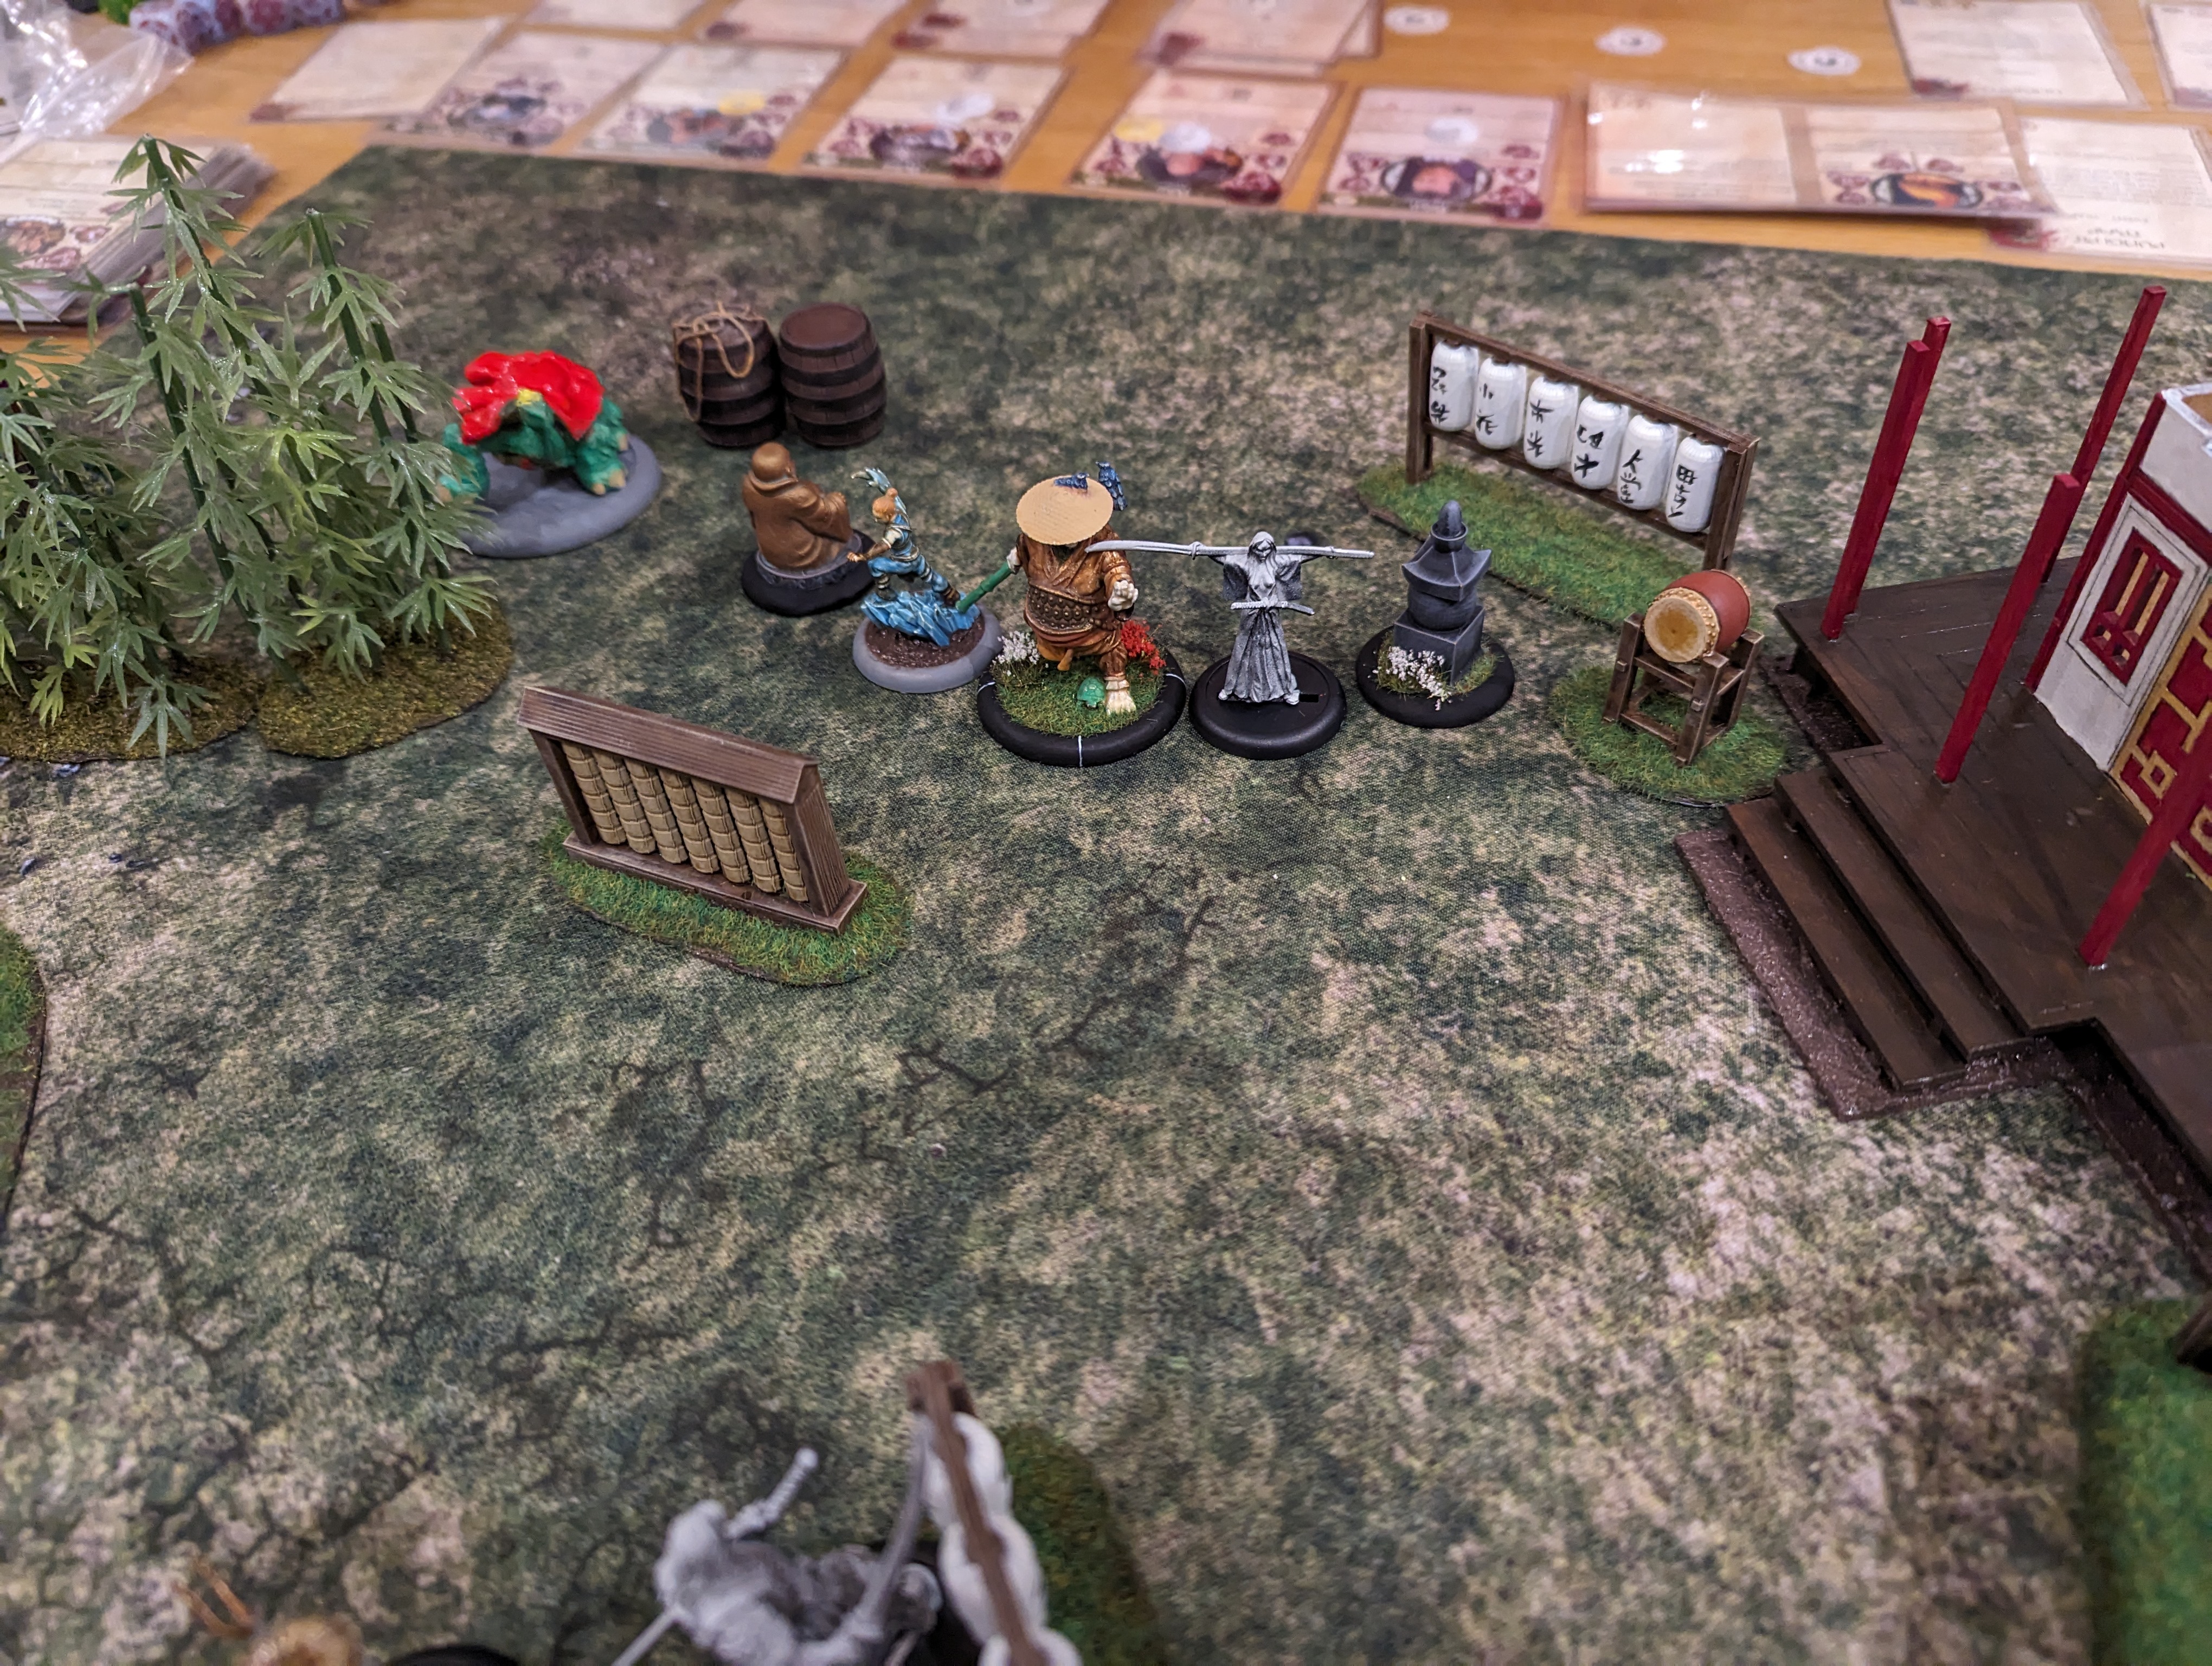
Time for another game. My son wanted to play a bigger game and suggested 150 points. While Bushido will stretch to that limit, it will take some time to complete. I’m also not sure I have enough Cult of Yurei models to get to 150 points, so I talked him down to 120. This should allow another couple of models per warband and/or a few more enhancement cards to be added. My son also suggested that the game should be first to destroy 50 points of enemy models, to which I agreed.
For my warband, I went with the following,
- Mo Ises (an assassin that likes stabbing people in the back)
- Mokoti (dreadful in combat but can control enemy models)
- Umeka (another assassin armed with a pair of scissors – I guess she also likes hobby crafting)
- Yama Uba
- Risu (A pitch fork wielding nutter who can poison people from afar) who I’ve also given an enhancement card Violence Fetish to provide a bigger punch in combat
- Ibara (Can handle himself in combat and can throw some fire around at range)
- Tenbatsu (another ronin who’s a combat monster)
Drain Spirit Event. This allows me to steal a couple of ki tokens from an enemy model
Feed on Fear. Every time an enemy fails a Fear test, this card gains a Ki token. When it gets to 4 ki, I lose the card and can distribute the ki across my models
Crush the oppressed. When I play this card, all of the state markers on the enemy get doubled
Cursed Honden. This is a terrain piece. At the start of each turn, any enemy model within 4” loses a Ki token
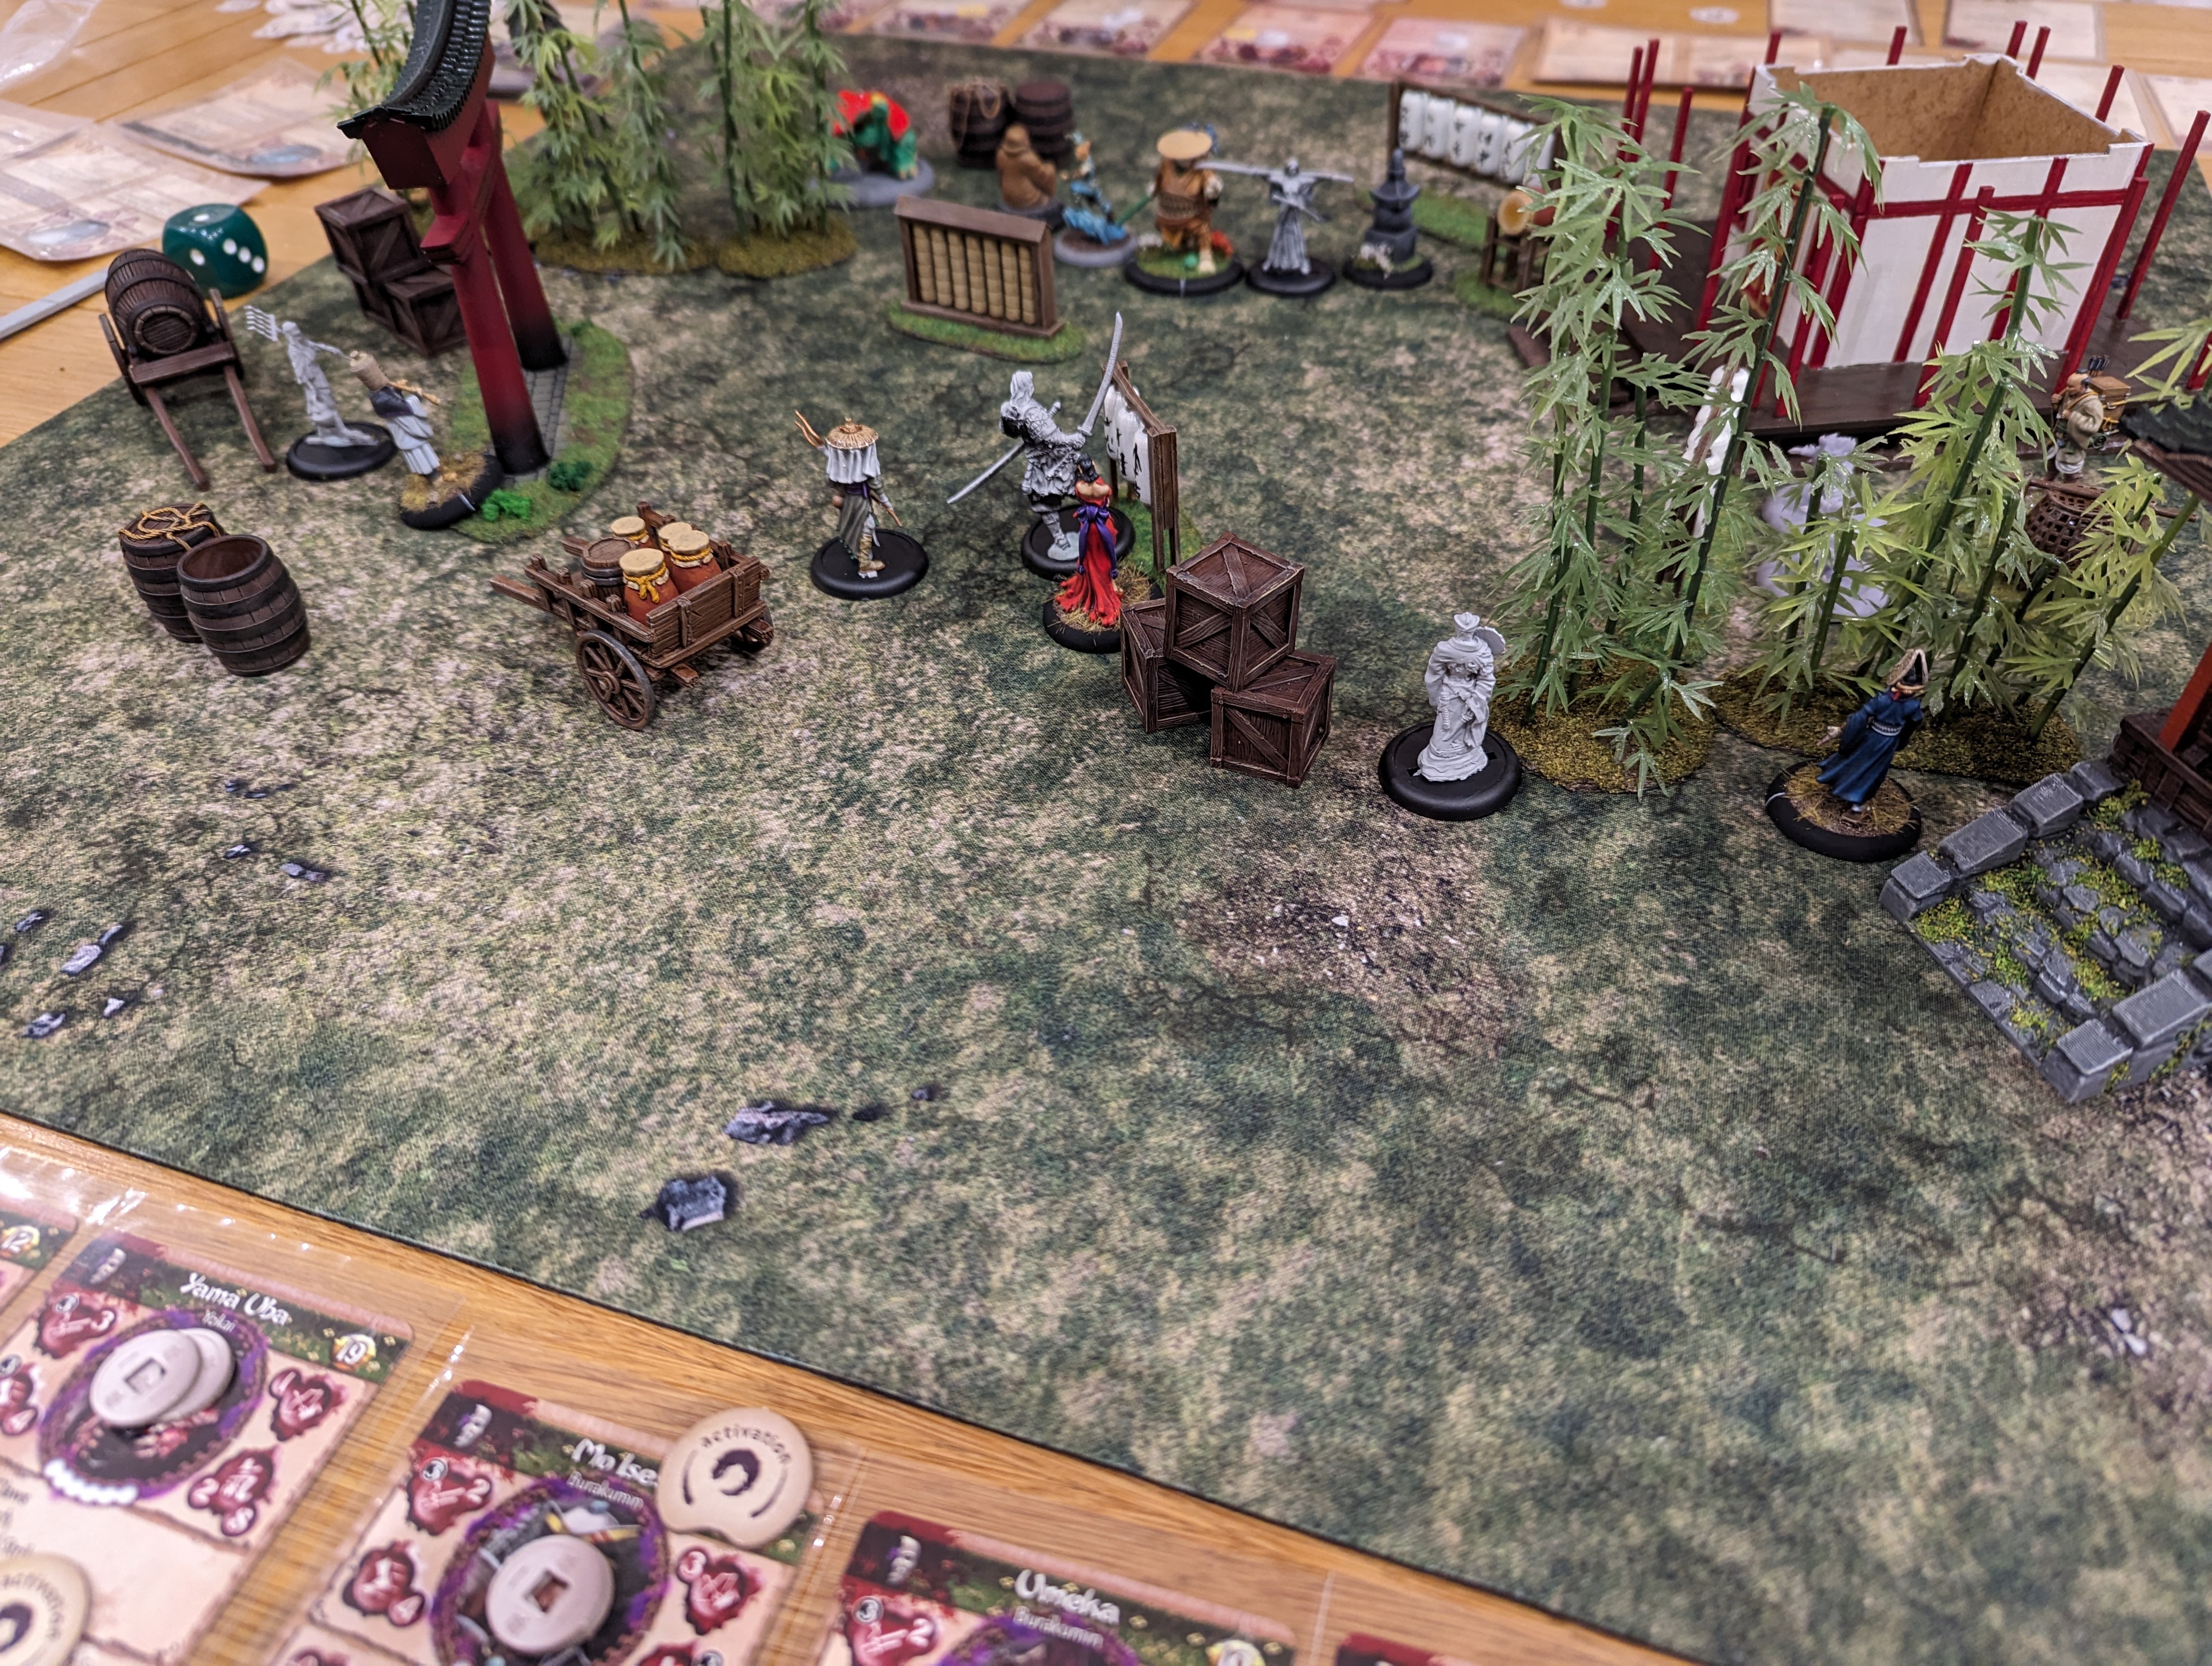
My son opted for the following,
- Master Ekusa (who’s a monk riding a tortoise and can heal, remove activation tokens and stops attacks due to his zen like demeanour)
- Taiyo (a ronin from the starter set who has a low points cost and is able to resupply friendly models. He’s also a Villager, allowing my son to take the two pit trap cards below)
- The Grey Pilgrim (a lightening wielding ronin)
- Kuma (an angry, bo staff wielding panda who can root opponents to the spot while slapping them around a lot)
- 2 Kami of the evening flame (a flame spirit that provides a boost to nearby monks with the flame speciality)
- Riku (a water monk with a massively powerful tsunami Ki feat and also quite handy in combat)
My son also took a lot of enhancement cards including his favourite trap cards and a couple of cards that allow him to generate extra Ki. The Temple of Rokan really excel when they have Ki, their Ki feats and abilities are very powerful. He also took two terrain pieces, the Gorinto which allows 1 model within 6” to generate an extra ki token. And a Roadside Idol that allows a model in base to base contact to generate Ki for an activation.
Turn 1.
My son clearly didn’t like the fact that I had bought some terrain that drains Ki from his models and went full tilt to destroy it. In hind sight, I probably deployed it too far forward as he was able to run the Grey Pilgrim forward into base contact with it and then spend an activation to destroy it. So much for my Cursed Honden, with the only small crumb of comfort being that it cost the Grey Pilgrim an activation to deal with it, so at least they weren’t going to be using their ranged weapon on my warband this turn. Otherwise turn 1 was the usual moving forward and getting in to position. Kuma was able to spend his Virtue token to generate an extra Ki ready for his next round shenanigans
Turn 2.
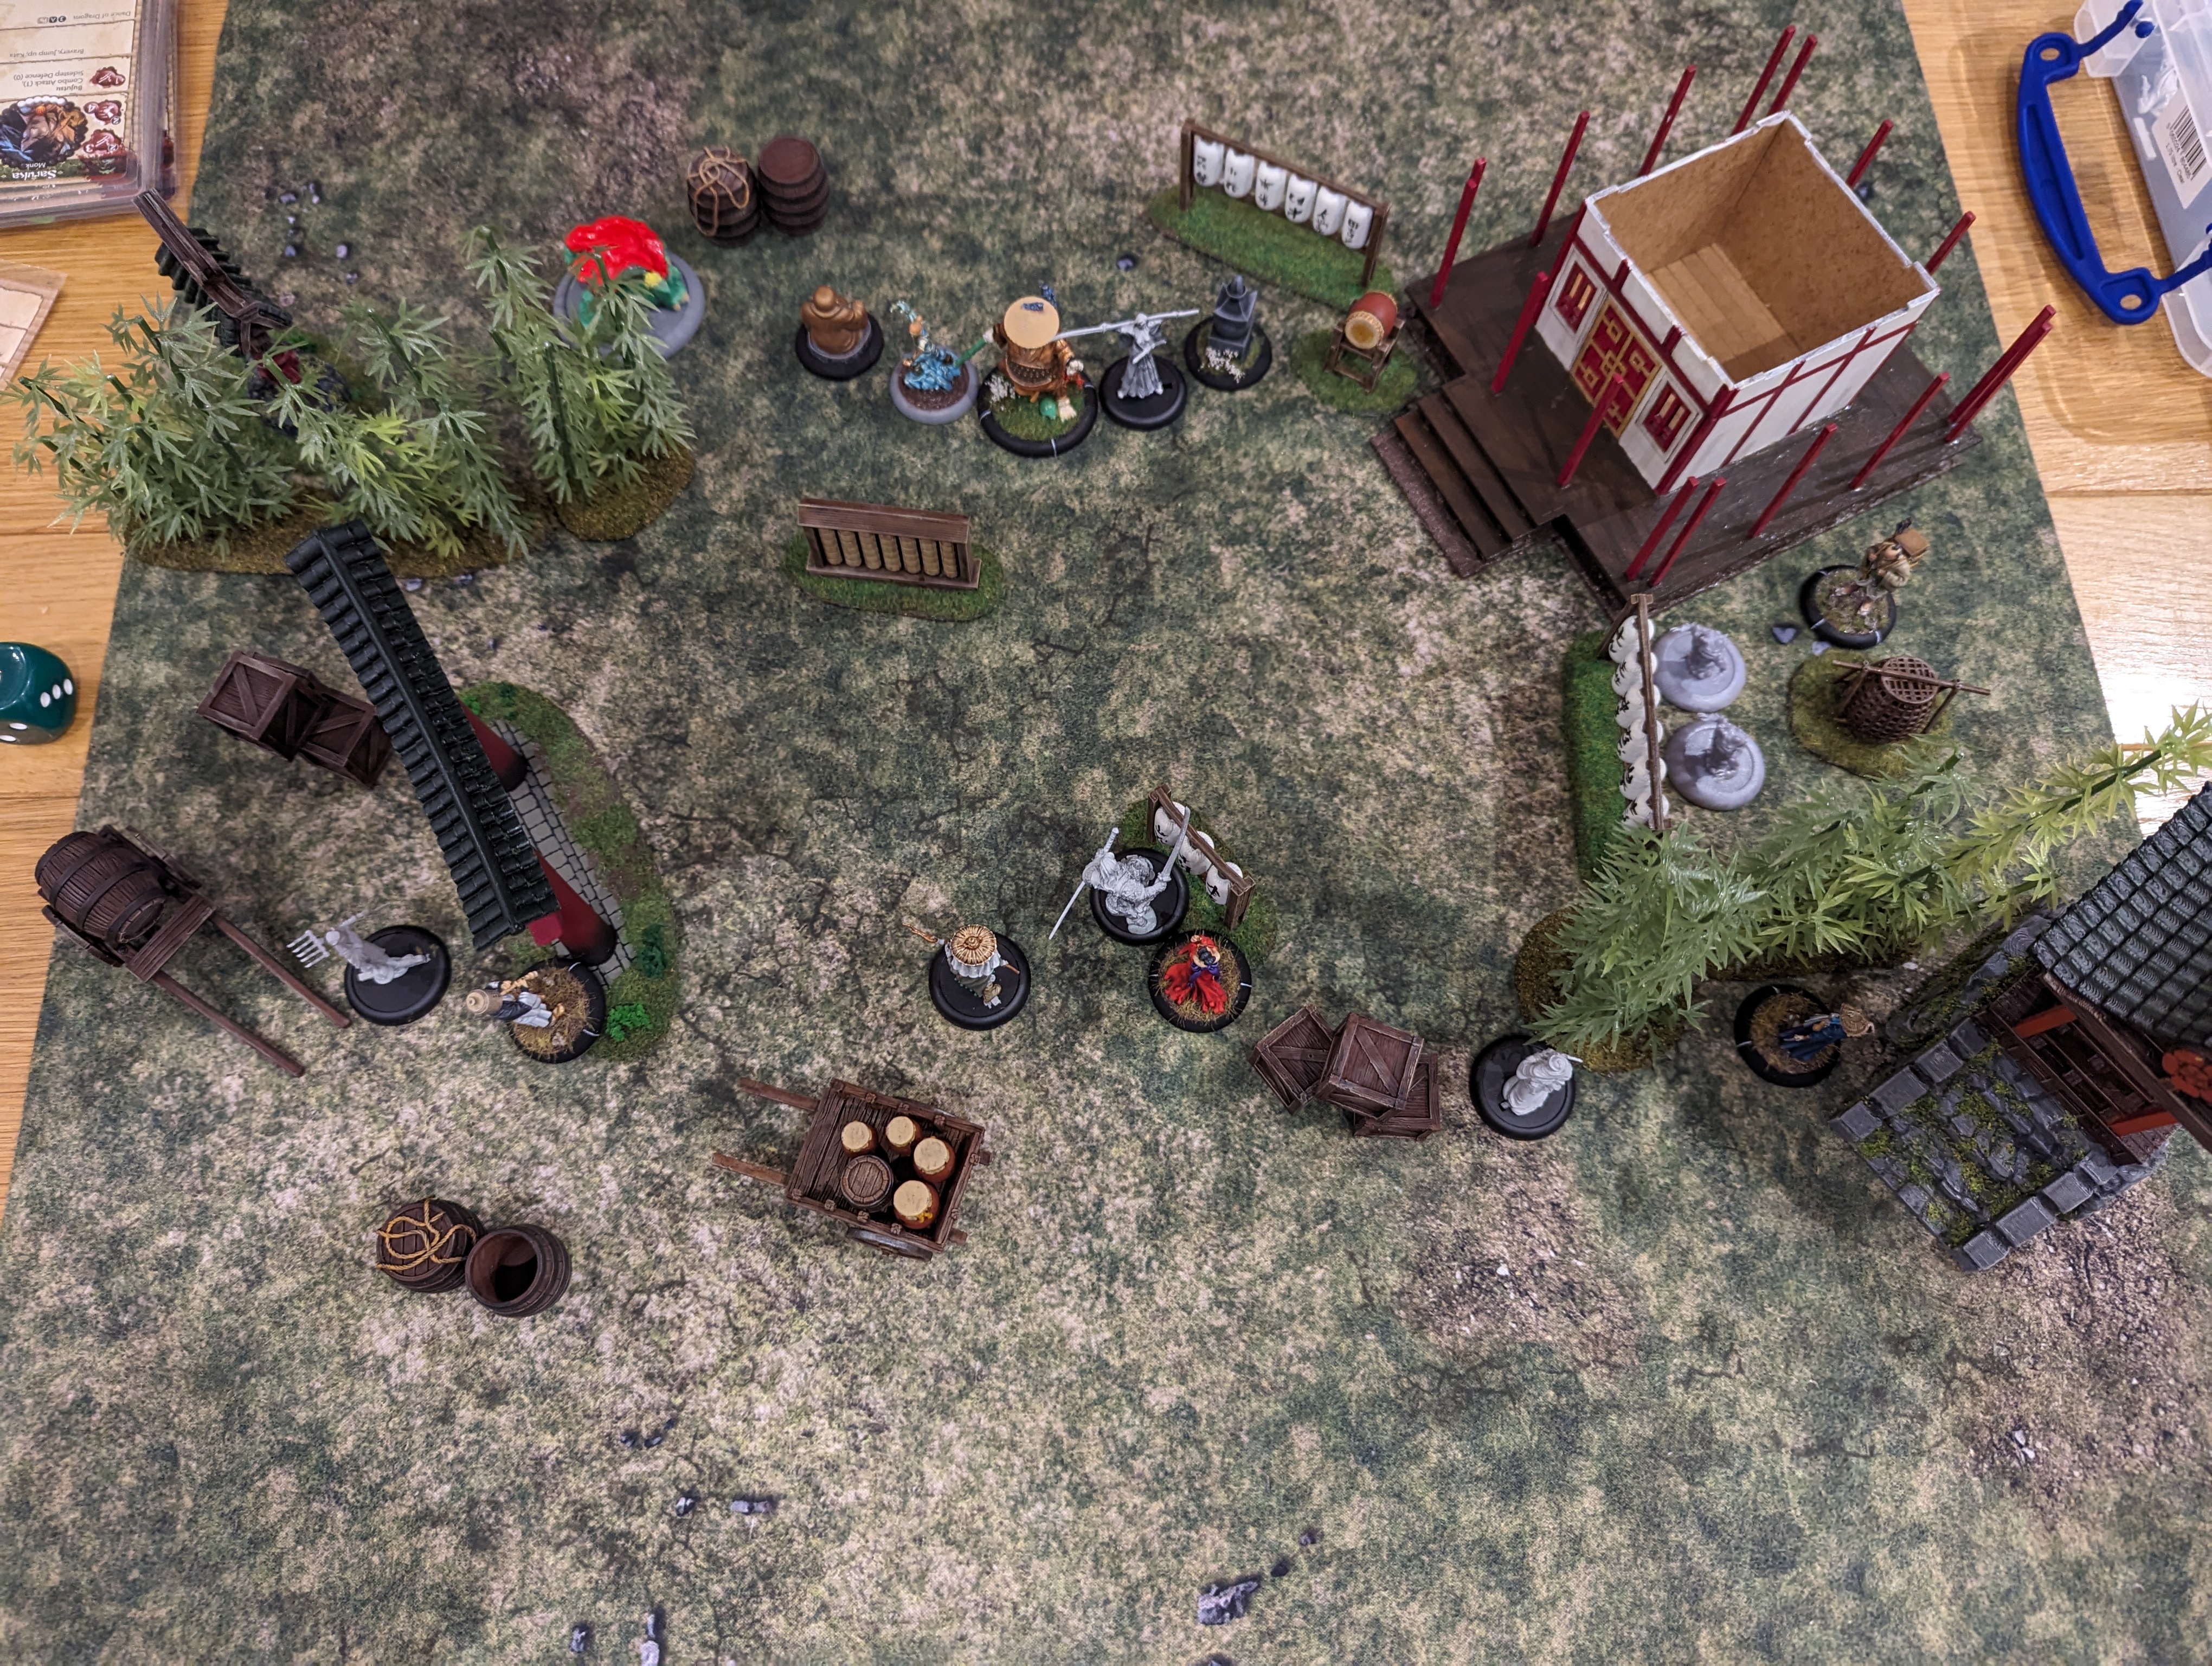
My son launched his fire kami attack this round. He’s clearly been doing his research and had read these cards in detail. I hadn’t. His first fire kami entered base contact with Tenbatsu and then promptly exploded. This applies a level 2 fire marker to Tenbatsu and all models within 2”. Unfortunately, I had grouped Yama Uba and Risu close to Tenbatsu as support and they also picked up a level 2 fire marker.
As retribution, Risu launched her special Ki ability of Mortal Corruption on Kuma and succeeded in giving the big panda 3 level 1 poison markers. My son then launched his second fire kami attack exploding it on Mo Ises and Umeka, who both pick up a level 3 fire marker. With most of my warband now on fire, my son moved the Grey Pilgrim forward and uses her special abilities Raijin Rage and Electrify which boosts her call lightening attack to ‘leap’ to another model within 3” of the first target and gives all attacks stun. The Grey Pilgrim then calls lightening against Tenbatsu which hits but fails to do any damage, but Tenbatsu does pick up a stunned marker to add to his fire marker. And then Raijins Rage allows my son to make a second attack against Risu which hits and does 2 damage as well as adding a stunned marker. (Stunned markers effectively require an activation to remove them or you act at reduced capacity when you do activate).
Kuma spends his virtue token which unlocks Master Ekusa’s ability to lift all tokens from a model and so Kuma loses all of his poison markers. Kuma also gains 2 Ki as well. Kuma then charges Tenbatsu and in the ensuing melee is able to inflict 2 damage on Tenbatsu. It’s clear over the games that we have played that my son has a particular dislike of Tenbatsu….
Mokoti, so far lurking around behind cover, attempts to control Kuma and succeeds in the Ki test. Kuma now picks up a control marker and, for his next activation at least, is part of my warband. I try to activate Umeka but my son plays one of his pit trap cards. Umeka is unable to pass the test to avoid it and my son rolls very well on his damage roll, killing Umeka outright. First blood (again) to my son.
Finally, I activate Mo Ises who is able to control Taiyo and give him a control marker. I then play my crush the oppressed card and double all of the markers that I have handed out this turn, meaning both Taiyo and Kuma pick up an extra control marker.
At the end of the turn, the fire markers are removed meaning that Tenbatsu, Yama Uba, Risu and Mo Ises all take 2 damage each.
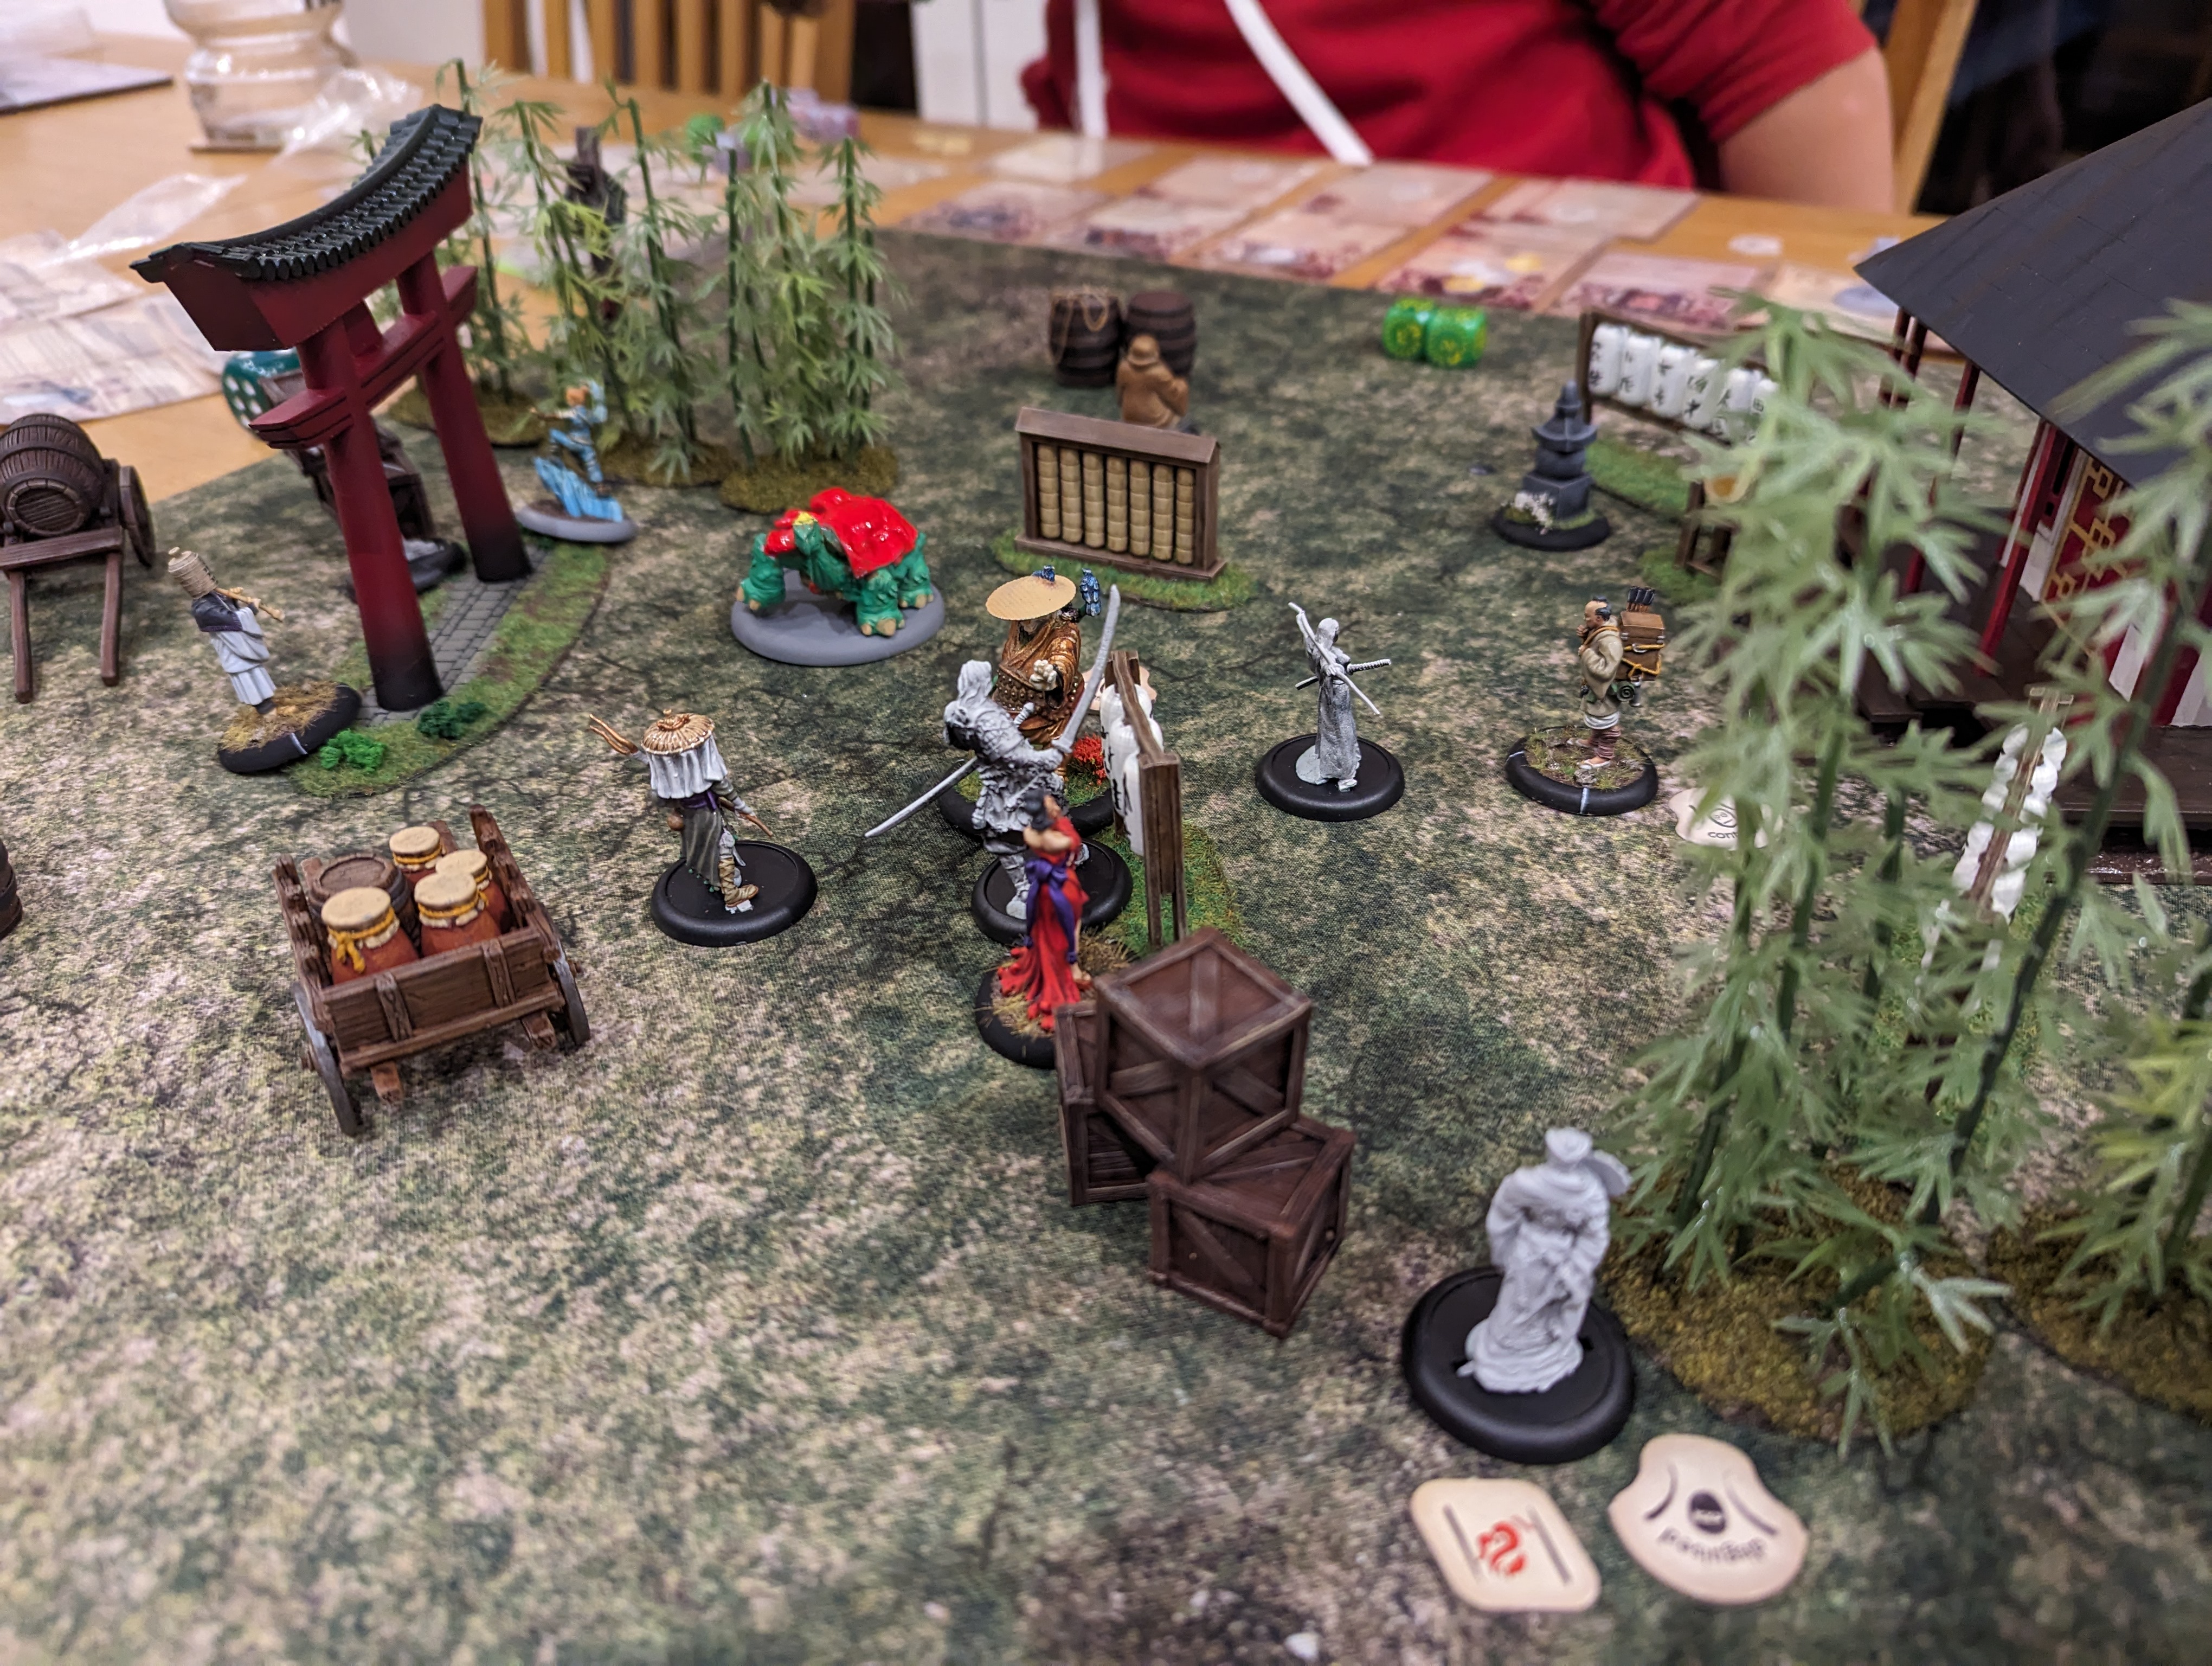
Turn 3
I immediately activate Kuma and spend both control markers to have him charge the grey pilgrim but unfortunately he’s not as effective when fighting for me and does no damage. The Grey Pilgrim calls lightening again on Tenbatsu doing 2 damage and, thanks to Raijins Rage, this leaps to Risu who is hit and killed. My son has already scored 21 points (Risu at 11 and Umeka at 10).
Riku triggers his Ki feat Tsunami which pushes all models within 3” of Riku back until they hit either terrain or the edge of the board. This pushes Ibara back and way out of the fight.
Tenbatsu is now able to do his thing and attacks Master Ekusa. I pour a lot of Ki into getting extra dice and also use the Combo Attack special ability, which if my attack is successful, I get to make additional damage rolls. I’m able to break through Ekusa’s defence and deal 3 damage to the tortoise riding monk. Ekusa deals 1 damage back in return.
I activate Yama Uba and have her enter melee against a now exhausted Kuma (I spent both of his activation tokens charging the Grey Pilgrim). Yama Uba activated her Ki feat ‘morph’ which allows her to copy one of Kuma’s abilities until the end of the game. In this case she take Brutal which gives her a +1 to melee attacks. She then attacks Kuma and uses her Critical Strike attack. Yama Uba is rolling a lot of dice in this attack and succeeds in successfully hitting Kuma. With Critical Strike, a roll of a double on the damage roll automatically kills the target, regardless of how many wounds they have. And yes, a double 4 on the damage roll had me laughing and my son deeply upset with me. Kuma is dead and, at 22 points, I take the lead!
 End of turn 3
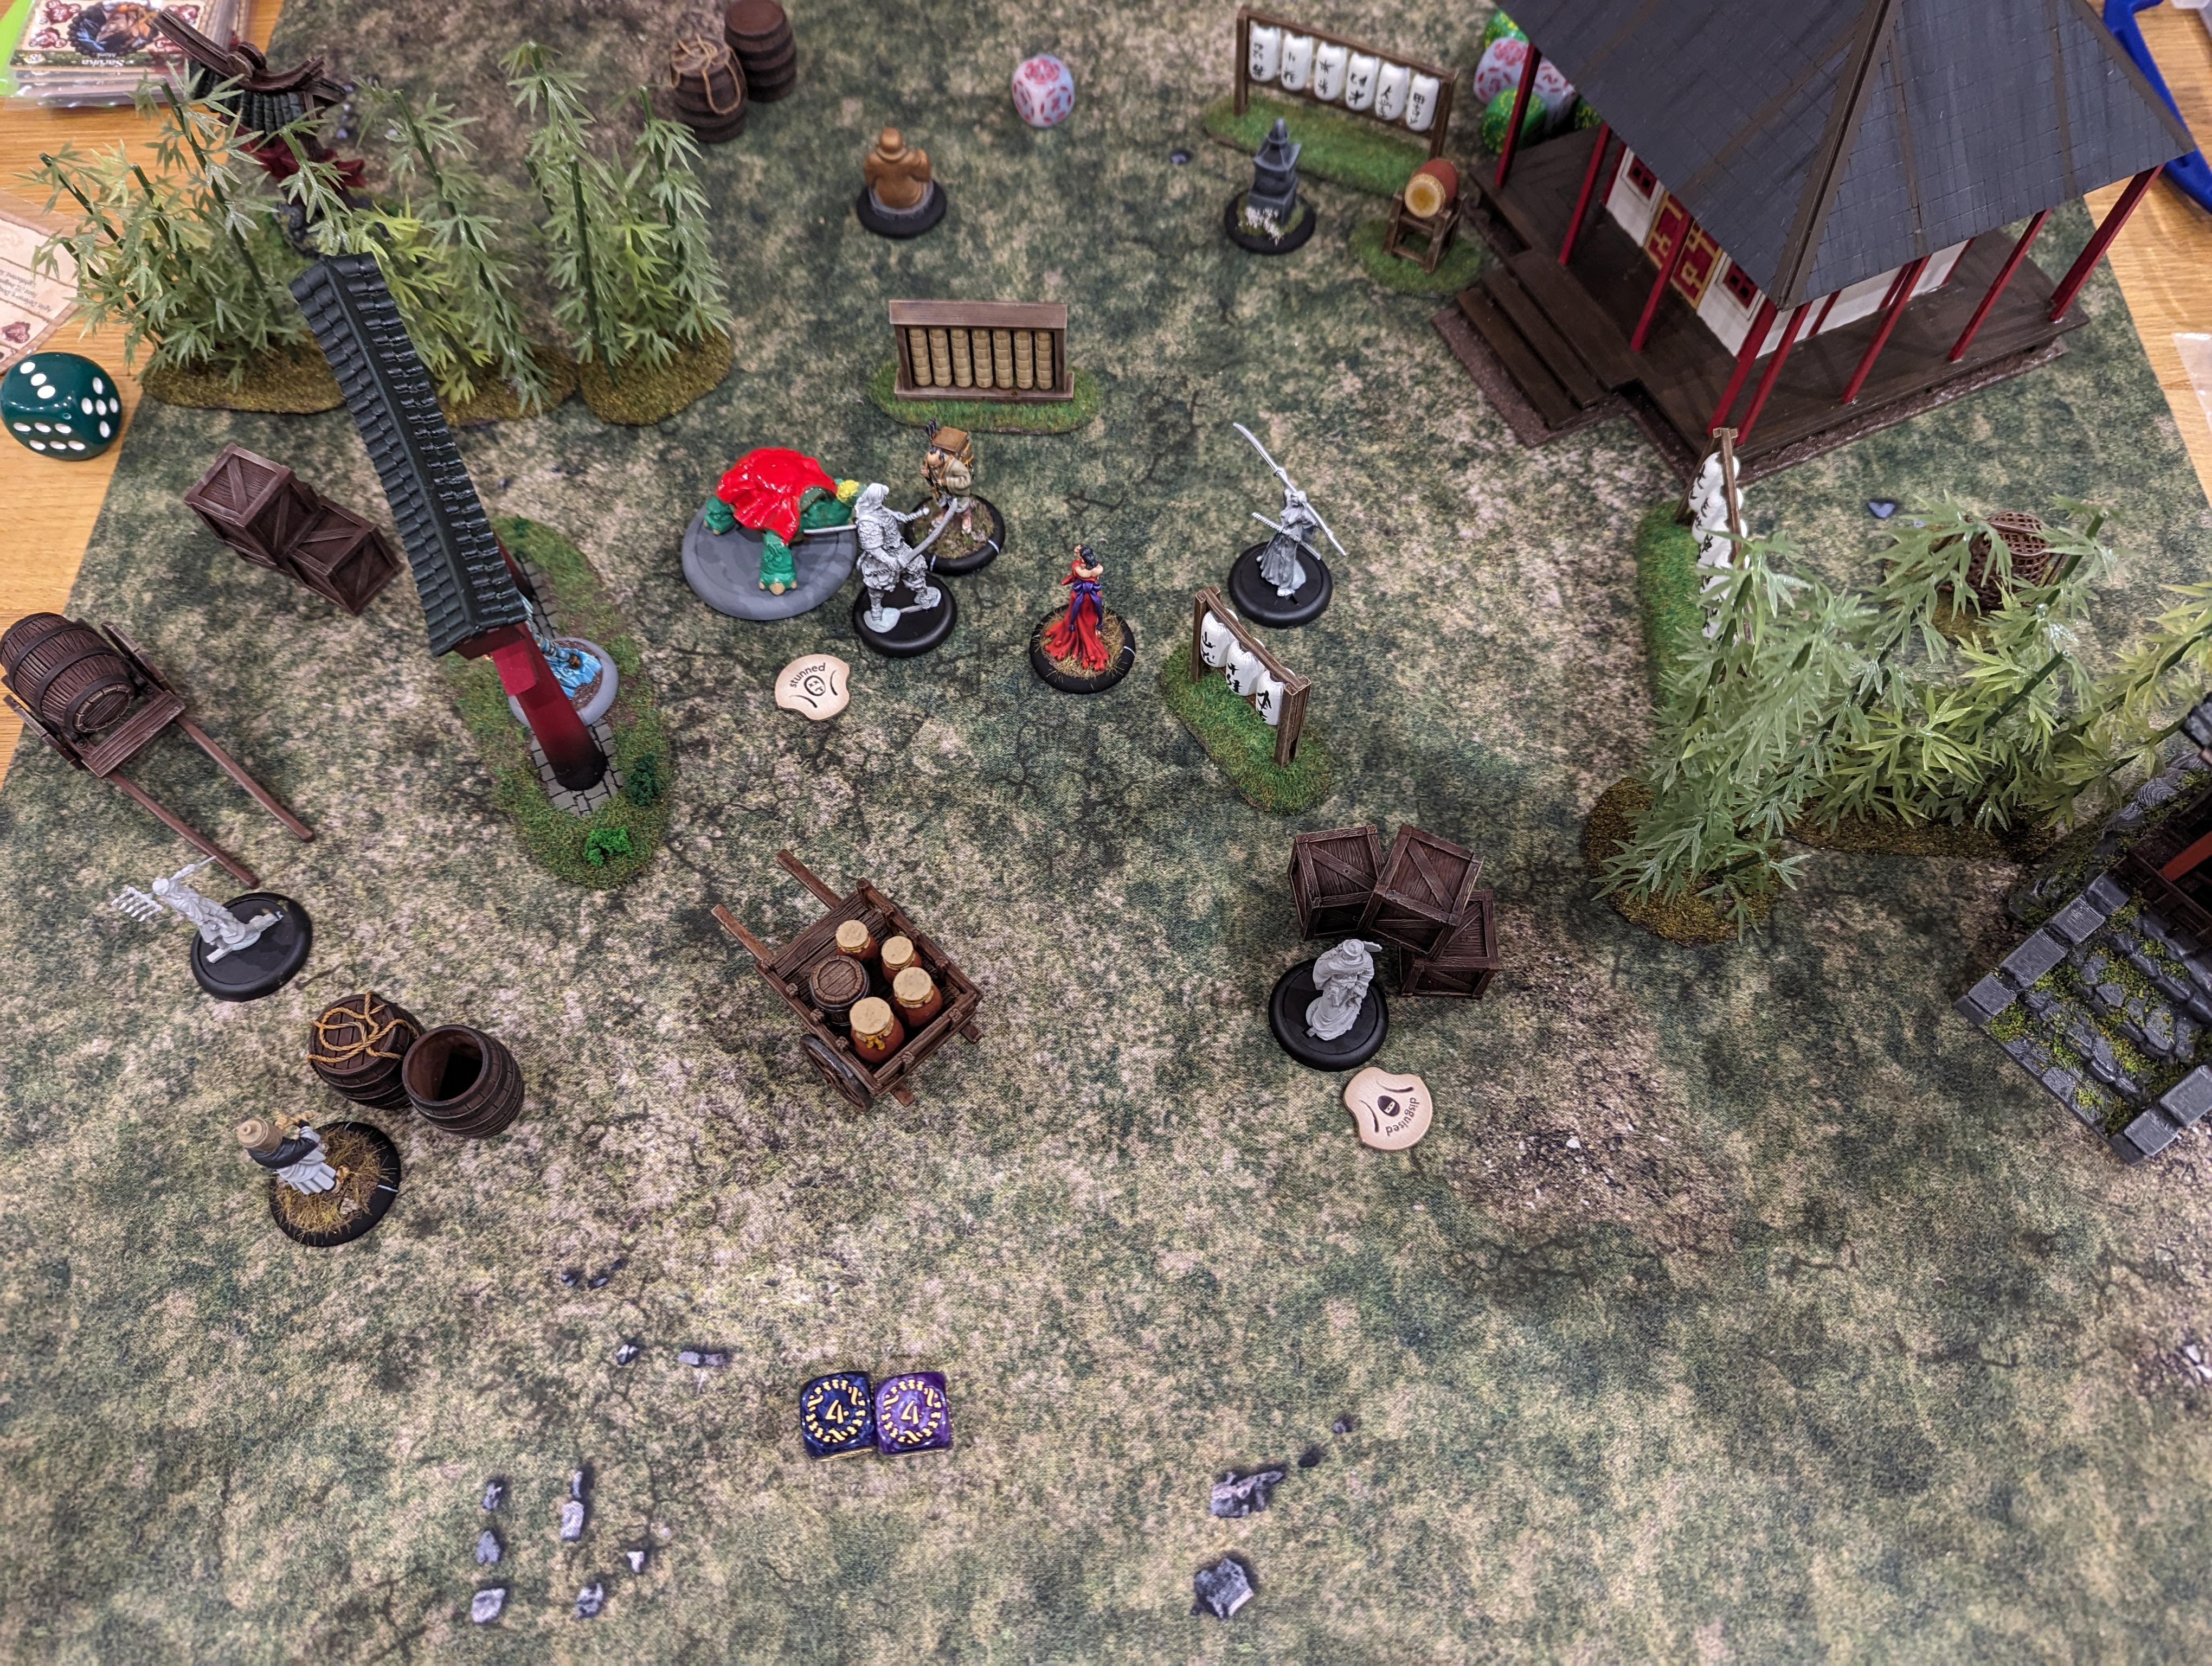
Turn 4
My son really needs (and wants) to kill Tenbatsu. He’s badly damaged and, at 27 points, he’ll be 2 points short of winning the game. With this in mind, he attacks with Riku but Tenbatsu is able to hold him off doing no damage, partly because I put a lot of dice into defence to protect Tenbatsu. Yama Uba then attacks Riku, who being on contact with two enemy models, will lose melee dice. Yama Uba is able to inflict 1 damage.
My son attacks Tenbatsu with Taiyo, creating a scrum of models in the middle. Taiyo is somehow (he’s not very good in combat) able to hand out another 1 damage to Tenbatsu. Yama Uba uses her second activation to attack Riku again. As Riku is now exhausted and outnumbered, he loses 2 melee dice giving Yama Uba (who still has Brutal) and significant advantage. It pays off as Yama Uba hits and deals out 6 damage to Riku, killing the water monk. That gives me another 17 points taking me to 39.
With Tenbatsu nearly dead, Ekusa attacks him and successfully hits. It’s enough to cause the 1 wound required to kill him and my son moves to within 2 points of victory.
My son then makes a mistake as he attacks Yama Uba, who while she has damage is a much more formidable combat opponent than other models on the table. Yama Uba also has Reach, which means that she will attack first in combat, which, coupled with Brutal, gives me a significant edge. We roll our dice and I get a significant success in the attack and the damage roll is the 2 damage required to kill Ekusa. This gives me enough points to win a very close and well fought game.
 End of the game and a win for the Cult of Yurei
The Cult Starter Set: Umeka
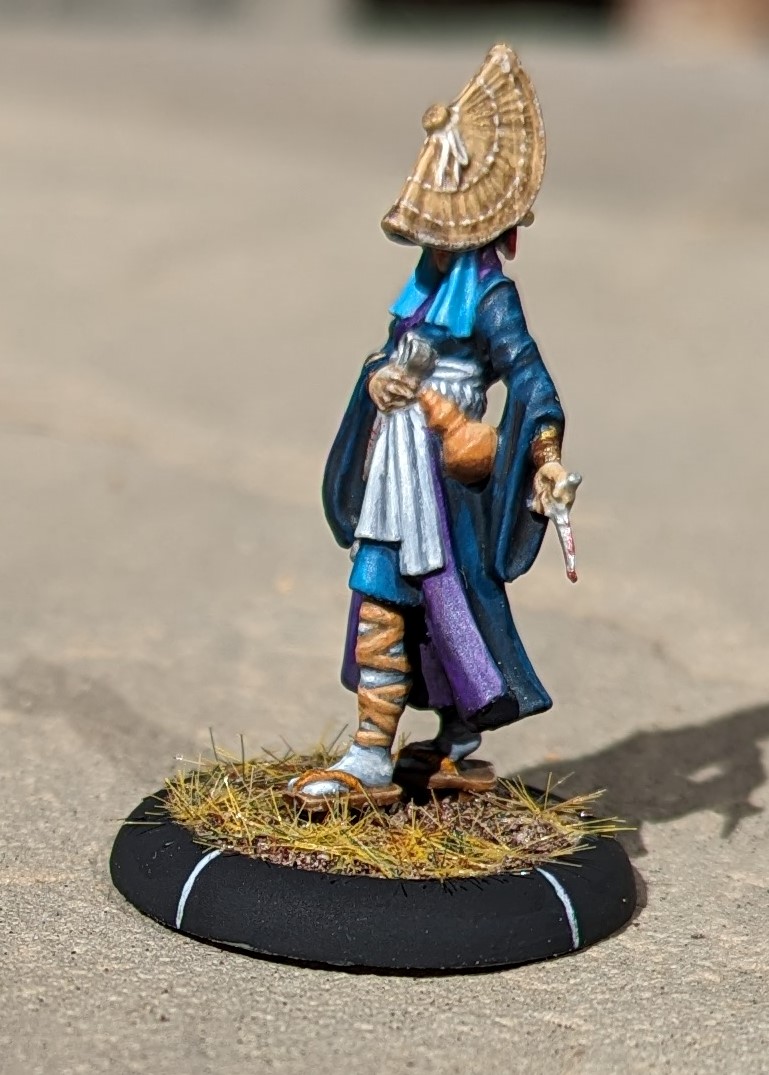
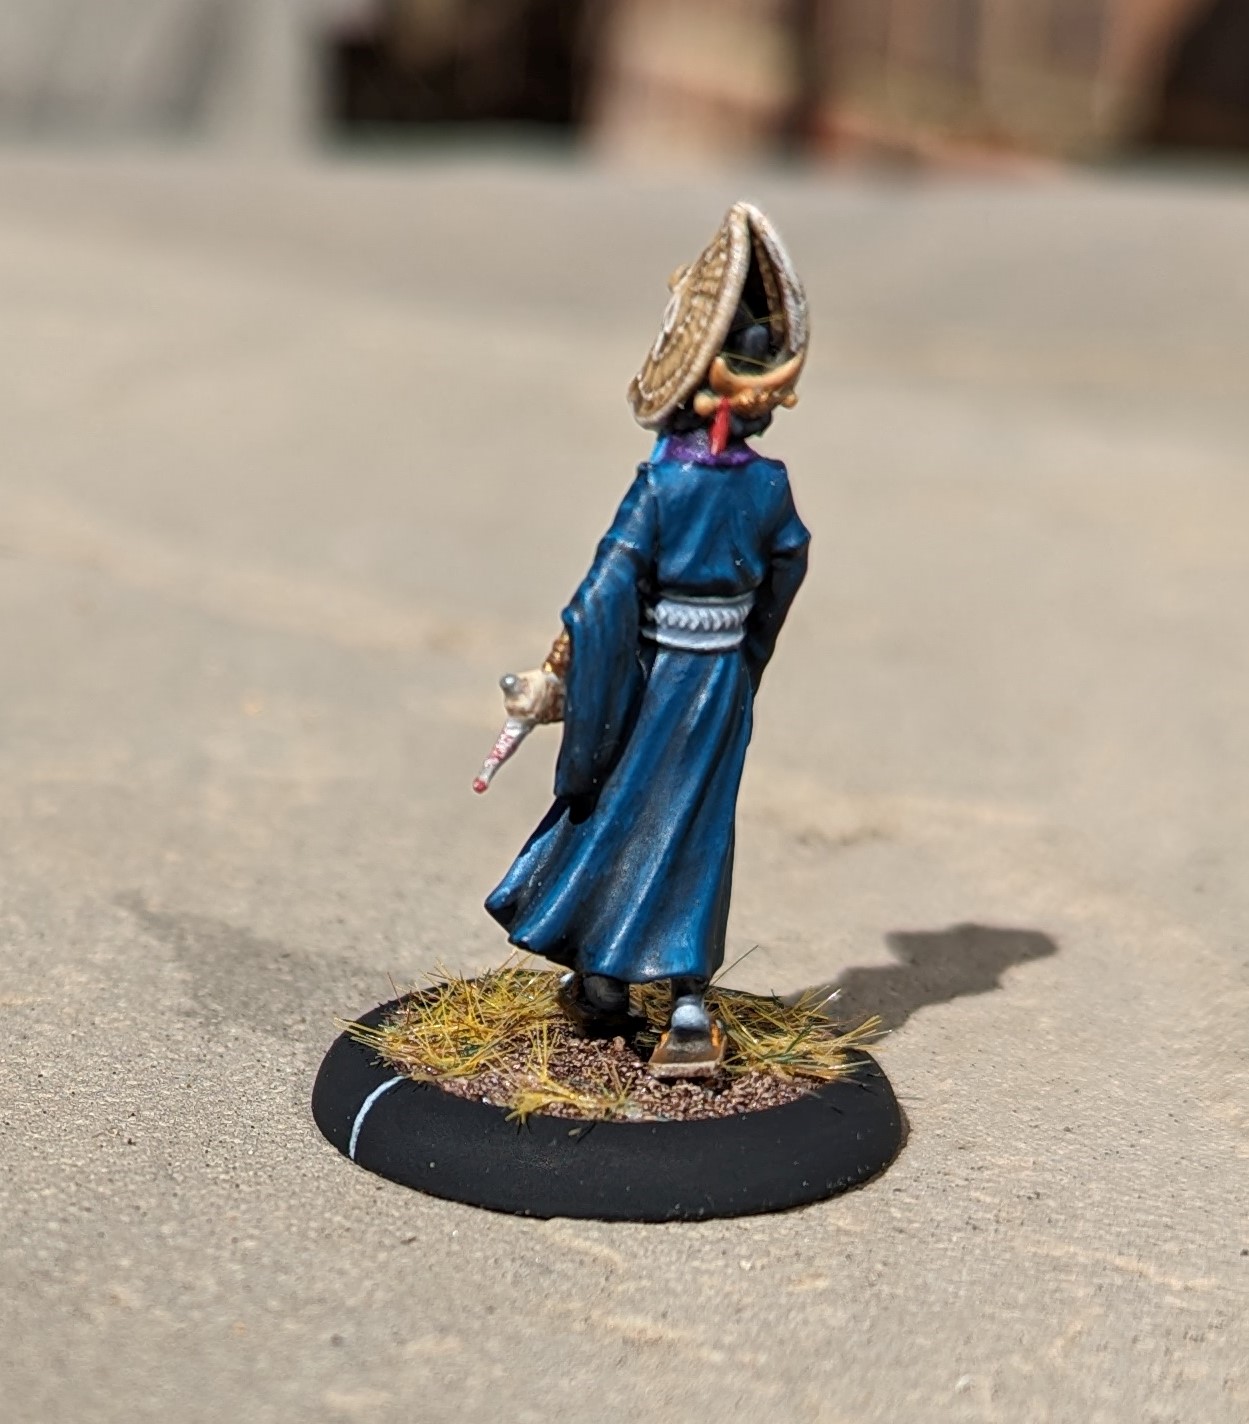
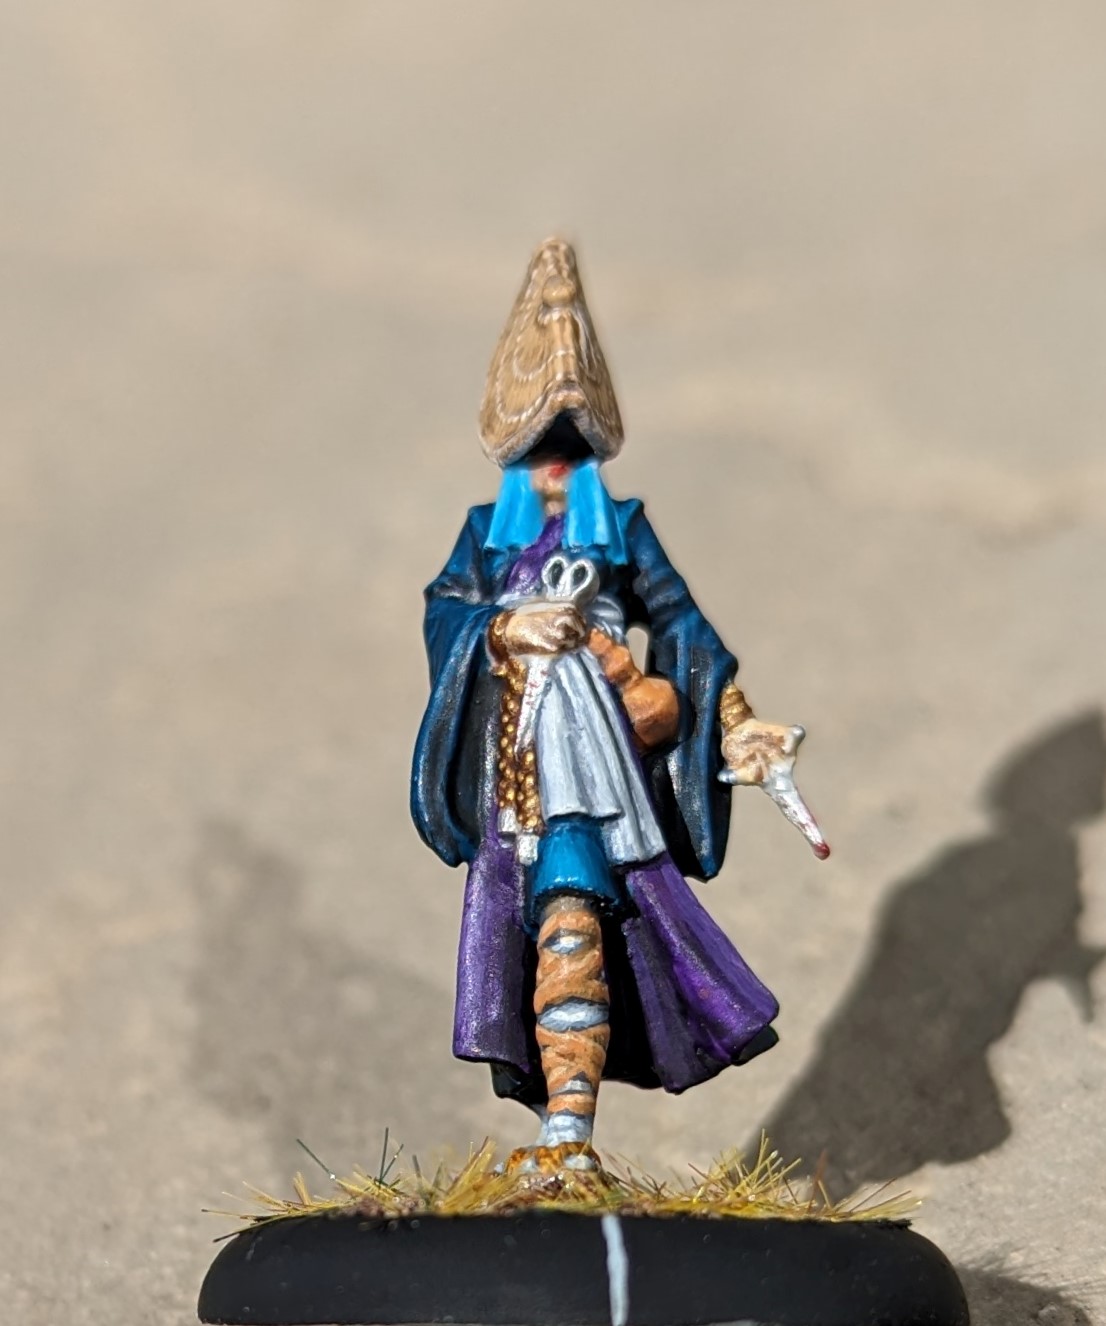
Umeka is a lovely lady who’s preferred weapon of choice is a pair of scissors. I assume that she likes to deliver these to the kidneys from behind. In game, she’s cheap and has the Assassin skill which gives her a boost to damage when attacking from outside of an enemy’s line of site. She also has a Ki feat that allows her to debuff enemy models making attacks against them deliver more damage. So handy to have loitering around on the sides waiting for the chance to sneak in and shank someone.
For the painting, I wanted to give her a colourful feel and opted for a deep sea blue for the coat. I opted for purple for the inner lining as this is my choice of faction colour to tie all of the models together. Both of these colours I’ve applied the base colour and then mixed up lighter and darker versions using an off-white and dark brown. This was then applied in glazes. The blue undercloth was a mix of different shades of blue, glazed on to create the highlights.
The white sash is luftwaffe grey and off white mixed together in differing amounts to create the shadow. Same for the stockings.
The hat is Iraqi sand given a wash and then a very careful picking out of the higher areas. Off white completed the ribbon in the hat.
Leg bindings are flat earth and then highlighted with light brown.
I wanted to give Umeka a sinister look, so decided to only paint the lower half of her face. The top half and the underside of the hat got painted black. I picked out the lips in a blood red to really emphasise the look.
The metal work was either viking gold or a polished metal.
In addition to the purple colour, all of my Cult figures will get the same base of a dry earth acrylic paste. This is given a brown wash and then I’ve applied some dead grass in patches.
And that’s my second model of the starter set finished.
 My attempt at a sinister face
Making Trees
In all my gaming history, I’ve never made a tree for the tabletop. I’ve bought trees and added a bit of extra flock, but I’ve never started with an armature and built upwards. Now that I want some Japanese cherry blossom trees, I need to address this gap in my hobby cv.
I’ll keep this brief as this is not a new approach to tree making, just a tried and tested method you can find on the internet or, in my case, in Mel’s terrain book.
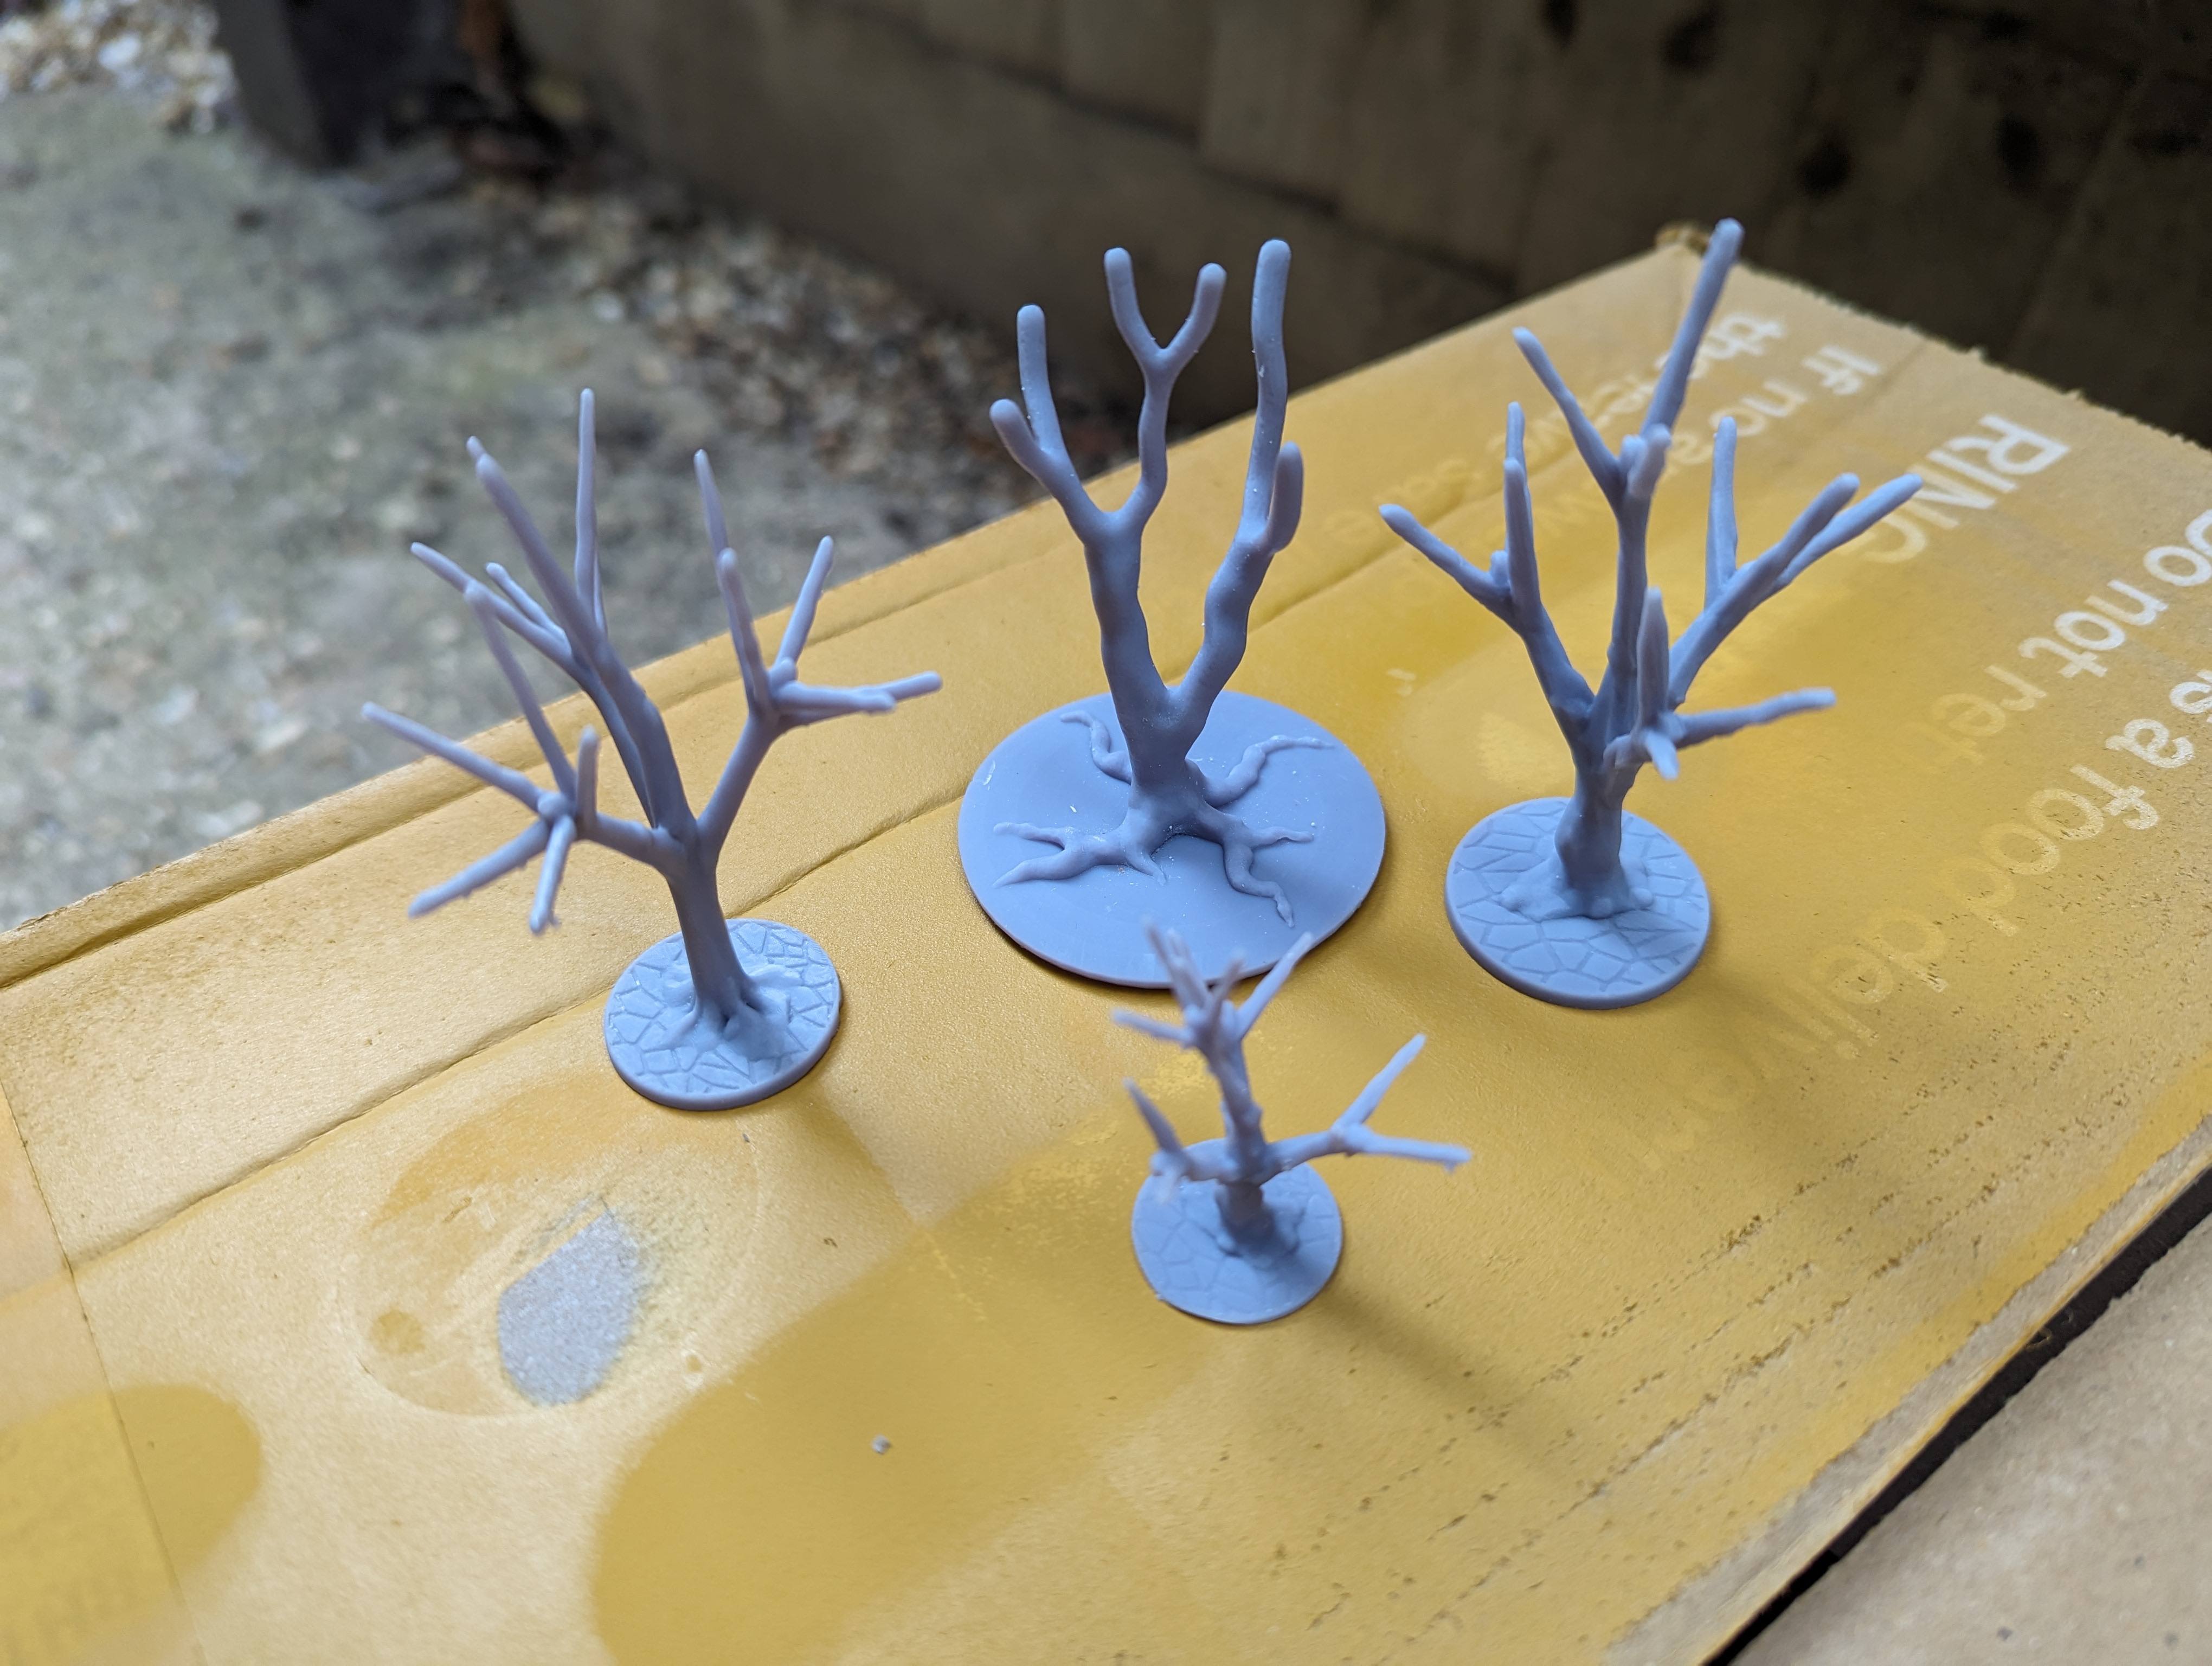
To start with, I need armatures. I’ve bought some plastic ones from eBay and I’ve 3d printed a couple as well, just for good measure. These were primed and painted a Flat Earth before I dry brushed them a light brown.
Once dry, I mounted the plastic armatures on a small mdf off cut and then glued this to a plasticard disk. The 3d printed armatures I cleverly printed out already on a base. I’ve covered the base in my acrylic mud and applied a static grass to the base.
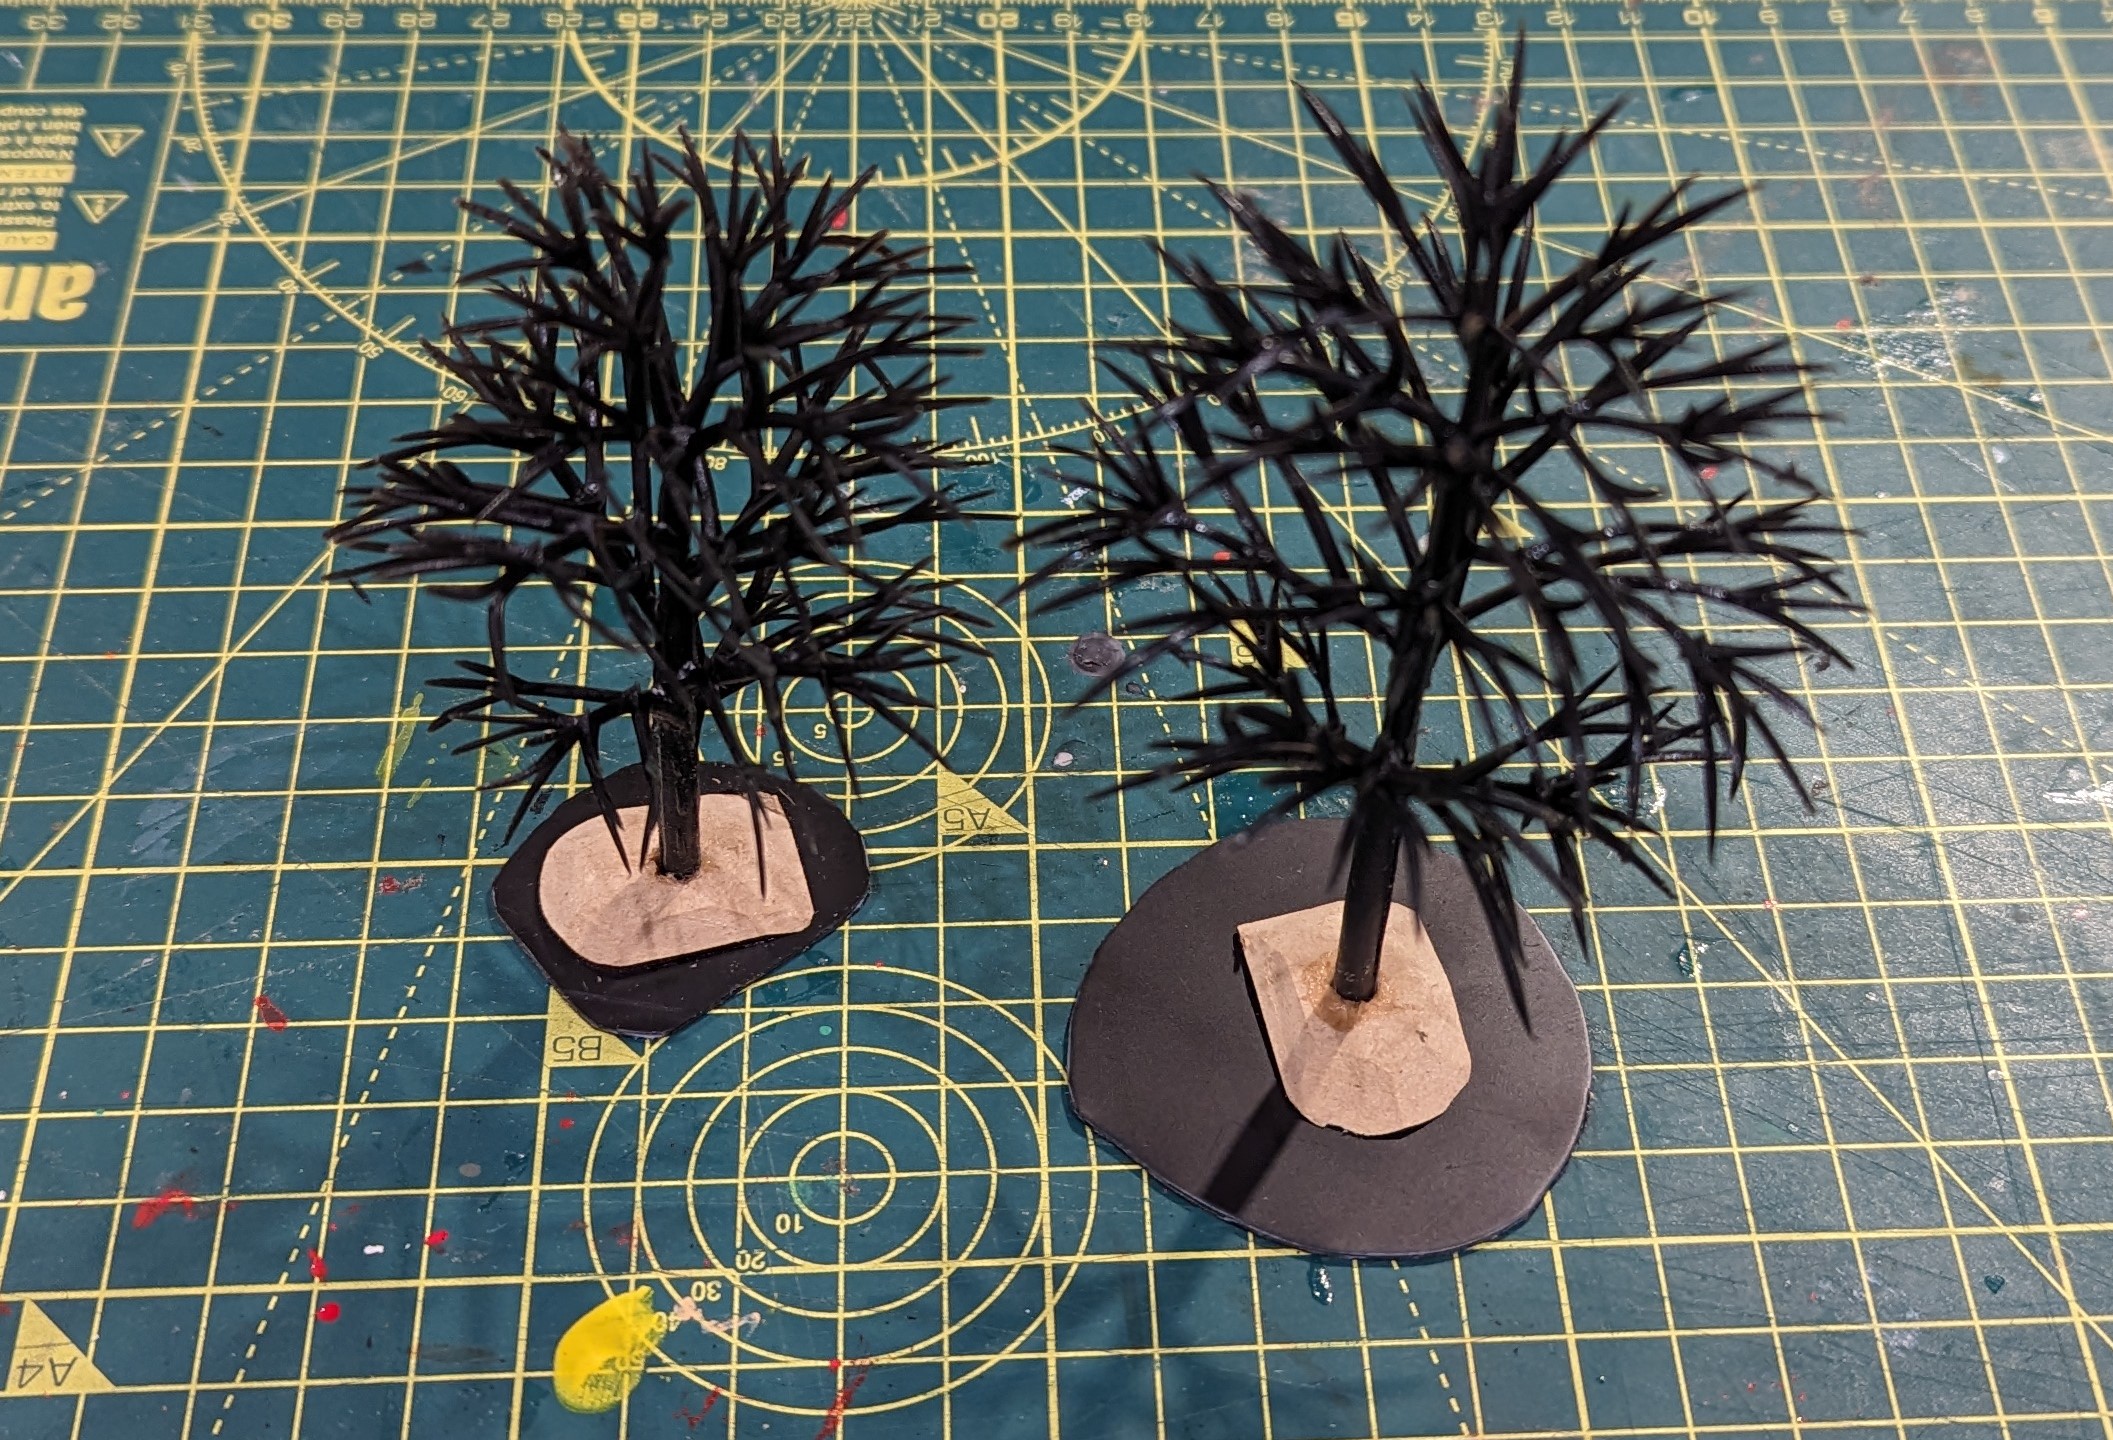
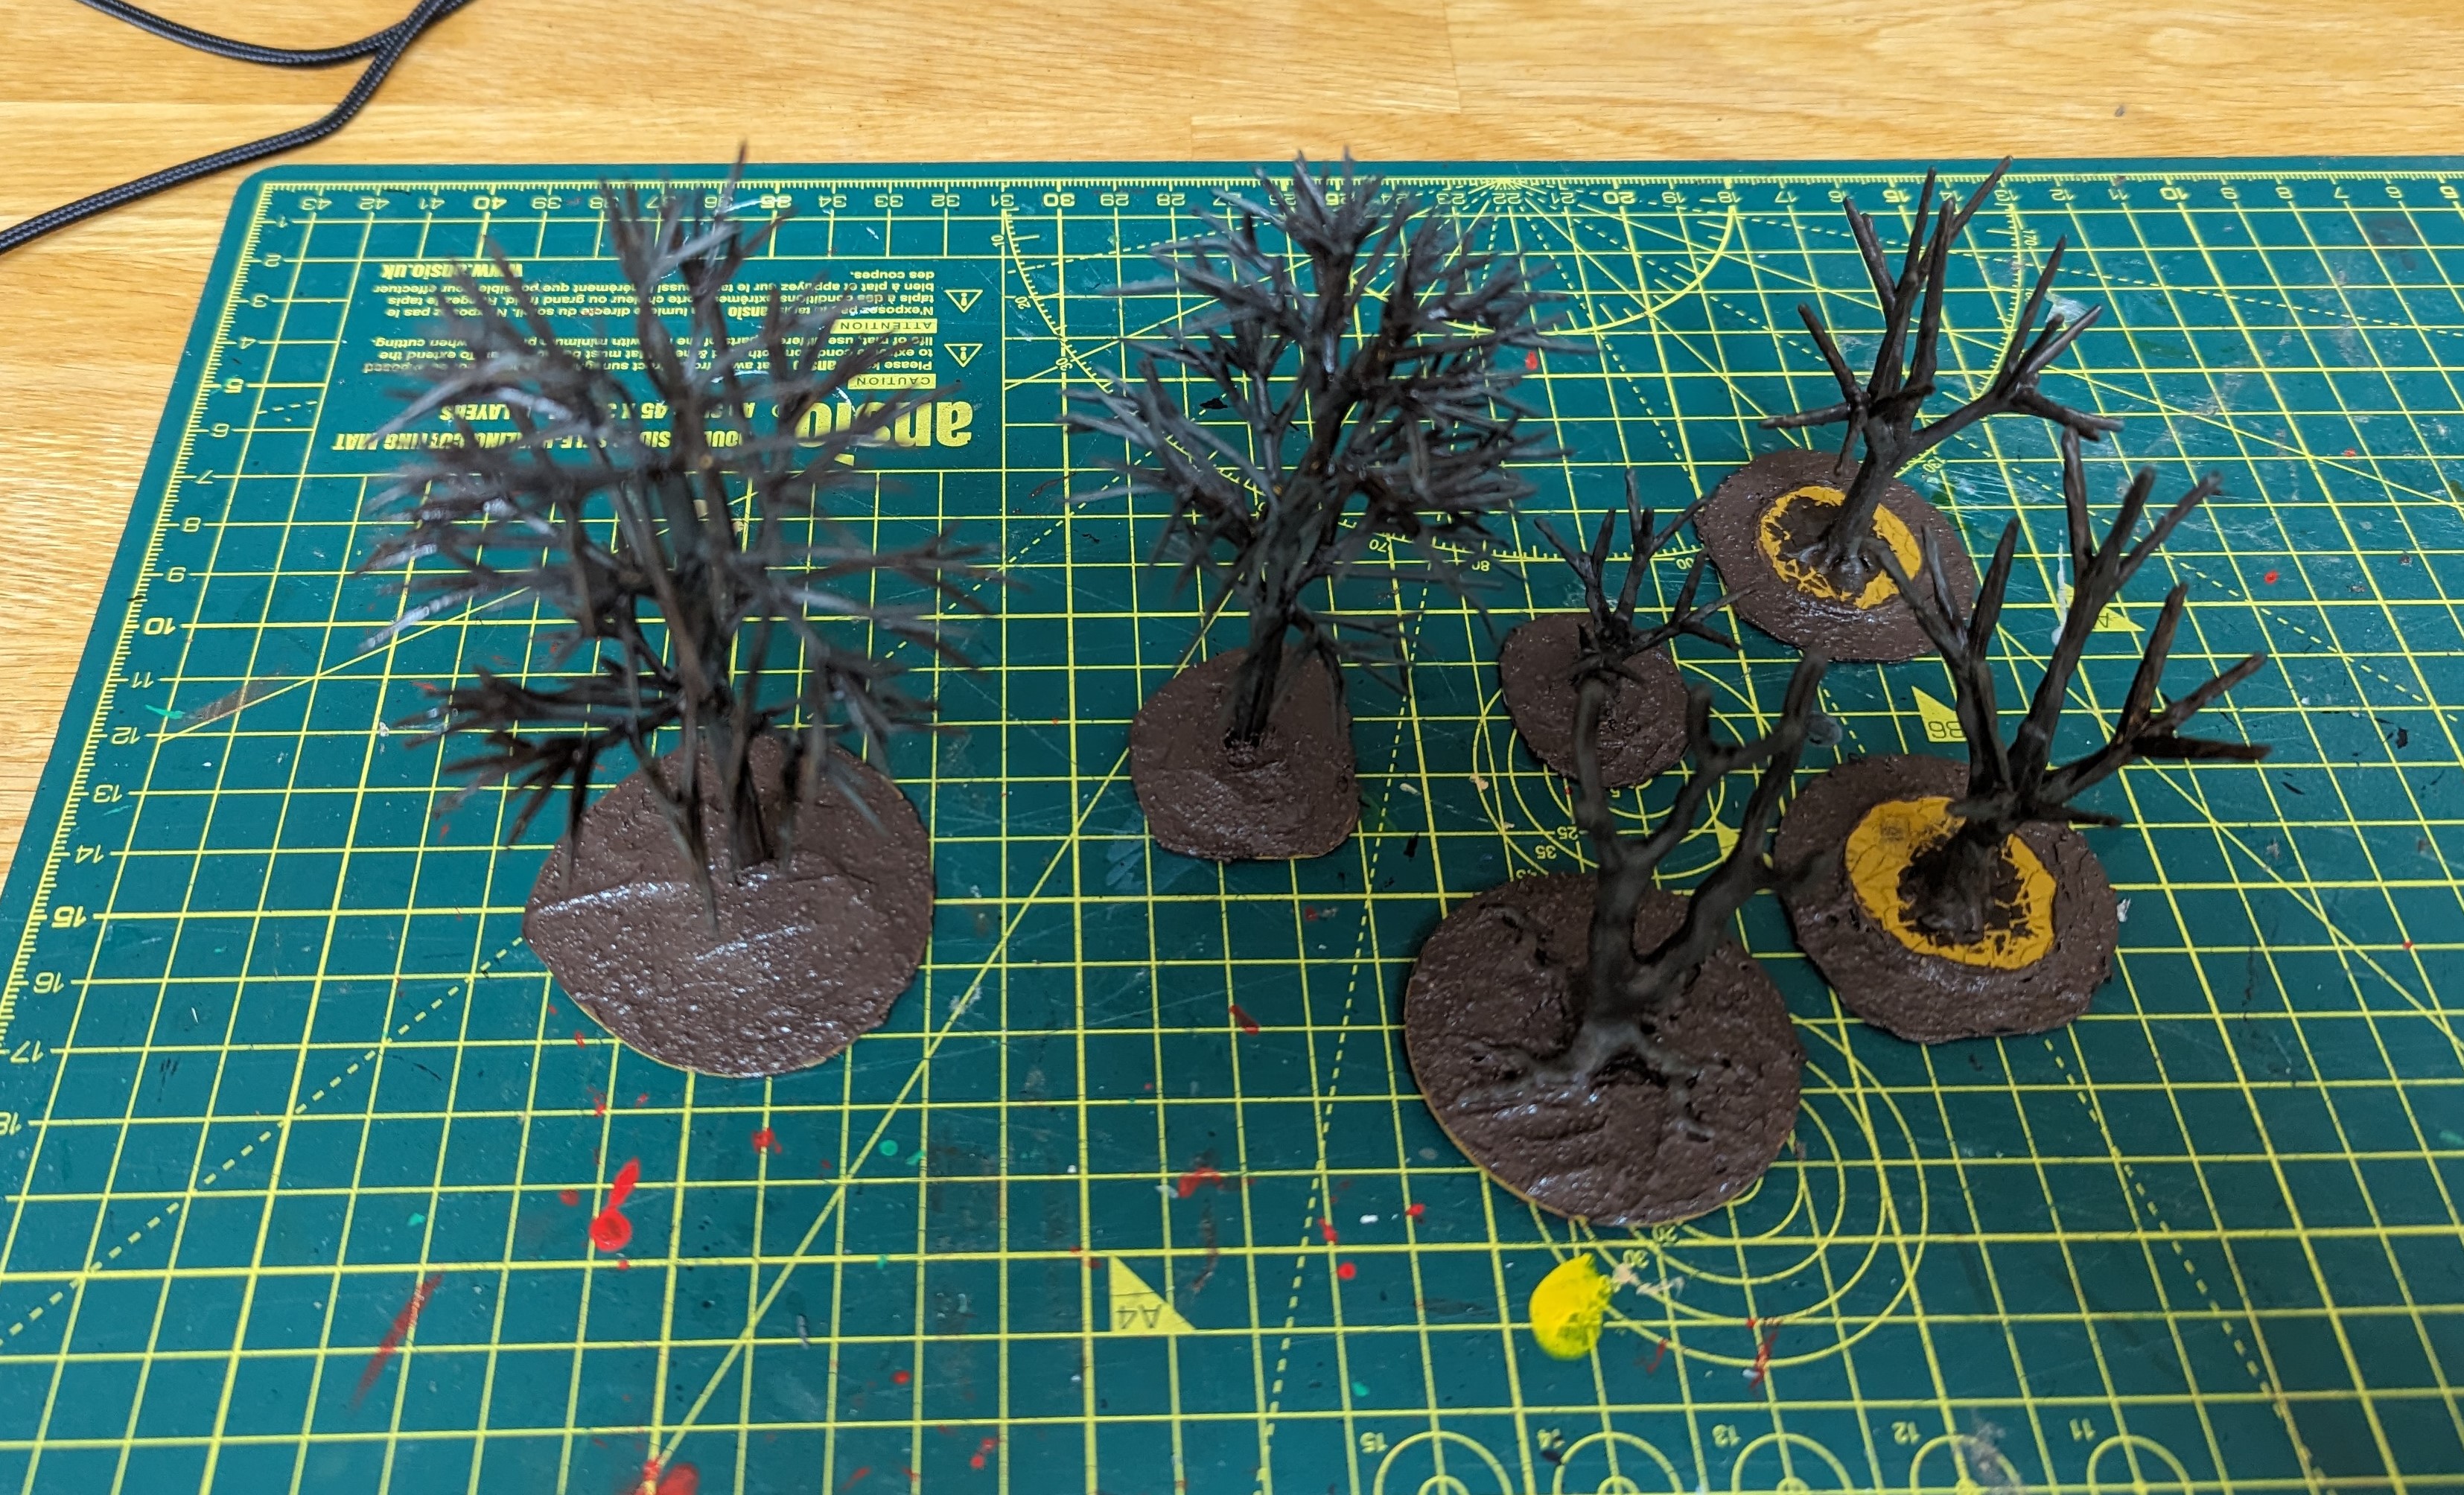
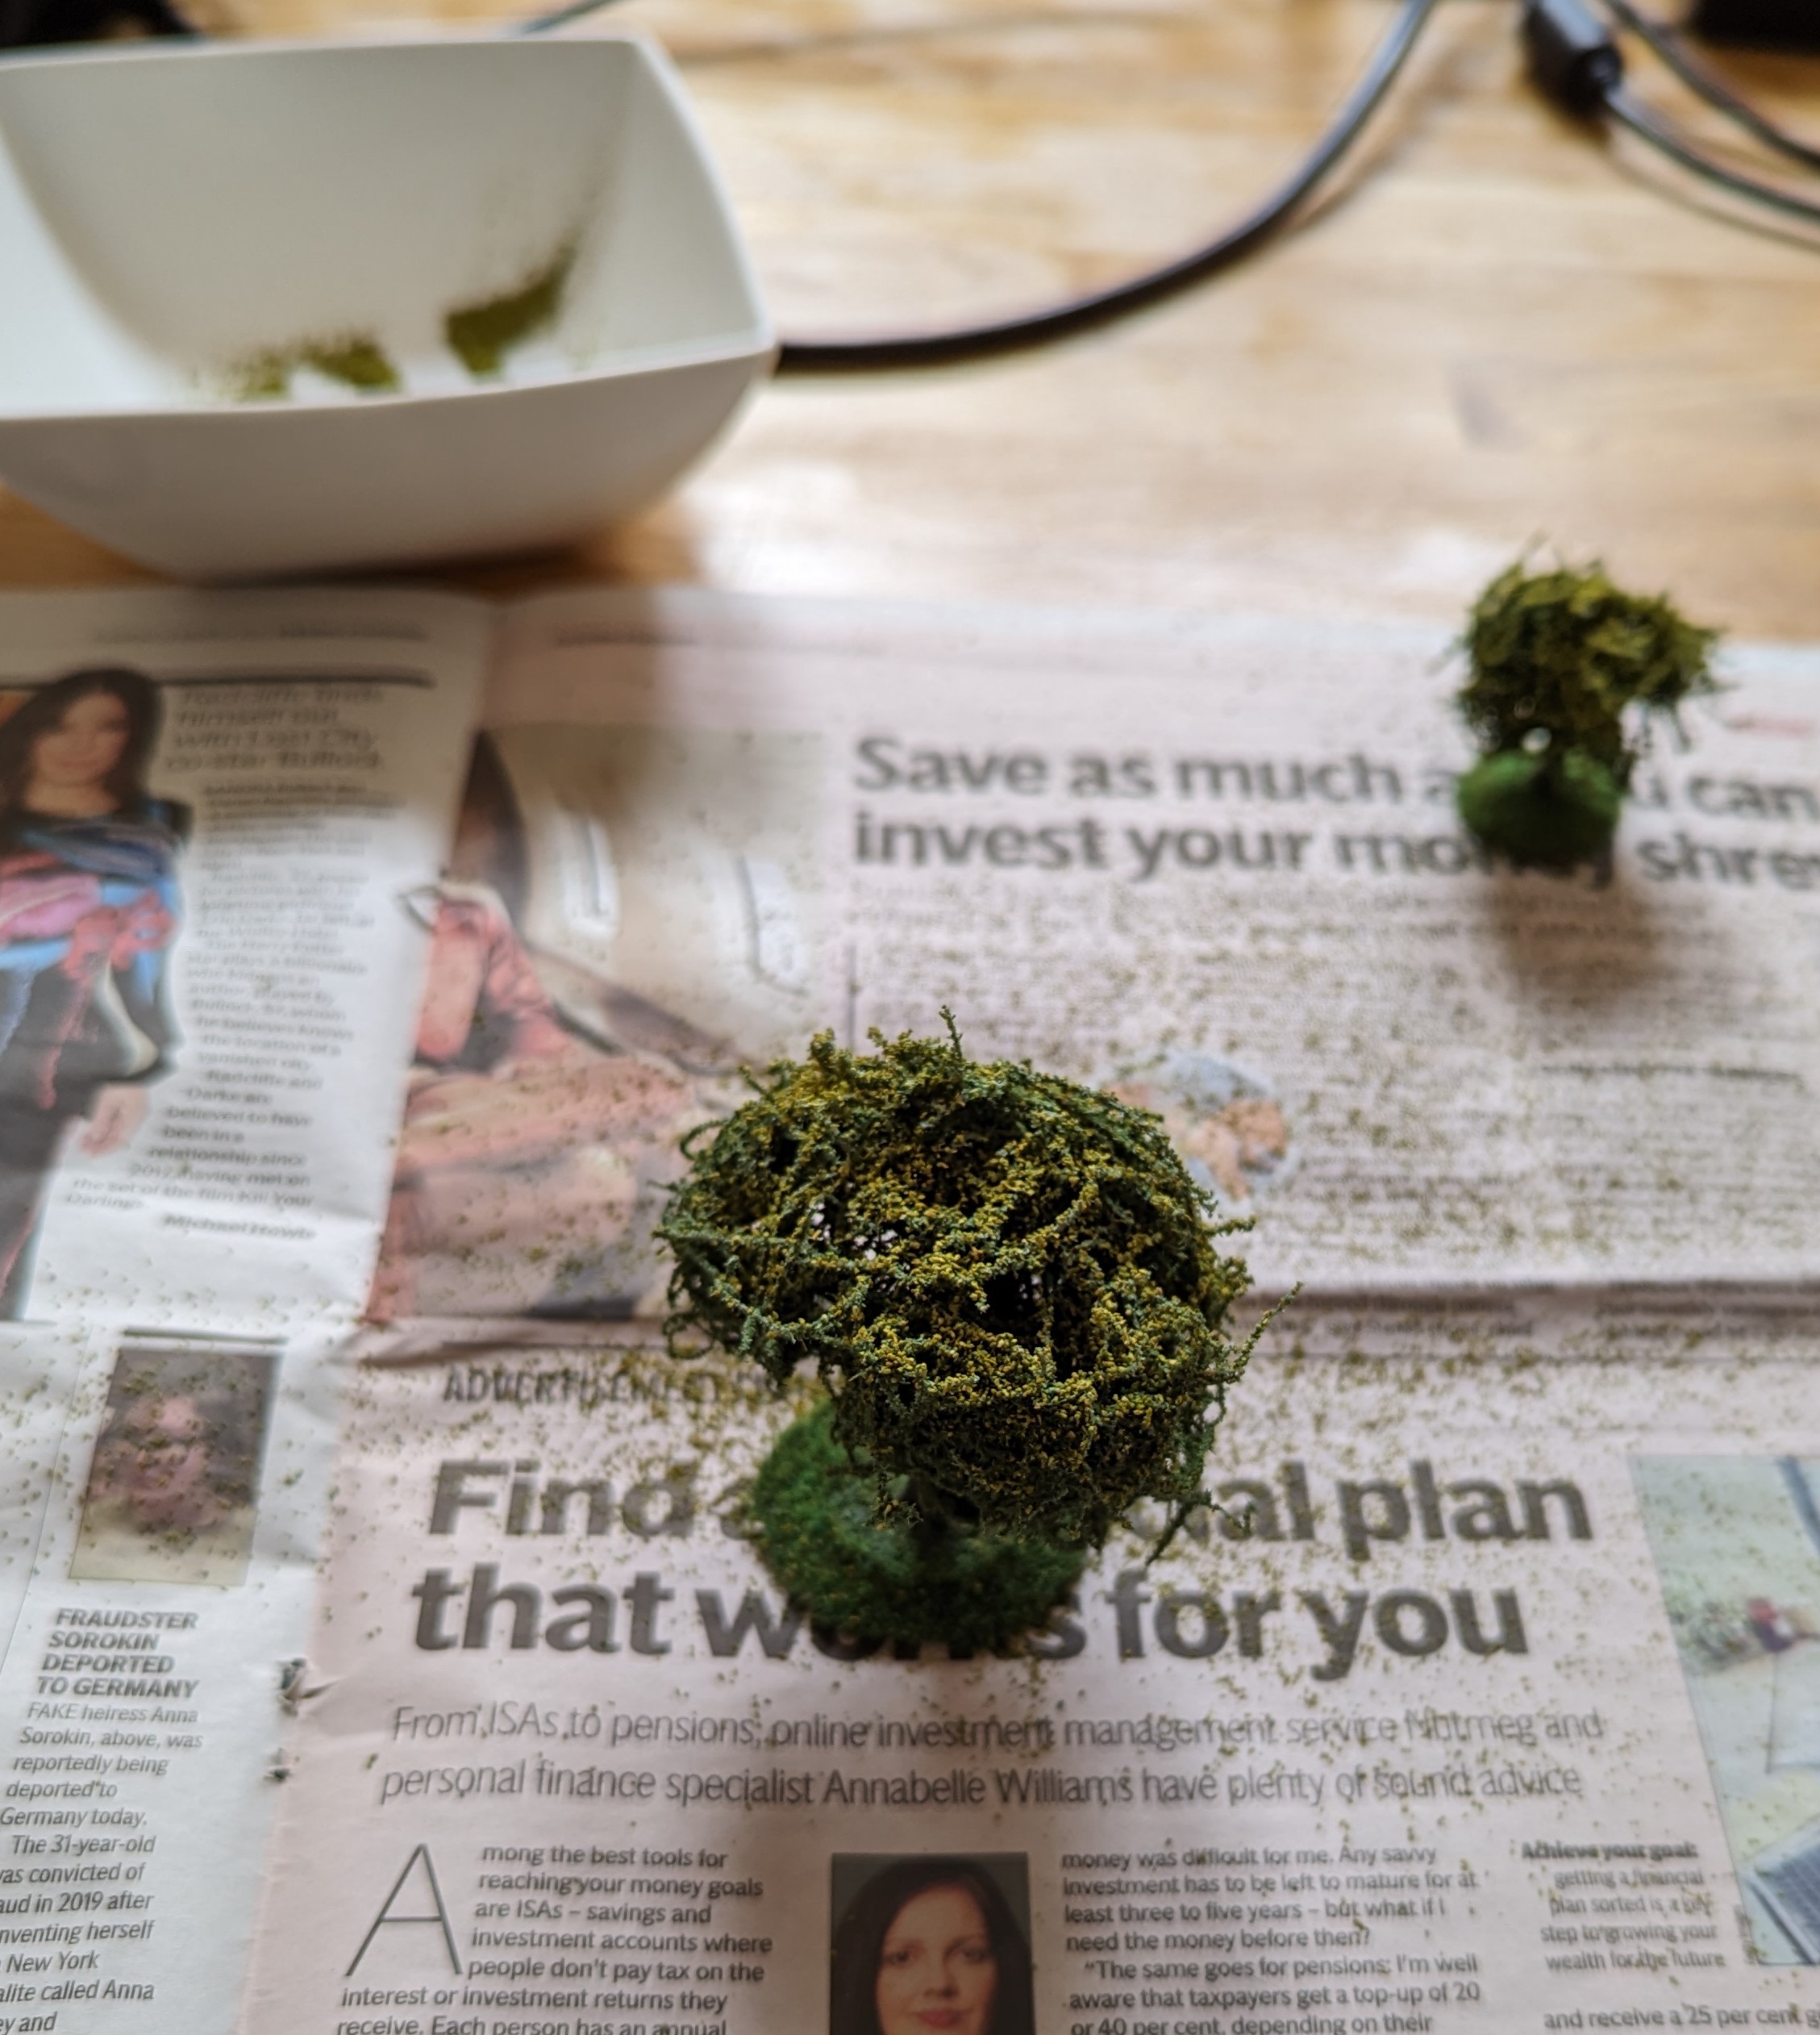
I decided at this point to take two approaches. The plastic armatures have their branches close enough together to just flock these directly. I did this by spraying with mounting glue and then sprinkling the coarse flock over the top. This was then sealed with a spray of scenic cement.
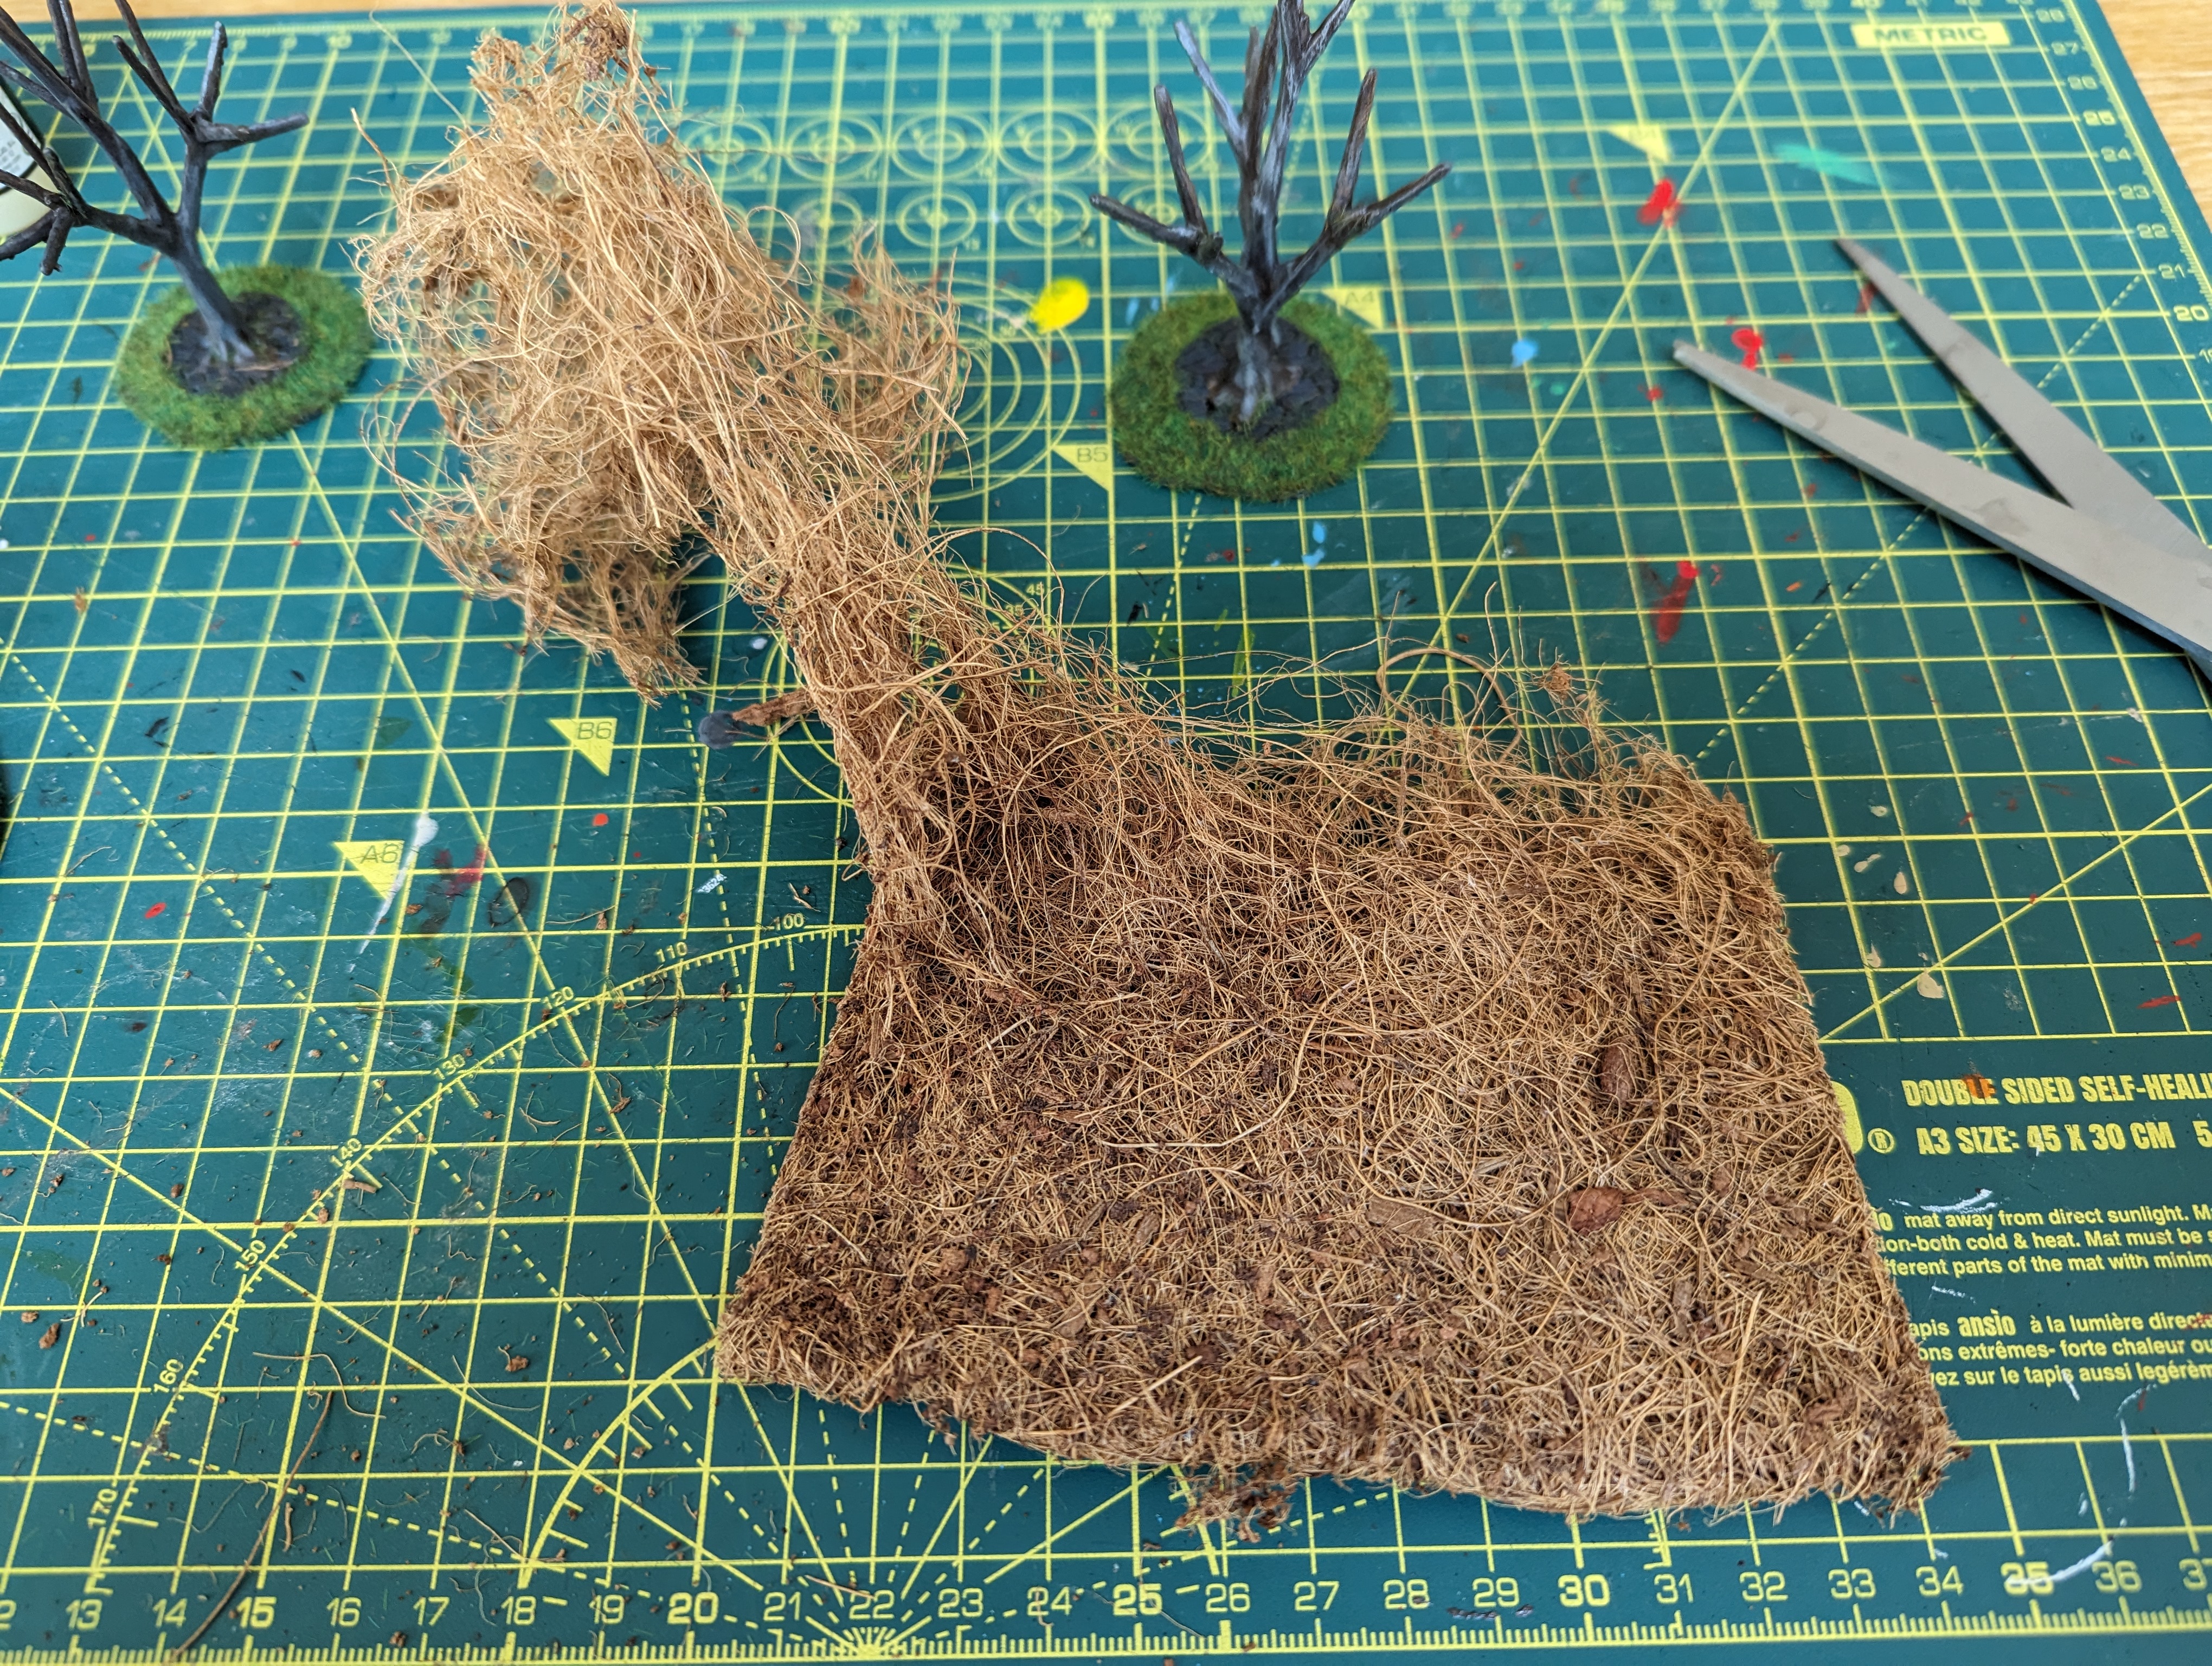
For the 3d printed armatures, I took a trip to the garden centre and bought some hanging basket liner and teased this apart. Once thinned out, I’ve glued it to the armature. A spray of mounting glue and a finer flock was then applied. Once dry, I sprayed again and applied a lighter green flock over the top. I’ve then added a pink coarse foam flock for the blossom. And then finally sprayed it all with a scenic cement.
Unfortunately, some of the colour has leached out of the blossom so it is not as vivid a pink that I was hoping for but it still looks very spring time Japan.

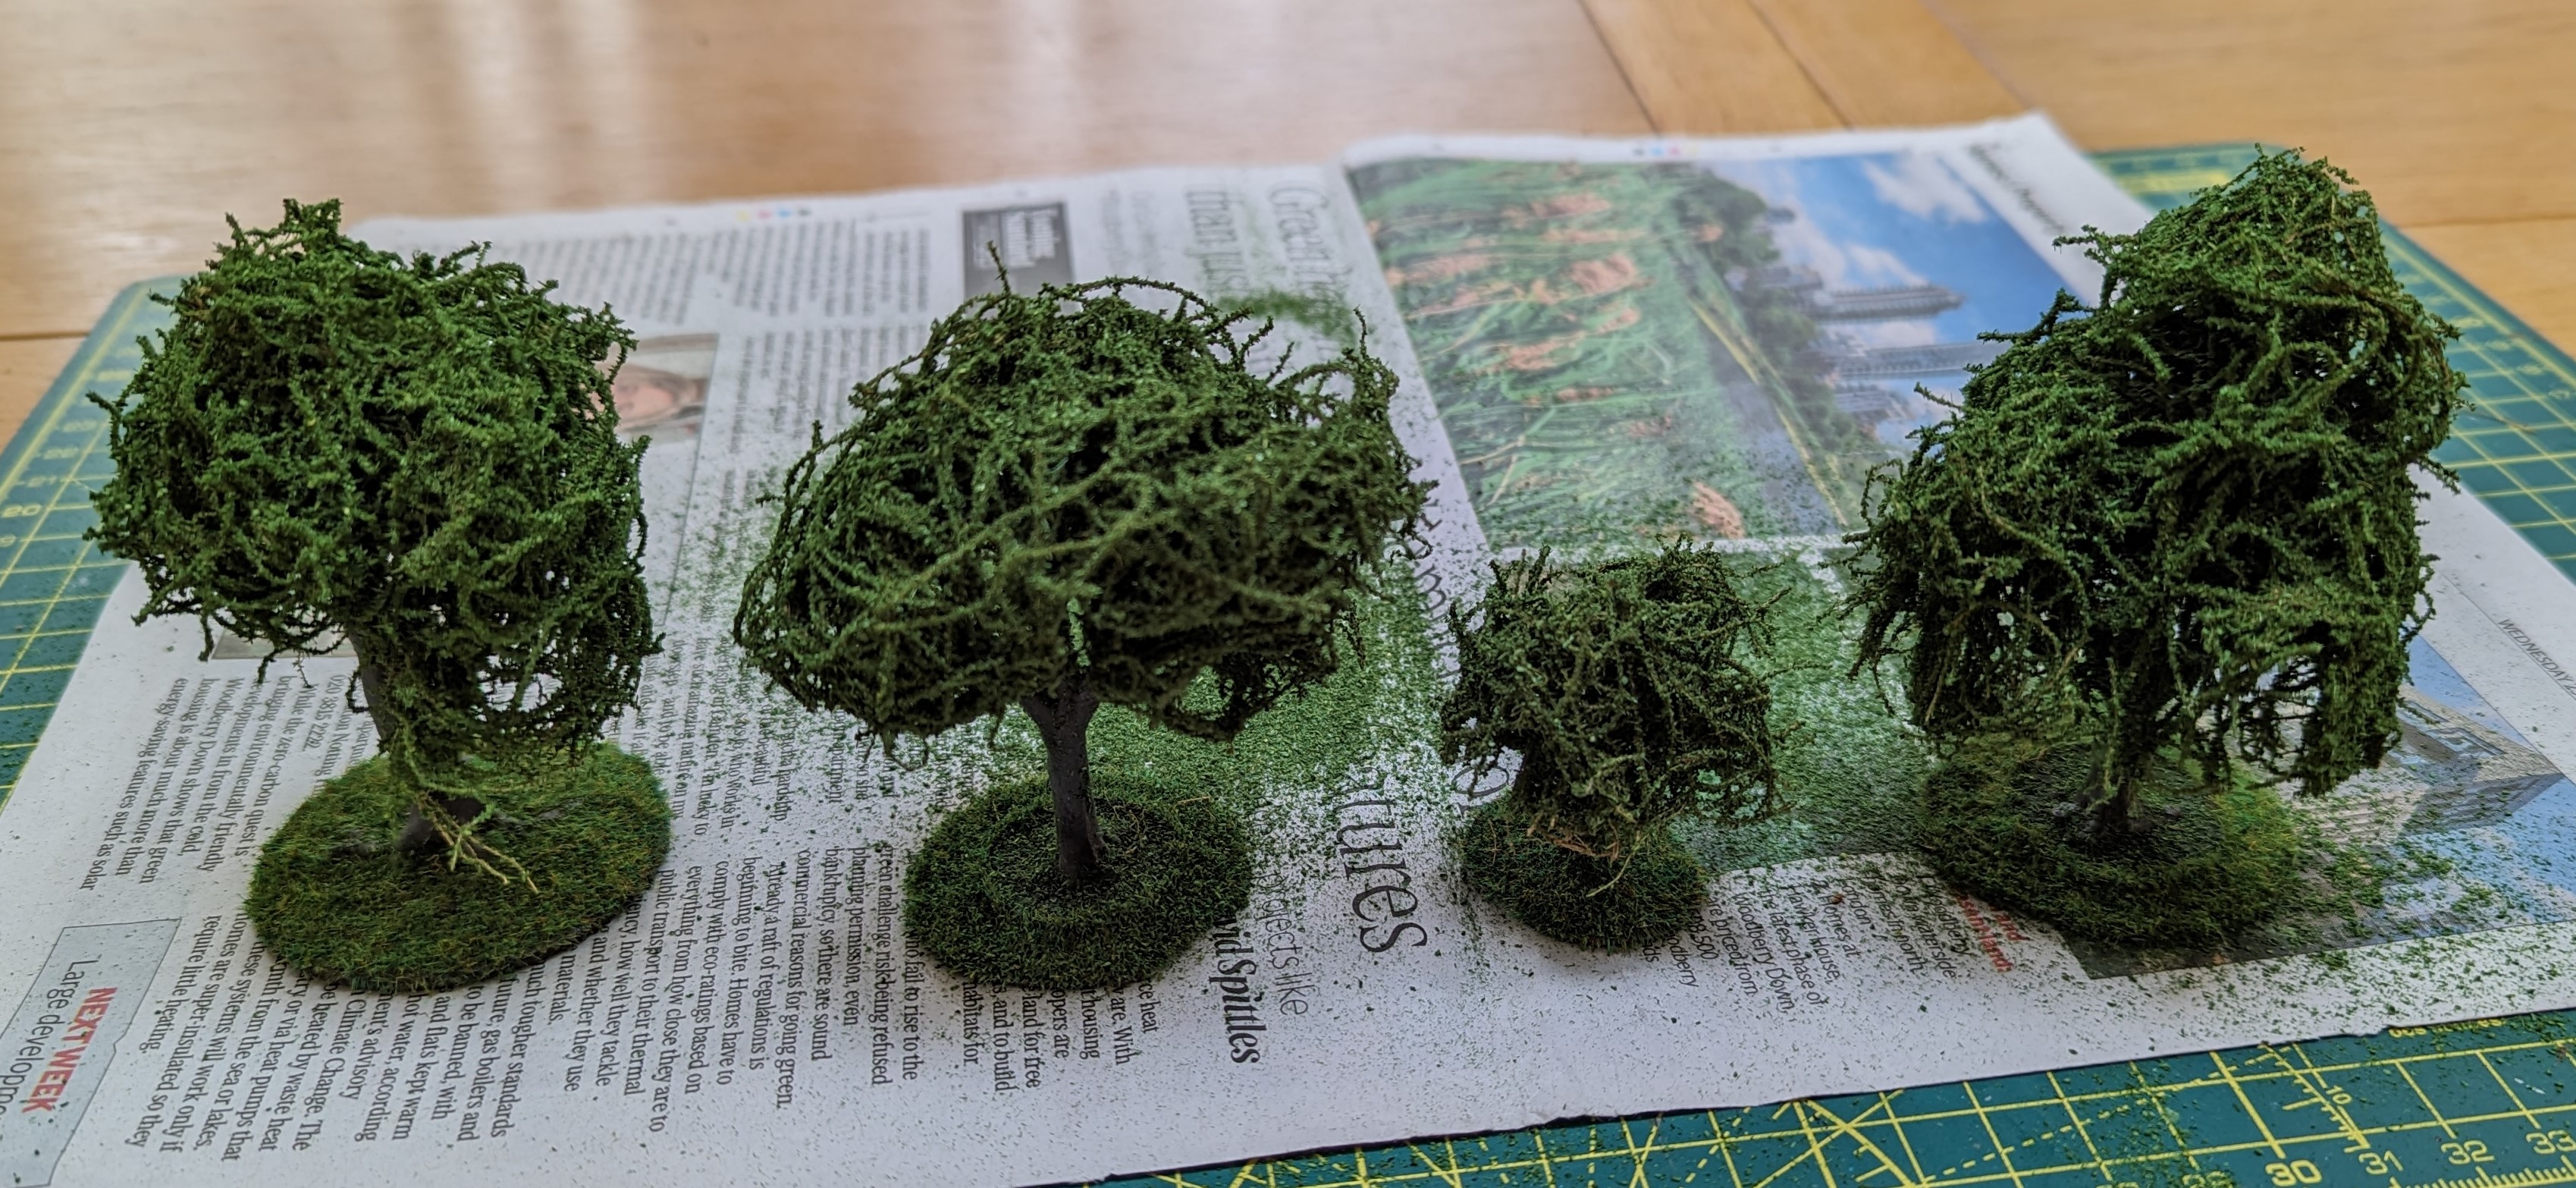
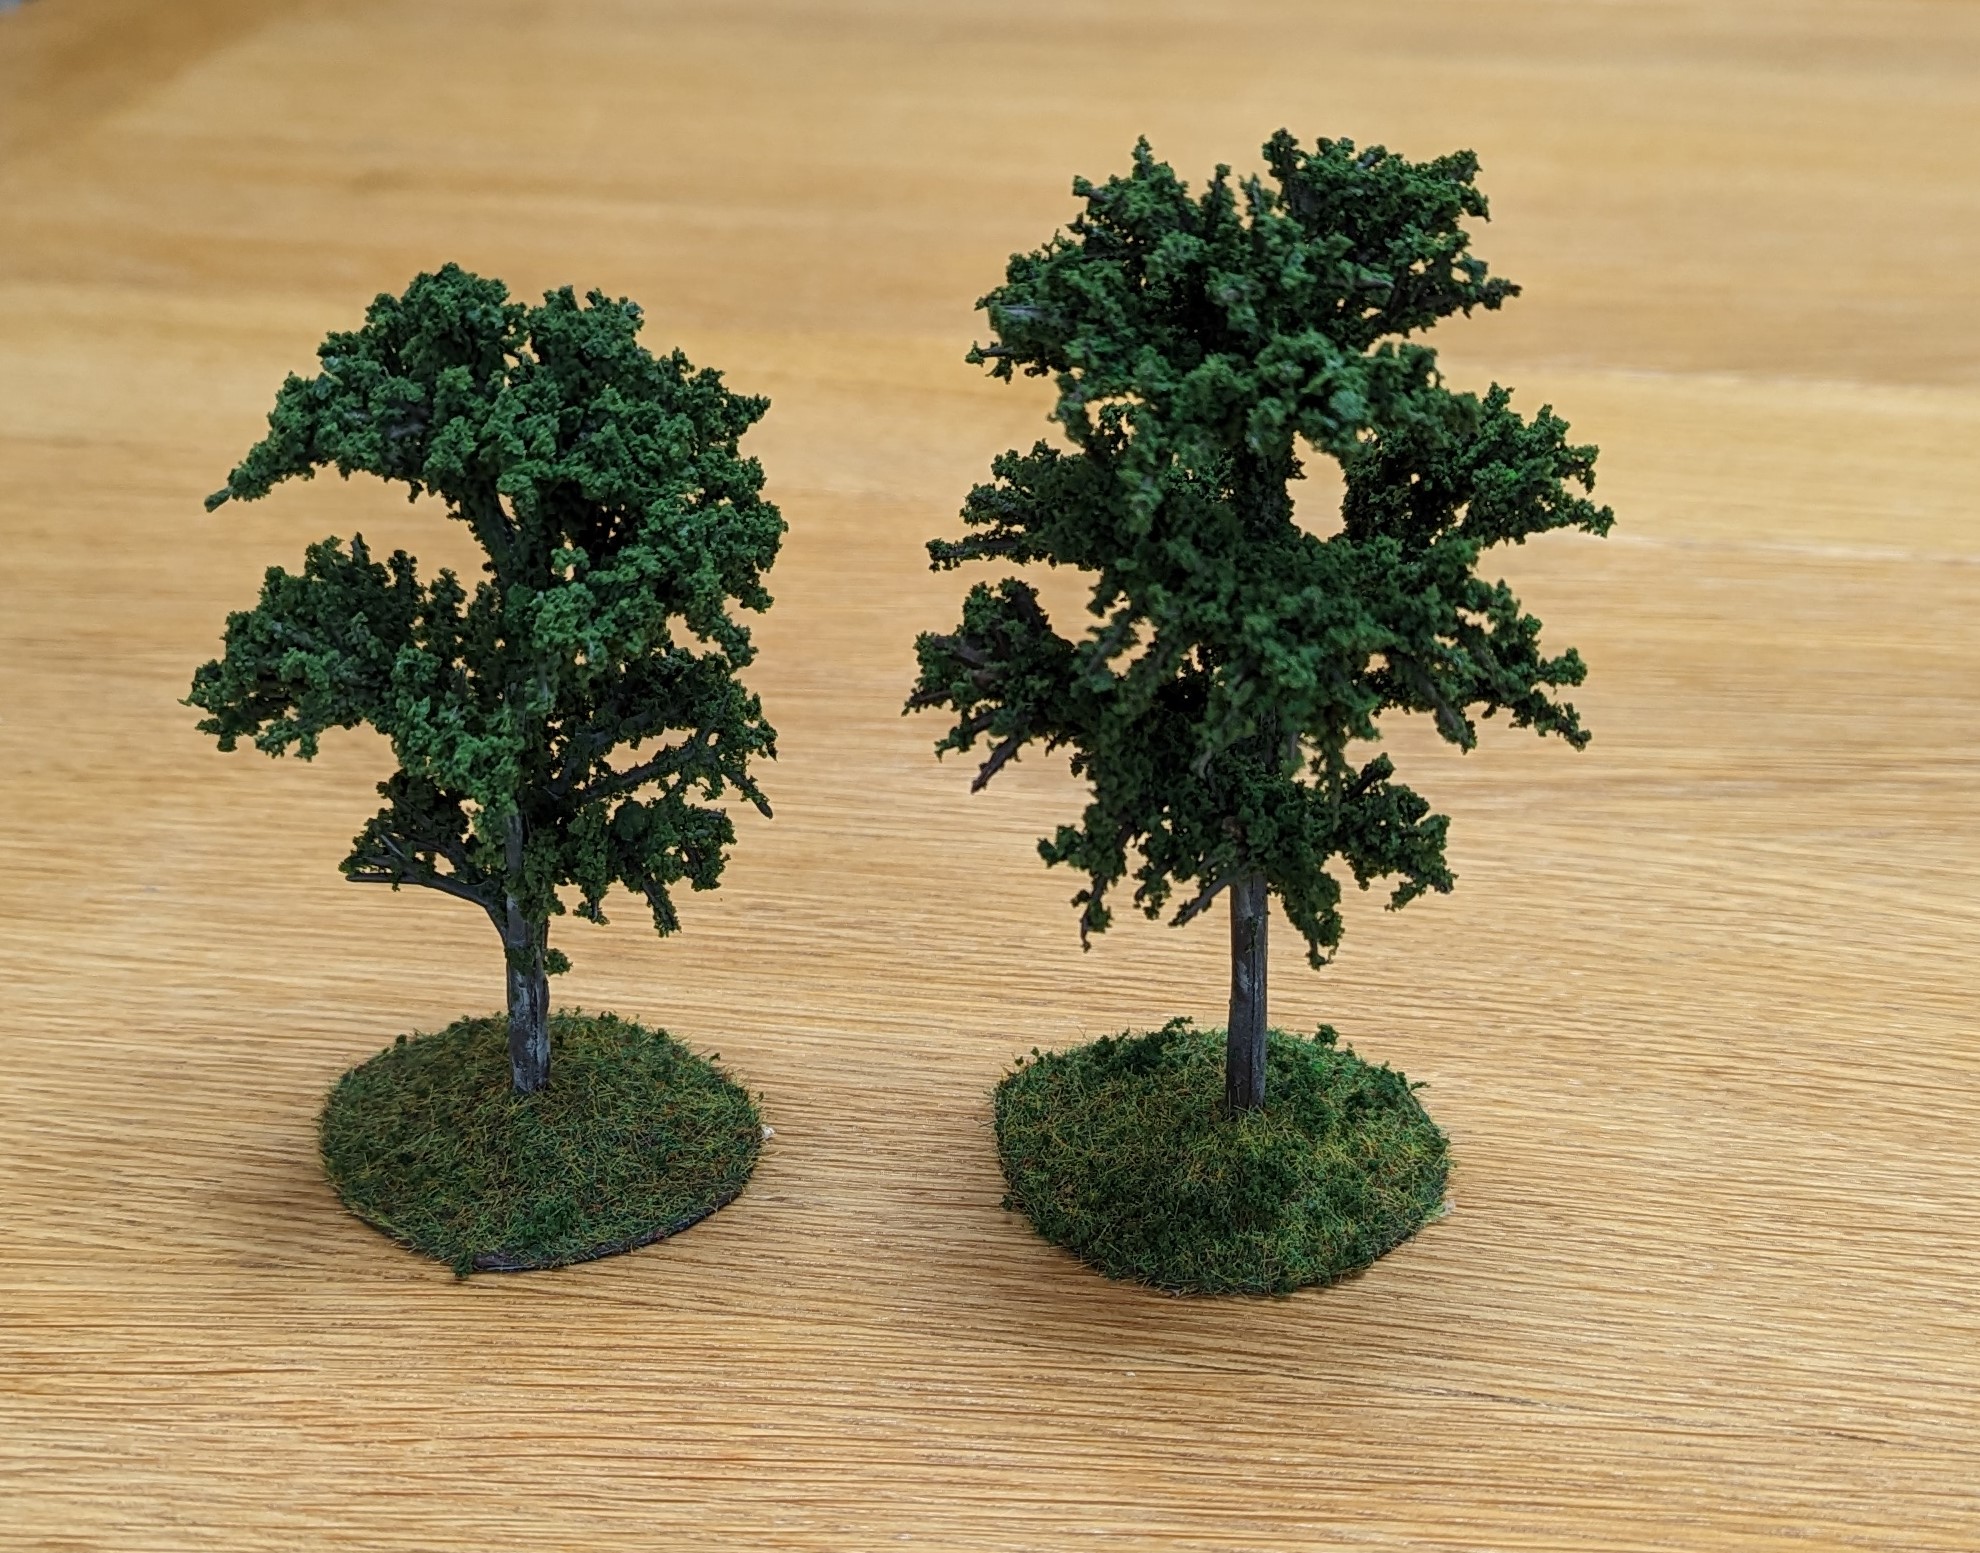 The plastic armature trees
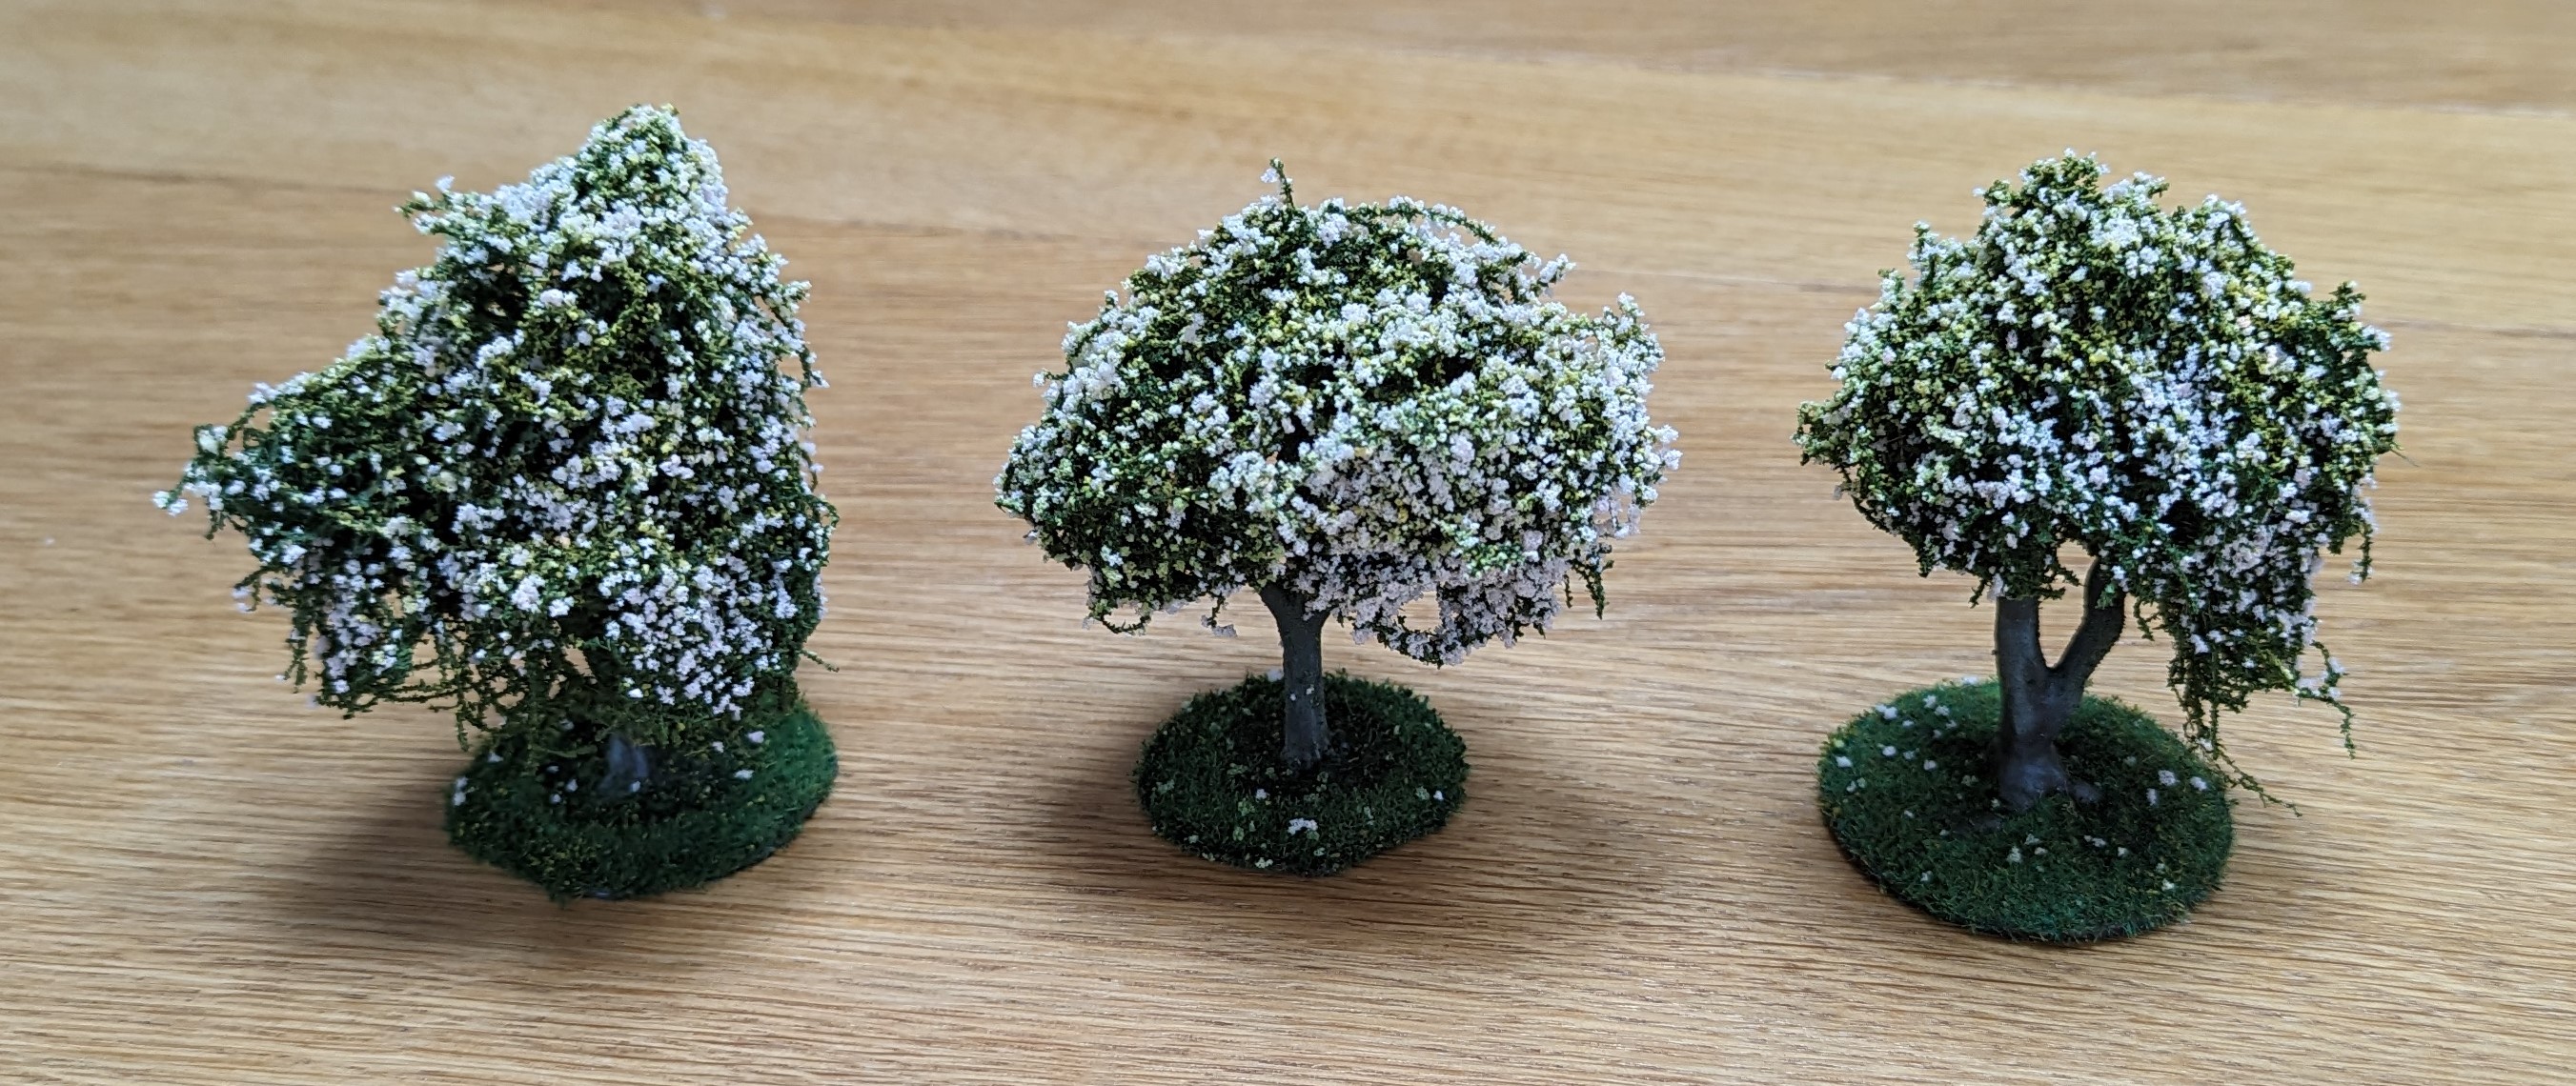 Cherry blossom
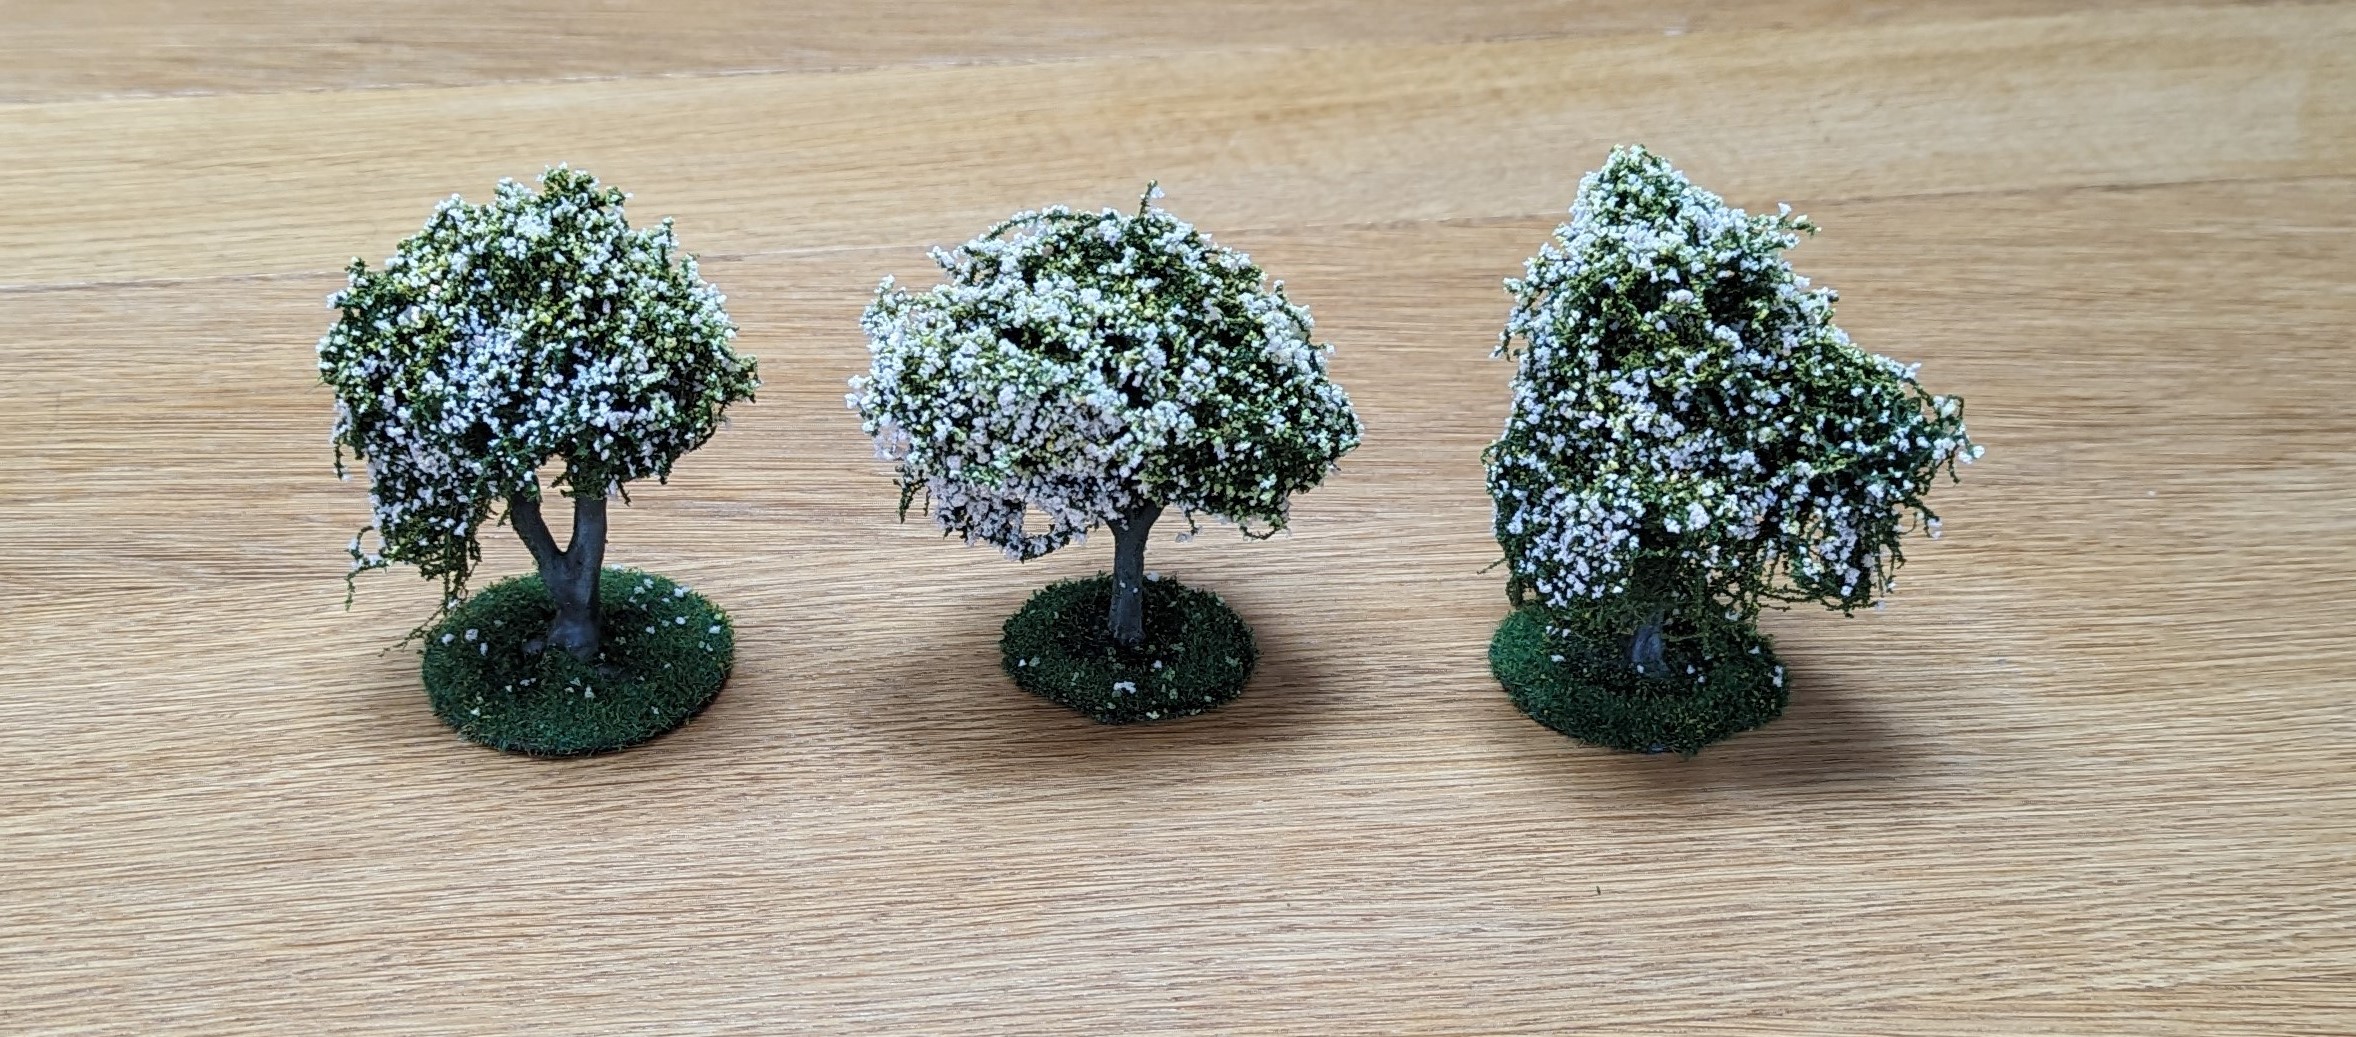 Lloyd shot
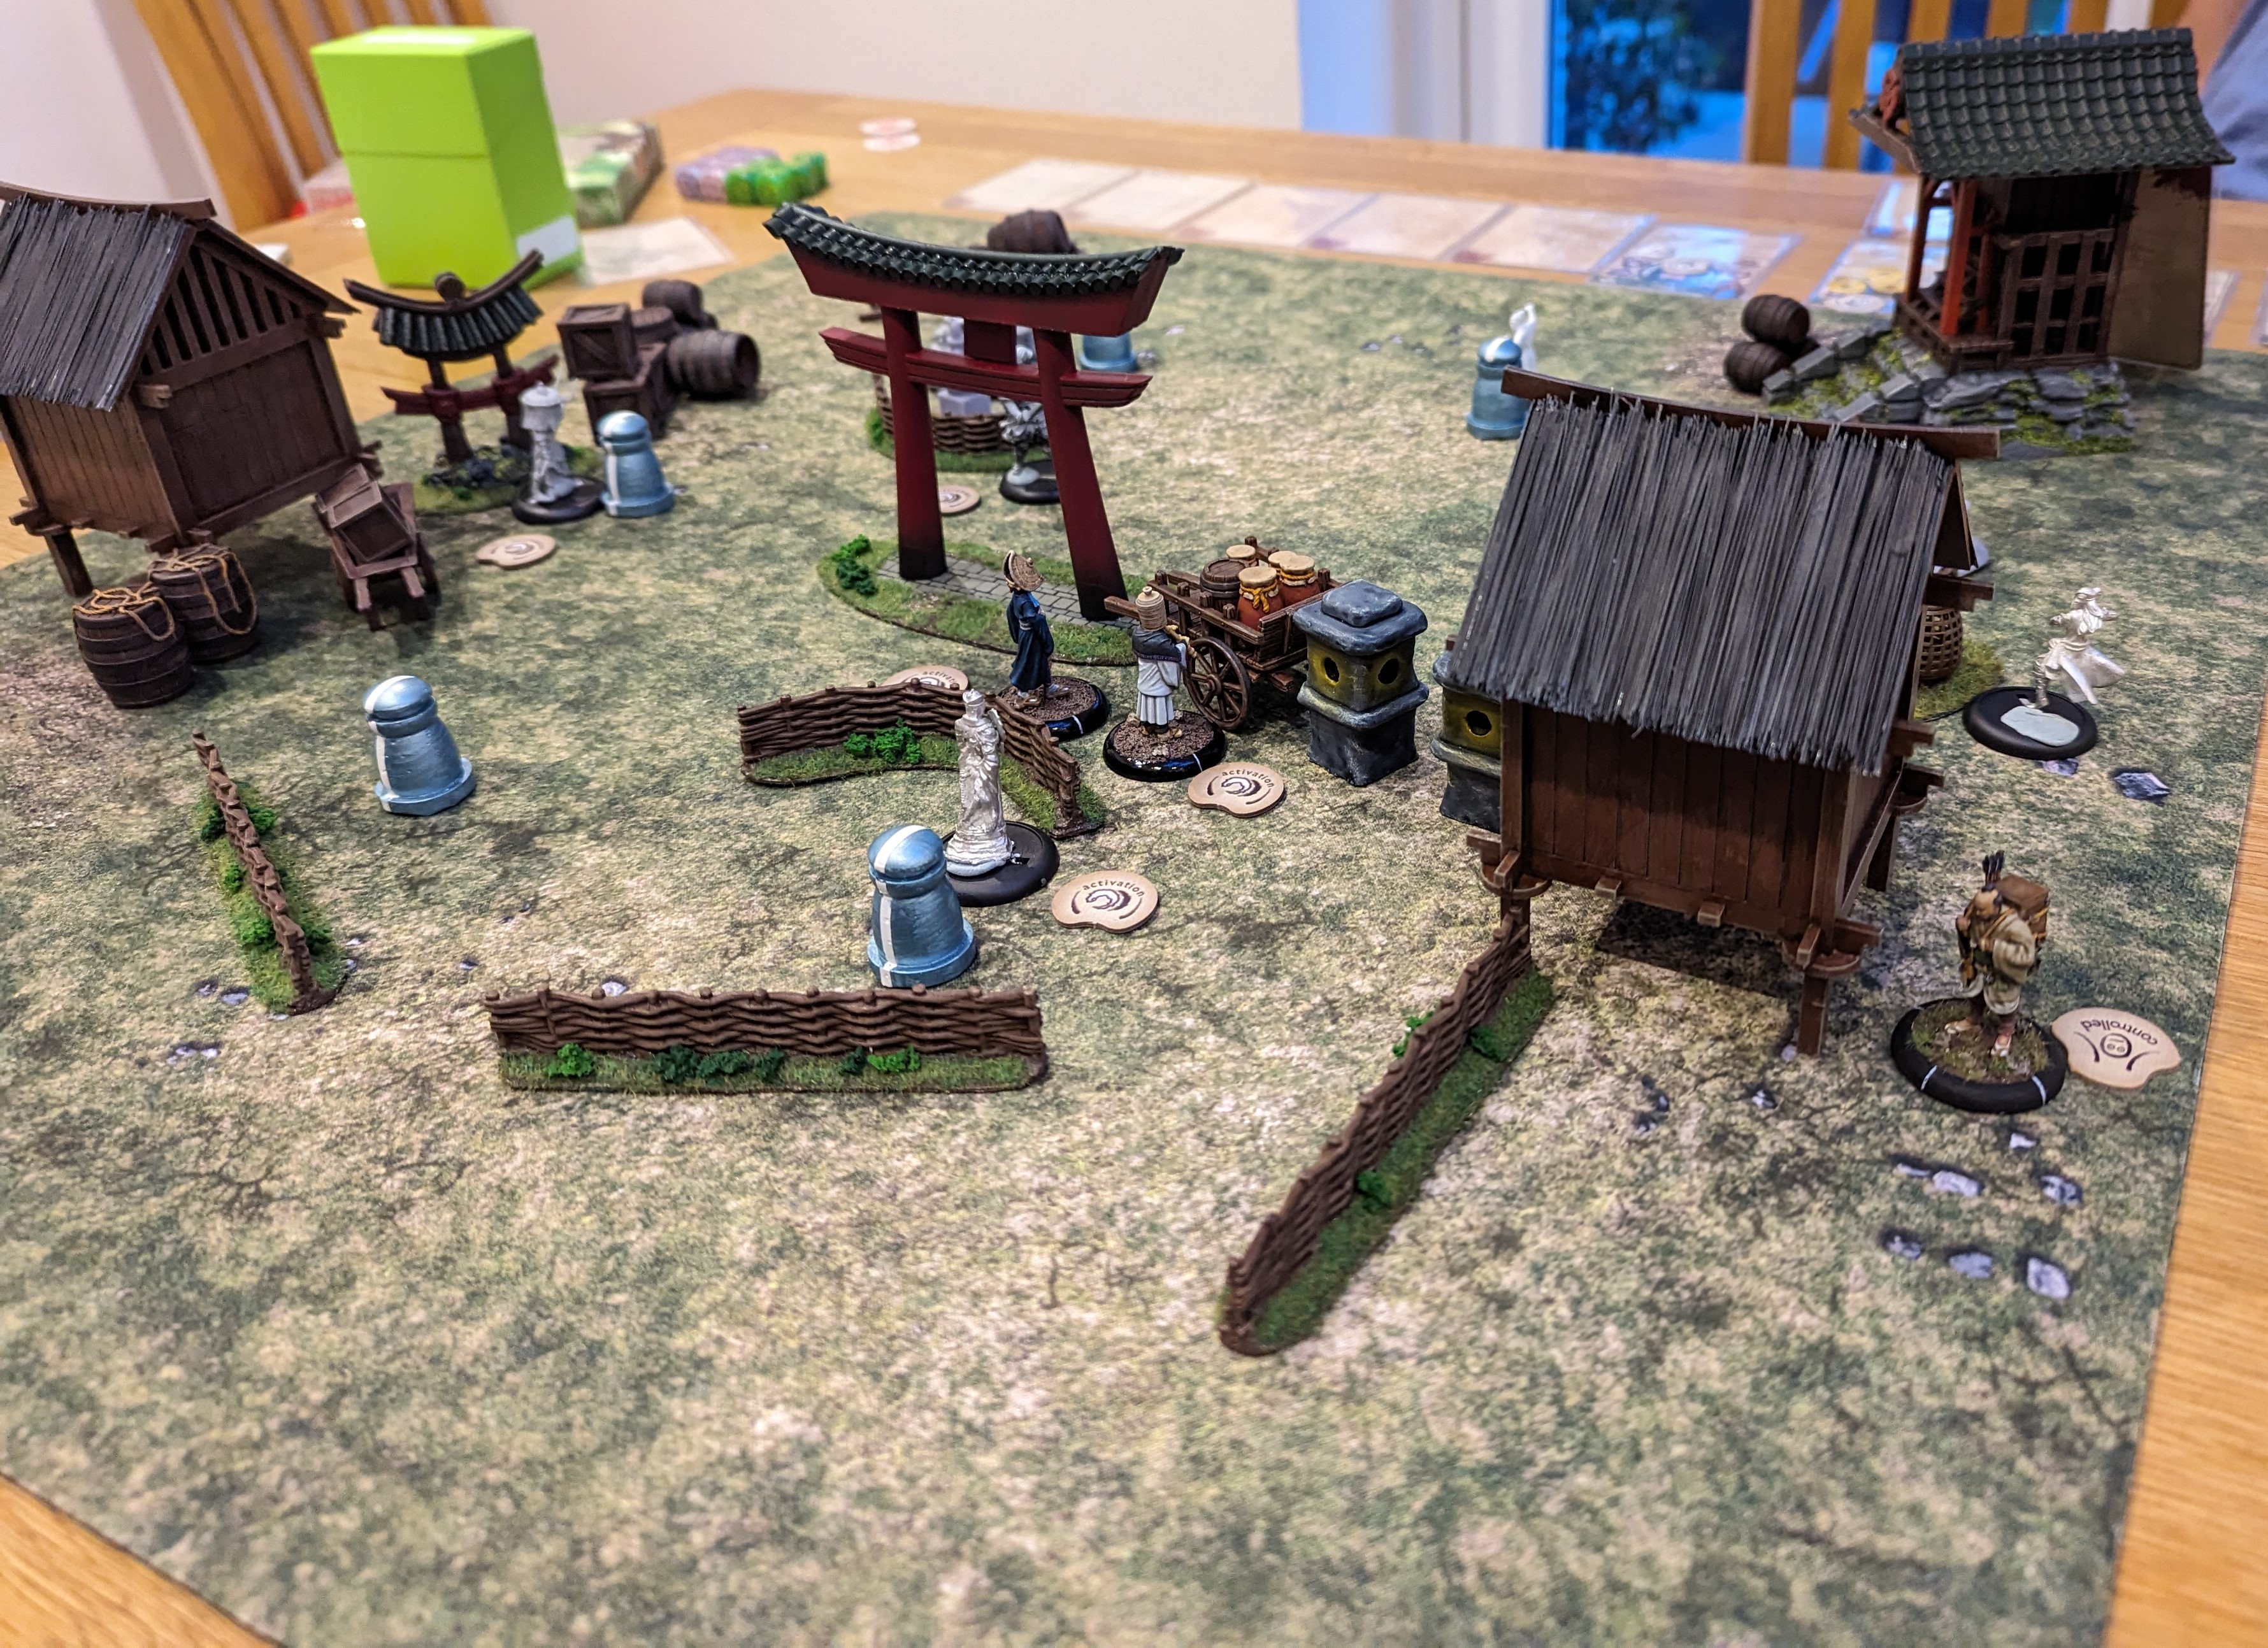
Deployable terrain
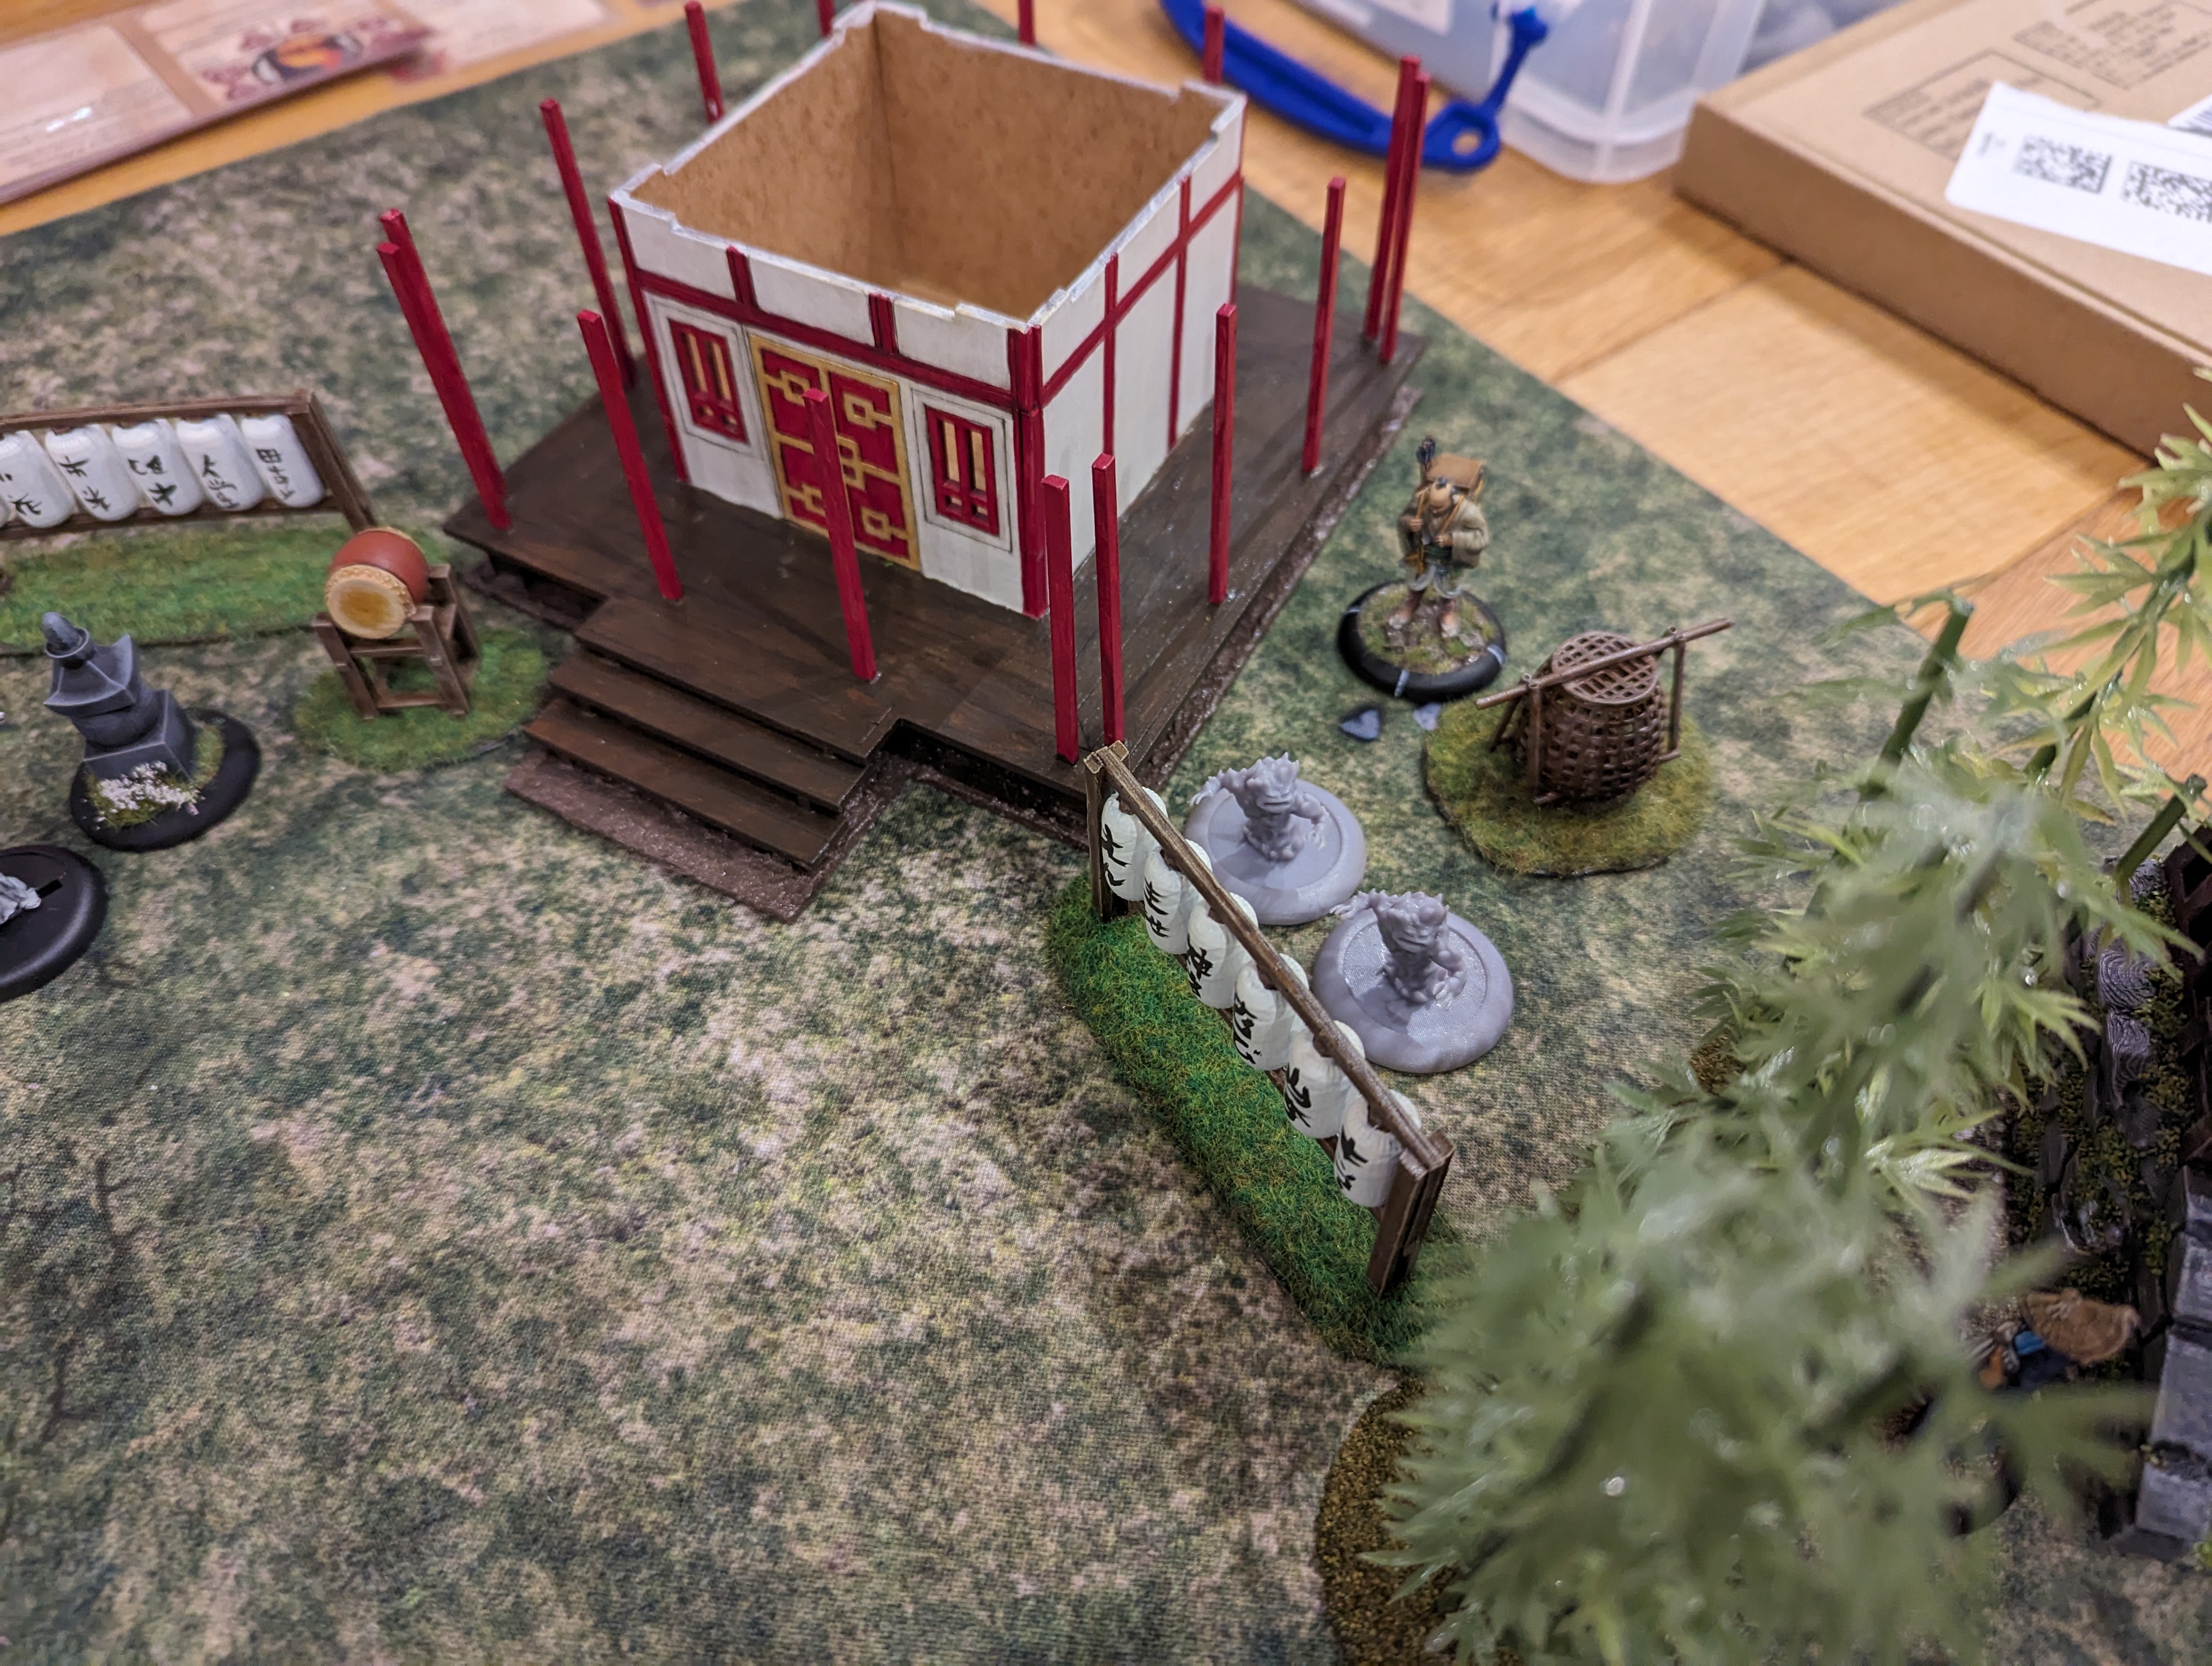
As part of your warband, Bushido allows you to purchase upgrade cards, event cards and terrain to refine your approach. My son likes to use both the Road Side Idol and the Gorinto cards as part of his Temple of Ro Kan force so rather than deploying 30mm bases, I decided to 3d print some terrain for him.
On the left in the picture, we have the roadside idol that allows a monk in btb with it to use an activation to generate their full Ki for the turn. Very handy for the Ki hungry monks.
The idol was a 3d scanned image of a real Buddhist statue (I forget which one) that I’ve downloaded and reduce in size to fit the game scale. I’ve then virtually attached it to a 30mm base in a 3d building tool and printed it out. It’s been painted with a bronze, given a light dry brush of dark rubber grey, a heavy dose of nihilakh oxide which I’ve then wiped most of it off. Finally, a dry brush of shining gold to pick out the detail. All quick and easy.
The Gorinto (on the right in the picture) allows one model each turn within 6″ to gain 1 extra Ki (Ki being the in game currency for models to perform their special actions and boost their abilities). Out of game, a Gorinto is a Buddhist pagoda, often used in funeral services.
To create this, I’ve searched thingiverse and found a free gorinto which I’ve then attached to a 30mm base in a 3d builder program. Once printed, it got a grey primer, black wash and then a grey dry brush. It was painted in about 30 minutes including drying time.
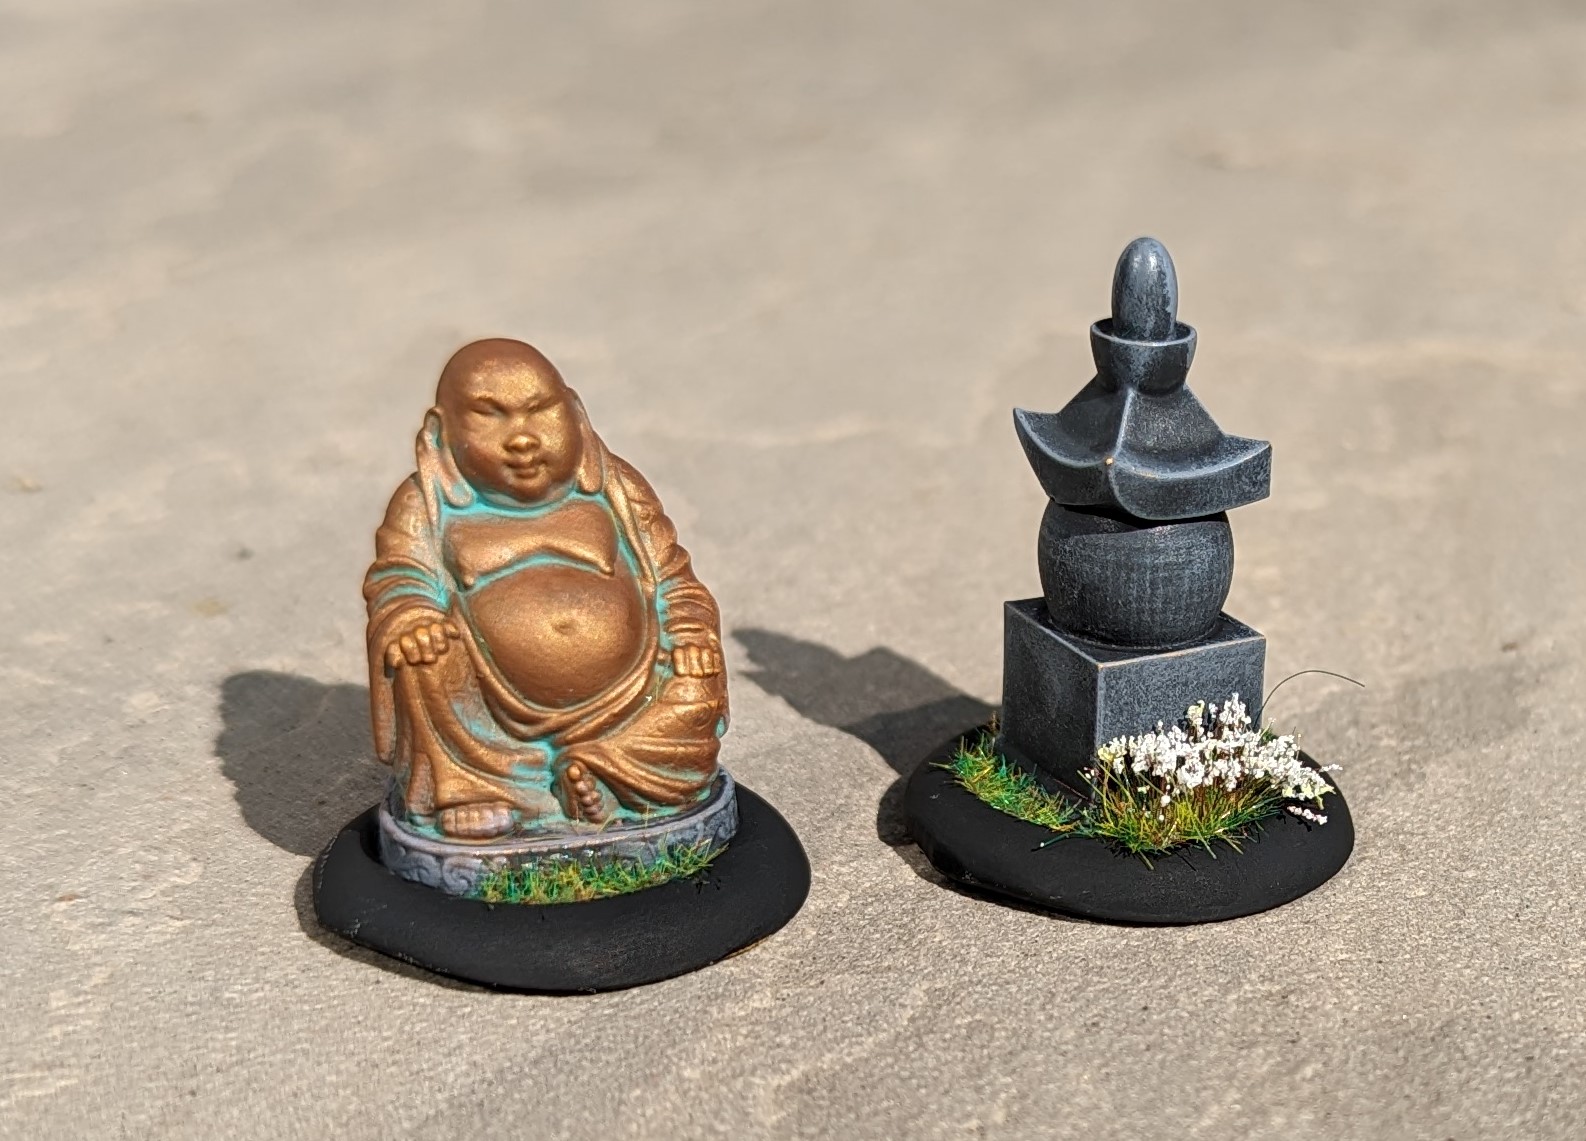 Idol and Gorinto, living in harmony
Making a Panda Restaurant
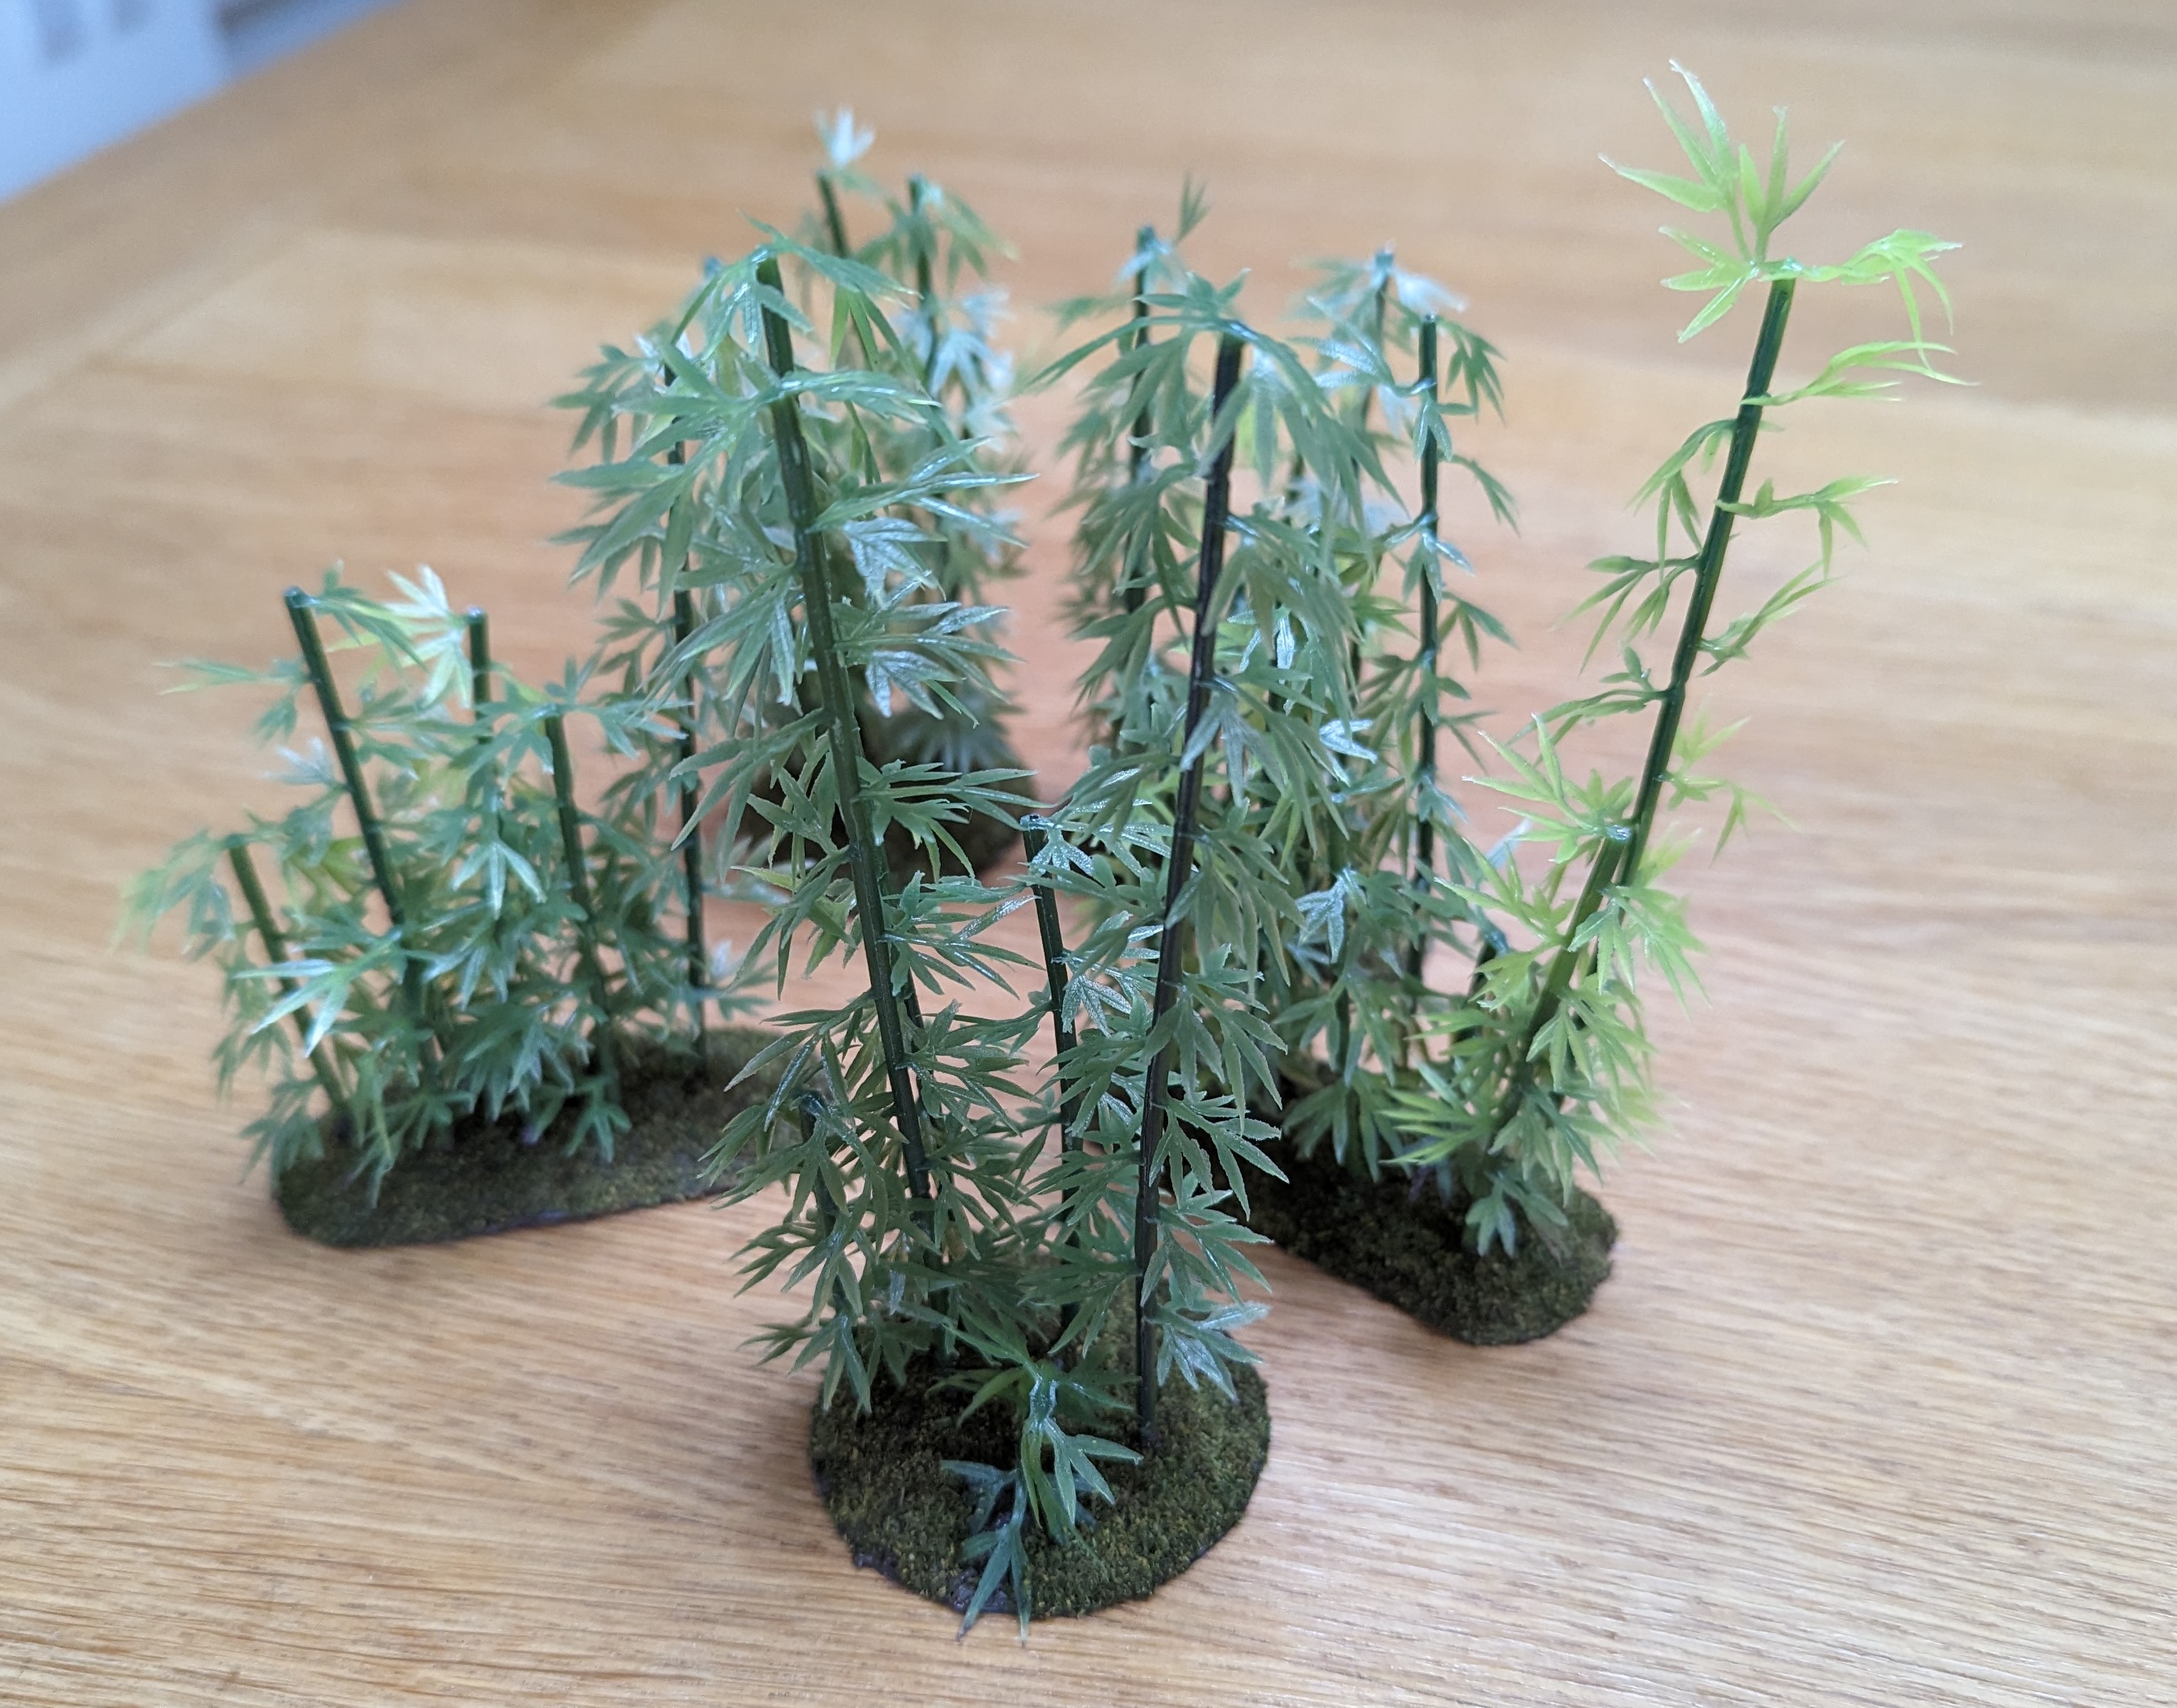
We’ve got no vegetation for our Bushido games, so time to correct that. I’ve ordered a bag of plastic bamboo. It’s not the most realistic of plastic flora but will certainly work for some throw down terrain for our games.
I’ve got lots of left over 3mm mdf off cuts which I’ve used as a start of the base. I’ve drilled a hole in the mdf and then just glued the bamboo into it, cutting the bamboo to different heights to create variation. I’ve then cut plasticard to the desired shape and size of the terrain and glued the mdf/bamboo to the plasticard.
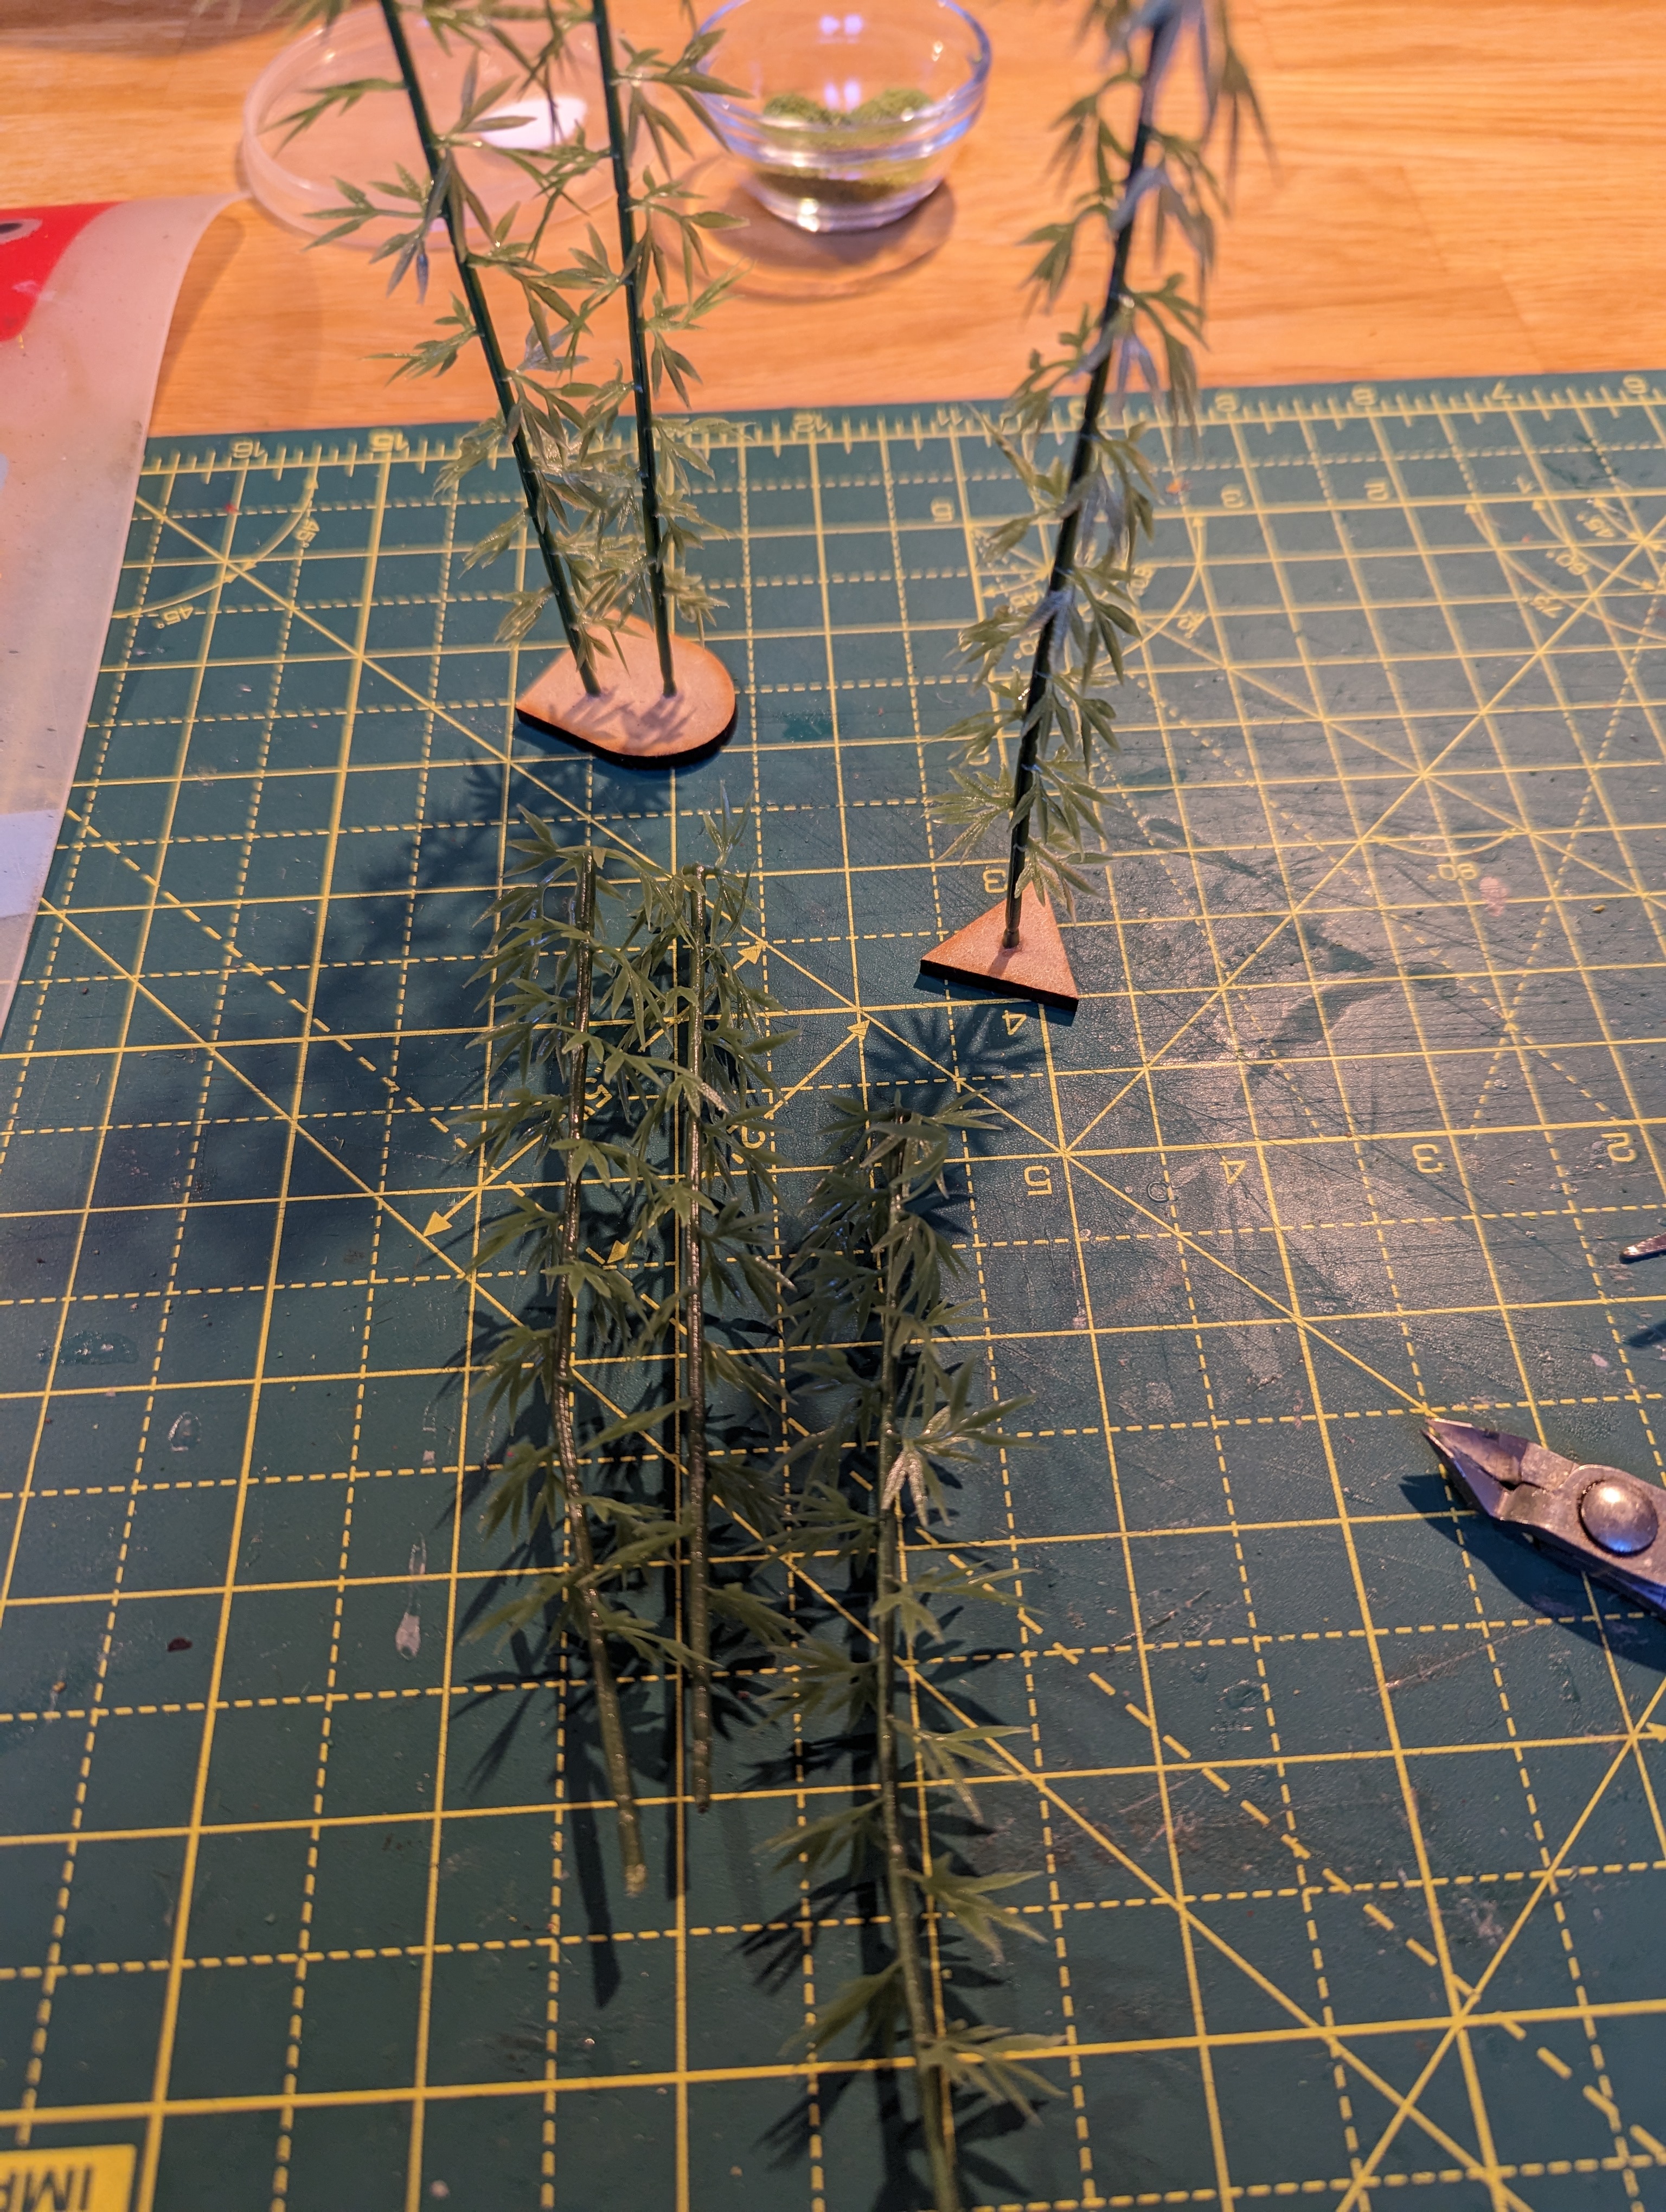
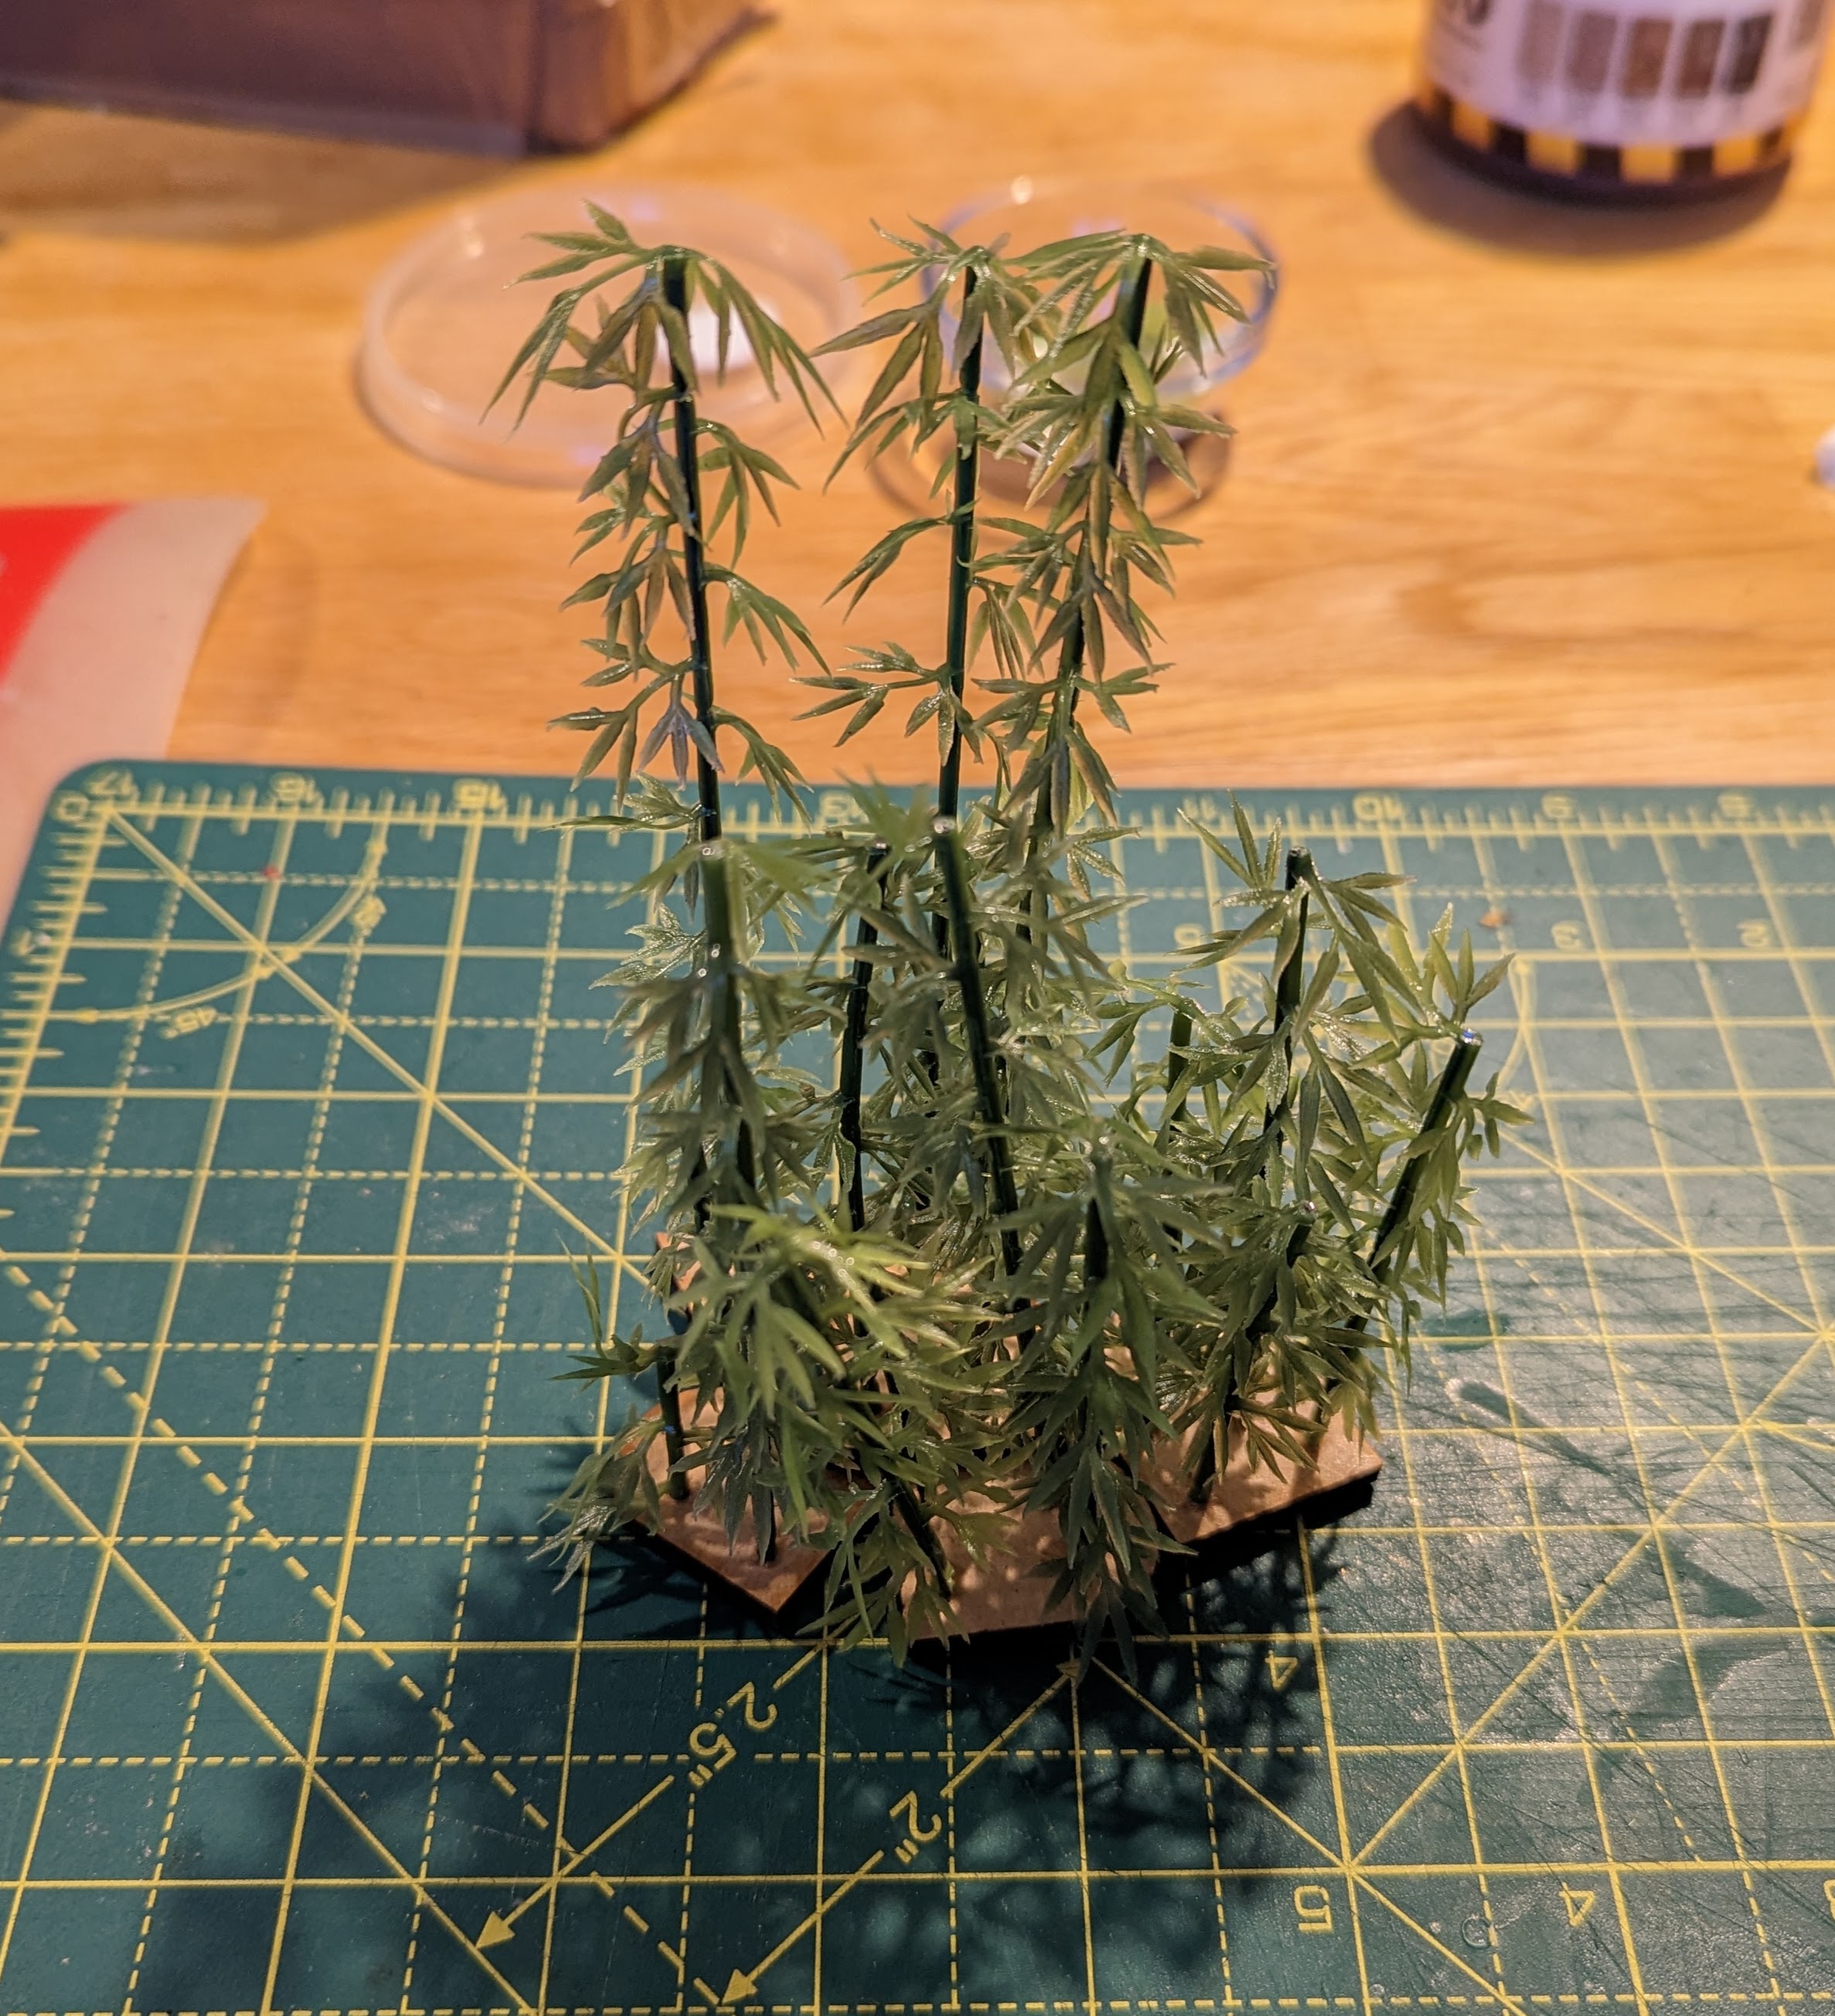
Once all the superglue is dry, I’ve smeared the plasticard and mdf with my acrylic mud paste. I’ve been very liberal here to hide the mdf. Once dry, an application of pva and some flock and job done! Quick, easy but quite effective.
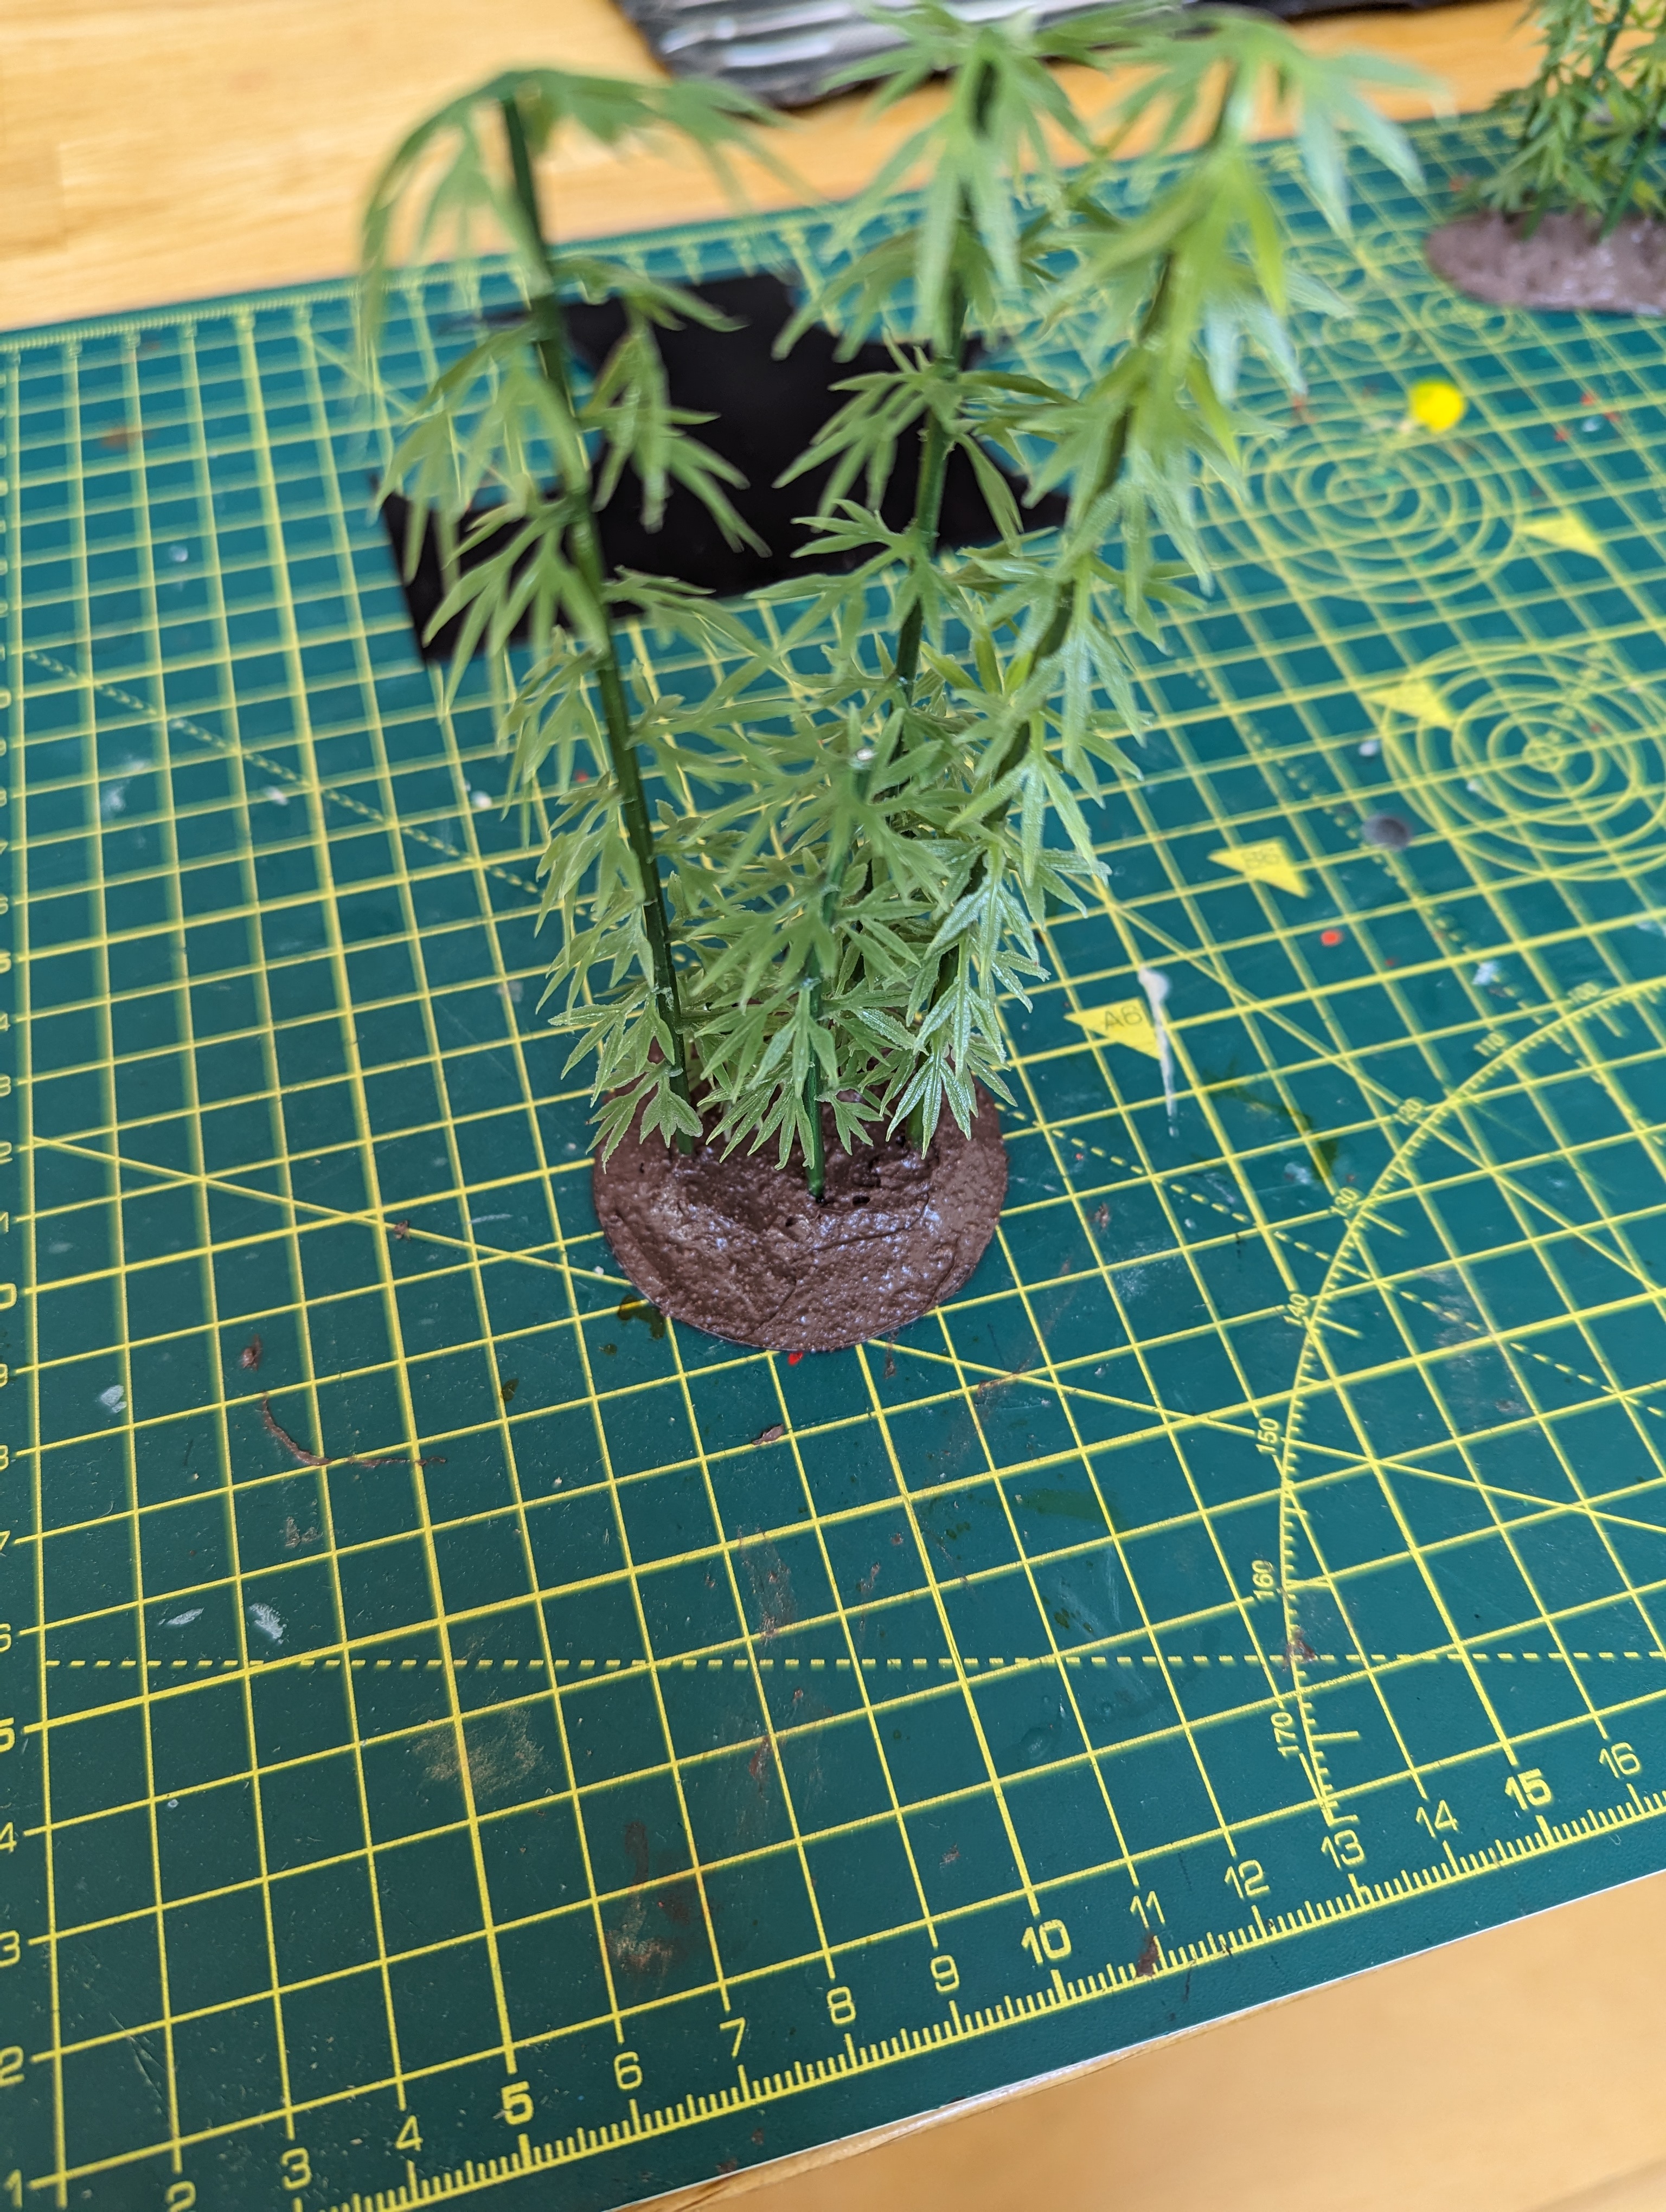
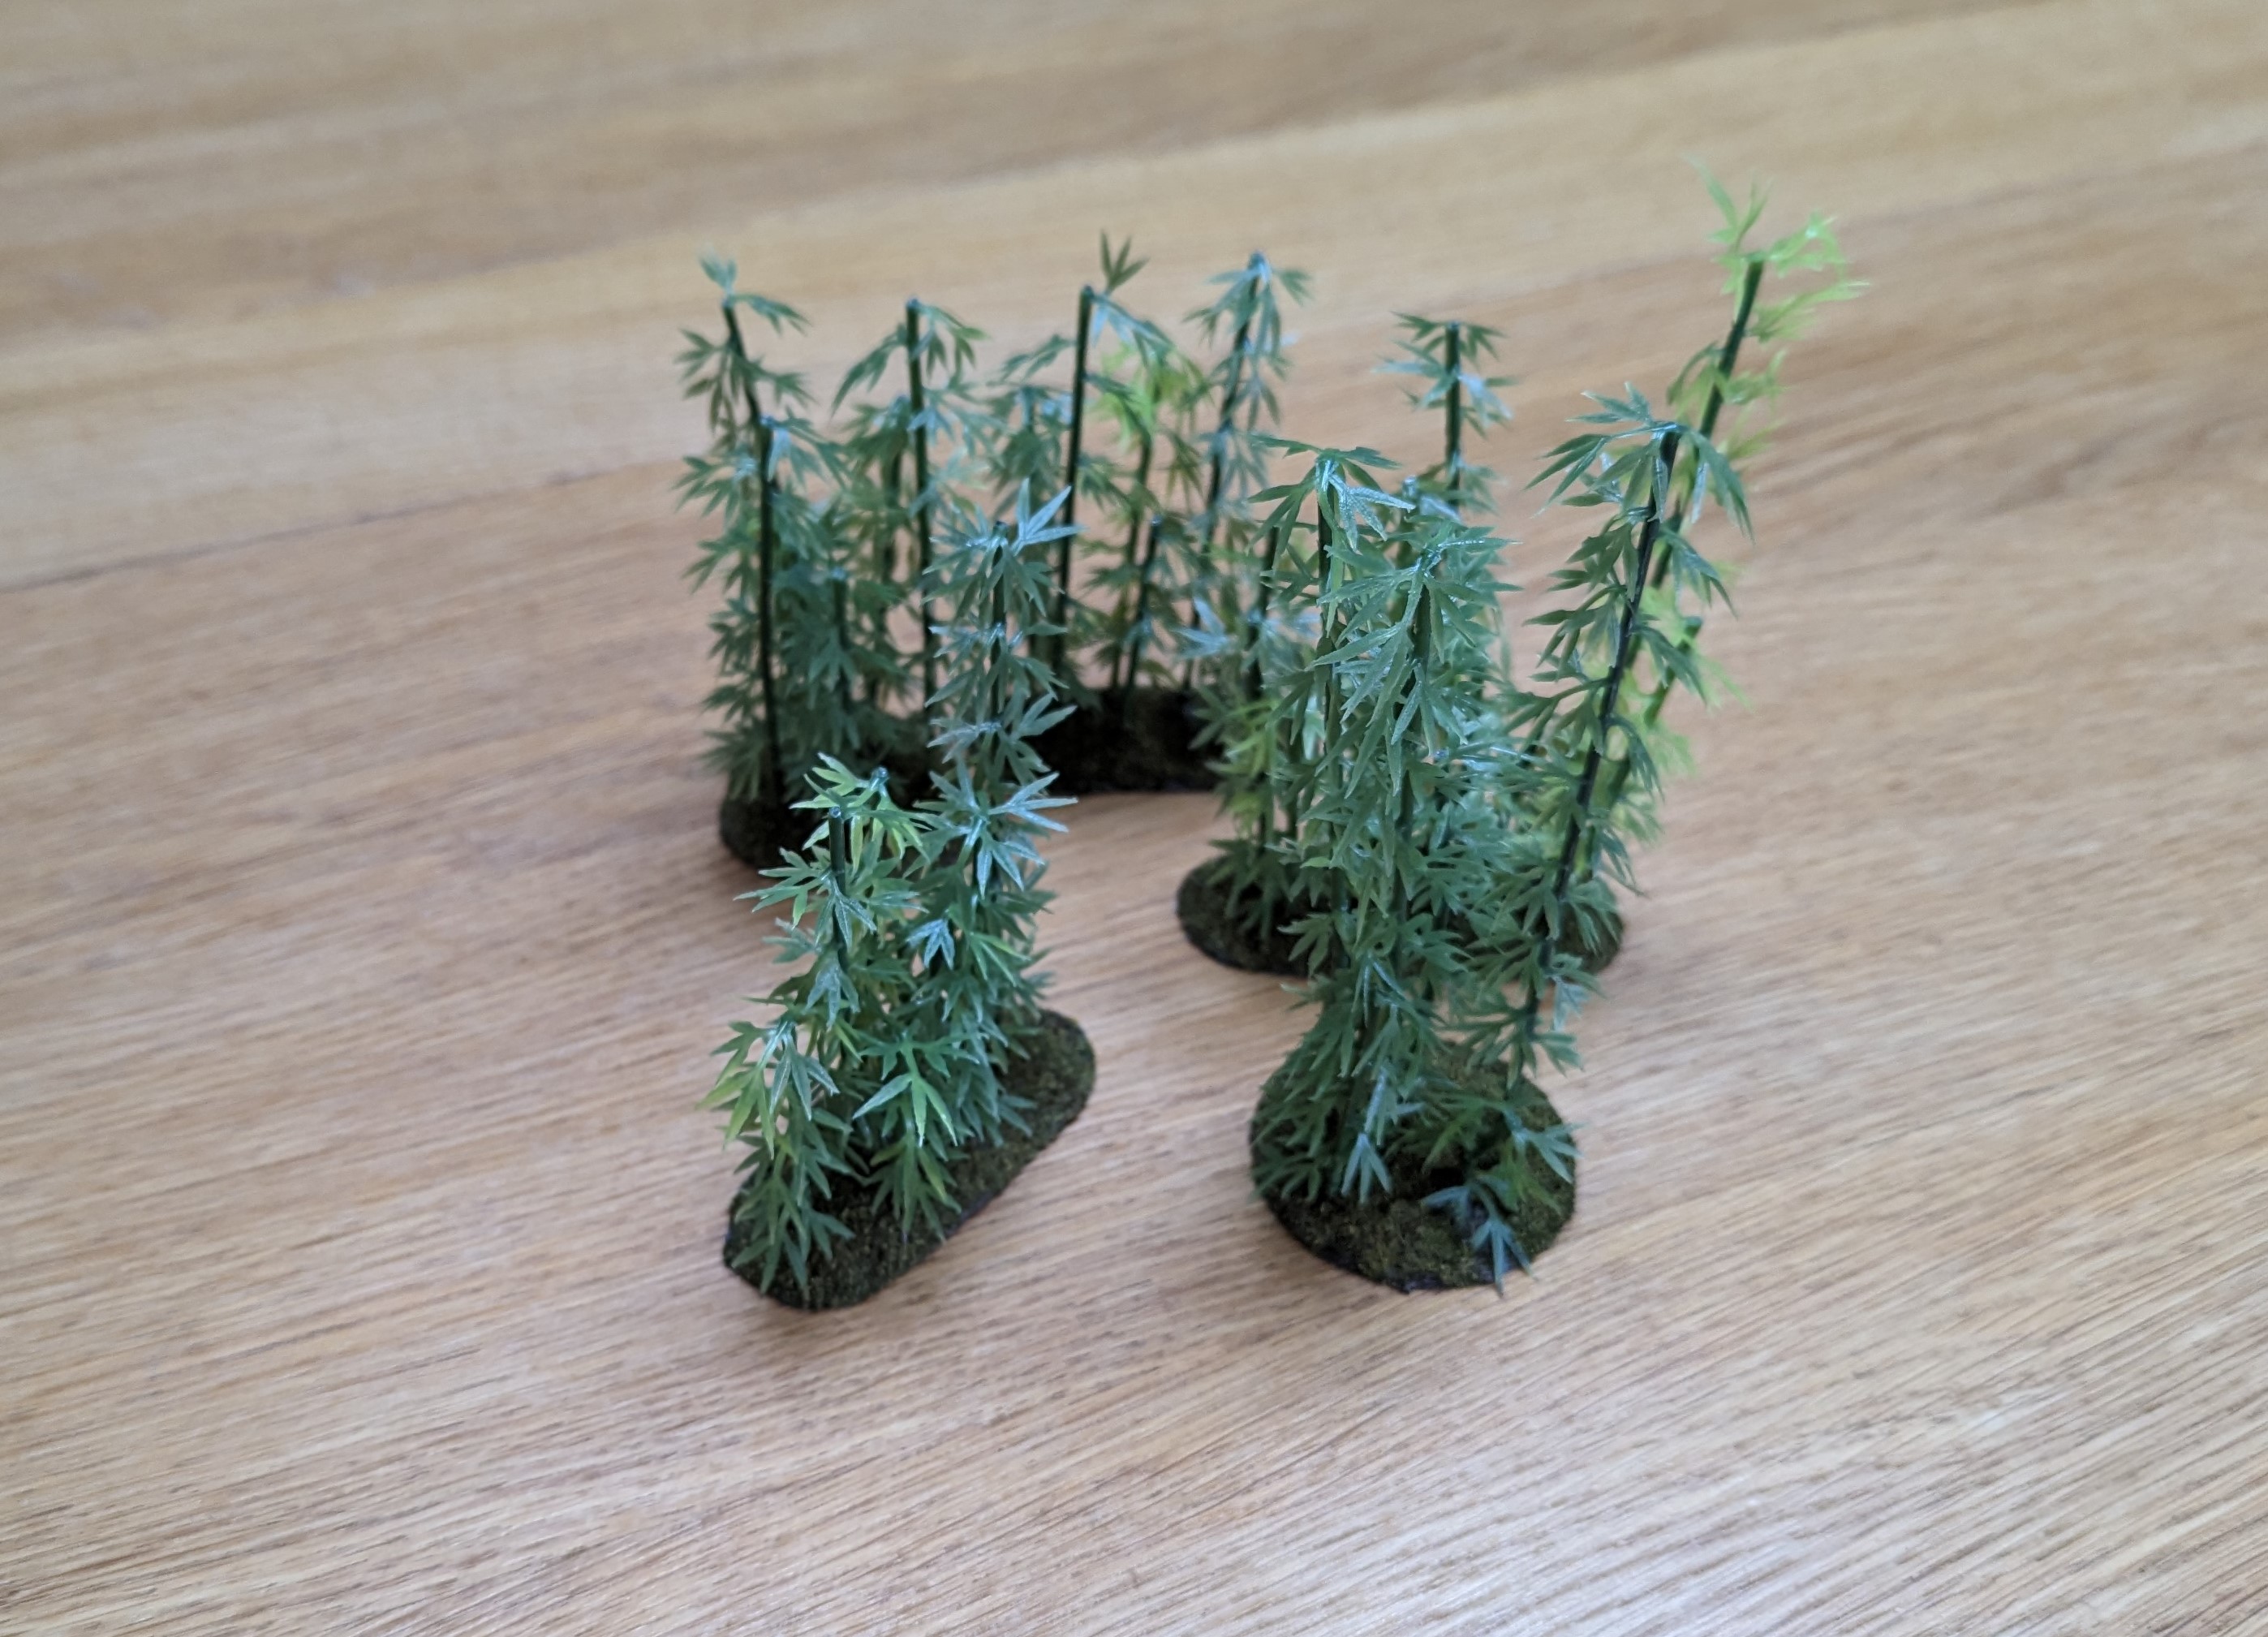 Lloyd shot
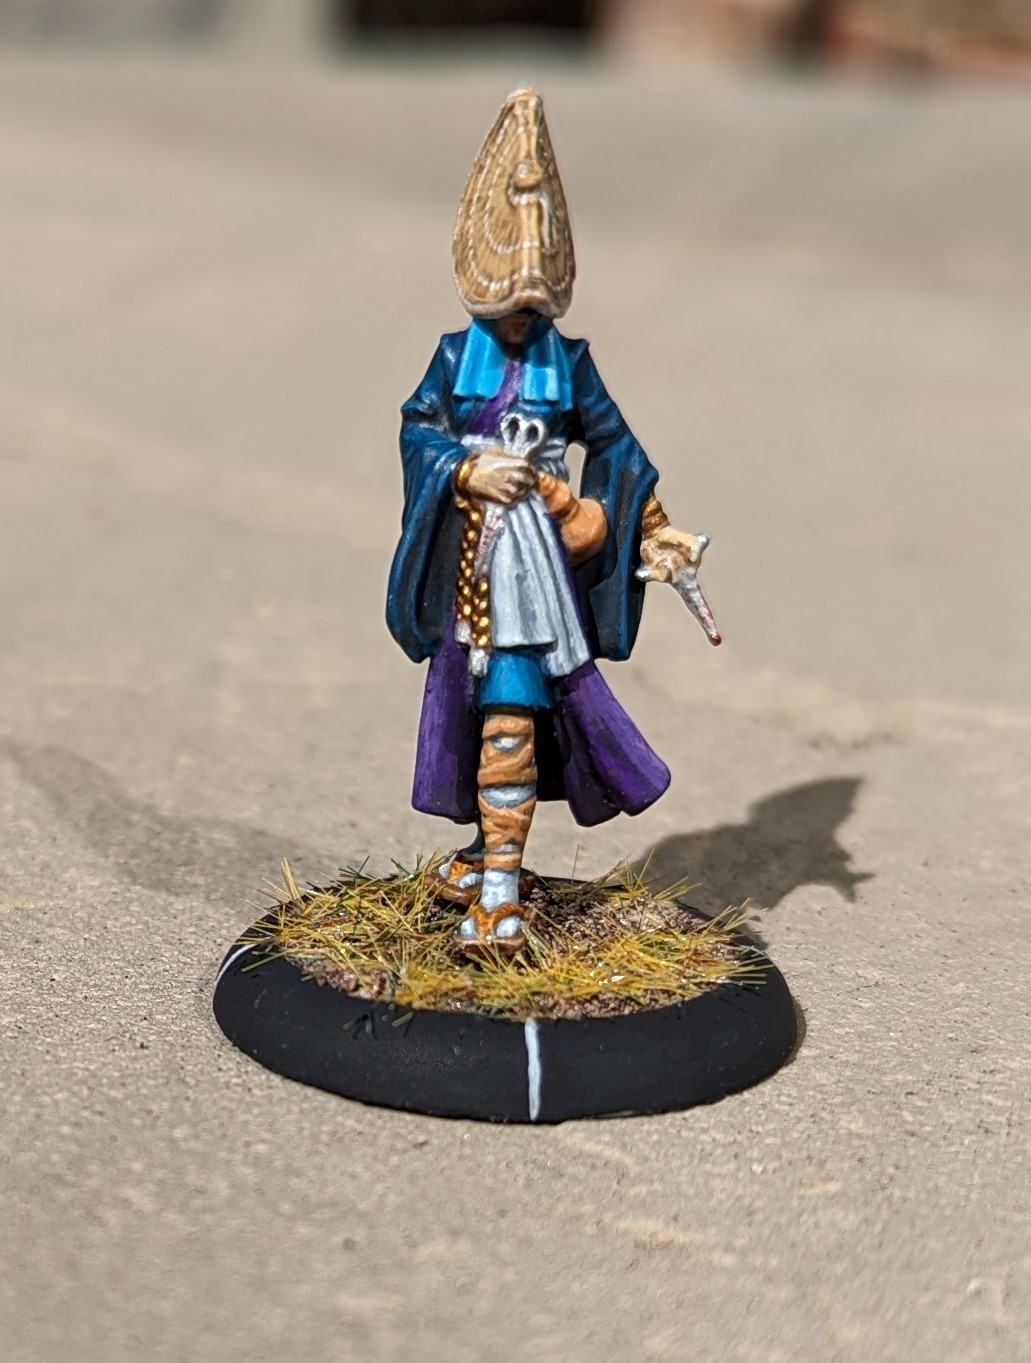
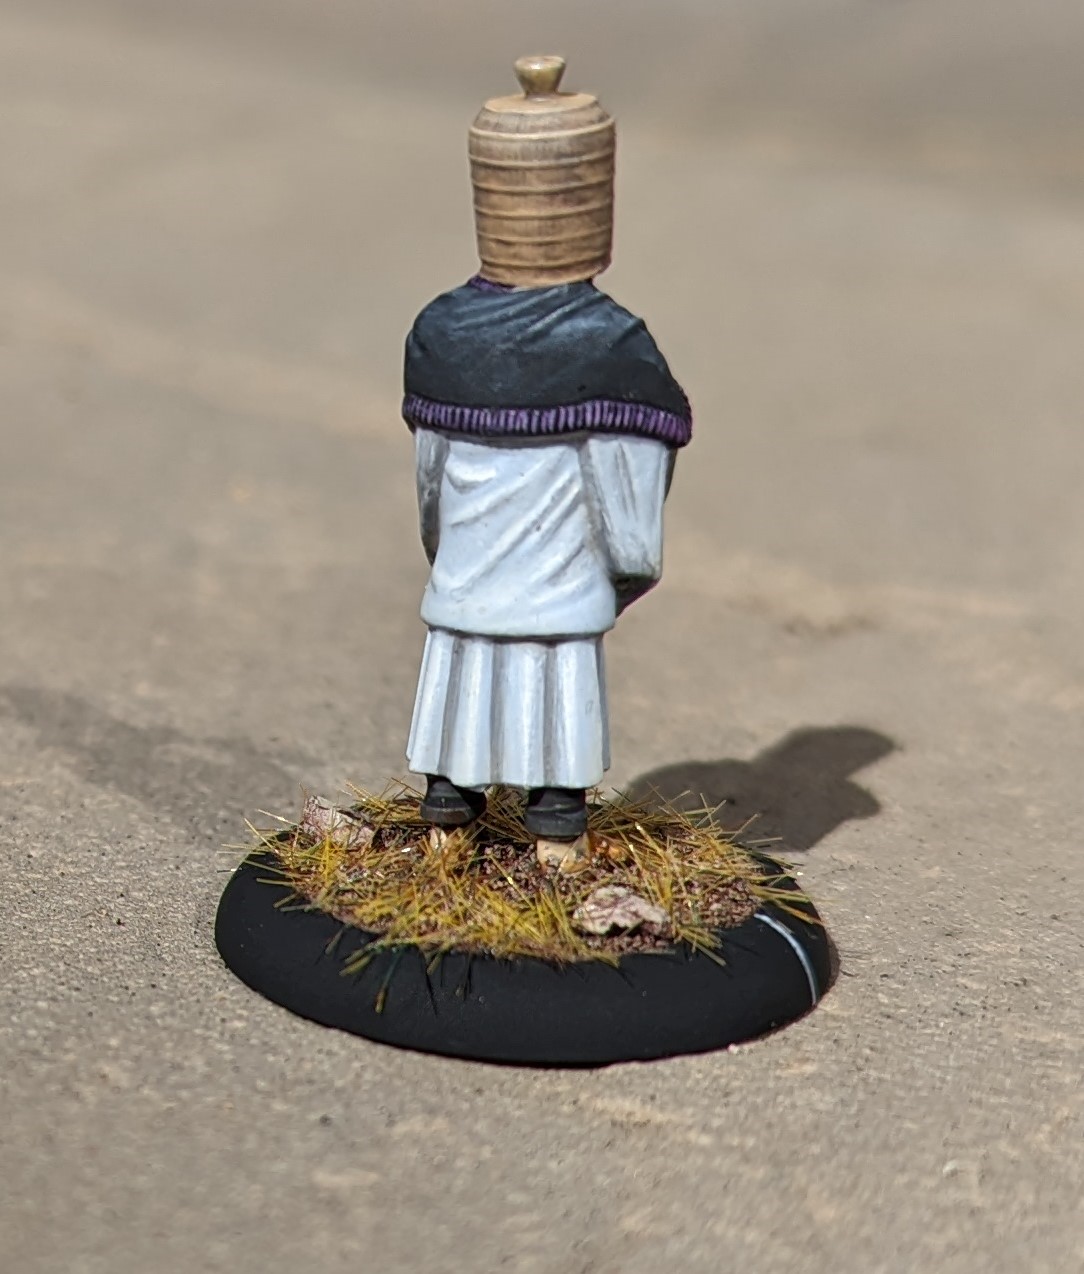
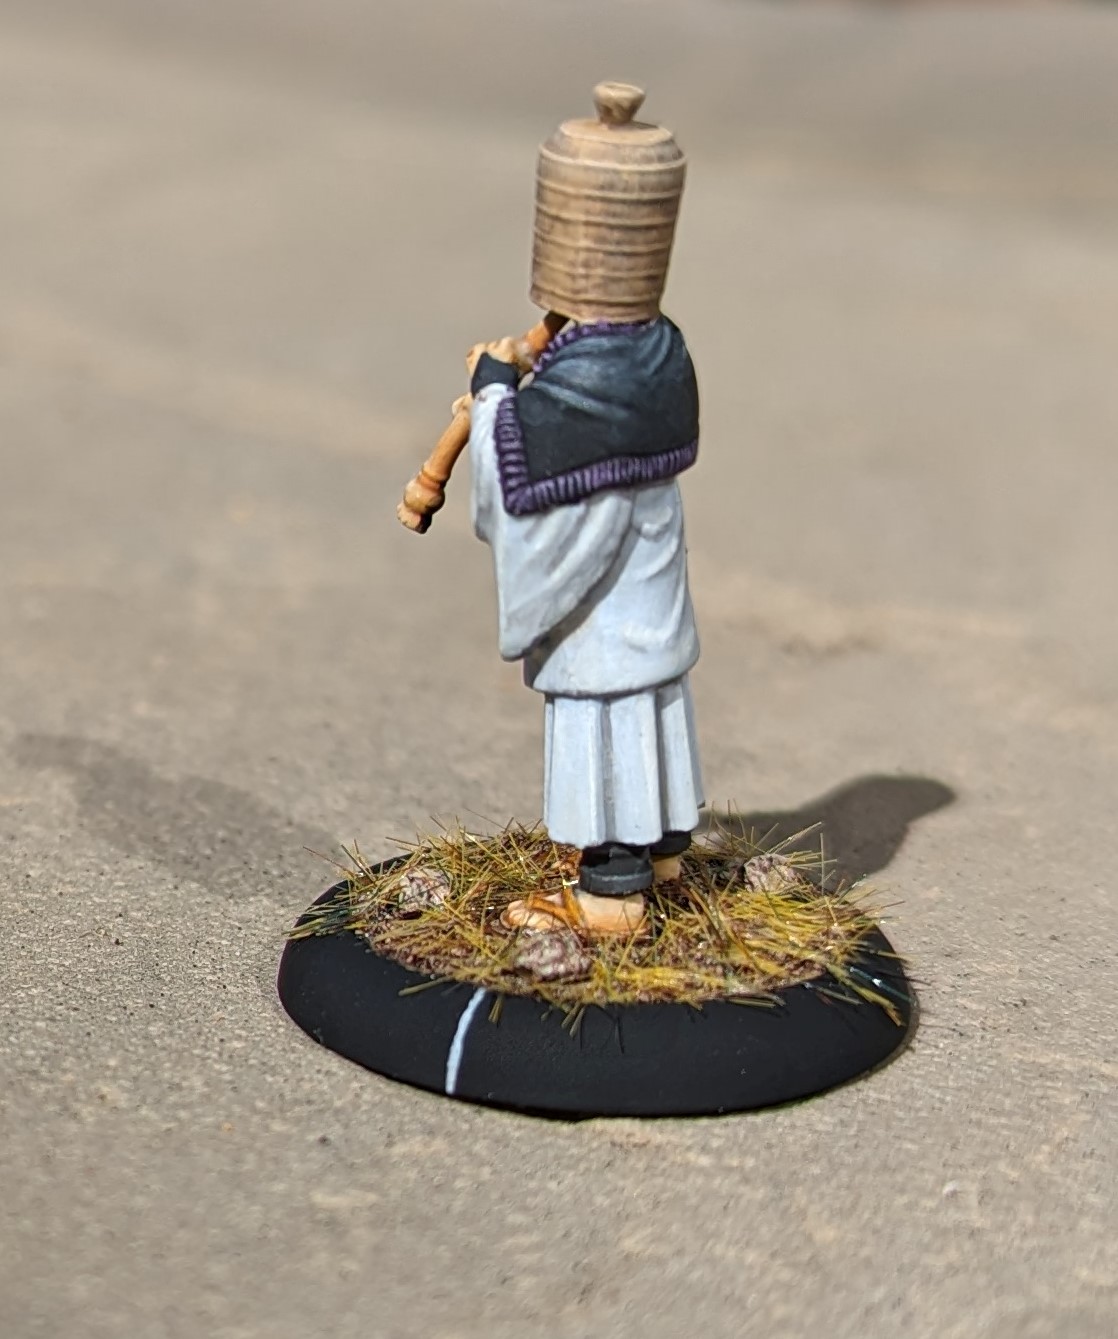
The Cult Starter Set: Mokoti
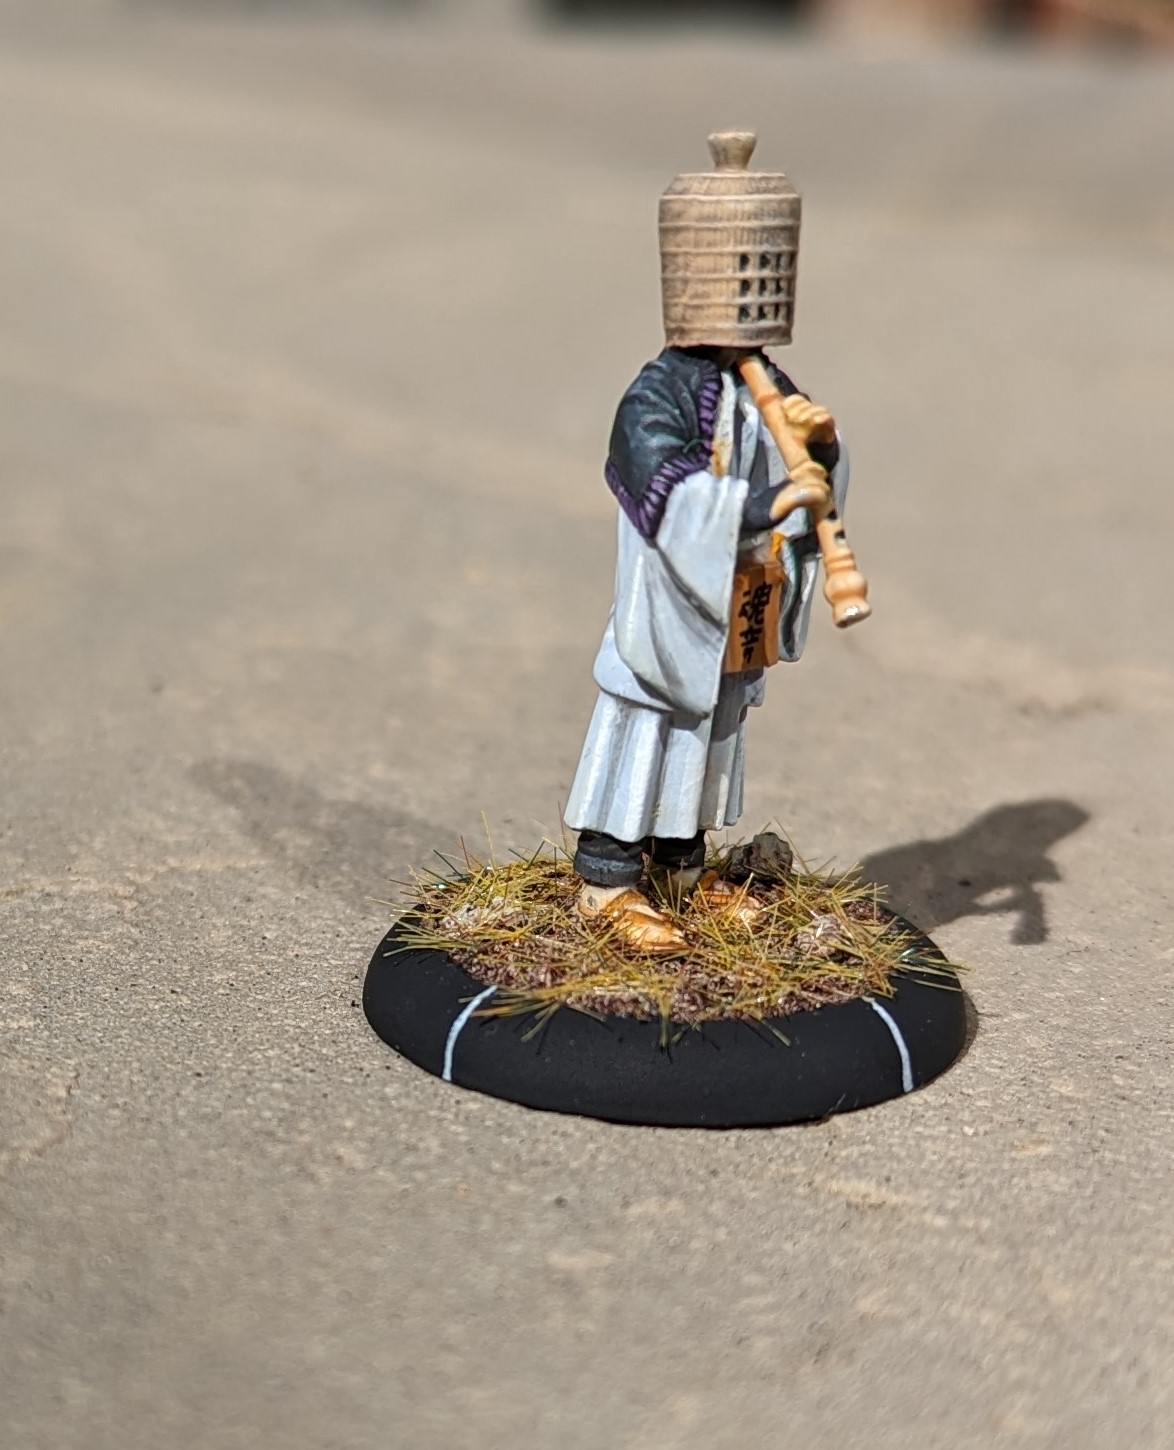
We’ve now got lots of lovely terrain to play around but time to actually paint some models beyond the Ronin starter set. I’ve delved into my Cult of Yurei starter set and started on Mokoti. In game, he’s cheap – just 10 rice, the Bushido equivalent of points – so in a normal 100 point game, he’s not hogging a lot of points but he does come with the Obey Ki feat which allows him to attempt to control other models. In the last battle report, this came in handy in controlling the mighty Kuma!
He’s based upon the Zen Buddhist Komuso monks that used to travel from village to village in Japan, playing their flute for food donations. They used to wear a wicker or reed basket on their head (called a tengai) to separate the monk from their ego.
In the case of Mokoti, he uses his flute to subvert those he meets and bends their will to that of the Cult.
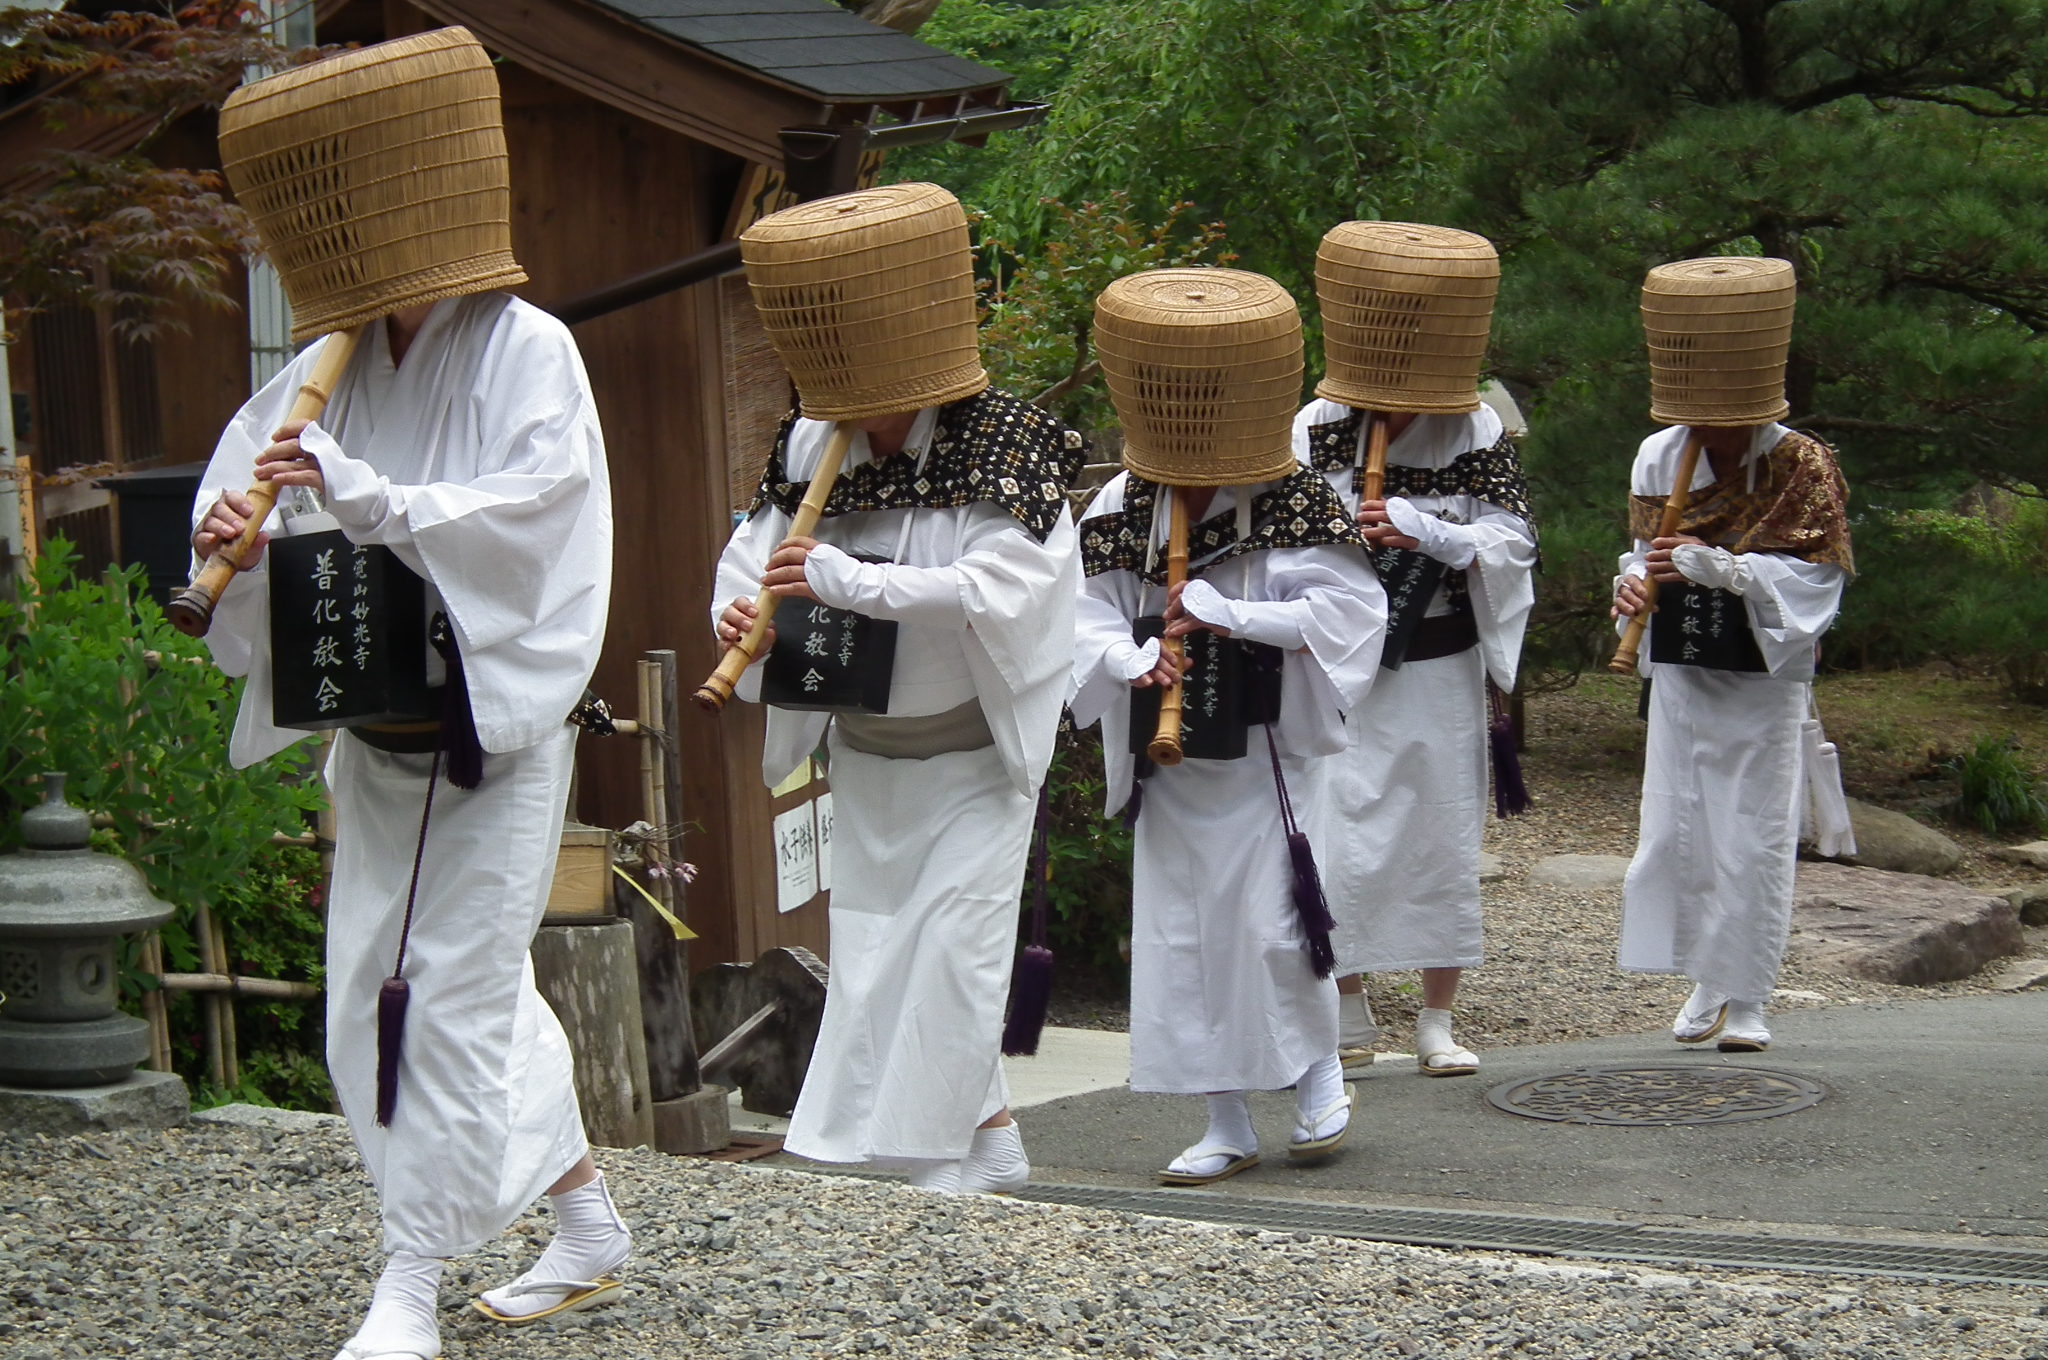 Some Komuso monks yesterday
Painting wise, I’m going to use Purple as the accent colour to tie all of my Cult models together. In this case, I’ll paint the tassels of his shawl purple. The main clothing is off white and then mixed with Luftwaffe uniform to develop a gradually darker grey that was applied as a glaze into the folds.
The wicker basket was tricky as the definition is too fine for dry brushing but I started with Iraqi sand, then a light soft tone wash (twice) before carefully trying to pick out the higher areas with first Iraqi Sand and then IS mixed with off white.
The shawl was a Luftwaffe grey given several nuln oil washes. I’ve then picked out the raised areas with glazes of Luftwaffe grey and off white mixes.
The sandals was flat earth for the wooden bases while the strapping was scruffulous brown. Flesh was made up of a mix of various flesh tones from my Scale 75 flesh set.
The writing on the board I think says Pay Me, at least that was what Google Translate came back with. It could be highly offensive or mean nothing at all.
The base I’m aiming again for consistency across the Cult. In this case it is a dry earth acrylic mix which, when dry, gets a brown wash. I’ve then applied clumps of dead earth, to really highlight the Cult’s dead side.
Overall, fairly easy but the glazing always takes a bit of time to get right.

Battle Report No. 3
This game was played a little while ago, but I’ve only now gotten around to tackling the project system in submitting it.
Once again, it was my son’s Temple of Rokan (TRK) force against my mighty Cult of Yurei (CoY).
We selected a new mission for this game with deployment along each faction’s back edge. This called for 6 objective markers (the chess pawn looking pieces painted a metallic blue) to be placed on the board in a hexagonal shape. The two objective markers closest to each faction’s deployment are friendly to that faction (and consequently hostile to the other faction) and the two objectives deployed on the centre line are neutral. Each faction also received 3 prayer tokens.
Scenario points can be earned on each turn if a model in base contact with an objective marker uses an activation to pray. A prayer token is spent and the factions gain 1 scenario point for praying at a friendly objective, 2 at a neutral objective and 3 at hostile objective. At the end of Game Turn 4, each faction gains scenario points equal to the number of friendly objectives that are on the table.
1 Victory Point is then earned at the end of Turn 4 for the faction with the most scenario points. The scenario points are then reset to zero (any used prayer tokens are not reissued but unused tokens can be spent in future rounds).
At the end of Turn 5, any prayer scenario points earned that turn are added to the number of friendly objectives that a faction has and the most scenario points gets 1 Victory Point. The scenario points reset to zero again.
At the end of Turn 6, the same happens and the game then finishes, with the faction with the most VPs the winner!
In addition to praying at an objective, a model in base contact can also choose to spend their activation and interact with the objective. This turns a hostile objective to neutral and a neutral objective friendly.
Simple eh? It’s more simple than I’ve described it…..
Onto the forces.
My son ran a slightly different list in this game than the previous two and it is below,
- Master Ekusa (who’s a monk riding a tortoise and can heal, remove activation tokens and stops attacks due to his zen like demeanour)
- Taiyo (a ronin from the starter set who has a low points cost and is able to resupply friendly models. He’s also a Villager, allowing my son to take the two pit trap cards below)
- Yim (a monk who’s strong and linked to iron)
- Saruka (another flame monk and can also cast a fireball like ranged attack)
- Kuma (an angry, bo staff wielding panda who can root opponents to the spot while slapping them around a lot)
In addition, my son had selected a couple of terrain pieces that allow extra Ki generation for his models (Ki allows the activation of special abilities and boosts regular stats and the TRK are big Ki users). He also selected some trap cards as well. He had a one off event card that allows him to give 4 Ki to any one of his models. Kuma also had an enhancement card of prayer beads allowing him to generate an additional Ki each turn.
I changed my list up and also opted for some additional cards,
- Mo Ises (an assassin that likes stabbing people in the back)
- Mokoti (dreadful in combat but can control enemy models)
- Umeka (another assassin armed with a pair of scissors – I guess she also likes hobby crafting)
- Risu (A pitch fork wielding nutter who can poison people from afar)
- Ibara (Can handle himself in combat and can throw some fire around at range)
- Tenbatsu (another ronin who’s a combat monster)
- 2 plague rats (very quick, dispensable and can also hand out poison)
In addition, I equipped Mo Ises with the Violence Fetish enhancement card which gives her a boost in melee combat. I’ve also taken the Crush the Oppressed event card, which when played, doubles the number of state tokens applied to all enemy models. I think this could be a game winner for me as state tokens include poison, fire and control. Played at the right time, my son is not going to be happy!
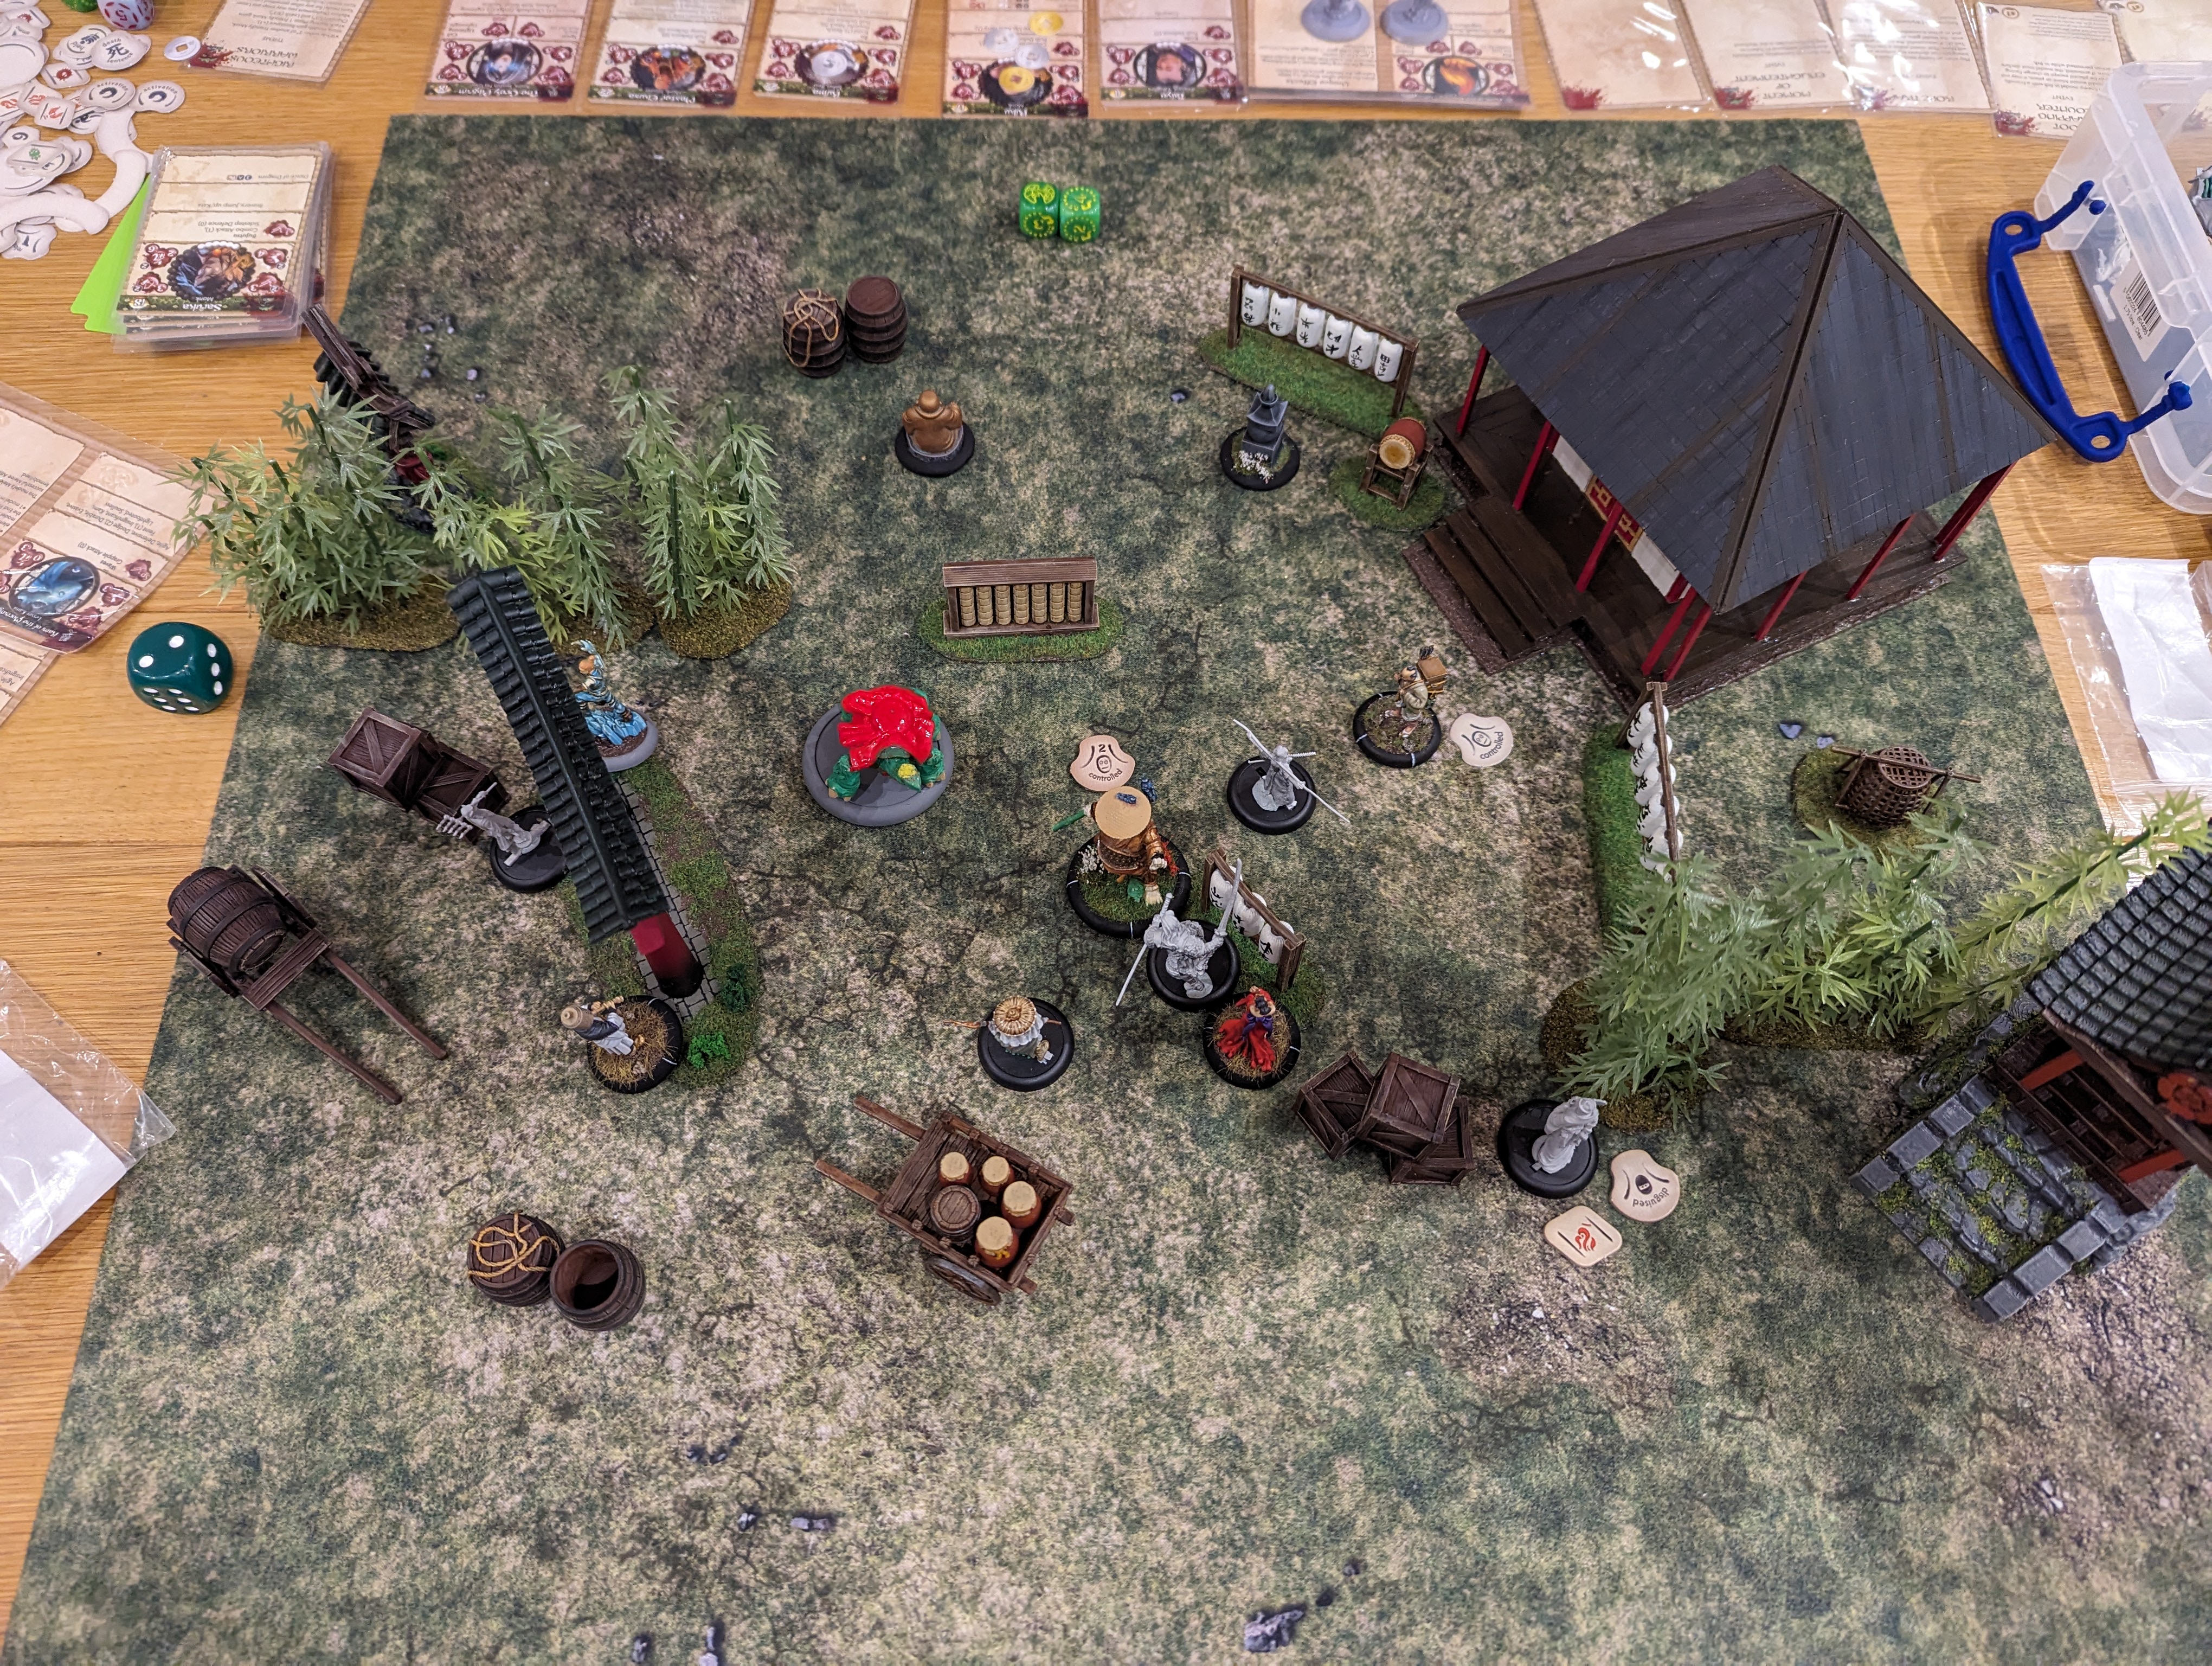
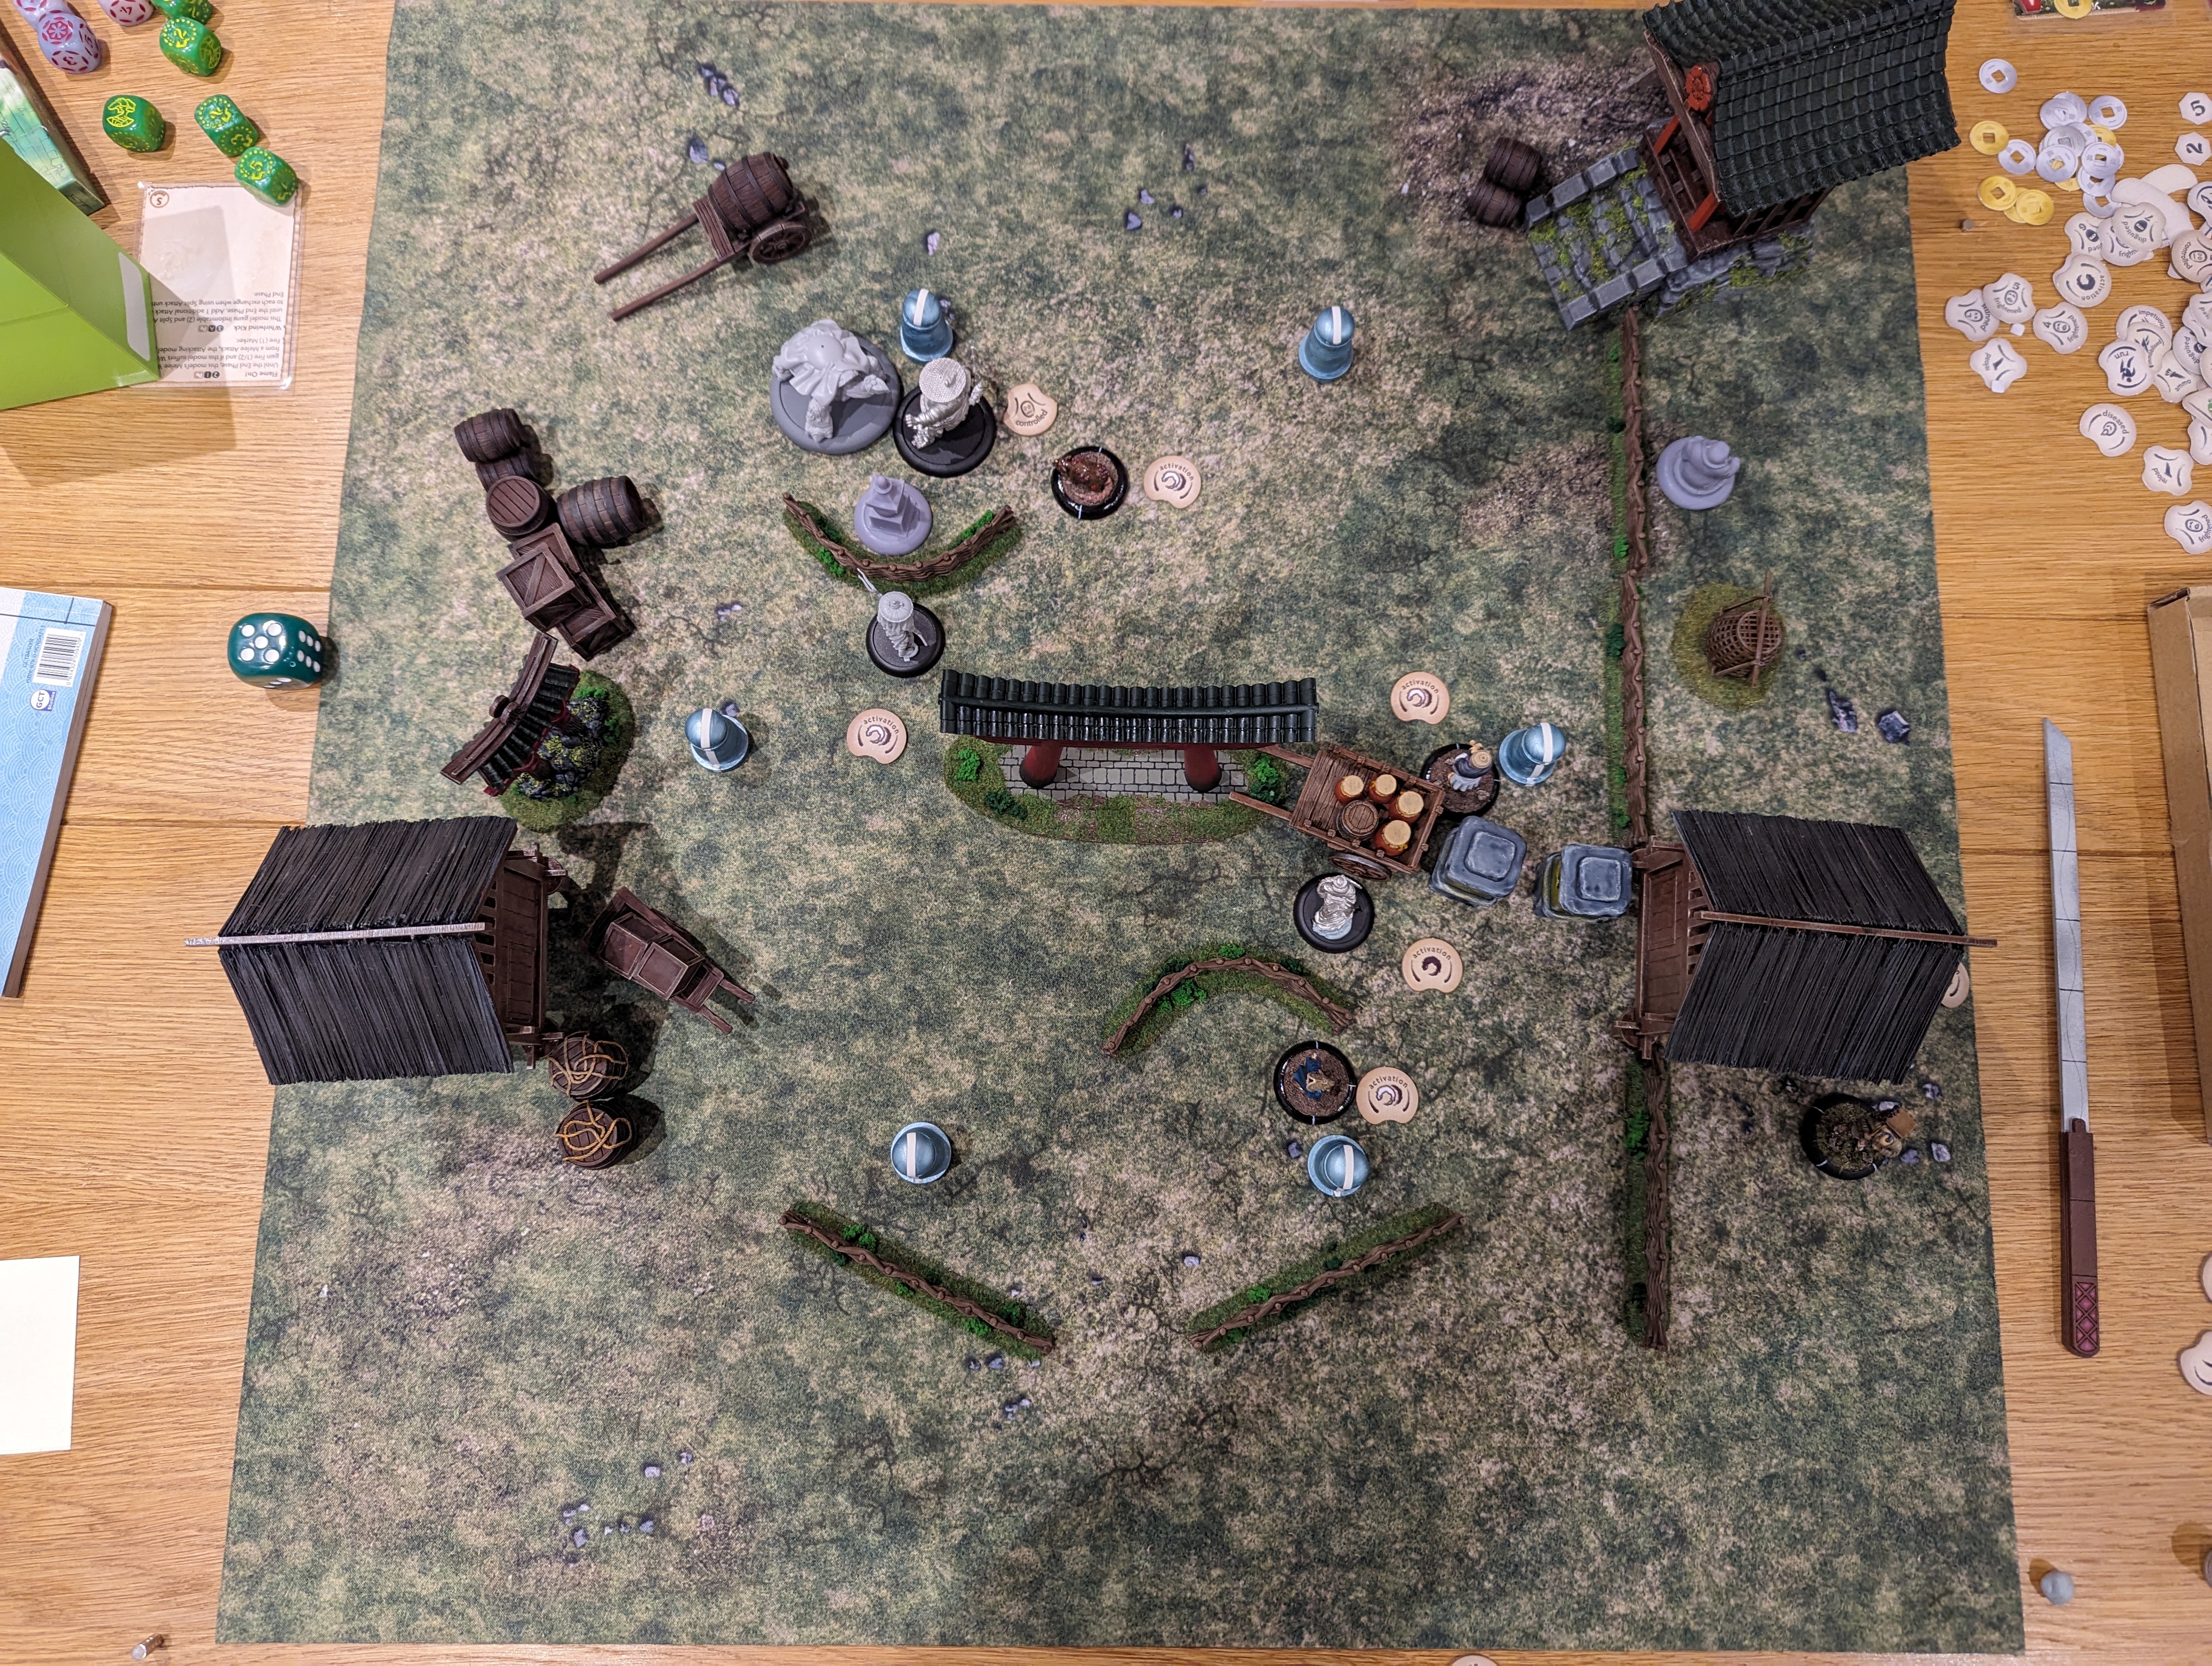
Terrain and Deployment.
You take turns placing terrain until one side stops at which point the other faction can place one more piece. I stopped after about 3 objects but my son just carried on sticking stuff down across the board. He kindly placed quite a lot of cover on my side of the board.
You deploy each model in turn with the edge of the base in contact with the back edge of your side. I deployed into three groups, on the left flank I have the two fast plague rats and Risu, in the middle Umeka, Mo Ises and the mighty Tenbatsu and on my right Mokoti and Ibara.
My son placed Ekusa, Kuma and Yim in the middle (making a solid central force!) and Taiyo and Saruka on his left. He had no right flank.
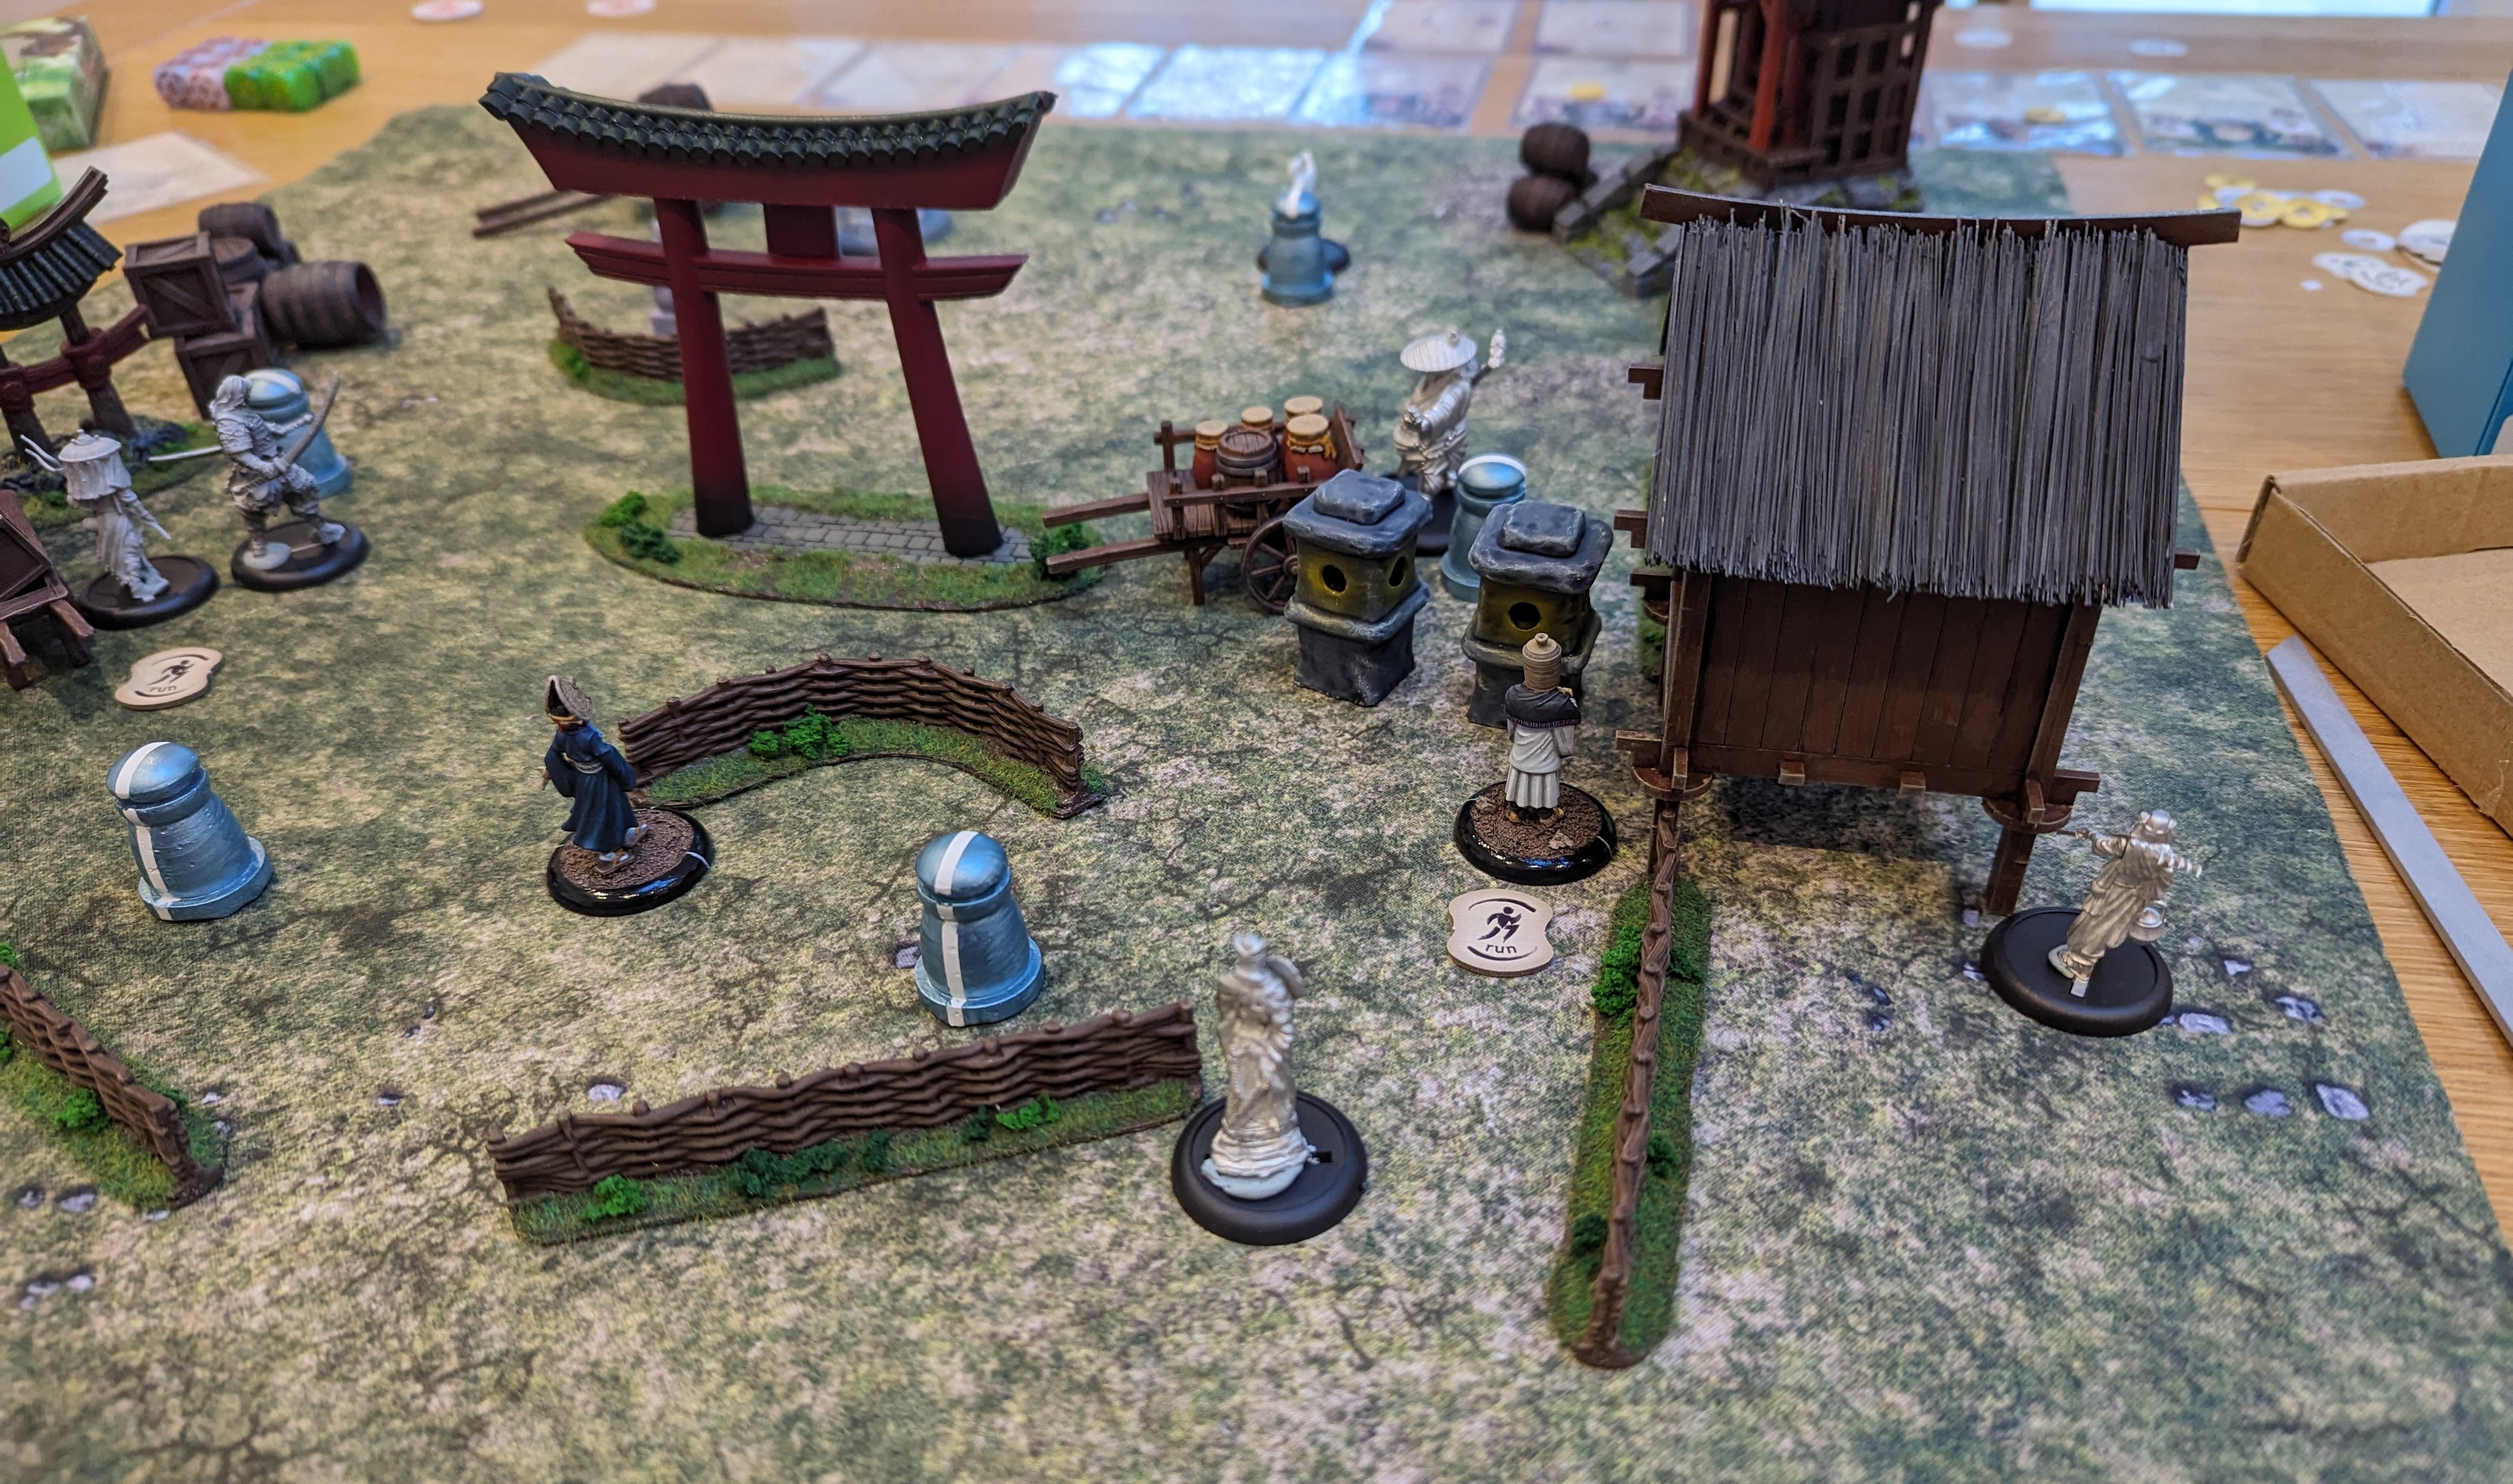
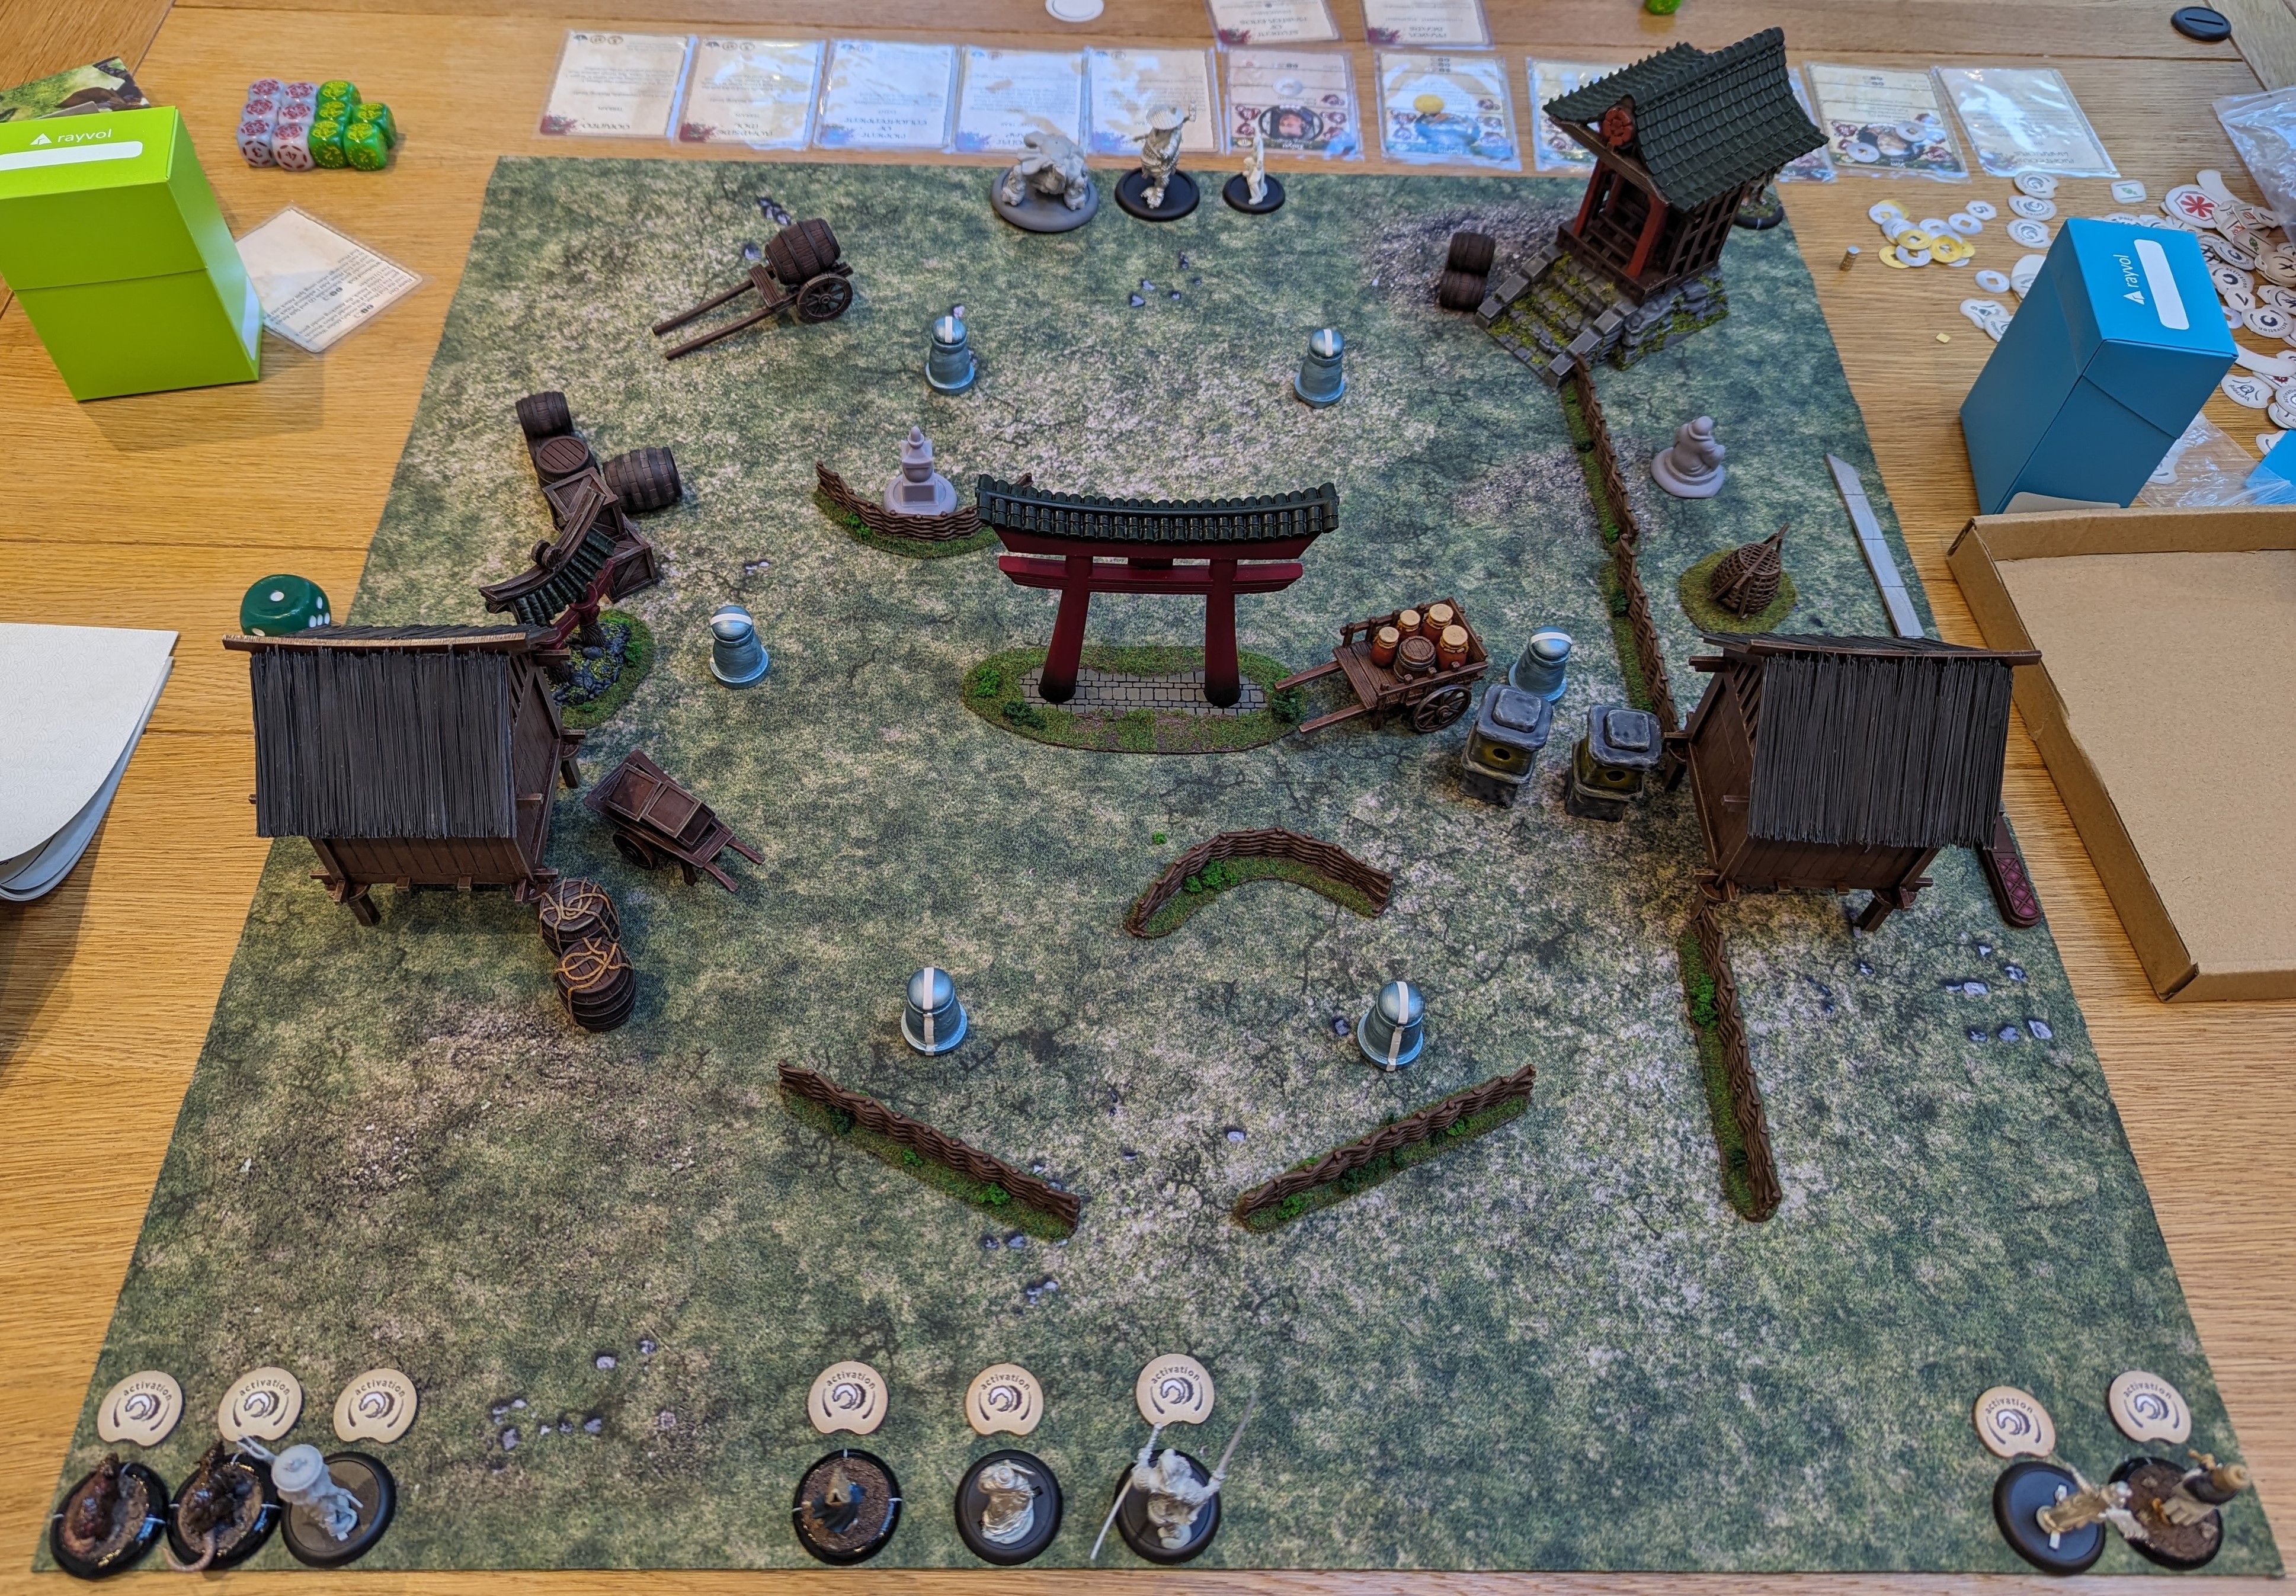 Deployment (with Taiyo and Saruka hiding behind the hut top right)
Turn 1.
All of the models move forward in a largely uneventful turn. Yim prays at a friendly objective earning TRK 1 Scenario point. Saruka also gets into range of one of the TRK terrain pieces to gain extra Ki. I’m able to advance my plague rats quite far up my left flank – I’m hoping to bring a threat from the rear onto some of his models. My son tried both of his trap cards on my rats but failed to have any effect as I rolled the required numbers to avoid them!
Turn 2.
My rats continue their gallop around the back and are into the TRK back field – handy! Kuma gets into base contact with a neutral objective and spends TRK’s second prayer token to gain another 2 scenario points, bringing TRK’s total to 3.
Taiyo (who’s not known for his martial skills) charges Ibara. Ibara can strike first but fails to do any damage however Taiyo suddenly finds his inner samurai and batters Ibara for 4 wounds.
Saruka activates next and in support of Taiyo moves forwards and uses her Ki to cast Dance of Dragons and kills Ibara. Some nice combo work there from my son!
However, I strike back as Mo Ises uses her Obey Ki feat and is able to take control of Taiyo, which makes him part of my force for one activation.
Yim prays again to gain another scenario point however Risu interacts with a neutral objective to turn it friendly to CoY.
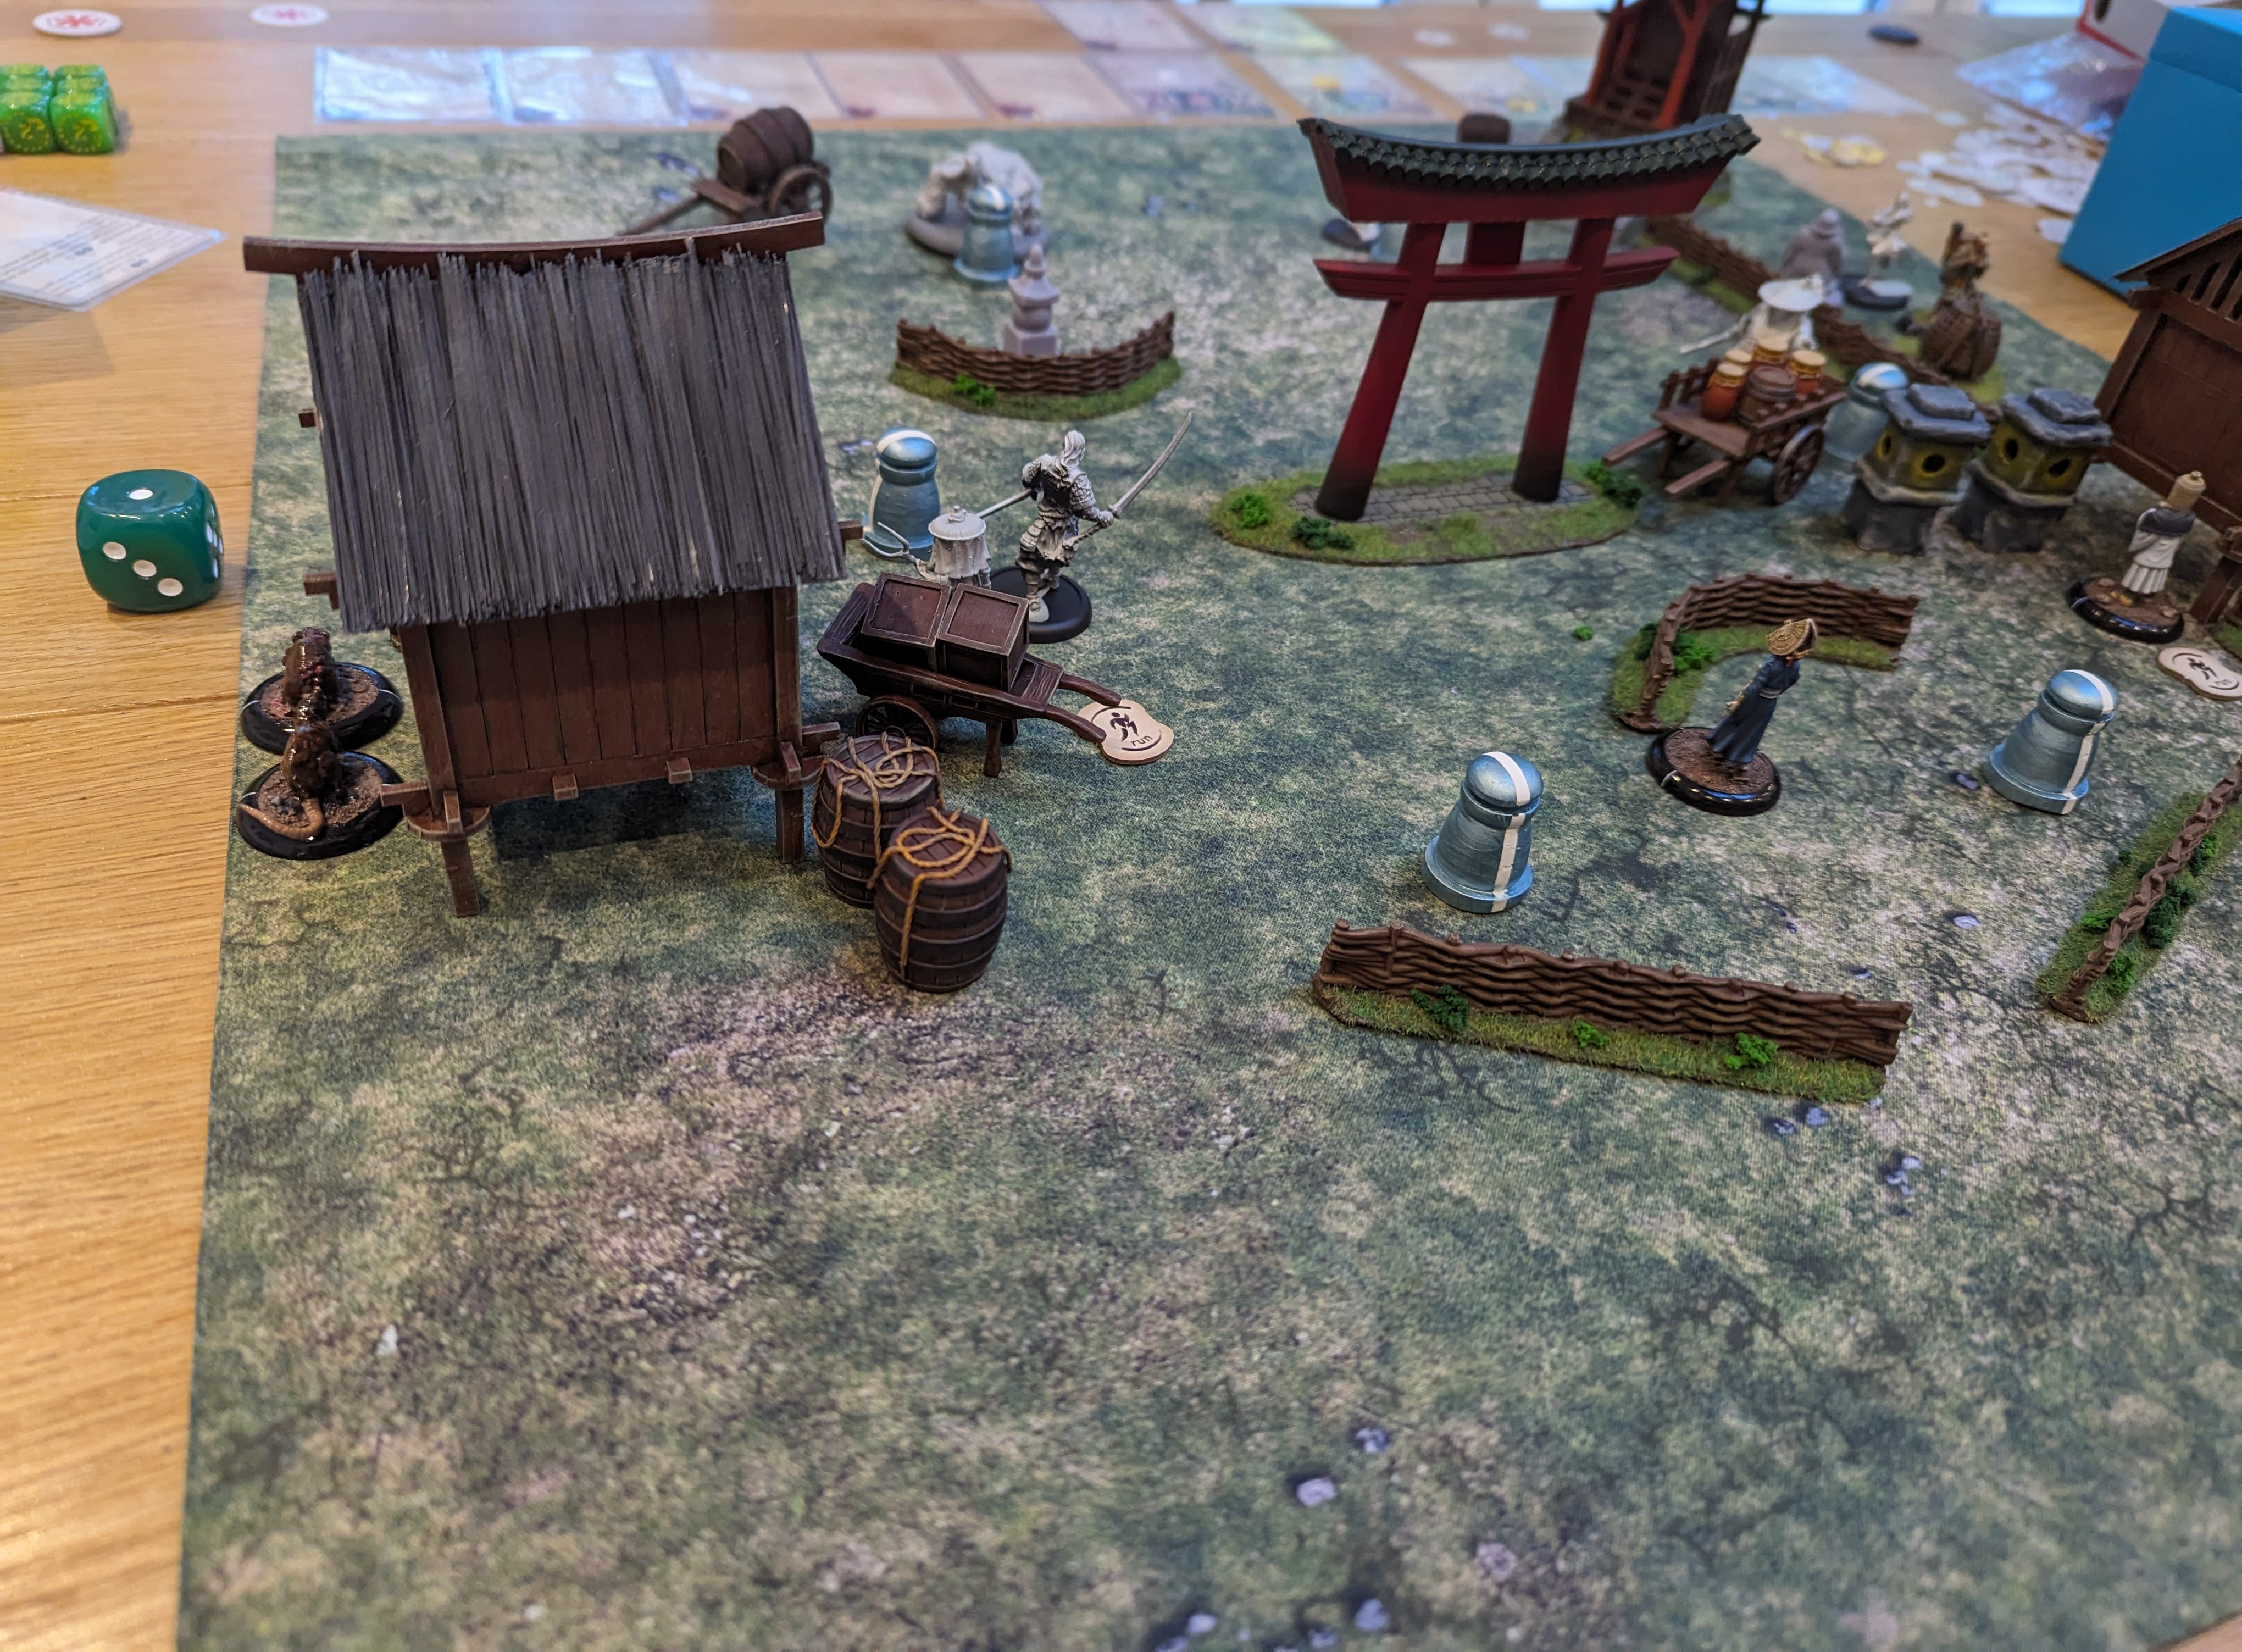
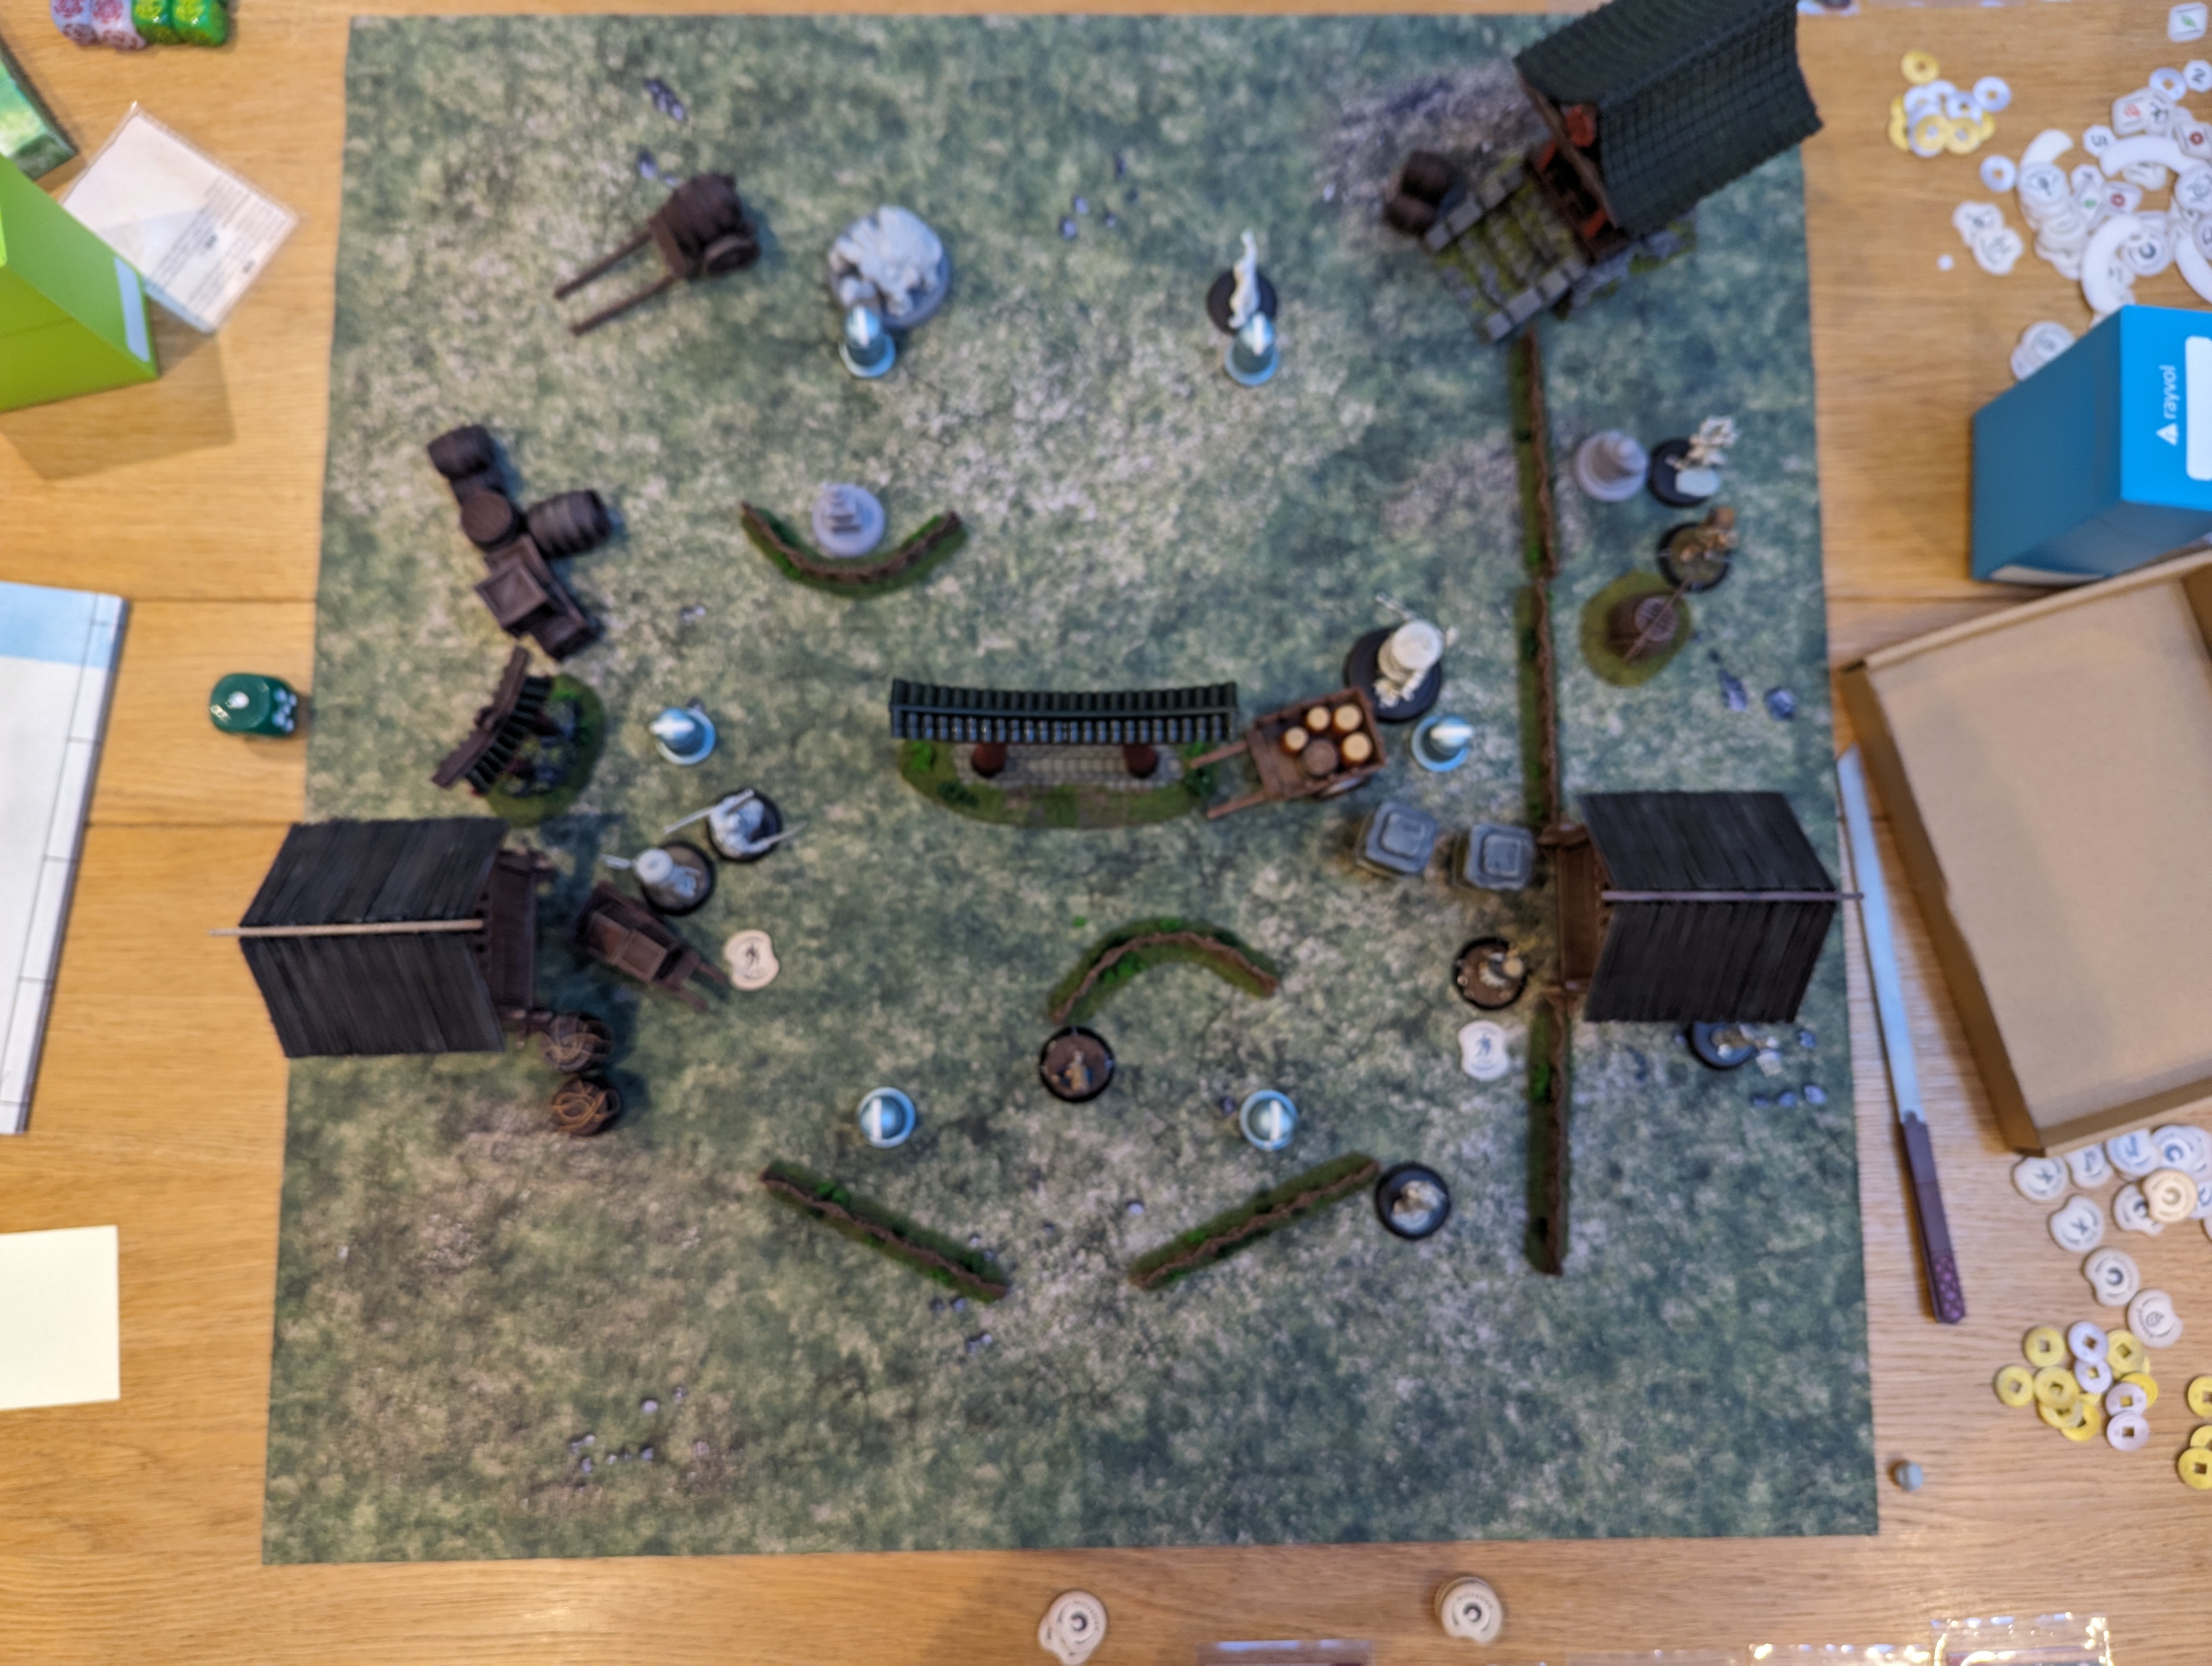
 Action from turn 2
Turn 3
I bring Tenbatsu into the fray and activate his Oni Rage. This makes him very aggressive at the expense of a degree of control. I charge him into Yim and cause 5 wounds to Yim with Yim unable to hit back.
The mighty Kuma, seeing his friend Yim in trouble, charges Tenbatsu and casts War Cry. Tenbatsu is outnumbered by Yim and Kuma and loses dice to roll in defence. This proves to be fatal as Kuma roundly slaps Tenbatsu into next week and kills him in one shot. This is not a good turn of events for CoY!
Mokoti, seeing how useful Kuma could be if he were on the side of CoY uses his Obey Ki feat and is able to convert Kuma to CoY, albeit for just one activation. Not wanting to miss out on the controlling Ki feats, Mo Ises uses Obey and is able to control Saruka.
It’s at this point I play my Crush the oppressed event card and get to add one additional control marker to Kuma, Taiyo and Saruka meaning that I now get to activate them twice each in the service of CoY!. My son was really not very happy at this point.
I use the controlled Taiyo, who is out on his own a little, to move into base contact with Saruka. Taiyo is somehow able to kill Saruka, so CoY gets its first kill.
My rats, still lurking in the background, leap forward to attack the already wounded Yim. I don’t care if they die, so I allocate all my dice into the attack pool hoping to overwhelm Yim’s defence pool – I do and I manage to remove Yim’s final wound and kill him.
Suddenly things are looking up for the CoY.
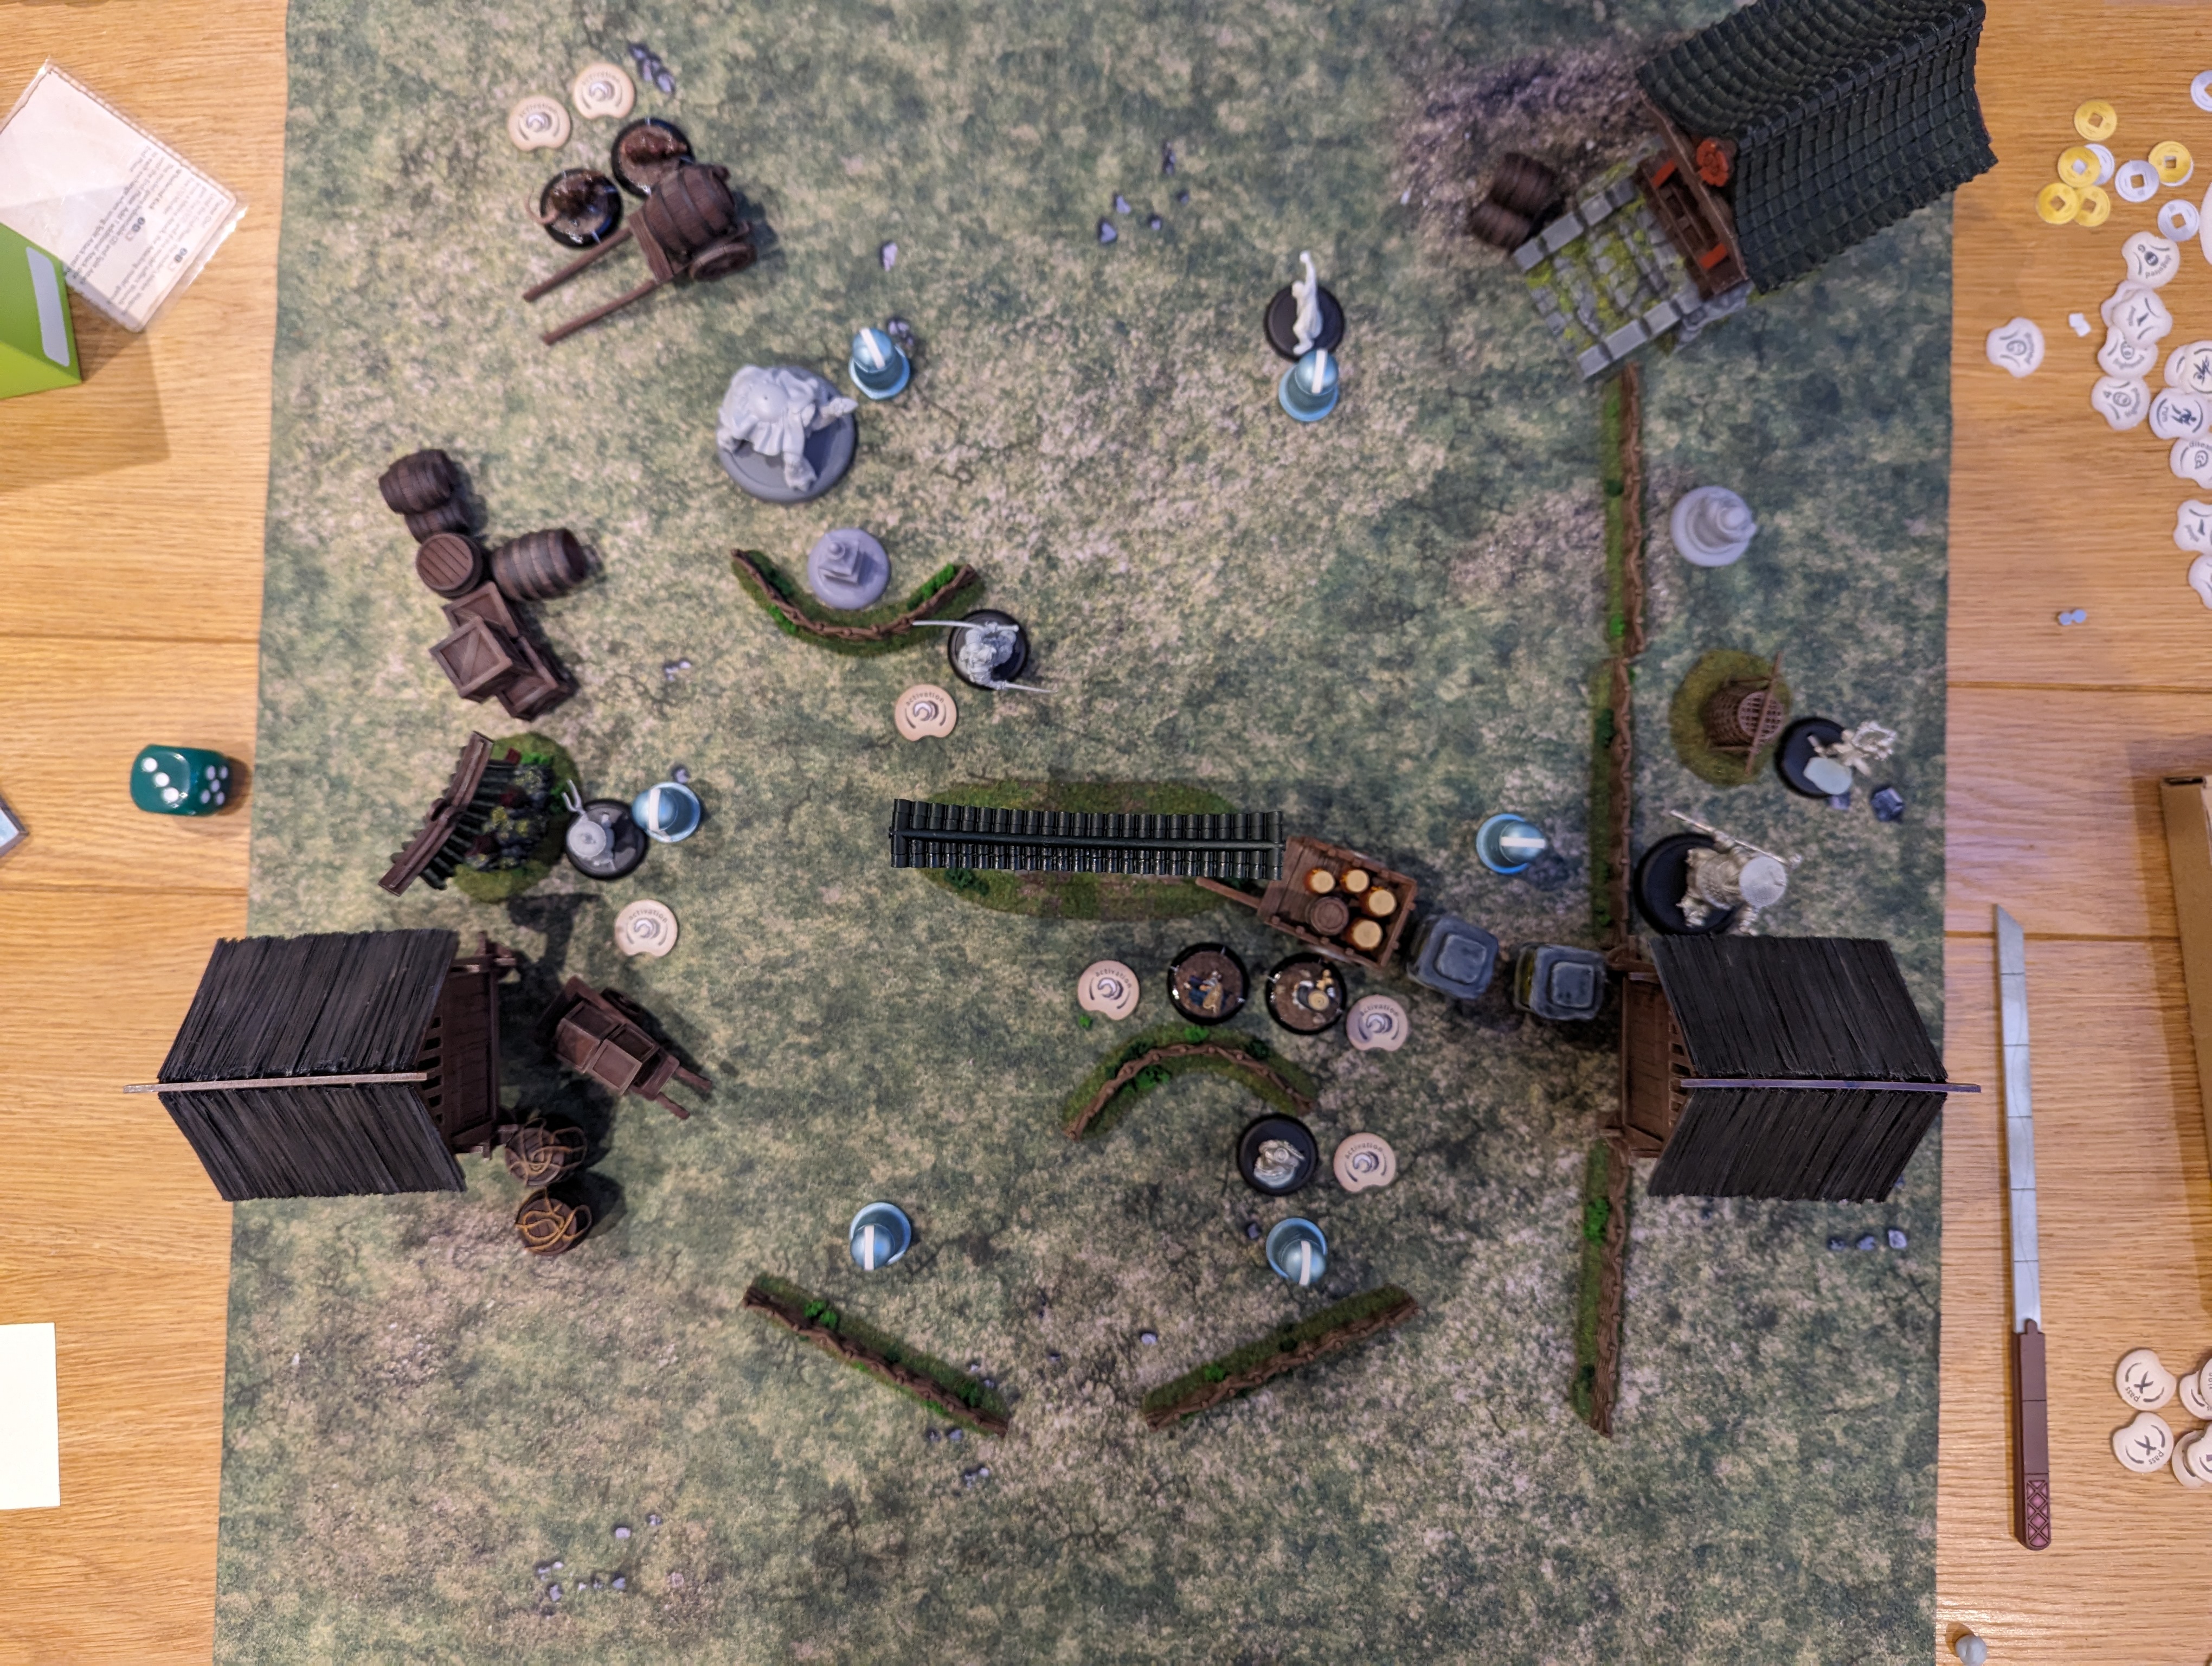 End of turn 3
Turn 4
Kuma, still controlled by the CoY, attacks Master Ekusa. Ekusa is great in defence and Kuma struggles to get through but is able to cause a single wound. I run Taiyo back up the flank to move him away from my forces to use up his last control marker.
End of turn 4 is where we look at the scenario points. My son has accumulated 4 scenario points from praying and has two friendly objective markers. I have three friendly objective markers so, with a score of 6 to 3, the TRK takes a Victory Point. The scenario points are reset to zero.
Turn 5
I kick off with Mo Ises who immediately targets Kuma and gets control of him. The TRK use up their wait token to see what I will do so I take the opportunity to attack Taiyo with one of my plague rats who hits, doing no damage but Taiyo picks up a poison marker. Taiyo kills the rat in return though.
I make Kuma attack Ekusa but this results in no damage as Ekusa’s defence cancels out Kuma’s attack. I use Mokoti to convert another objective to friendly and Risu moves up to block Kuma and Ekusa should they decide to make a dart for the objectives in the next round.
Once all of the models have been activated, the End Phase starts. It’s here that fire, poison and other tokens are managed. Taiyo takes a wound from the poison token he picked up from the plague rat and dies. The plague rat has his revenge from beyond the grave!
At the end of the round, my son is regretting burning all of his prayer tokens early on as with 4 friendly objectives to 2, the CoY have more scenario points and wins a victory point.
 End Turn 5
Turn 6
All to play for as the scenario points are reset to zero.
Mokoti gets straight to work in controlling Kuma, who has spent more time fighting for CoY than he has for TRK this game. However, Ekusa uses his special Ki ability to remove all of Kuma’s tokens, lifting the control. Ekusa then attacks Risu but fails to cause any wounds.
I launch a plague rat at the rear of Ekusa, more out of hope than anything else but given that Ekusa has already taken some damage, the biting rat is too much for him and Ekusa goes down.
At this point, with just Kuma left, my son realises that he cannot get enough scenario points to pick up the last victory point this round and concedes the game 2-1, a win for the Cult!


