


![NO Weekender Or Cult Of Games XLBS This Weekend [Updated]](https://images.beastsofwar.com/2026/03/No_Weekender_and_XLBS_this_Weekend-225-127.jpg)


Sharp Practice – ACW for Pennies on the Dollar.


Recommendations: 807
About the Project
This is a 1/72 scale American Civil War project for Sharp Practice. I will be building two small forces, one for the Union and the other for the Confederates using Italieri and Hat models I bought several years ago at a car boot sale. I have managed to find six boxes, but I know I have a few more stored up somewhere. Nonetheless, I have enough to build up two playable forces.
Related Genre: Historical
This Project is Completed
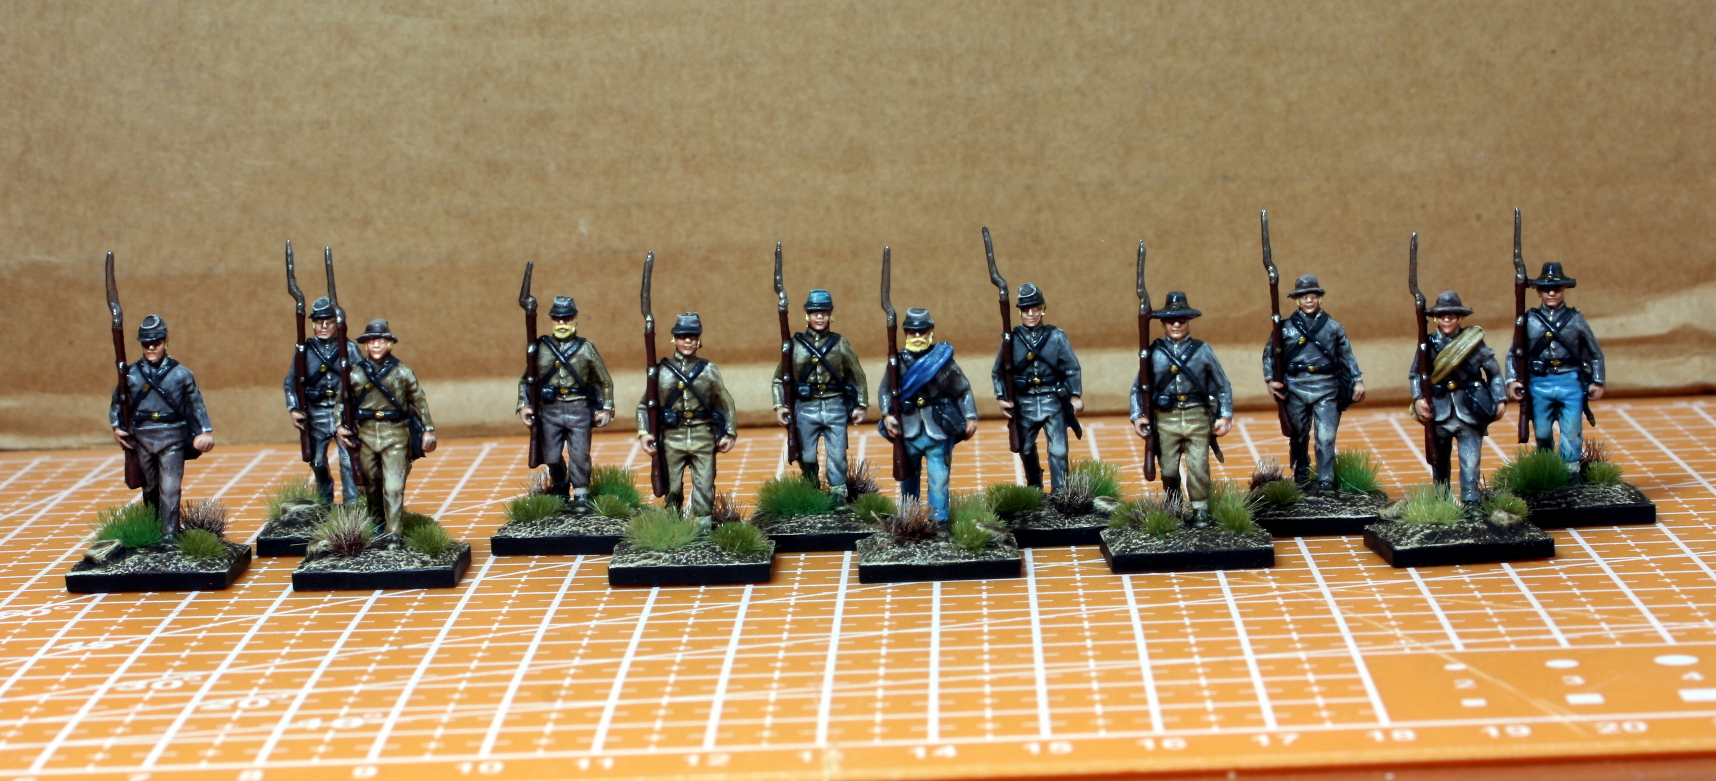
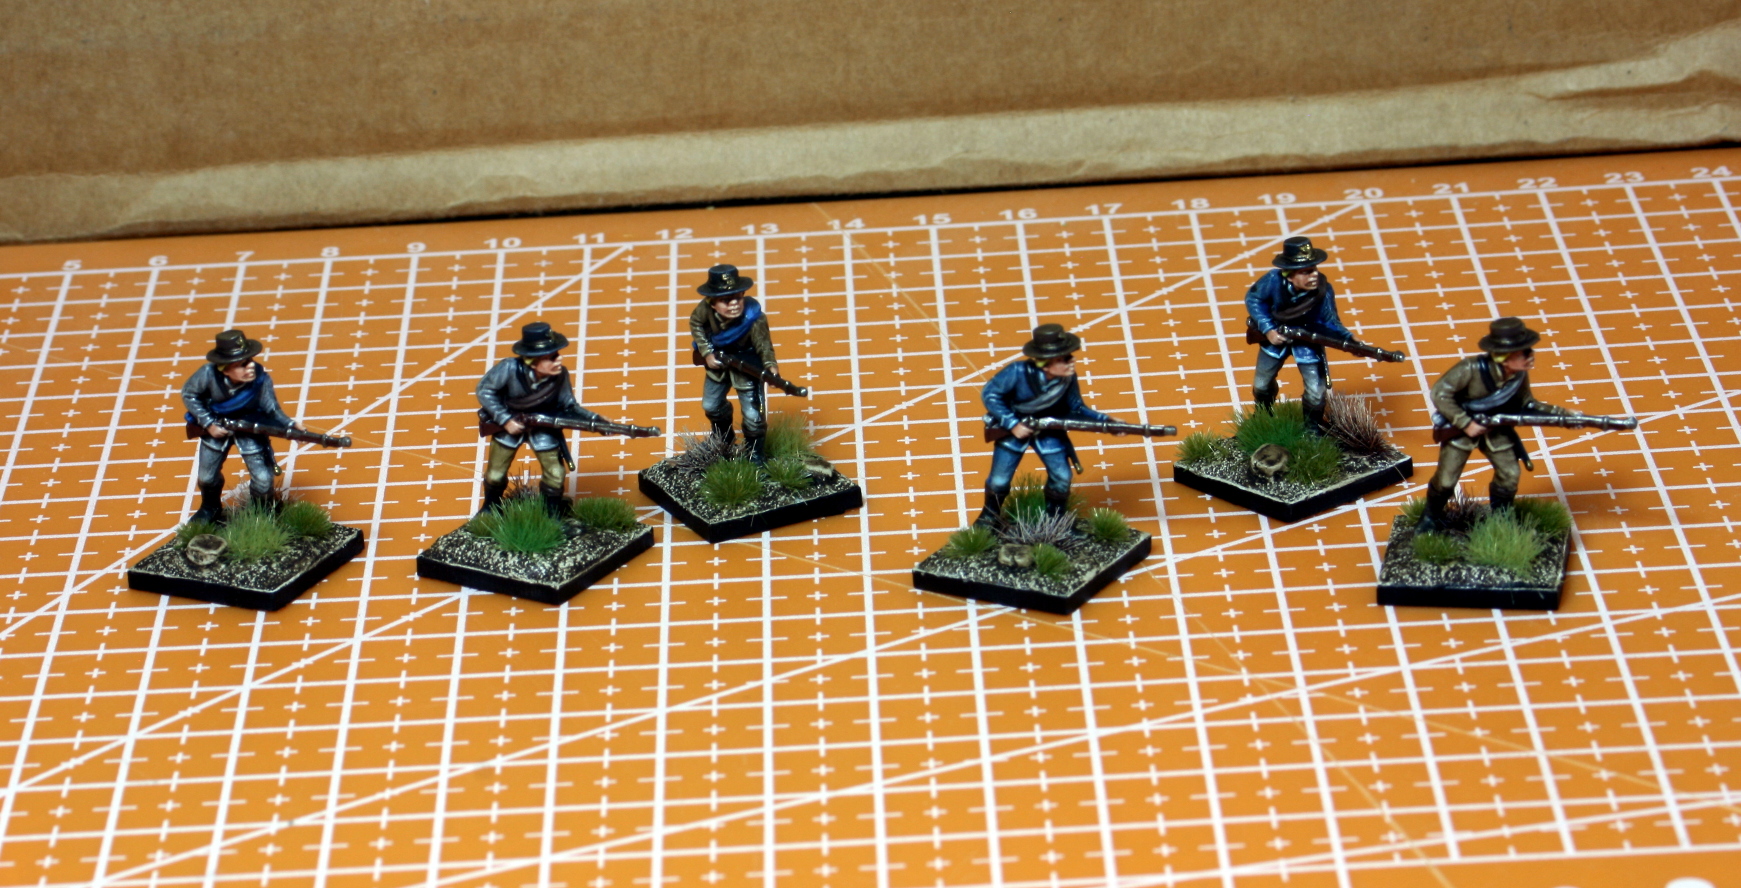
Another Batch of Confederates Ready.
Hi everyone,
Just finished another batch of Confederates for Sharp Practice. The Confederates are taking me a little longer to paint up because they are not as uniform as the Union. Nonetheless I am enjoying the experience of painting without worrying too much about accuracy or quality.
These figures are cheap and of poor quality, but they serve their purpose perfectly – to represent fighting men and to play with. The buck stops there. They are wargaming miniatures and when the game is over they are packed away and do not go into the showcase.
The following are the Hat miniatures. They are not as good or as detailed as Italeri miniatures in this scale, but they are still good and relatively the same size. This scale can also vary widely – as I have discovered when building my Roman and French Napoleonic armies.
The best thing though is that they are also half the price than Italeri.
There are still more Confederates to come before I finish Stage 2 of this project. Until then stay safe and have fun.
NR
Waiting For More Bases.
Hi everyone,
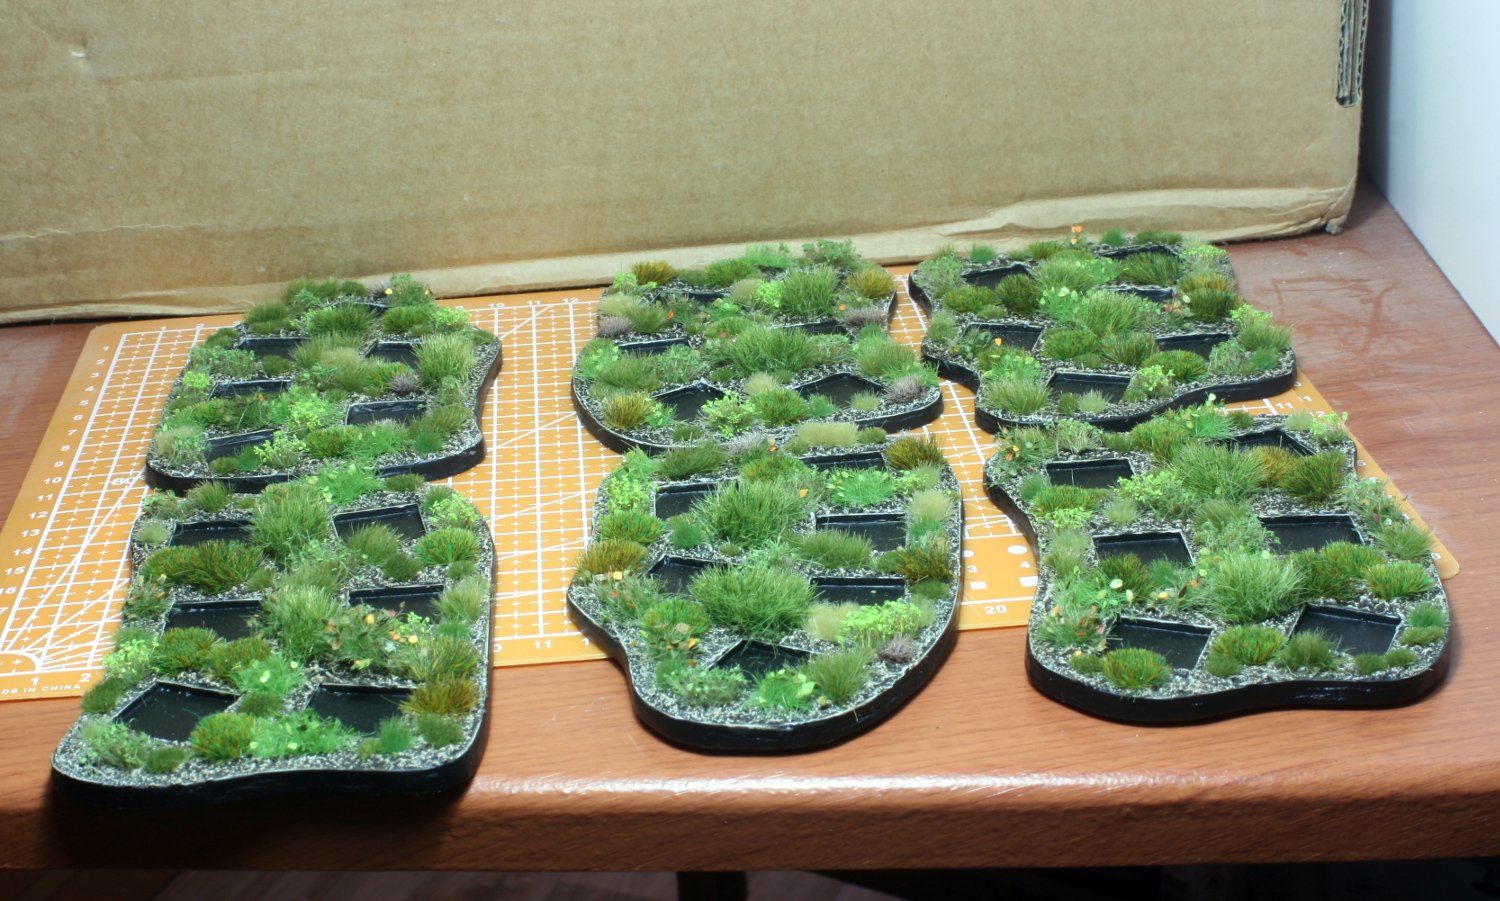
While I wait for my bases to arrive from the UK, I decided to use up the last six bases paint up another 6 Confederate soldiers. Also, I built myself some skirmish movement trays. I realized I forgot to order any, so instead of making another order, I went ahead and made six from materials that were thrown away by the company I work for.
 The six bases I had left have now found their owners for life.
The bases were made from materials that my company threw away. These boards were used as packing for various items. The modeller in me immediately spotted their worth, and I asked my manager if I could take some of this material home instead of throwing it away. Guess what – he agreed.
I am not sure what they are, but the white board is a firm but easy to cut plastic material and the brown board is a hard-board type of material with qualities like MDF.
Fast-forward nearly 8 months and I have finally found a good use for them. The pictures below will chronicle he process used to make them.
 This is a soft but firm plastic like material. I cut in the base inserts and the overall shape.
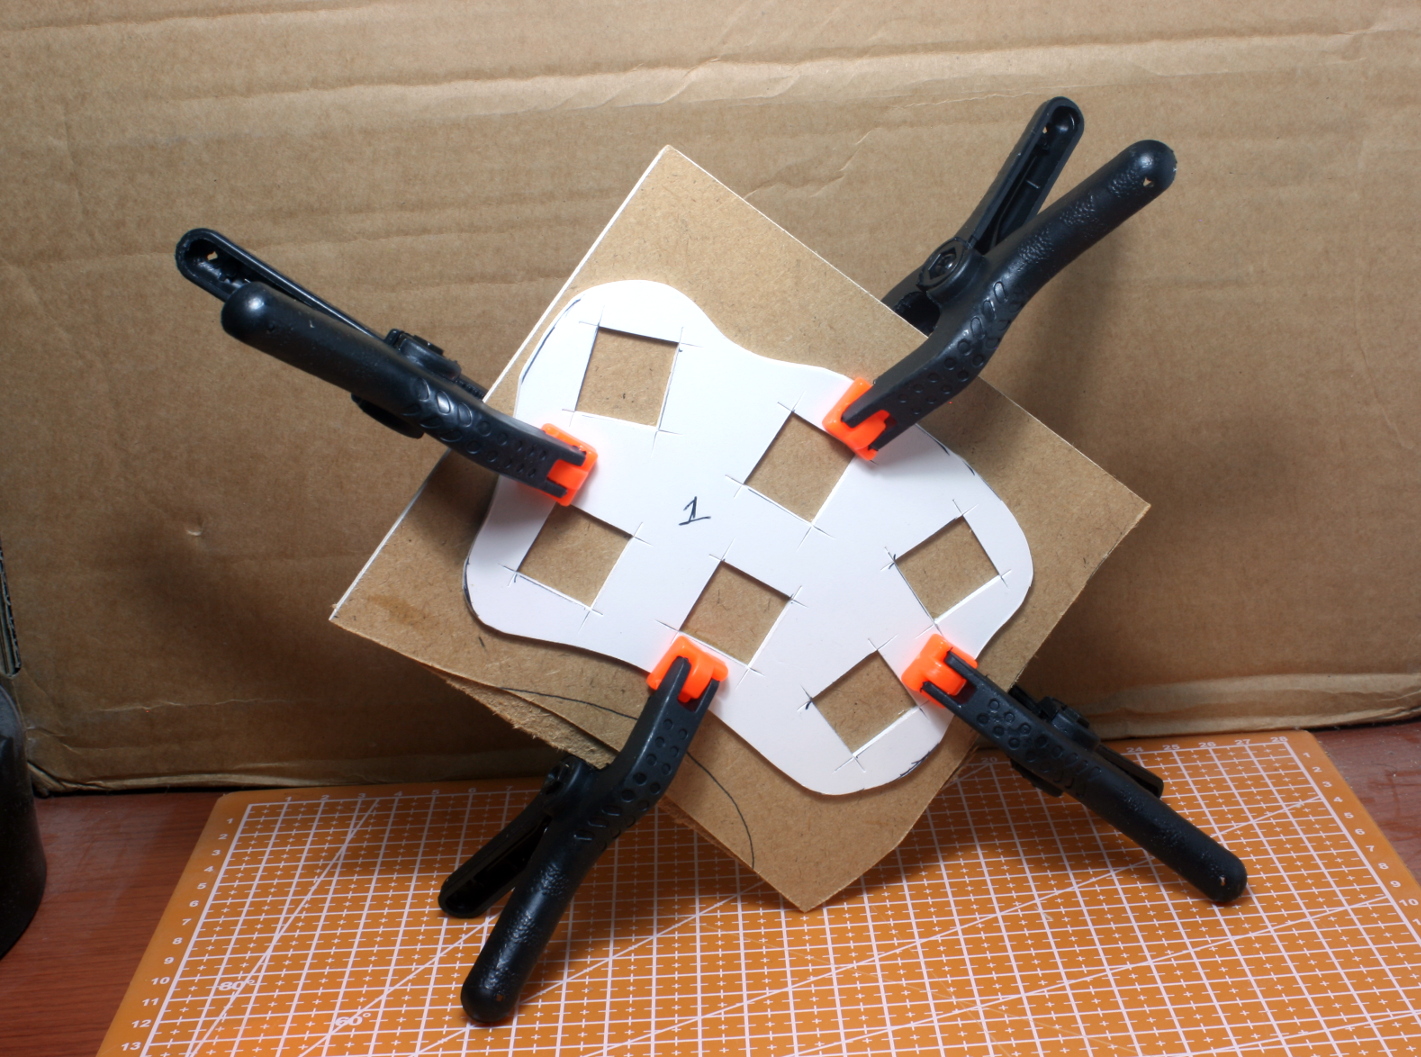 I glued and clamped the top to the hard-board beneath.
 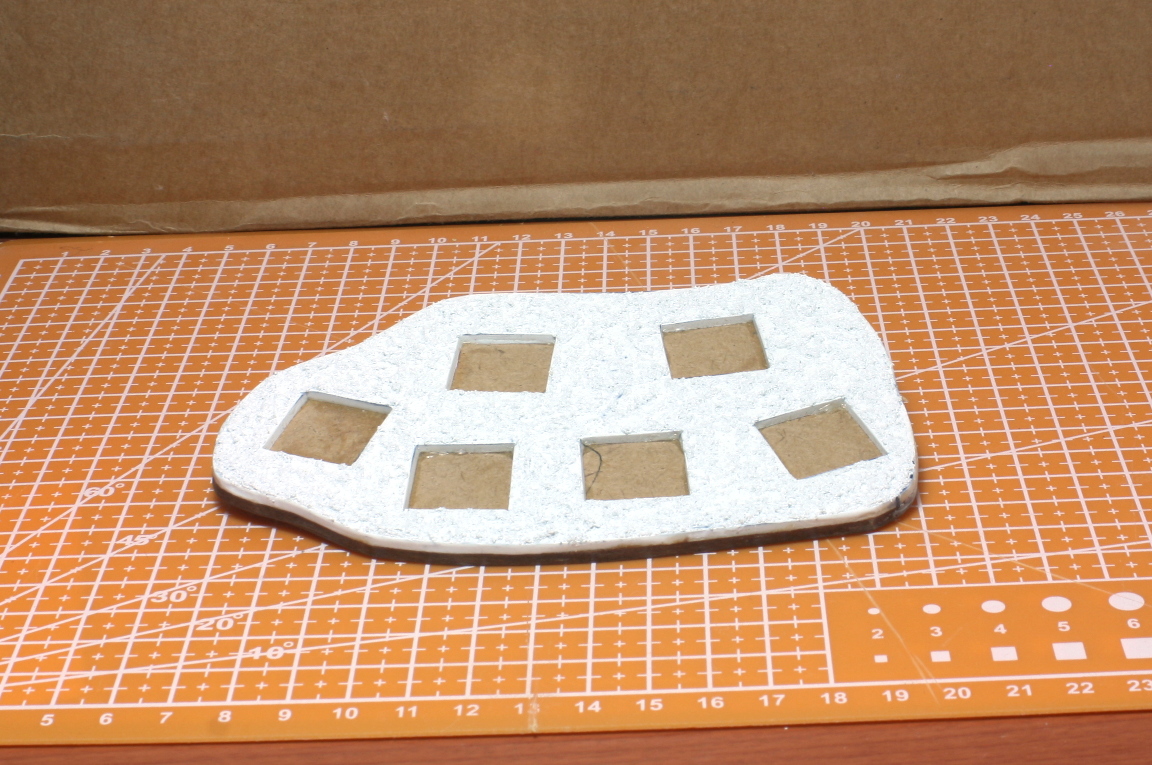 When dry, I cut the bottom hard-board and coated everything with Vallejo rough texture.
 Next I painted and drybrushed the base and added a plethora tufts.
And viola – six skirmish movement bases! The question I ask myself now is why I did not make all the movement trays in this manner! (Between us the answer is simple – I am lazy. Why do it yourself when I can pay someone to do it for me).
I am not sure what to do next. If the bases come I will paint up the last of the Confederate soldiers. If not, I will start work on the characters.
Until next post, stay safe and have fun.
NR
A Little House on the Prairie.
Hi everyone,
As I wait for the bases to arrive from Warbases.com, I realized I had no terrain for this period in 1/72 scale. I looked around and did not find a lot in 1/72. Most of the ACW is in 15mm or 28mm.
Since I am playing in a 1:1 scale I really wanted my terrain to be in scale. The underlying philosophy of this project is to get it on the tabletop cheaply, therefore I decided to make my own terrain as cost-effectively as possible.
I already made the skirmish bases with cheap materials, so I decided to make the rest in the same fashion.
The first piece is a small house. I have never built anything like this before so it was a bit of a challenge. The materials I use were off-cuts of foam-board, thick cardboard and pieces of Styrofoam. The only thing I bought was bag of wooden stirrers for 5 euros.
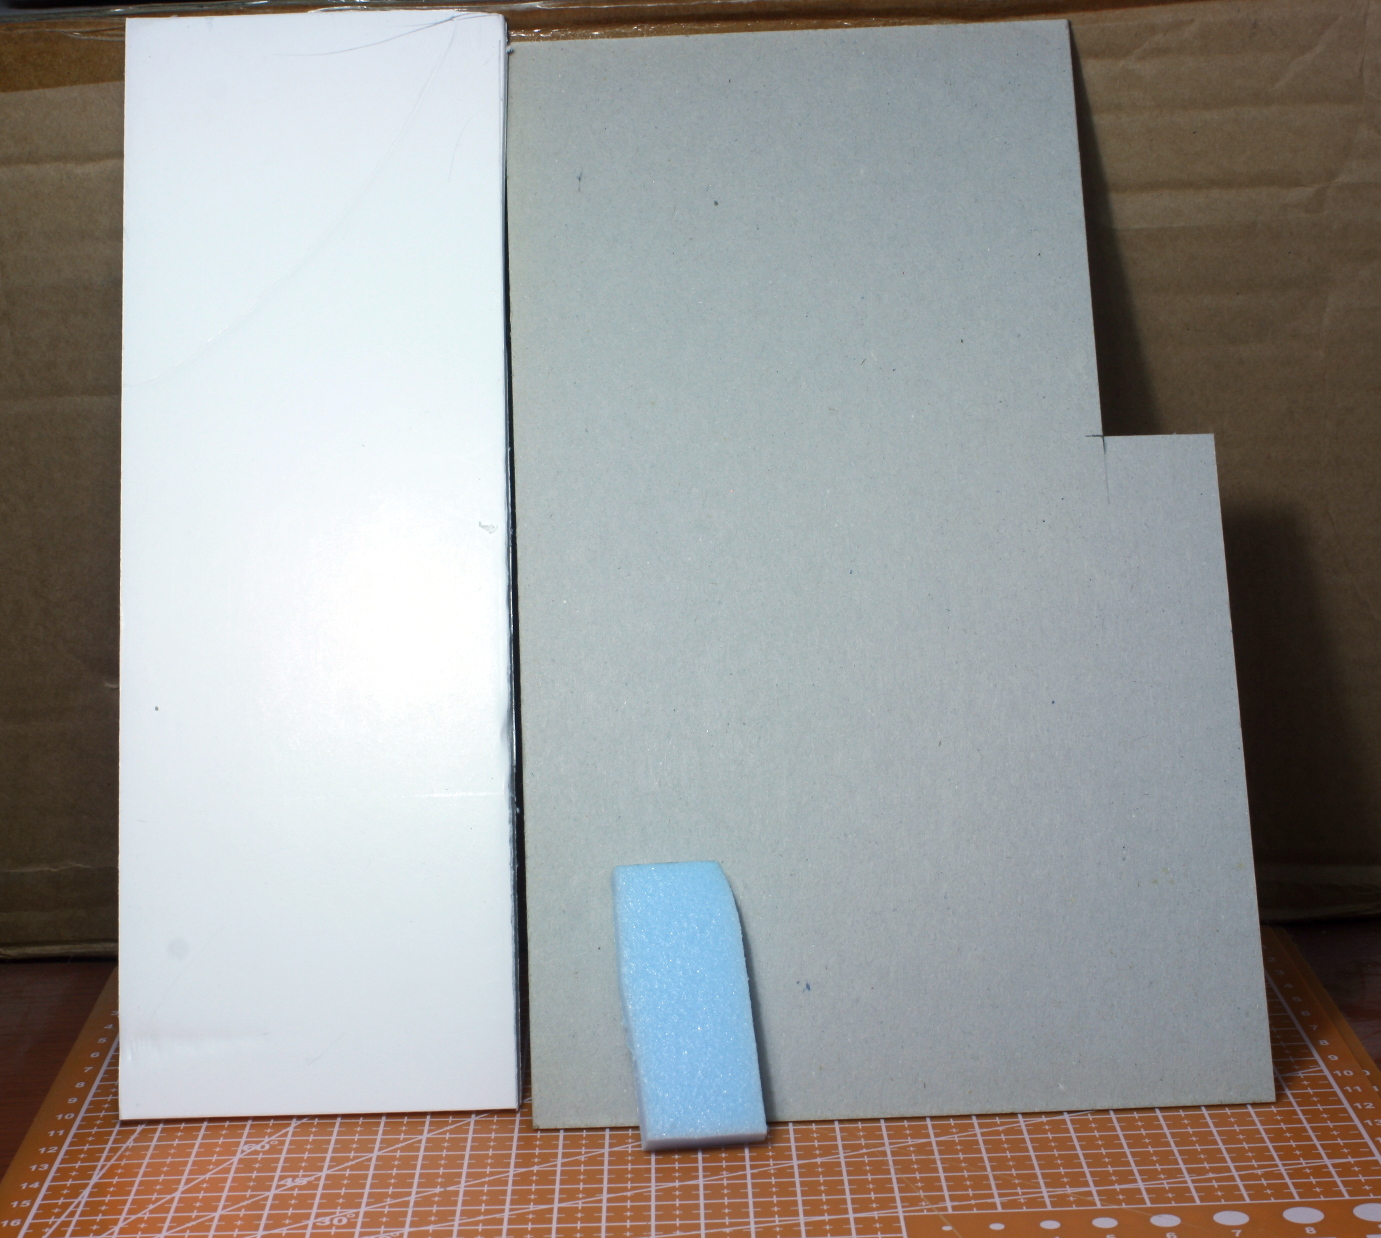 Foam-board, thick cardboard and pieces of Styrofoam.
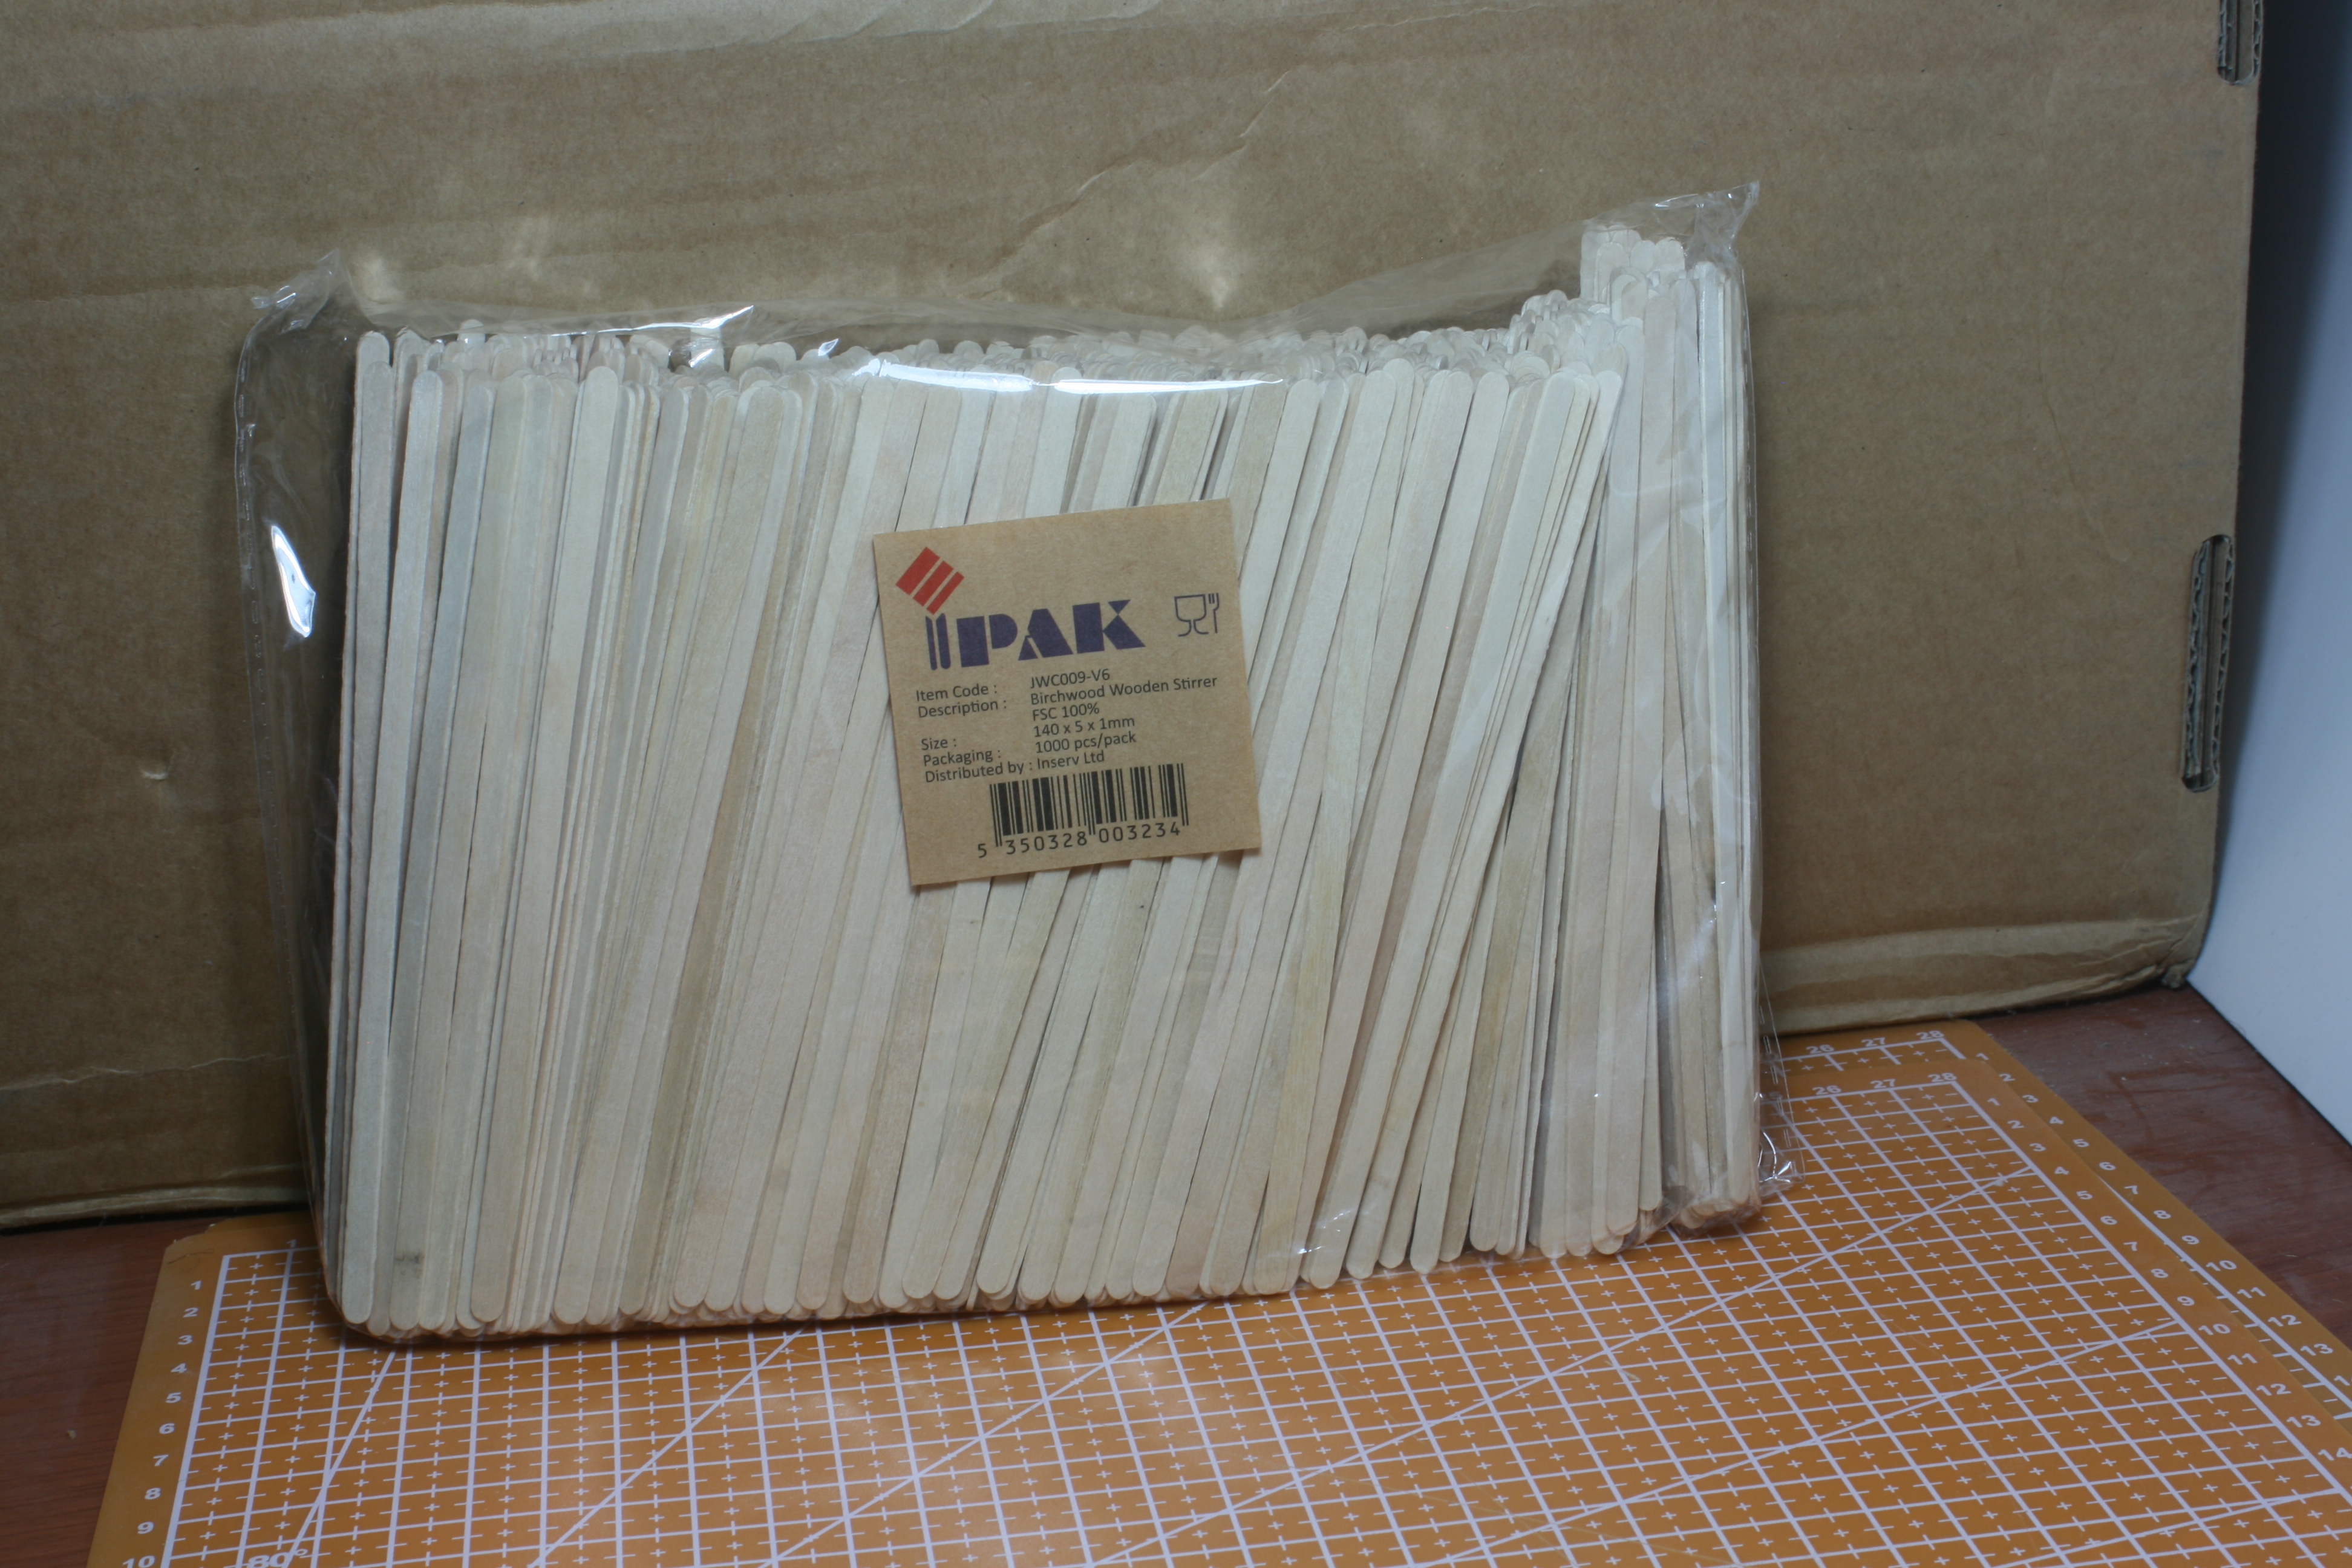 Enough wooden stirrers to last me a lifetime.
After looking at some photos of ACW period houses, I drew one to scale on paper and copied it onto the foam-board. I cut out the shapes and glued them together and placed them on a base (this is the same stuff the skirmish bases are made from).
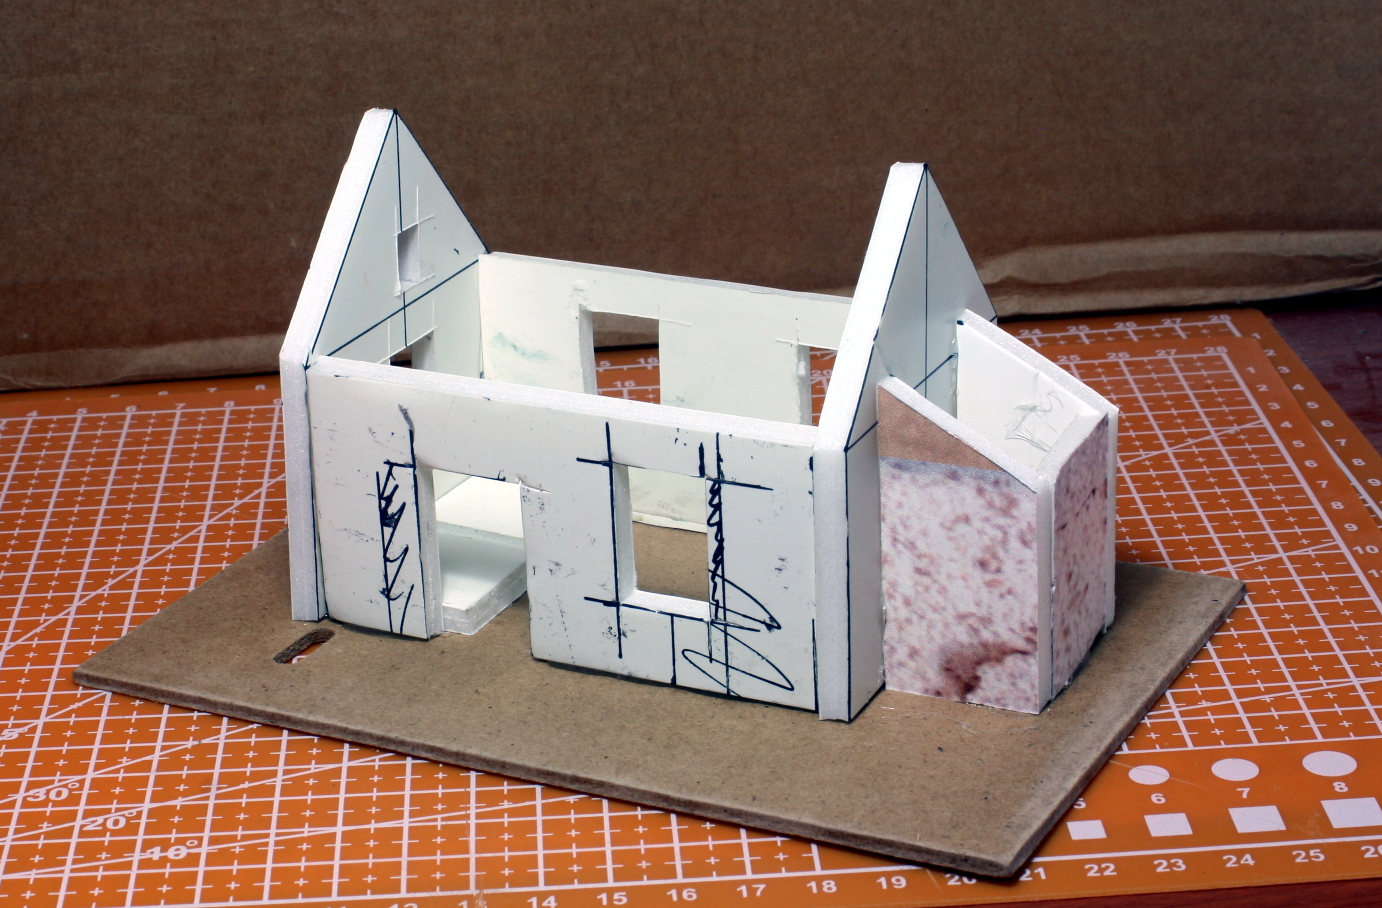
The next step was to glue the wooden planks to the structure. At first I did a lot of measuring, but I realized later I could just glue them on and cut off the jutting pieces with a scissors and trim down the planks with a blade at a later stage.
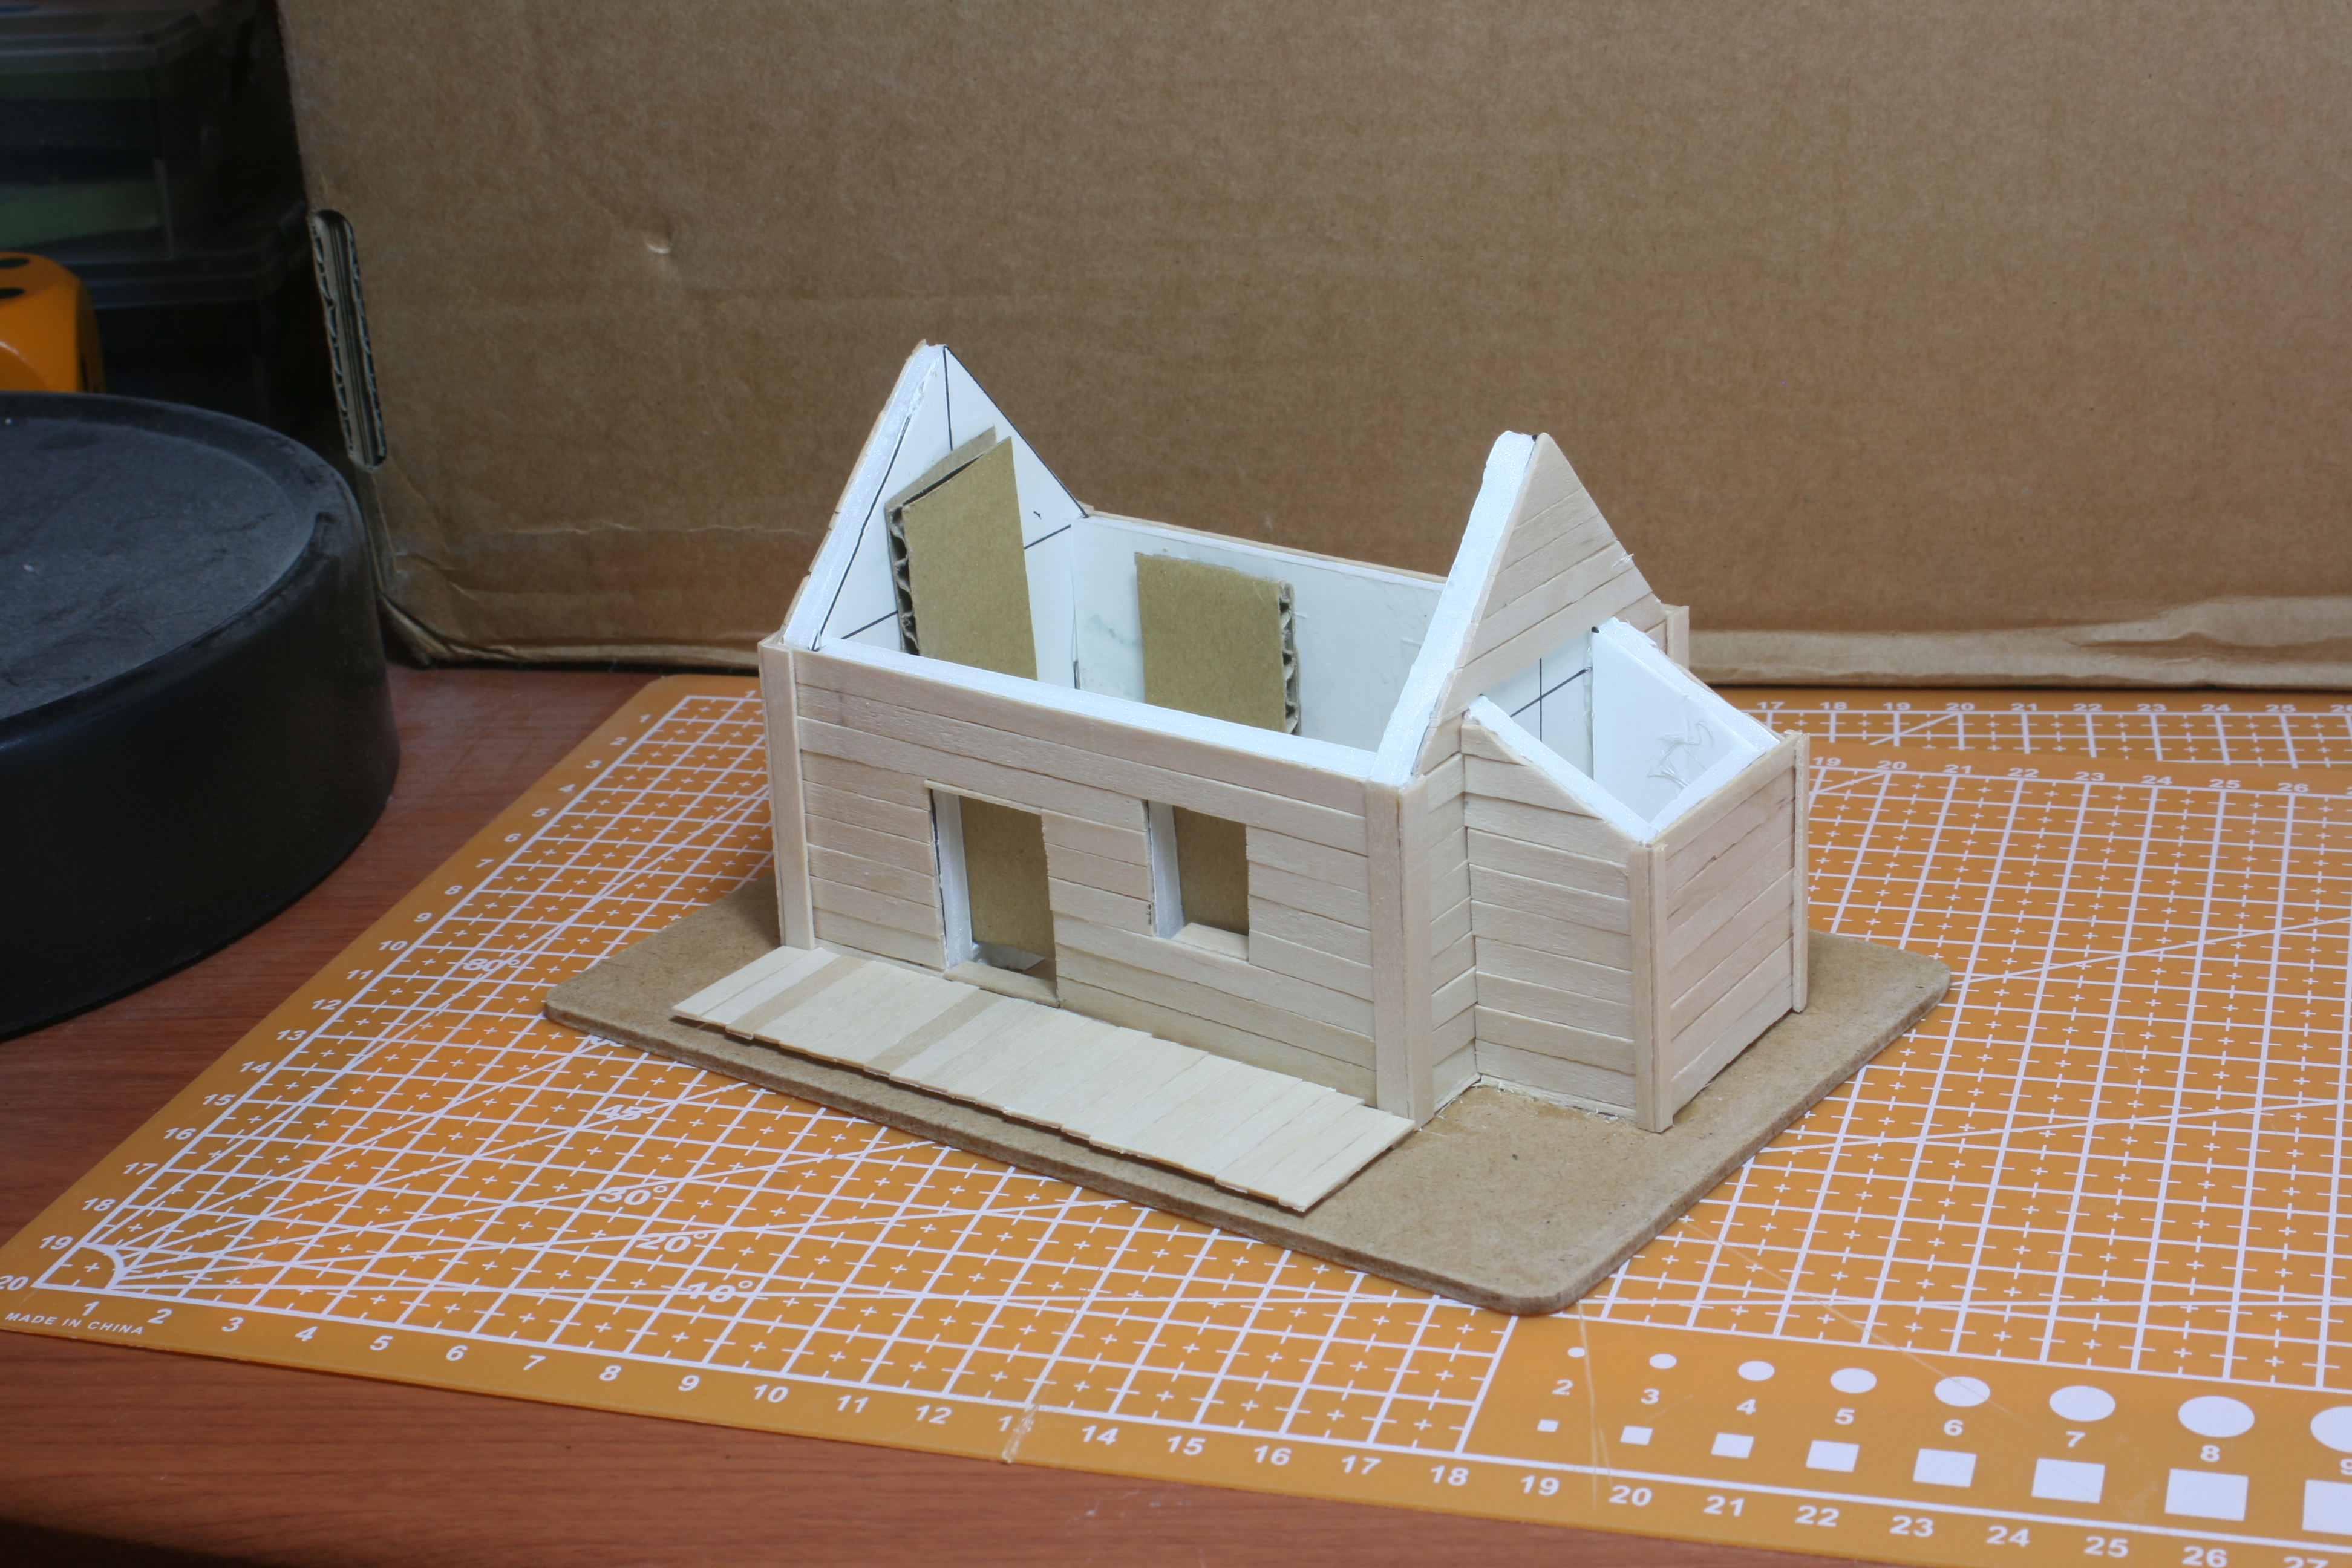
The last step was the most time consuming. This was the roof and details. Cutting up the tiles individually and gluing them on one by one was a headache. Adding the window frames and the patio fence was very finnicky.
The chimney is made out of Styrofoam and covered with card to mimic brick work. The bricks came out a little too big but I did not realized the mistake until after I primed the chimney with Vallejo’s White Stone.
Thankfully I only want three houses. So one down, and two to go.
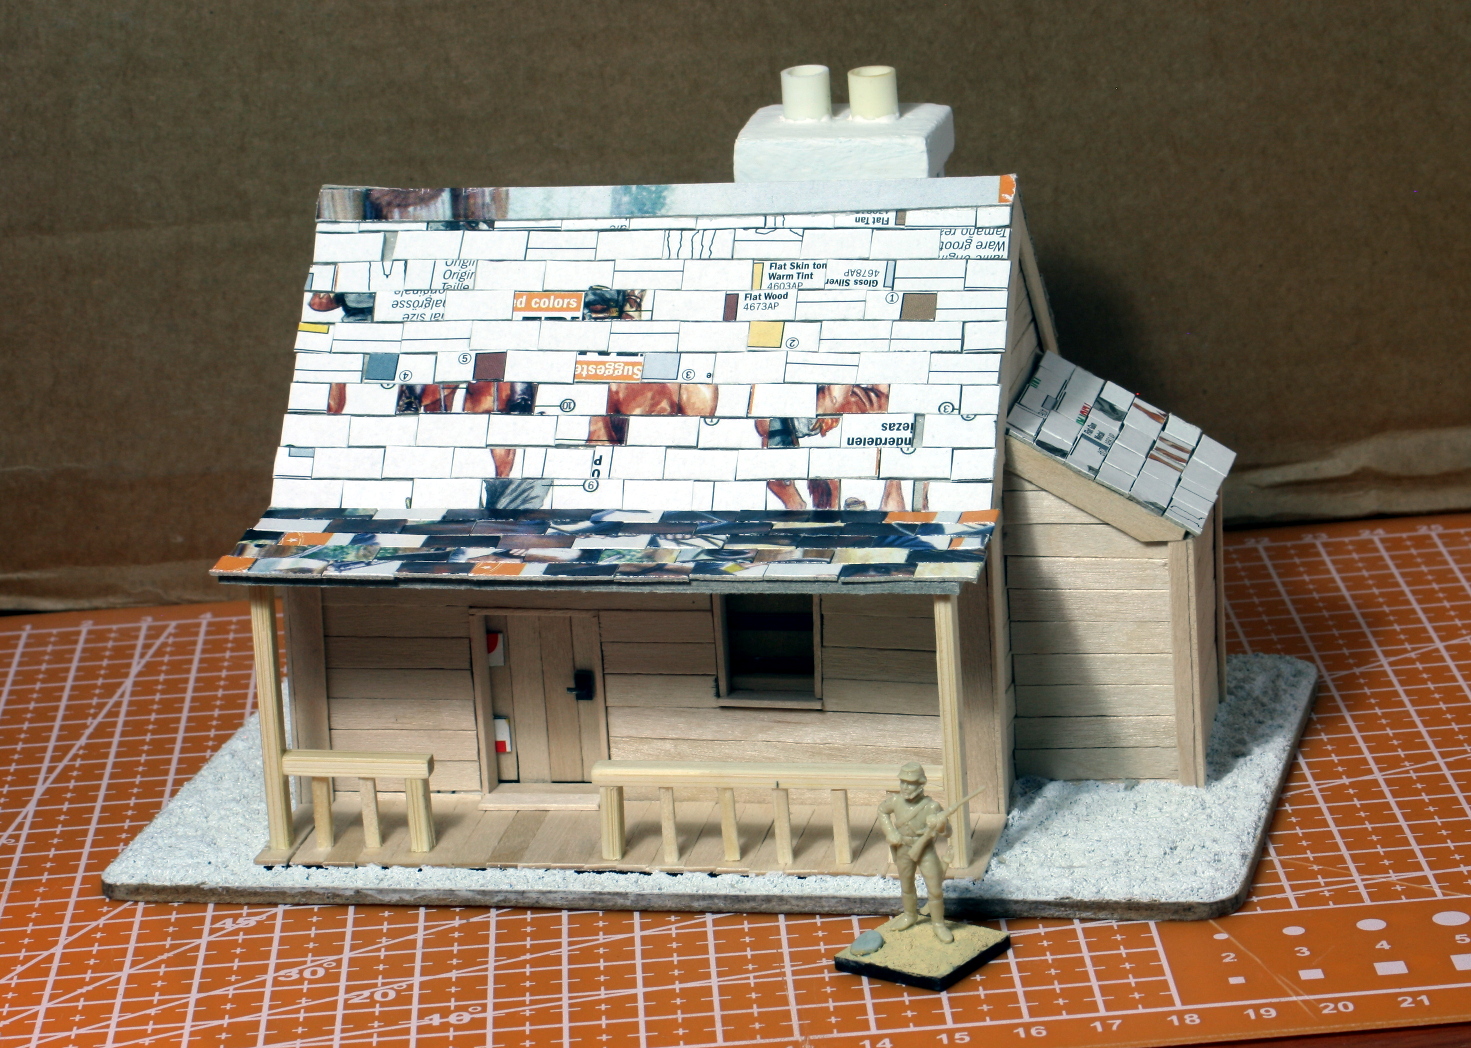 A soldier is in the photo for scale - it looks correct.
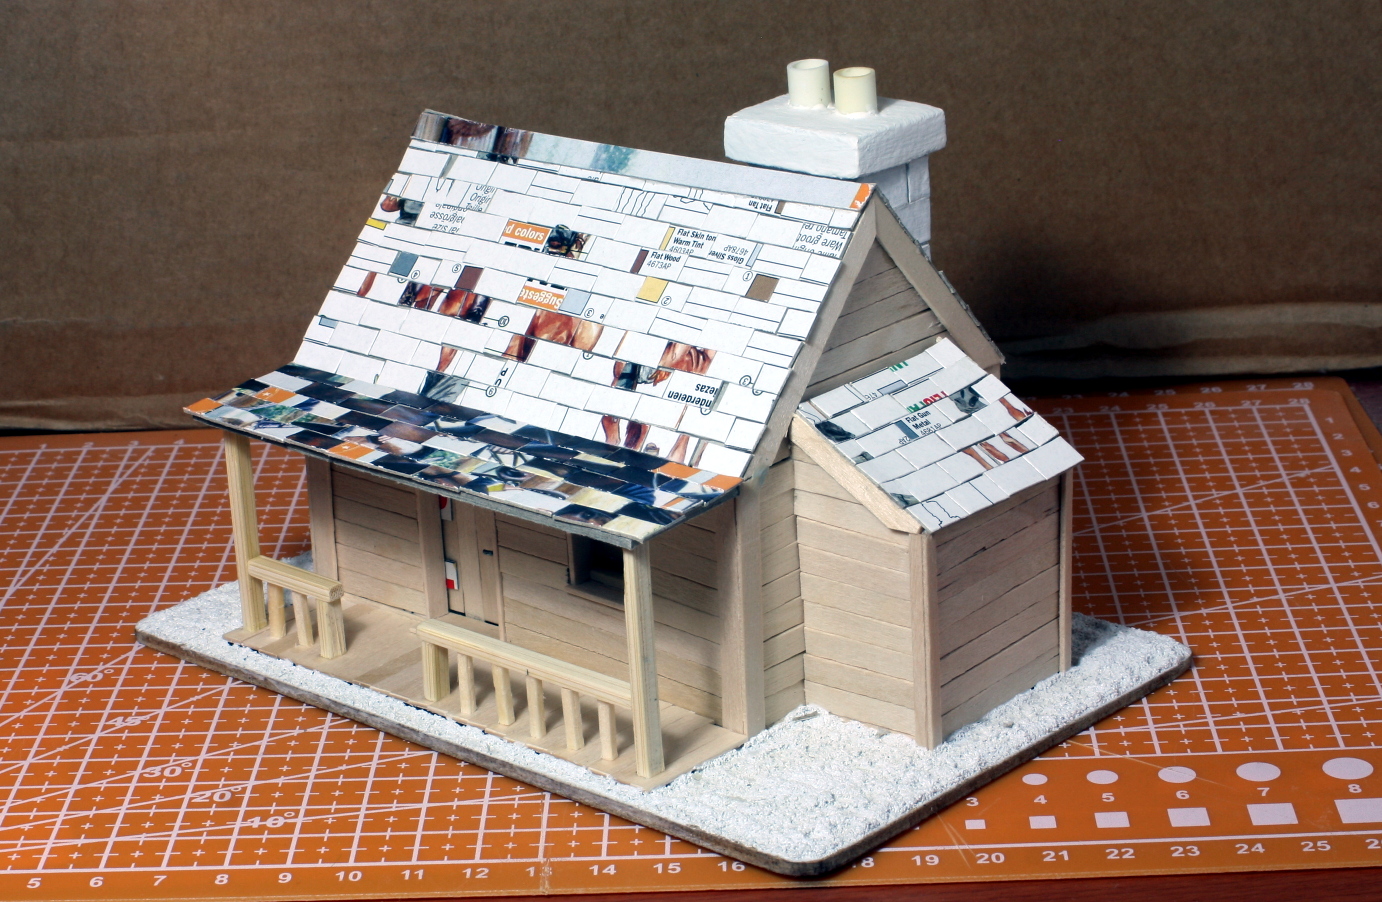
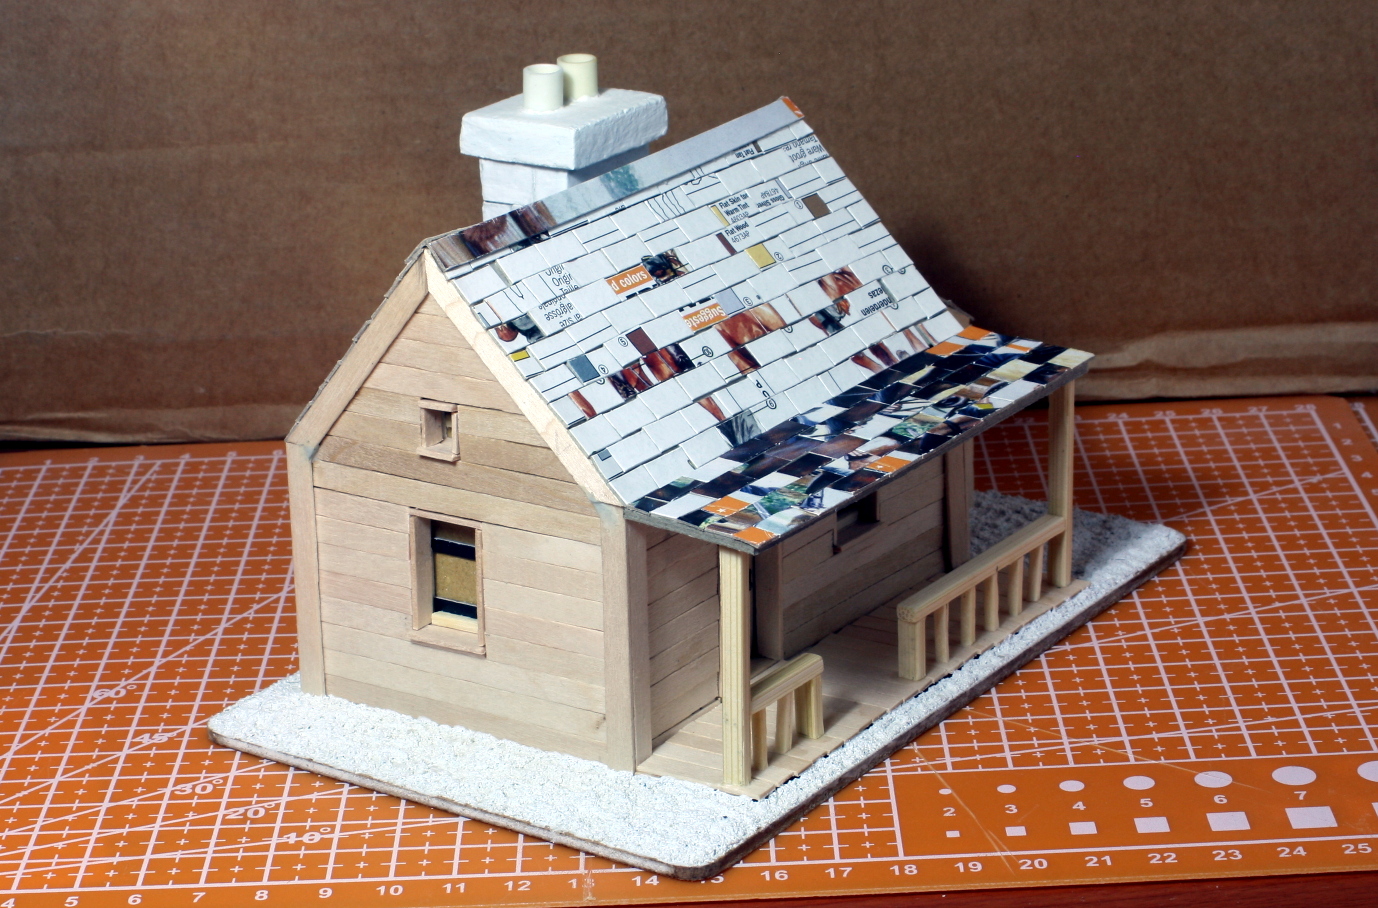

I made a lot of mistakes with this first attempt. I also learned a lot. So things balance out. All I need to do is paint it up.
The next building will be a barn. If the bases don’t come by Tuesday, then I will start it, otherwise I will continue painting up the Confederates.
I also want to make some trees, fences, hills and fields – which I will also document here.
Until next time, stay safe and have fun.
NR
Bases Are Here!
Hi everyone,
Another short post. The bases arrived this morning, and I painted up and based 6 figures from the Confederates. To be honest a lot of the painting on these six miniatures was already done – I just needed to add some finishing touches.
I also took the time to finish up the skirmishing bases I made. I now have to paint the movement trays I received with the bases.
 Six should be more than enough. I doubt I will ever use more than 4 in a game.
So that is it for now. By the end of the week Stage 2 should be at an end with the last 9 Confederate soldiers and their leaders all painted up.
The next stage will be the Union Cavalry or more terrain. I will see what mood I am in!
Until next post stay safe and have fun.
NR
Fences - Because I did not feel like painting models!
Hi everyone,
So this week was a bit slow on the model painting scene. With work, life in general, and the stress of painting armies – the miniatures took a second seat this week.
Instead, I spent the week building terrain. These include fences, trees and hills all scaled down to 1/72 scale.
Today though I will focus on a type of fence, the one you usually find around houses or gardens. I am also building a second type of fence used mostly for livestock, but that I will leave for another post when I am ready.
The fences where all built from stirrers I bought for a few euros. These are the same I used to build the house in the previous post. I will detail the process in pictures below.
 Cheap stirrers bought at a Two Euro shop.
 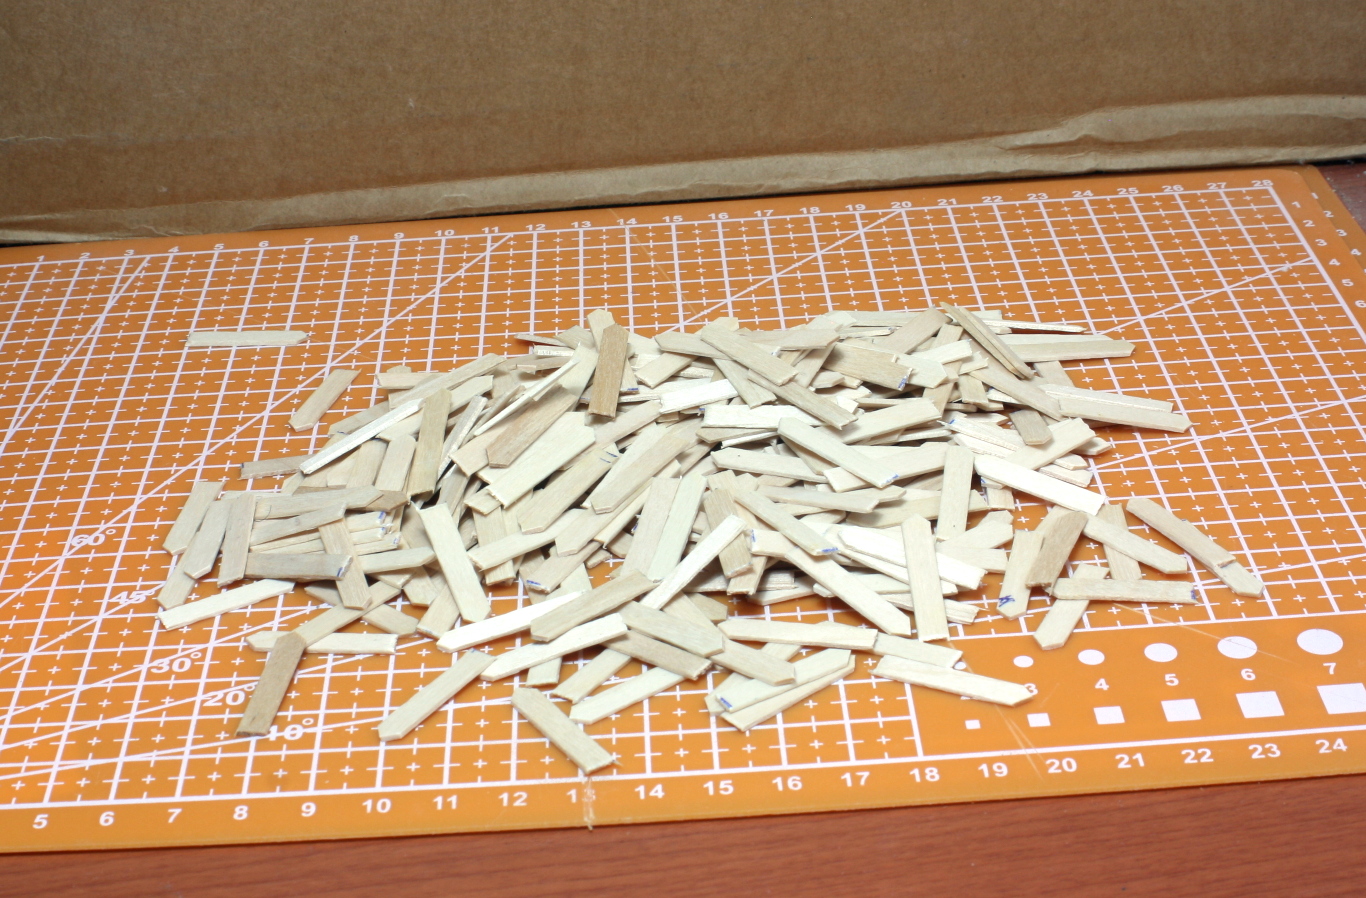 I cut up a bunch of them during one of my night shifts.
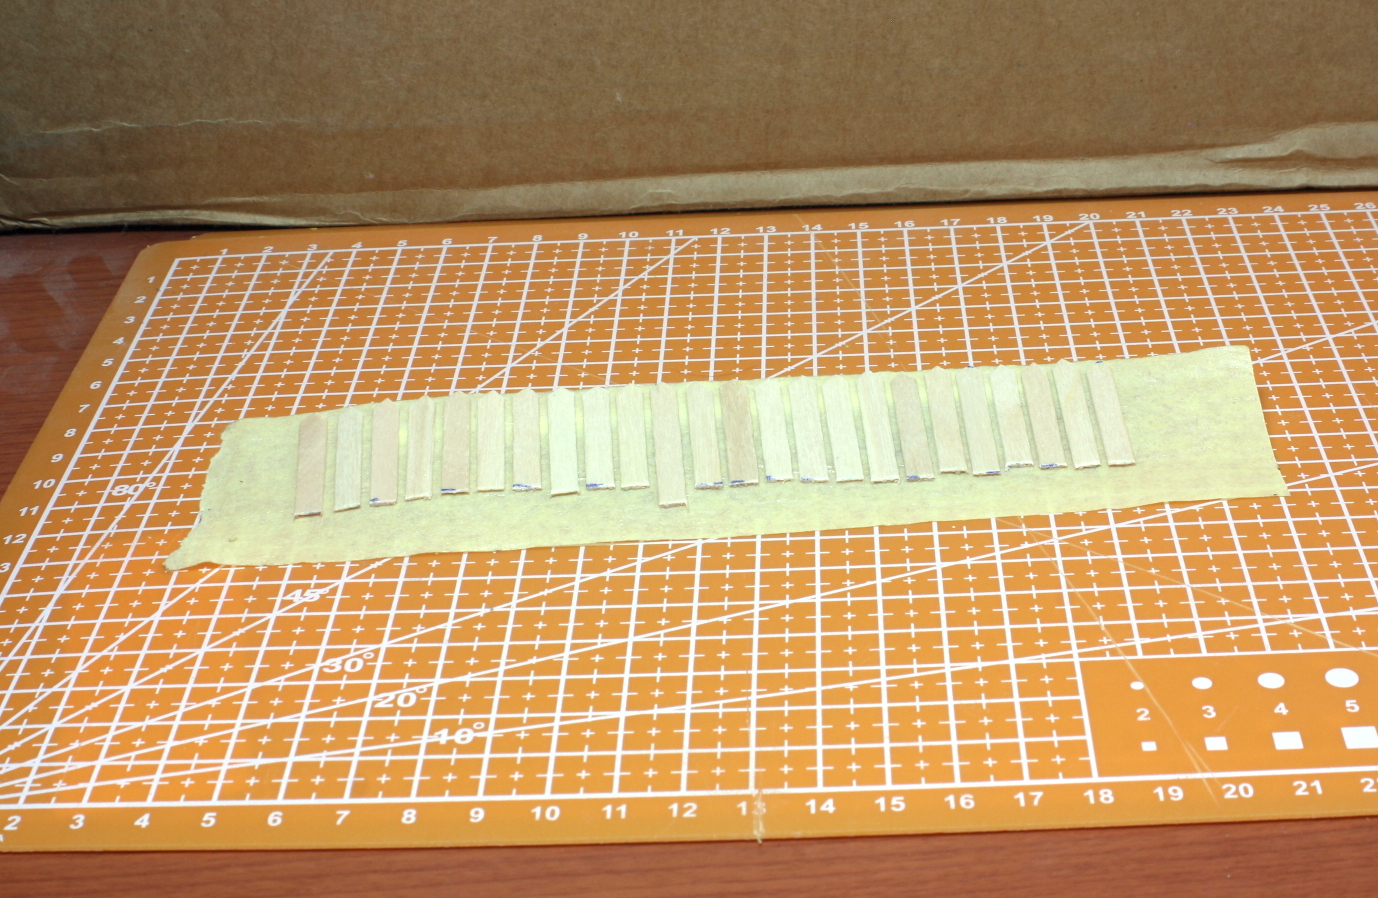 I attached several to a piece of masking type.
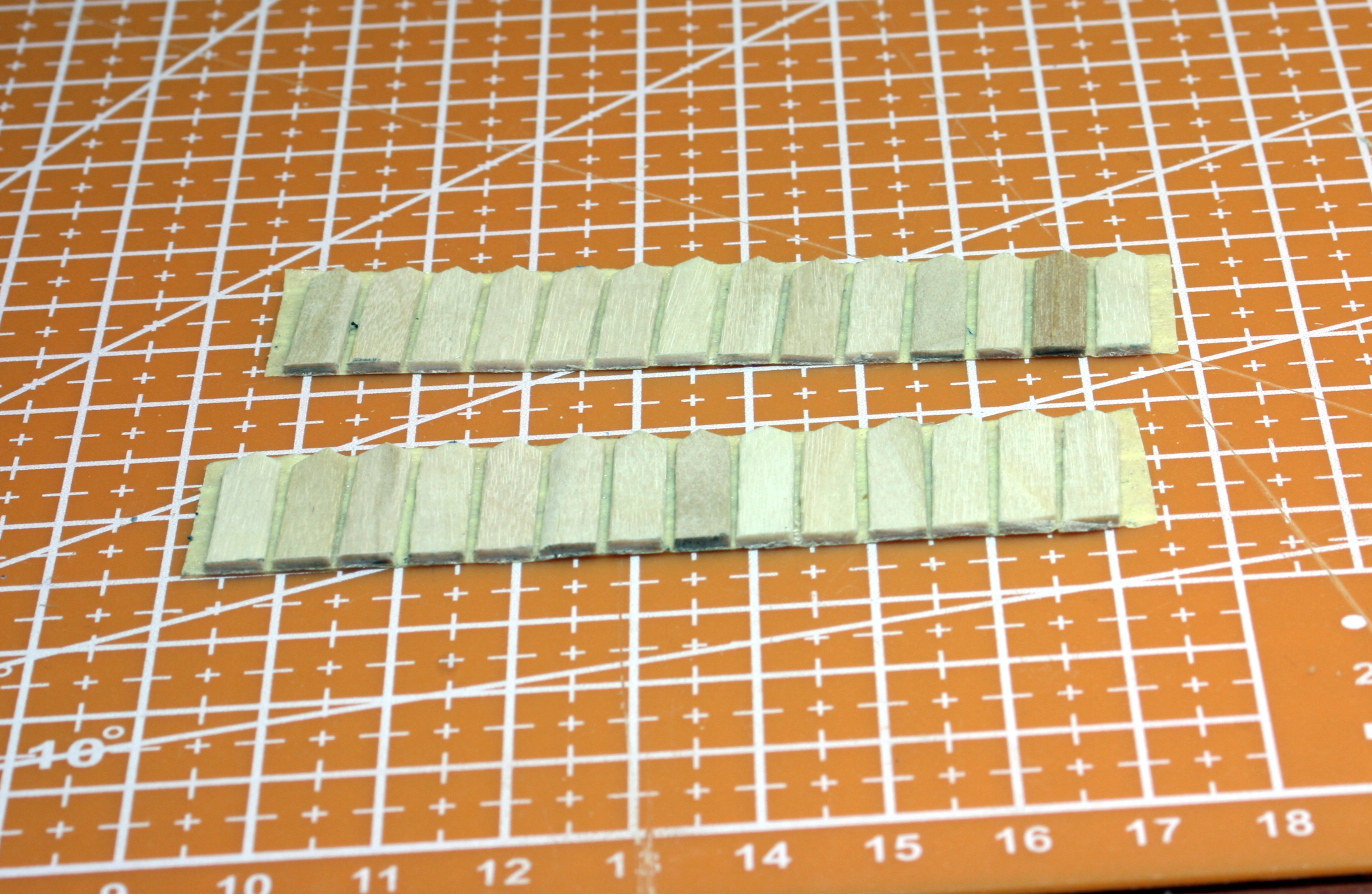 I then trimmed them down with blade and ruler and subsequently attached support beams.
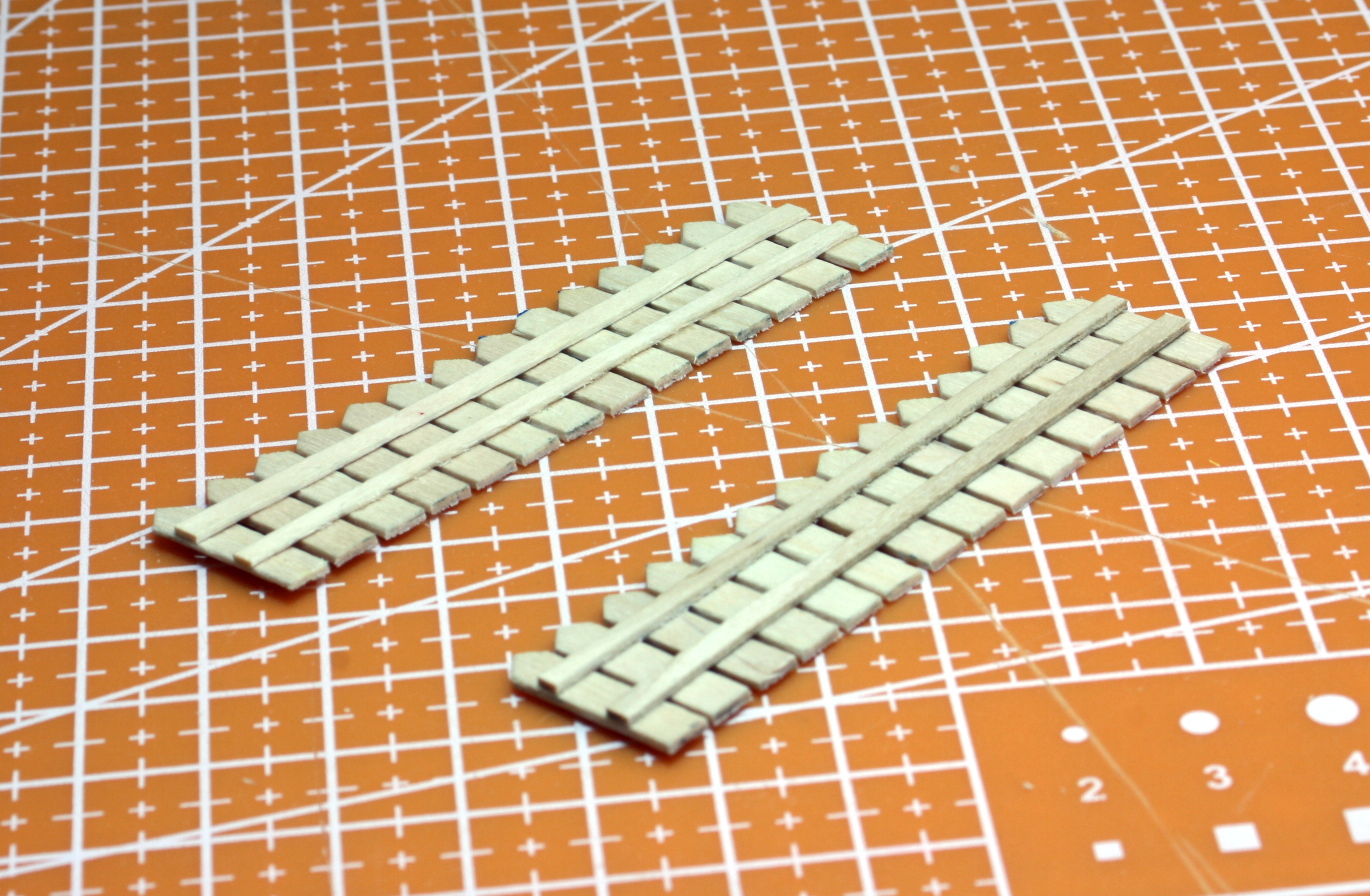 Support beams glued on and piece was removed from masking tape.
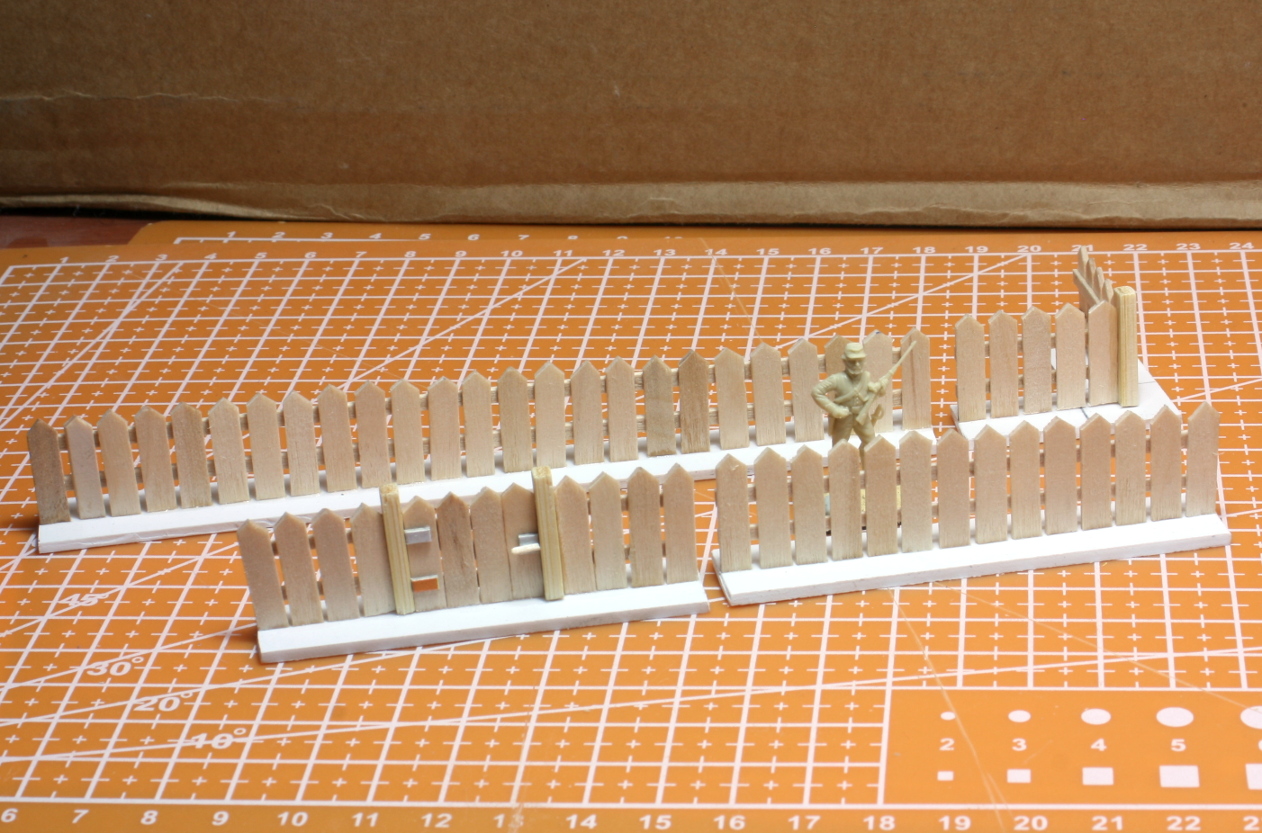 The fence pieces were then based. I posed a 1/72 figure in there for scale purposes.
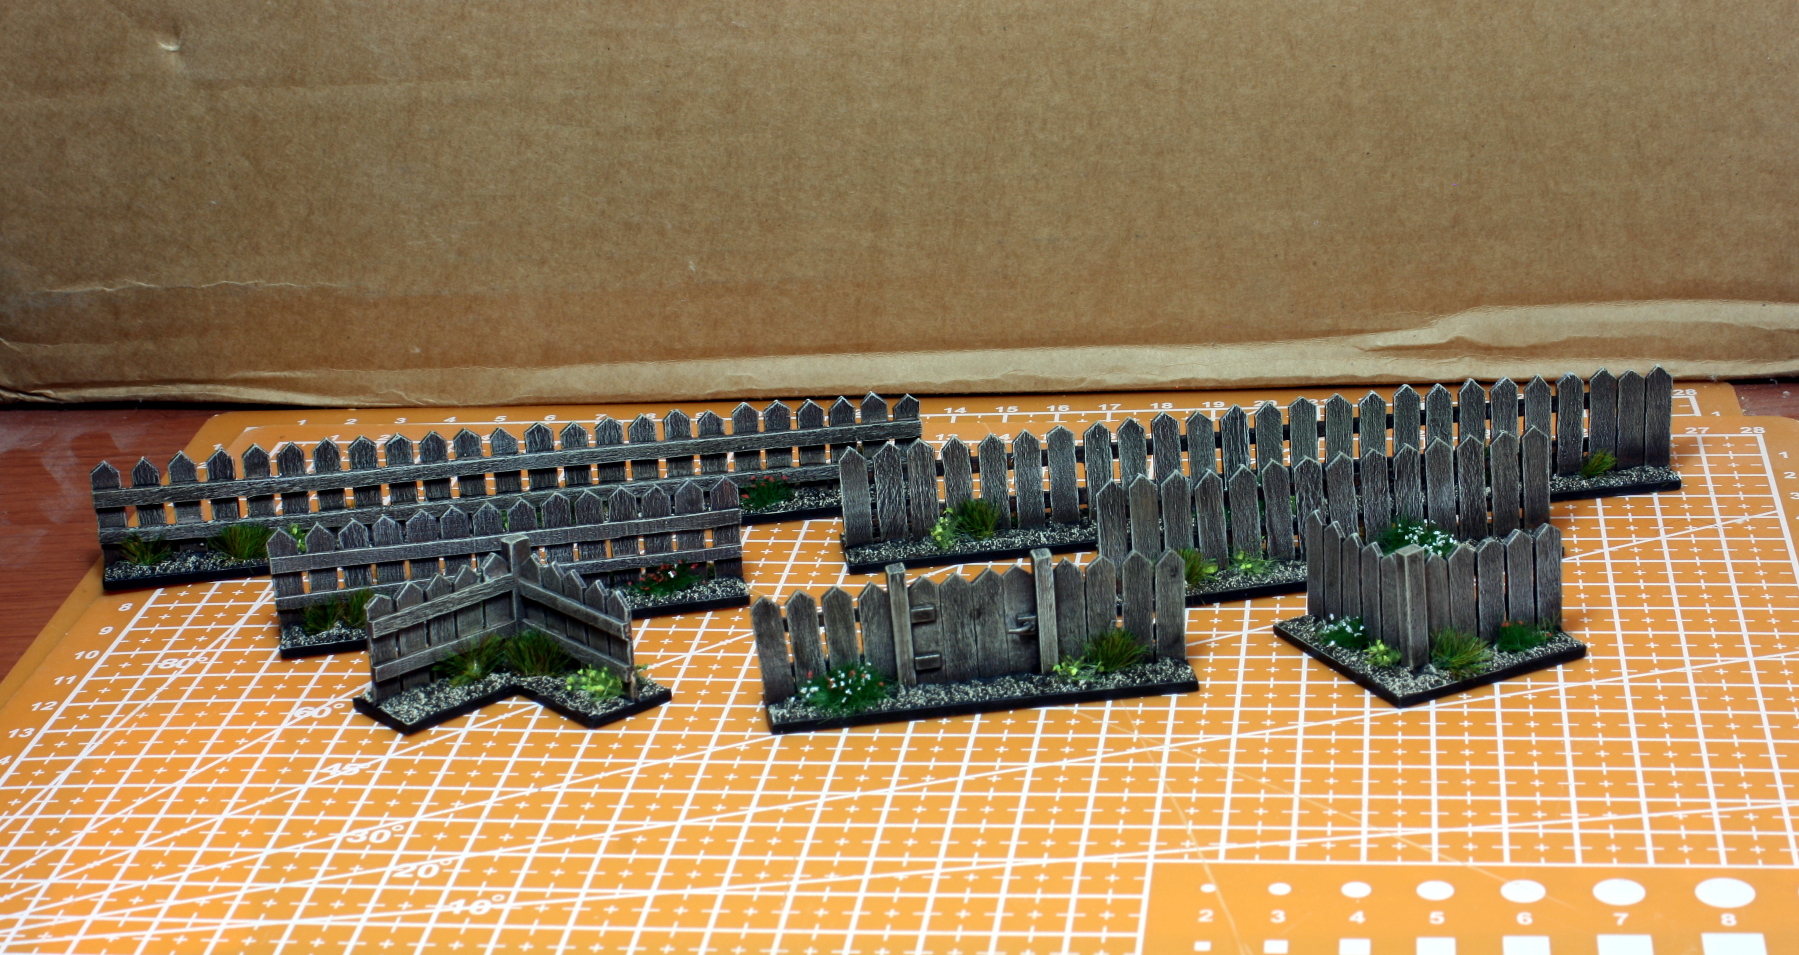 The last step is to paint them up. I opted for dry-brushing - quick and effective.
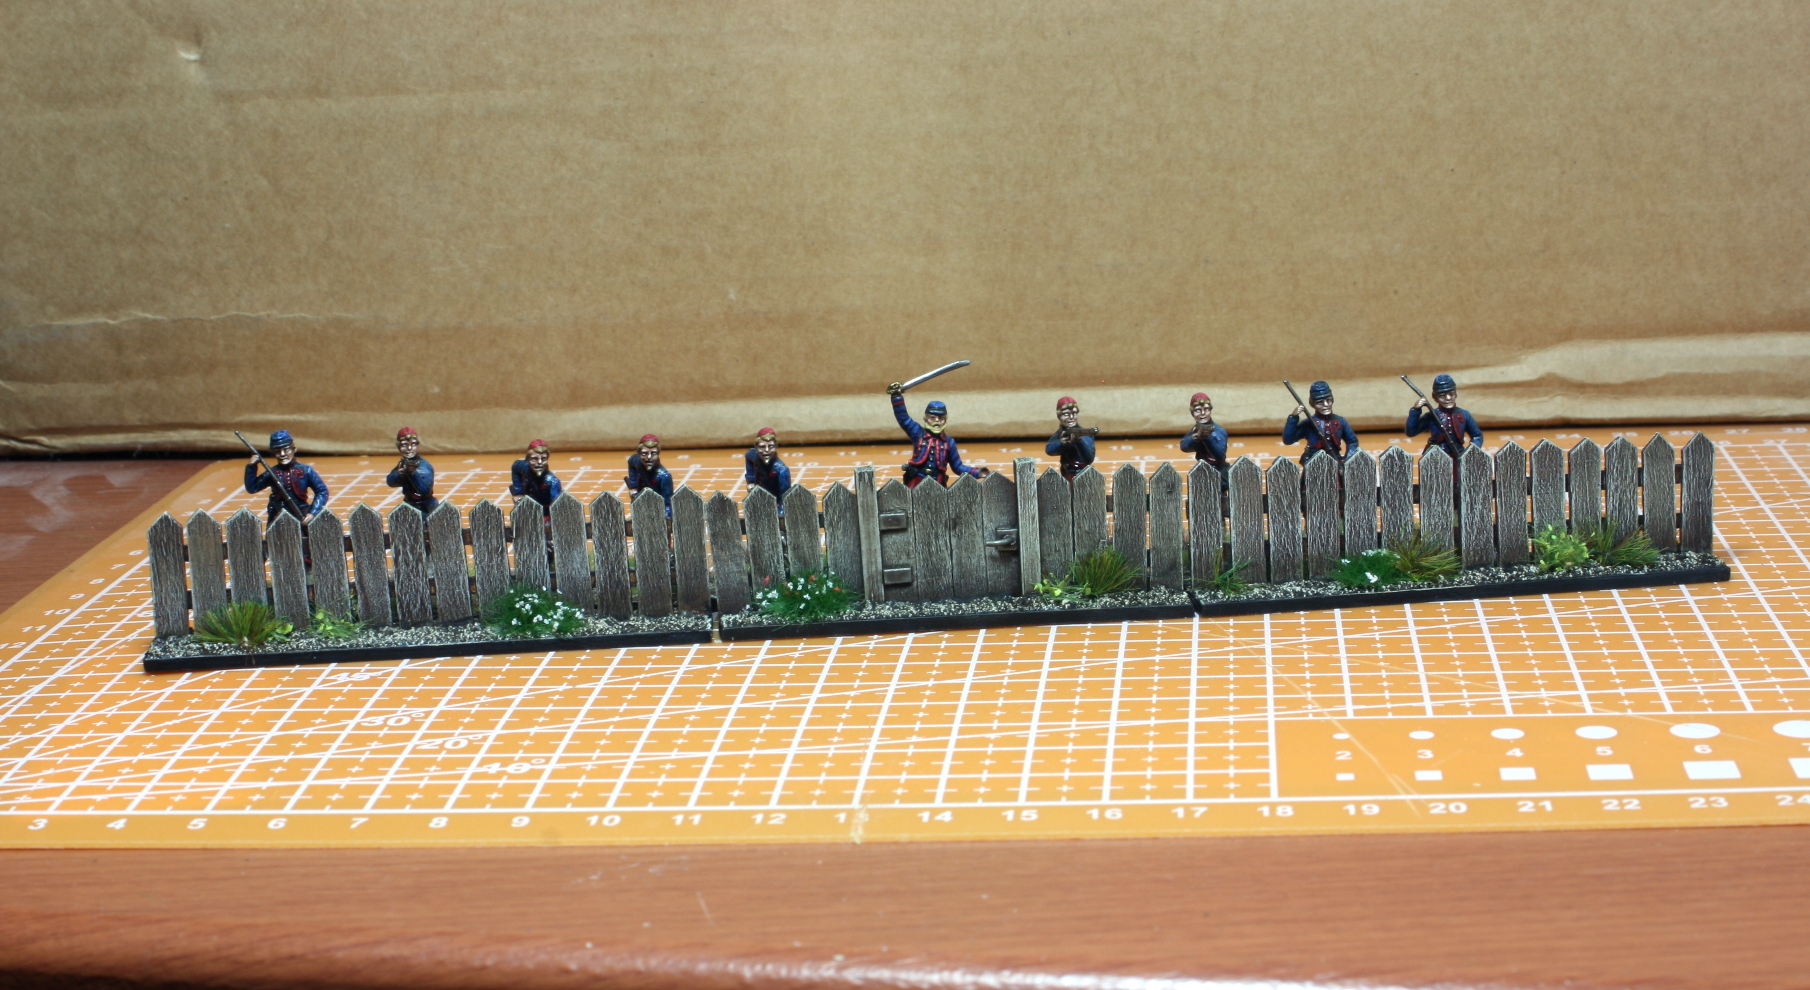 Steady, aim, fire!
That is all for now. The next post will possibly be the trees. Whatever the case, I will make it a priority to start painting the miniatures again.
Until next time, stay safe and have fun.
NR
If It Looks Like A Tree....Then It's A Tree!
Hi everyone,
This project marches on, but I have been focusing on terrain a bit more than the miniatures for the moment. The next type of terrain I focused on are trees.
Like the buildings and fences, I went with the same philosophy – if possible, use materials I already have and try to build the trees as cheaply as possible.
Like most gamers and hobbyists, I never throw anything away (a habit I am trying to break), and I had a lot of foam from blister packs and various other items.
About two years ago I saw a Youtuber make trees from foam pieces, but unfortunately I do not remember who he is.
Therefore I set my mind to replicate his process and make a bunch of 1/72 scaled trees from foam and kebab skewers.
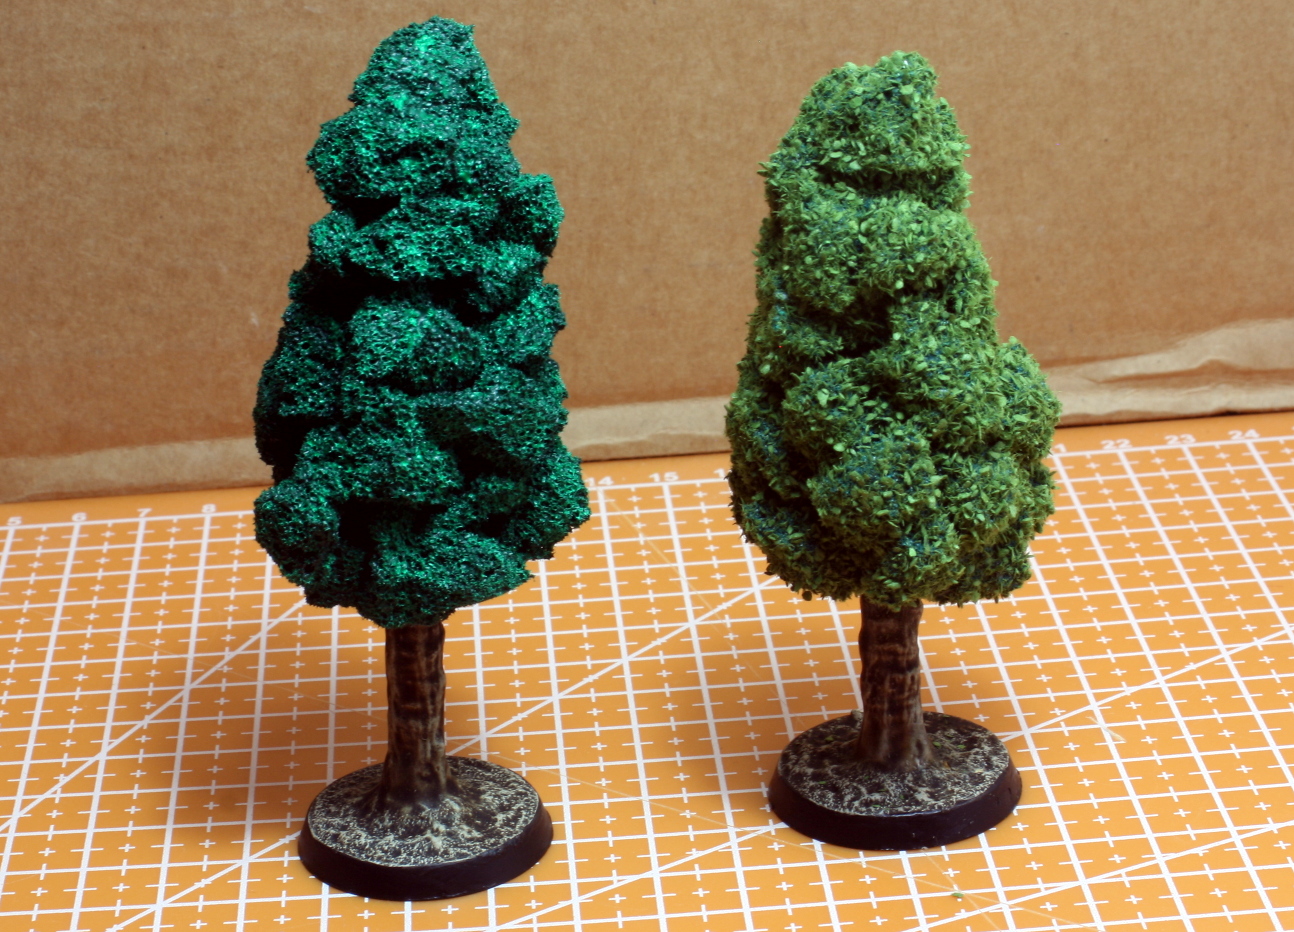
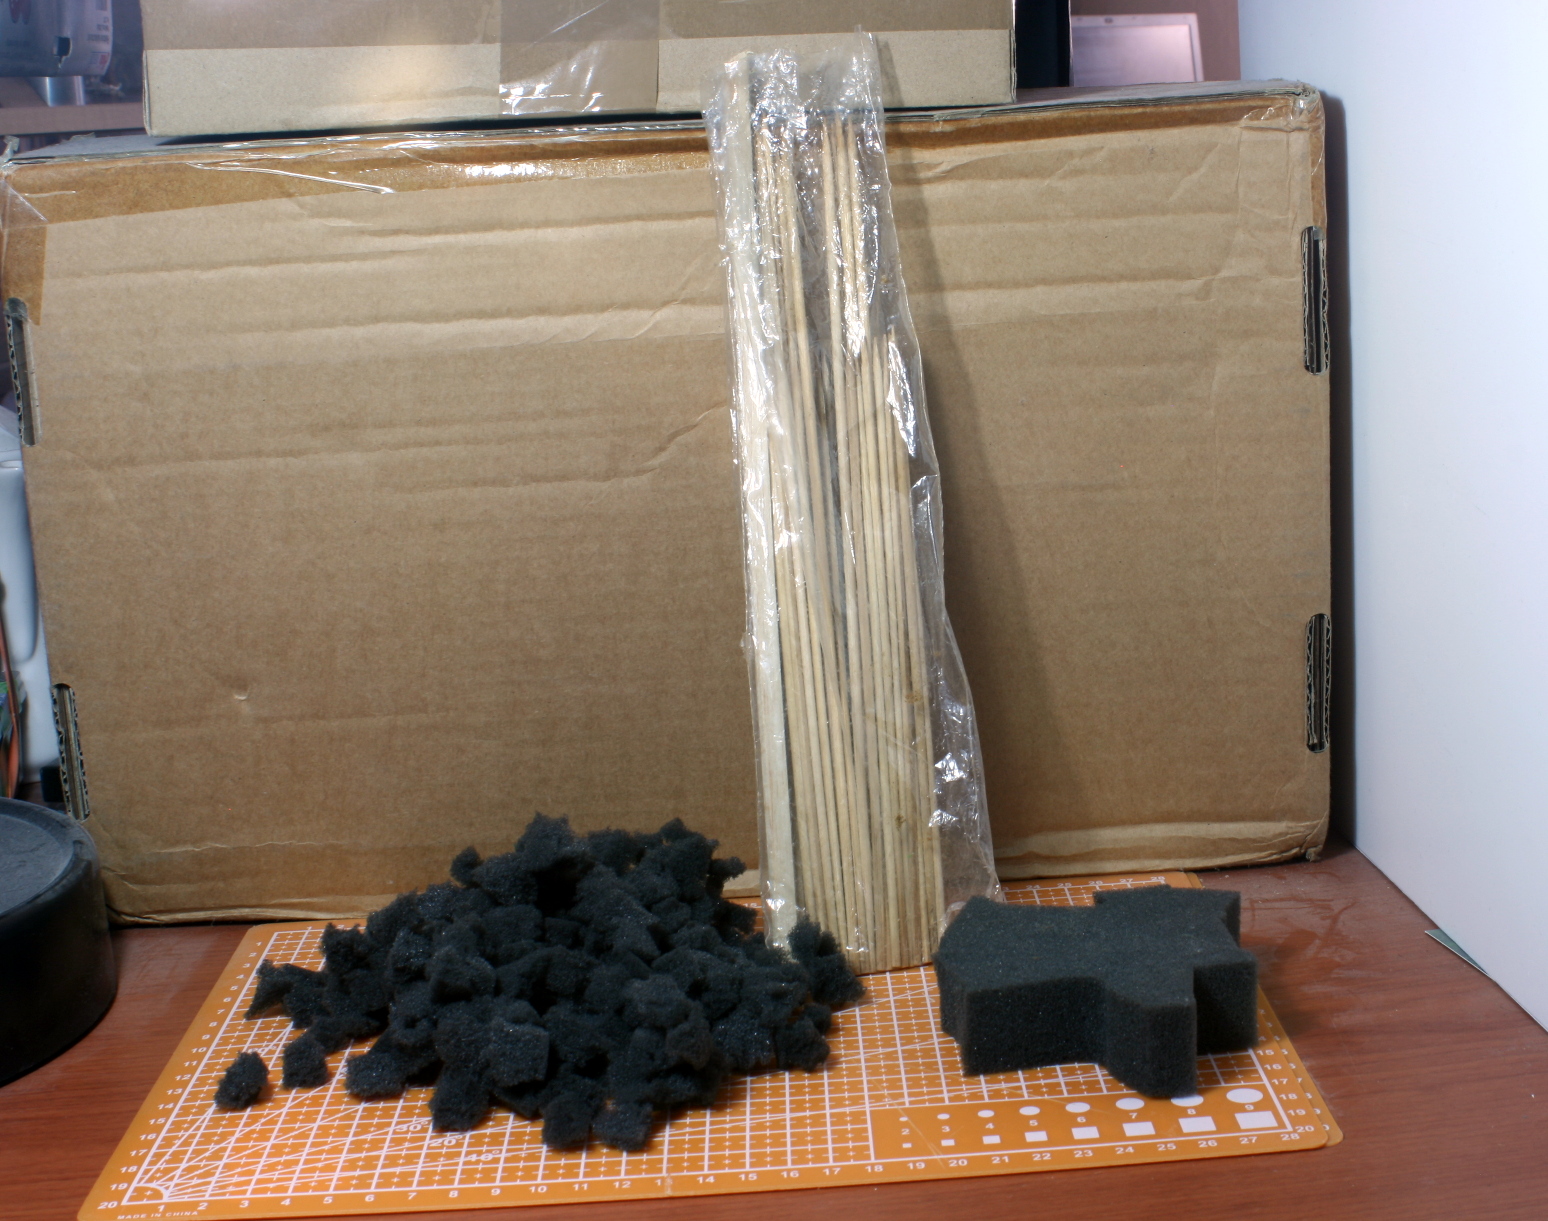 The trees are made from foam and kebab skewers.
The first step is to tie three skewers together with fine aluminum wire. I had bought a roll of wire several years ago from a crafts shop. These will act as the trunks of the trees.
Next is to glue these trunks to bases and give them several light layers of Polyfilla, art stucco, or art modelling paste. Whatever you have. I used stucco mixed with some light very fine sand. I gave the trunks three thin coats.
After the stucco had dry, I pinched out a lot of foam pieces and glued them to the trunks. I have seen very talented hobbyist make trees of various shapes and species. Personally, I just wanted trees to play with. I wasn’t too interested in the artistic side of the process.
After the glue has dried, you might want to trim down the sharp edges of the foam with a pair of sharp scissors to give the tree a more appealing form.
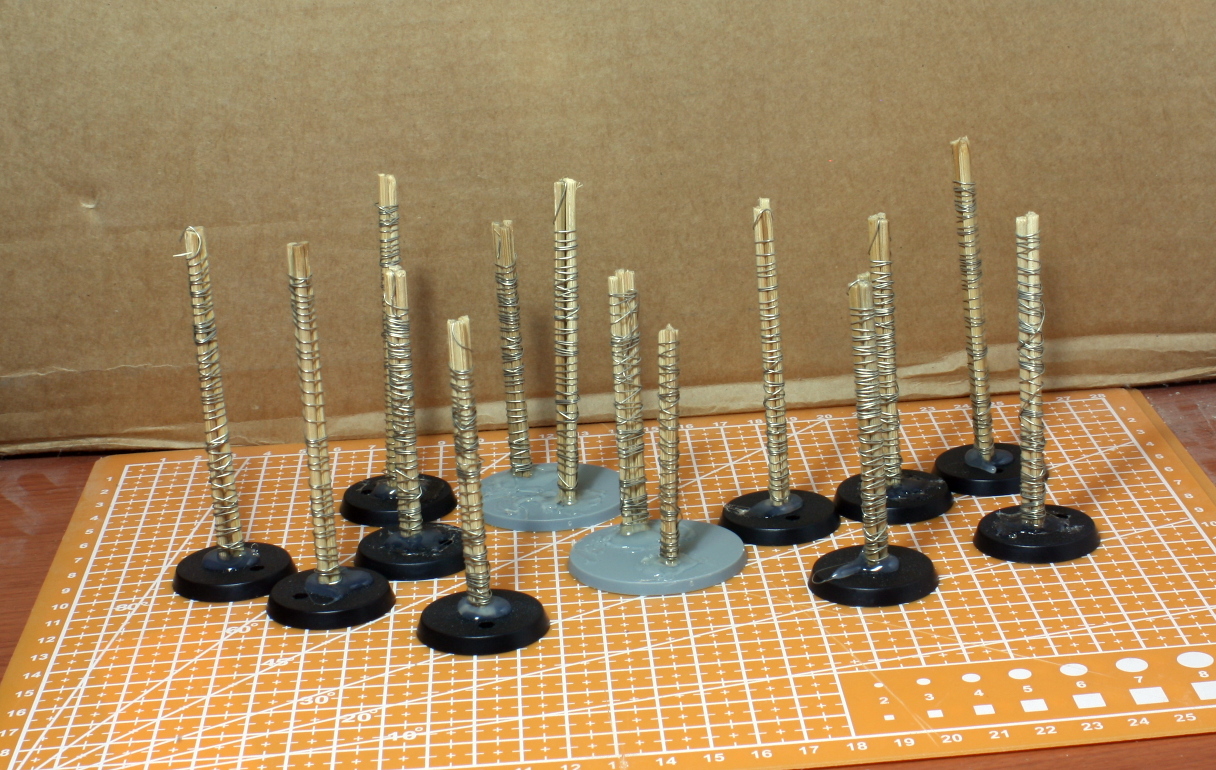 Kebab skewers tied together and glued to the bases.
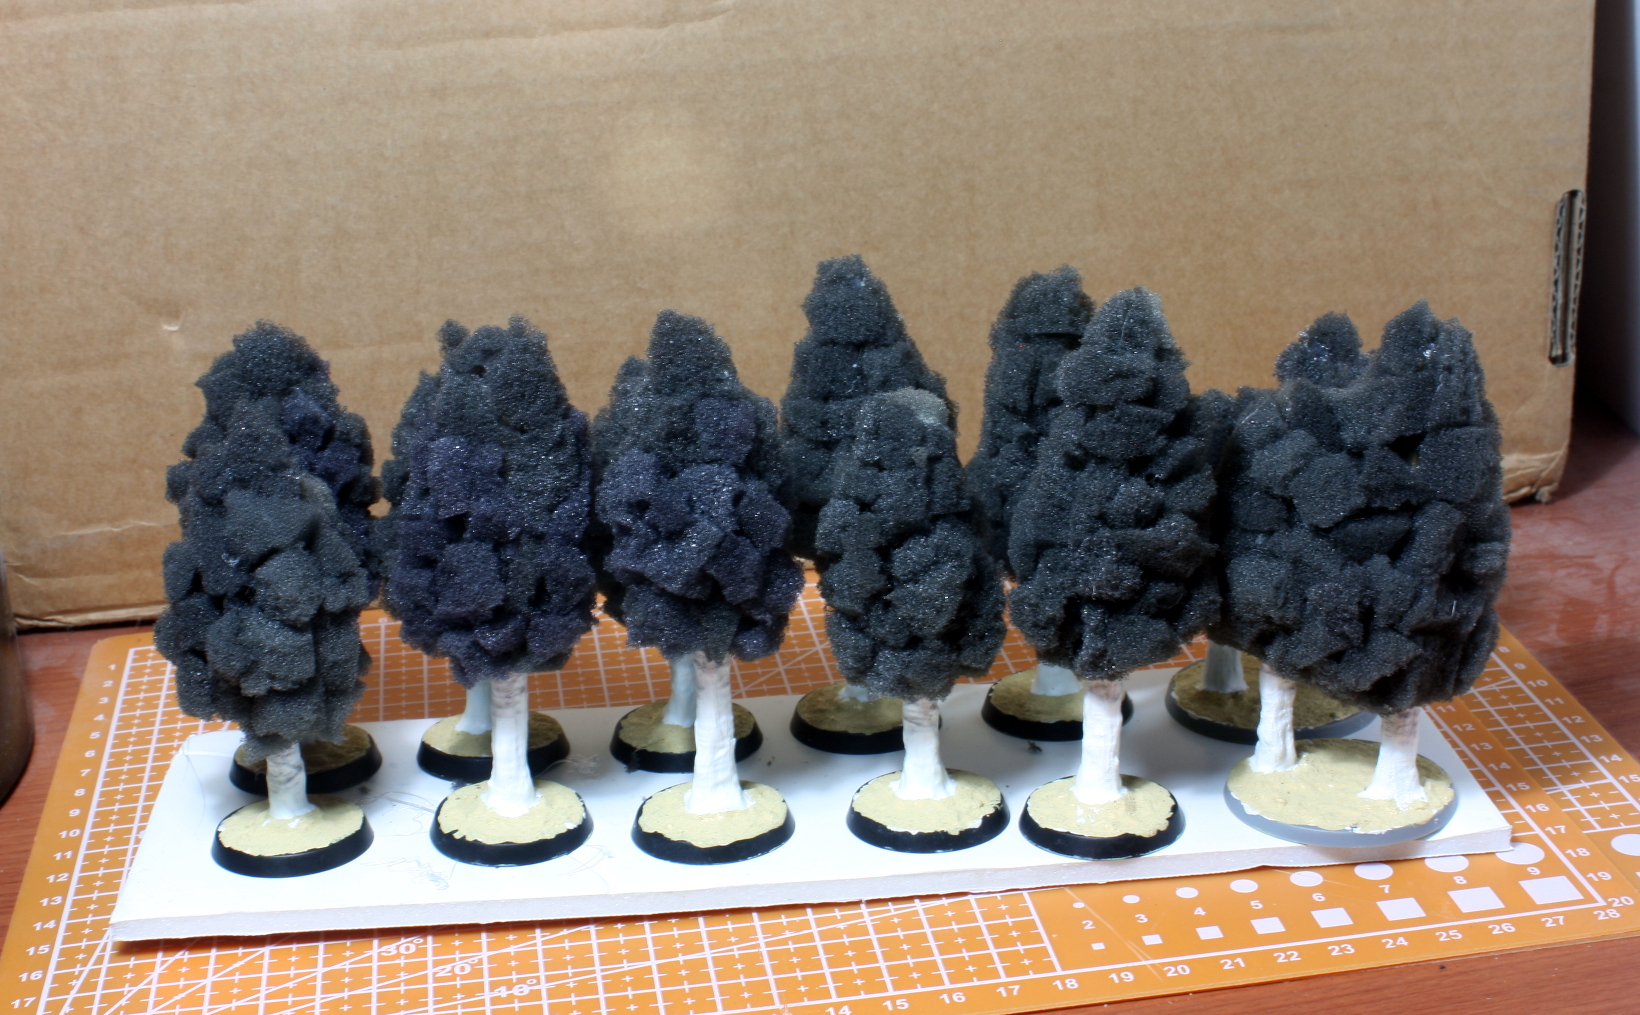 Stucco added to build up the trunk and pieces of foam glued on and trimmed down.
If you used white, cream or light coloured foam, you can dip the foam into diluted paint before attaching the foam. In my case, this would not work because the foam was dark grey.
Therefore, I had to first paint the foam white, then paint it green. The foam absorbs a lot of paint, so I used very cheap acrylics bought from the 2 Euro Shop.
The trunk was painted light grey, then I gave the trunks several washes with cheap homemade brown washes. You can also use Contrast or Speed paints at this stage as well.
Leave everything to dry for at least a day or two. The spongy foam absorbs a lot of water and paint and needs to dry properly.
 The foilage was painted green and the trunk light grey.
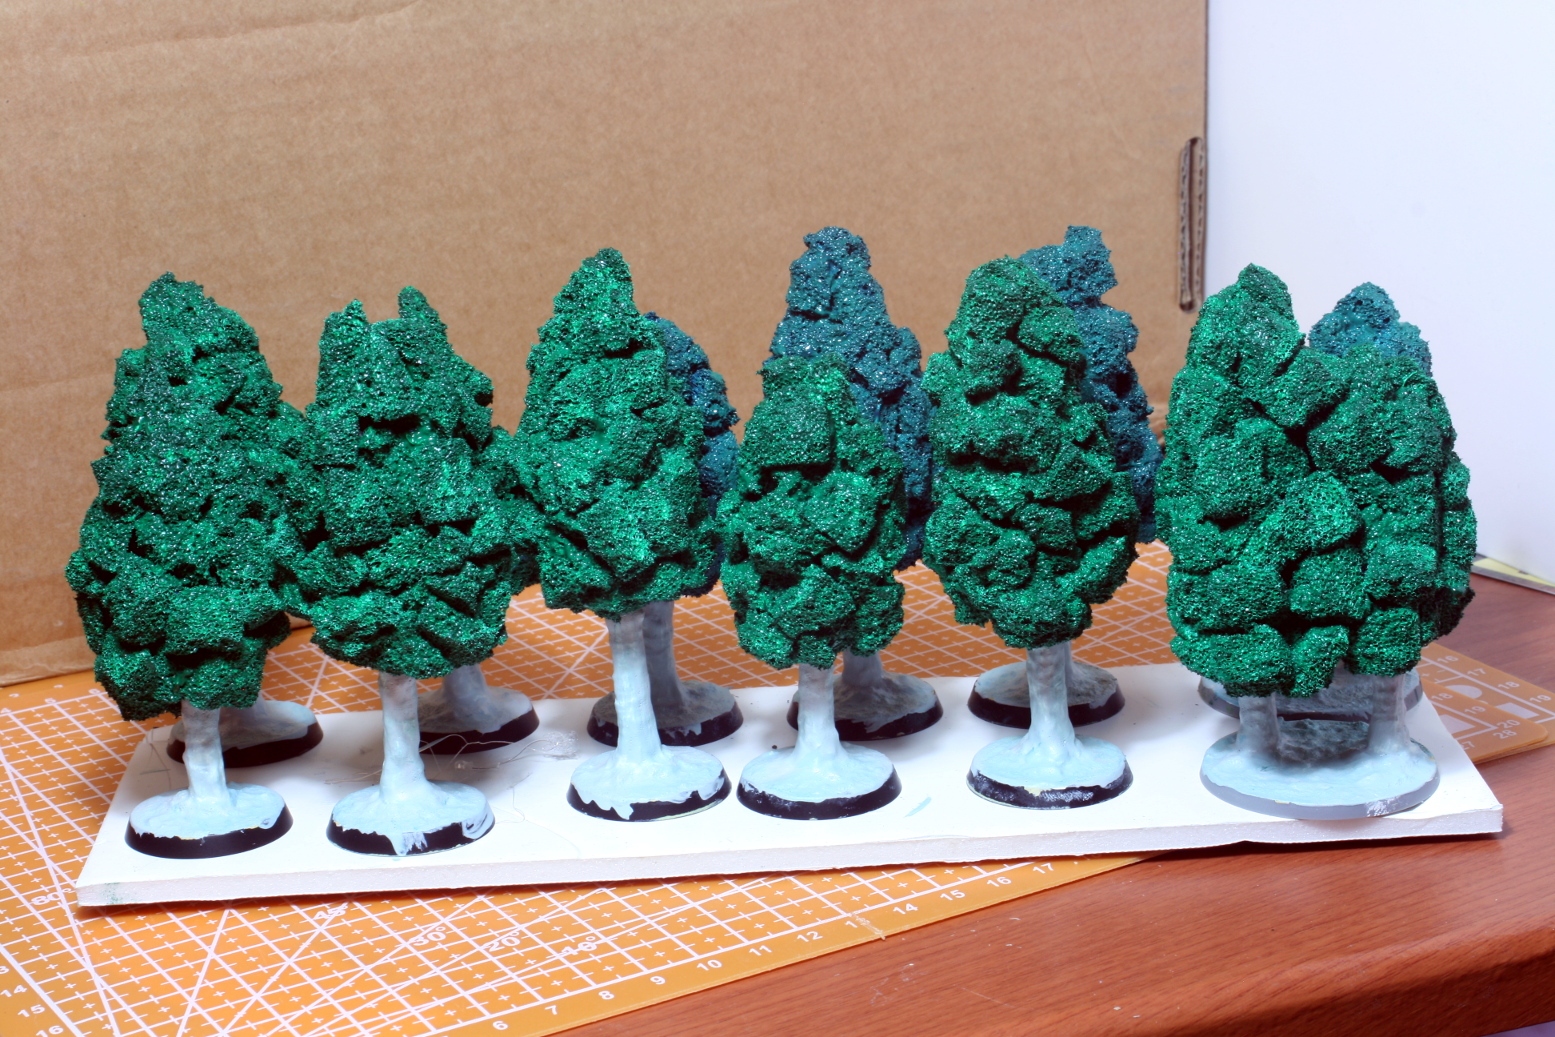
When everything had dried properly, I started flocking the trees. The first coat of flock was glued on with PVA glue. Mix 50% PVA to 50% water and give the foam a generous coat, then sprinkle the first layer of leaves. This gives a solid covering that will not fall off easily.
I then gave the trees a second covering of flock. I do this by spraying the trees with hairspray and adding the second layer of flock.
I do this step again for a third time, but lightly flocking with lighter green leaves – just to give the trees some colour dimension.
When the hairspray has dried properly I gave the trees a wash of scenic glue to solidify the whole thing. You can also use spray adhesive – but this might prove expensive.
That’s it. I hope this post gives you some ideas of your own to make cheap but very presentable gaming terrain.
Until next time, stay safe and have fun.
NR
 First covering of flock on PVA glue.
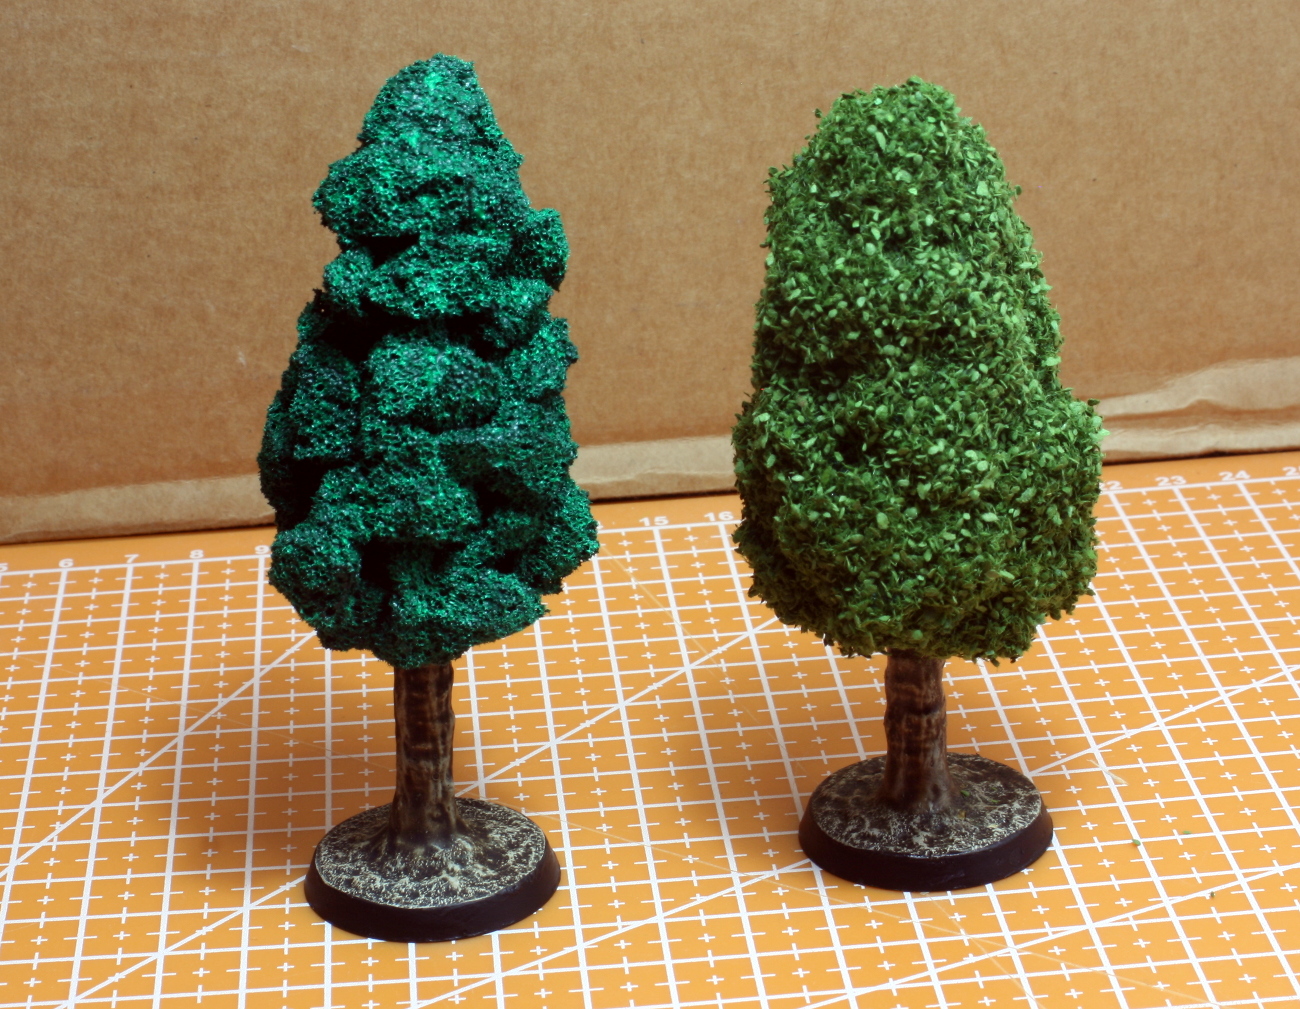 A second flocking after spraying the tree with hairspray.
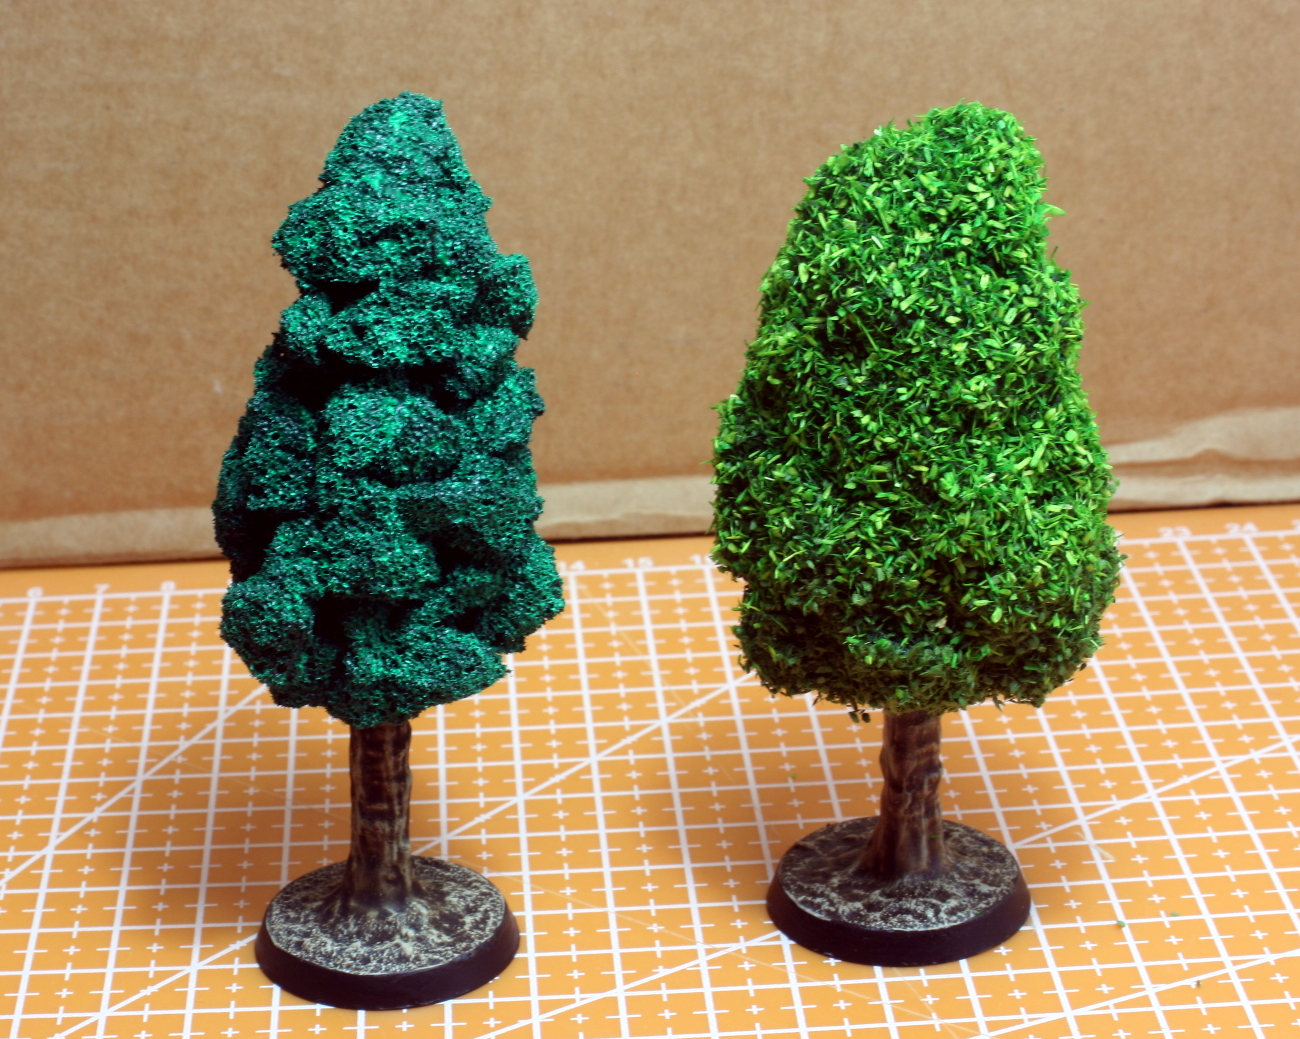 Finally a light flocking with a lighter green flock.
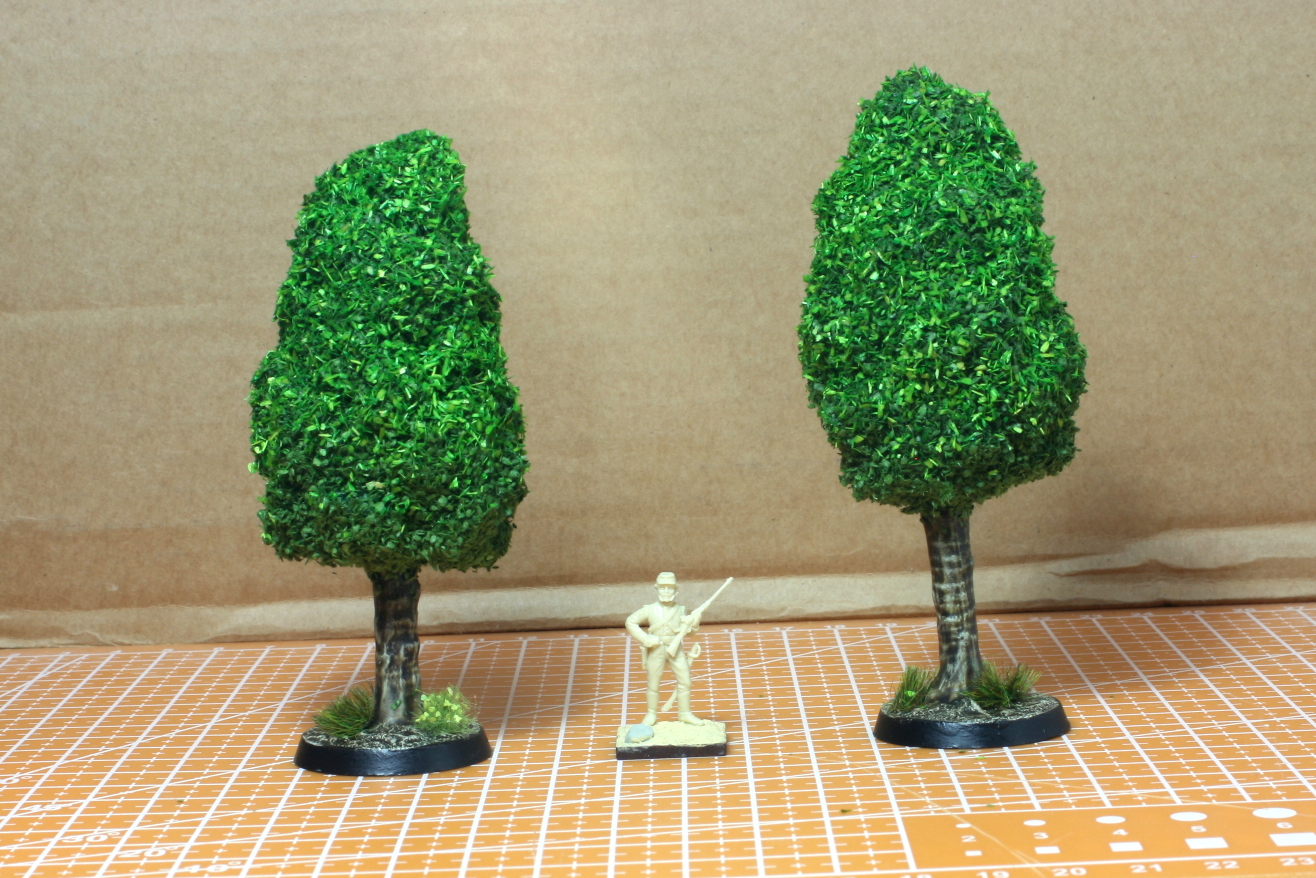 Two trees are ready - ten more to go!
Finishing Off the Fences and Trees.
Hi everyone,
A short post today. So I finished off all the fences and trees I started in the previous posts. I also worked on a new type of fence for animal pens and other livestock.
I won’t go into the techniques here as you can check out the other posts or leave a comment if you have any unanswered questions.
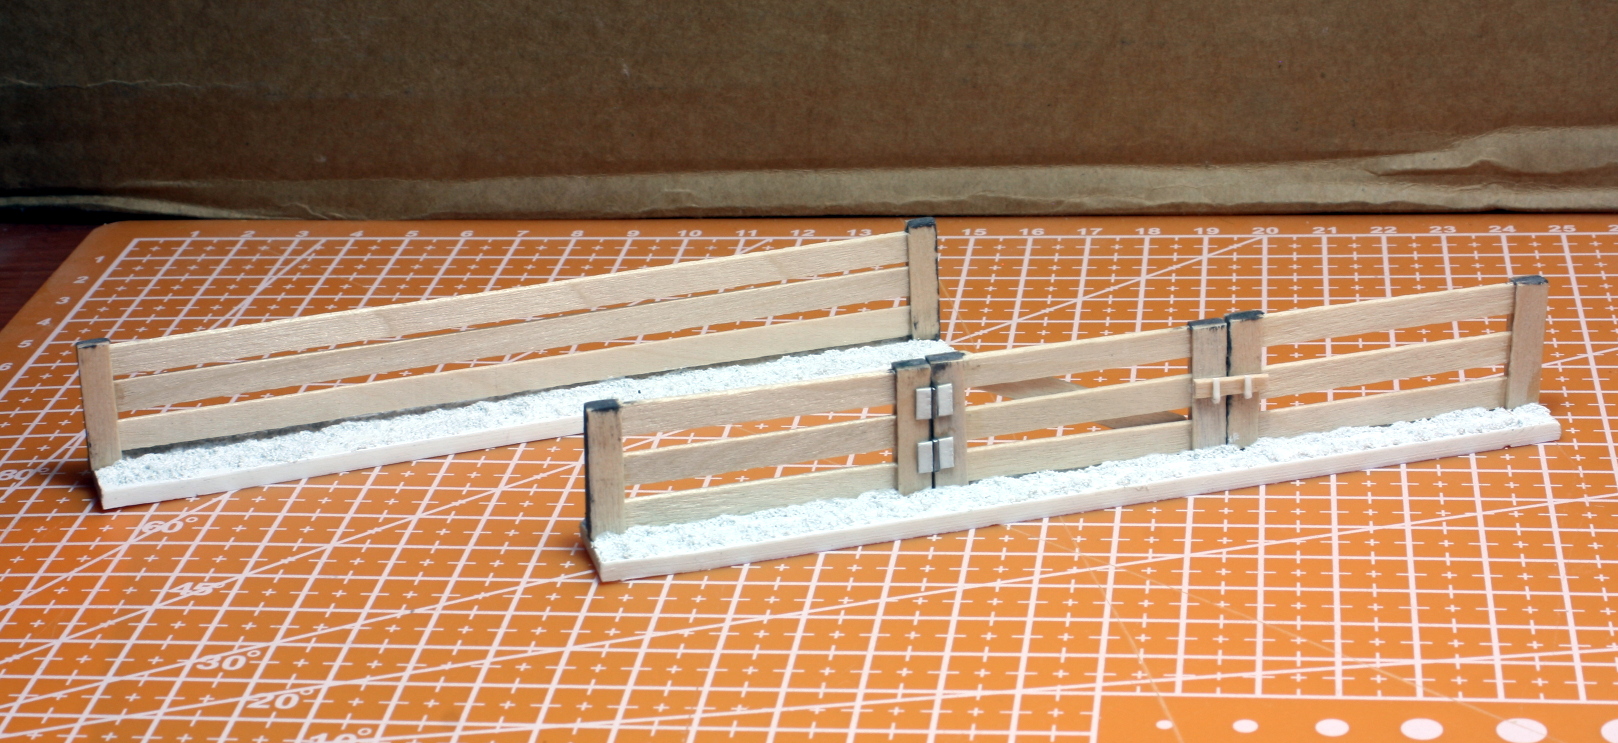 The second type of fence for animal pens.
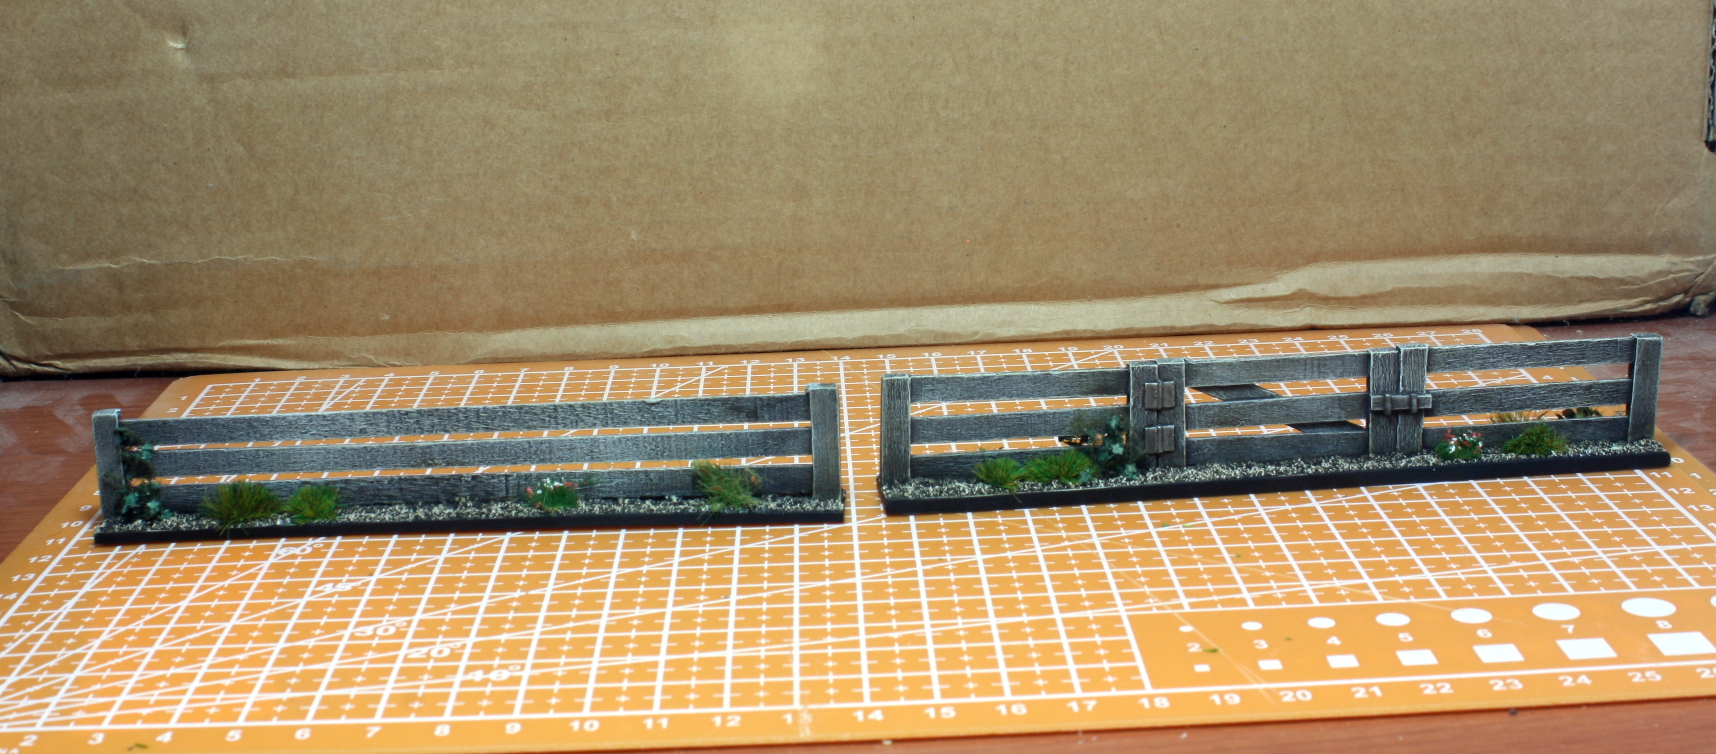 A standard section and one section with an entrance.
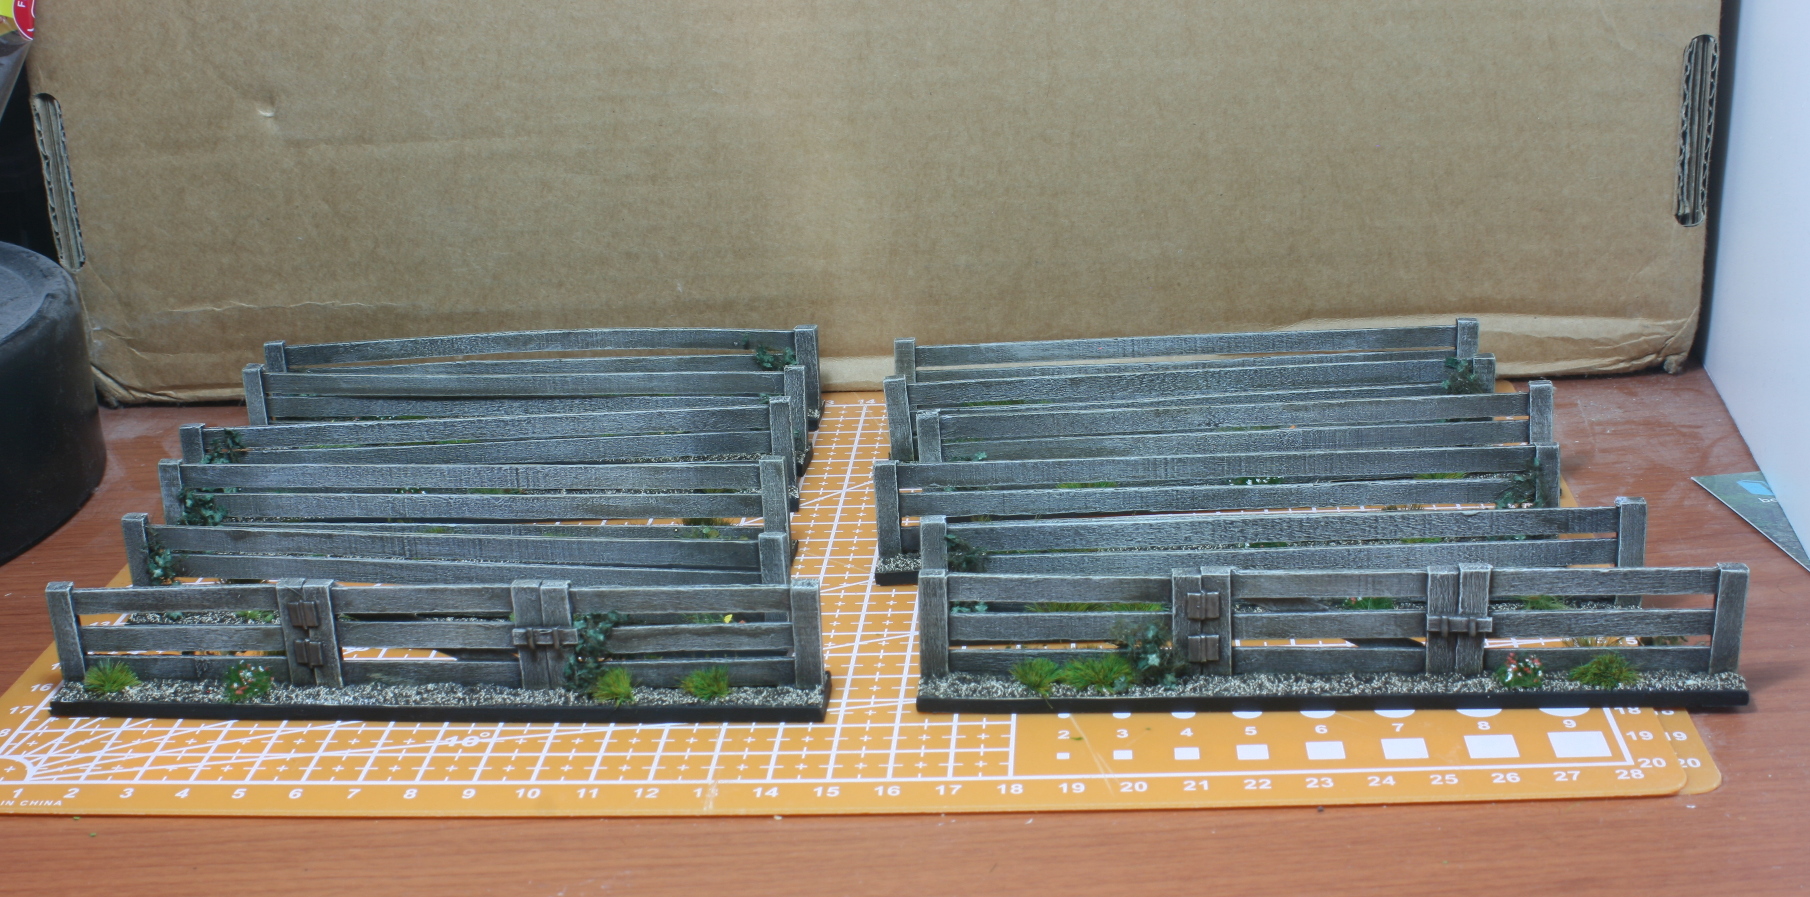 All 12 painted up.
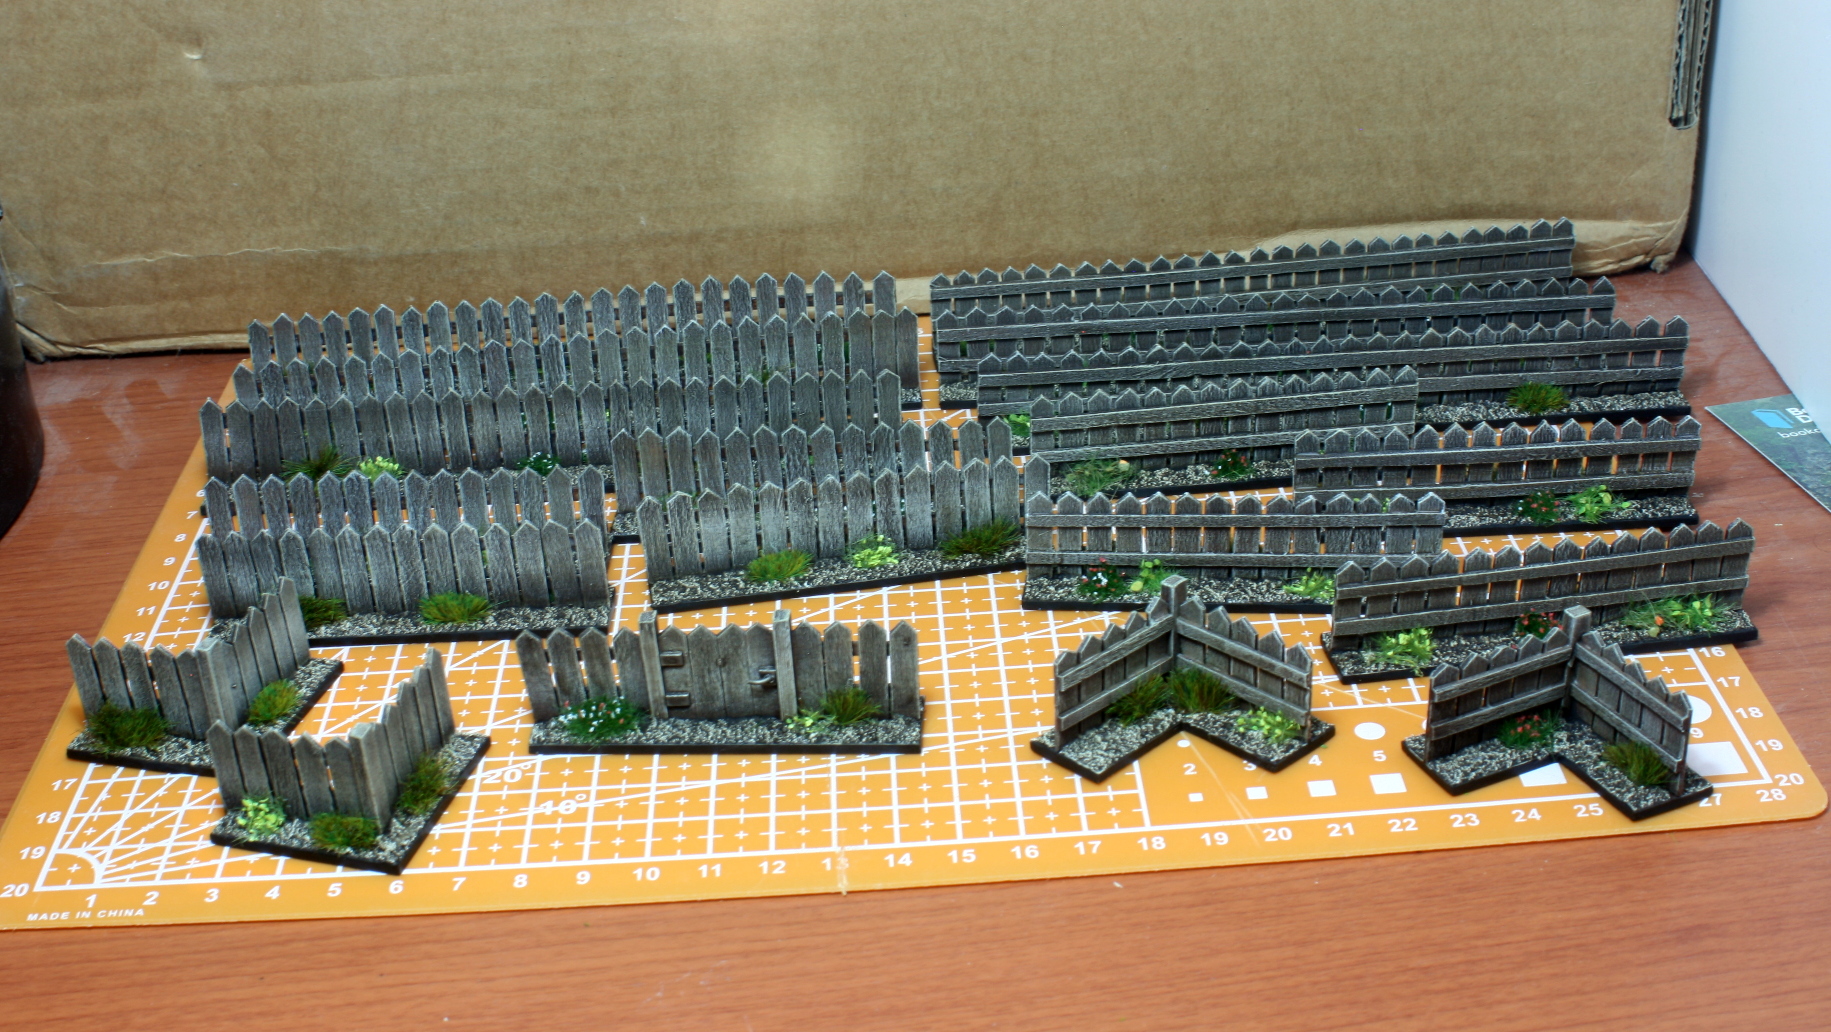 The first type of fence are noe all painted up.
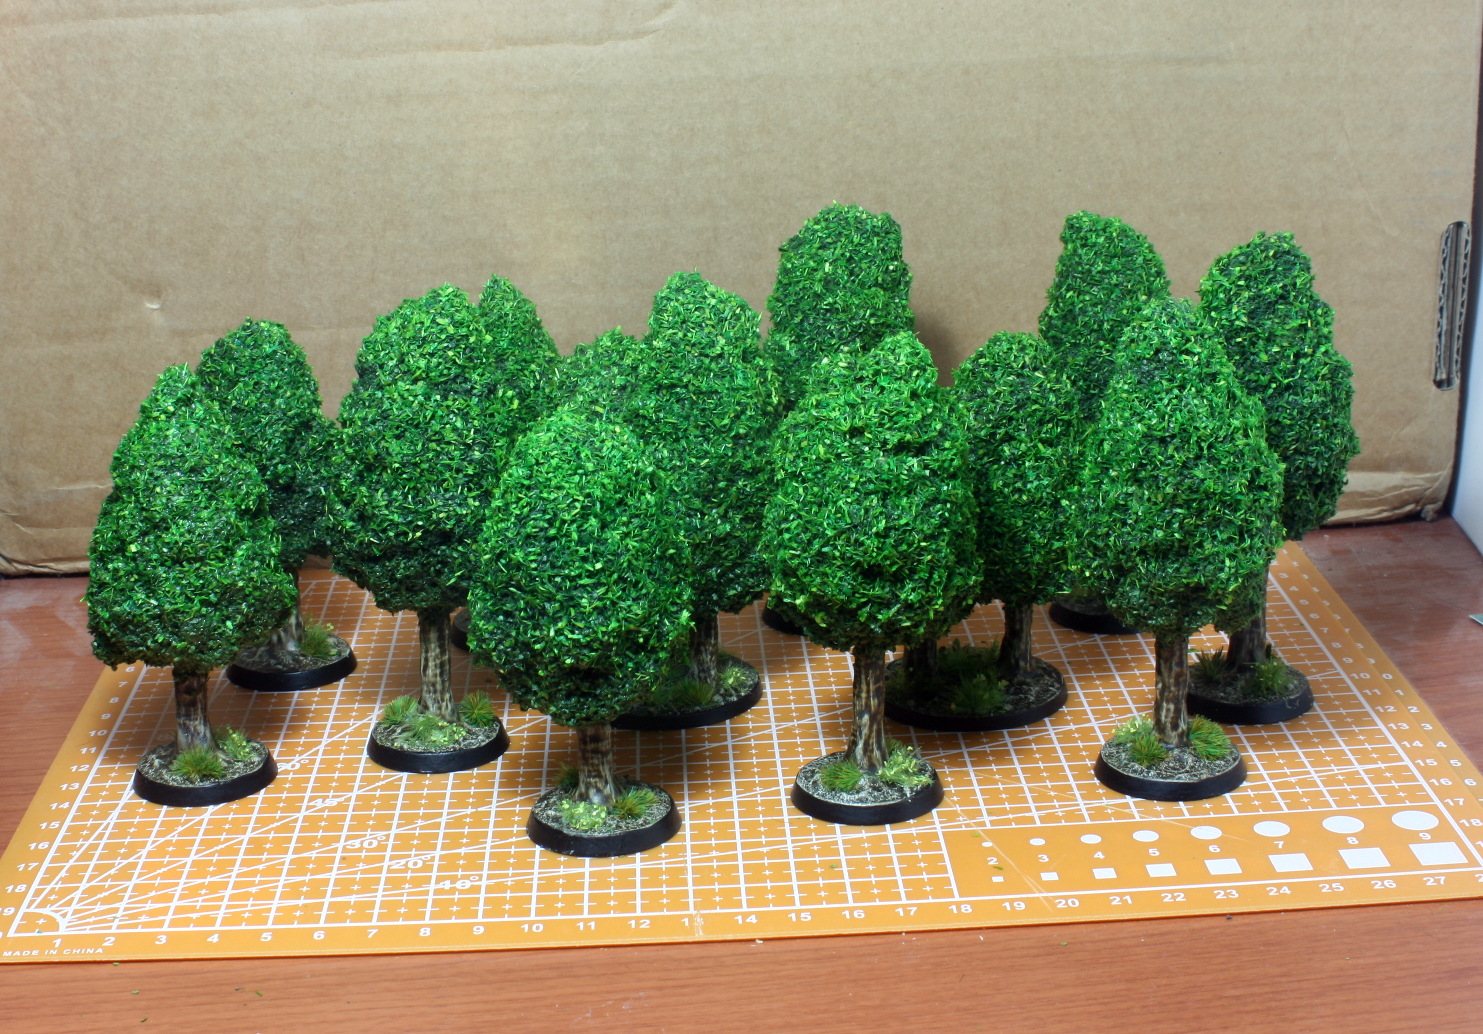 The 12 trees are now tough and durable - basically toddler proof.
Now I have to get back to the infantry, but as is tradition with me I will probably find some other terrain item to work on for this project.
Until next time, stay safe and have fun.
NR
Quick Hedges and Shrubs
Hi everyone,
As predicted, I found an excuse to not paint infantry – so I worked on some hedges and shrubs.
The hedges were very easy and quick to make and no paint was needed except for the base. I used Vallejo thick sand paste for this. The painting of the base is the same for the rest of the models in this project.
I then dabbed PVA glue all over the hedges and sprinkled flock on it.
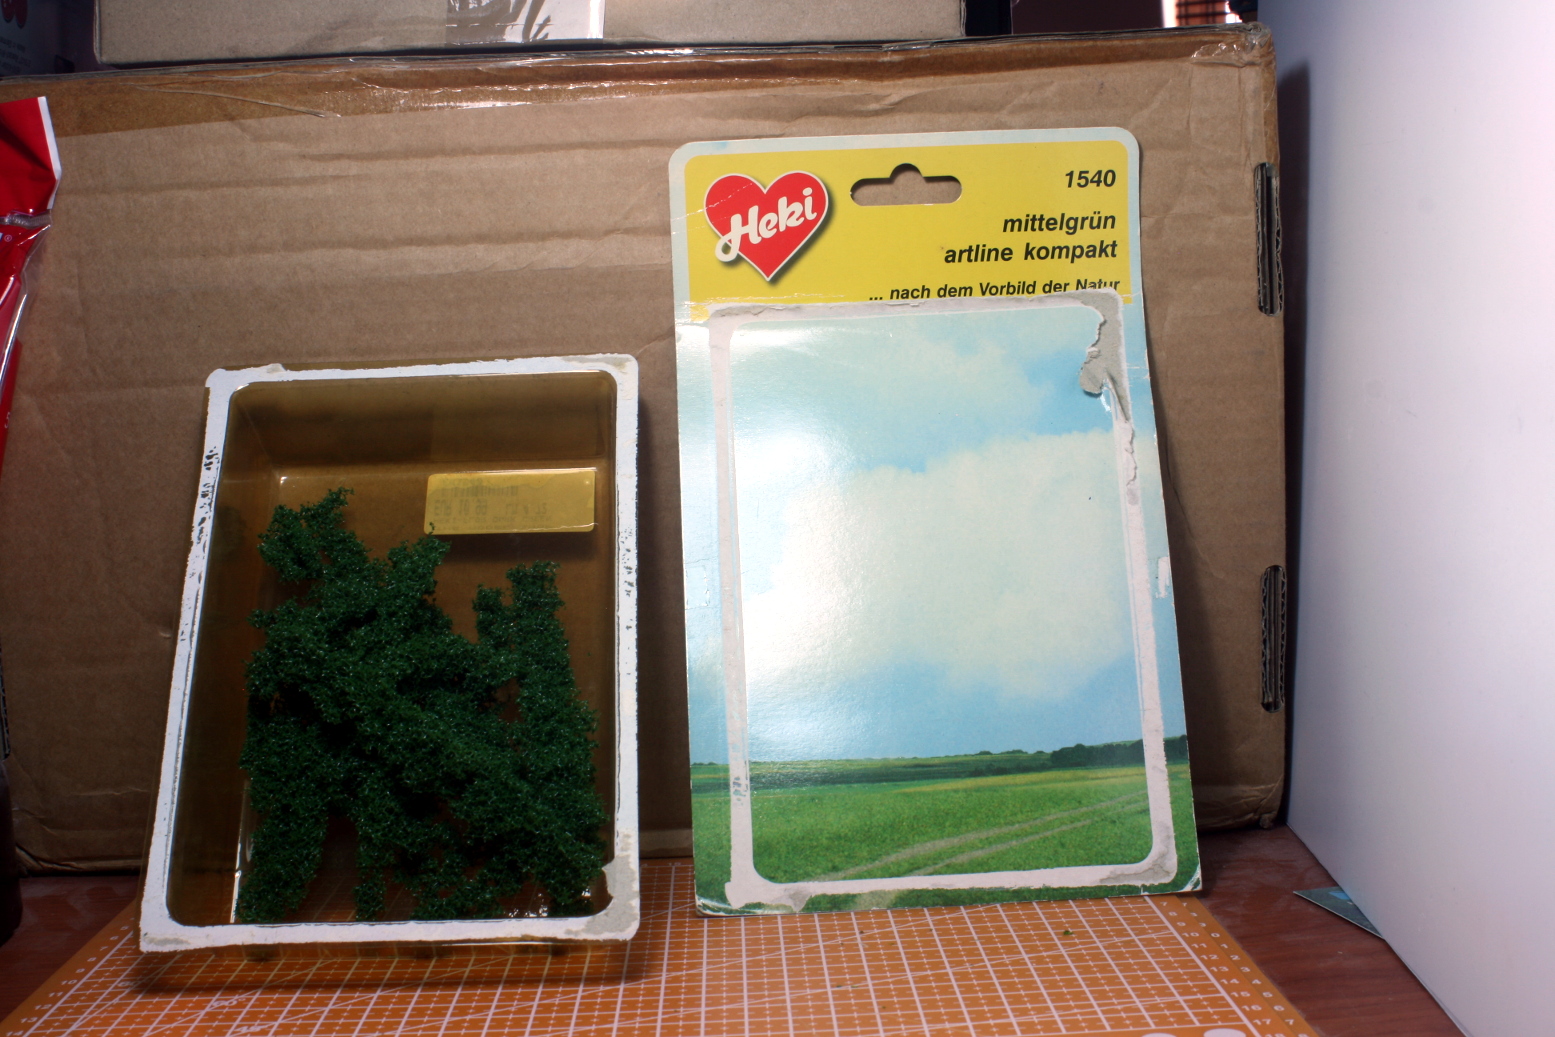 I bought this Heki product sometimebefore 2008. I am not sure what it is called.
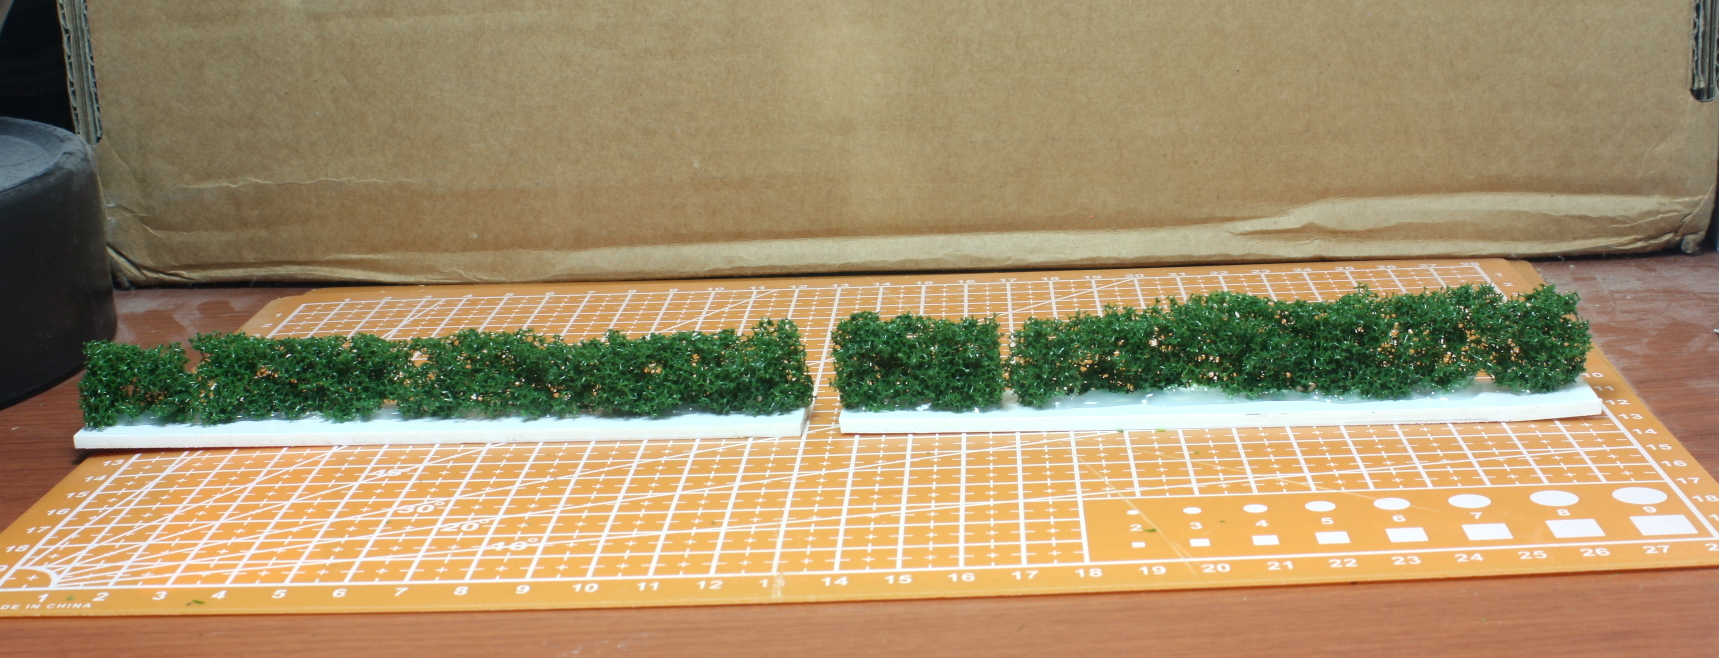 Strips of this Heki product was hot-glued to base strips.
 The base was painted up and flock added.
The shrubs were made in a similar way. The branches are real dried pieces, and the base was covered with real soil. Therefore no paint was used to make these. I cut up what was left of the Heki material and glued the pieces onto the dried braches. Then when dry and dabbed with PVA glue and flocked.
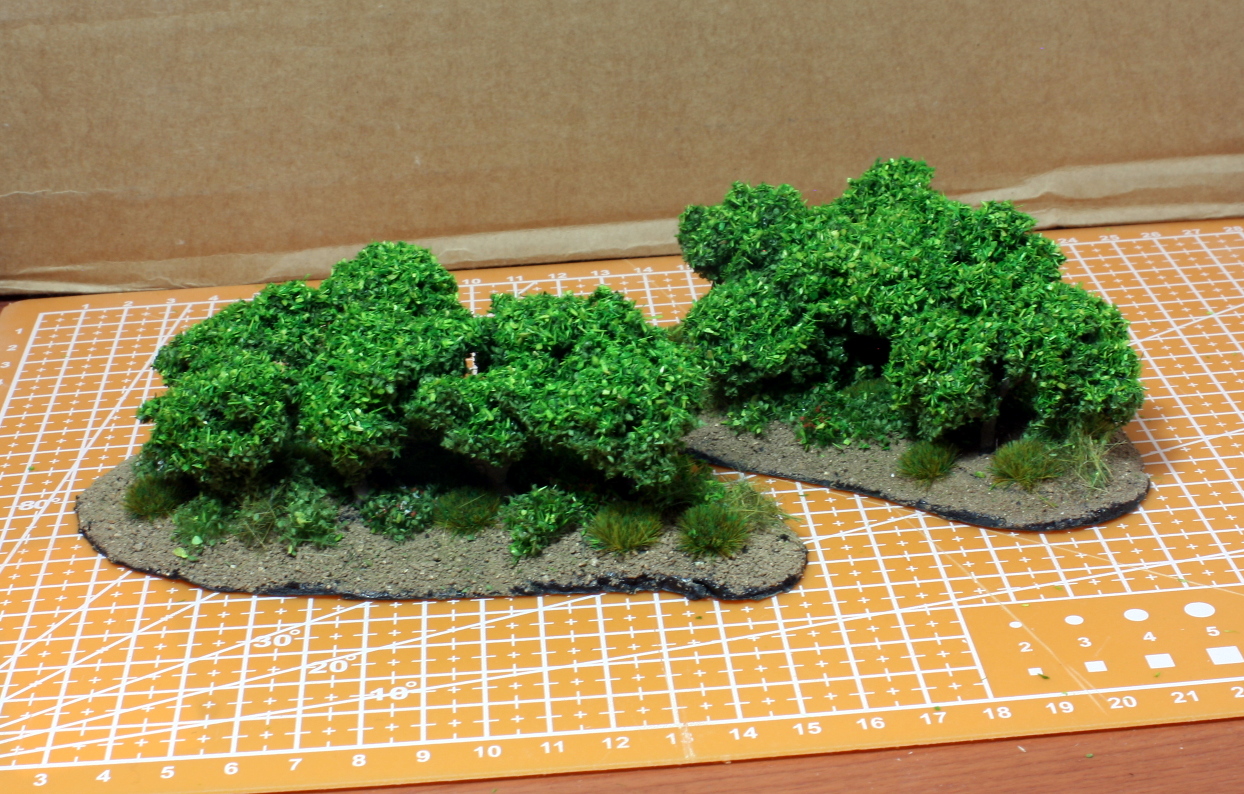 No paint was used to make these shrubs.
Last but not least I made some storage for the terrain I made. The philosophy behind this was the same for the project as a whole. Use materials I already have and do it as cheaply as possible.
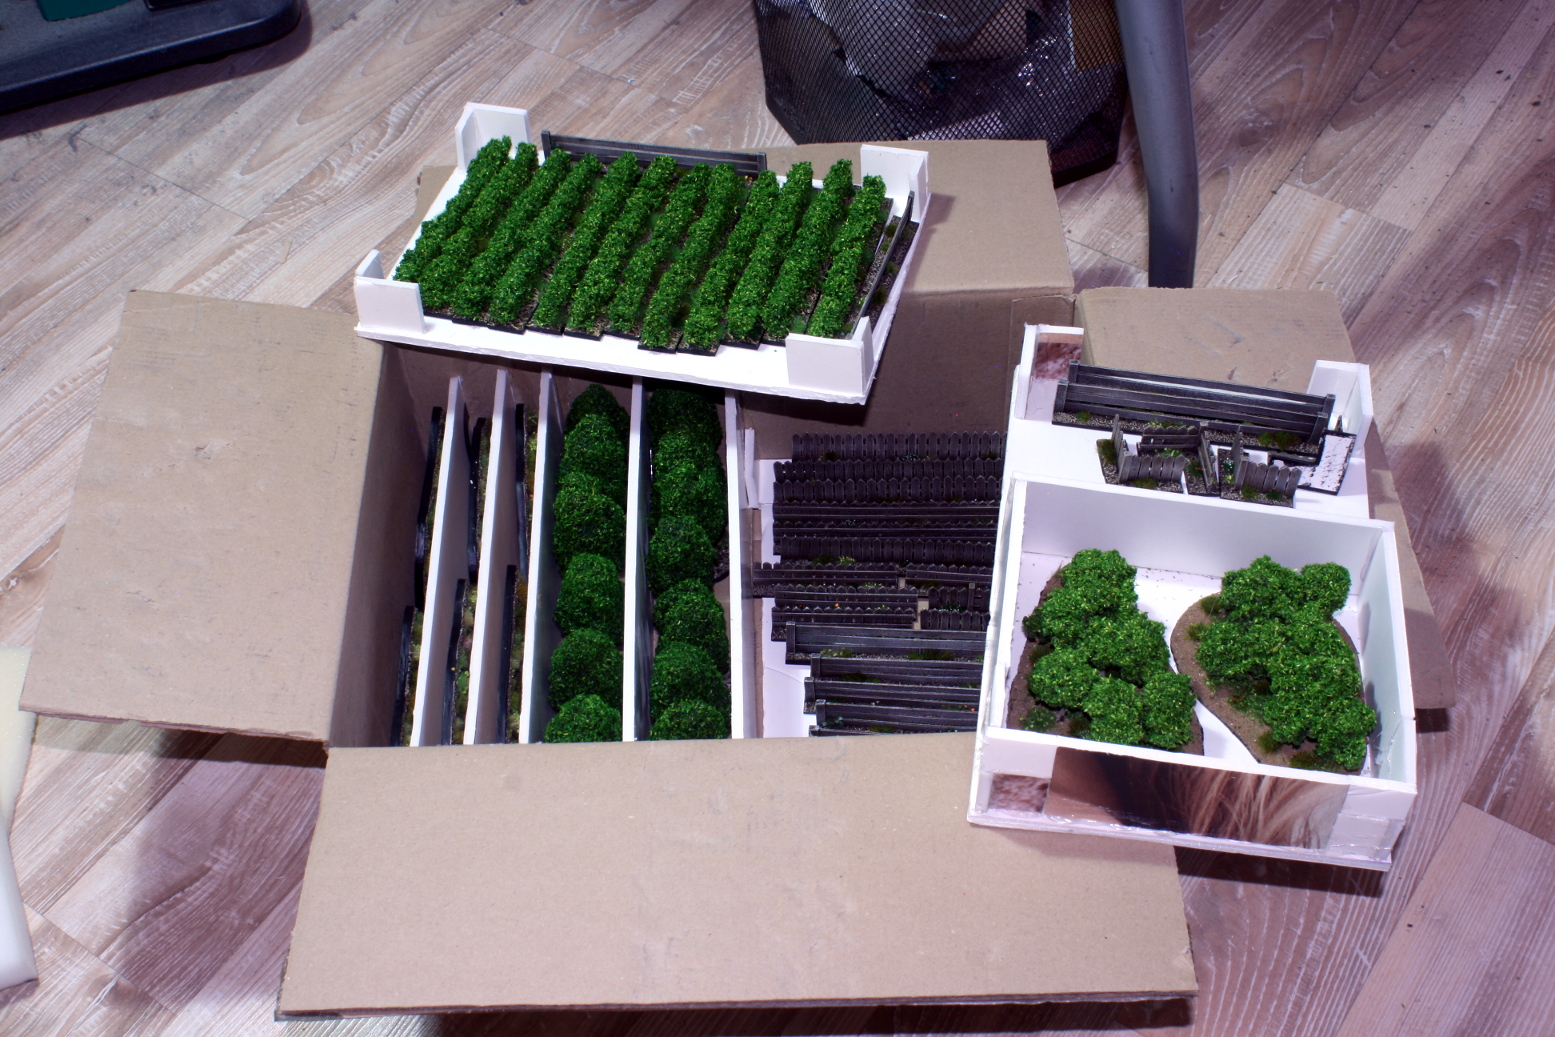 A multilayer storage made from a cardboard box and foam board off-cuts.
 Everything paked up neatly and securely.
That is all for now. Until next week stay safe and have fun.
NR


