


![NO Weekender Or Cult Of Games XLBS This Weekend [Updated]](https://images.beastsofwar.com/2026/03/No_Weekender_and_XLBS_this_Weekend-225-127.jpg)


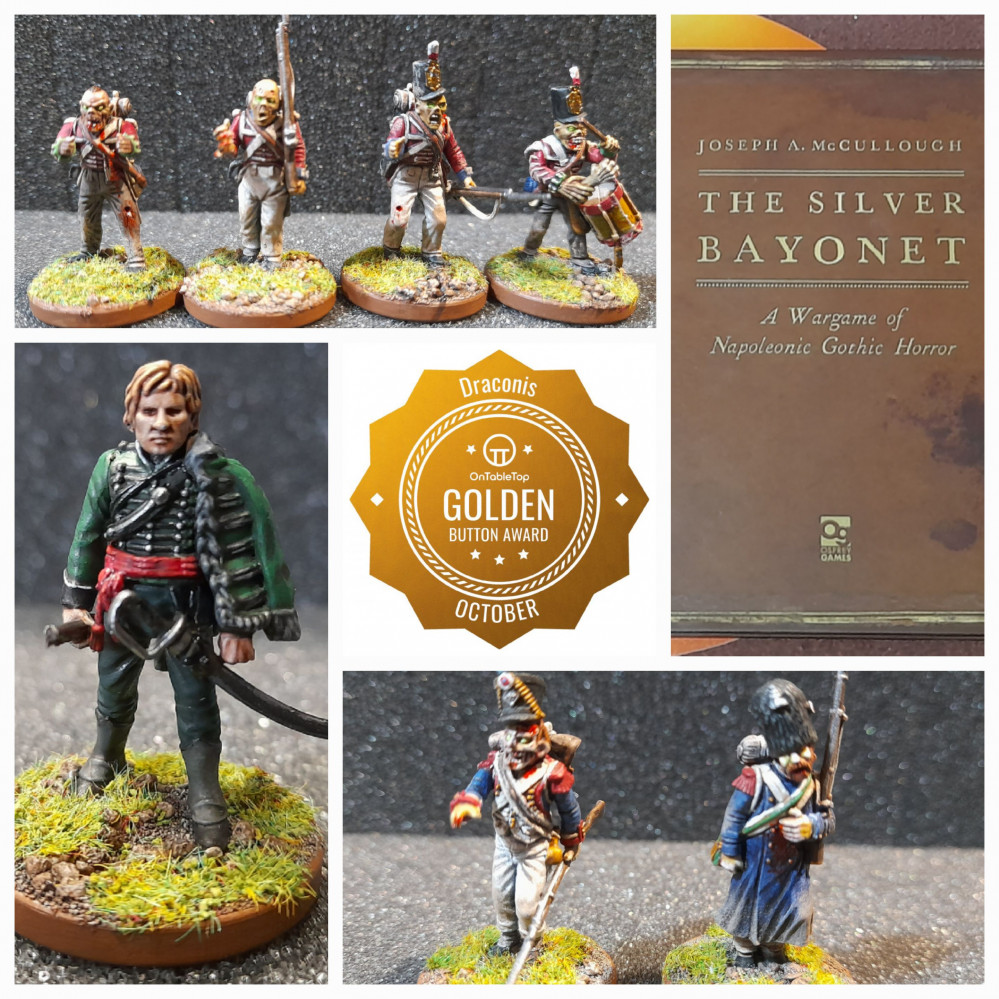
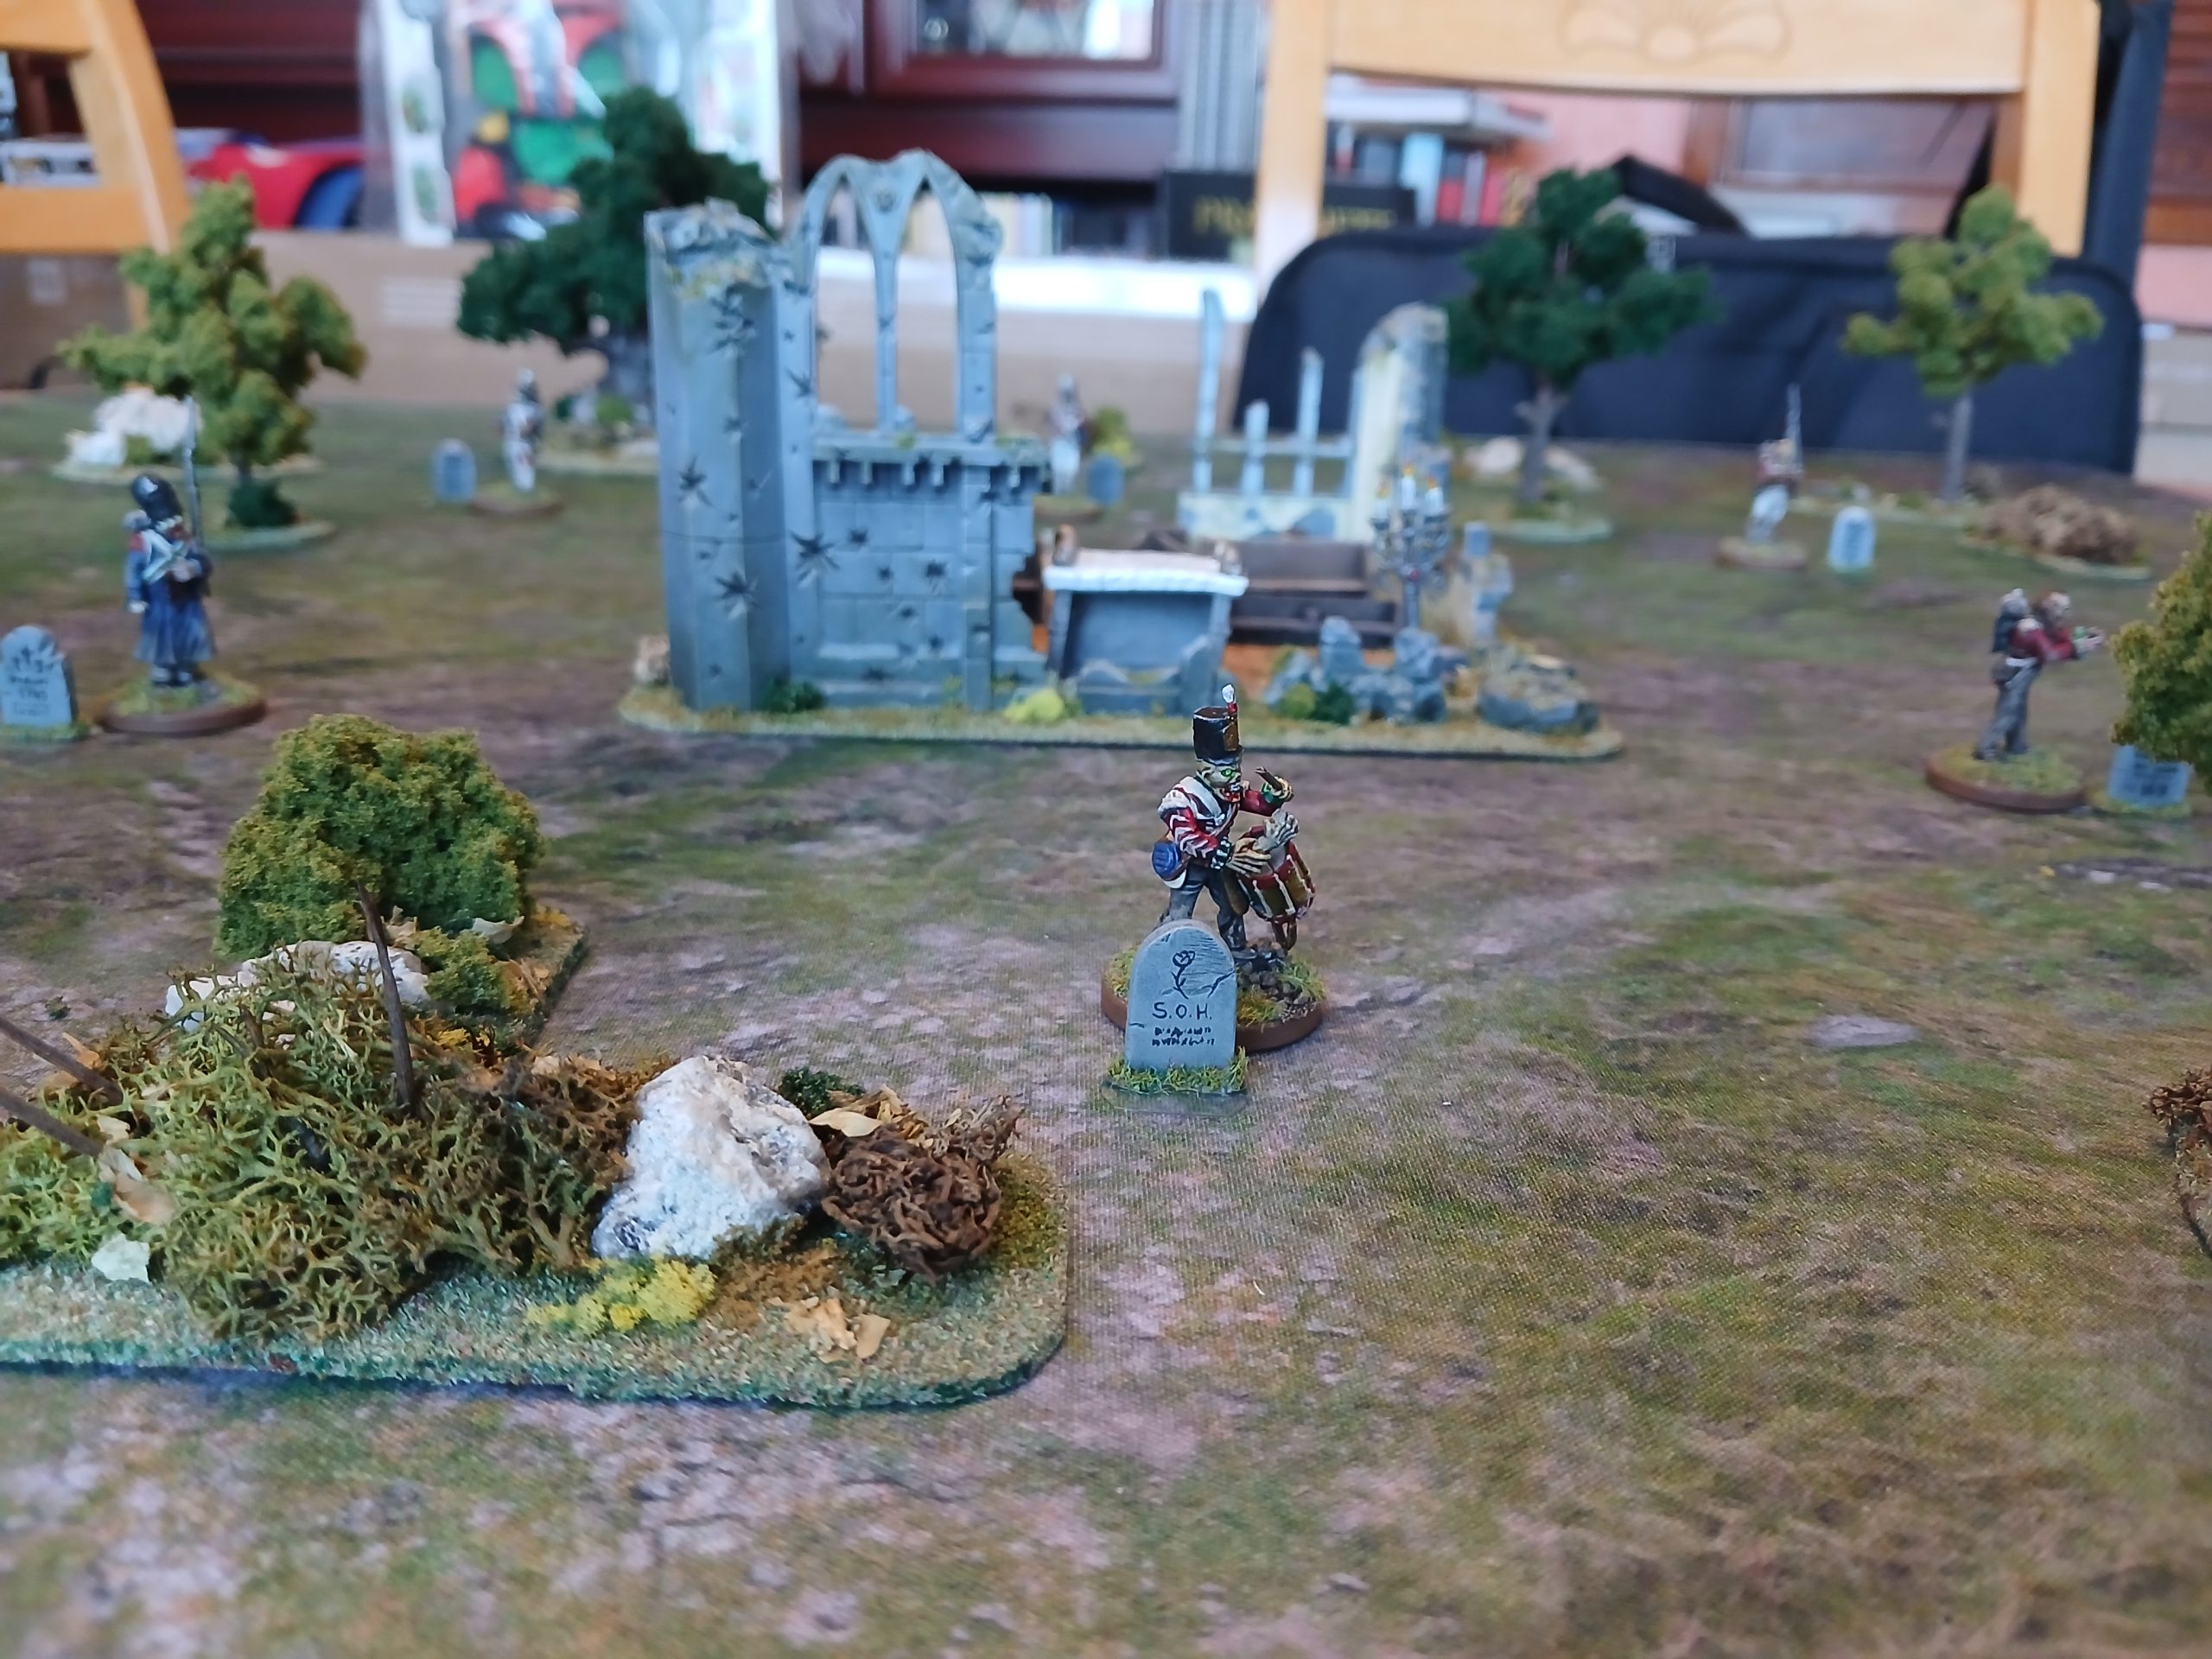
Draconis does….. The Silver Bayonet


Recommendations: 1195
About the Project
Ever the hobby butterfly..... Putting together some British Napoleonic Riflemen for my wife lead me down this road 😀 Like many gamers I own a number of rulebooks for systems that I don’t yet play. The Silver Bayonet is one of them. So this project will be me starting out on the journey into ‘A Wargame of Napoleonic Gothic Horror’.
Related Game: The Silver Bayonet
Related Genre: Horror
This Project is On Hold
Next steps
22nd March 2026
With the core scenarios completed I will take a pause for a while.
I have more scenery to work on for later scenarios, and more enemies to paint up.
I am also hoping my friend can get his force painted so we can play cooperatively.
The Loup Garou and Doctor have been very good, as has my mounted leader, Richmond S Harpe. Hopefully they can keep that up into Carpathia and beyond…
For now I will look to work on this year’s Spring Clean Challenge, as I haven’t painted in a while.
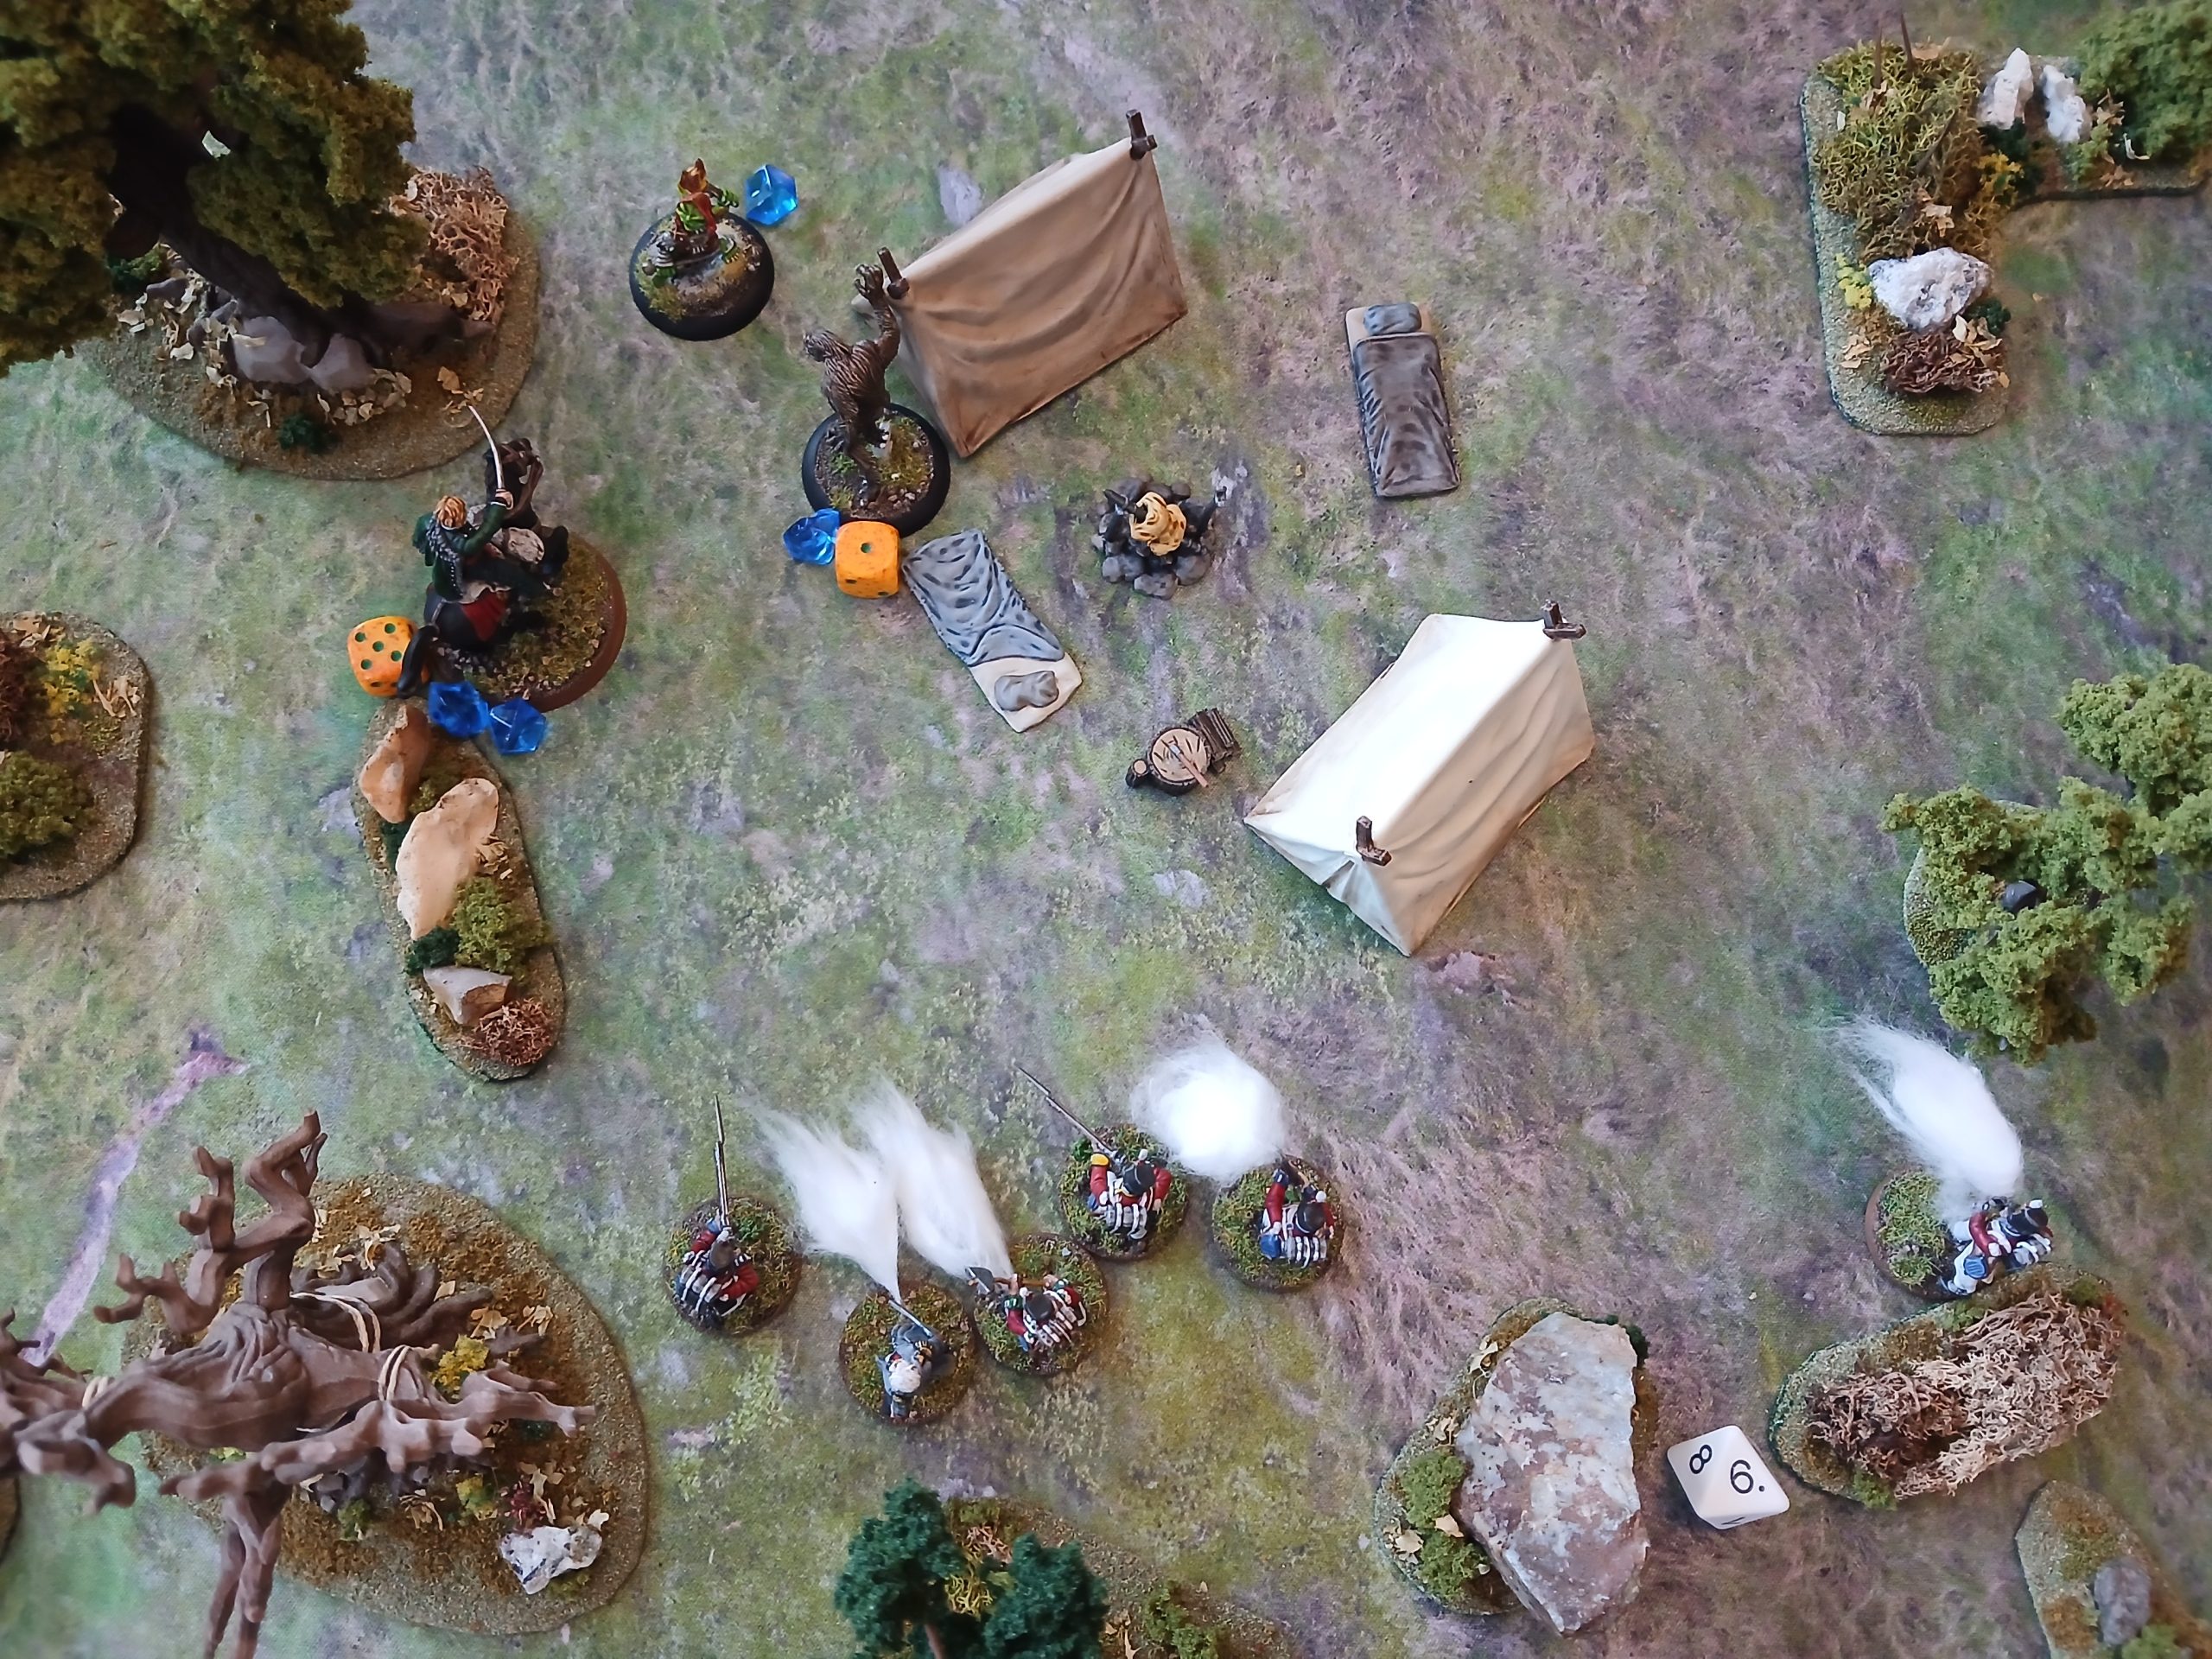
Bat Rep – Scenario 4, The Last Mile Part 2
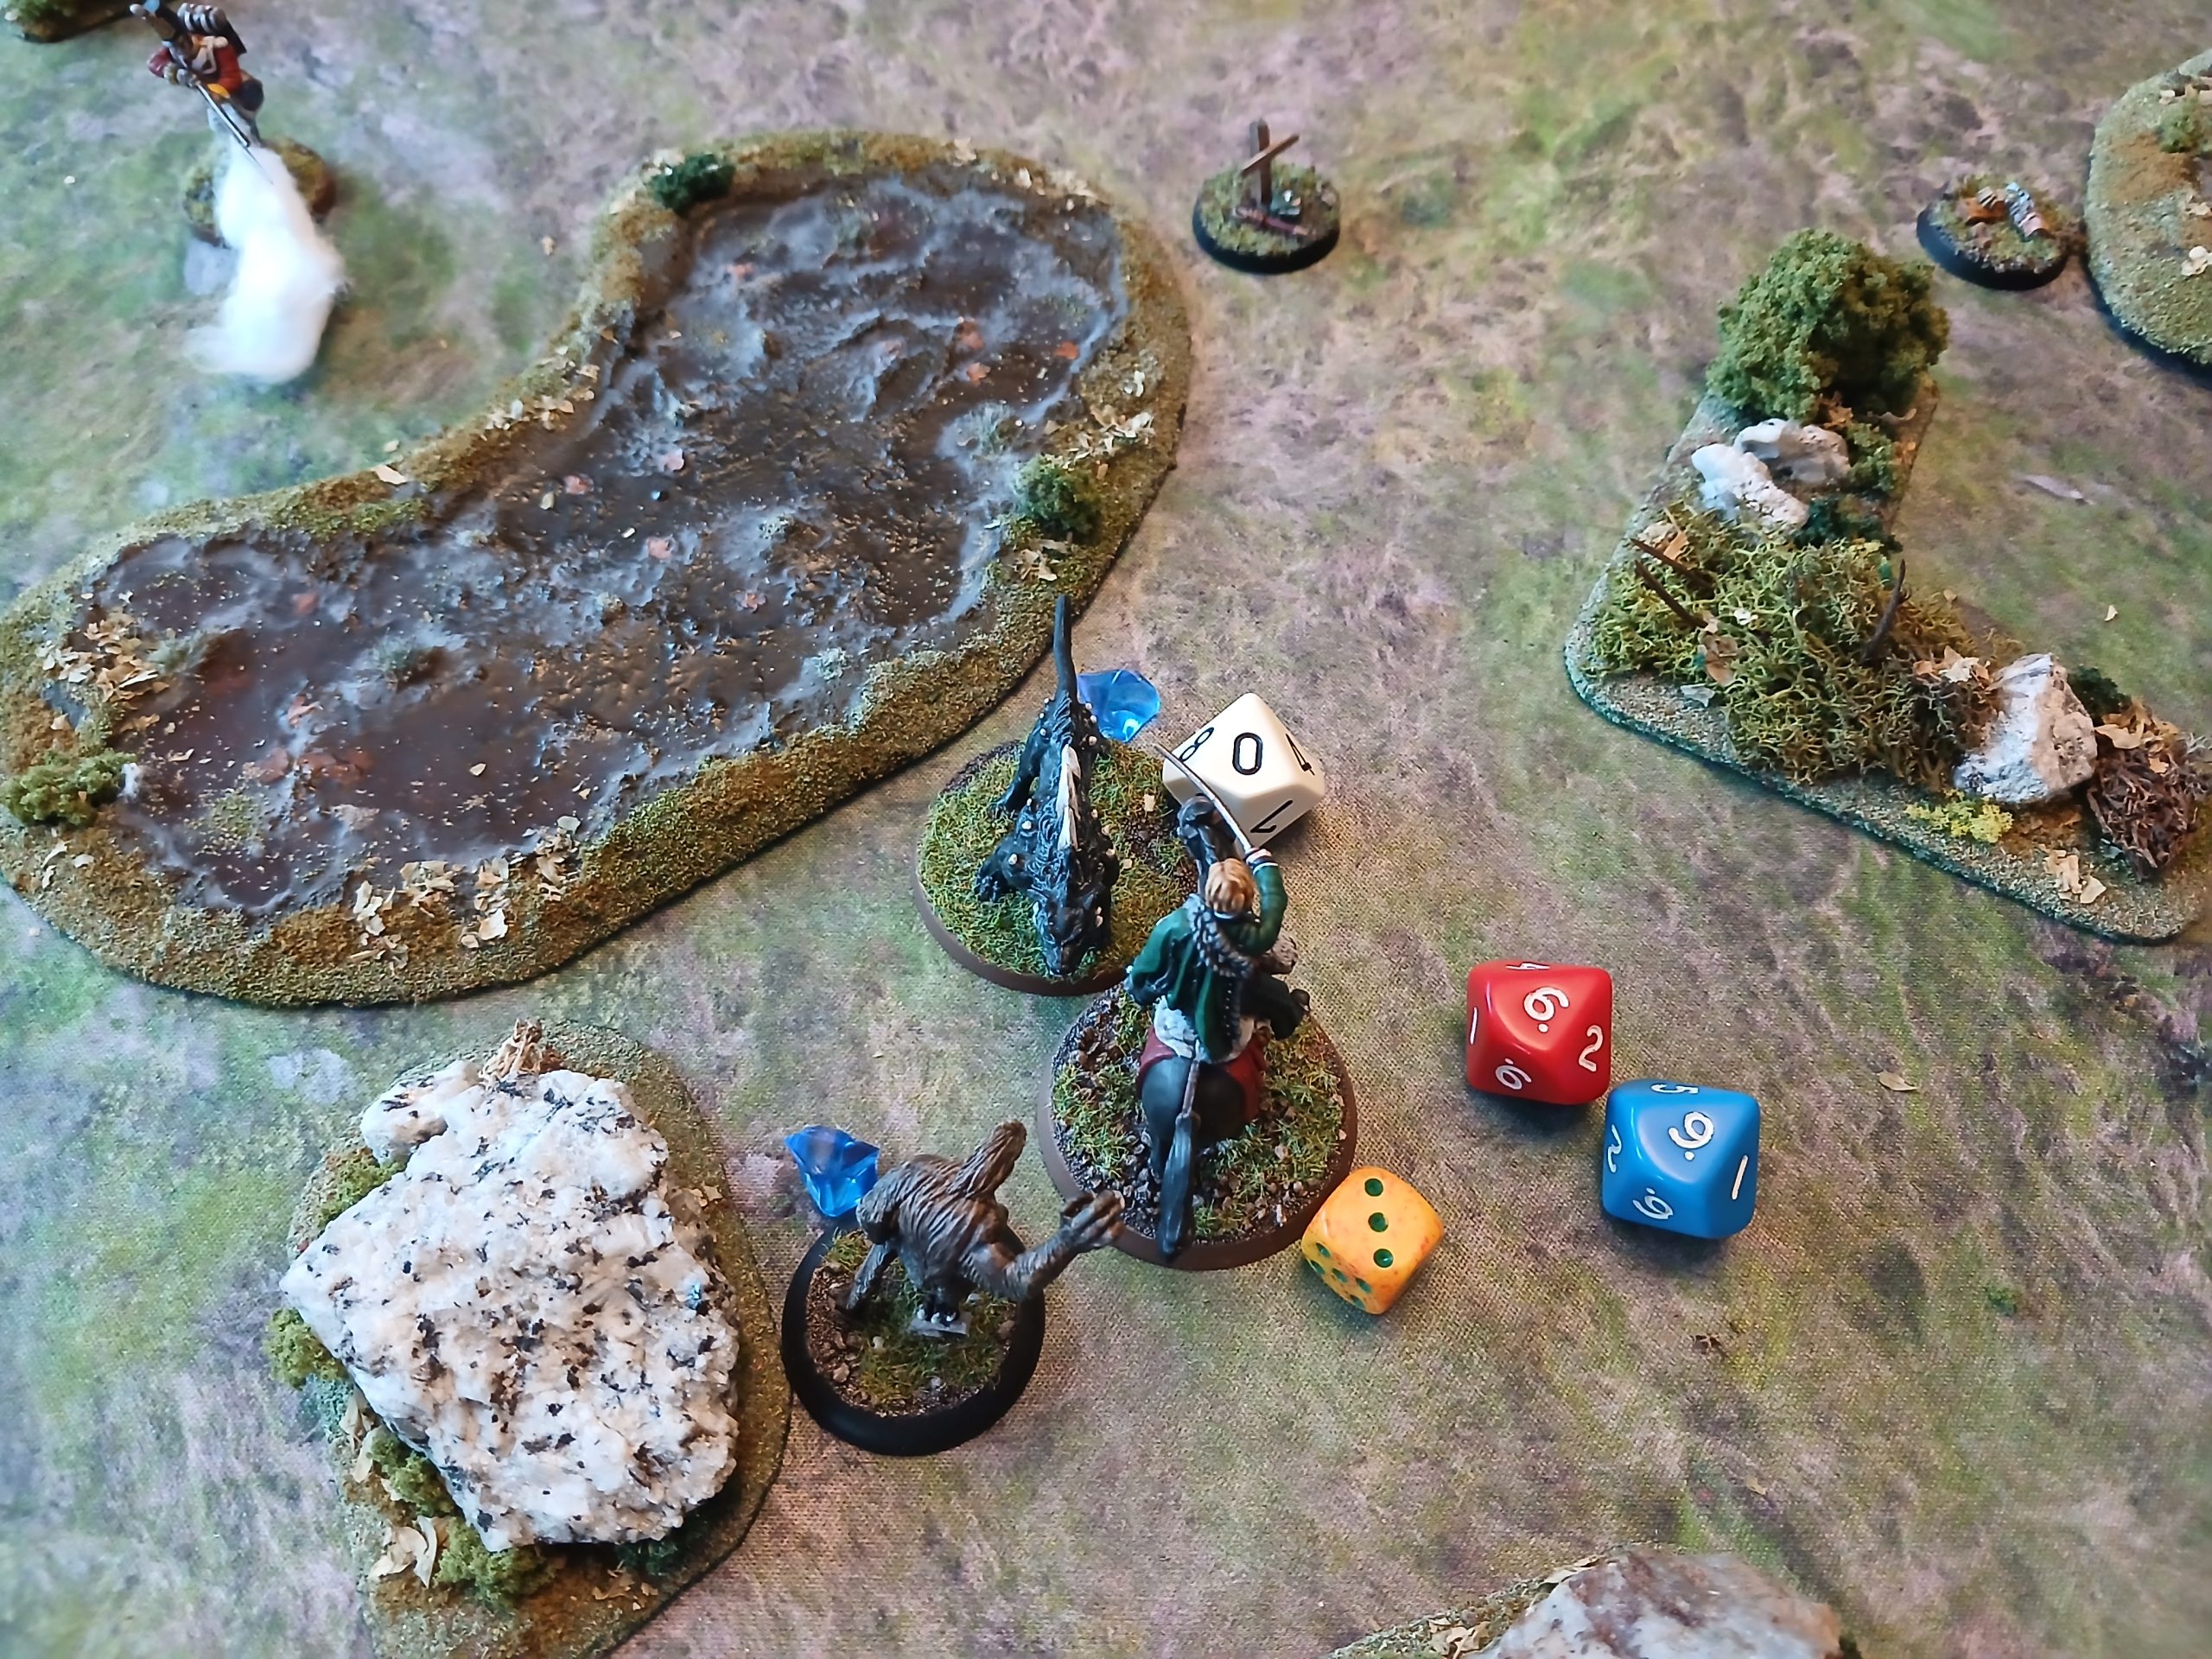
Turn 5:
Jones, now blessed, takes aim at the Black Dog, but a twitch of his arm sends the shot wide. He reloads to try again next turn.
Doc G heals Harpe for 2 health. Angua charges the Black Dog, hitting but doing no damage – just getting a fatigue onto it. Black Dog again misses in return. Getting lucky here, although she does have DR5 and healing.
Harpe charges back in on the fatigued Black Dog, hitting for 9+6, killing it. Again Harpe leads his men from the front (and can overcome the immunity 😊 ).
Wilson reloads and moves. Yet again no new bandit – beginning to feel sorry for them, just a little bit though.
 Harpe puts down the Black Dog
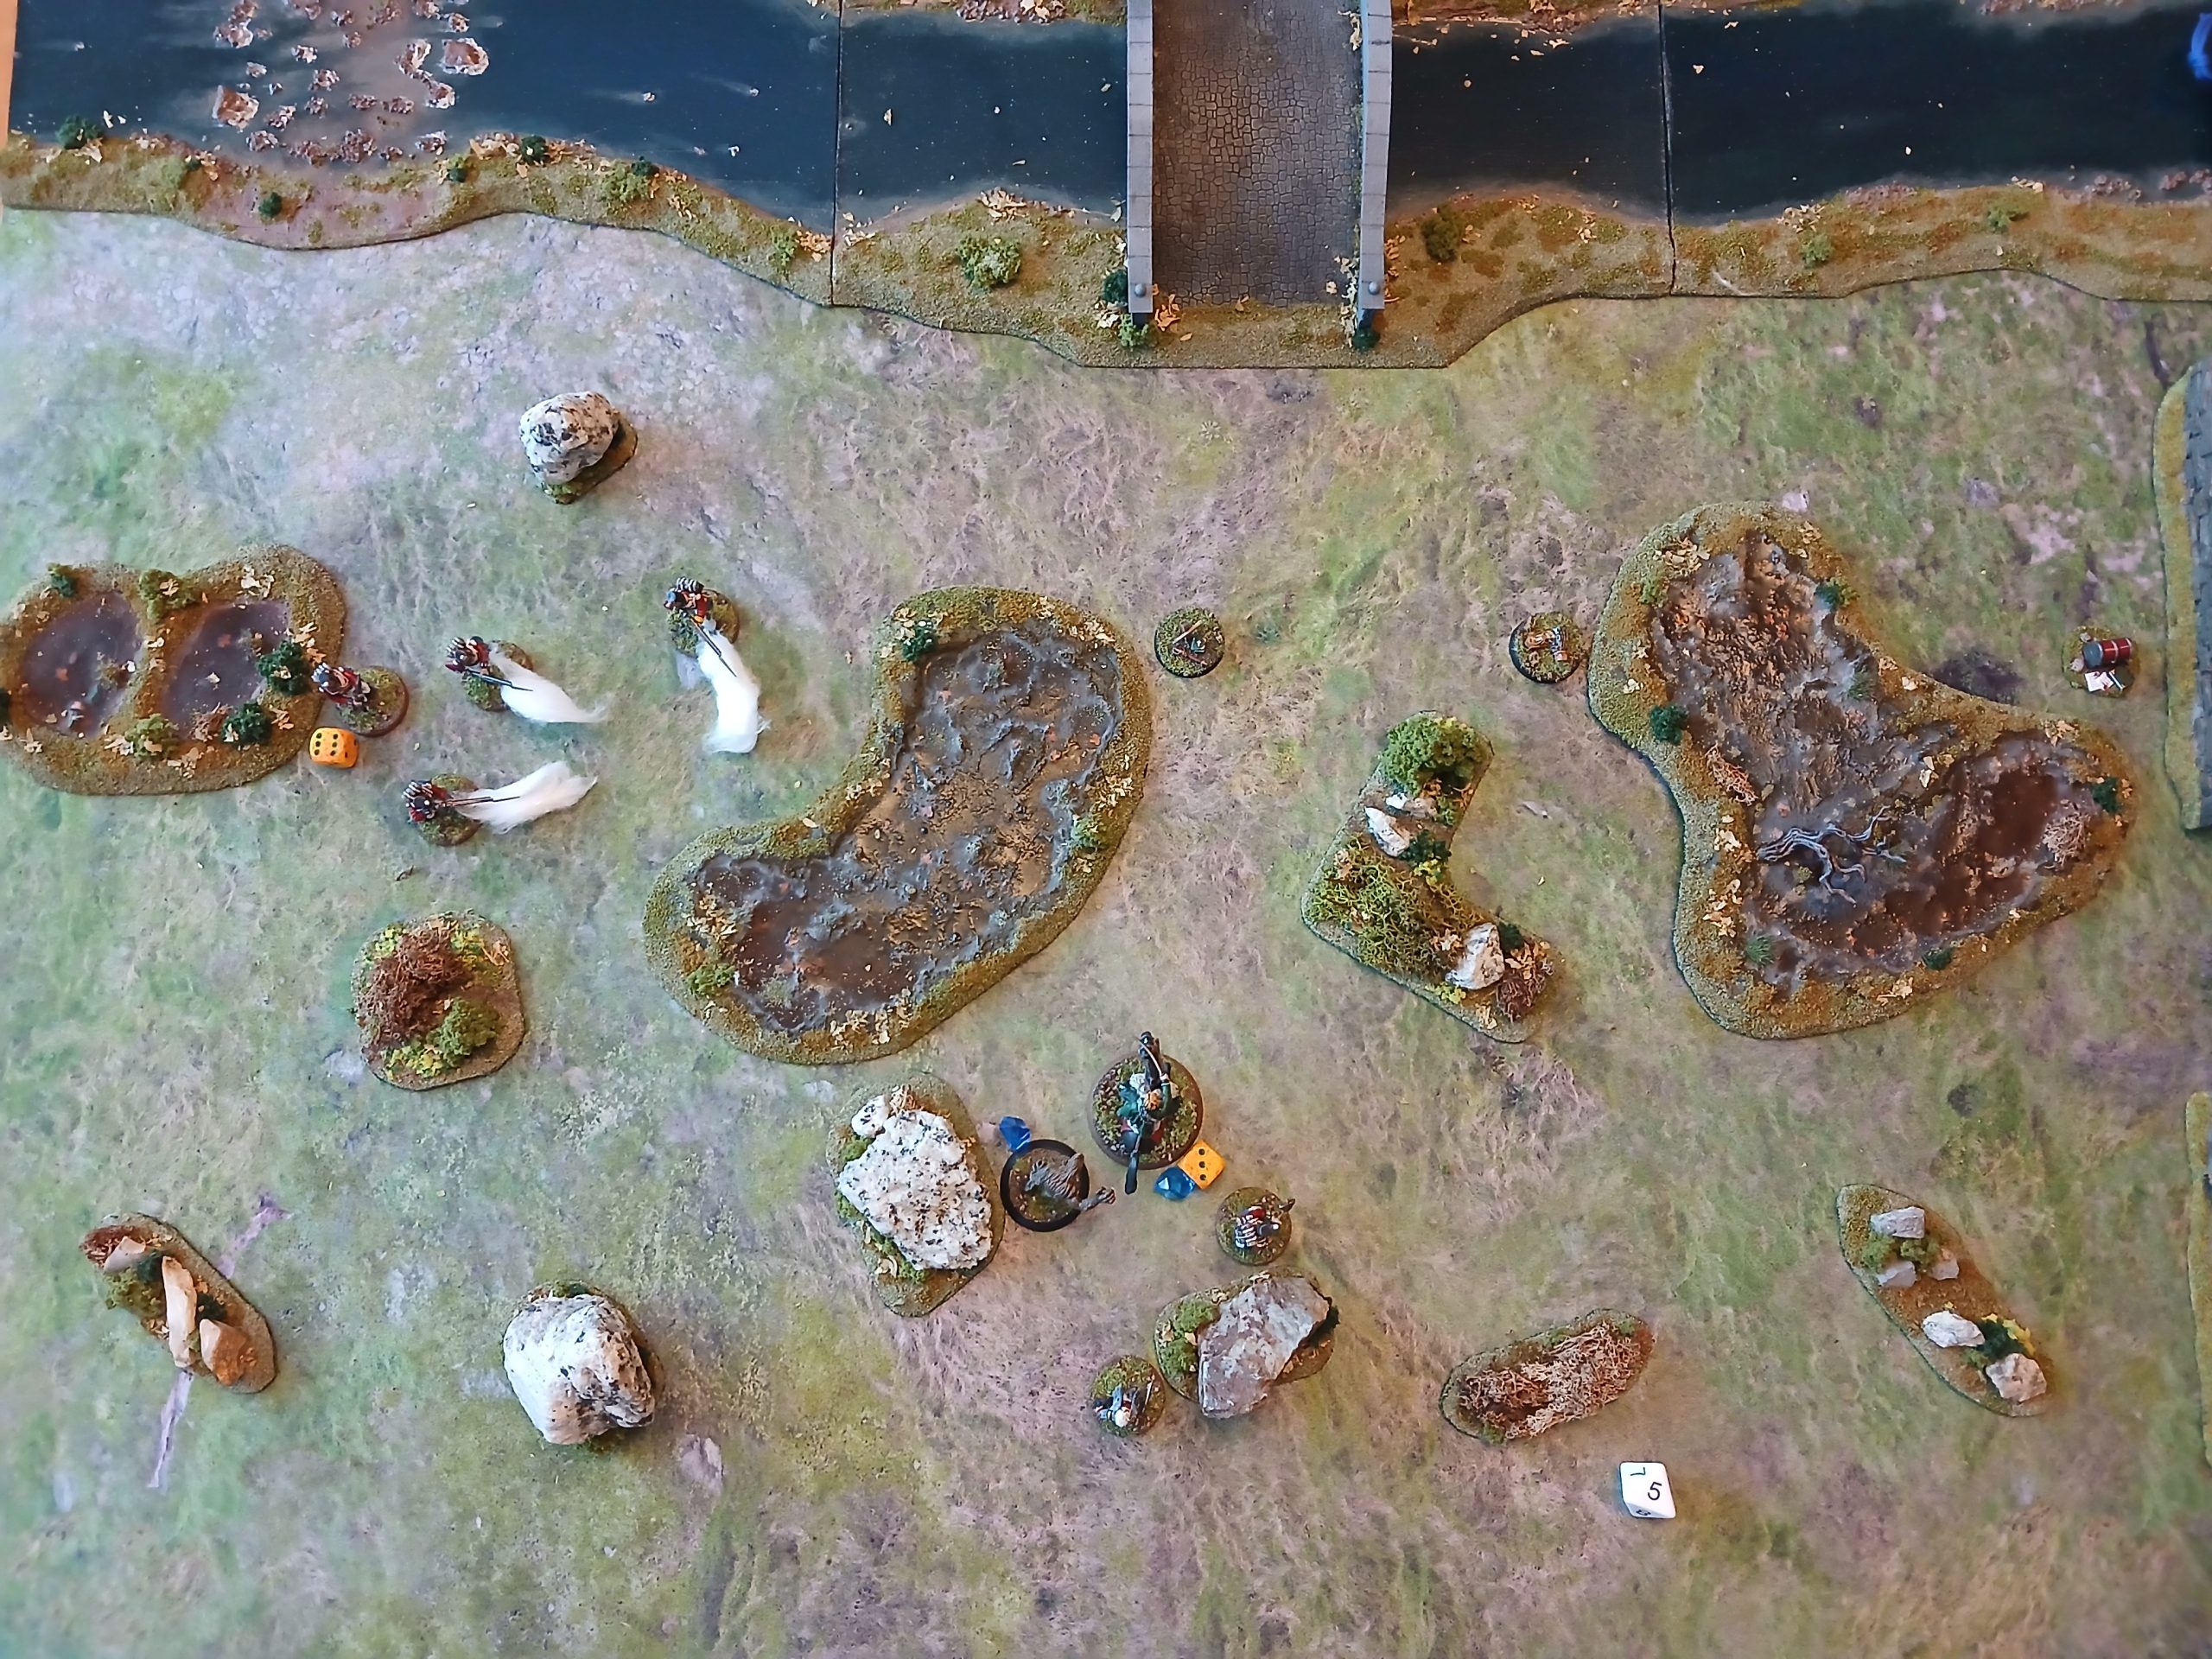 End of turn 5
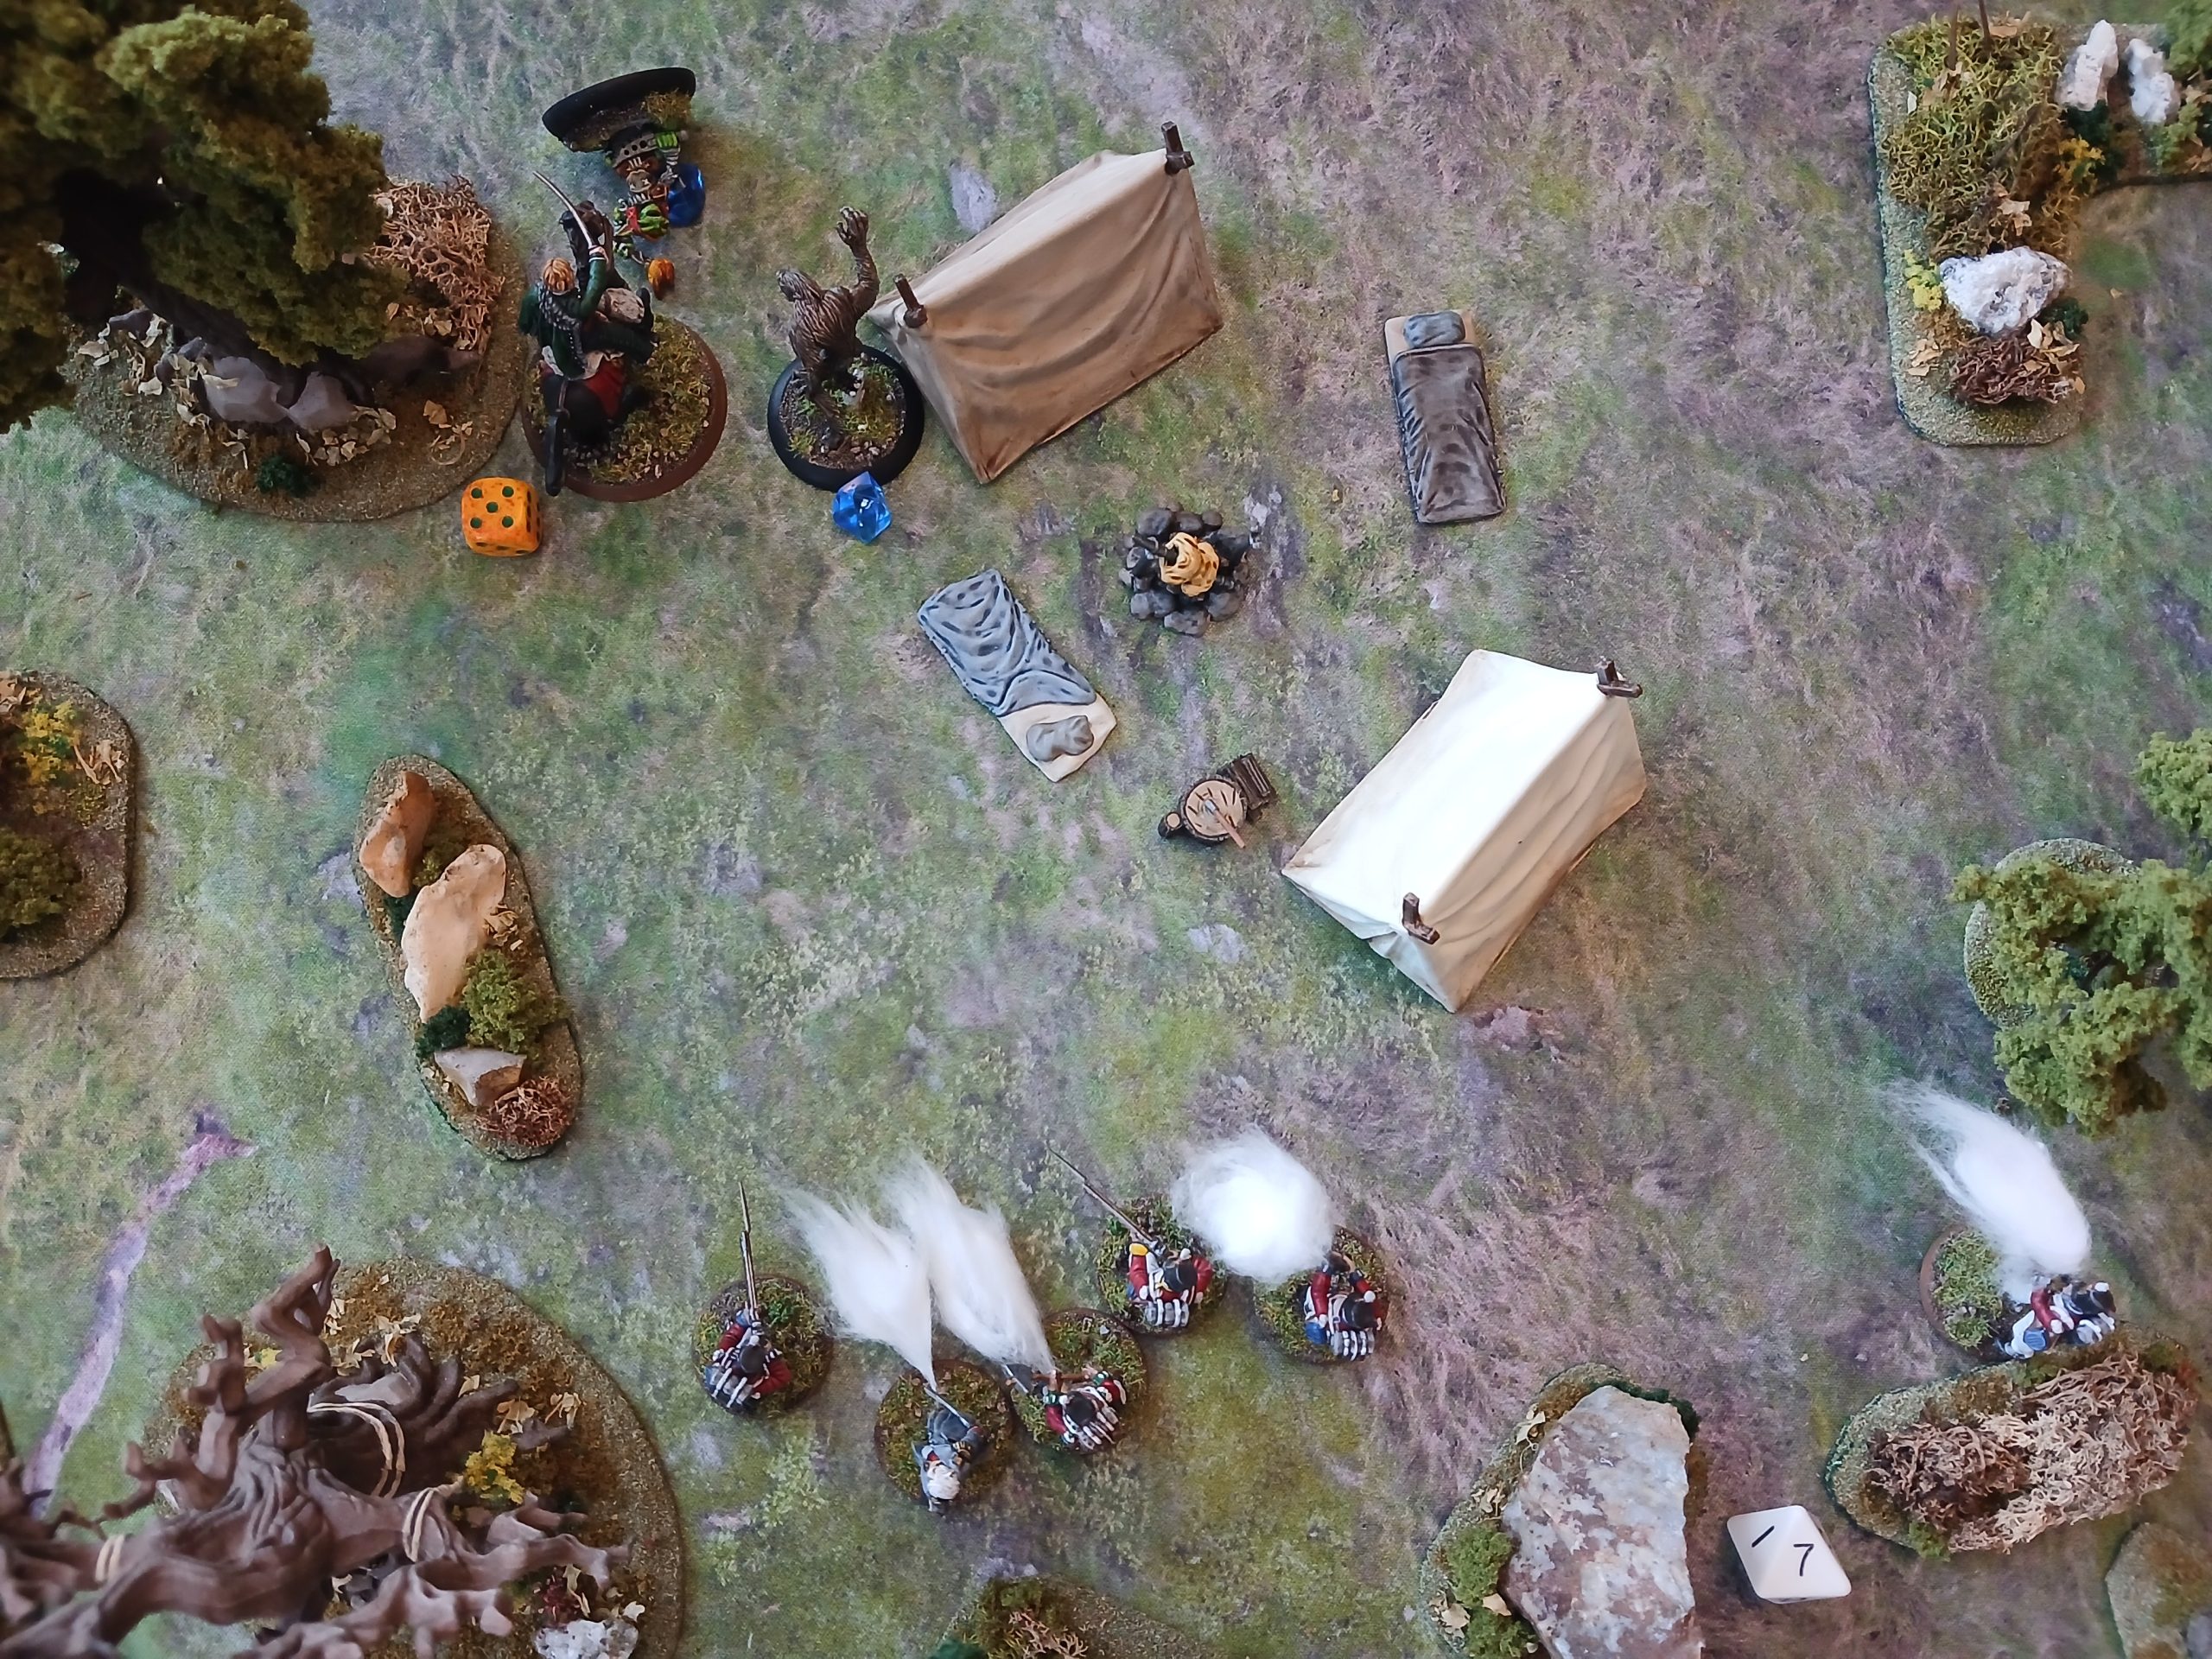
Turn 6:
The unit still needs to investigate one more clue to get the bonus xp
I move Walker up and he investigates, finding an old military medal (+1 fate die). Frasier and Pike both reload and move towards the bridge. Jones and Godfrey sprint towards the bridge. Harpe moves up to cover Doc Godfrey. Angua and Wilson sprint up from further south.
This time a new bandit does arrive, from the north east.
 End of turn 6
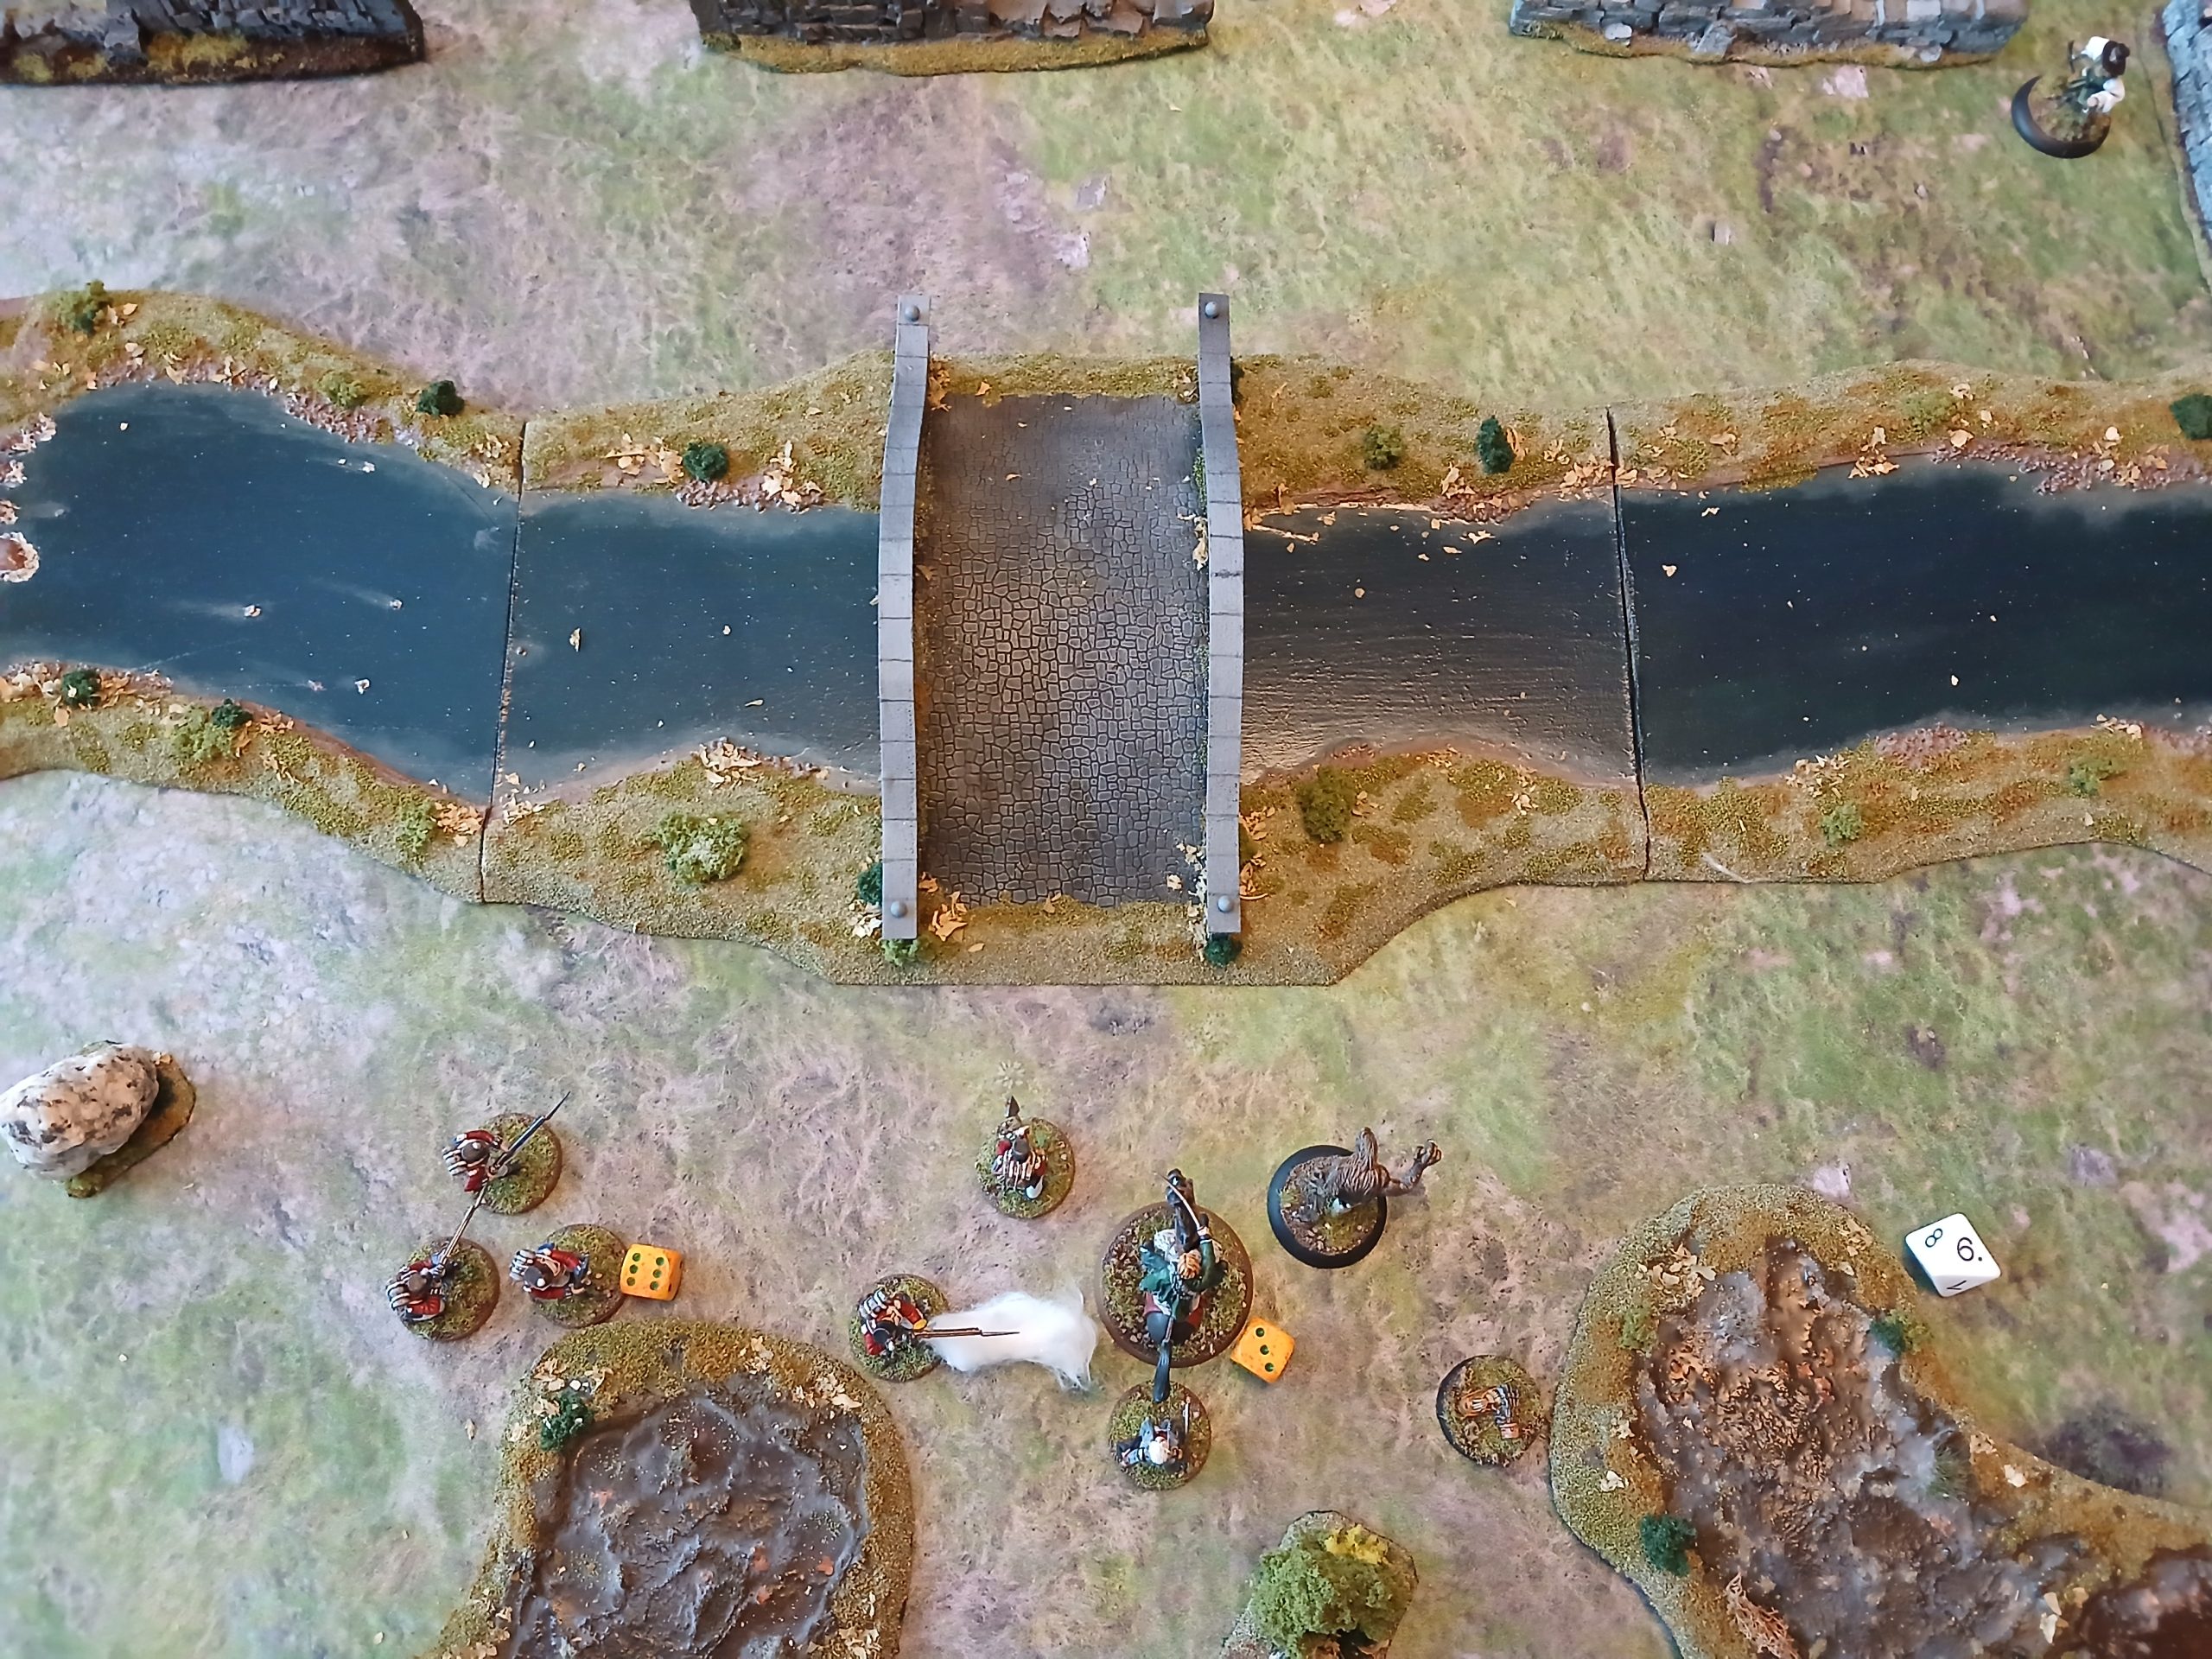
Turn 7:
Doc heals Harpe for 2. Harpe moves on to the bridge and takes a shot at the new bandit. Hitting on double 8, even with the penalties for moving and being mounted. The bandit returns fire though, hitting Harpe for 7 health. I use a fate die to reduce that by 3, meaning he only takes 4 health loss instead.
Wilson moves on to the bridge, shoot and misses. Walker reloads and shoots, missing by 1. I use a fate to reroll, but miss by more.
The bandit reloads, shoots and misses Harpe.
Frasier moves up to get a shot, hitting and killing the bandit. The rest move up. No new bandits arrive.
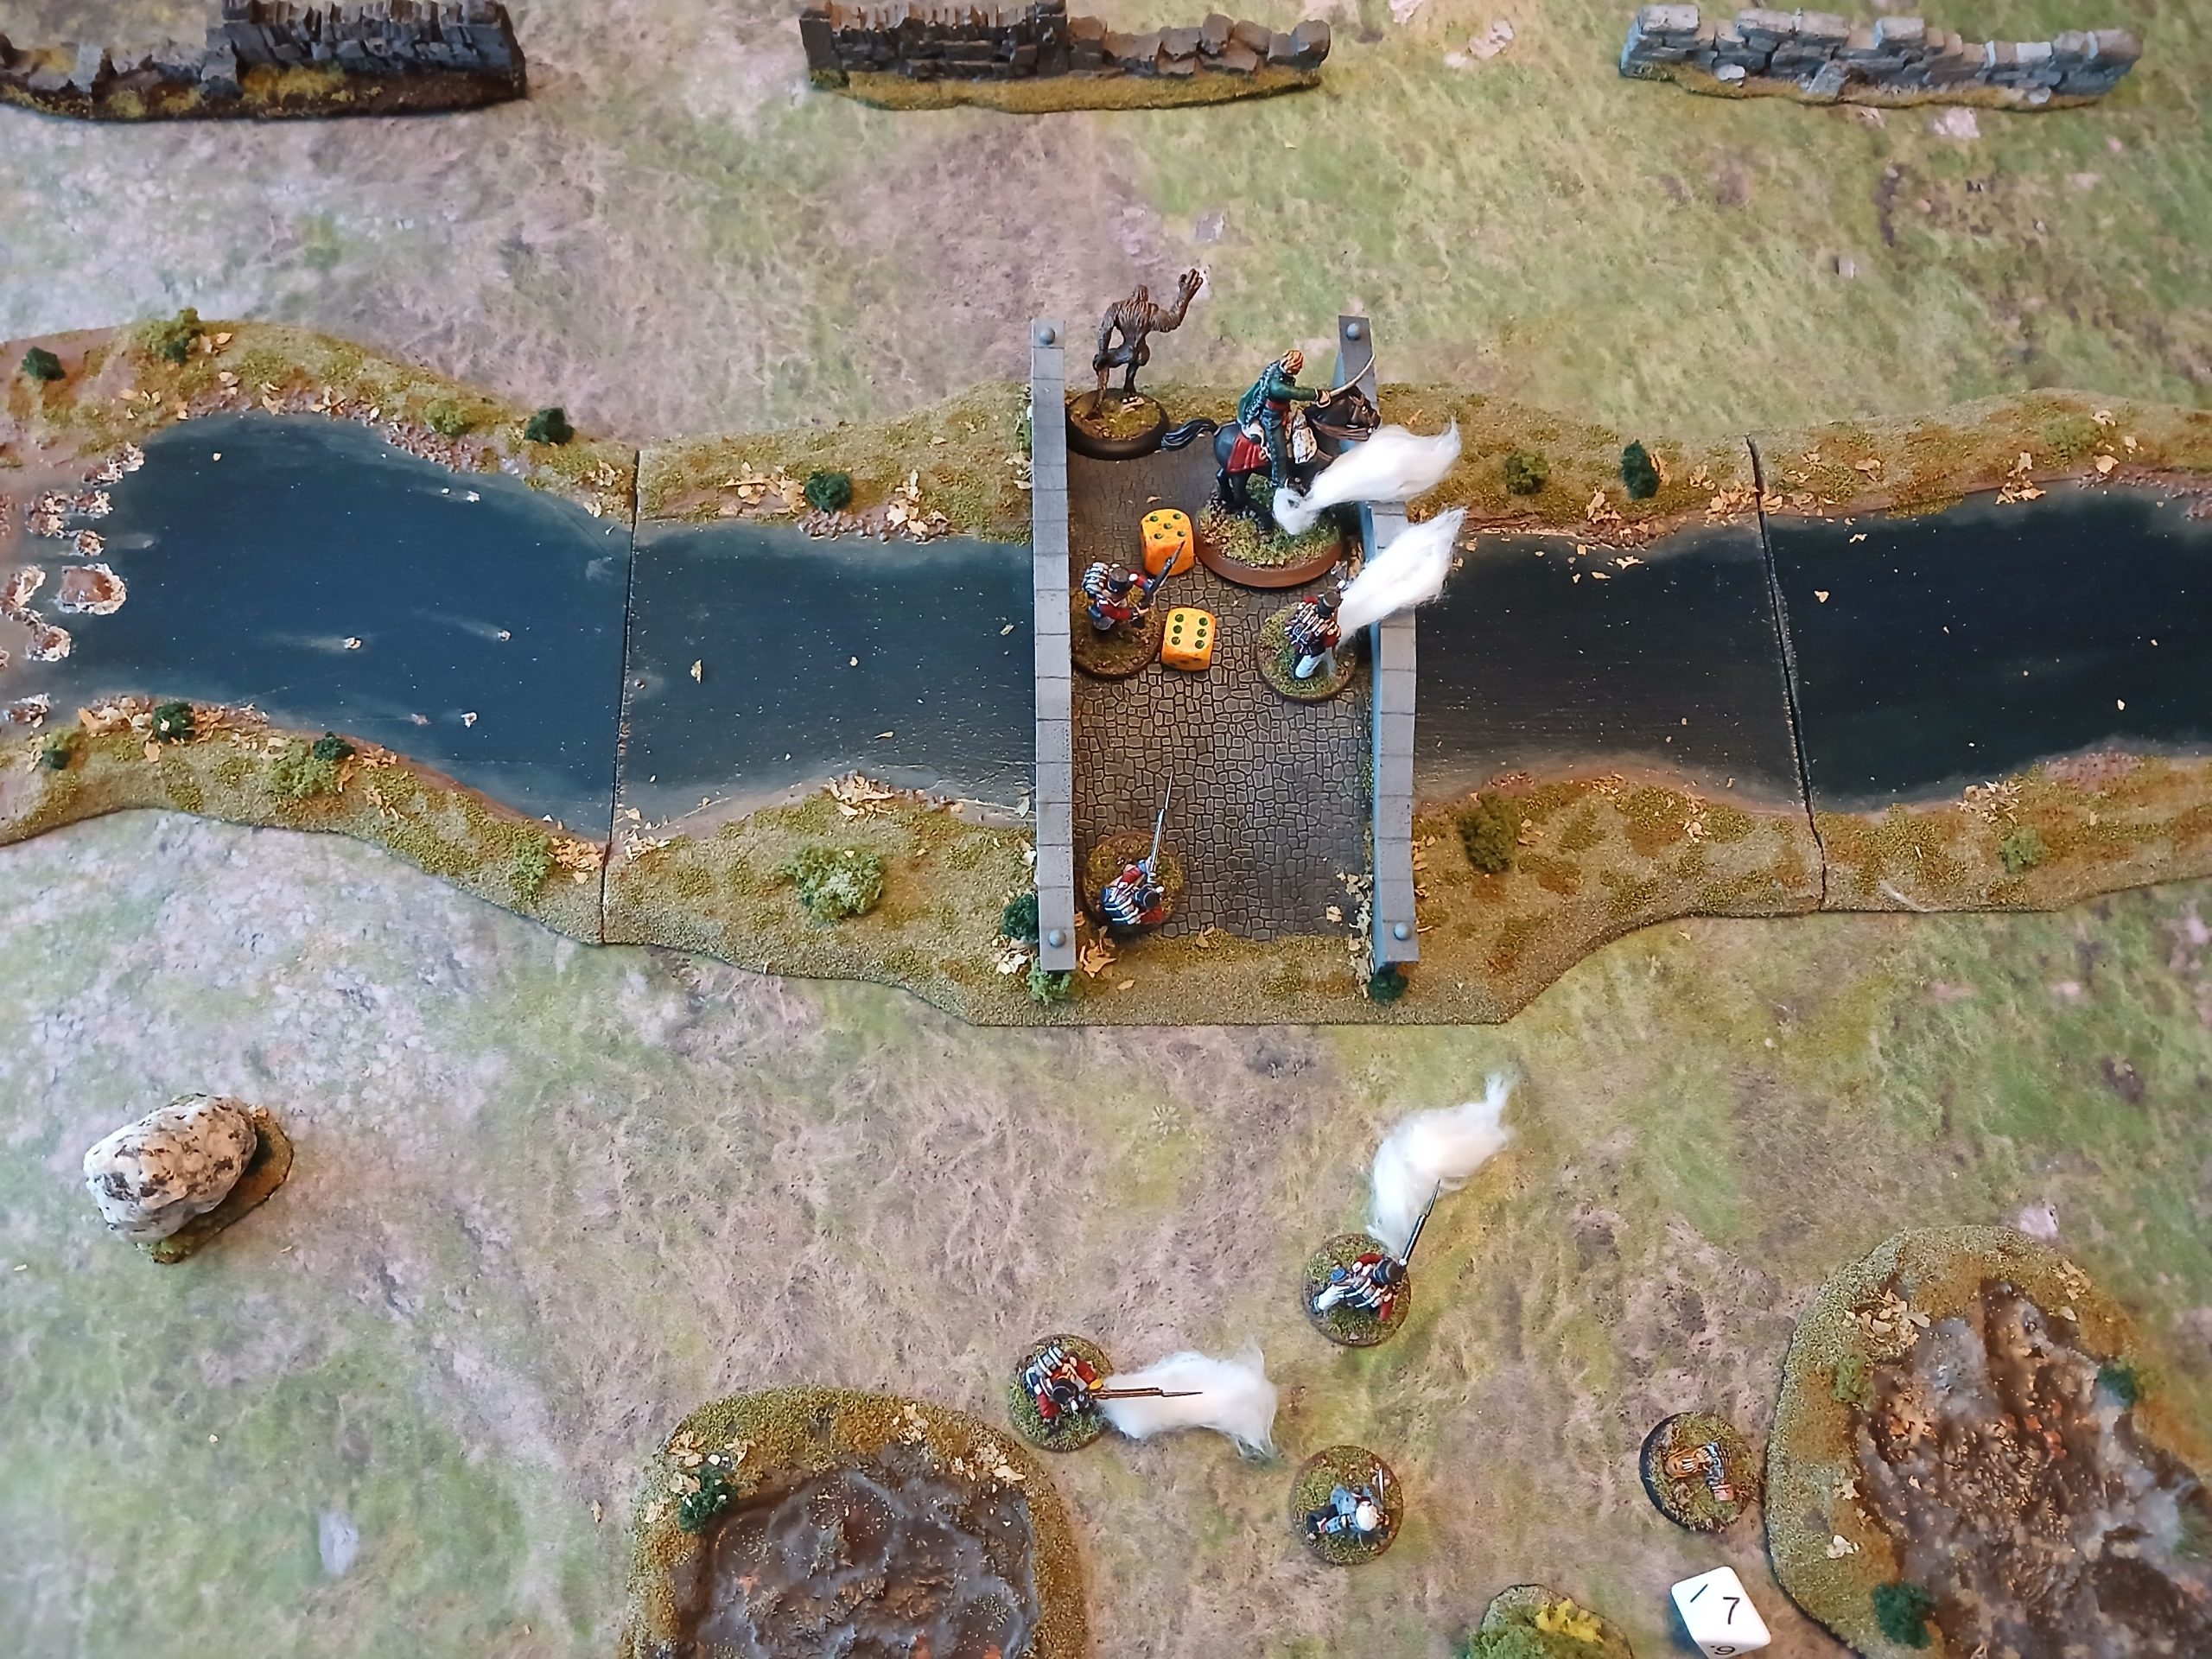 End of turn 7
Turn 8:
With no enemies present the whole force moves up, but stays on the table so that they can cover the soldiers furthest away (and give me more activations before the enemy phase). Some reload, some sprint. Another new bandit arrives.
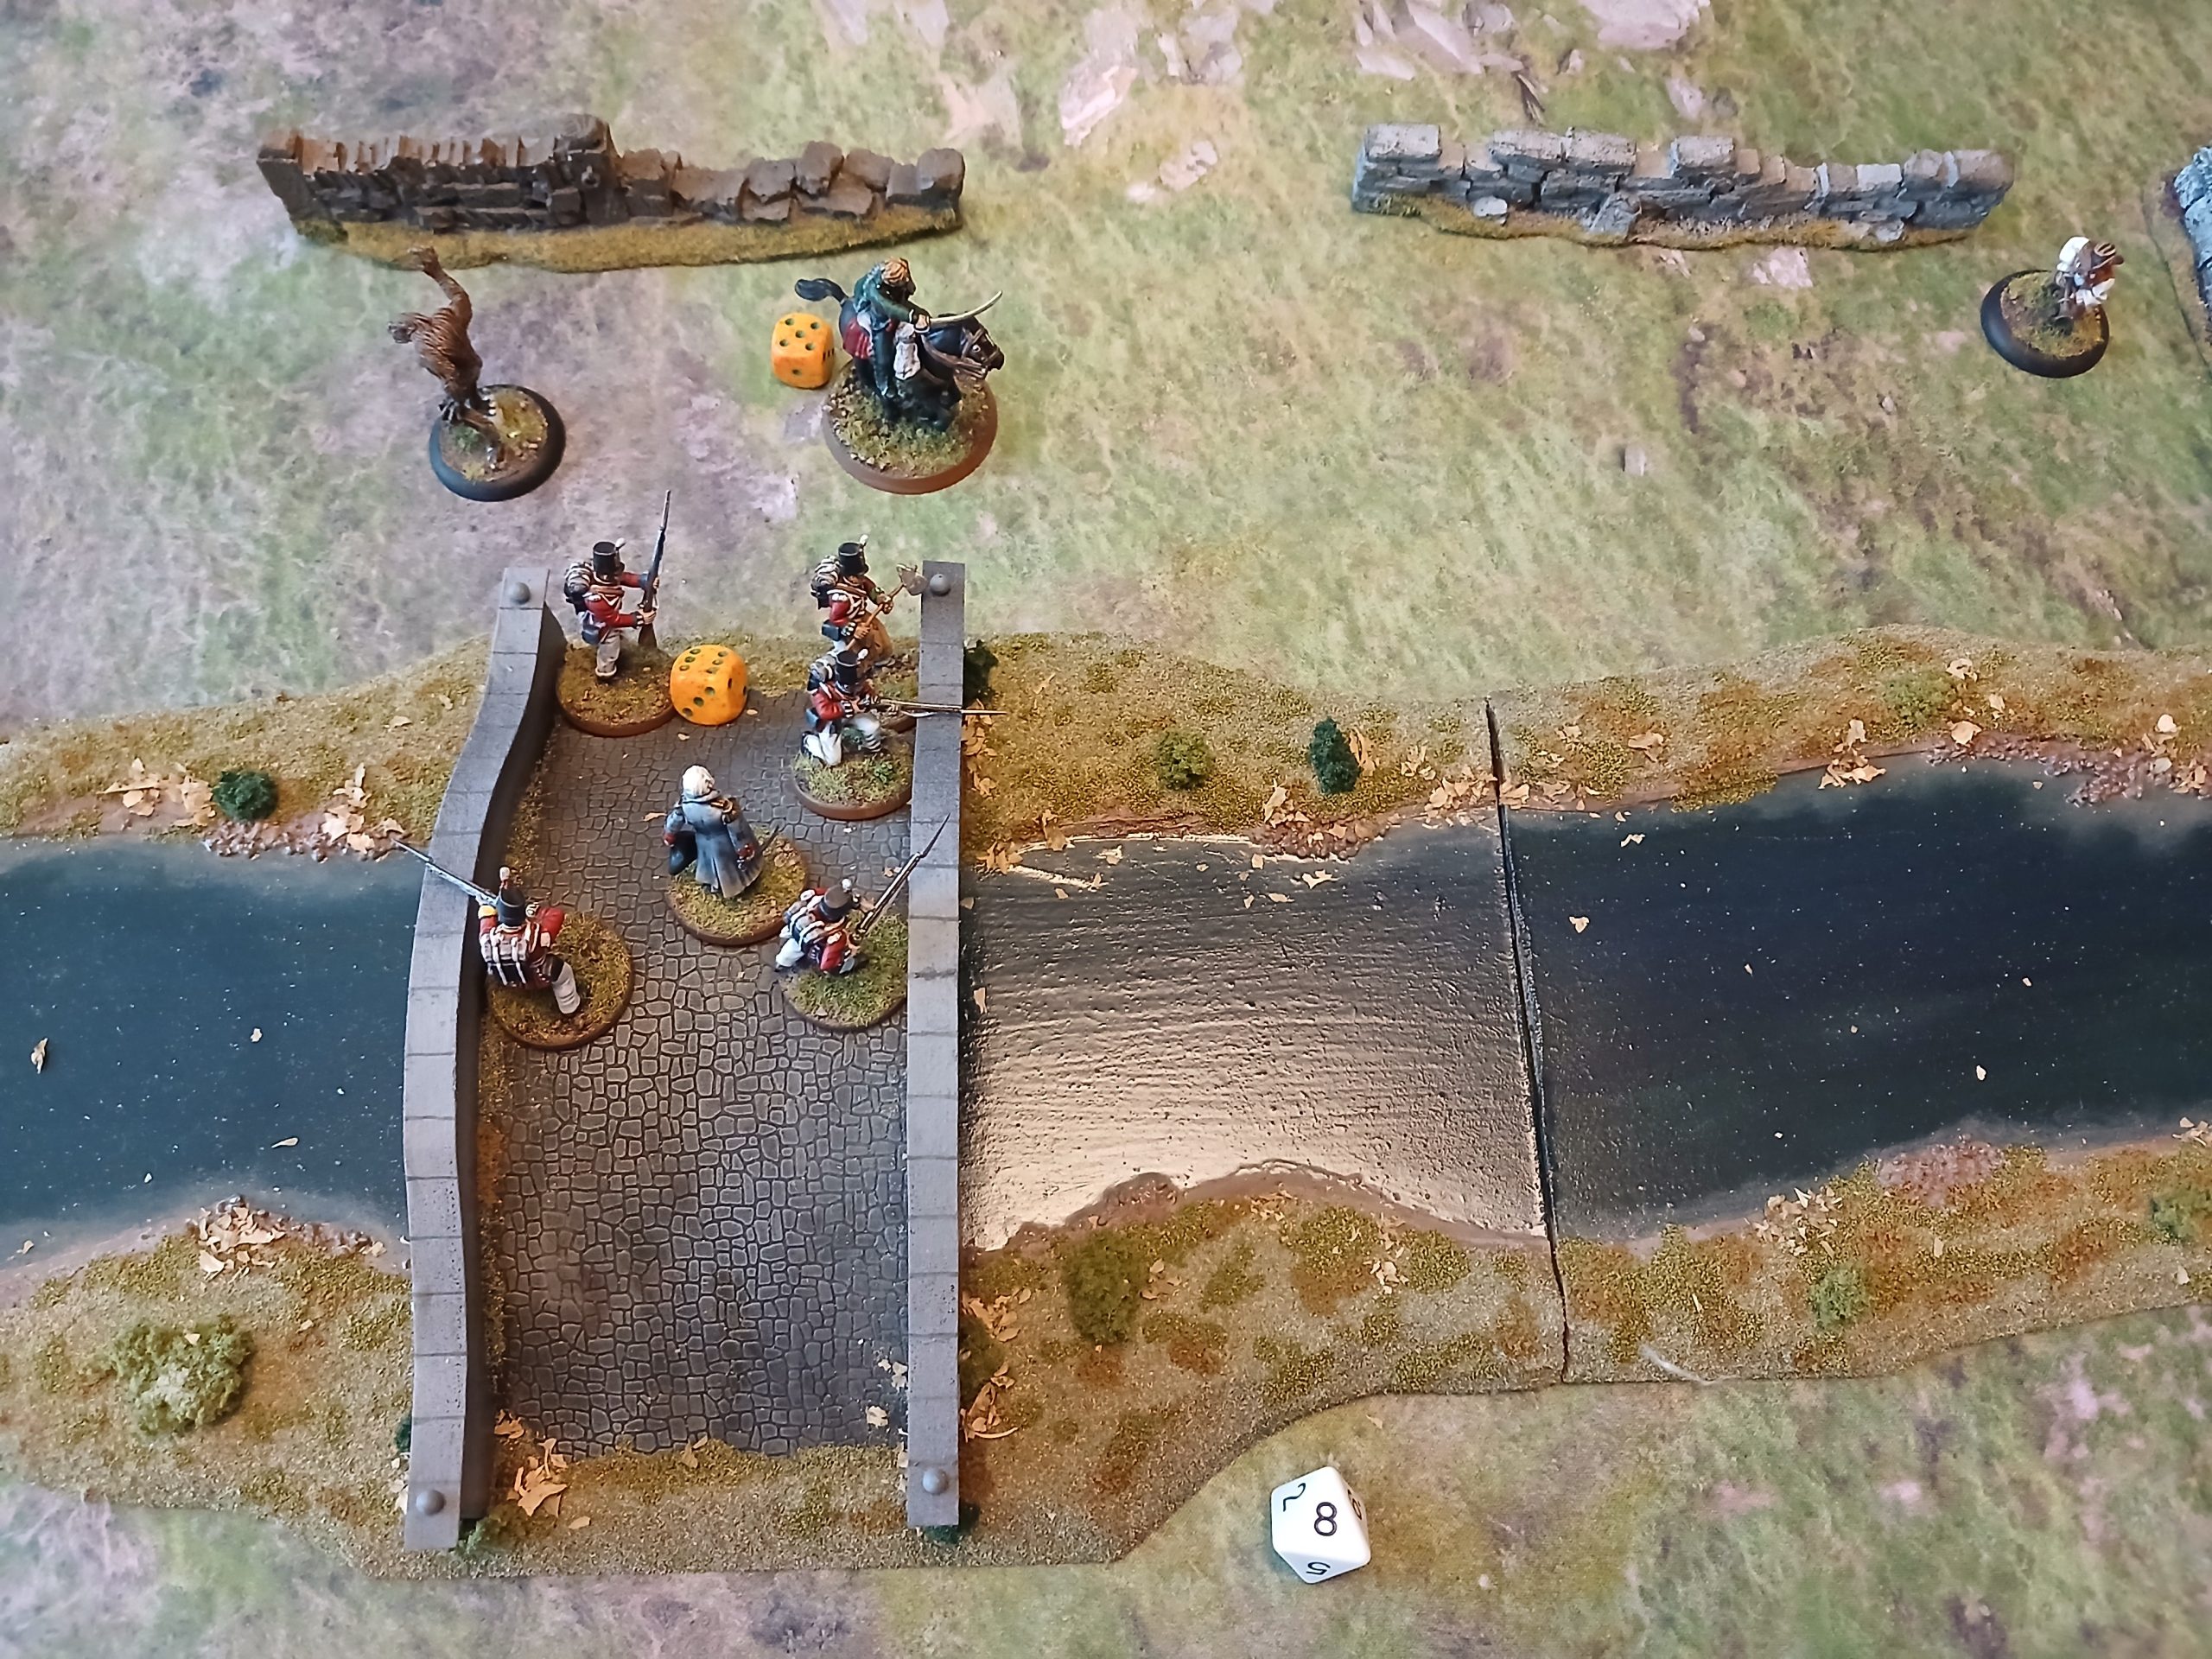 End of turn 8
Turn 9:
With everyone close to exiting, and not wanting to risk return fire, my soldiers move to exit, and Angua is left to be the closest target, knowing that with her DR5 she can survive even a max damage shot from the single bandit.
It shoots, hitting her for 3…. Then everyone gets off the board.
Victory, and 9 bonus xp (can only assign 8 though, max of one per soldier)
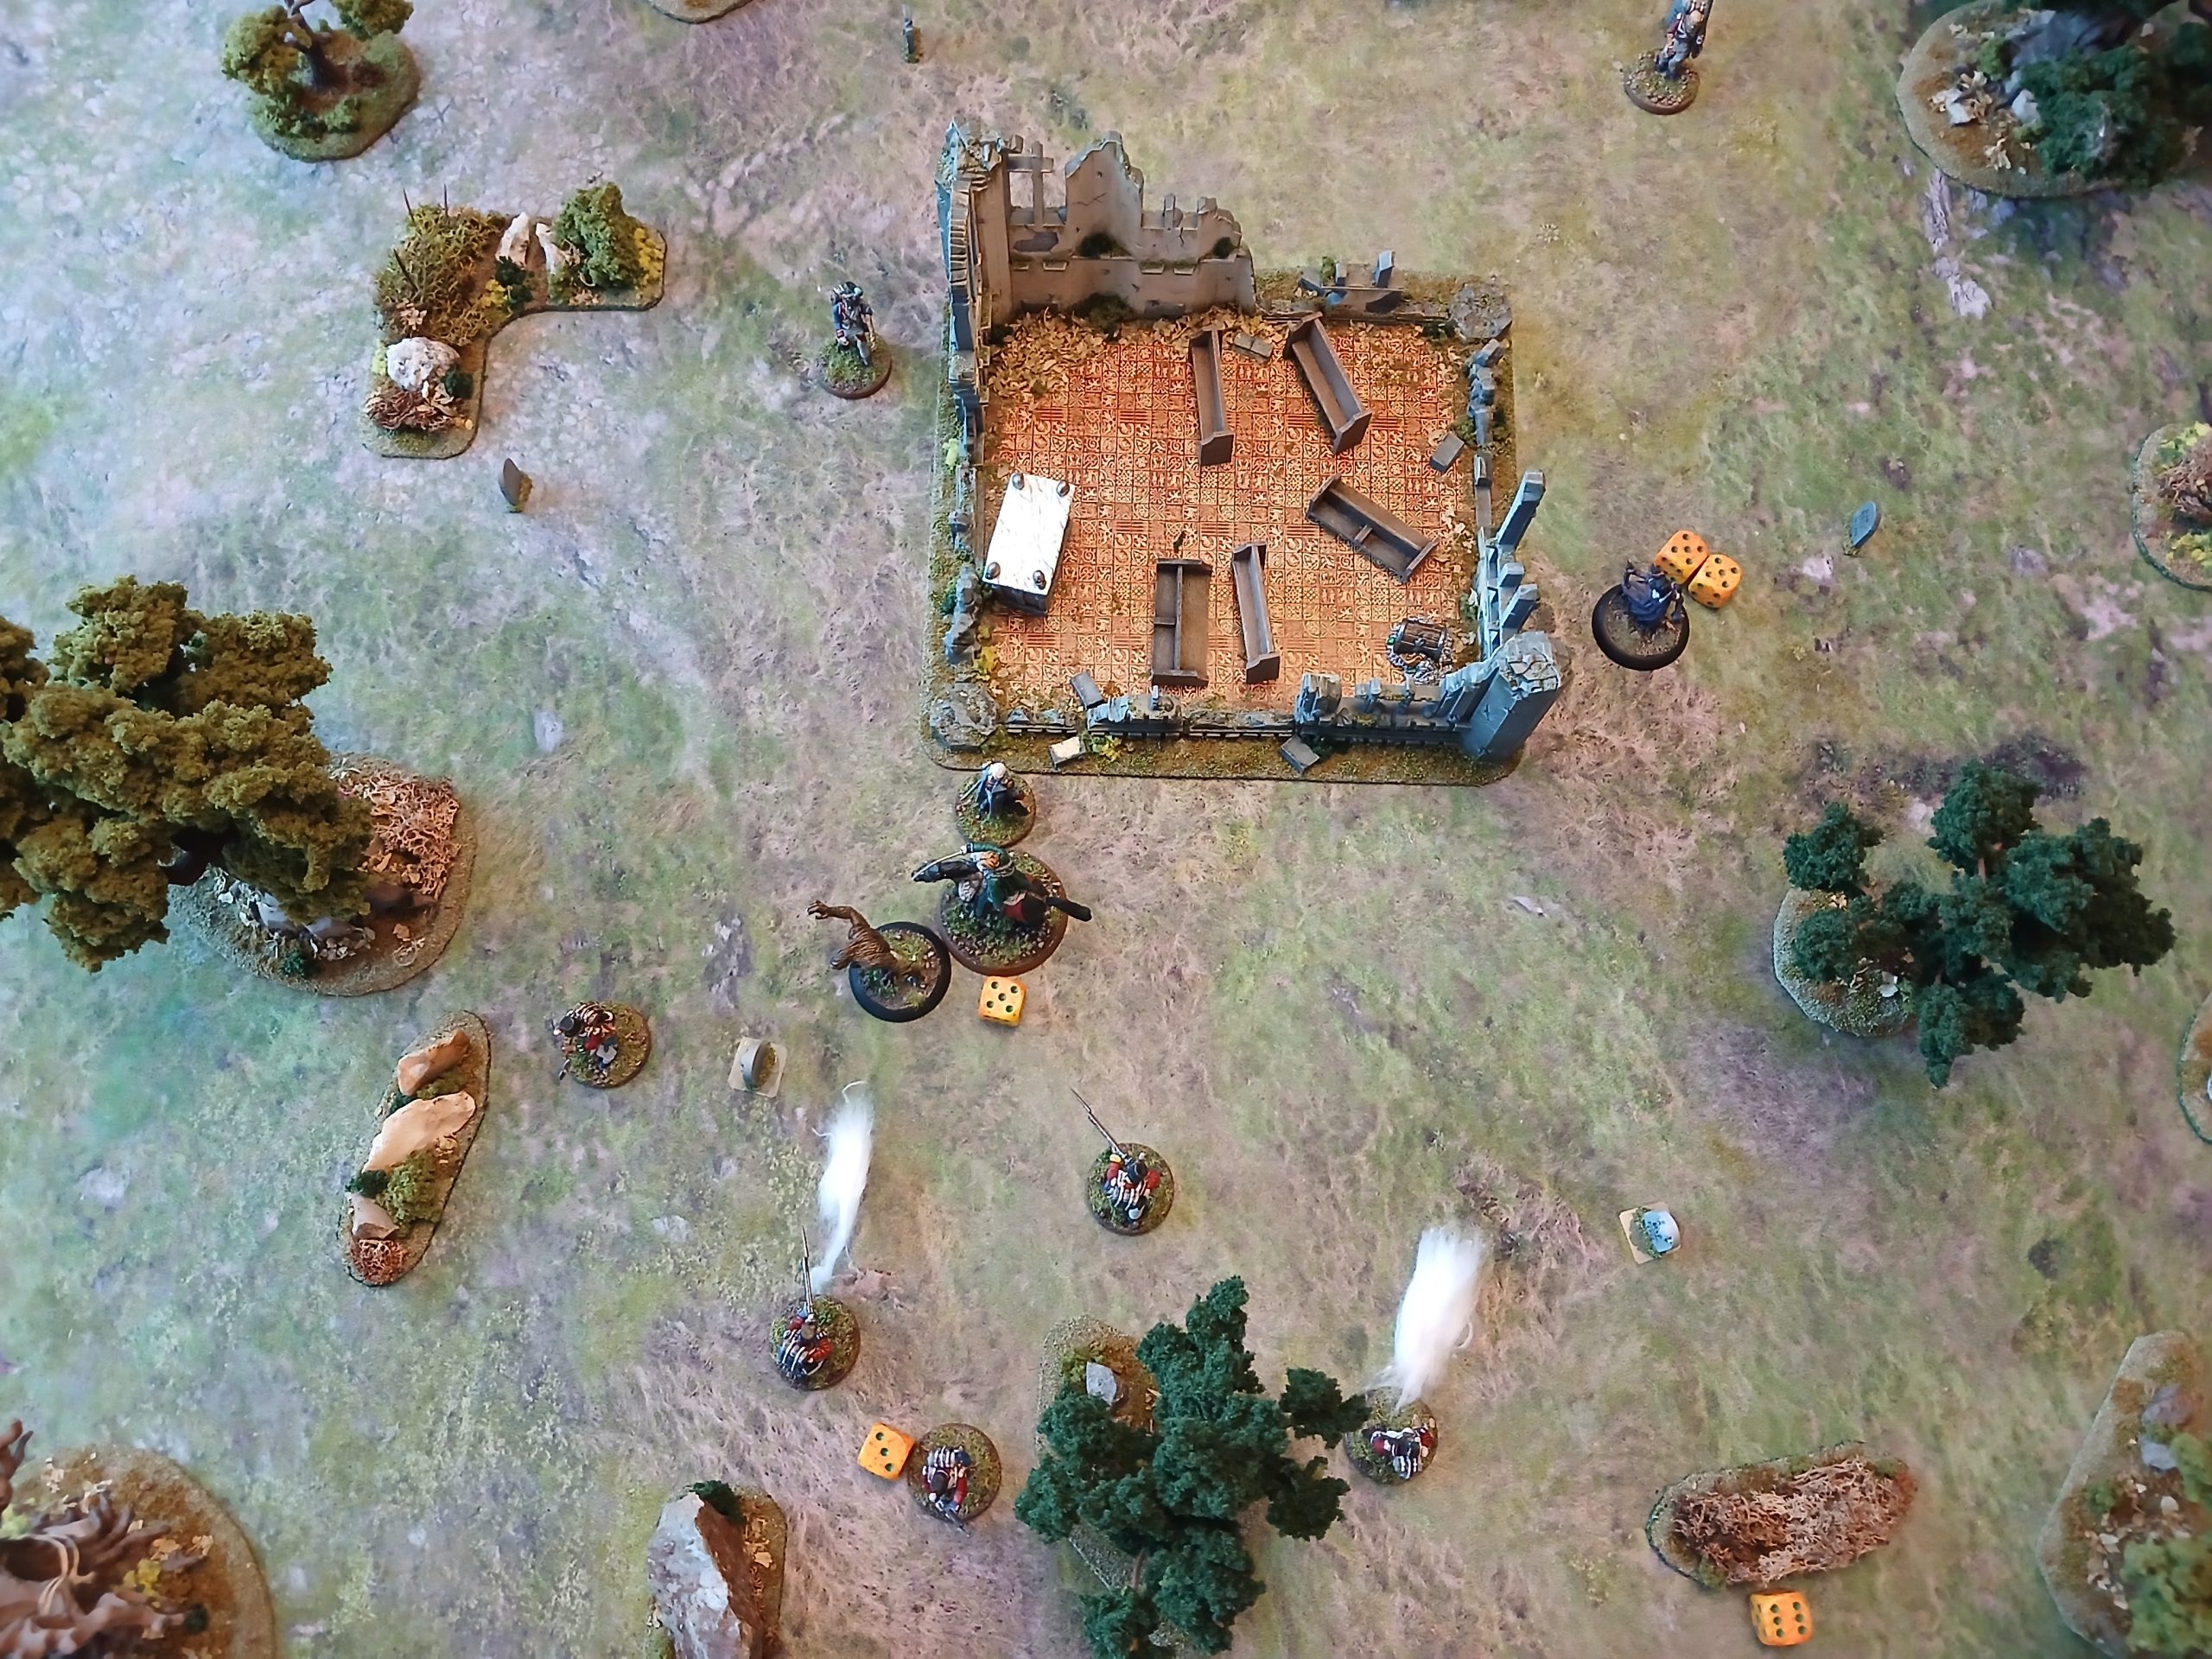
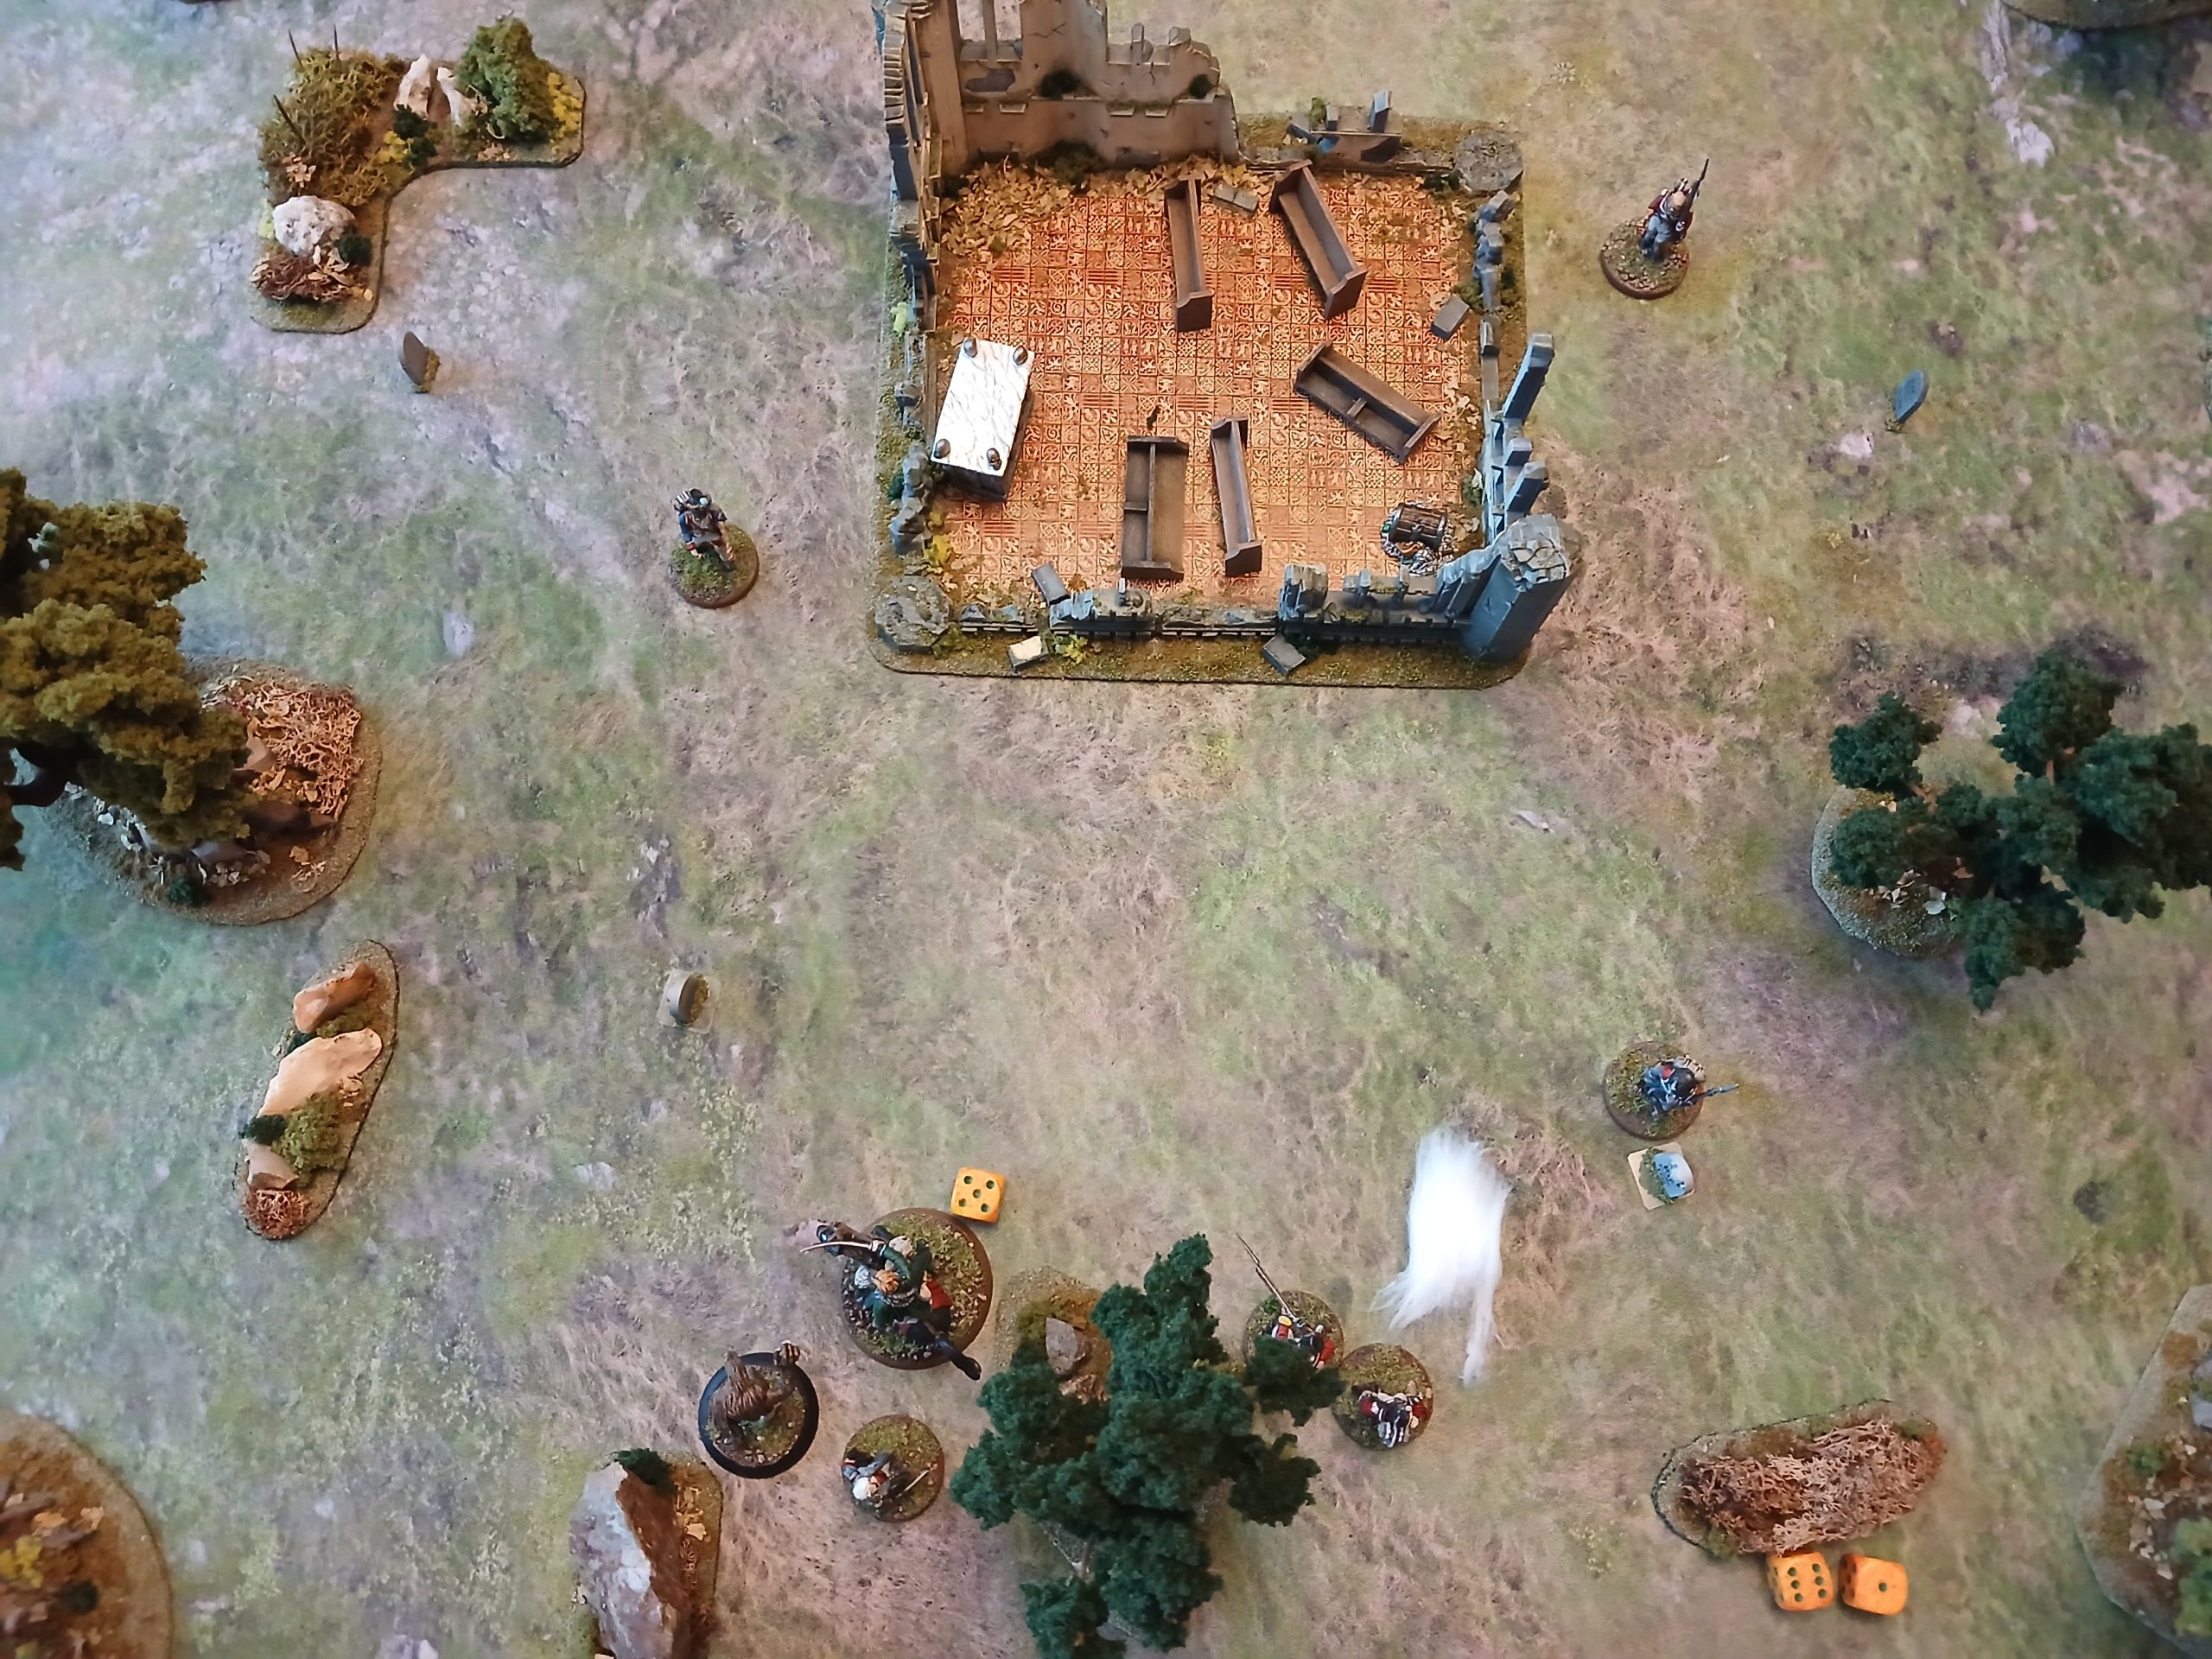
Bat Rep – Scenario 4, The Last Mile Part 1
Onto the final scenario from the core book.
This time the enemies have guns too, and can shoot back. To mitigate the amount of enemy attacks I set up my whole unit on the left flank, using some of the rocks to give a few of them cover.
Harpe and Angua were assigned as the models carrying the items from the chapel, since they had the highest survival chance.
The clue tokens are arrayed across the middle of the board. Two bandits guard the bridge, one guards the ford and three others are placed randomly by clue markers.
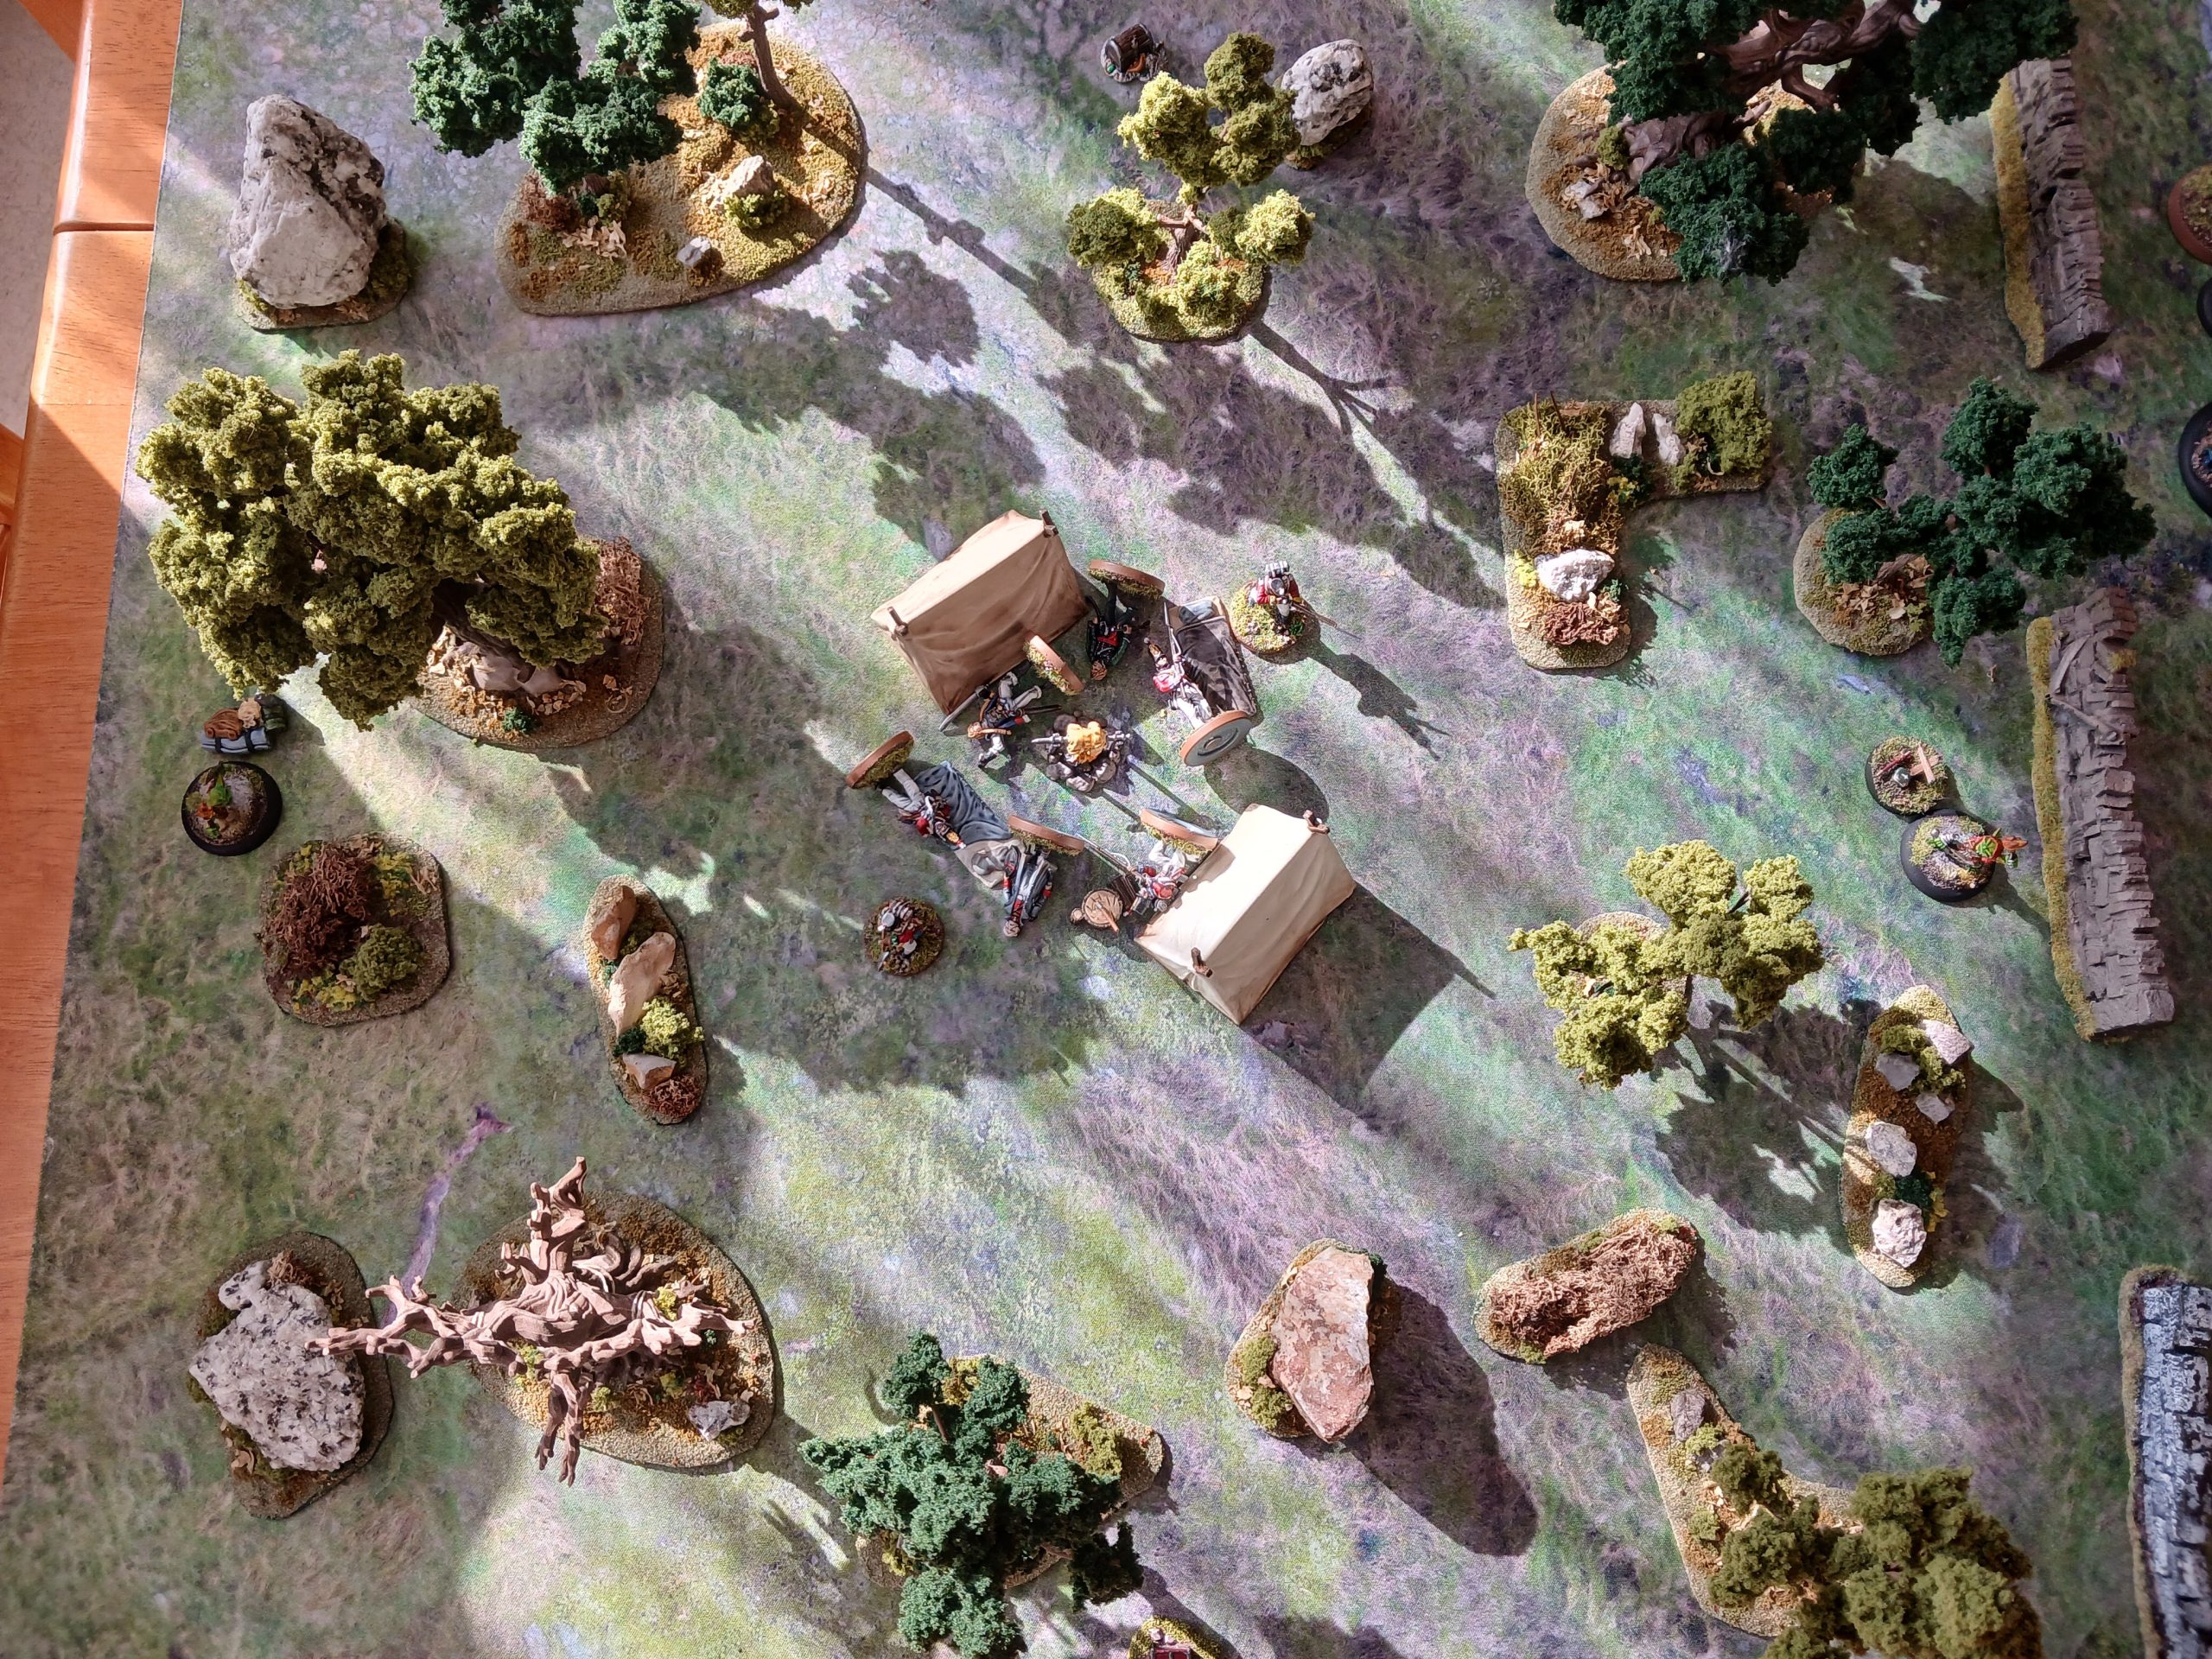
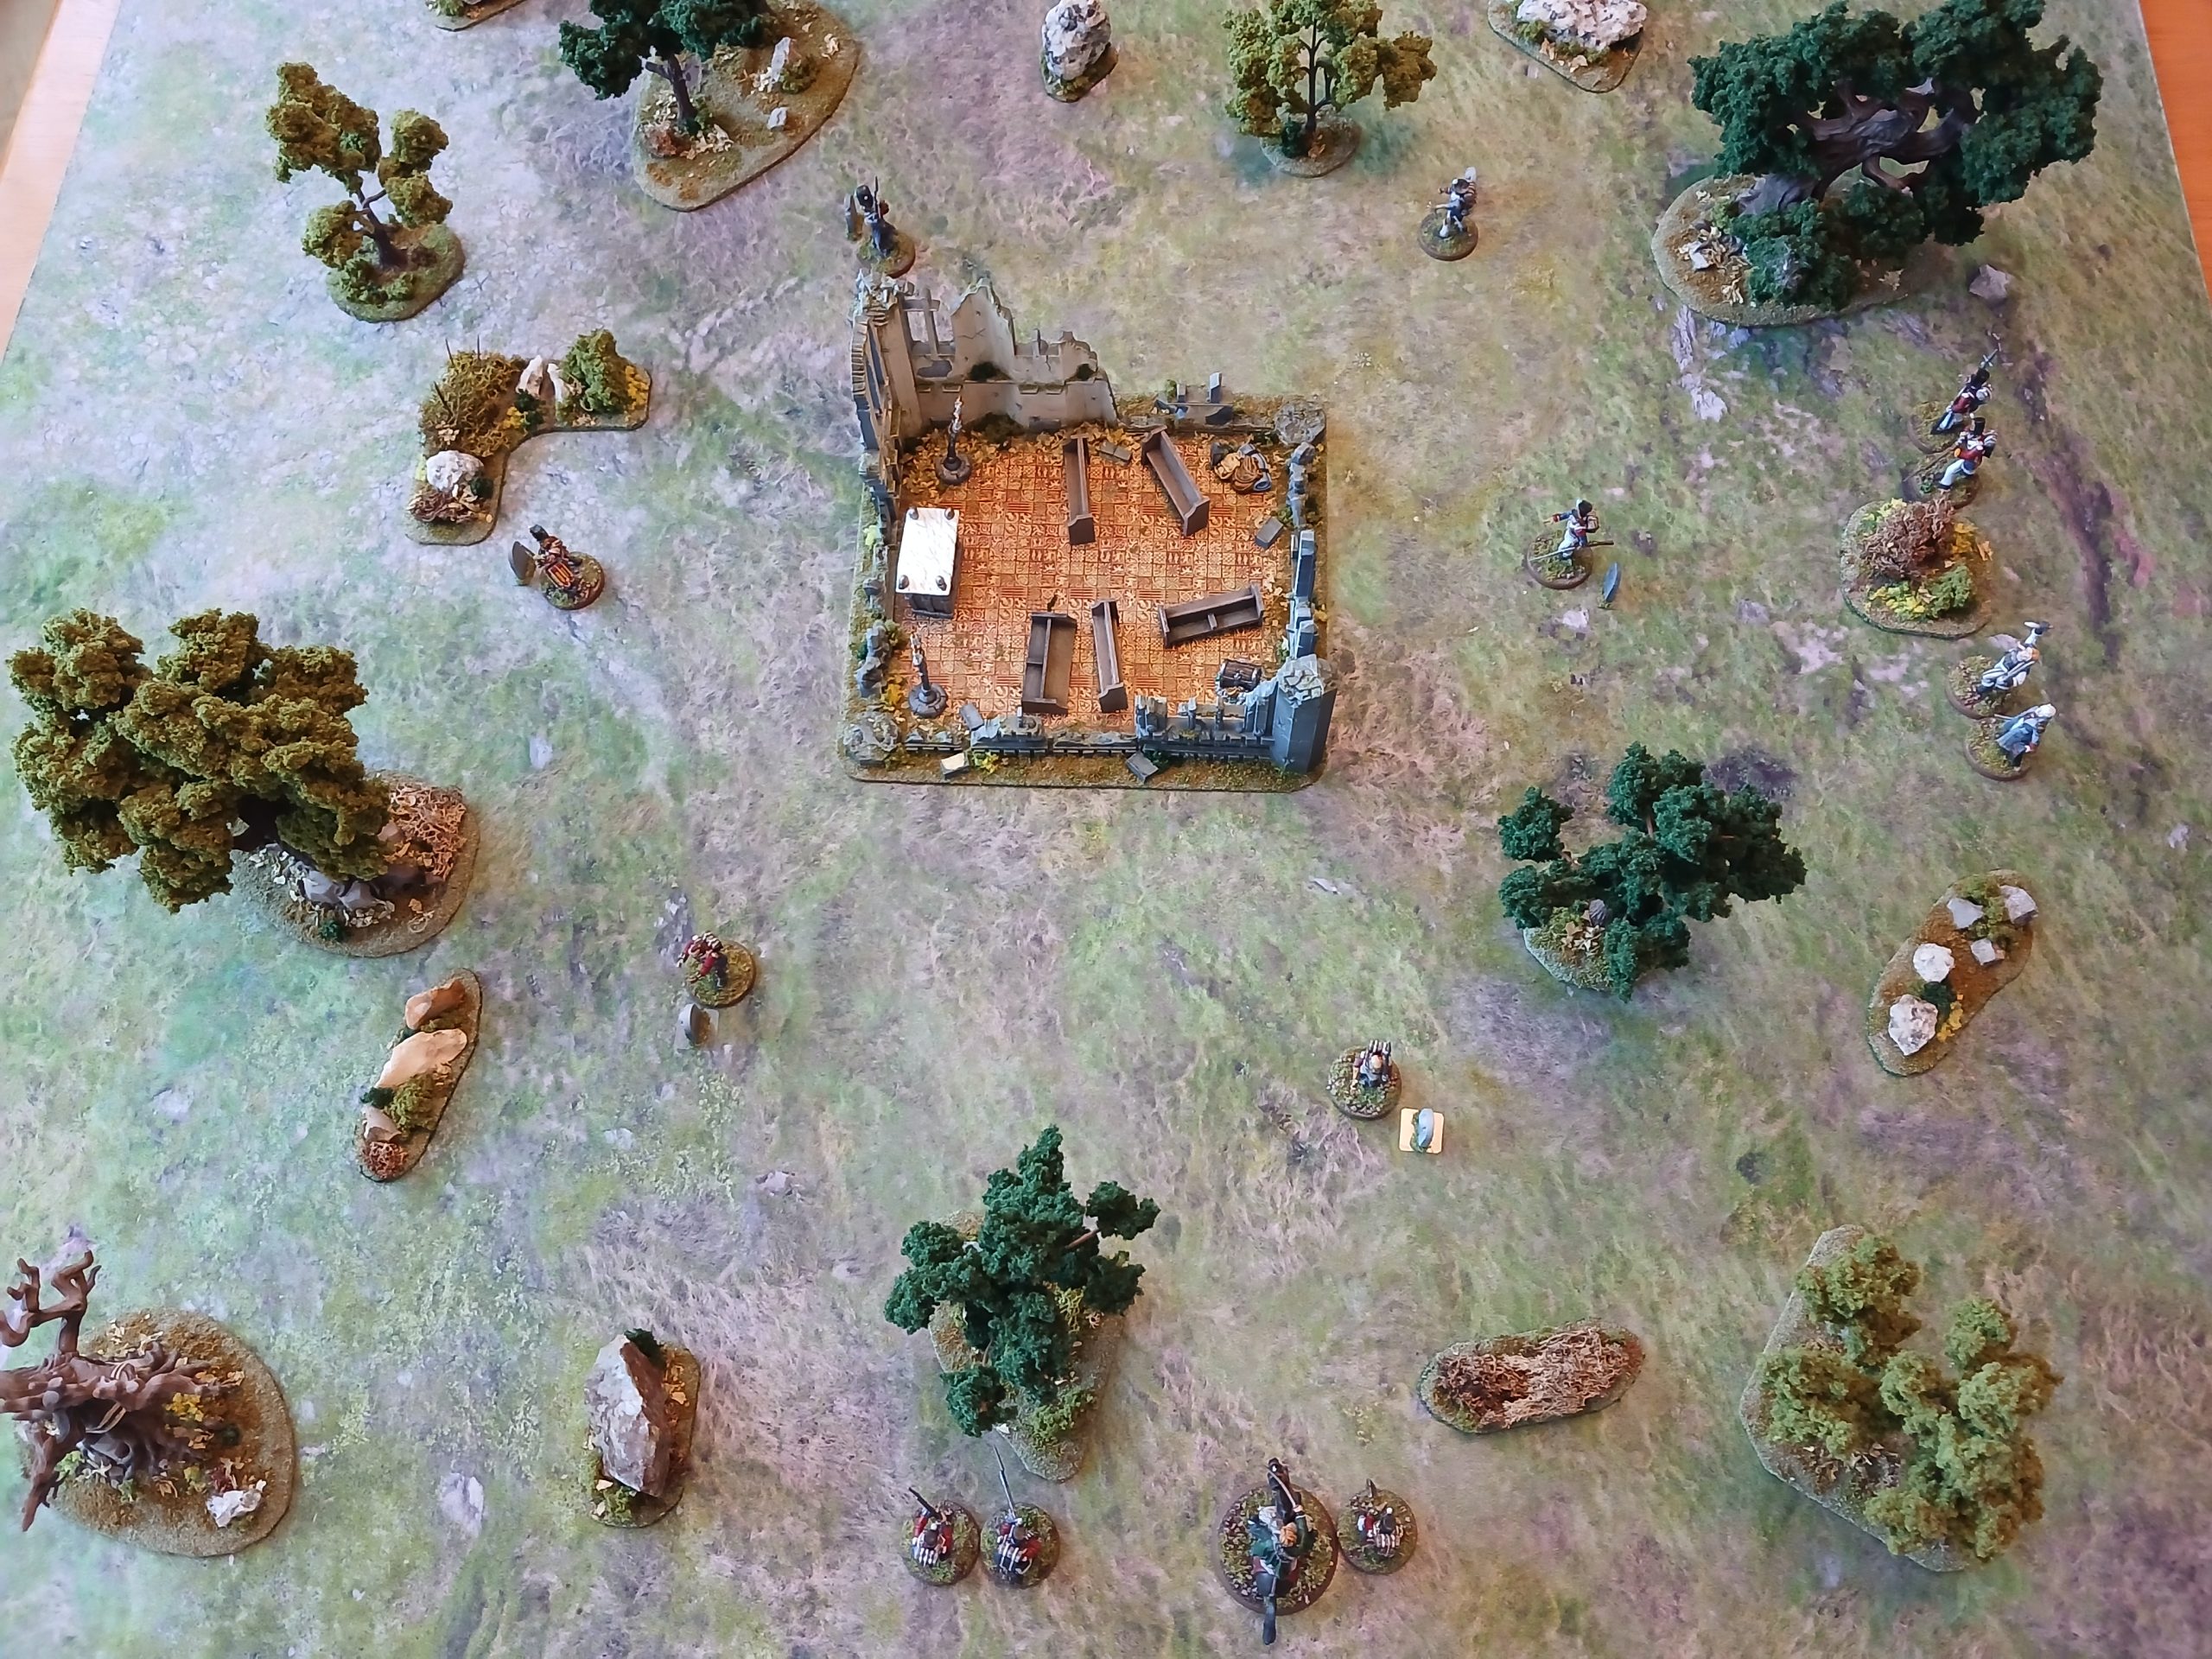
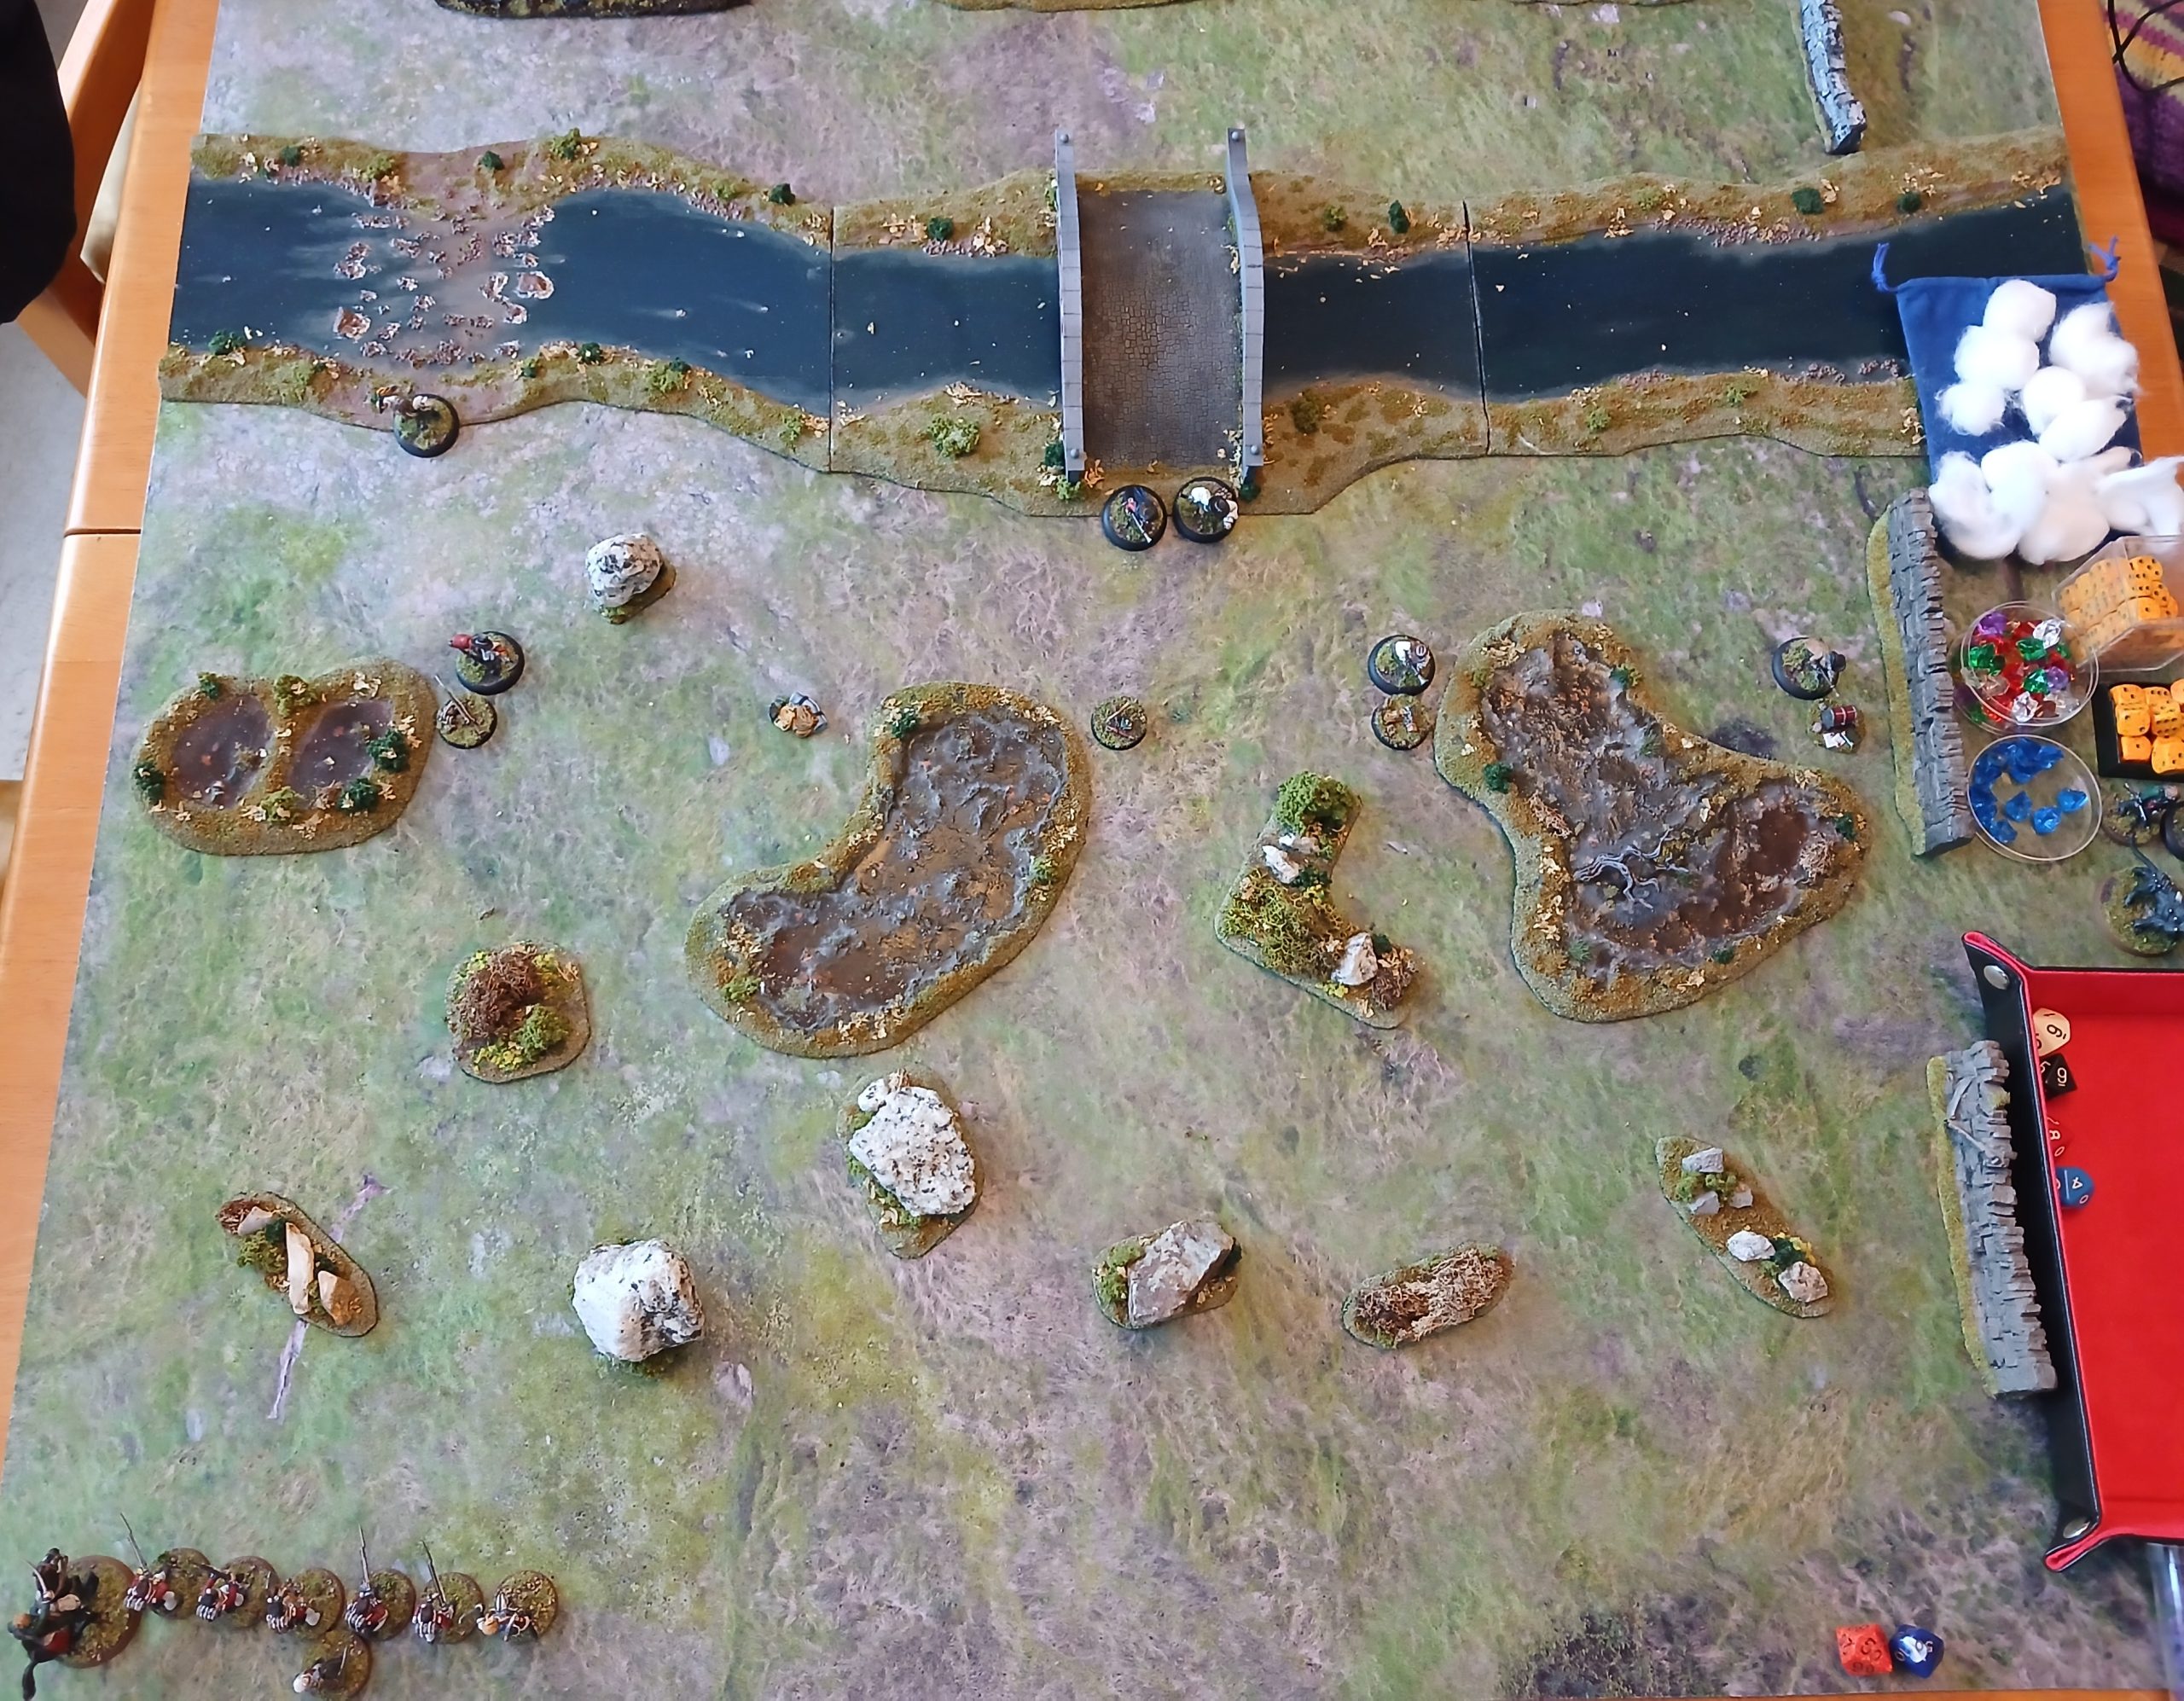 Set up
Turn 1:
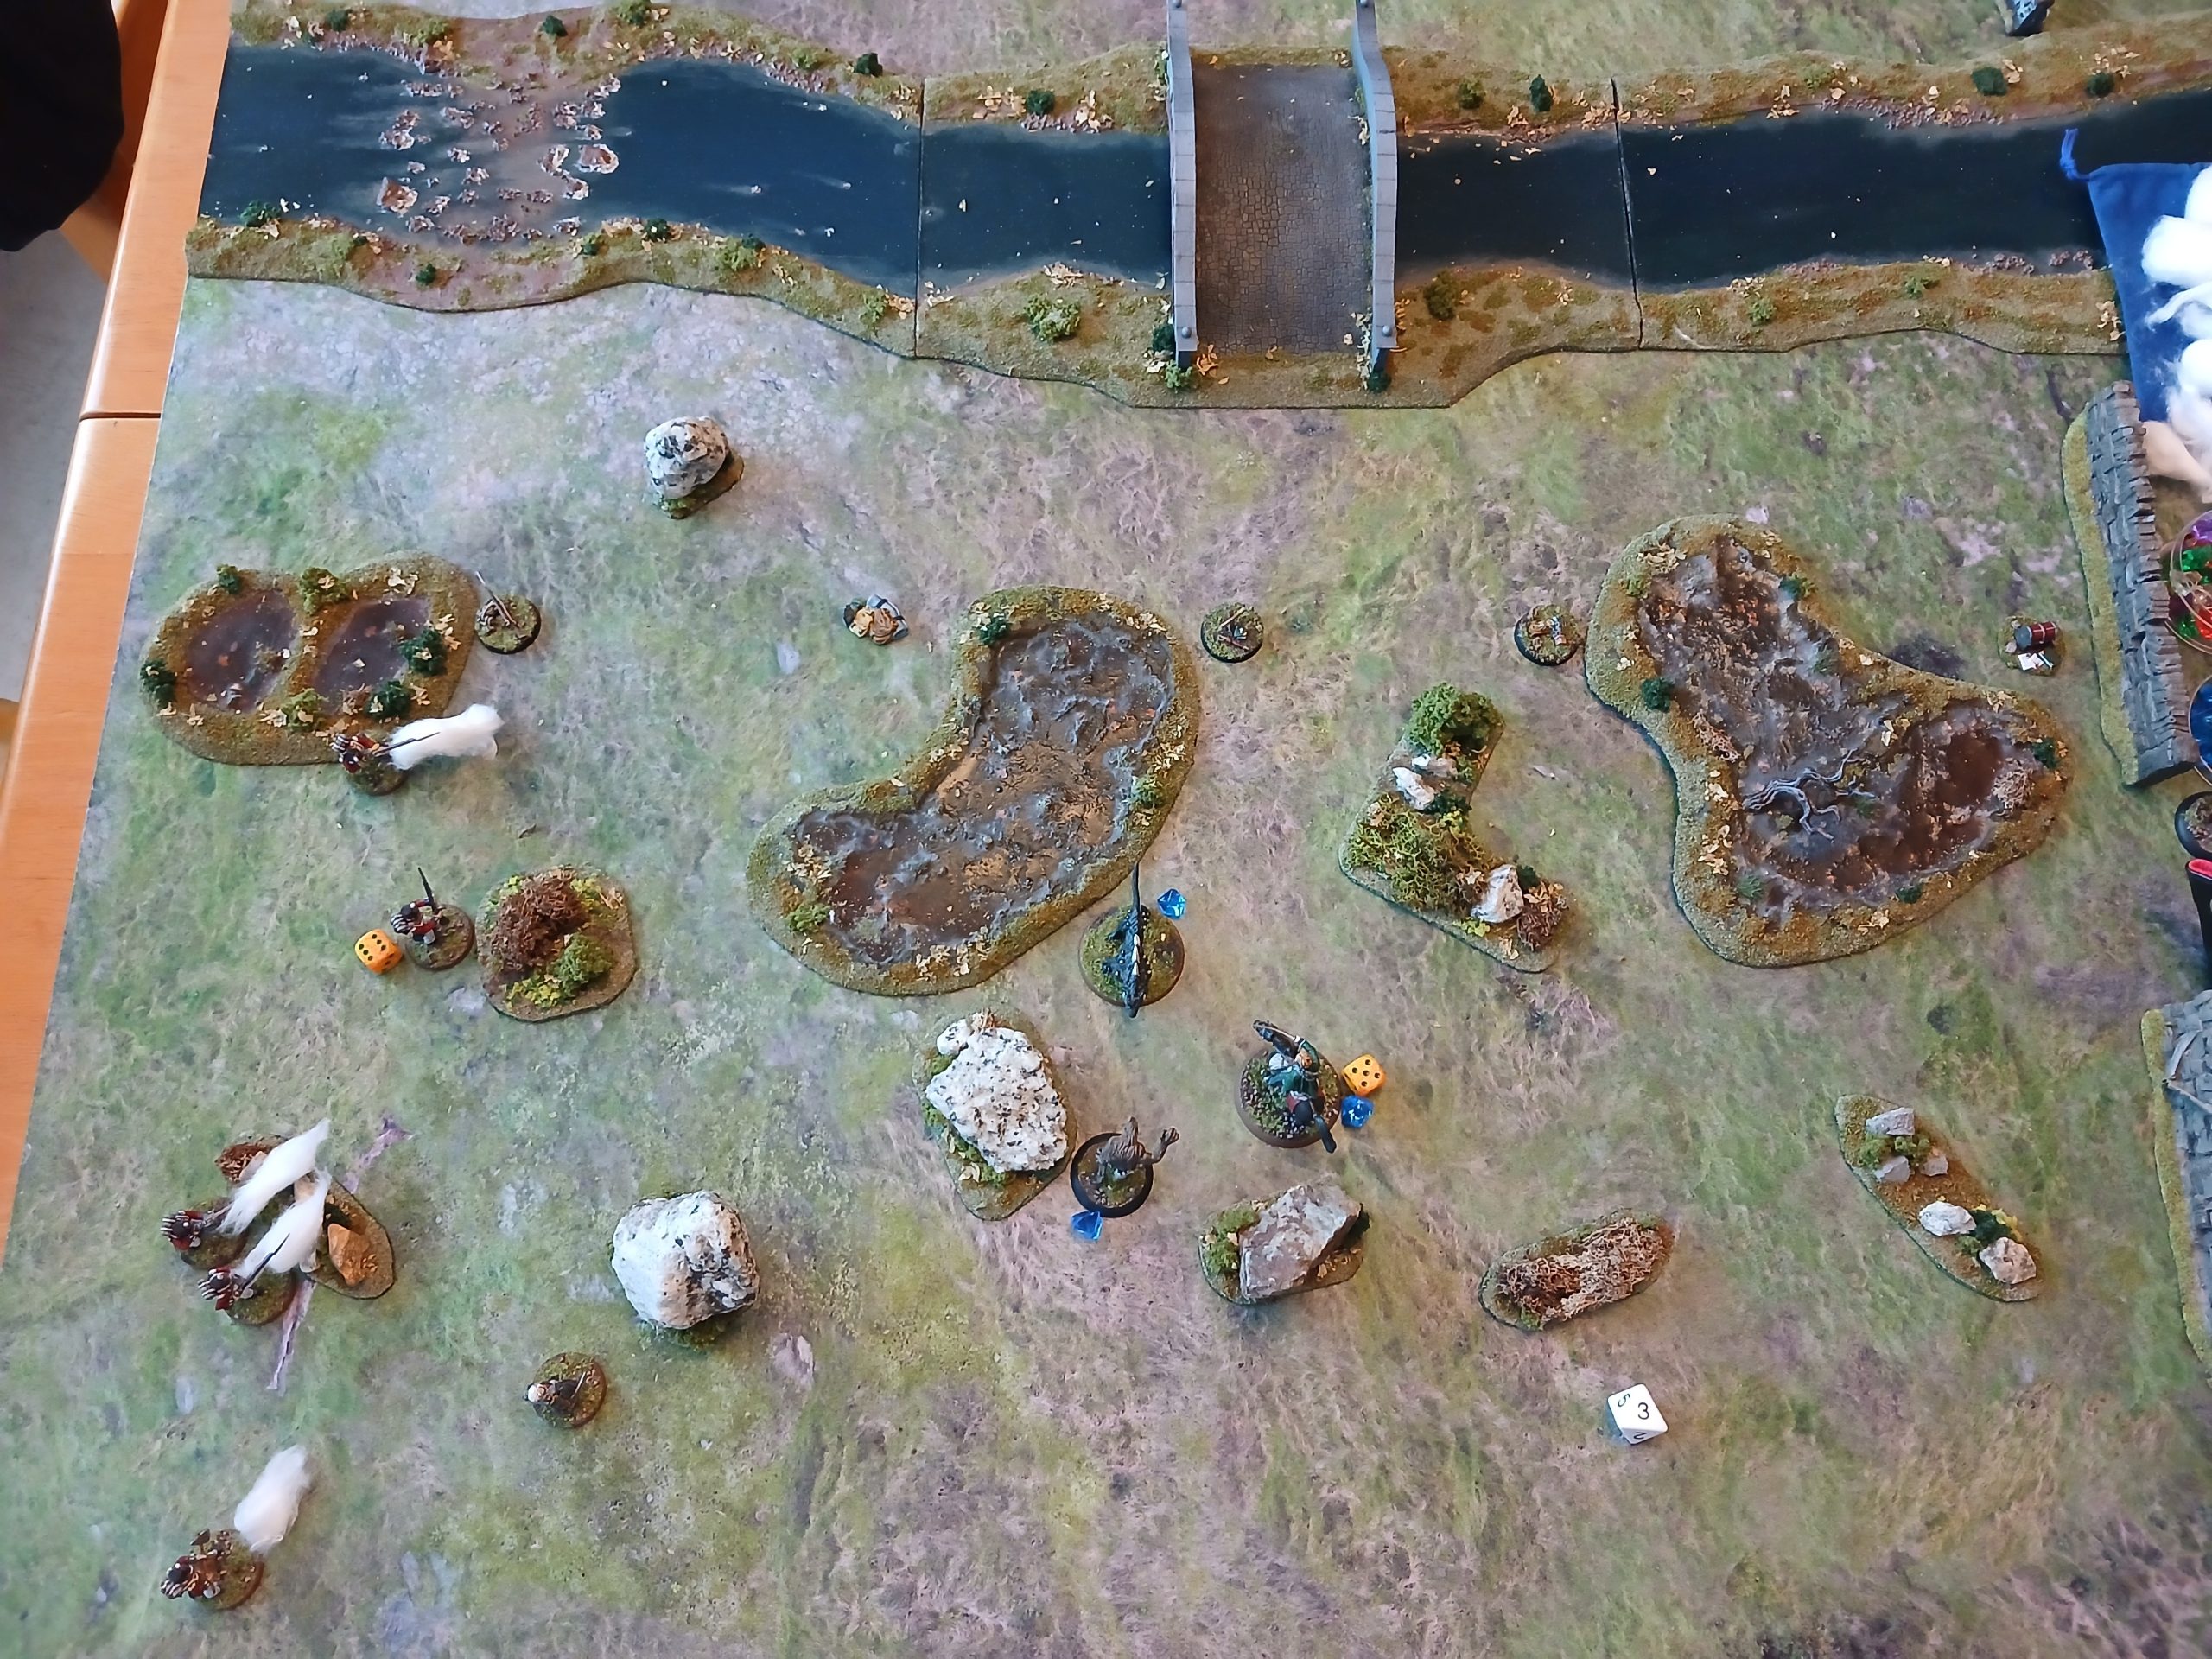
Pike shoots the closest bandit on the left for 6 health. The return shot misses, and Pike reloads. Frasier shoots the same one, doing enough to finish it off. Jones shoots, misses and the bandits return fire does 4 damage. Jones reloads. Wilson shoots the next on the left, for 6 health, and reloads.
Then the bandits act. The injured one on the left reloads, and shoots Jones, putting him down. (sine the doc is on the table Jones is left in place – and the doc is right next to him). One of the bandits on the bridge misses Wilson, but Wilson’s return fire also misses. The other bandits miss or move up, and none of my unit do anything in return – except Angua who reacts by moving up closer to cover.
Doc Godfrey then heals Jones for 2, putting him back in action, just. Angua fails to skinshift and just moves up. Harpe moves towards the middle, shooting and killing a bandit on a 10+6. Walker misses the injured bandit and moves up. No new bandits arrive.
 End of turn 1
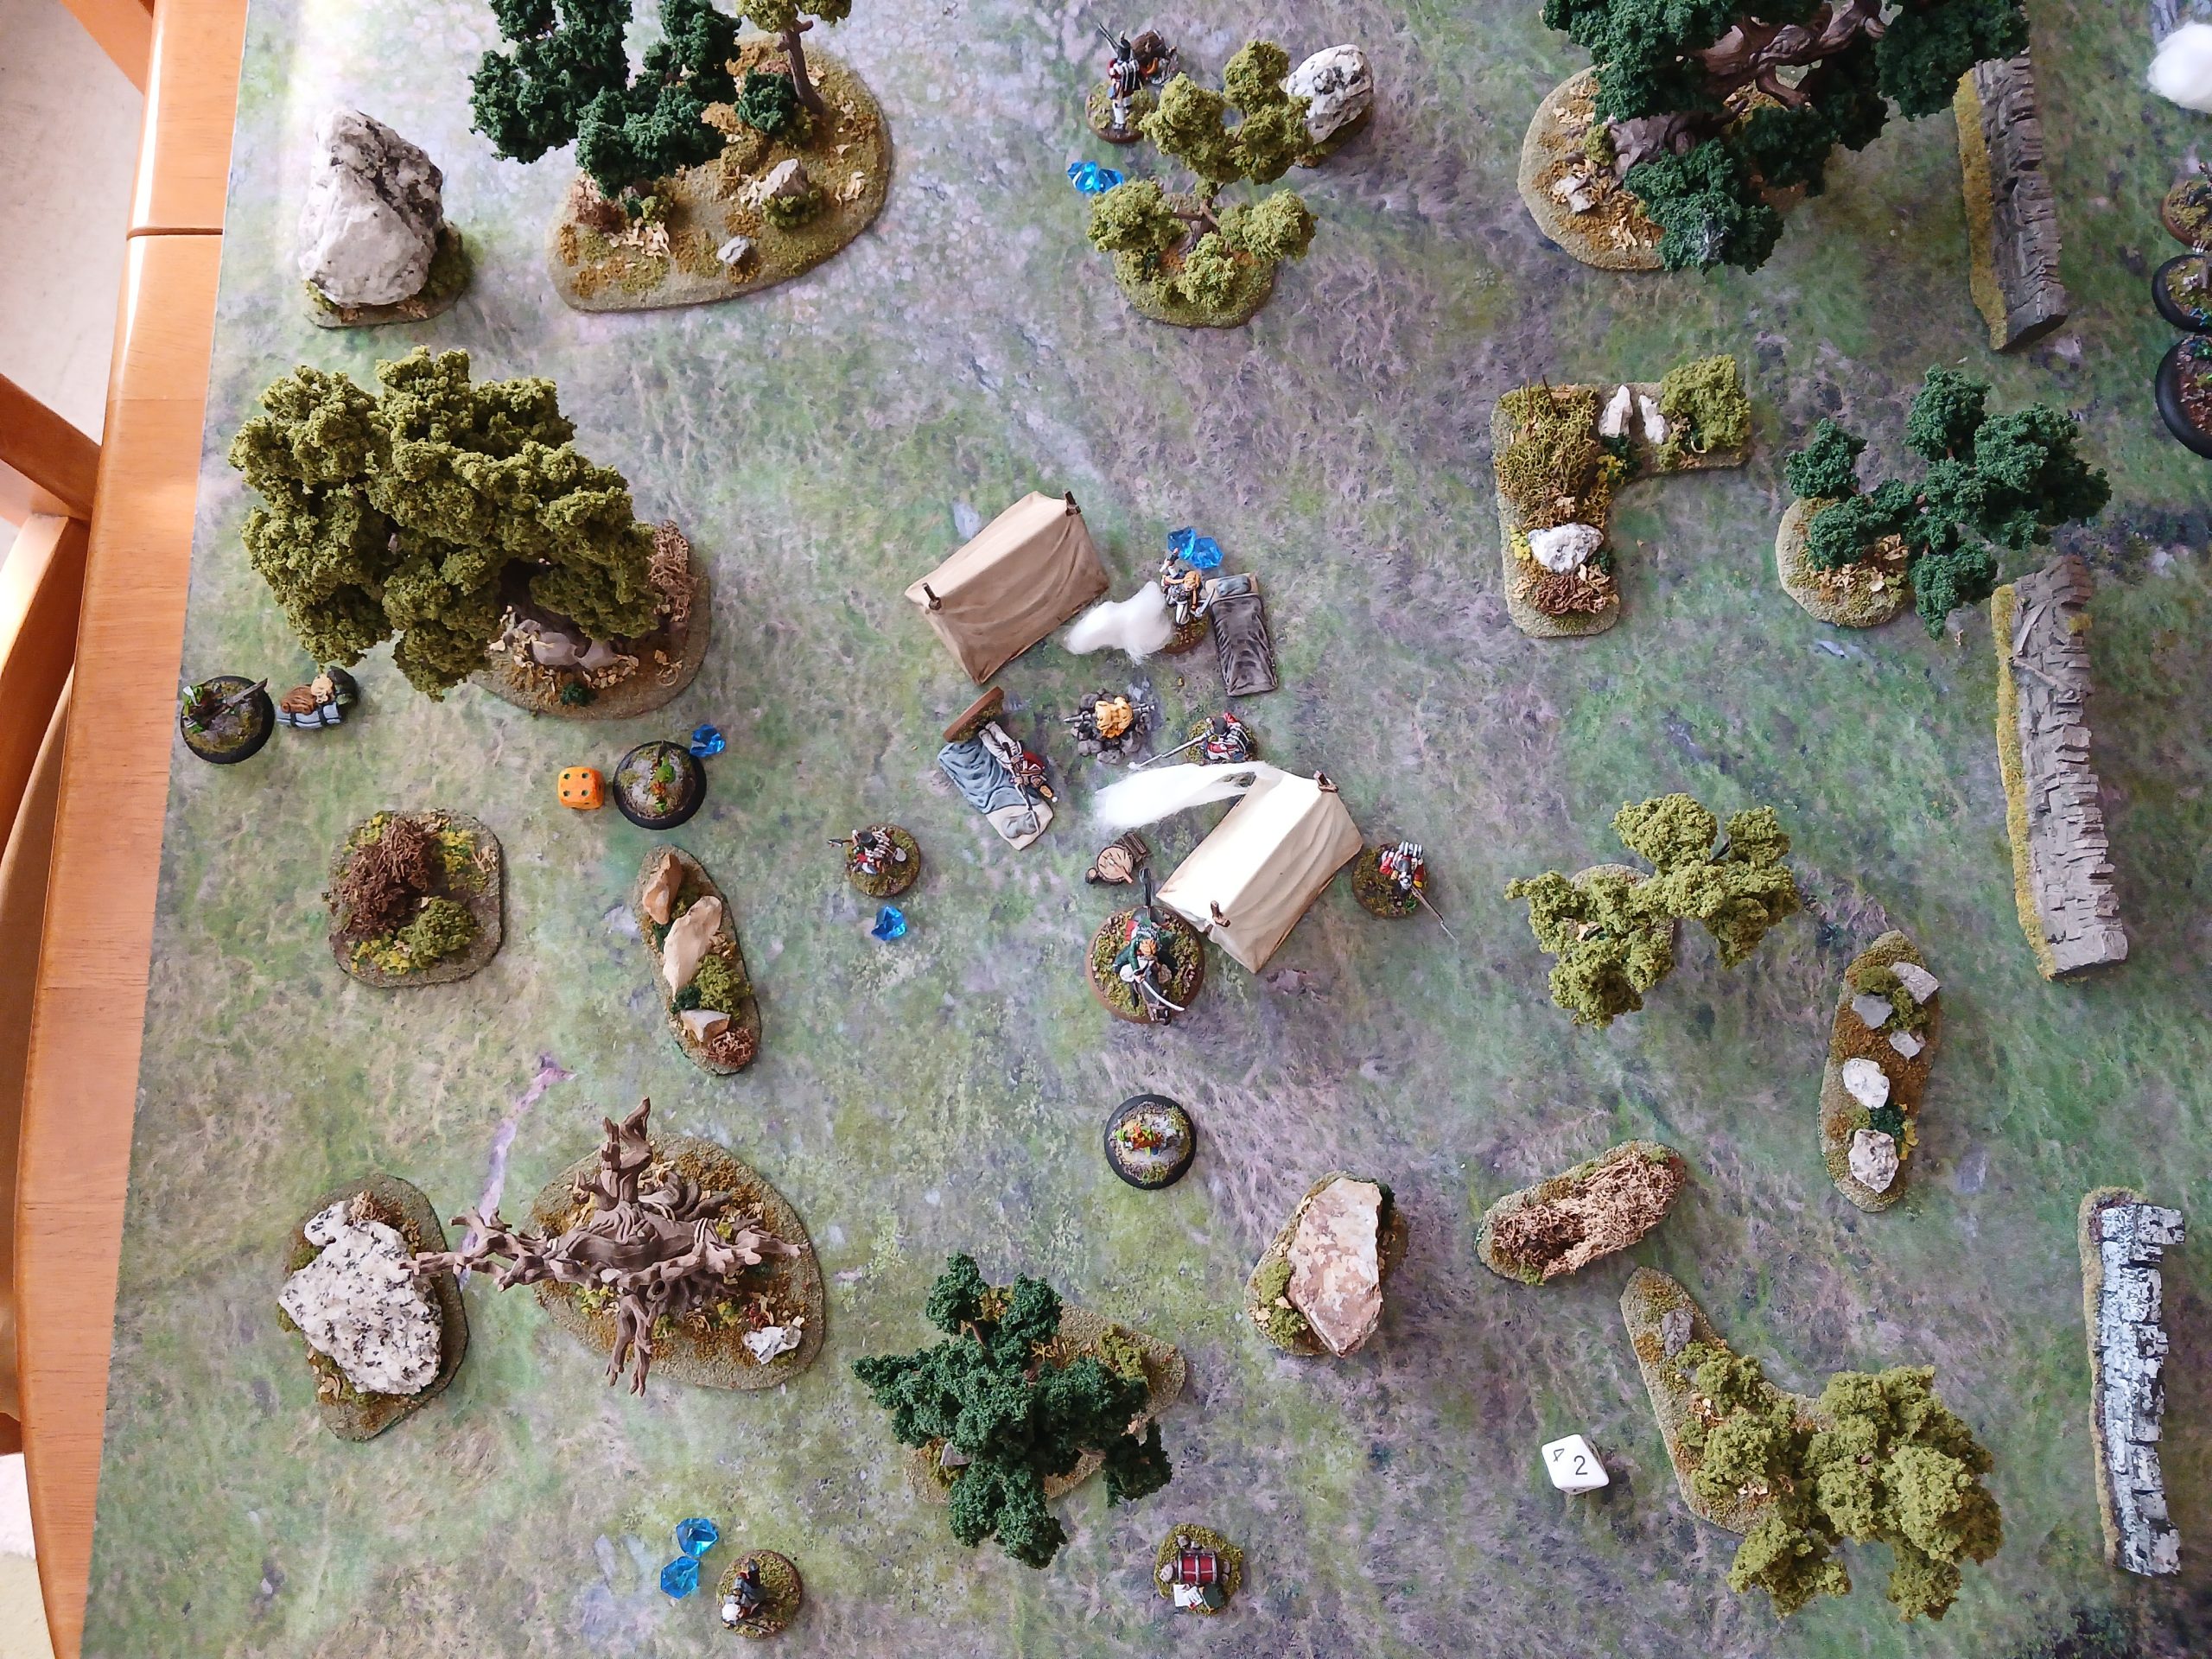
Turn 2:
The way I had placed Angua meant that she was blocking several lines of fire sadly. So I used other soldiers first. Walker reloads and shoots the injured bandit, missing by 1. Jones shoots at the same bandit, also missing by 1. This time though I used a fate dice as the other roll was high – and killed the bandit. He then moved to cover.
Wilson reloads and shoots the leftmost bandit on the bridge, killing him with a double 10! Angua manages to skinshift and moves up. Now she has DR 5 in place 😊.
Bandit shoots at Angua, but misses, then reloads. Bandit on the right moves around to get a shot on Harpe, missing by 1 (thanks to the penalty for him moving first).
Harpe reloads and moves further across. Doc moves up next to Jones, to heal him again next turn. Pike shoot the bandit on the right for 5. No return fire as that bandit had moved and shot. Frasier then shoots the same bandit for 7, killing him.
No new bandit again (requires a roll of 7+ on a D10). However, a Black Dog arrives on the bridge and decides to head for Pike.
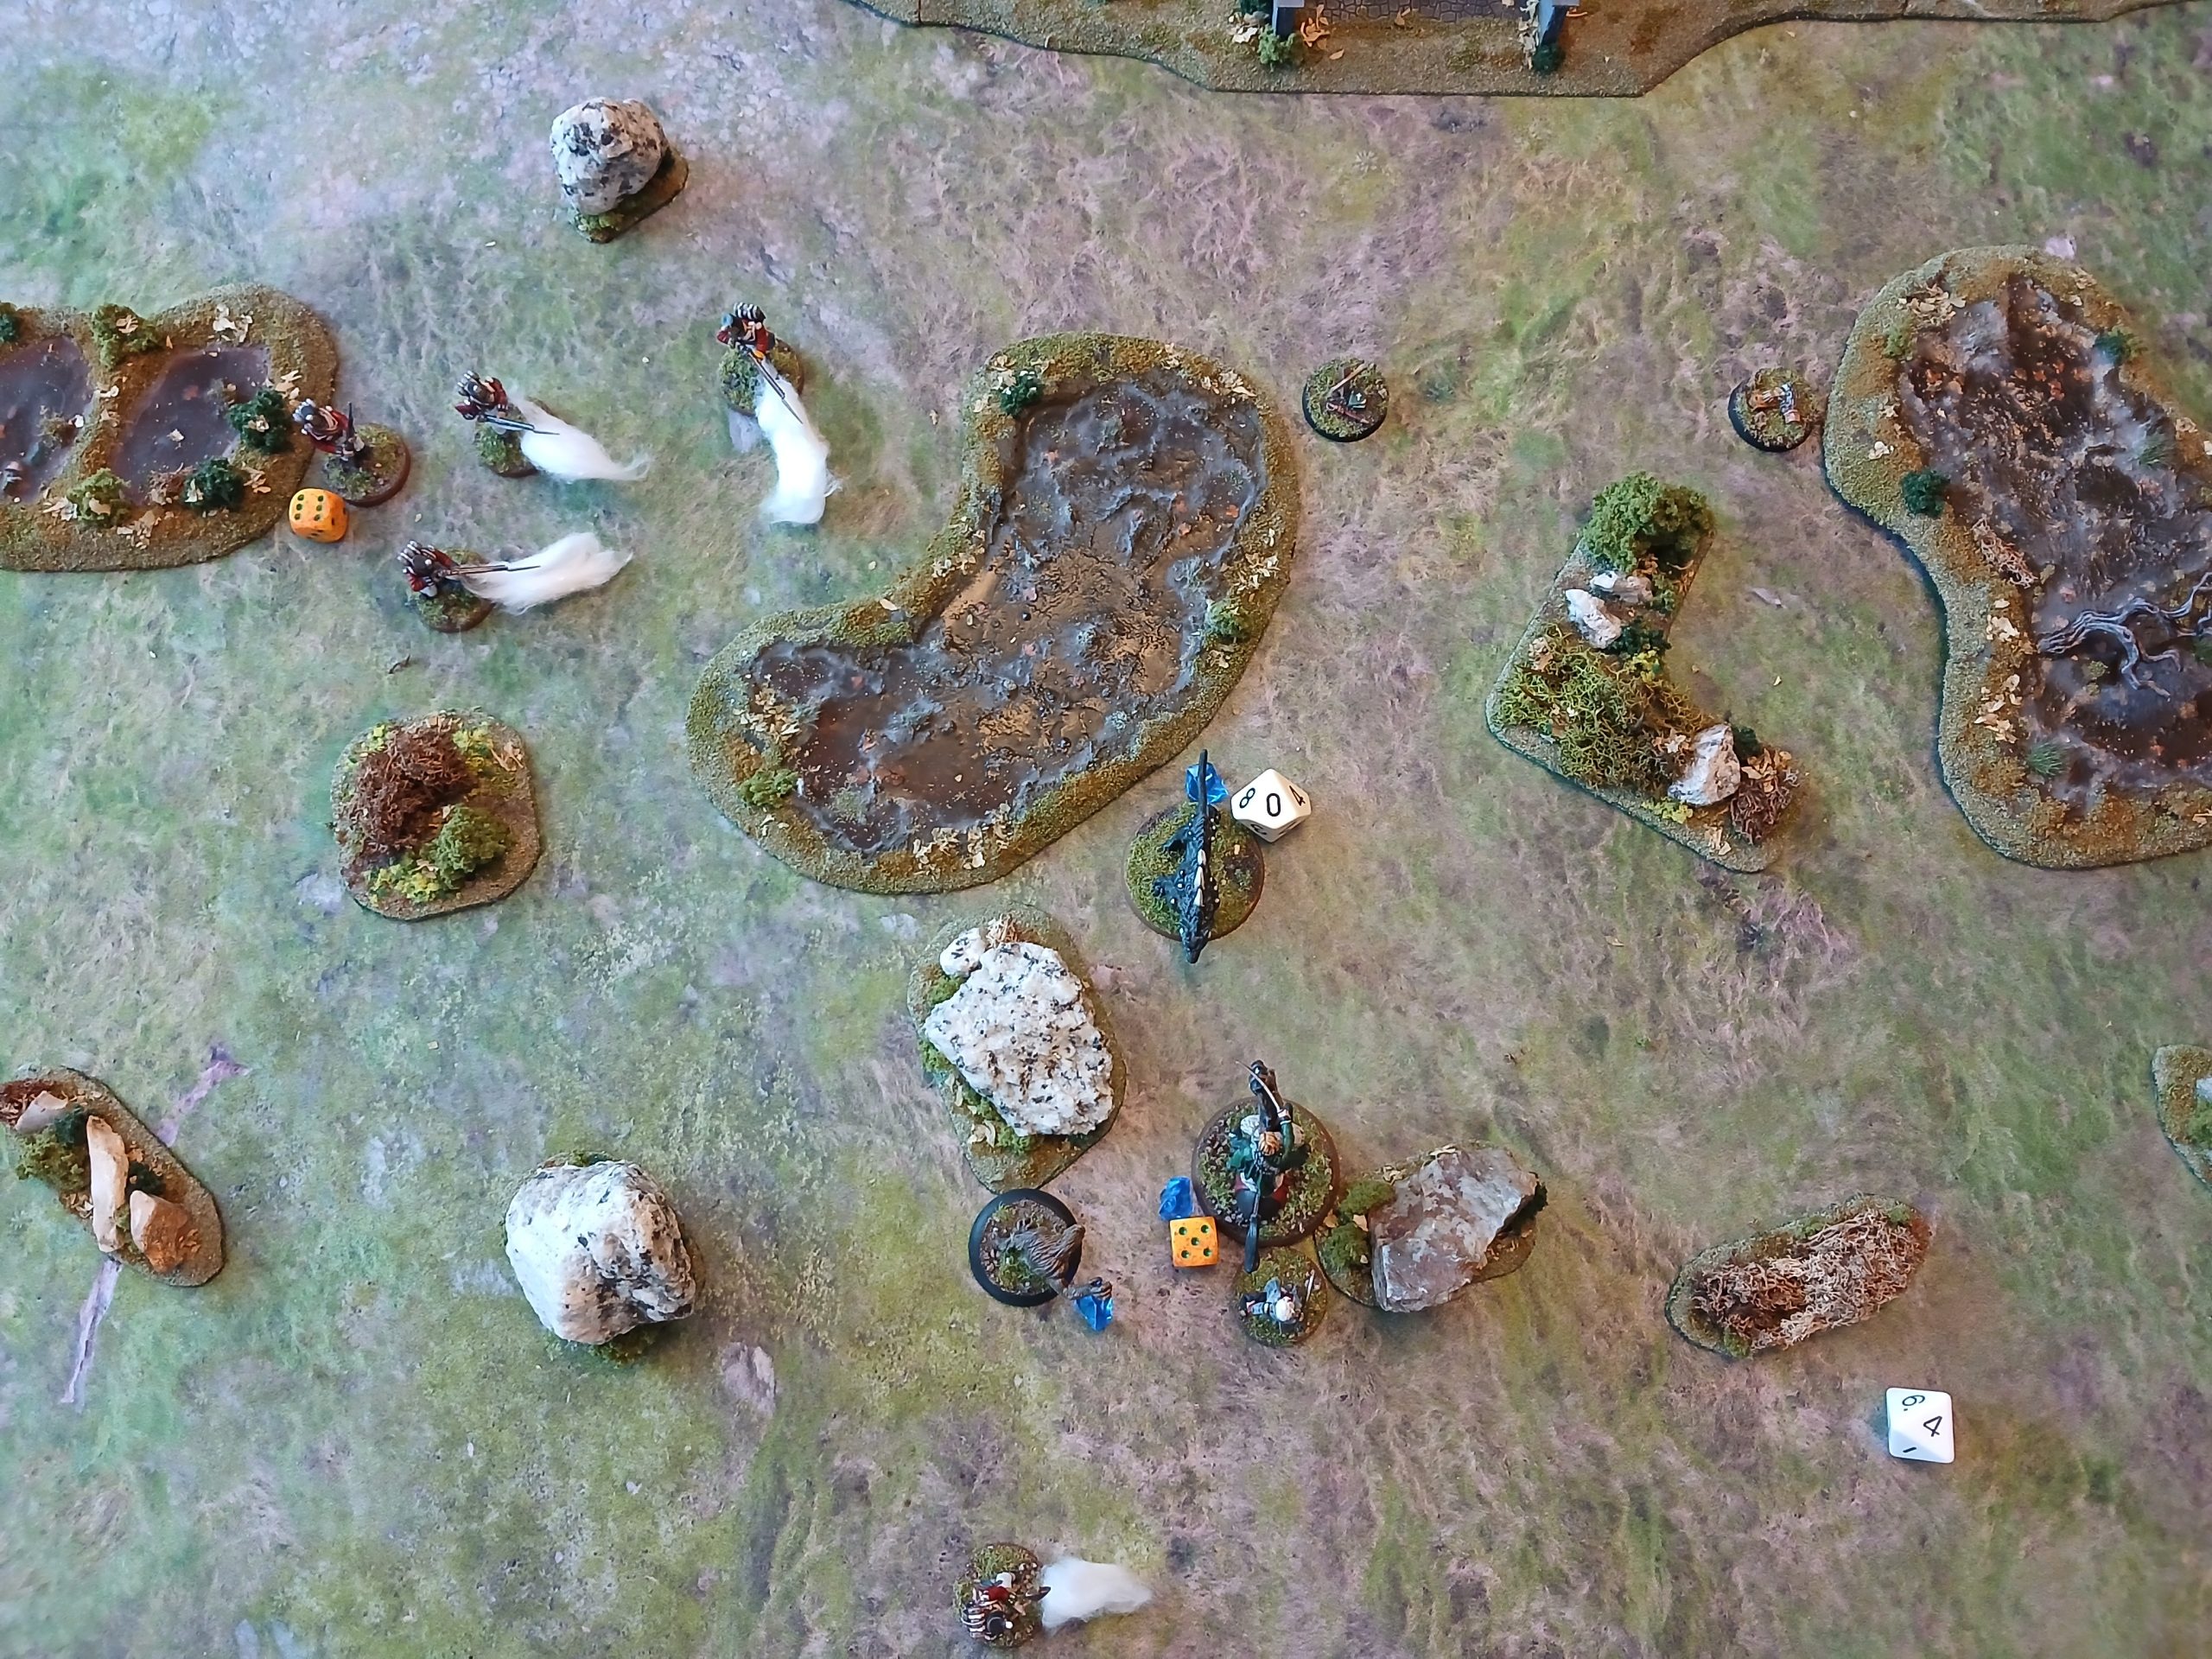
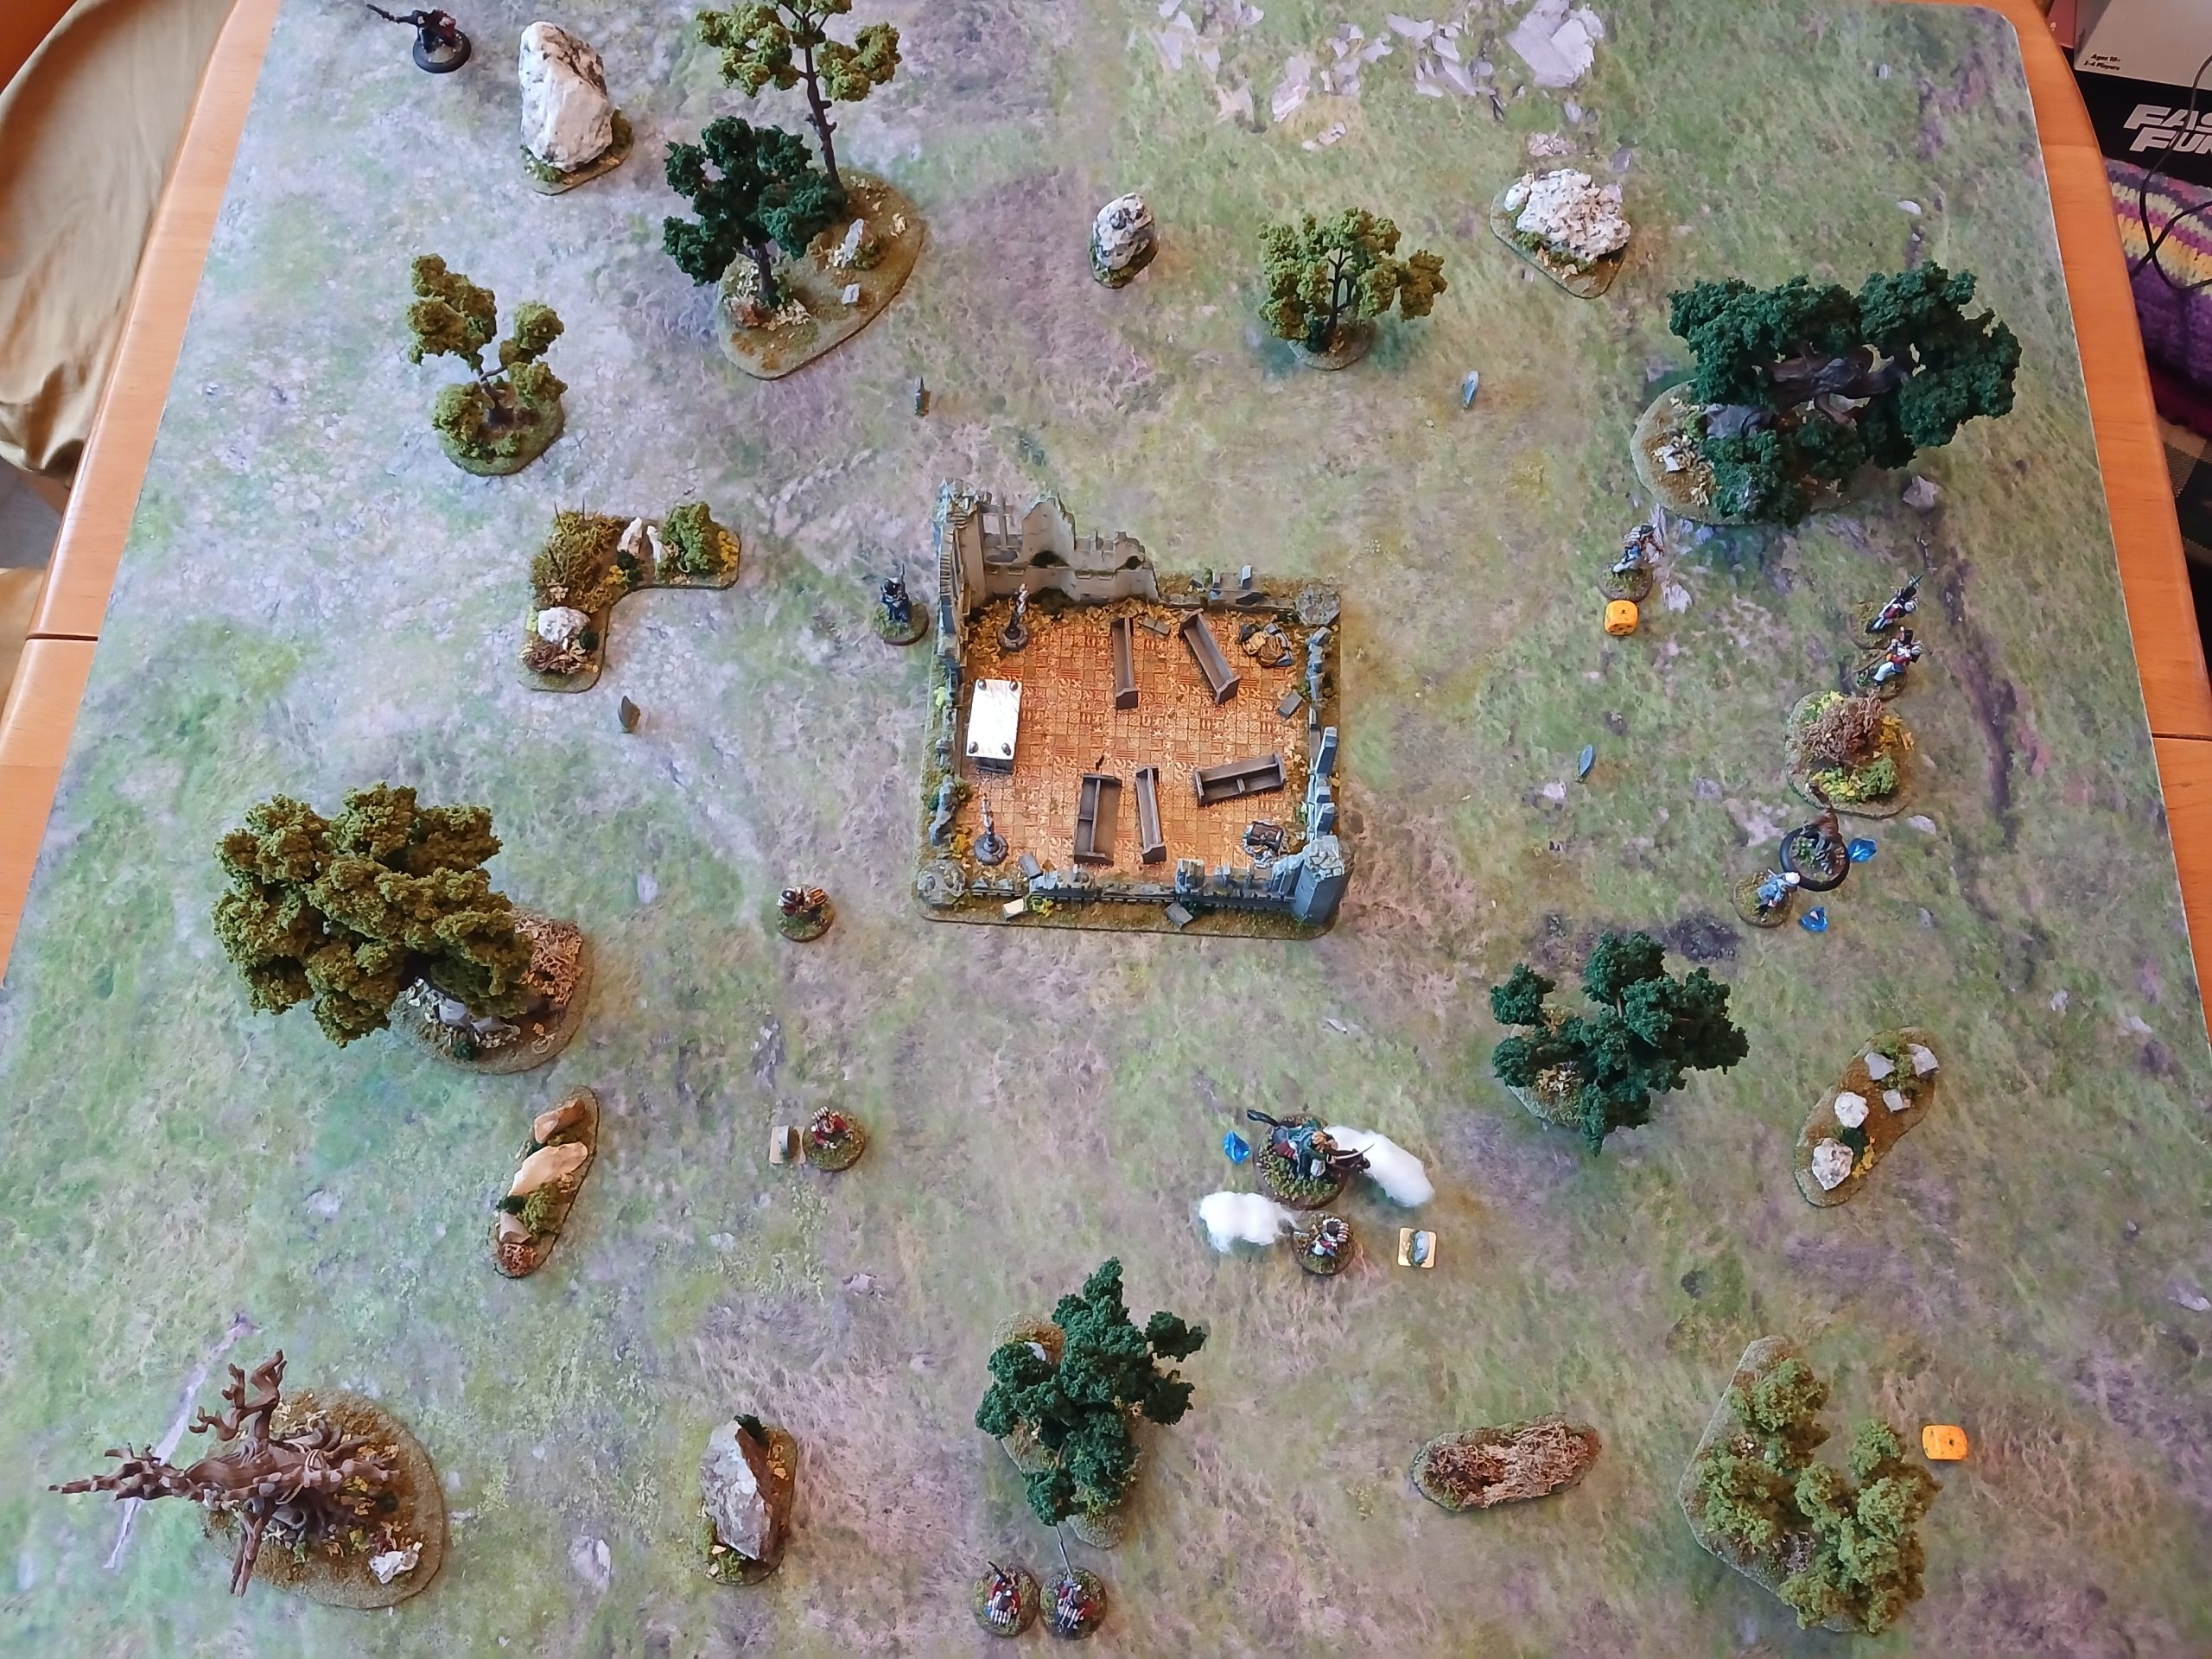
 Crack shot from Wilson kills bandit at the bridge
 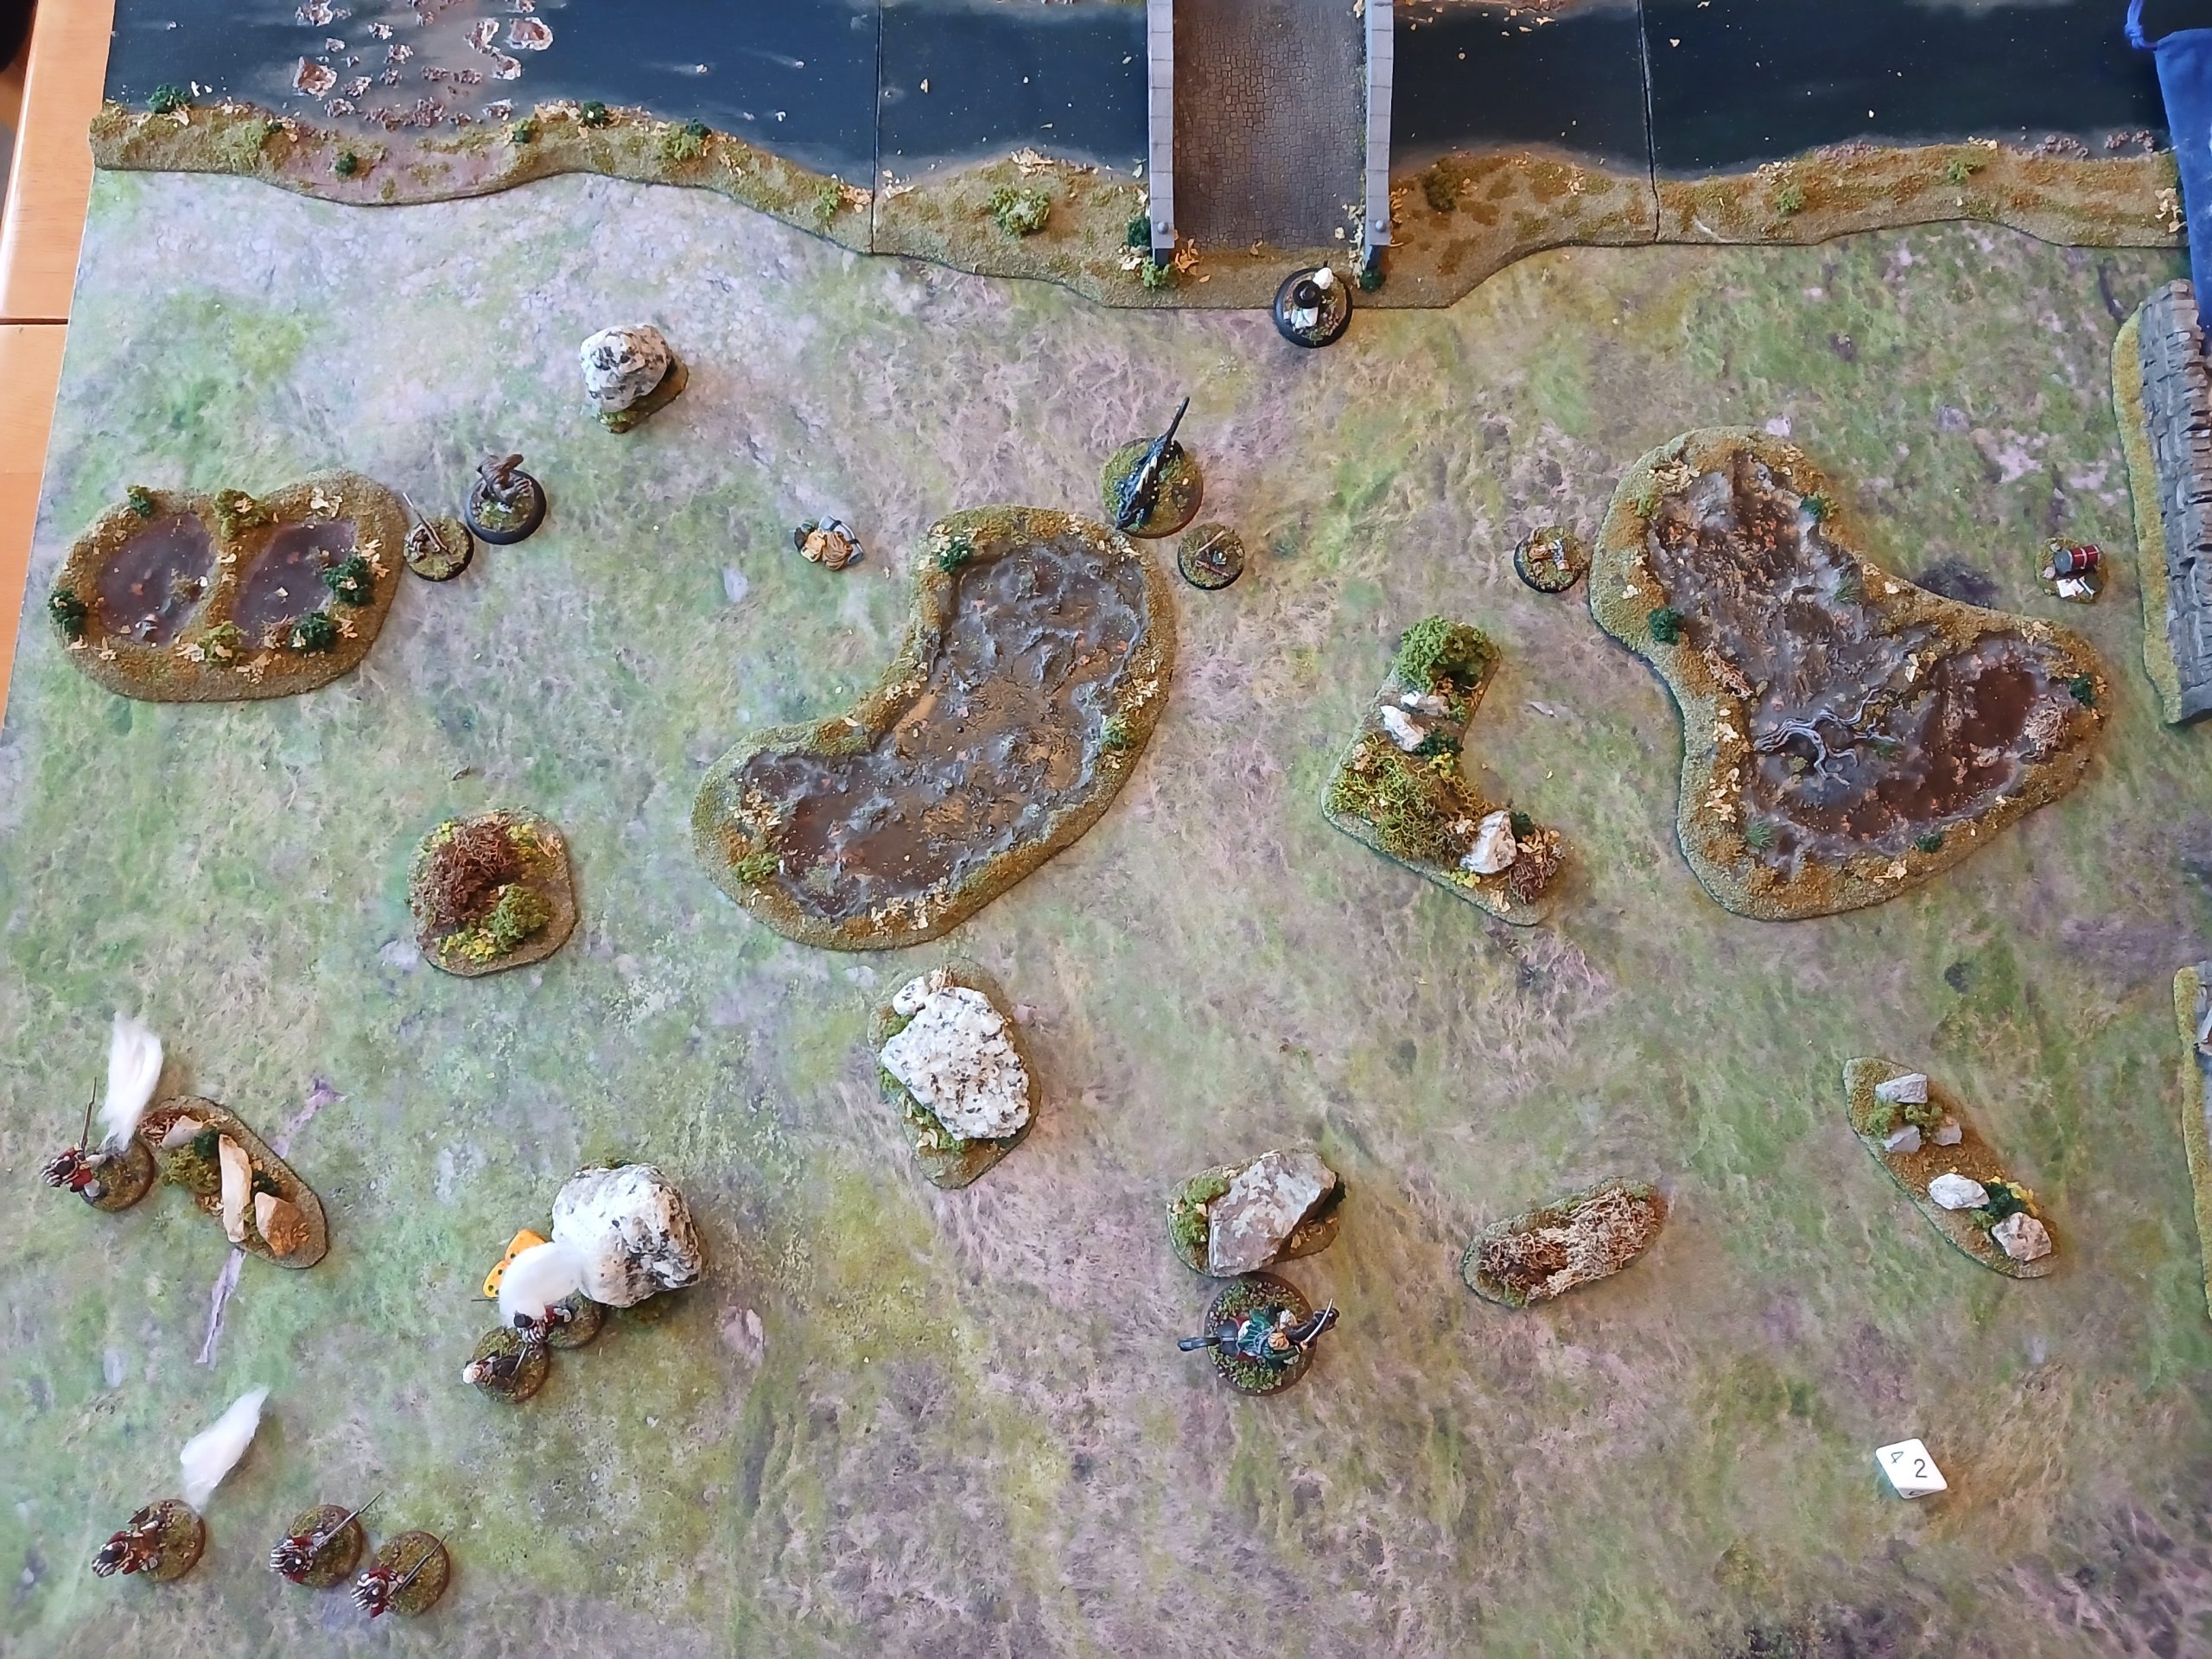 End of turn 2
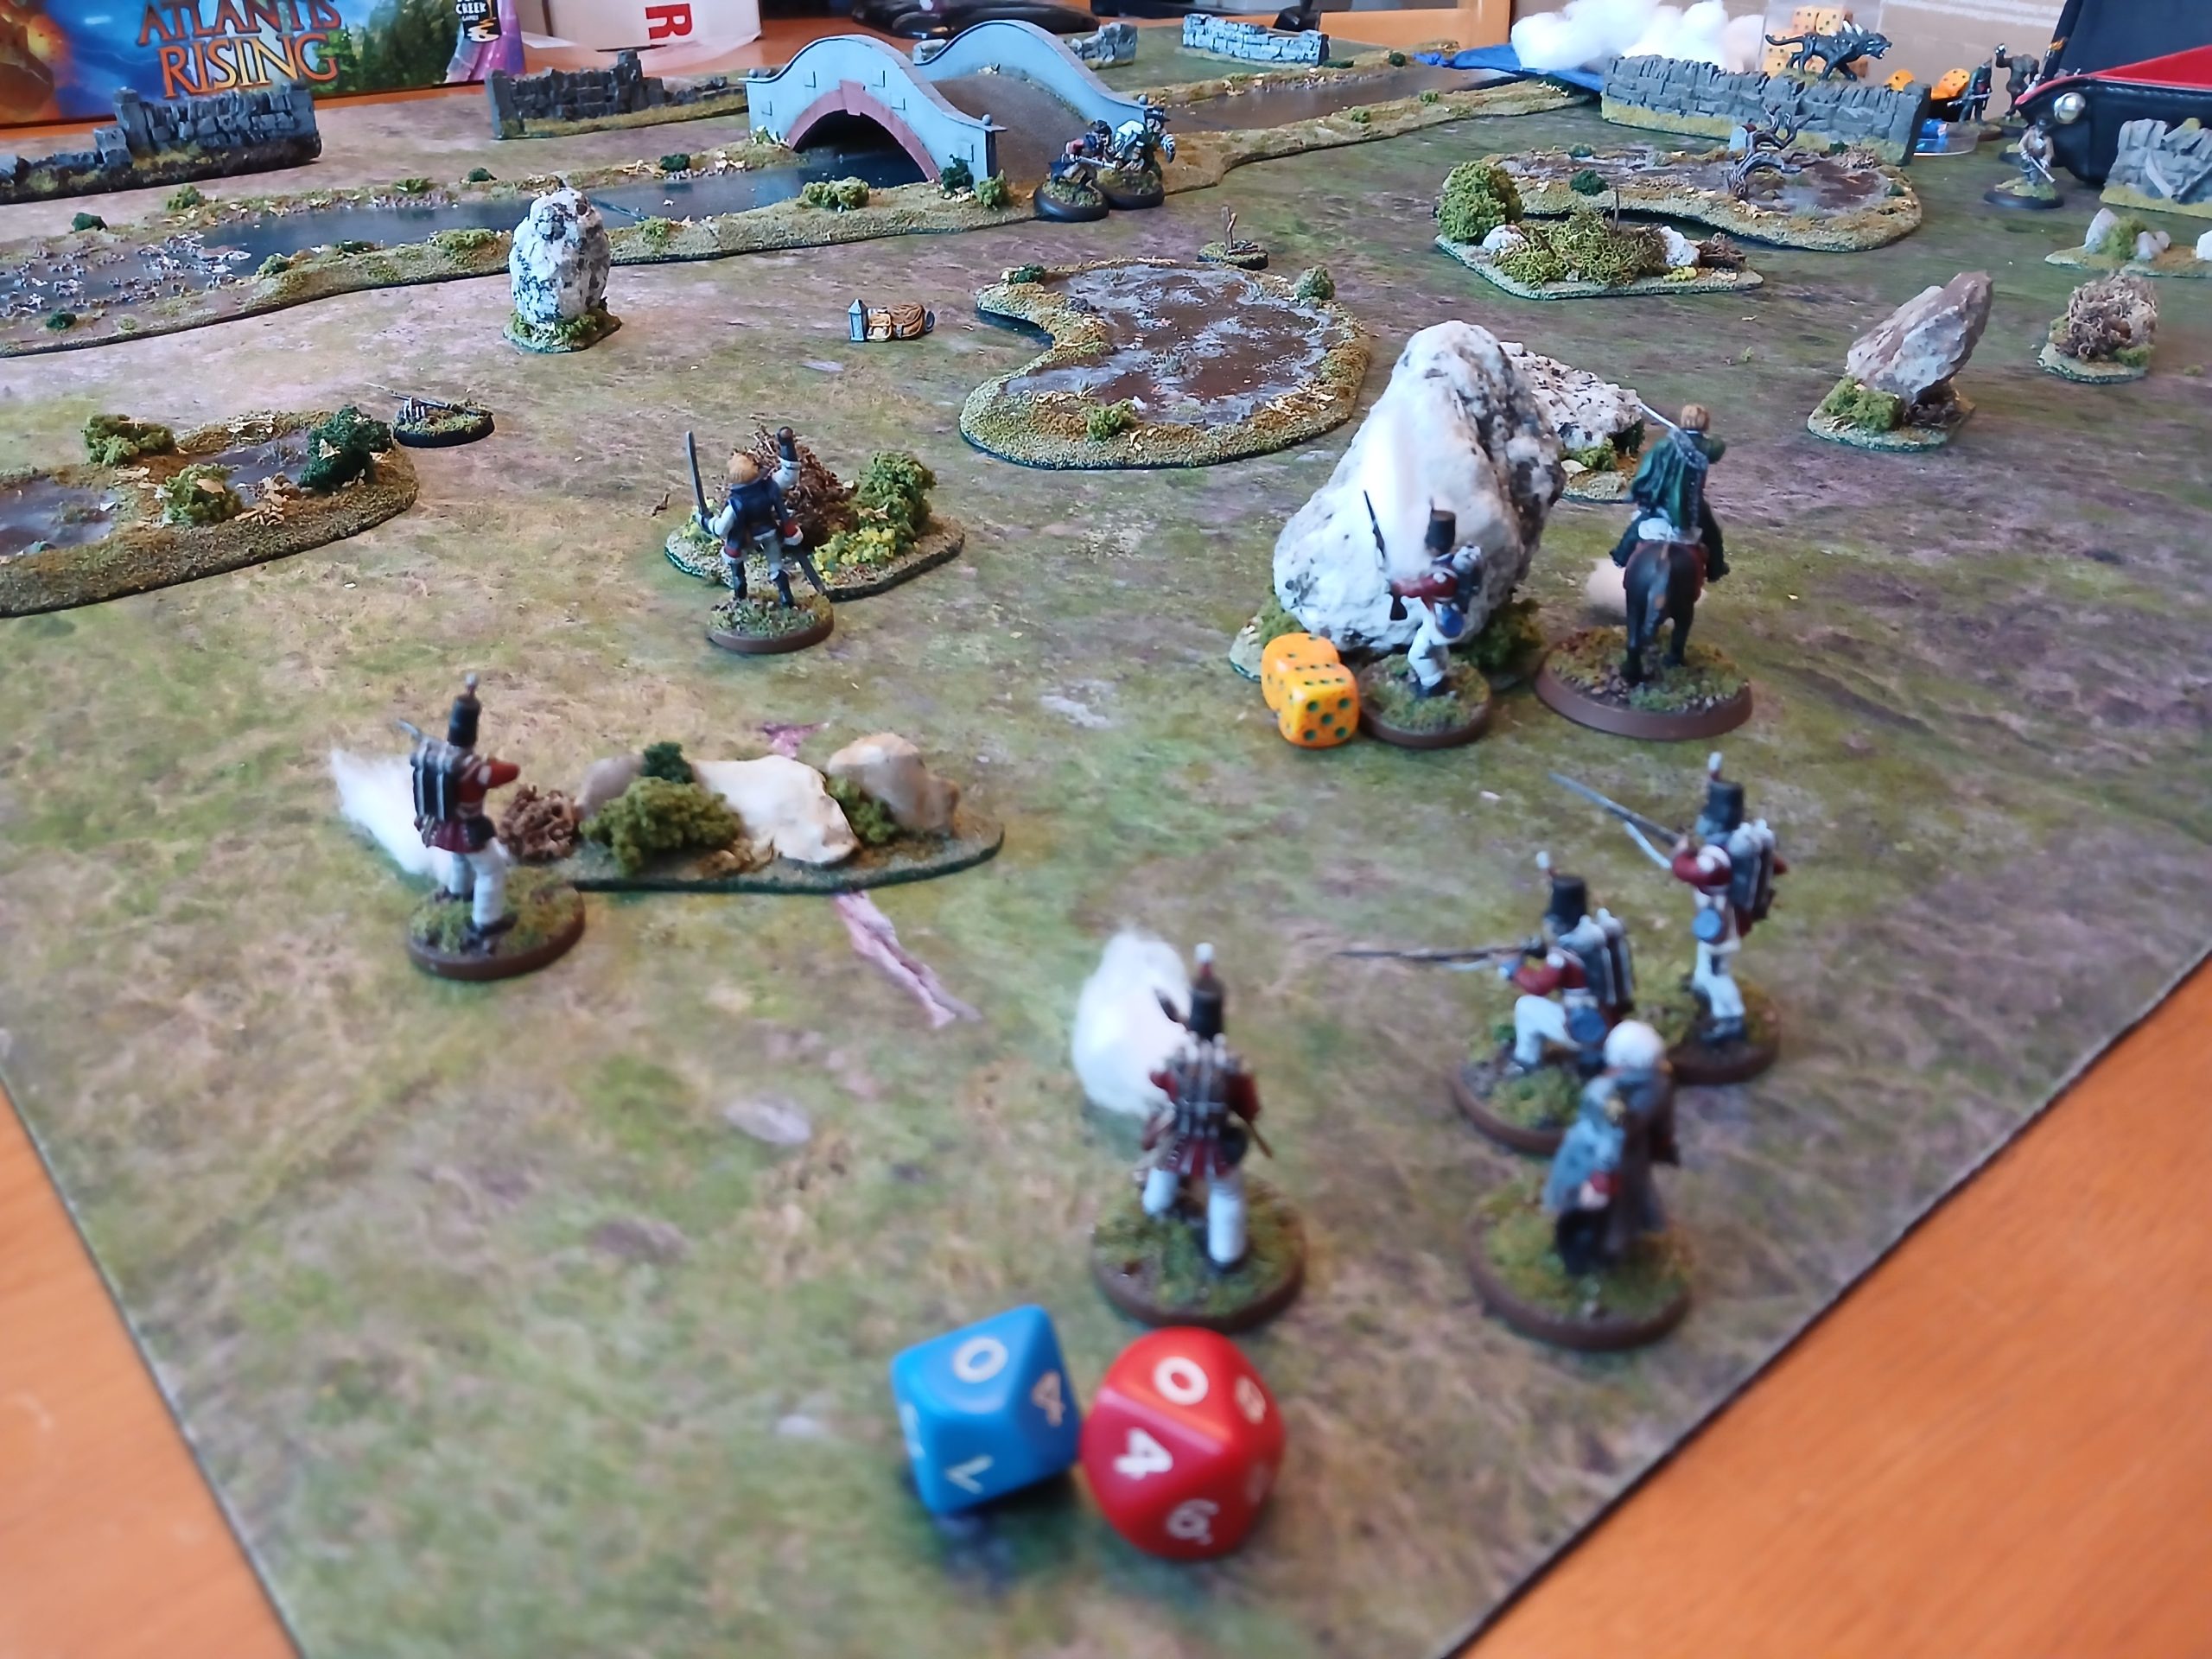
Turn 3:
I know I have to lure the Black Dog away, as currently only Harpe can hurt it. Angua with her DR and Quick heal could potentially tank some damage for a while too, so she sprints back towards the middle.
The Black Dog is positioned so it is blocking shots on the last bandit, so my other soldiers have to manoeuvre. Walker reloads and moves up closer to the leftmost clue token. Pike moves up to cover, getting LoS on the bandit, but misses. The return fire just misses Pike thanks to his cover. Frasier also moves up to cover, shooting the bandit for 6. No return fire as he already did so.
The Black Dog assaults Angua, but misses. She falls back. The bandit reloads, shoots at Walker, but misses. Walker returns fire, but he also misses.
Godfrey heals Jones for another 2 health. Jones reloads and moves up. Wilson reloads and shoots the bandit for 5 (5+10 rolled), enough to kill it. Harpe charges into the Black Dog, barely missing it (by 1). Black Dog hits back for 5, Harpe passes the Terror check for the damage. No new bandit arrives.
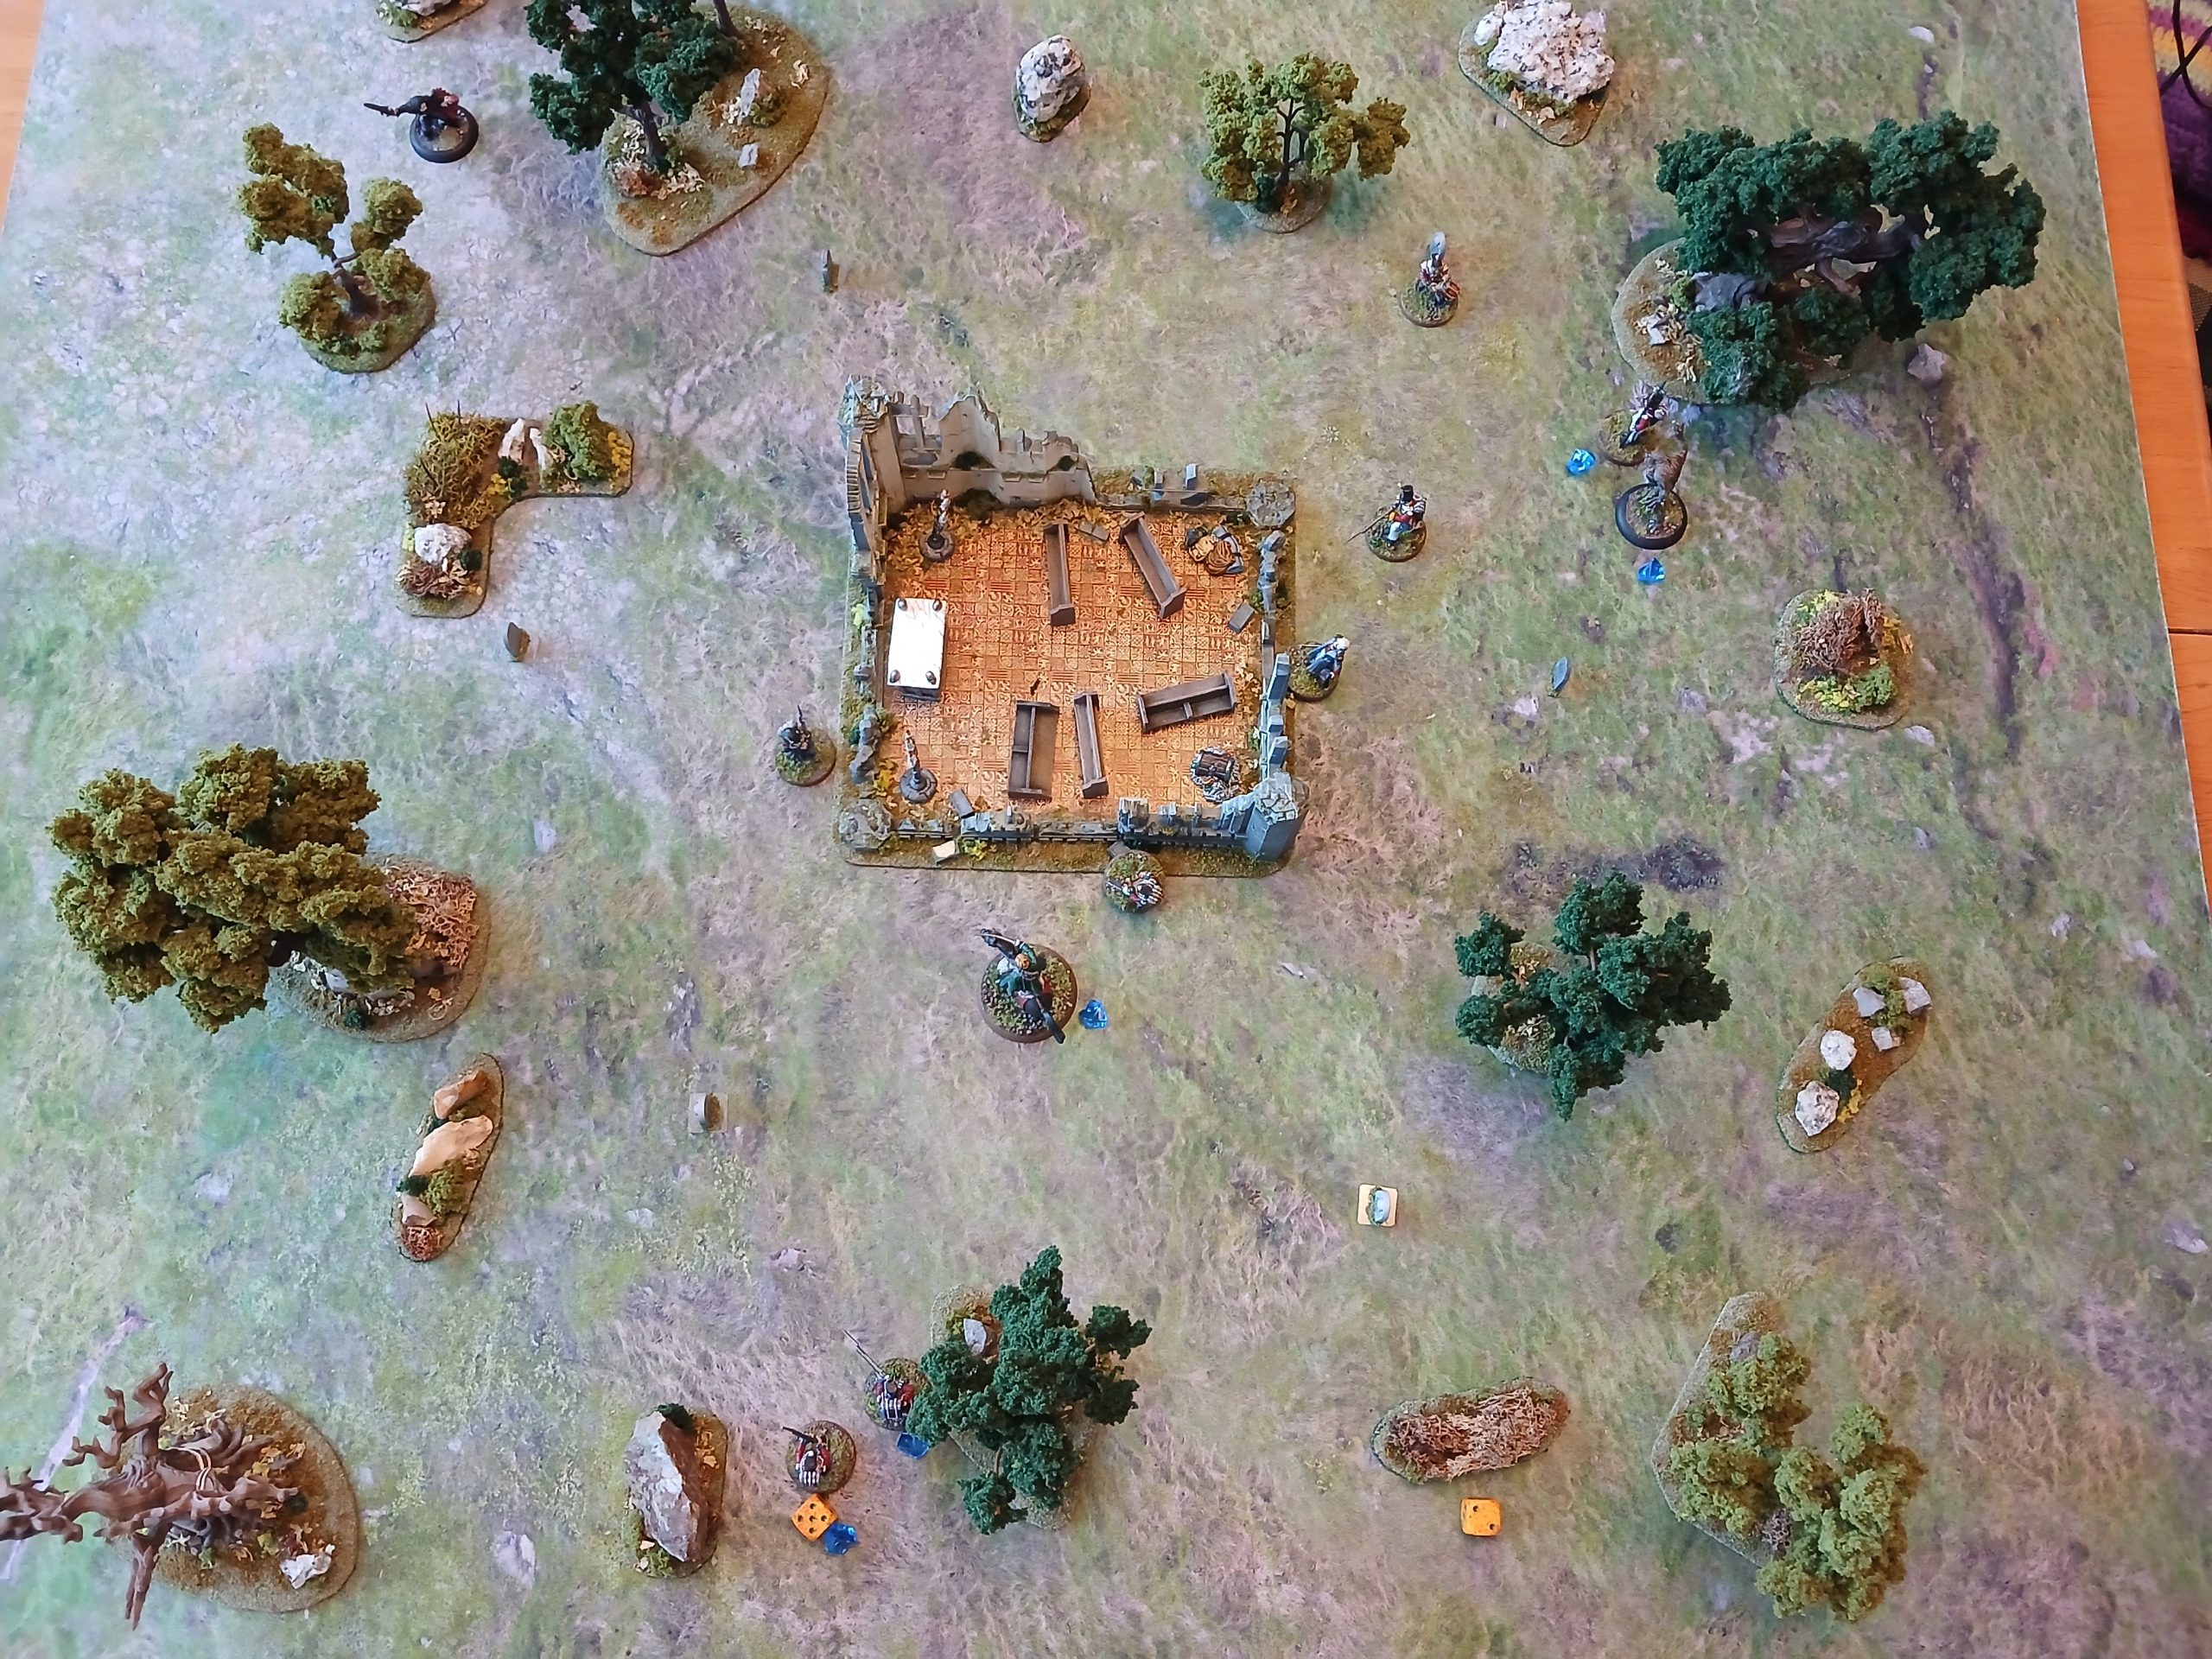
 End of turn 3
Turn 4:
Walker moves up to the second clue in line, sadly finding just some old mouldy bread ☹. Jones goes to the far left clue, finding a tattered prayer book (giving his attacked ‘Blessed’ meaning he can also hurt the Black Dog now). Pike and Frasier both sprint up without reloading their muskets (since there are no bandits, and they can’t hurt the Black Dog).
The Black Dog attacks Angua, missing again. She backs off.
Wilson sprints along the south. Harpe attacks the Black Dog, hitting this time for 10+8, solid blow. Black Dog’s return attack misses, it is obviously shaken by something being able to hurt it (Glad I chose to give Harpe Great Faith). Godfrey moves up next to Harpe. Still no new bandits 😊
 End of turn 4
Bat Rep – Scenario 3 – The Troll Hunts Part 2
Turn 5:
All of the unit call for Jones to wake, but he stubbornly refuse to, still snoring heavily.
Angua heals, then charges the goblin, killing it. Harpe reloads and charges the injured goblin, hitting it for 4 and finishing it off with his cold iron. Pike shoots the troll for a big 10 damage, but its DR makes it 6. Still good though.
The troll moves towards Angua, missing with a rock. Goblin moves up.
Frasier reloads and moves to get a good line of sight on the goblin. Walker misses his shot and moves towards the middle. Wilson reloads and misses the troll. Doc reloads and hits the troll for 4.
 End of turn 5
Turn 6:
Jones finally awakes…
I imagine he gets up like Jones in Dad’s army, calling out Don’t panic and stamping around… while everyone else has been fighting for quite a while already.
He shoots at the troll, misses and moves south. Frasier misses the goblin and moves south as well. Angua charges the troll, hitting for 8, DR makes it 4. The troll hits back, but even with Very strong her DR keeps her safe. Harpe lights his torch and charges the troll, hitting for 8 – and with fire it finishes off the troll.
Goblin charges Harpe, hitting him for 6, DR makes it 5. (forgot to do Harpe’s strike back here).
Wilson reloads, but misses. Doc reloads, misses. Walker reloads and moves, as does Pike.
 End of turn 6
Turn 7:
Angua heals and charges the goblin, hitting it for 3 after DR. Goblin misses. Harpe charges the fatigued goblin, just hitting it, and killing it due to Cold iron.
With that the campsite was safe.
Jones slept through most of it, then when he finally woke he shot randomly in the air and walked away…. 😊
 End of turn 7
Victory and 7 bonus xp. Since one of the soldiers had to miss out on a bonus xp I chose that to be Jones, to fit with what happened in the scenario.
All now reach Tier 1, and get +1 courage.
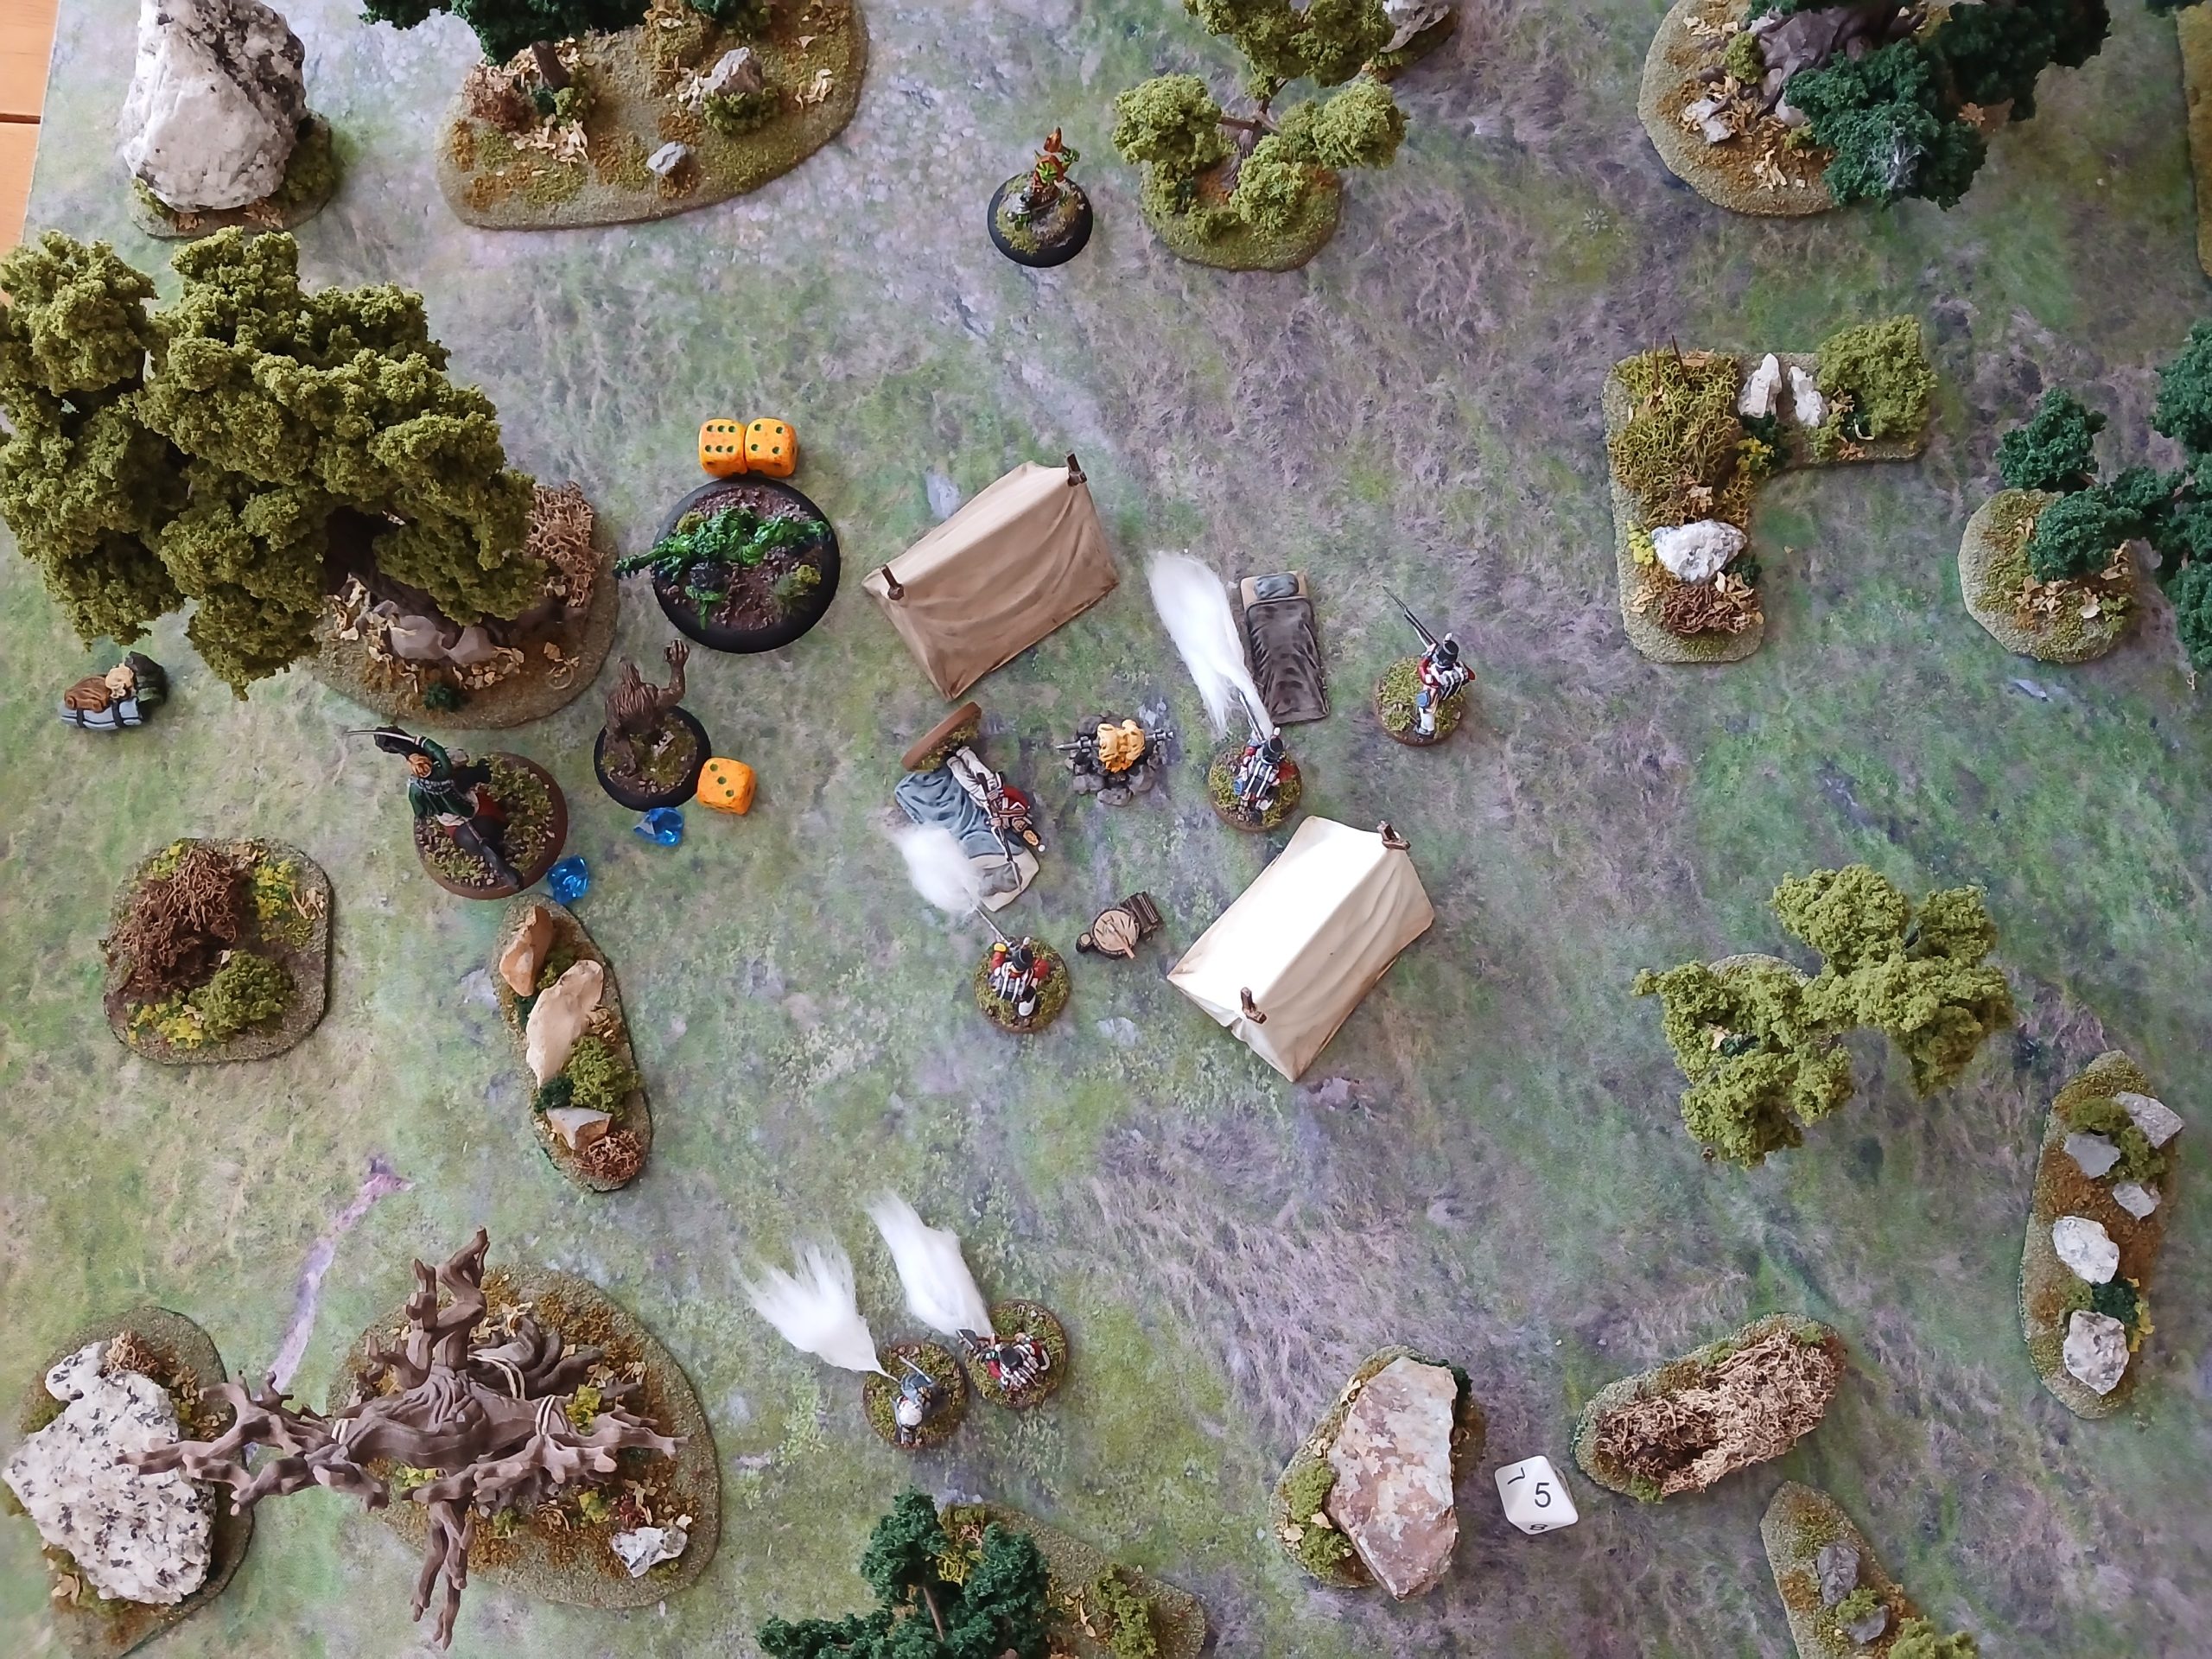
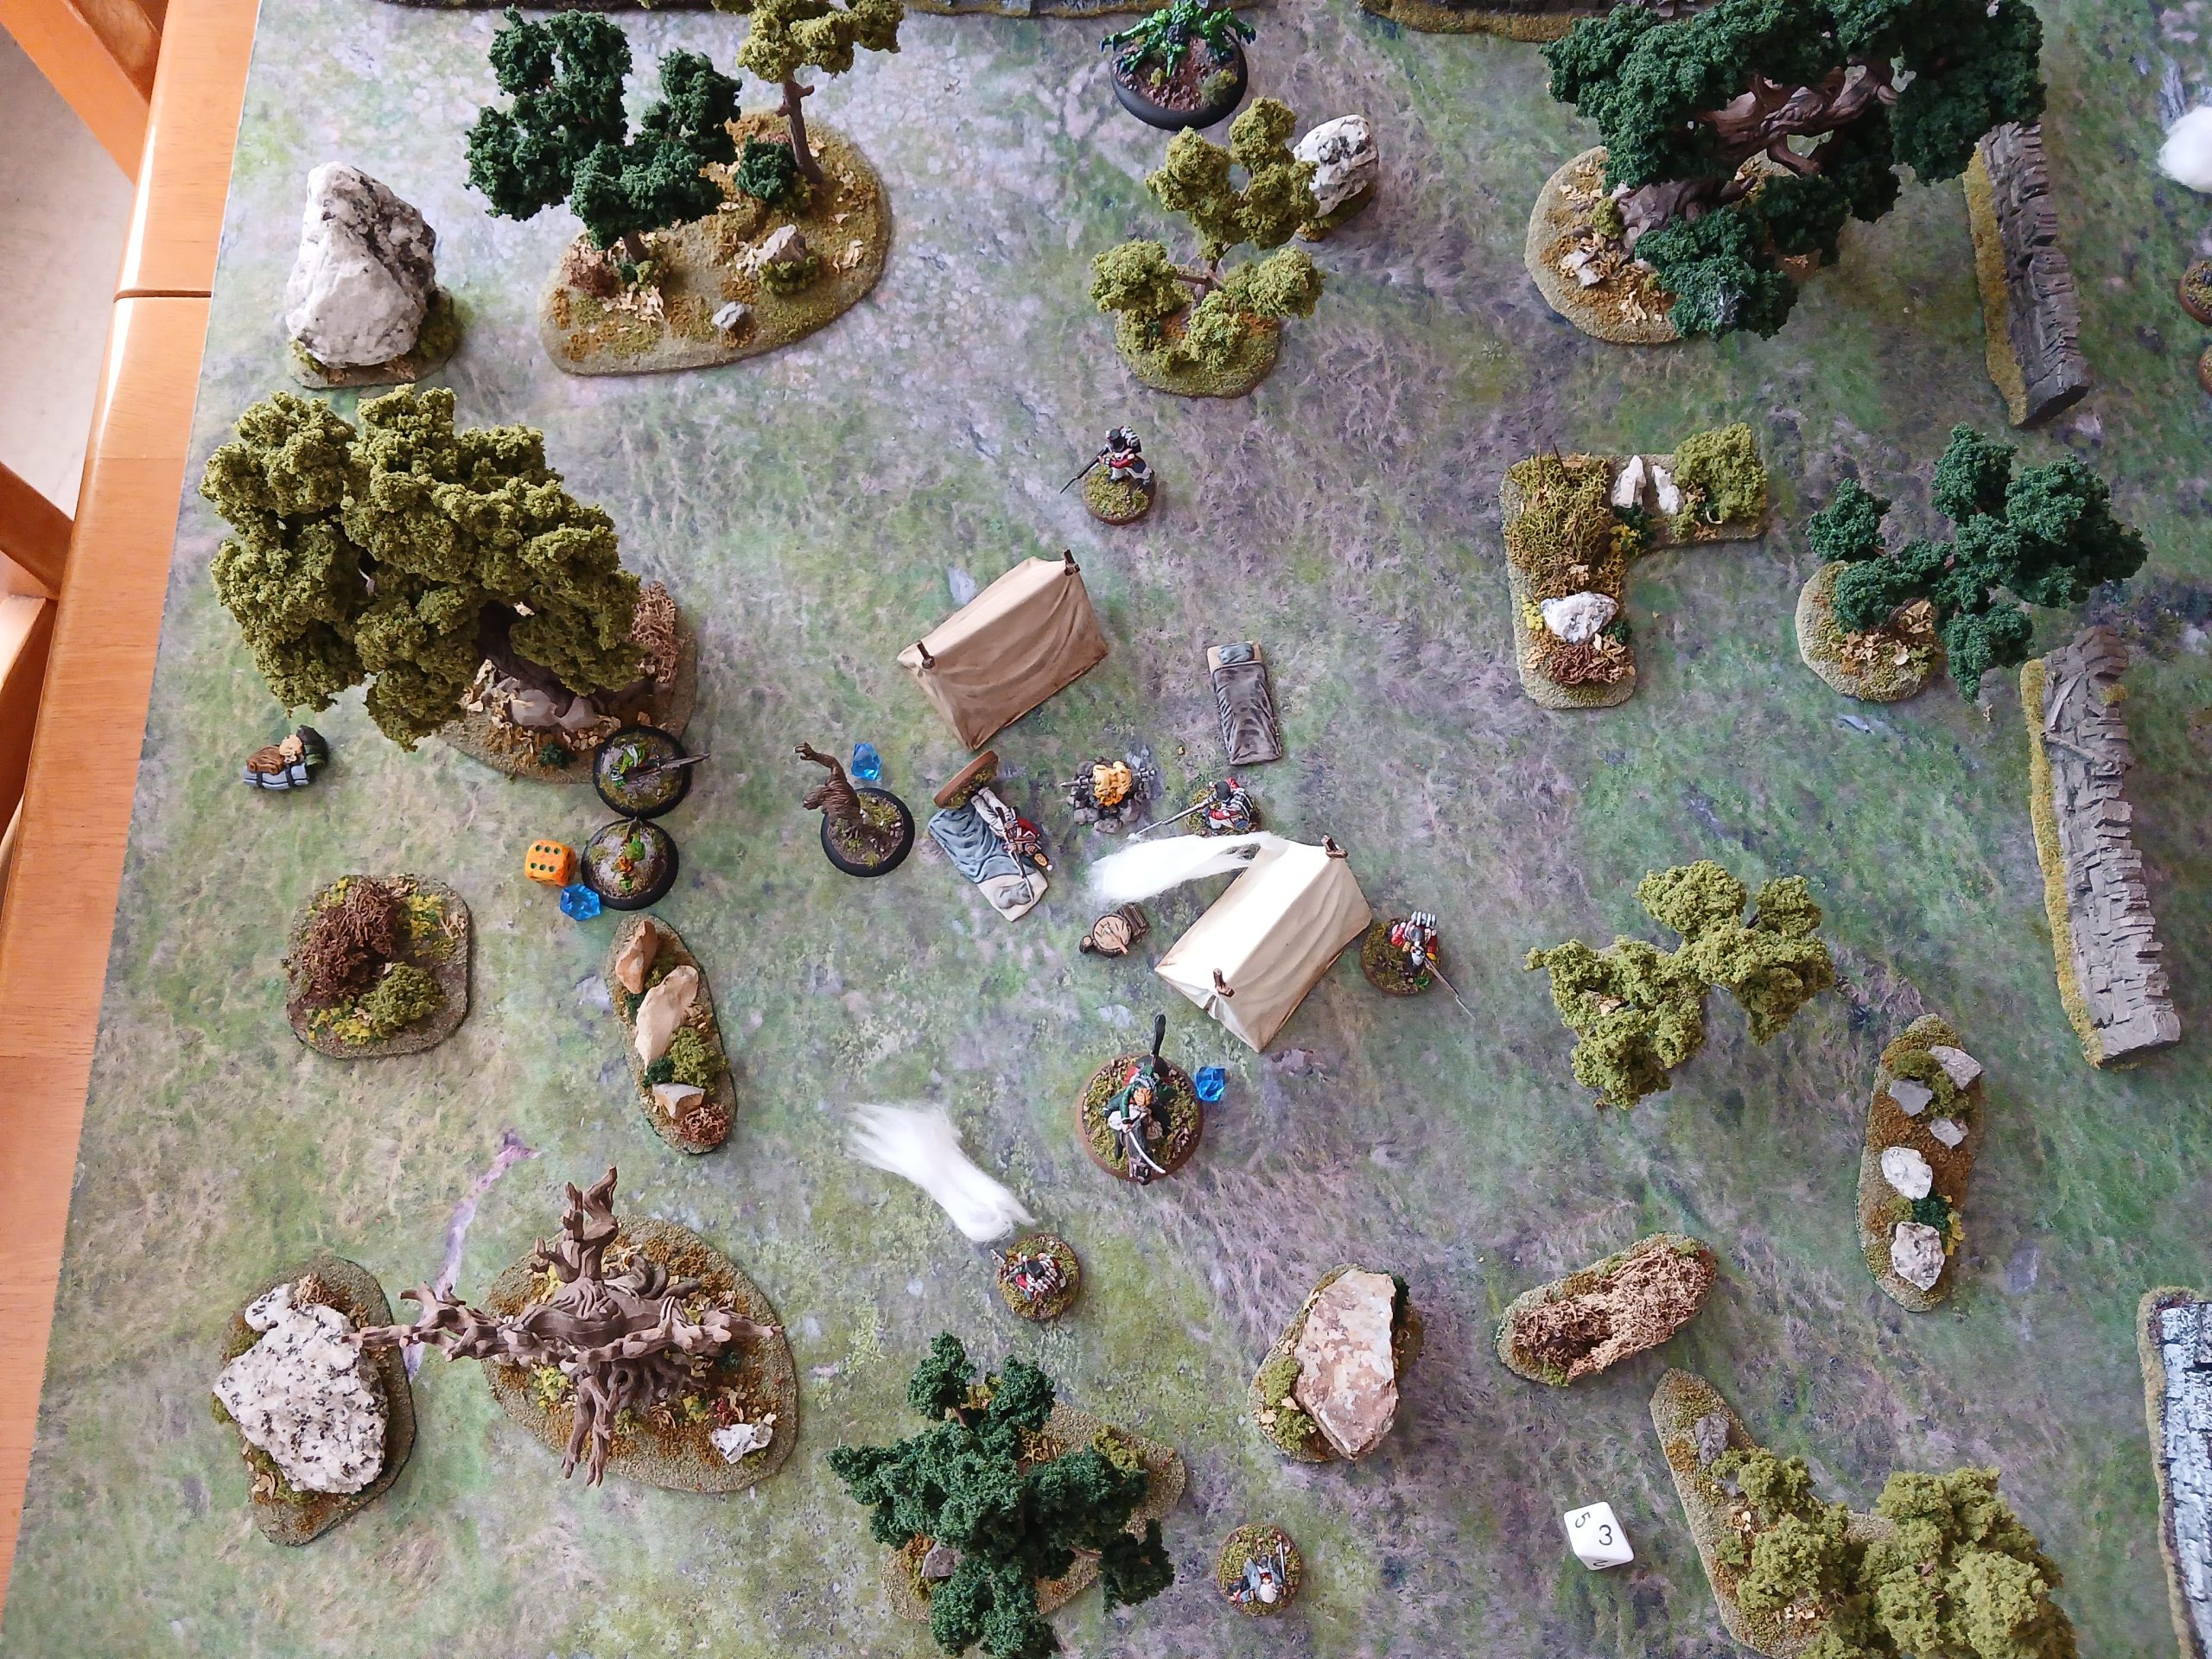
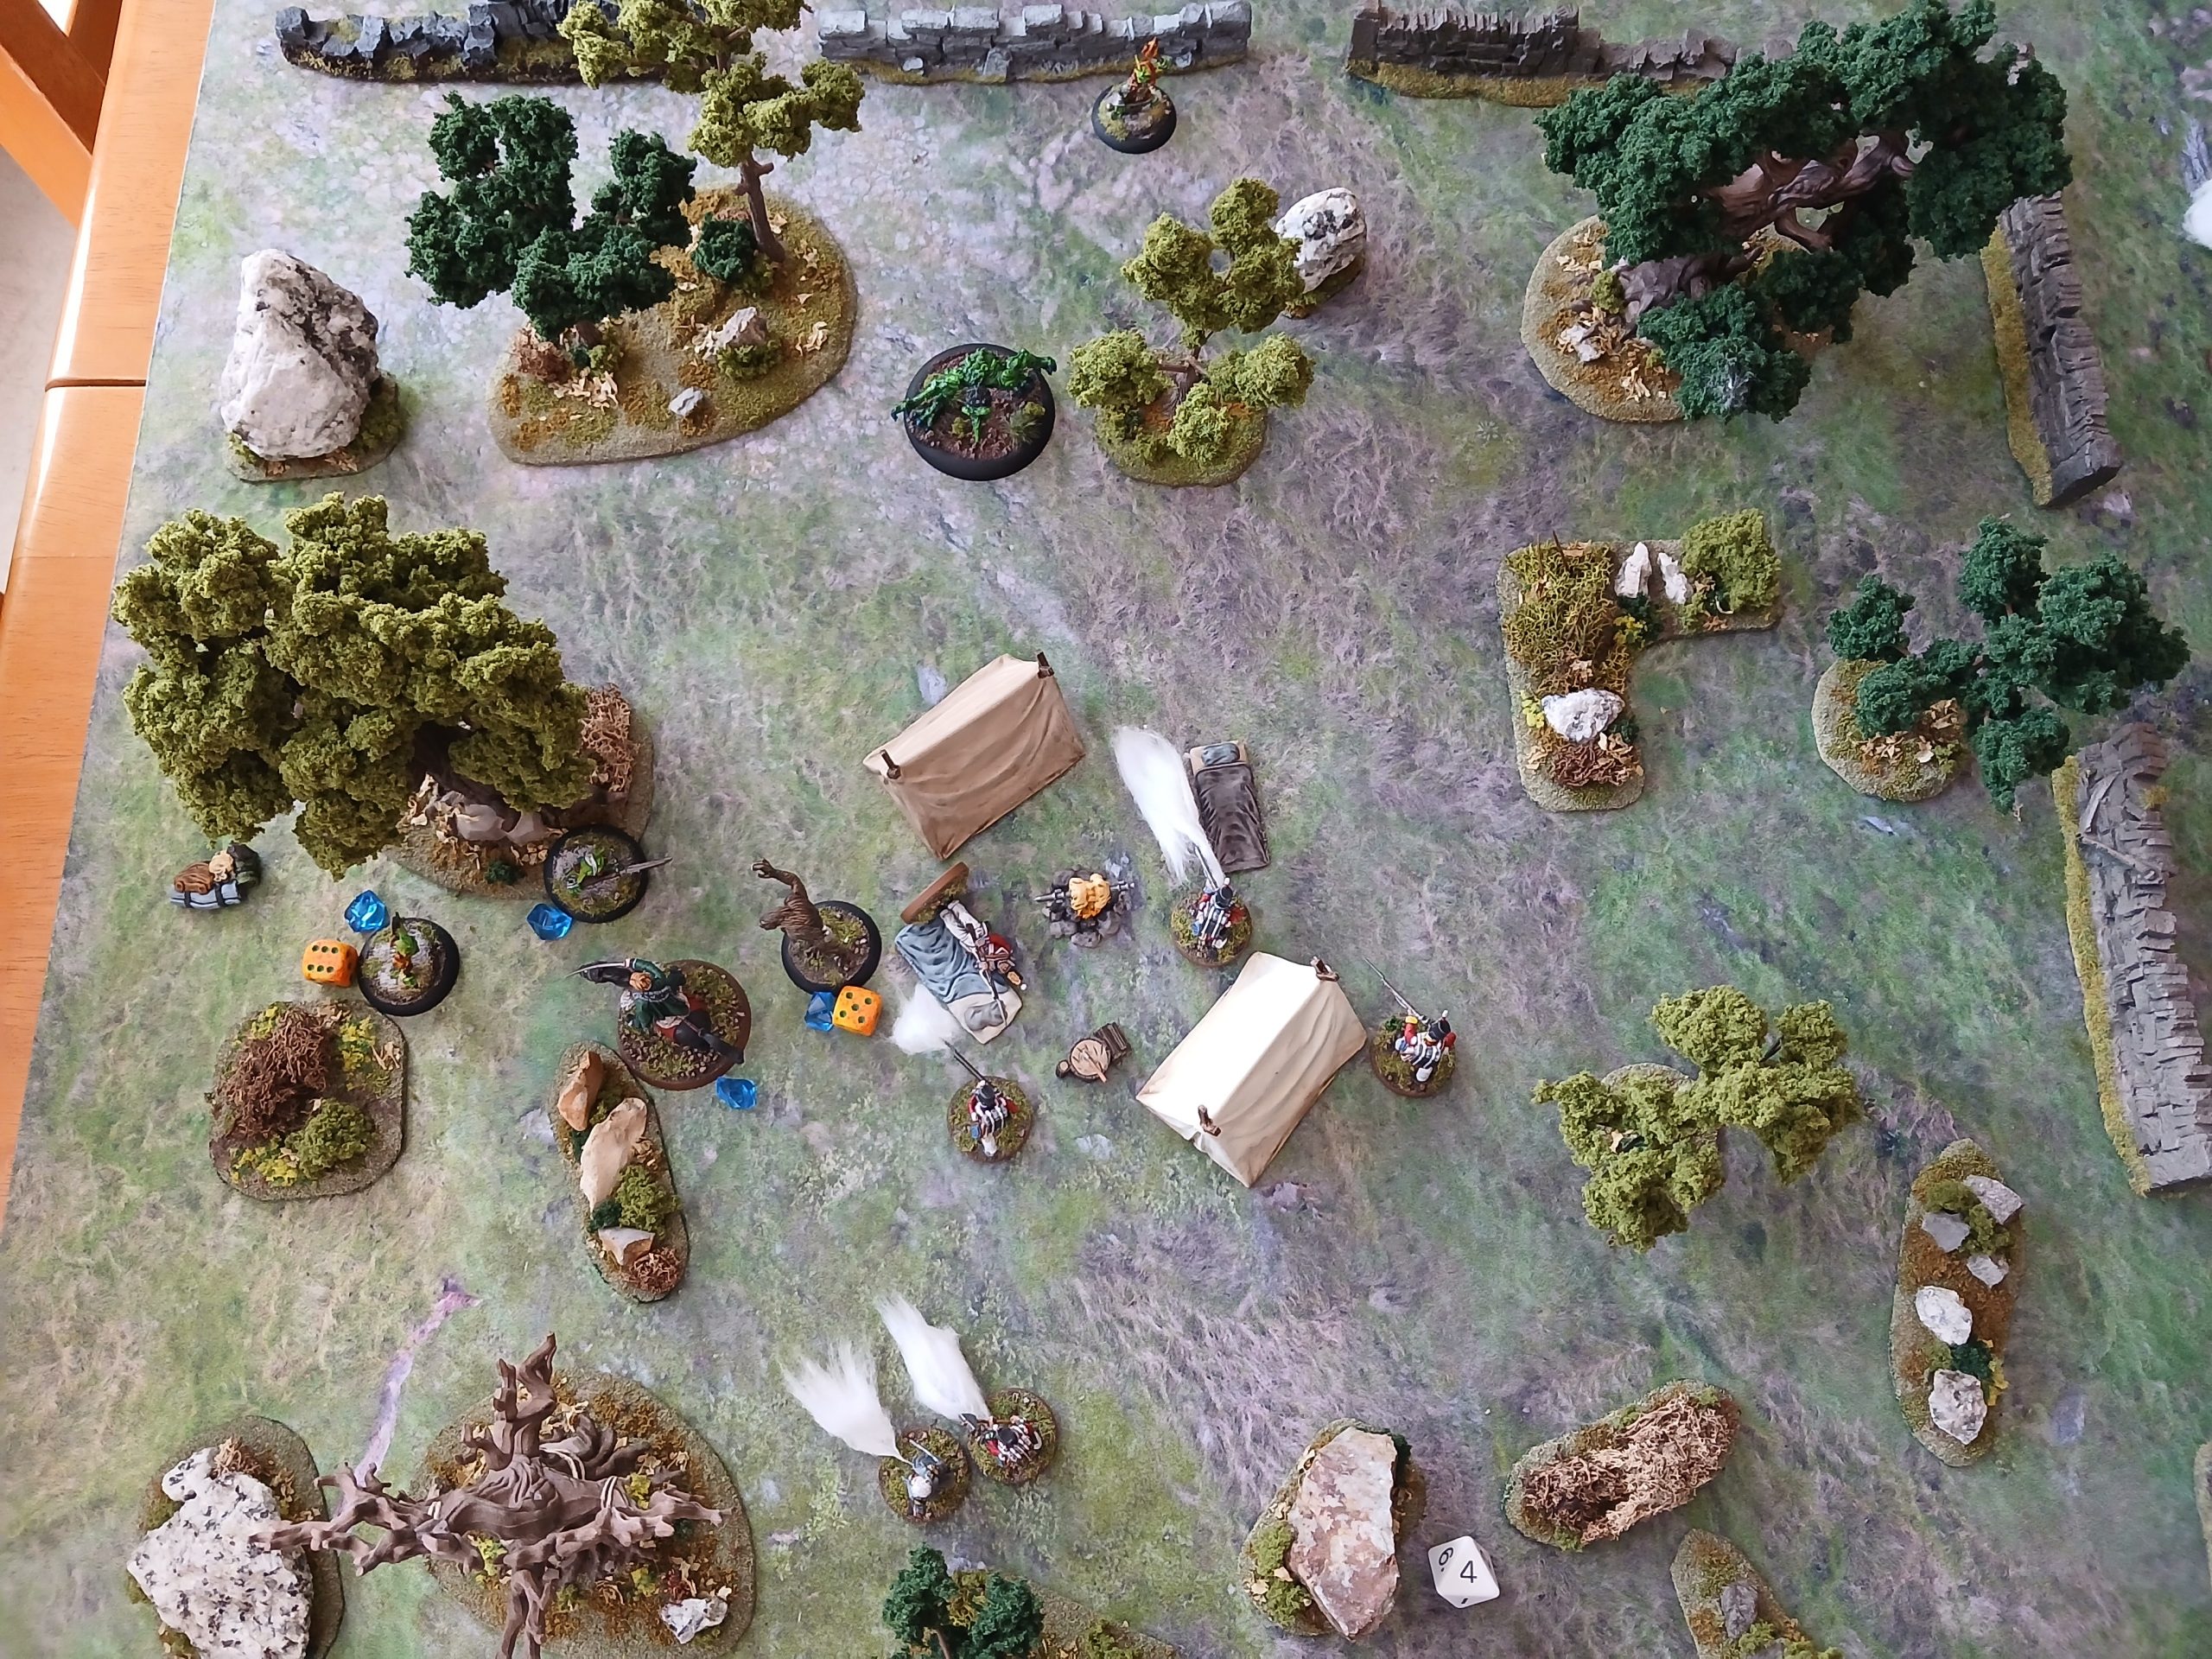
Bat Rep – Scenario 3 – The Troll Hunts Part 1
My unit was set up around the camp fire. Only Wilson and Walker were awake, and neither had Cold Iron to help vs the encroaching Goblins.
 Set up
Turn 1:
I started out by trying to wake those with Cold Iron. Jones fails to wake, but Harpe does wake. He sprints (gallops?) into combat, passing the Hypnotic check and strikes down the Goblin (after suing a cheeky fate to reroll). Again he leads from the front 😊.
Walker sprints to the clue by Harpe. Wilson takes a shot on the other goblin, but misses.
The Goblin moves towards Wilson on the left.
I then try to wake the rest, but only Pike wakes up. He shoots, misses and then reloads.
At the end of turn a new goblin arrives in the south.
 End of turn 1
Turn 2:
With the goblin near the camp affecting guns that are close I again try to wake Jones, but fail. Harpe moves back towards the camp to help out. Walker investigates the clue on the right, finding firewood, then moves back towards camp.
Wilson passes the hypno check and charges the goblin, missing on 10 and 1. With their high defence, and thinking about damage mitigation, I don’t risk using a fate yet. The goblin misses its strike back.
The other goblin moves towards Harpe.
I try to wake the rest. Angua wakes, and backs off for a pistol shot, but misses. Doc Godfrey wakes, heads to the south west. Frasier wakes, heads north. Pike backs off and shoots the gob, hitting it for 8, but DR makes that 4. Still a good hit.
New goblin arrives to the east.
 End of turn 2
Turn 3:
Jones, who has Cold Iron shot, remains sleeping…. Harpe charges a goblin, but misses. Since I rolled a 10 and 2 I used my last fate to reroll, hitting and killing the goblin. Pike reloads and fires, missing. Angua skinshifts (just) then charges at the injured goblin, but misses. It hits back, but her DR means no damage.
The second goblin moves up on the west.
Frasier checks the northern clue, finding a bag of iron nails, then moves back towards camp. Doc moves to the southern clue, finding firewood. Wilson moves south, out of the goblin’s ‘Inimical to Technology’ range to shoot at the injured goblin, just hitting it, and causing 2 damage after DR.
At the end of the turn a Troll arrives in the north.
 End of turn 3
Turn 4:
Harpe just makes his hypno check, thanks to his high courage, and charges at the injured goblin on the left, but misses. The goblin misses in return.
Angua charges in, misses, and gets hit back for 10, but her DR makes it 5. Frasier shoots, but misses. Then reloads.
Jones….. remains sleeping through it all.
The troll moves up, and throws a rock at Harpe, but misses.
Doc moves, shooting but missing the injured goblin. Wilson reloads and shoots, missing by 1. Pike reloads and hits the troll, but causes no damage. Walker misses the troll and reloads.
A new goblin arrives in the north.
 End of turn 4
Bat Rep – Scenario 2, The Ruined Chapel Part 2
Turn 6:
Leg it time! Doc heals the injured inf. Who then reloads and moves. Harpe moves to the doc to cover him. Wilson runs to be close to Angua.
Vampire and revenant move up.
Inf moves and shoots rev, but no damage due to DR. Inf with cross reloads and moves. Angua covers Harpe. Inf on right moves and shoots at the vamp, hitting it for 5 damage (Silver).
A new revenant appears top right, shouldn’t impact the escape.
 End of turn 6
Turn 7:
Even with a maximum sprint the doc can’t get away this turn (slowed up by healing Harpe before). So, I plan out a covered fall back. Two infantry do leave the table. Inf on right reloads and shoots, hitting the vampire again (9+6) for 9 more damage, killing it now. Wilson also makes it off the table.
The two revenants move up slowly.
The rest of my unit move towards the table edge, but stay on.
A new revenant appears bottom right.

 End of turn 7
Turn 8:
With the revenants too far away the rest of the unit escapes over the two player phases.
Victory, and 9 bonus xp to be shared out (can only use 8).
Doc again proved his worth, the Loup Garou soaked up damage.
And having the right counters to invulnerability yet again really helped out – I guess that’s why the clues give you silver and blessed etc 😊
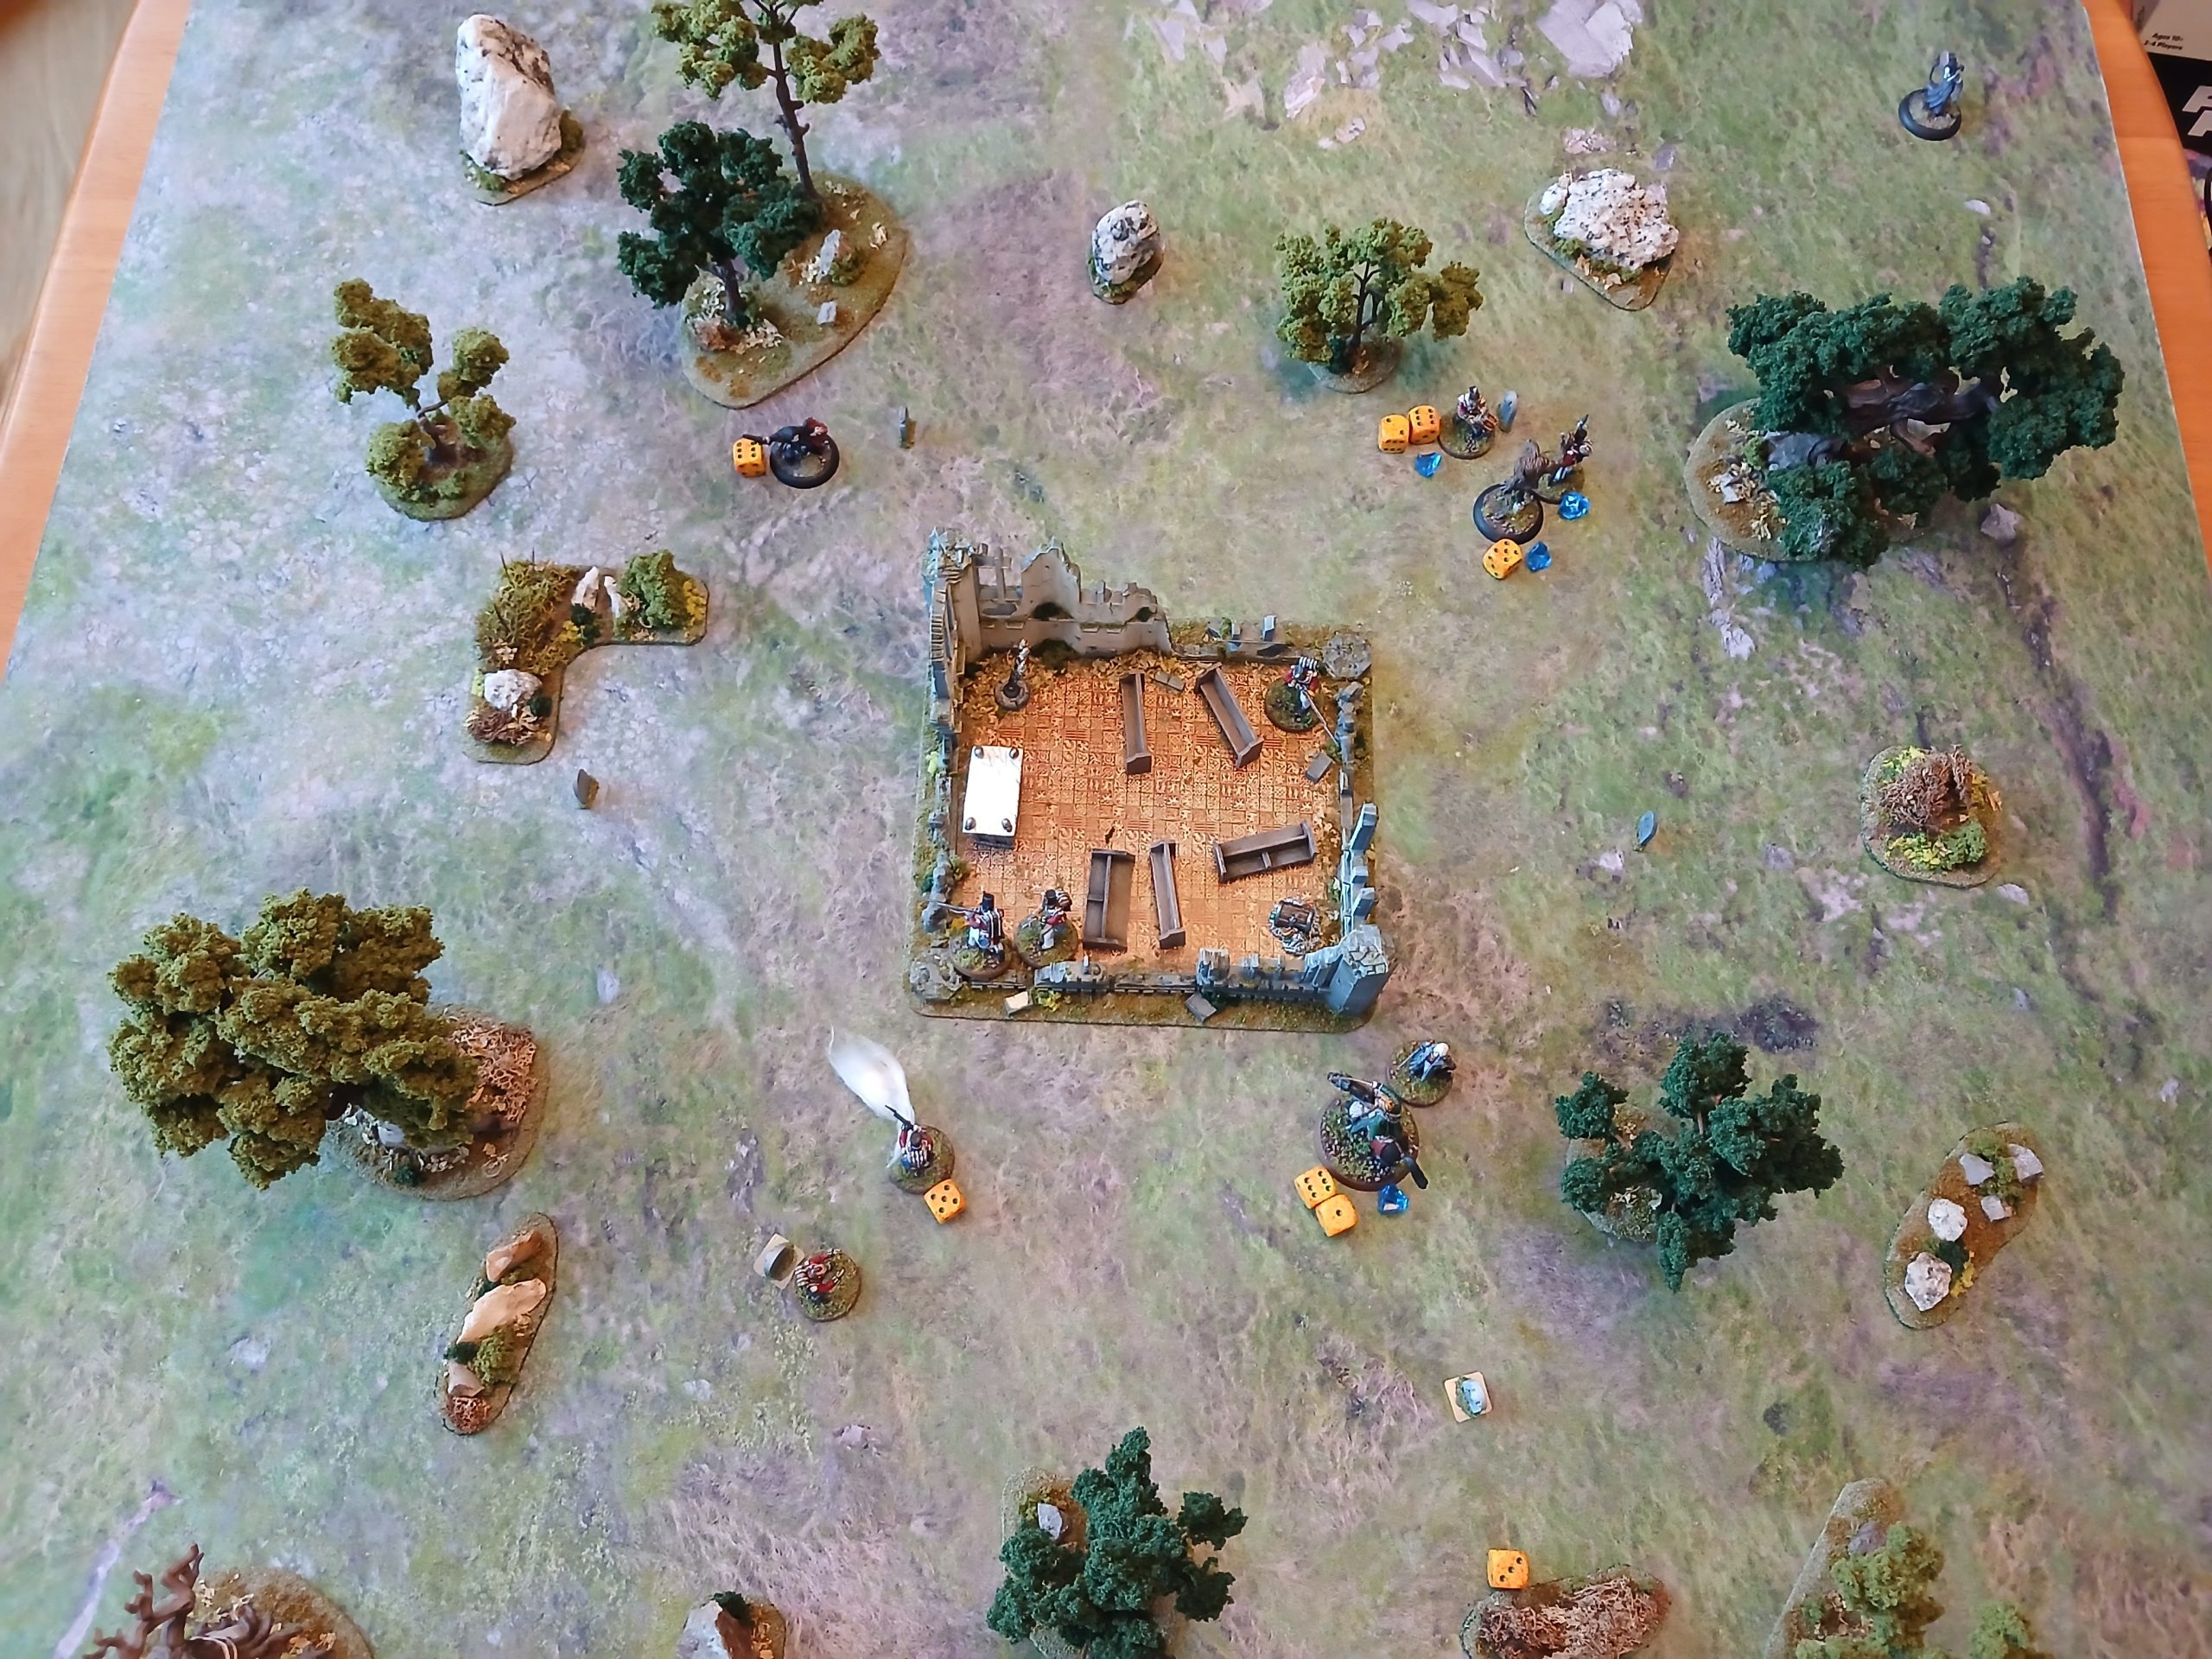
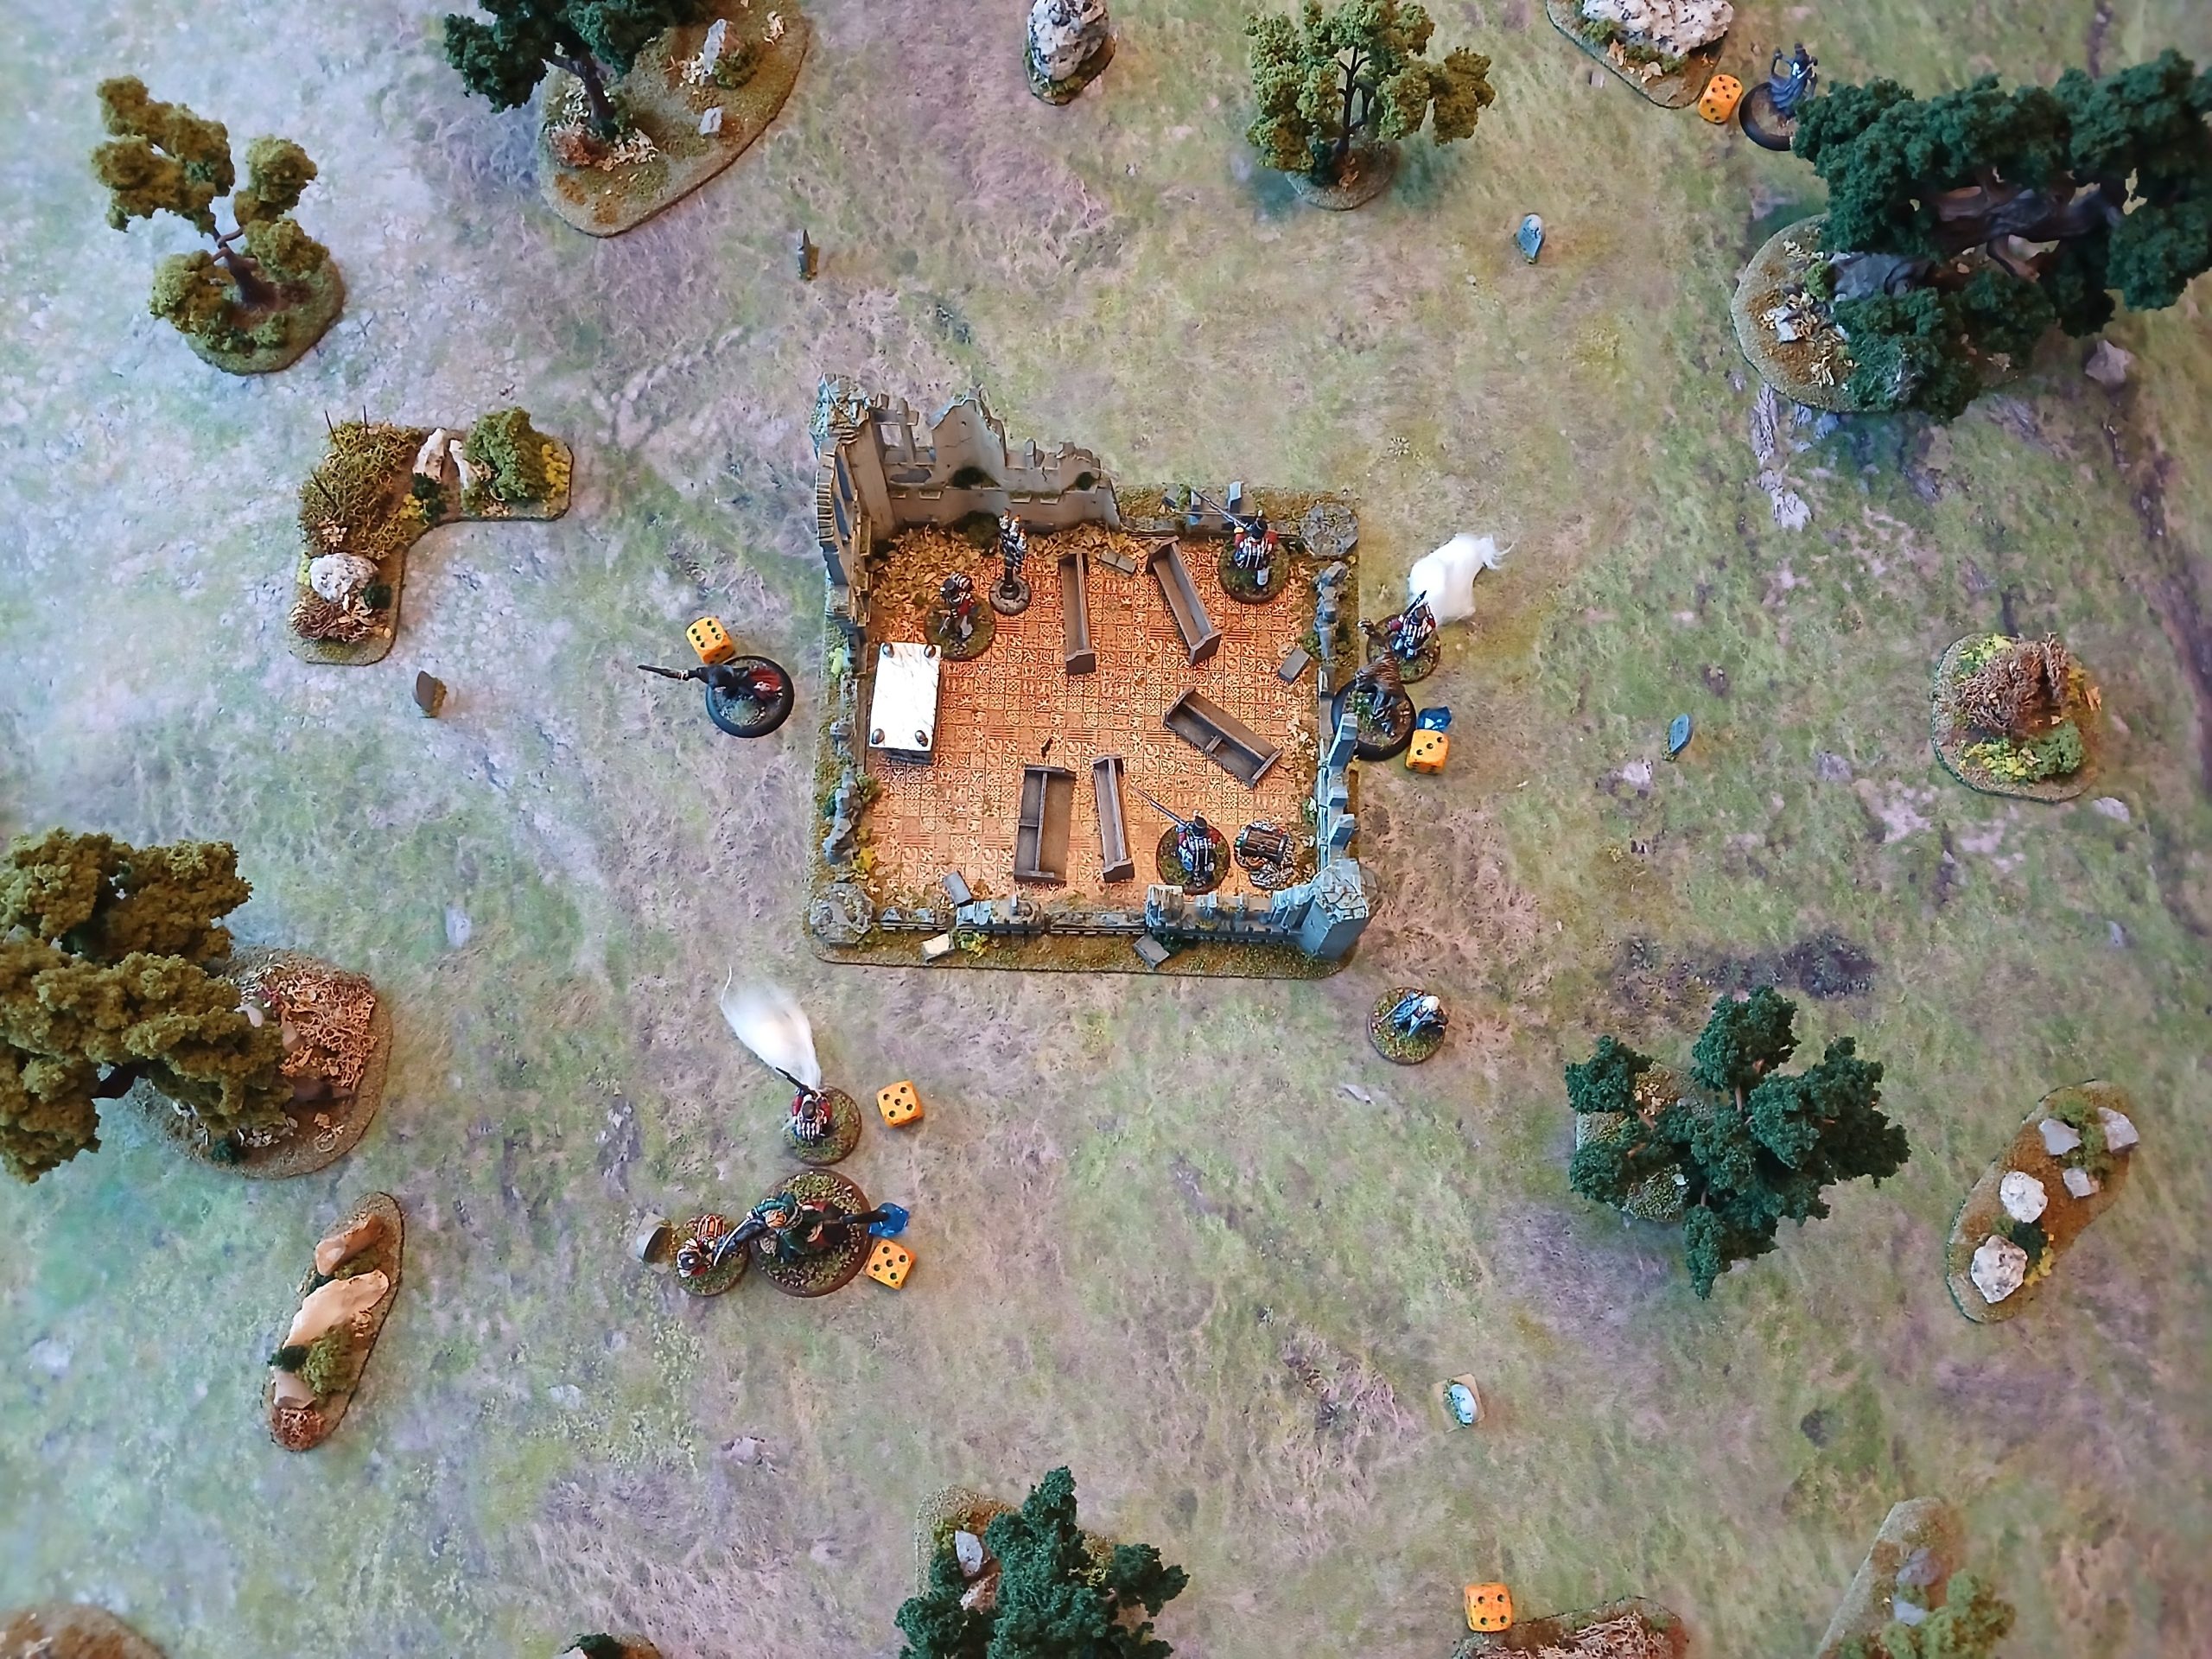
Bat Rep – Scenario 2, The Ruined Chapel Part 1
Seeking important items from the old ruined church, we spy shambling forms around it in the gloom. I split my force between the bottom and right edges.
Turn 1:
Harpe starts out with a good shot on a Revenant, doing 10 damage! However its damage reduction means that it is still ‘alive’. He then moves into combat and just about finished it off thanks to the cavalry bonus. A couple of the infantry fire, one missing, one getting a double 10 – but again the damage reduction means it is still up. The sapper, Wilson, charges in and finished it off.
For the enemies, the remaining revenants all move up slowly.
Over on the right the Loup Garou, Angua, skinshifts first try (just, and way better than the first use of her), then moves into combat with the closest Rev. Hits it for 8, but doesn’t kill it, and the Rev hits back for 6. However with her Damage Reduction (DR) of 5, only 1 pt gets through.
The Doctor, Godfrey, moves in and successfully finishes off the badly injured revenant. The two remaining infantry shoot, again one missing and one hitting, for 5 this time. But DR means only 1pt on to the Rev.
At the end of the turn a new Rev pops up in the south. Worse though, a Vampire arrives, luckily in the north, giving us some time. No clues investigated yet though.

 End of turn 1
Turn 2:
Angua heals at the start of activation, then moves up to attack the Rev threatening the two infantry. She hits on double 8, with ‘strong’ meaning she does 9 damage to the Rev… leaving it on just 1 health. The Rev strikes back, but misses. The infantry move up, finishing off the Rev. The Doc and other Inf on the right move towards the chapel, and the clues within.
The revenants shamble towards the nearest visible soldiers, and the Vampire moves down towards the chapel area.
Harpe reloads and charges into the nearby Rev, hitting on a 19, with the Cav bonus meaning it takes out the Rev in one go!
The sapper, Wilson, reloads and moves up, to get away from the gravestones (where Revs can appear). Inf at the south moves up, hitting the rev, but just for 4 damage. The Rev hits back, for 10 – which would take out the inf. I used a fate die here, getting a 9… negating 5 damage (but so close to stopping it all….).
The remaining inf moves up, but misses. However, it was so close that I used the last fate die to re-roll, finishing off the Rev.
At the end of turn a new Revenant appears at the top right.
 End of turn 2
Turn 3:
Angua charges the newly emerged Rev, hitting it for 6. The Rev hits her back for 10!, but DR means only 5 health lost…. Inf moves up, missing, but the Rev also misses in return.
Next inf near chapel, Pvt Walker, goes for one of the clues, finding the Jewelled Cross – meaning he can now get past the Vampire’s immunity. Doc Godfrey fires his pistol at the nearby Rev, hitting for 6, but due to DR only 2 gets through.
The vampire and revenants all move up. Rev attacks Angua, missing. She also misses in return though. Vampire moves up. Rev charges Harpe, hitting him for 7 (DR 1 I forgot about). Harpe hits back, killing again thanks to the Cav bonus.
Harpe moves to the Doc, for healing next turn 😊. Sapper Wilson moves in, passing the clue check and finding a Silver Knife (can hurt vamp in melee). Inf with silver shot moves up and shoots at the vamp, getting a 6 and a 10, sadly the 6 is the damage, but still a good hit! Other inf runs to the chapel.
At the turn end a new vampire arrives, in the top right. A new revenant appears bottom left, near the injured inf.
 End of turn 3
Turn 4:
Godfrey heals Harpe for 2. Harpe moves to protect the injured inf, hitting the rev and killing on a 10 and 3. Inf reloads and fires at the Vamp again, but misses. Inf with Jewelled cross also shoots at the vampire, but he too misses. Then reloads.
The vampires both move up, as do the revs. One rev strikes at Angua, missing. She strikes back and finishes it off.
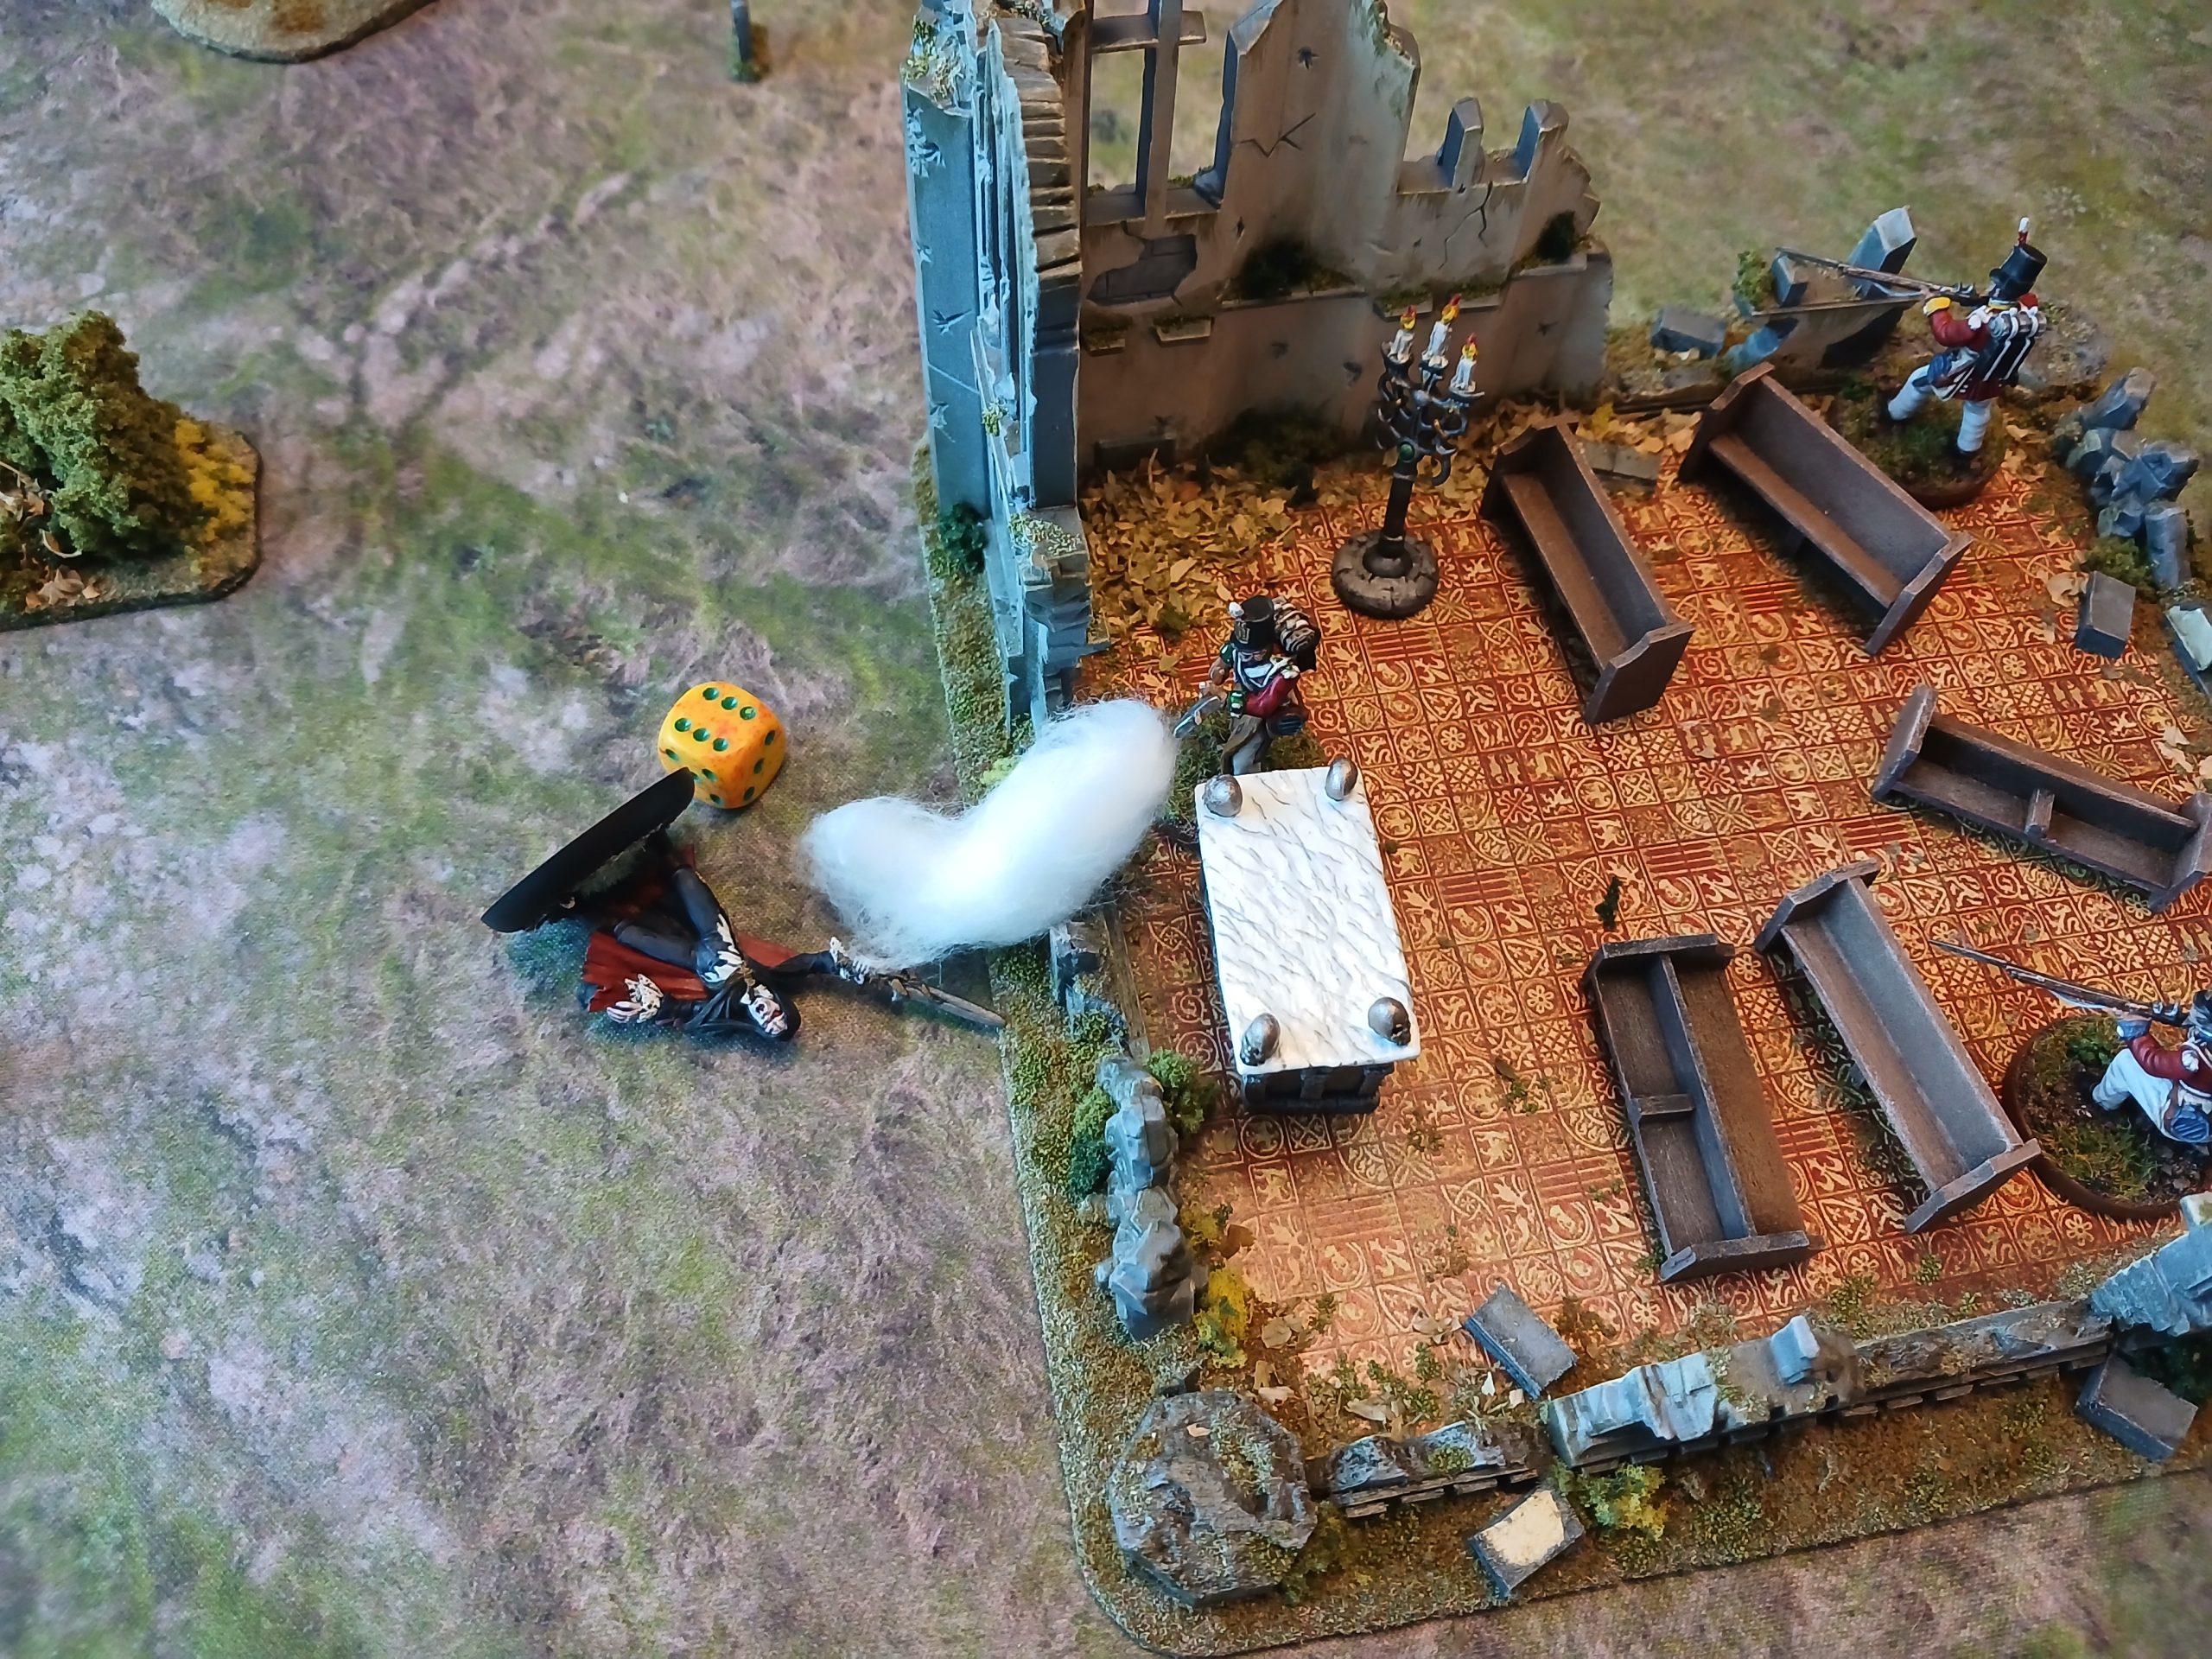
Angua then activates, healing for 2, and backs off. Inf back off, firing at the new vamp (silver) hitting it for 5. Inf moves to clue, but fails the test. Sapper Wilson moves to the next clue, and auto passes due to Combat Engineer. He finds the Strange Candelabra. Meaning he can hurt the vampires at range as well, and has a holy symbol now. With the key treasures located they now need to get out of here….
A new revenant appears in the bottom left again – I guess he wont stay down….
 End of turn 4
Turn 5:
Difficult choices this turn.
We need to get away, but the proximity of the Vampire and revs is an issue.
I decided to use all three soldiers that could hurt the vampire to try to take it out. The first reloads and shoots, missing. Wilson hits on 9+7, killing it thanks to his newly acquired Candelabra 😊 He then reloads.
With a change of plan the Doc moves and strikes at the new rev. Just about hits it, but only for 2 damage due to DR. Harpe then charges it, hitting on double 9, killing it anyway (doc’s shot wasted… but could have been important though).
The remaining vampire on the right moves up.
Angua heals 2 and sprints down to be close to the gravestone that the rev keeps coming back at. Inf with the Jewelled cross shoots at the vamp, but misses. He then moves away. Final inf runs.
End of turn a new revenant appears, but top left gravestone this time.
 Wilson kills the injured vampire
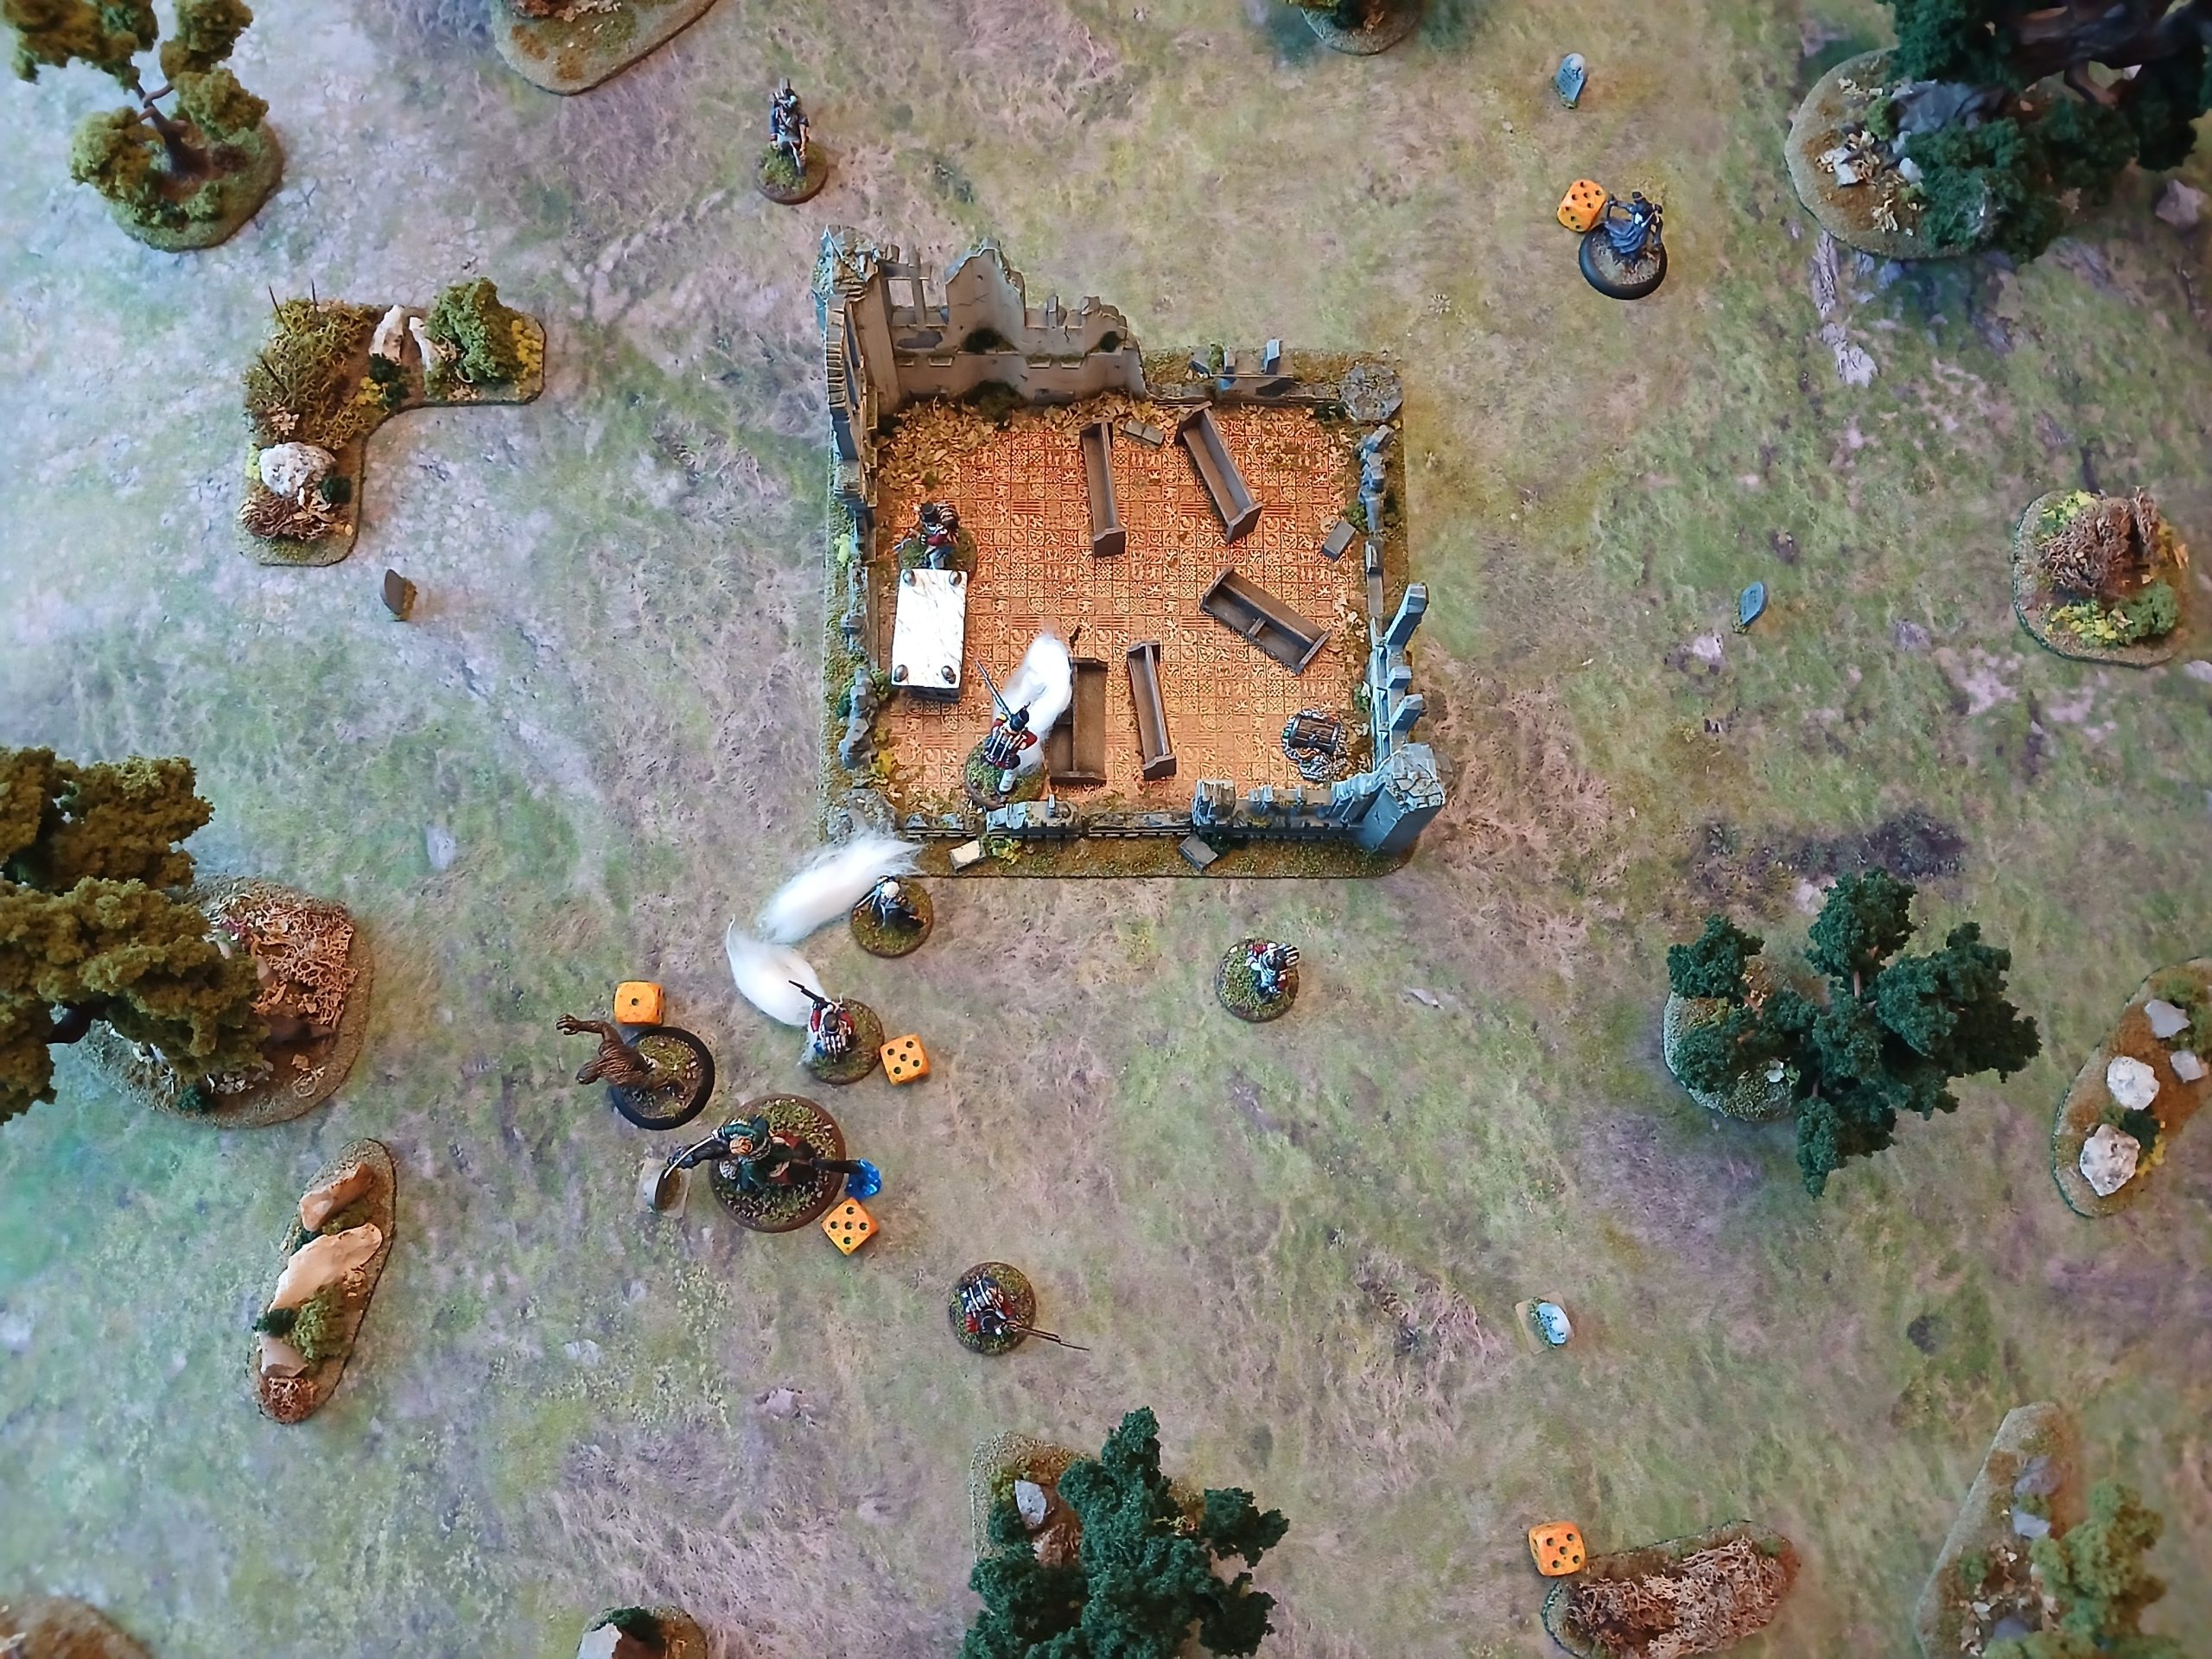 End of turn 5
Continuing the Core campaign
21st March 2026
Over the past week I have played through the four solo scenarios in the core book.
After playing the first previously, and making a few mistakes, I decided to restart.
This also gave me the chance to change up my force.
I didn’t find the Occultist of much value sadly for my play, so dropped her, the Supernatural Investigator (good, but one skill not used in solo, and quite pricey) and the Rifleman.
This gave me enough points to bring in a Loup Garou (30 pts, +8 for non list), a Sapper and an infantryman.
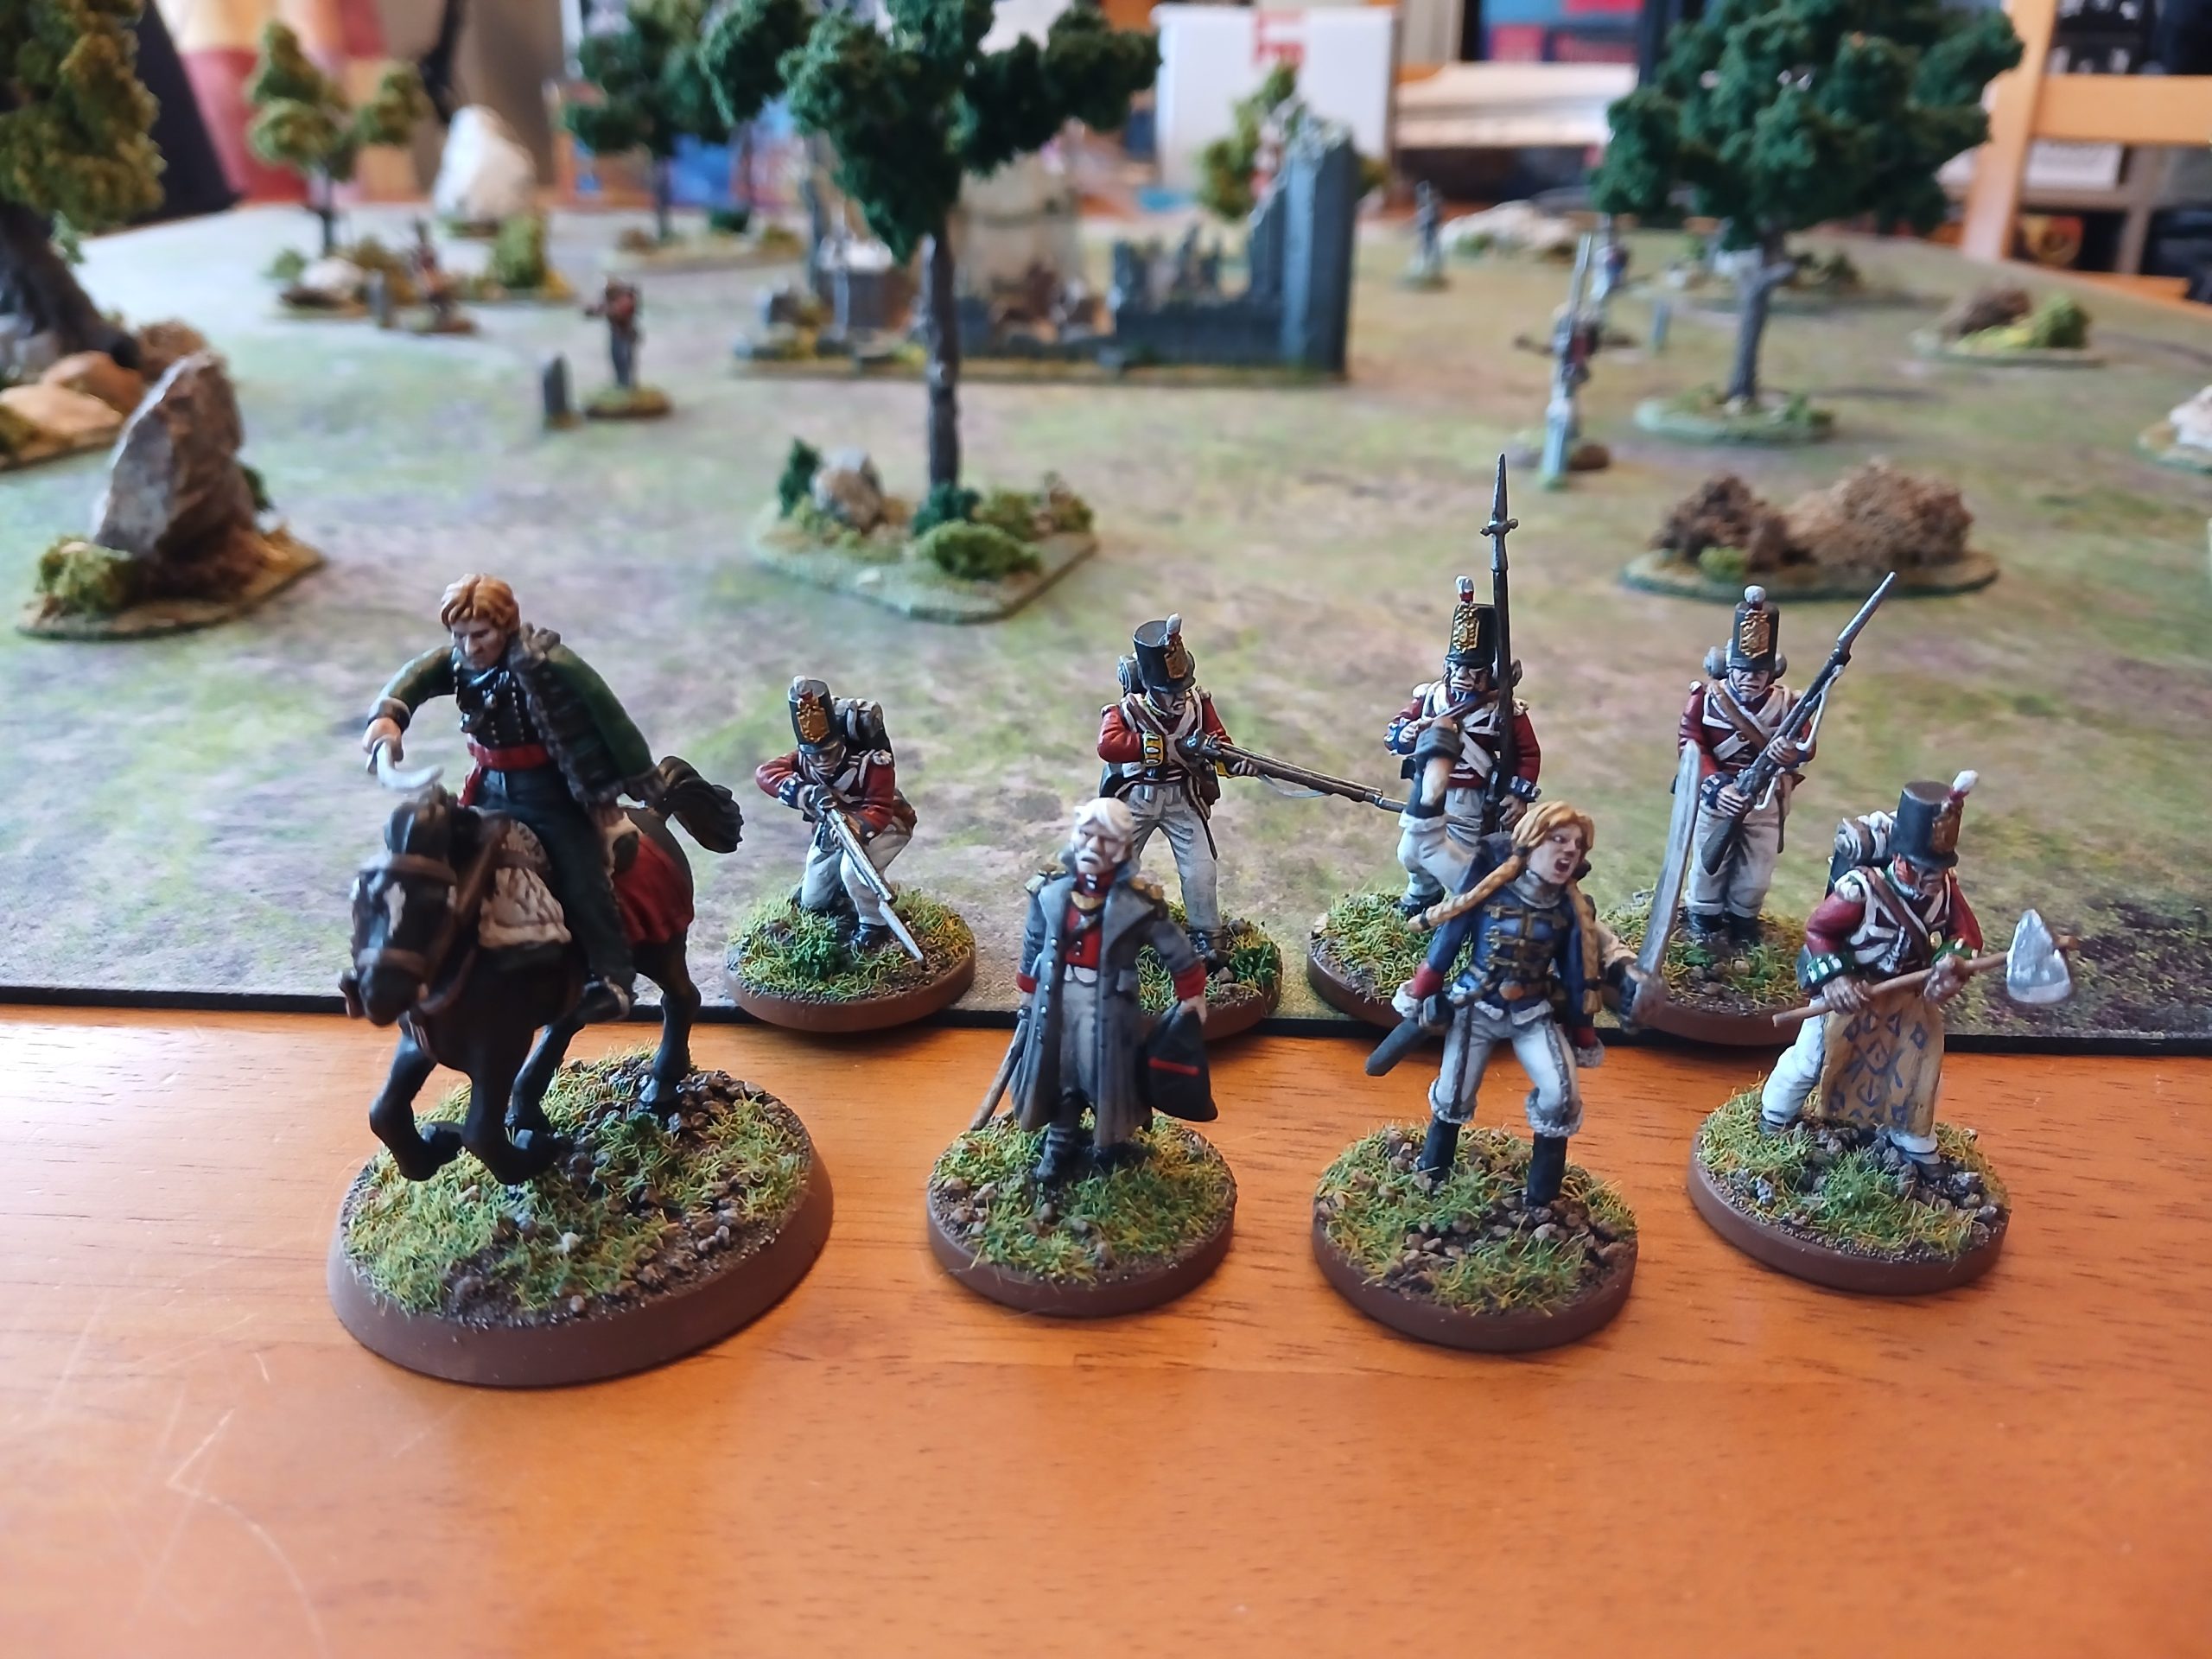 Used the same figure for Loup Garou as the Supernatural Investigator
 In hindsight I could have used the ‘Trading Companies’ list from the Canada supplement. All of the soldier types I chose are available to them, and the Loup Garou would not cost the extra 8 pts – meaning that I could make one infantry (Frasier….) into a Highlander (or rifleman, or suchlike). Since it is solo play I may well make that update for the next scenarios that I play.
The first scenario played out in a similar way to how it was with the previous force, so I wont repeat the Bat rep here. But the Loup Garou, once she eventually skinshifted, did soak up a lot of damage 😊


