


![Alternative Trench Crusade Miniatures? Trench Missionaries Review | Wargames Atlantic [7 Days Early Access]](https://images.beastsofwar.com/2026/03/unboxing-wargames-atlantic-trench-missionaries-coverimage-225-127.jpg)


It’s going to be something…


Recommendations: 1226
About the Project
One day Gothic Horror, Victoriana, Steampunk and Medieval Fantasy all met up in my head. They started to fight it out which would be the subject of my project for Terrainfest 2024. Limbs flayed as the battle commenced and it was not long before they were all strewn across the floor in a tangled mess. This is my approach to this. Chuck it all in a pot, mix it up, and see what comes out.
Related Genre: Weird
Related Contest: TerrainFest 2024
This Project is Completed
Slapping on colours
As mentioned before the basic bulk painting for my painting method is fast and easy. I use a cheap throw-away brush from the local hardware store, normally a 1″ brush and household paint that’s been colour-matched to miniature paint.
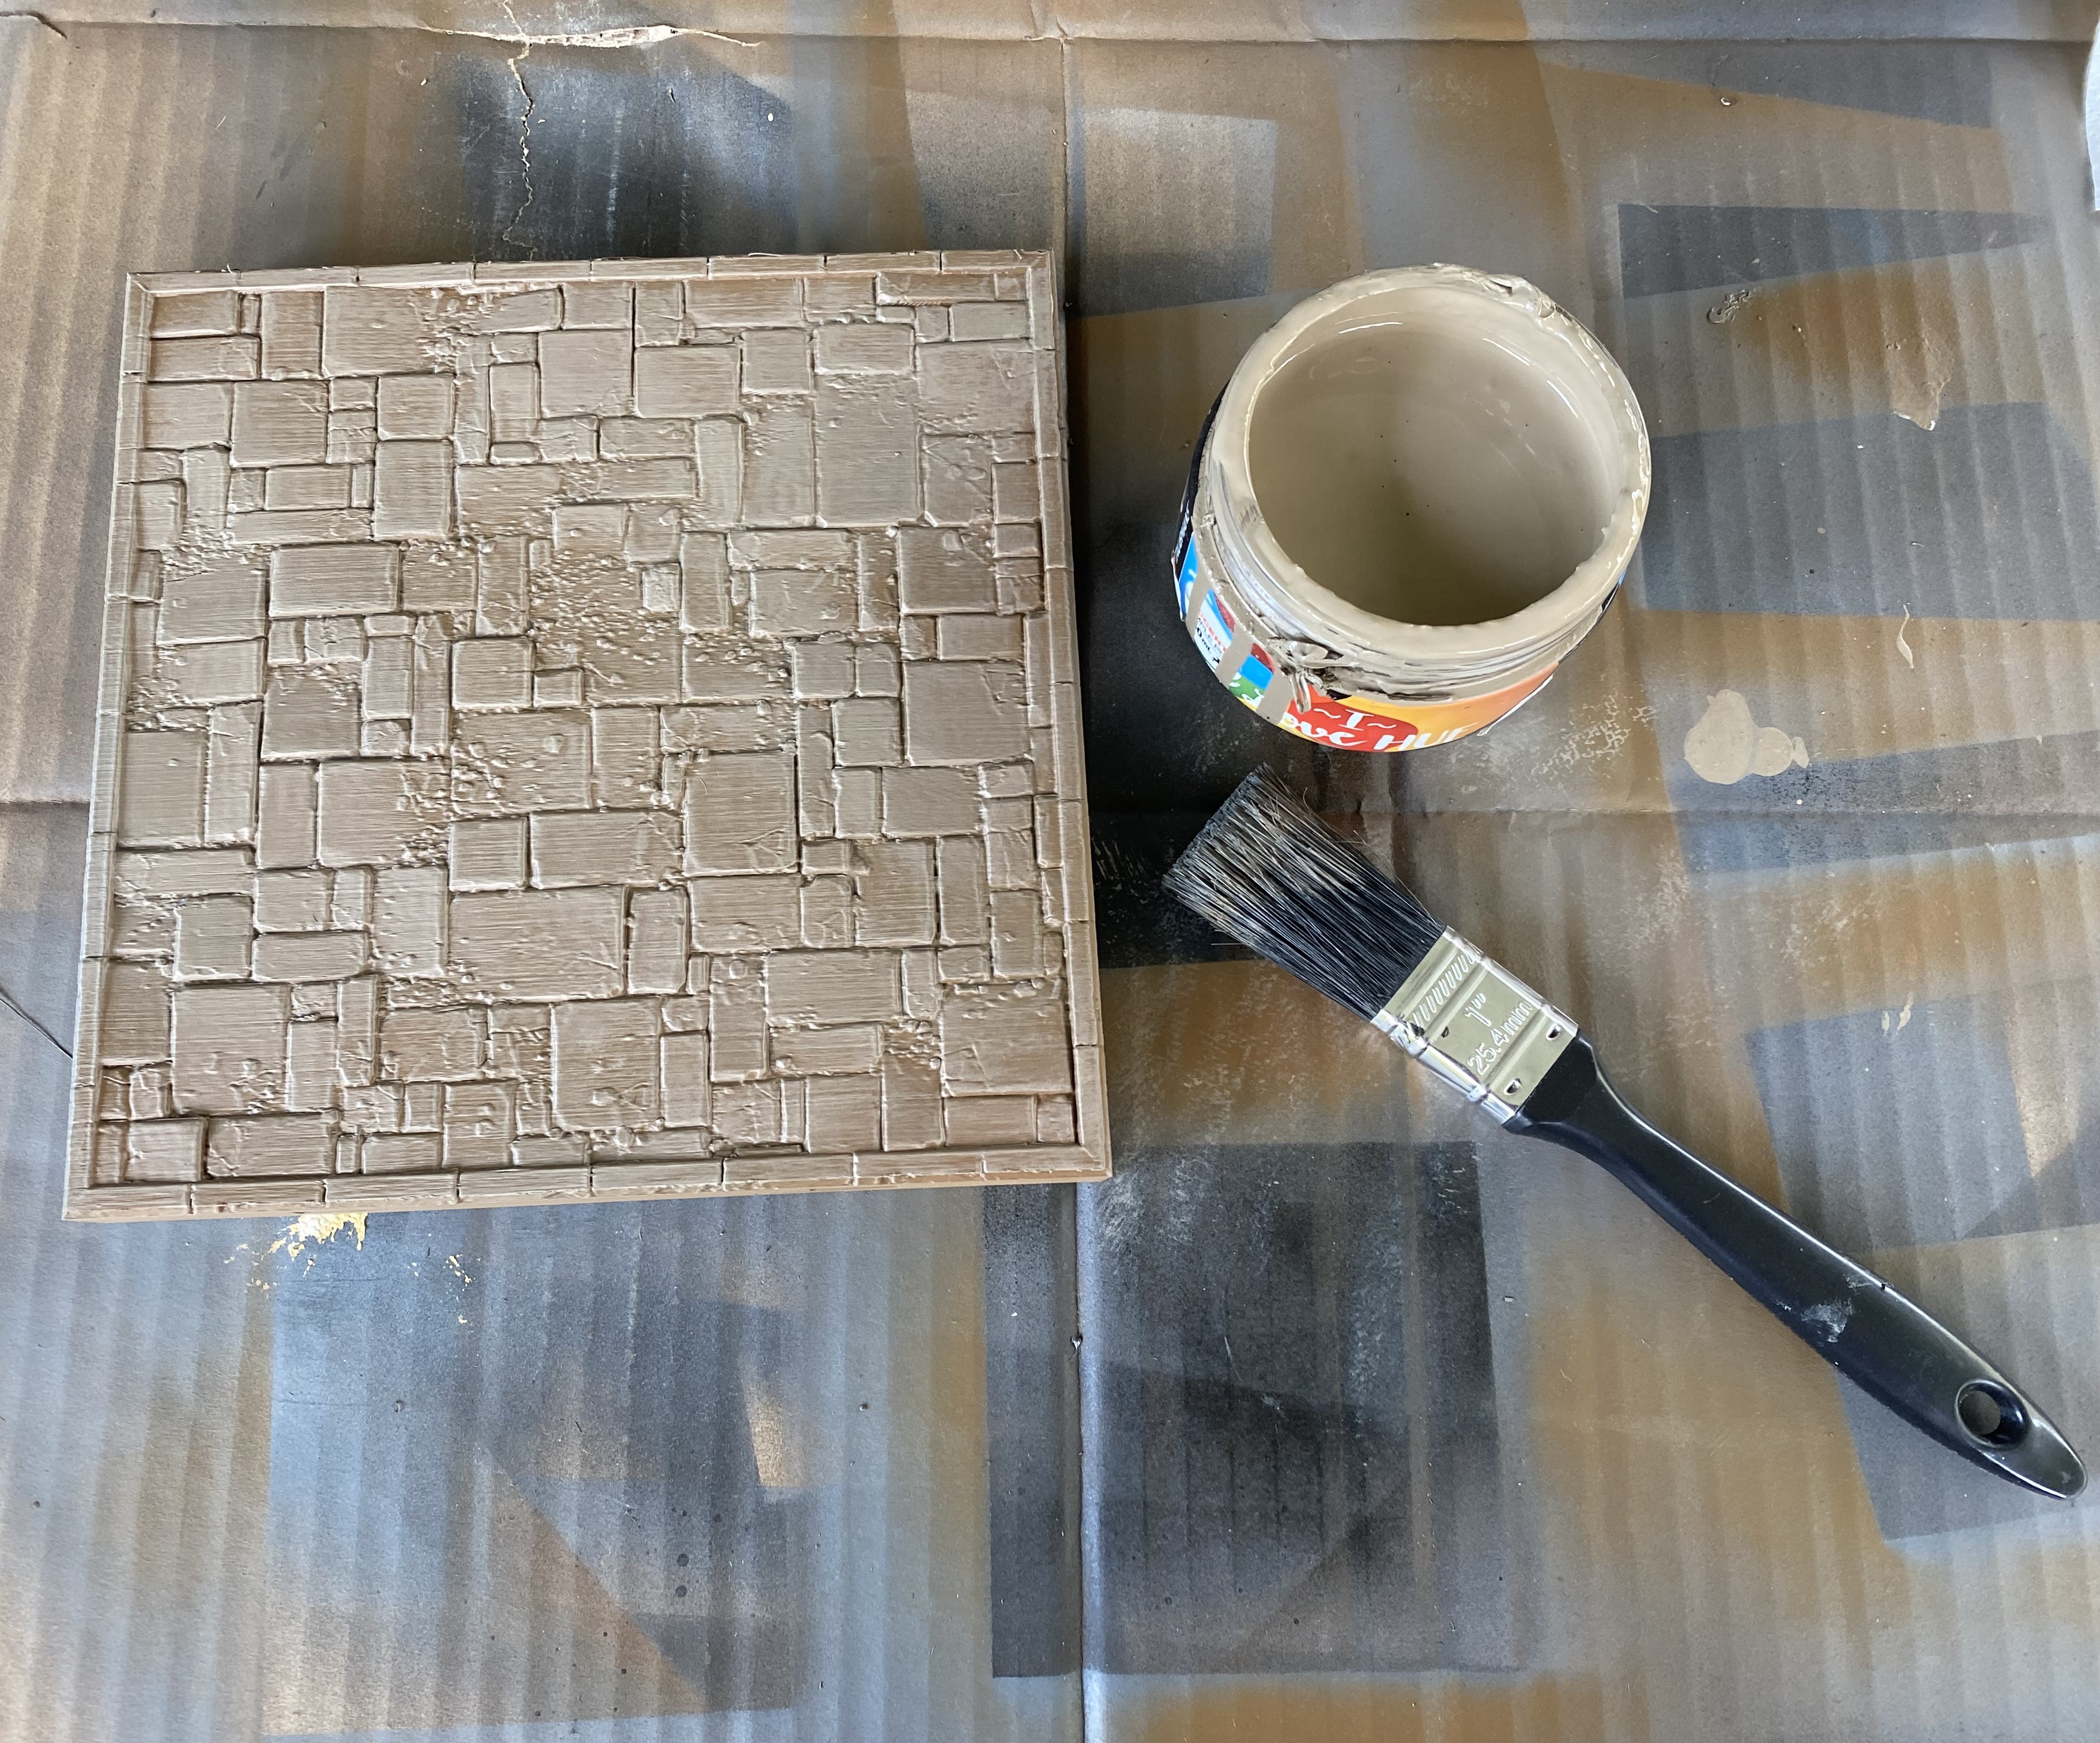
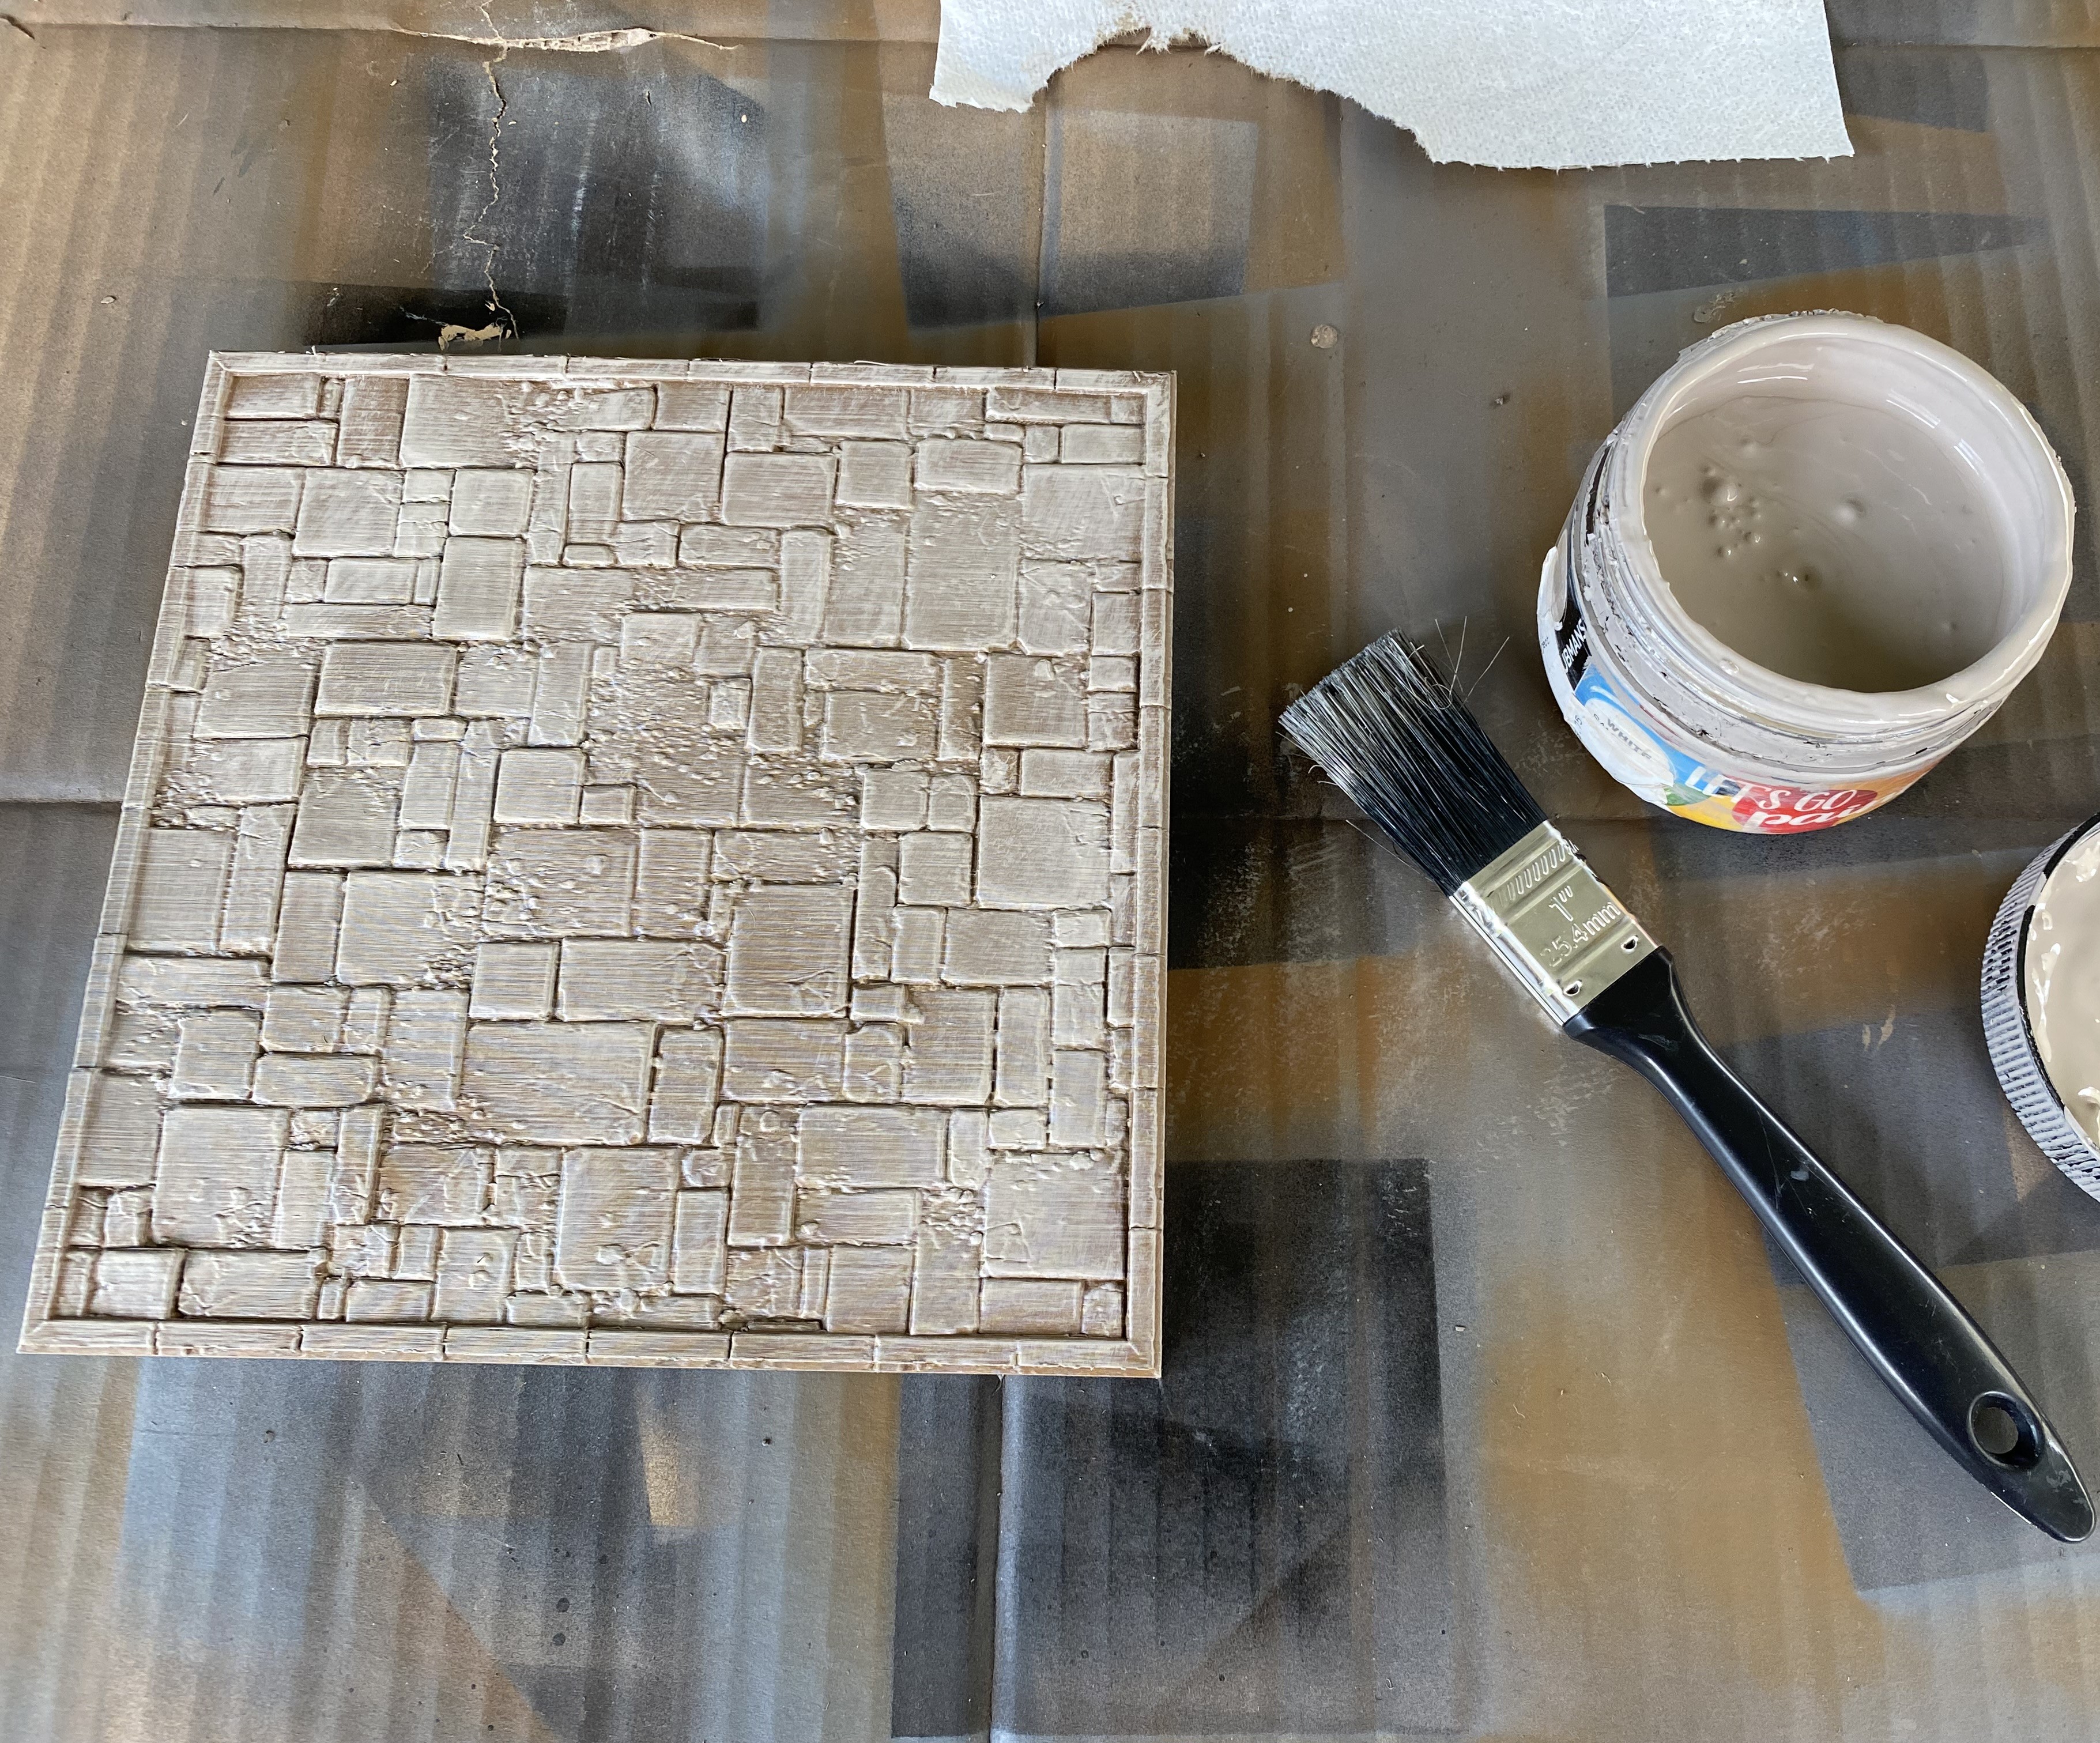
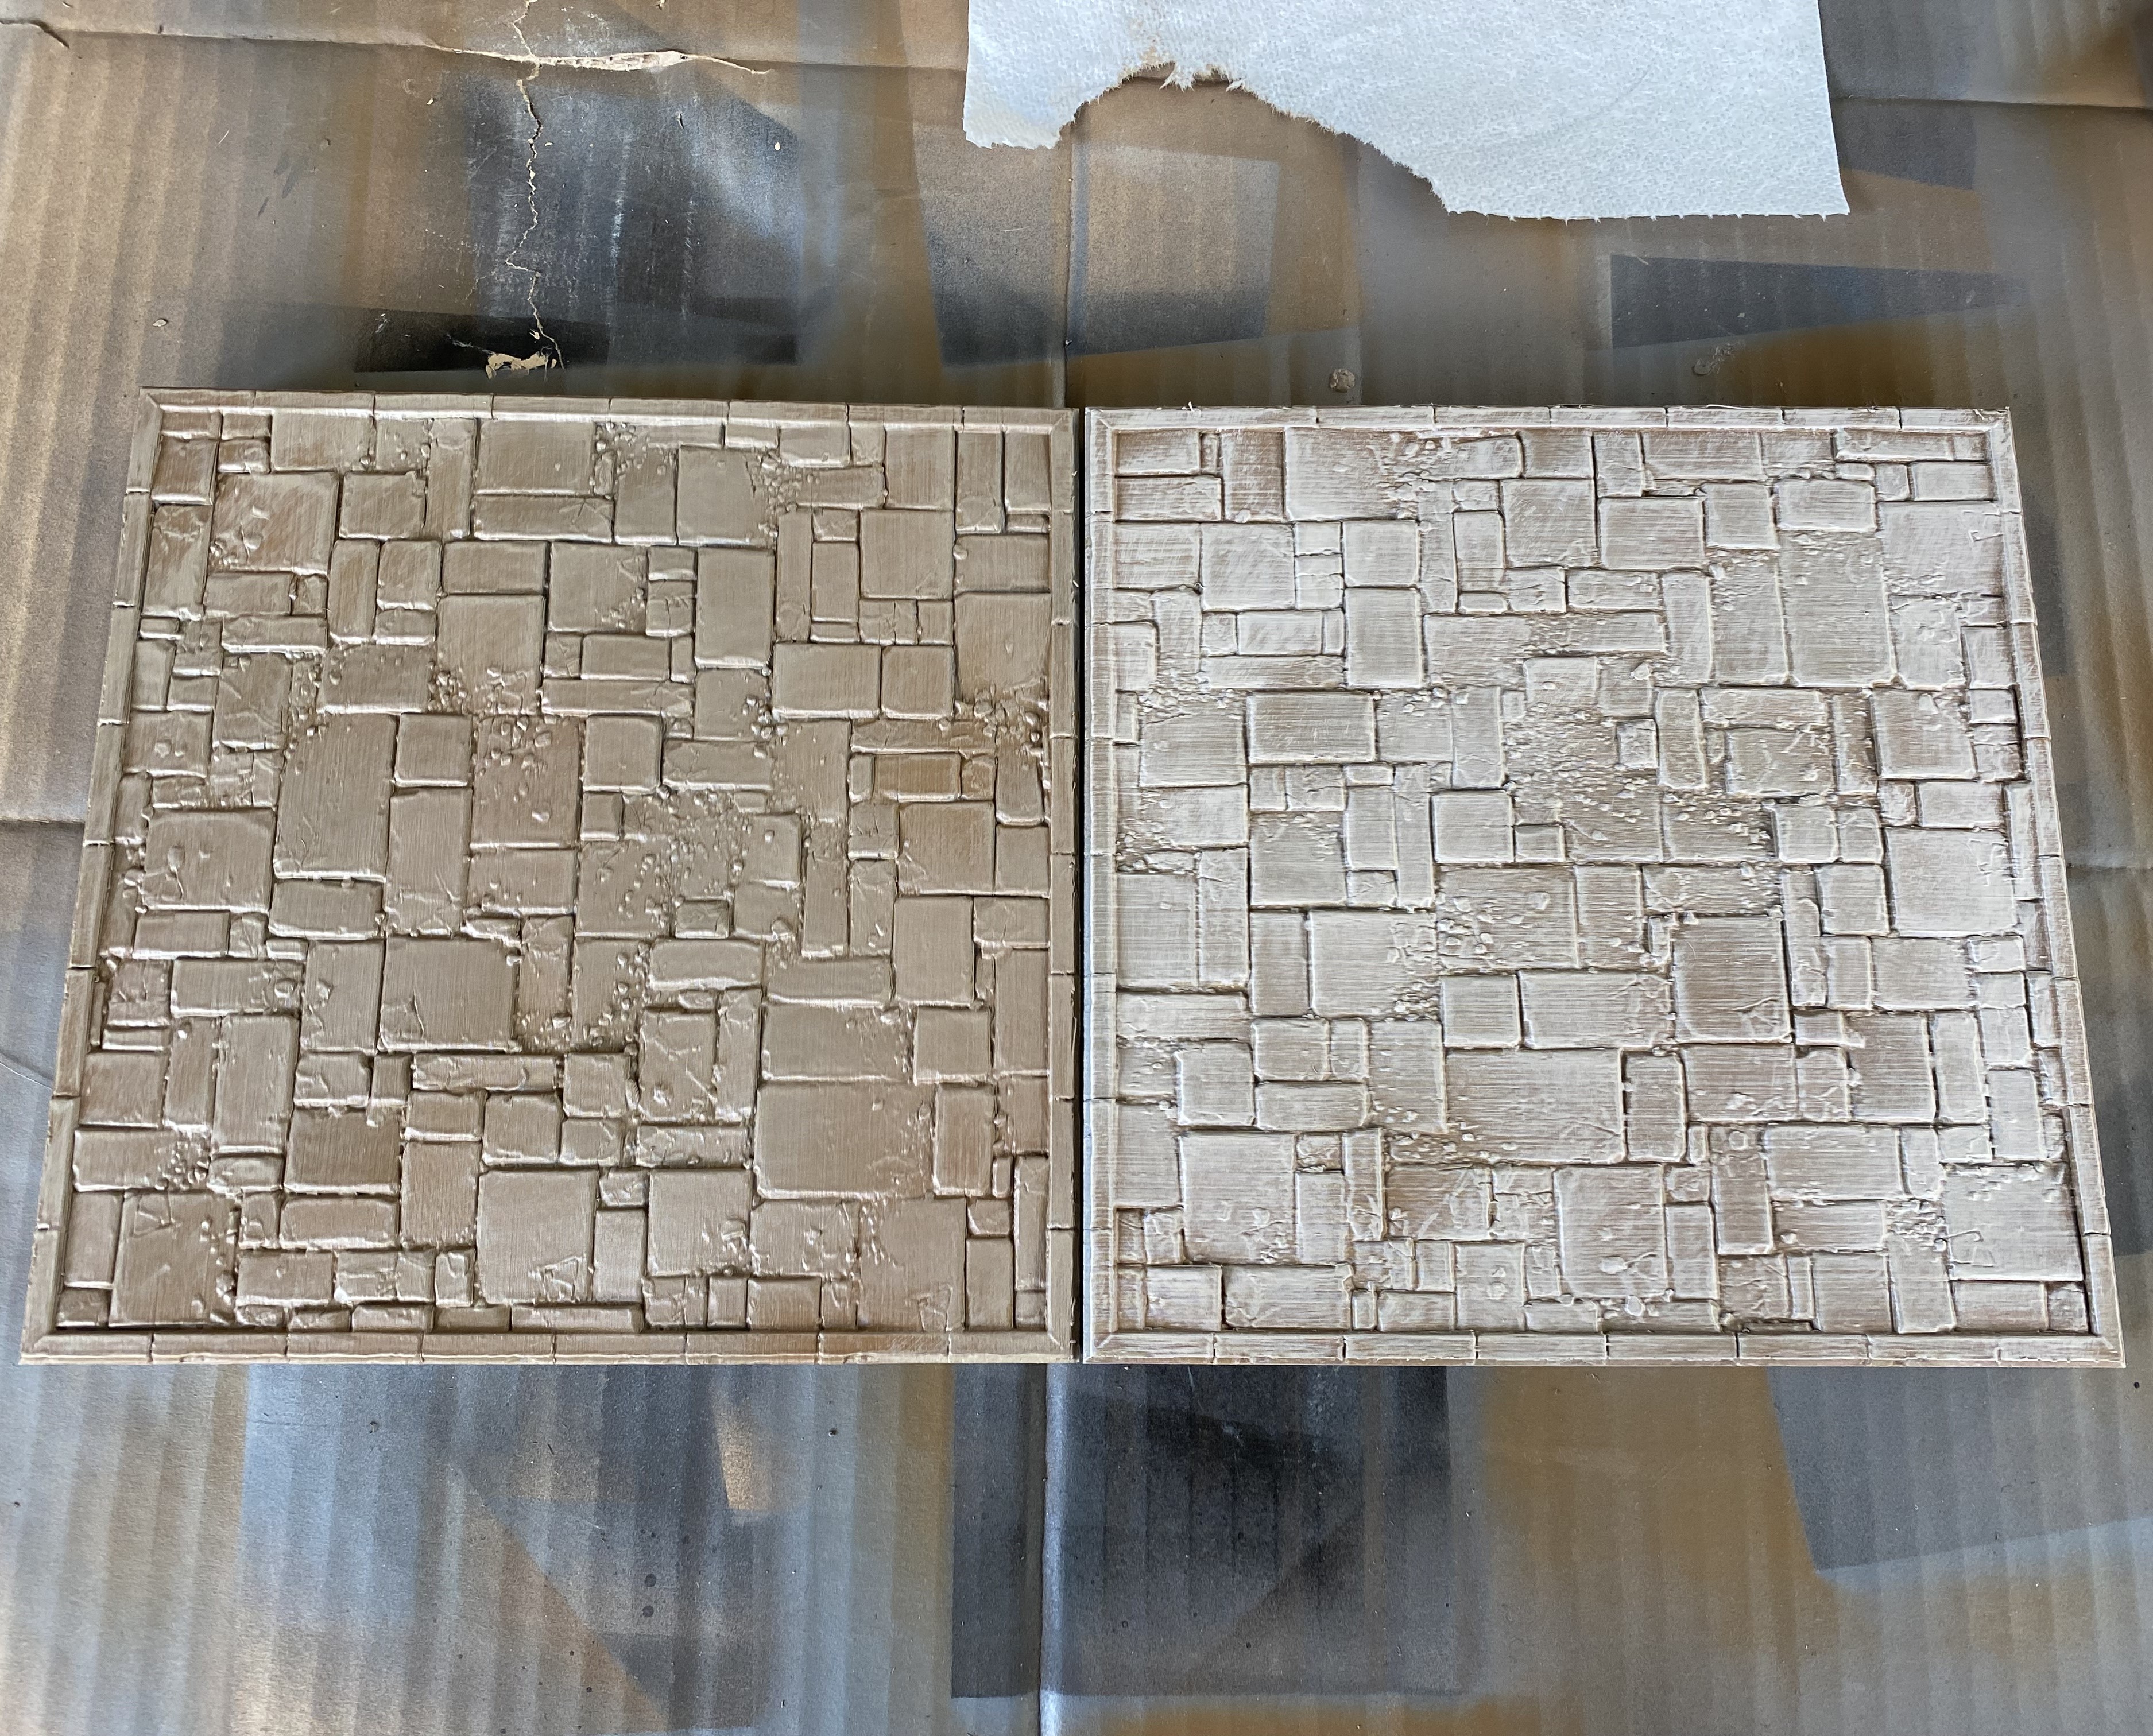 Side by side comparison between the two dybrush layers.
After that, I go in with a cheap flat bristled craft paintbrush and pick out individual flagstones with my selections of greys. For some, I leave the dry brushed colours showing.
I do these in bulk so that by the time I get through them, the first ones are well and truly dry. Then I add some wash over them in black and brown, wiping most of the wash back off with a paper towel. Again, I do this in bulk, so I don’t have to stop the production line I set myself.
Finally, I once again use some of the lighter grey colours to roughly highlight a few of the flagstones.
I keep these deliberately rough and quick because I like the colours to merge. After all, this is a backdrop really for the miniatures which will go on the table.
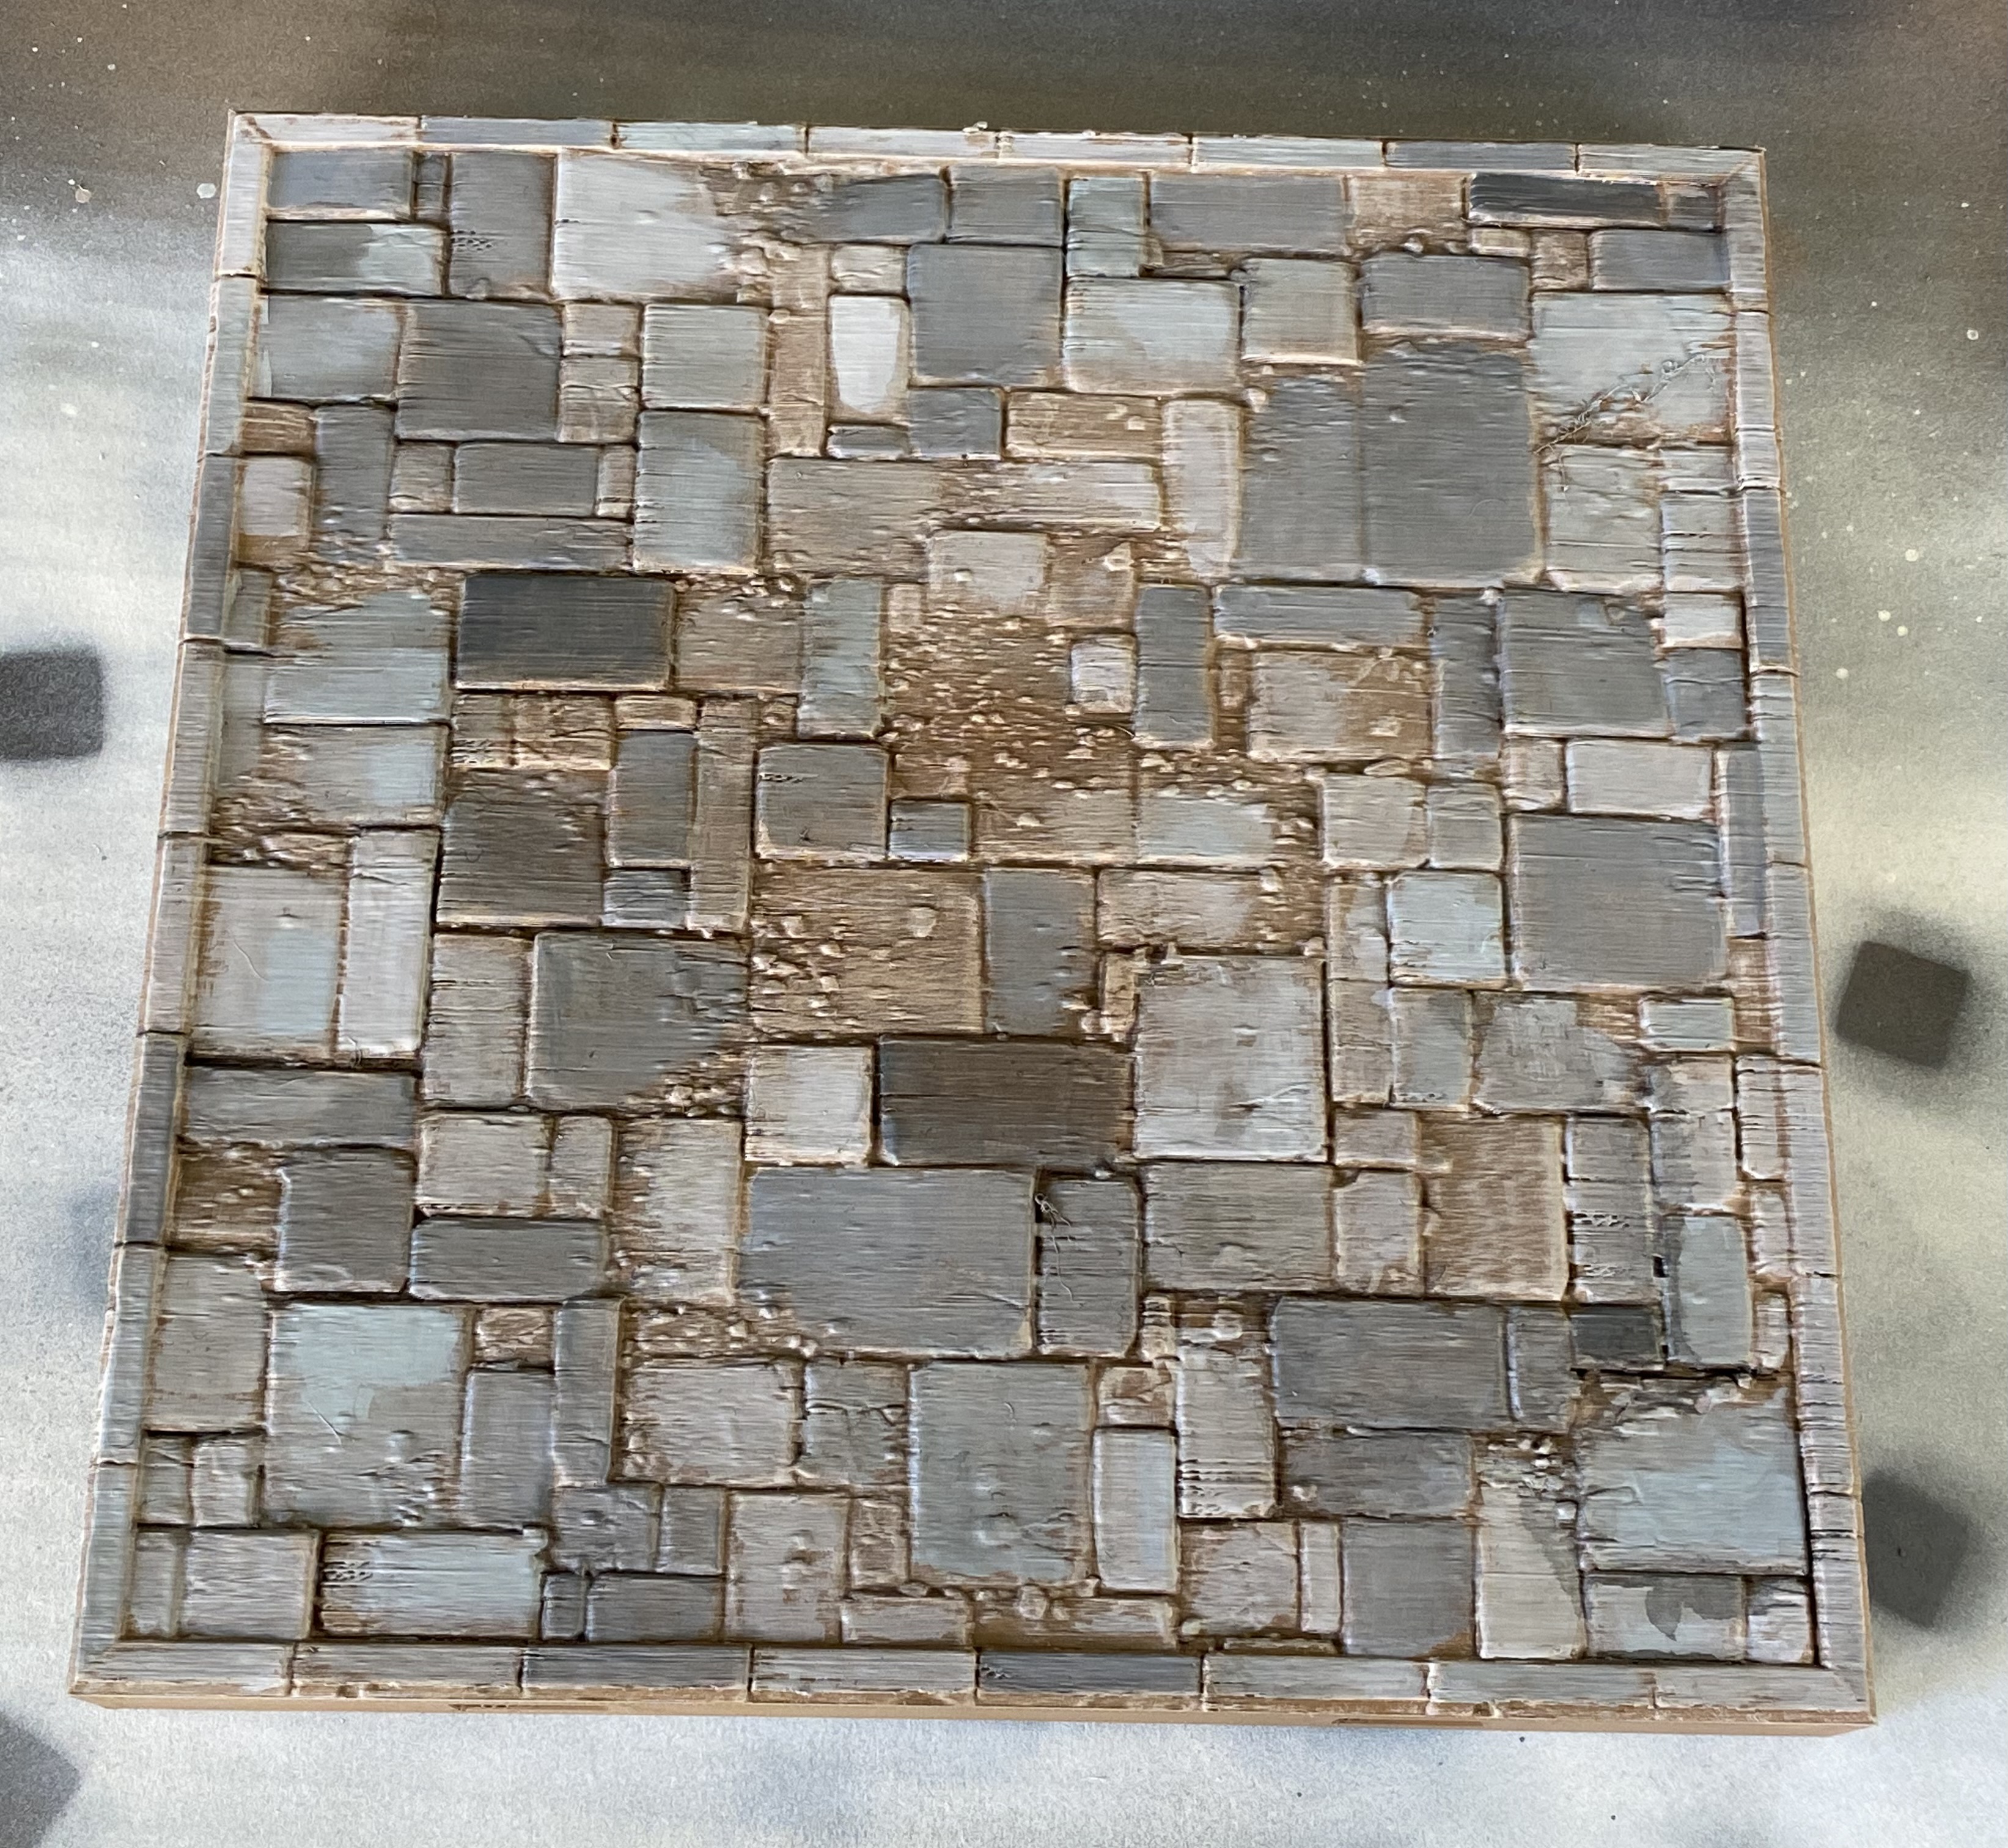
This is a really fast way for me to get these done. I can stick a movie on, or in this case, catch up with some stuff on YouTube and just knock them all out.
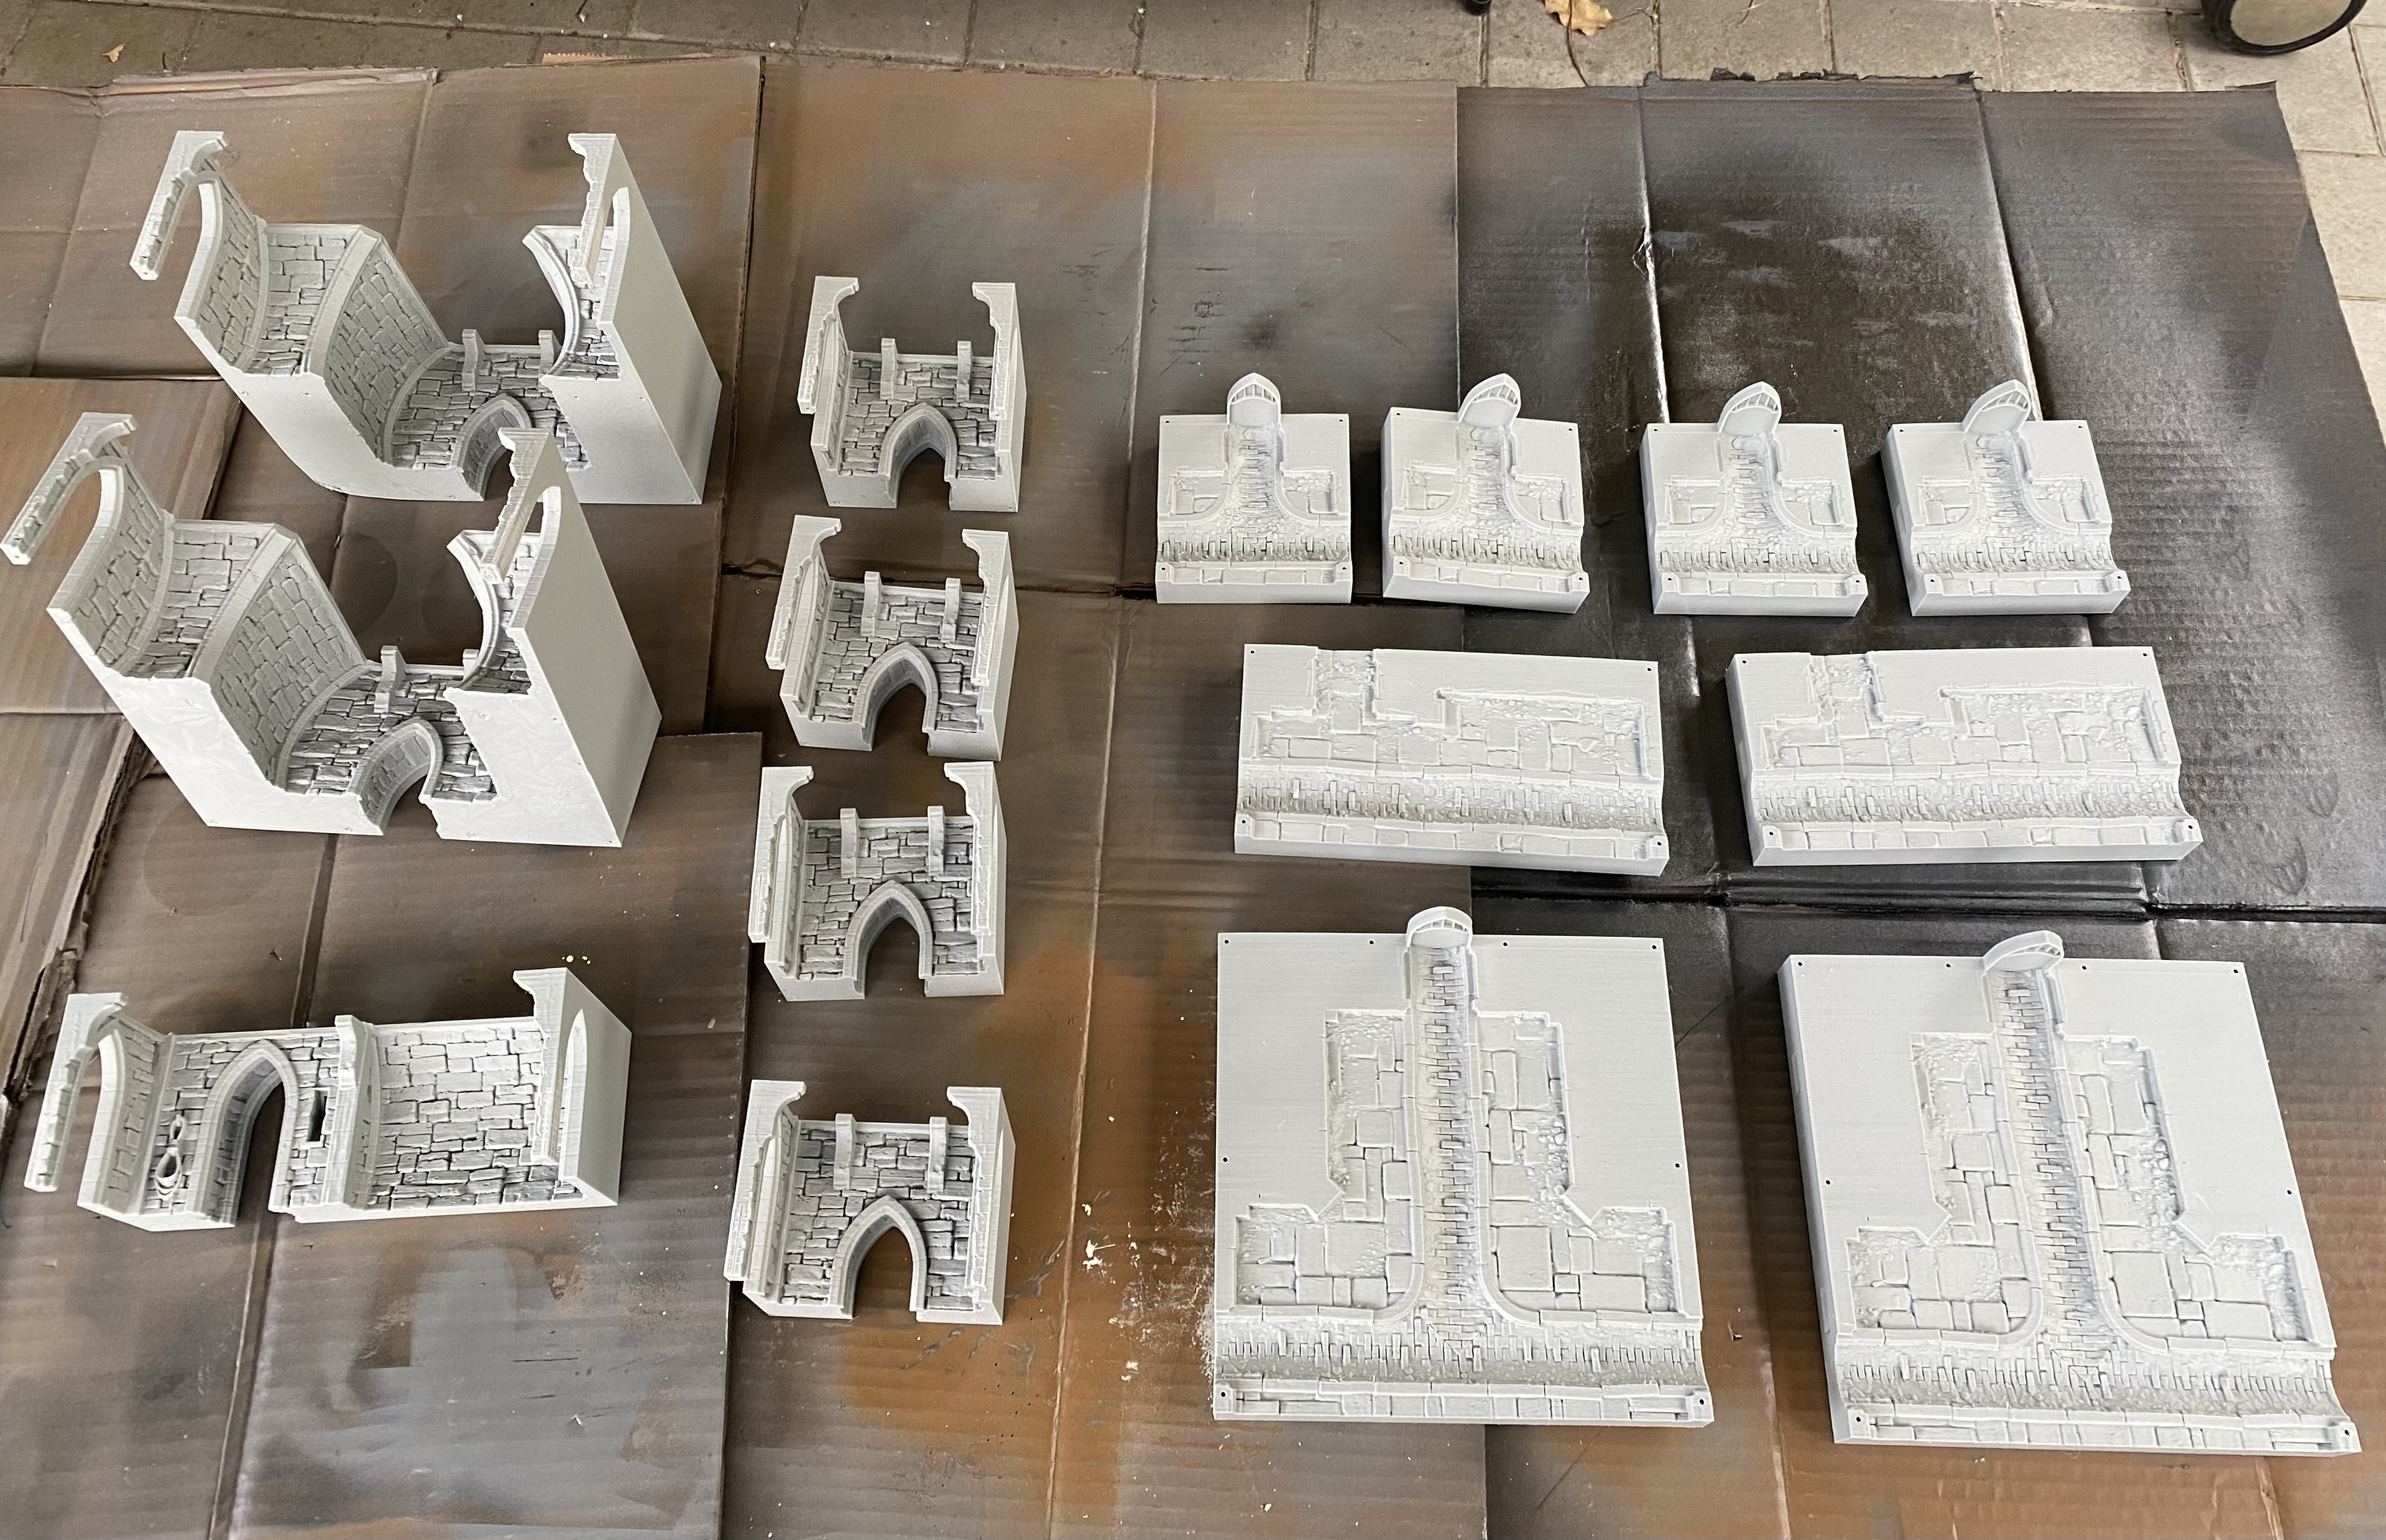
The walls, I have already covered in my Gaslight project, so I won’t go into detail here, suffice to say the brickwork consists of 3 colours and 2 of those are undercoats from rattle cans.
Where im up to
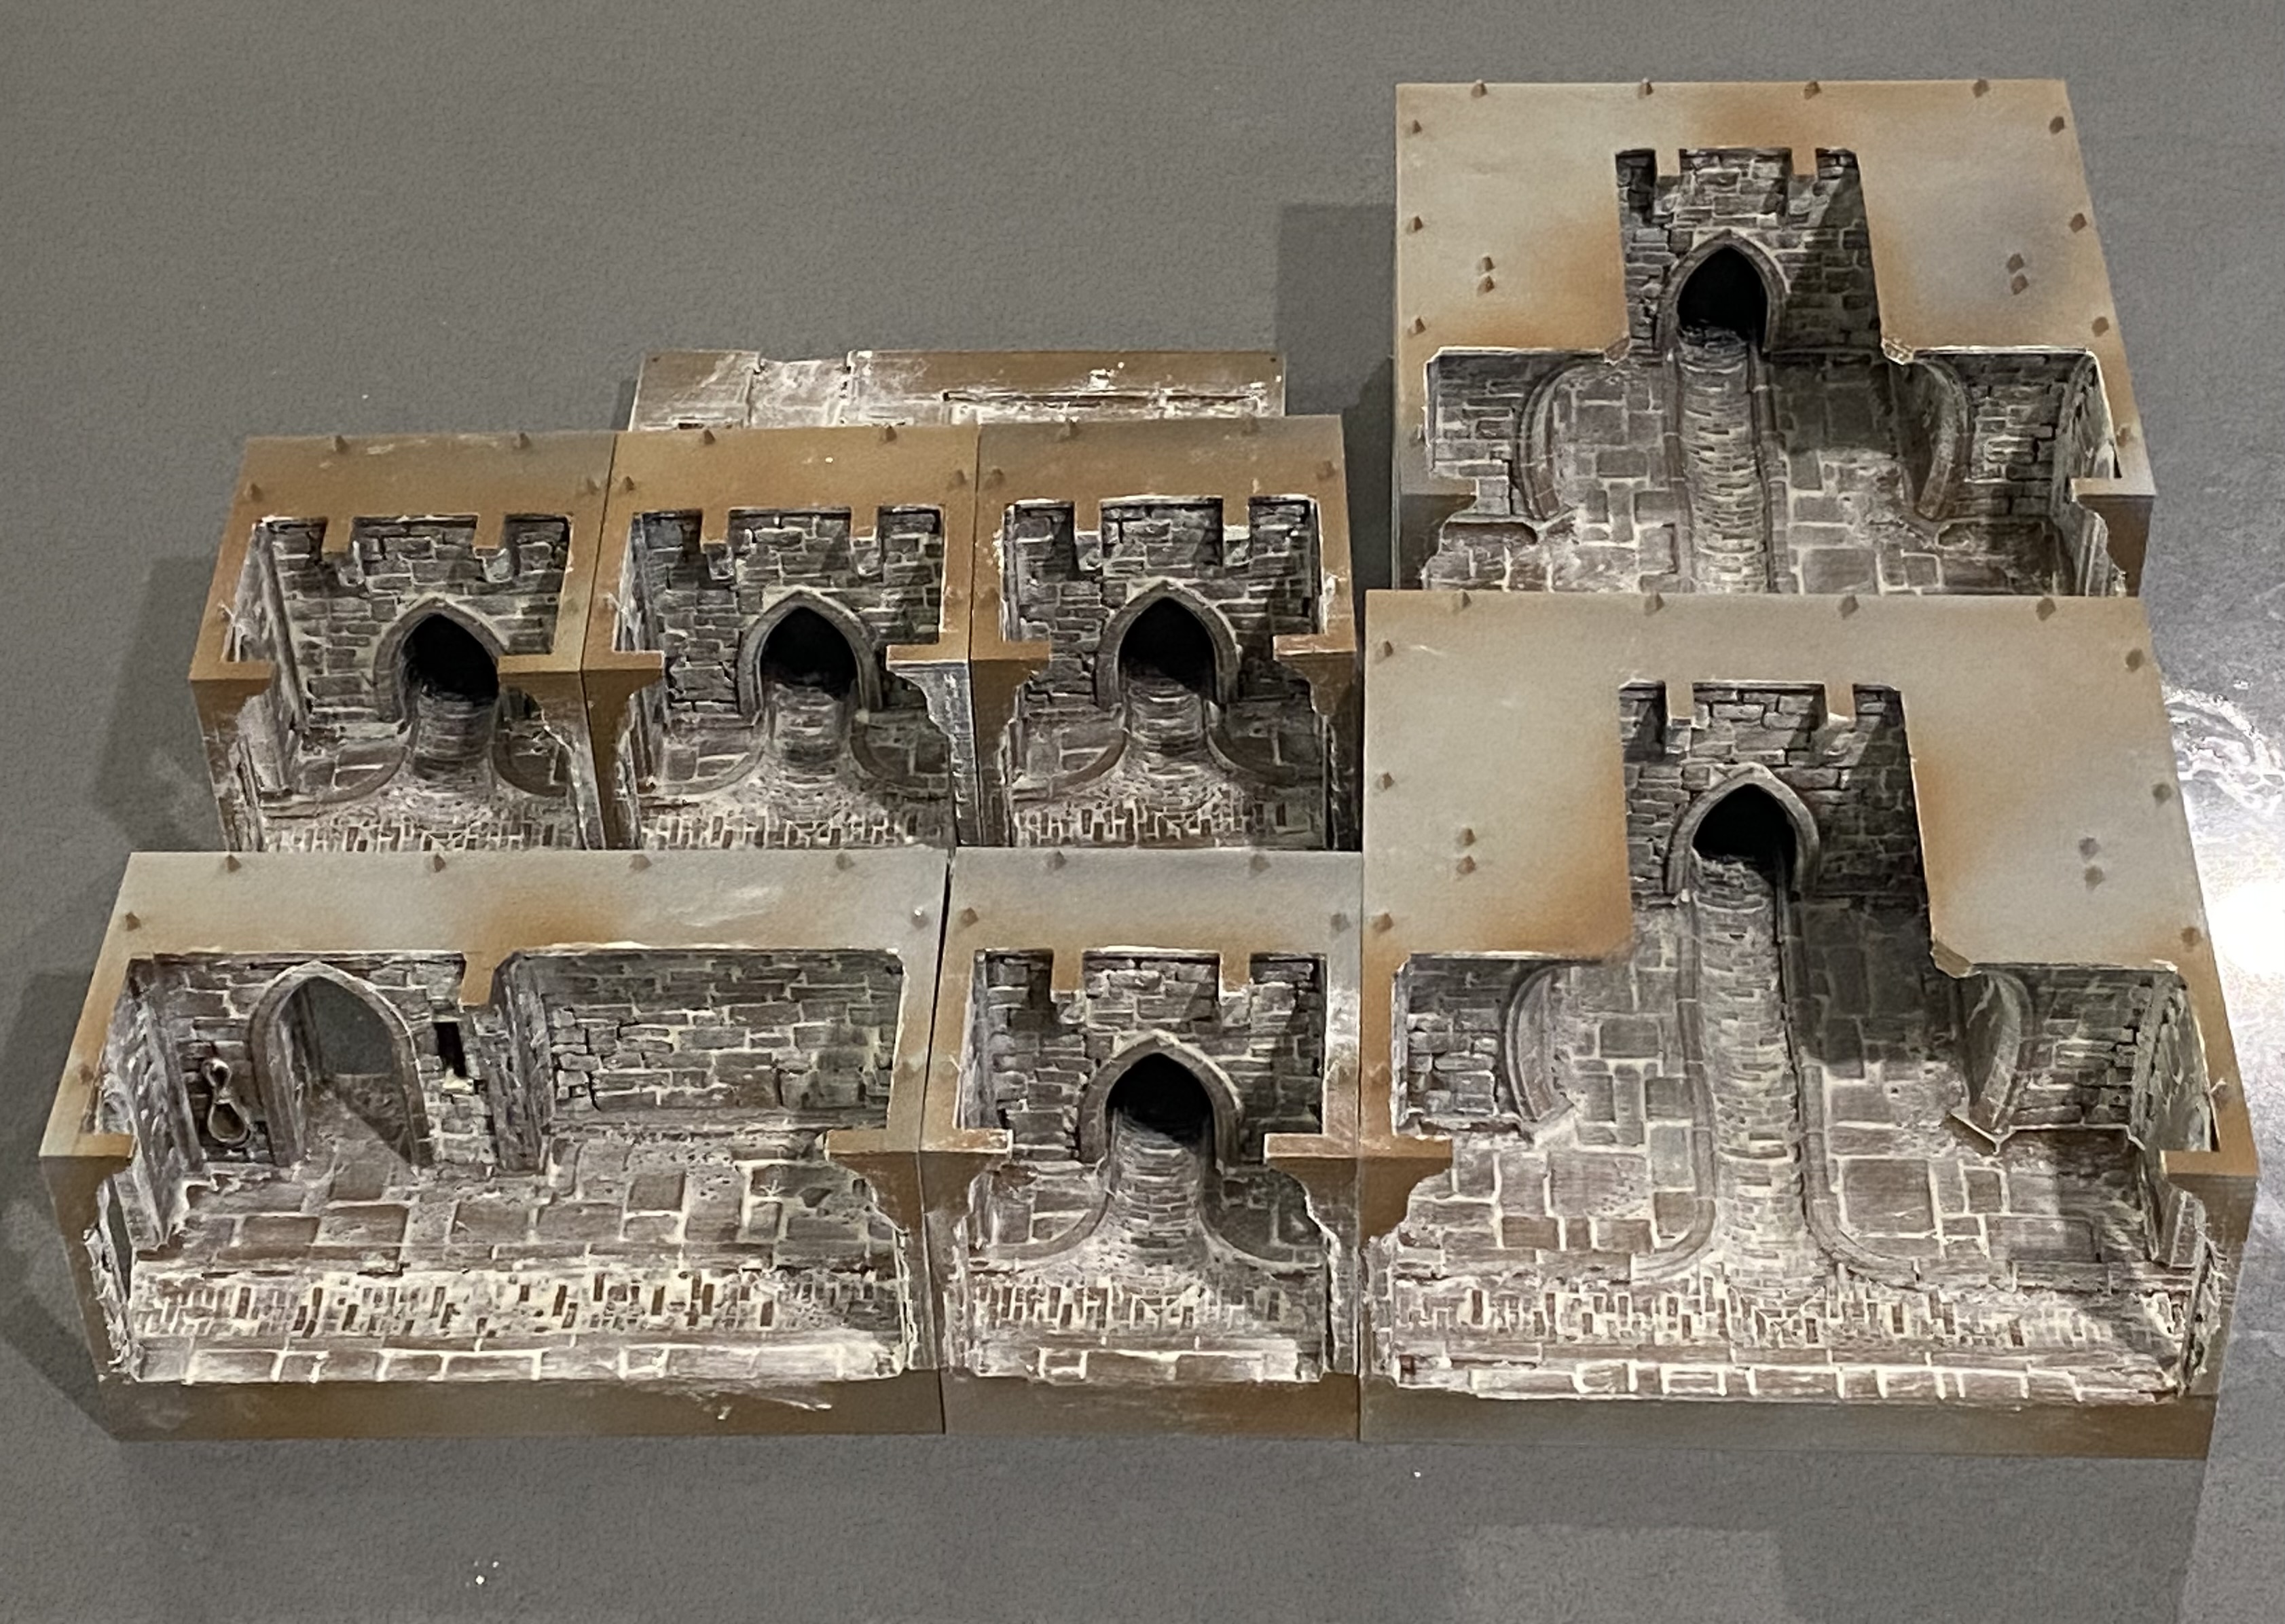
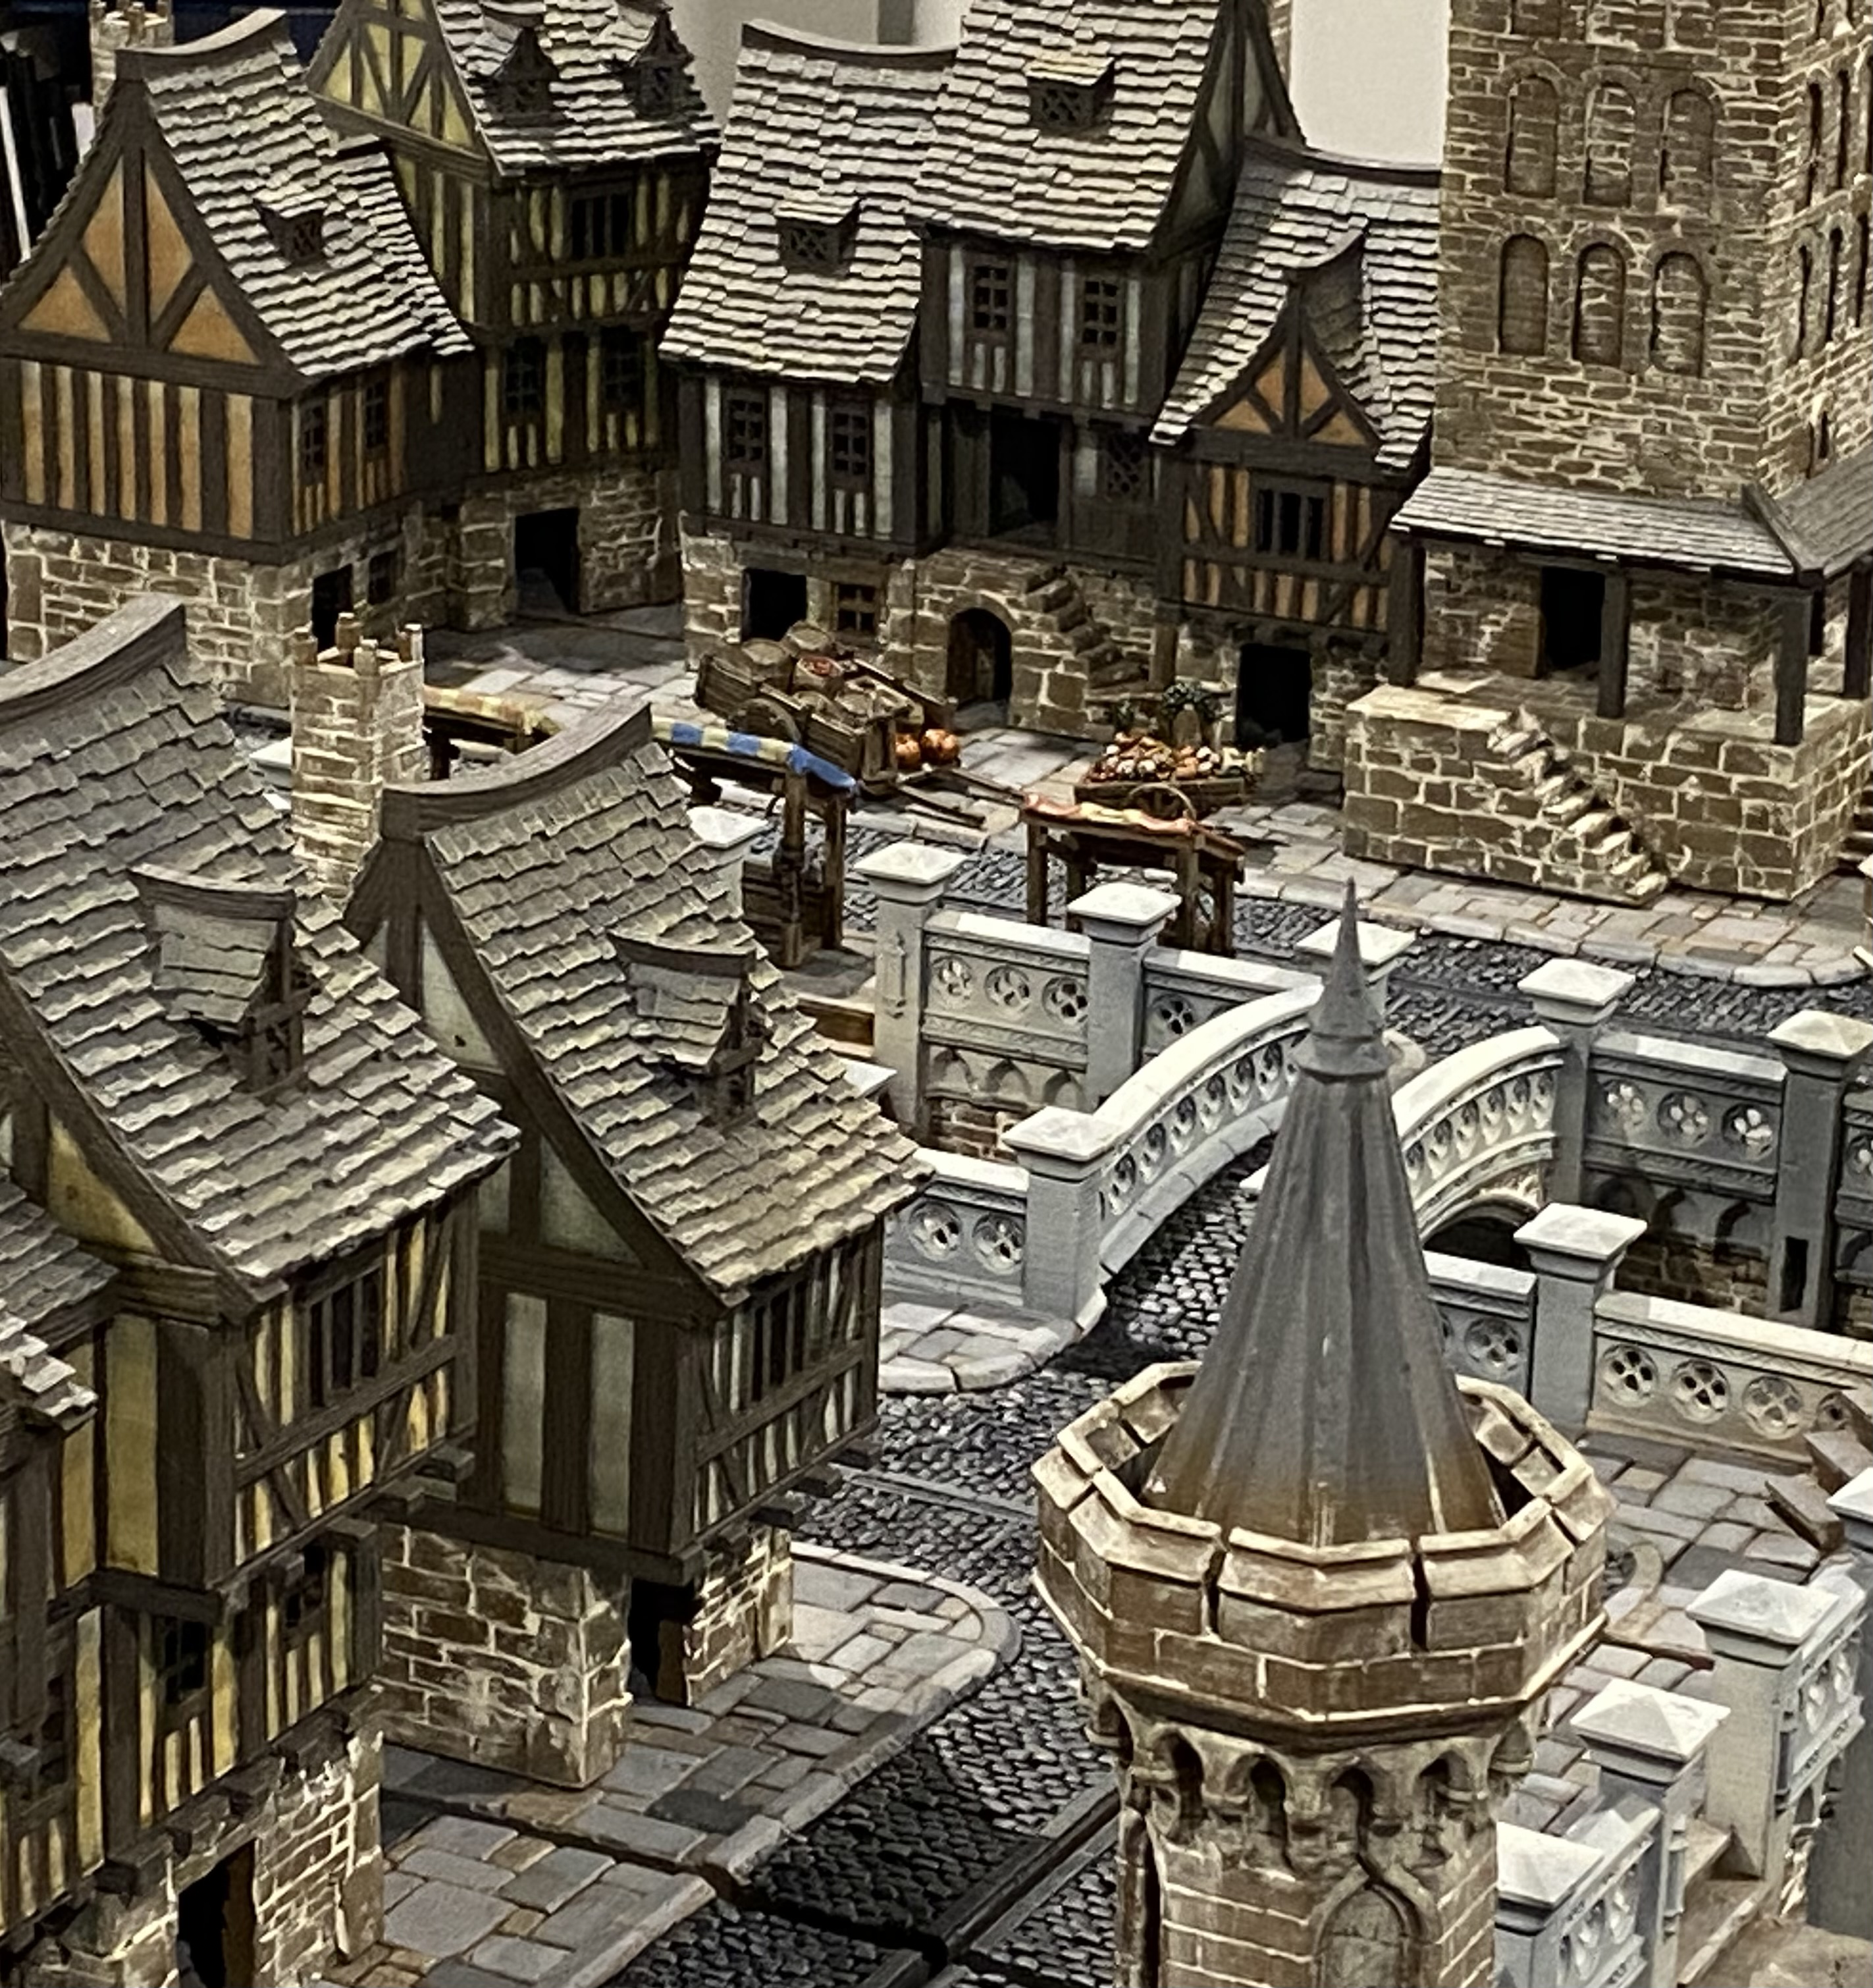
A little stock-take on where I am up to.
I have a fair bit of painting done, still lots to do and still lots more that my mechanical helpers and churning out for this.
The cobblestone roads will change as I am not happy with how they look at the moment.
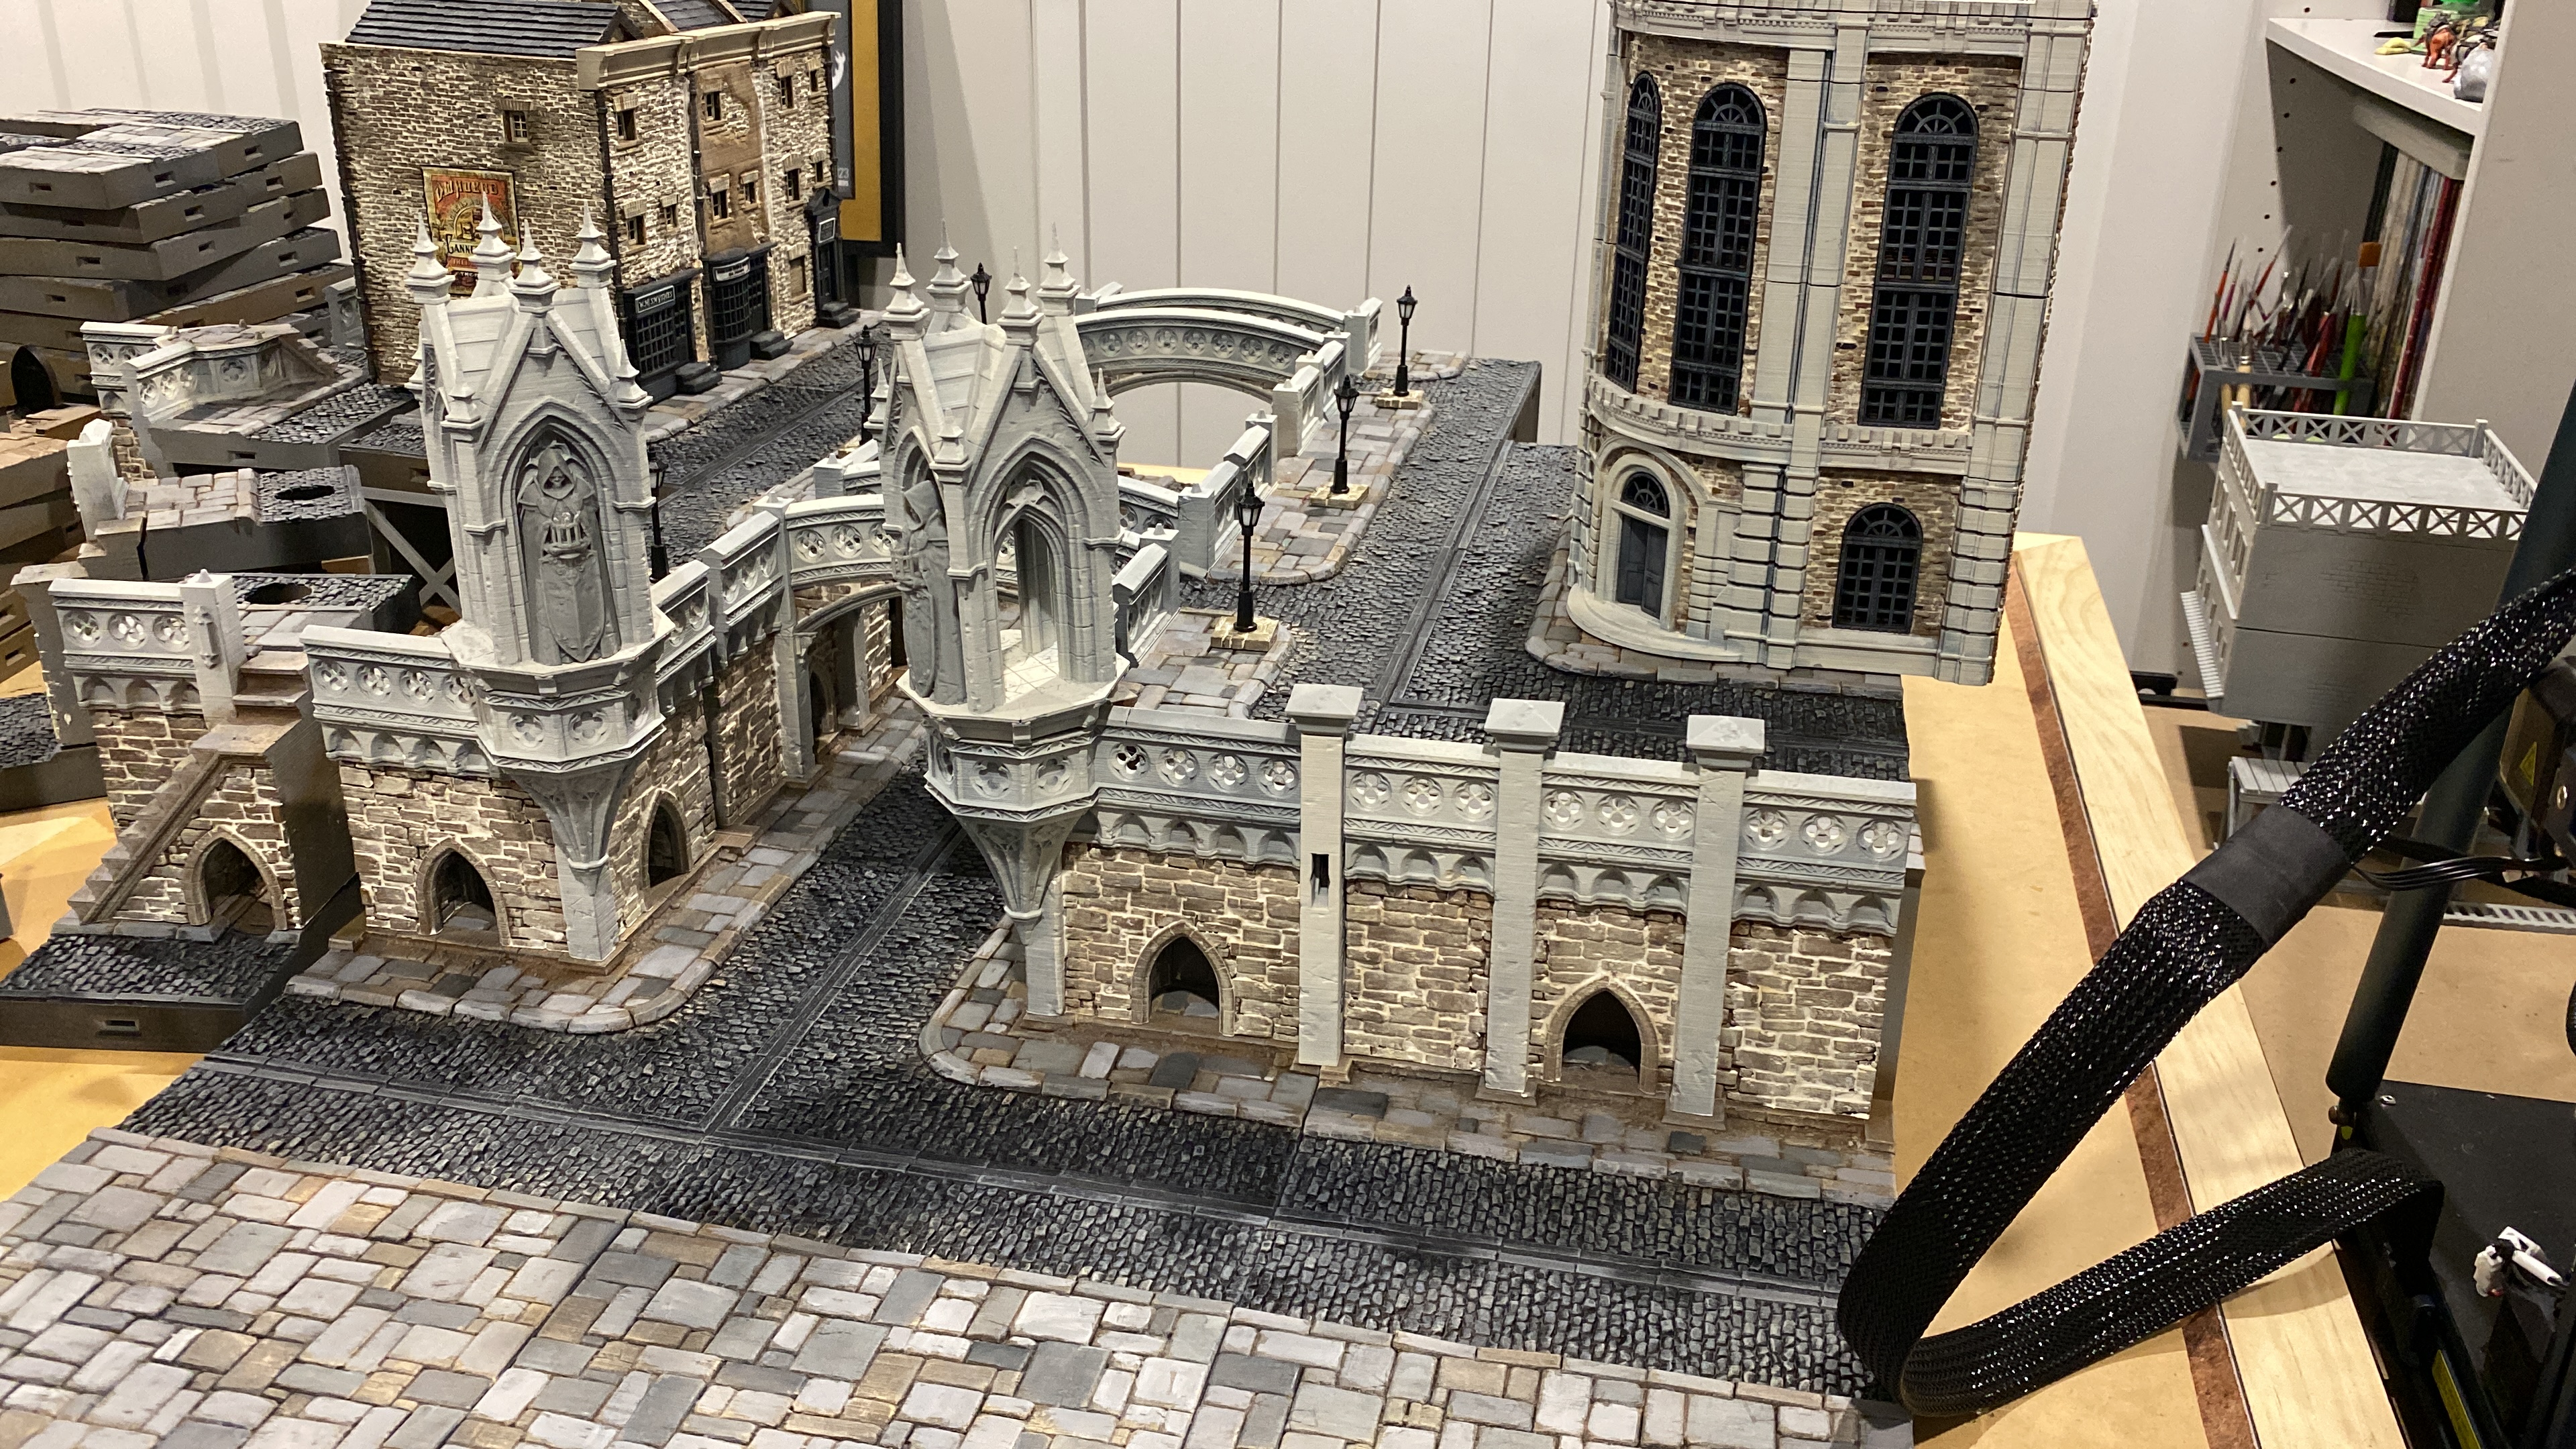 Disclaimer - The buildings on the table set up in this picture were built last year.
I have heaps more to do, thankfully with my work I have been lucky in getting a block of days off all in a row. A new job is on the horizon though, so I have to make hay whilst the sun shines.
 The curb pieces just look wrong to me. I think I will lighten them all up so they stand out a bit better from the flagstones. Also I need to do the curb pieces on the bridges. The more I look the more I see little bits to adjust.
A quick tutorial
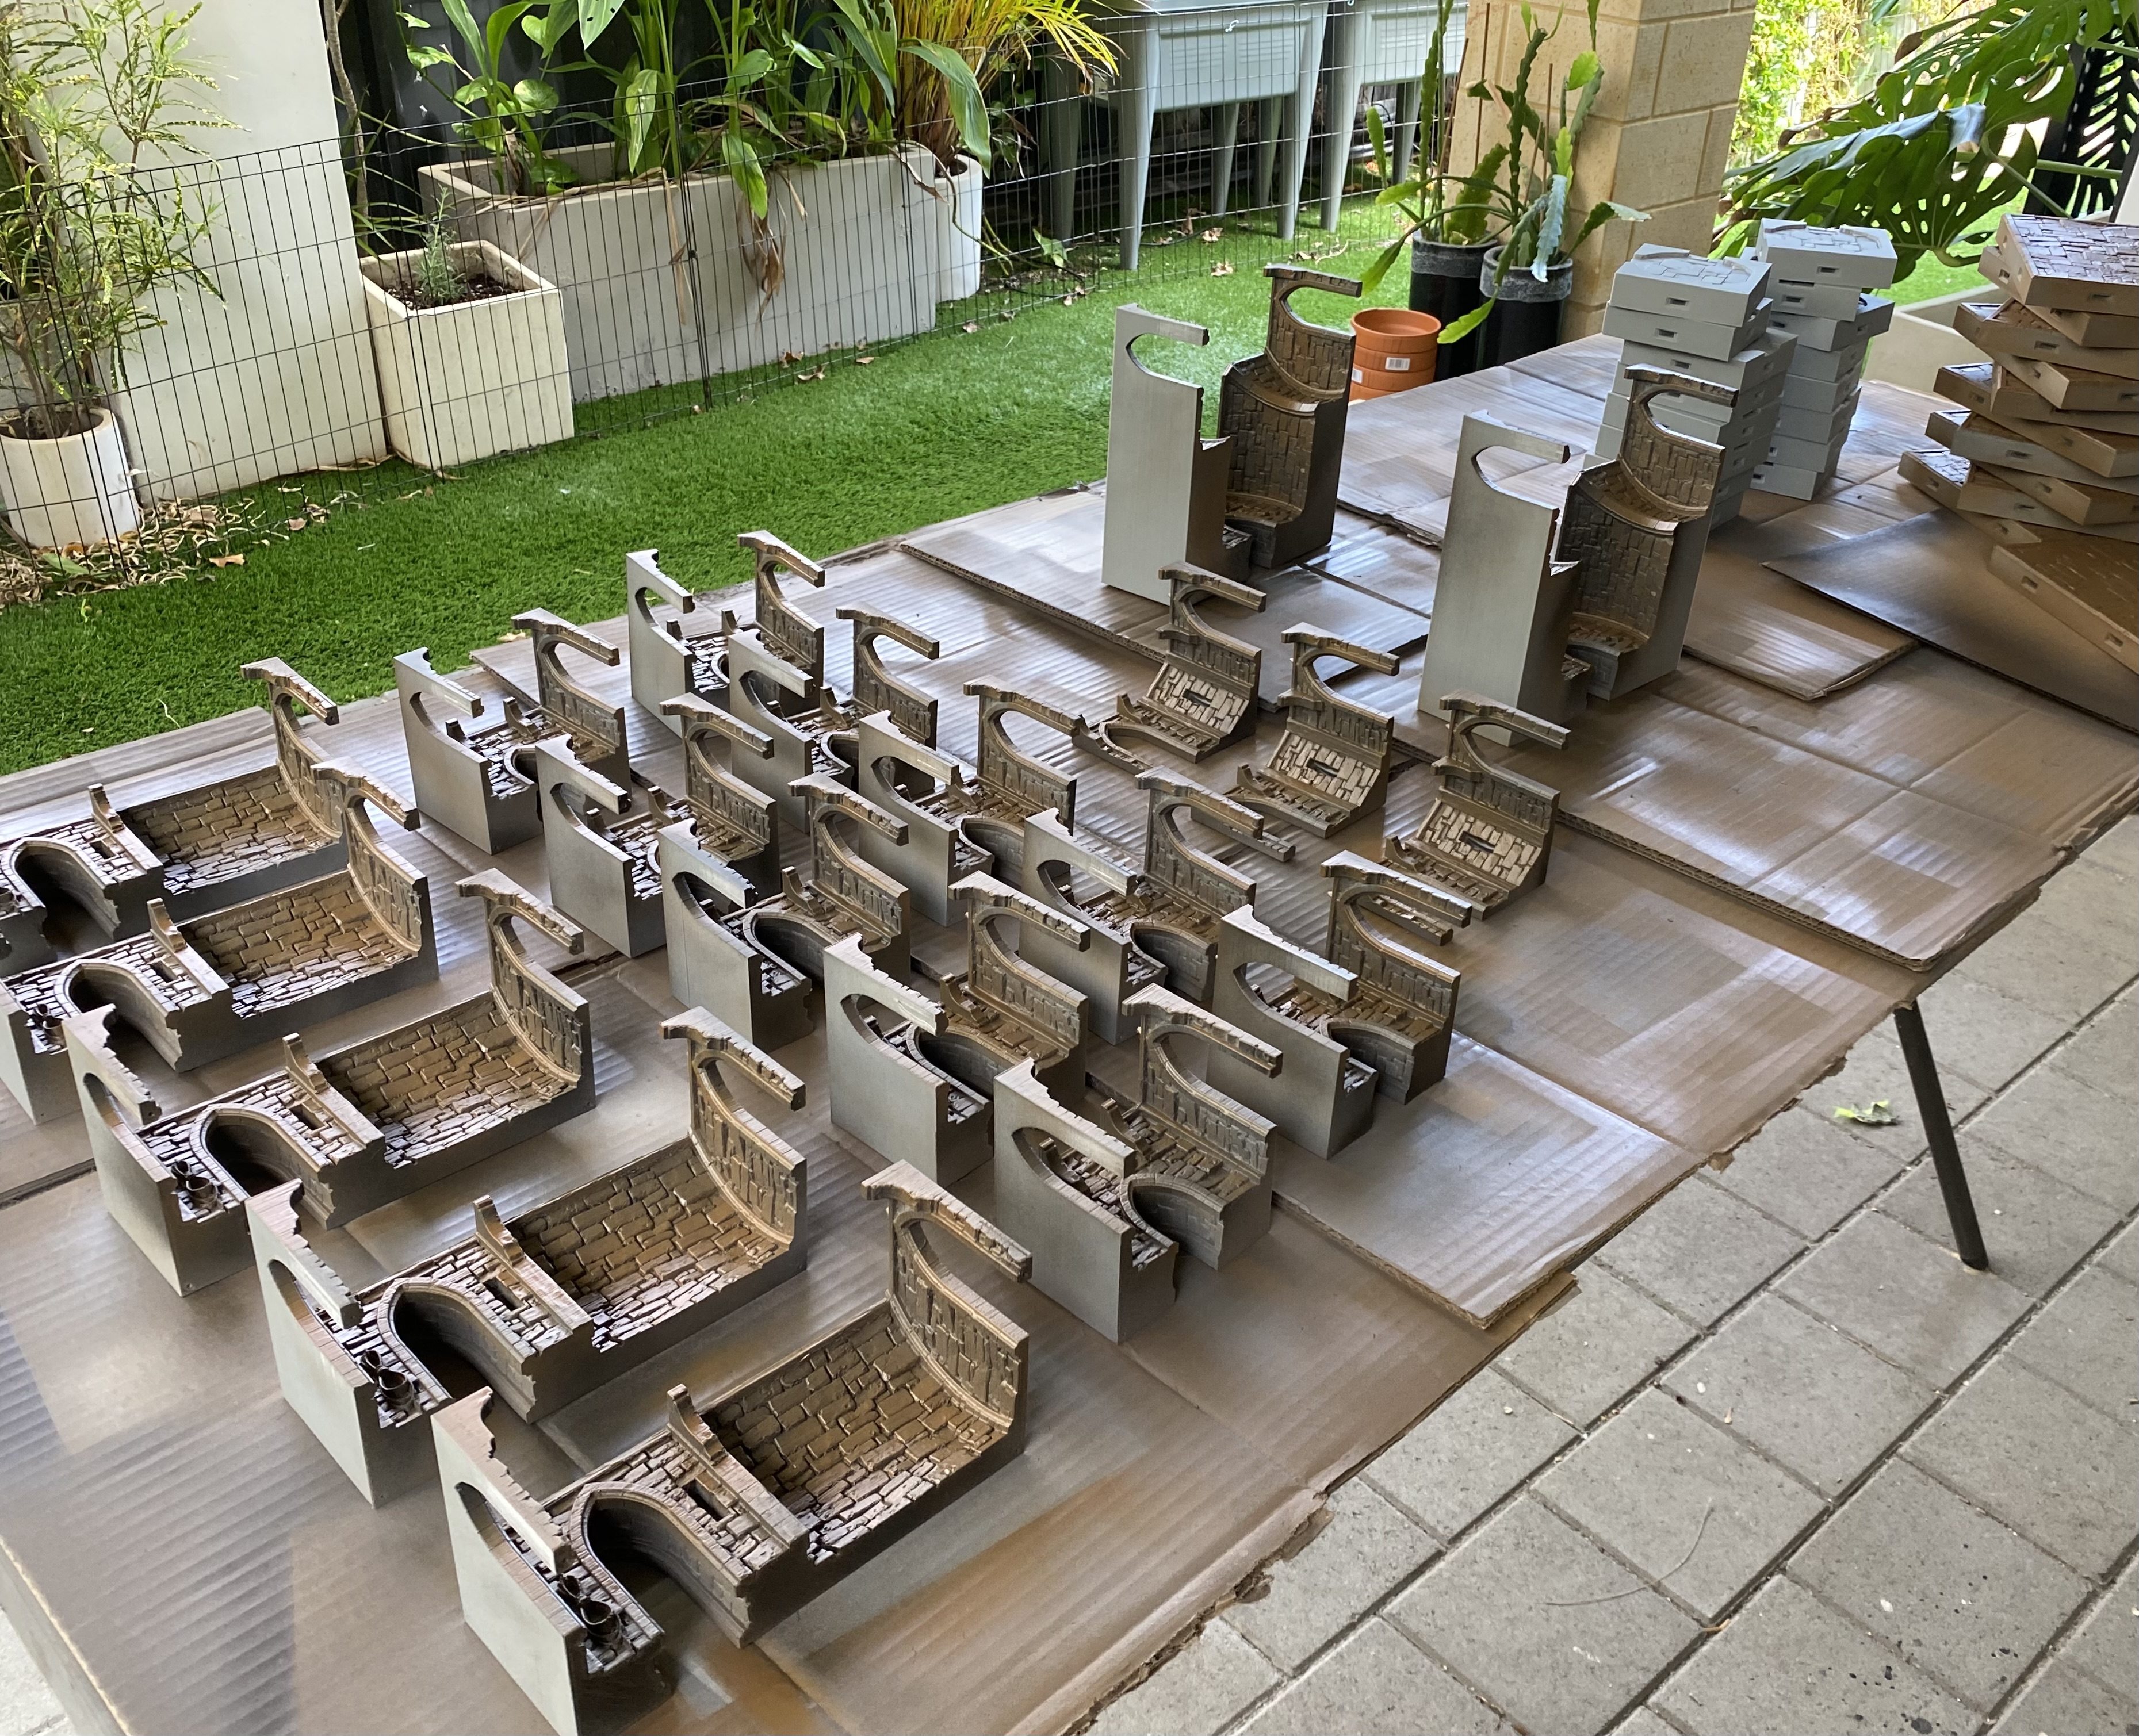
A really quick tutorial on my sewers. Call this part one if you like.
I’ll come back and do the woodwork and weathering in a later post.
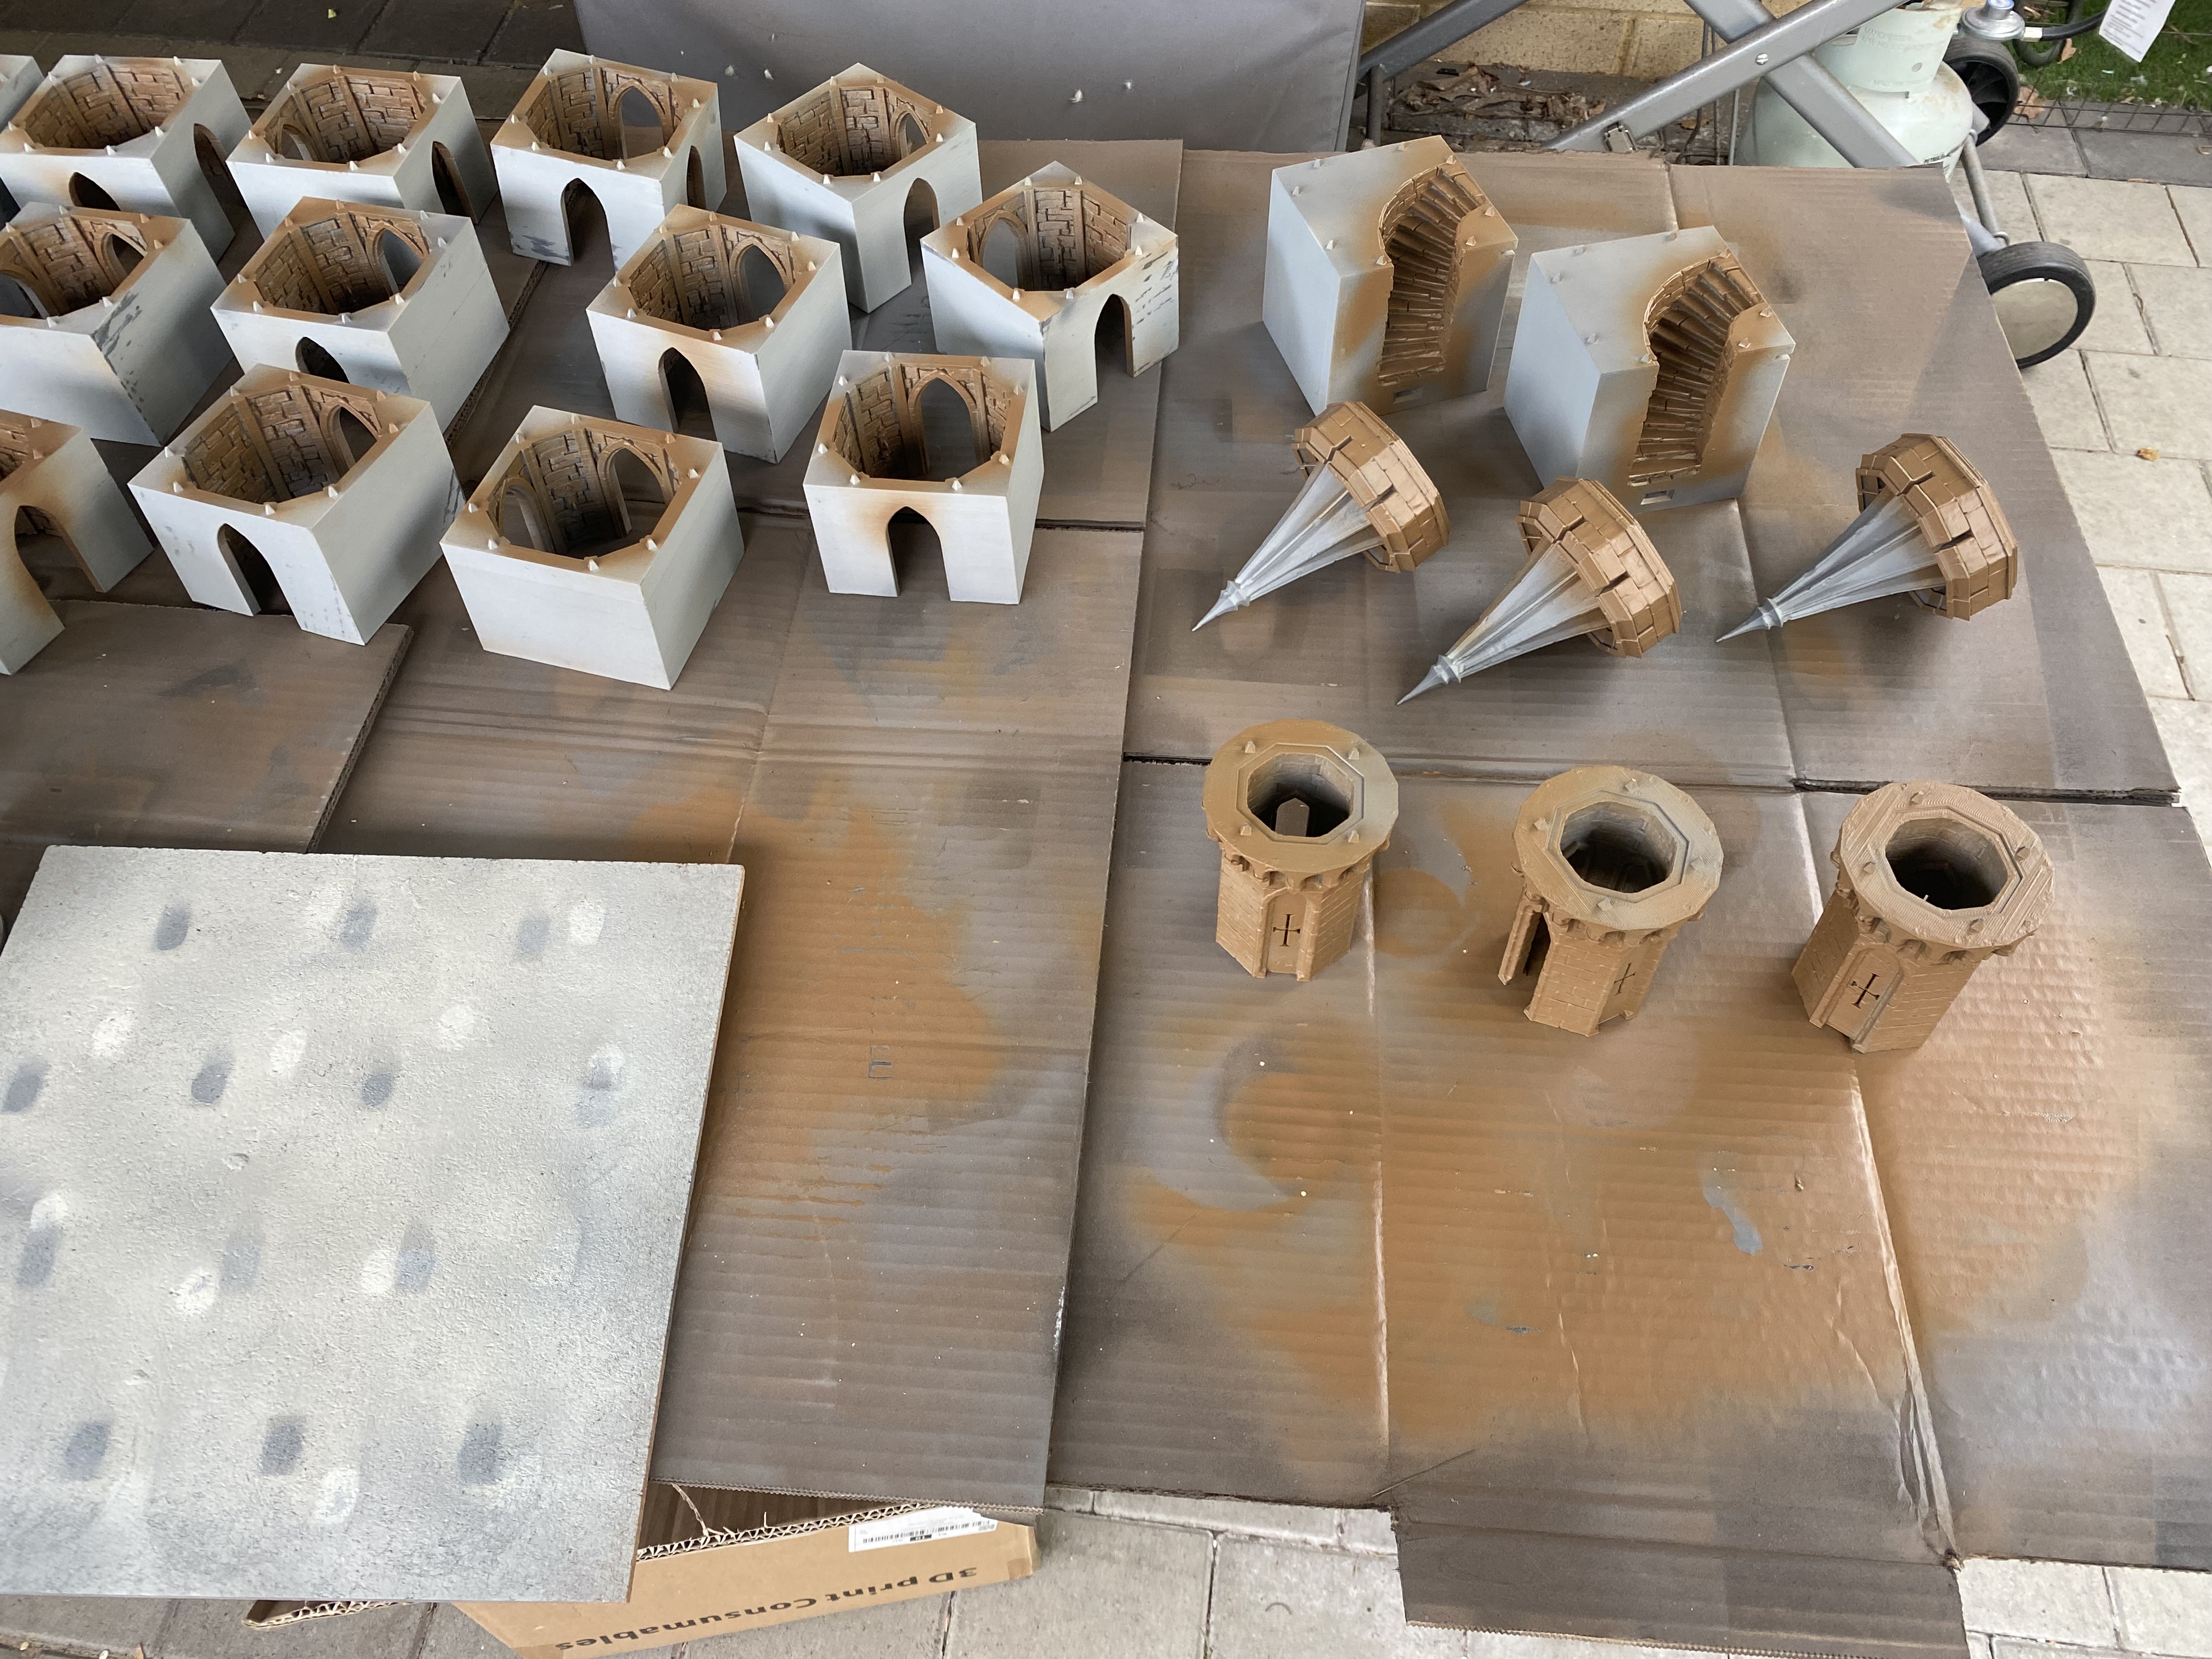
 Sewer edge pieces ready to go
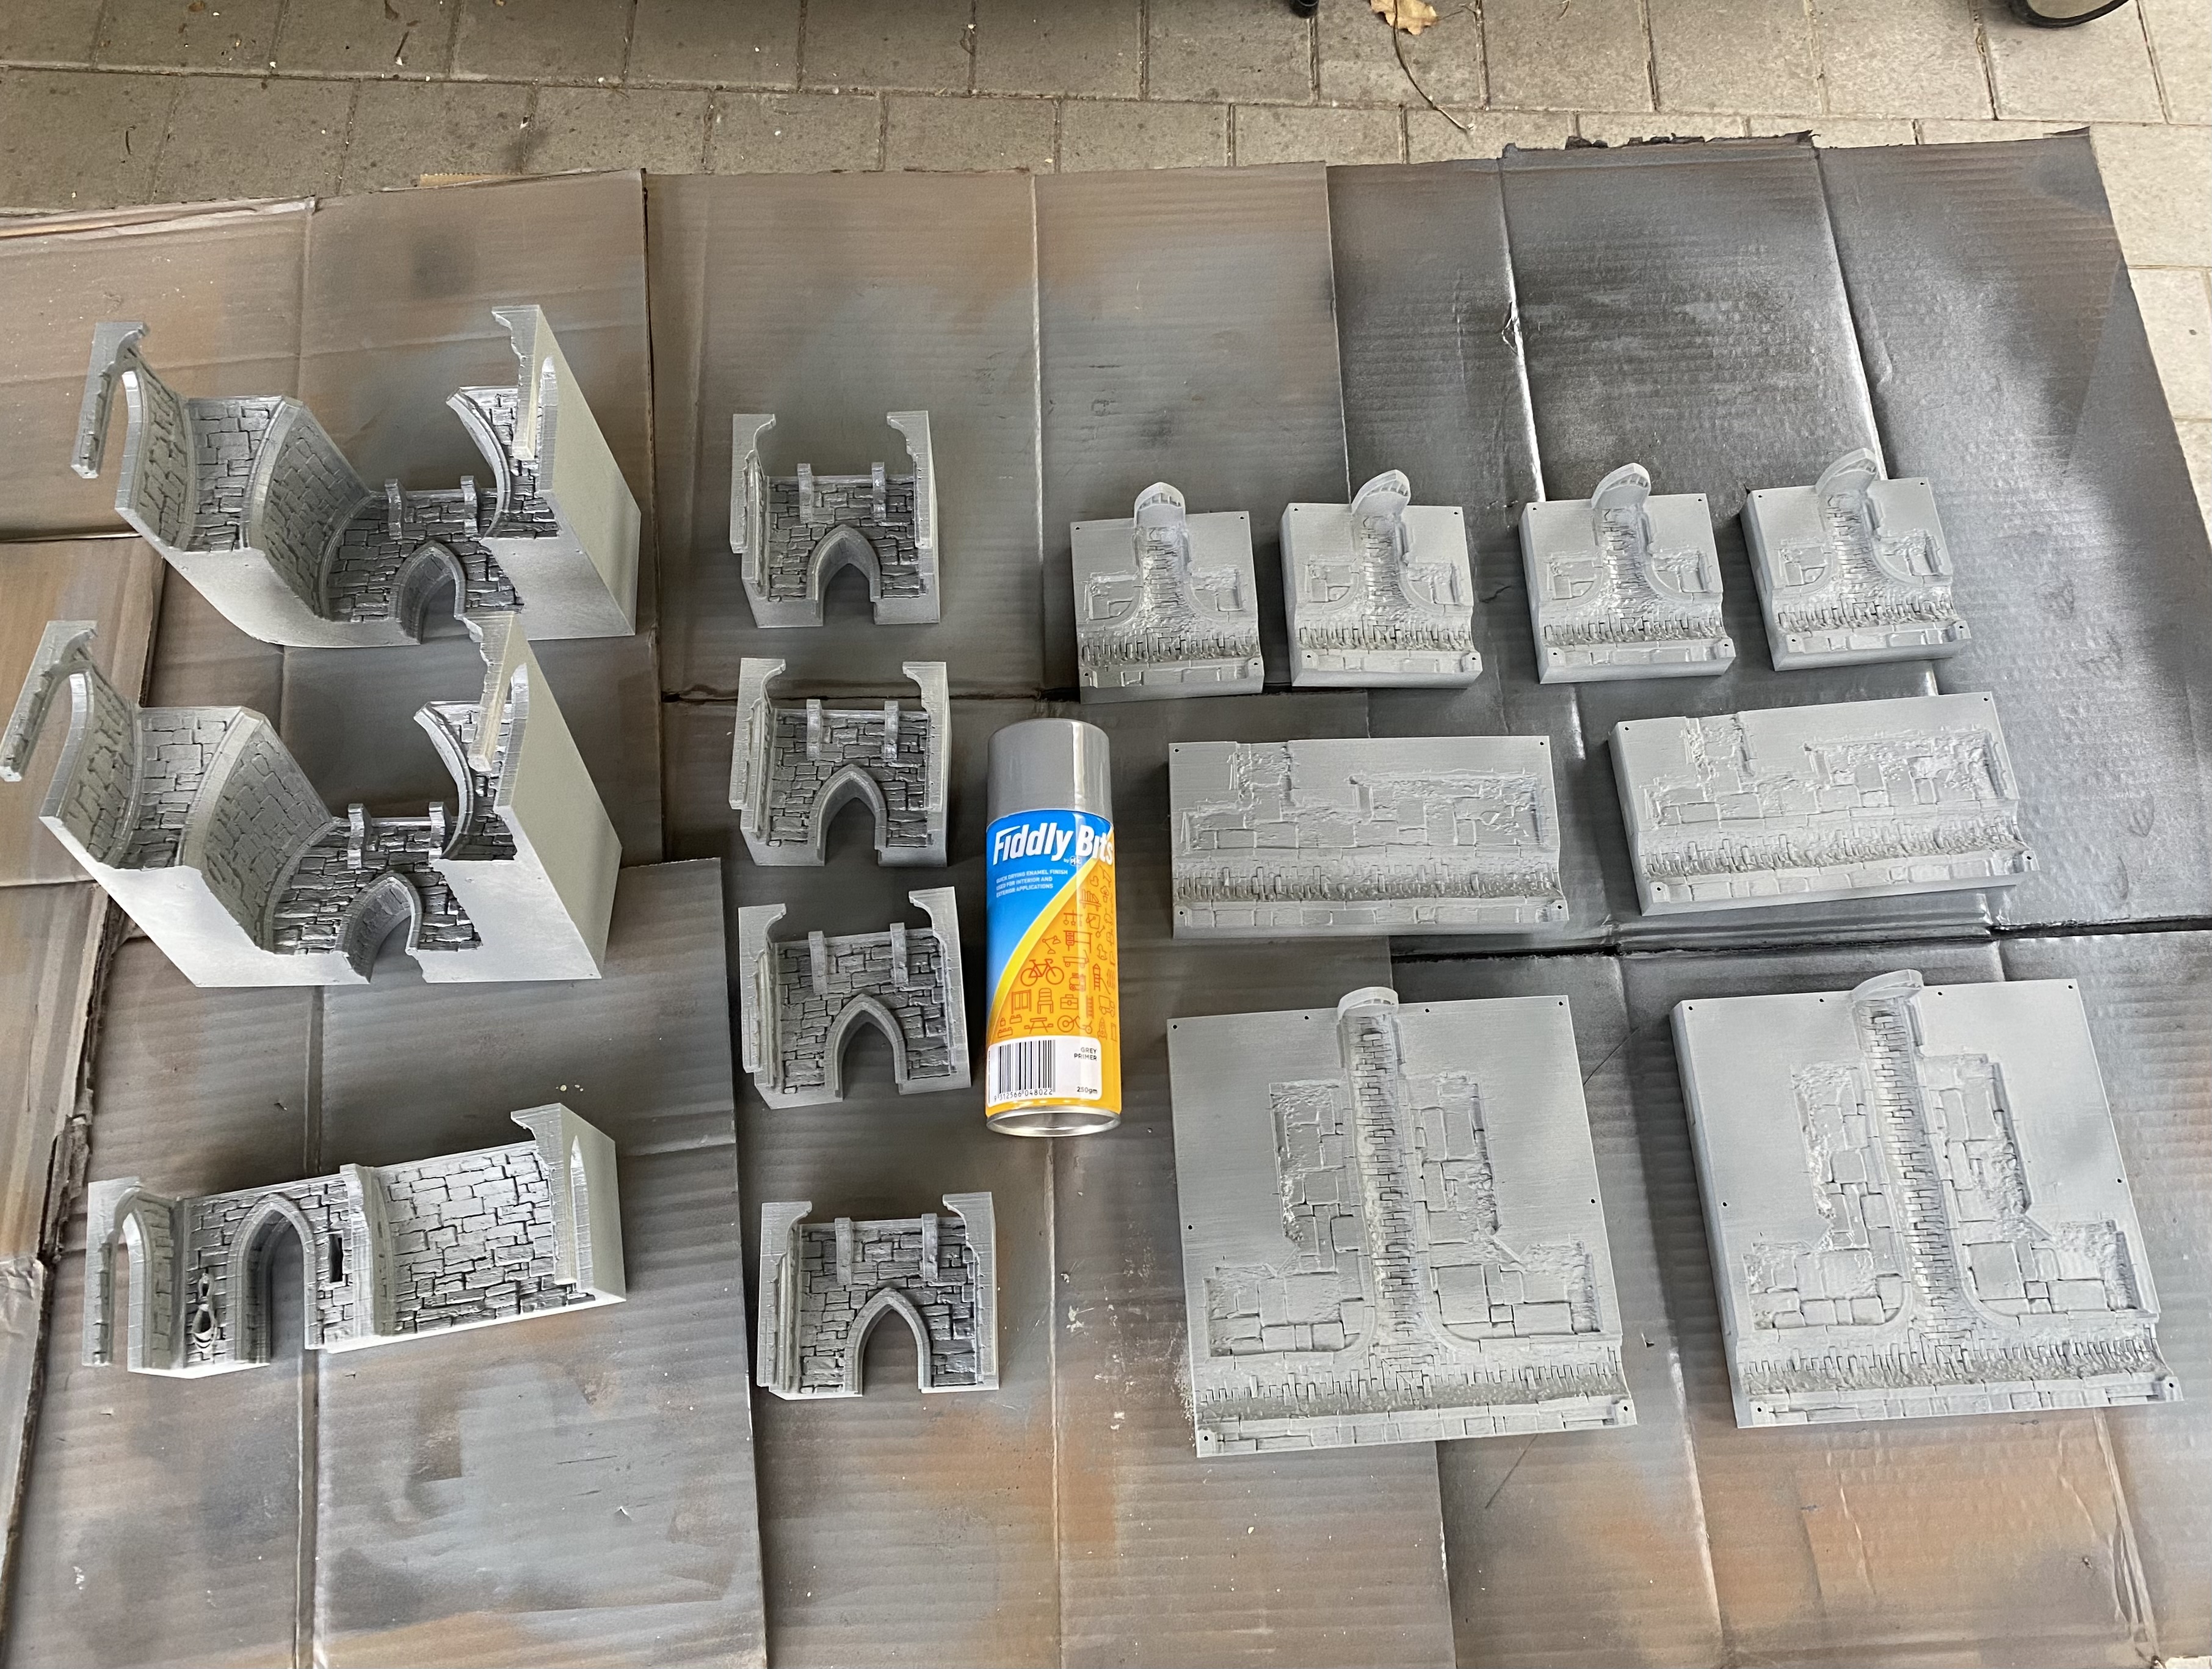 Quick undercoat with the cheapest grey primer I could find
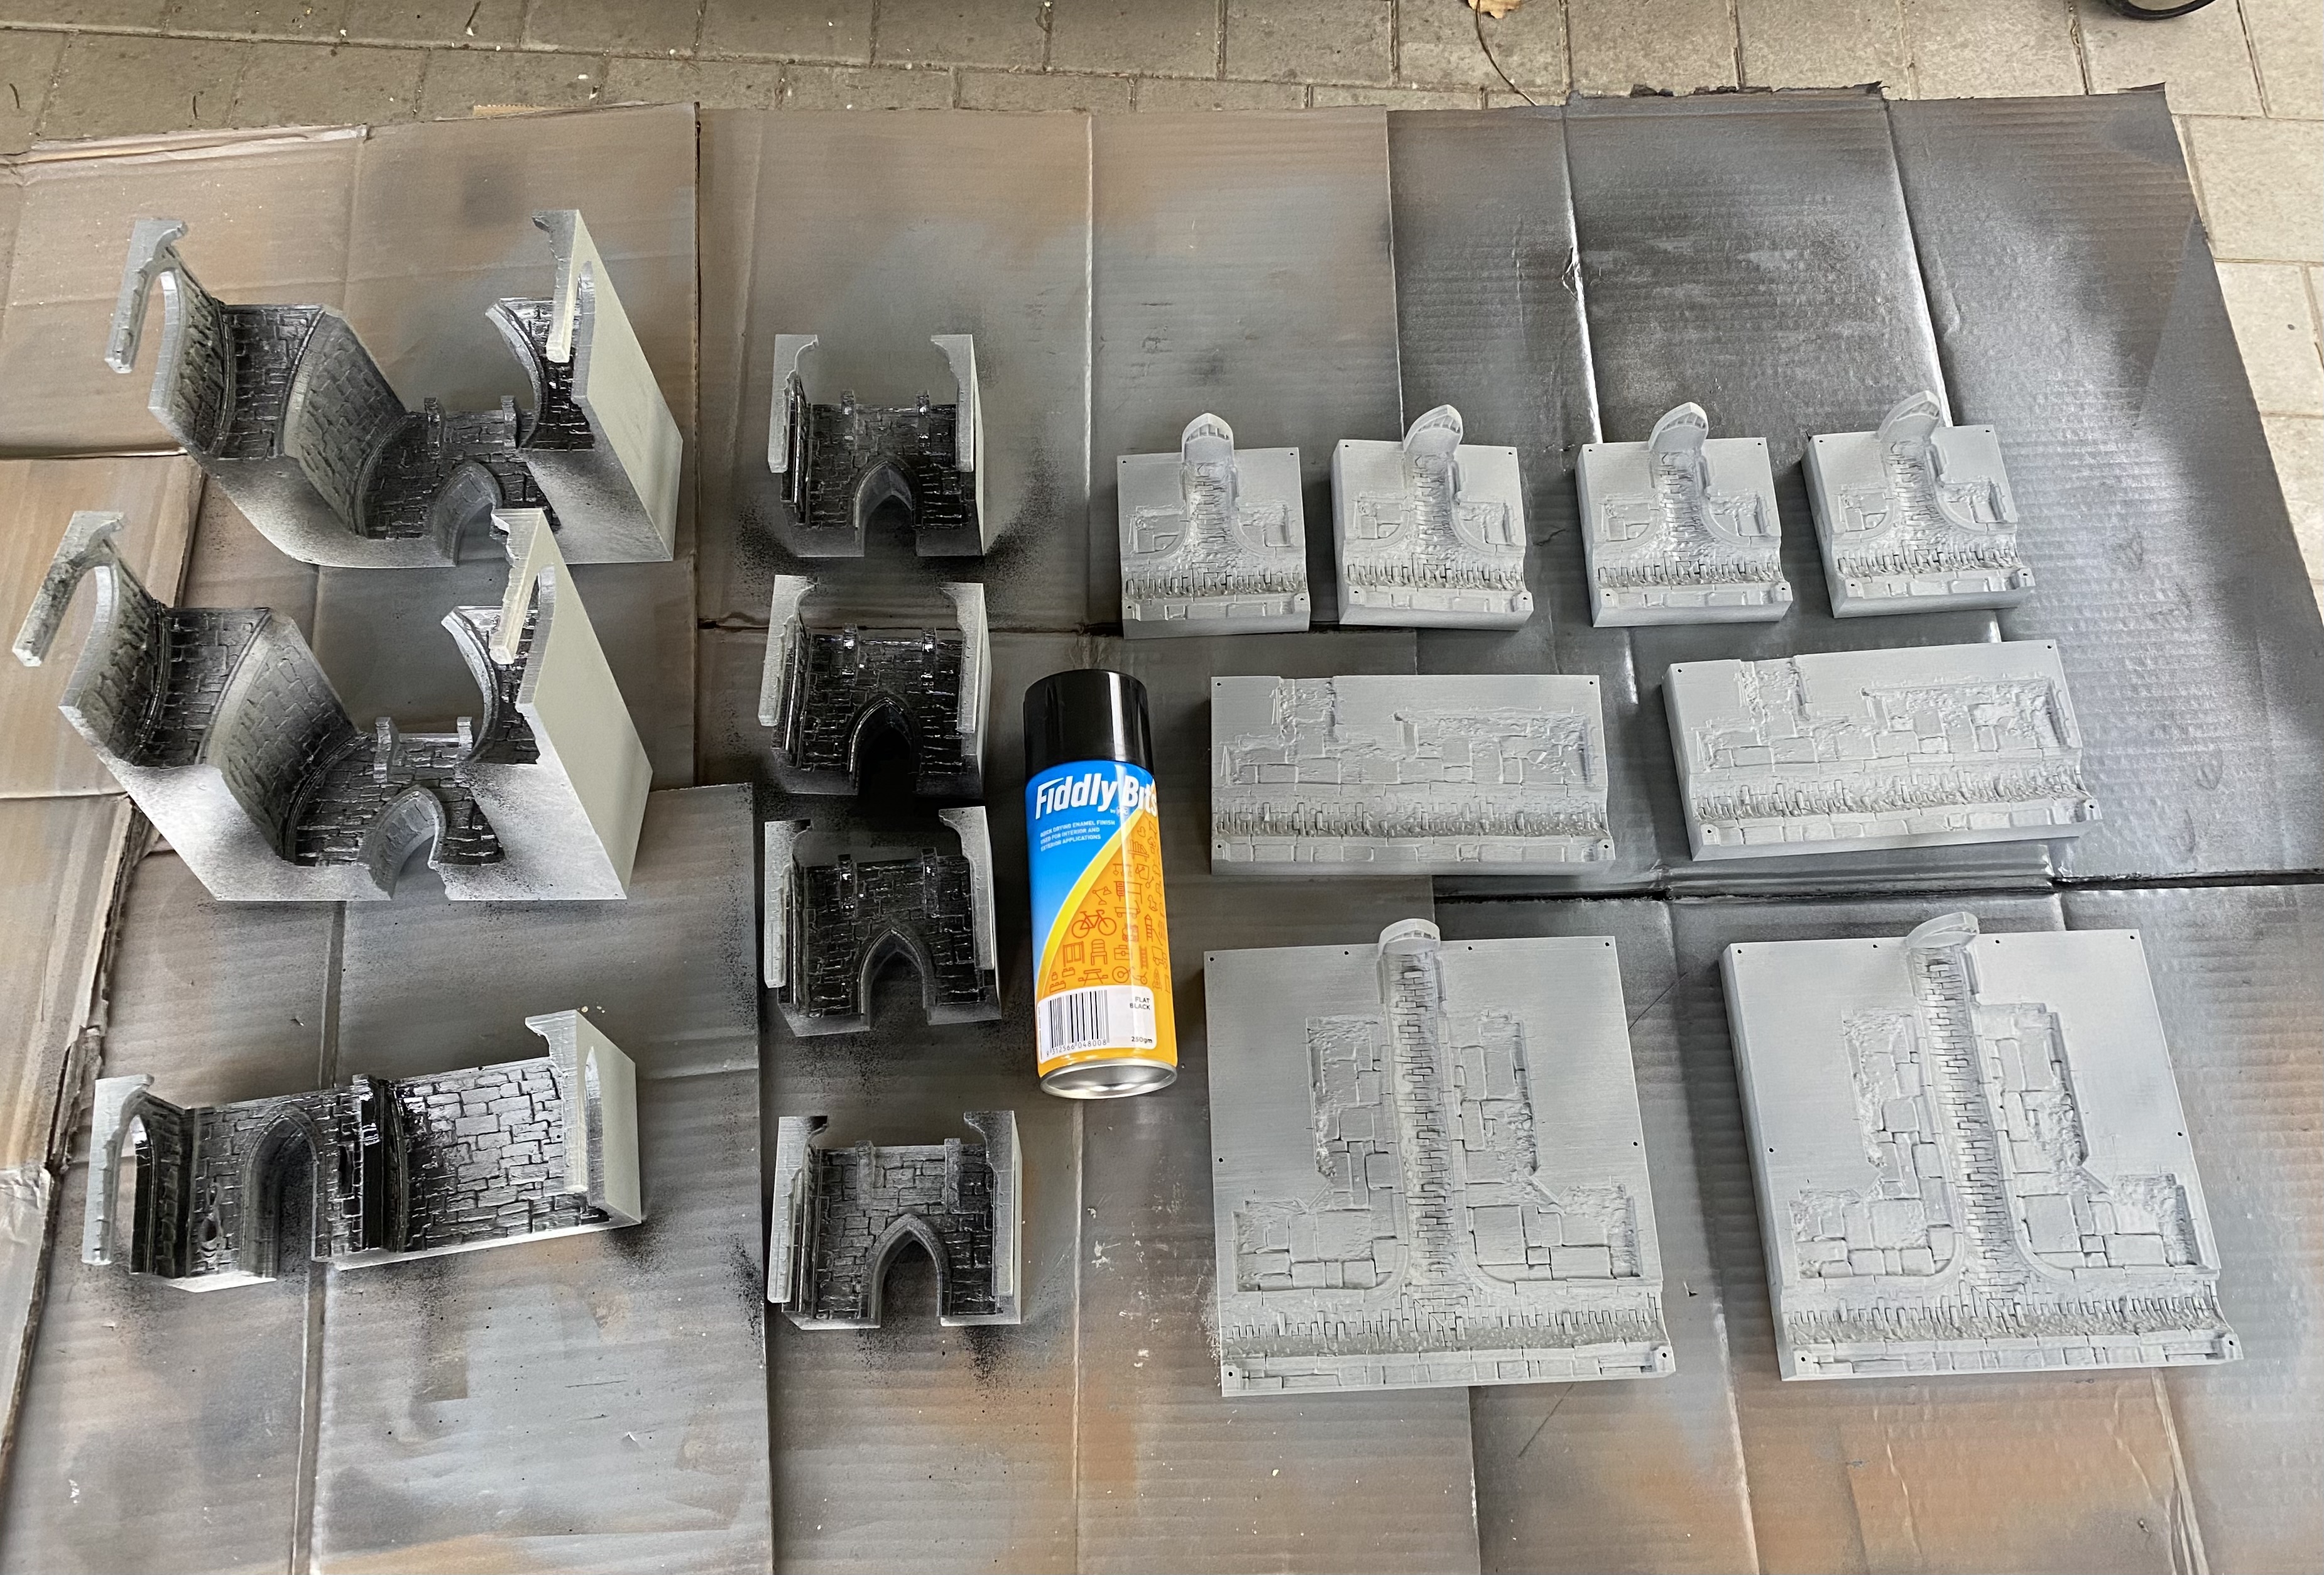 Cheap black primer to roughly paint in the sewer tunnels that are there to represent them going deeper, and a few shades in corners, although those are probably not necessary
 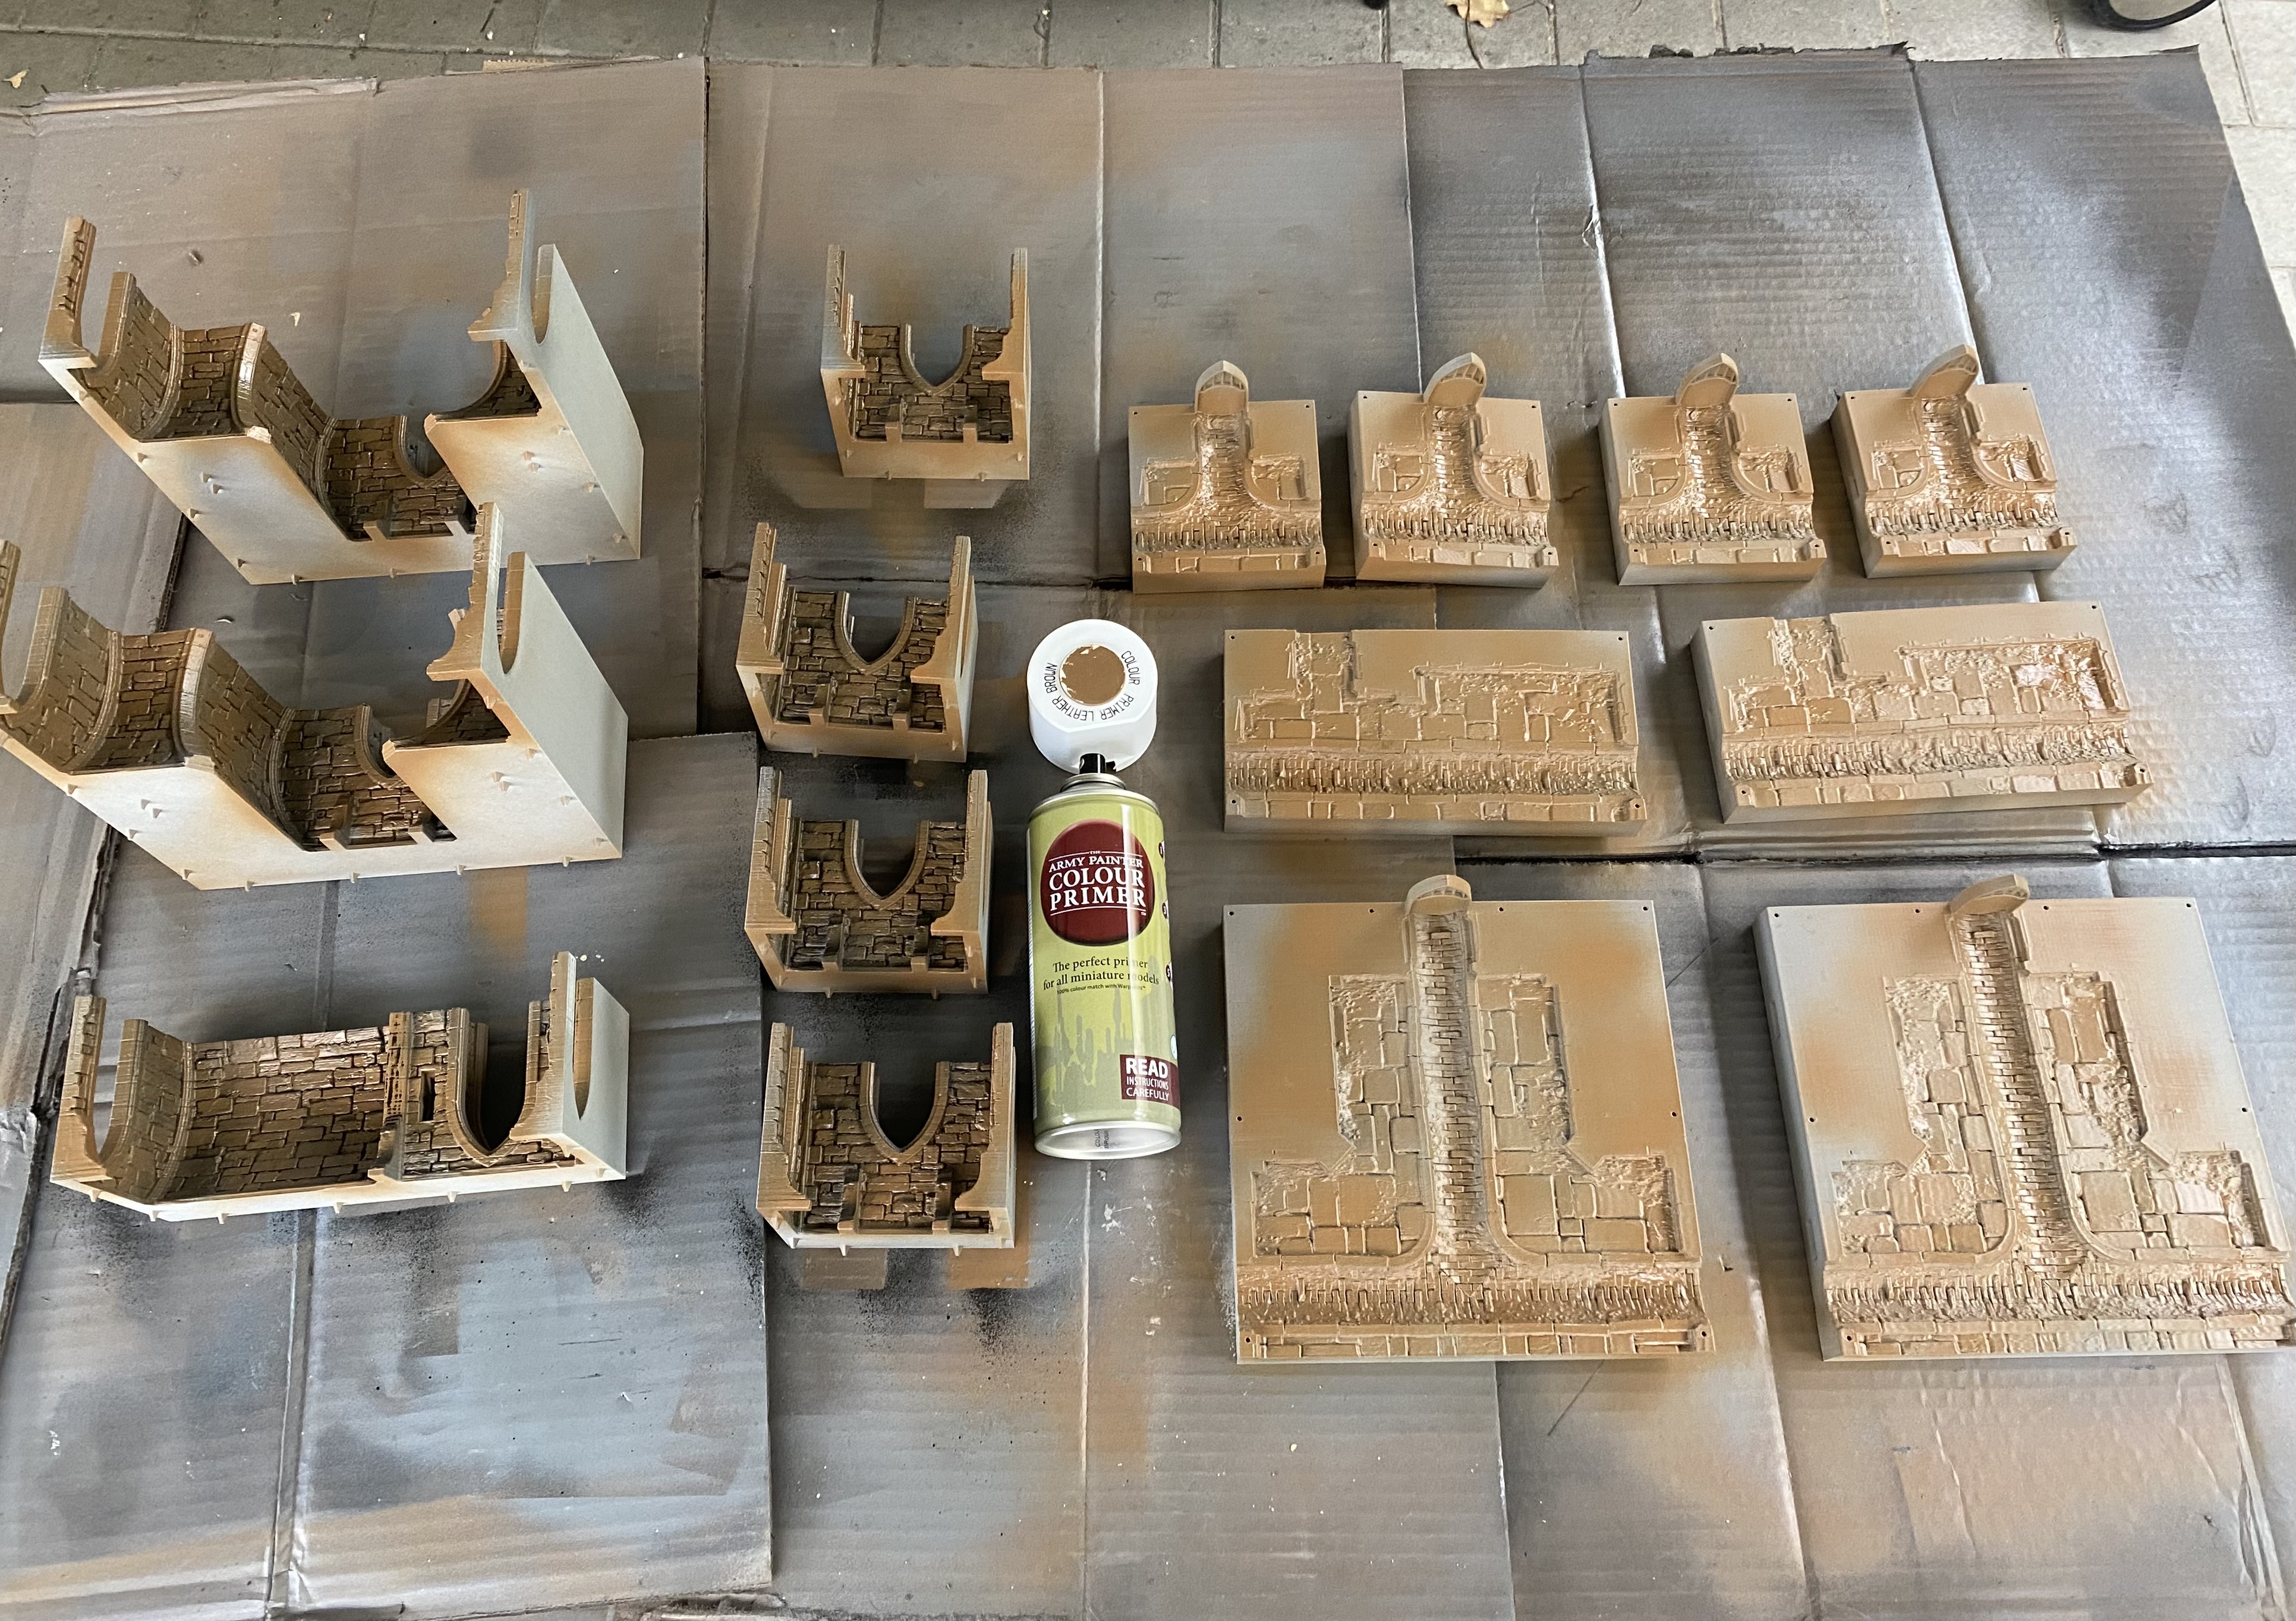 My secret weapon, Army painter leather brown. This stuff is magic in a can.
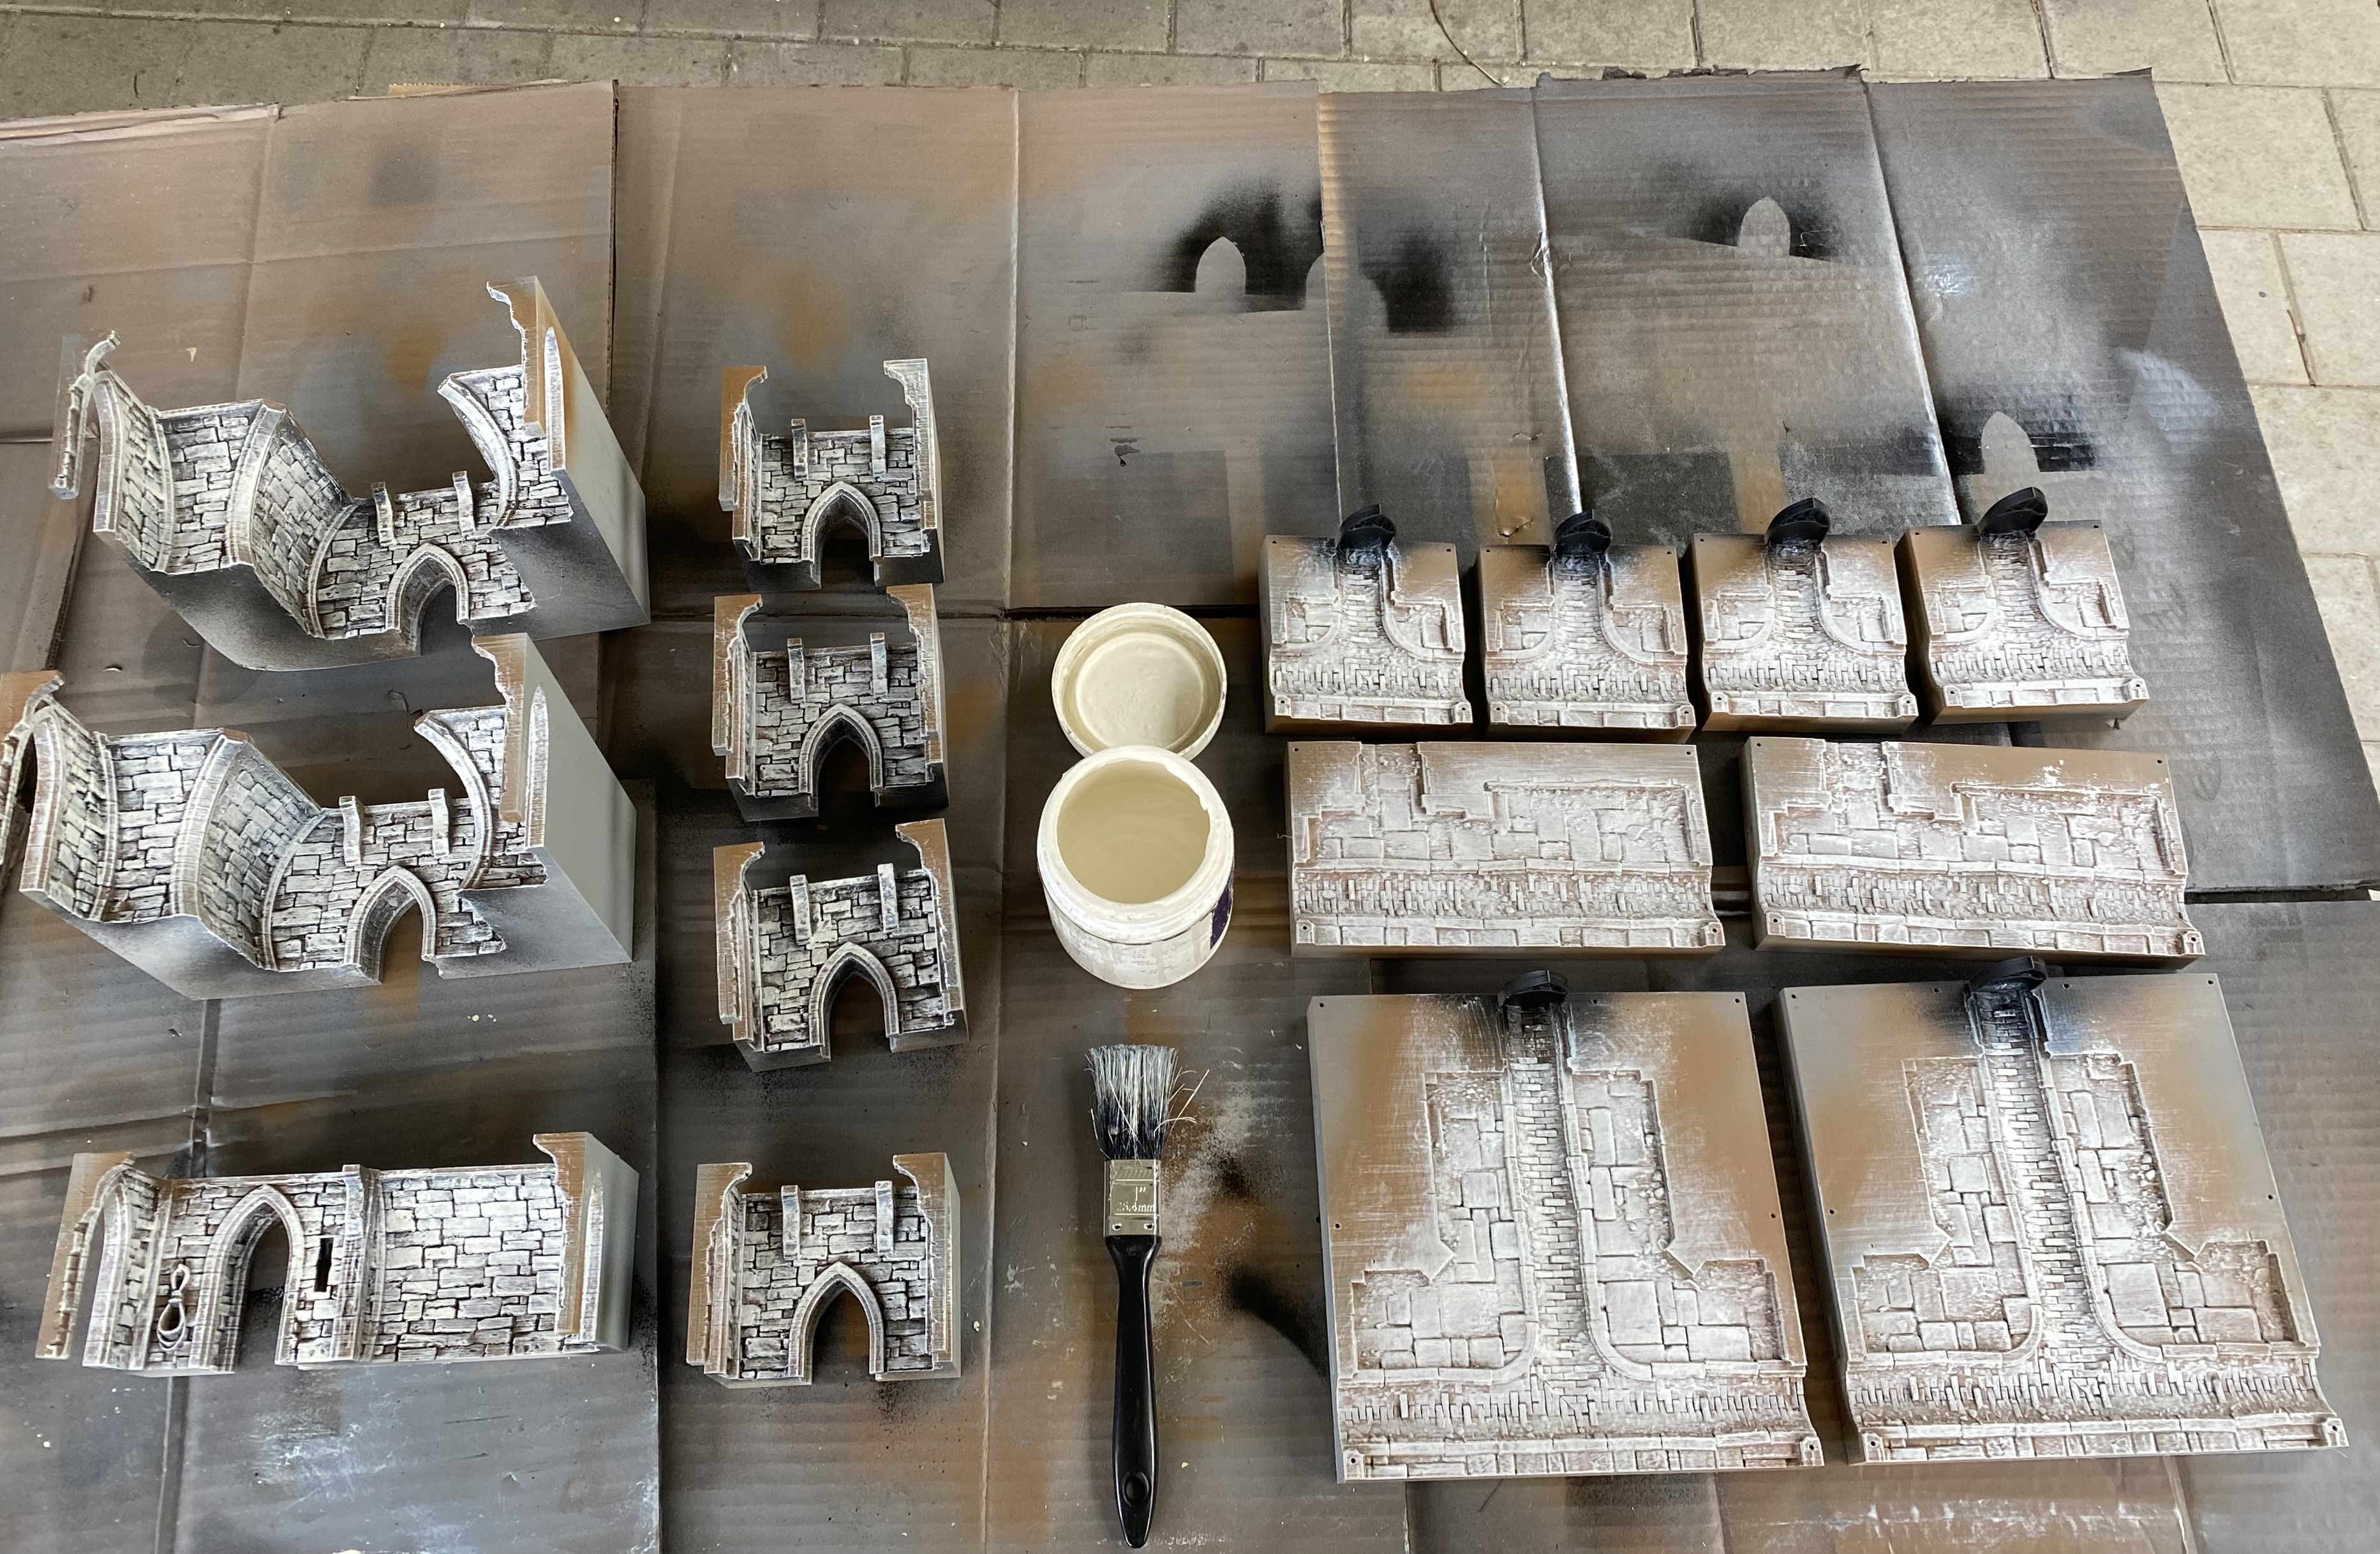 Really rough drybrush. For the sewers I went lighter than my walls and used this off-white colour. Plenty of life left in that brush I'm sure.
 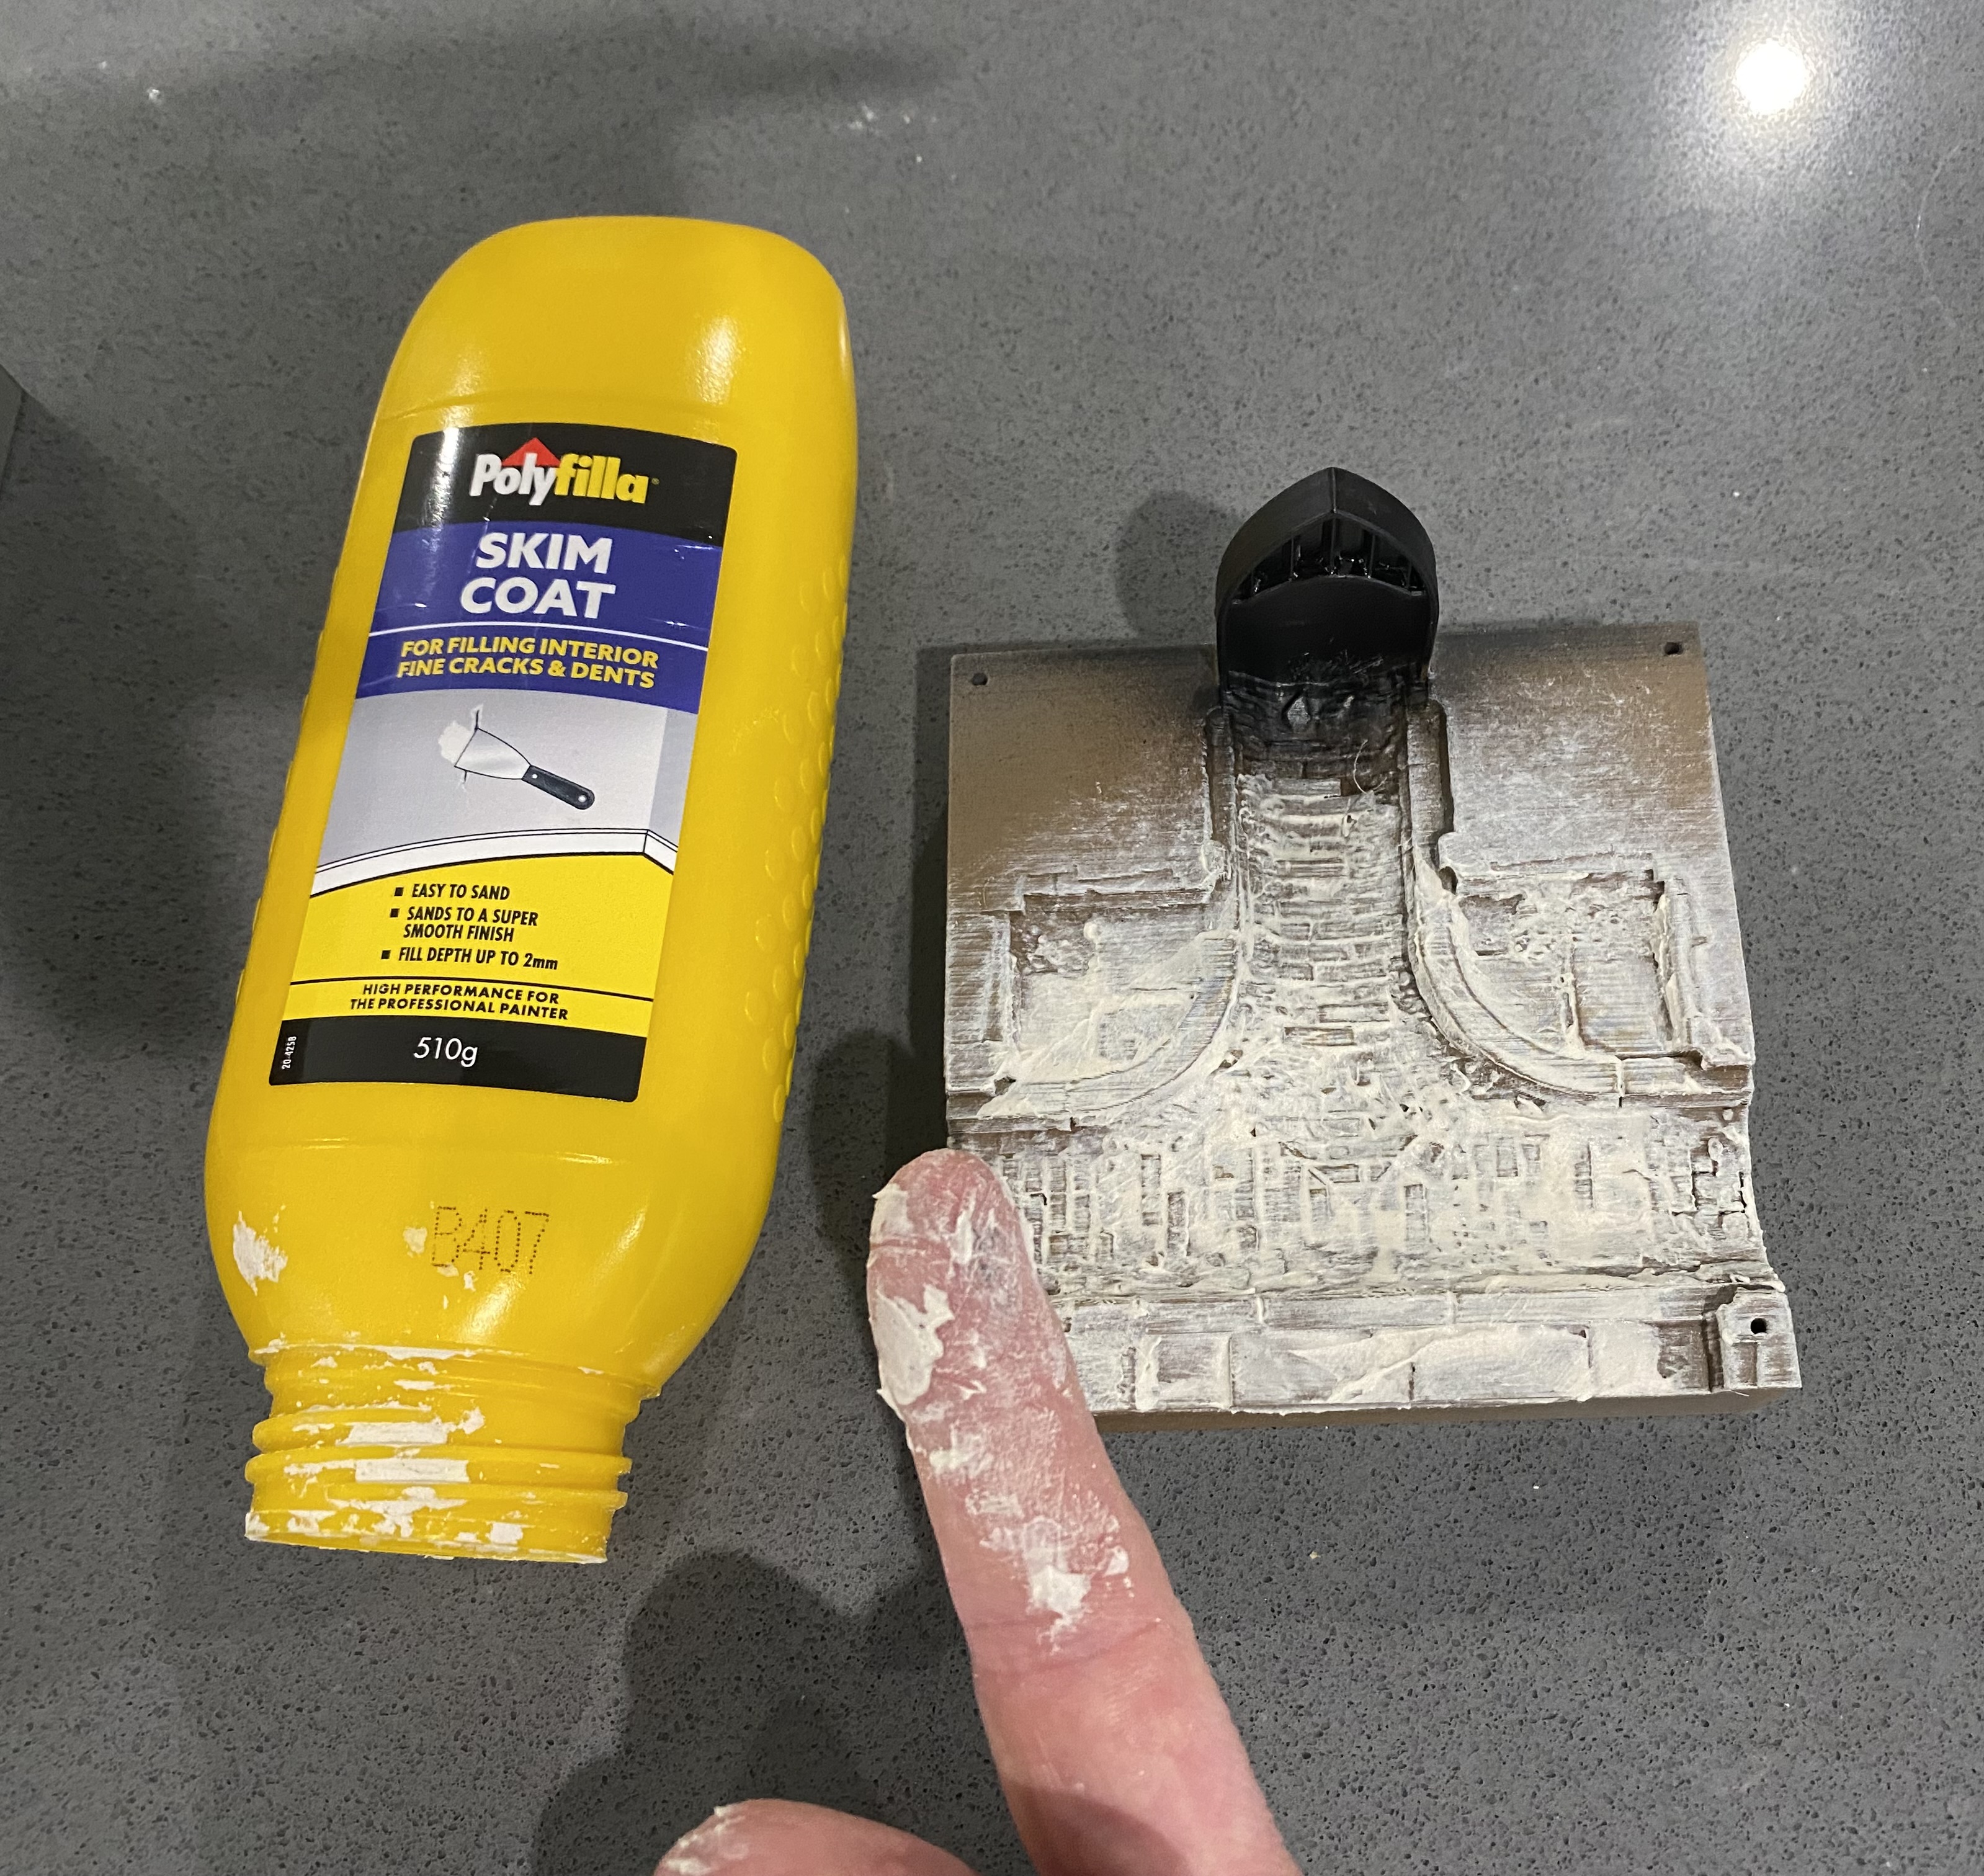 Small crack filler with a handy applicator, most people should find at least one of these in their home, if not more.
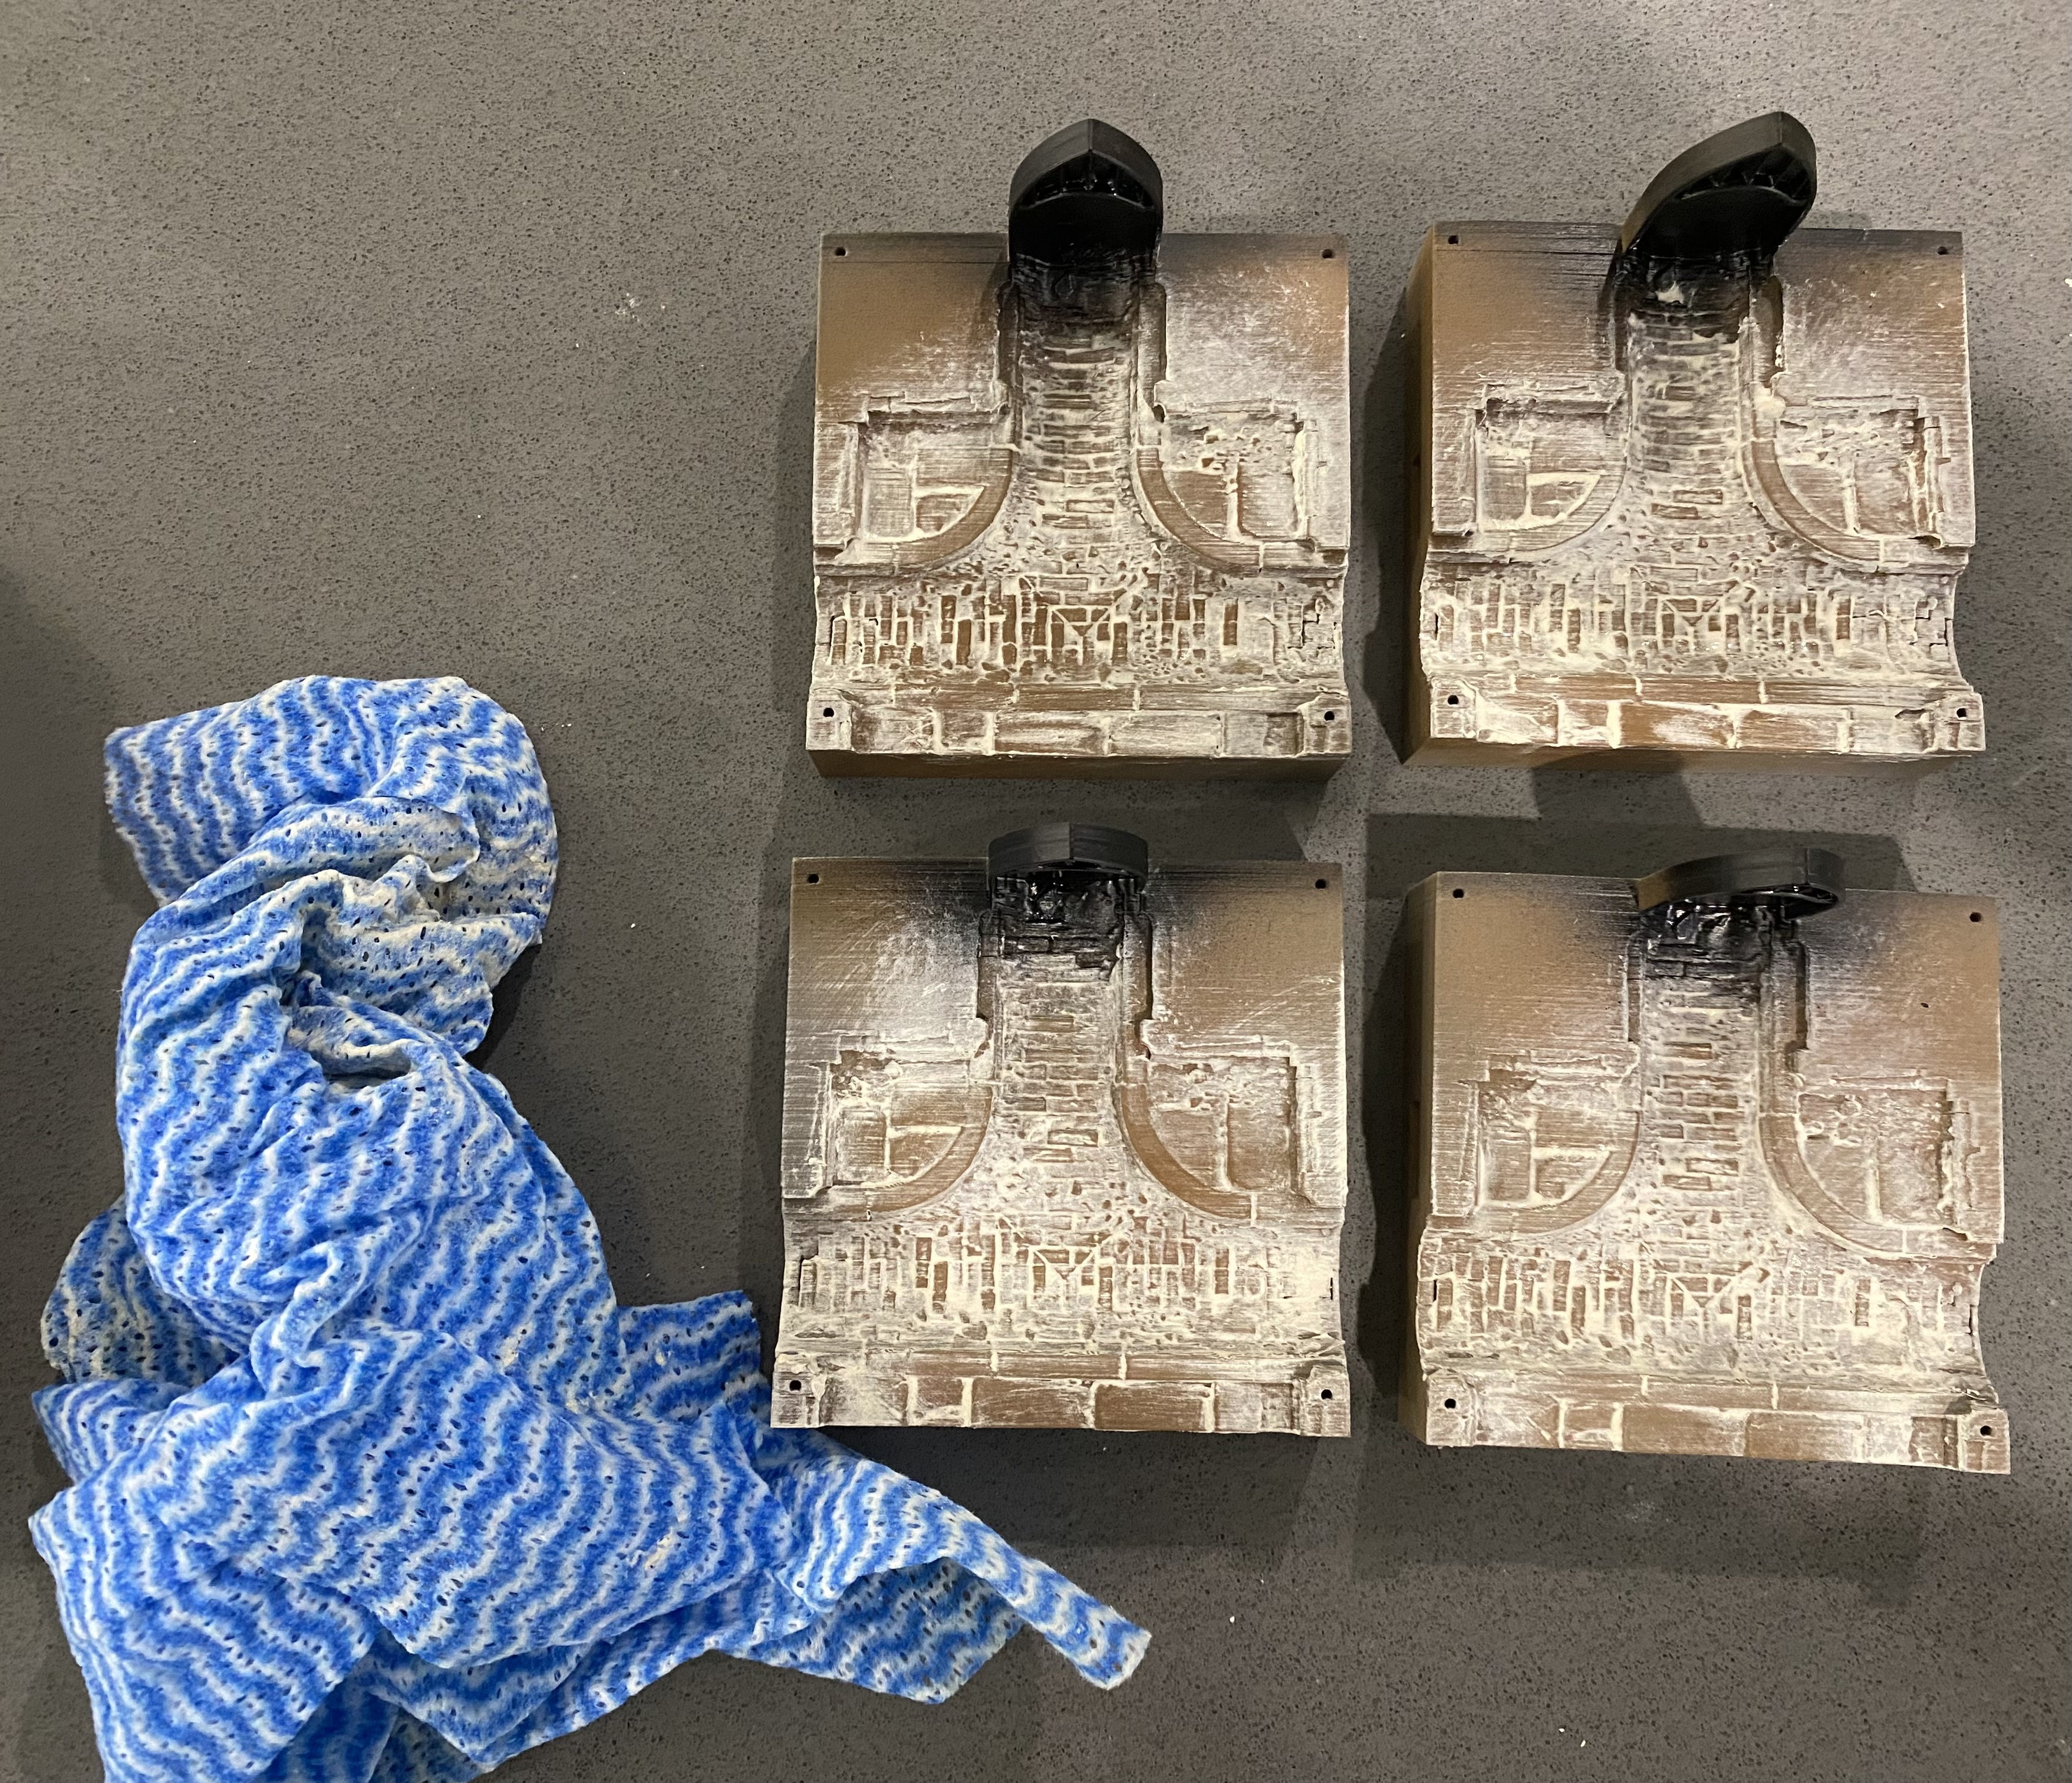 Damp cloth of some sort to wipe off excess plaster. I literally do 3-4 pieces and then wipe them off.
 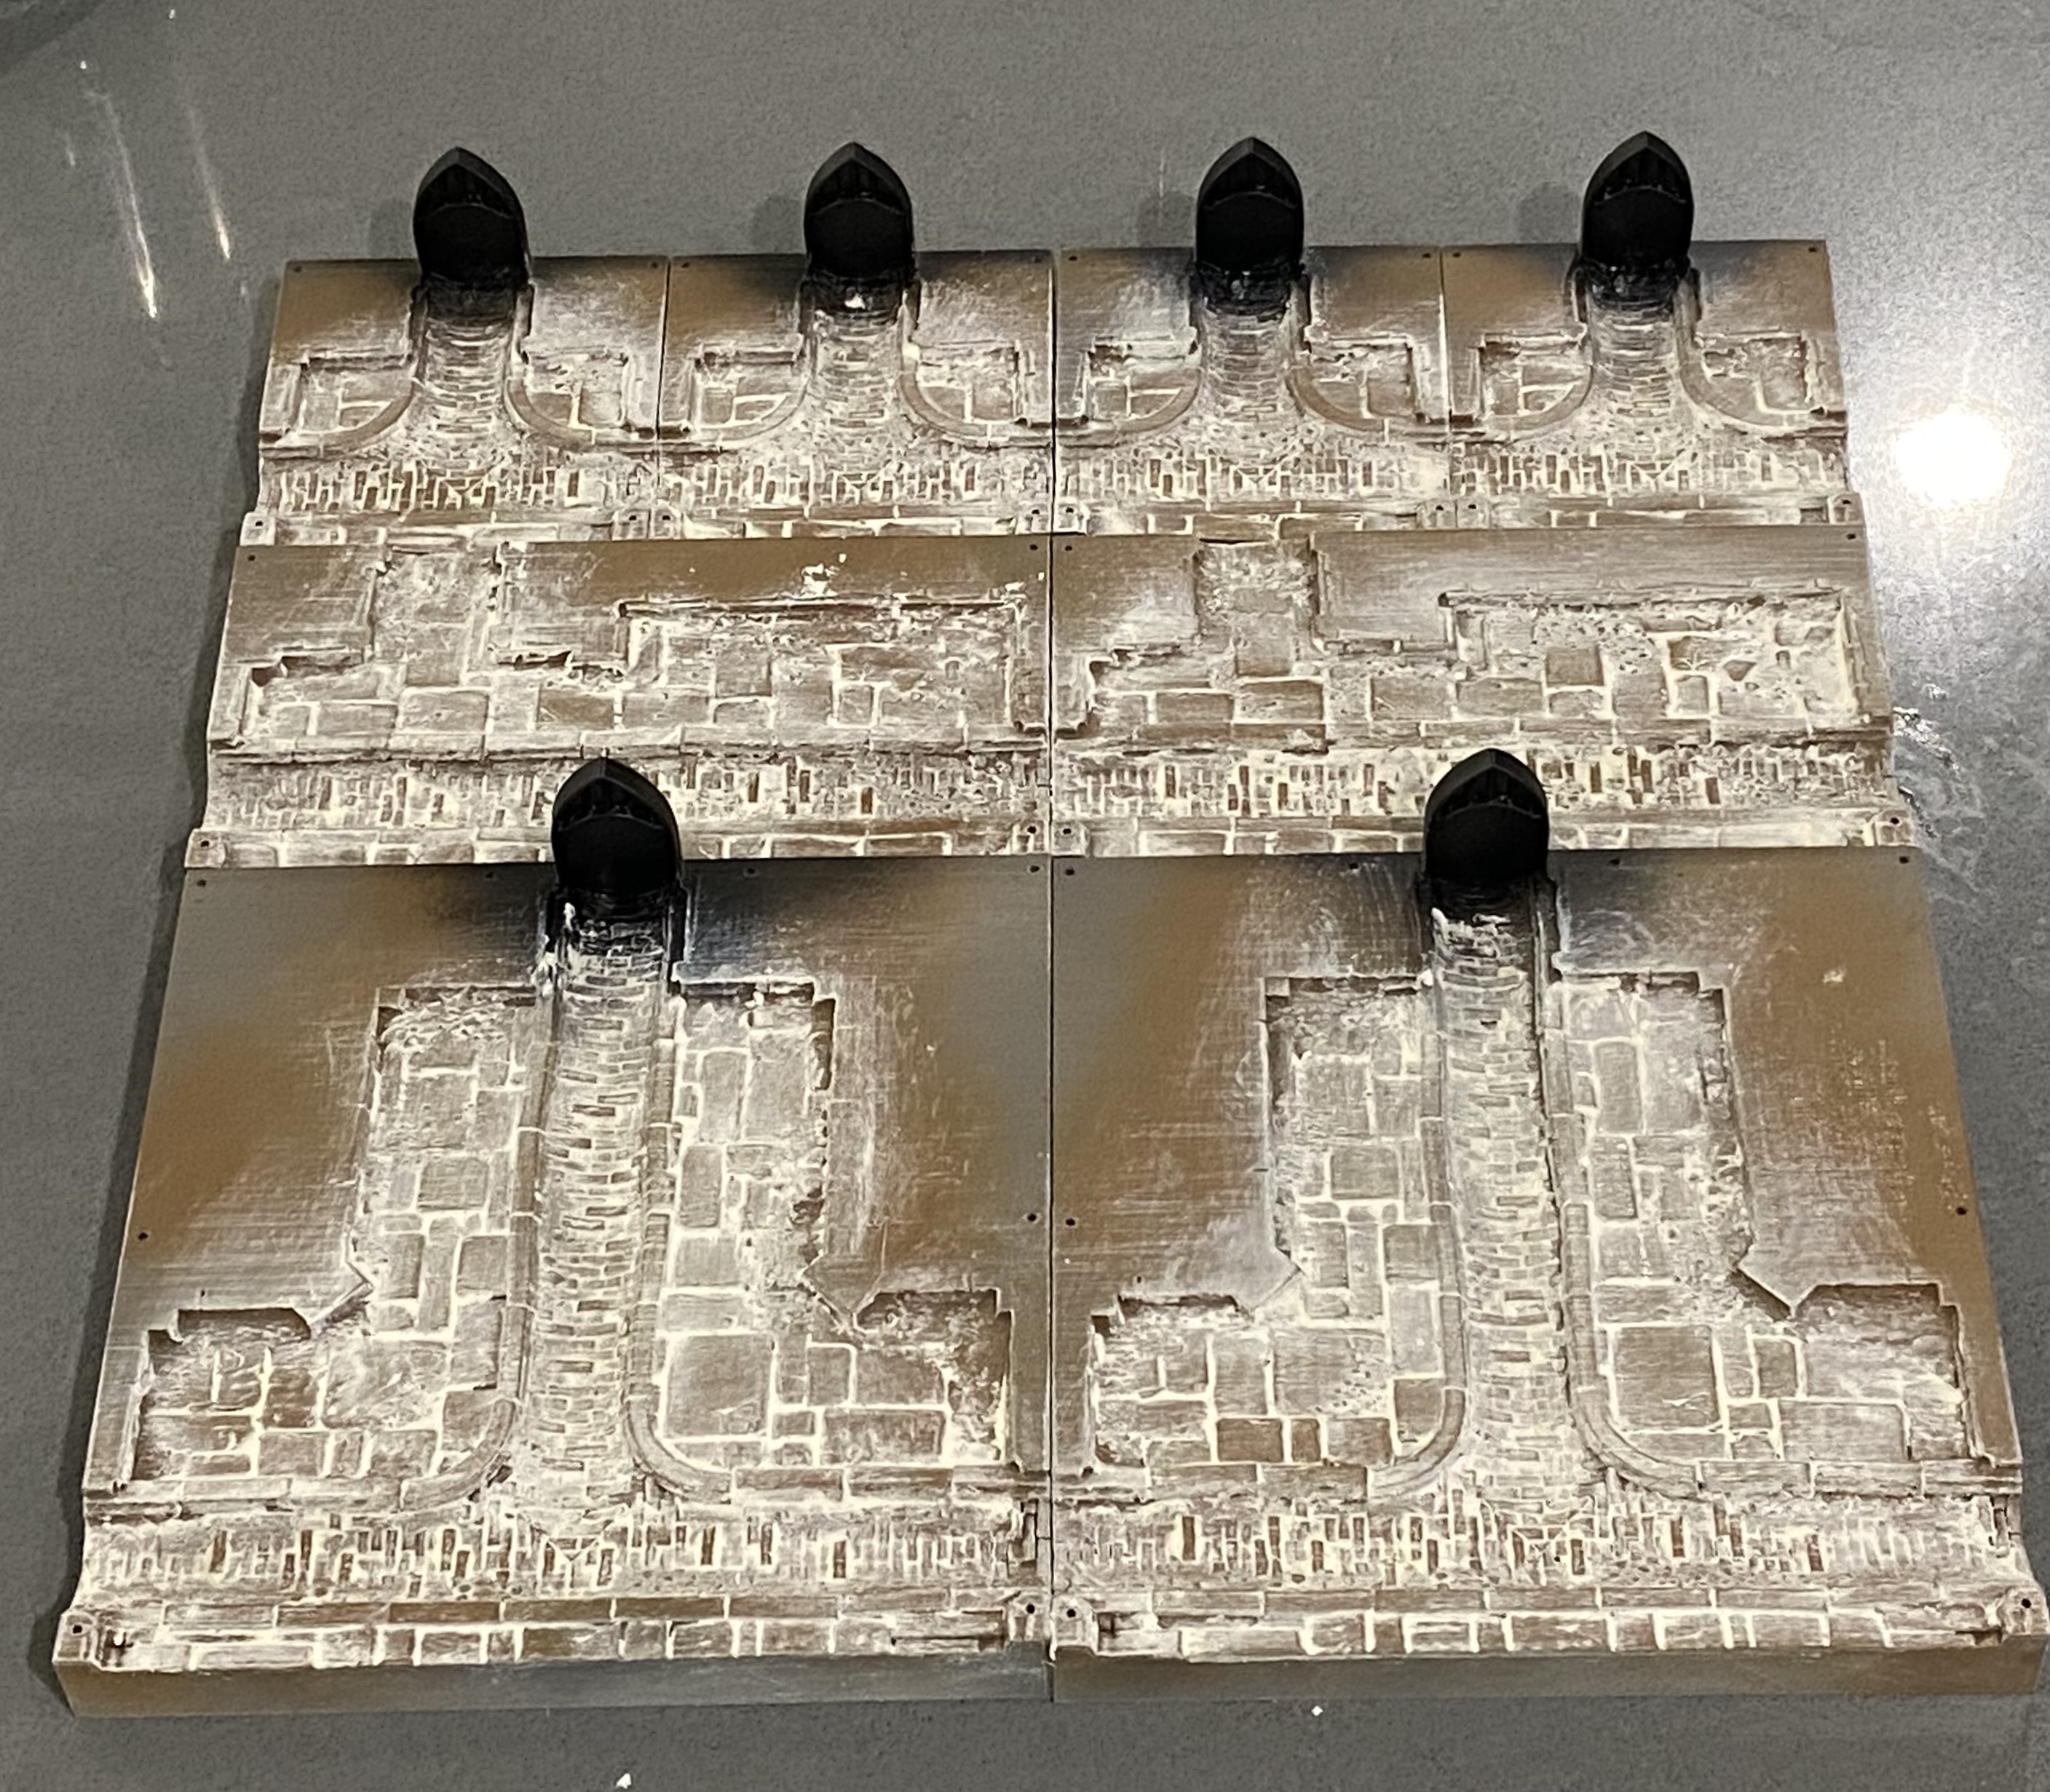 They end up looking something like this. You can scrub away with the damp cloth as much as you like. I like to add some variation so that some parts show more brown than others
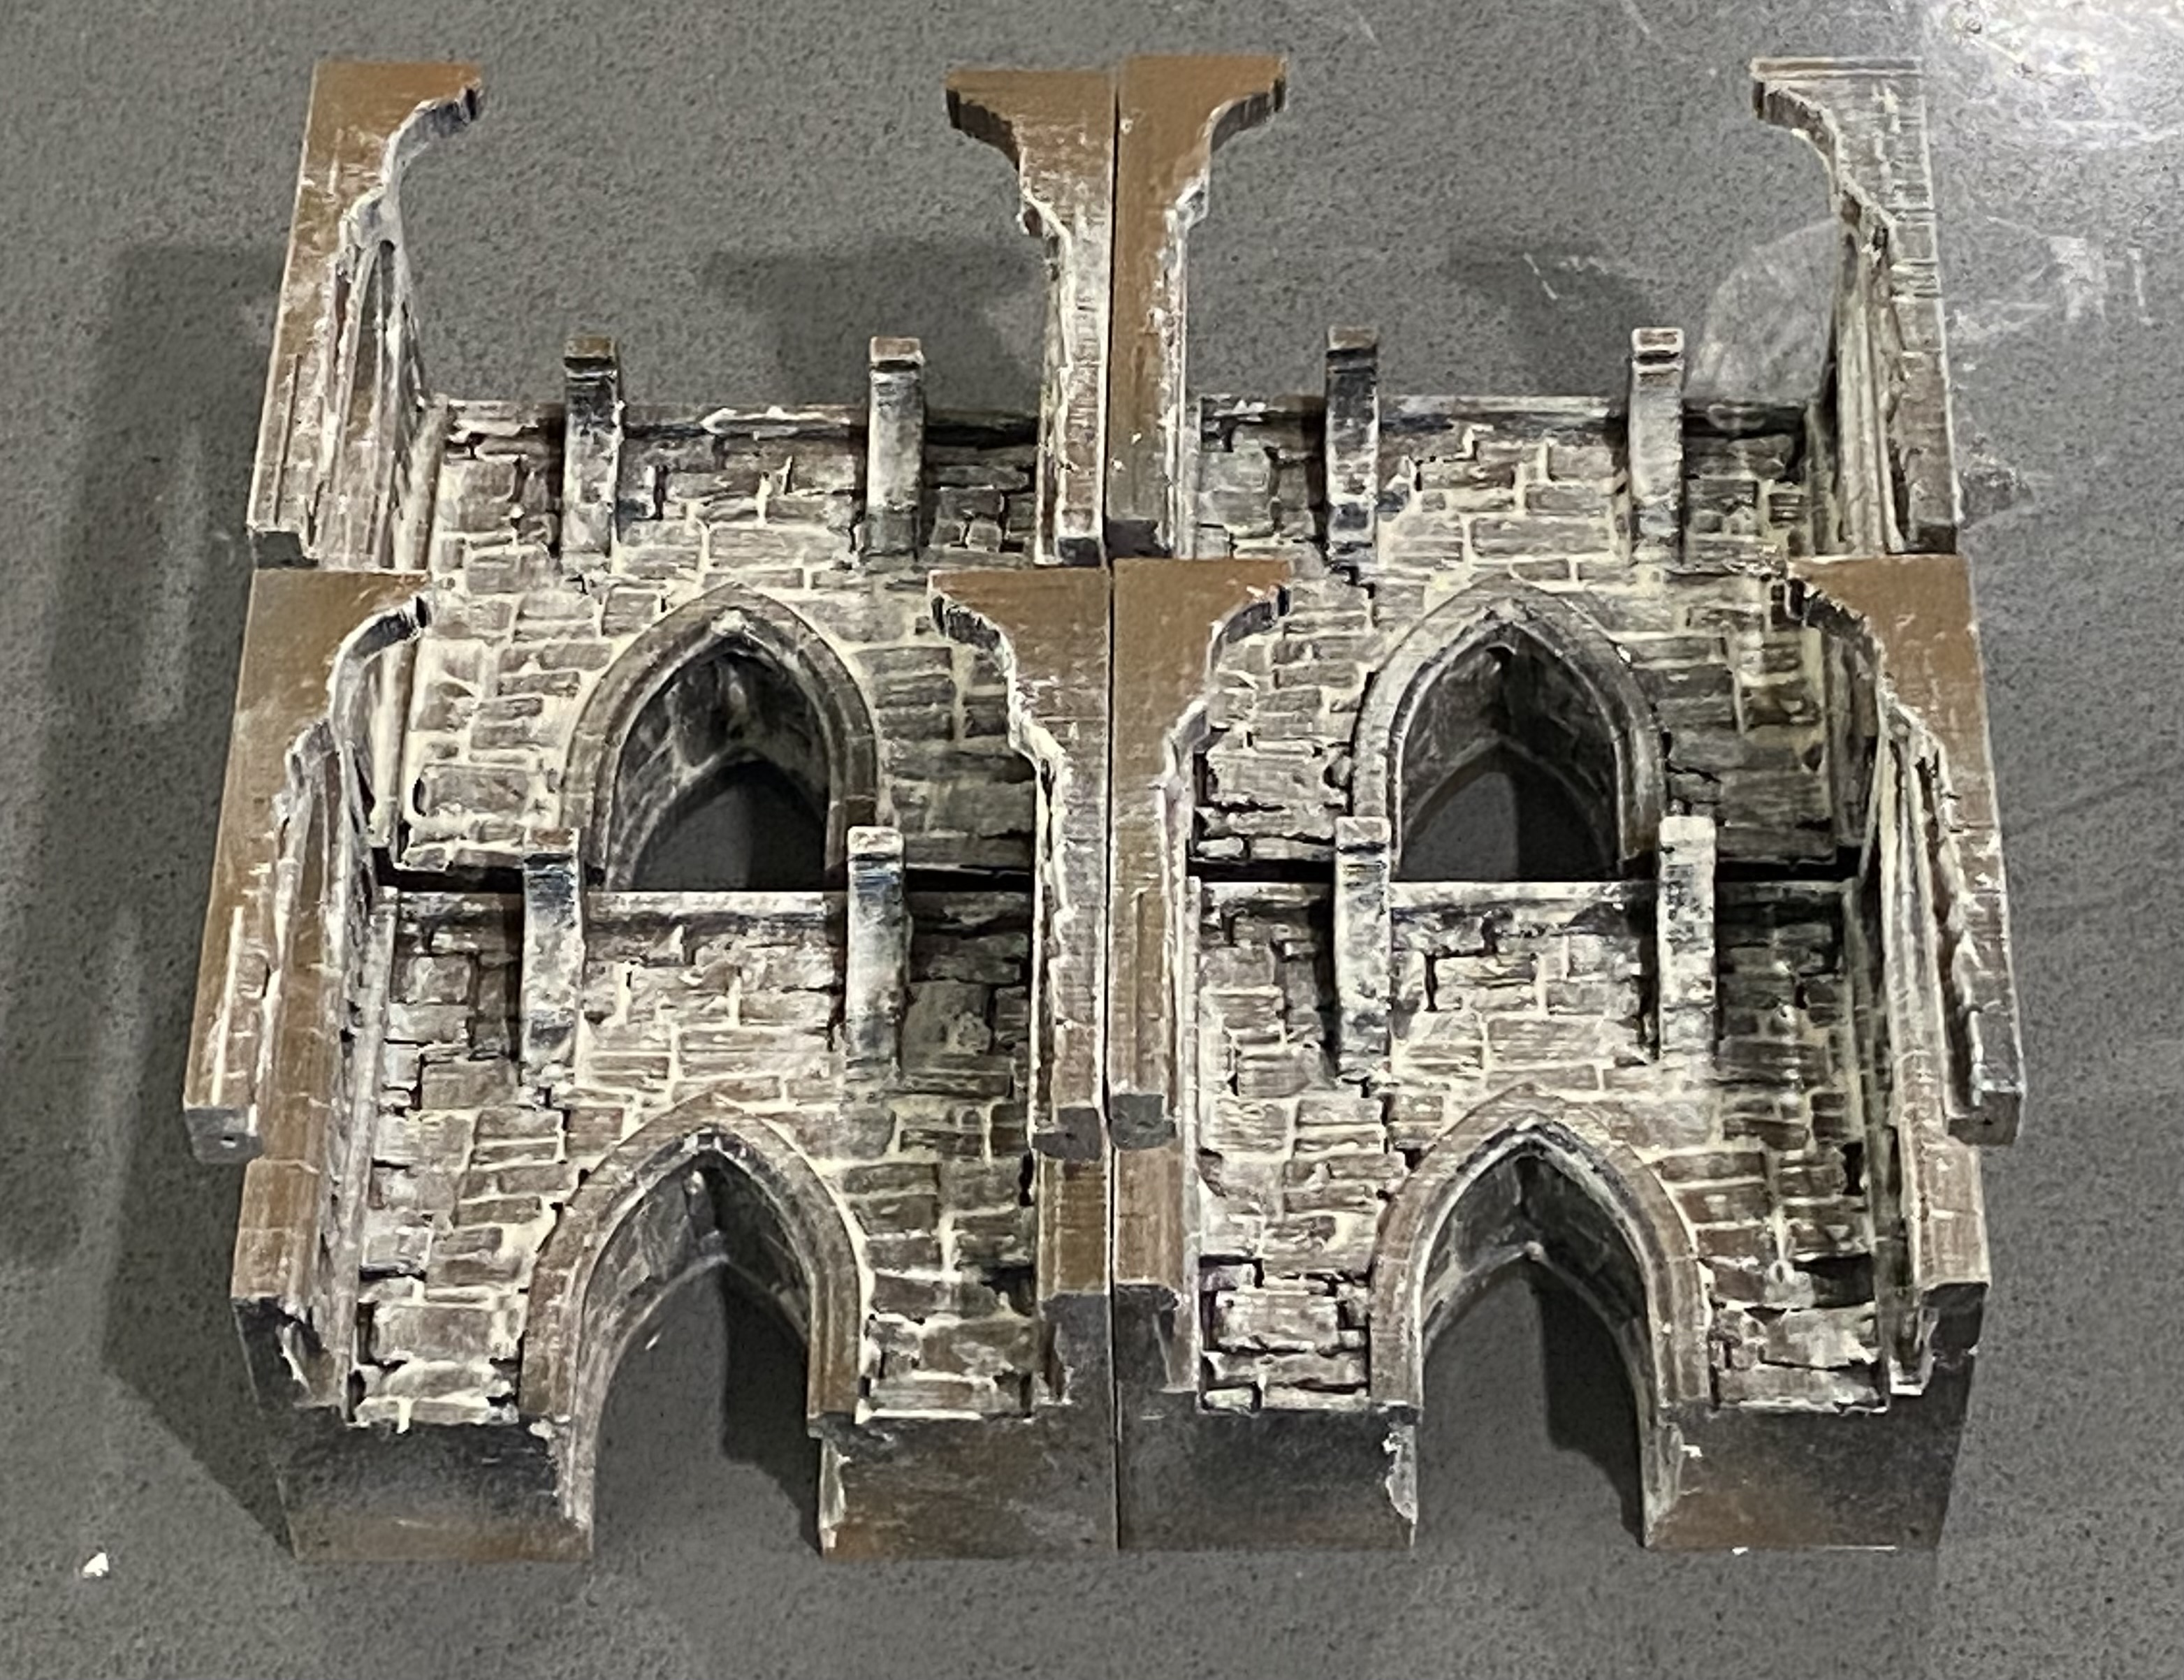
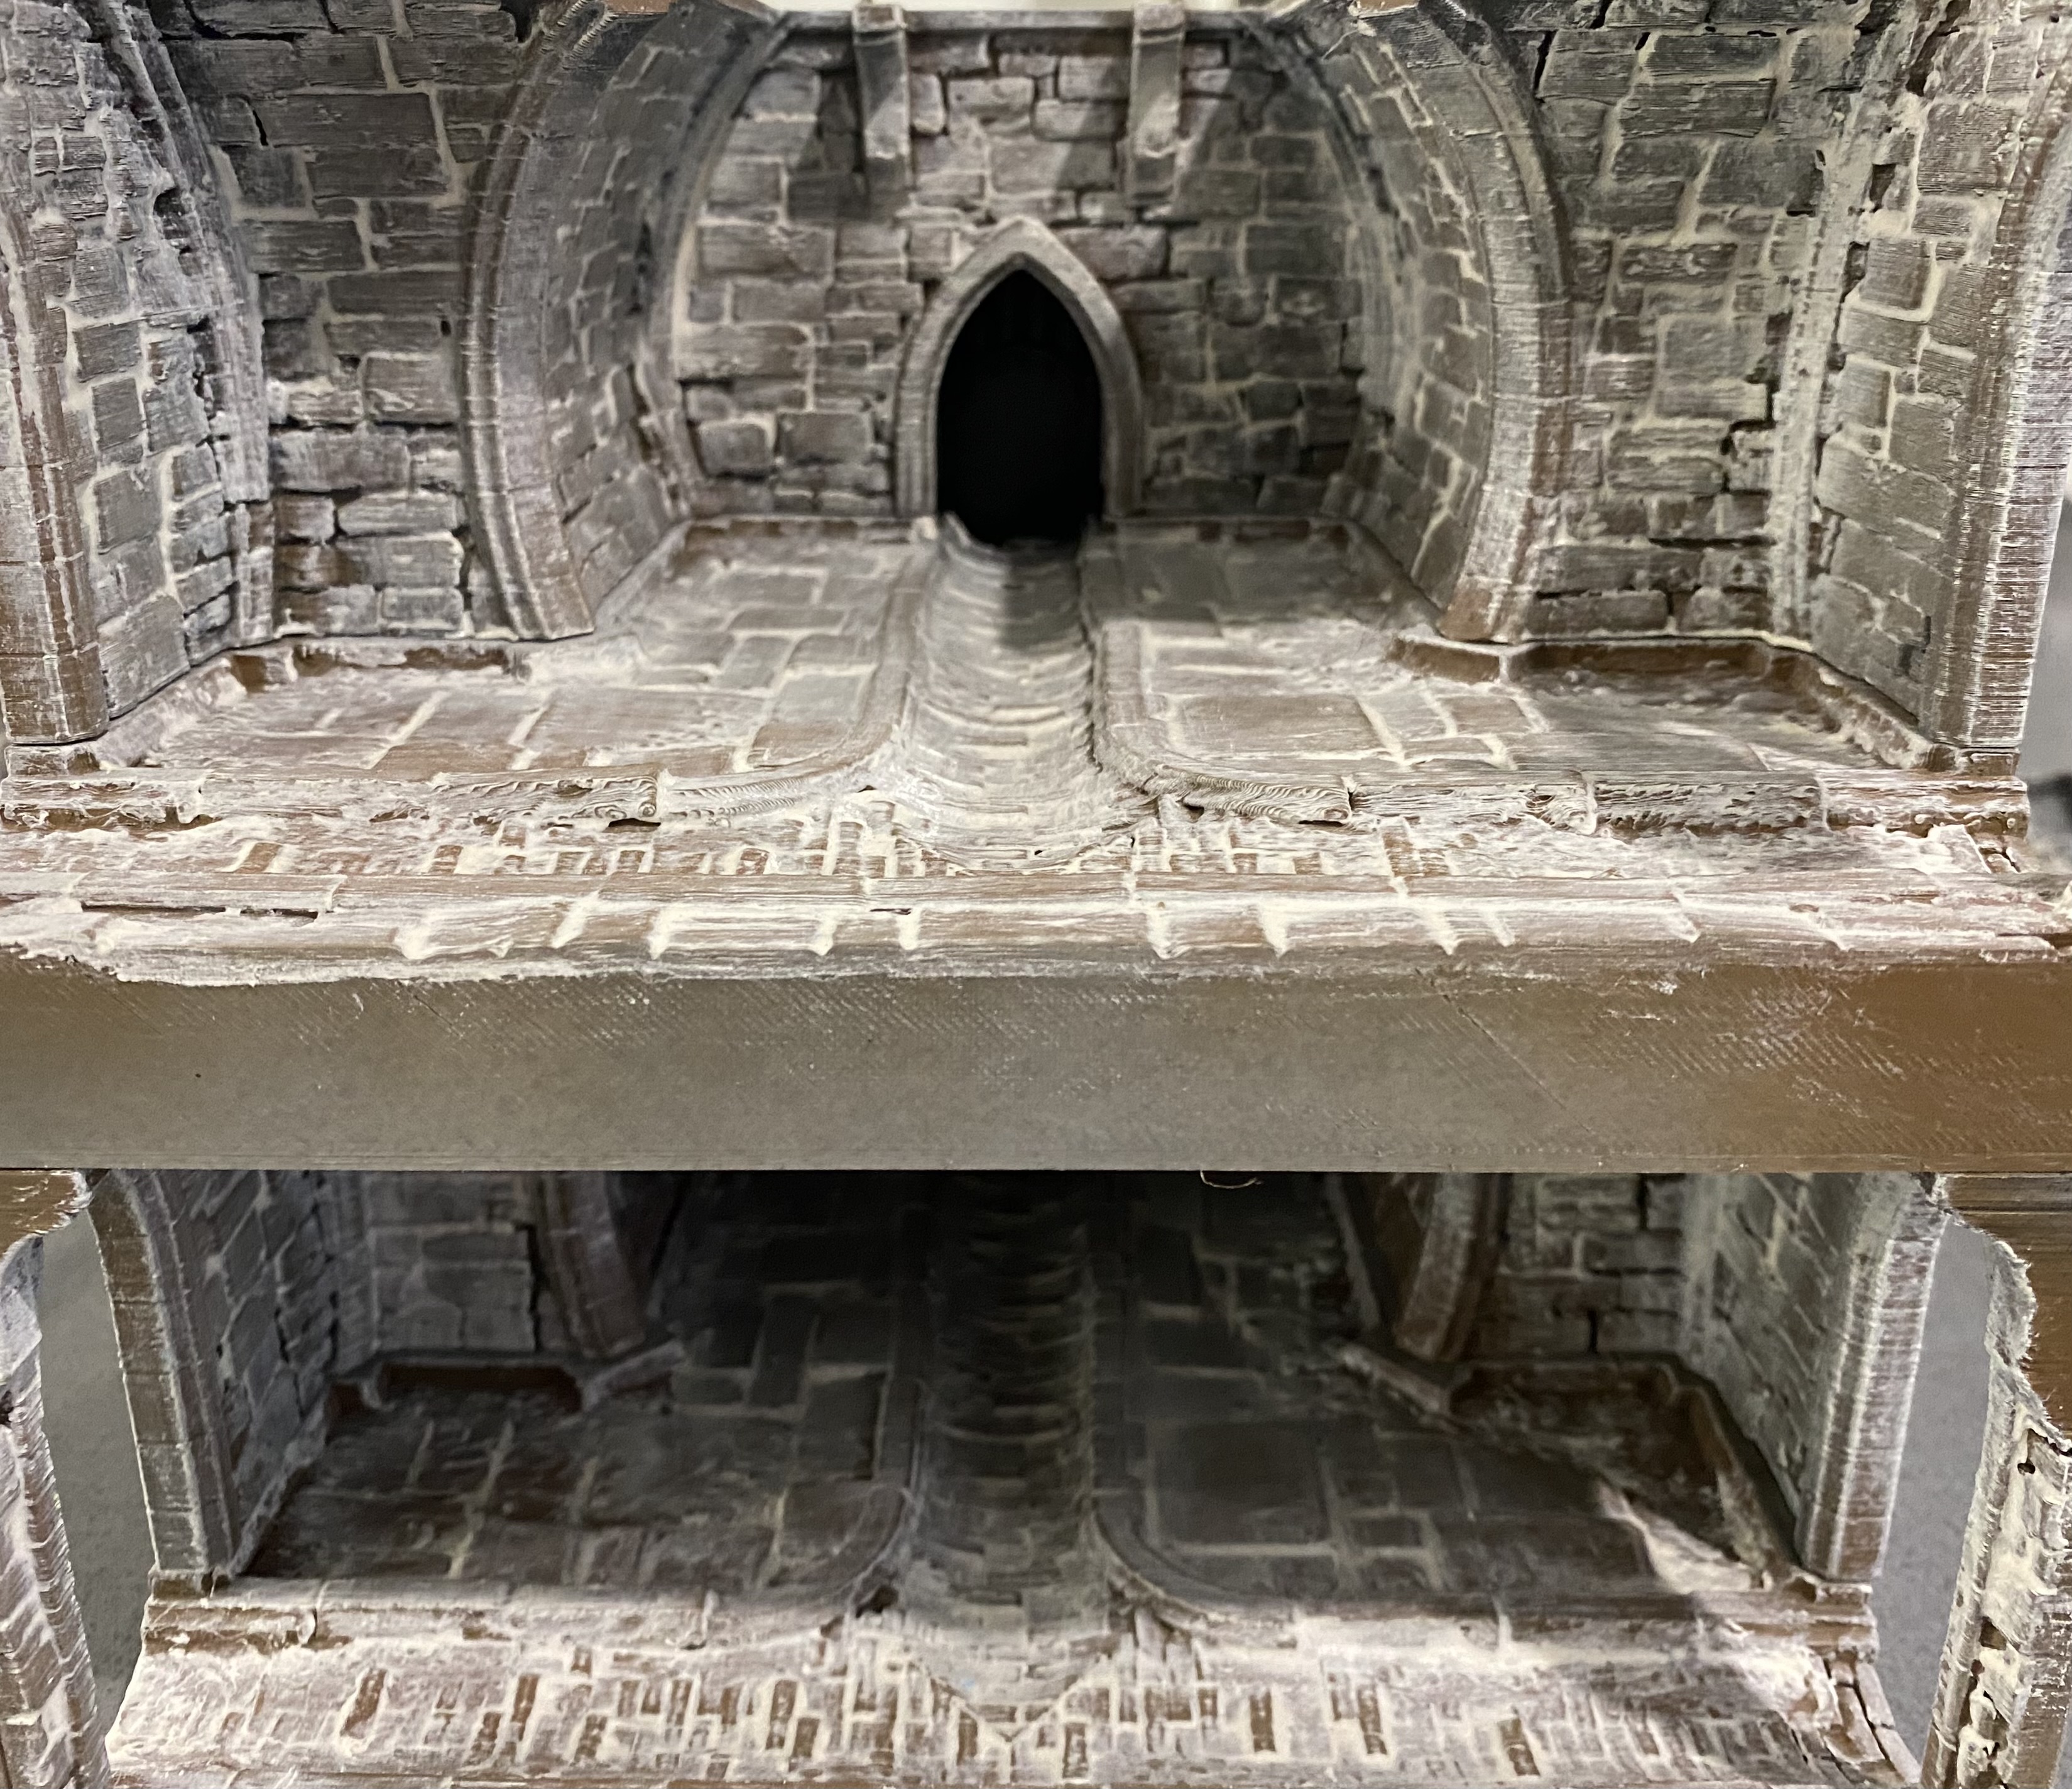
You can now put those aside whilst doing the next batch. After the next batch is done, this lot will be dry enough to paint in the woodwork and use some inks to add some stains and the like.
Test Fantasy set up
Of course, up until now, I have only really been comparing the colour scheme with the board to my Victorian Gaslight buildings but that is only a part of the plan for this table.
I needed to make sure it would also look okay with my fantasy-styled buildings.
My fantasy buildings have a smaller footprint so I can get a few more of them onto the table. I switched out the Gothic-looking towers for something more fantasy, they are only partially painted so far. Removed the streetlights as I have other plans for the lighting for the fantasy set up and took a few quick pictures.
I still need to redo the cobblestones and do a lot more base tiles before I can start looking at the details.
 Disclaimer - The buildings on the table set up in this picture were built last year.
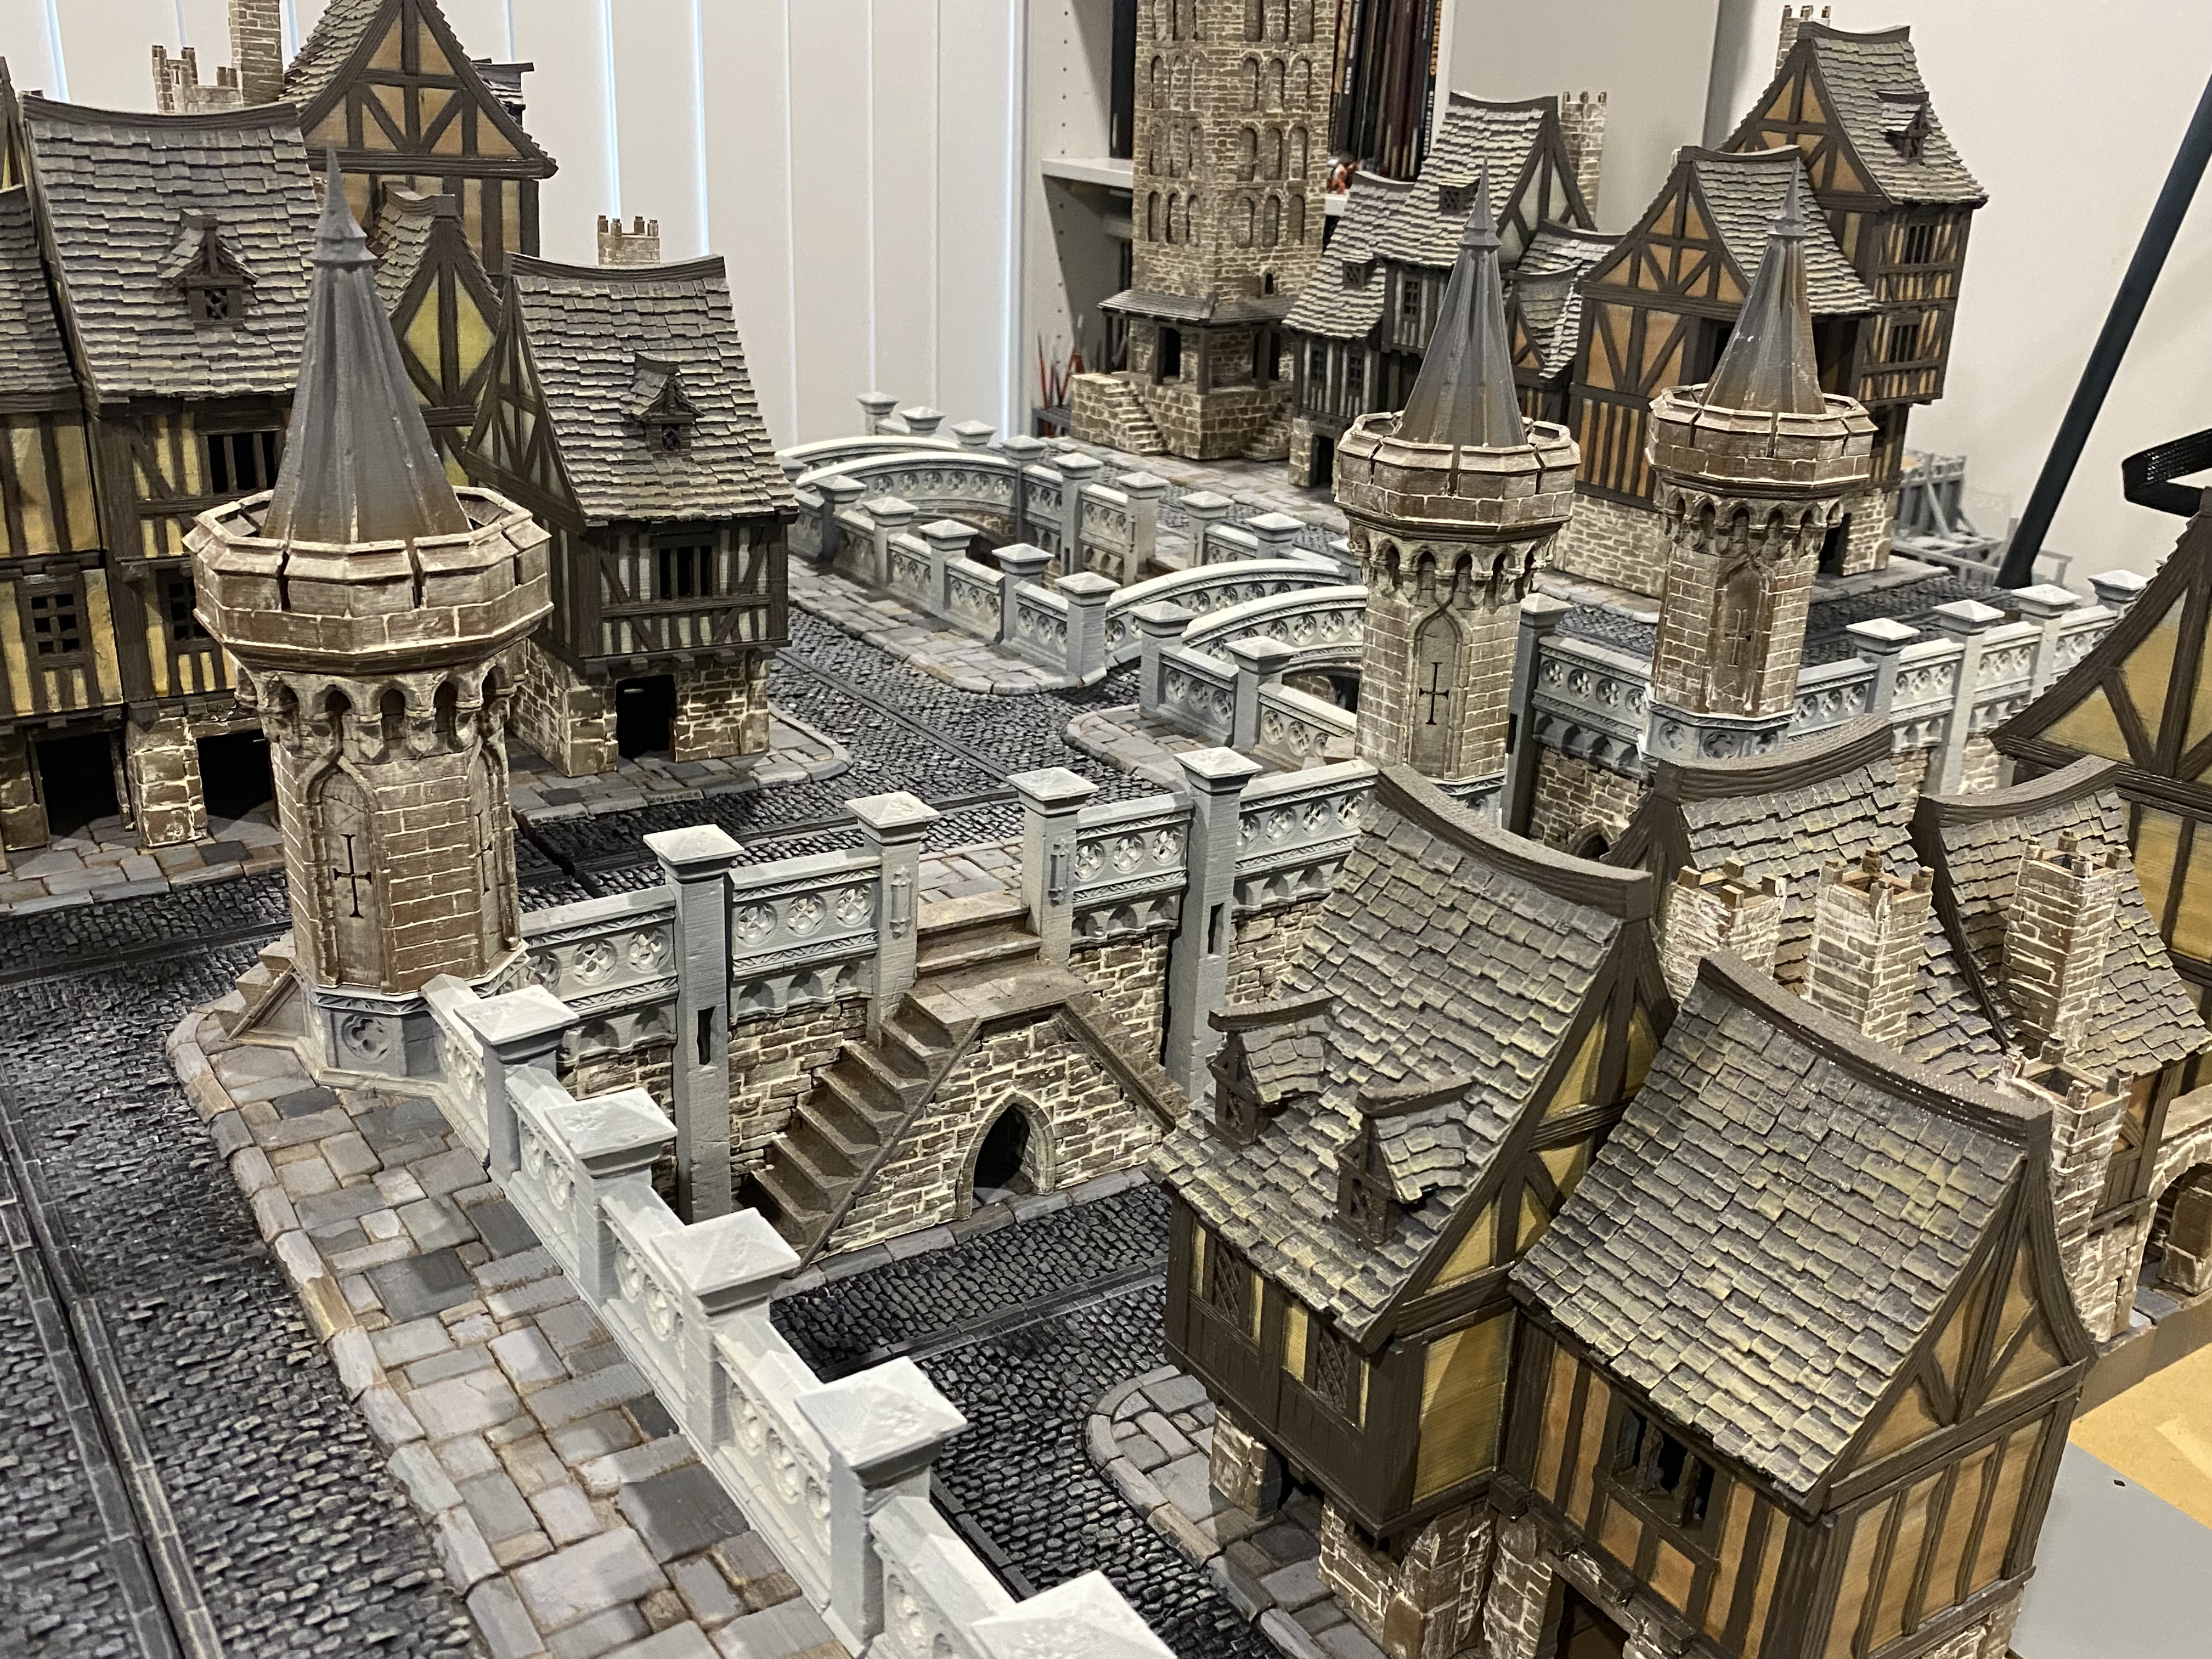 Disclaimer - The buildings on the table set up in this picture were built last year.
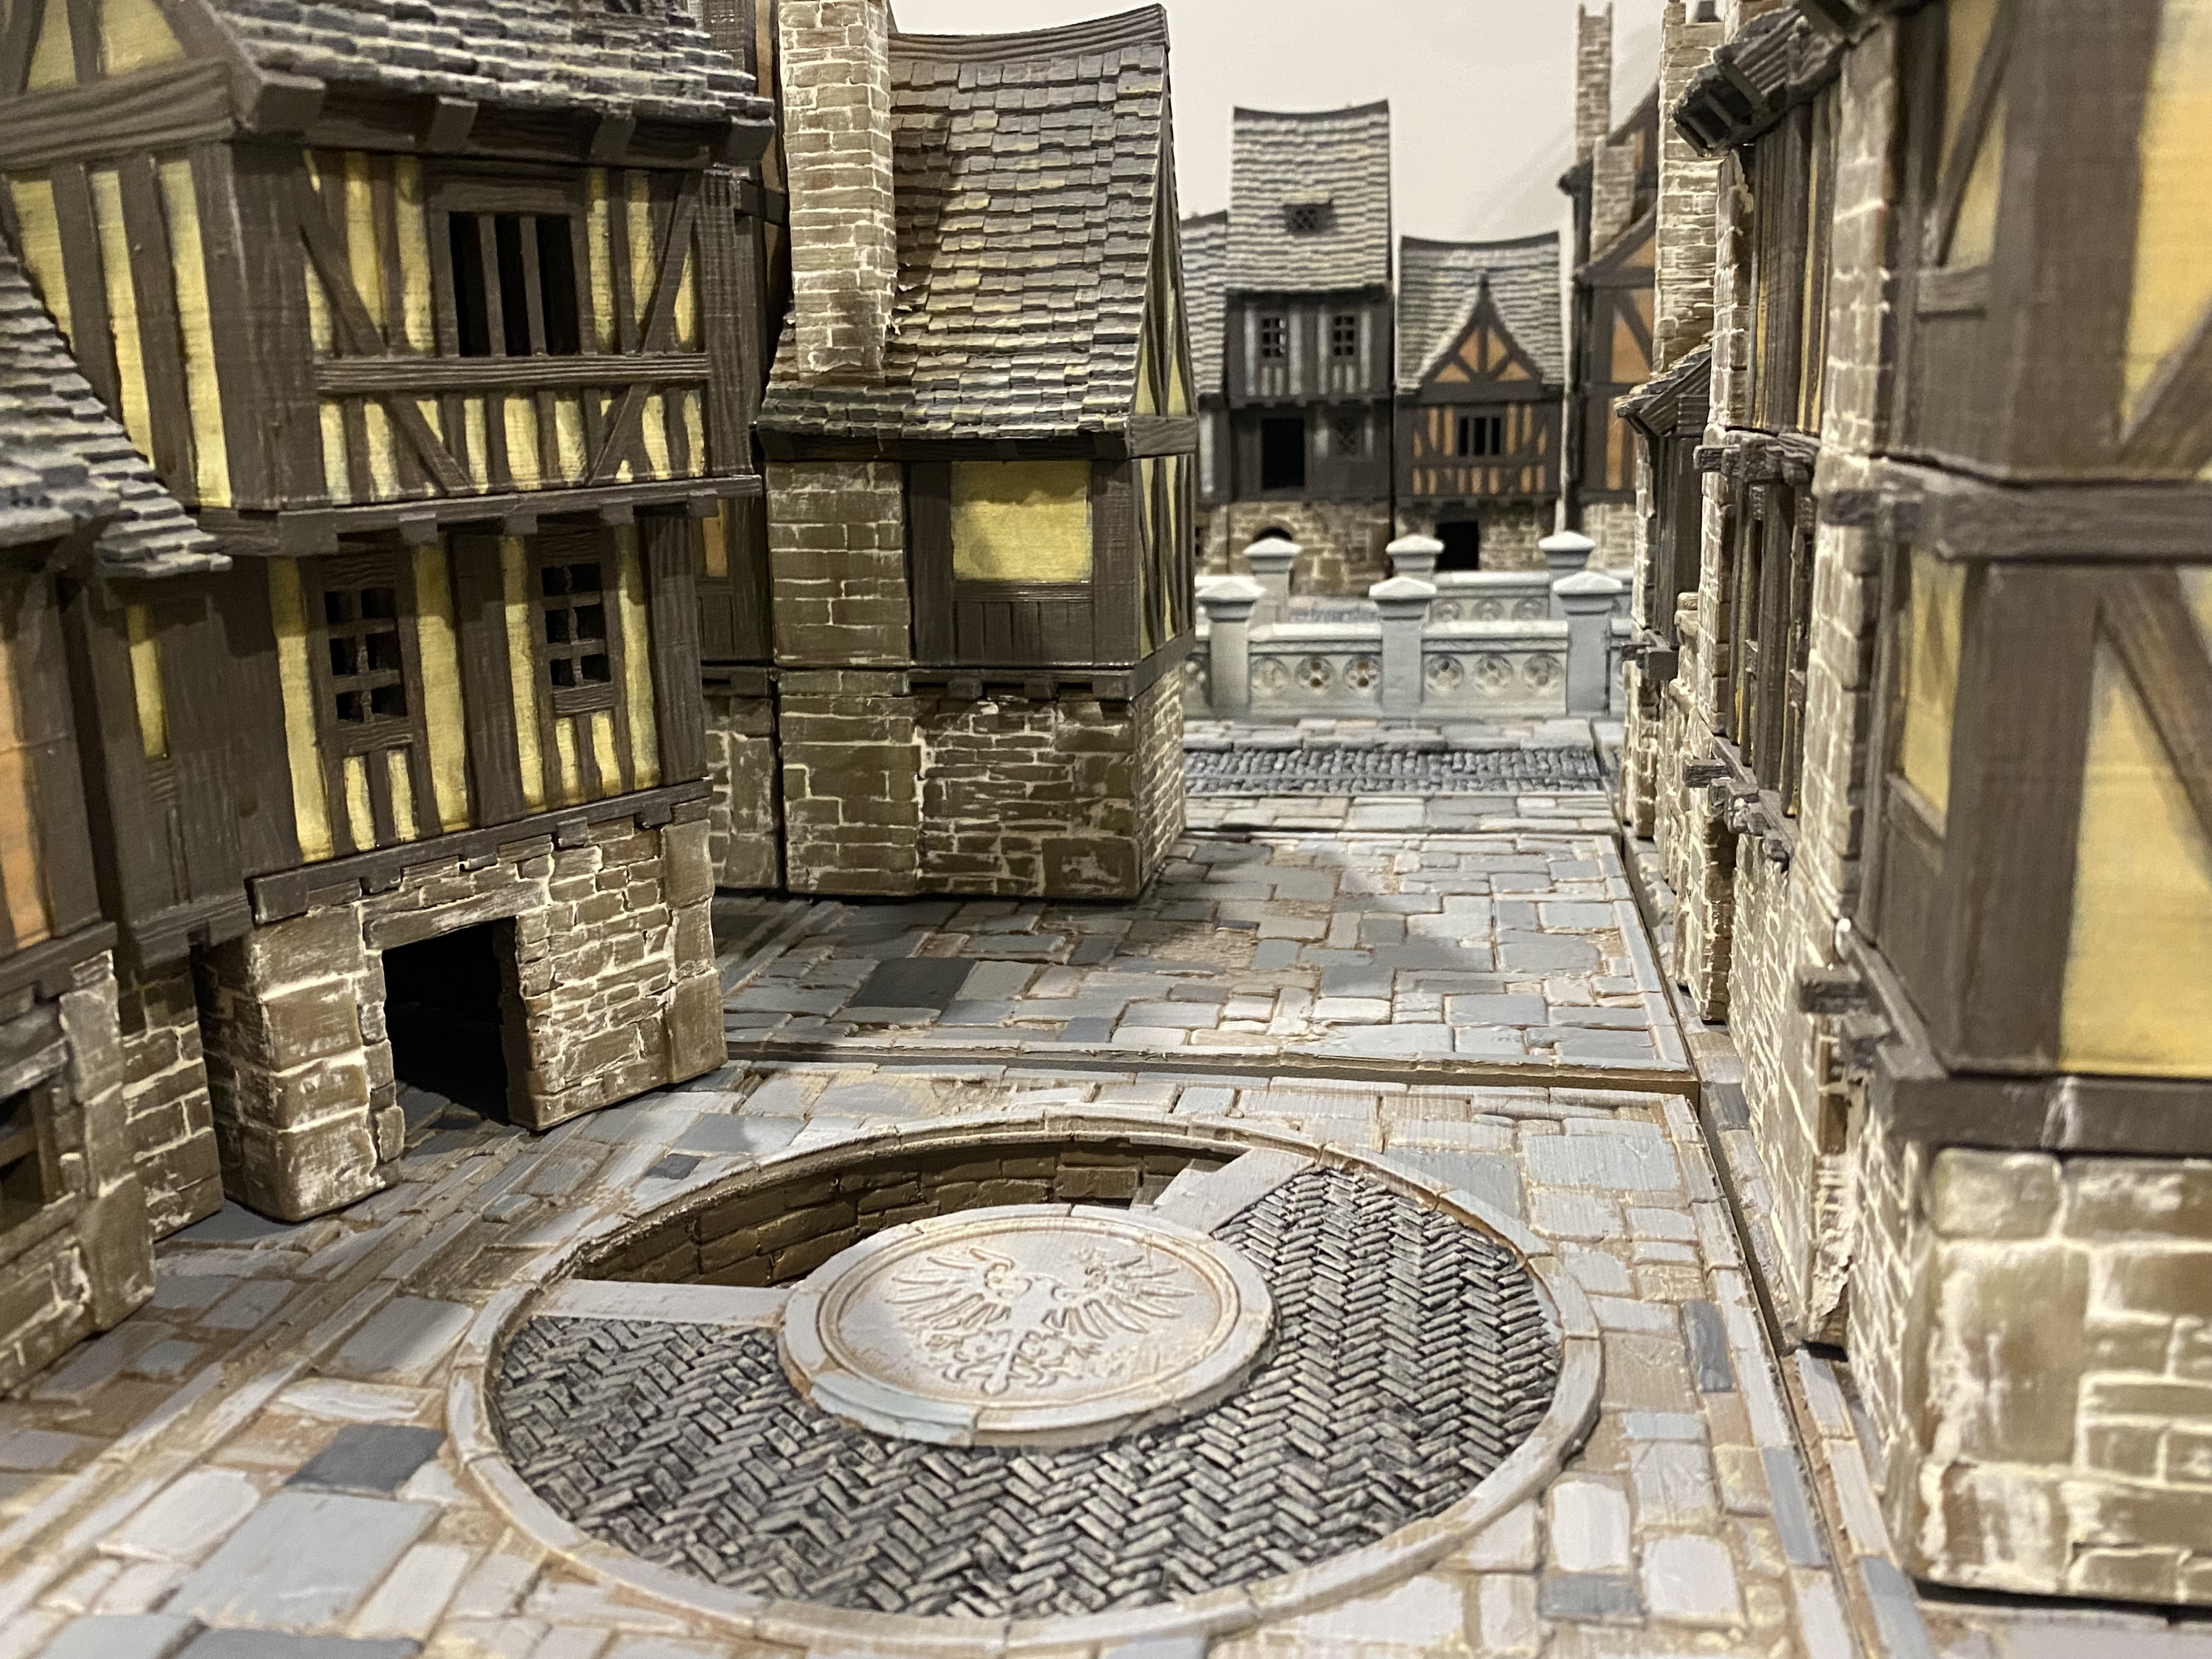 Disclaimer - The buildings on the table set up in this picture were built last year.
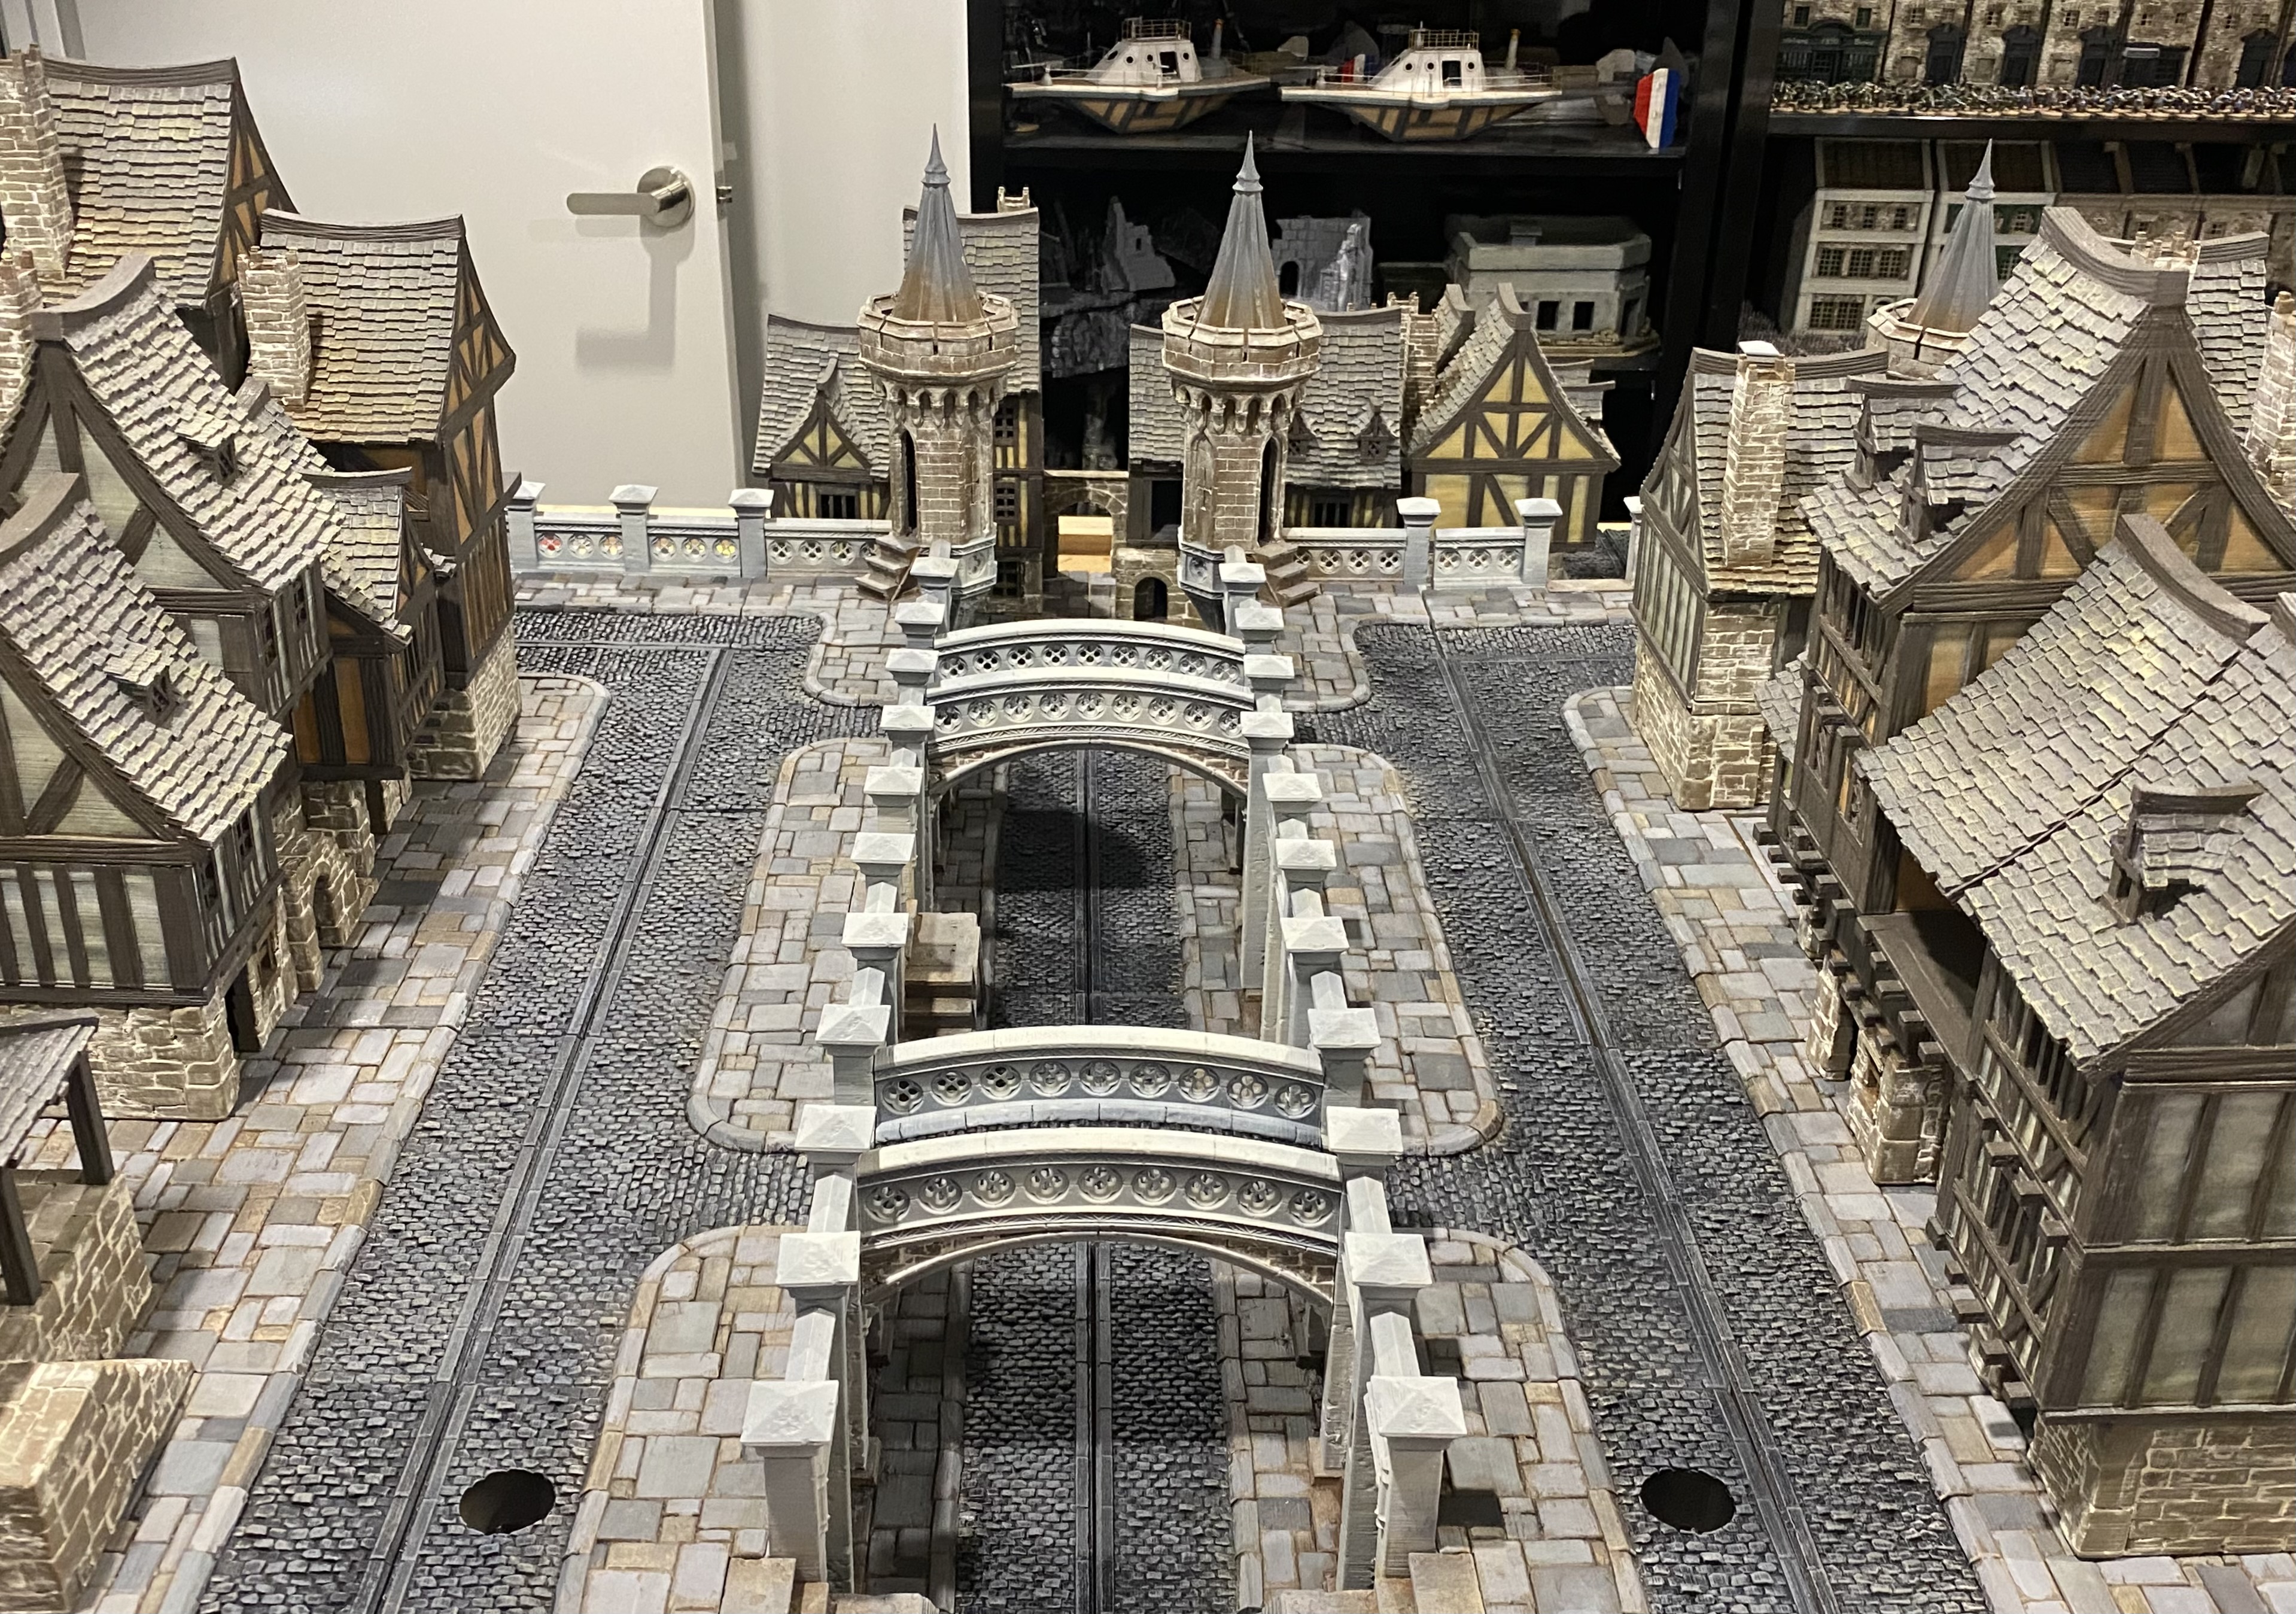 Disclaimer - The buildings on the table set up in this picture were built last year.
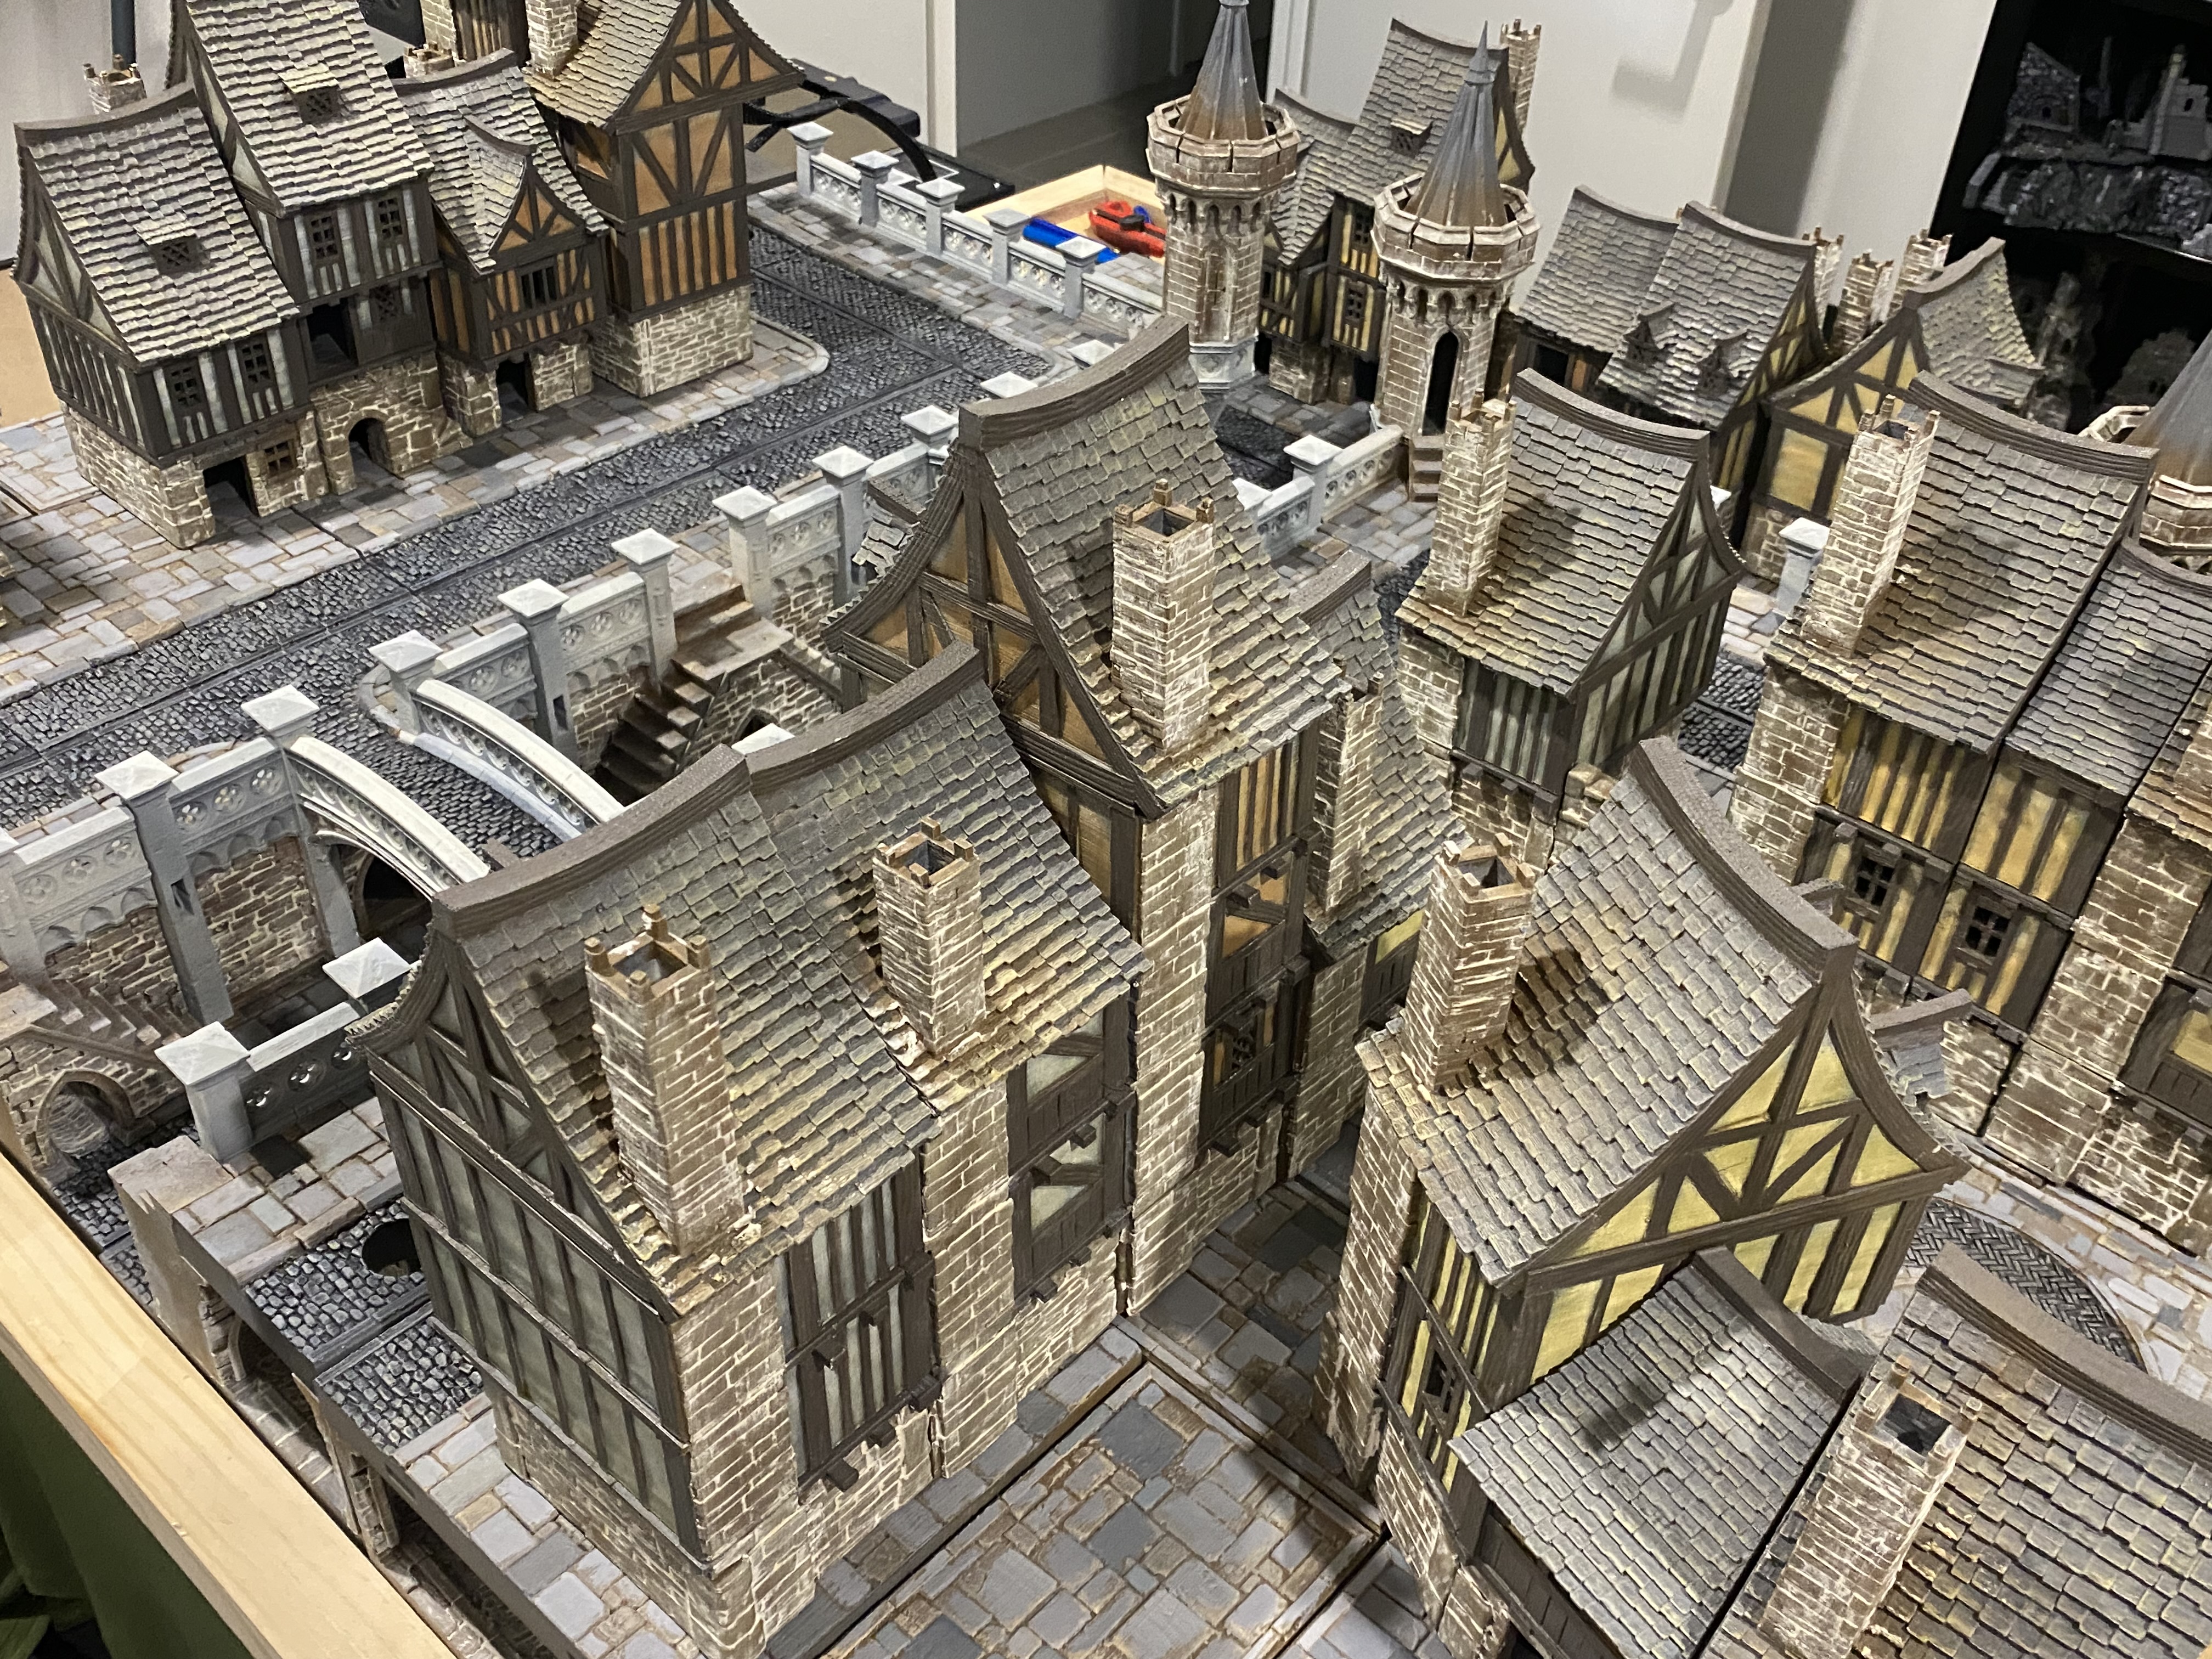 Disclaimer - The buildings on the table set up in this picture were built last year.
Little bits
I few little bits that have been bugging me. The curb pieces need to change colour so they look different to the flagstones. Also, the curb pieces over the bridges need painting. The road still needs changing.
 Disclaimer - The buildings on the table set up in this picture were built last year.
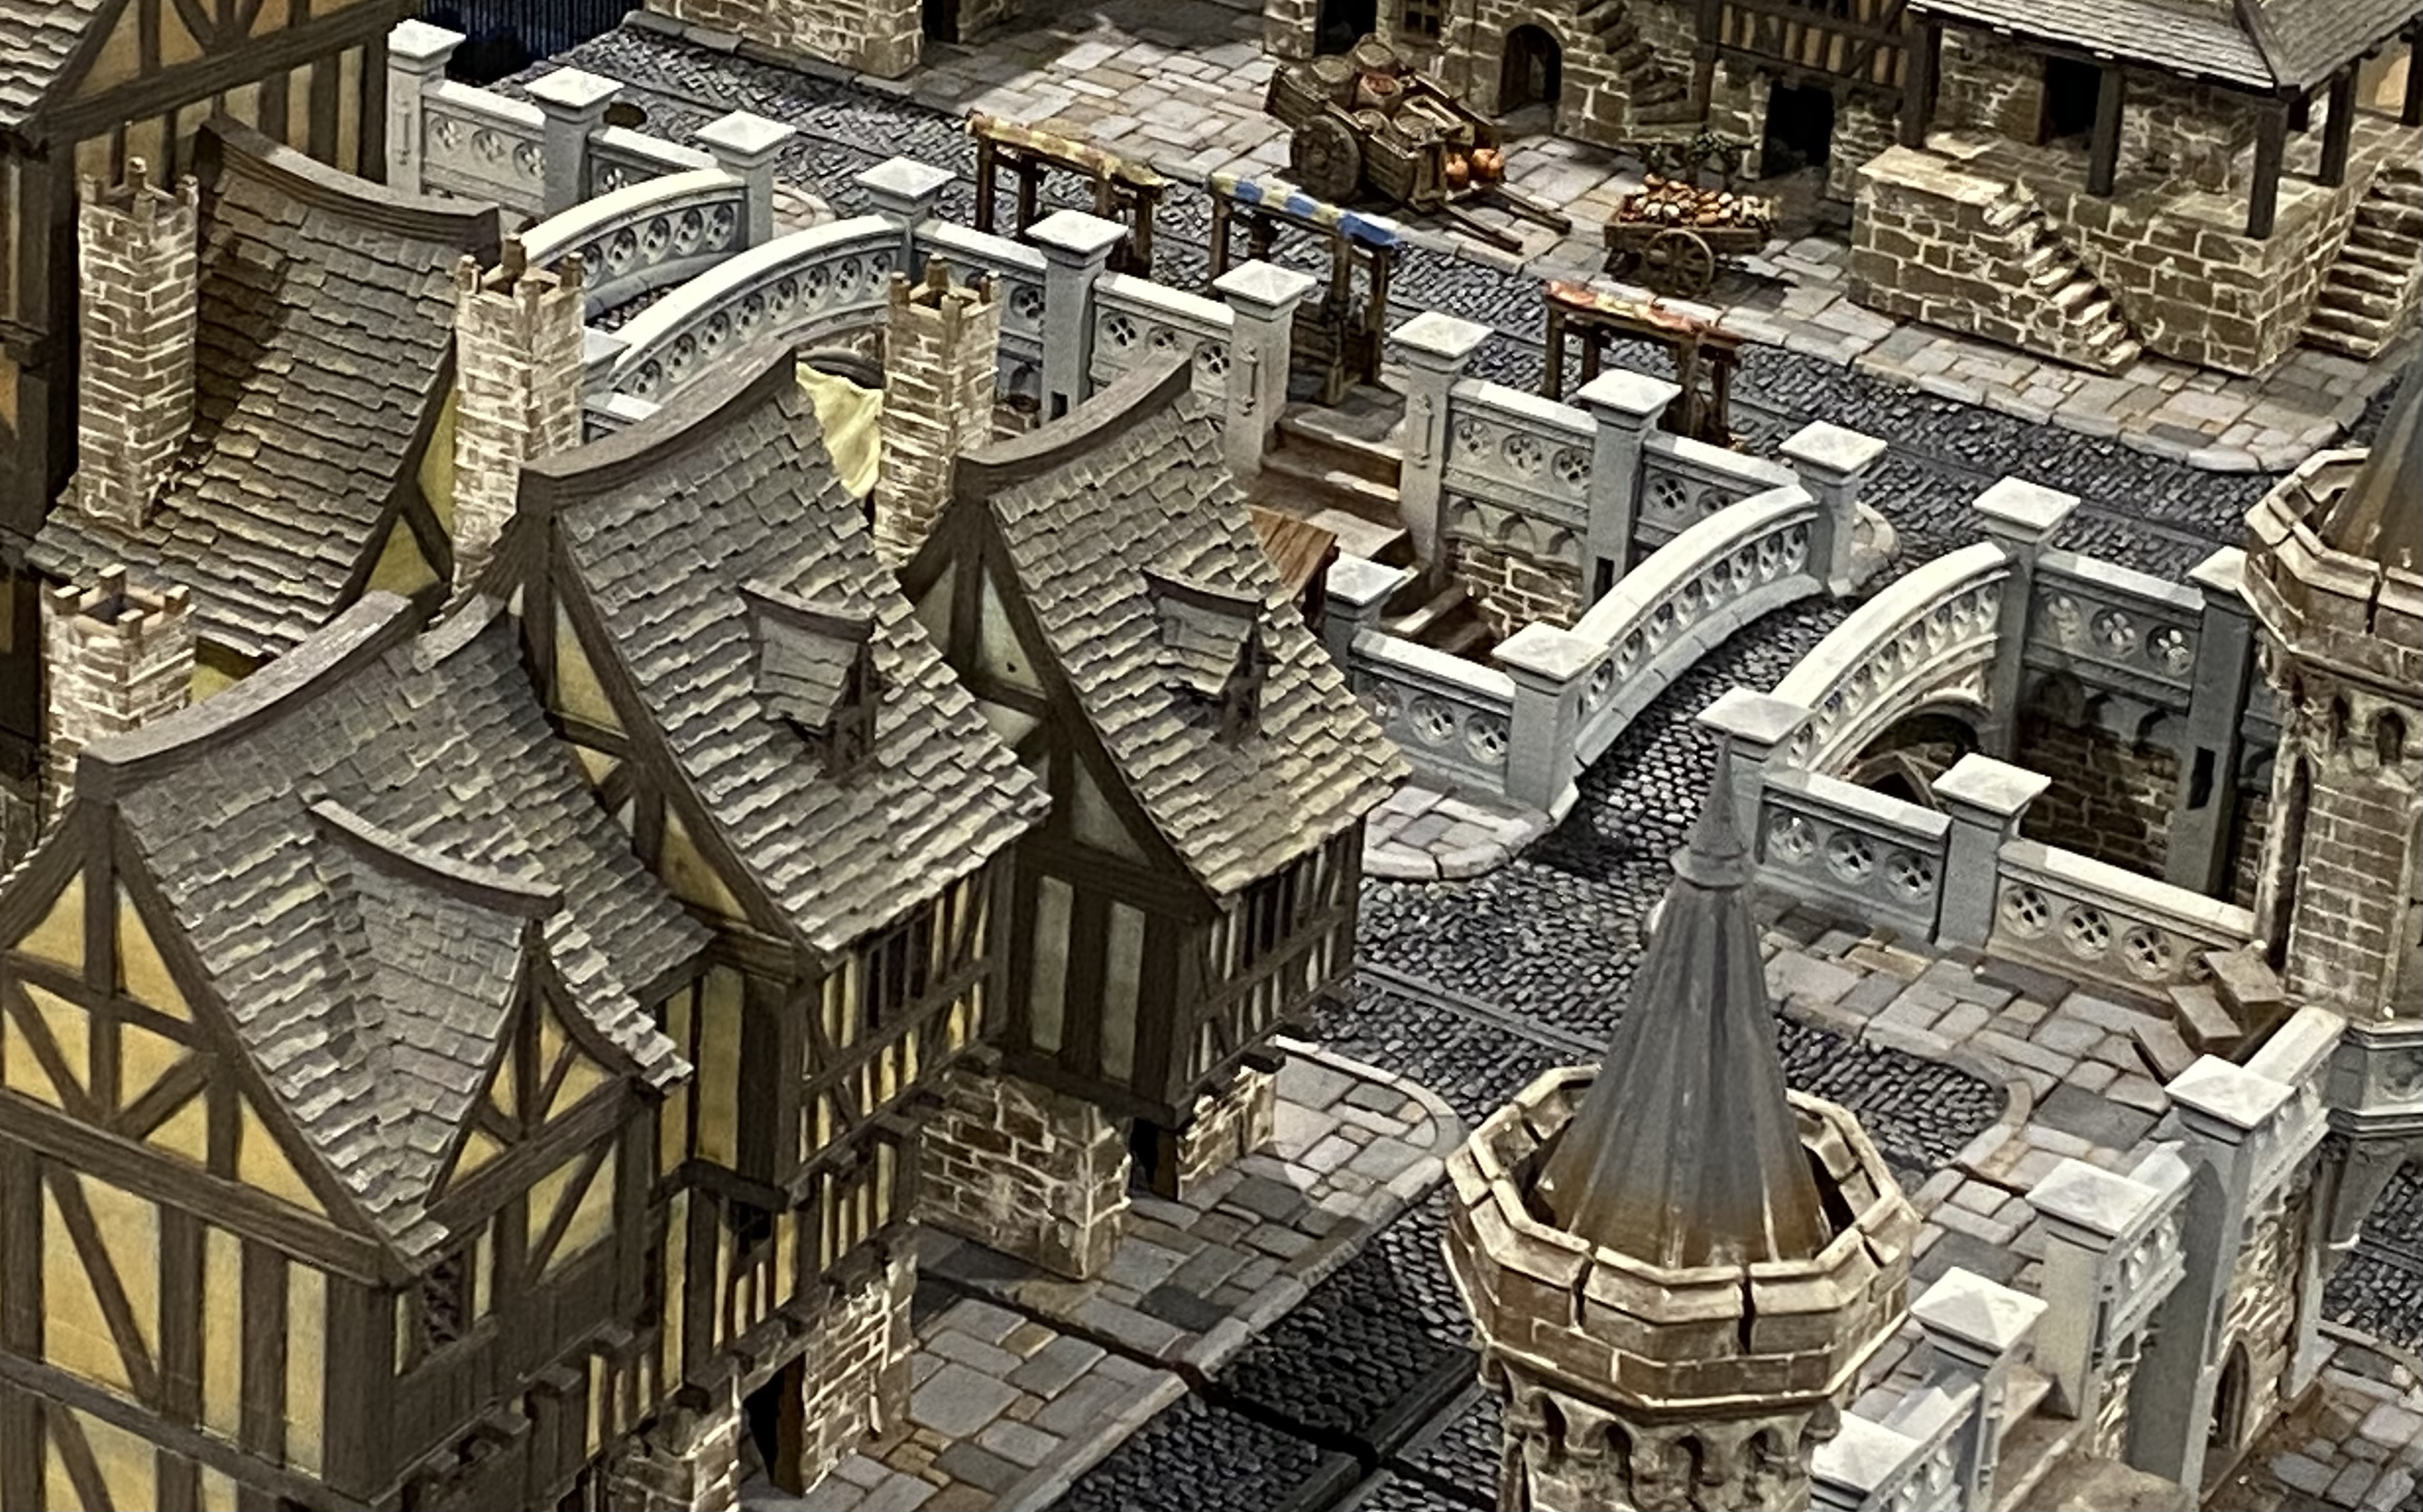 Disclaimer - The buildings on the table set up in this picture were built last year.
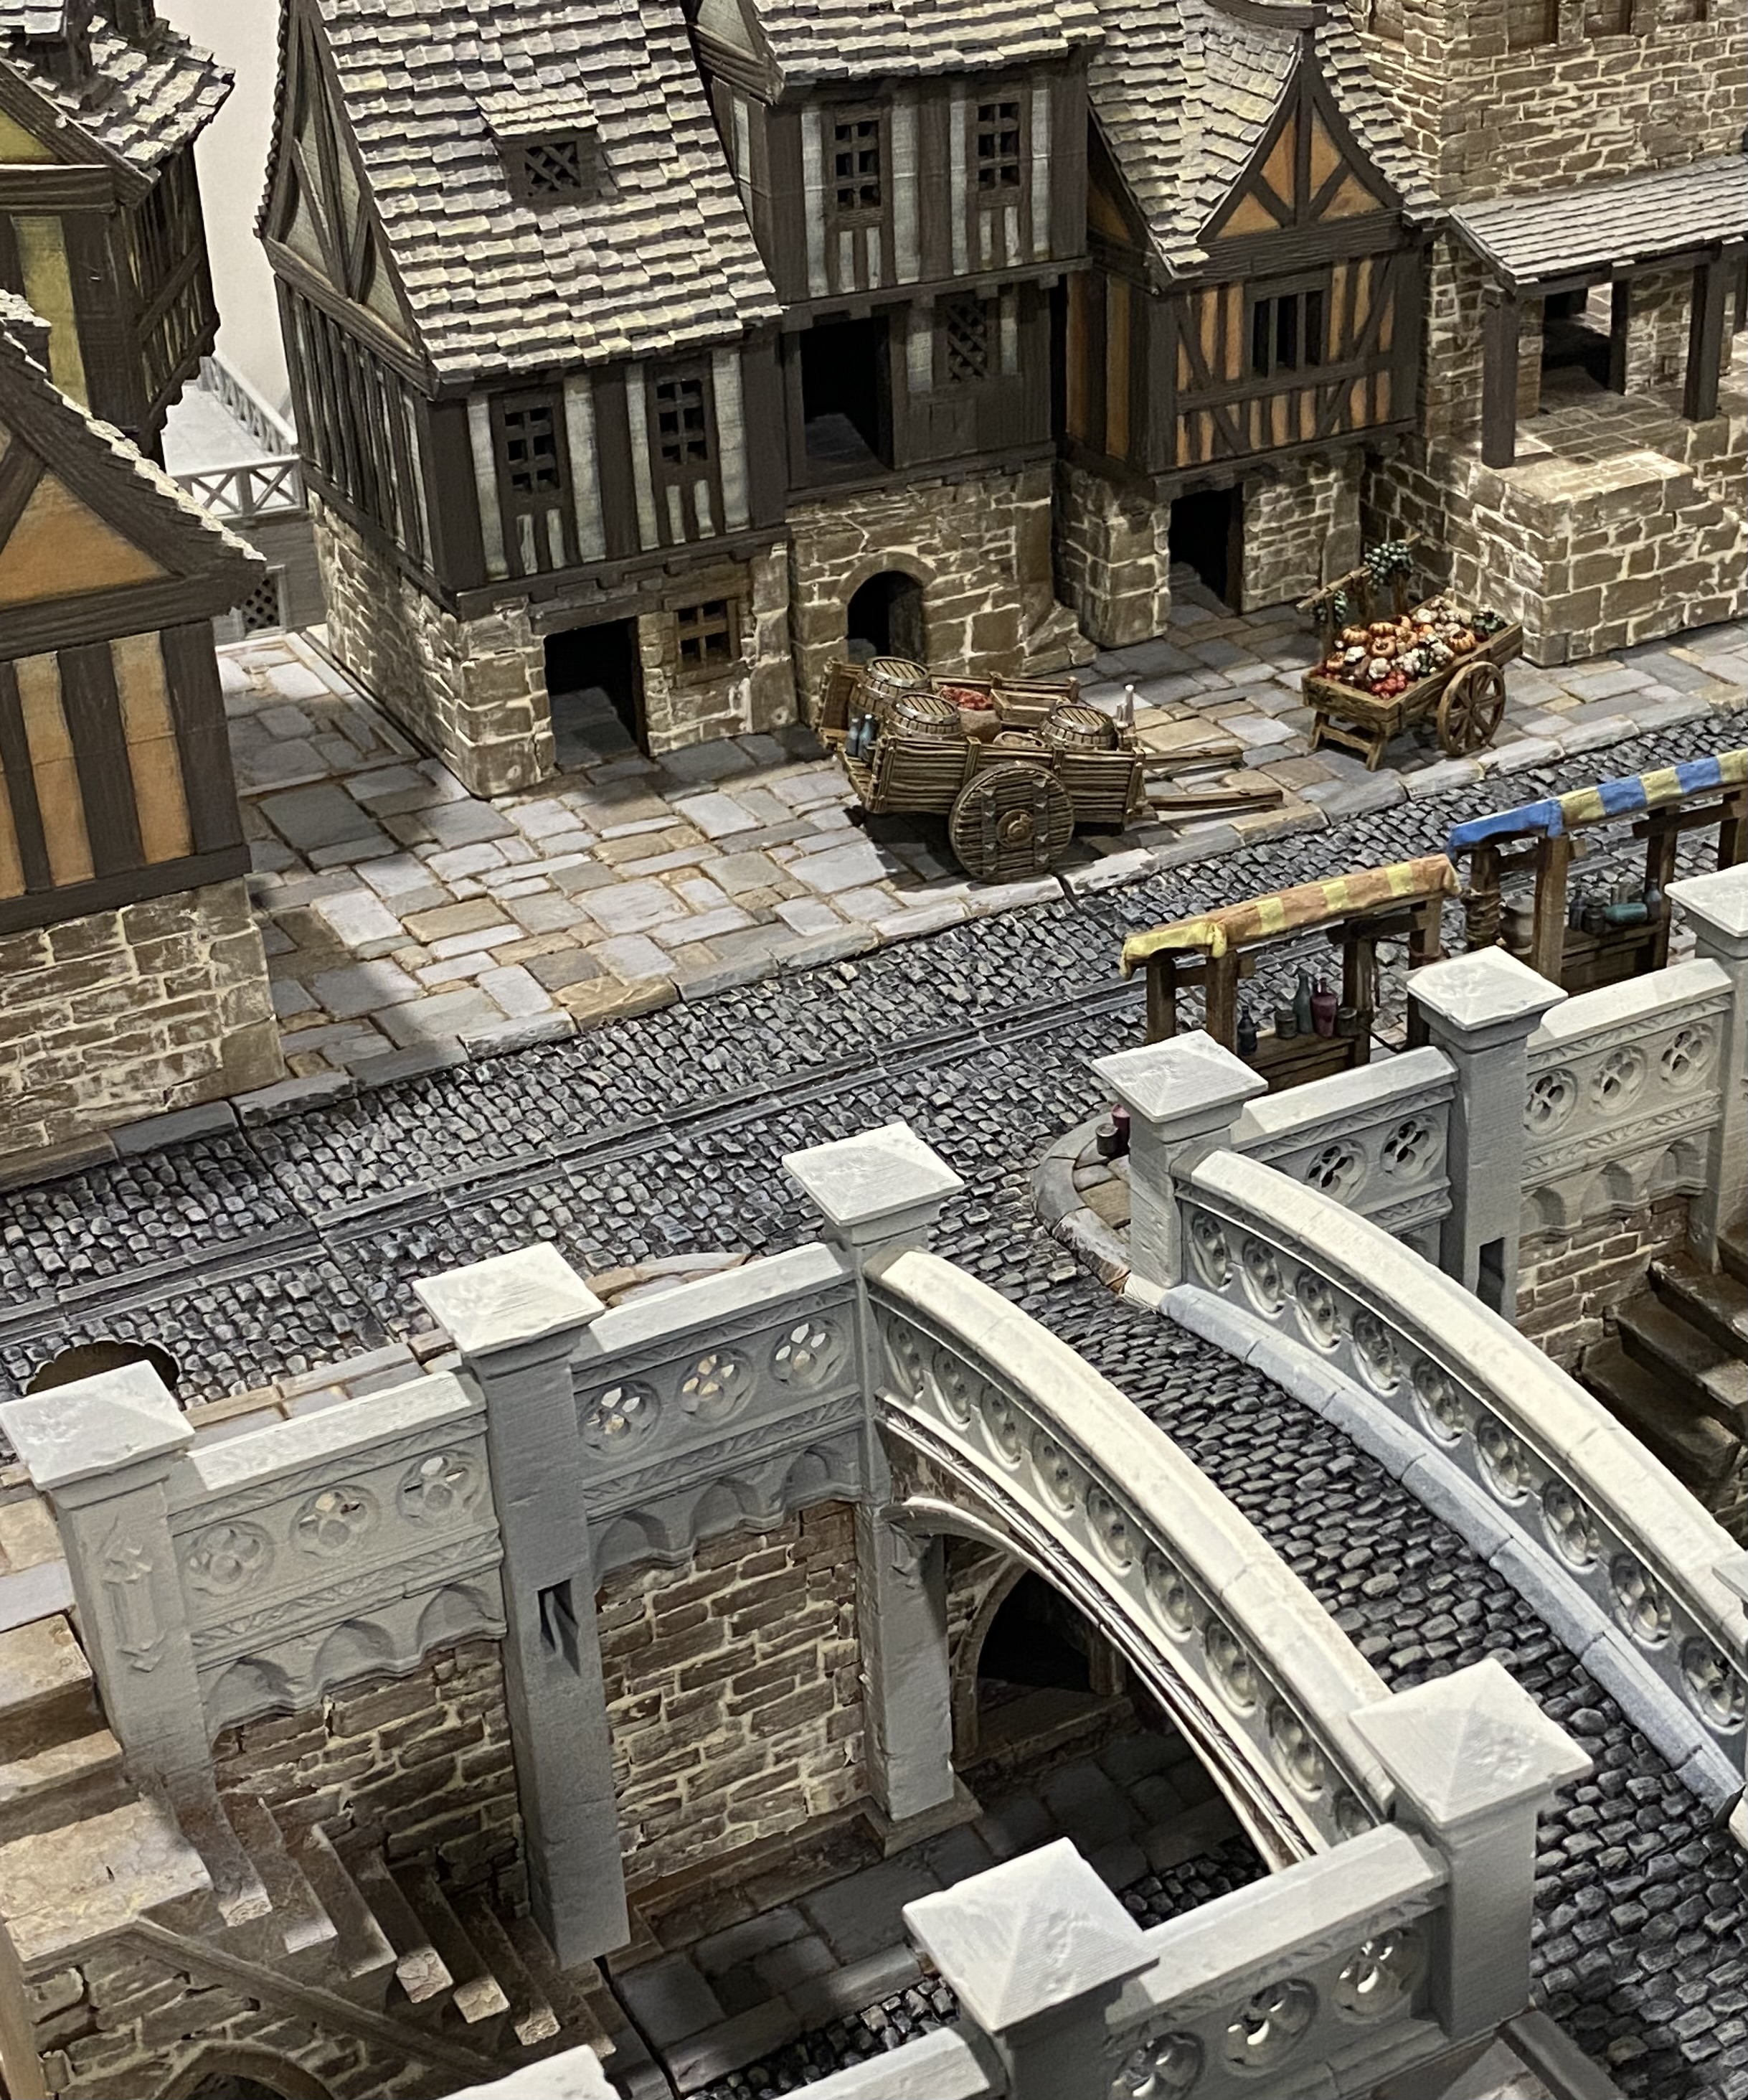 Disclaimer - The buildings on the table set up in this picture were built last year. The curb pieces just look wrong to me. I think I will lighten them all up so they stand out a bit better from the flagstones. Also I need to do the curb pieces on the bridges. The more I look the more I see little bits to adjust.
Scale
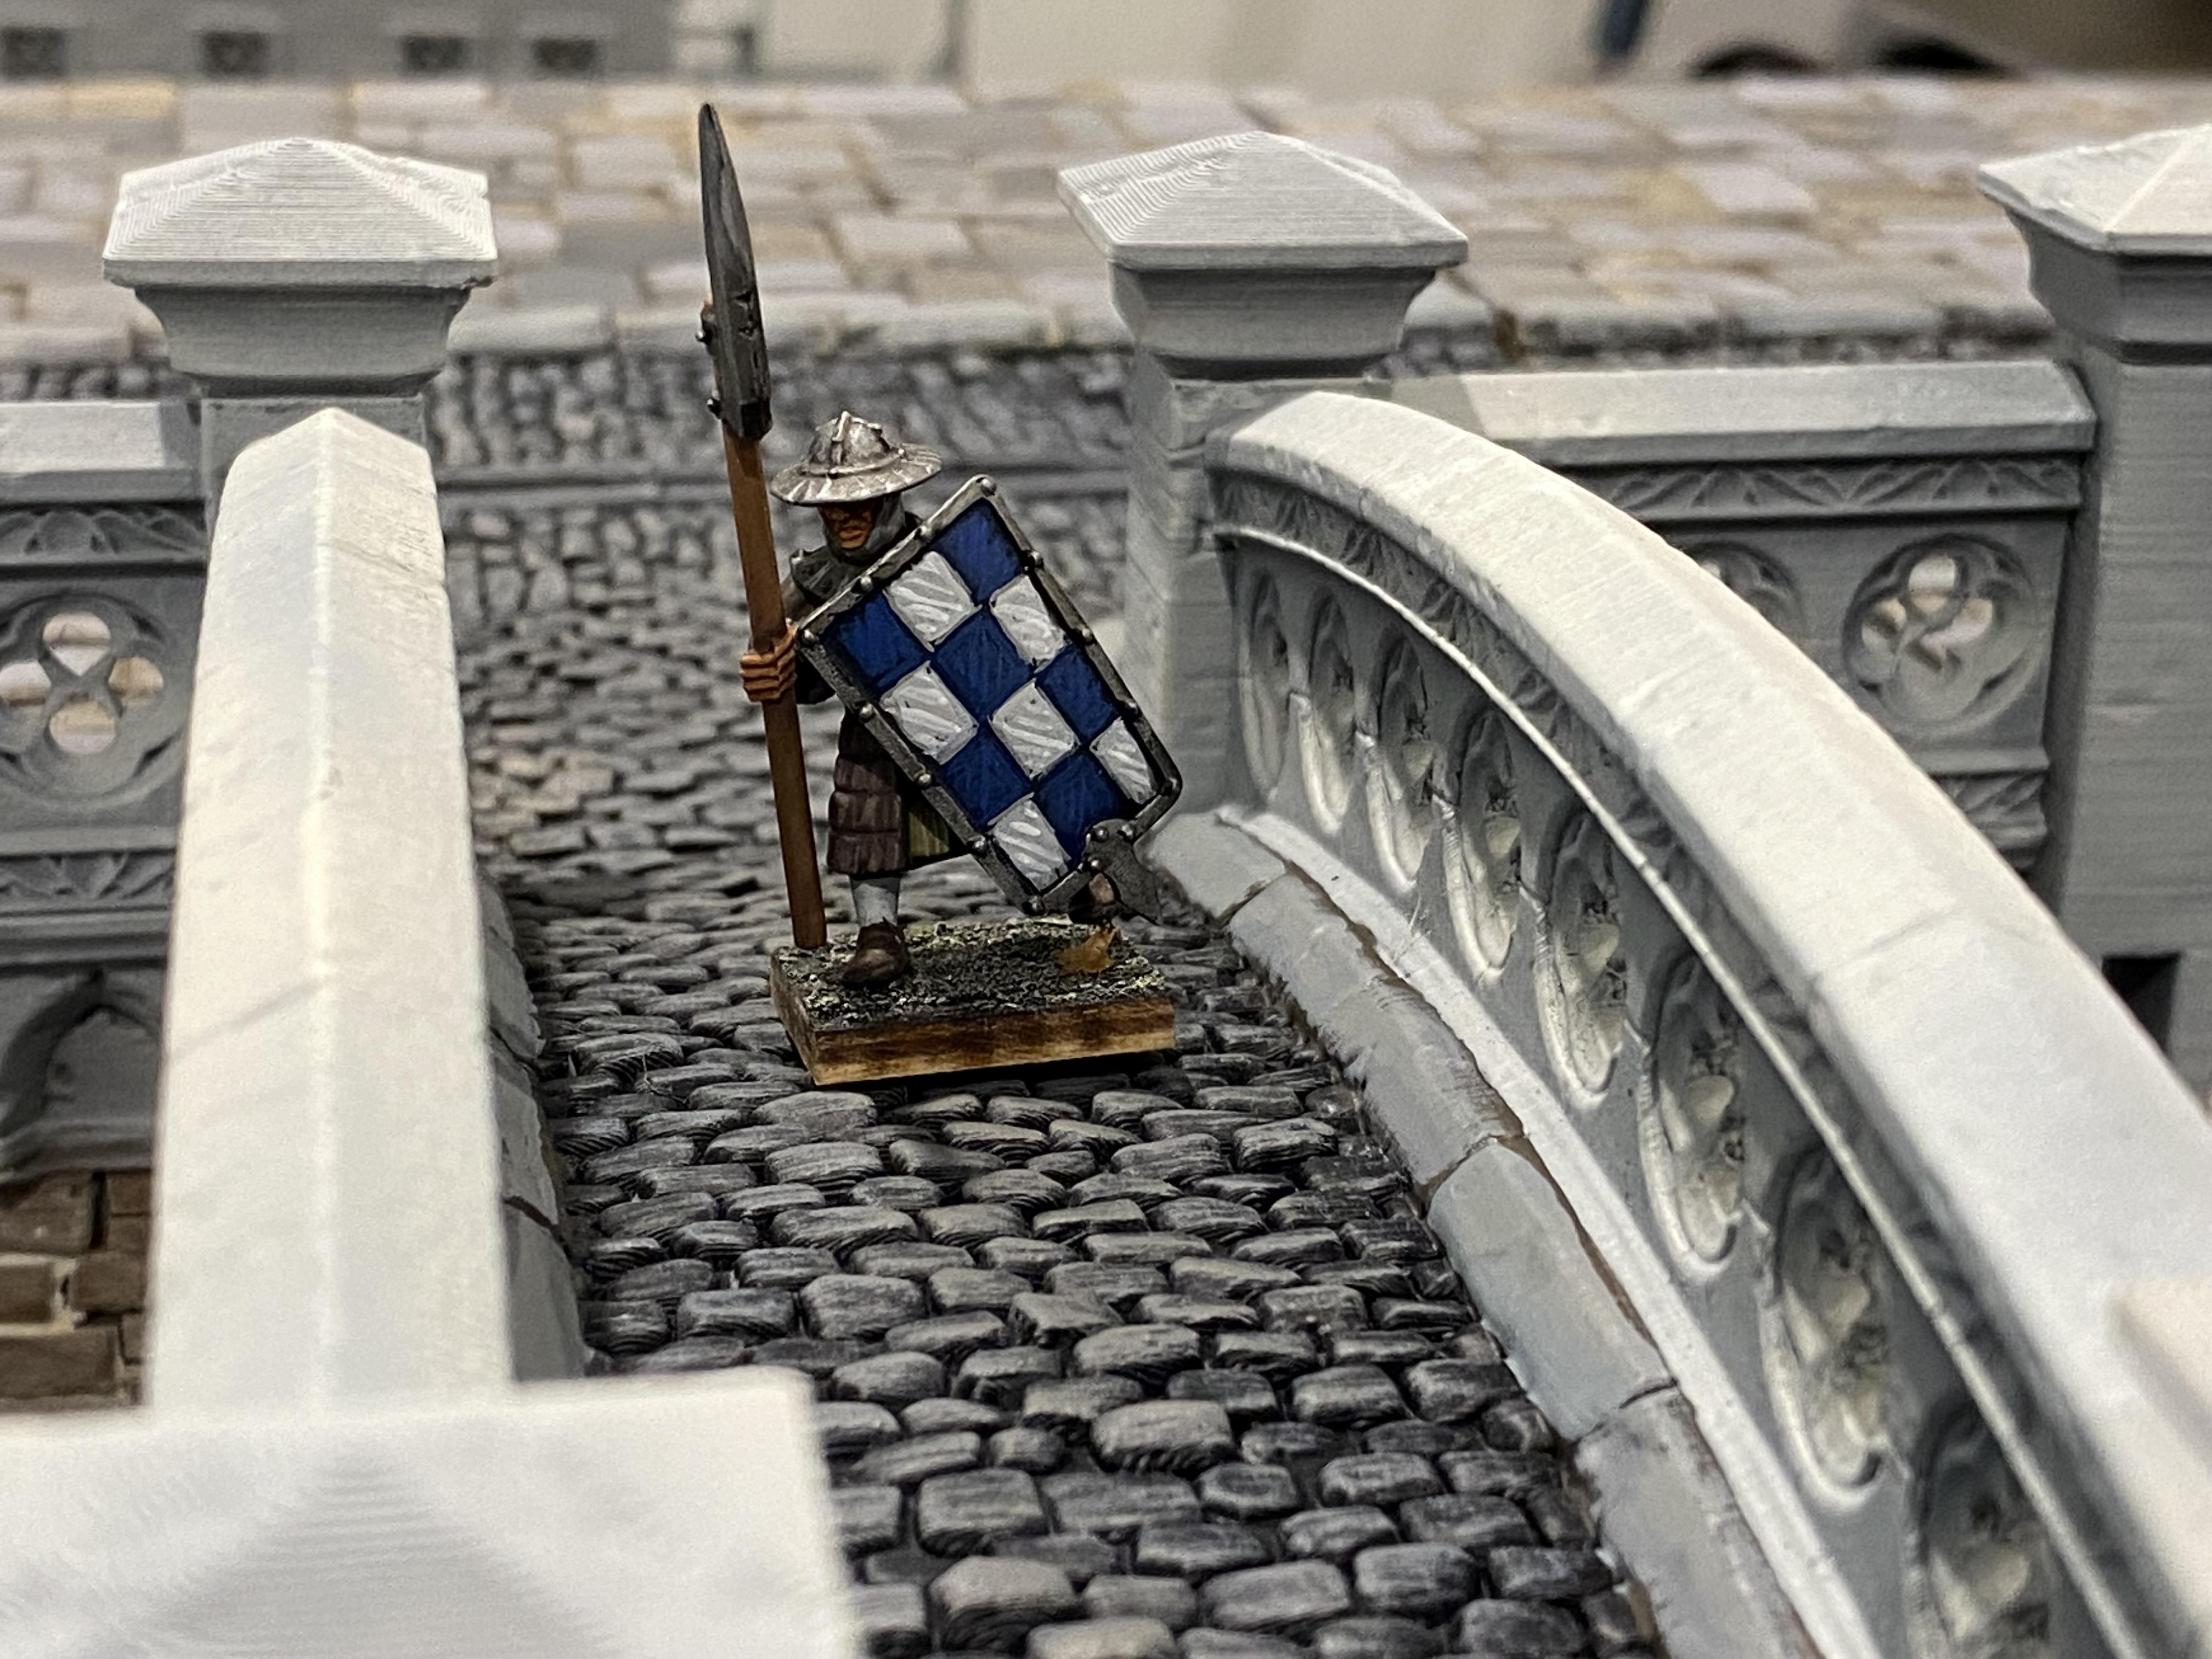
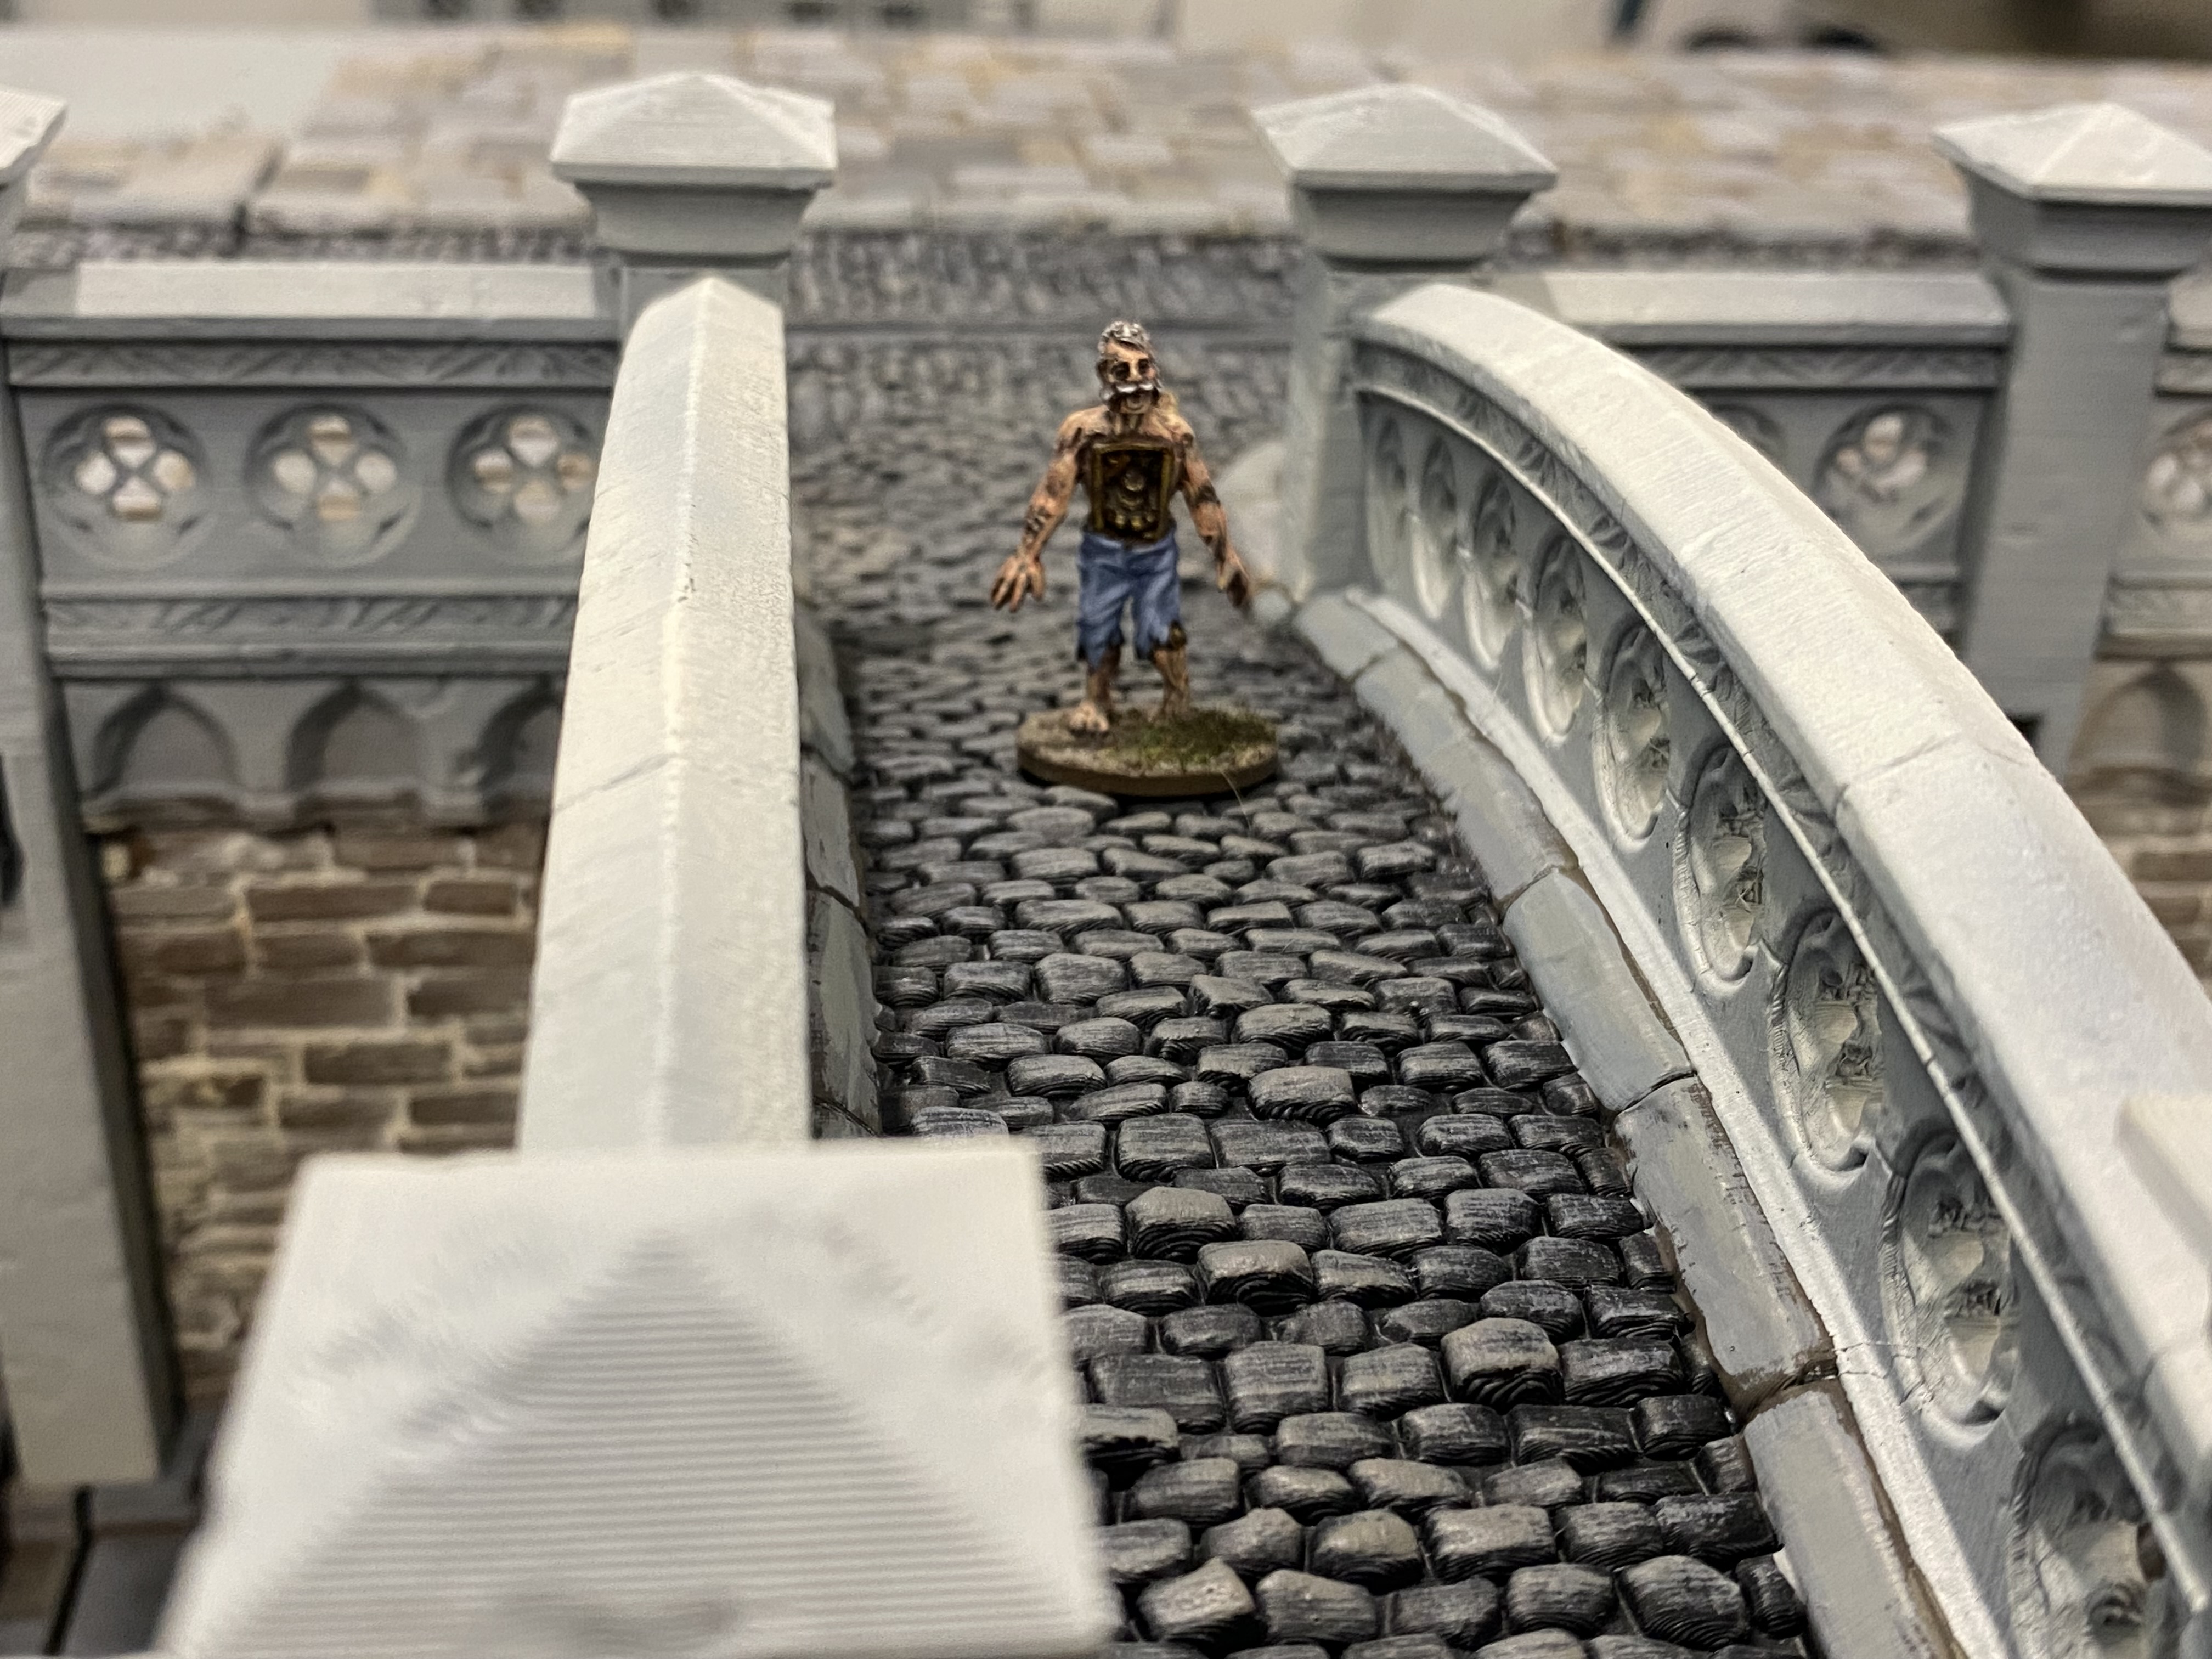
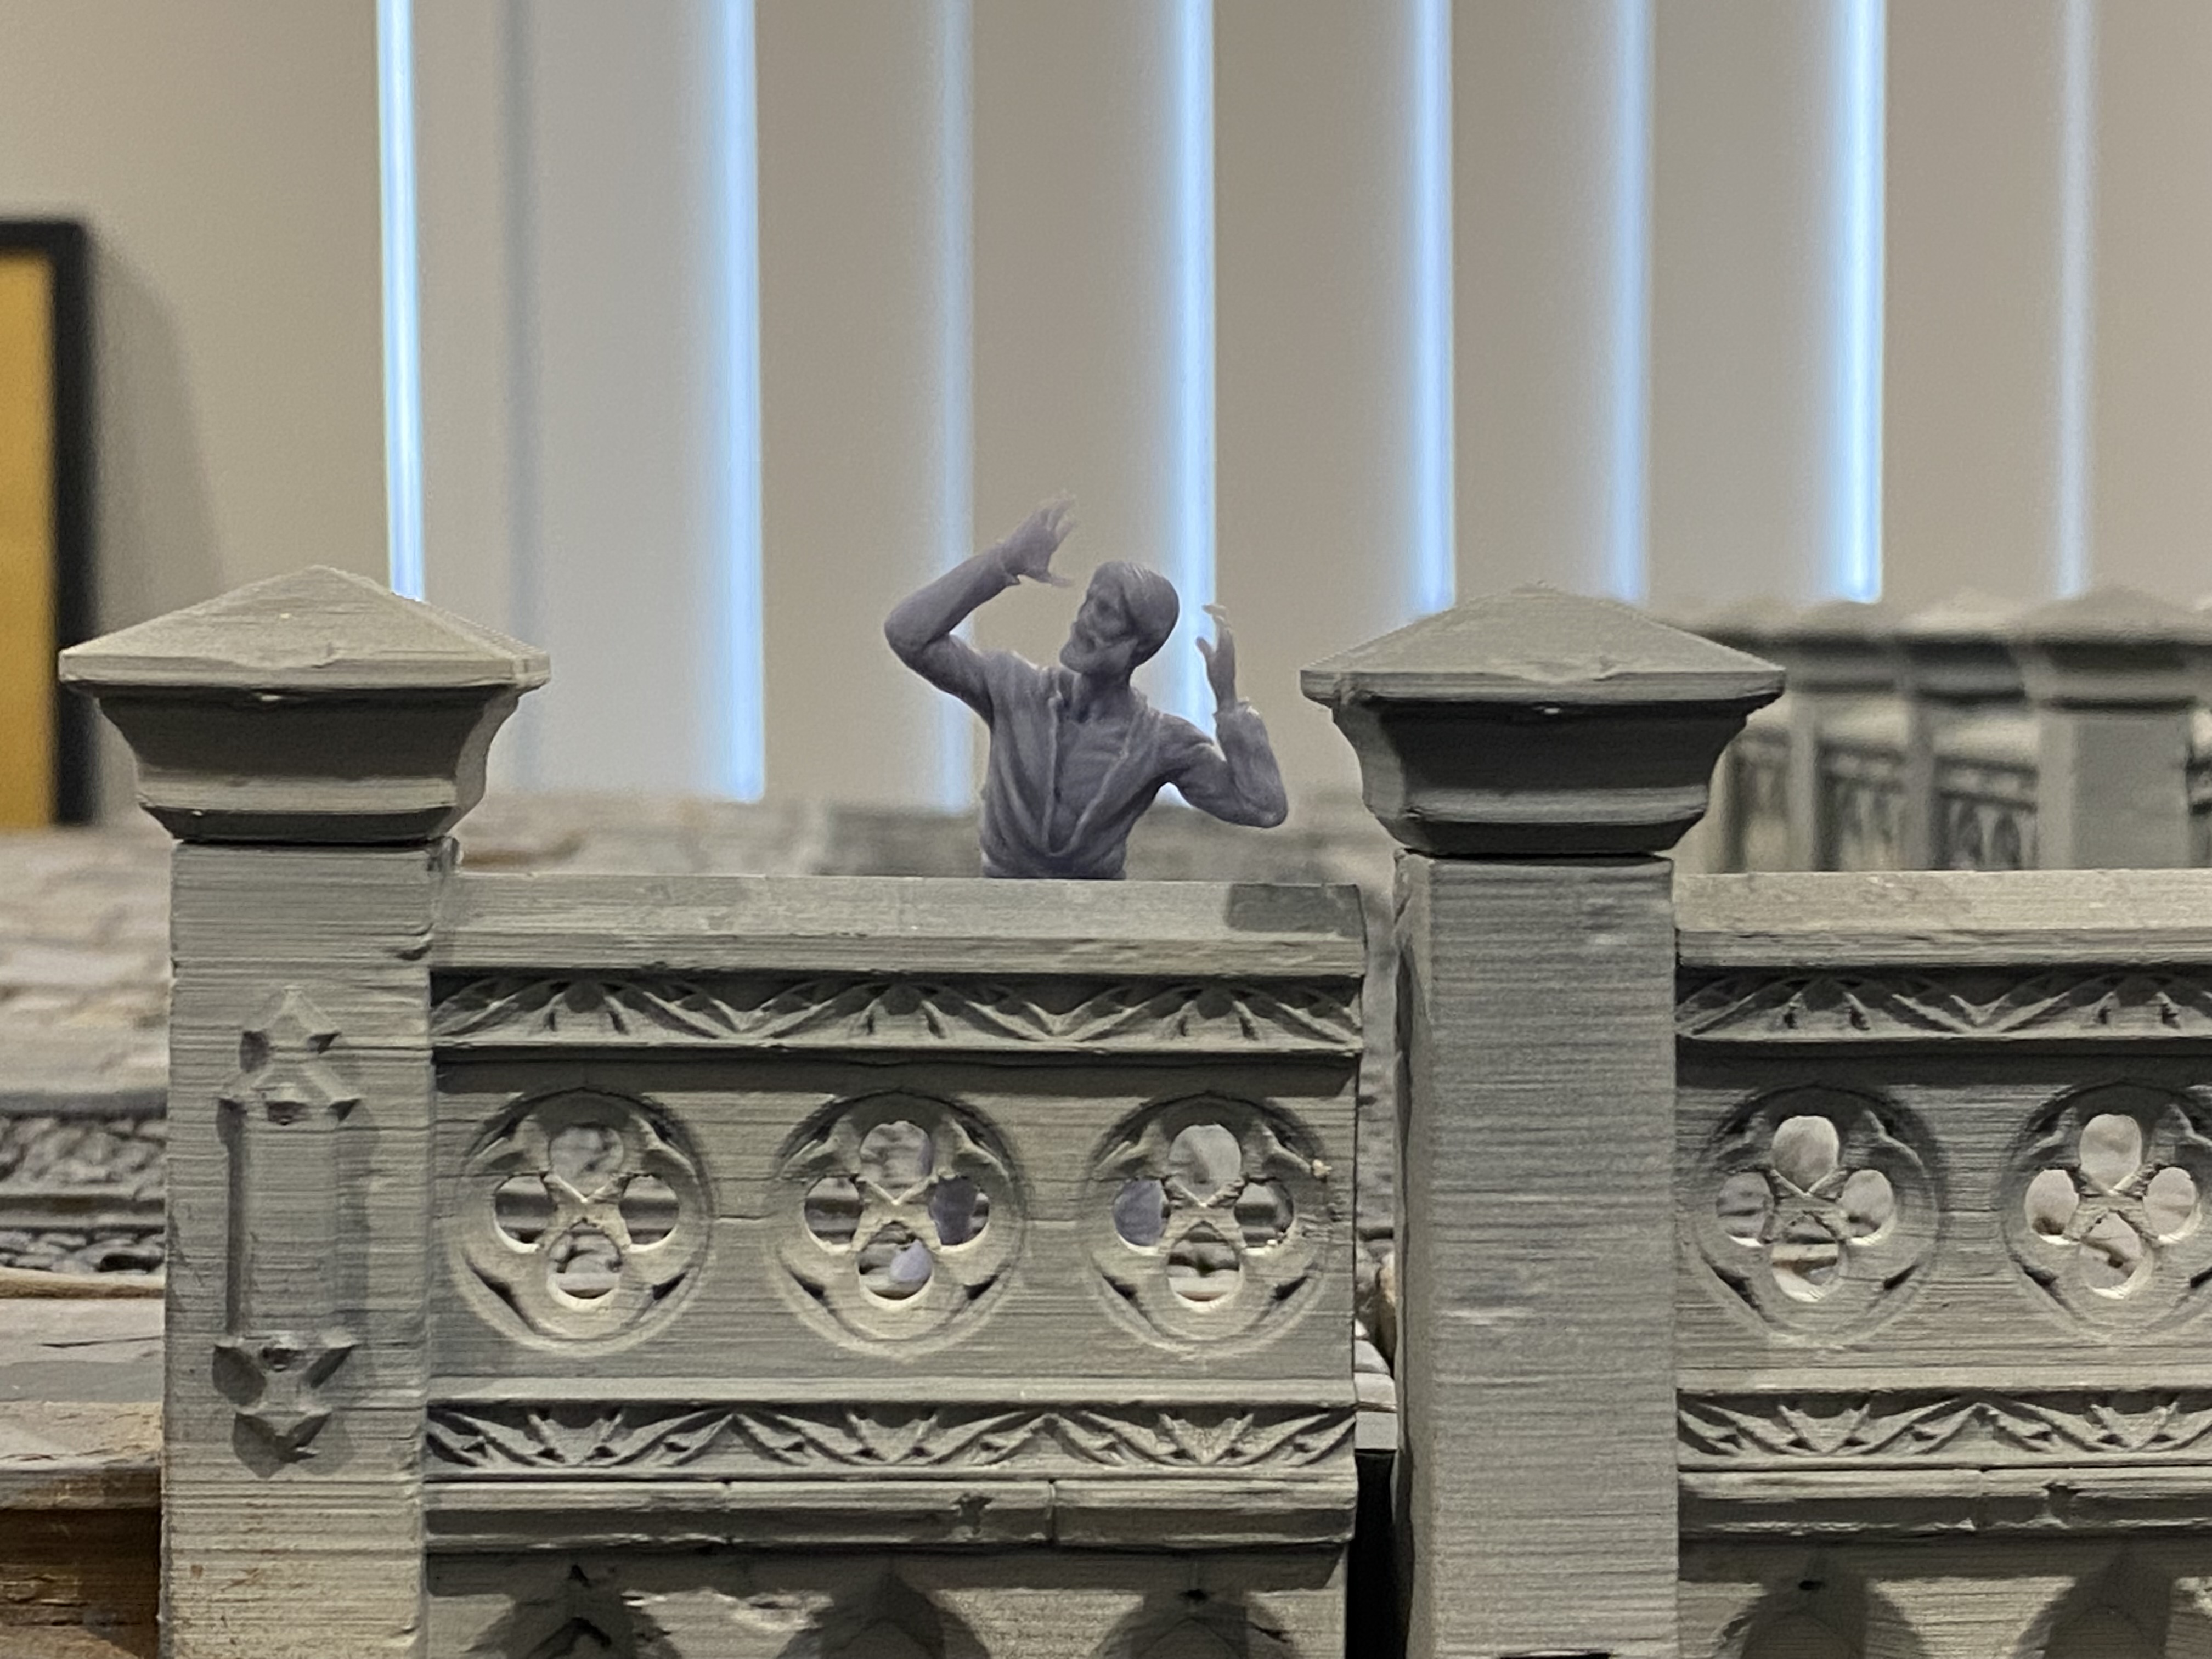
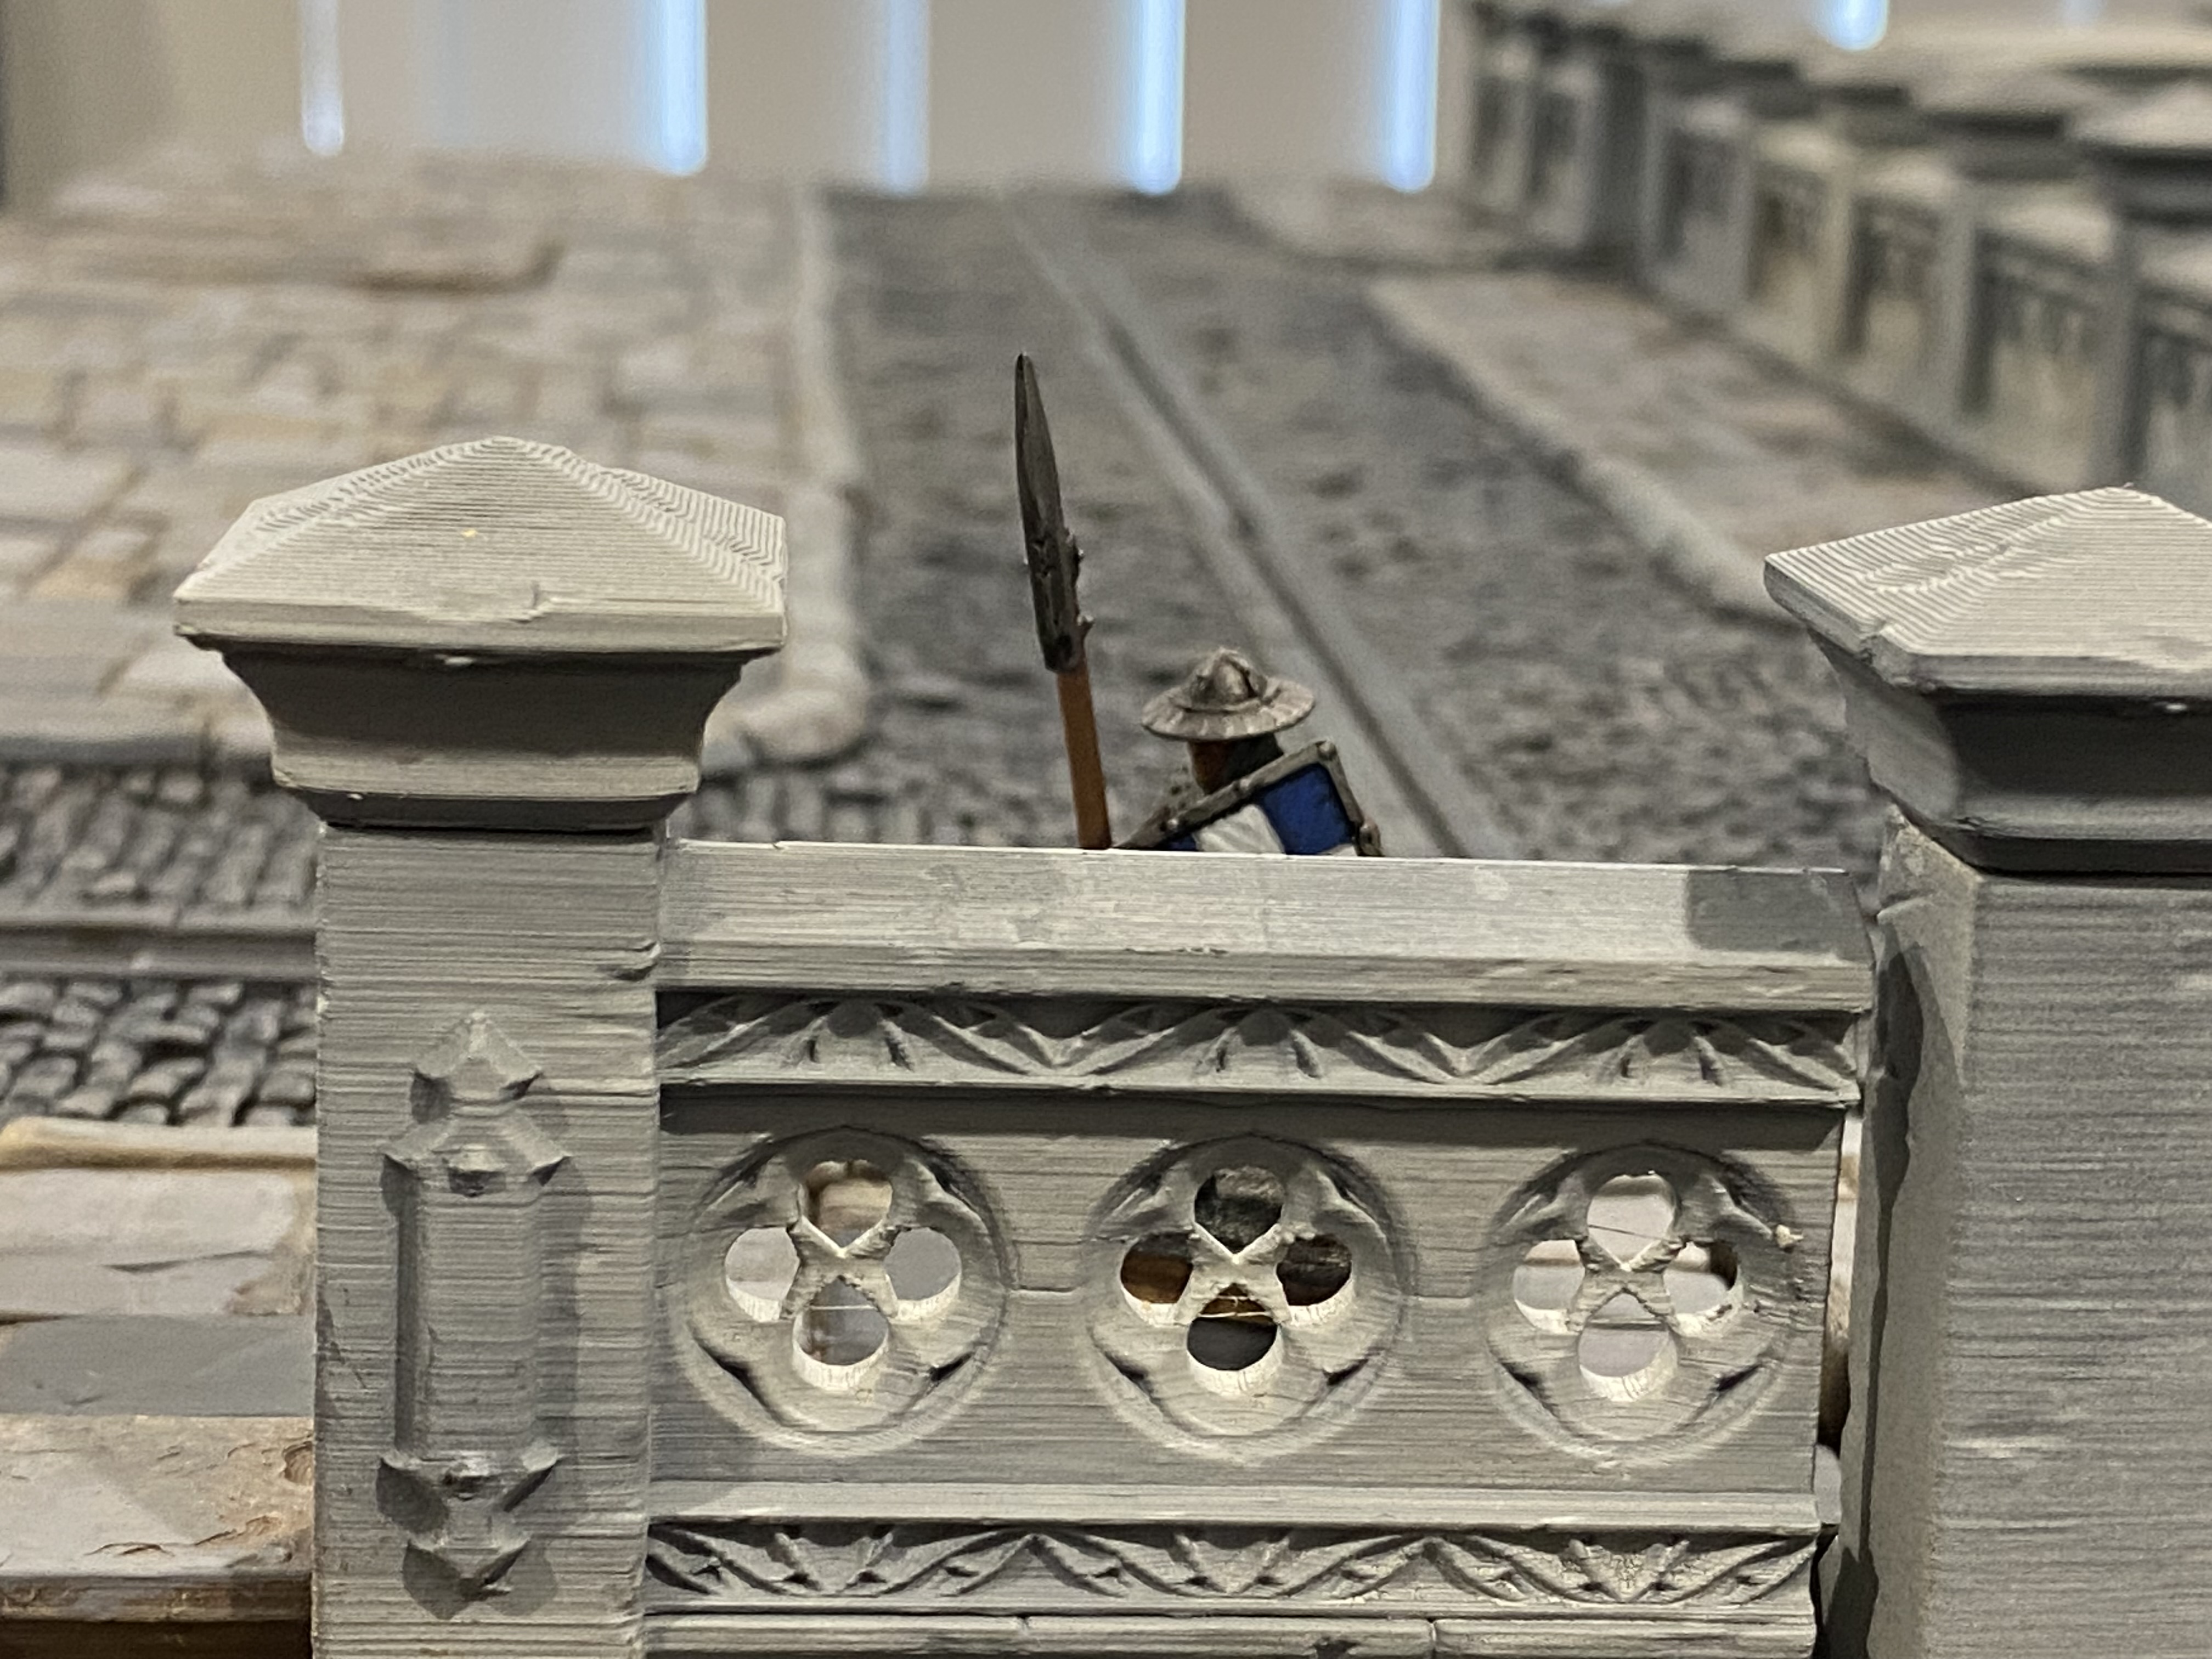
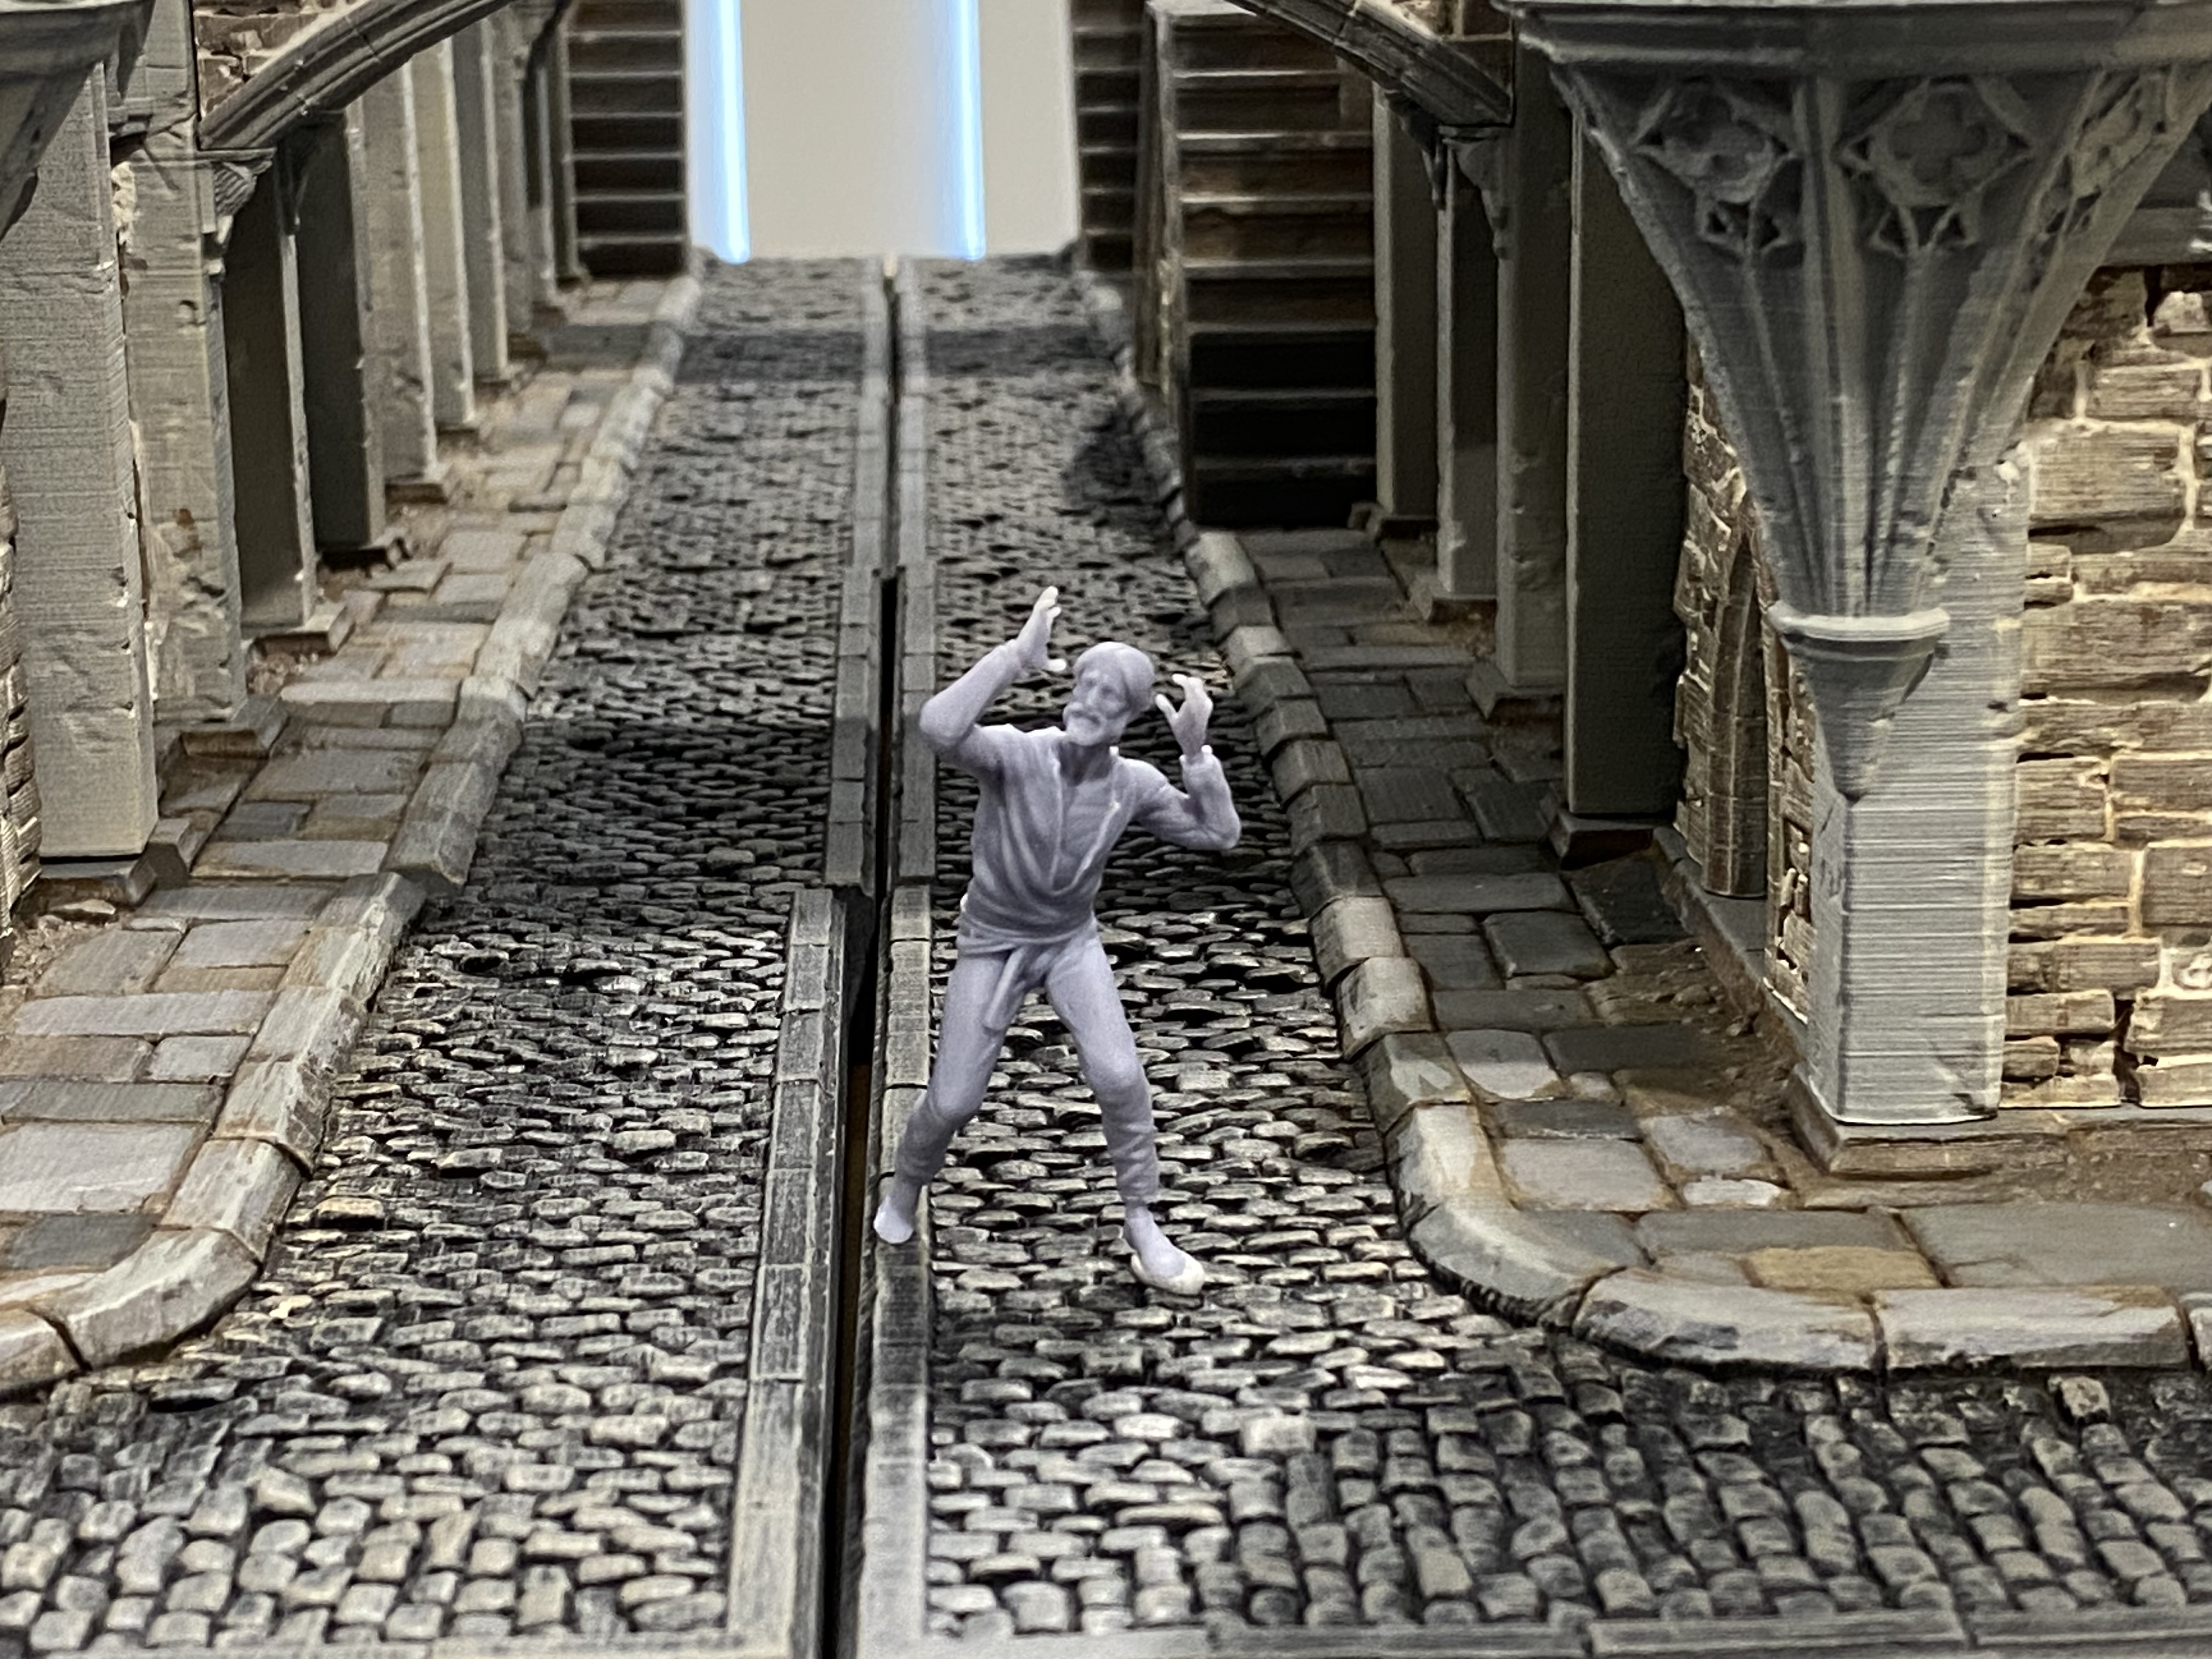
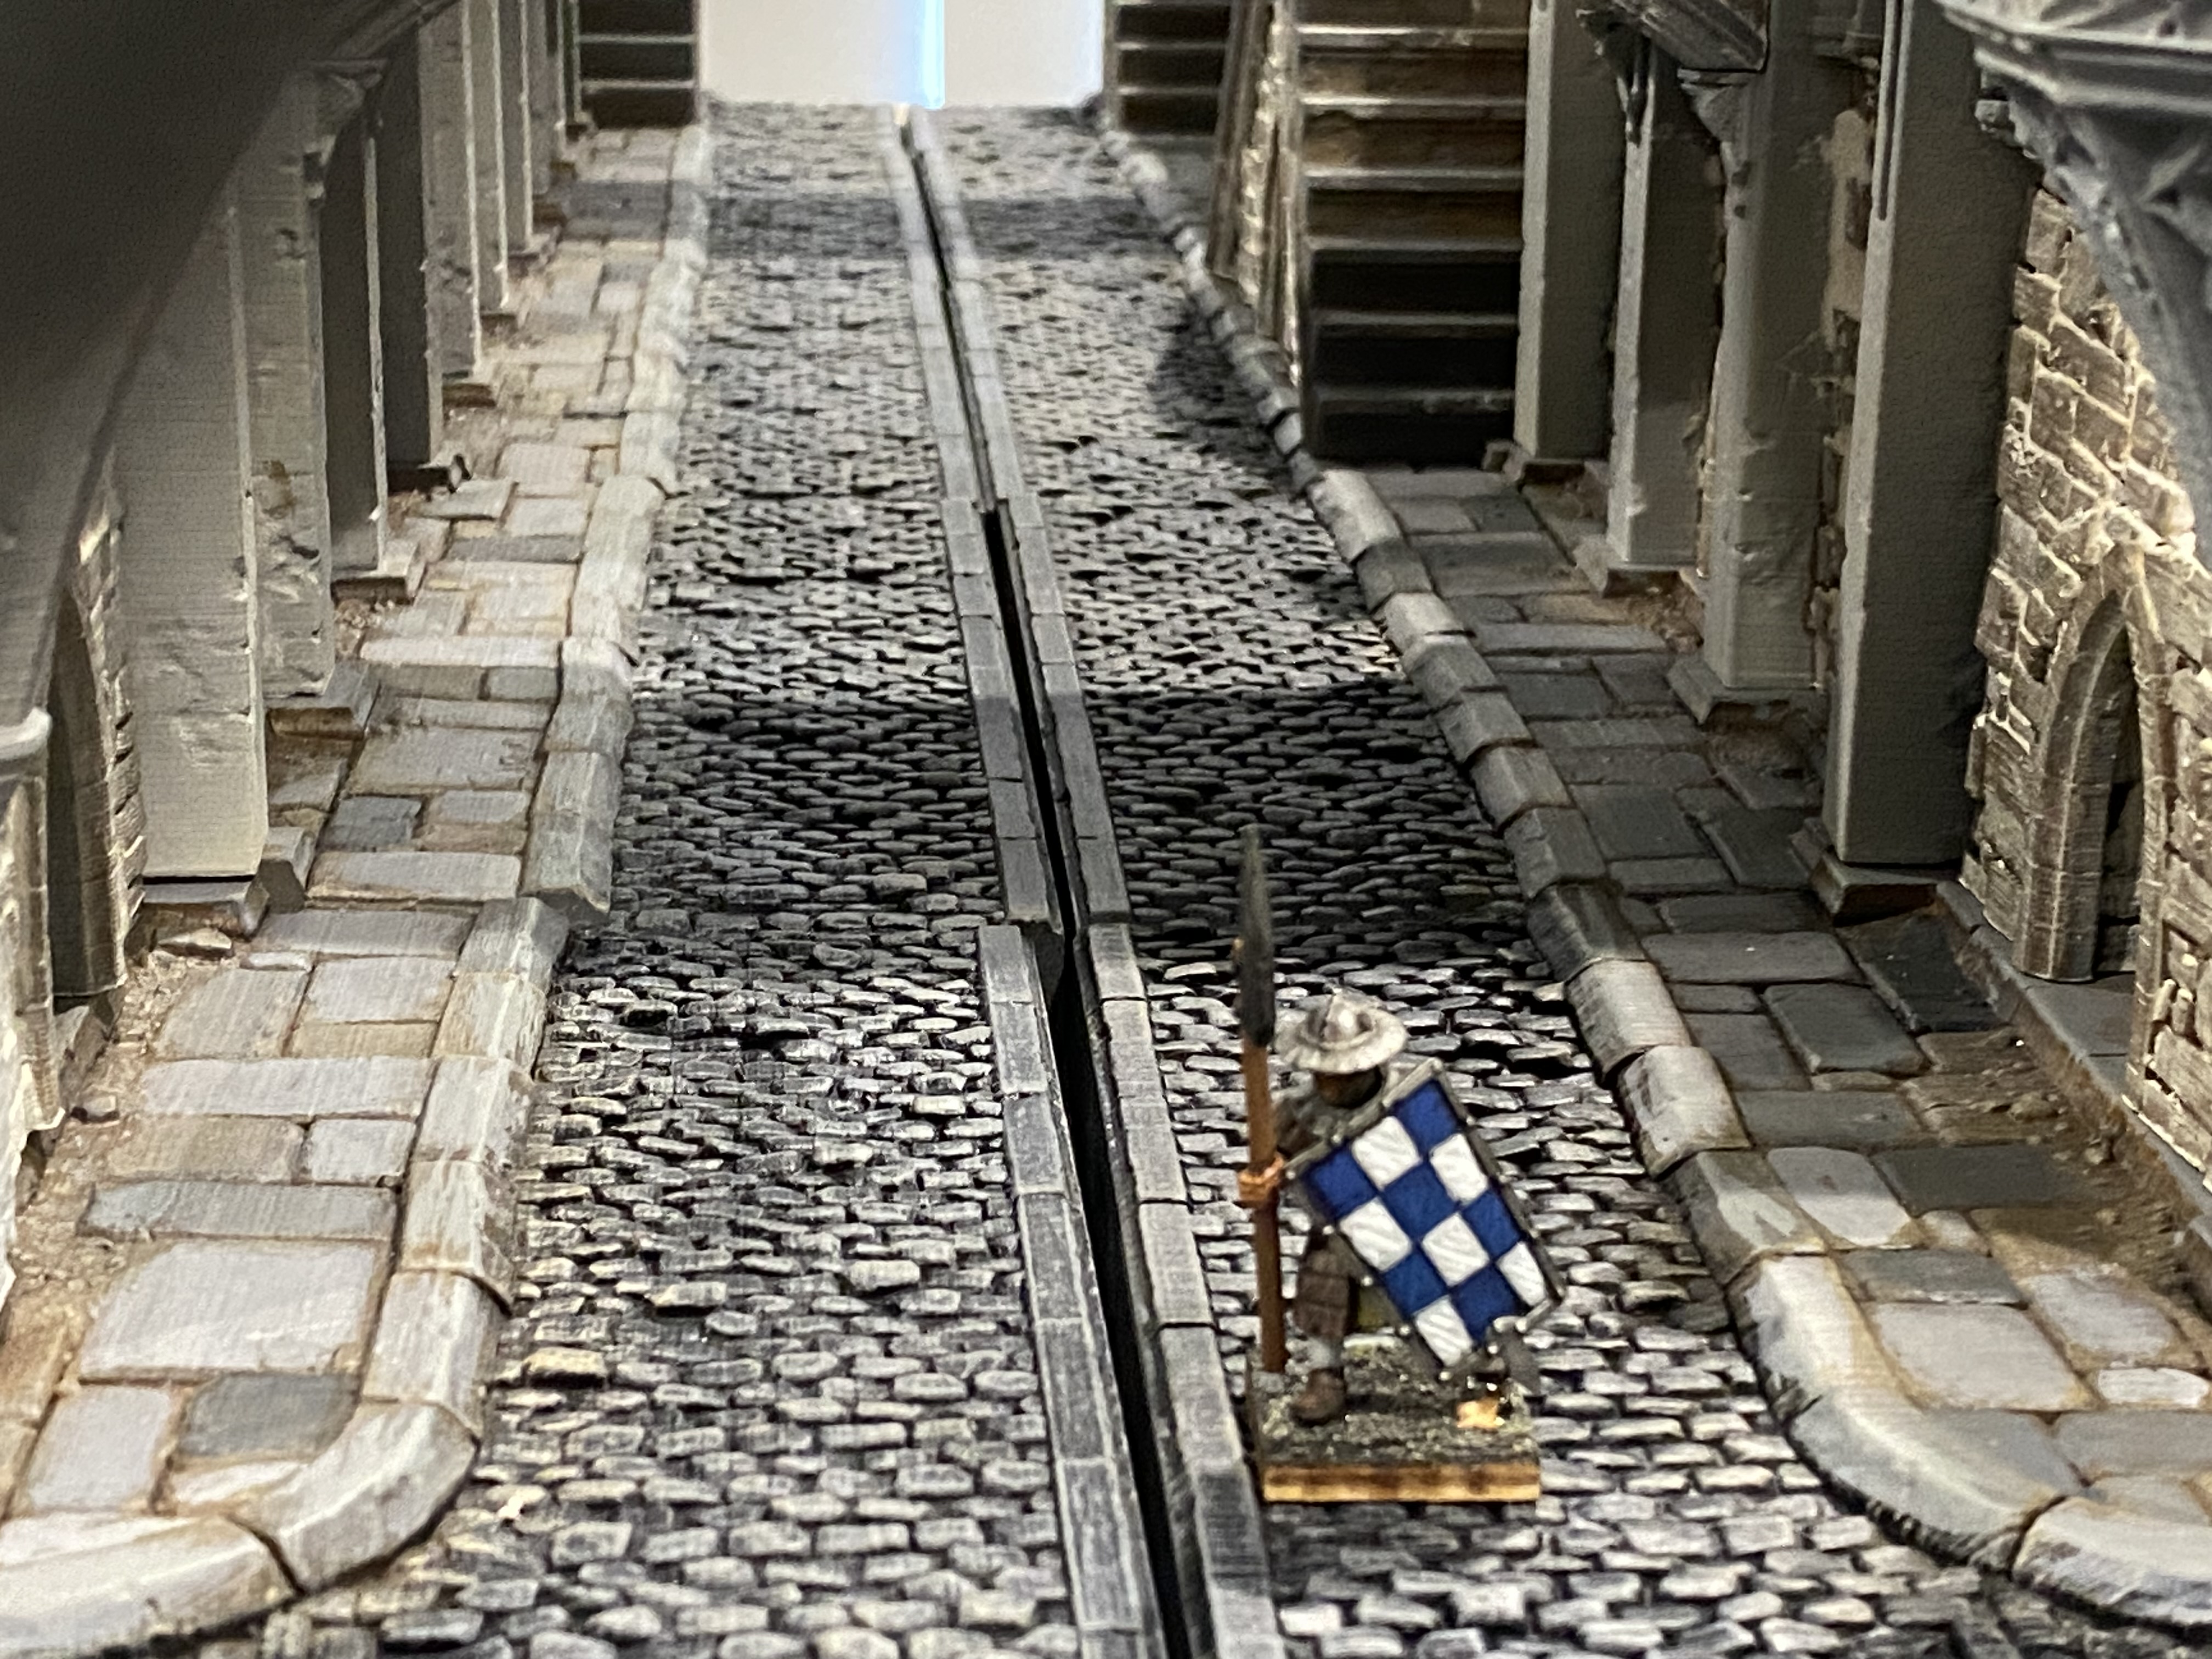
Some quick comparison shots with
55mm Gothic Horror Figures
32mm or whatever scale Games Workshop figures are
28mm Scale Victorian Science fiction.

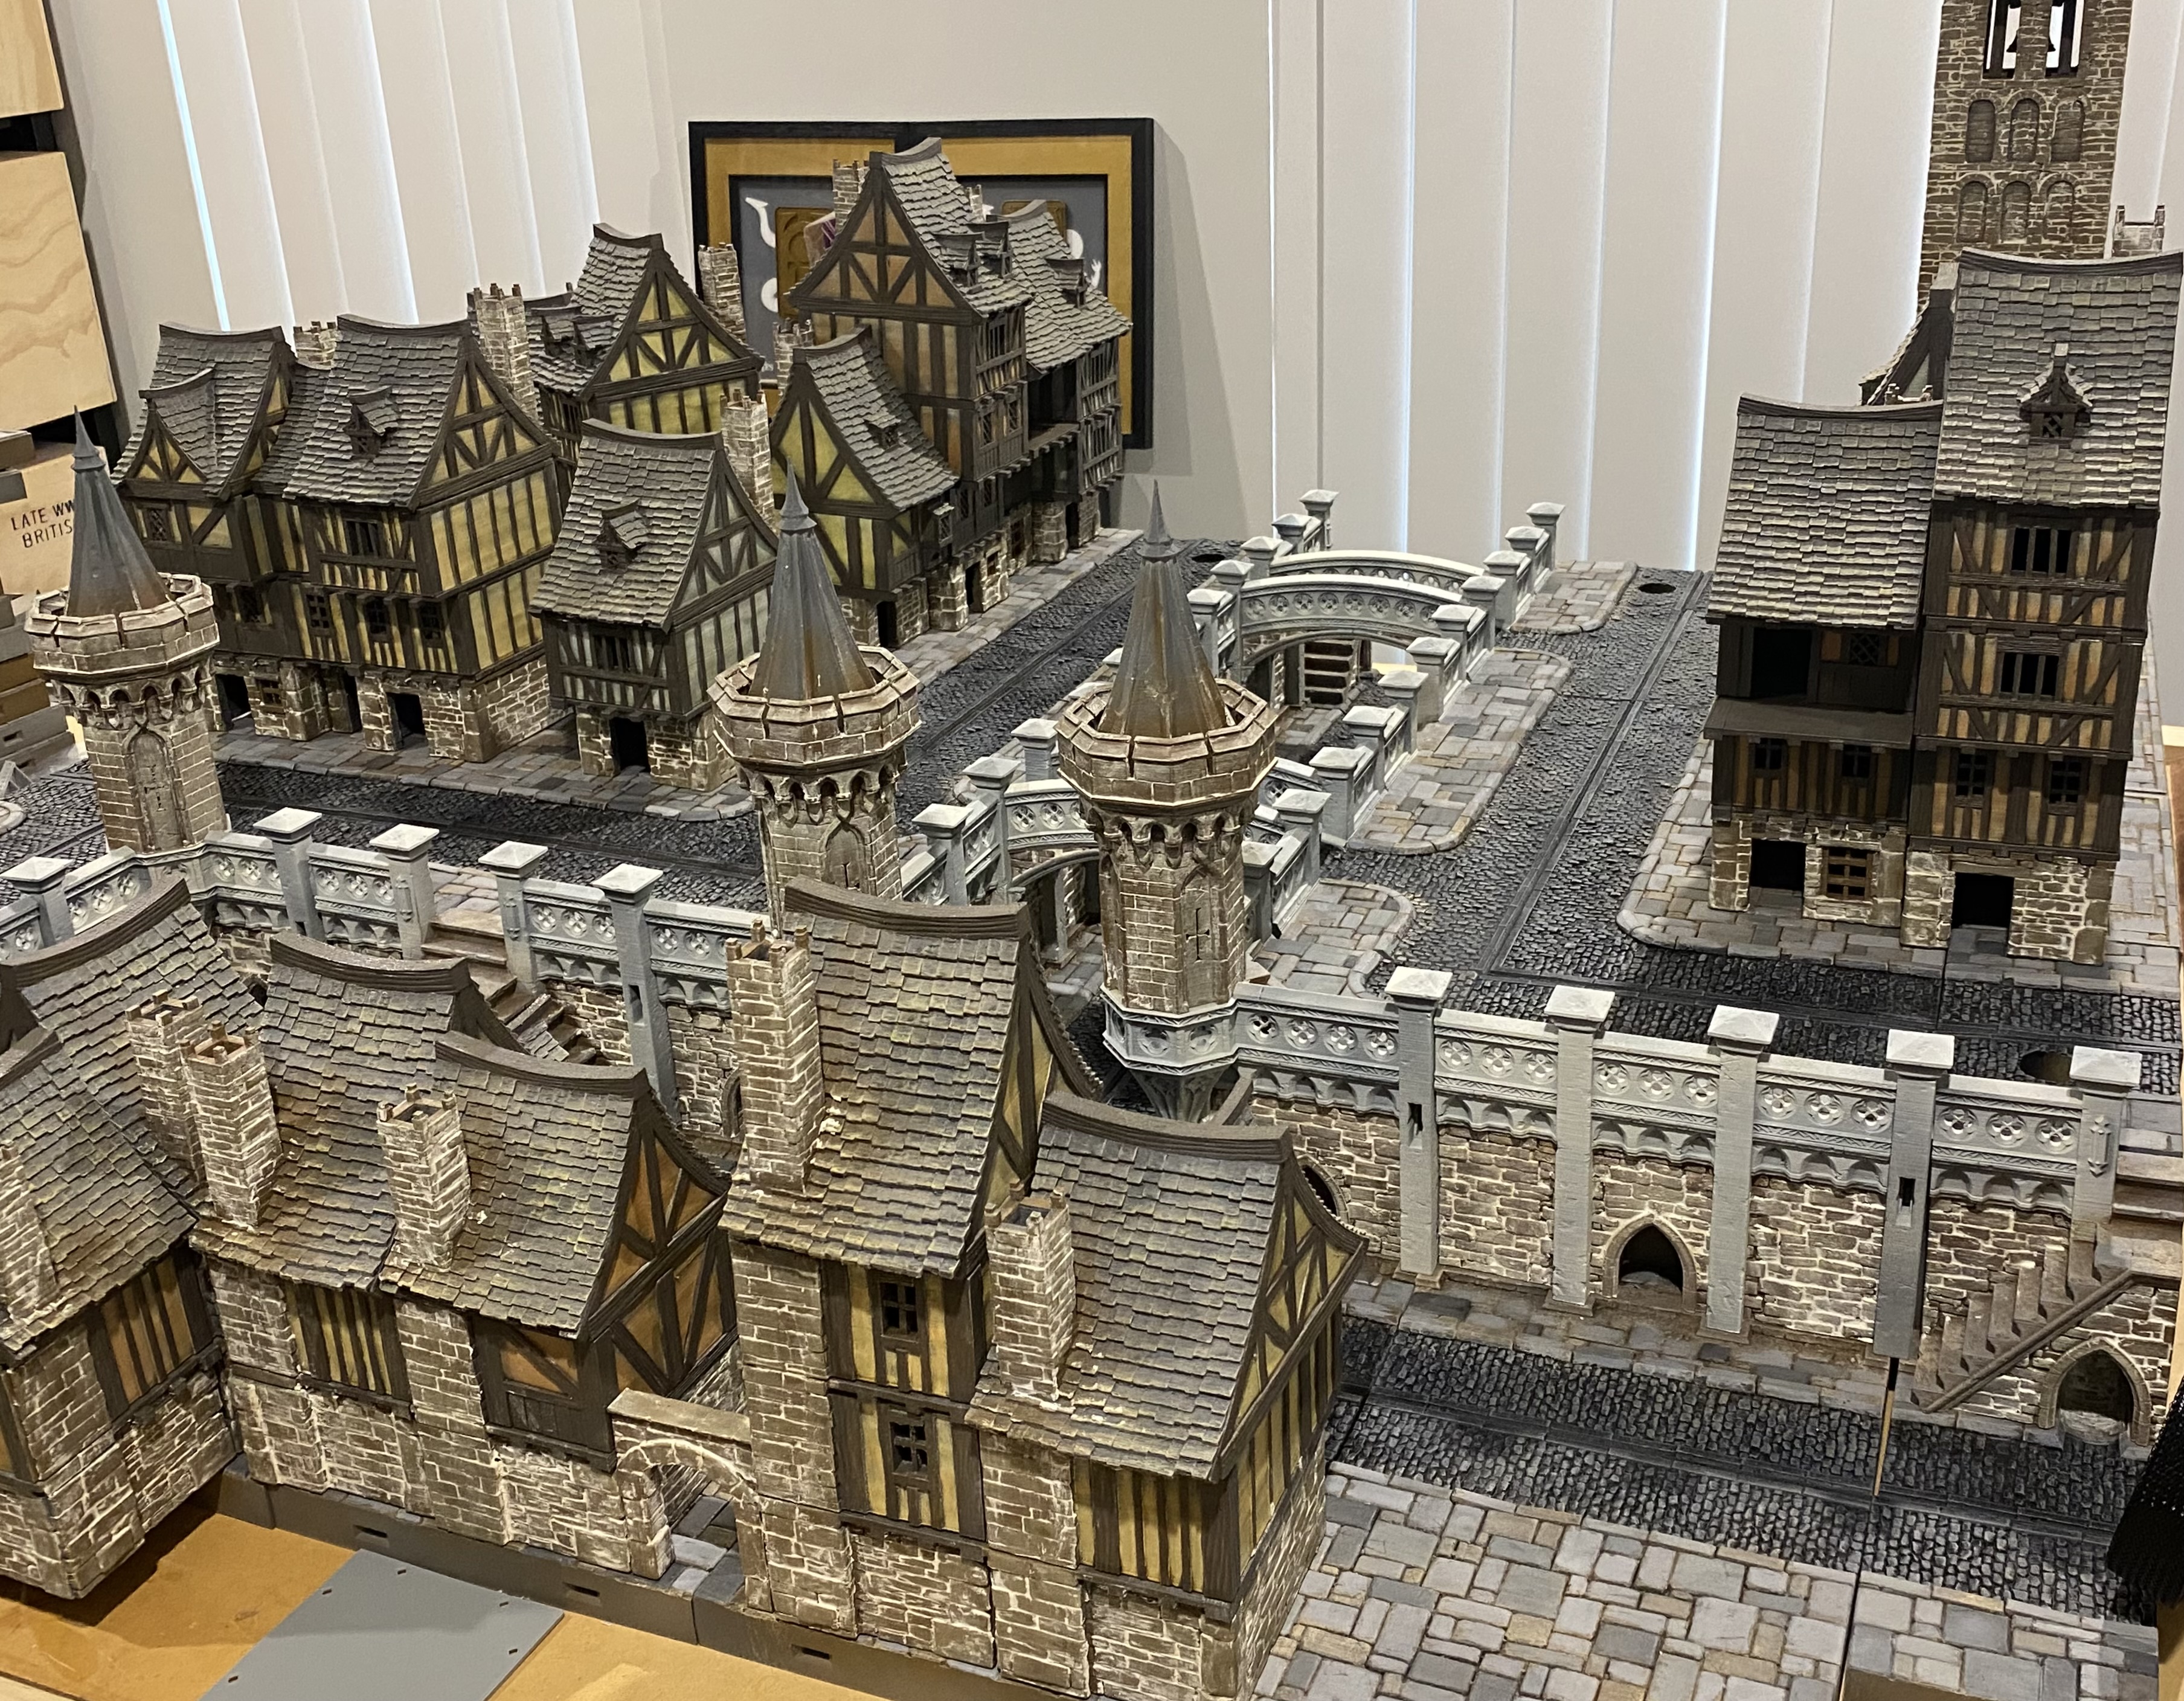
Aggressive expansion and small update.
I decided that I should make a few extra pieces so that I can rearrange the layout in different ways. This would also mean I can expand to a full 4′ x 6′ layout and have enough room to fit my Victorian Science Fiction Airport onto the board (once I actually finish that building, that is) and also increase the ‘slums area’, which I still have to make.
This would also mean I could add some more Fantasy style buildings to my collection in the future. It would be nice to add a tavern and wizards tower of some sort down the line.
 Still plenty more to do just to get the basic tabletop done, but I'm getting there.
I also found a little time to do some general tweaks here and there and fix up a few bits that were not quite sitting right for me. At the moment the board is all ‘unclipped’. Once I insert the clips it pulls the whole thing together and closes all the gaps. Once I have got all the individual tiles to the same level, I can give them some weathering to help tie them all together and then start clipping them together so I can start making some progress on all the extra bits to go with it.
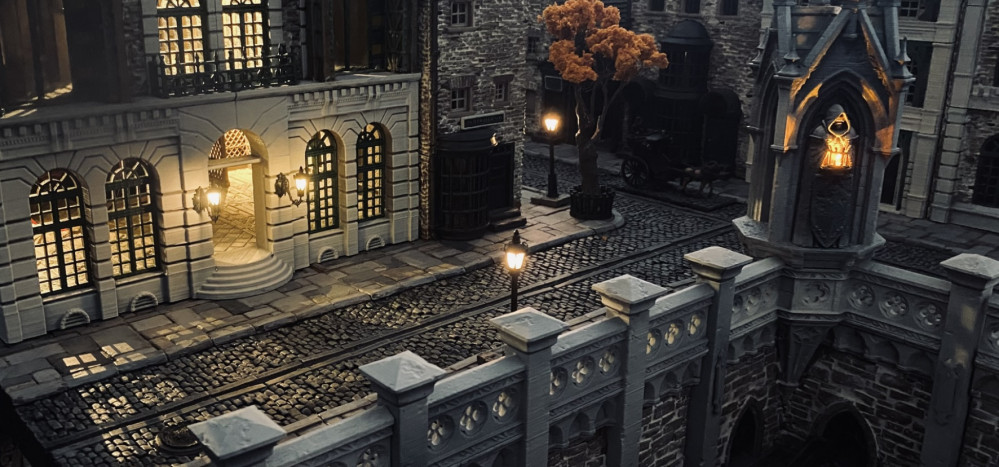
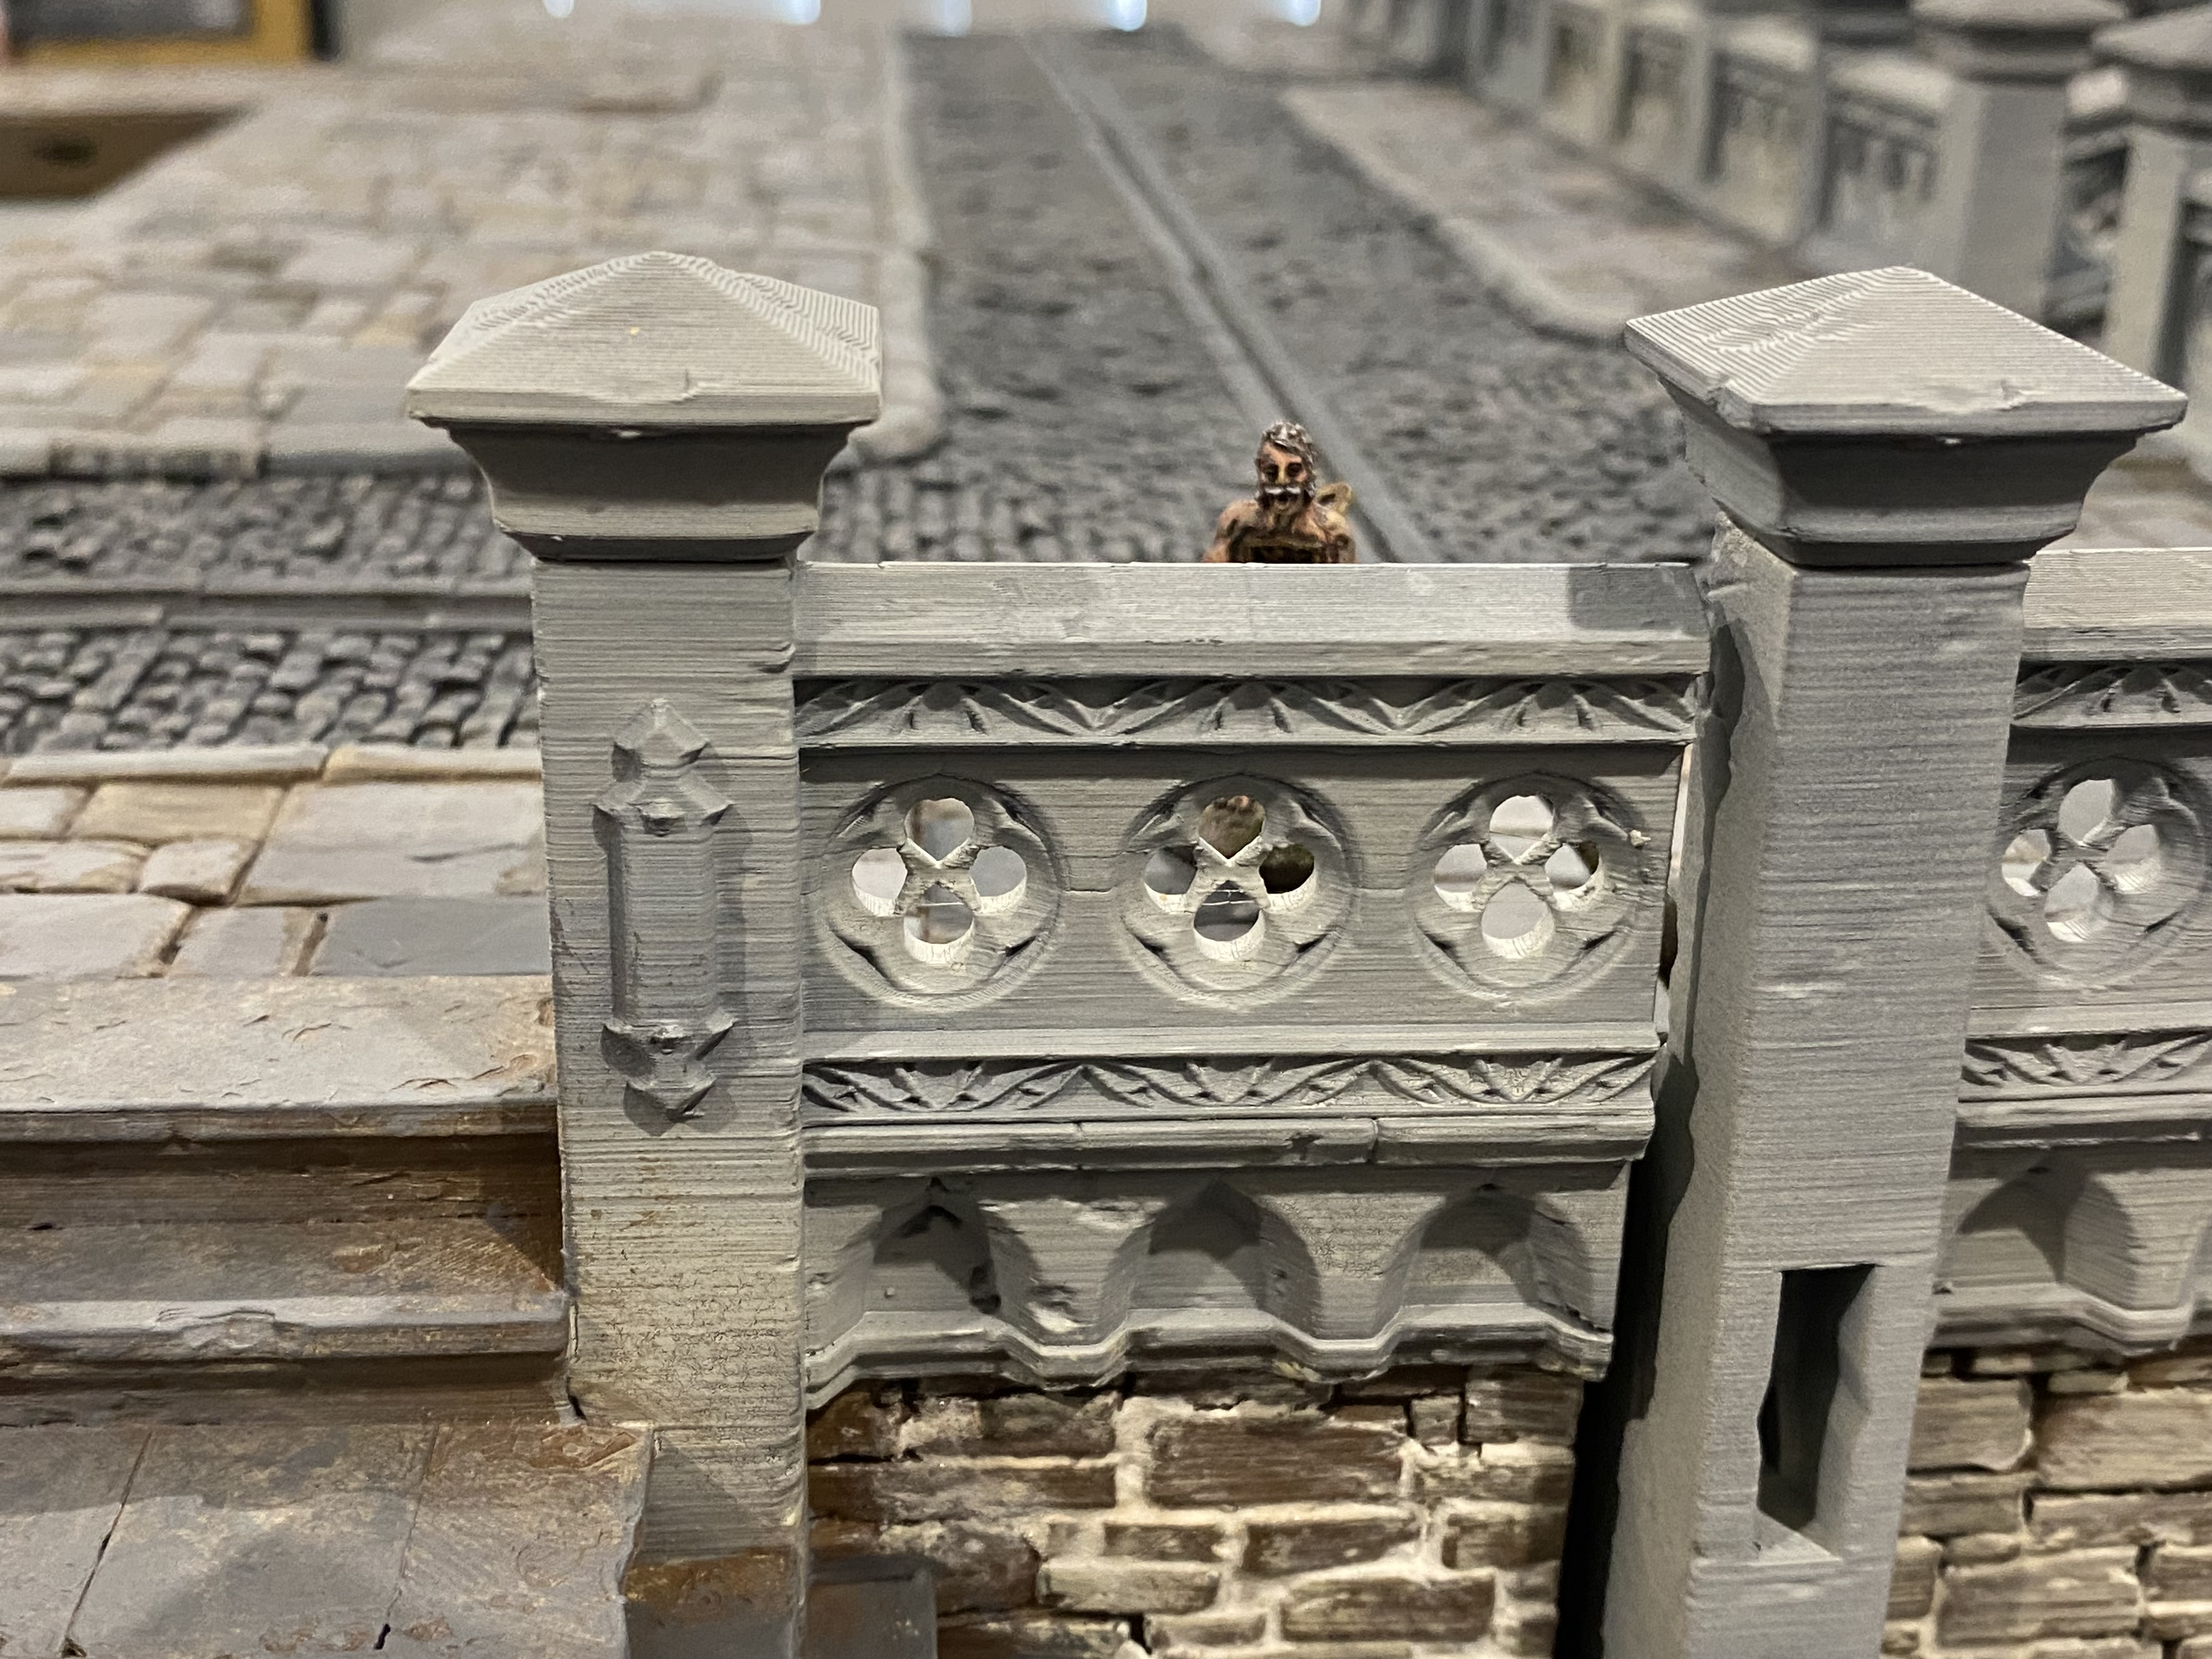
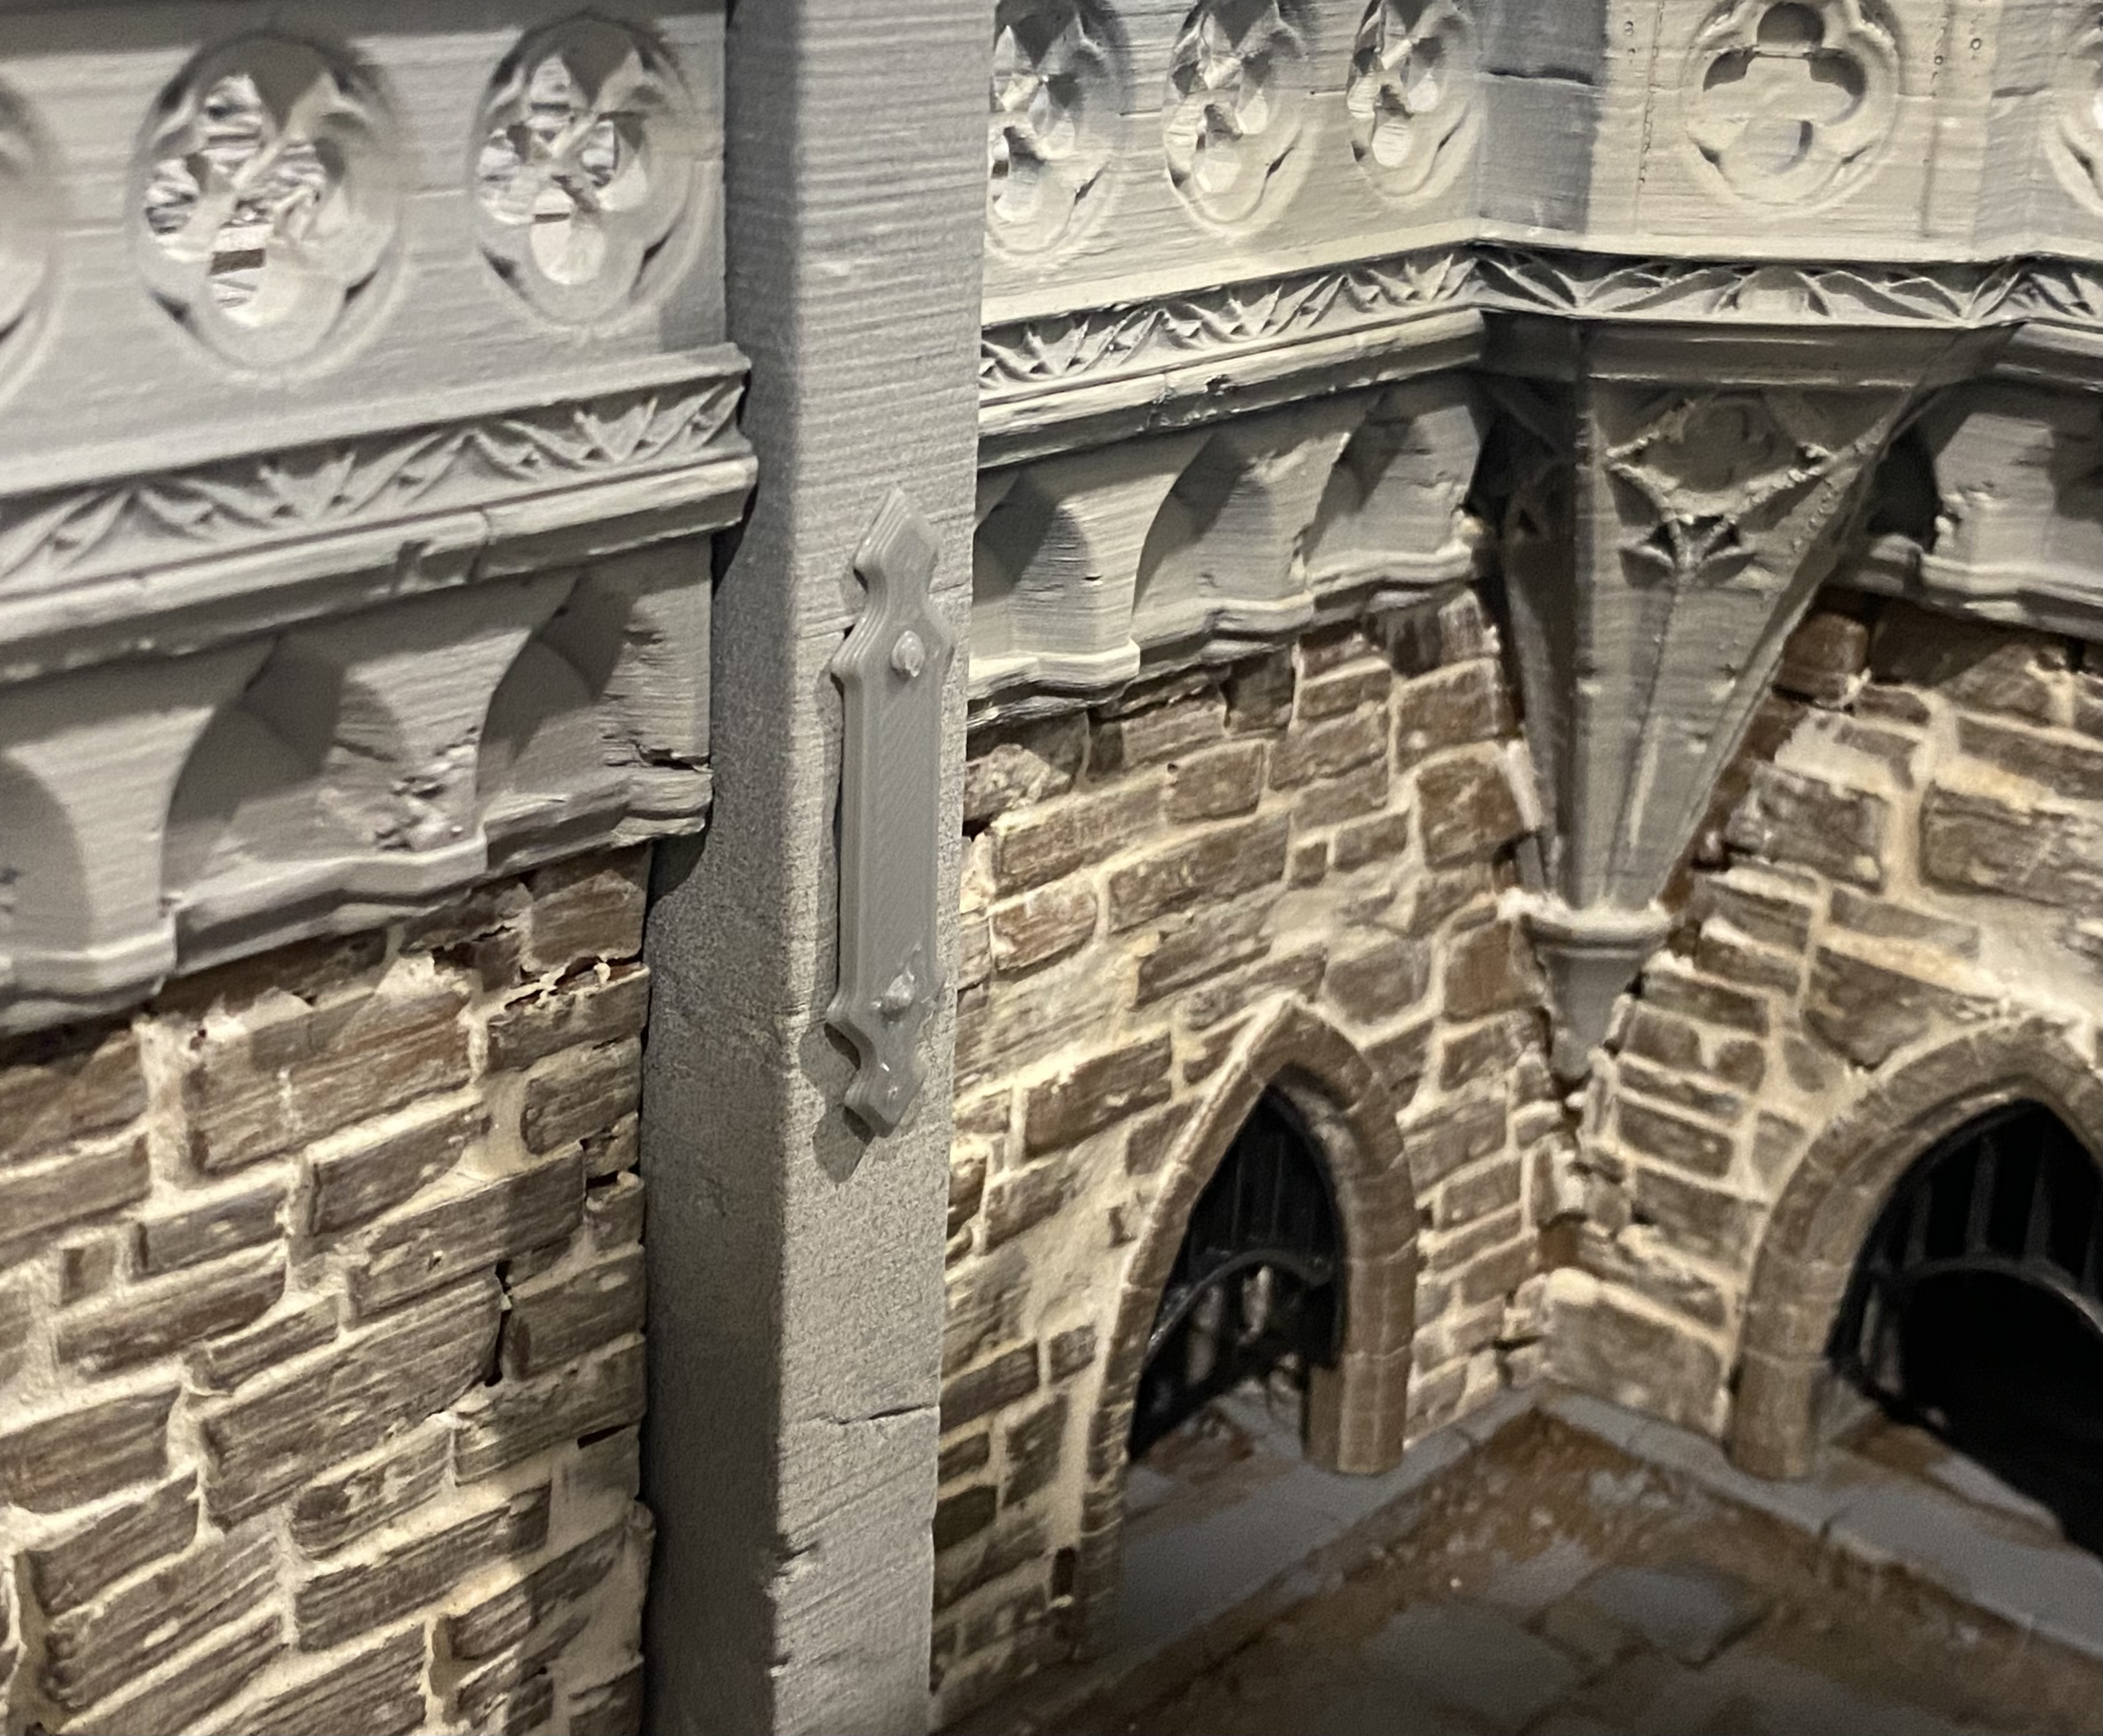
 I have repainted the cobblestone road, added small grills to all the arches built into the walls, repainted the curb stones a slightly lighter shade, which I think helps separate the paving from the road sections better. I also inserted batteries into the pillars for the lighting.
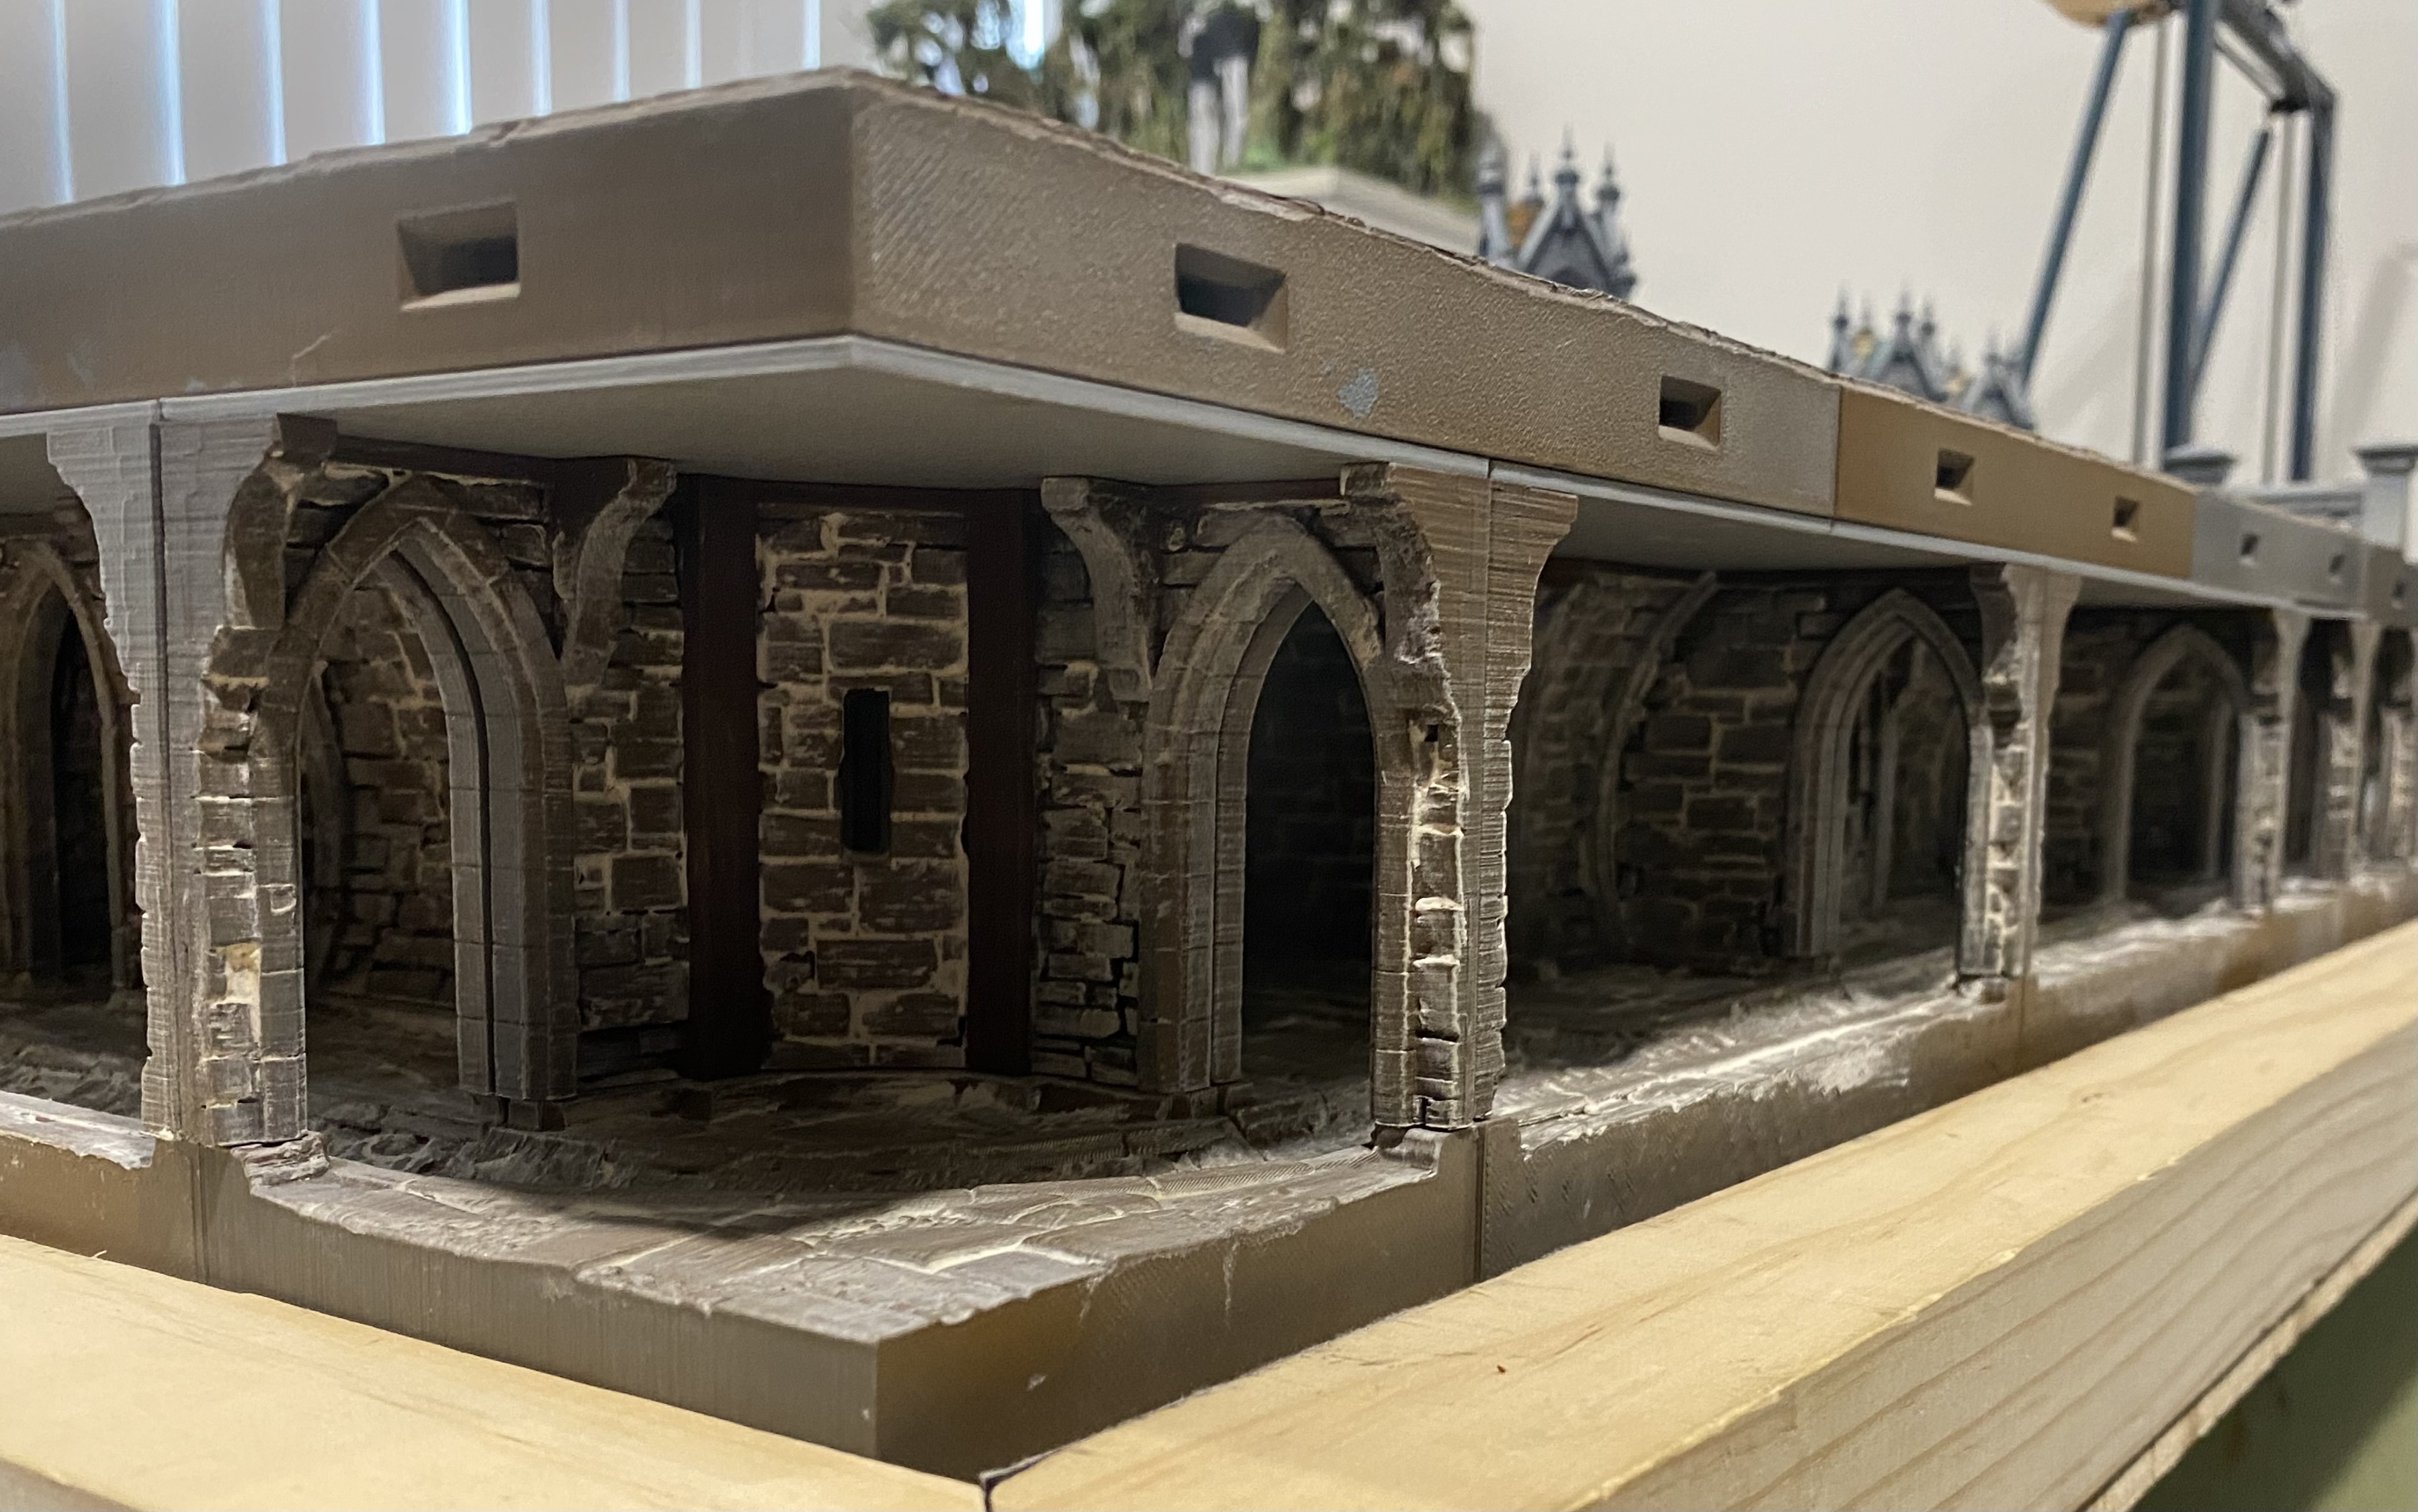 A view along one section of the sewer system that runs around the outside of the board, and will eventually expand into the board under the surface. I created small thin lift off roofs for all the sewer sections so that I can still use them without all the stuff on top and have a similar 'fog of war' effect as I have for my Dungeonalia project.
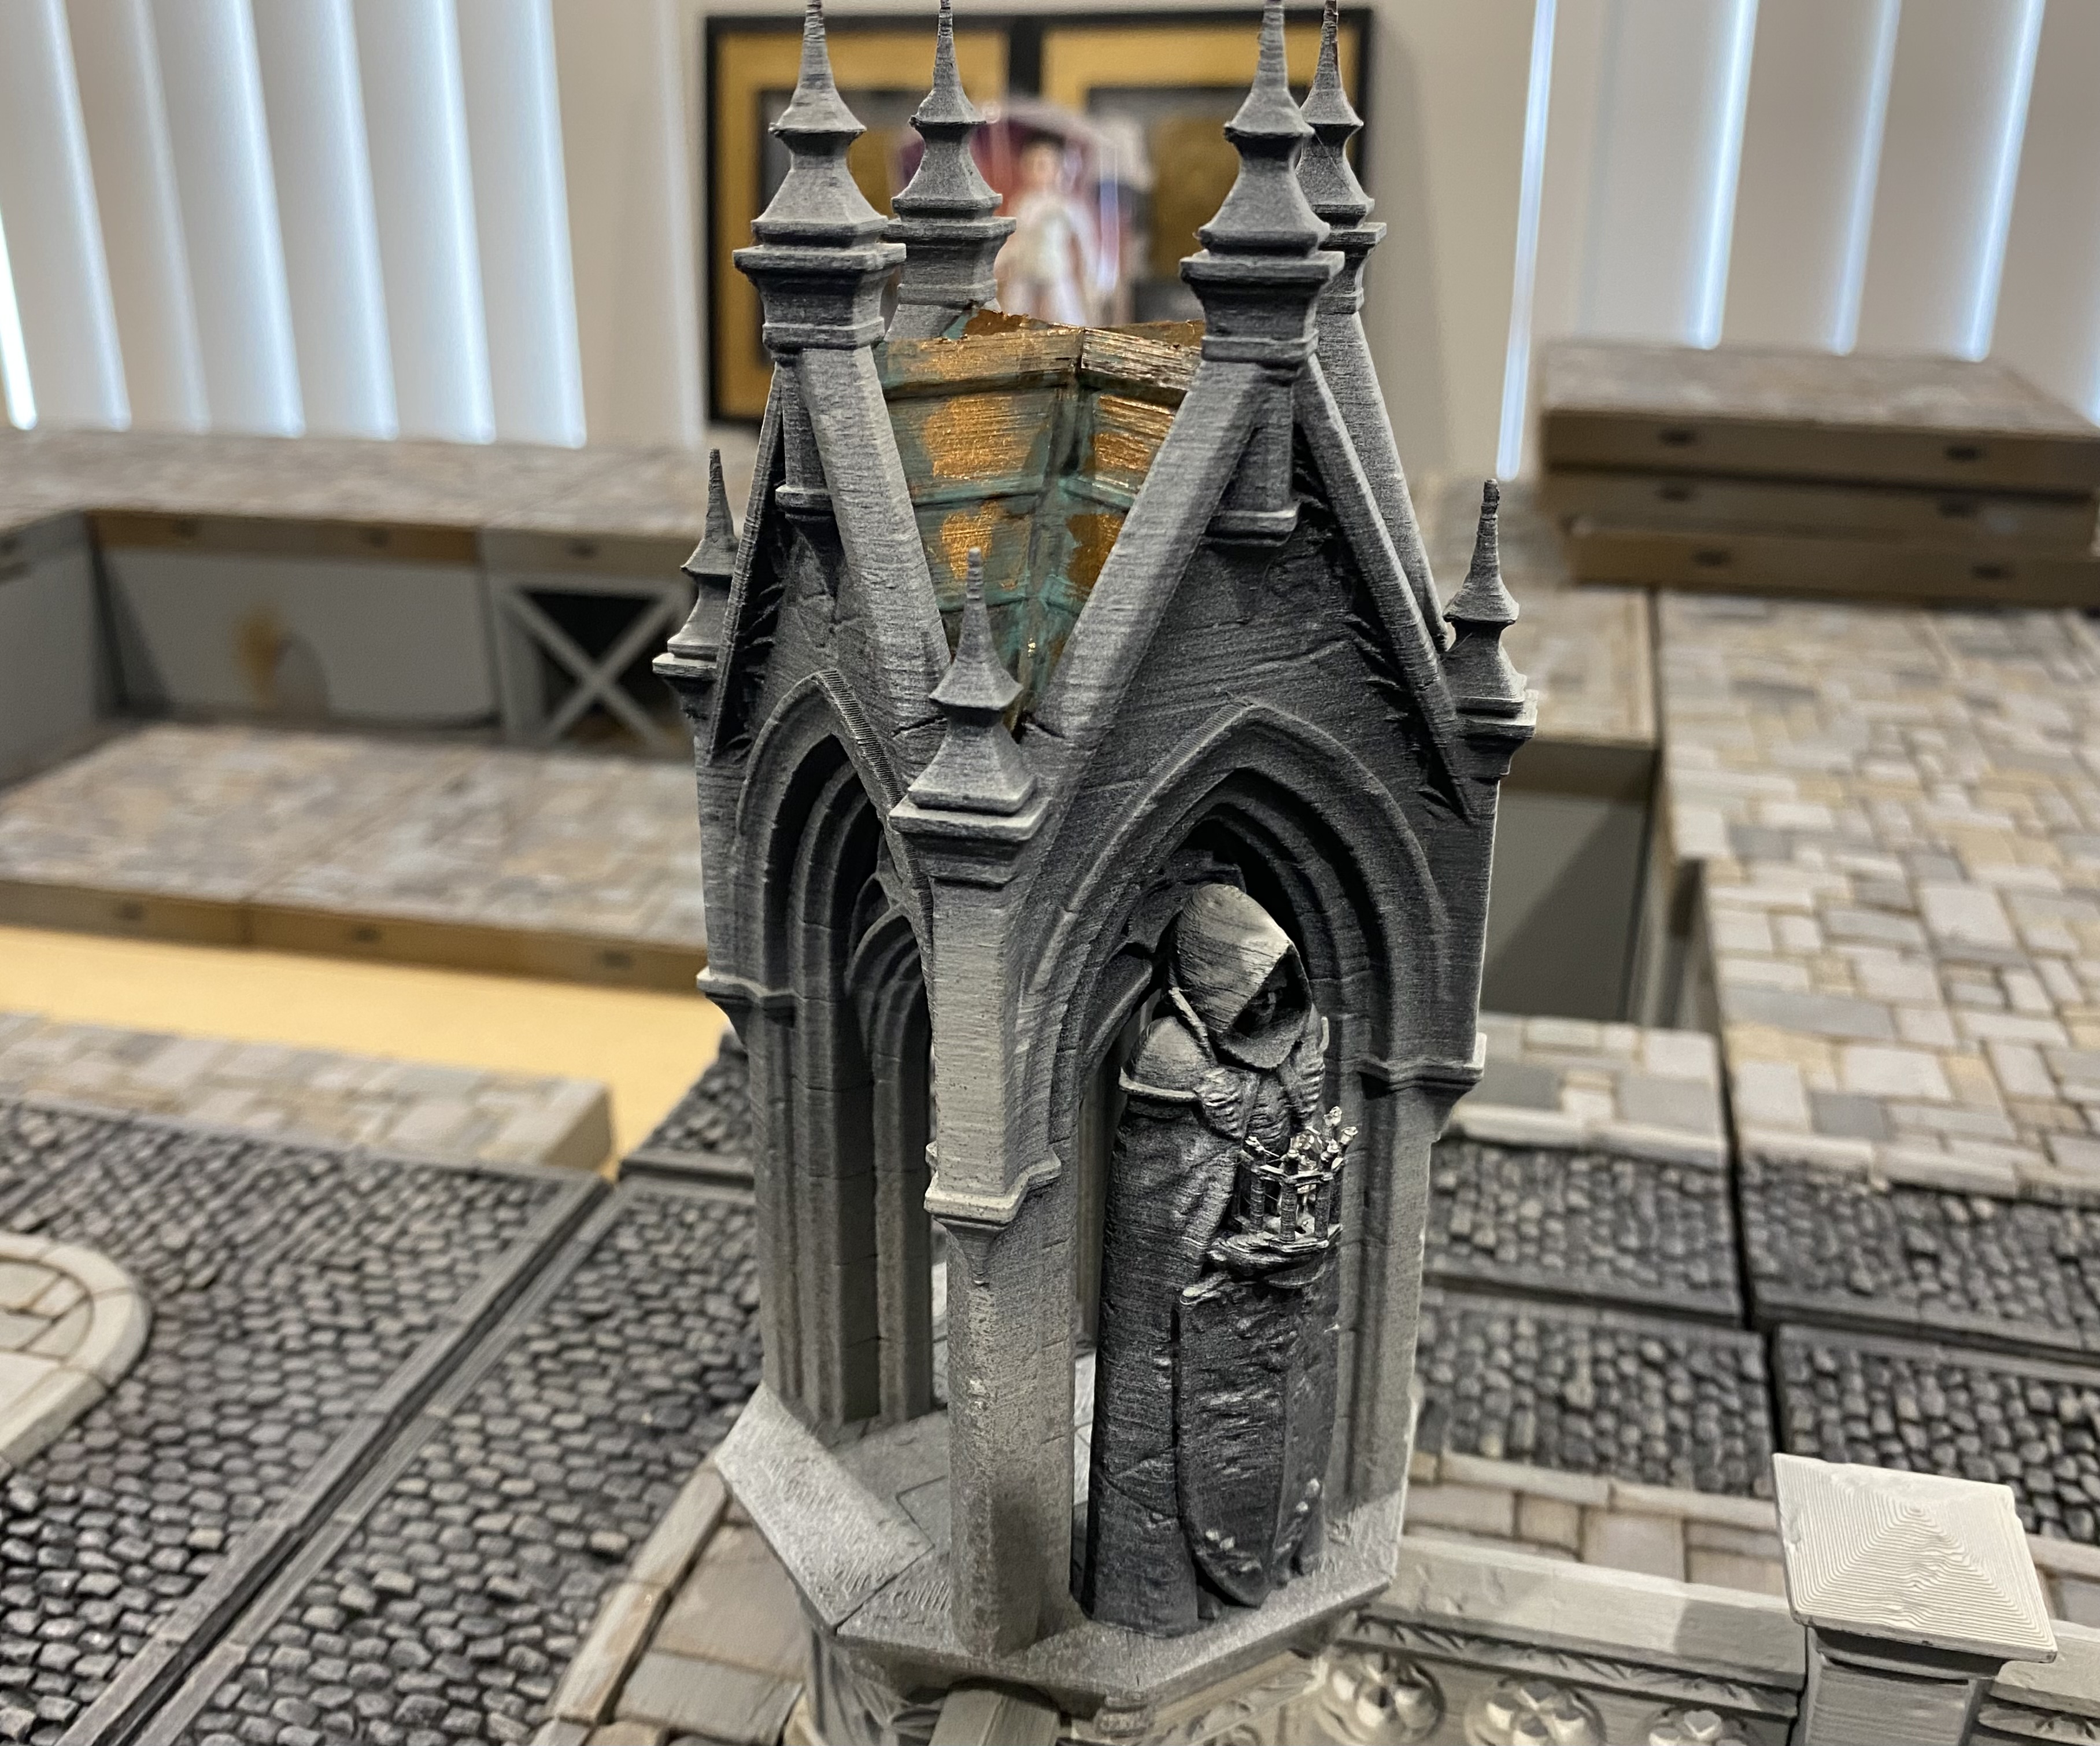 I painted the roofs of my Gothic corner pieces to match the copper roofs of my Gaslight buildings
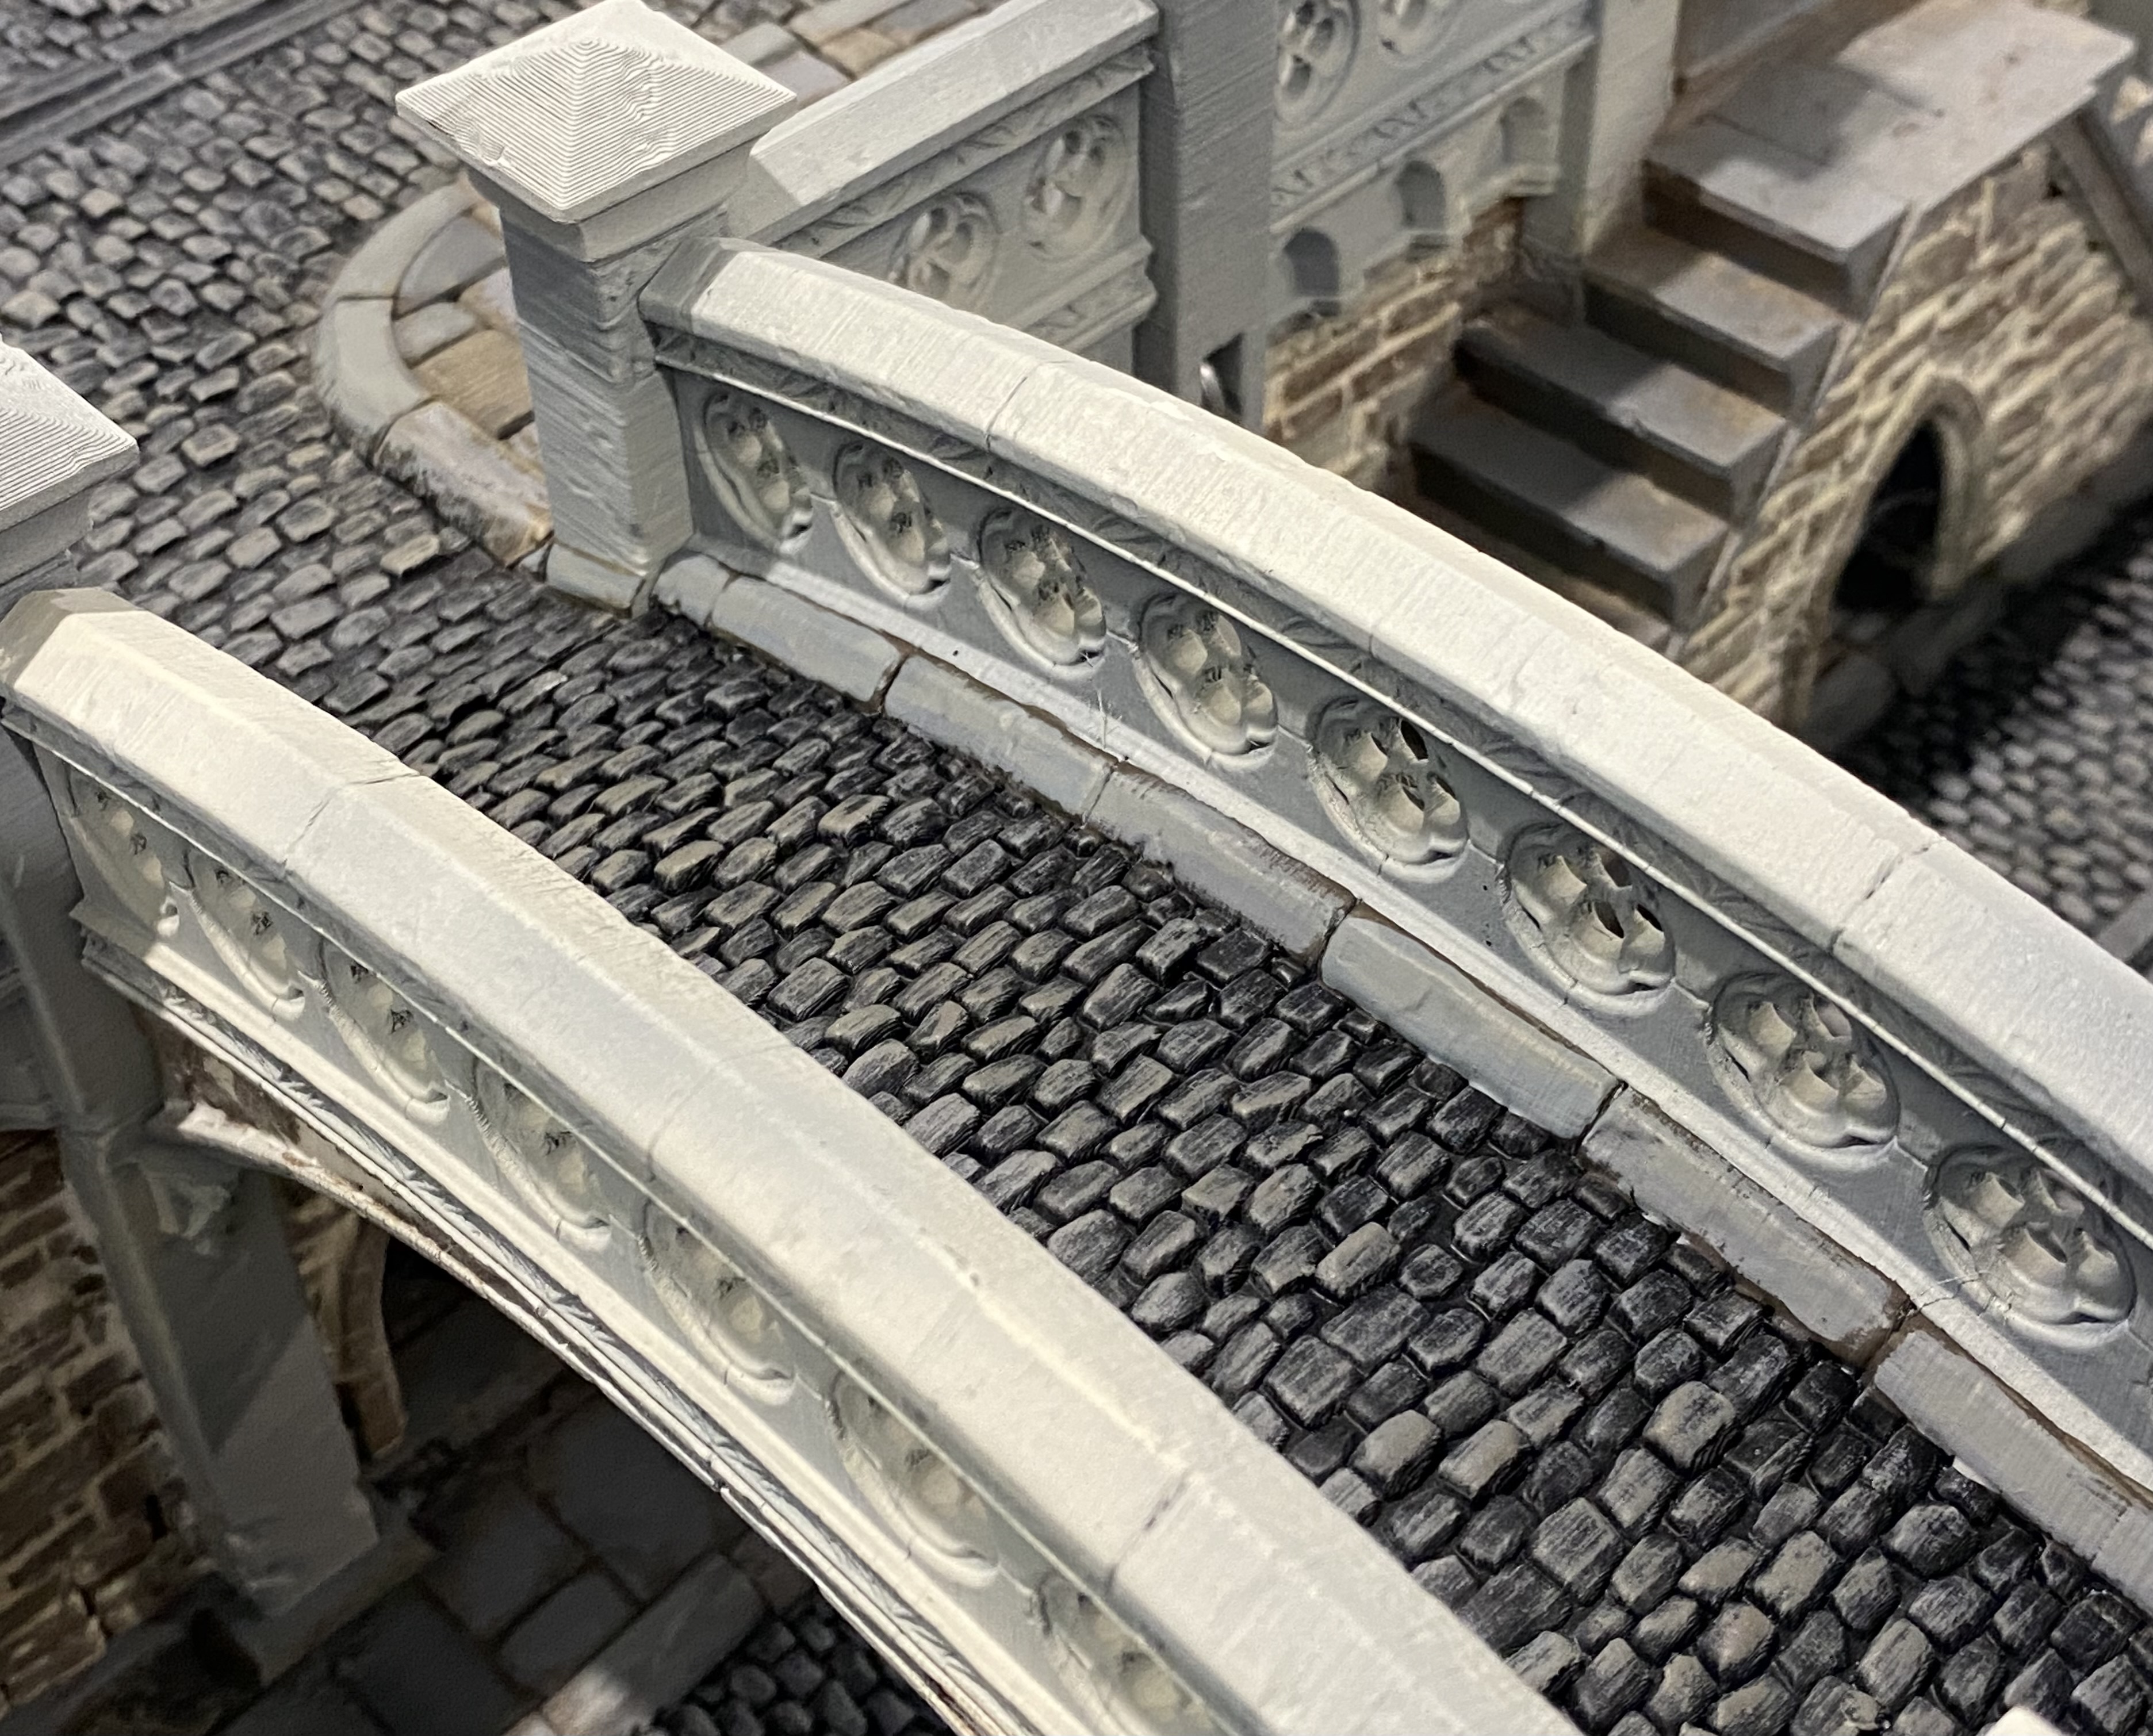 I also painted the curb stones going over the bridges and made the steps from the lower to upper levels more grey in colour.
 Tower tops and light assembly
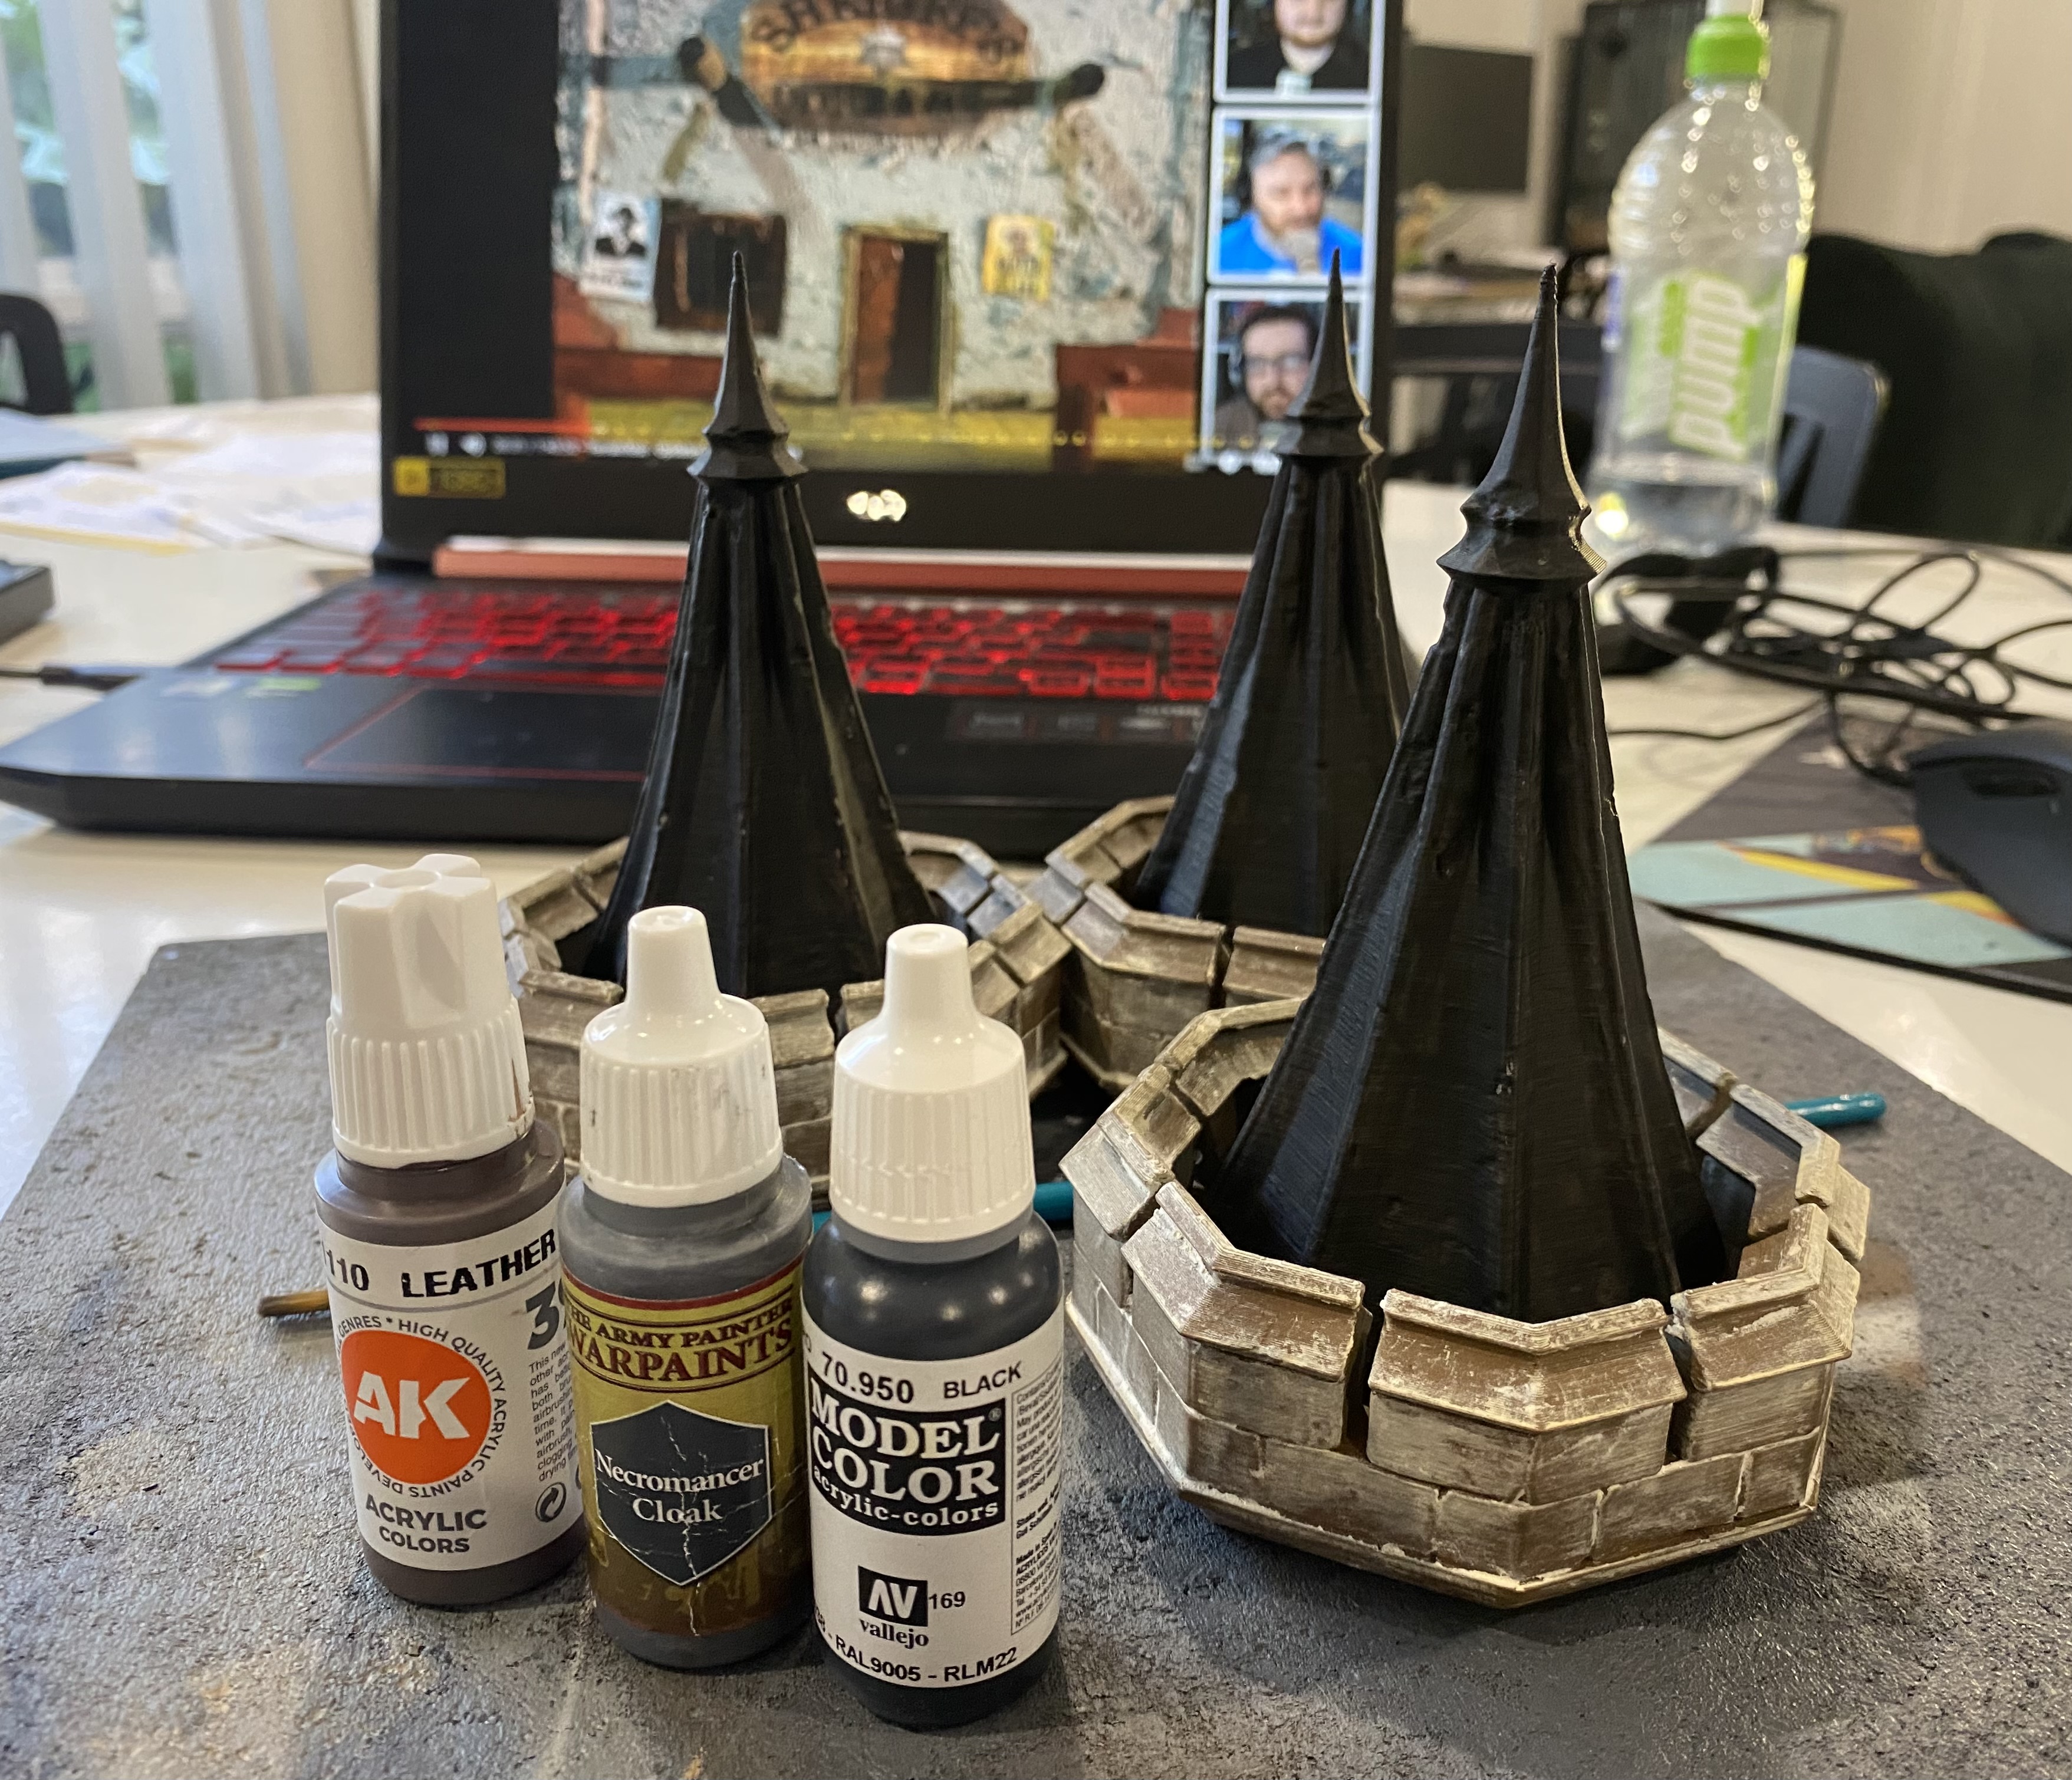
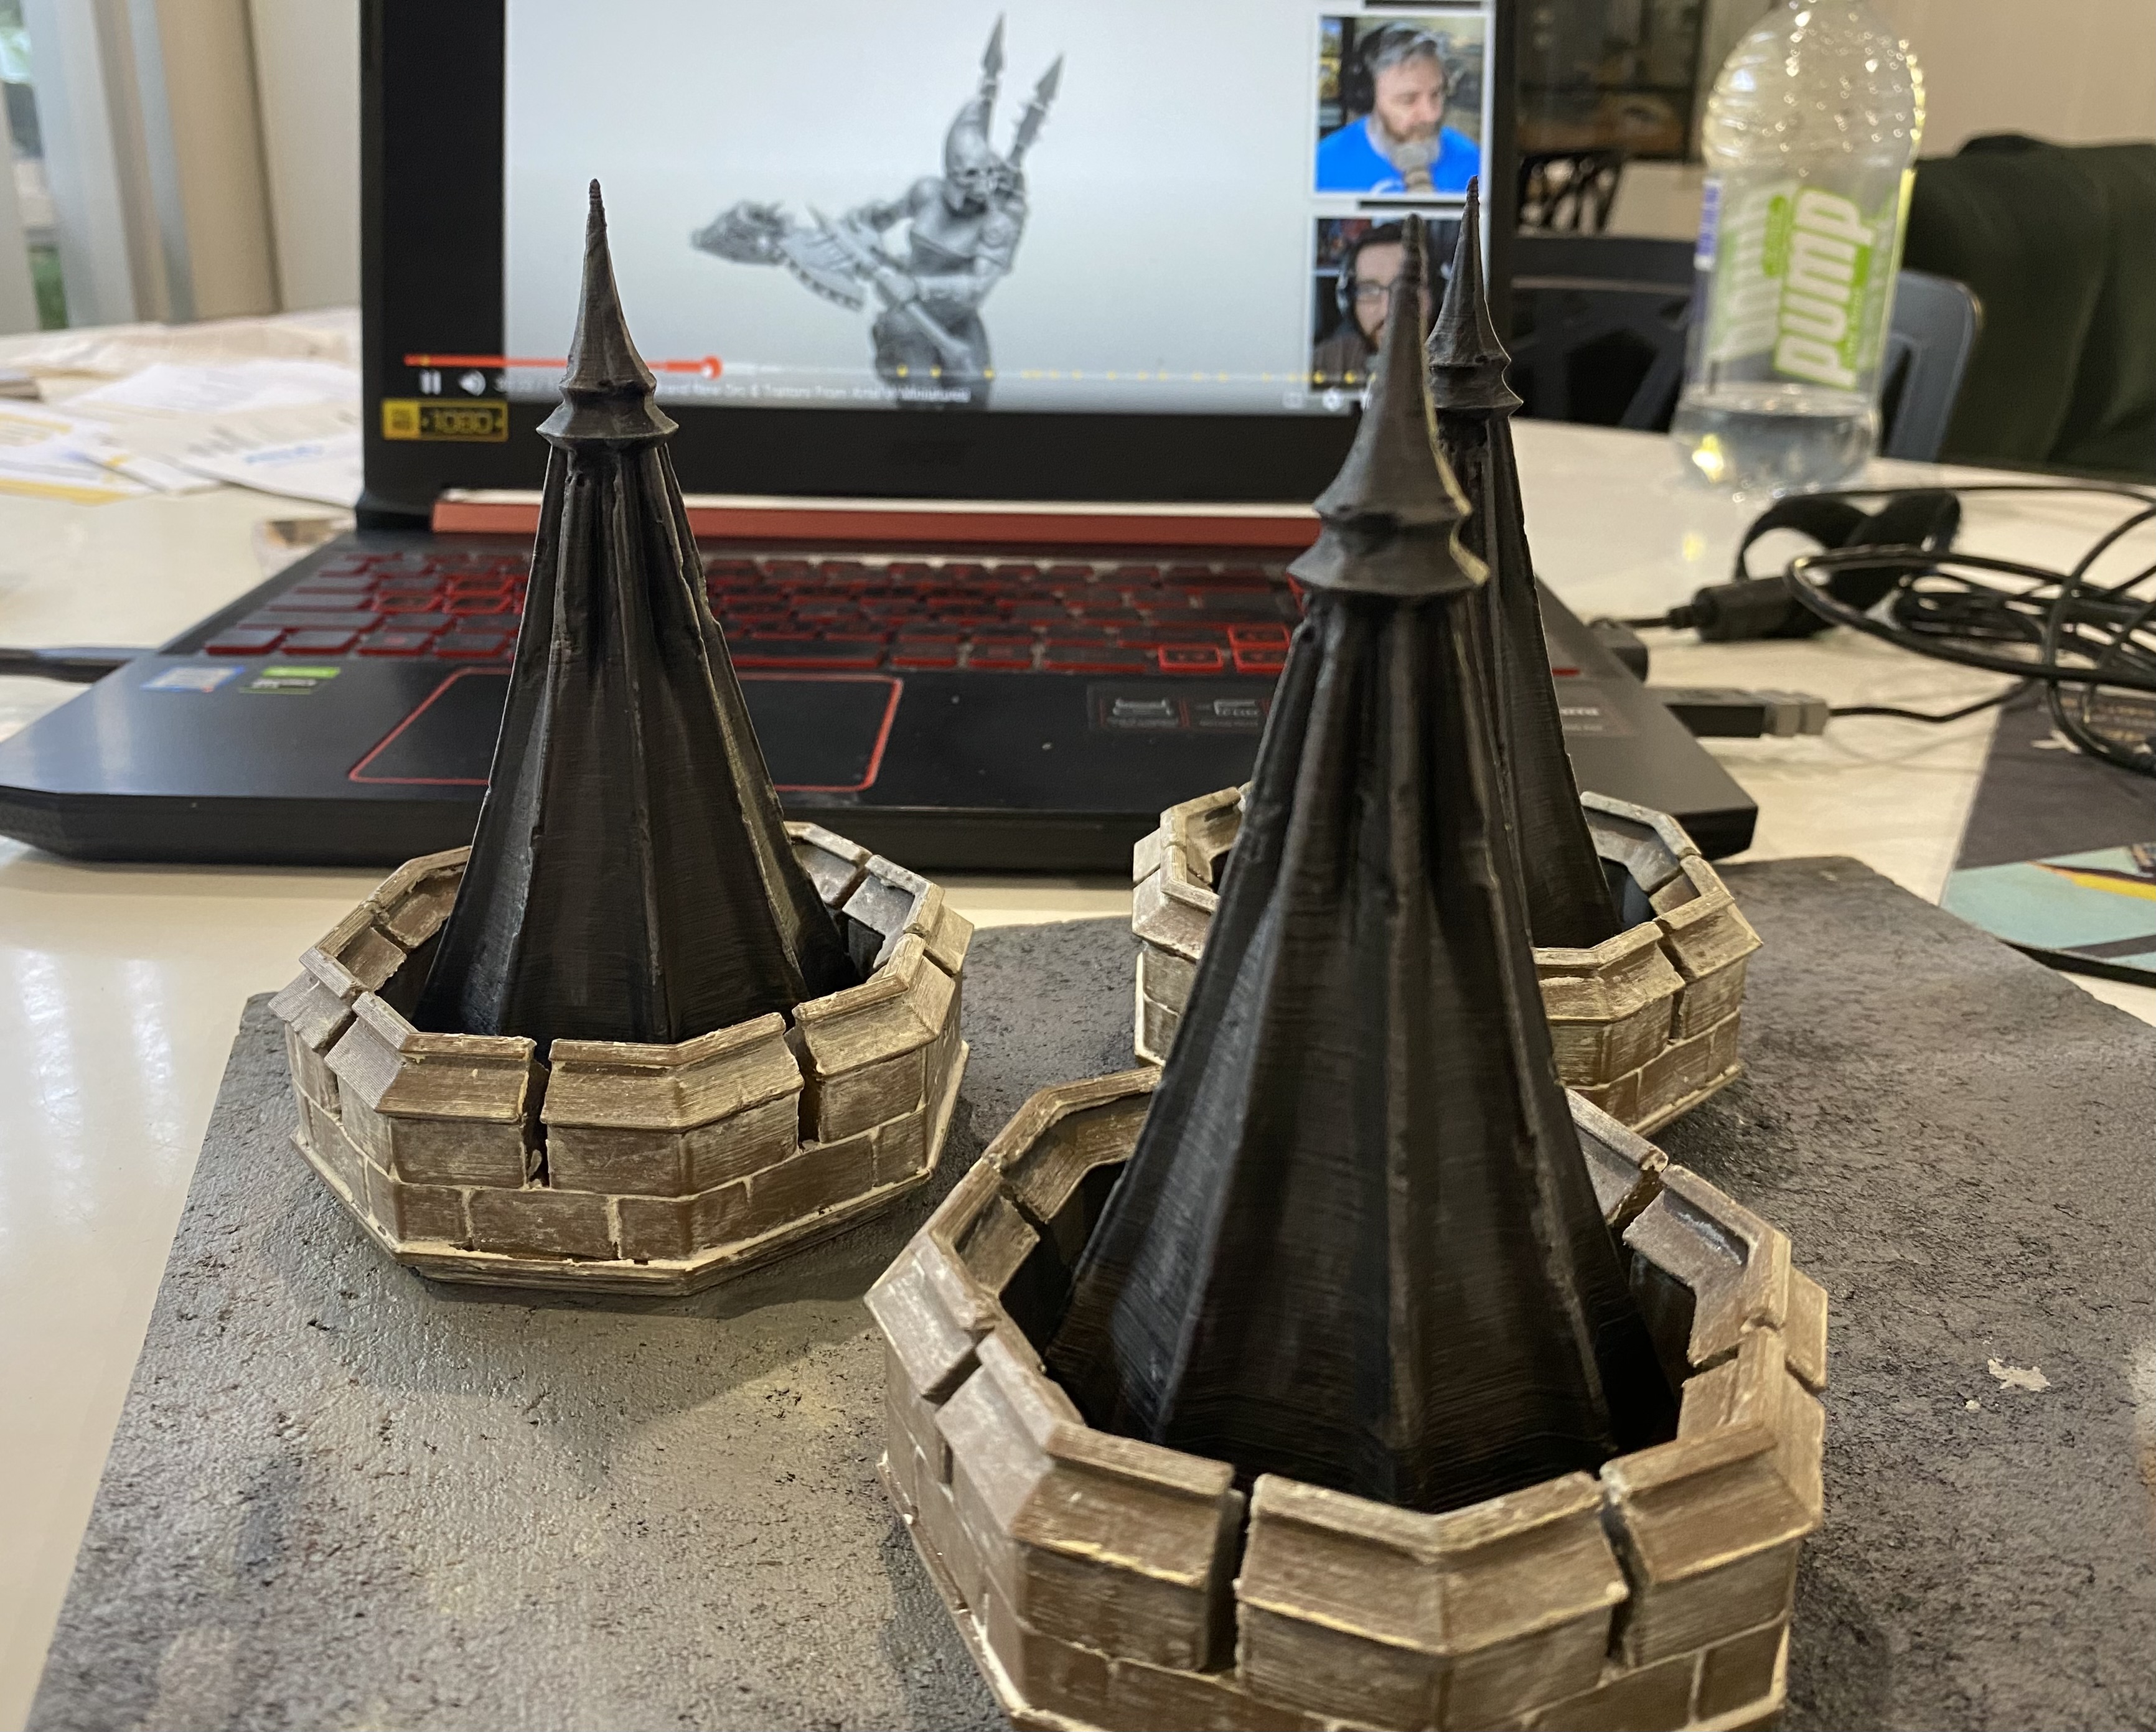
I quickly painted up the tower tops using a mix of black, brown and grey paints and a kid’s craft brush. I kind of wet-brushed it over and mixed it up on the model with my finger to create a weather and worn look. I like my terrain to look a bit rustic.
For the lighting, I have two ideas in mind. One for the fantasy setting and one for the Victorian setting.
I used 3D-printed elements with a 3v yellow flicker bulb to create a plug that can fit into the collum and sewer walls. I then went onto a 3D building program and quickly designed some plugs that I could use to replace the lights and that would also match the aesthetic of the table.
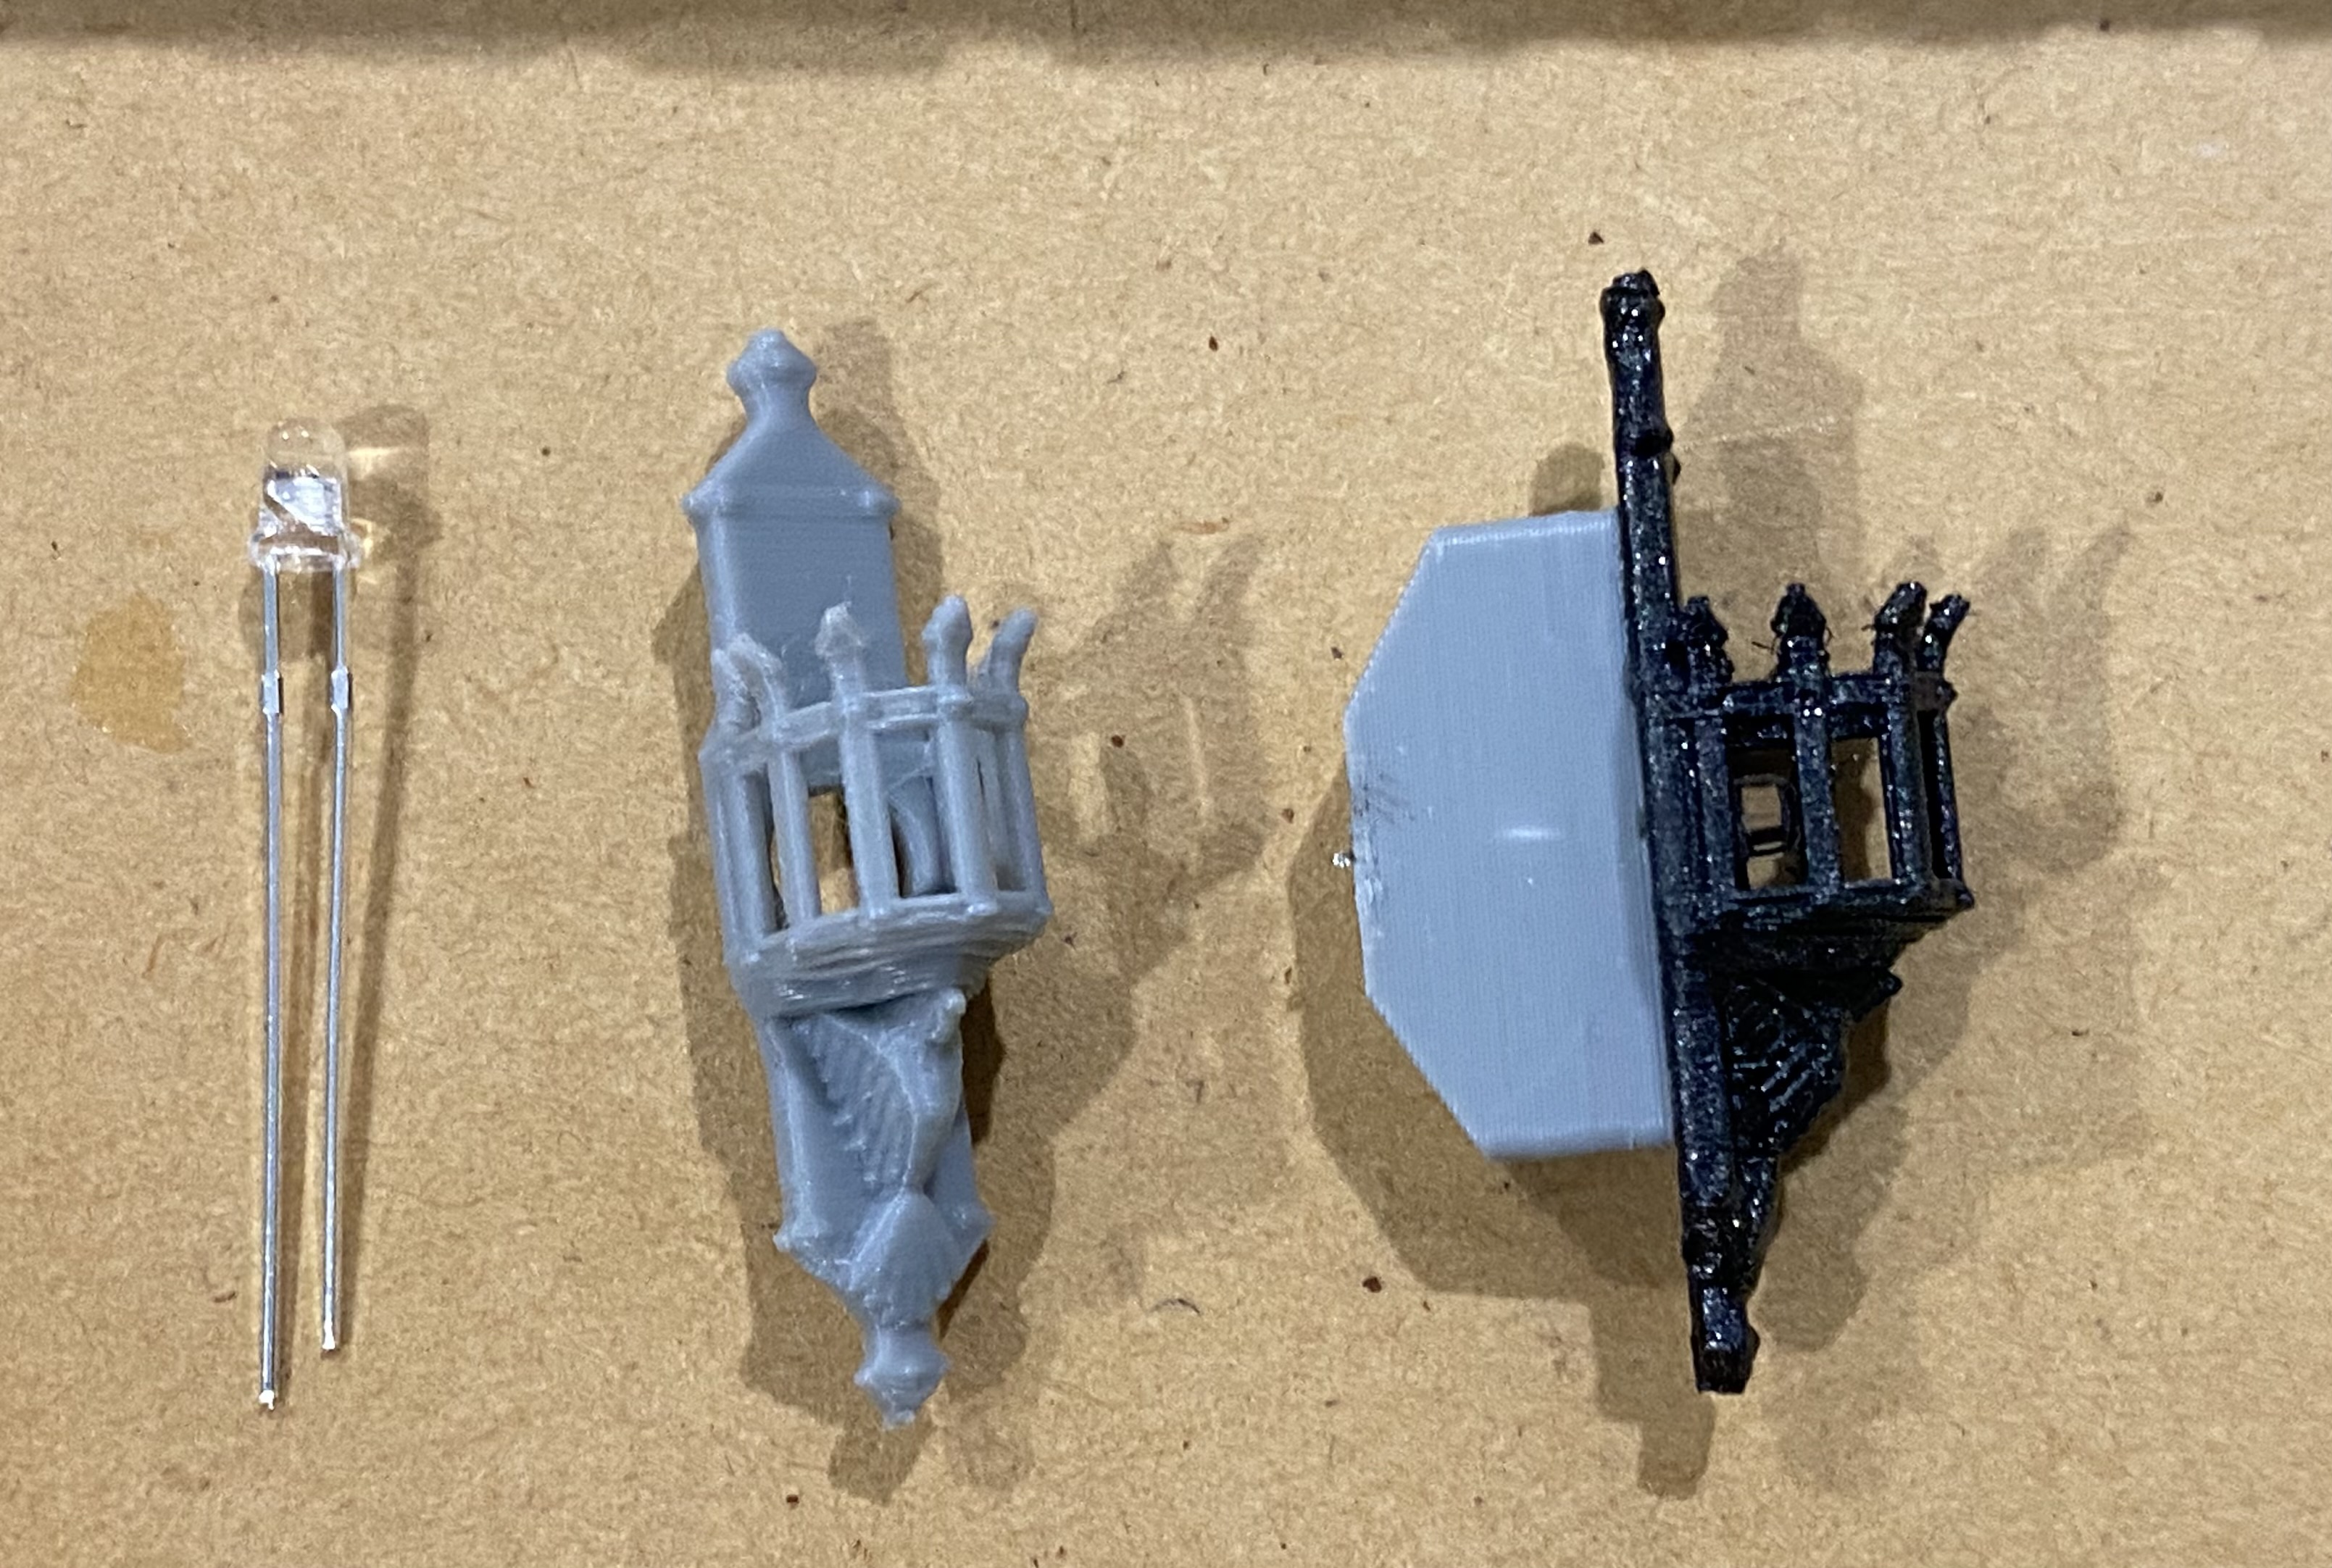
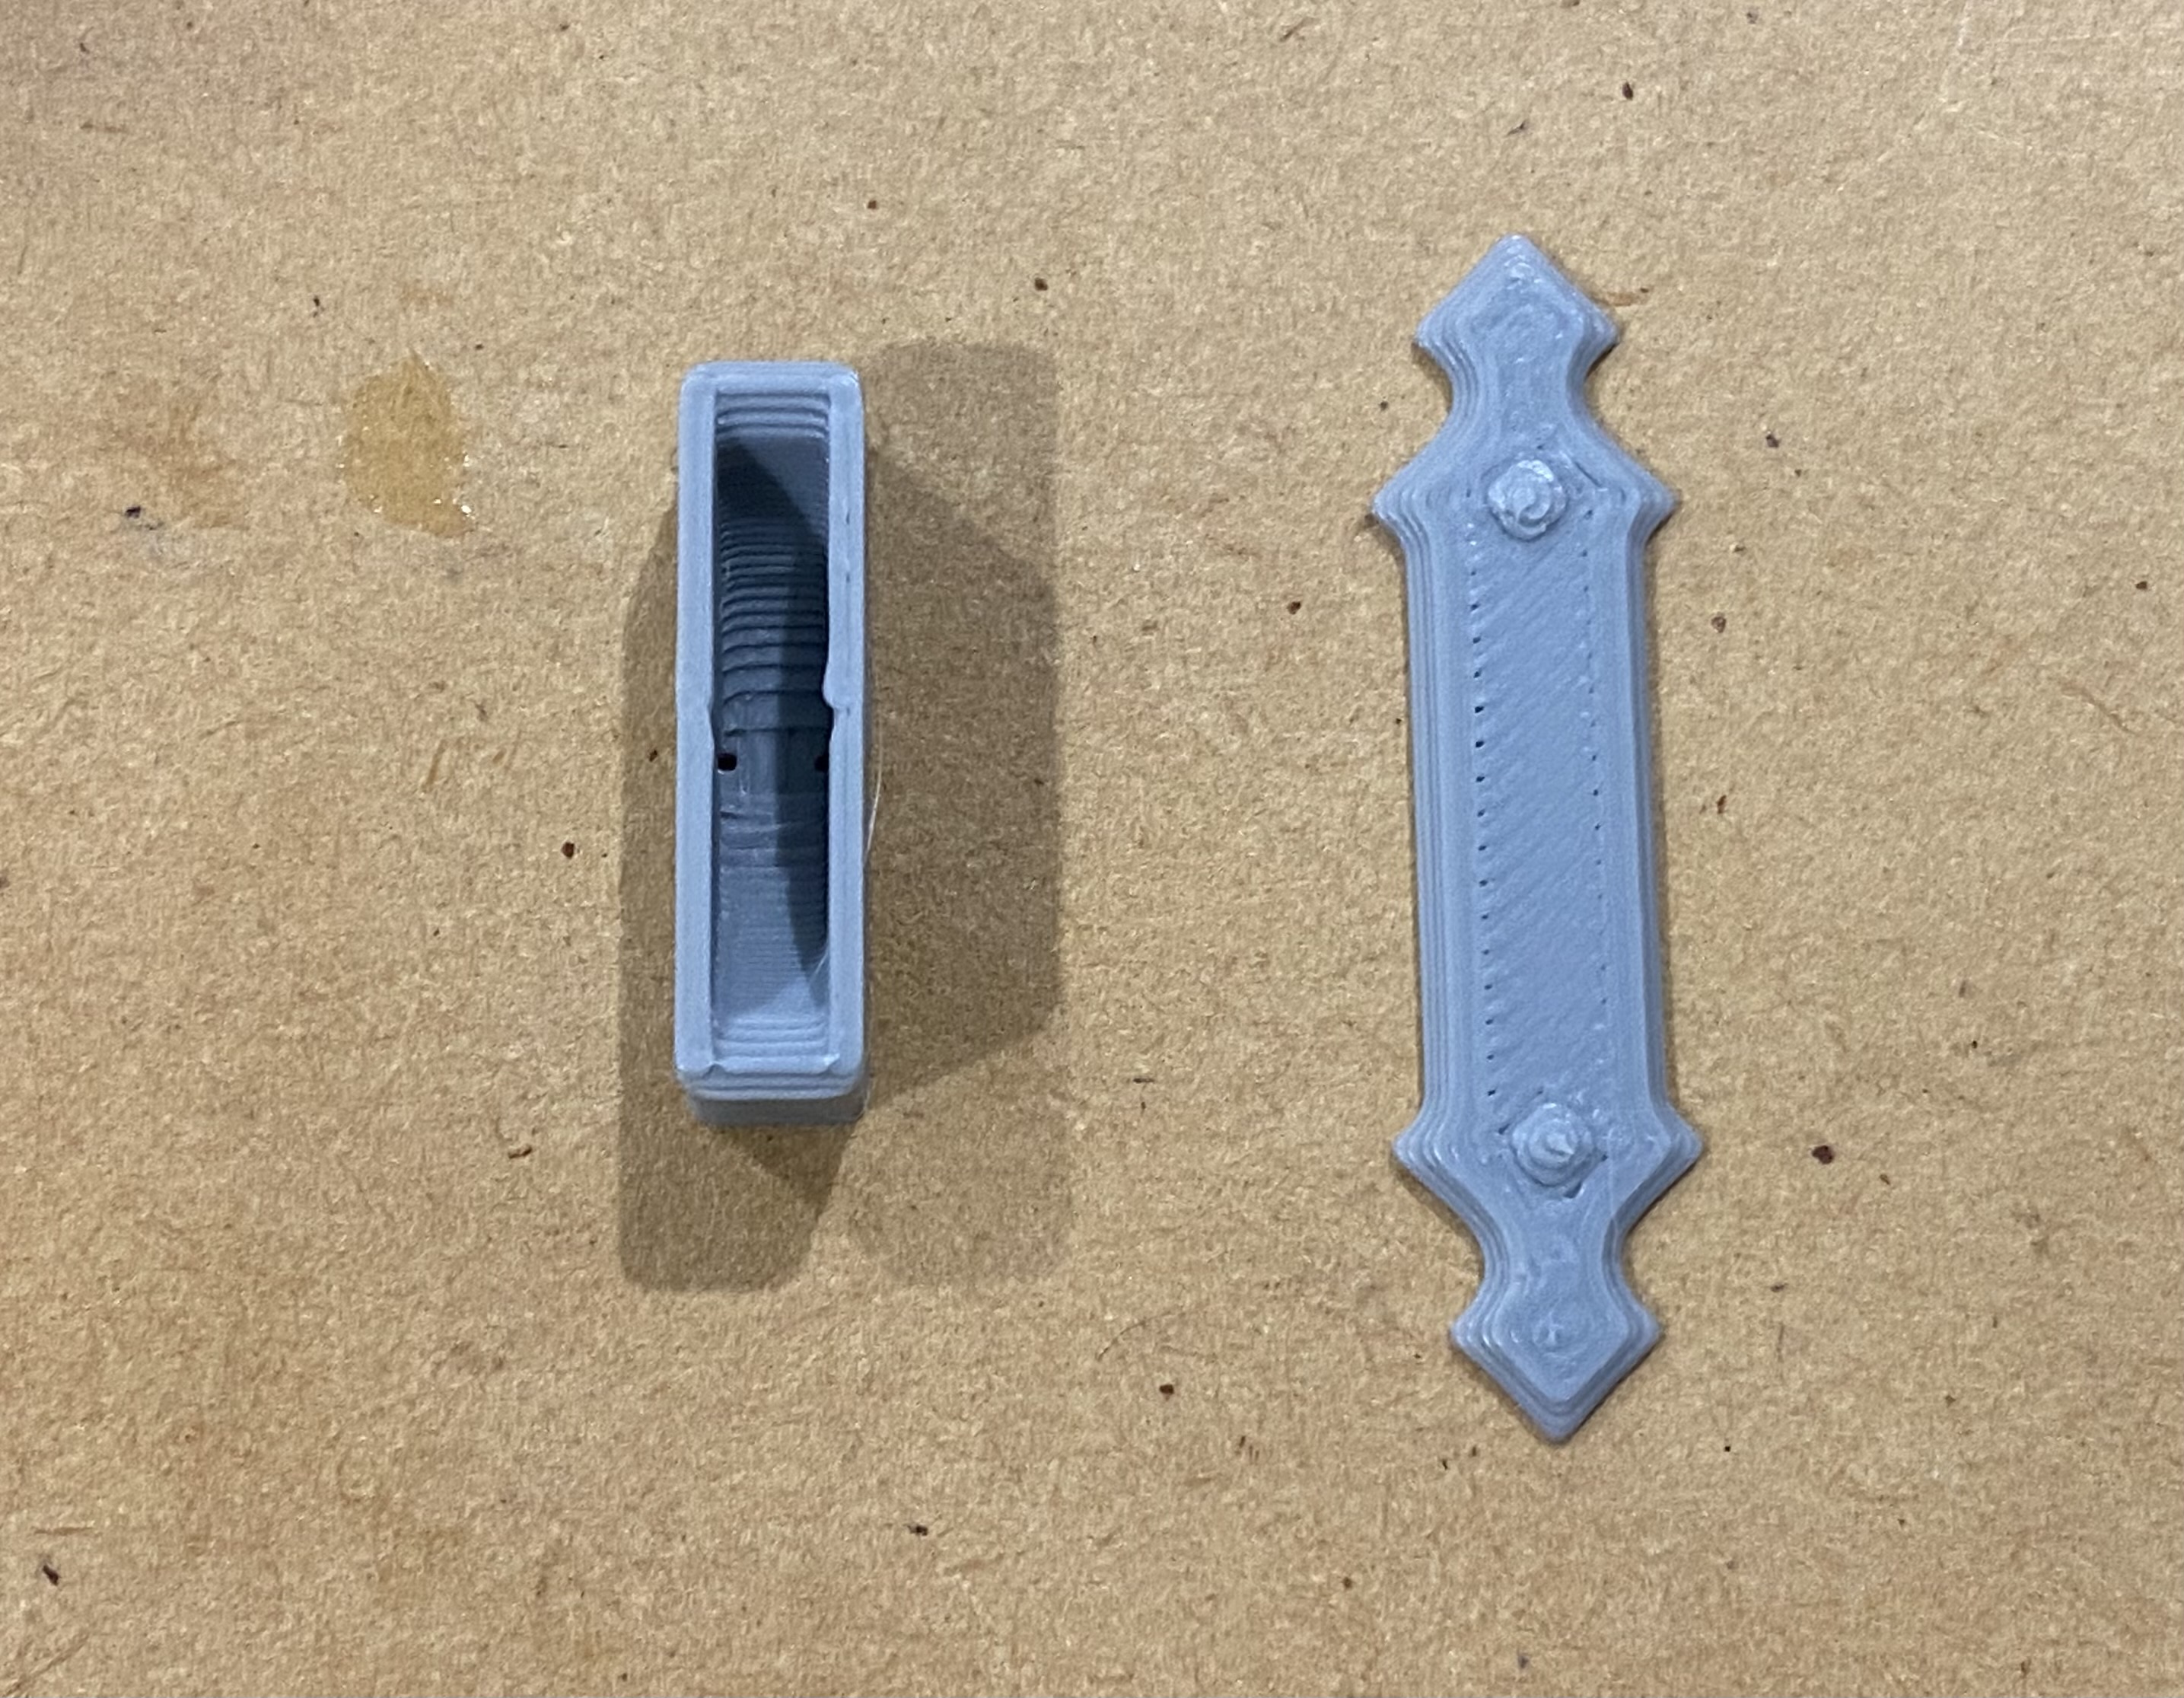
These plugs can then be easily interchanged depending on whether I want lights or not.
The simple decoration without the light still needs to be painted of course.
The batteries can be replaced by removing the columns and pushing them out via a hole in the back.
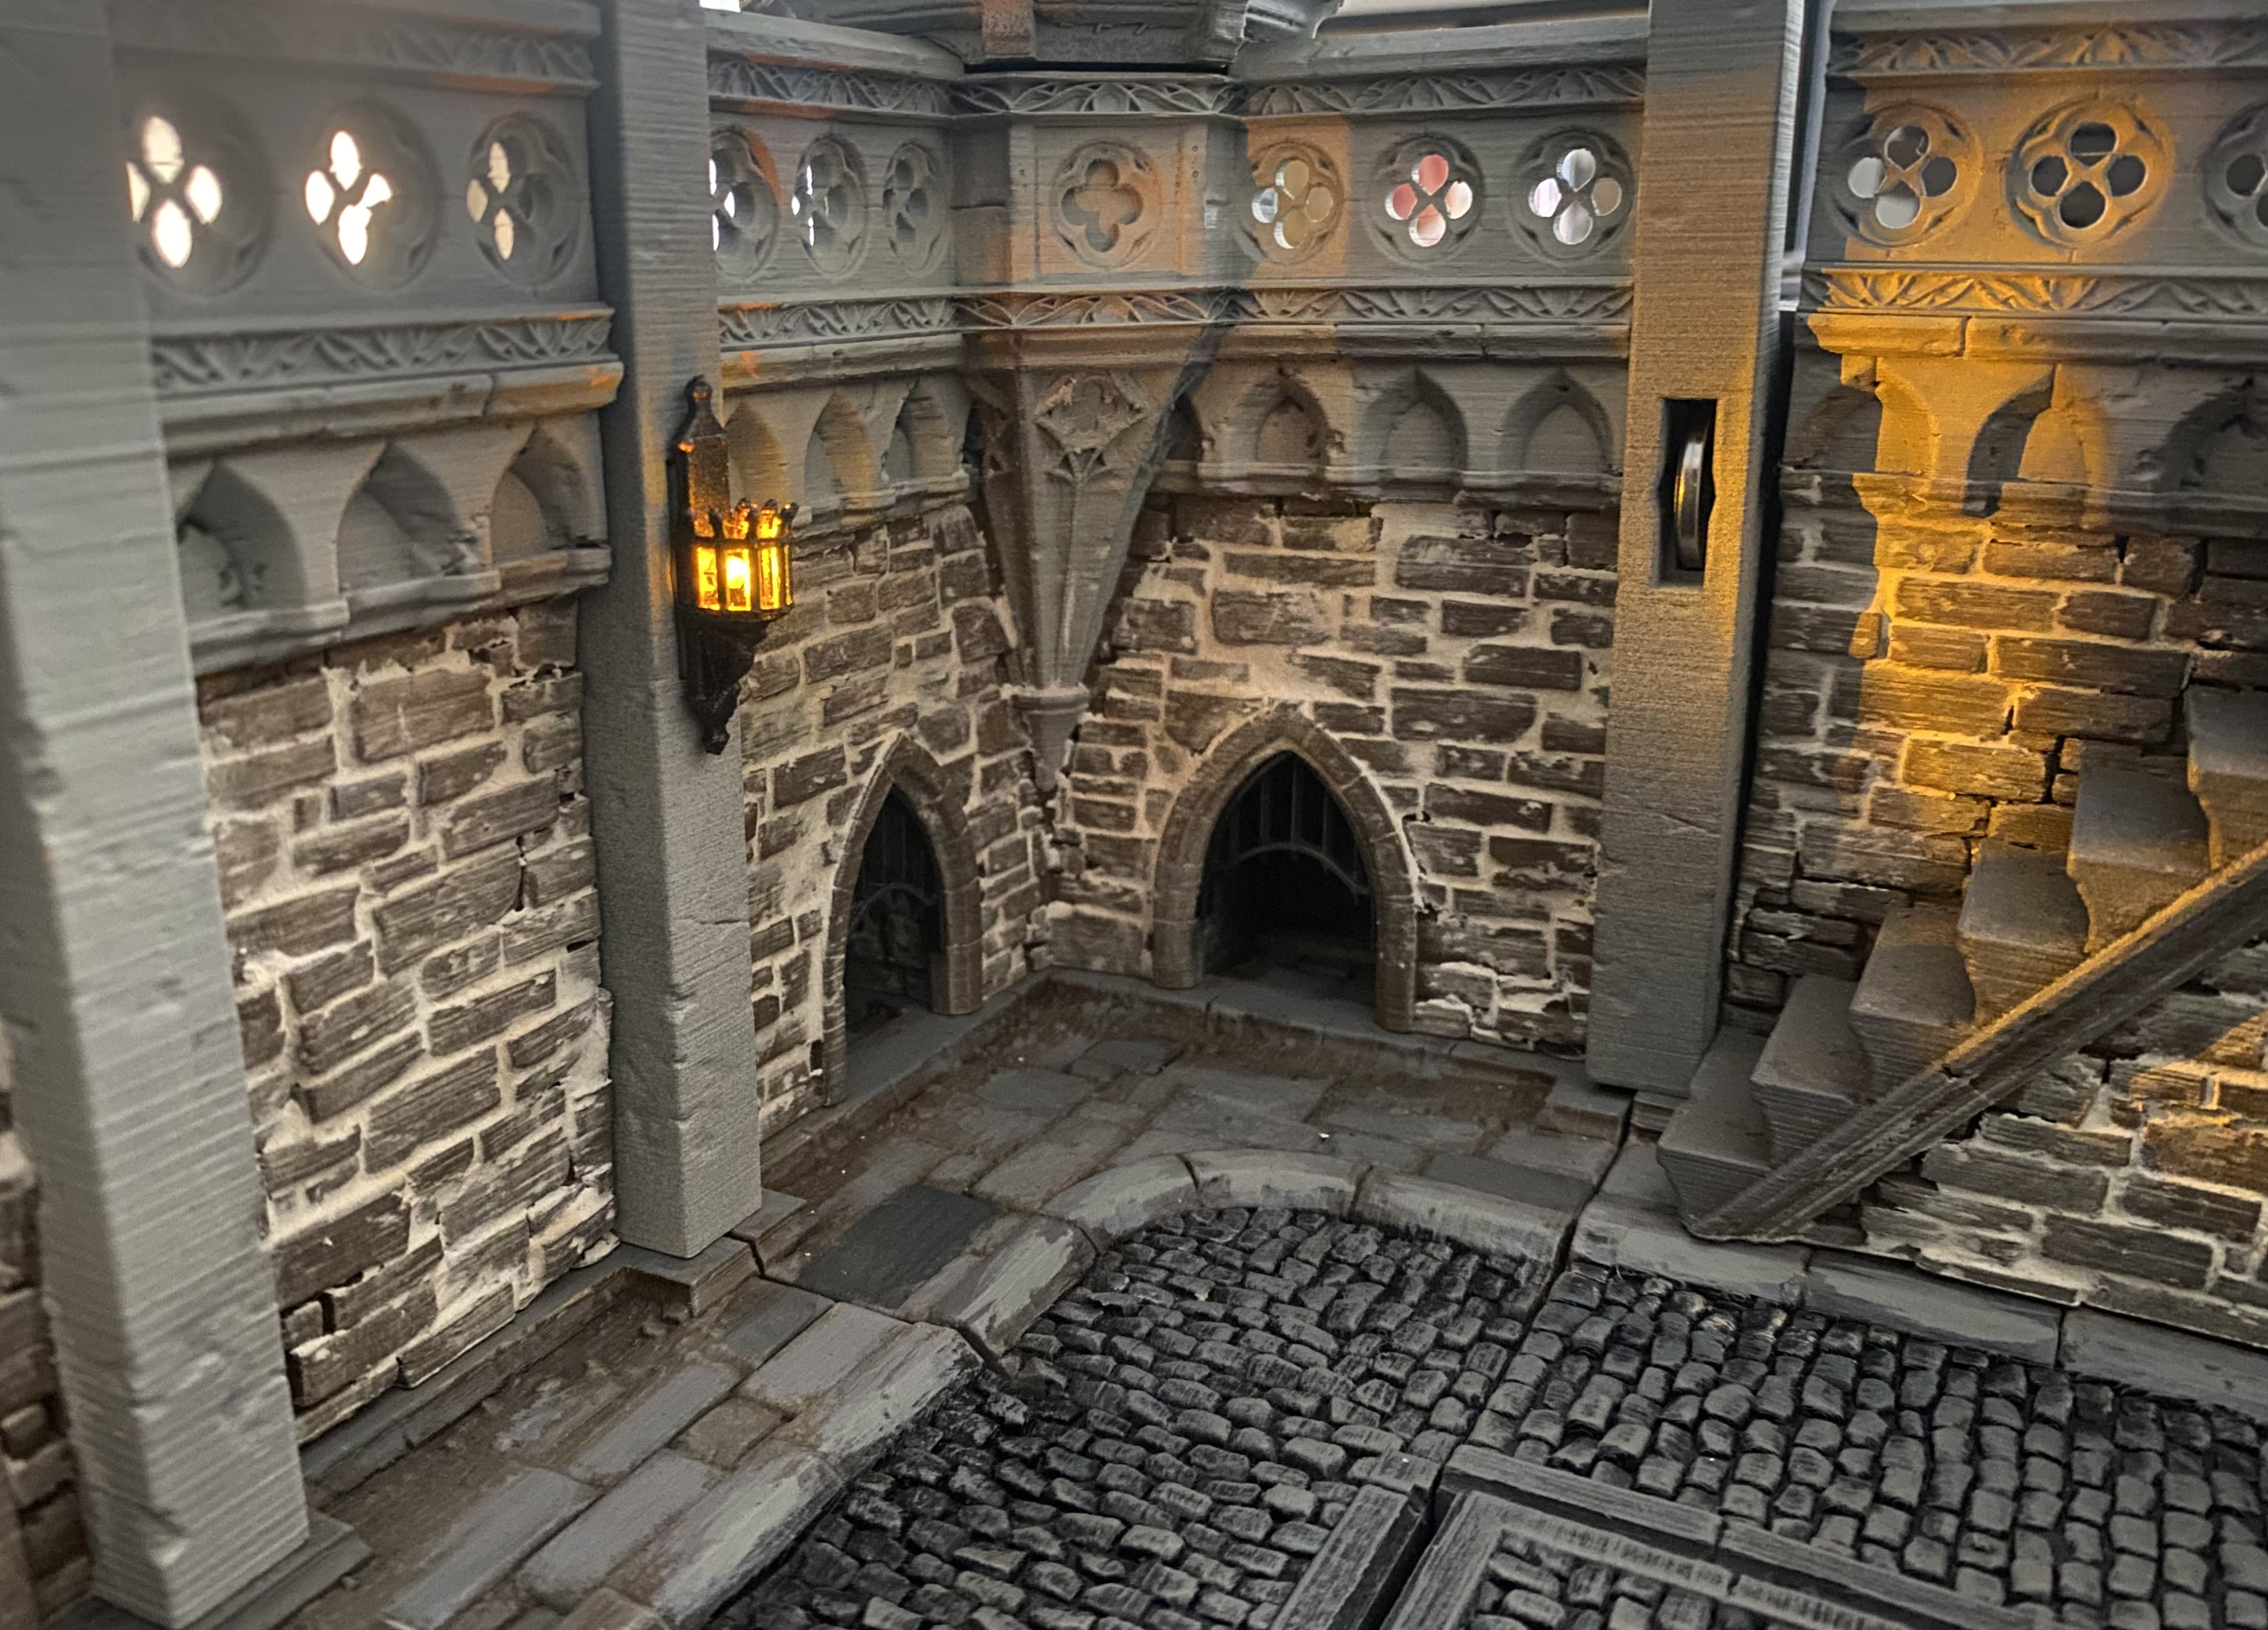
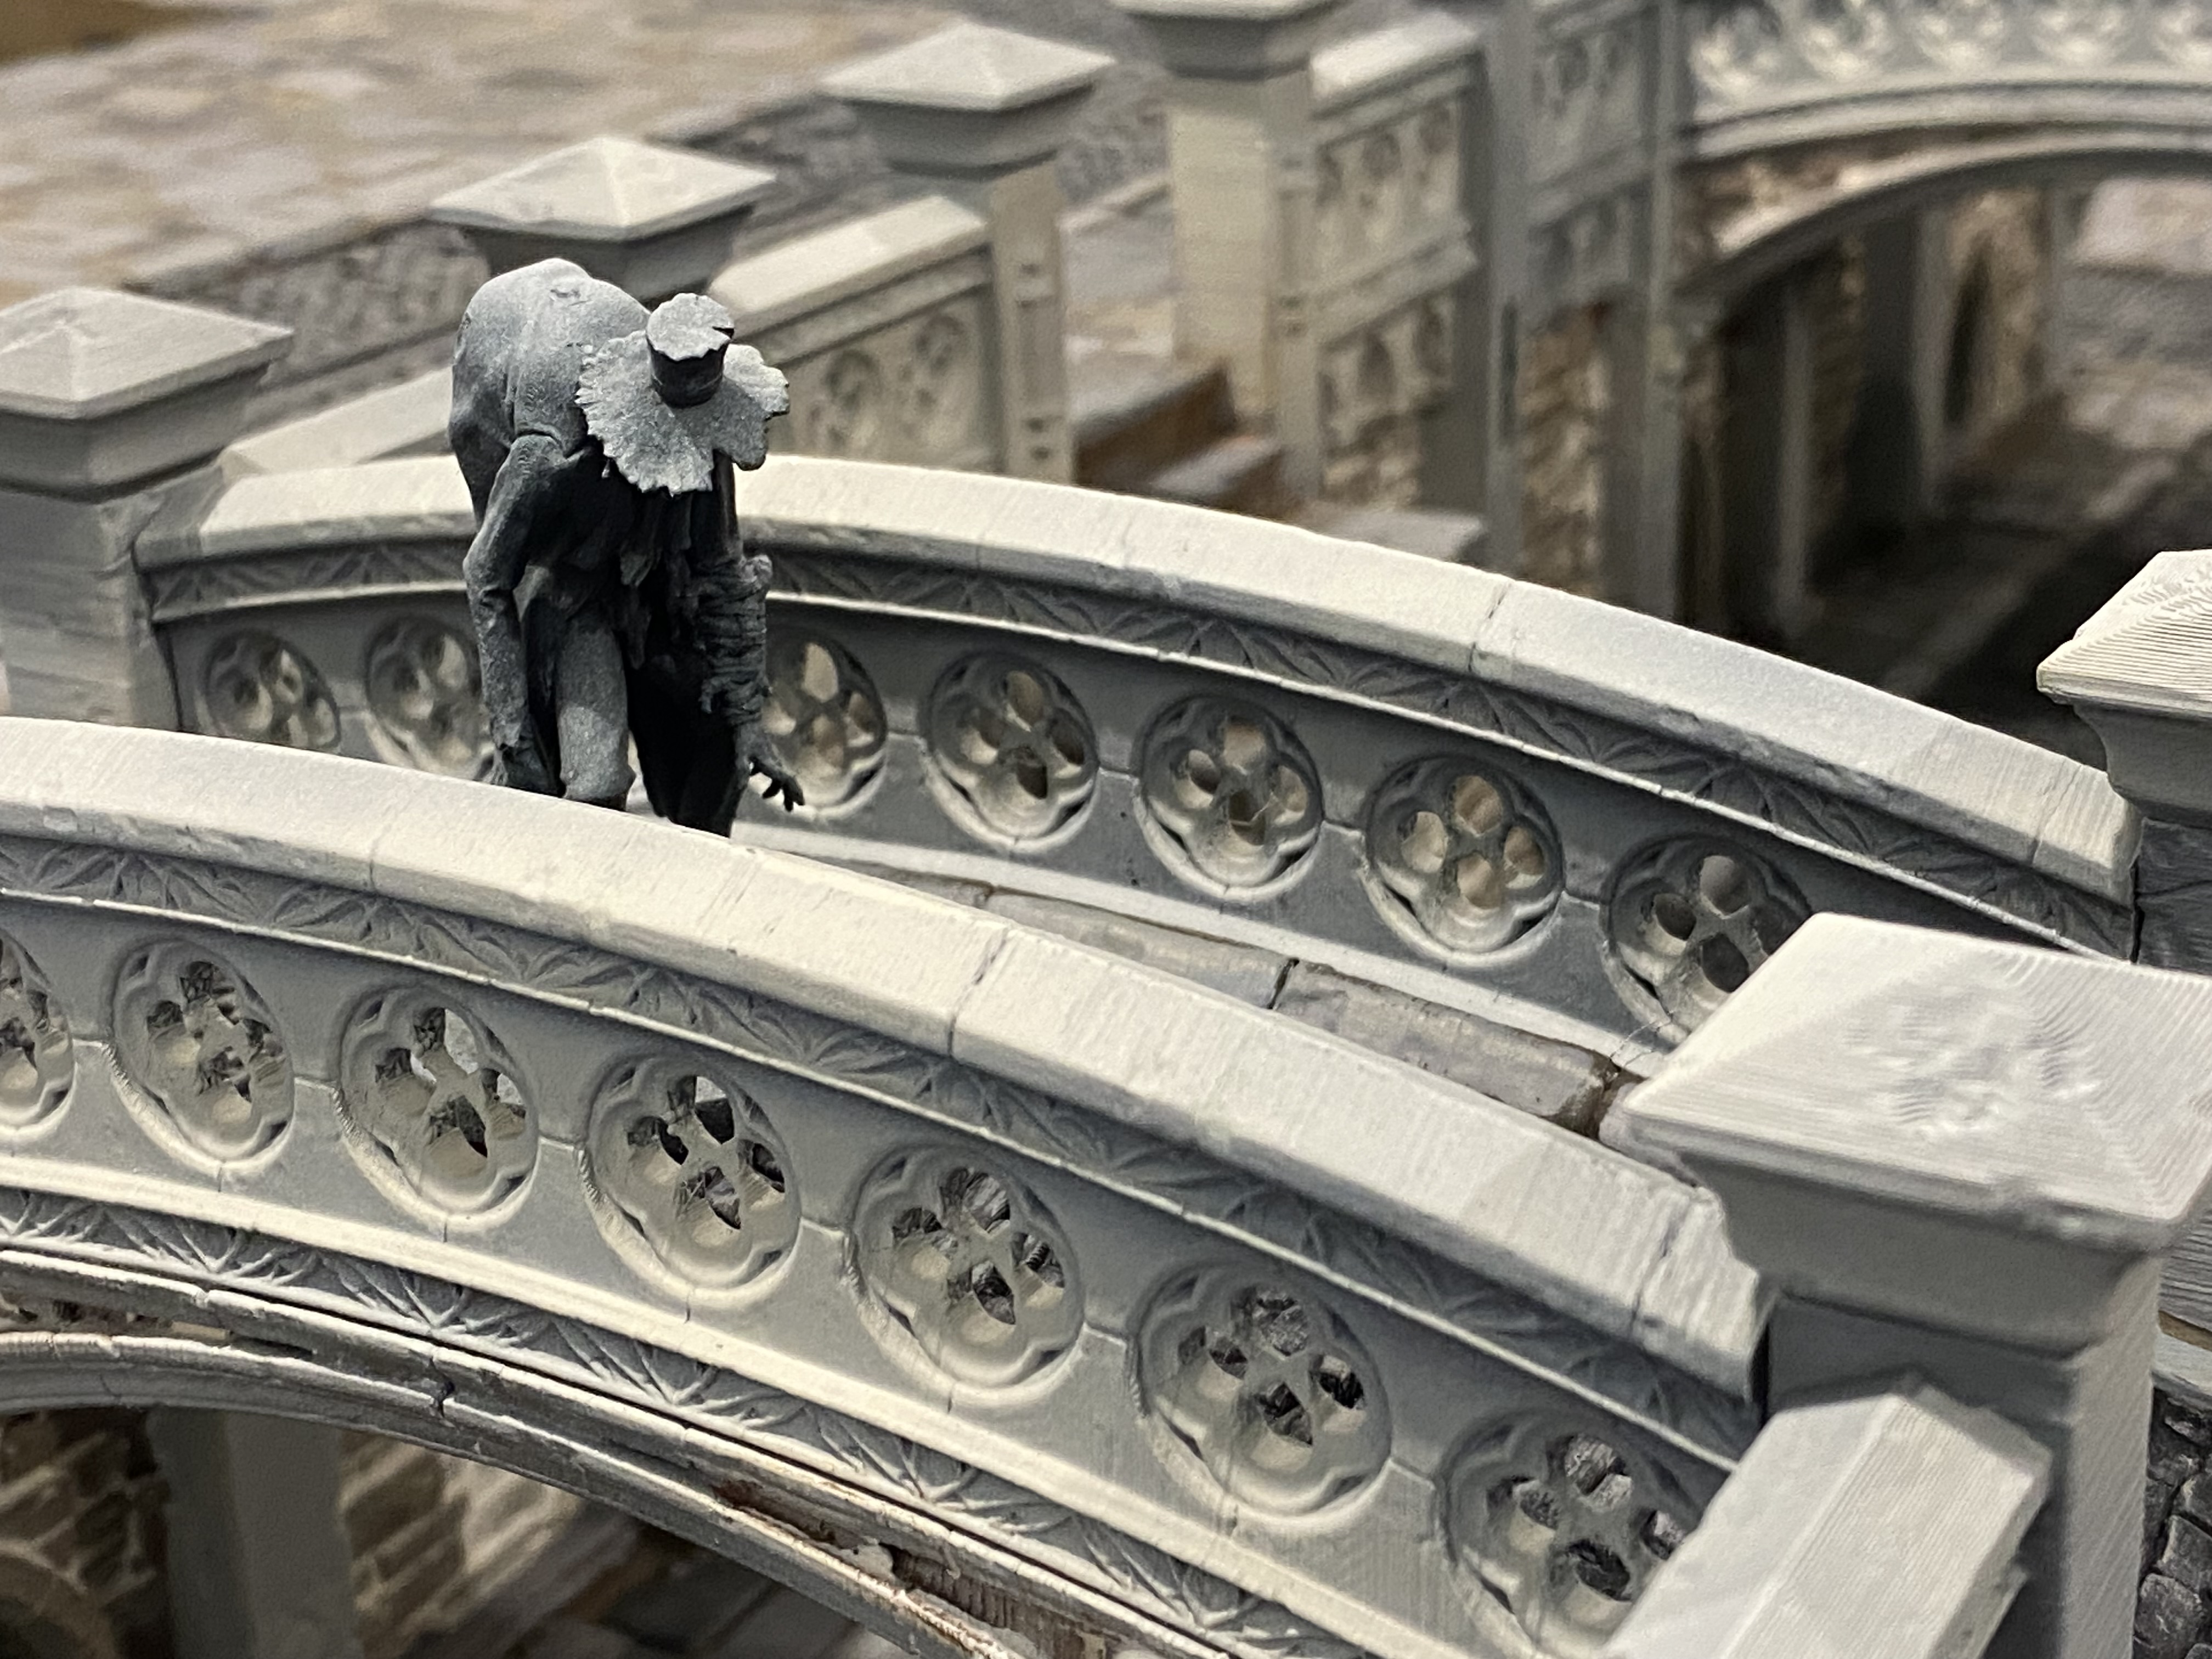
I also added lights, to the Gothic statues, which are also removable.
Because the lights are all removable I can also change the colour of the lights easily, so it’s possible to have an eerie green glow if I choose, or in fact almost any other colour.
 Just a few lights added as an example of the effect
![StarCraft Tabletop Miniatures Game Pre-Orders Live Now [Updated]](https://images.beastsofwar.com/2026/03/starcraft-tmg-news-cover-600-338.jpg)


![Mounted US Cavalry On Kickstarter For Dead Man’s Hand! [Updated]](https://images.beastsofwar.com/2026/03/us-cavalry-main-600-338.jpg)


![Play WW2 Commando Operations With Butcher & Bolt [Updated]](https://images.beastsofwar.com/2026/03/relaunch-600-338.jpg)


