


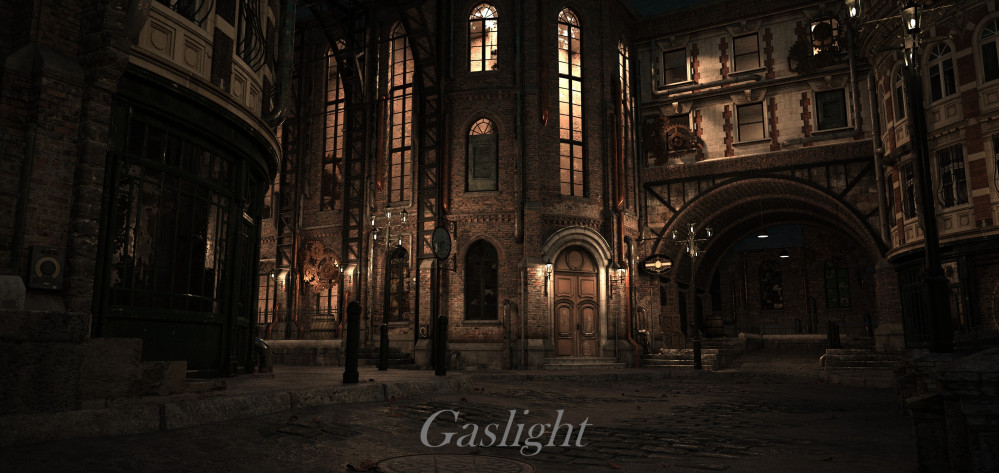
Gaslight


Recommendations: 426
About the Project
The Prussians have been carrying out lightning-swift strikes all along the western edges of the British Martian Protectorate and have sent Queen Victoria’s forces reeling back towards the capital, New Brighton. The Grand Martian Canal has slowed the advance of the Kaiser's forces, but it is only a matter of time before the Capitol is besieged. Back on Earth, things are no better. Prussian troops have established a firm foothold in the southwest of England and are slowly advancing towards major cities. Meanwhile, small parties have been sent to Egypt in search of one of the Lost Keys of Power. It has been way too long since we visited ‘A Tale of Two Worlds’ and it is about time I pulled my finger out and built some more up-to-date terrain for it. Victorian/Steampunk-style buildings could be useful on both Earth and Mars, so I think I will start there and if I get a chance maybe move on to either some Martian terrain or Egyptian terrain. Basically, this really could go in any direction.
Related Genre: Steampunk
Related Contest: TerrainFest 2023
This Project is Active
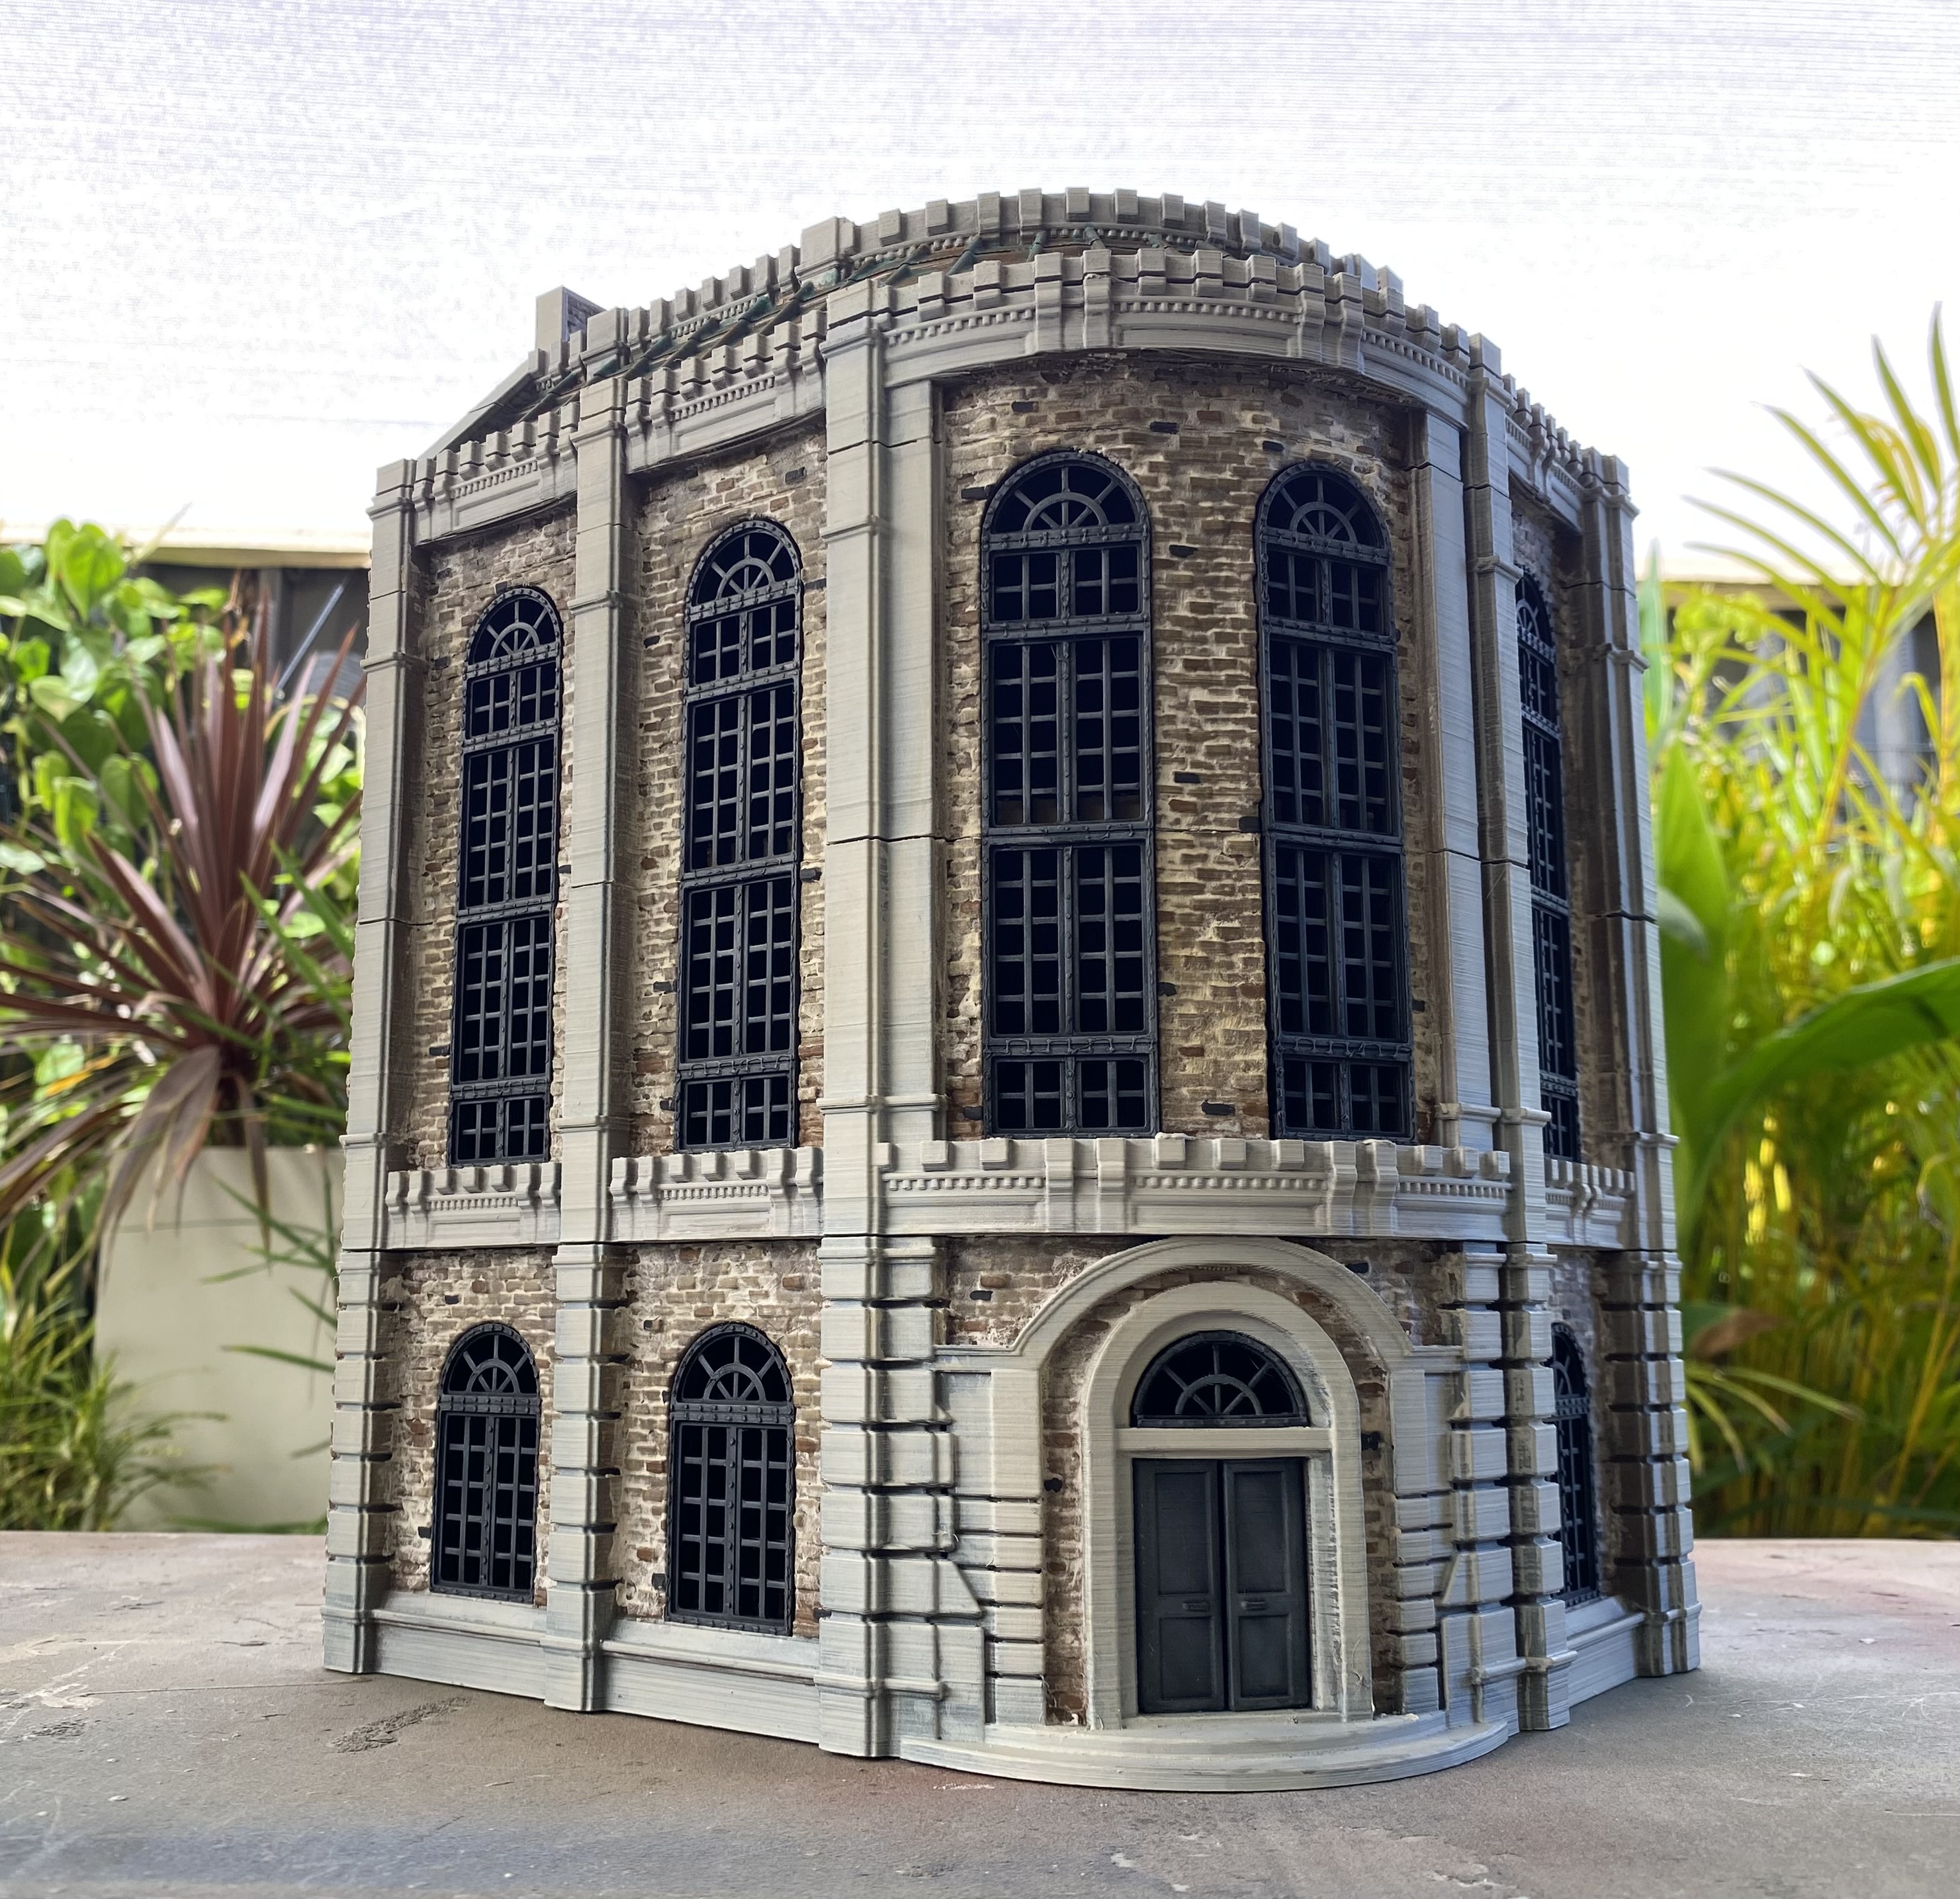
The Residence
This project needed something big. I toyed with the idea of doing a version of Big Ben, something which I may come back to in the future, but for the moment settled on a large building that could act as either a royal residence or some other government official building.
Still in the early stages with this one as it is rather large.
My apologies for the poor-quality pictures. At the moment the Sun is like a deadly laser melting everything it can see.
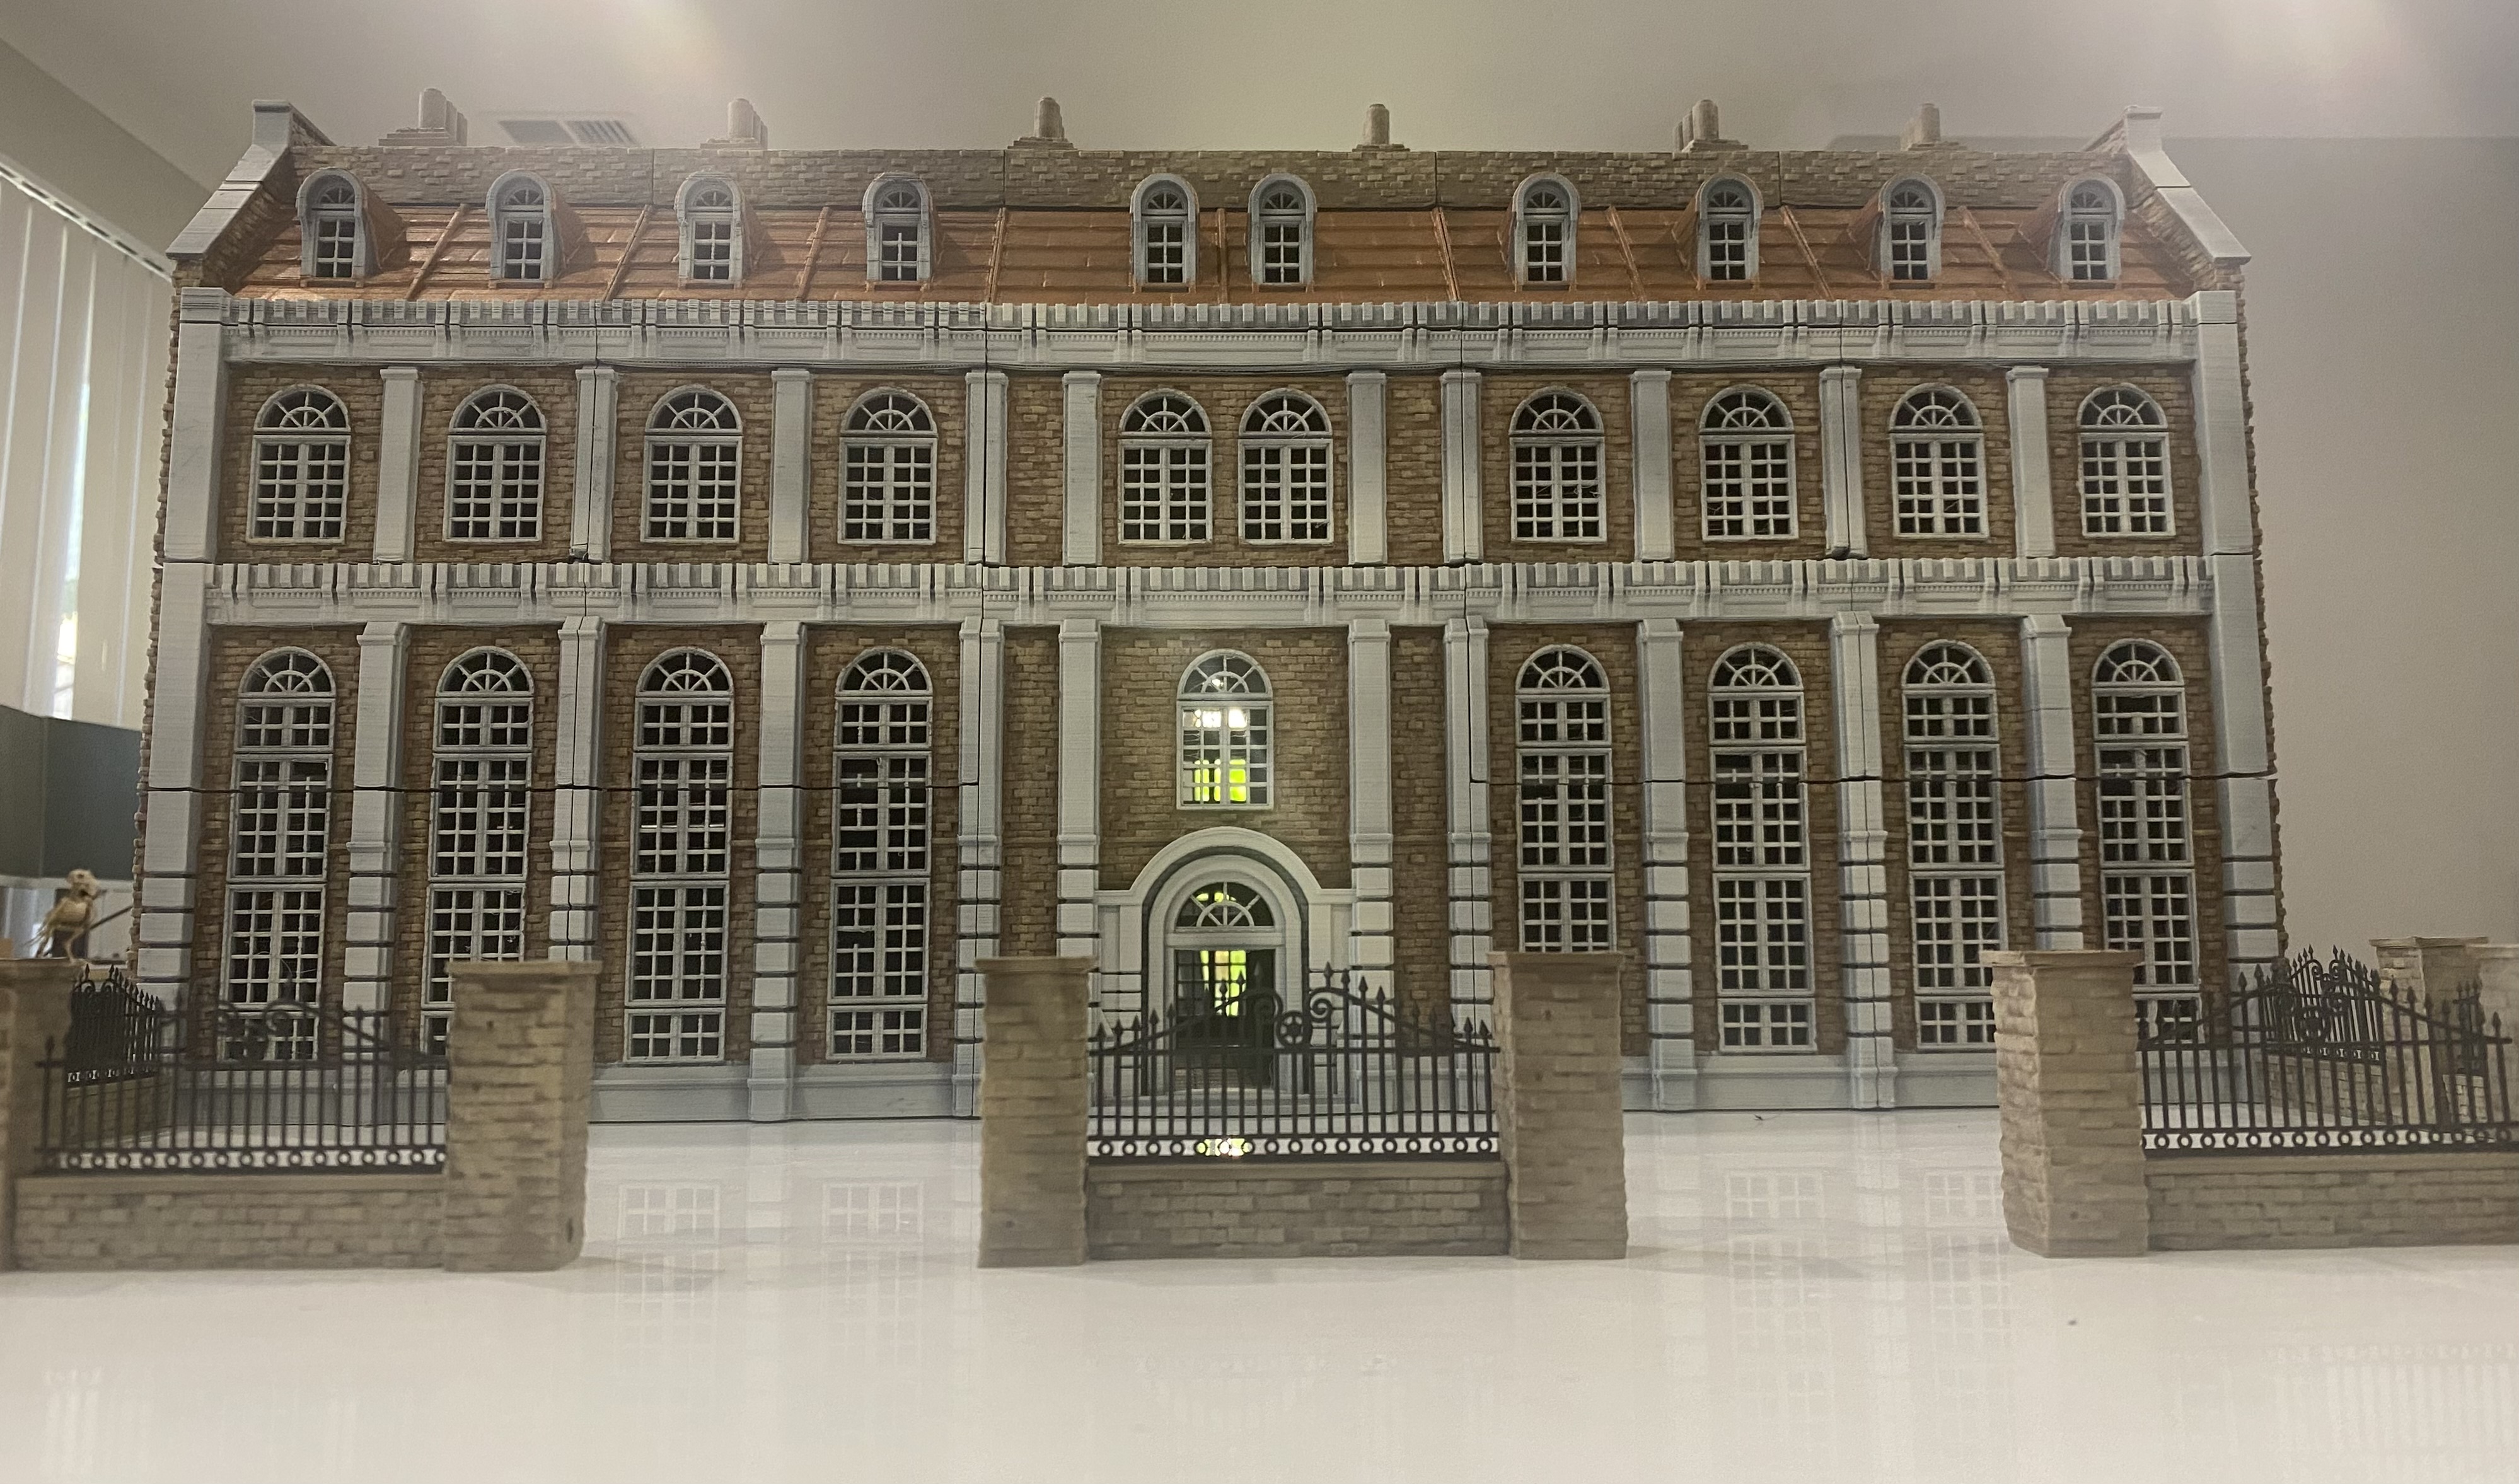
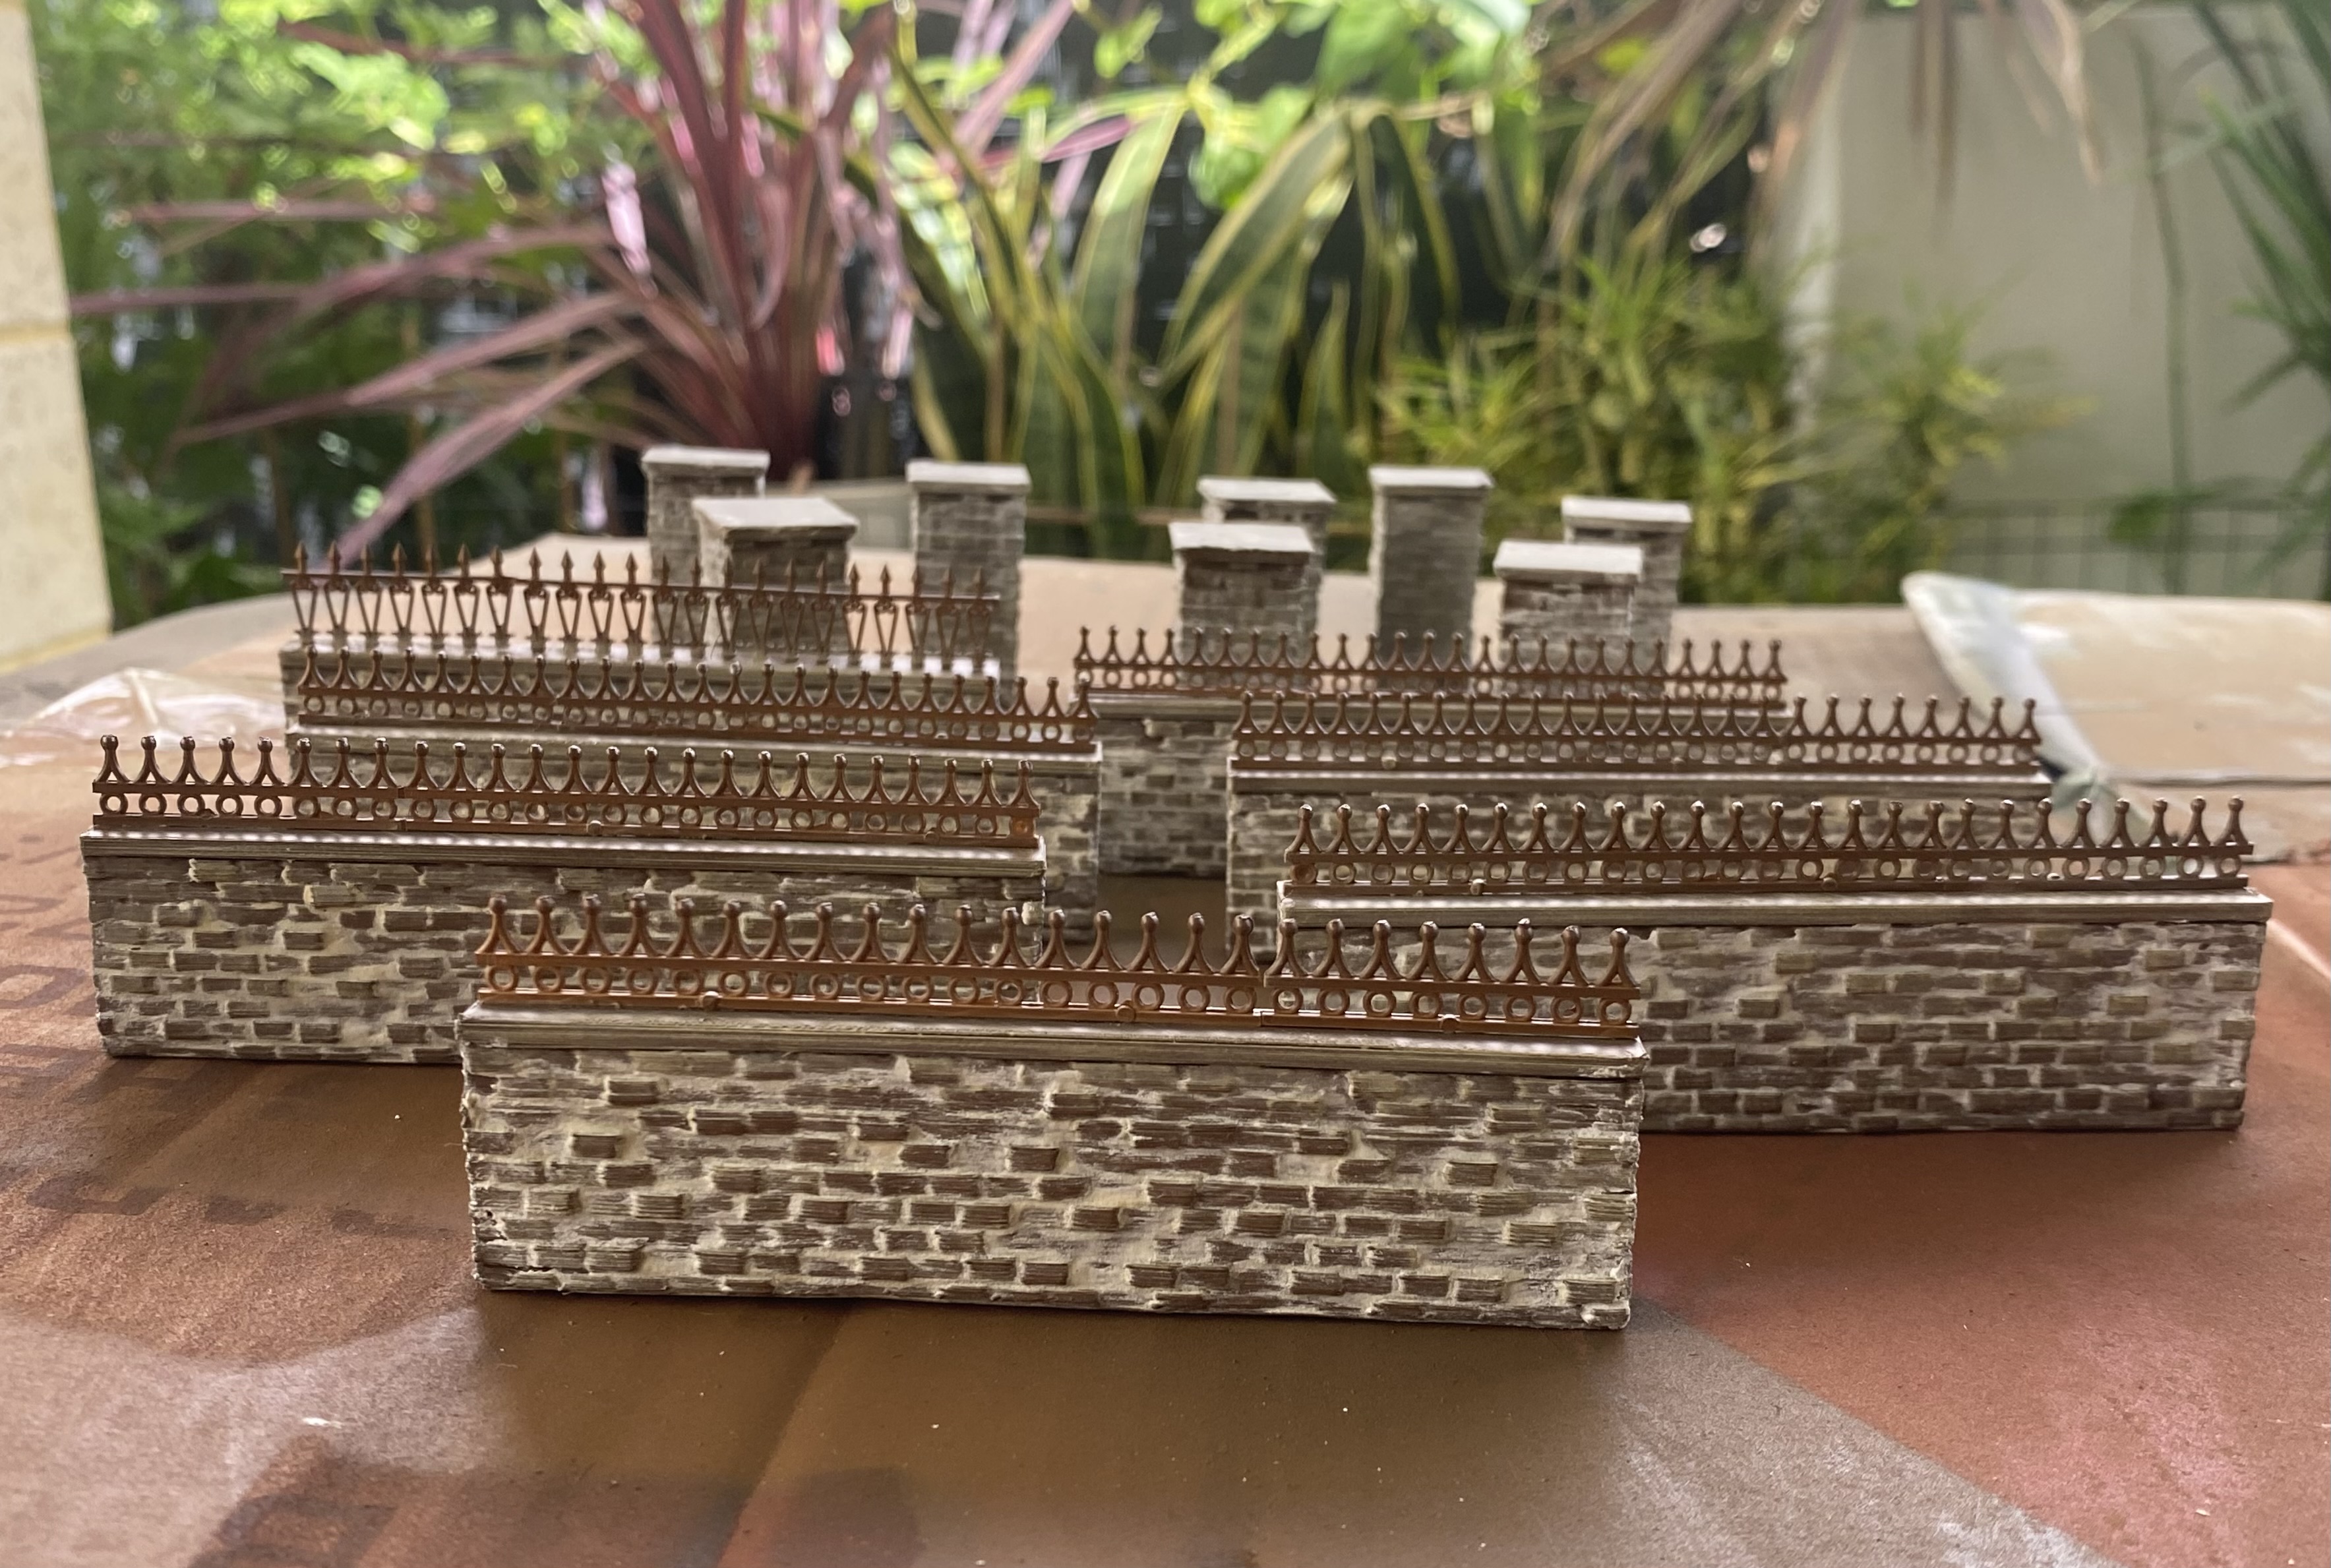
Still quite a bit more to do on this but this is how the painting looks after day 1.
I have some toppers to make for the pillars on the fence line plus I need to plaster the whole model and fix up or cover up some damaged areas. I also have to come up with some suitable gates for this and possibly some guard boxes too.
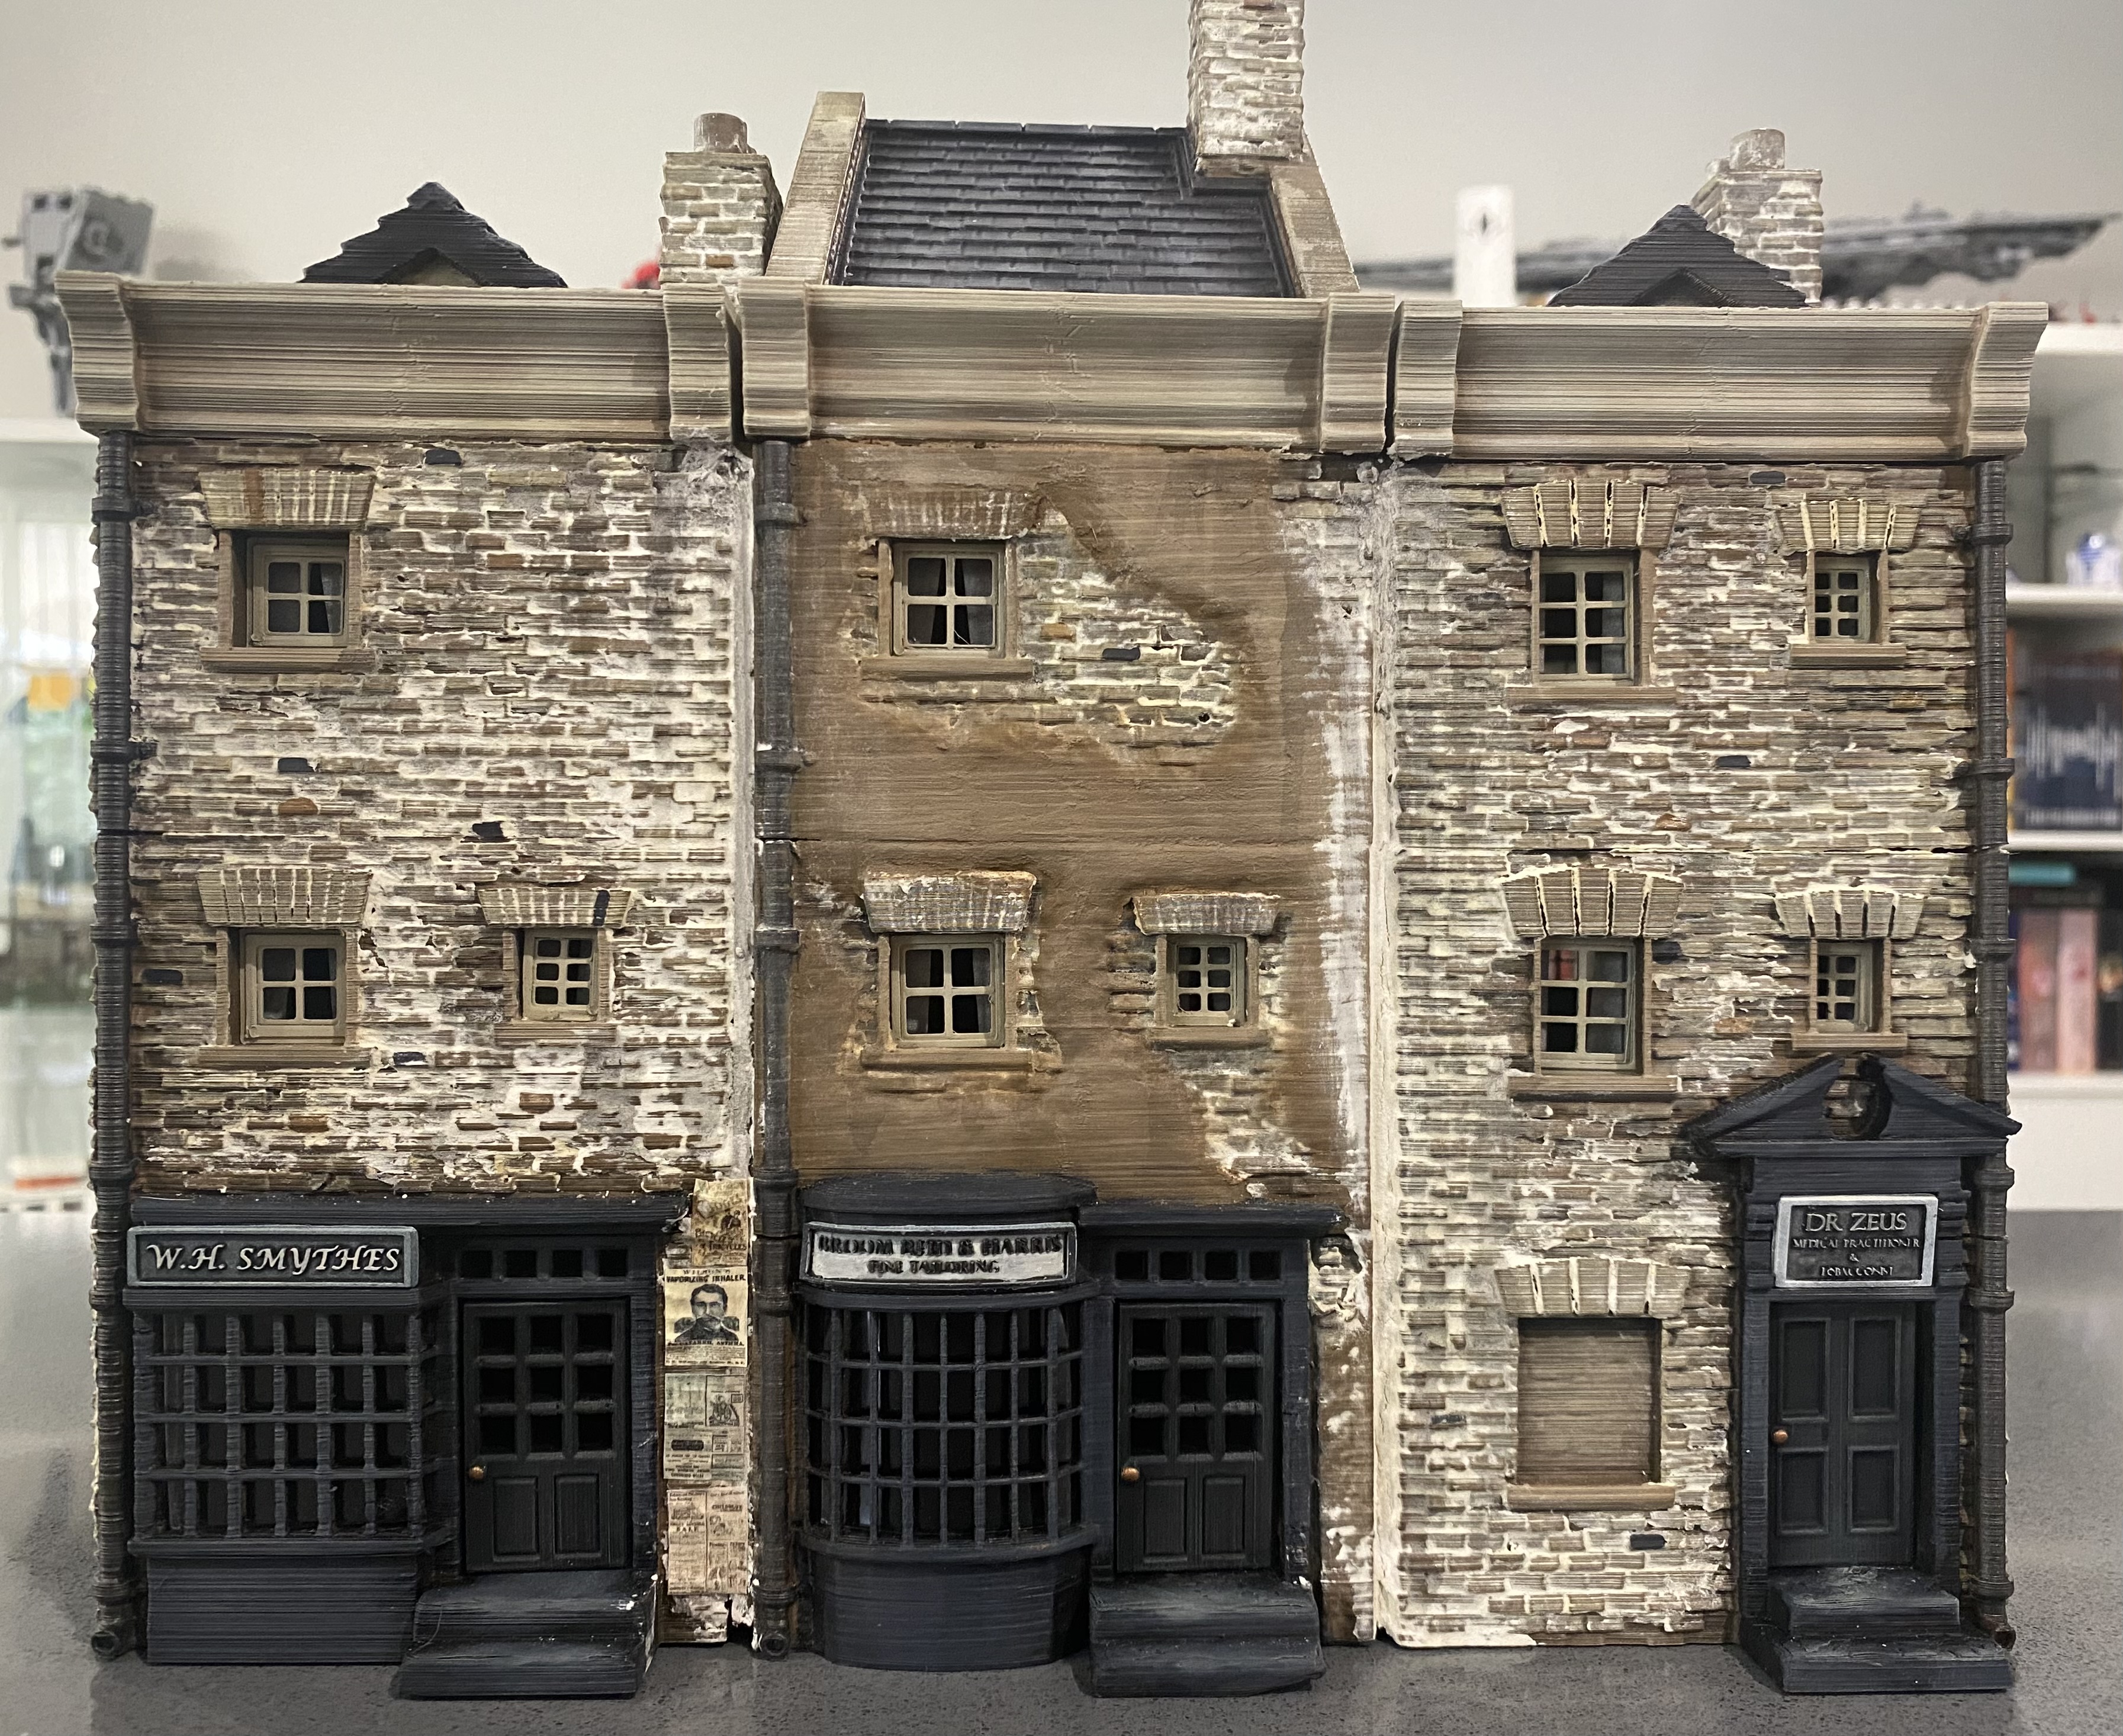
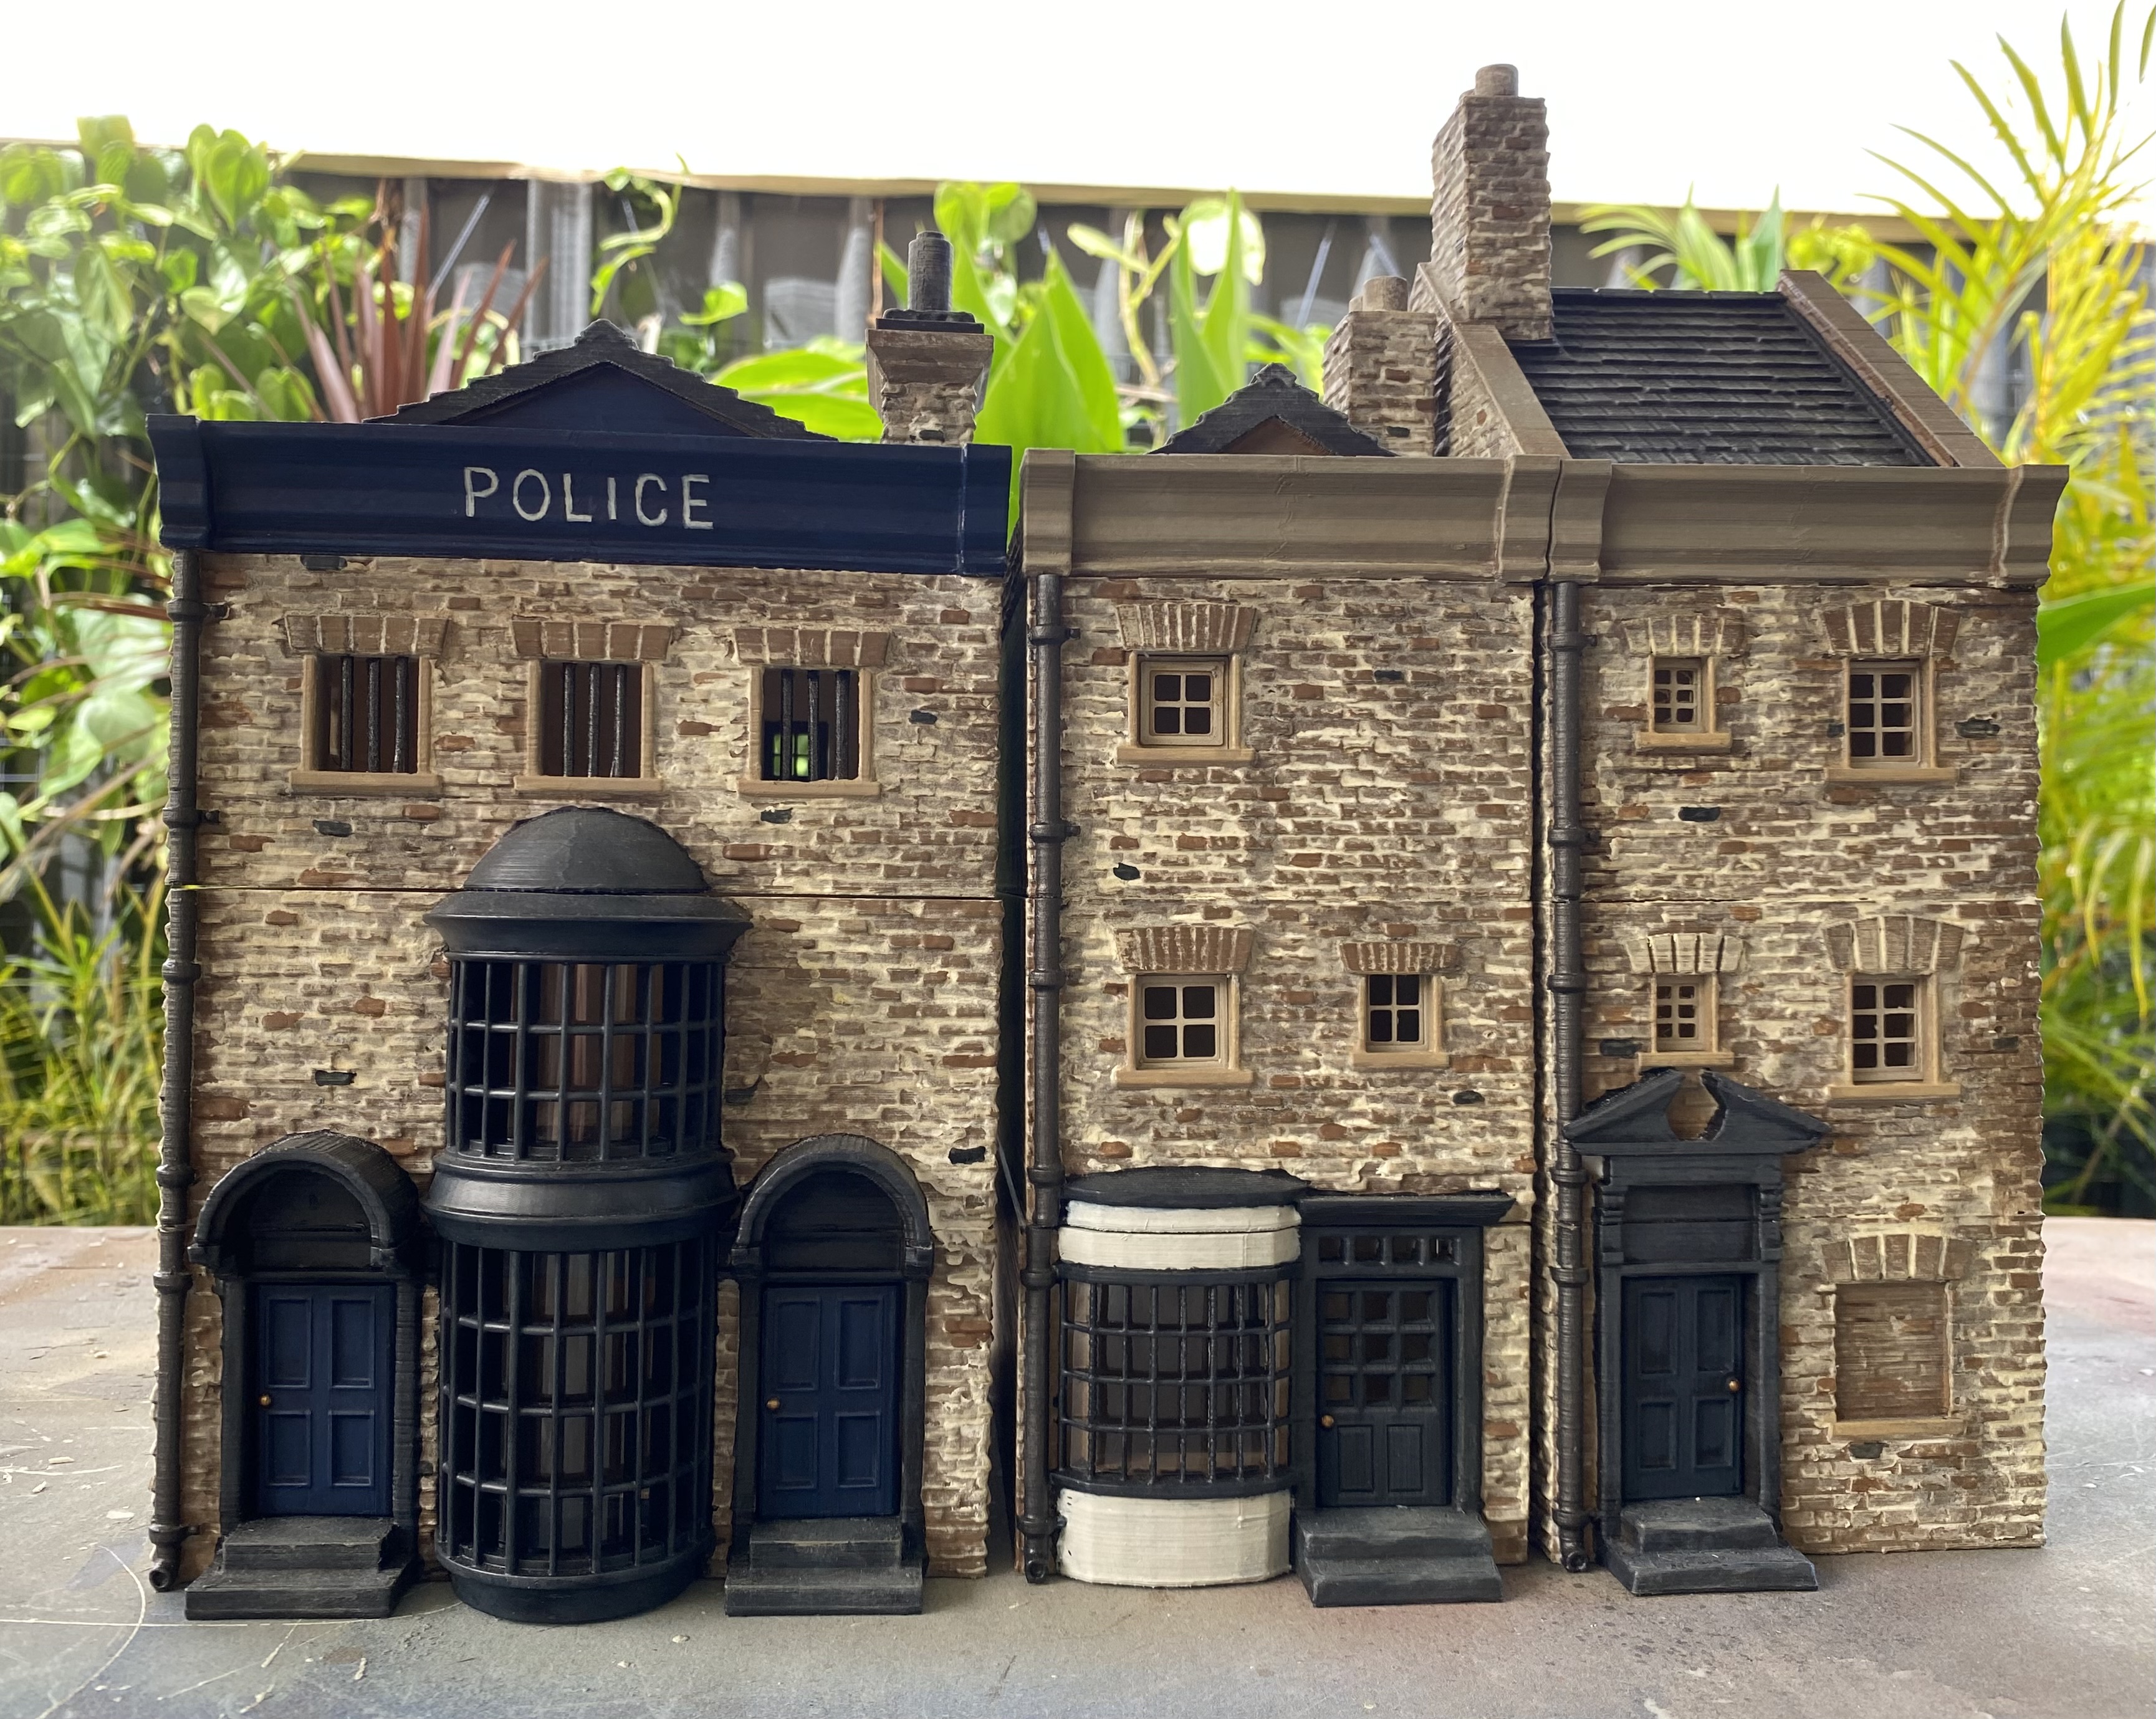
Signage
Just a little update.
I made some signage for the shops and a sign for the police station. Only minor bits really but I think they add to the buildings somewhat.
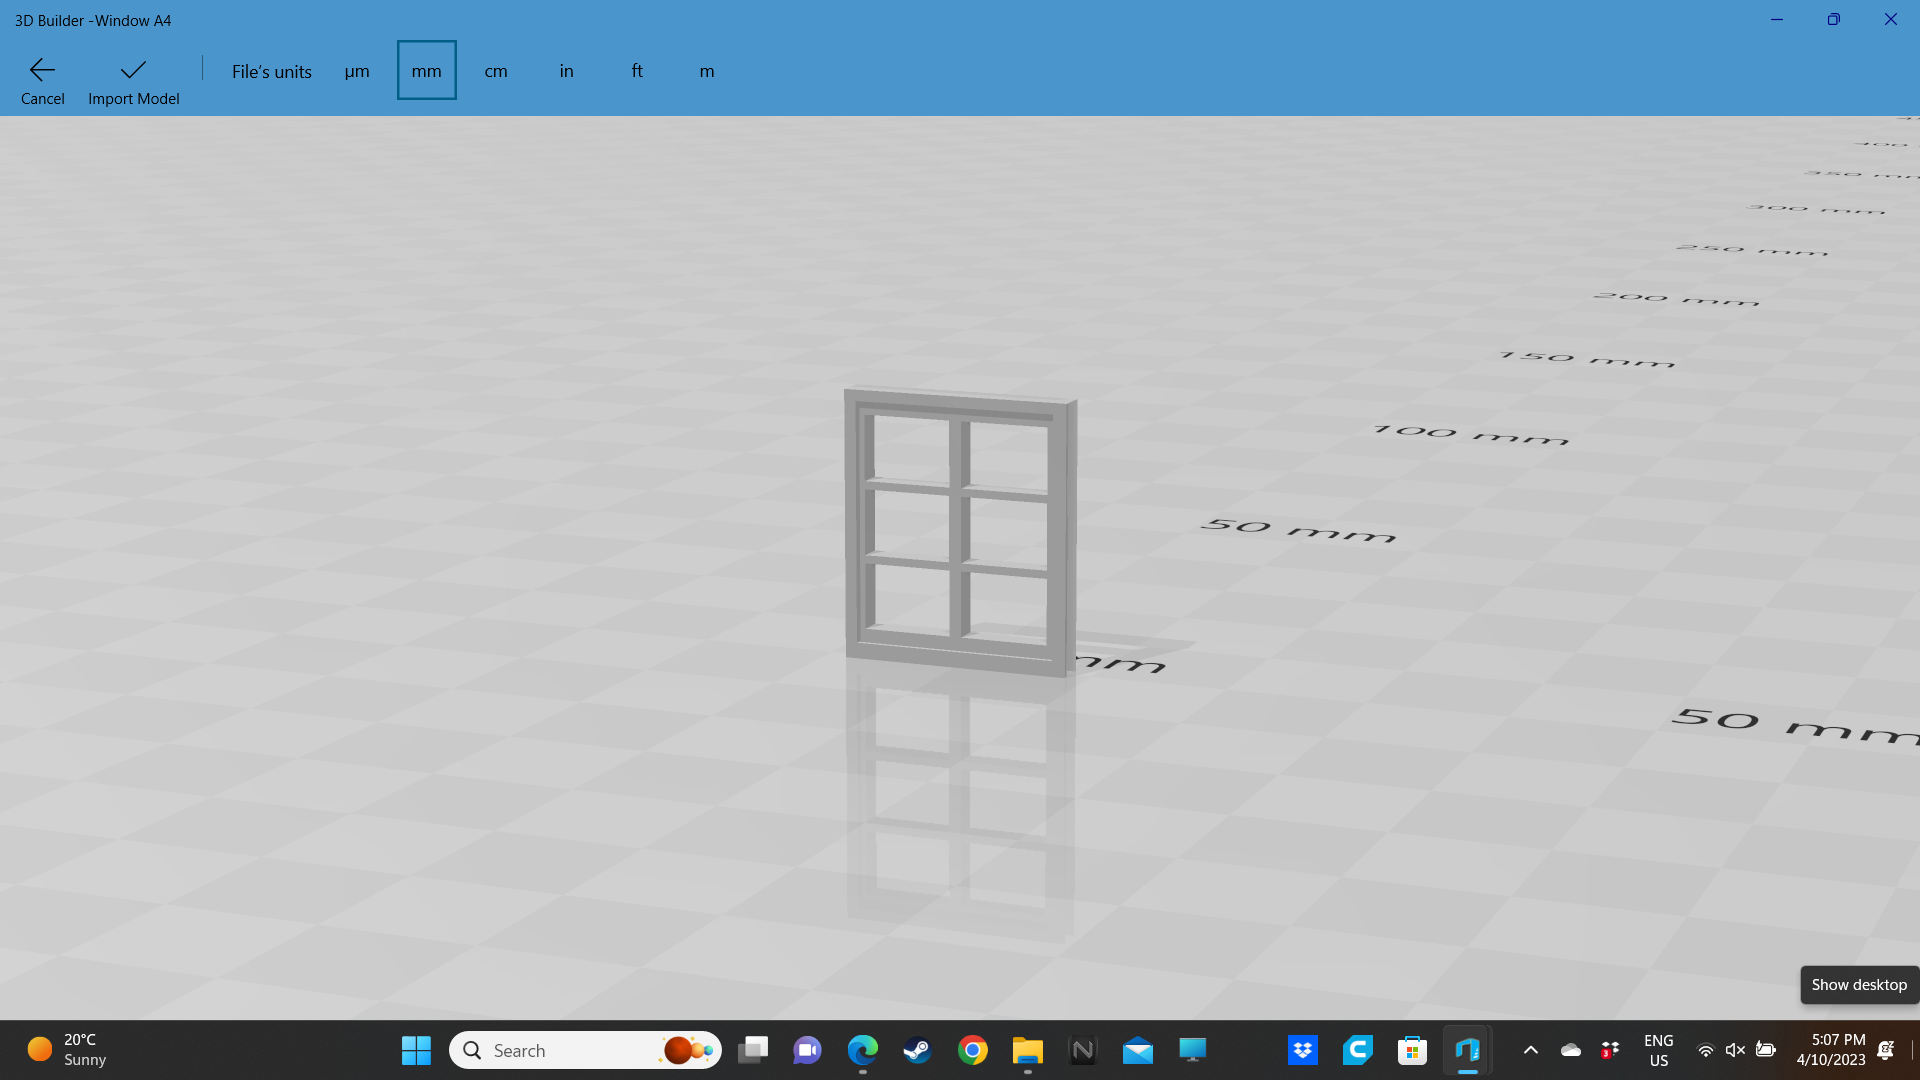
I designed them on 3D Builder and printed them out on my resin printer.
Honestly, I have been struggling to get much ‘hobby’ done at the moment.
Contemplating taking a break for a bit to recharge the batteries, or maybe just clearing some stuff out. Sometimes I find when the hobby space gets too overcrowded it makes it hard for me to get motivated to do anything, which in turn just makes the situation worse as things start to pile up.
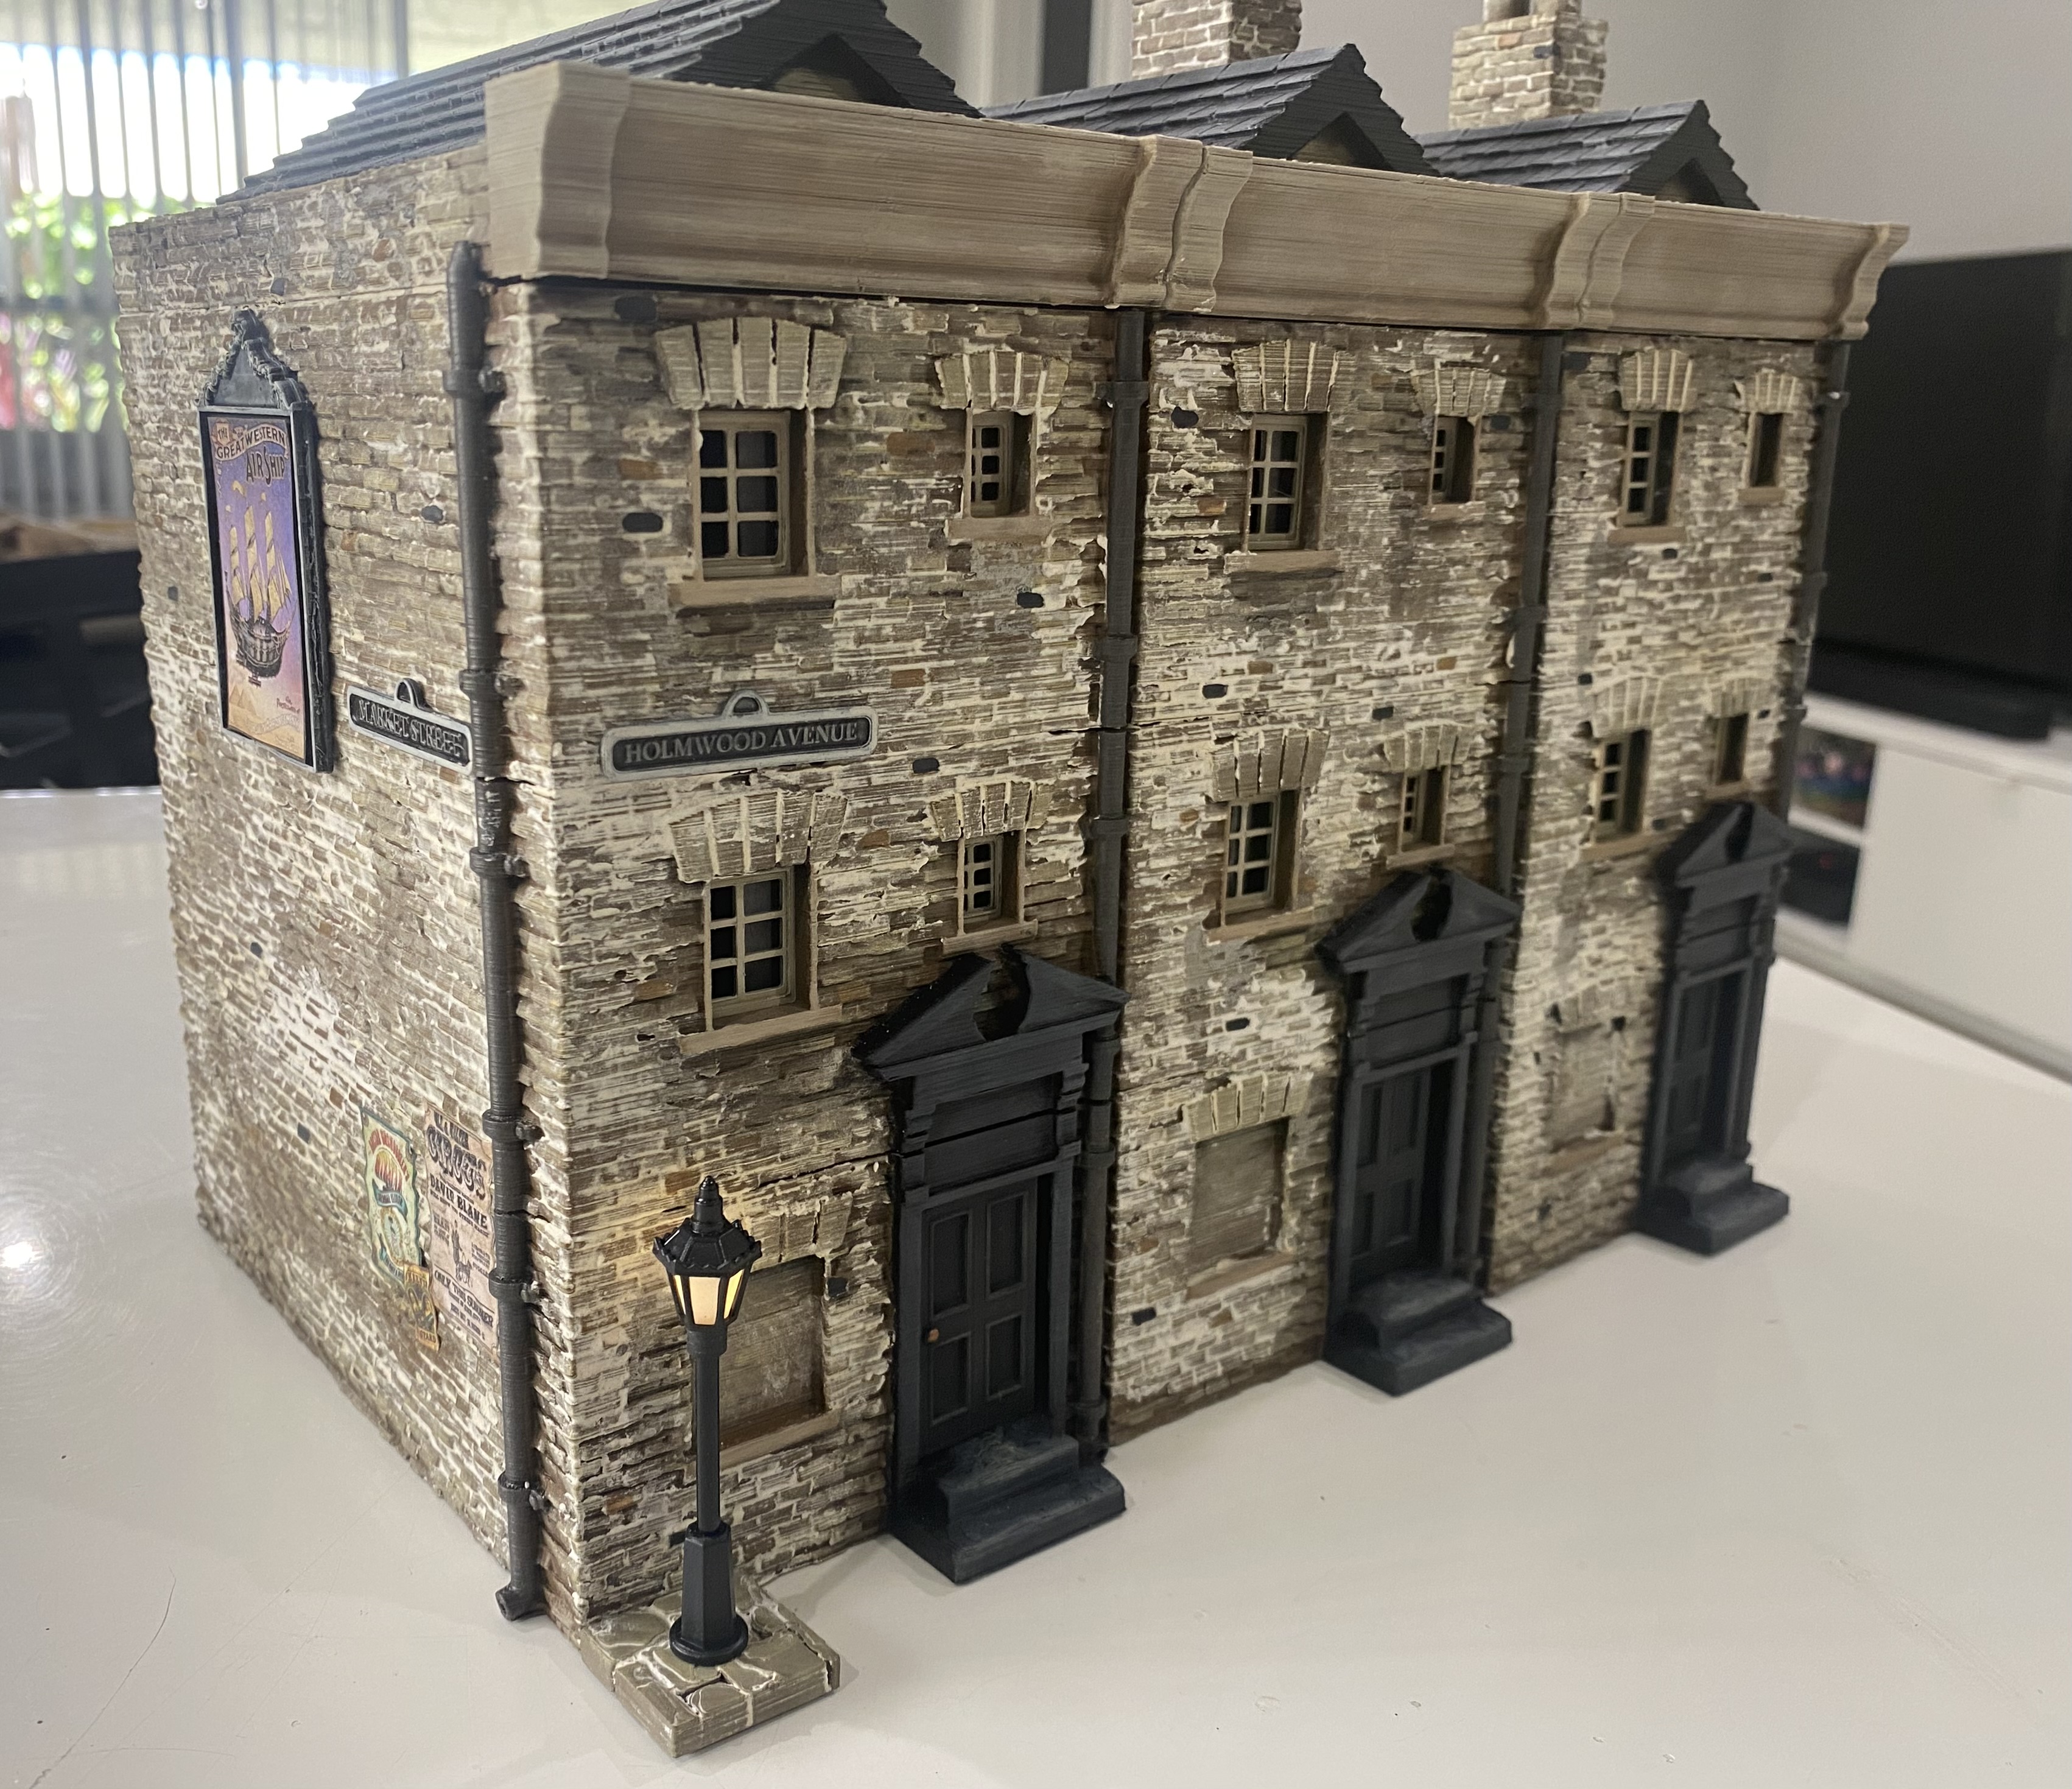
Trying to add life.
Right from the beginning of this project, I had an image in mind that I wanted to try to make these buildings at least a little lived in, whilst still keeping them not completely covered in extras. I often find that any terrain can look good, but the little bits added at the end help lift it up.
This is my attempt to make what are effectively empty boxes, look a little more lived in. Adding some life to them so to speak.
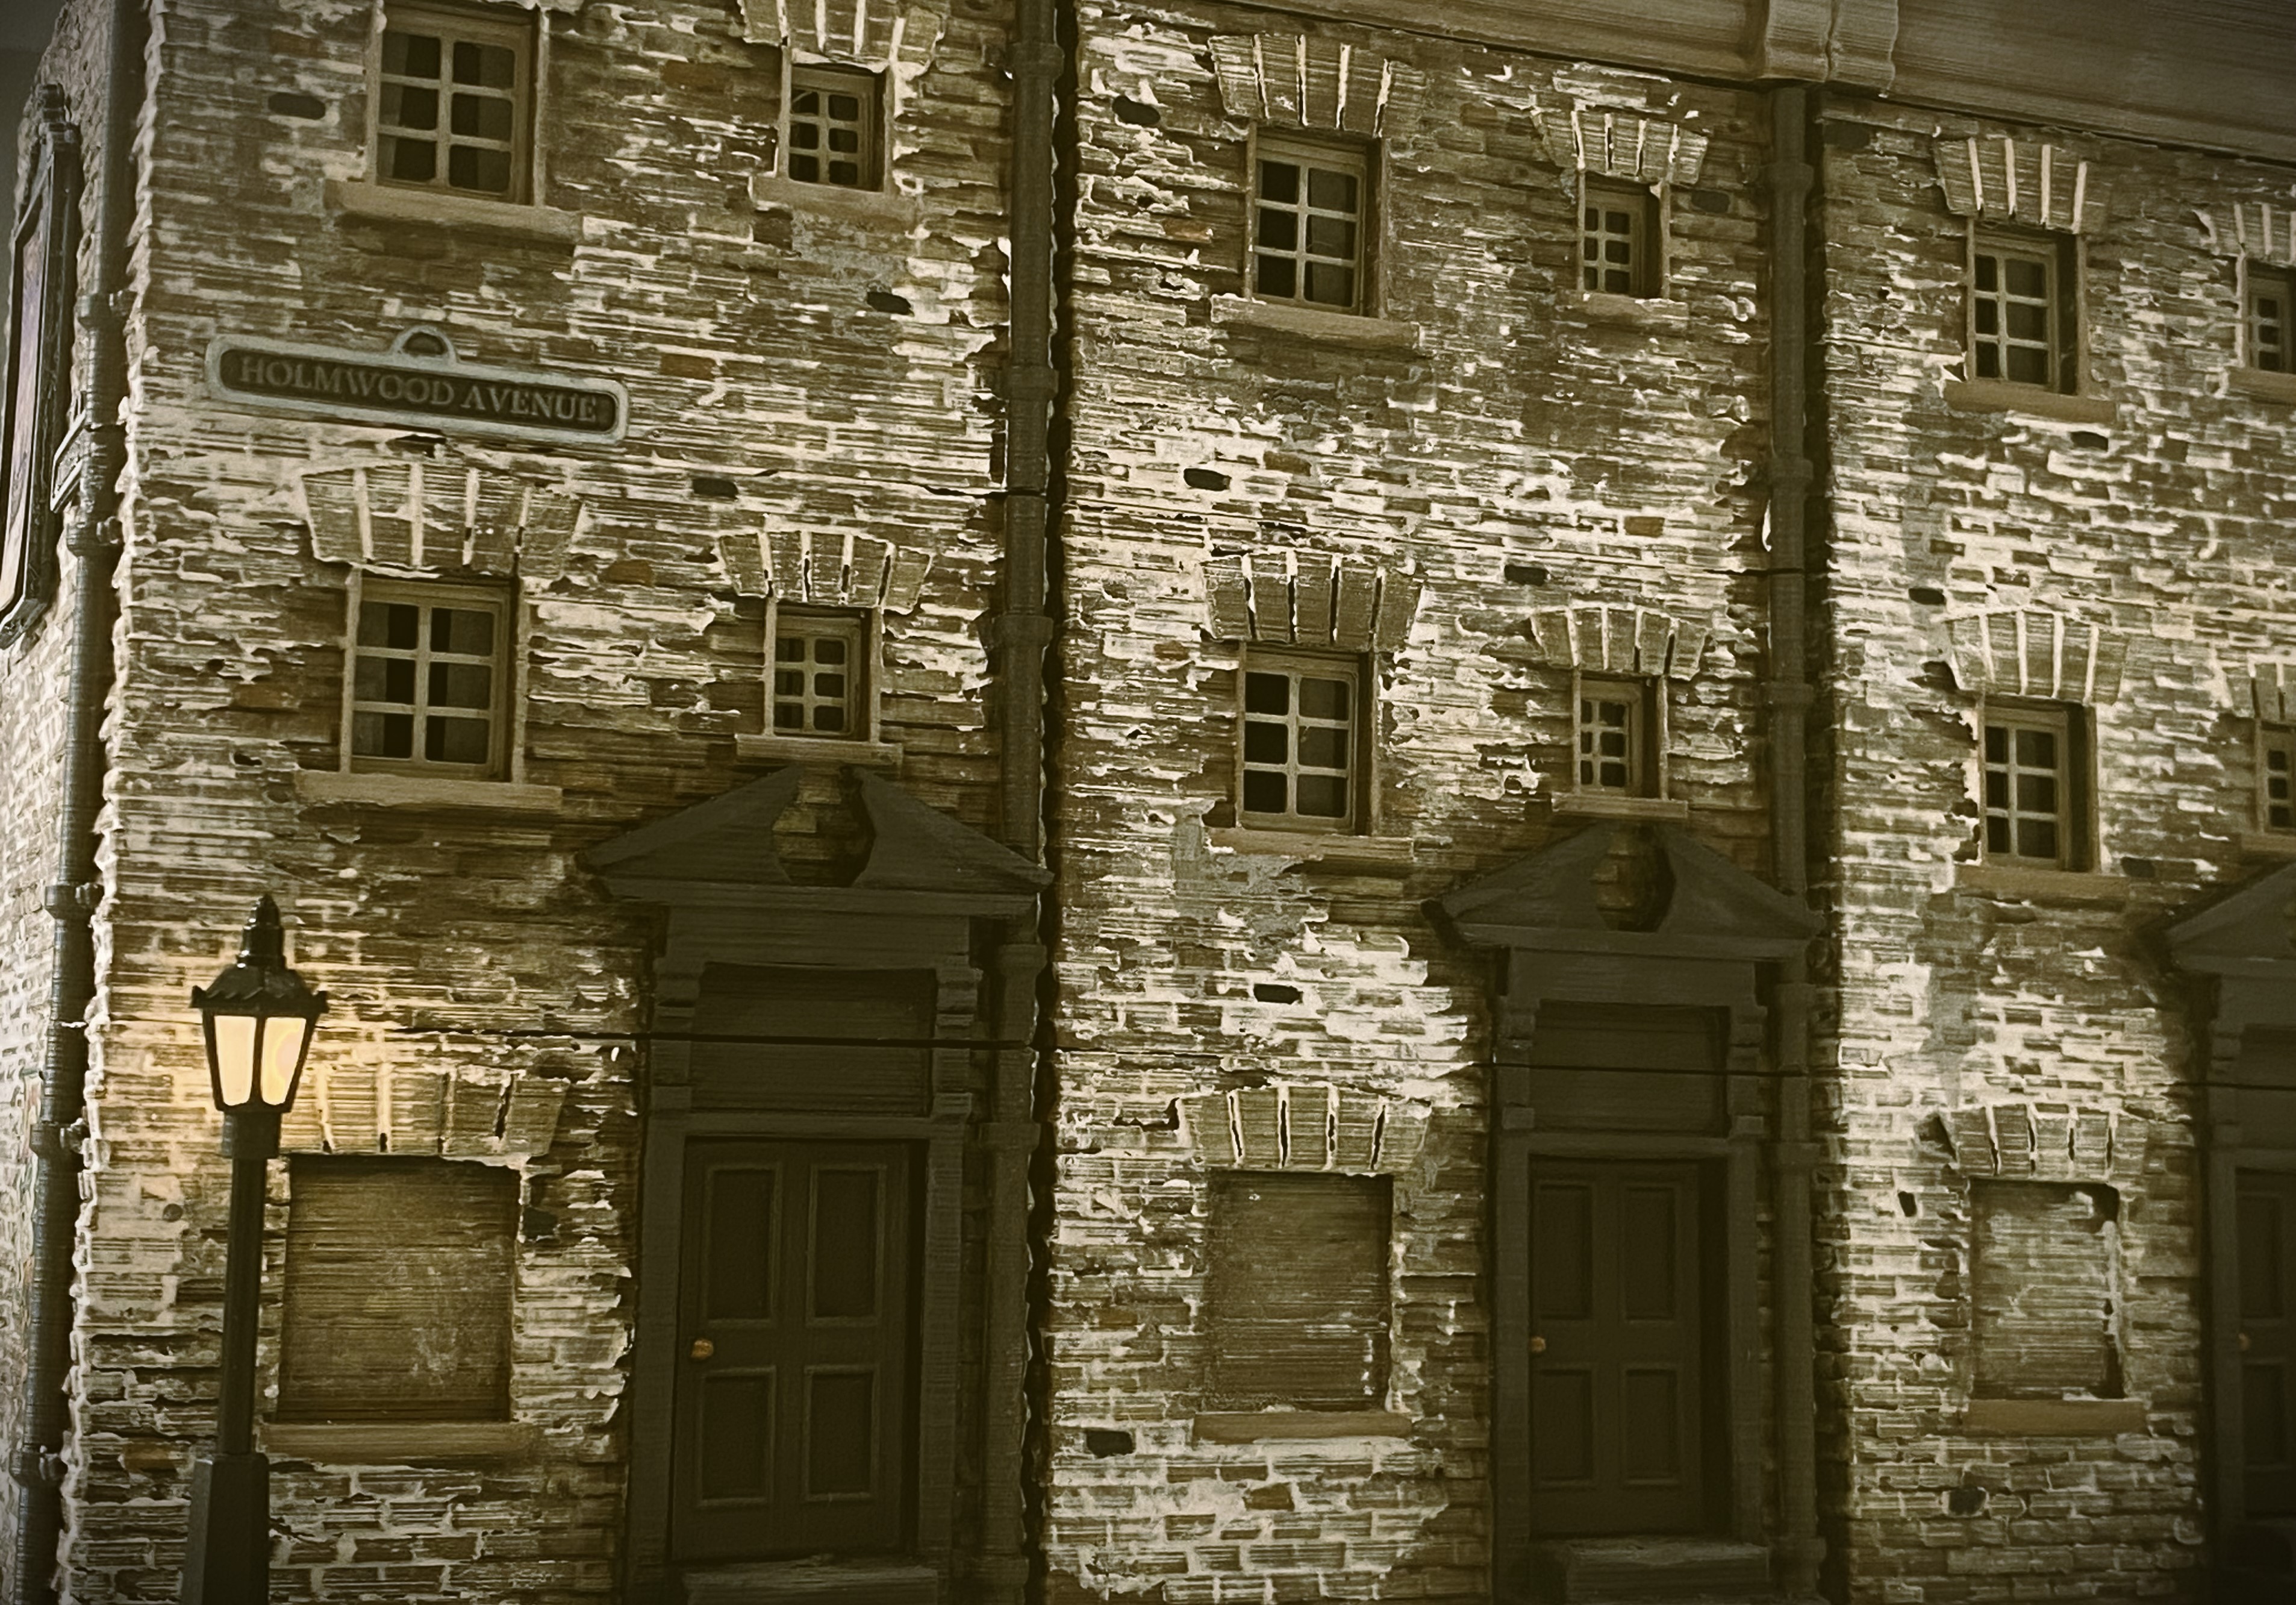
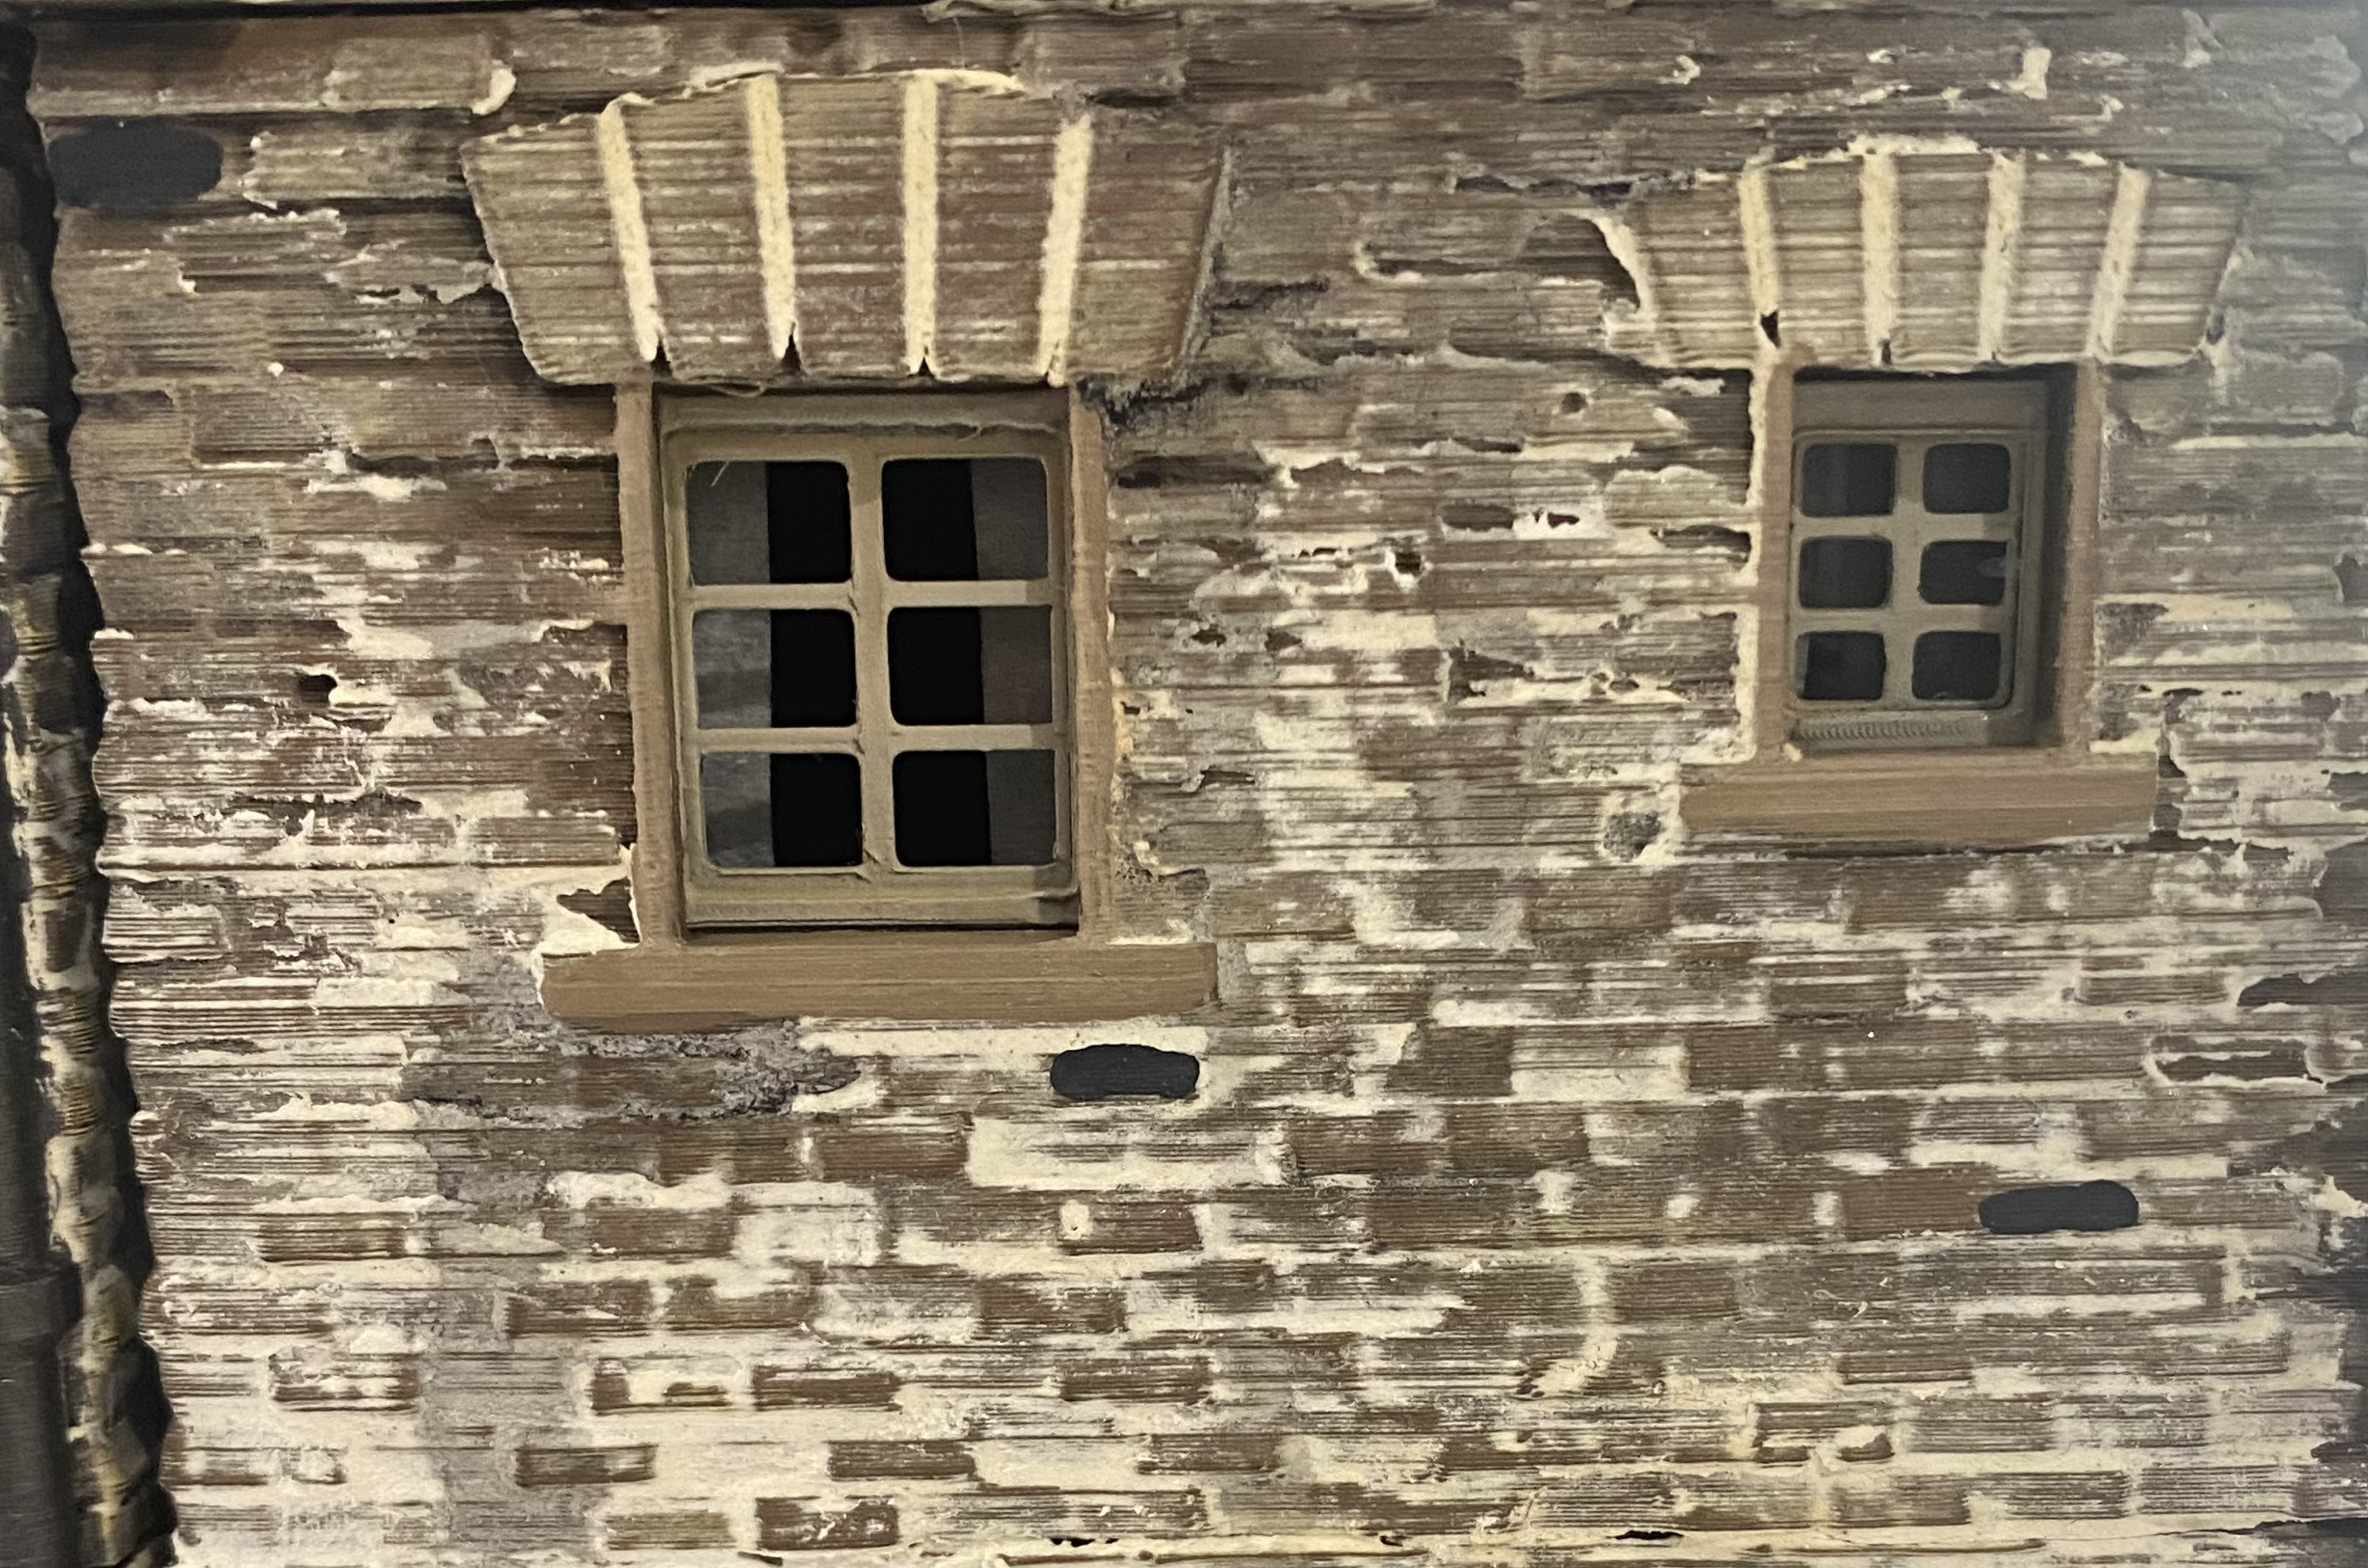
I started by adding curtains to all the windows. To do these I simply added little bits of masking tape stuck inside the buildings. Masking tape has the added benefits of having a slight texture, is not bright white, is self-adhesive and is thin enough to create a better finish than paper.
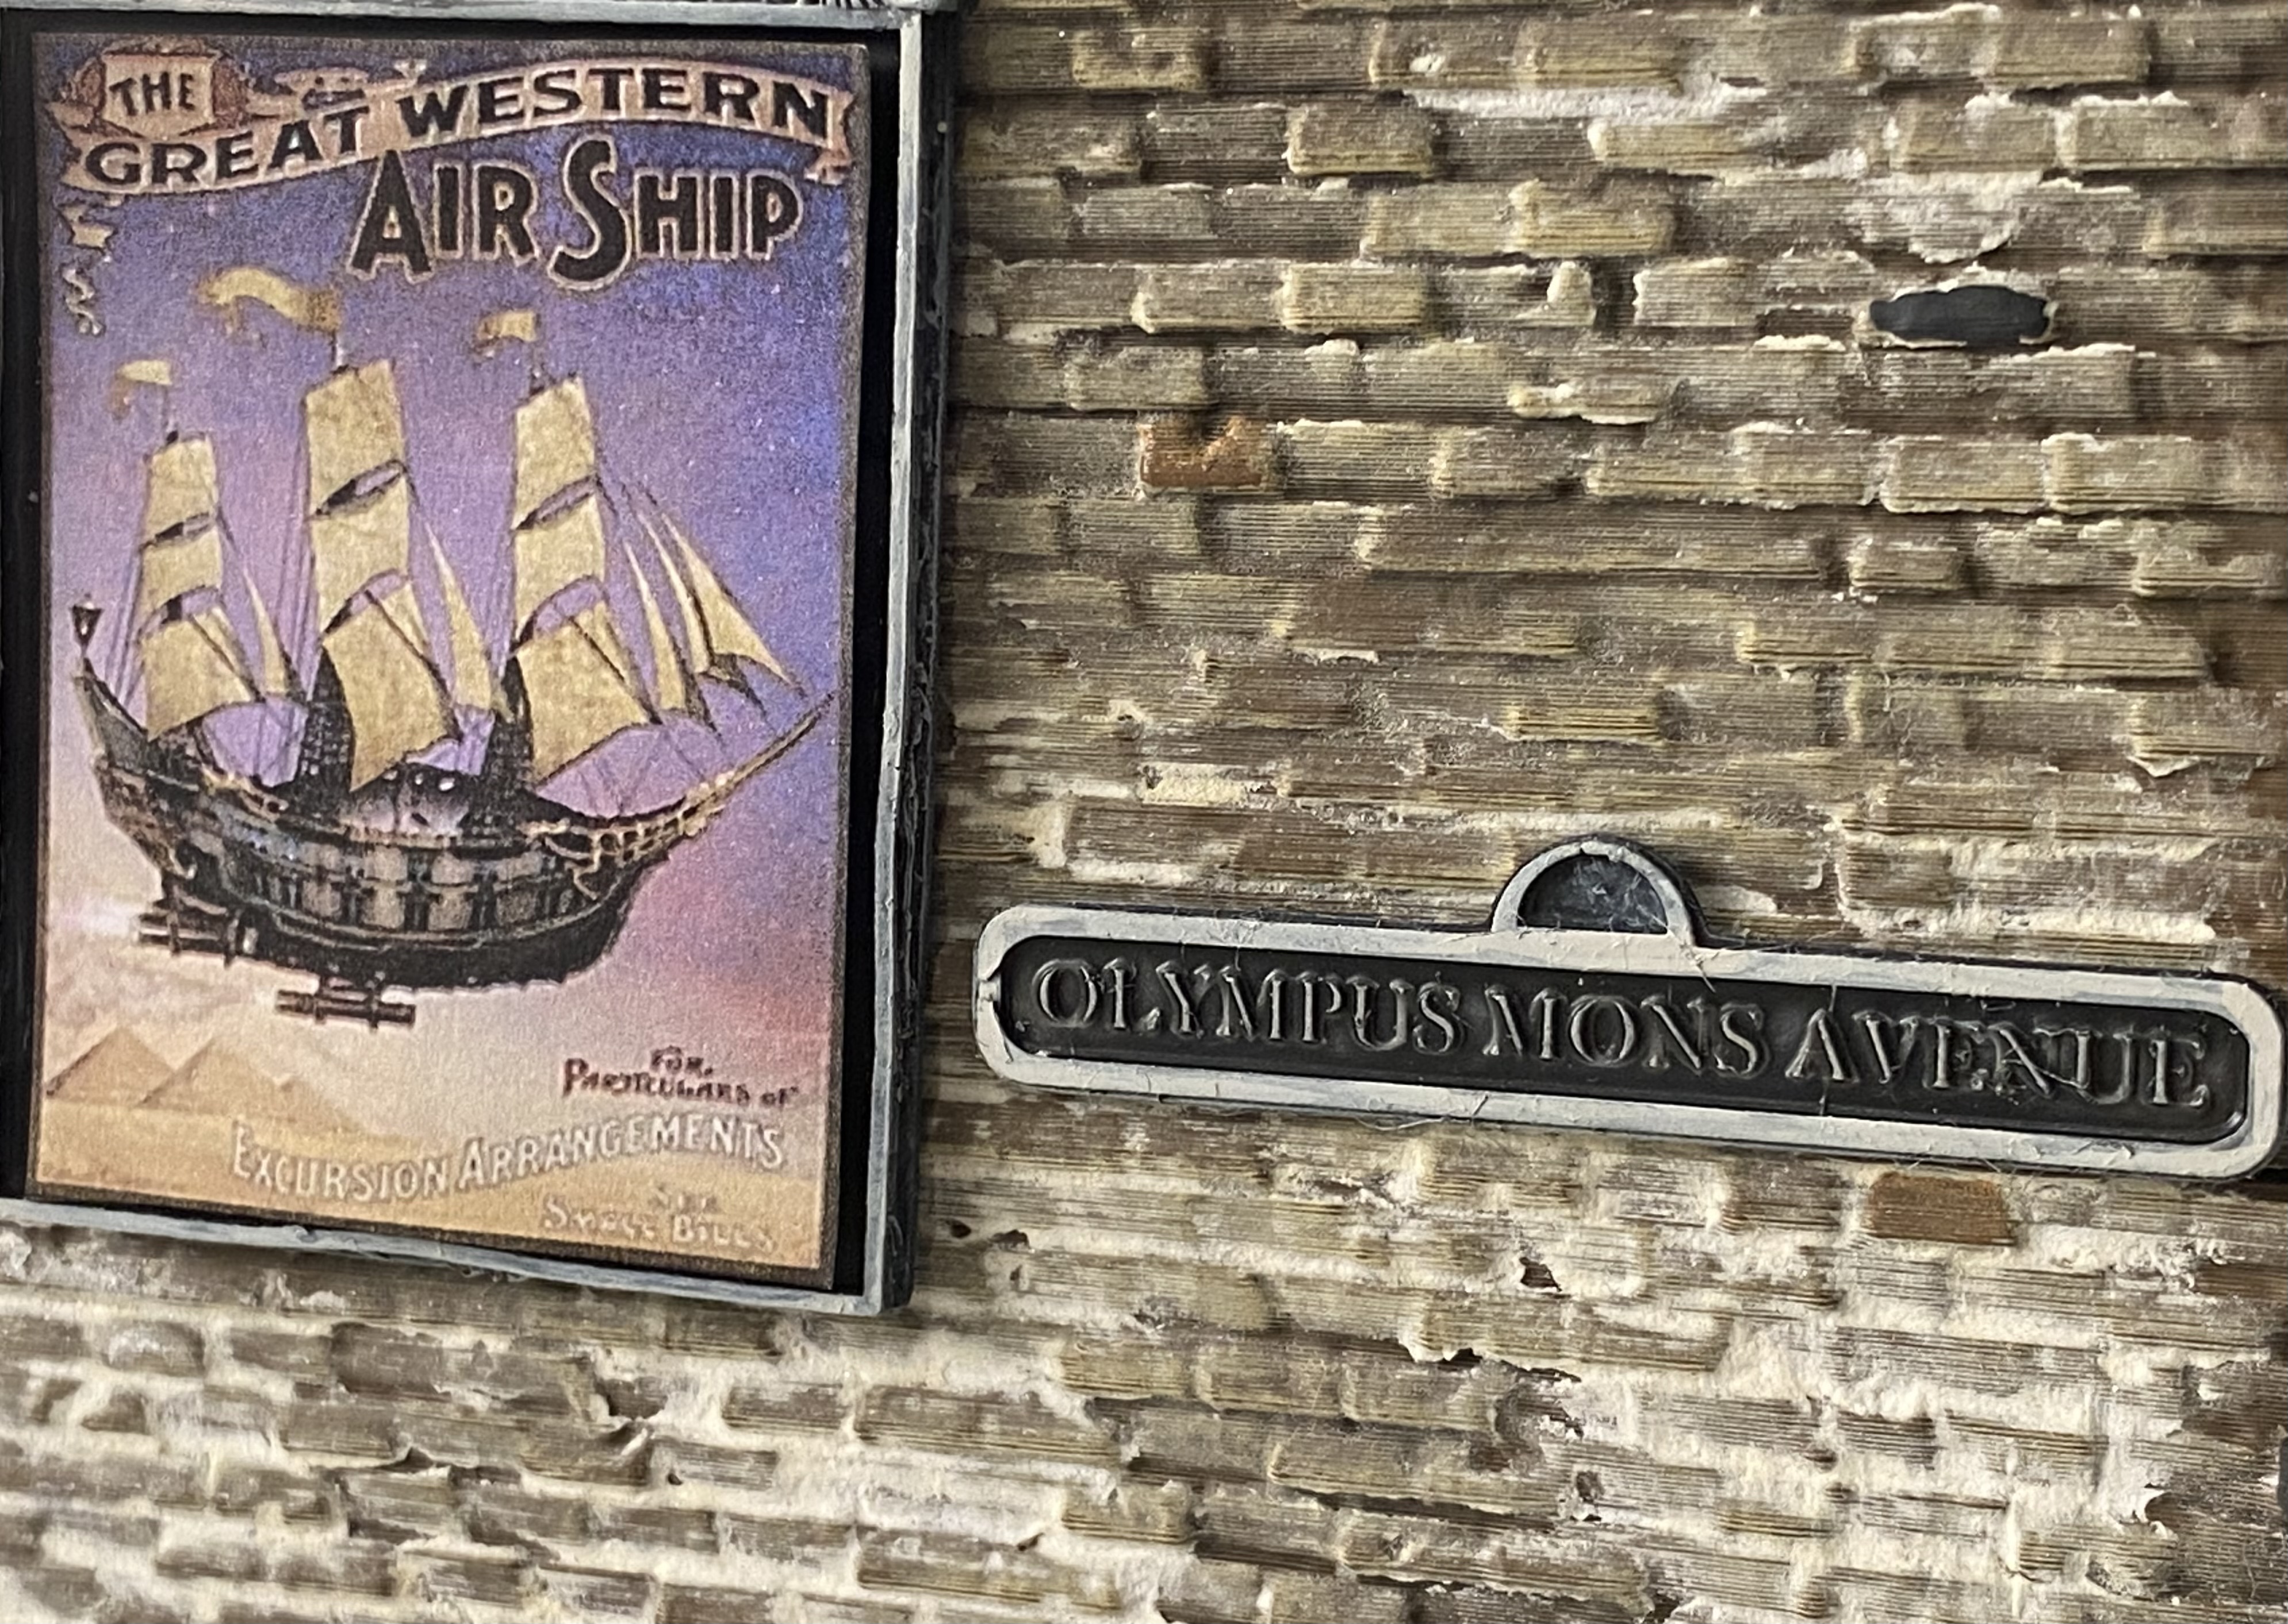
Street Signage was a must. I came up with a selection of different street names. I designed a small sign template, based on the Sesame Street sign, and embossed the letters onto them for each of my chosen streets.
Albert Road
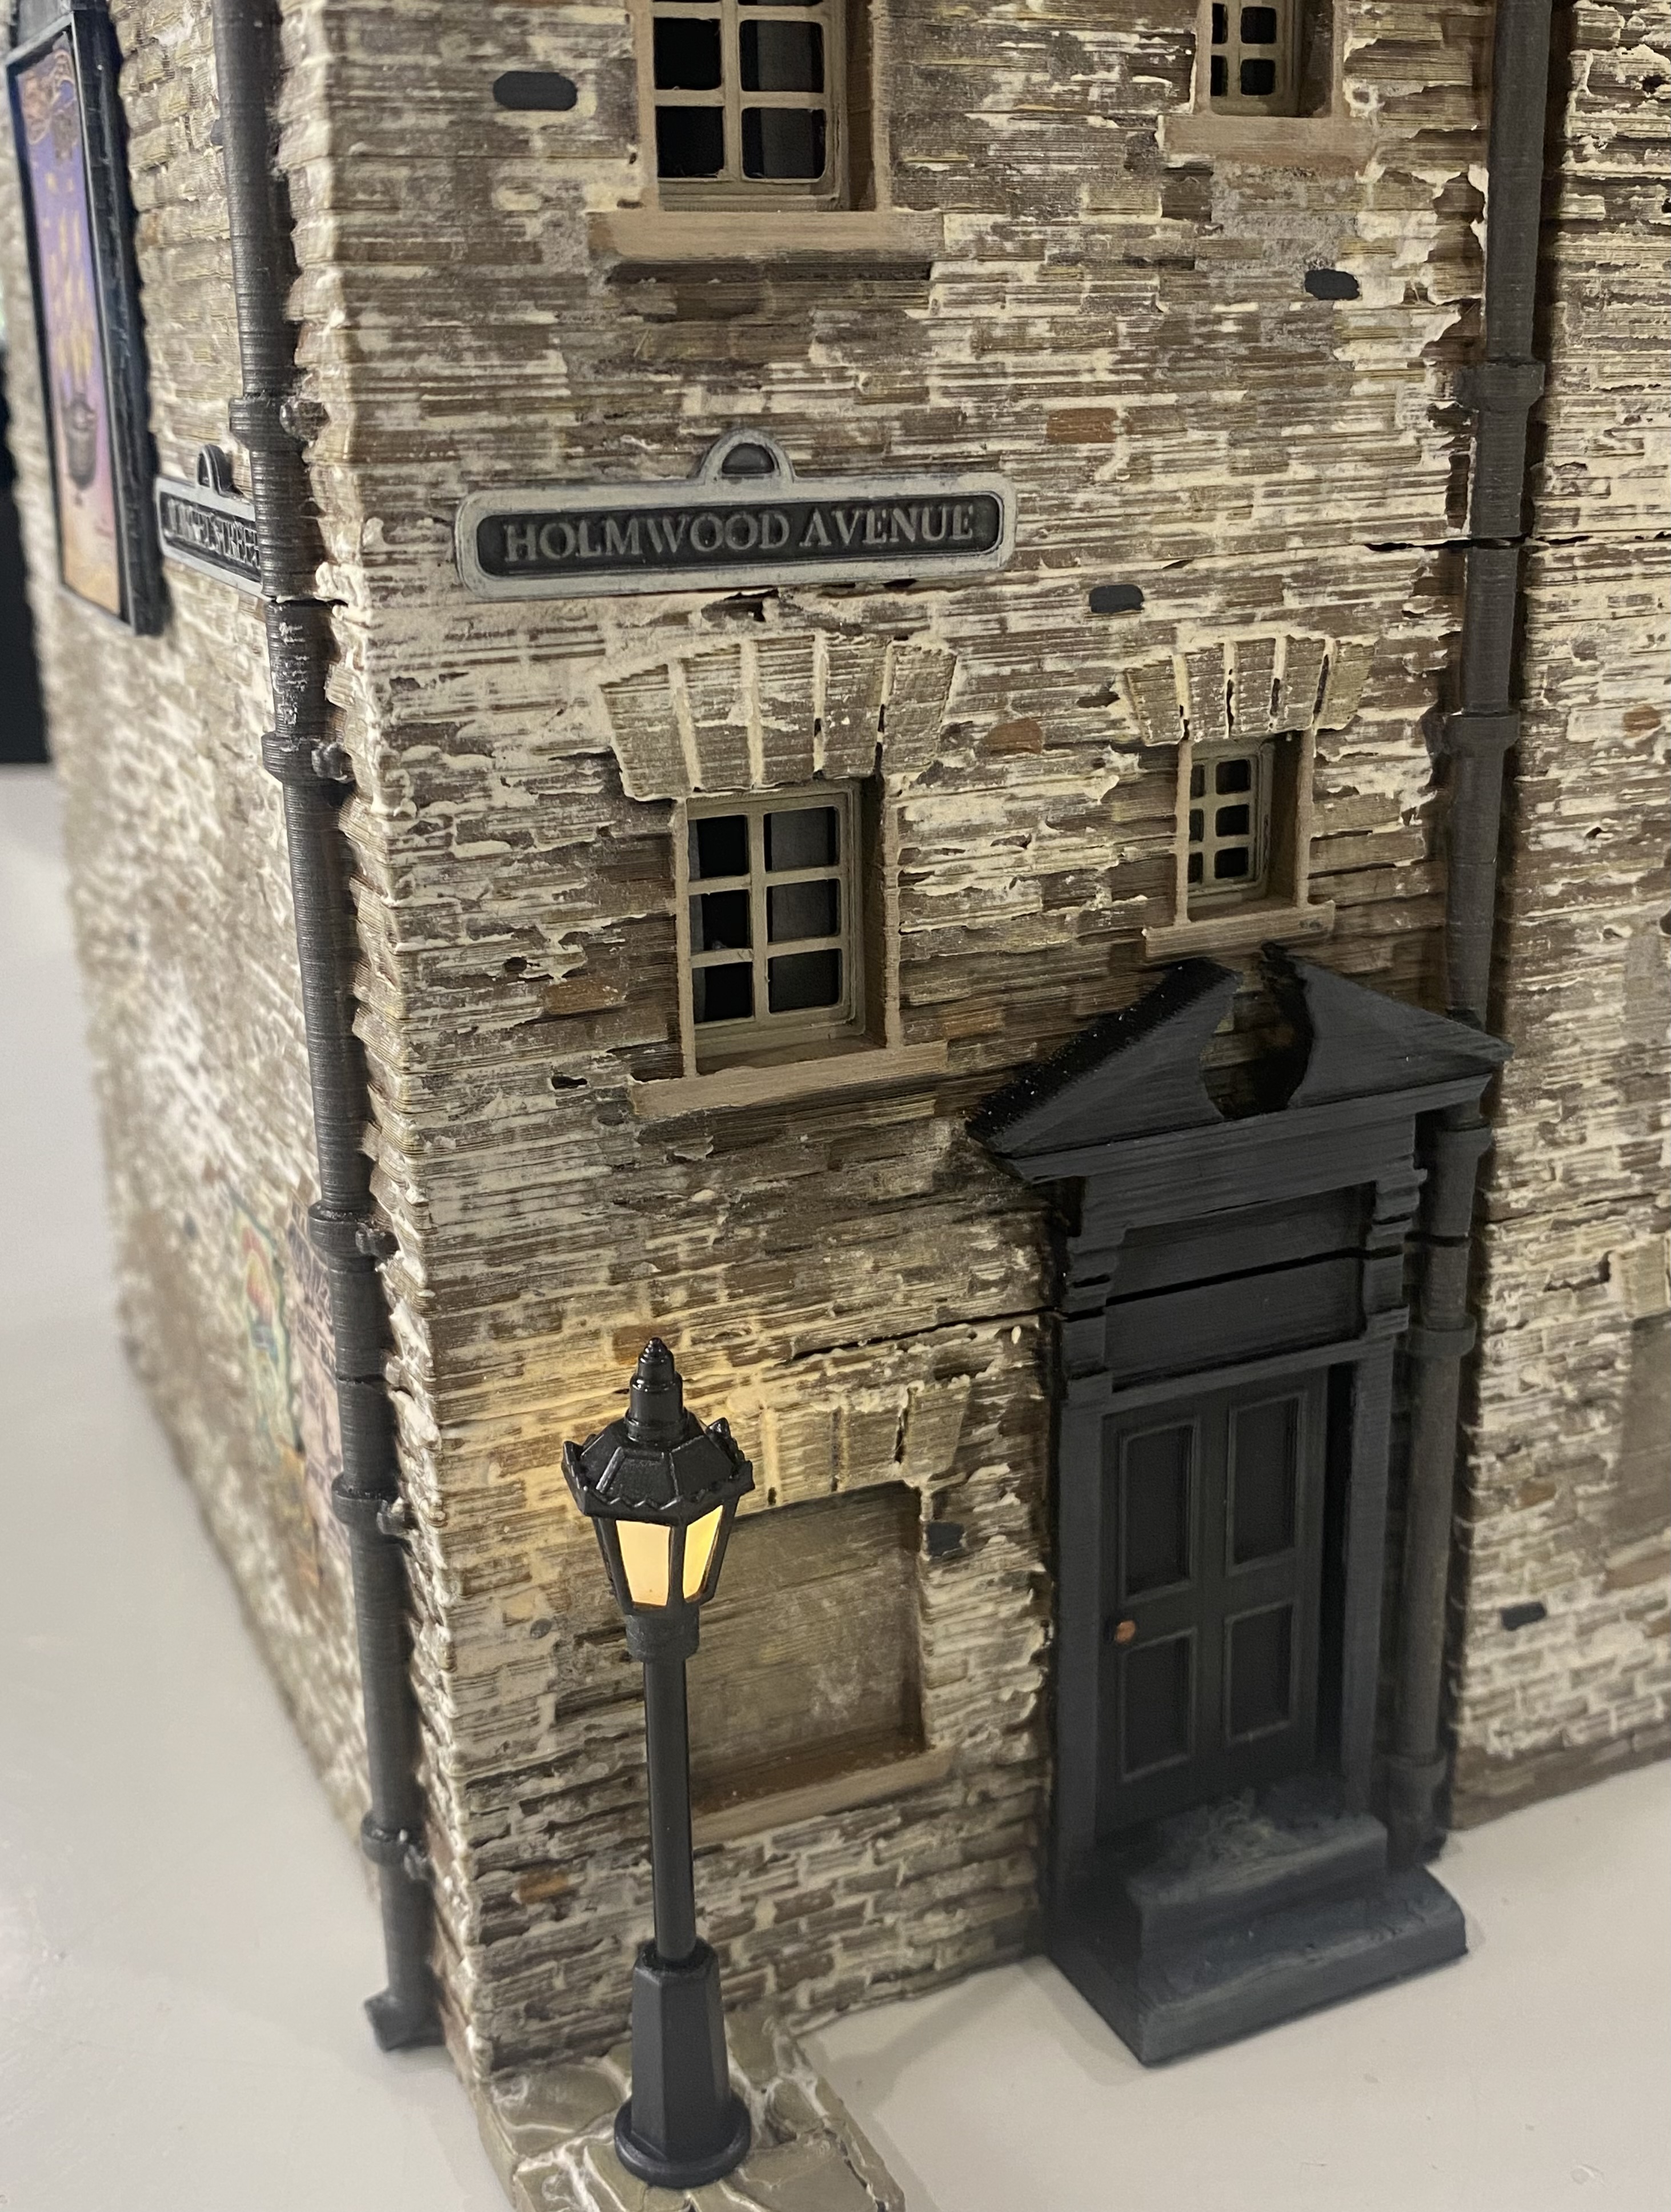
Holmwood Avenue
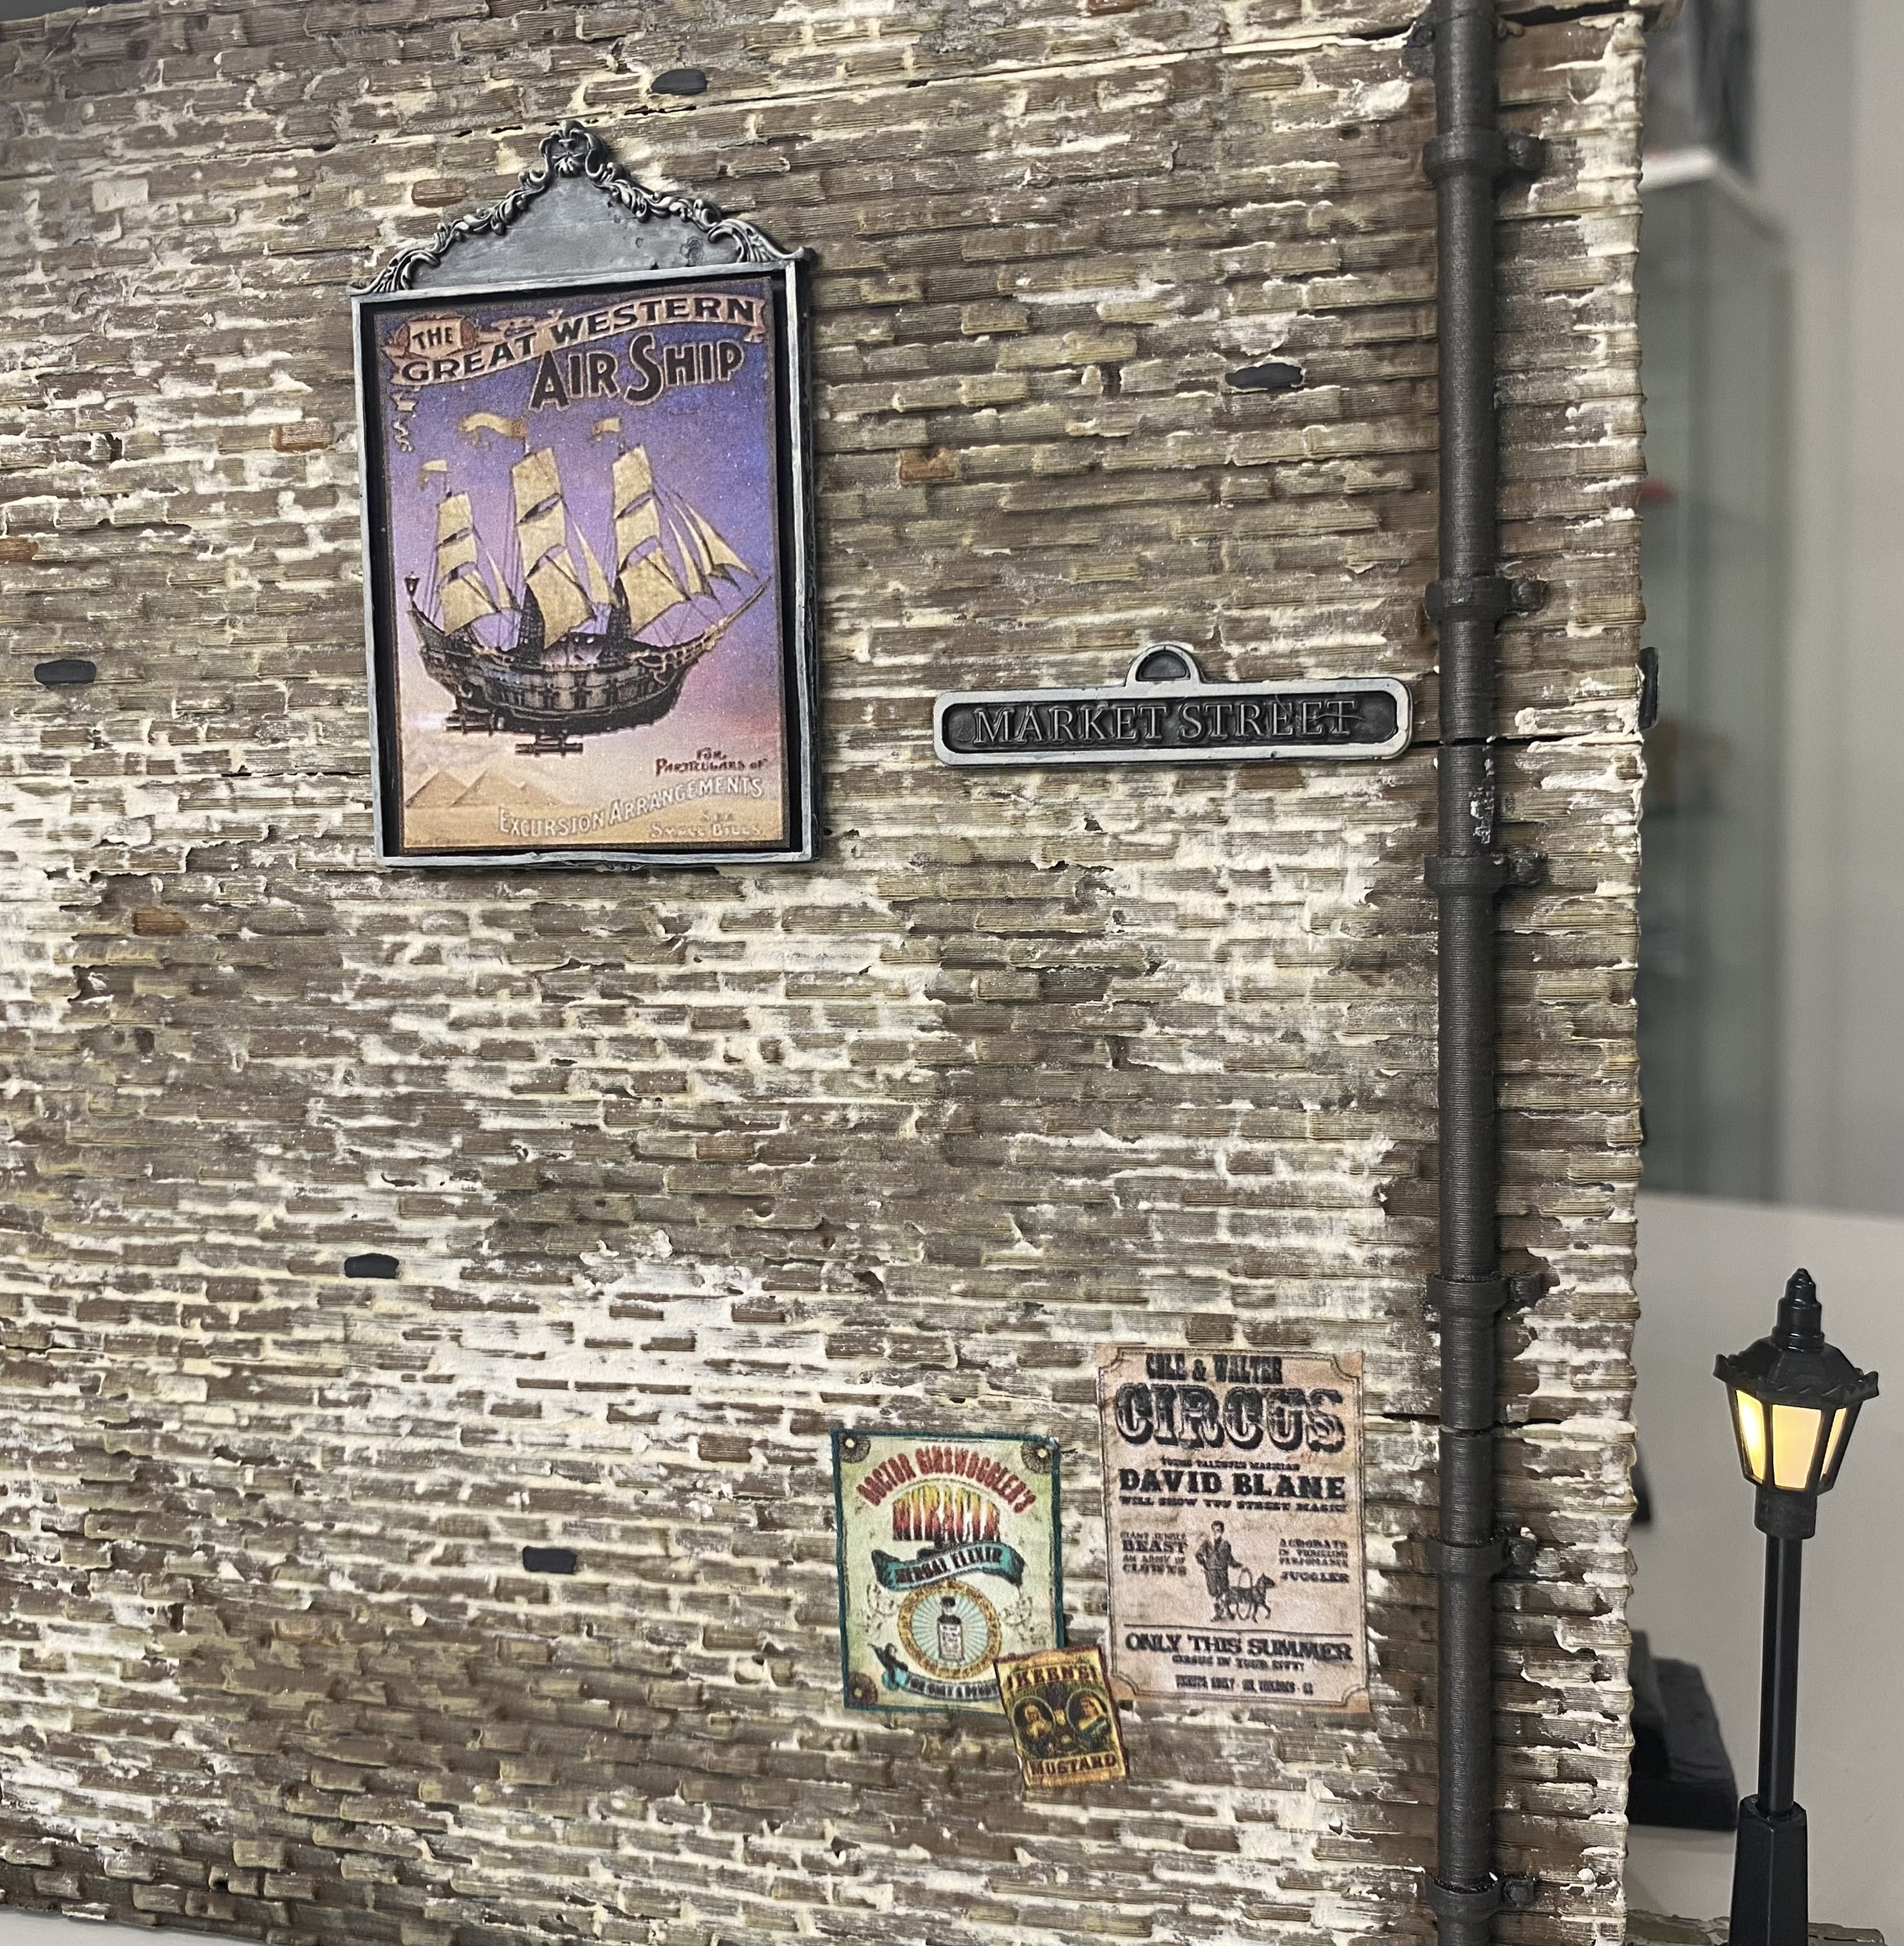
Market Street
Baker Street (of course this needed to be there)
I also added some Victorian Science fiction-themed ones.
Floatwood Avenue
Olympus Mons Avenue
Valles Marineris Street
Hellas Planitia View
I painted the signs up in a black and off-white colour scheme. Of course, the signs are all removable and interchangeable.
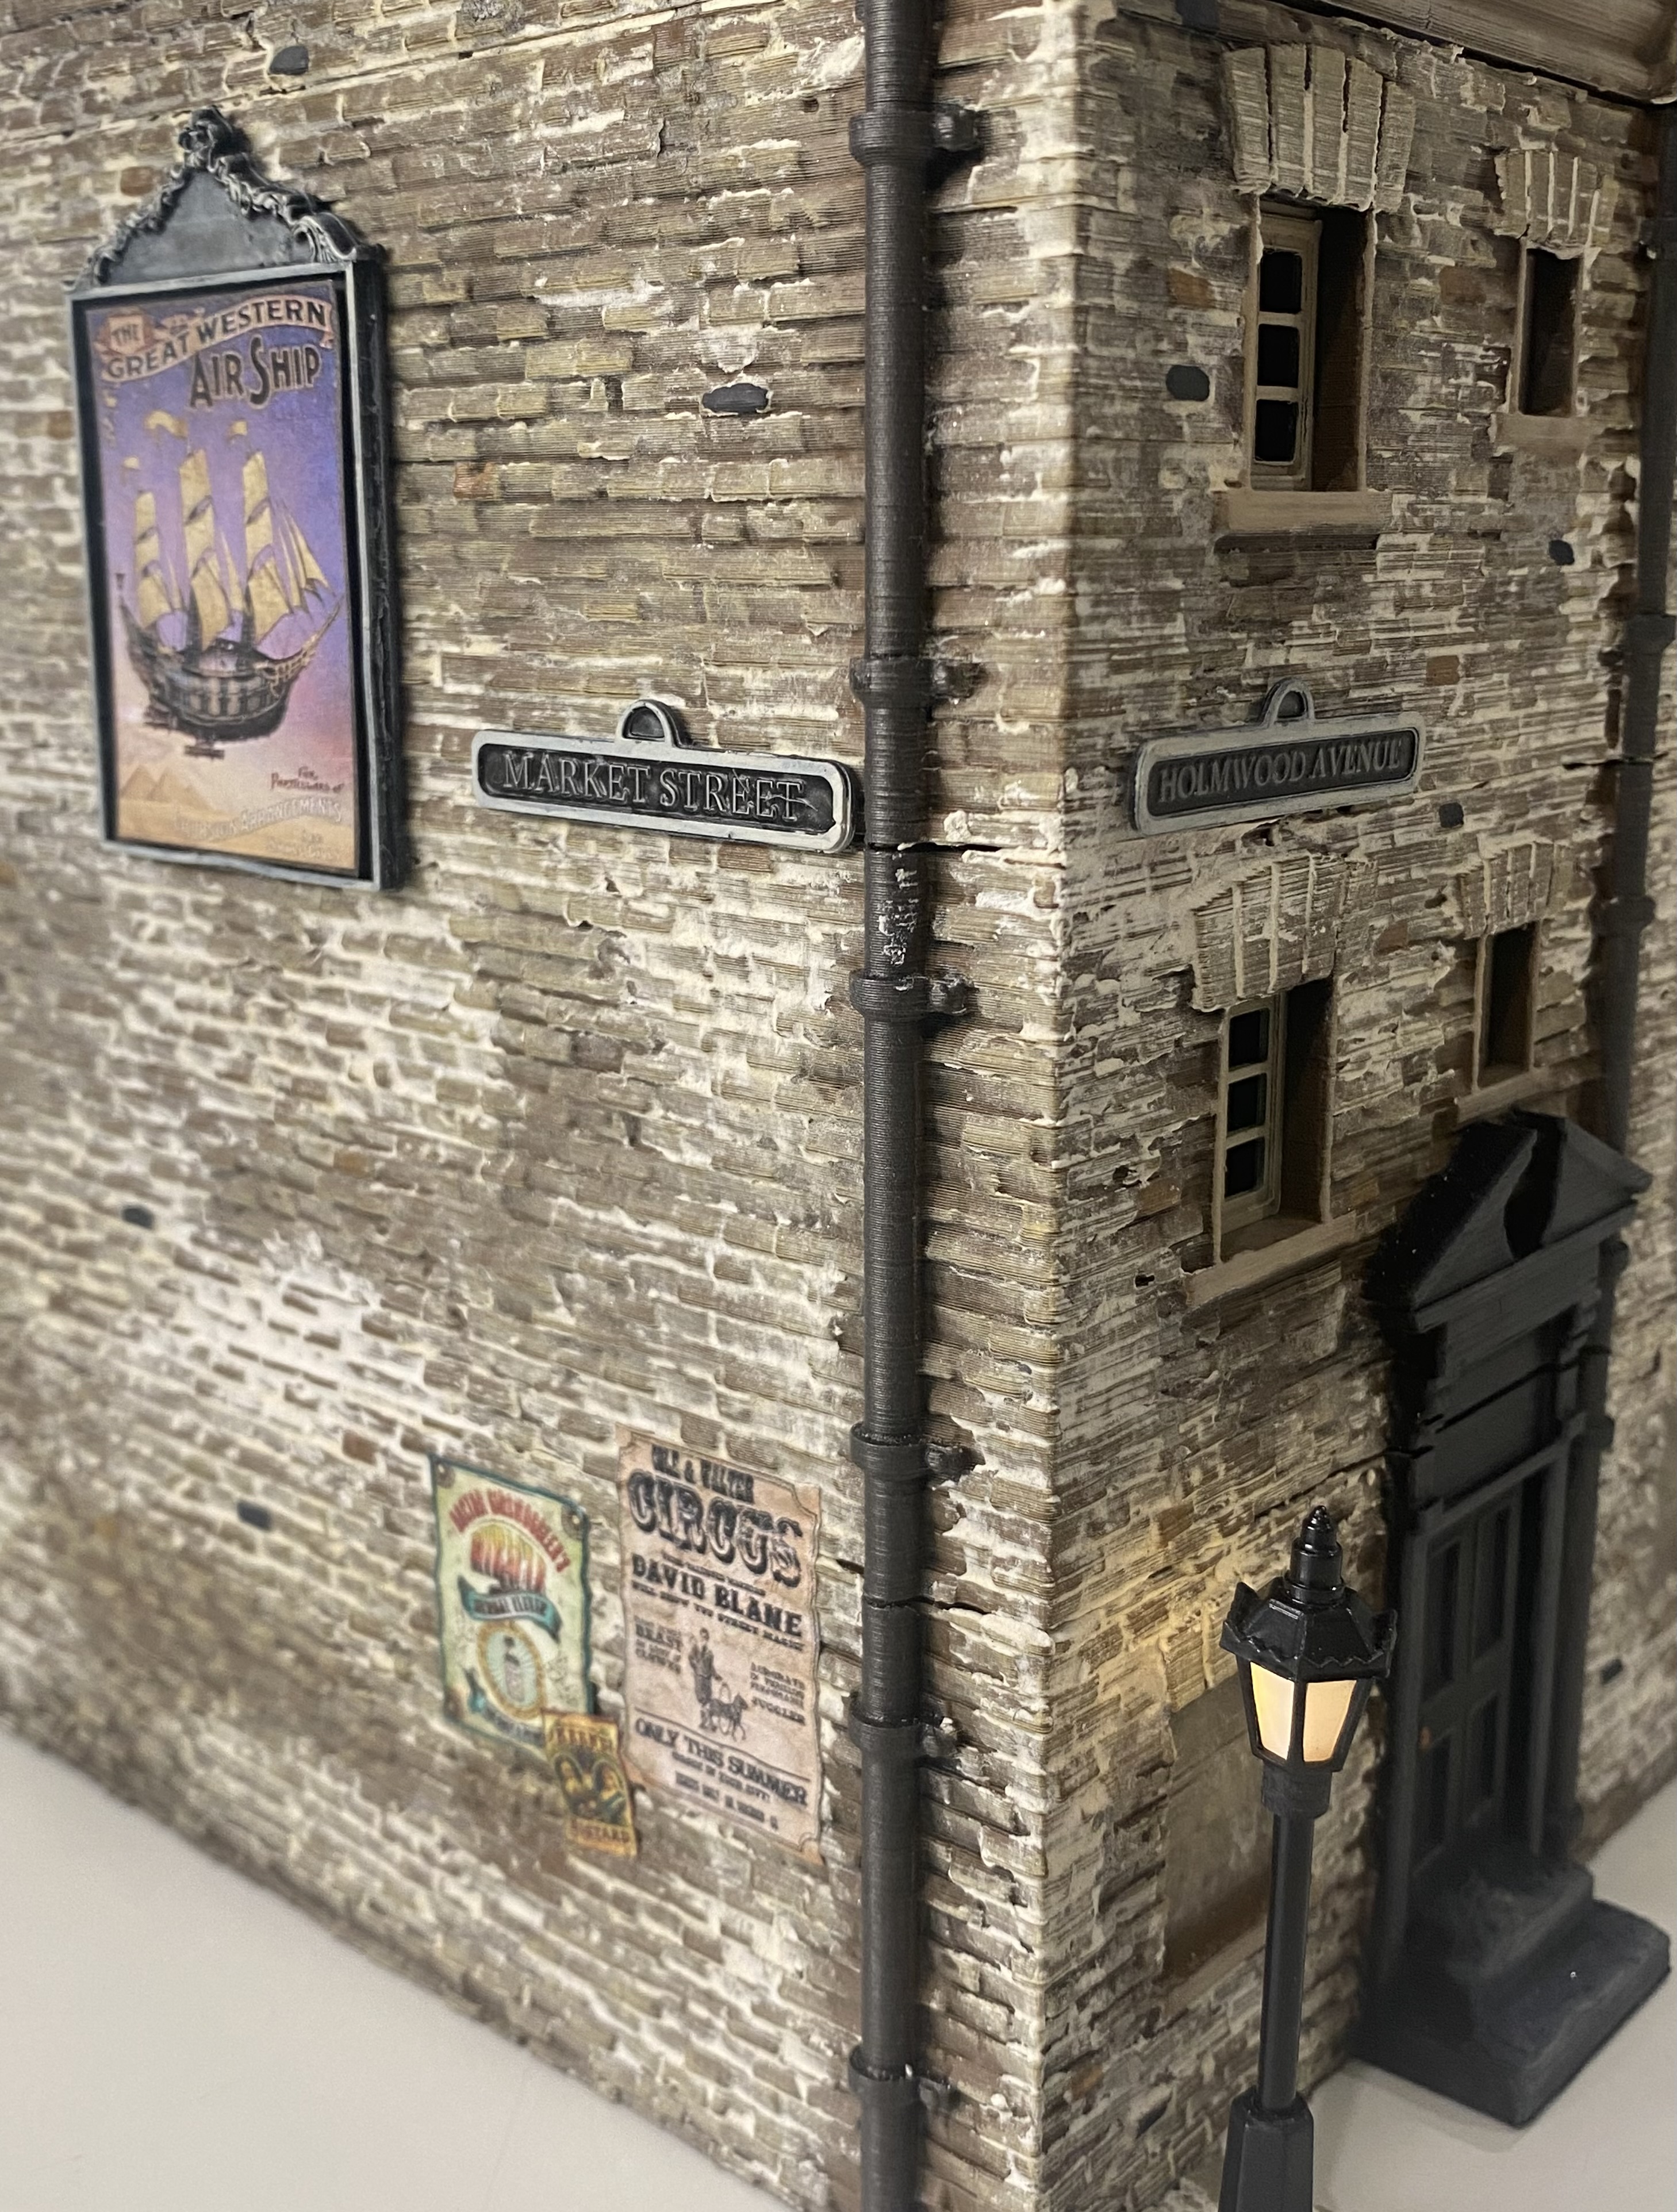
Next up was signage and posters. I knocked up a quick sign frame on a 3D building program and printed it out on a resin printer. A Google search was all that was needed to find suitable images.
Again, I have kept both the signboard and the picture within it removable, so I can swap images in and out as I please.
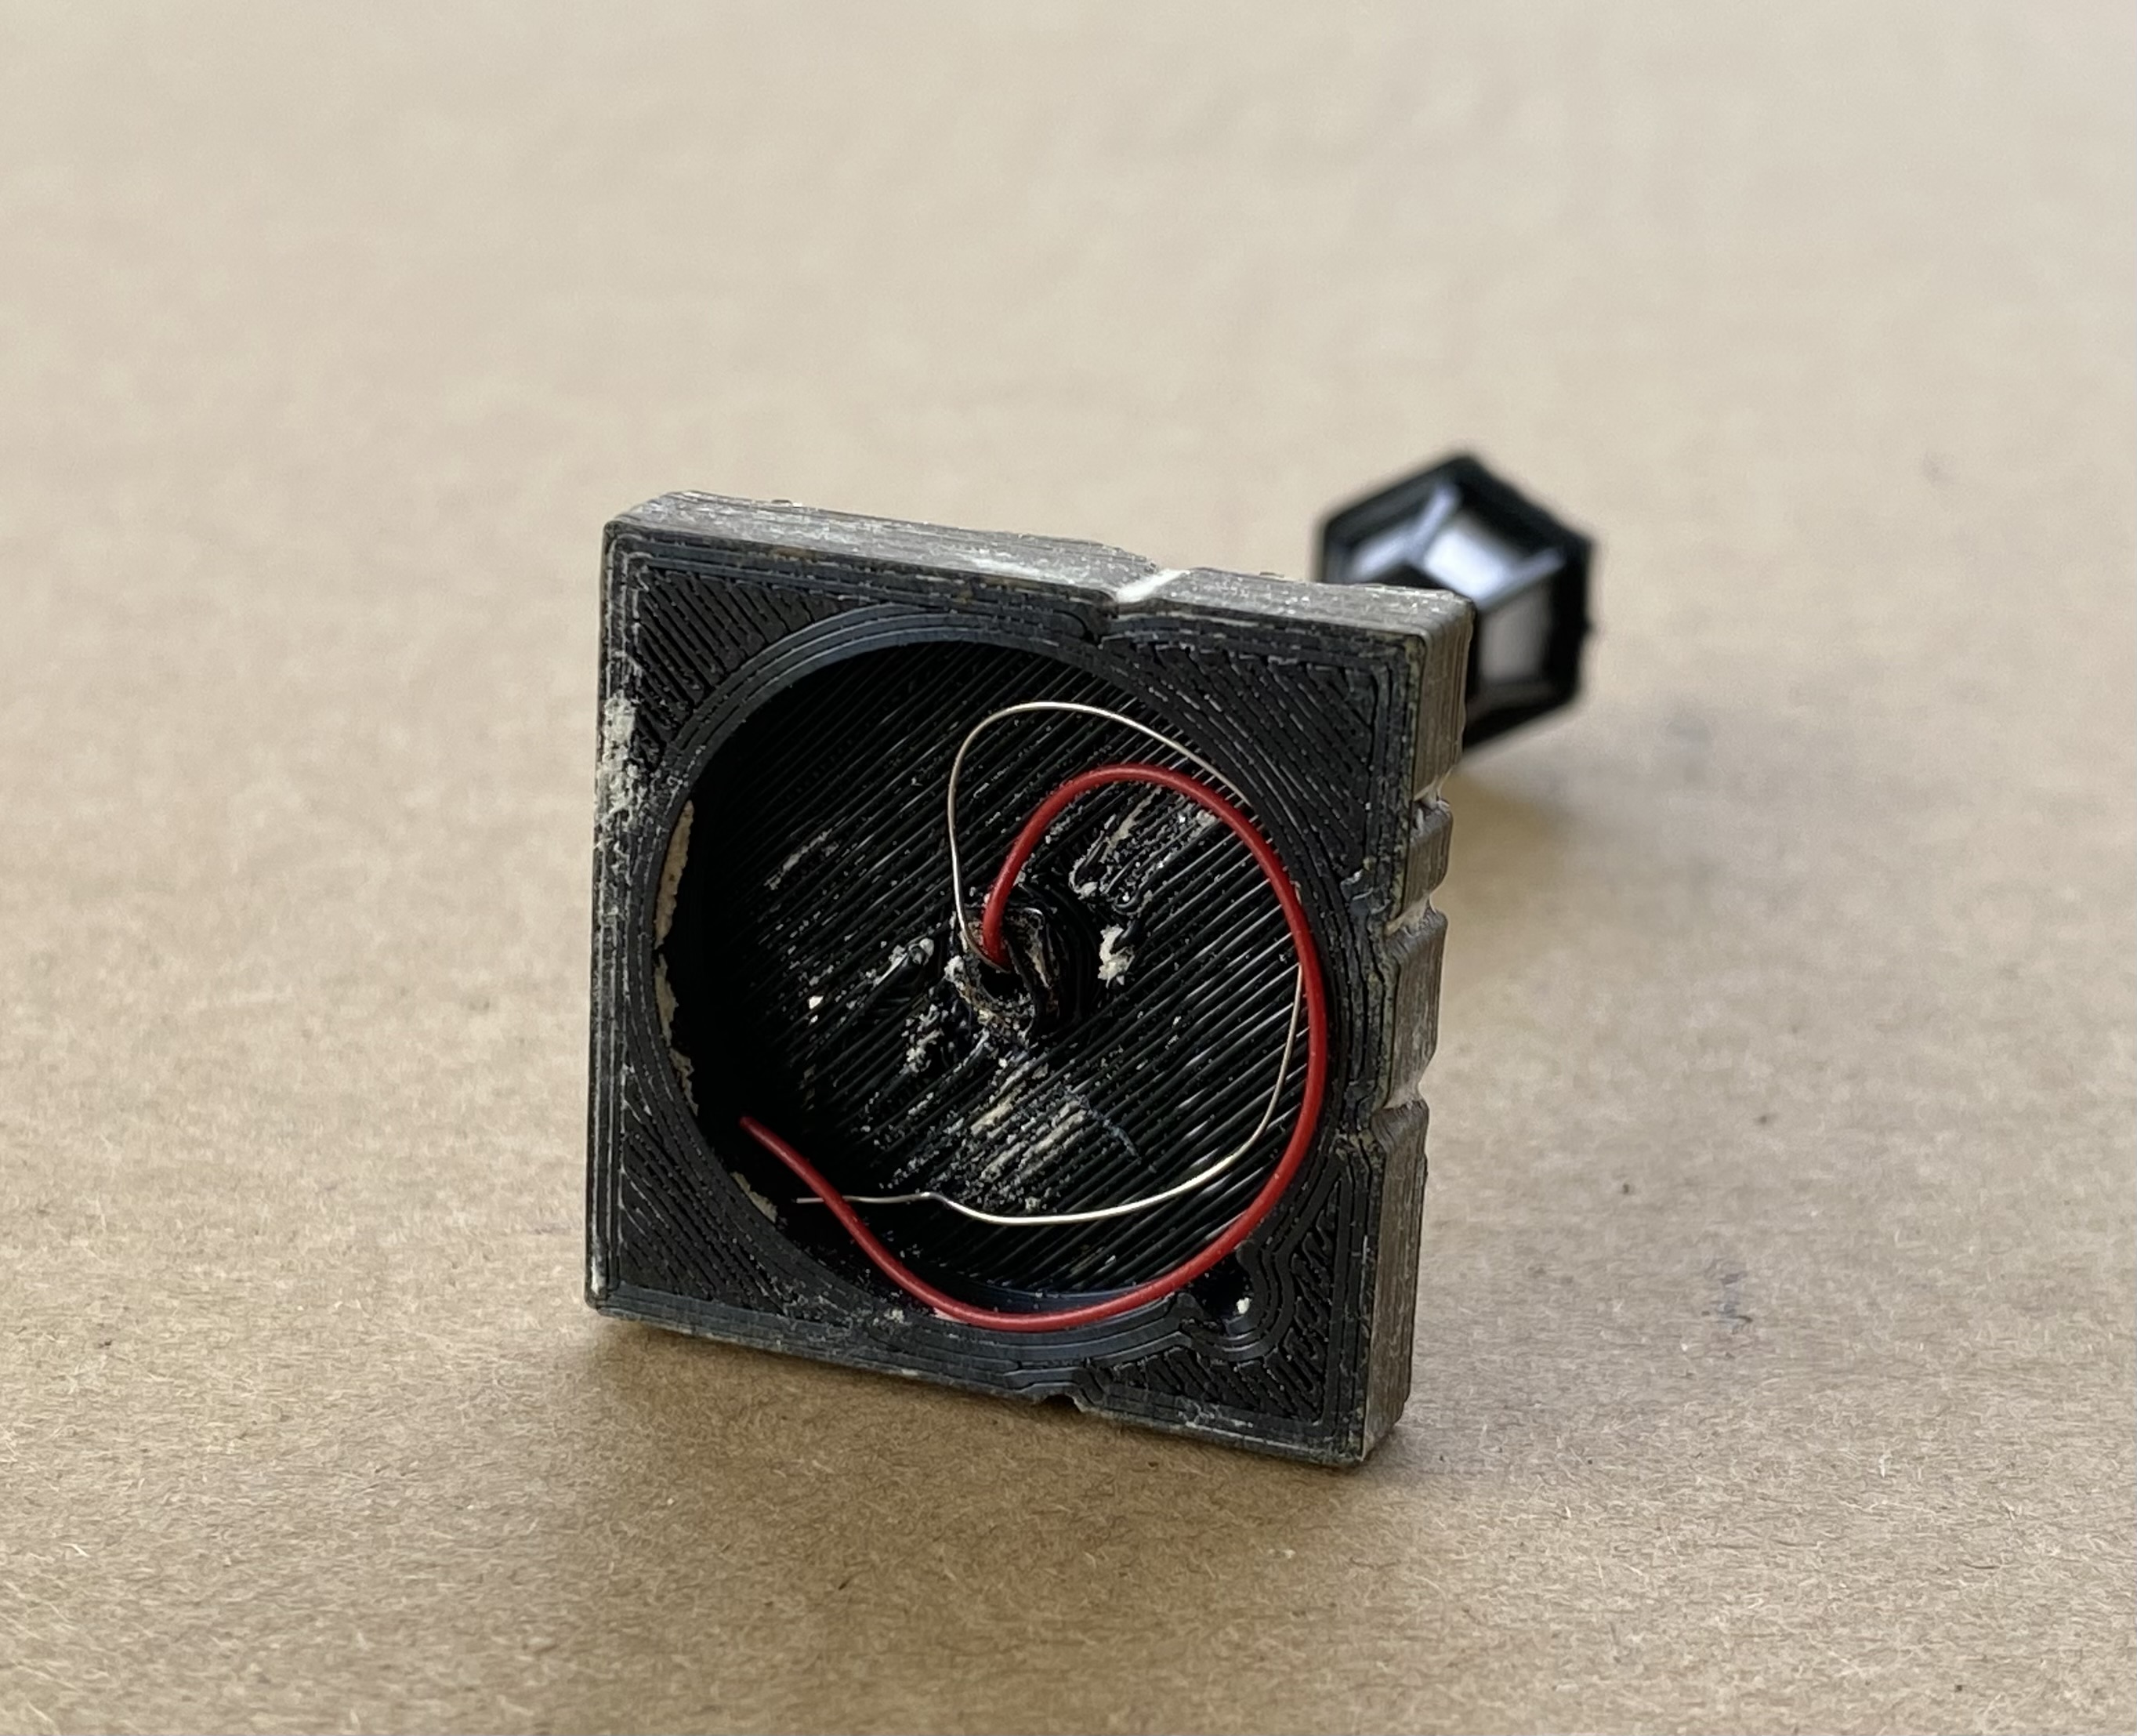
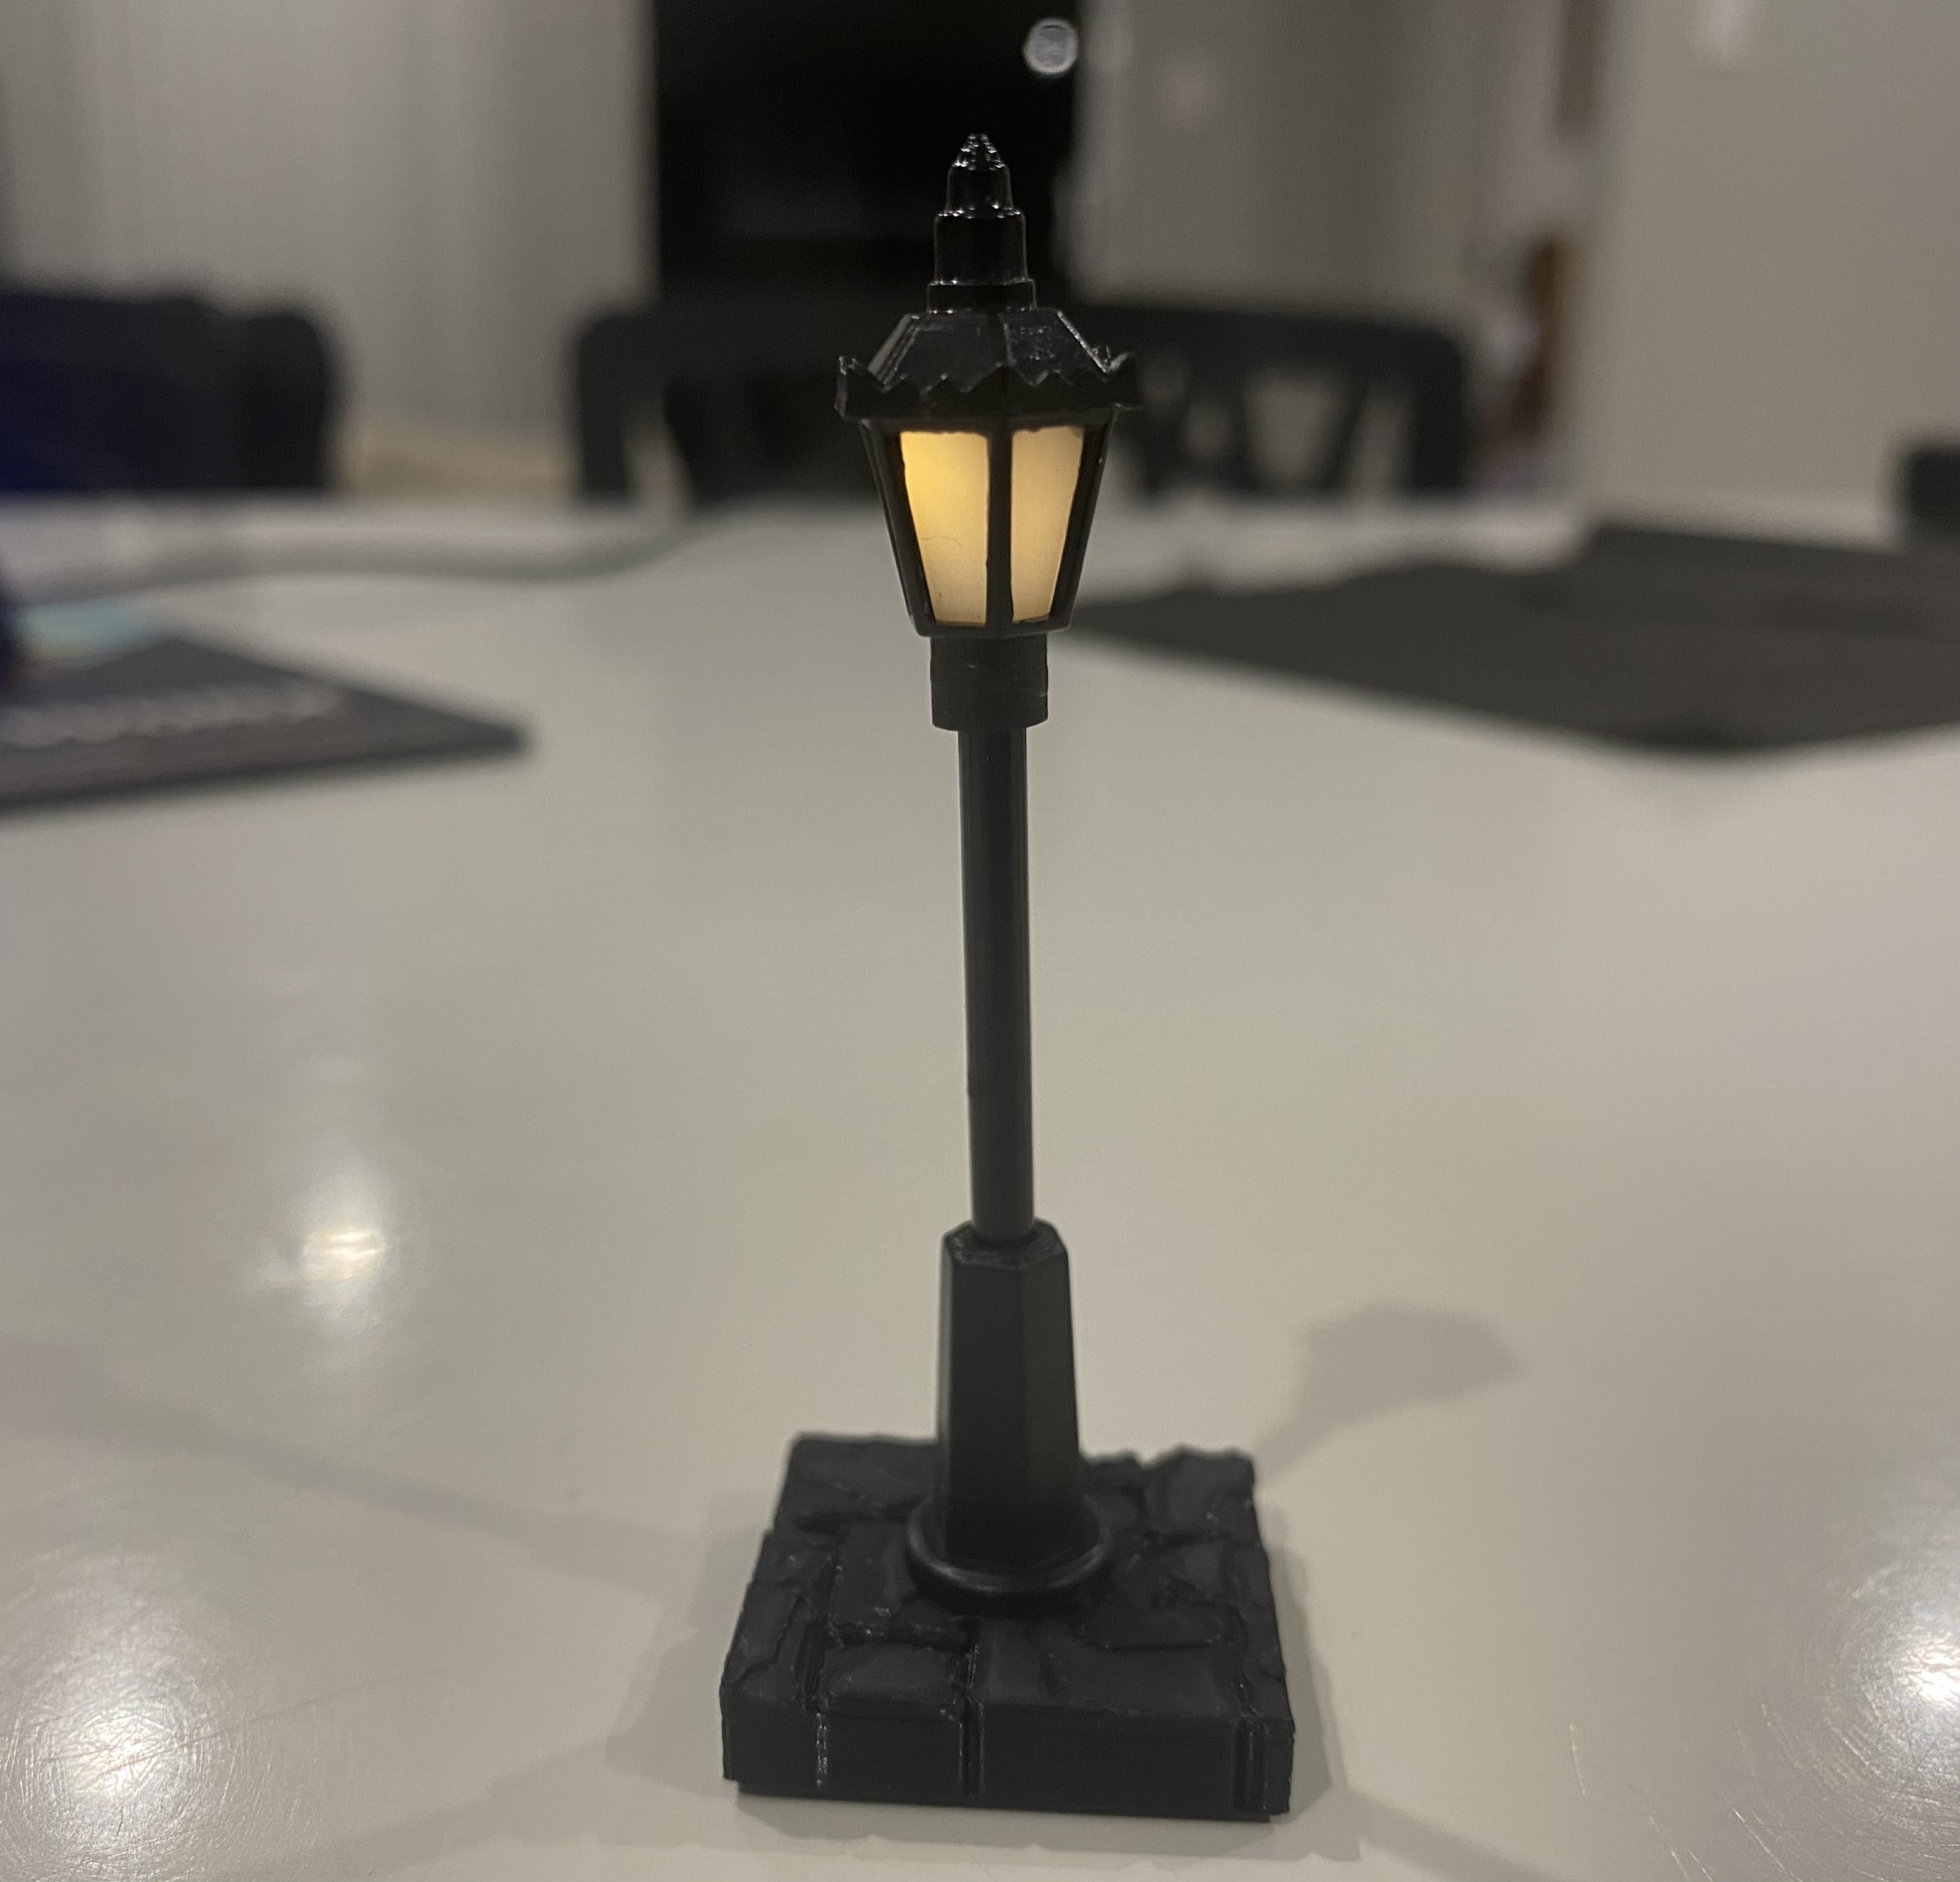
After that, I simply added a button battery, left over from tealight candles used during Halloween, to light up the streetlight.
I suppose I should look at adding some details to the insides of the building too as you can see through the windows a bit. At the very least I should do that to the shops with their bigger display windows. They will also need shop signs to brighten them up and help them stand out from the townhouses.
As always, I am open to ideas and suggestions.
Plodding along
Well after a hectic Terrain Fest month trying to push through as much stuff as possible, I am feeling a little burnt out. Of course, that doesn’t mean I have to stop, but now it’s time to slow down and take a more leisurely pace.
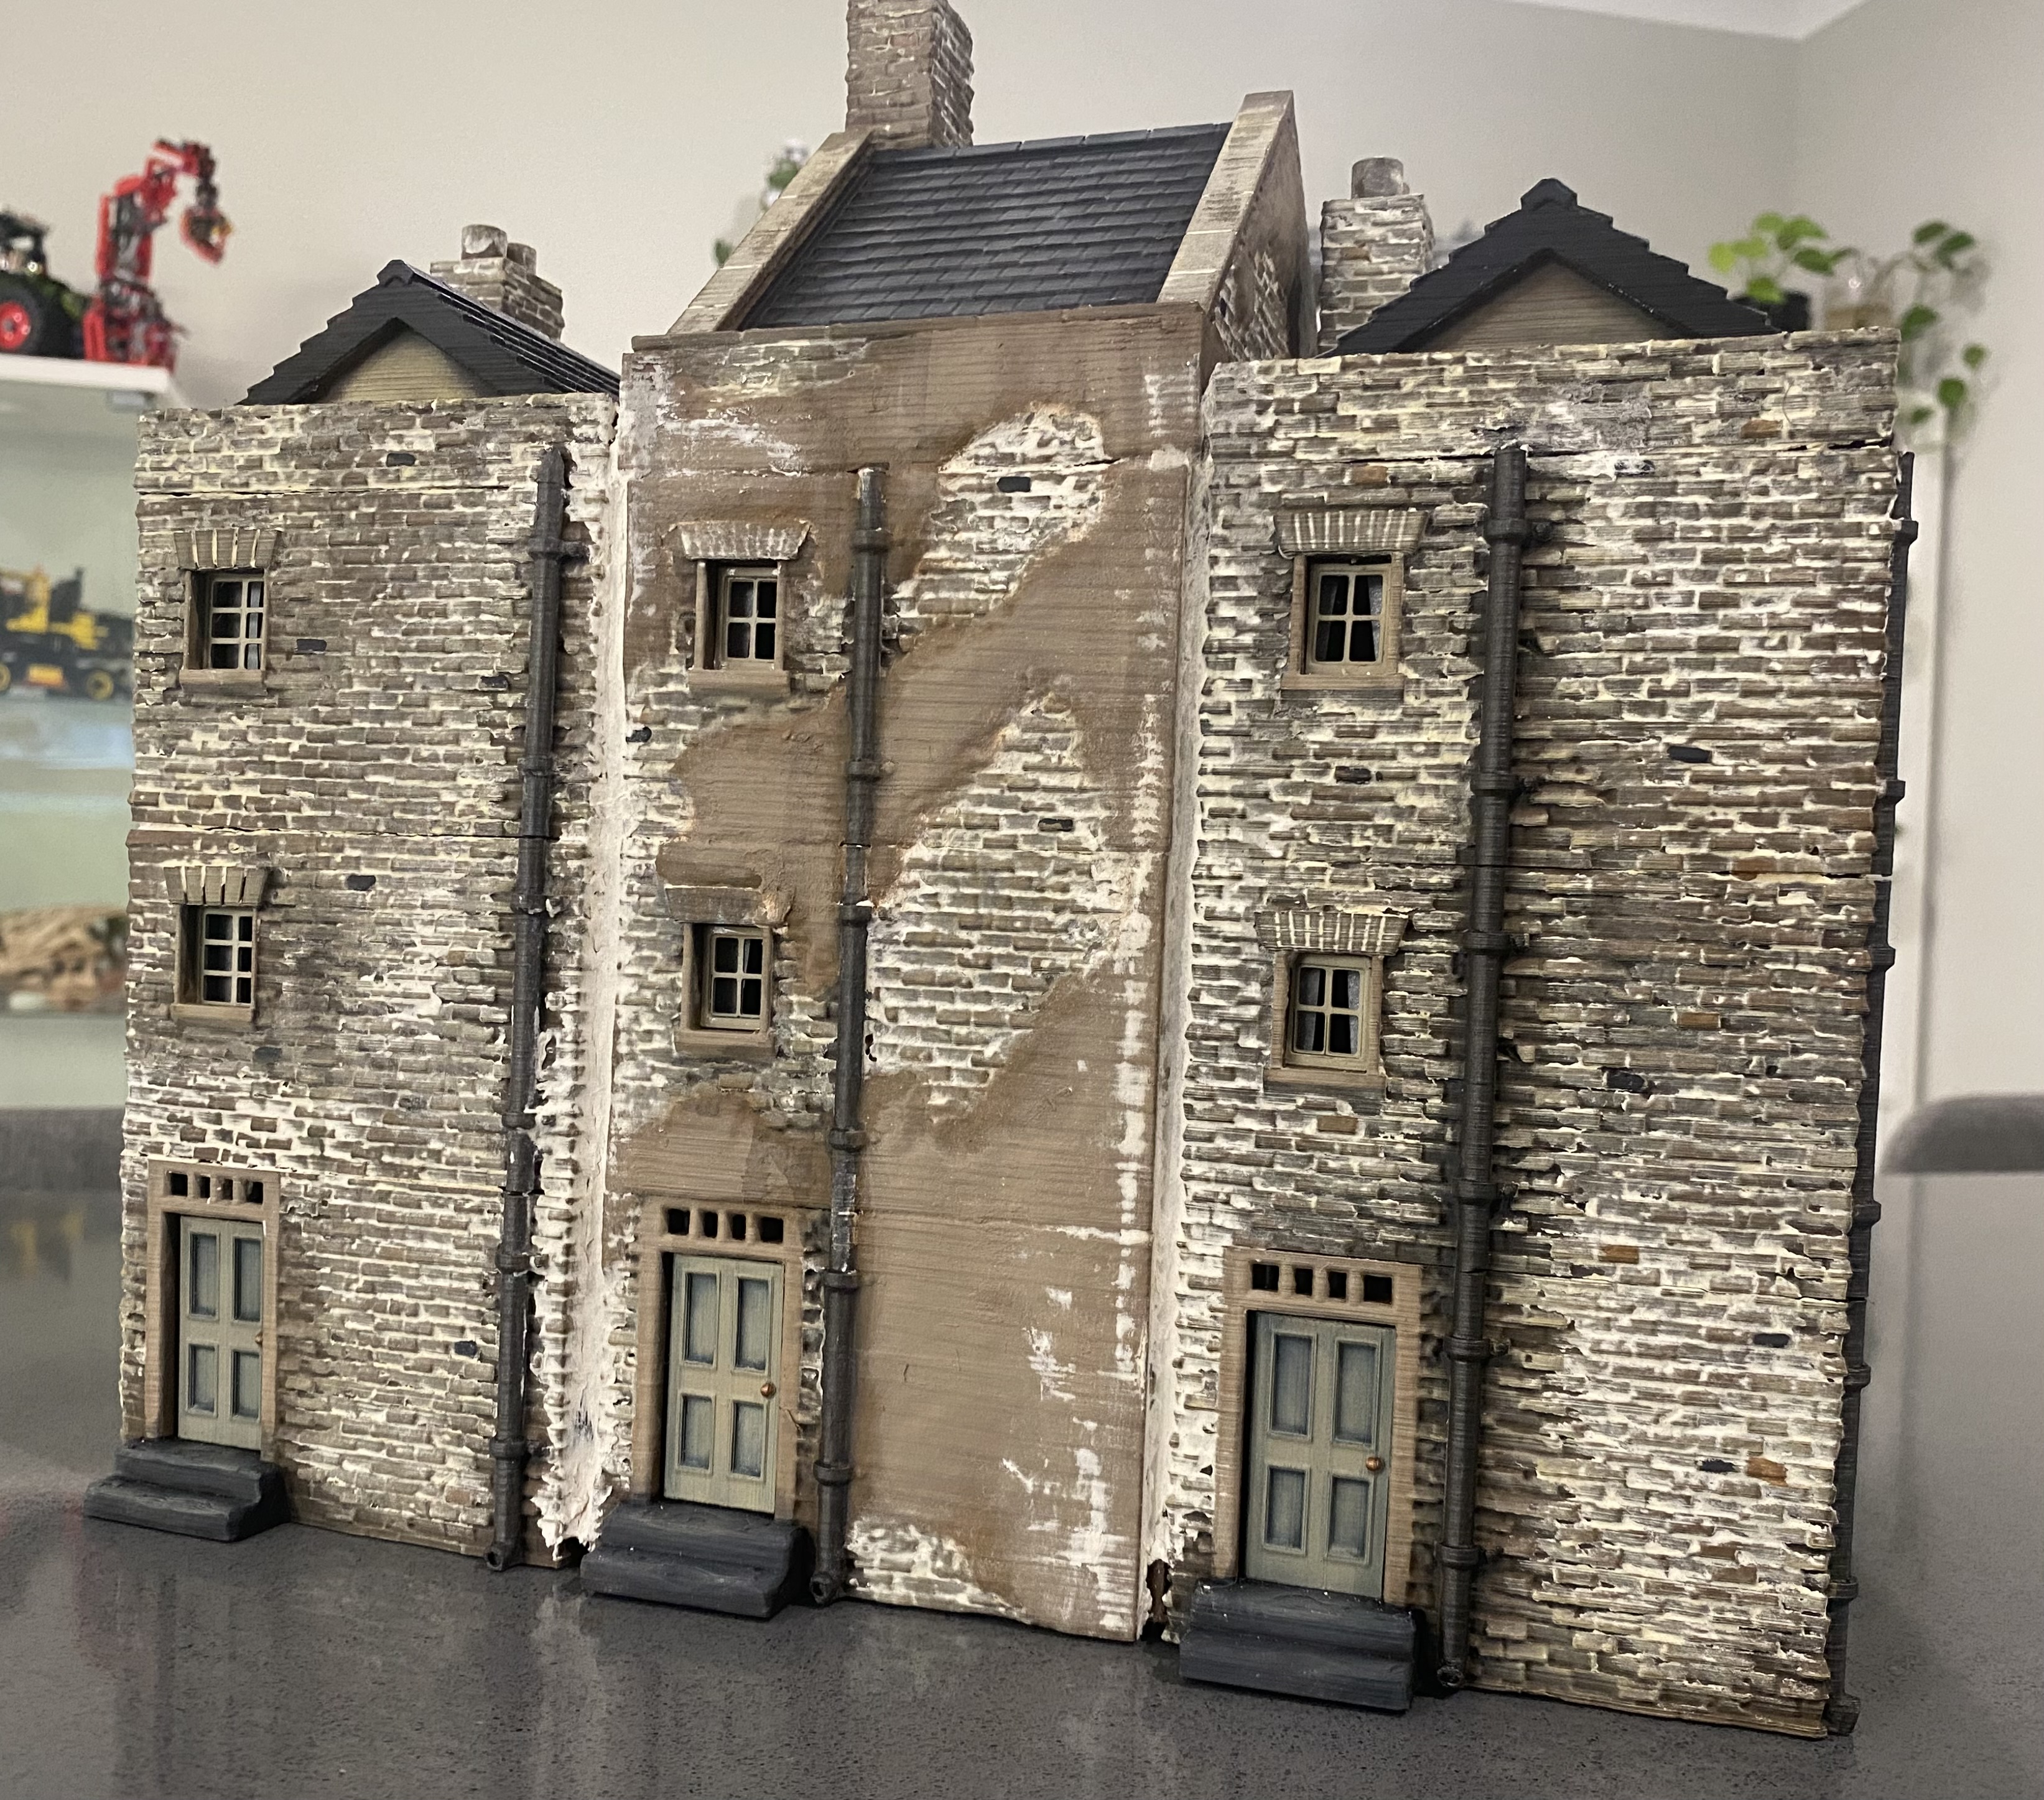
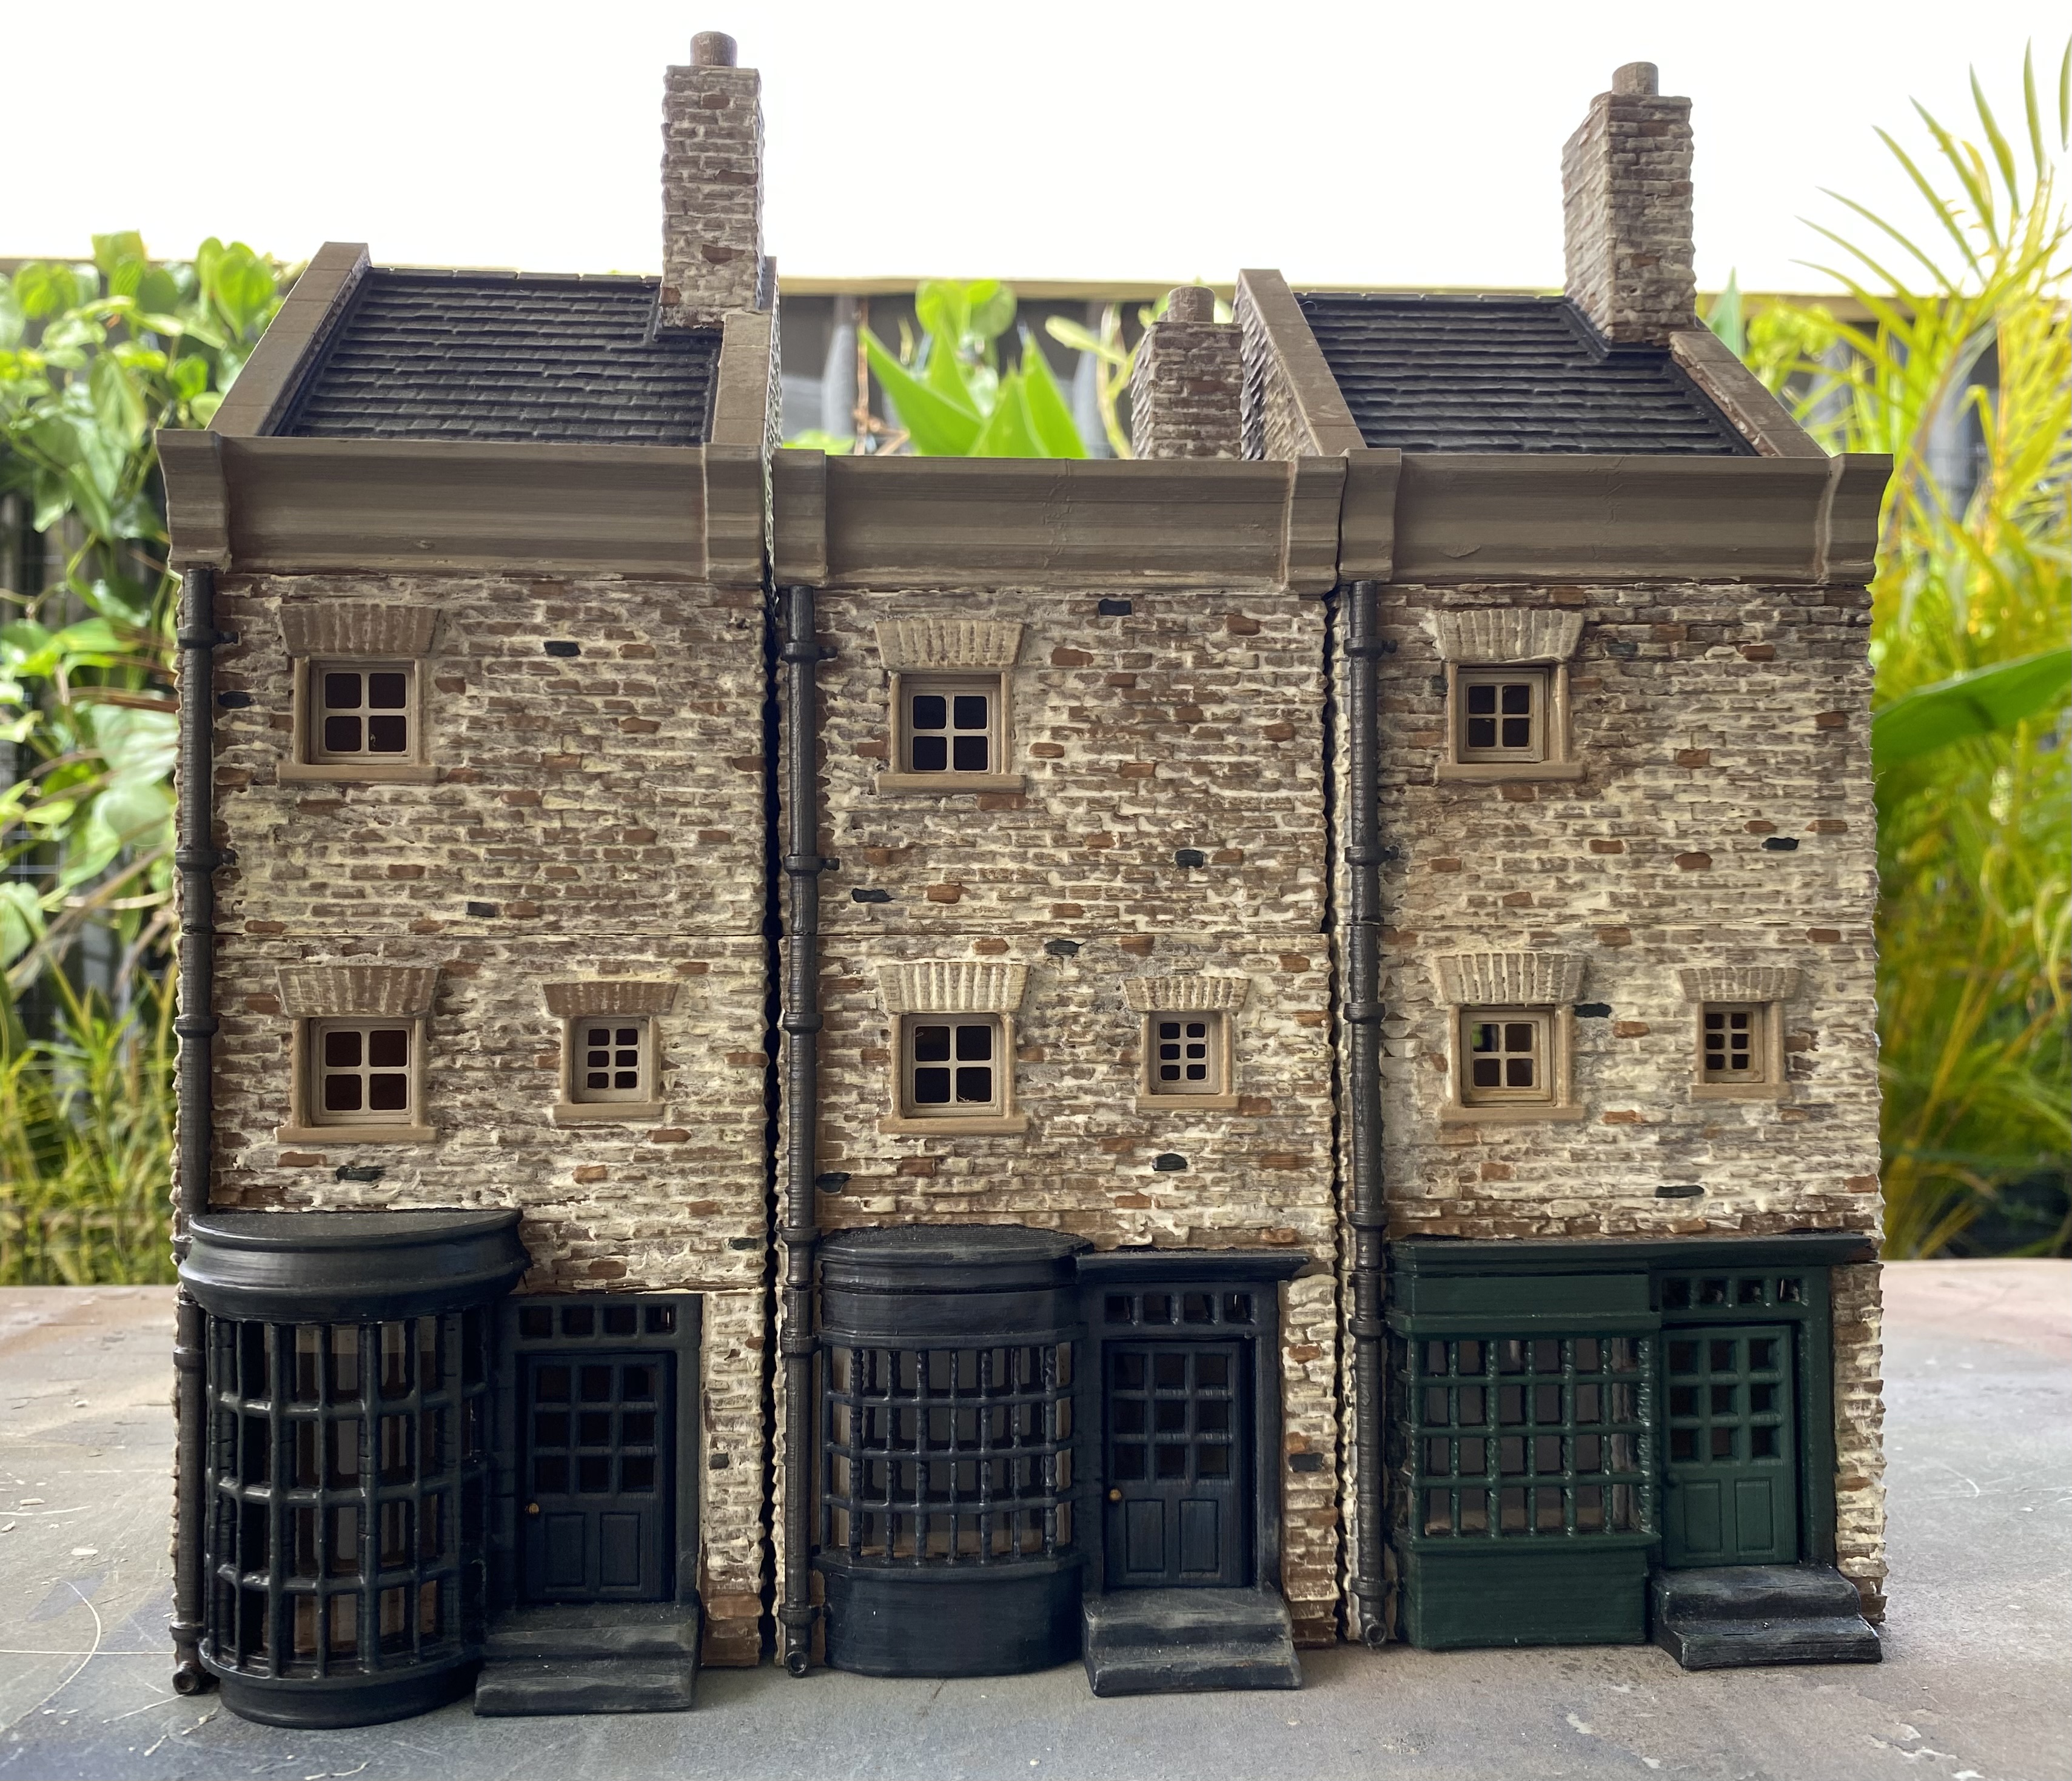
I knocked out a couple more small terraces of ‘regular’ buildings. Nothing that I have not covered before. Simple prints with only the visible bits being printed to cut down on time and resources.
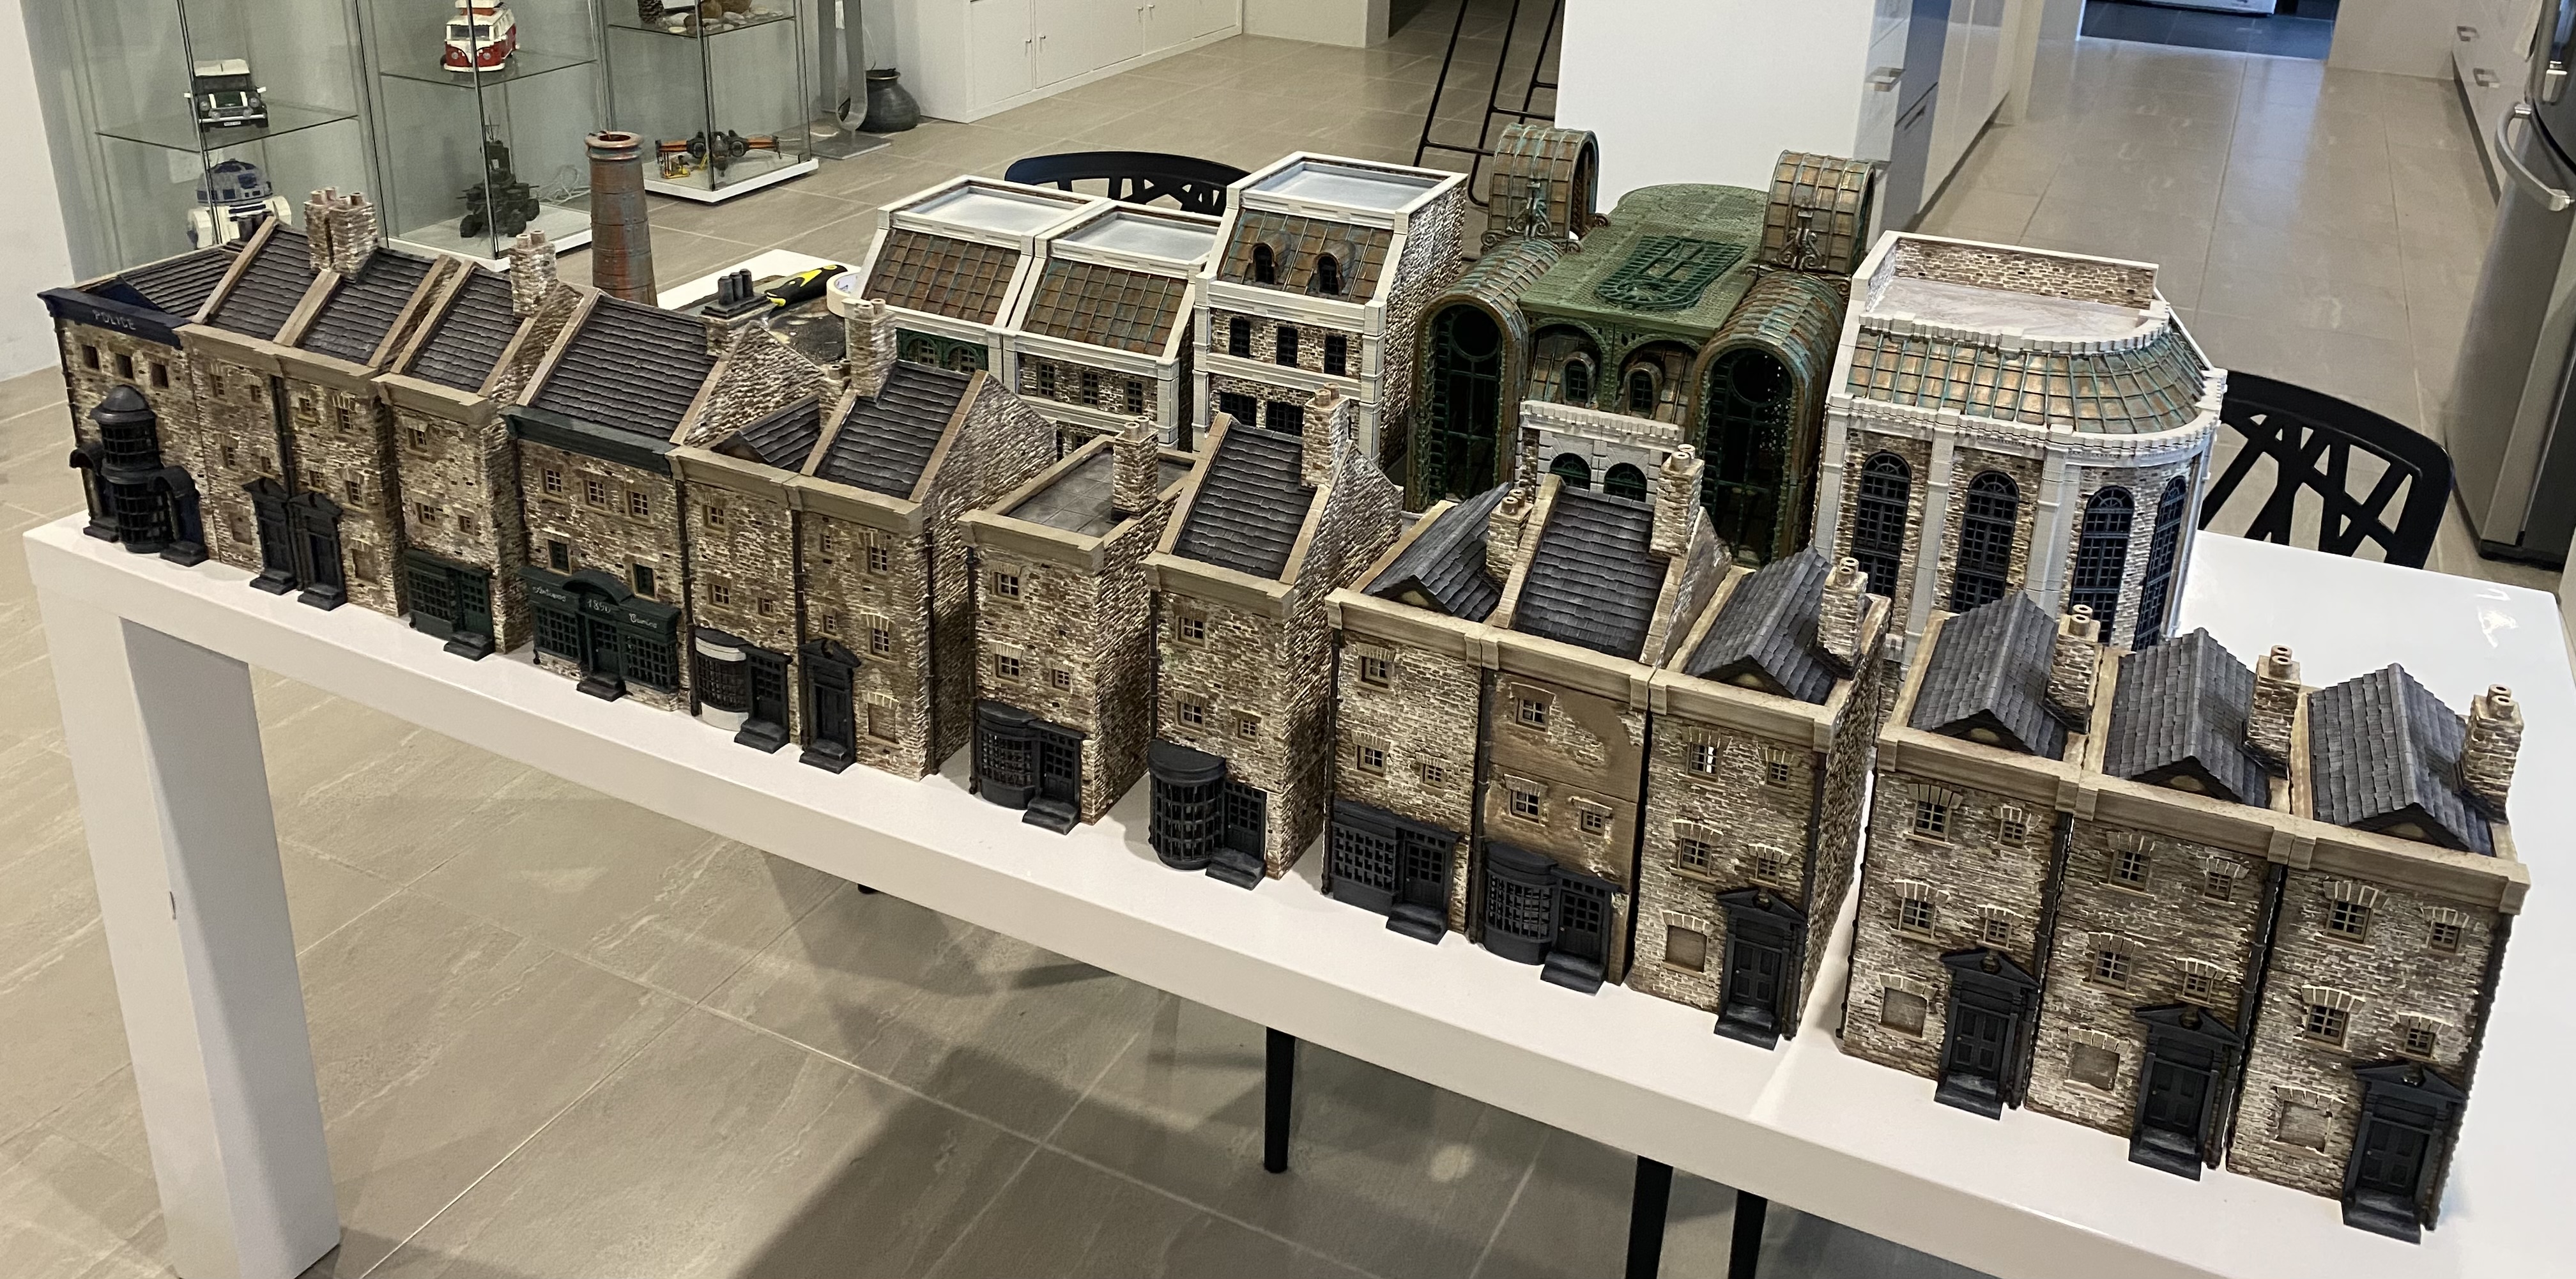
The collection is growing nicely. Next up will be another larger feature building followed by some wall sections. After that, I may move on to something else for a change of scenery.
Before all that, I have a few small details I want to add to my existing buildings. Nothing too fancy, just some small details to give a more lived-in feel.
Irony
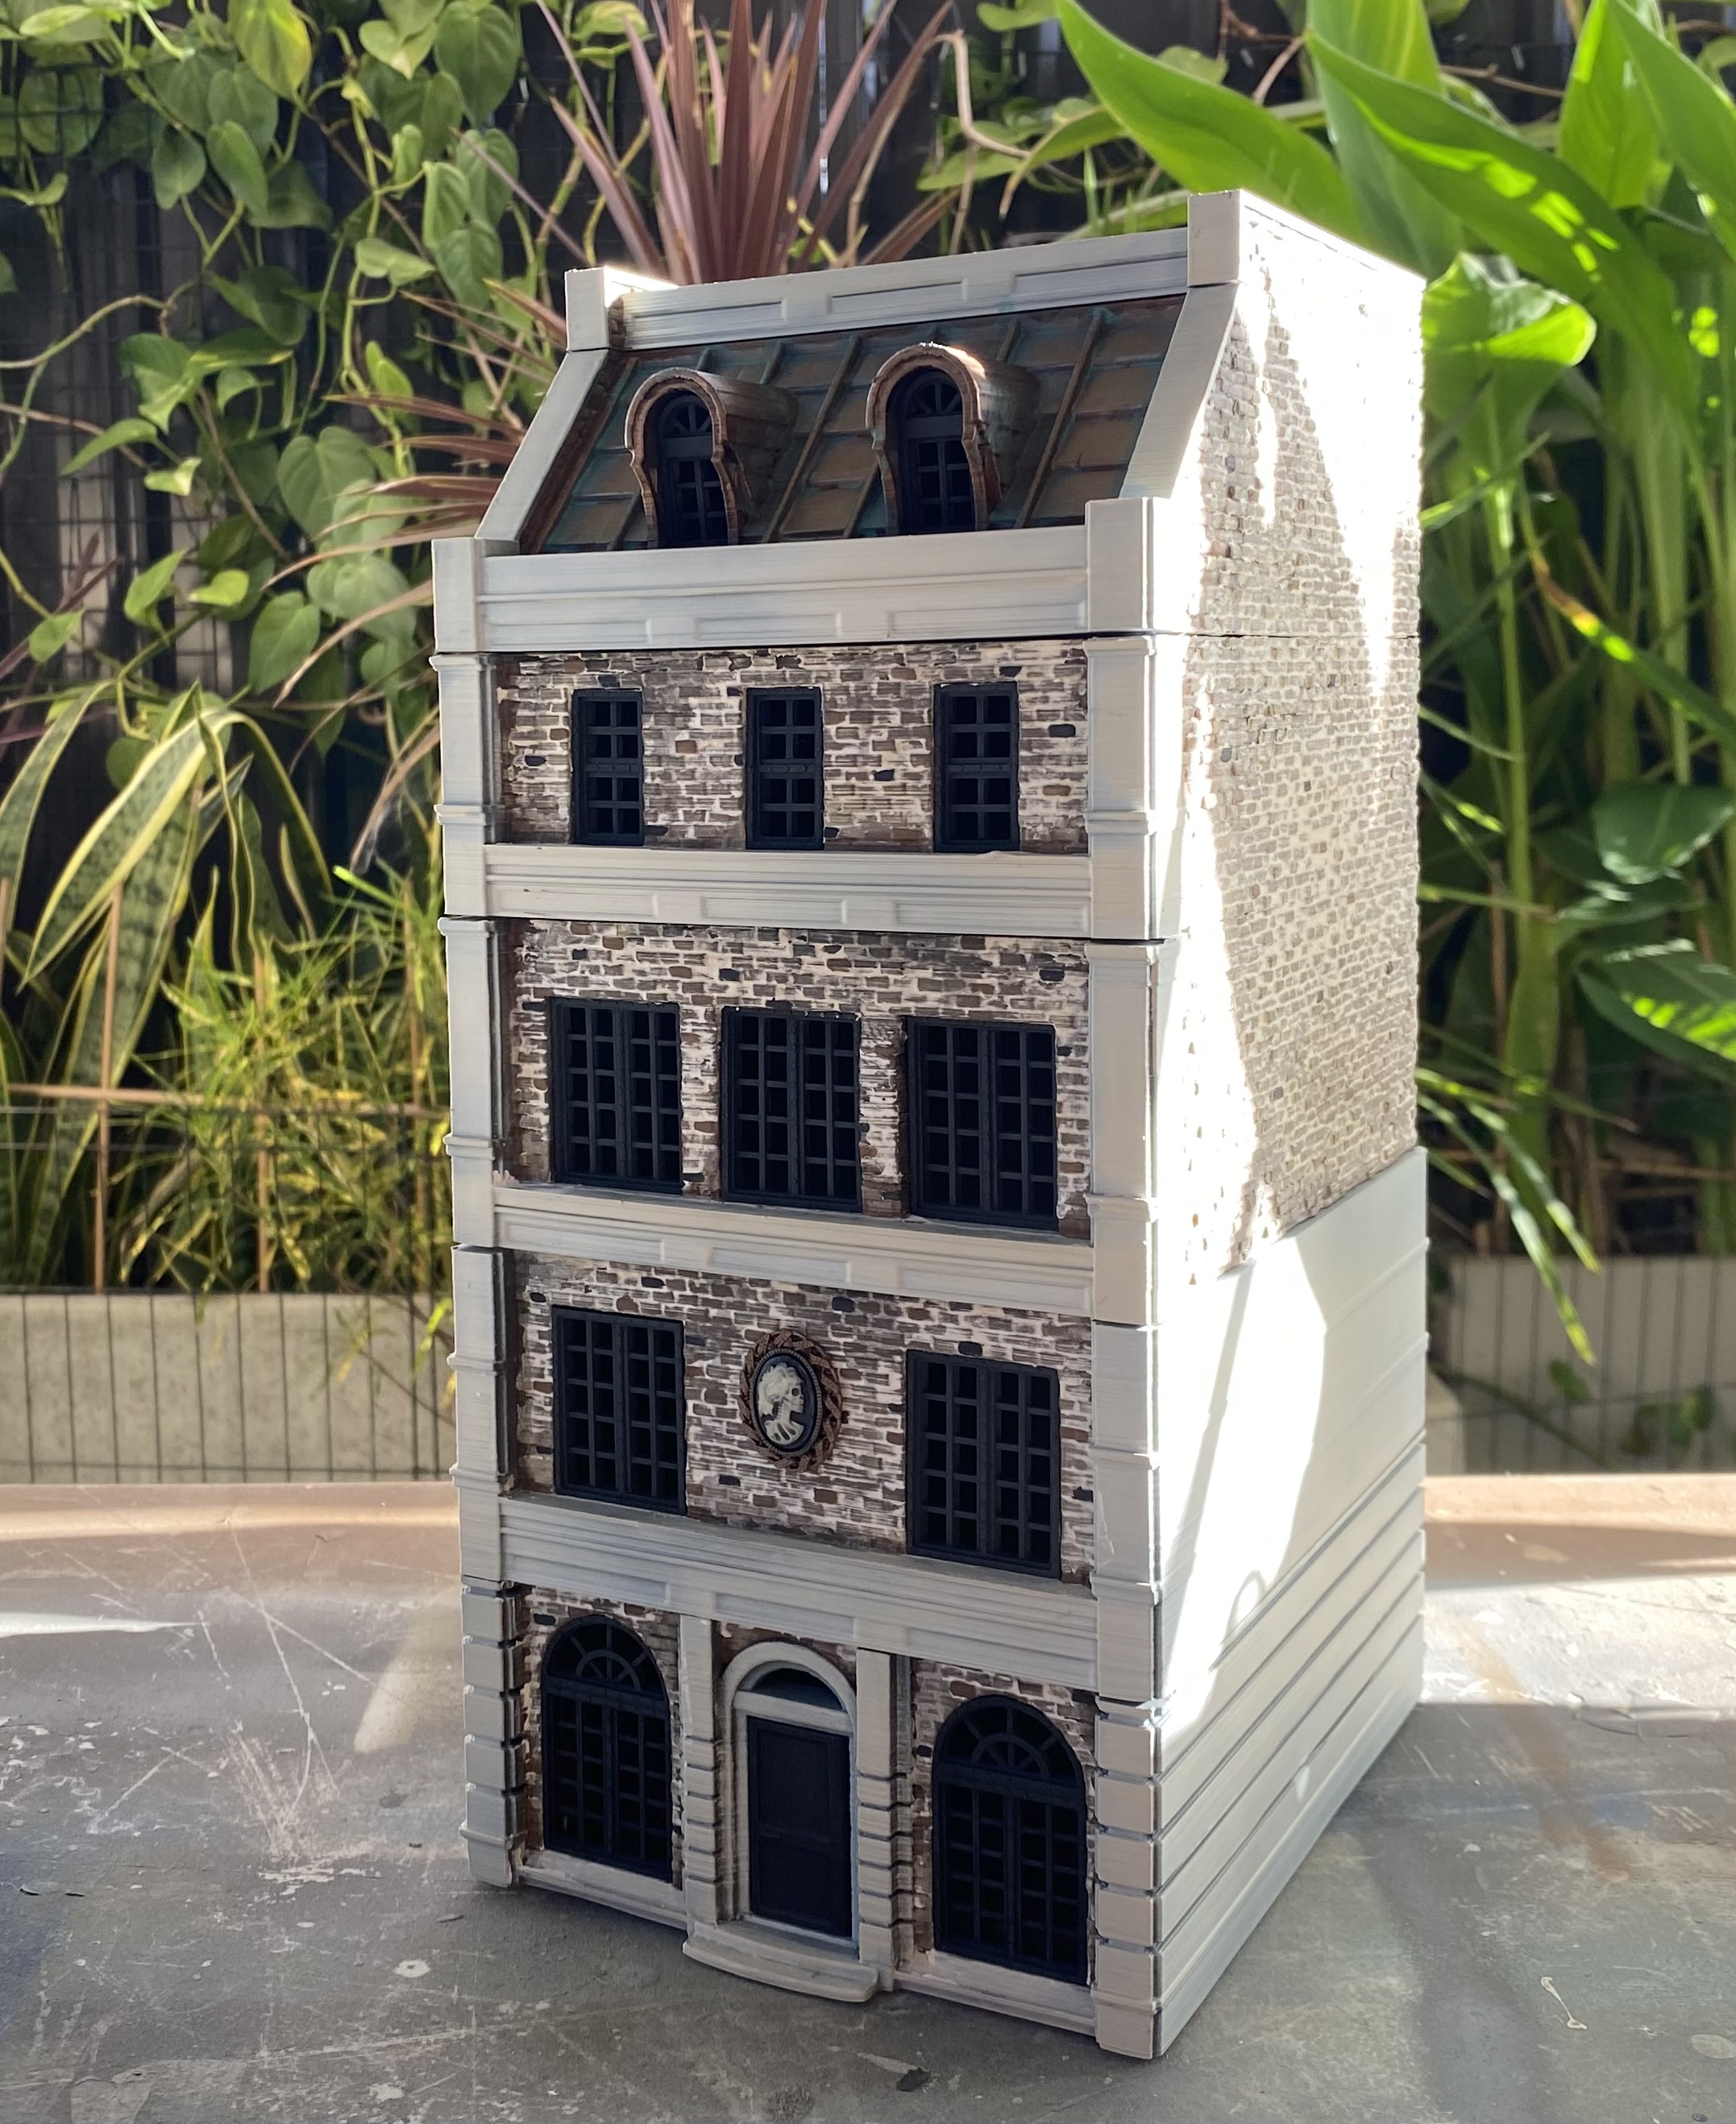
The Irony, whilst posting the last update the windows I mentioned in that post finished. So here is the next building all done up.
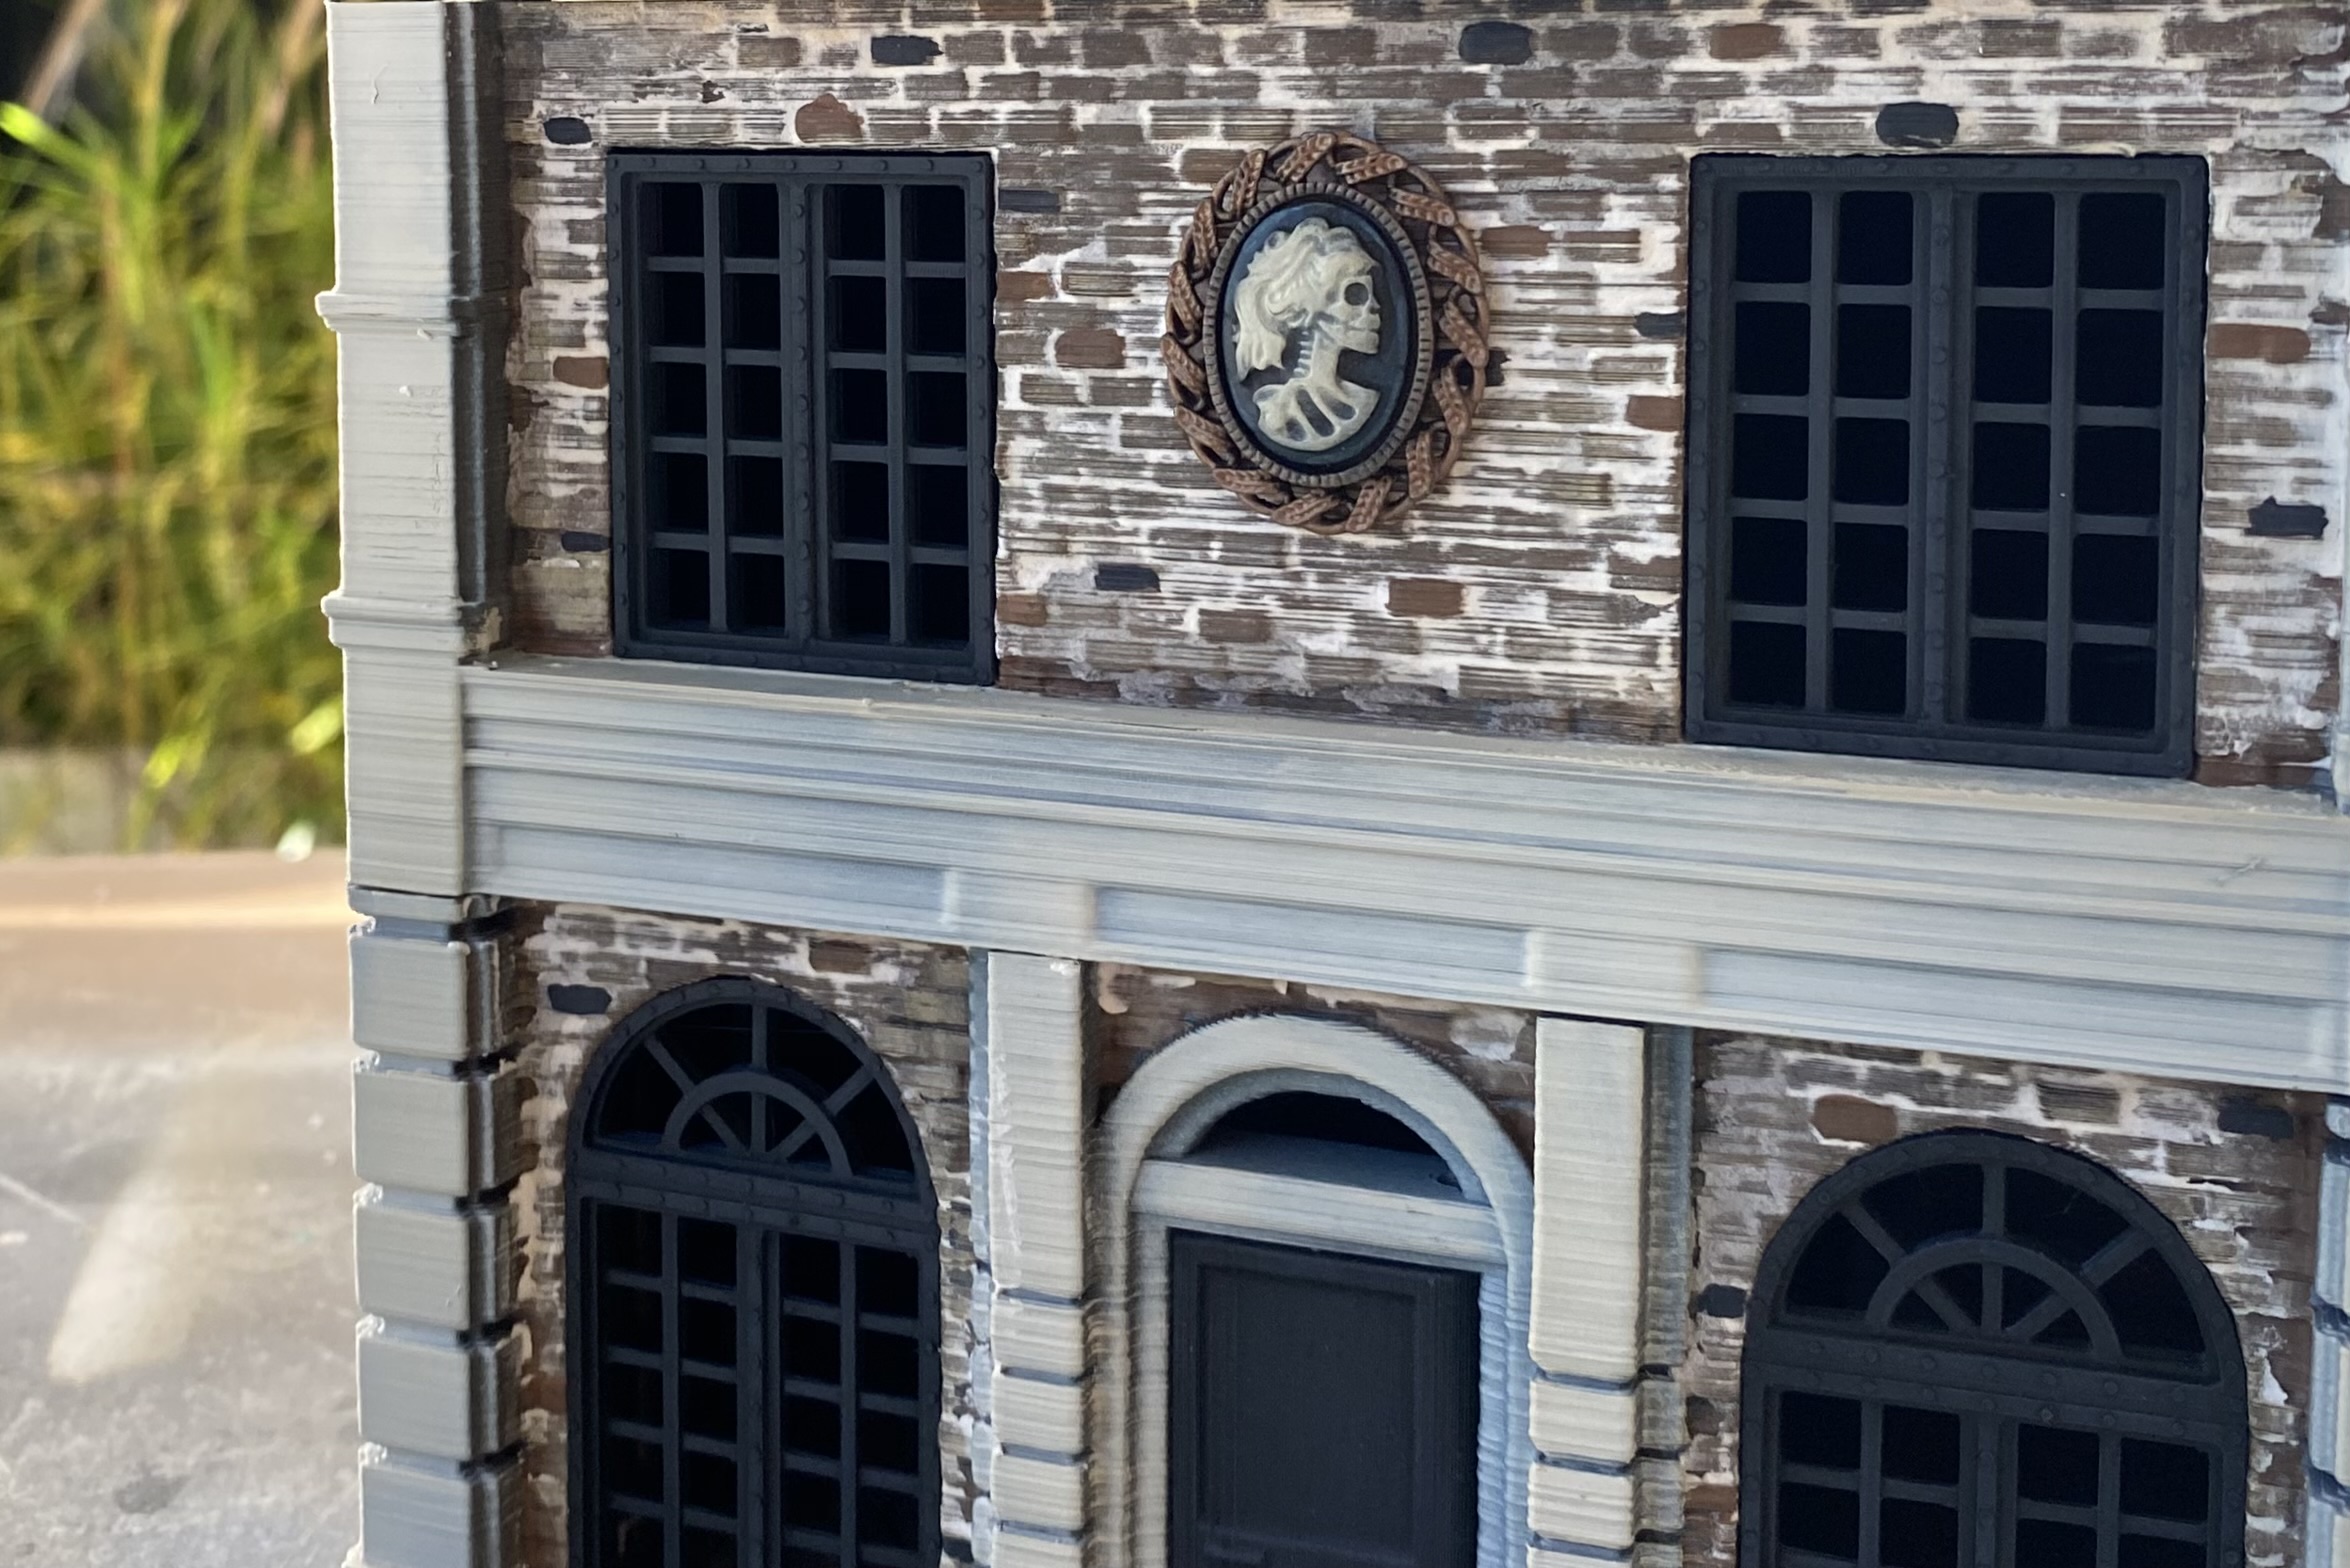
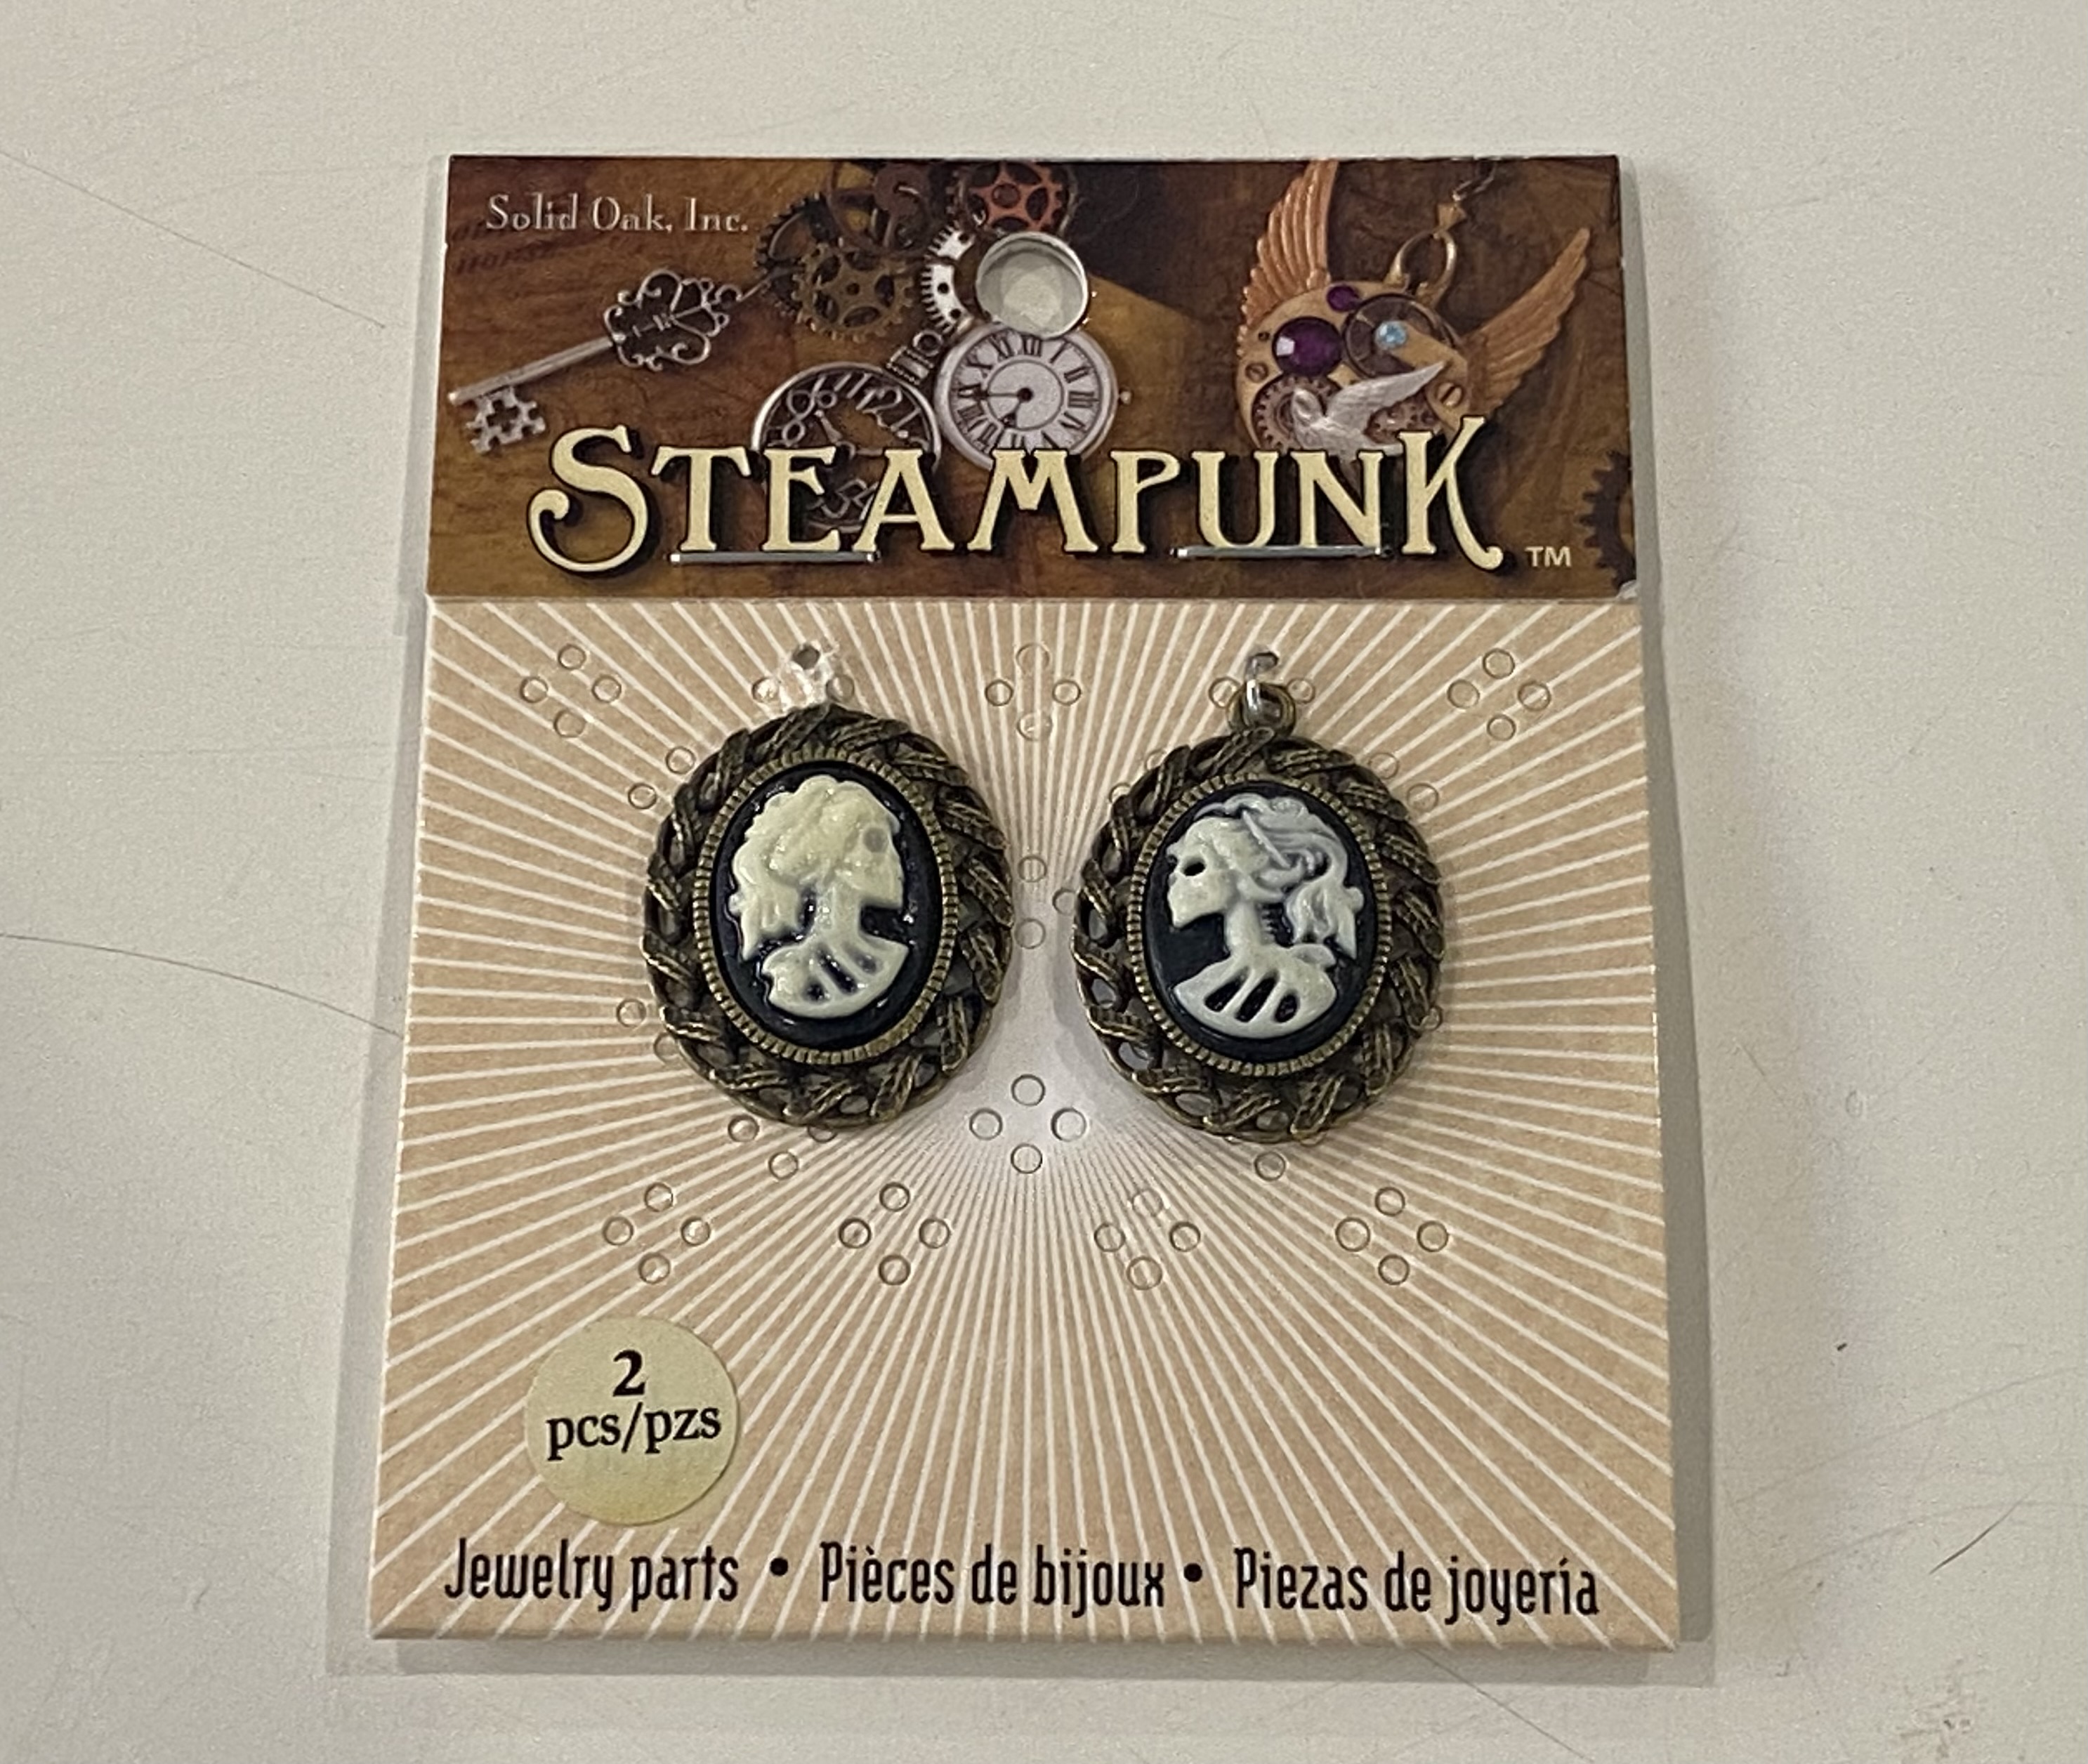
The little detail on the front is a small pendant that I found in a local shop. I repainted it to make it fit in with the painted buildings but used colours similar to what the original pendant was.
A couple more buildings
Managed to also get a couple more buildings done to add to the growing pile.
I have one more that is almost done, I forgot to do the windows so just waiting on those.
After that, I have 2 more terraces each of 3 buildings to do and then I may move onto a warehouse of some sort.
I did consider doing ‘Big Ben’ or at least something very similar, and that is still an option I may pursue down the line. It will be pretty big at about 36″ tall though.
I would also like to do some railway arches and a city wall to keep those pesky Martians and Prussians out.
Nothing much to see here.
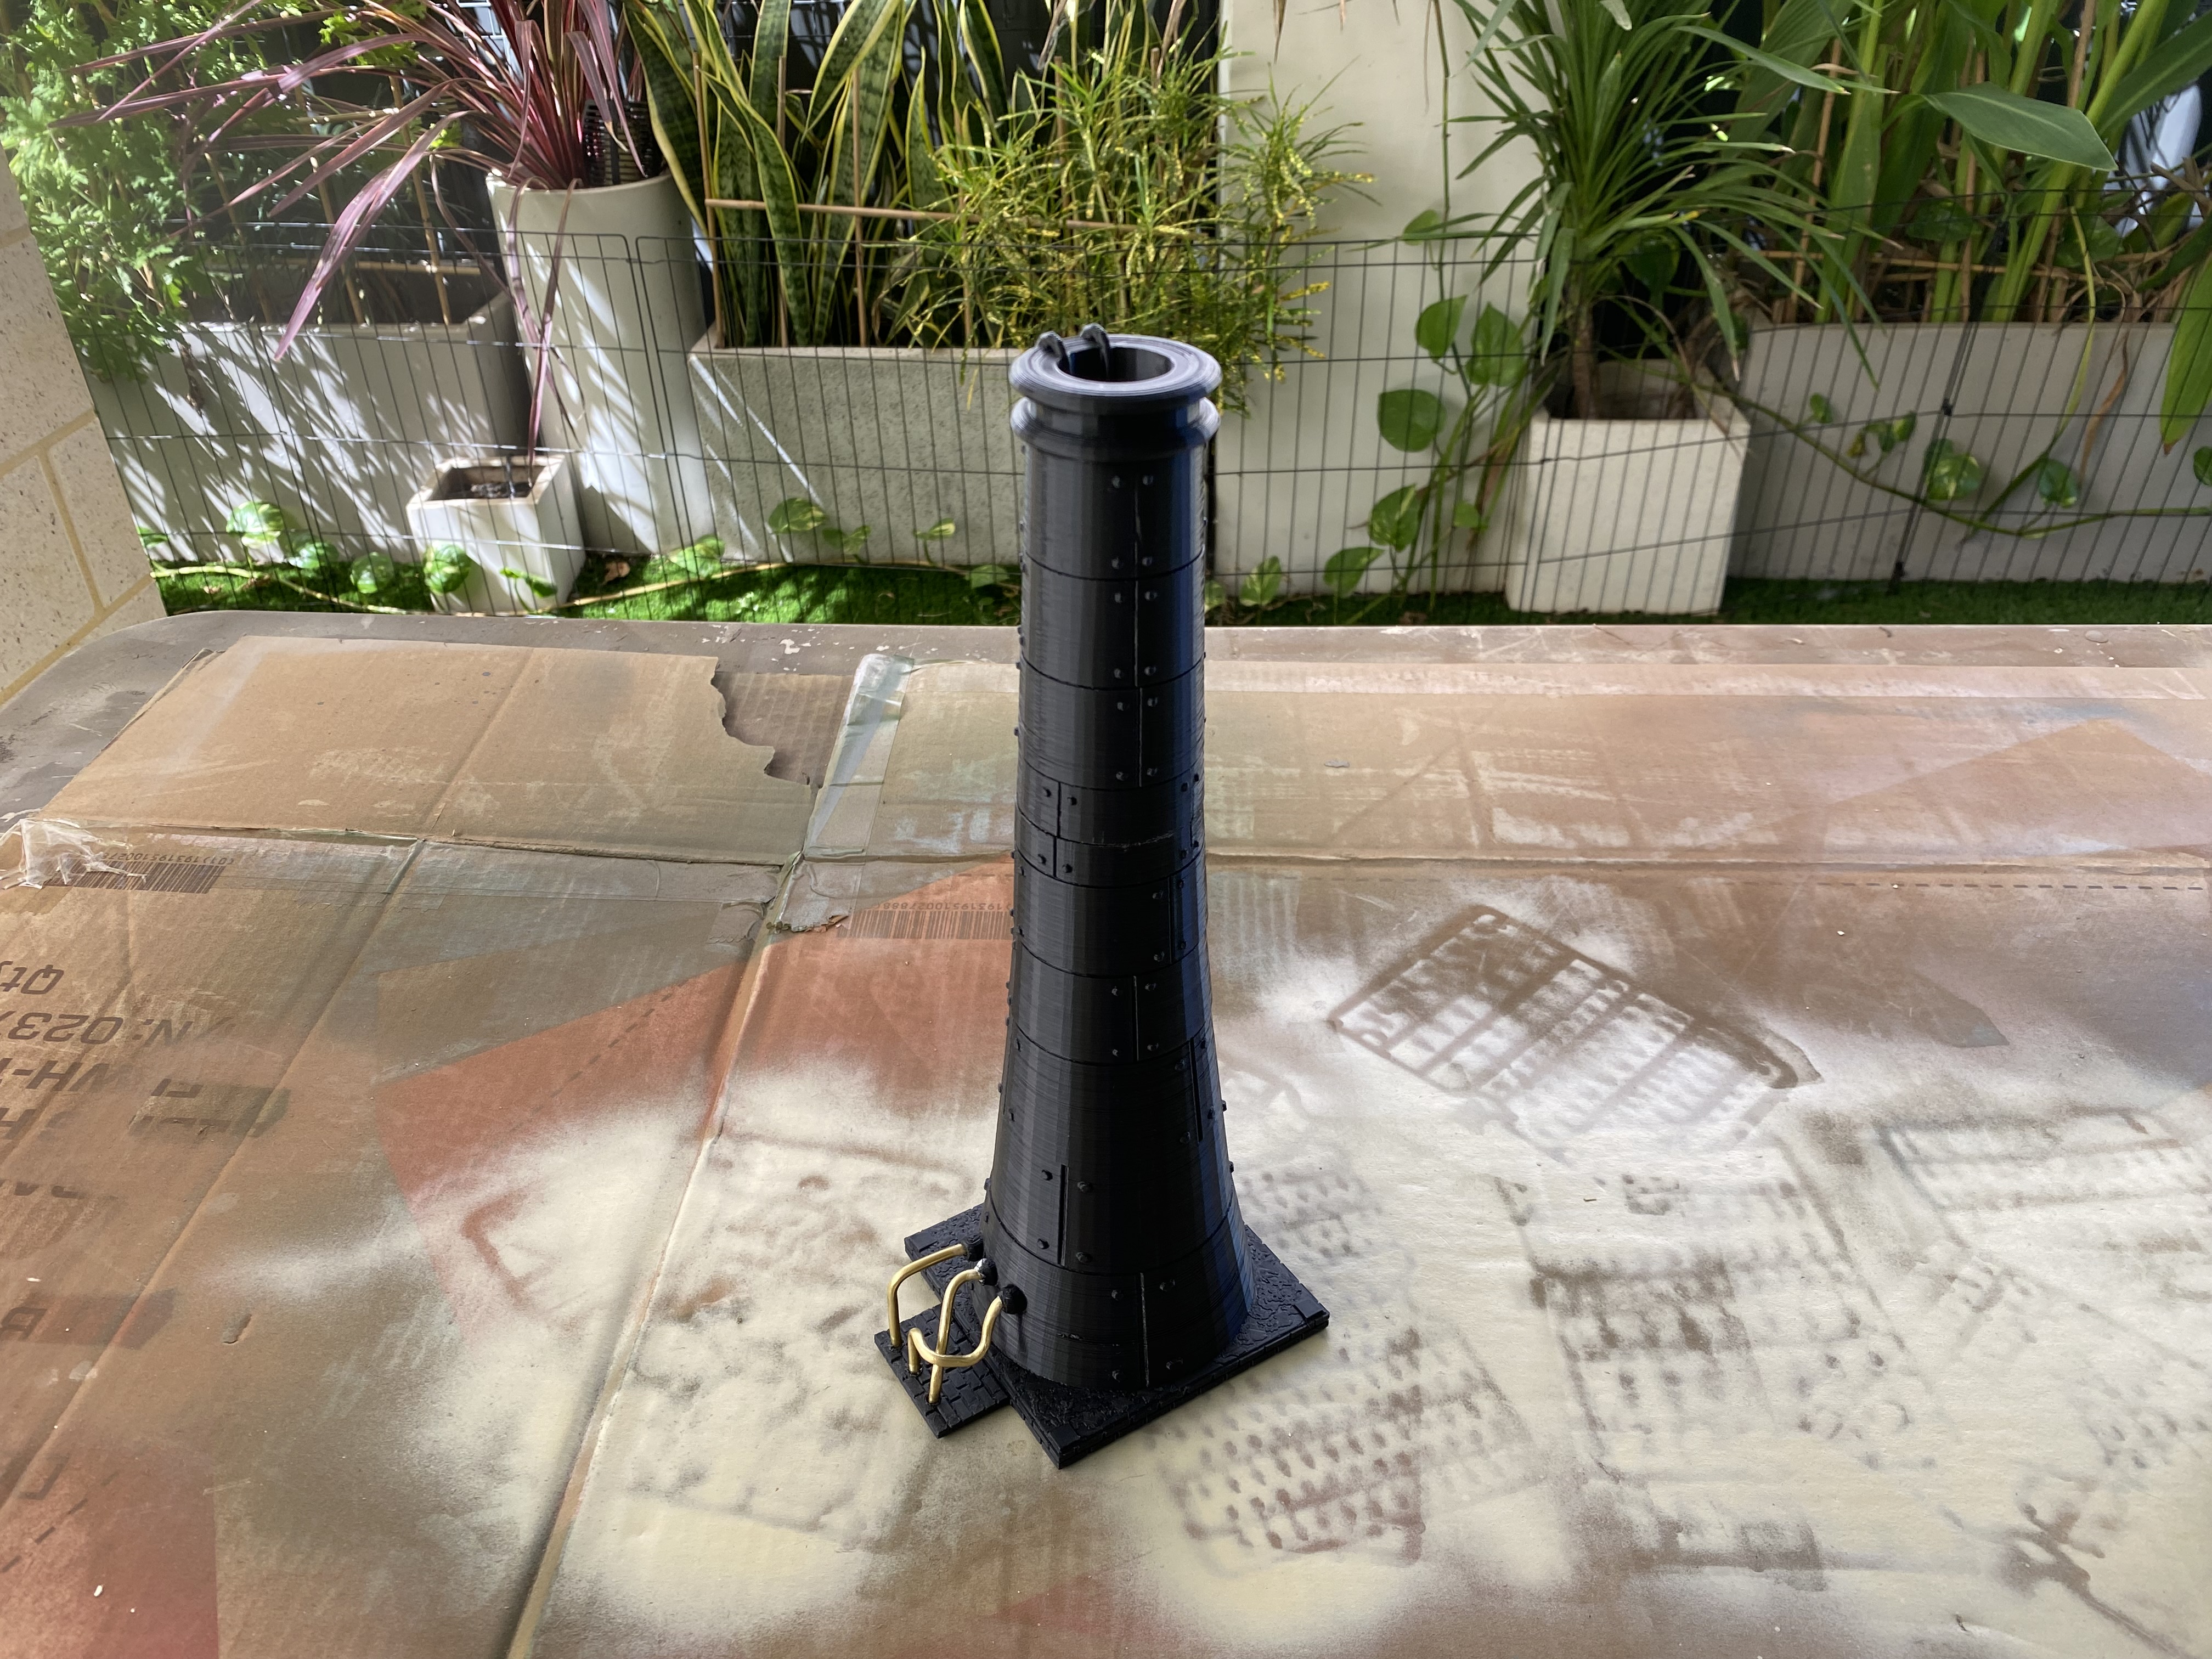
Finishing up the walls and chimney so they fit in better with the rest of the terrain.
I have ordered a load more fence railing so that I can make some more wall sections when they arrive.
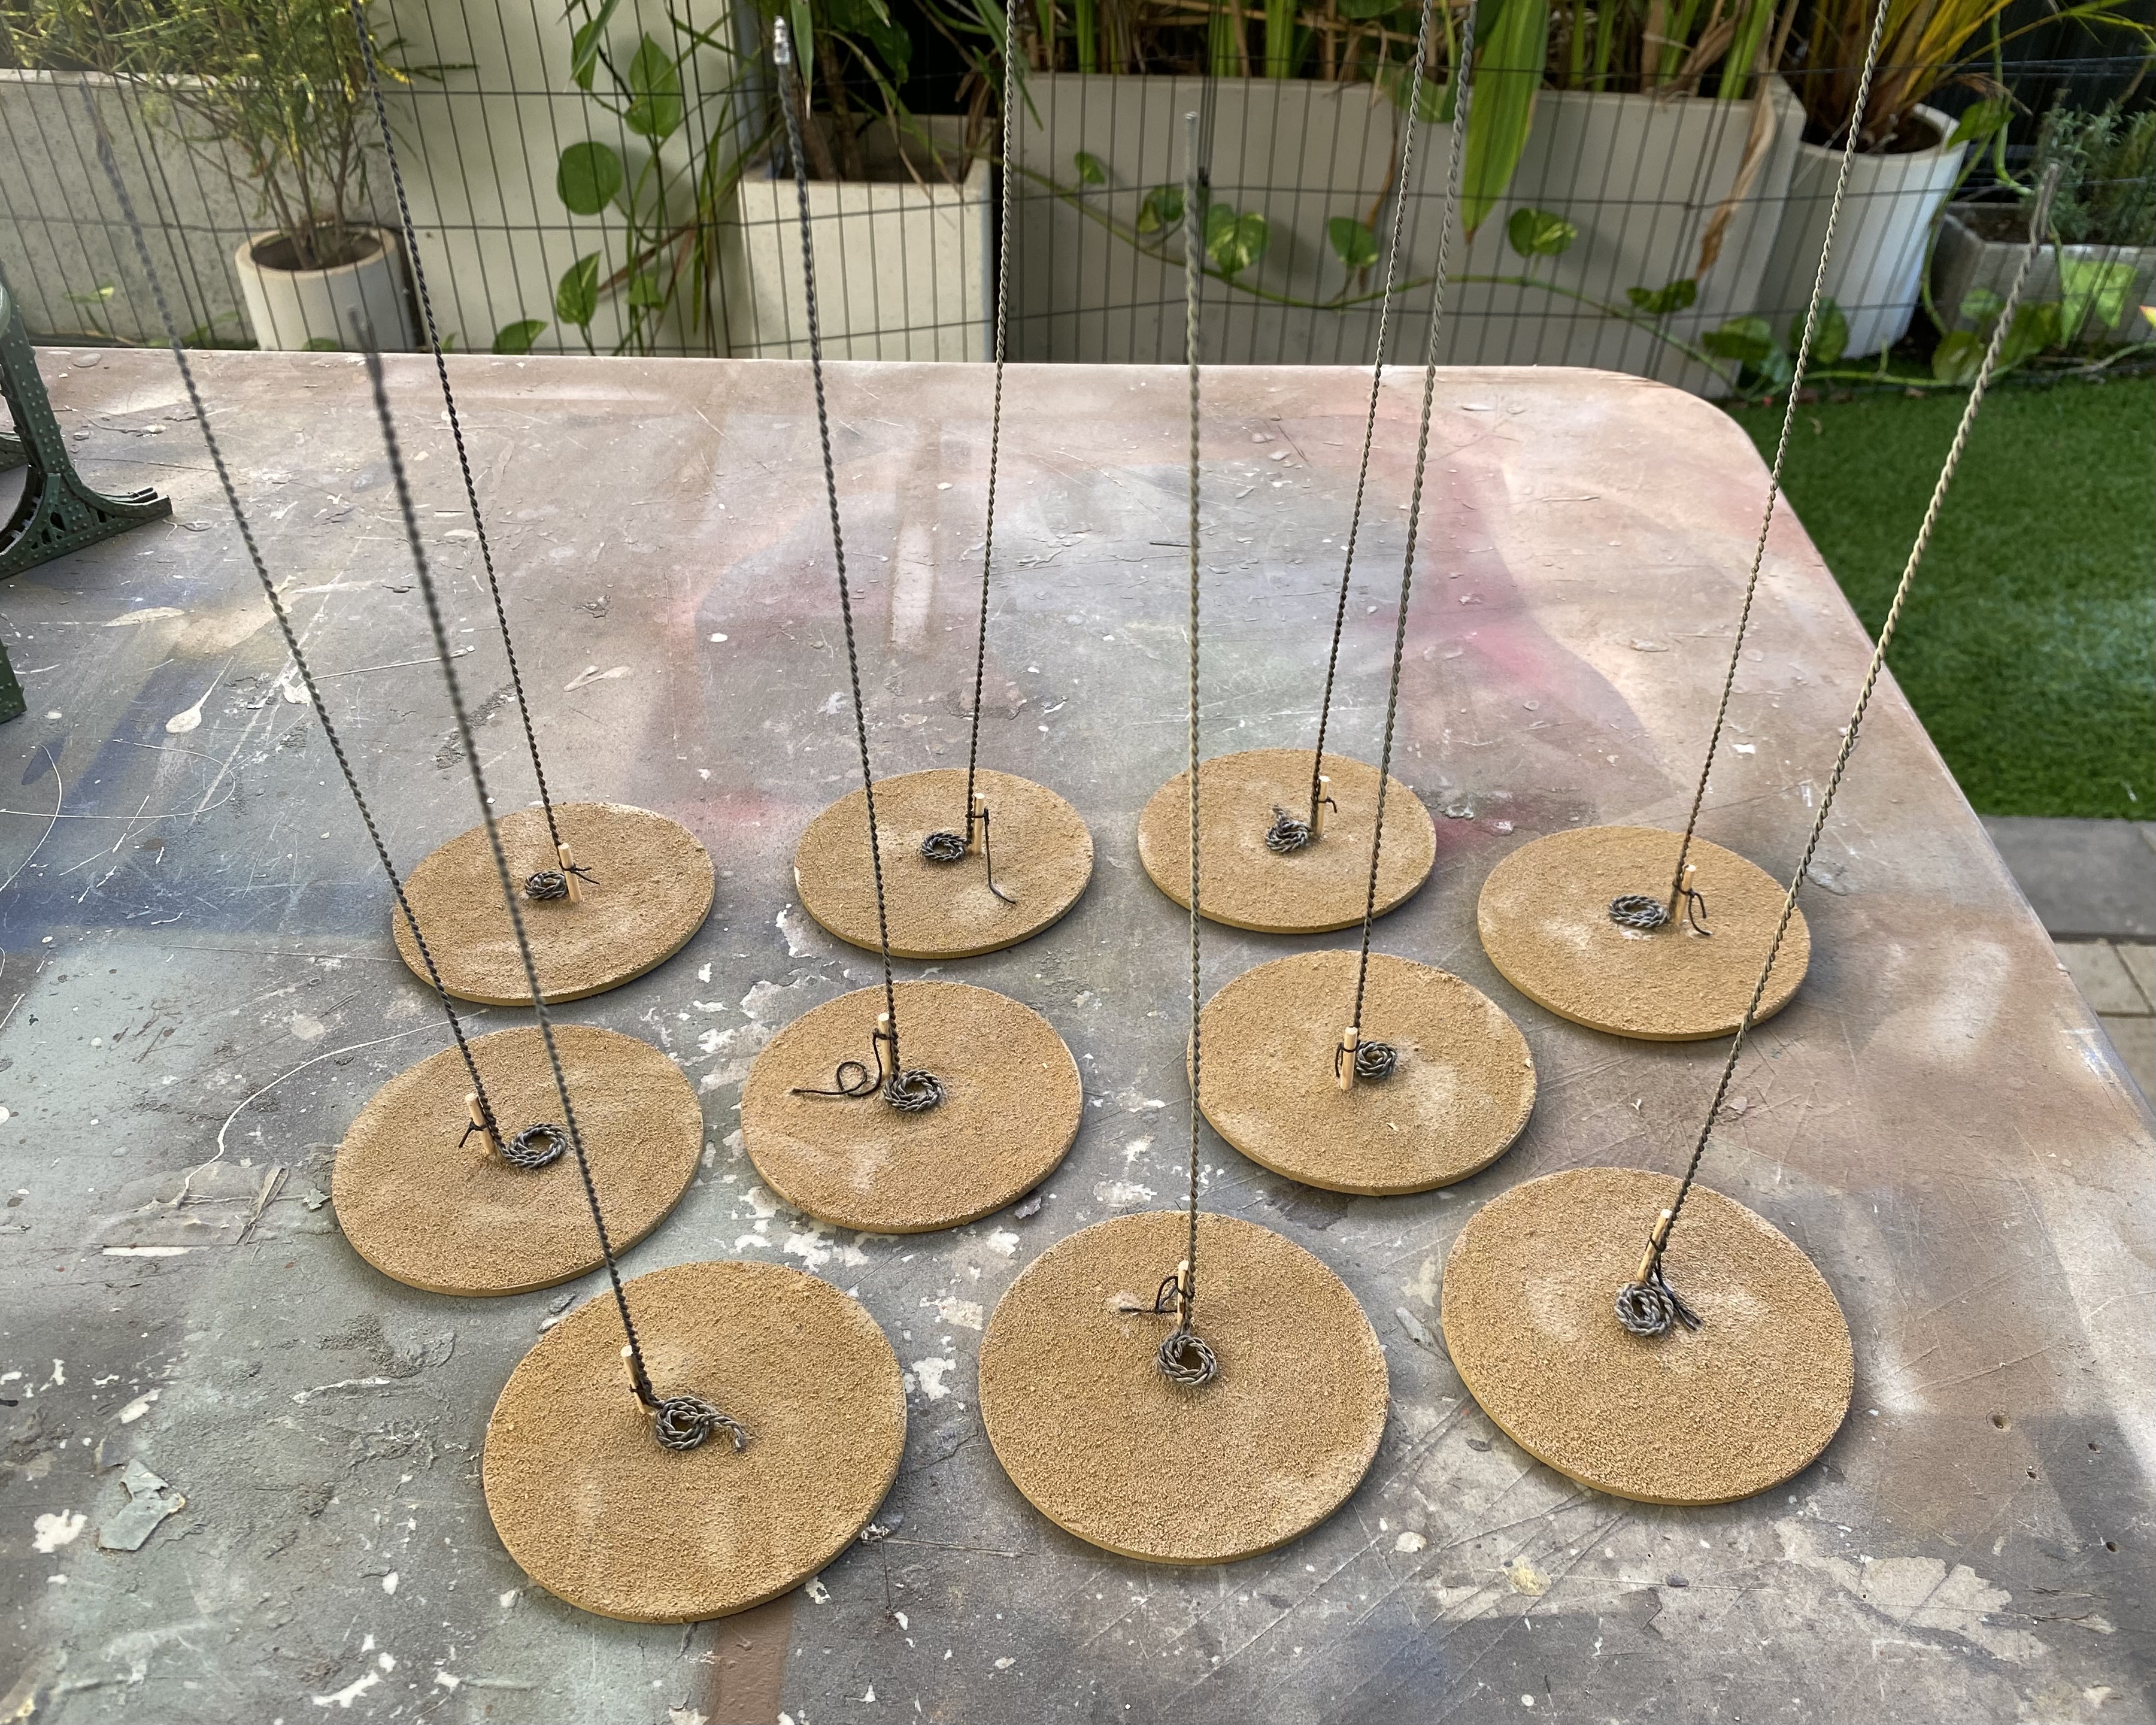
Made a little progress on my Aerial minefield. The plan is to have some ‘deployed’ and some on the ground waiting to be deployed.
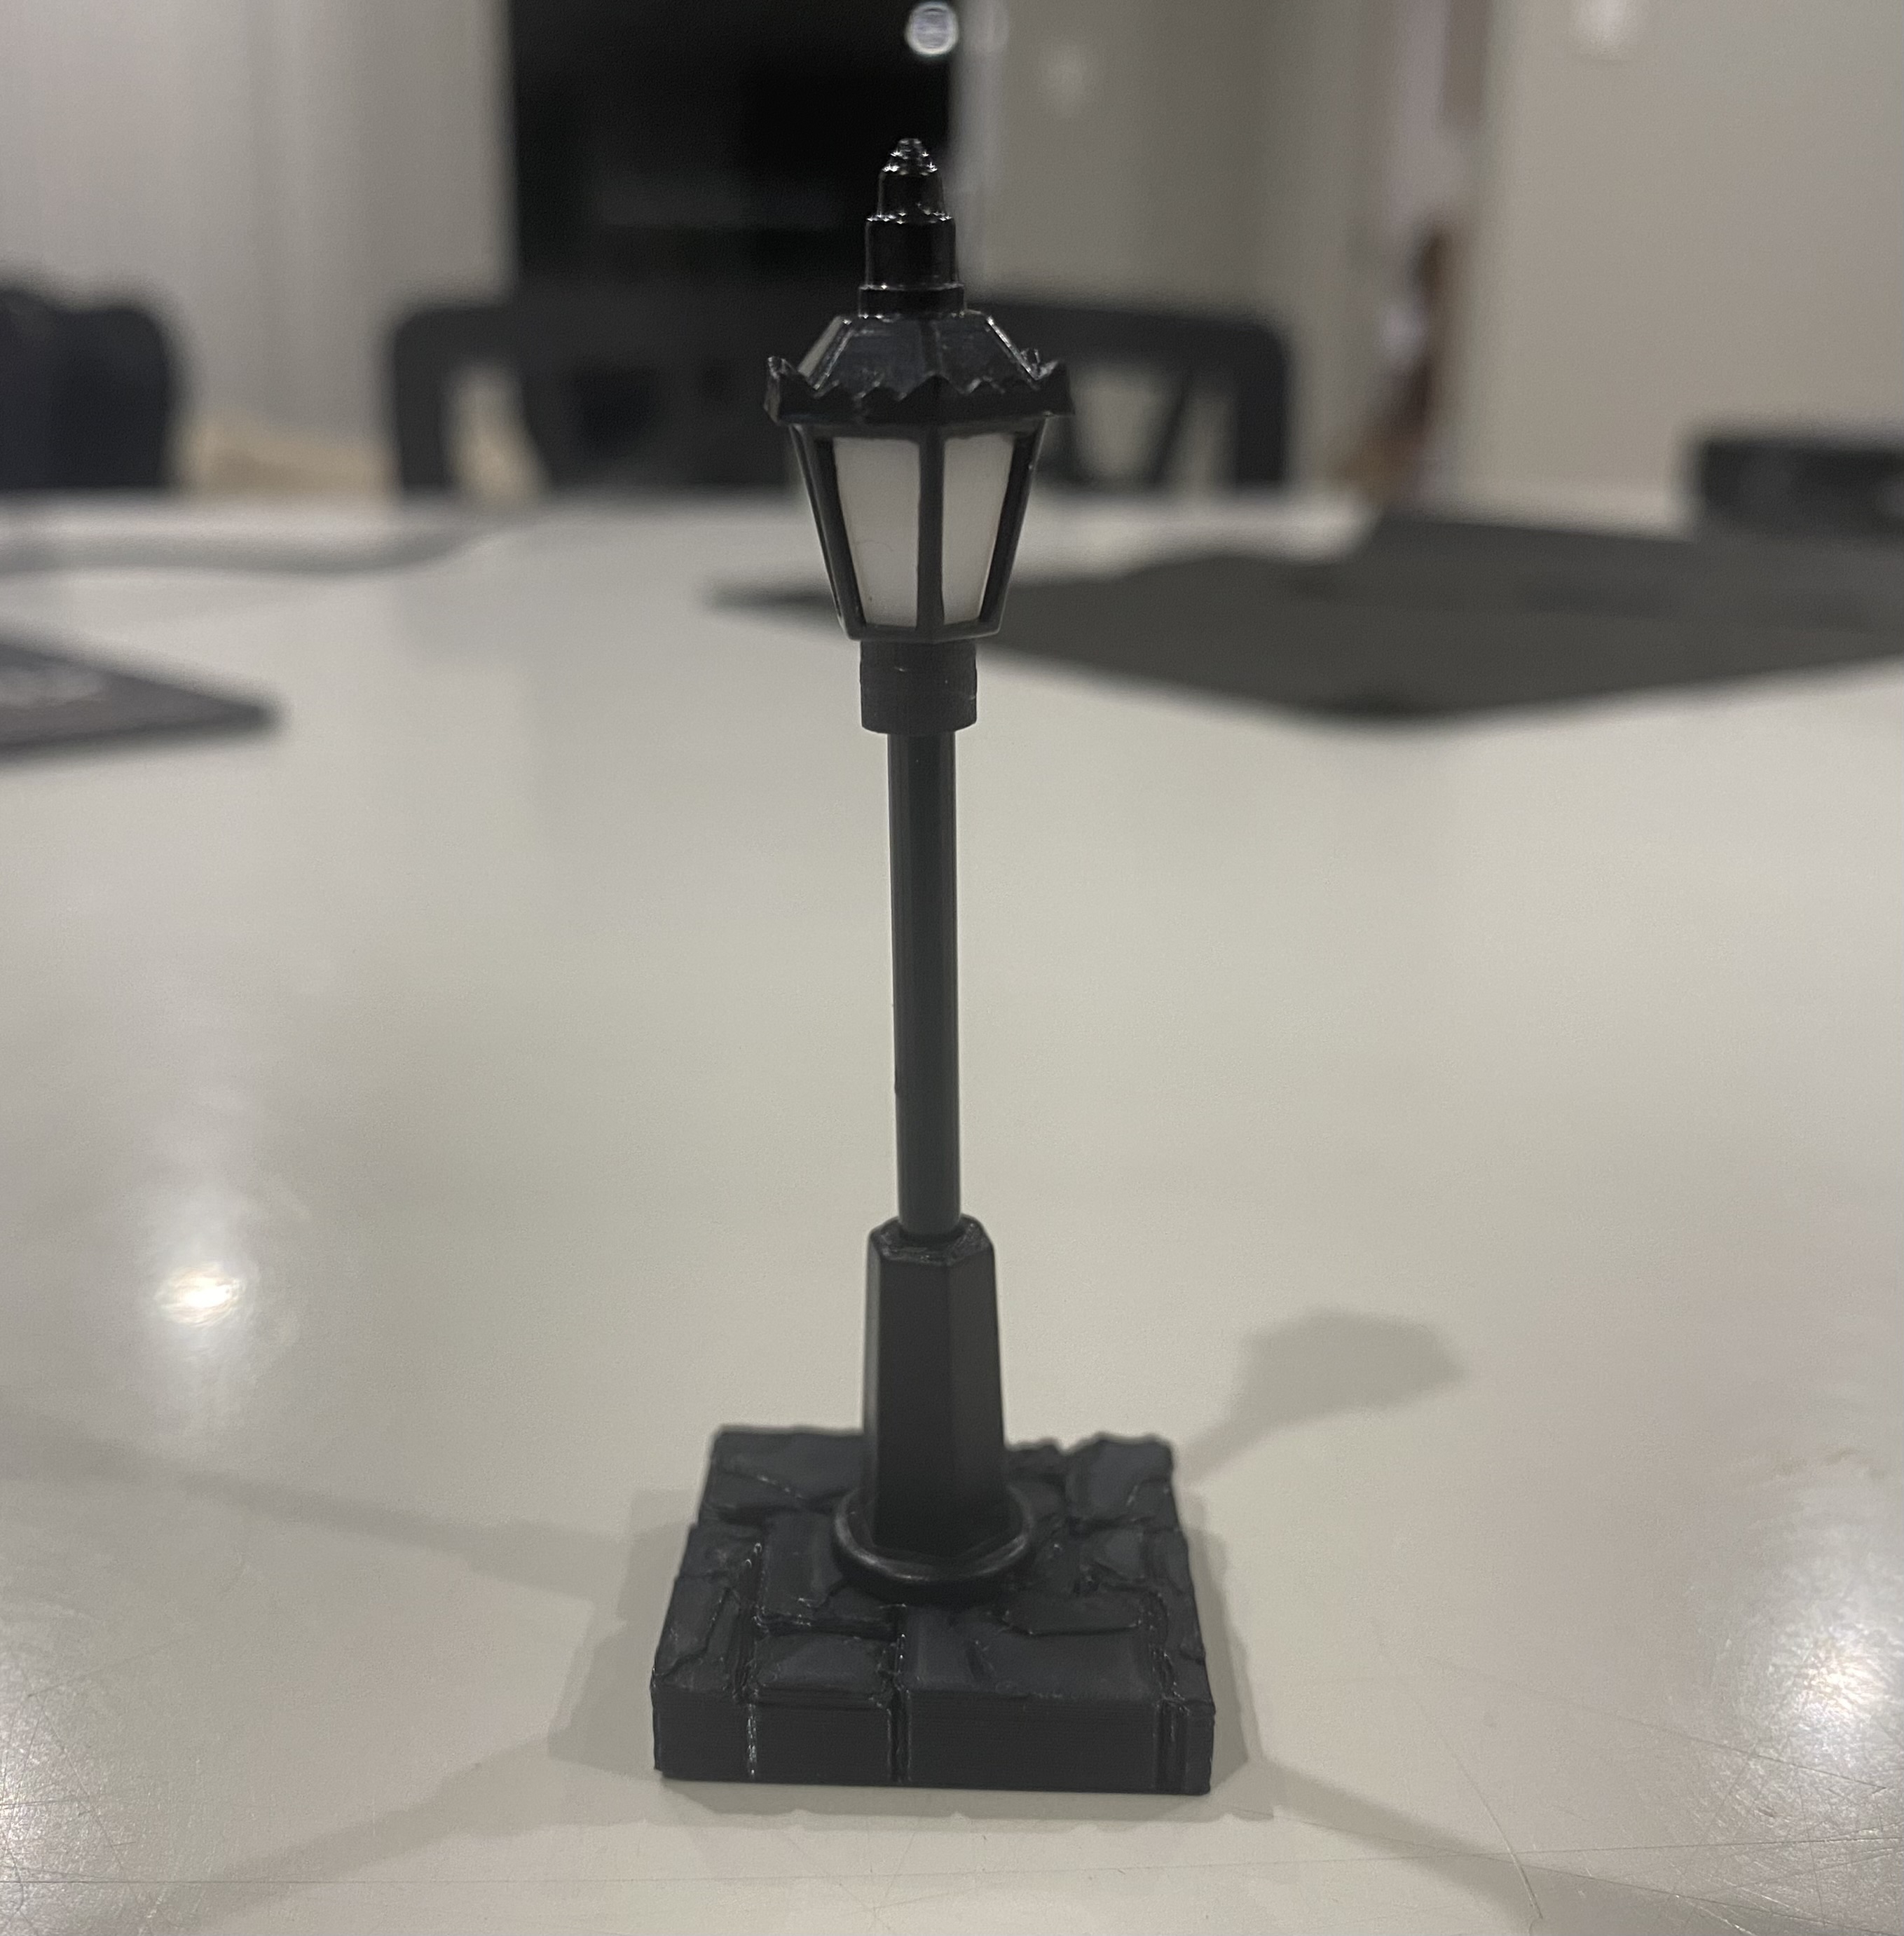
Streetlights
A little update on the streetlights. Nothing too fancy just a quick paint job on the bases to make them a little nicer. The small batteries fit underneath them so they can be lit up. I am going to do a few more that will have magnets in the bases so that I can add them to the bridge from my Port Blacksand project and that way adds more possibilities for the bridge’s use.
A little update
I didn’t get too much done on this project today, I got distracted by Aeon Trespass and before I knew it time was slipping away from me.
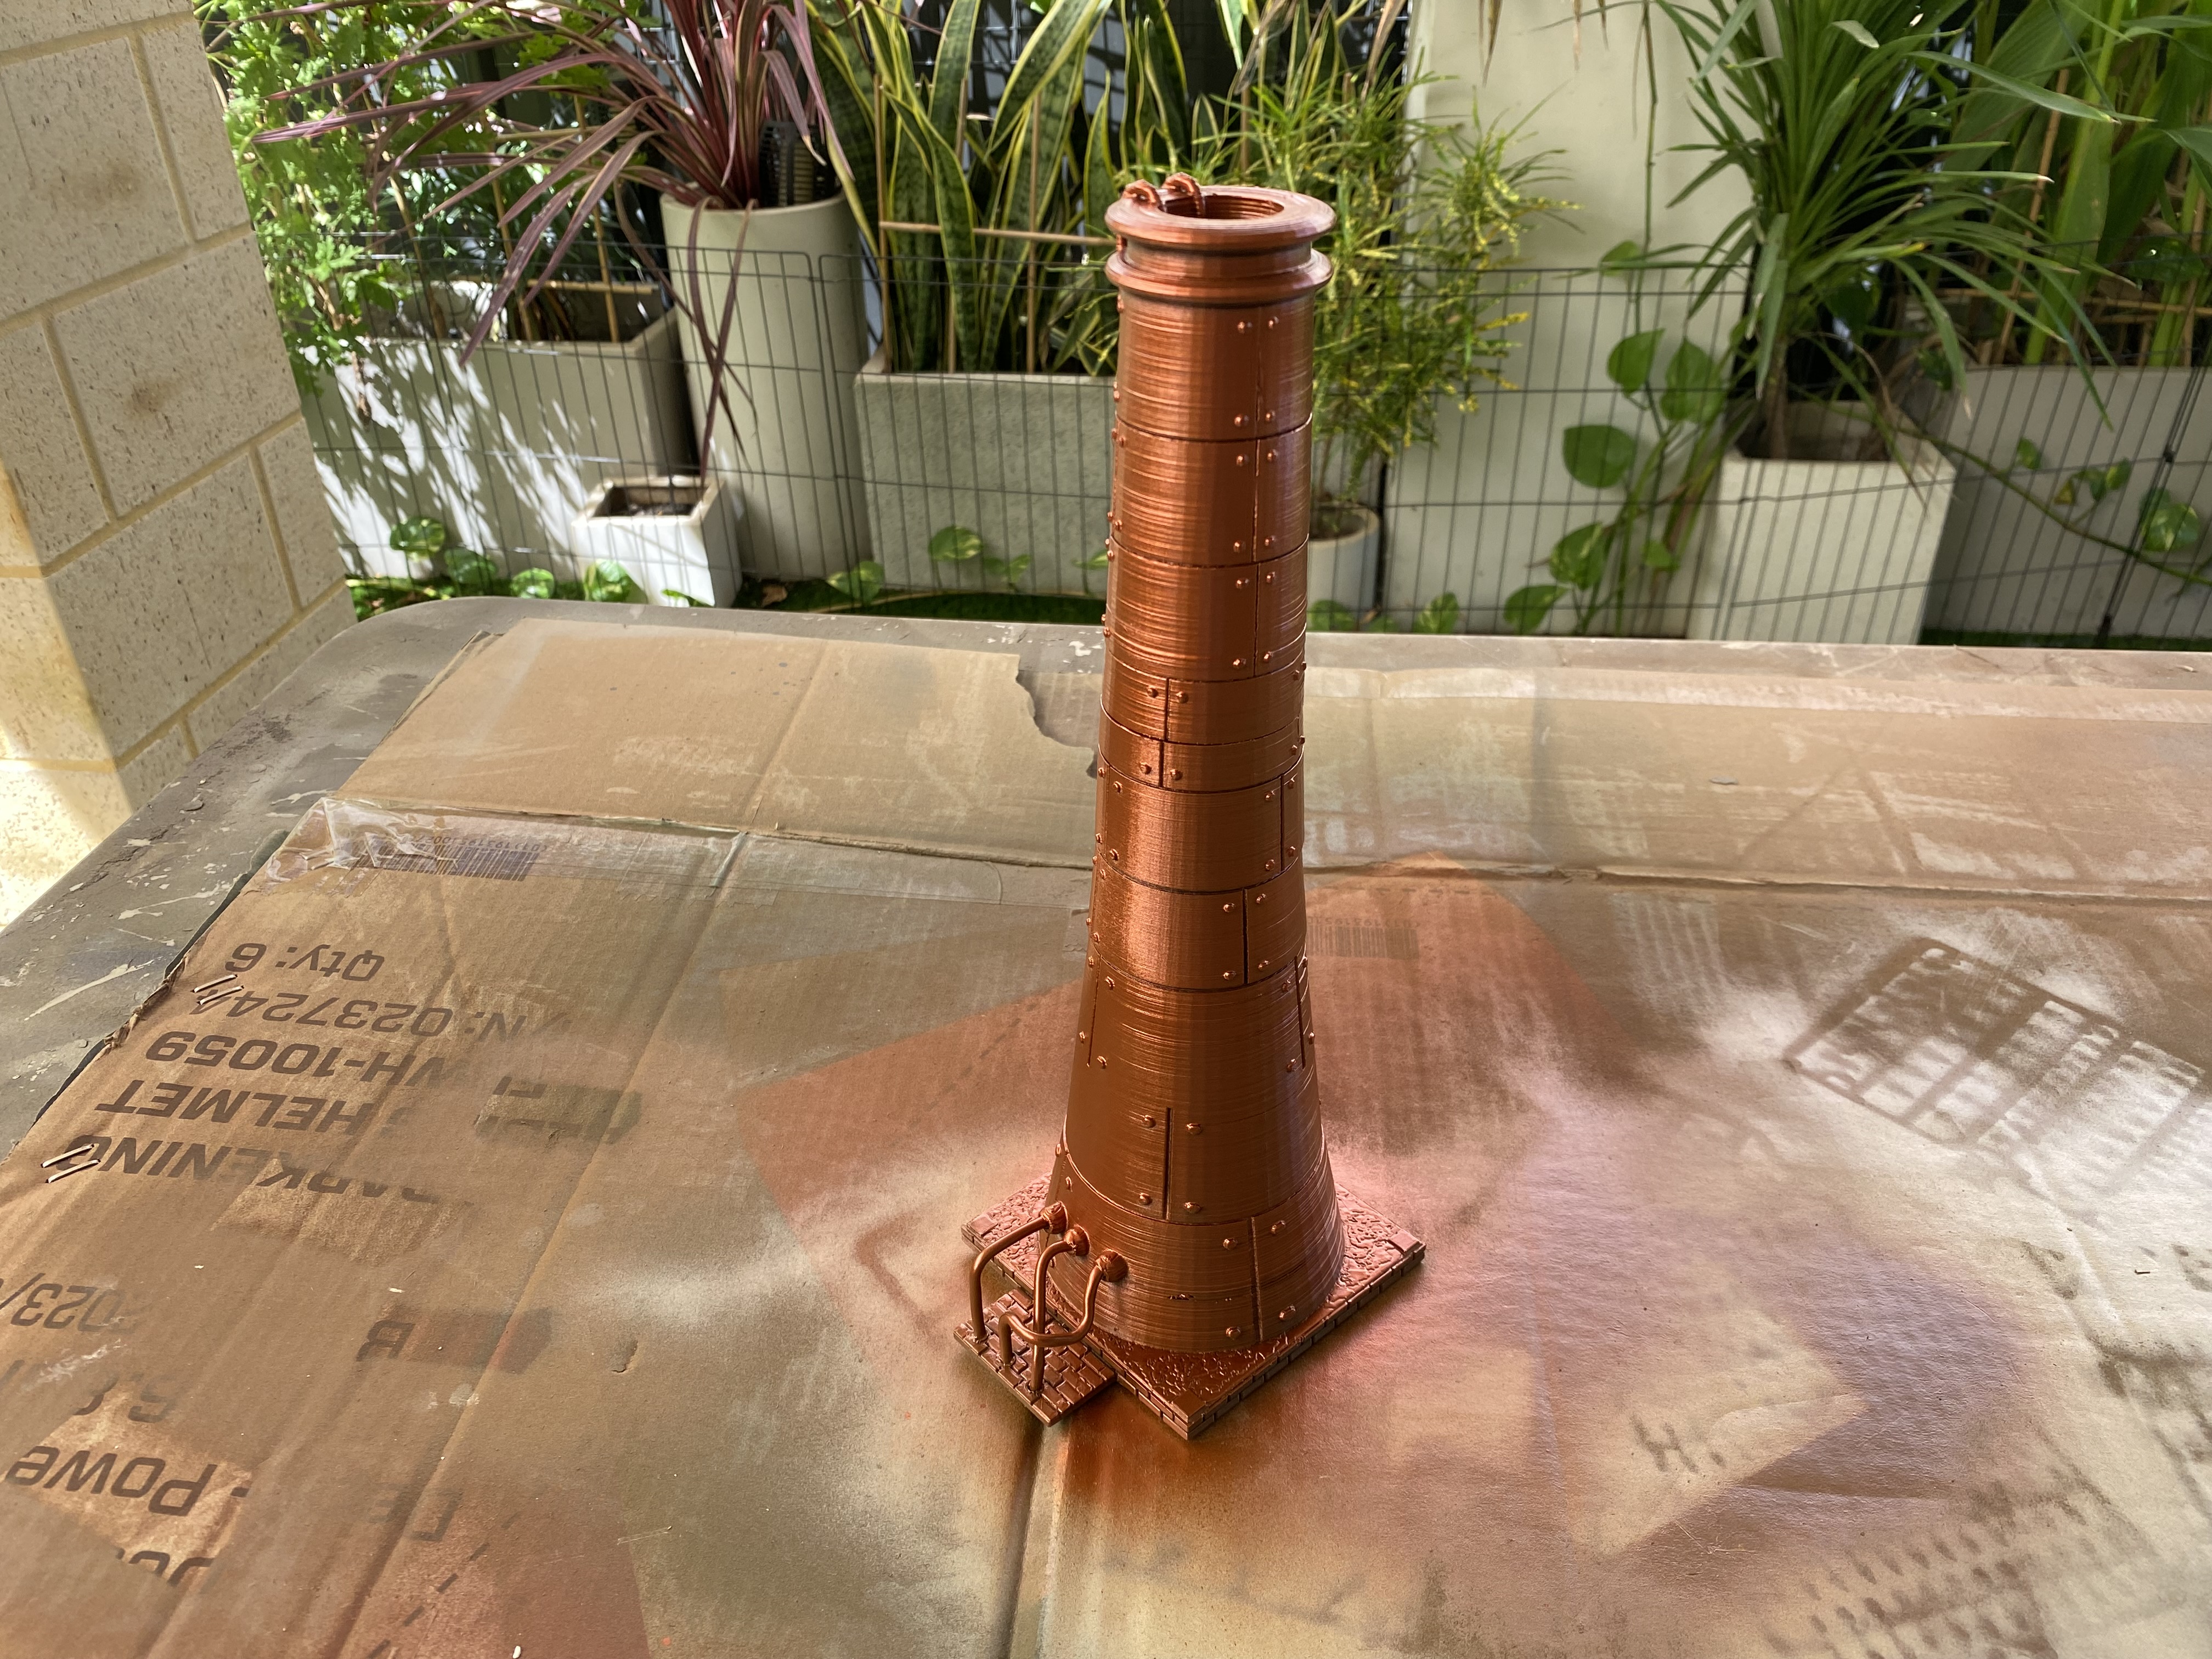
I managed to add a bit of colour to the large chimney and also started work on figuring out some streetlights using a mixture of bits I designed, and 3D-printed, plastic railway set lights and little tea light candles. I am pretty happy with how they came out.
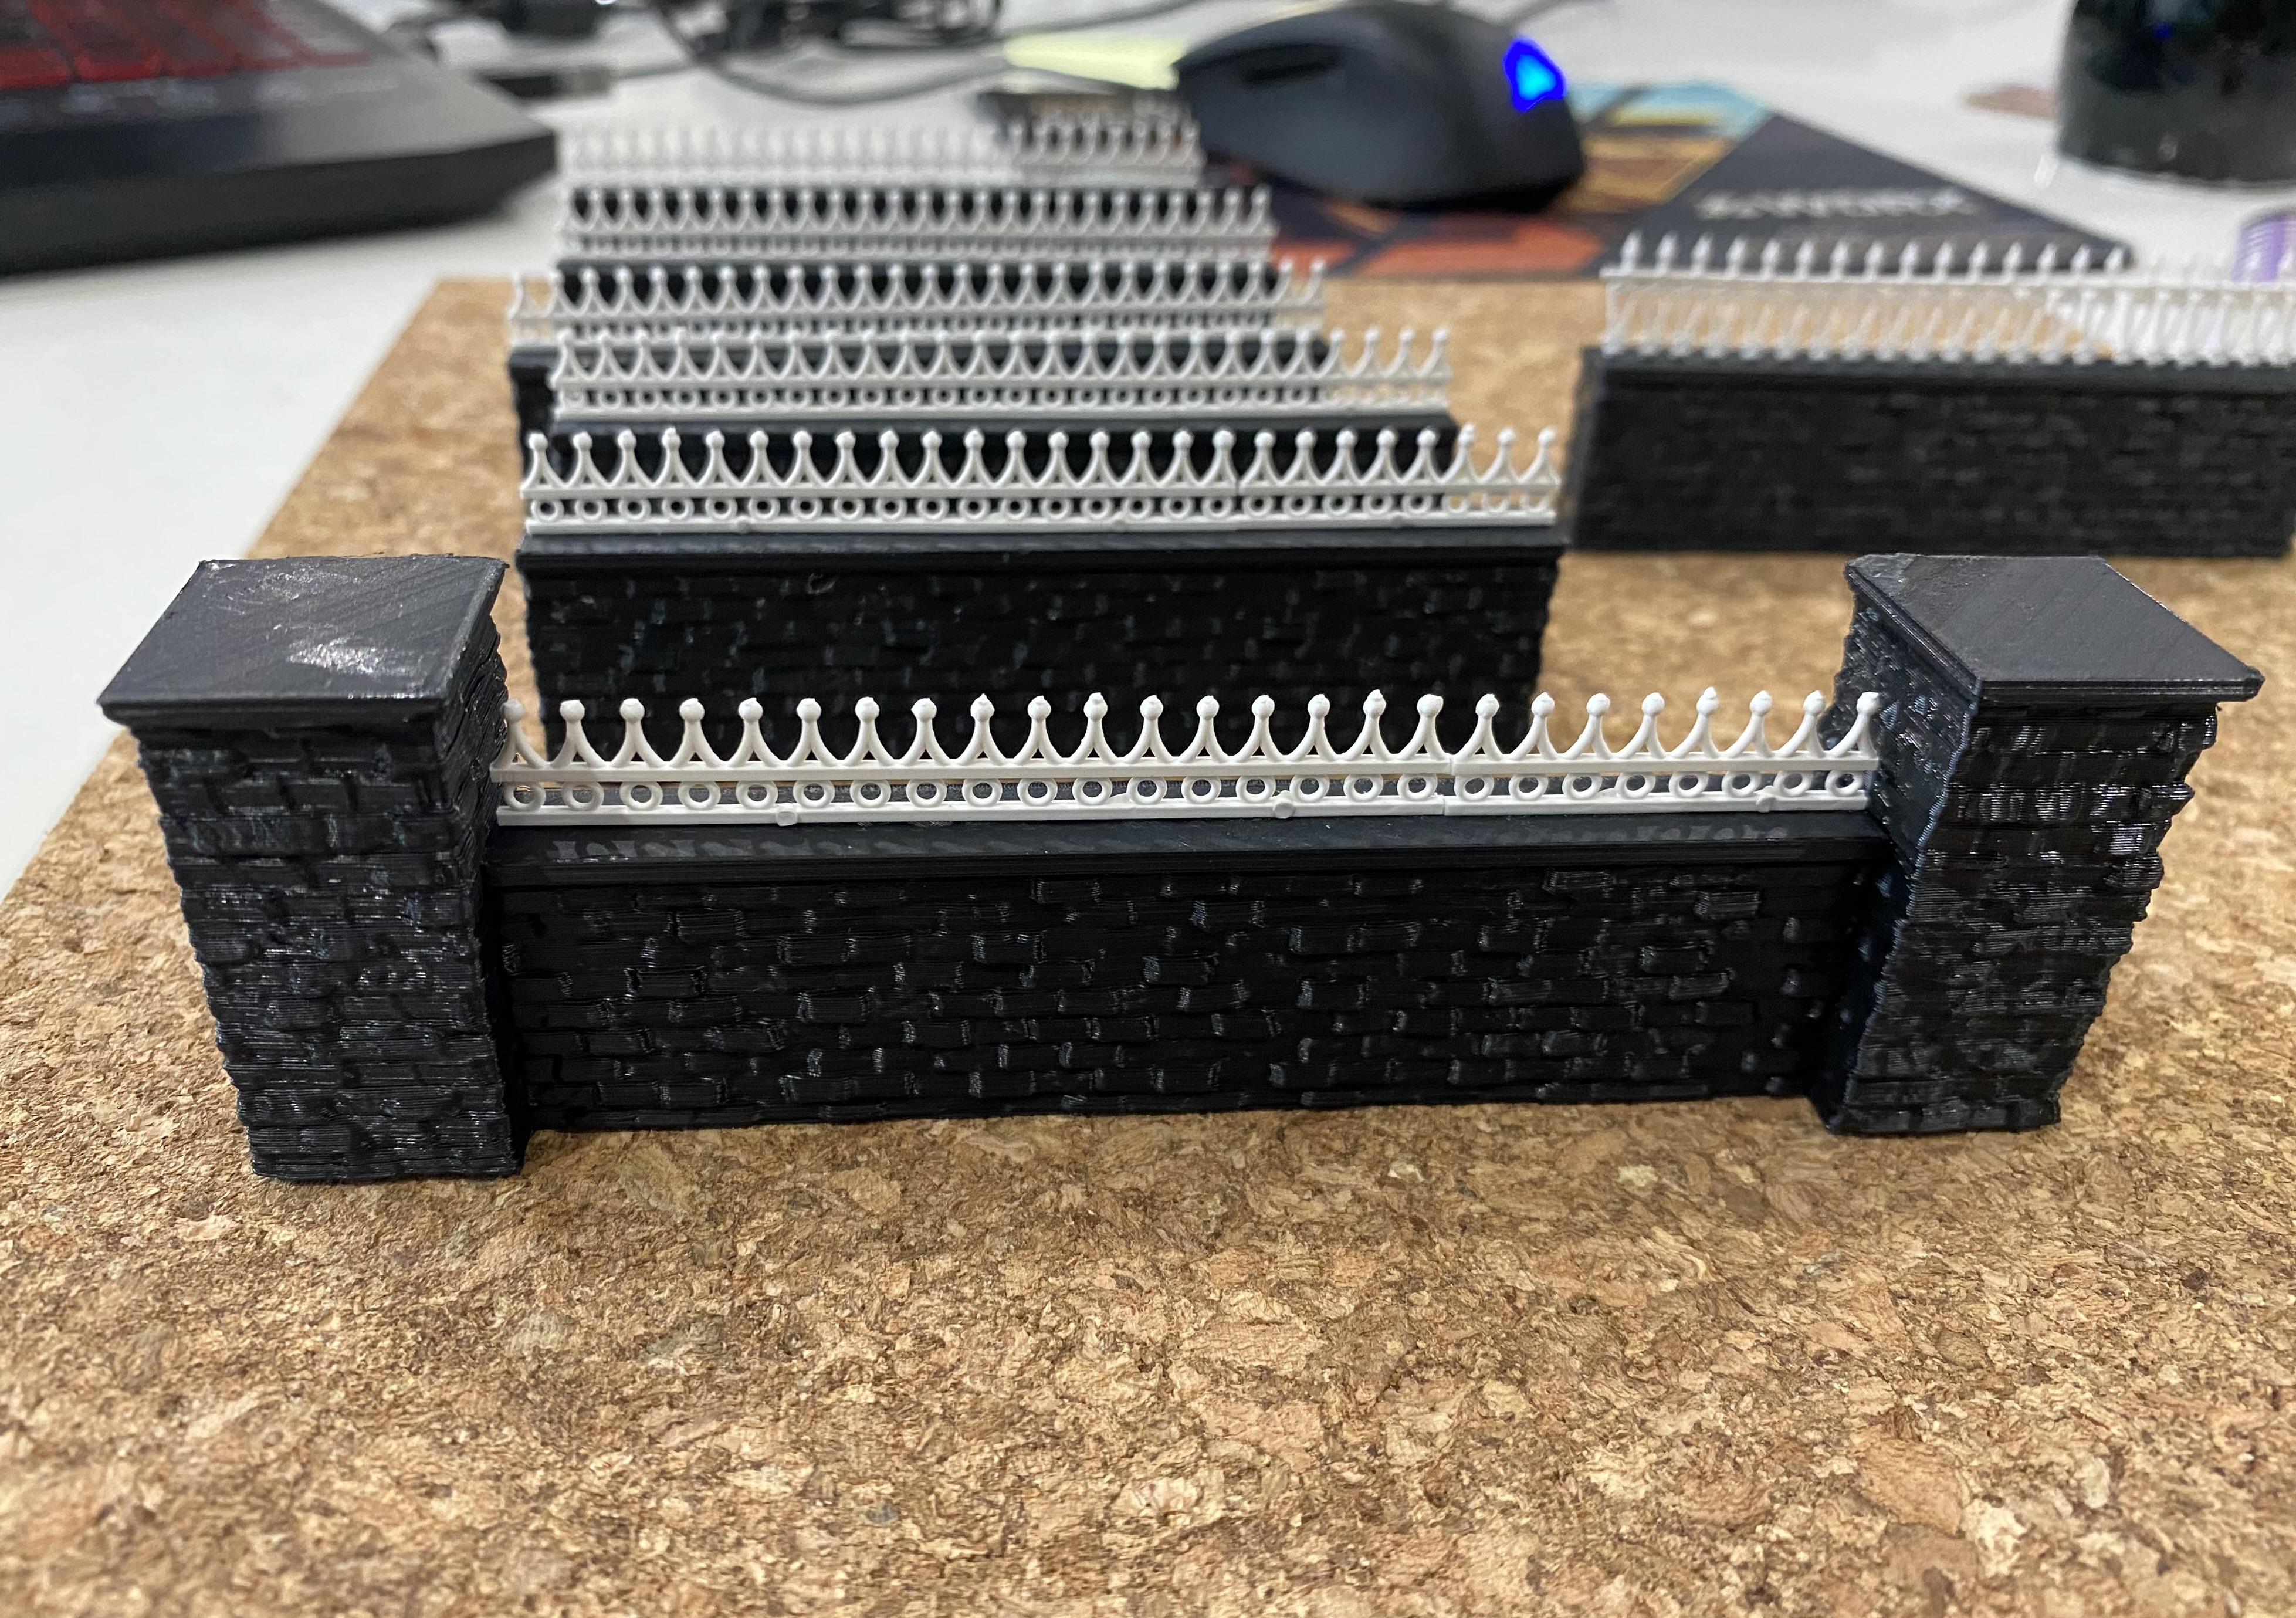
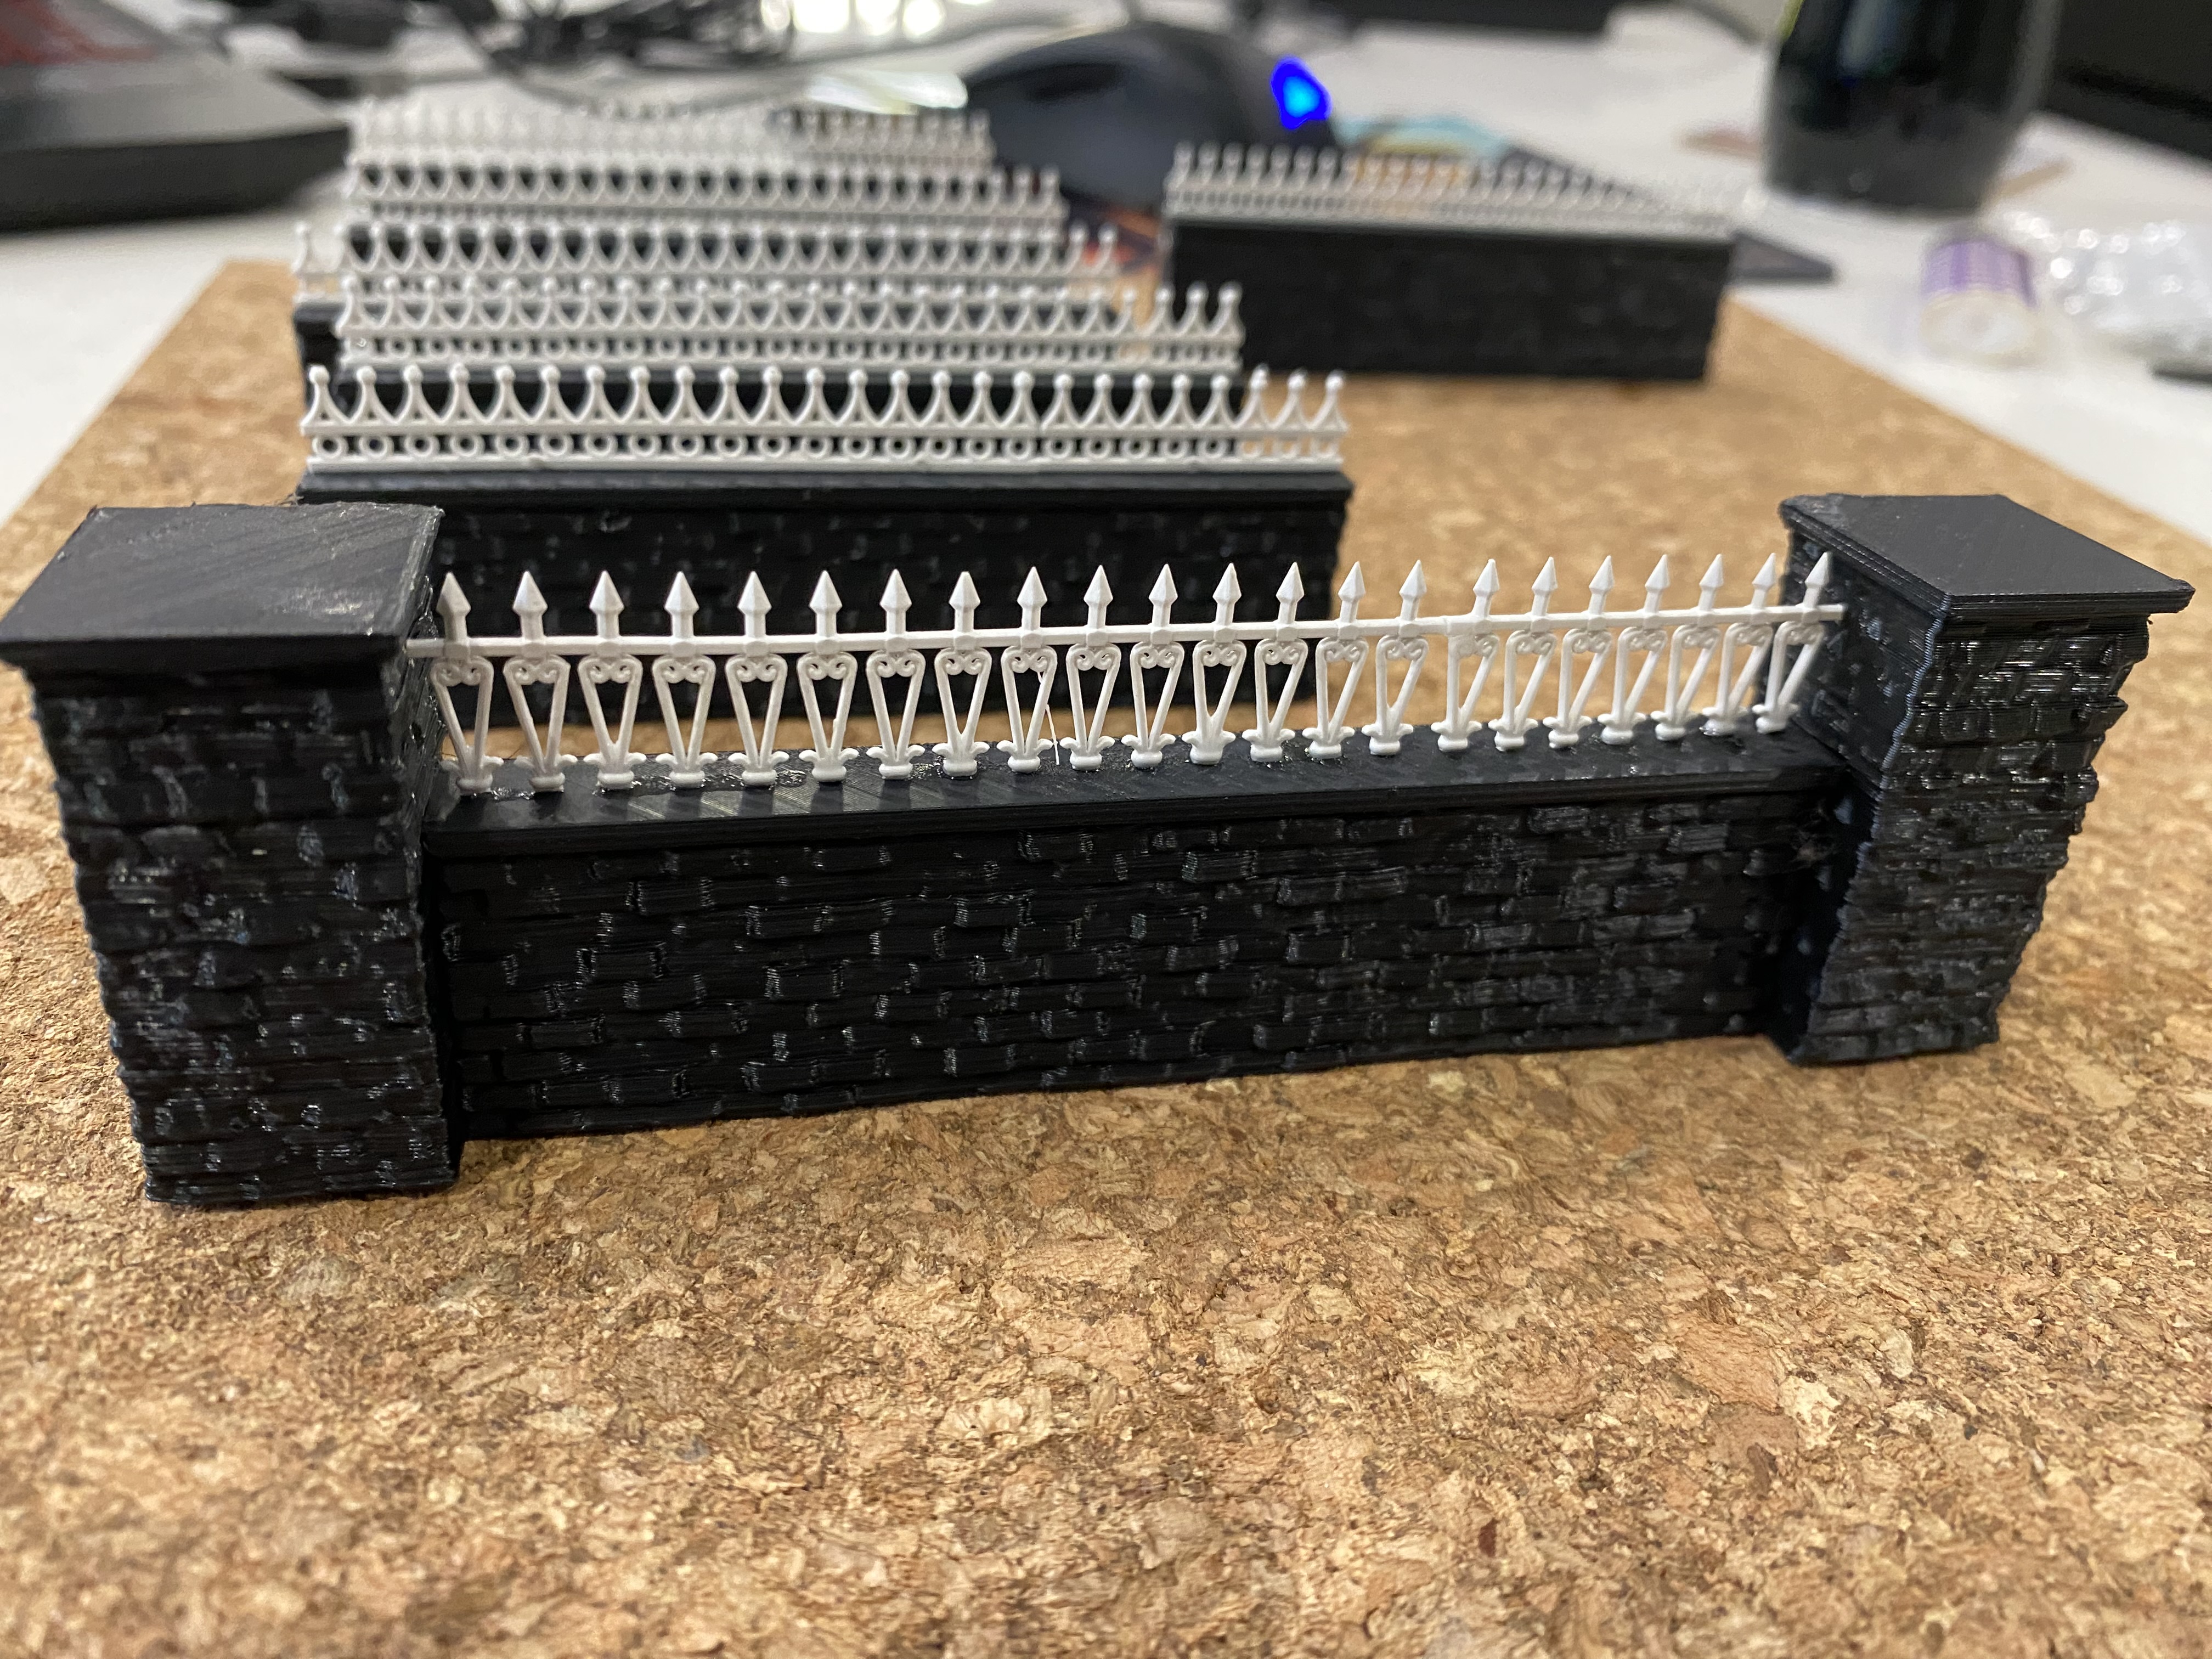
Walls
Finally pulled my finger out and did some work on the simple free-standing walls that I cannibalised from other STLs.
First, I added some detailing to the tops to give them a ‘Victorian’ vibe. I had some plastic fencing sets that were possibly for dollhouses or train layouts. I can’t remember exactly because I have had them for years. I cut the top section off one design and the bottom section of the other to create two different finishes.
Then, it was just a case of painting them up like the rest of the brickwork.
When posting this, I have just applied the plaster to them. Once that is dry, I will go back in and paint the railing sections. I will probably go with black railings, although I am open to suggestions.

I also started work on three of the other buildings which were still sitting in the to-do pile. I found a nice-looking little pendant at the local craft shop that I think will make a nice bit of detailing for one of the buildings. I will post up more details on that as it happens.
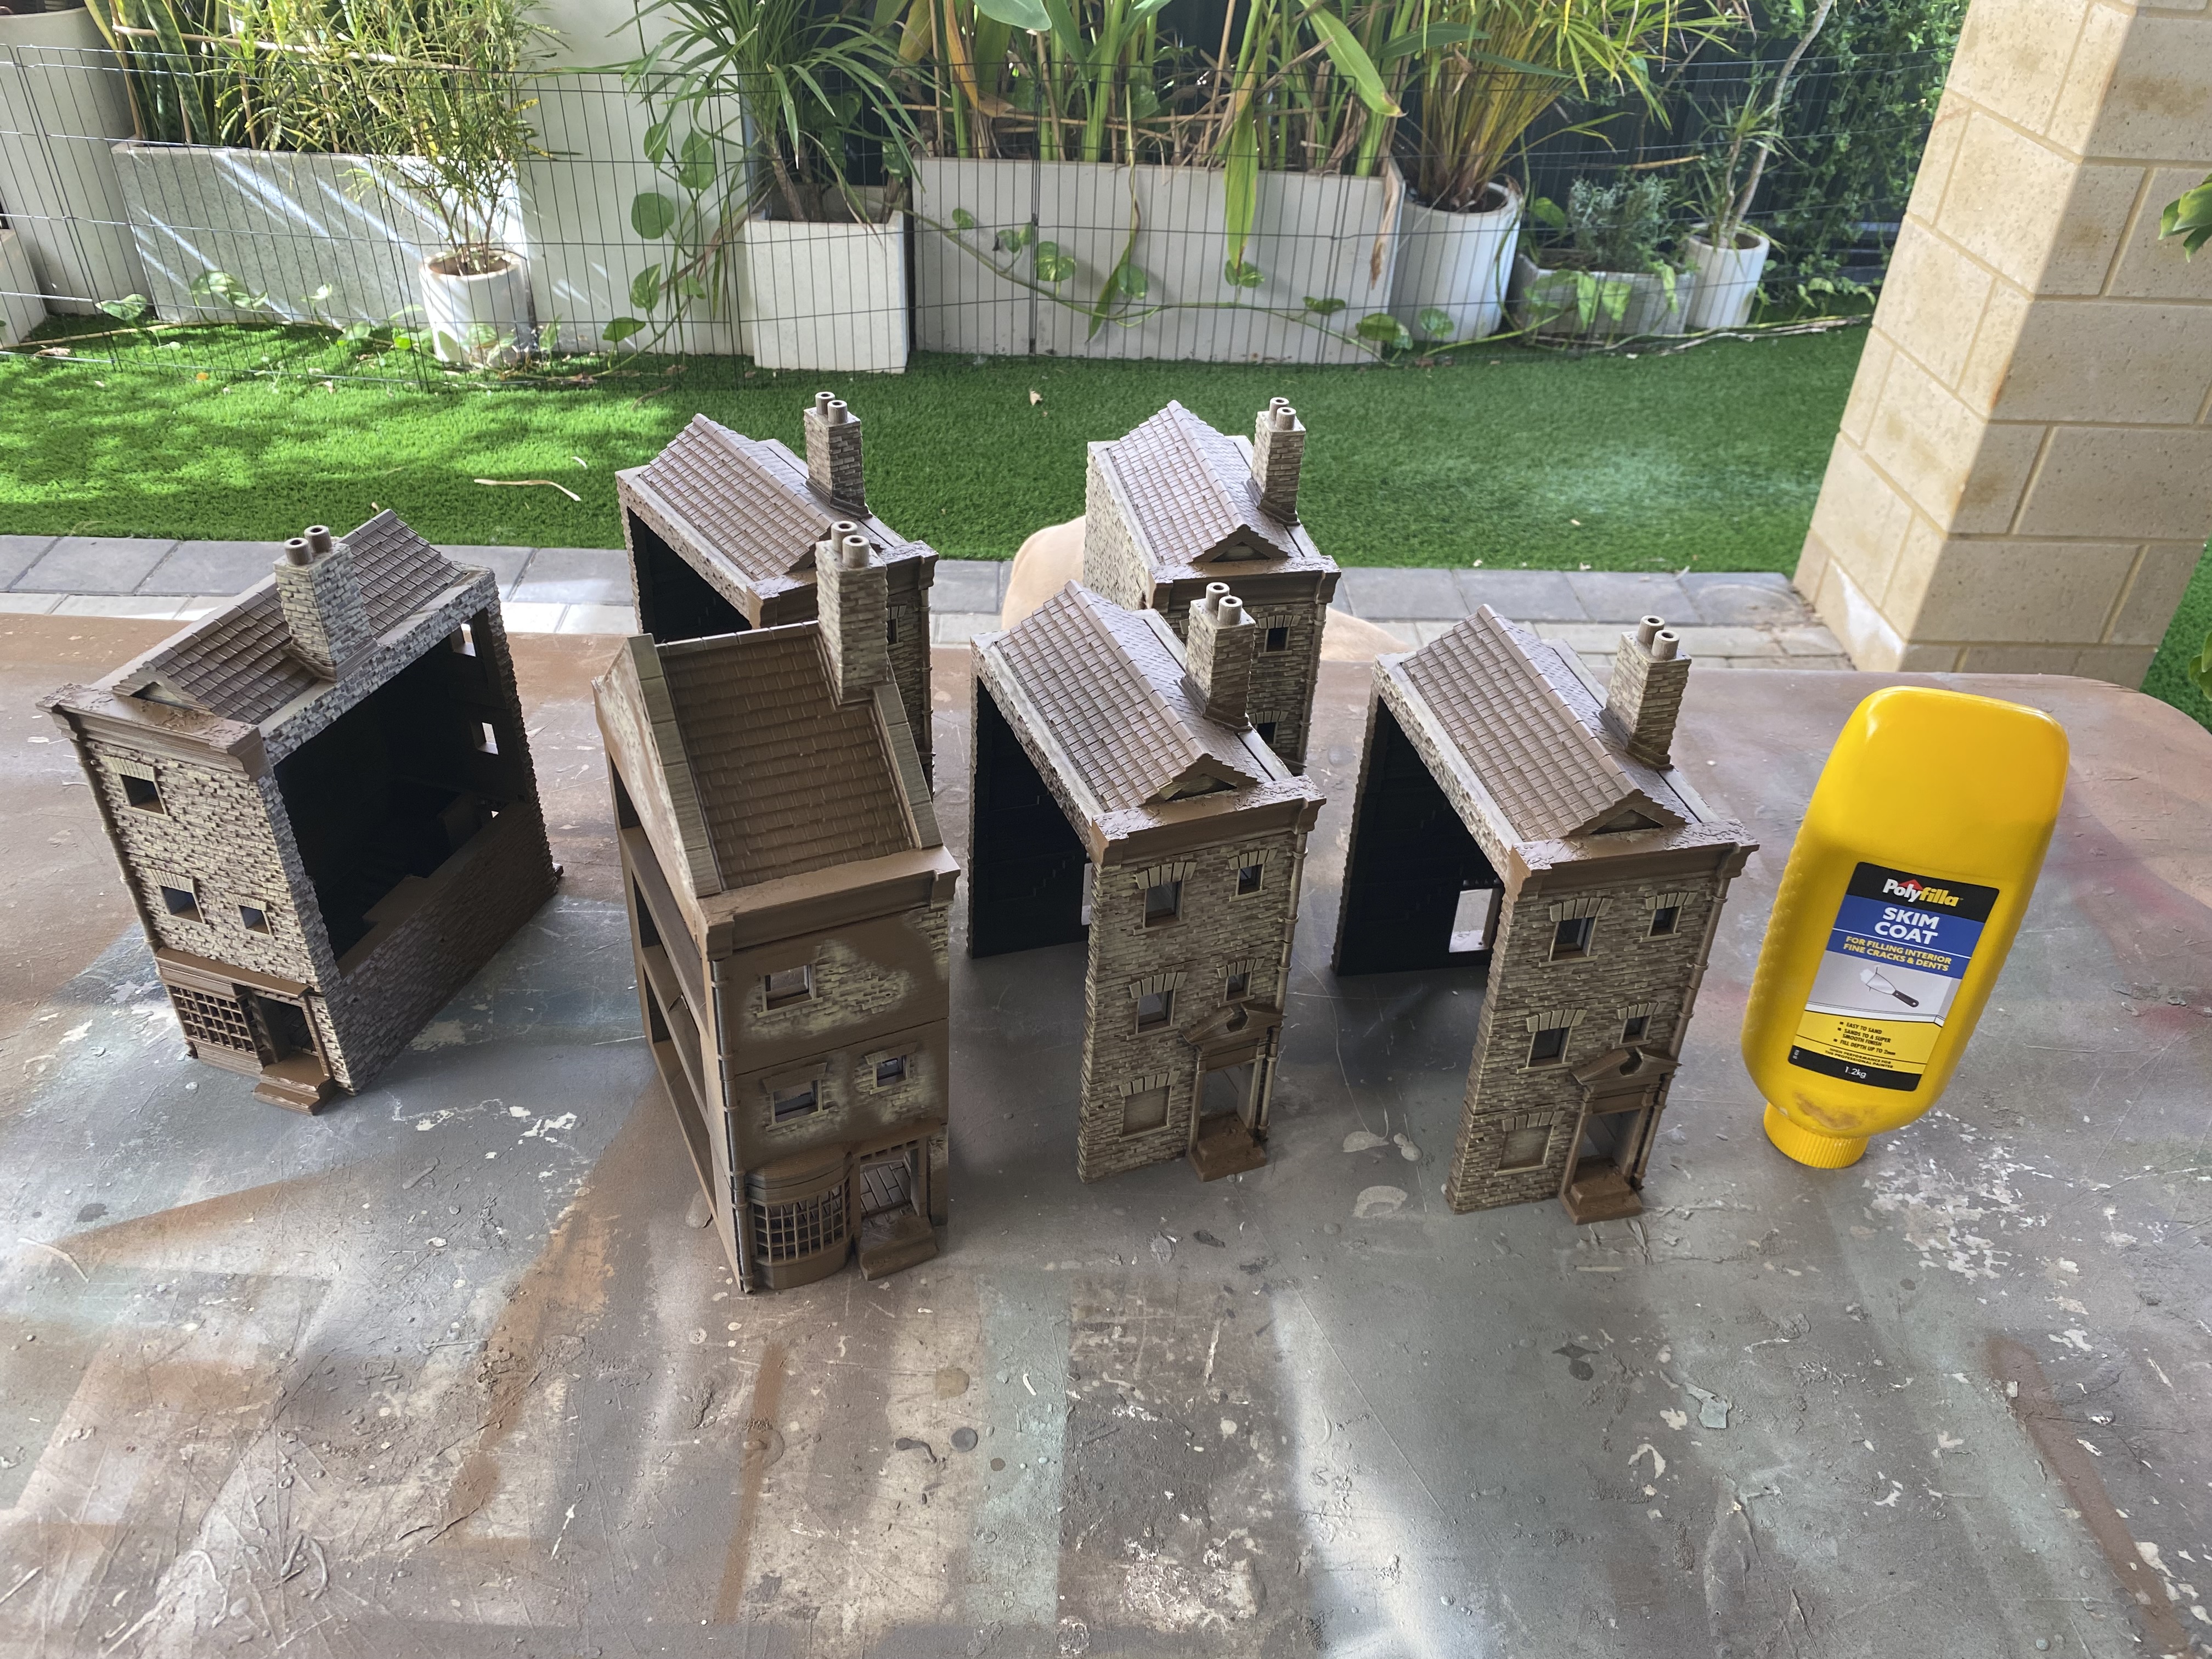
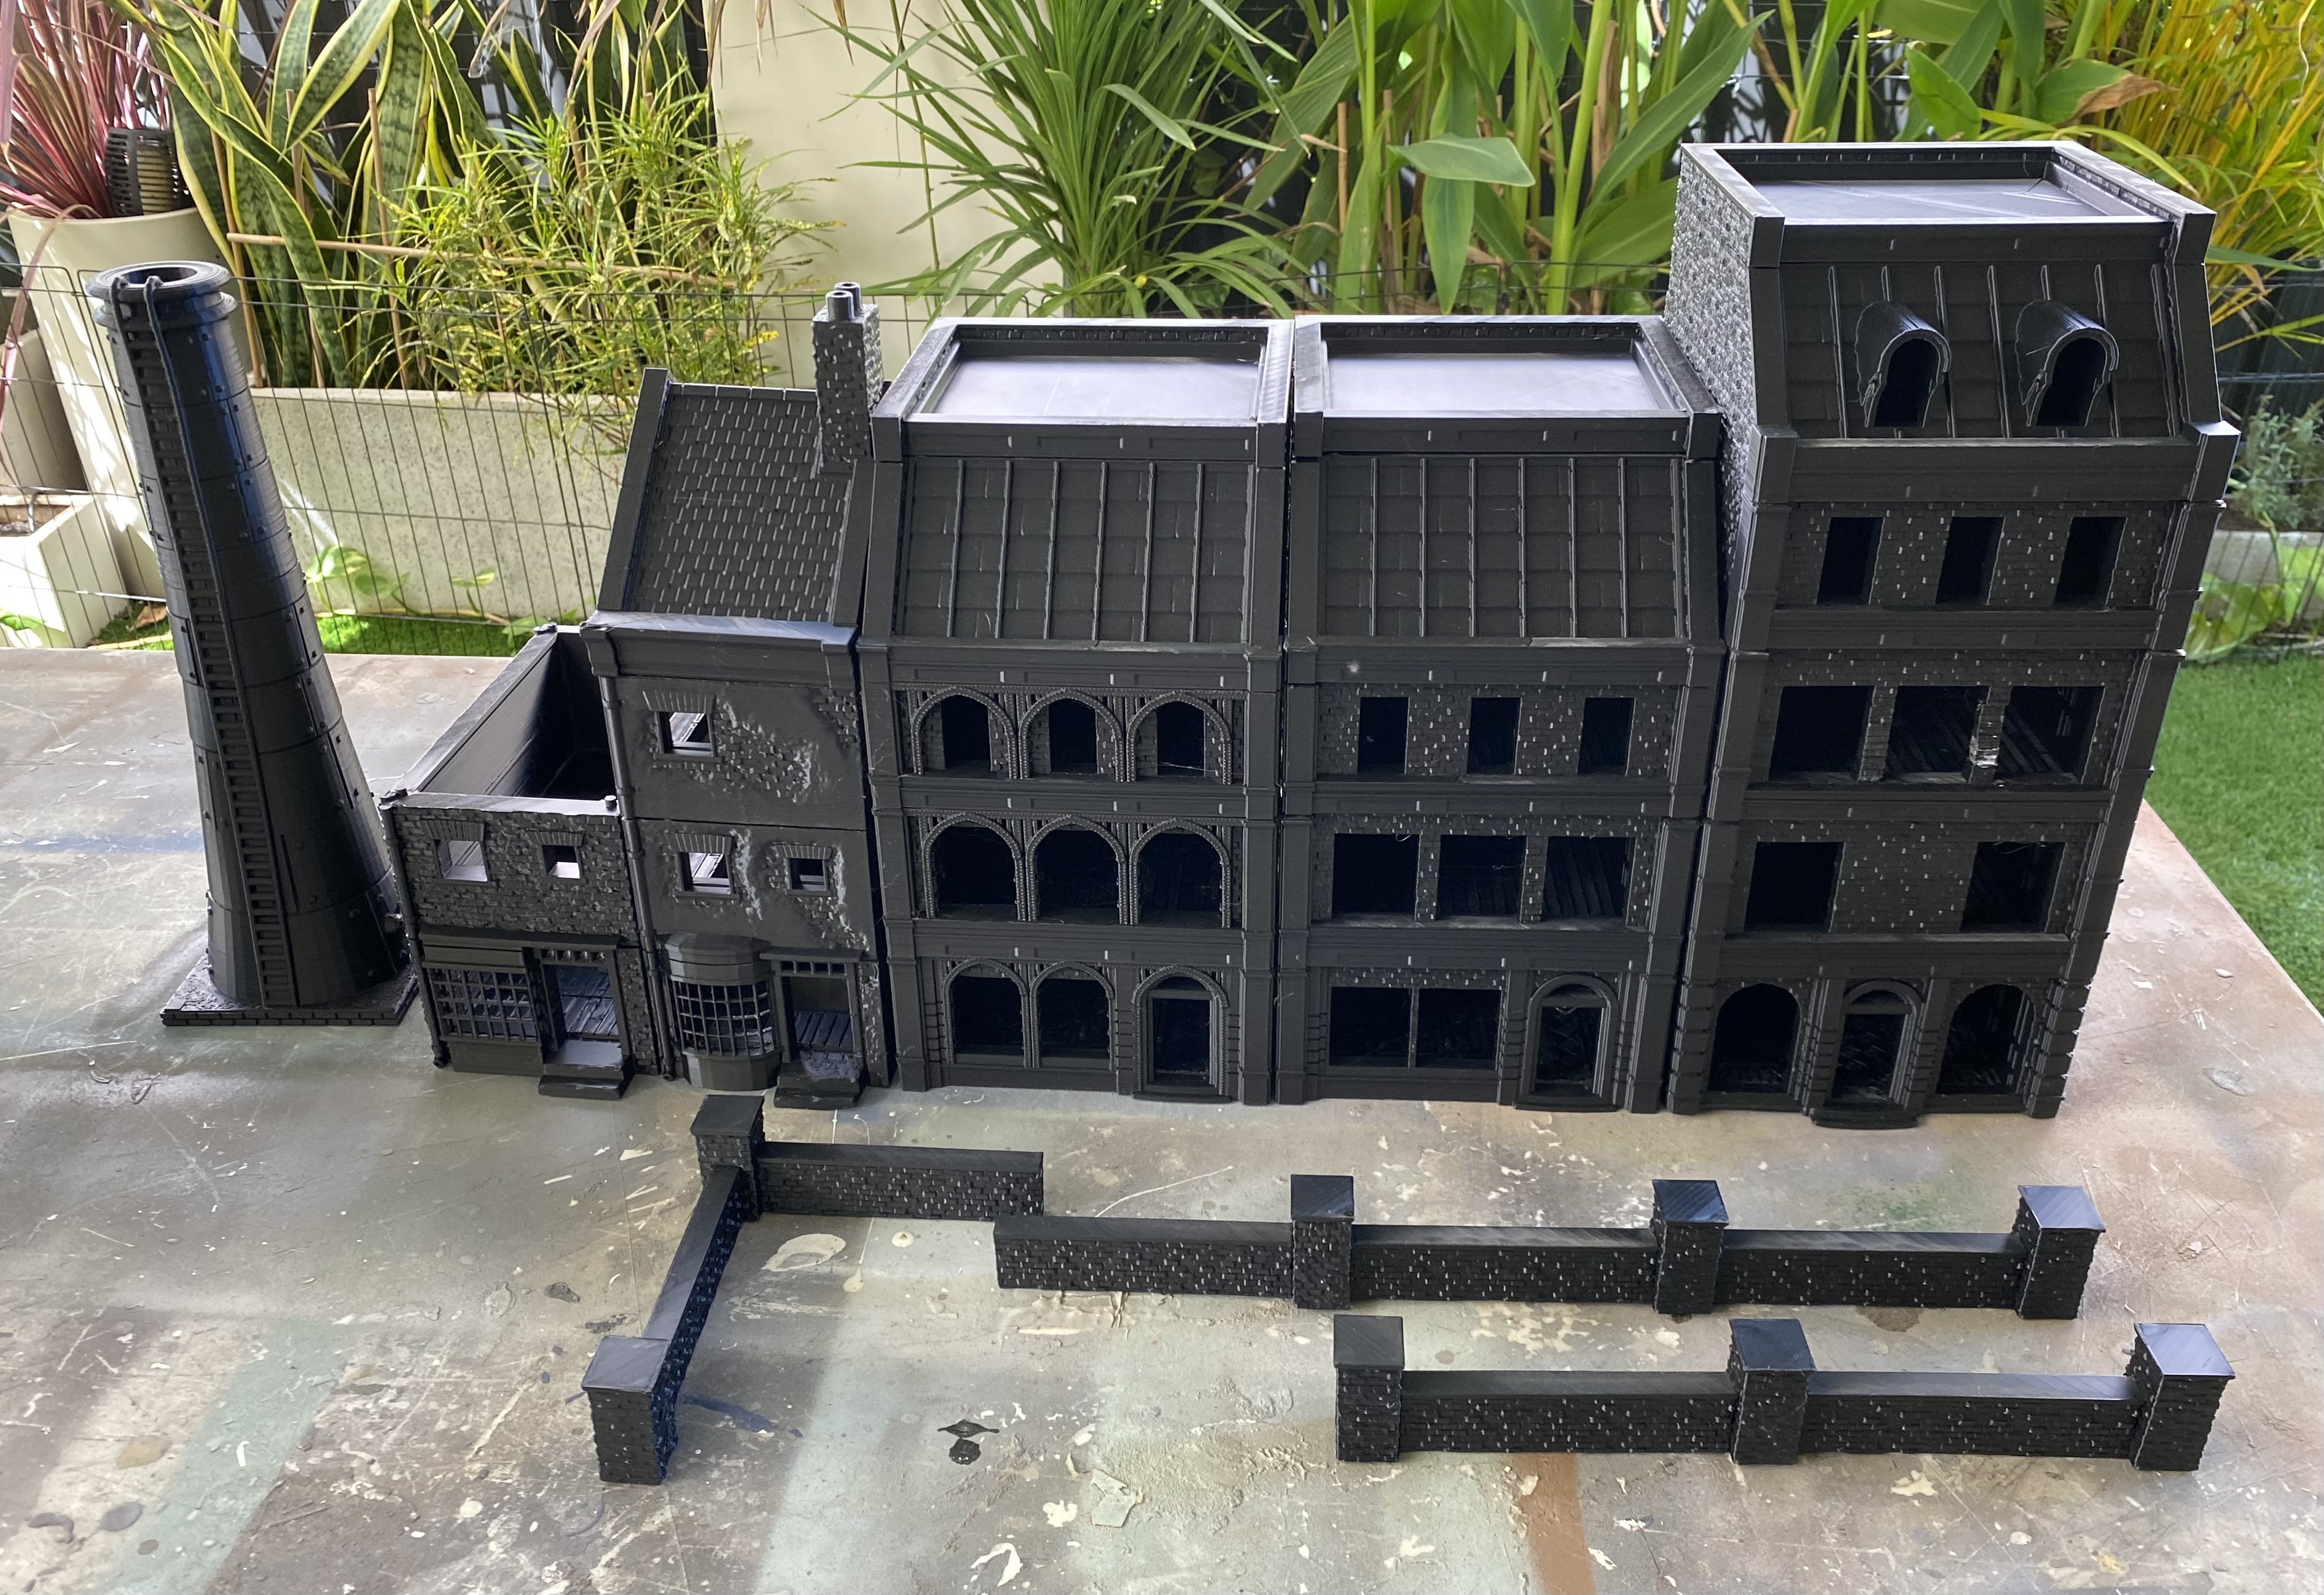
State of Play Continued
Continuing from the last post this is what I currently have left ready or almost ready to start on.
A few buildings, a large funnel and an anti-nef minefield.
State of play
My apologies for neglecting this project in favour of my Port Blacksand project.
I had figured that as both builds are using similar techniques it would be easy to alternate between the two and provide regular updates. The reality of the matter is that the Blacksand project is using up way more time than I had thought.
Anyway, enough excuses and onto the reason for this post. We now have 11 days before the end of the month, which means for me I have 3 full days off to get as much done as I can. I am now down to just one printer working on the Gaslight stuff, everything else is churning out stuff for the other project.
My current state of play for this project is shown in the following photos.

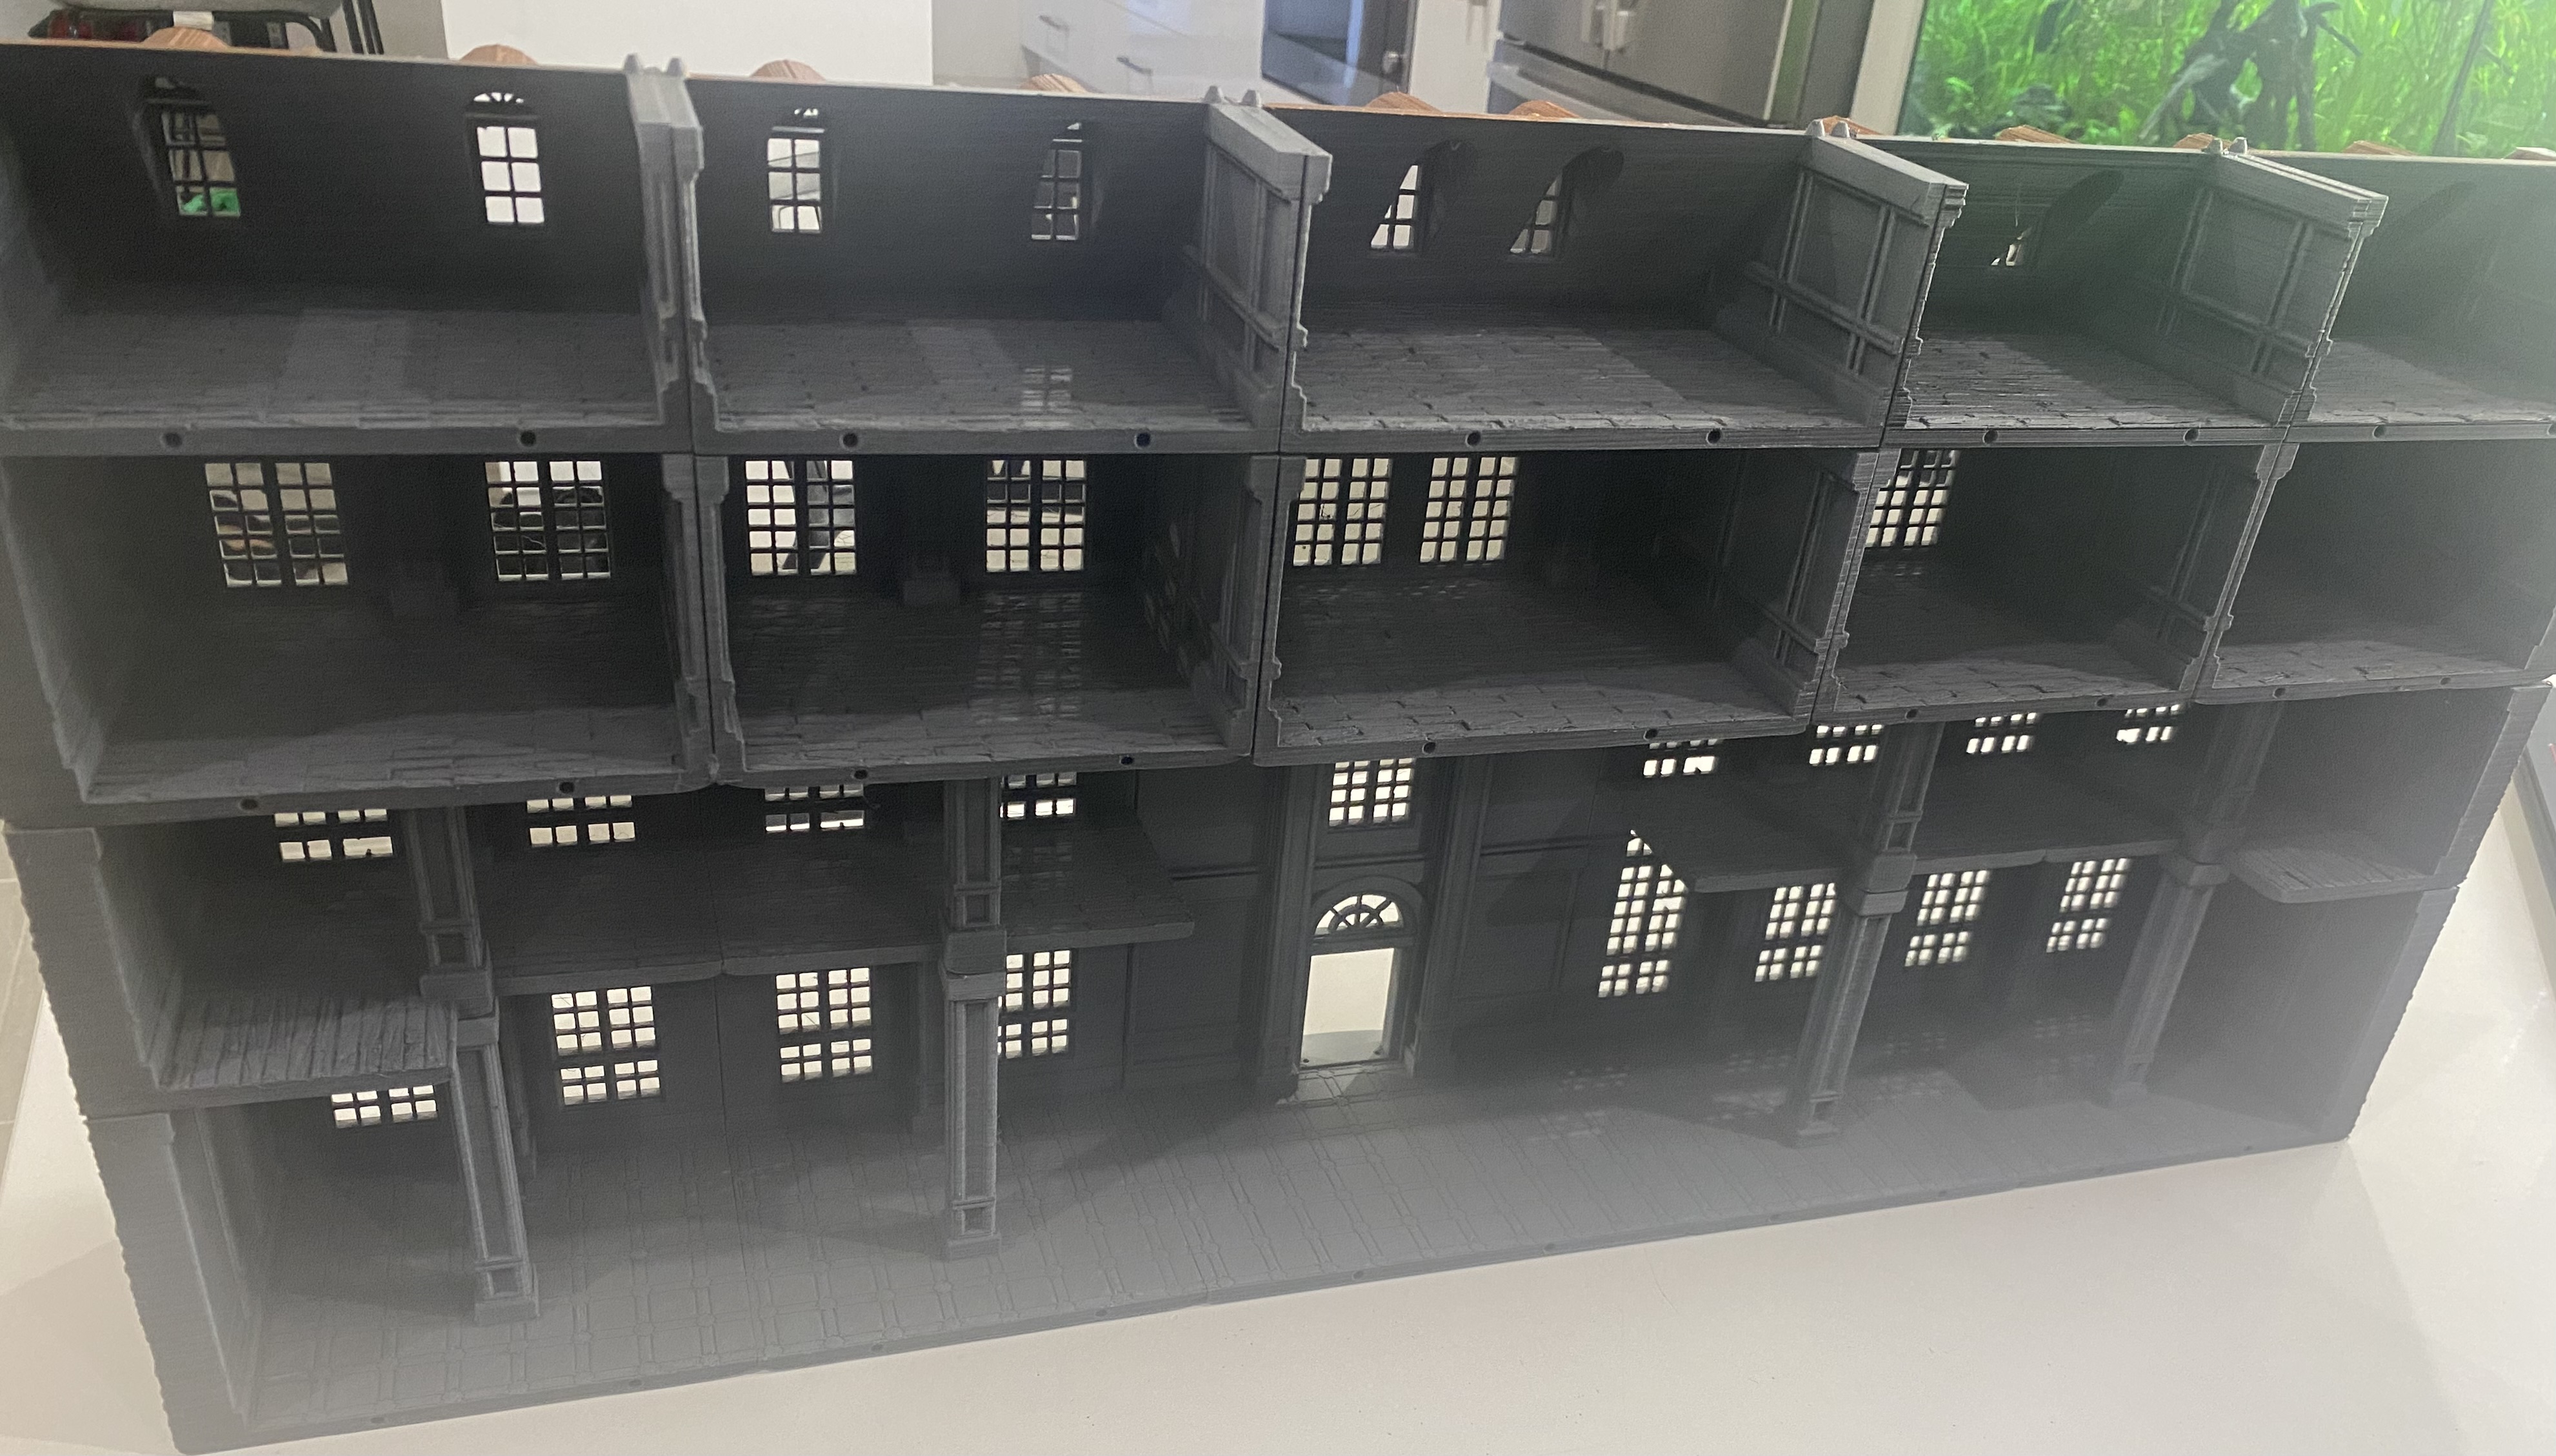
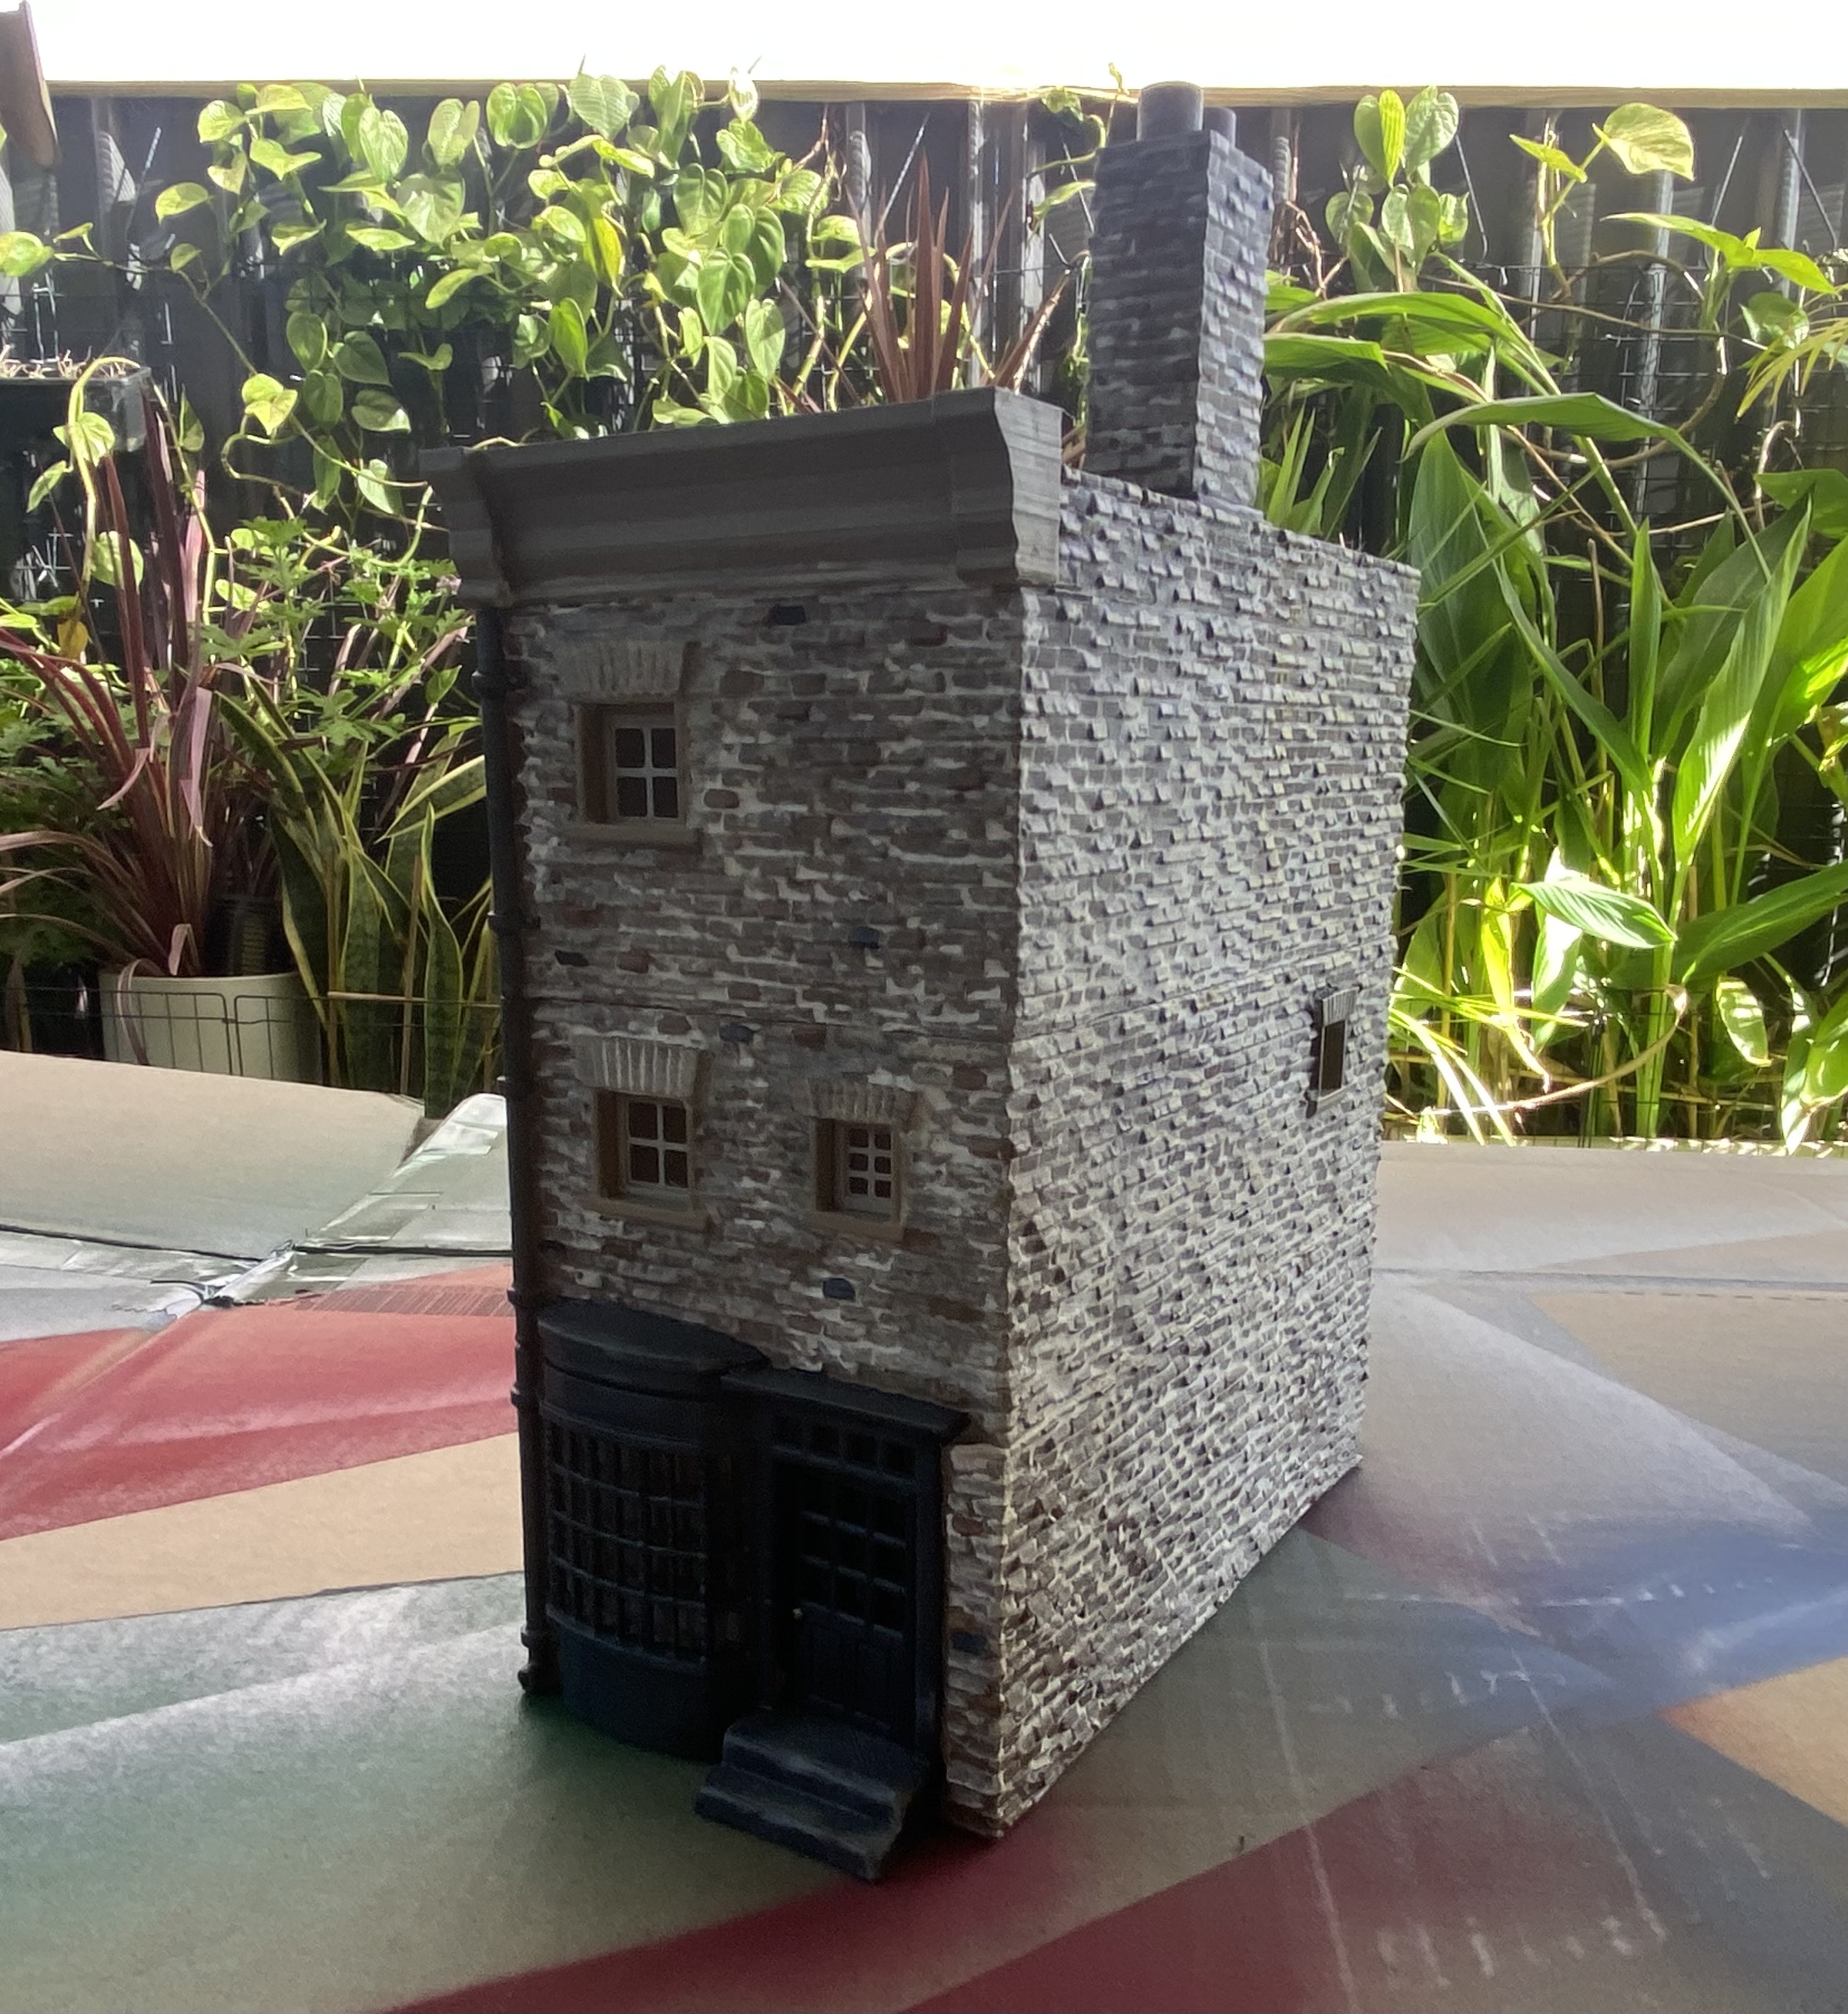
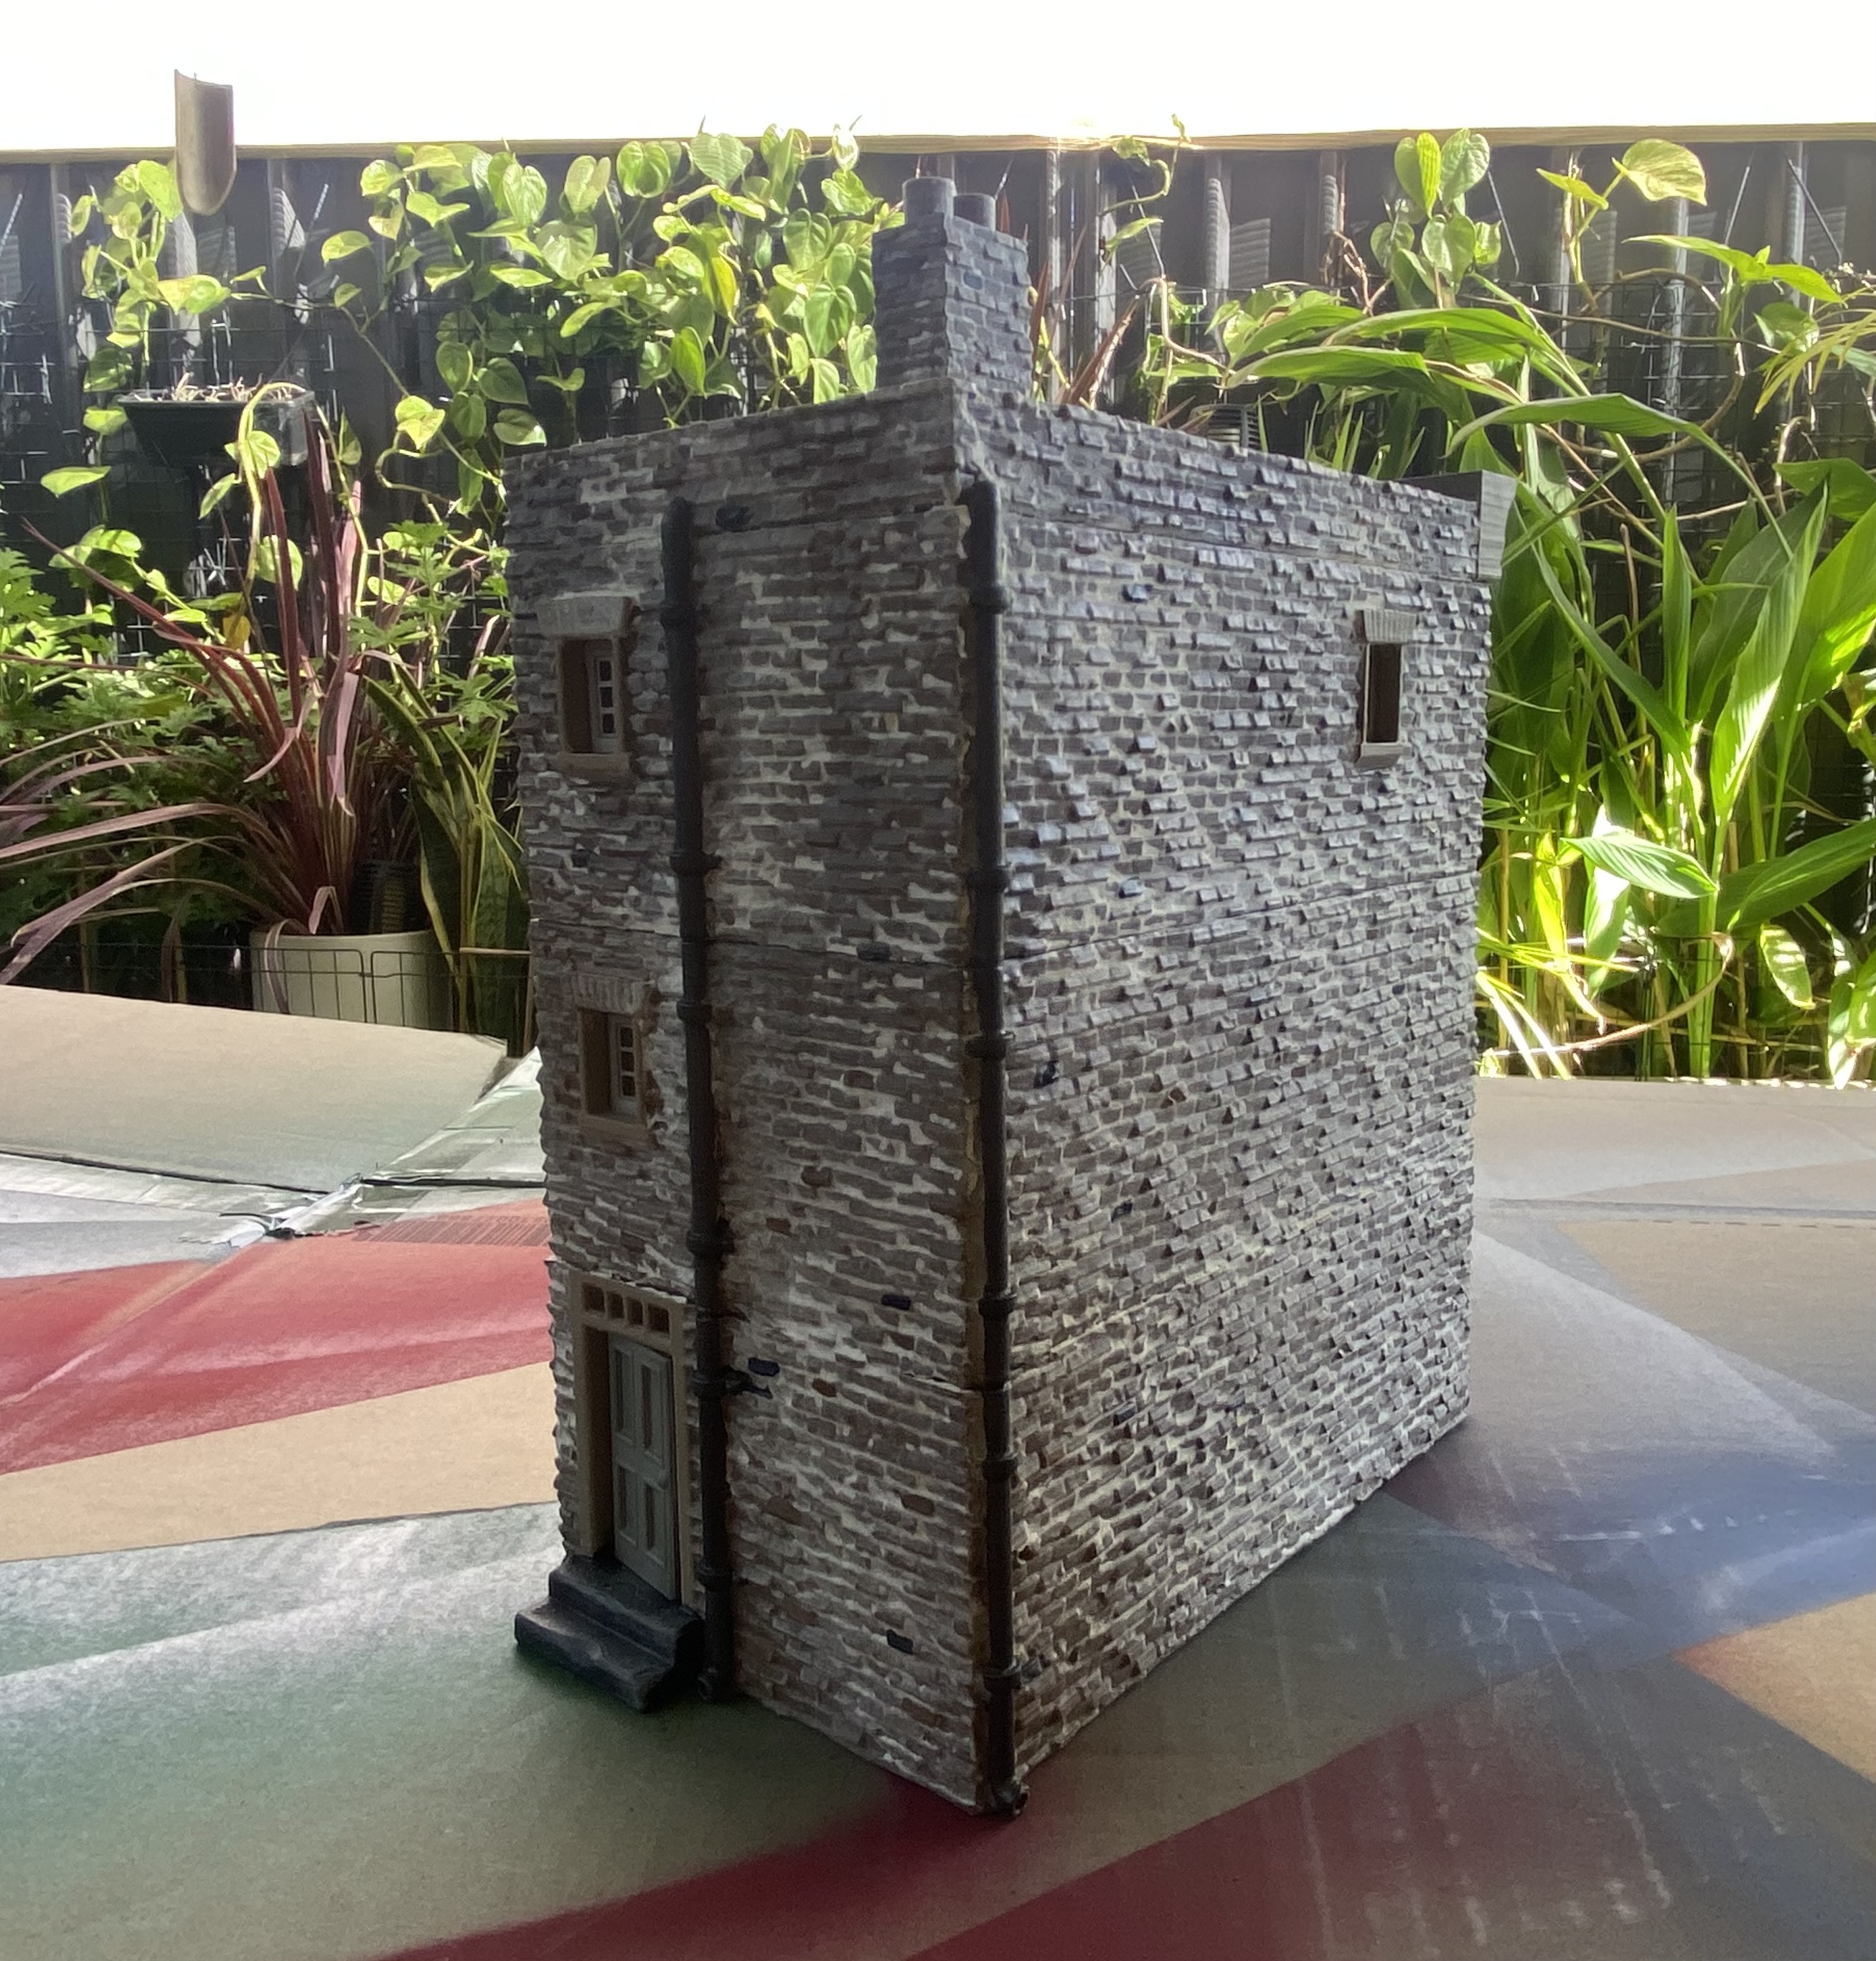
Easy street
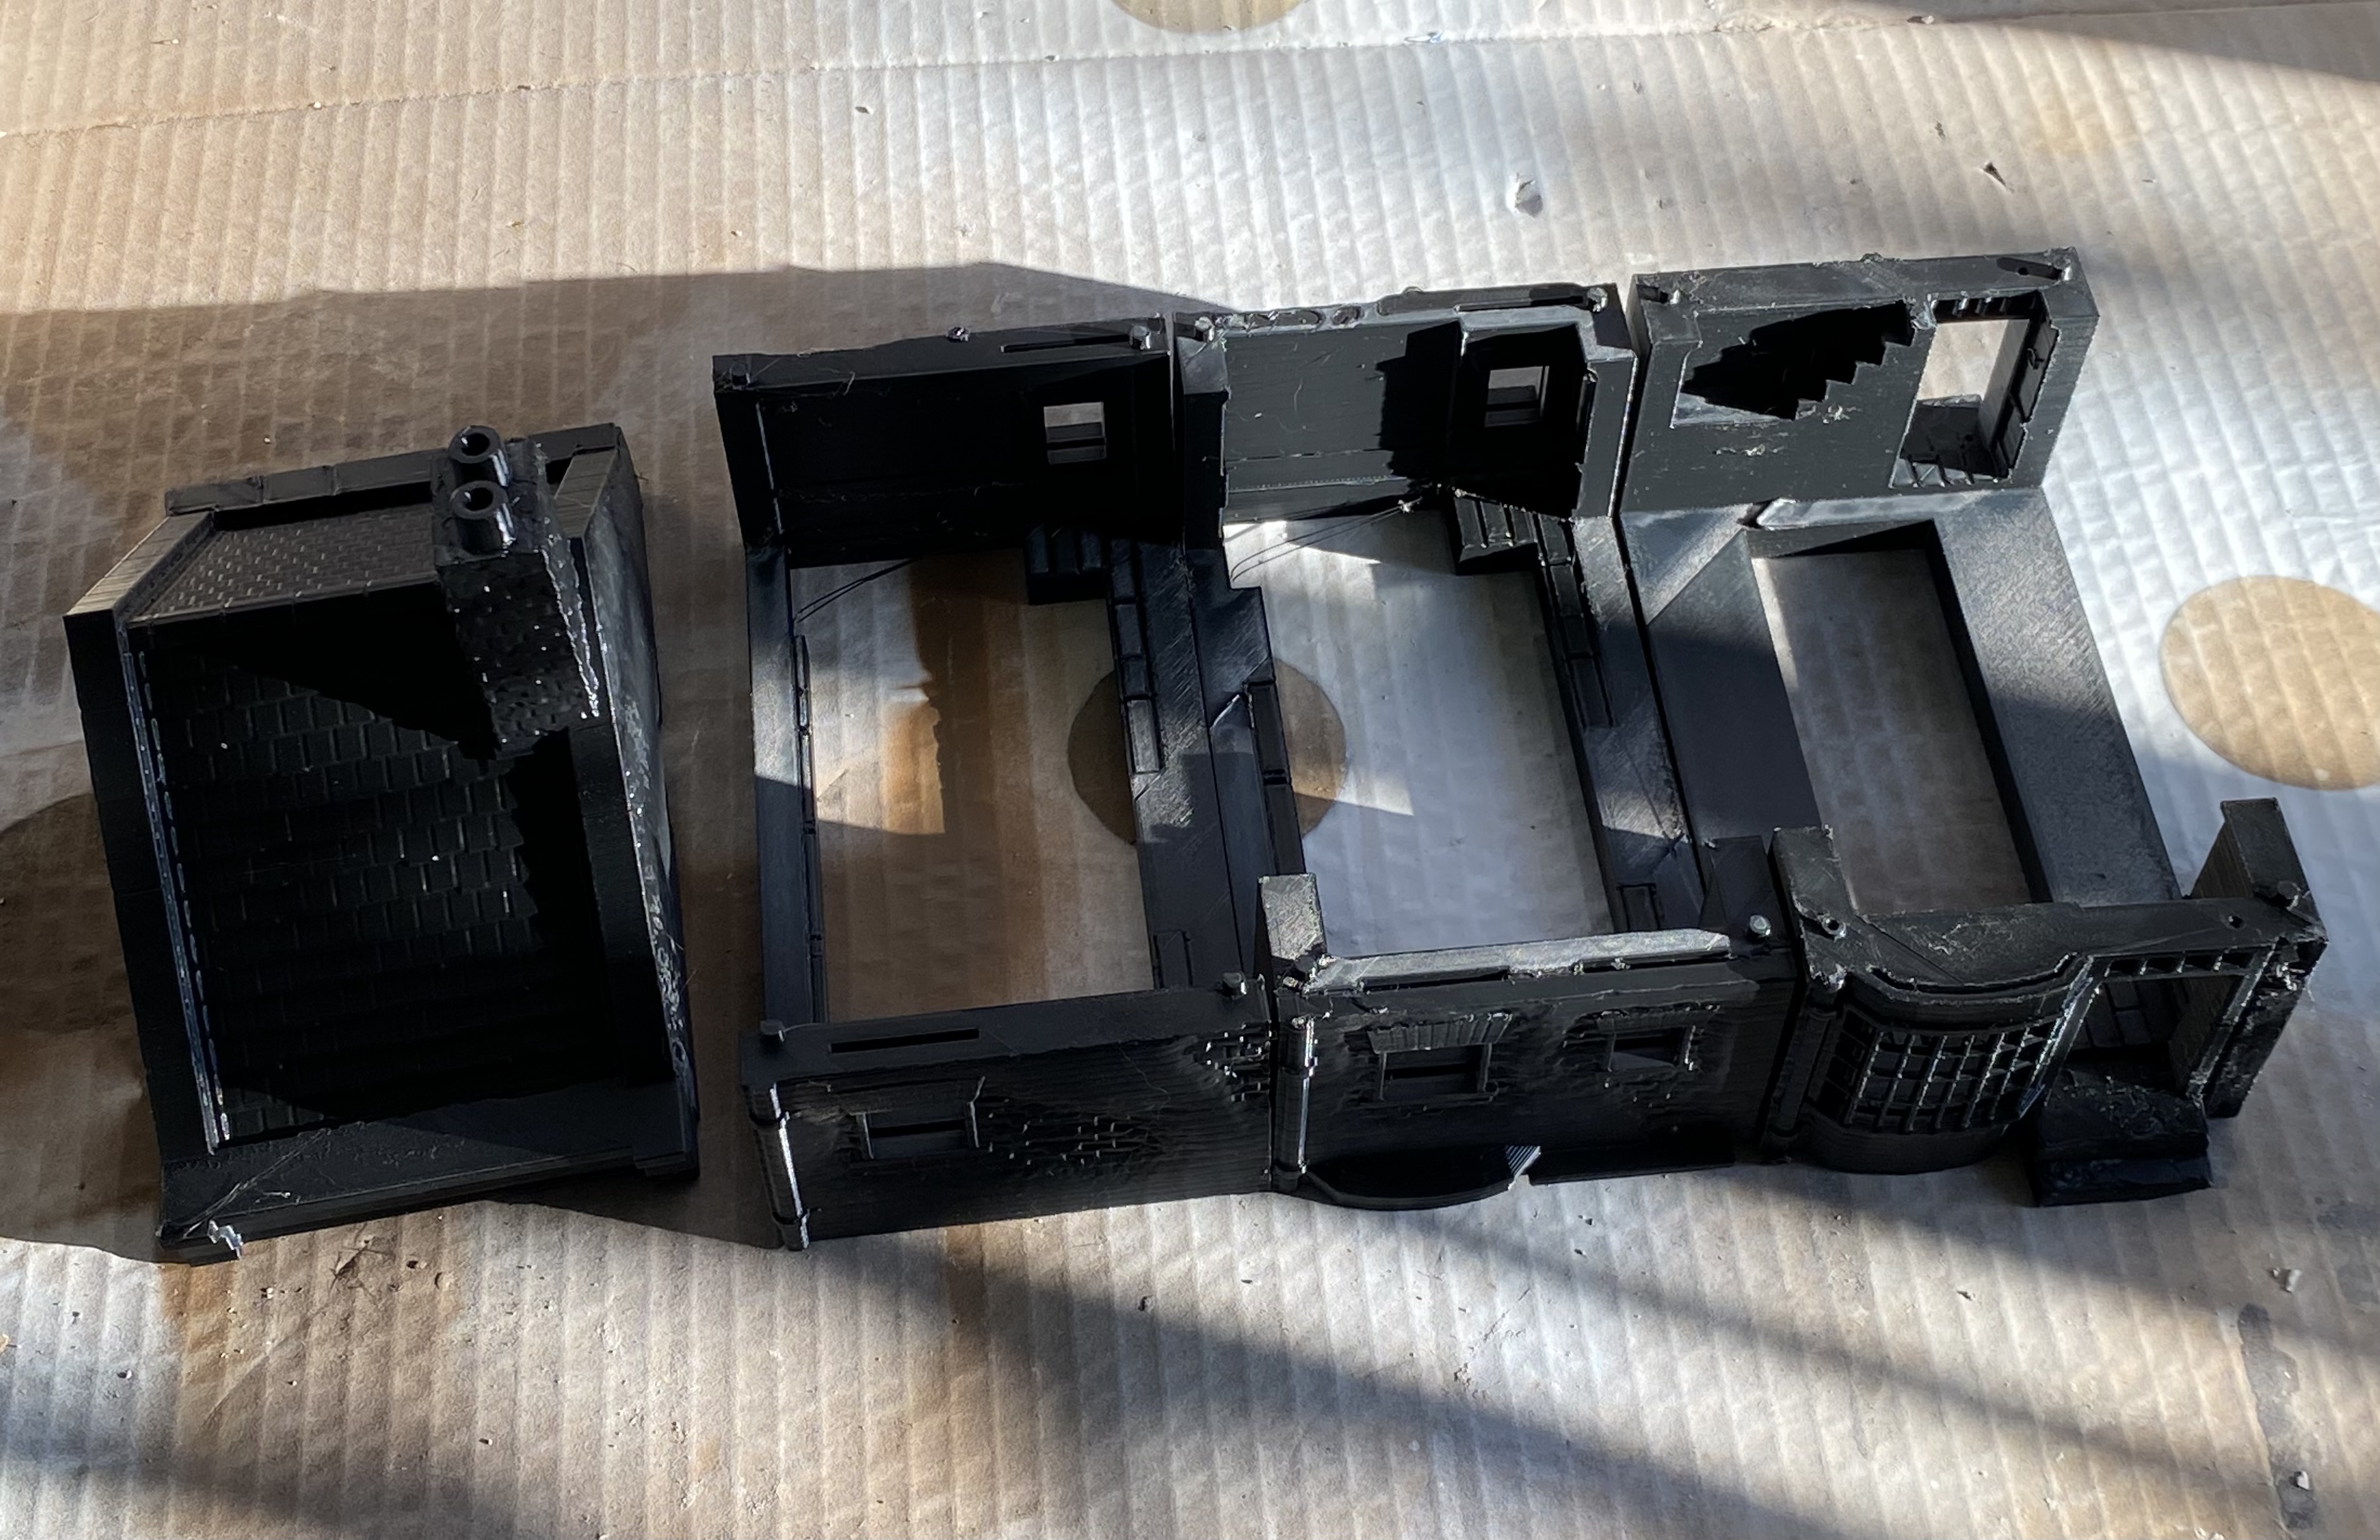
When building terraces in a hurry it is sometimes beneficial to take STL files and cut away all the bits that won’t be seen as this can massively reduce both printing time and consumables.
With houses that are going to have a plastered appearance, the missing walls can always be replaced by foamcore. You will hardly notice the difference with a thin coat of filler over the joins. Although this is entirely optional.
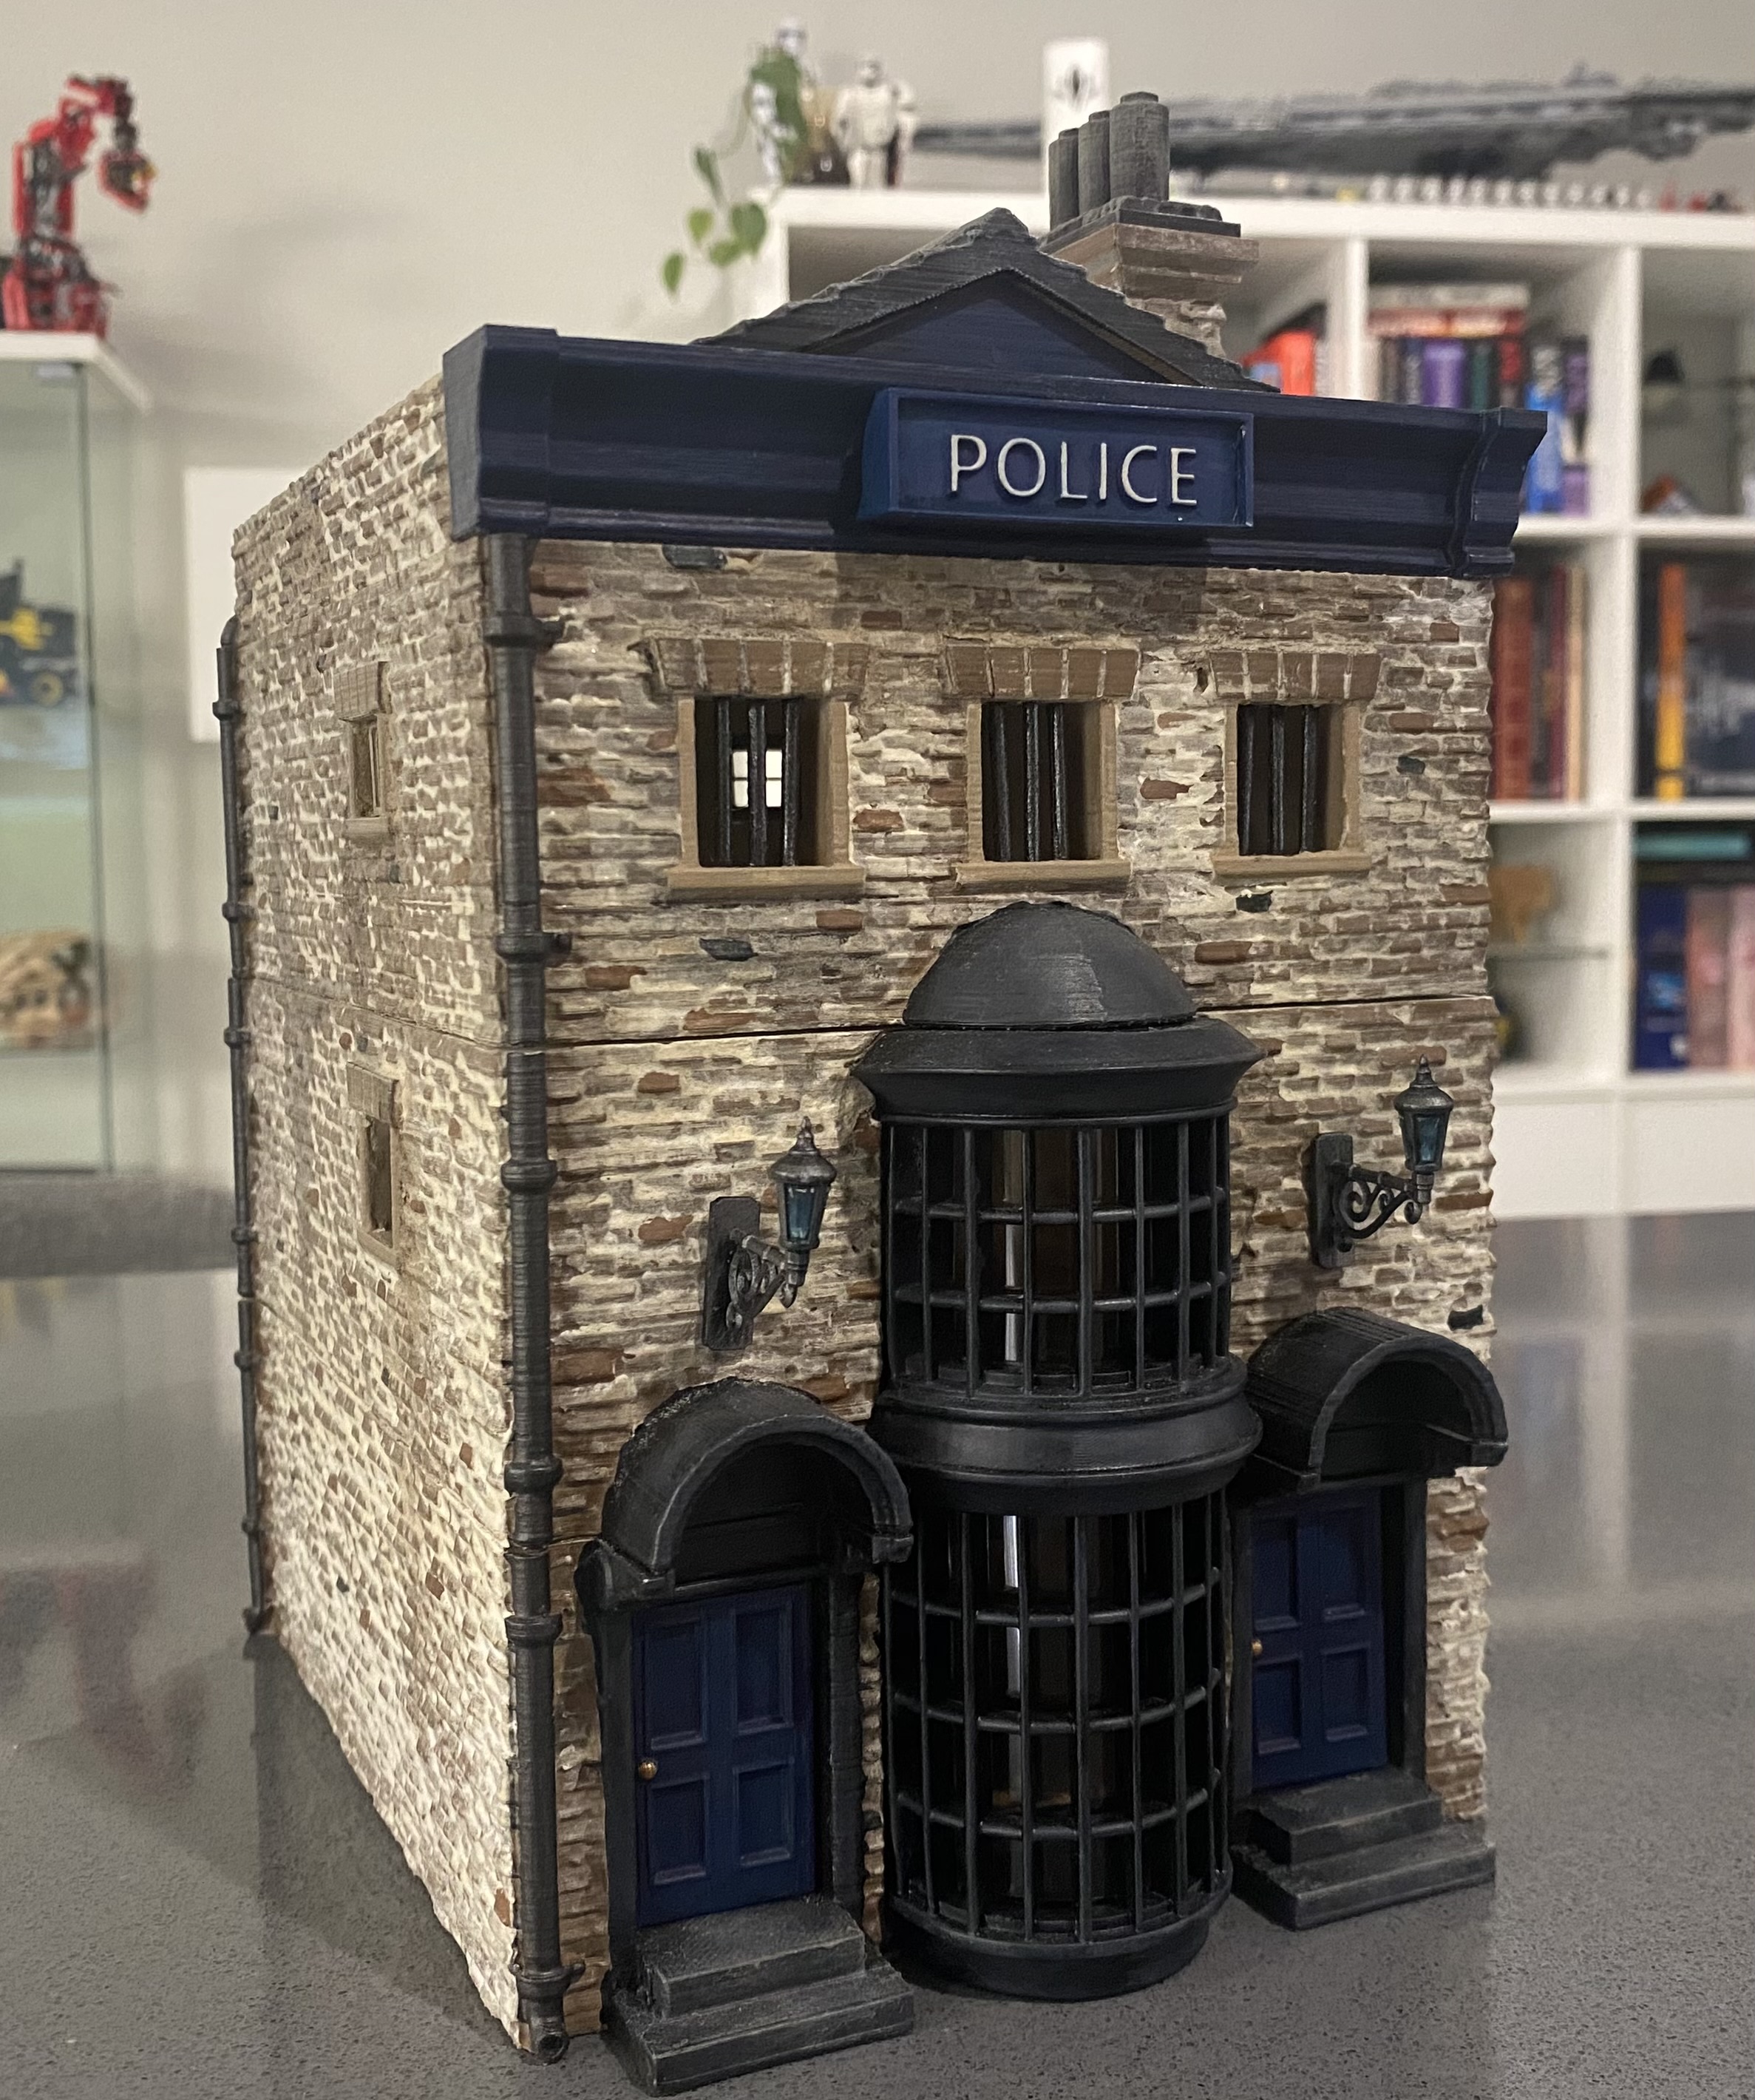
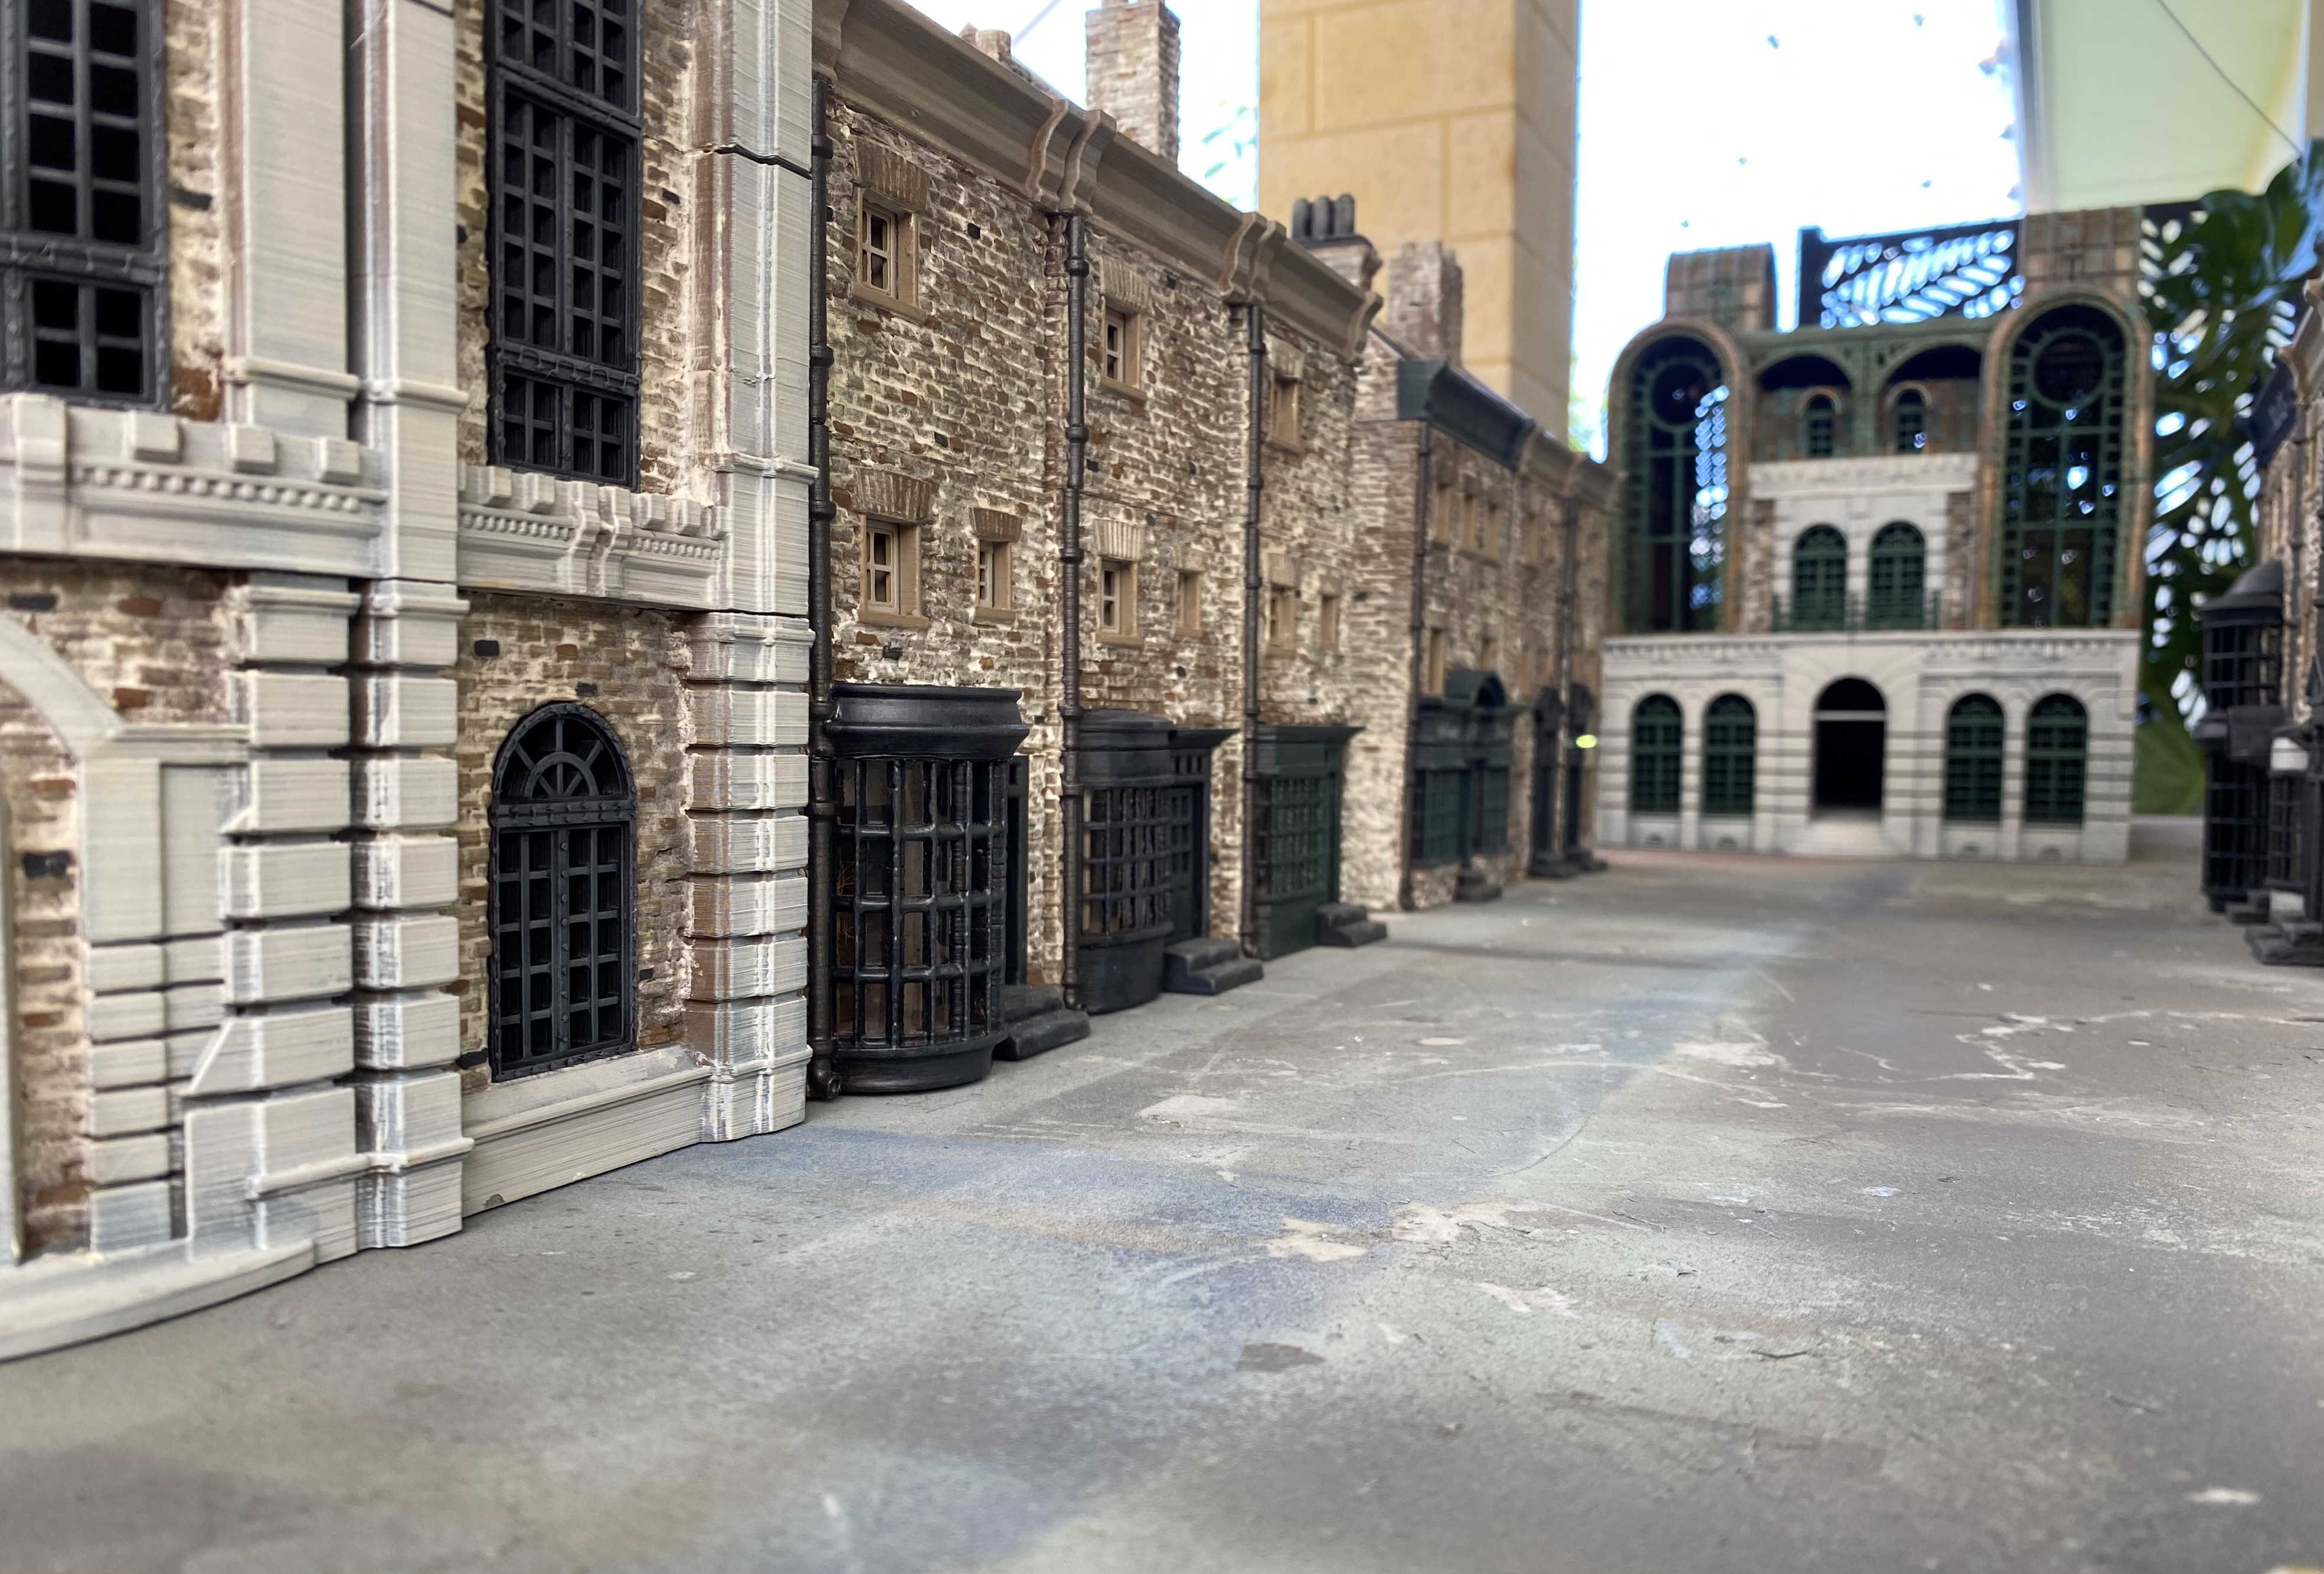
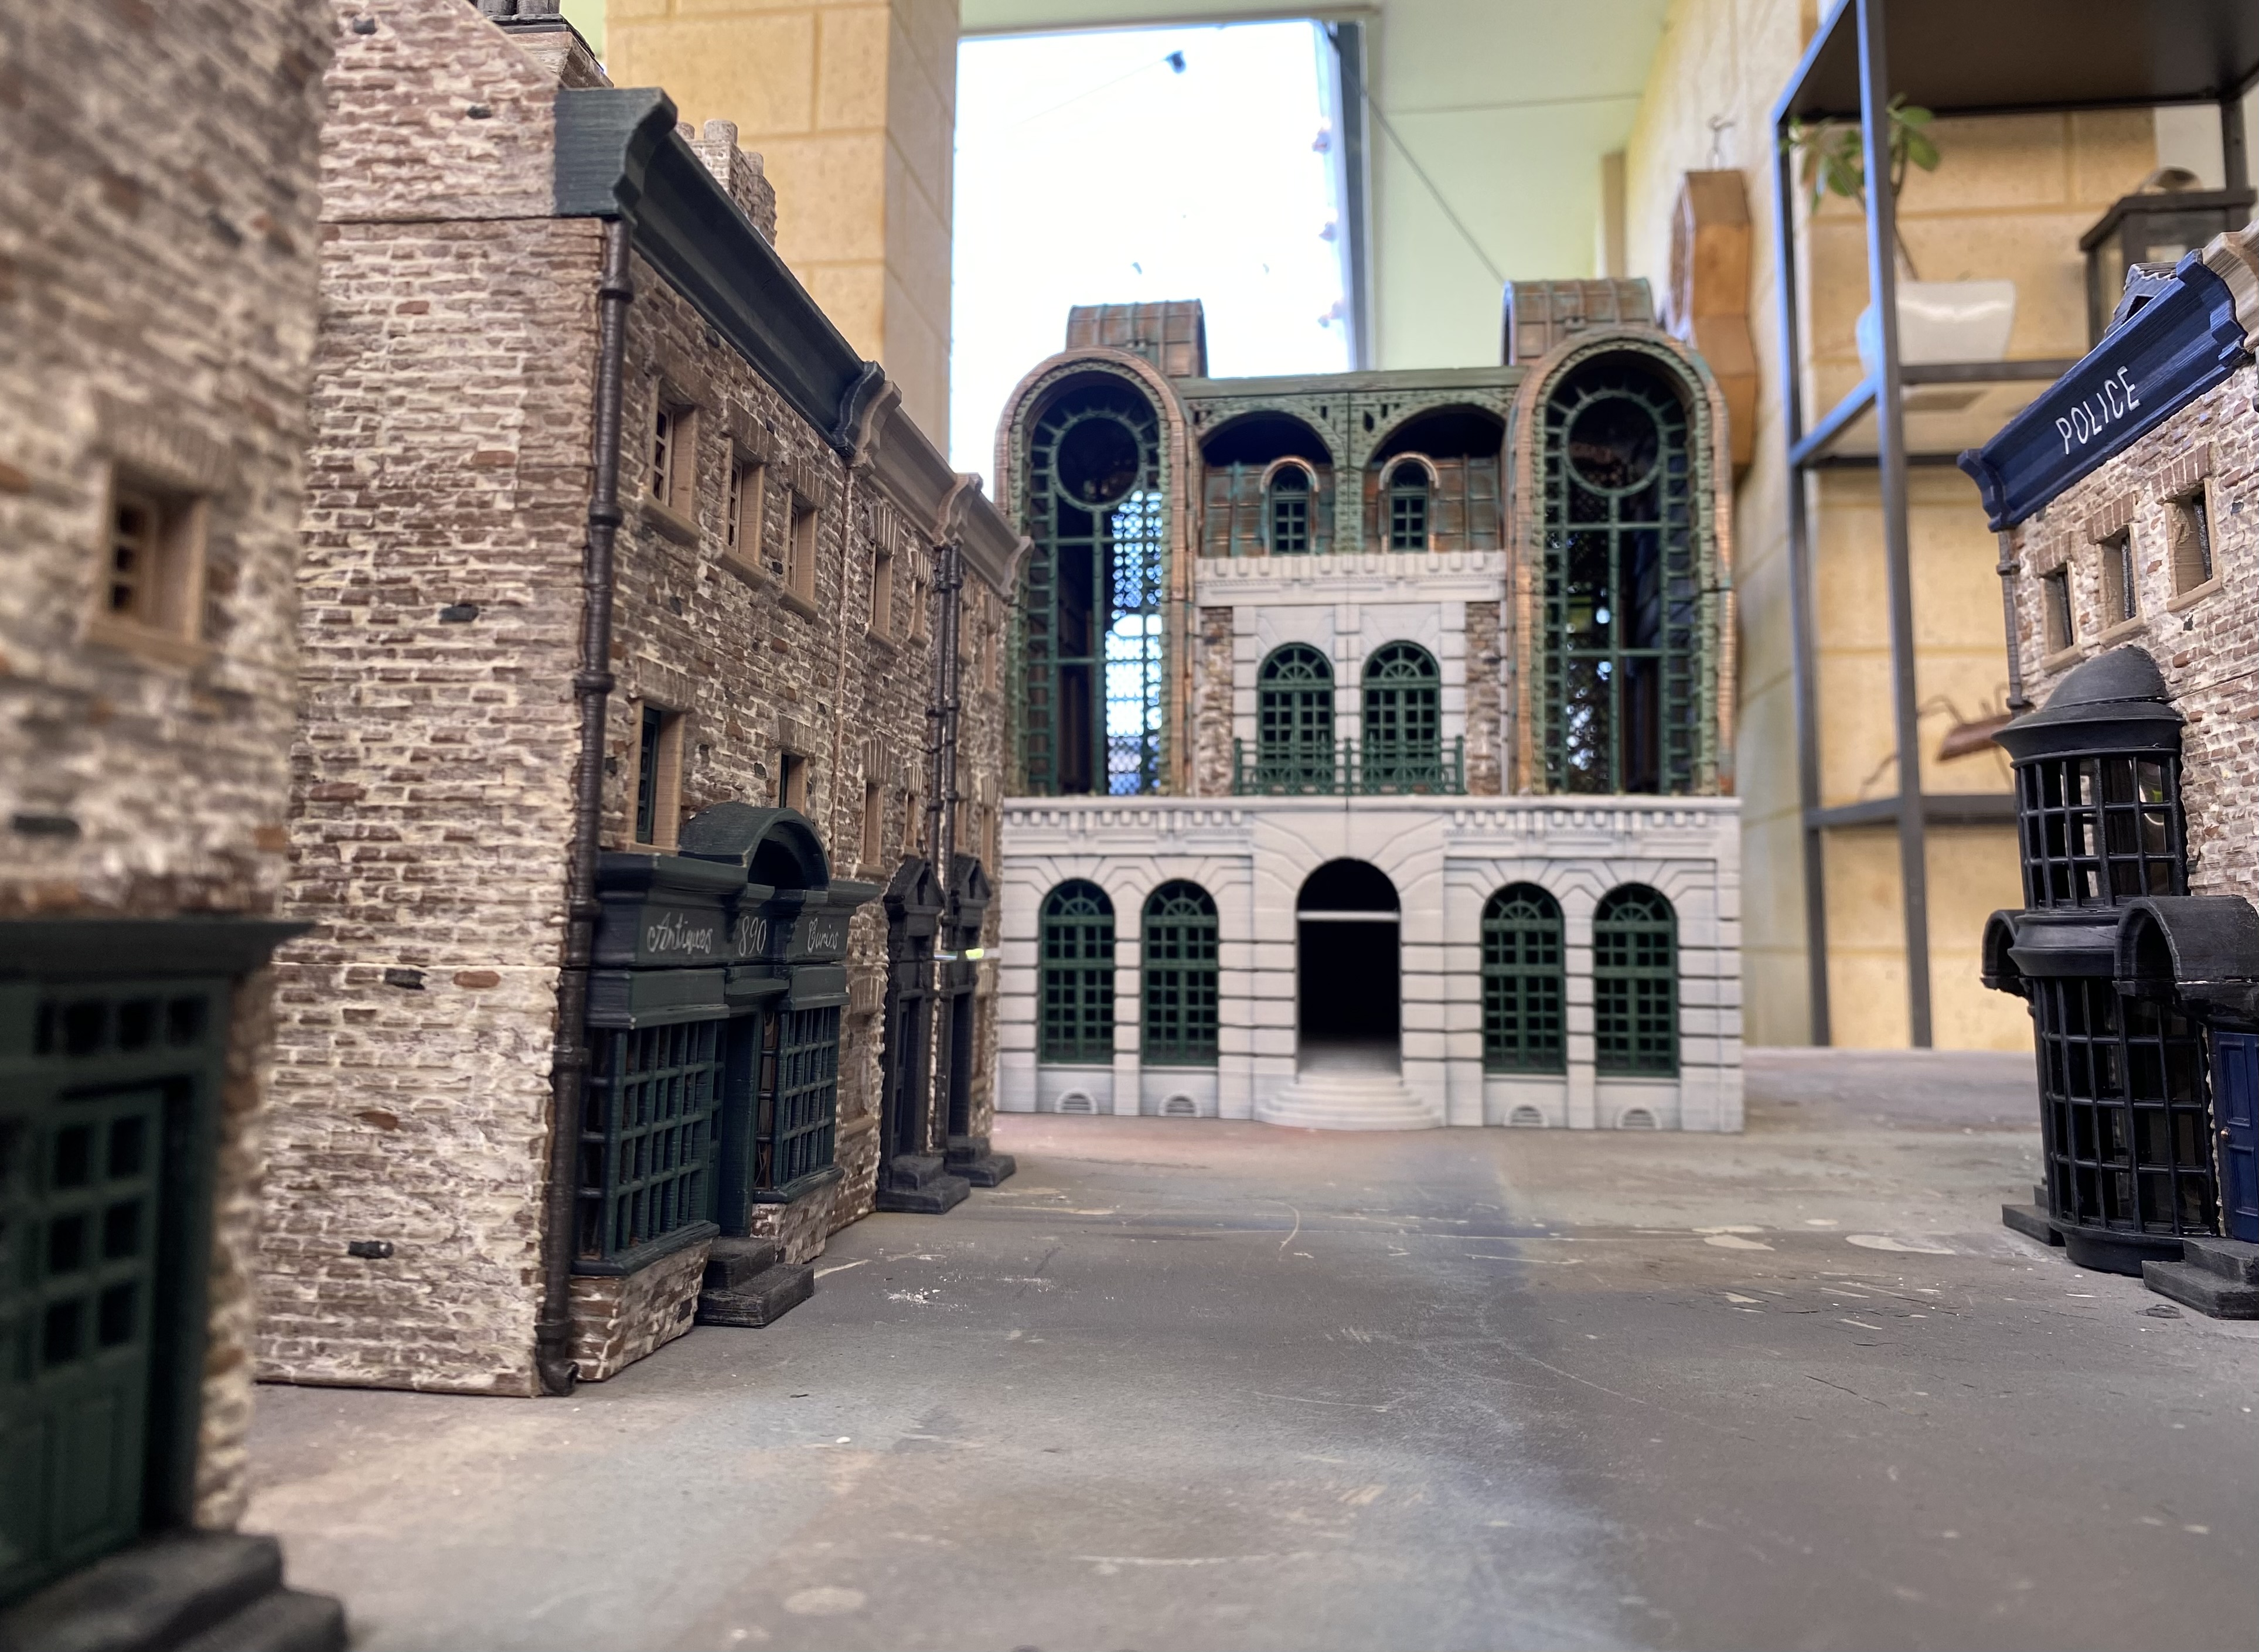
Hello, ello, ello
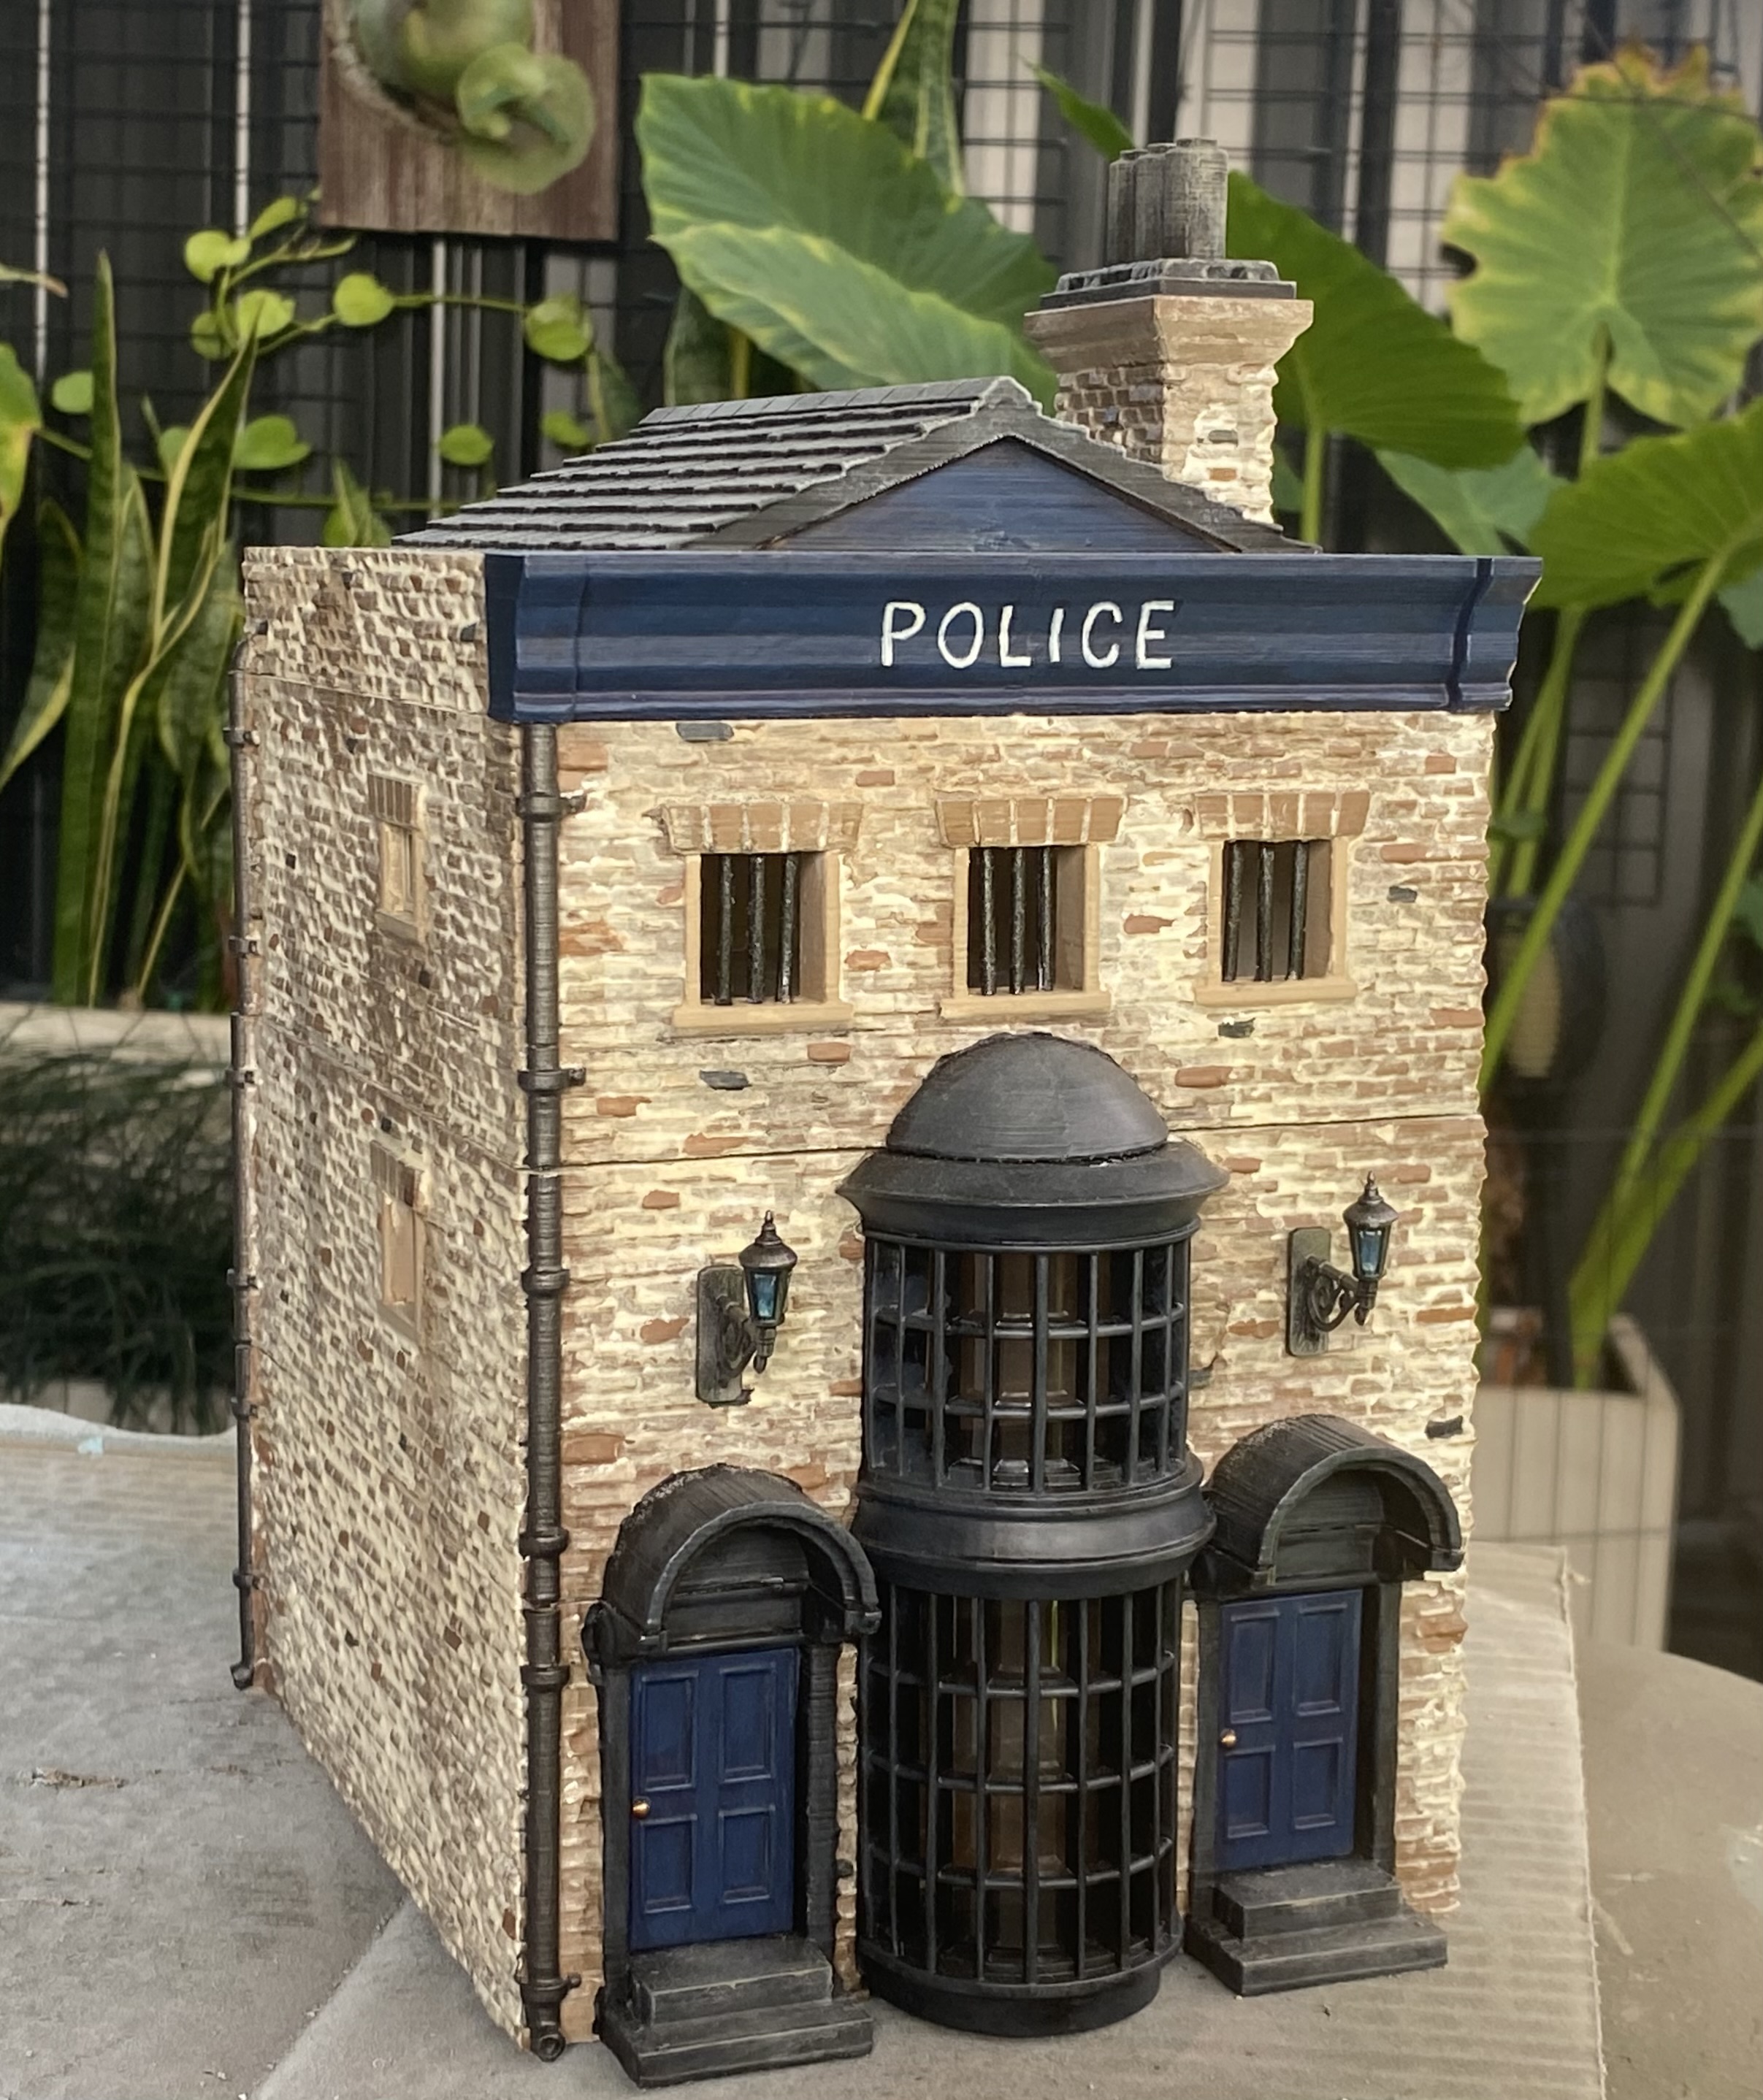
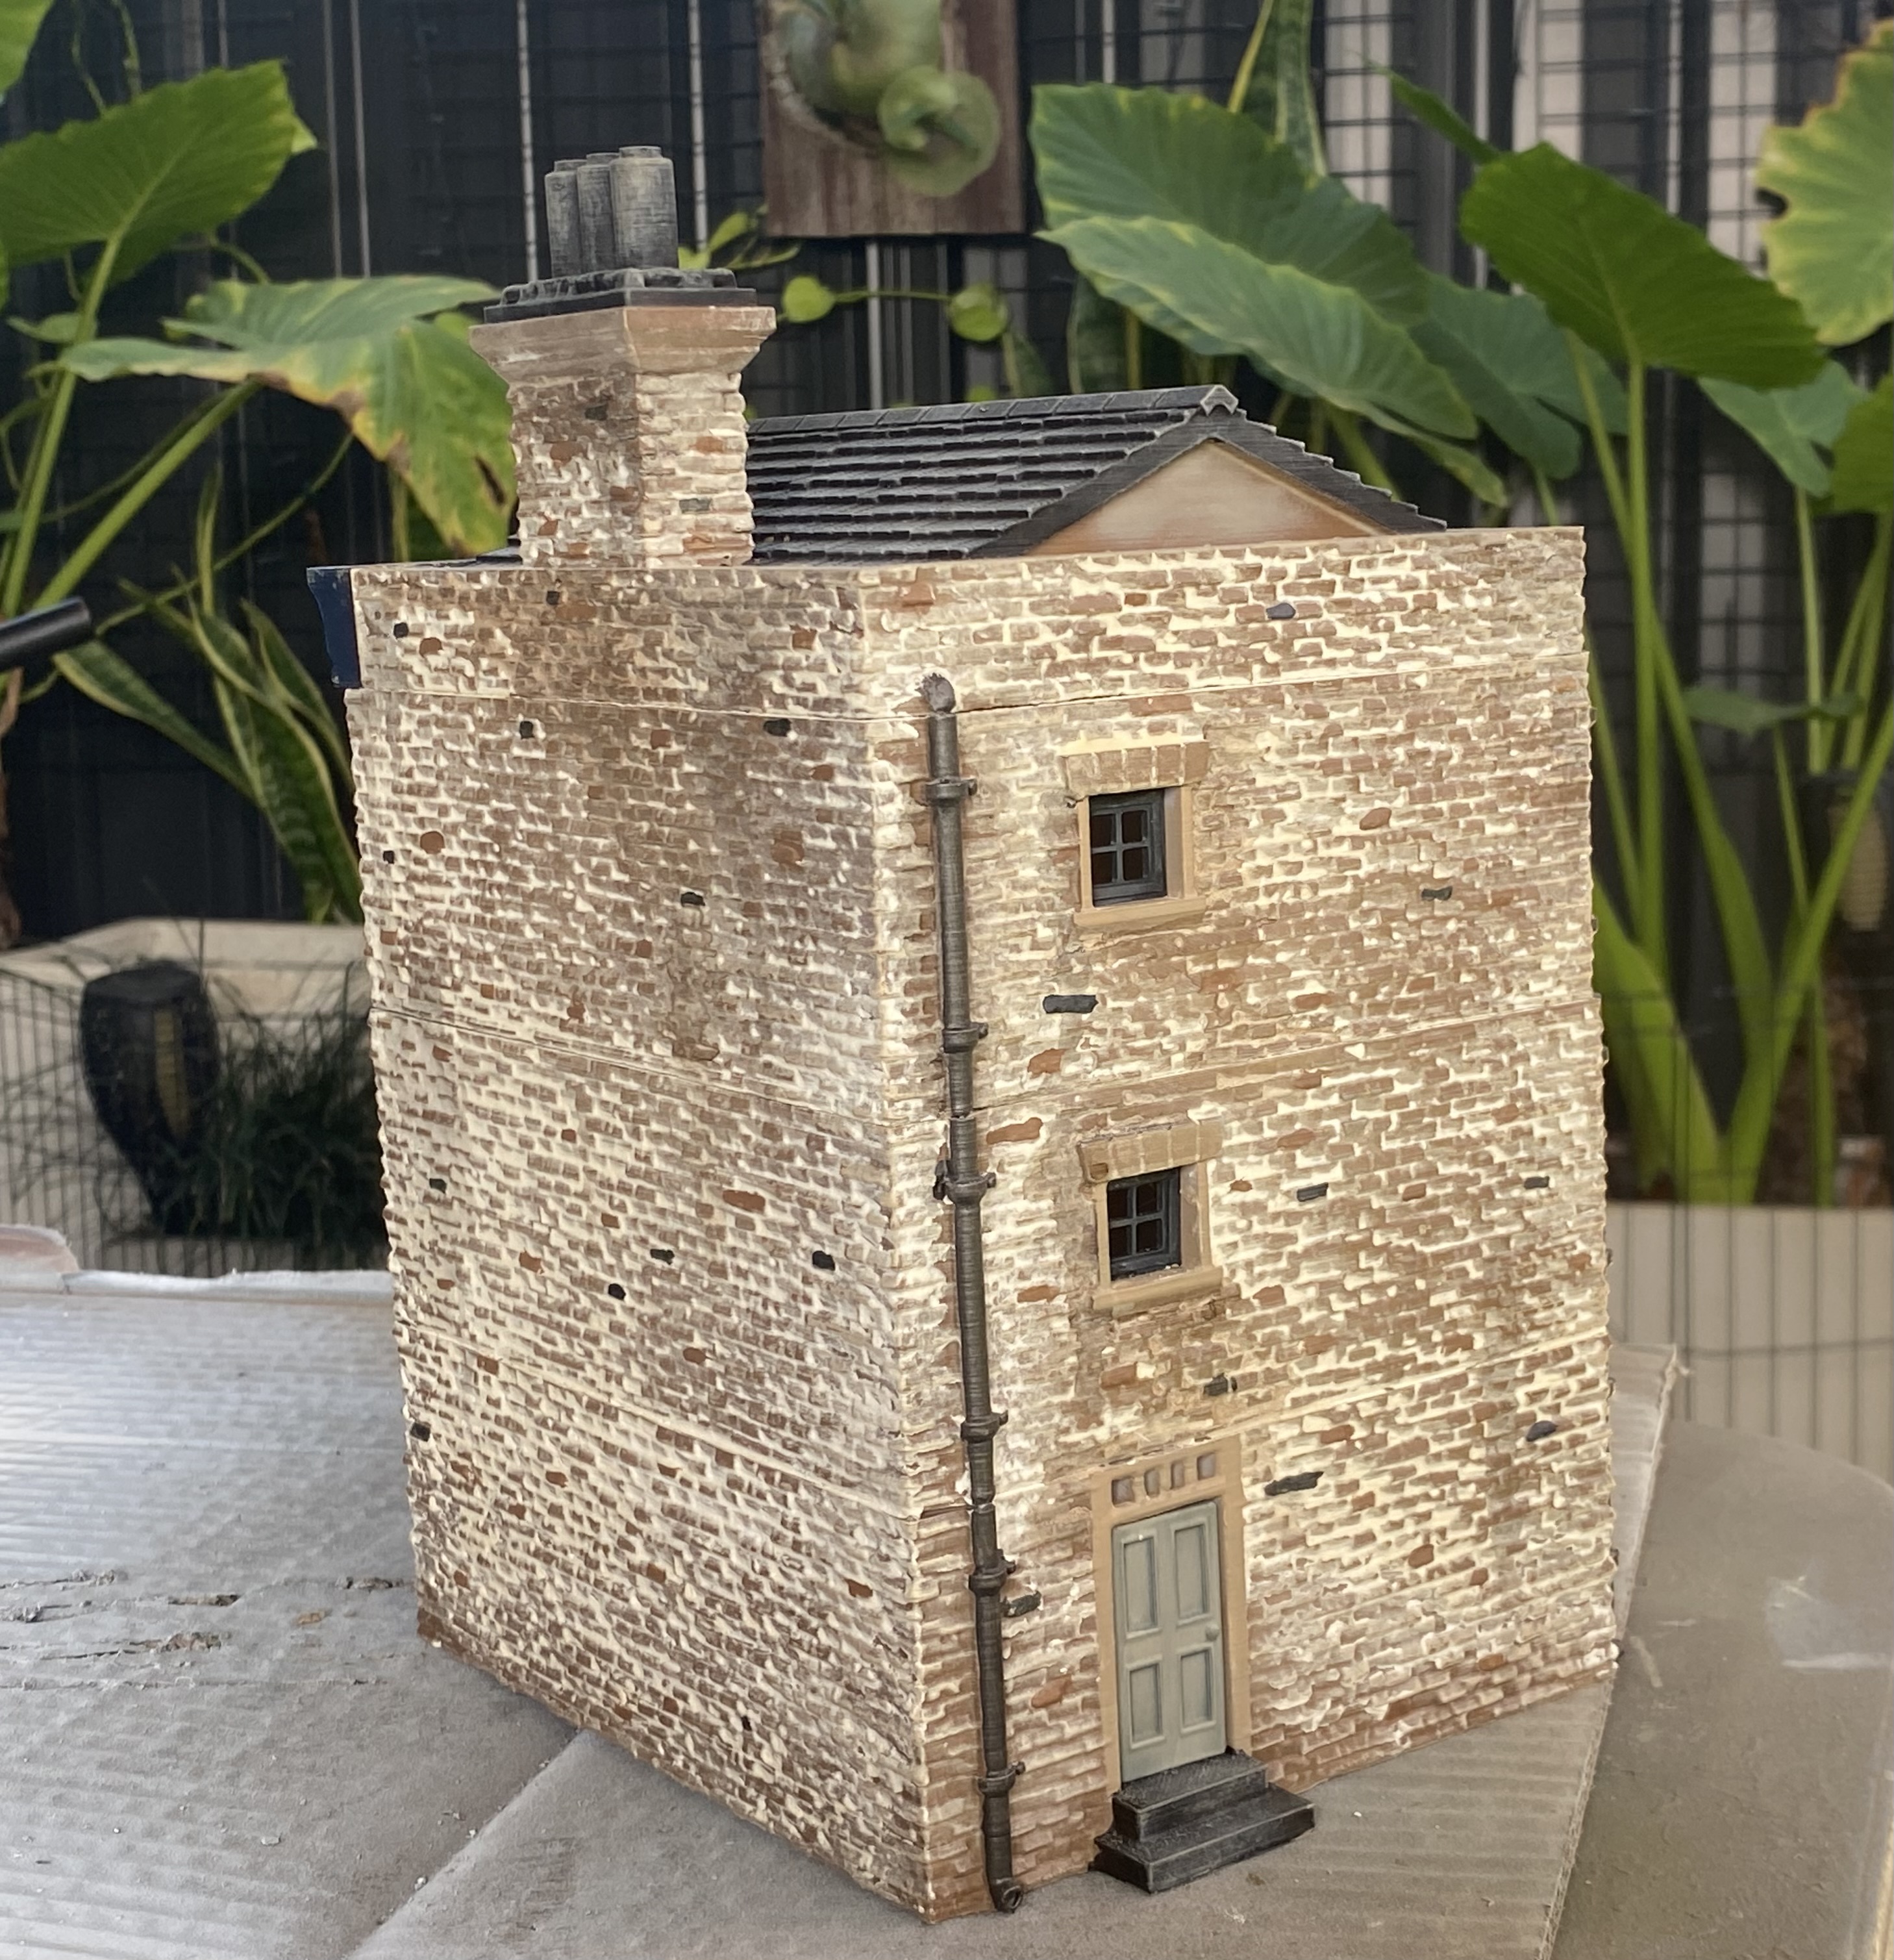
Simple Police Station was painted pretty much following the same recipe as the other buildings, but with blue accent colours and window bars made from cocktail sticks.

Making walls
I want to make some free-standing or perimeter walls that I can move around and want them to fit the same aesthetic as the rest of the walls.
to do this I will use parts from existing STL’s and cannibalize the bits I think I could use.
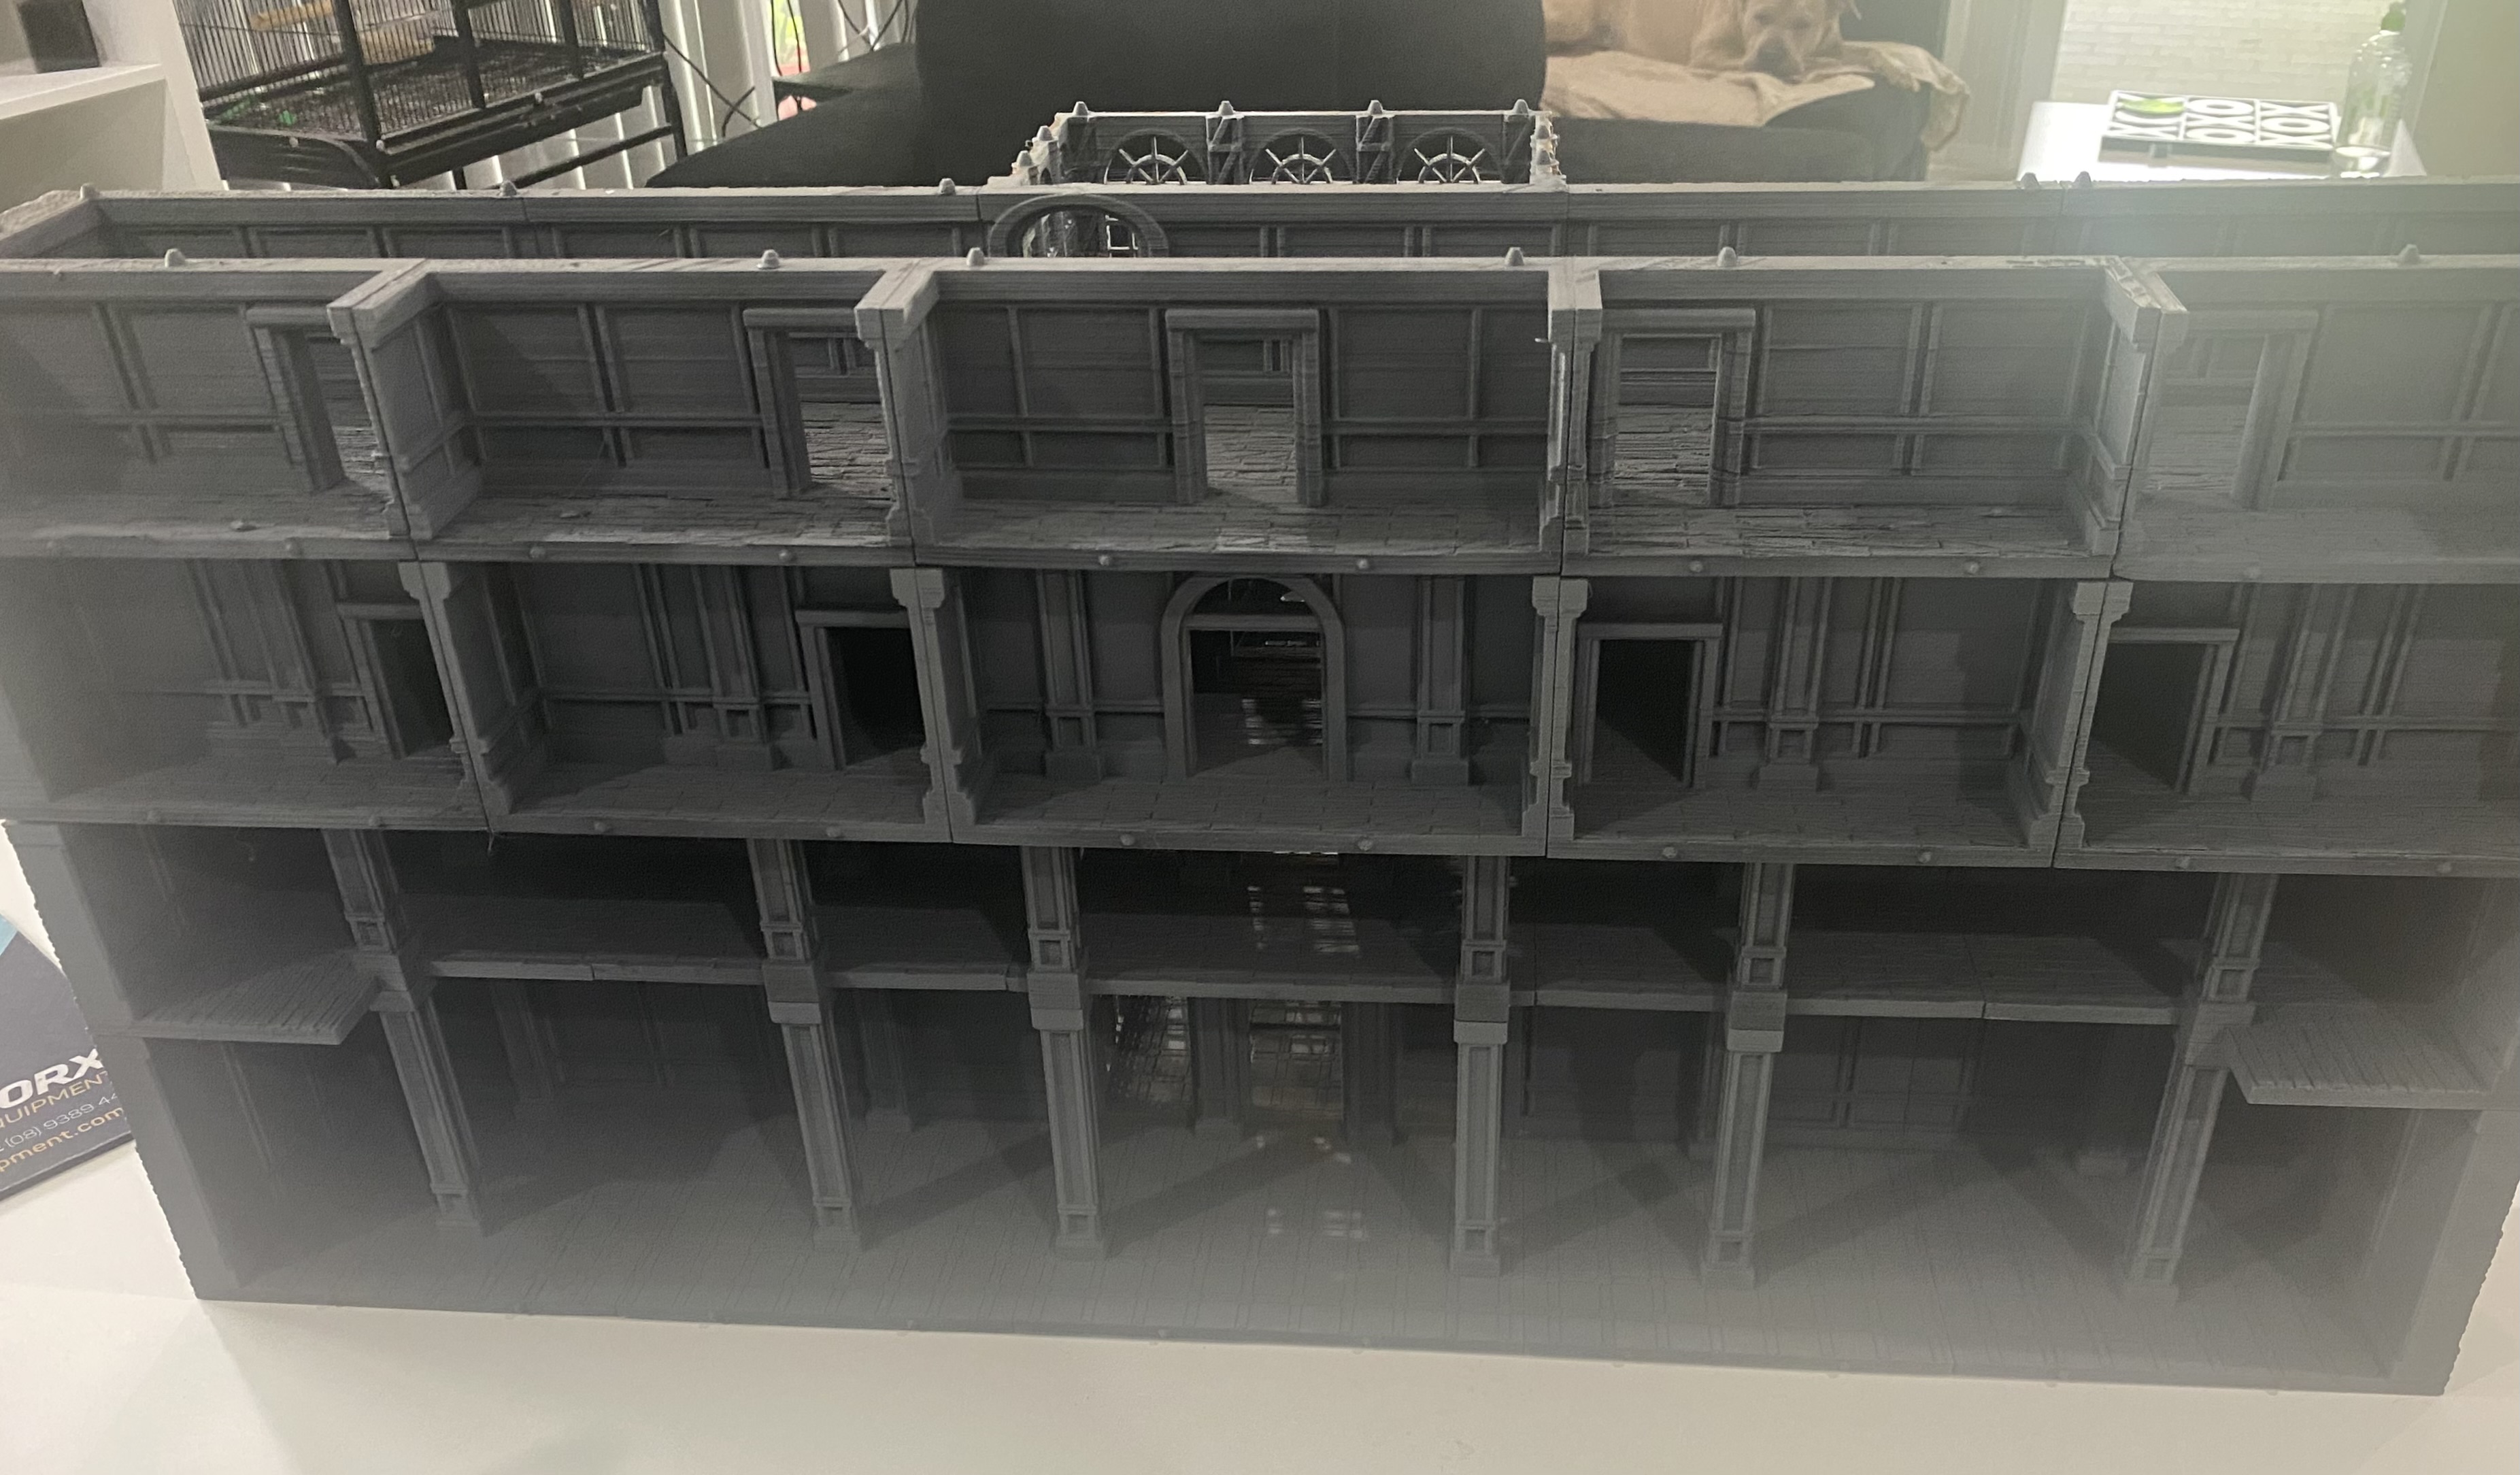
 The kind of thing I'm going for.
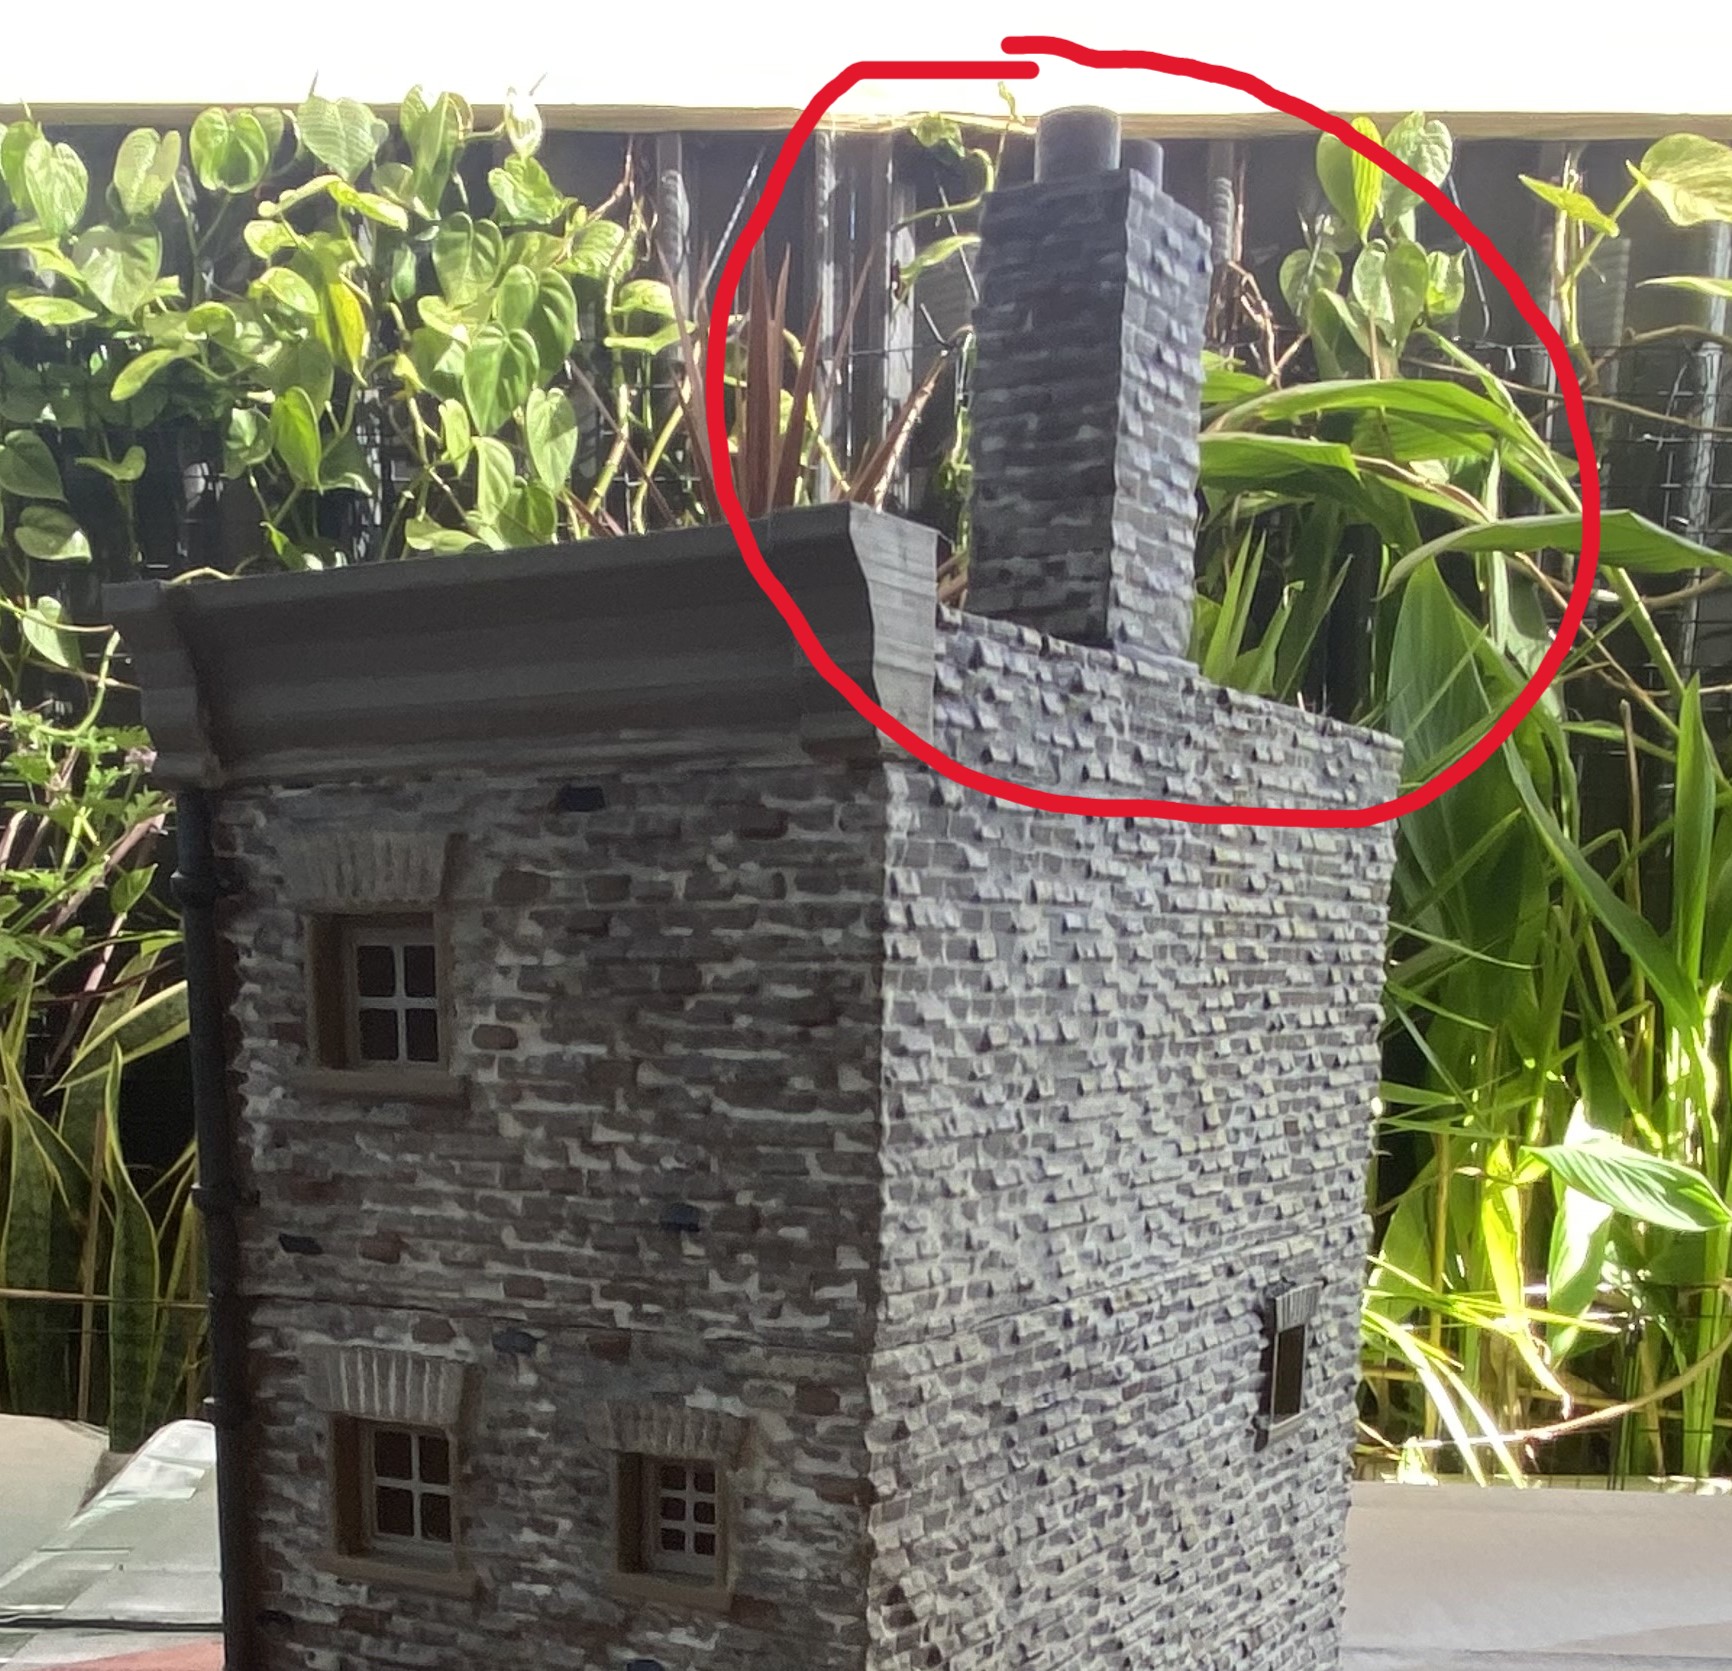 This chimney can be a good starting point for the columns on the walls.
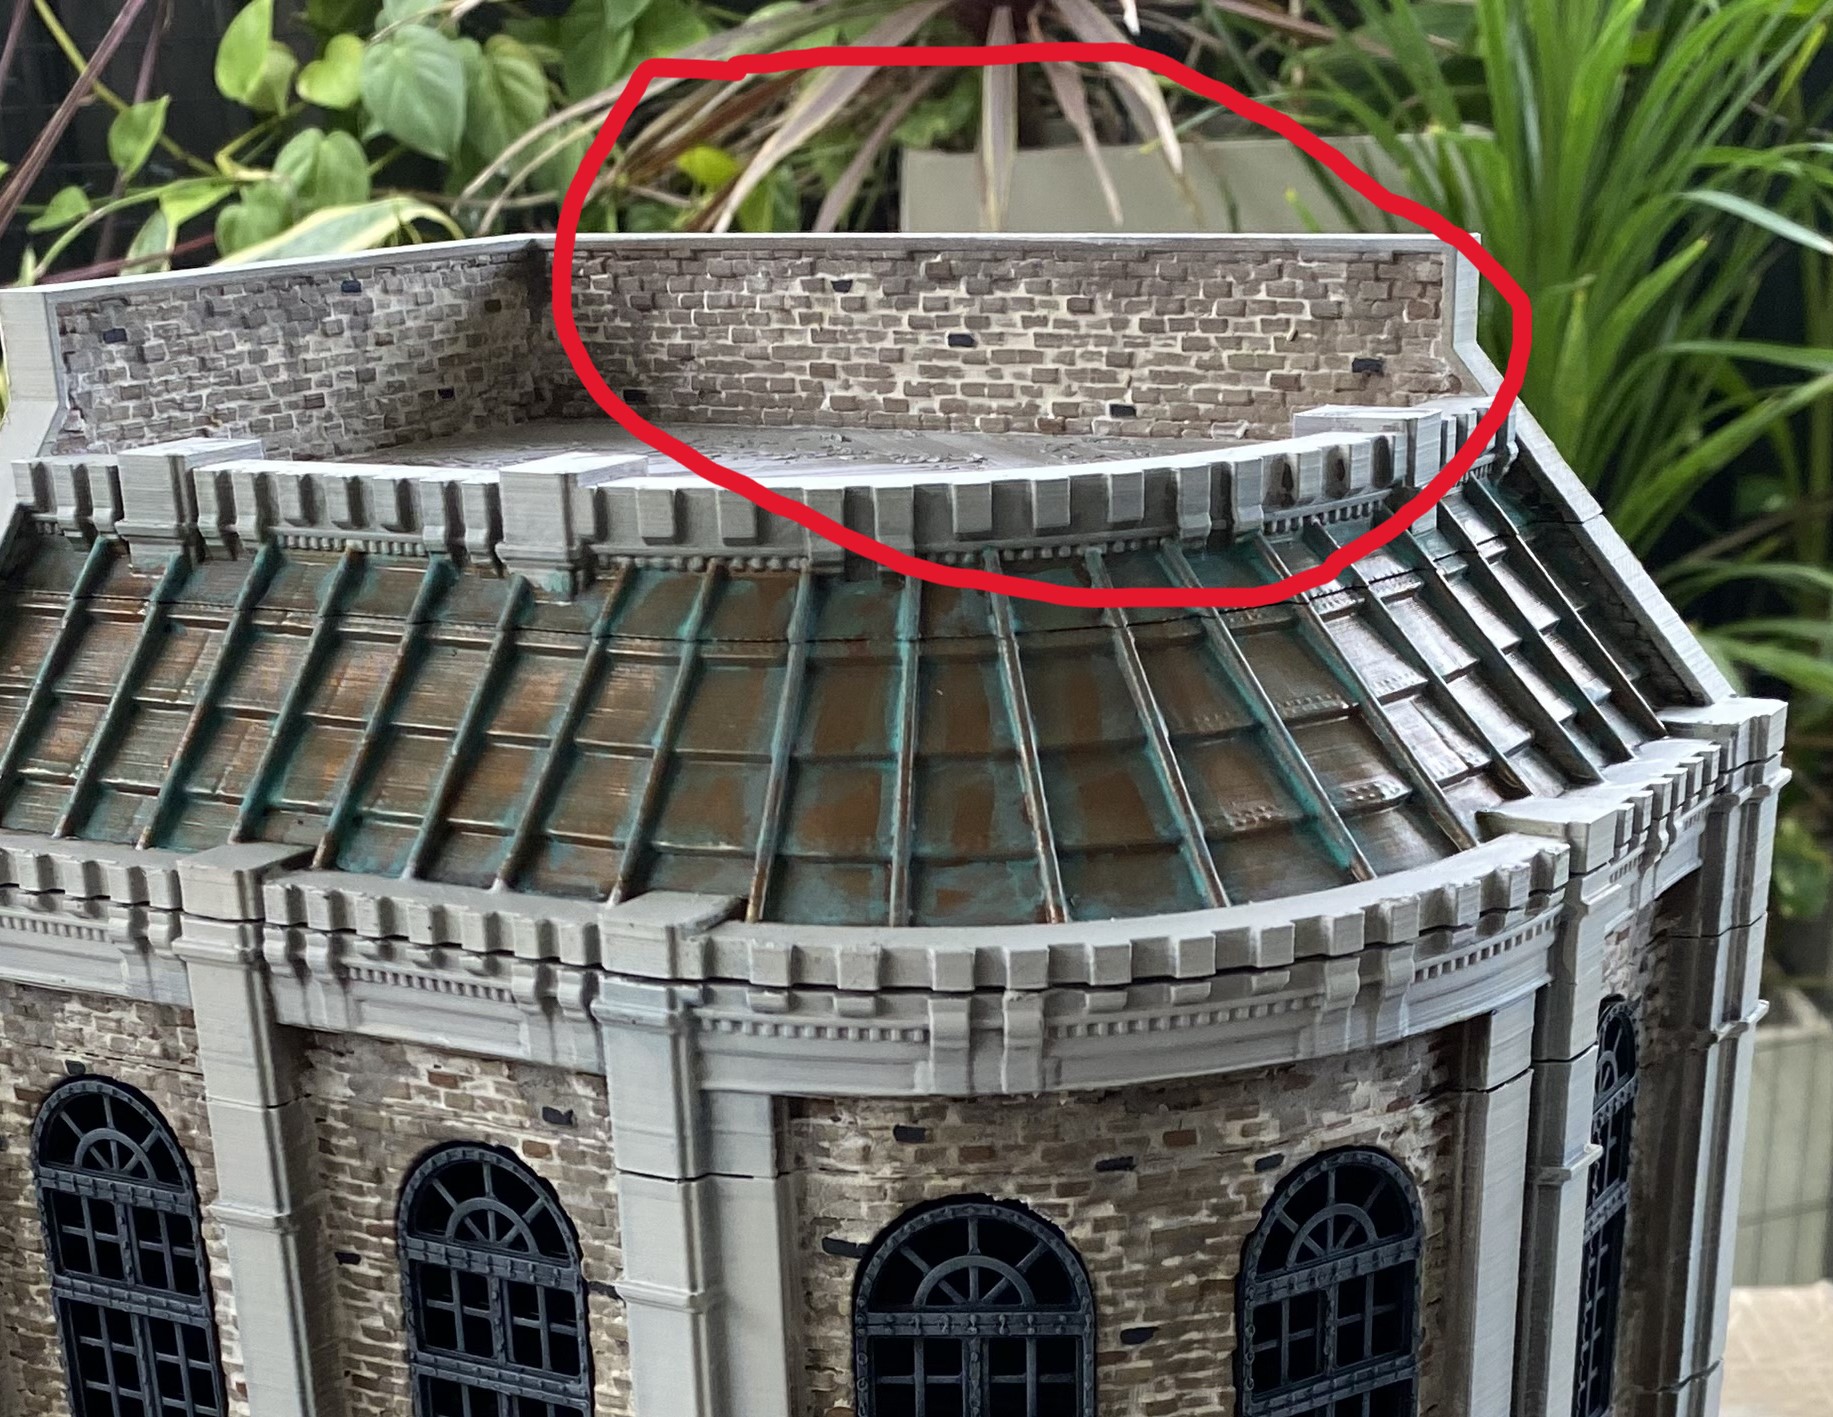 This part of the roof would be excellent for the actual wall.
 This section could come in hand for arched gateways.
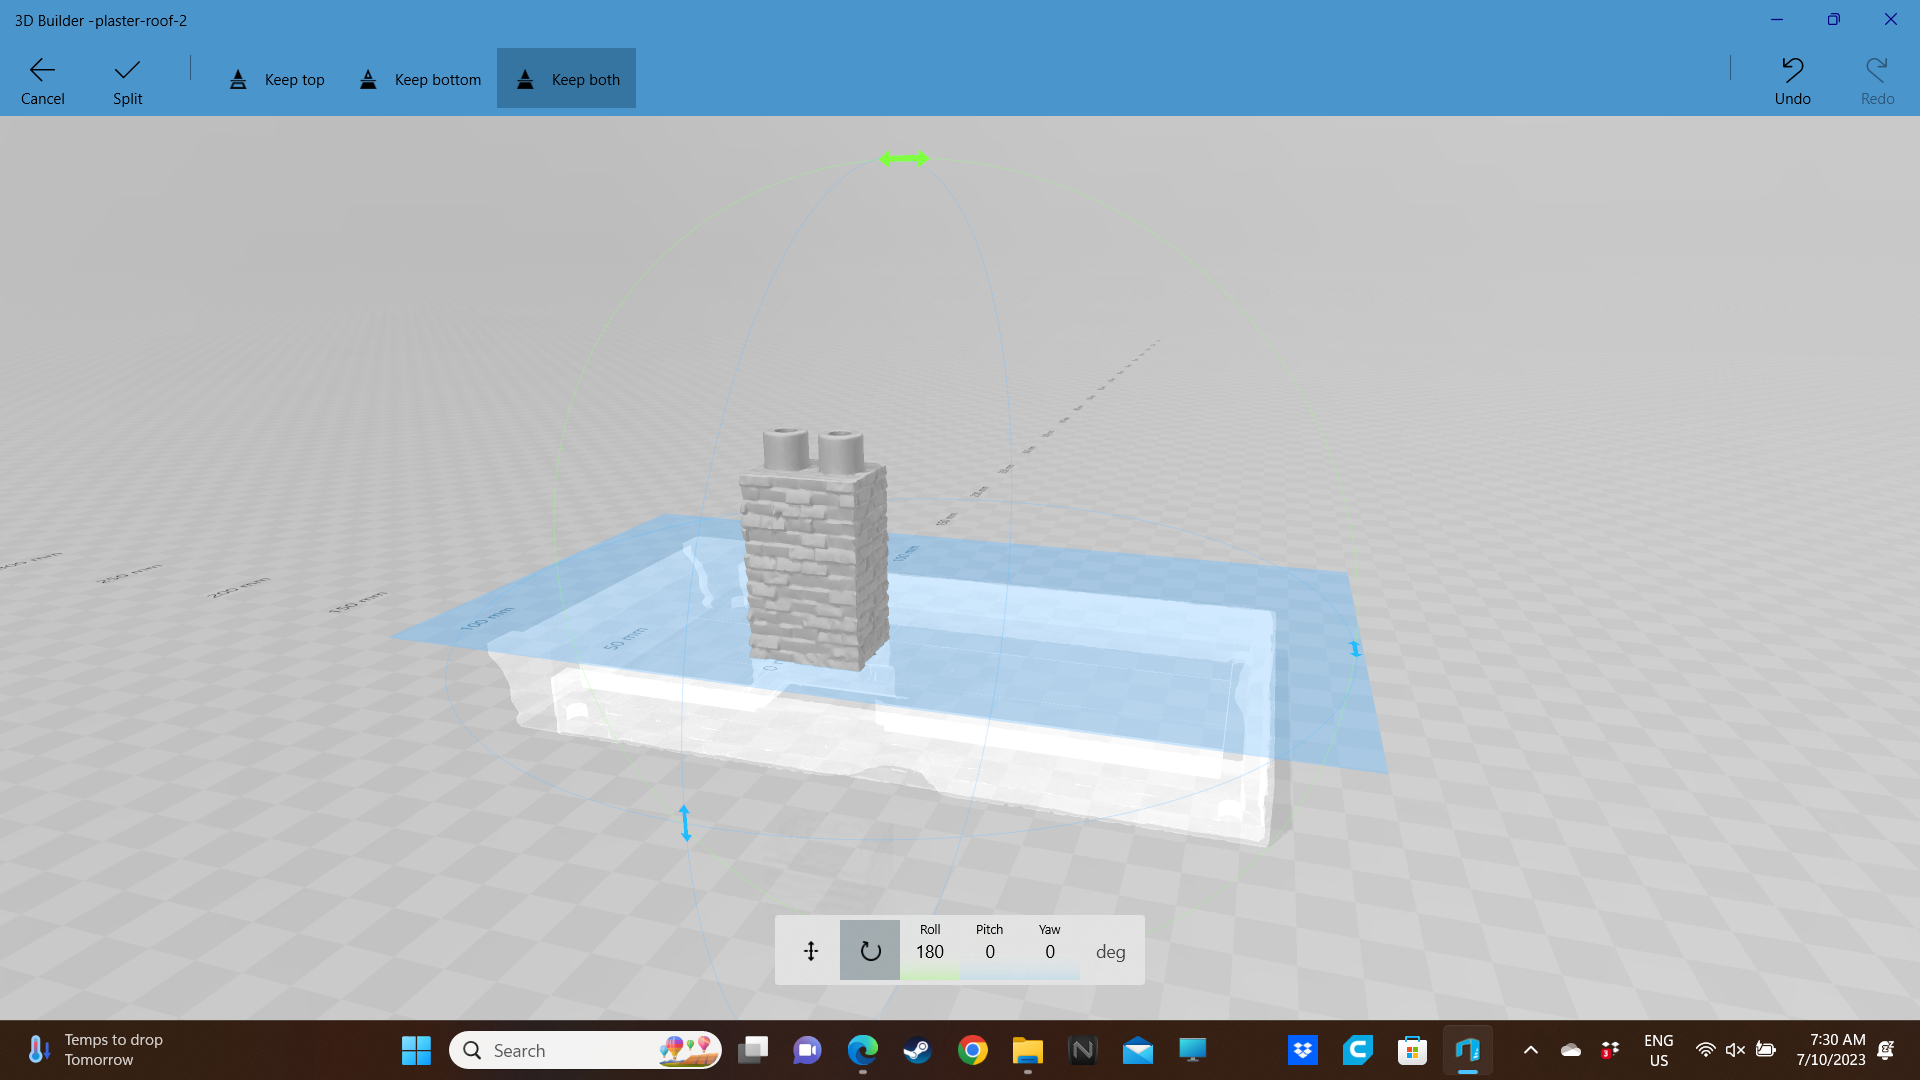
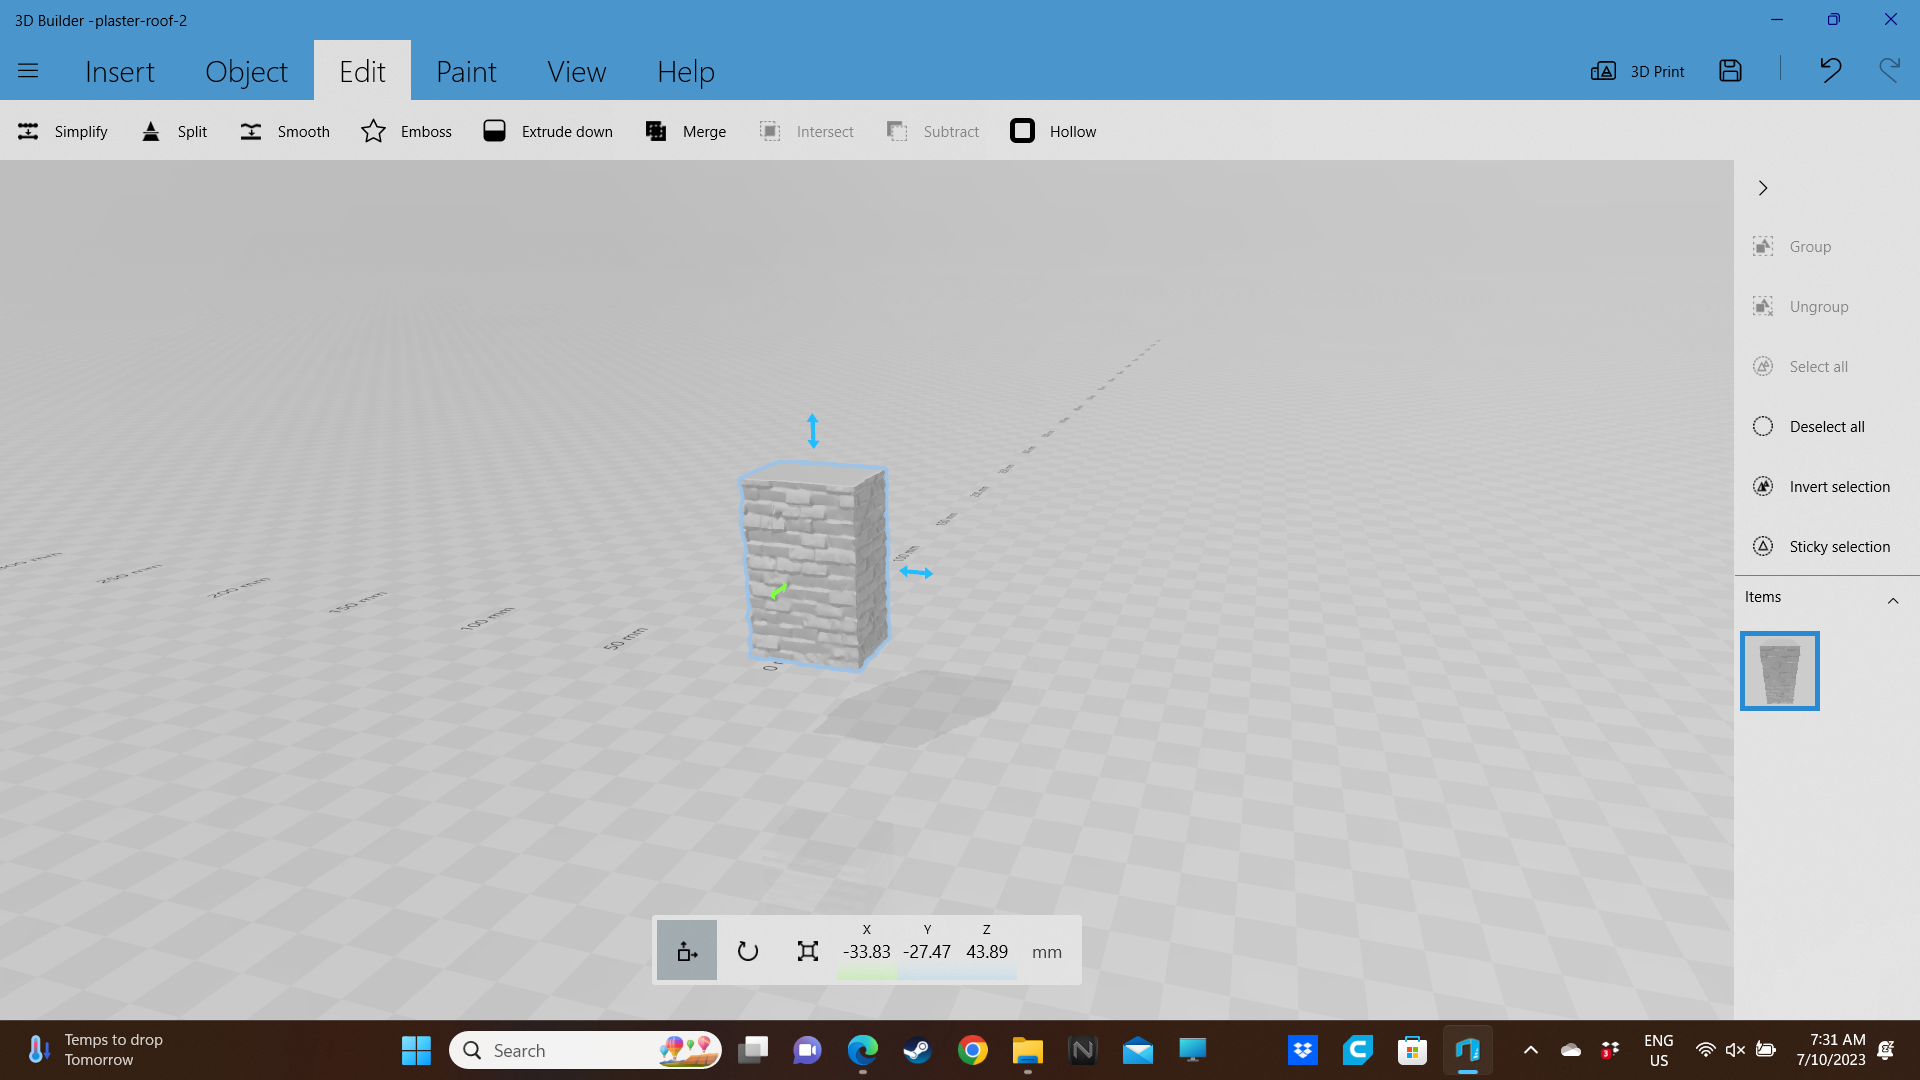
Now I have identified the bits I think I can use it’s just a matter of opening the STL in 3D Builder and using the ‘split’ function to cut away all the bits I don’t need.
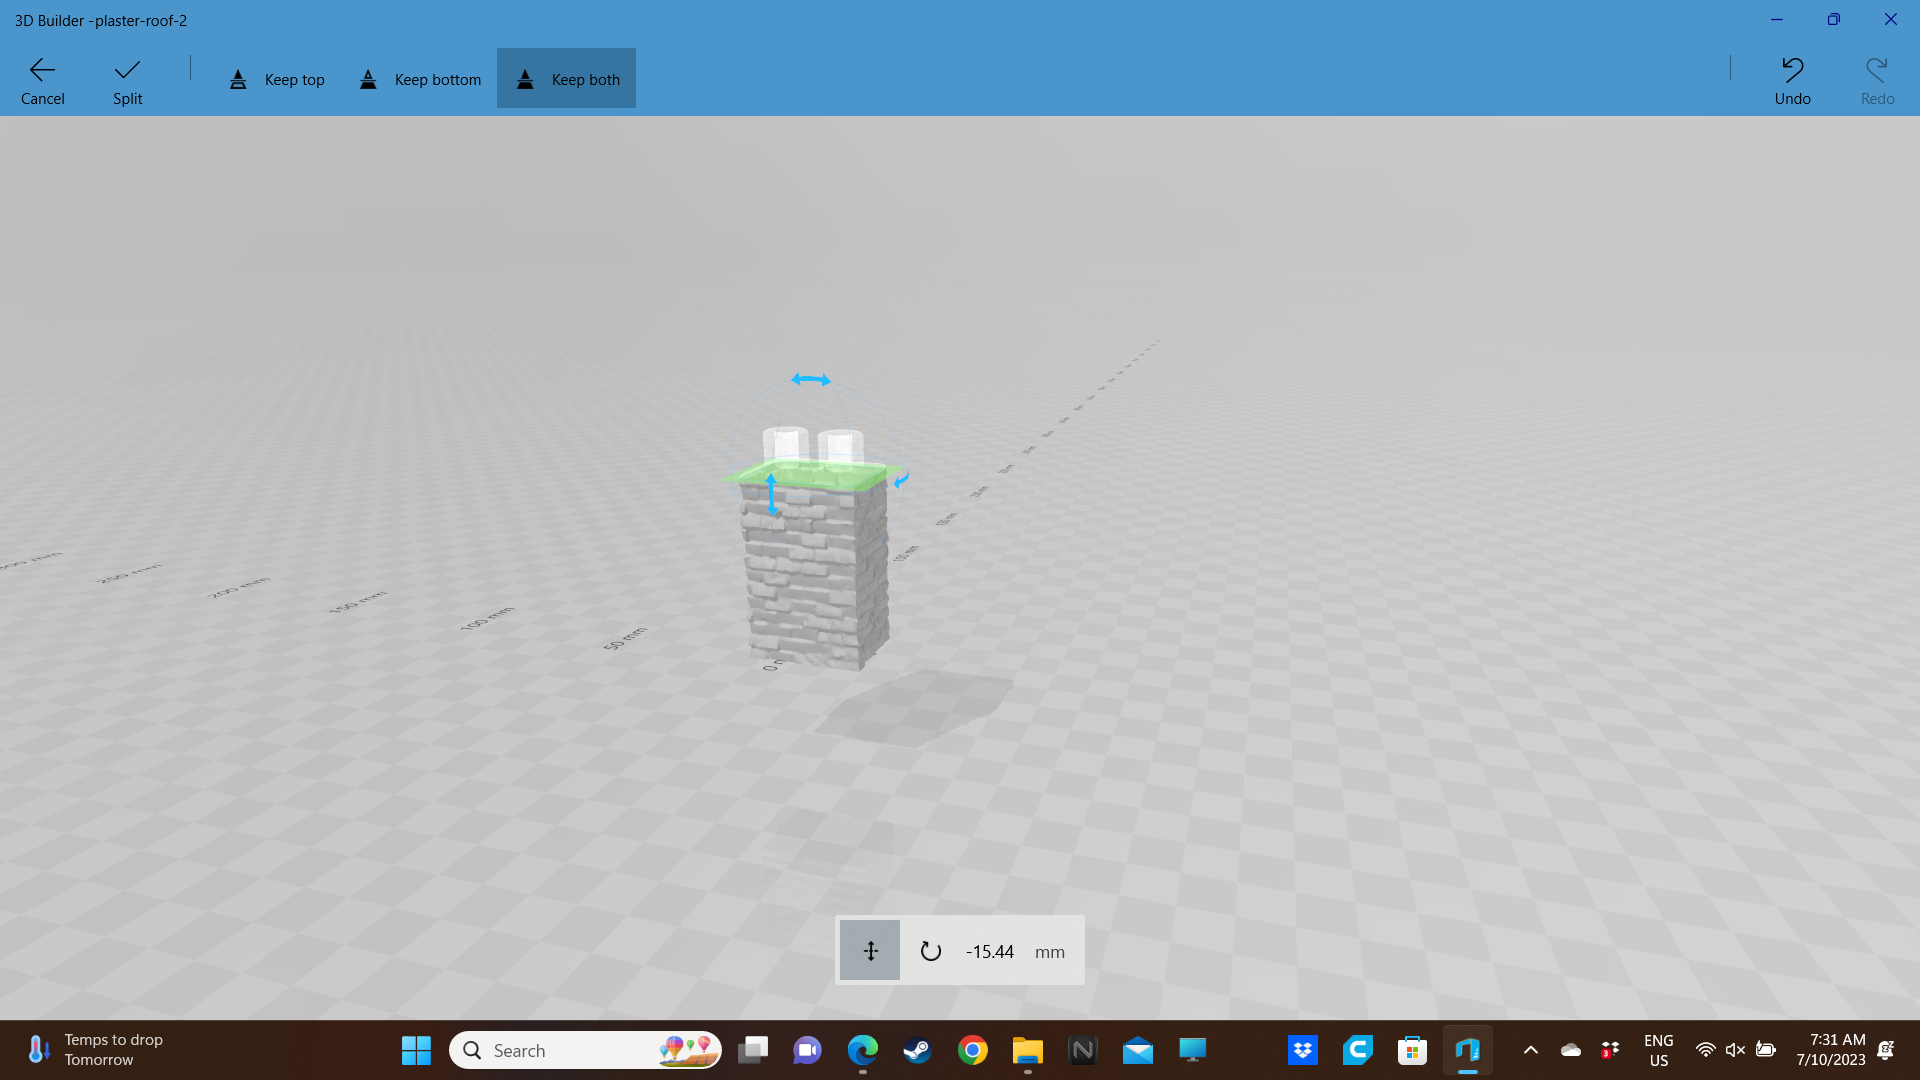
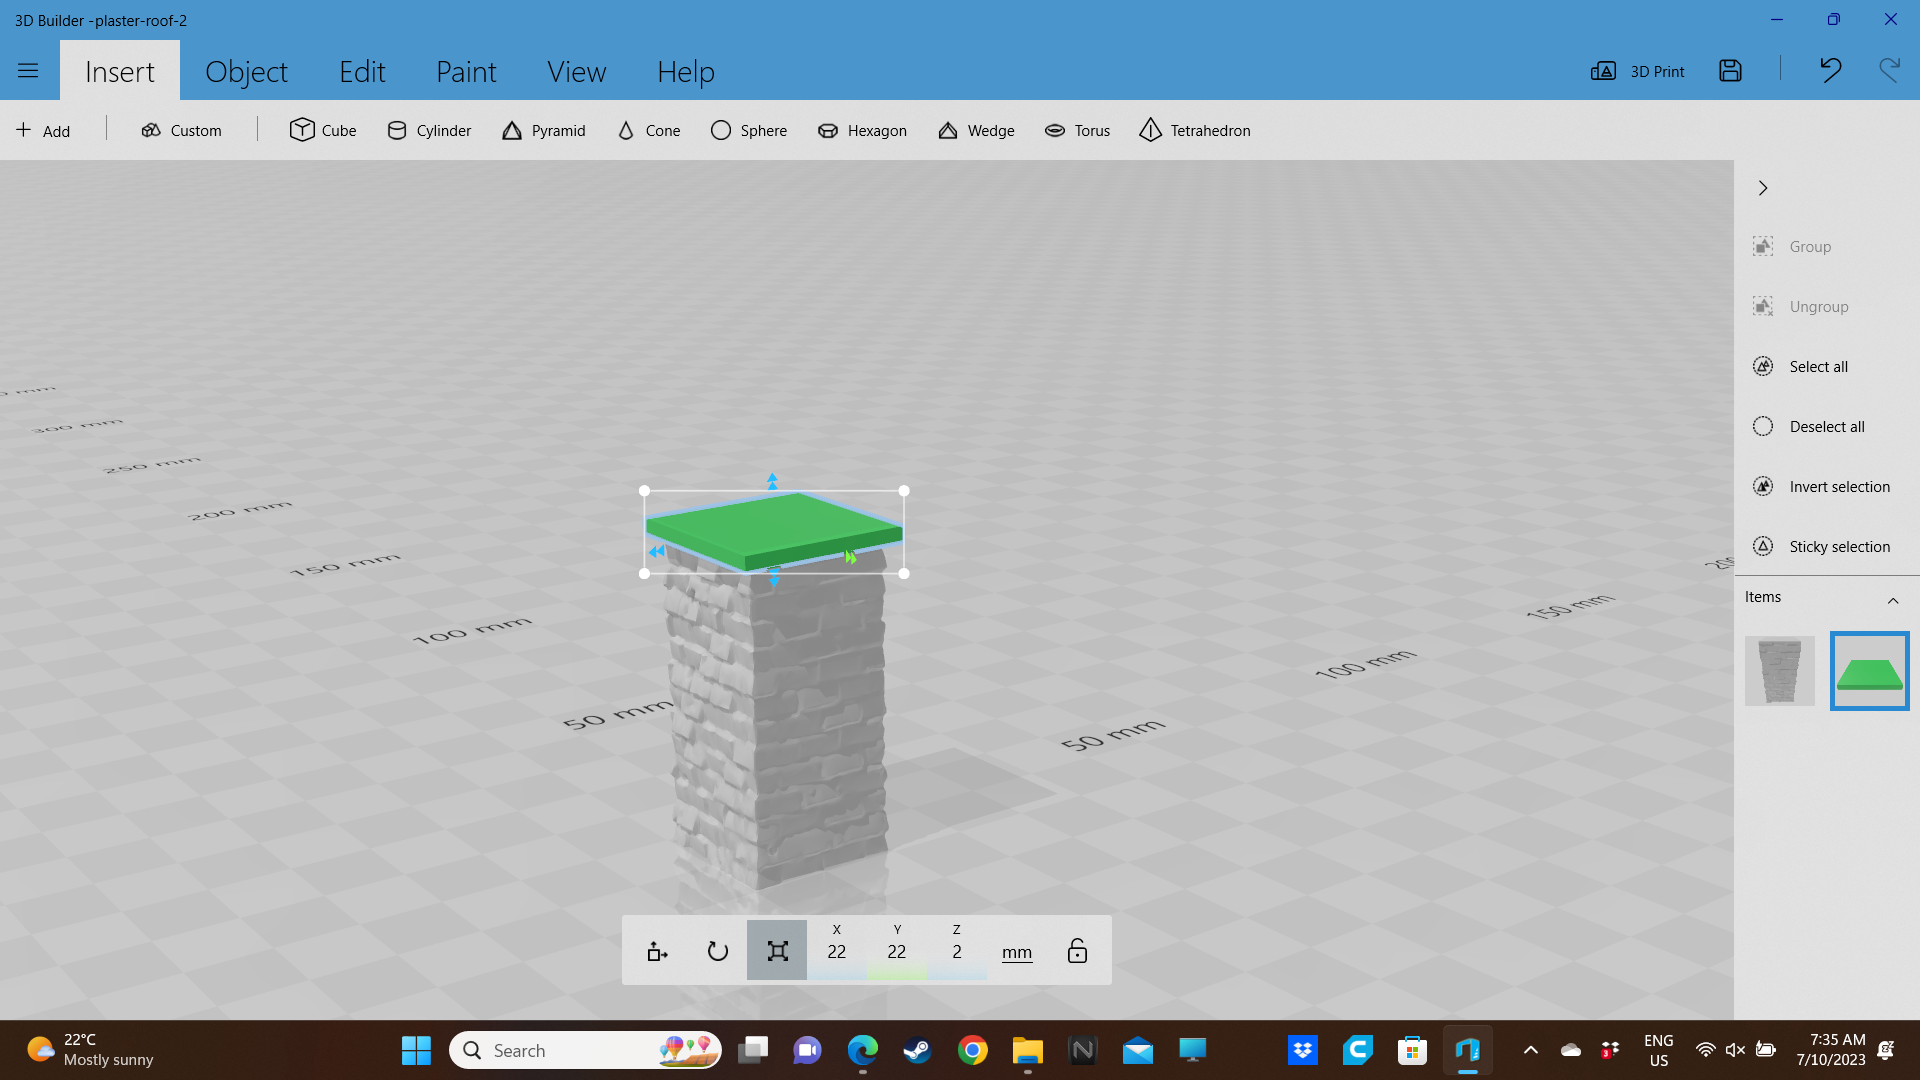
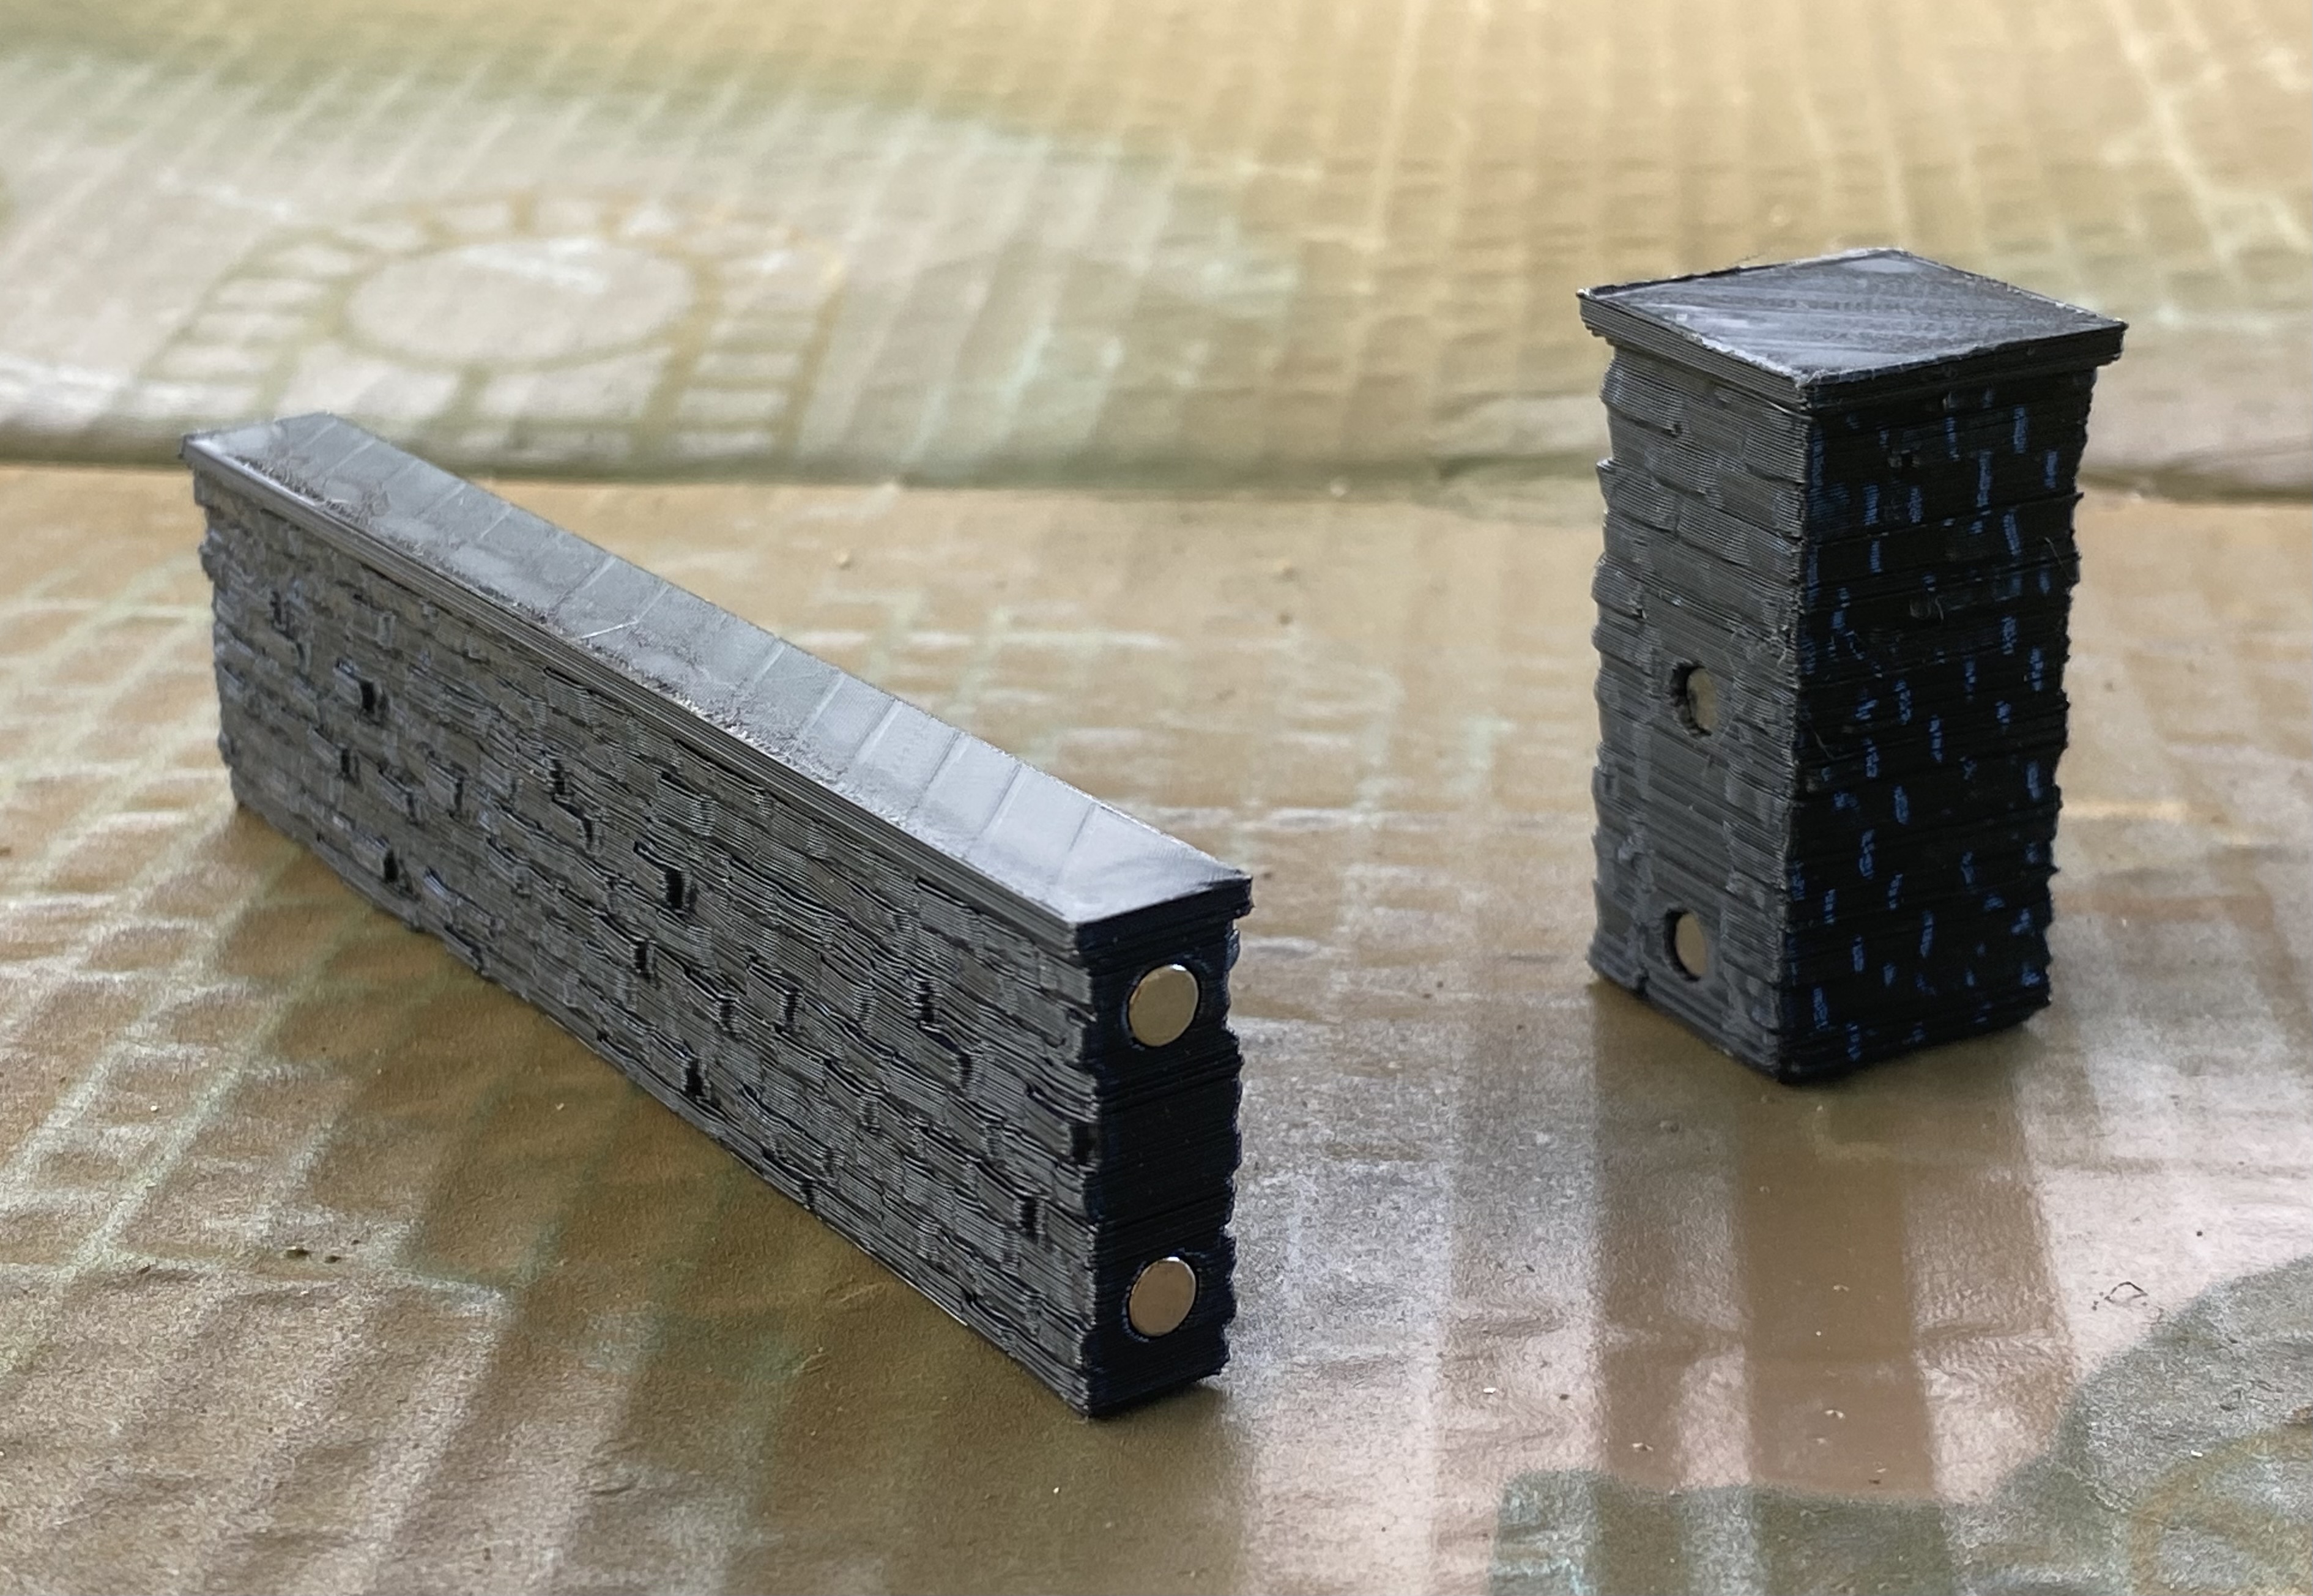
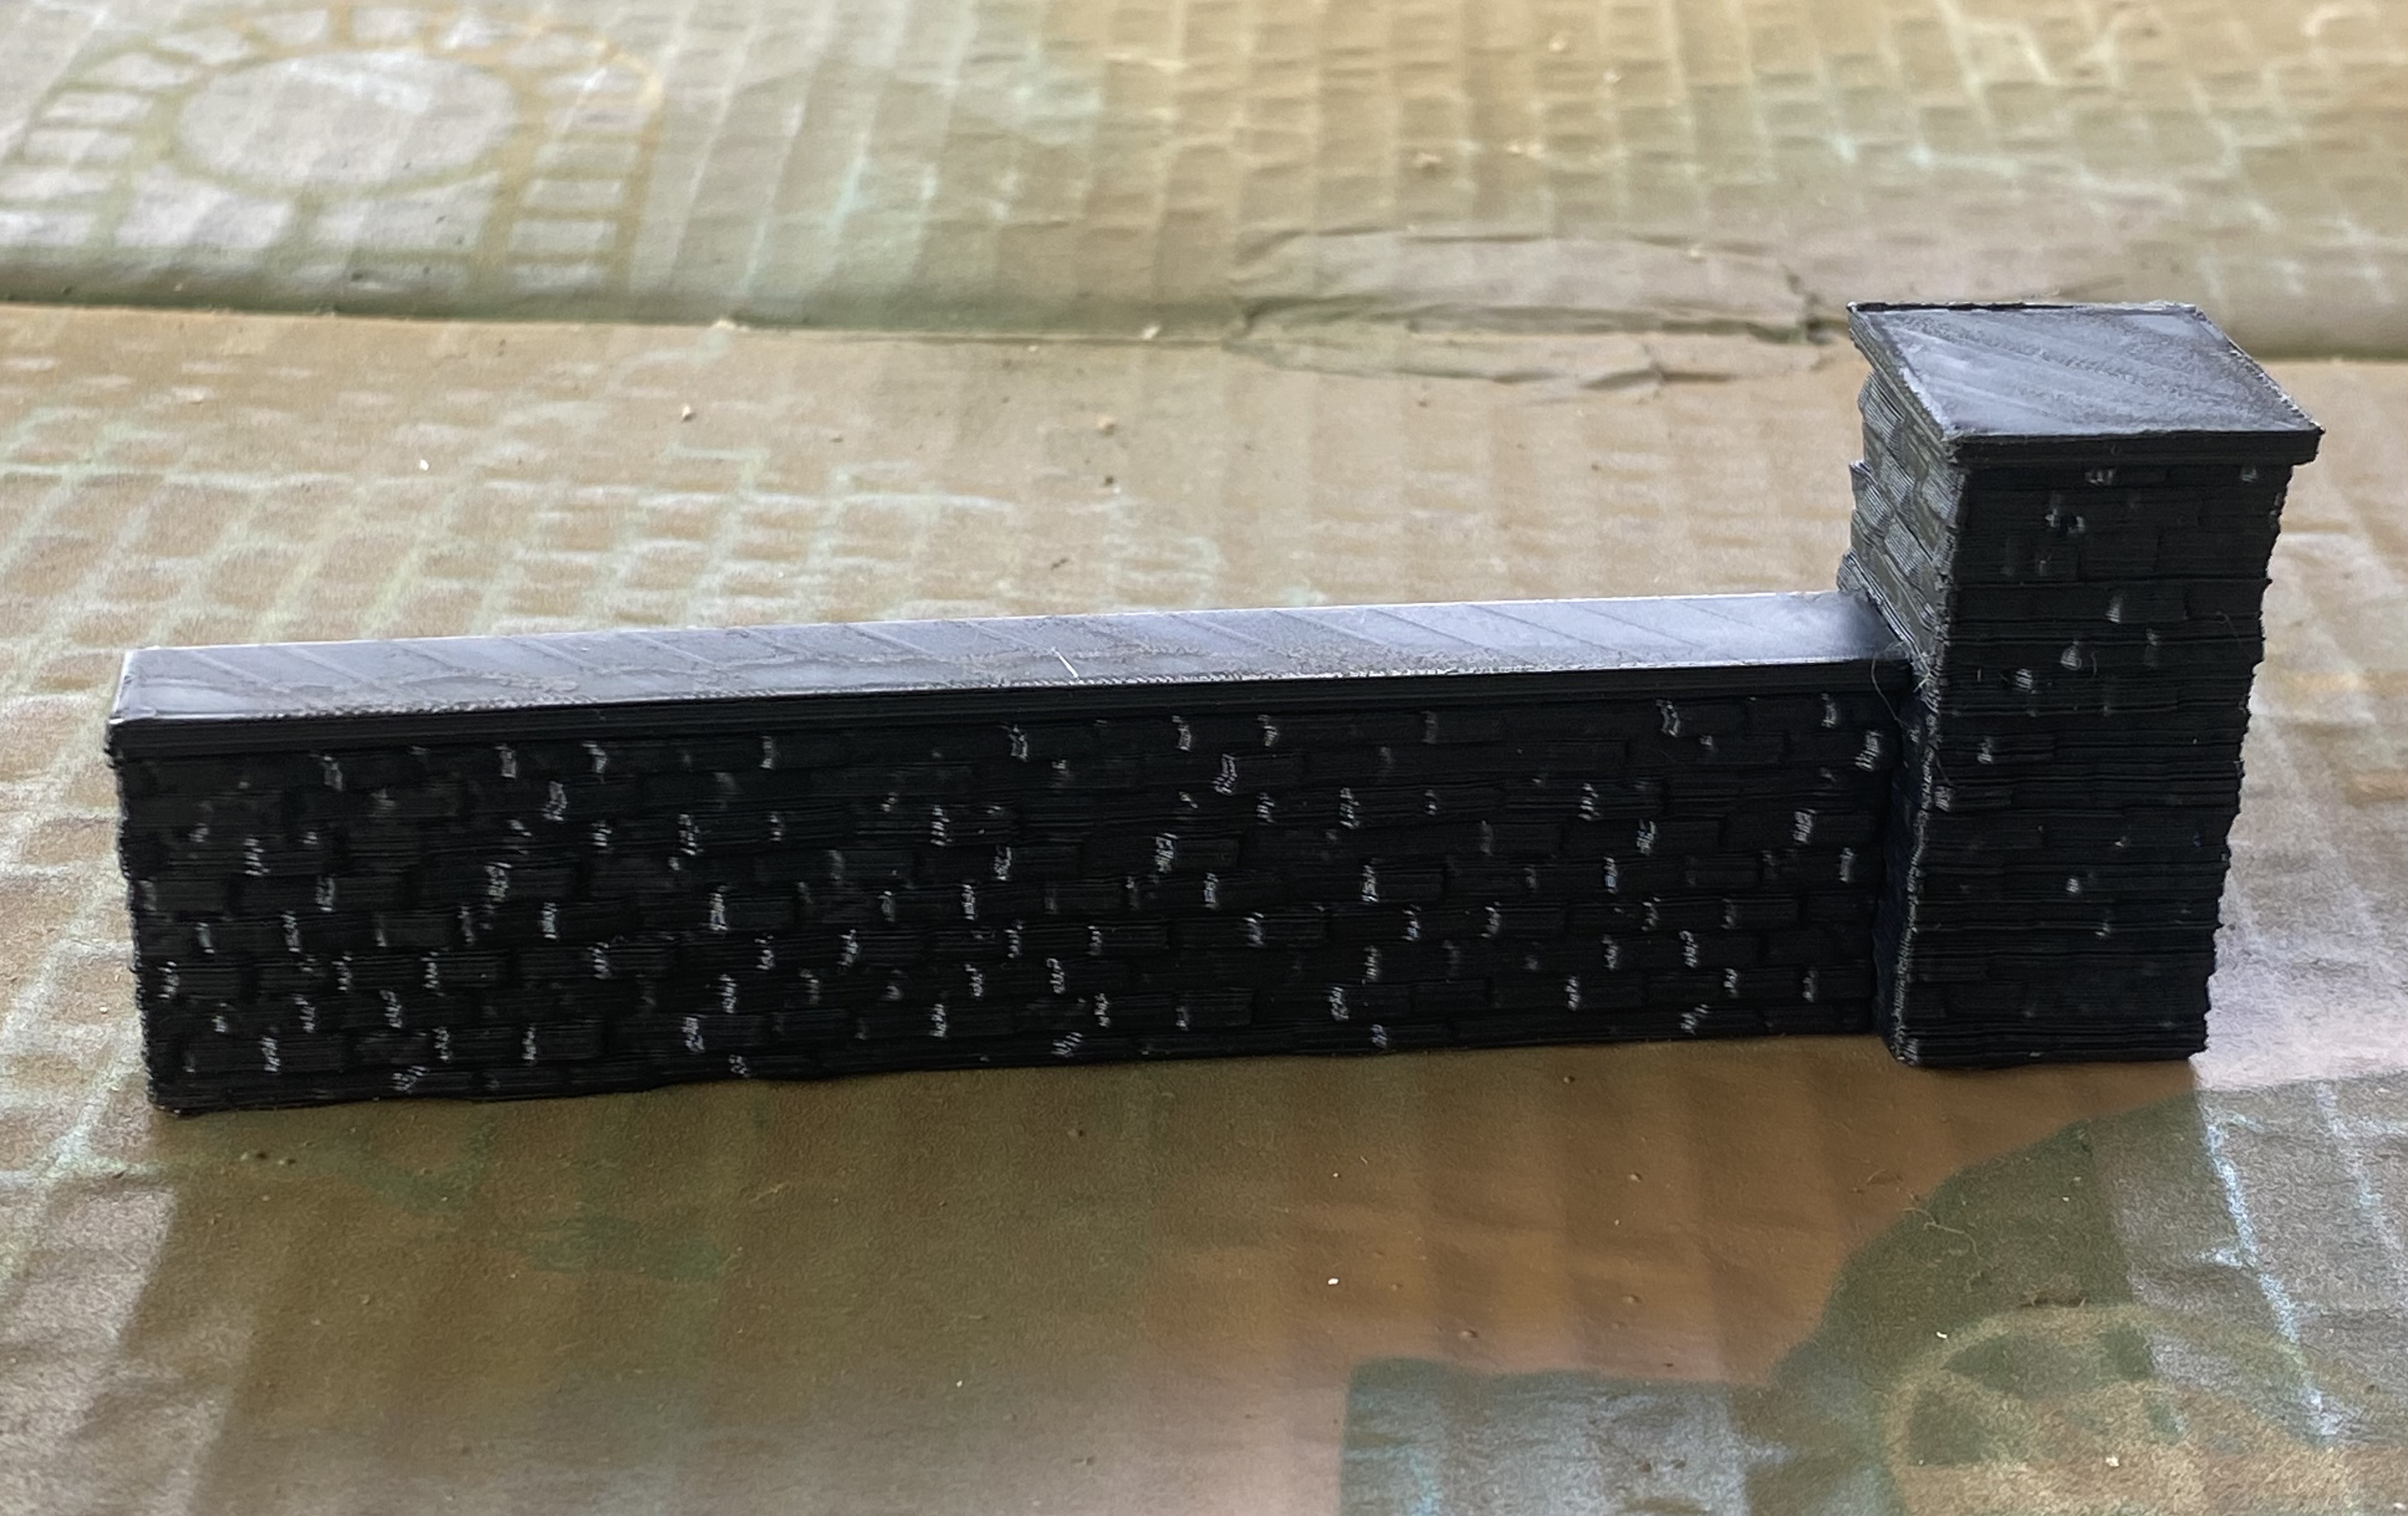
The next step is the ‘settle’ the remaining piece on the ground and resize its width and depth. The height you can adjust by using the ‘split’ function to remove brick layers. Add a cube or whatever shape you want as a topper and place it on top of the pillar.
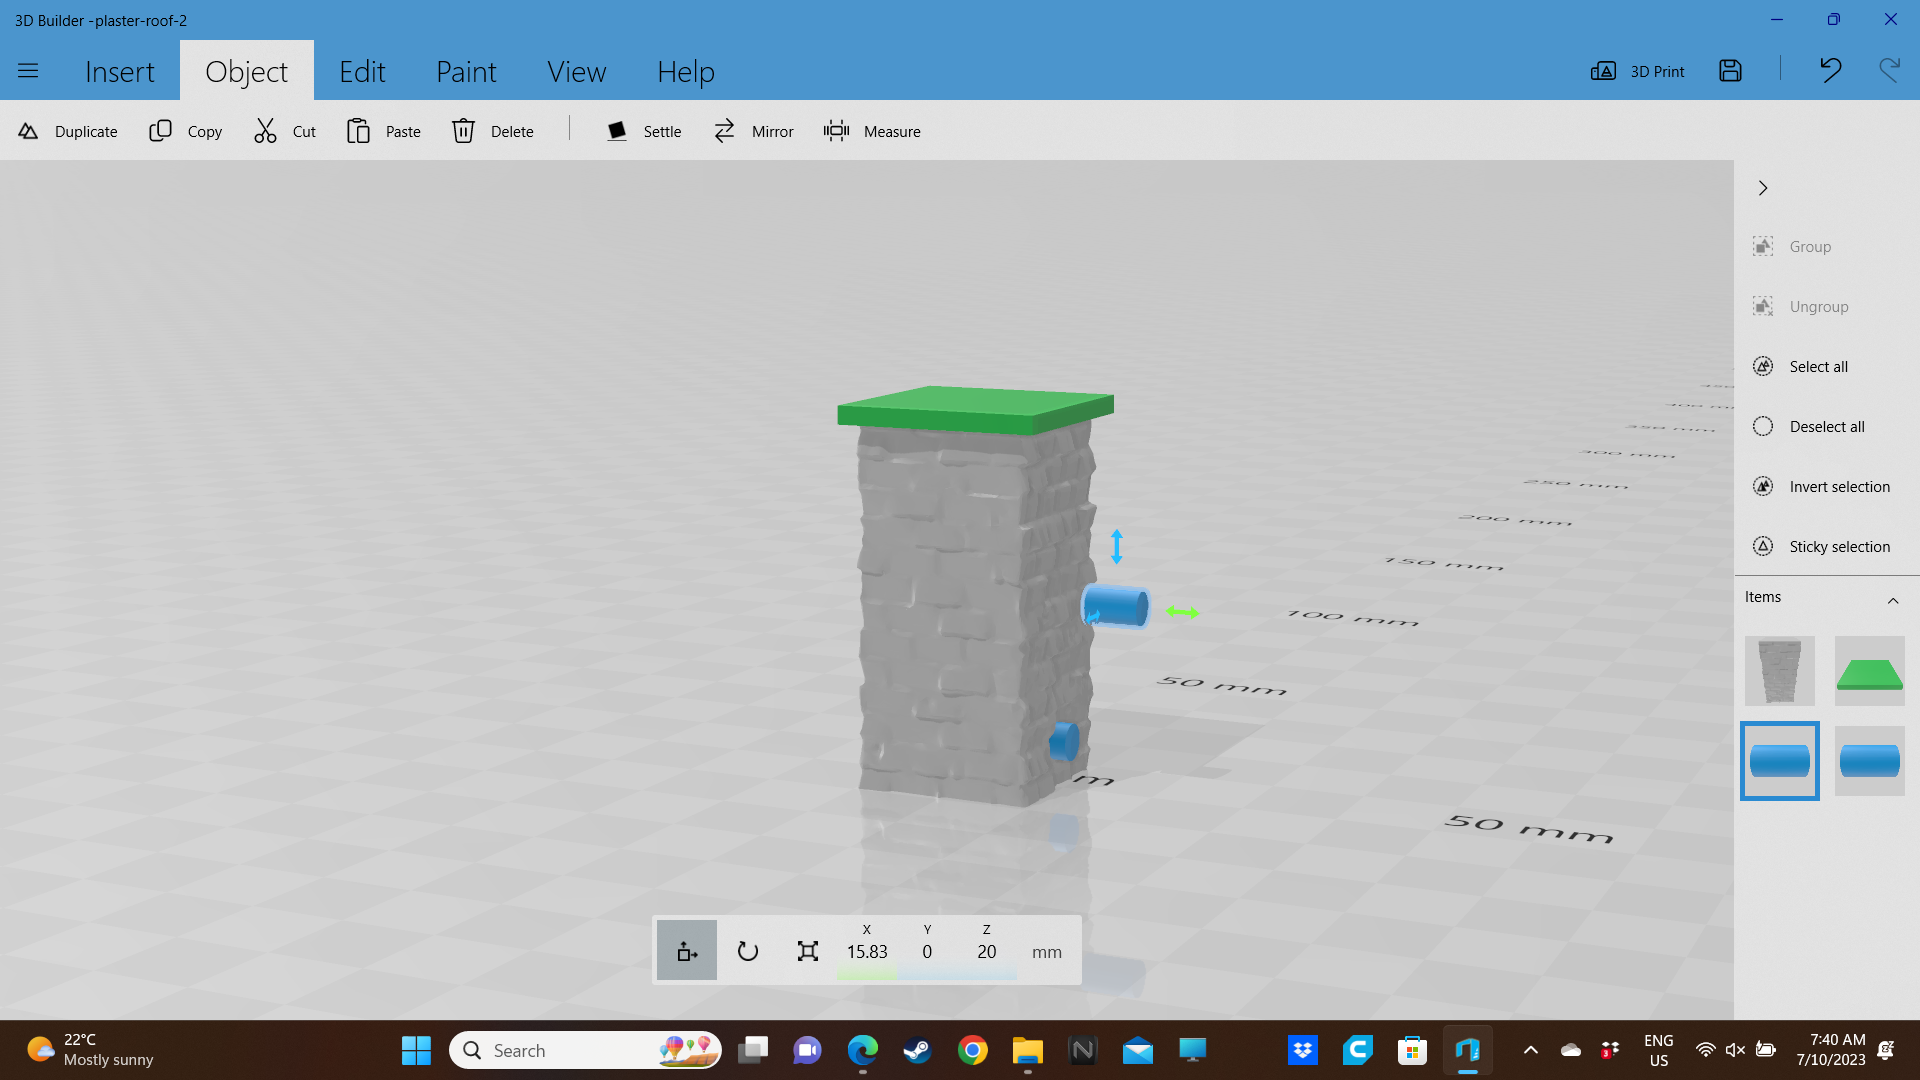
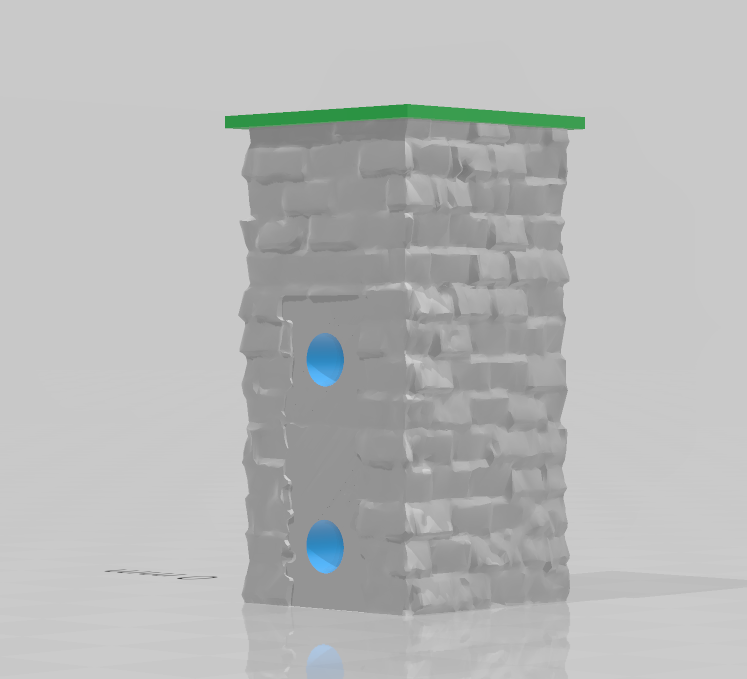
As I intended to magnetise the walls, I made some little pegs a little longer than the size of the magnets I intended to use I positioned where the magnets would be and then used the ‘Subtract’ function to remove them. This then leaves a perfect hole for the magnets and means they will always be in the same place on each pillar I print.
Finally, I inserted the wall I was going to use into the pillar and also ‘Subtract’ that, so it leaves a nice indent for the wall to fit snugly in.


Obviously, this is just a quick run-through of something really basic but should give an idea of what you can do.
I may add an additional magnet hole in the middle of the top to allow different toppers to be swapped in and out.
For the actual ‘walls’ sections I may do some with flat tops and some with little grooves to add railings.
Either way, I will save the files so that I can quickly and easily replicate the pieces whilst also having the option to go in and alter bits to make some pieces unique.
Next up is to run a few quick test prints to see if it all works.

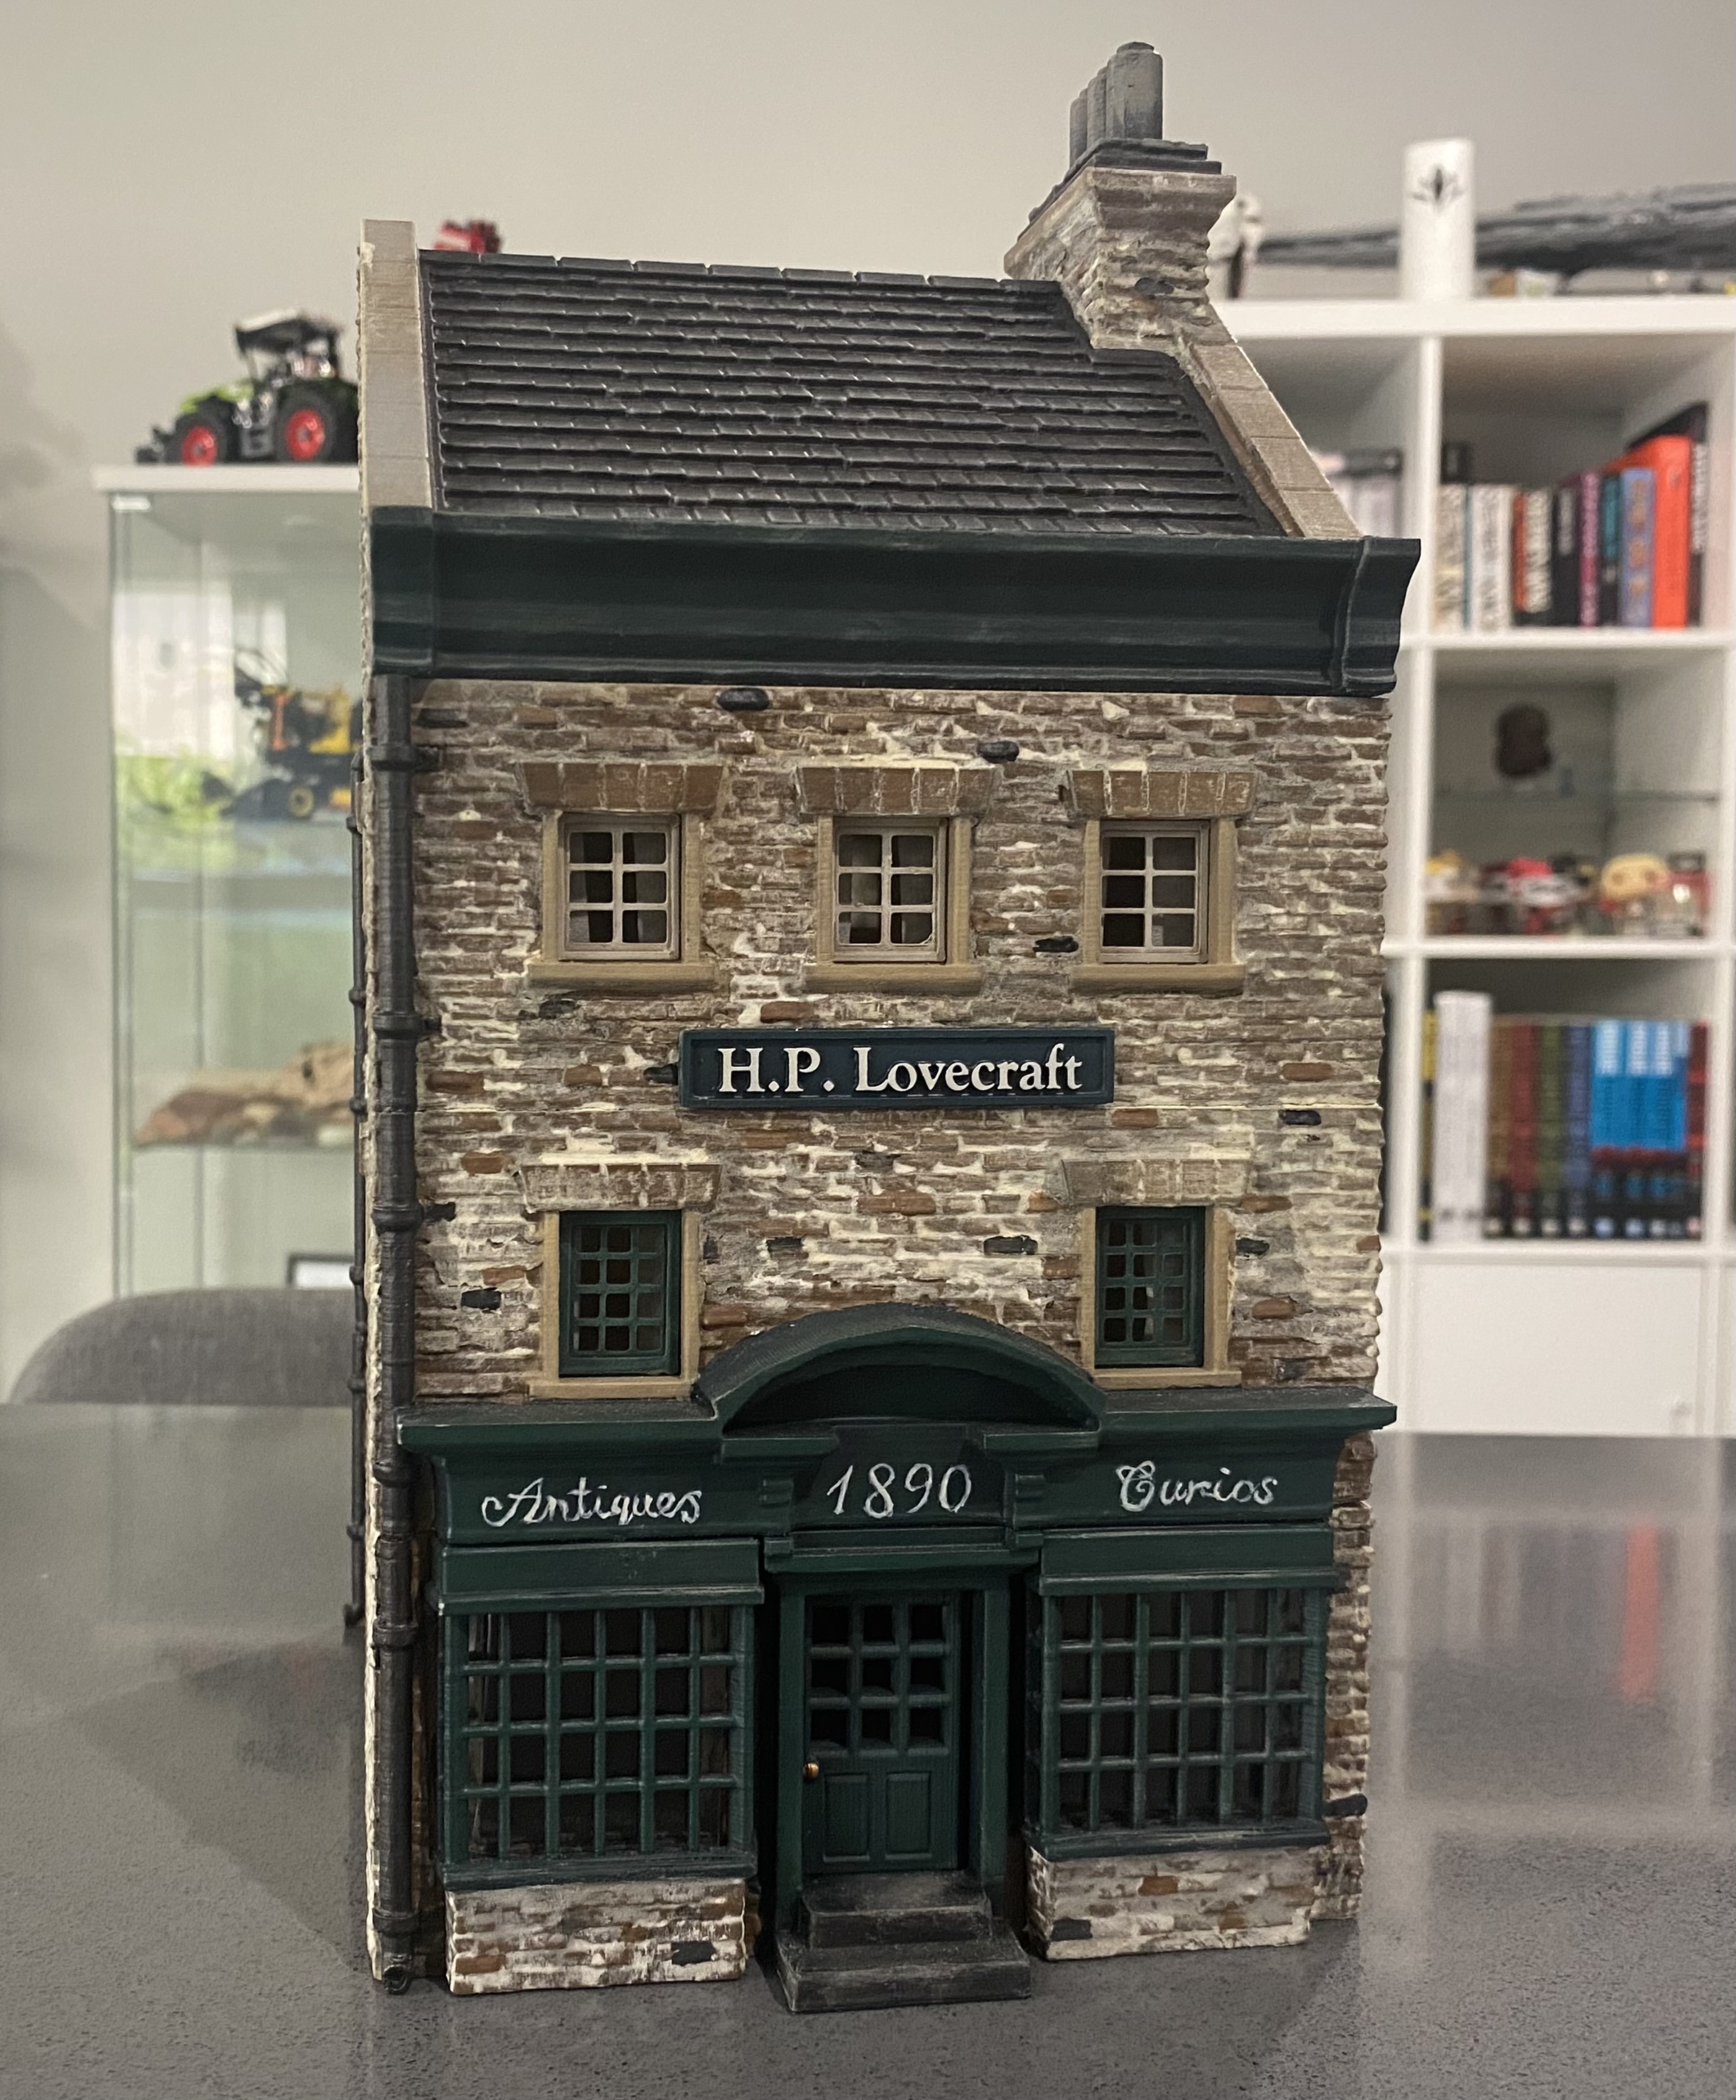
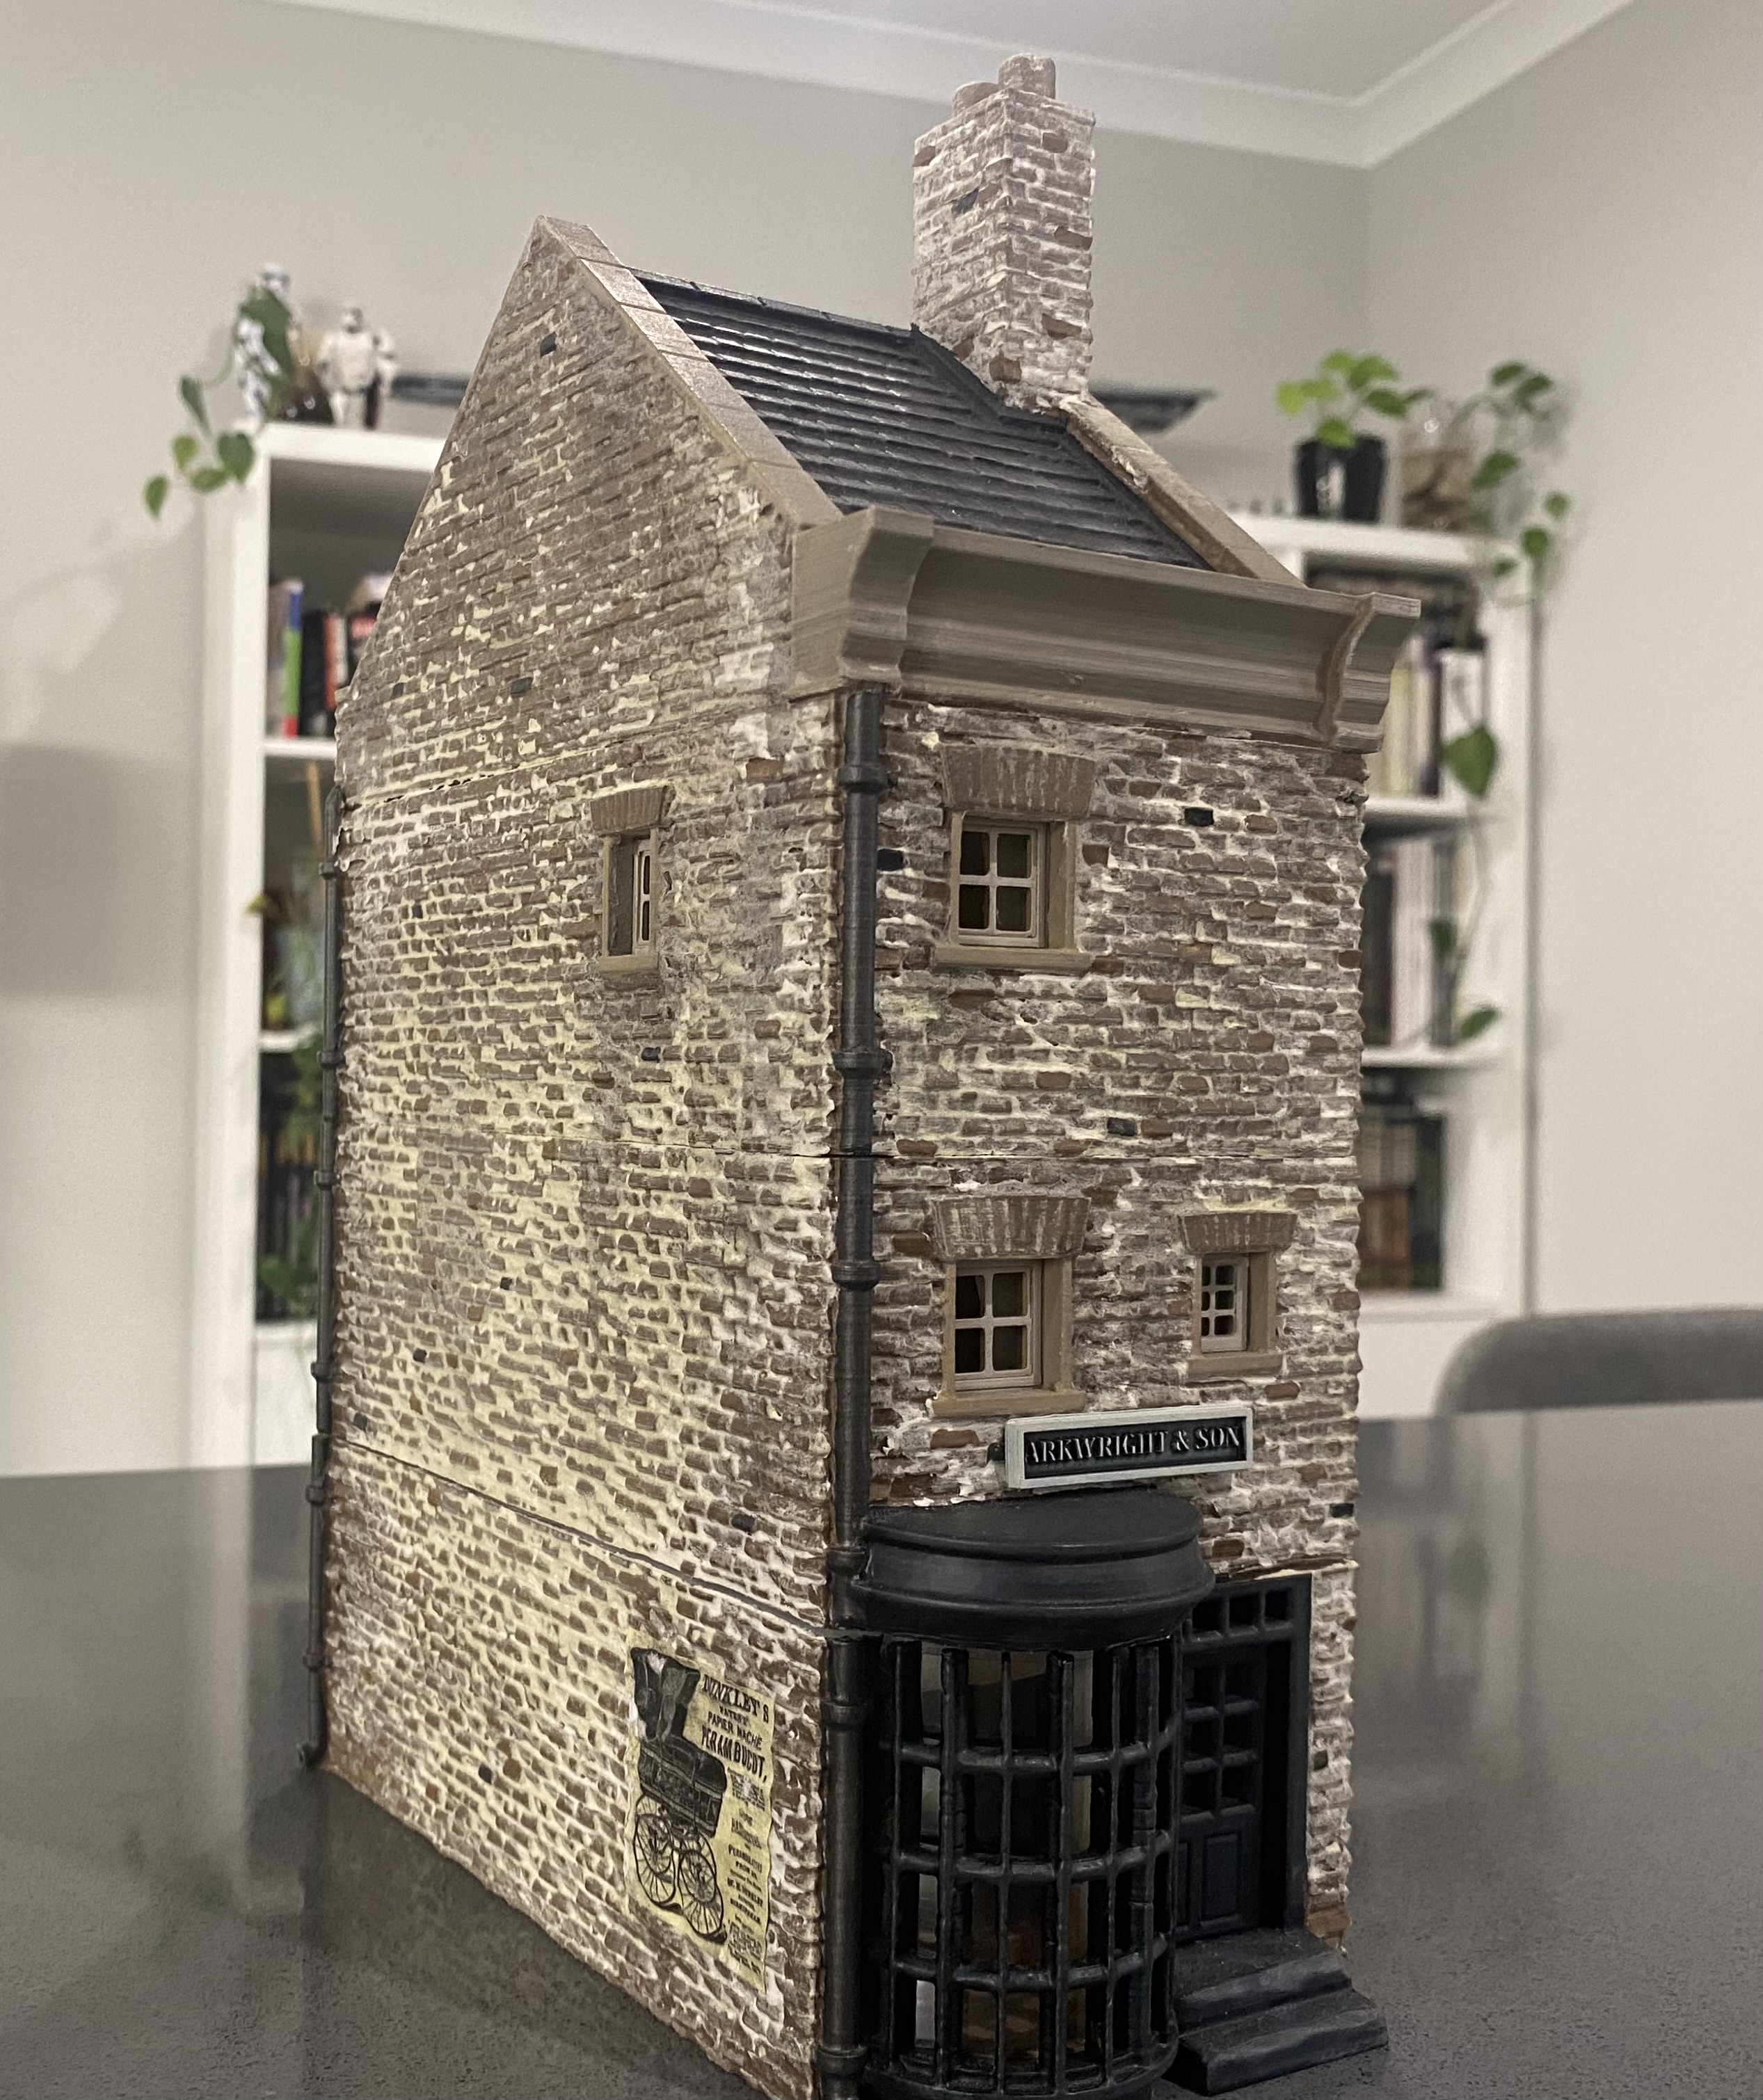
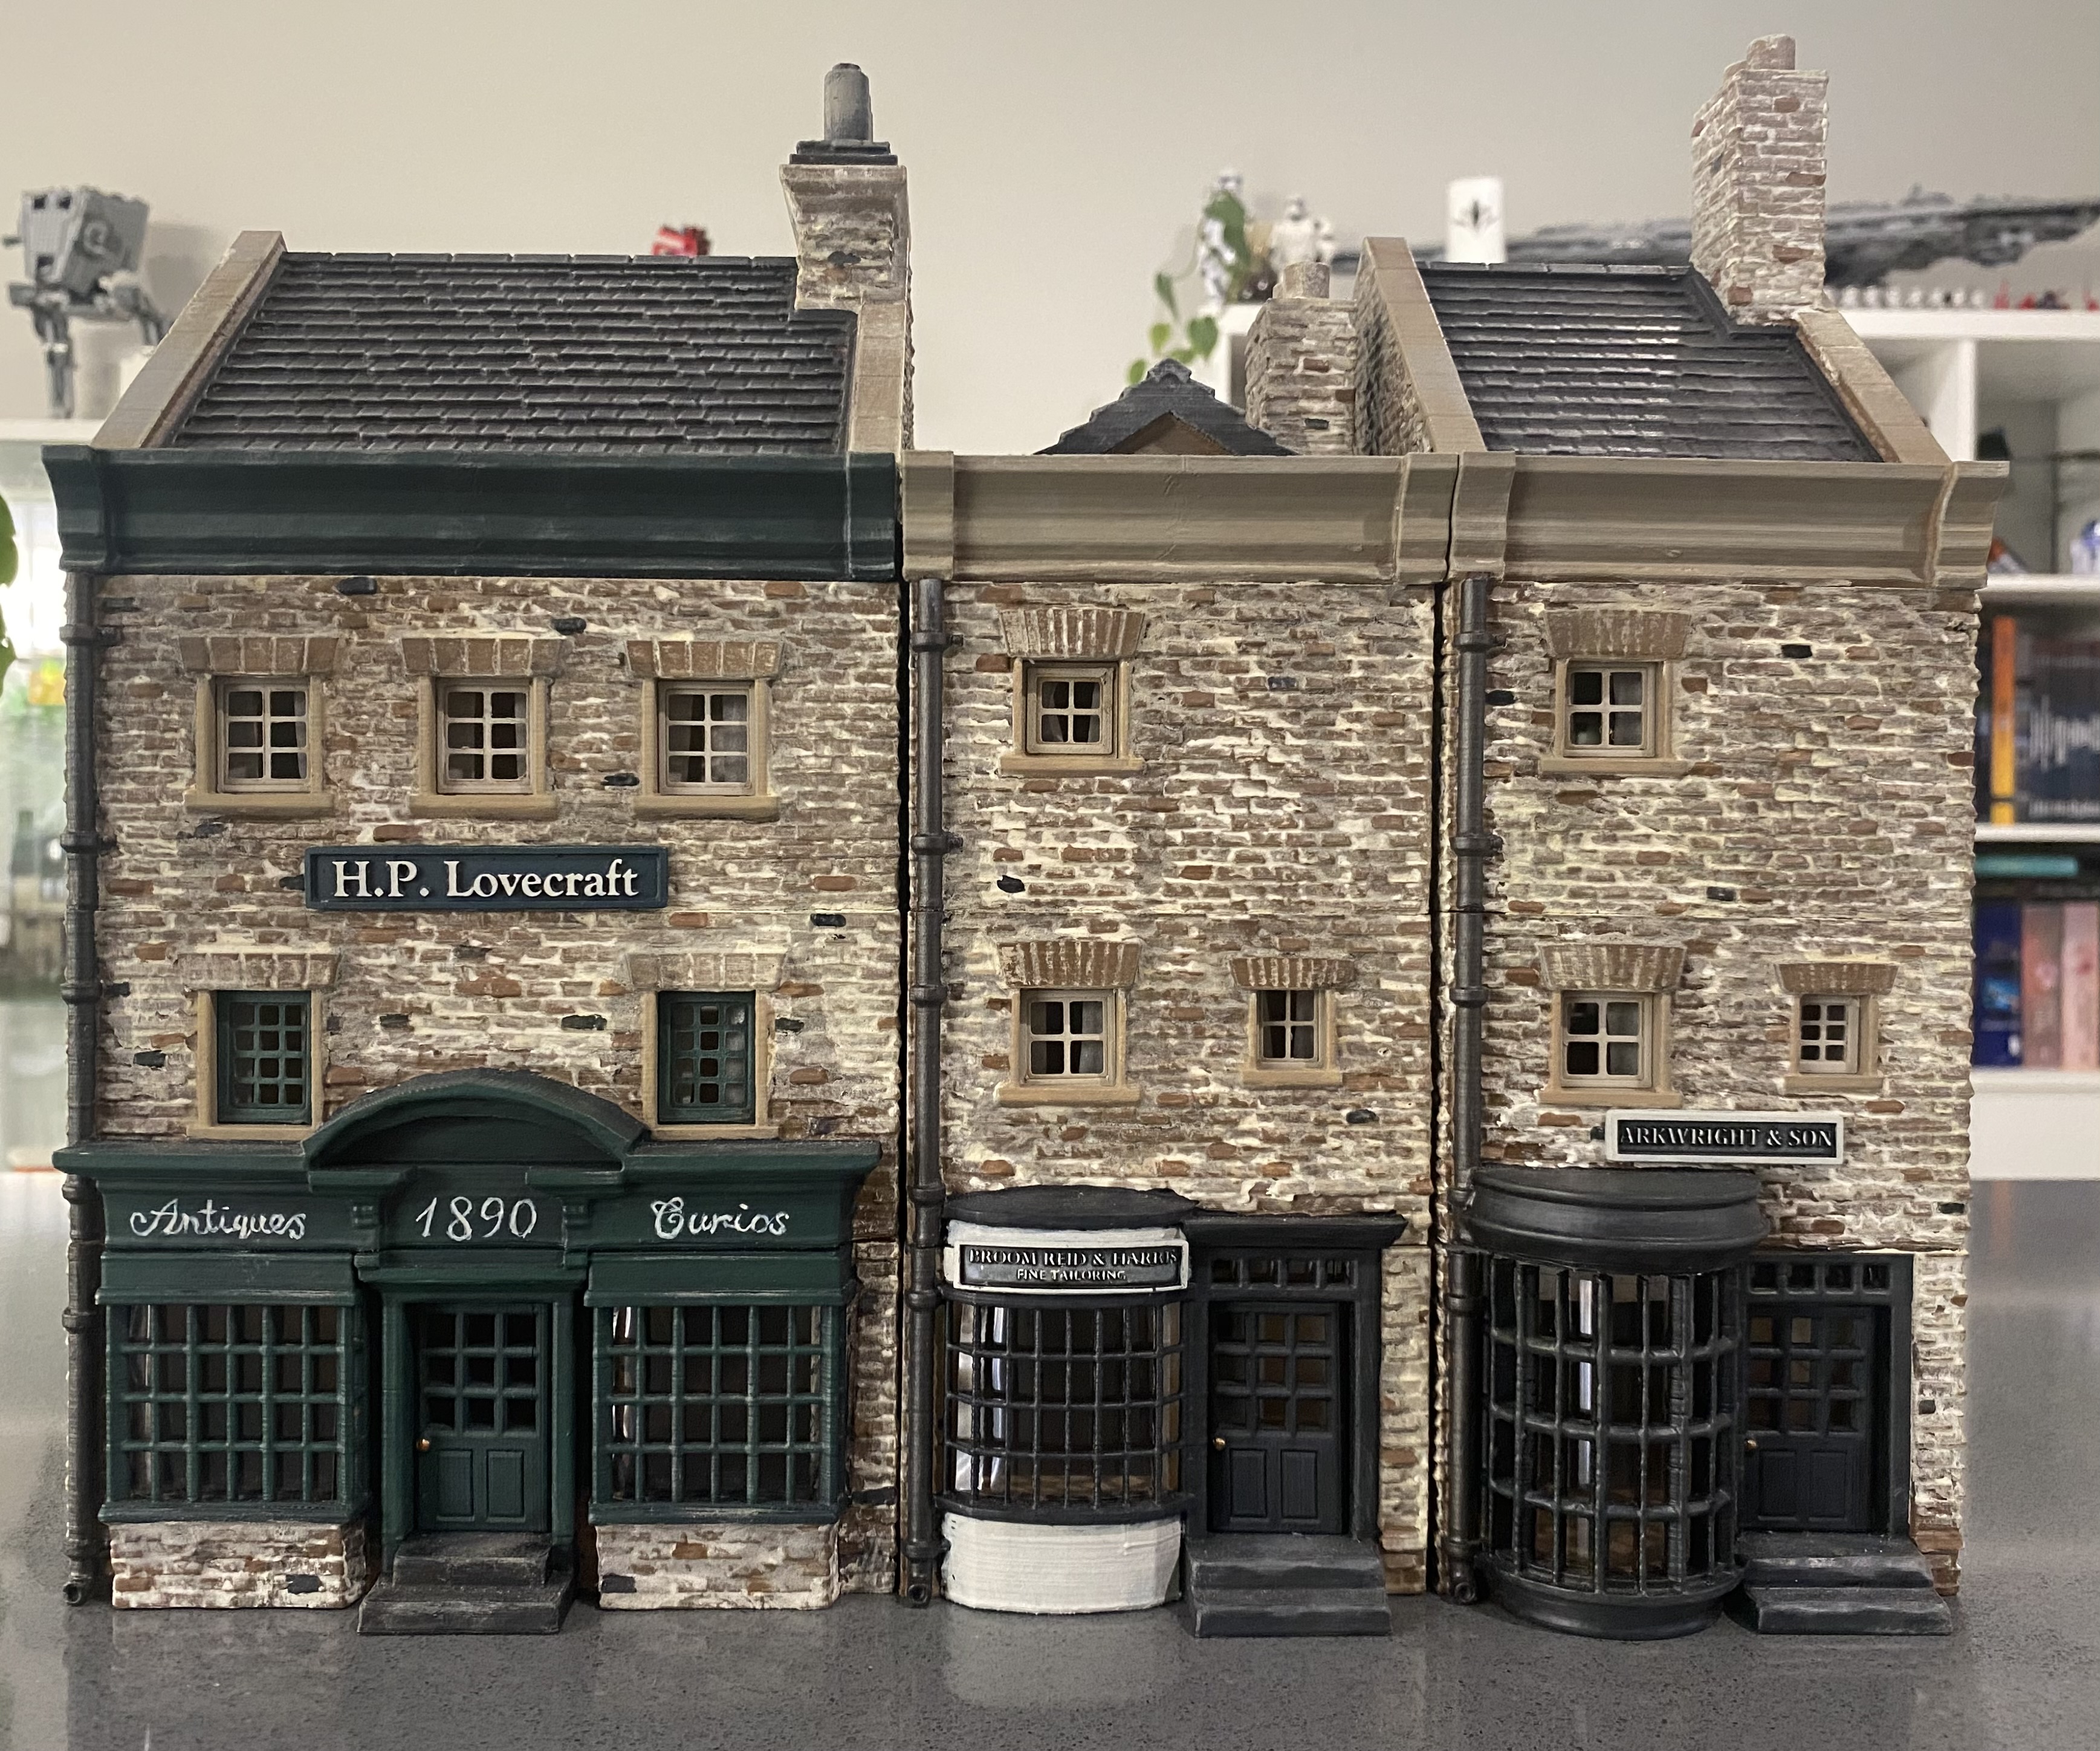
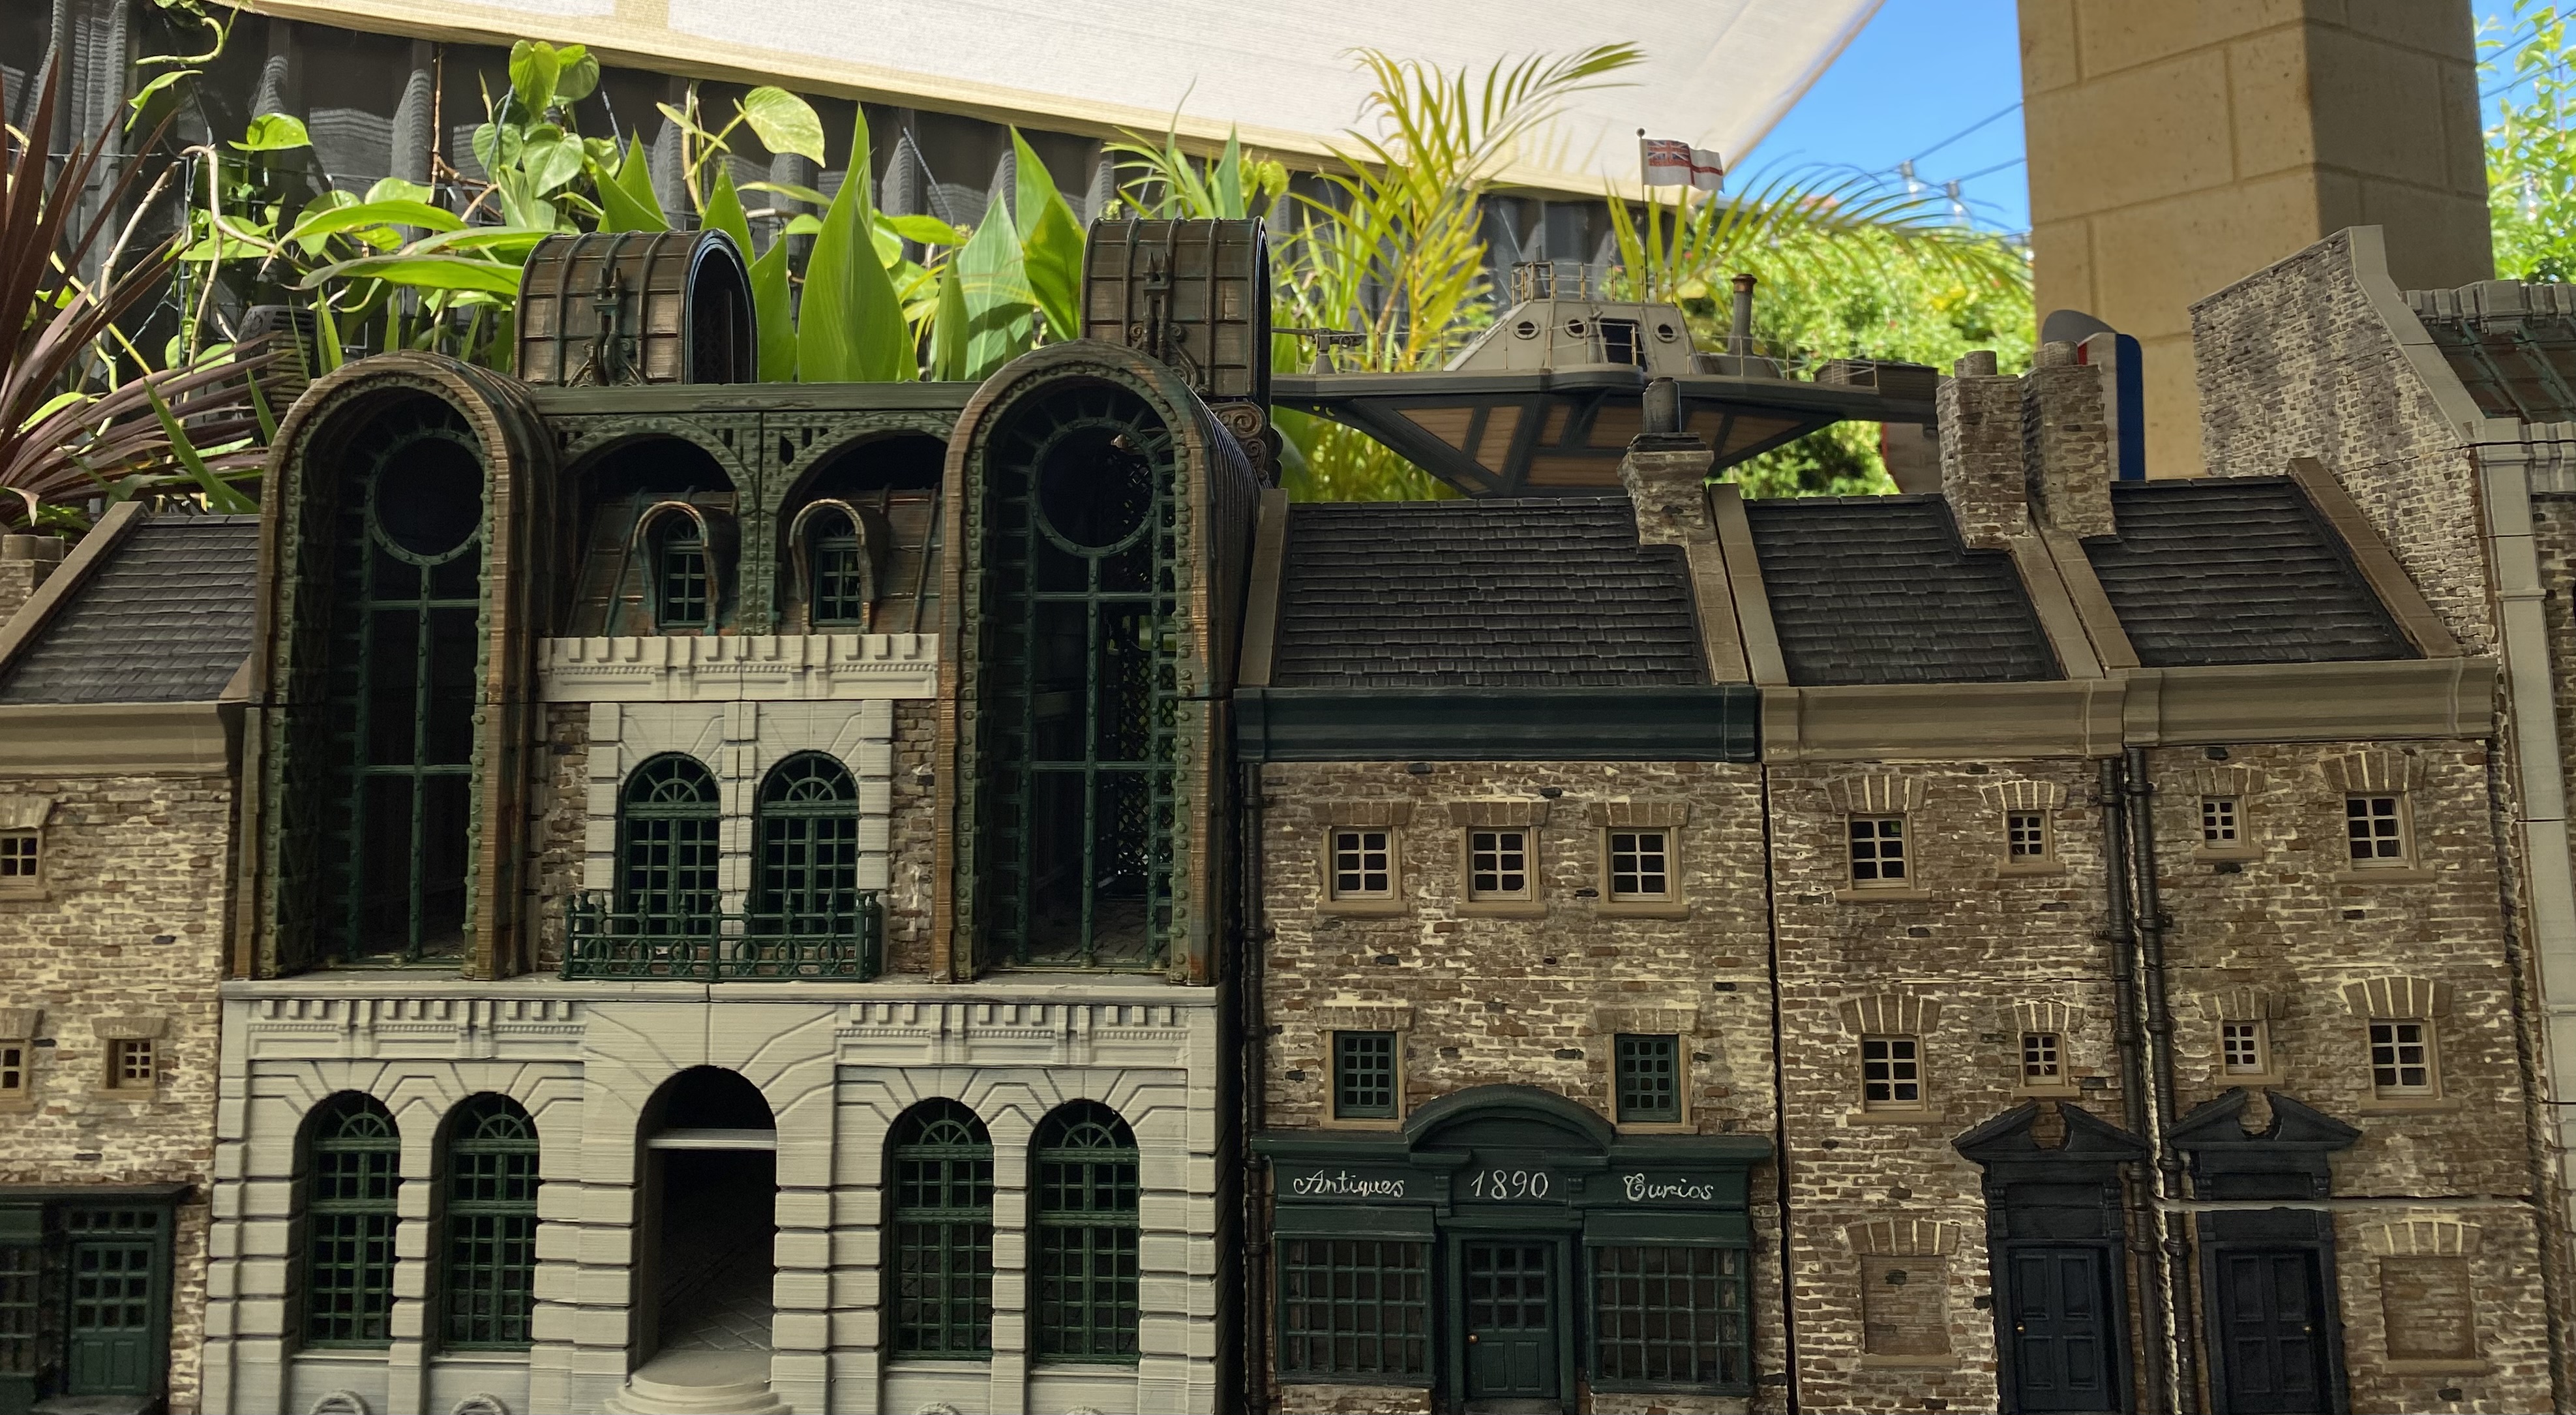
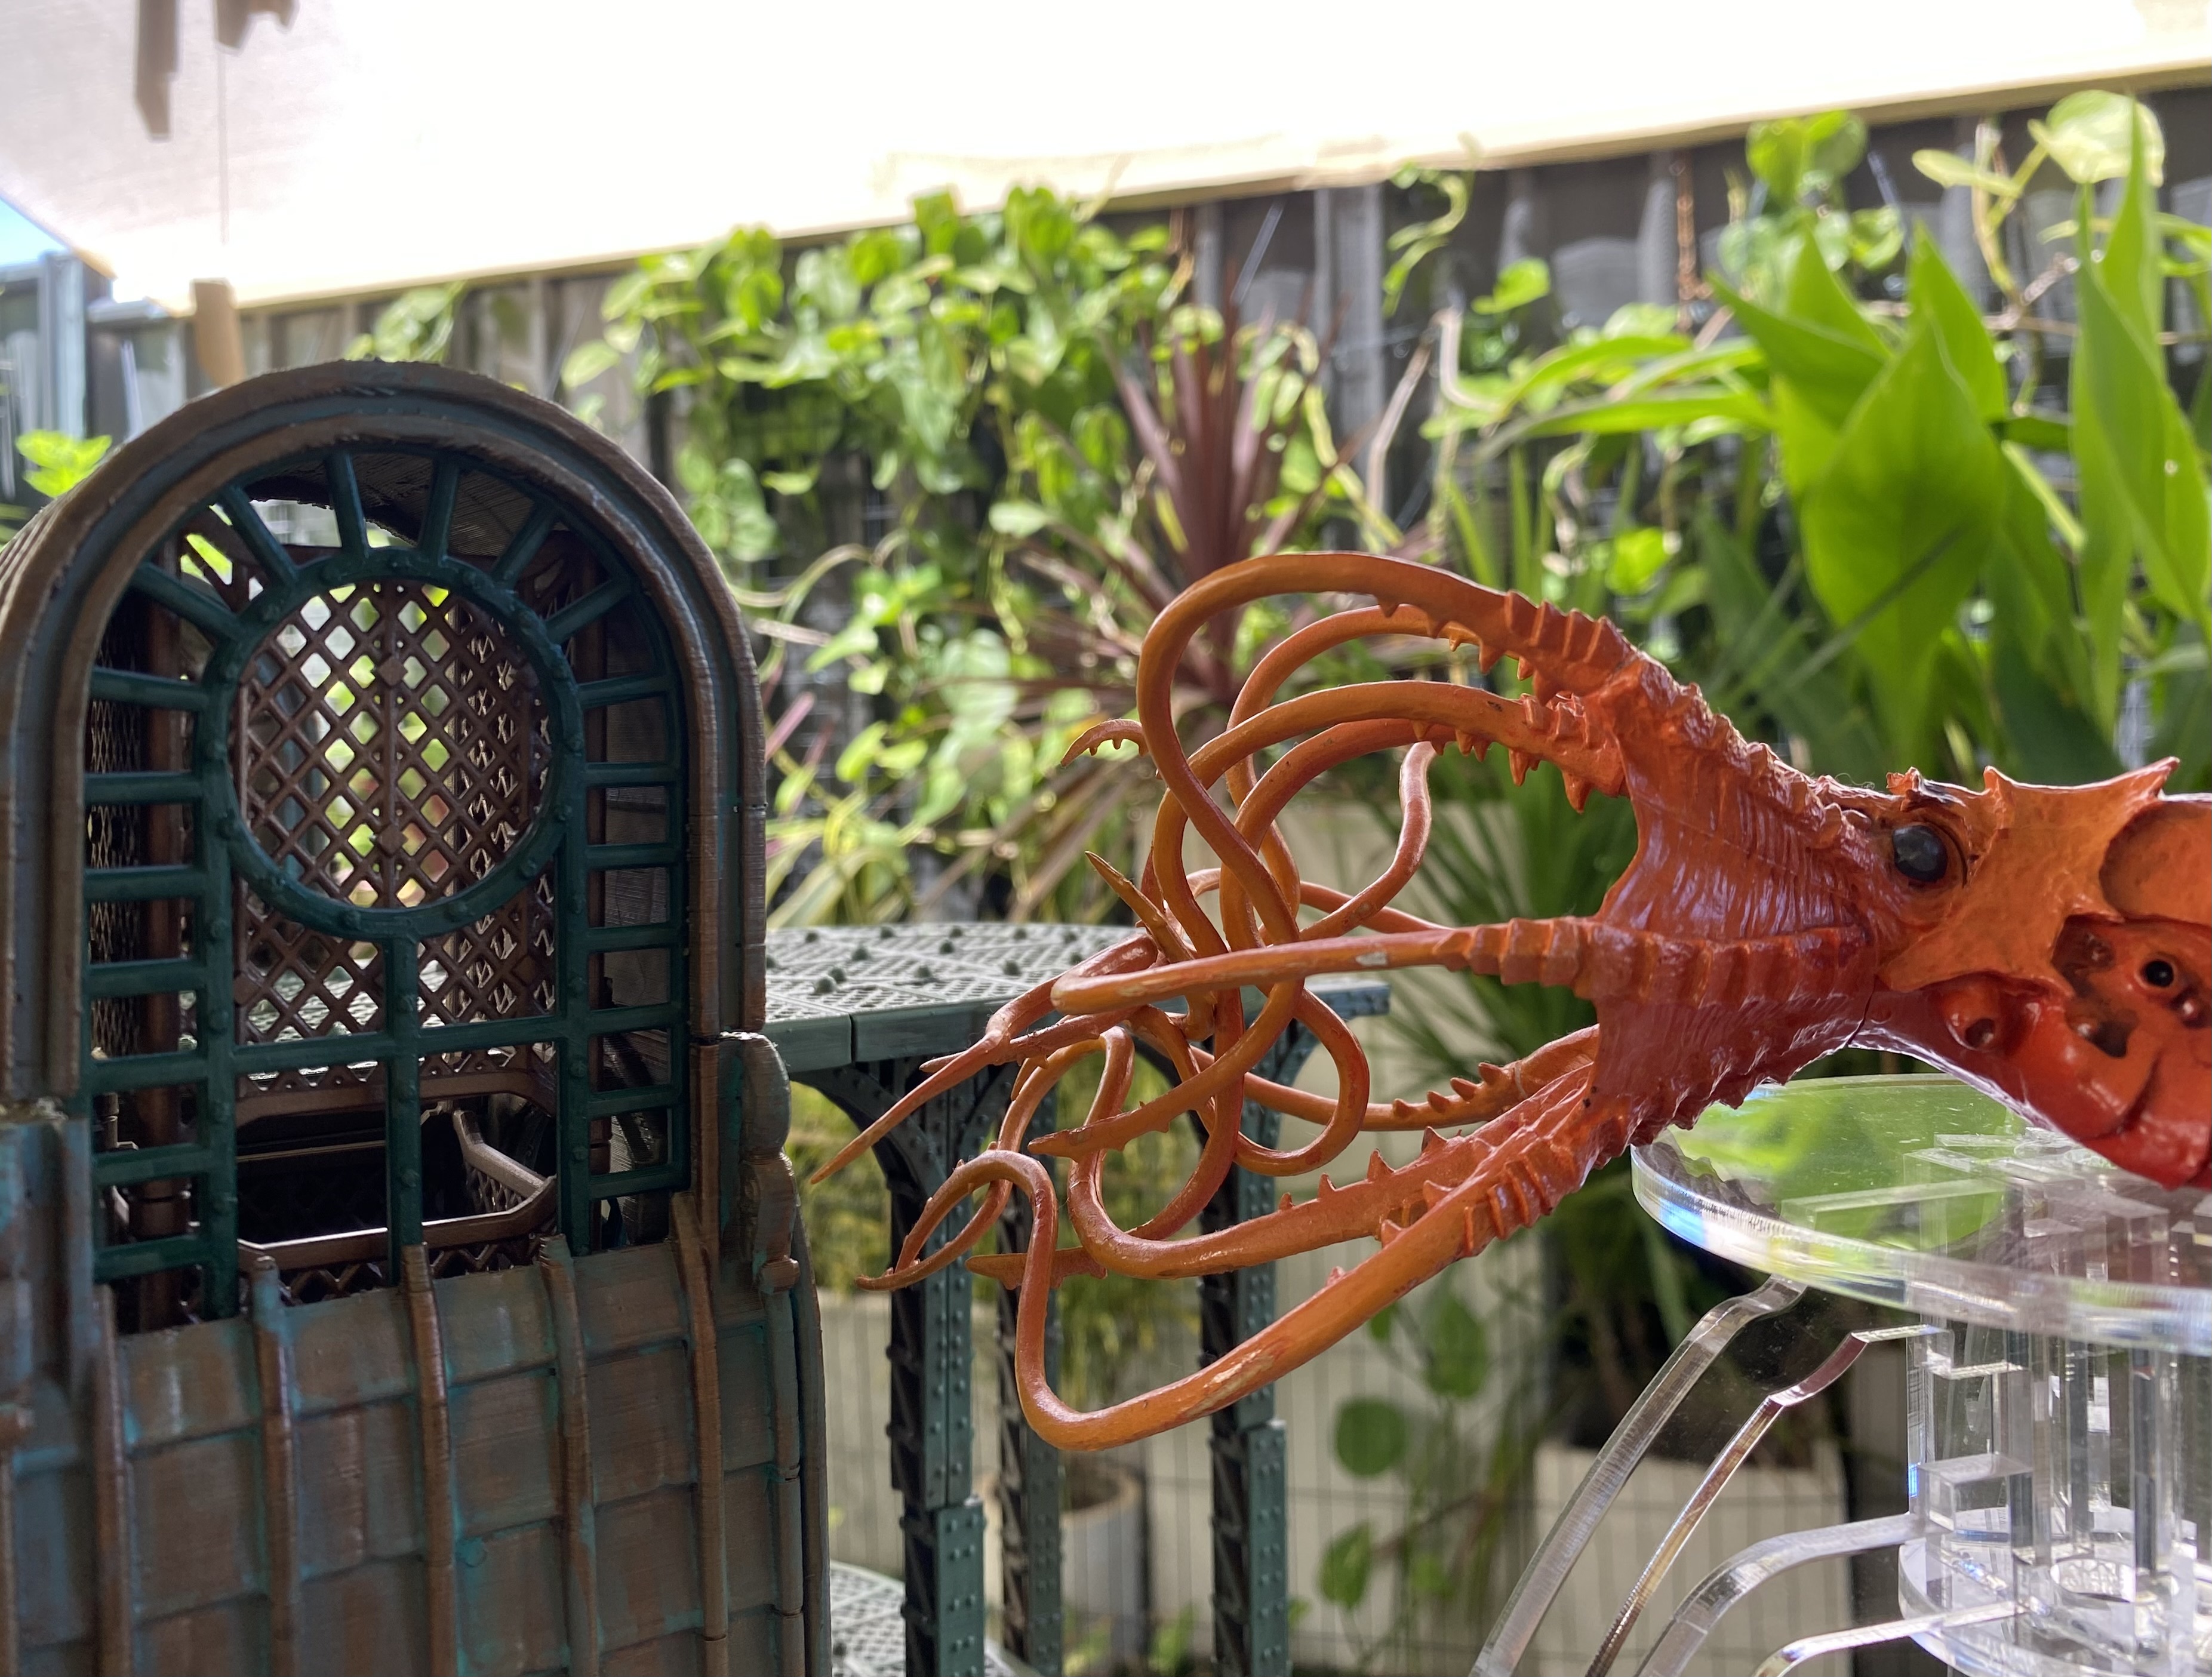
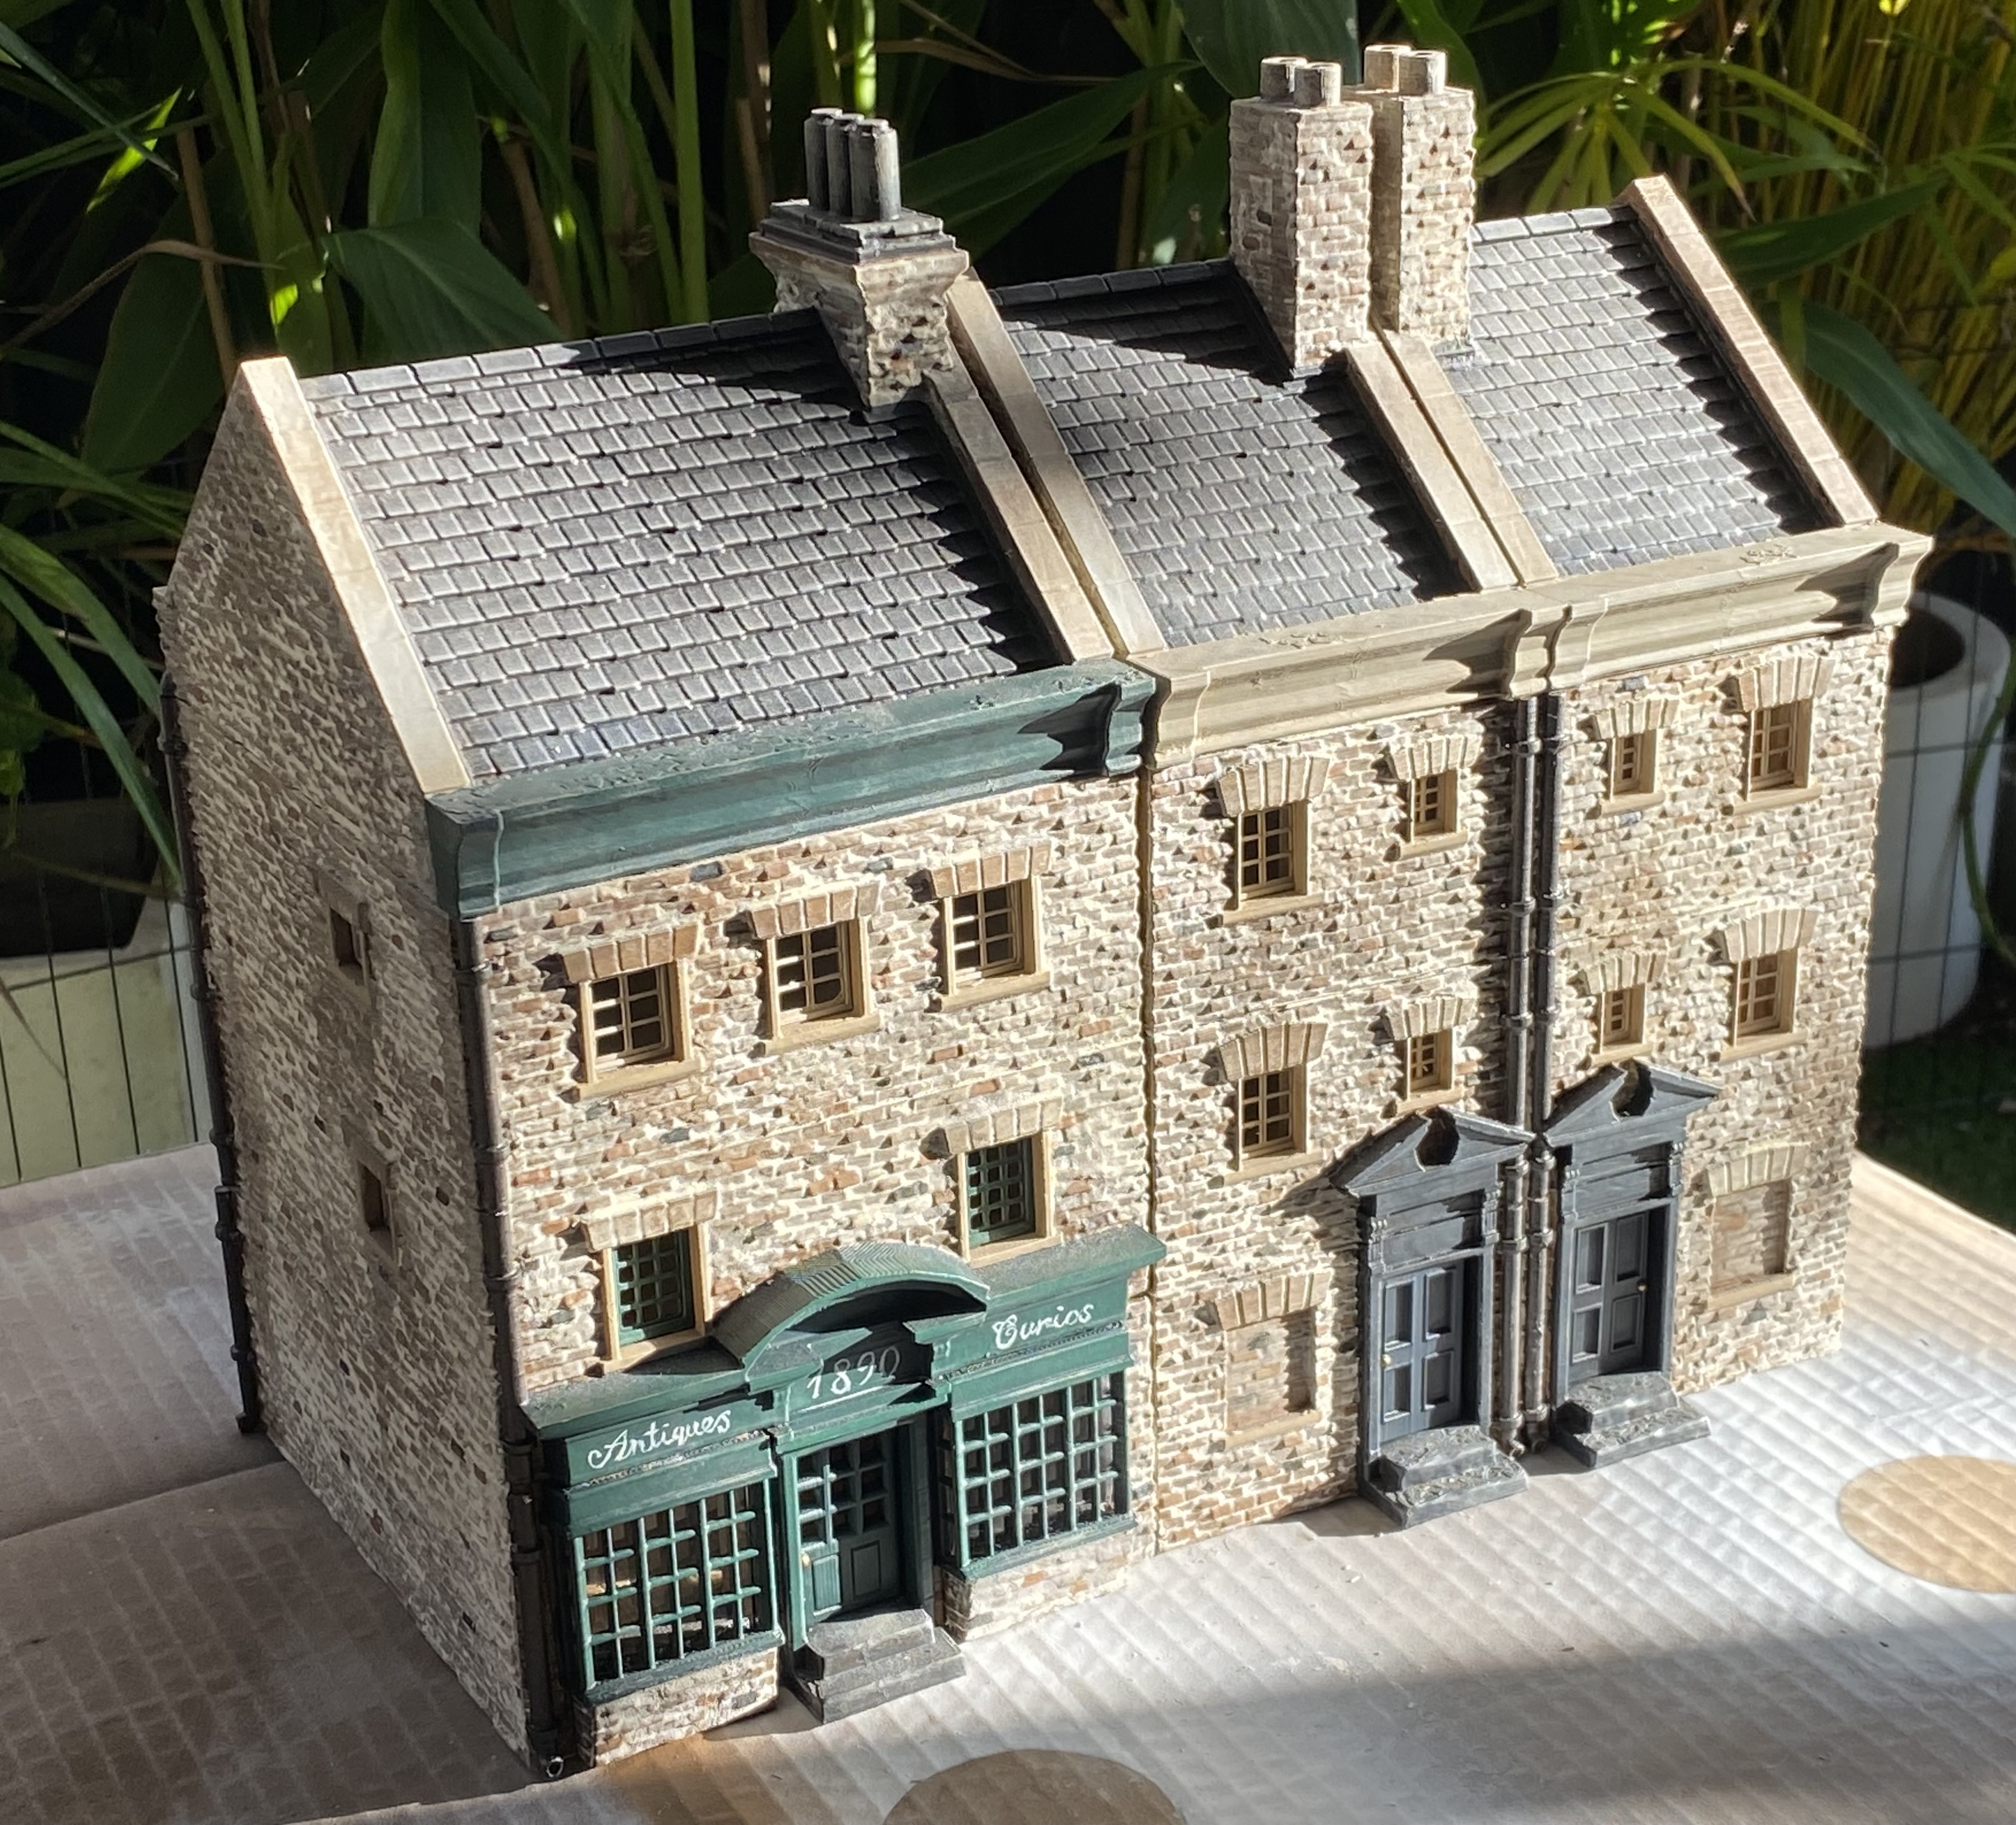
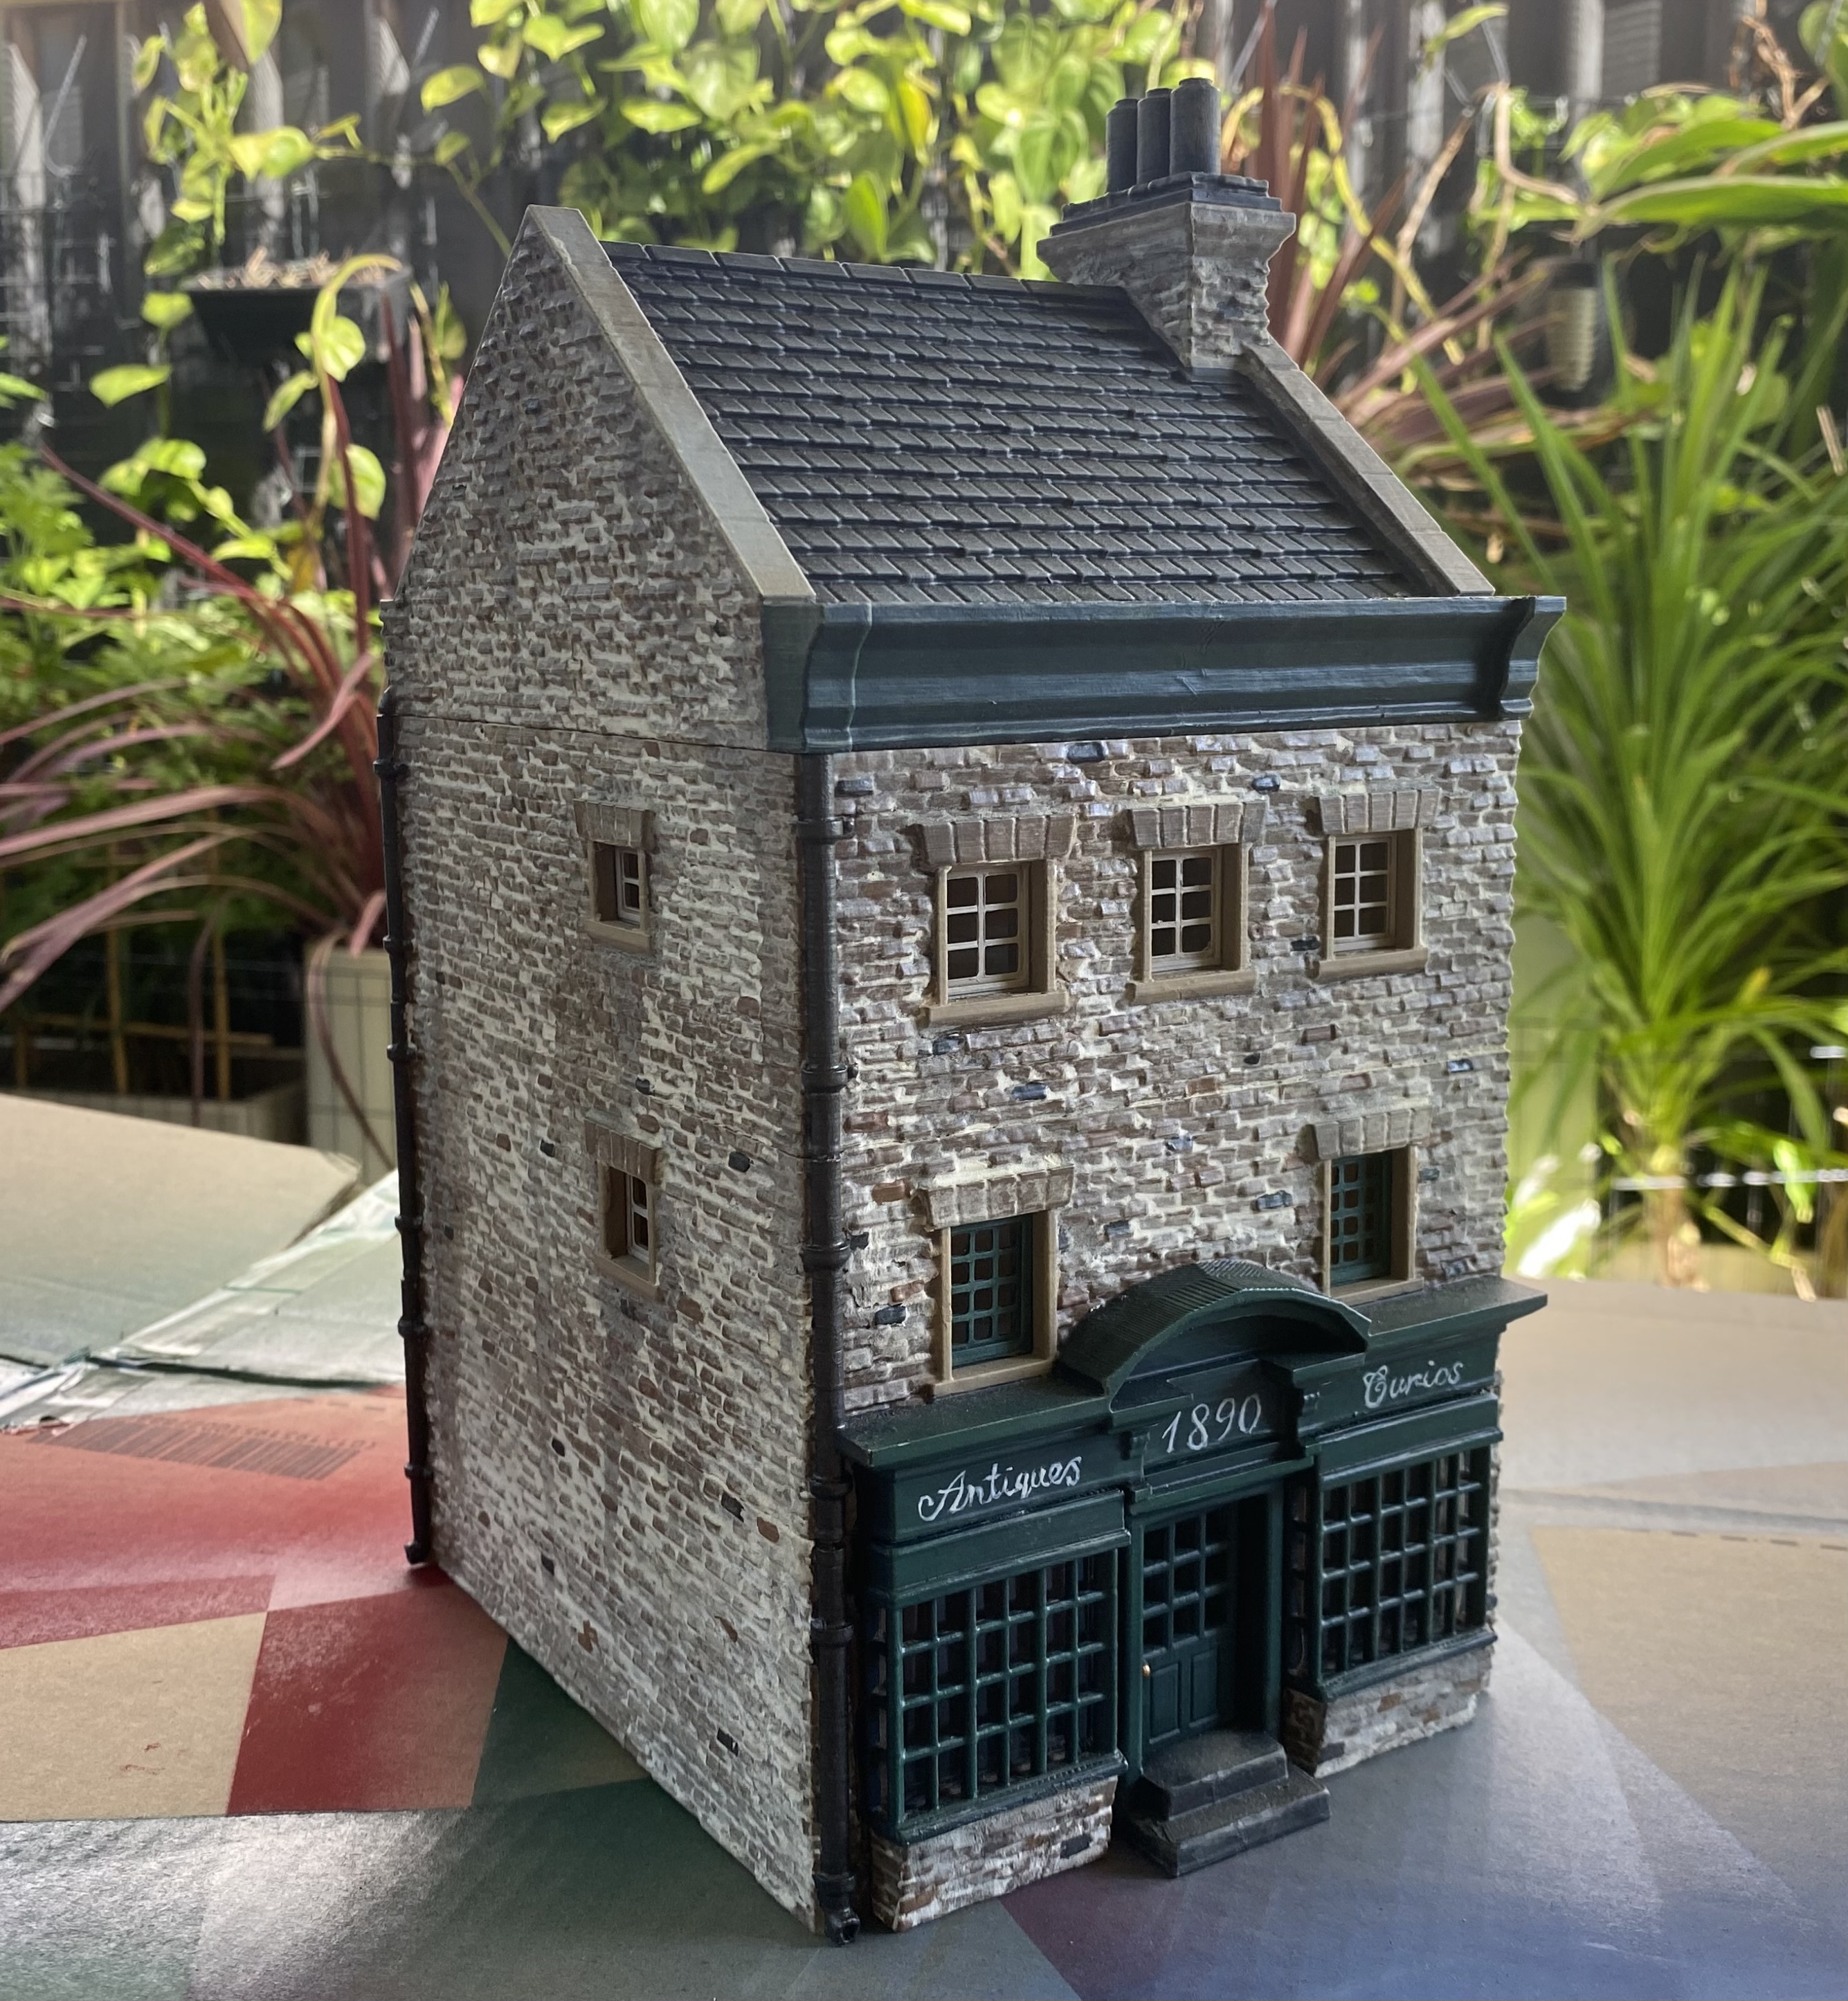
Antiques and Curios
Shops are a must for any self-respecting Victorian-era city, and what better place to start than an Antiques and Curios shop?
Dated 1890 for good reason.
Howard Phillips Lovecraft (H.P. Lovecraft) was born on the 20th of August 1890 and thanks to him we now have the amazing Cthulhu Mythos. I won’t go into too much detail about the person himself as that can open up a whole can of worms, what with his views on different aspects of life, but his weird creation of the Mythos has quite likely had a massive impact on a lot of games we have all come to love.
Painted in the same quick style as the other buildings. Nothing too fancy or special.
Once I have a decent number of buildings done, I can go back over them to add more characterful details here and there.
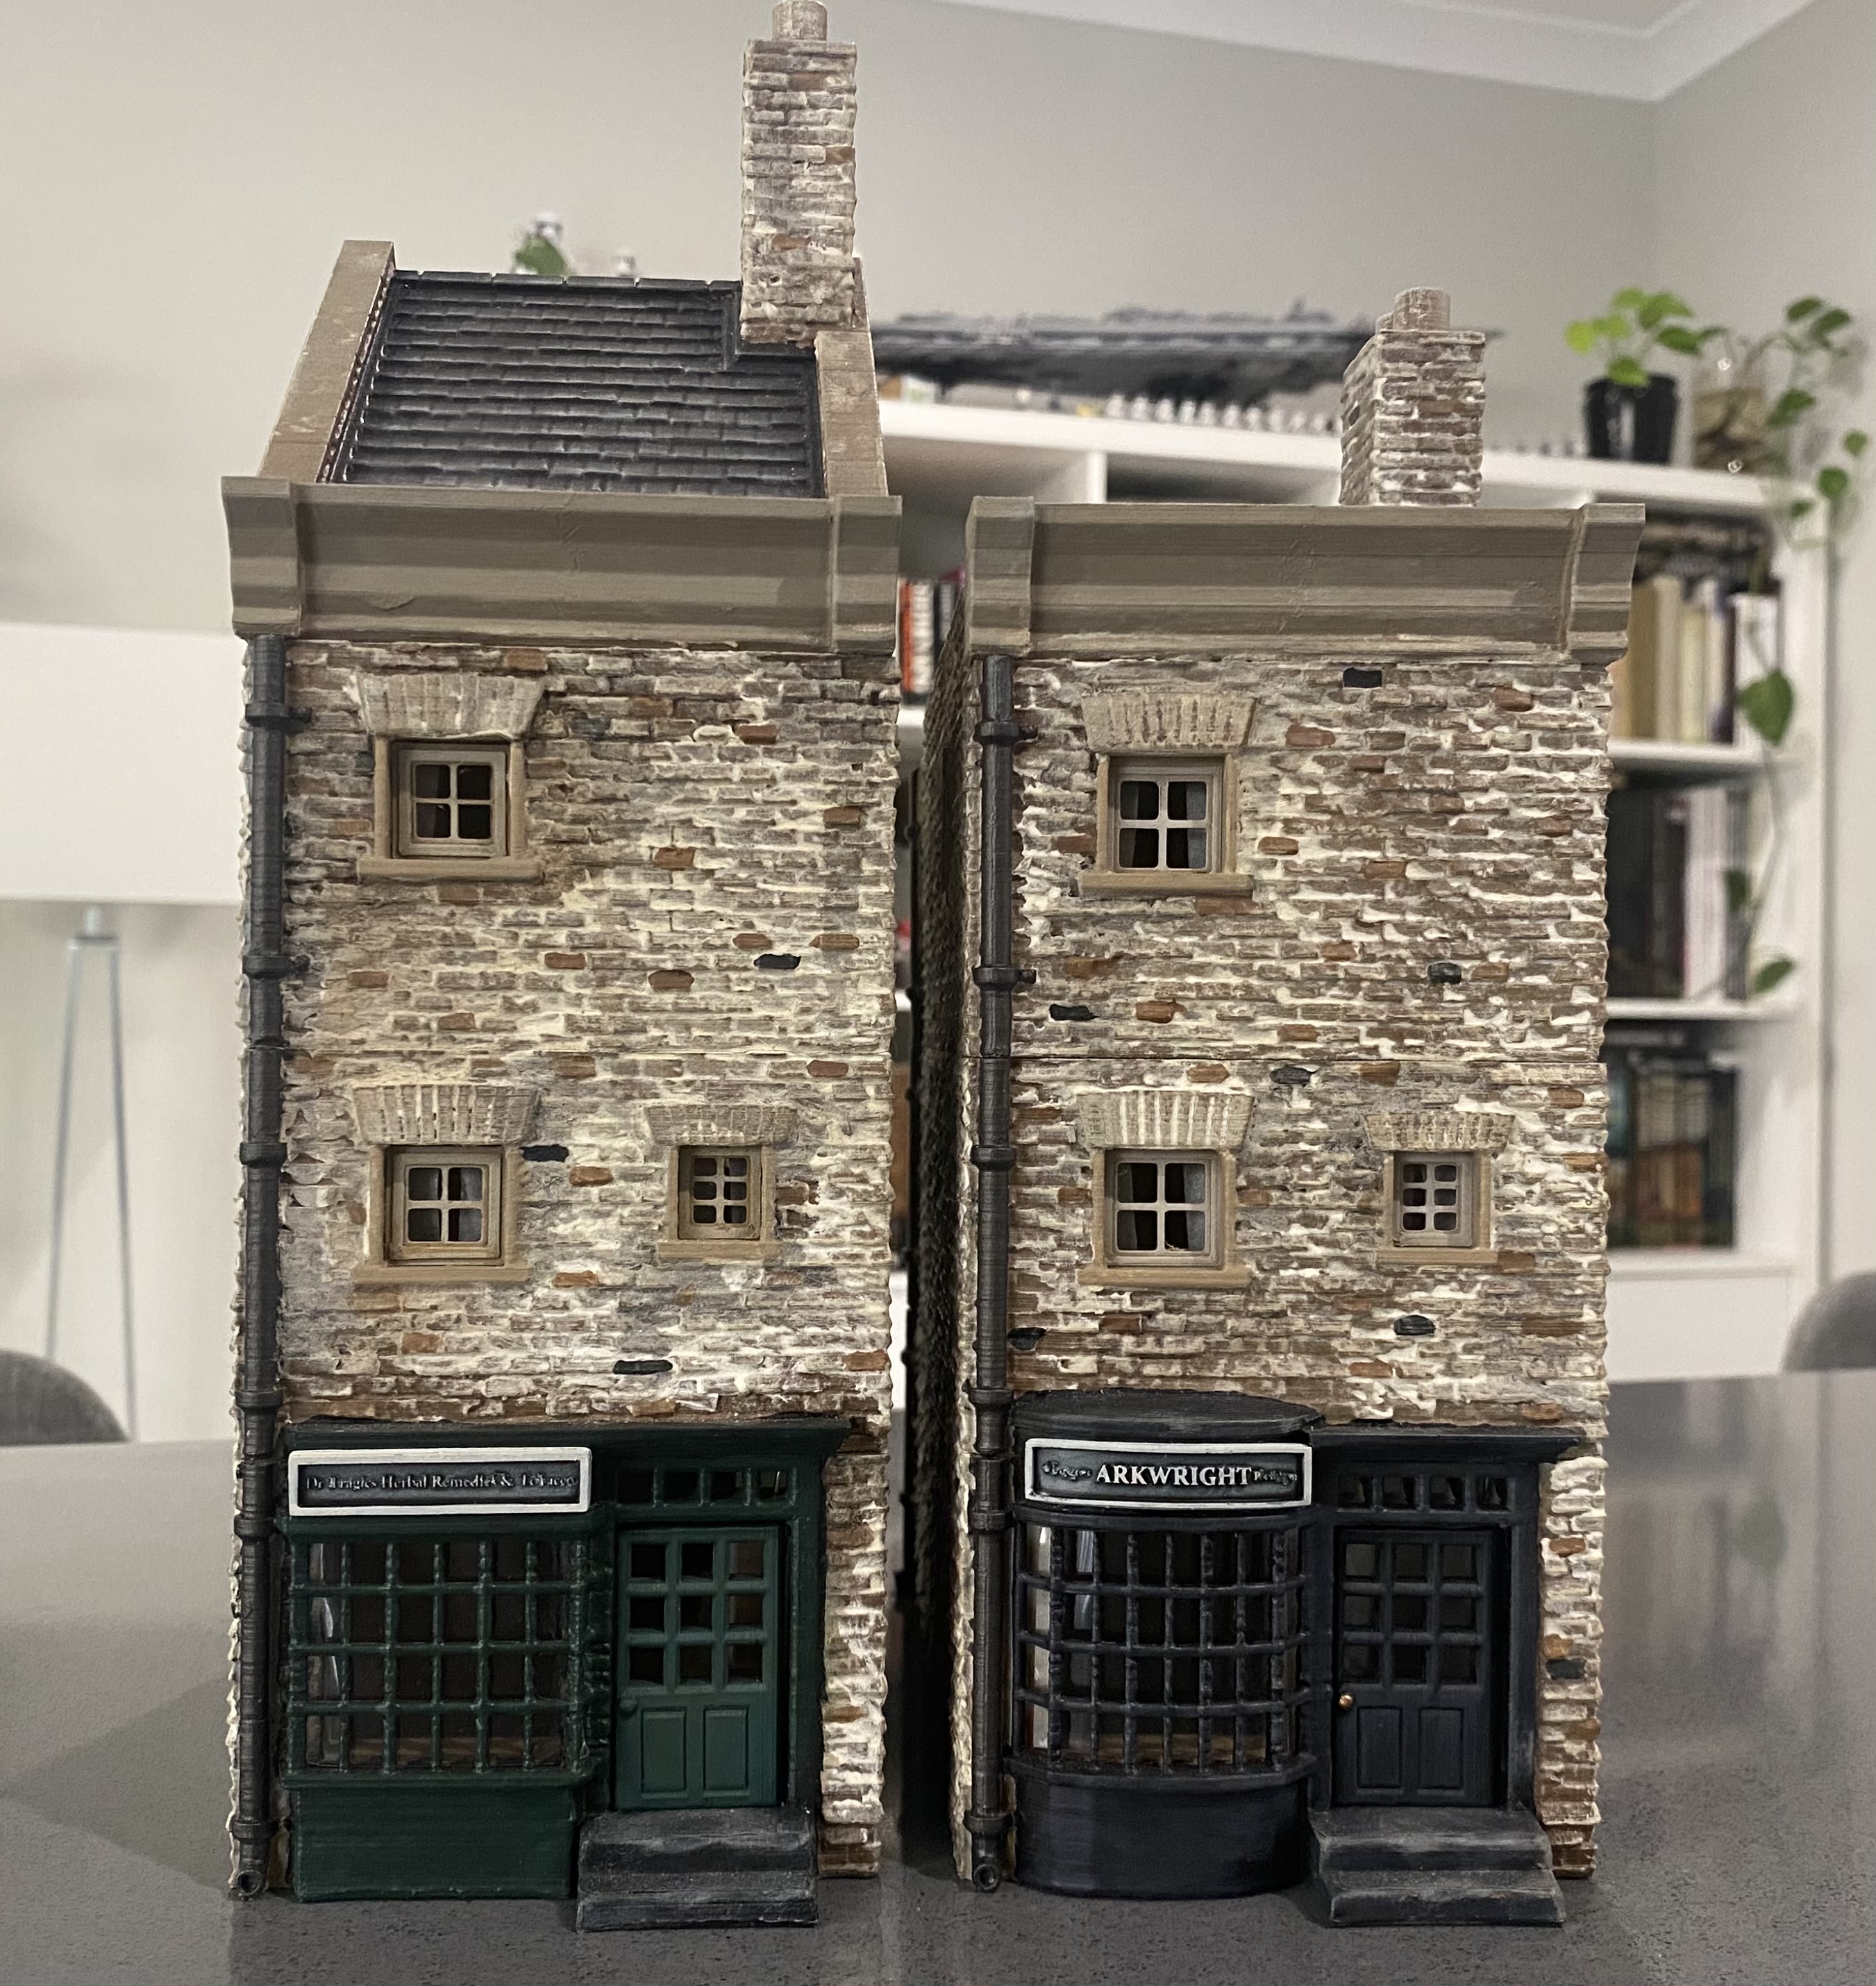
Next up is a generic shop. I will add signage to it later.
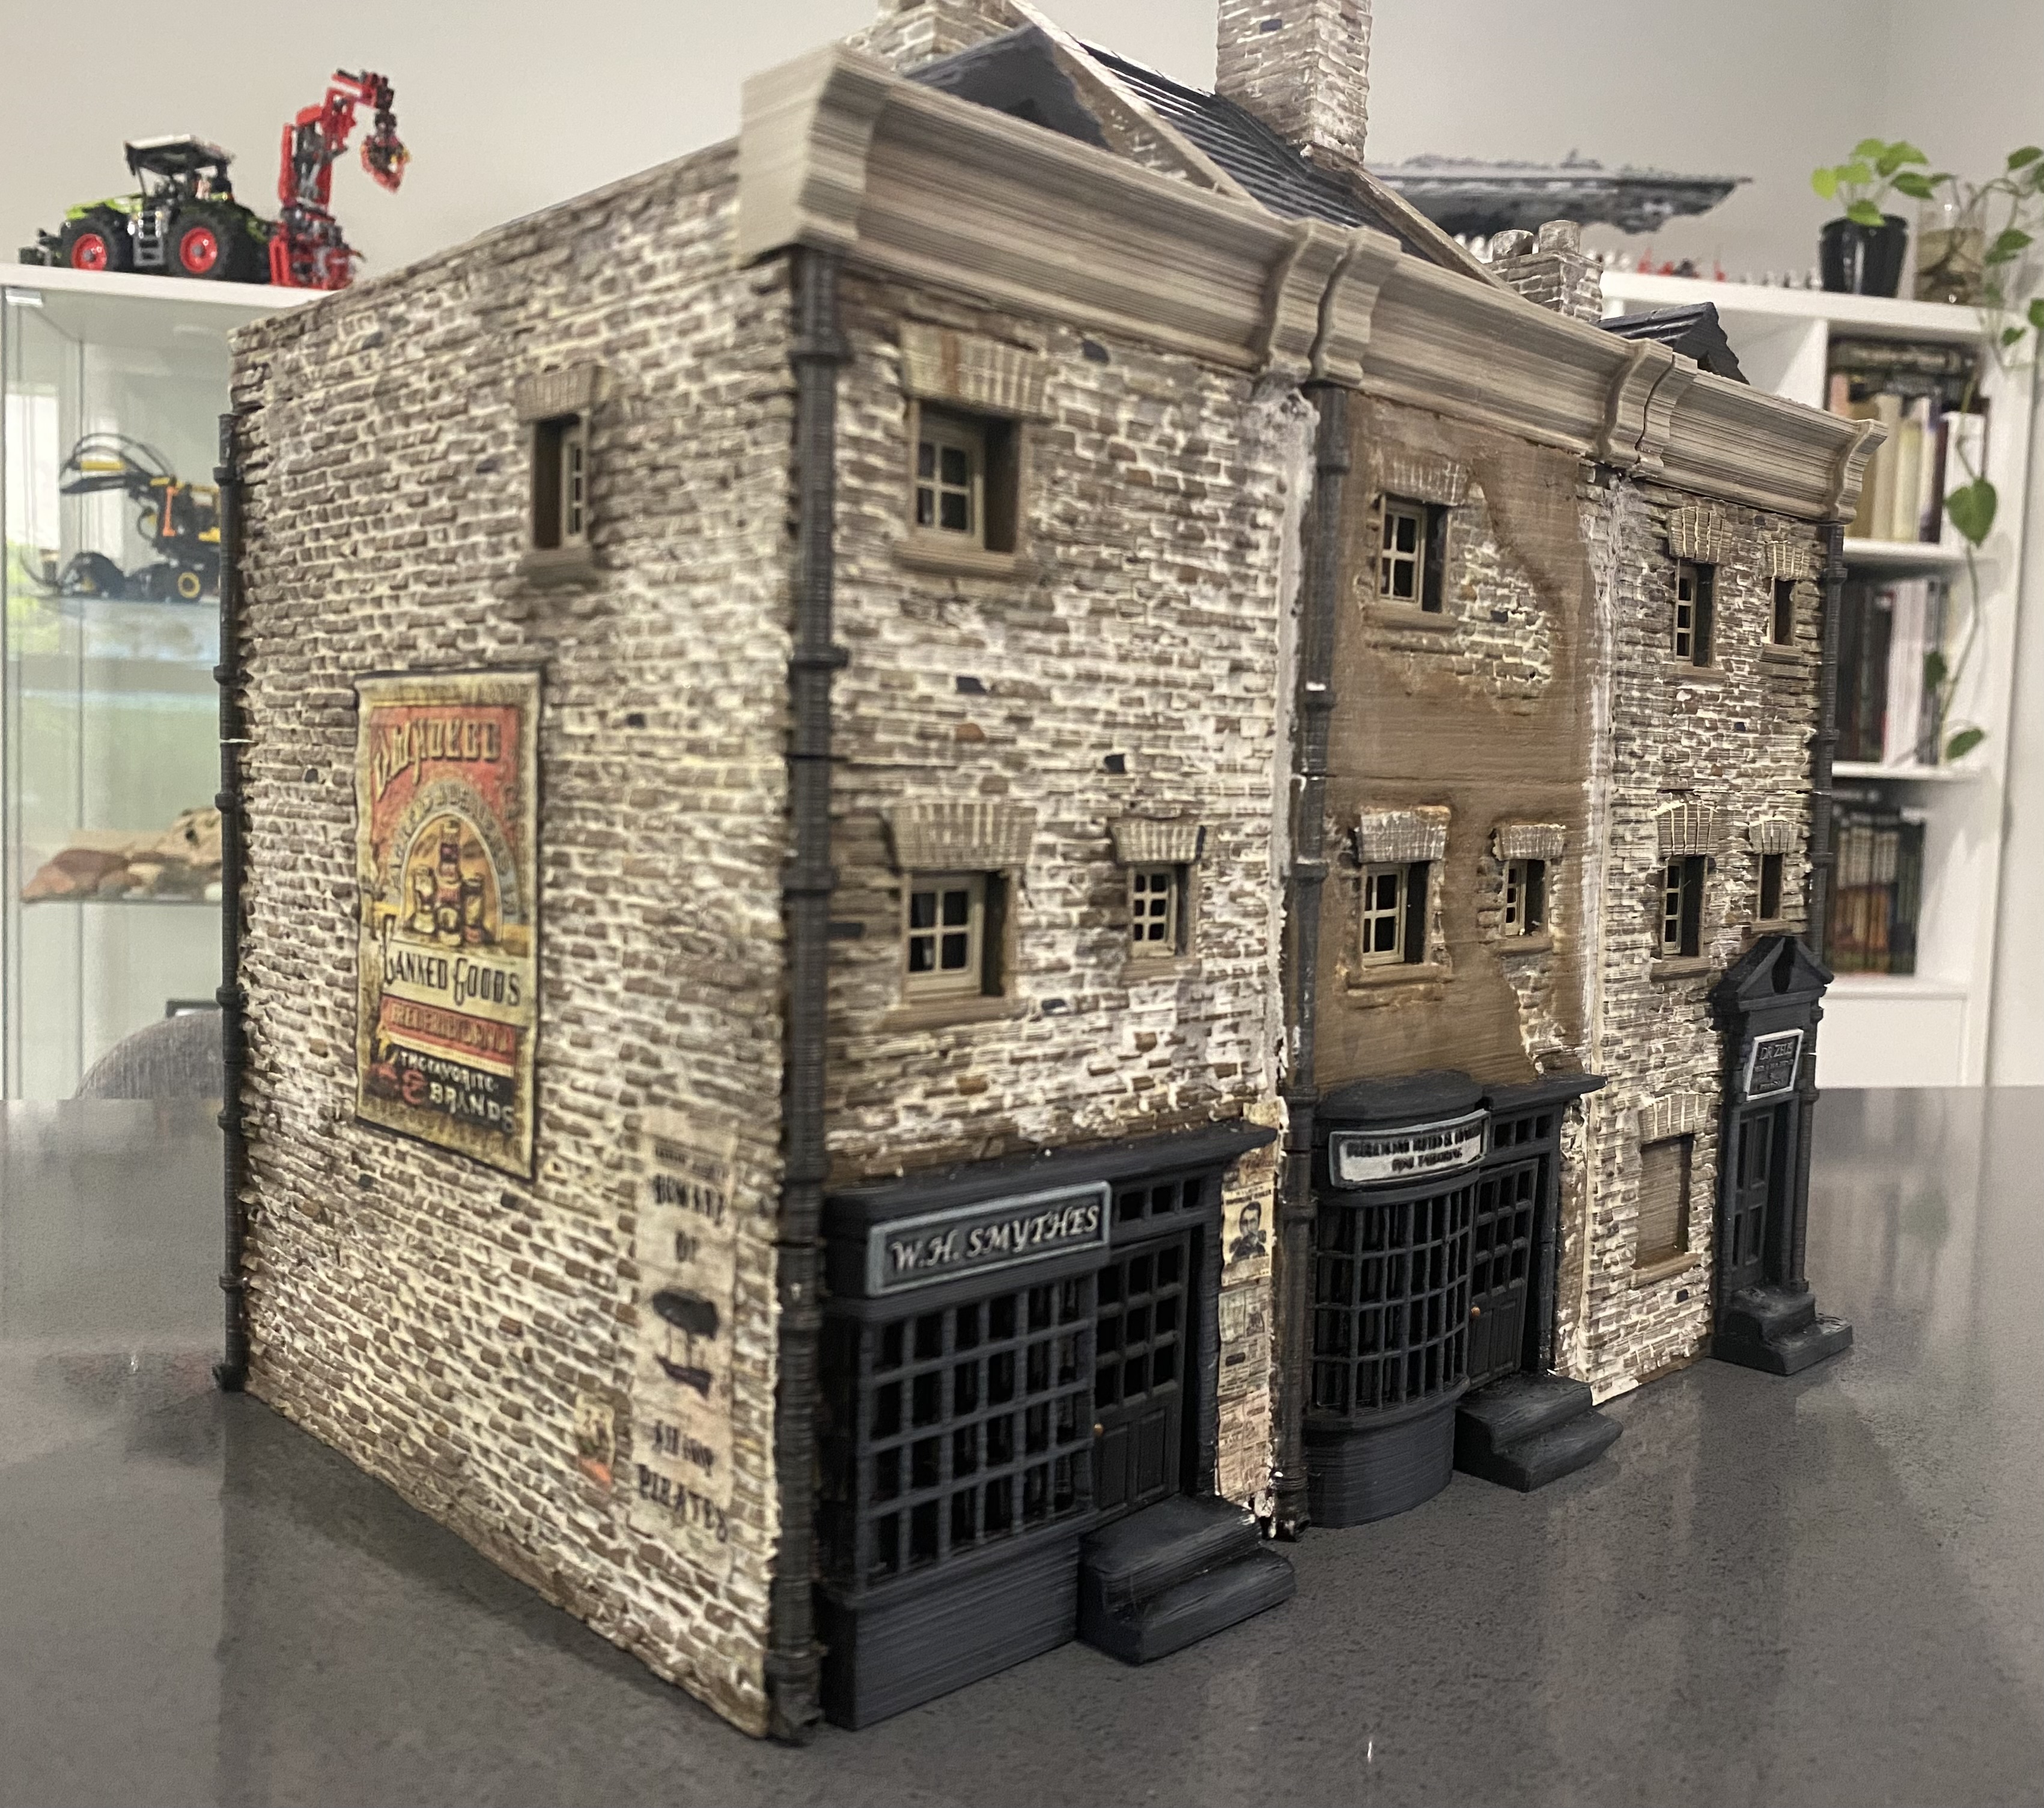
I wanted to get this building done because there are various bits from these buildings so far that I intend to put into 3D builder and alter and cannibalise to create other bits and pieces for my city. Before I do that however I wanted you to at least see the fully printed out and painted buildings to get an idea of where my mind was going when I was looking at them.
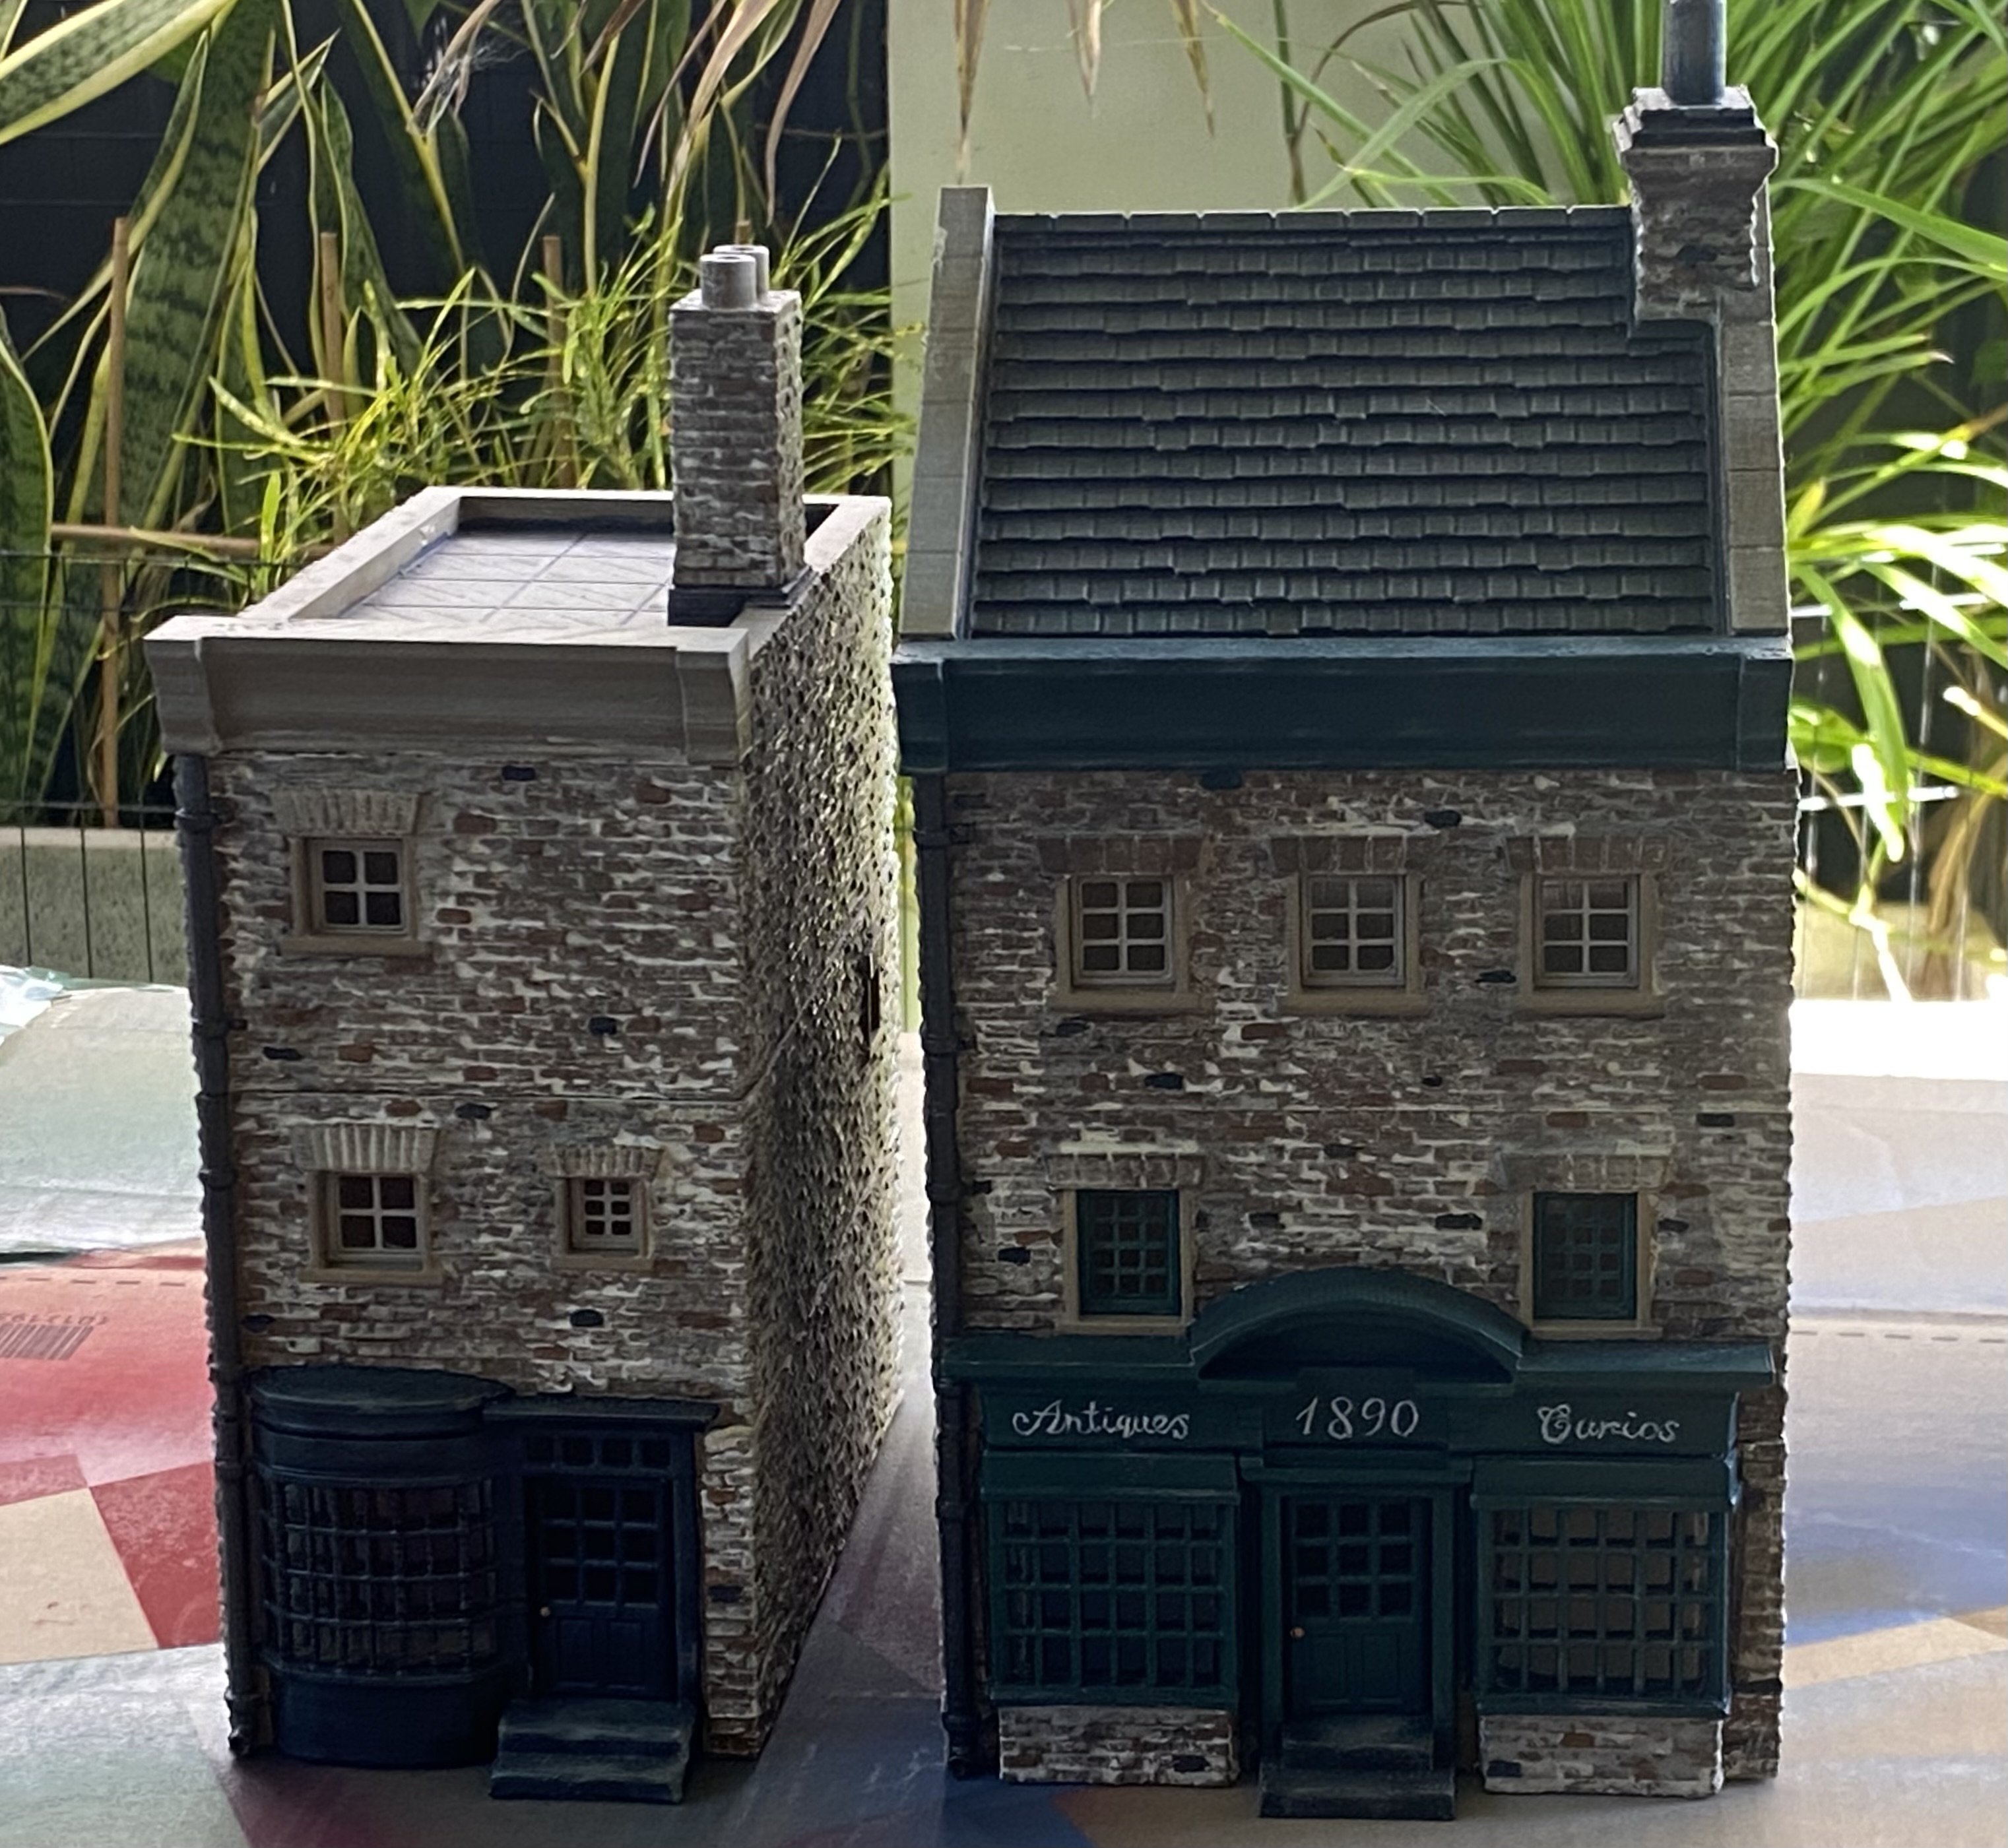
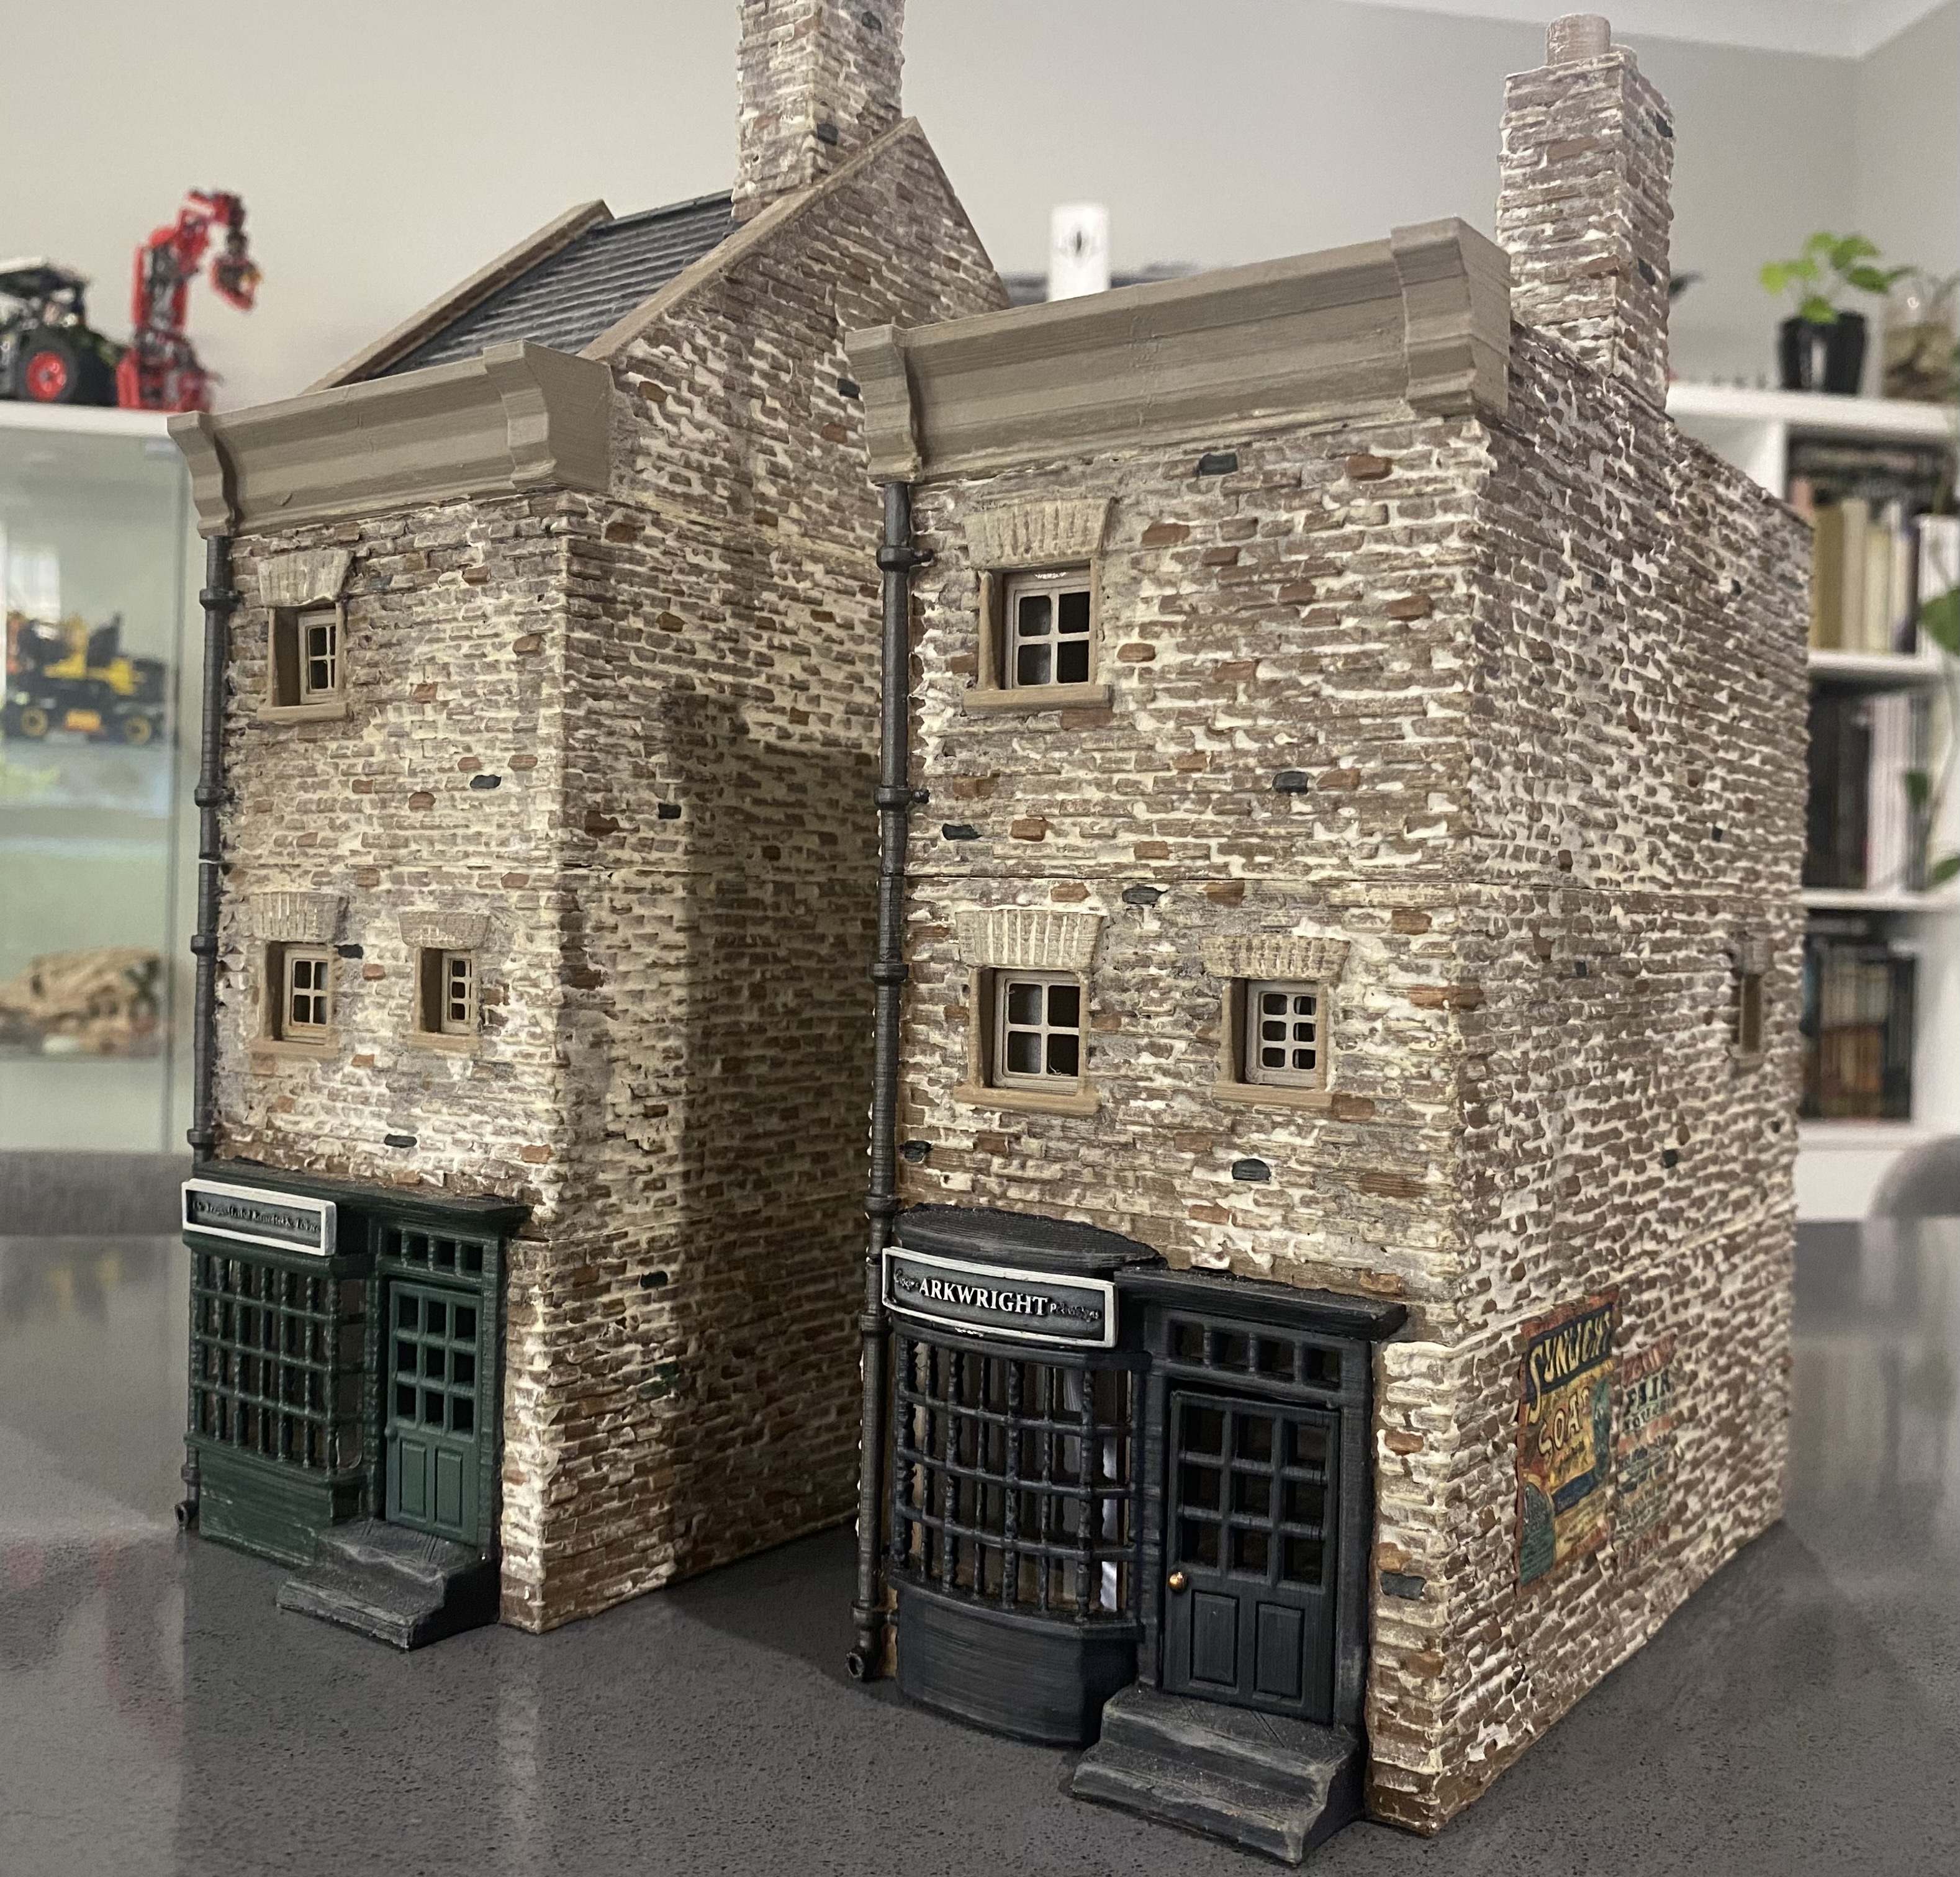
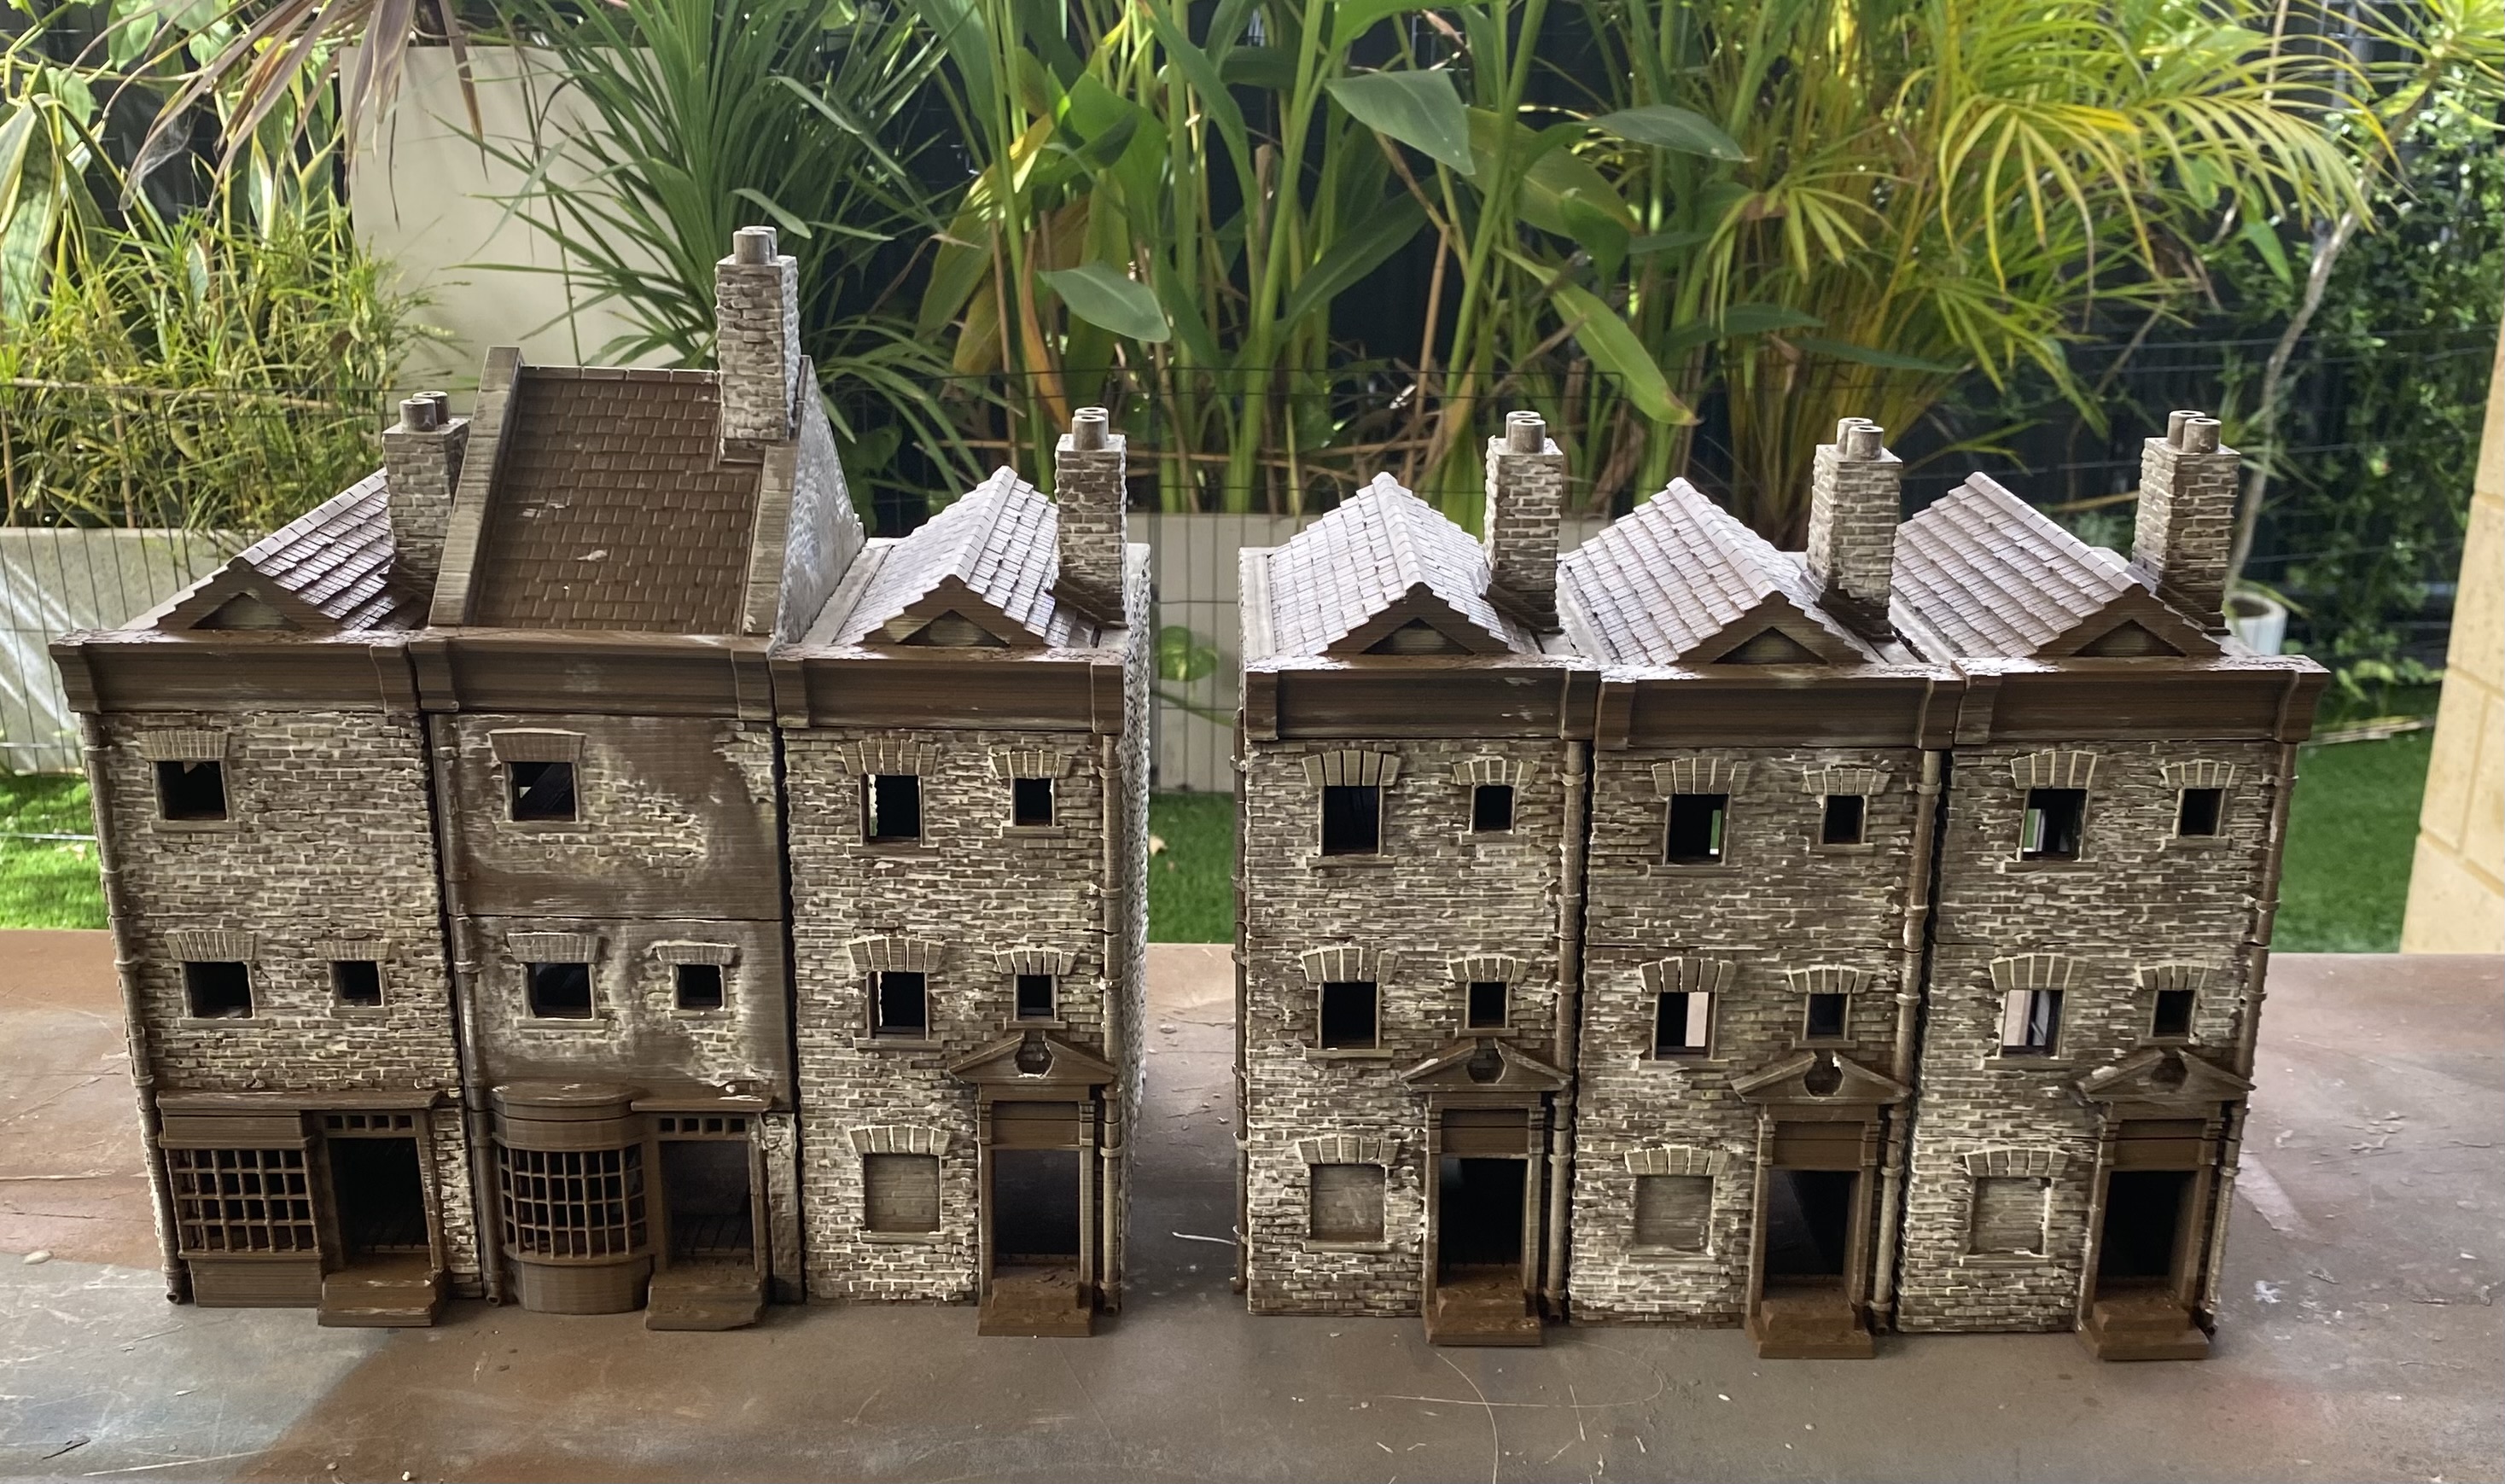
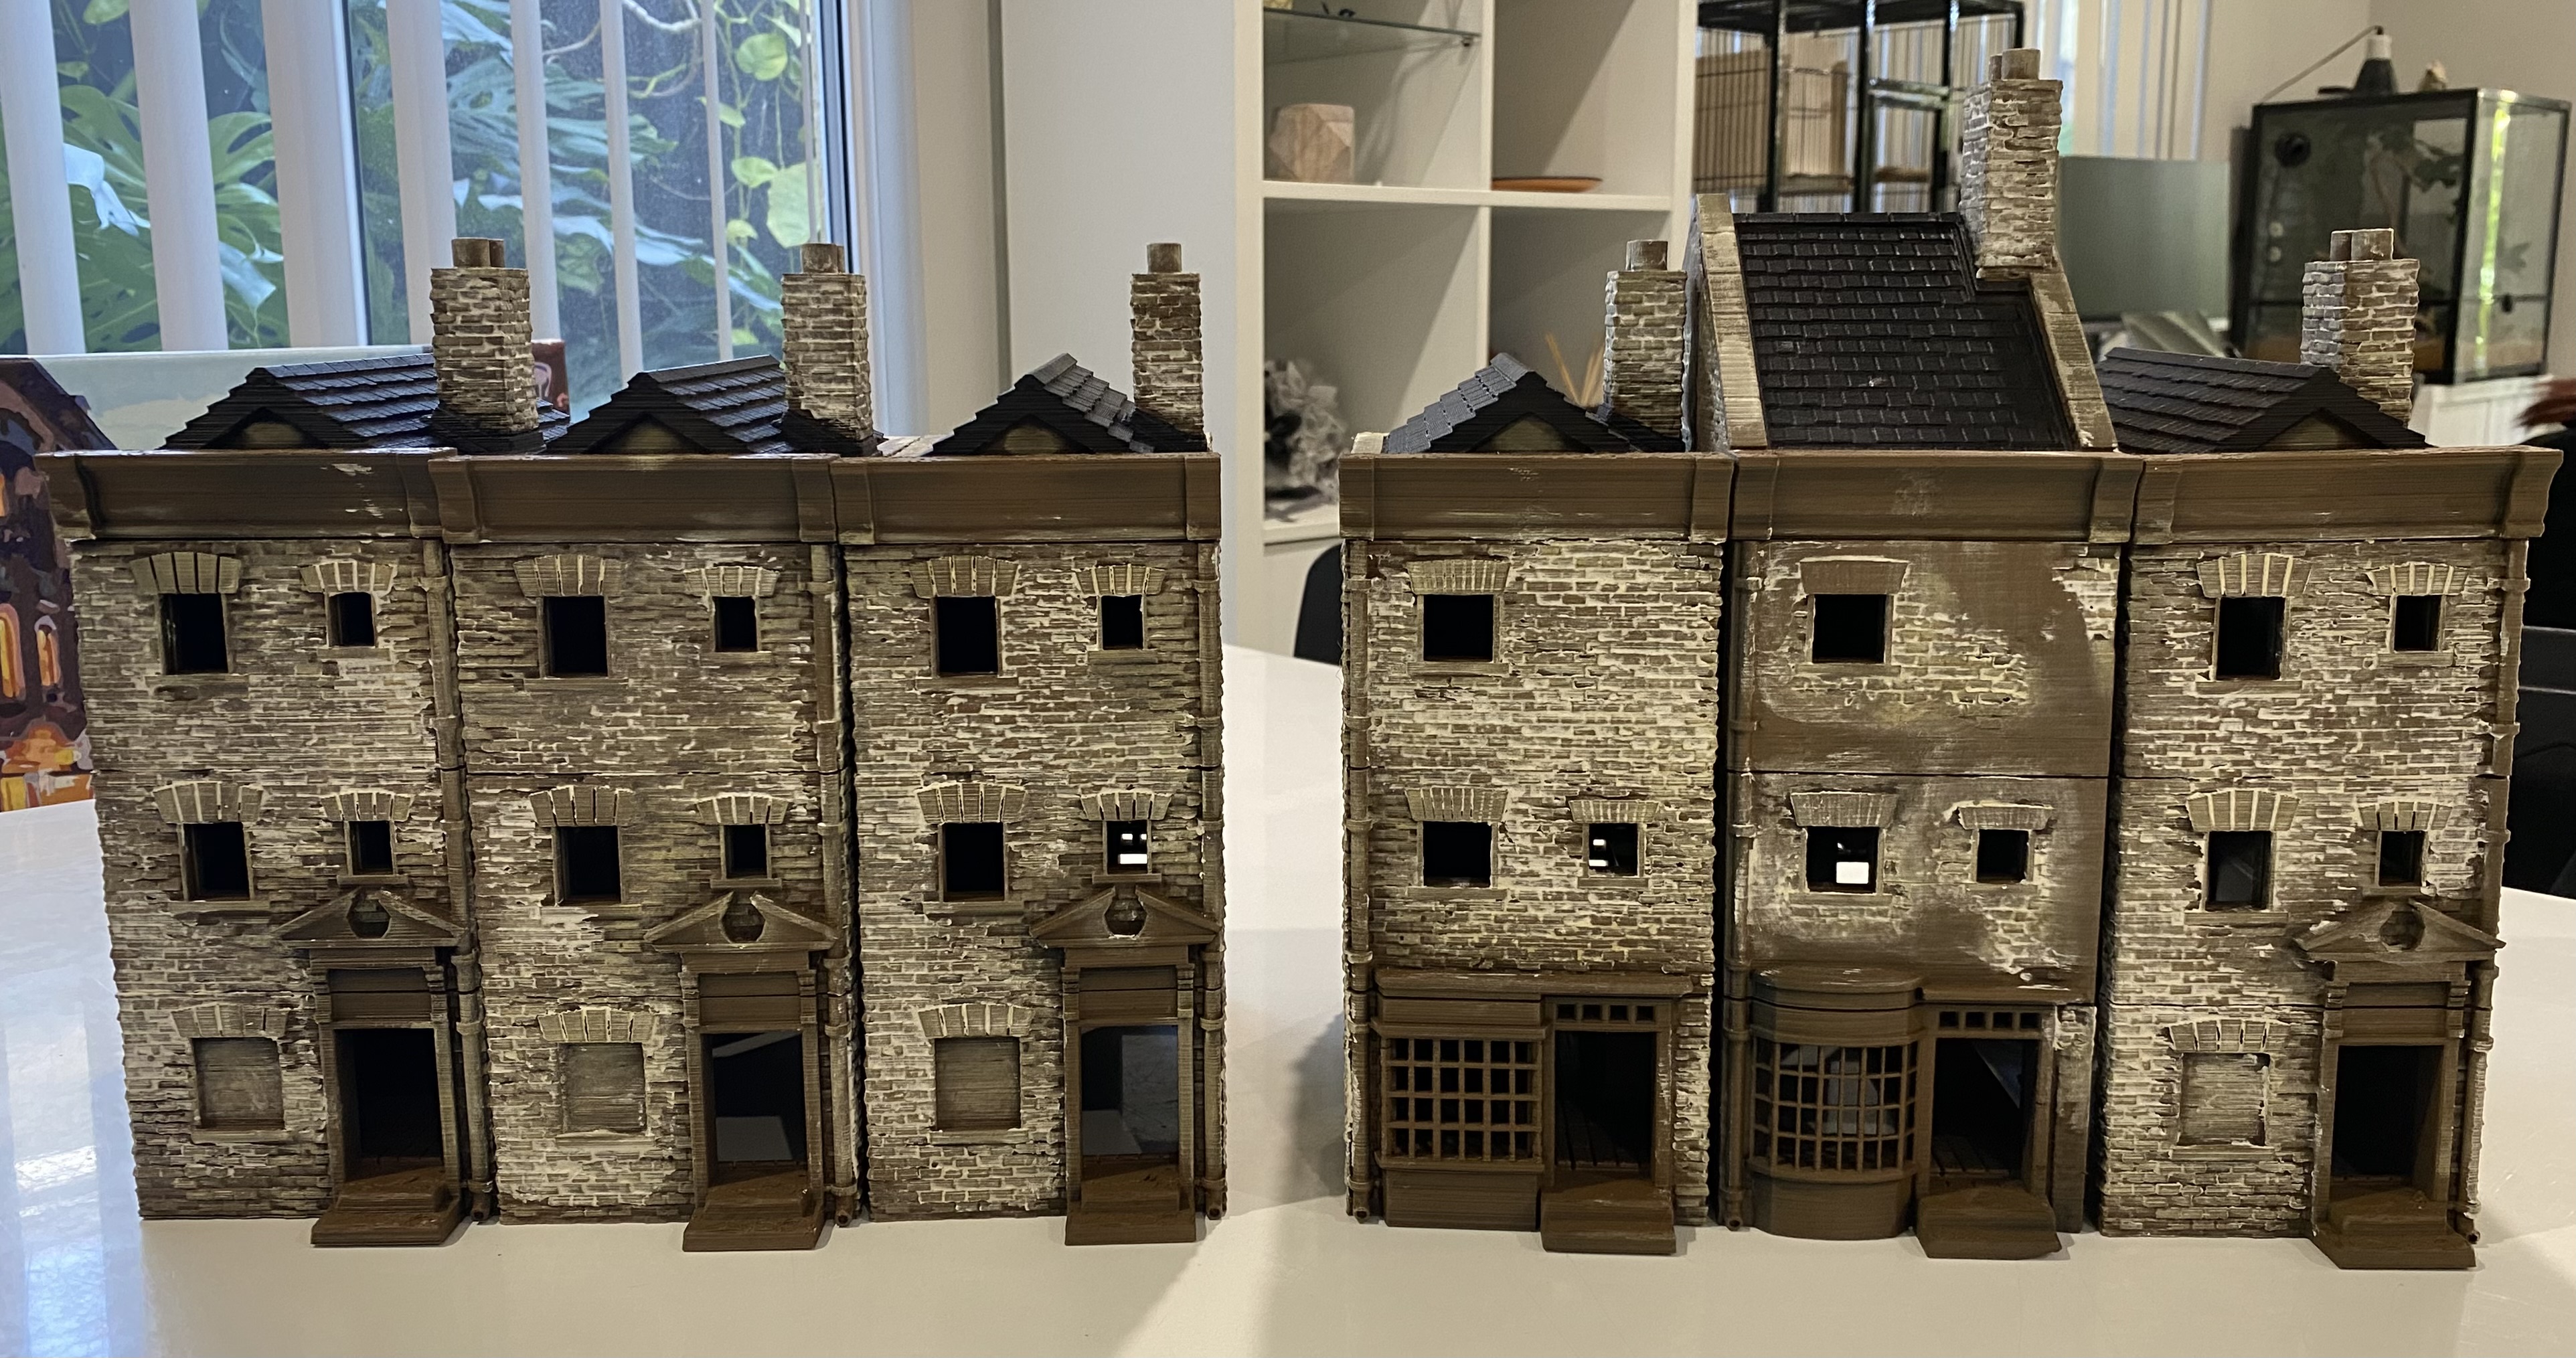
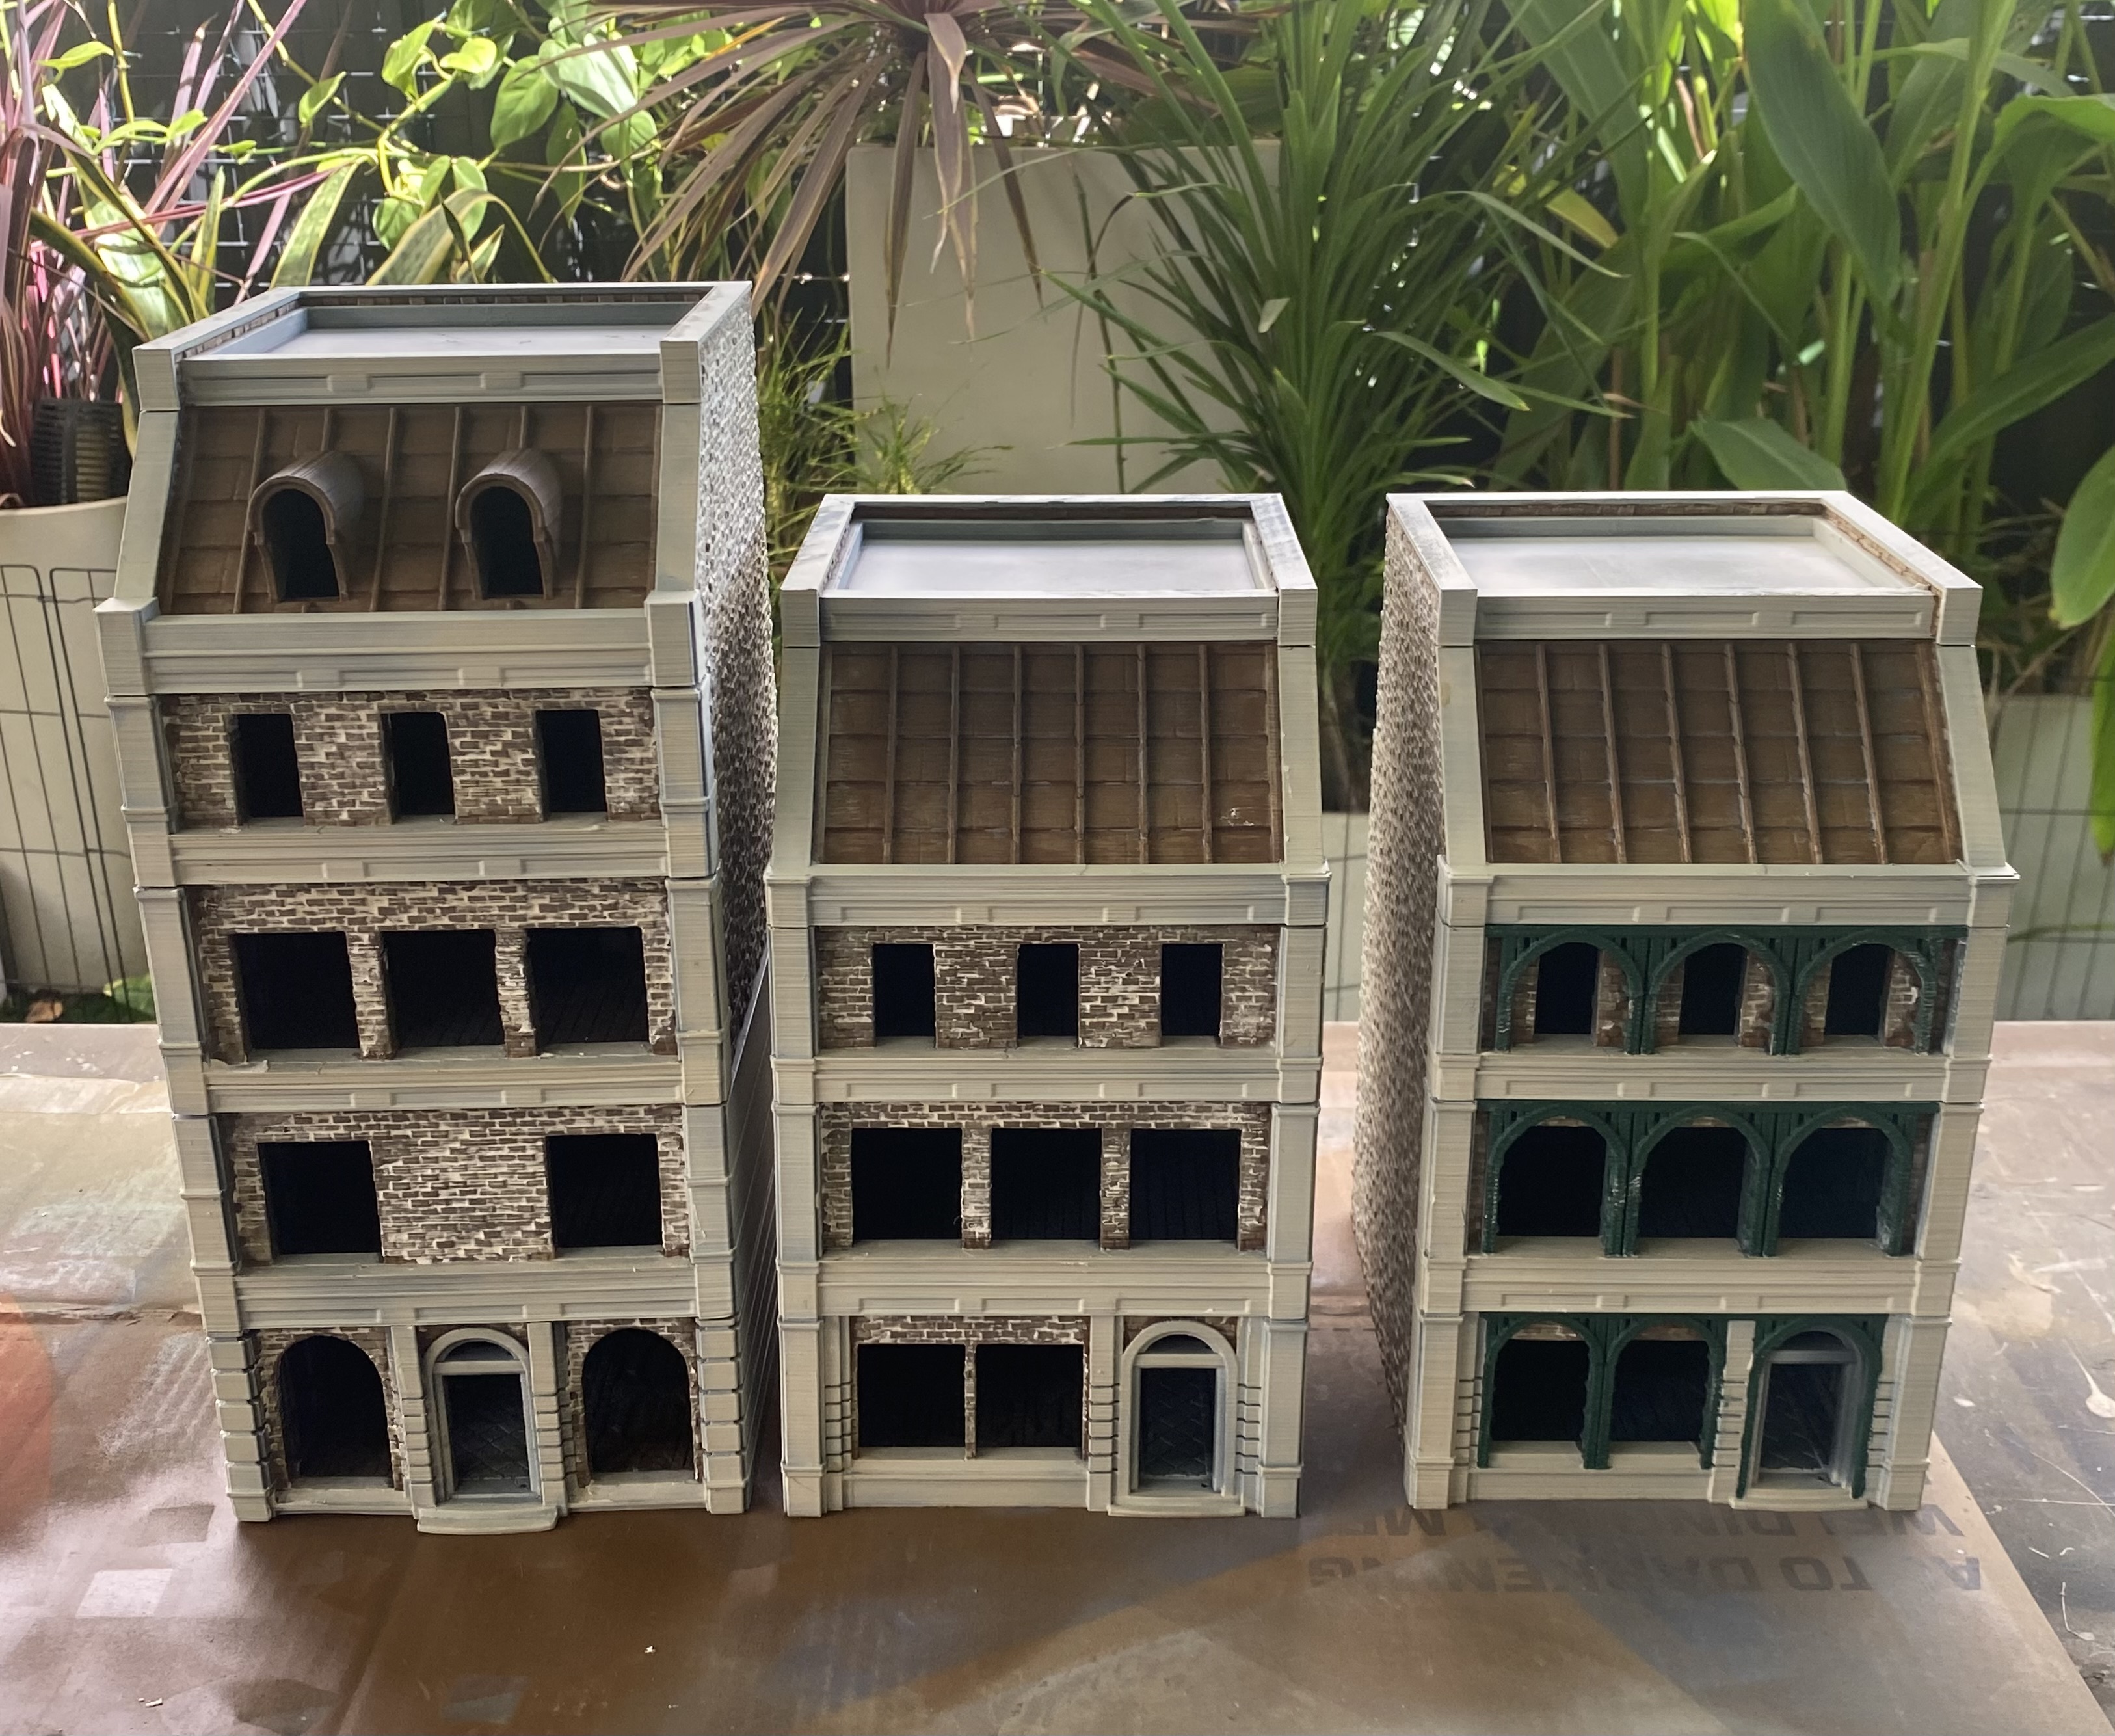
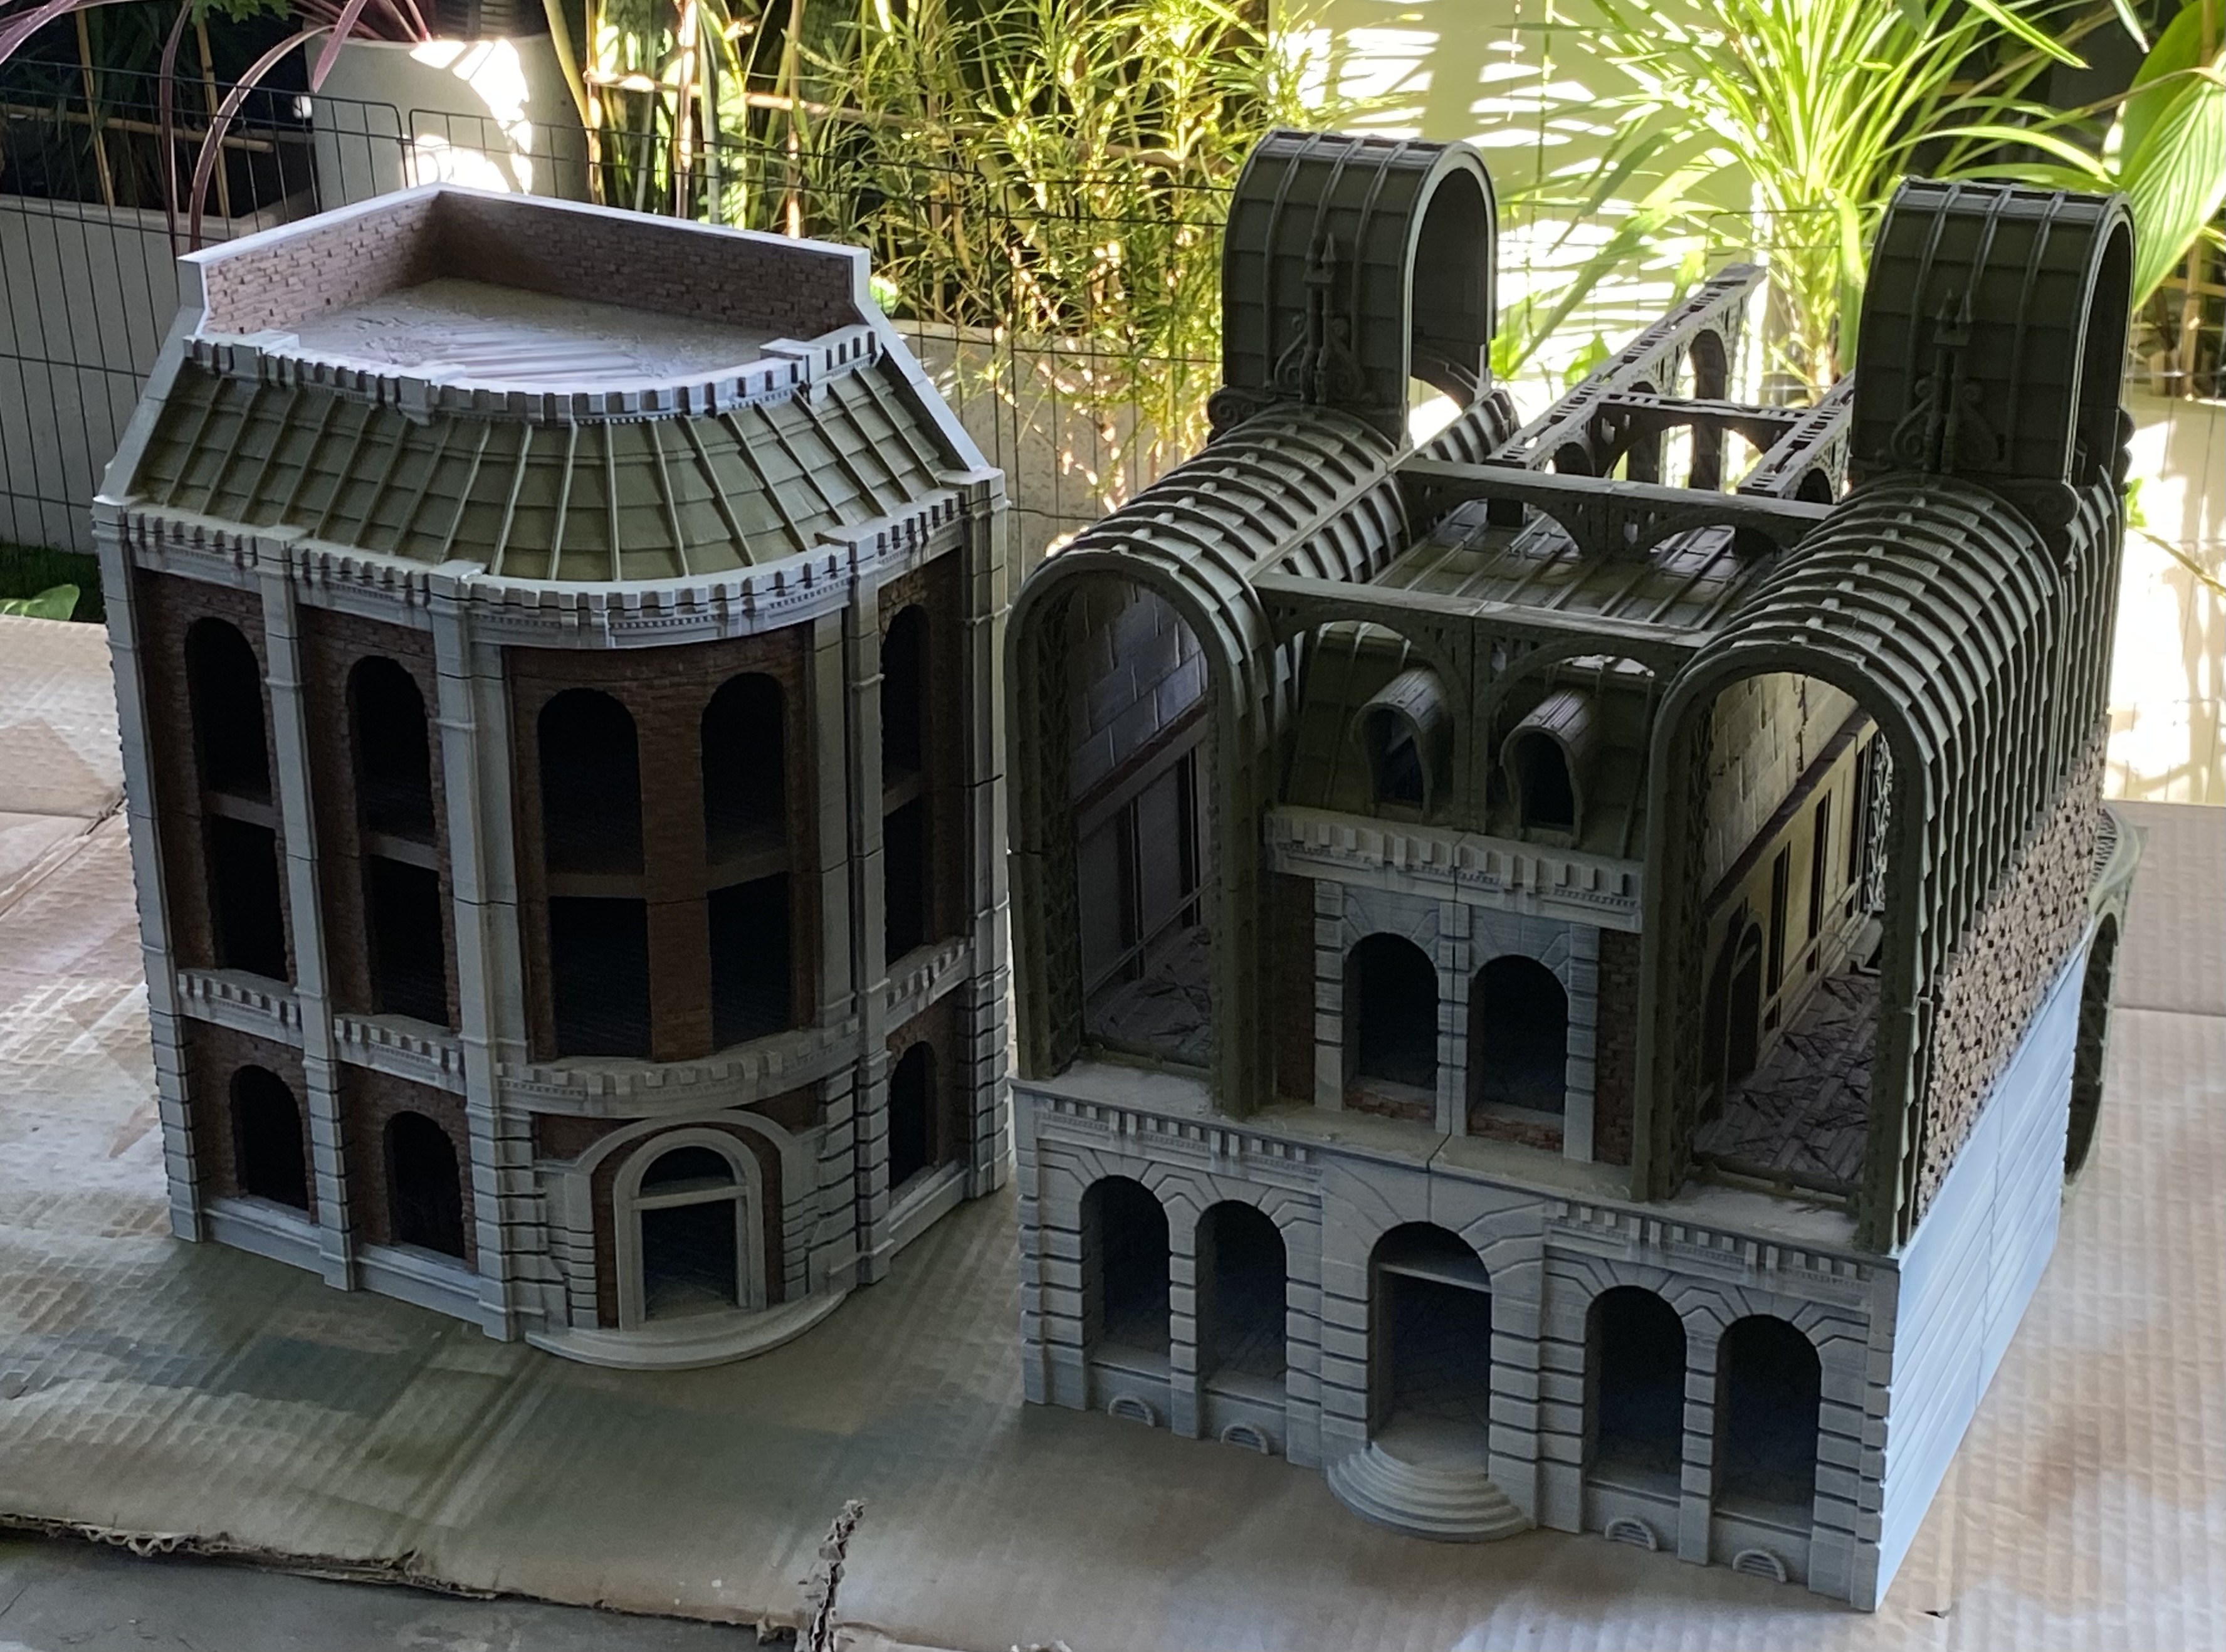
Size comparison
These first couple of buildings are quite large and I don’t want to make all the buildings quite so big as I want to have that nice variety of height on the skyline. I can’t do that with all the buildings as some will be in terraces so maybe I will have to have a variety of other smaller details to make them look interesting.
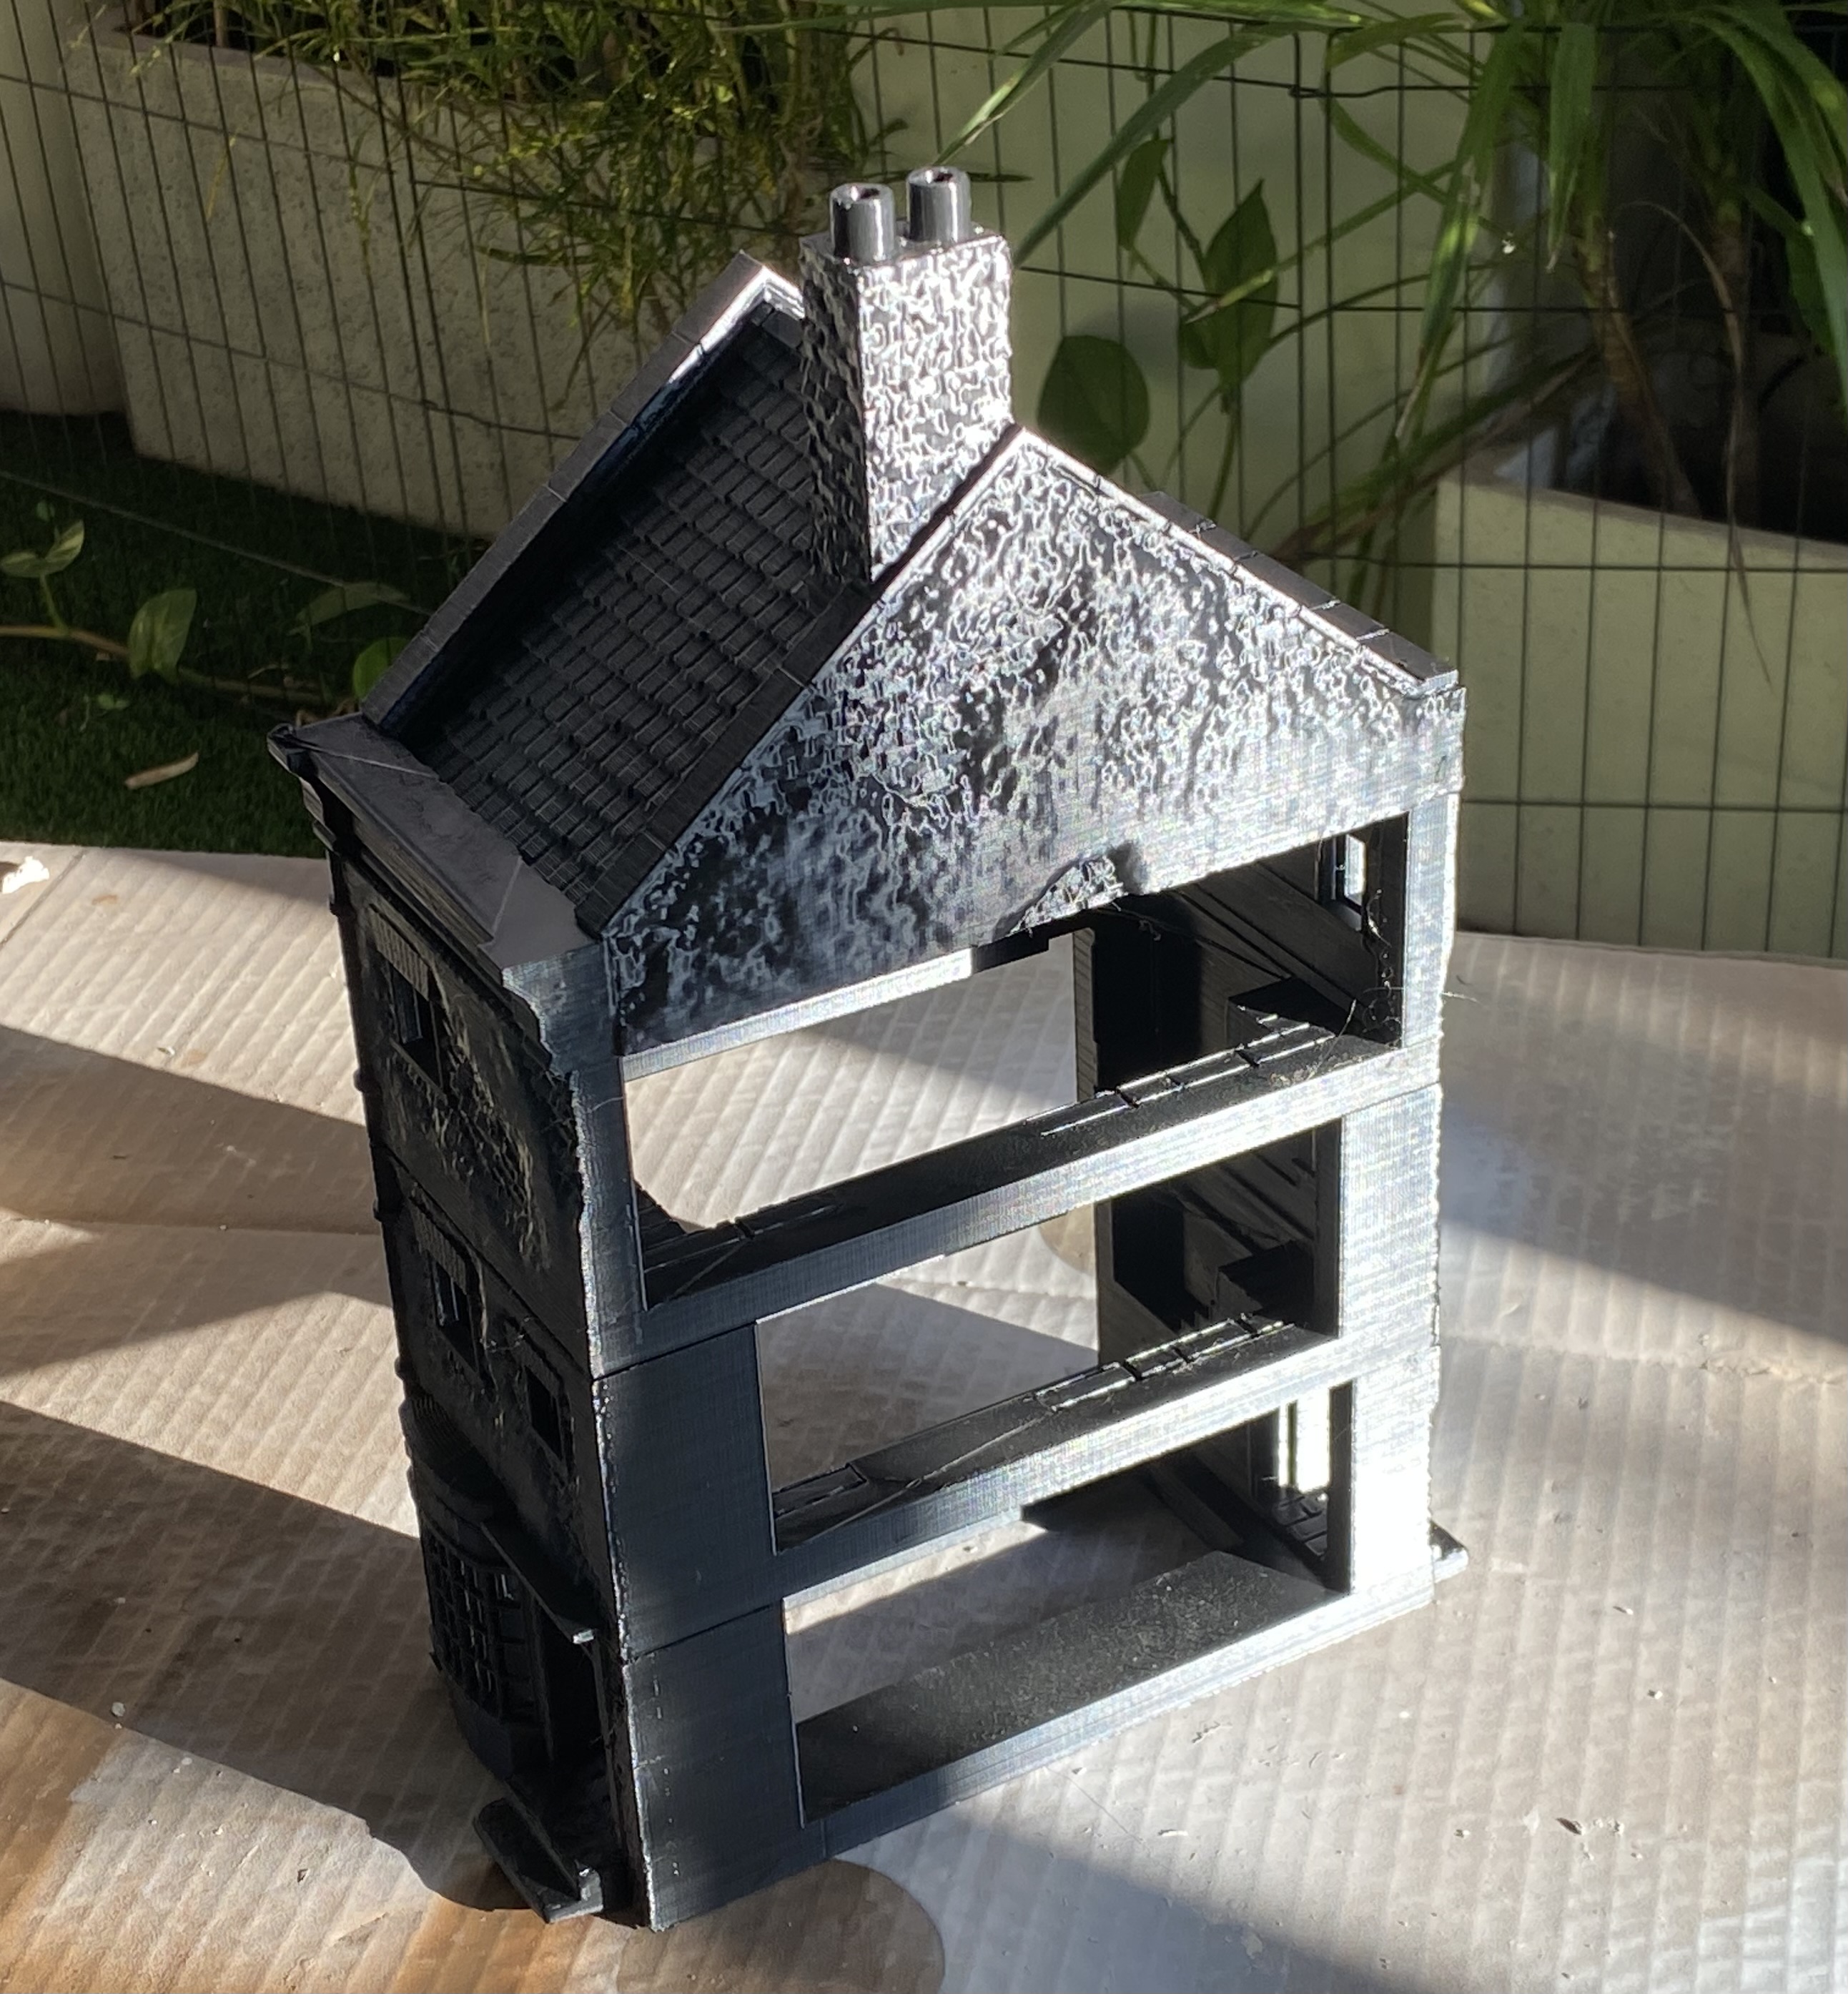
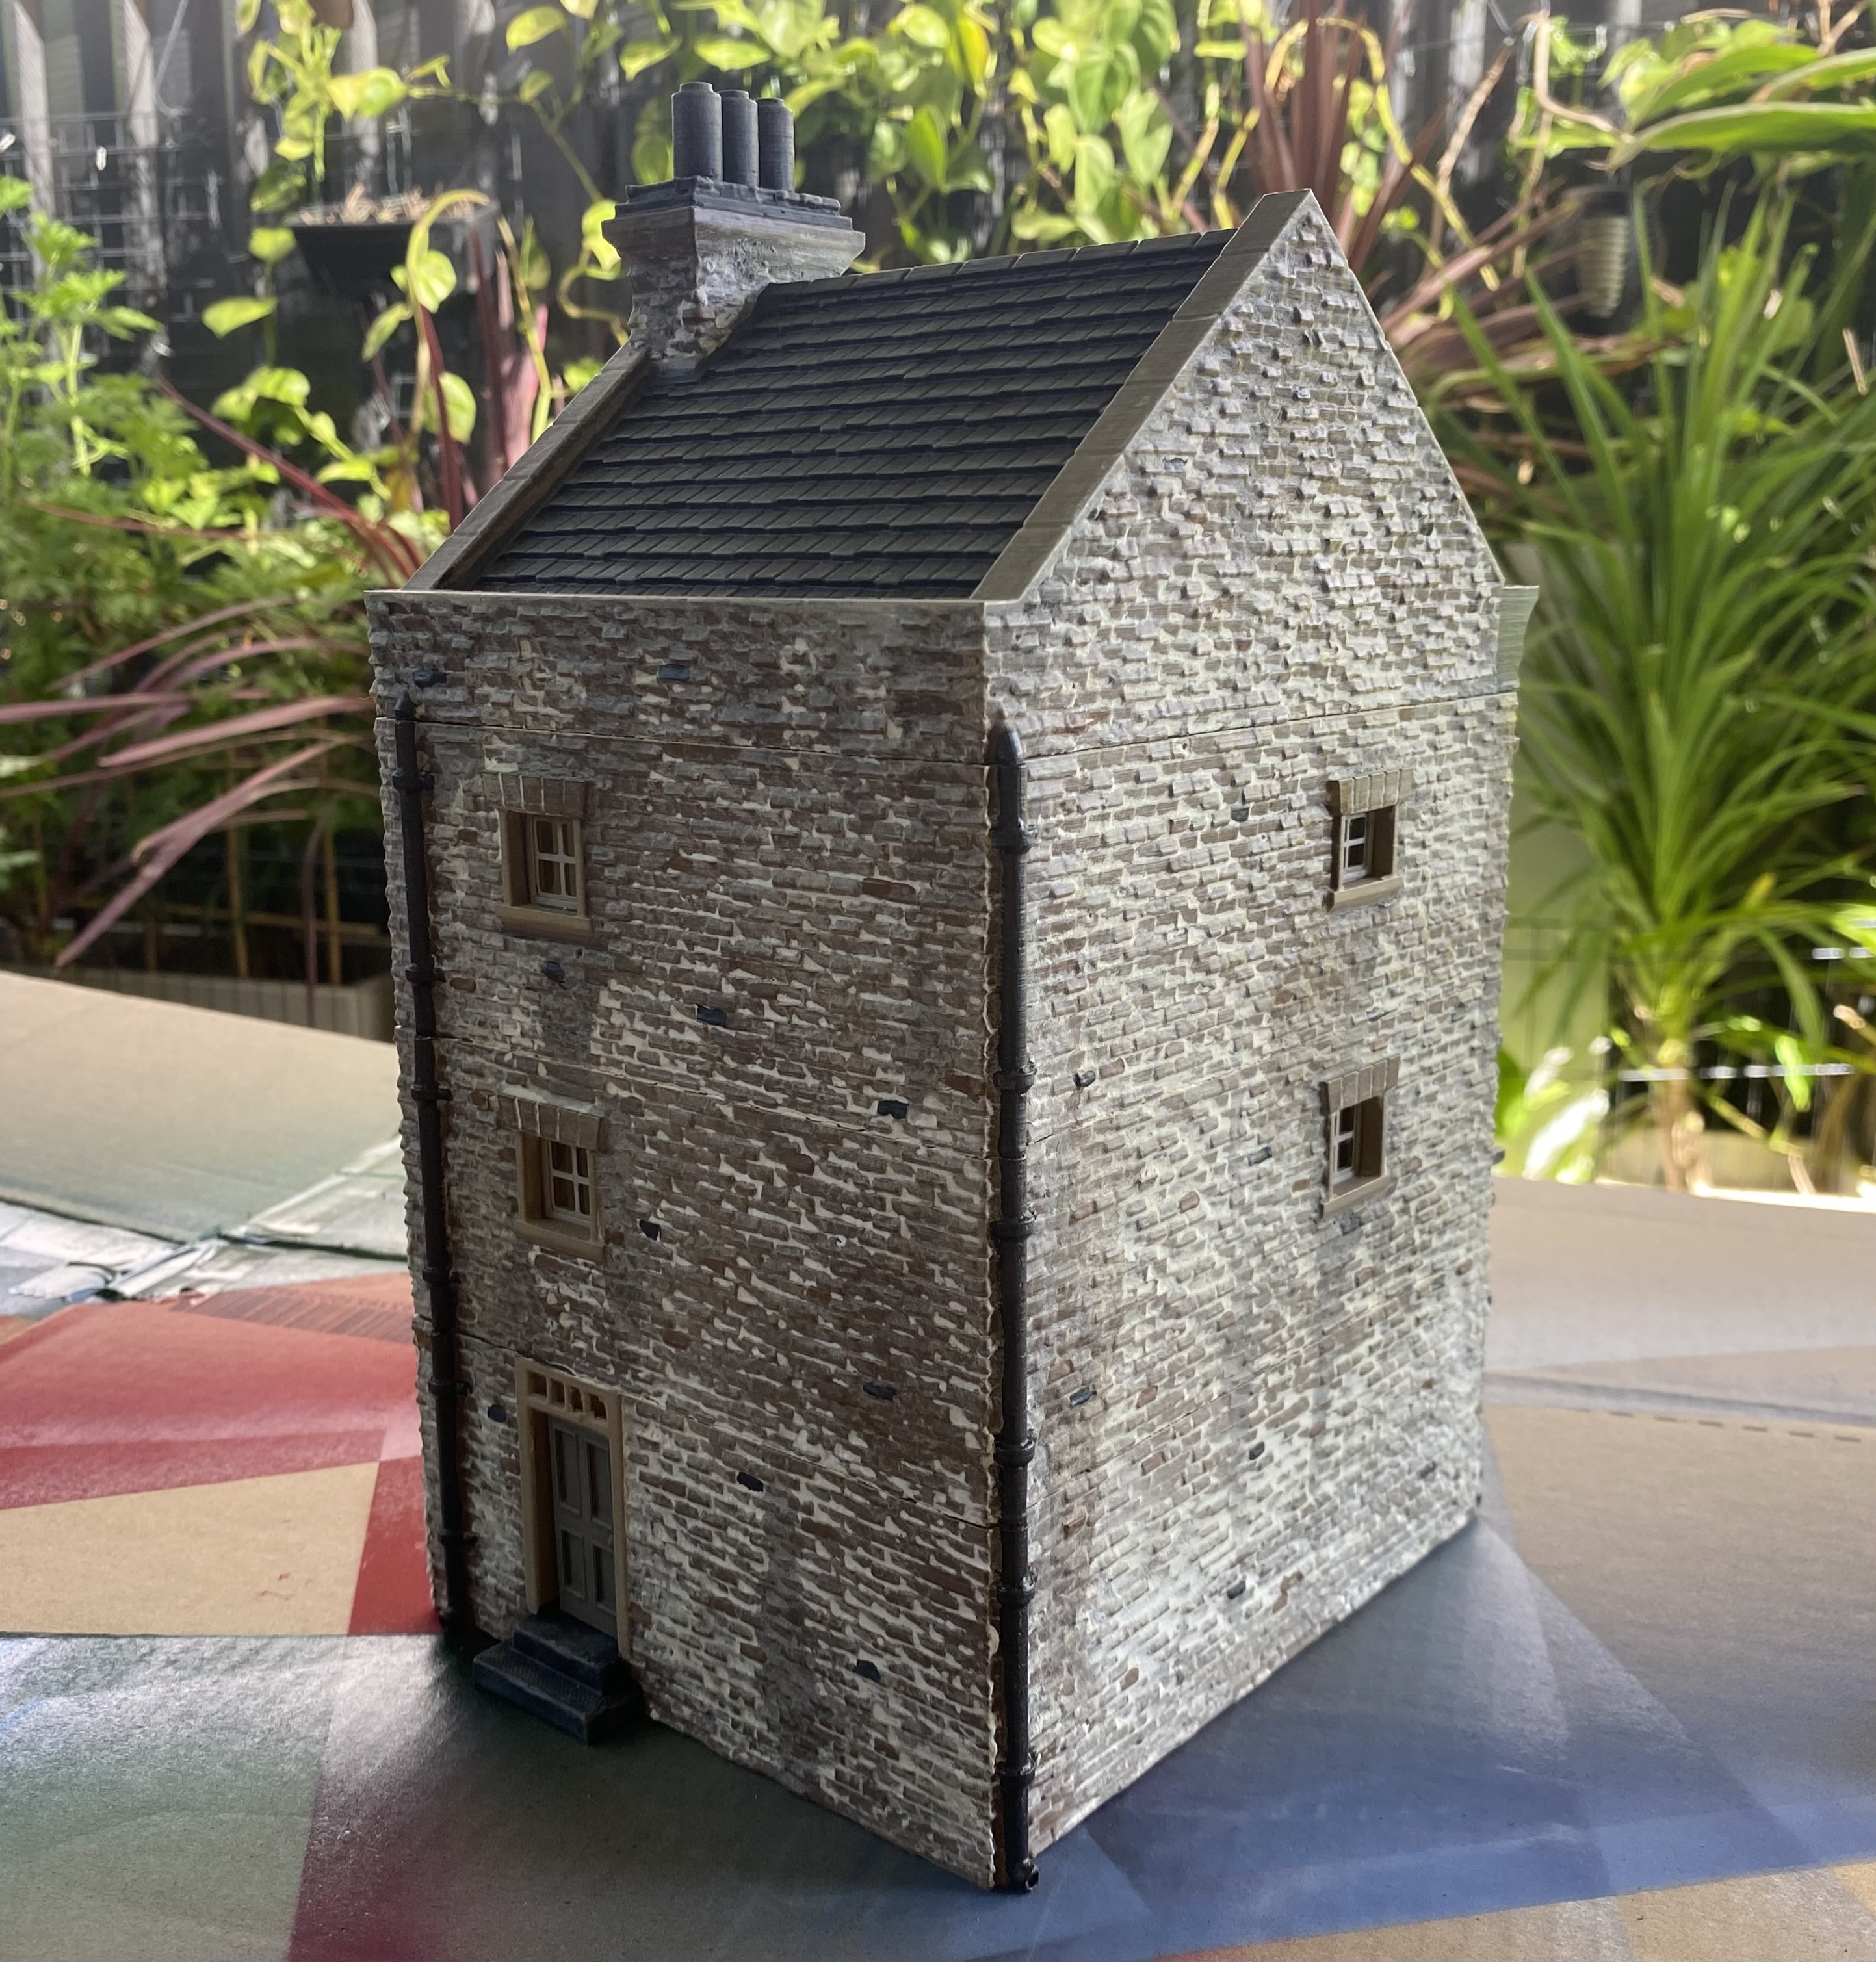
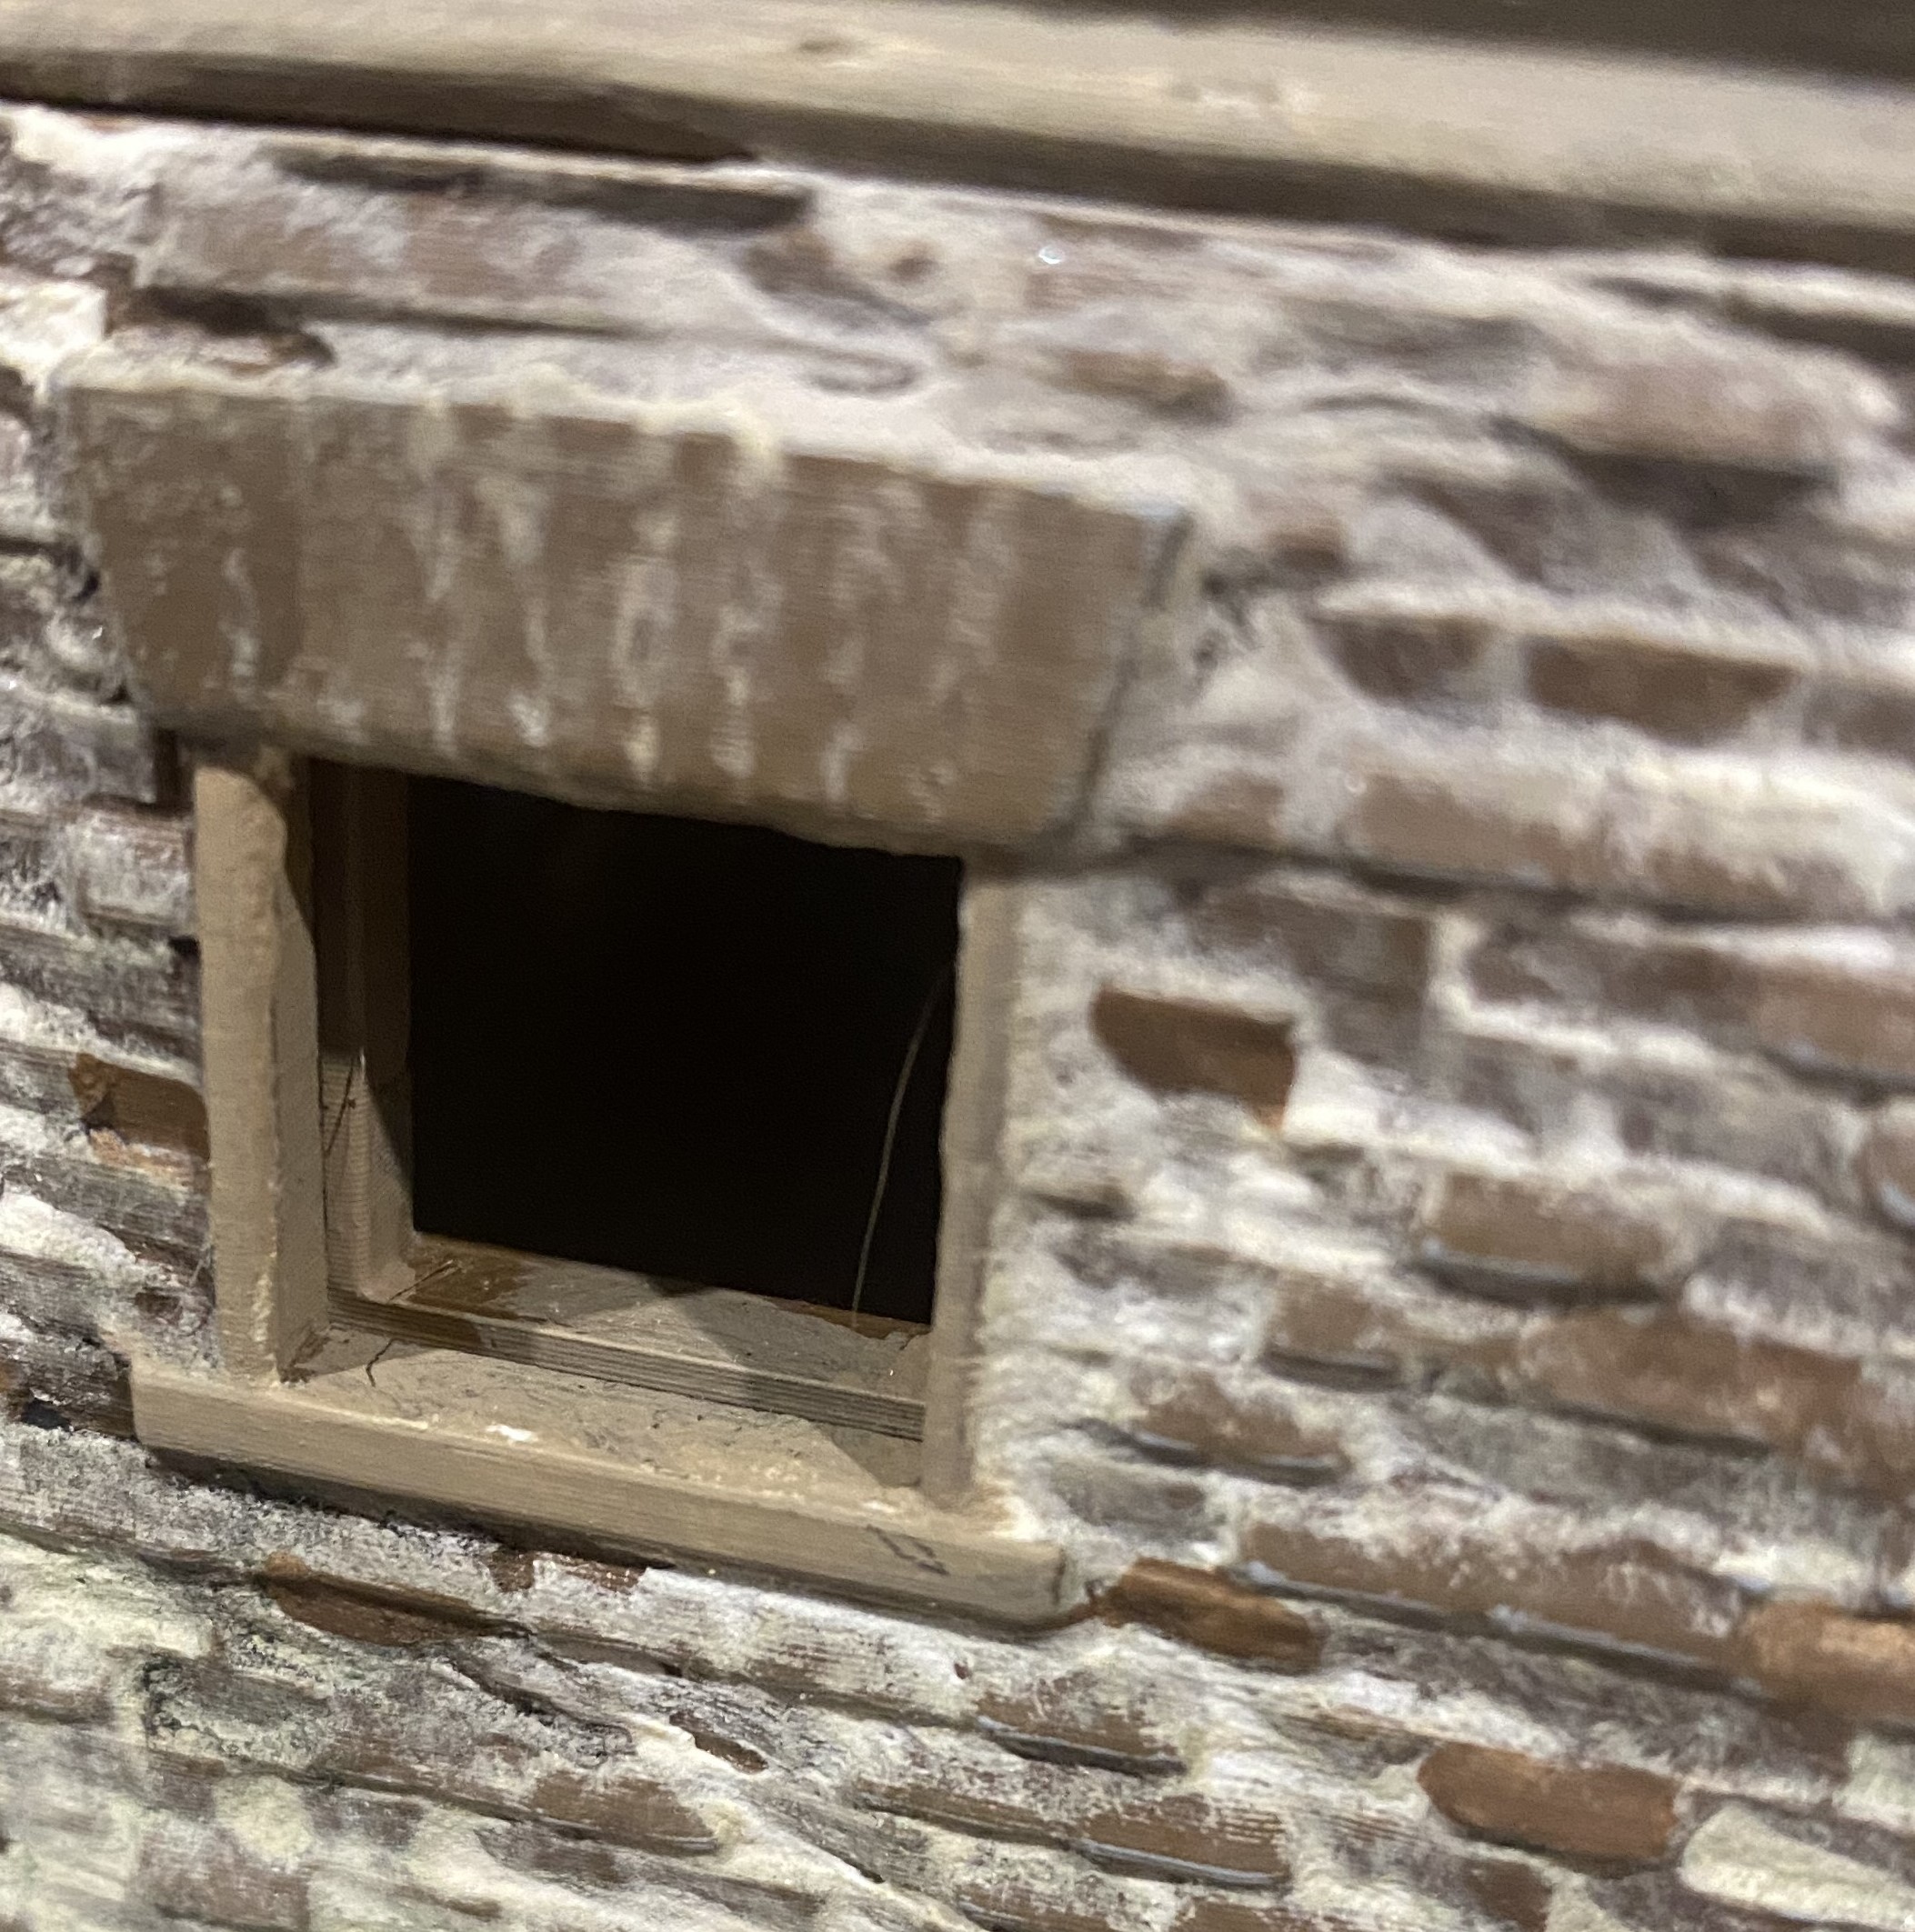
 Painted in the same manner as the other buildings but with a slate-coloured roof and a more subtle colour for the roof trim.
I had to create the windows myself in 3D Builder because the files didn’t come with any.
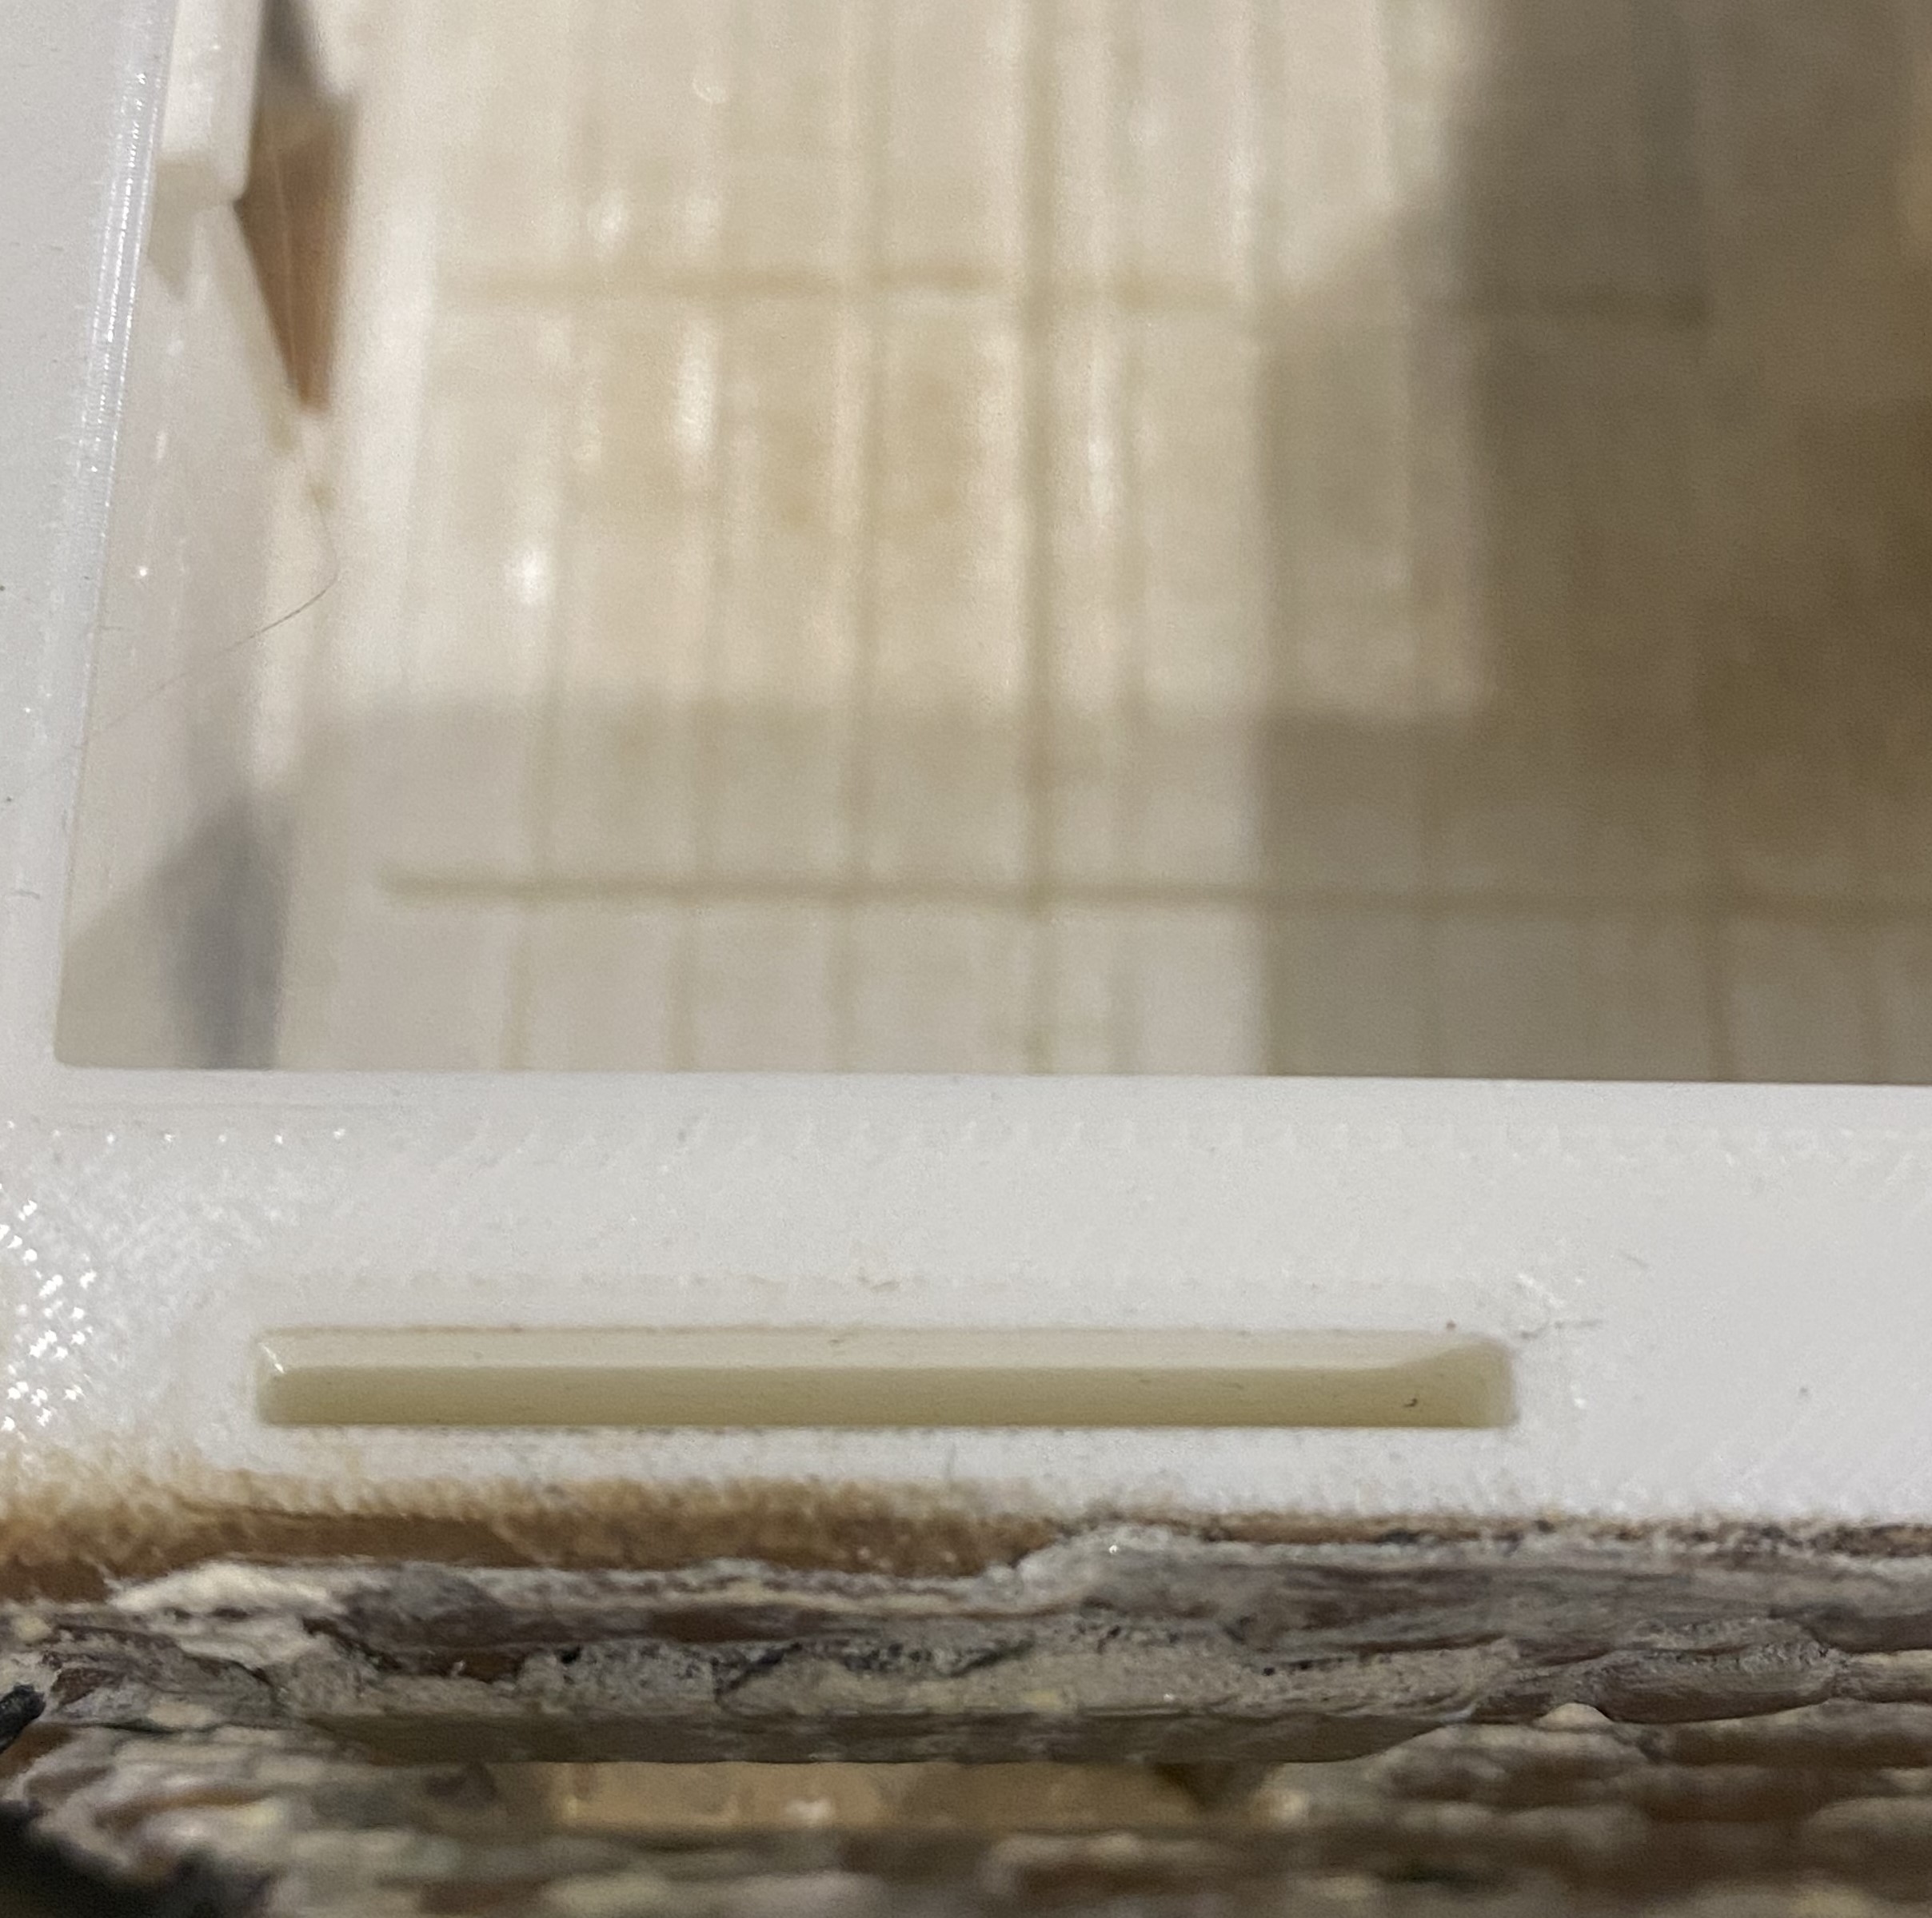
What the files come with are slots to slide in a piece of transparent film, like the sort used in overhead projectors. I just didn’t like the look of that on its own because large glass panels just looked too modern.
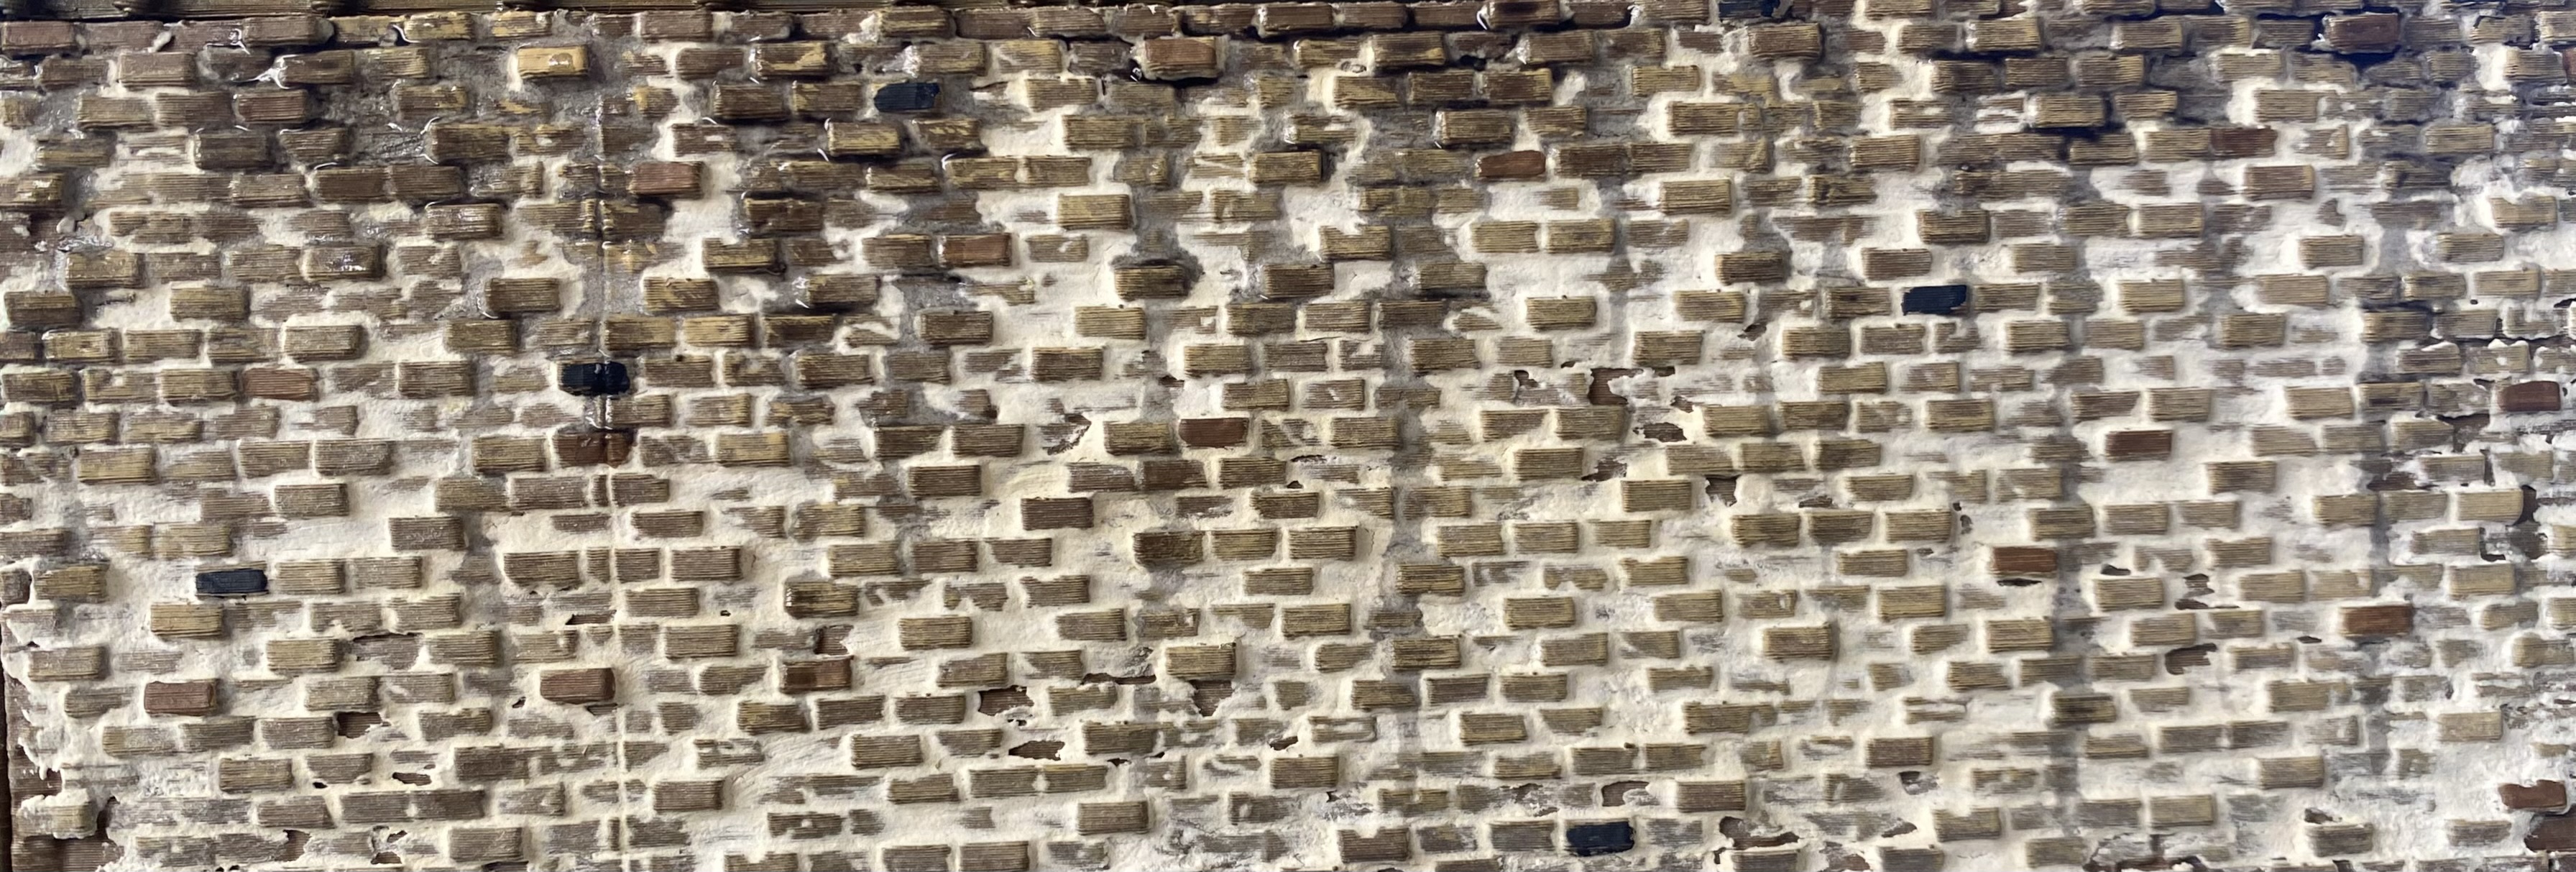
Once dry.
 Once the Quickshade or Agrax Earthshade is dry take a light sand colour and dry-brush the brickwork. Any light sand or bone-type colour will do. If I am doing a lot of walls, I go to the local hardware store and get them to colour match colours for me. For these though I just used miniature paint. Iraqi Sand by Vallejo to be precise.
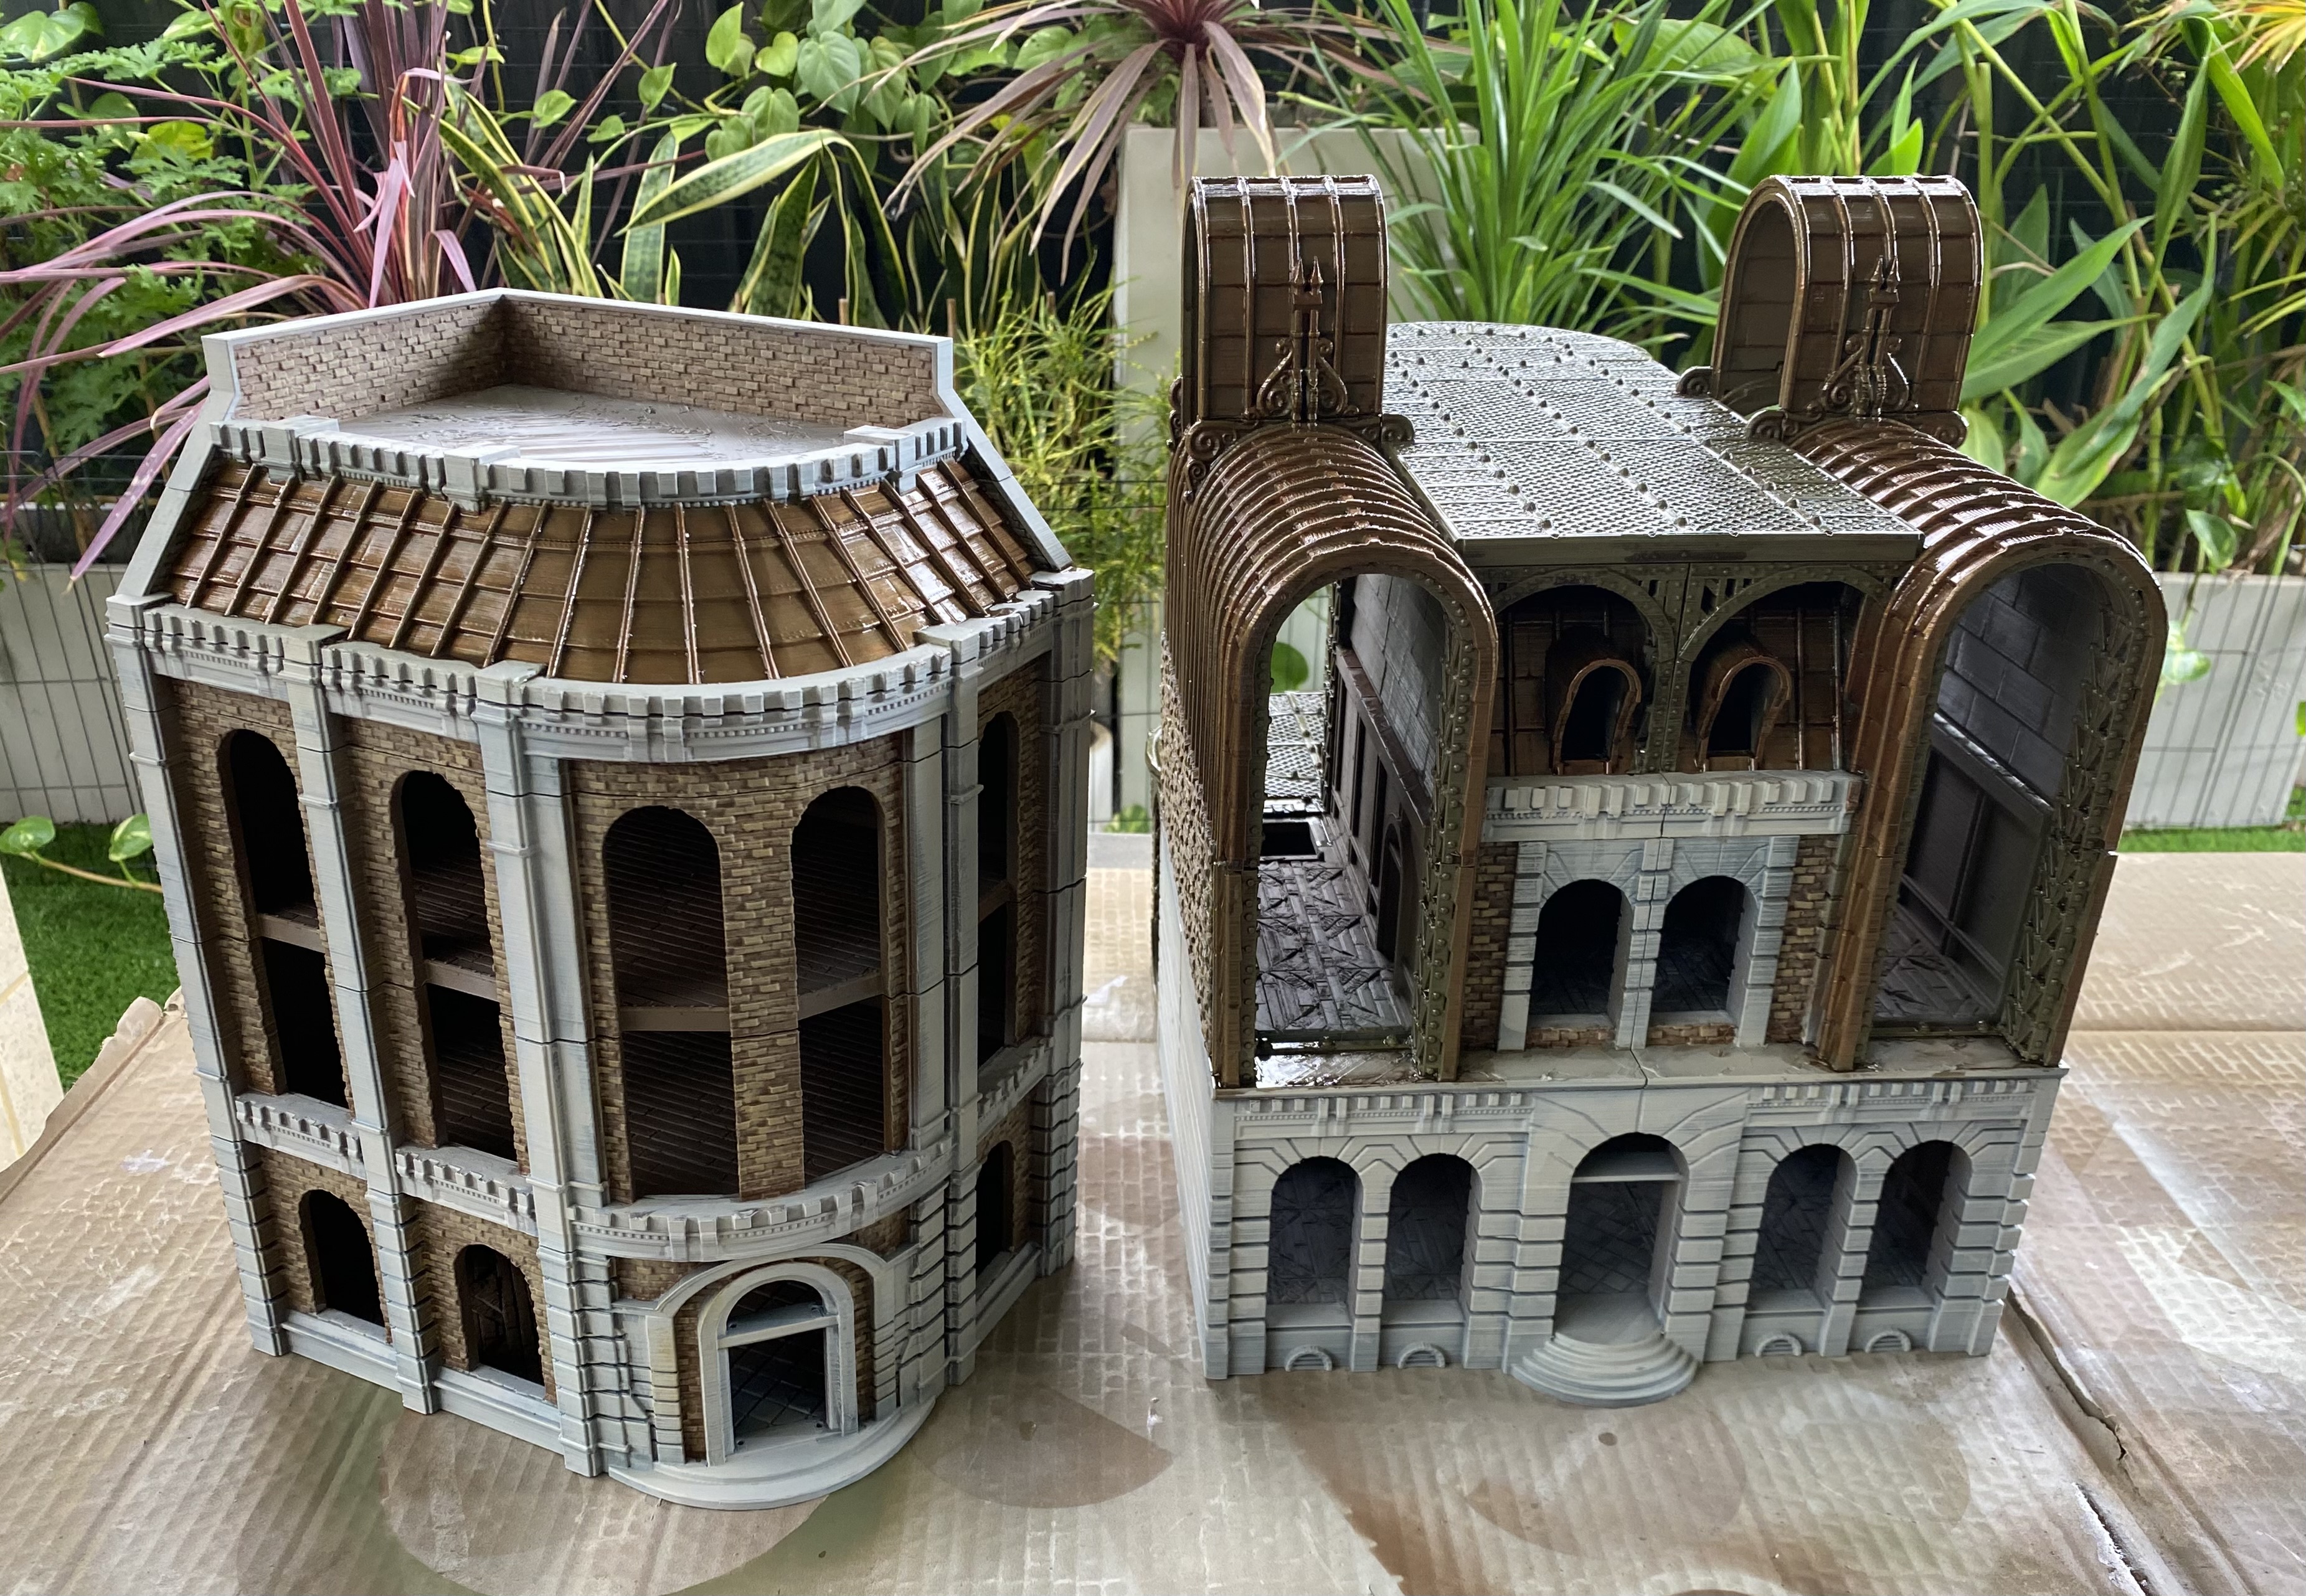

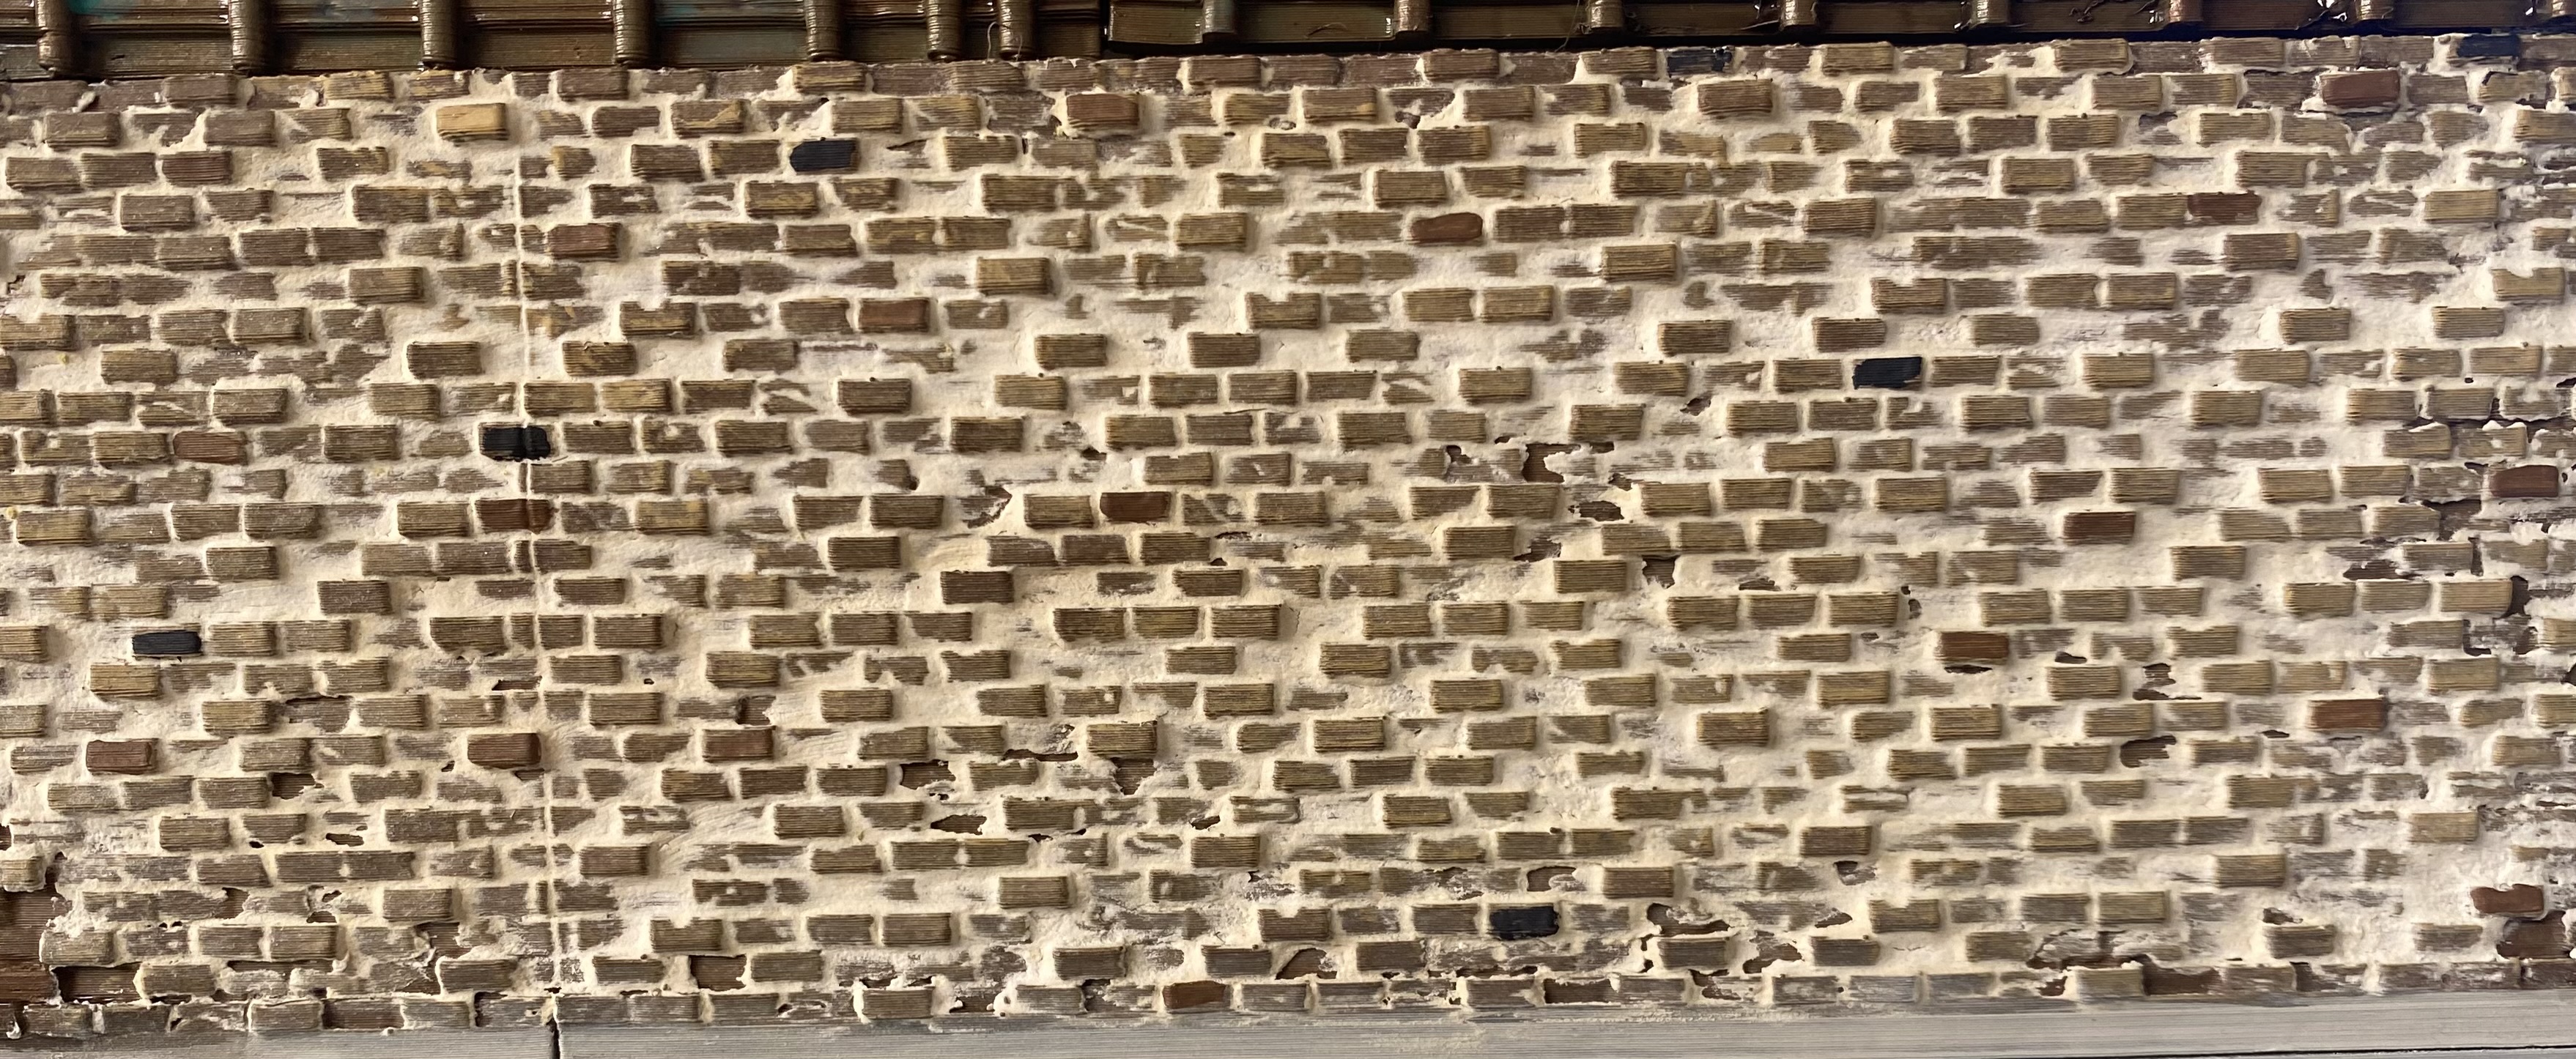
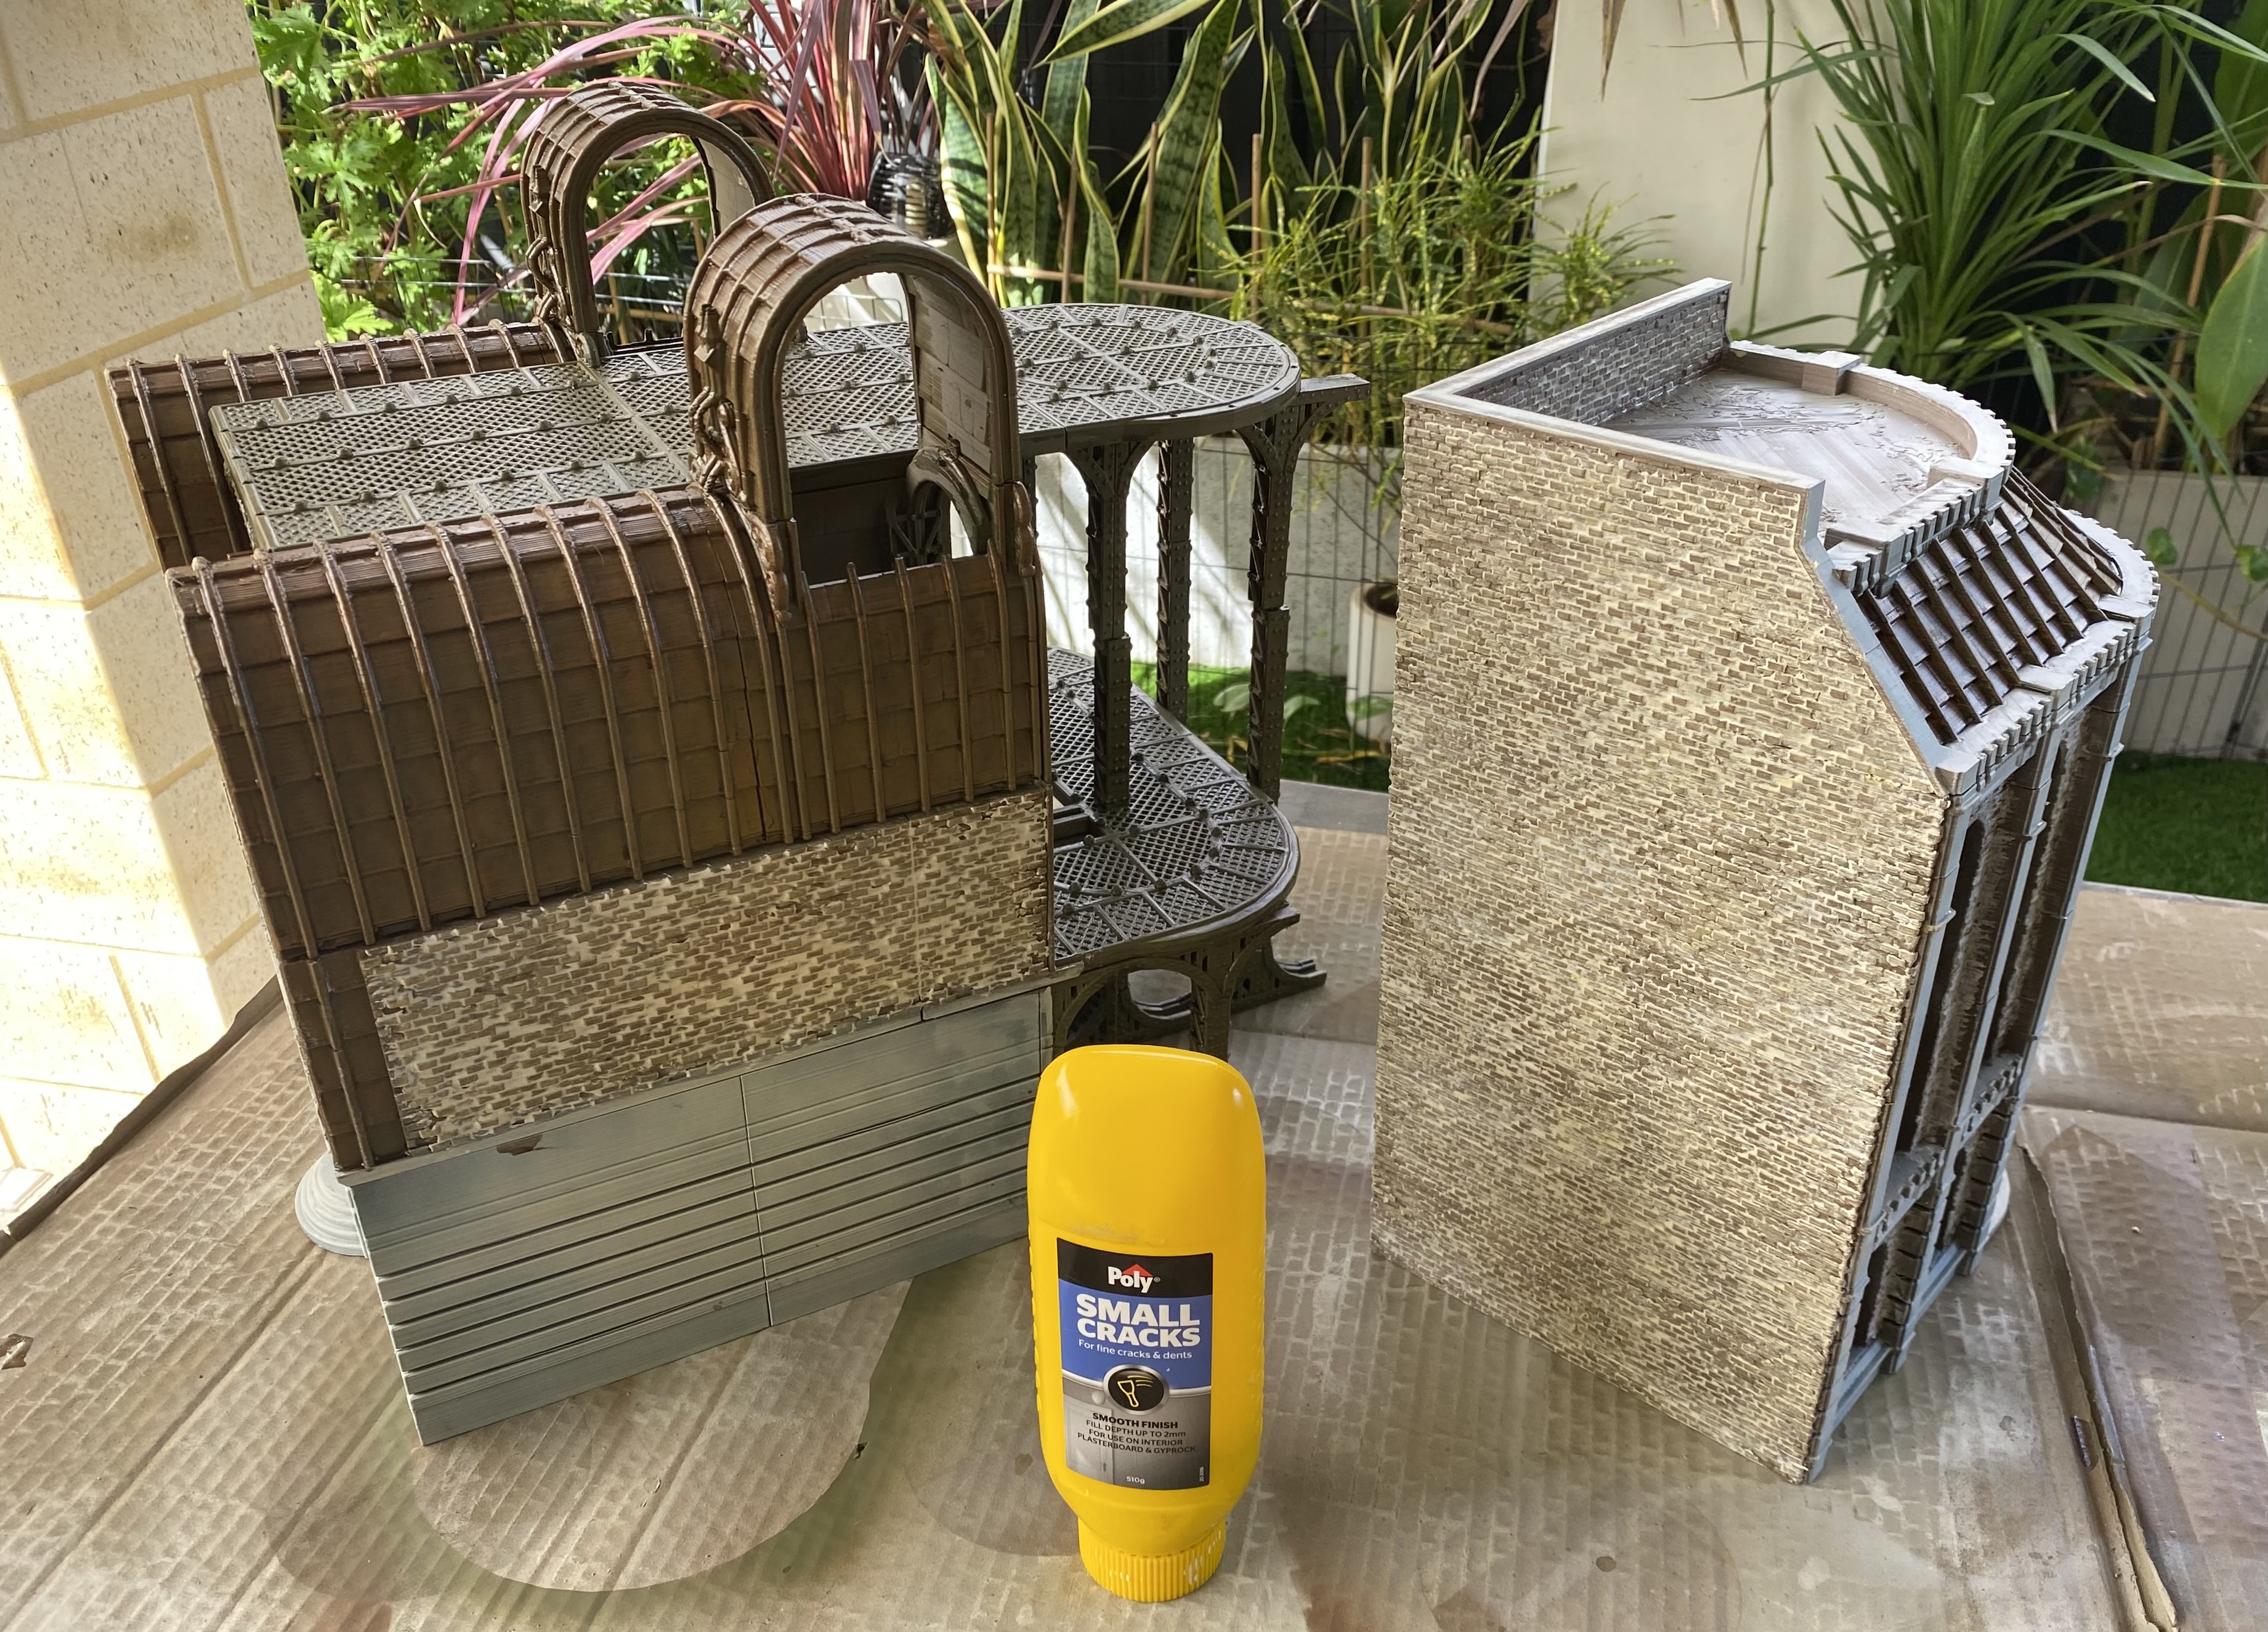 The next stage was smearing regular filler mix over the brickwork and then before its dry, wiping it with a wet clothe. This will leave some filler in the gaps between bricks and also remove some of the paint from some of the stones. It gives a nice irregular finish. Once that was dry, I just tidied up the bits were the Quickshade had gone over areas where I didn't want.
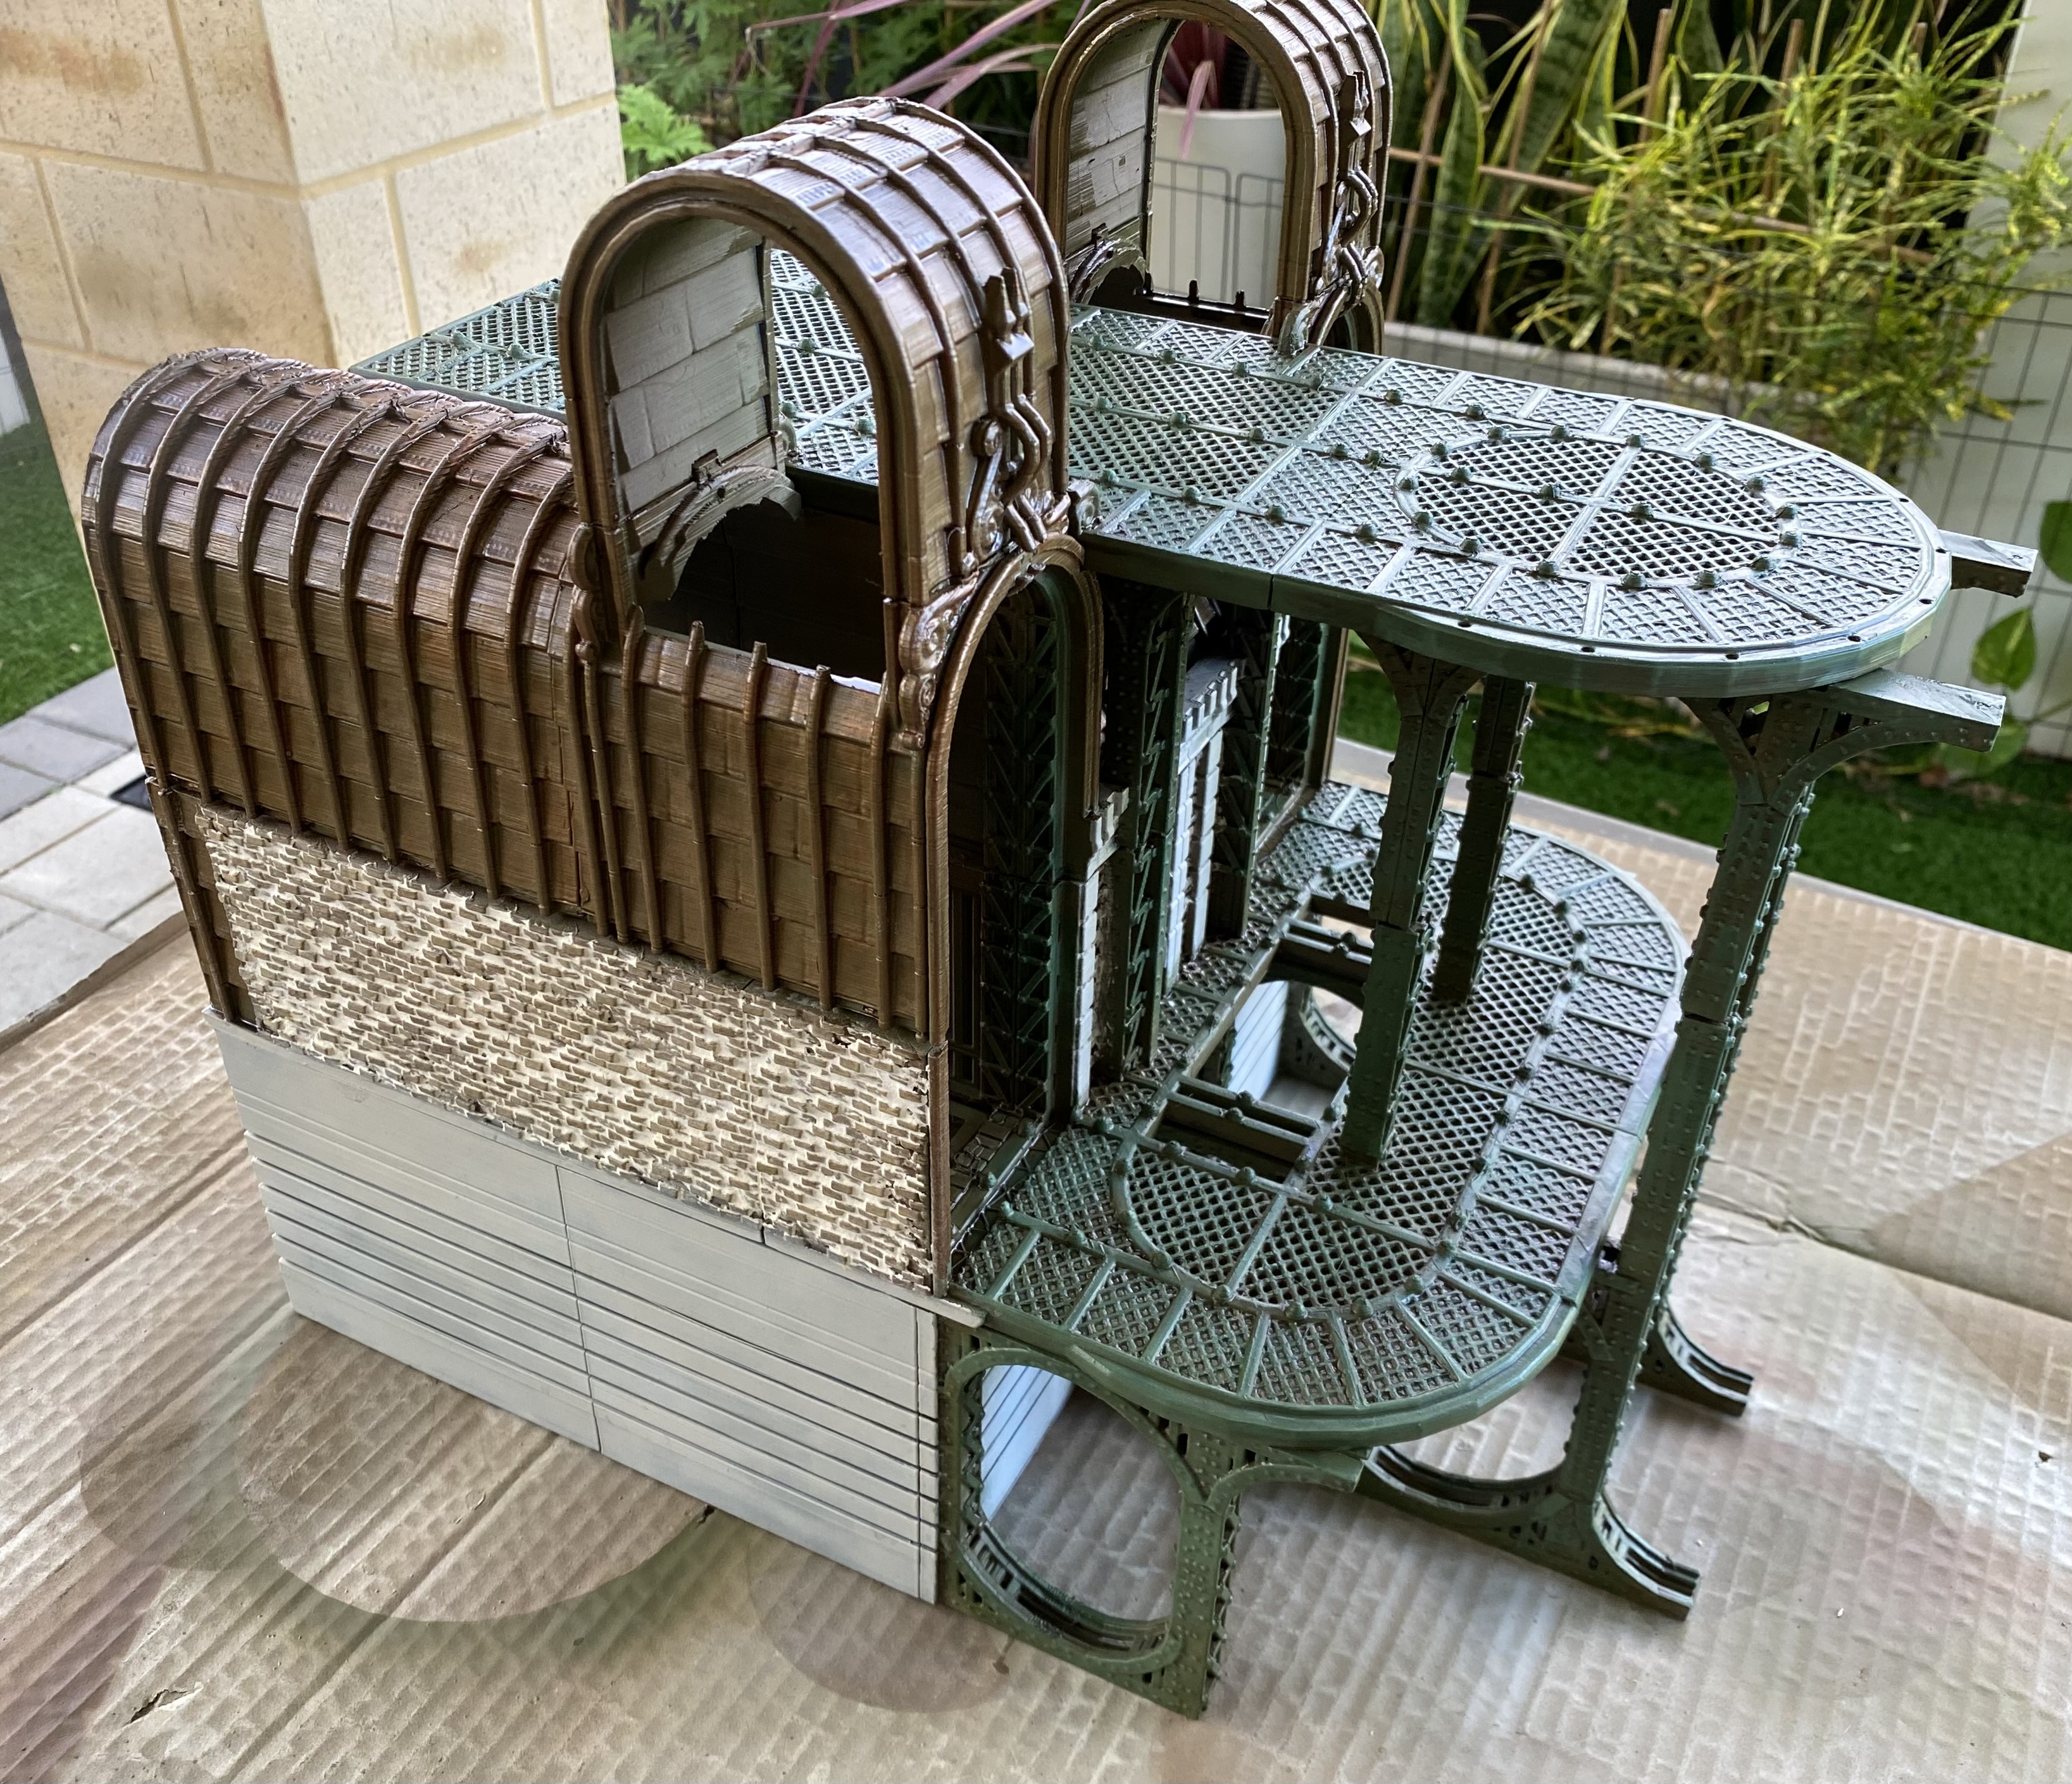
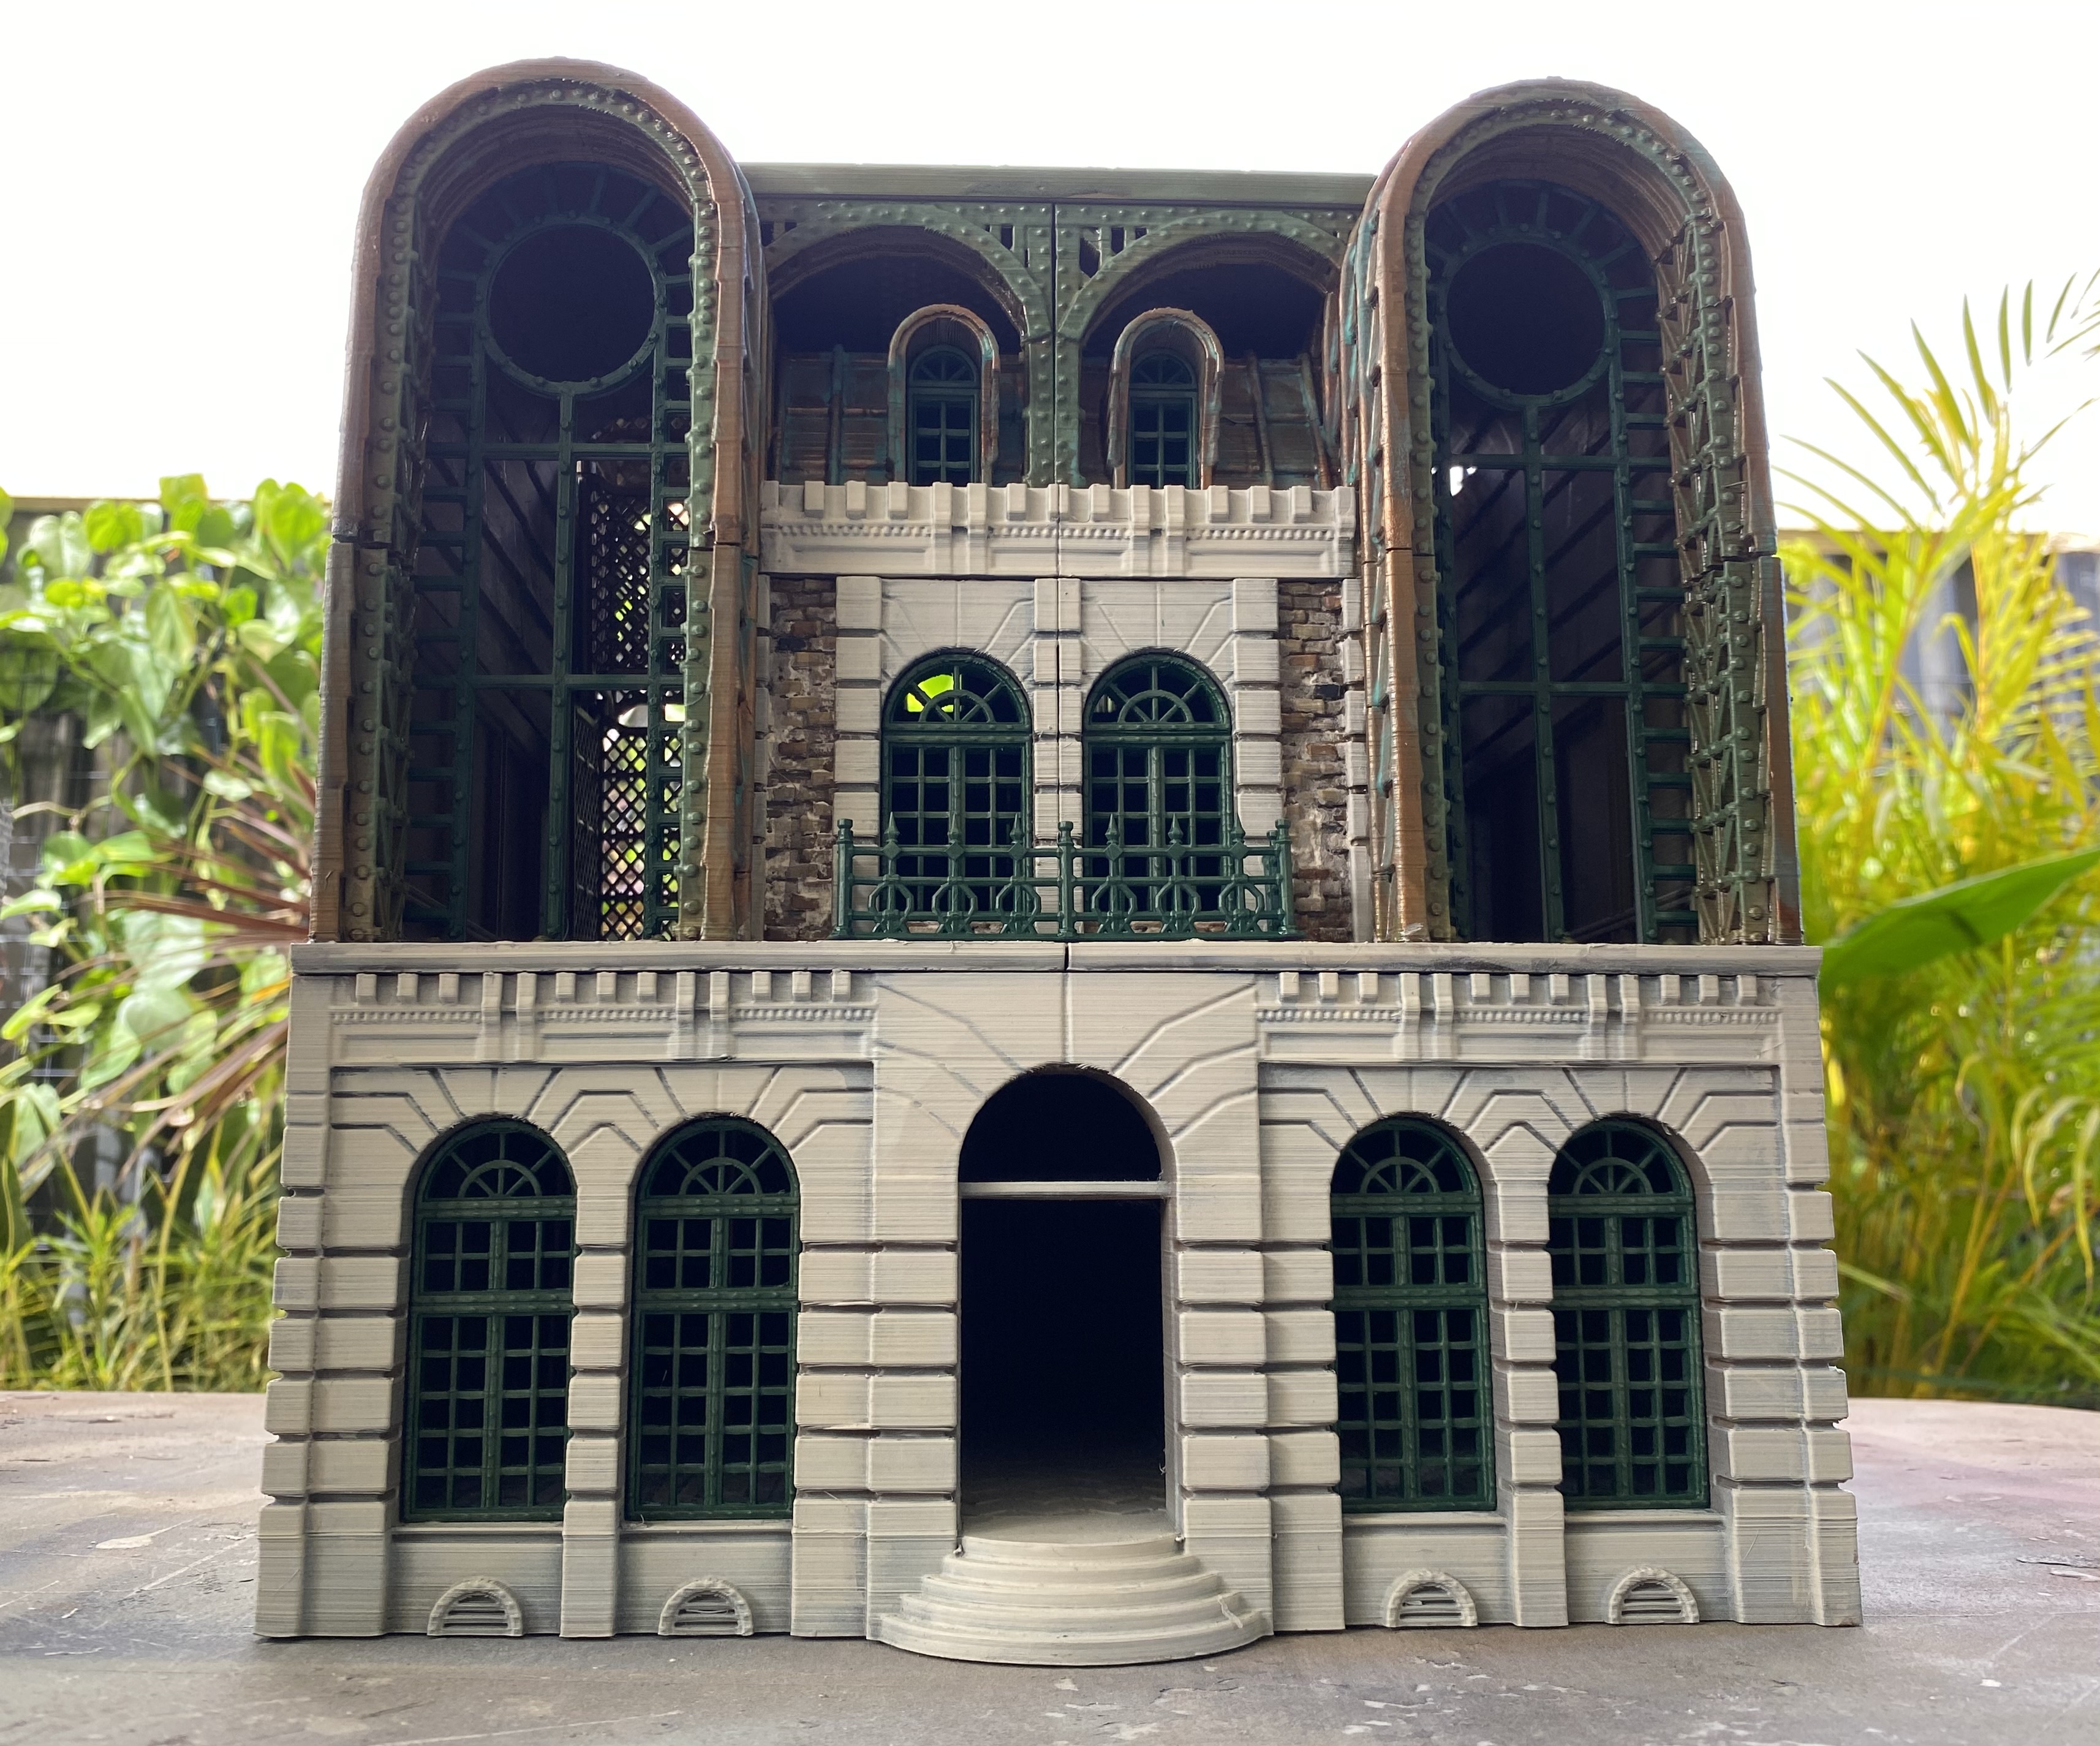
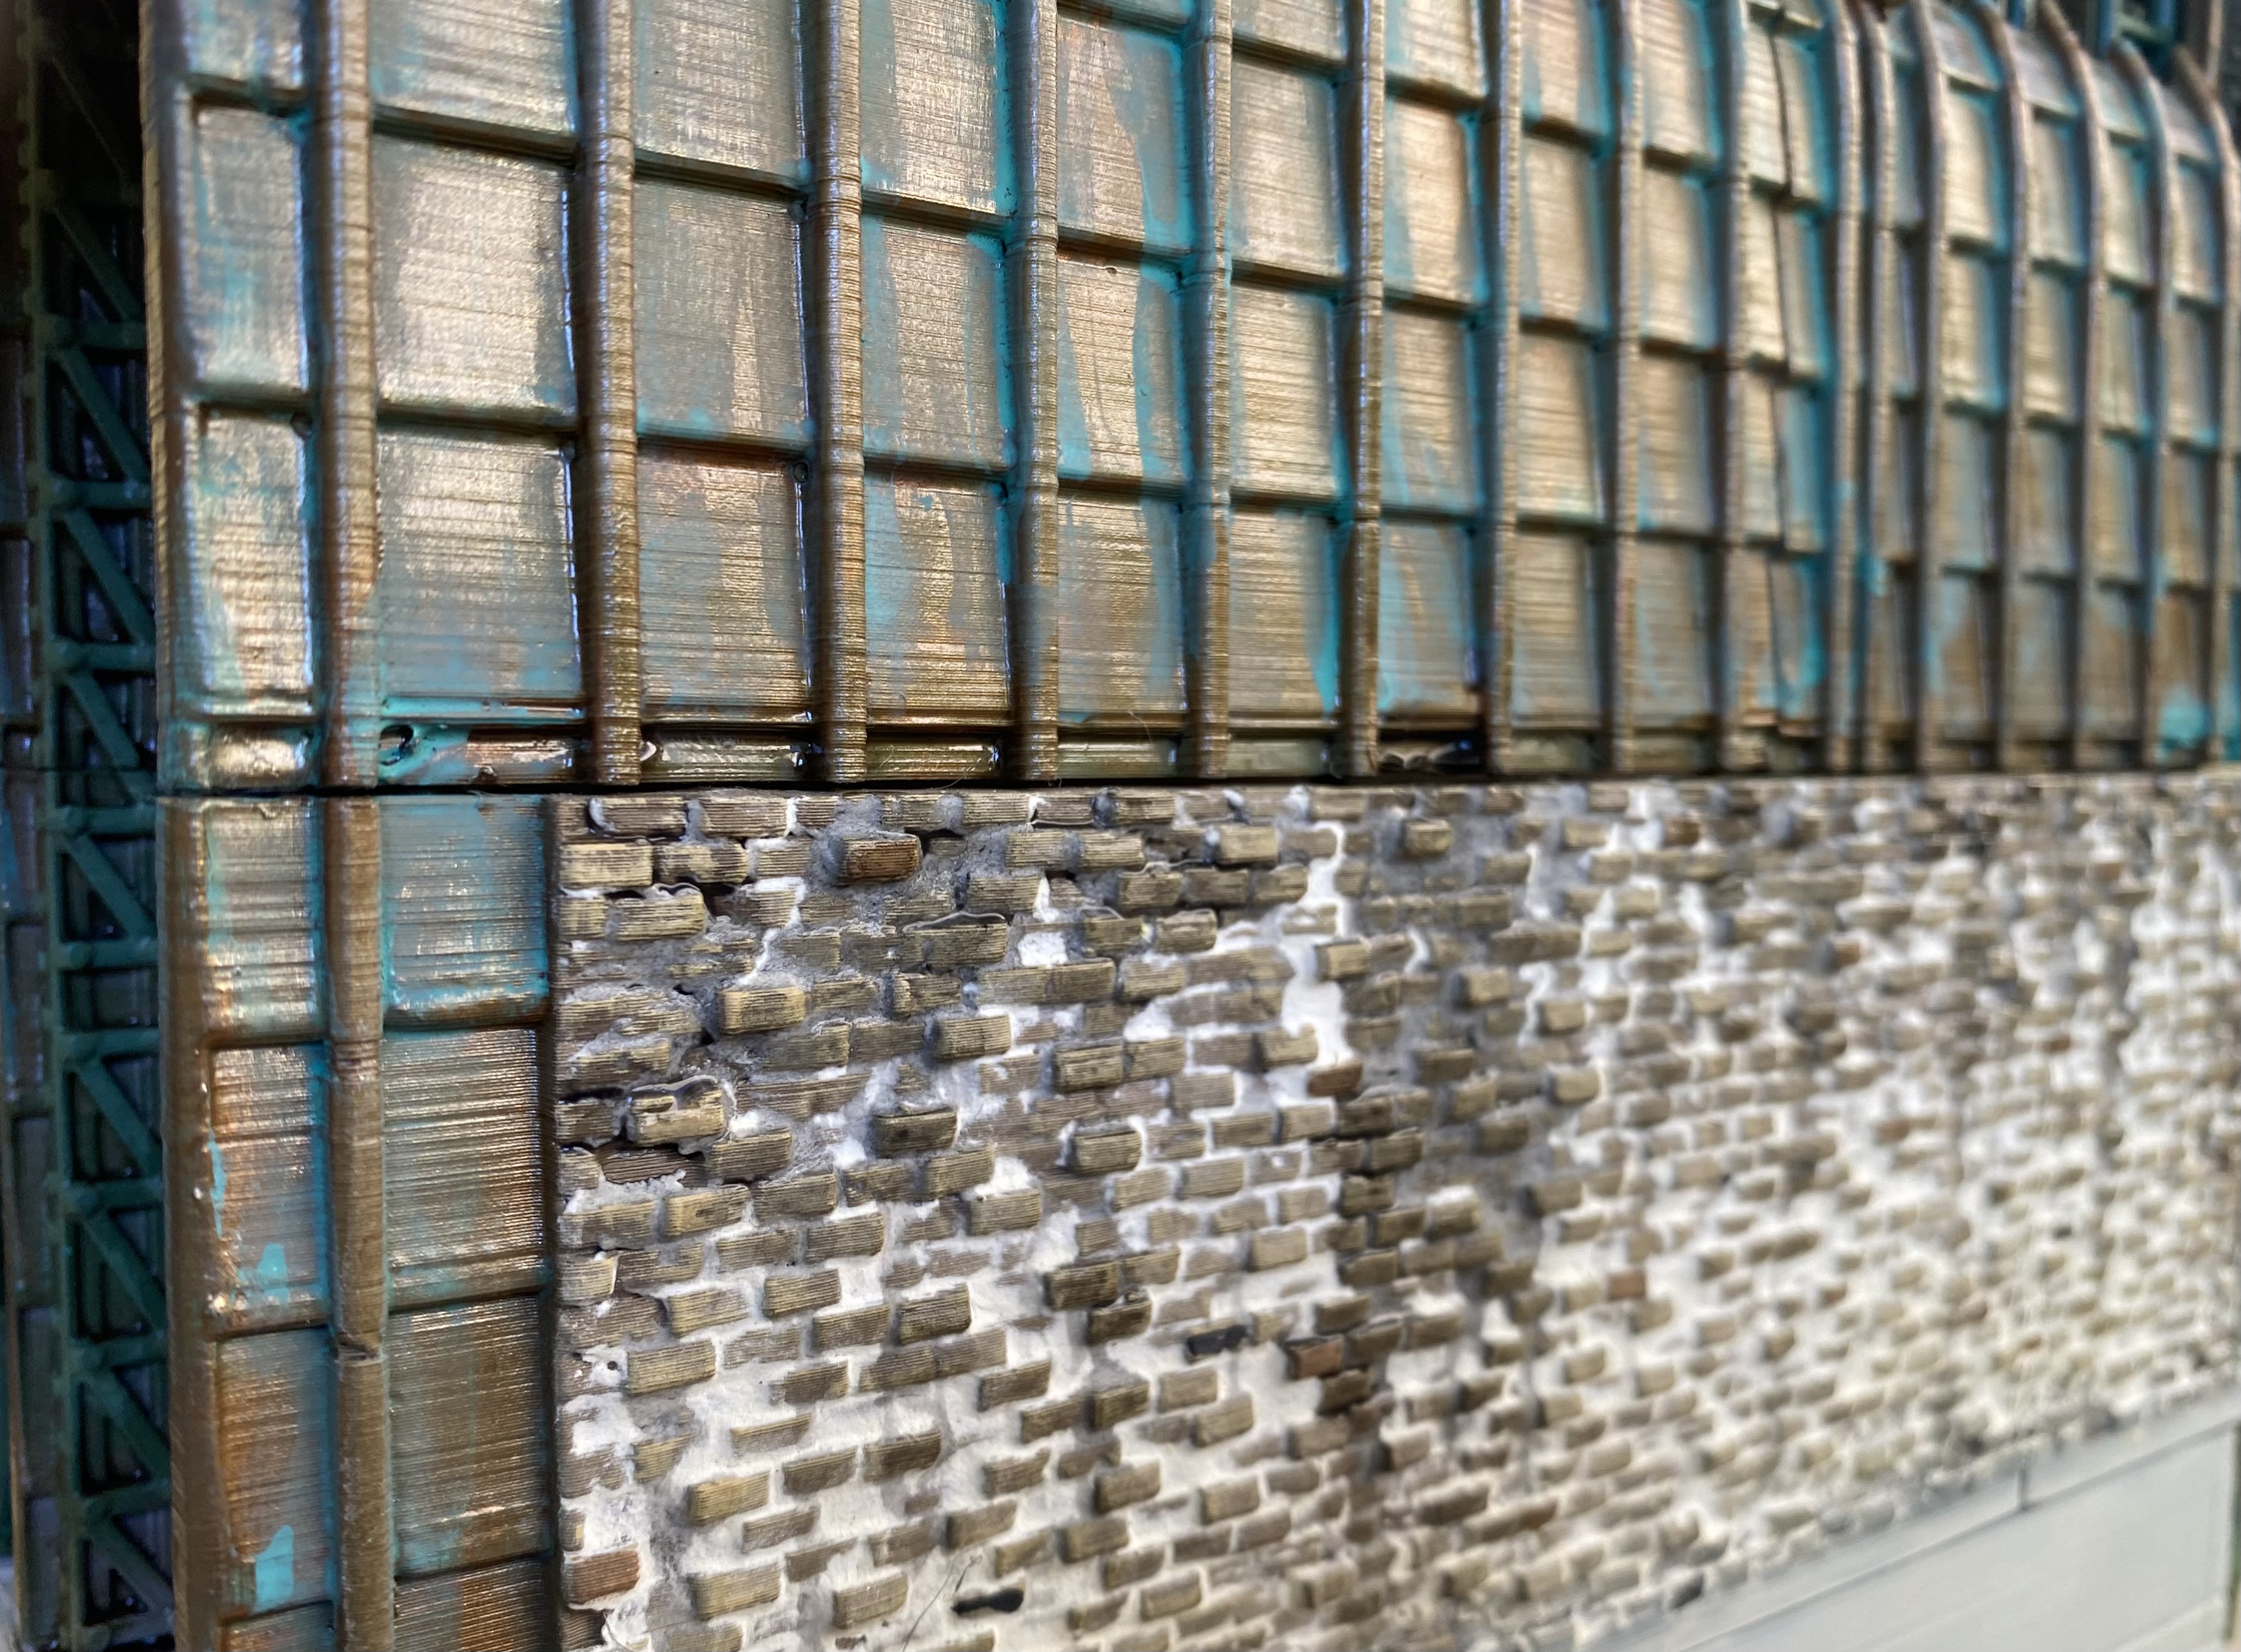
 Next was painting some Citadel Nihilakh Oxide on the rooves. I was quite liberal with this because I planned to lightly drybrush copper back on to blend it in a bit.
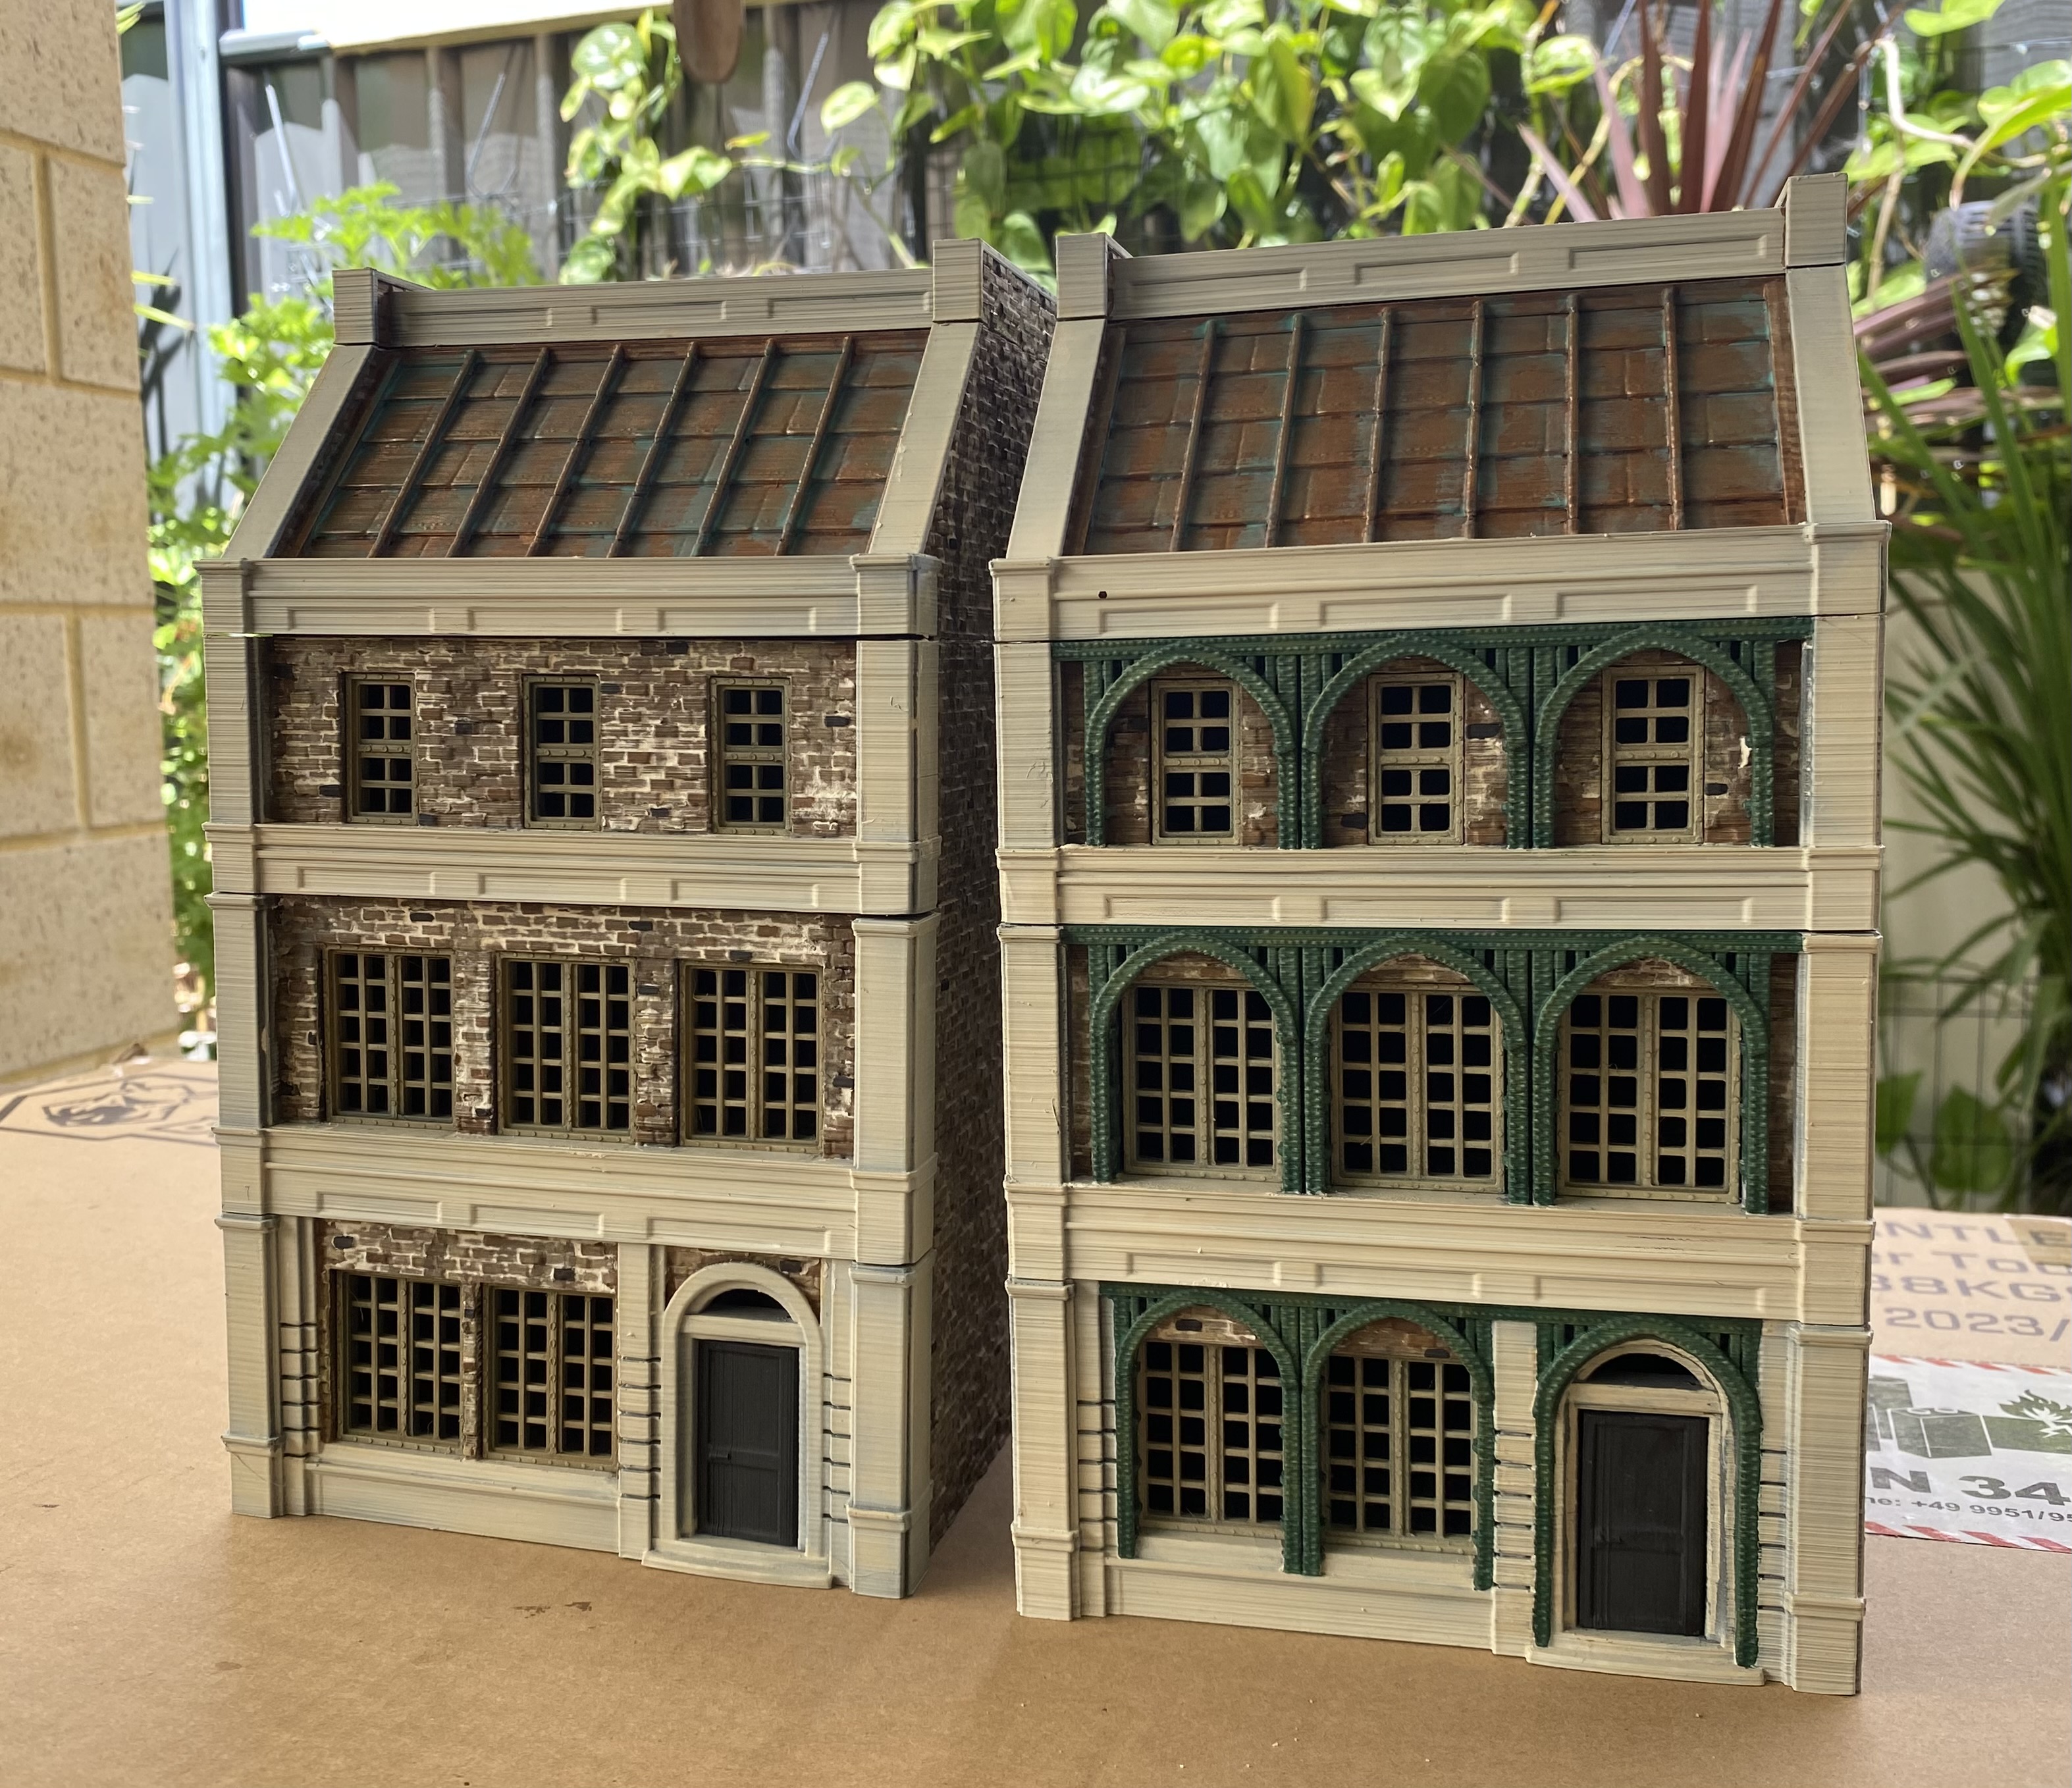
 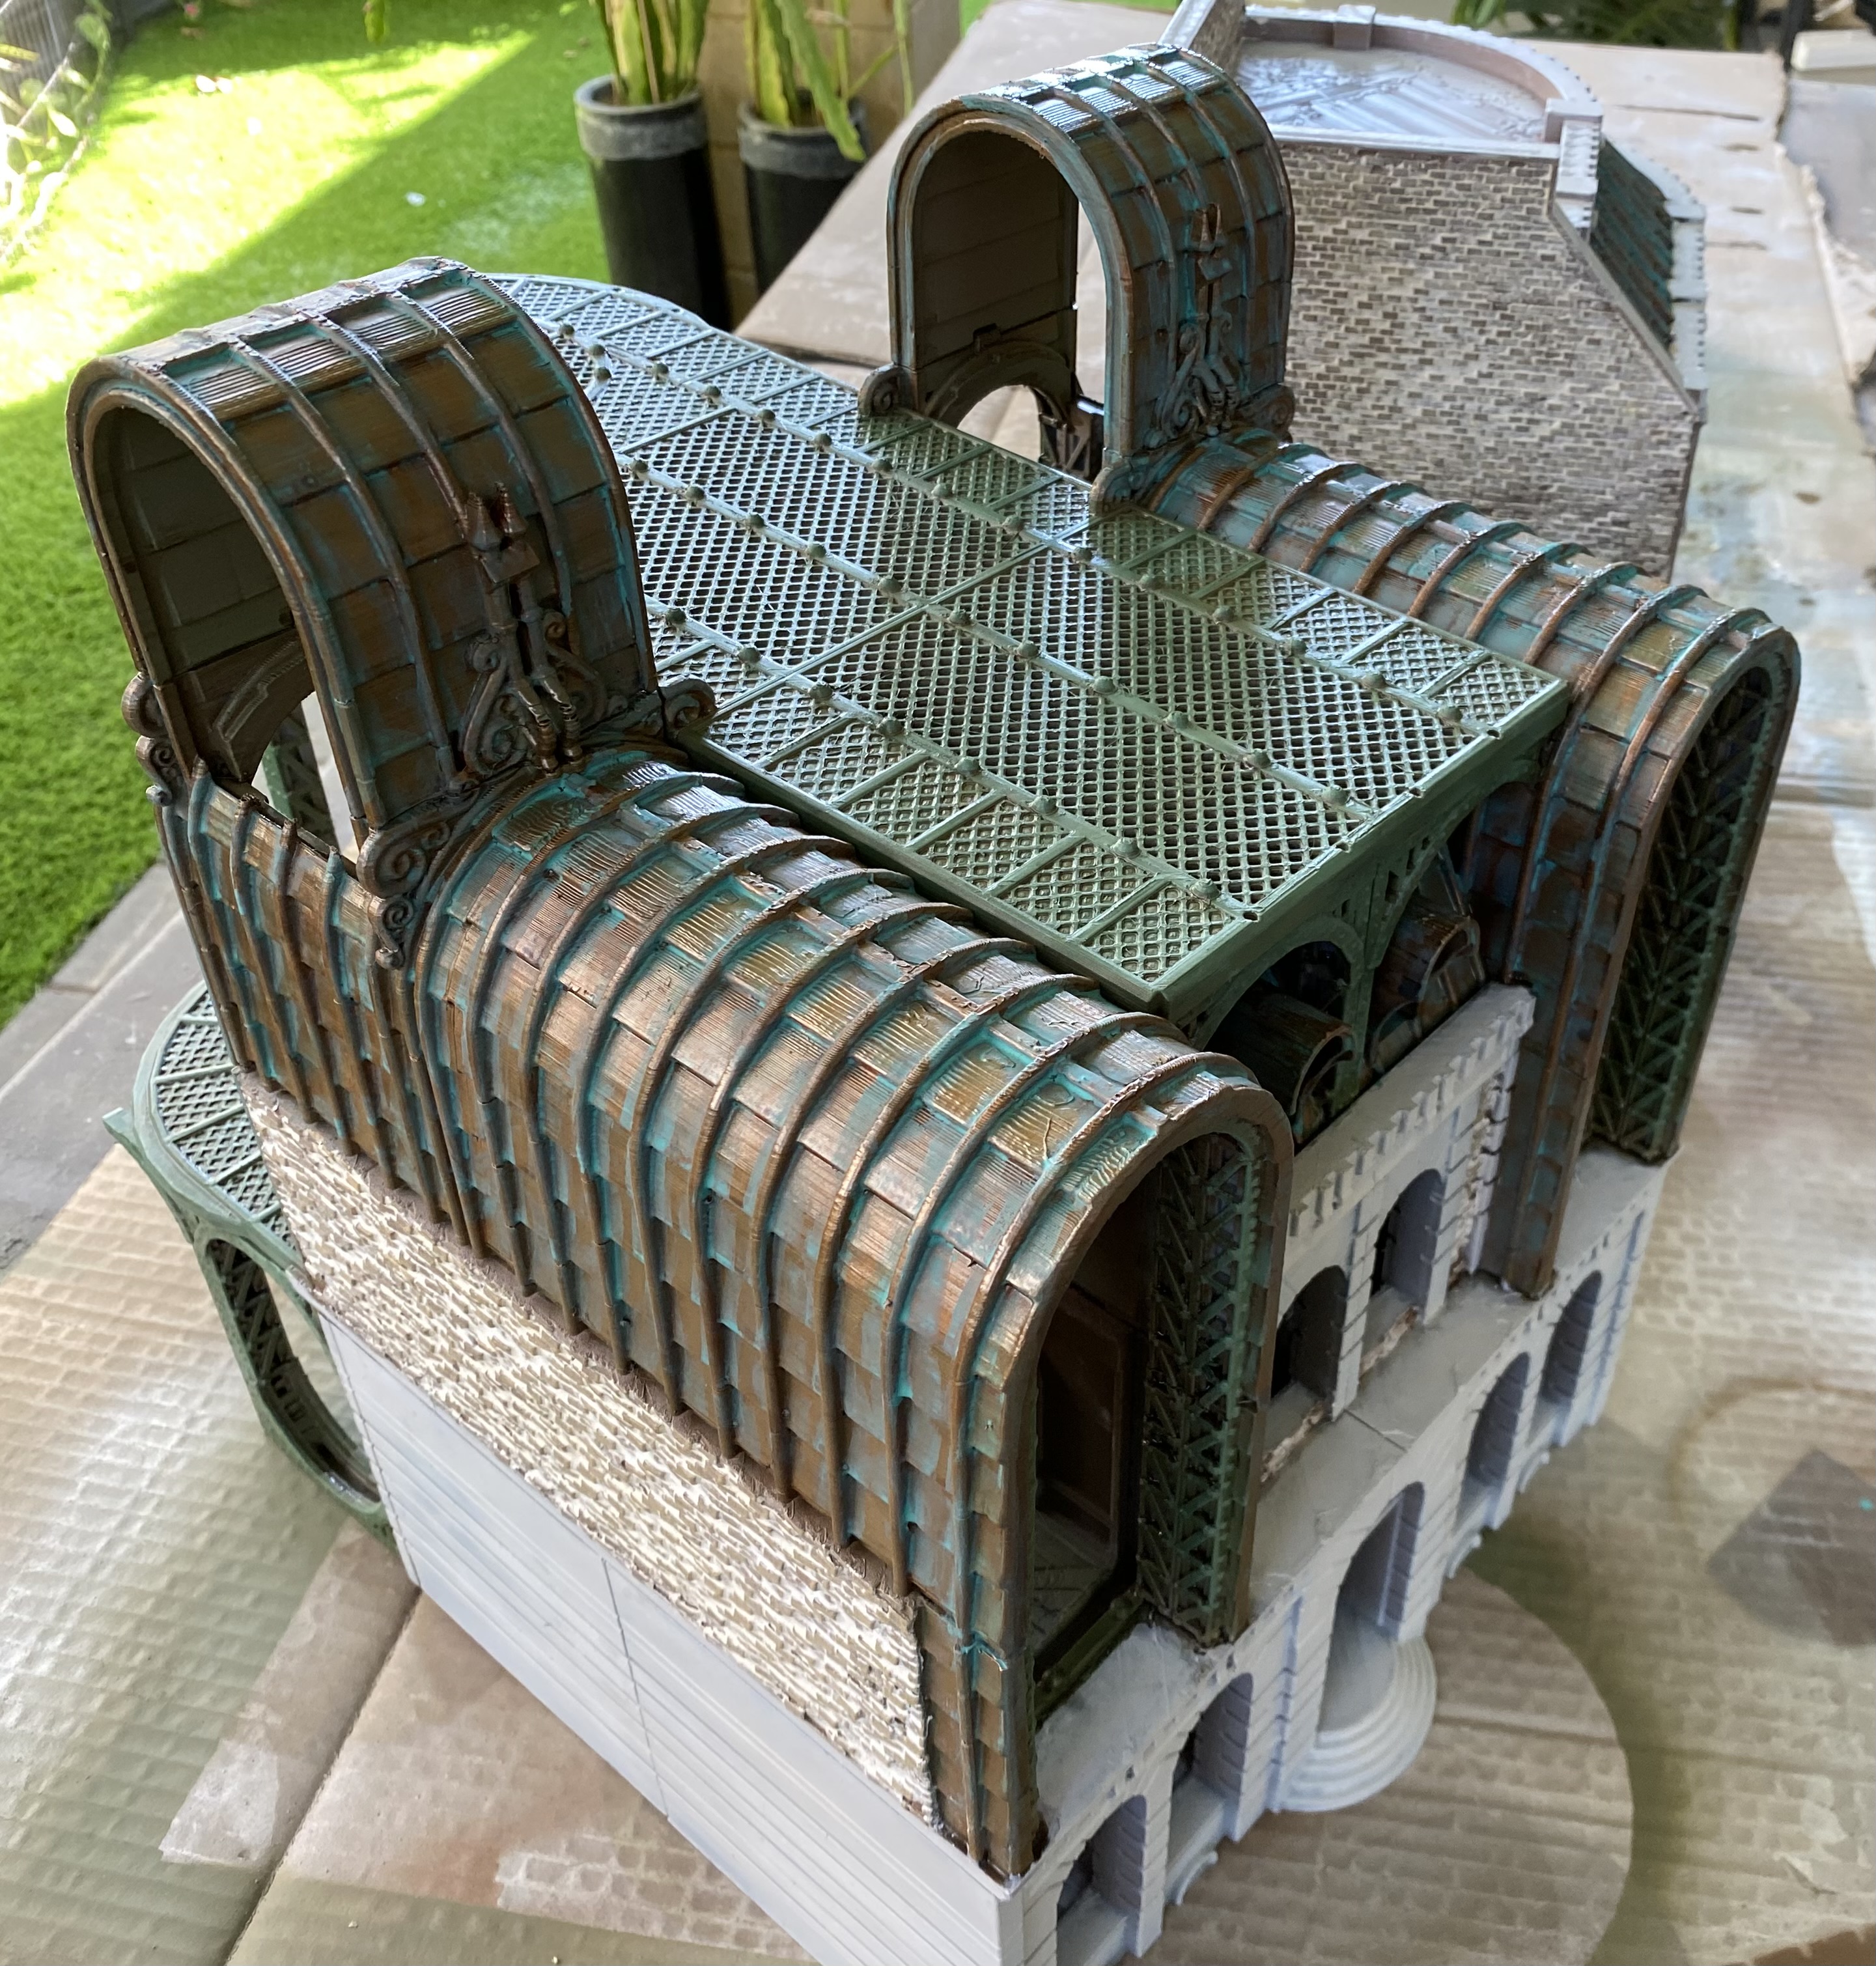 The steelwork was drybrushed in shades of Green. I used Forrest Green from Wargames Foundry.
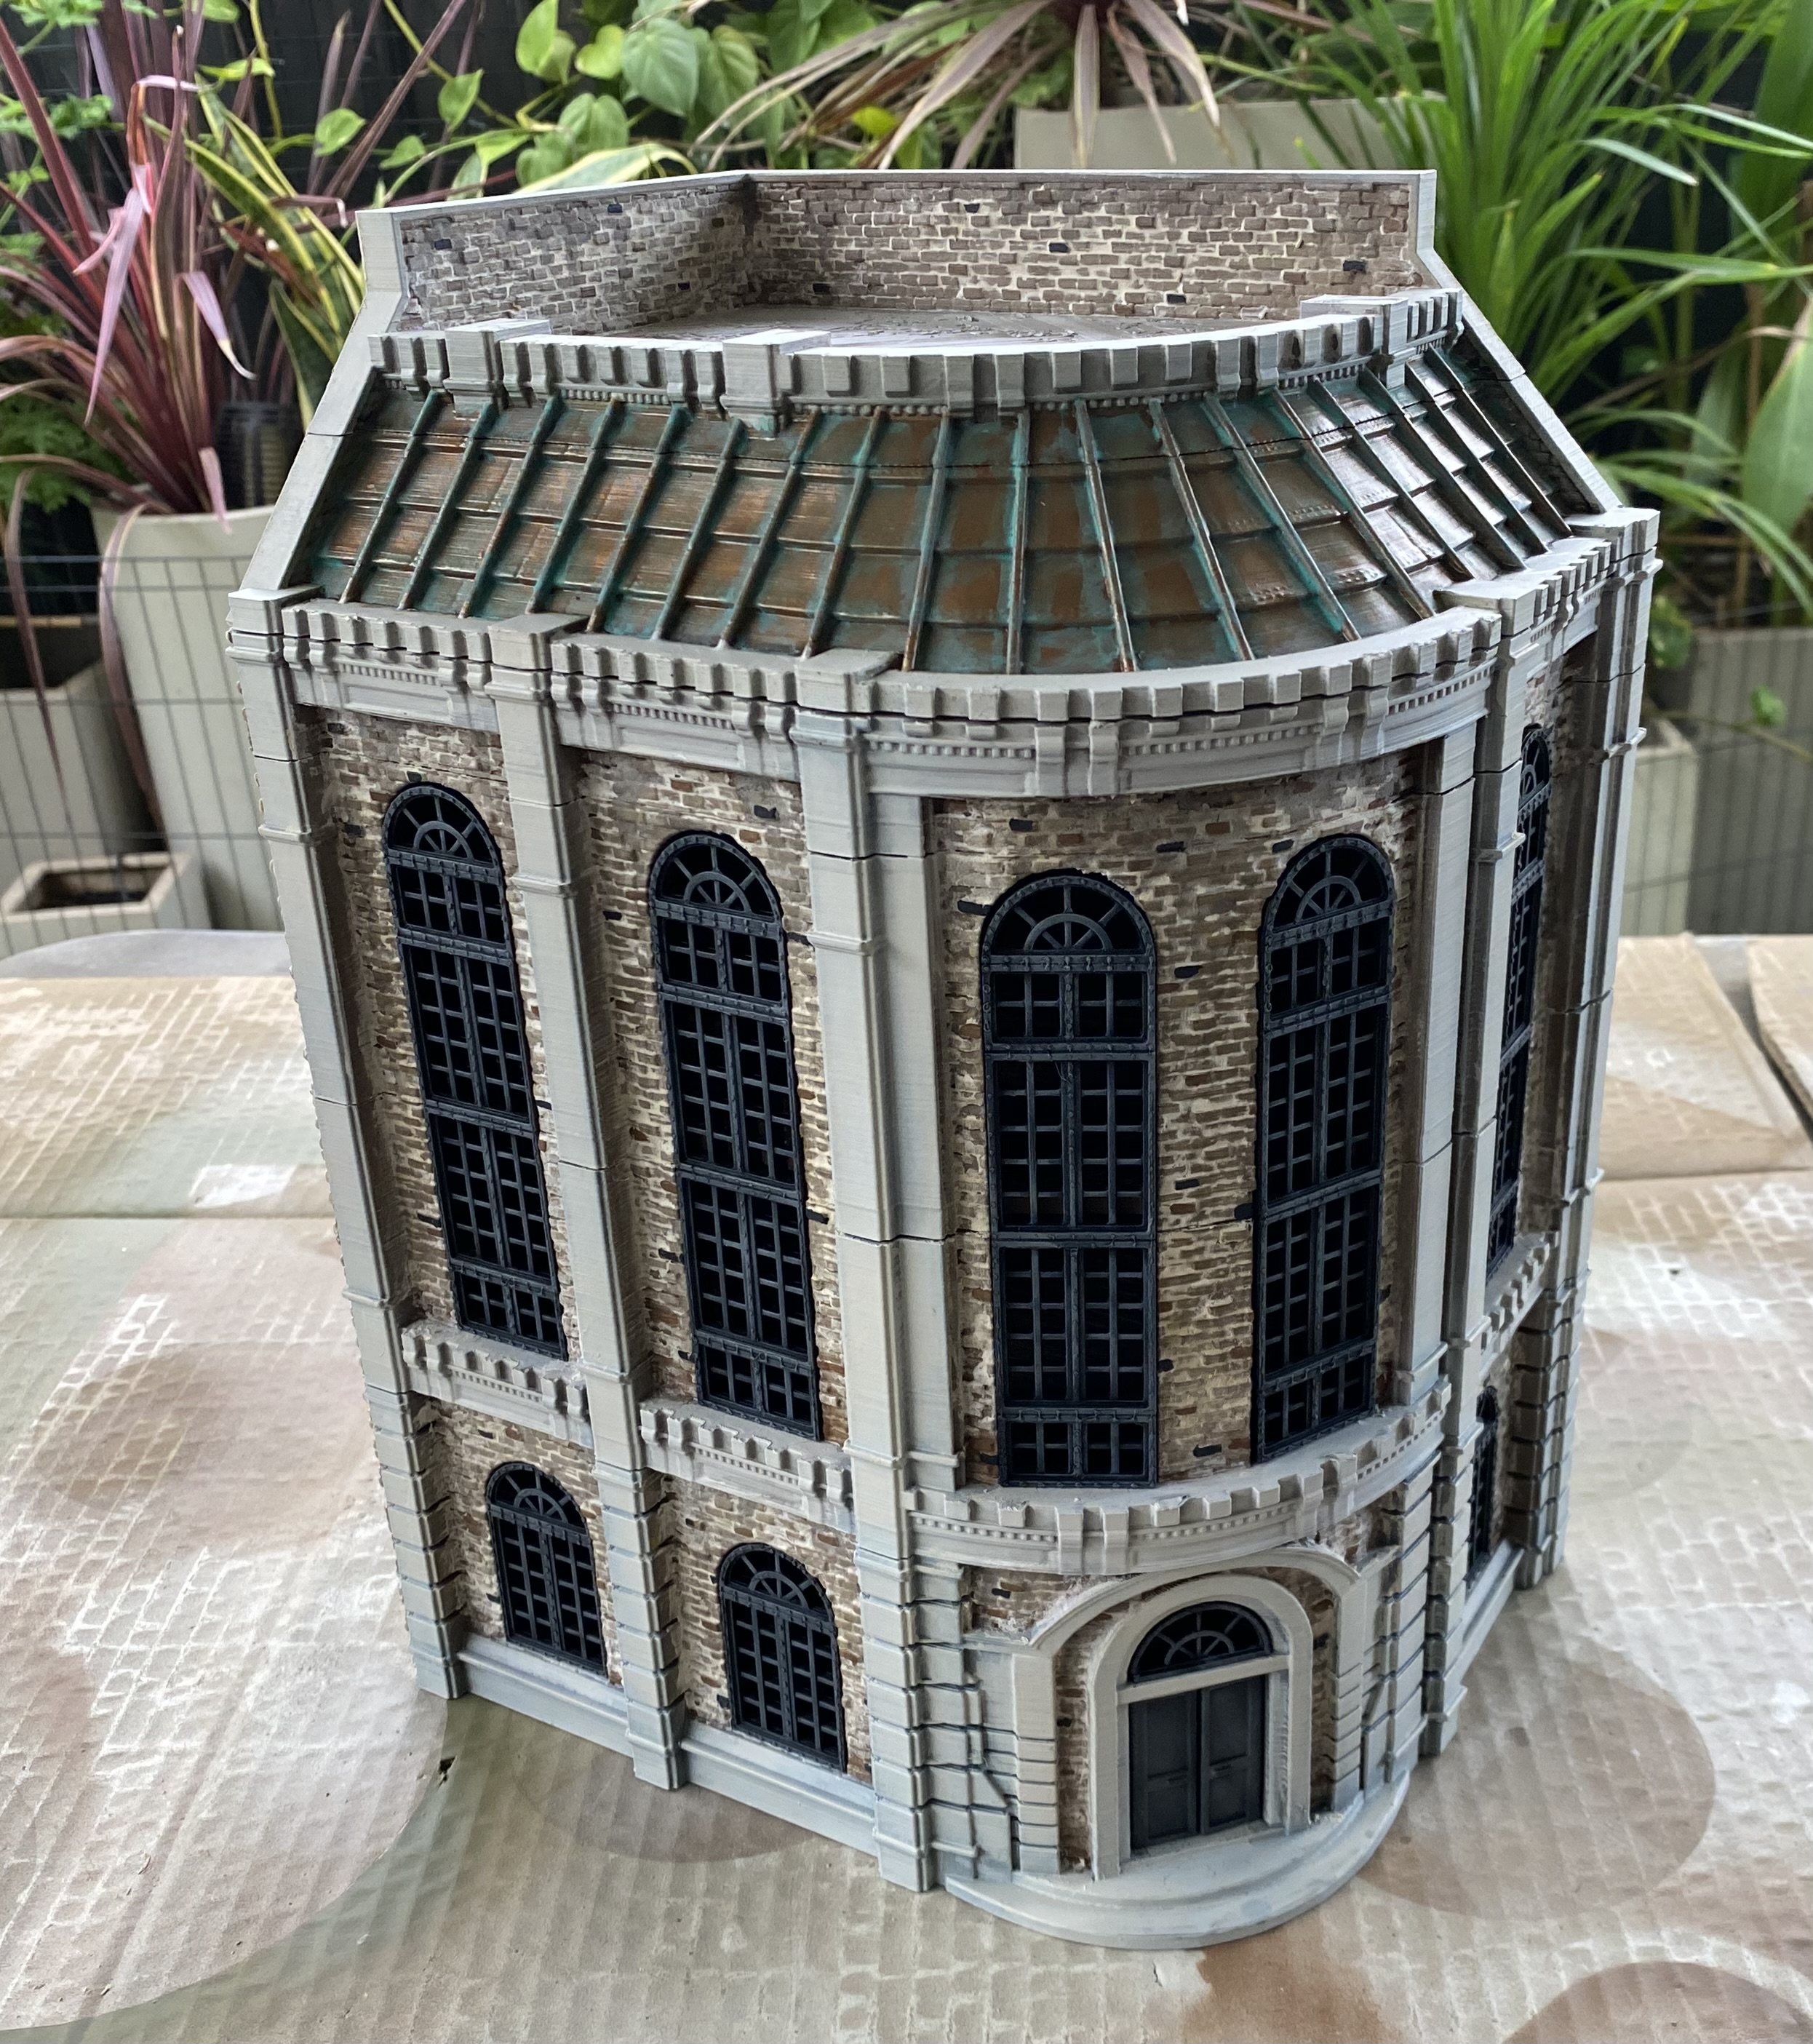 For this building the windows and doors were spray painted black and then drybrushed with German Grey for vallejo. I felt that the darker windows would look good against the otherwise relatively light-coloured building. I also picked out a few random bricks with Army Painter Leather Brown and Vallejo German Grey. I do this just to make it look like I spend more time on the brickwork then I actually do, plus it adds a few little extra details.
 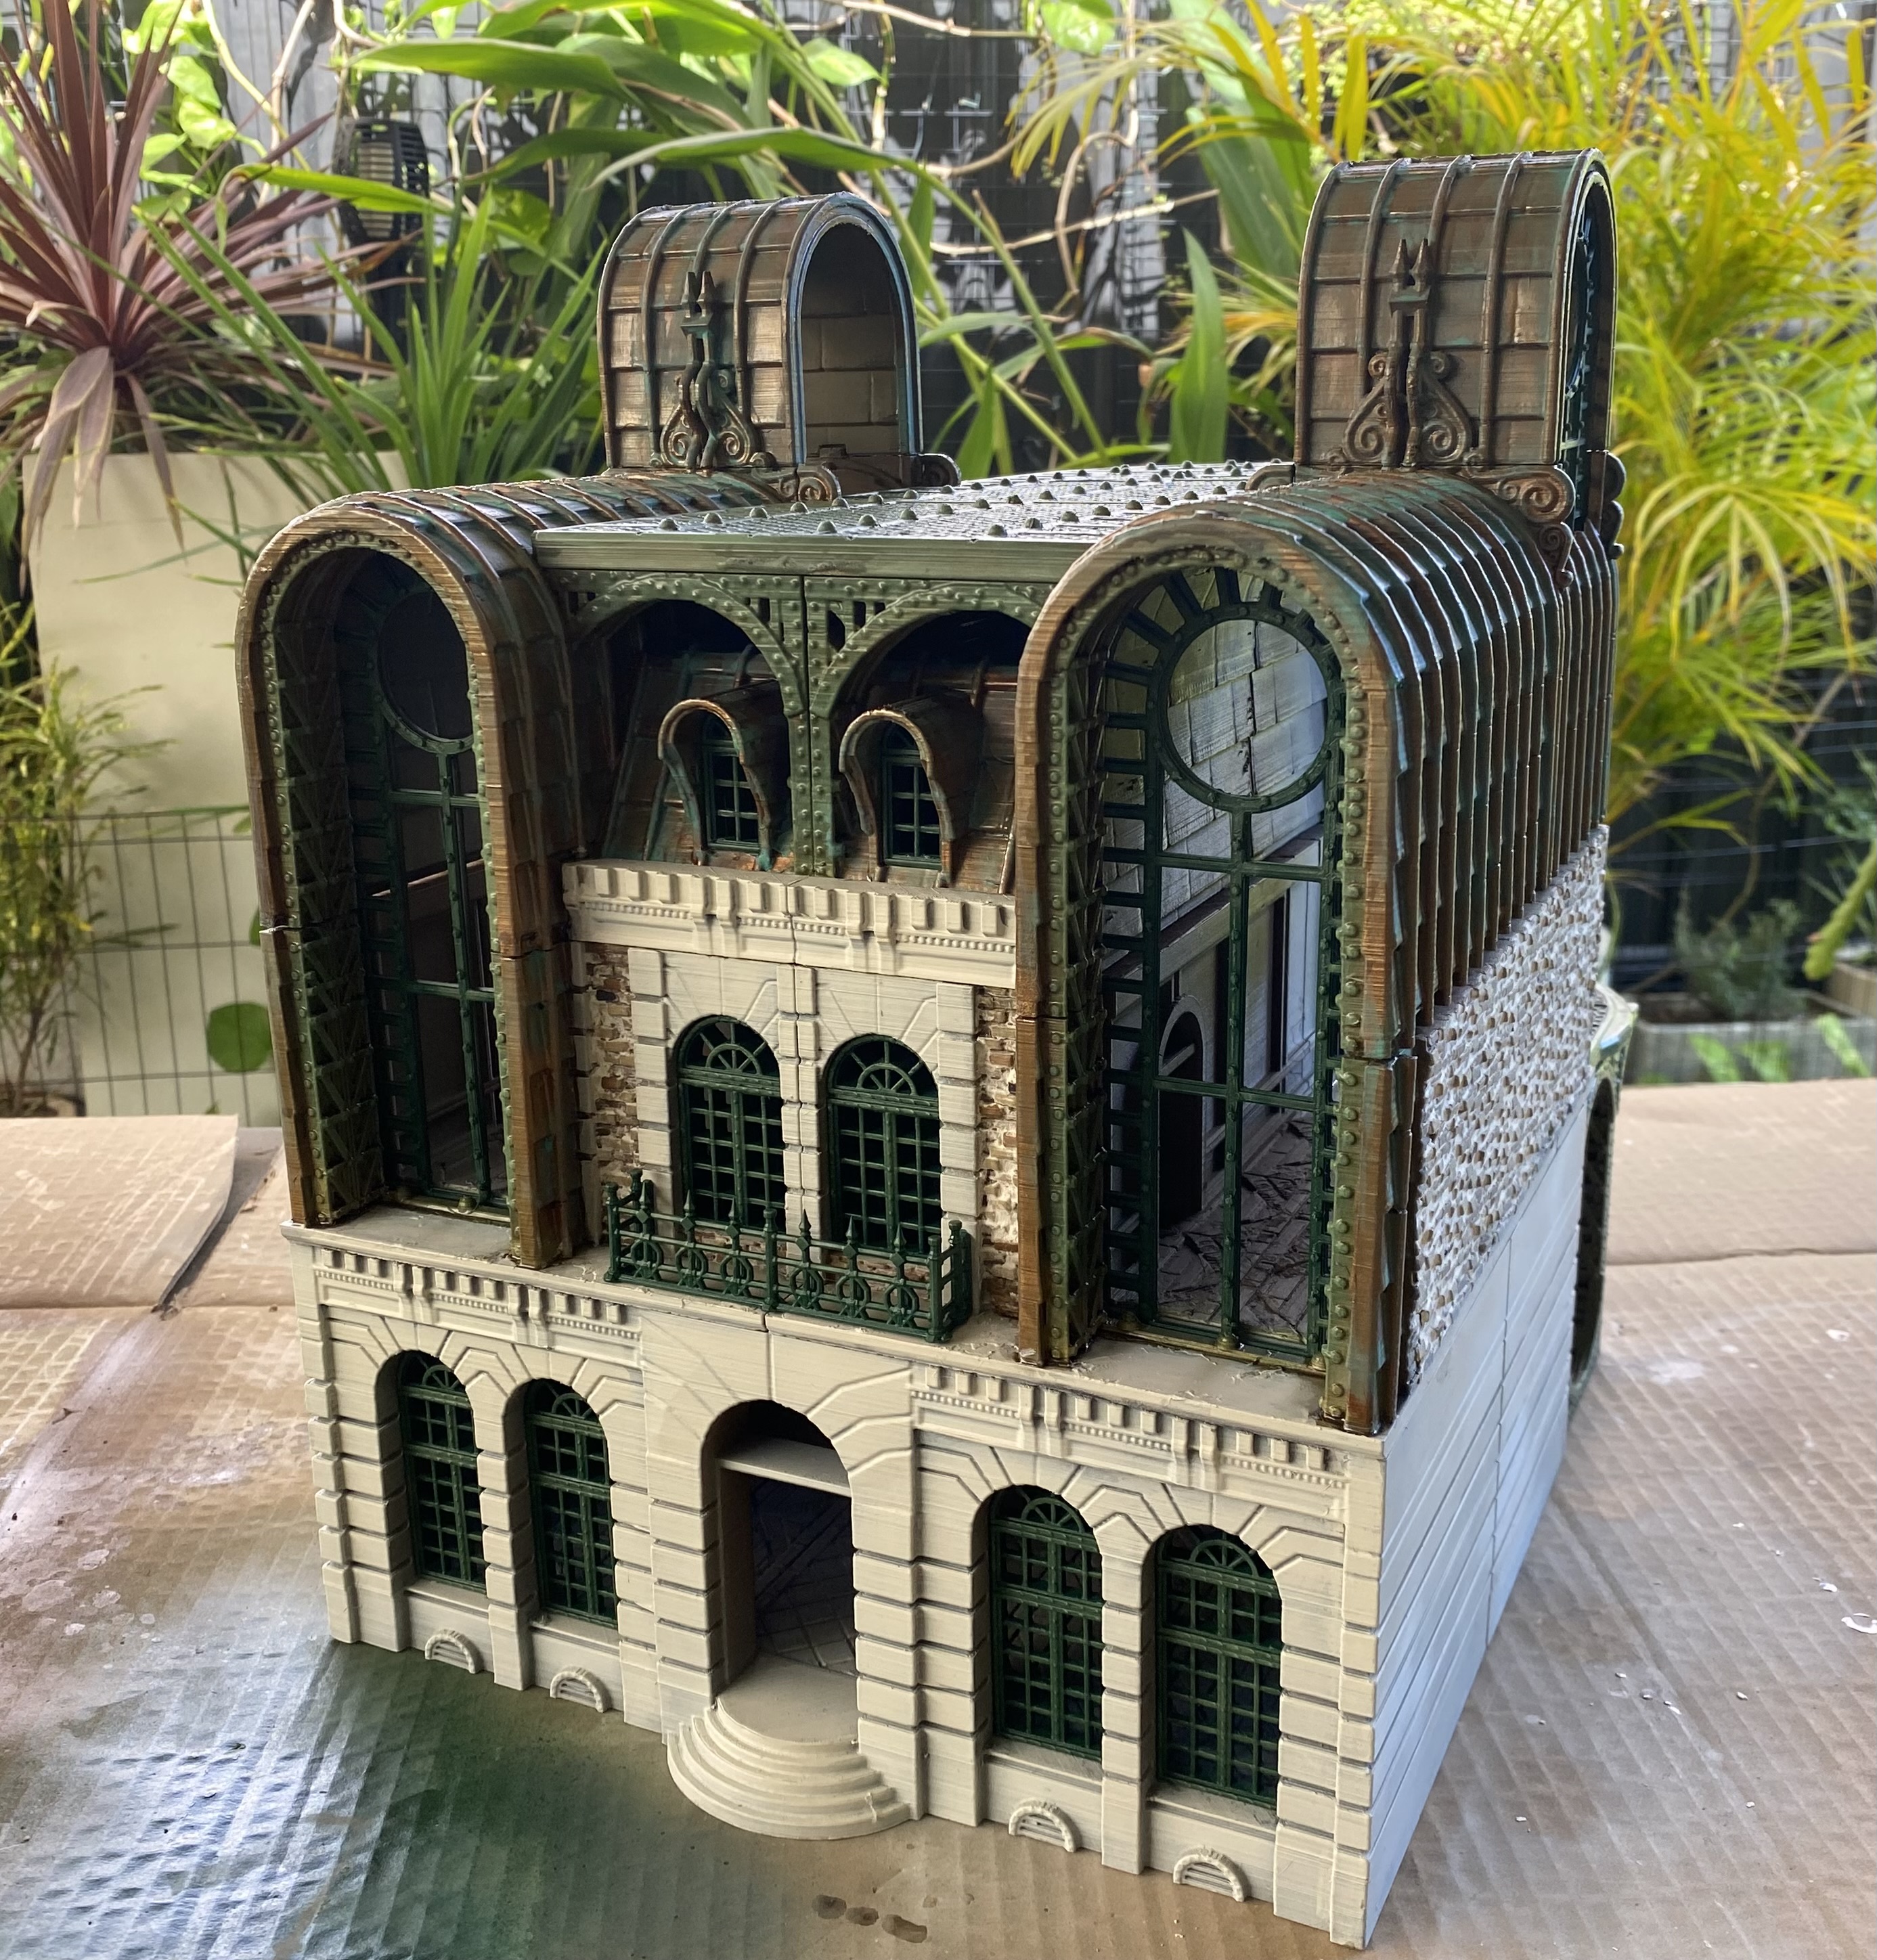 For the Nef Station I went with green windows and railings at the front. For some reason the green metal windows just felt like train station to me. I'm not sure why.
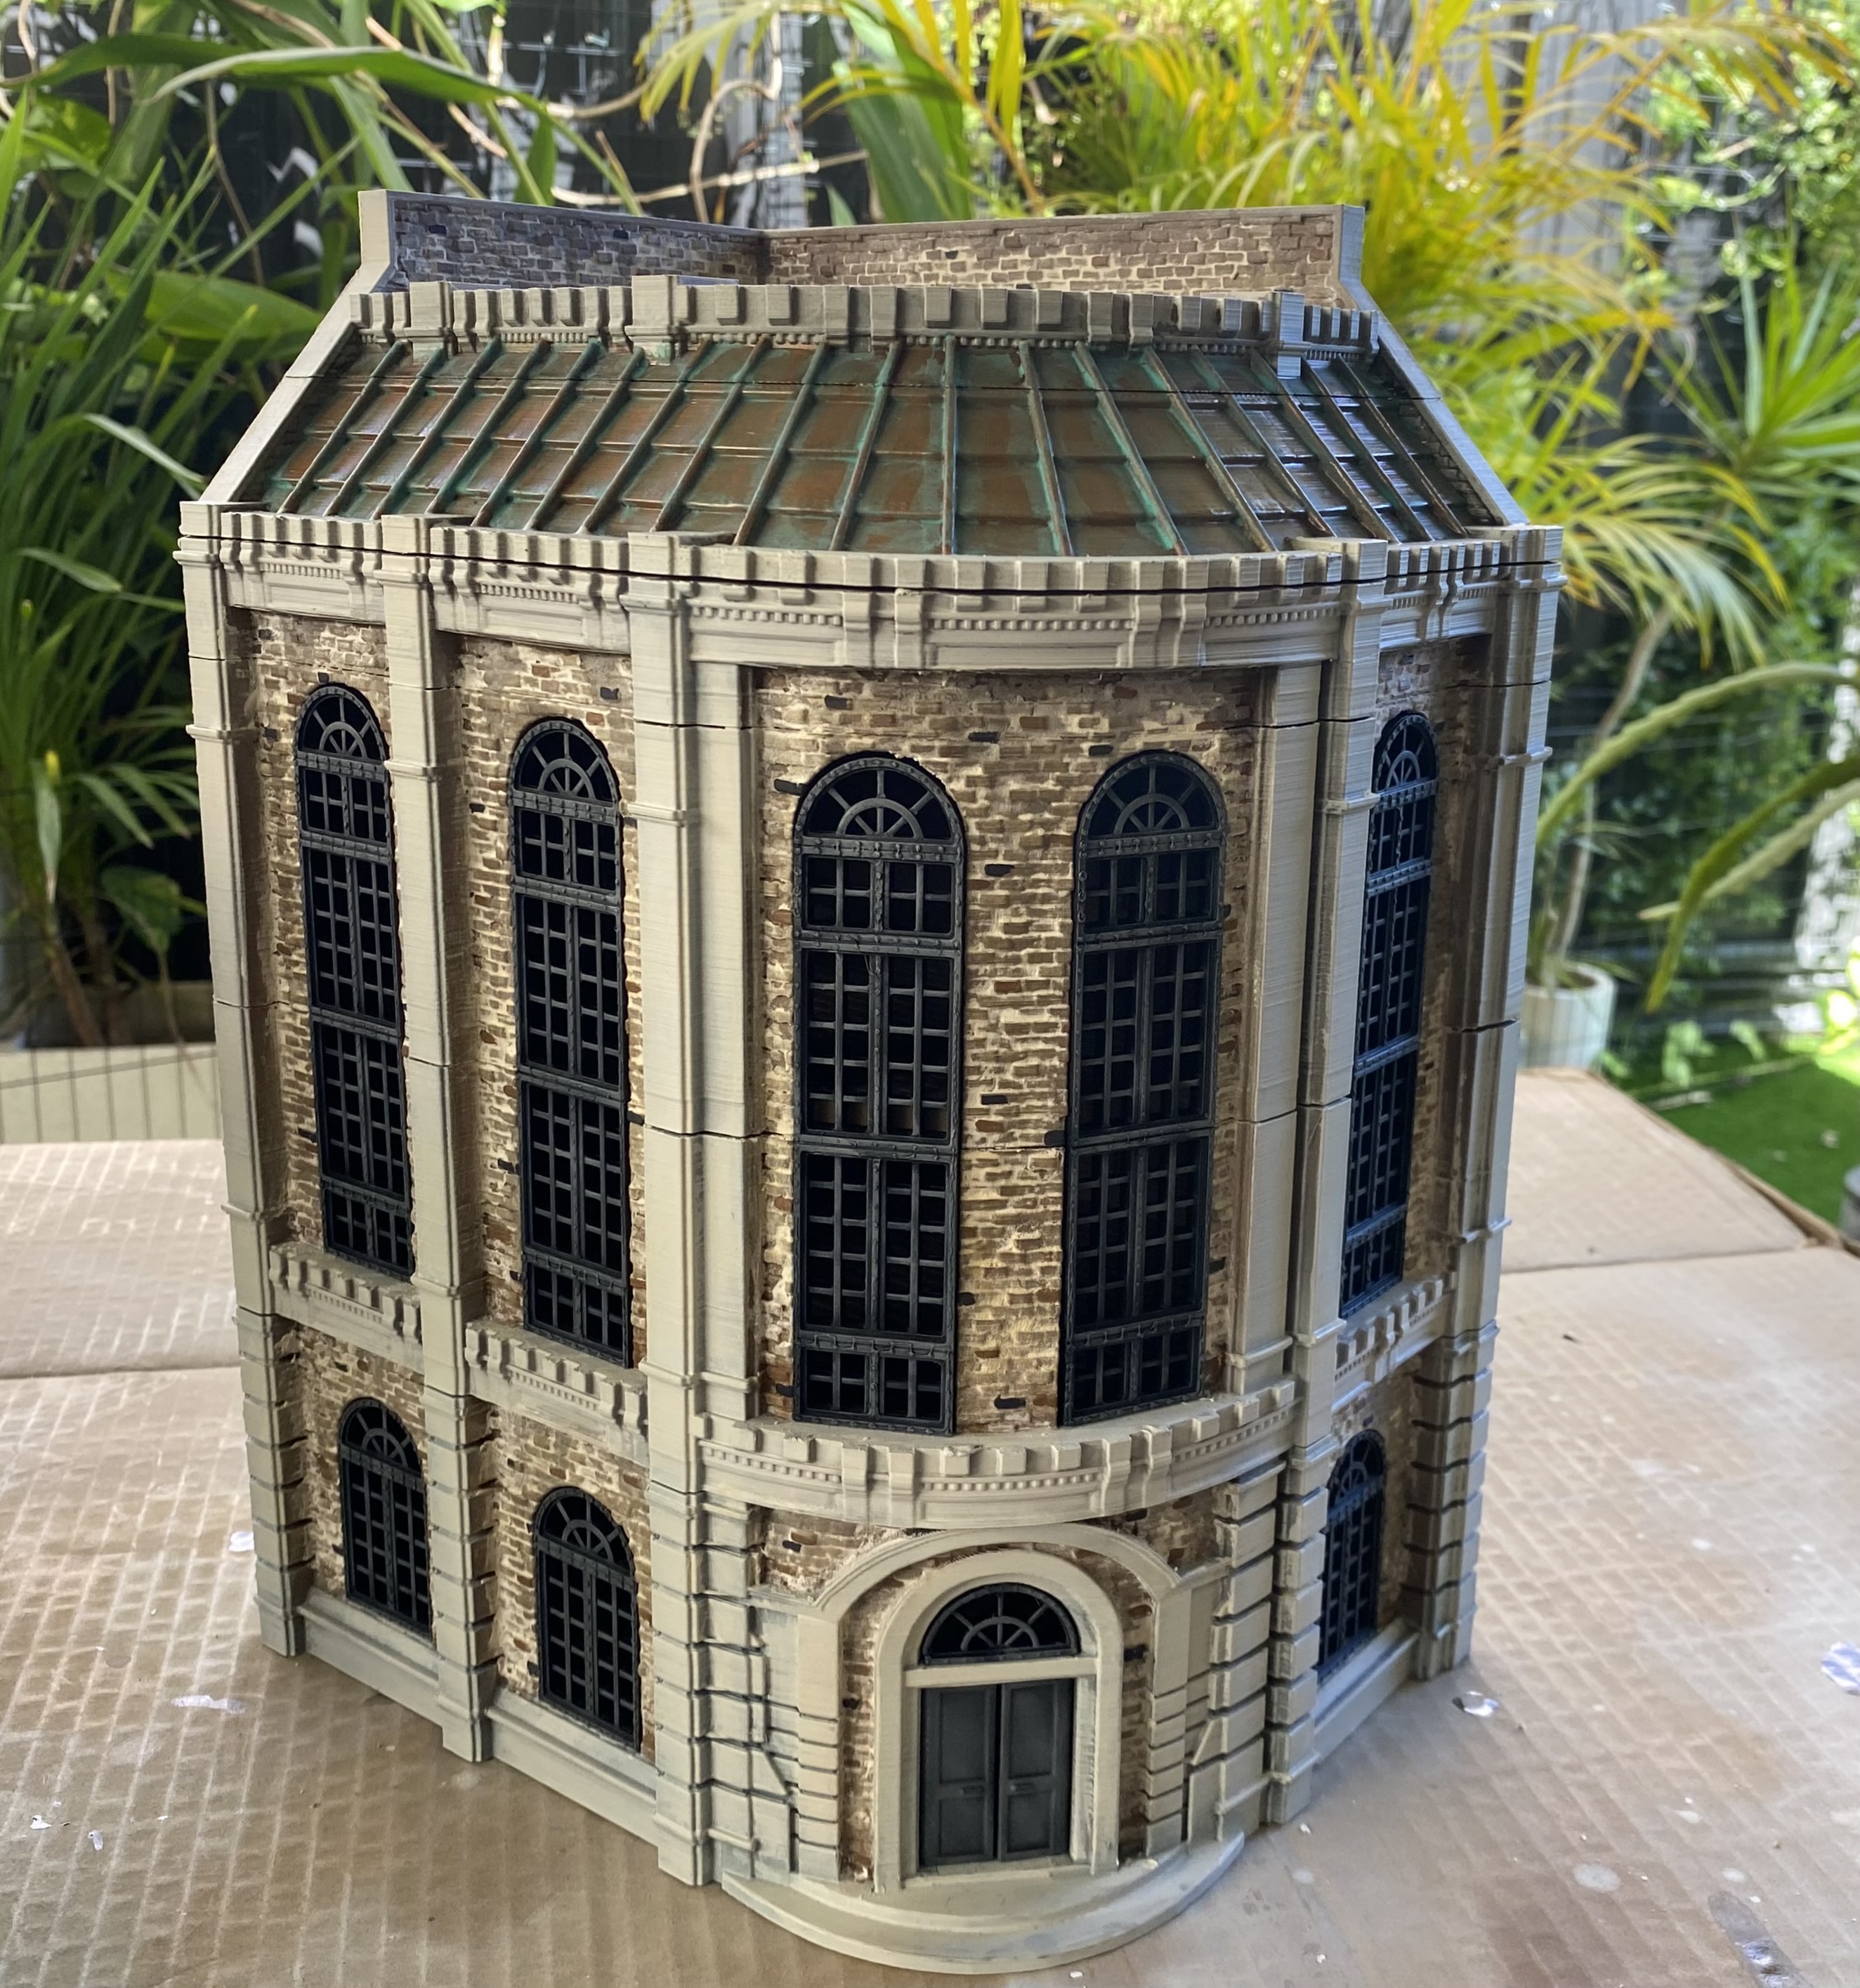 Weathering the brickwork was the next step and is incredibly easy to do. I used vallejo light grey wash and basically drew lines down the building on the brickwork. You can make it as subtle or as pronounced as you like by just adding more layers. (The brush I used had snapped whilst frantically paint plebians for my Circus Maximus project last month.)
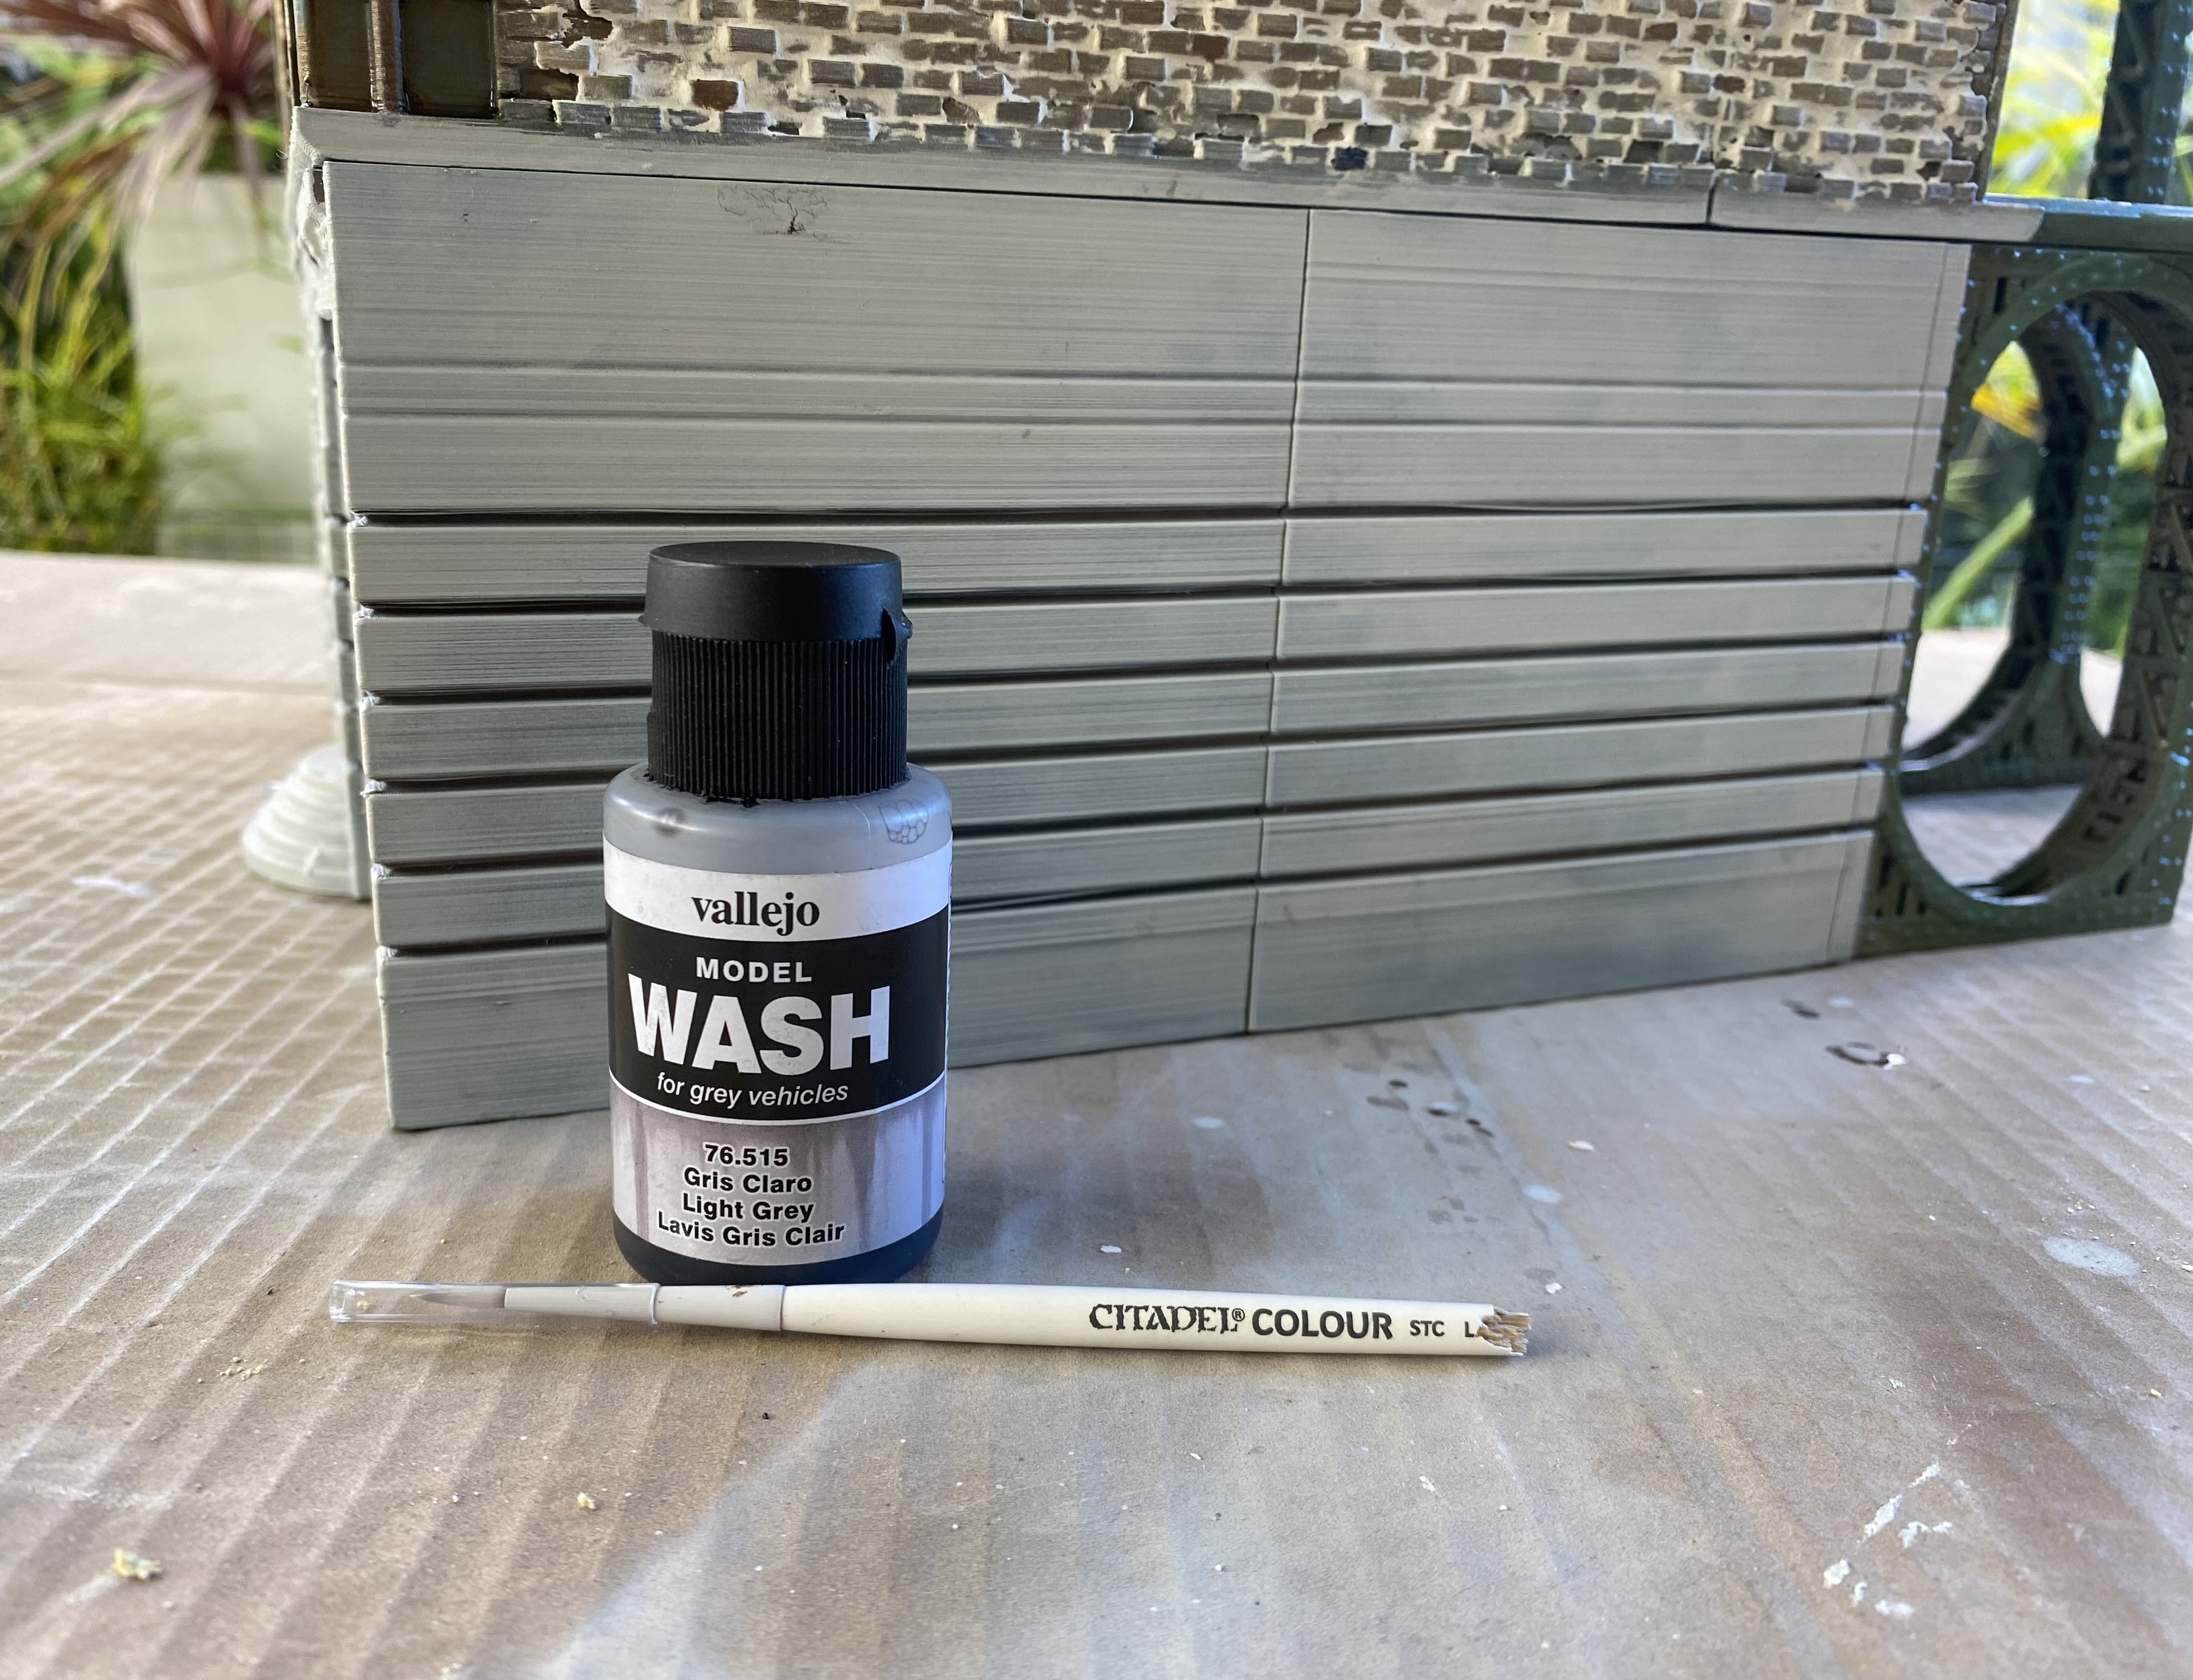
The next stages will be to figure out some stained-glass effects for the Nef Stations large windows and to paint up the lift shaft cages that go inside it.
Anyway, that is basically my quick method for painting buildings. There are plenty more to do but I won’t bore you with breaking down the steps for each building unless there is something drastically different that I do.
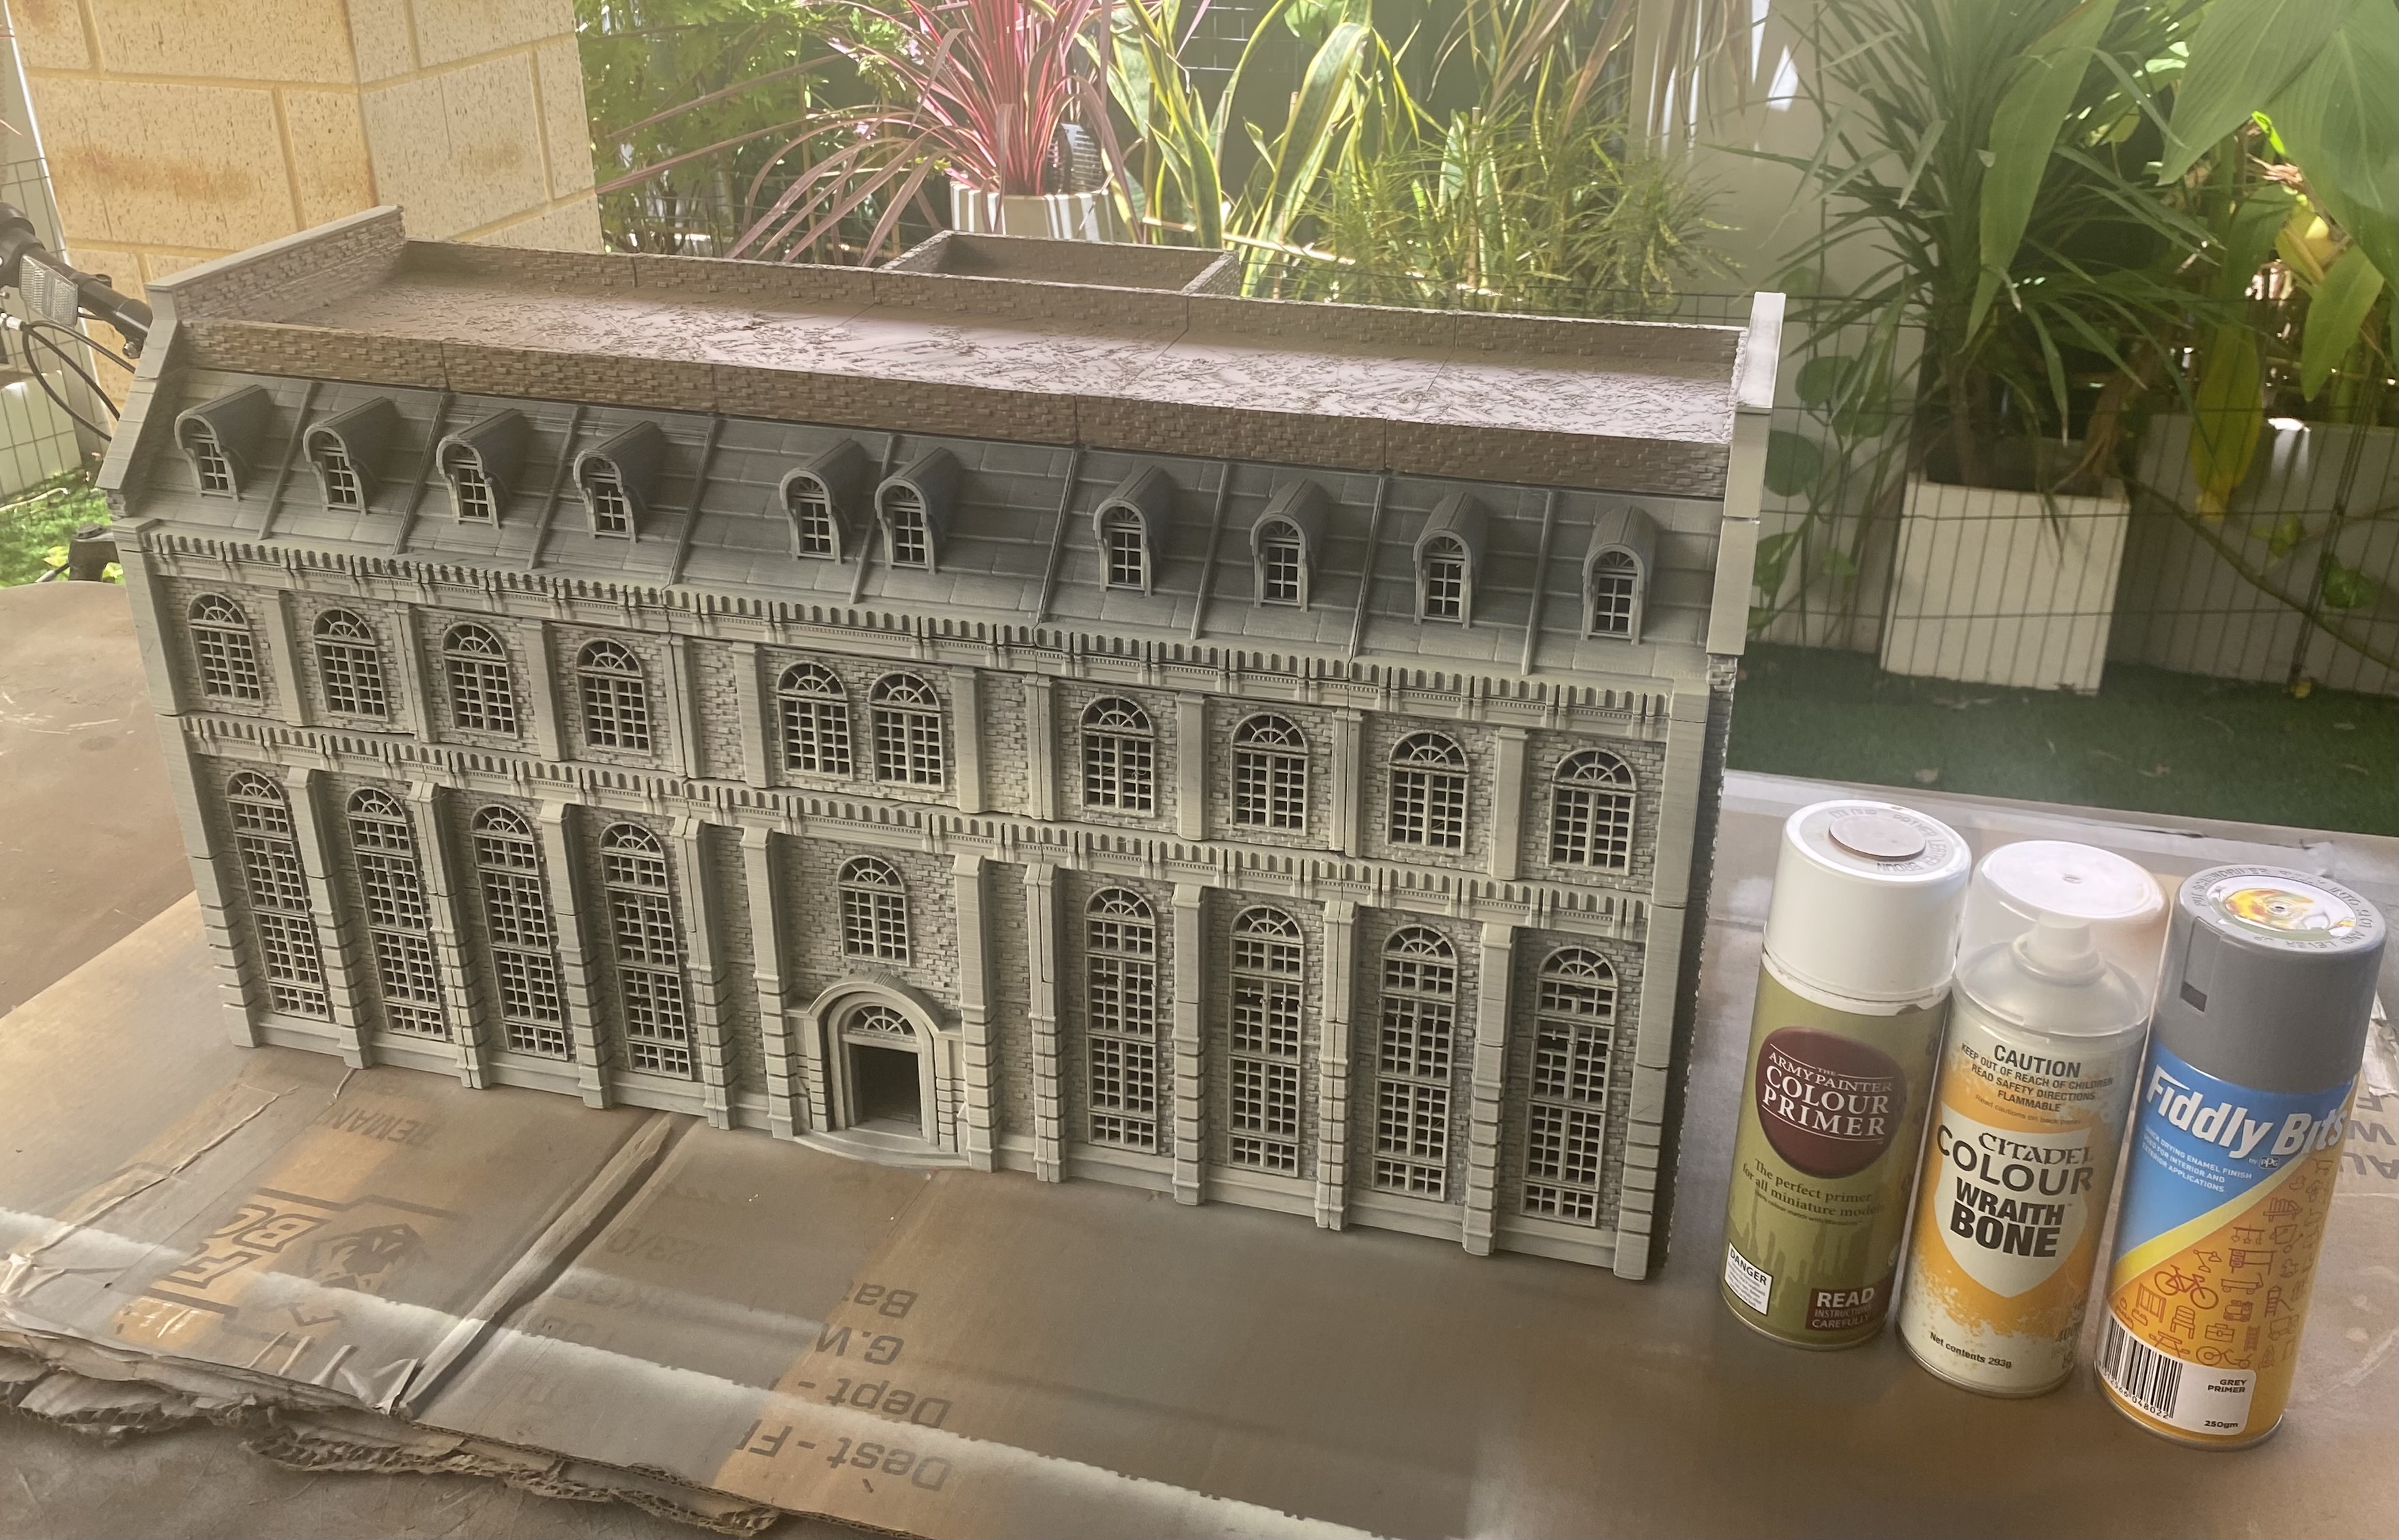
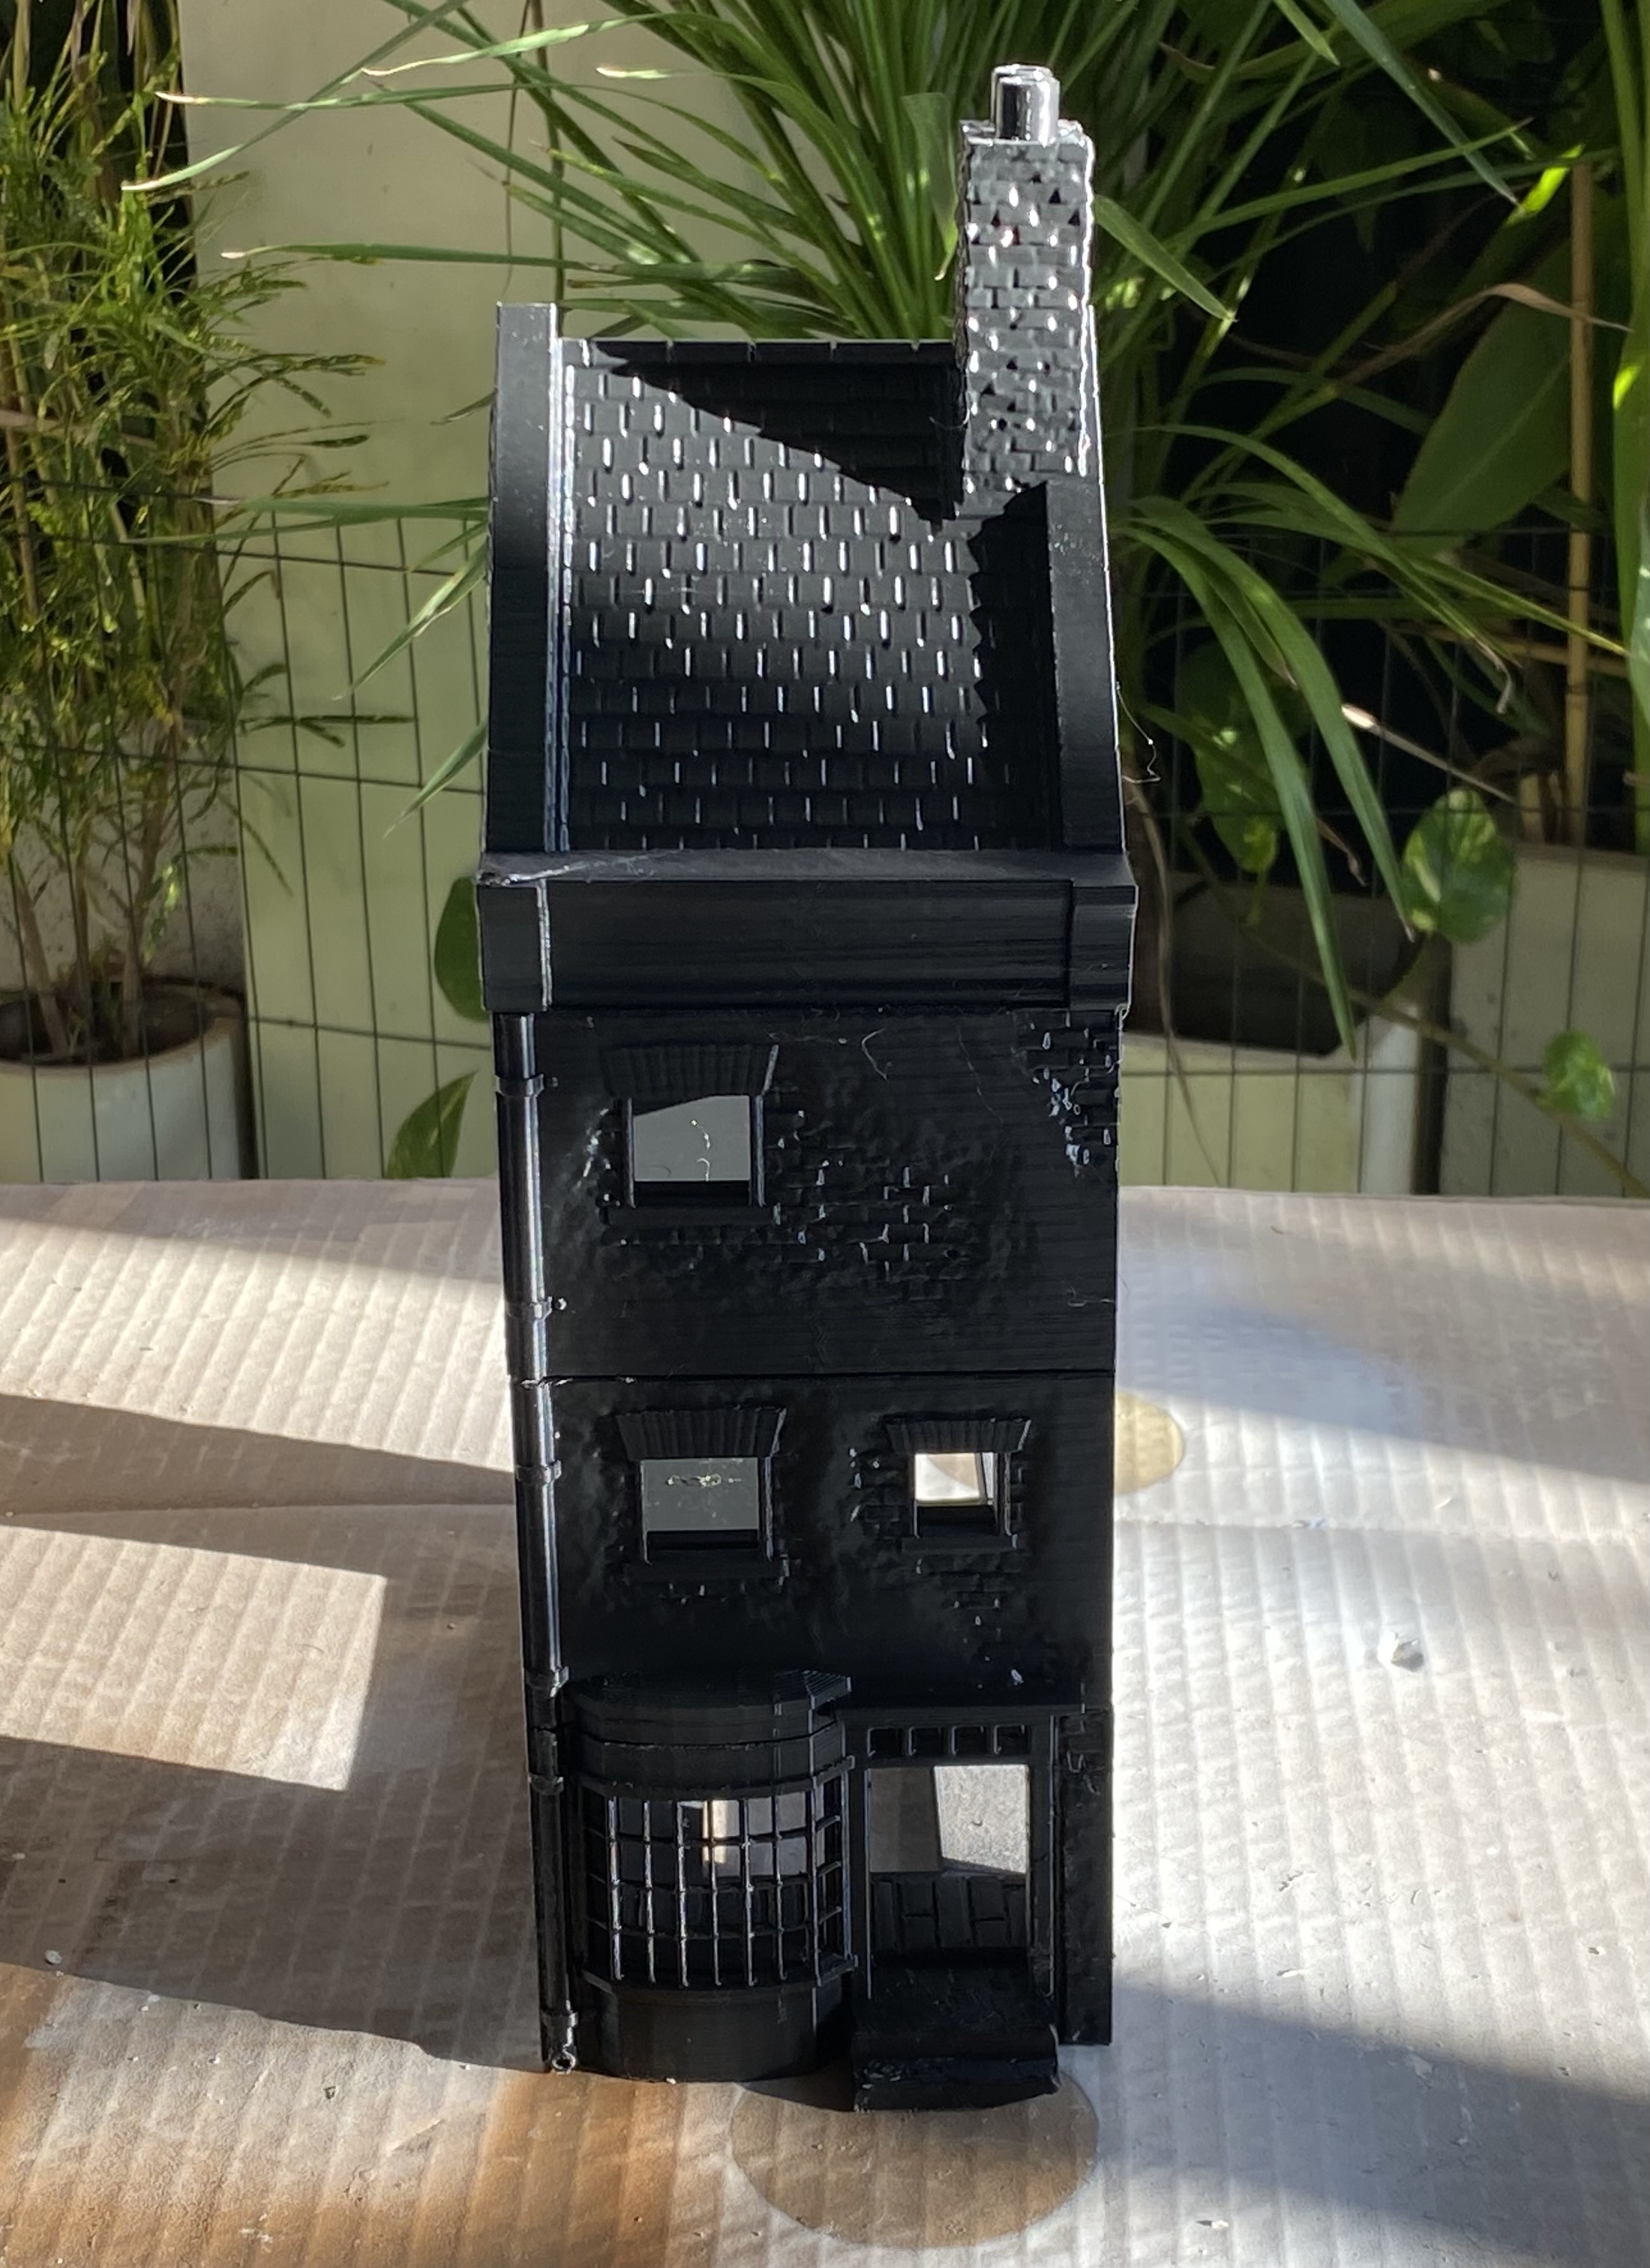
Quick Painting
Quick painting.
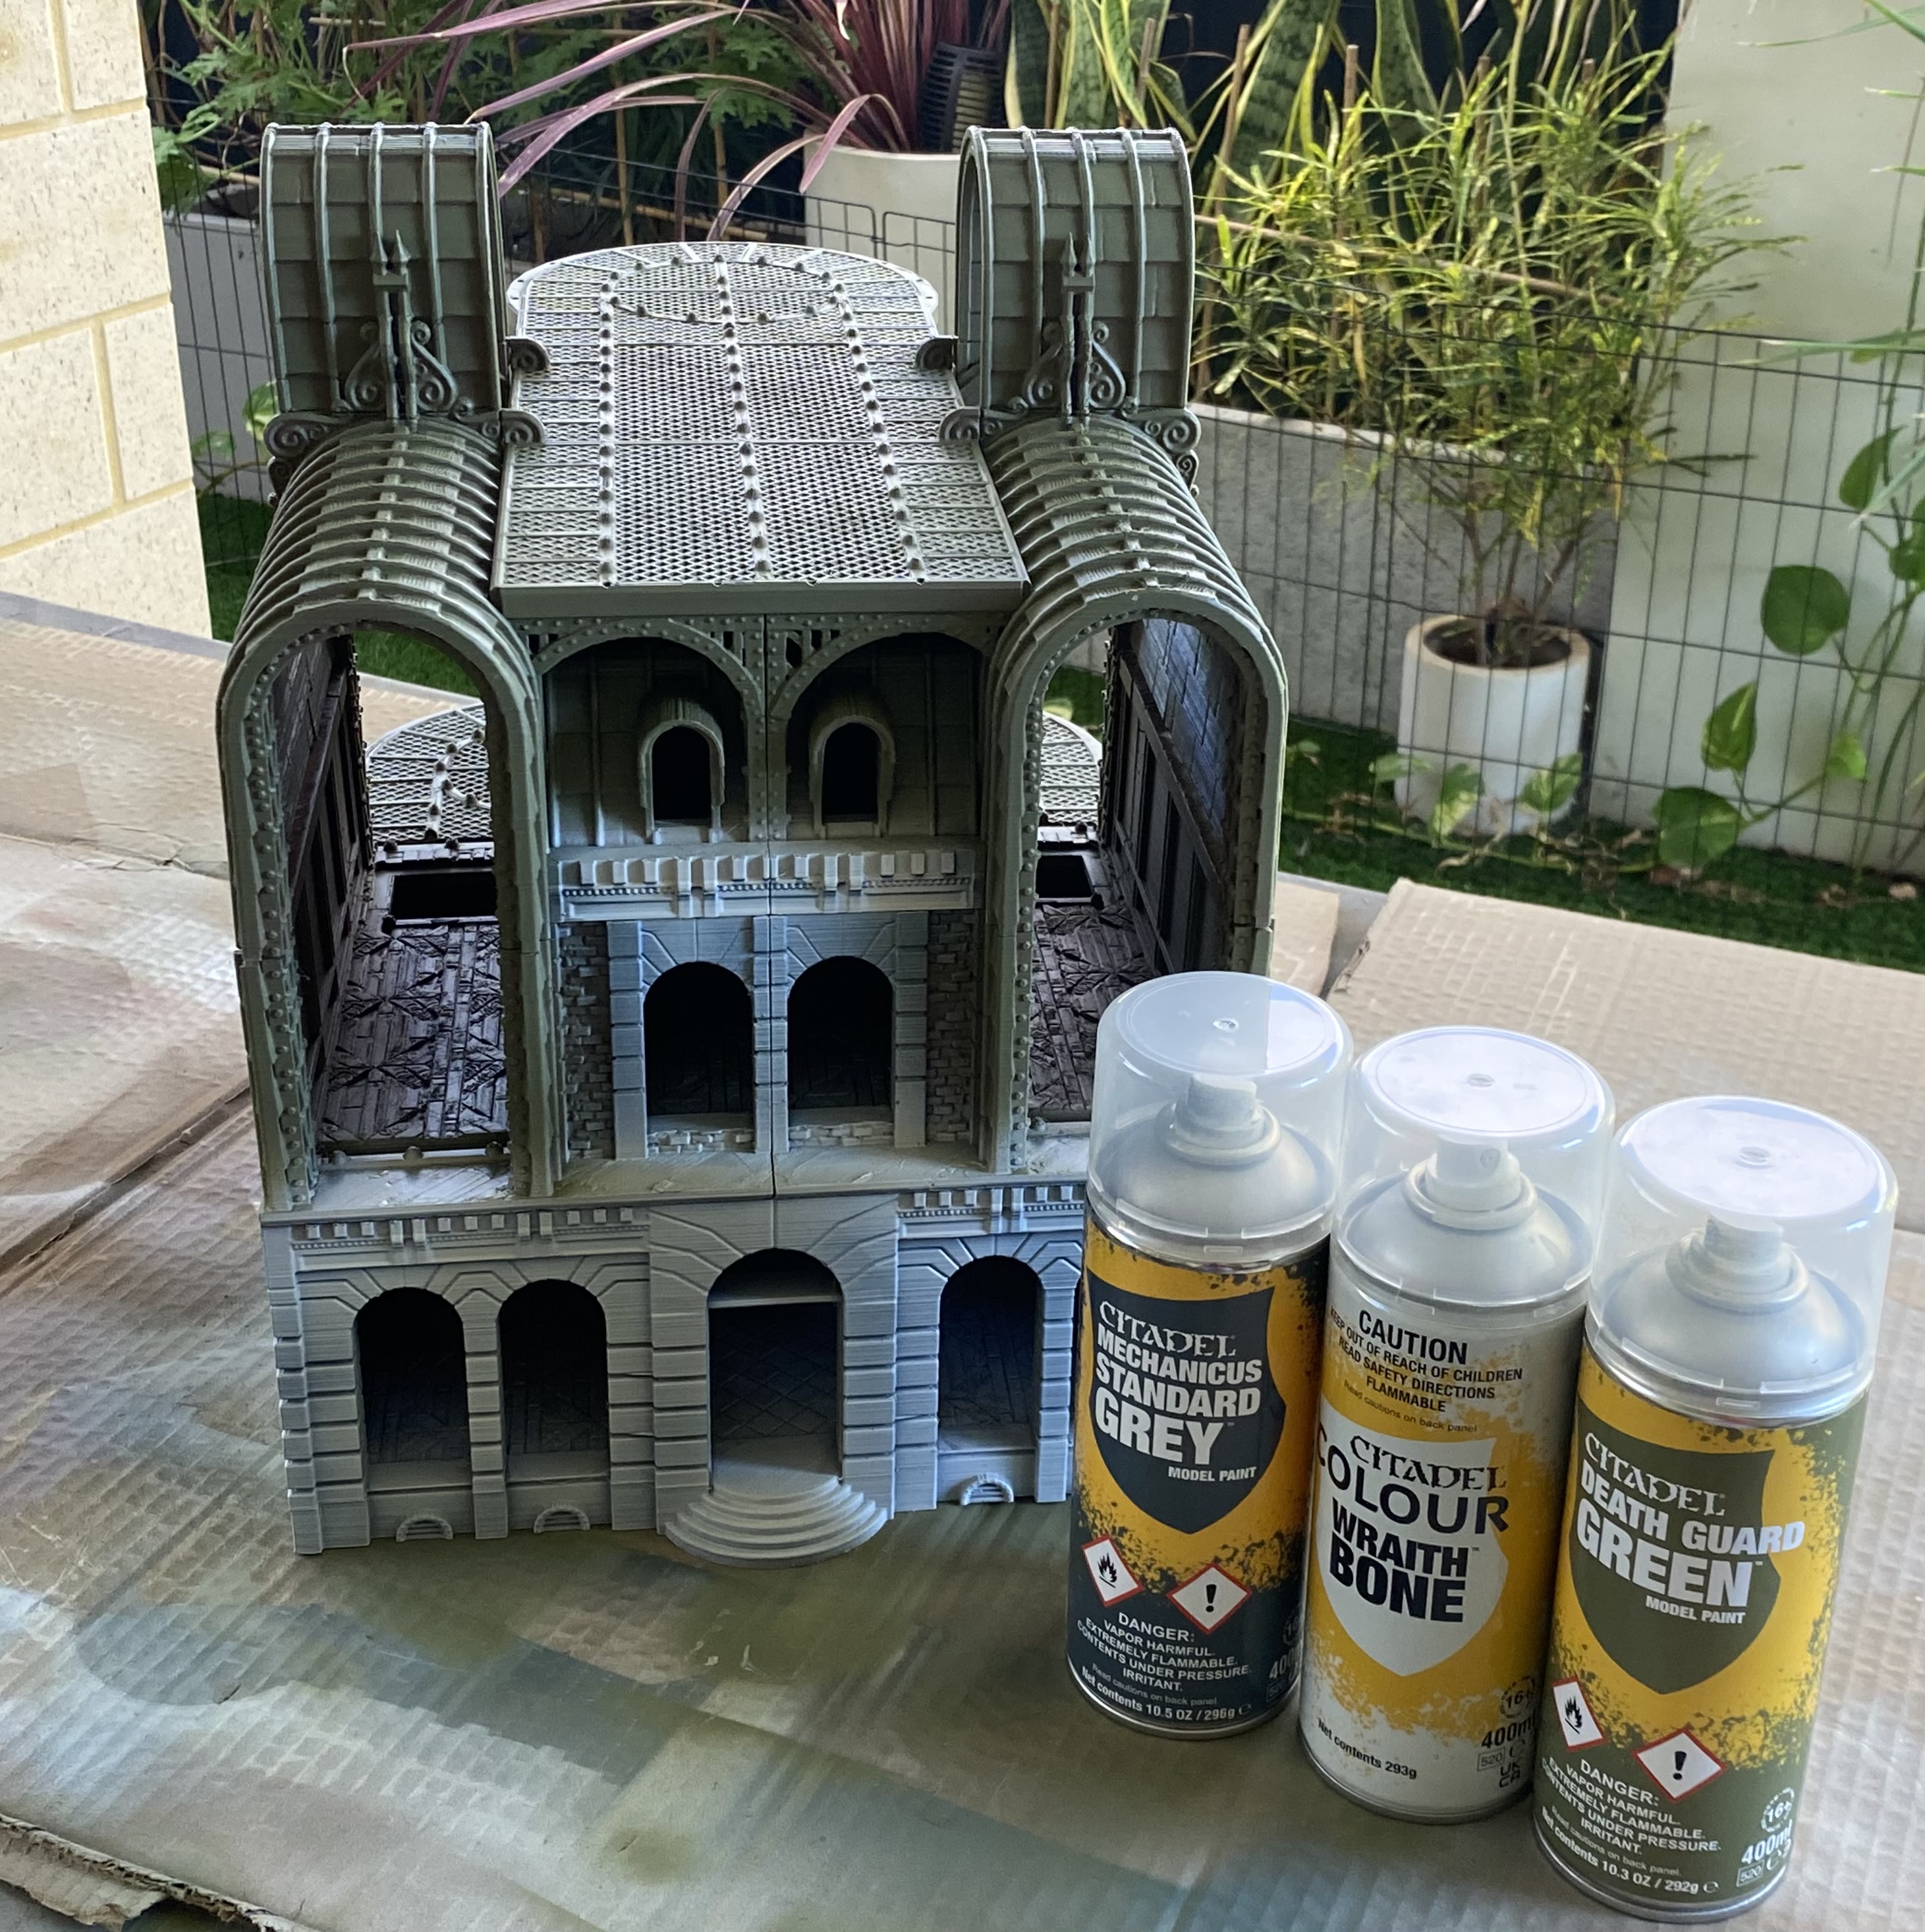
The first thing is to undercoat the model. I use spray paint for this.
My first bit of advice is to use colours that are also available in pots of paint. This way it is really easy to cover up overspray. I gave the entire model a spray coat of Army Painter Leather Brown. I use this colour a lot and it’s my go-to for the base coat of brickwork.
Once that is dry enough to handle the model I then go through and use spray paint to pick out the other areas. In this case Death Guard Green by Citadel for the roof and steelwork and Mechanicus Adeptus Grey for the areas that will become off-white. I then go over the grey areas with Wraith Bone Spray, also by citadel.
All the colours used so far are also available in individual paint pots.
It doesn’t take long for the primer coats to dry here, and I like to work on a few buildings at a time.
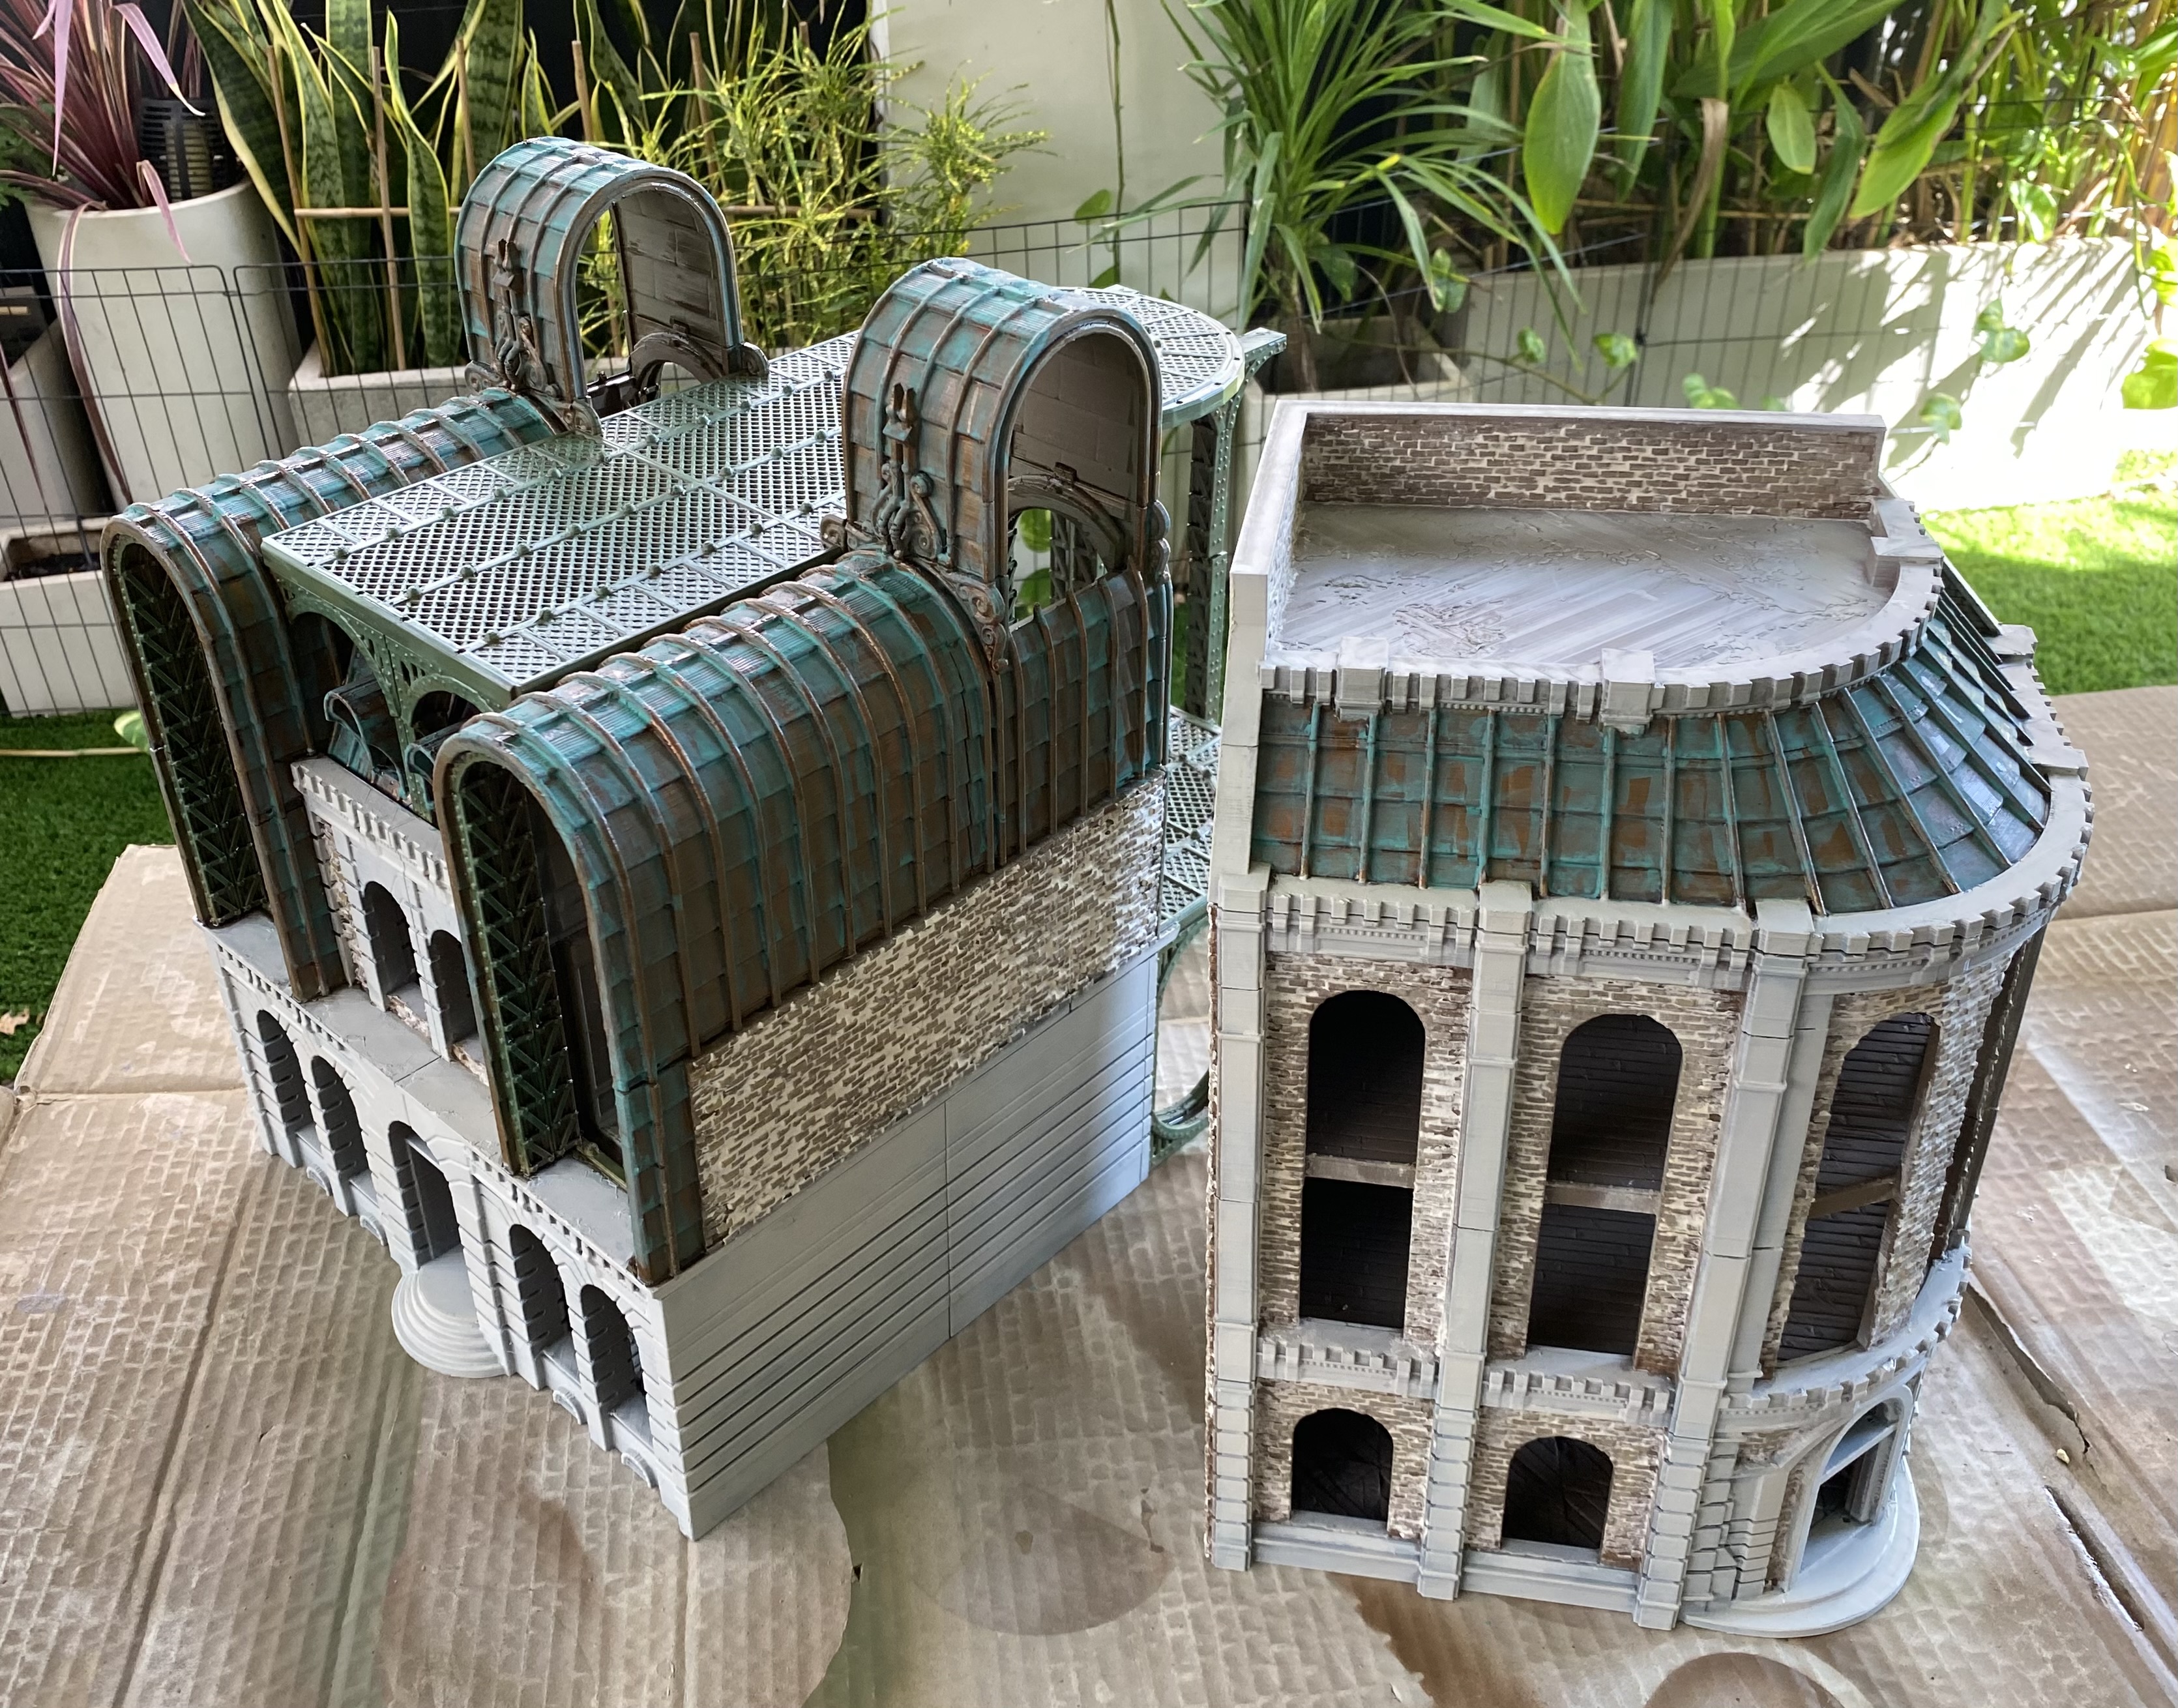
The second building is going to be a bank or something similar.
Clean up all the overspray using a big cheap brush and the relevant colours. Leather Brown, Death Guard Green or Wraith Bone. The brush that I use is a really cheap flat hobby paintbrush that I picked up from the local hardware store. Doing two buildings at the same time allows the paint enough time to dry before moving on to the next colour.
I decided that the roofs would look better in tarnished copper. so gave them a quick wet-brush with metallic copper paint. Any metallic copper will do. Once that is dry, I gave the roofs and steelwork a coating army painter quickshade. I used this as it was a cheaper option than using Agrax Earthshade and over here the stuff dries pretty fast.
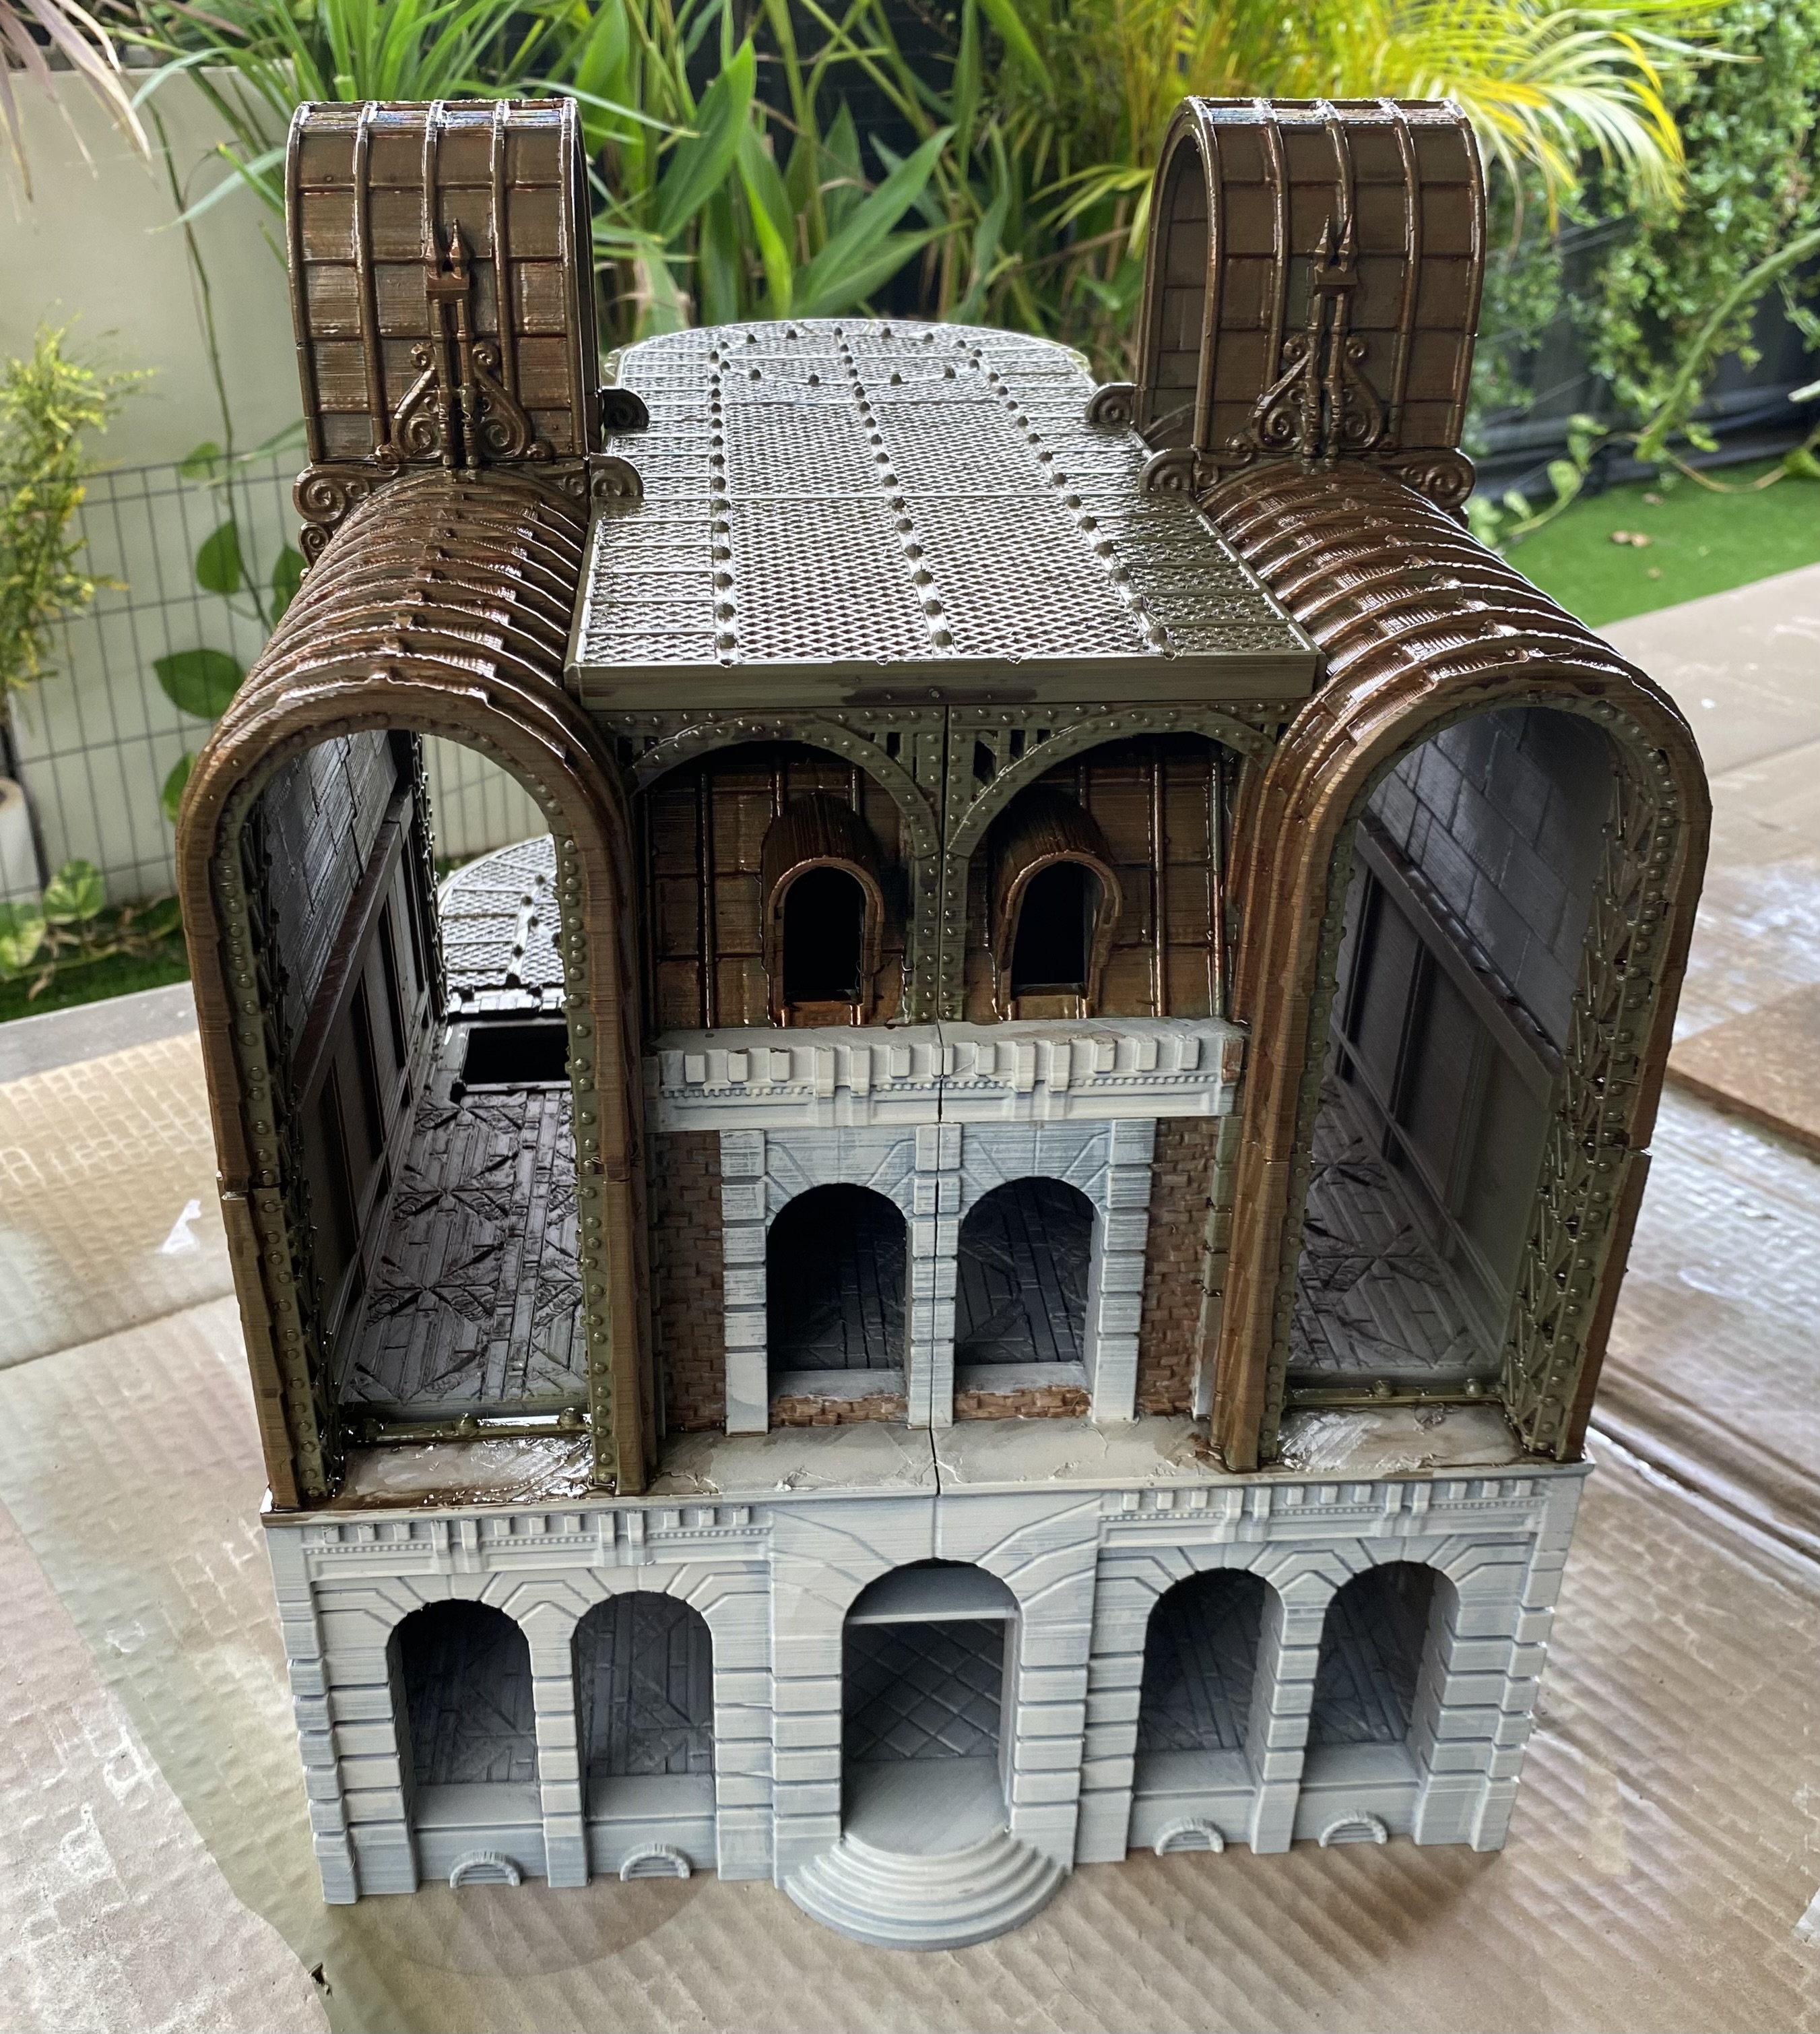
In hindsight, I could have done this before touching up the overspray on the wraithbone but at the time my initial idea was to do green roofs. Oh well, sometimes it’s good to just go with things on the fly.
Now just time to let these dry.
Kick-off Time
Well, it’s officially the 1st of October here in Perth so that means I can start kicking off with some terrain. I have a lot of ideas buzzing around in my mind and a lot I would like to get done so with that in mind it’s time to get busy.
With this little project, the aim is to incorporate a mixed set of mediums, 3D prints both purchased STLs and ones of my own making, traditional scratch building and possibly even converting of existing kits.
However, the main focus will be speed for this, and I will aim to share my method of speed painting buildings. Now I don’t claim to be an expert at this, but I have settled on a rather quick process that is incredibly easy to achieve in almost no time at all.
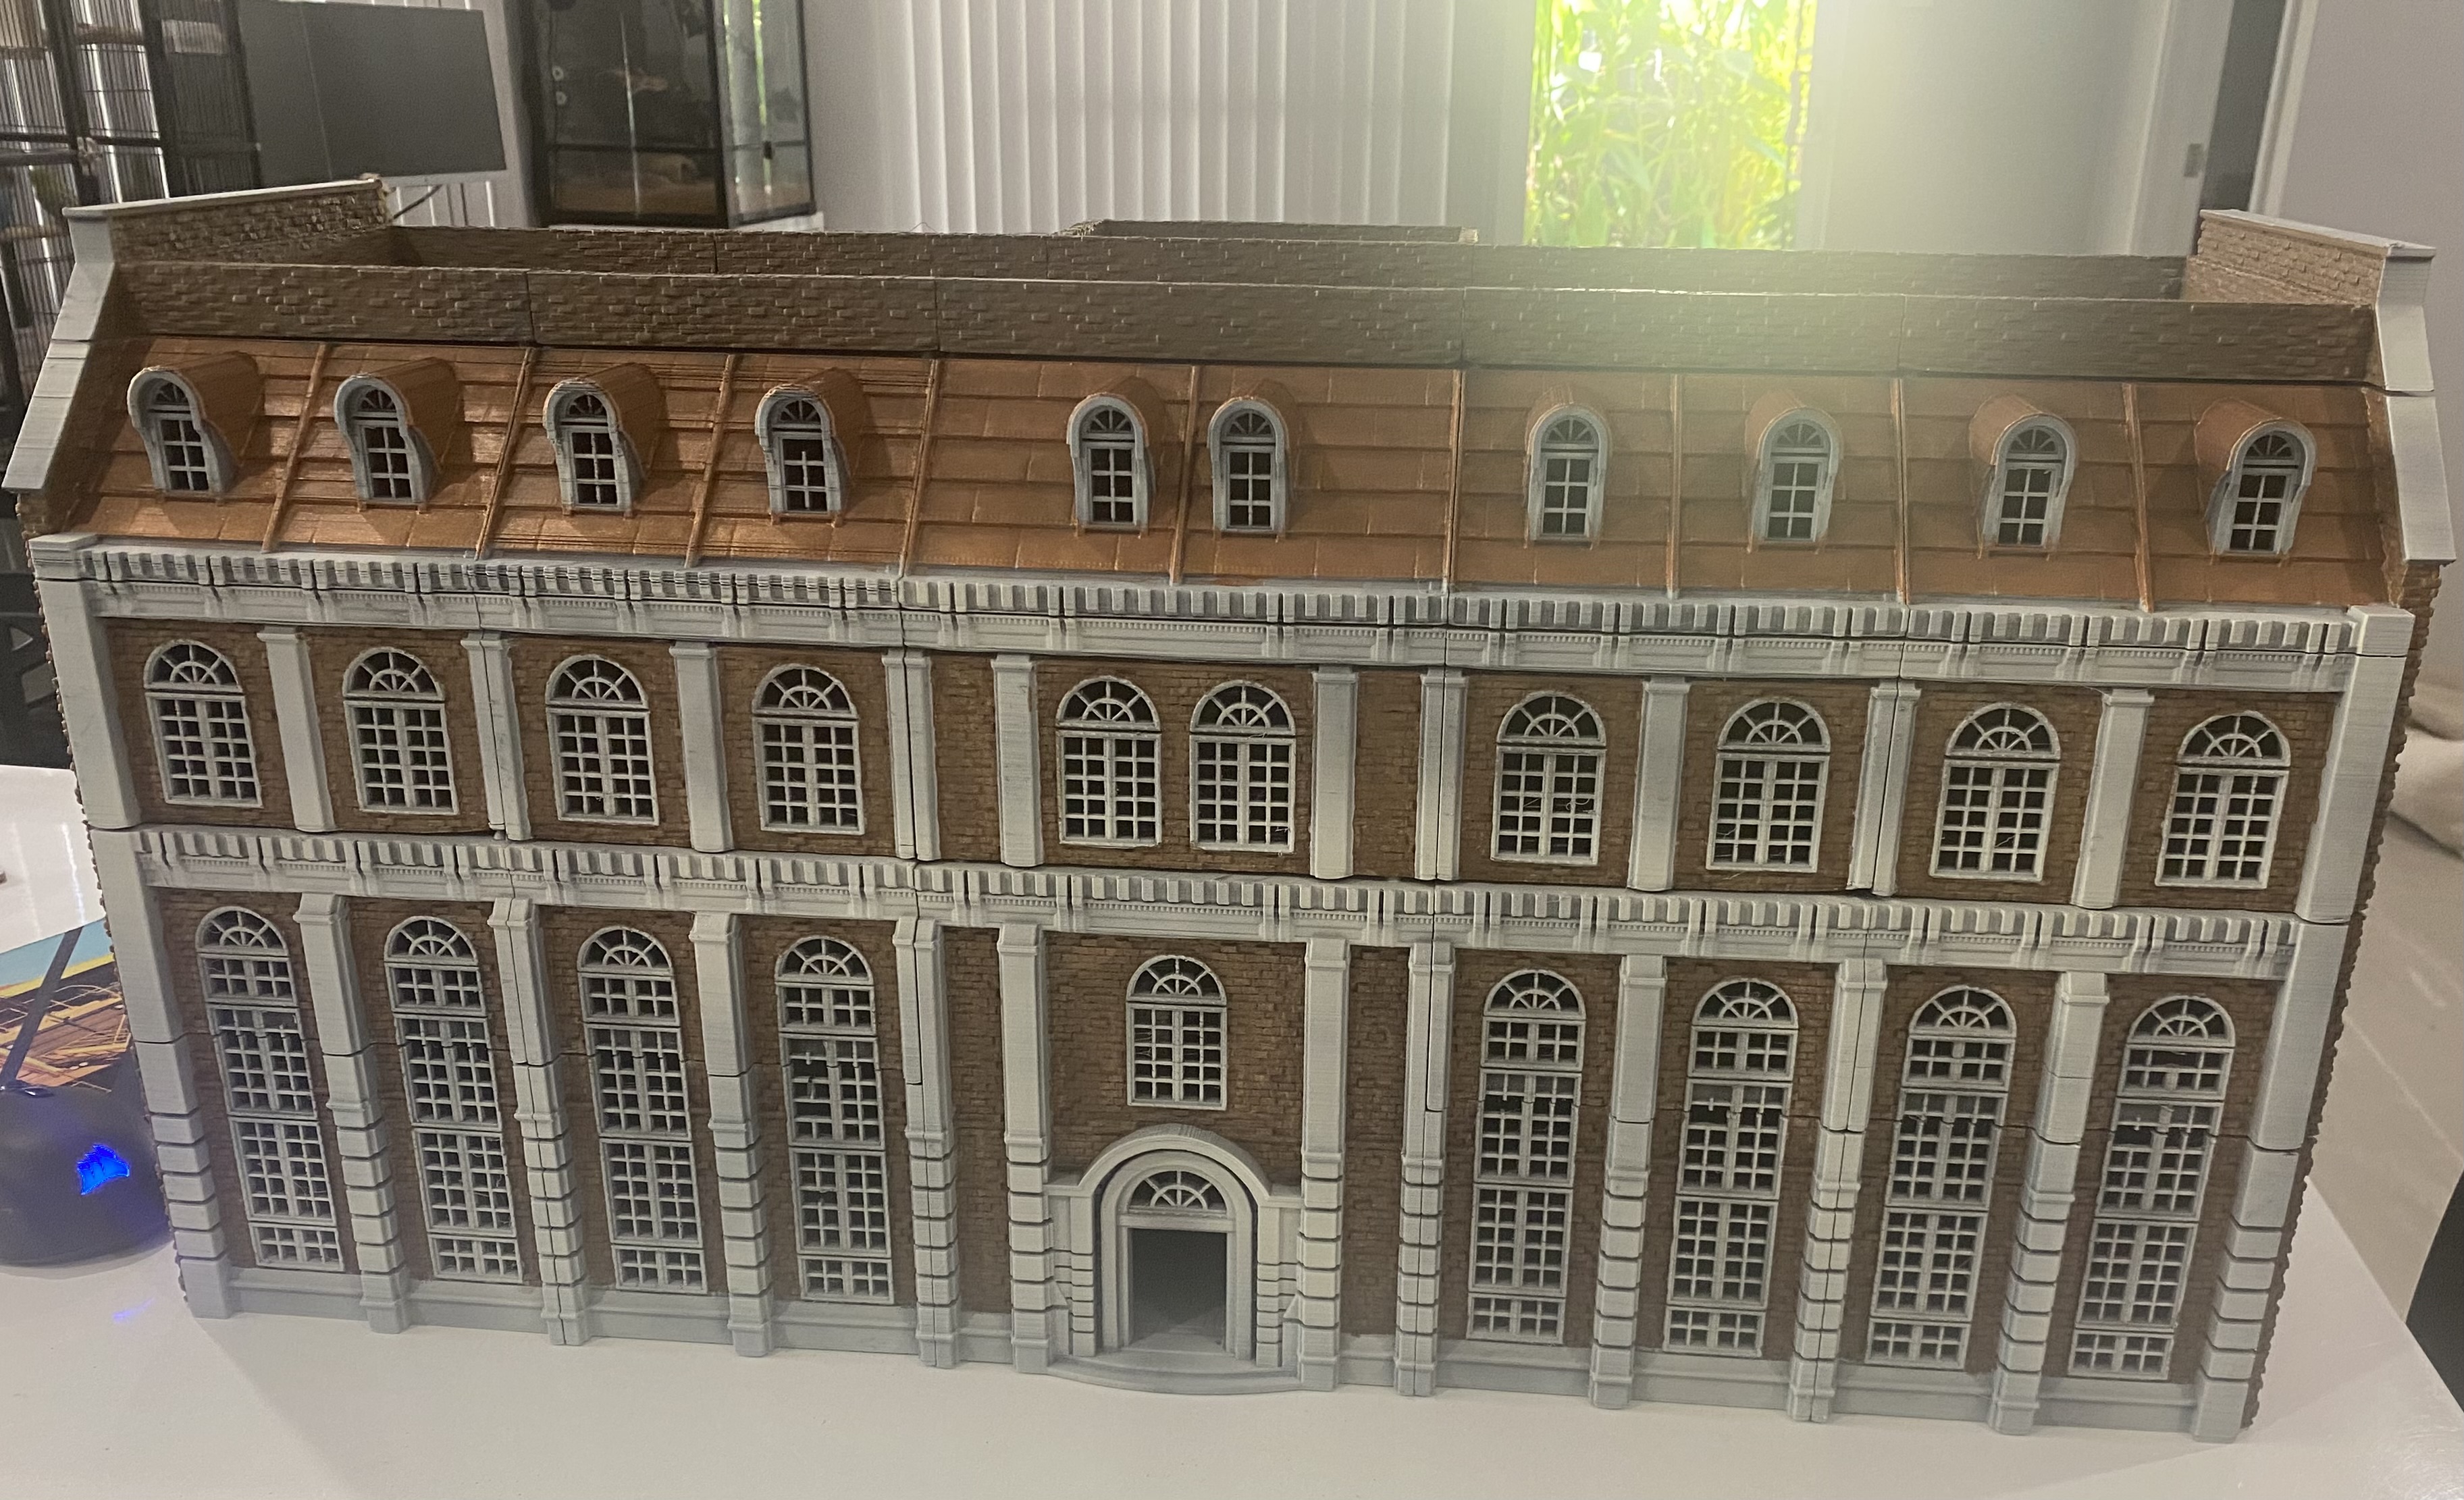
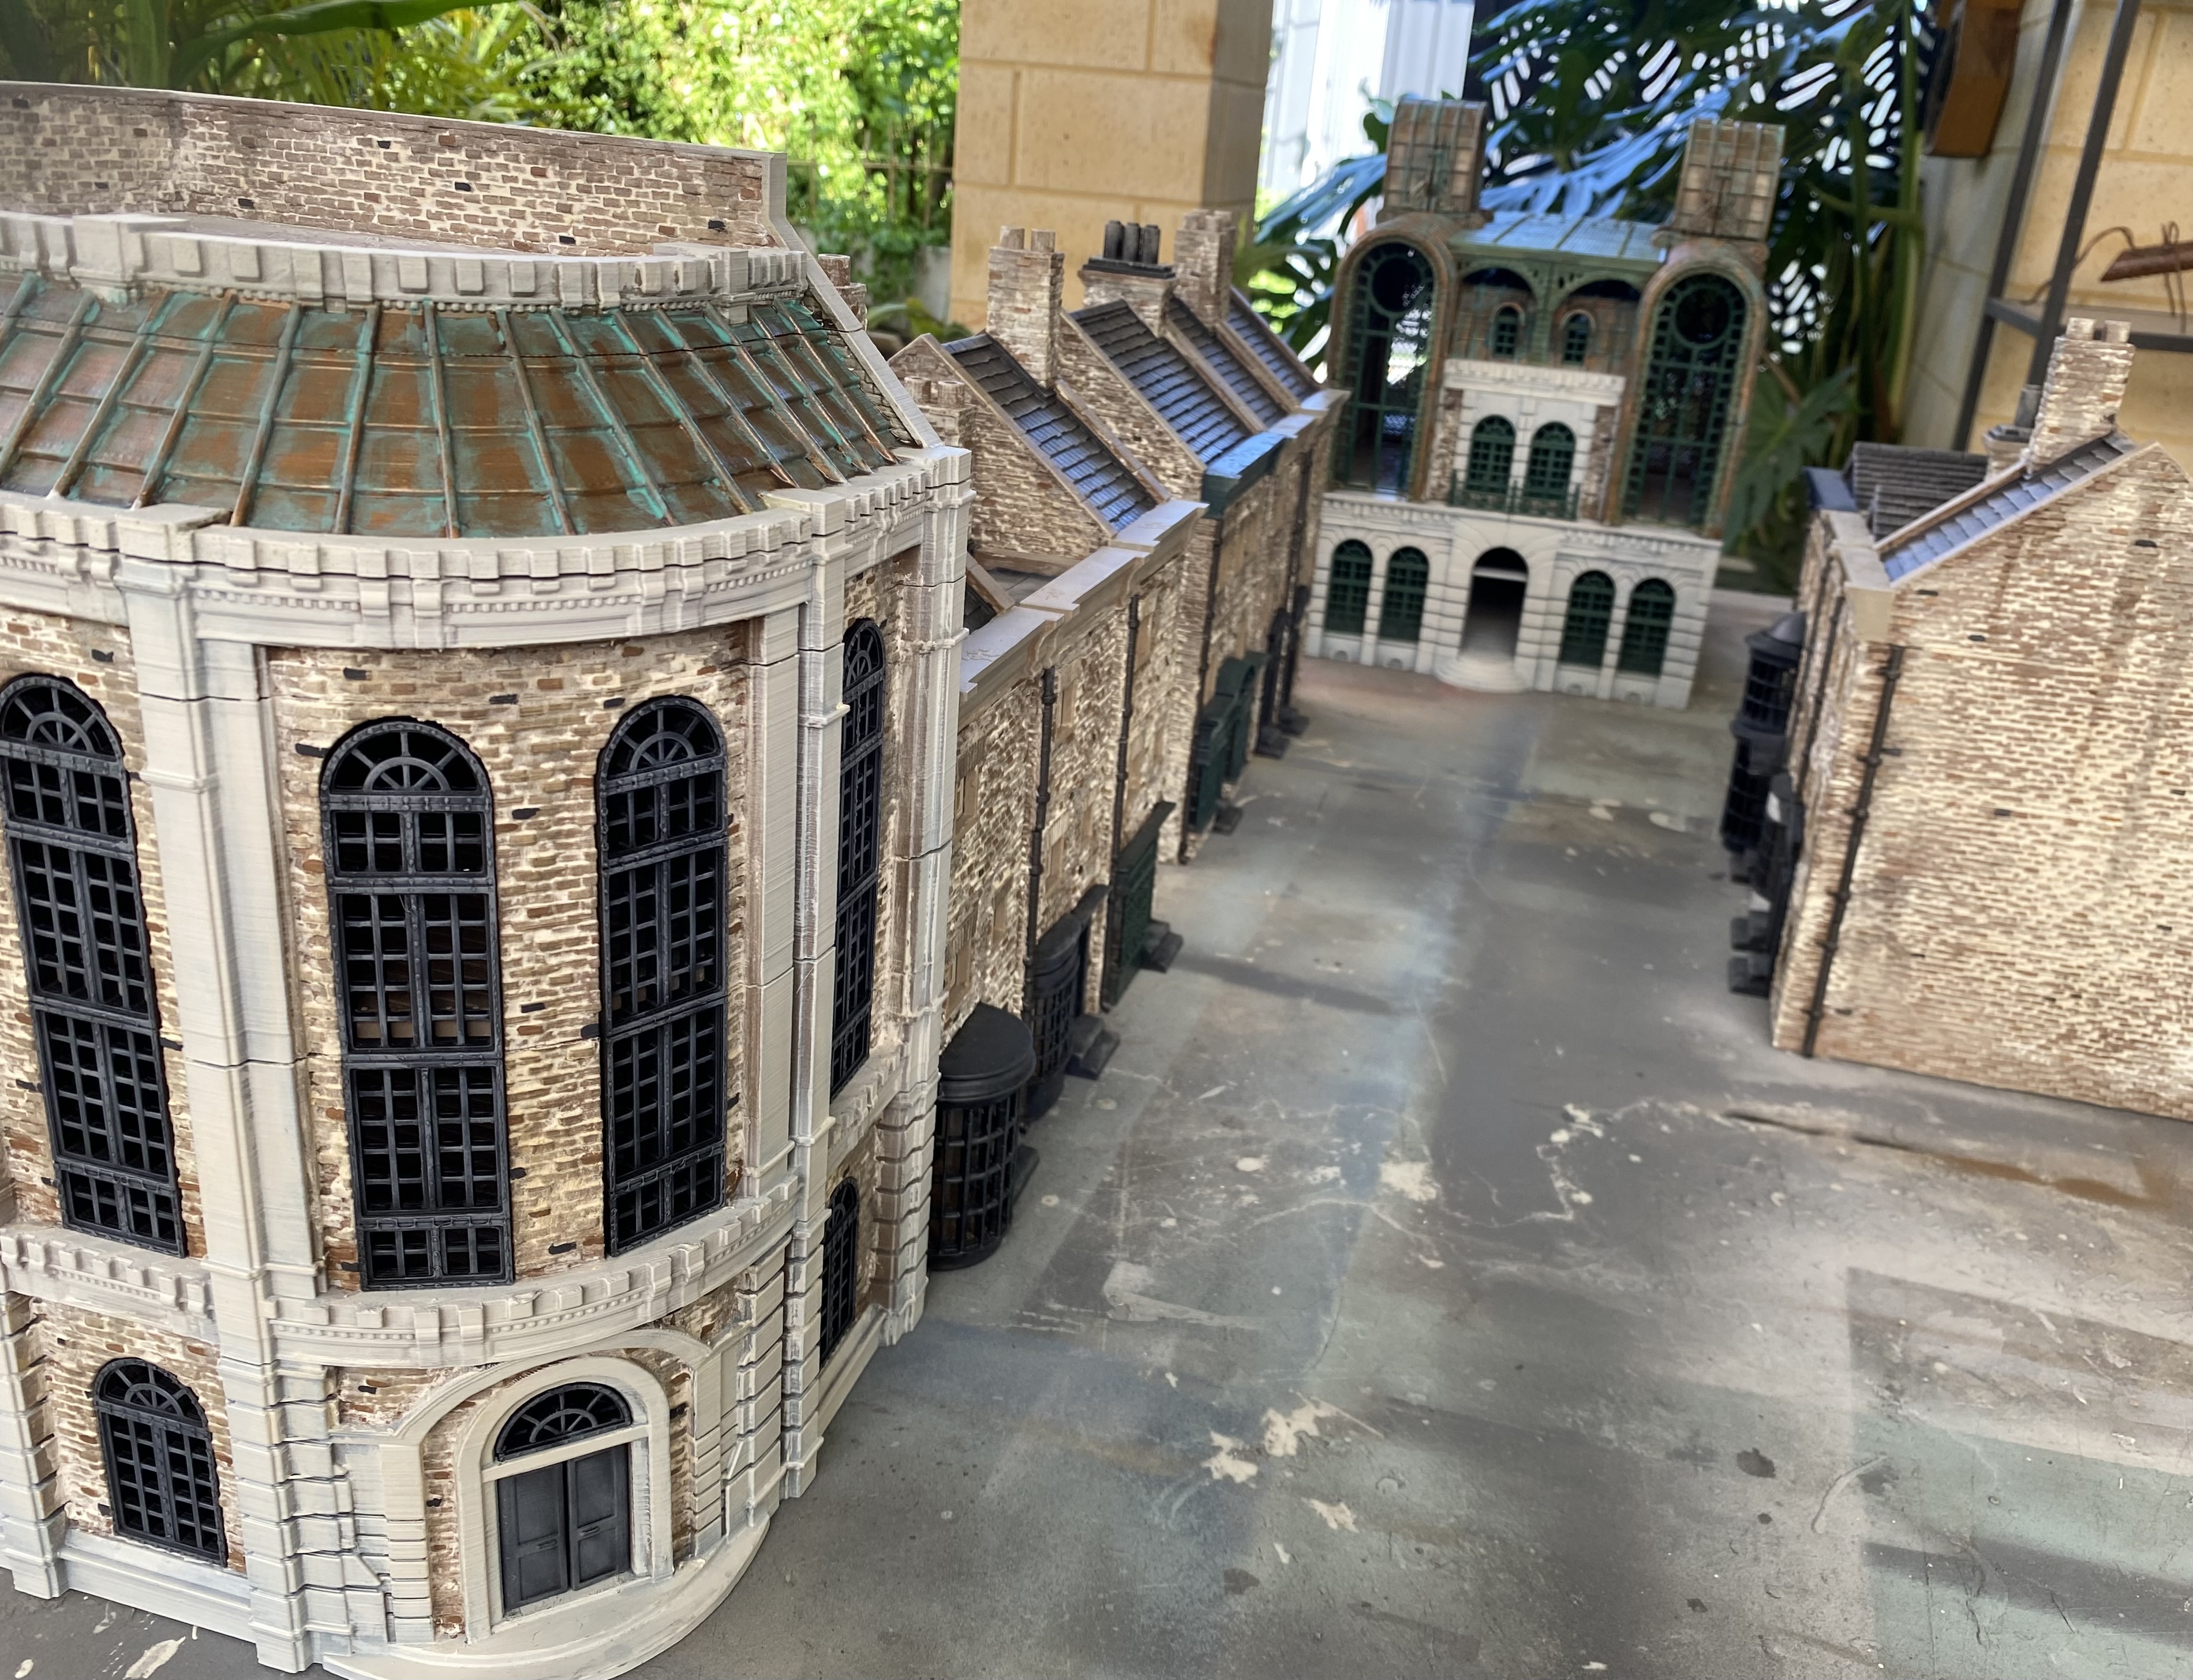
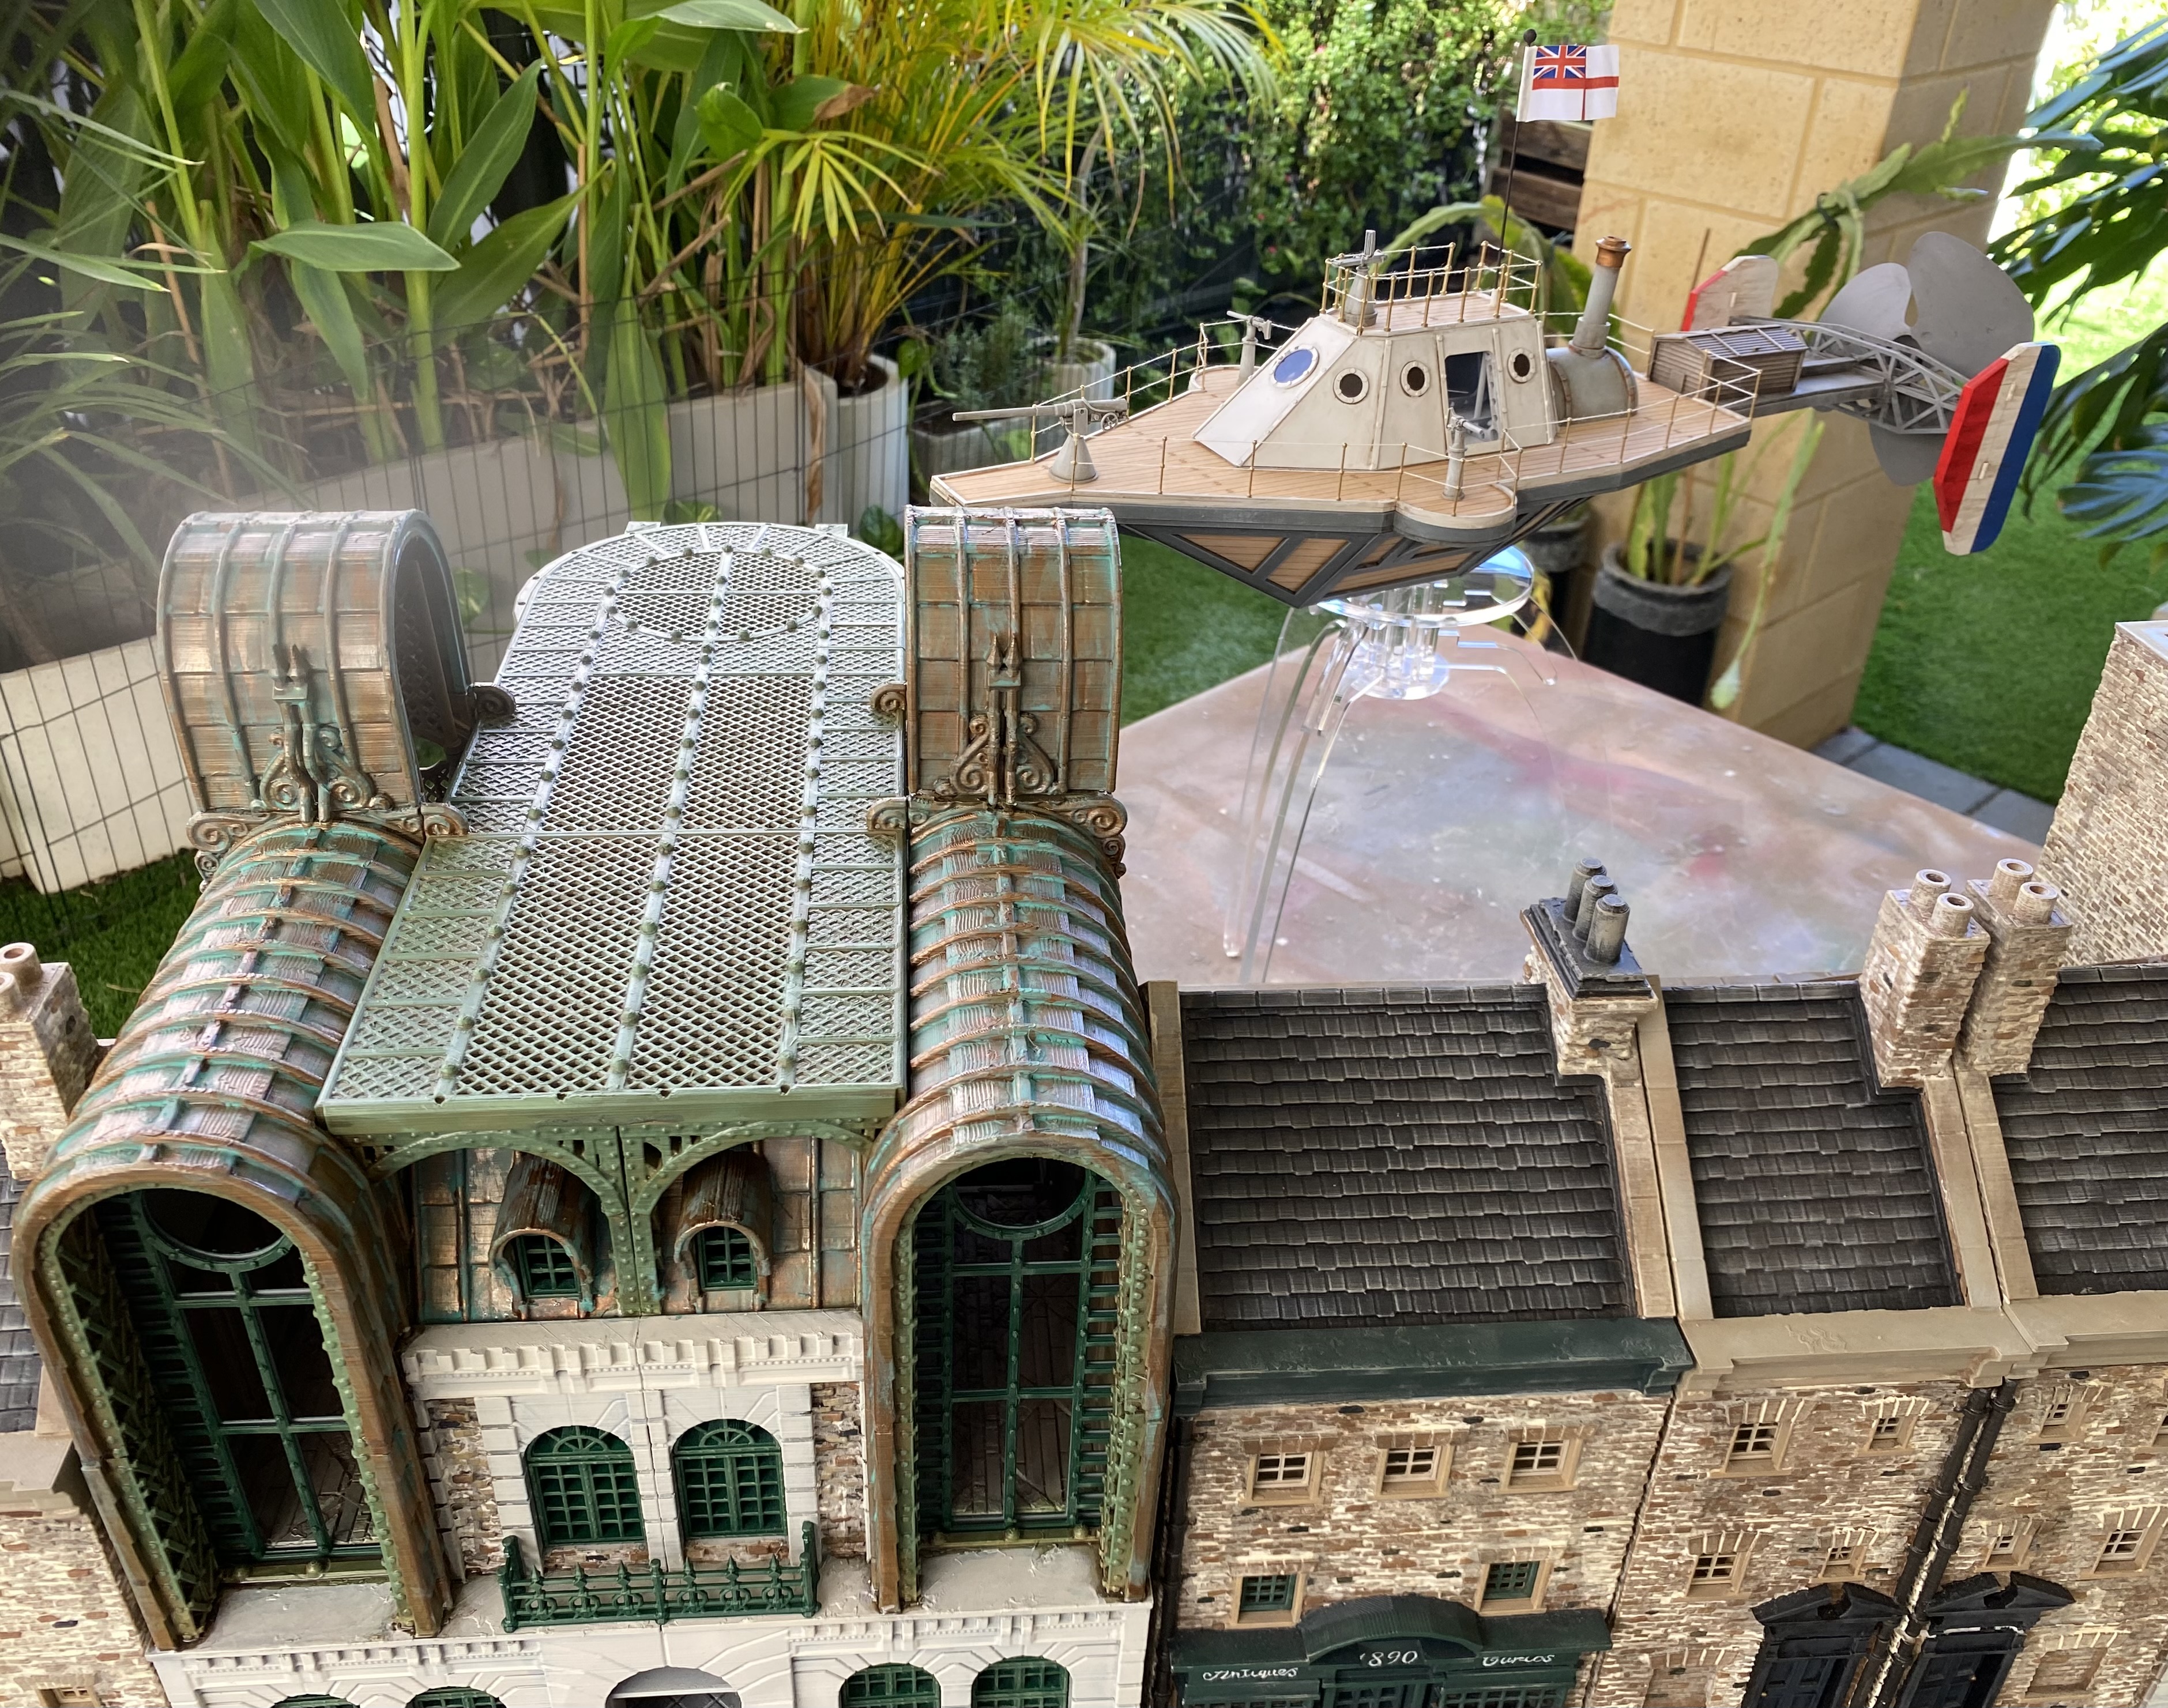
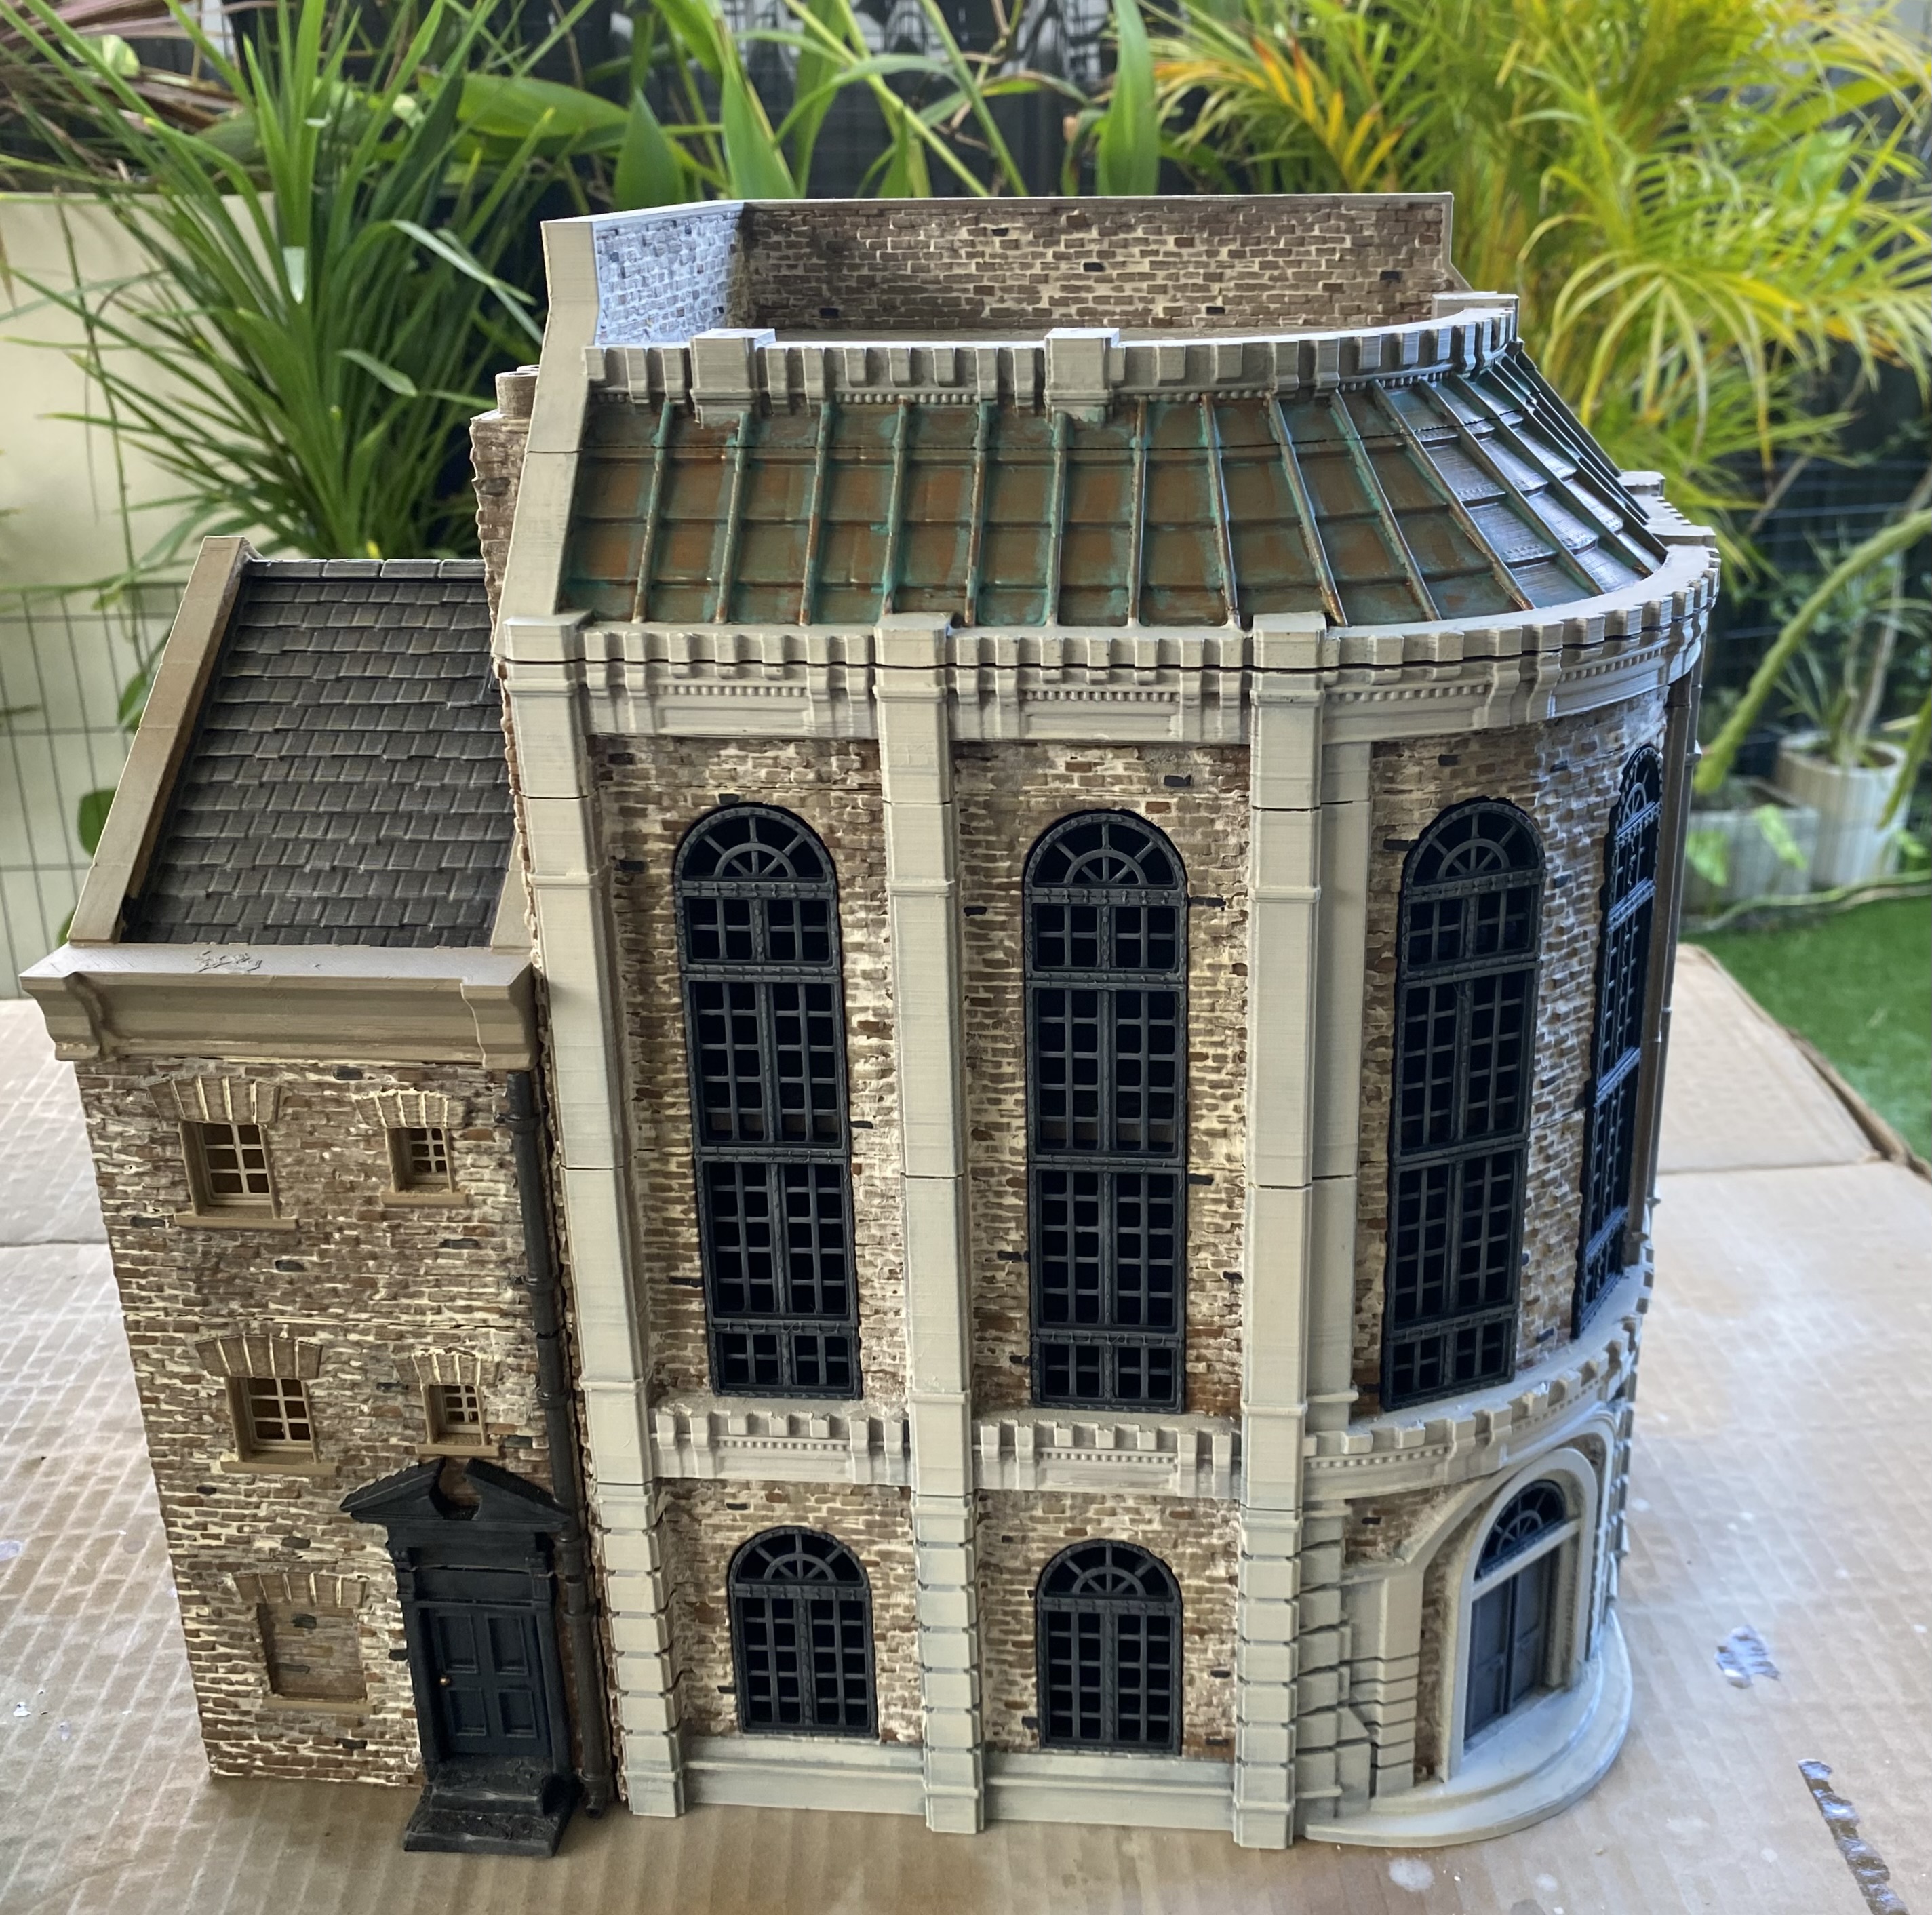
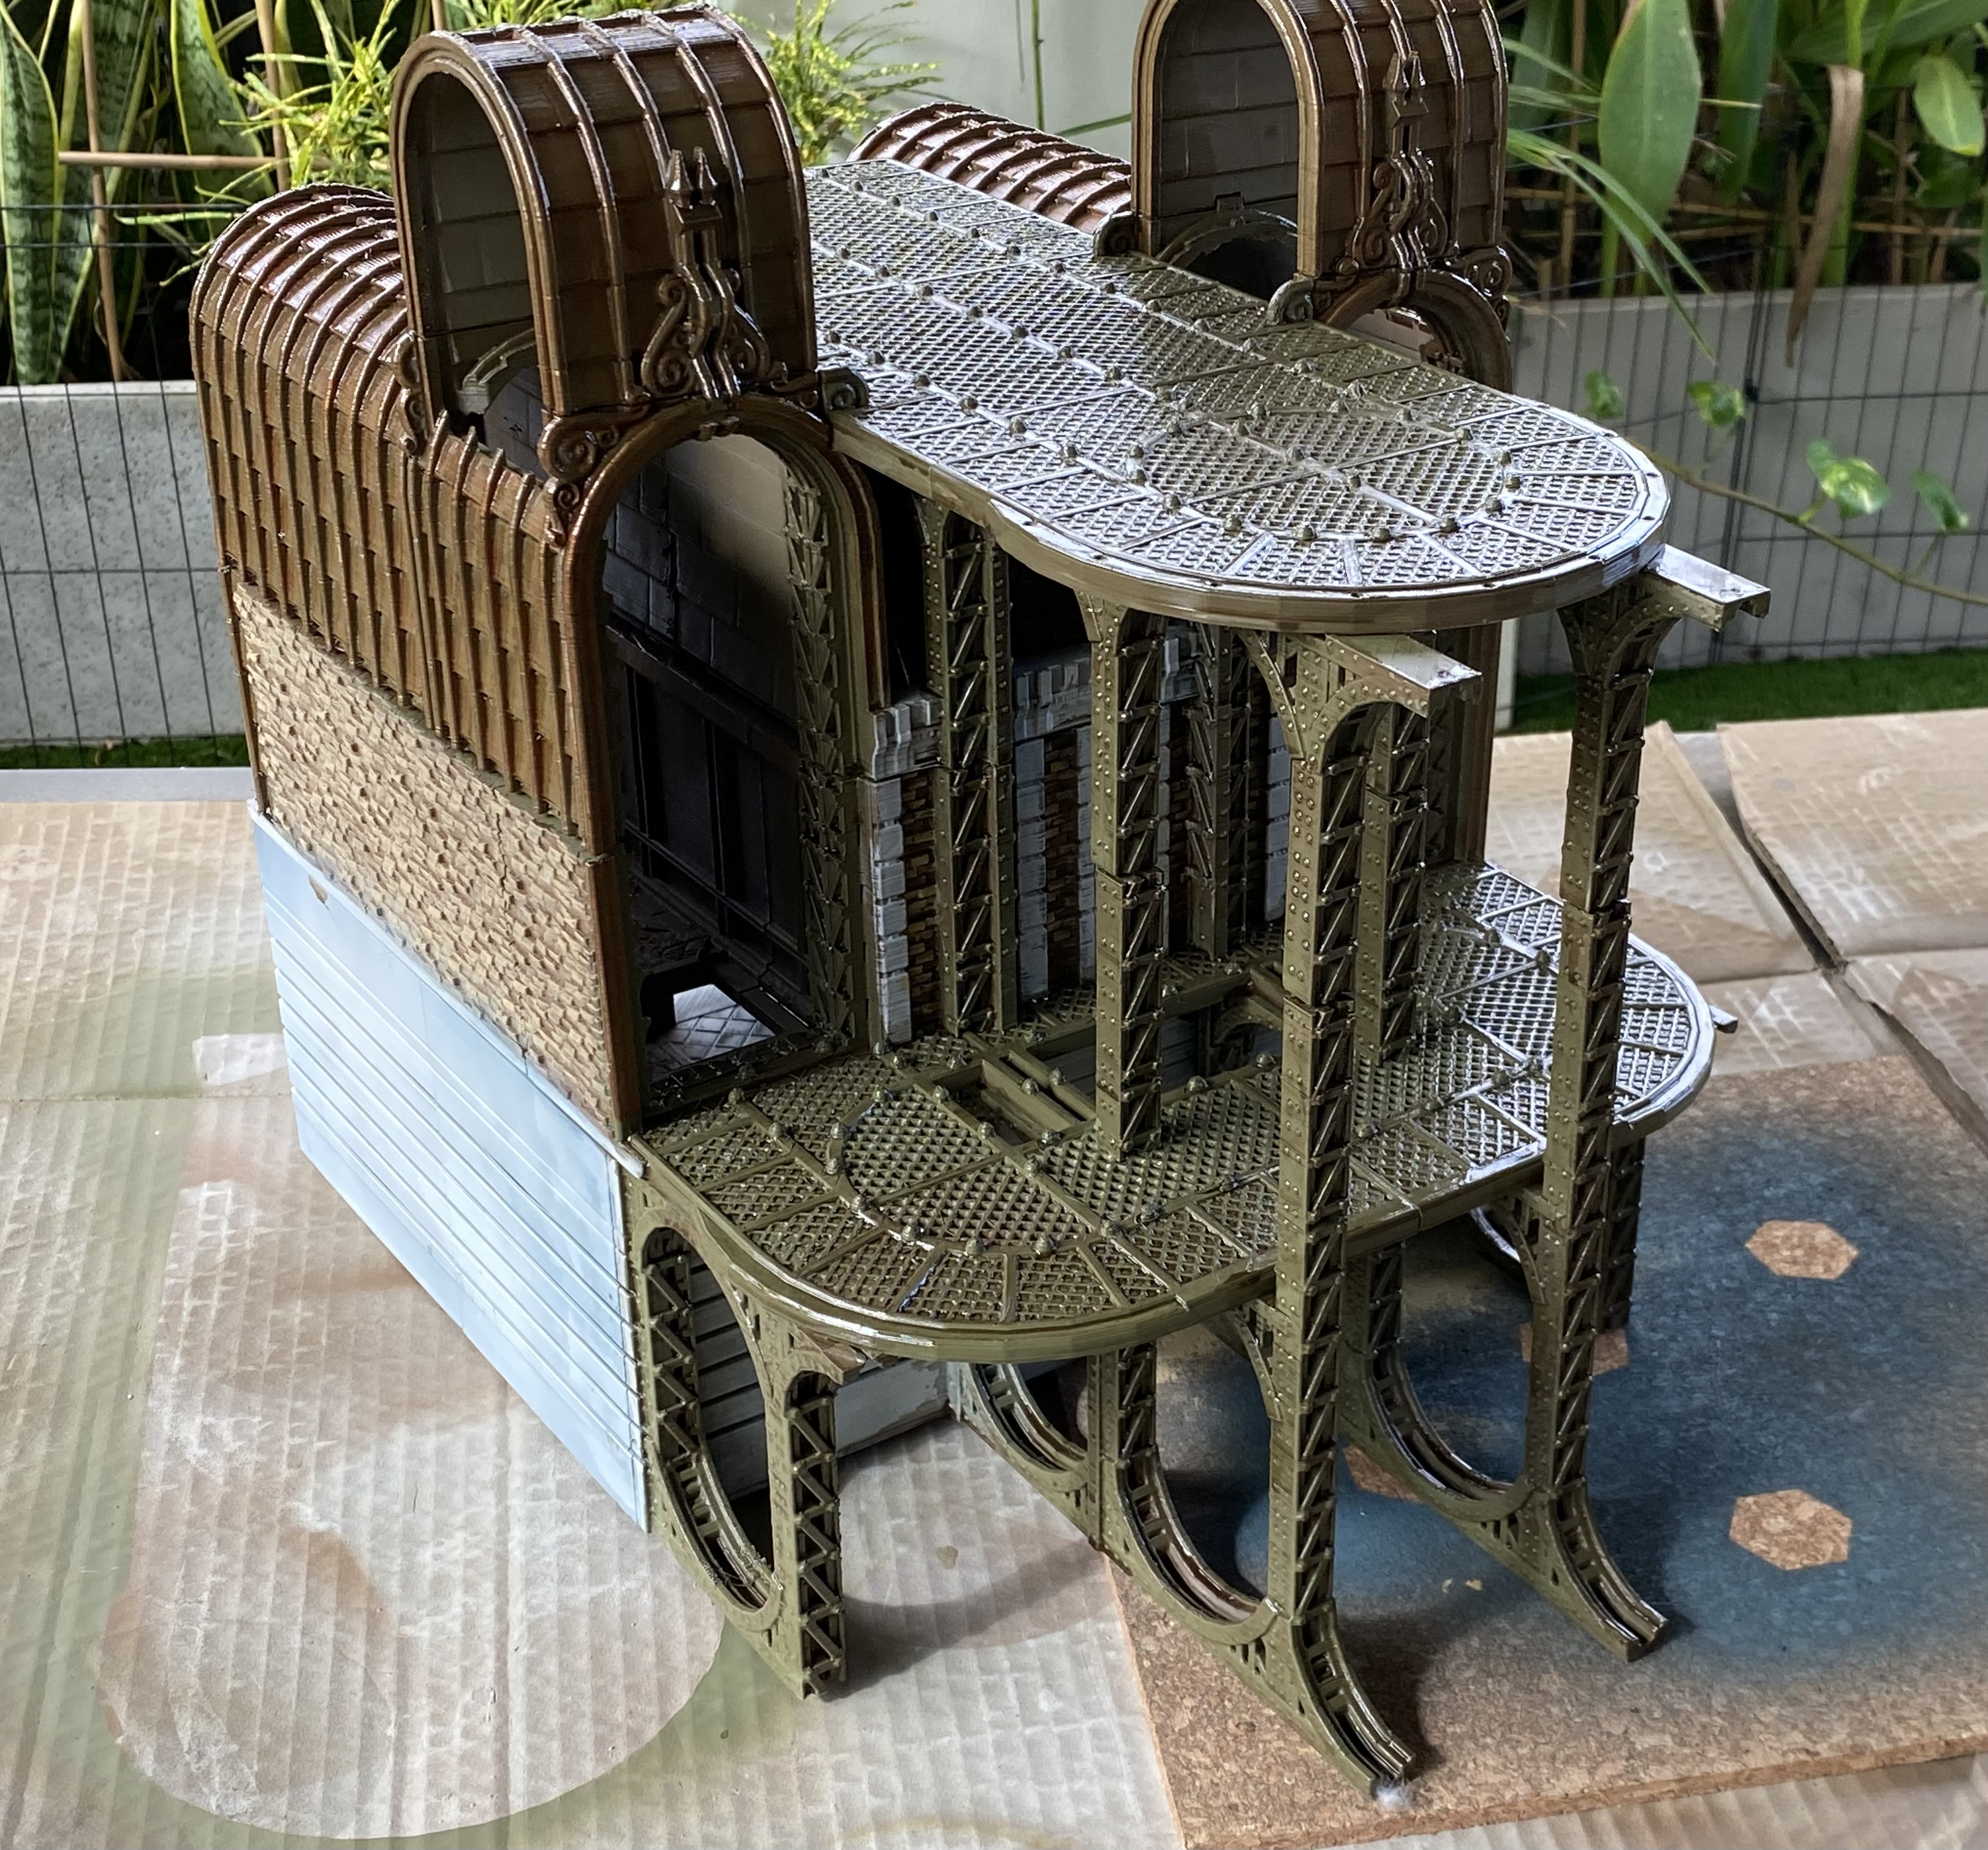
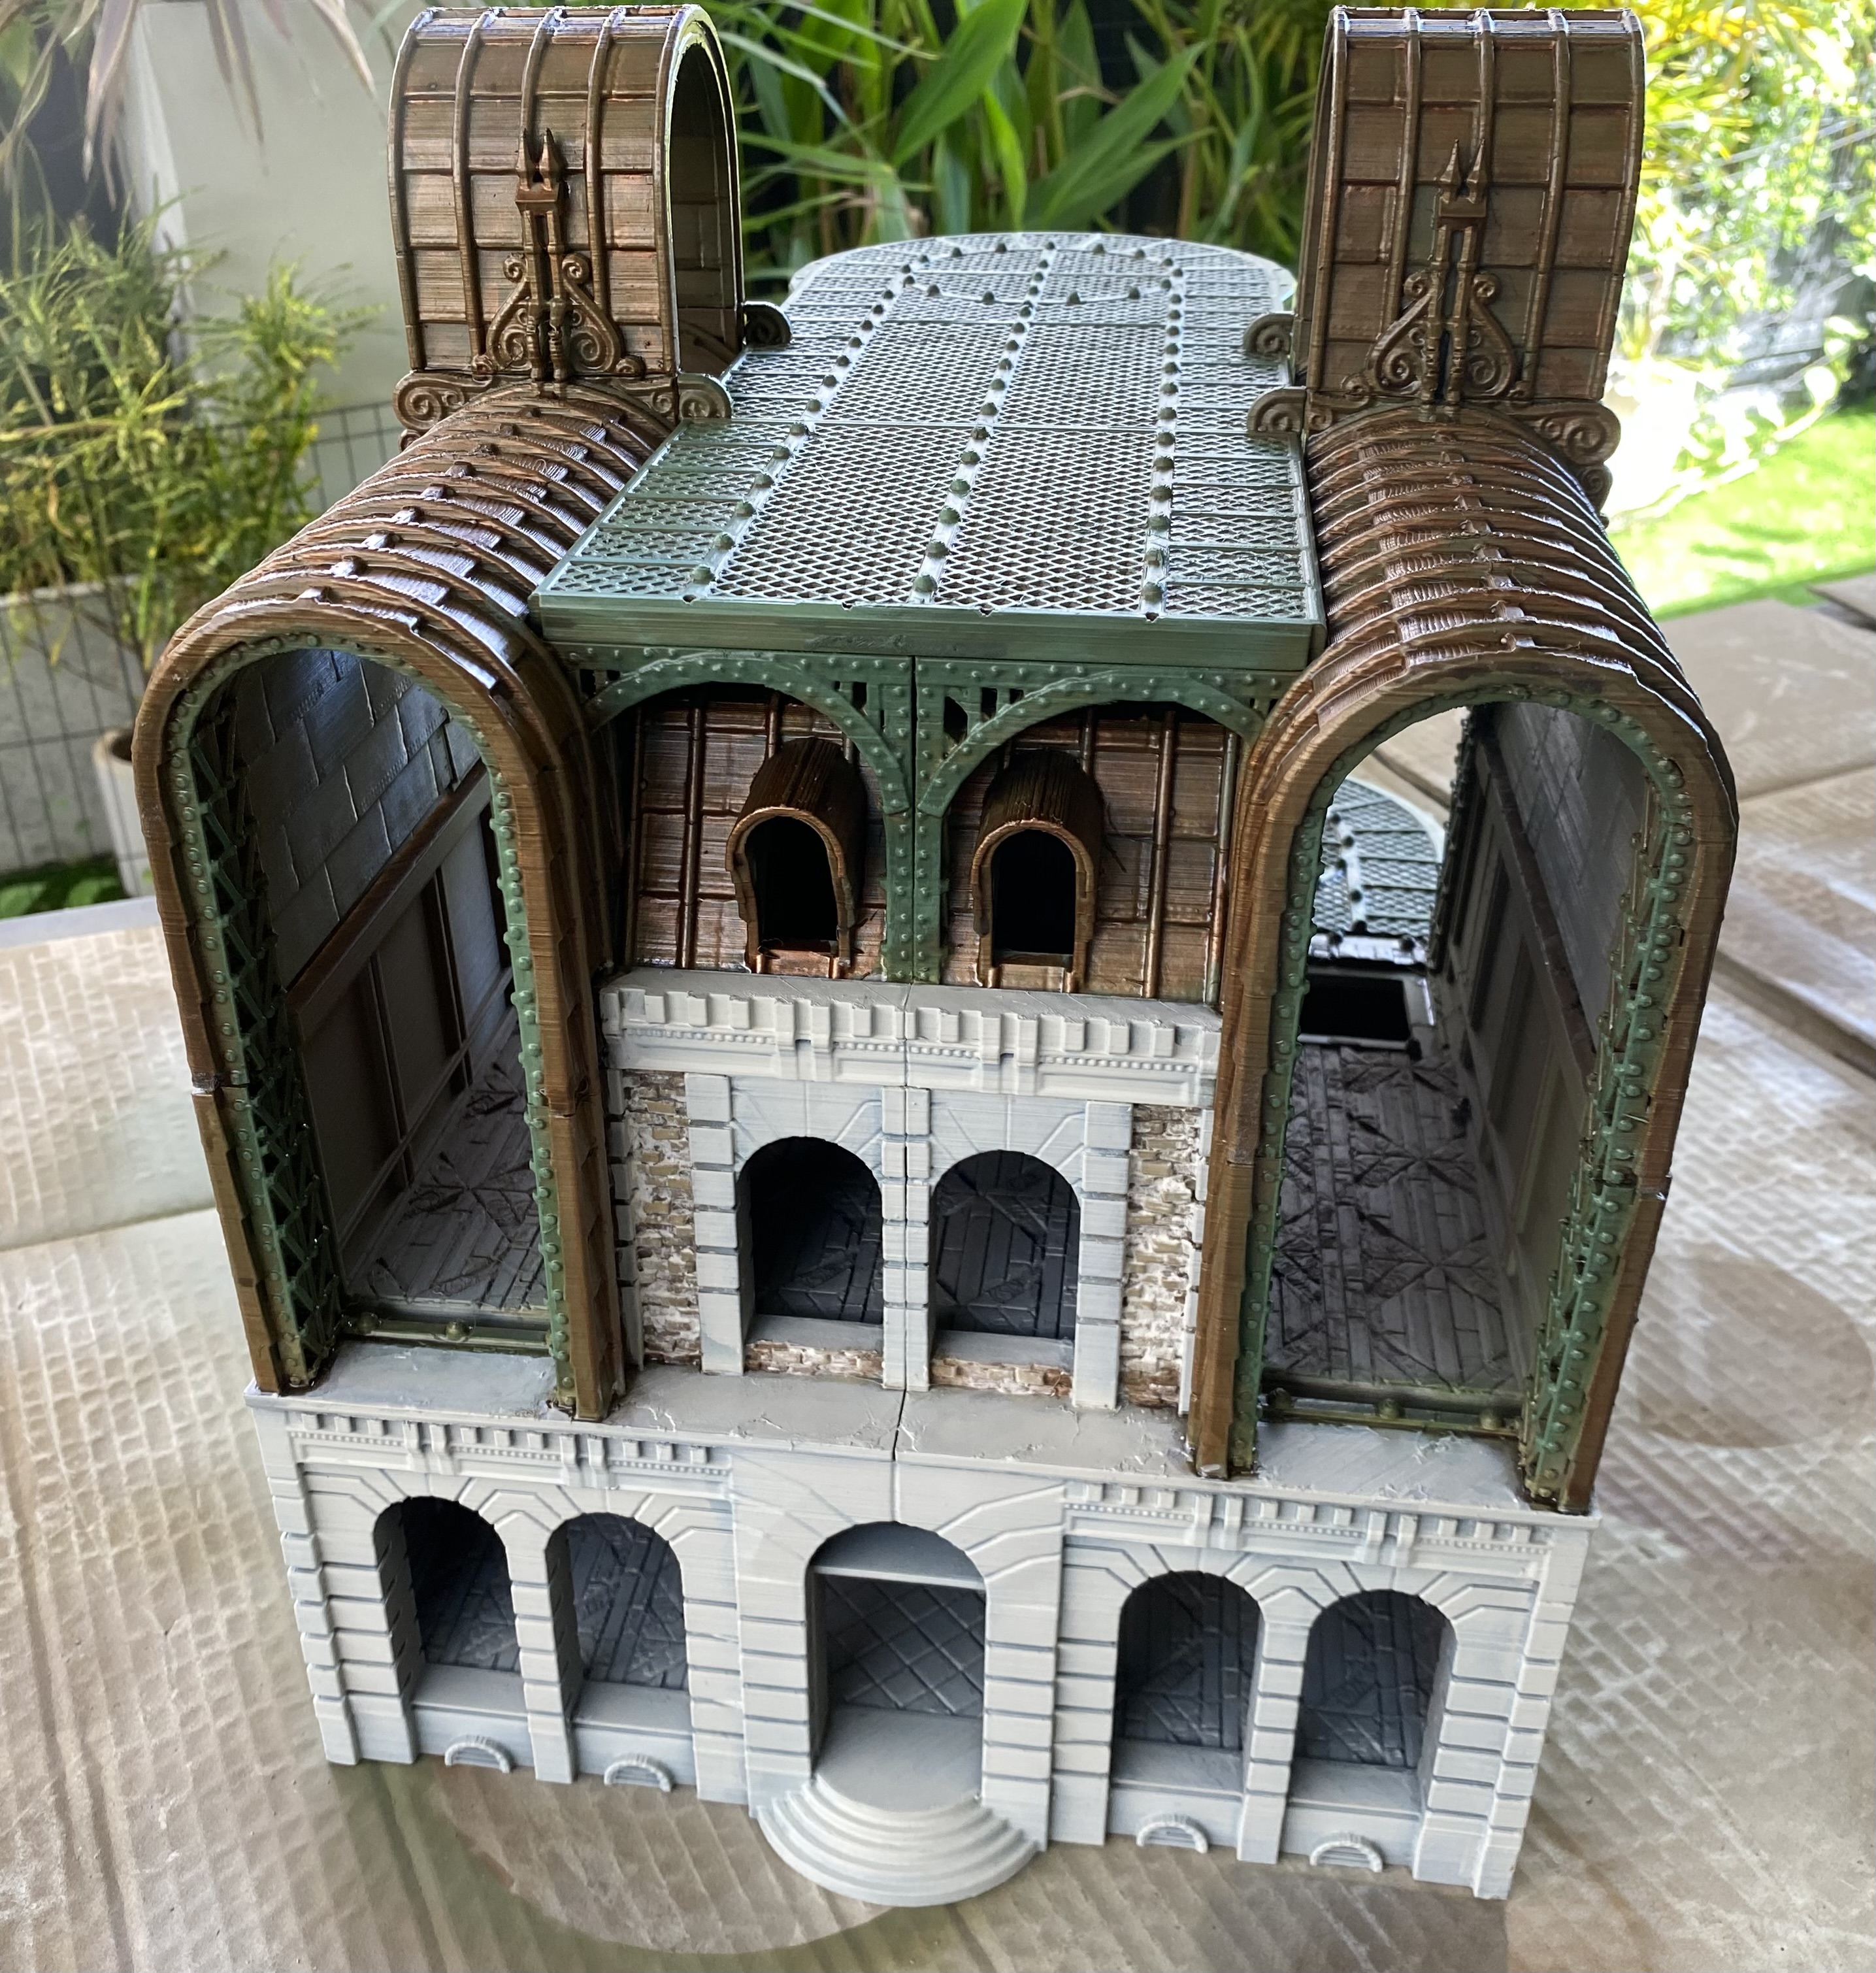
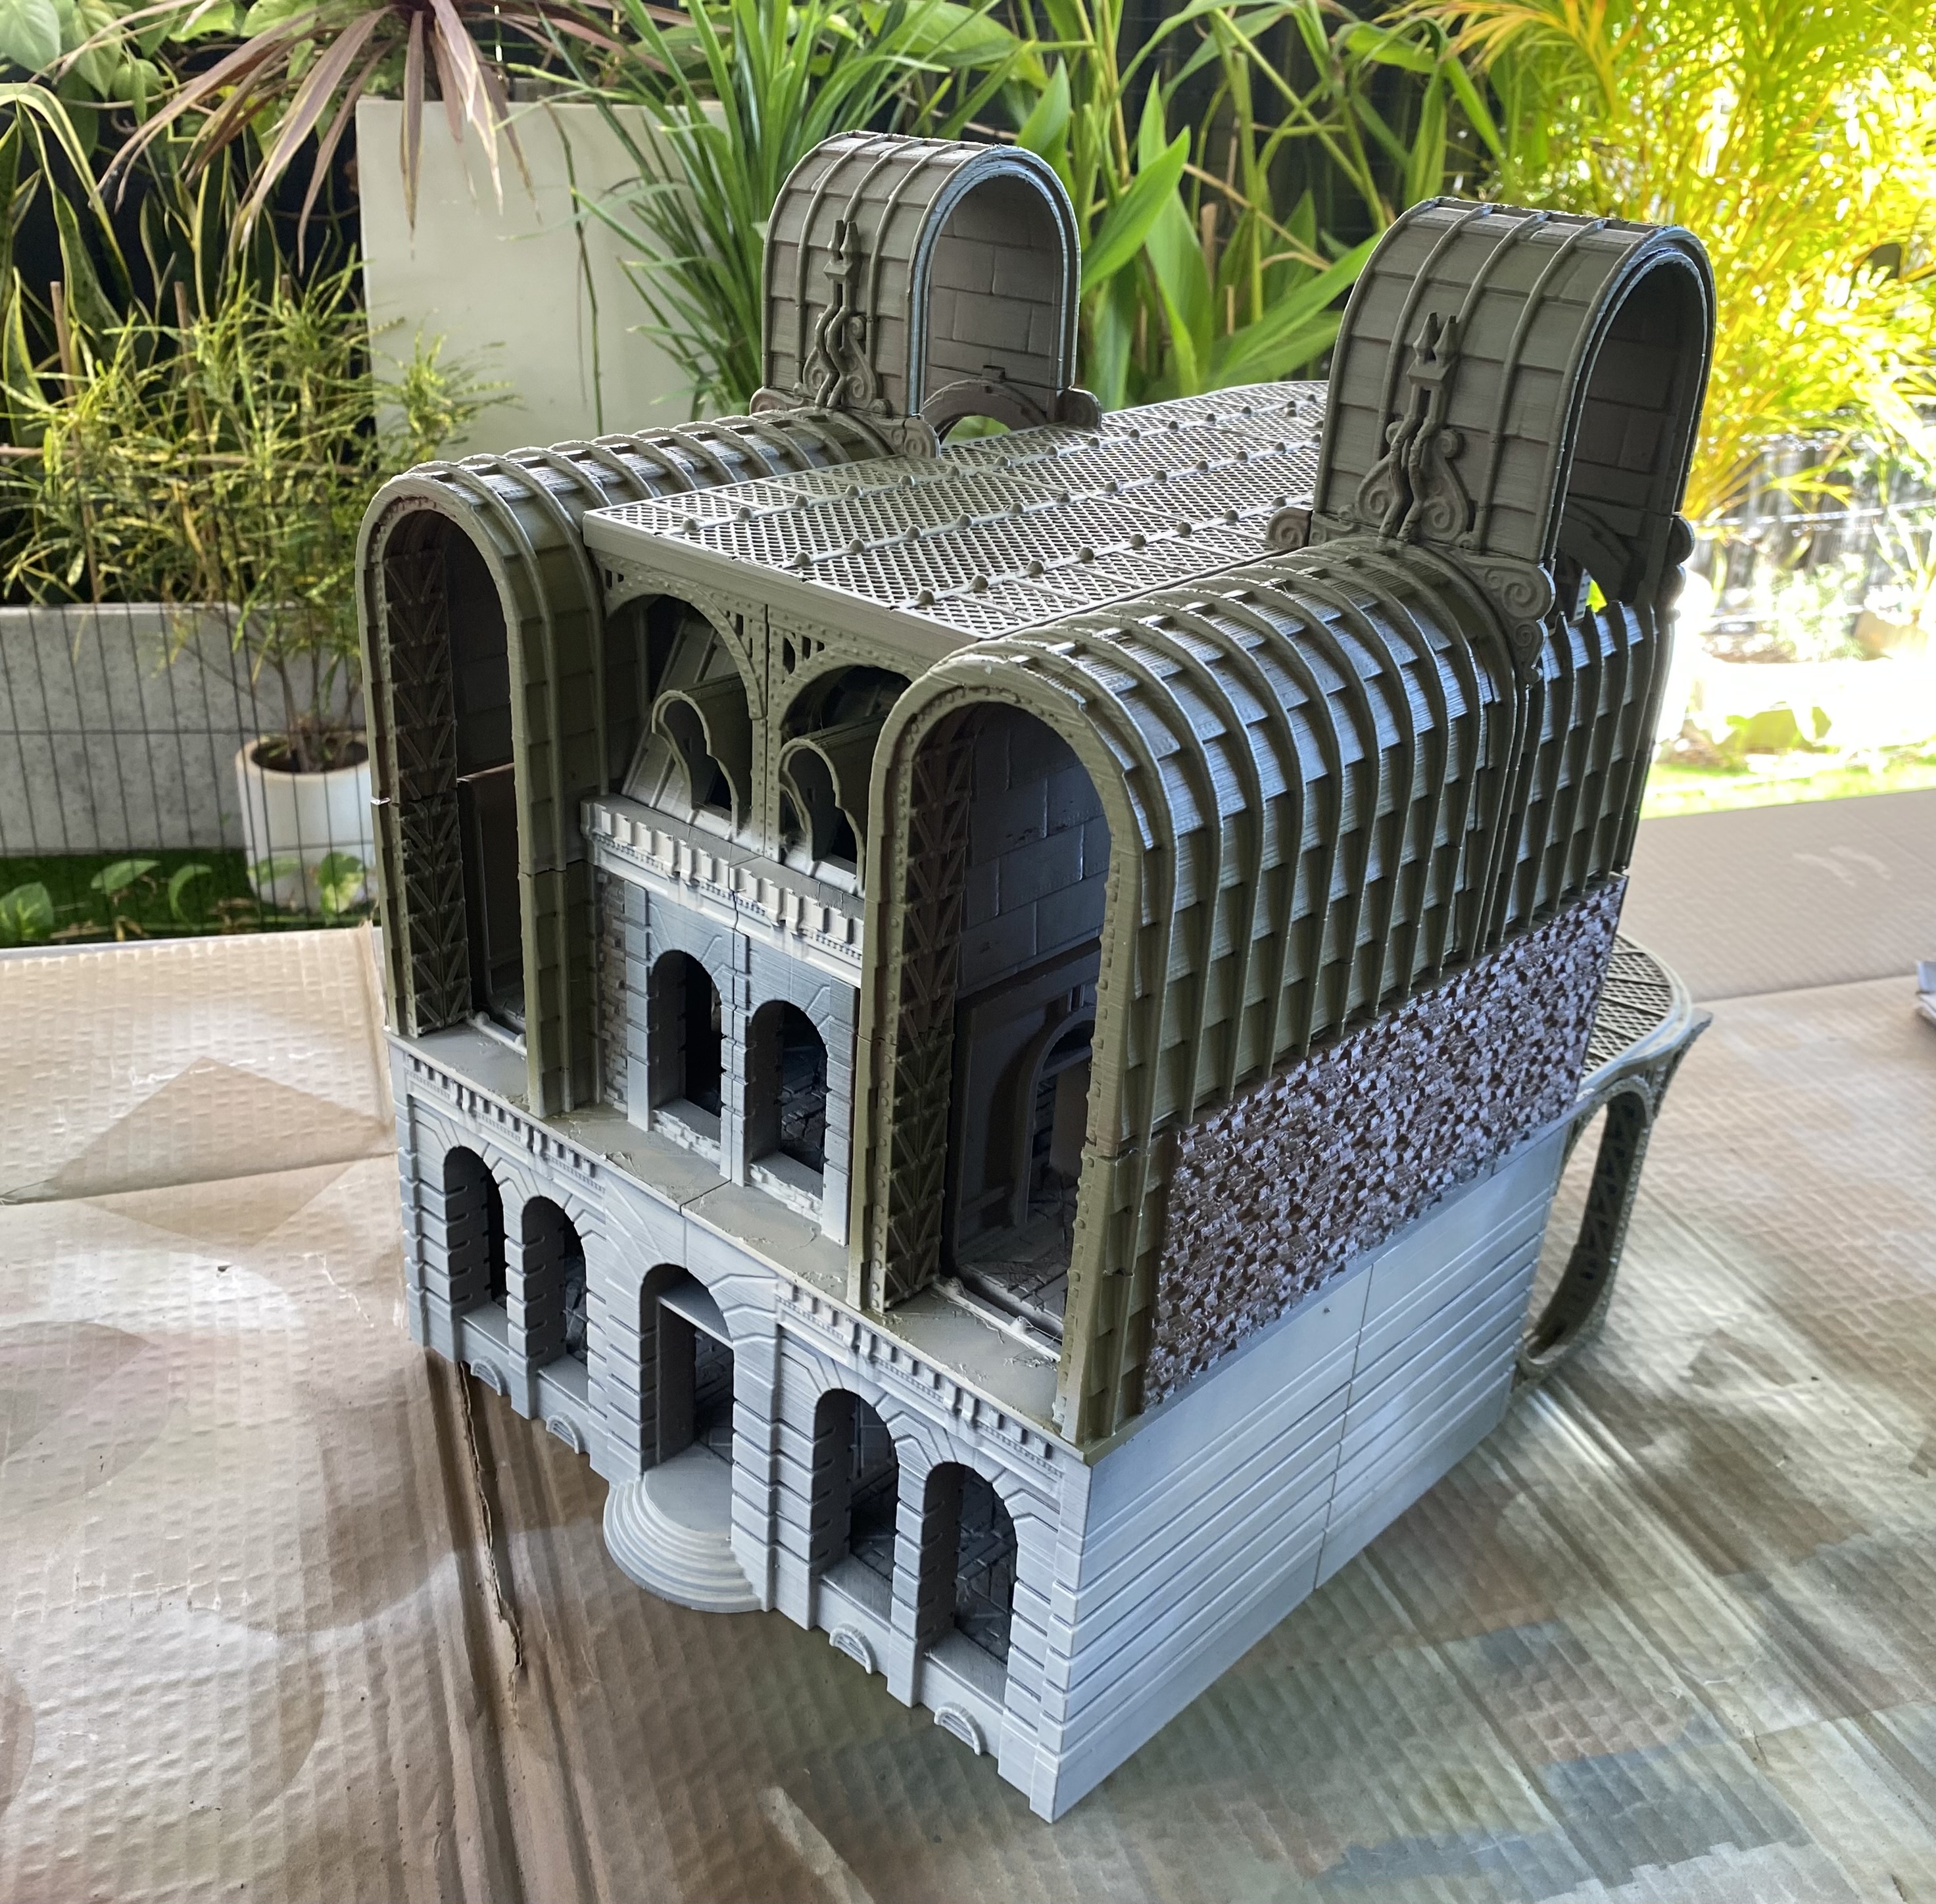
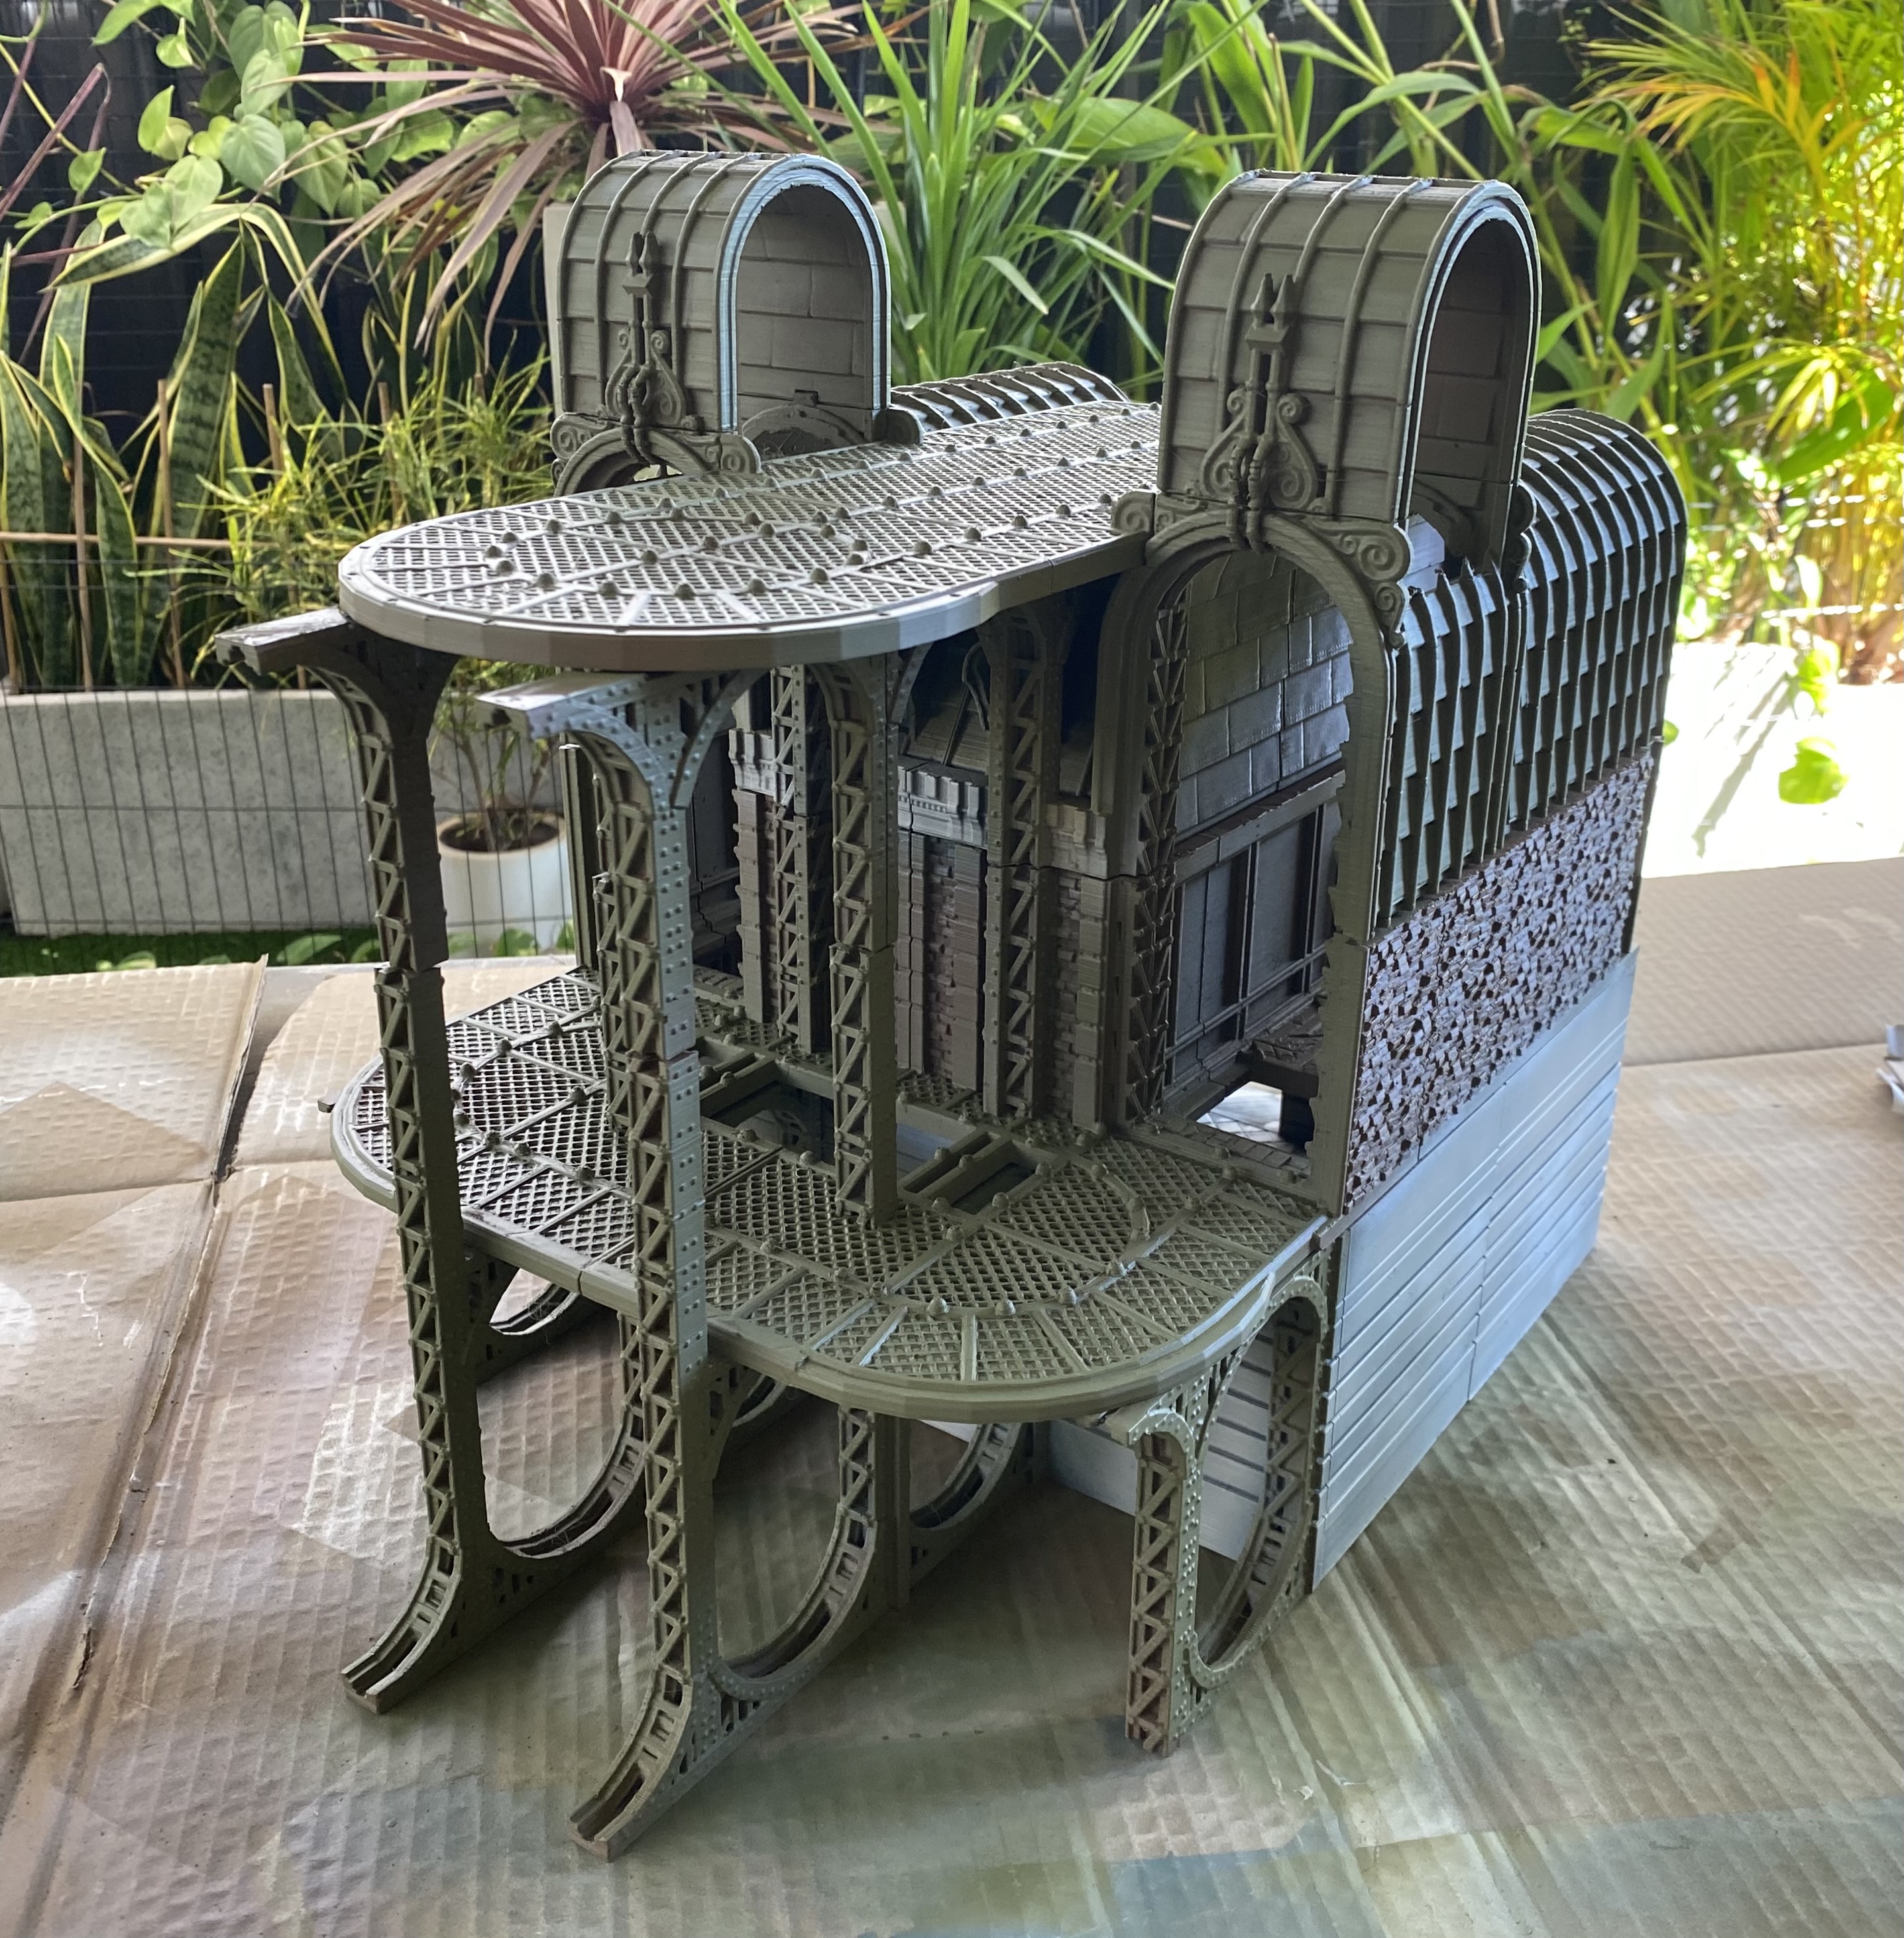
New Brighton
New Brighton is the capital city in the ‘A Tale of Two Worlds‘ Victorian Science Fiction Campaign that we started up some time ago now. The campaign is set on both Earth and Mars during the height of the Victorian Empire. War rages across both planets as both Humans and Martians are drawn into the fight. Earth forces have long established settlements on the red planet and have drawn inspiration from their home world during their construction. Flying ships called Aeronefs, or Nefs for short rule the skies and also provide important transport networks to supply smaller outposts.
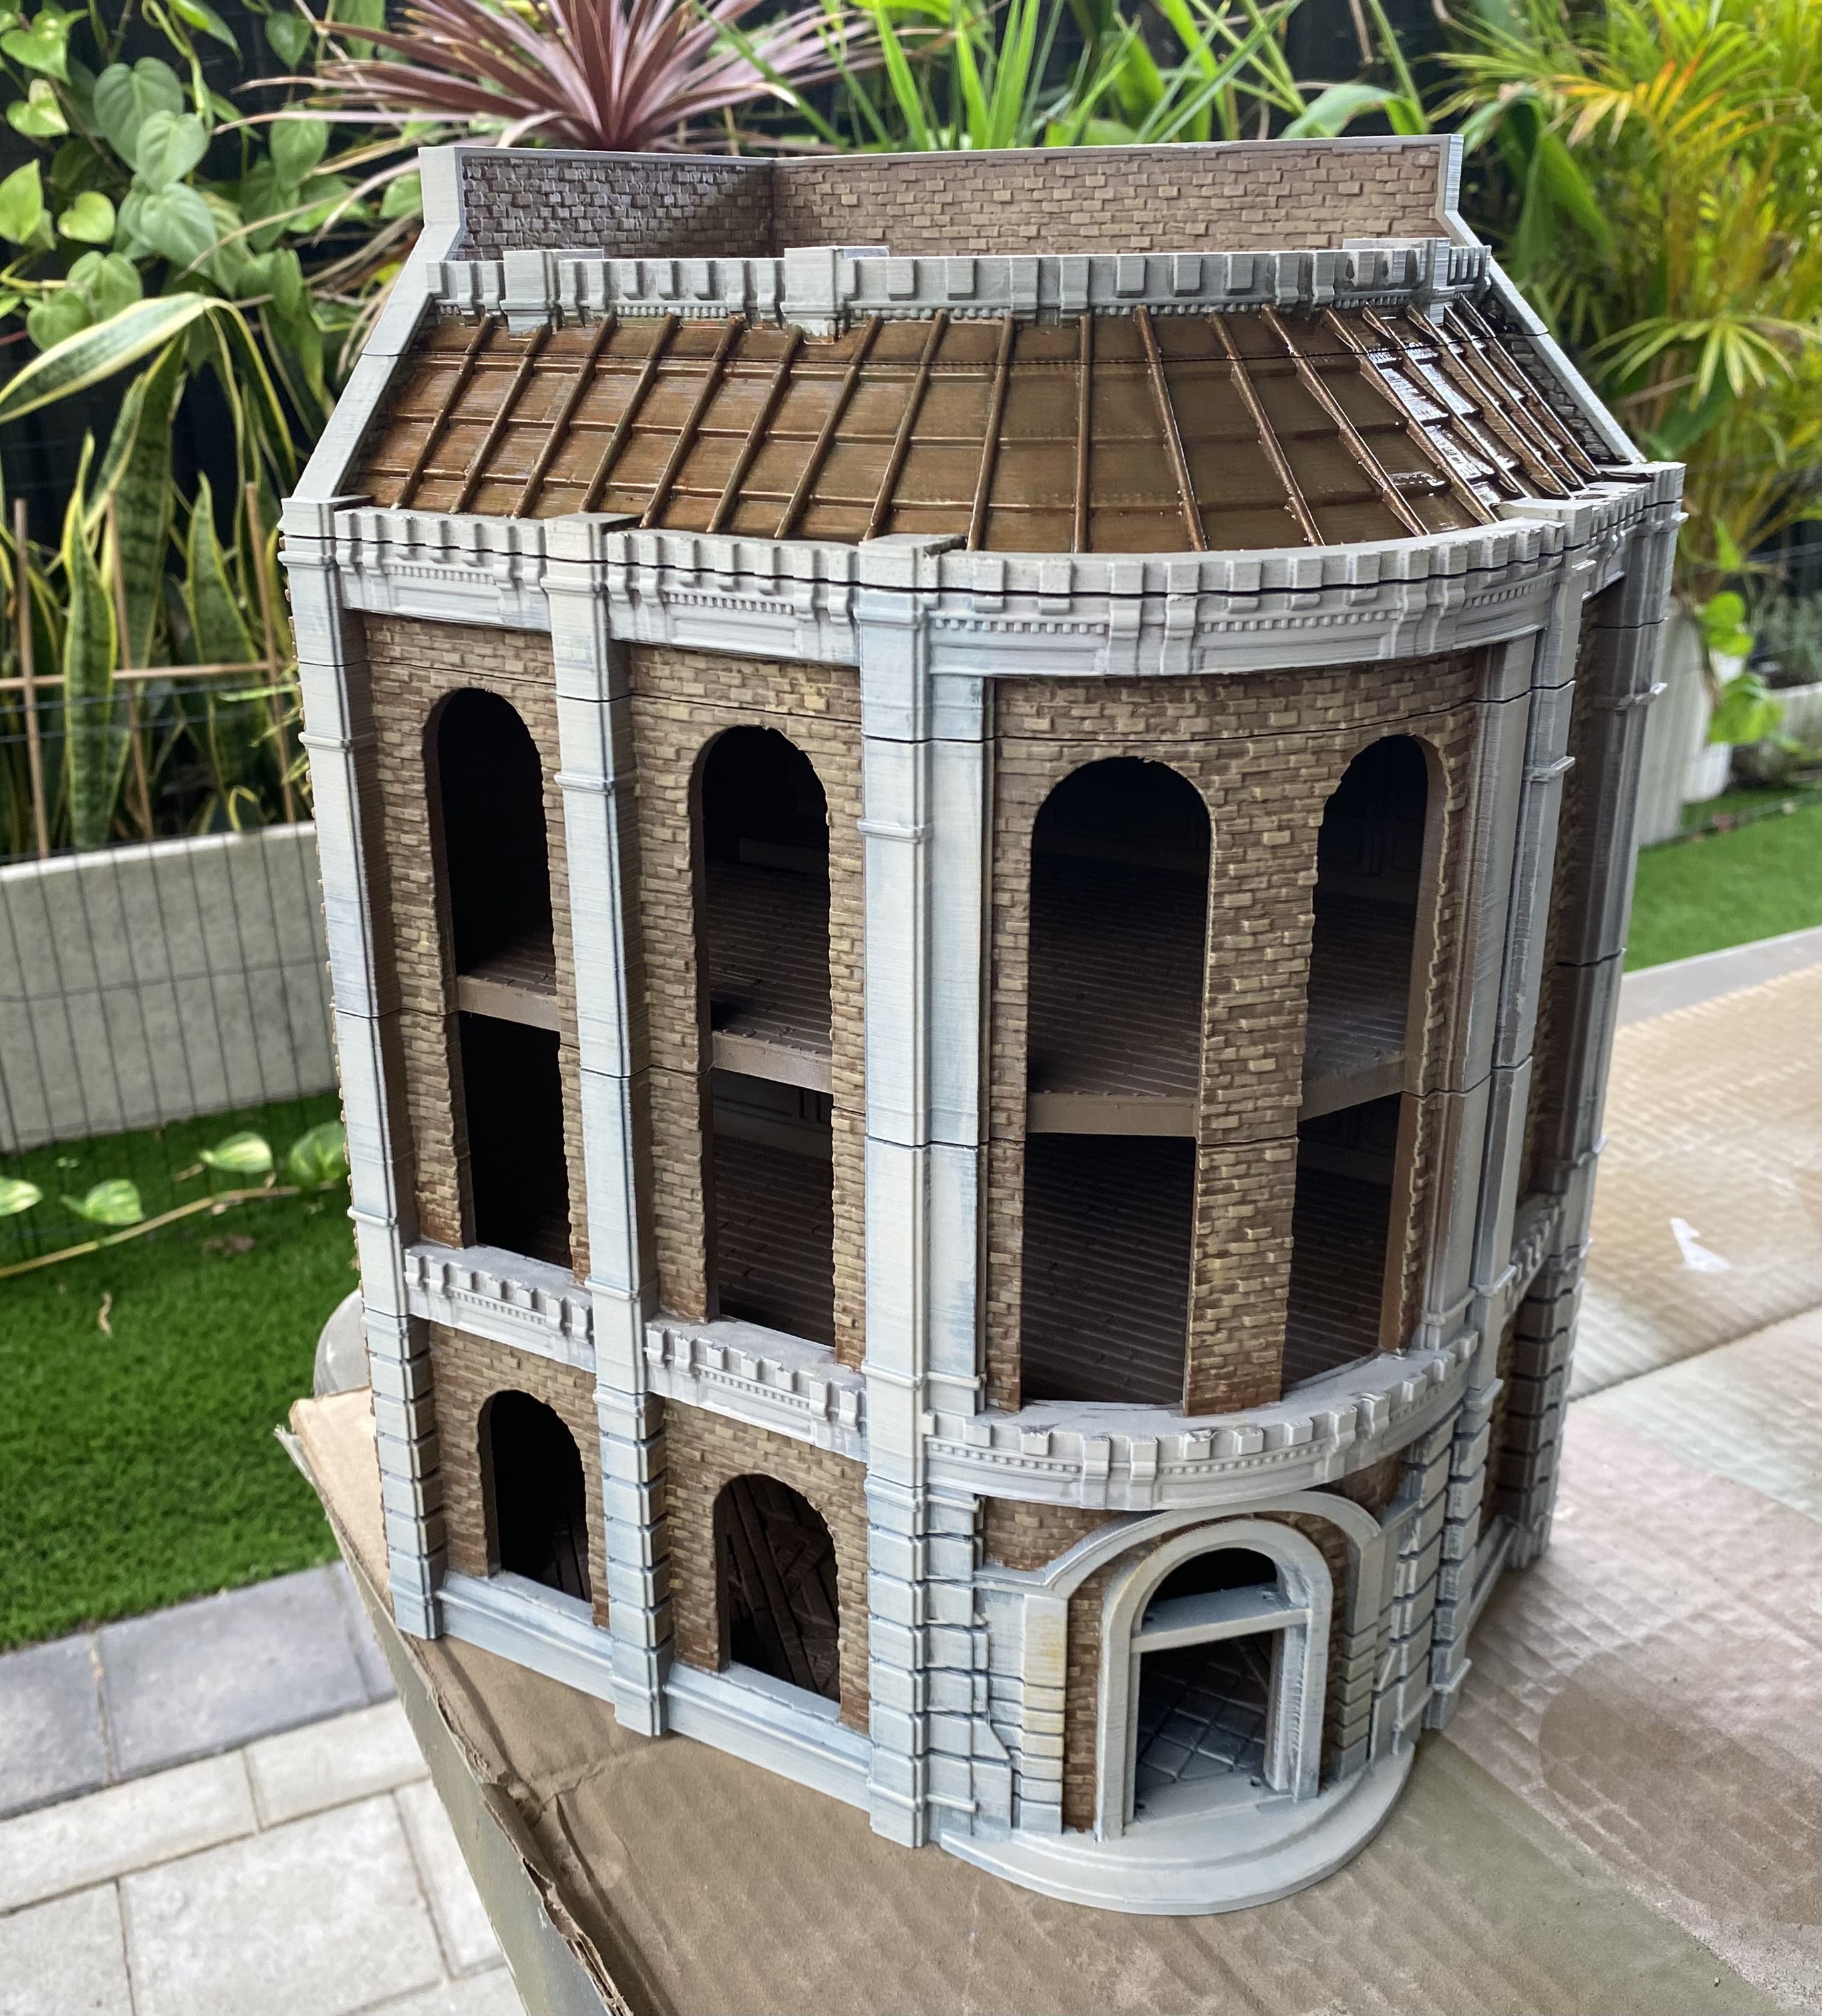
The buildings I plan to do for this will be able to be used for both settings and also some of them would also be usable in more conventional historical games.
As Nefs are the main form of transport in this alternative setting it seems only appropriate that we start this with an Aeronef Station. Thankfully I have this rather large 3D printed building that has been gathering dust. Just the thing to demonstrate my painting technique.