![10mm Medieval Miniatures! Azincourt English Army Review | Wargames Atlantic [7 Days Early Access]](https://images.beastsofwar.com/2026/03/unboxing-wargames-atlantic-azincourt-english-army-coverimage-225-127.jpg)


Moonstone Christmas Surprise


Recommendations: 733
About the Project
OK first time I’m trying this in a long long time. Surprising my little gaming group this Christmas with Moonstone. I’m doing a not so secret, Secret Santa. I’m picking up three factions for moonstone wrapping them up in three mystery packages. So that during our Christmas game we can randomly pick a faction. That bit’s easy purchase the boxes wrap them up and then on the dat we Ro Sham Bo for the privilege of first choice. Obviously to play we will need a gaming table to play on. That’s where we begin. I’m aiming for a 3x3 dark fantasy ruined/ghost town themed table. But obviously plans can change.
Related Game: Moonstone
Related Company: Goblin King Games
Related Genre: Fantasy
Related Contest: TerrainFest 2024
This Project is Active
Time to top it off
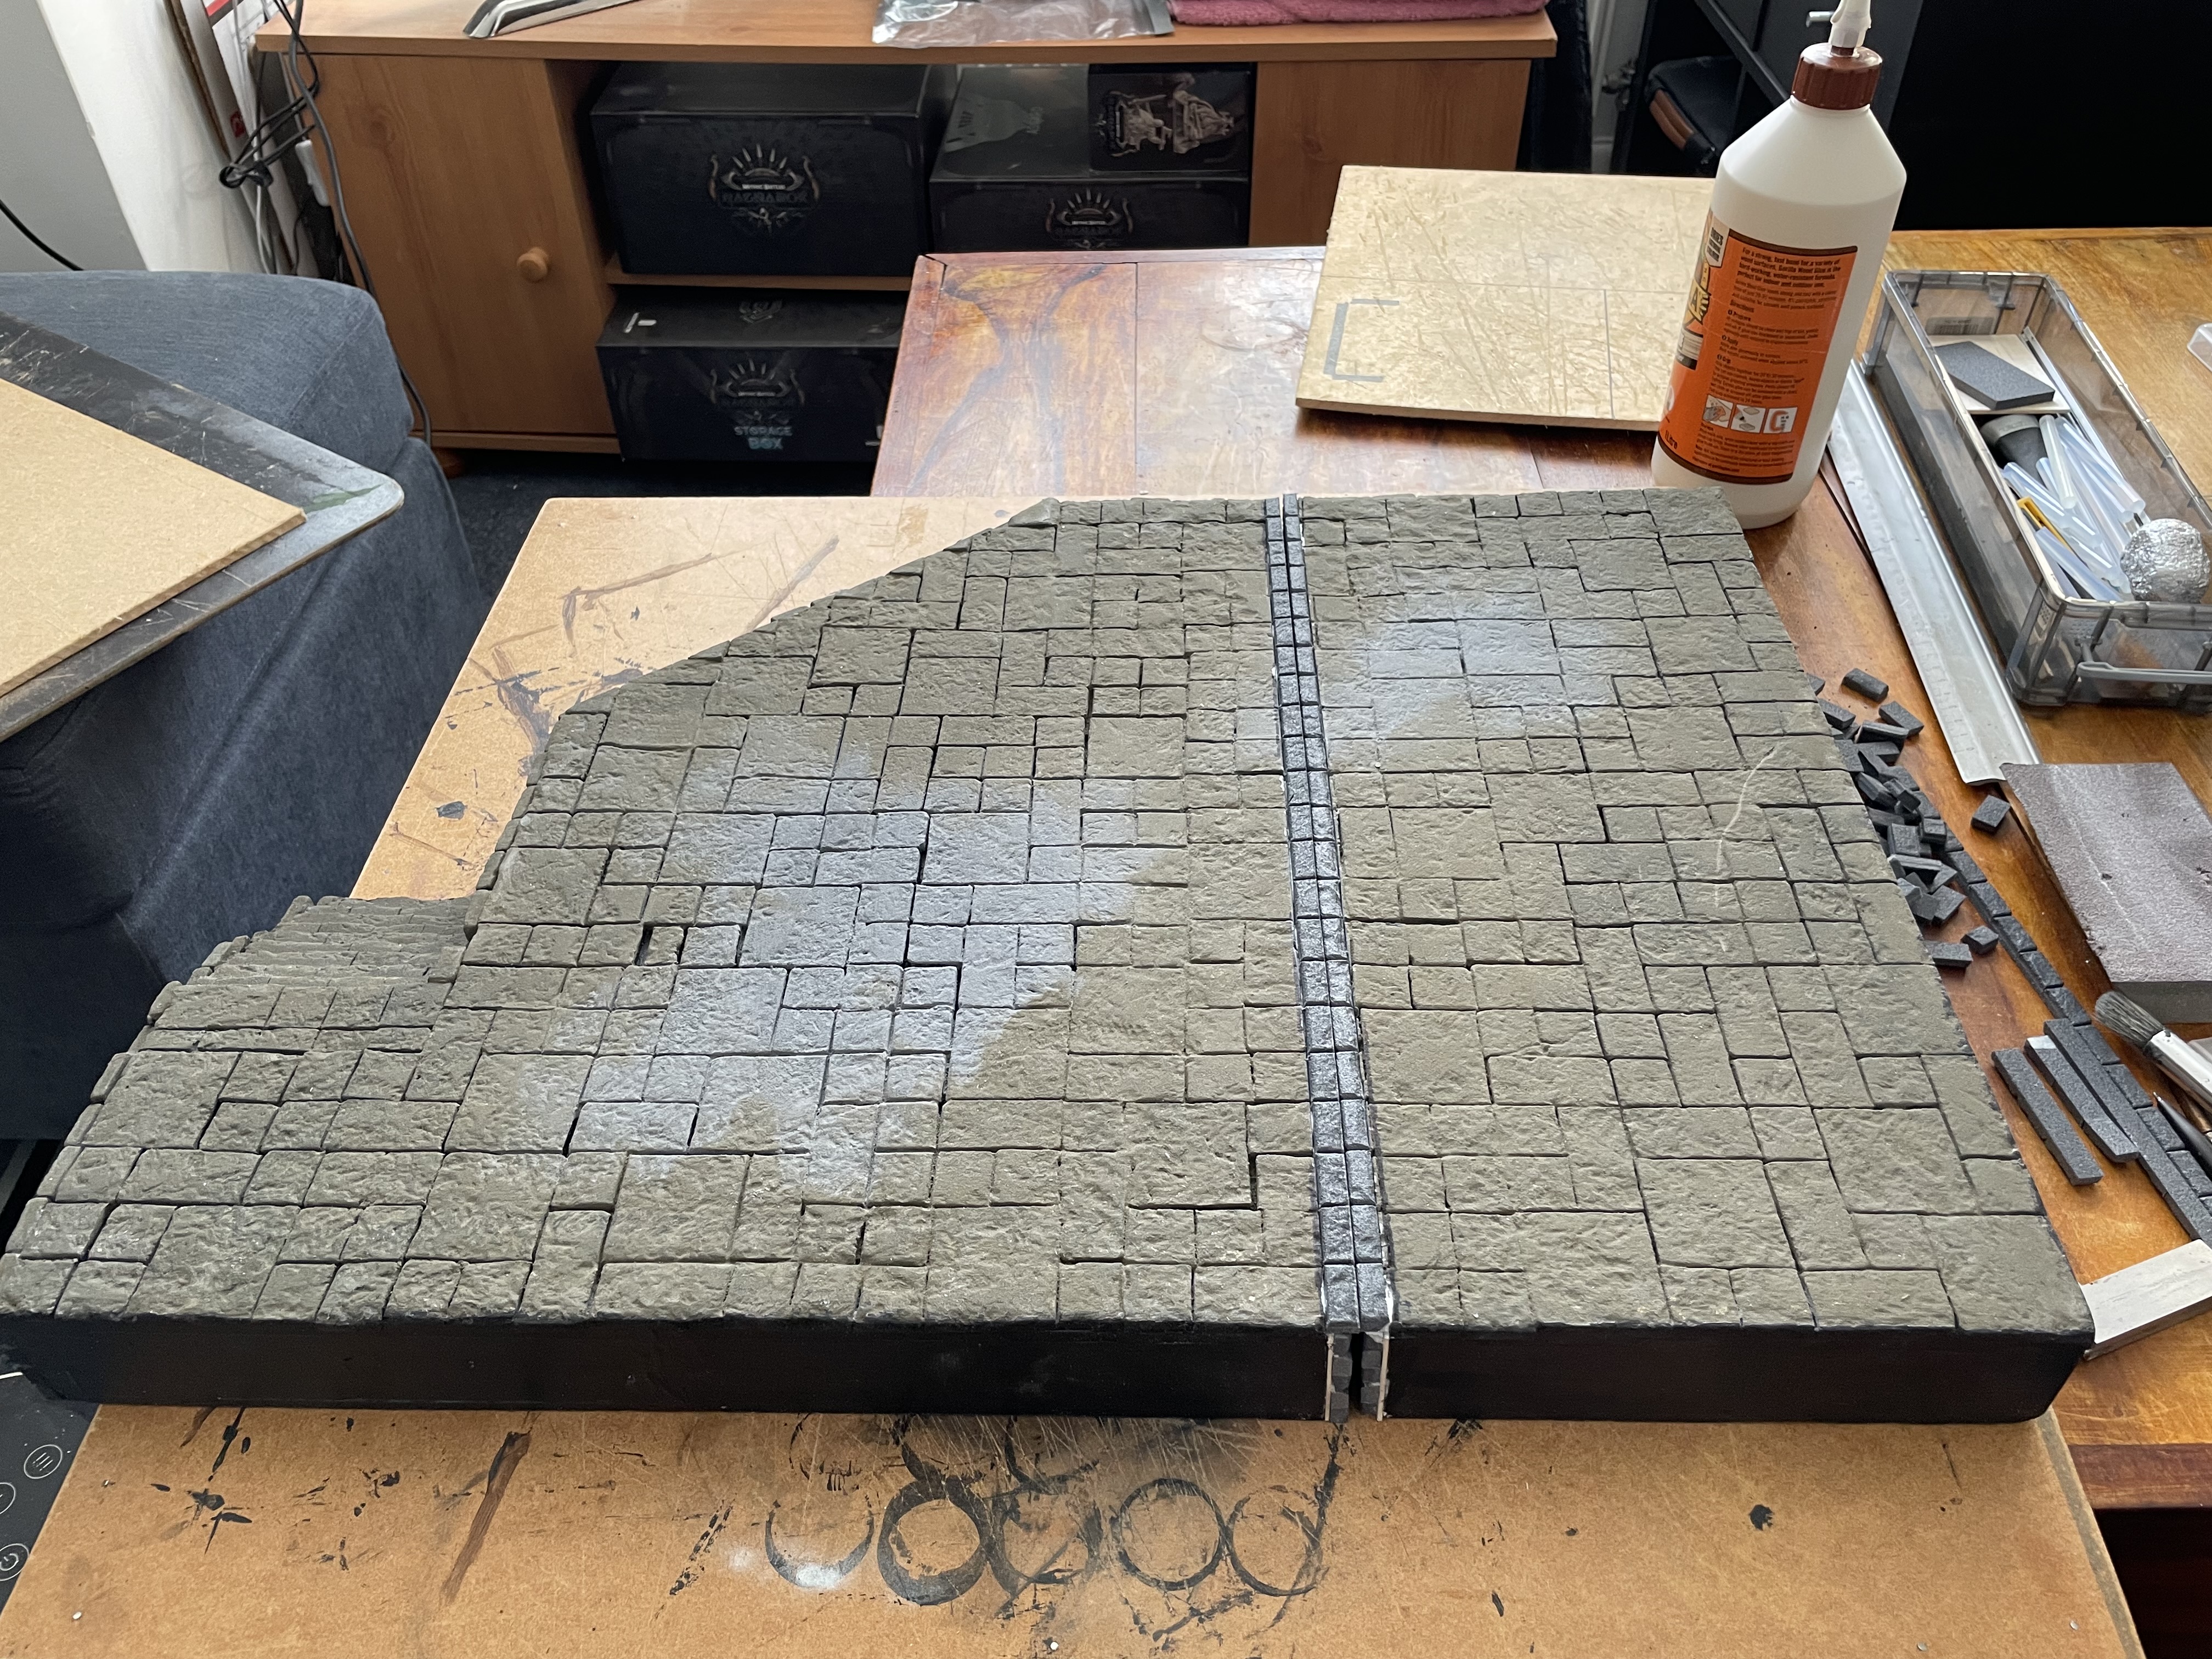
 XPS foam cut to size, textured up with some scrunched up foil and flagstones removed in areas to destress it a little bit. Once it’s dried and set in place I’ll add some earth texture and broken stones.
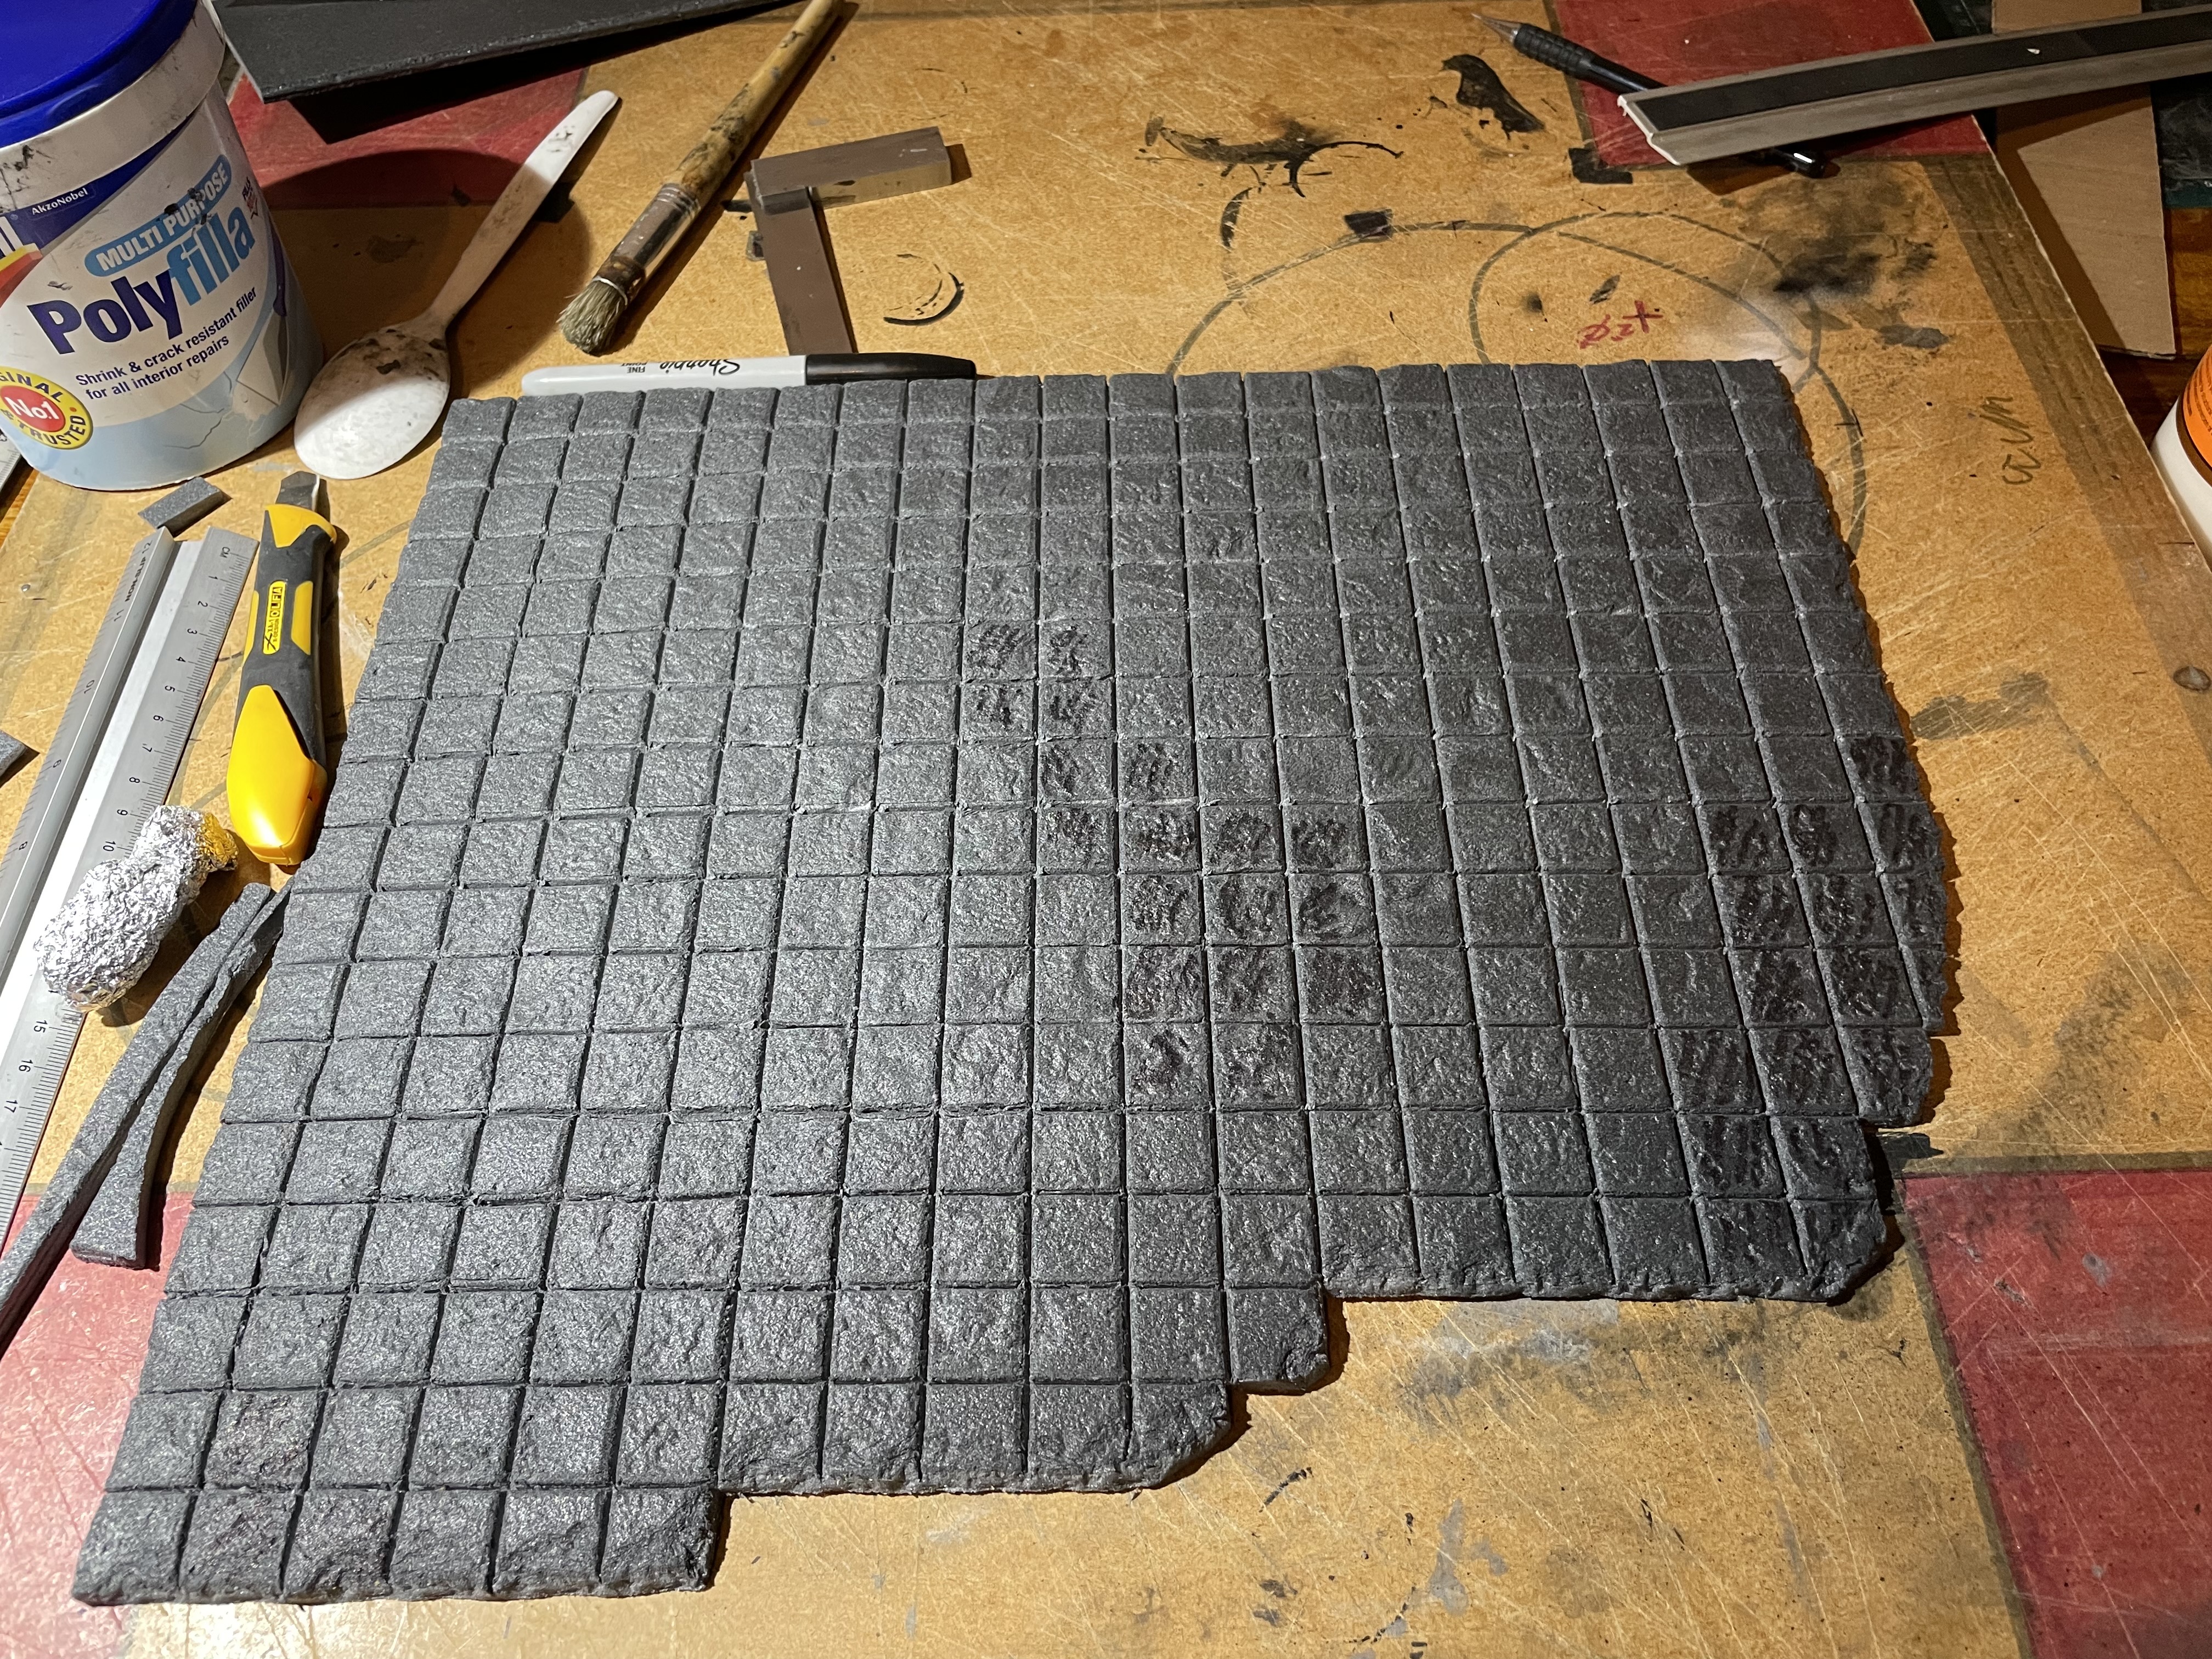
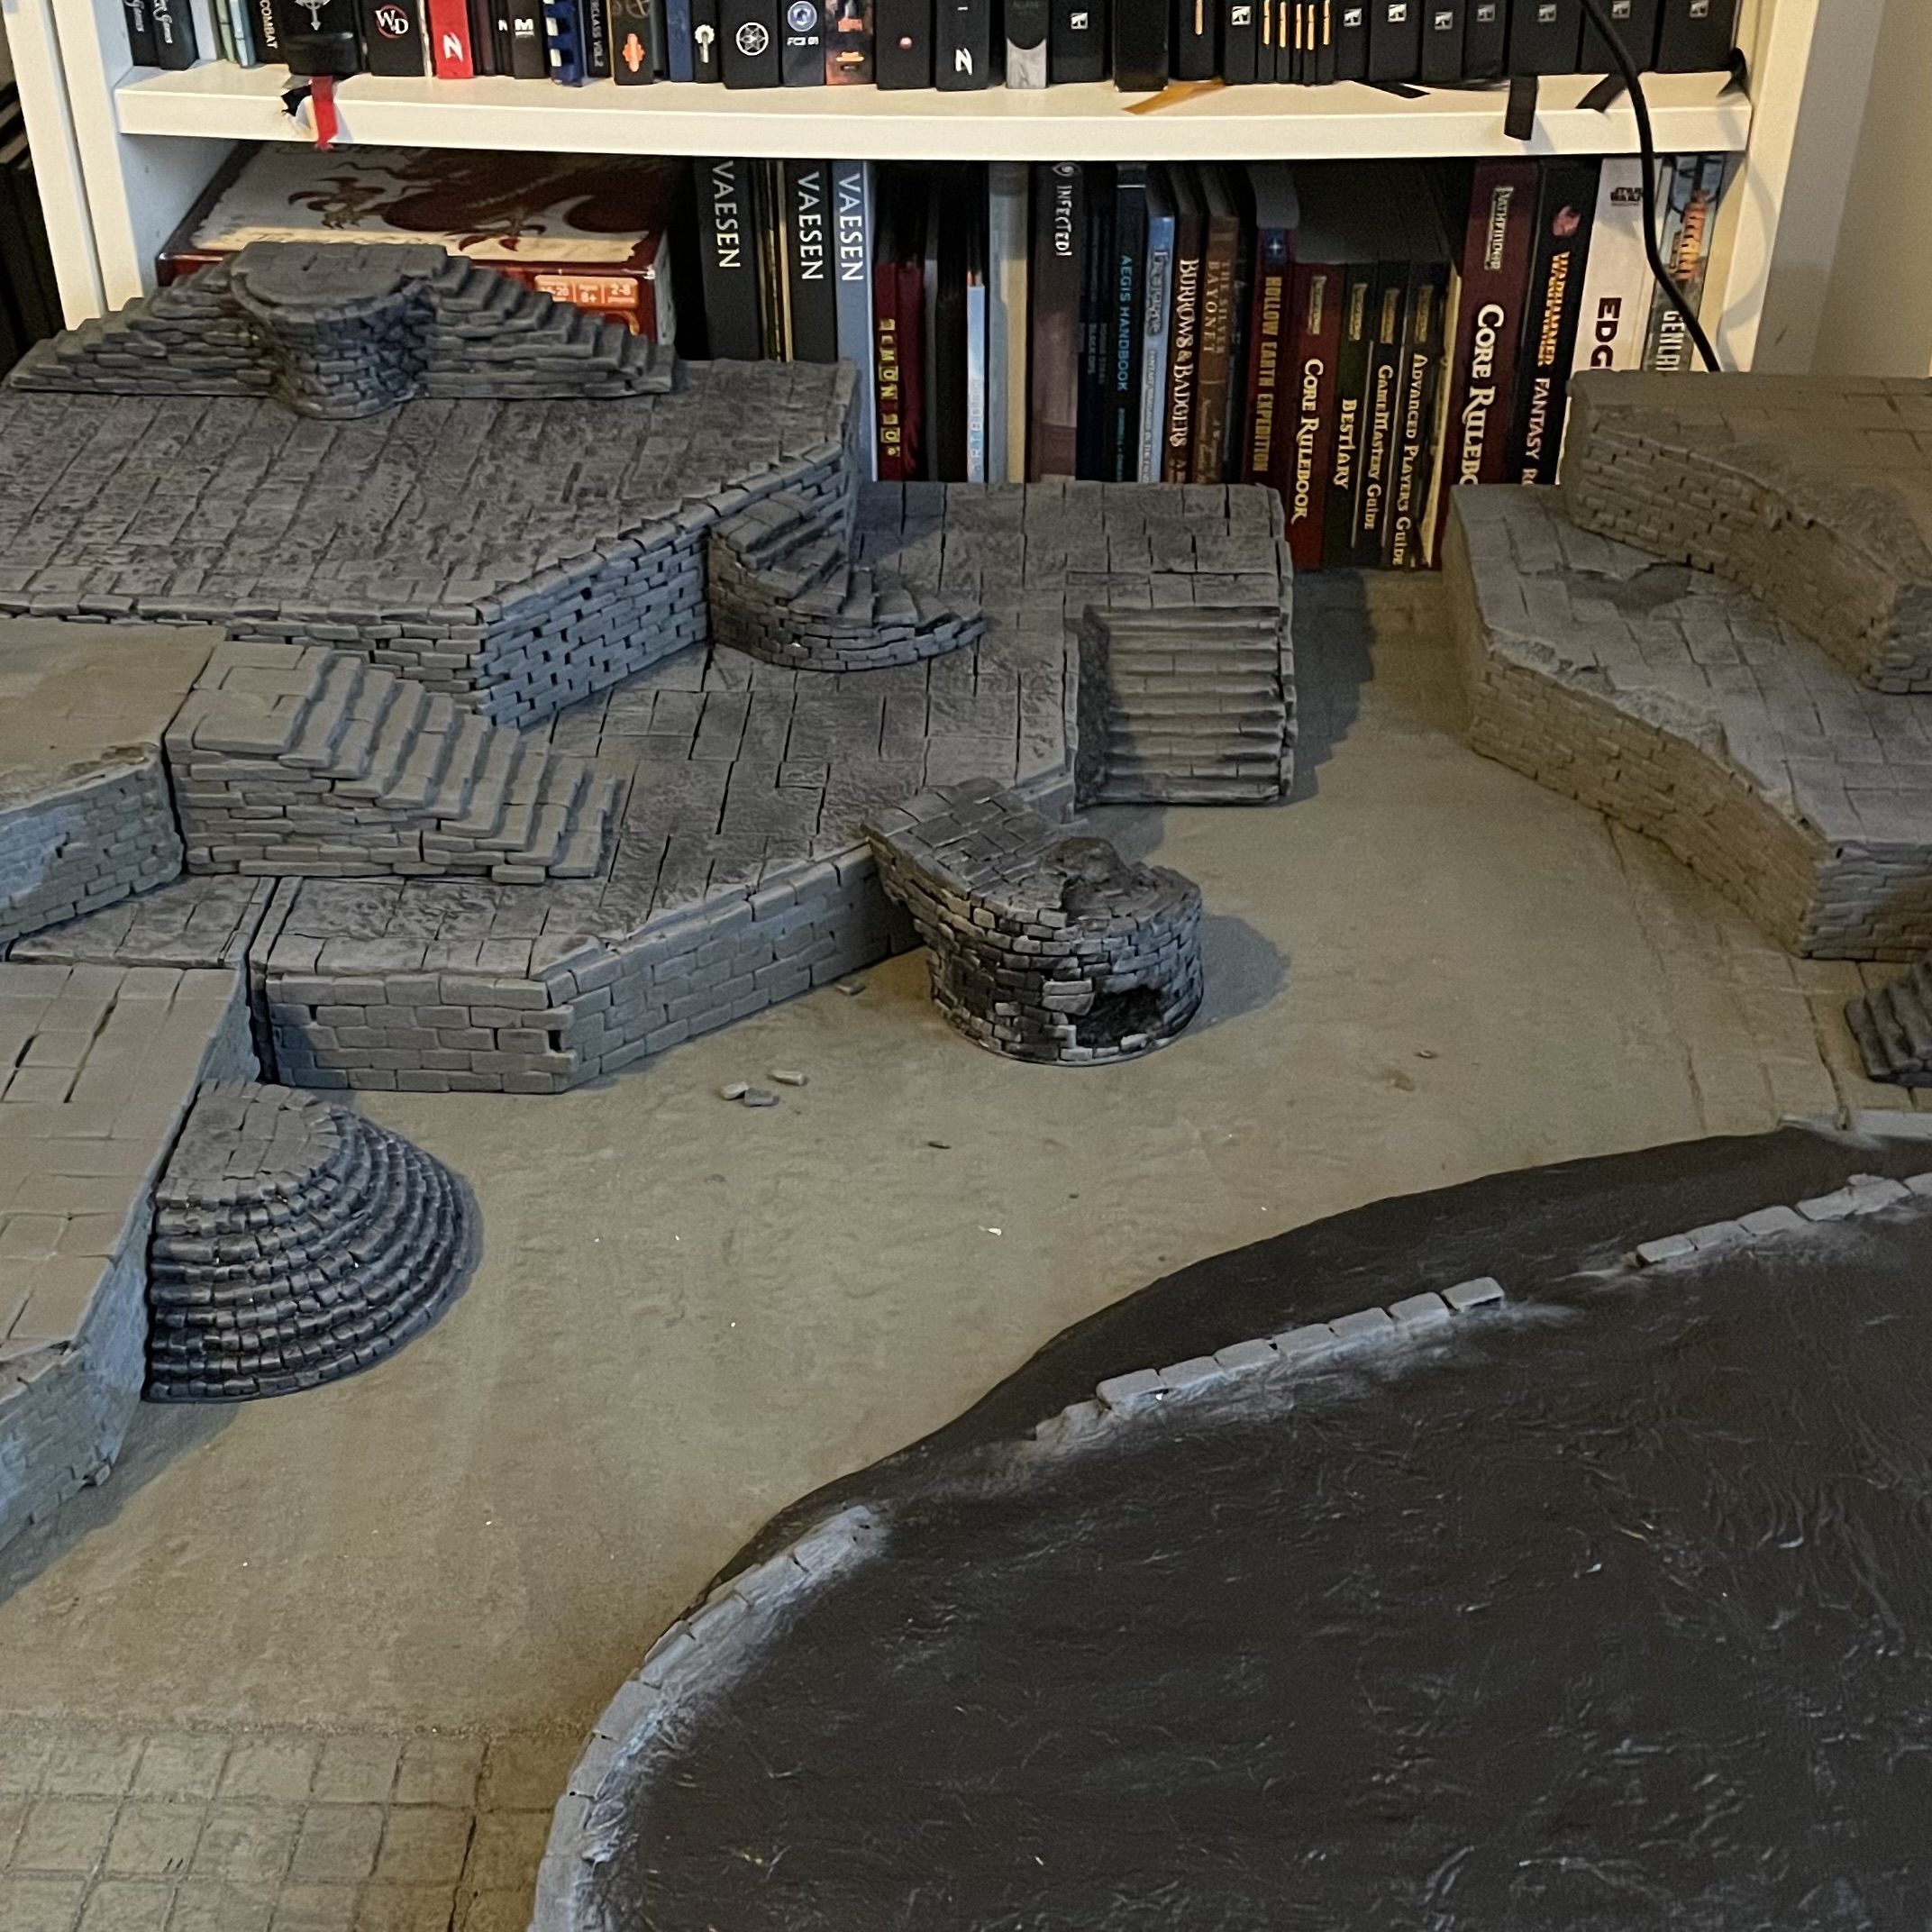
Some solid foundations
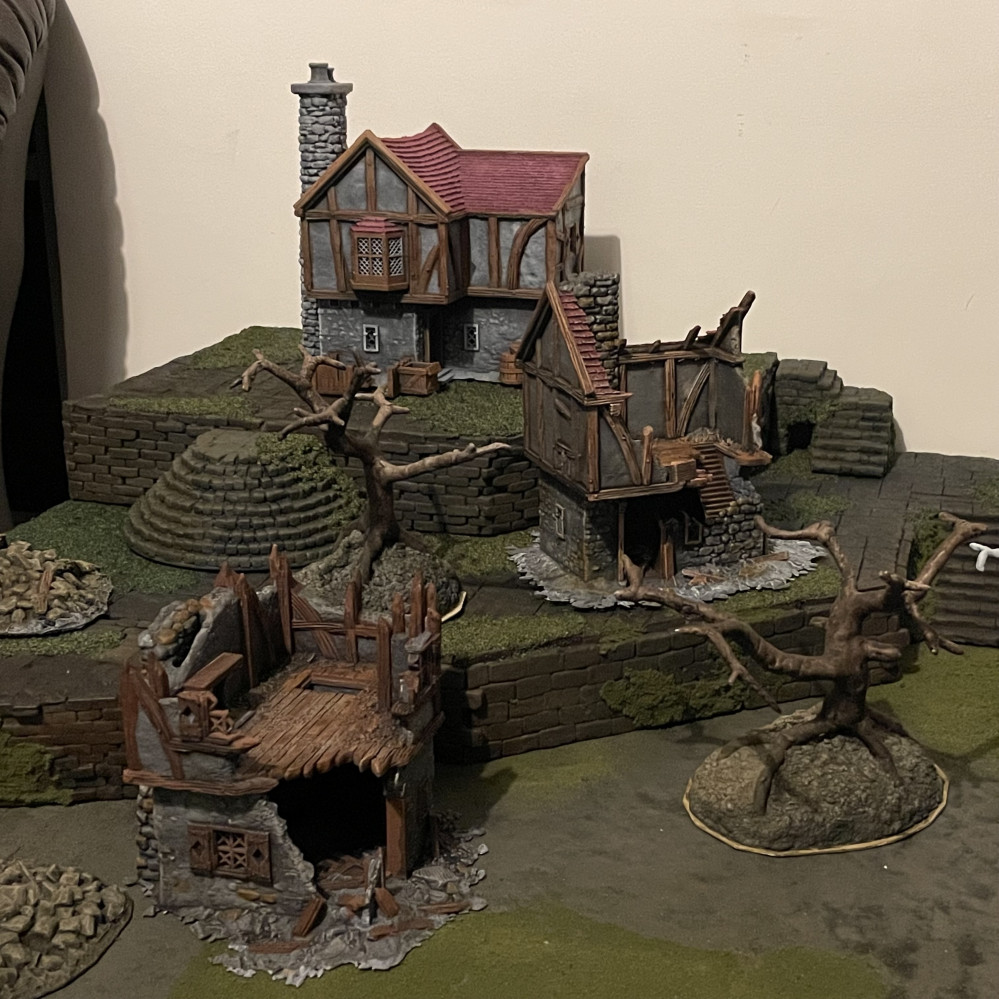
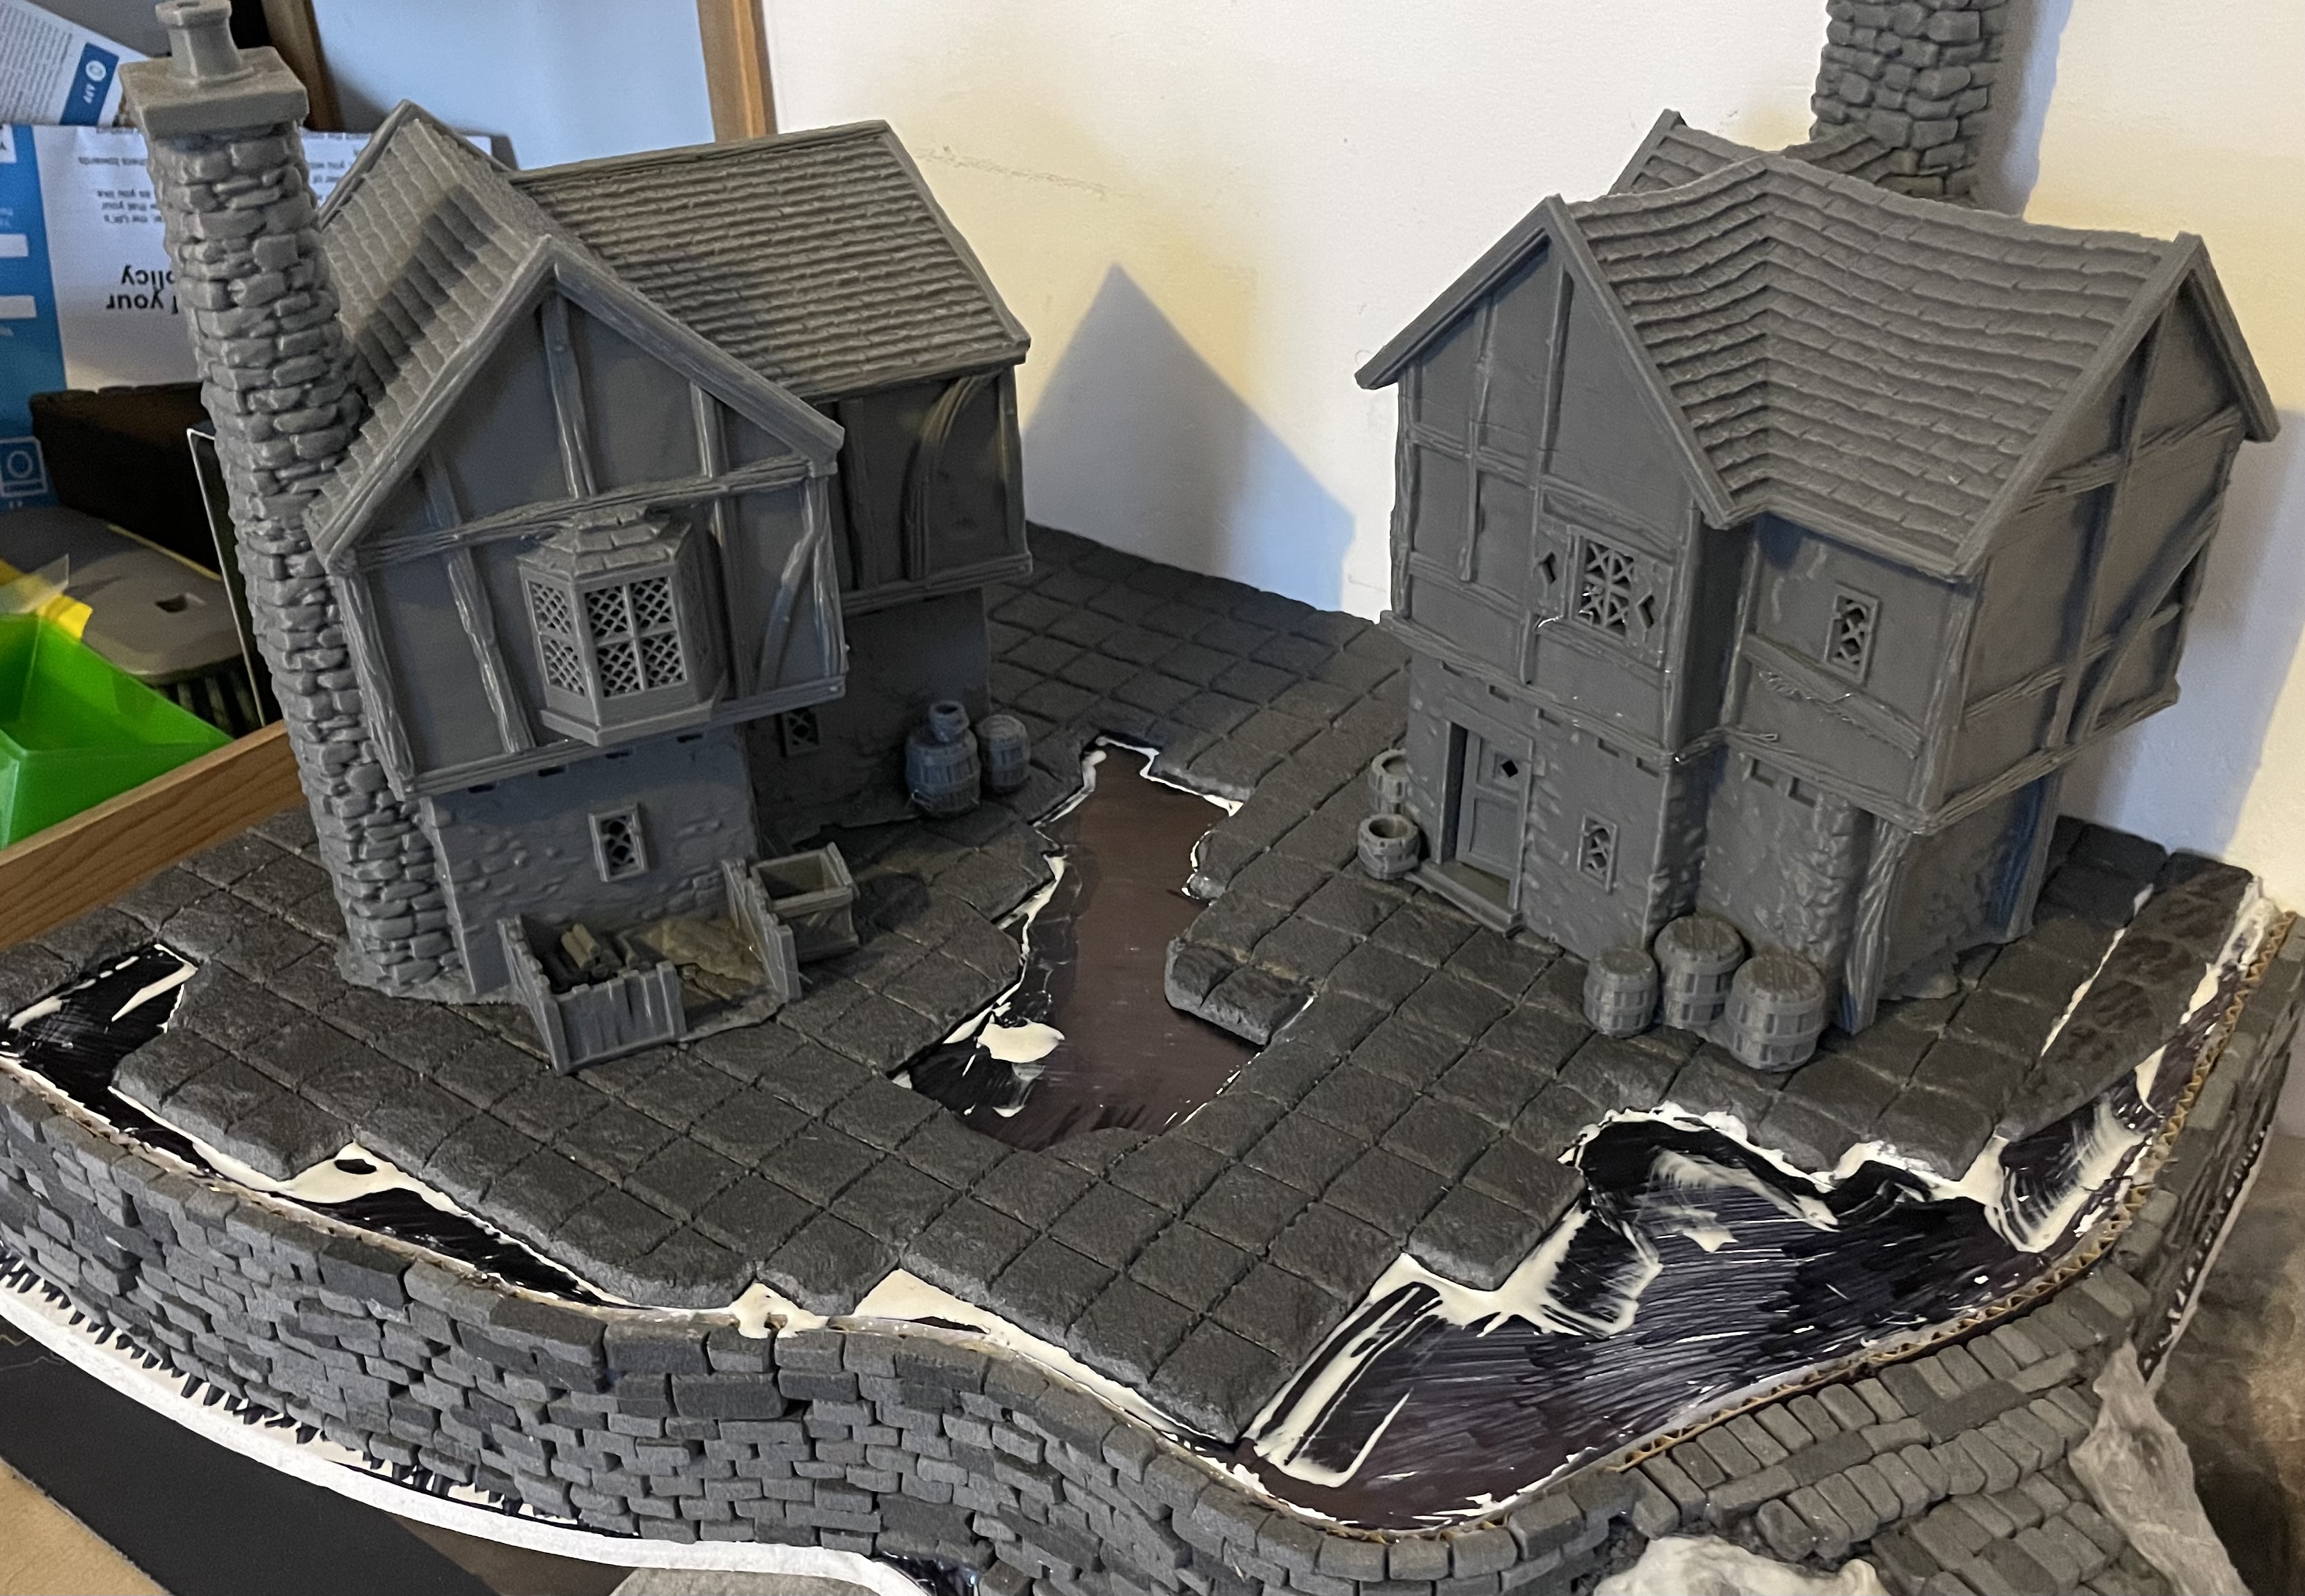
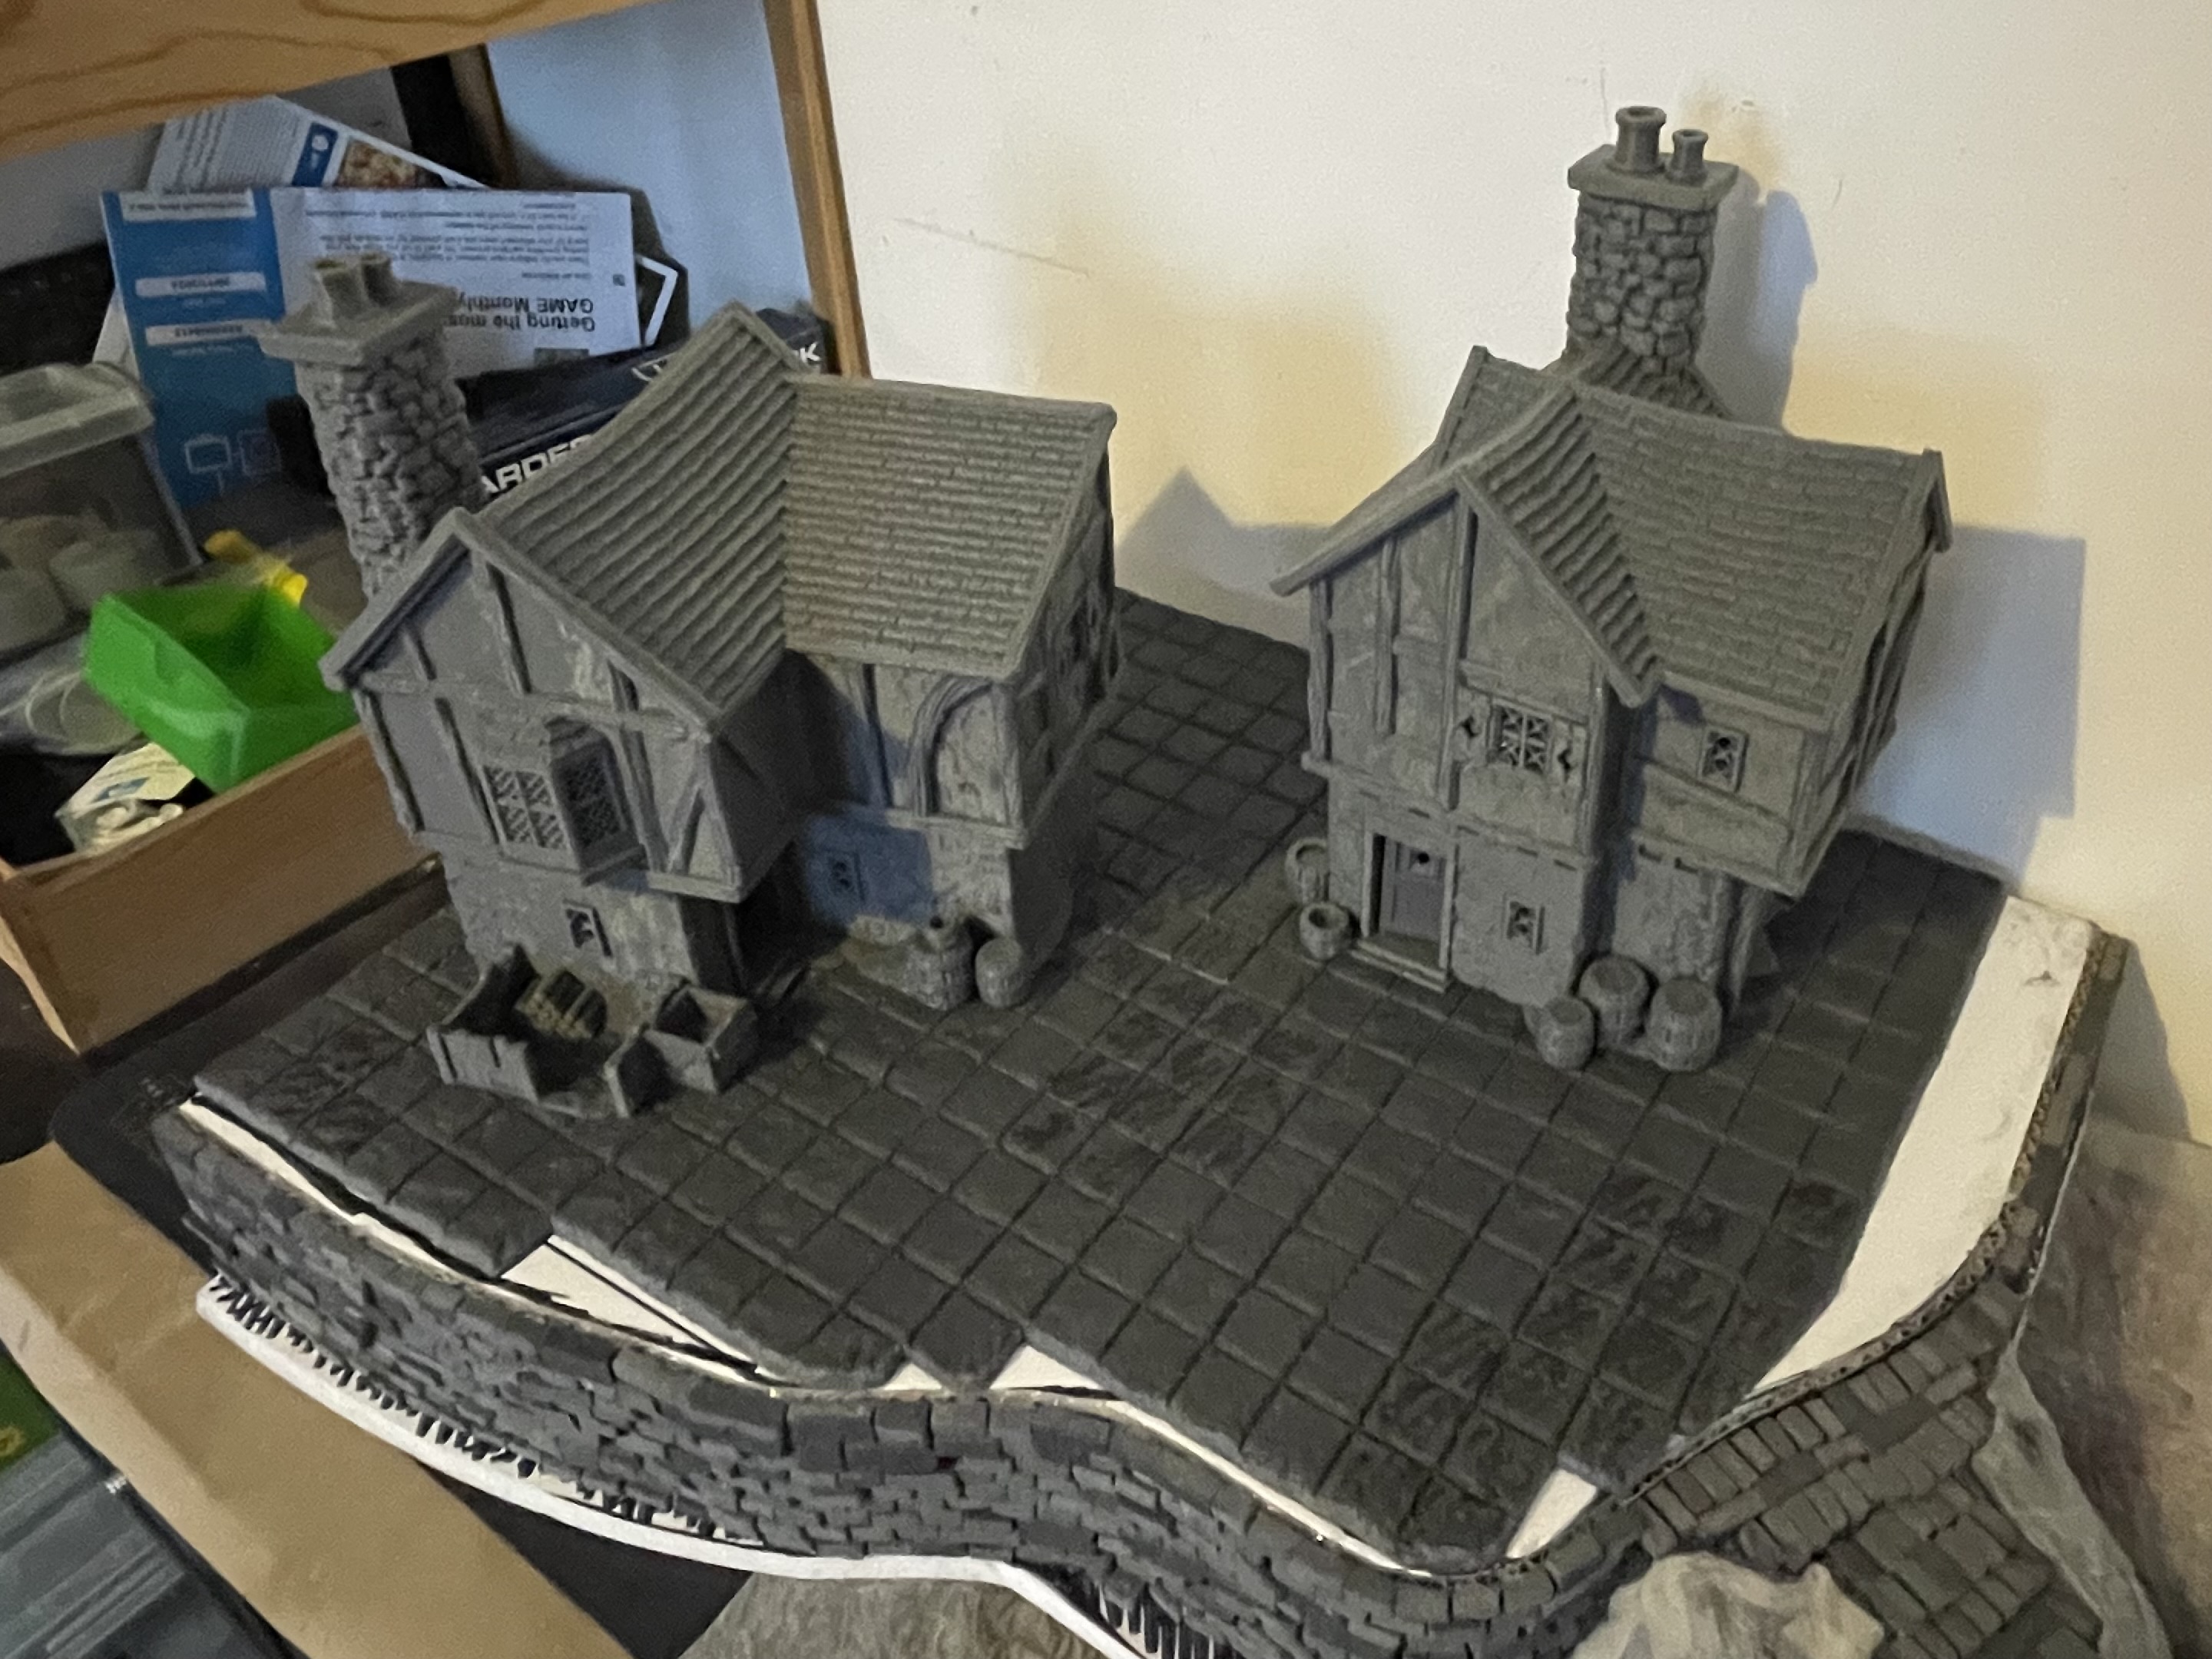
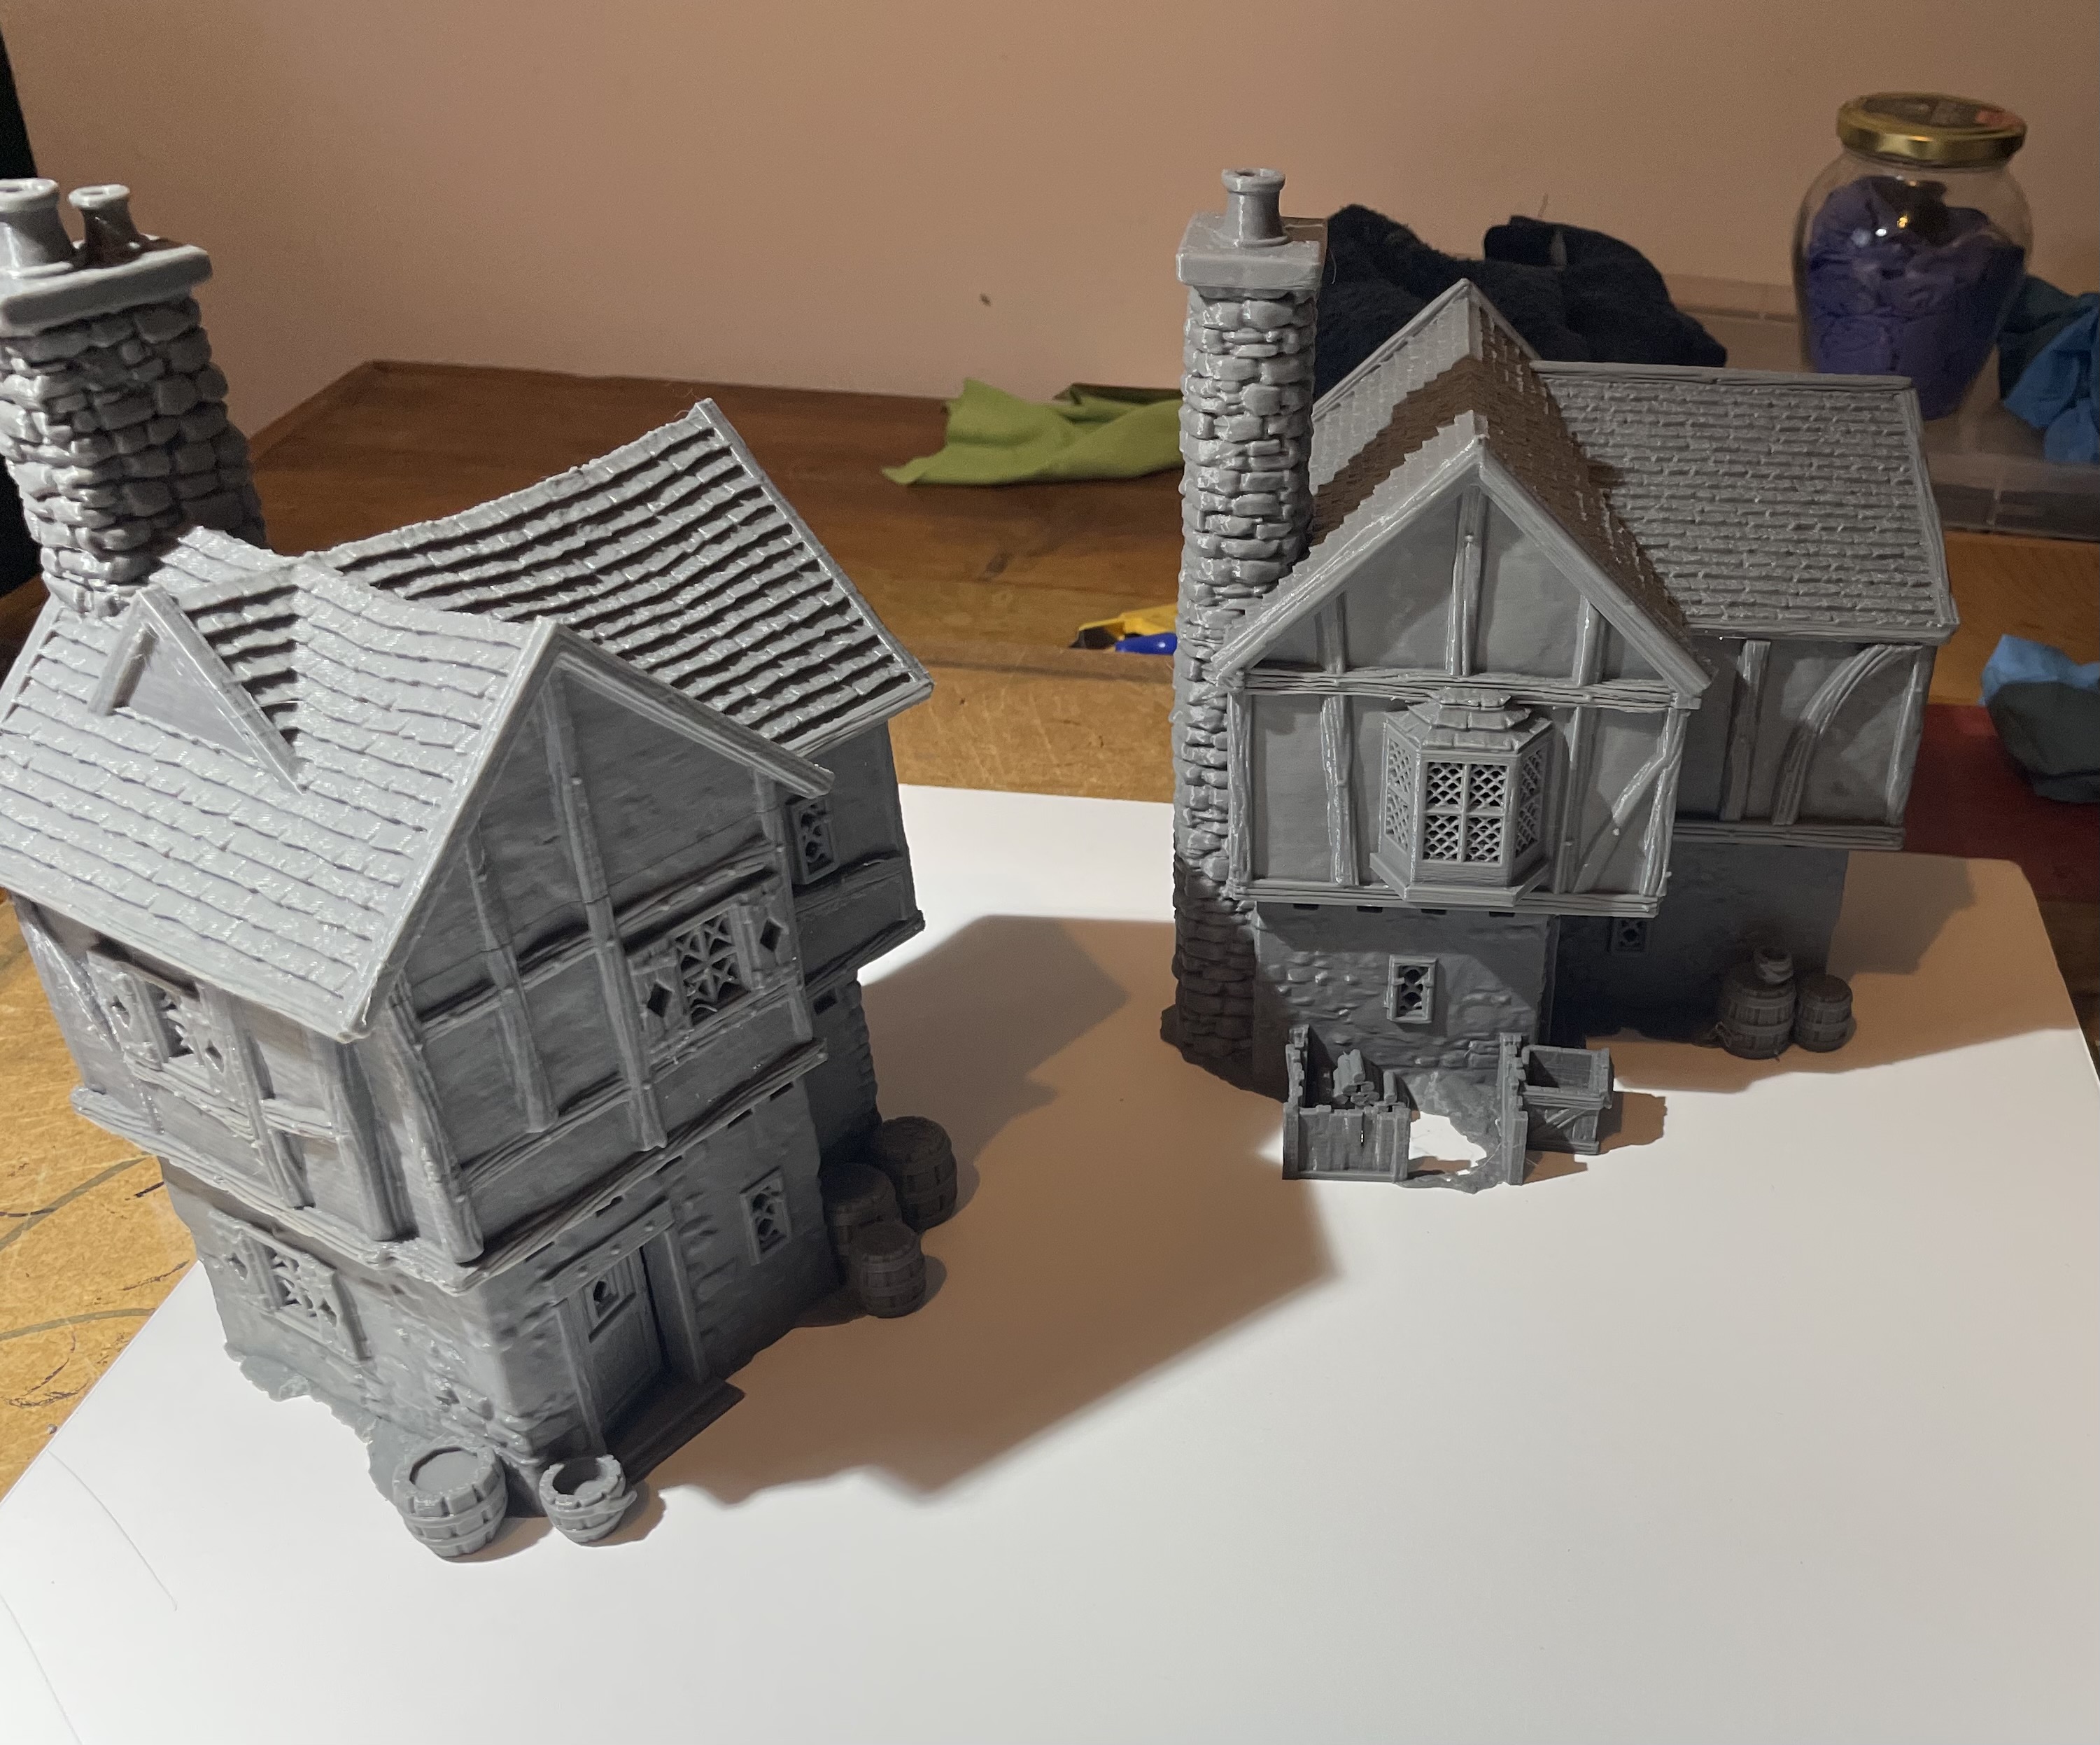
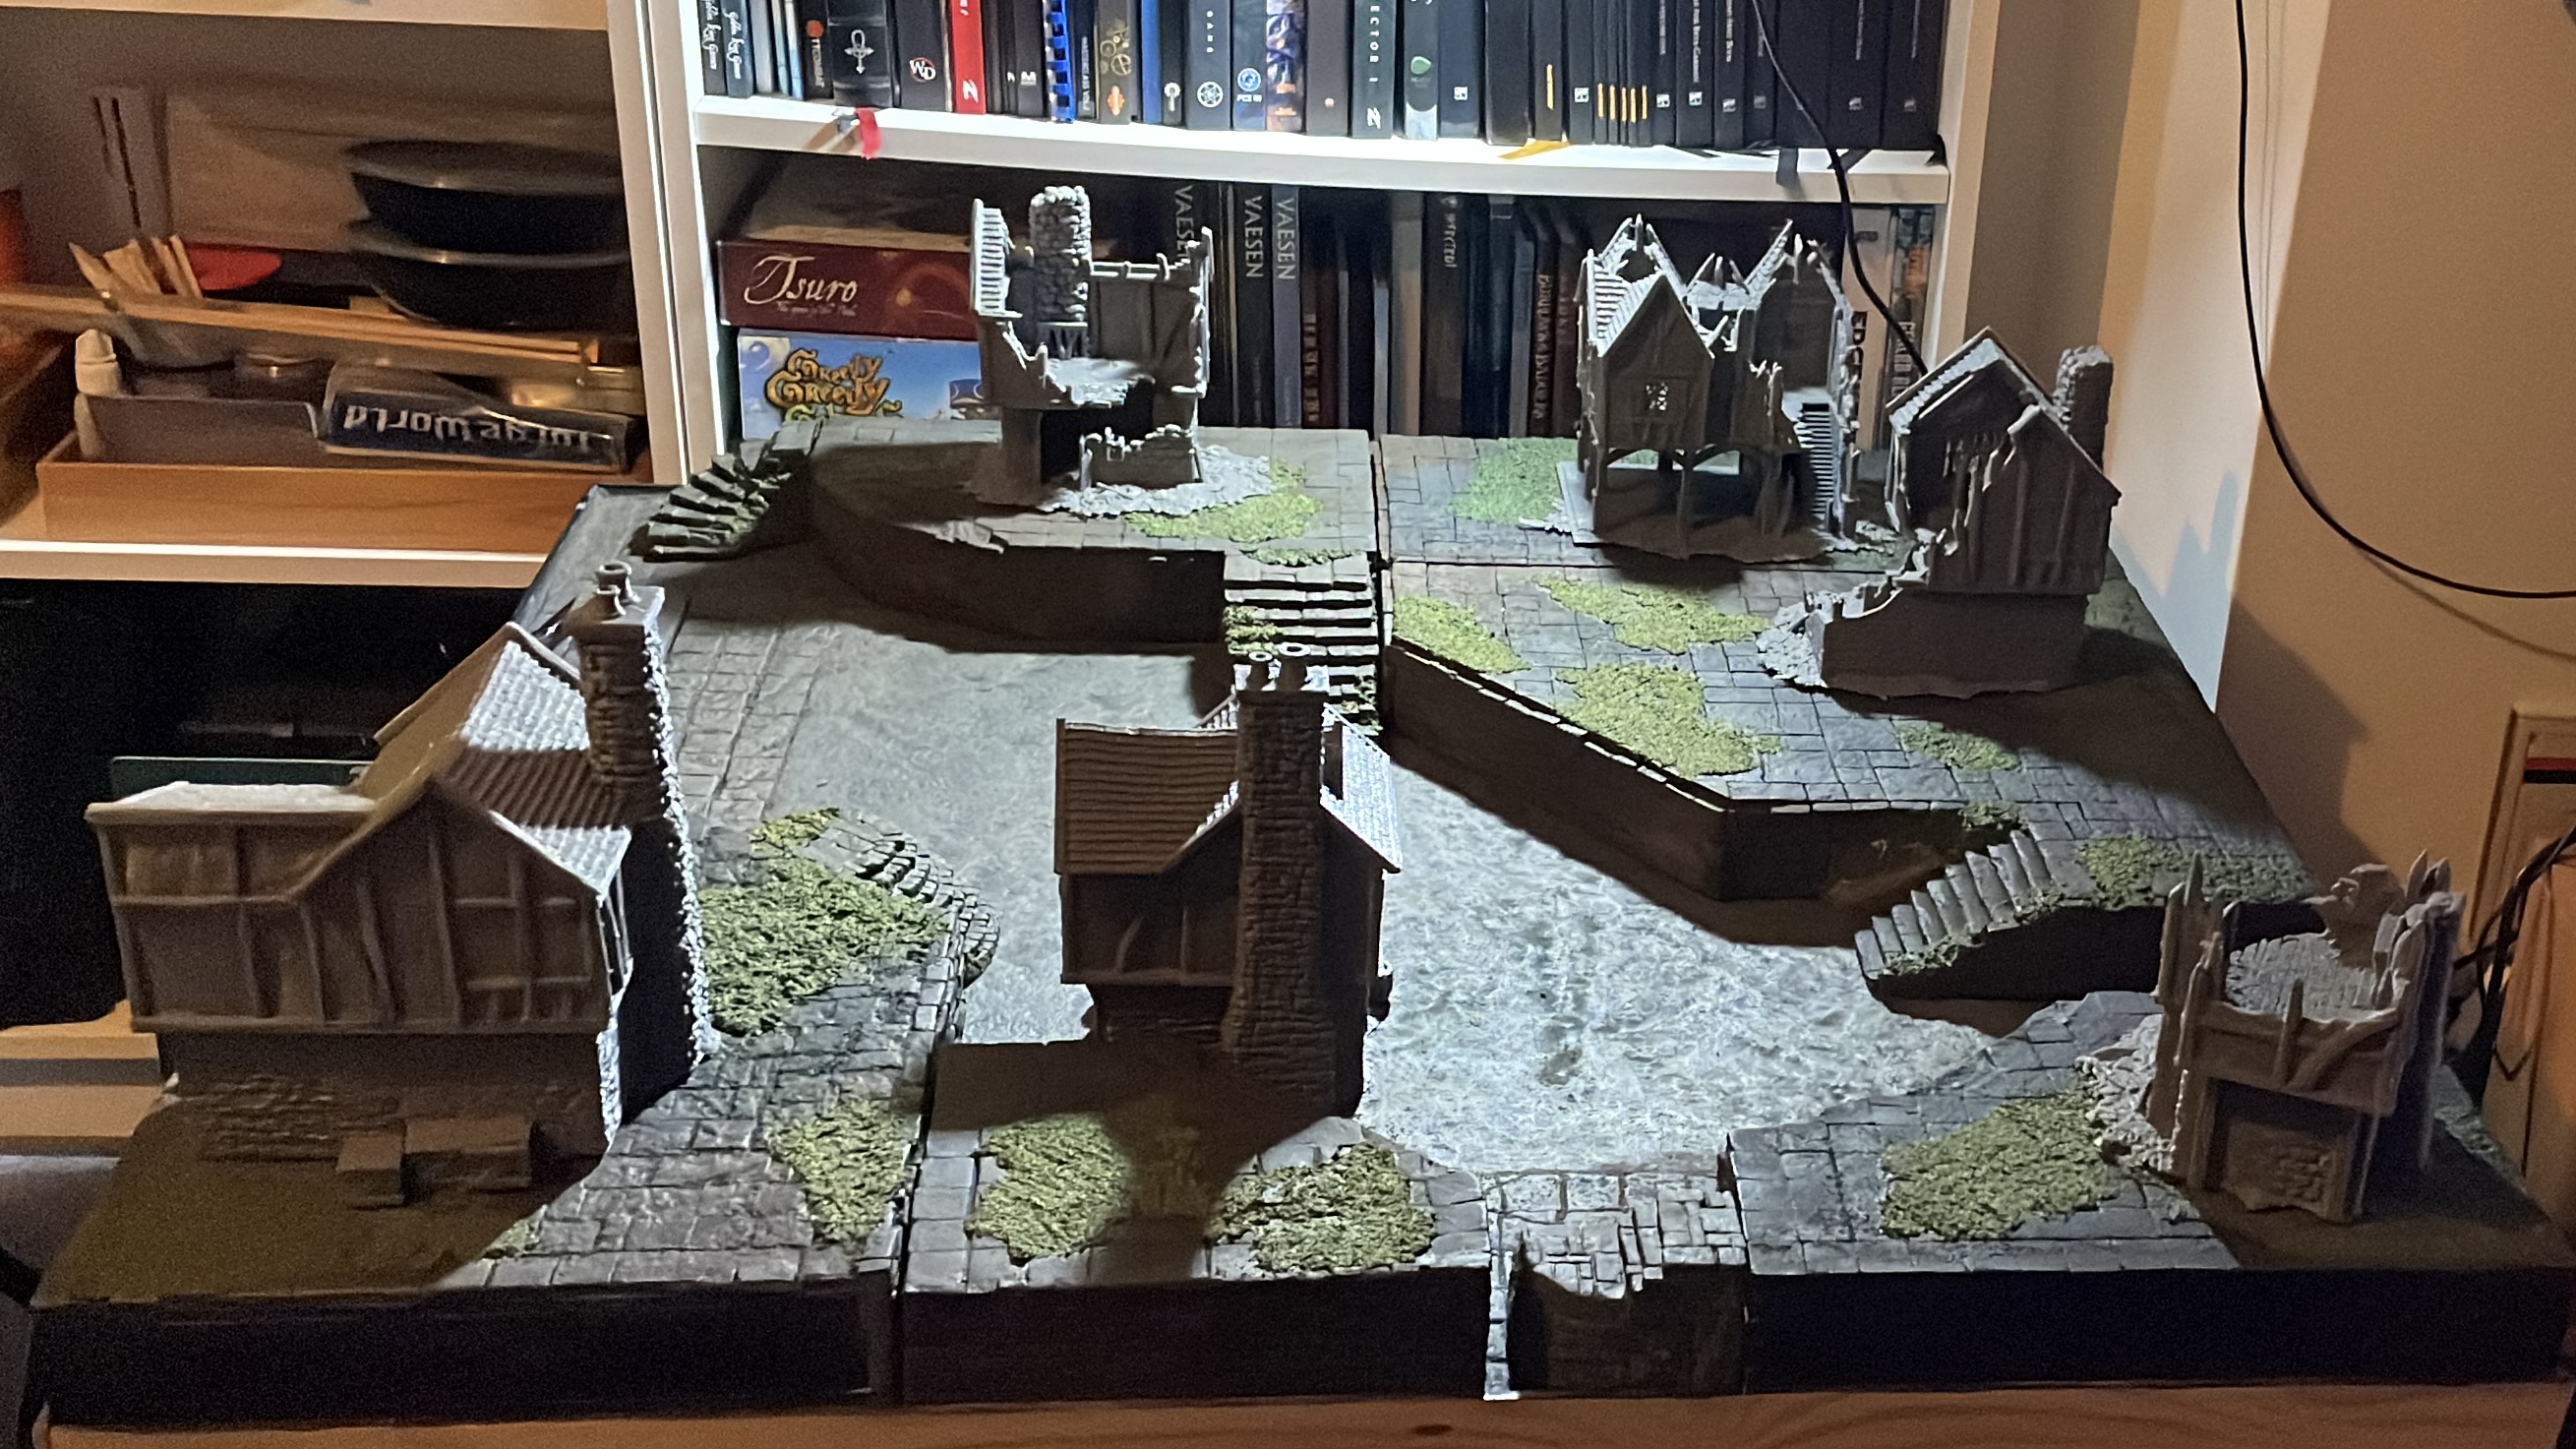
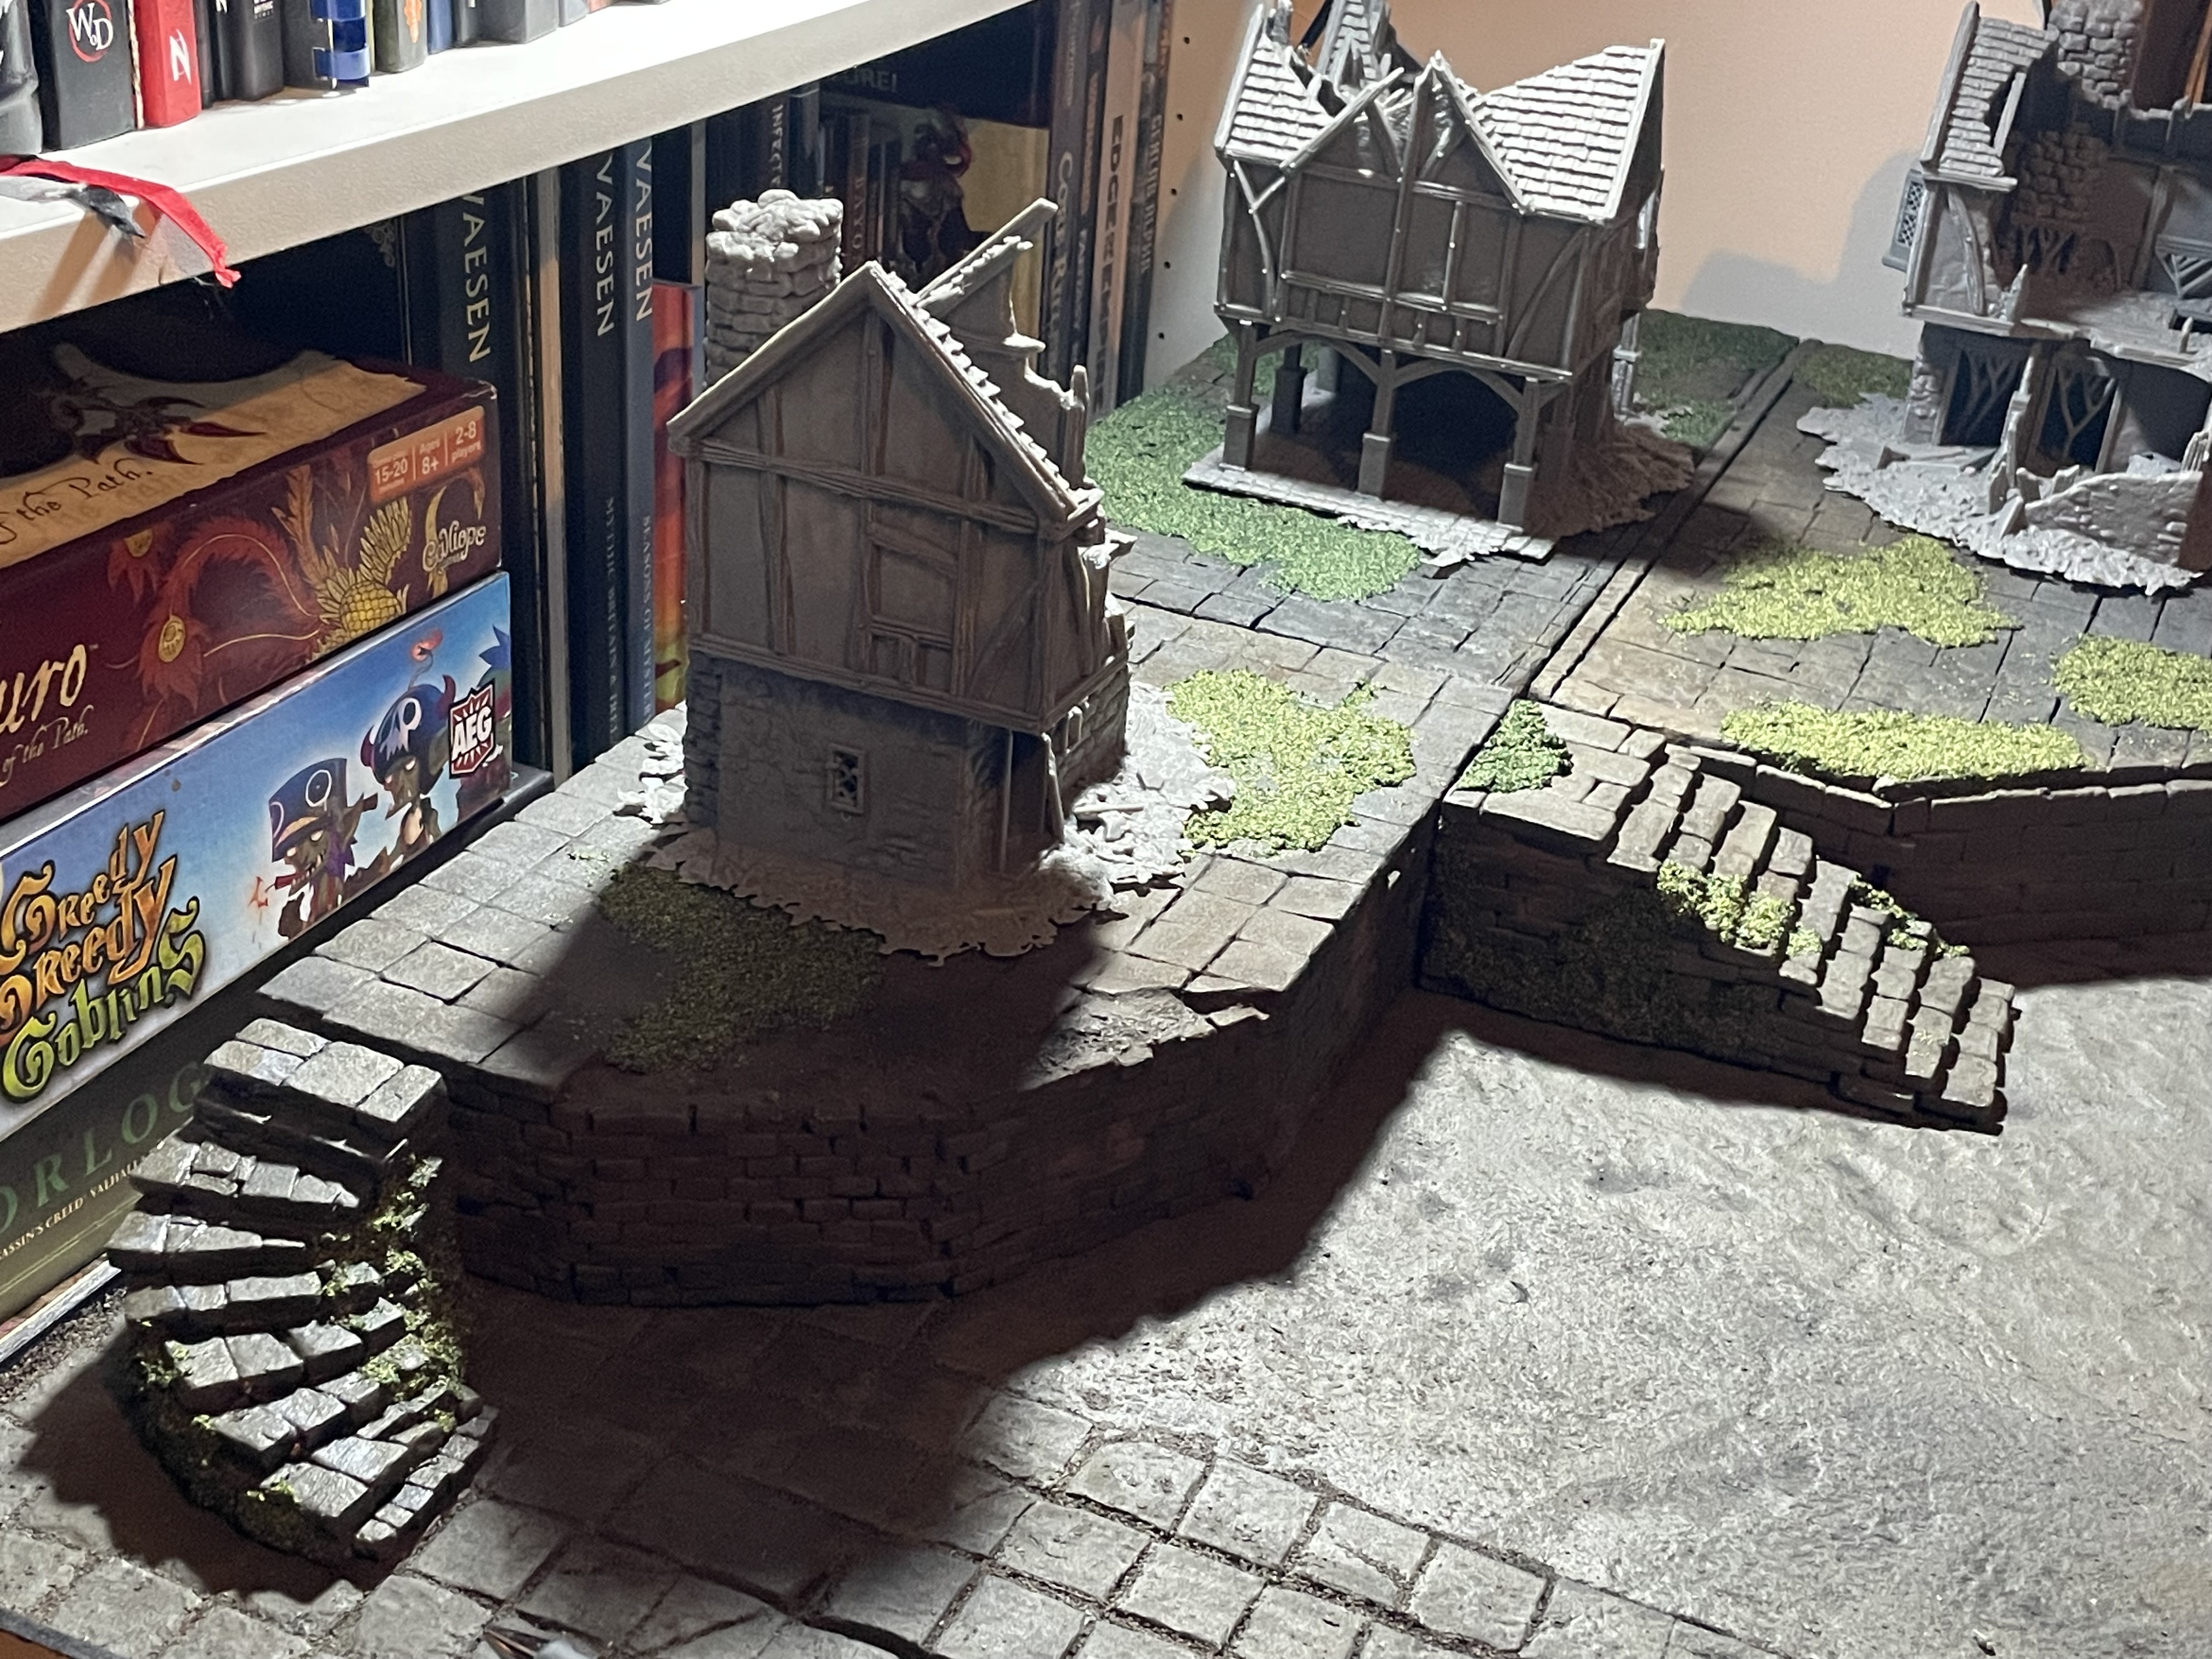
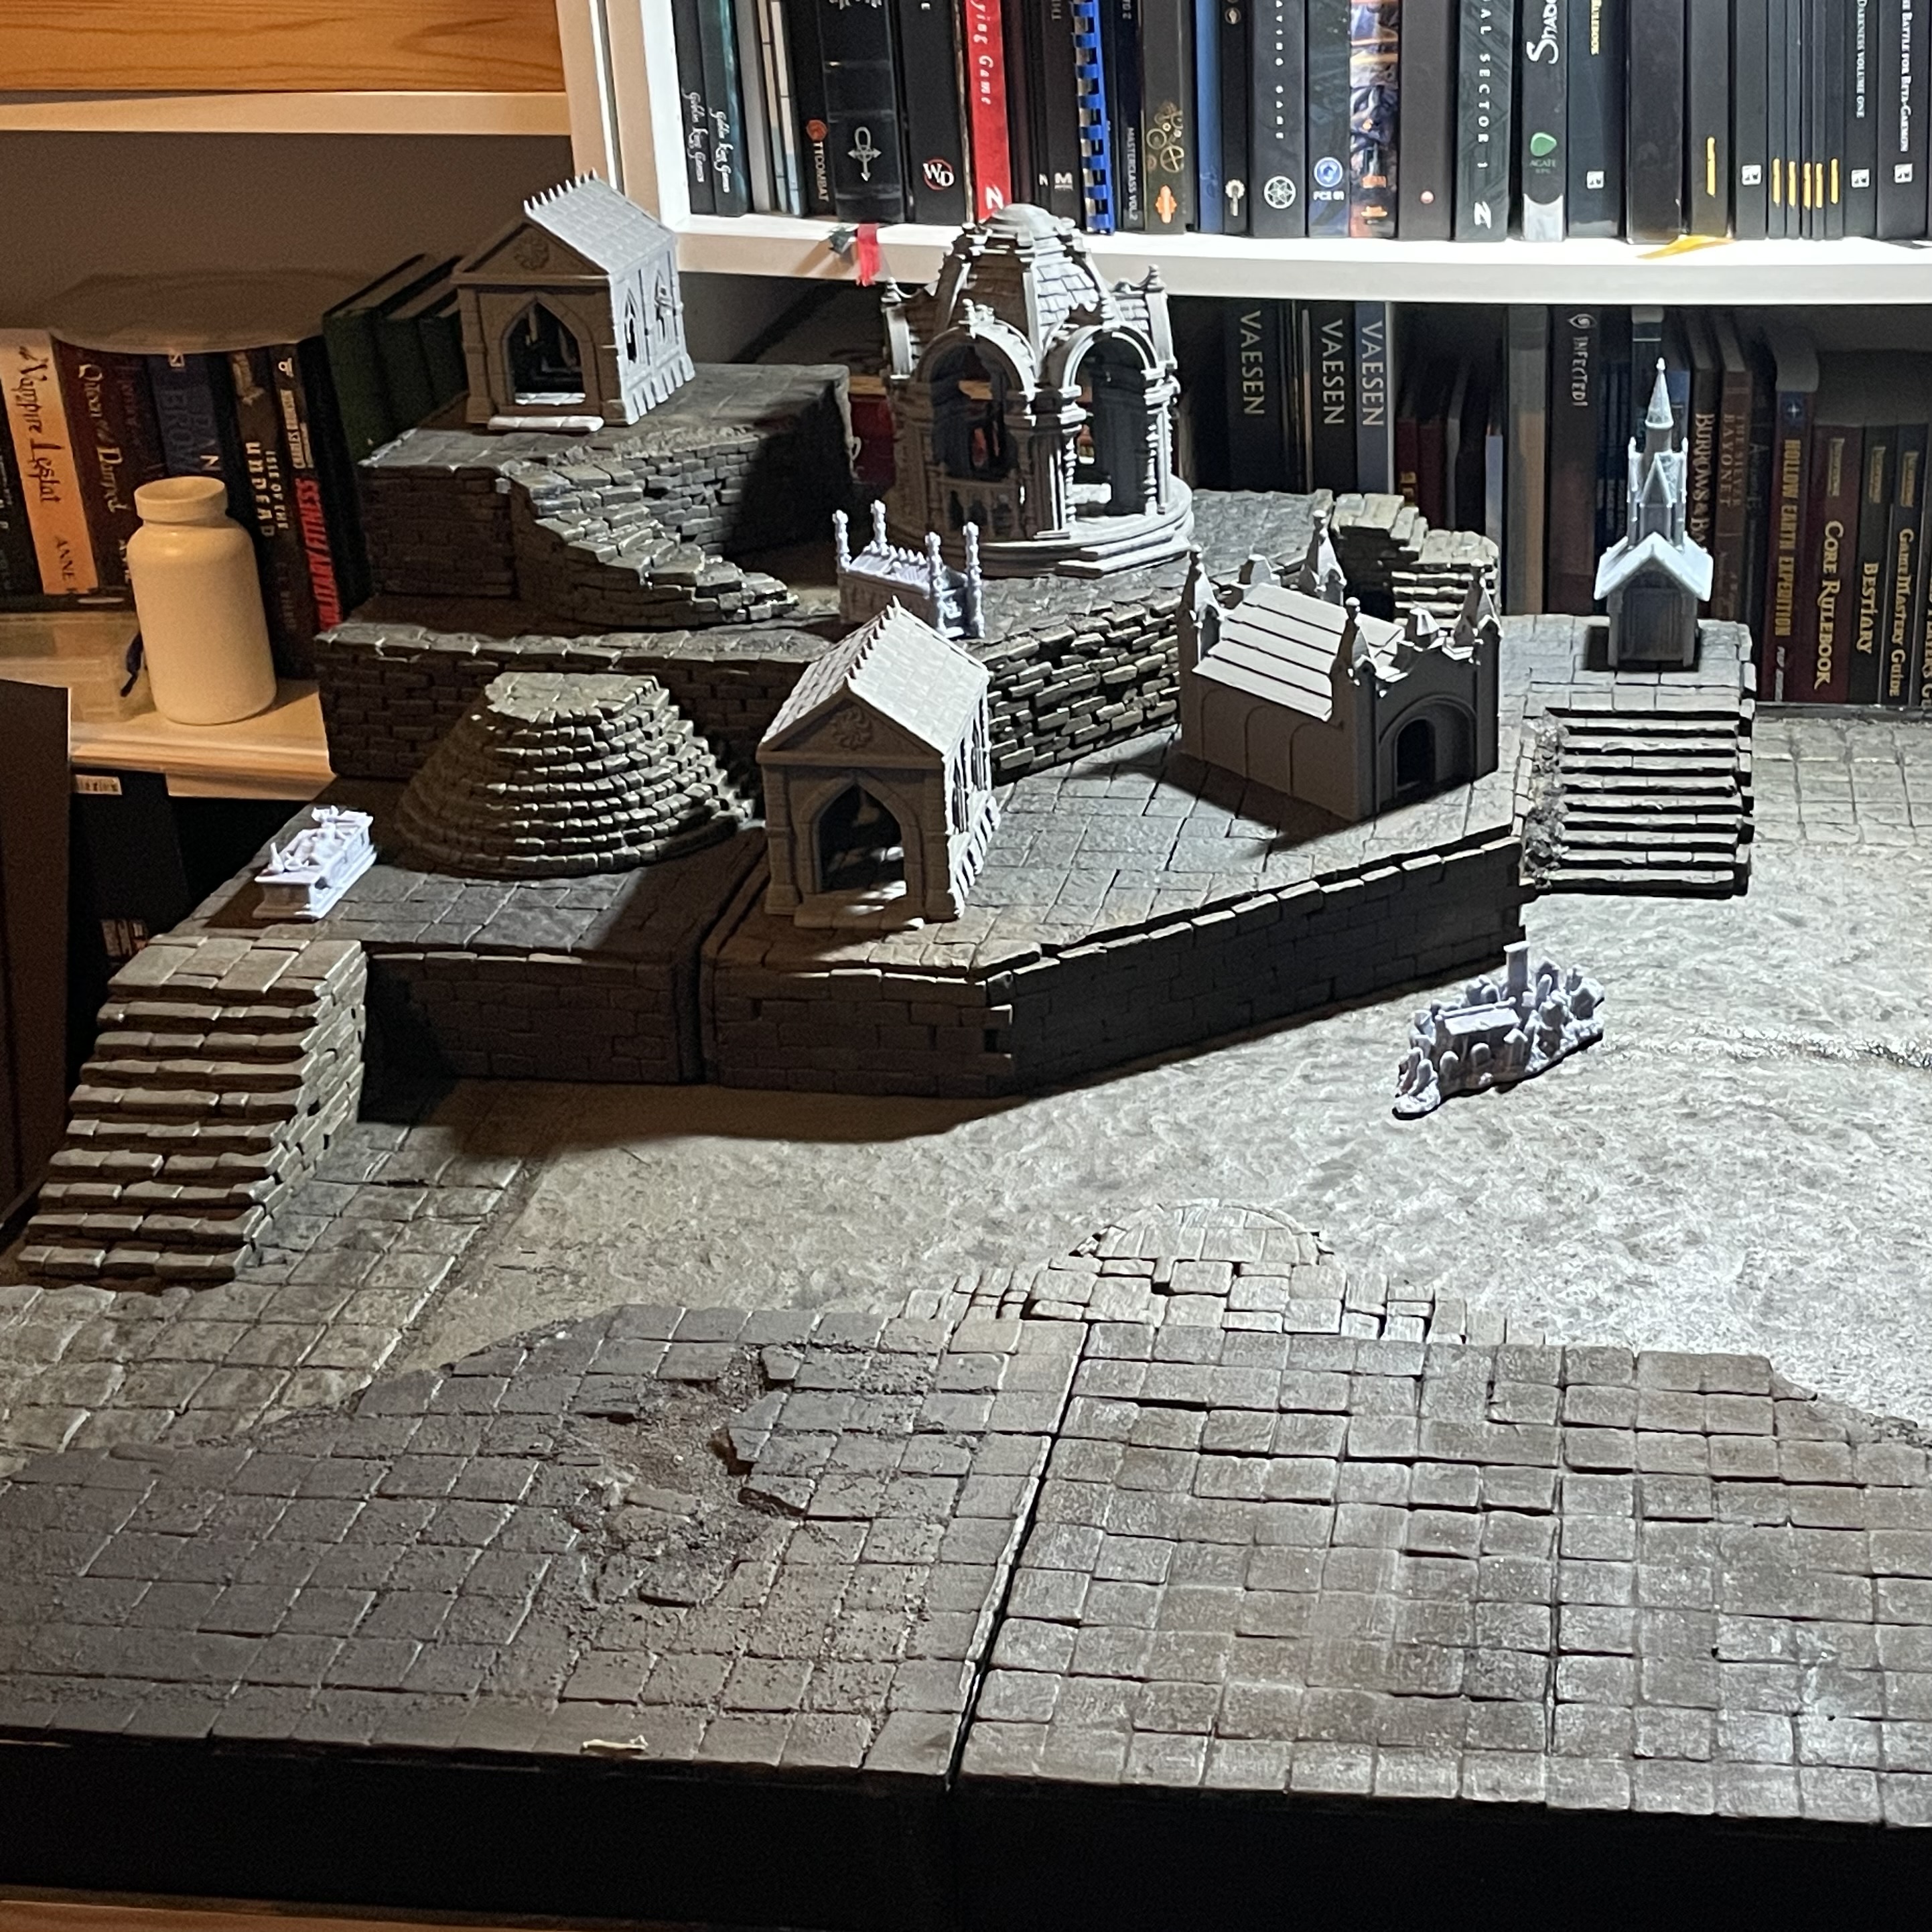
So a while back I was given some 3D Printed goodies by a friend of mine at www.beowulfminiatures.com. You remember the big box that turned up. Well there were six buildings four ruined and two complete pristine. Well I decided today they need an area just for them to sit on in the table. Besides I still have loads of those crazy teeny tiny bricks that I cut up to use.
 First of all placed them on the Foamcard and worked out the footprint they would leave so I knew how big to make this piece.
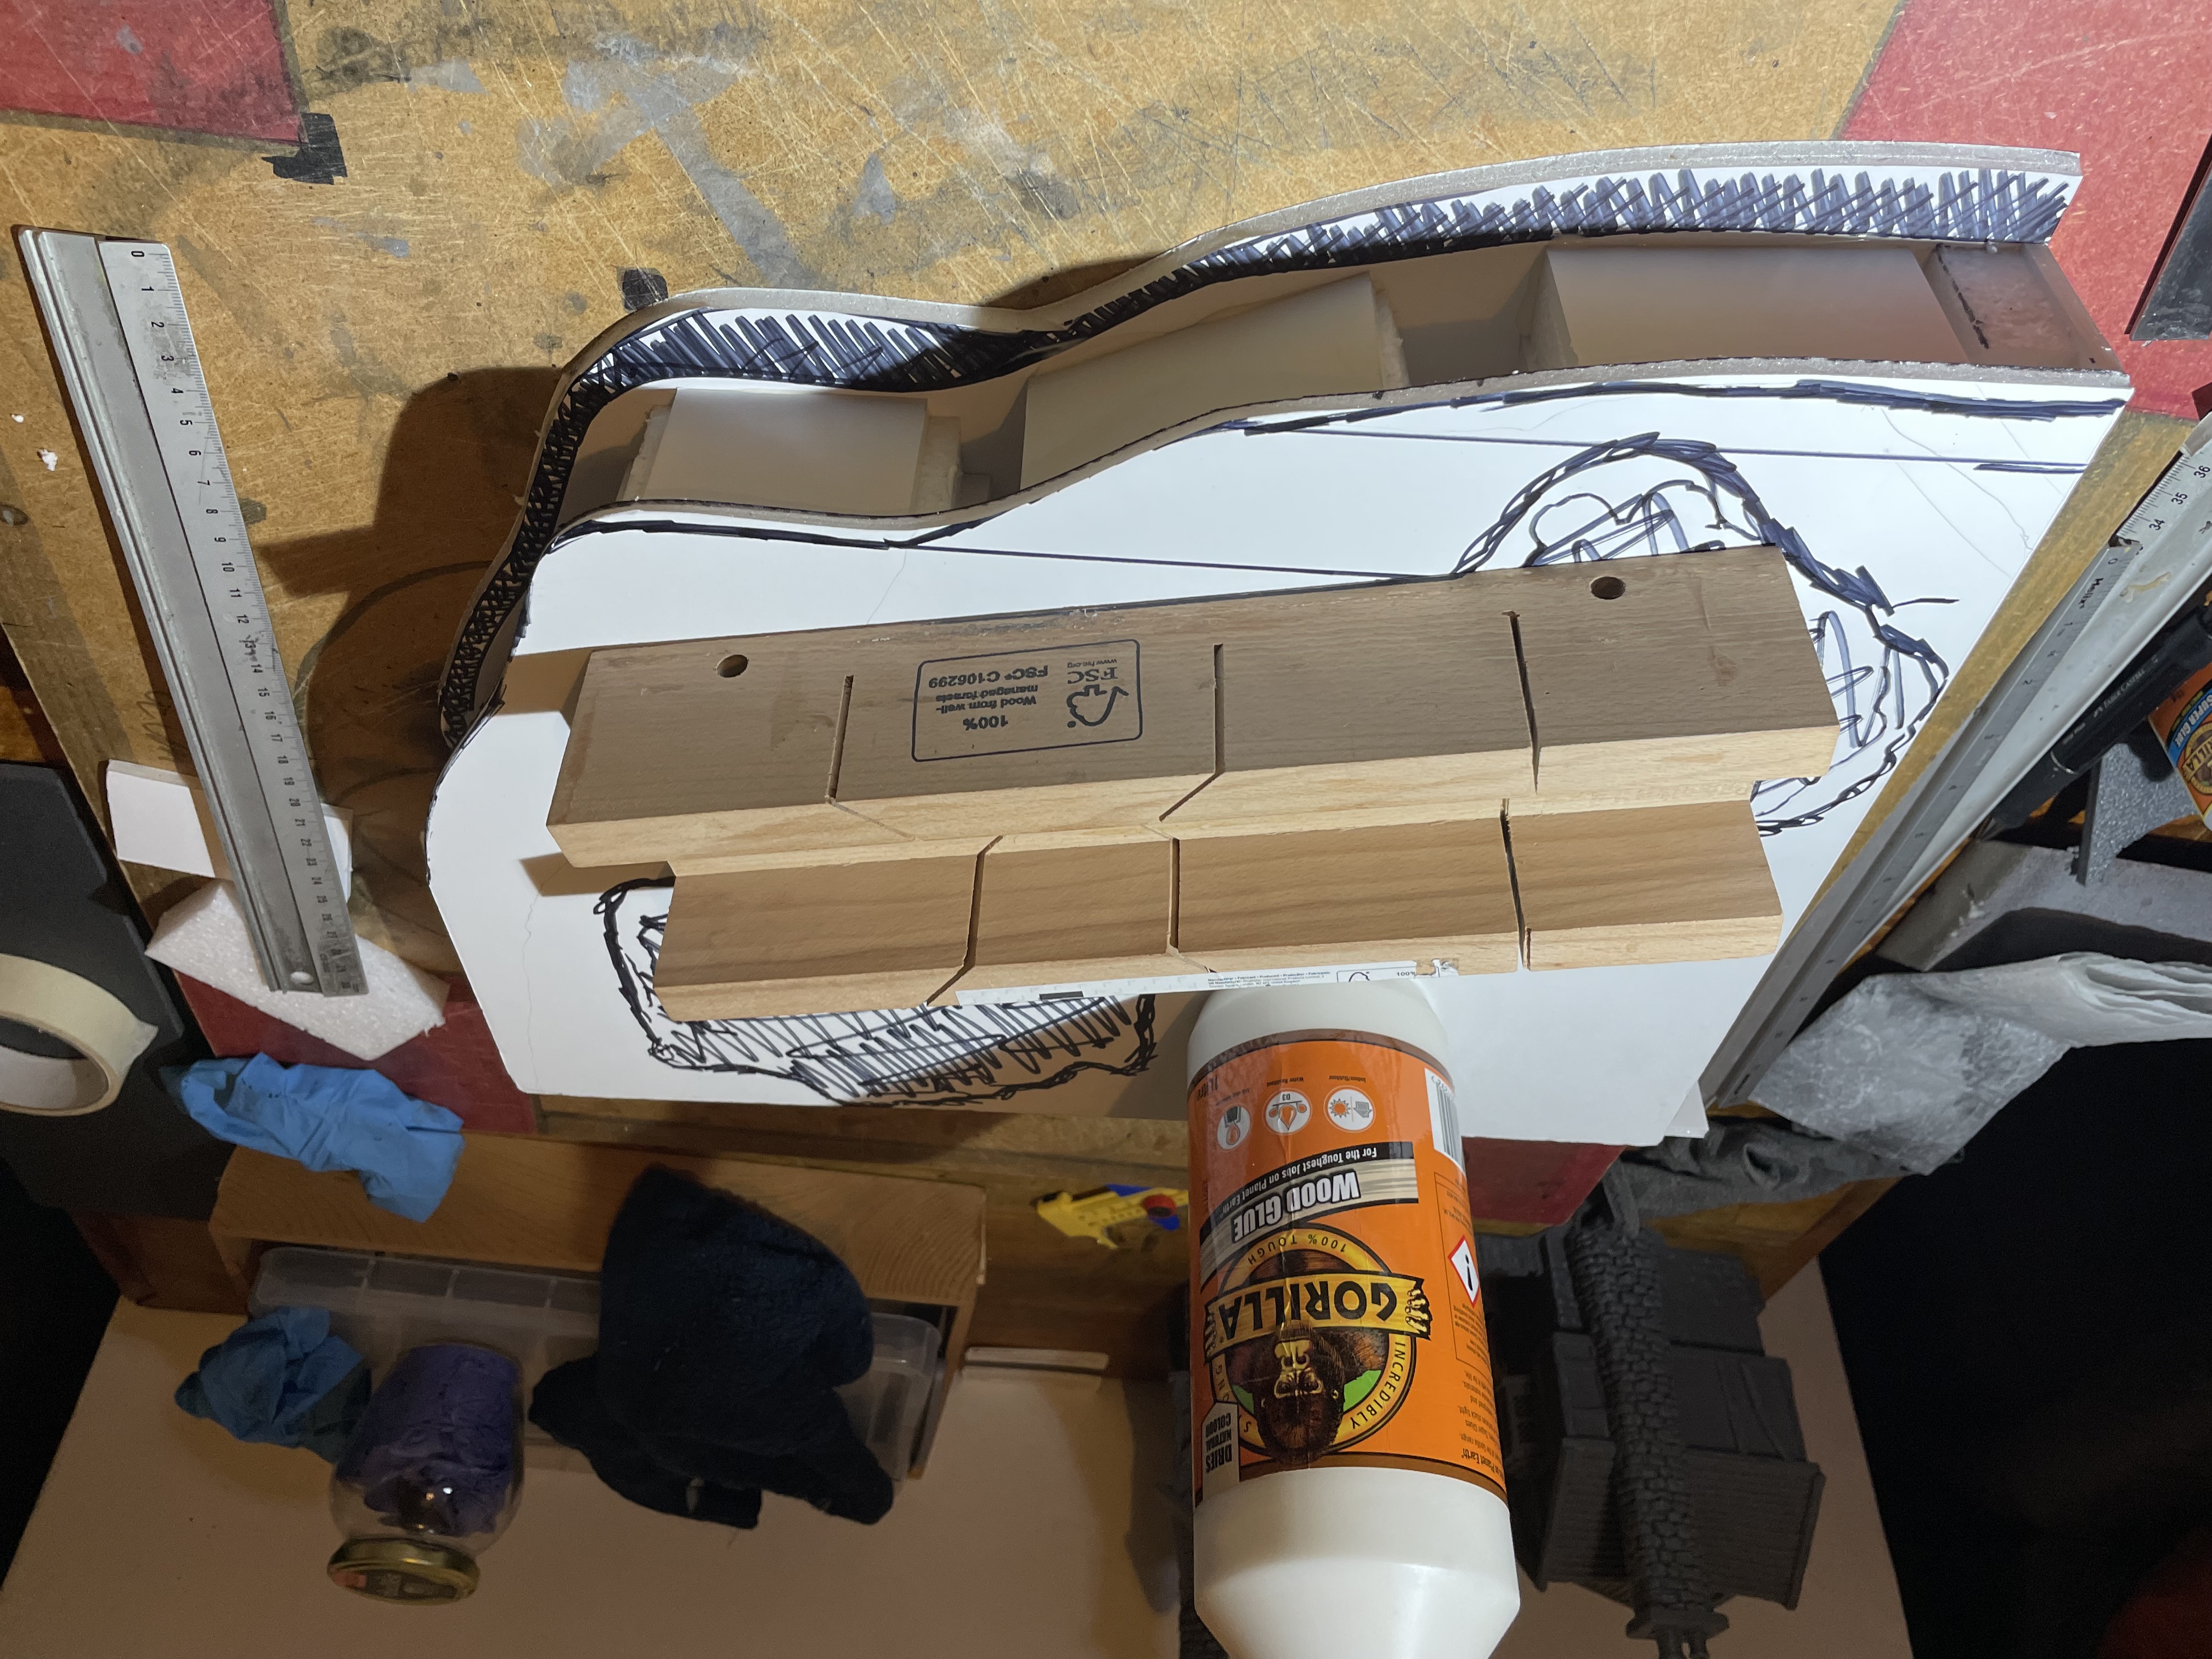

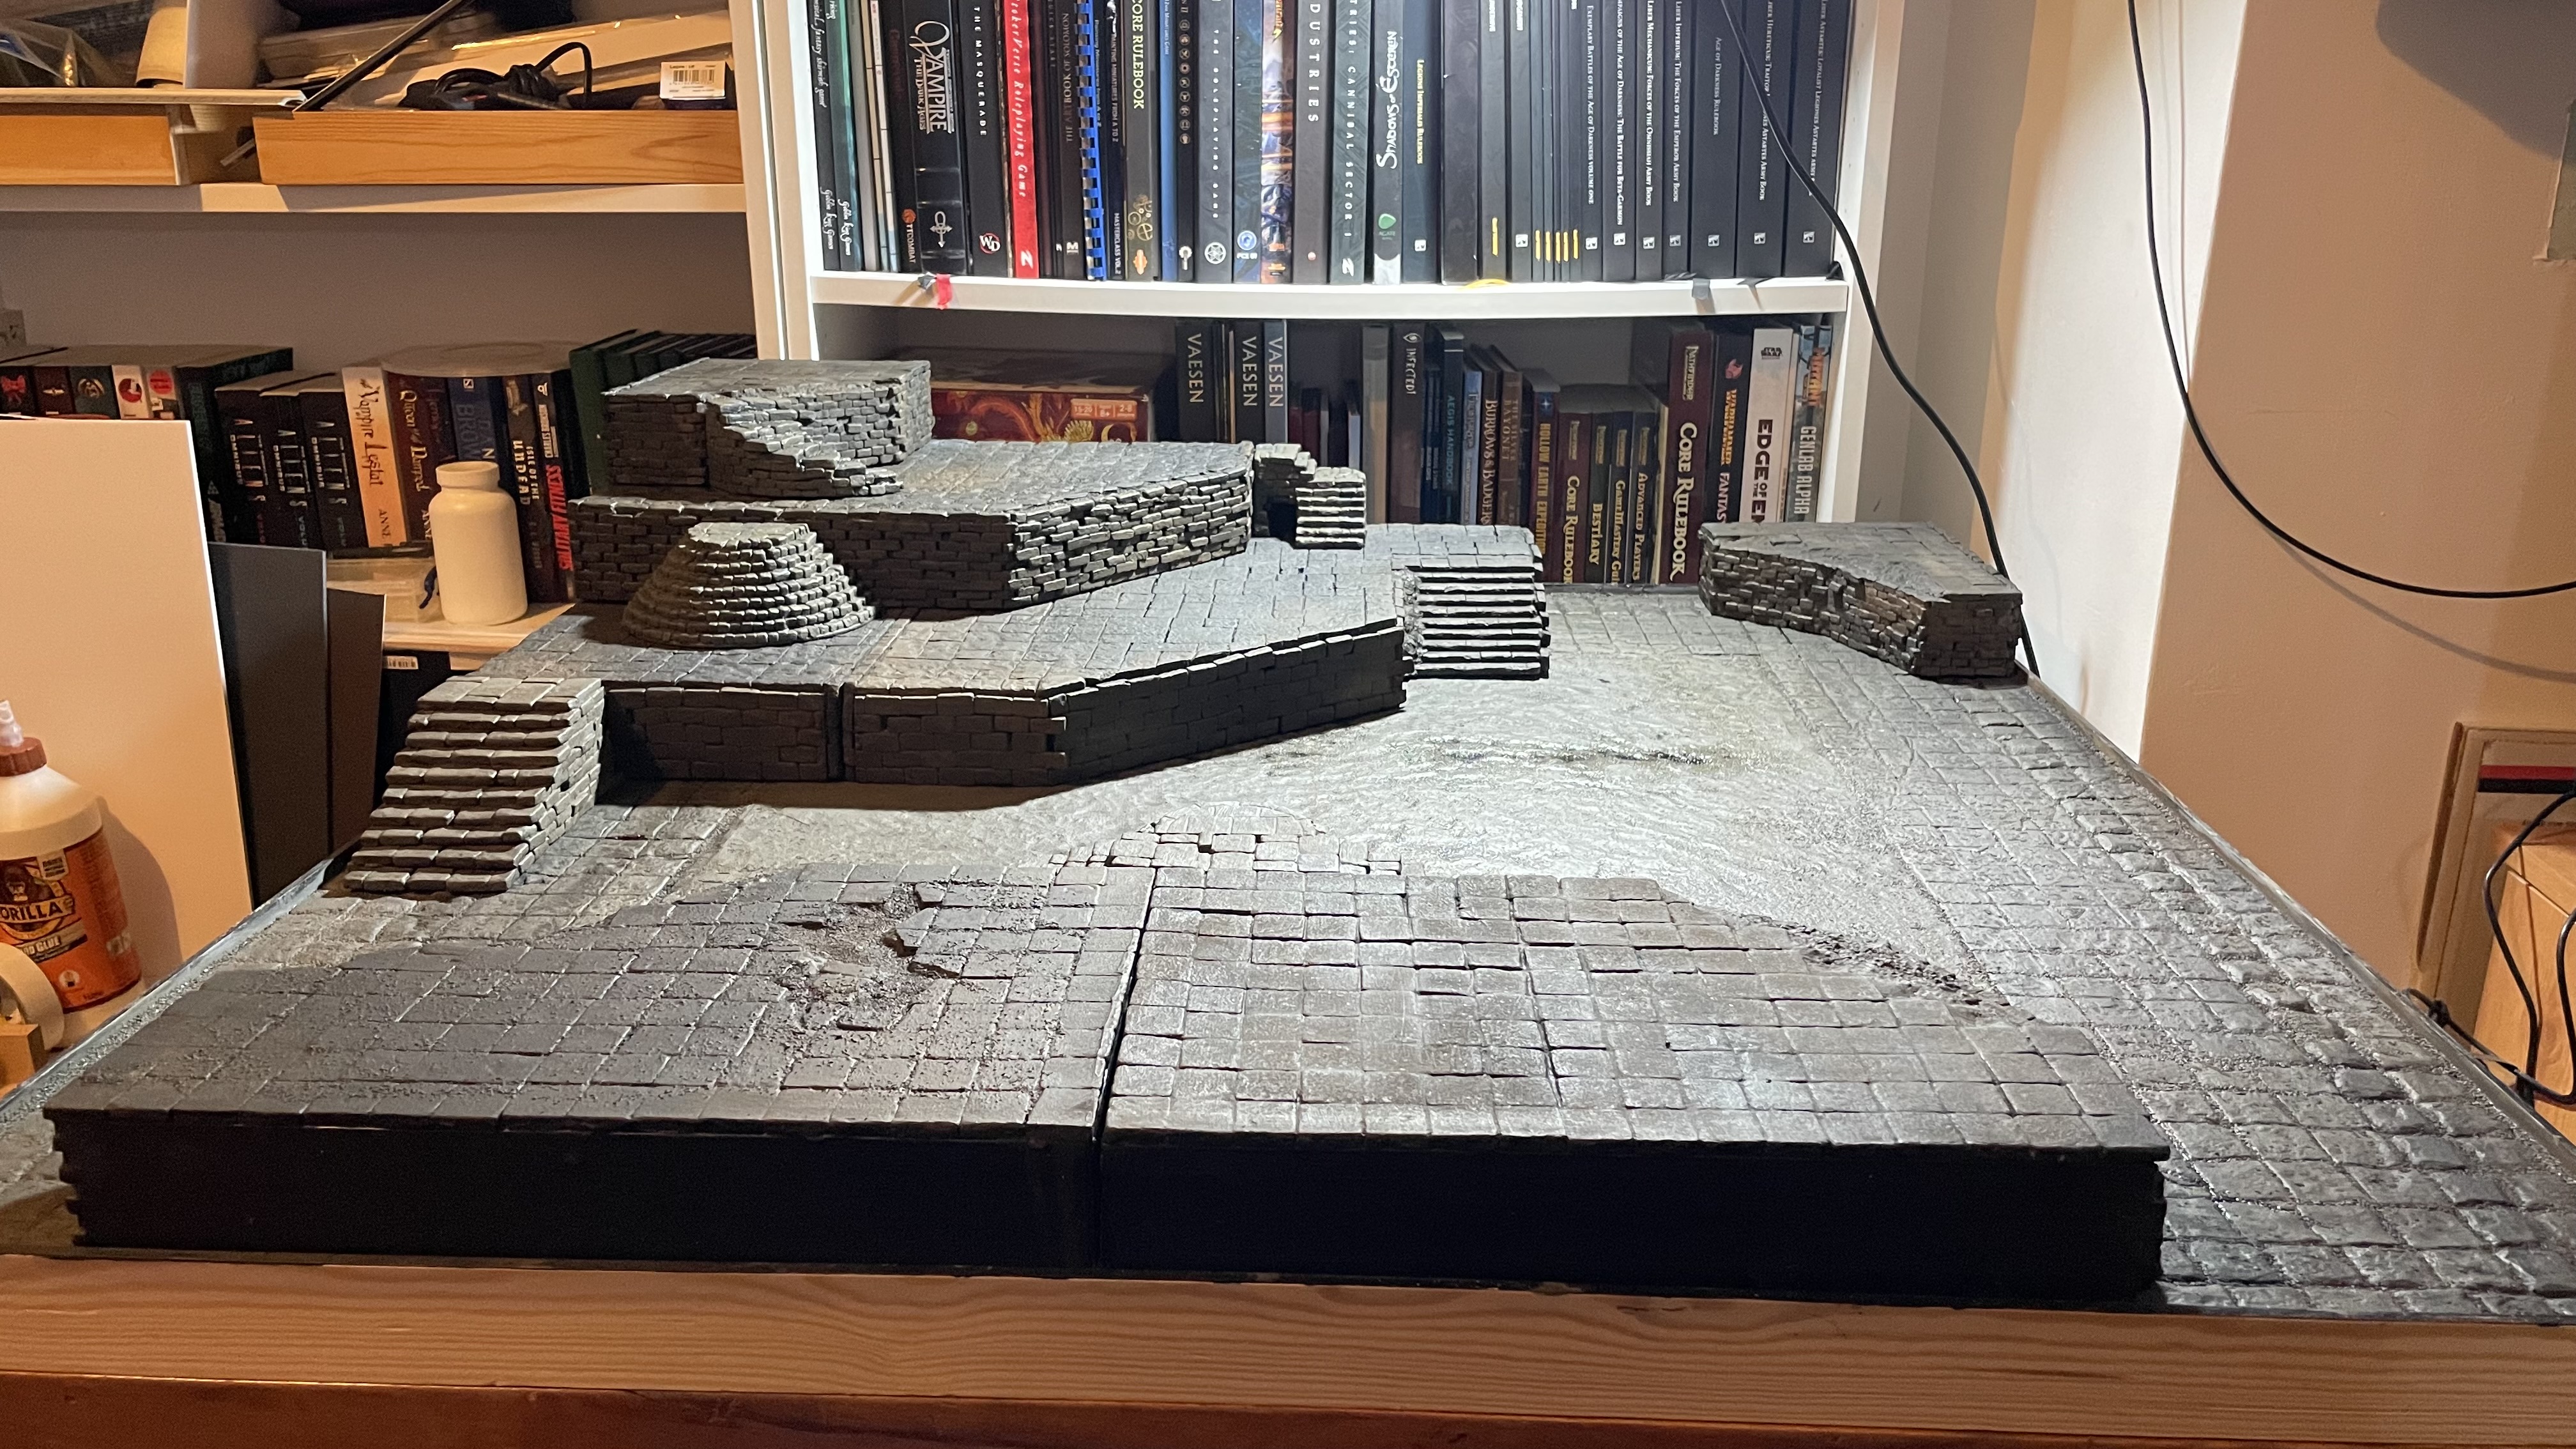
 I learnt from previous raised platforms I’ve created for the table that they need support so the flat top doesn’t sag. These supports are pieces of polystyrene packaging sandwiched between two strips of foam card
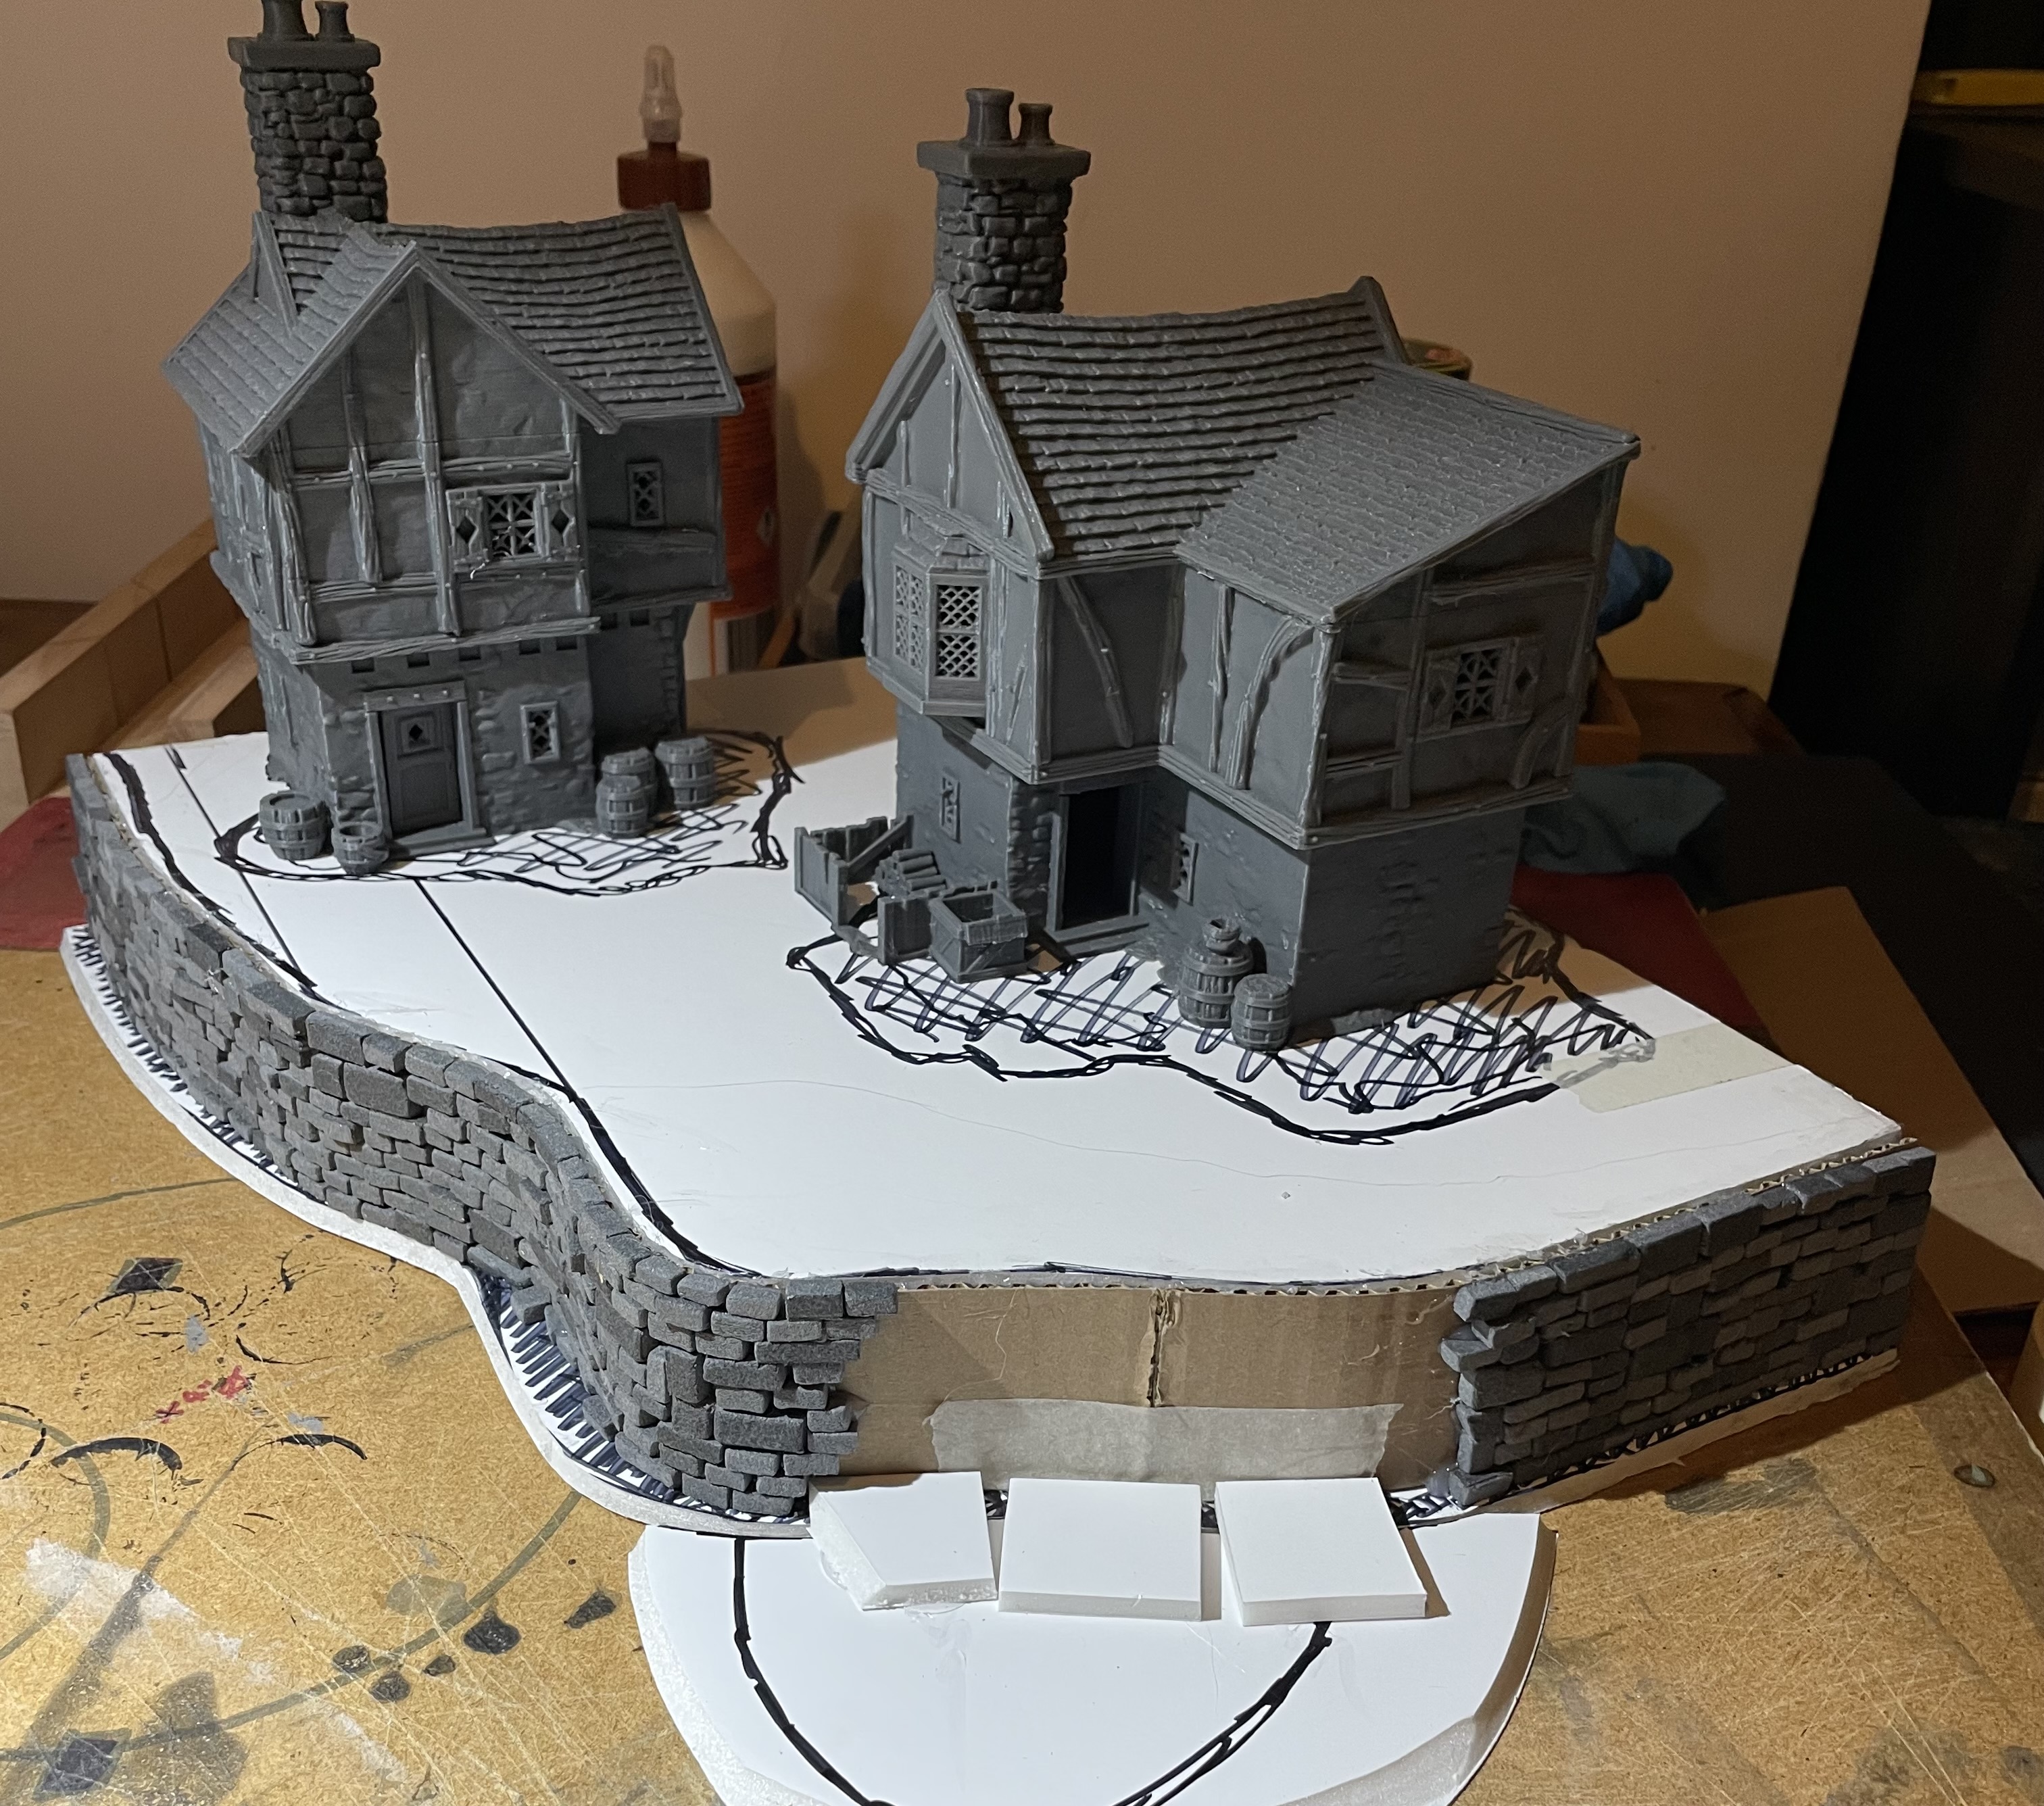
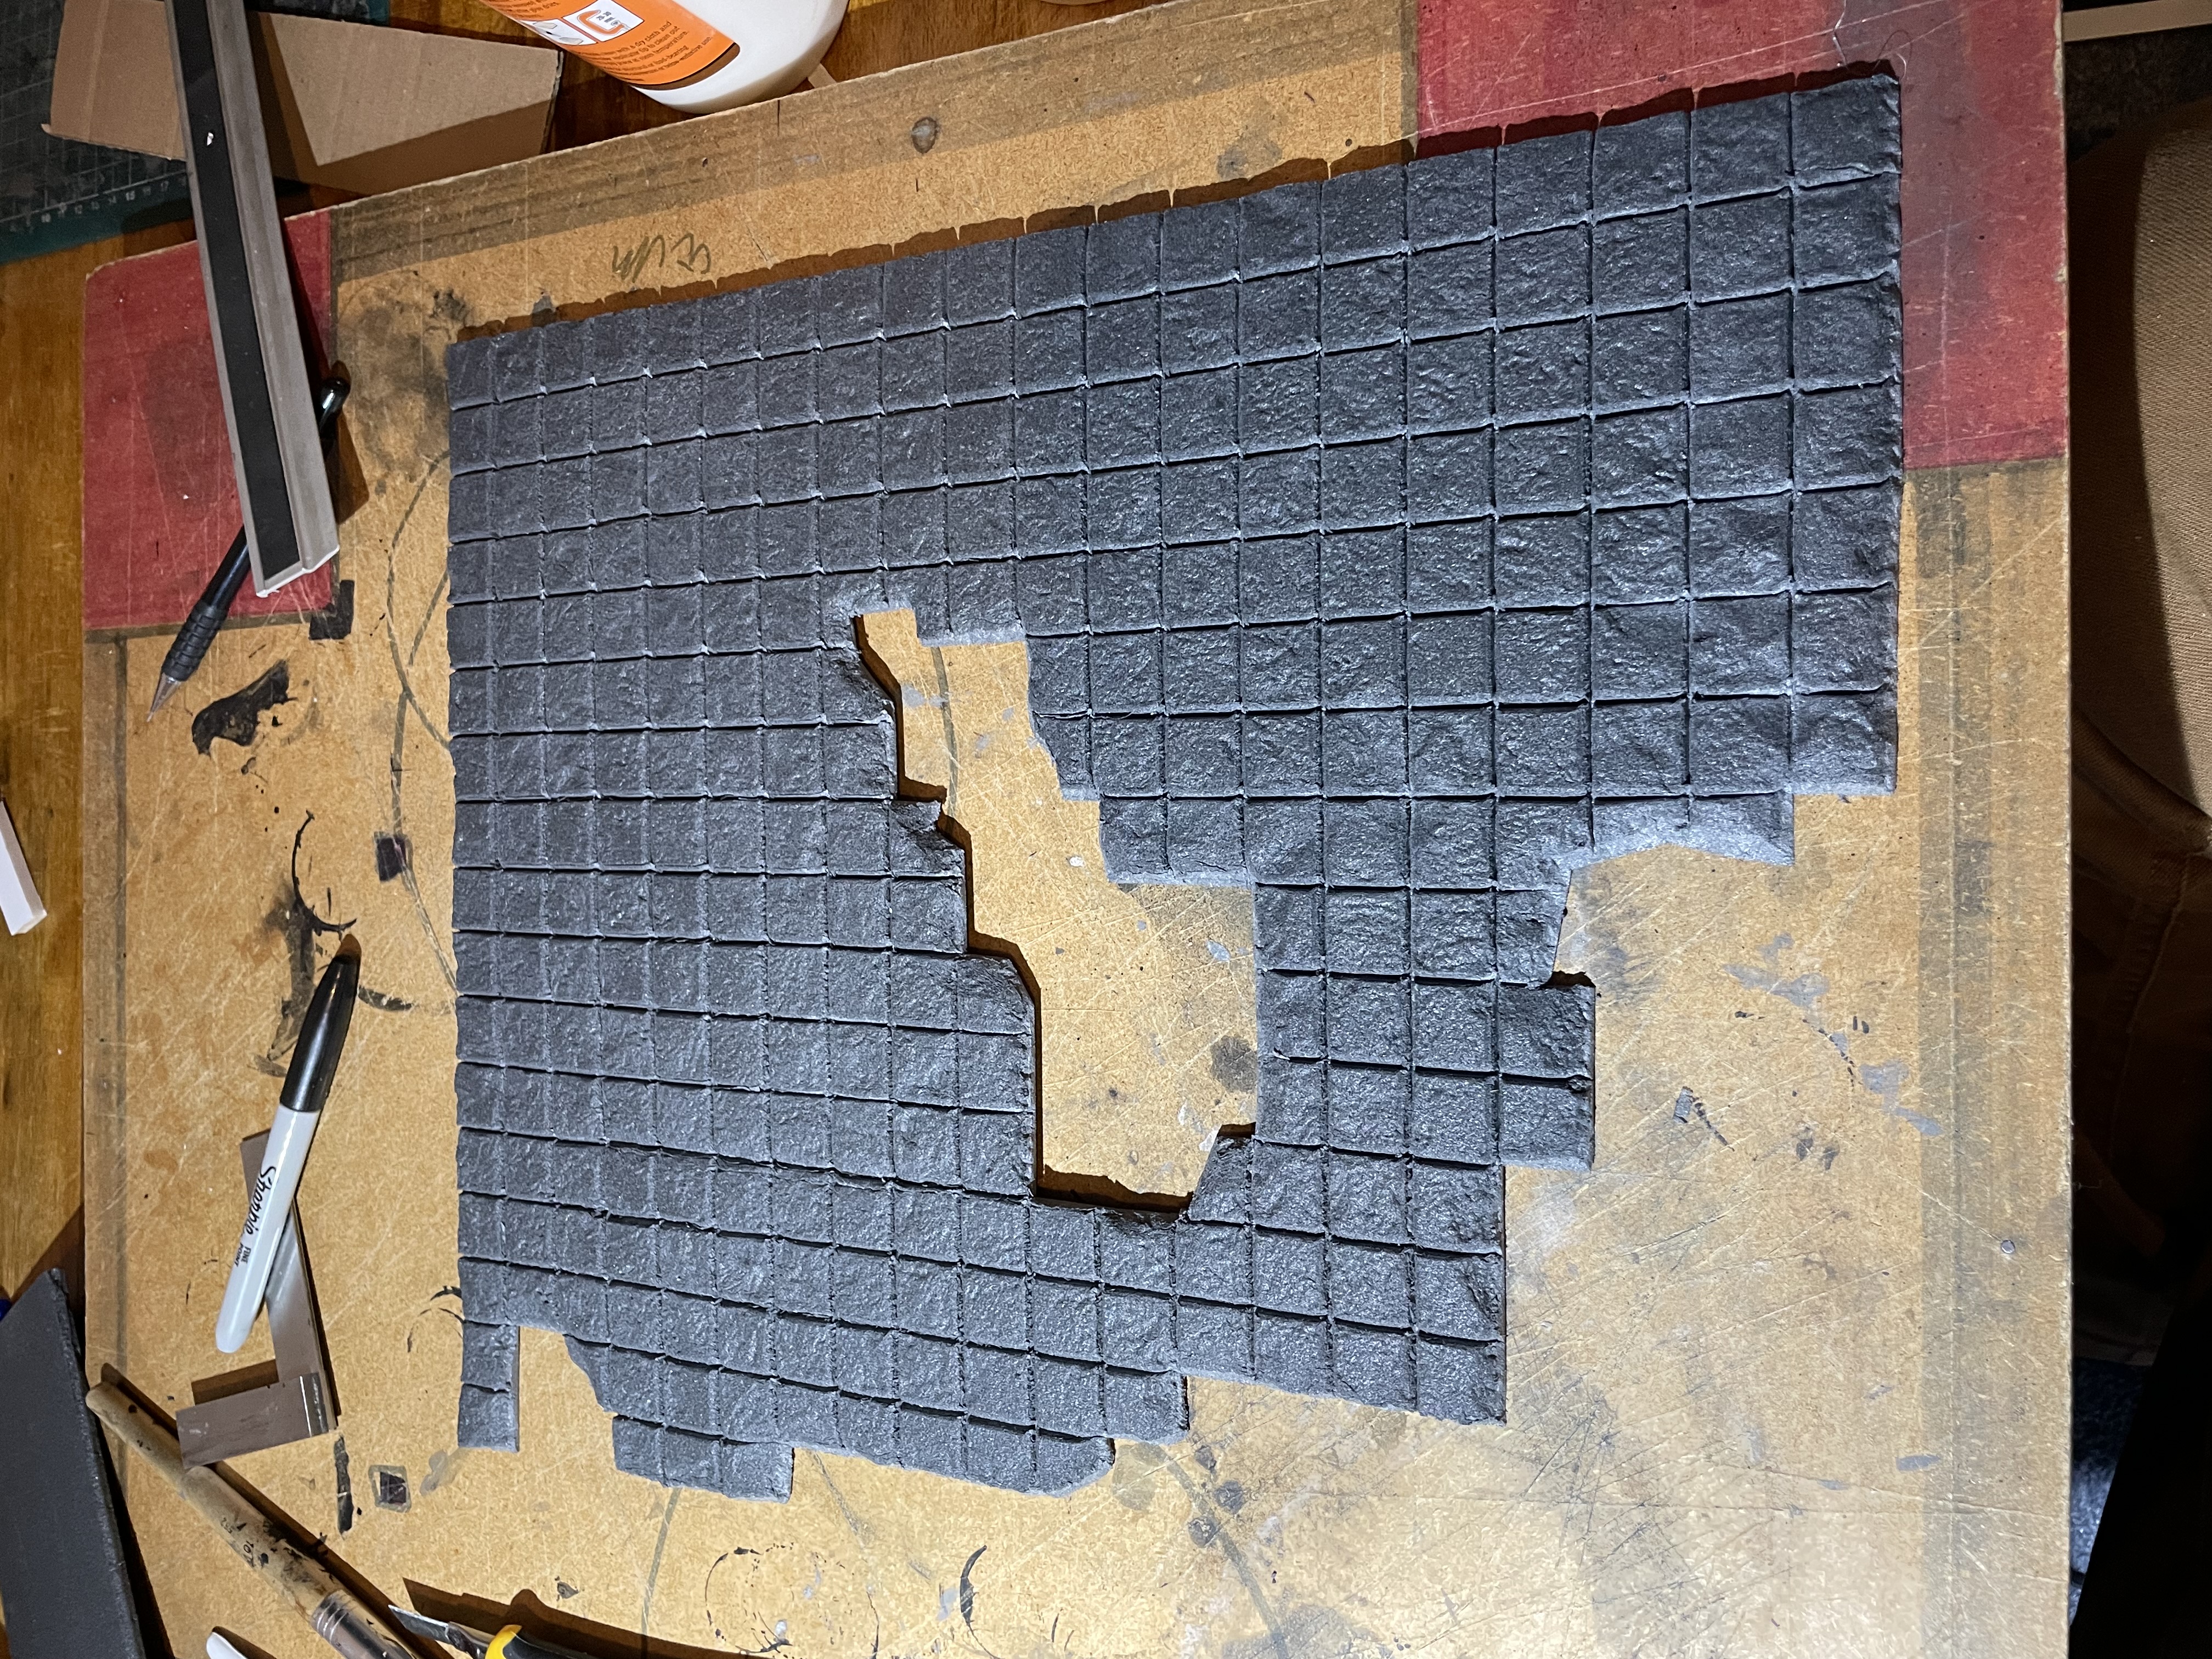
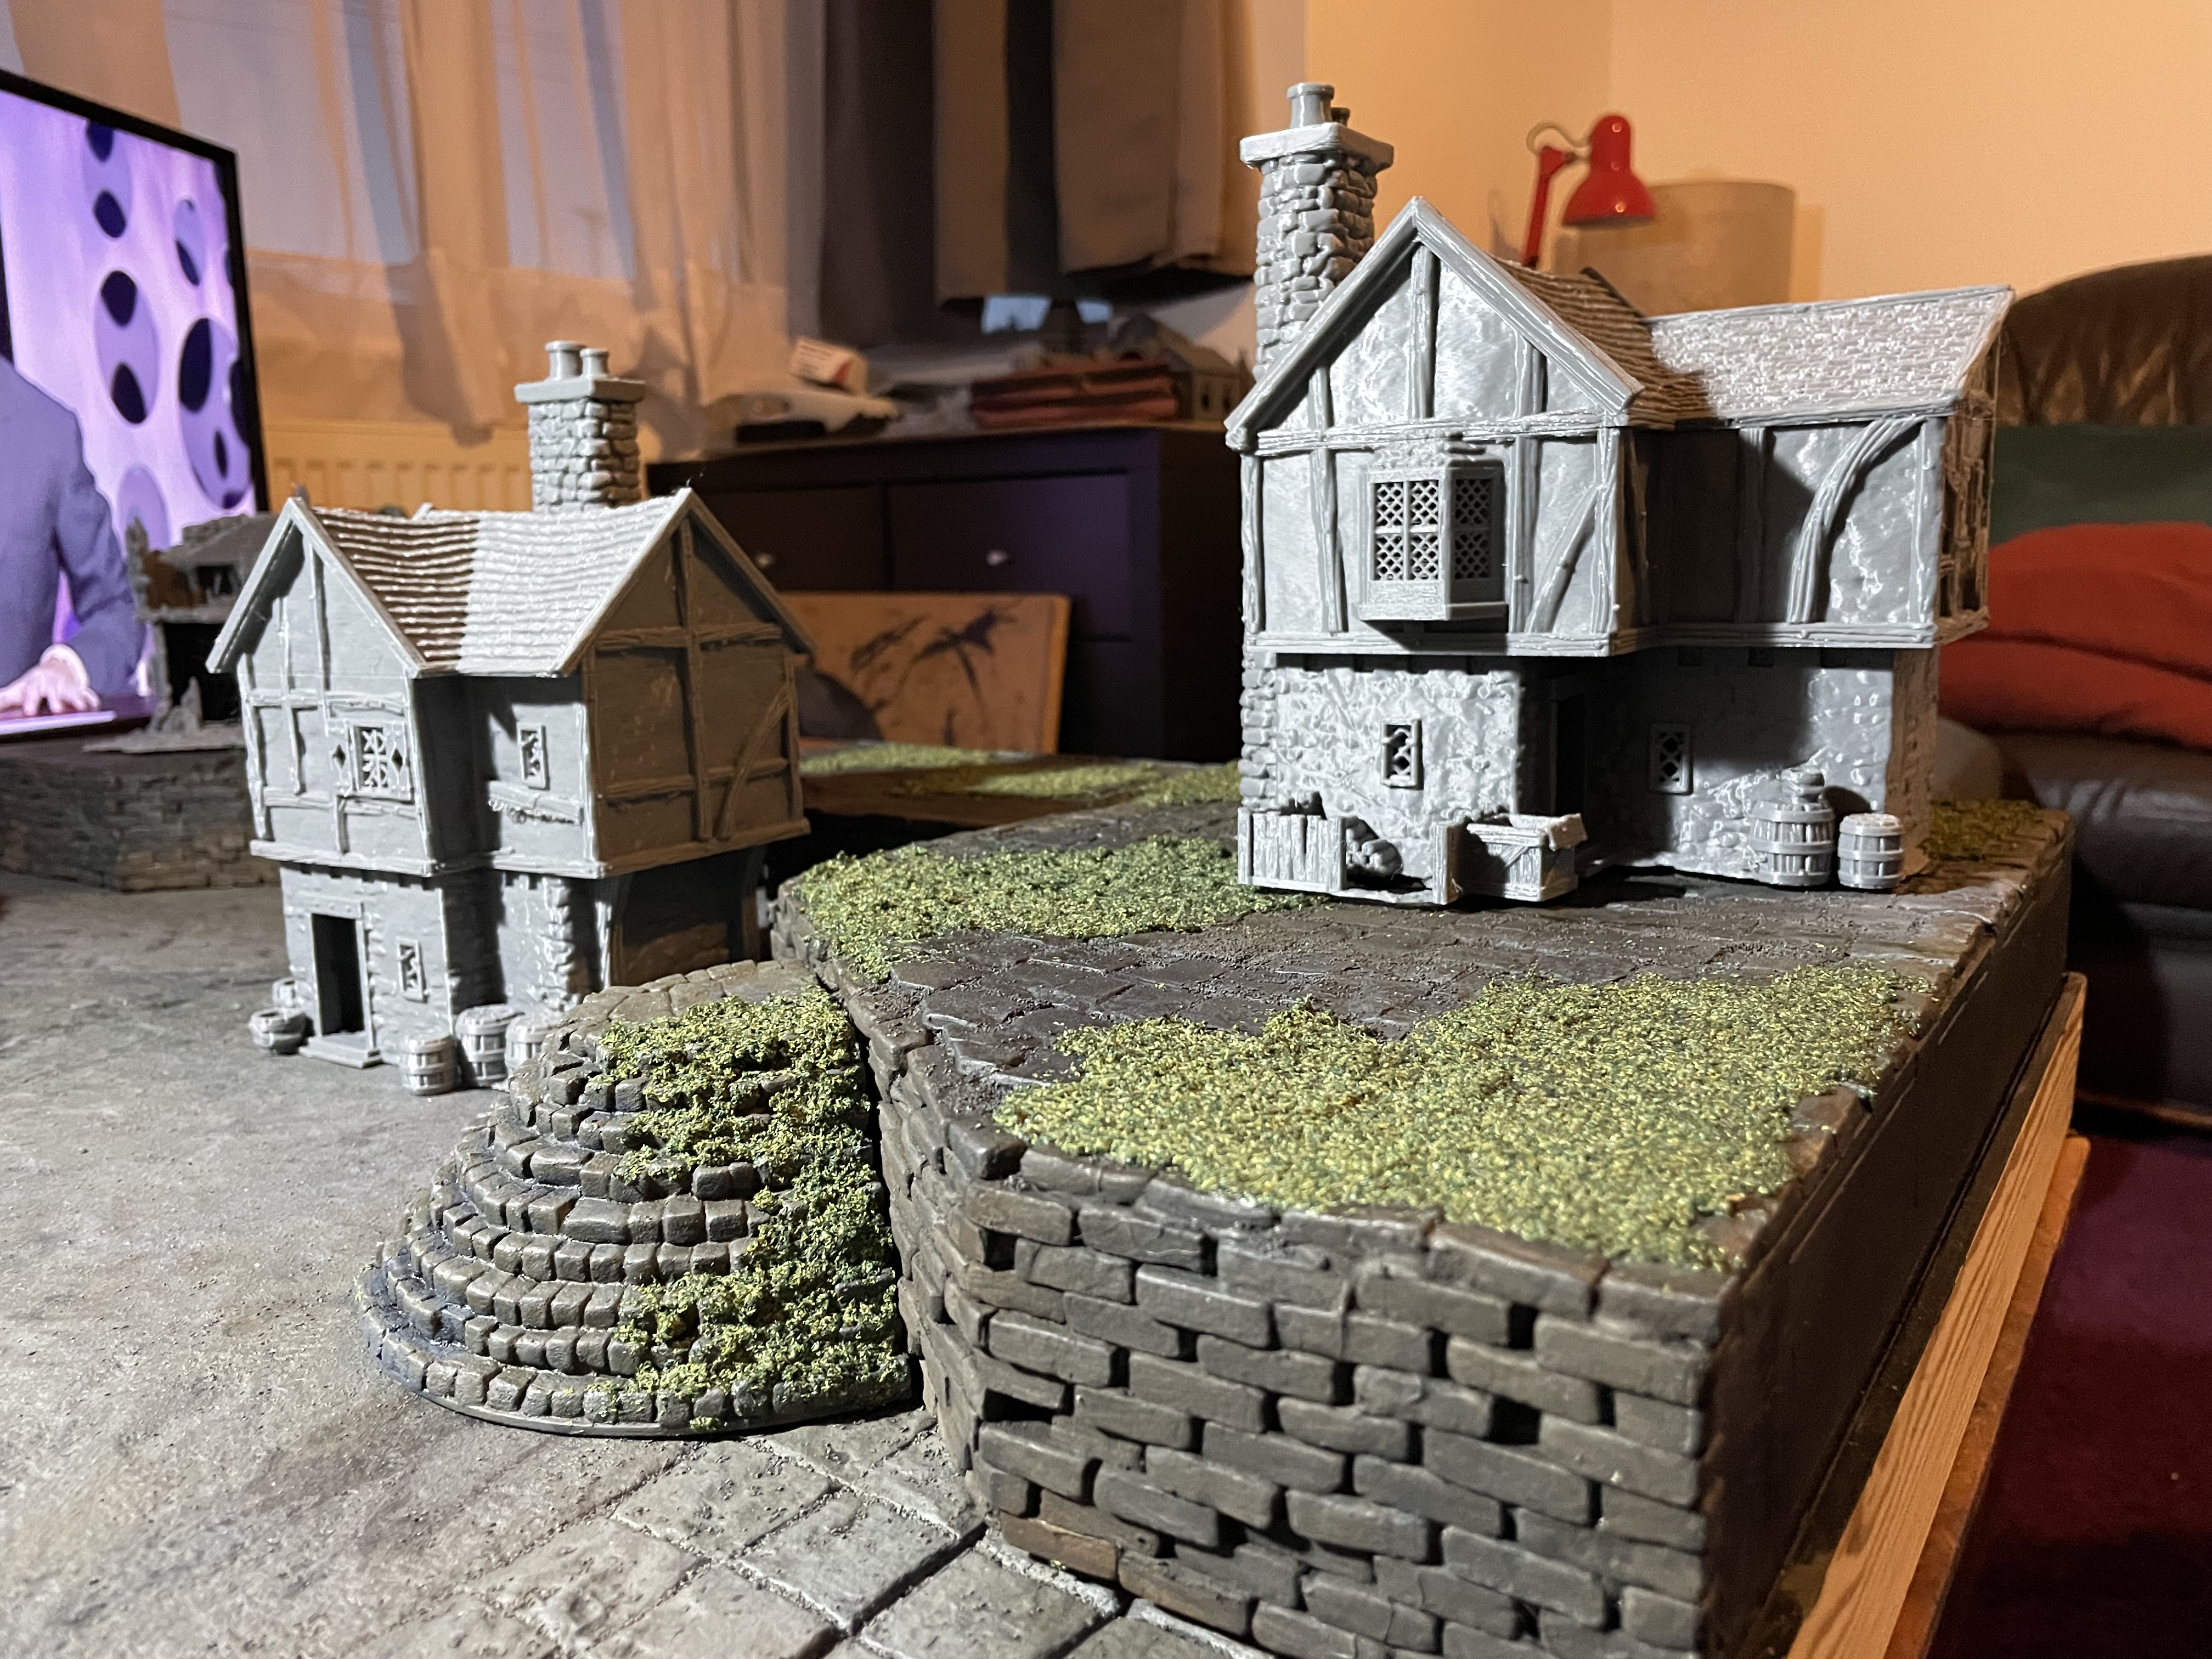
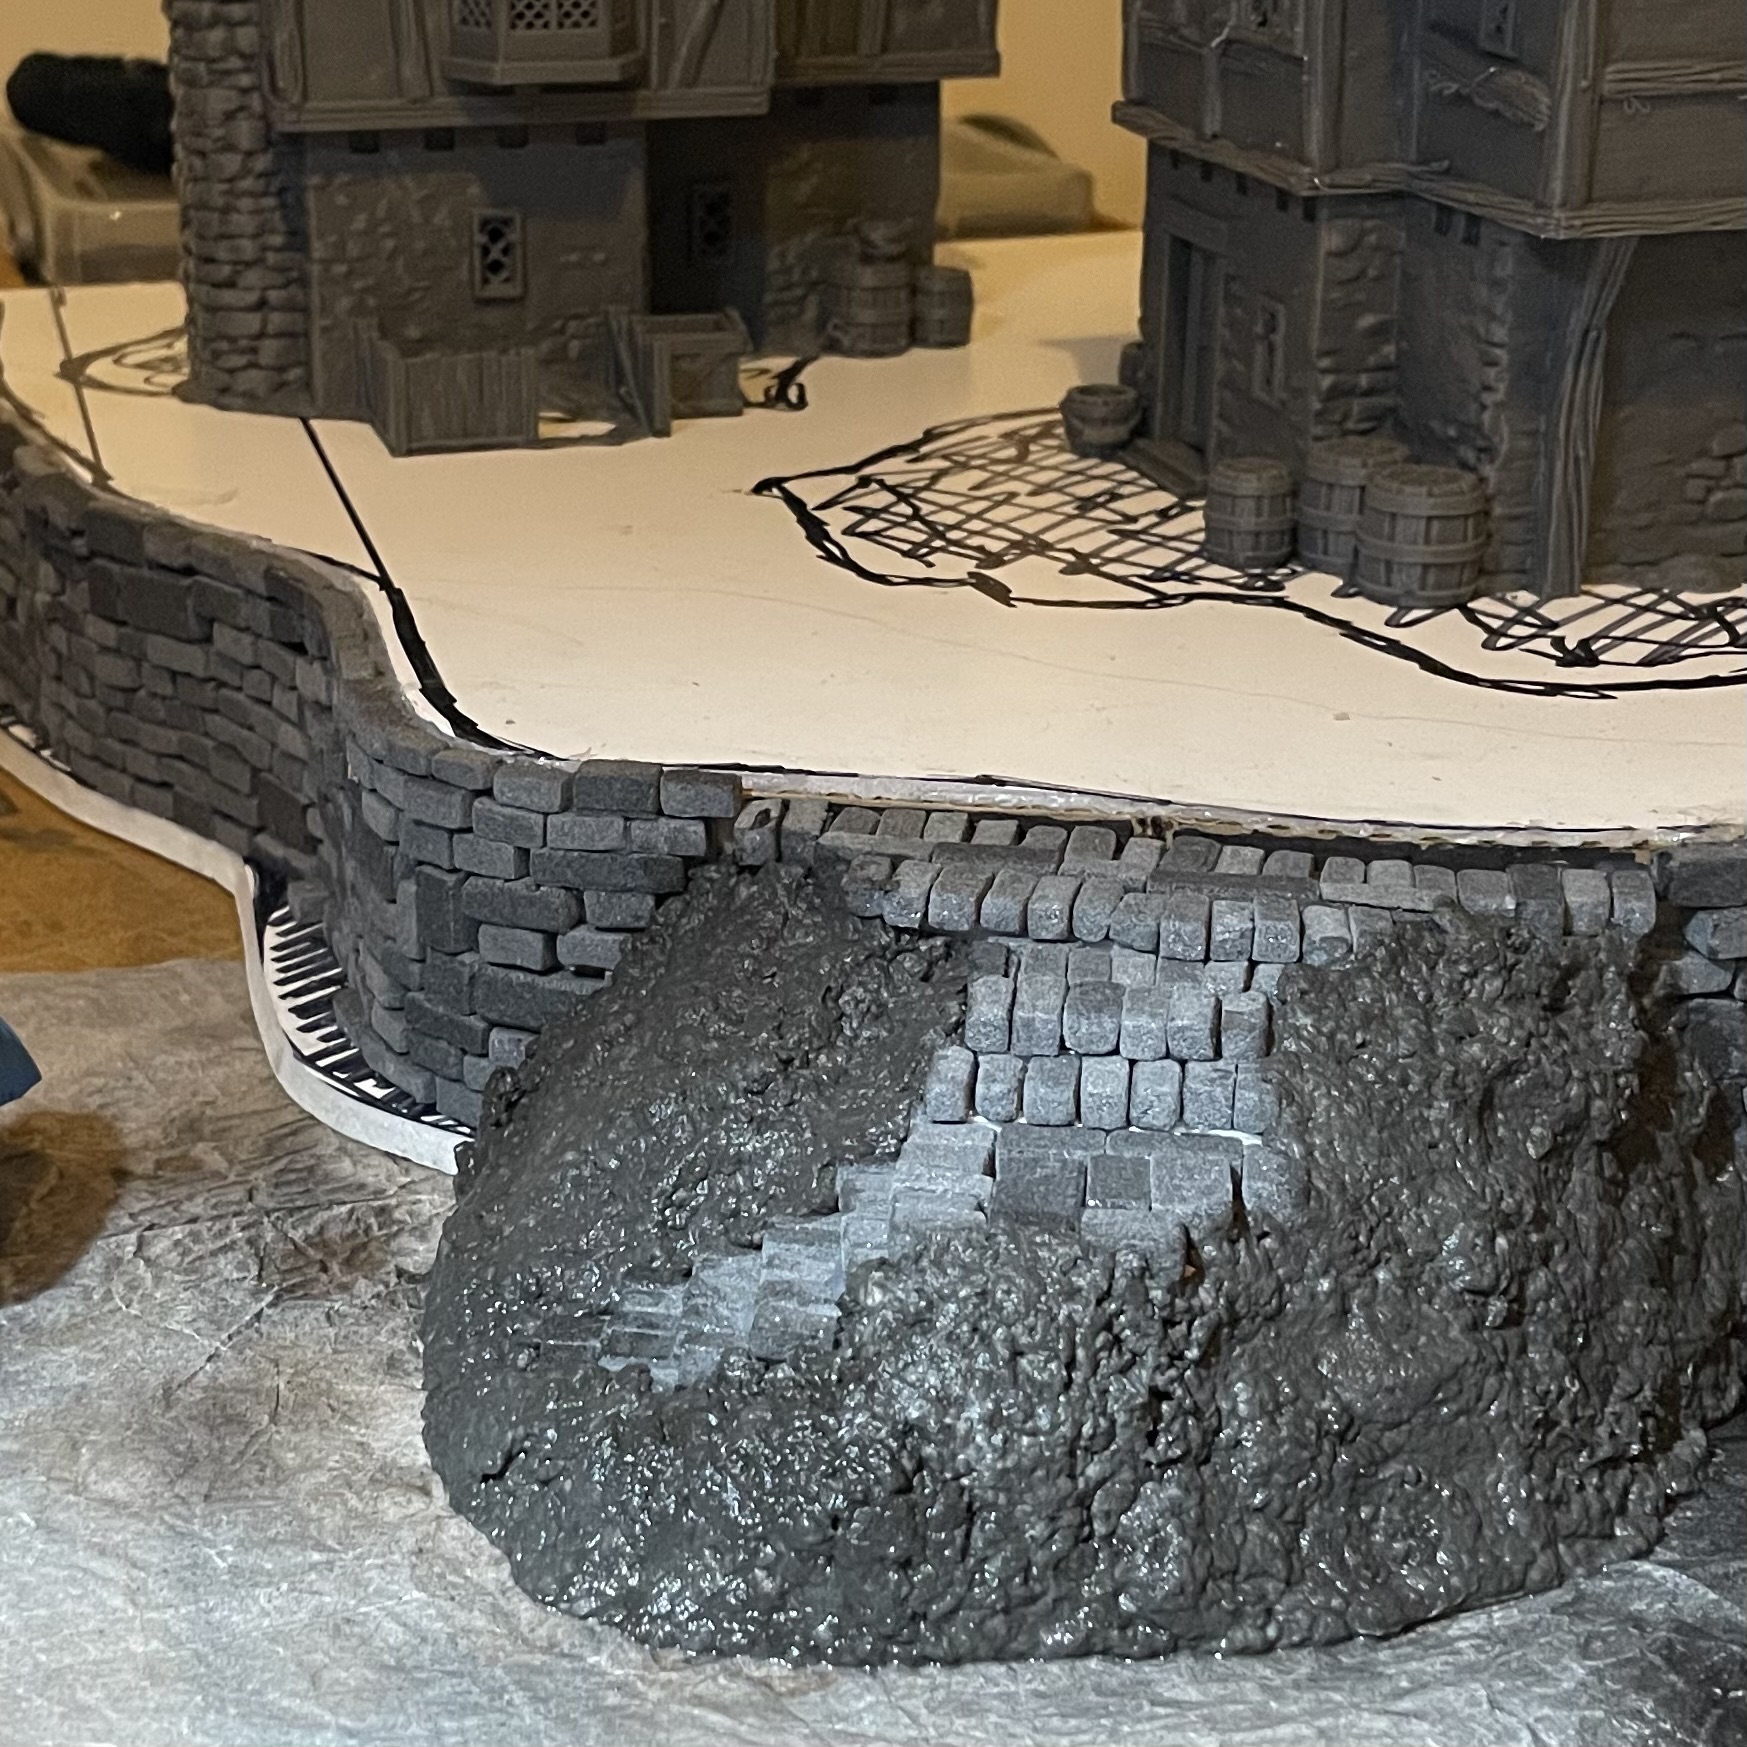 With the flat top attached I then used some corrugated cardboard, again left over from packaging to edge the piece being corrugated I could bend it to bend nicely around the top surface. Finally I clad the side in the teeny tiny bricks as you may have seen on previous posts and deciding that I need to make space for steps up I left part of the side free of any bricks.
 Time for trees
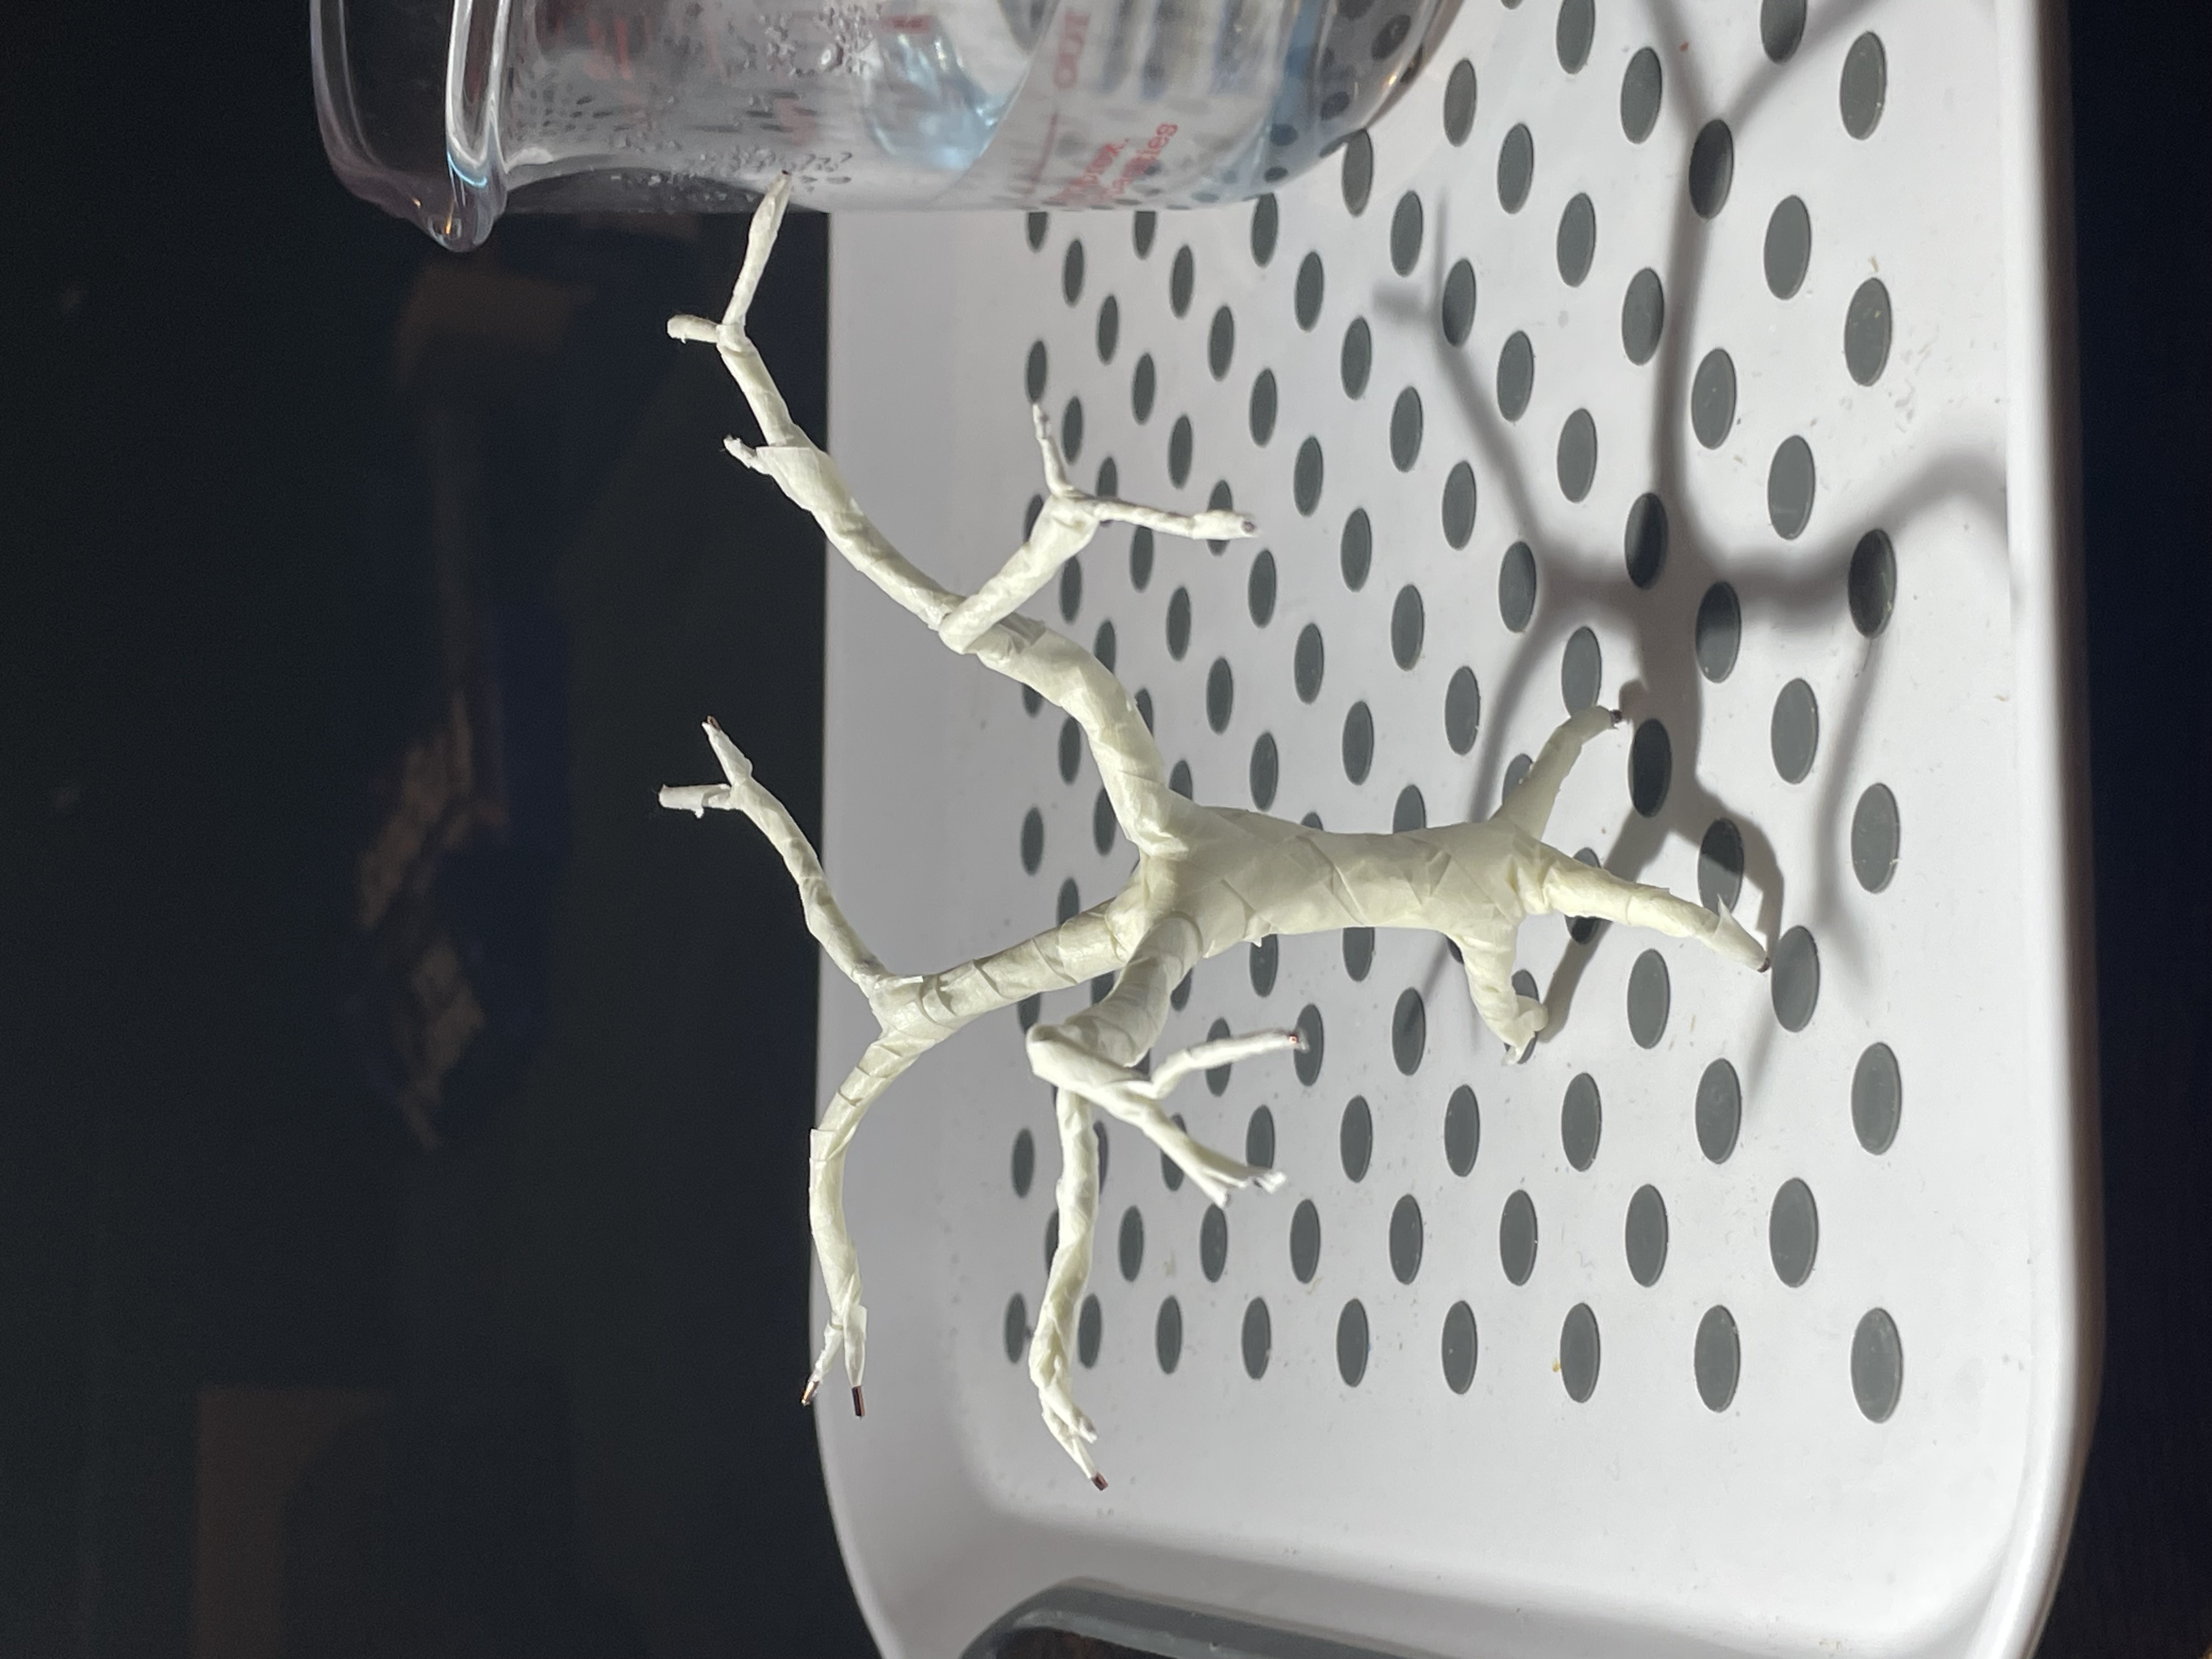
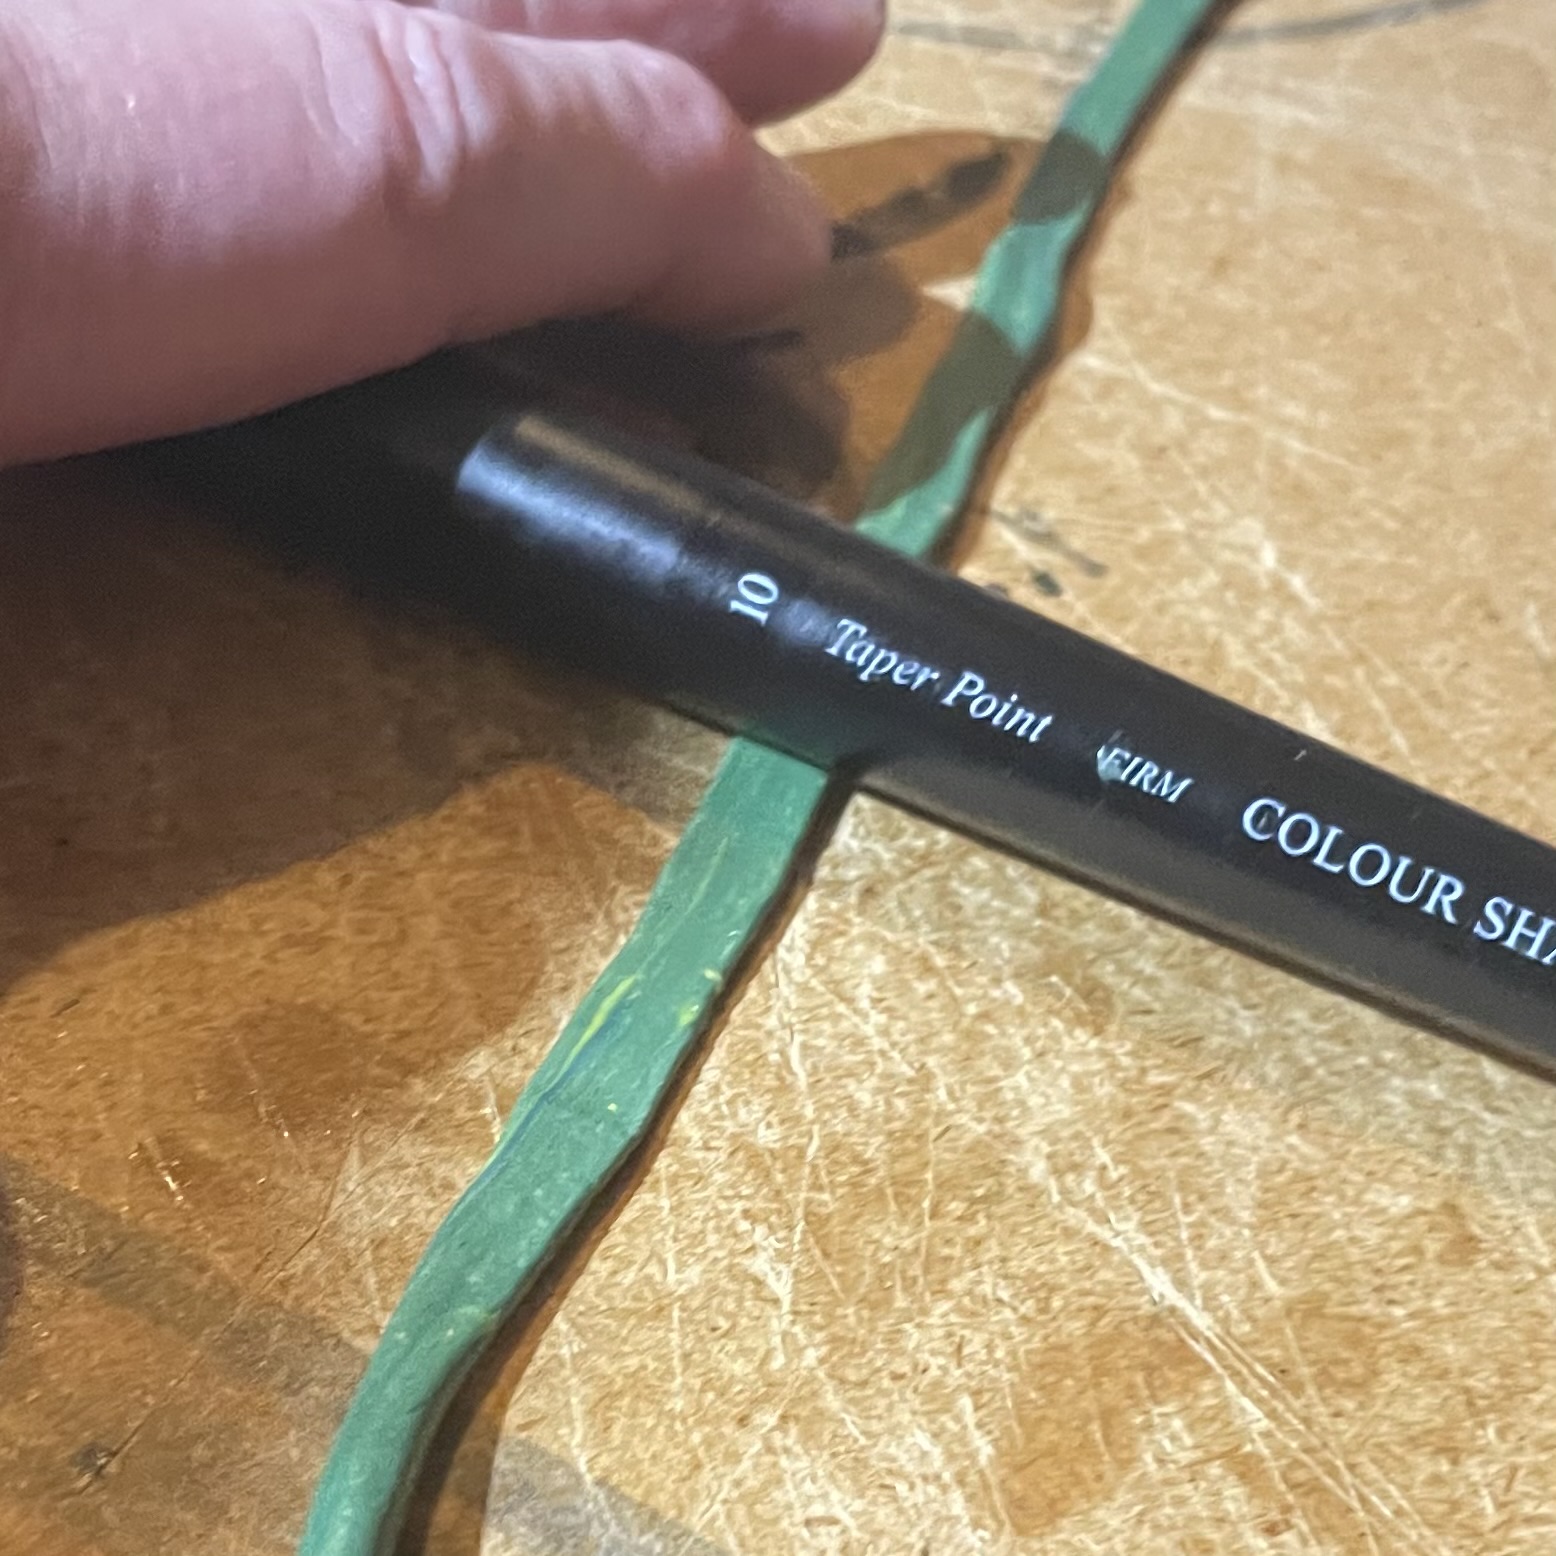
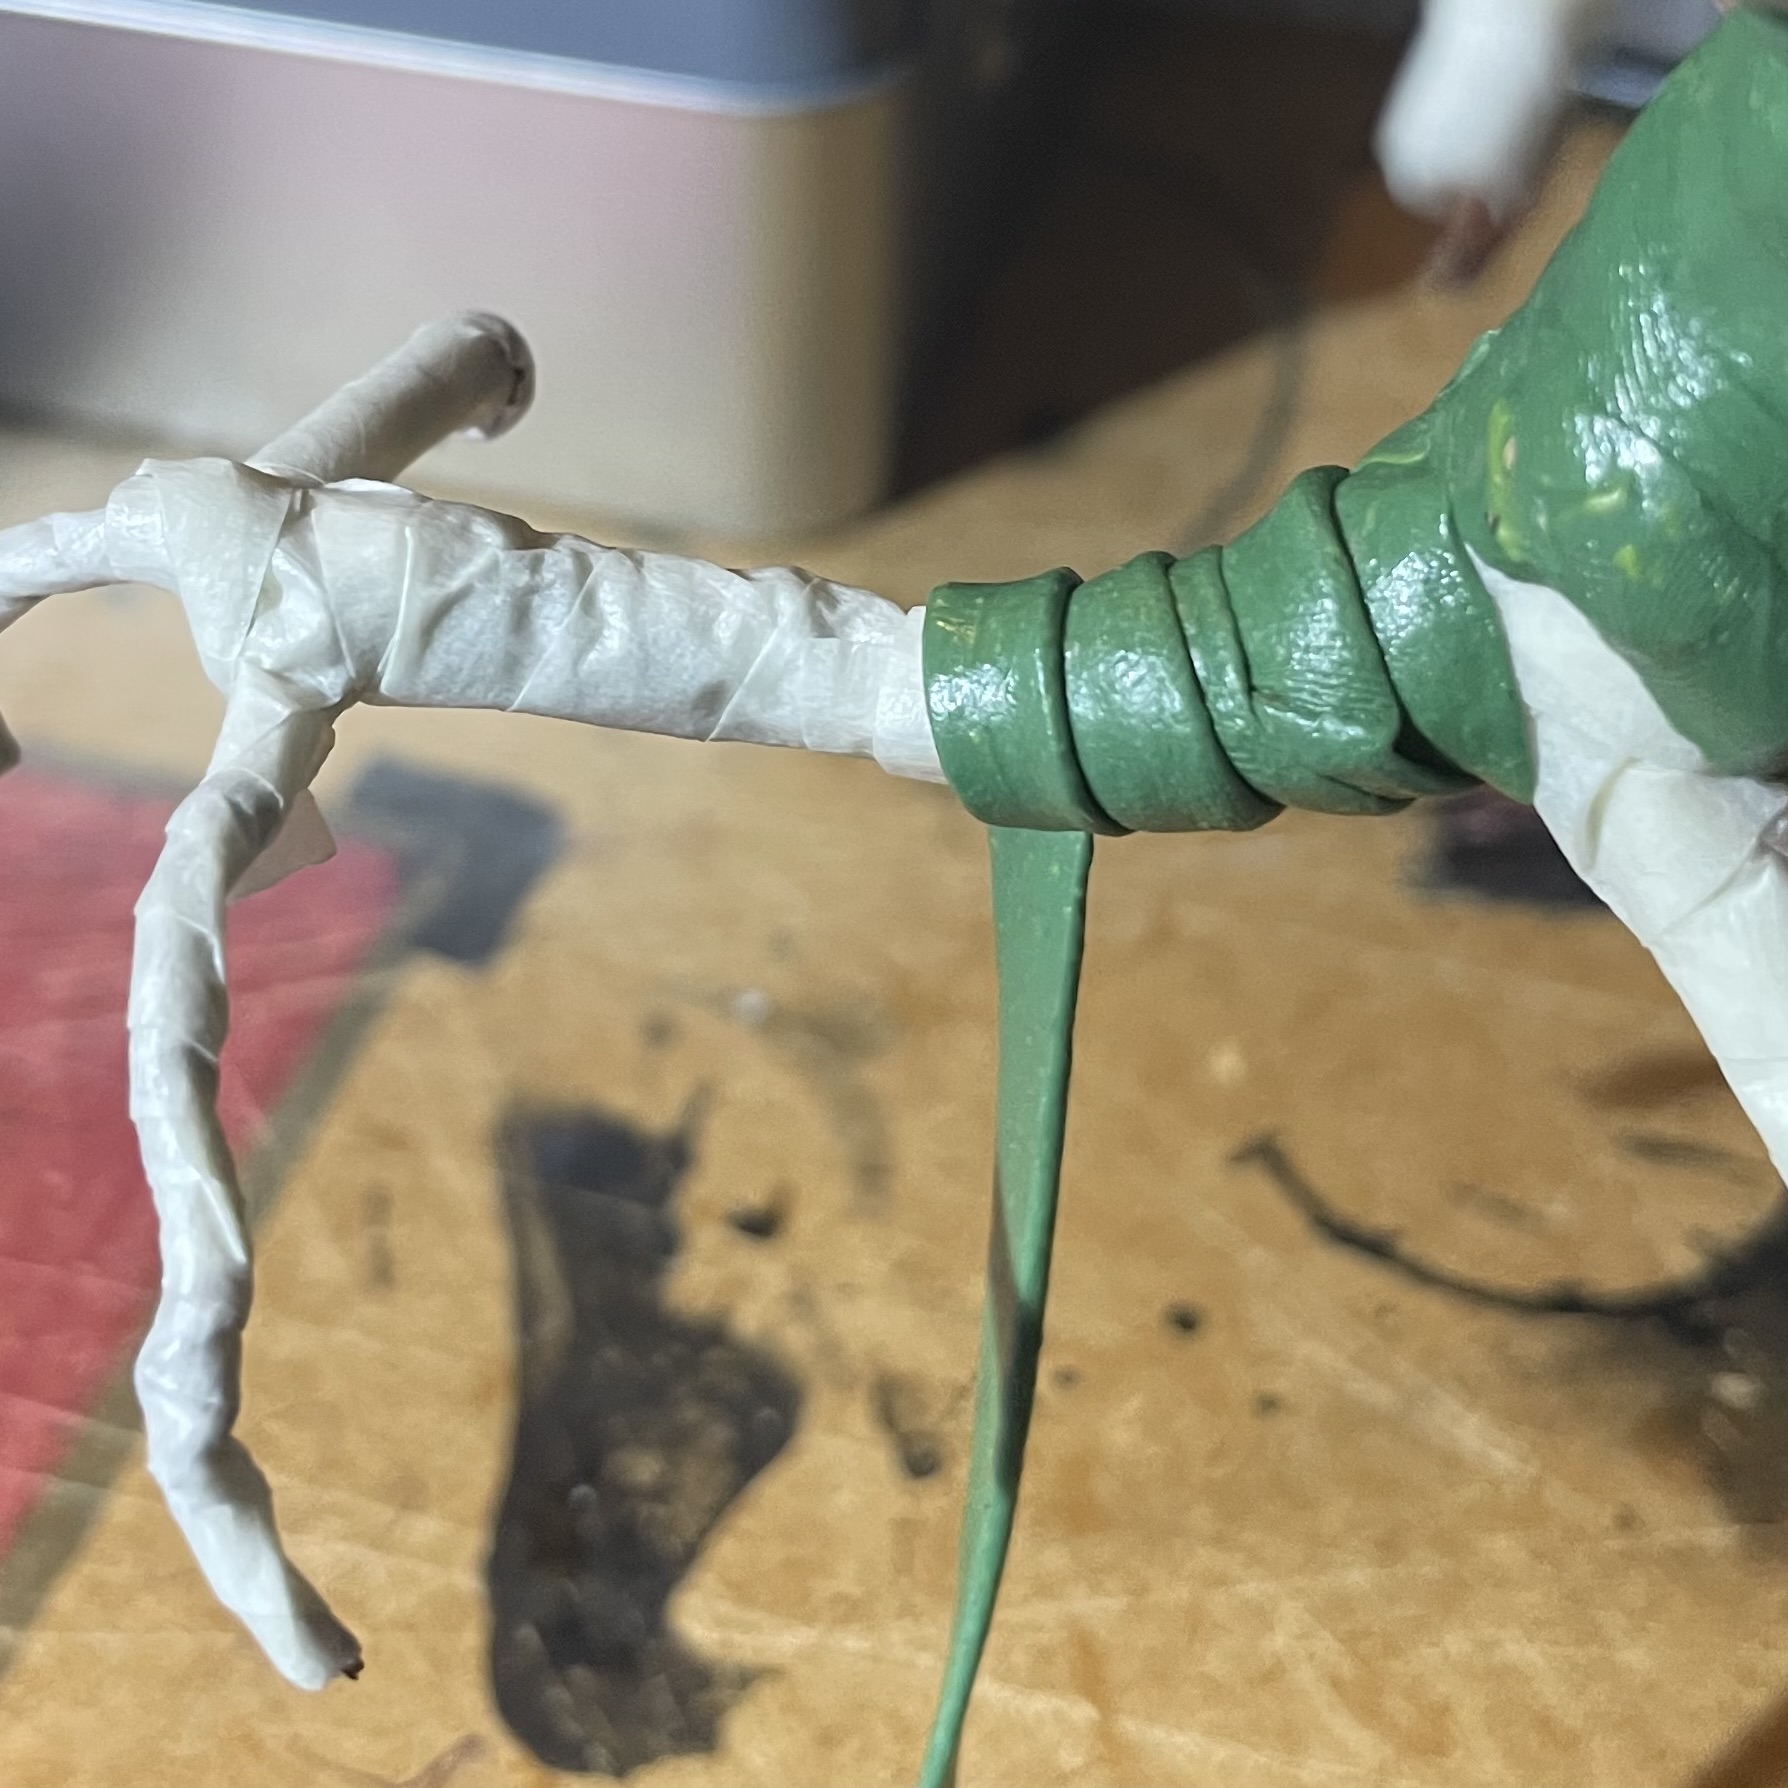
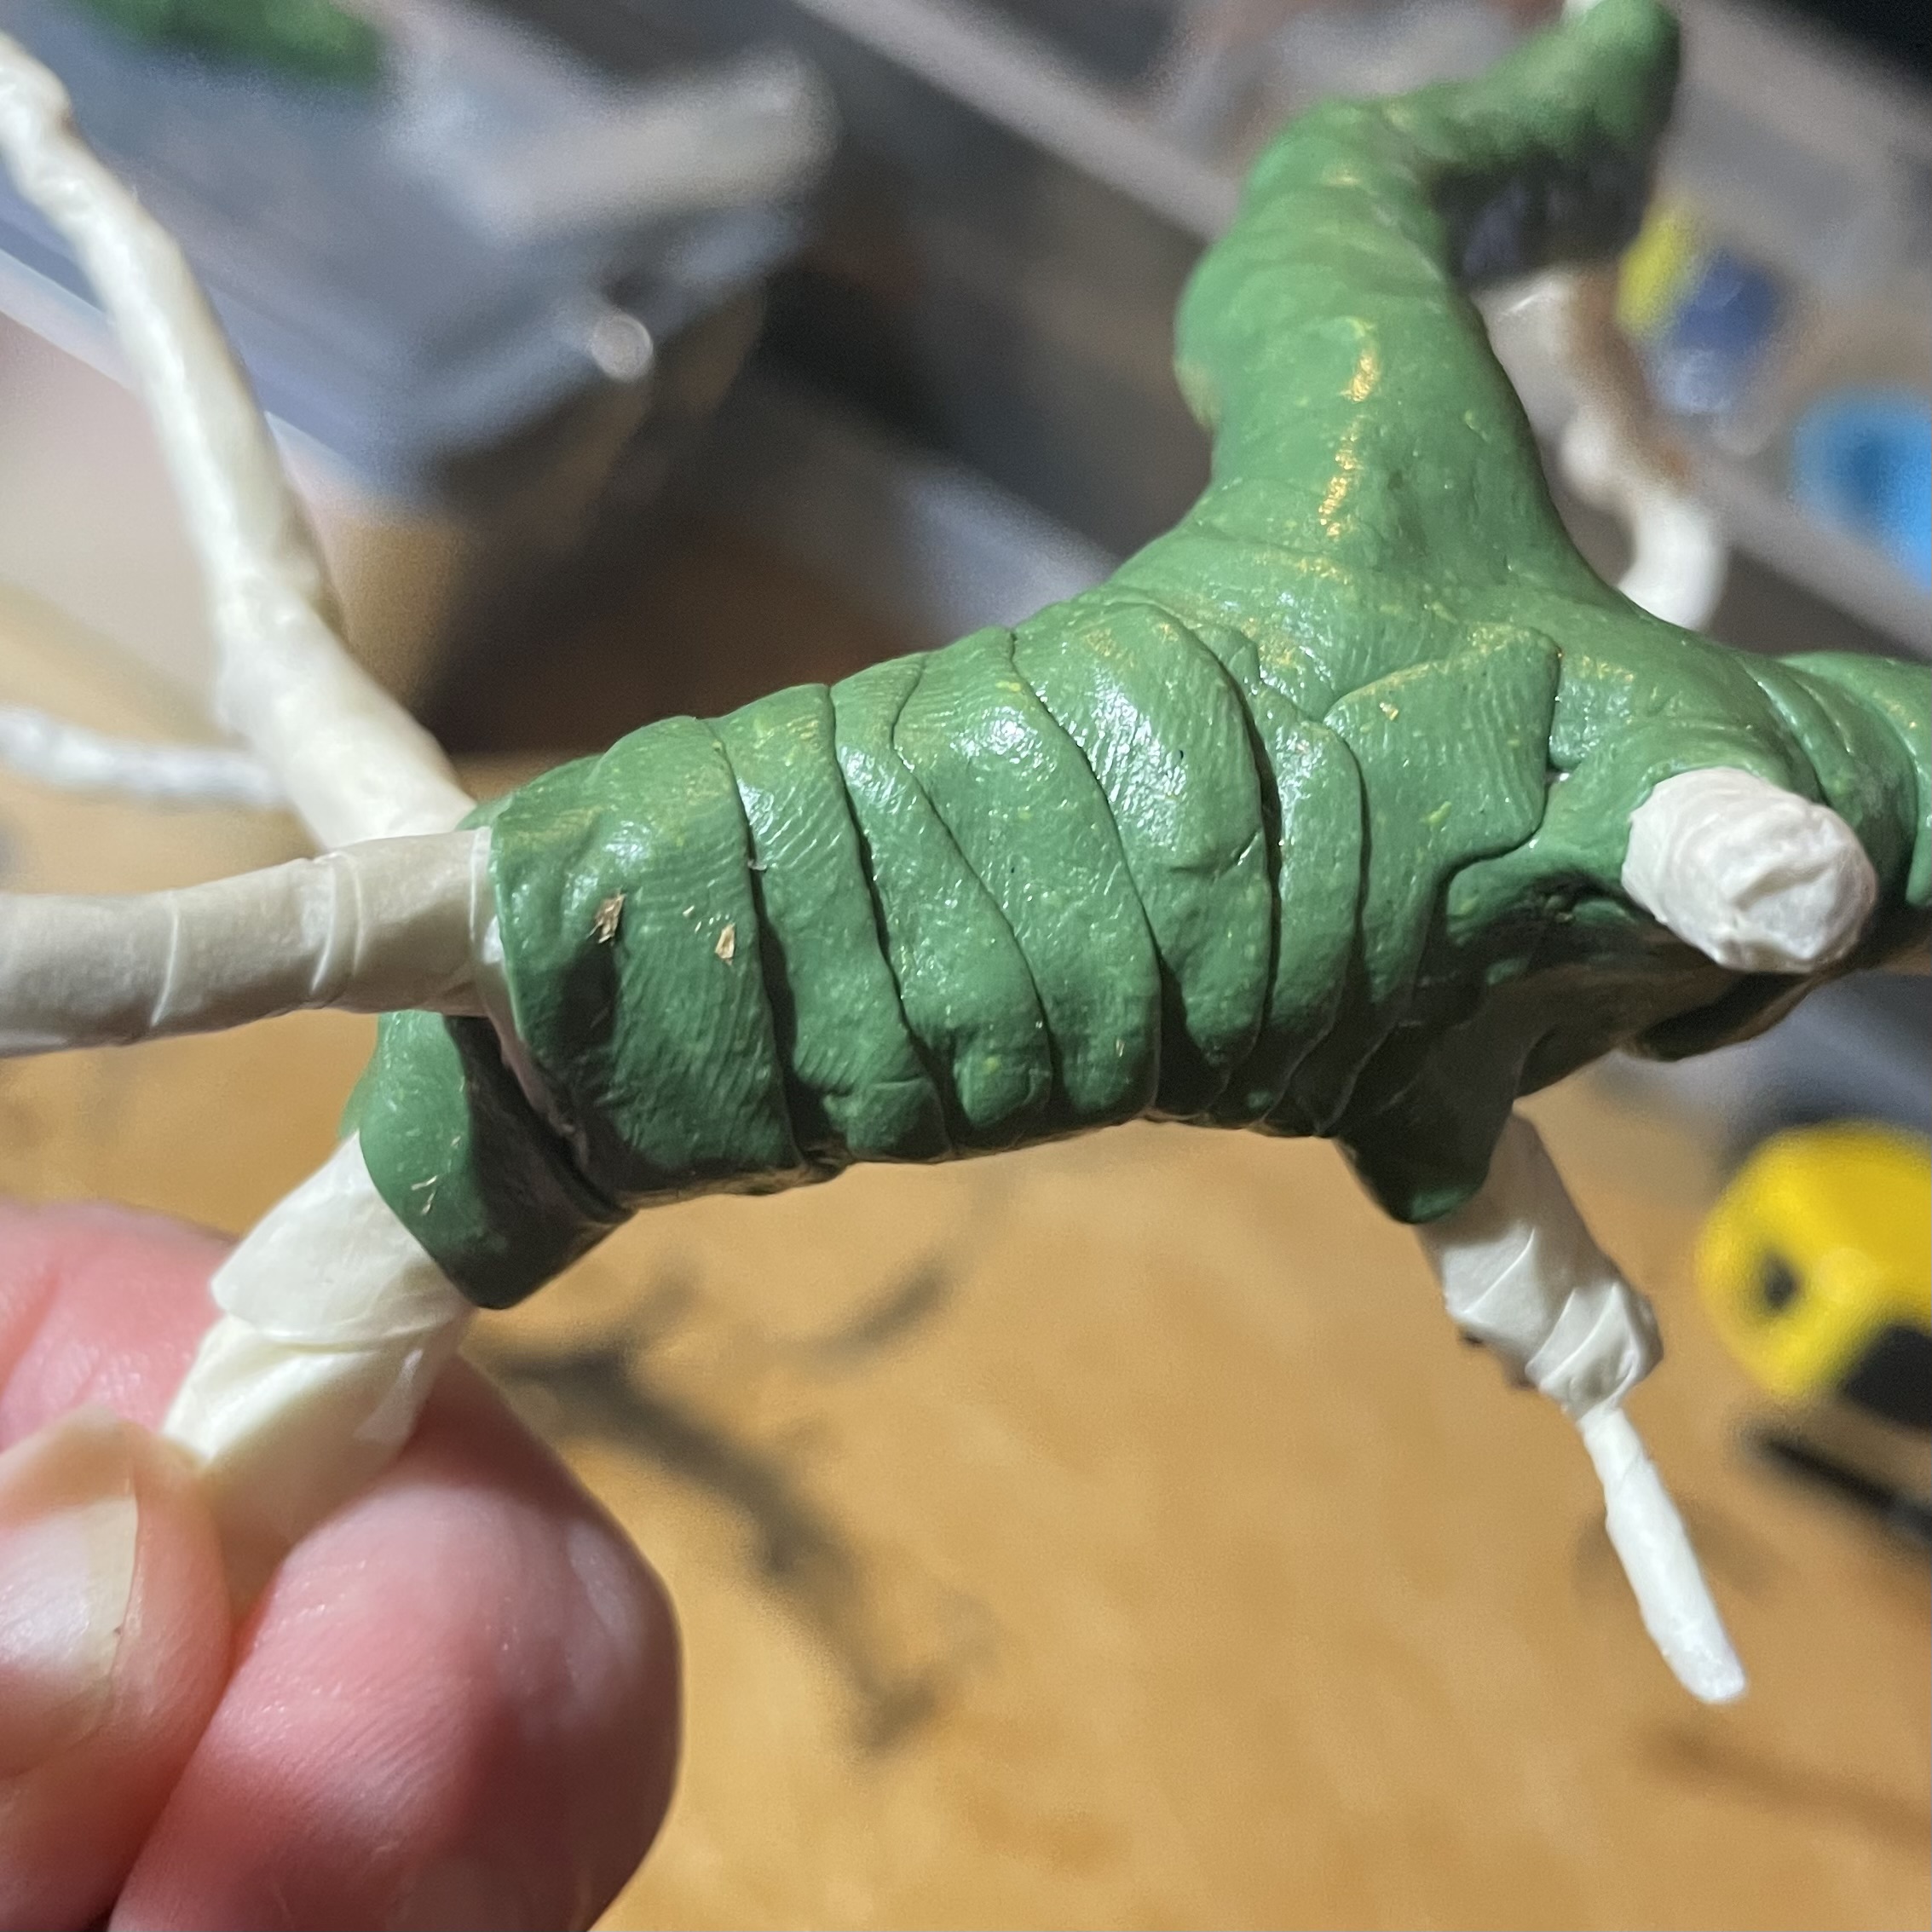
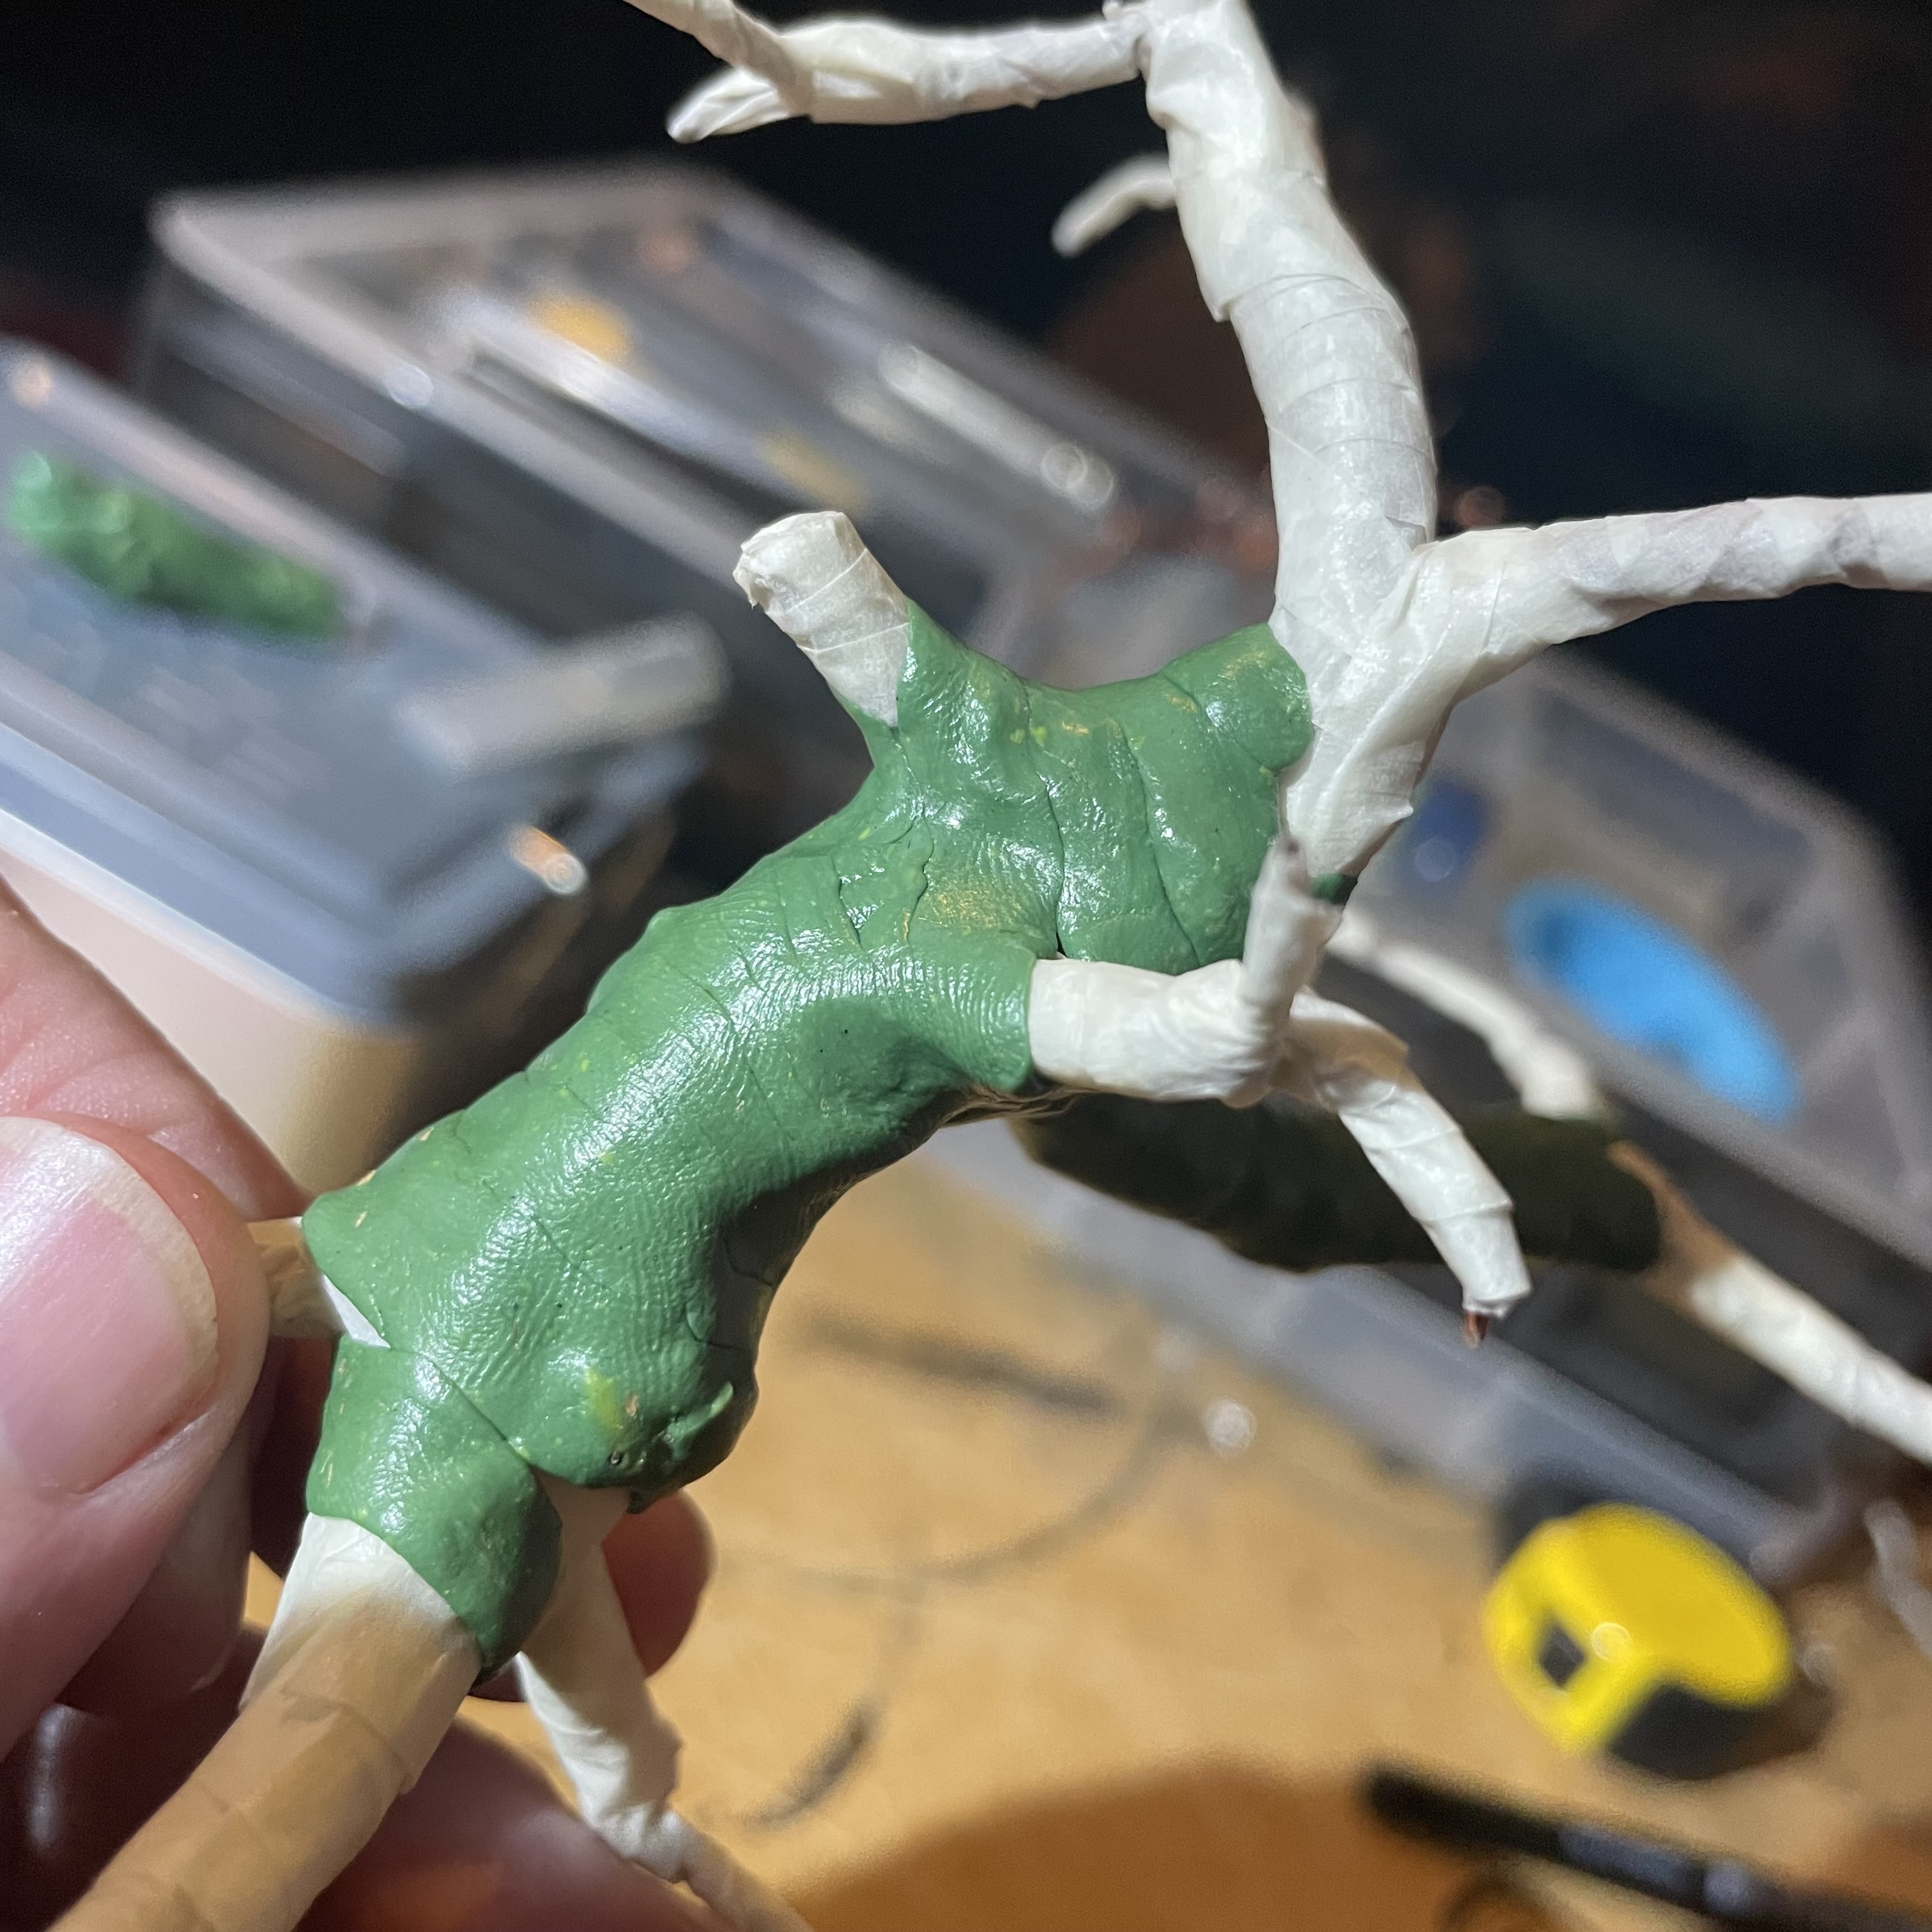
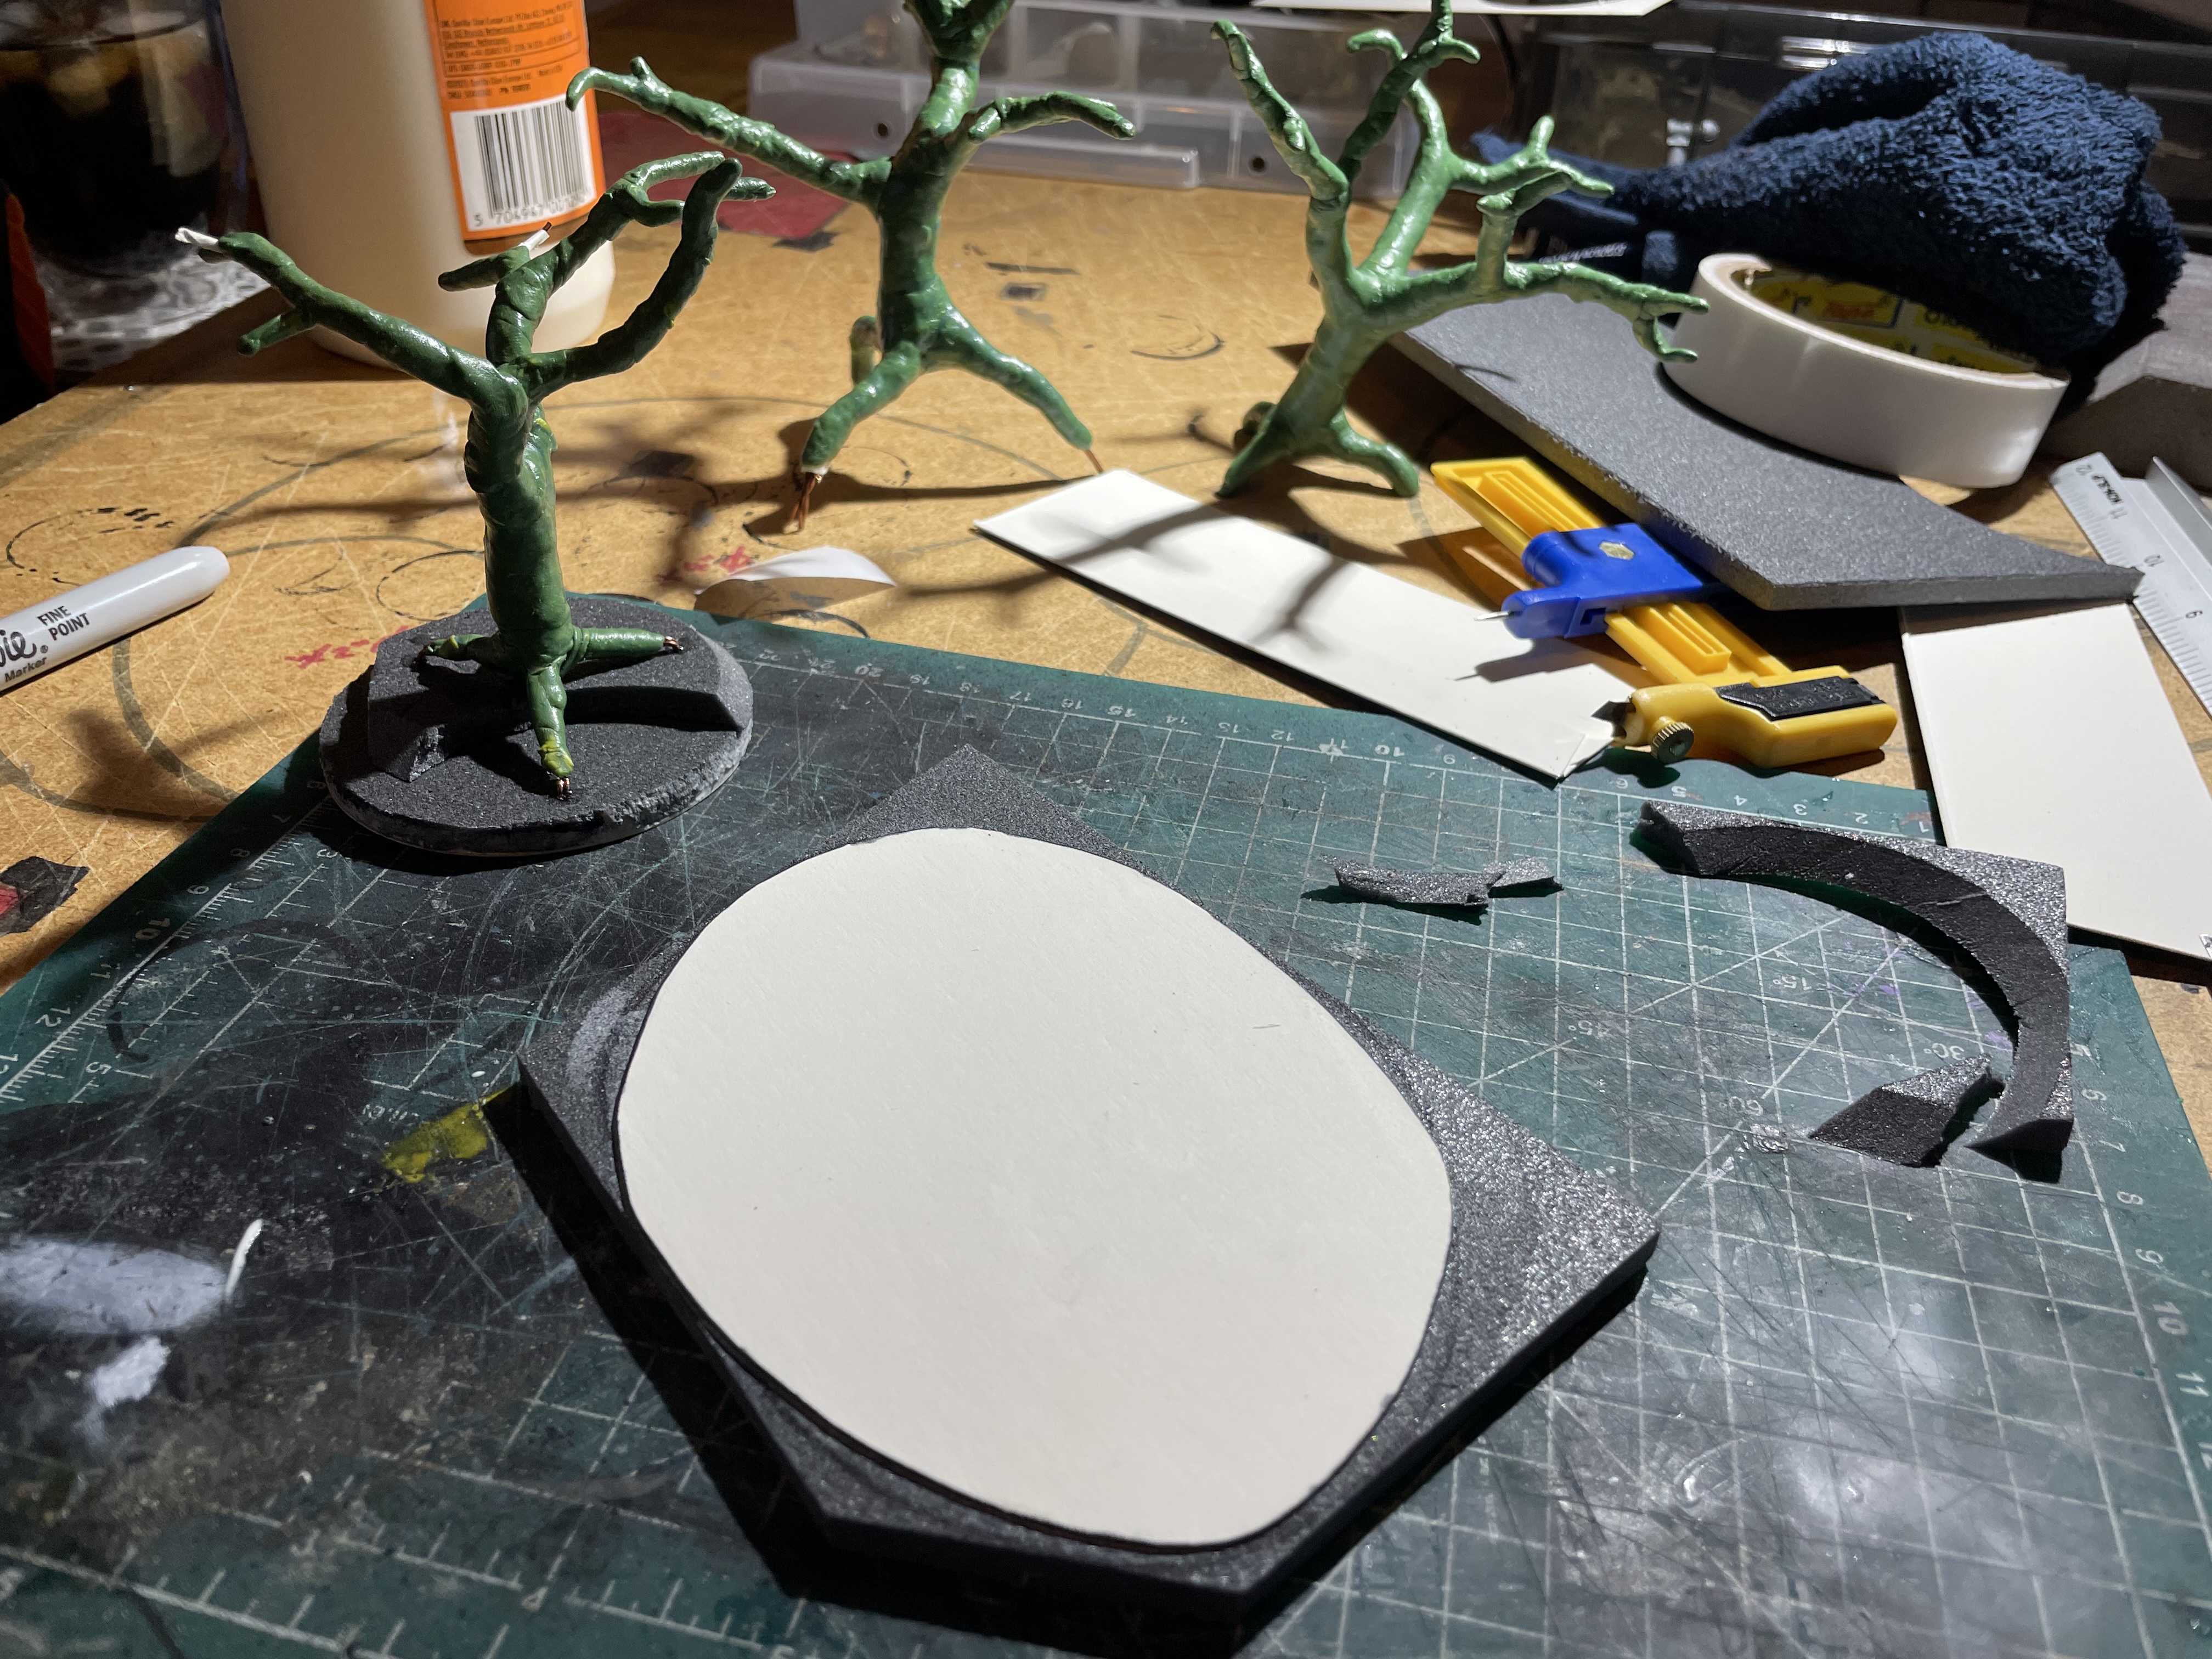
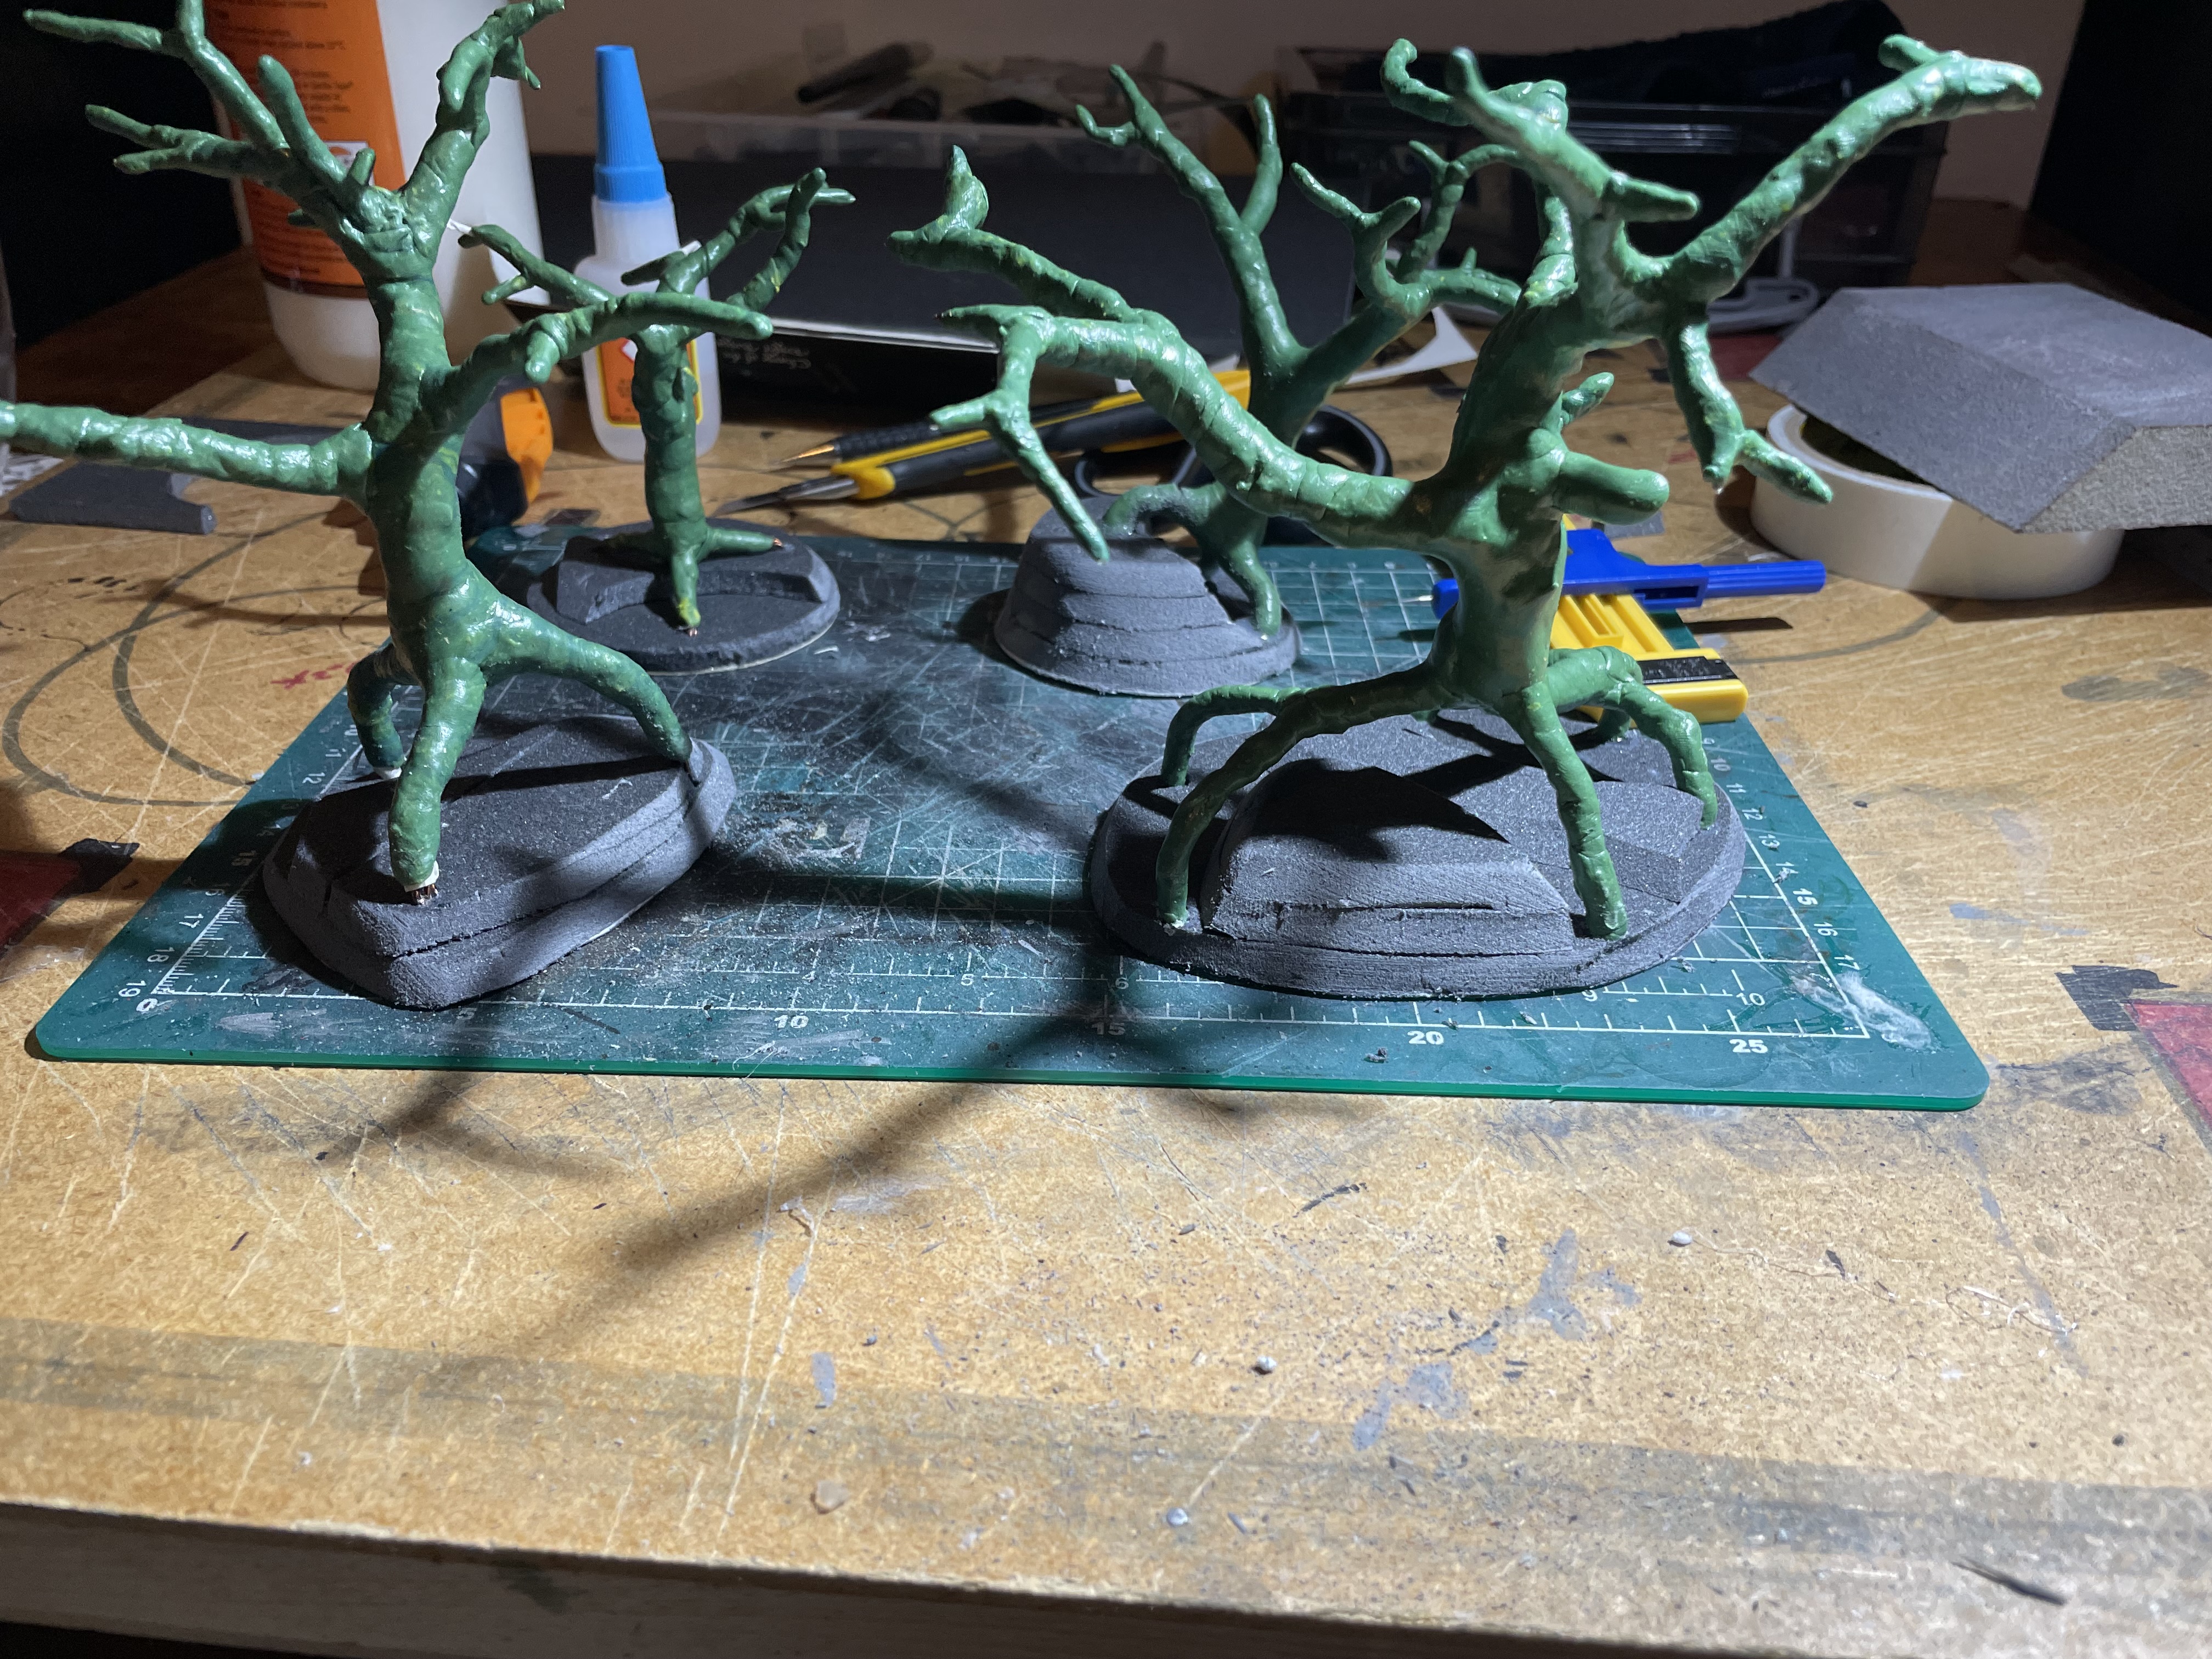
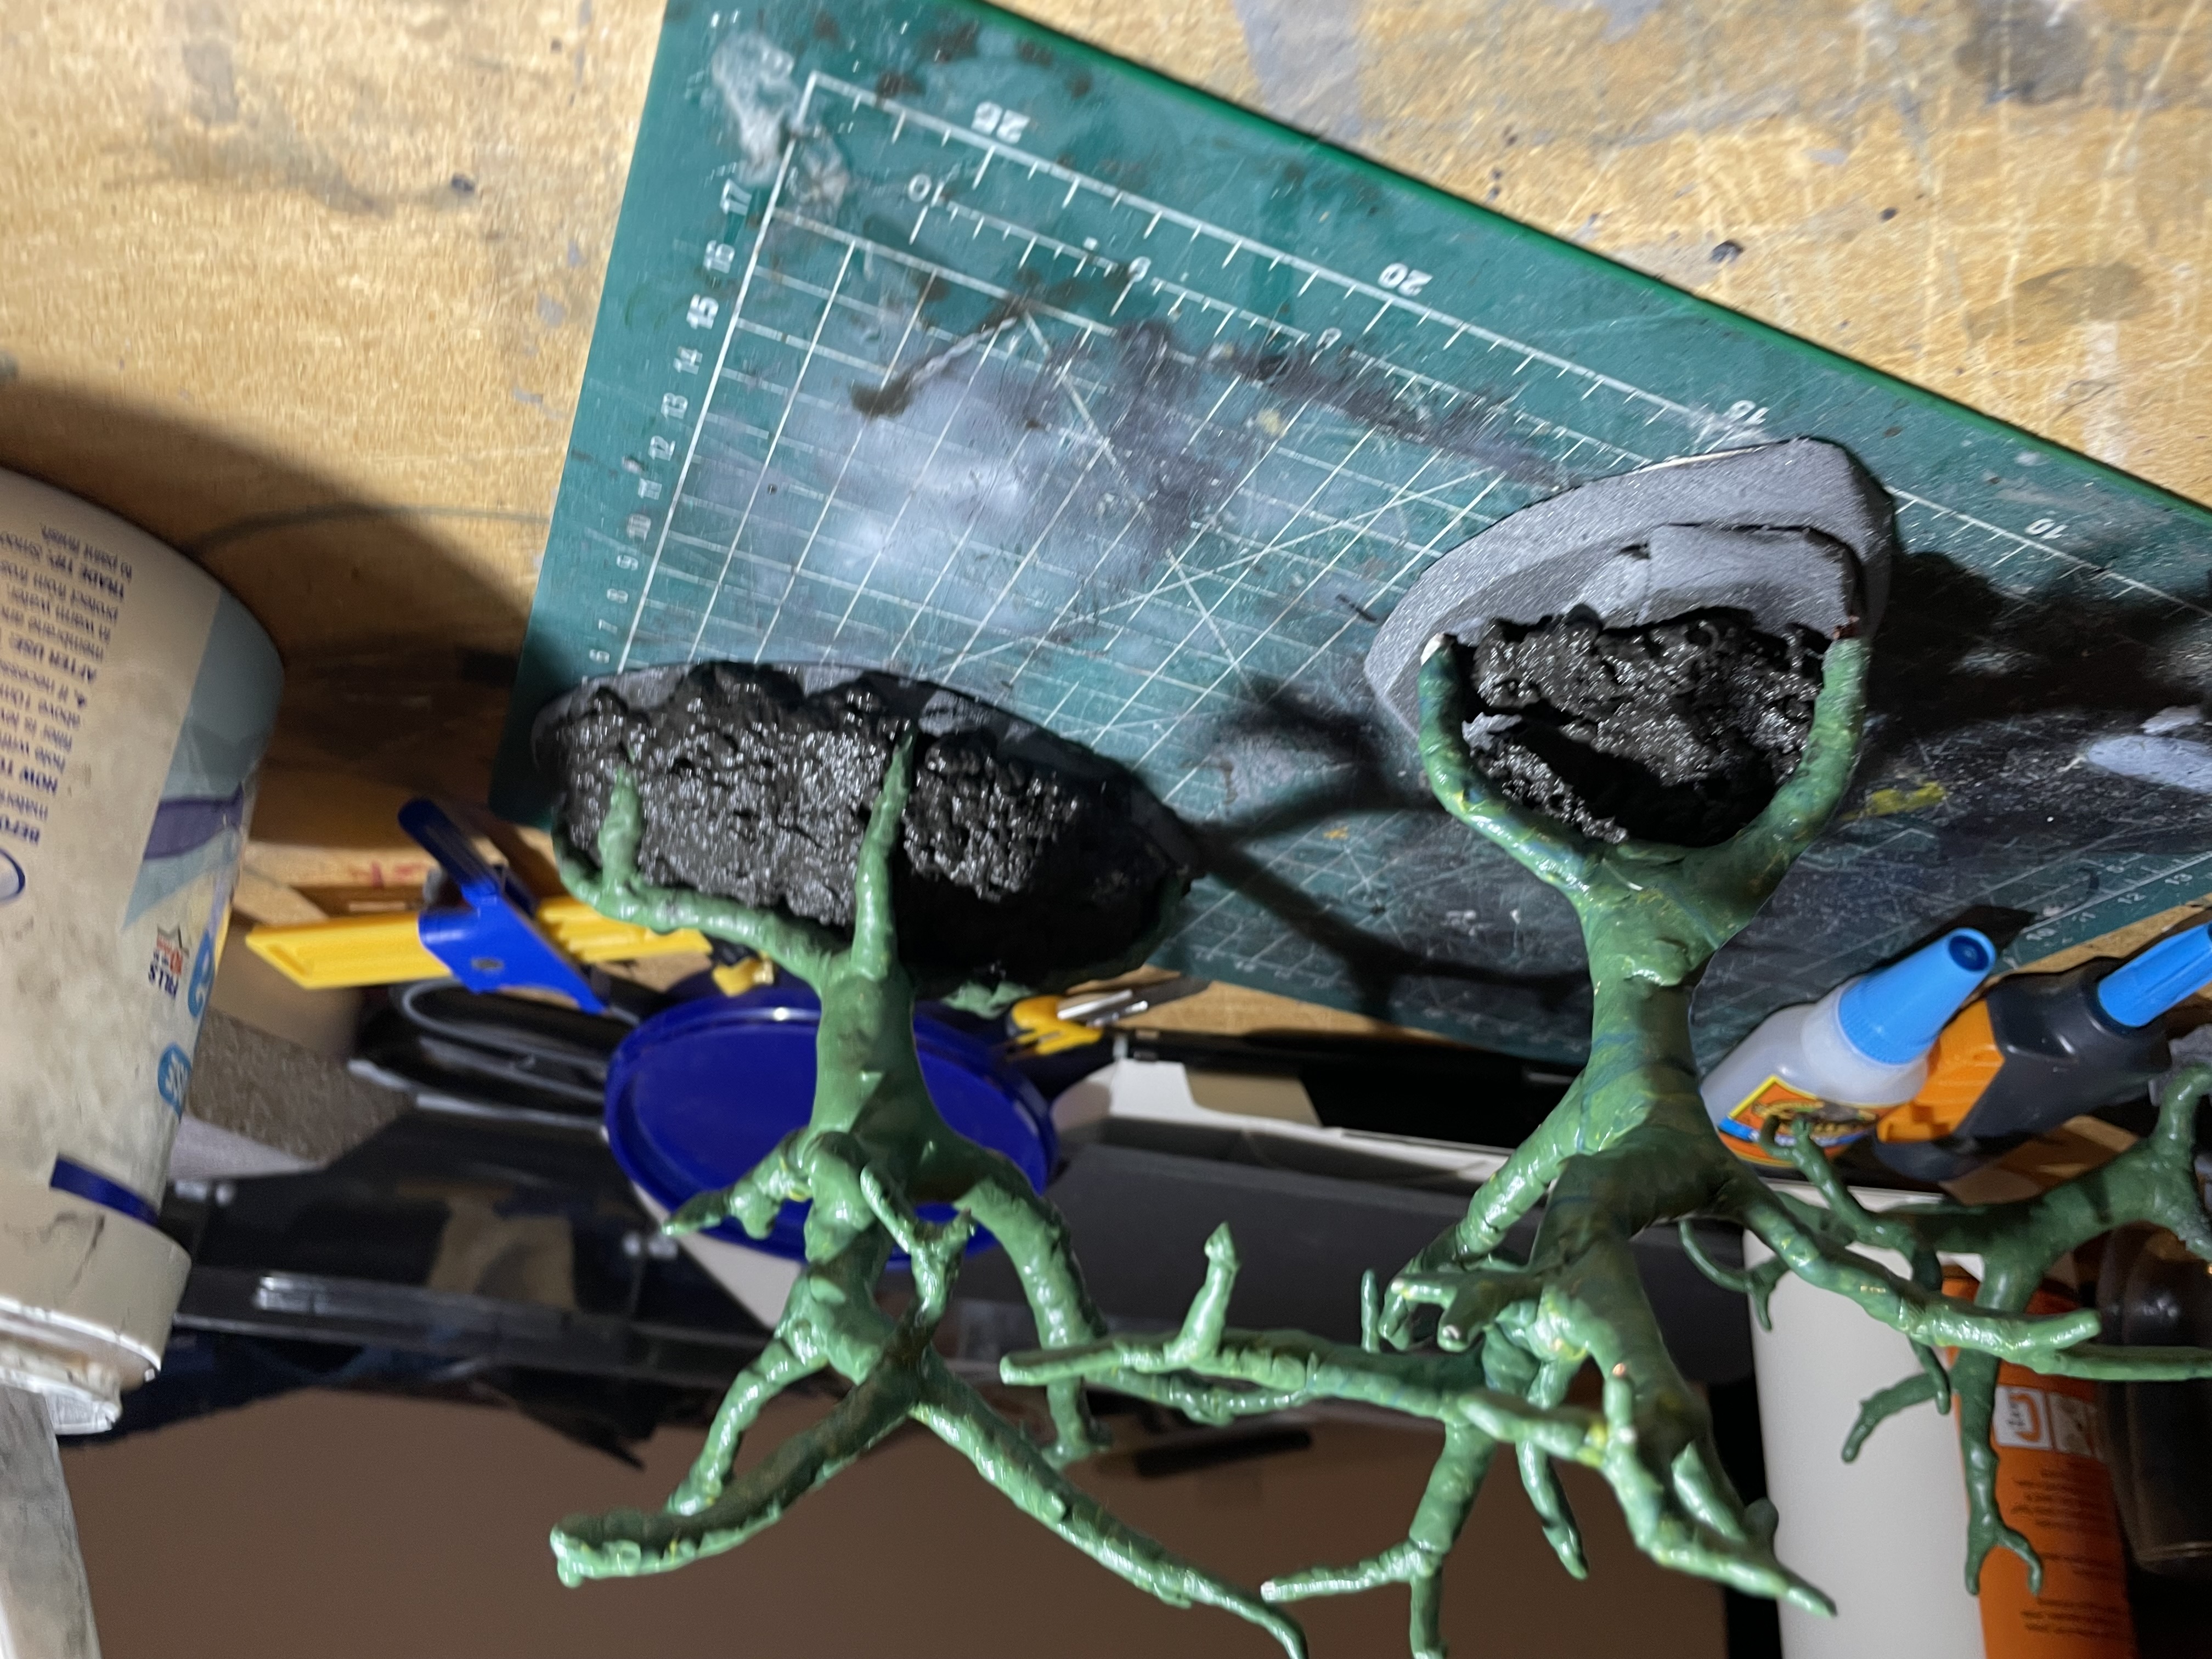
So a few posts back I made the wire trees. I’ve moved on a bit since then. Covered in green stuff bases made for each tree with my own mix of soggy toilet paper, hot water, PVA and some tile grout although I forgot the PVA this time. Let’s see how it works with the brainfart hopefully the tile grout will hold it together. I’ll remember the PVA next time.

Been a little busy, but back again.
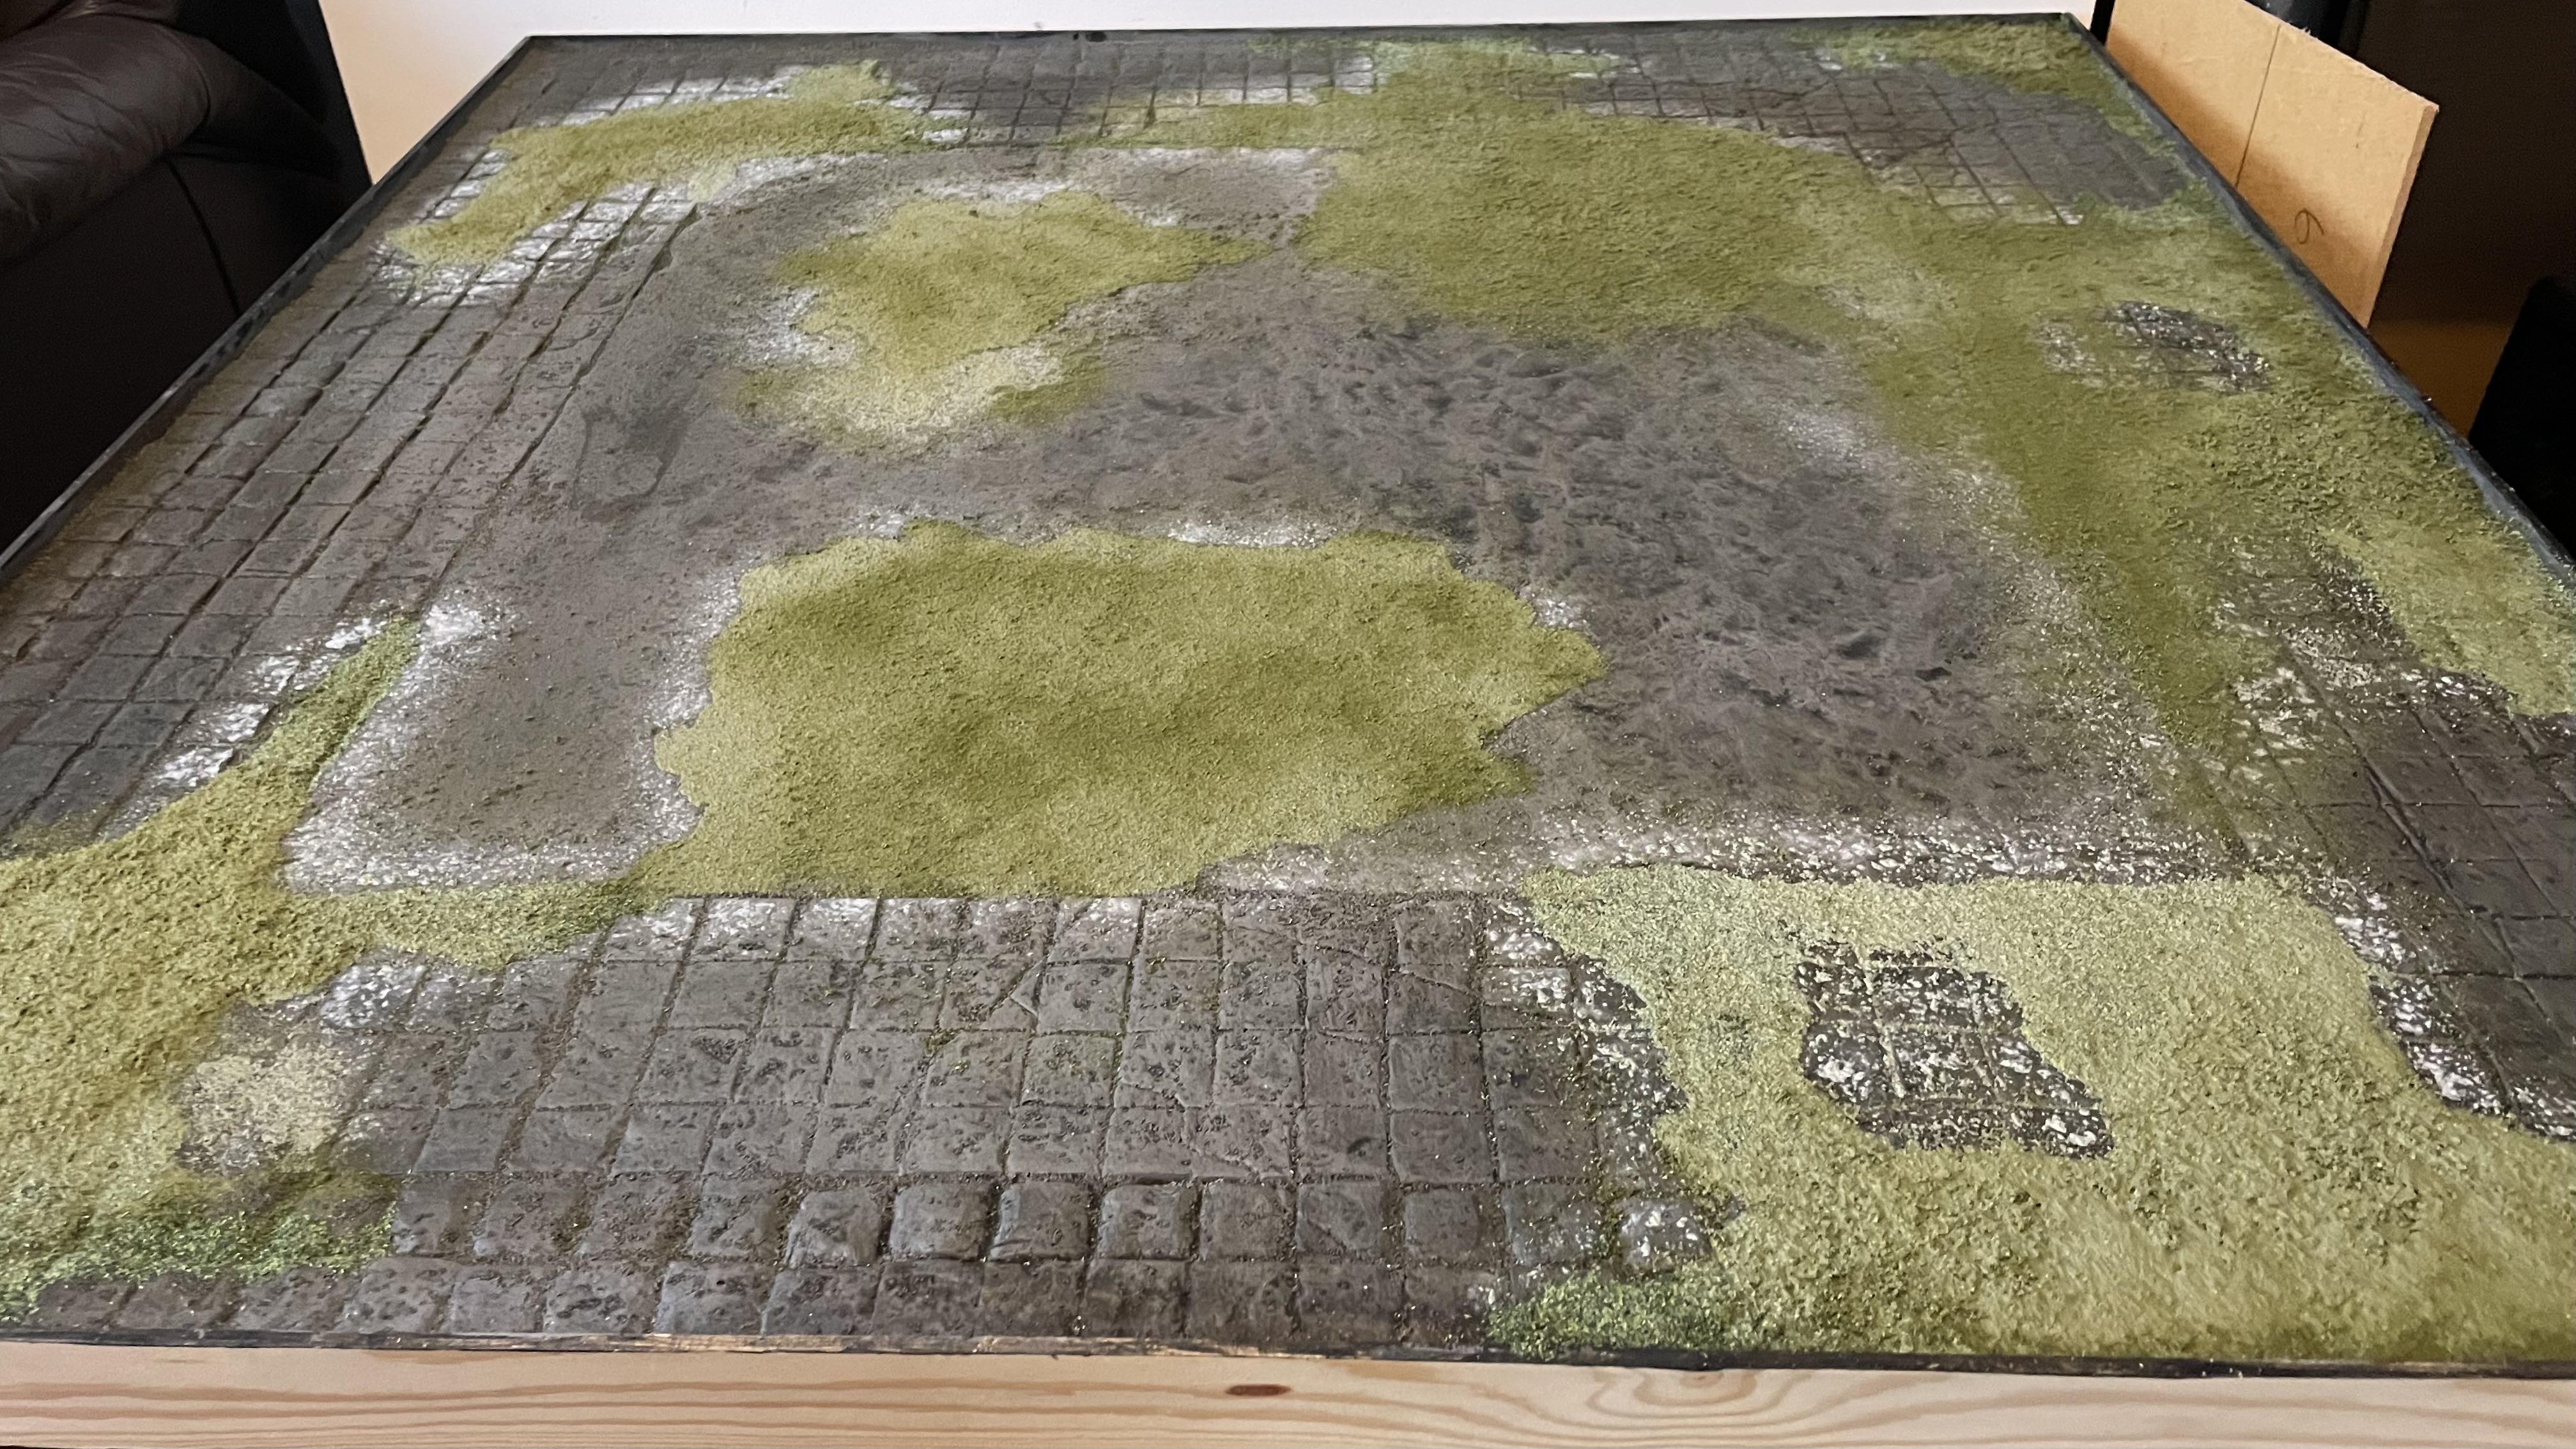 50/50 PVA and Water mix brushed onto the board in patches. Then fine flock sprinkled over it. Leave it to dry overnight and tomorrow I’ll brush the excess off. More updates will follow as I work on the base.
 Mystery Package arrives!!
 That’s a big box
 So a big box of goodies turned up today curtesy of a friend at Beowulf Miniatures. Thanks Jack they turned up ready for the undercoat. I’ve got to get the board finished now because it’s going to be shown off at Salute next year where the “Multi Award Winning Moonstone” will be getting played on it for the day. http://www.beowulfminiatures.com
Let’s start bringing it together.
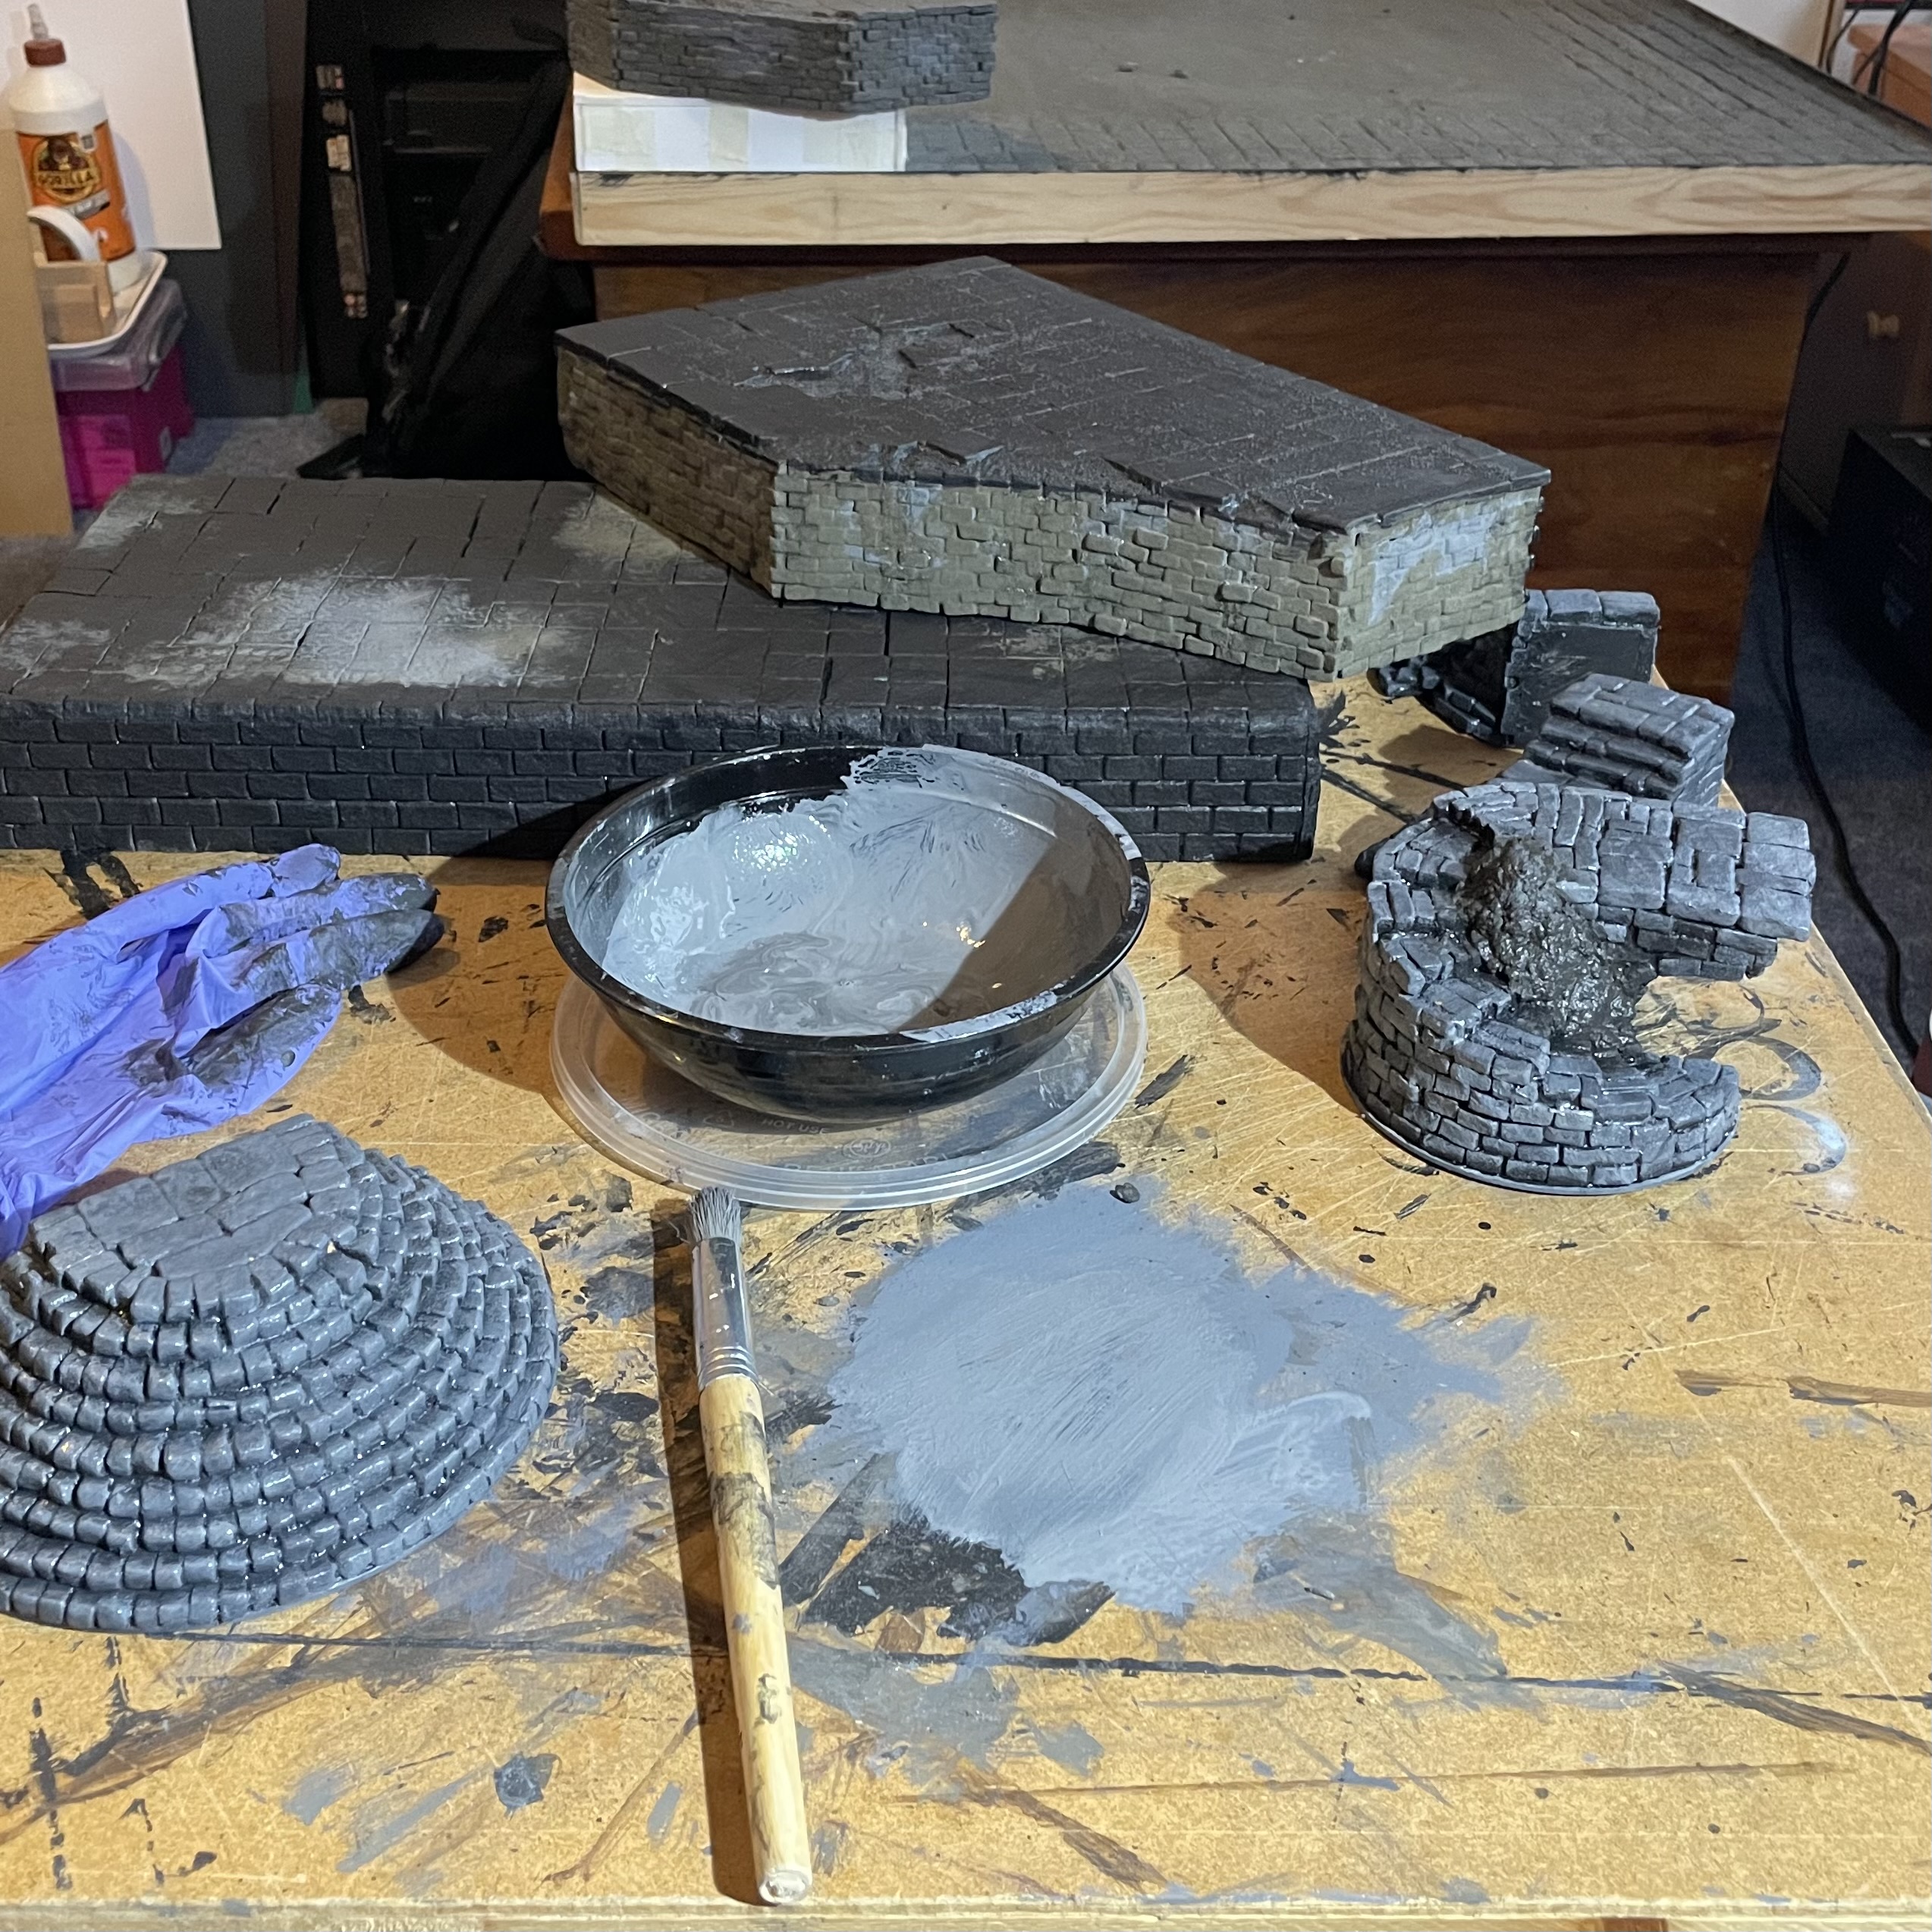
- It’s Saturday it’s cold outside so I grab the paints and get started painting the different parts of the board to bring it together. Dry brushing is my friend. Start from black add some grey then some woodland Scenics Earth undercoat slapped haphazardly around. When that’s all dried I’ll add some washes that should tie it together nicely at the end. This is a WIP so more pictures will follow later on.

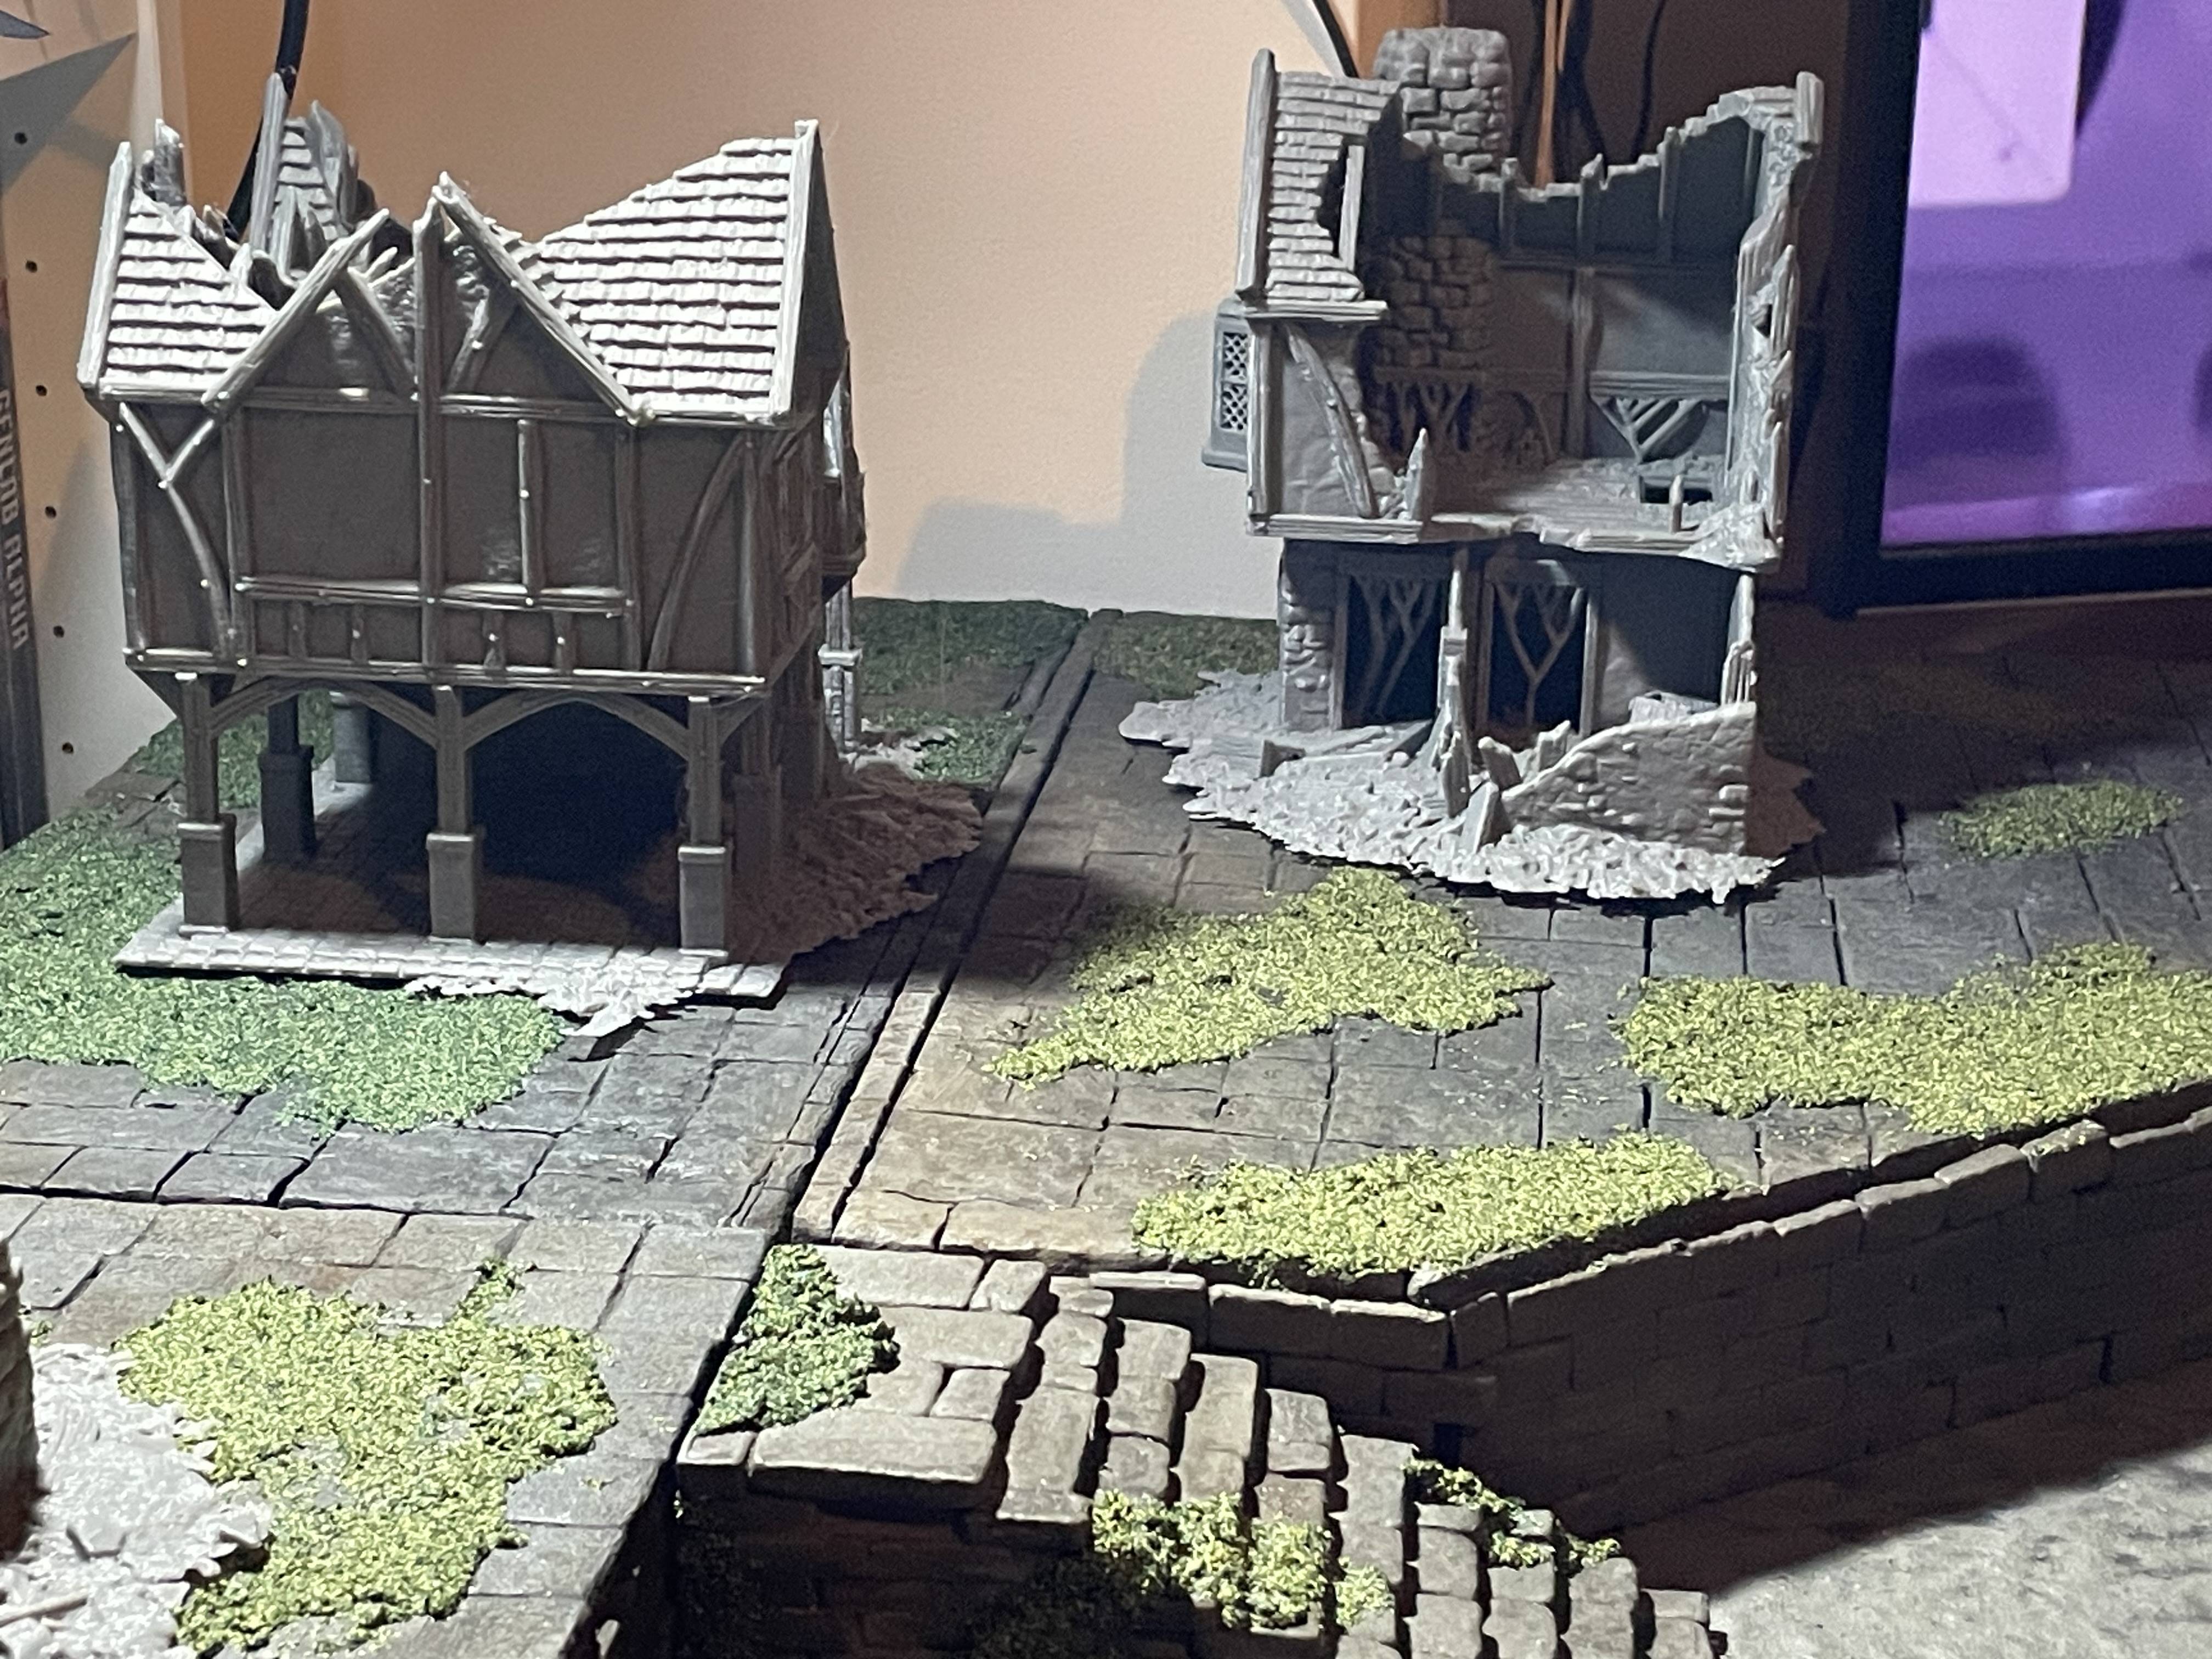
 Added flock to a 50/50 PVA water mix made into a paste. Painted it onto the stairs in places and the tops of the raised platforms. When I get some more flock I’ll do the same to the bricked sides and the board to bring it all together. When it’s dried the greens may be too vibrant and stand out too much so I’ll dull it down with some washes and a drybrush. I guess I’ll make that last decision when I see how it ass looks.

Let’s start bringing it together.
It’s Saturday it’s cold outside so I grab the paints and get started painting the different parts of the board to bring it together. Dry brushing is my friend. Start from black add some grey then some woodland Scenics Earth undercoat slapped haphazardly around. When that’s all dried I’ll add some washes that should tie it together nicely at the end. This is a WIP so more pictures will follow later on.


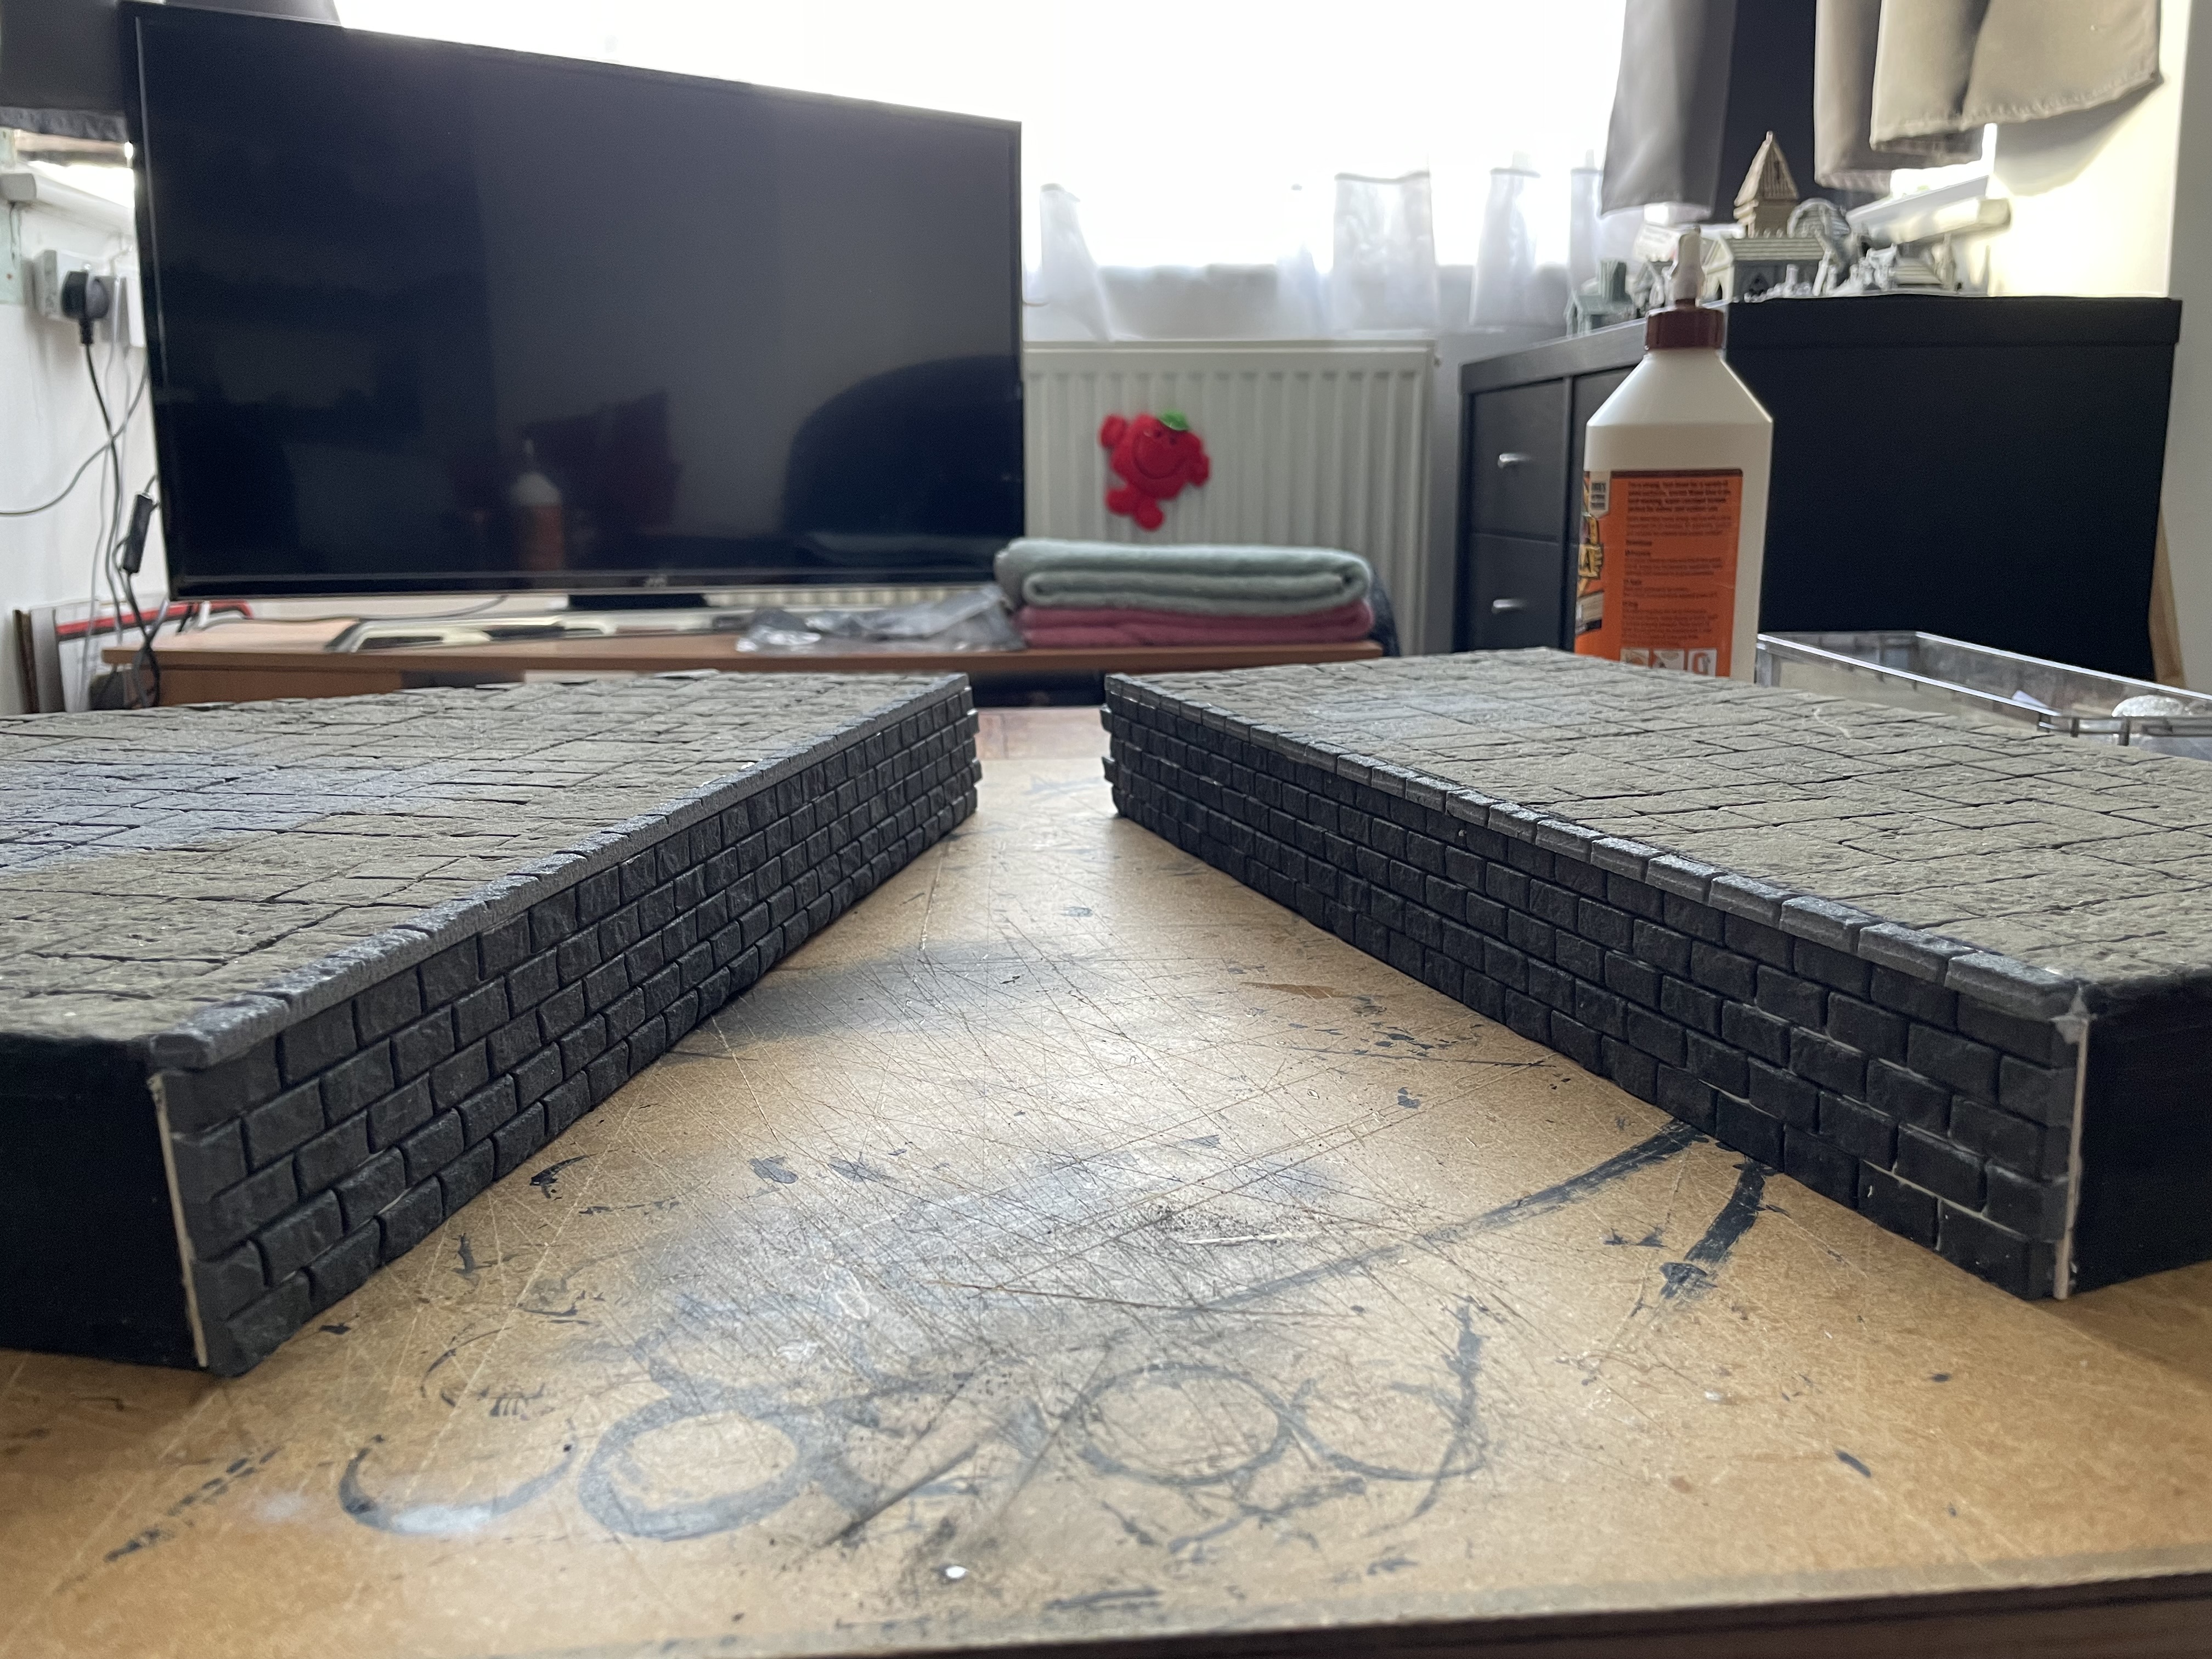
Storage issue solved
I recently posted regarding the fact that I was a little excited and made one of the raised sections for the board larger than the storage box I’ll be using to put it all in.
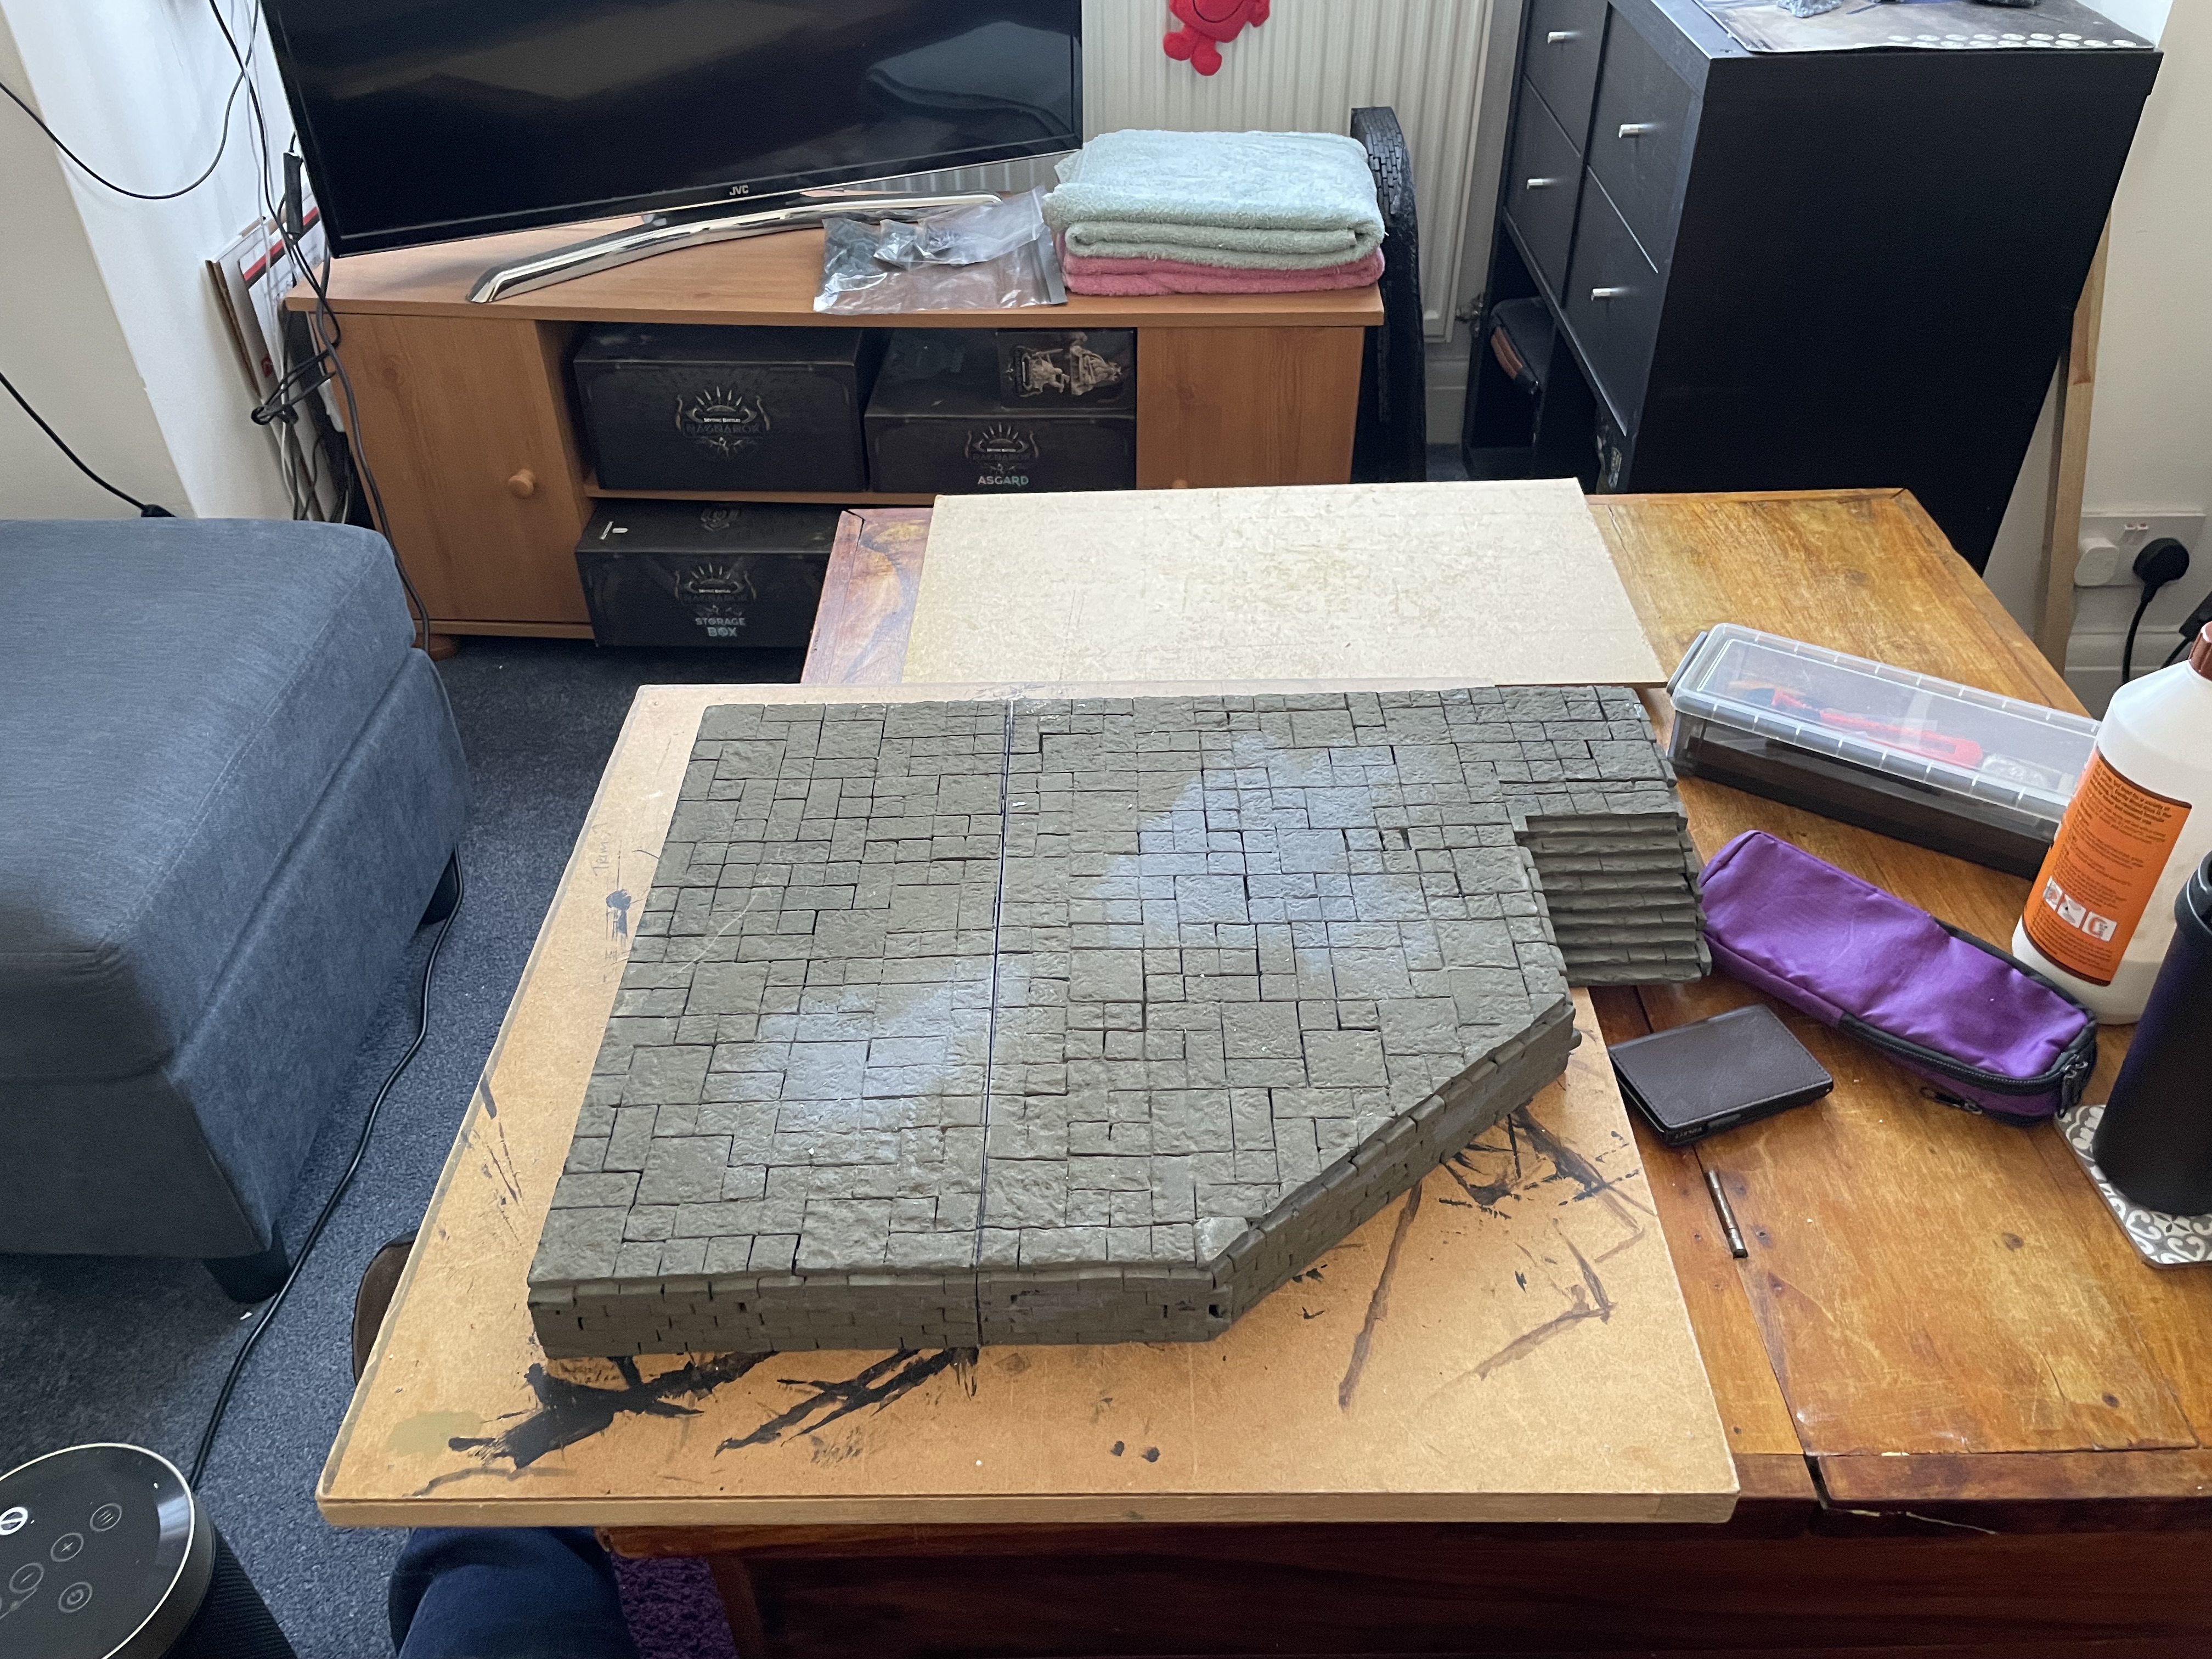 Before 1 big piece, slightly too large for the storage box. And sagging in the middle a little bit.
 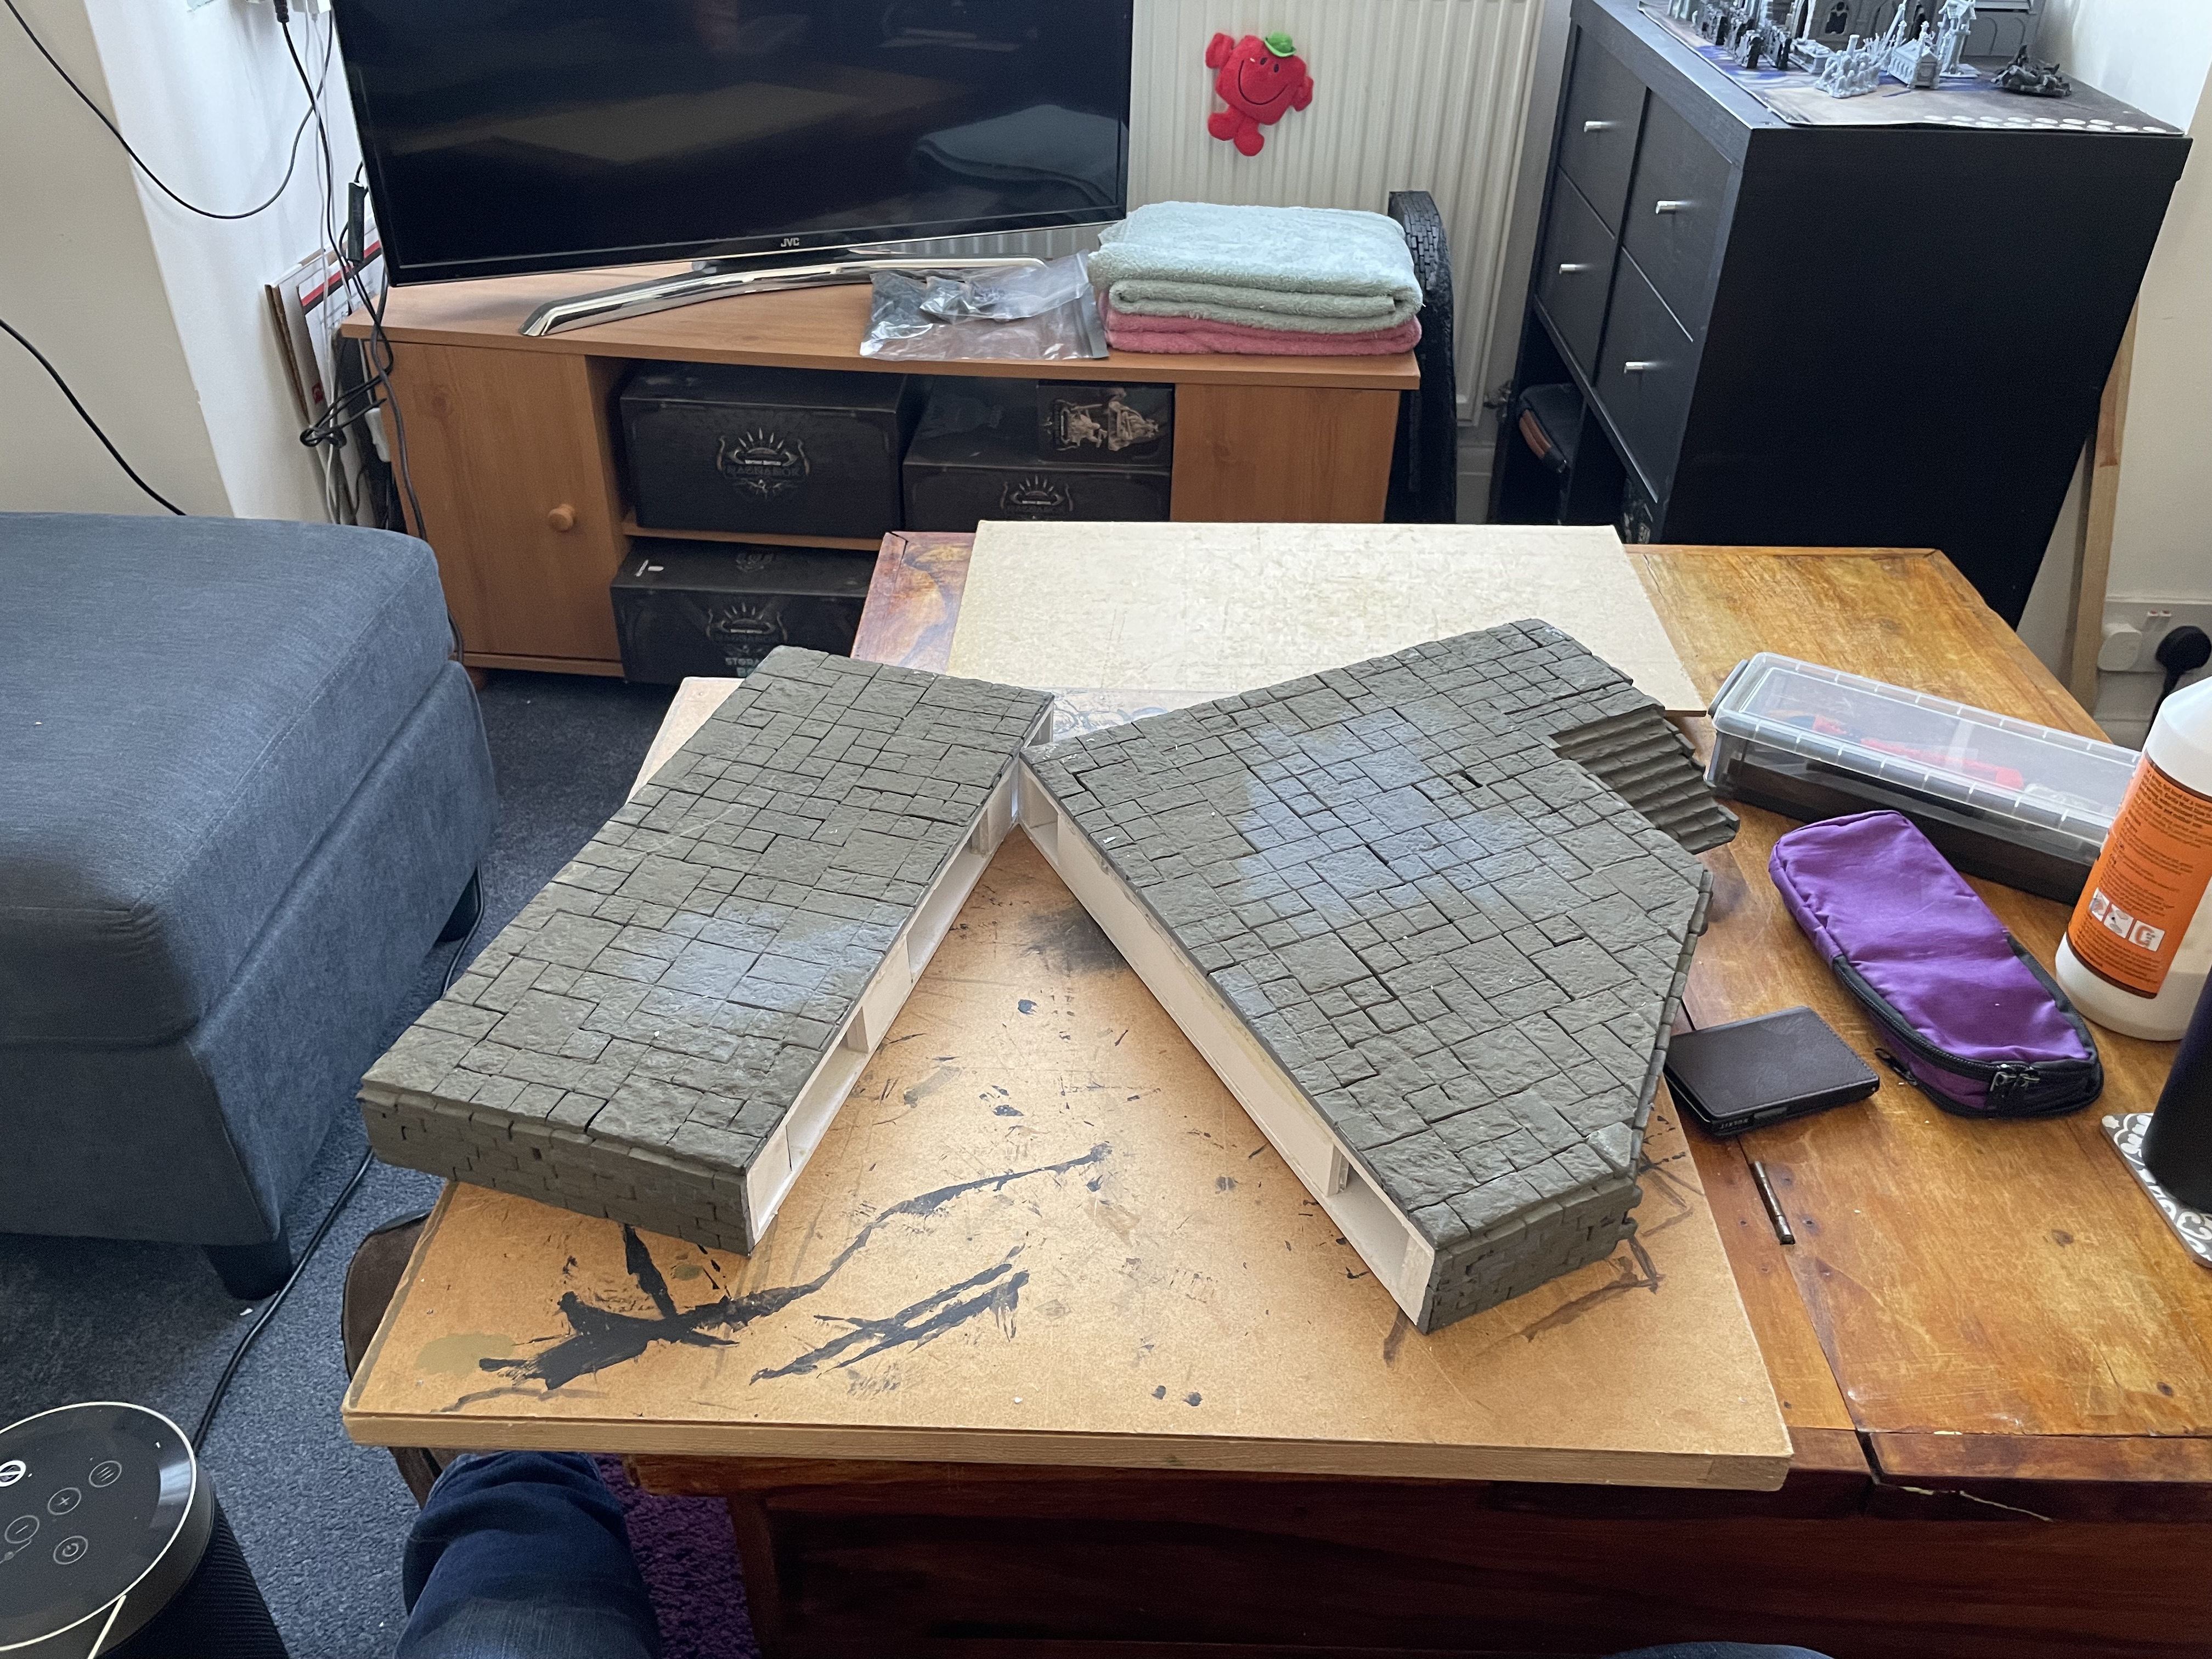 I was able to carefully cut it in two and before doing anything else I added do supports inside the structure to prevent sagging and as such allow scenery to sit flat on the raised area.
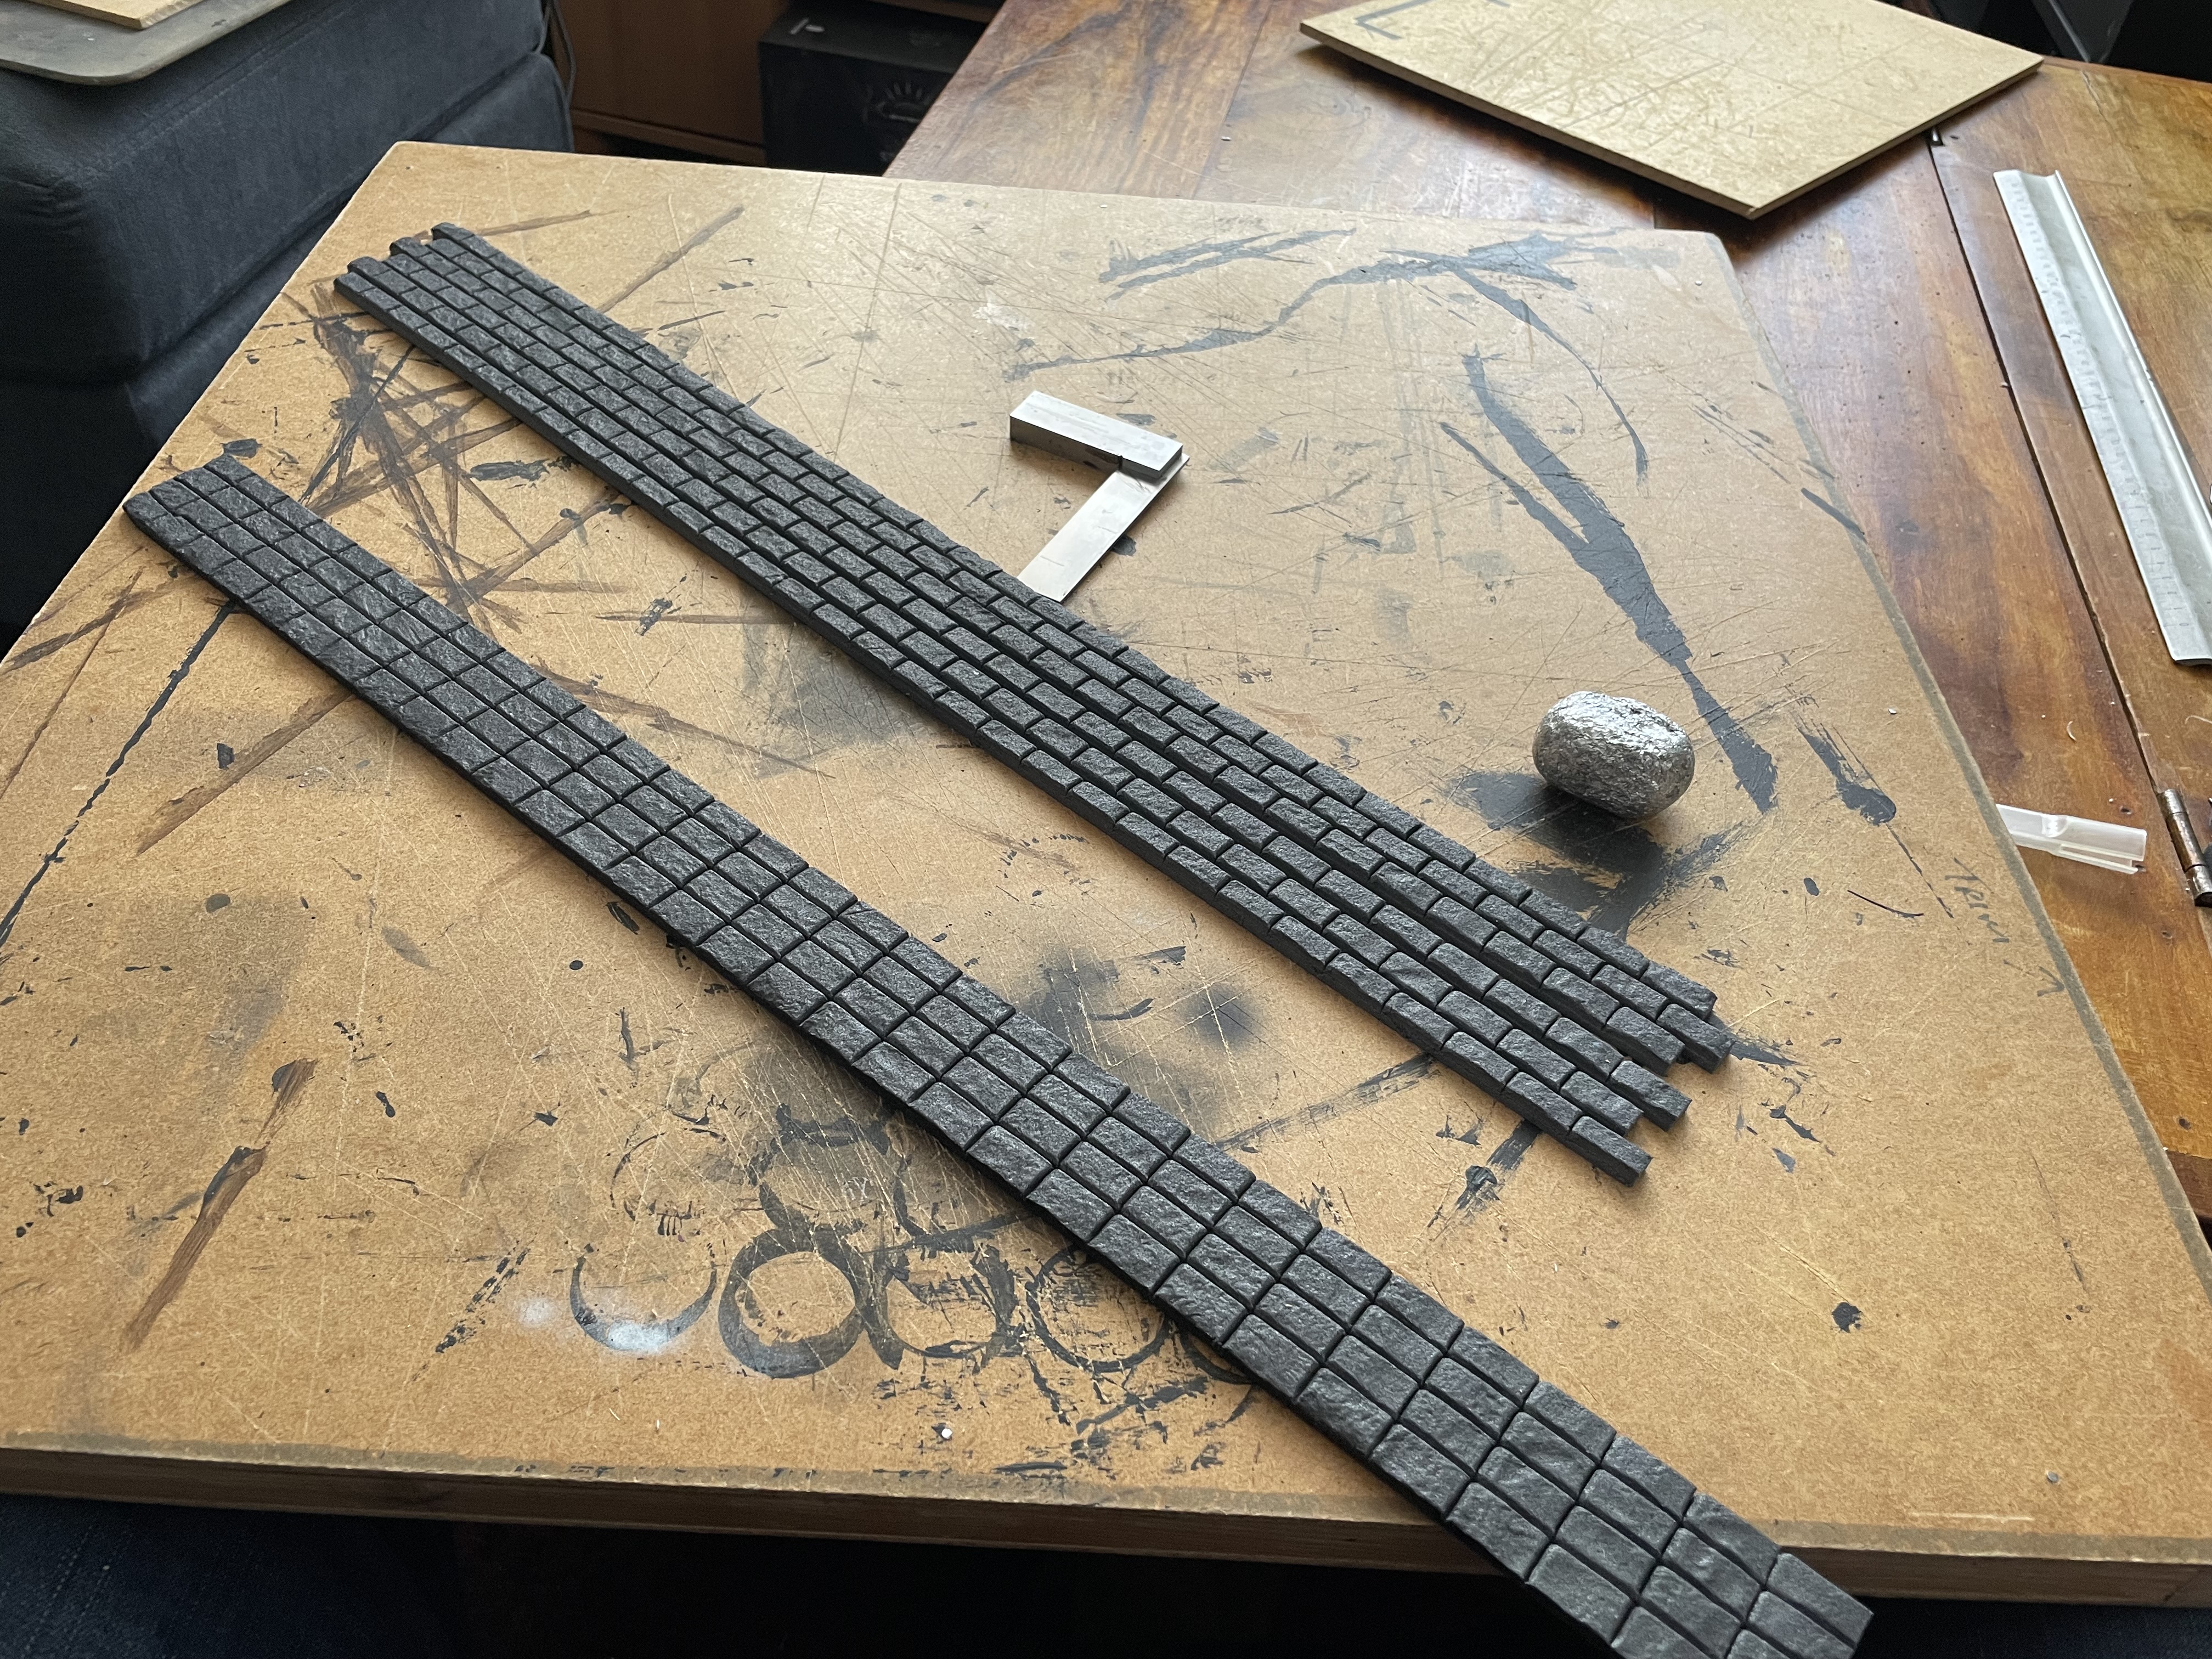


![Play WW2 Commando Operations With Butcher & Bolt [Updated]](https://images.beastsofwar.com/2026/03/relaunch-600-338.jpg)


