


![NO Weekender Or Cult Of Games XLBS This Weekend [Updated]](https://images.beastsofwar.com/2026/03/No_Weekender_and_XLBS_this_Weekend-225-127.jpg)


Epic Russian Doll Terrain


Recommendations: 106
About the Project
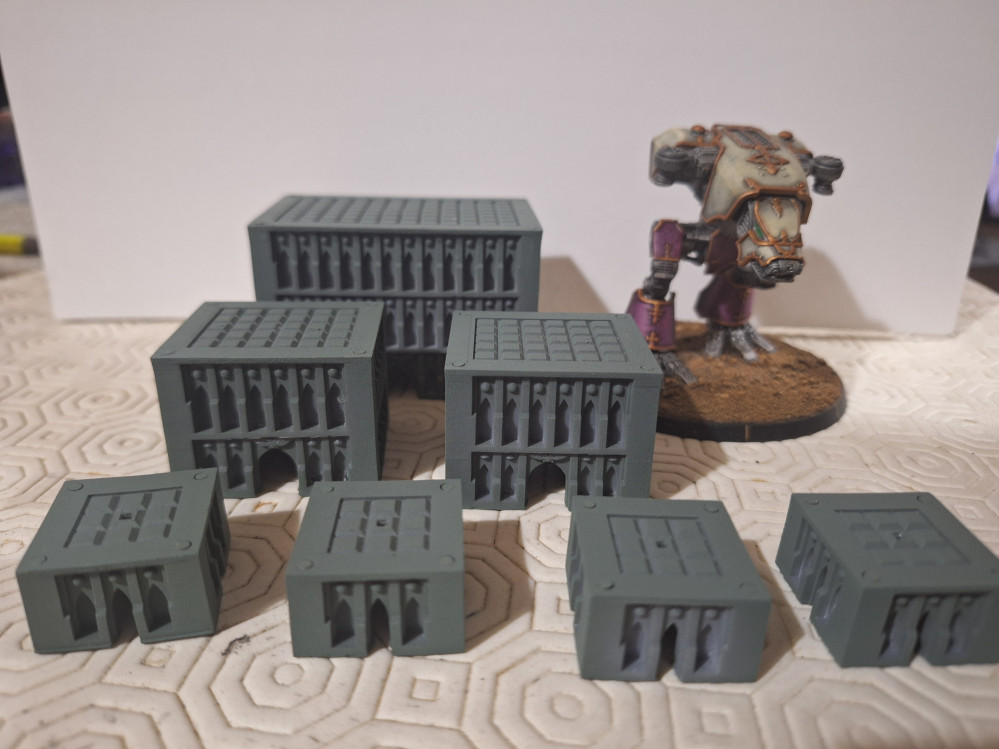
"Legions Imperialis" (or Epic to old farts such as myself) has really taken off at my club and I am also getting into other epic scale games such as "Steal rift". as a result I need a set of terrain suitable. Unfortunately storage space is limited in my flat so I wanted a set of terrain that would fill a table with city style buildings but take up very little space. unfortunately I couldn't find anything for sale that was what I was looking for so time to build it myself. The general plan is to design and produce a set of buildings that would fit inside each other just like a Russian doll and fit within a small 3 liter box from the "Really useful" range.
Related Game: Warhammer: The Horus Heresy - Legions Imperialis
Related Company: Games Workshop
Related Genre: General
Related Contest: TerrainFest 2024
This Project is Active
First test print of nesting buildings
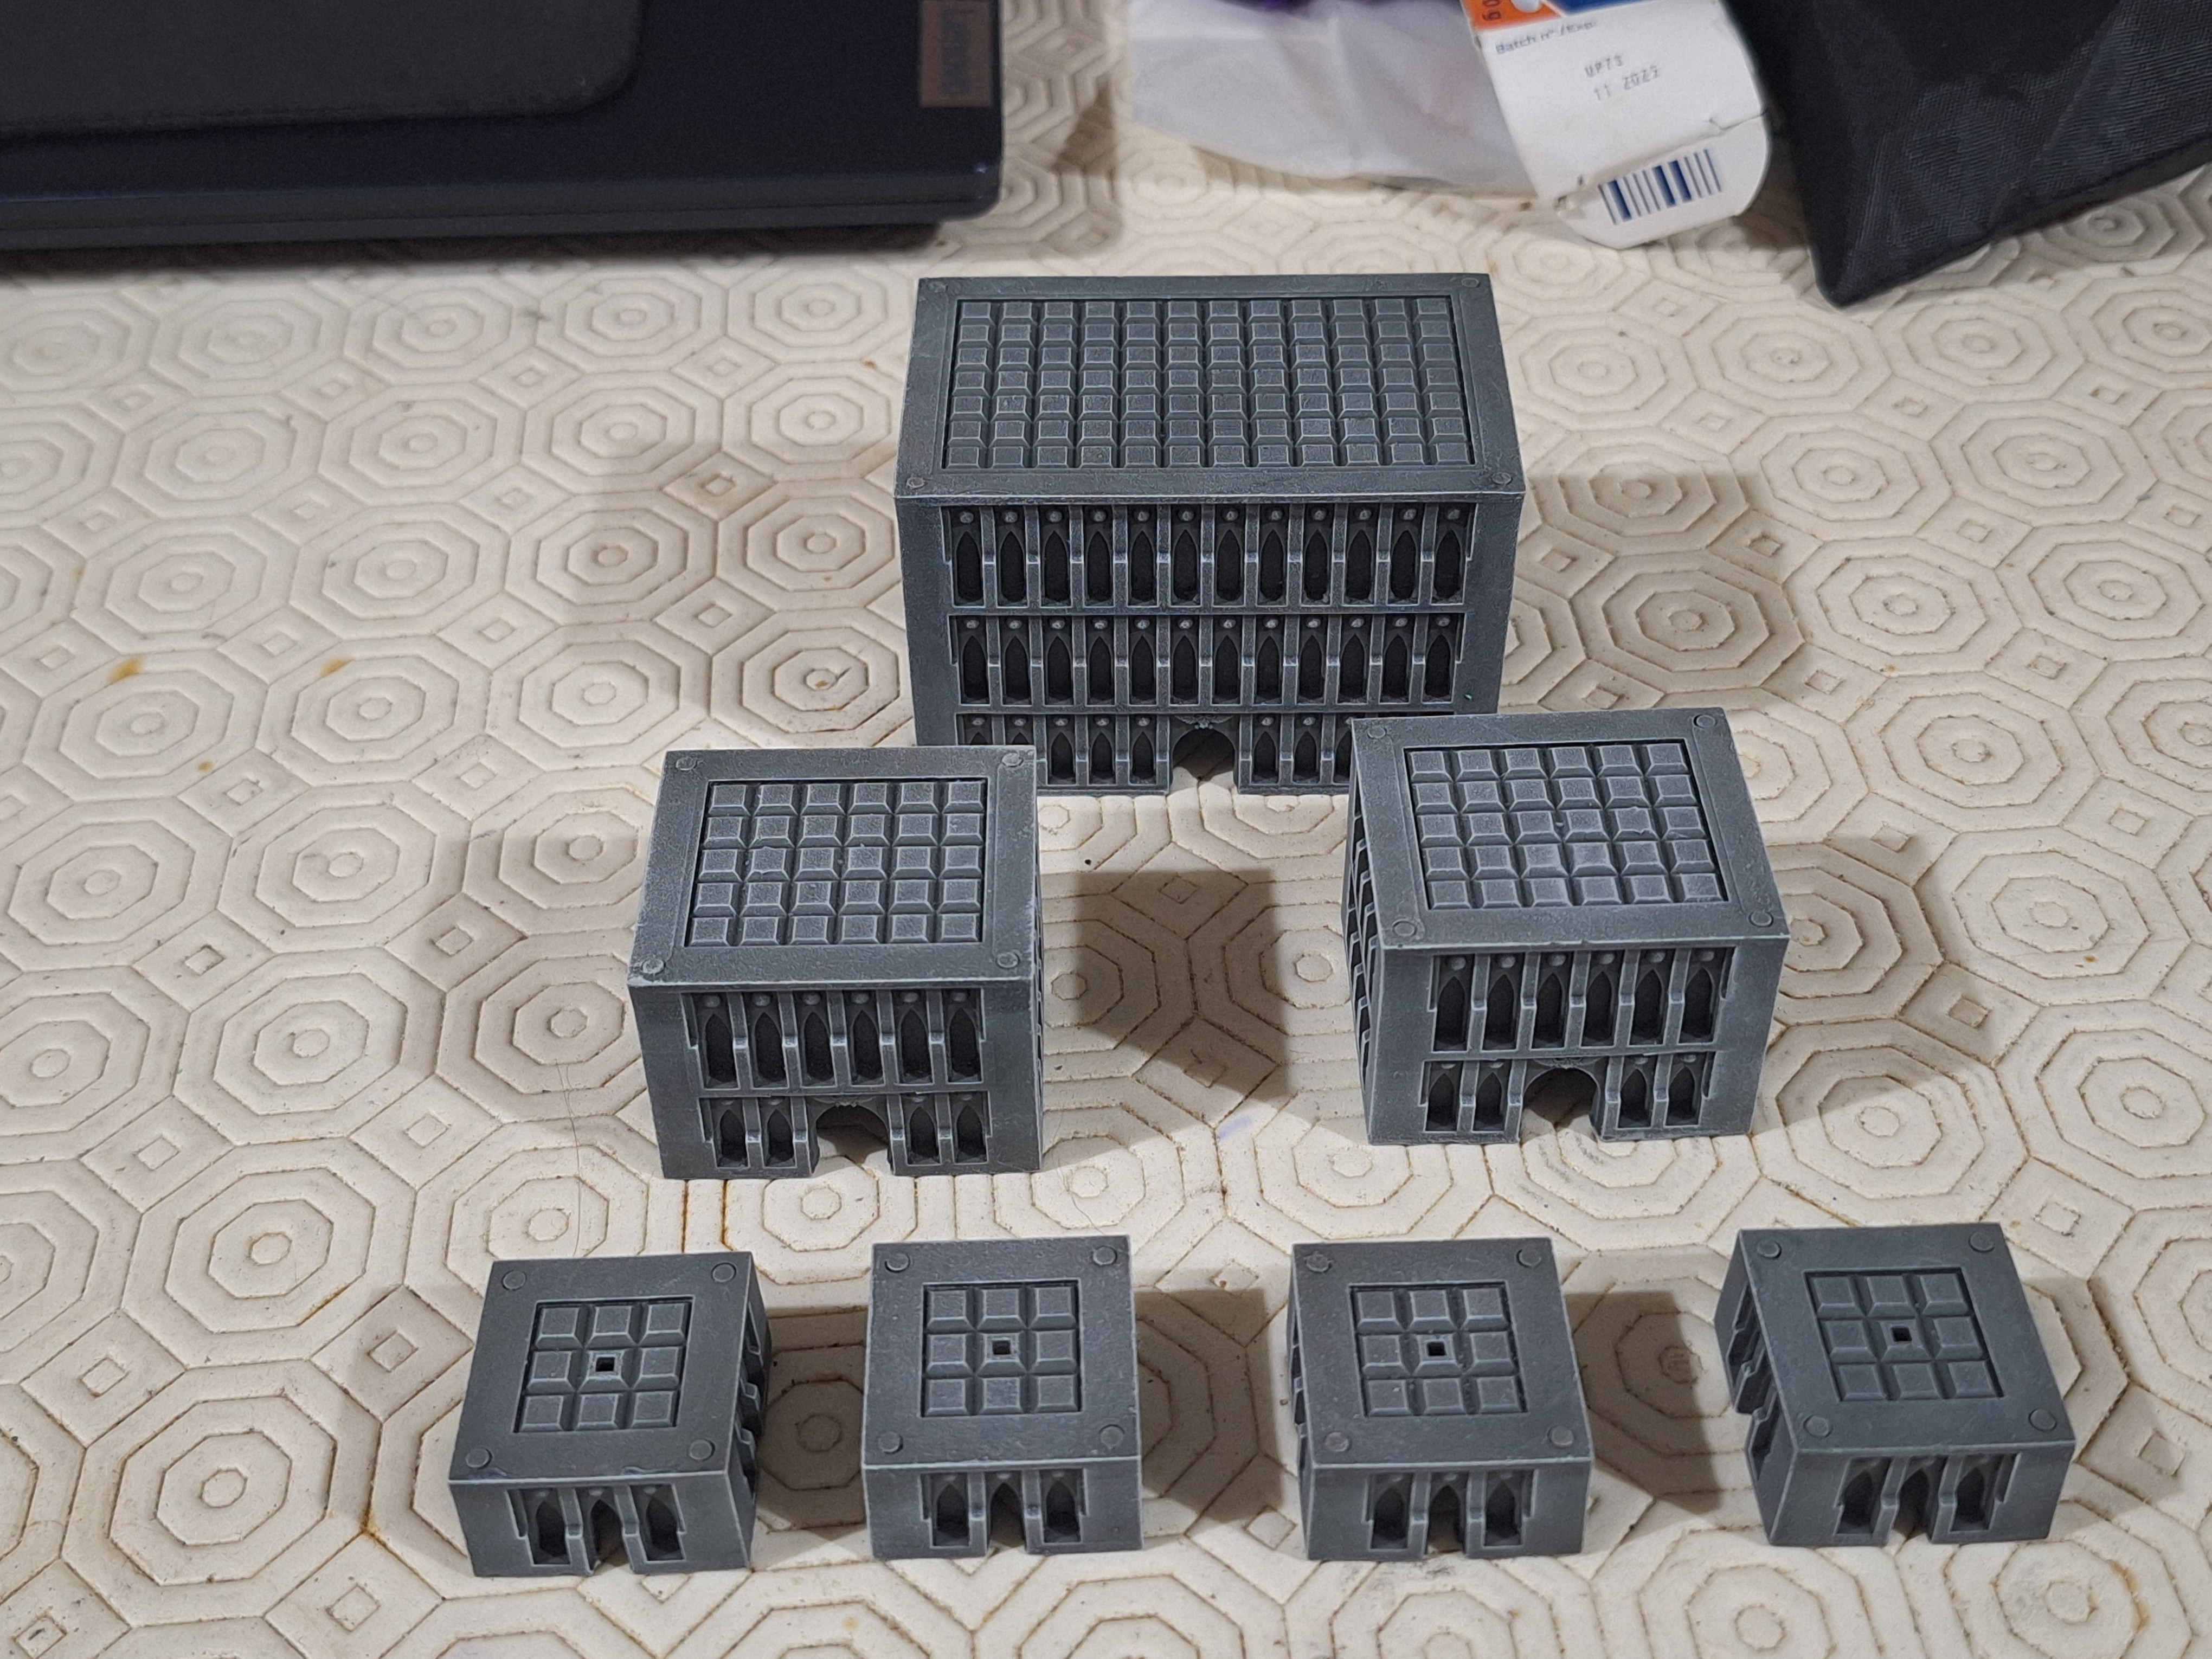
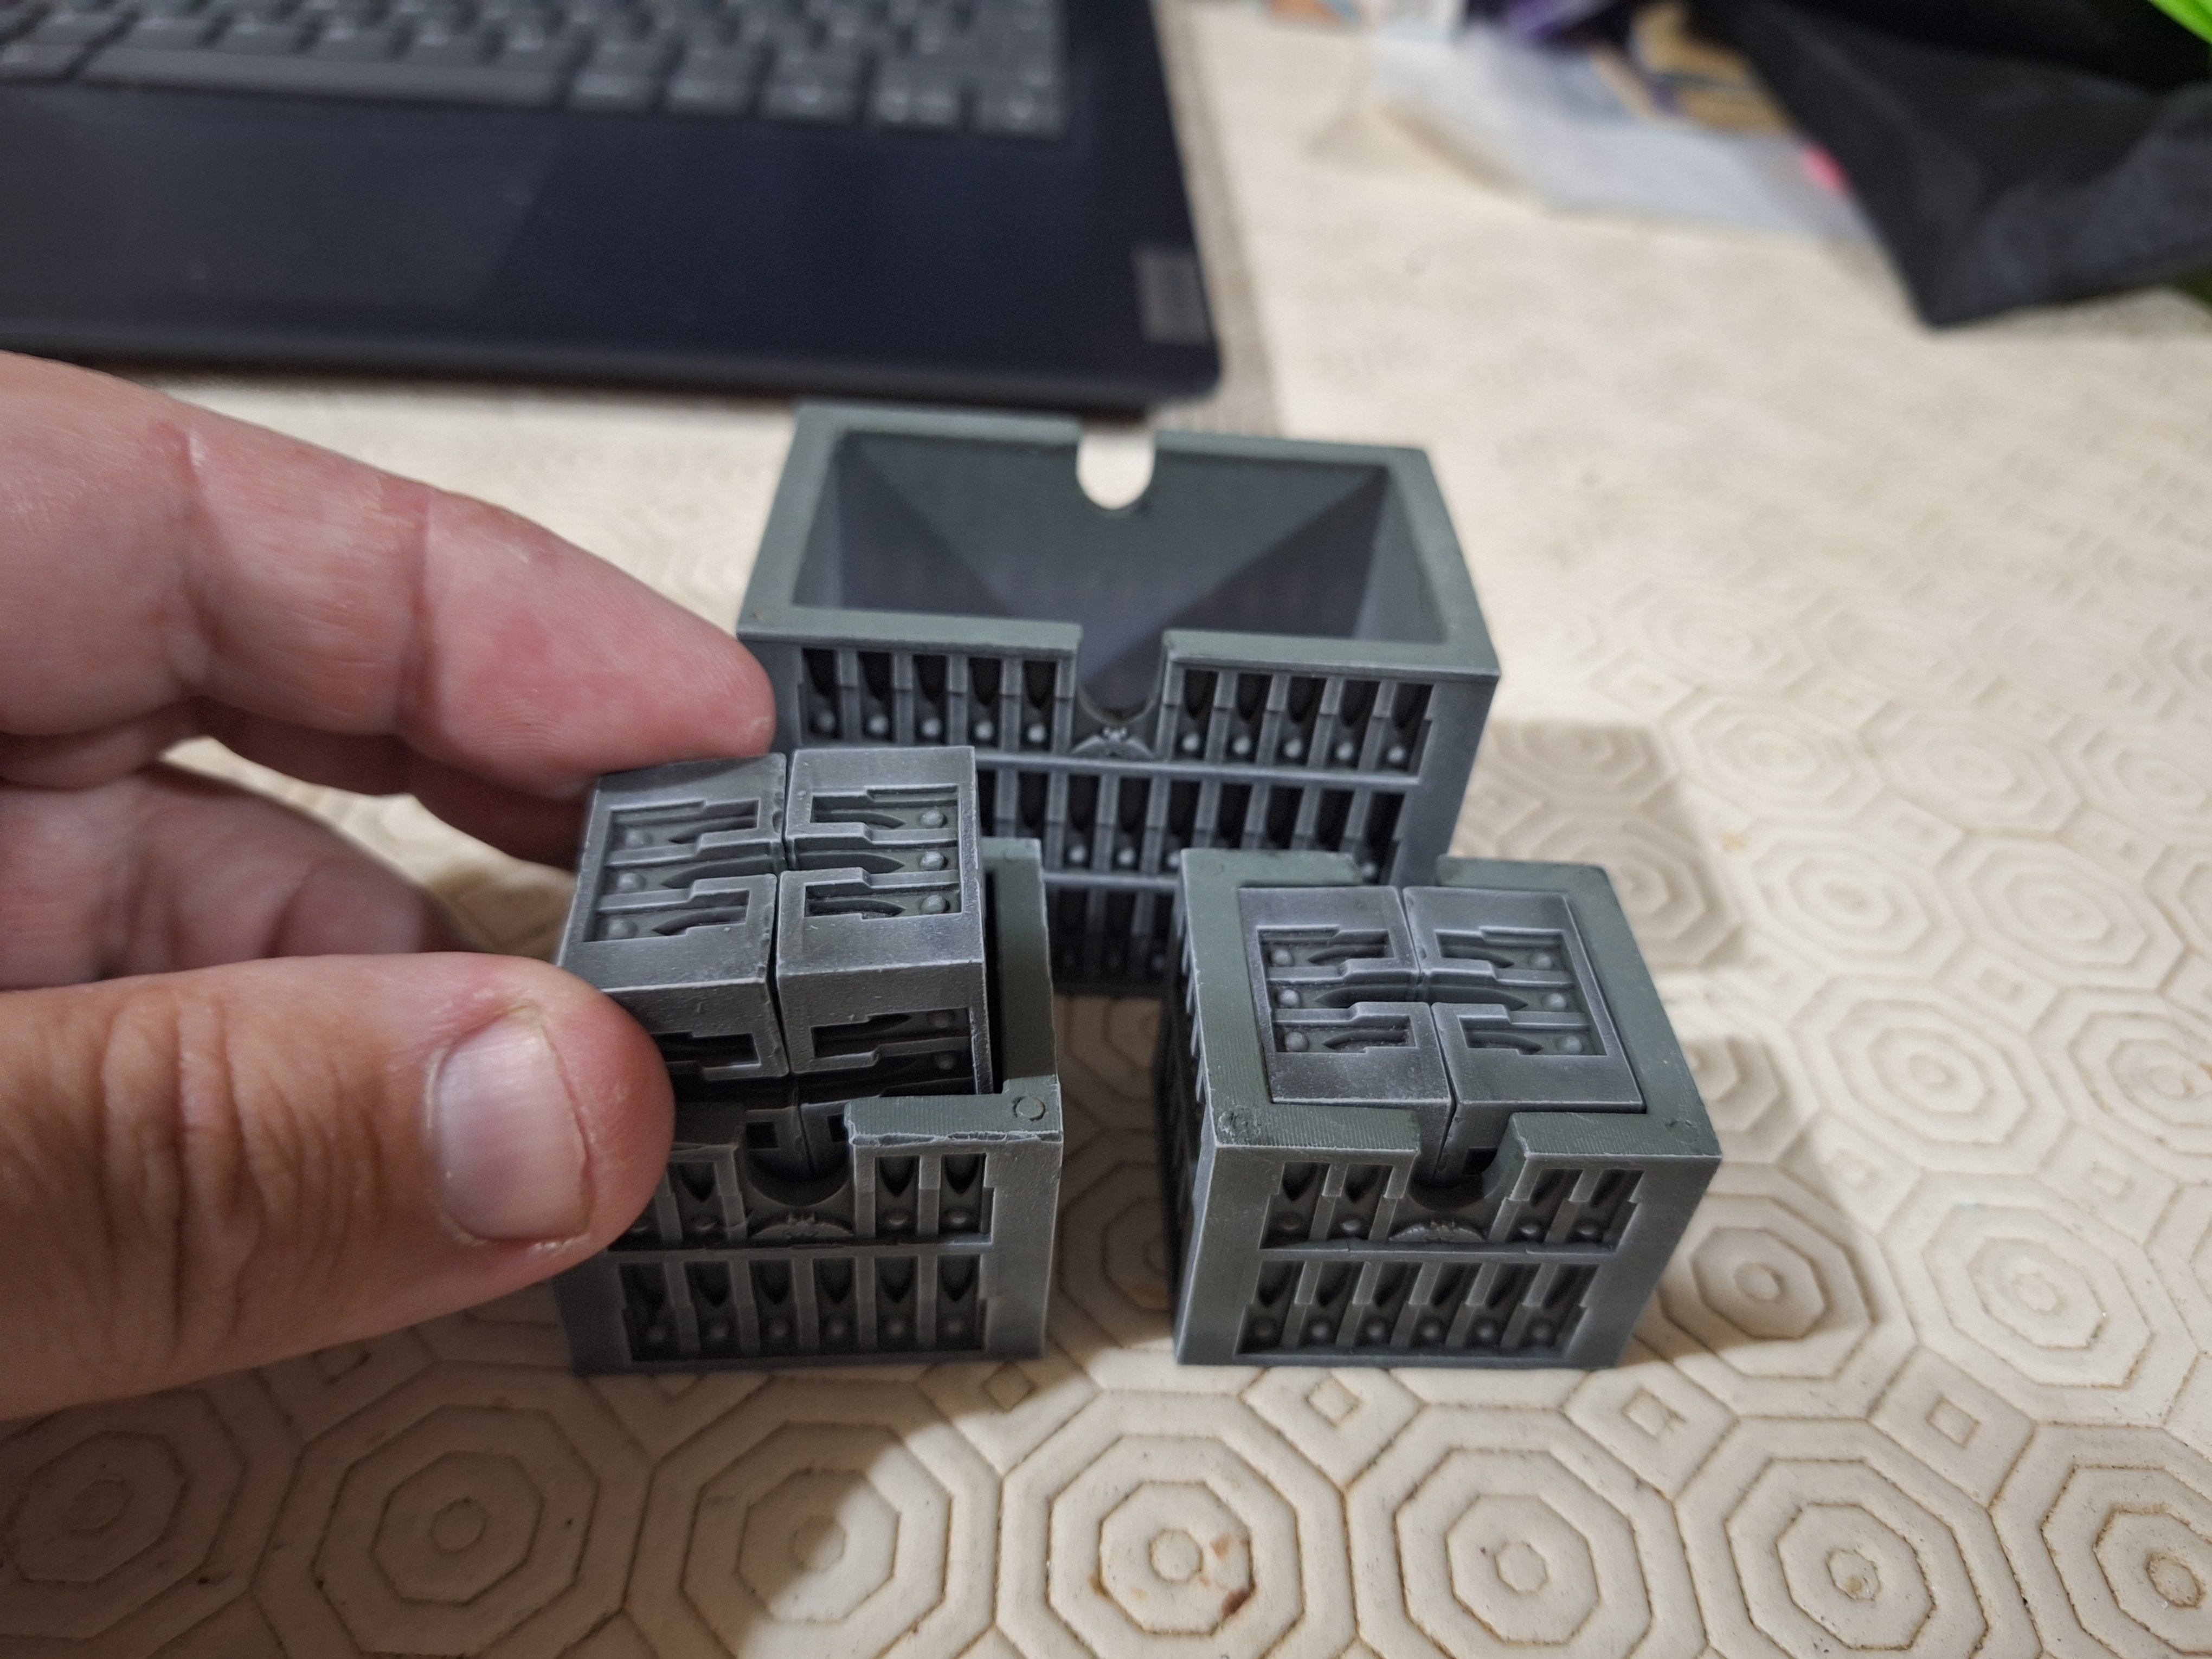
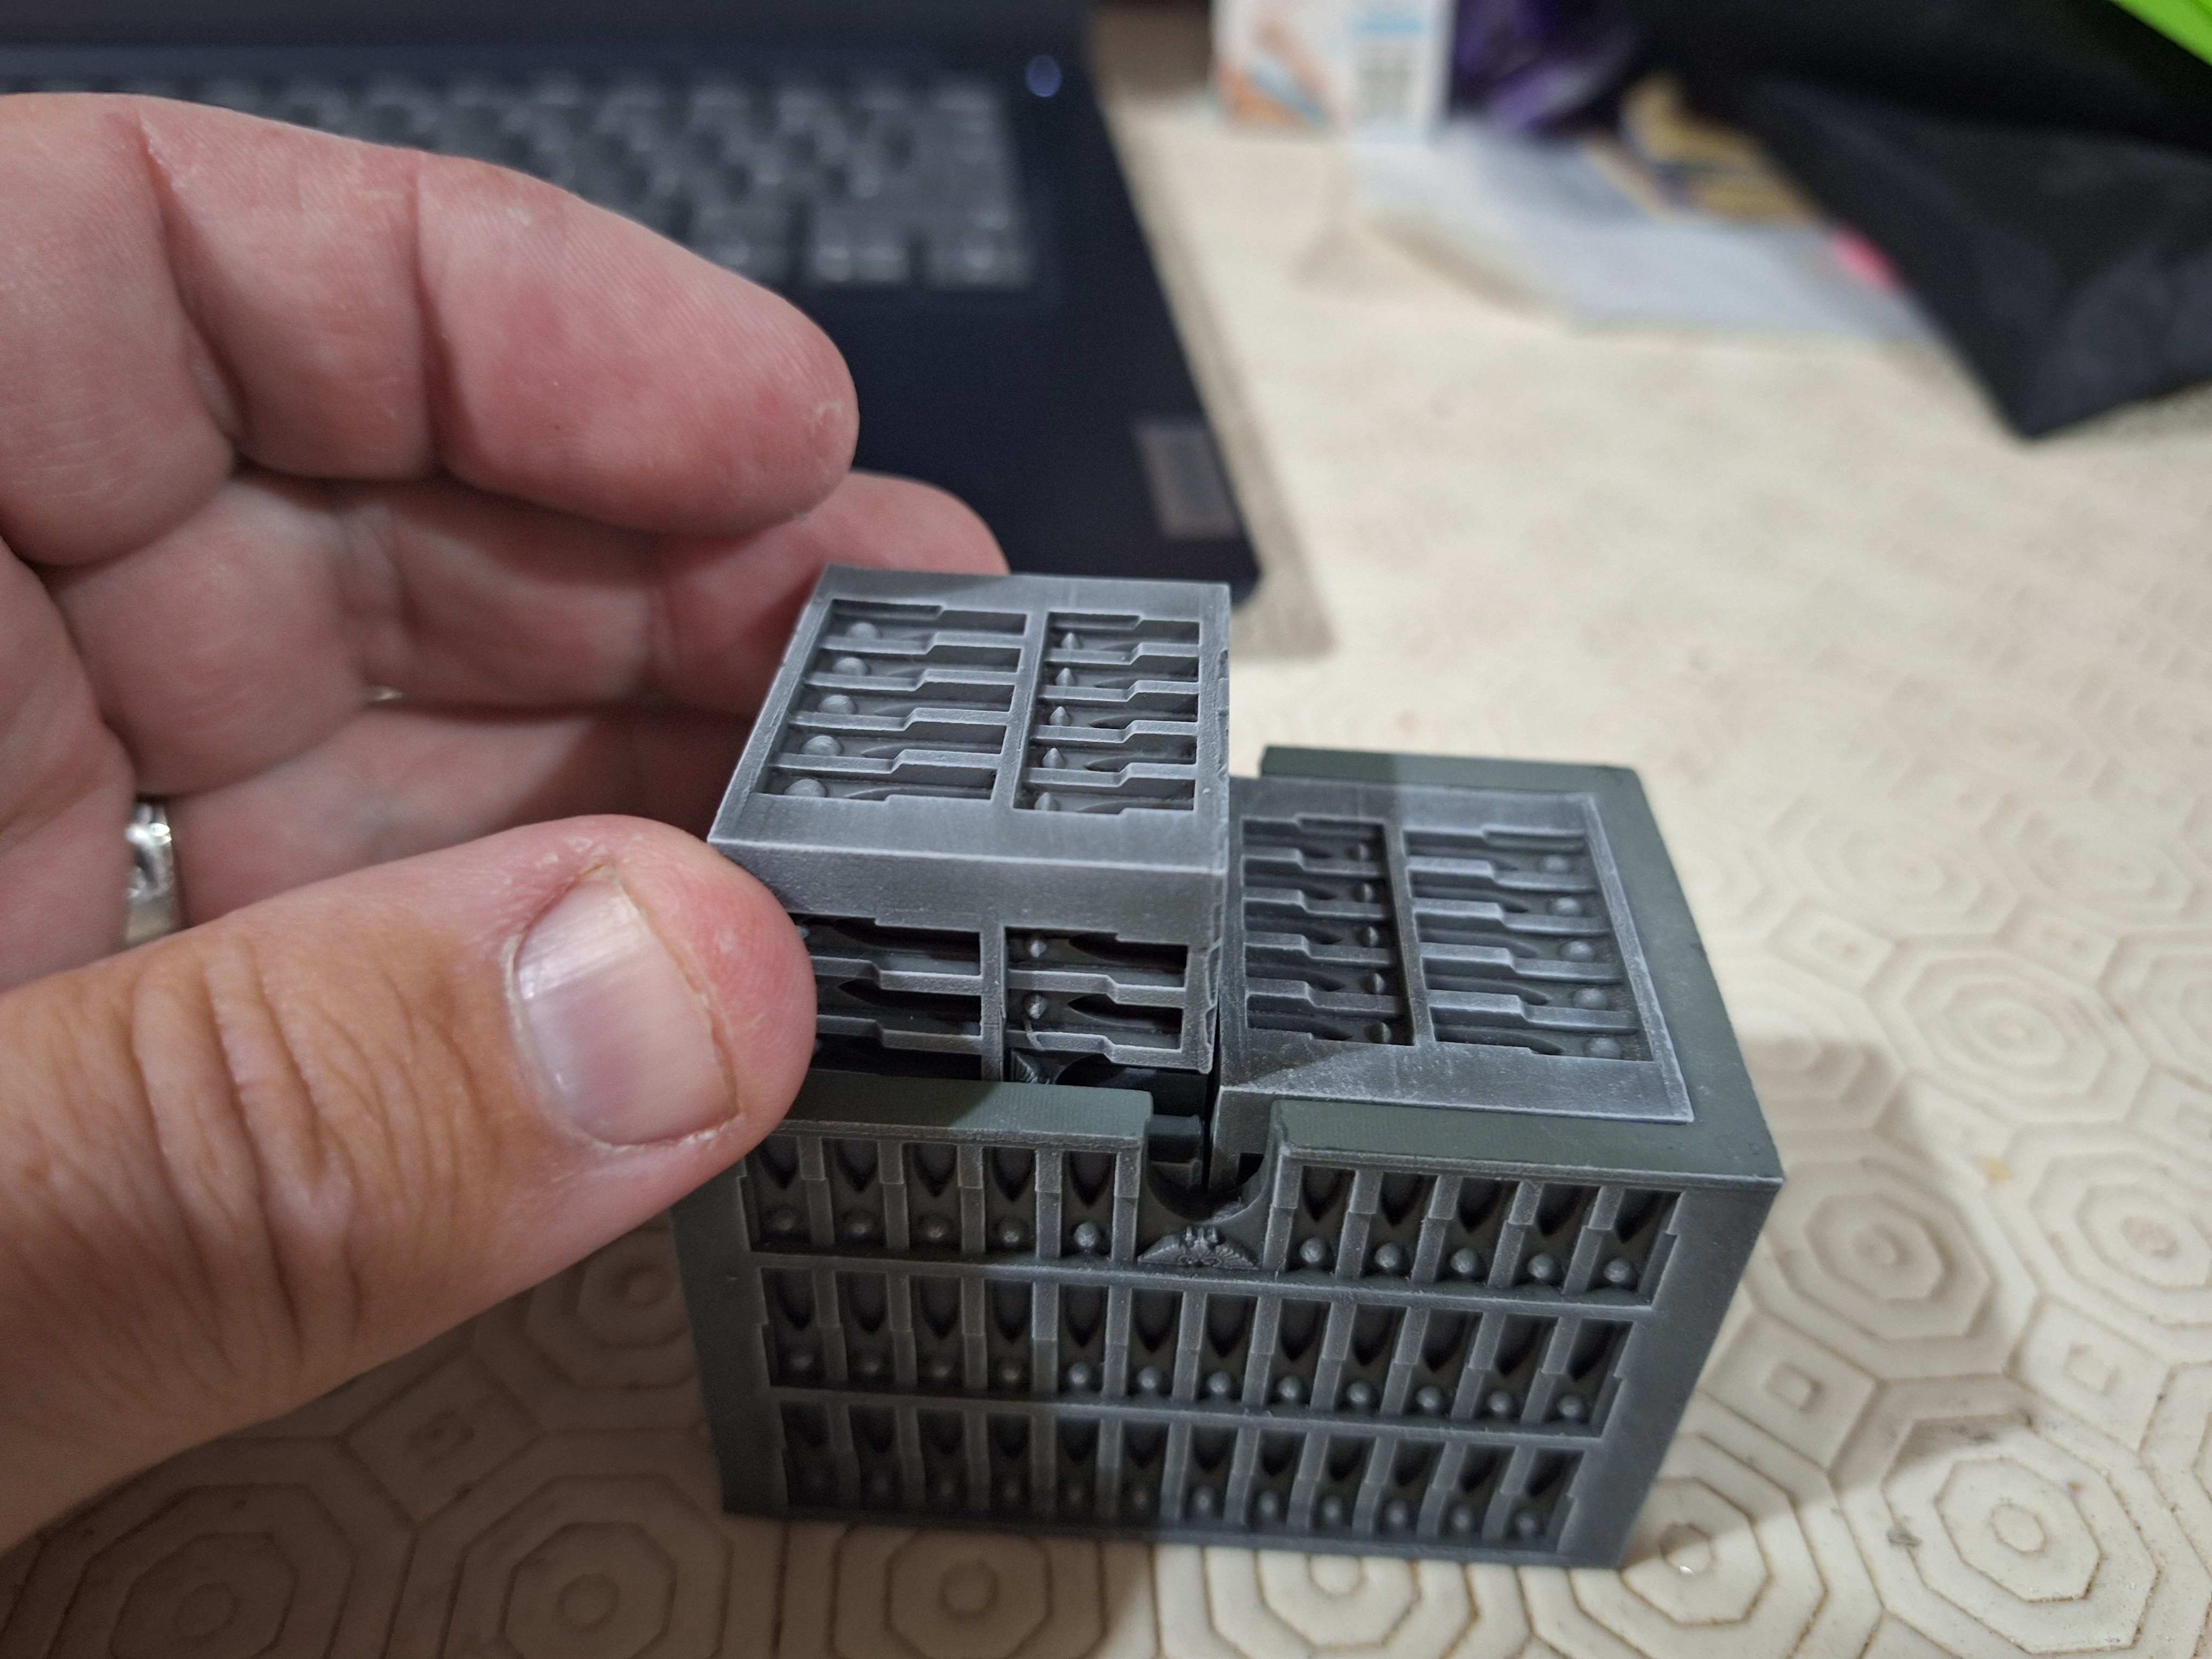
The first run of test prints of the nesting buildings is done and works just as hoped.
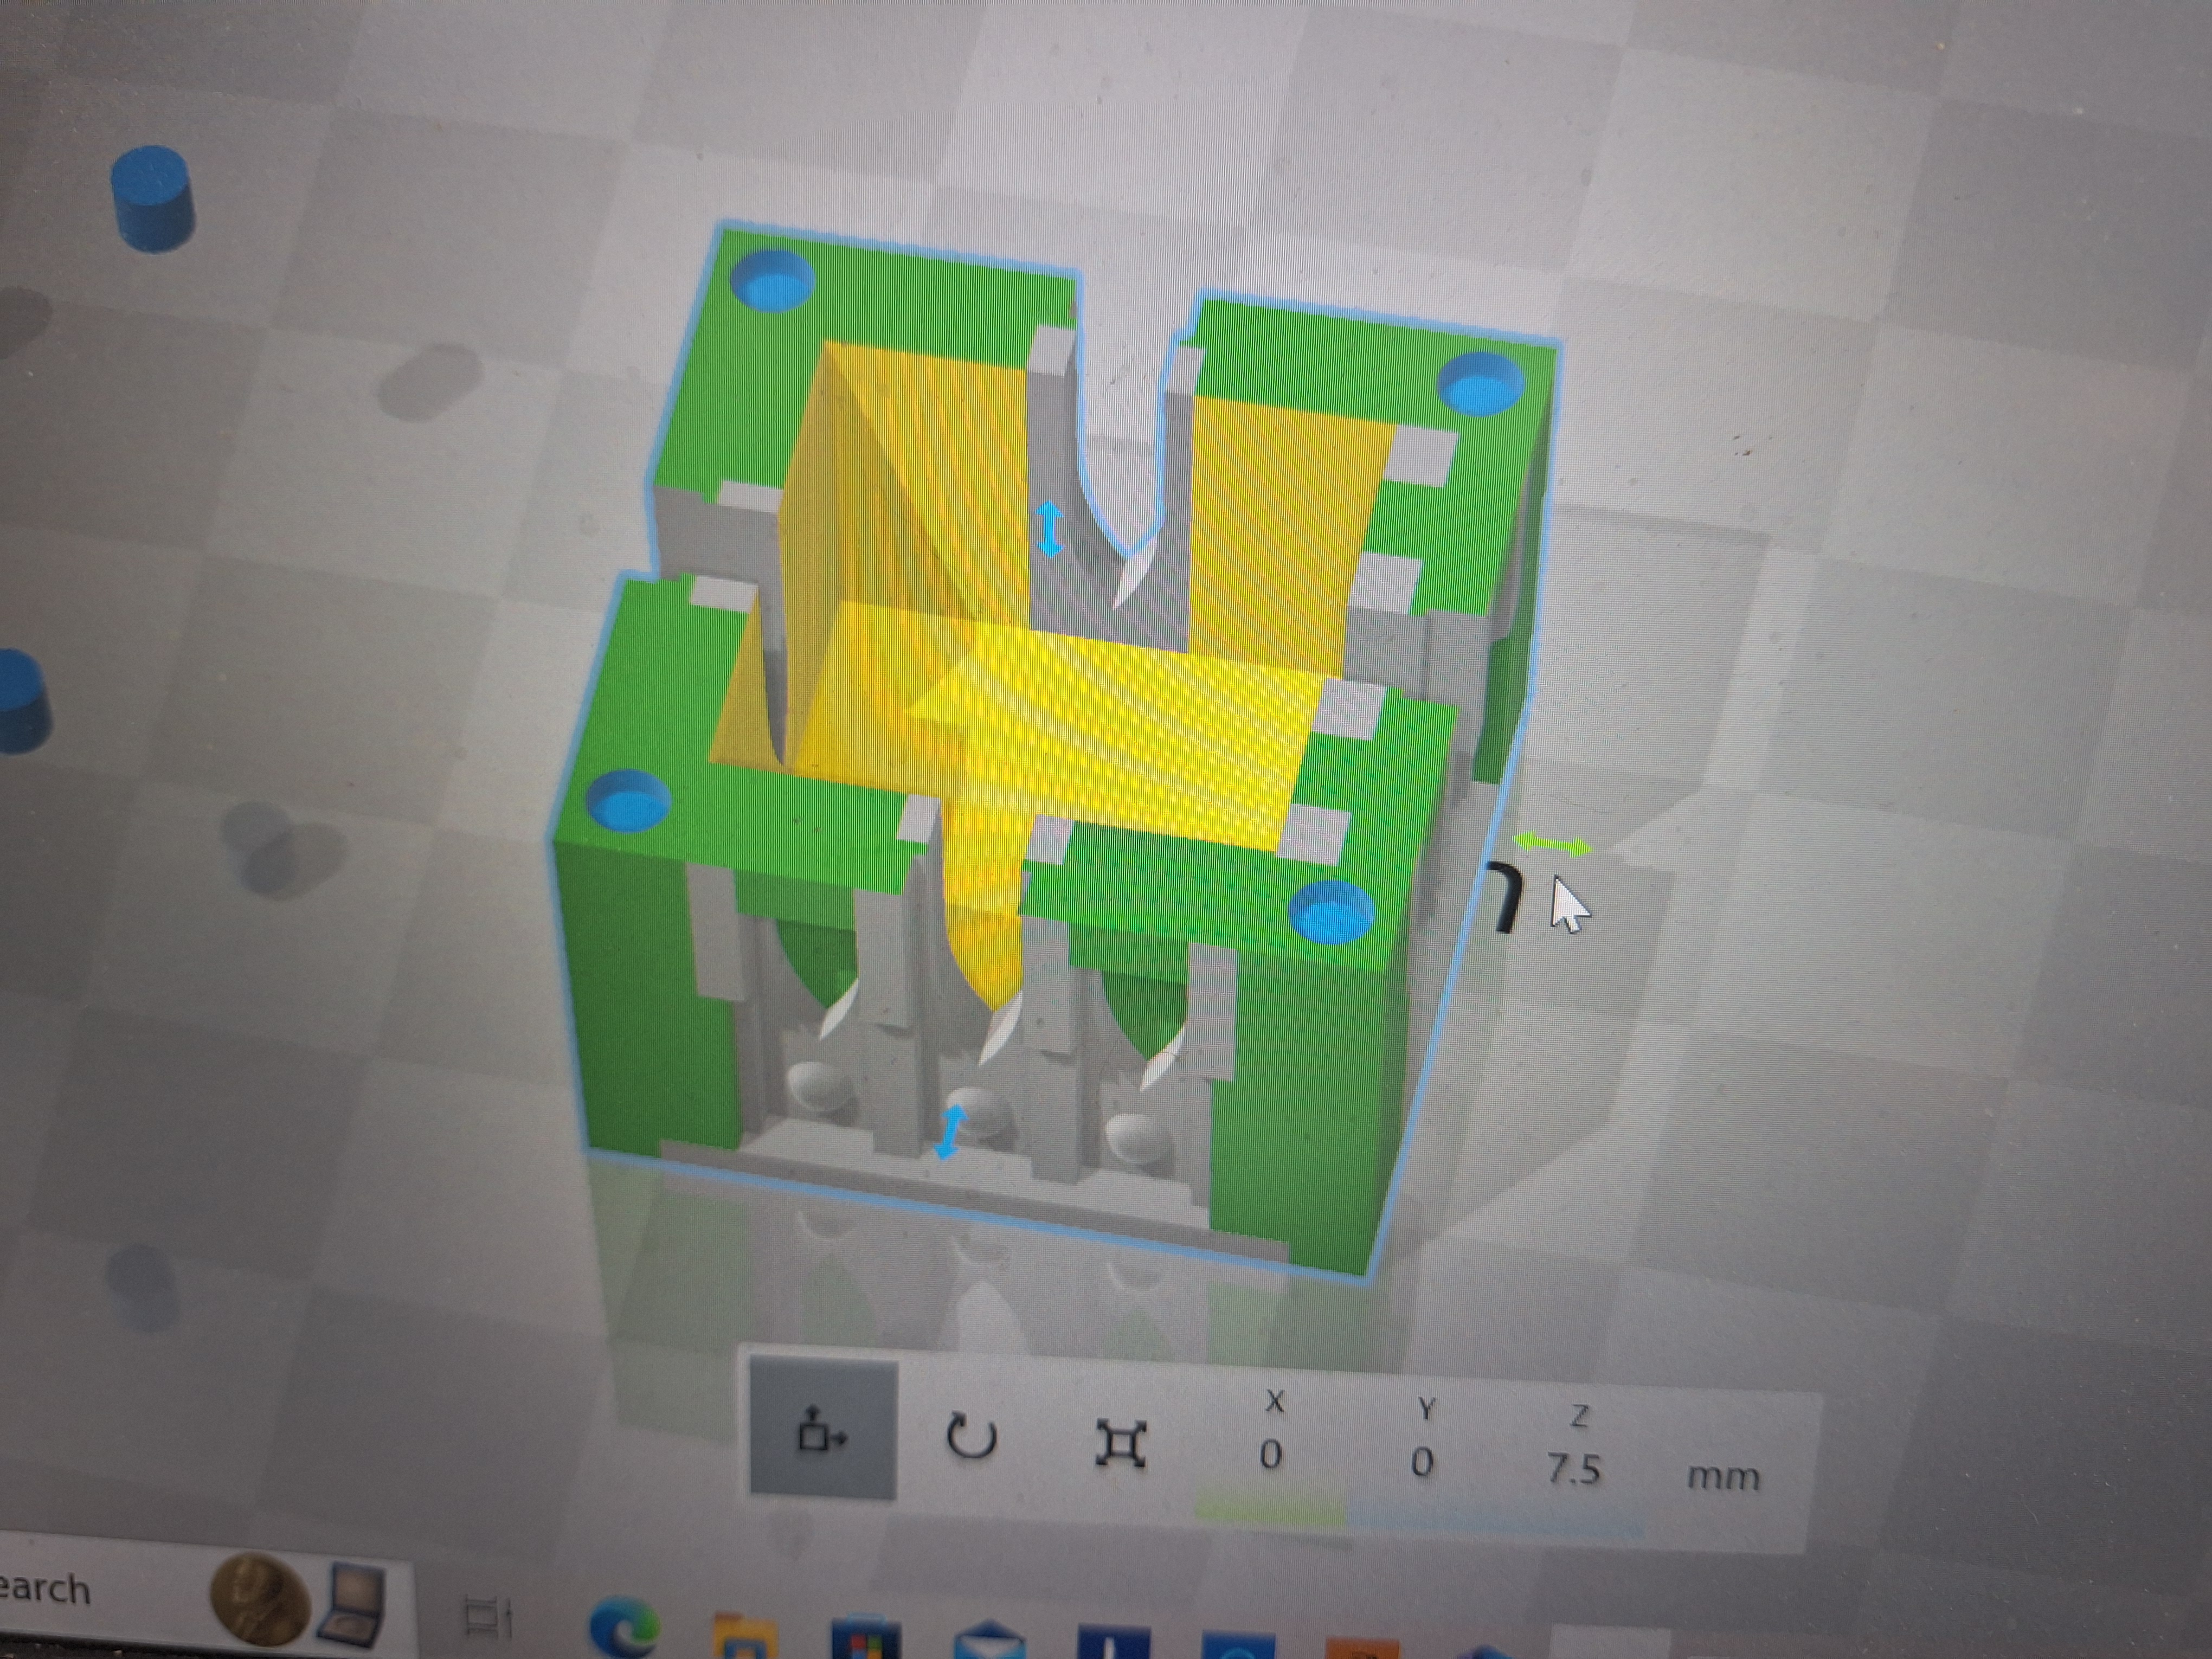
Hollowing out the Russian Doll step 2
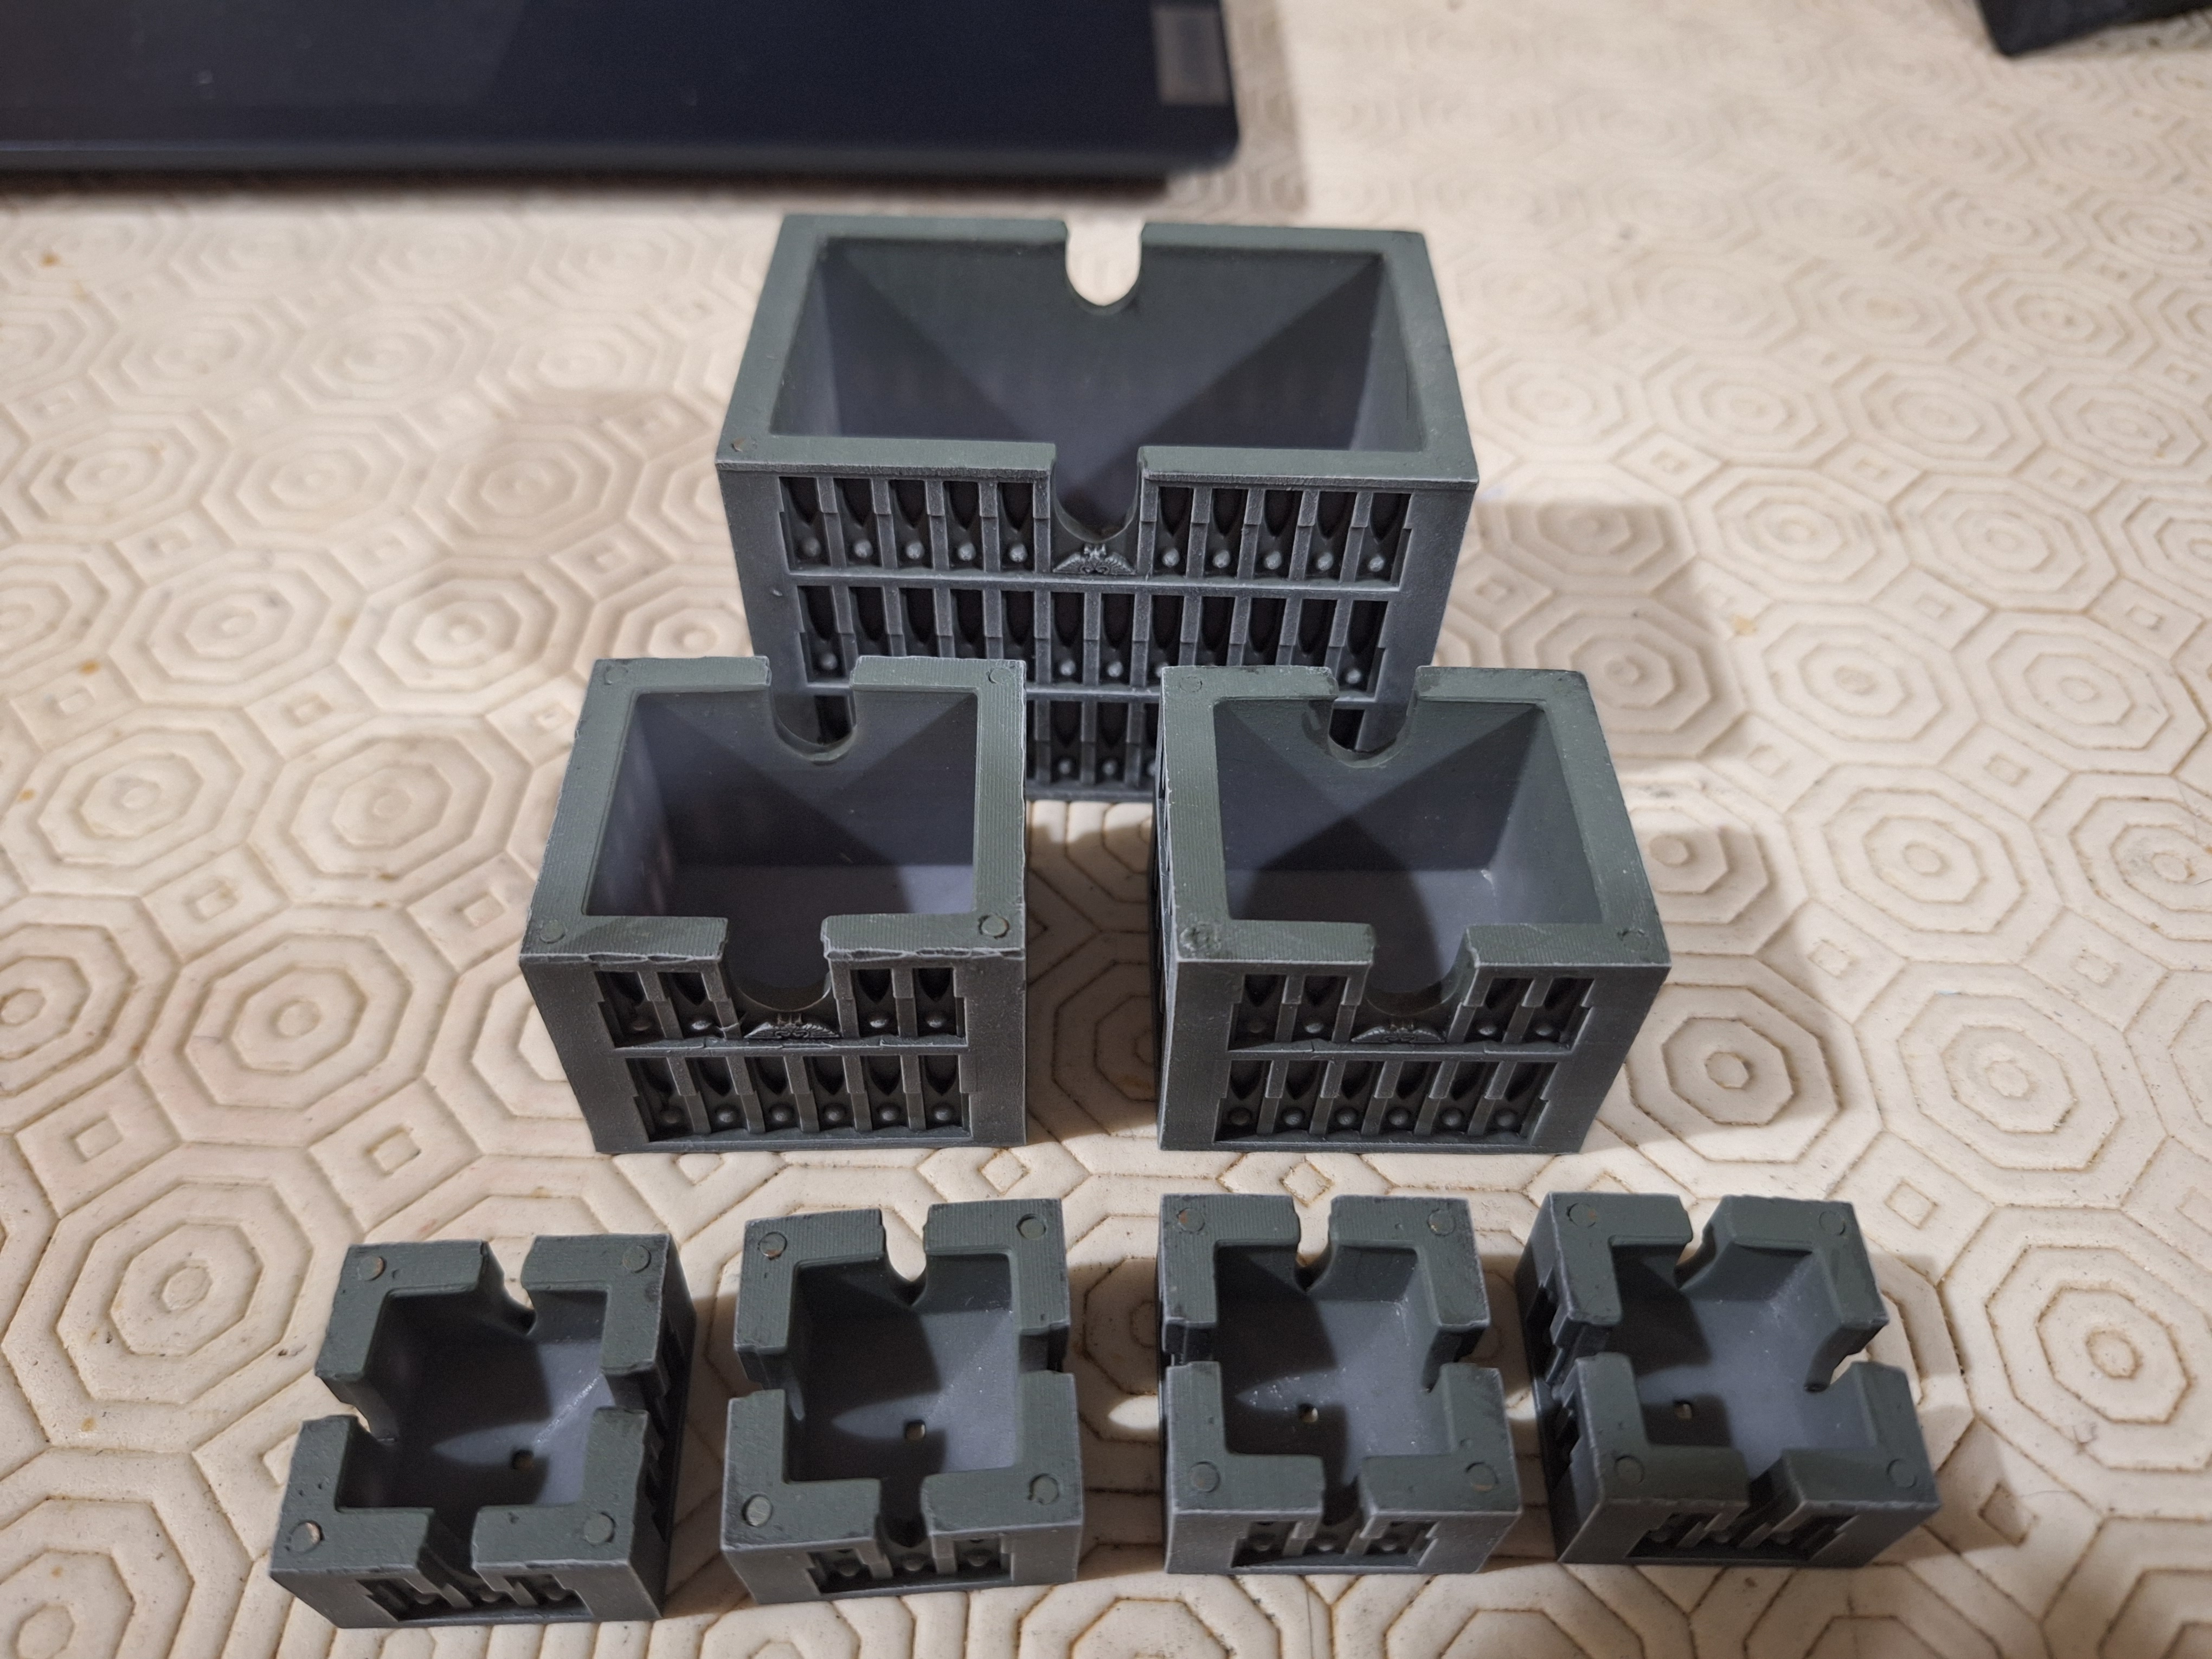
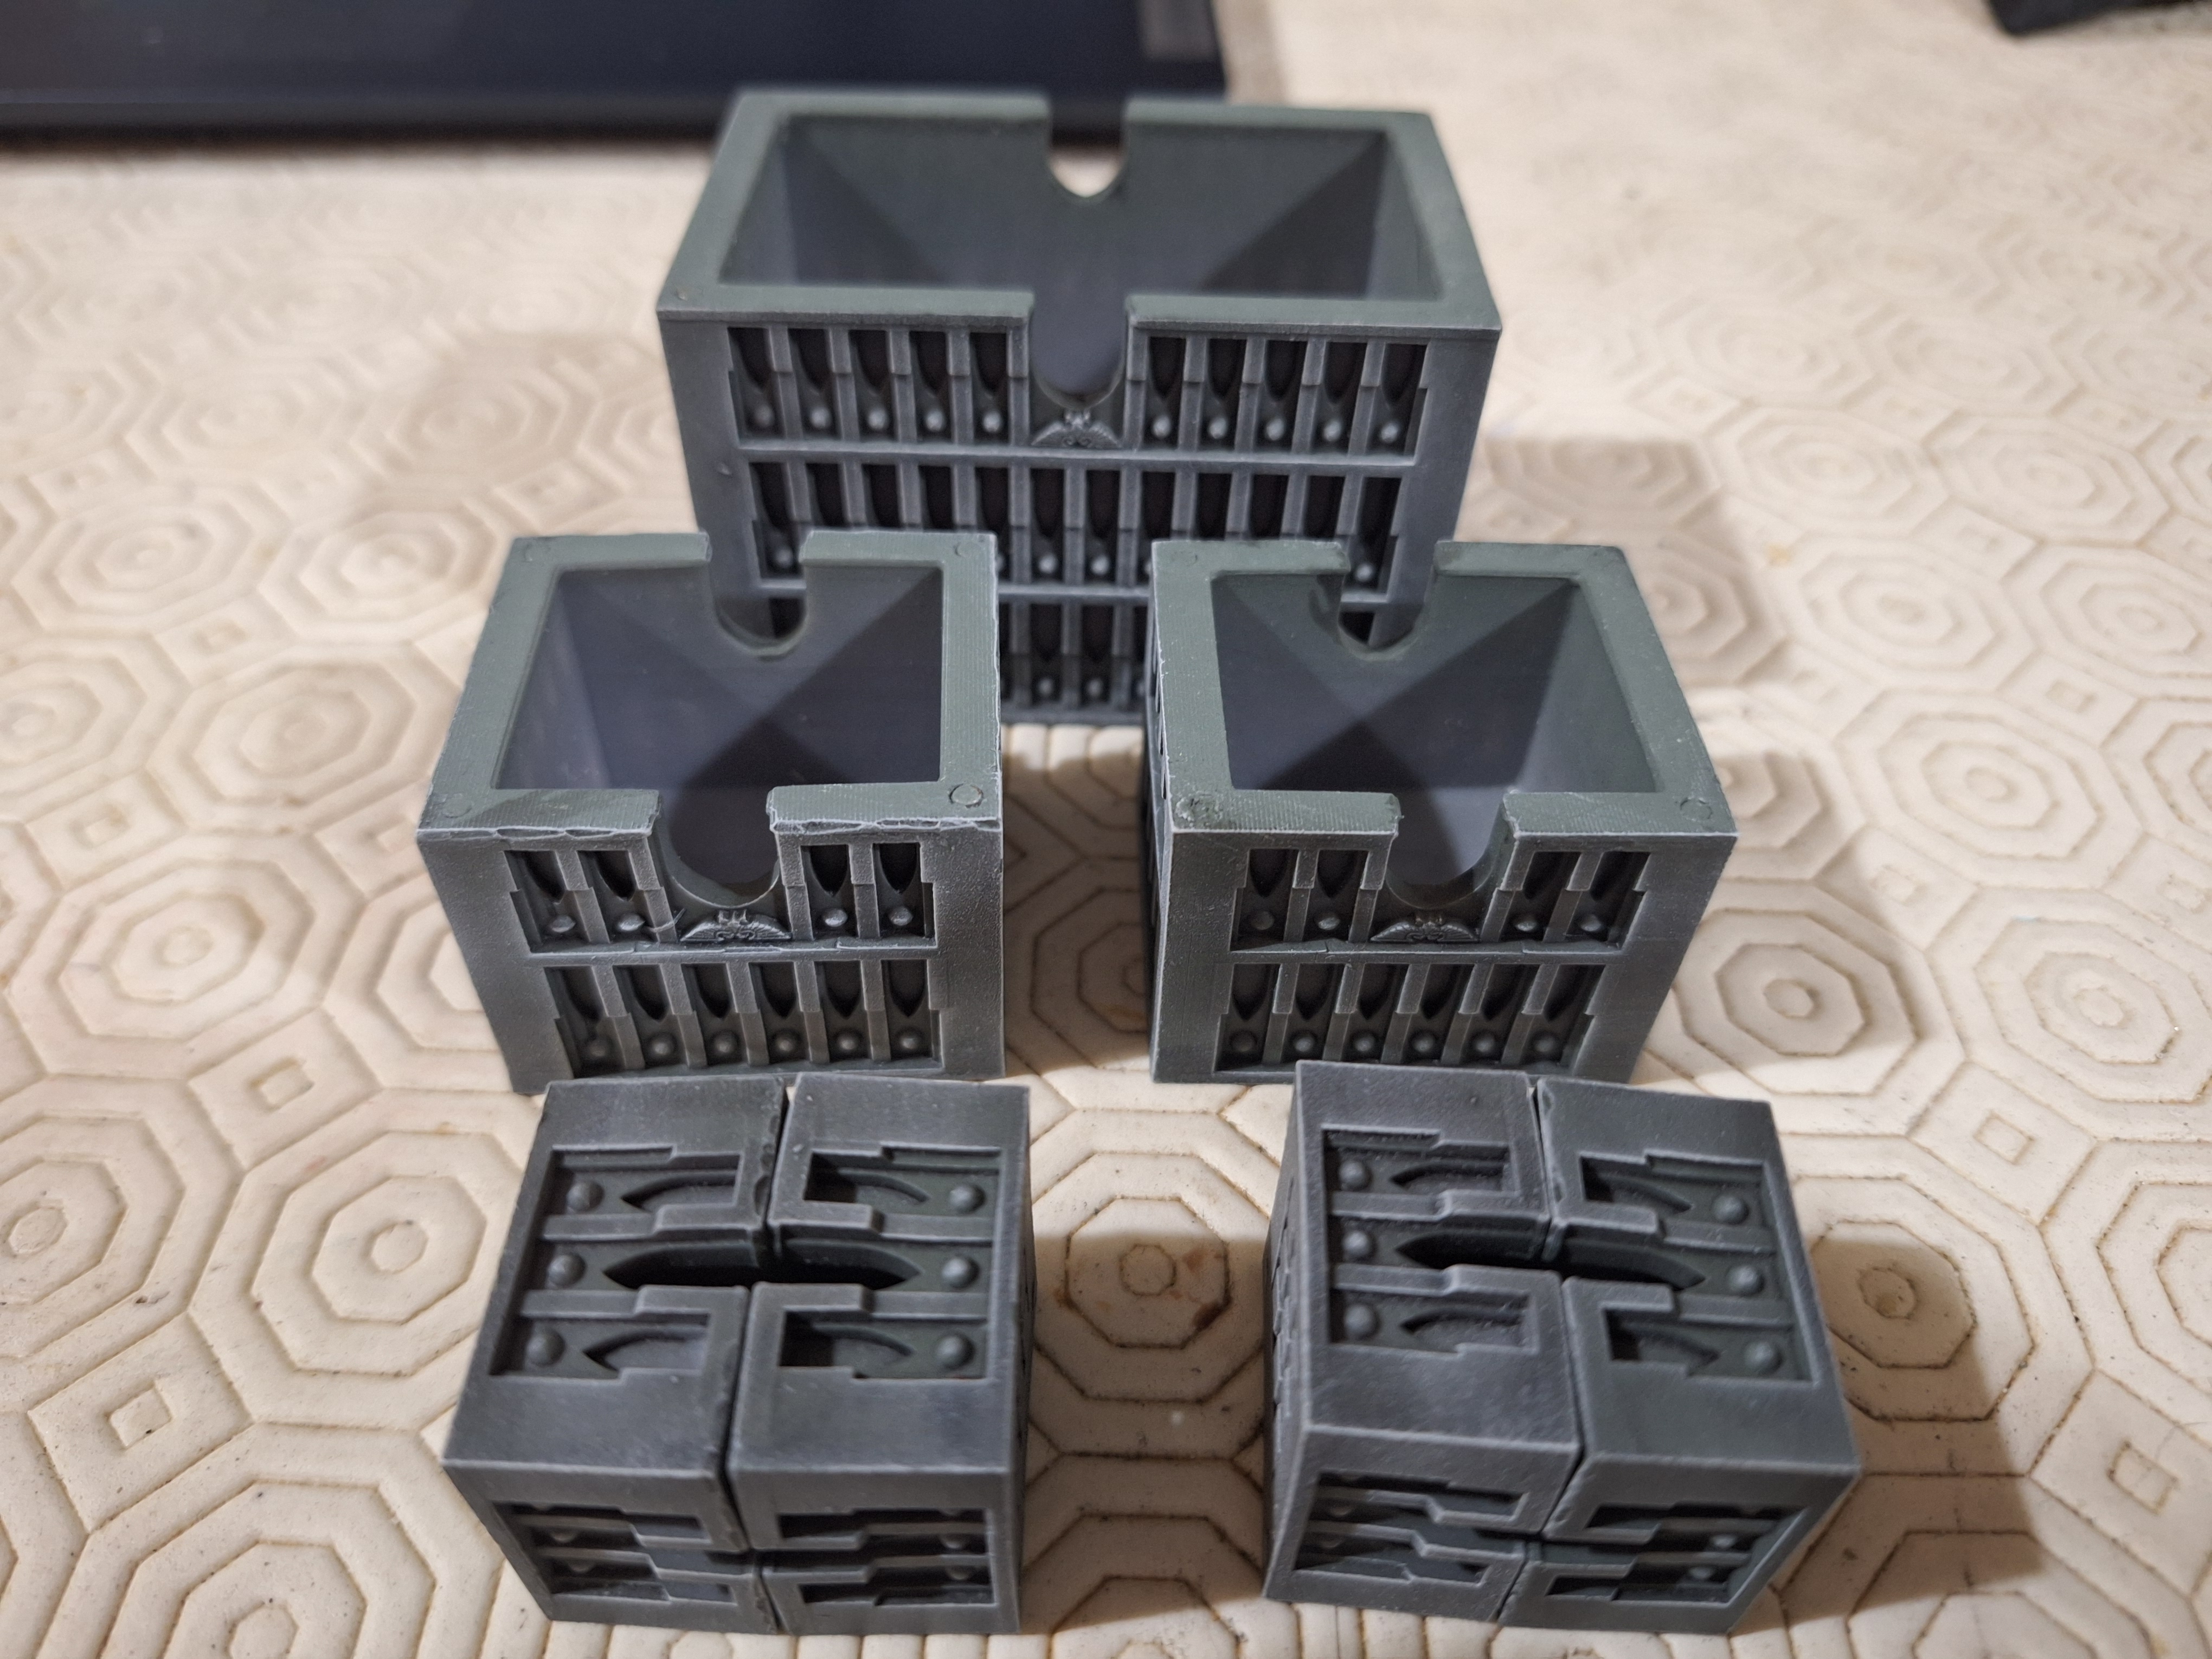
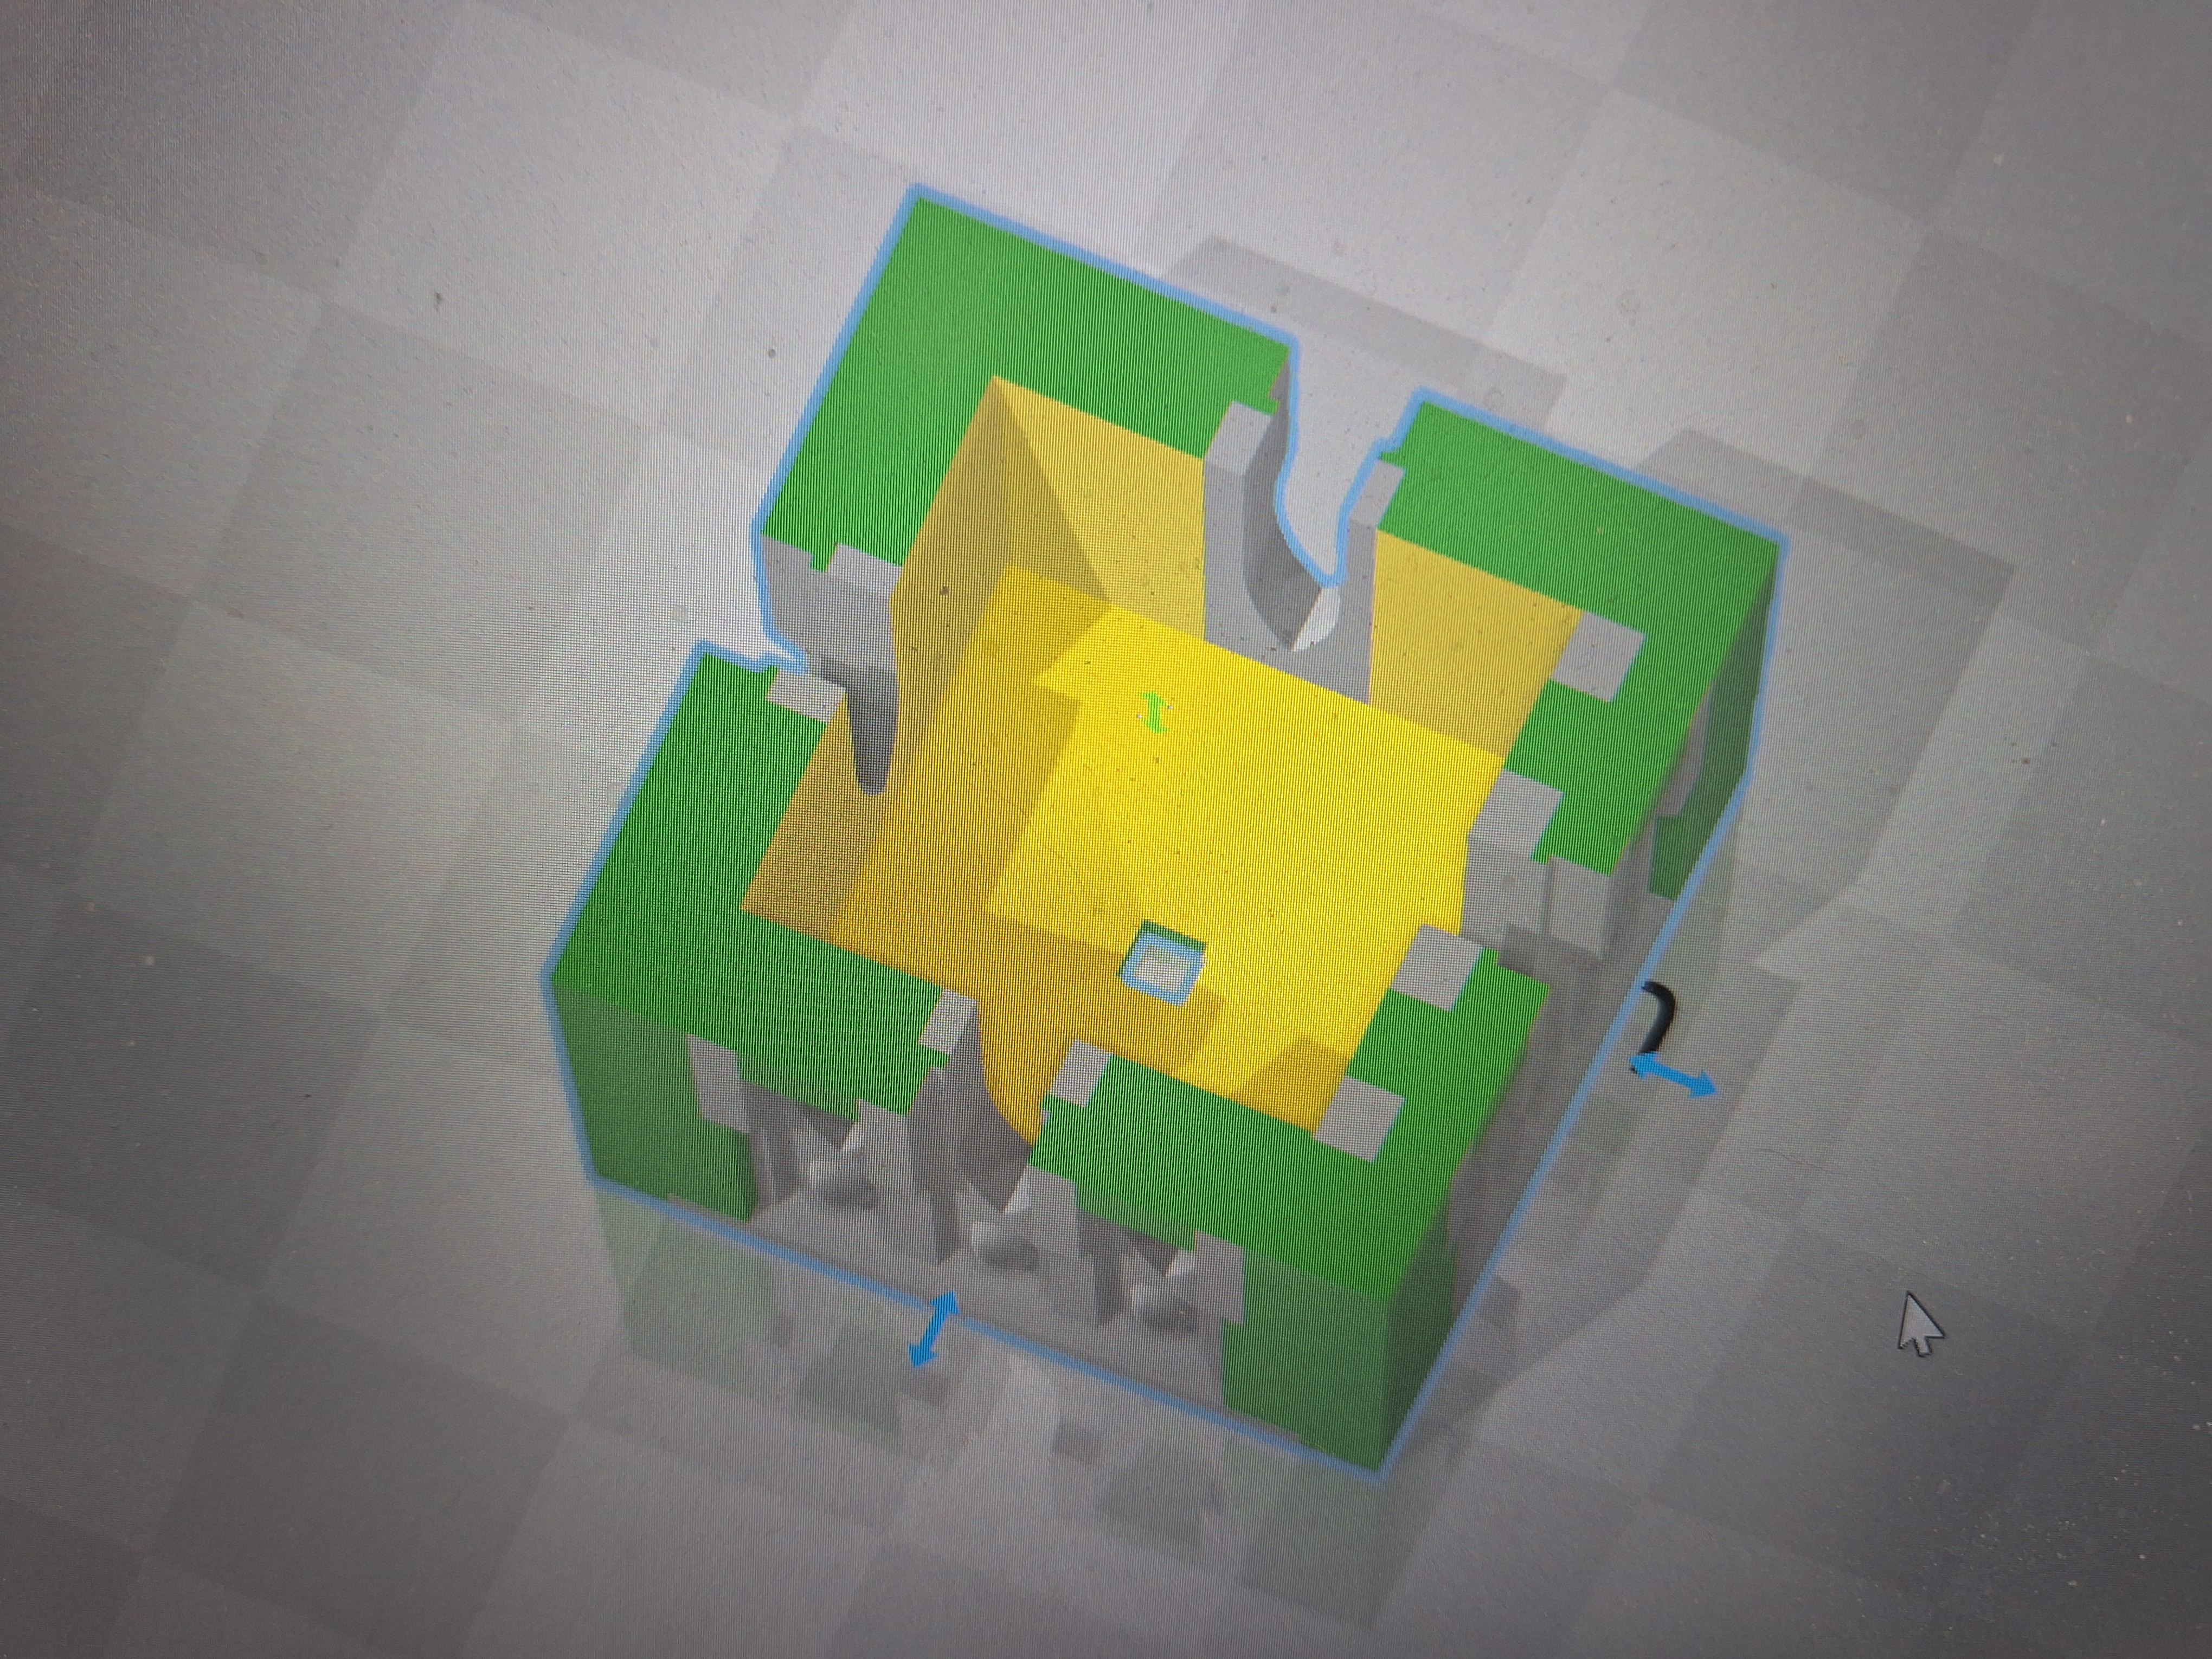 Using a small 2mm by 2mm block I create a small hole in the center of the roof of the building
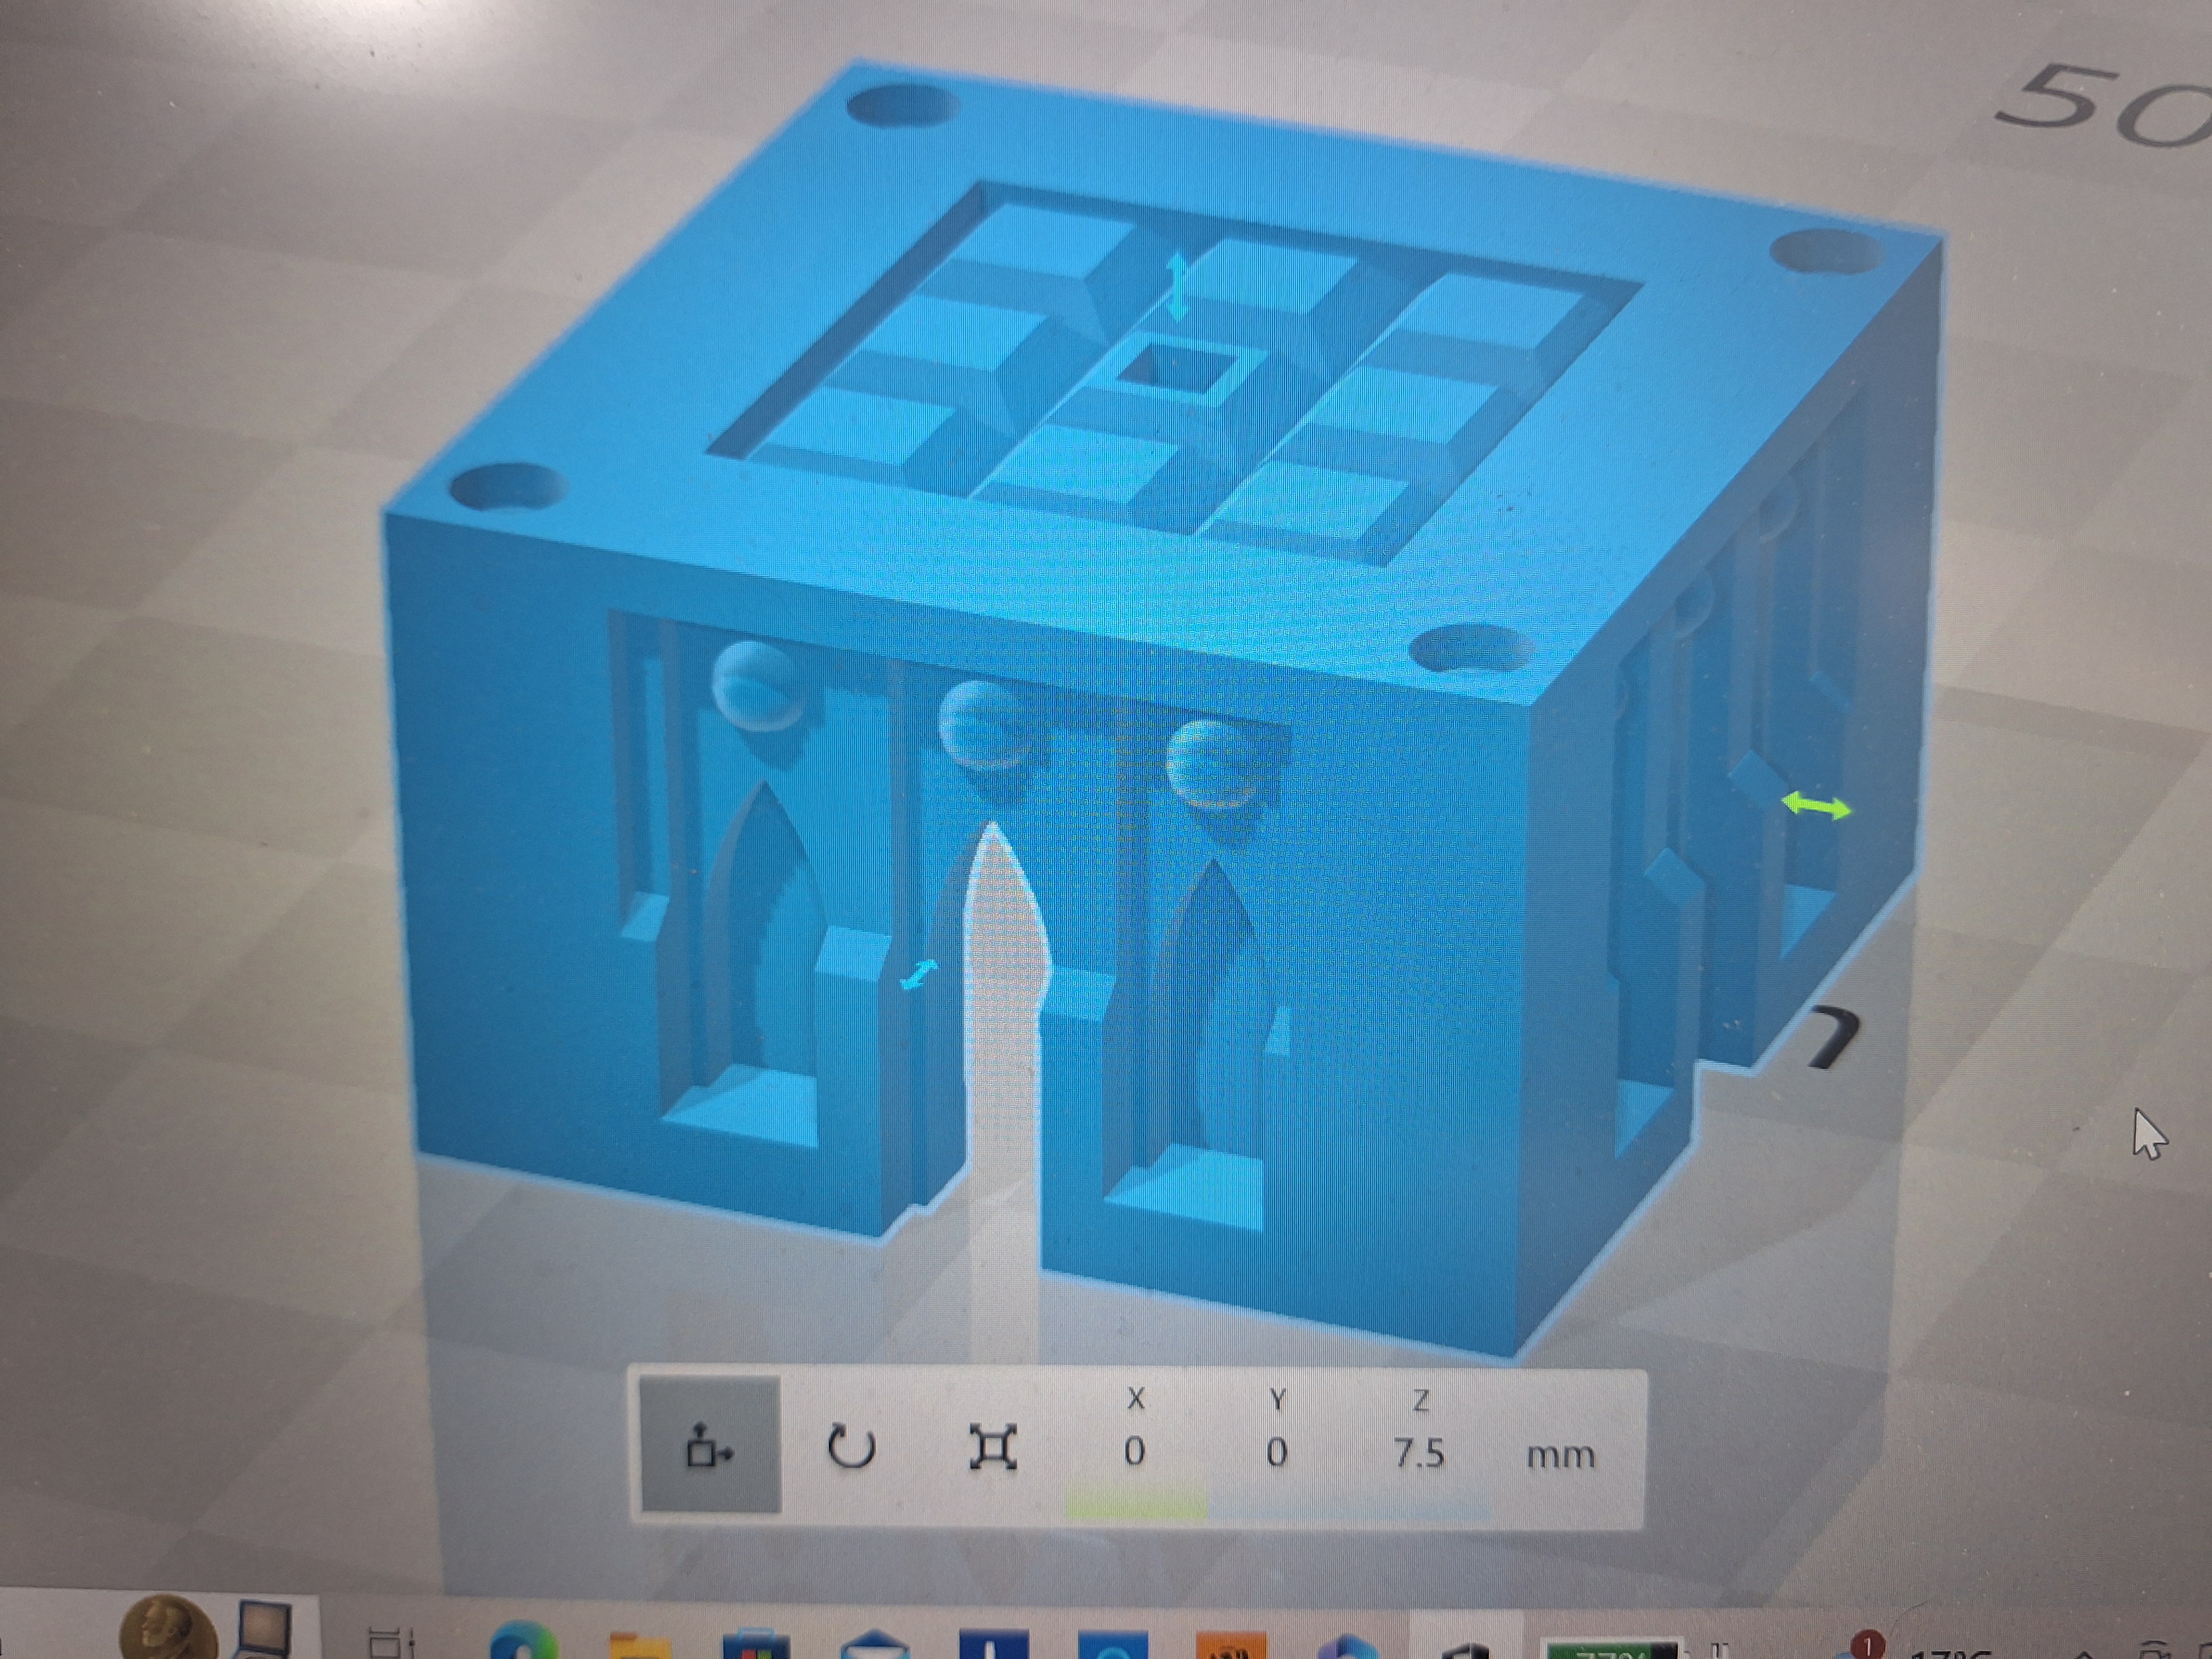 After adding some 2mm by 1mm magnet holes the first building is finished (in a digital sense). The building can be placed directly on my printer build plat. The combination of open windows at the base, drainage hole in the roof and the taper to the roof means resin will drain out as it prints. Also the taper to the roof means it doesn't need supports.
Hollowing out the Russian Doll step 1
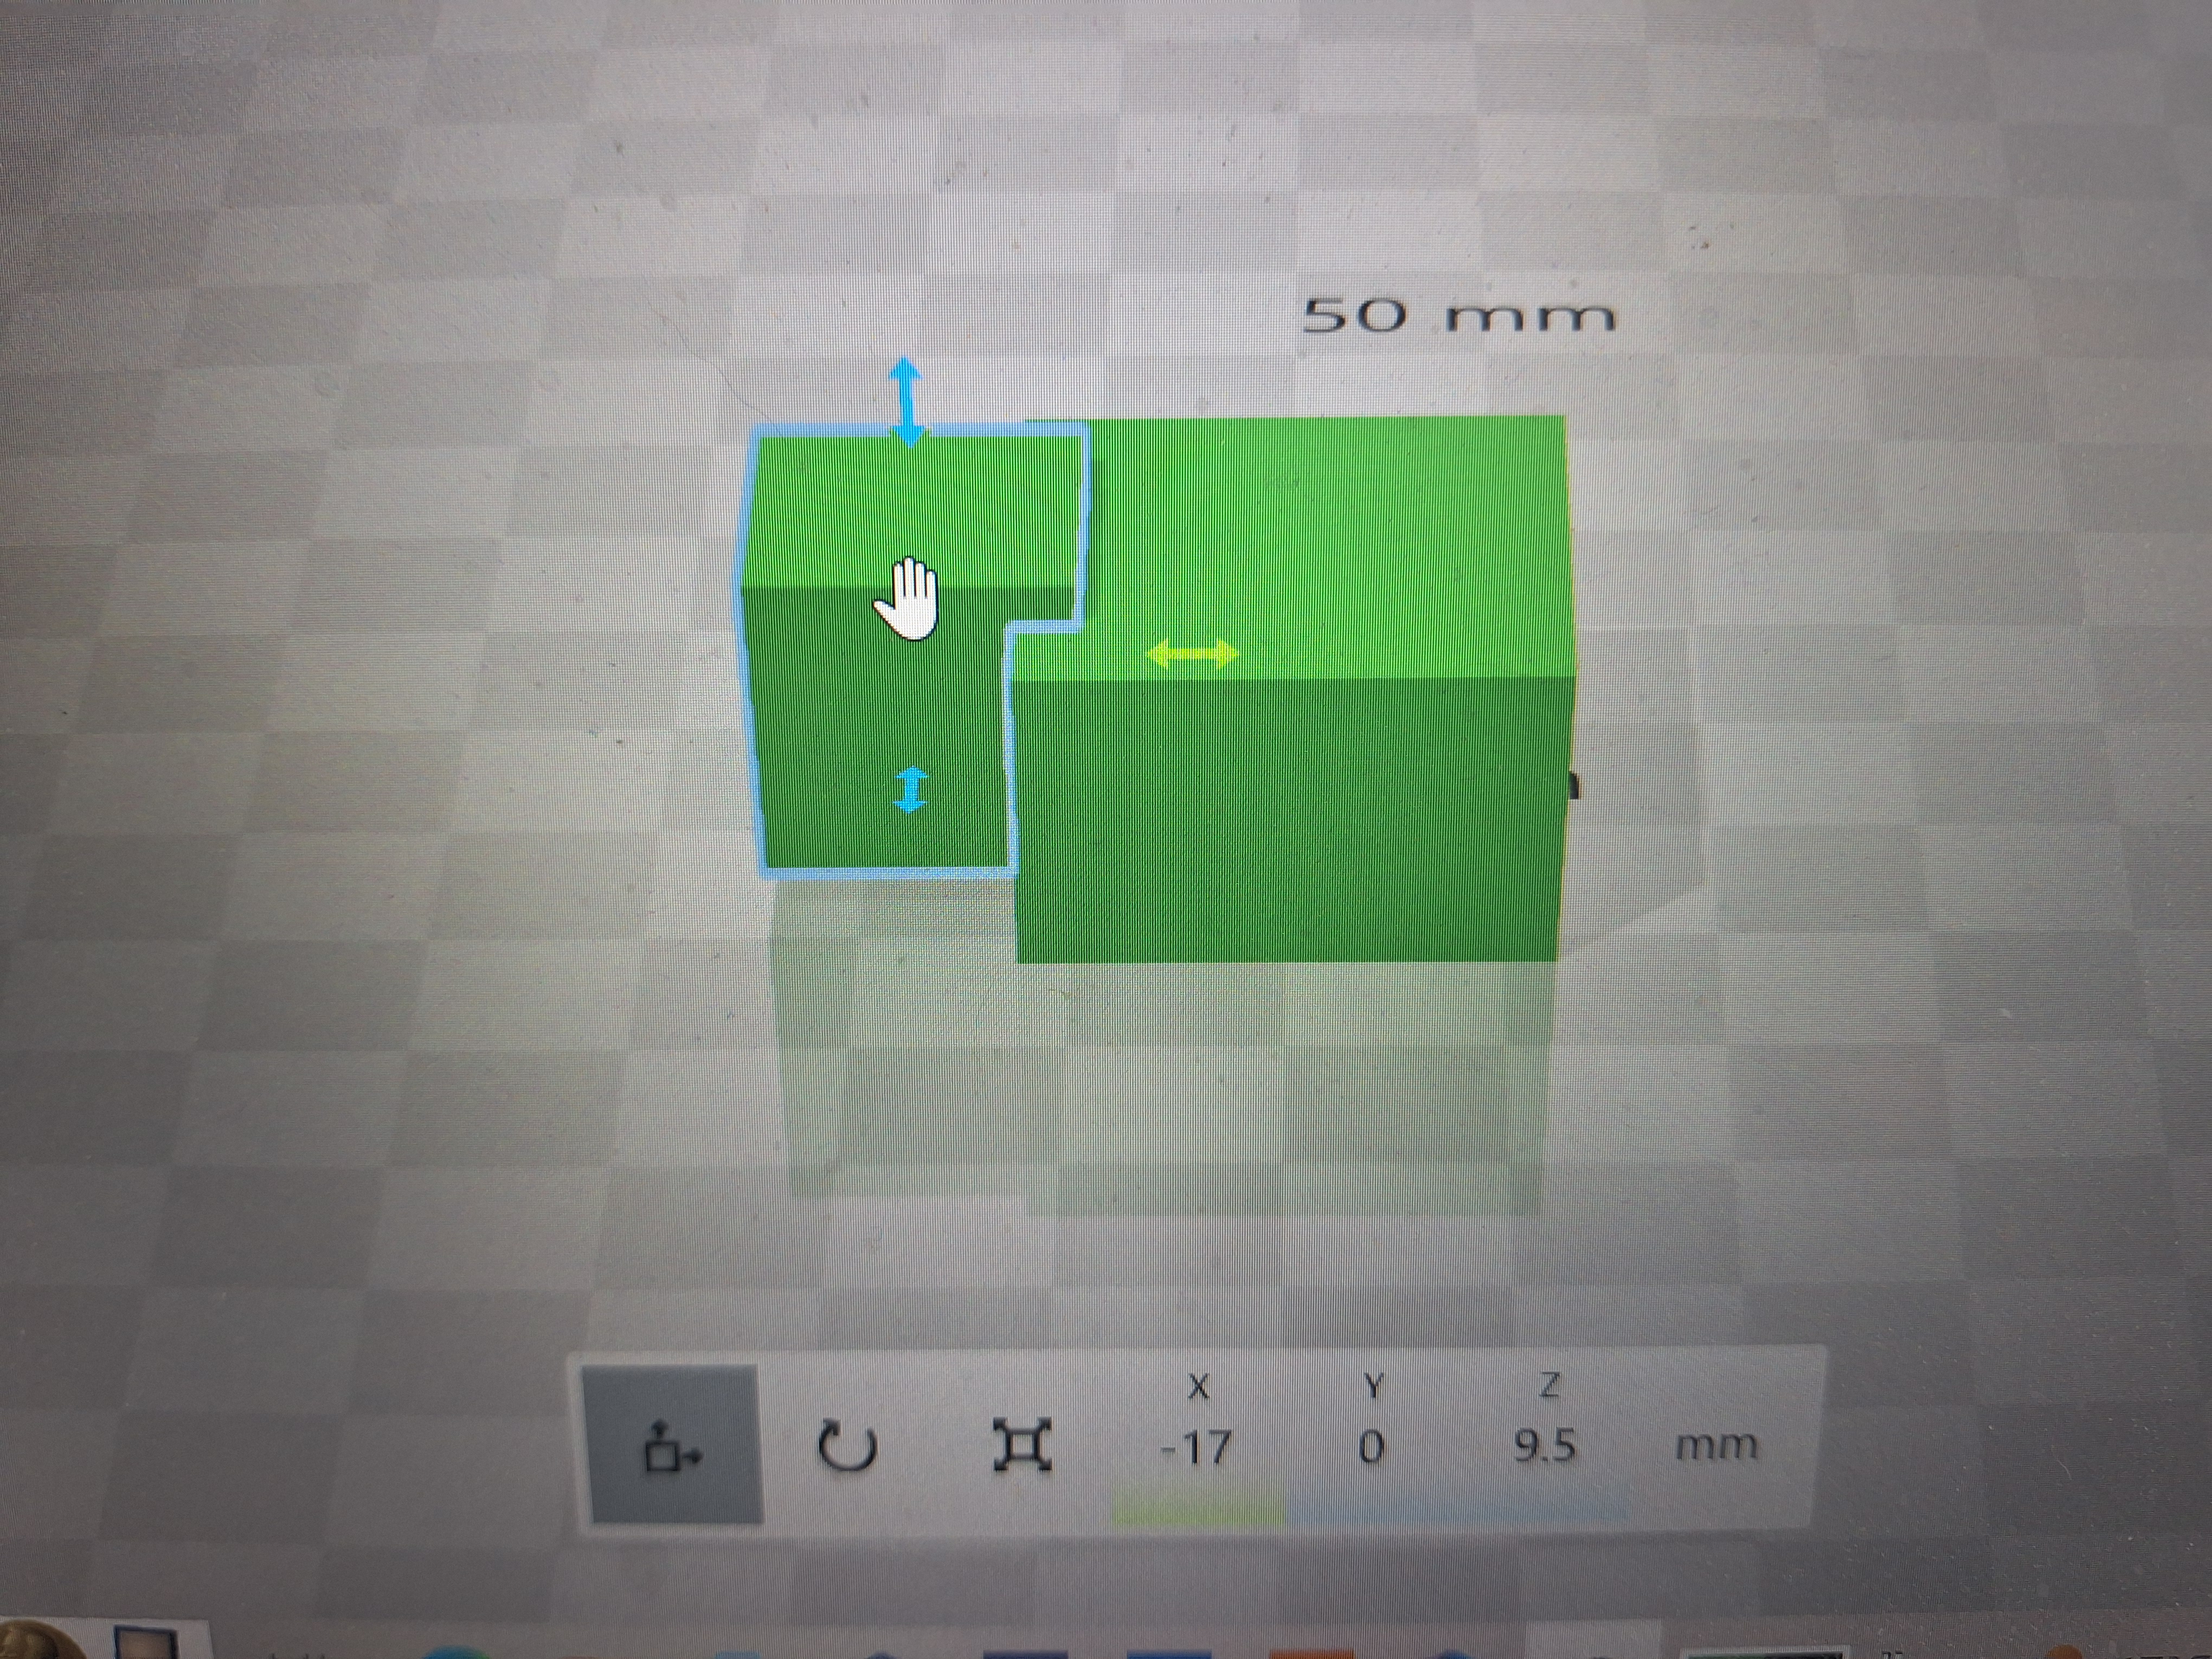
To hollow out the building first I start with a shallow pyramid which I then extend with the “extrude down” tool. this is then placed in the middle of the building and then subtracted. This leaves a taper to the internal celling which will be important later.
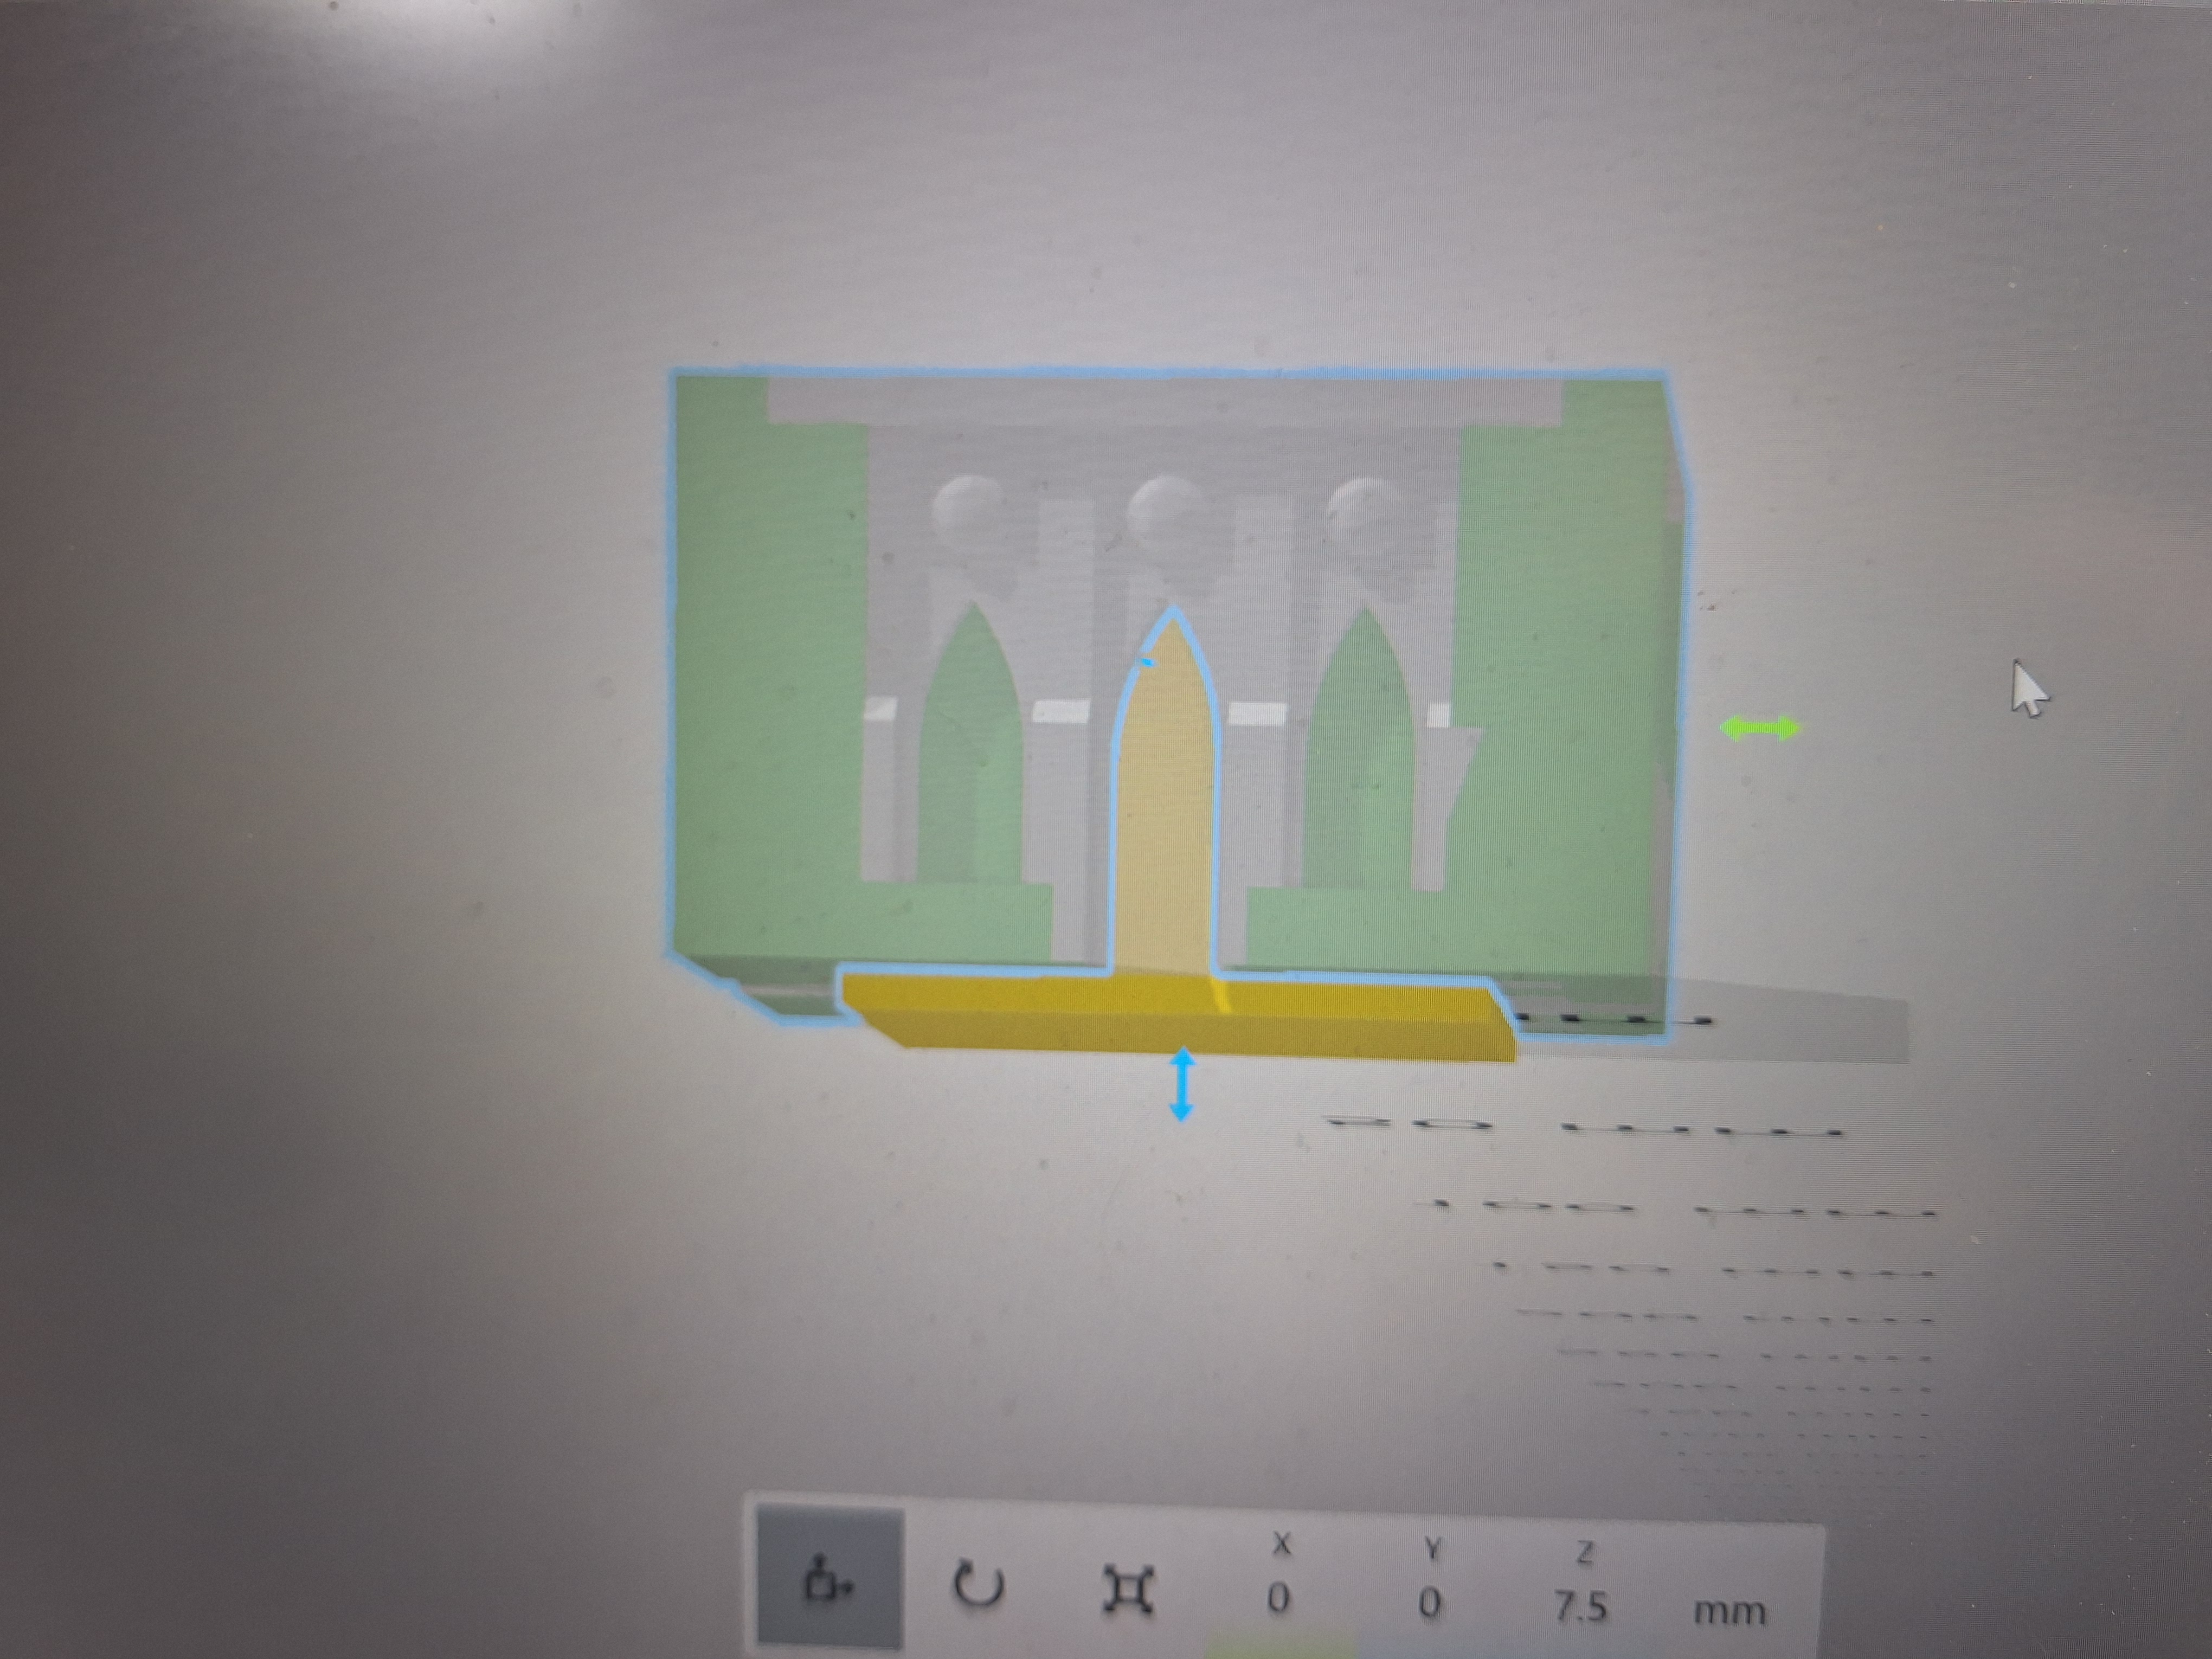
Digital Kit Bashing
Most people reading this will already know what Digital kit bashing is but for those reading this that are new to 3D printing hear goes. In standard Kit bashing you rummage through your pile of shame and bits box for parts of different models and put them together to create something new. In Digital kit bashing you are rummaging through your FILES of shame and putting parts from different files together (usually in Microsoft 3d builder) to print something different.
An important note is that you are dealing with files that are someone’s intellectual property so only use files that you have legally obtained. Also do not sell these kit bashed items on and only use for personal use, unless you have the original artist permission.
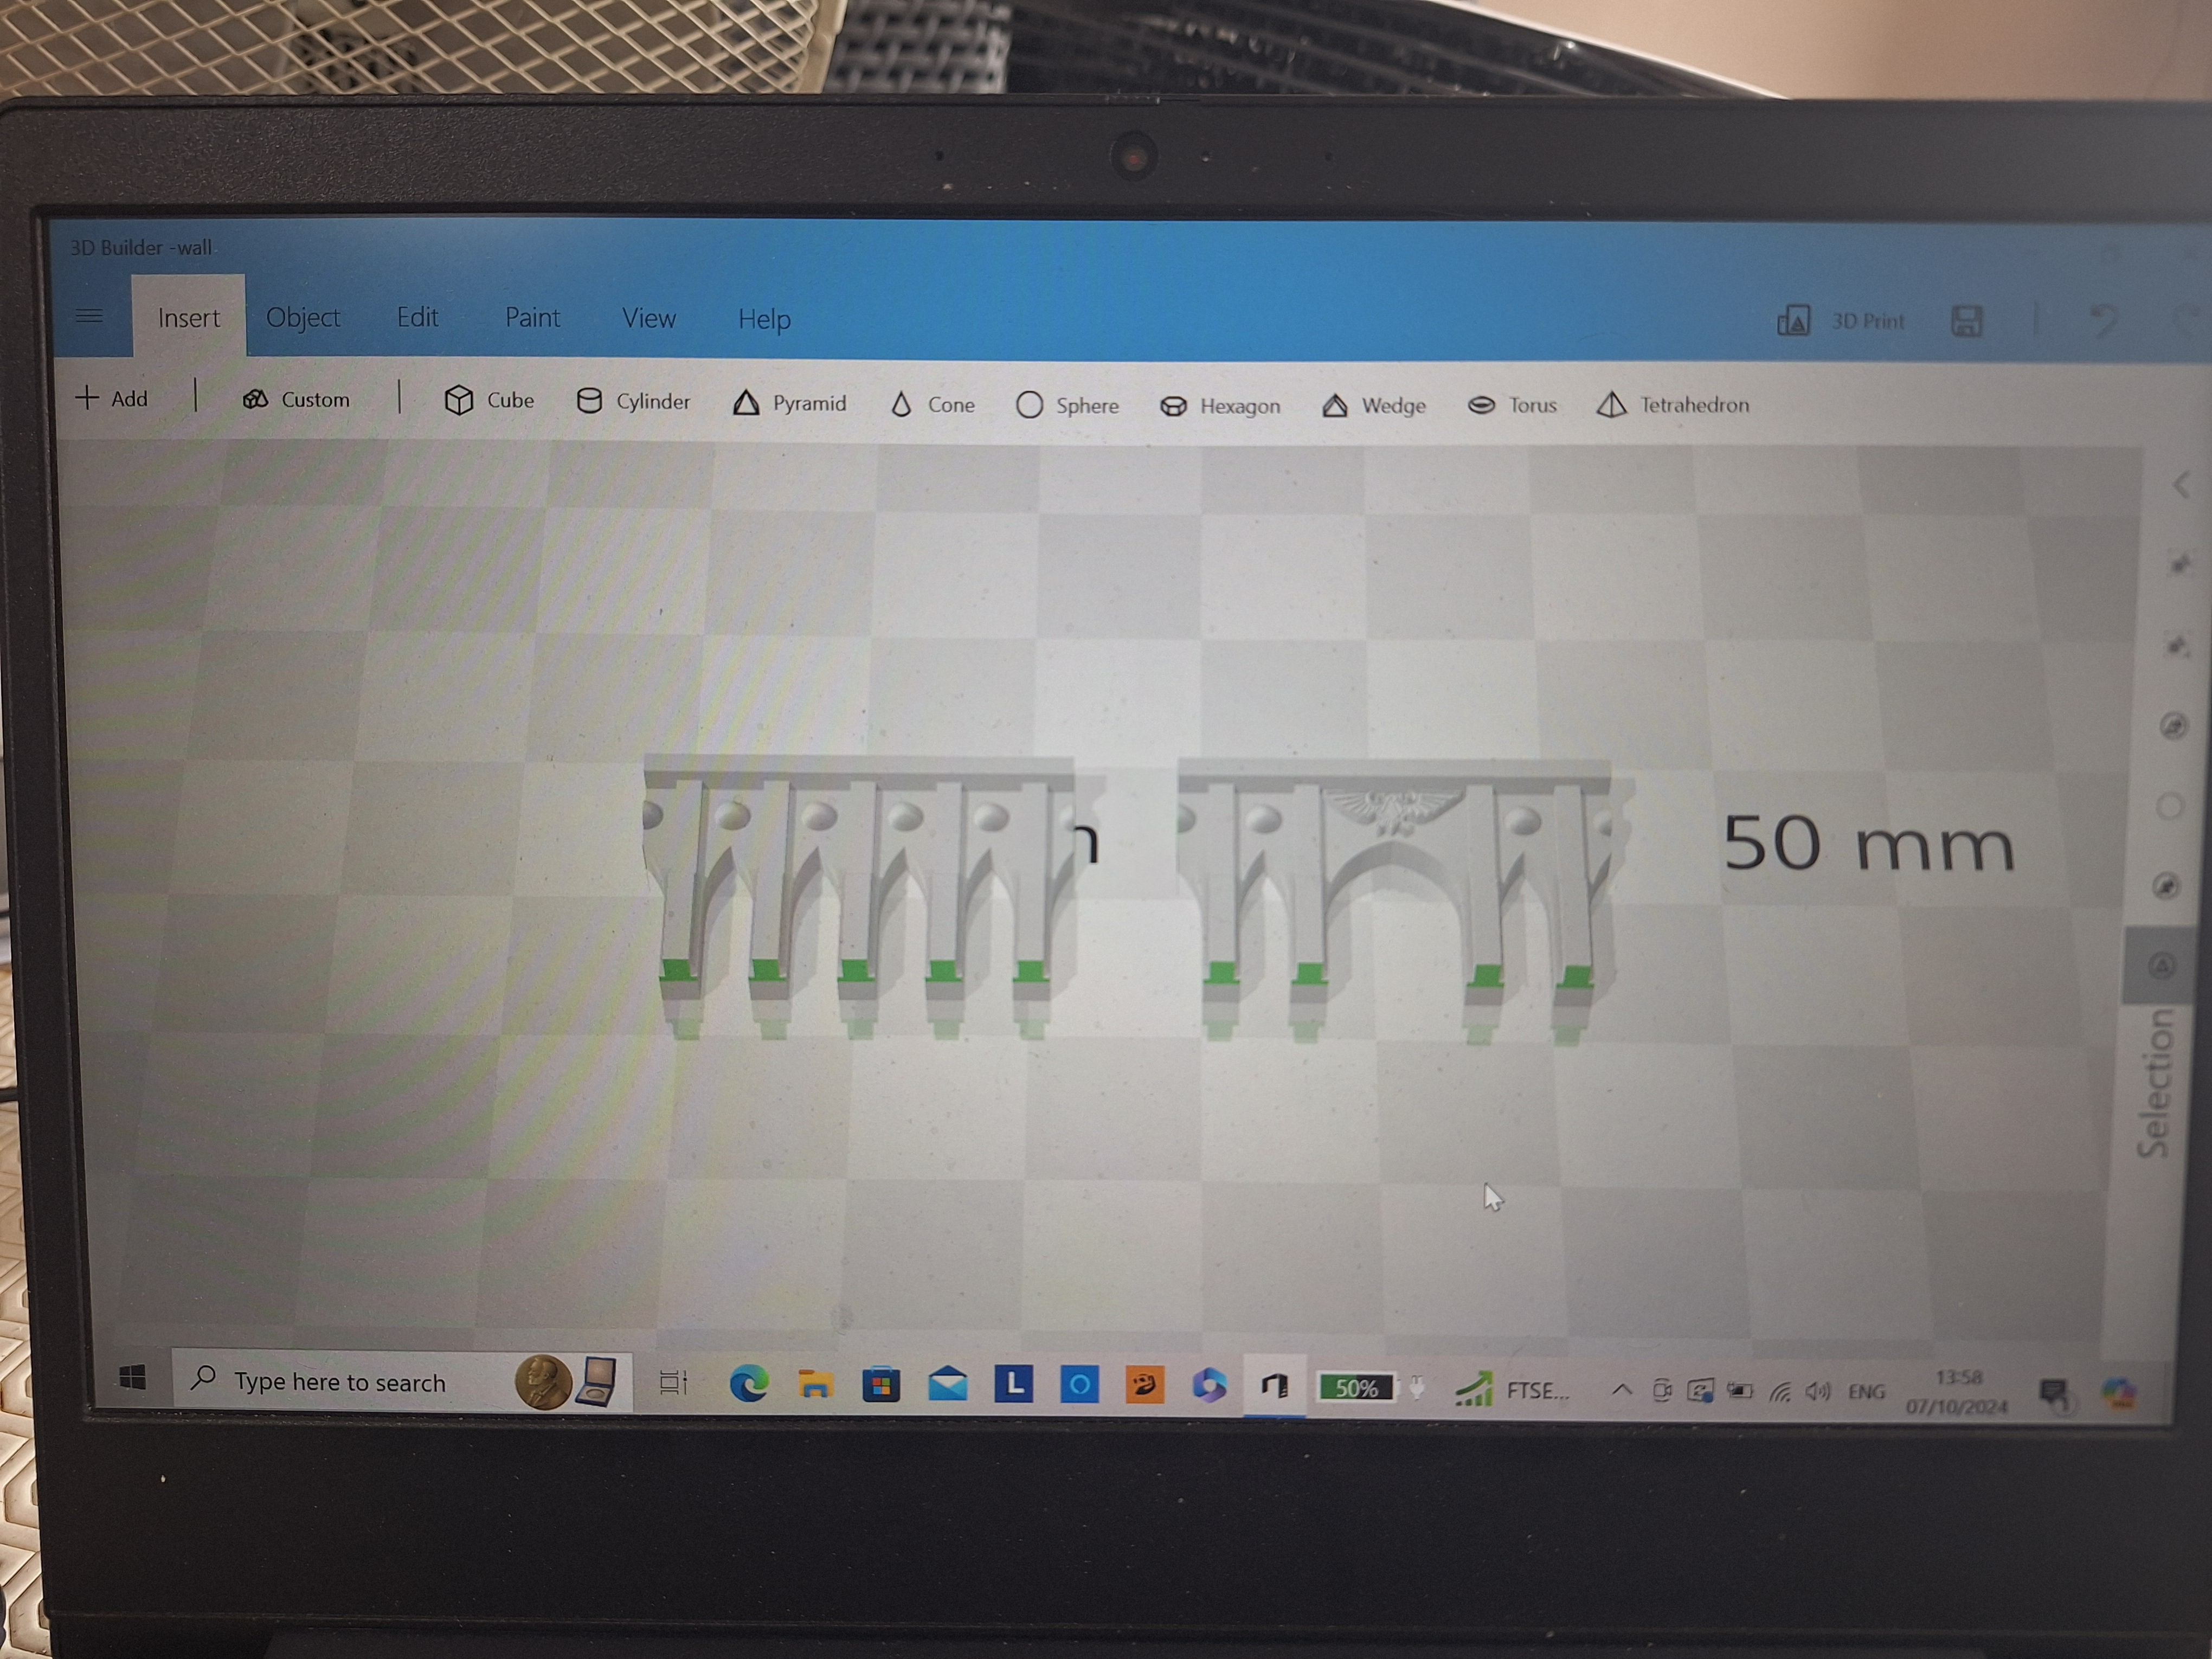 First I had a look through my files and found a 6mm scale building that had arches I liked. unfortunately I cant remember the artist but I do believe it was from thingiverse. I trimmed off the bits I didn't want and saved these two parts as samples.
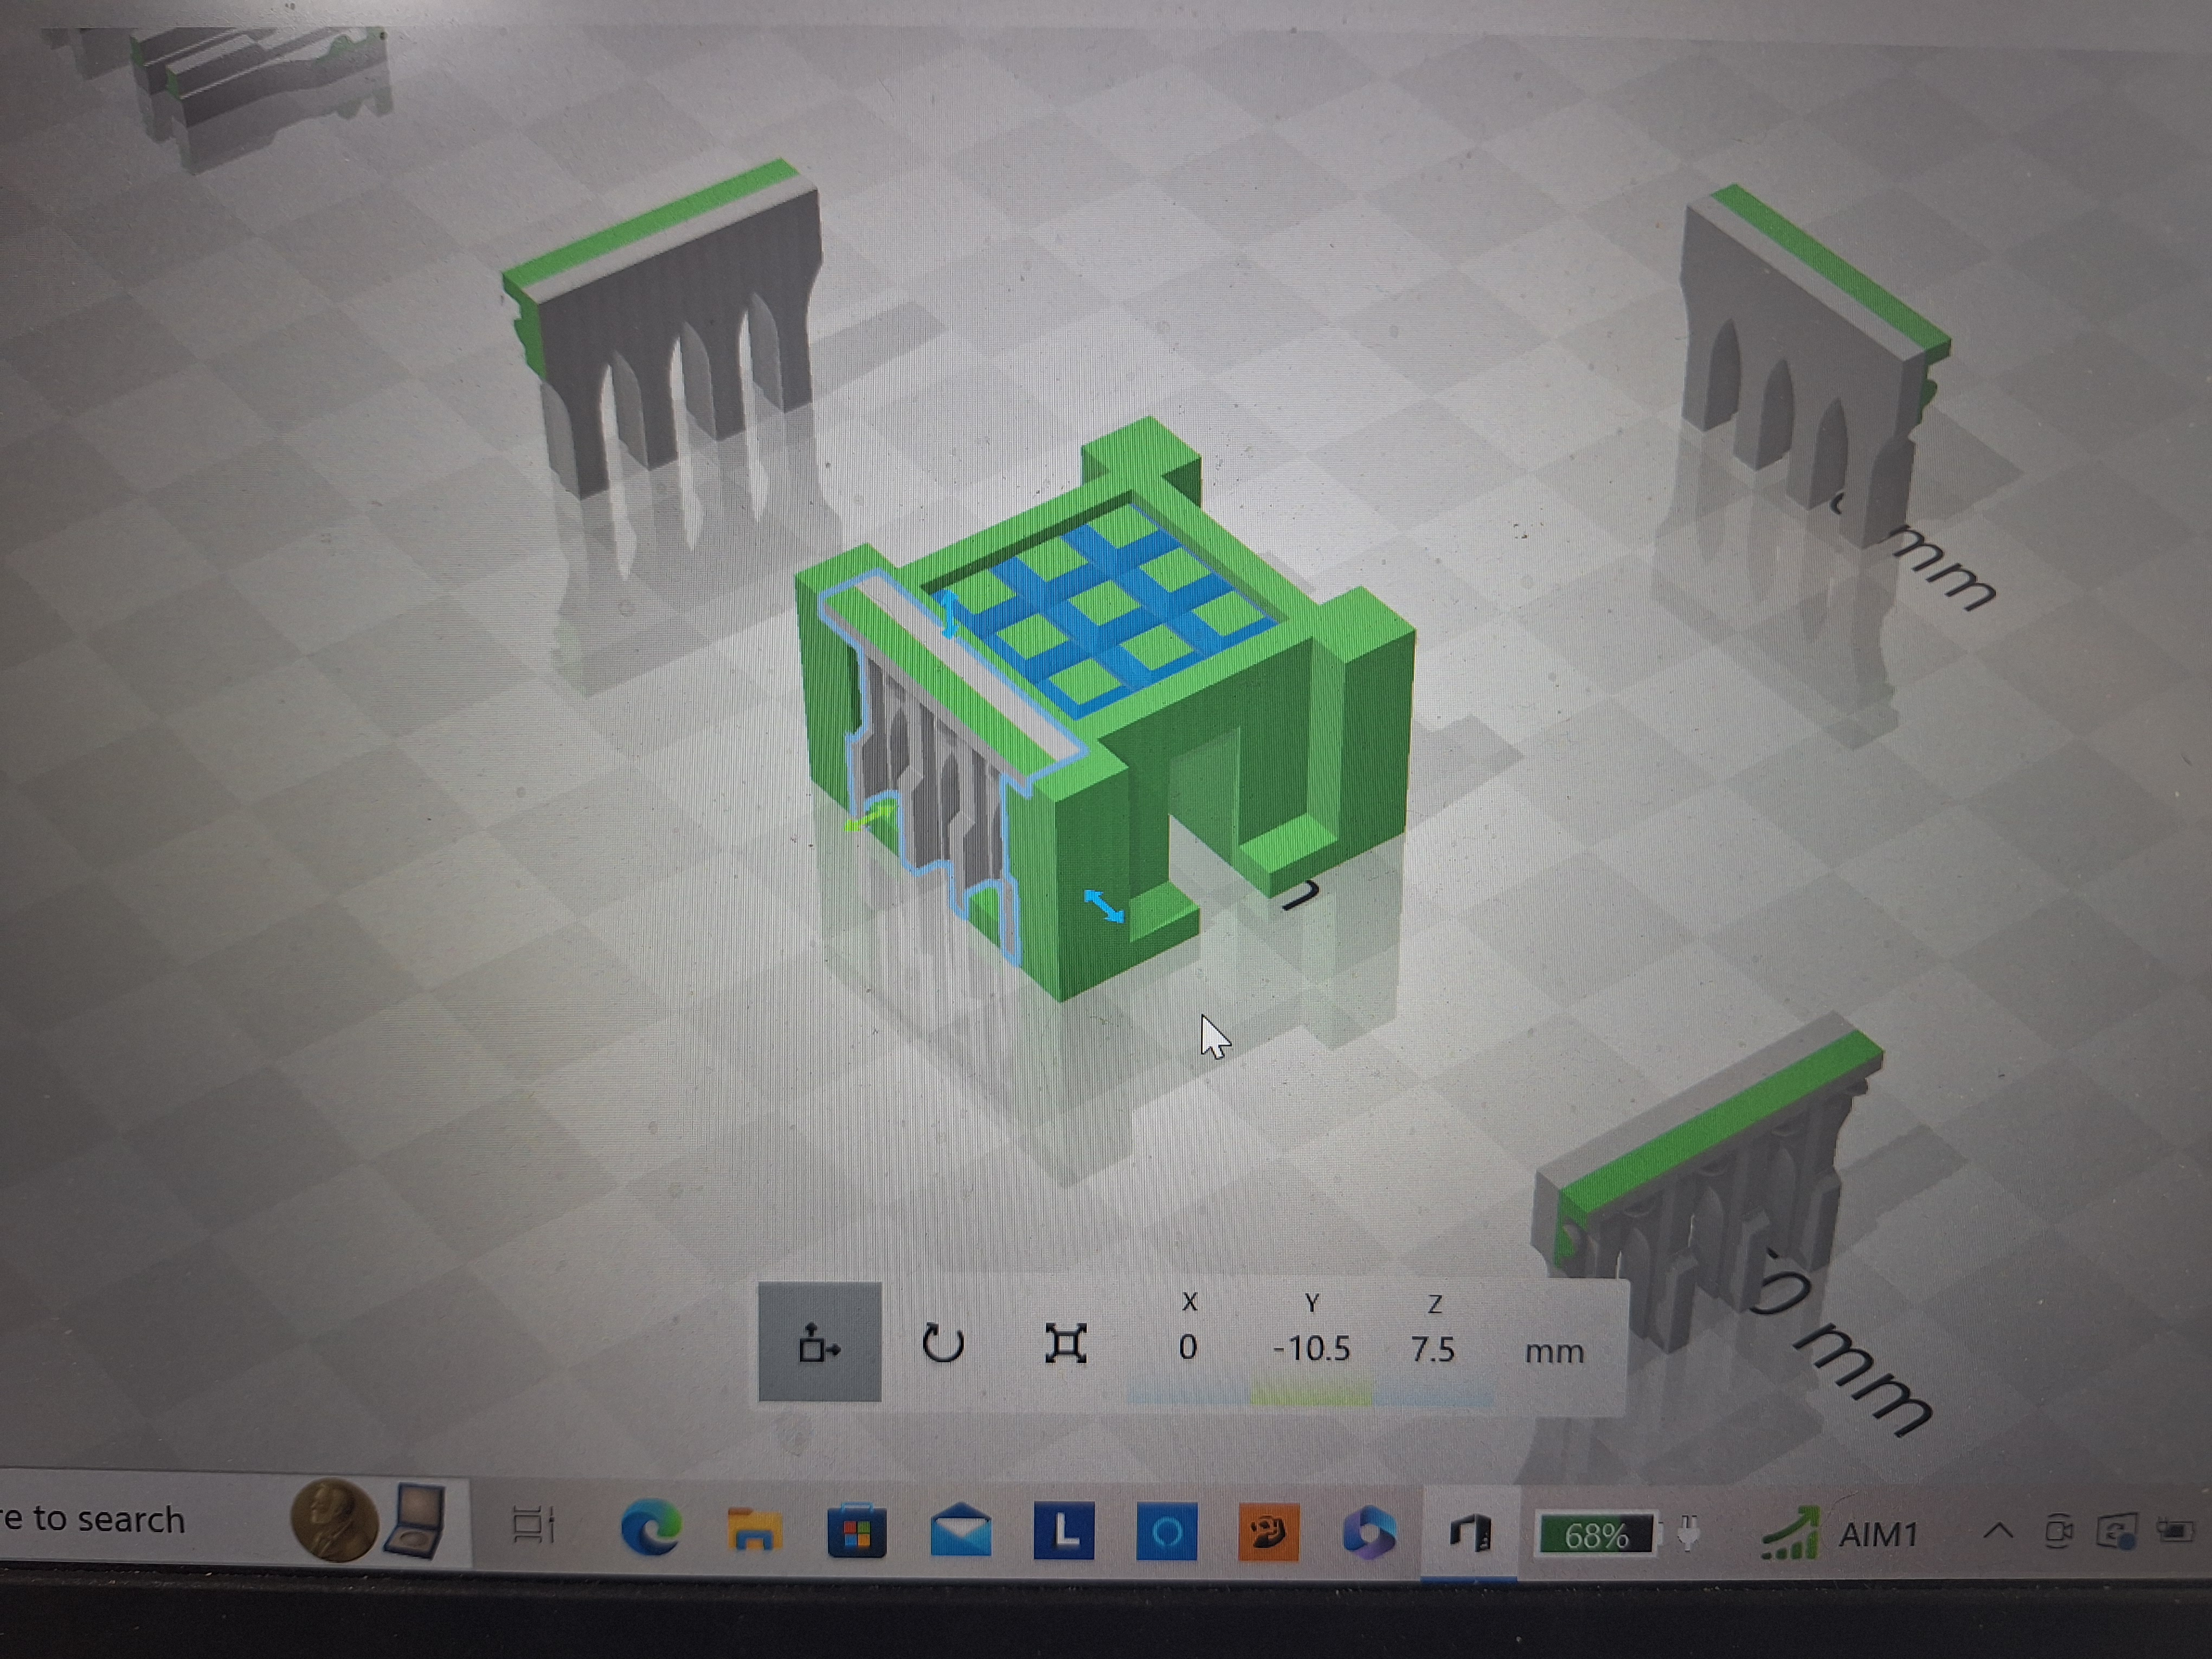 For this building I only needed the wall arches so made 4 copy's (1 for each side) and then overdyed them on the building.
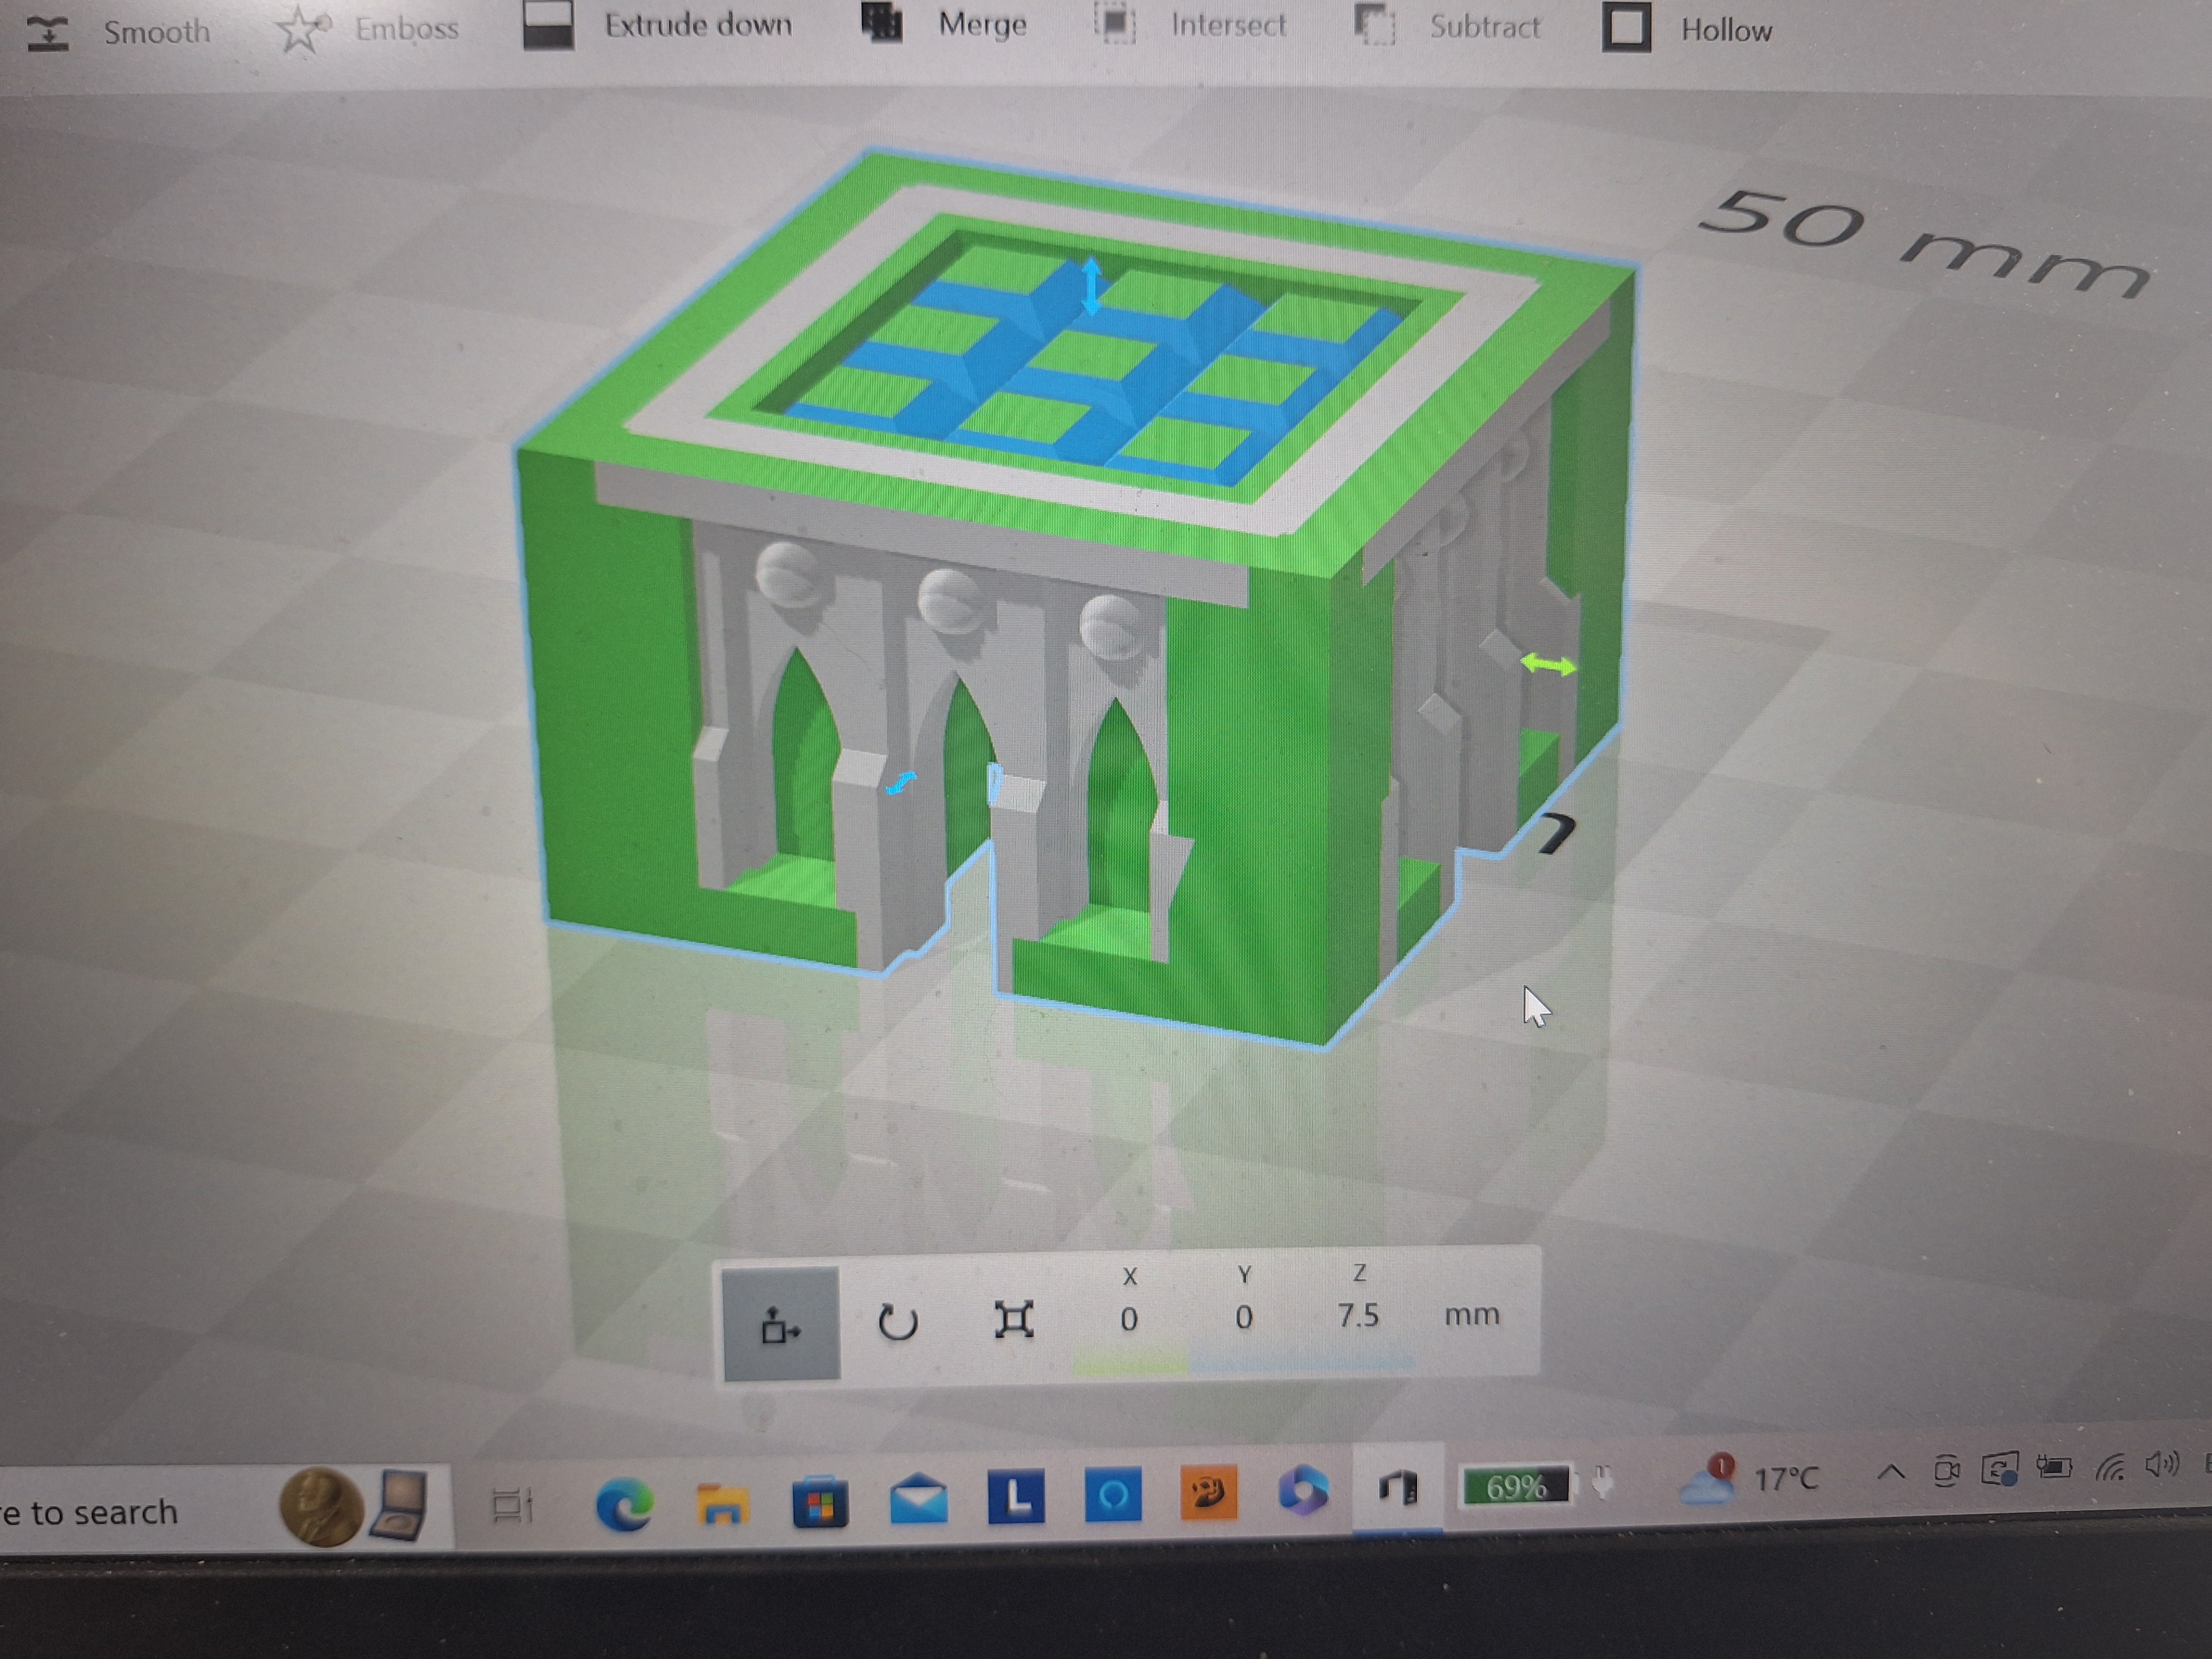 For each side I selected it and the building then used the "merge" tool to make both pieces into 1. I repeated this for all 4 sides and the building is almost done.
Basic 3d design
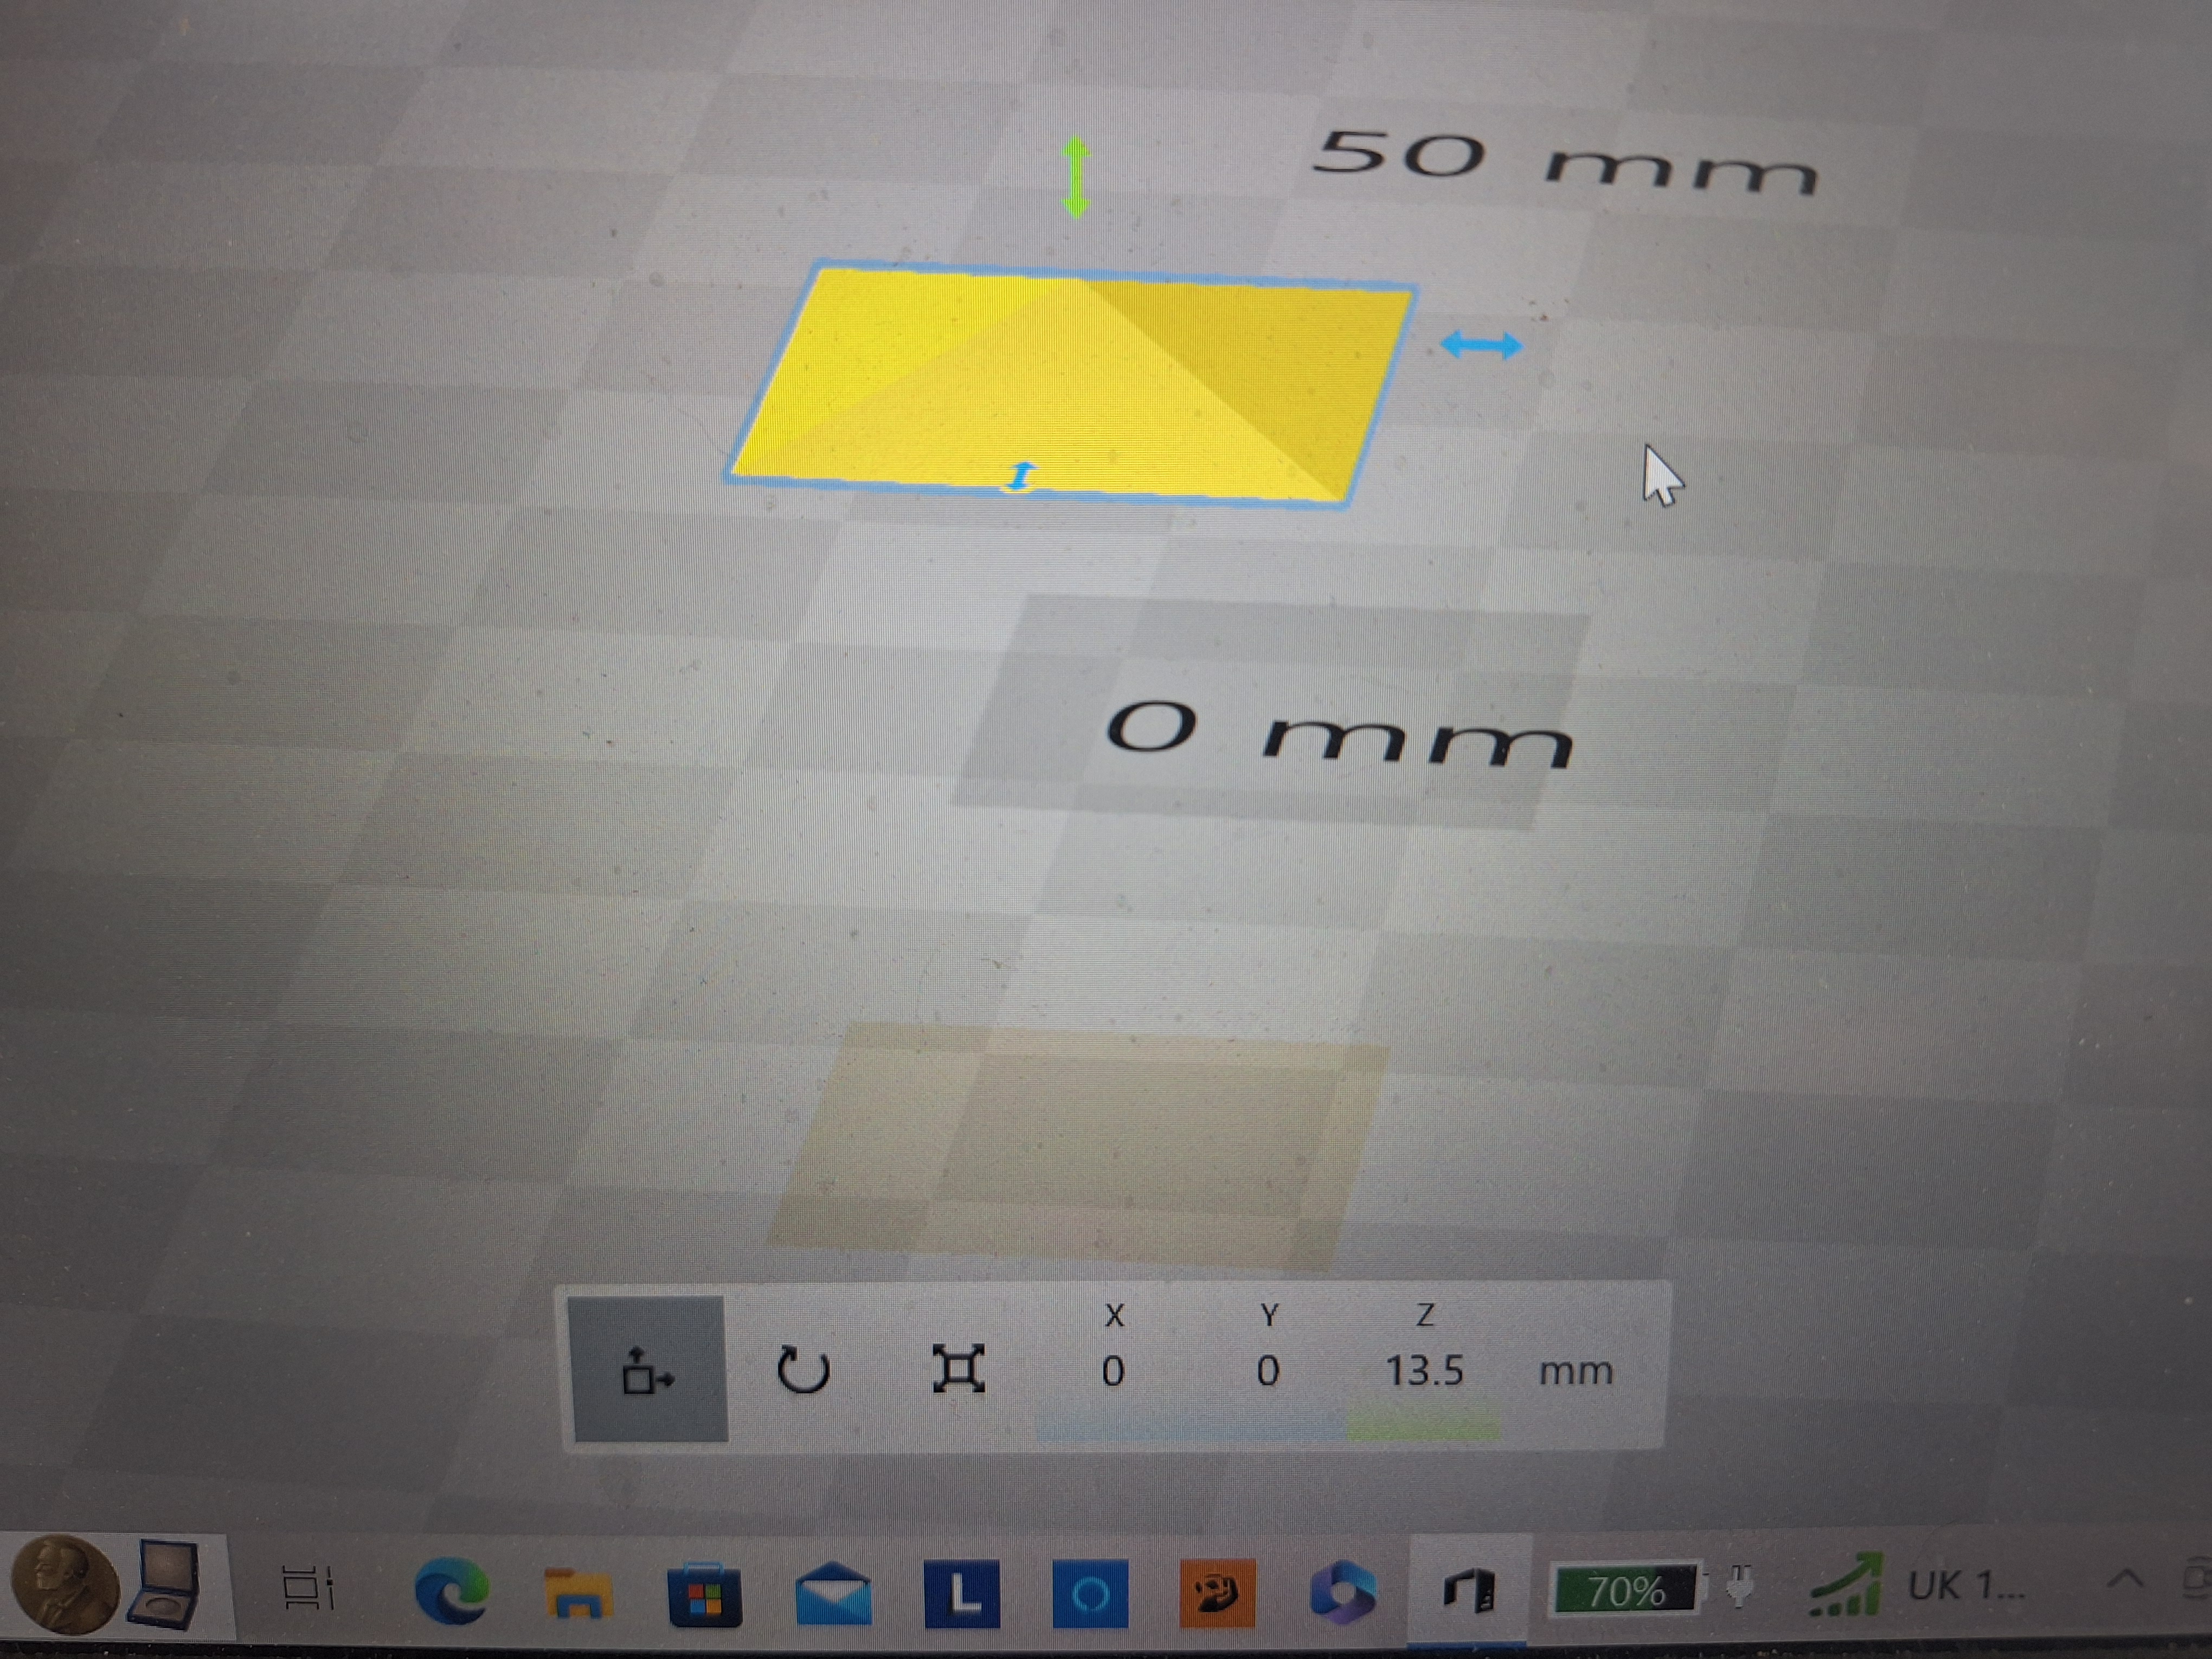
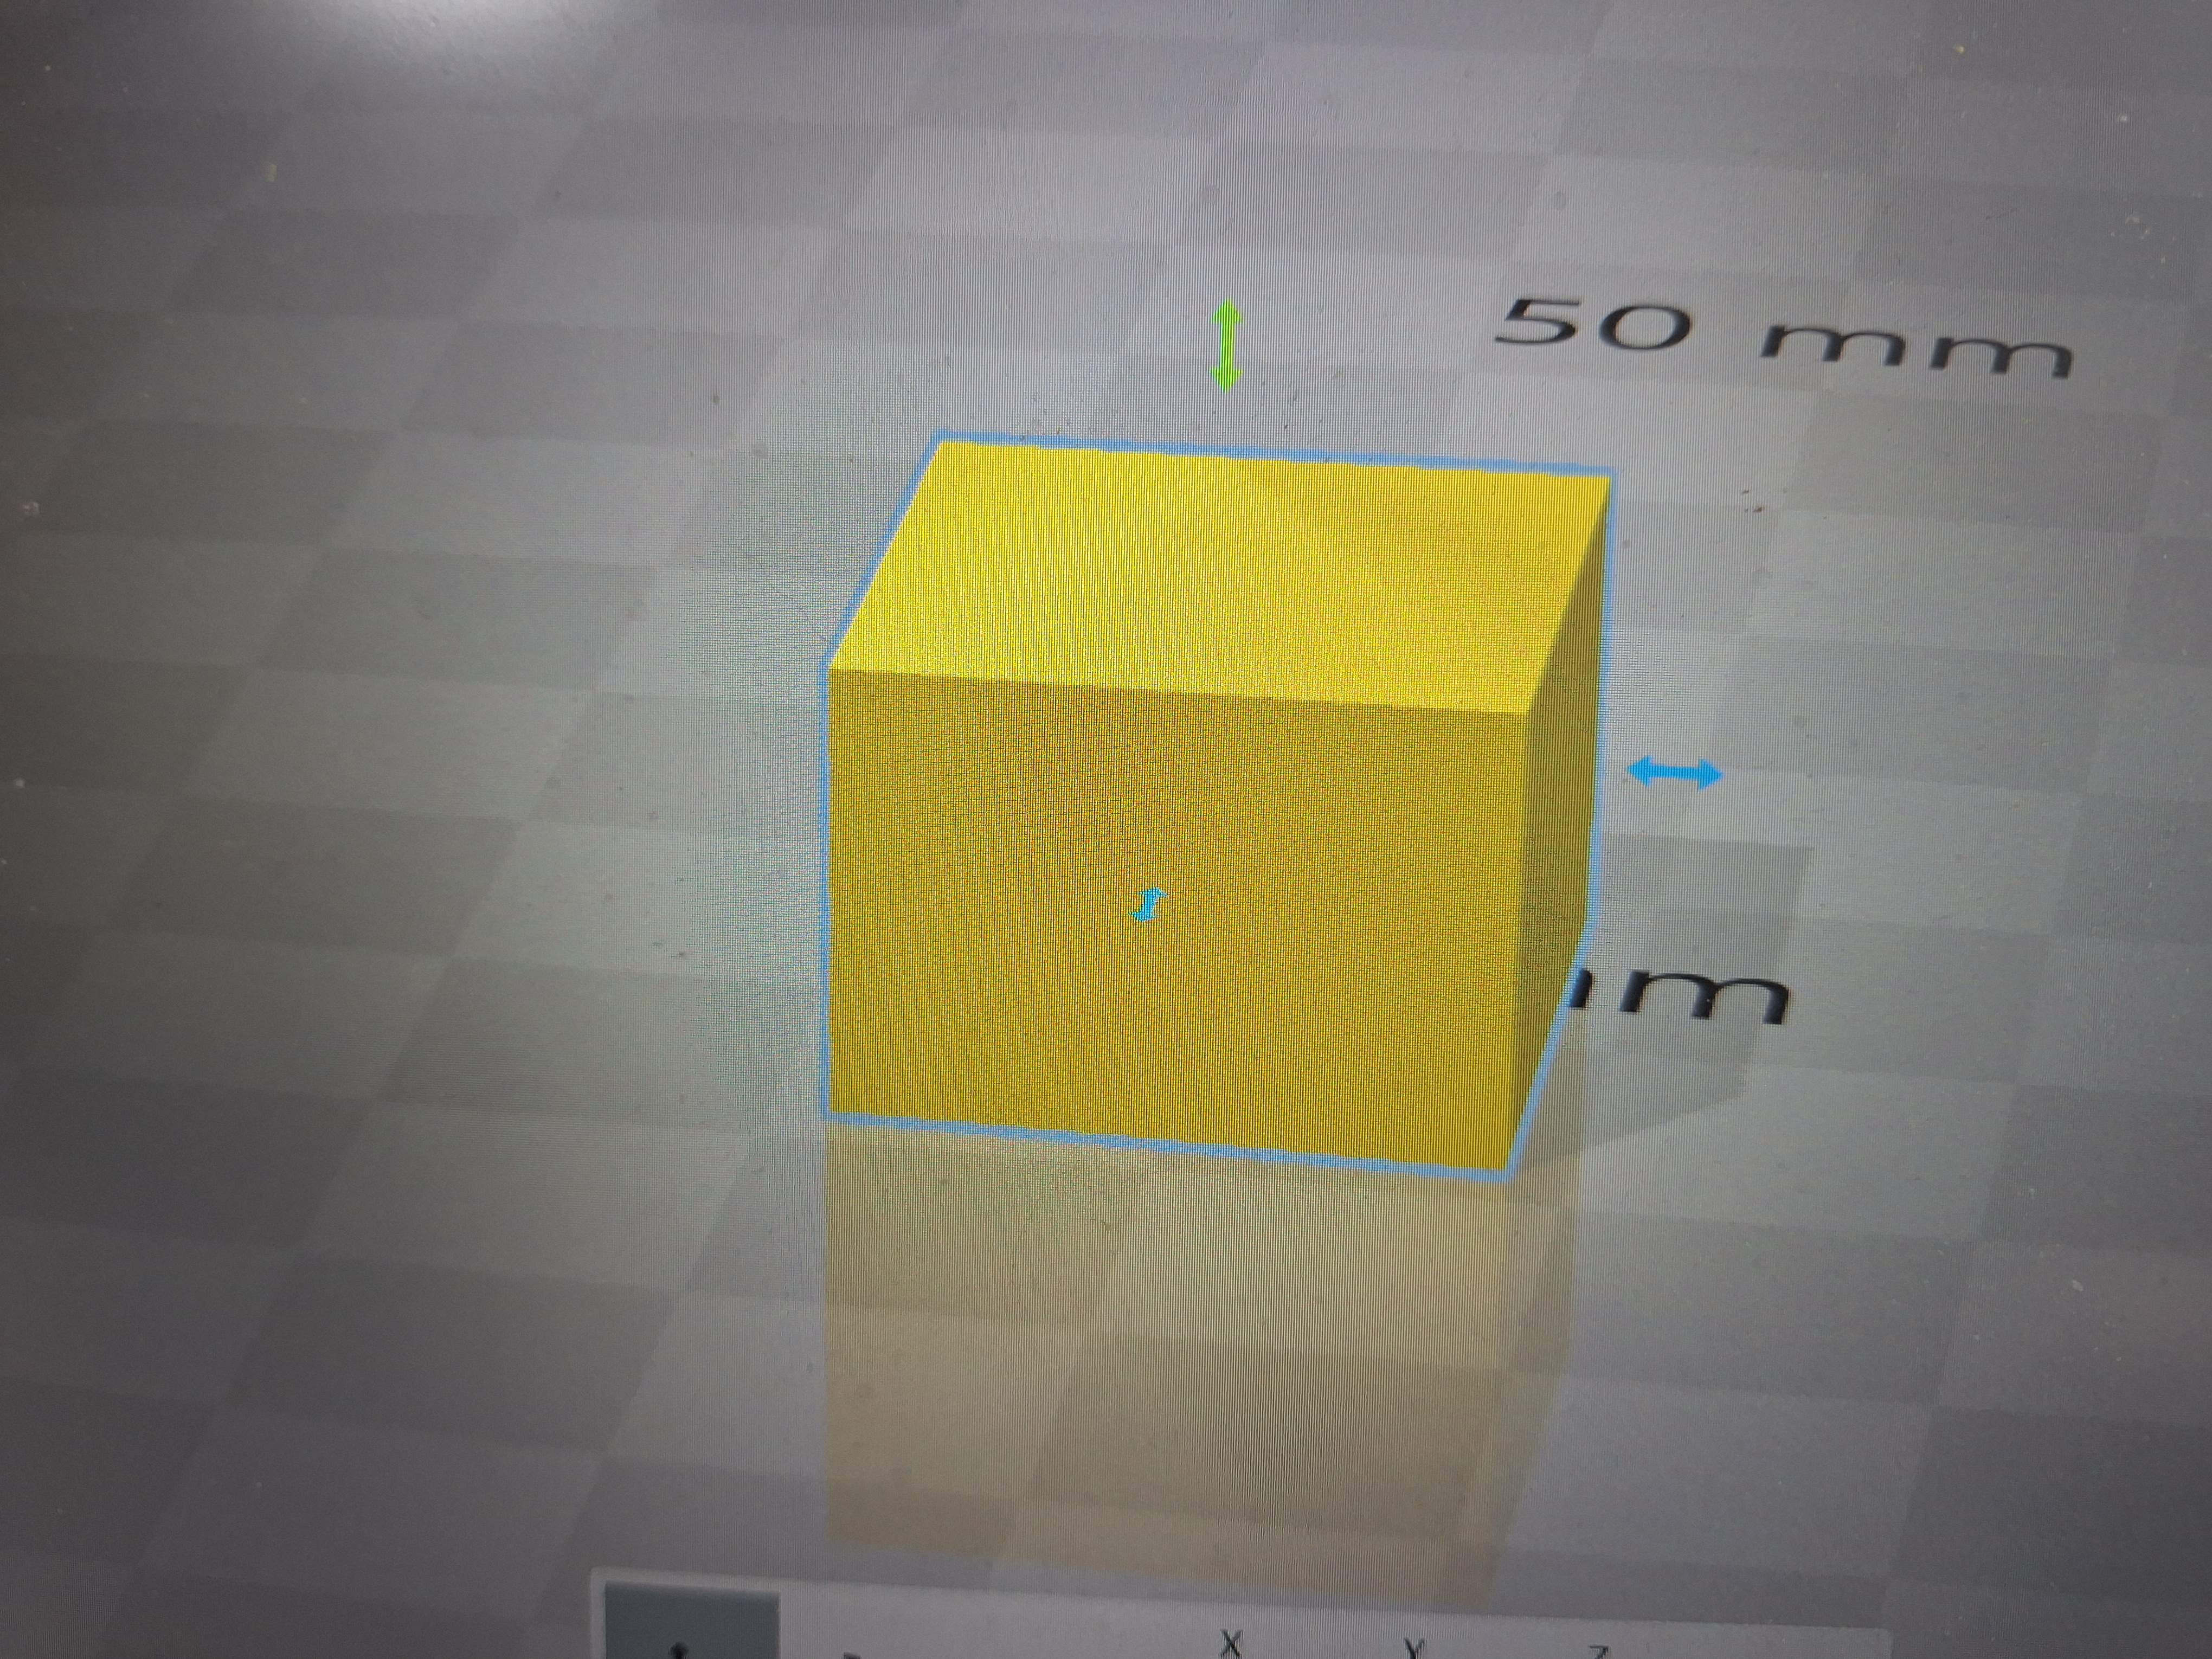
 To start with I load up "Microsoft 3d builder" which is a really simple program. This means that I can teach myself how to use it without any training courses. I setup a a simple block (in this case I set it to 25mm X 25mm X 15mm). I then load in a smaller block that I place over lapping the first shape.
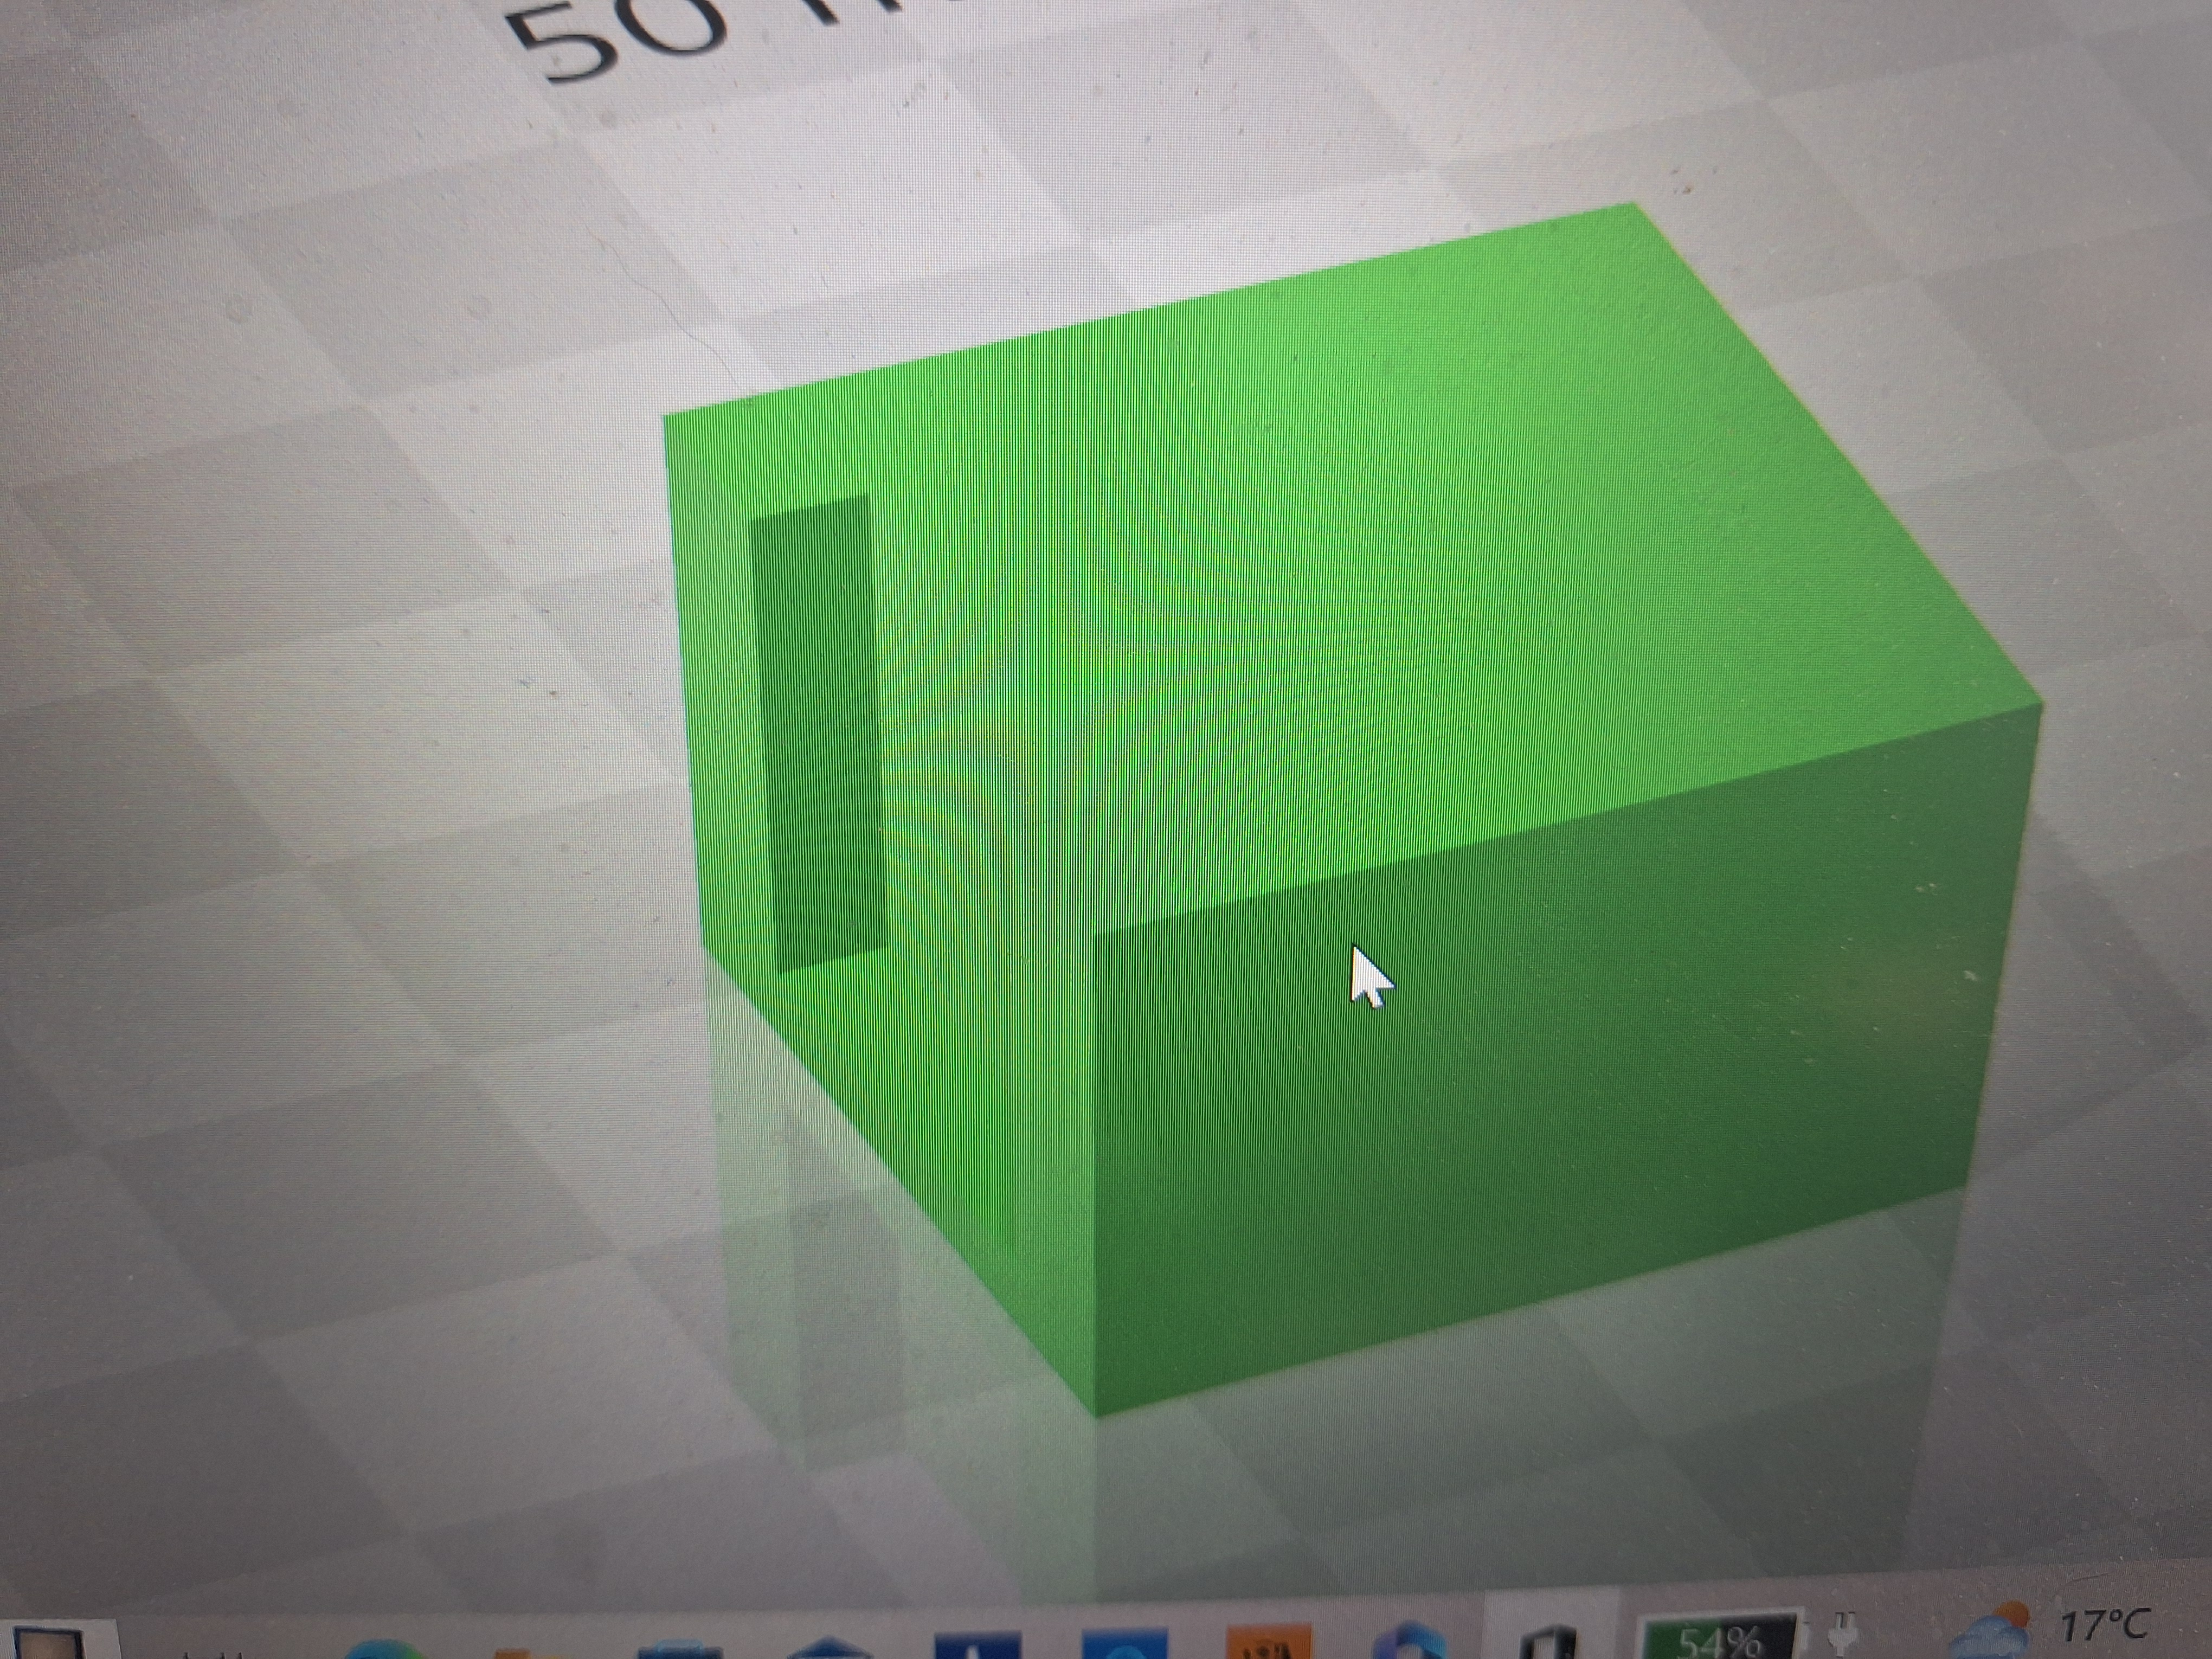 I then select the block I don't want and use the "subtract" option to remove it and not only will the block I have selected disappear but also any of the other block that it was overlapping.
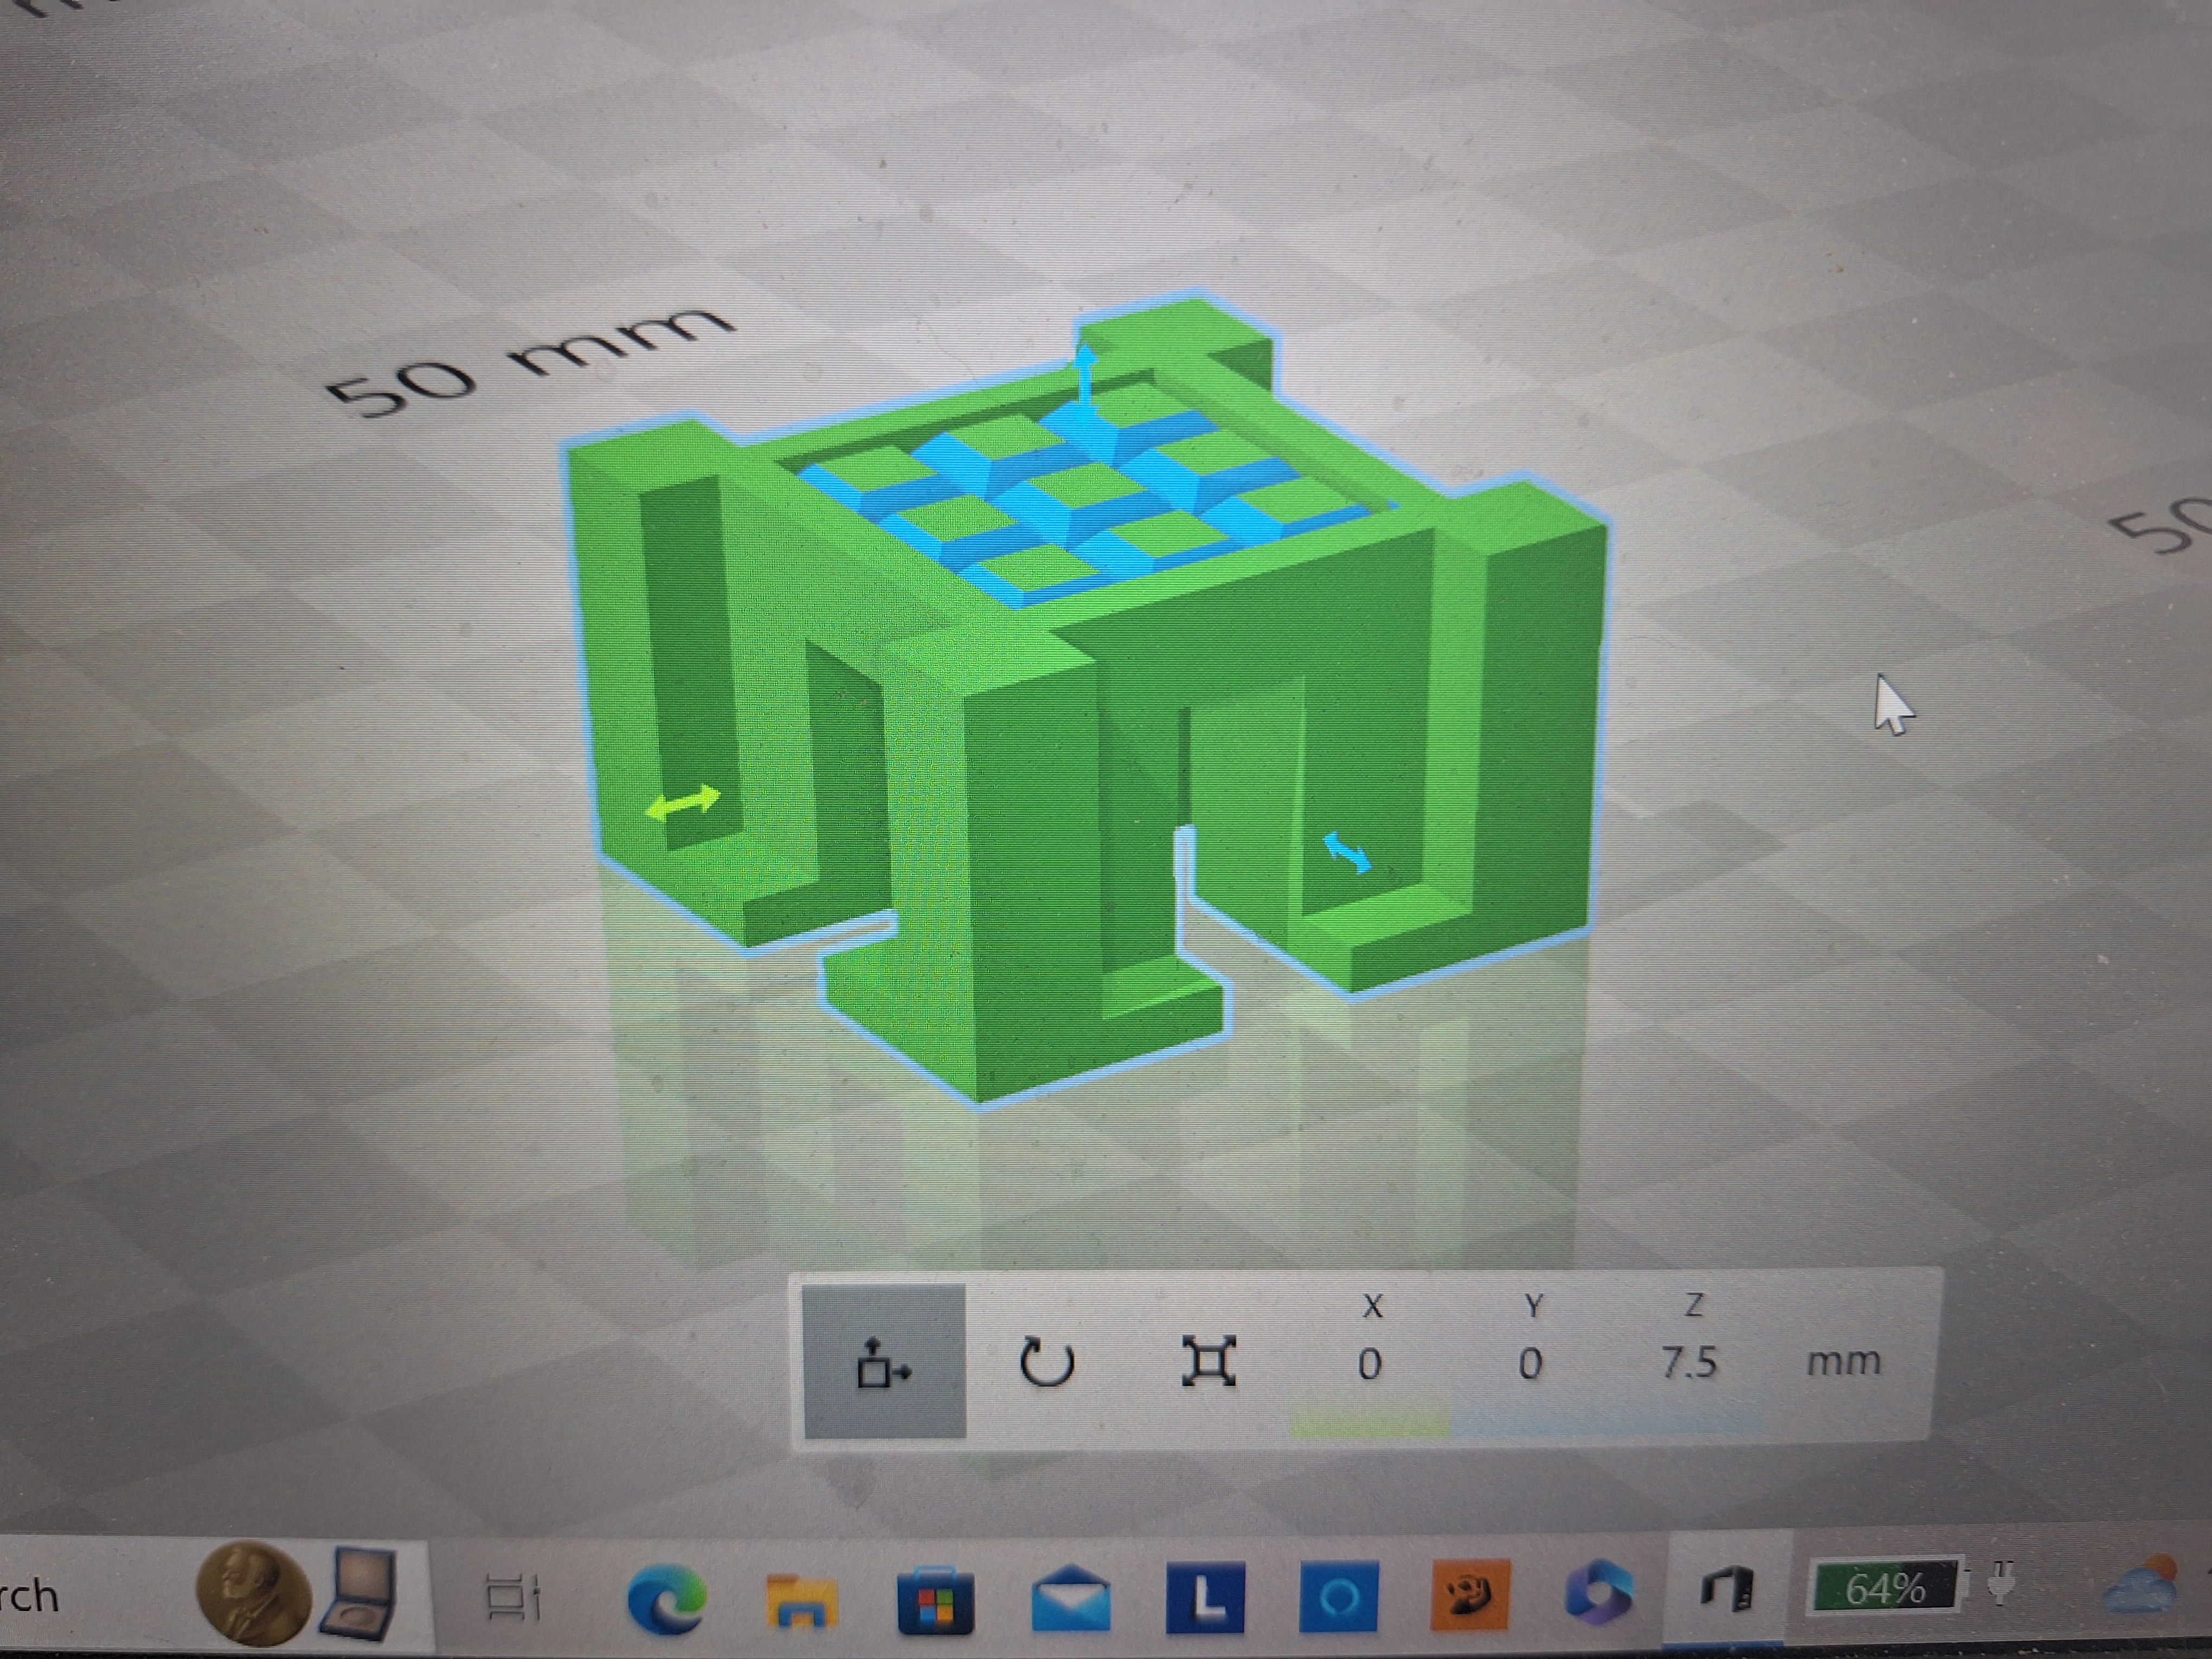 By using blocks, wedges, pyramids etc. I nibble away at the original shape a bit like a sculptor chiseling away at a block of stone to get the shape I want.
It all starts with a box
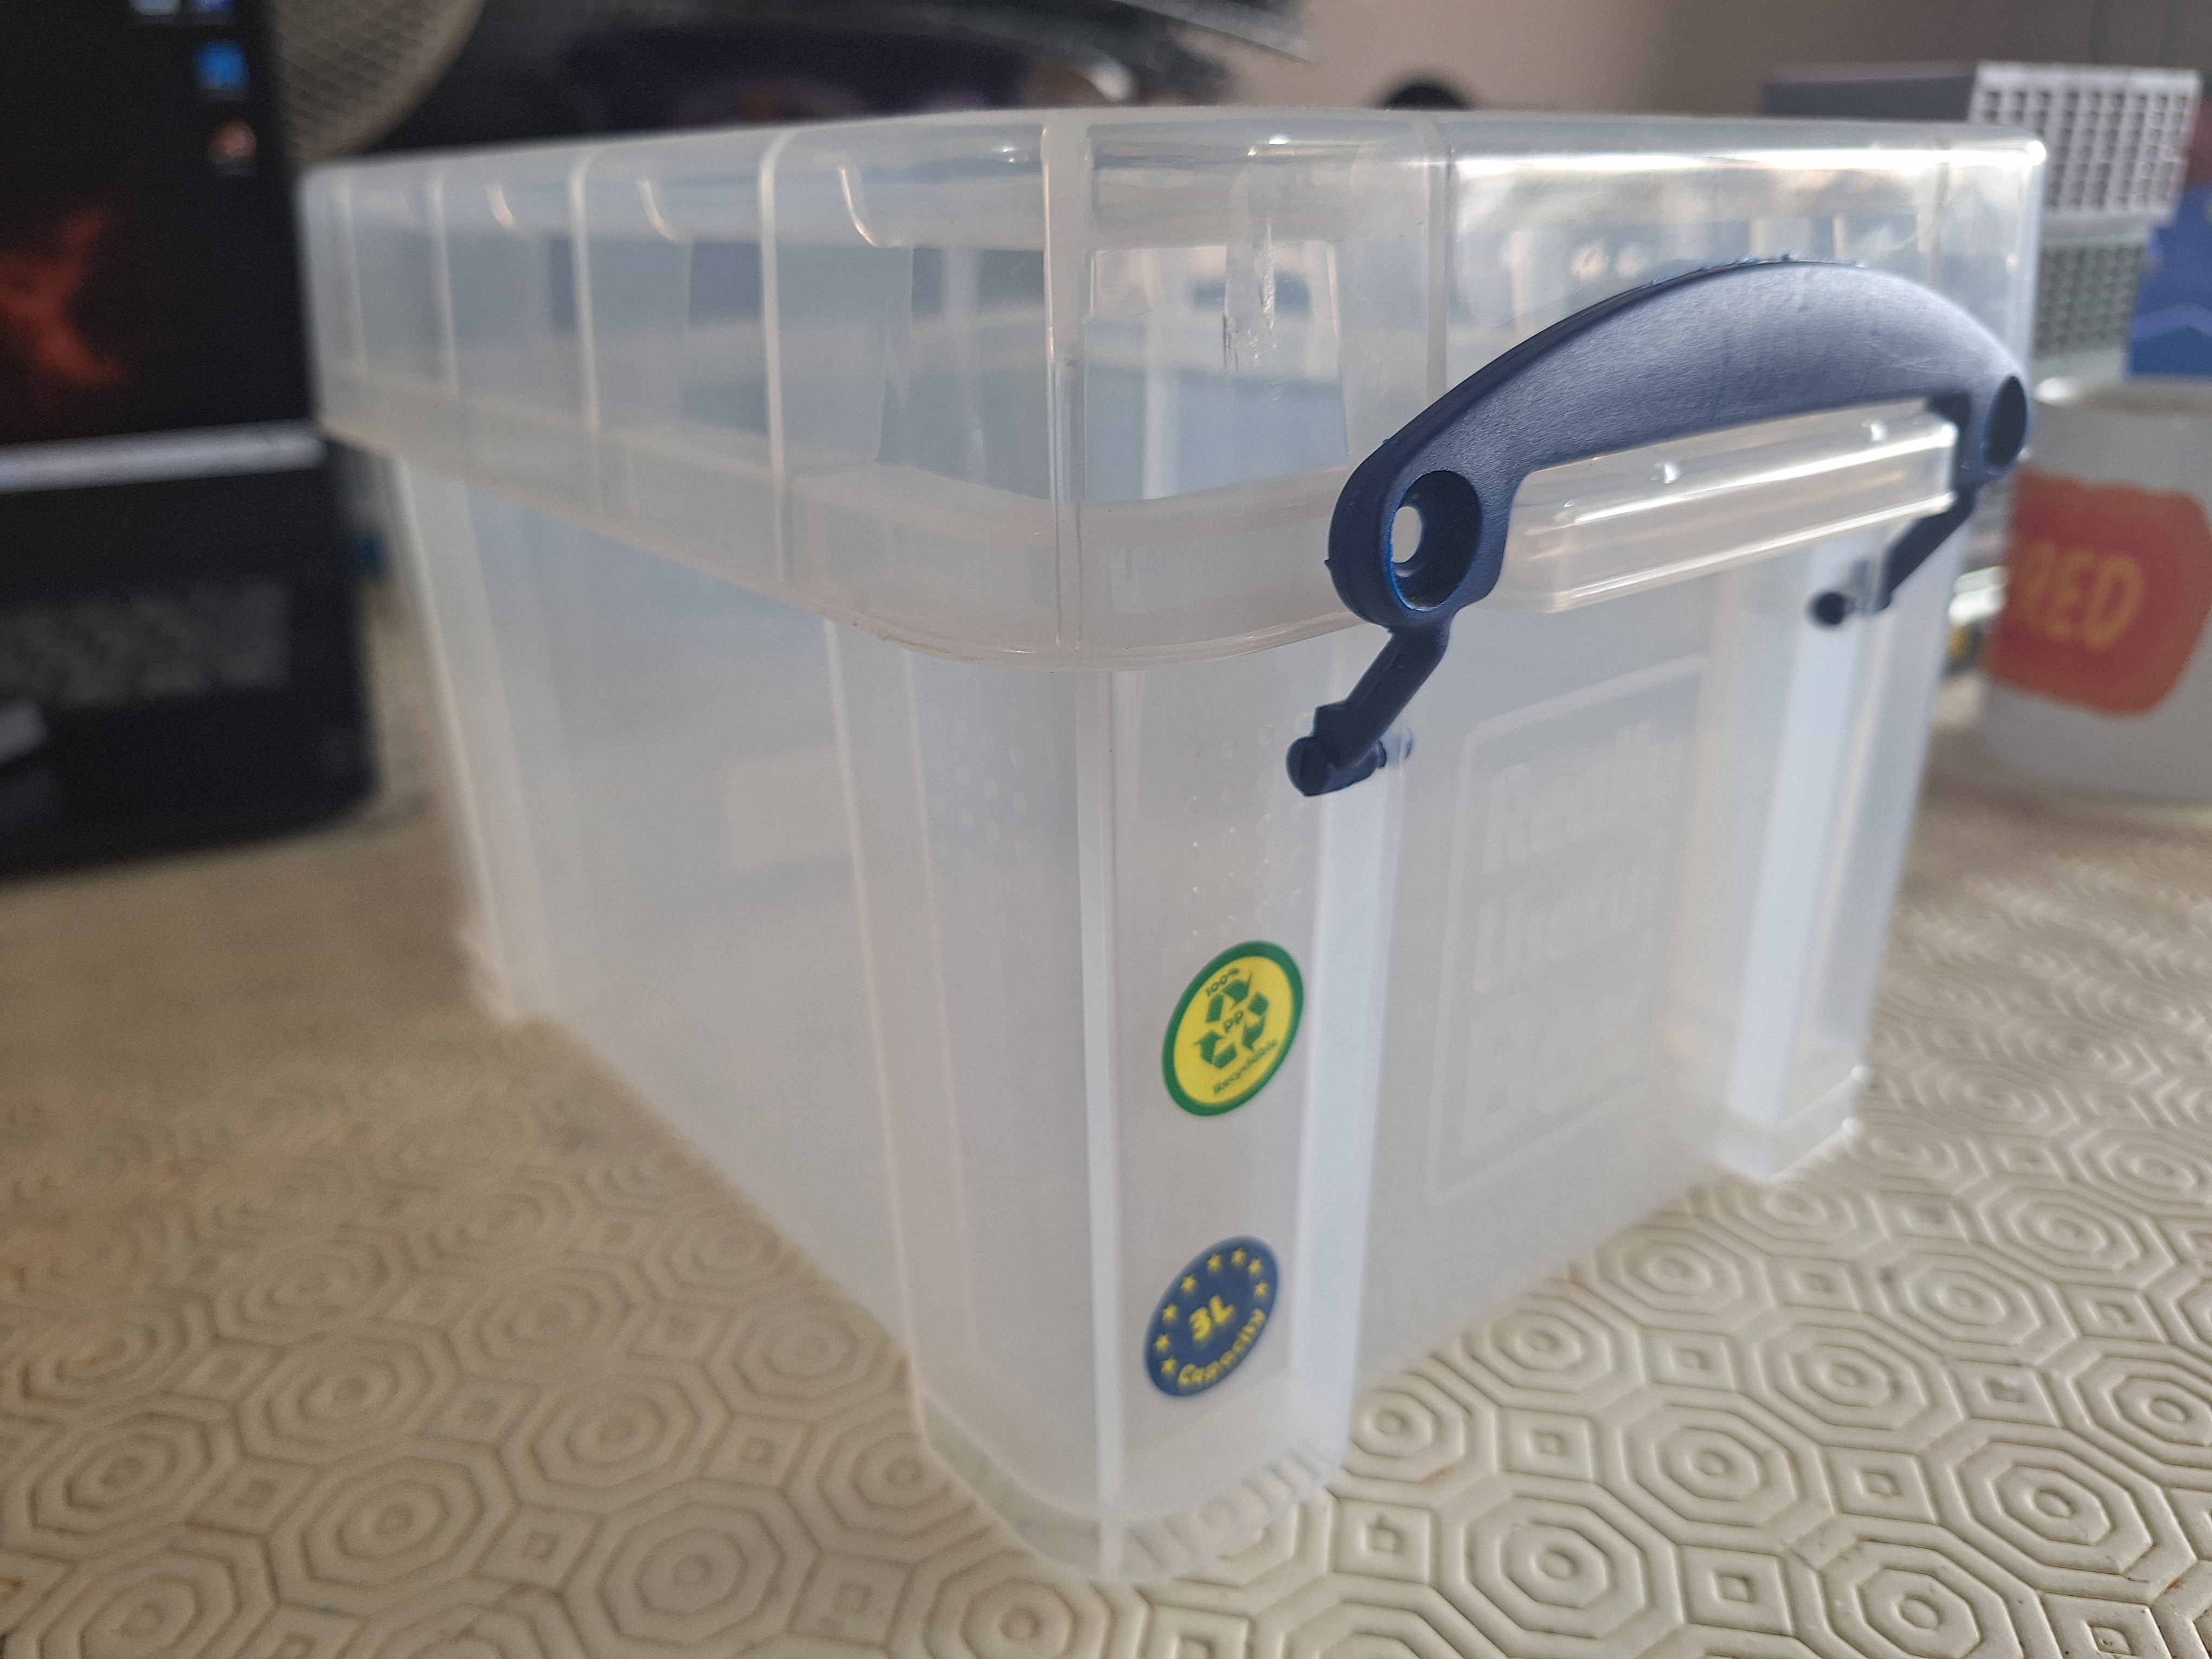 So a trip to my local hobby and craft shop and I come away with a 3 leeter box from the realy usefull range. After a bit of math I decide to design my largest building to be 70 x 45 x 45mm block. This means 24 such buildings would fit in the box. Within this I could fit two 40 x 35 x 30mm buildings (48 buildings). Inside each of them two 25 x 25 x 15 mm buildings (96 buildings). If I make these buildings magnetized then I could use these to create some very tall and large buildings.


