Something a little naughtical


Recommendations: 294
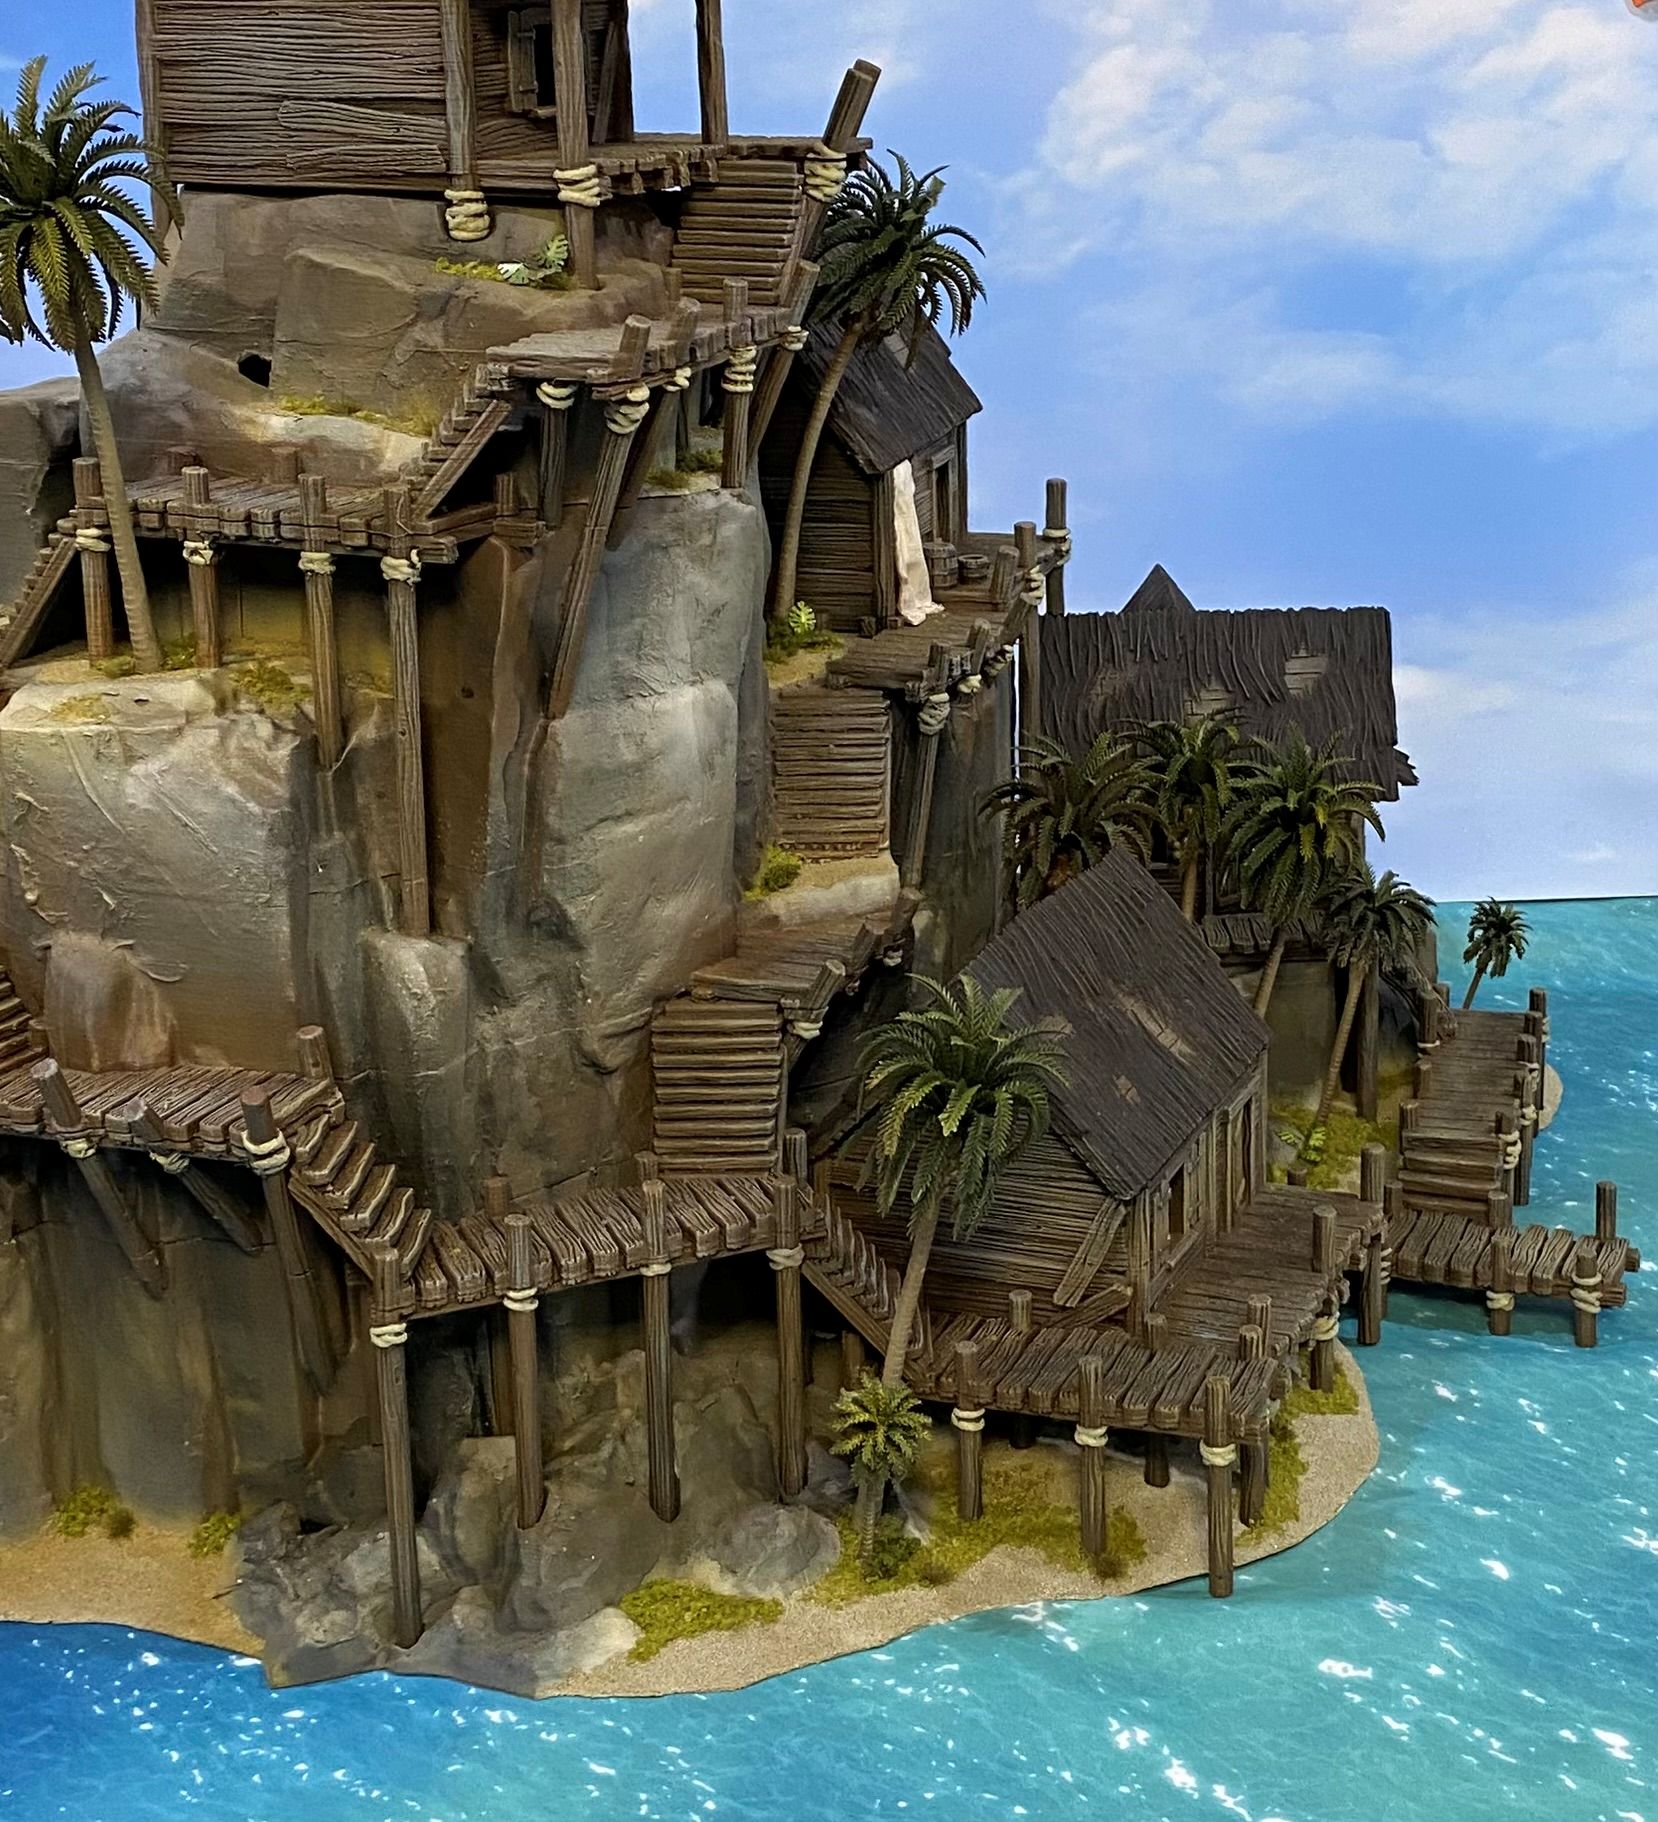
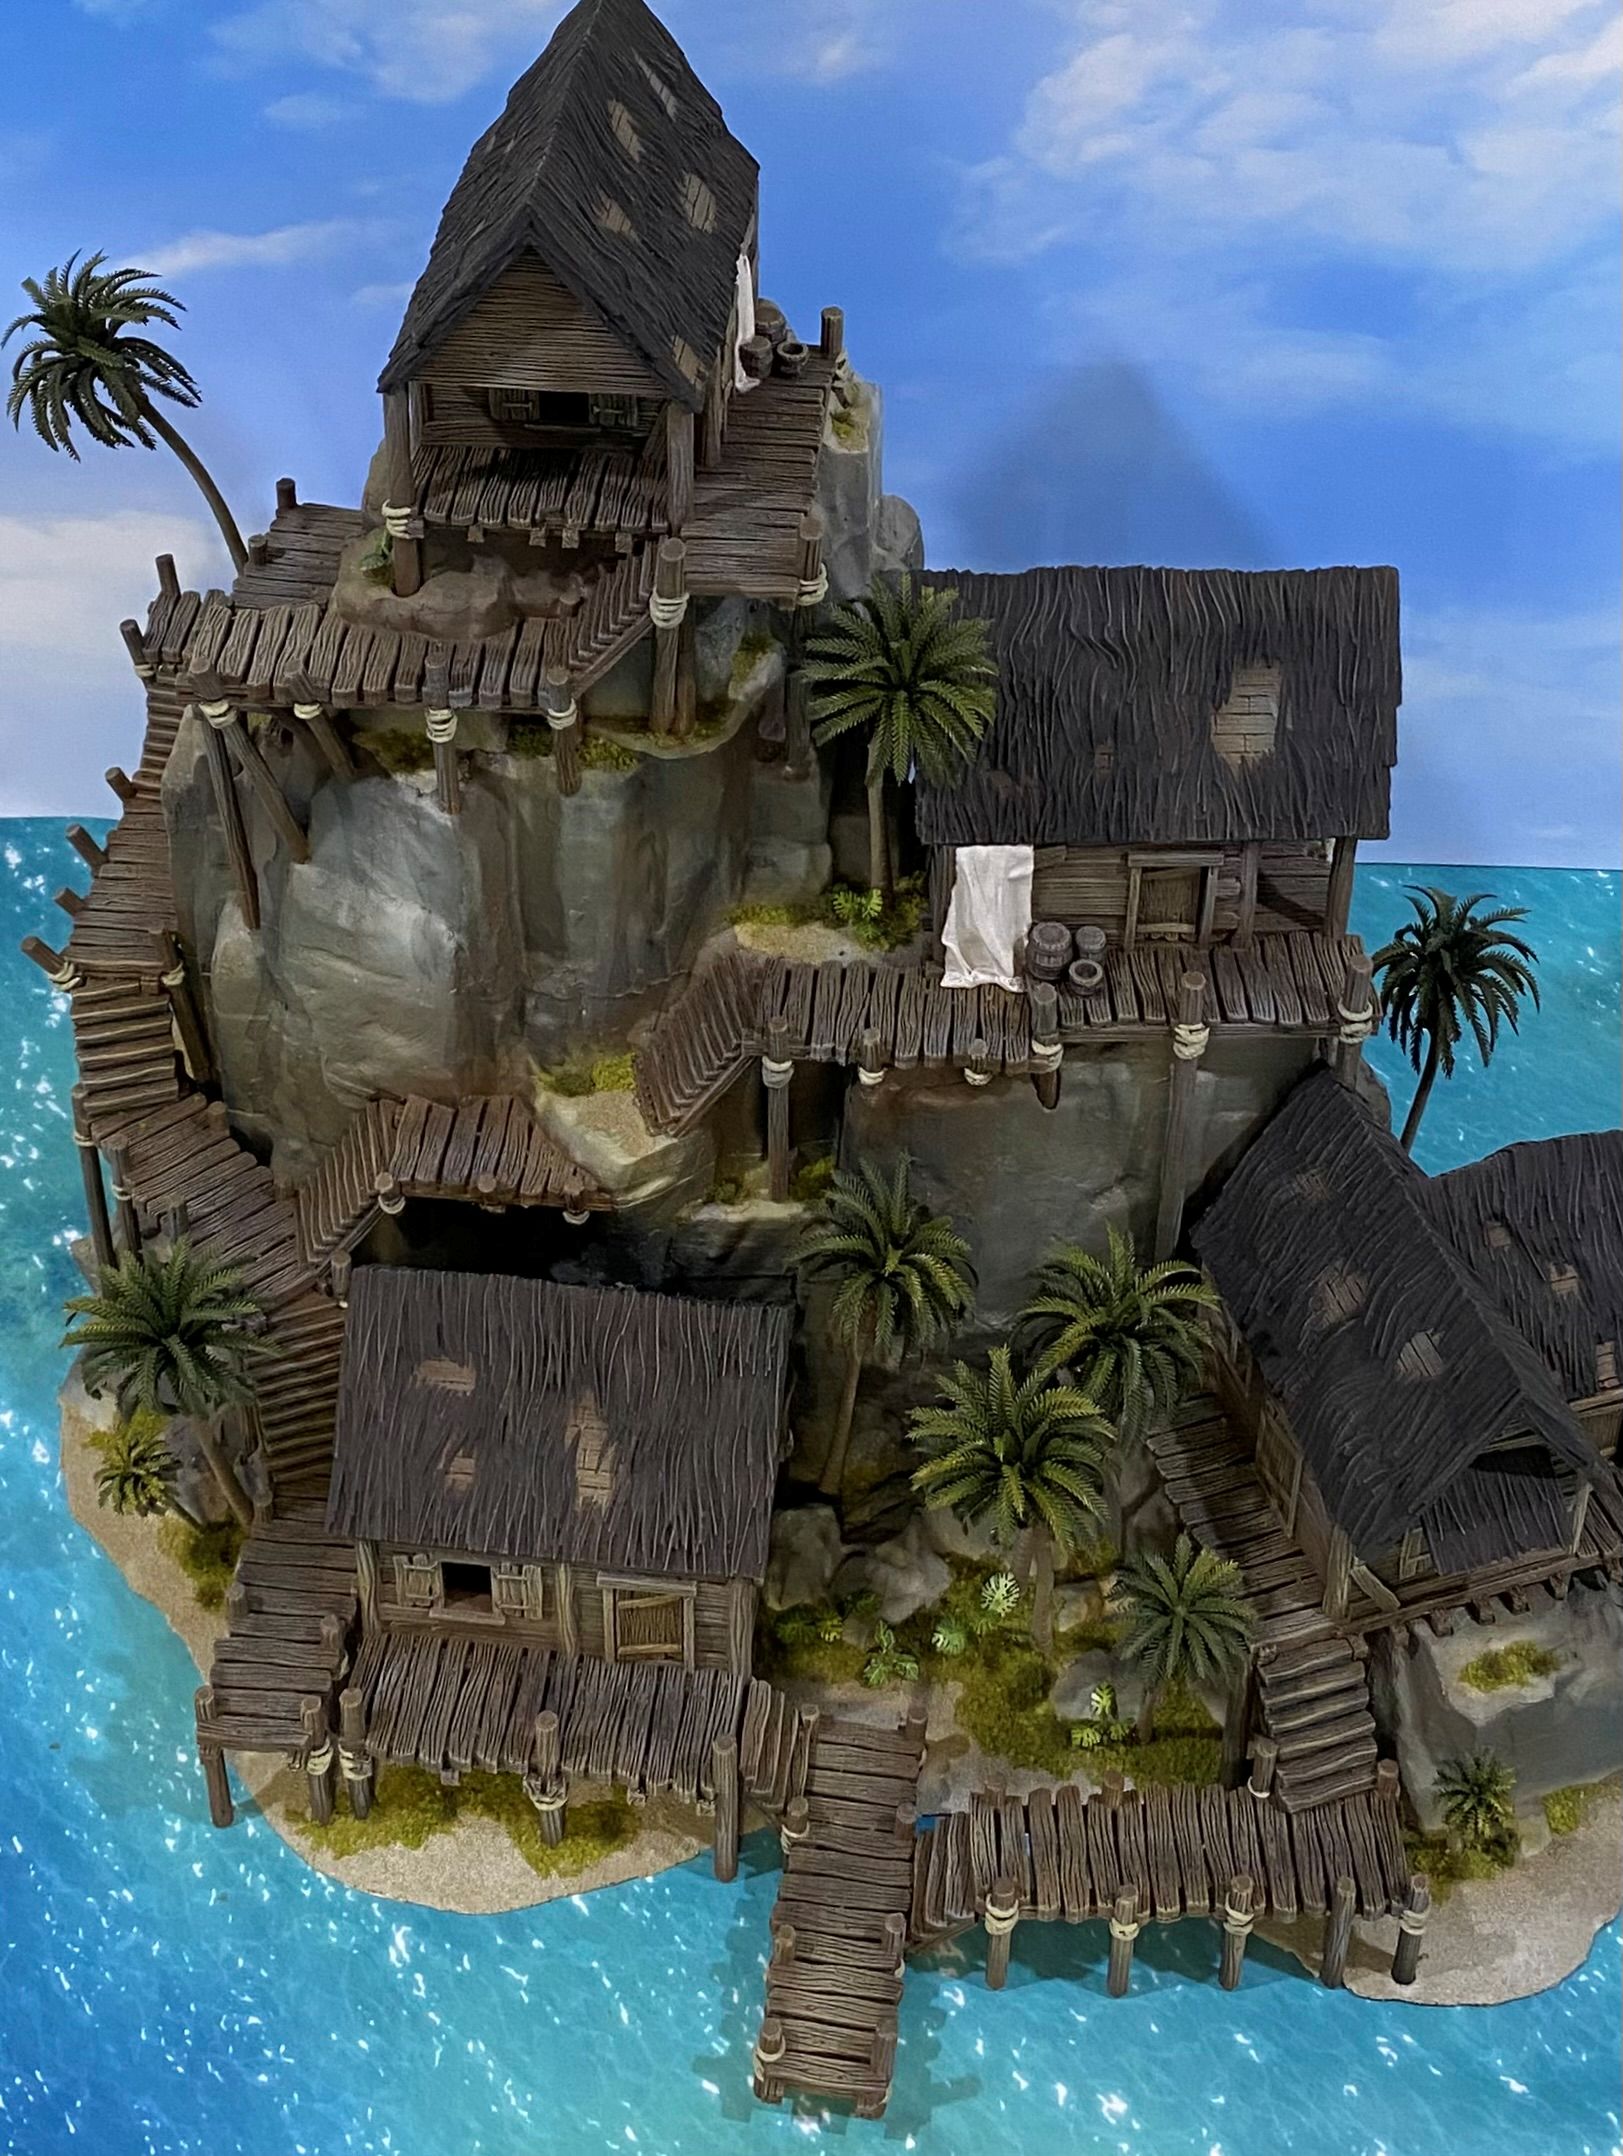
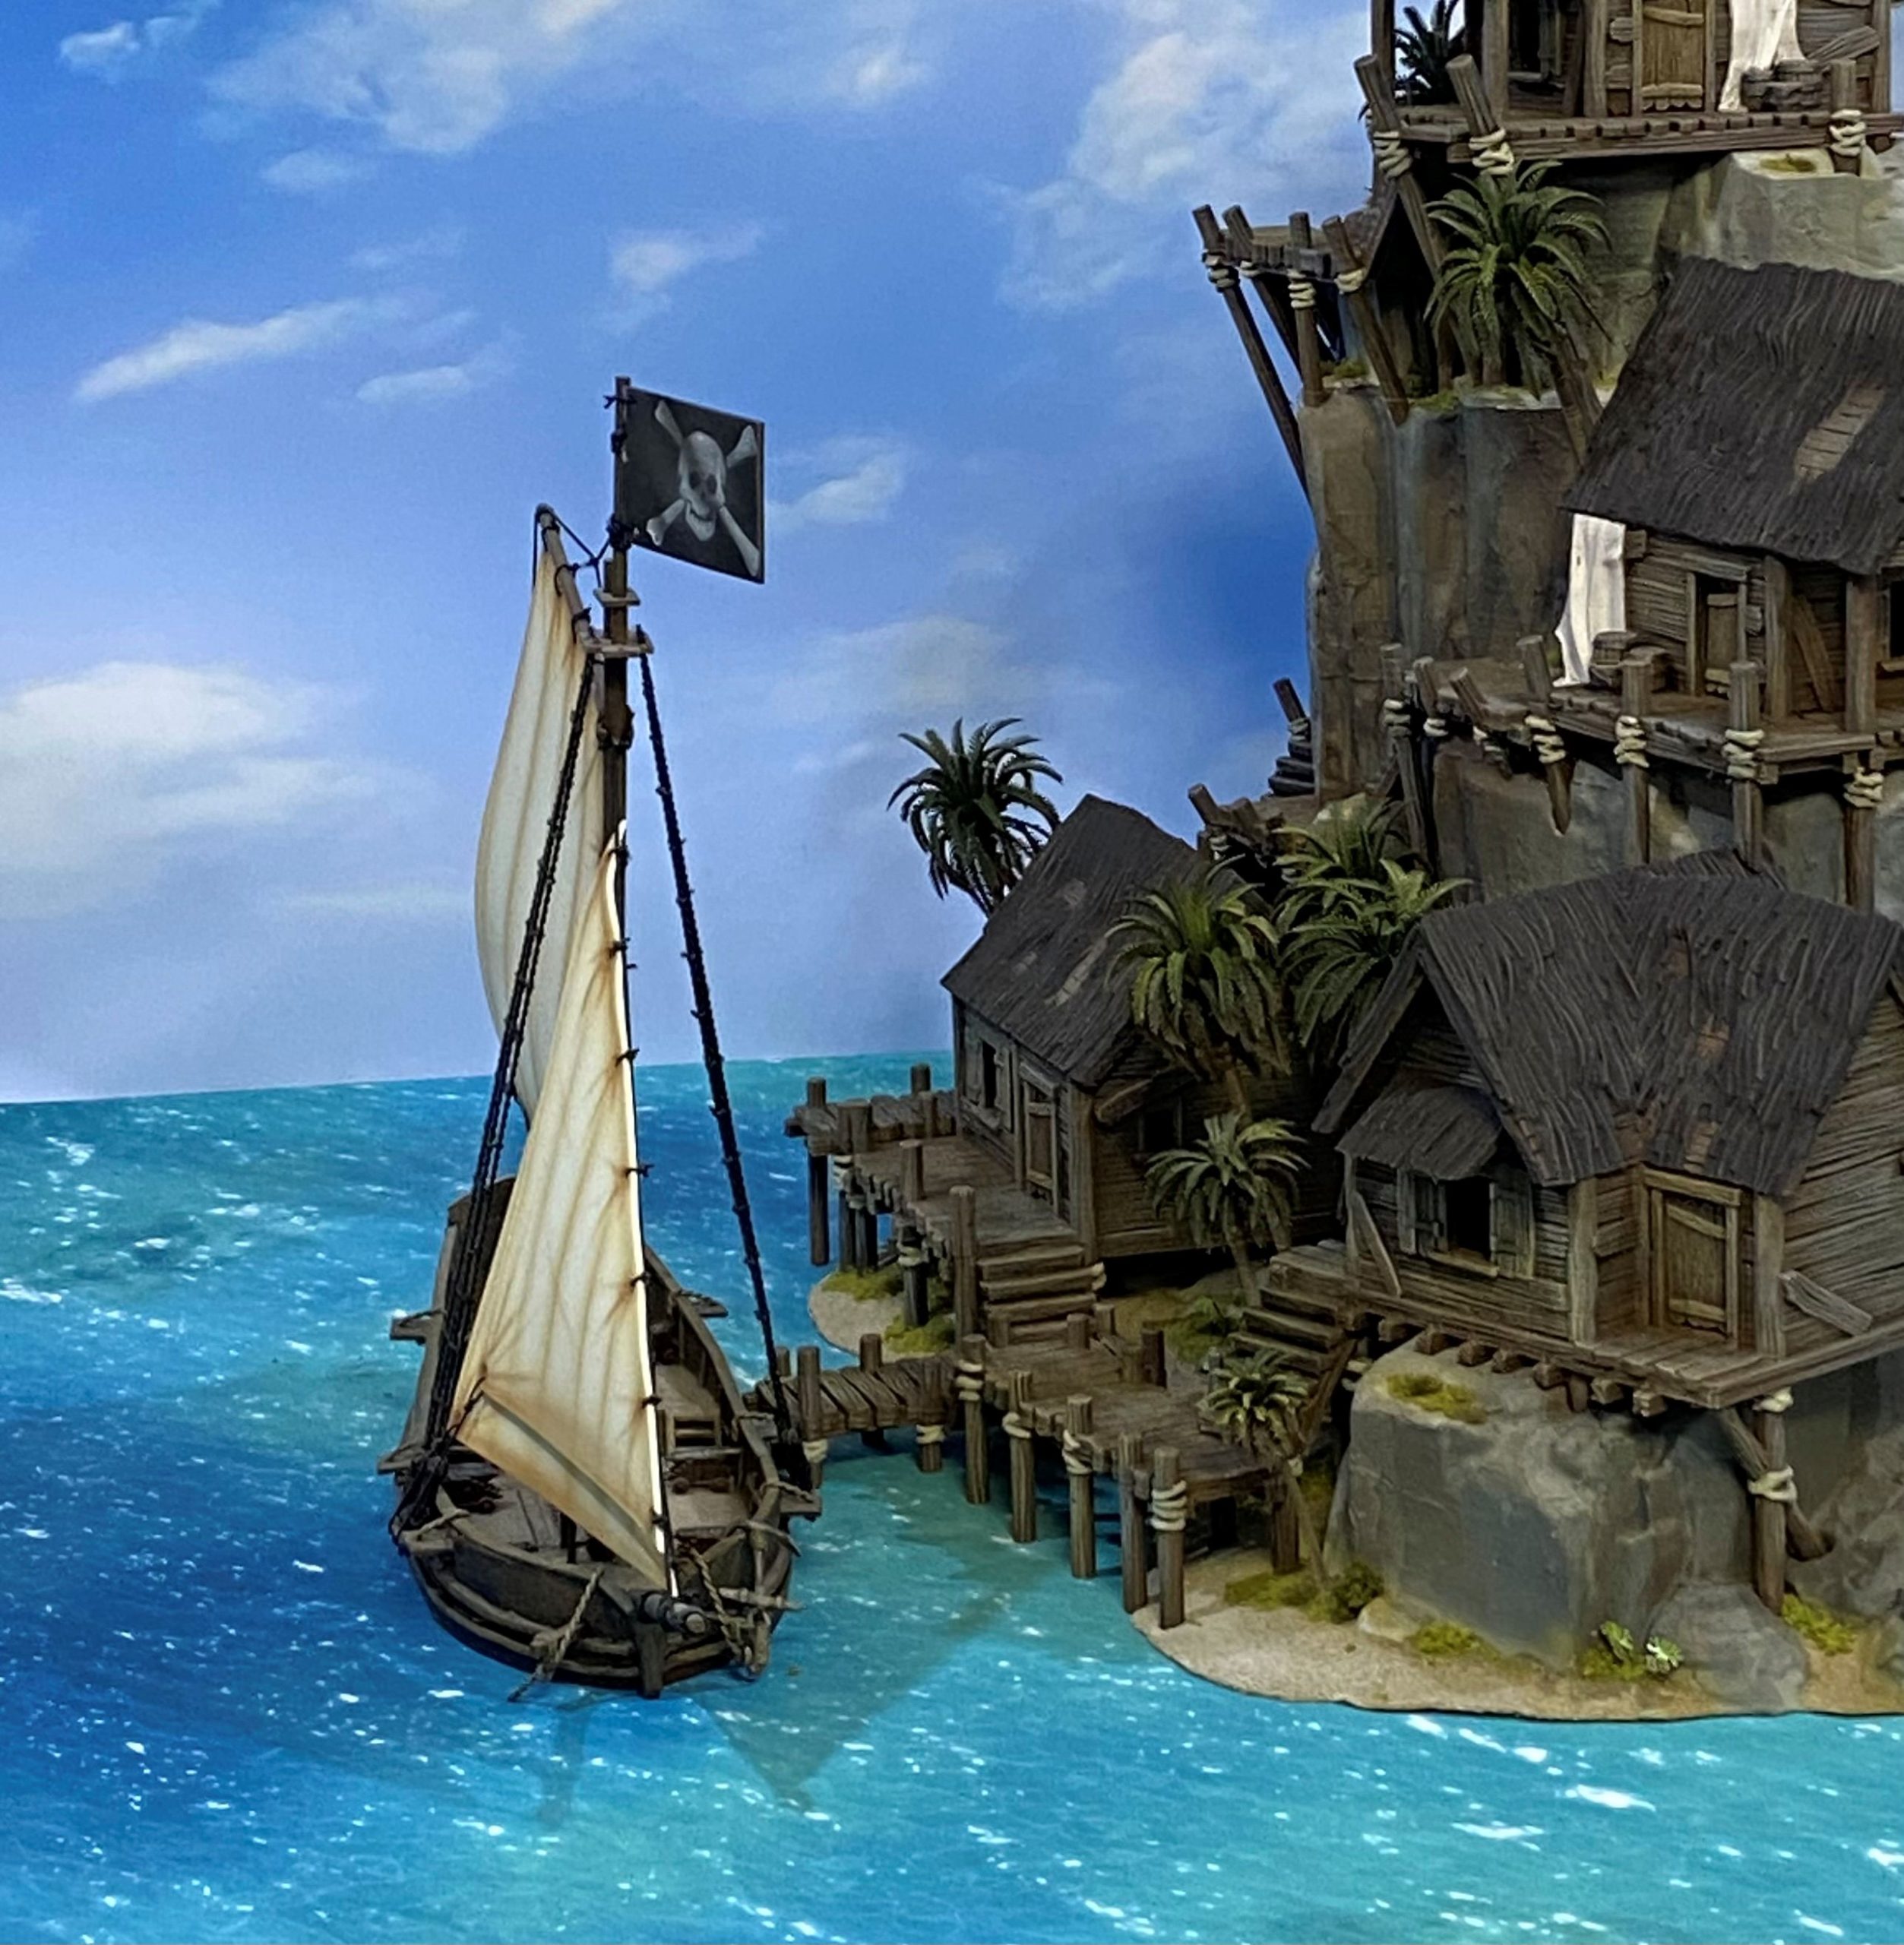
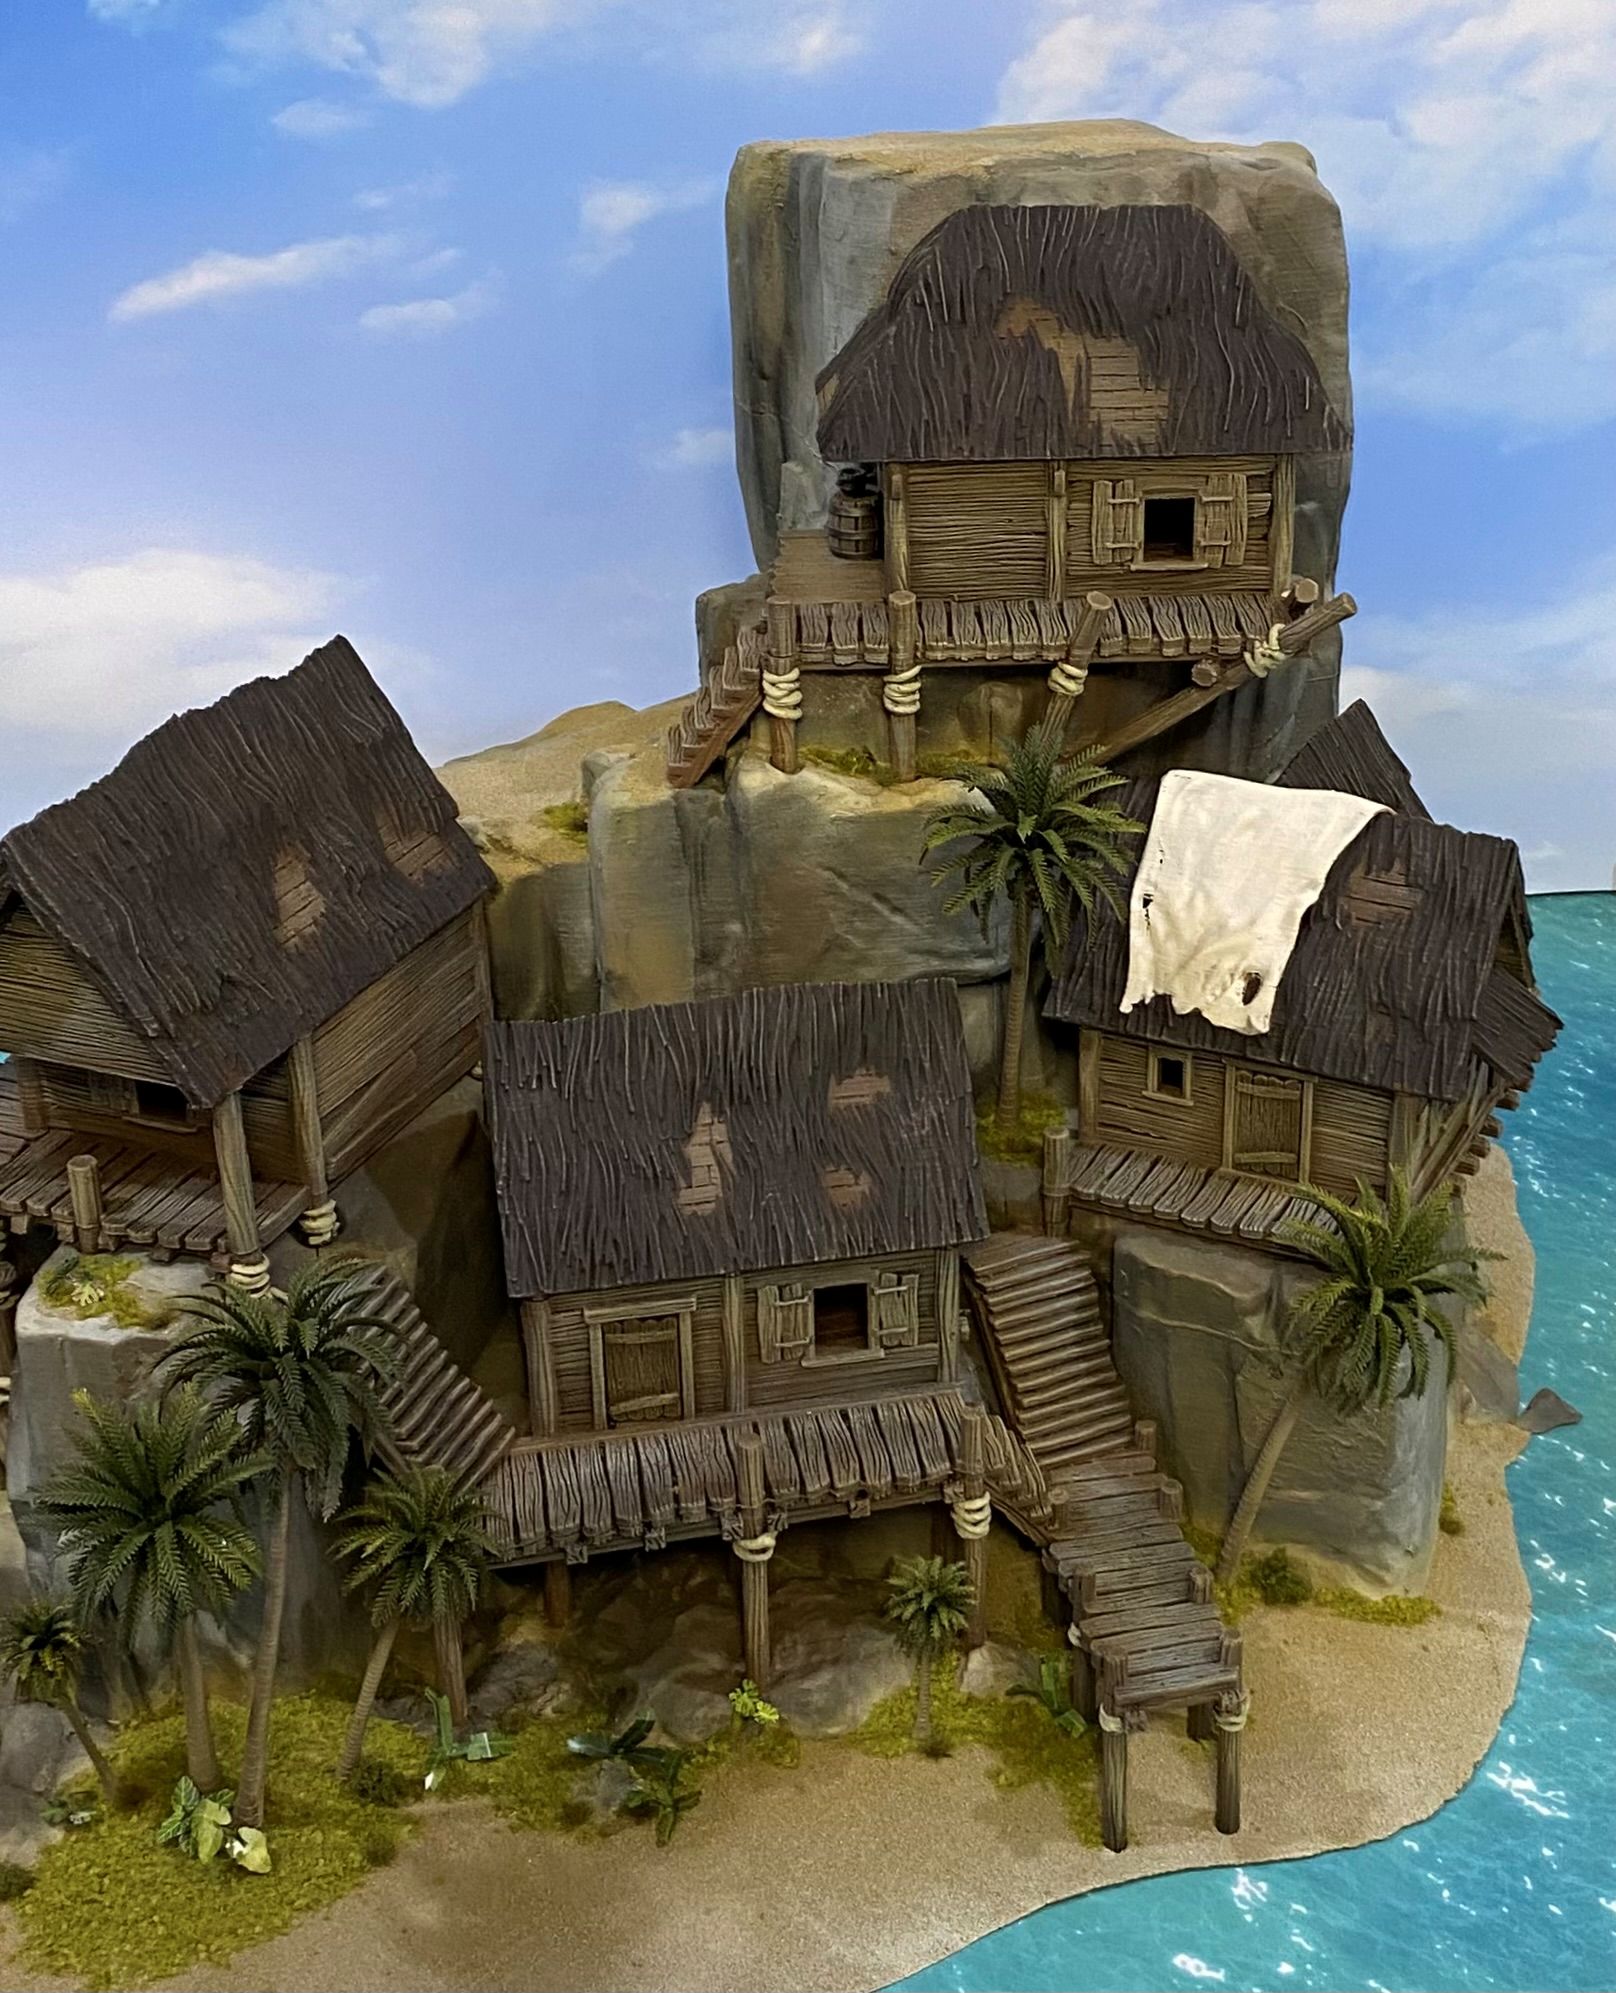
About the Project
What’s a Pirates favourite letter of the alphabet? If you are thinking it’s R you would be wrong, they are all about the C. I love making terrain. In fact it’s my favourite part of the whole hobby. I also like sailing ships. I’m not sure why, I just like the look of them. So, what can I do with ships and terrain? The thing about ships is they tend to be in the water, and ship on ship combat also normally happens on the water on the open sea. Now the thing about the open sea is it doesn’t really lend itself to an exciting terrain build. So here we come to a quandary. I could do ships in an open sea and have ship to ship combat or I can do a ship in a harbour and do terrain. Or I can do something else….
Related Game: Blood & Plunder
Related Genre: Pirate
This Project is Active
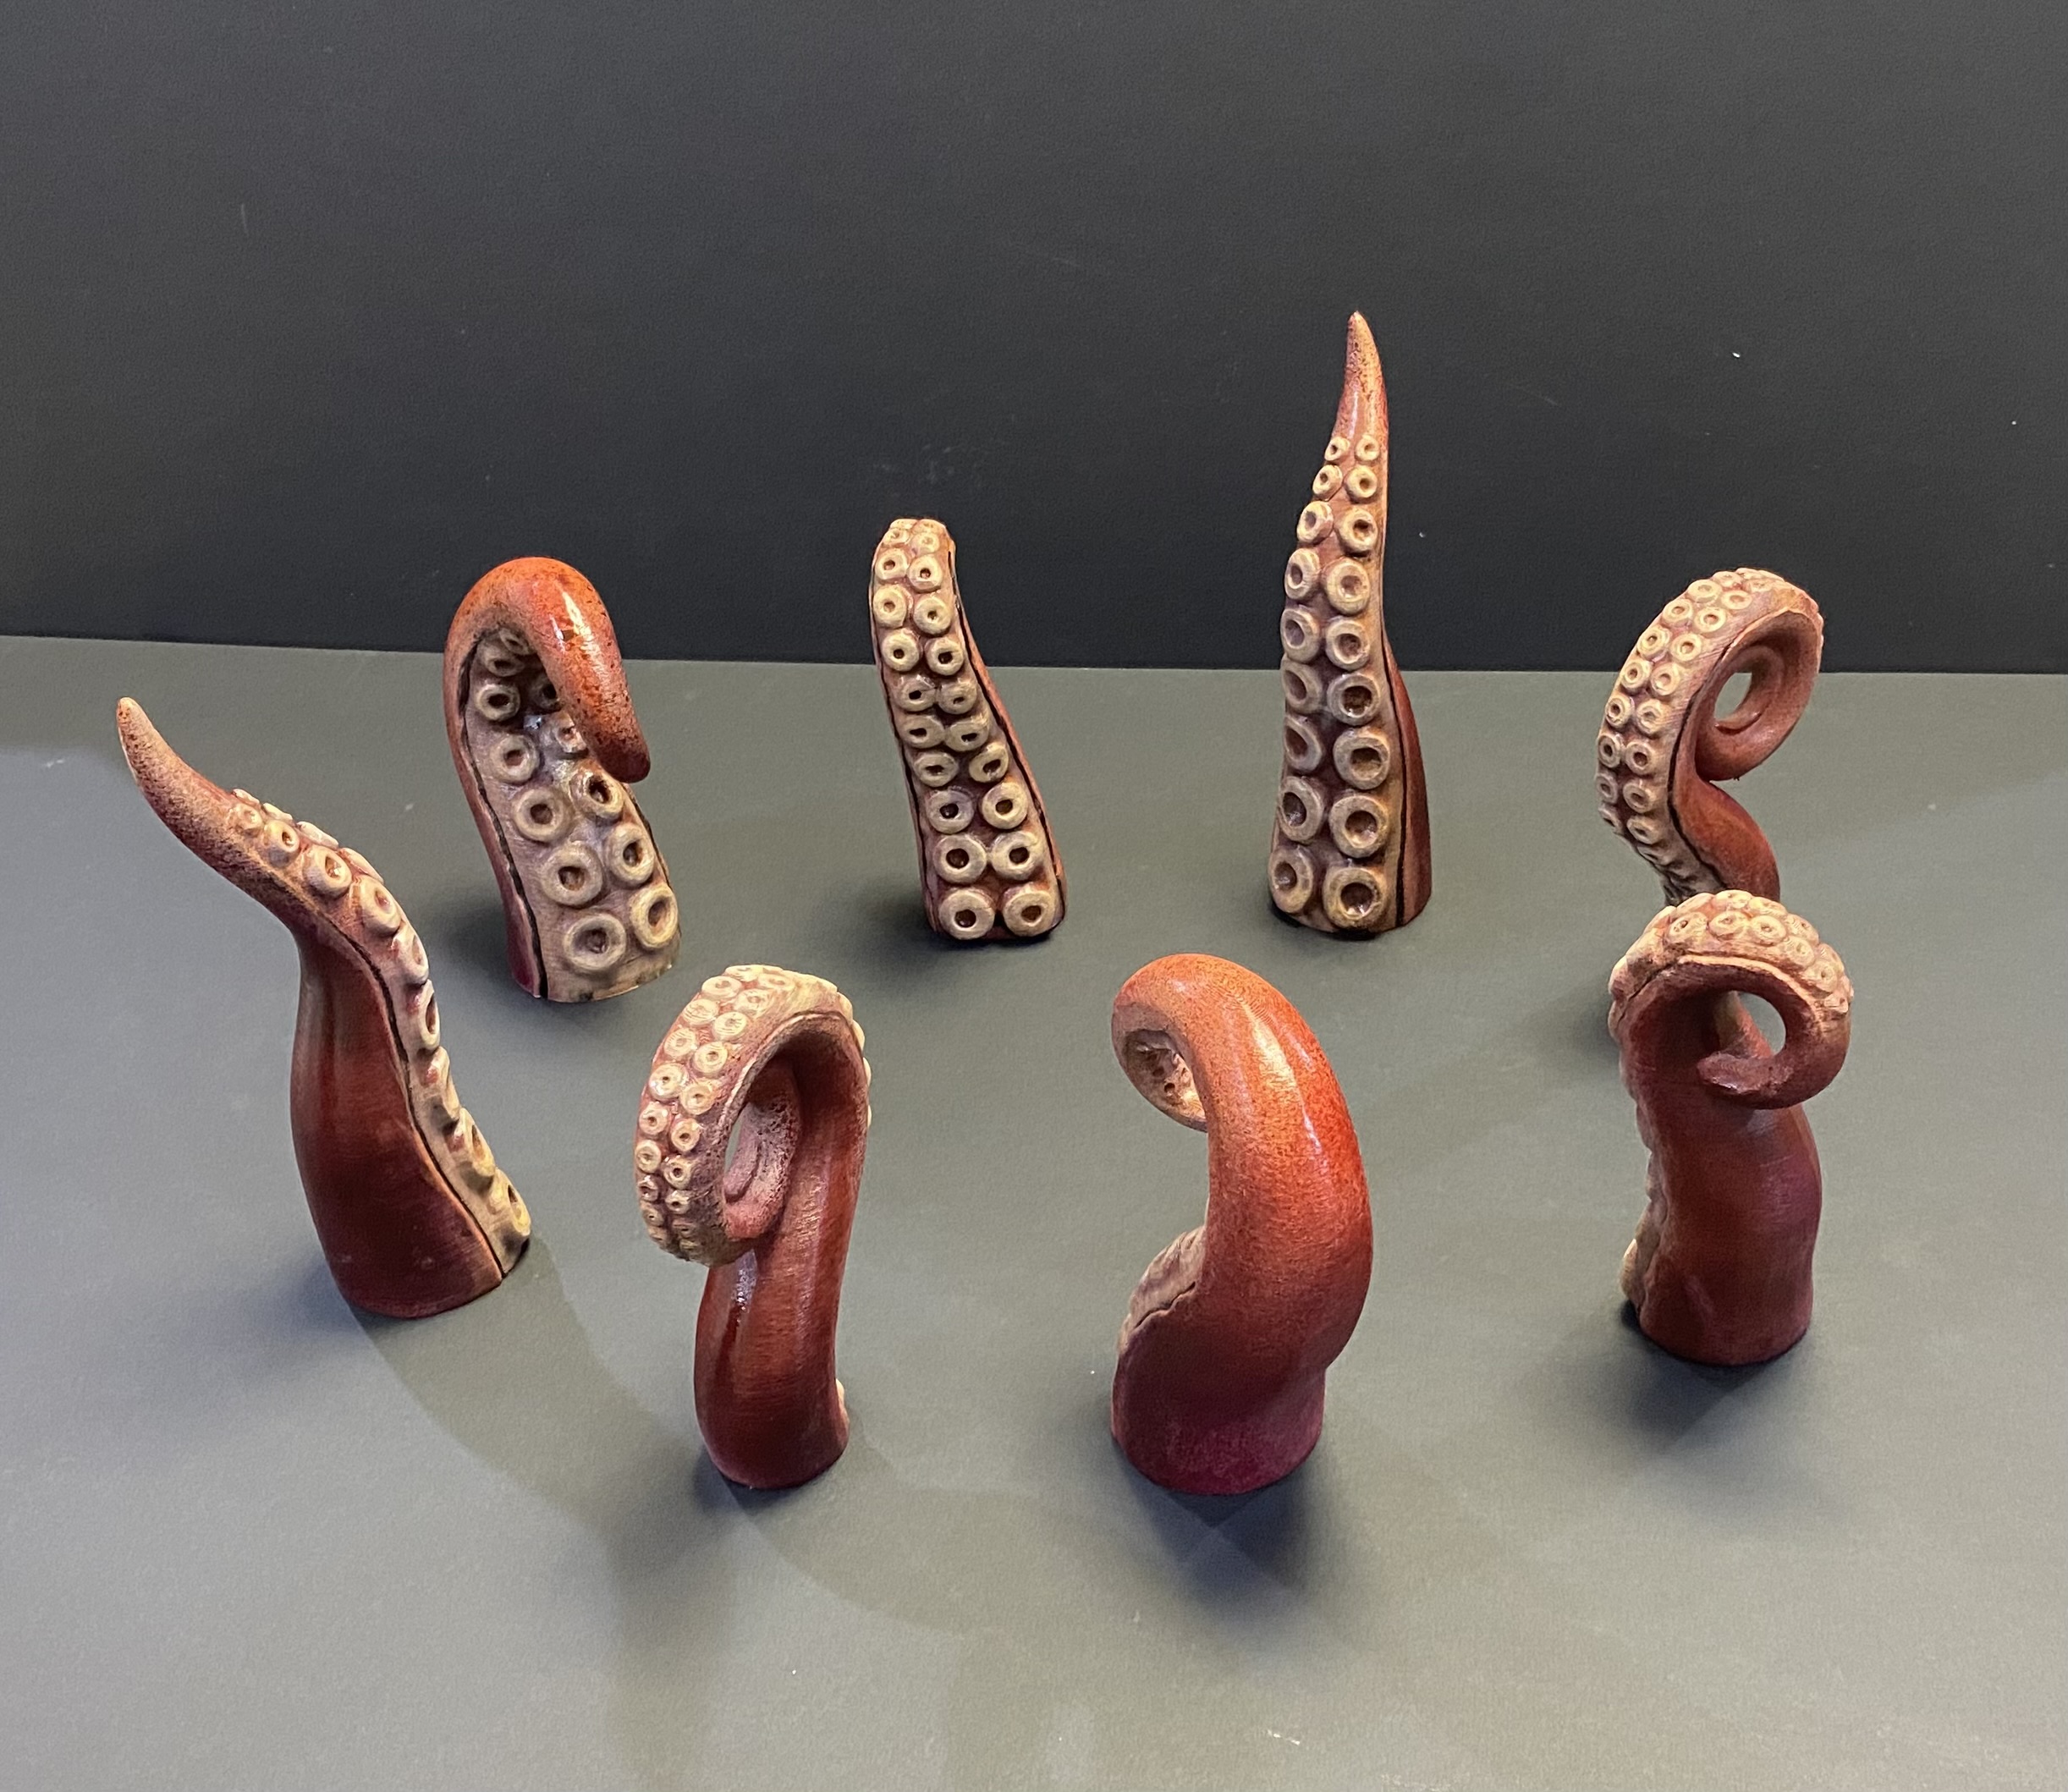
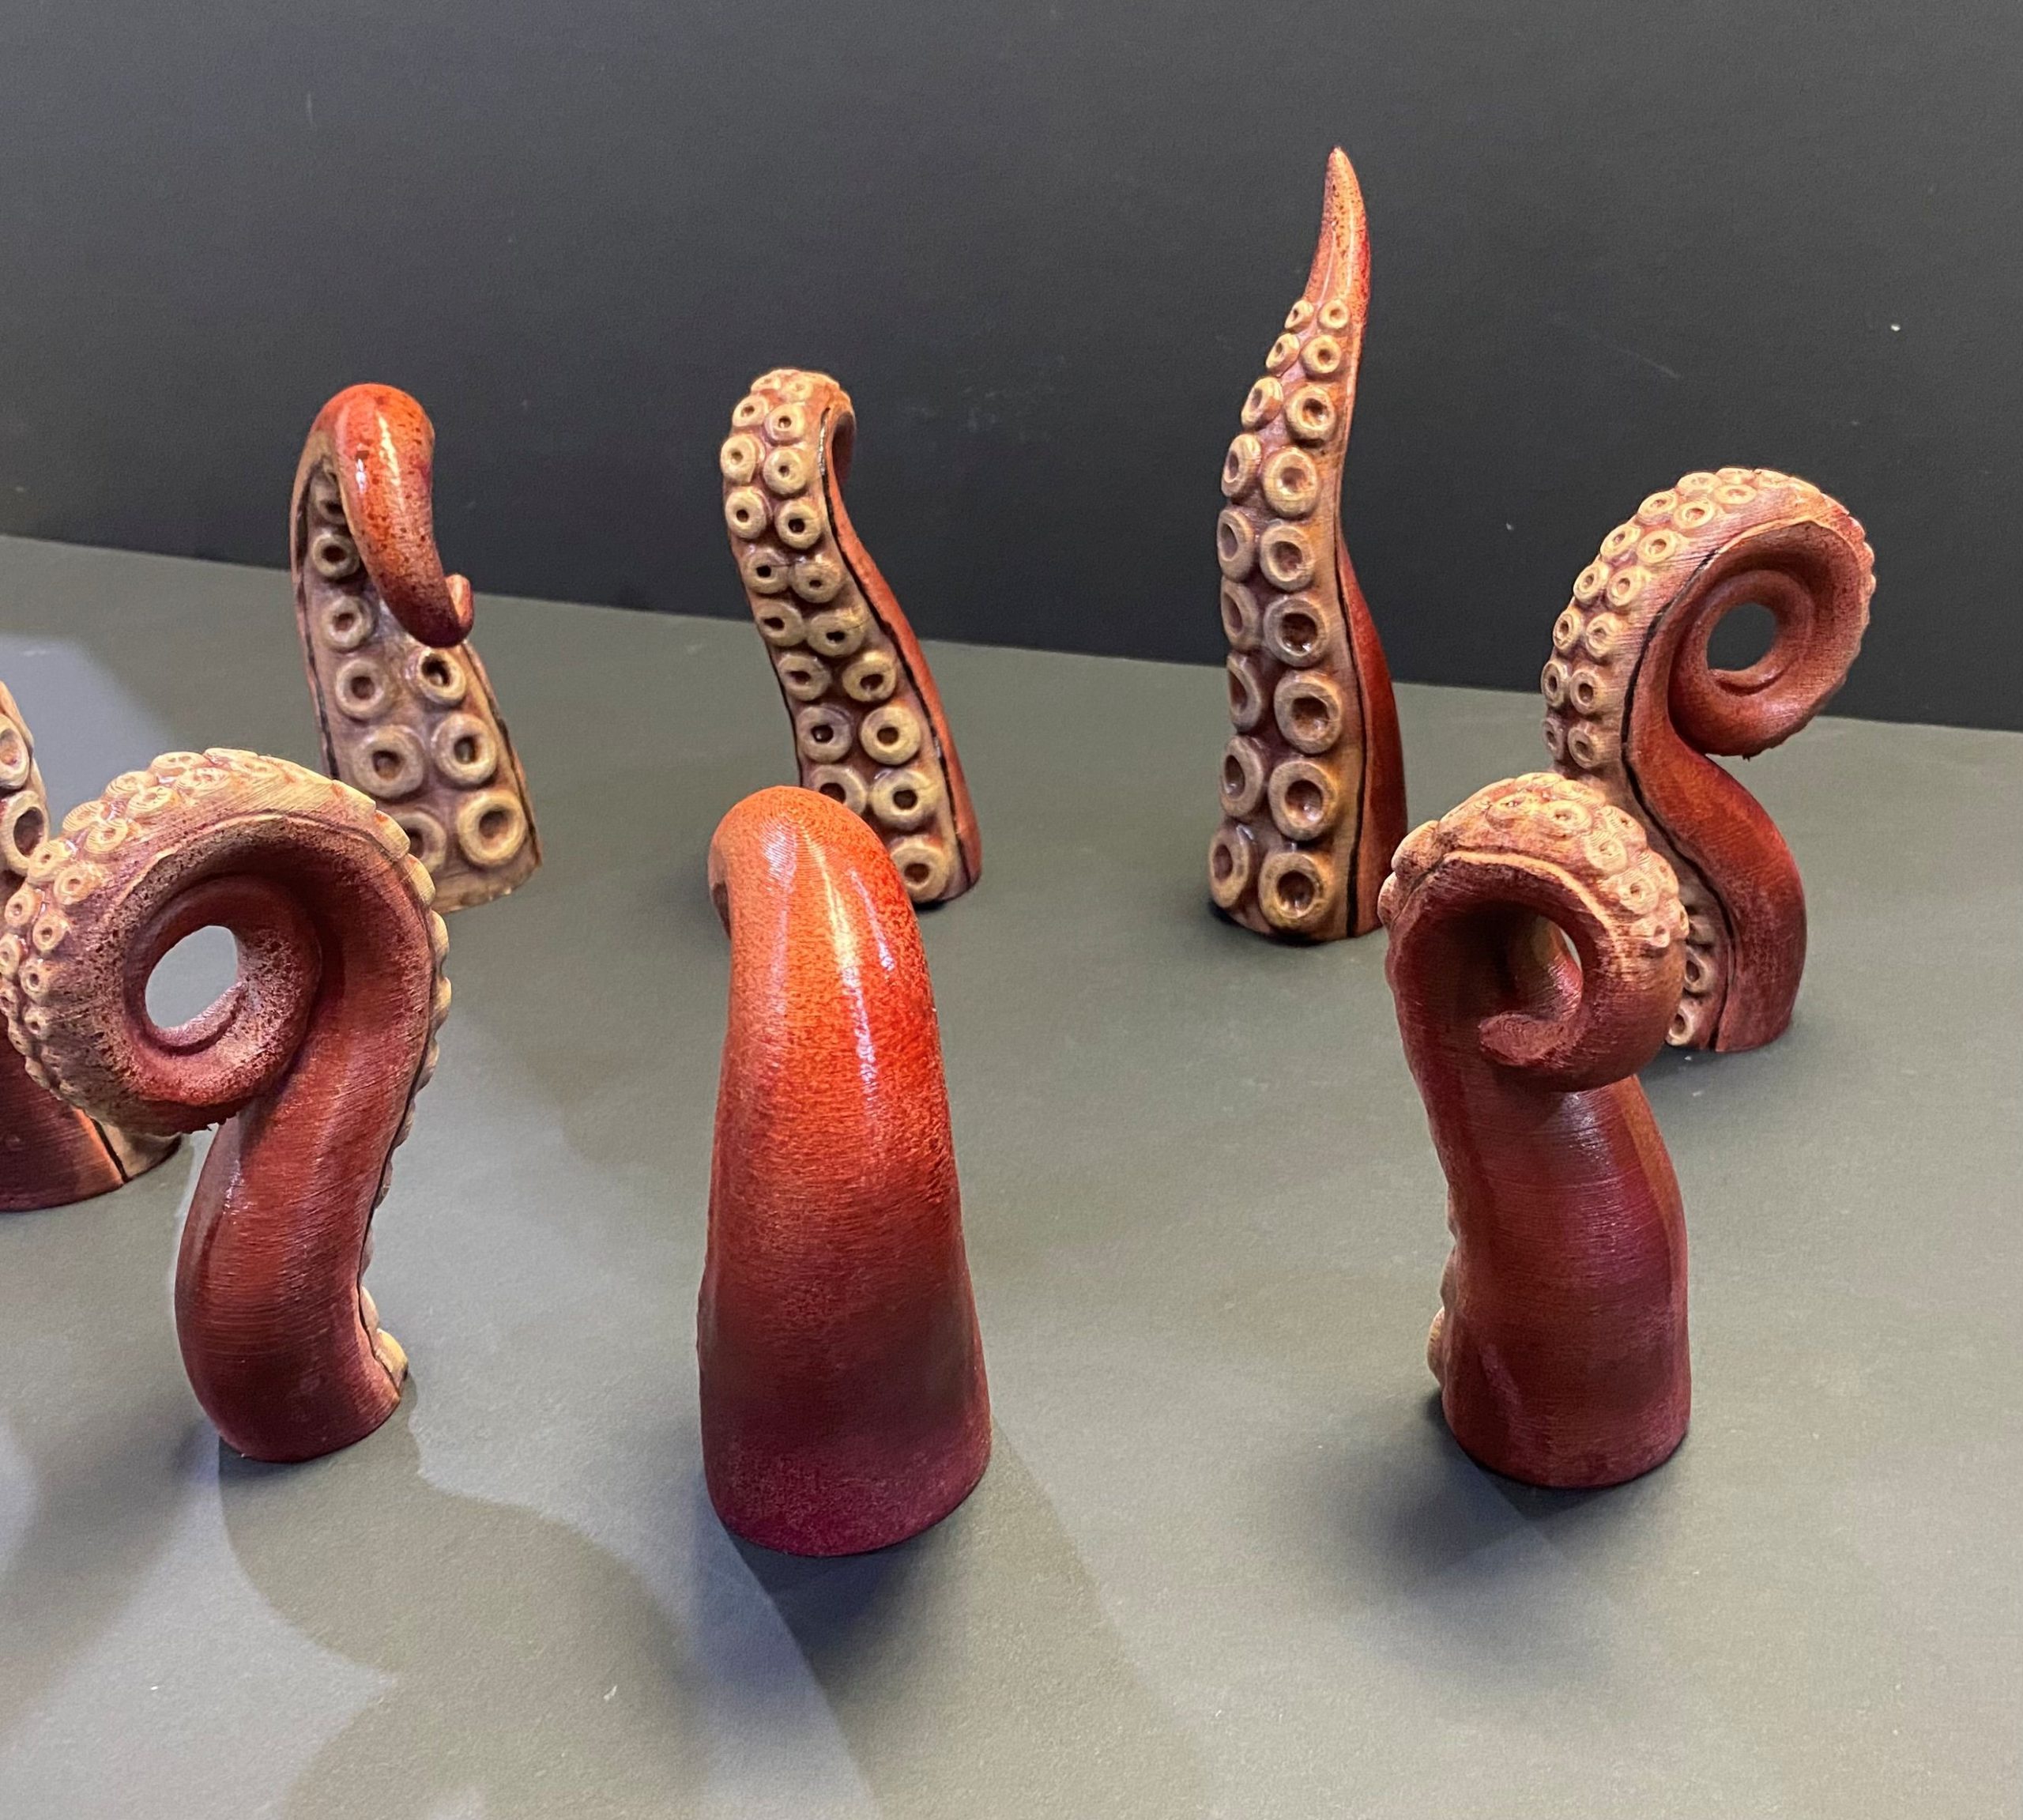
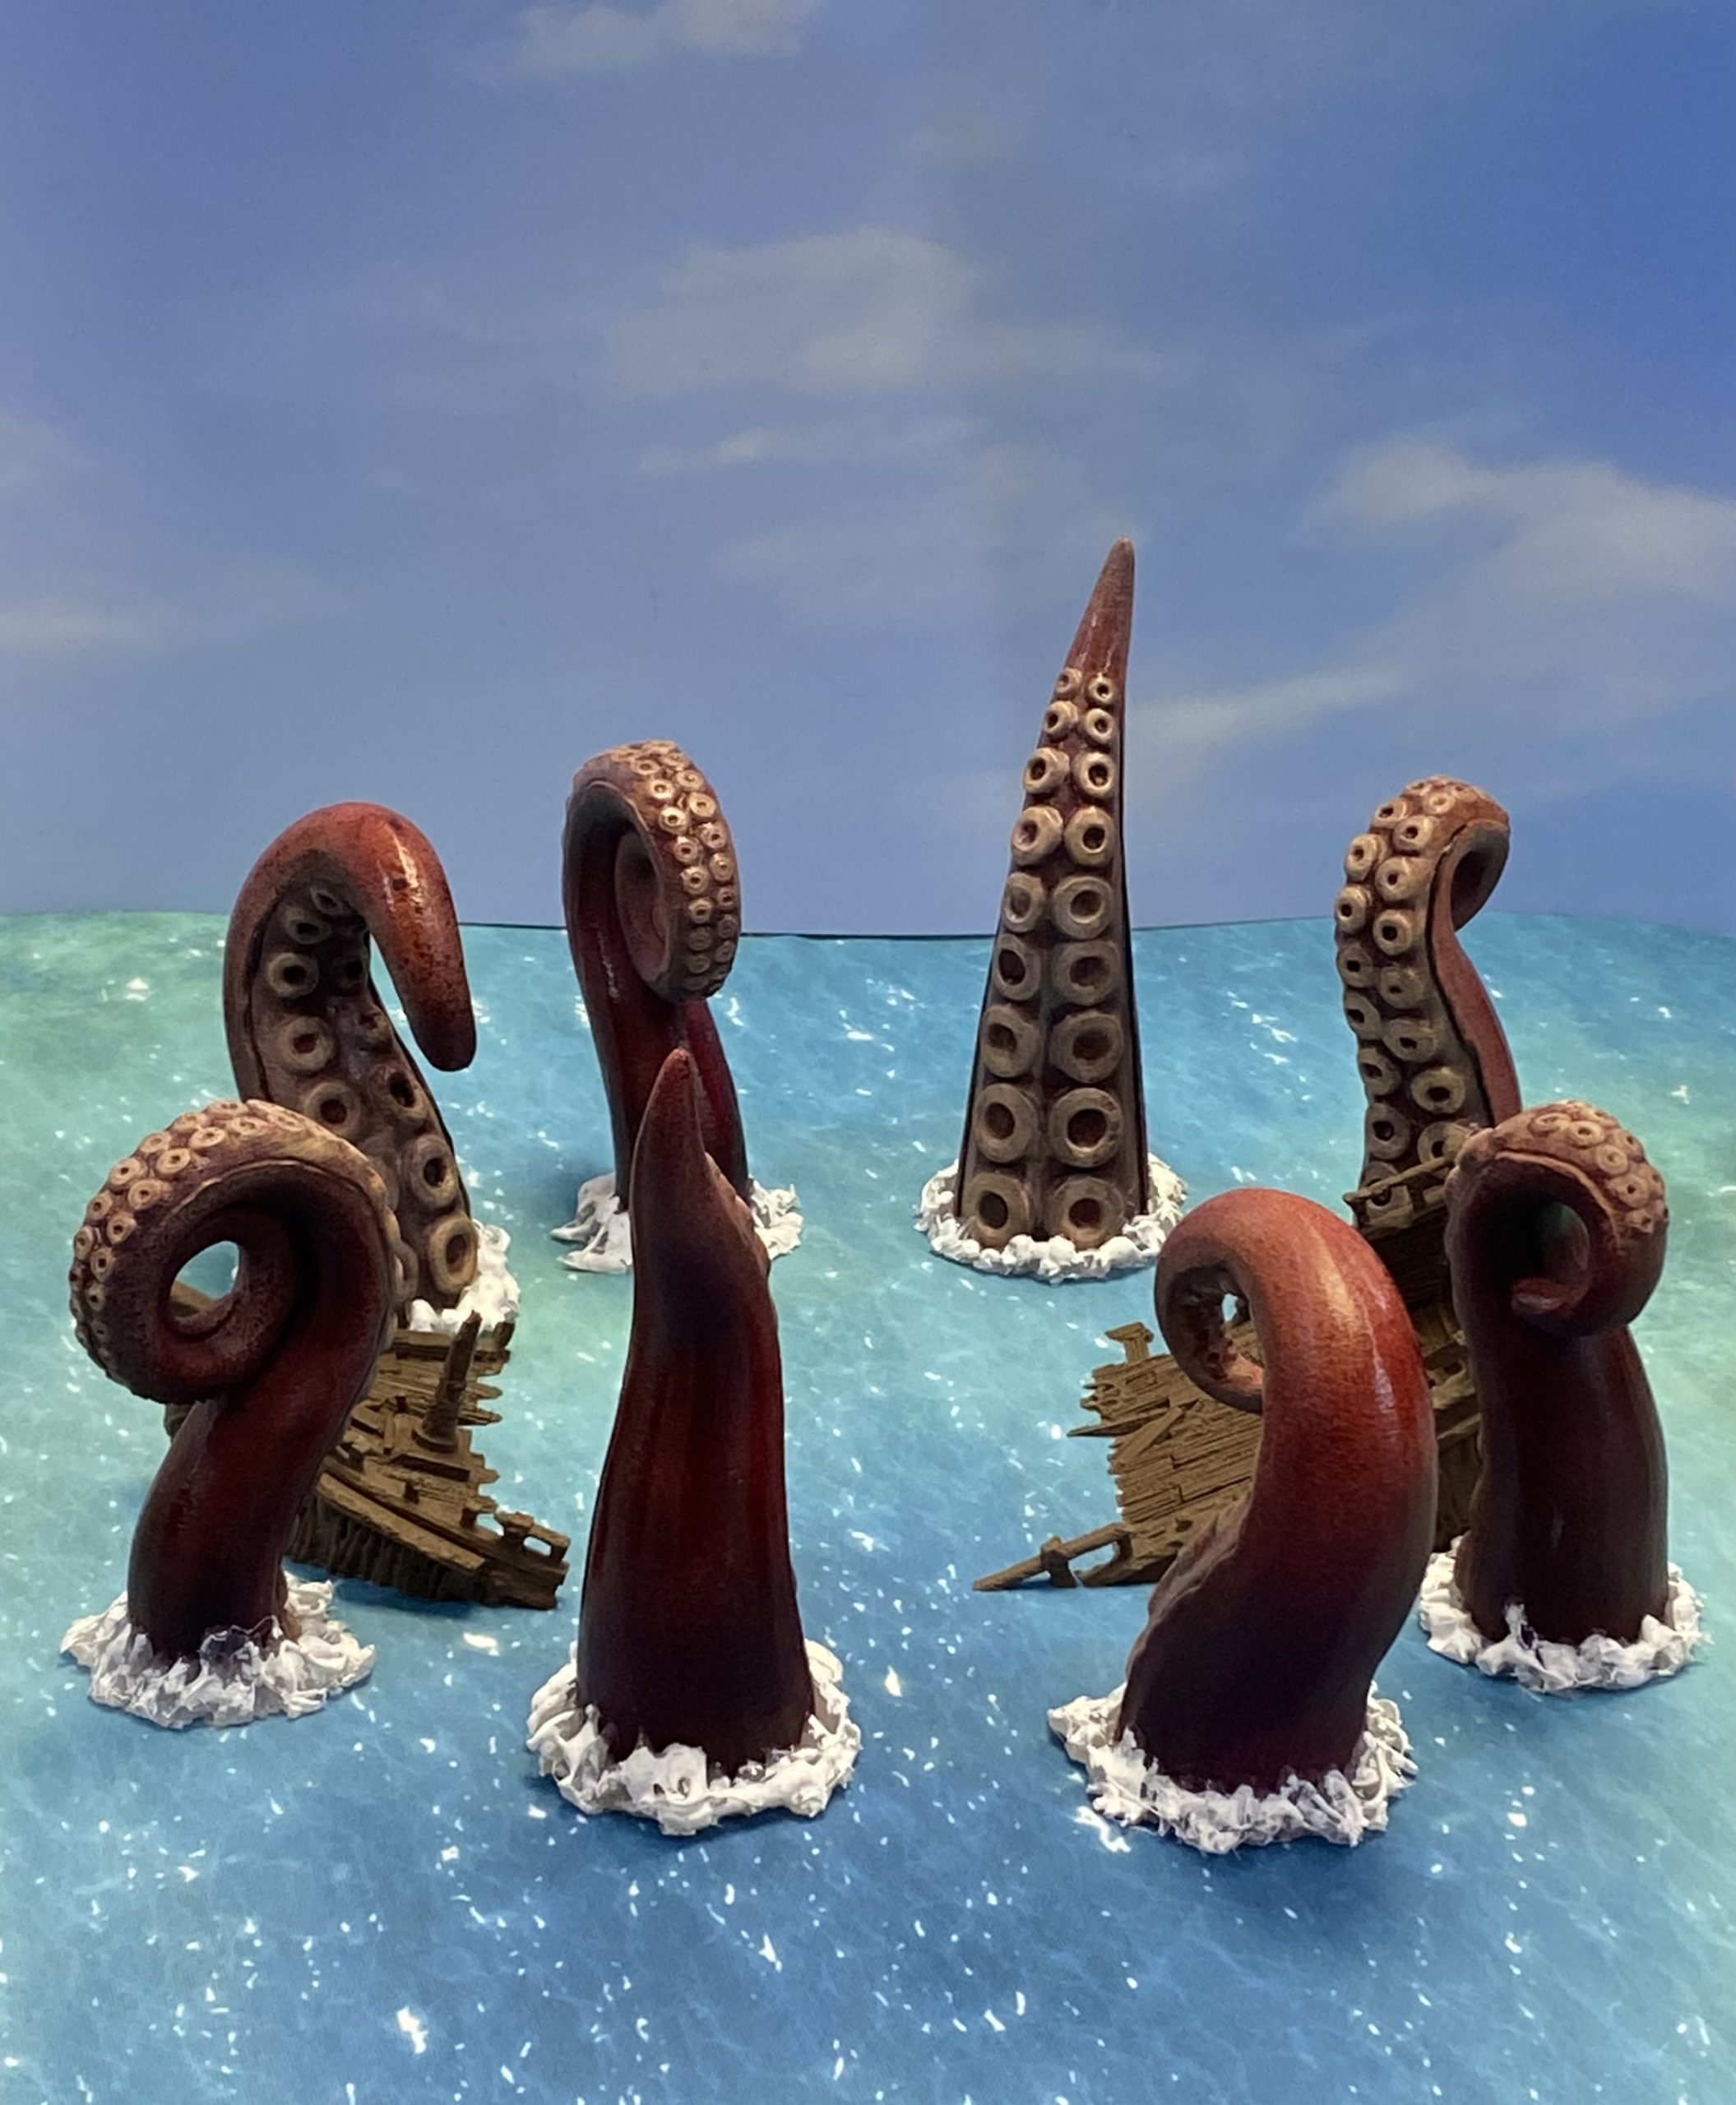
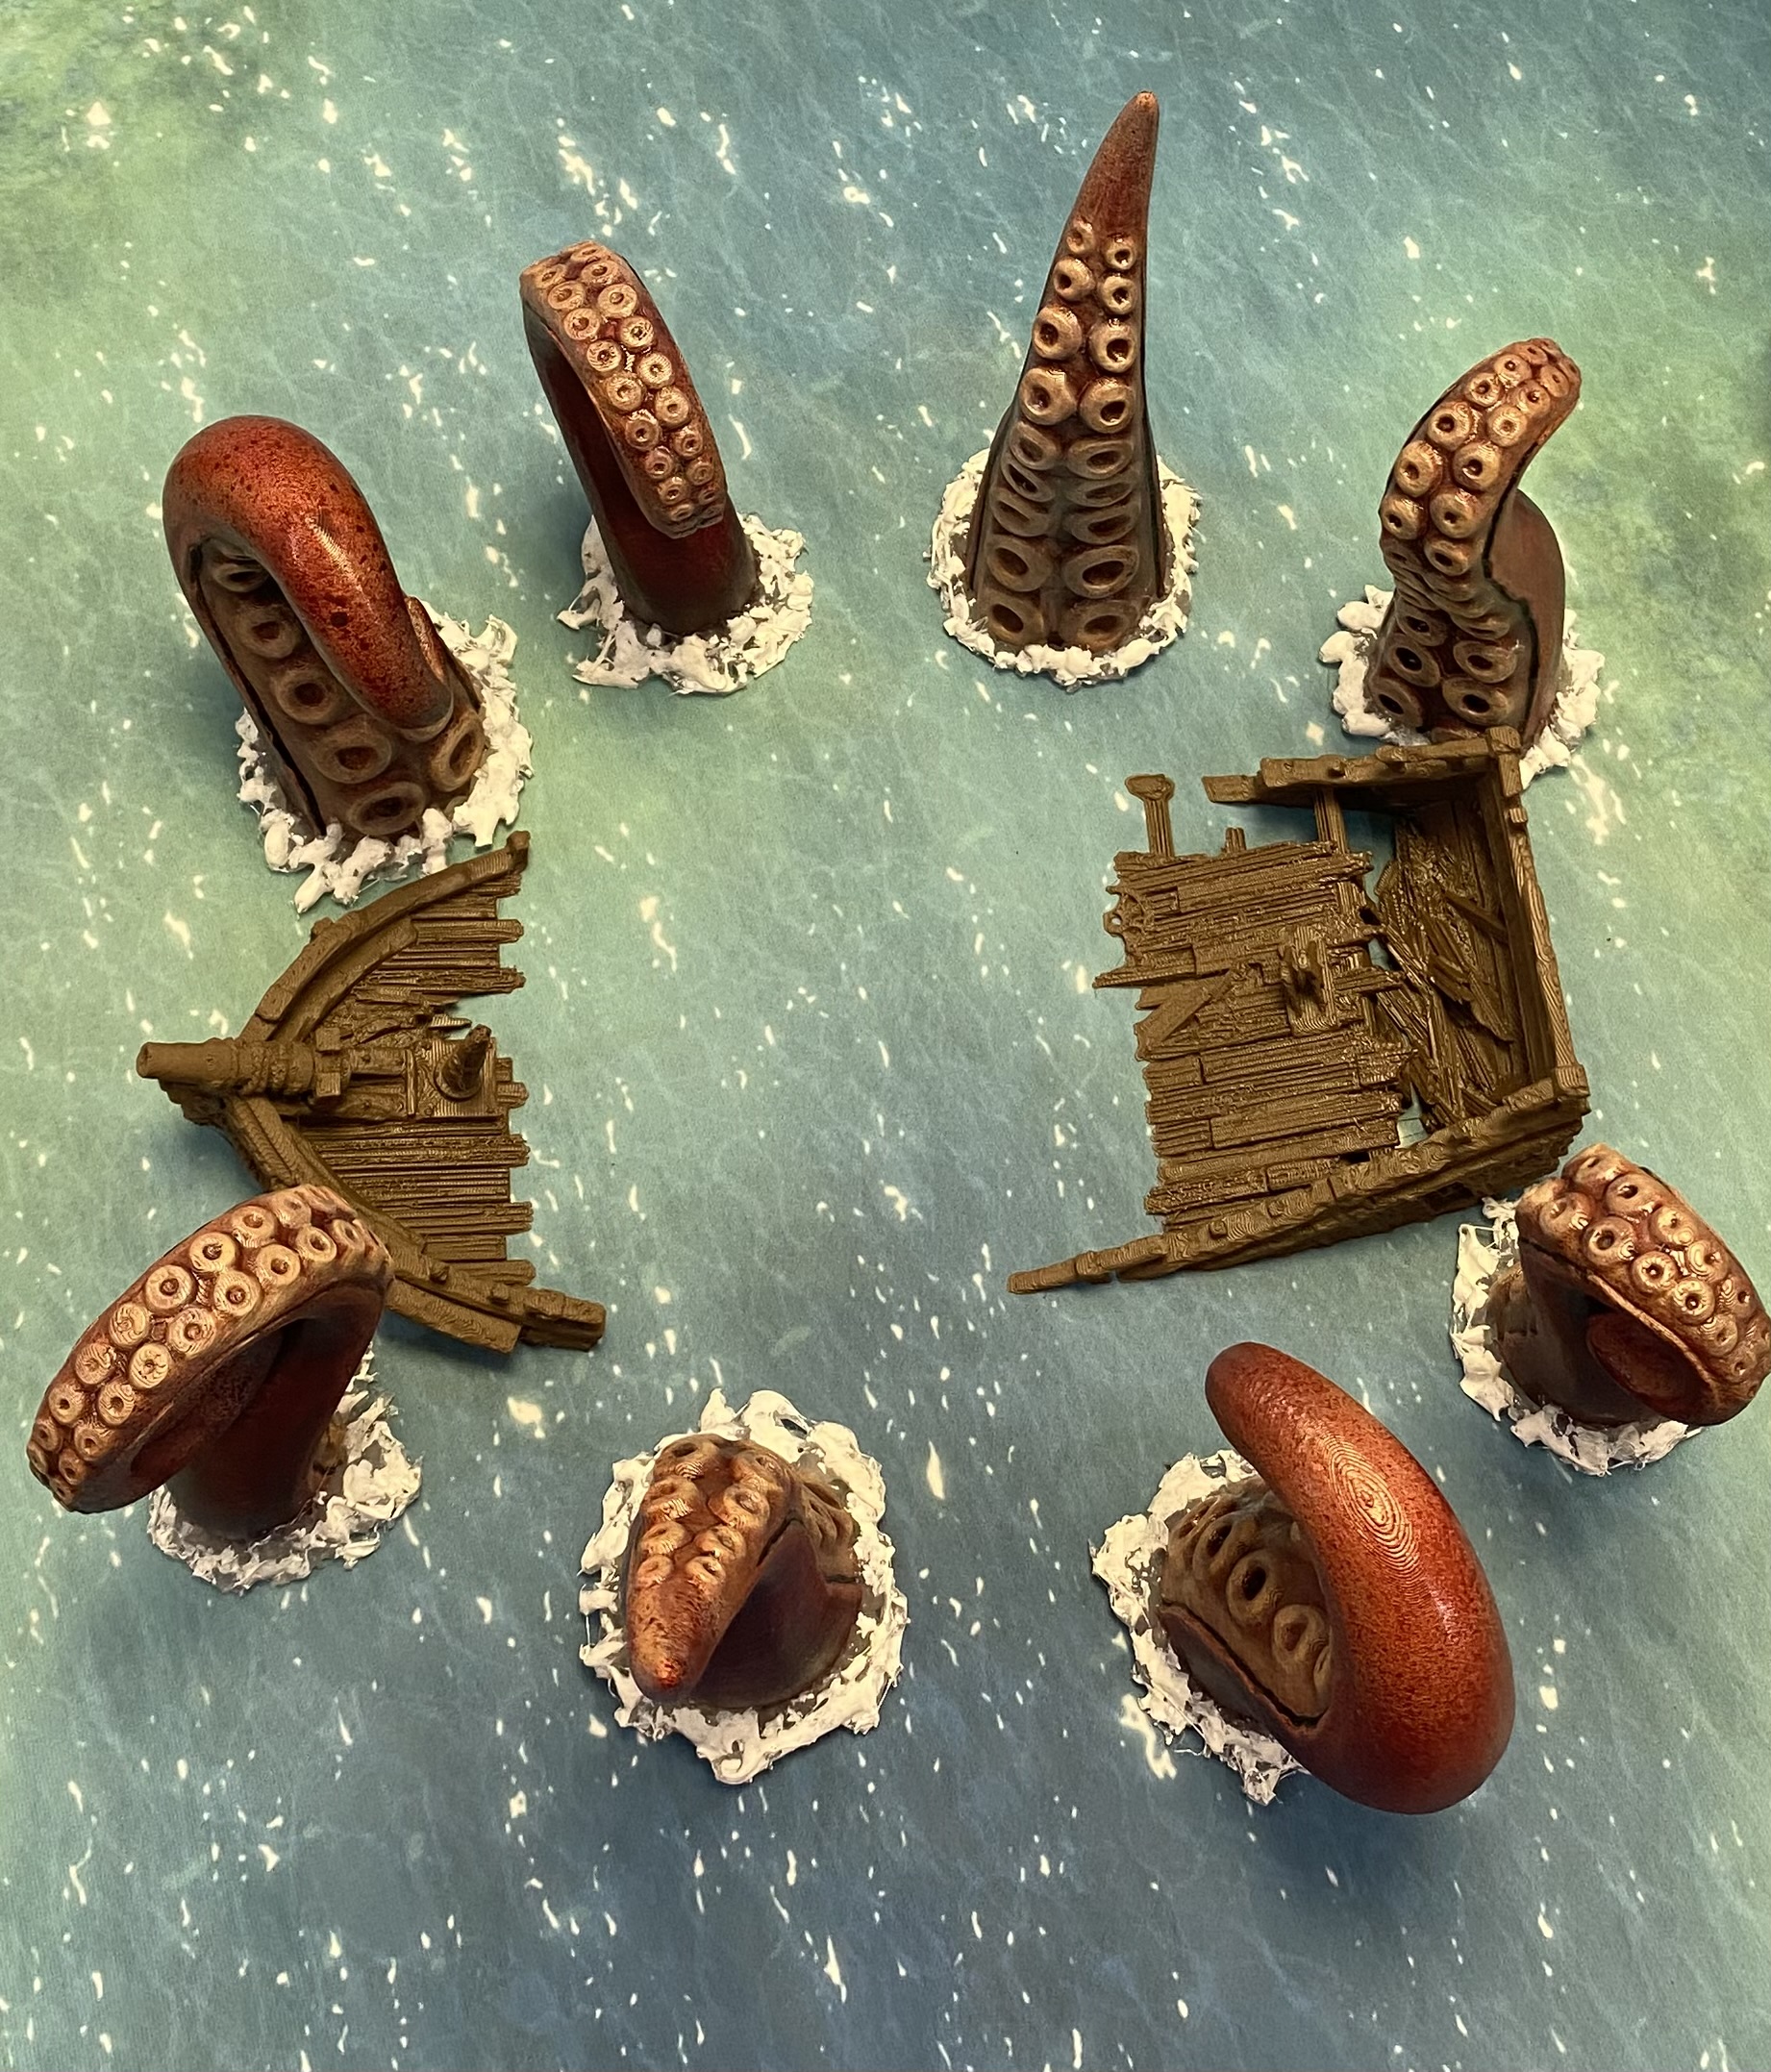
Time to get Kraken on with this project
No Piratey adventure on the Seven Seas would be complete without the threat from the deep, the Kraken.
I decided to go with an octopus rather than a squid, which meant I had two fewer appendages to do. Hurrah for saving time.
I found some suitable tentacles and enlarged them quite a bit until I had something suitably monstrous.
I then used contrast paints through an airbrush to first apply a dark mauve and then an orange to the limbs. By letting the airbrush splutter a bit, I created a nice, mottled effect that I rather like.
I then used a light pink to drybrush the underside where the suckers were.
After that, I cave the whole thing a very watered-down airbrushing of flesh wash.
I finished off with a gloss varnish.
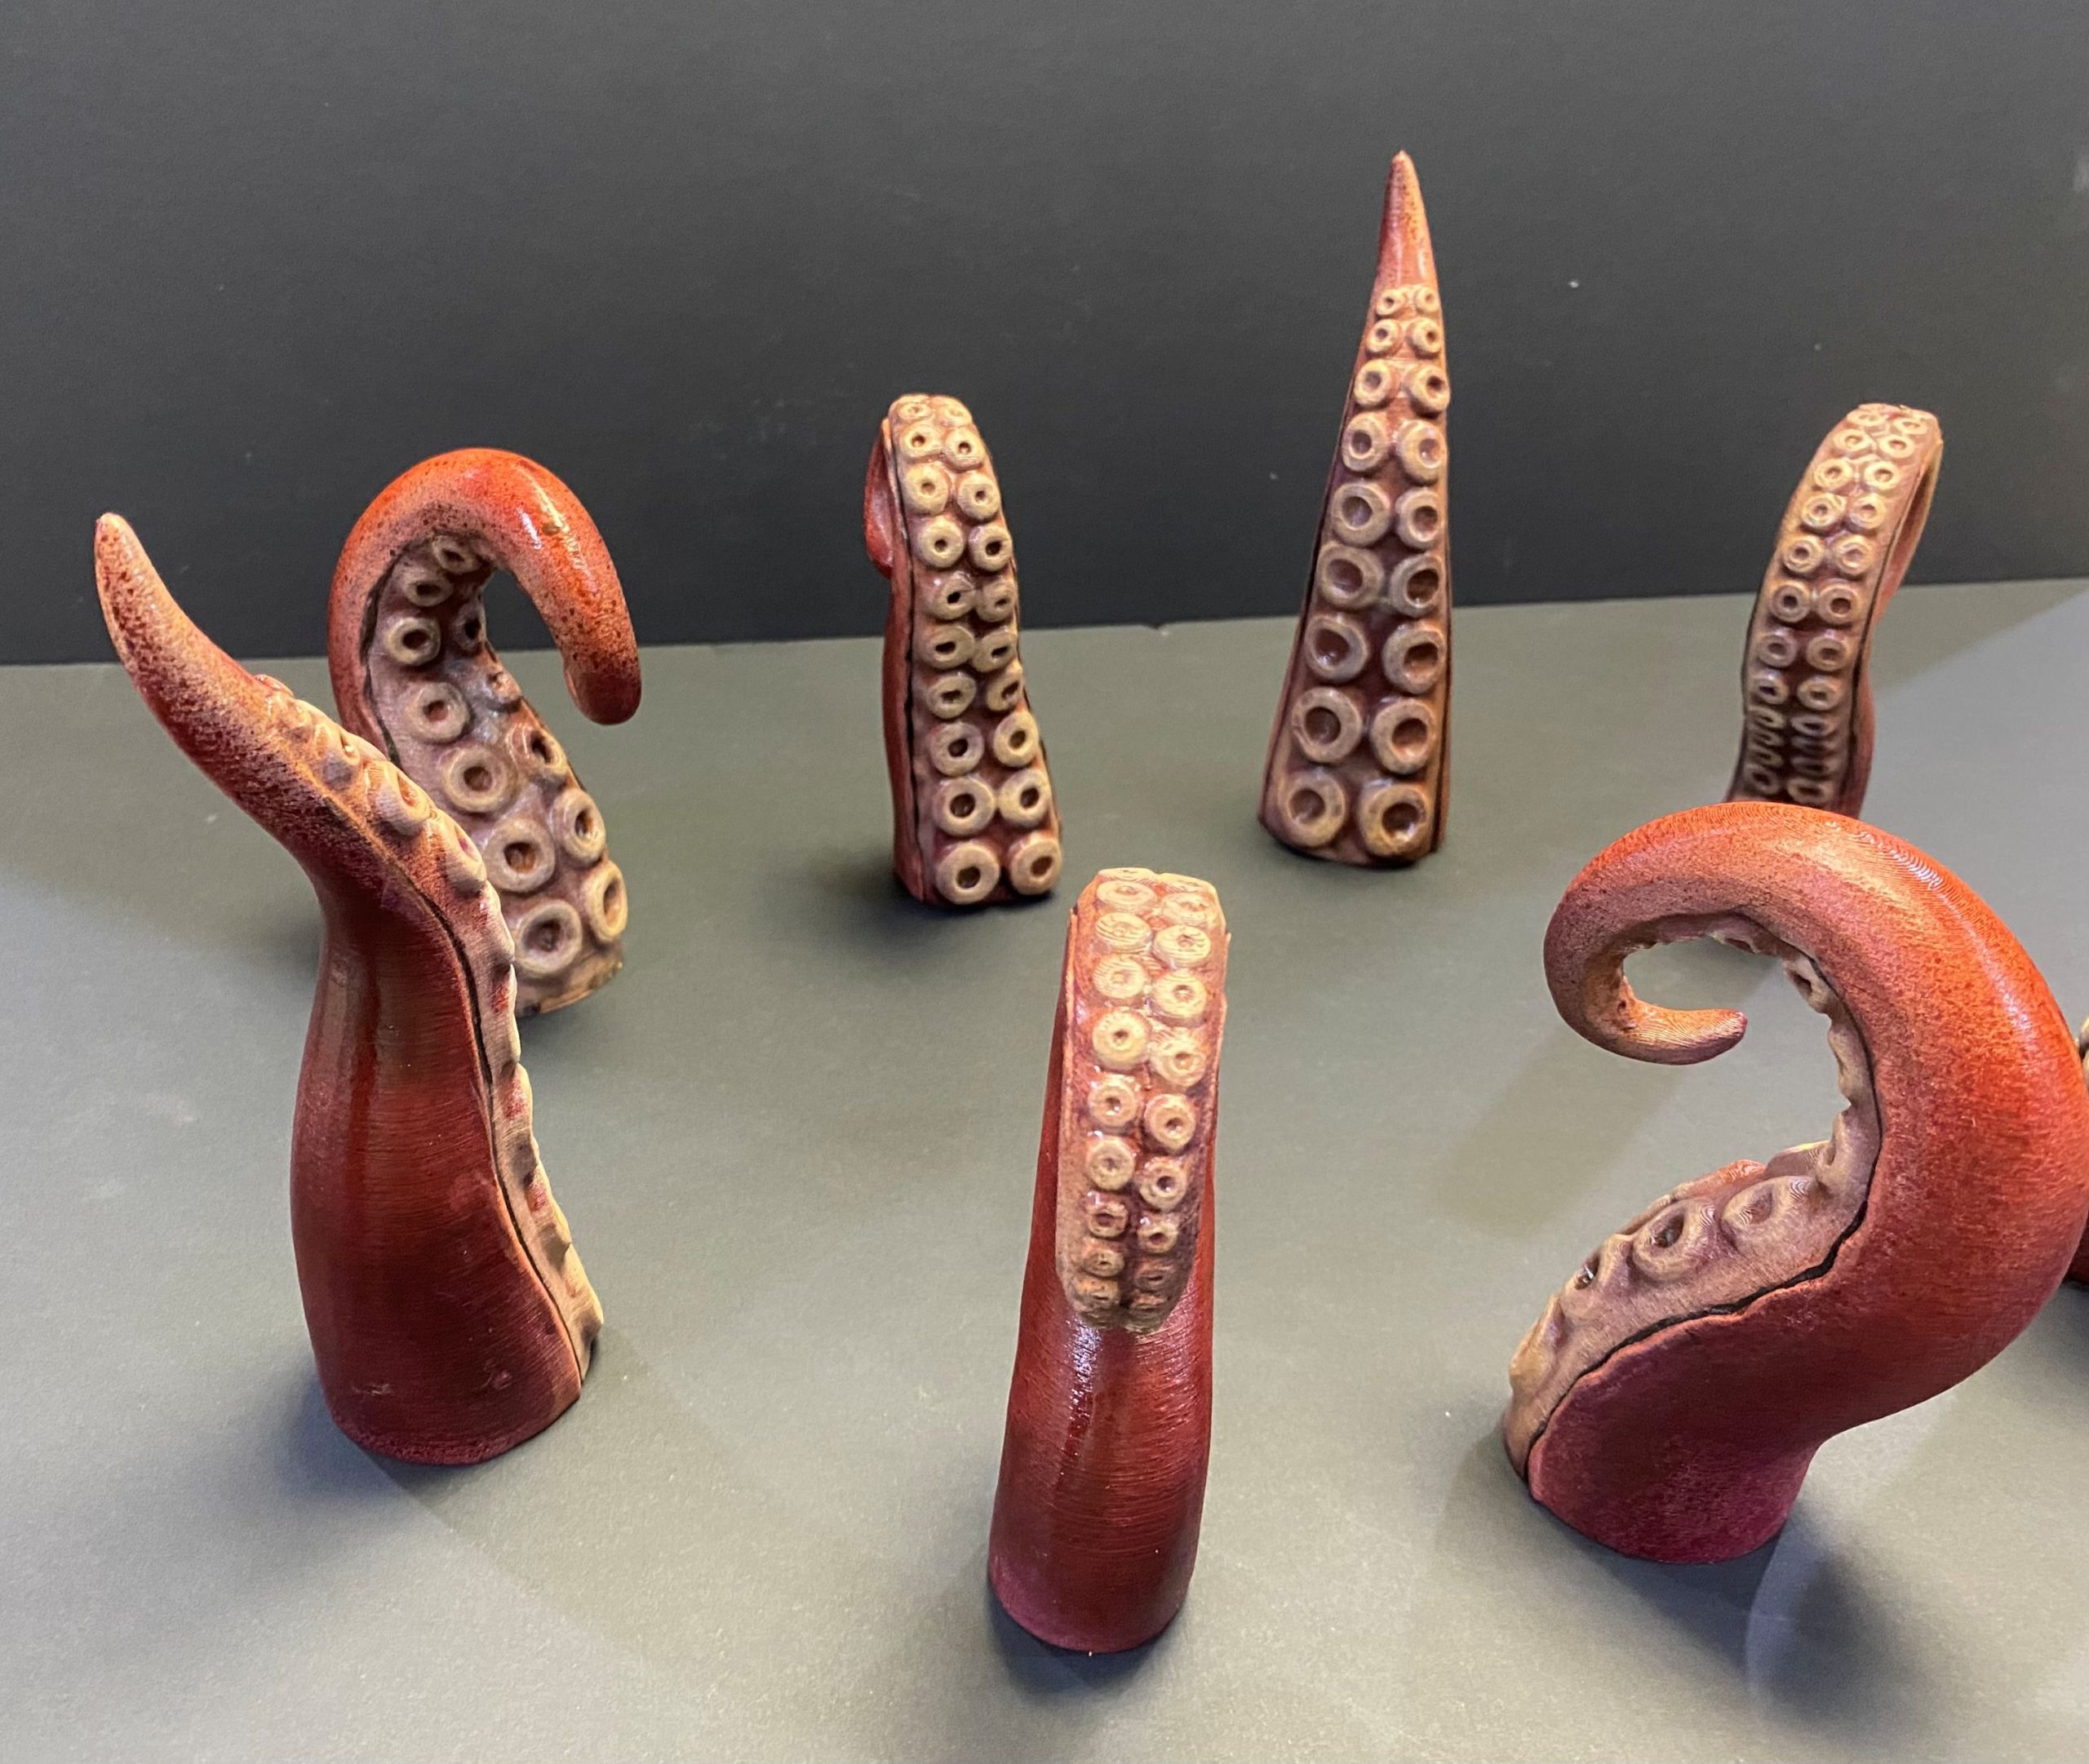
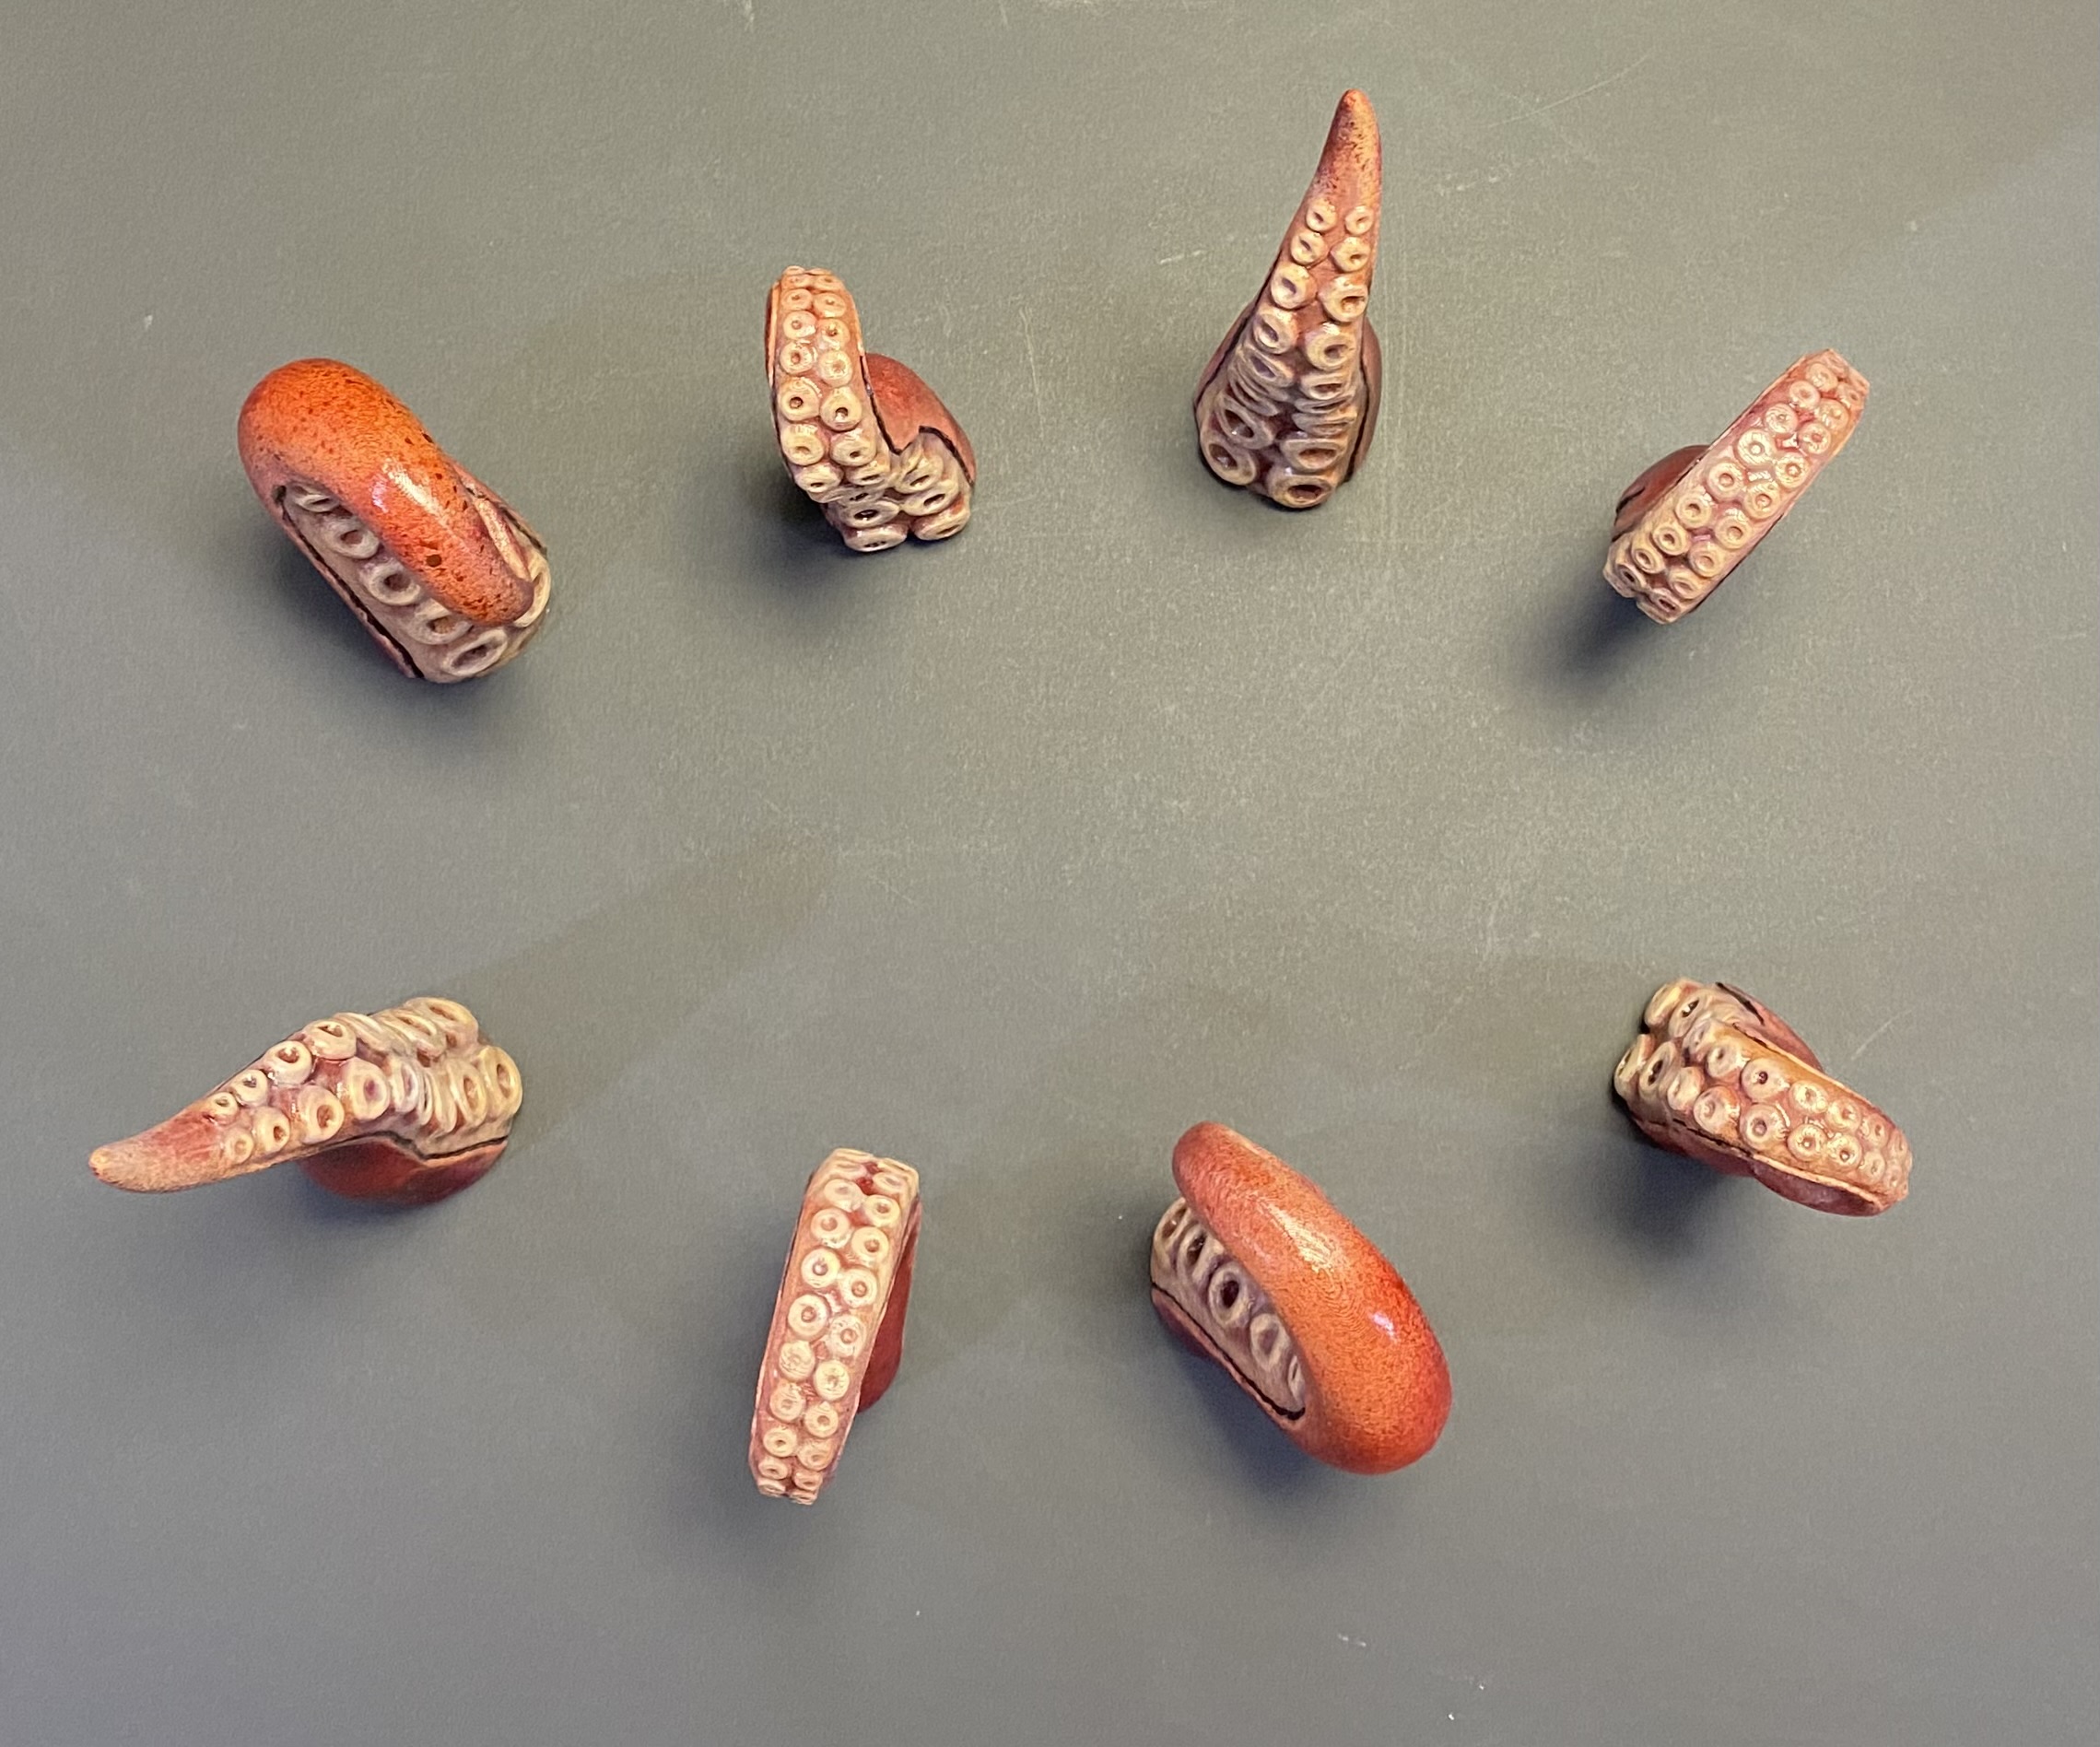
The next stage was to add some sea spray to help blend the tentacles into the water mat that I will be using.
I applied hot glue around the bases of all the tentacles and once it had cooled down, blobbed on some white paint to give an effect of breaking water.
I also knocked out a few sinking ship pieces that will also be useful as terrain in the ocean.
I will endeavour to get some better pictures taken once I get the sinking ships done.
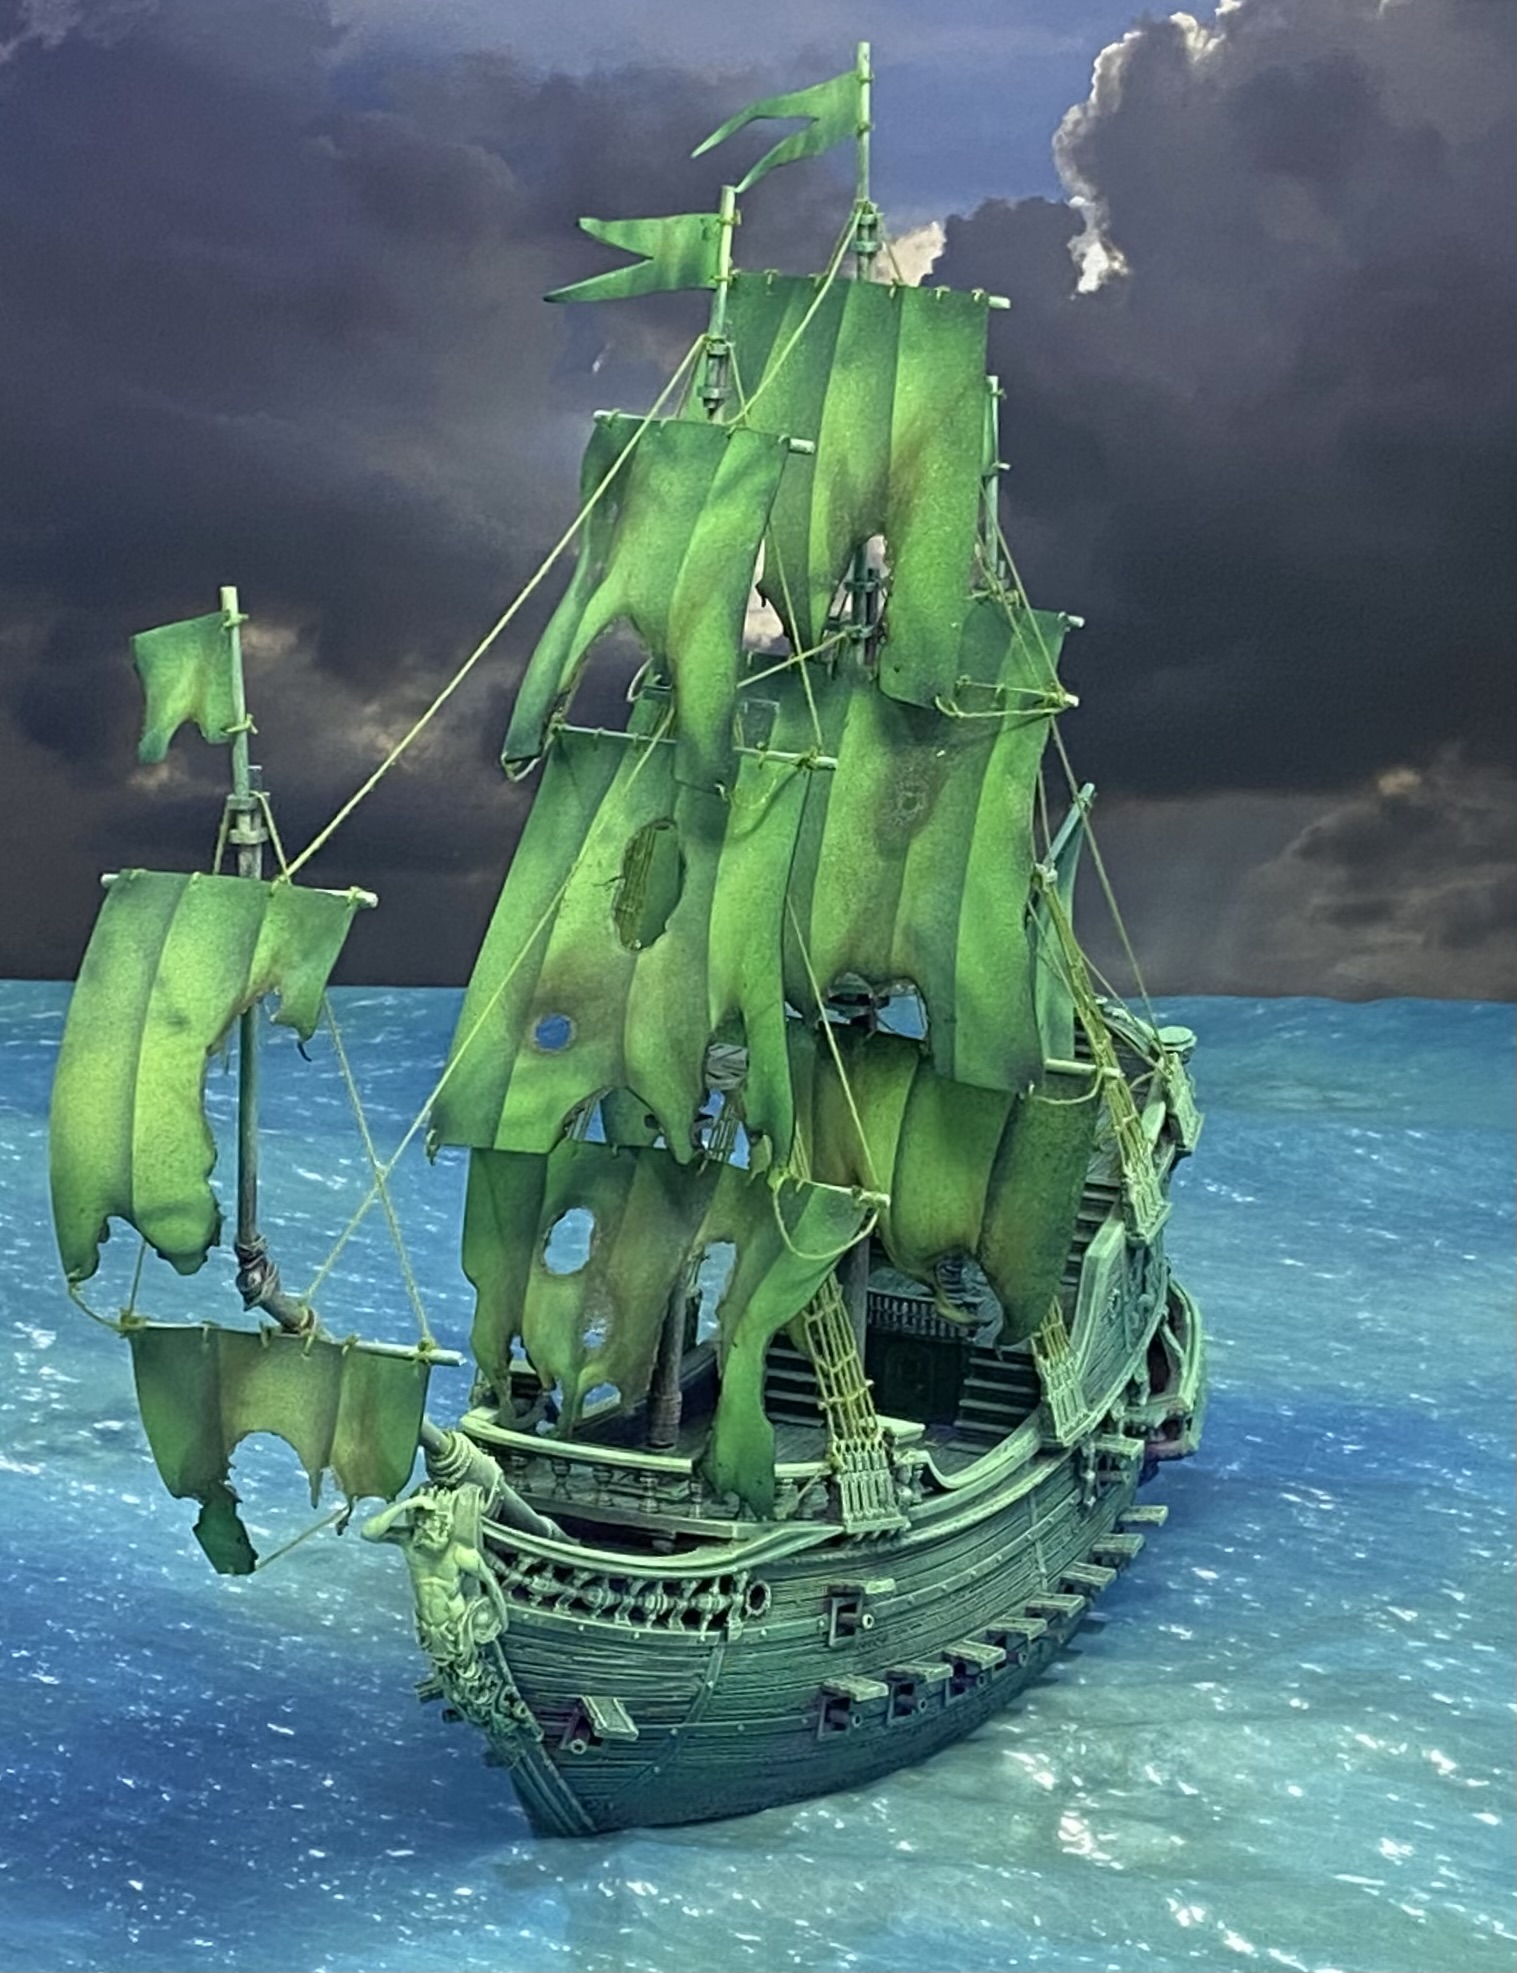
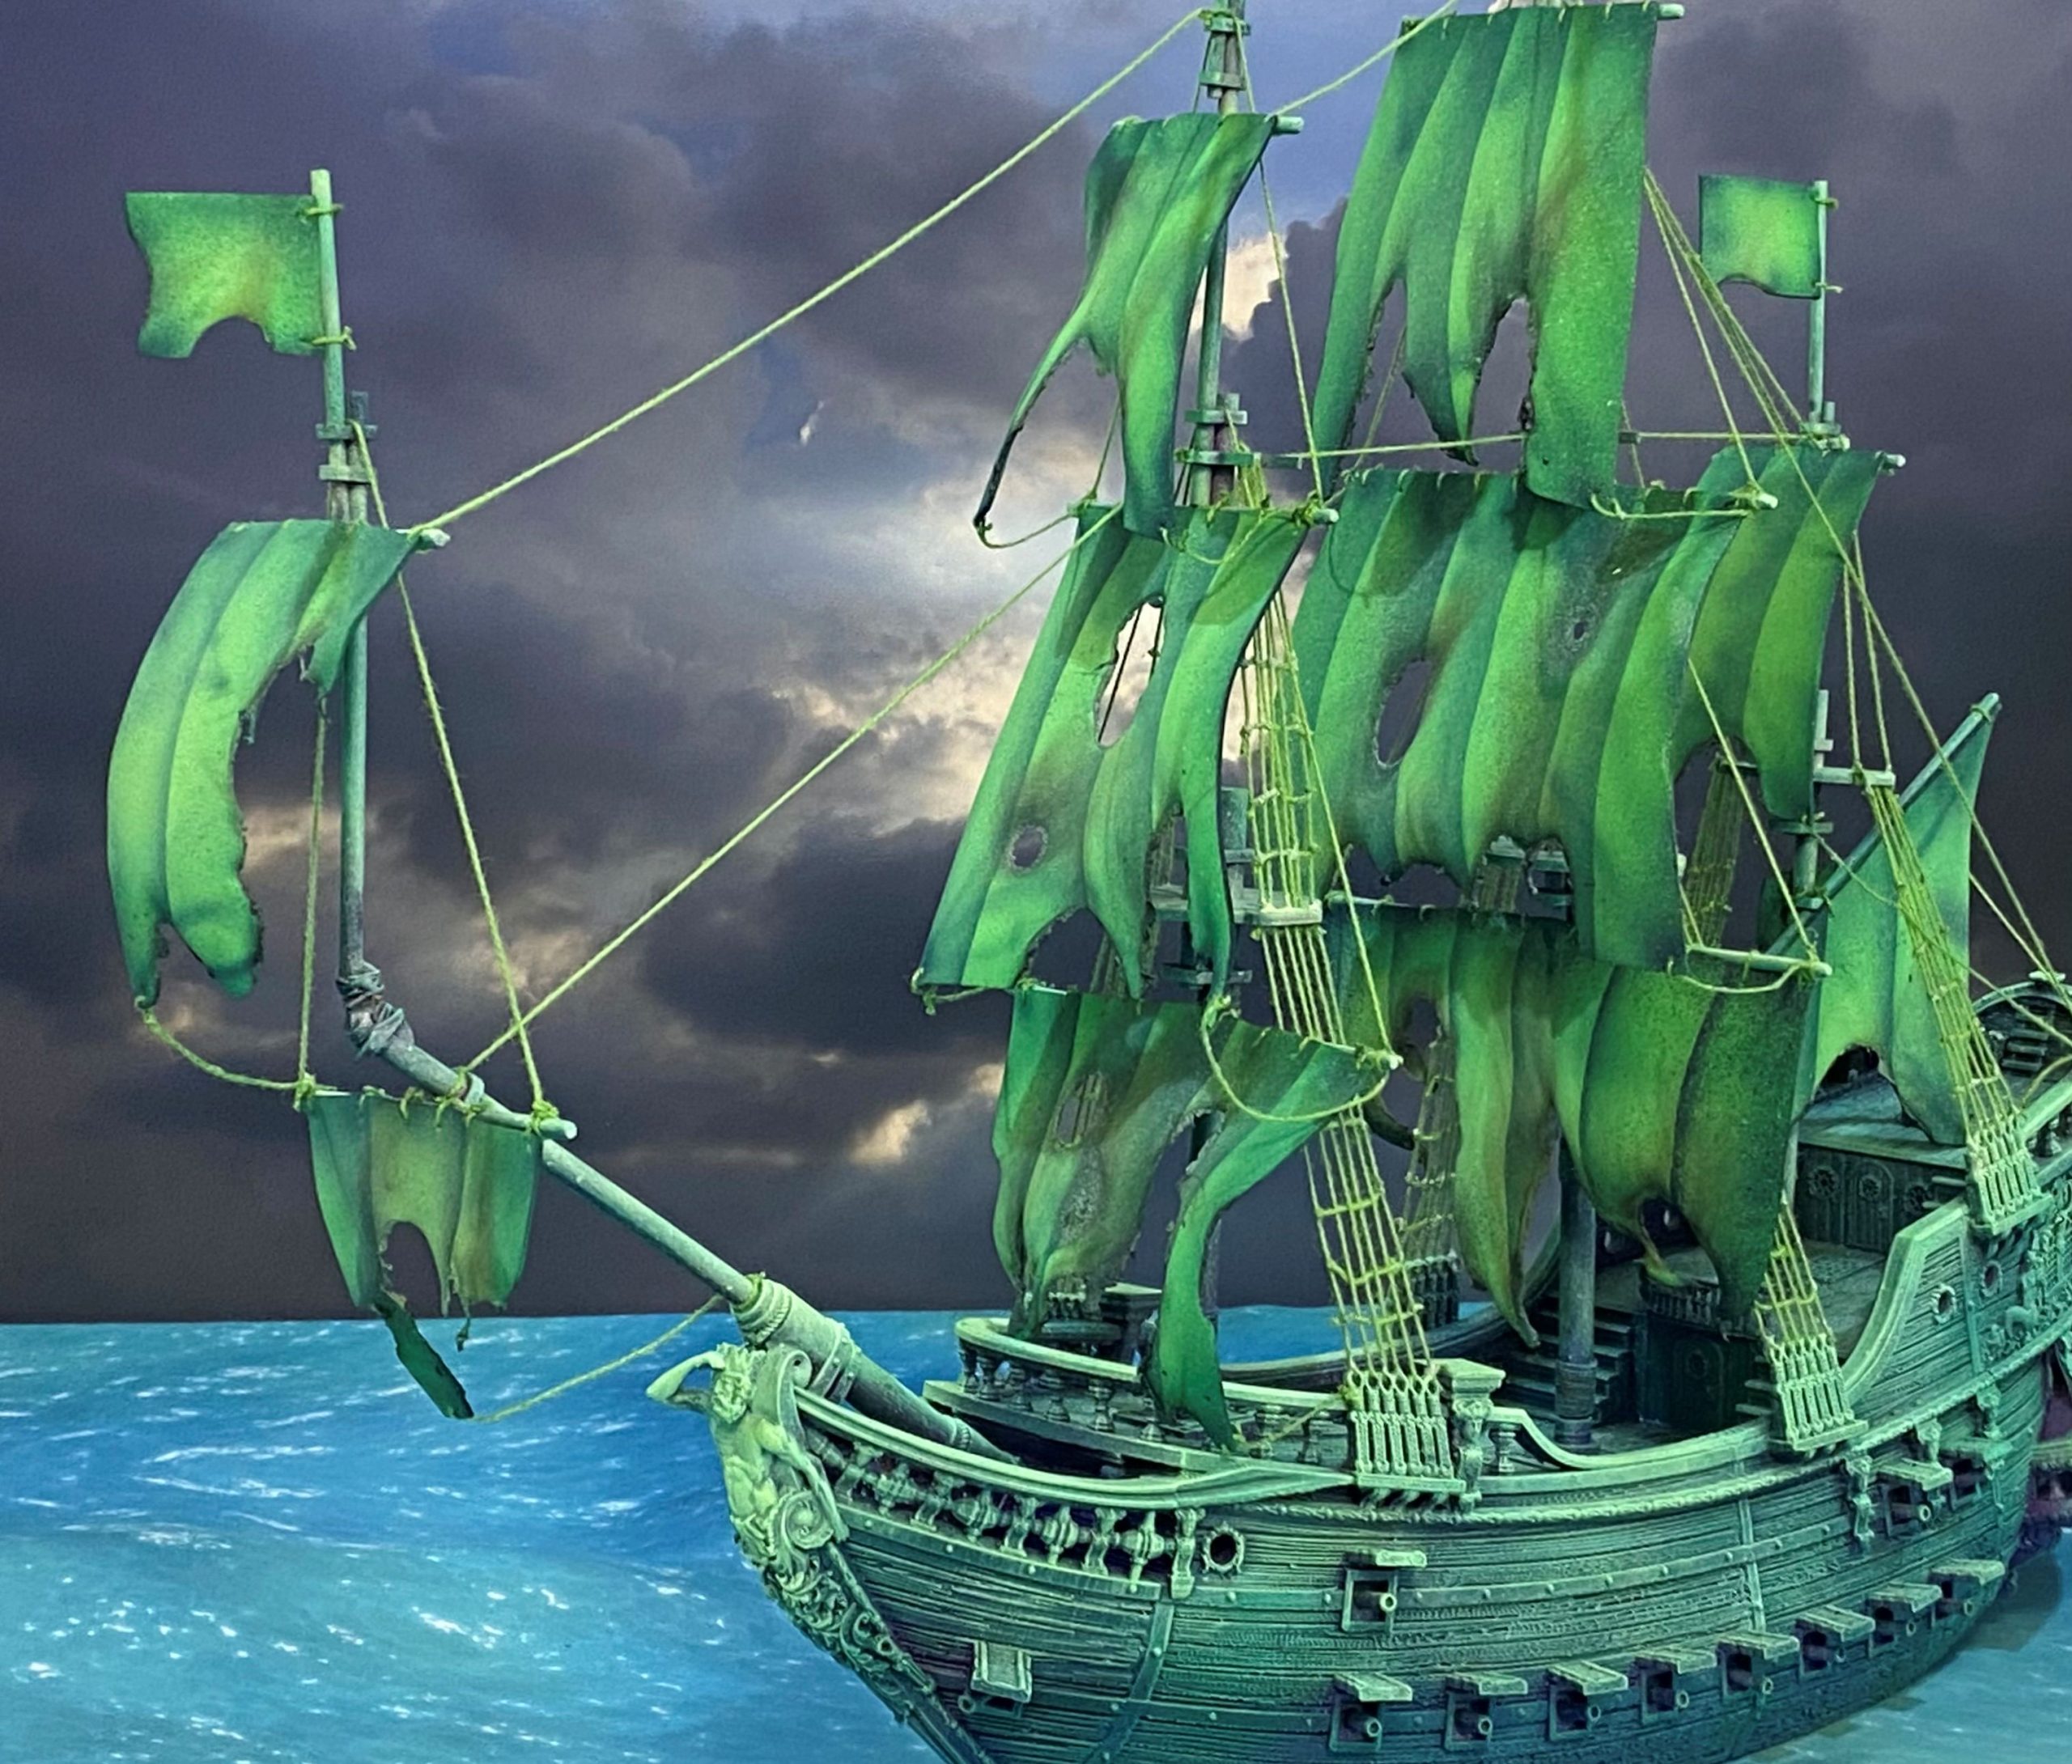
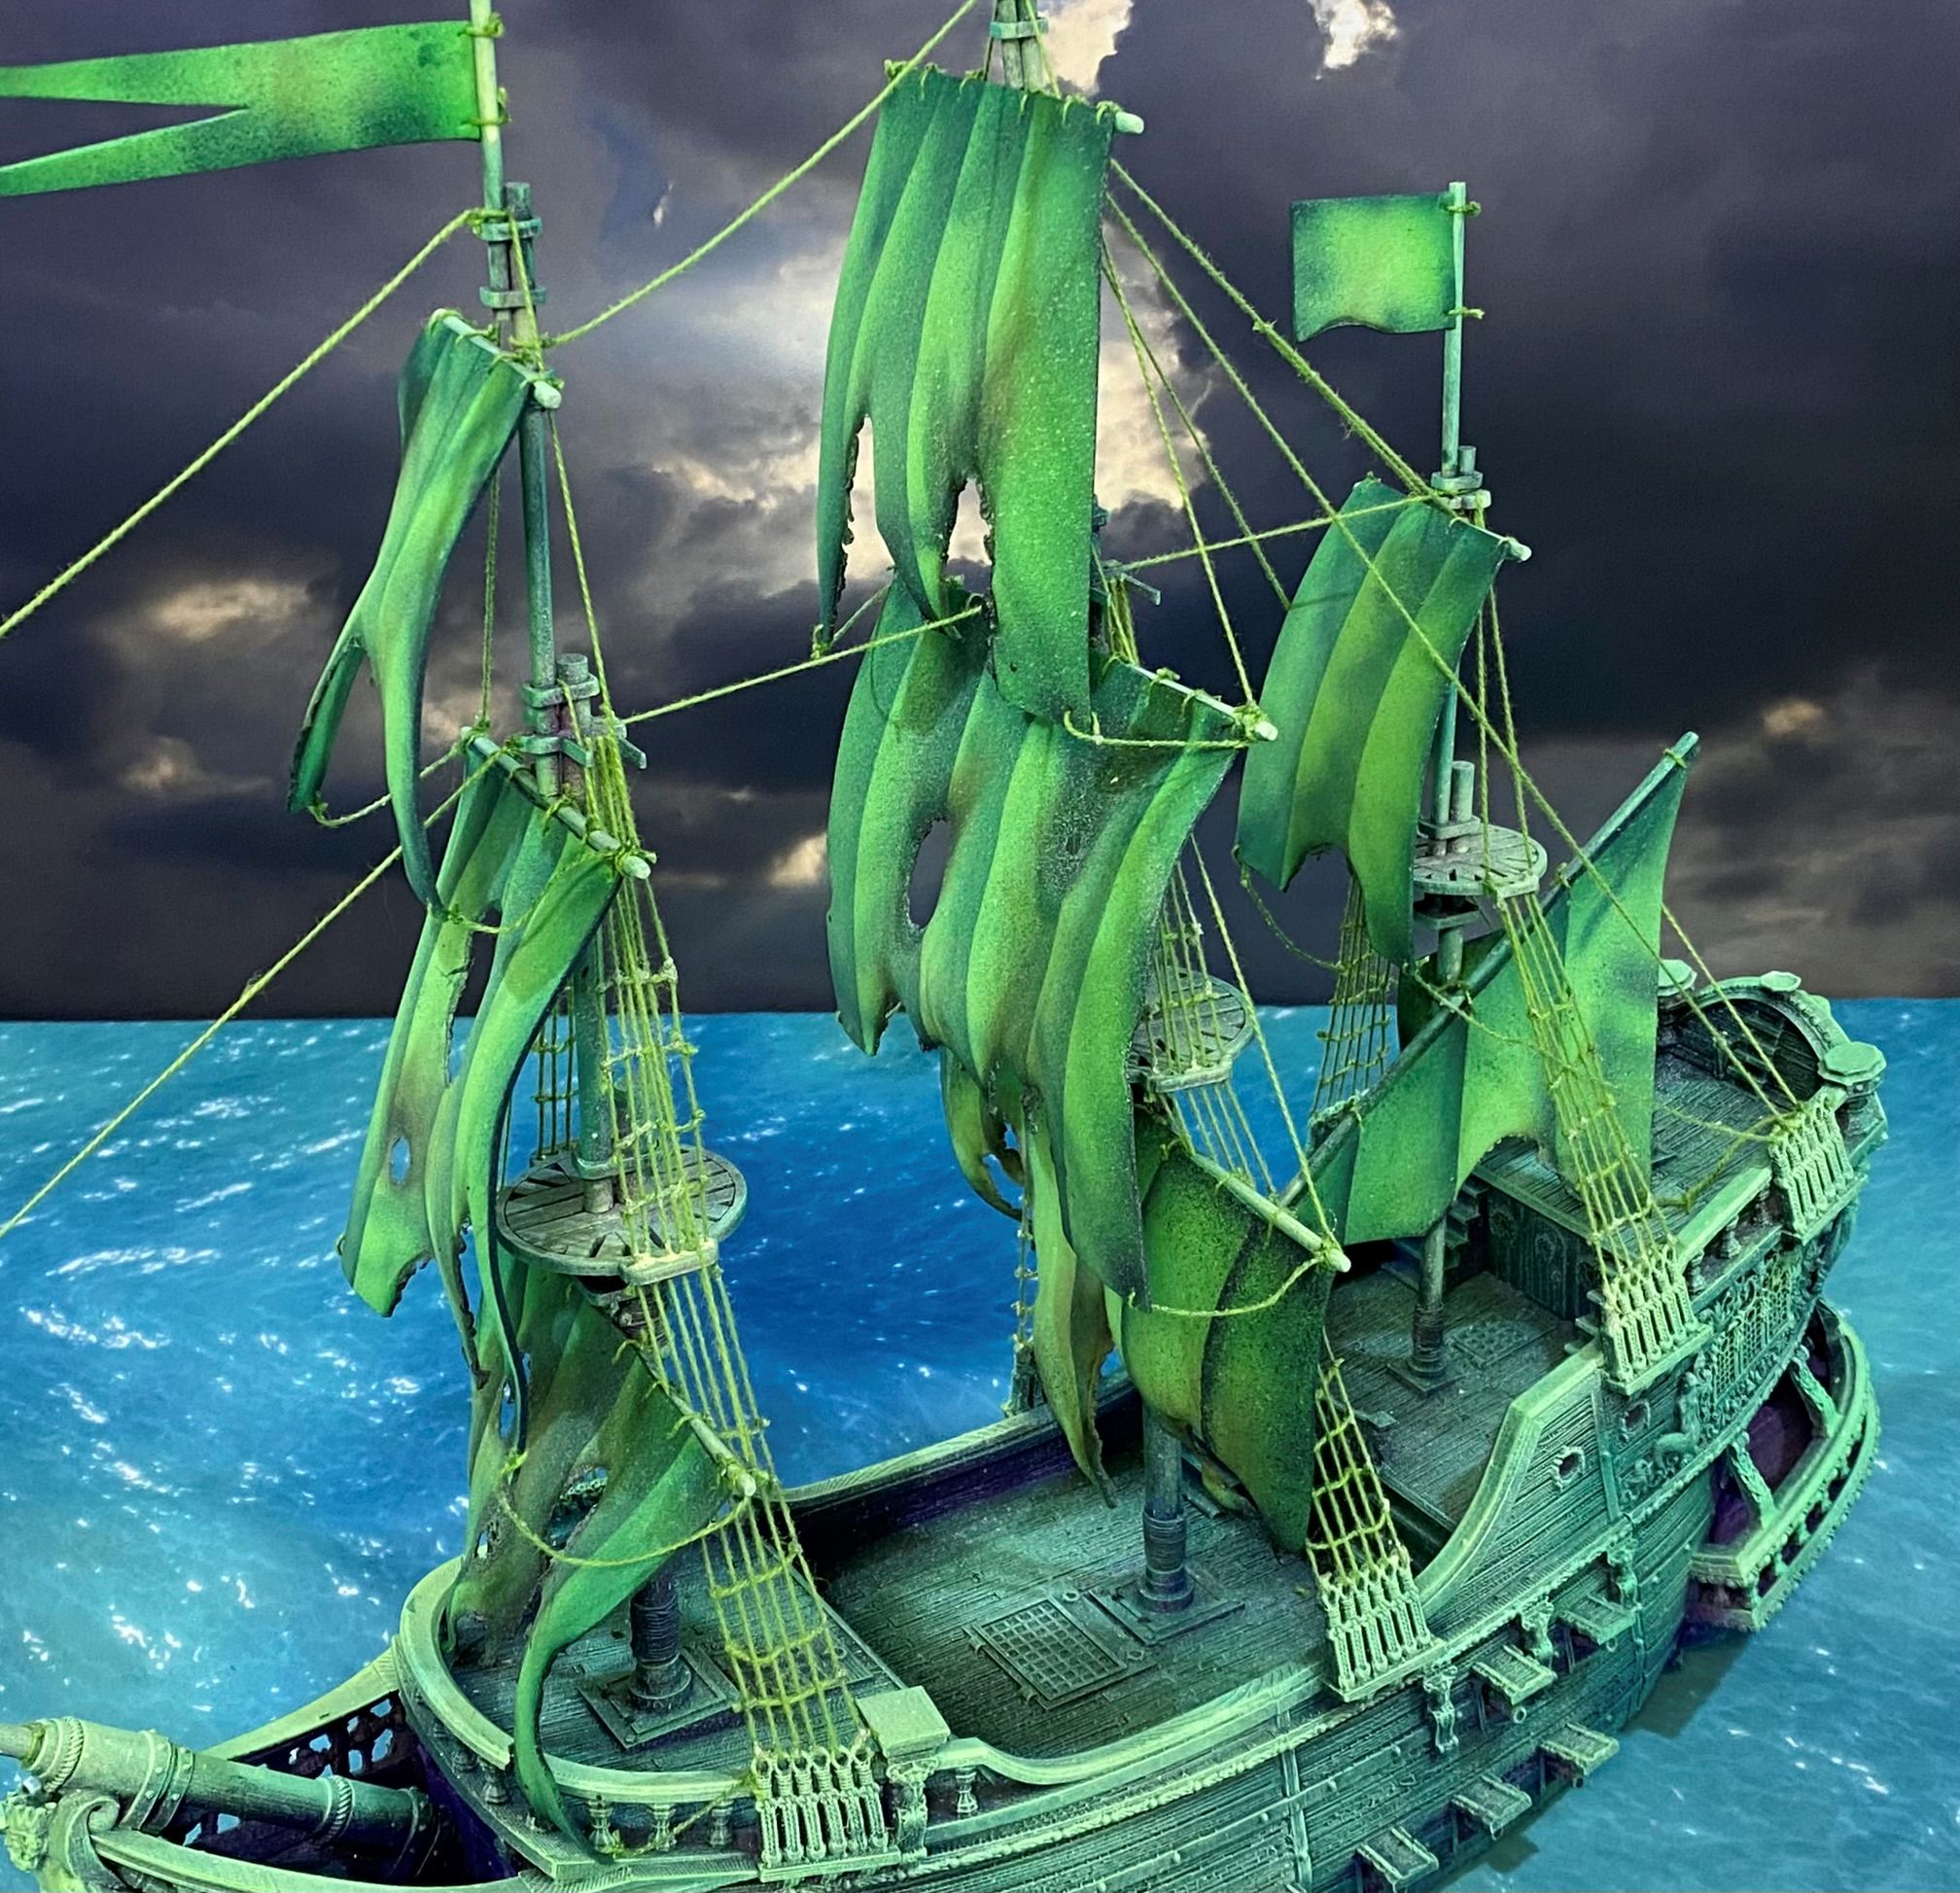
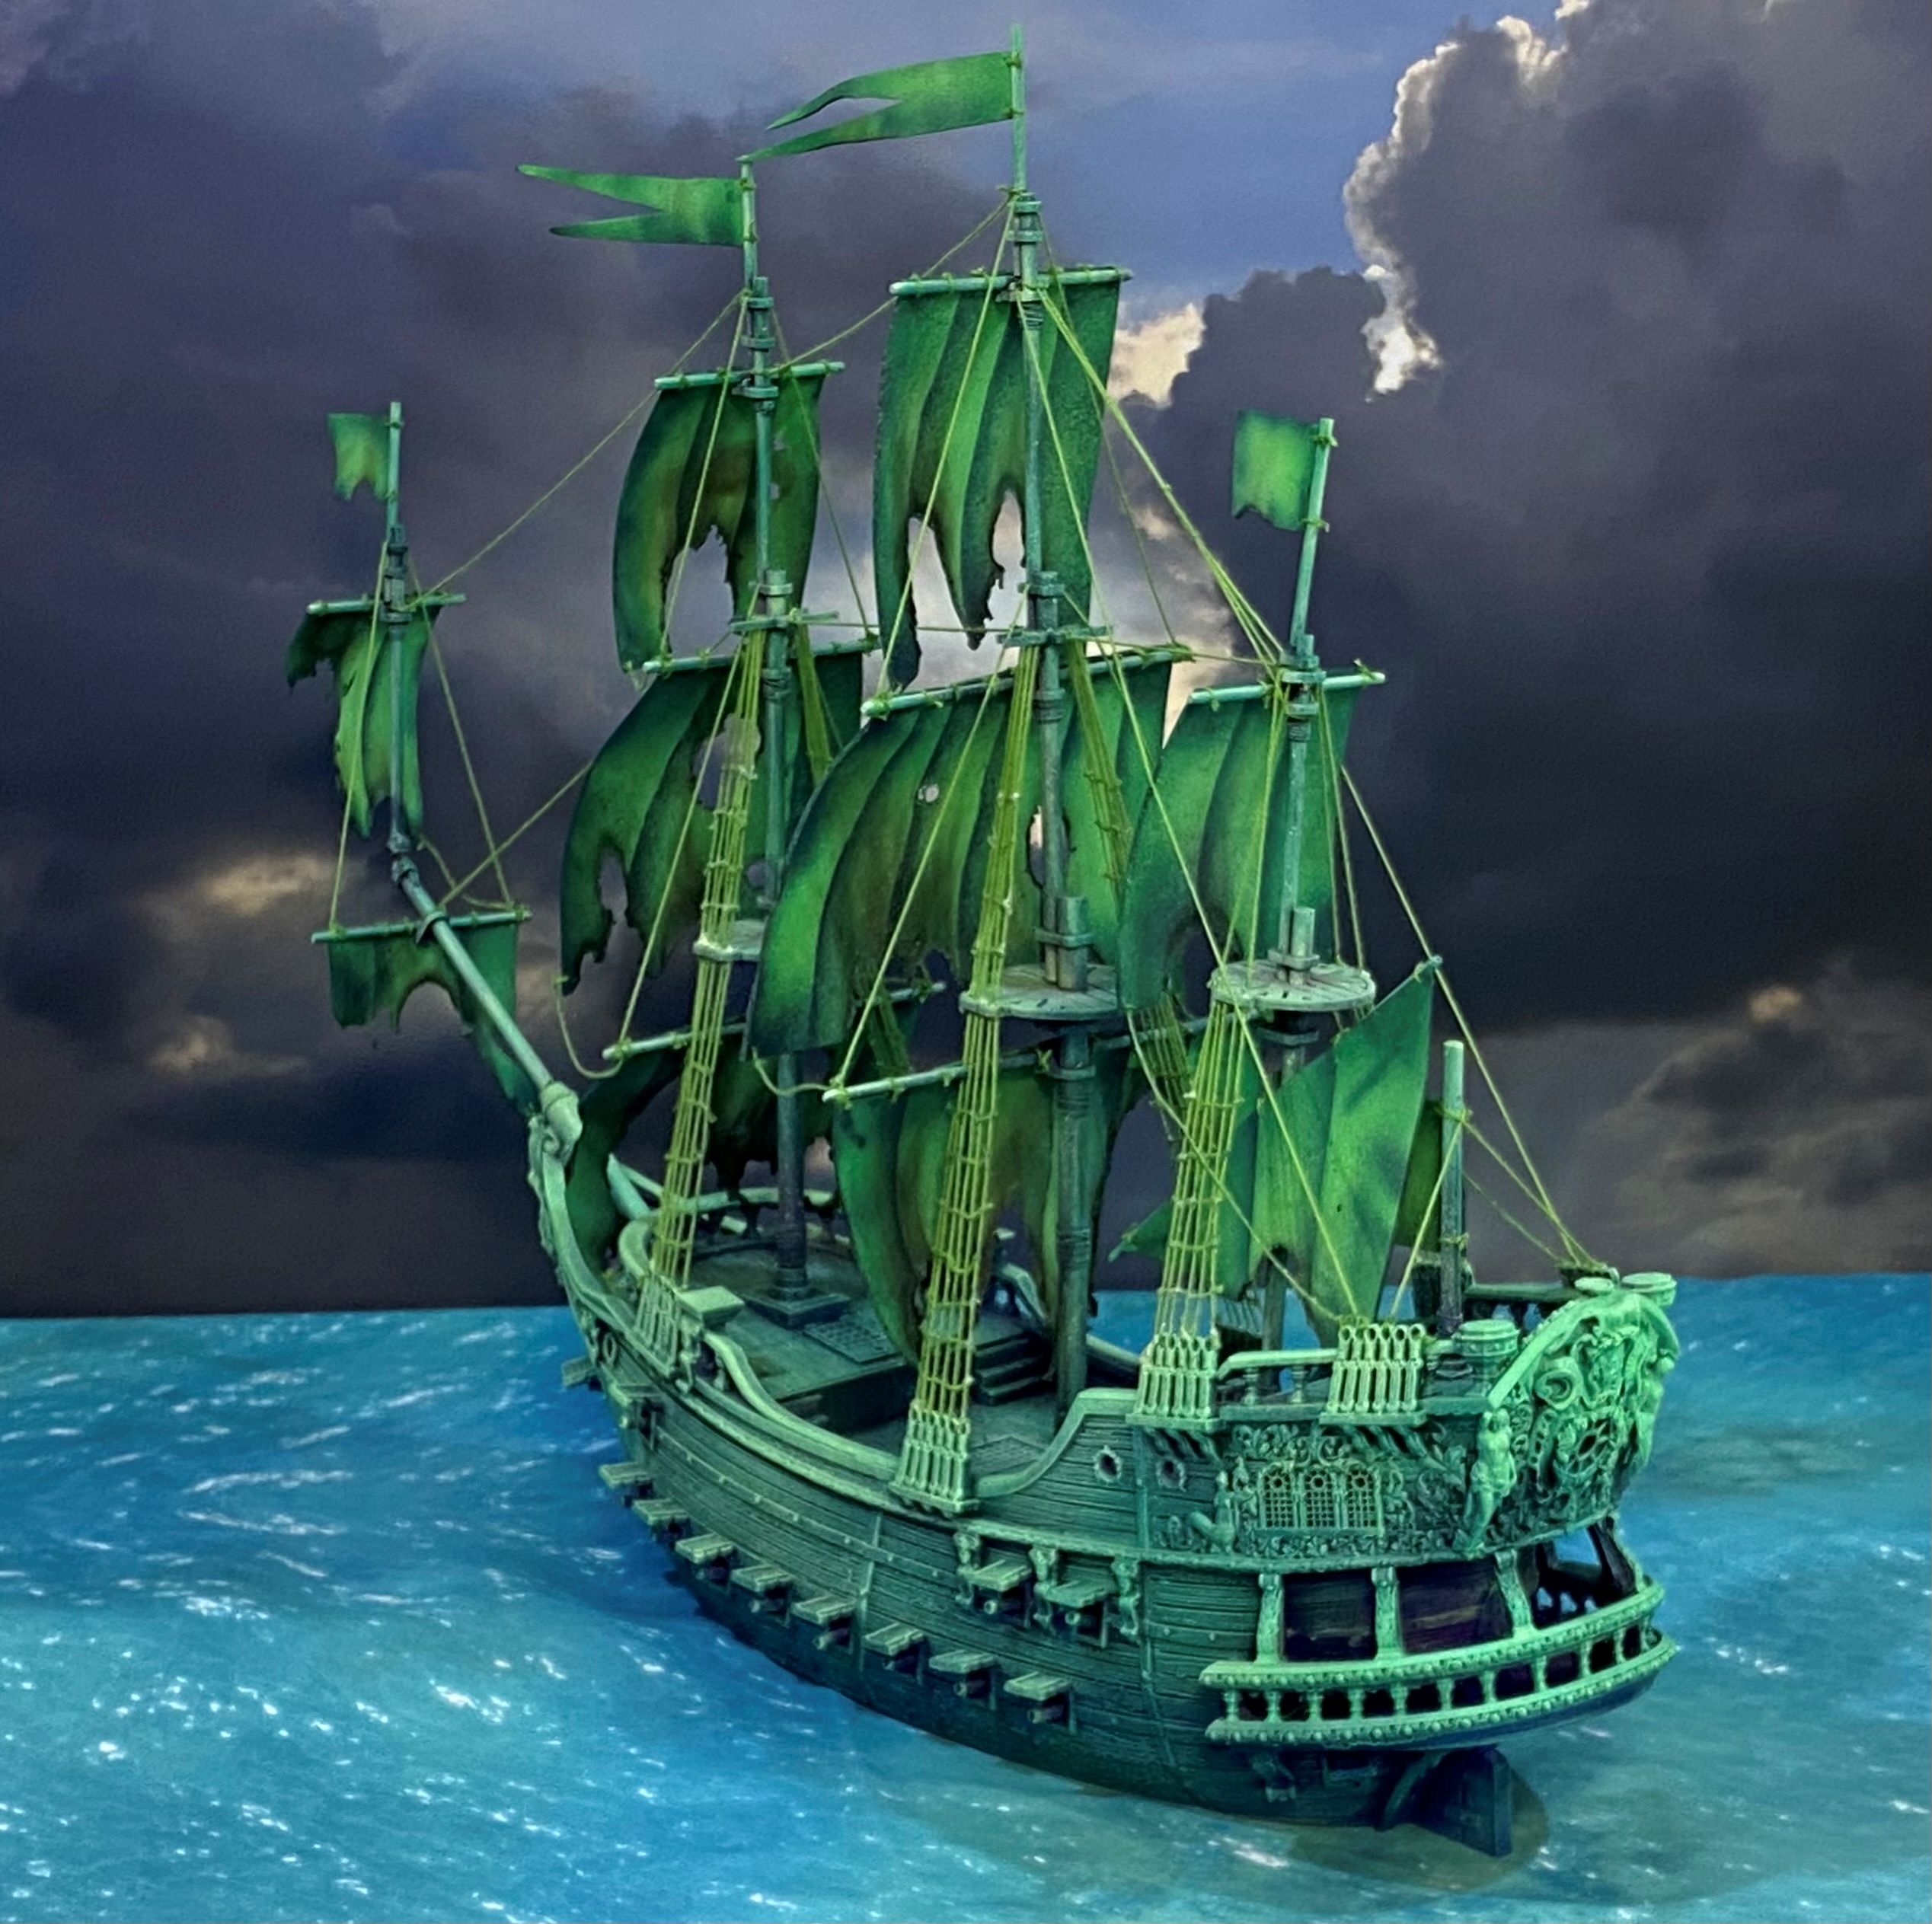
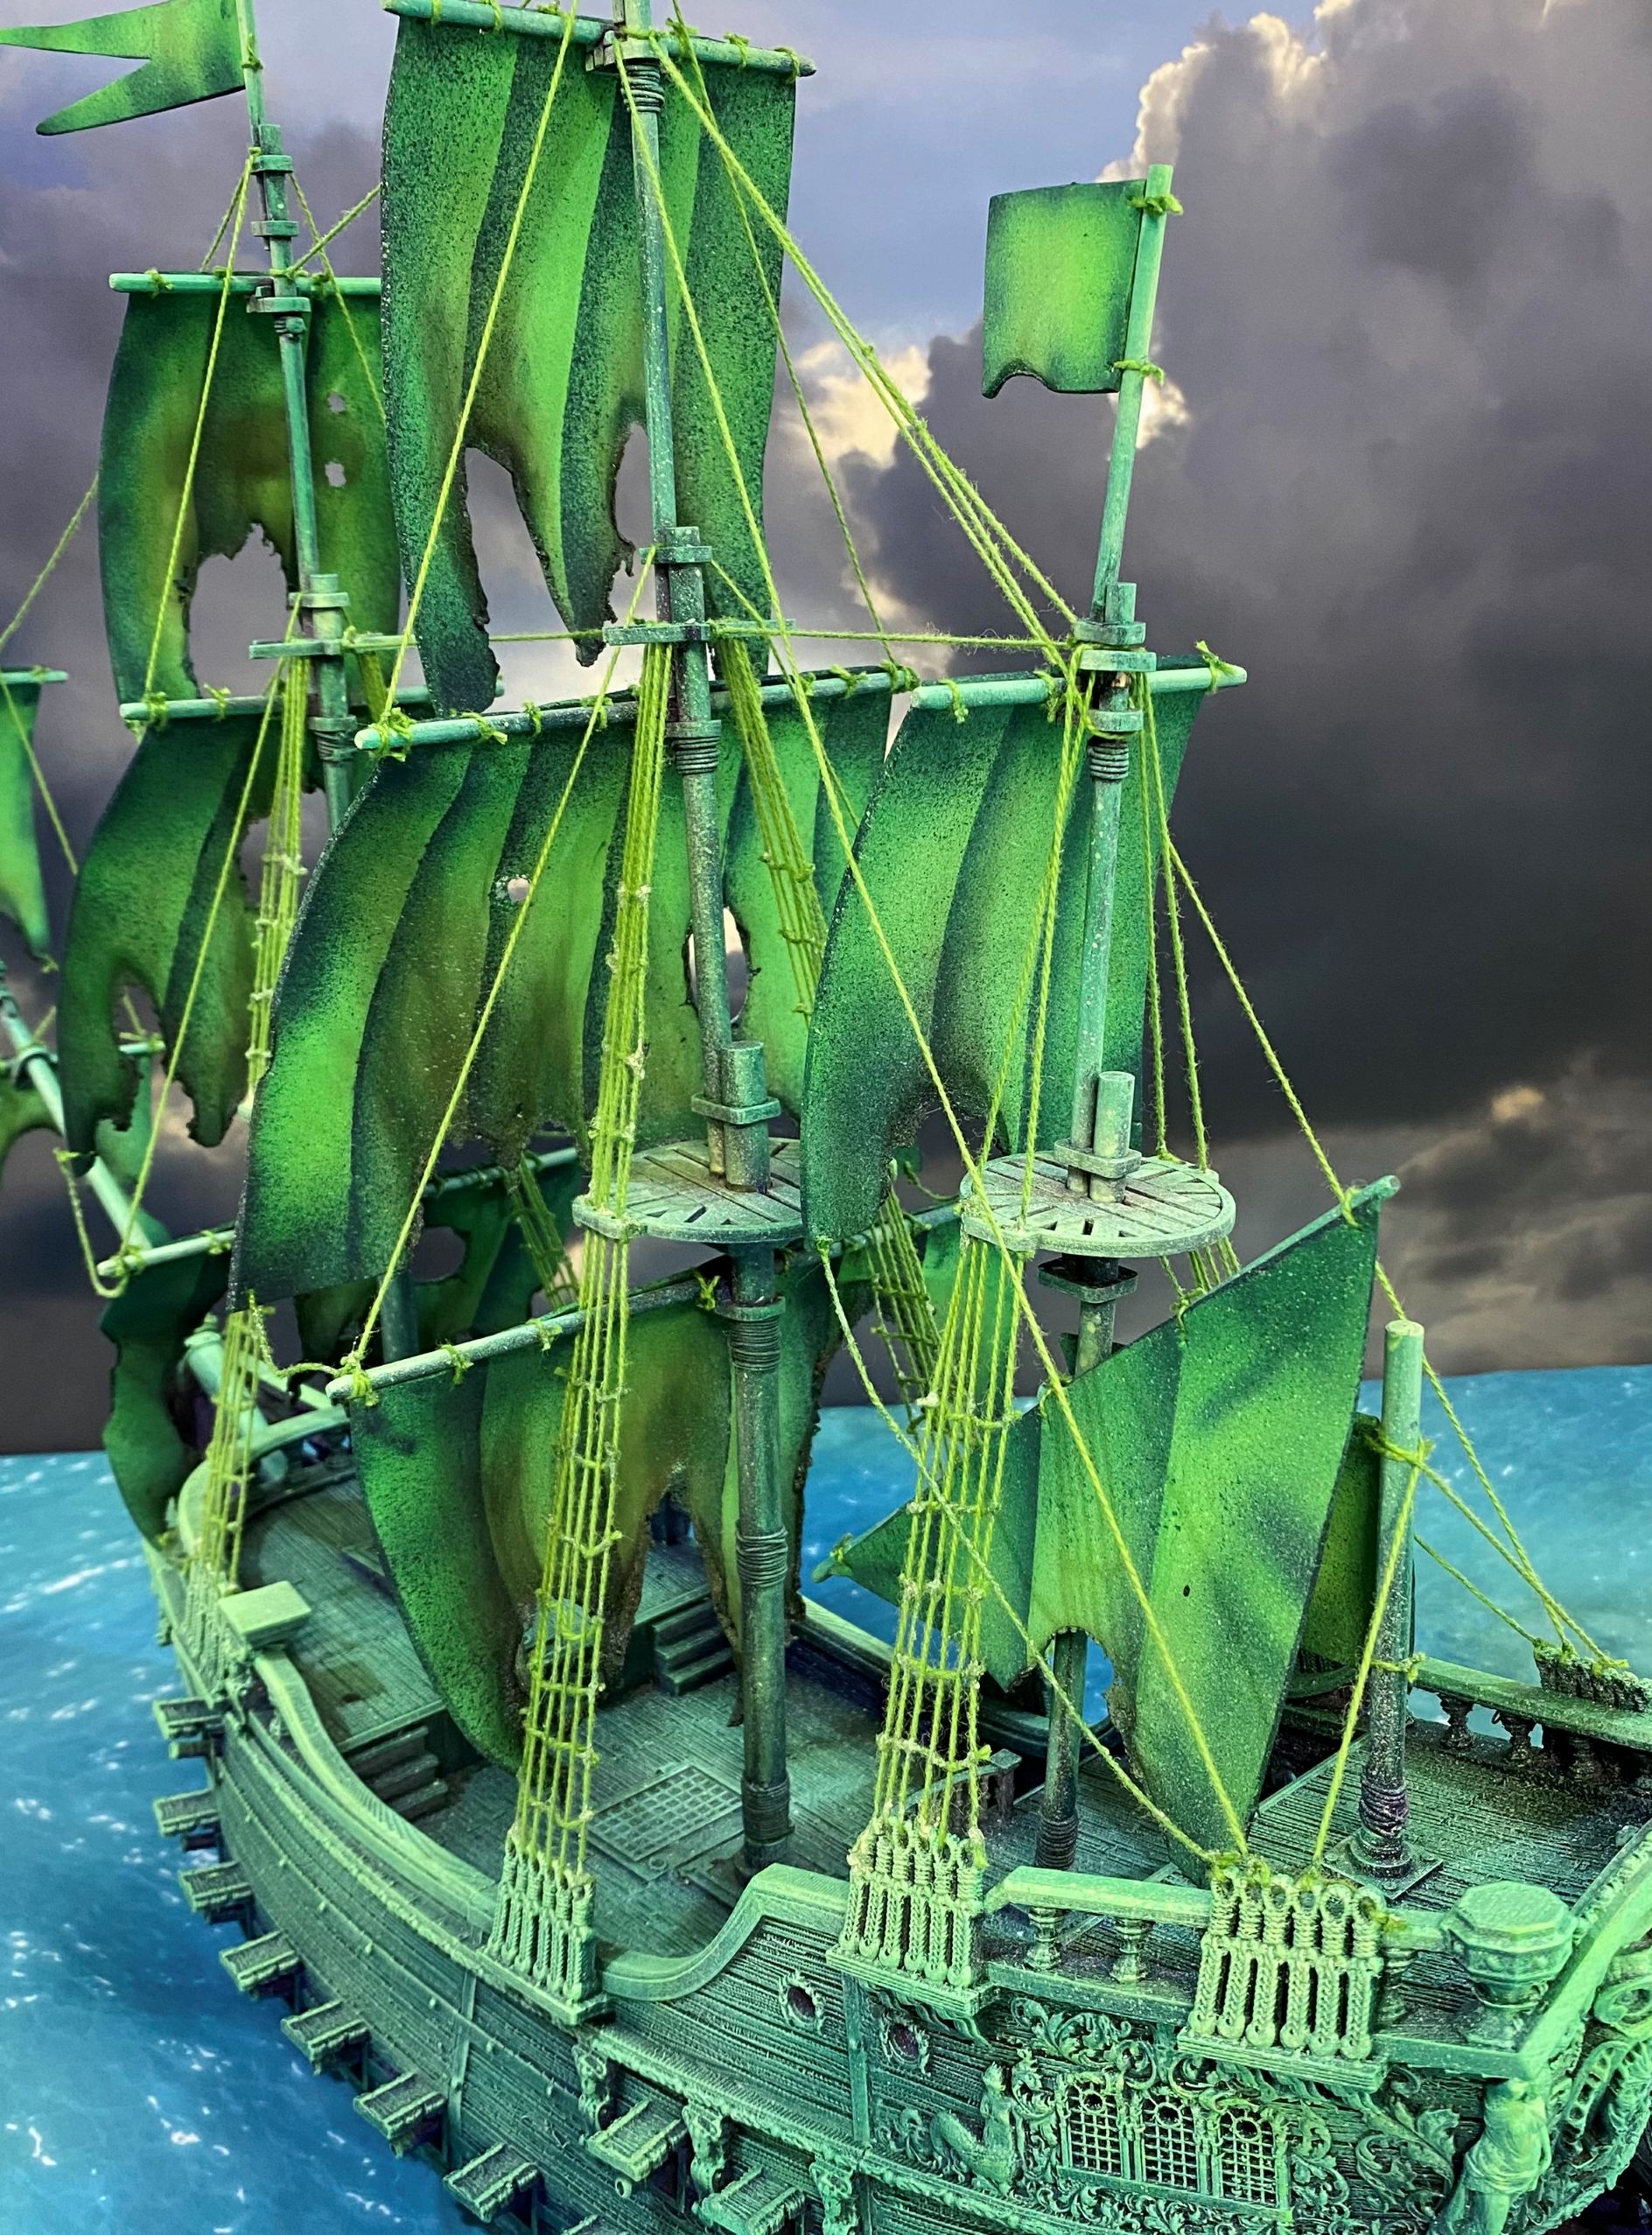
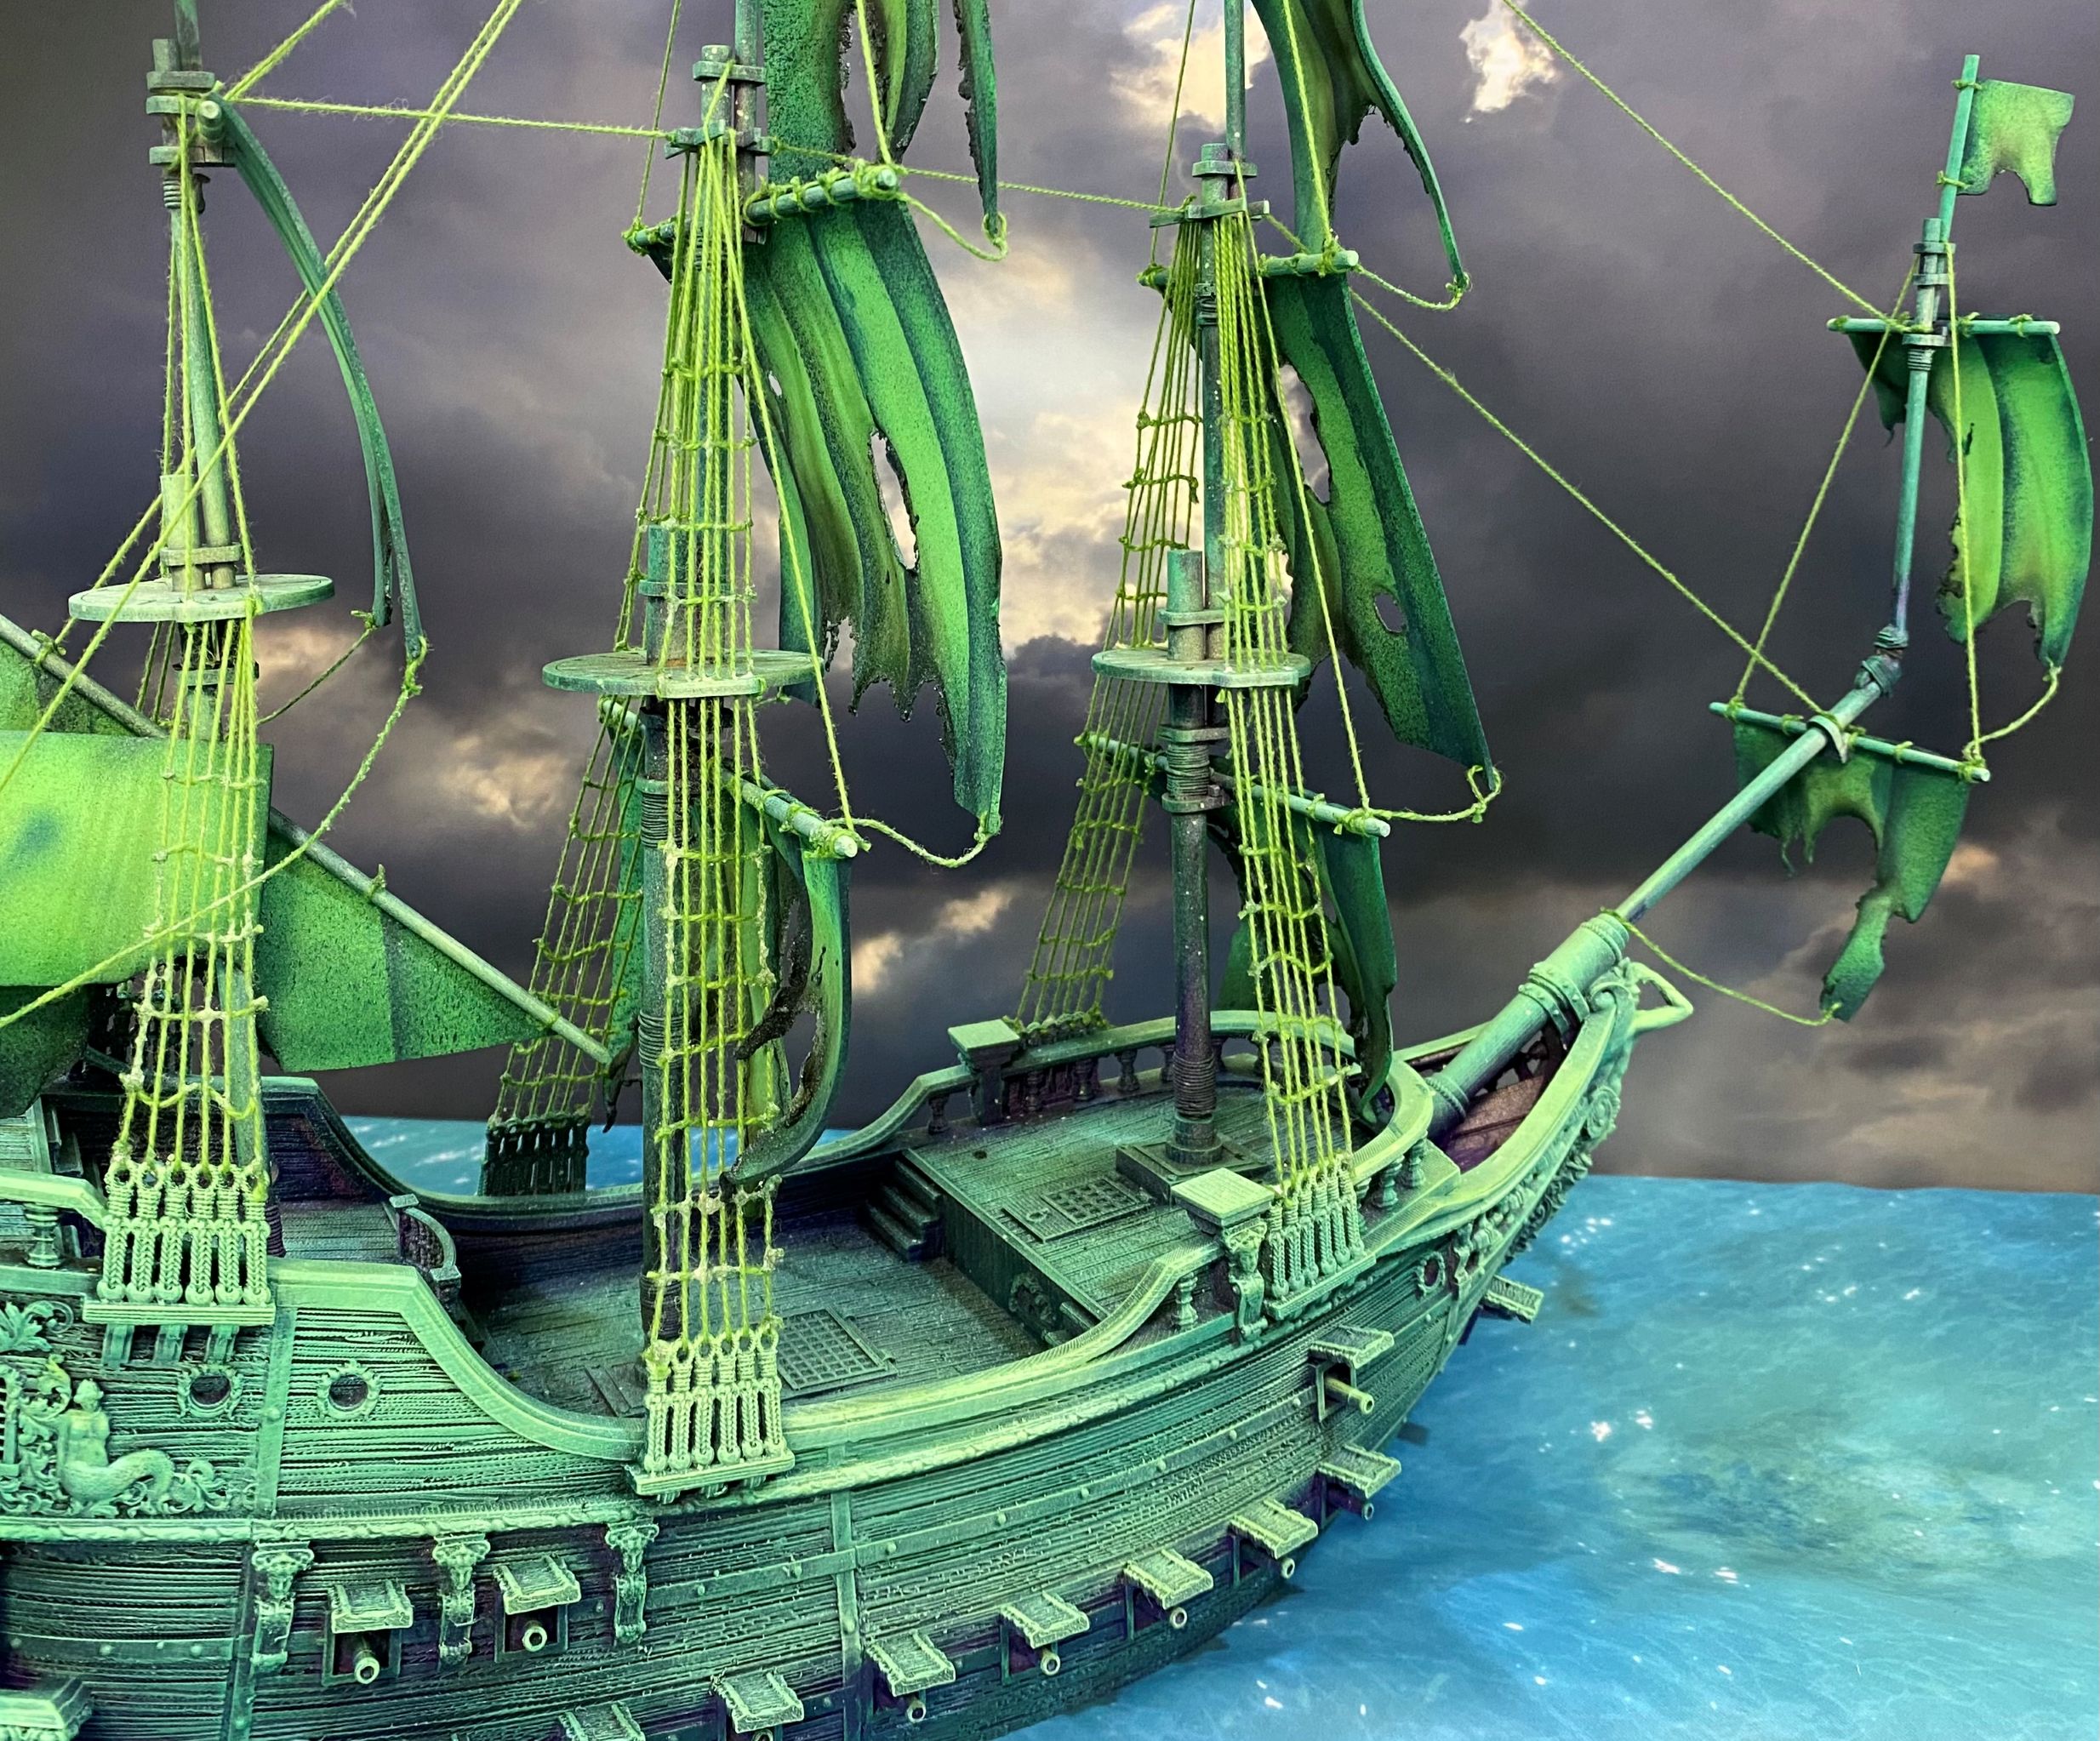
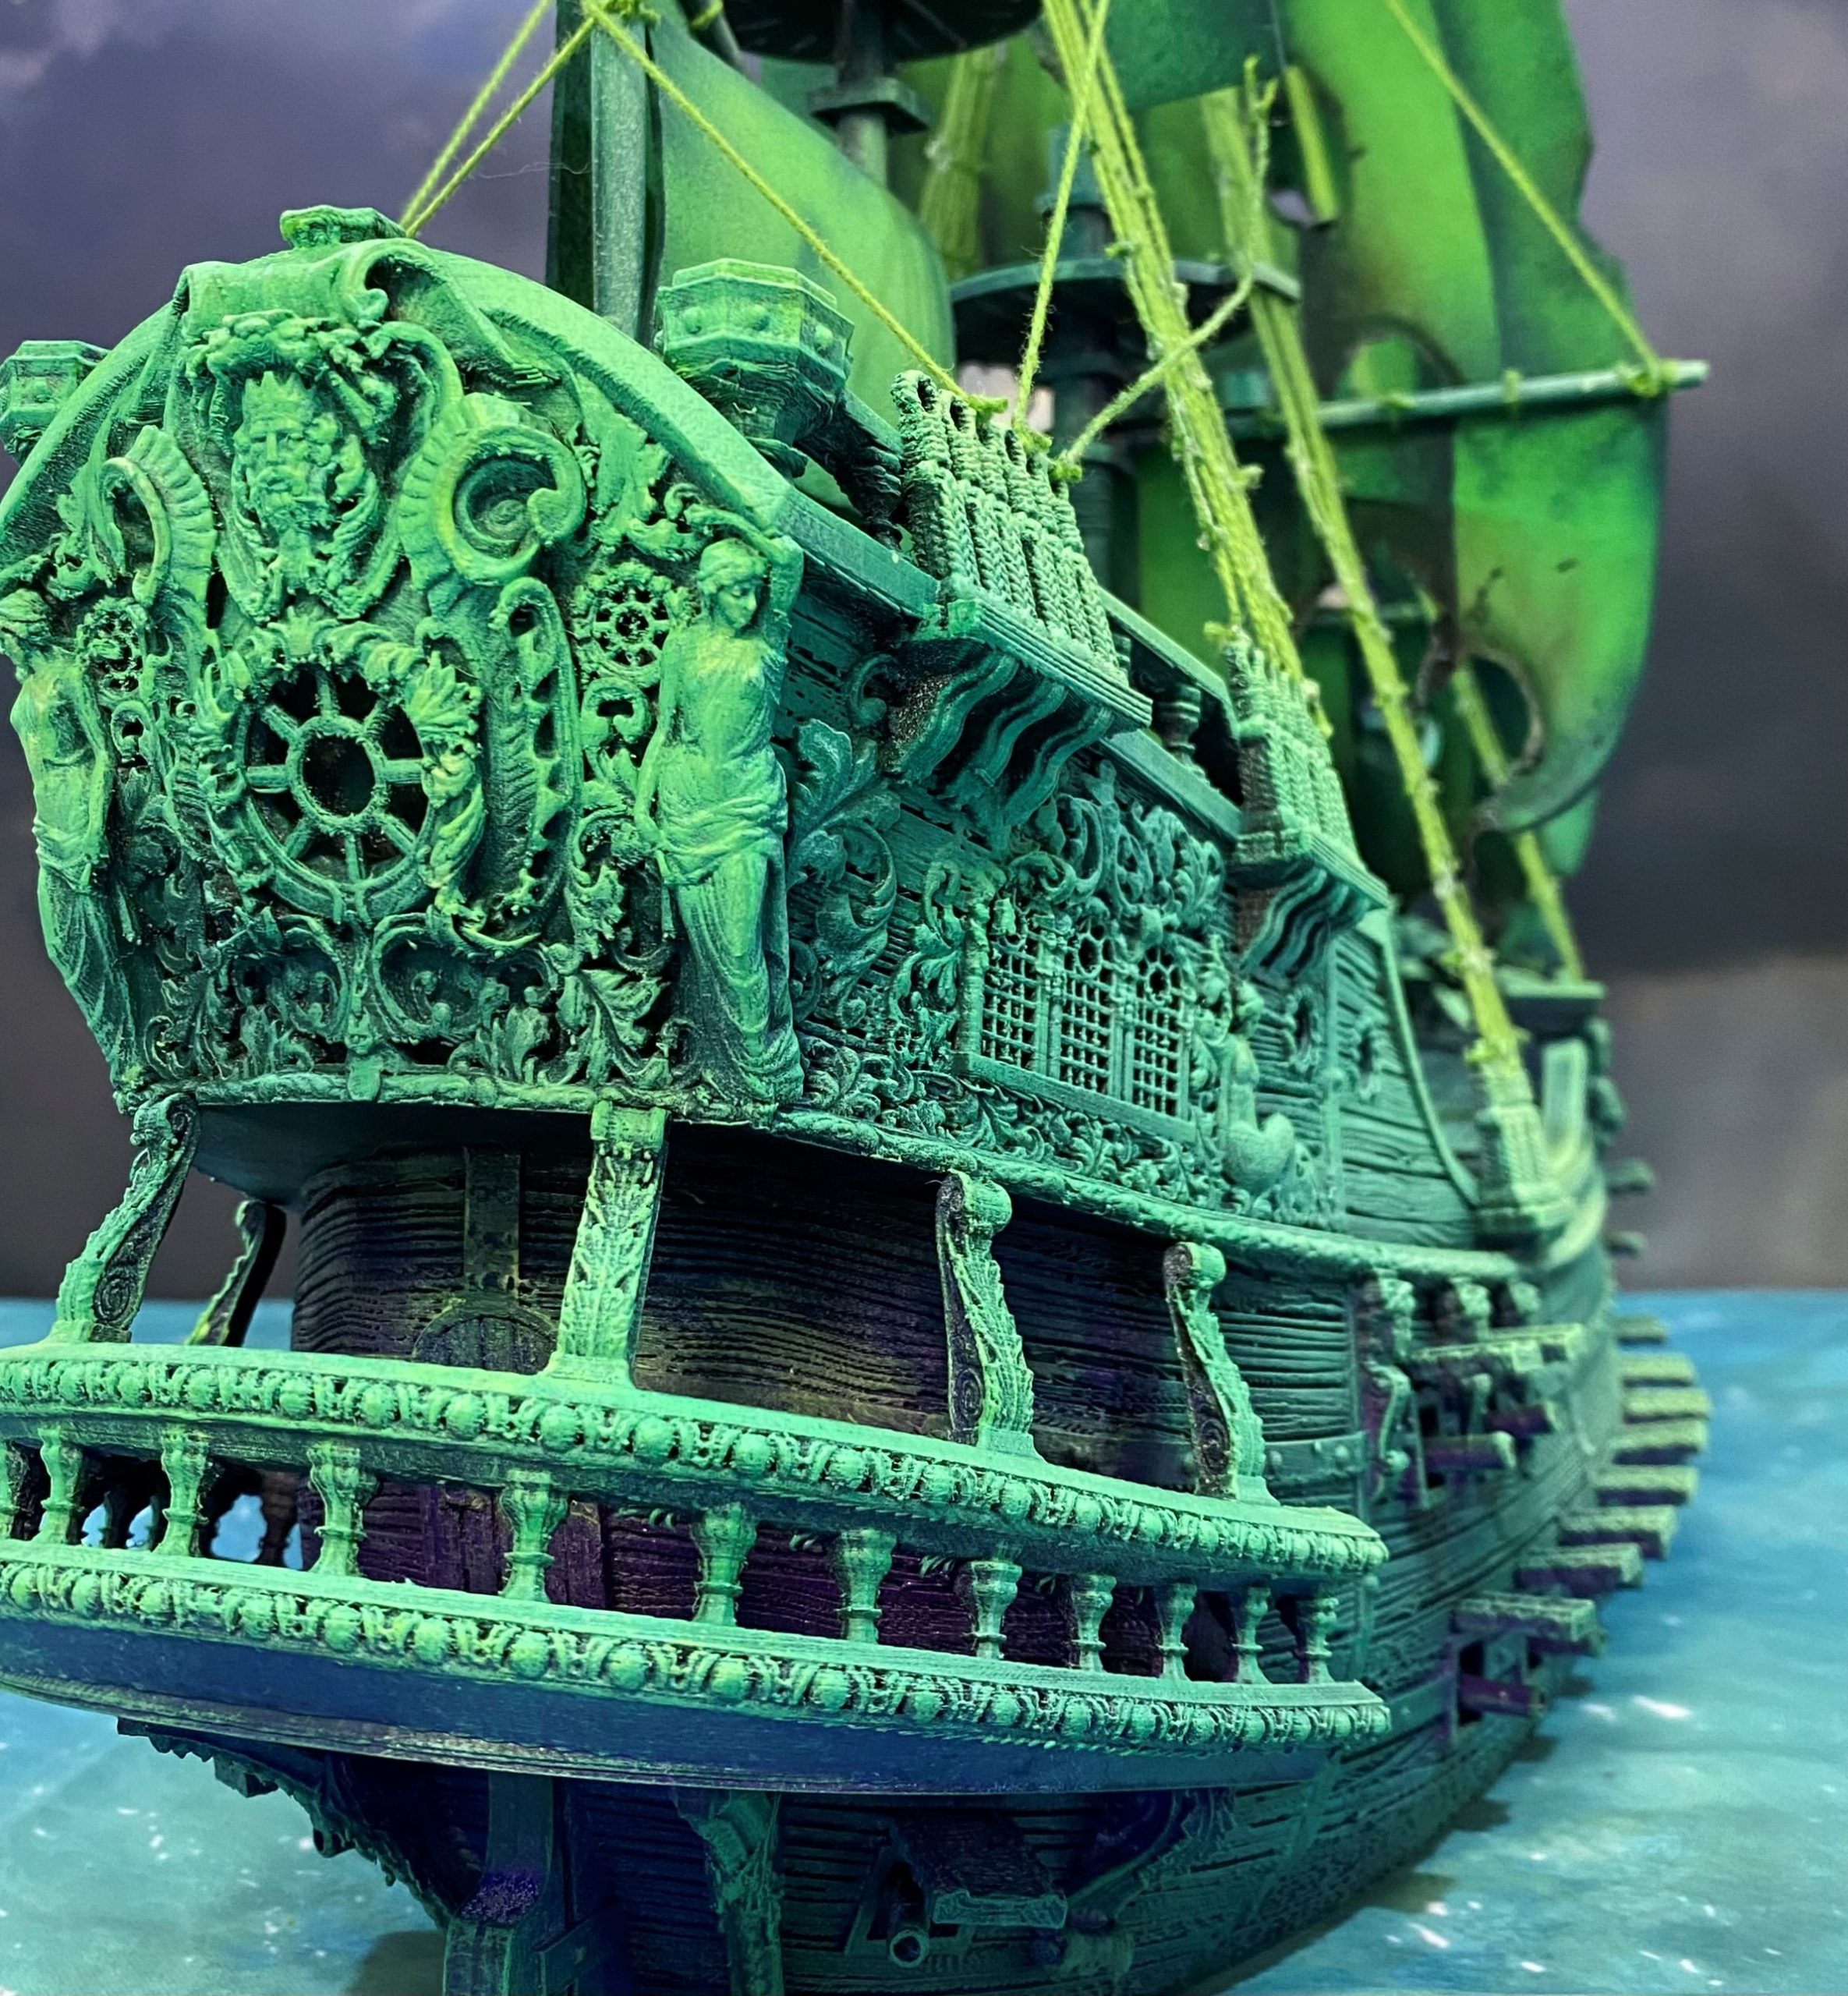
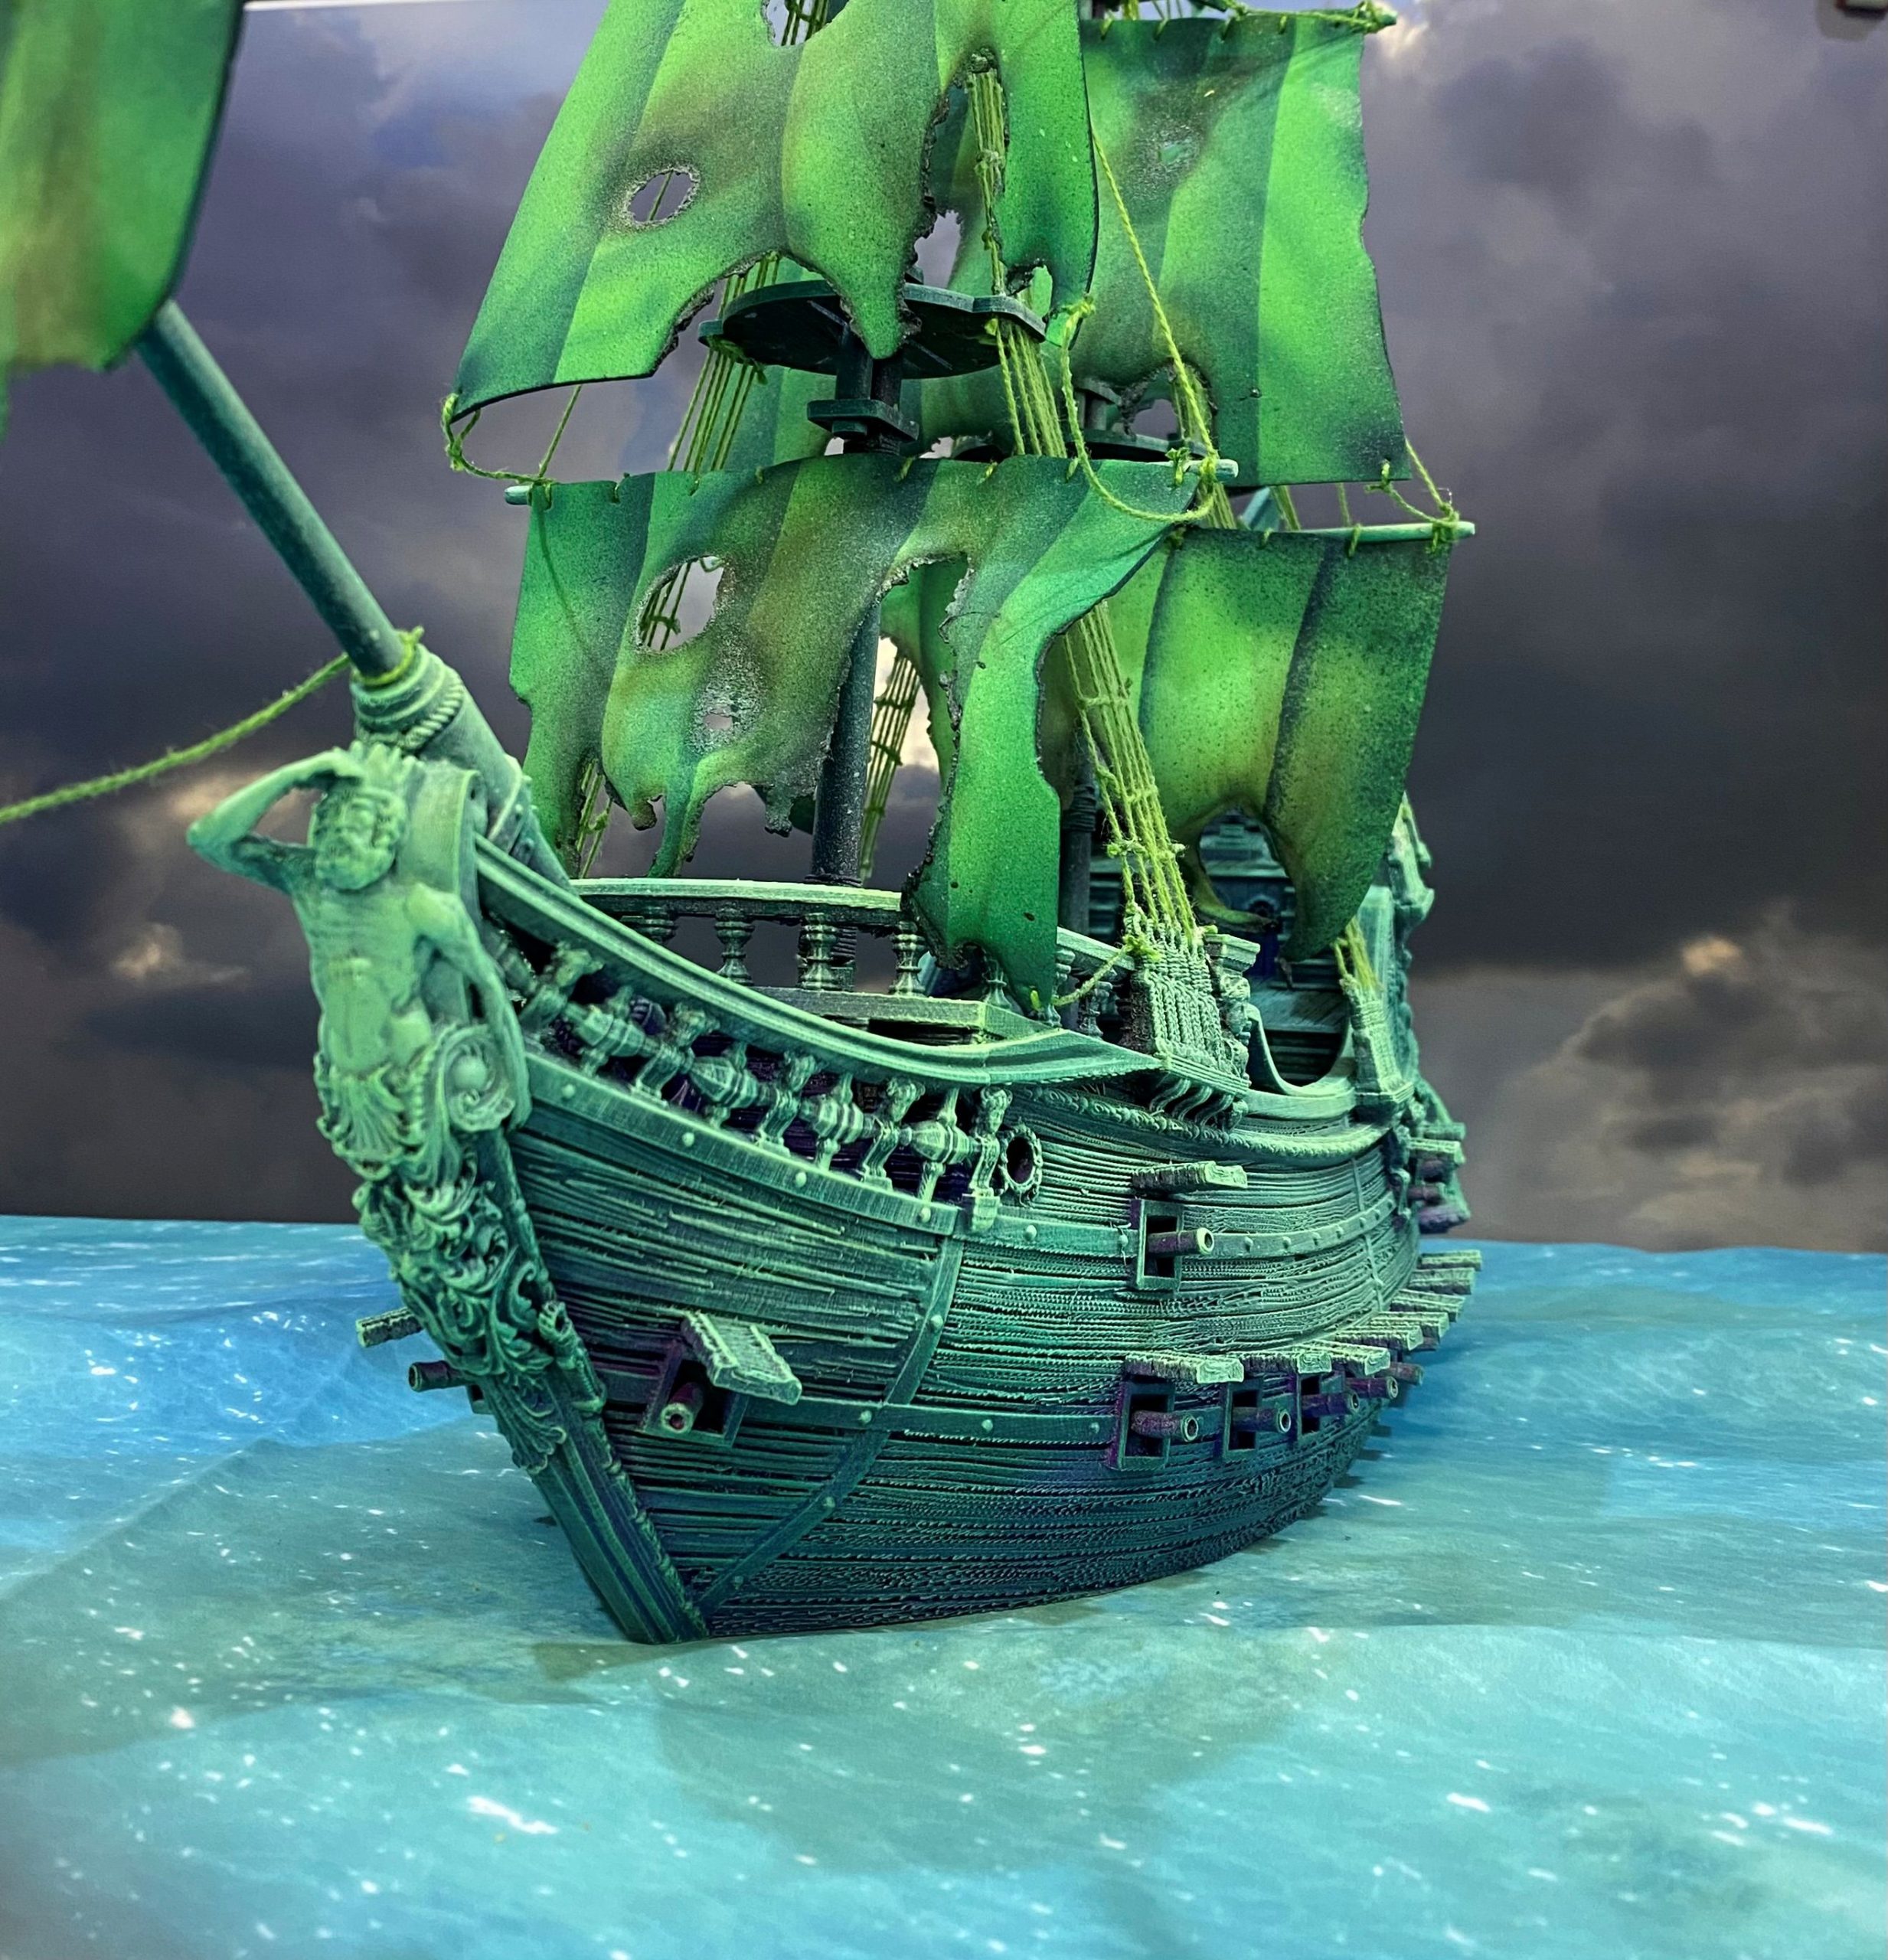
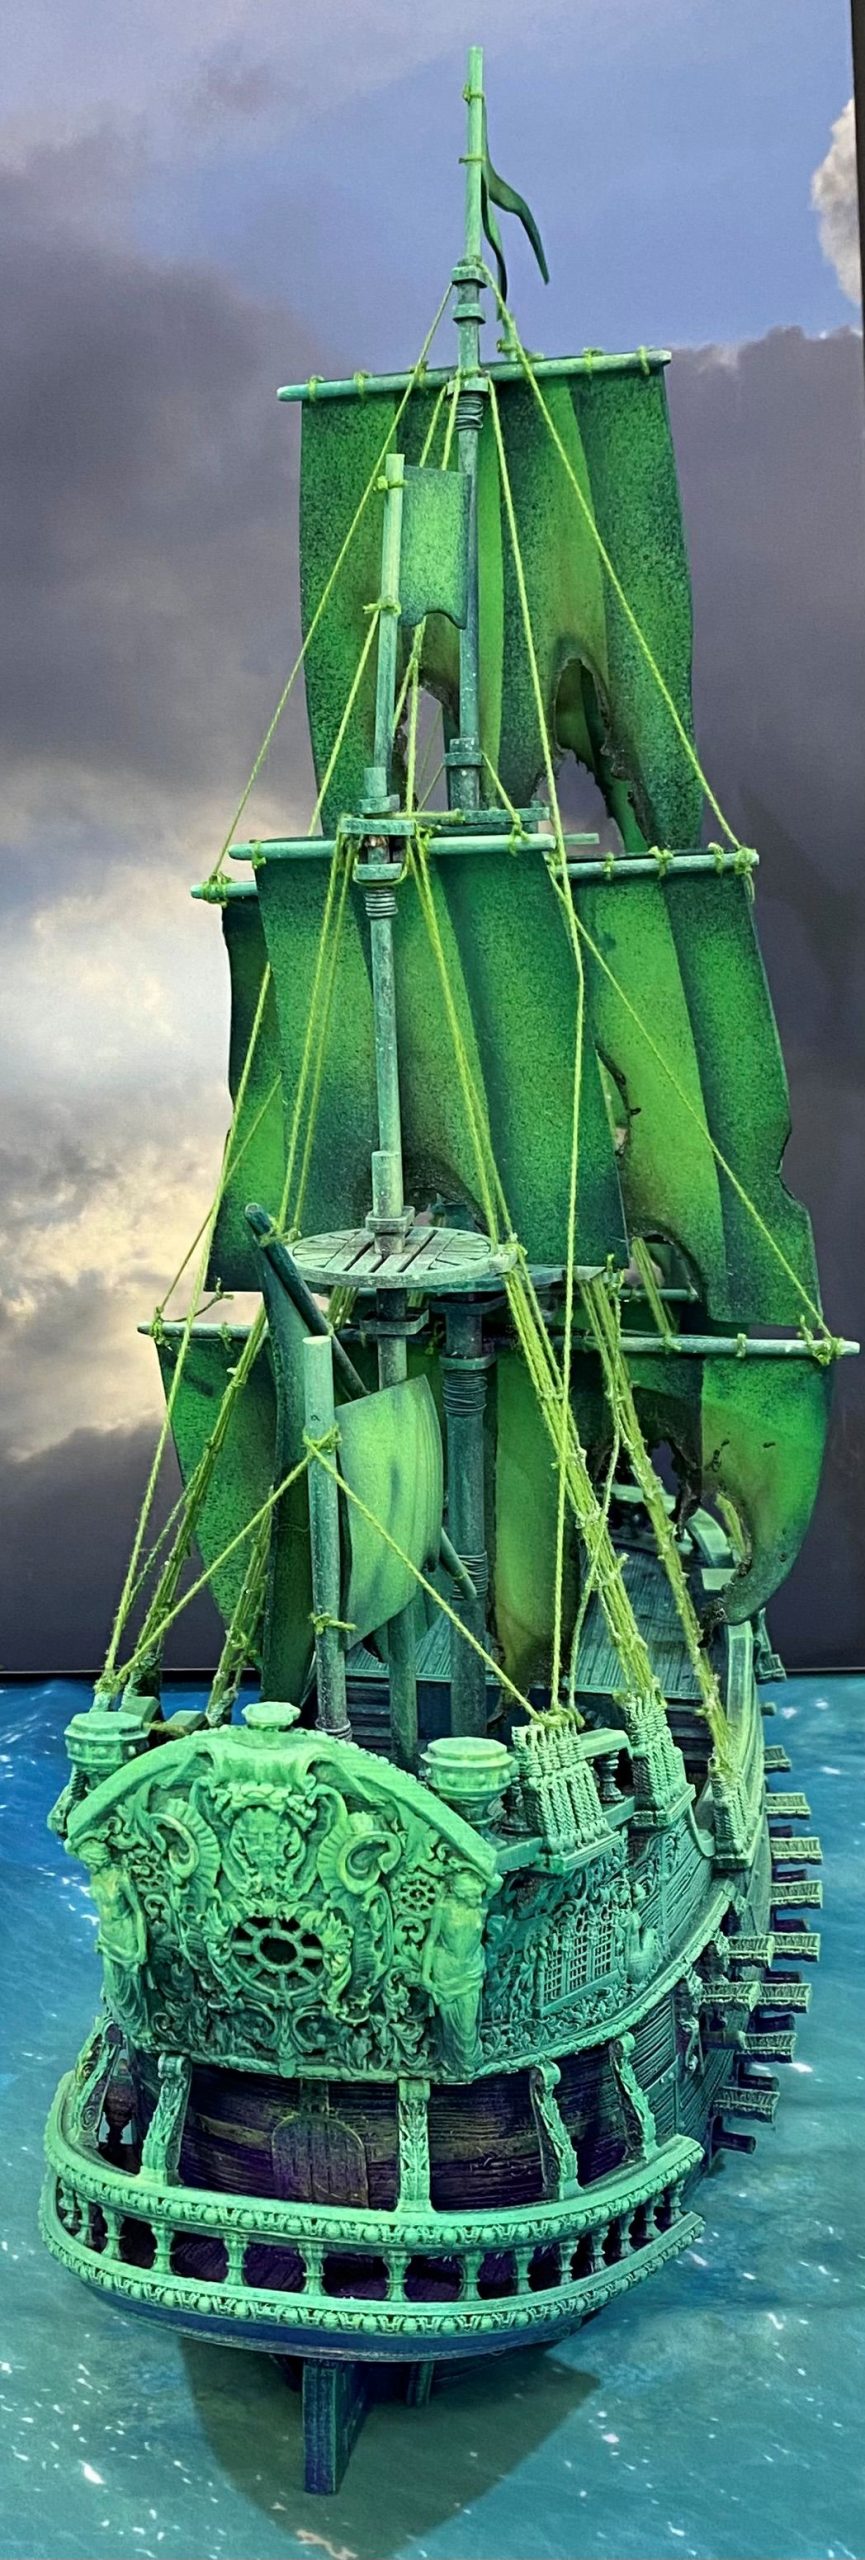
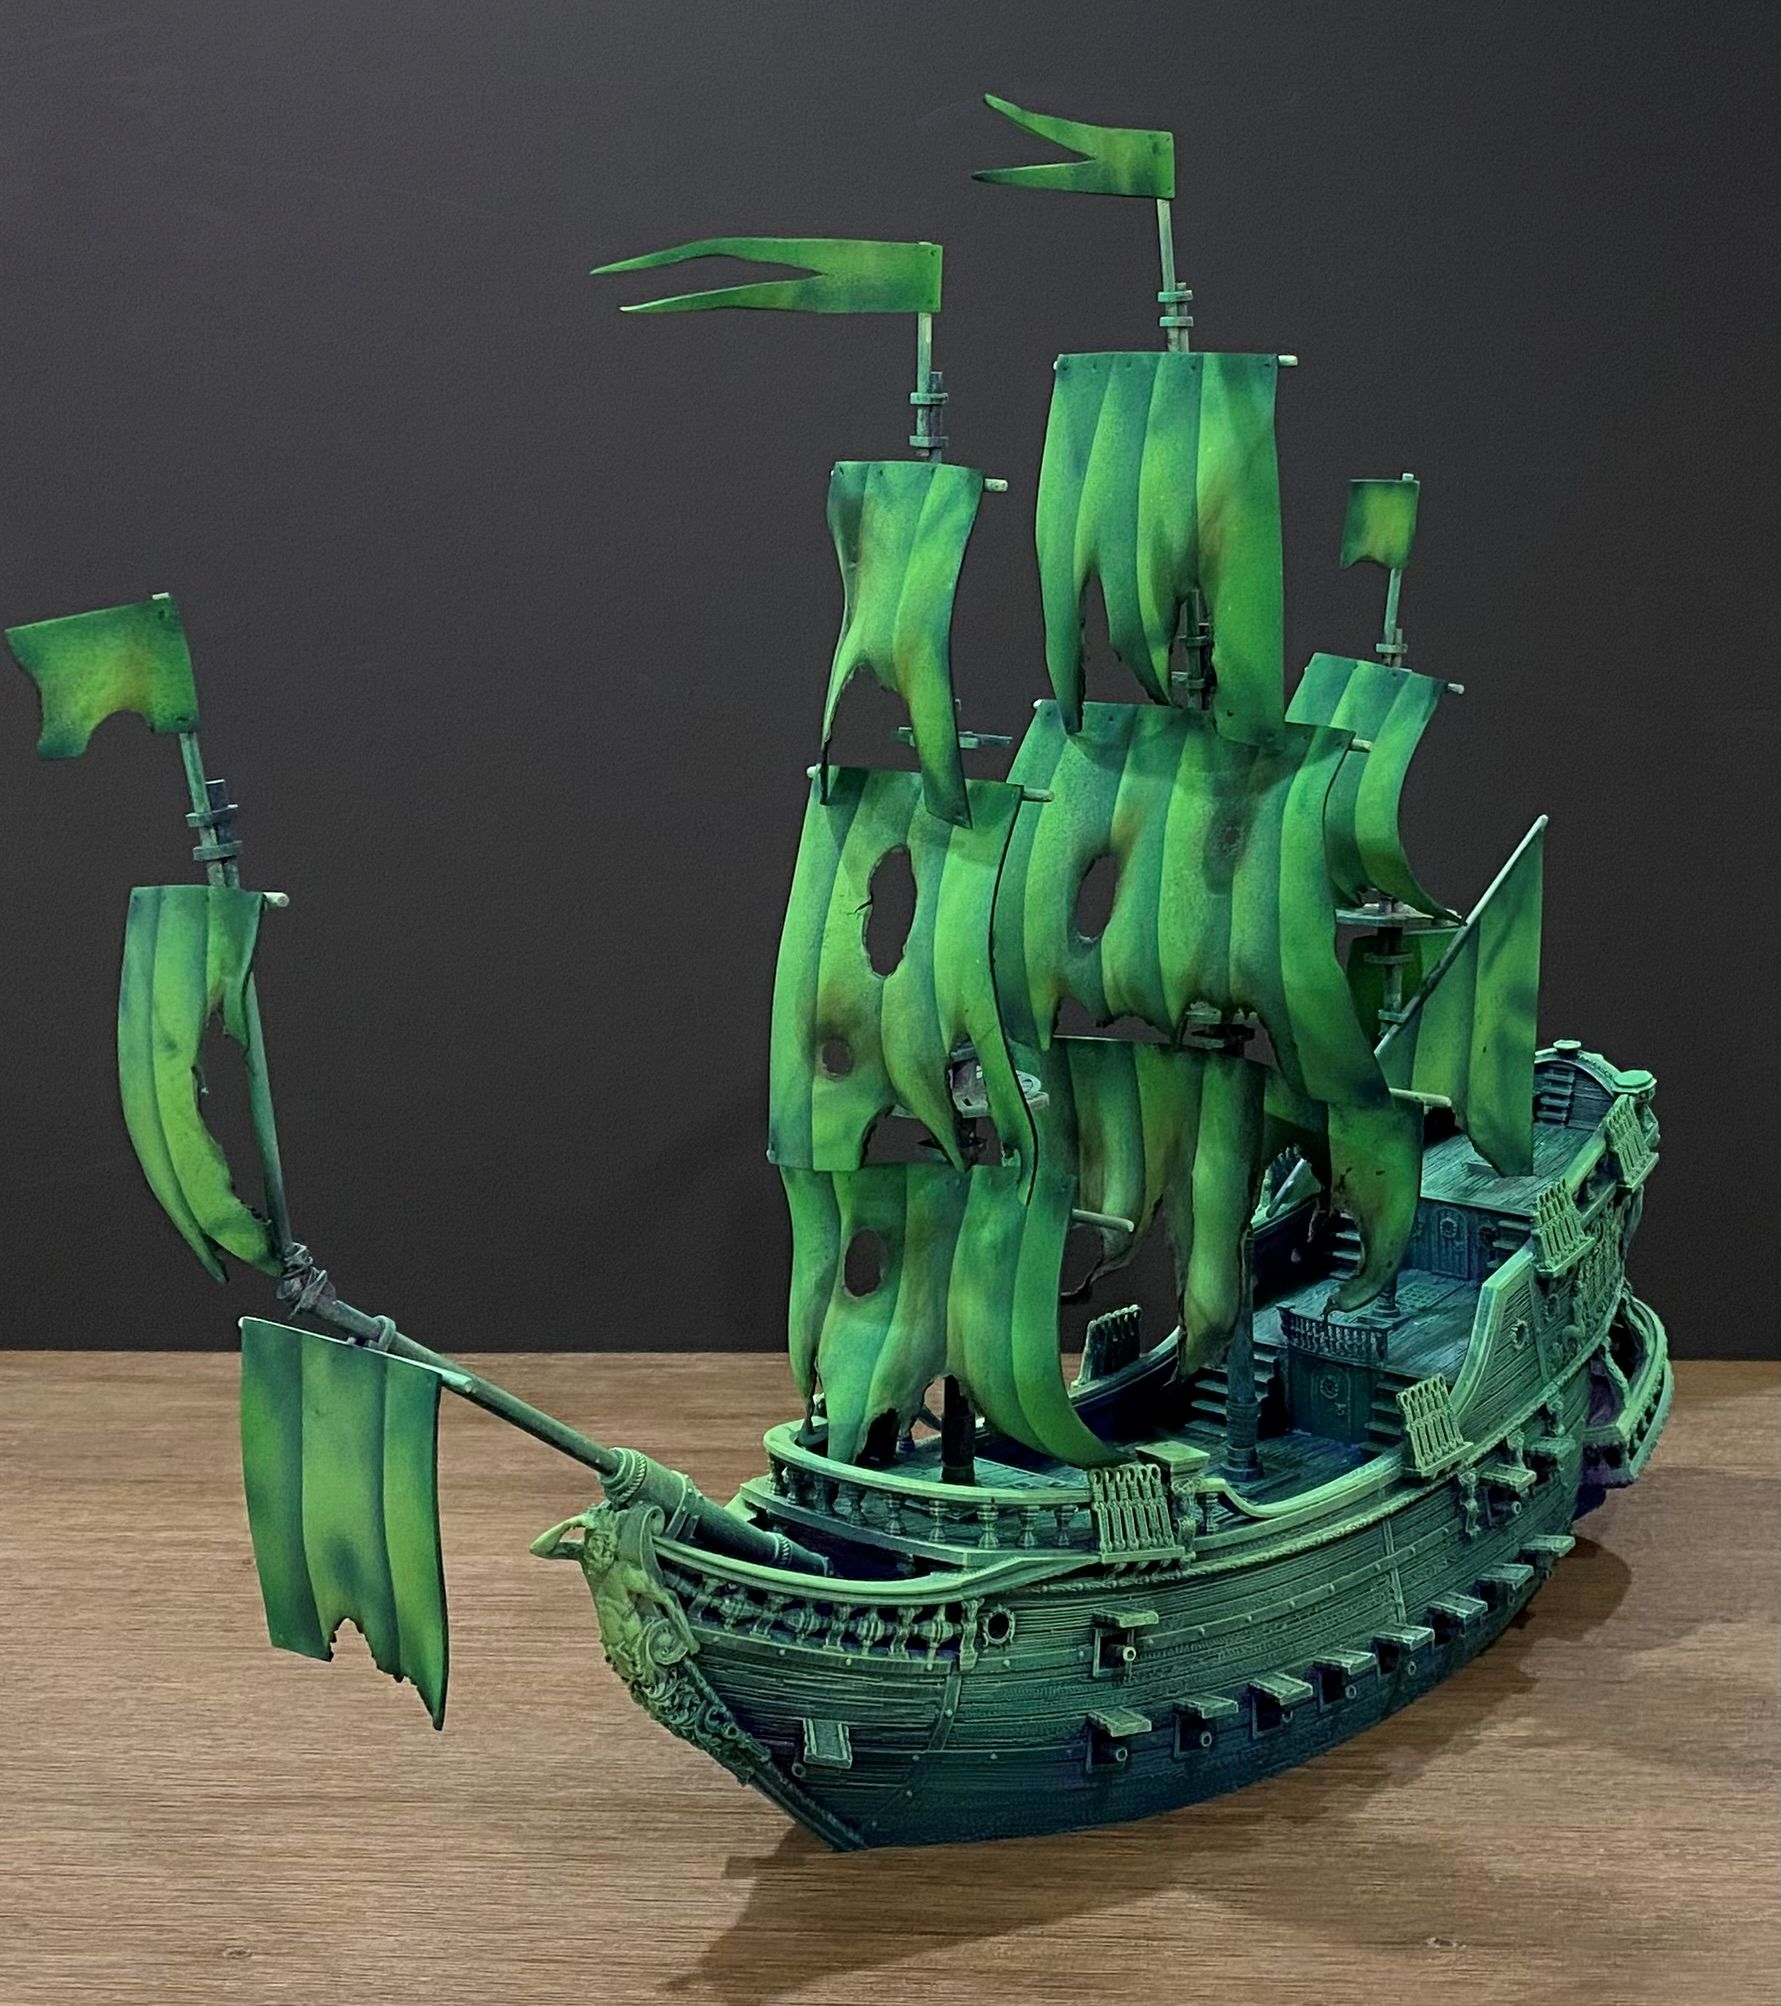
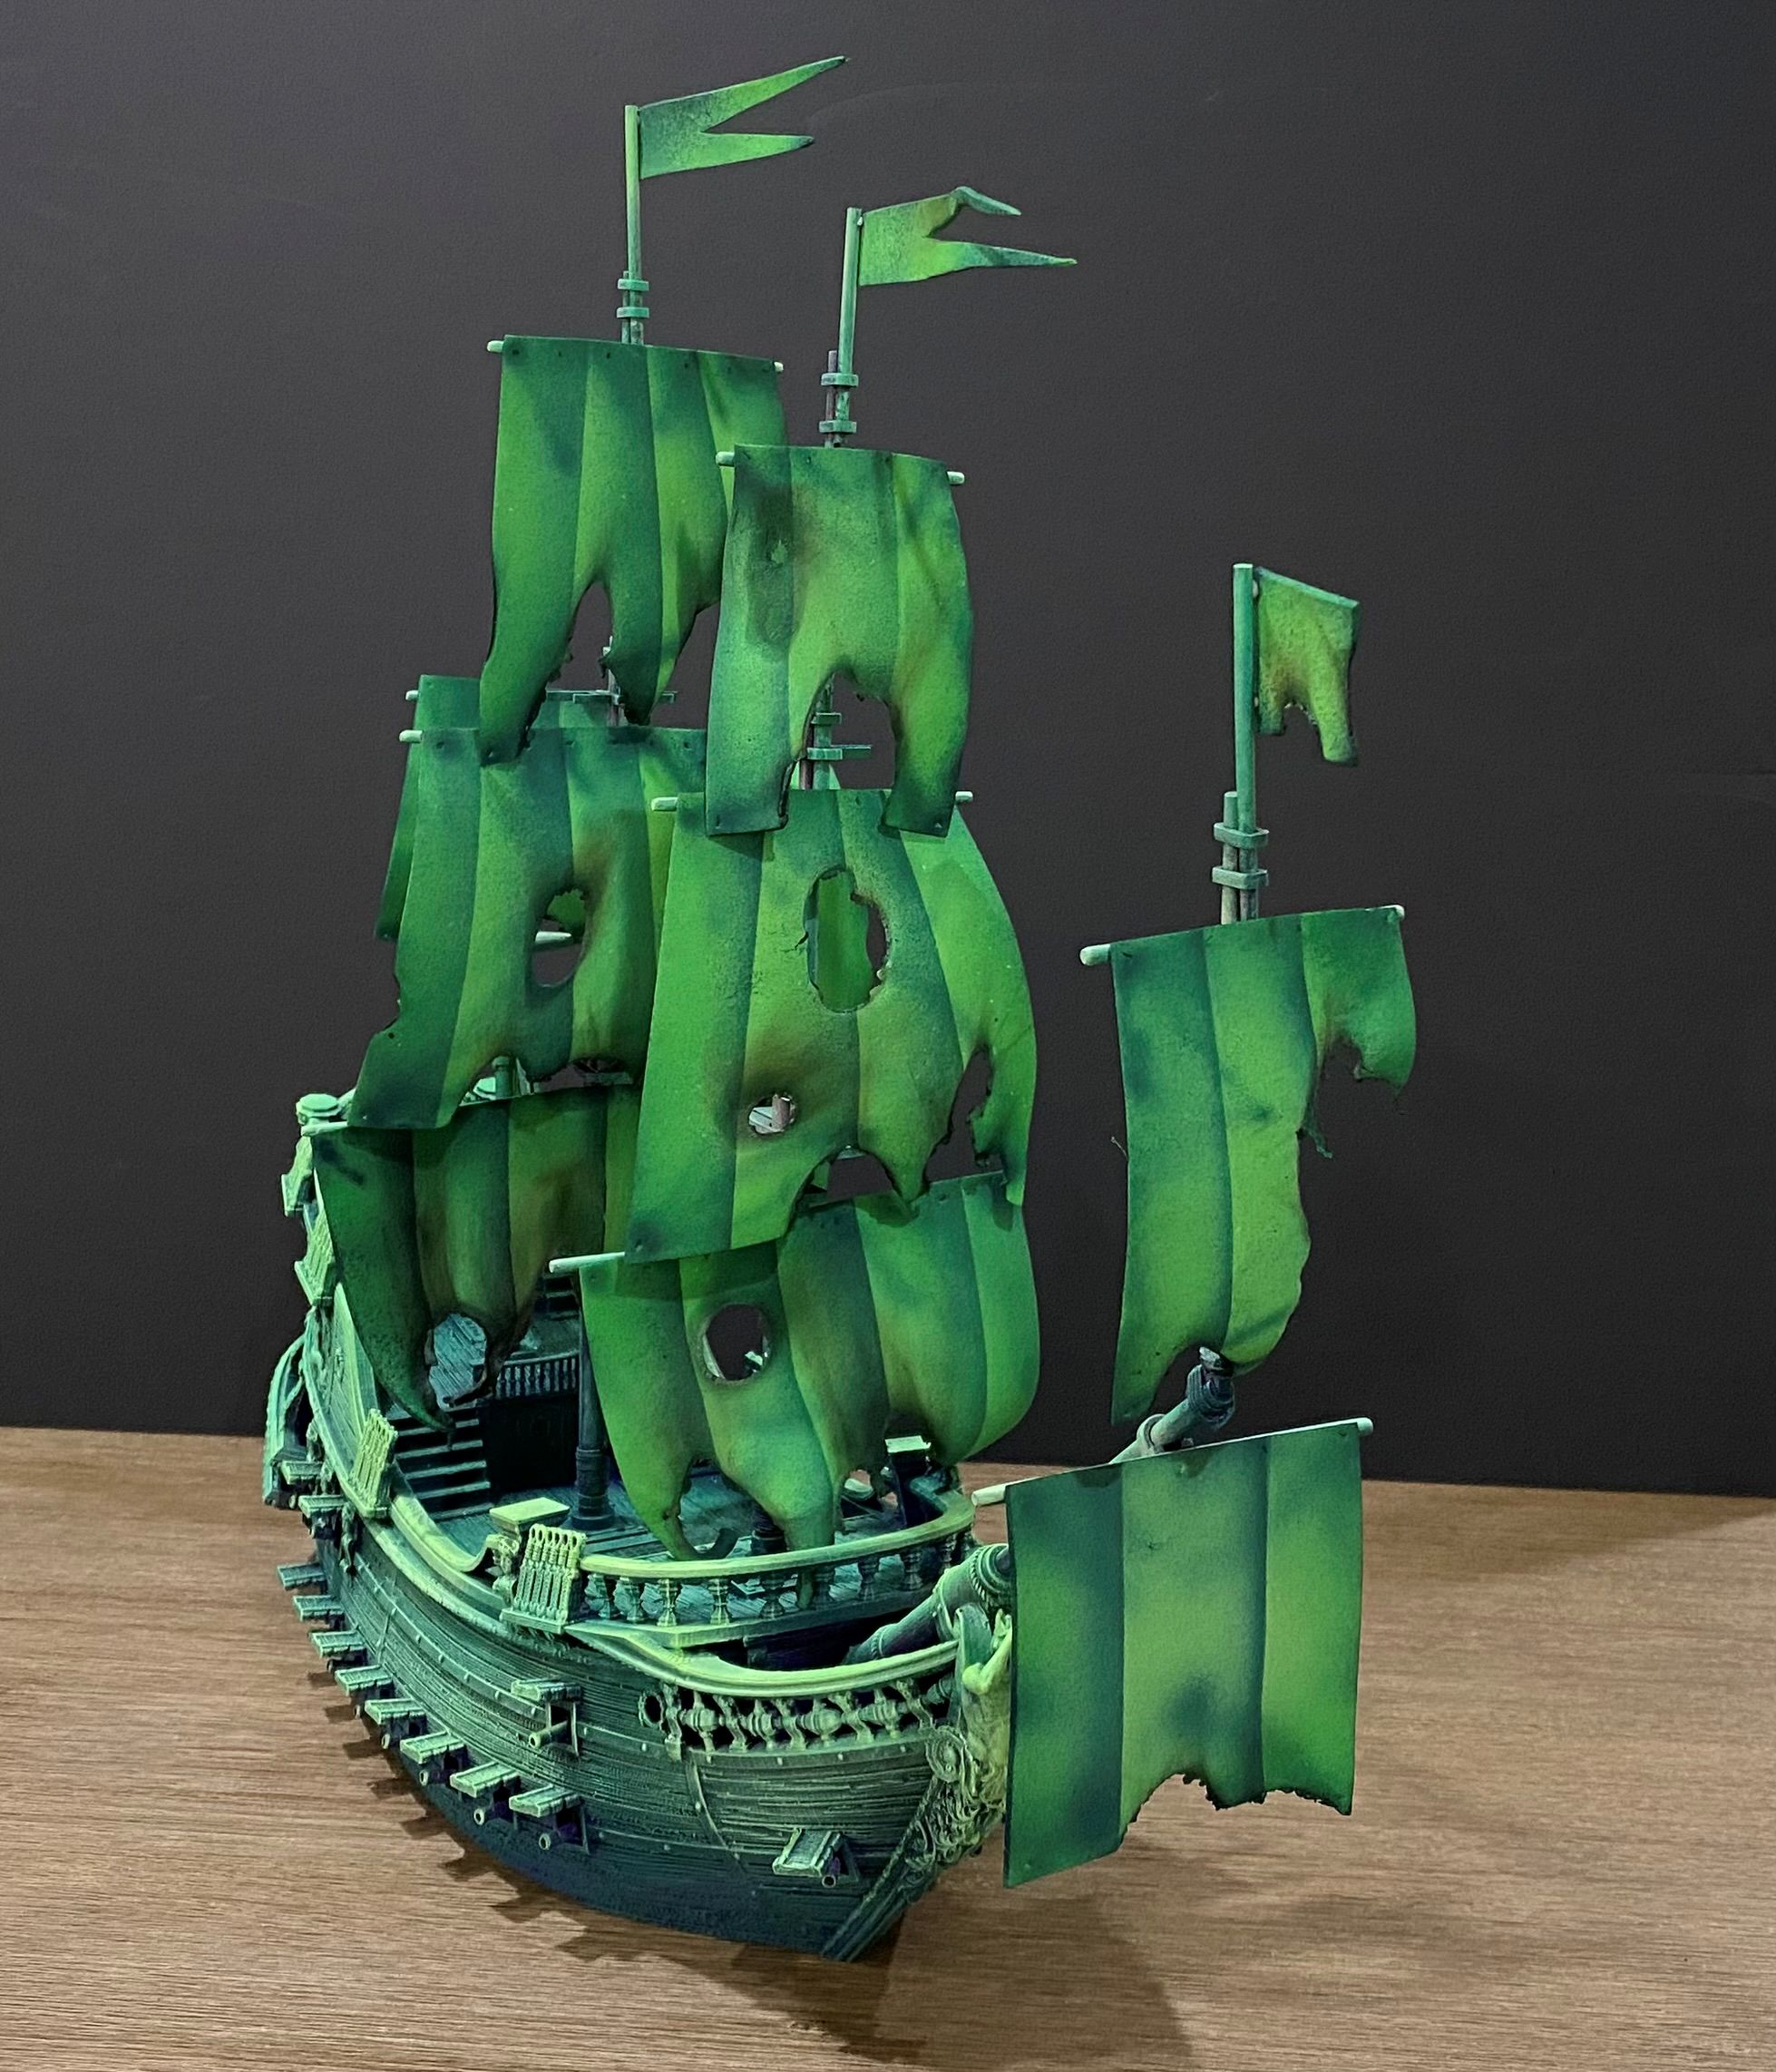
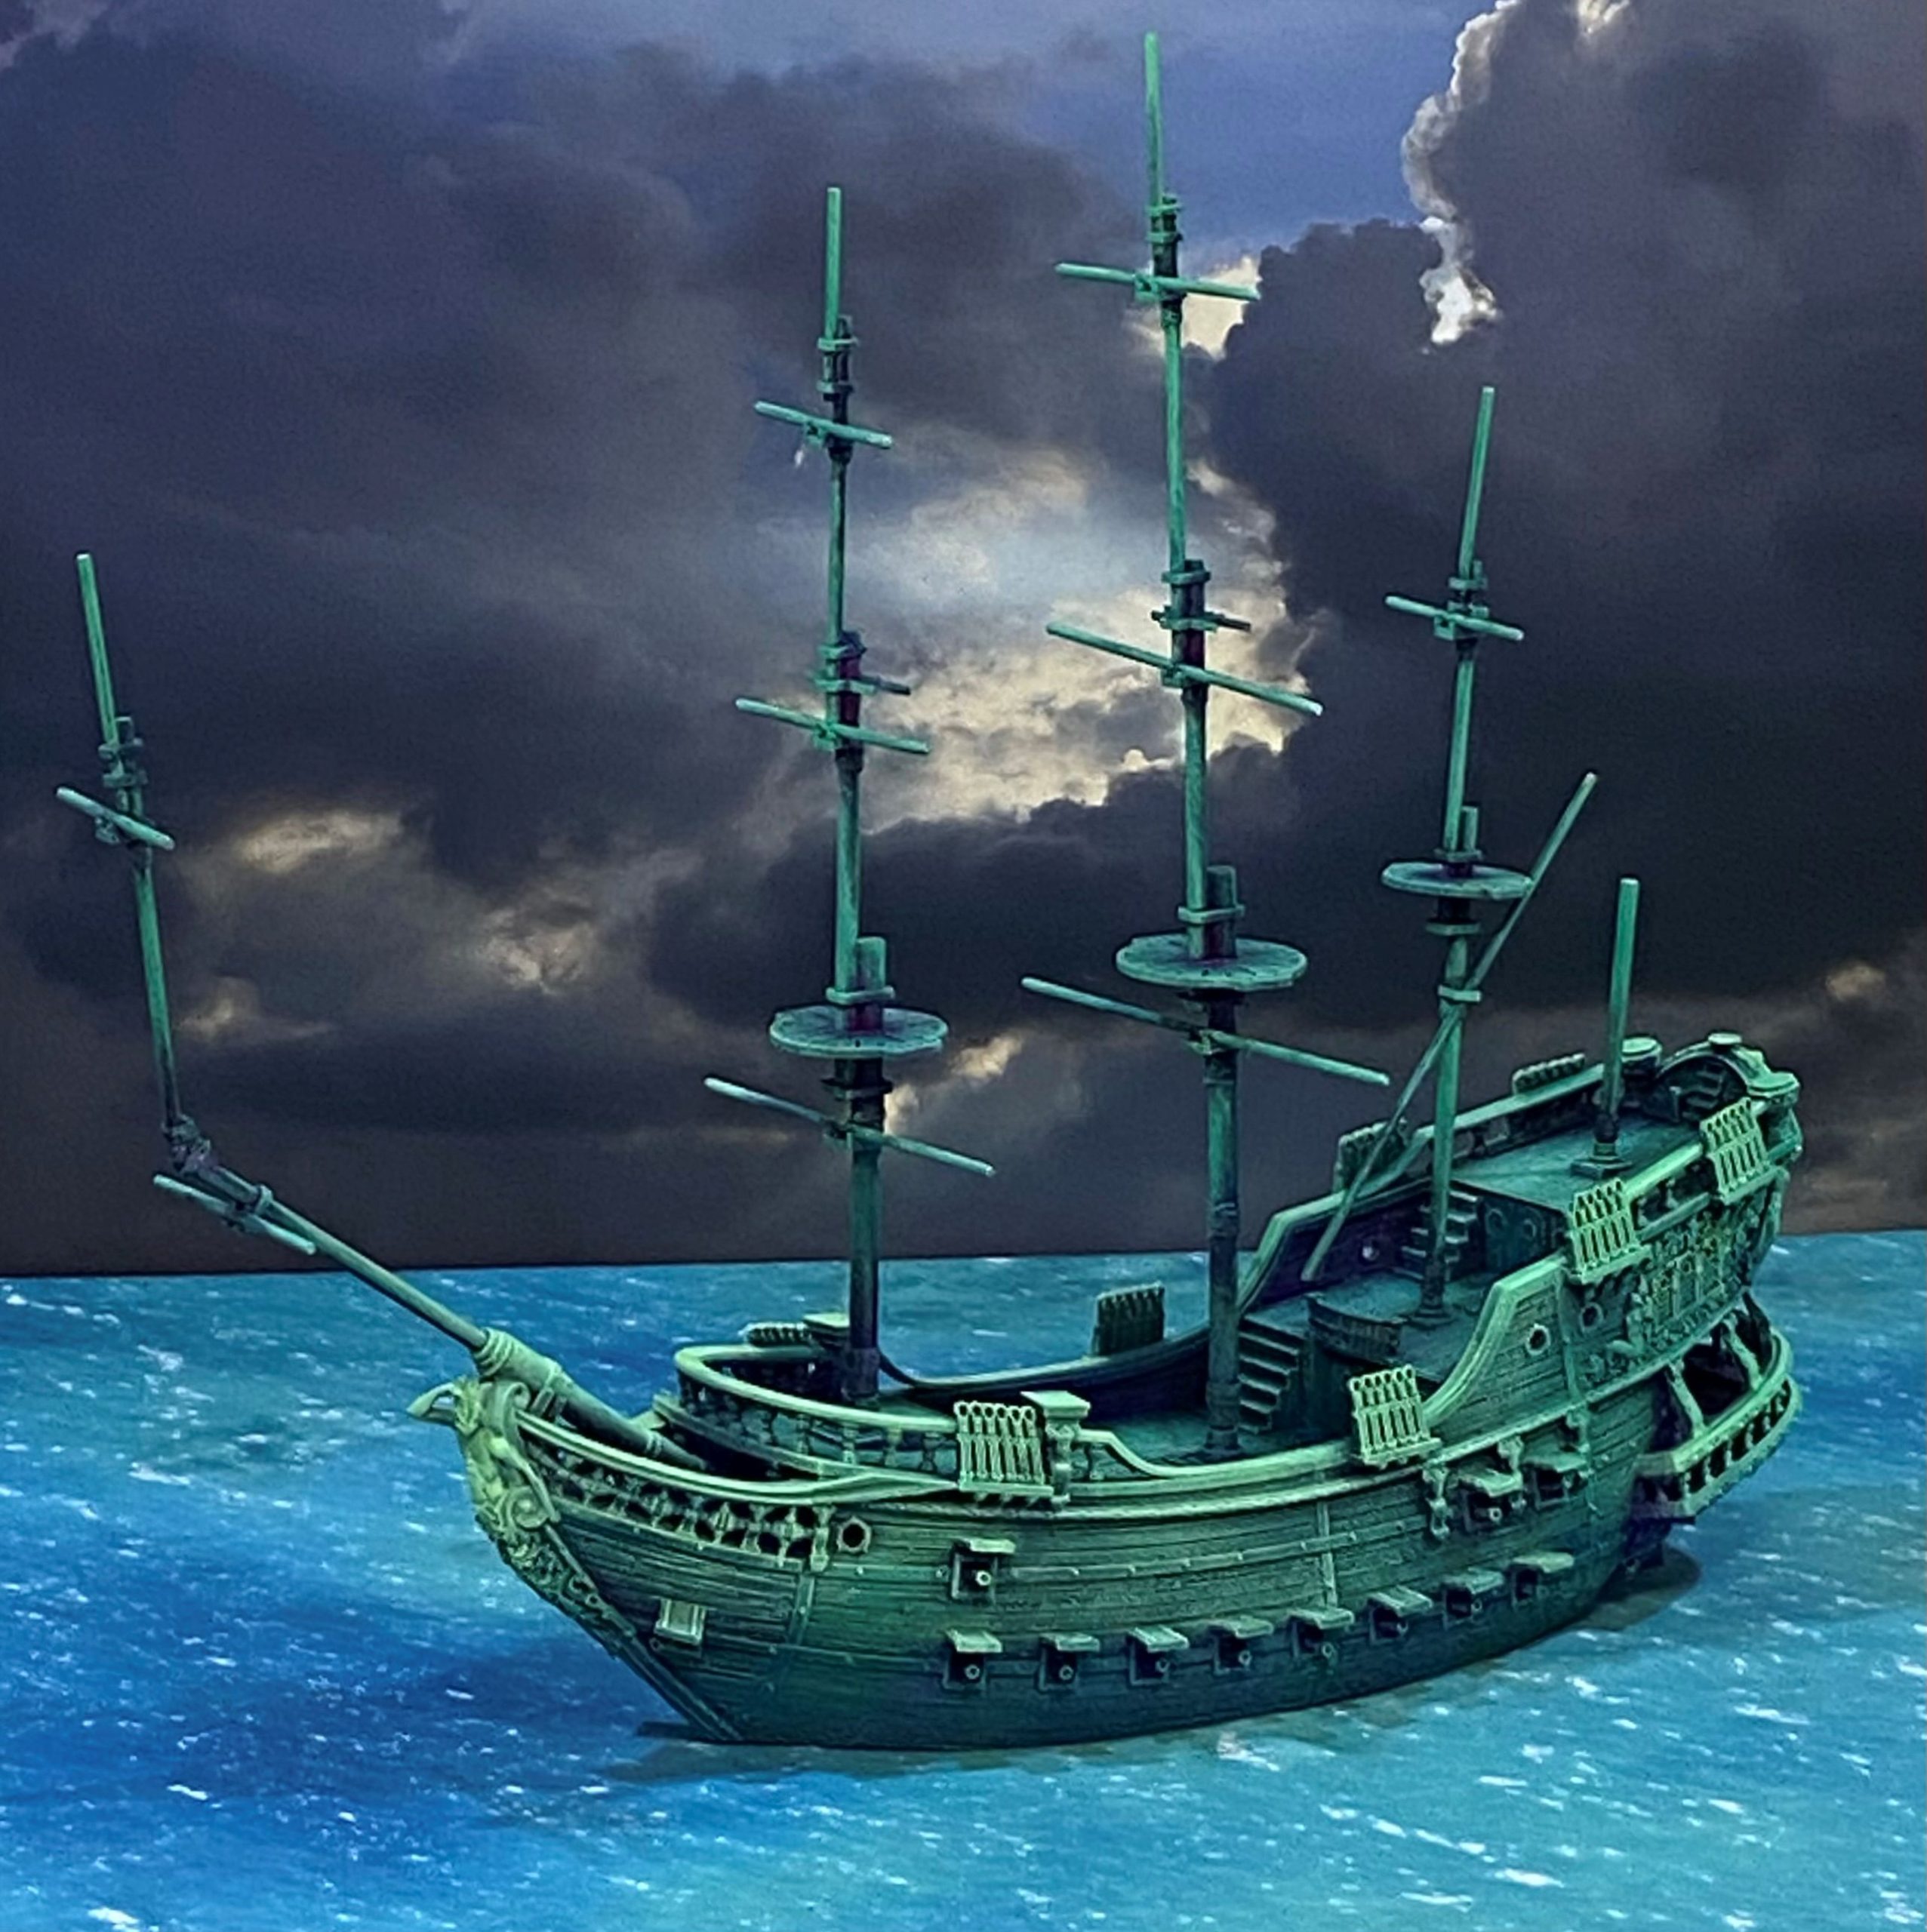
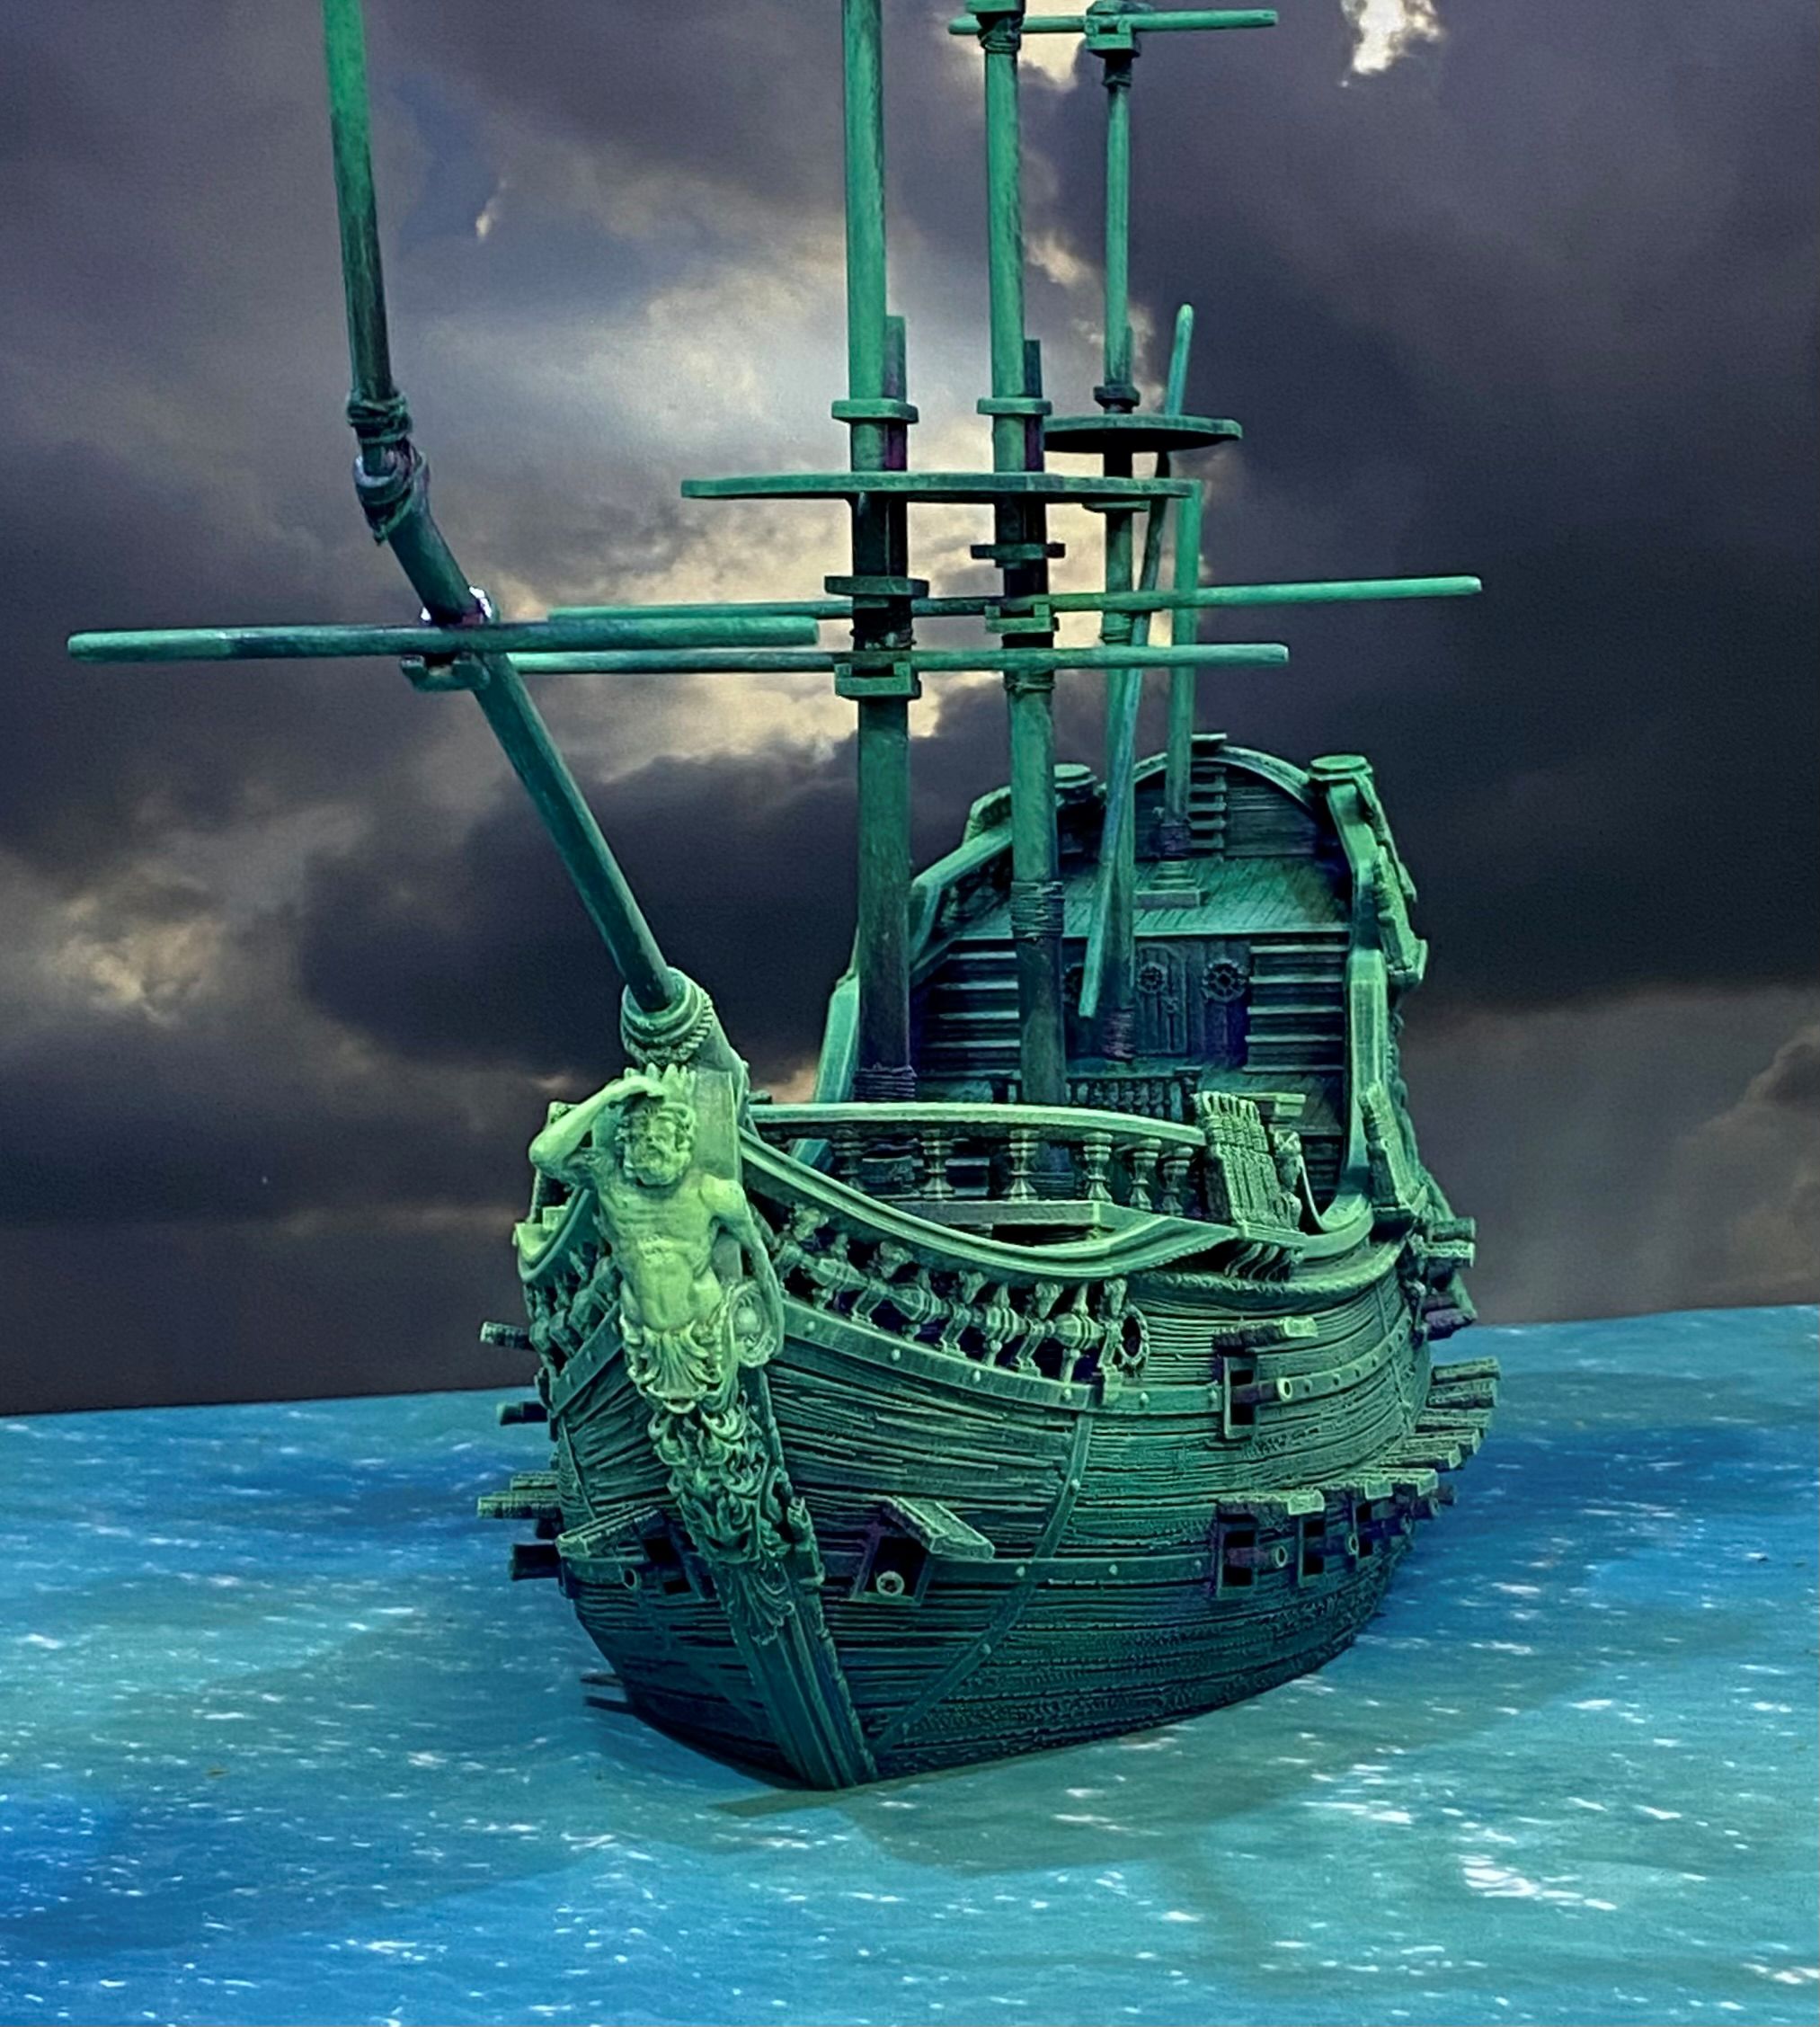
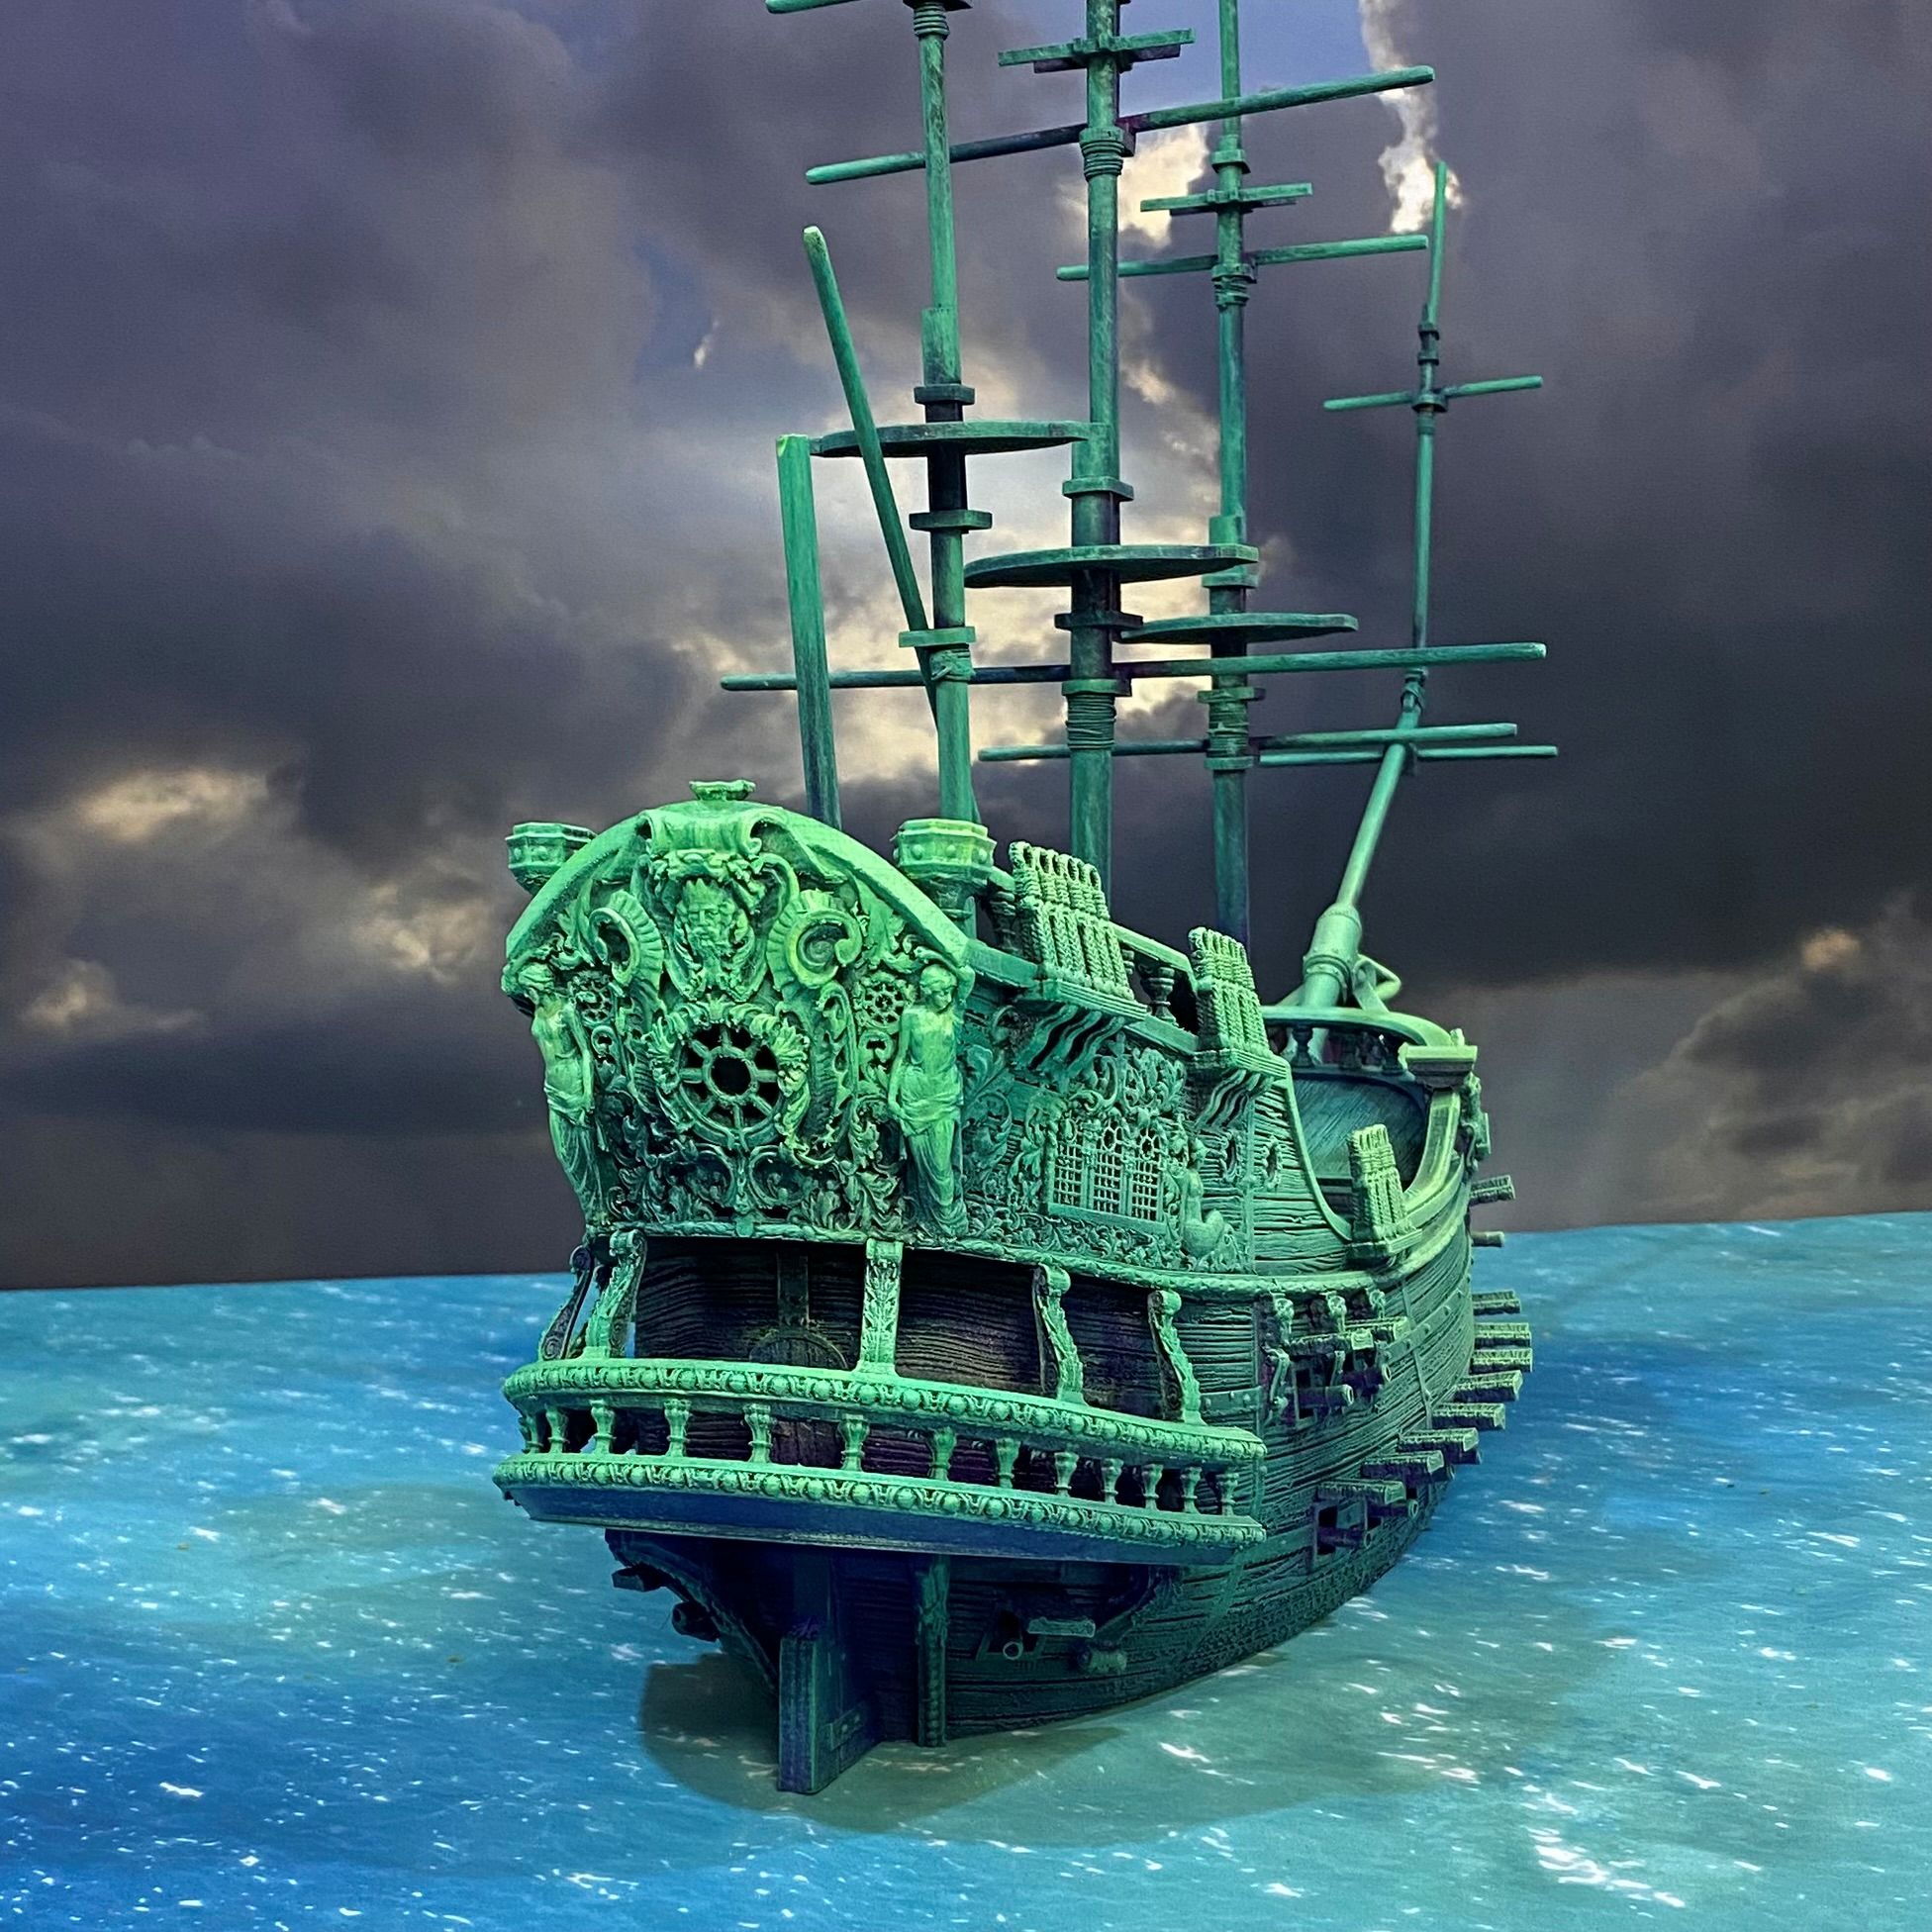
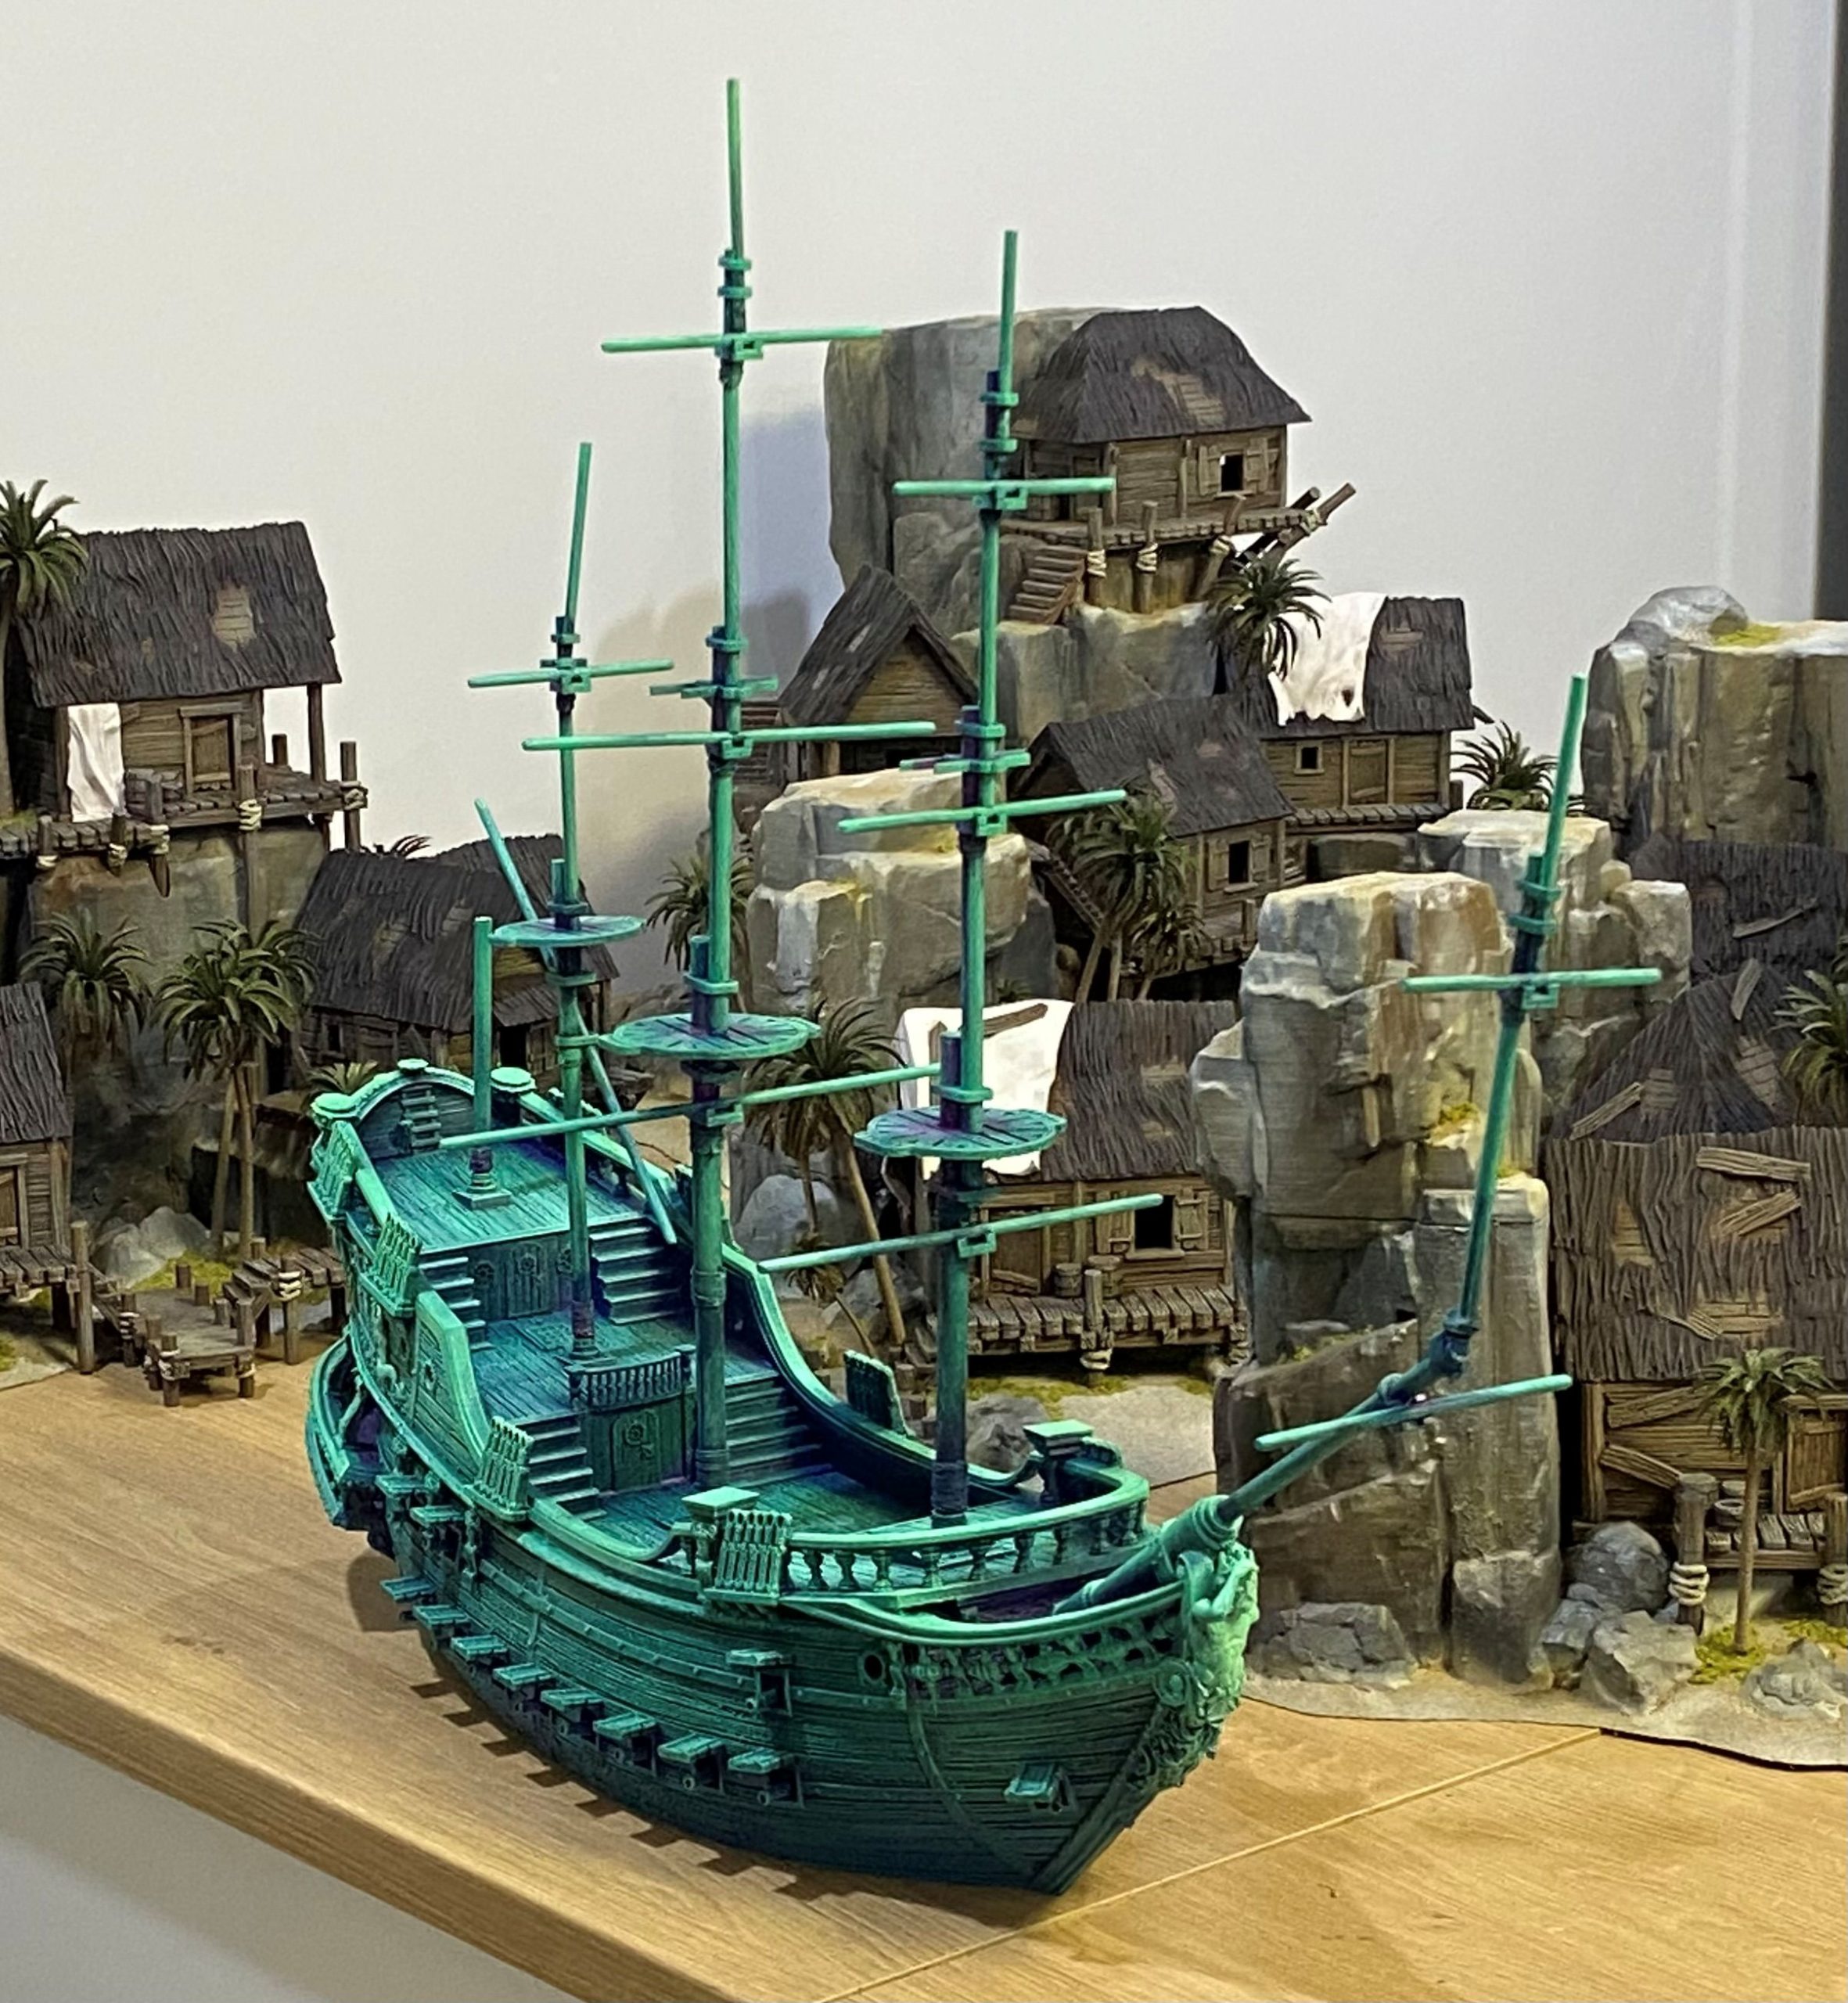
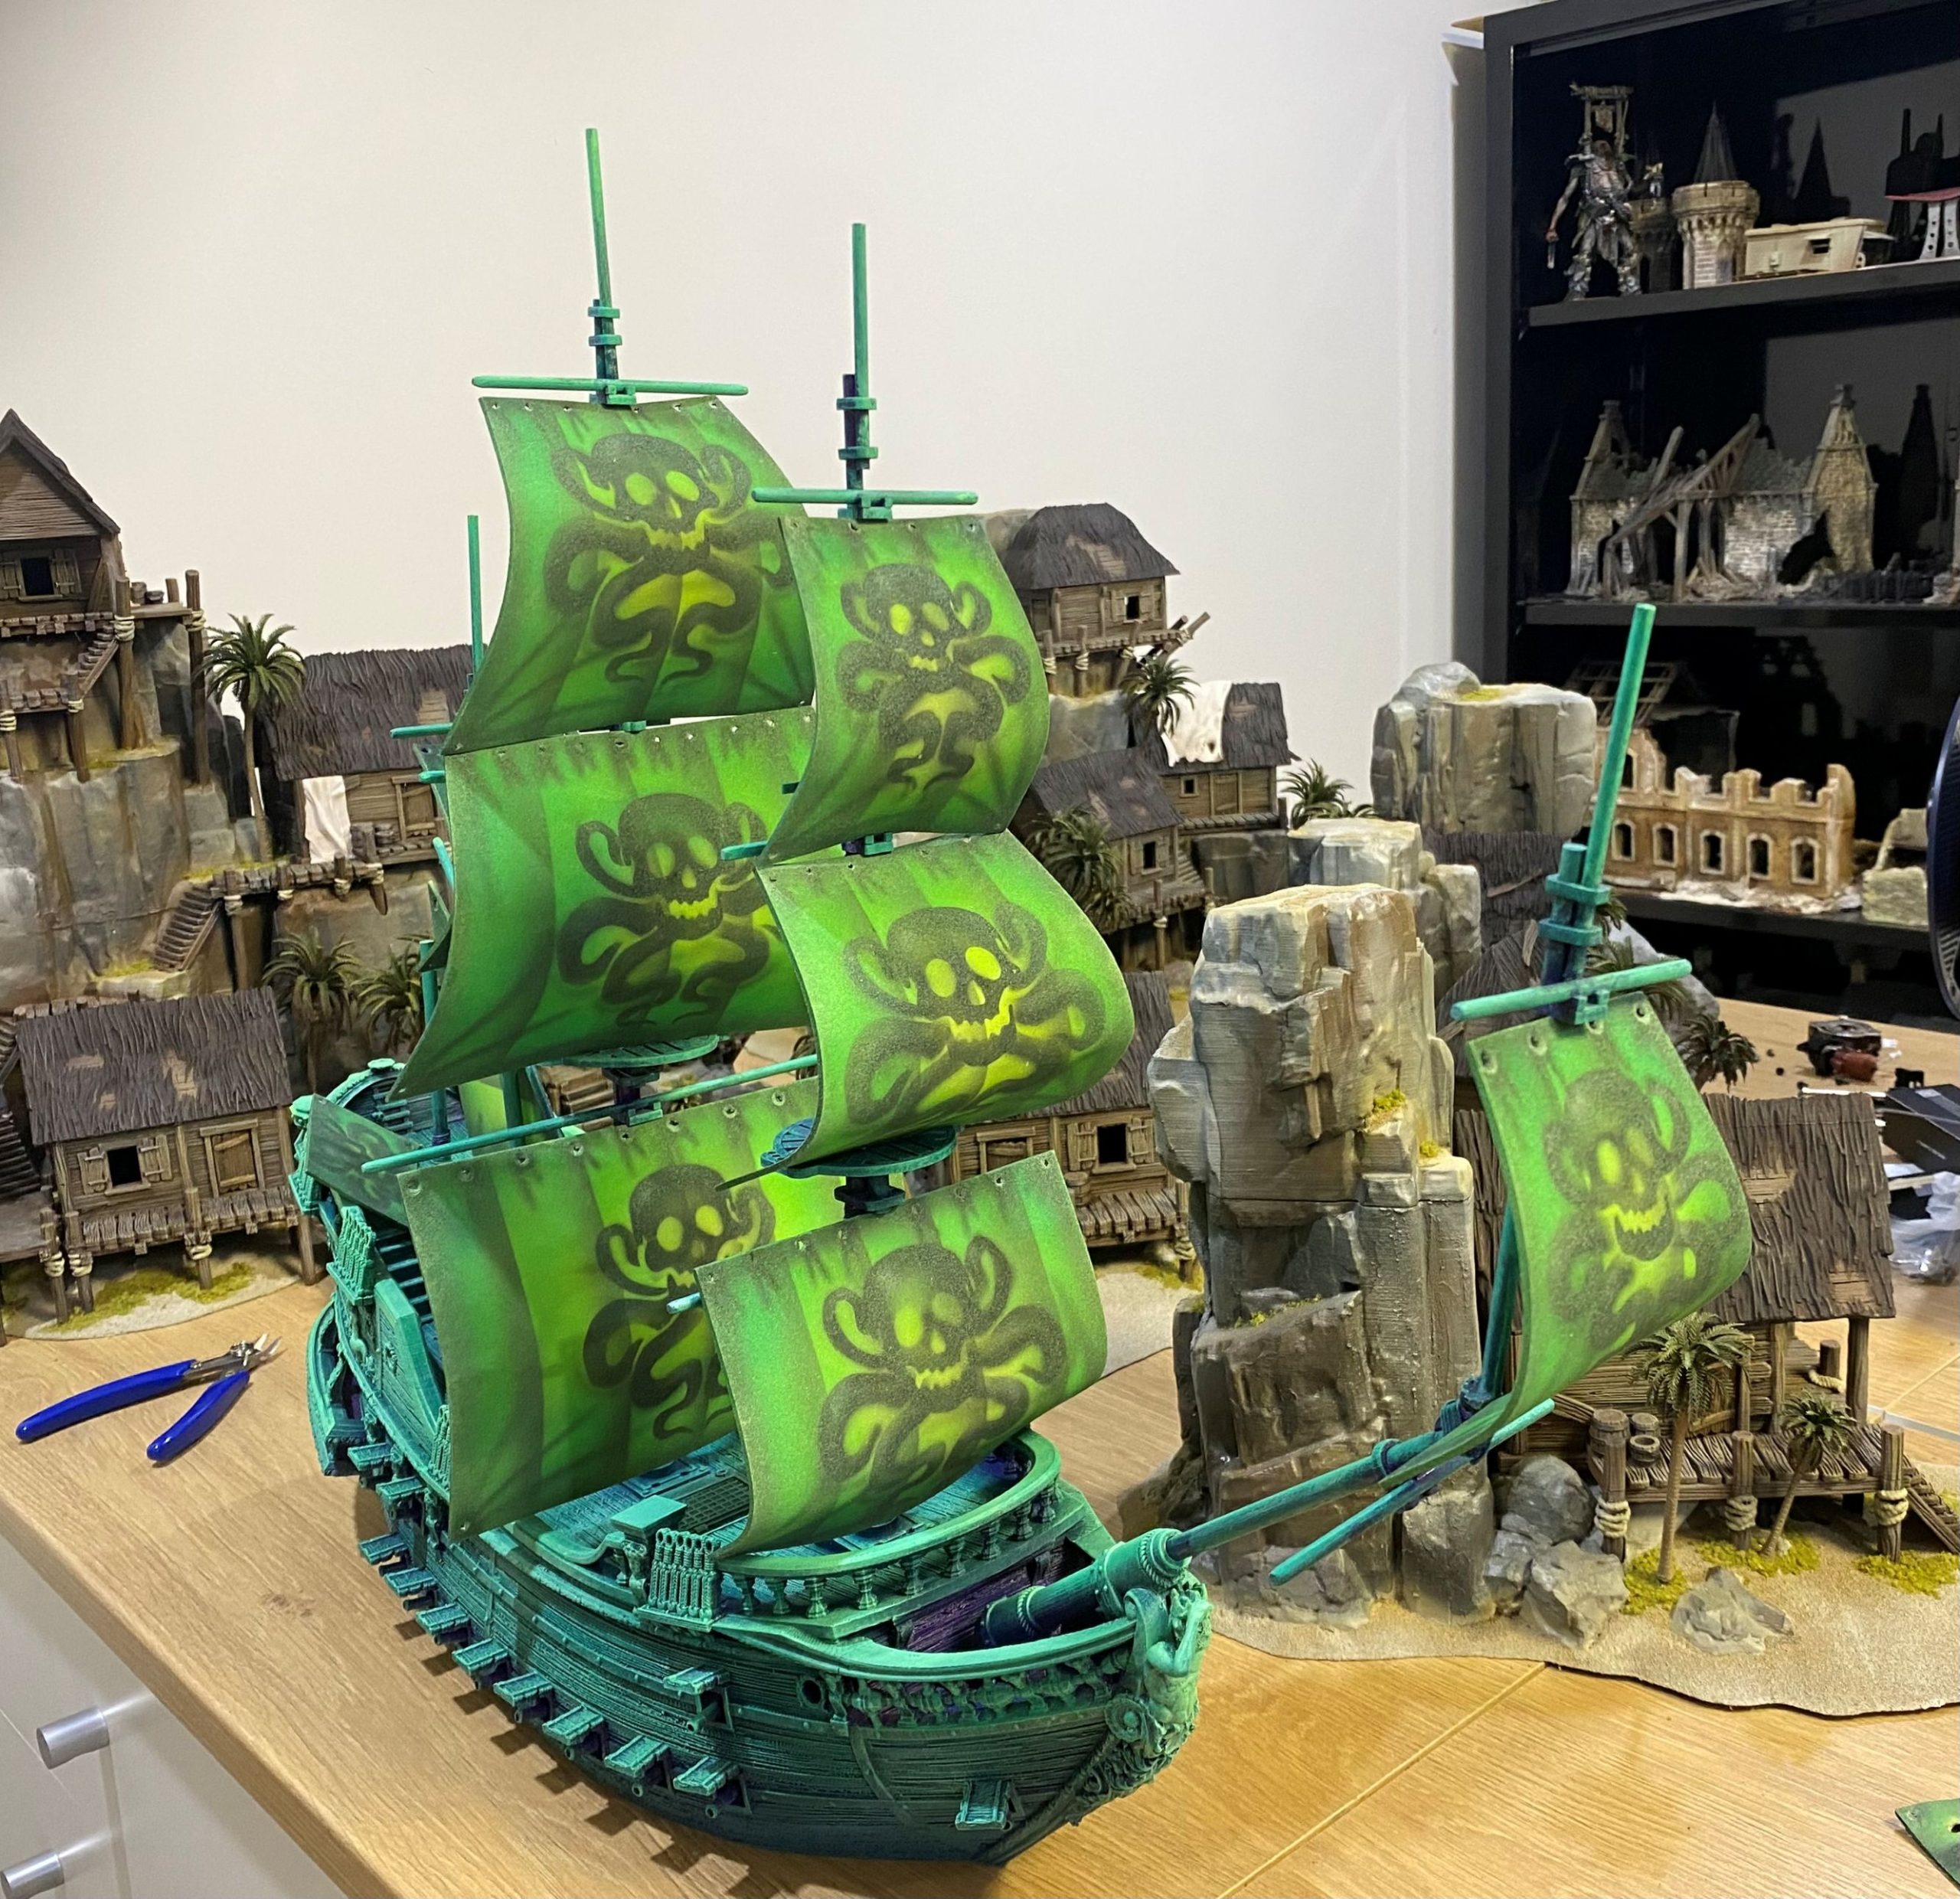
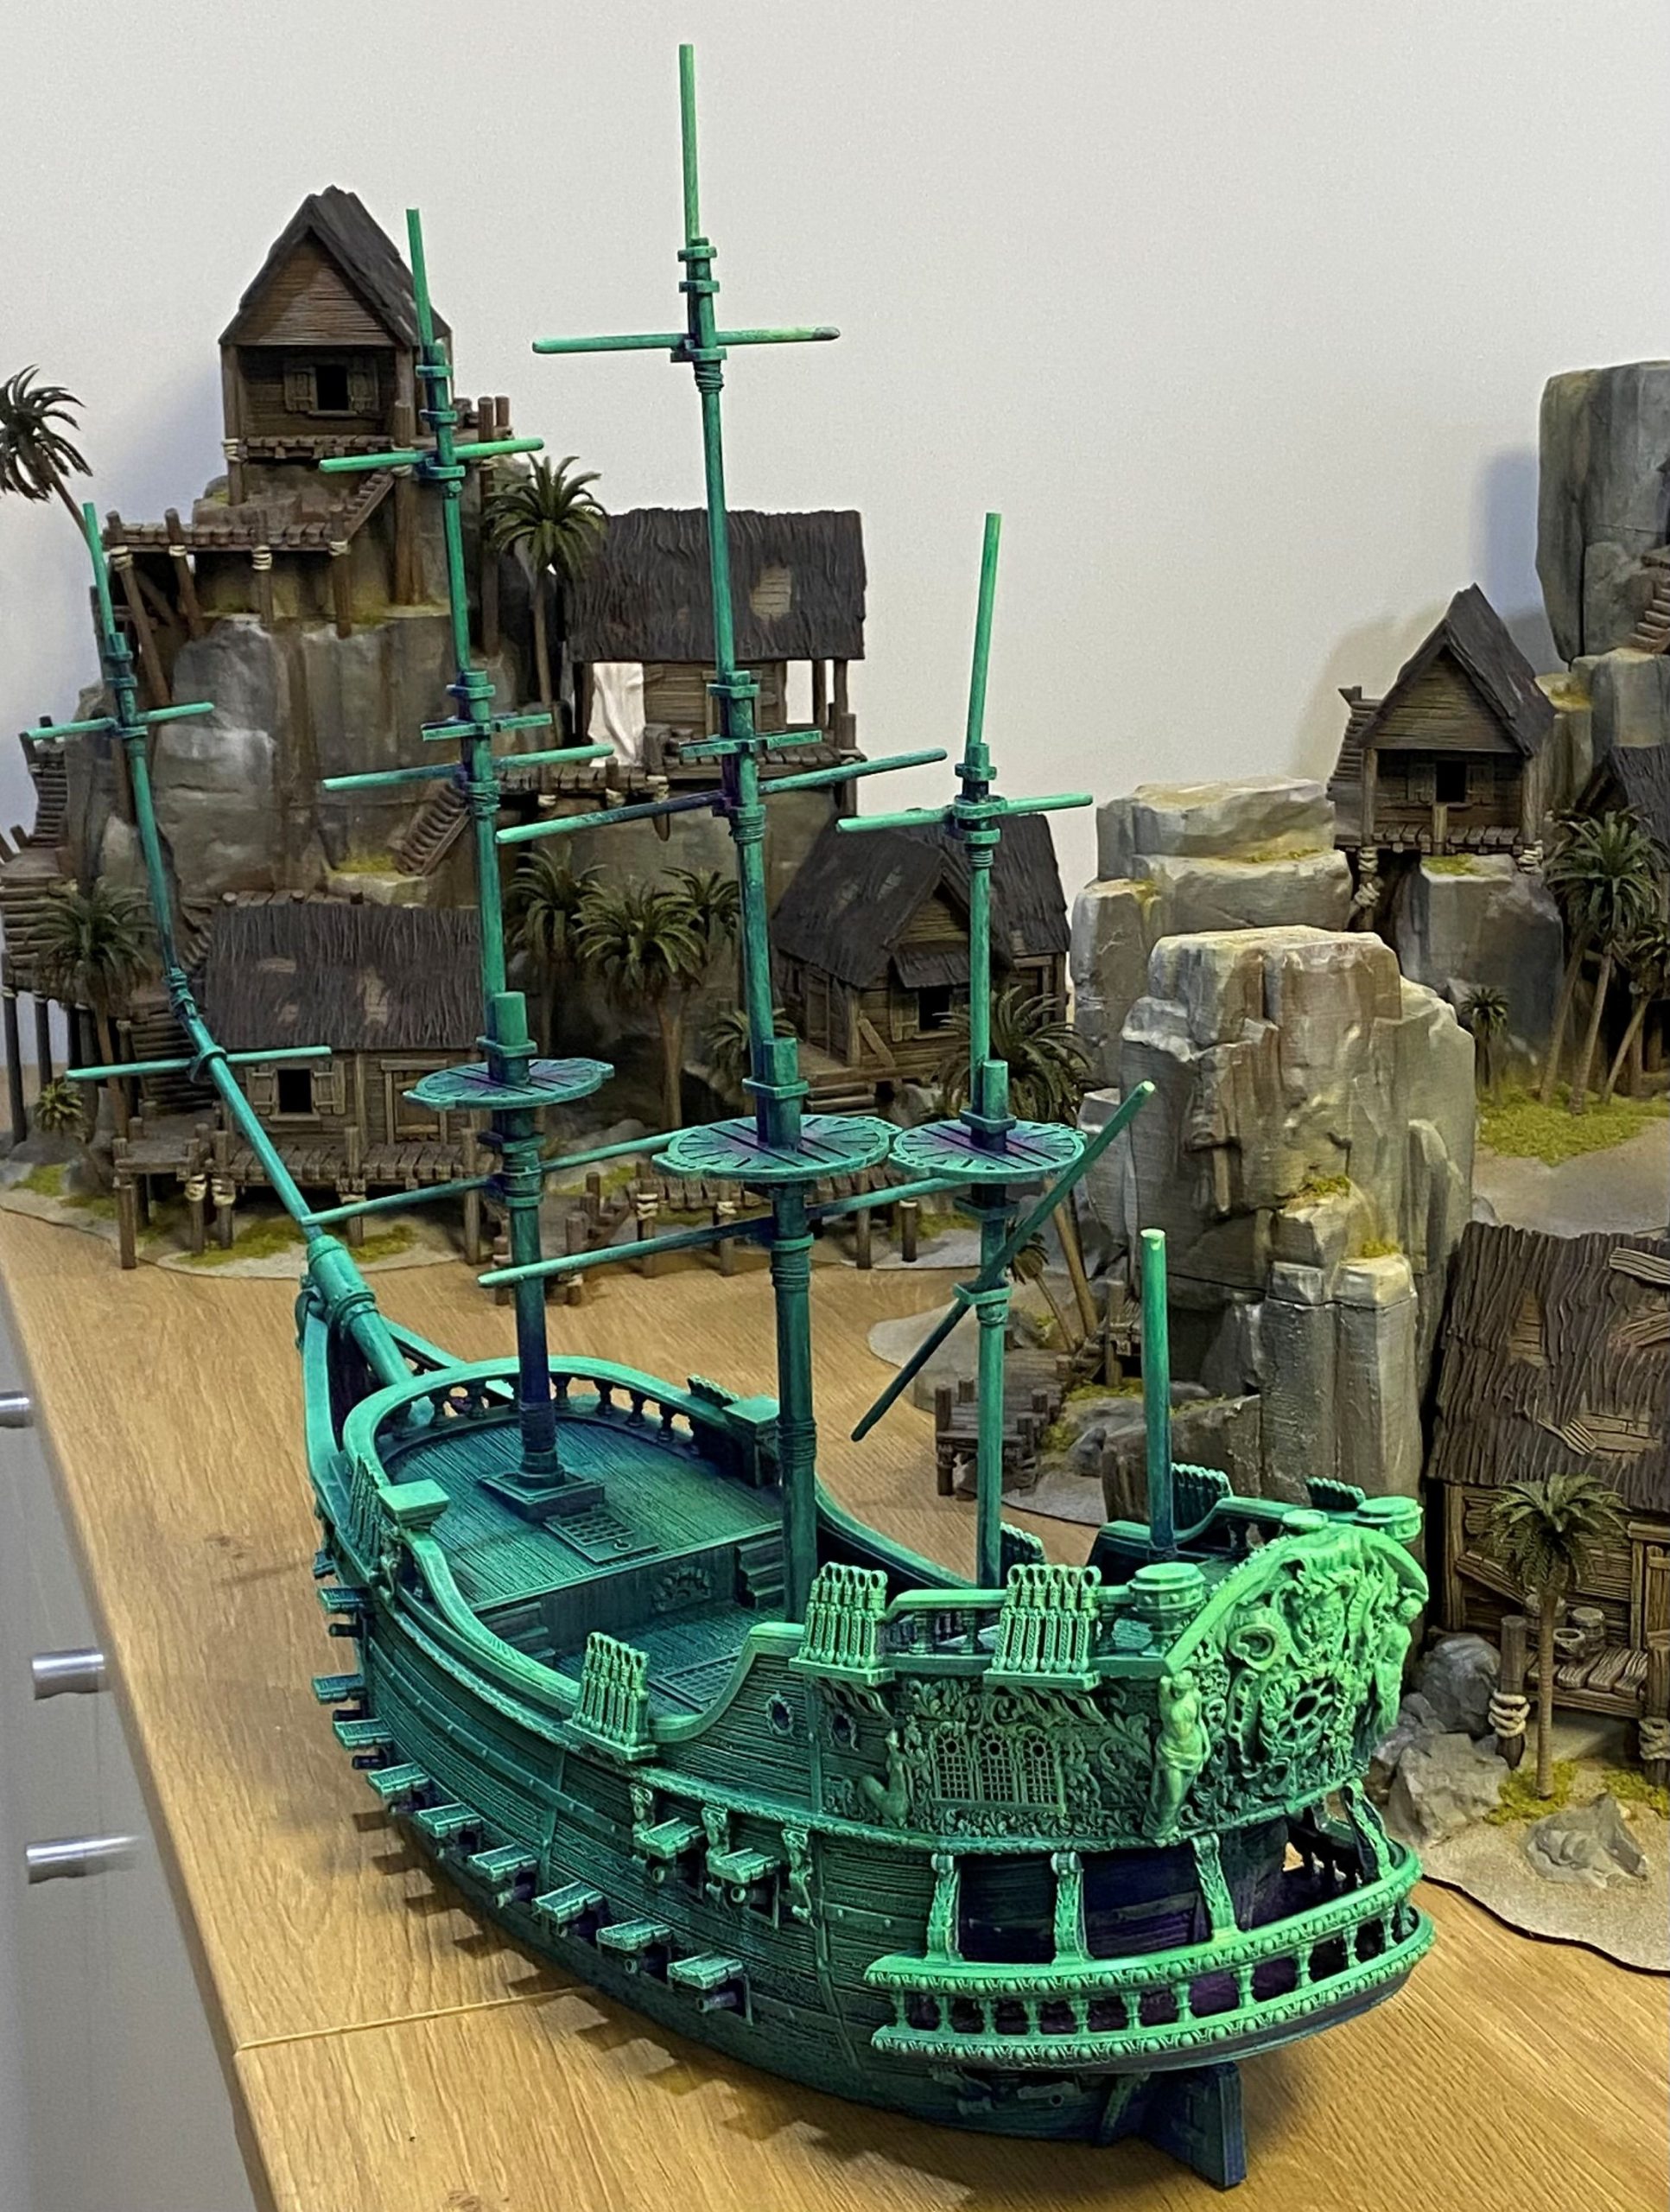
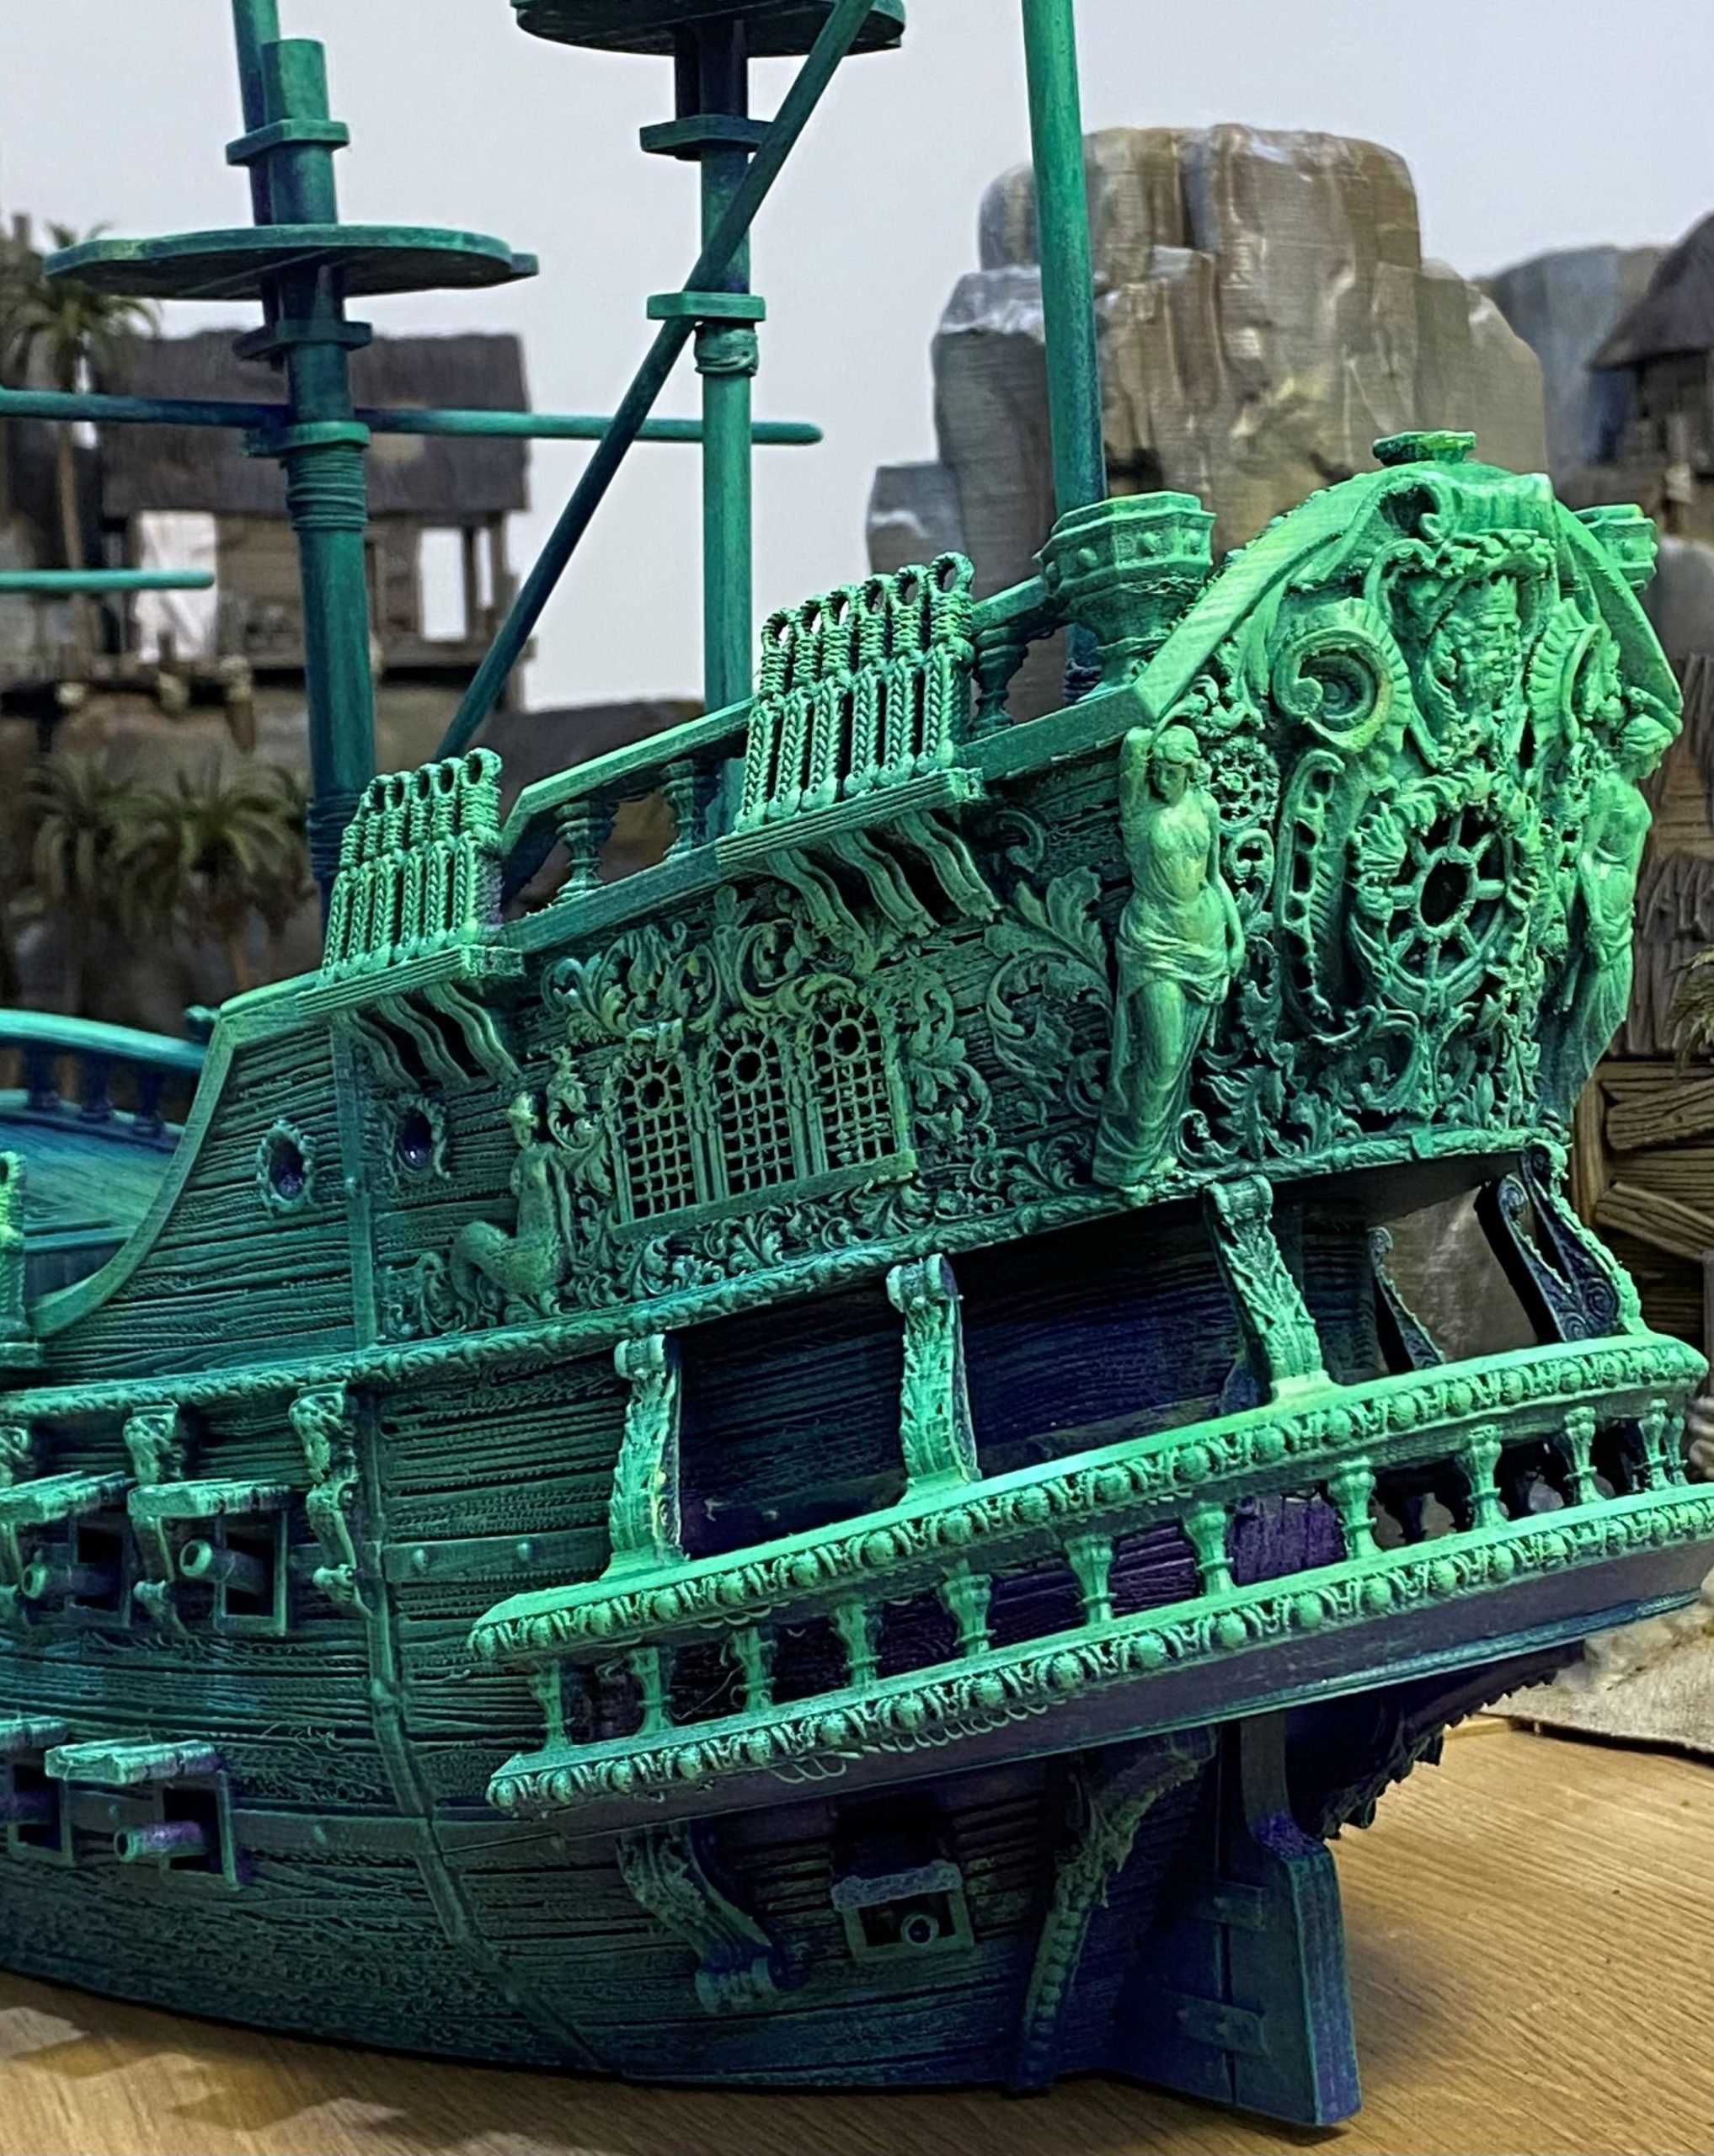
Ghost Ship - Part Five
I used a bright green string to add some rigging to the ship and also to attach the sails. A little blob of superglue on all the knots should hold it all together.
After that, I gave it a fairly light going over with a very pale Fluorescent green mix to help blend it all a bit better. Although I have used the same colours throughout the model, the colours do react differently on the different surfaces.
I hope that this has helped tie all the bits together a bit better than before.
The rigging is not accurate, not by a long shot, but it is really there to give an impression of rigging rather than being historically correct.
I have had this model sitting around waiting to be done for ages, so I am glad to be able to finally tick it off the ‘to-do’ list.
What’s next?
Possibly the Kraken, or maybe I will start work on Cannibal Island or the Port for the Forces of the Crown. I’m not sure yet.
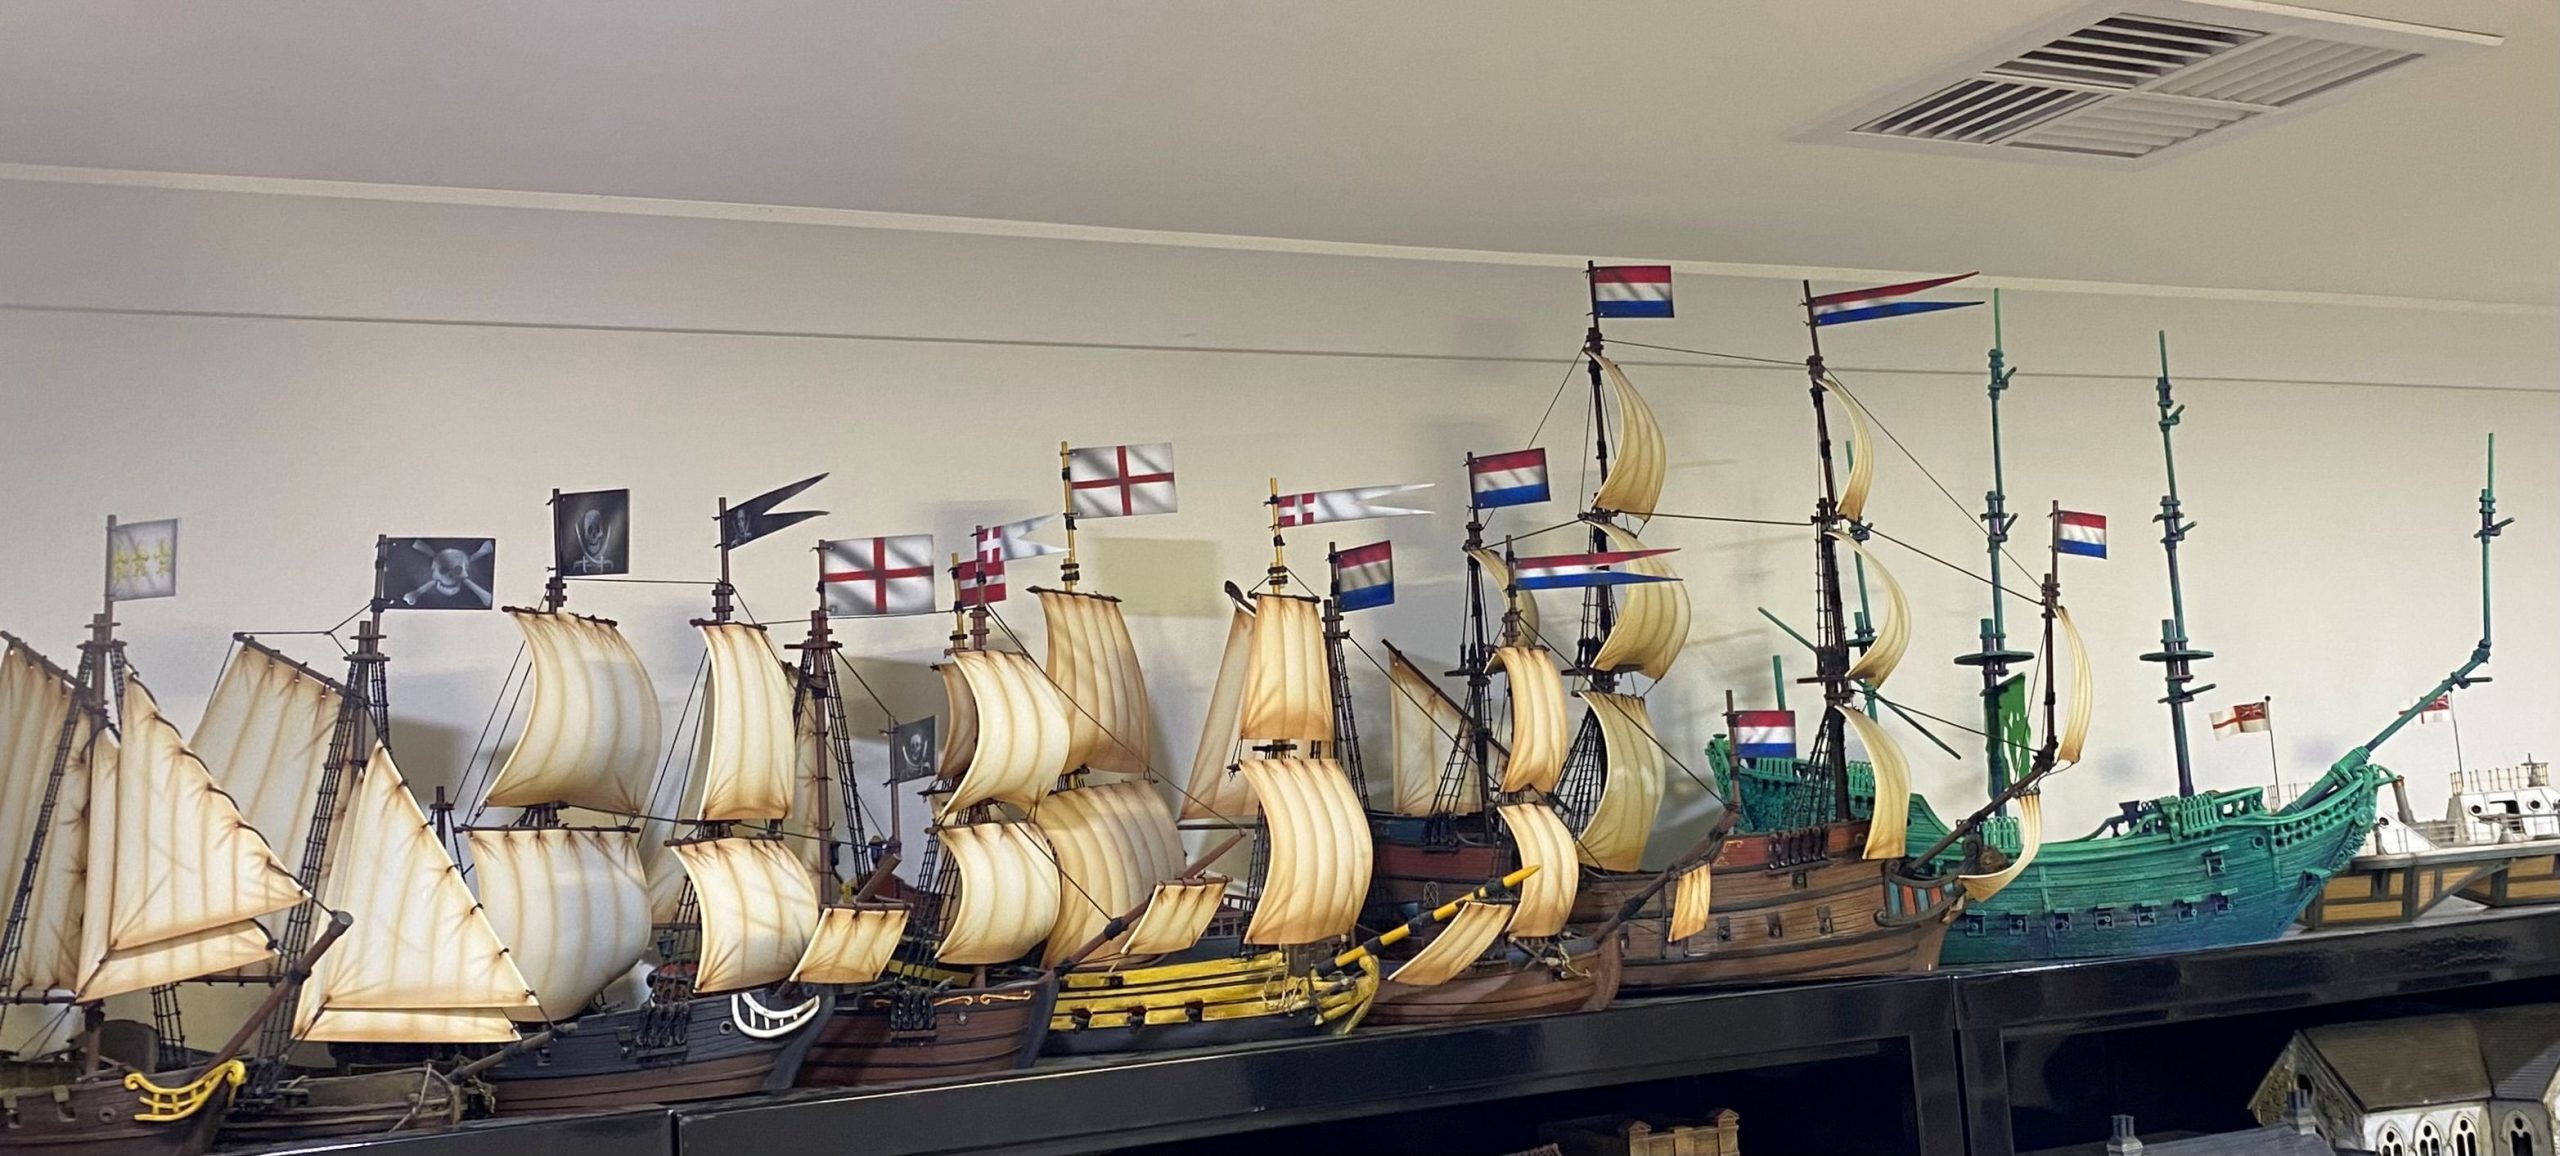
I still have quite a few more ships to do, but I think I may spread them out a bit rather than diving straight into another one straight away.
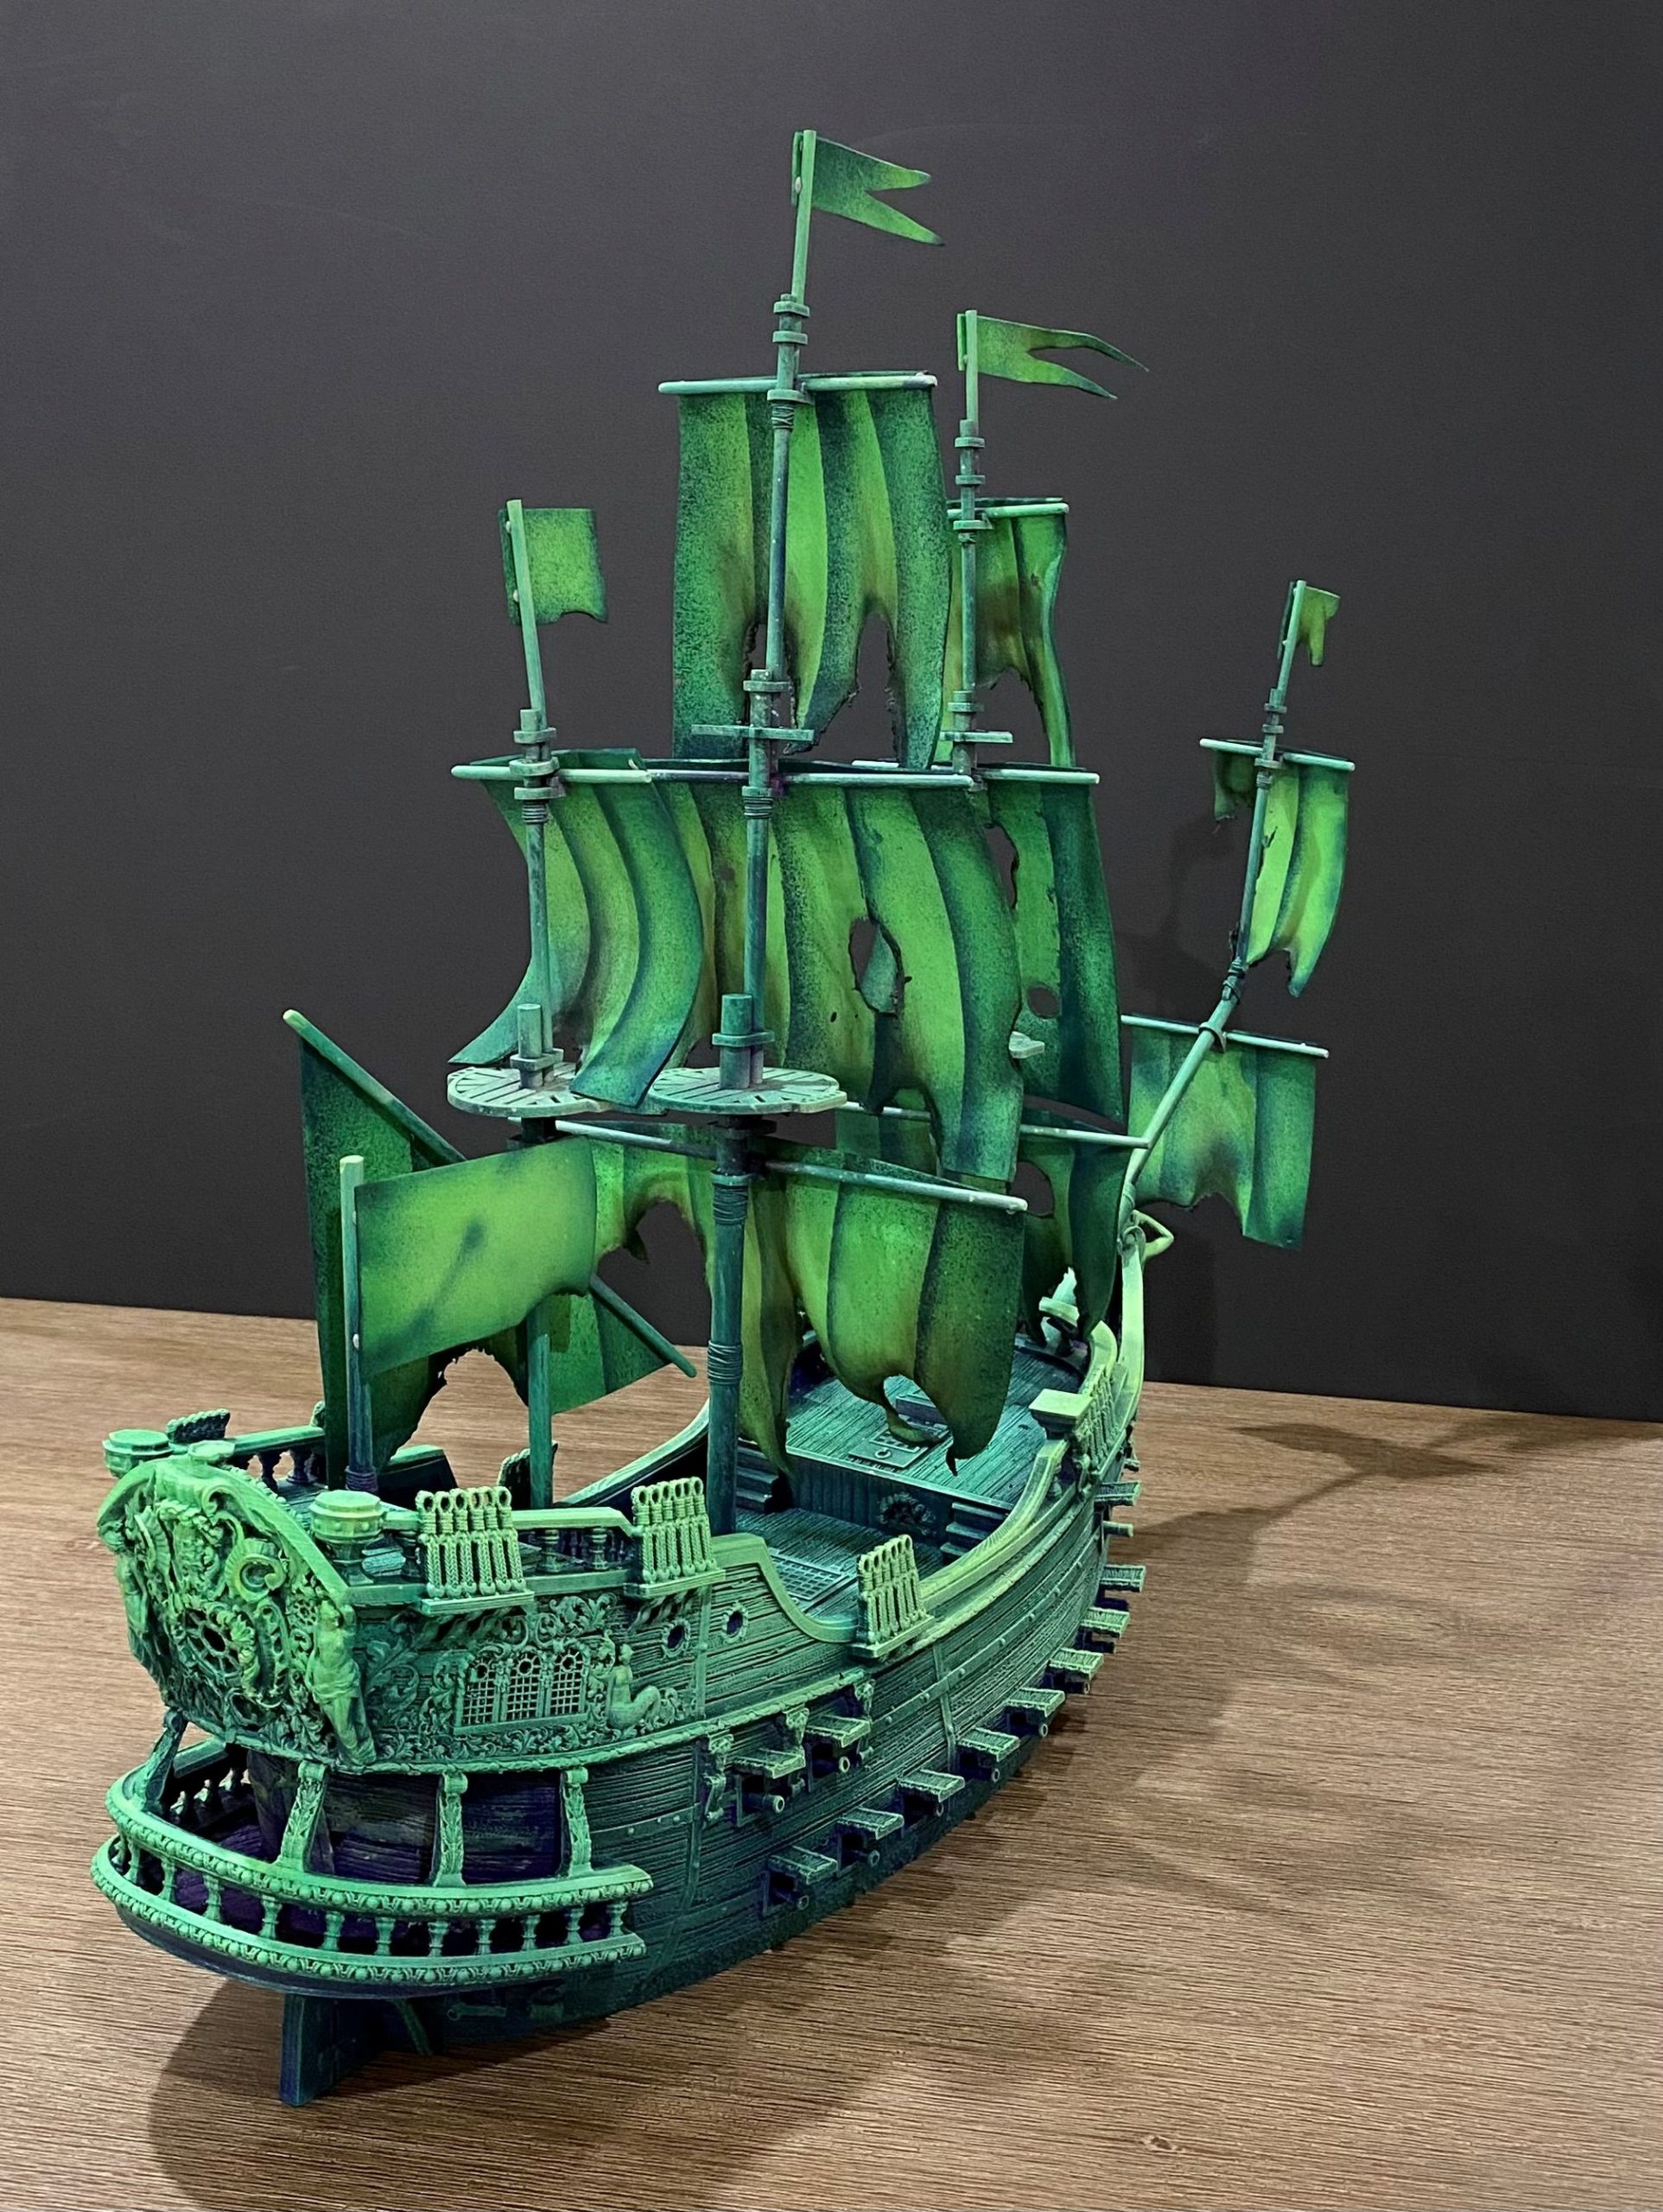
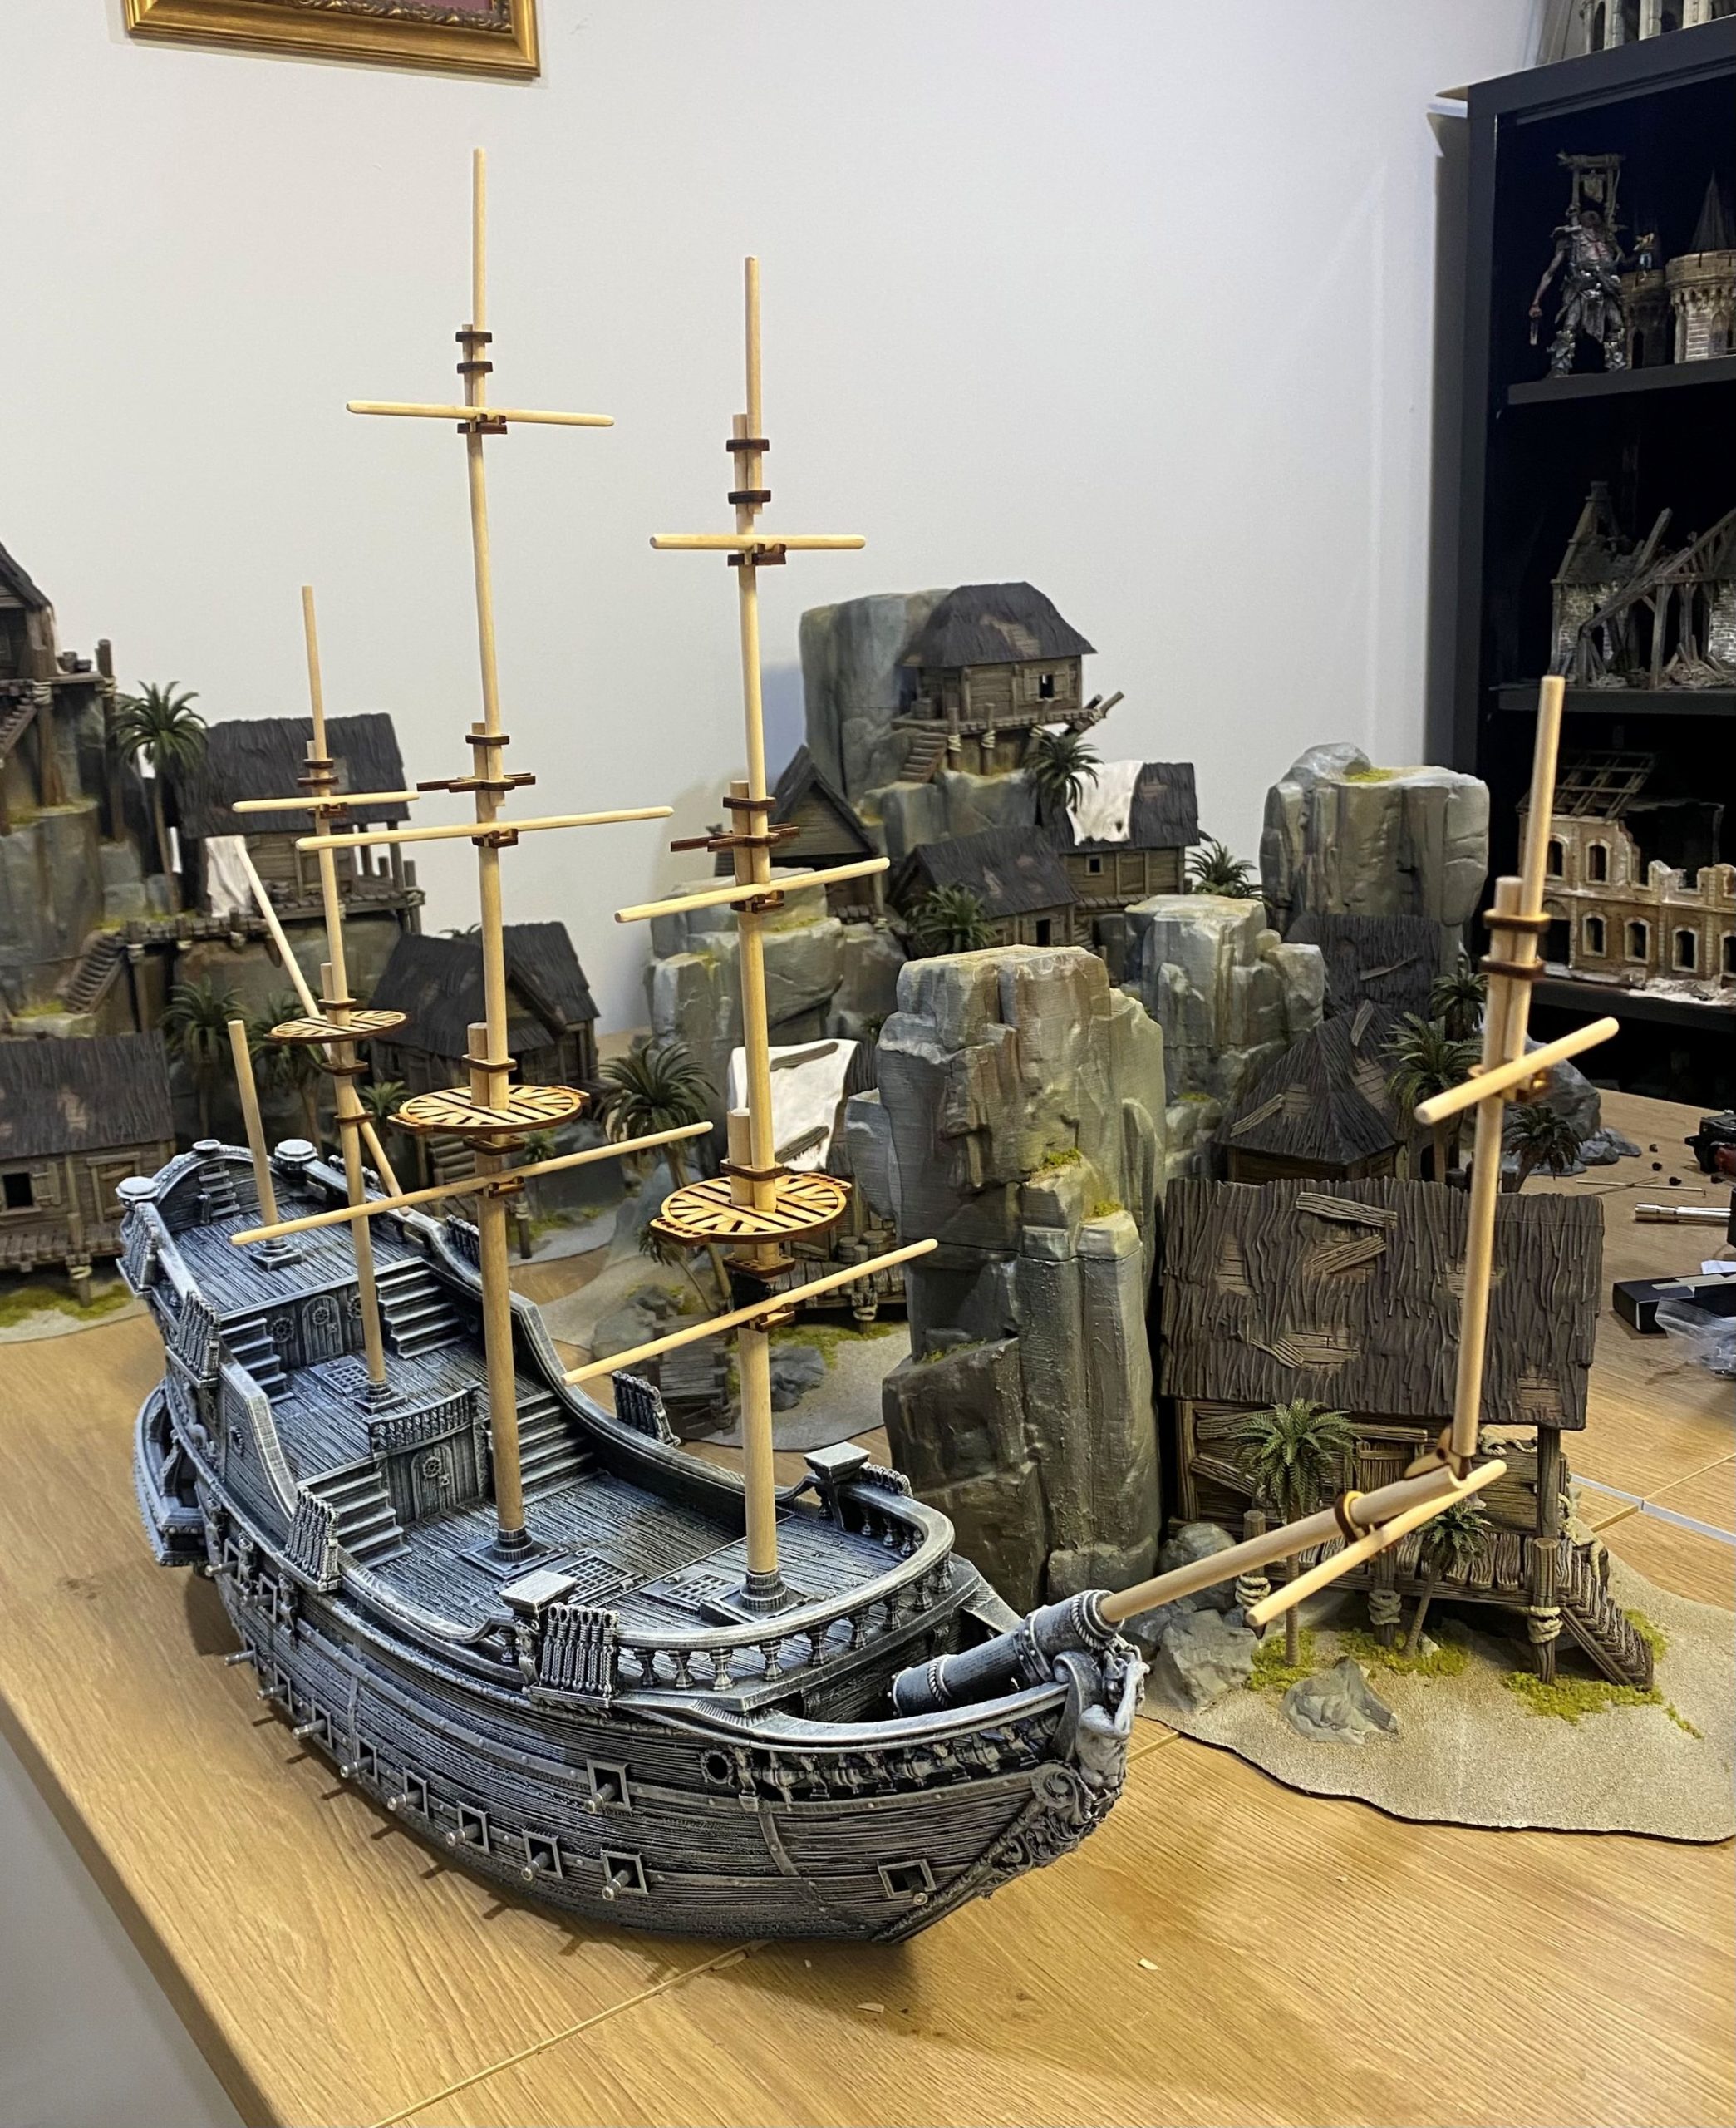
Ghost Ship - Part Four.
A quick test with some different sails fitted to the Ghost Ship.
I used the same colours as on the ship to airbrush a new set of sails and then set about them with a lighter to cause some damage. I will heat them slightly and bend them into shape after I have completed the rigging.
Once all done, I may then go over the entire model with a light airbrushing of Fluro to hopefully tie it all together a bit more.
At the moment all the sails are just attached with blutac
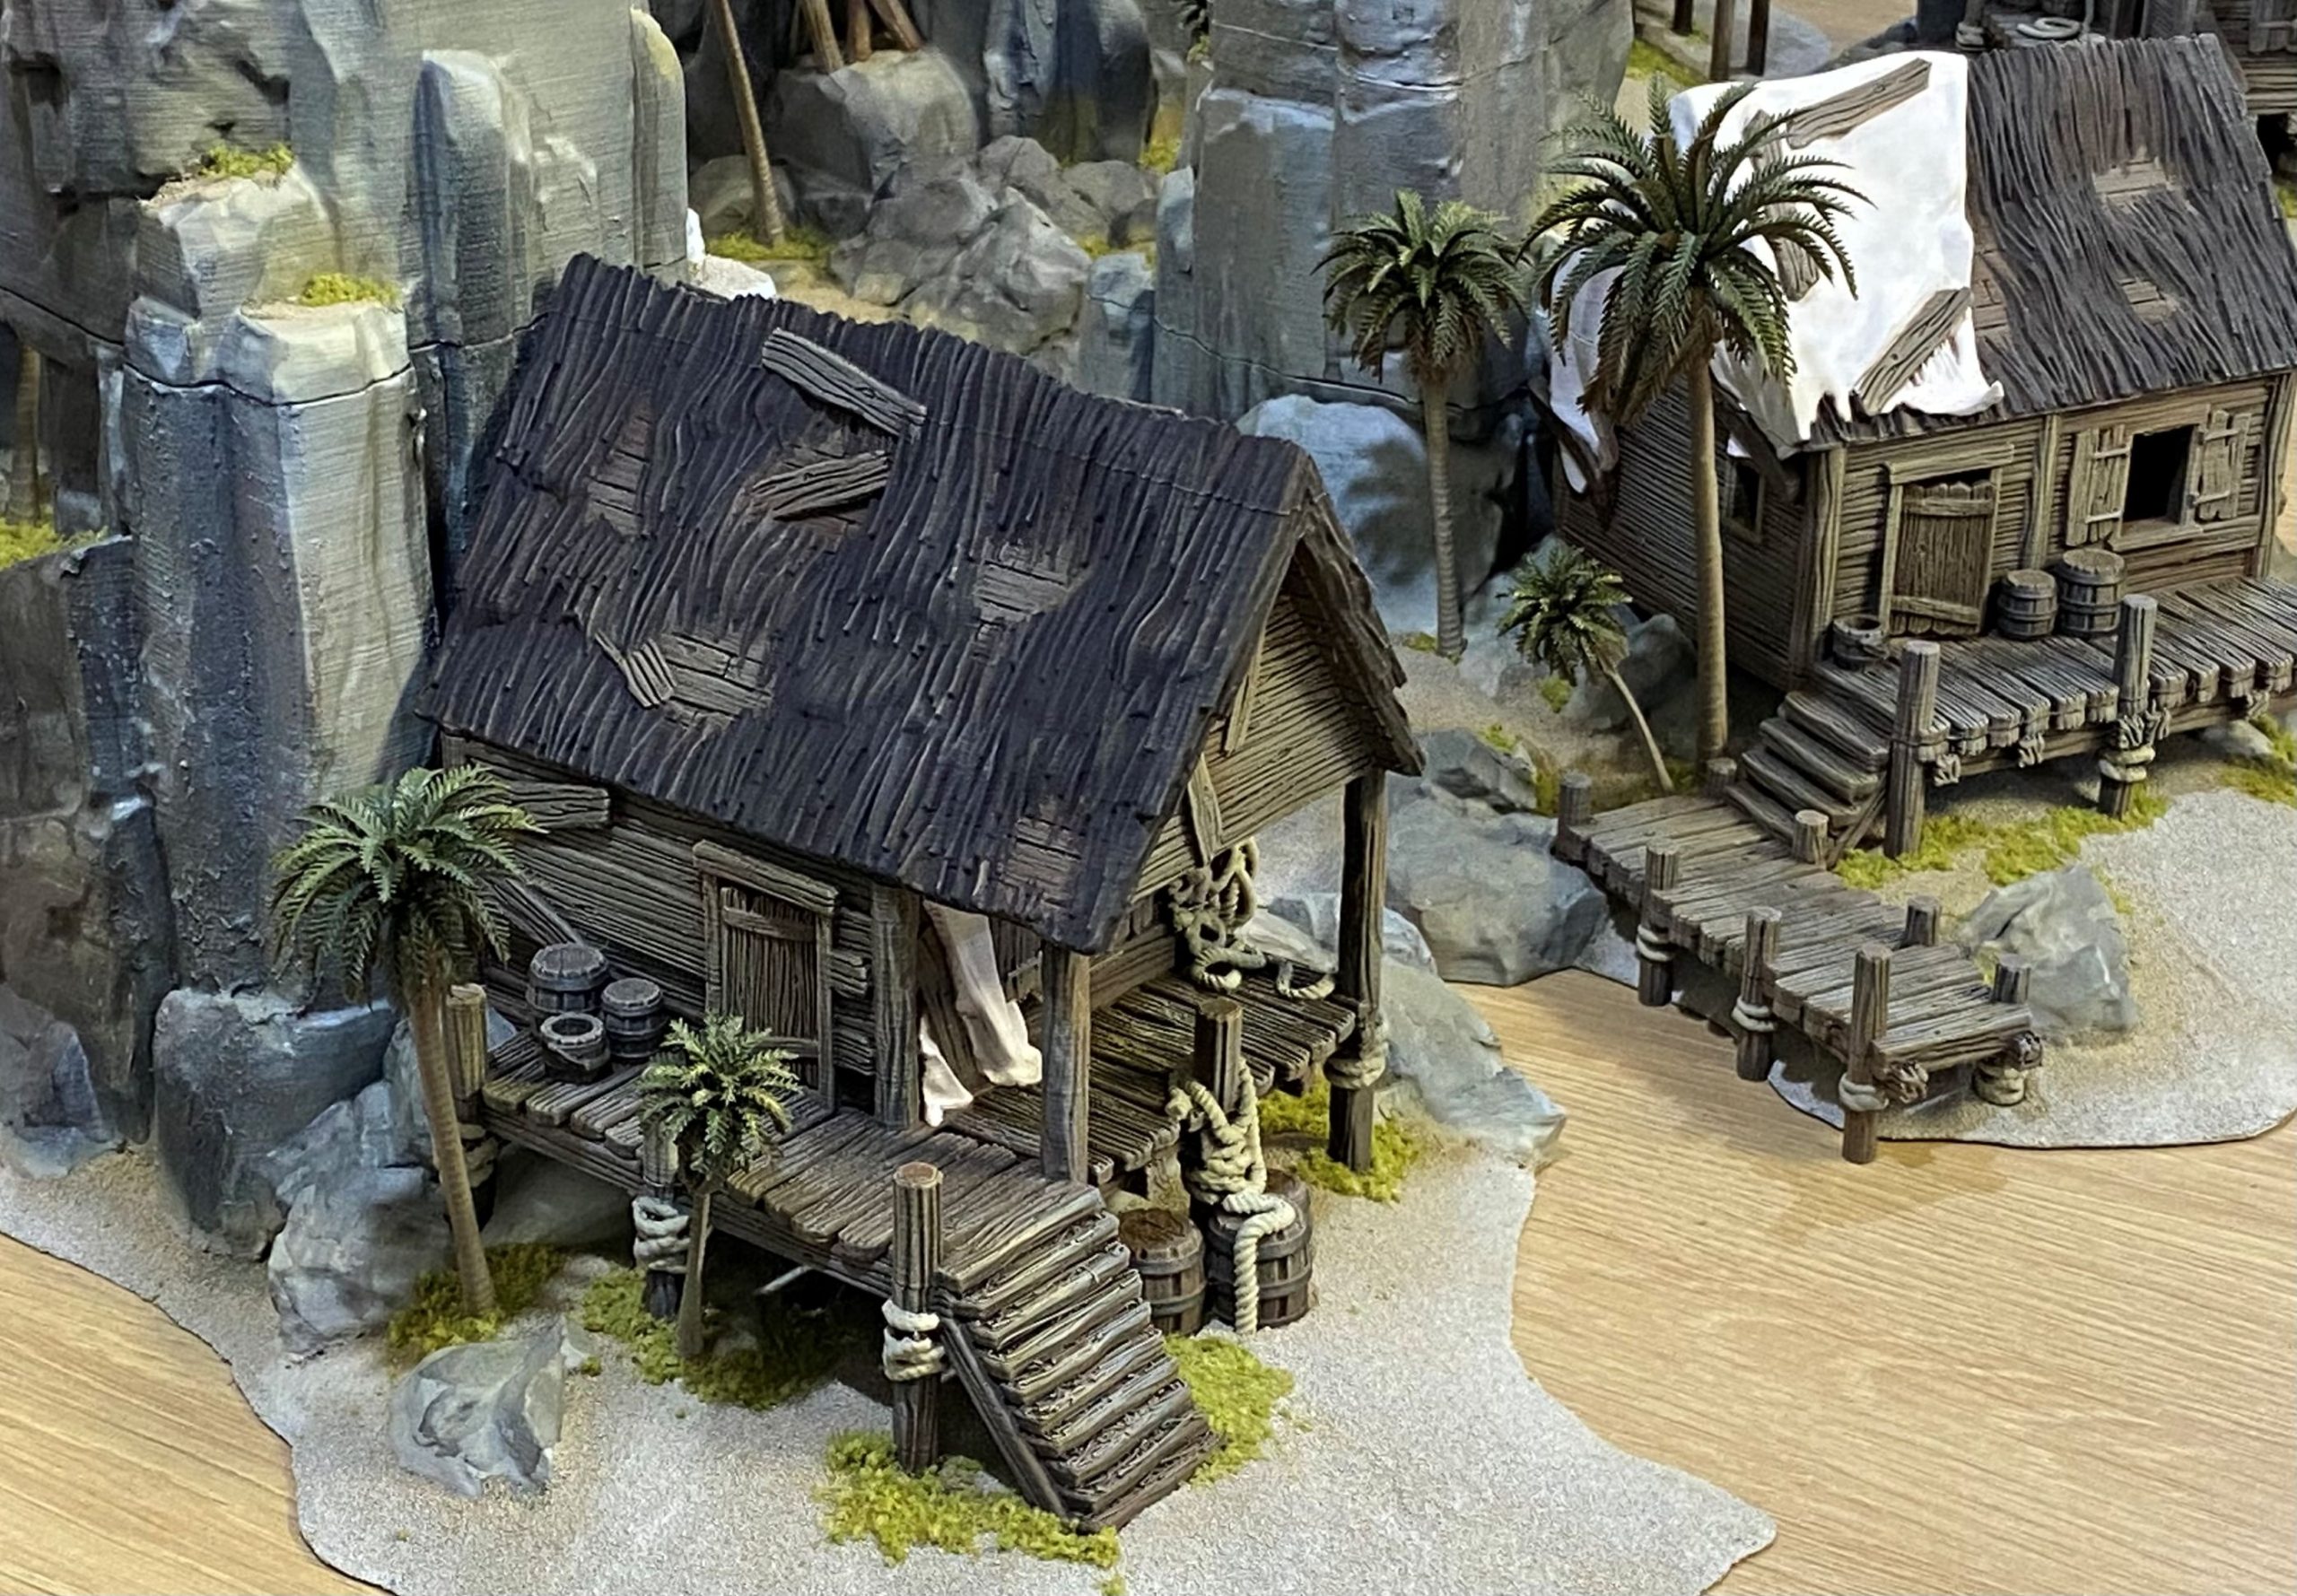
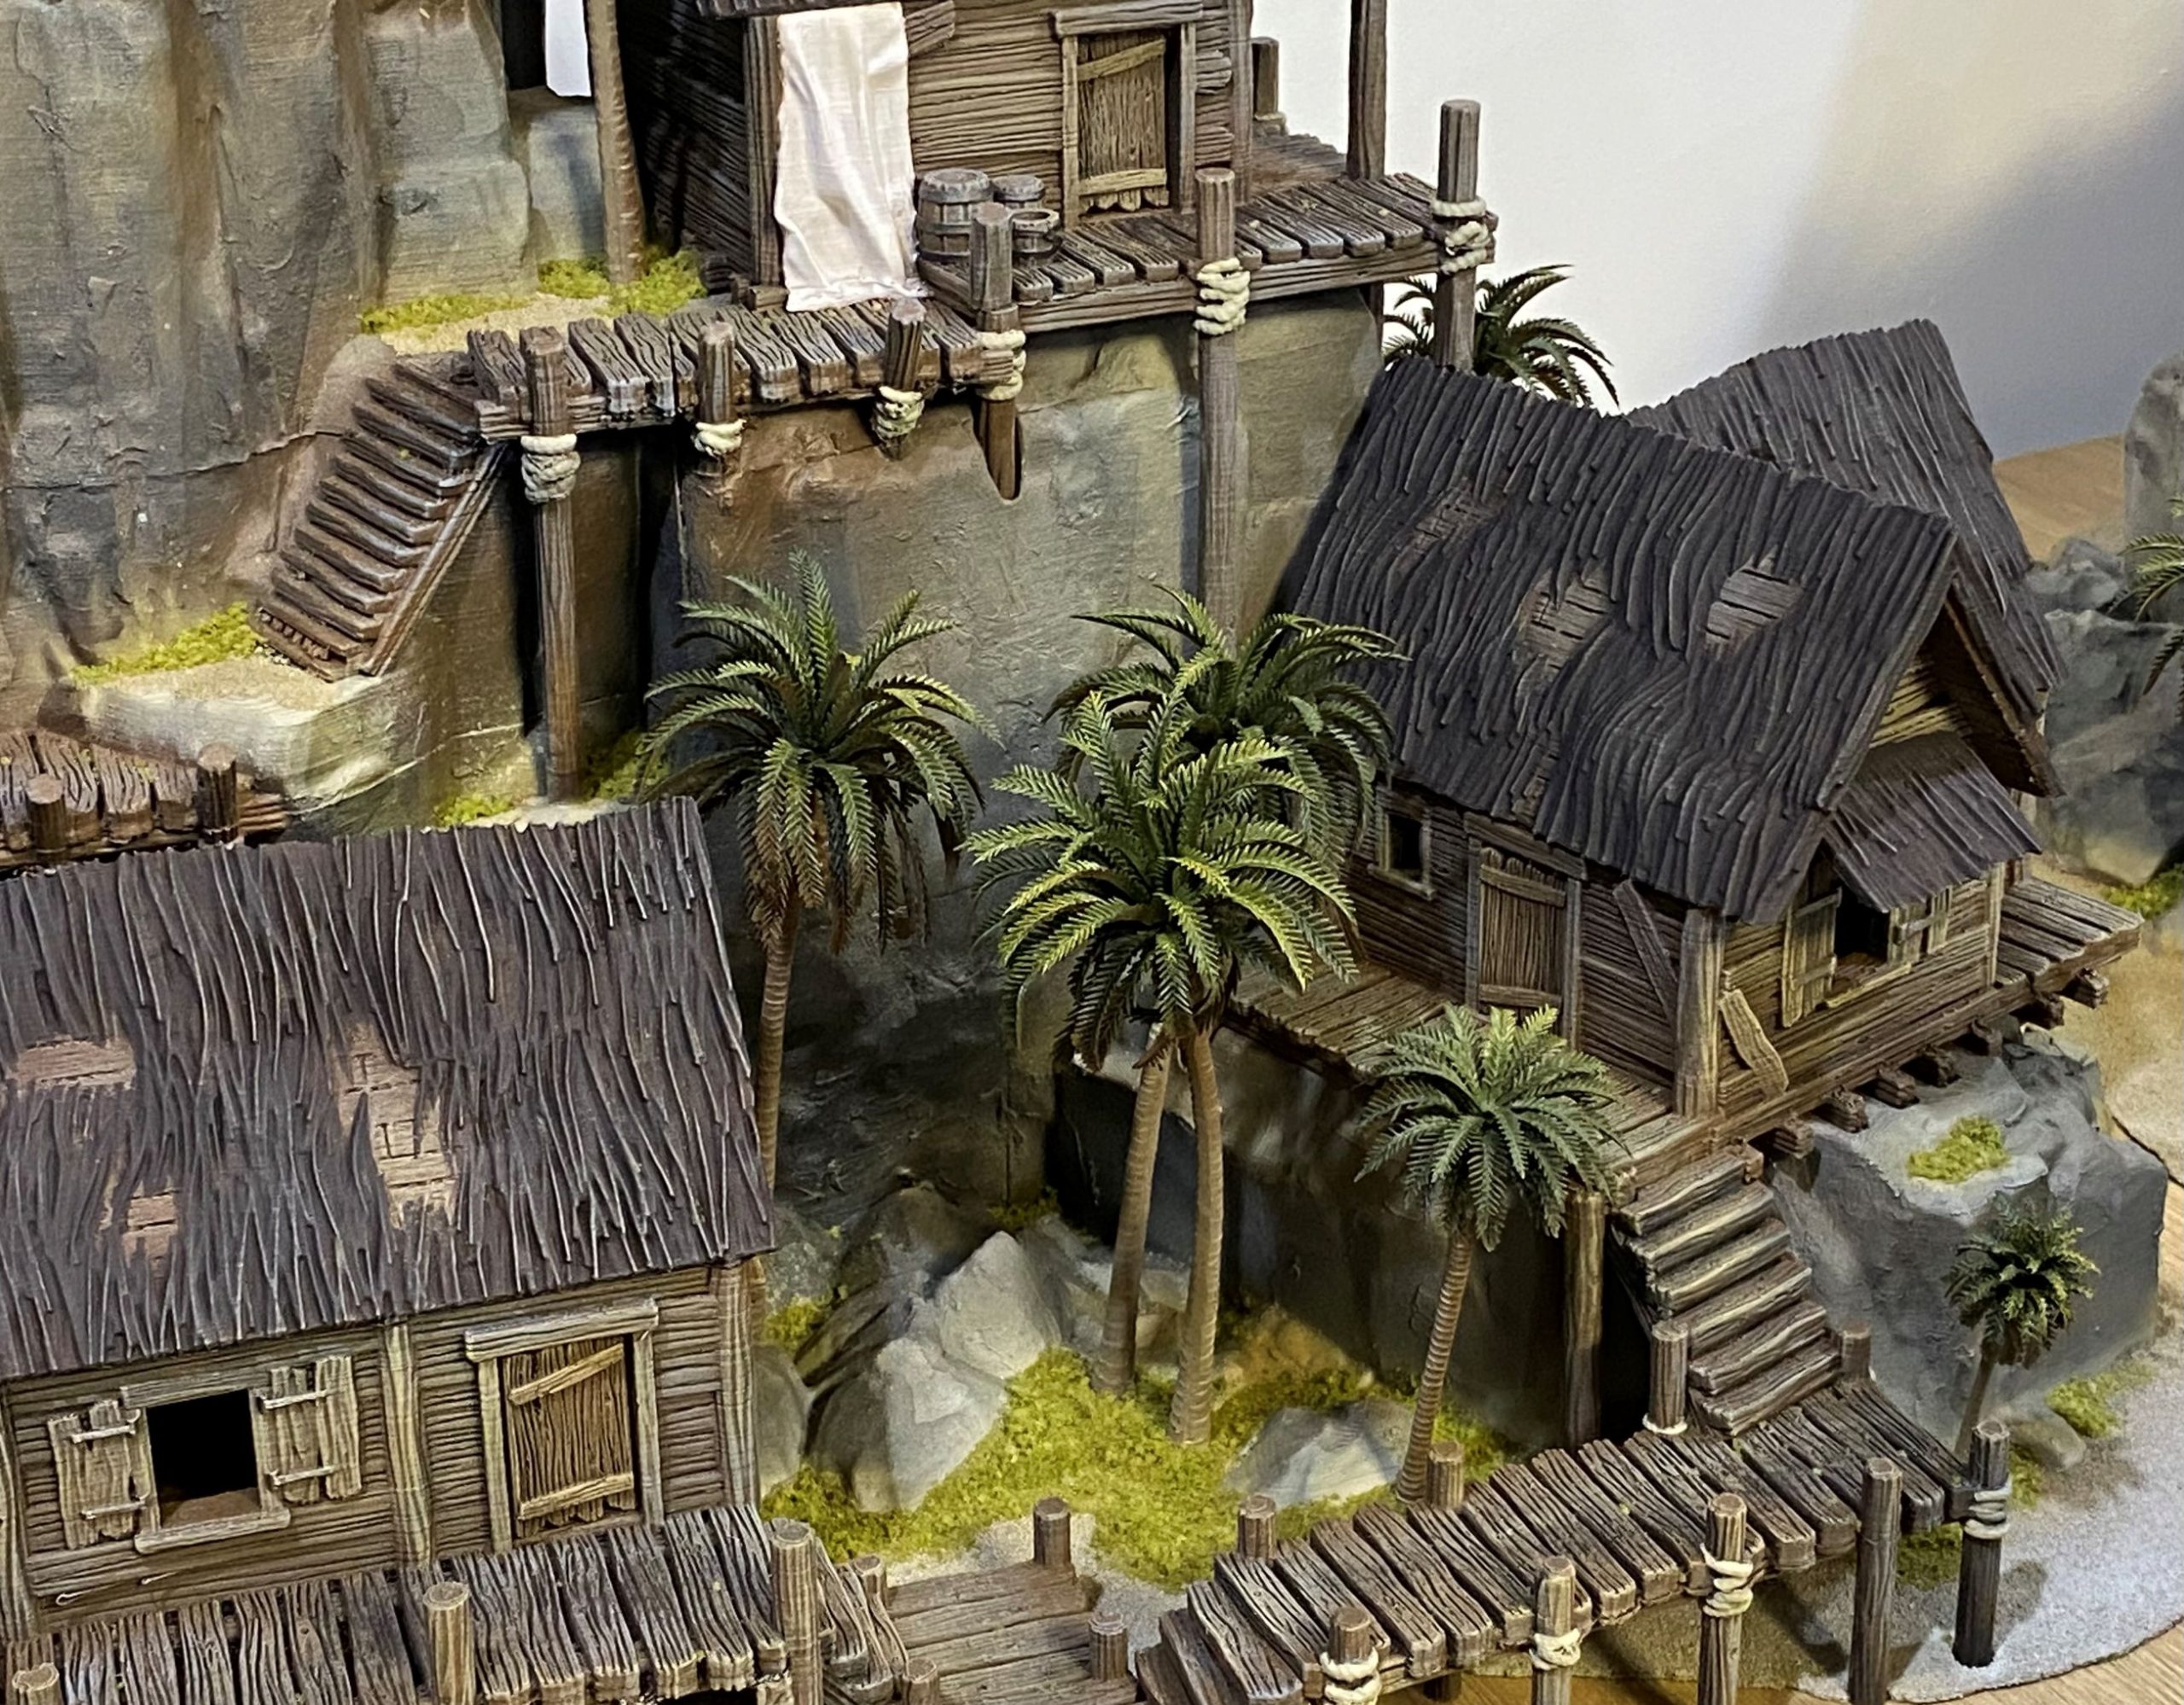
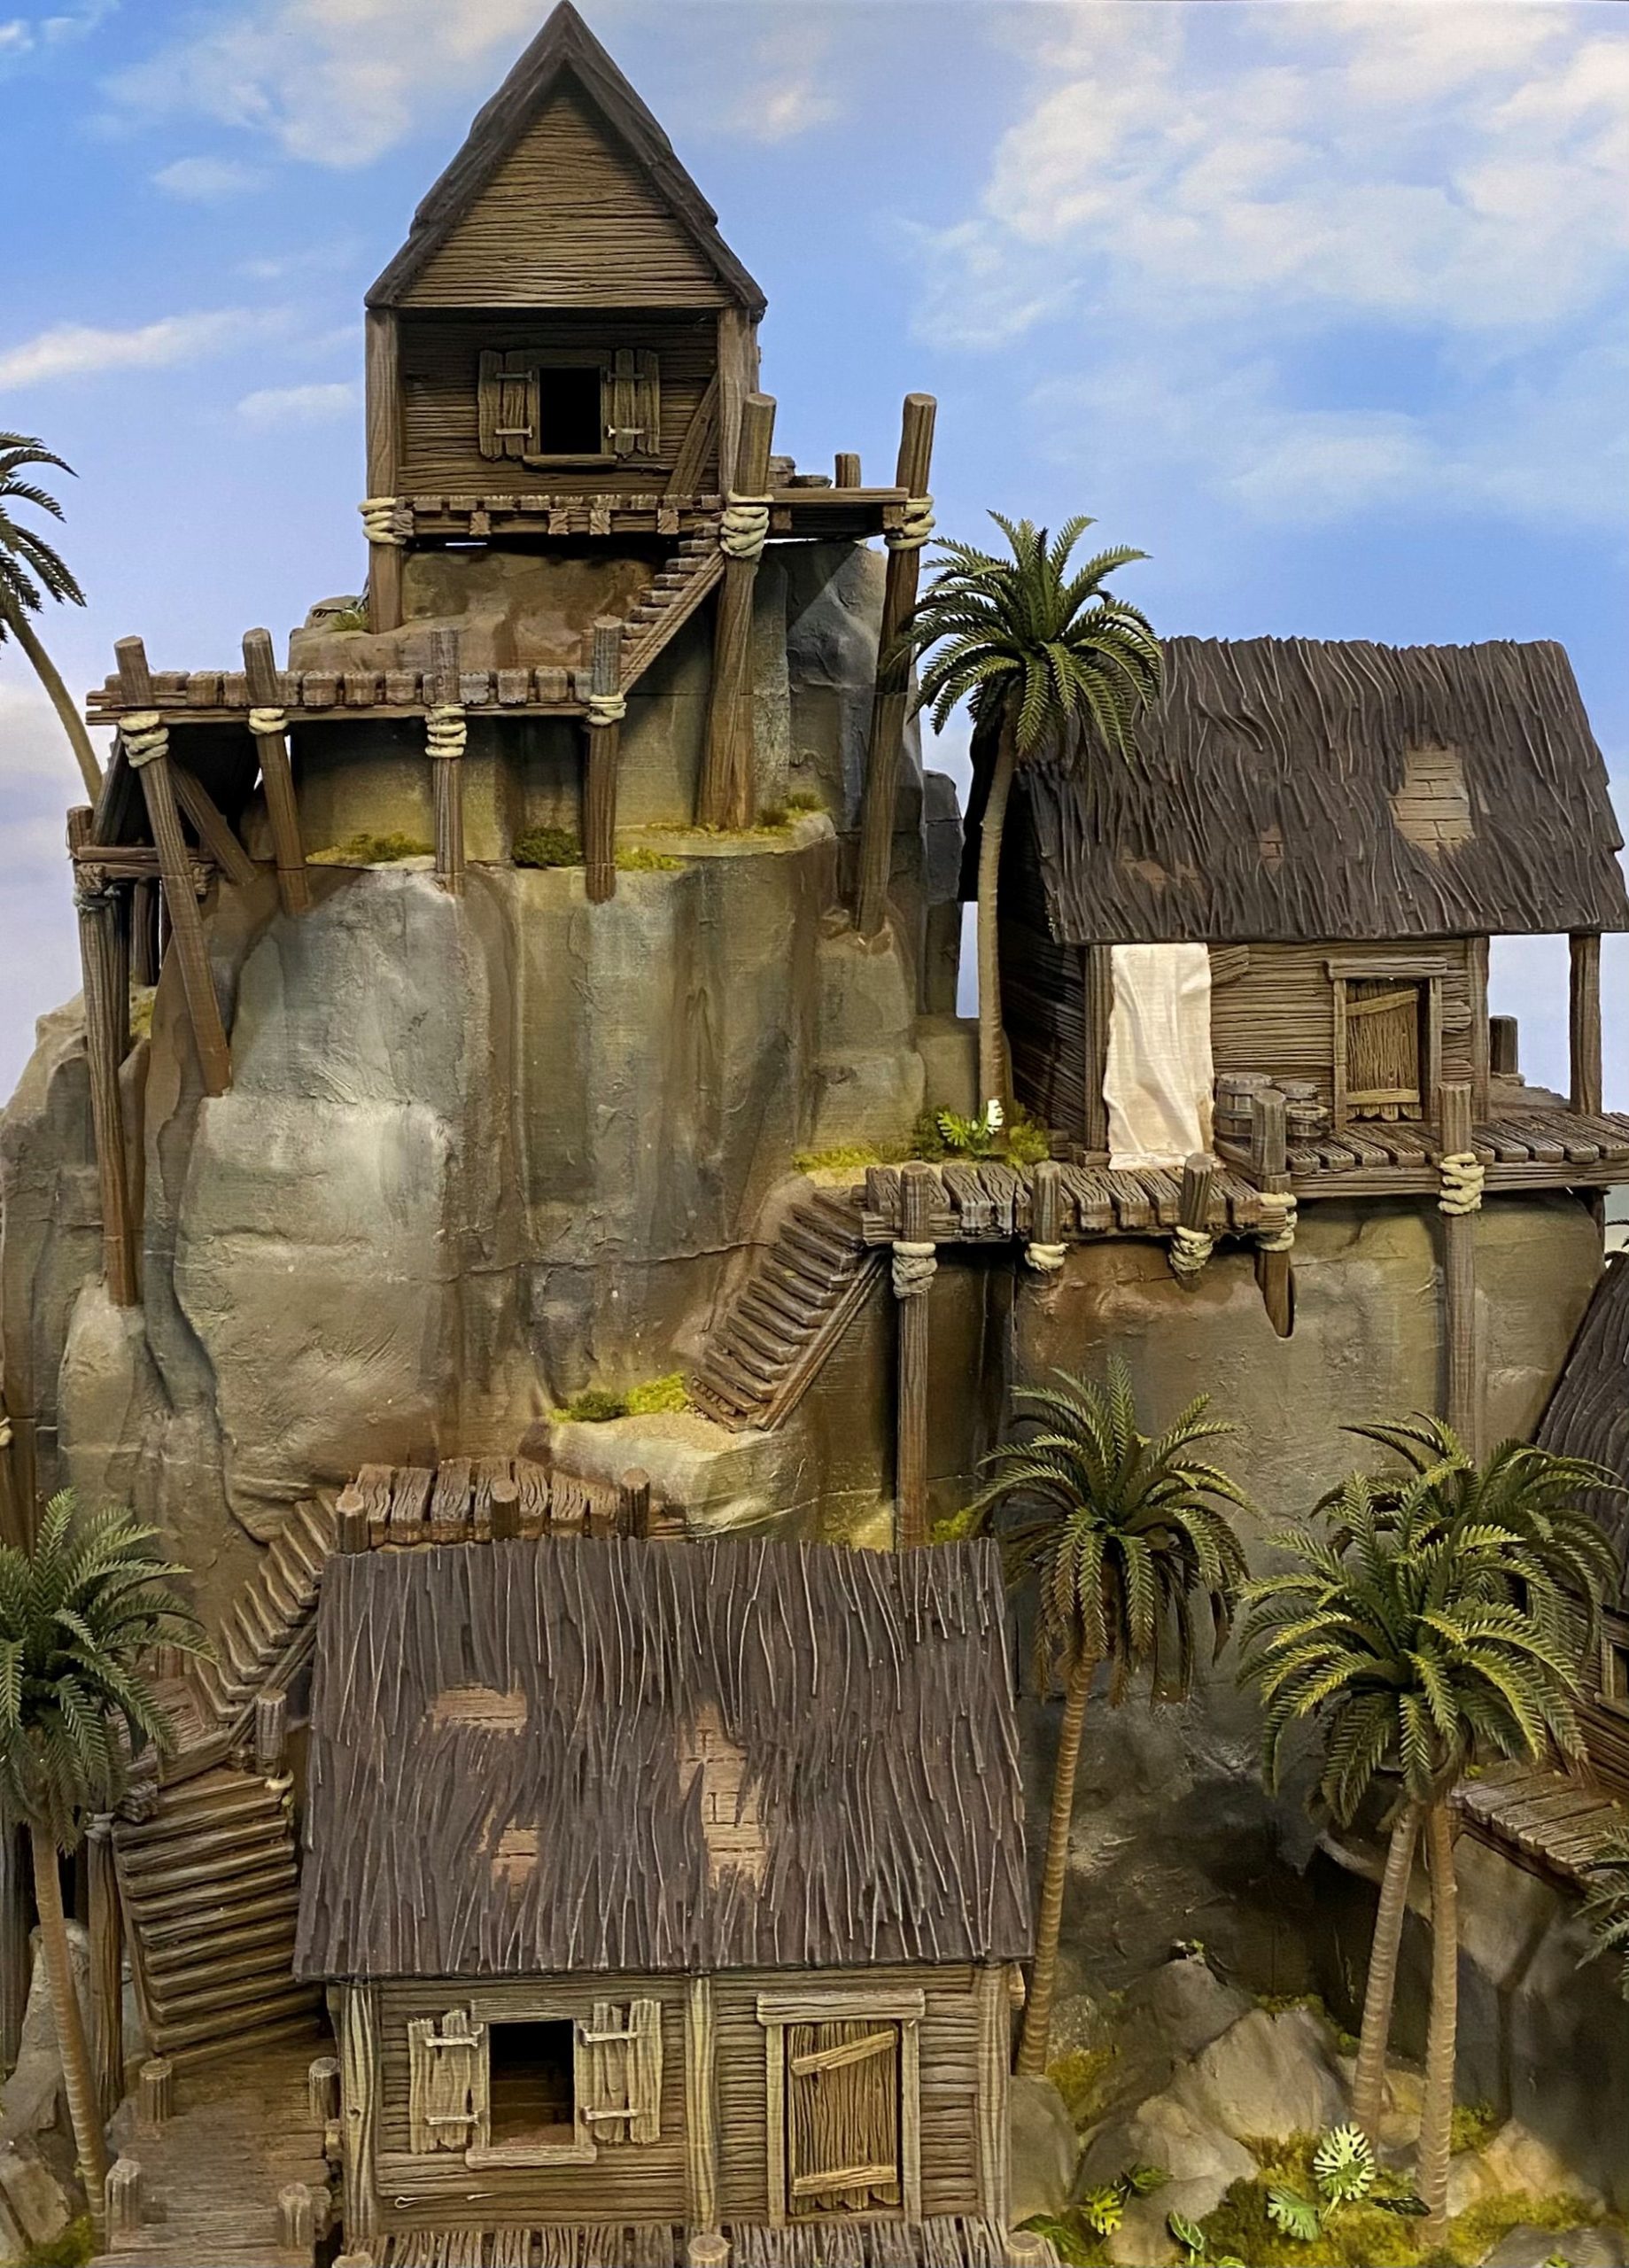
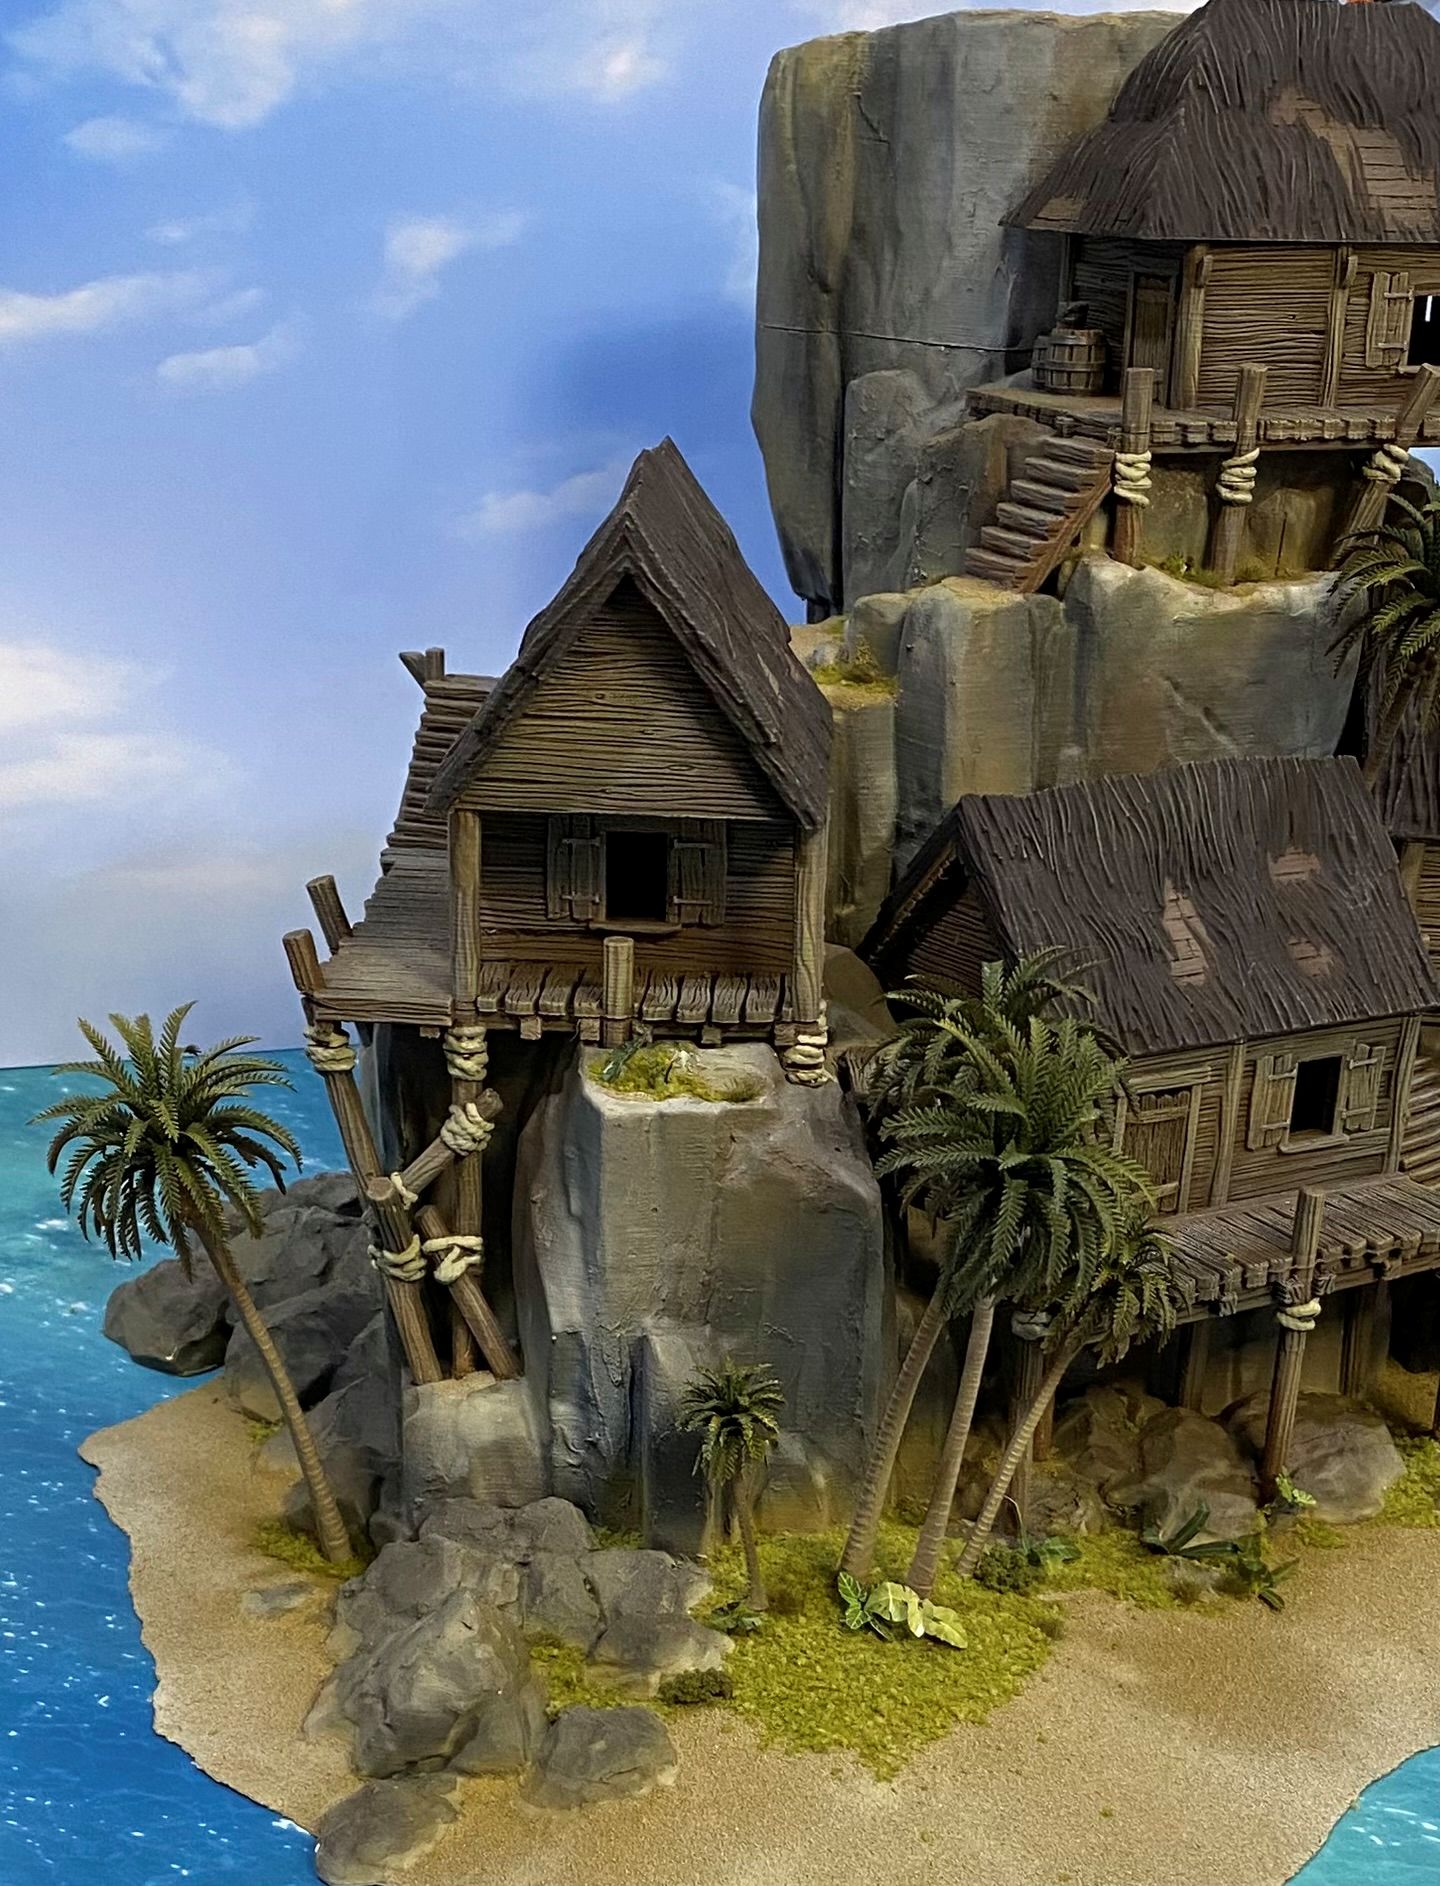
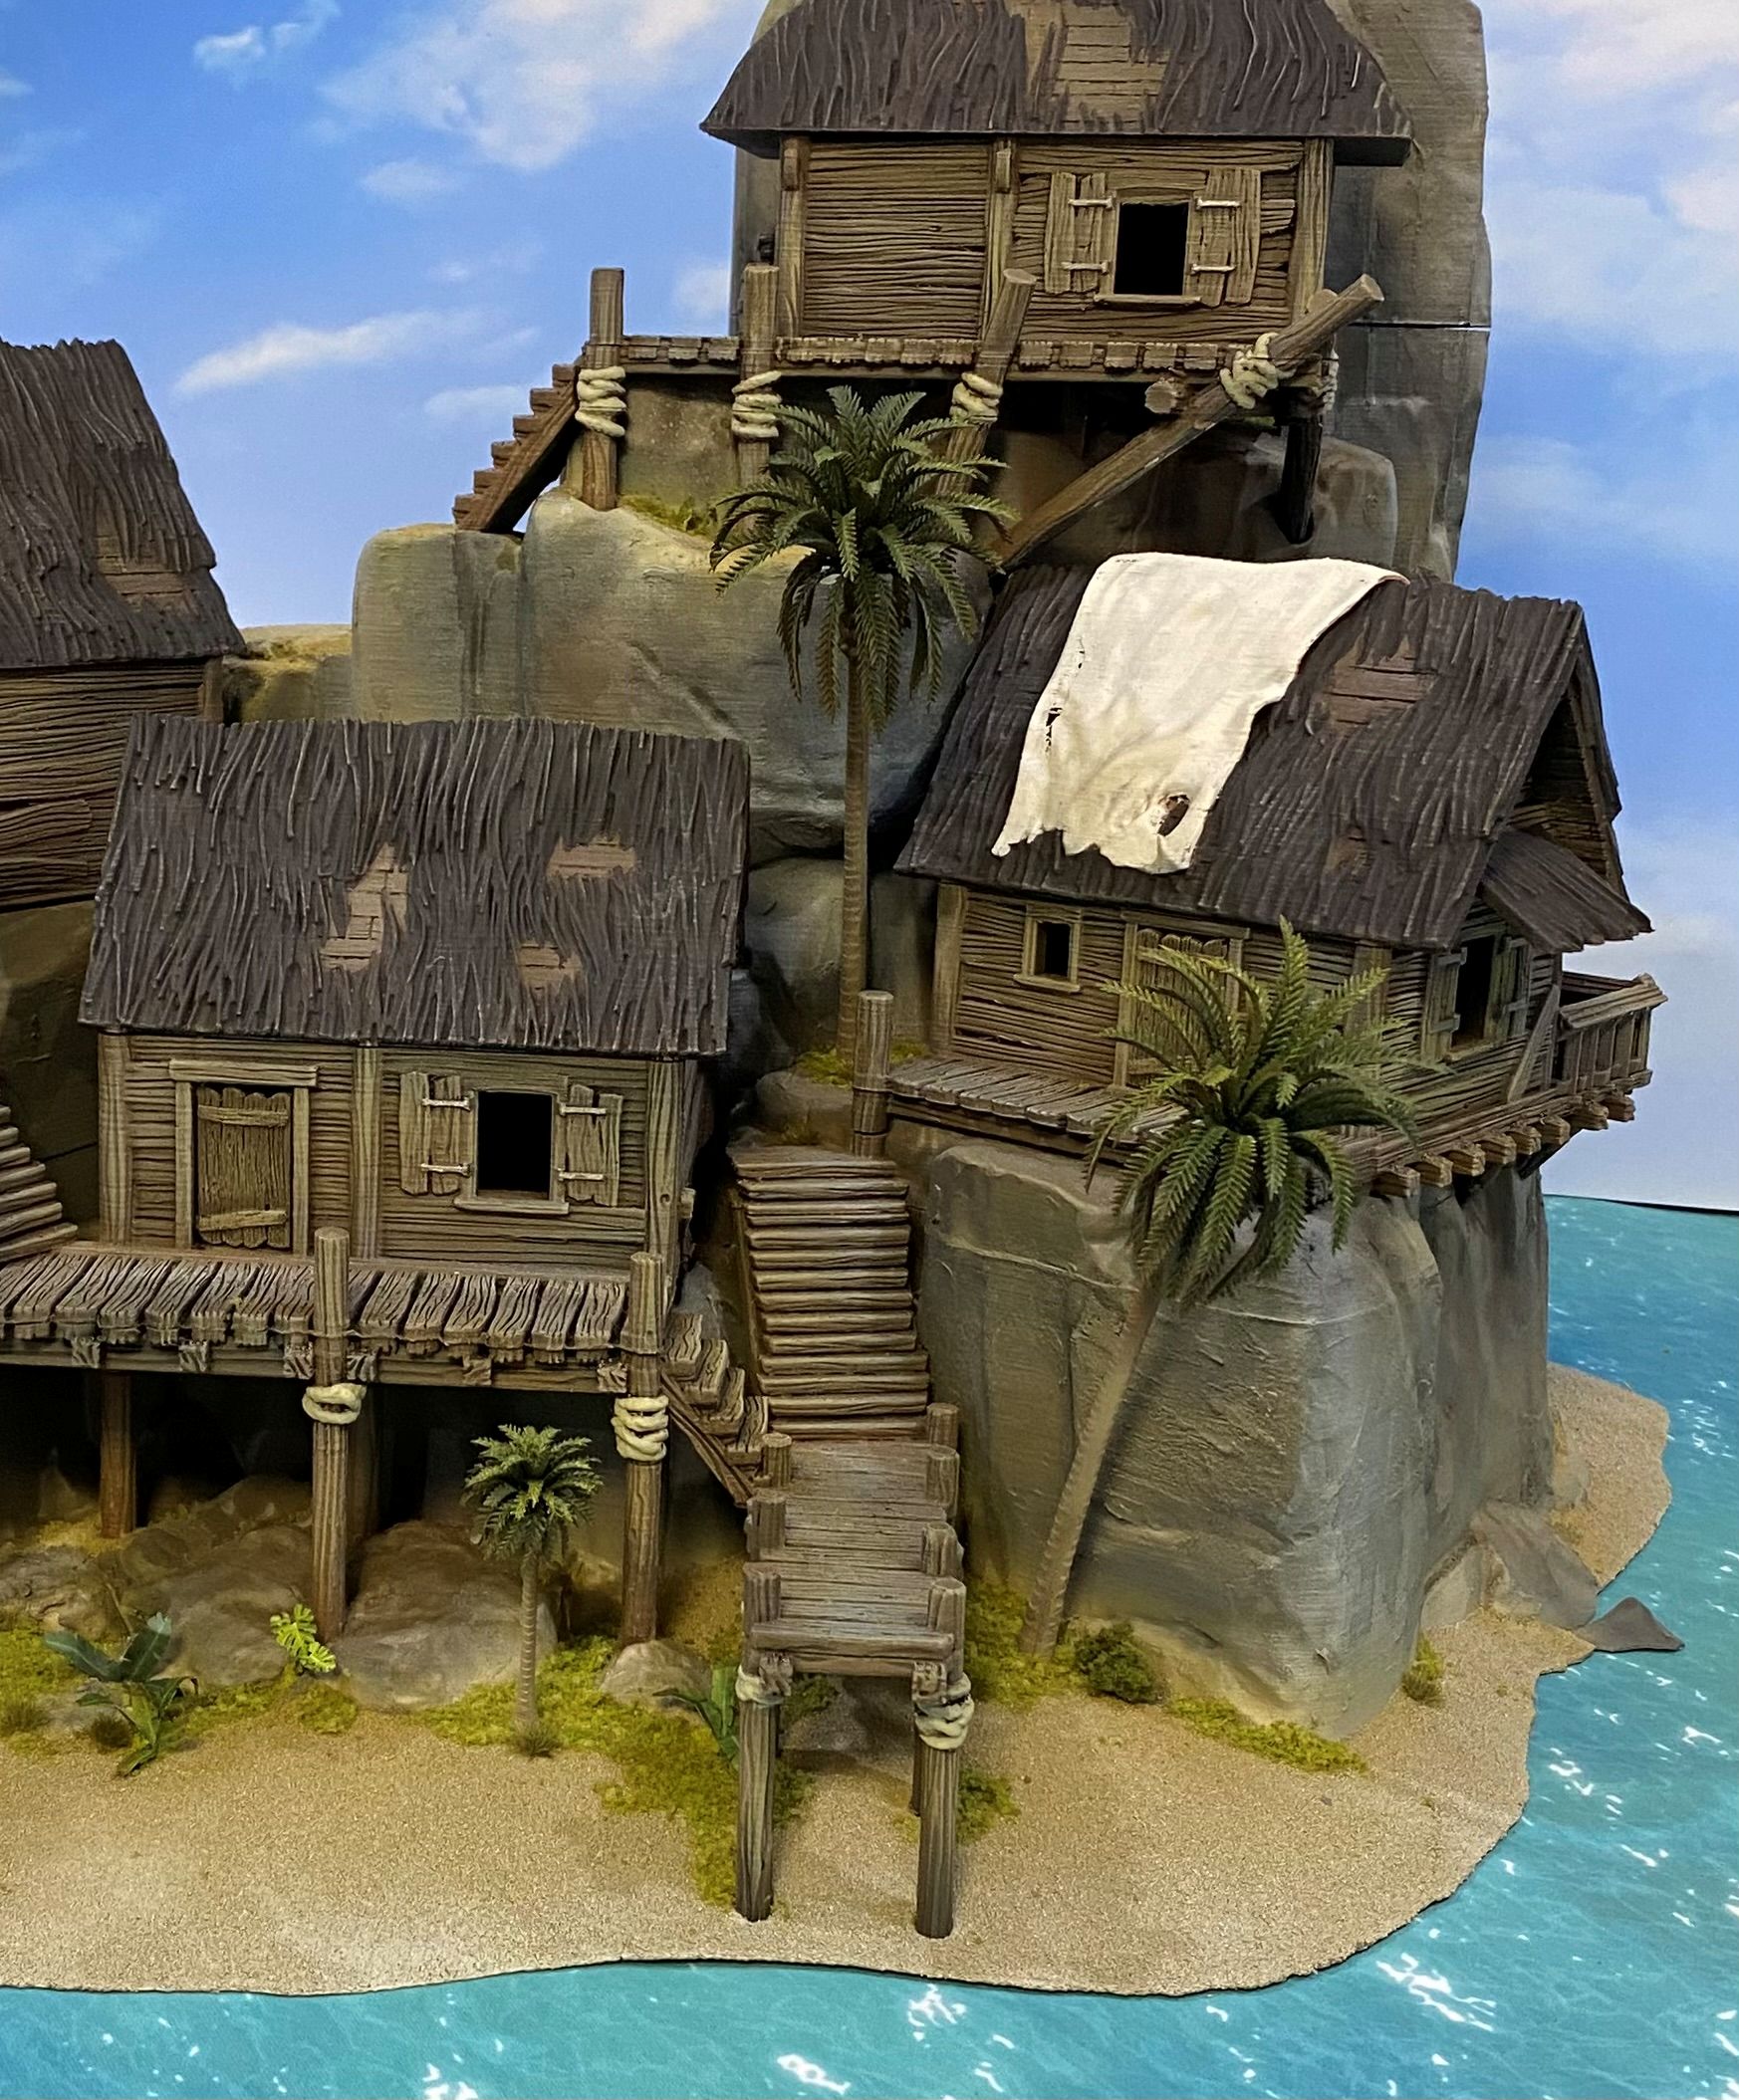
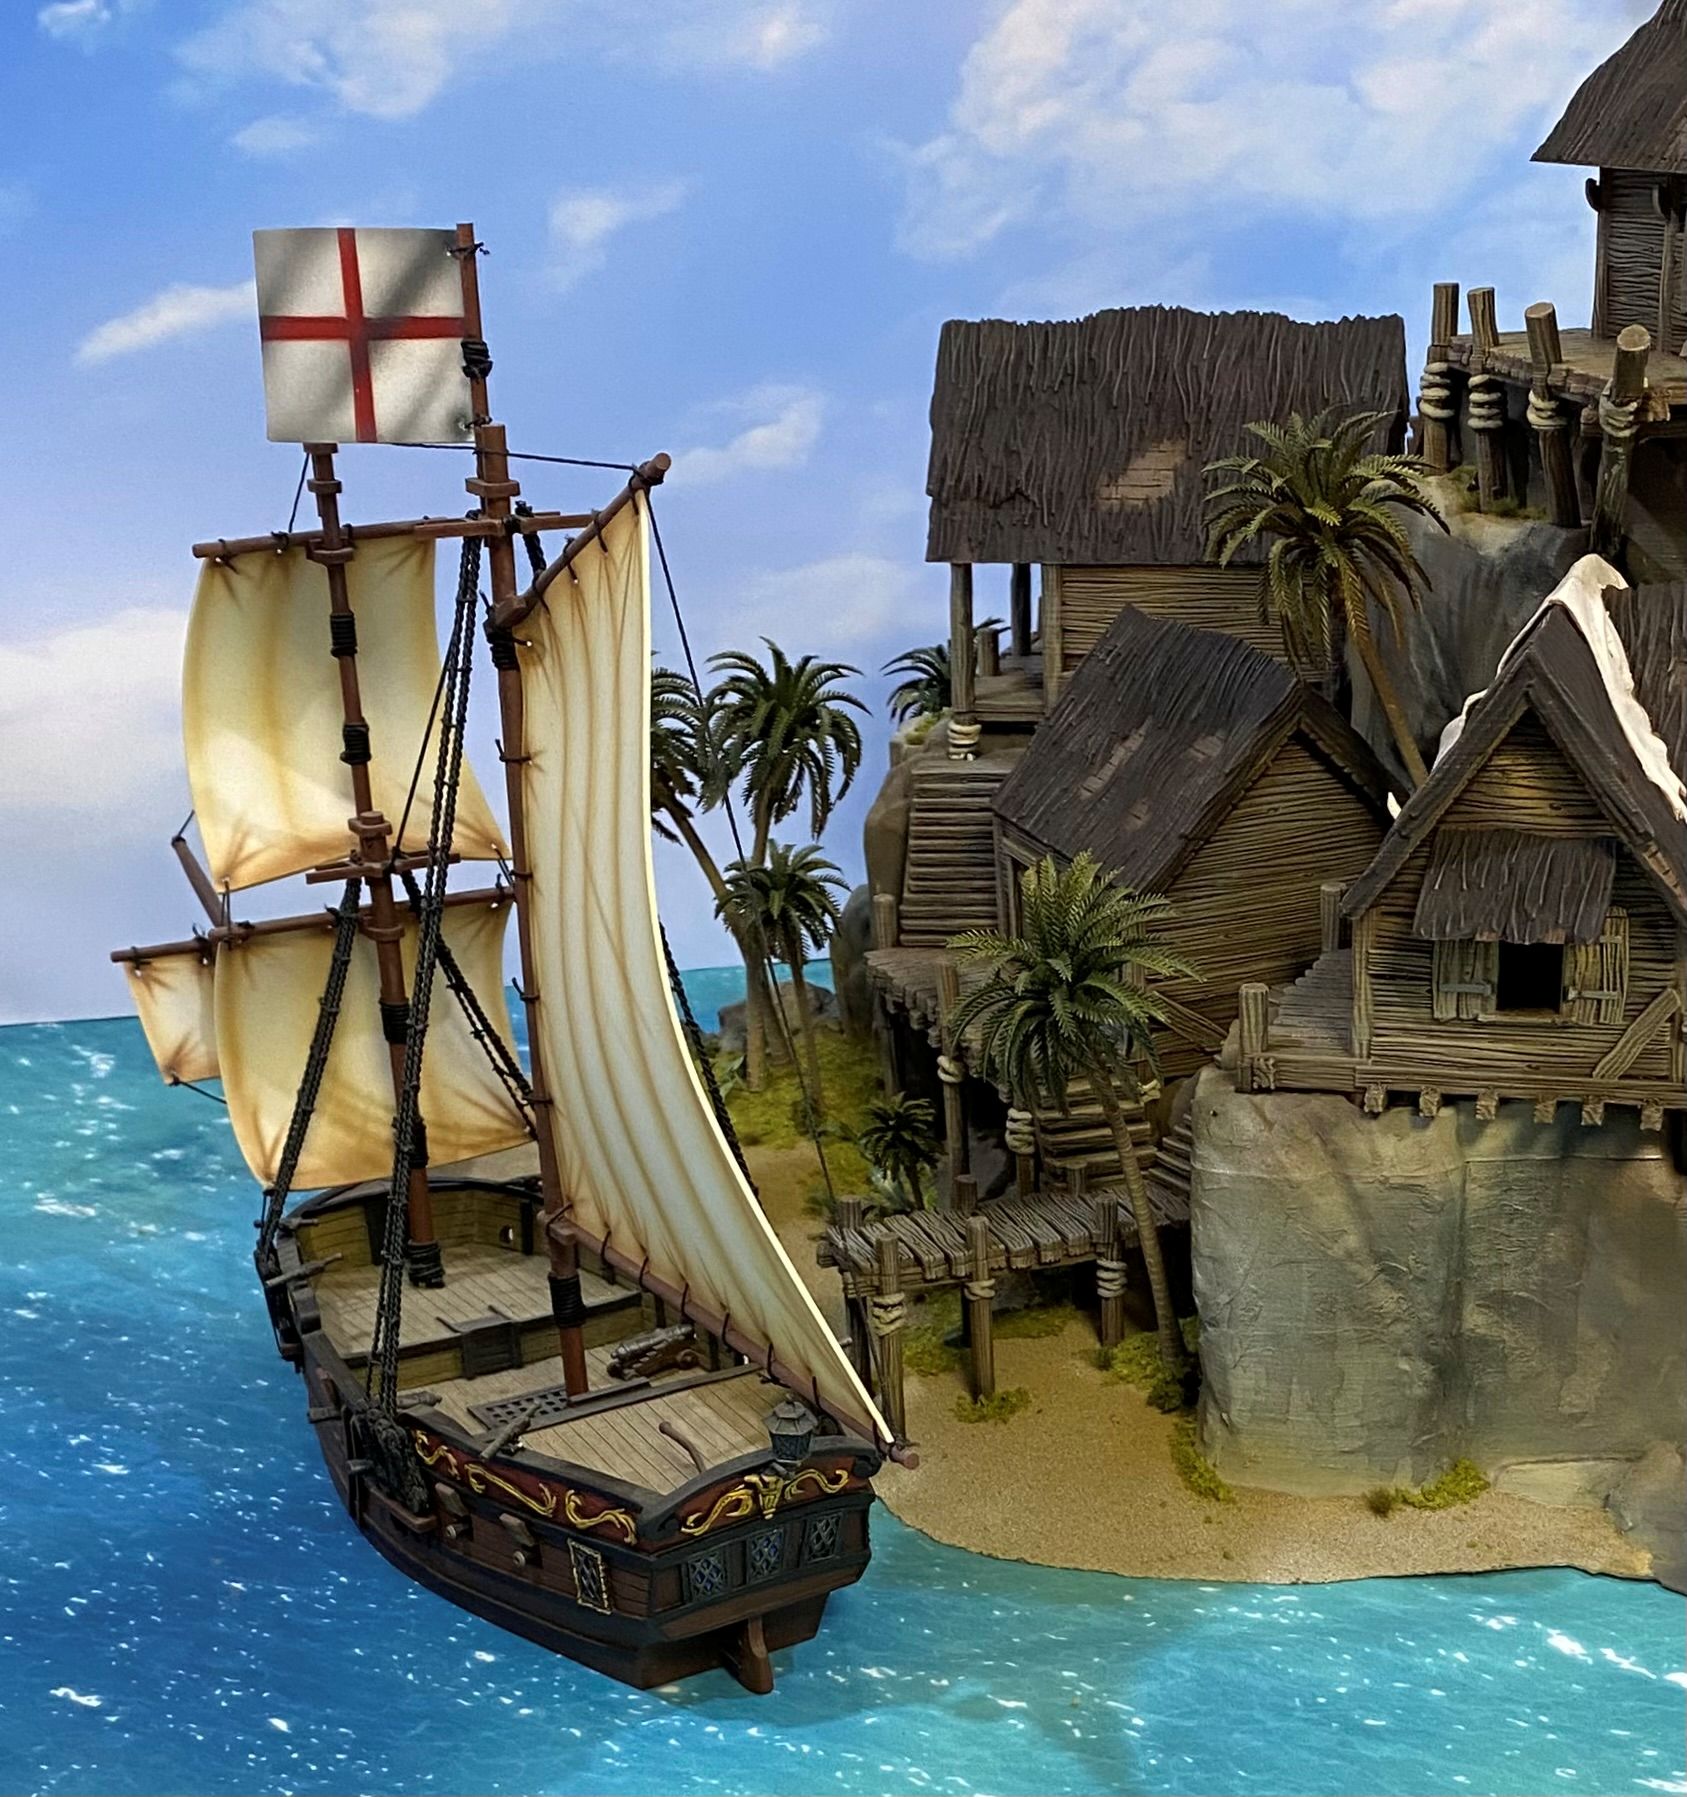
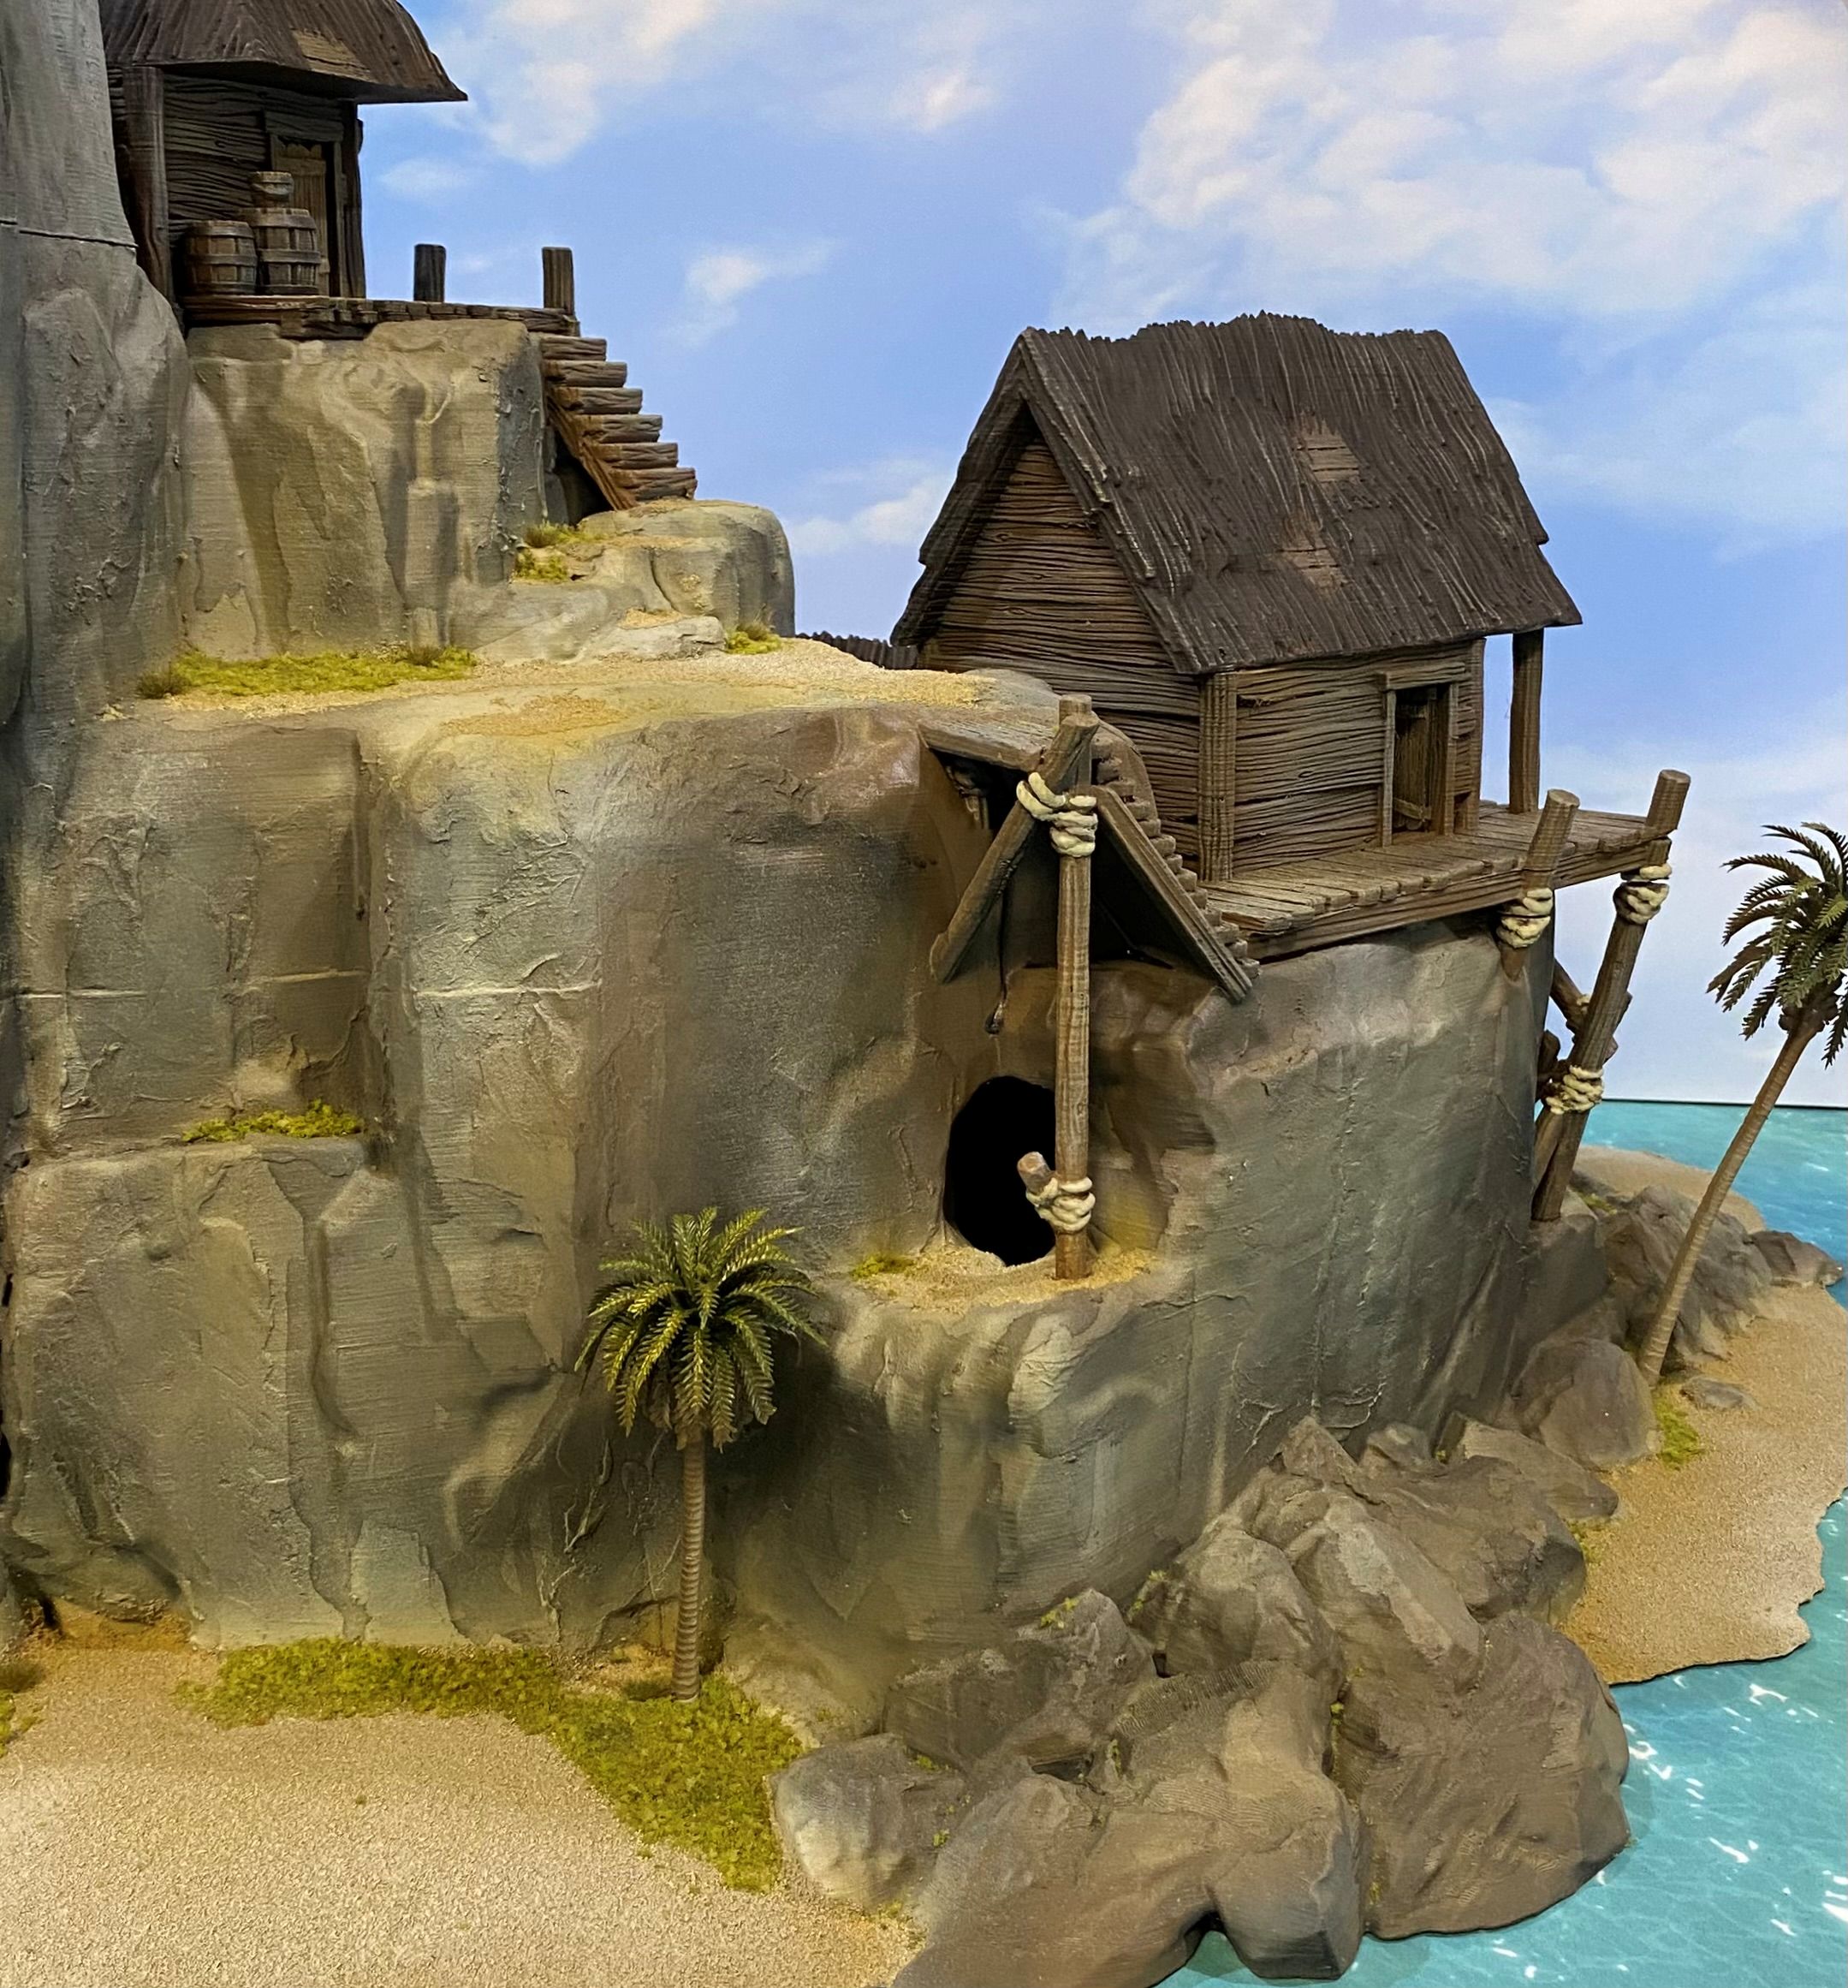
Plant Life
I finally got around to adding a bit more plant life to the first set of islands. Just stuff from my basing box to tie these pieces in with the other terrain I made for Blood and Plunder some time ago. Little bits of grass tufts and a various plant here and there.
I am going to call these islands done, except for some lighting that is going to go inside here and there.
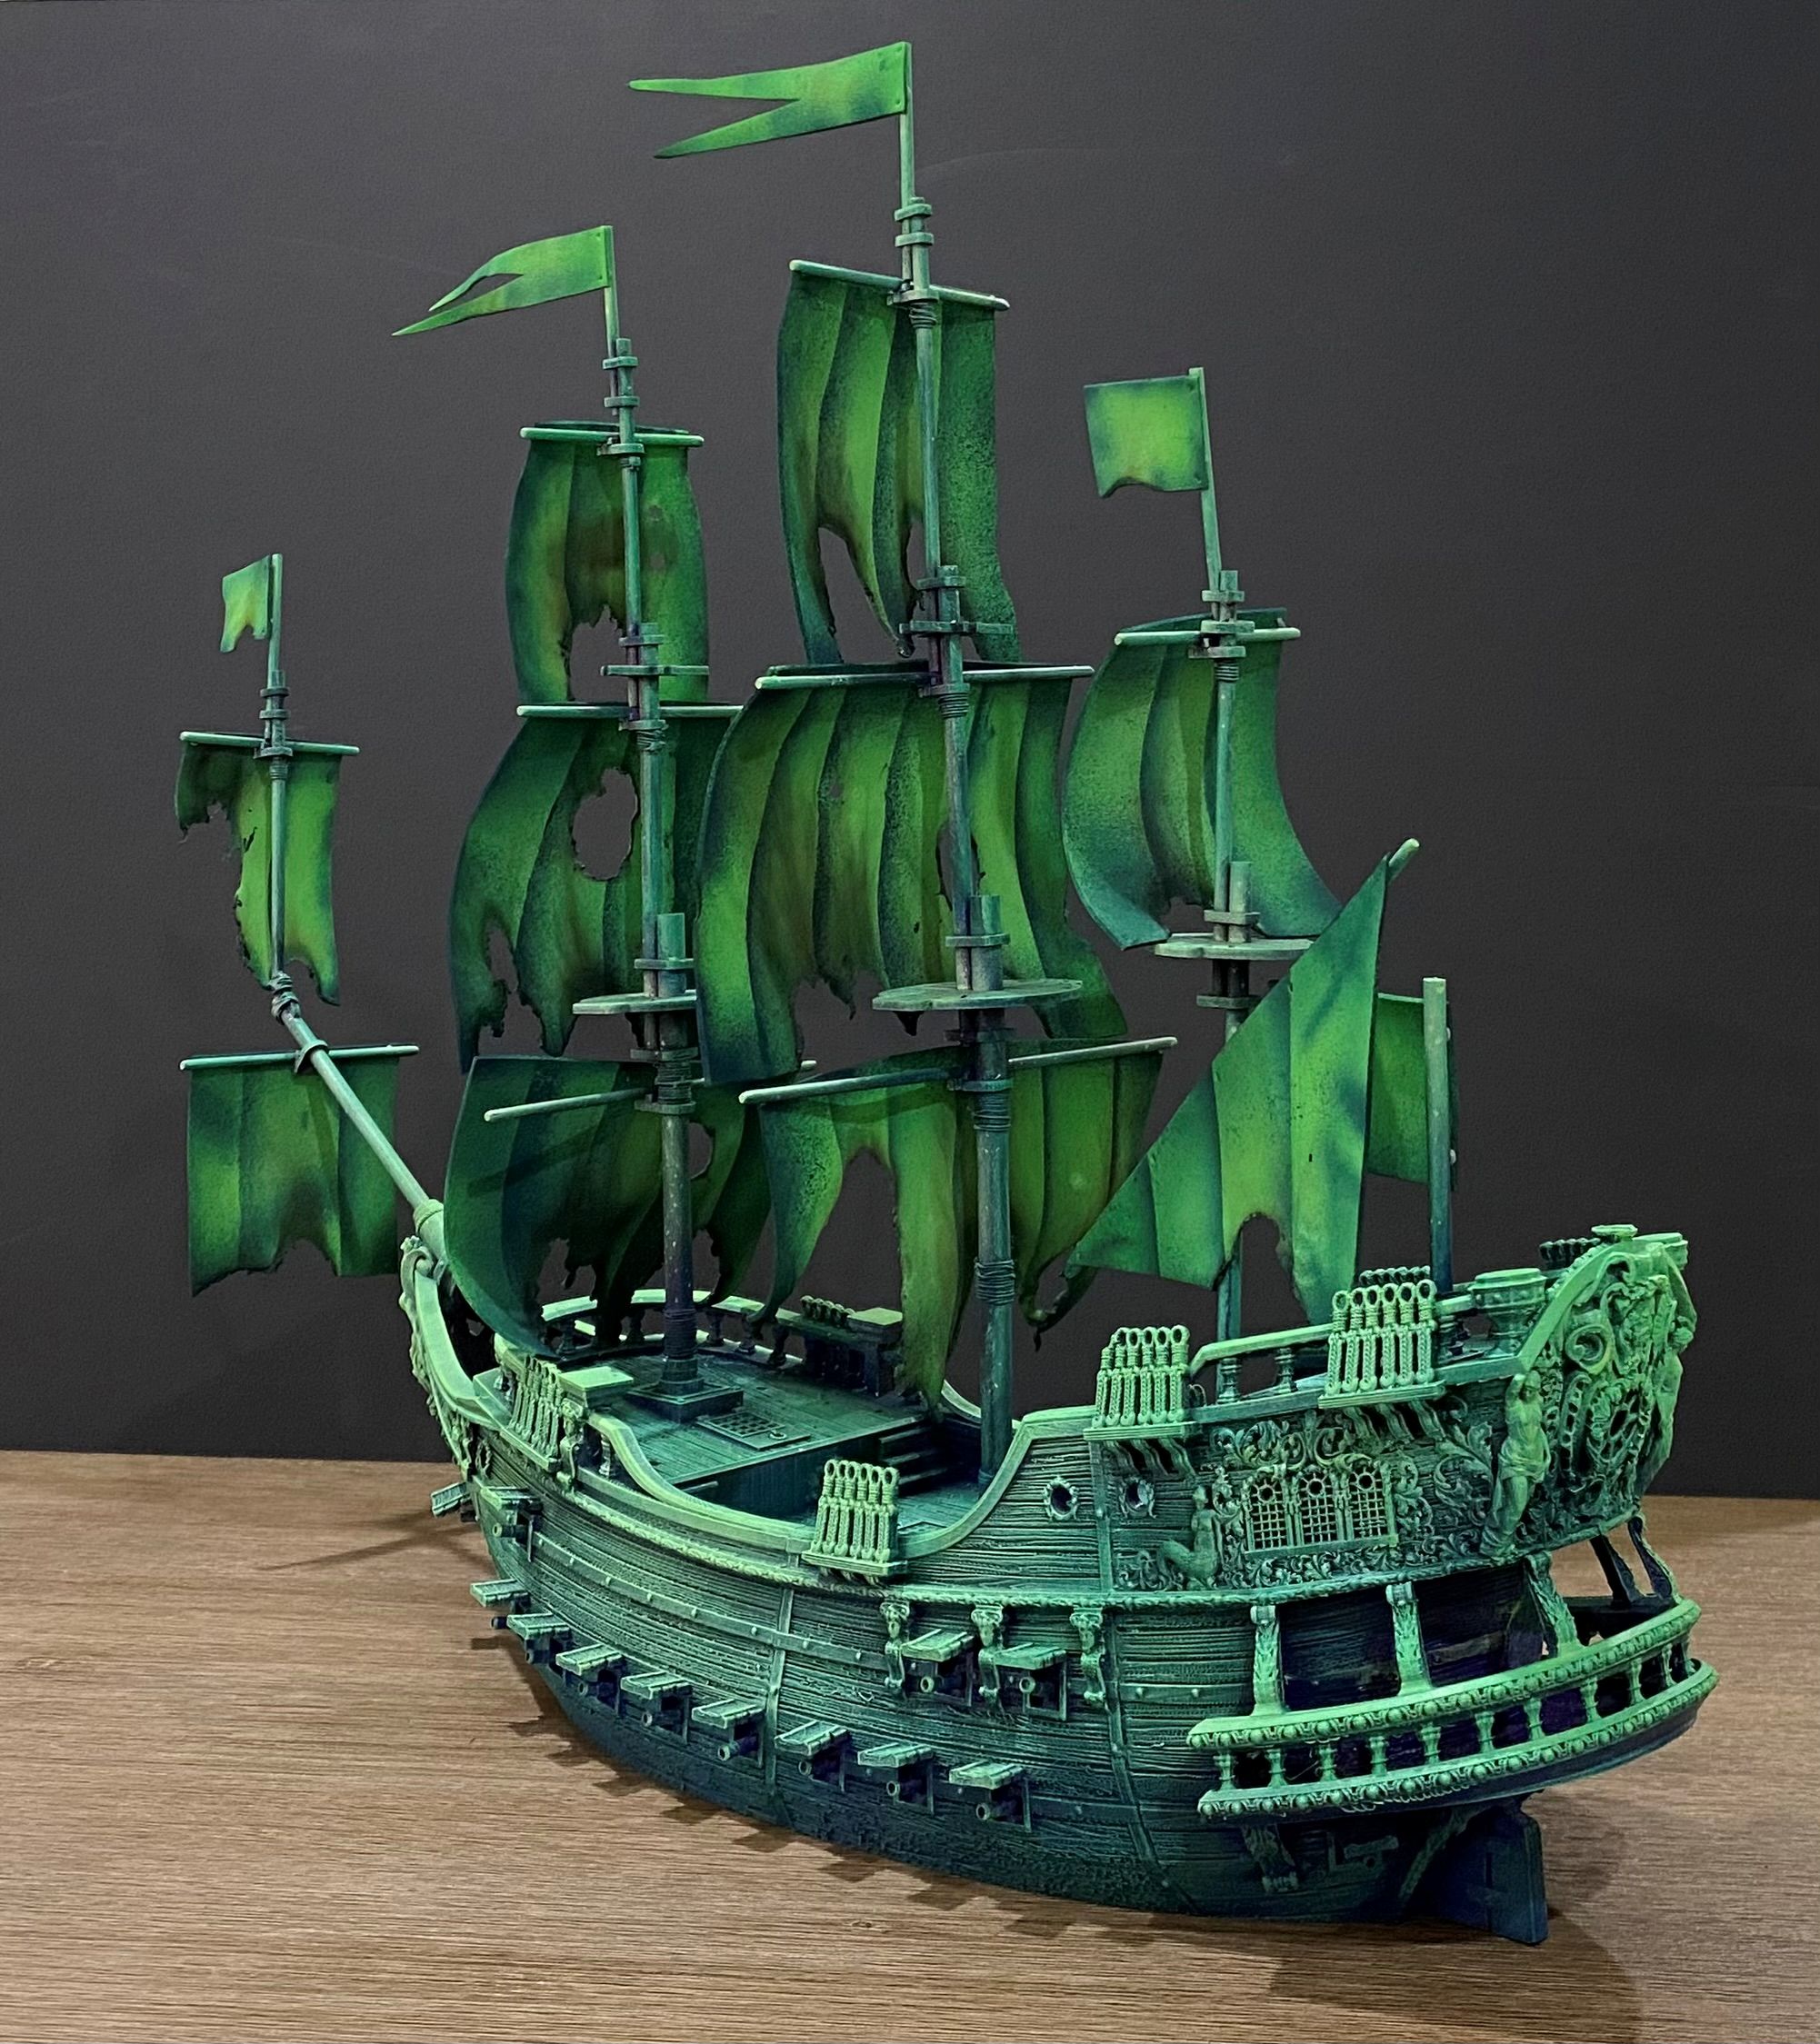
Ghost Ship - Part Three
Just a quick one to do a colour test to see how this thing will look on the open seas.
Ghost Ship - Part Two
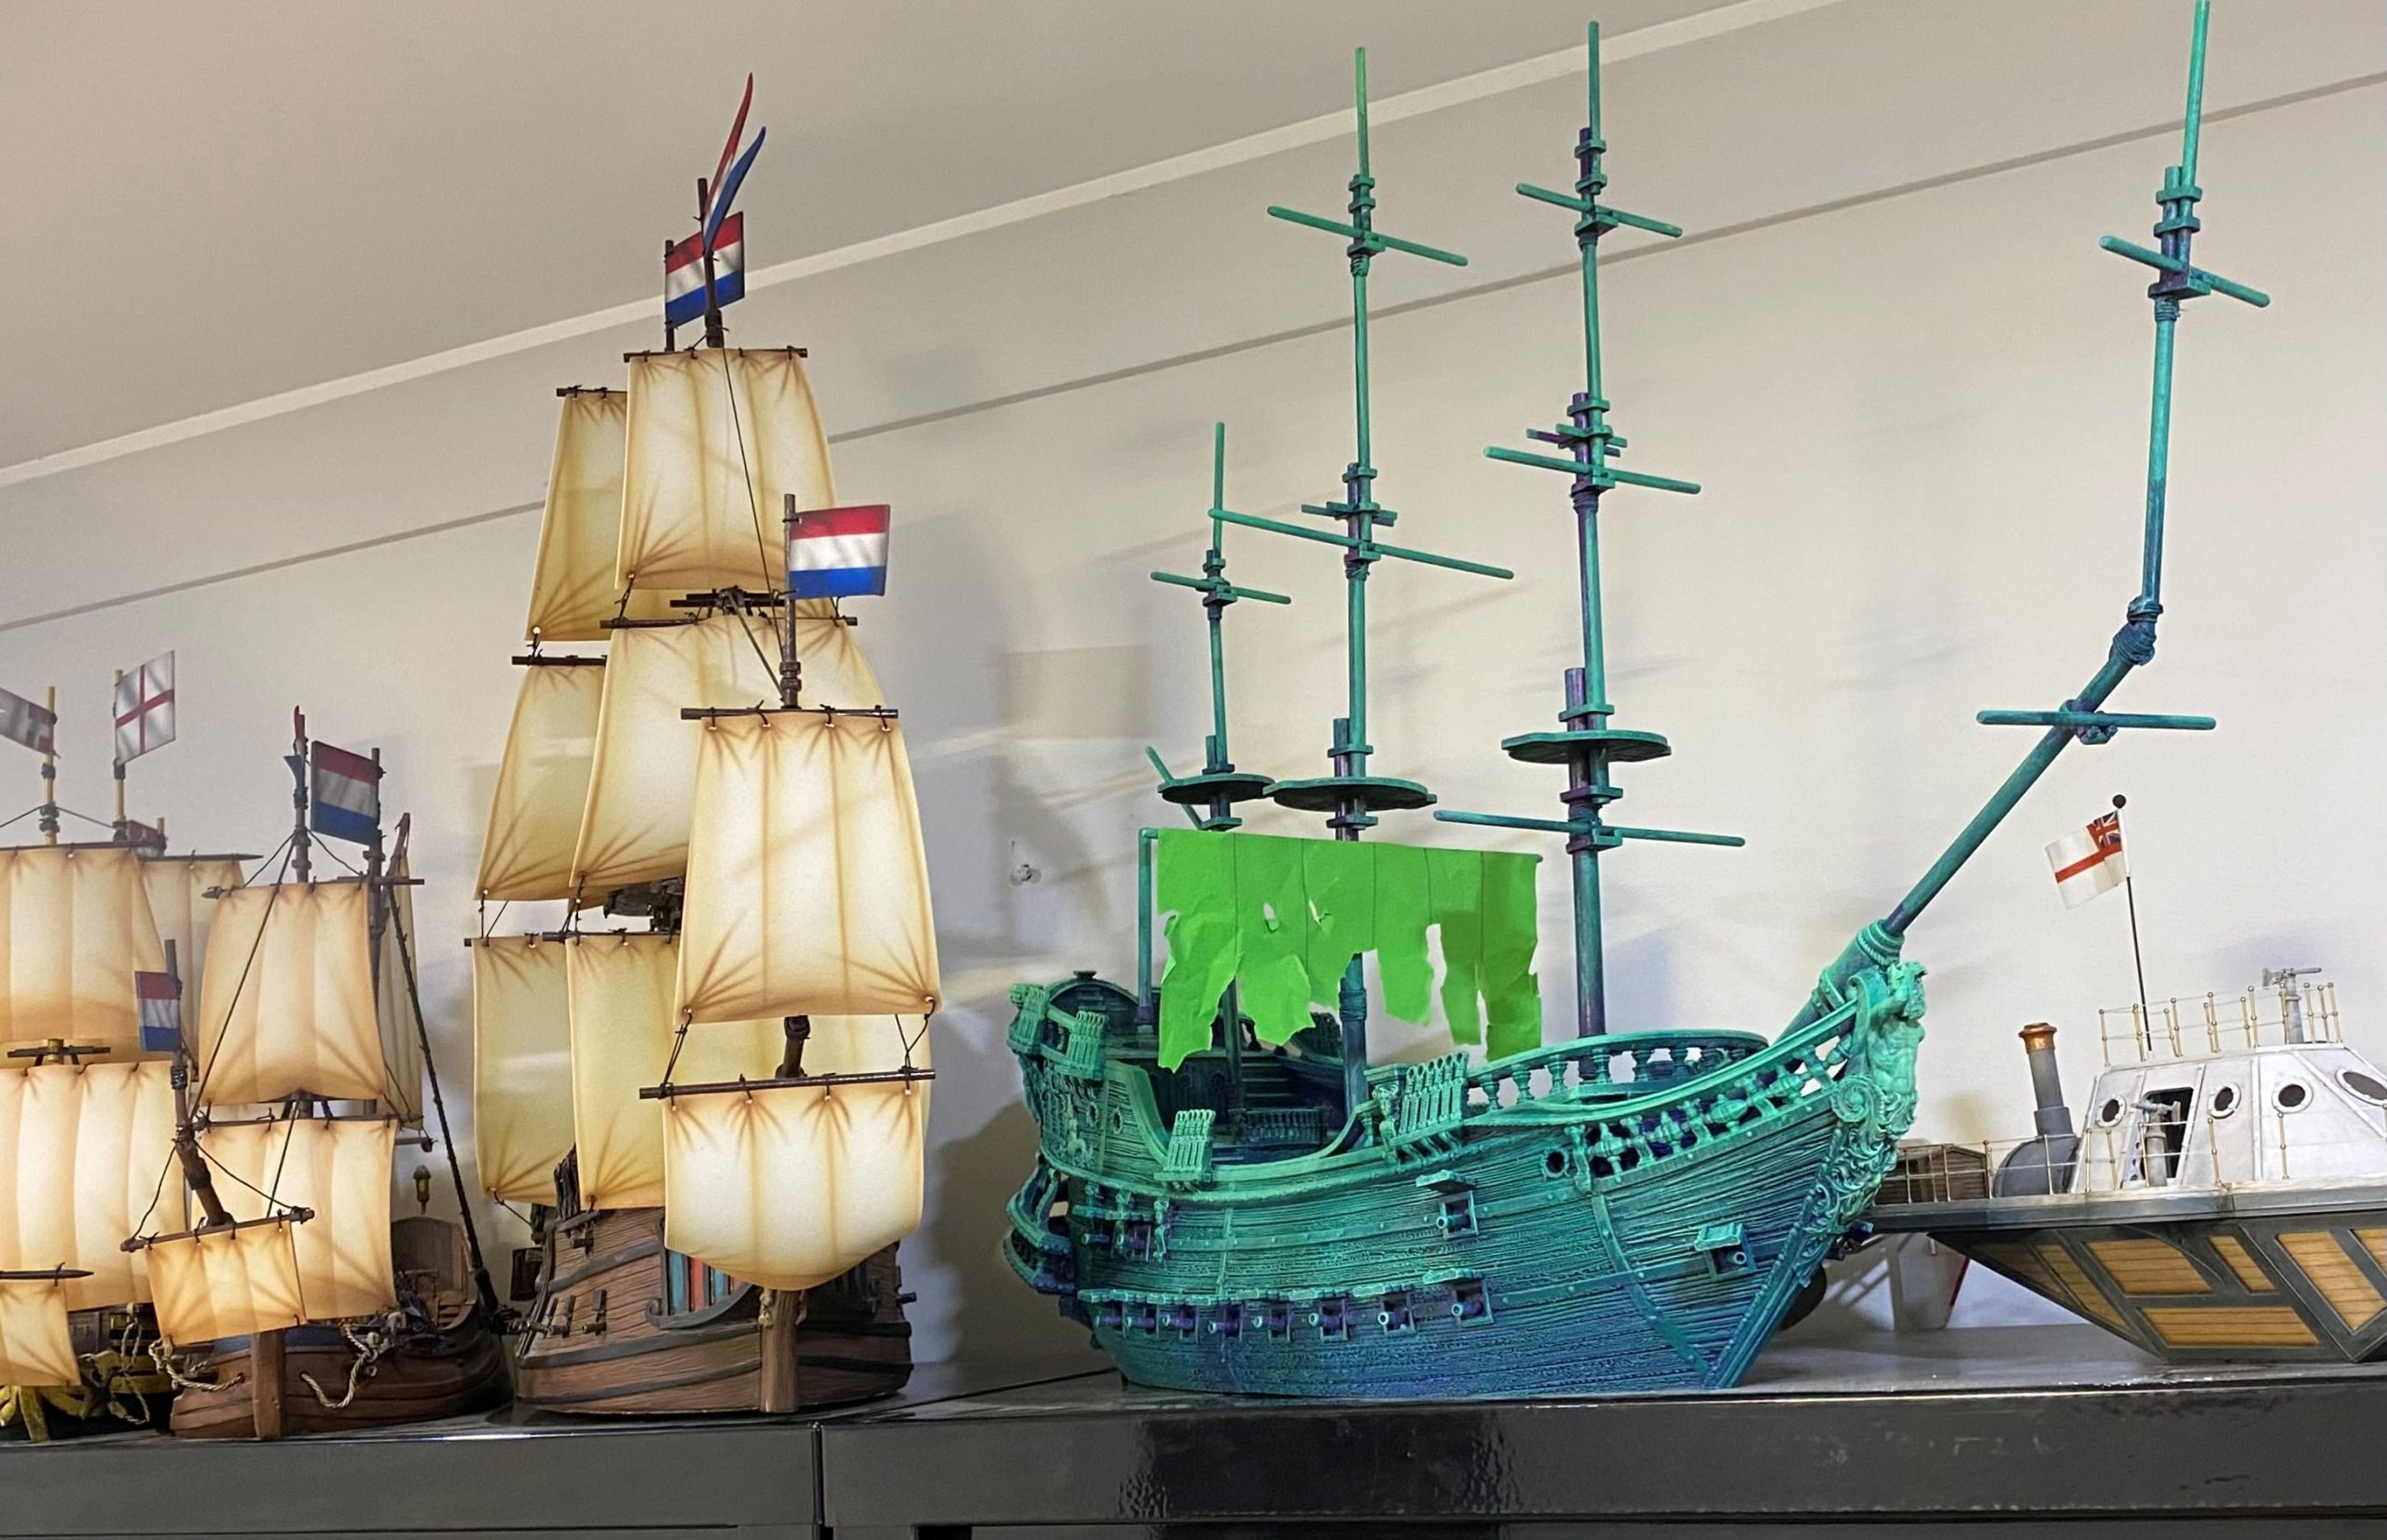
I am pretty happy with how the hull of the ship is looking, but it does need some sails and rigging to bring it into line with my other ships.
The bluey-green colour of the ship looks different from different angles and its quite hard to photograph to show its actual colour. from some angles it looks more Fluro blue and from others more green.
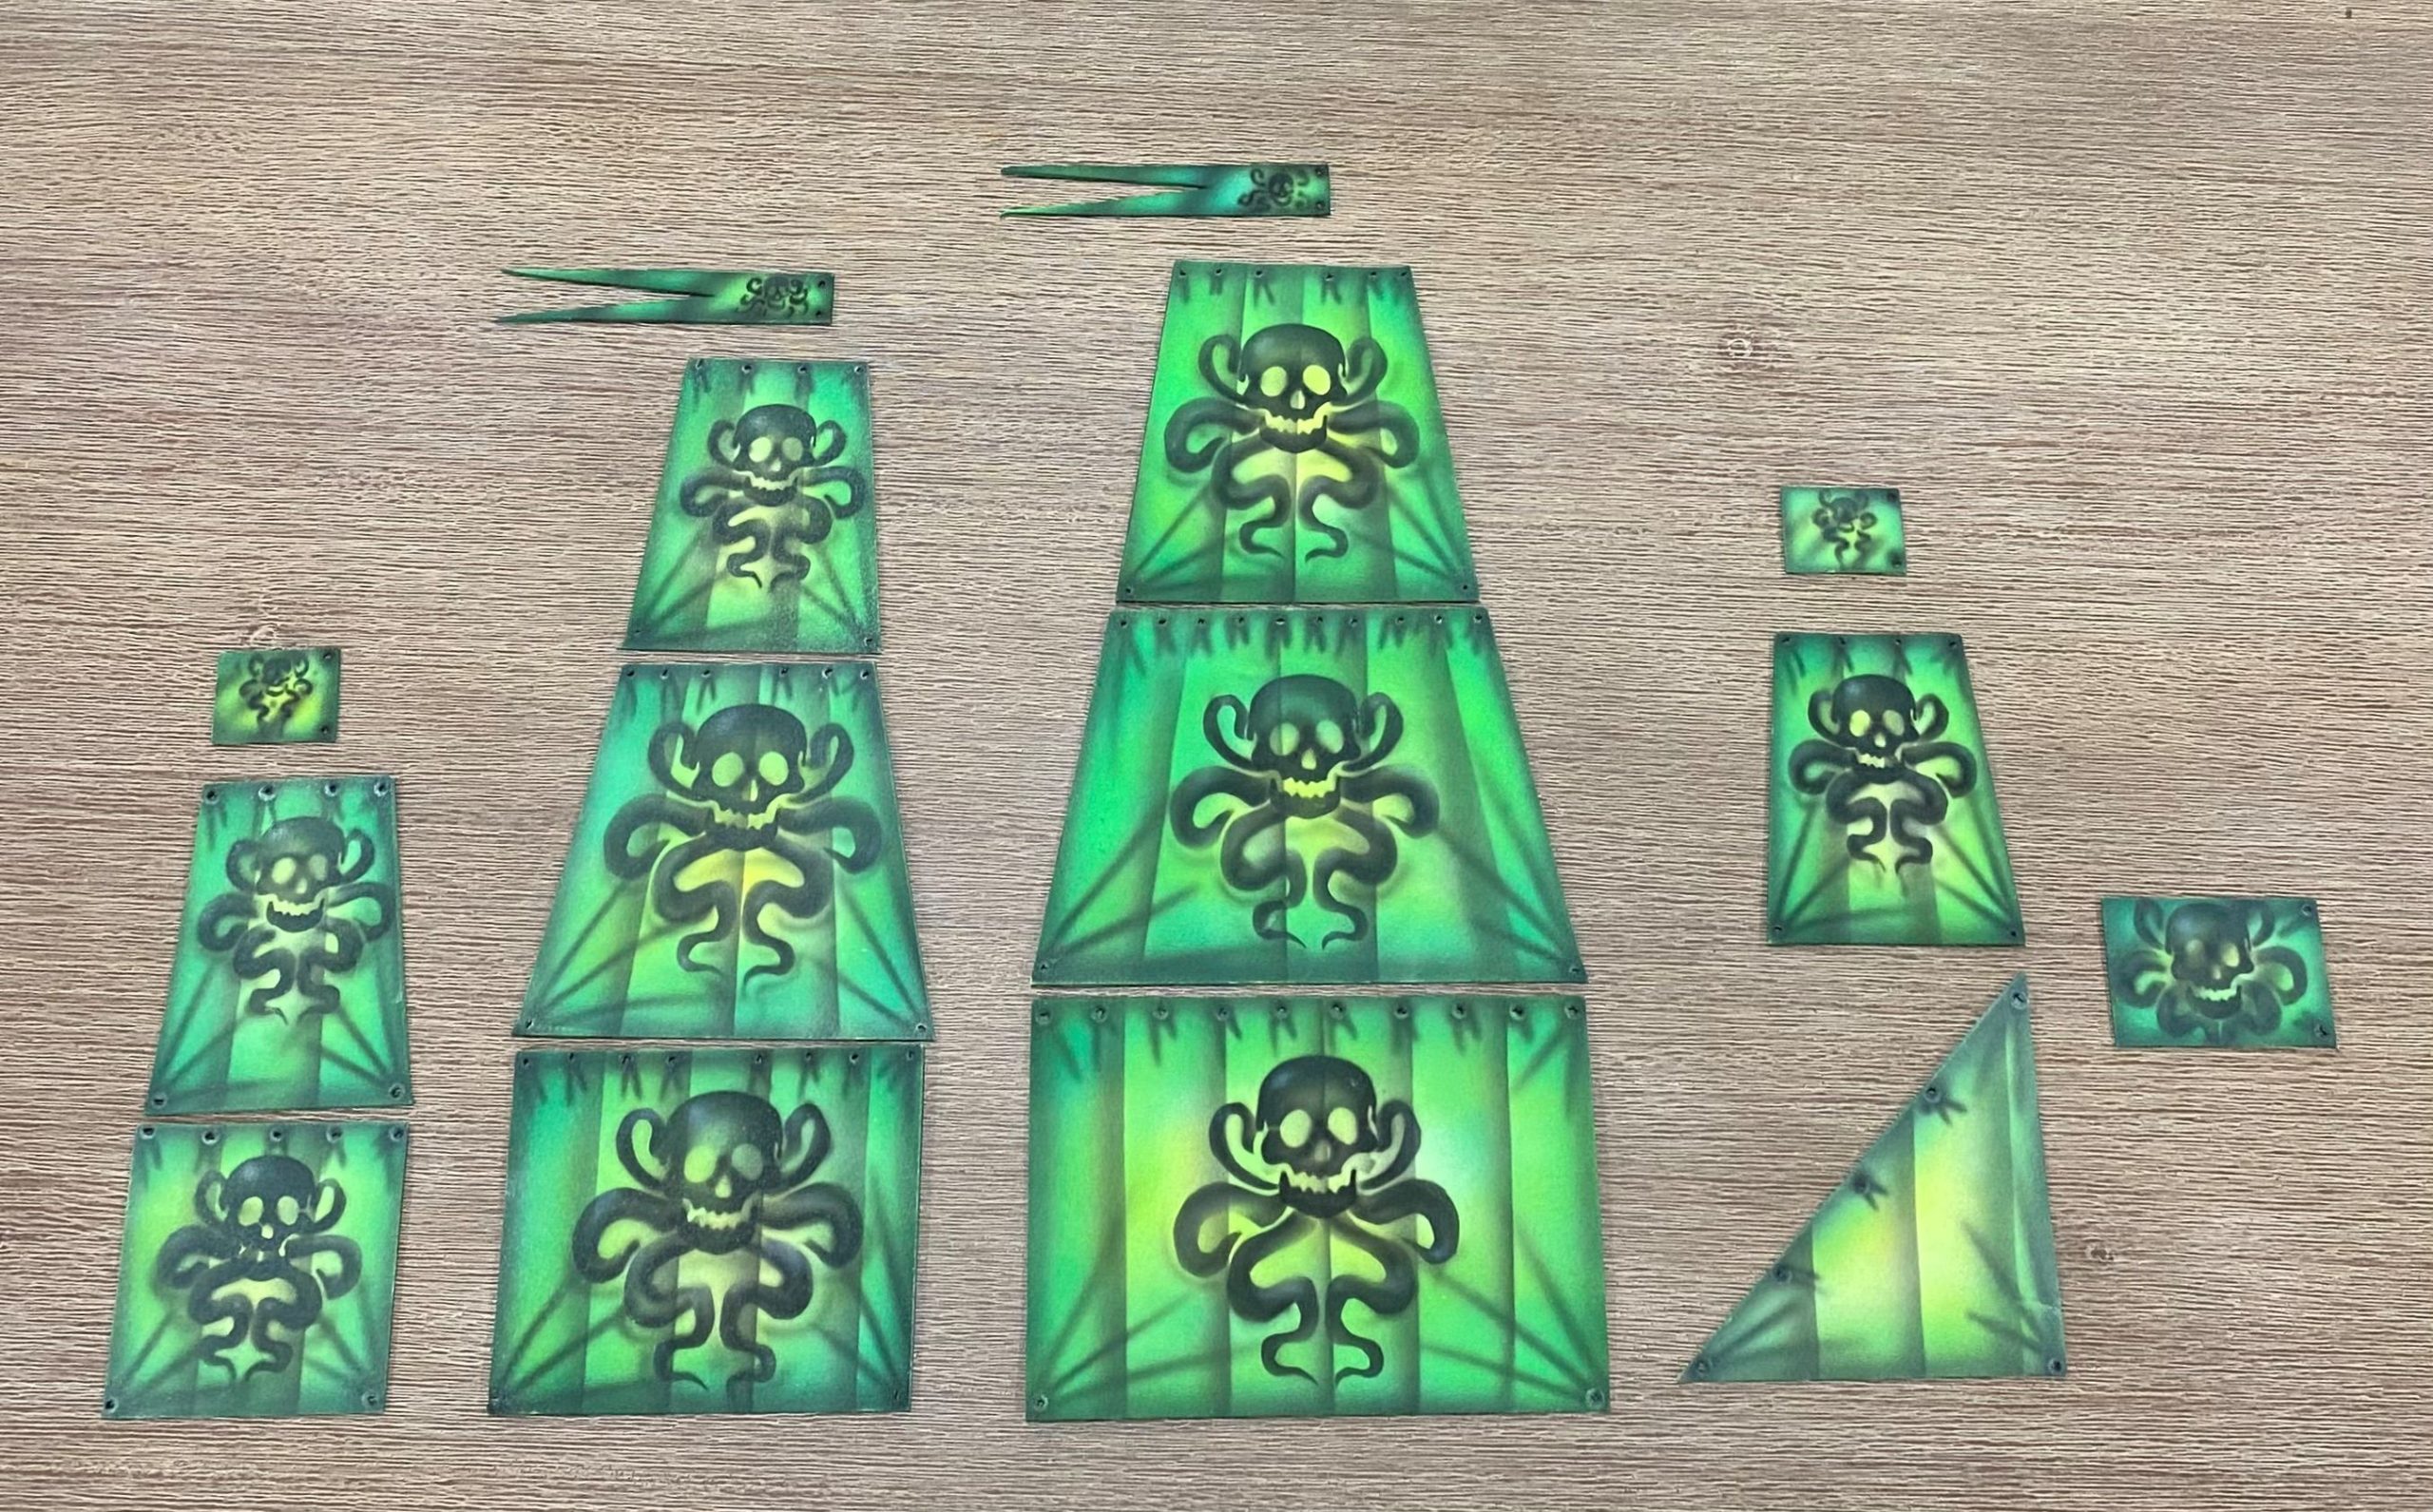
I have had these sails sitting around for quite a while now, with the thought in mind that they could work for a Ghost Ship. Now I am not so sure. The sails are a lot greener than the ship, and I think the image on the actual sails makes the whole thing look a bit more ‘toy-like’.
I used a cheap airbrush to attempt to tone down the greenness of the sails; it helped, but they still do not look right to me.
Next, I turned the sails around to see how they would look without the motif and to be honest, I like them a lot better without it.

I am still not happy with the look and think that it is not just the colour that is the problem, or even the motif on them. The sails are too complete.
After all, this is a ghost ship. It doesn’t need the wind in its sails to move. It moves regardless, relentless in its purpose. They shouldn’t be pristine-looking sails but shreds and drapes hanging in tatters to show that this thing will keep on moving towards you regardless of the damage it suffers, just like the crew who sail on her.
With that in mind, I will have to completely redesign the sails for this one.
Ghost Ship - Part One
Taking a little break from adding foliage to the islands, and thought I would knock out a quick ship.
Some time ago, I picked up a 3D printed ship from a company called OTP that is no longer in business. The ship was one that they had printed out as a sample that they would have on show on their trade stand.
To be honest, it was not very well printed and had some significant gaps that needed filling with modelling putty. I didn’t go overboard with the tidy-up on this, as it was always destined to be a Ghost Ship.
It didn’t come with masts or any fittings, so I had to source some myself.
The Obvious choice was Firelock Games, where I got hold of an extra set of masts. Digging through my bits box, I found enough metal gun barrels to use as cannon.
Gun ports were quickly created using 3D builder software and printed out. Elastic was added to the masts to create a little interest in the straight poles.
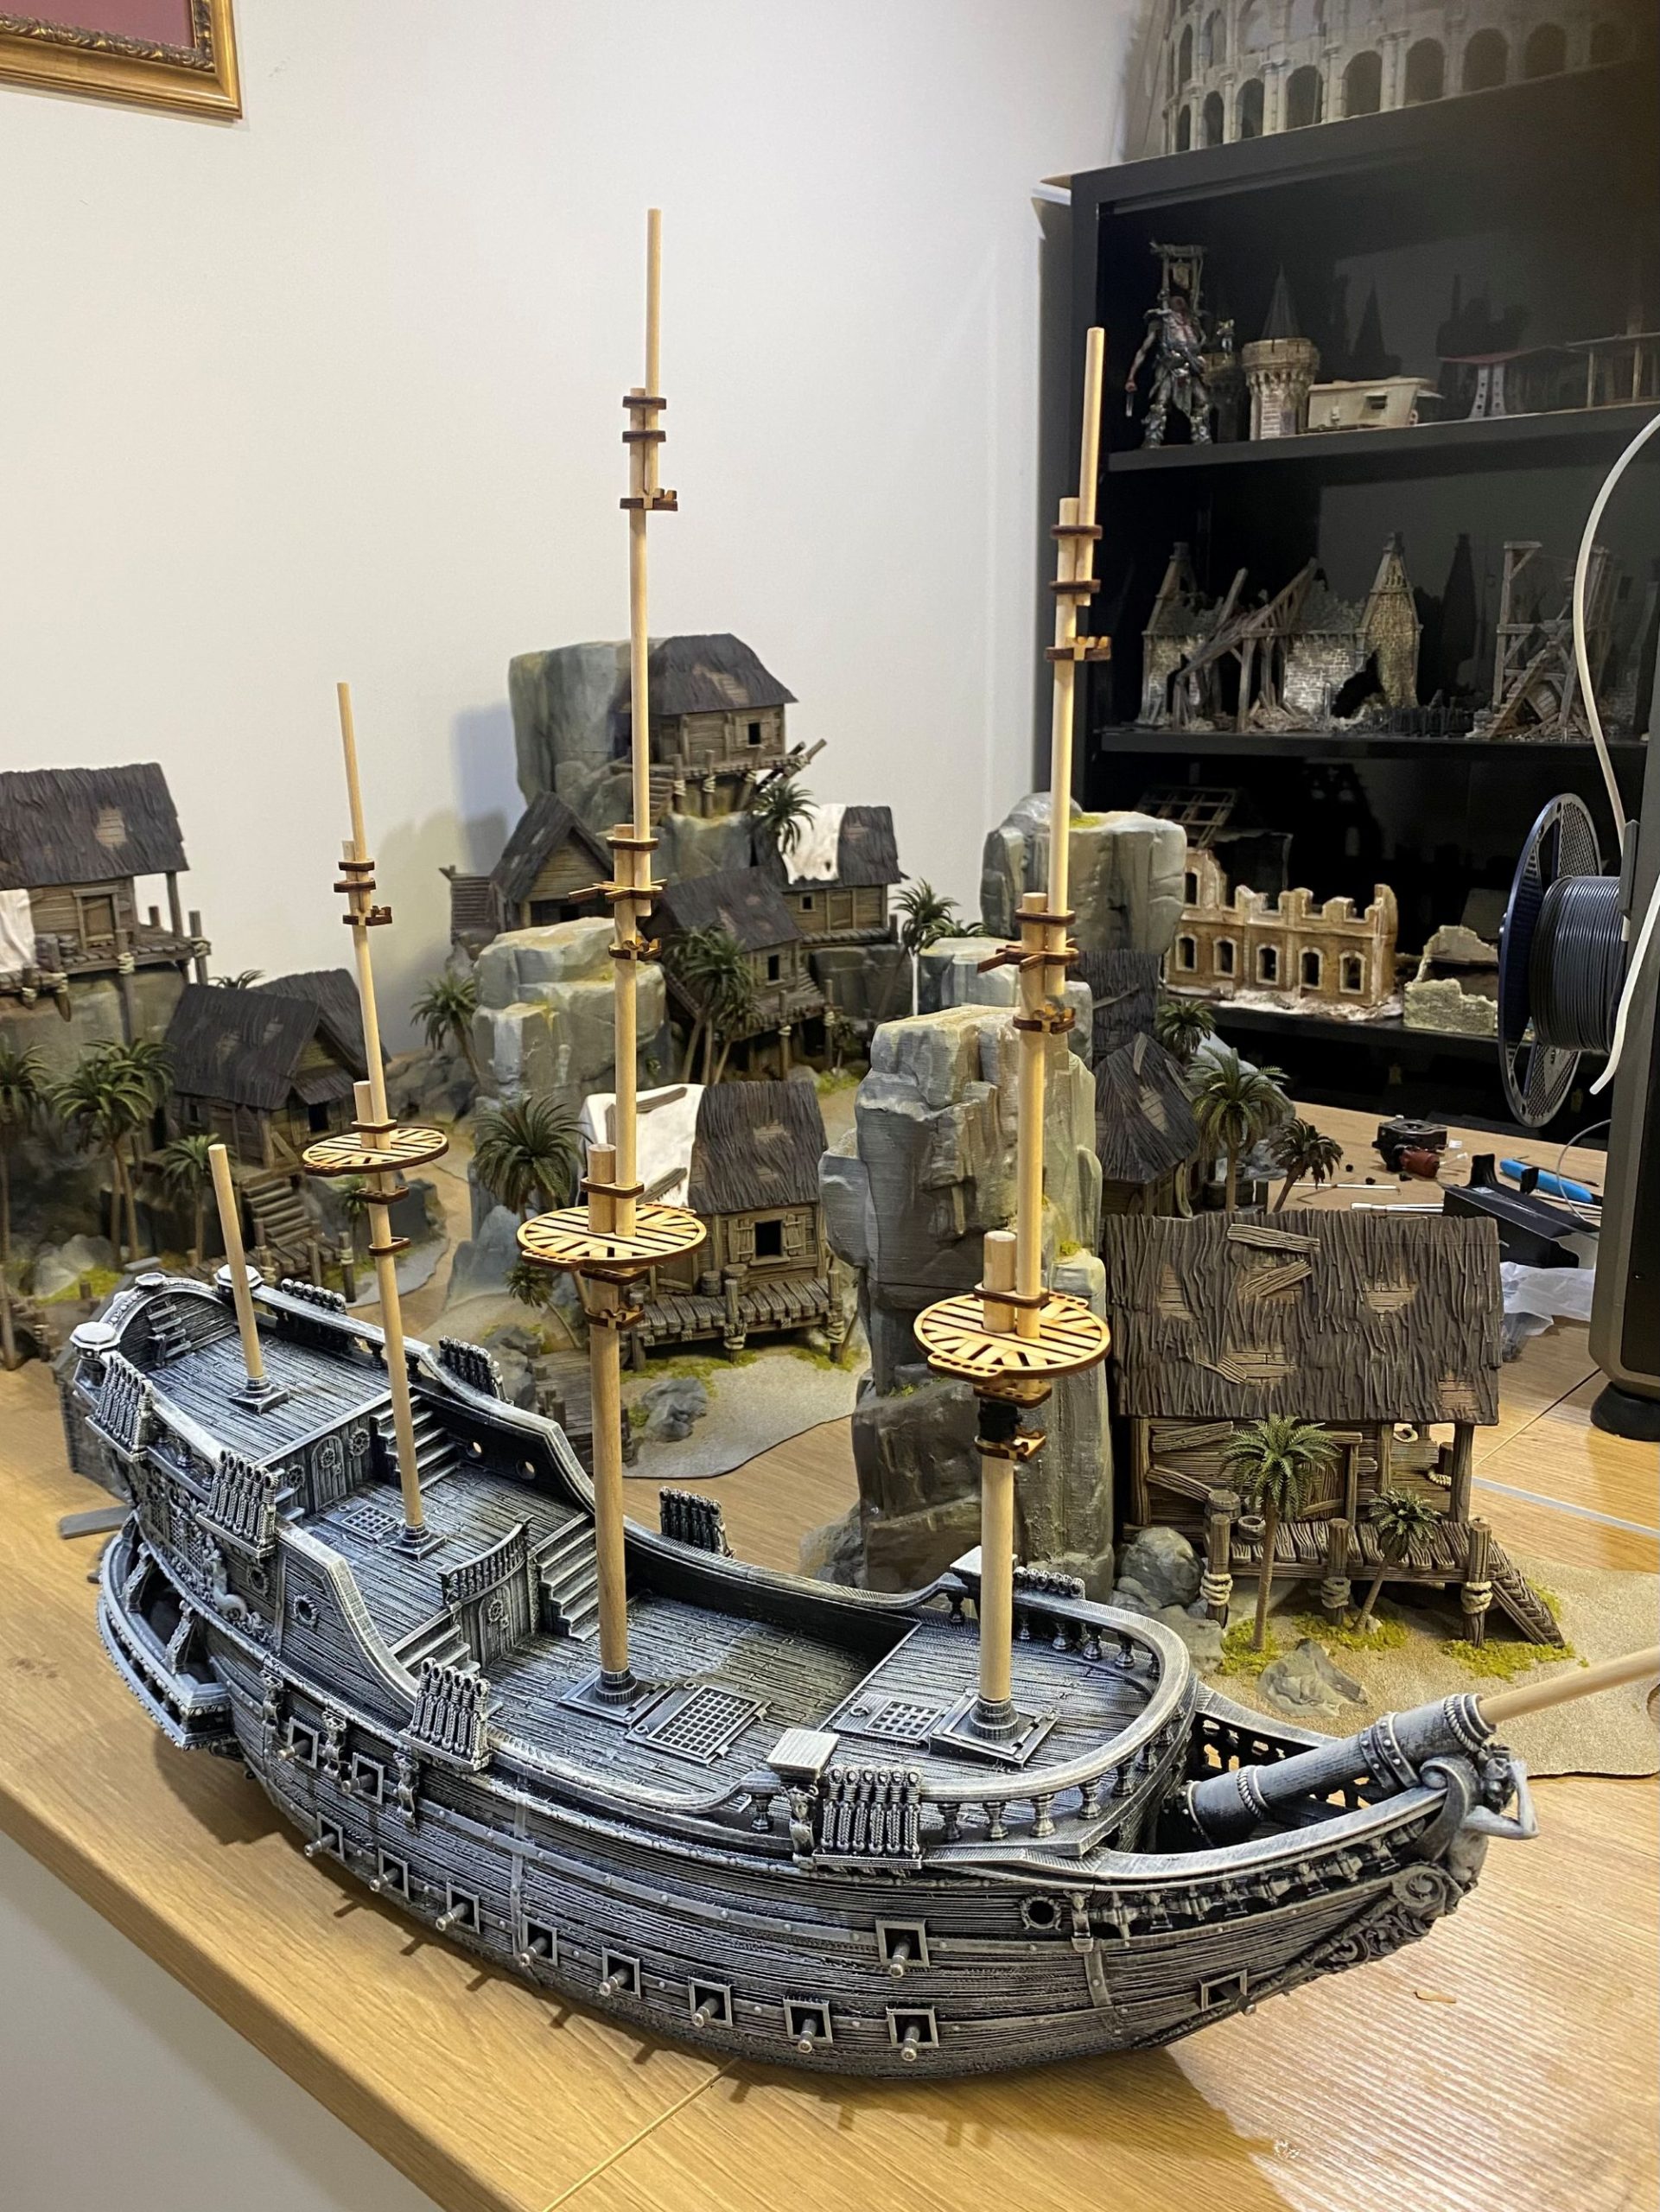
The entire model was then given a black undercoat before being given a good dry-brushing with white.

The model was then painted using stippling and dry brushing techniques.
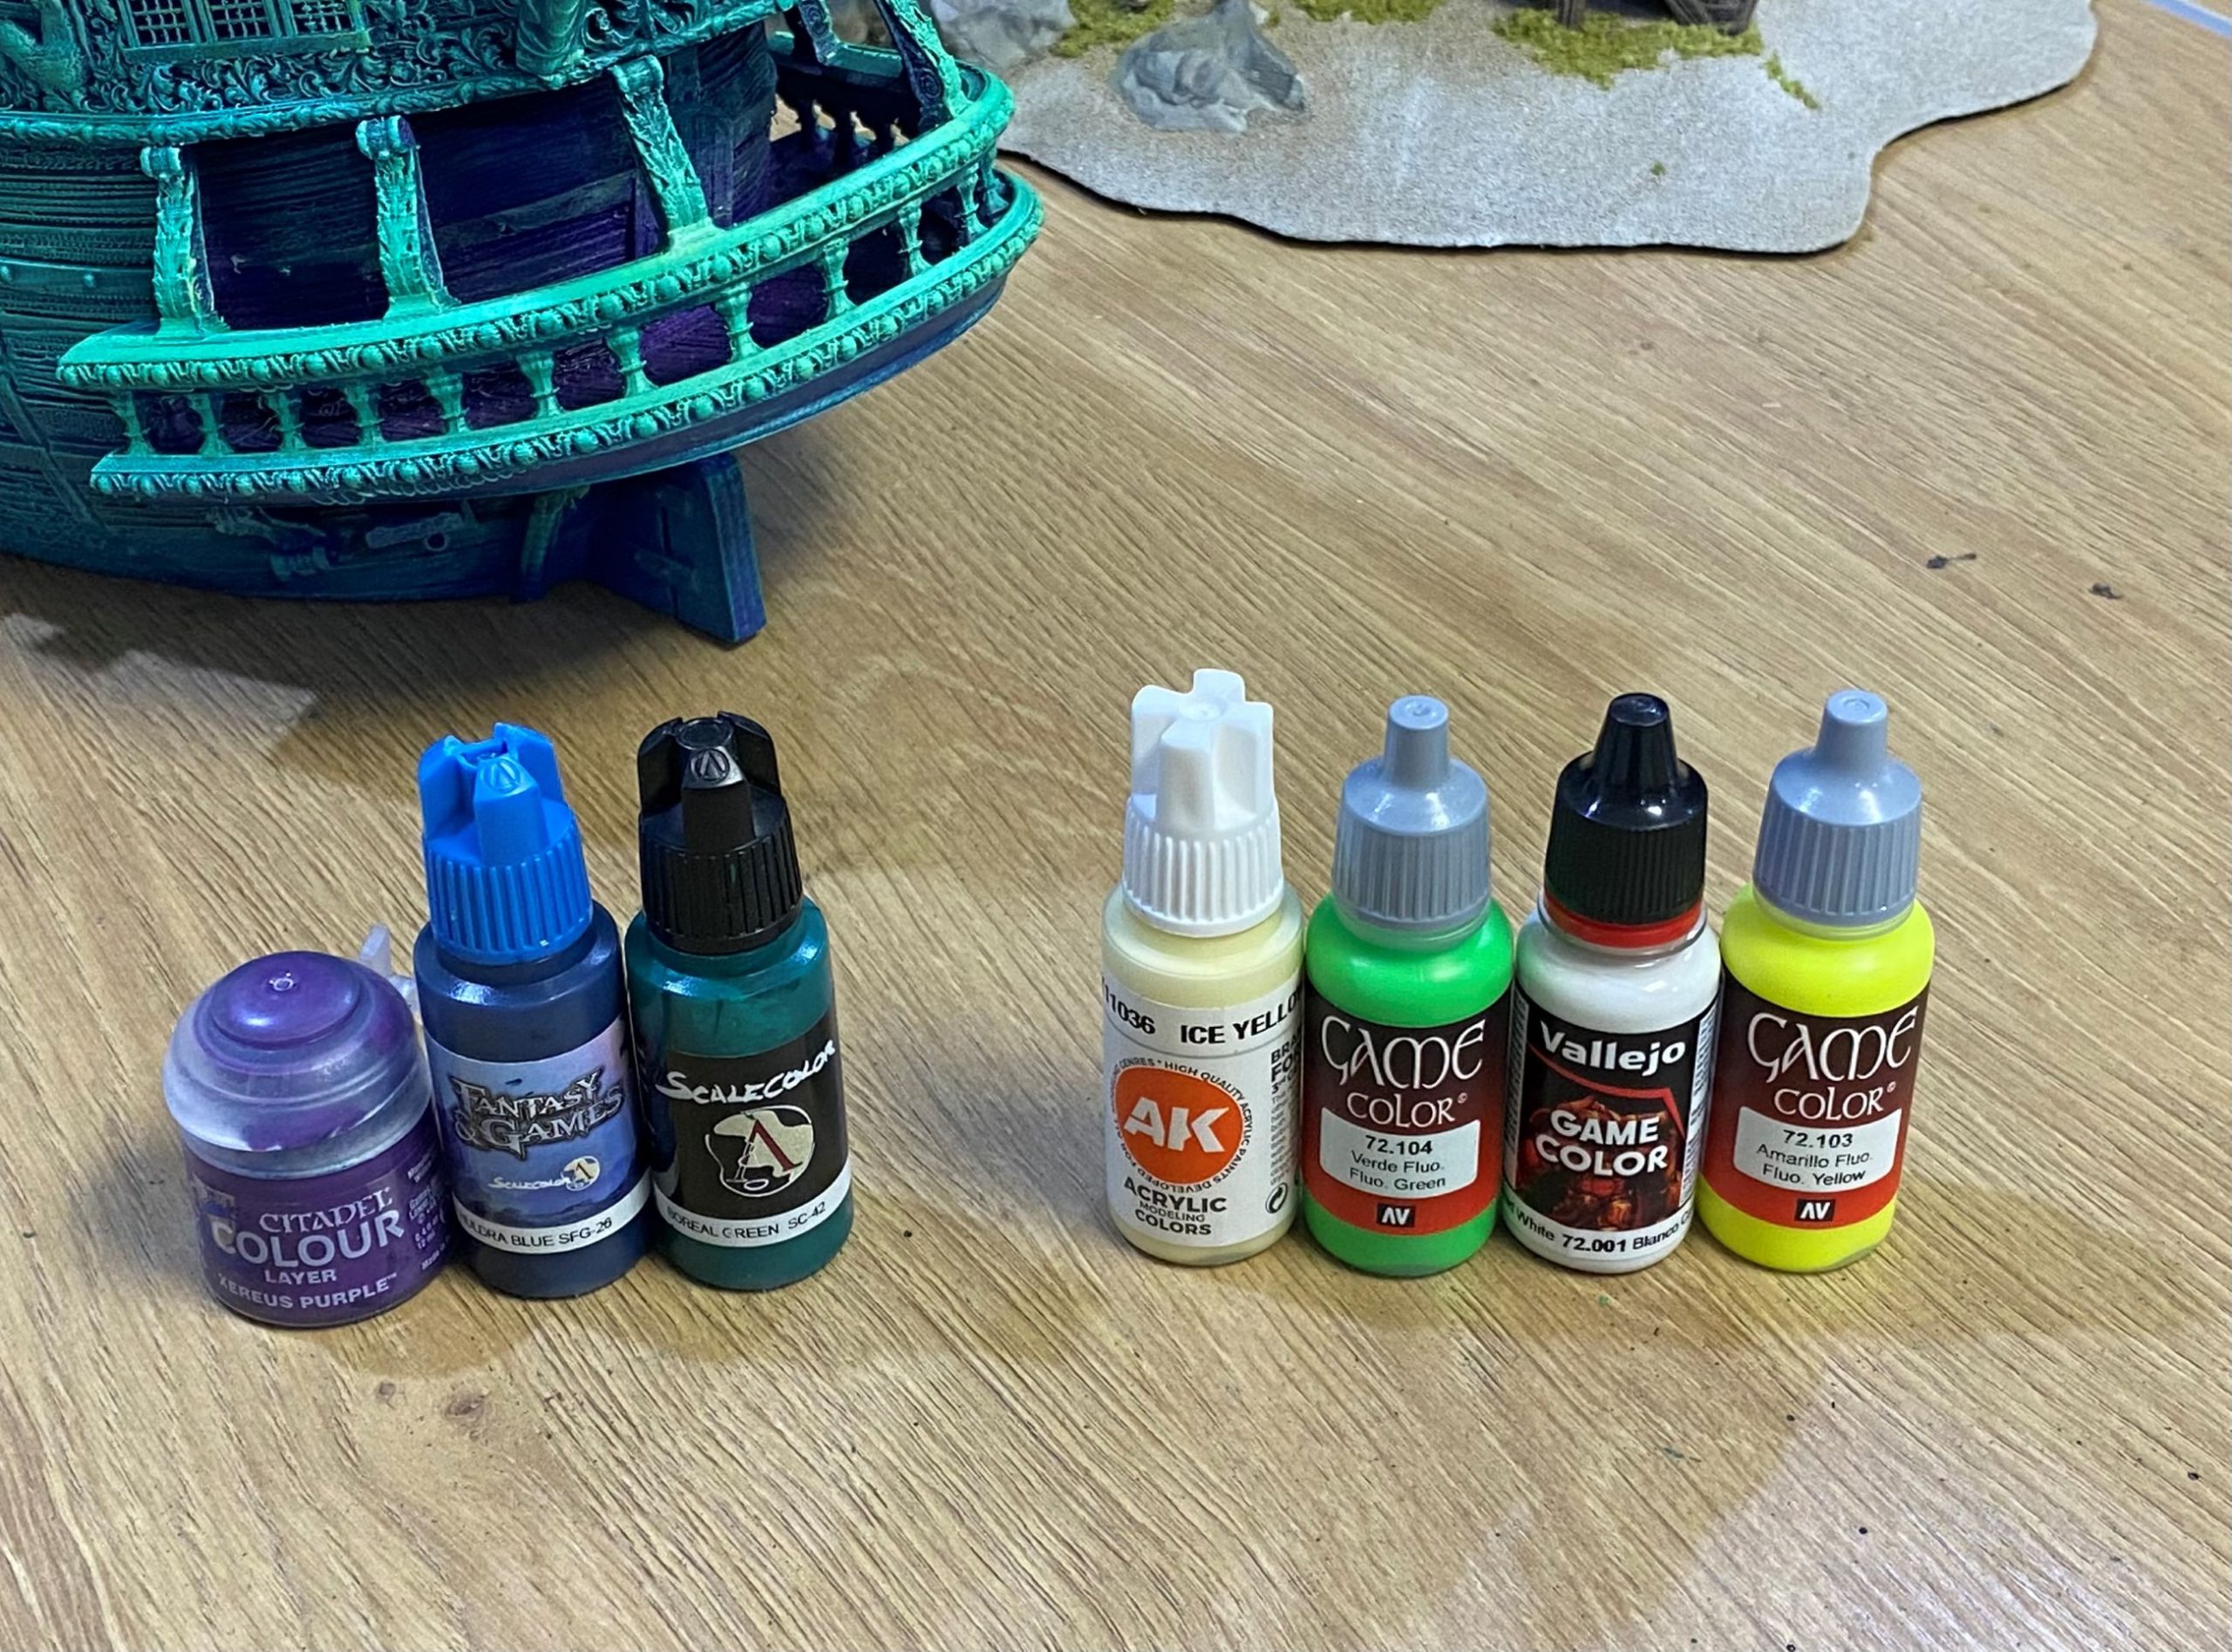
Purple for the shadows going through dark blue, green and then into Fluro paints.
With fluorescent paint, they do not really stick to models as well, so adding a little ice yellow or white helps with coverage. Keep building up layers to get a lighter and lighter colour for a ghostly green effect.
The next stage will be to add rigging and sails.

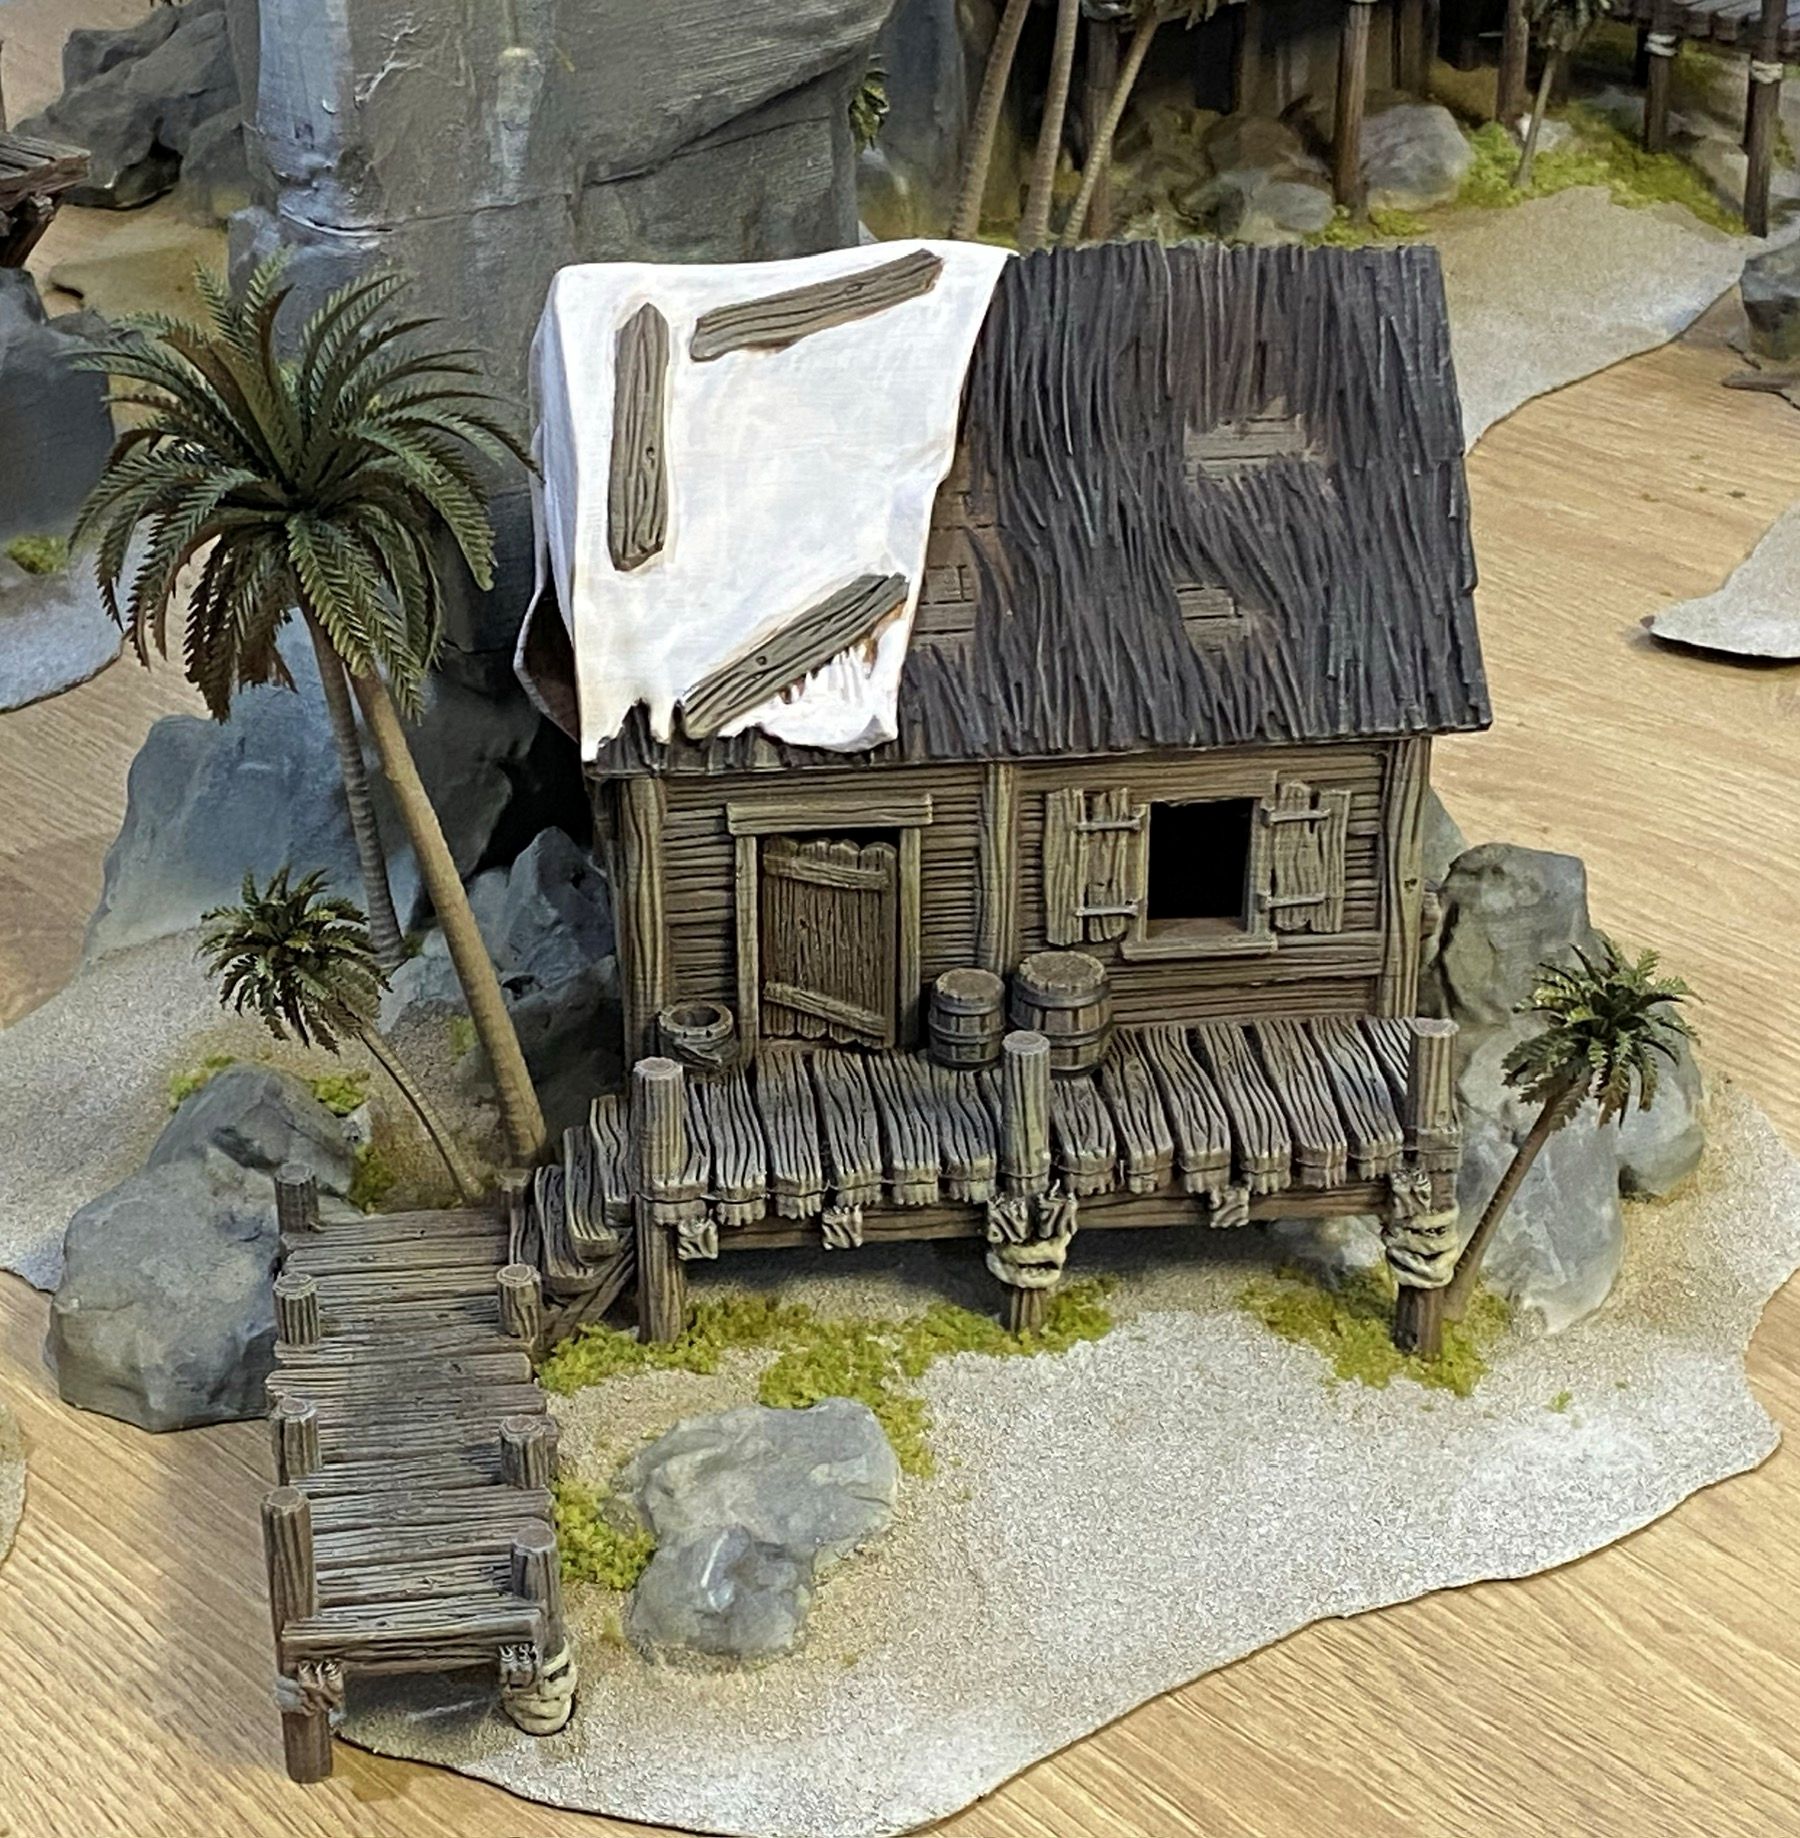
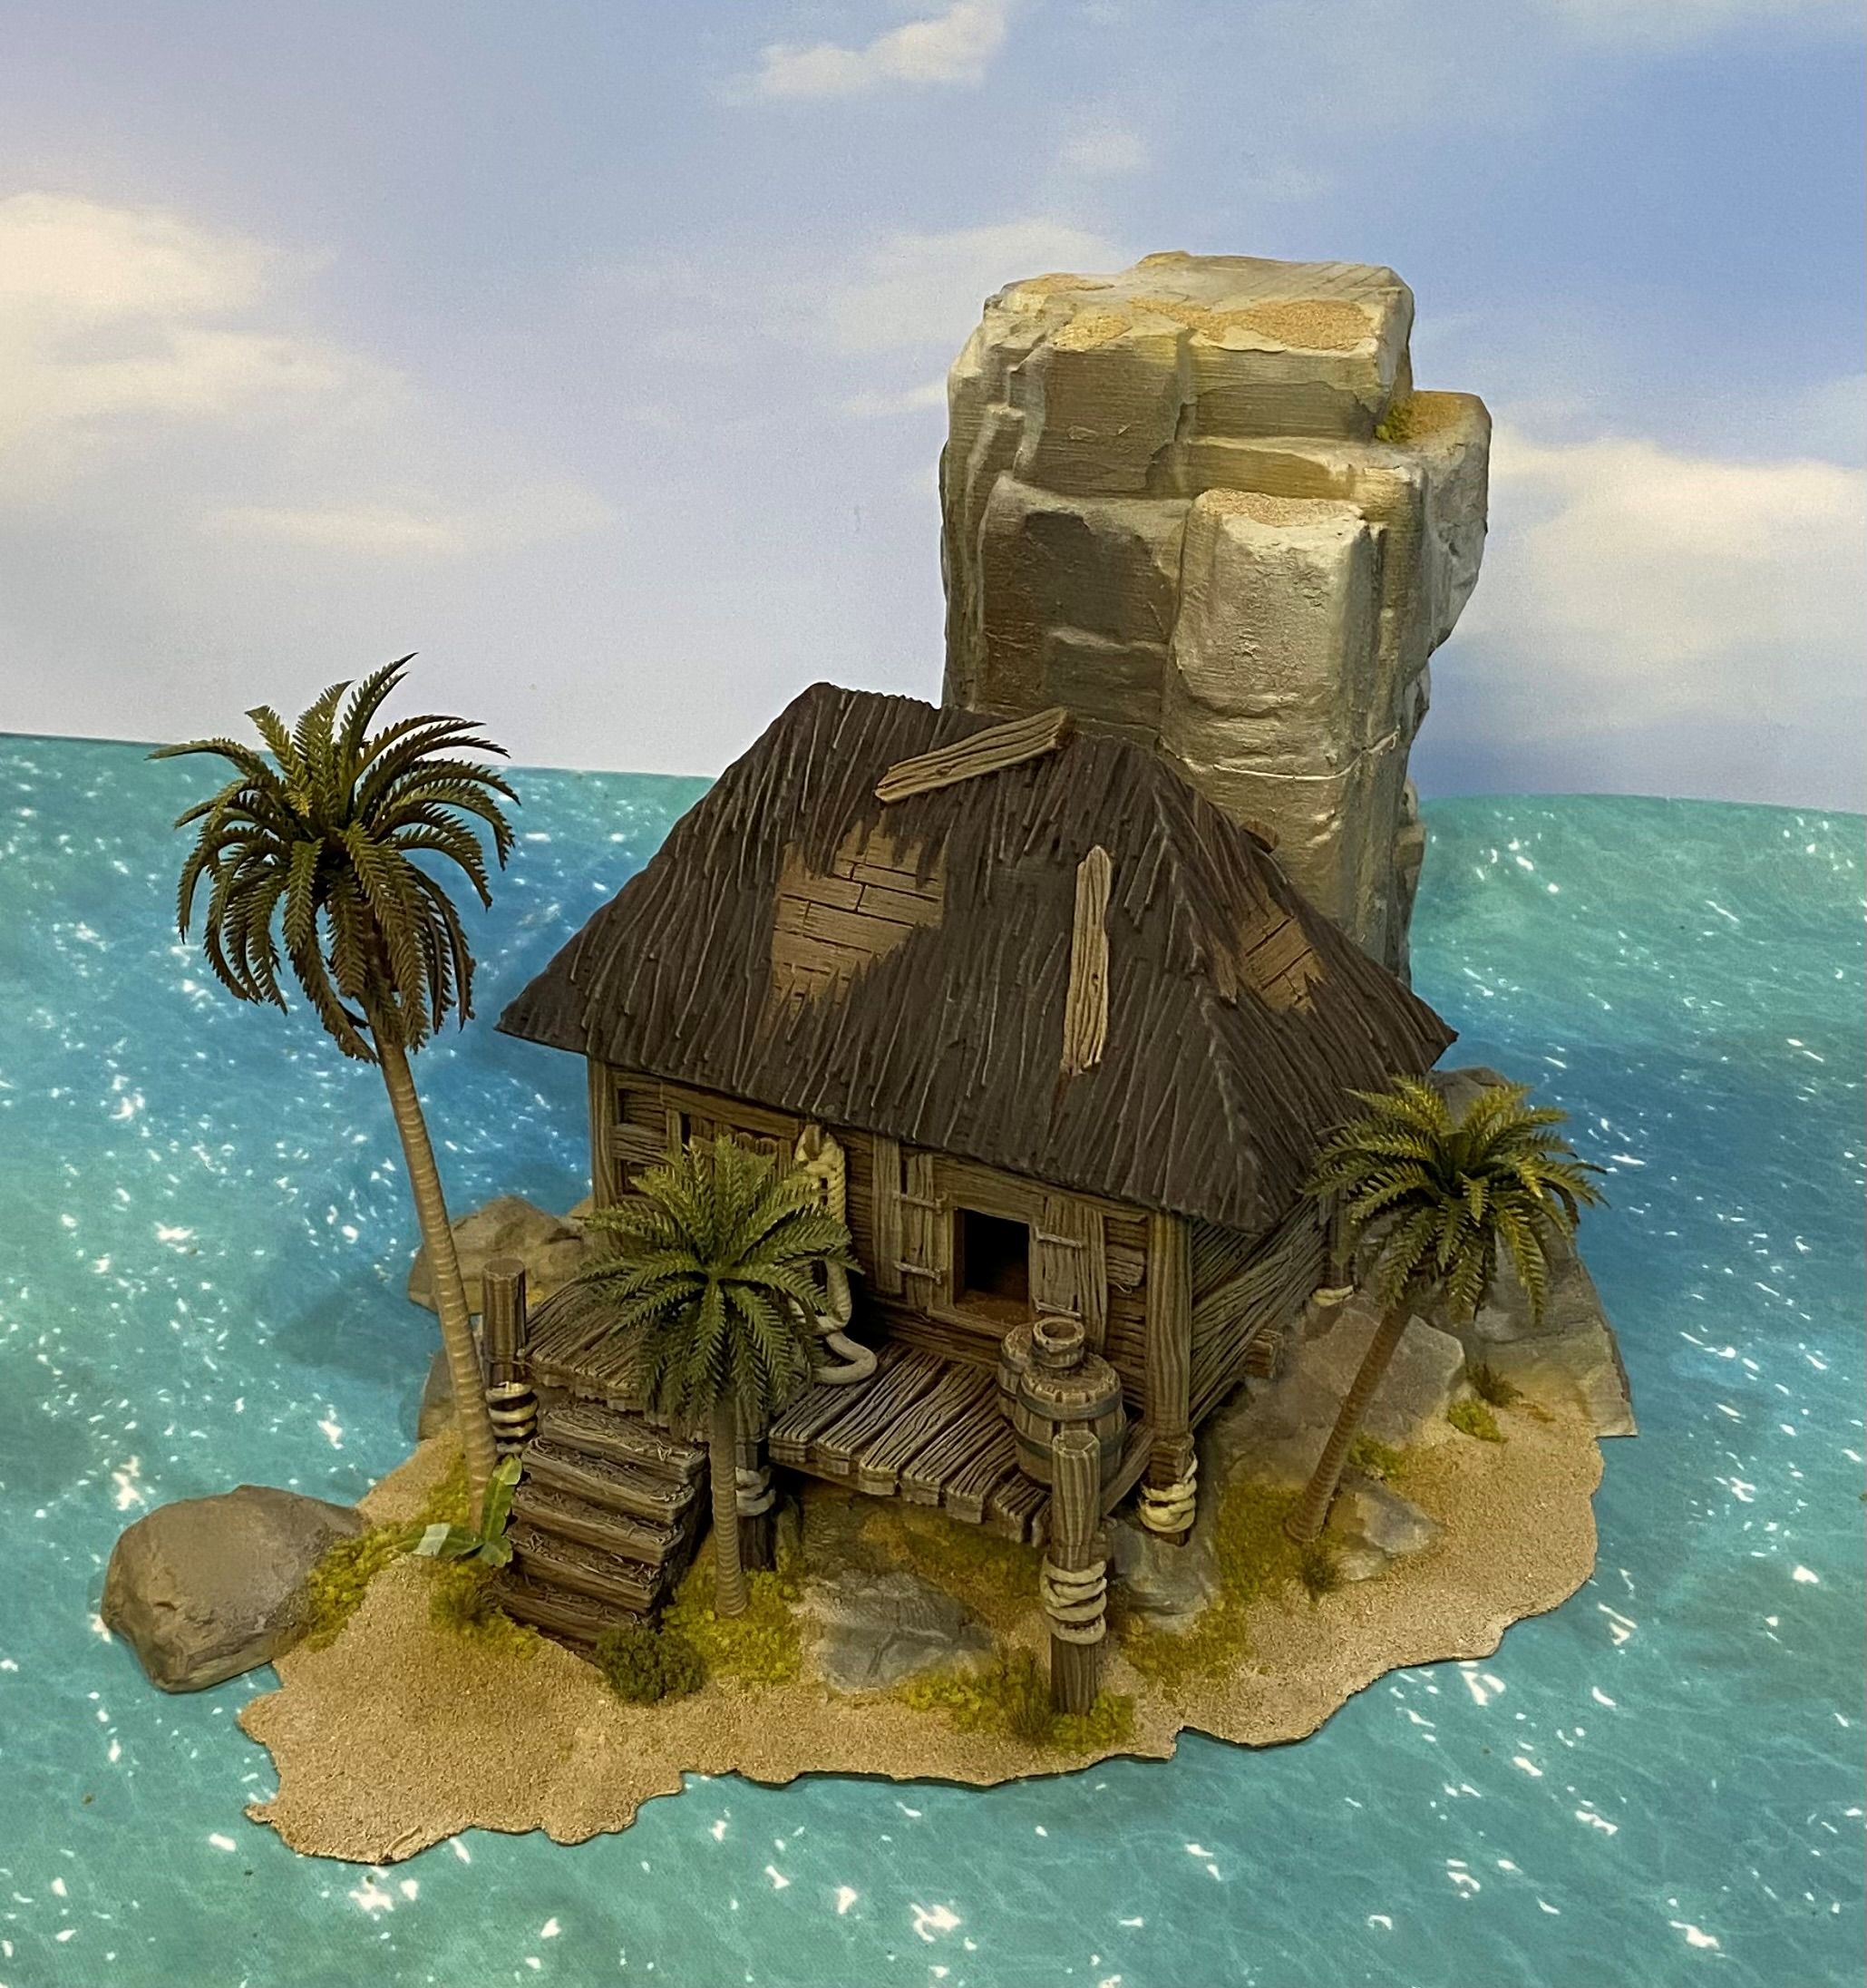
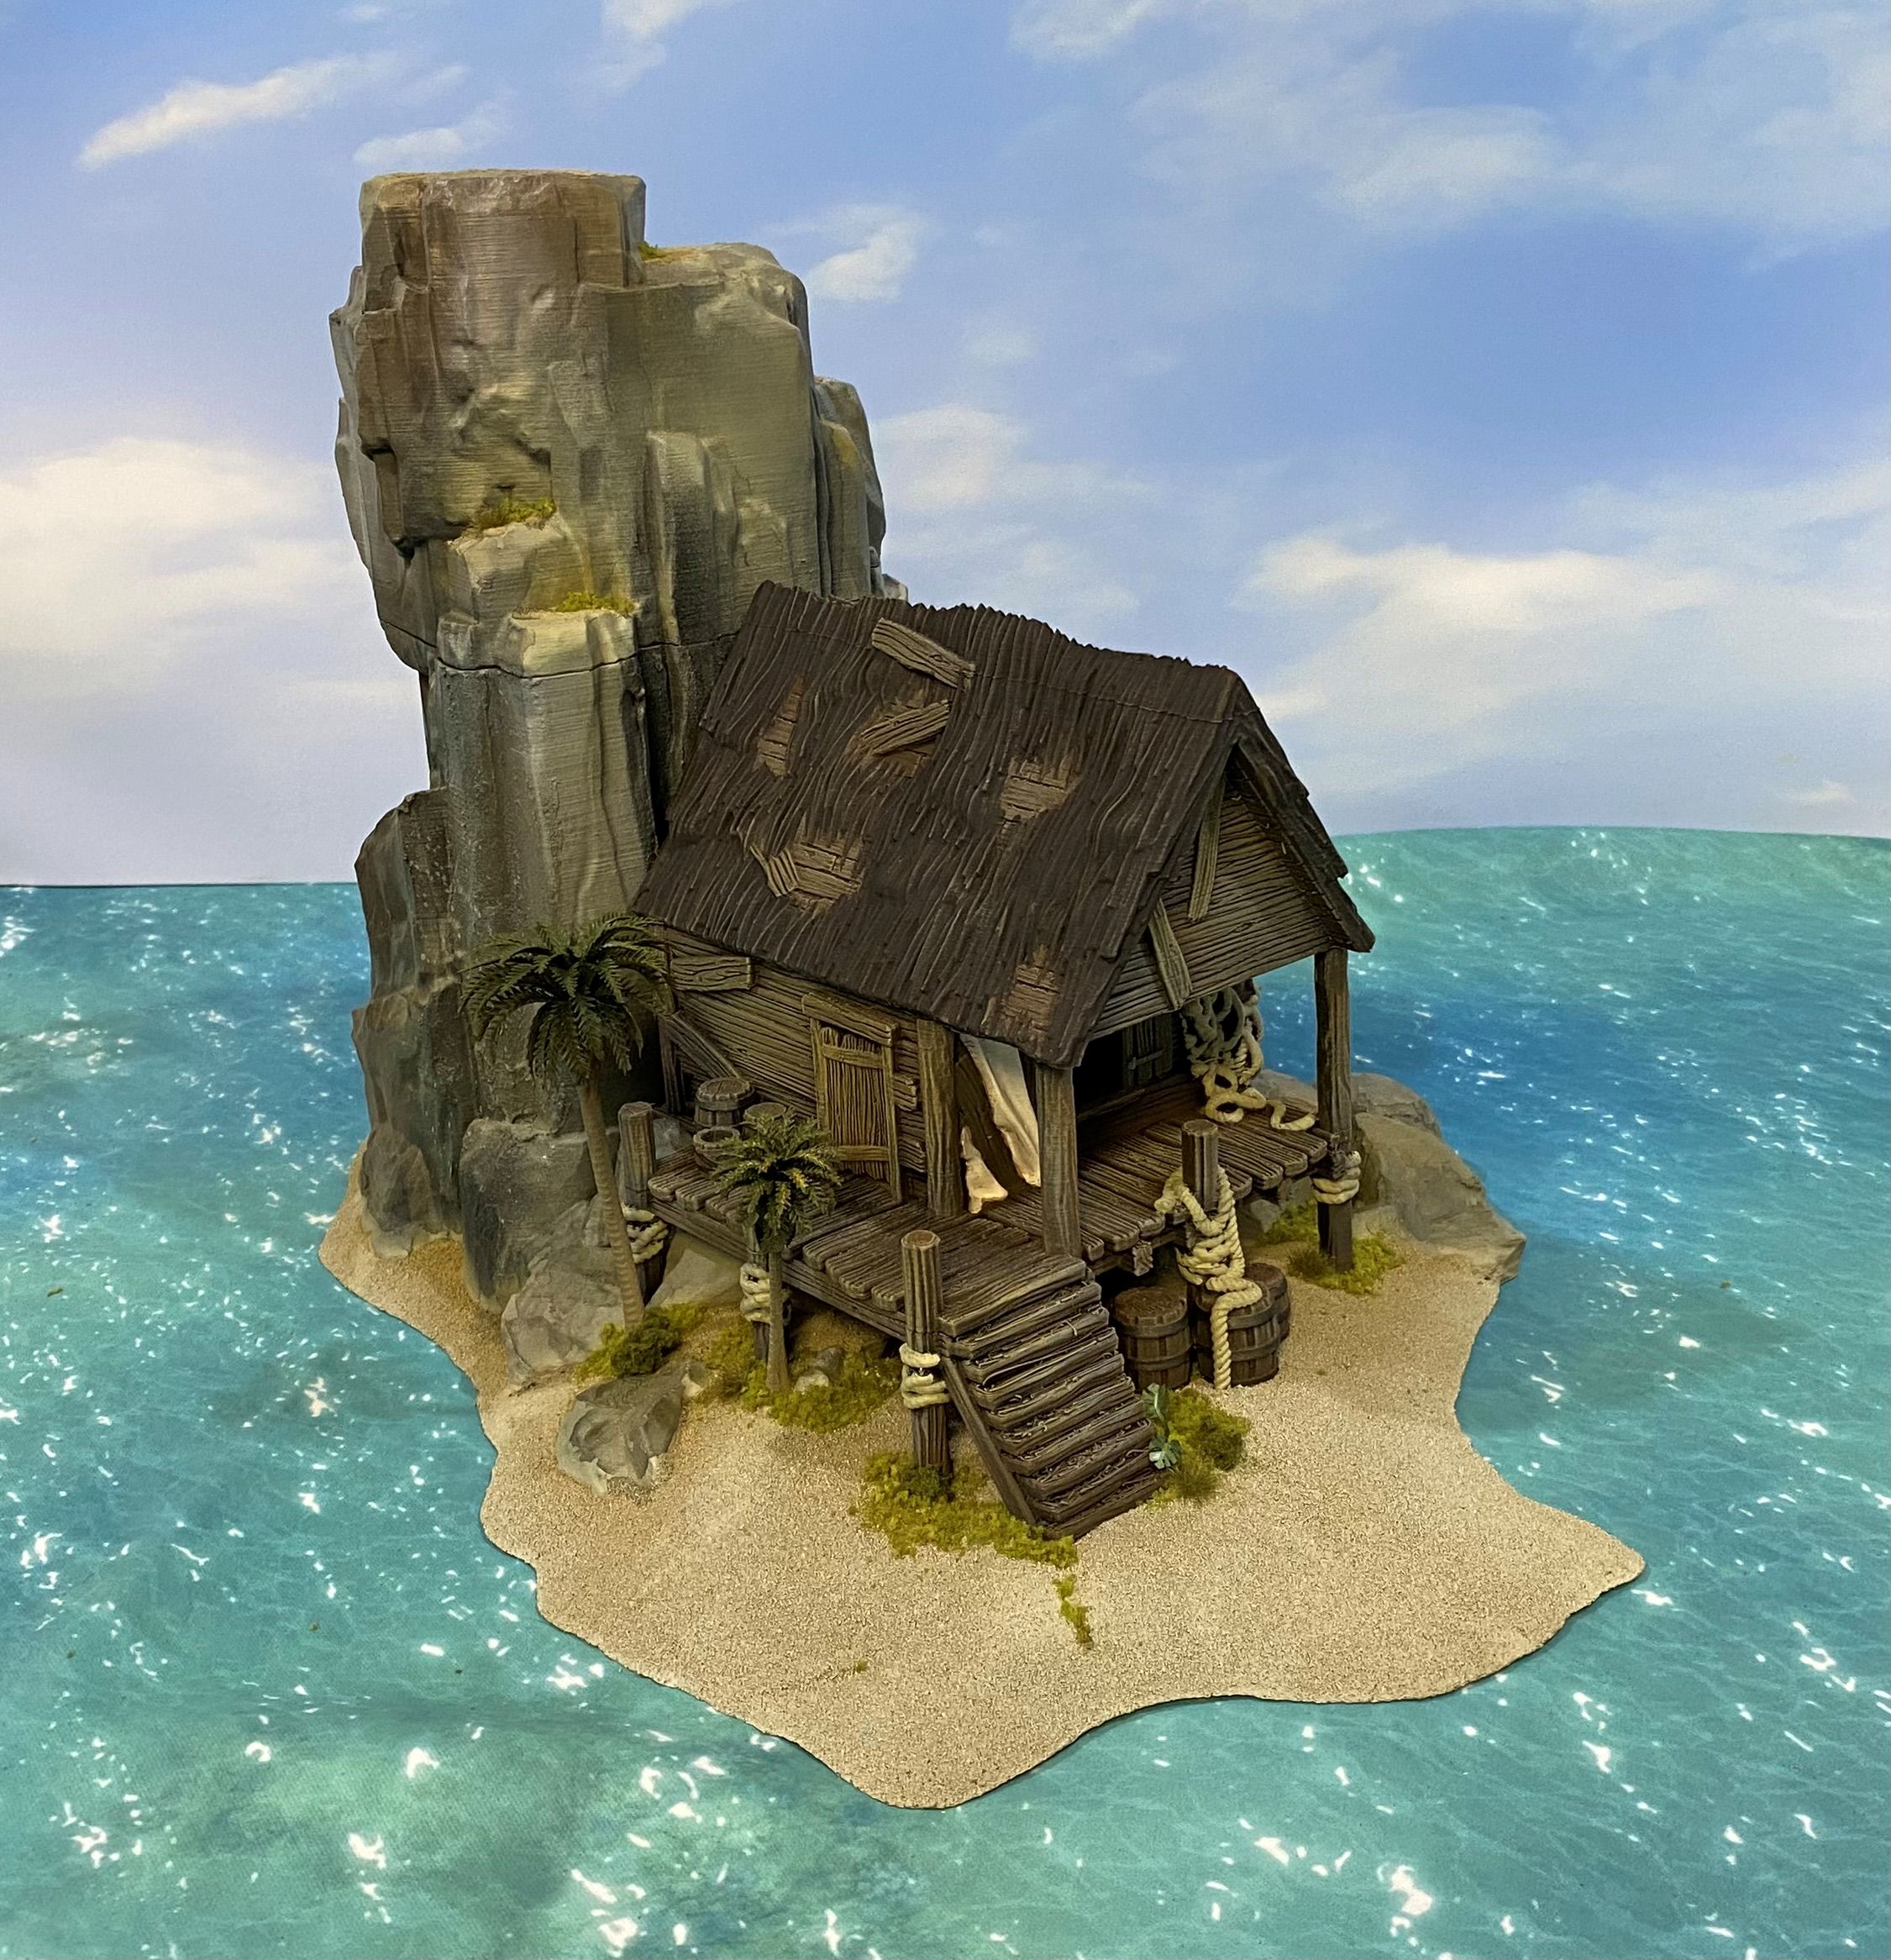
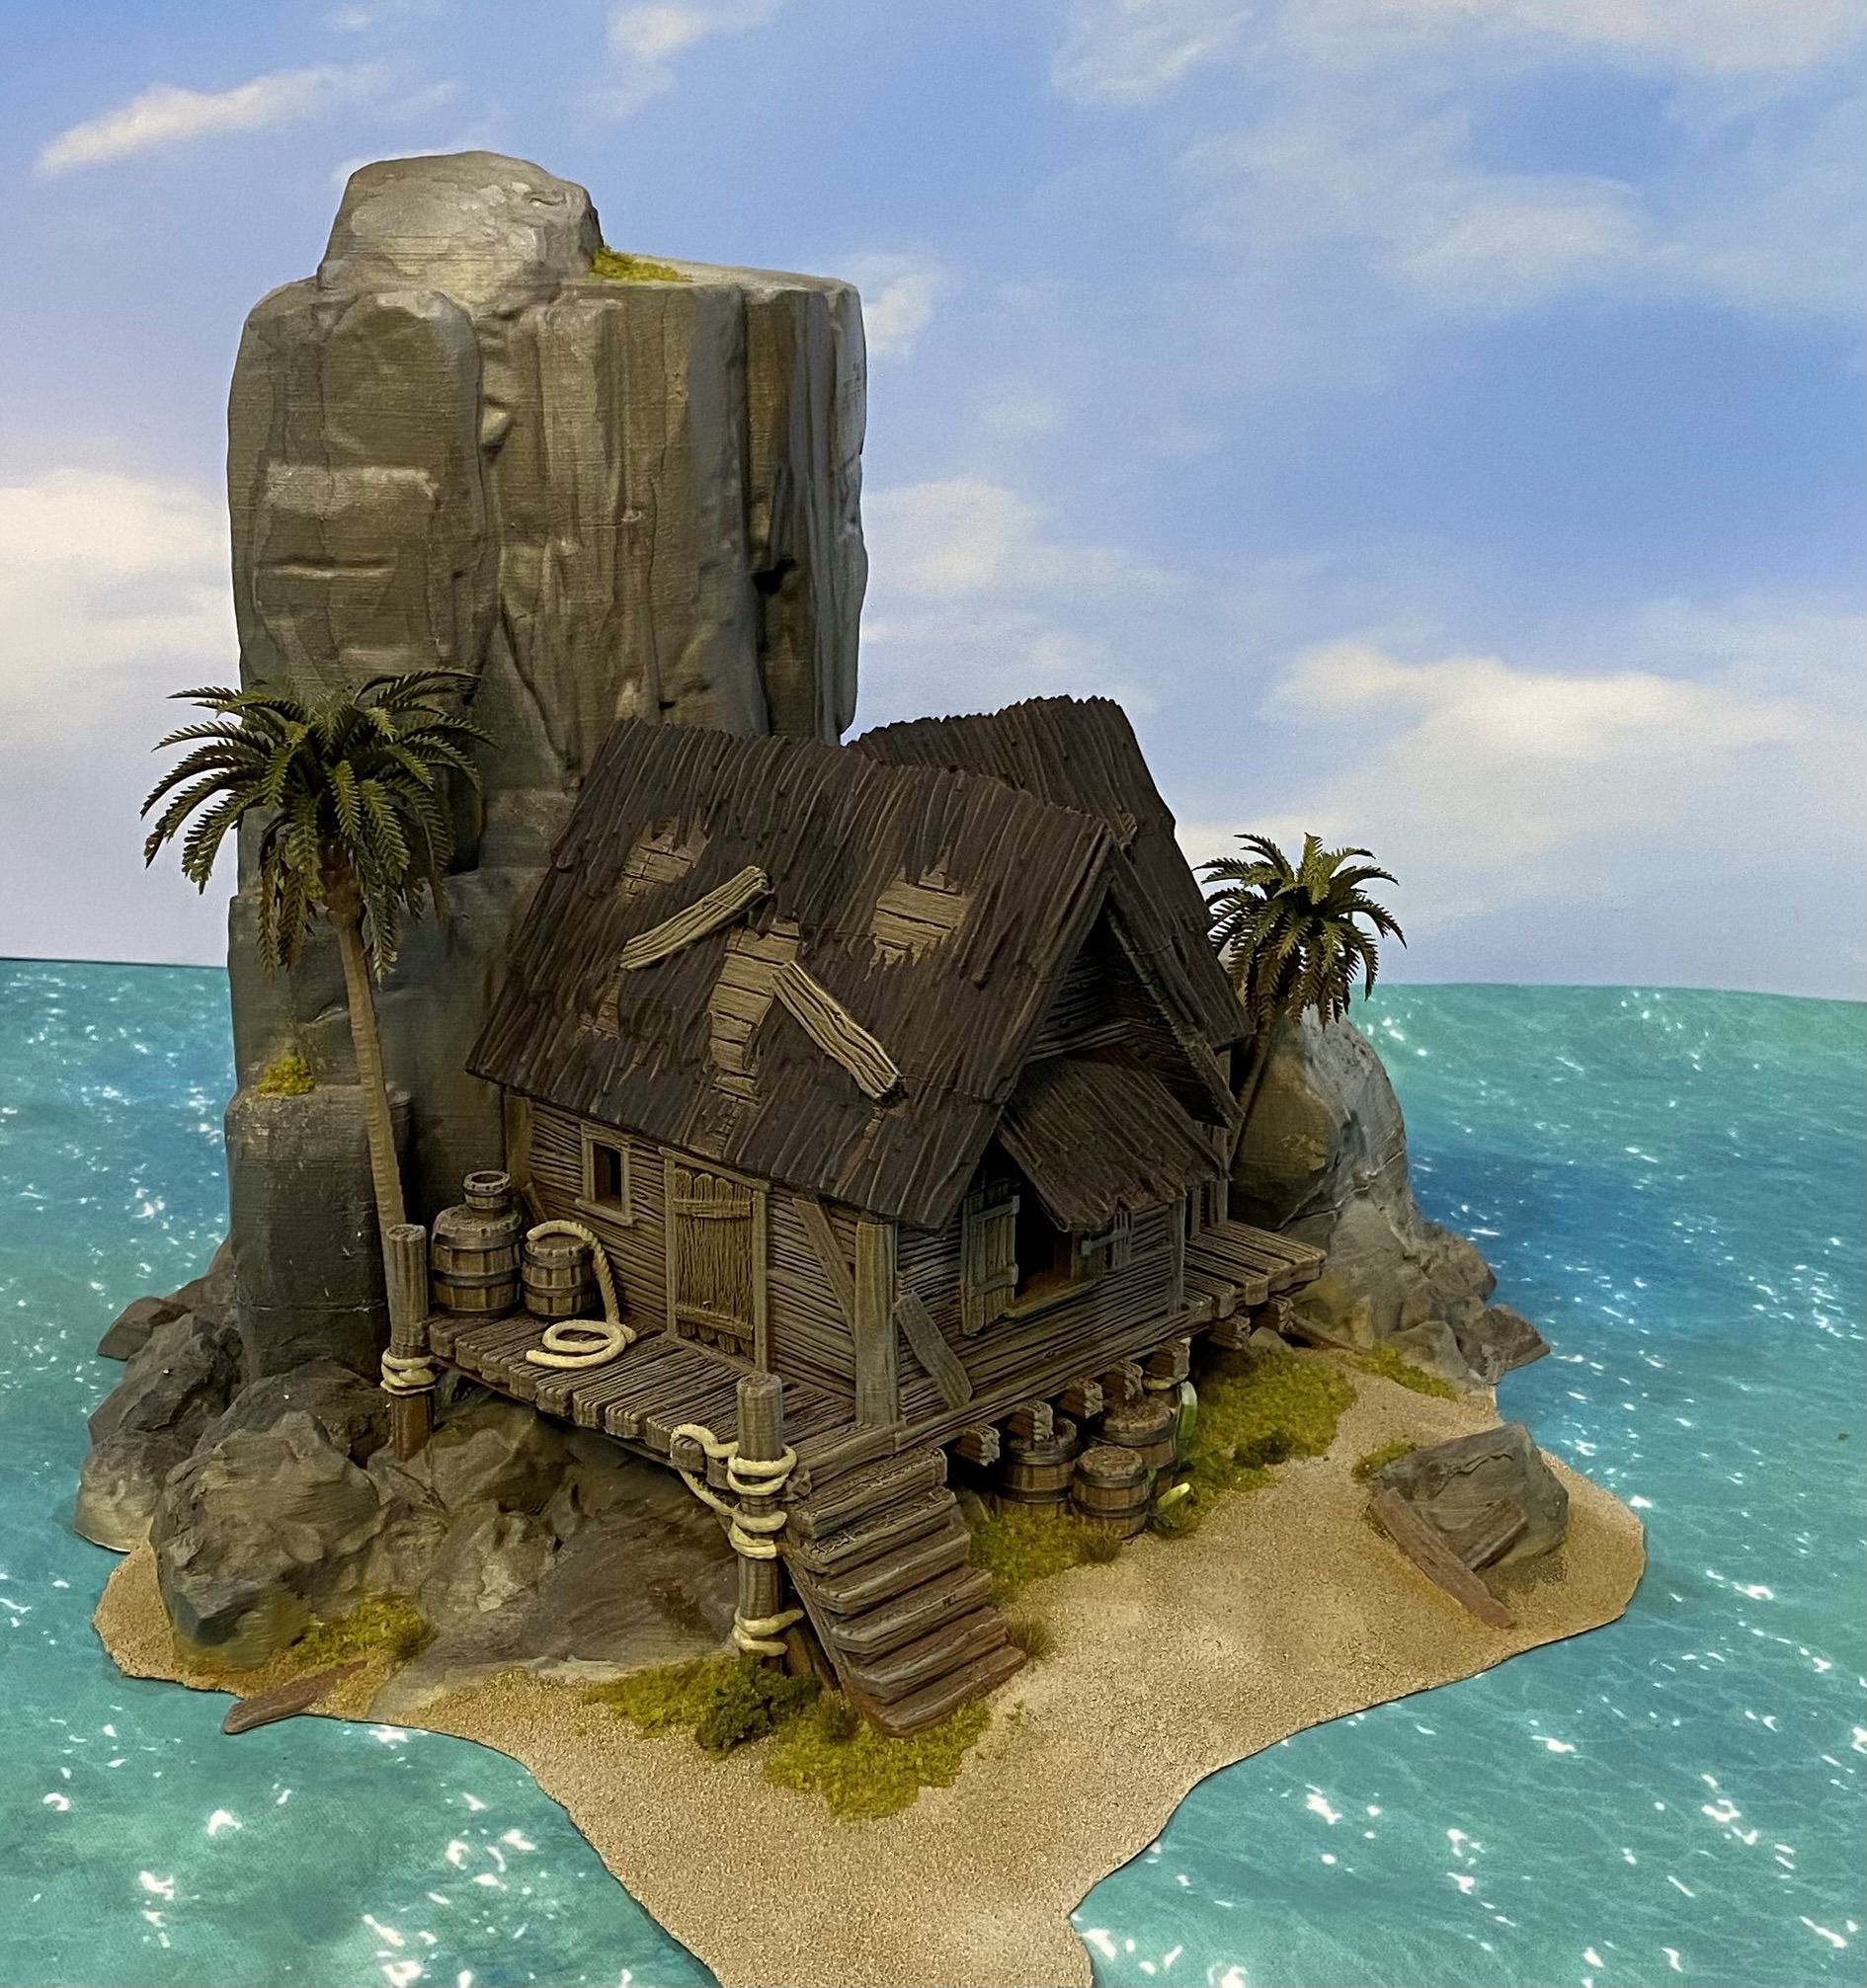
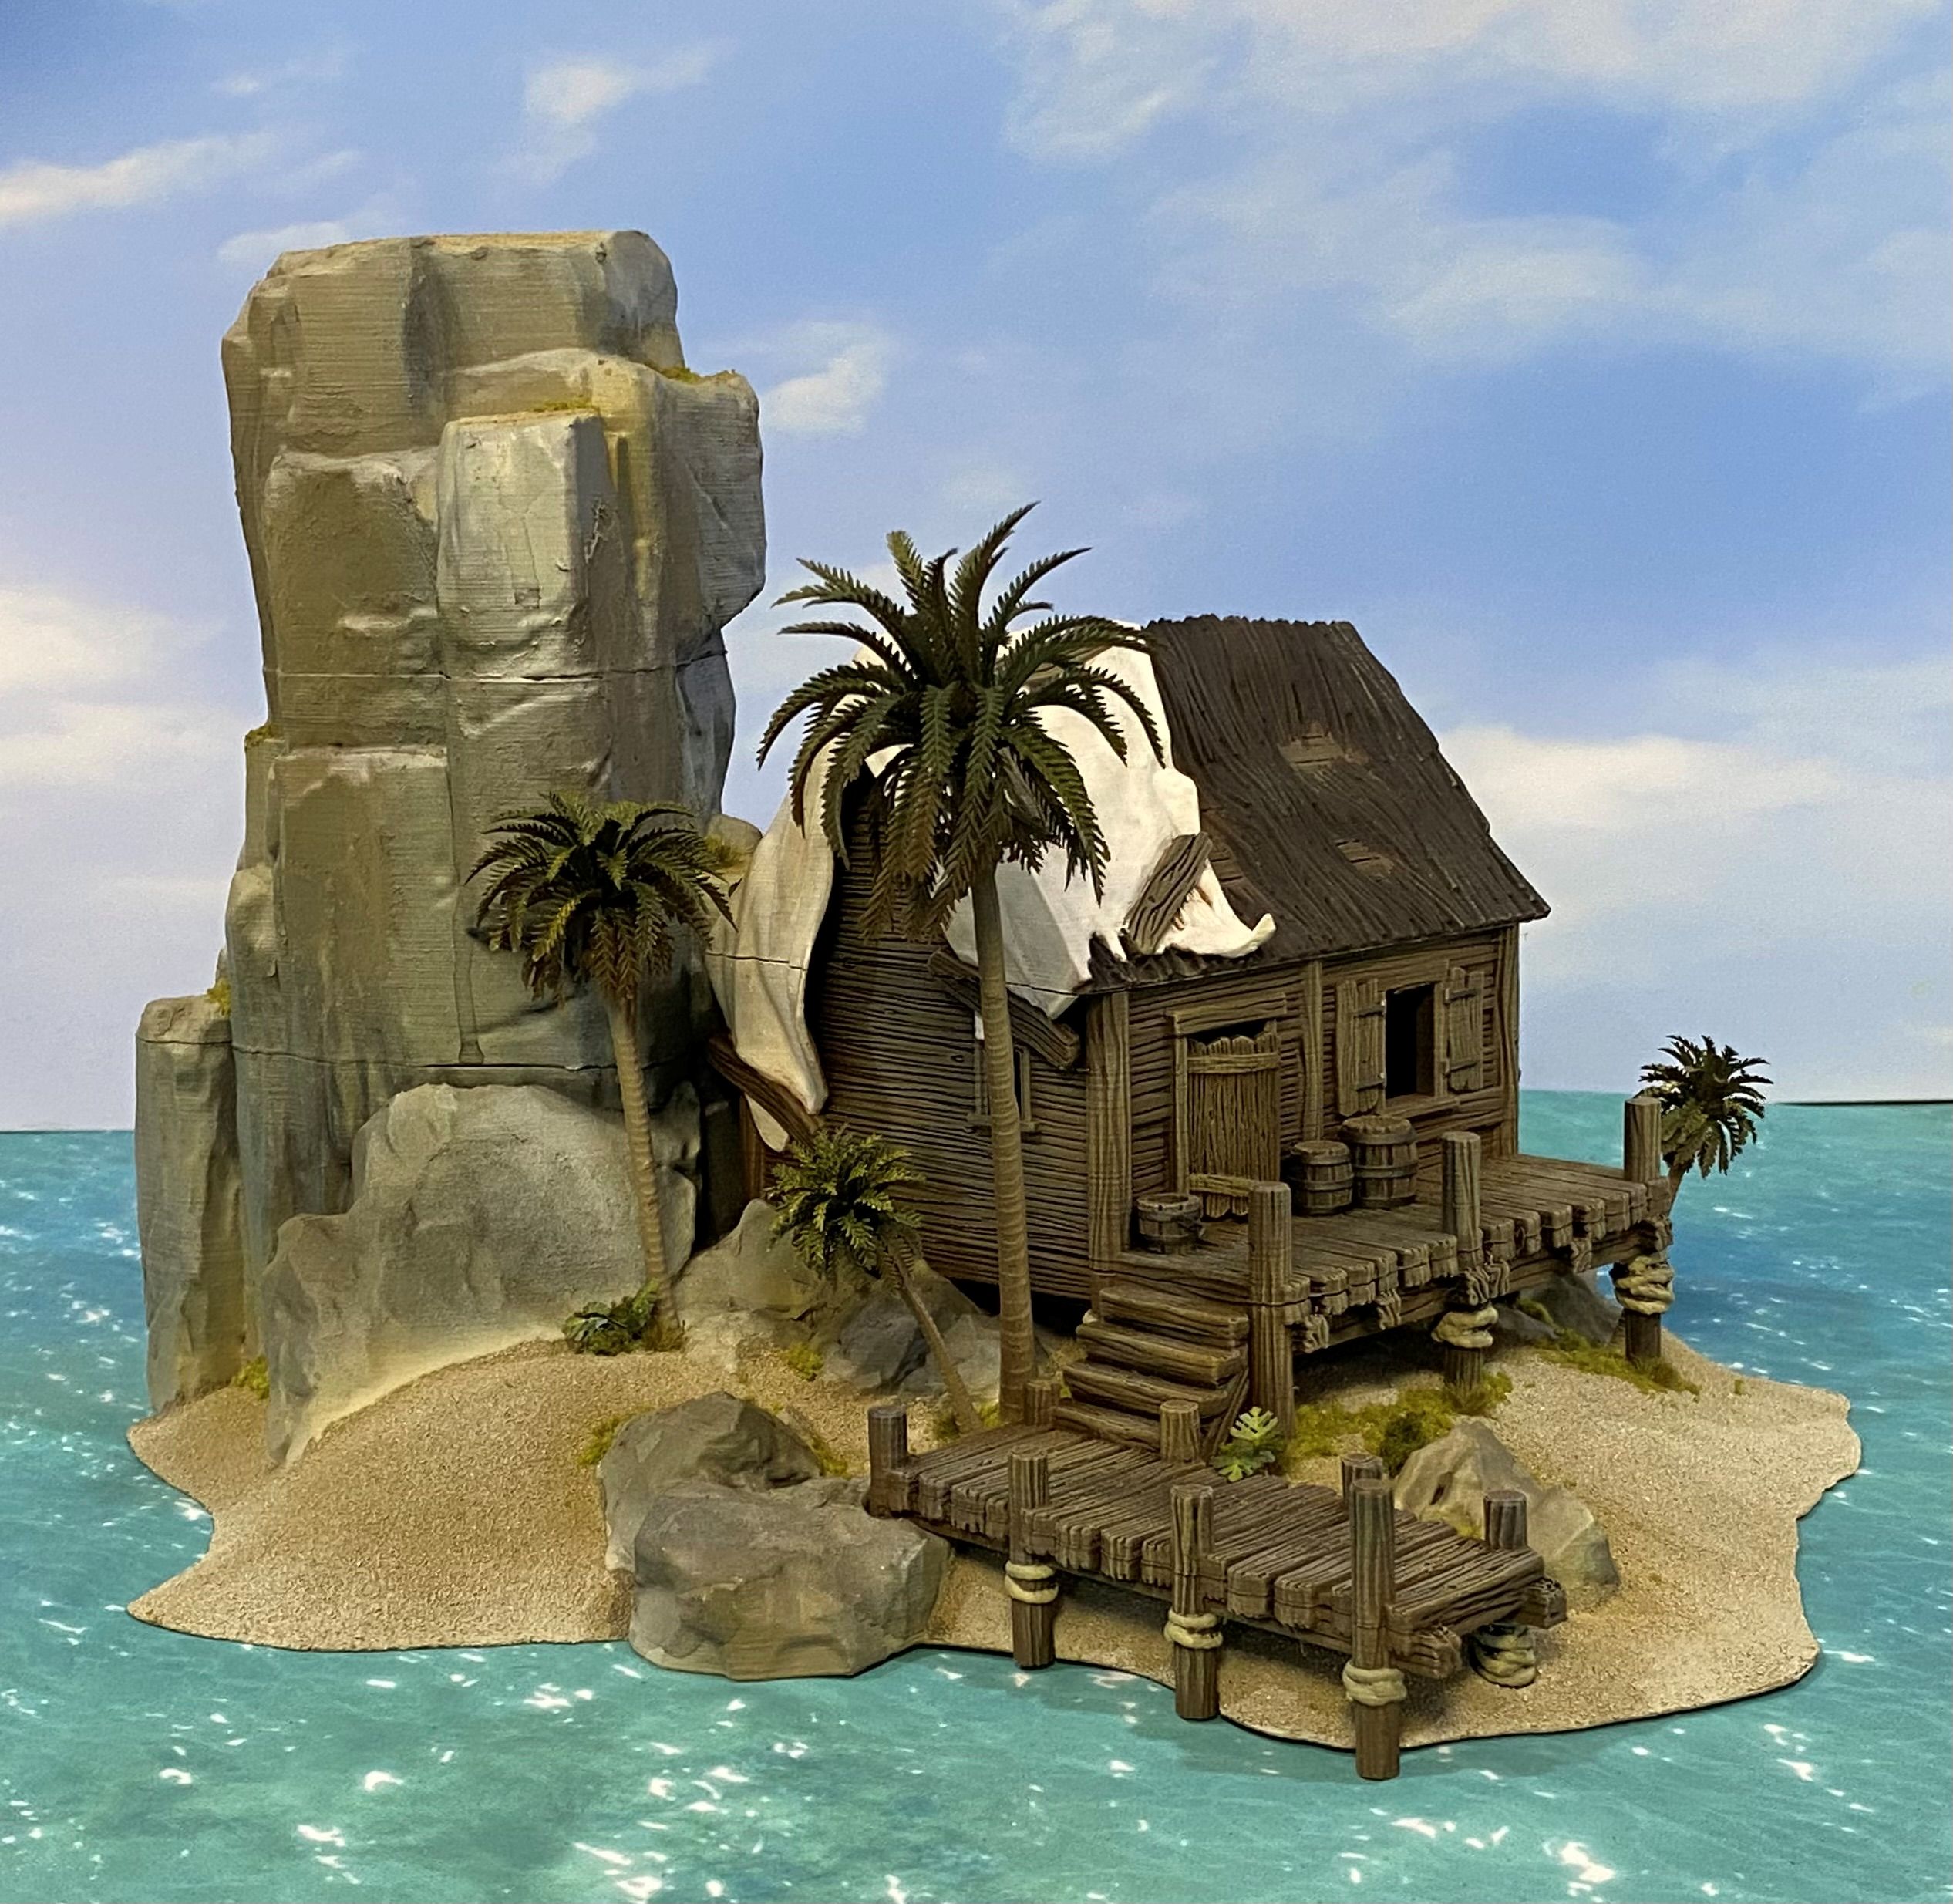
Put wood in hole
Just a small post to fill up one of these annoying duplicate posts that happen when the project system is having a moment.
Added some doors to the huts. Nothing too fancy.
Painted with an undercoat of Army Painter Leather brown and then dry brushed with a 50/50 mix of Vallejo Desert yellow and natural wood grain, followed up with a final light dry brush of Vallejo silver grey.