


![1918 Spring Offensive Wargame | Full Rules Overview with John & Gerry (WW1 Tabletop Game) [7 Days Early Access]](https://images.beastsofwar.com/2026/03/unboxing-warfulcrum-games-1918-spring-offensive-review-coverimage1-225-127.jpeg)


The Zurad (MSP 04a)


Recommendations: 369
About the Project
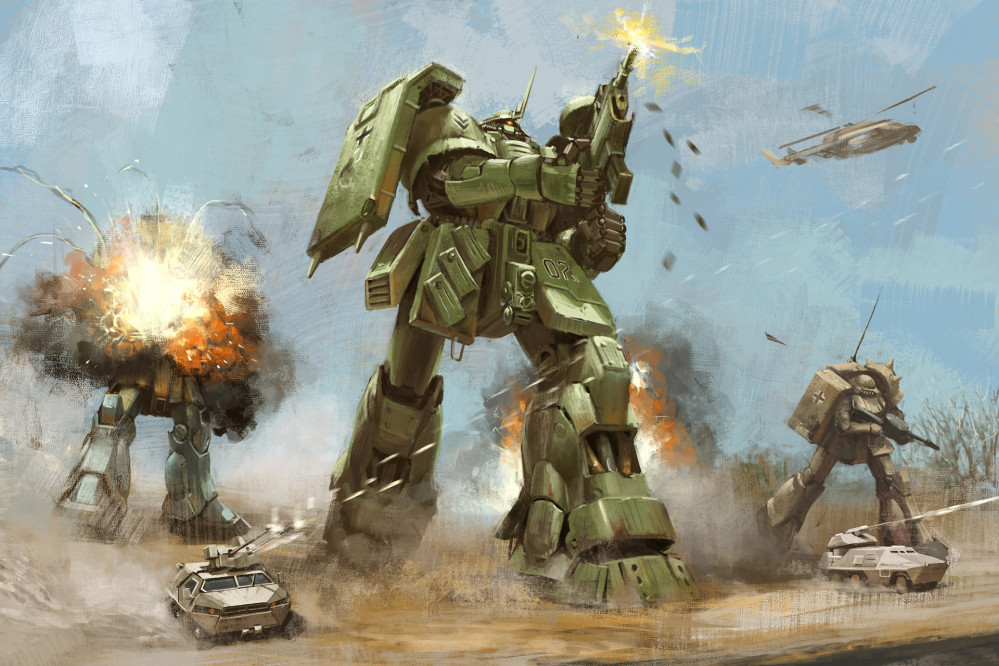
With all the Gundam projects popping up (and because I don't feel like painting armies), I was inspired to build another diorama with a Gundam. I have about 19 Bandai kits that I collected over 15 years and just left on the shelf. So I decided to take the oldest kits and try to upgrade them with extra detail. This kit is one of a Zaku 2. It is a very old kit and has very little detail for a HG kit - unlike the newer ones. Therefore this project will be my first 1/144 scale diorama and the first time I try to upgrade it by adding extra detail. This will be an imaginary Zaku prototype, like a paper panzer.
Related Game: Gundam Assemble
Related Company: Bandai
Related Genre: Science Fiction
This Project is Completed
The Project Begins - The Head
Hi everyone,
I still don’t feel like painting up armies, so I decided to continue to work on my side projects – hence this diorama.
I have collected about 19 Gundam Bandai kits over 15 years, but I have rarely built any of them. Therefore I decided to take two of the oldest kits where the mobile suits have very little detail and try to improve them.
Also, this Zaku will be an imaginary Zaku 2 prototype – like a paper panzer. Hence why it is called a ‘Zurad’.
Since the head is the focal point of any humanoid type figure, I decided to start with the robot’s head.
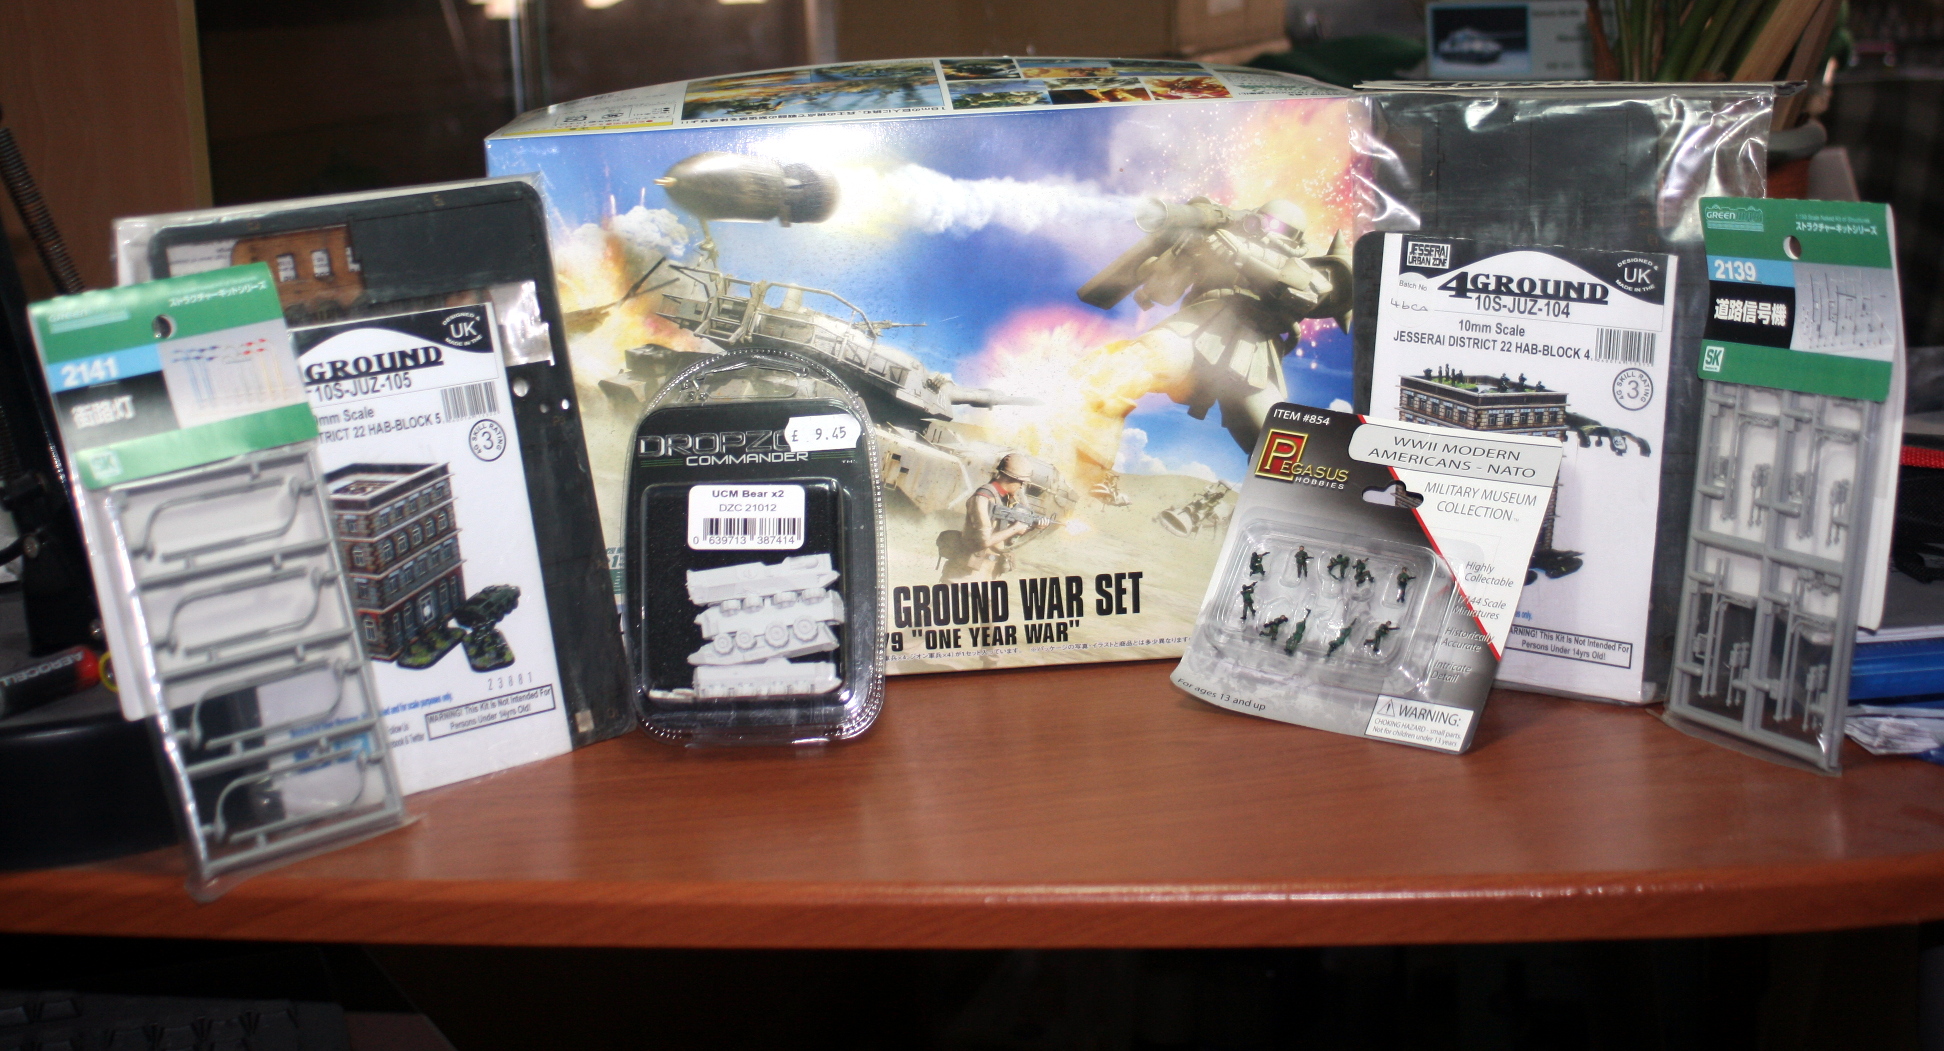 Some of the products I will be using.
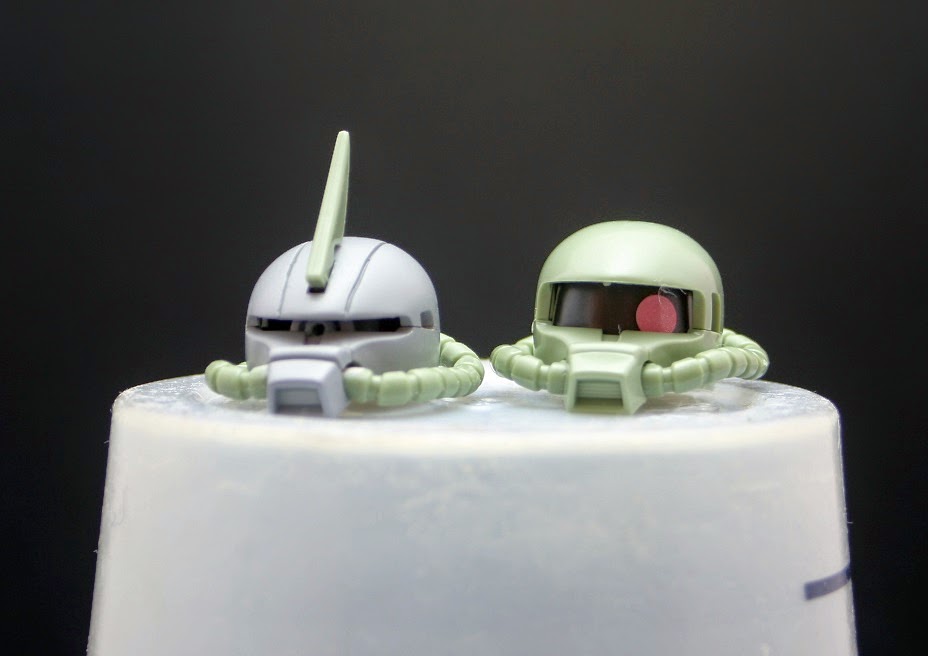 I tried to make the head more streamlined and look meaner.
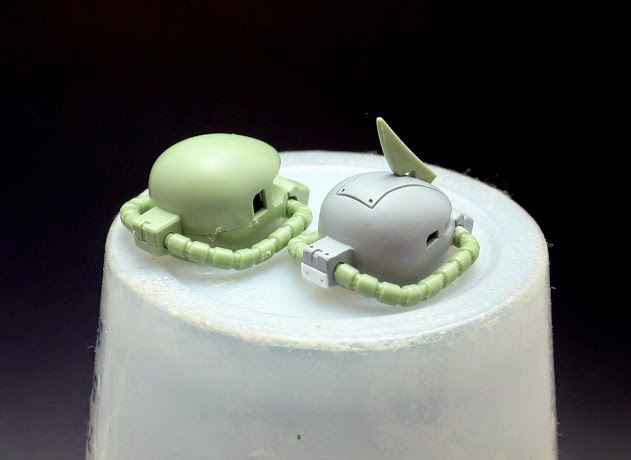 I used an manual engraver to cut in new lines - making the armour seem more detailed.
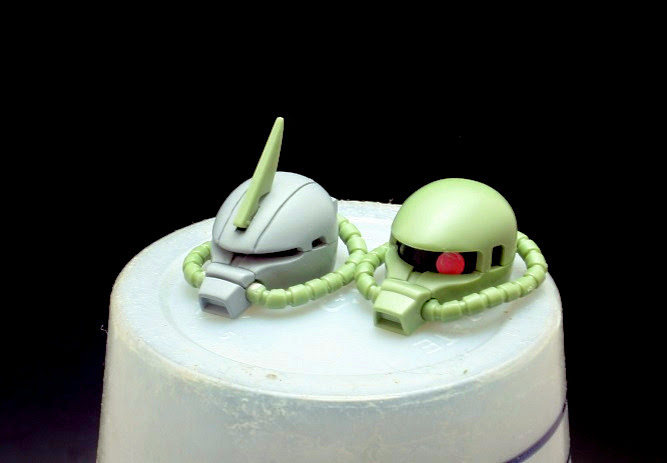 I also used the engraver to accentuate existing armour grooves.
I short start, but I do these projects to relax – and that is what I intend to do. Until next time, stay safe and have fun.
NR.
The Shoulder Pads
Hi everyone,
I just finished the shoulder parts. The first, is the shoulder-shield that I up-detailed with Polystyrene sheet plastic.
The second is the actual shoulder pad. I distressed it with Polystyrene cement, and added grooves manually with an engraver.
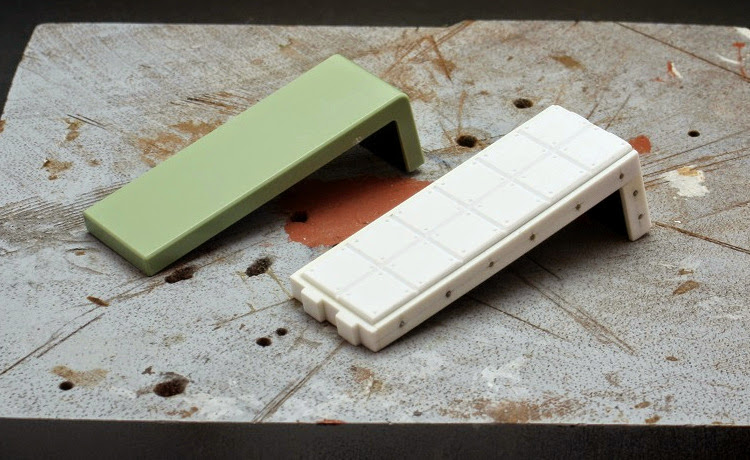 Ablative, reinforced, thermo-absorbing armour....maybe?
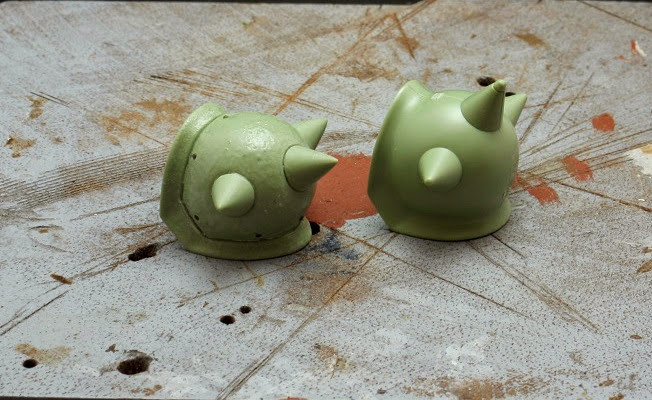 Distressed it with Polystyrene cement and engravered grooves.
I am currently working on the legs, and I hope to finish them by next Friday. Until then stay safe and have fun.
NR.
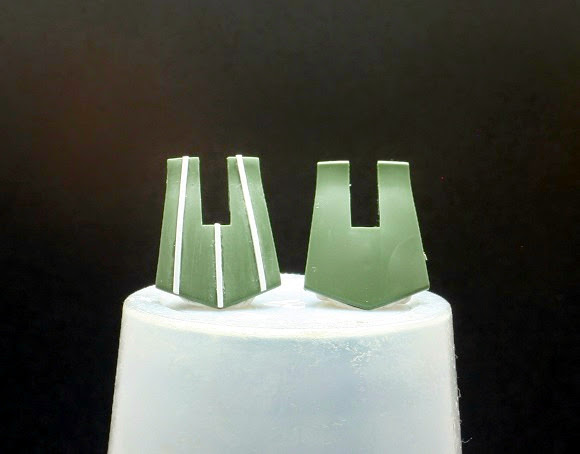
The Legs
Hi everyone,
I just finished the legs of the Zurad. Like the previous work, it is just about adding panel lines and plasti-card for extra detail.
Several years ago, one of our hobby shops was turning into a full blown toy shop and hence was selling off a lot of stuff that had to do with ship models. I bought some stuff and left it in my bits box.
The brass piece in the photos is one such purchase. I think they were ship hull portholes. The day has arrived when my spending is finally justified!
 The brass part is a port hole from a model ship.
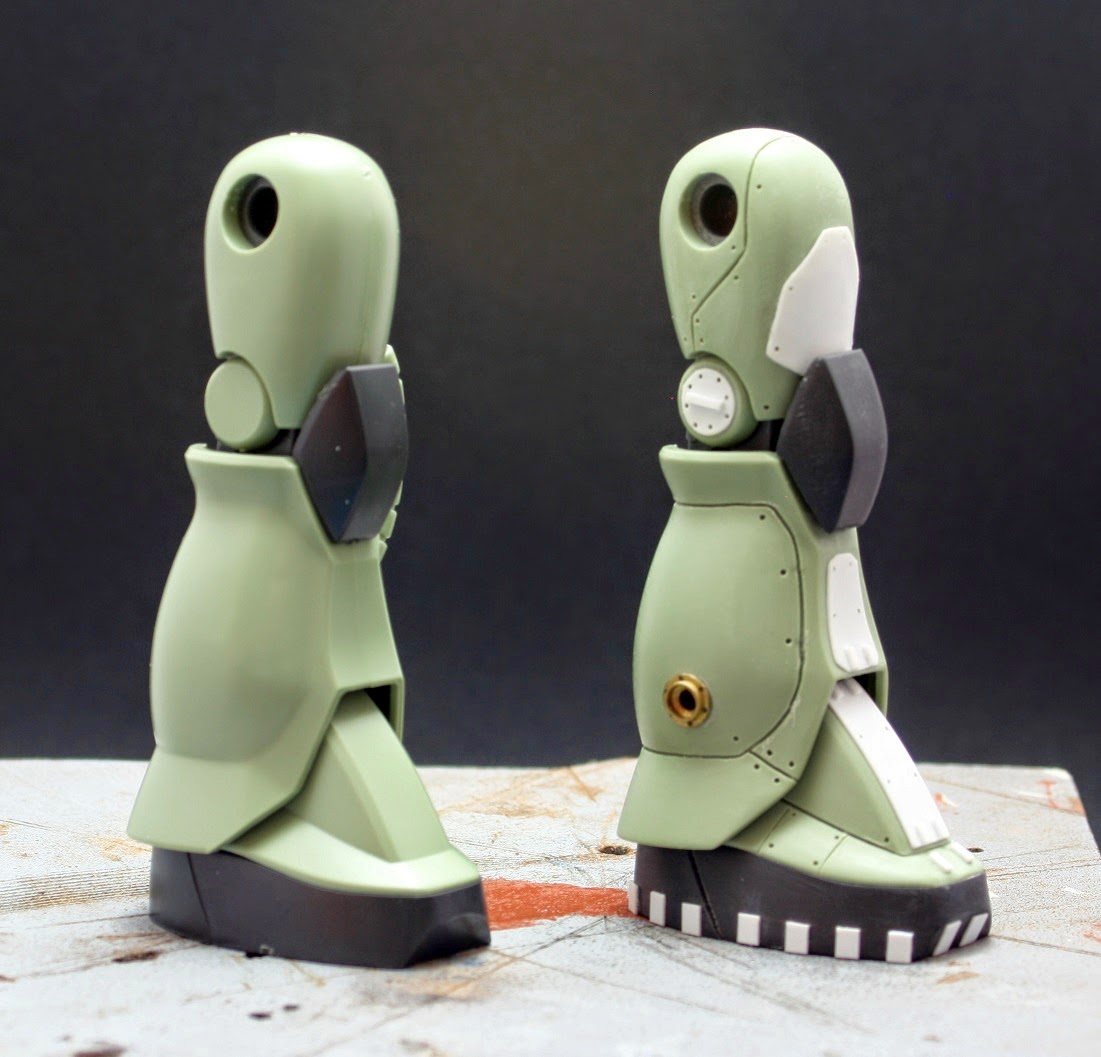 The rest of the detailing is panel lining and plasti-card.
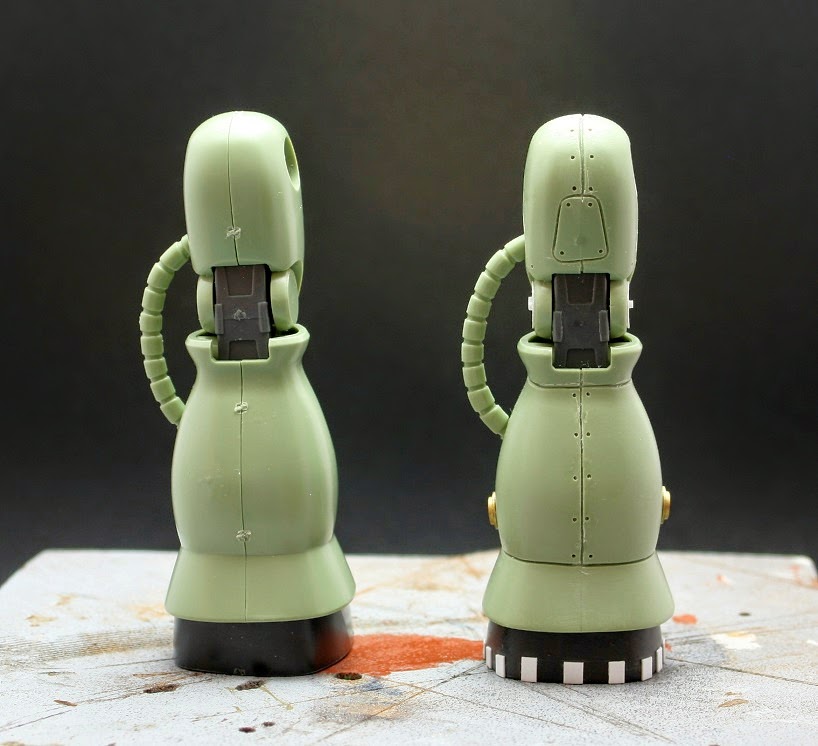 Using the line where the components meet is an easy way to create panel lines.
Sometime next week I will post the torso, but since this is a diorama, I will start some work on the base as well.
Until next time stay safe and have fun.
NR.
The Torso
Hi everyone,
In order to make the Zaku look like a new prototype, I had to change a few more characteristics of the body, and not just the head. Therefore I thought of adding some extra body armour in the form of plates made from plastic card.
I also used thin strips to add detail to the skirts. This was a bit tricky to get right, but with perseverance it does get easier.
The last thing I wanted to do was add some detail to the backpack, which was very bland. I cut out the vents and added flaps and detail as well as adding some more 15mm tank parts.
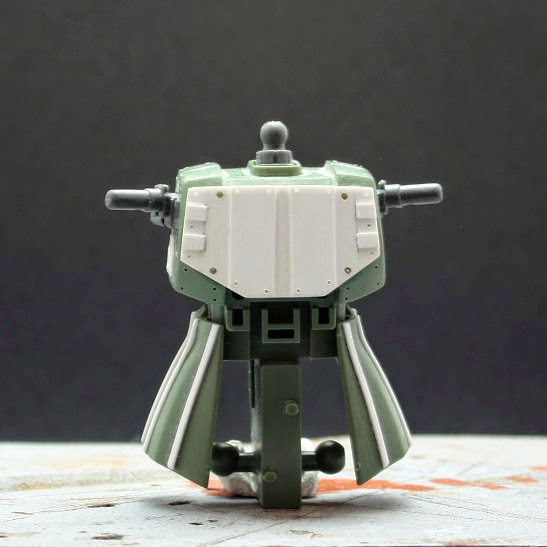 Extra Chest Plates.
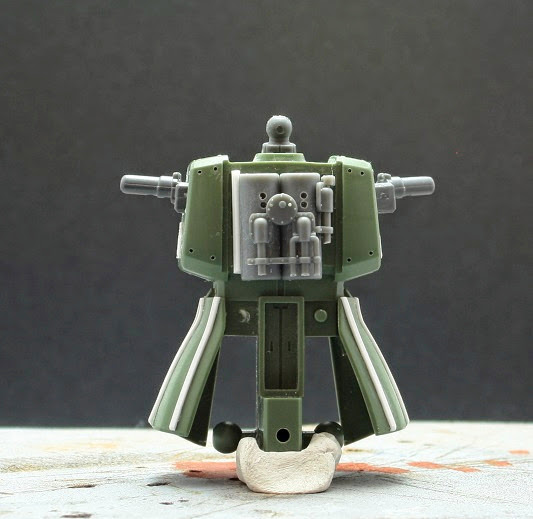 Add parts from a 15mm WW2 tank.
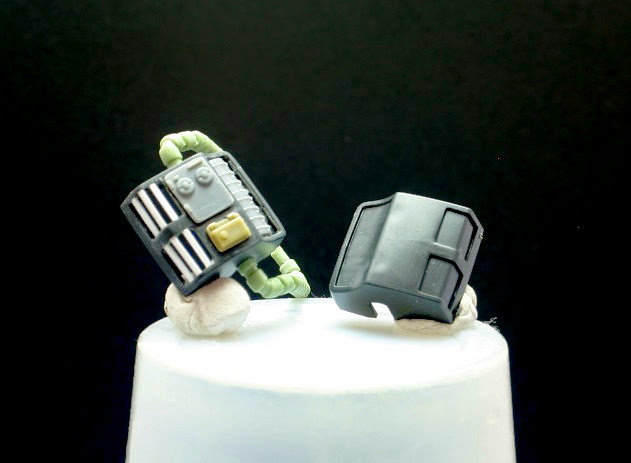 I opened up the backpack and added some 15mm tank parts.
This week I will do some work on the arms, as well as starting the diorama base.
Until next time, stay safe and have fun.
NR.
Detailing More Parts
Hi everyone,
I have finished detailing the last parts of the mobile suit. Hopefully, by Saturday, I will post pictures of the finished detail on the mobile suit all put together – the painting will come later.
The hand holding the head was an idea that came later. I thought it would add some drama to the scene.
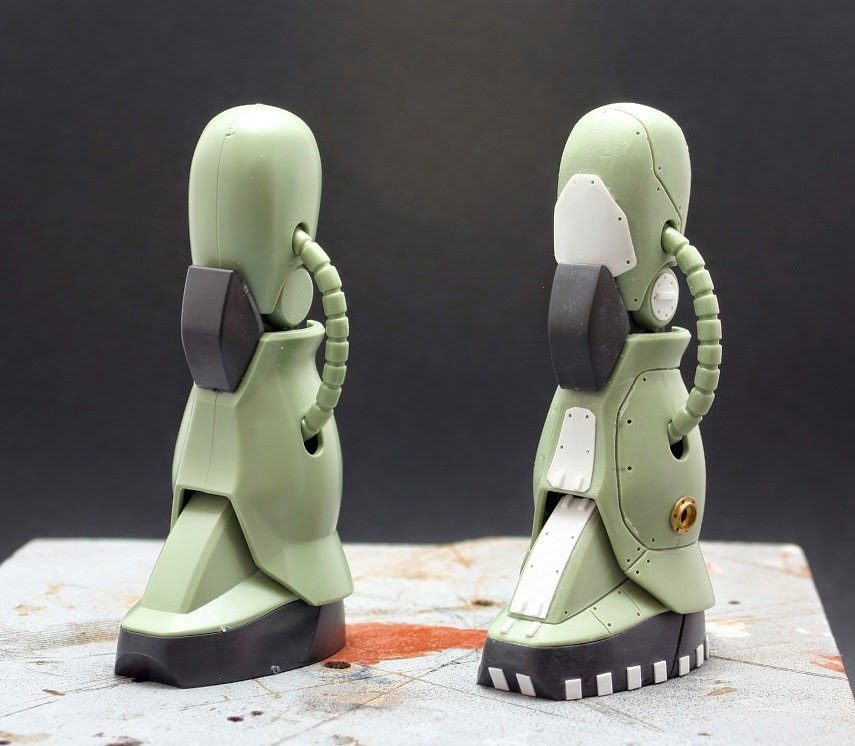
 Some more detailing on the back skirting.
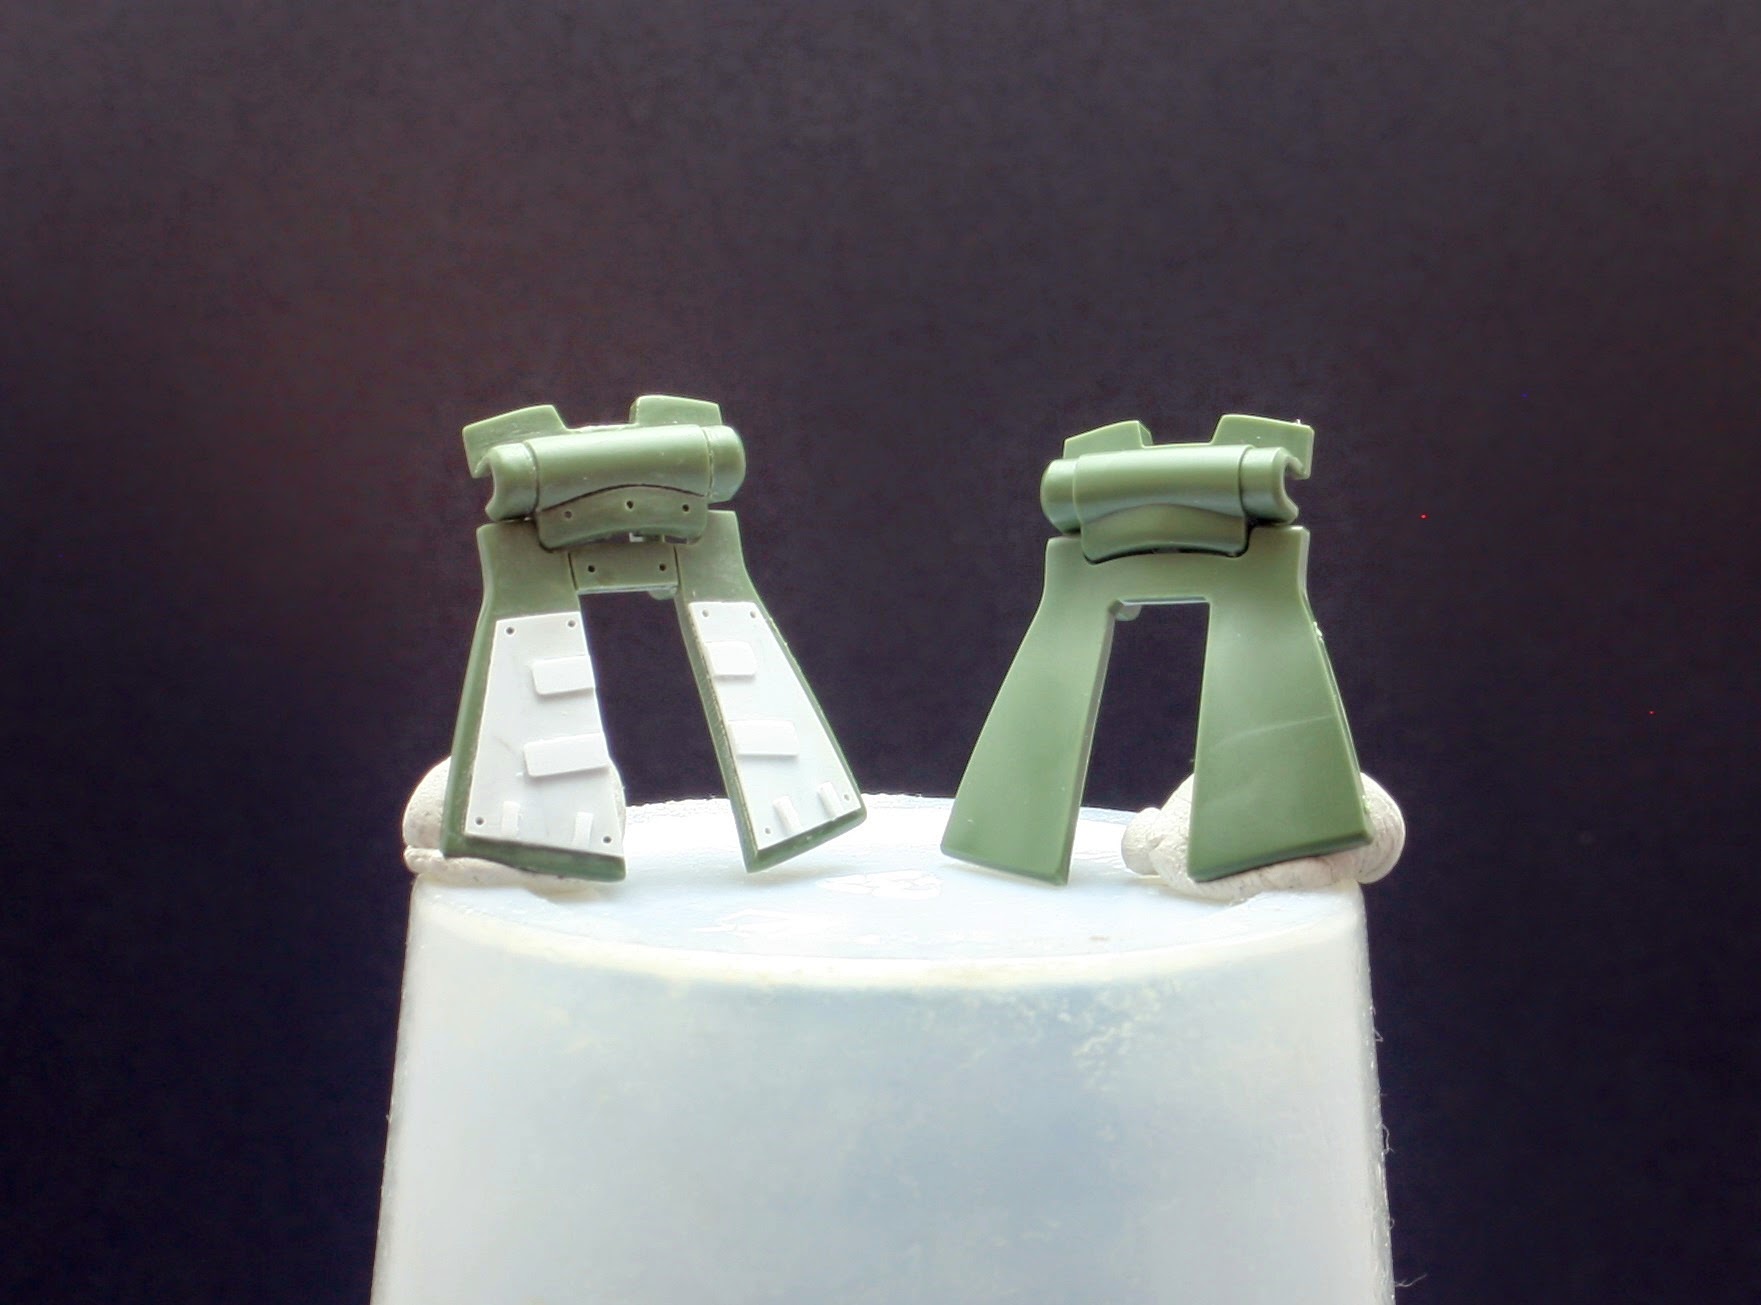 The front skirting.
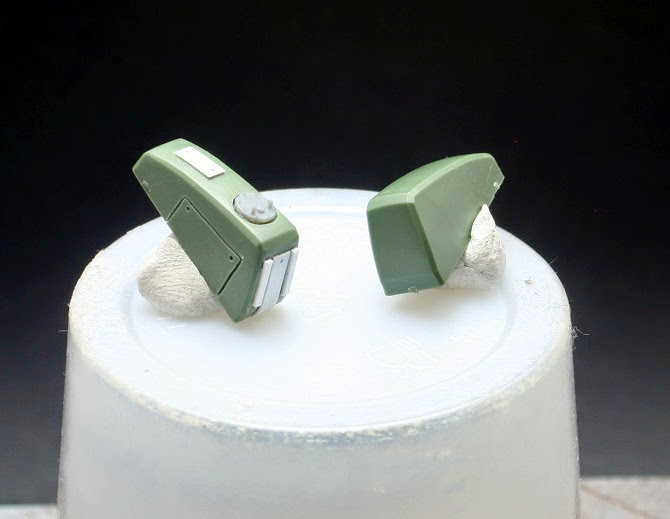 Even robots need to protect their gonads - apparently!
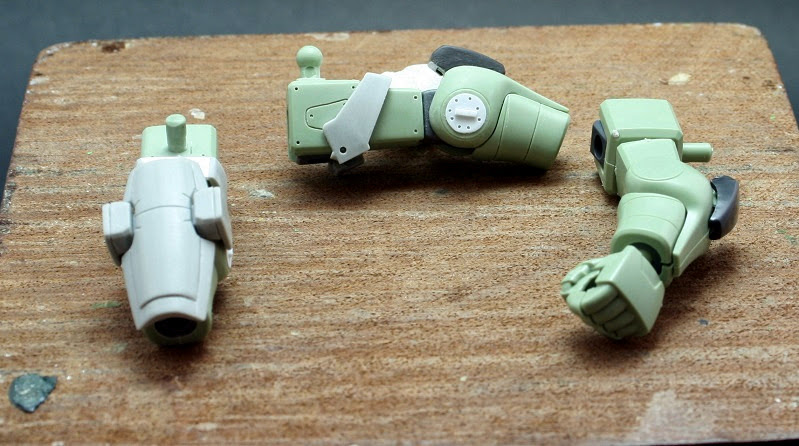 I am still working on the arms. They are probably the hardest part to detail convincingly.
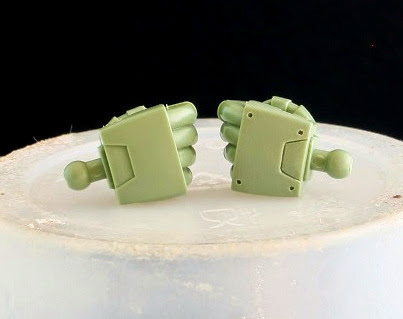 Simple detailing of the hands.
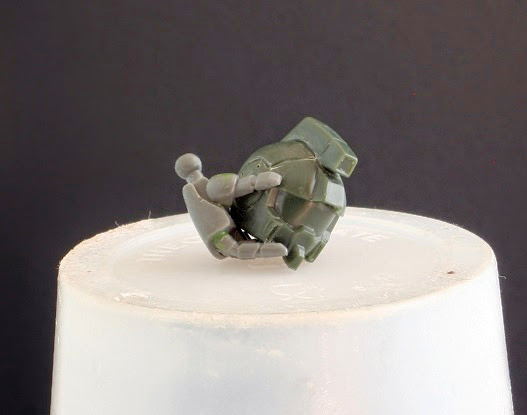 The single part that took the most work to convert. The head is a spare part I had.
Now I have to start work on the scene and the other mobile suit. Yes,’there is another’, as Yoda would say, but that is a post for another time.
Until next time have fun and stay safe.
NR.
The Completed Build
Hi everyone,
I managed to find the time to assemble the Zurad and take some photos. The next step for this model would be to prime it and paint it, but alas that is not the plan. Next, I am going to focus on the terrain. I have already did some planning and work and I should post something next week.
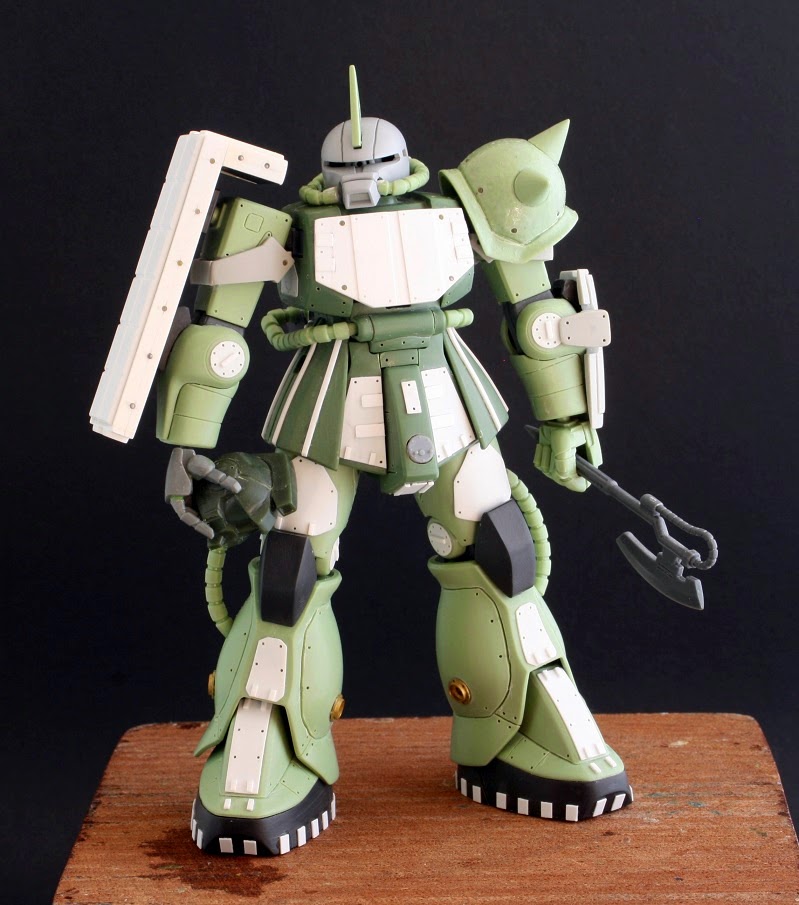 The complete build.
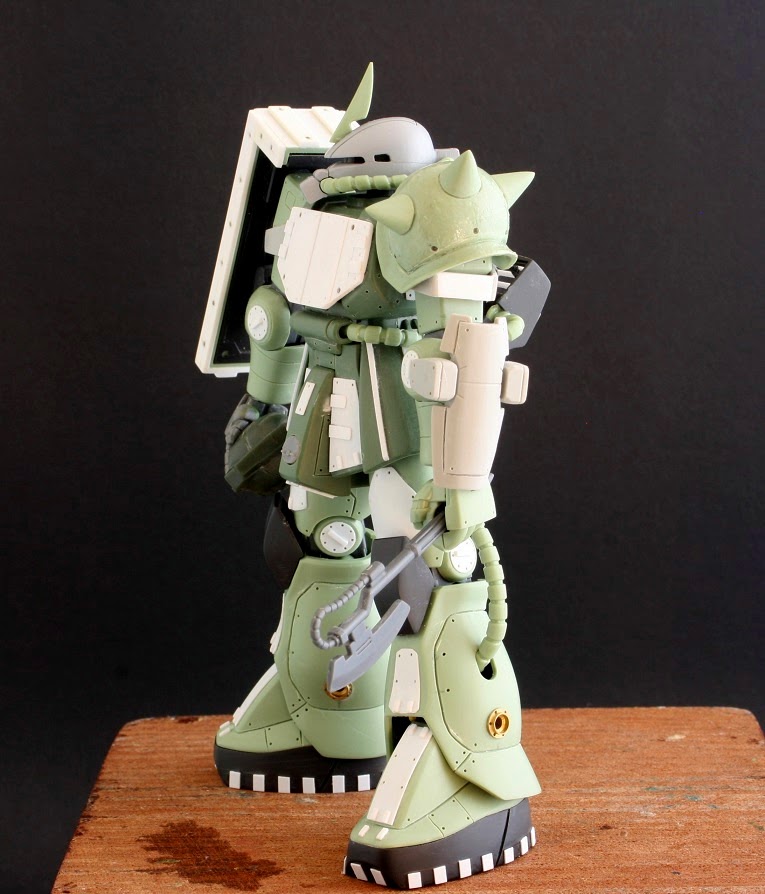 Experimenting photography with a black bacjground. Looks good, but too much work!
 I have not attached the back pack yet.
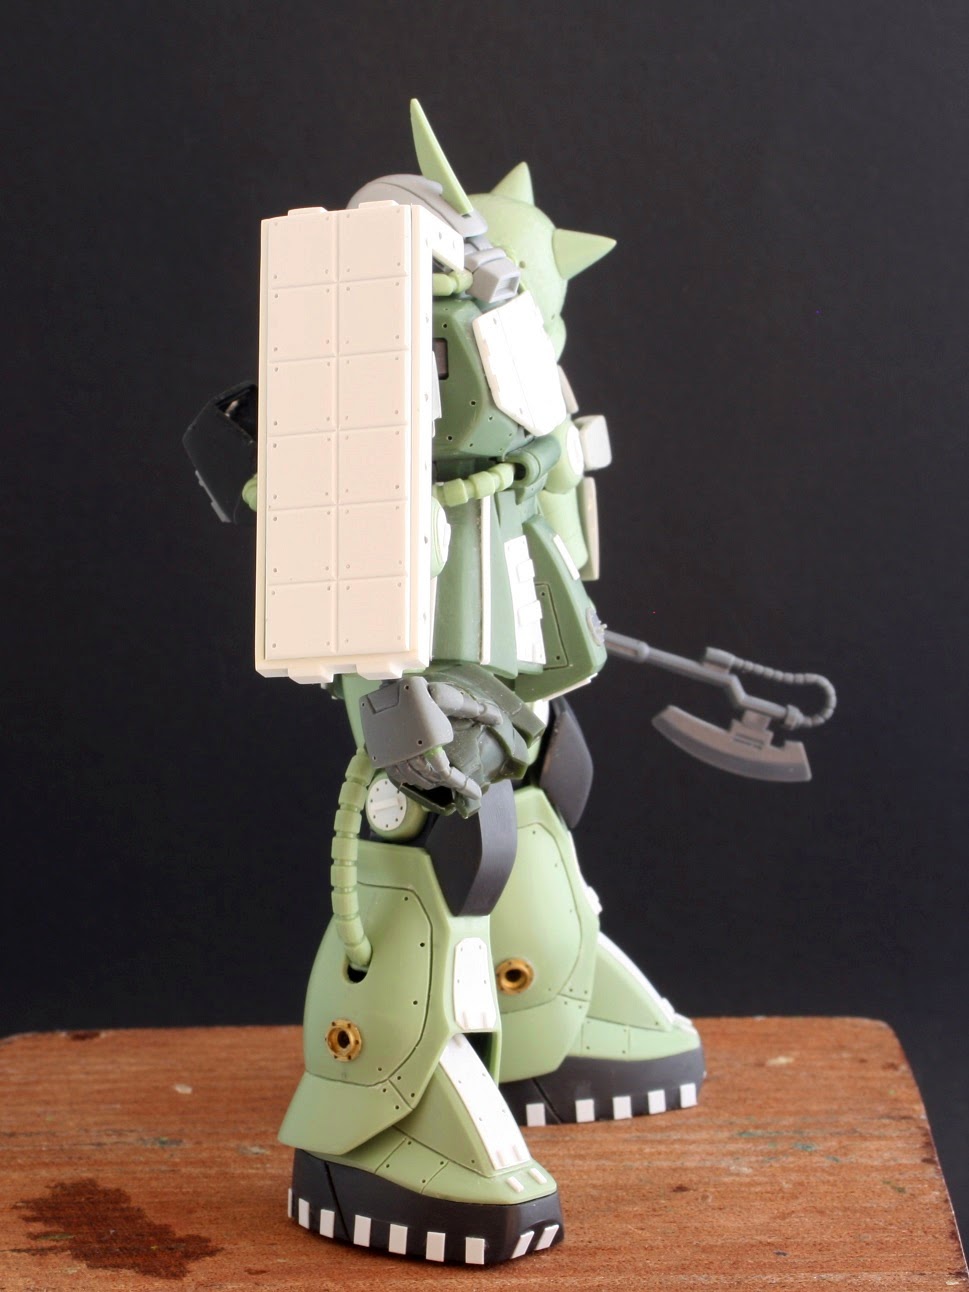 The weapons are subject to change according to my whims.
Until next week and next post, stay safe and have fun.
NR.
Another Mobile Suit and Buildings
Good evening,
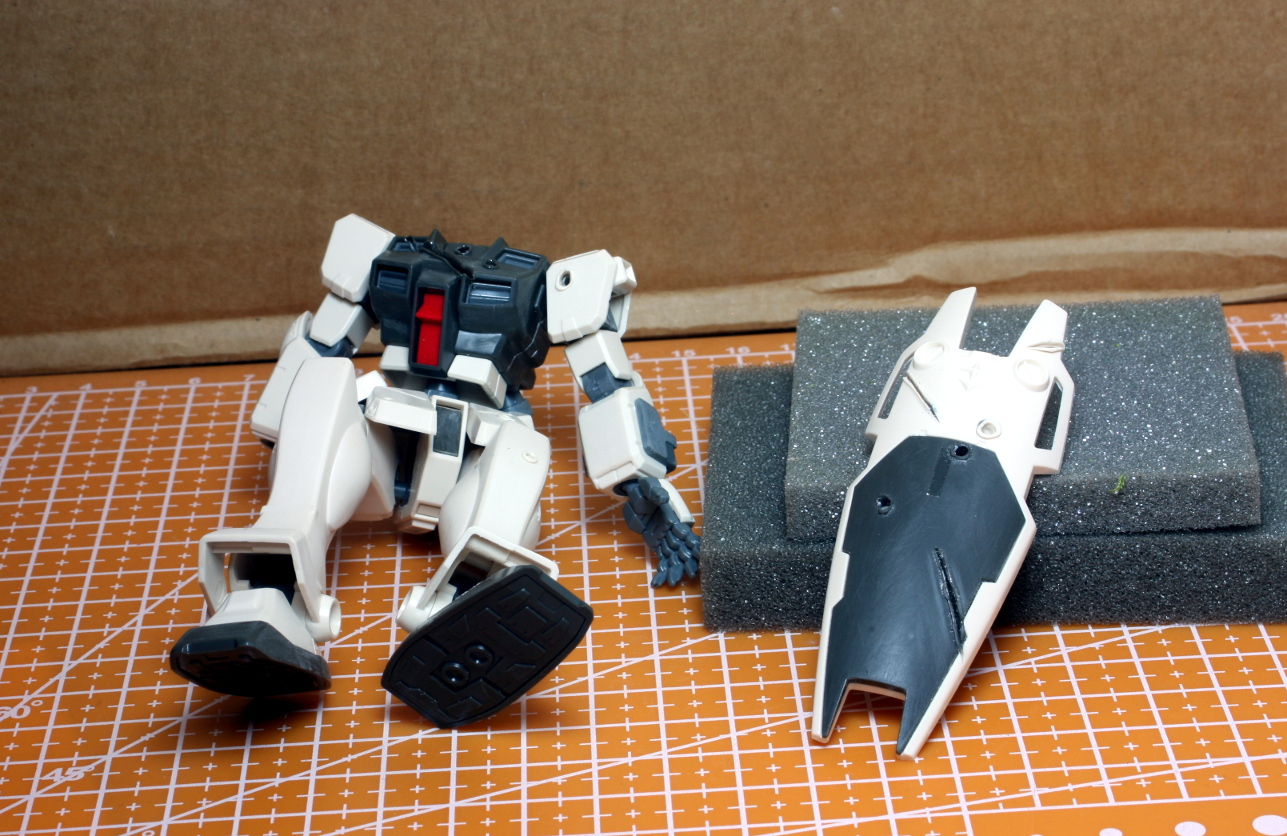
As I work on the diorama base, I decided to add another mobile suit to the diorama scene. This is a RGM-79G Command mobile suit – another grunt. This is my cheapest and oldest kit. I doubt it cost me more the Є9 euros including the postage and packing when I bought it from HLJ.
I will not be adding extra detail to this mobile suit. Not because I am being lazy, but because it will be part of the background, and I don’t want to steal the show from the Zurad.
I also started work on the buildings I bought from Wayland Games on one of their November sales. These are from 4Ground. I finally found a use for them. They came pre-coloured, but I will have to repaint them nonetheless.
The damaged interior of the building was created with the MDF sprues that came with the kit.
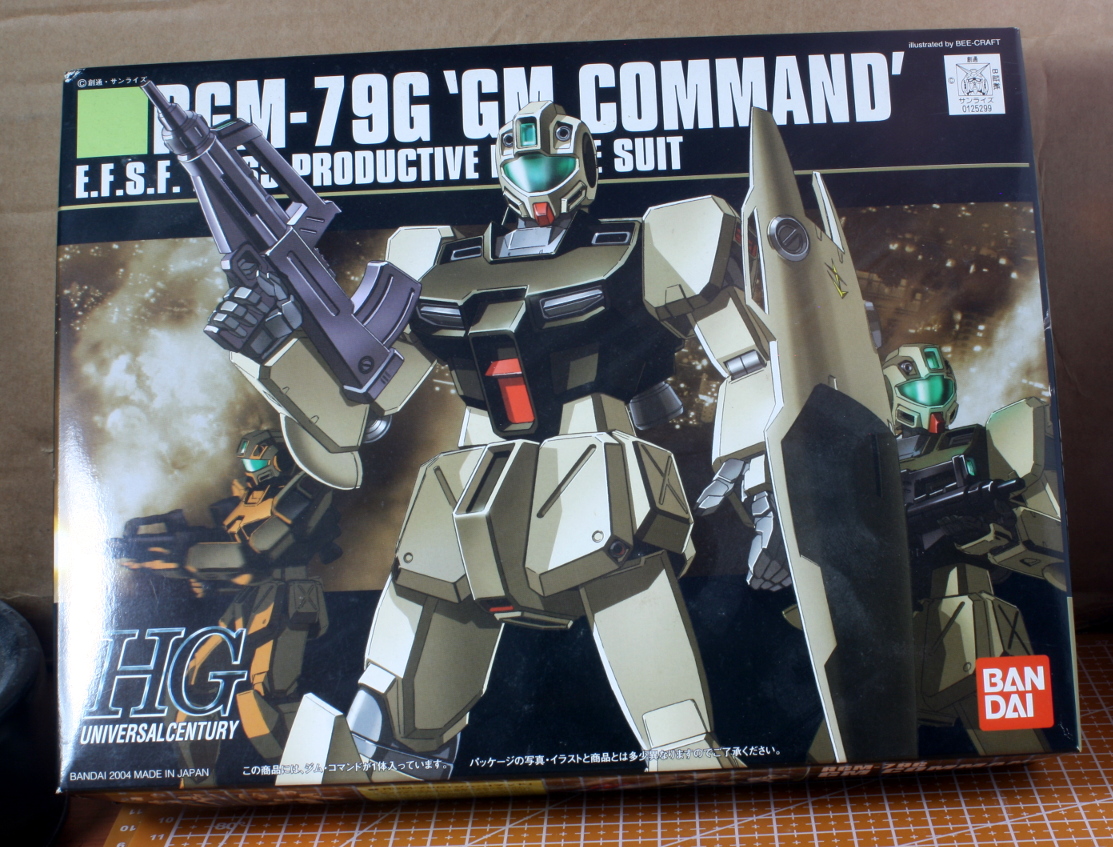 One of the cheapest and oldest kits that I have.
 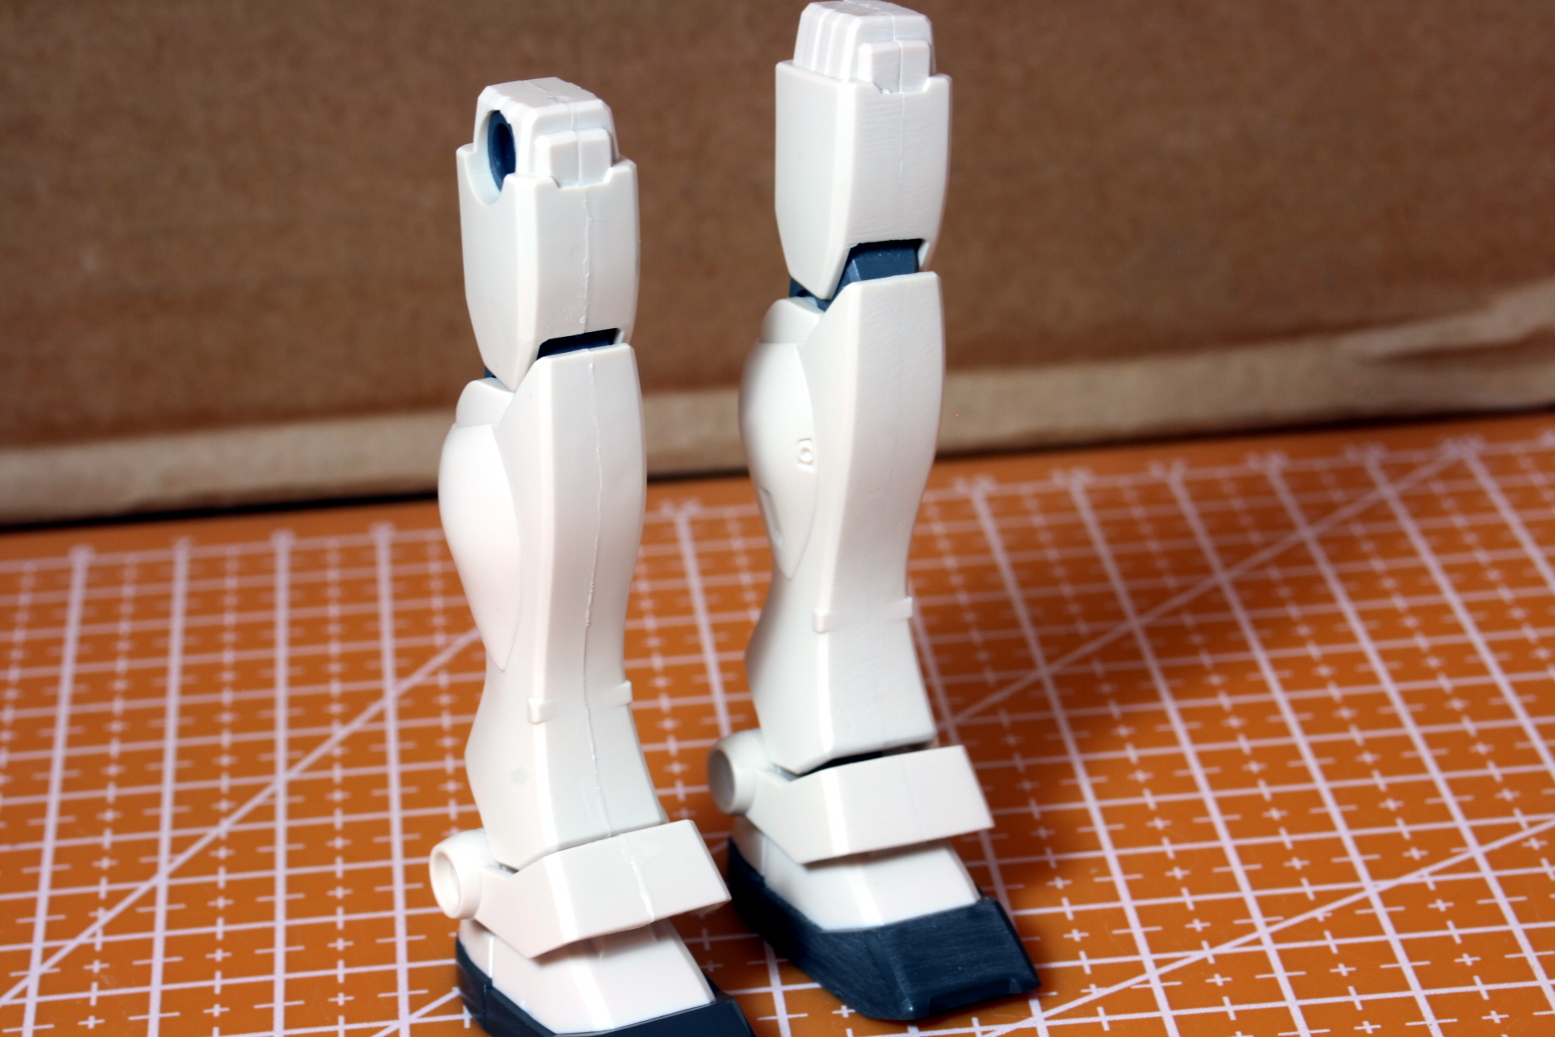 Working on the legs. The best way to attach the parts is to add extra glue, create a lip, let it dry and sand down.
 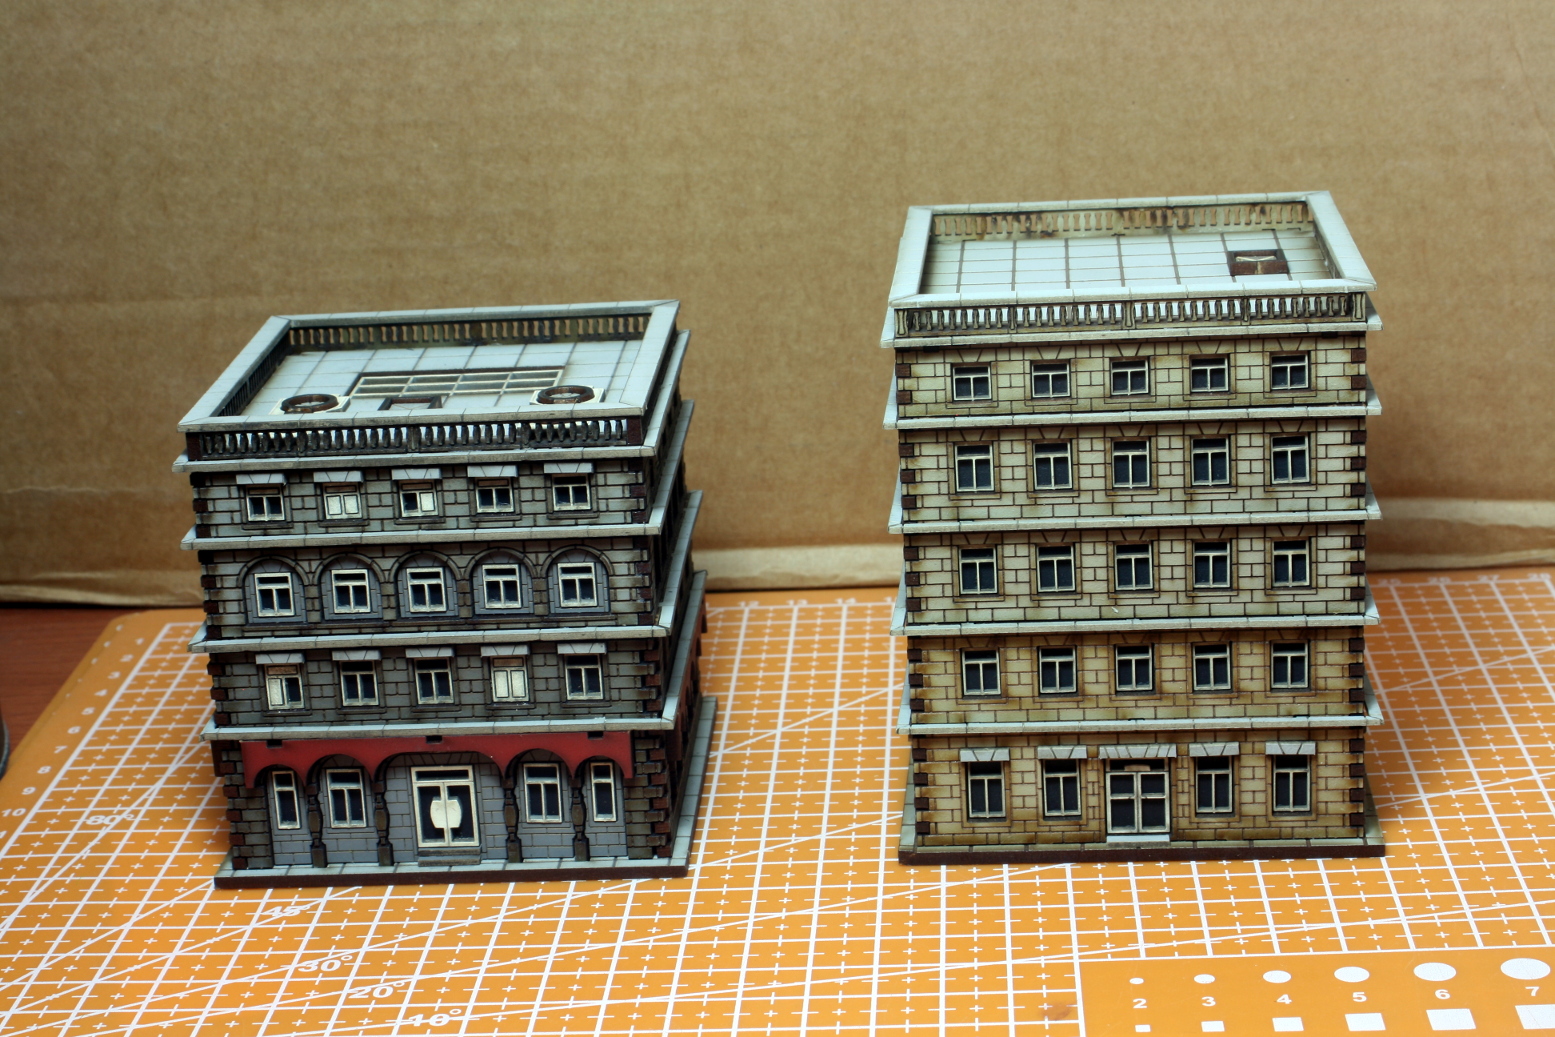 Constructed 4Ground building.
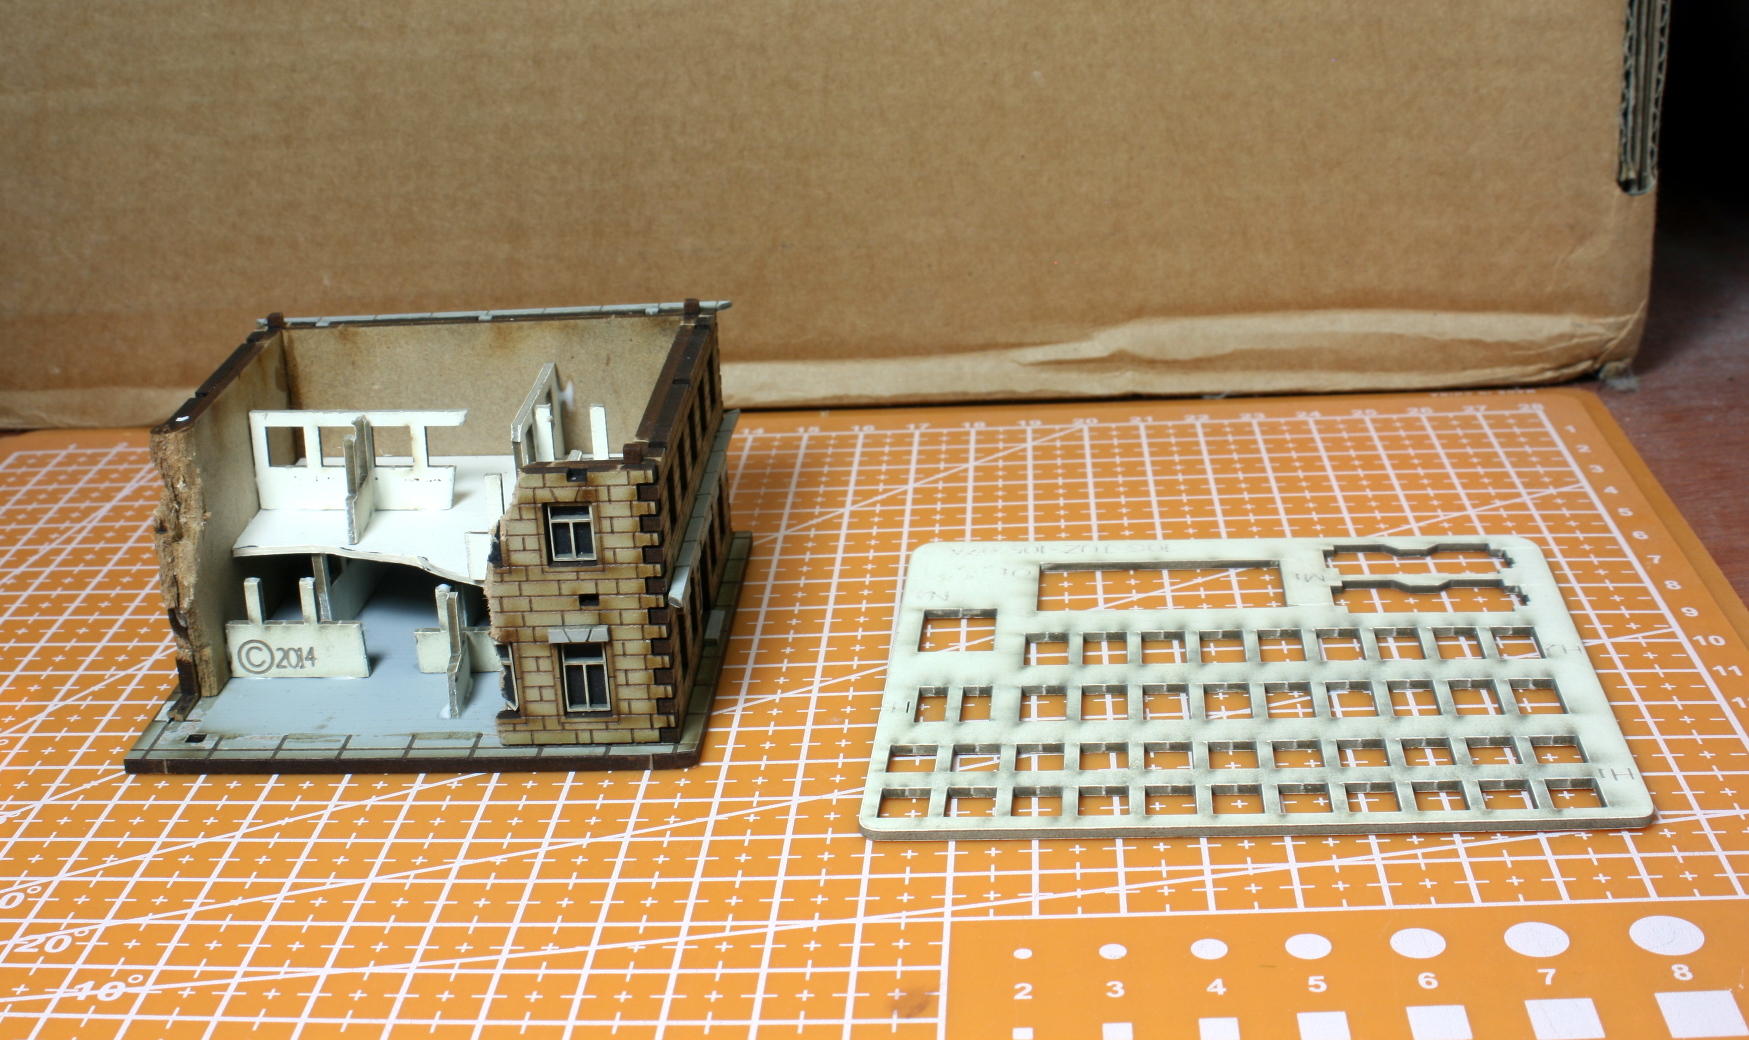 Using the sprues to construct the interior structure.
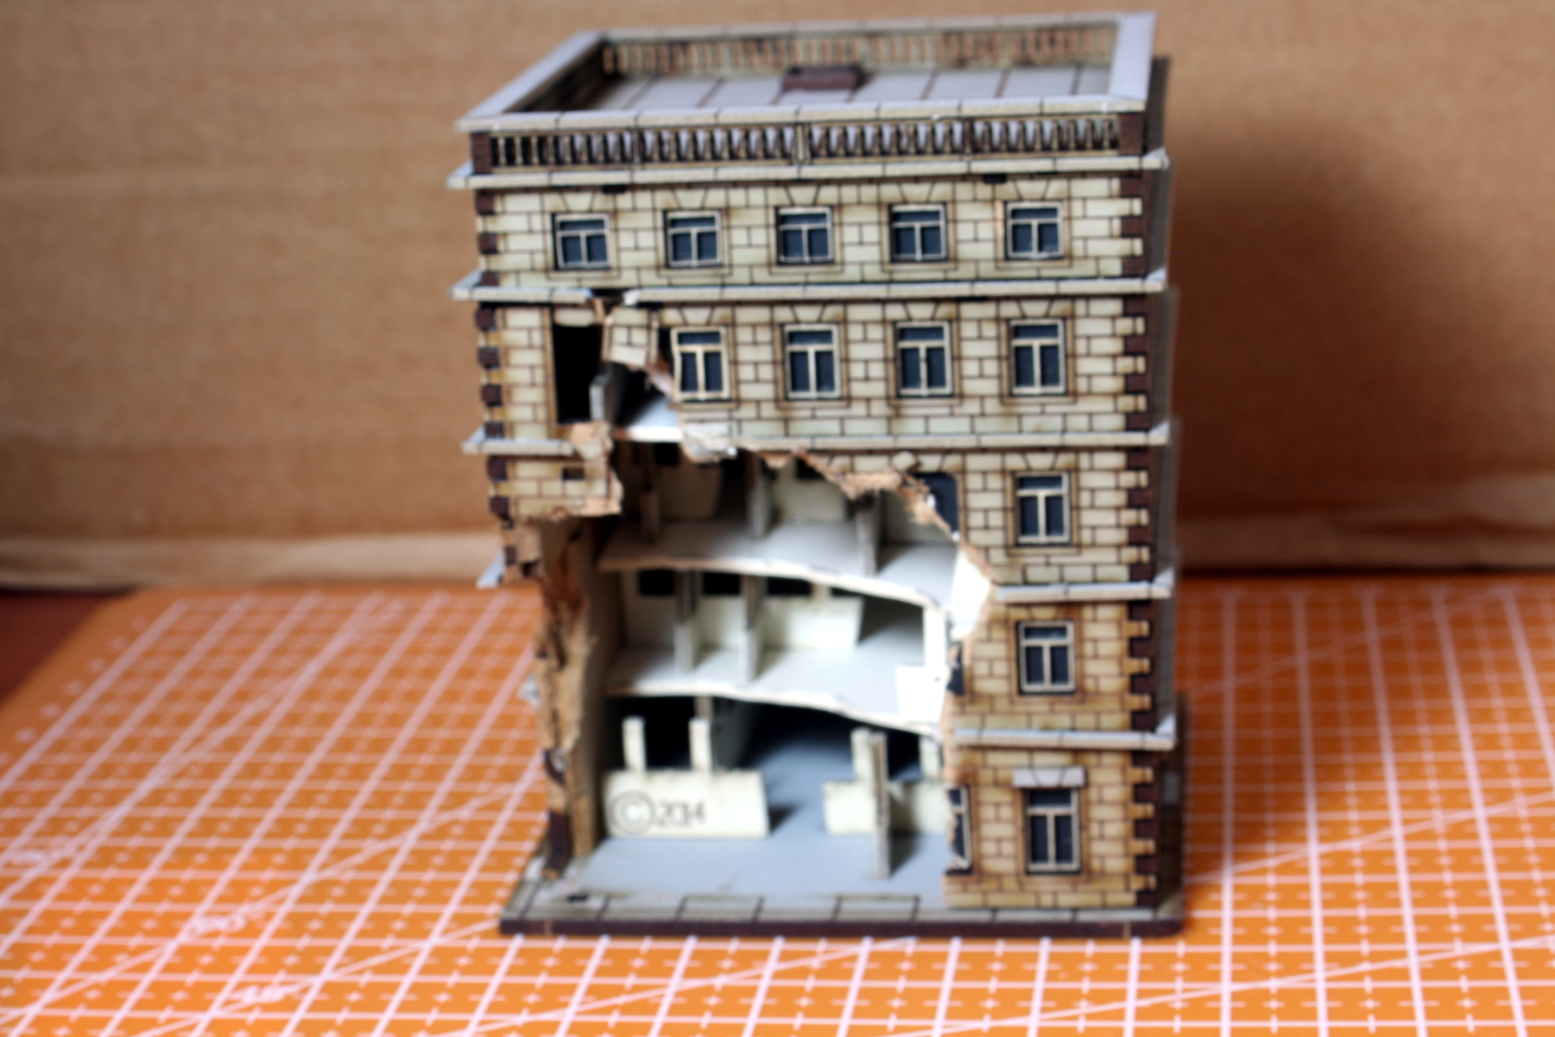 The finished construction.
That is all for now. Stay safe and have fun.
NR.
More Work on the Mobile Suit and the Terrain.
Hi everyone,
I have done more work on the mobile suit and the terrain. I decided not to add any details to the GM suit, beacause I did not want it to take away from the Zurad who is the focus point of the subject.
Other than that, there is not much to say, so I will let the pictures speak for themselves.
 The GM put together and some damaged added.
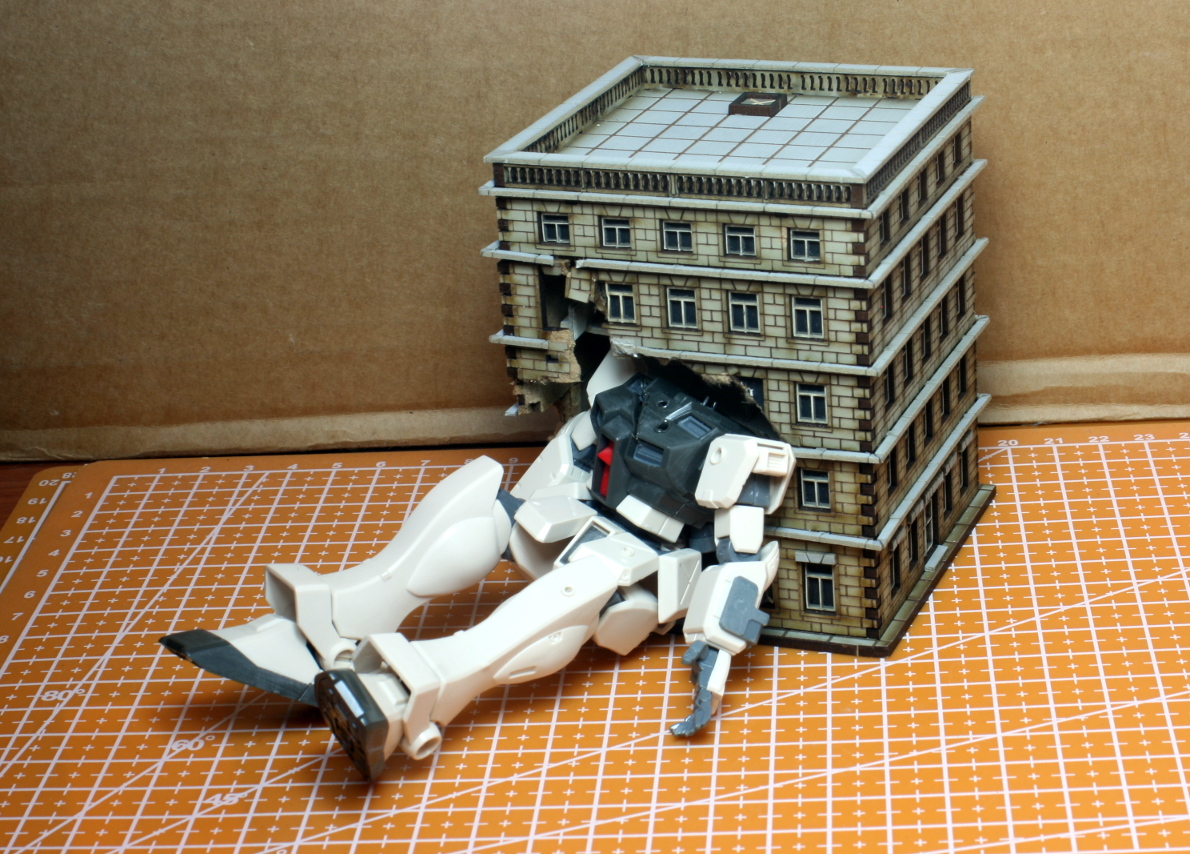 More fitting.
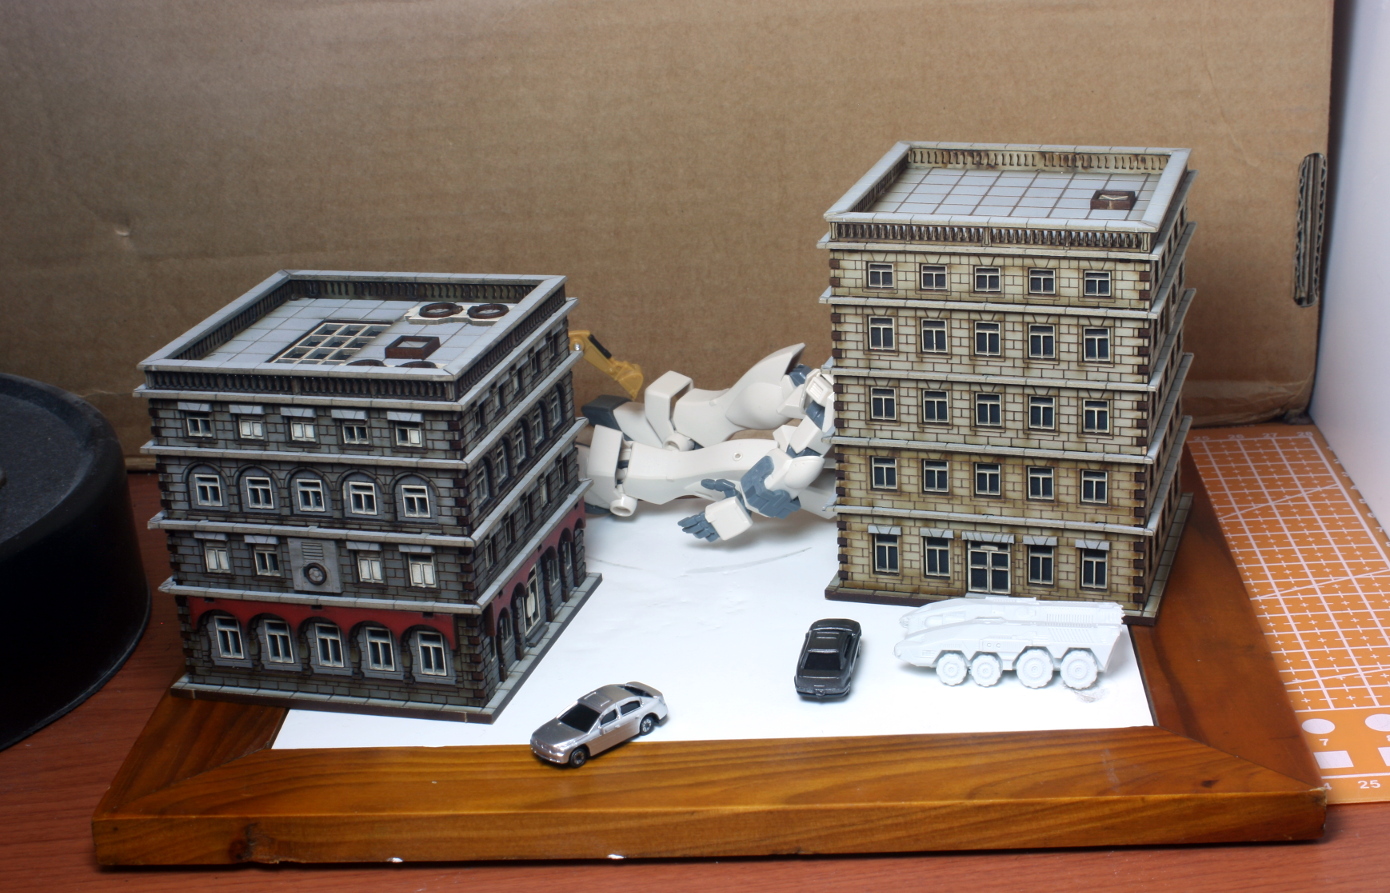 Planning out the diorama.
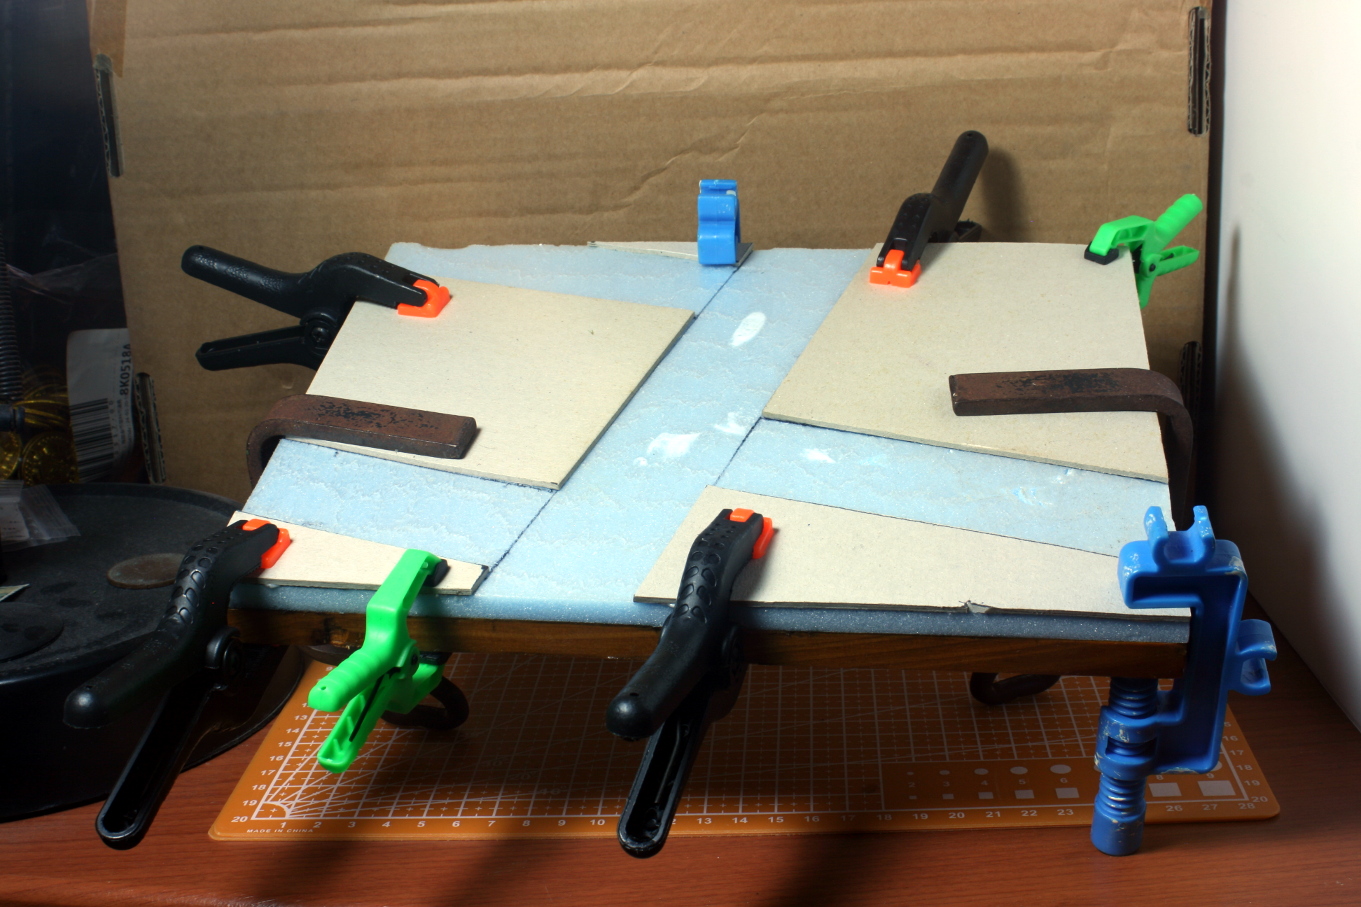 Base made out of XPS foam and cardboard.
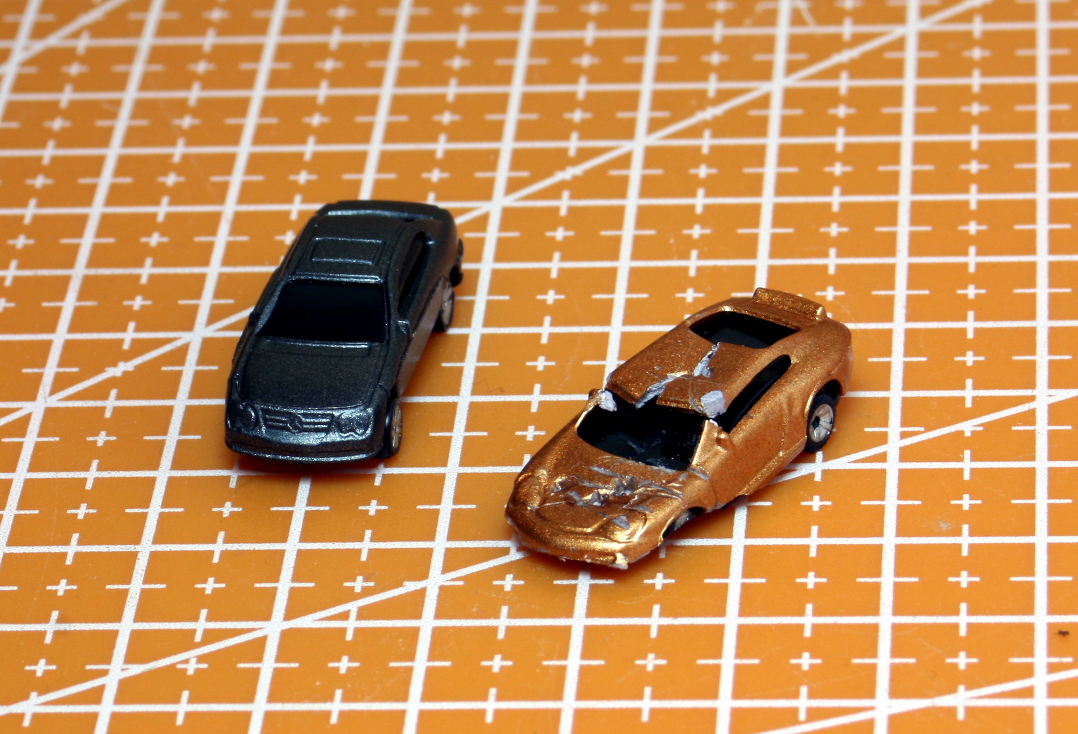 I managed to find some cars that are close to the 1/144 scale of the diorama.
That is all for now. Until next post stay safe and have fun.
NR.


![StarCraft Tabletop Miniatures Game Pre-Orders Live Now [Updated]](https://images.beastsofwar.com/2026/03/starcraft-tmg-news-cover-600-338.jpg)


