![NO Weekender Or Cult Of Games XLBS This Weekend [Updated]](https://images.beastsofwar.com/2026/03/No_Weekender_and_XLBS_this_Weekend-225-127.jpg)


Templar Tomb


Recommendations: 119
About the Project
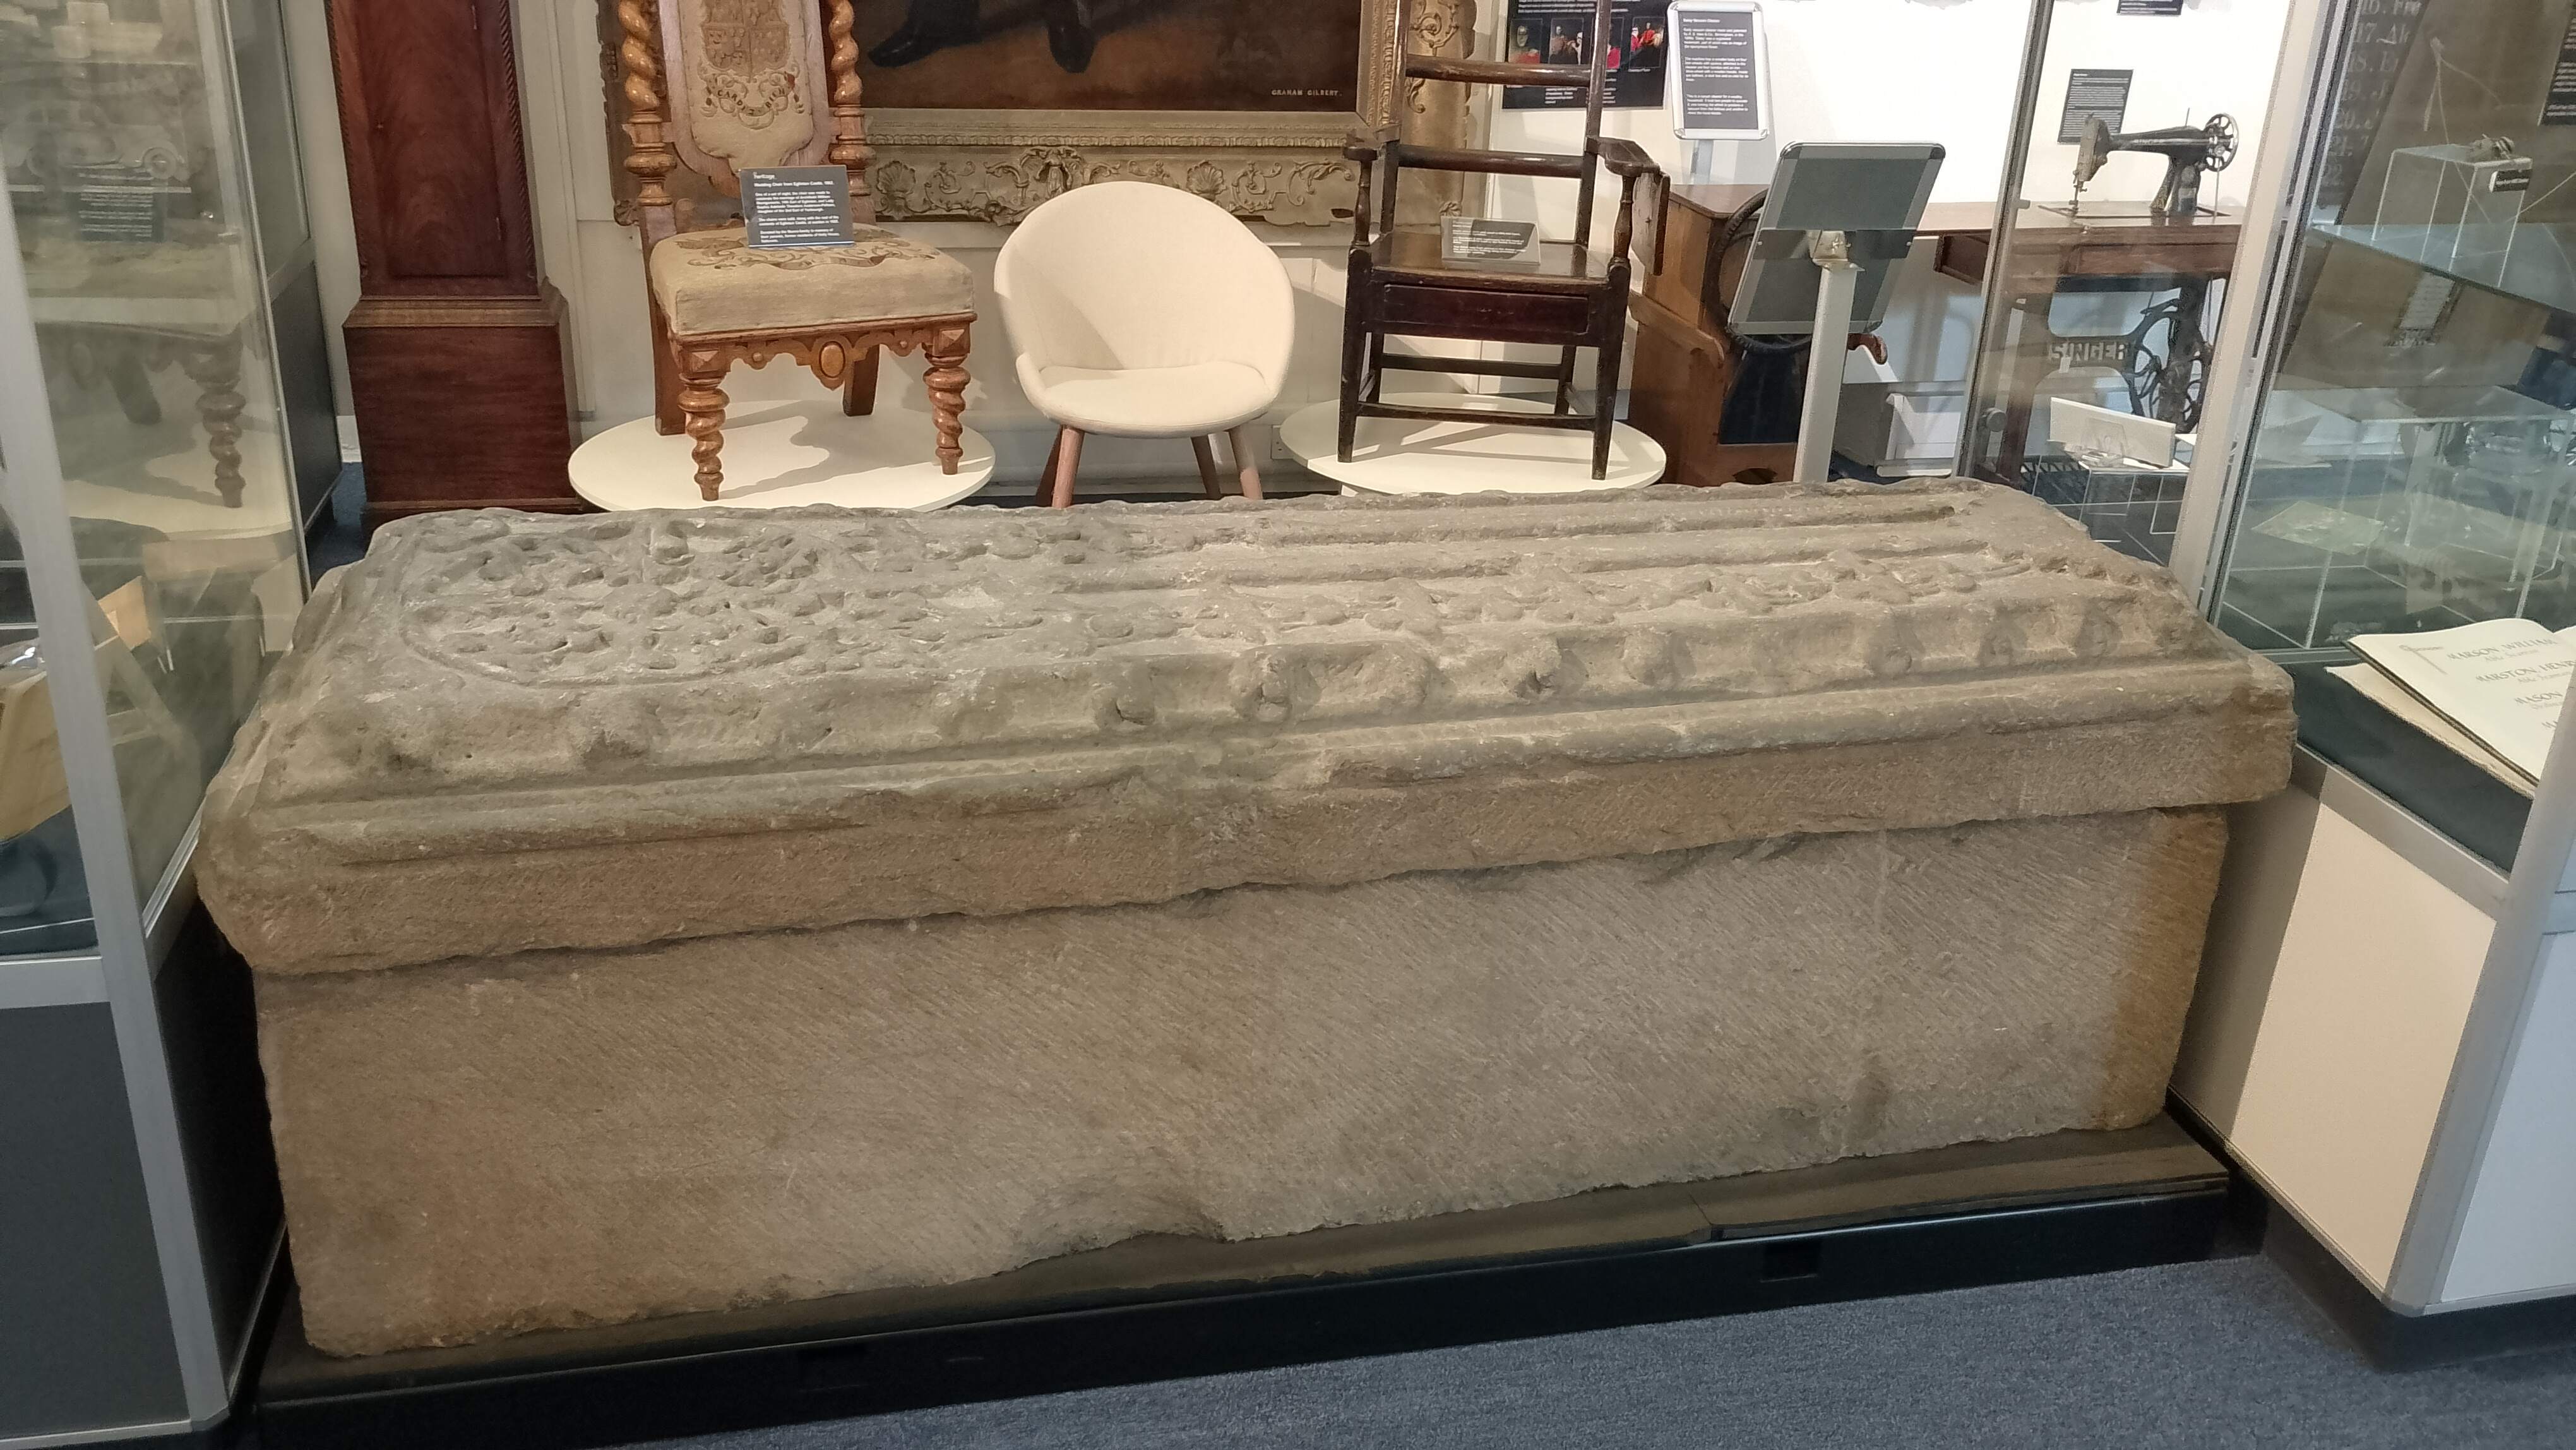
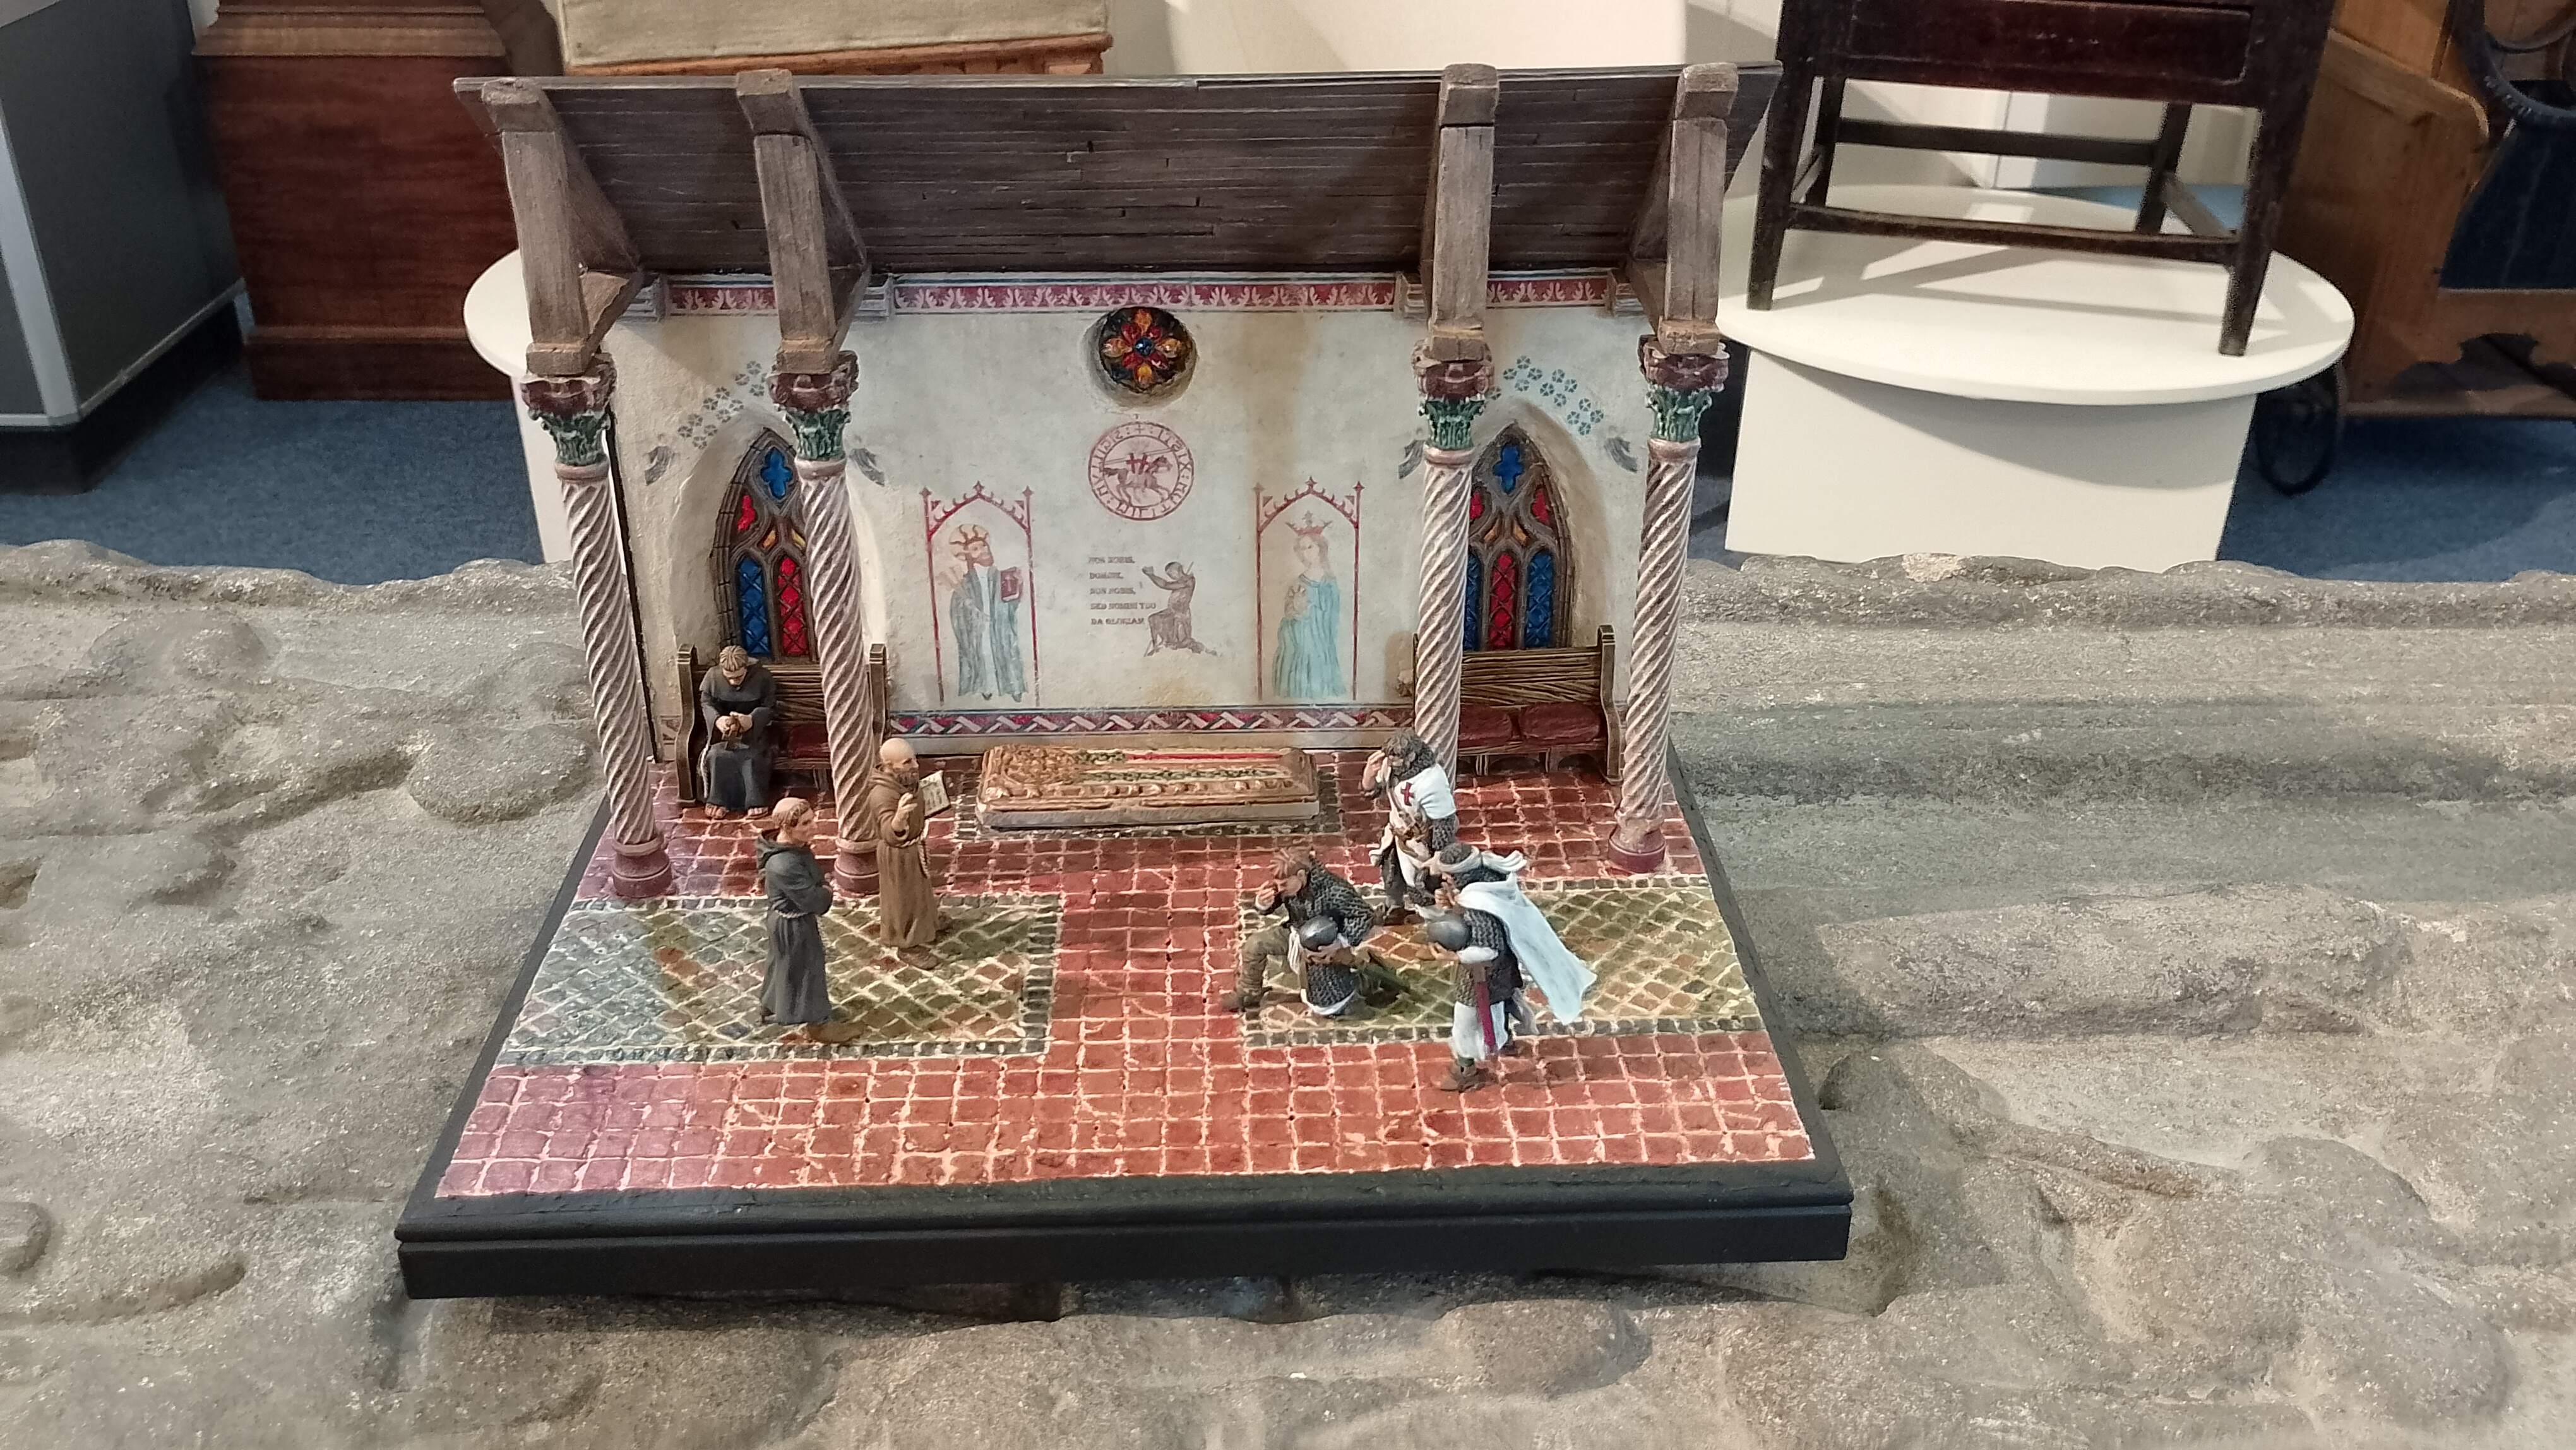
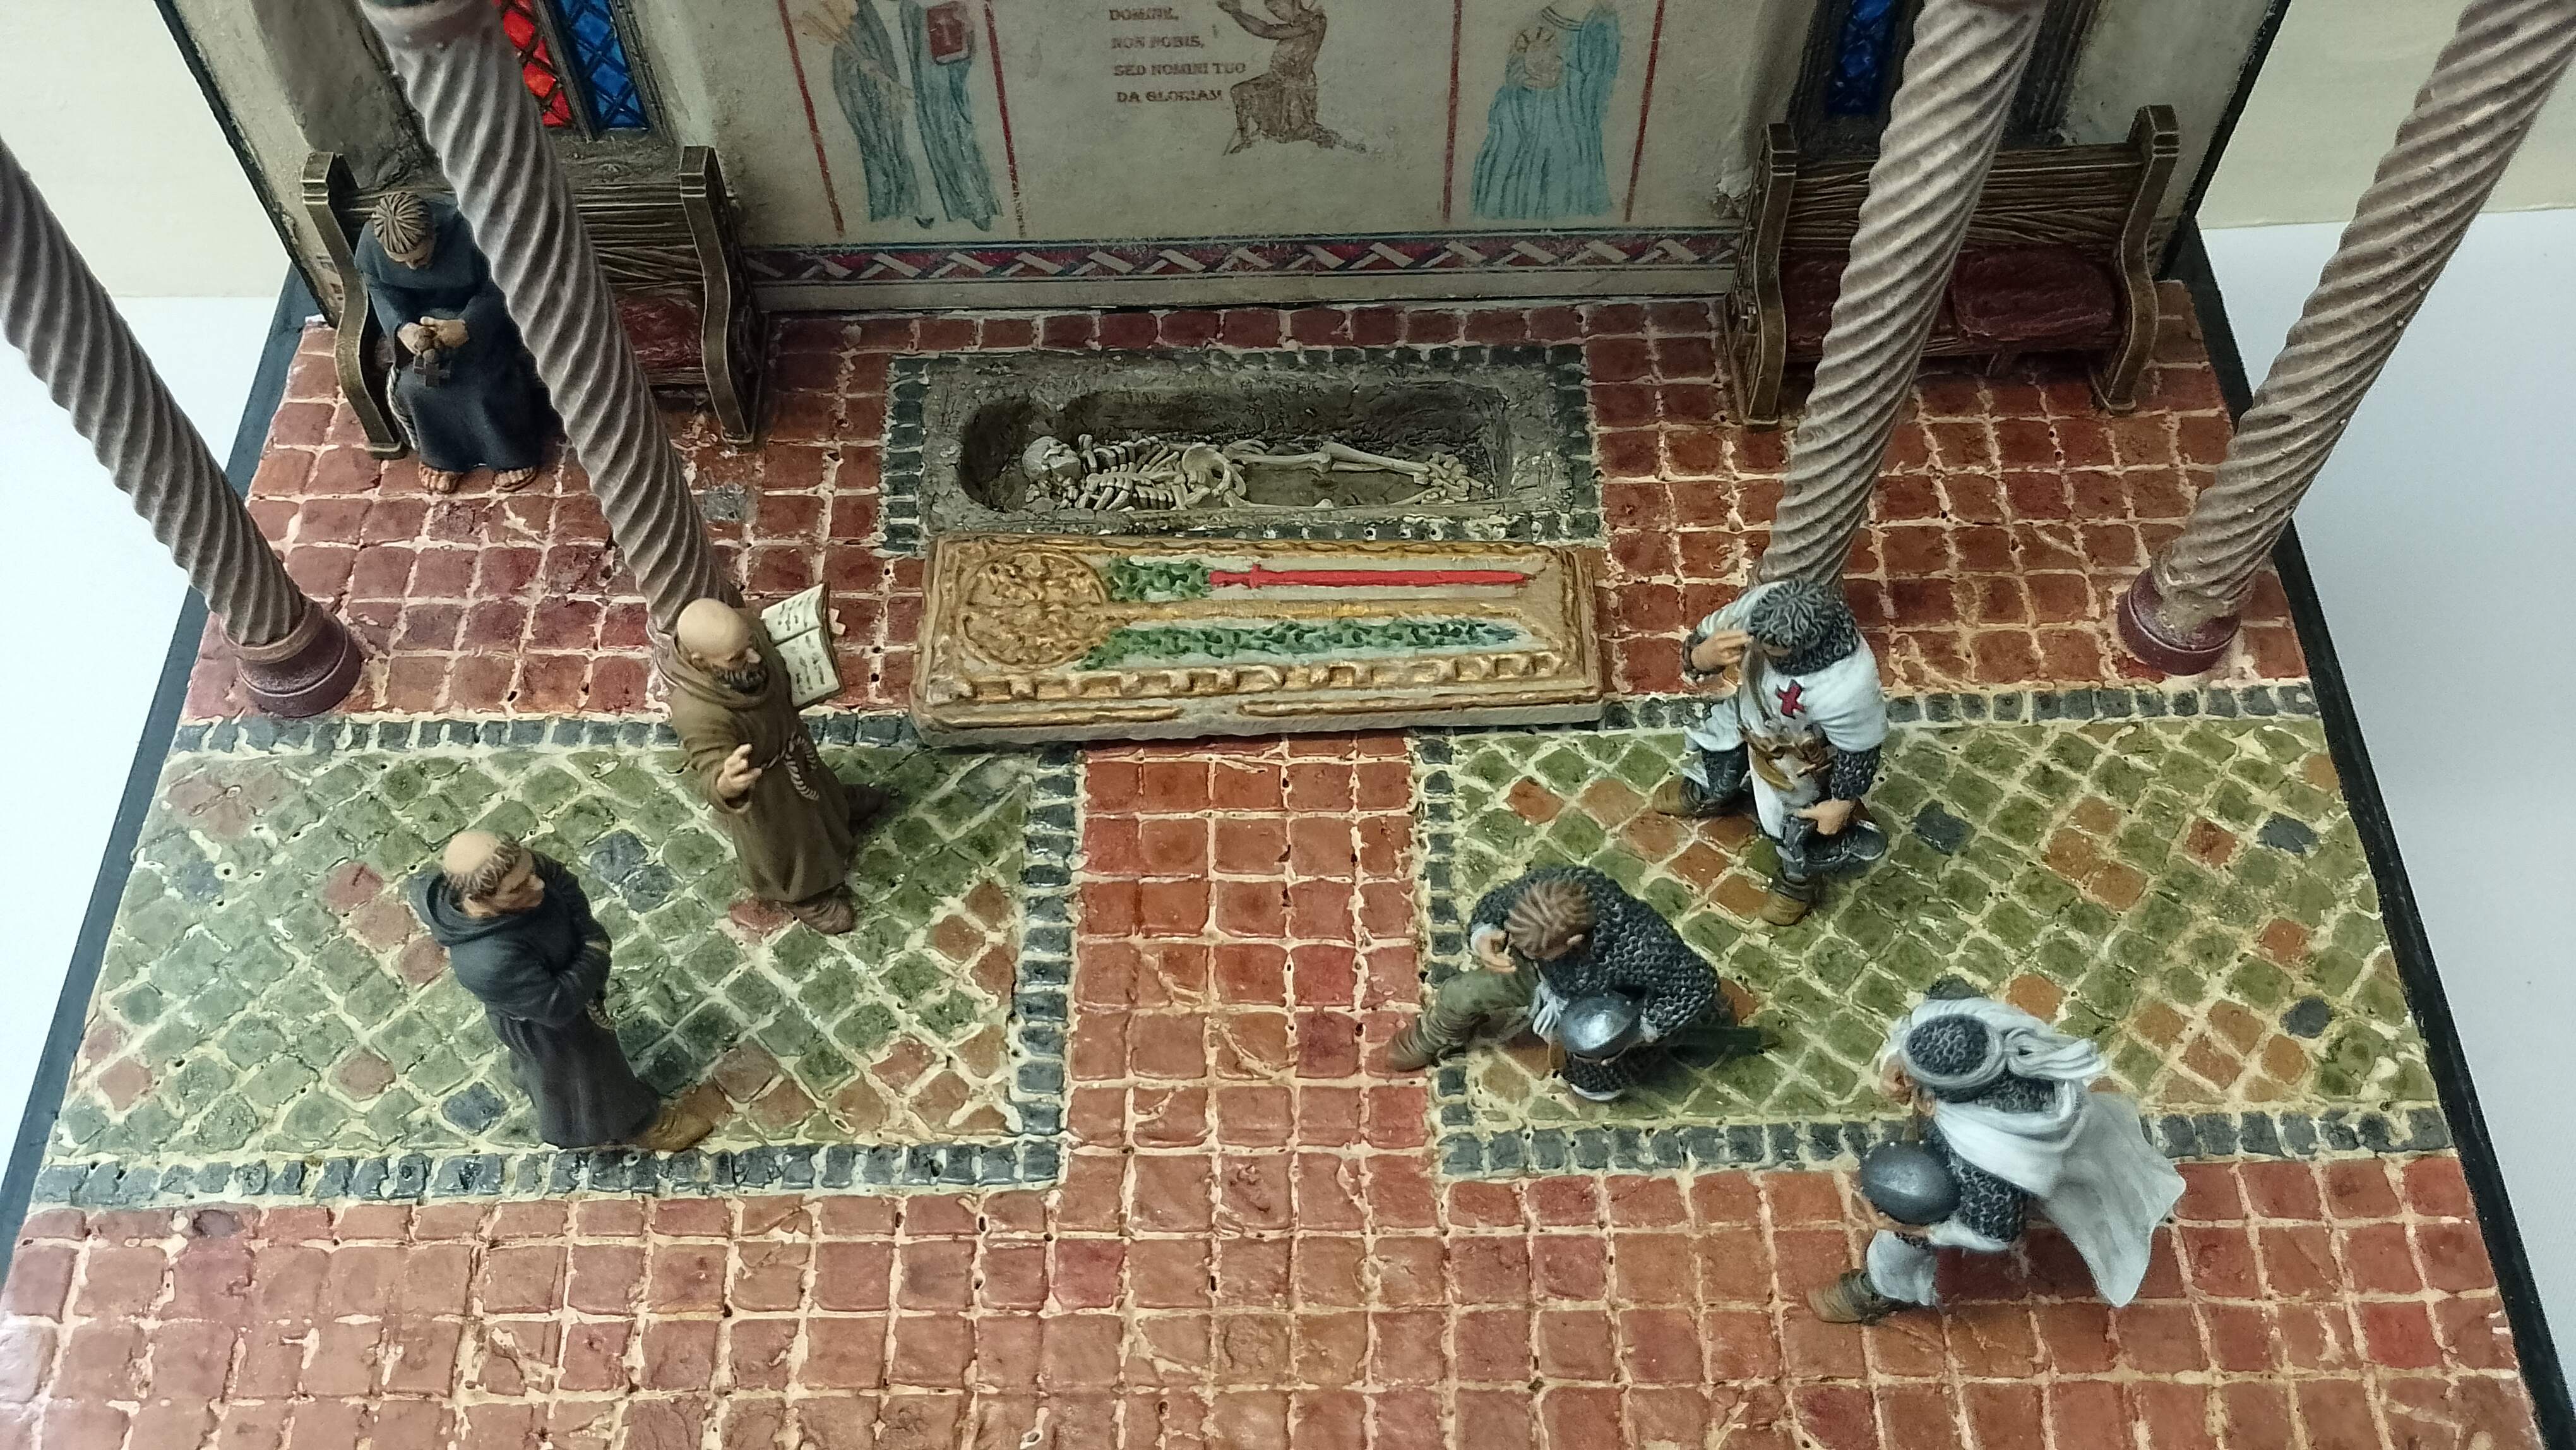
A reconstruction diorama of a medieval church at Ardrossan in Ayrshire, Scotland, where a stone sarcophagus Templar tomb was dug up in 1912. It's a reworking of another diorama I did years ago and will use a mix of 3D printed parts along with lots of foam and balsa.
Related Genre: Historical
Related Contest: Spring Clean Hobby Challenge 2025
This Project is Active
Out & About in Sunny Ayrshire
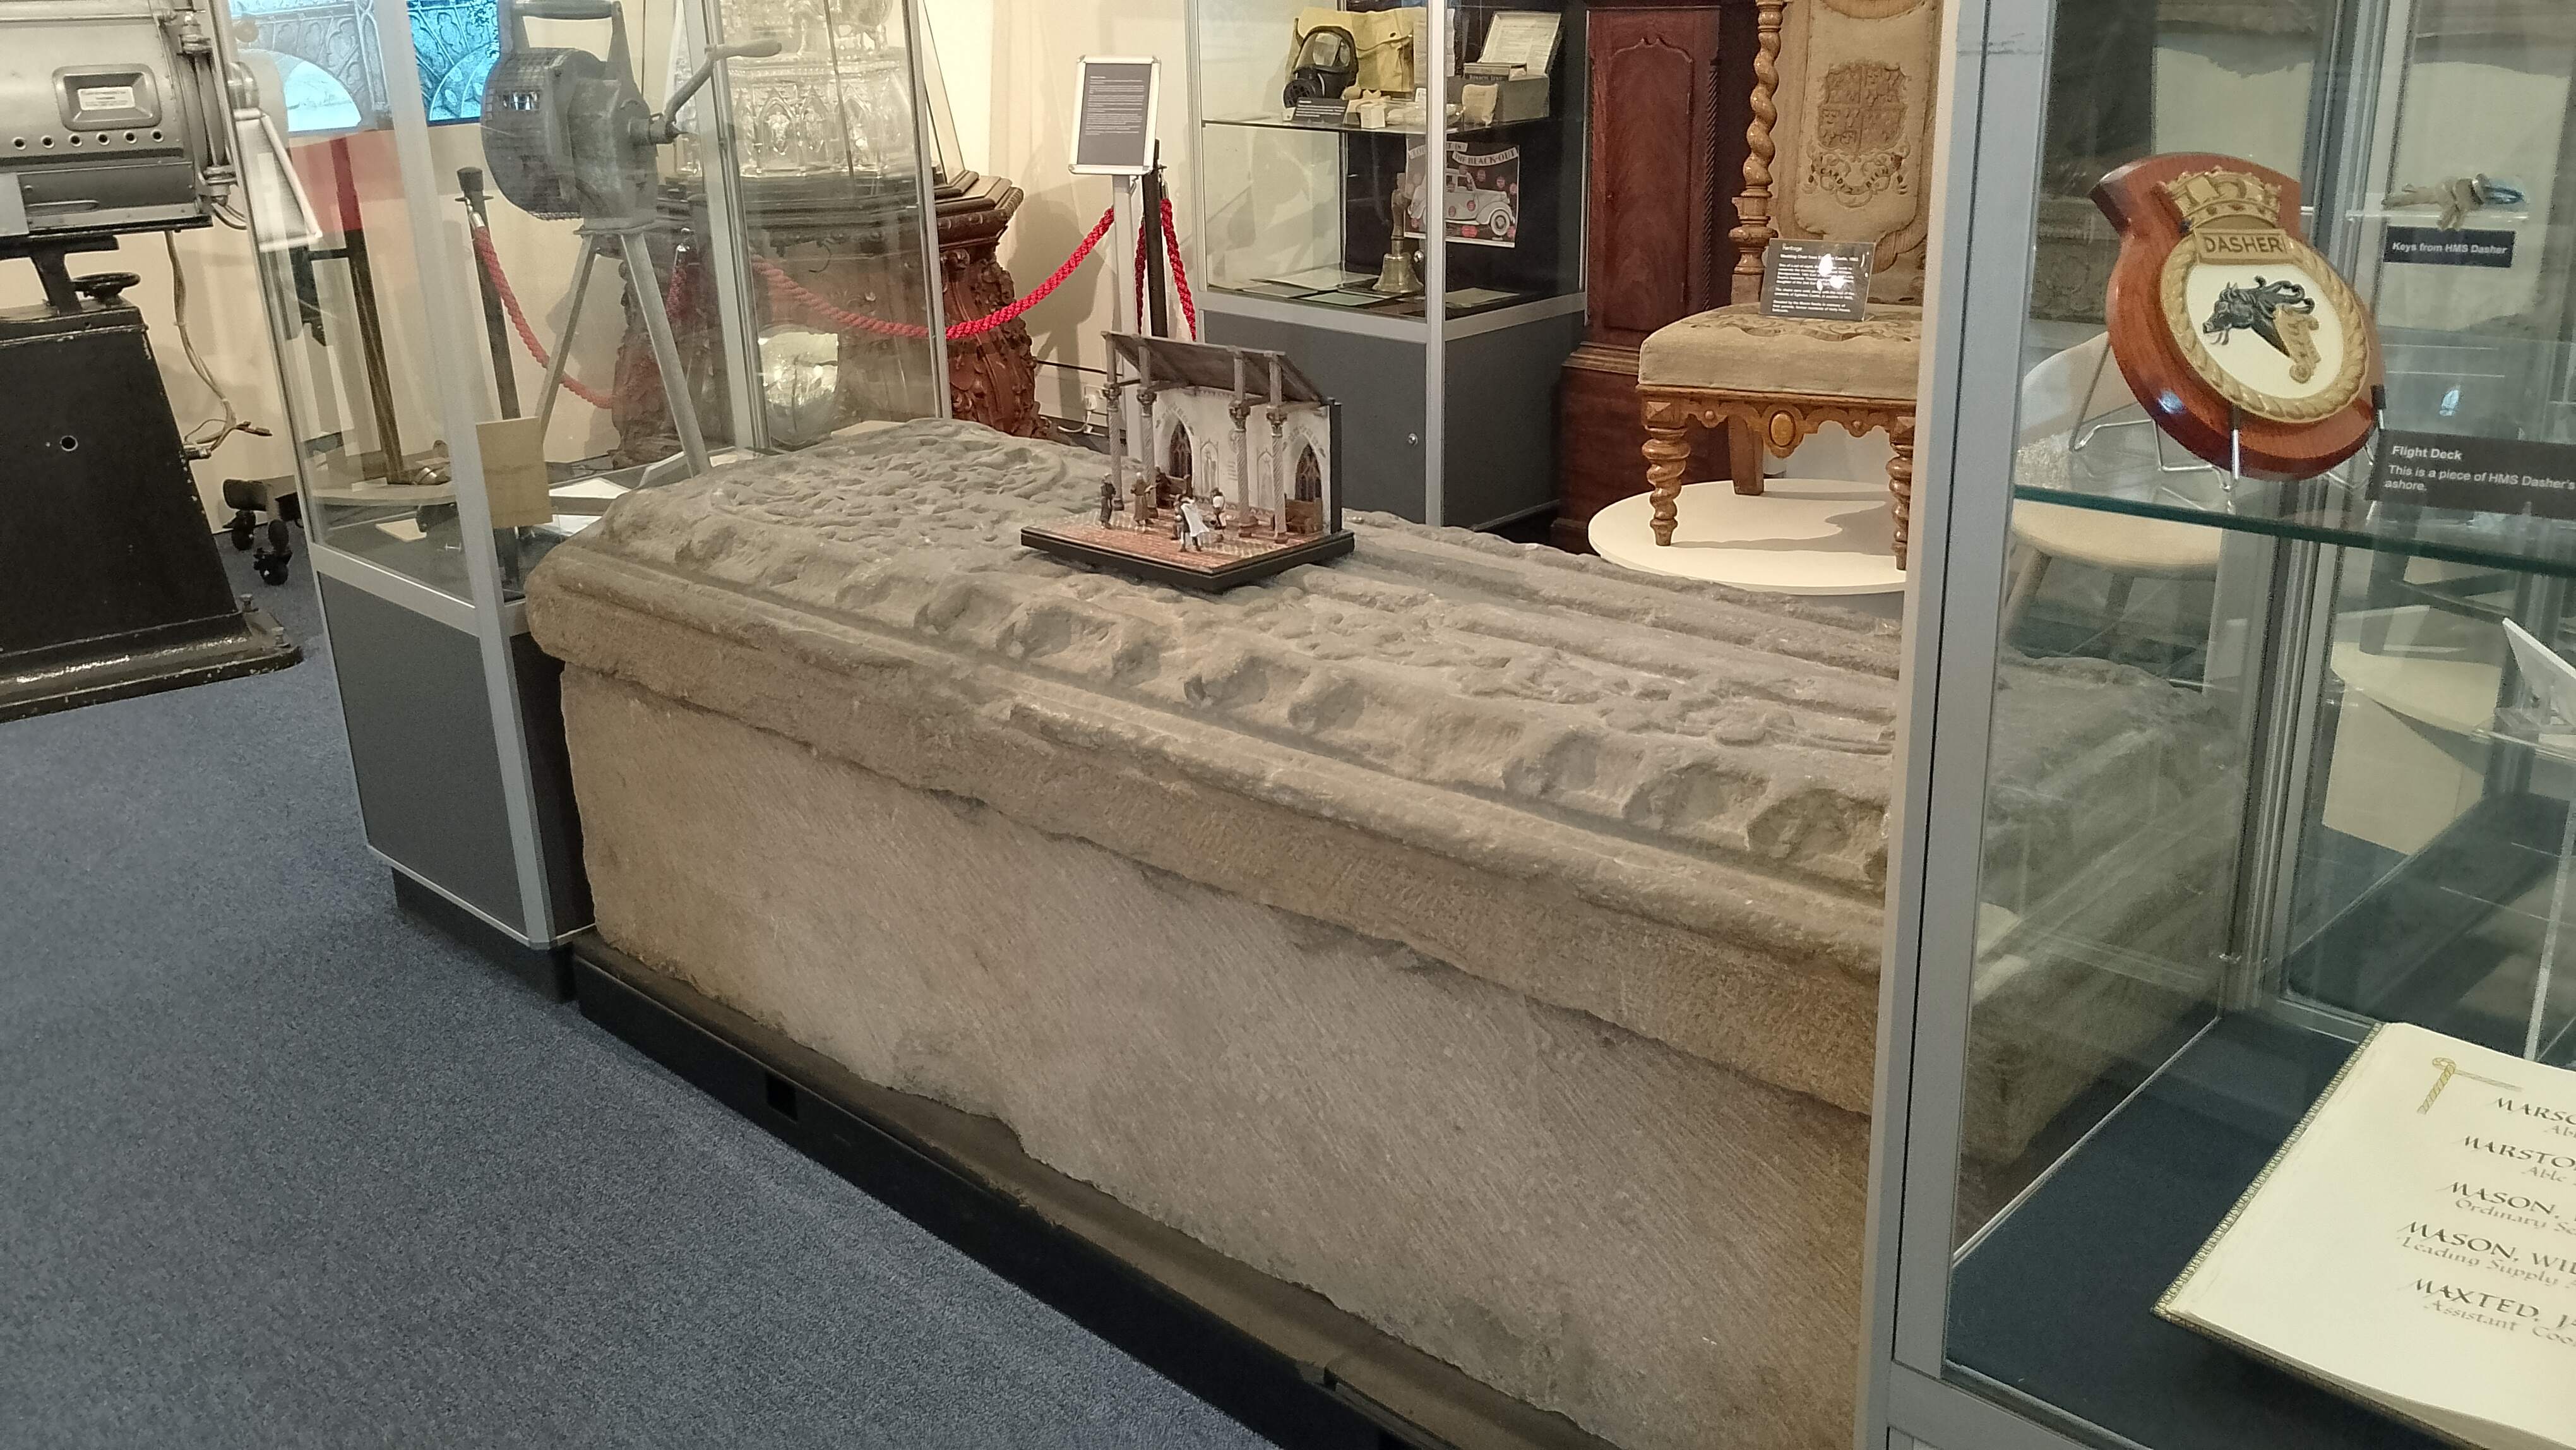
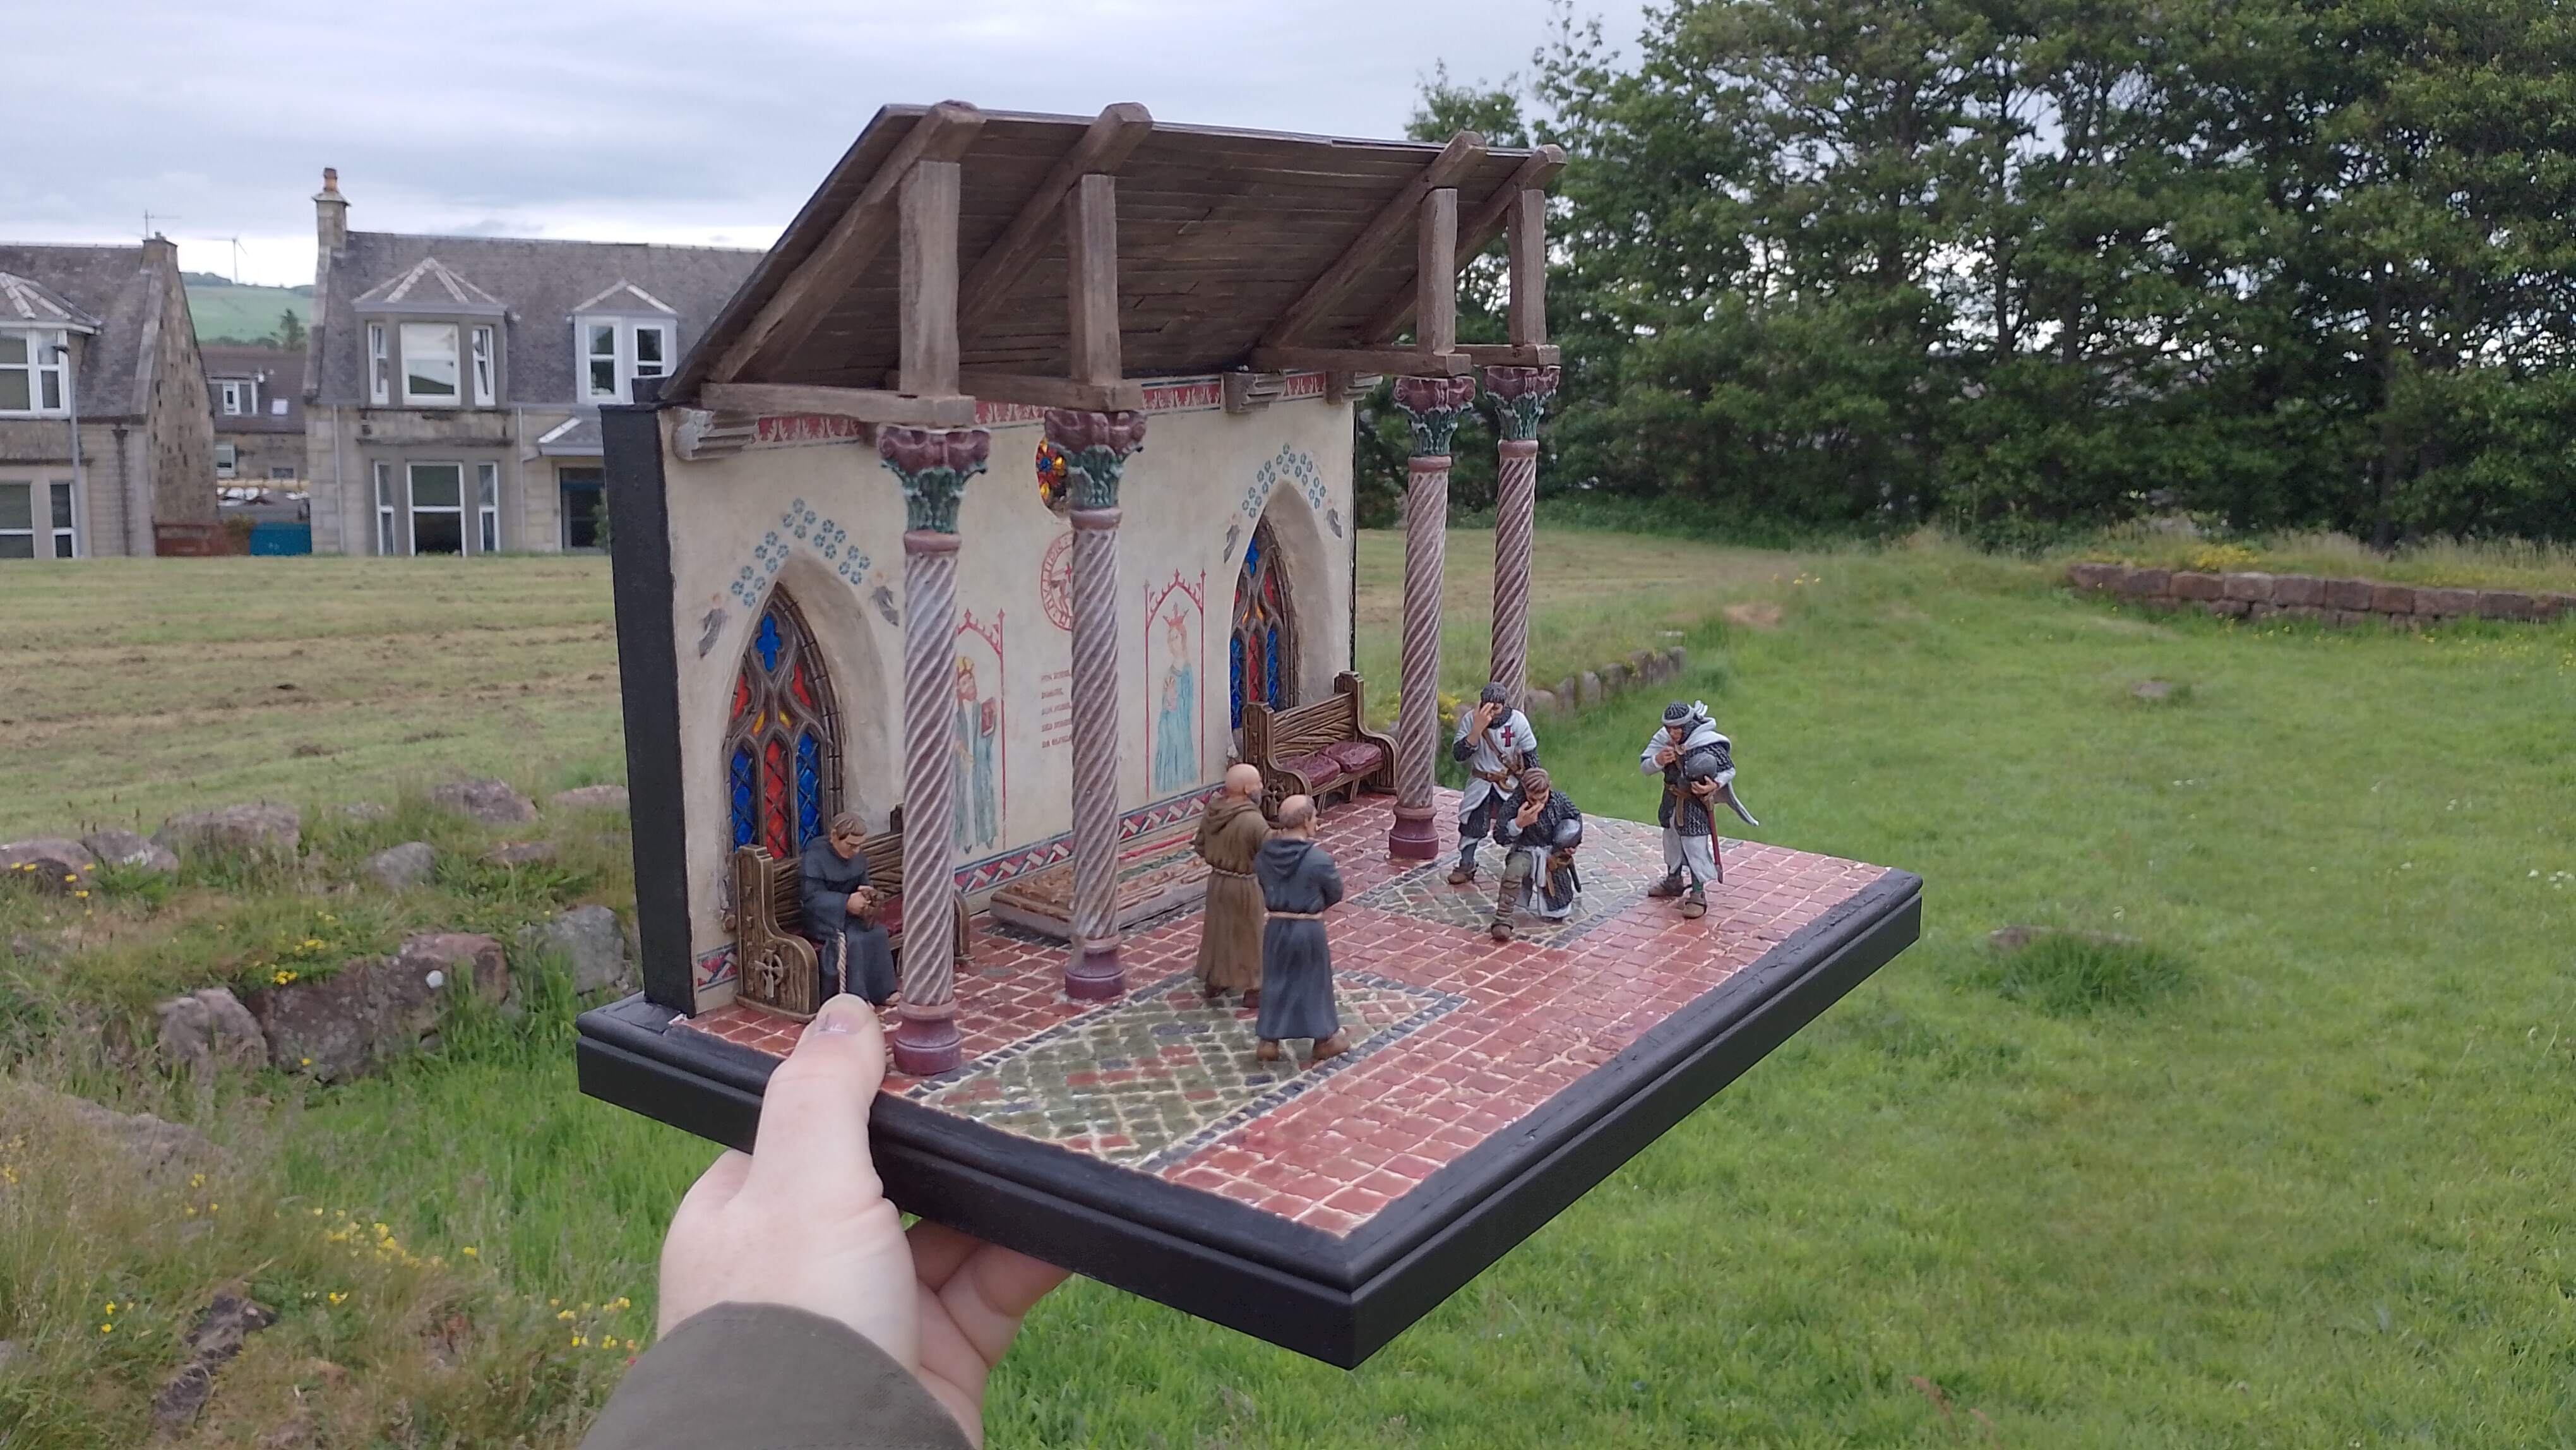
I took my finished diorama out on its holidays down in sunny Ayrshire and took a few wee pickies with the help of my friend Claire.
The first stop was the North Ayrshire Heritage Centre in Saltcoats, where the Ardrossan Sarcophagus is currently residing. We managed to get a few shots of the diorama on top of the sarcophagus, and luckily, there were only two bored museum staff members around who were on their tea break, so we had free rein of the place.
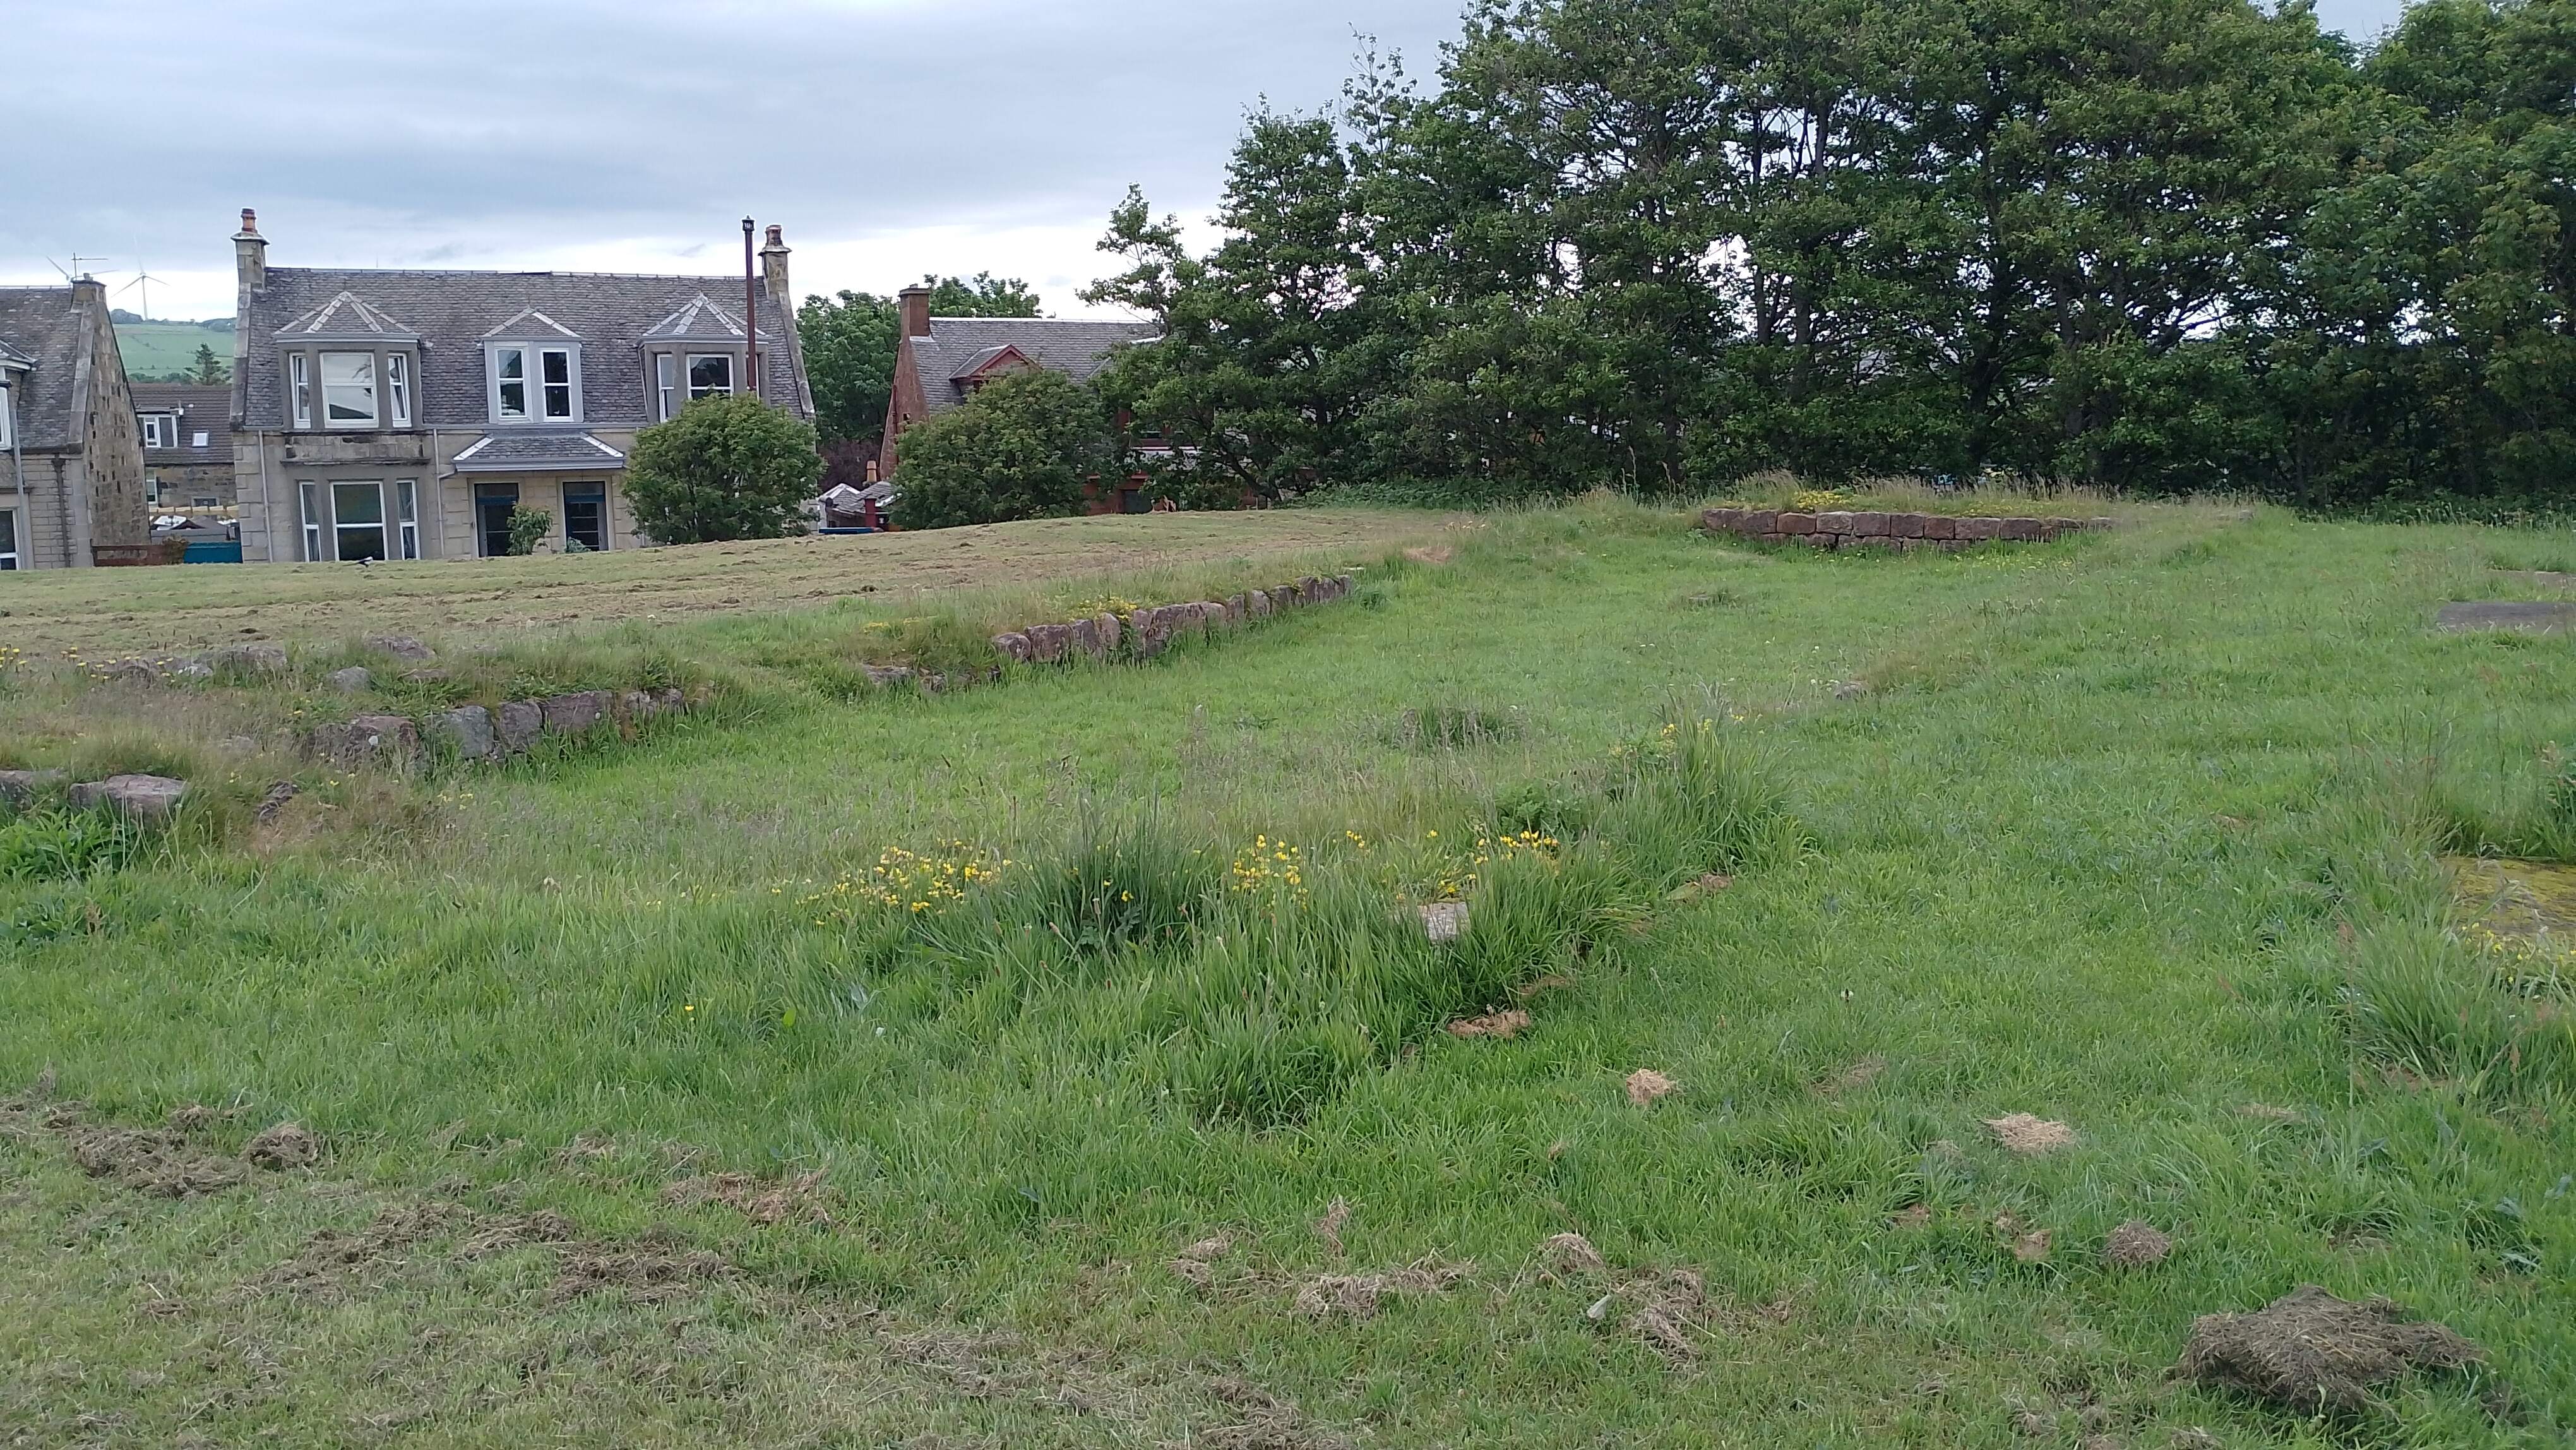
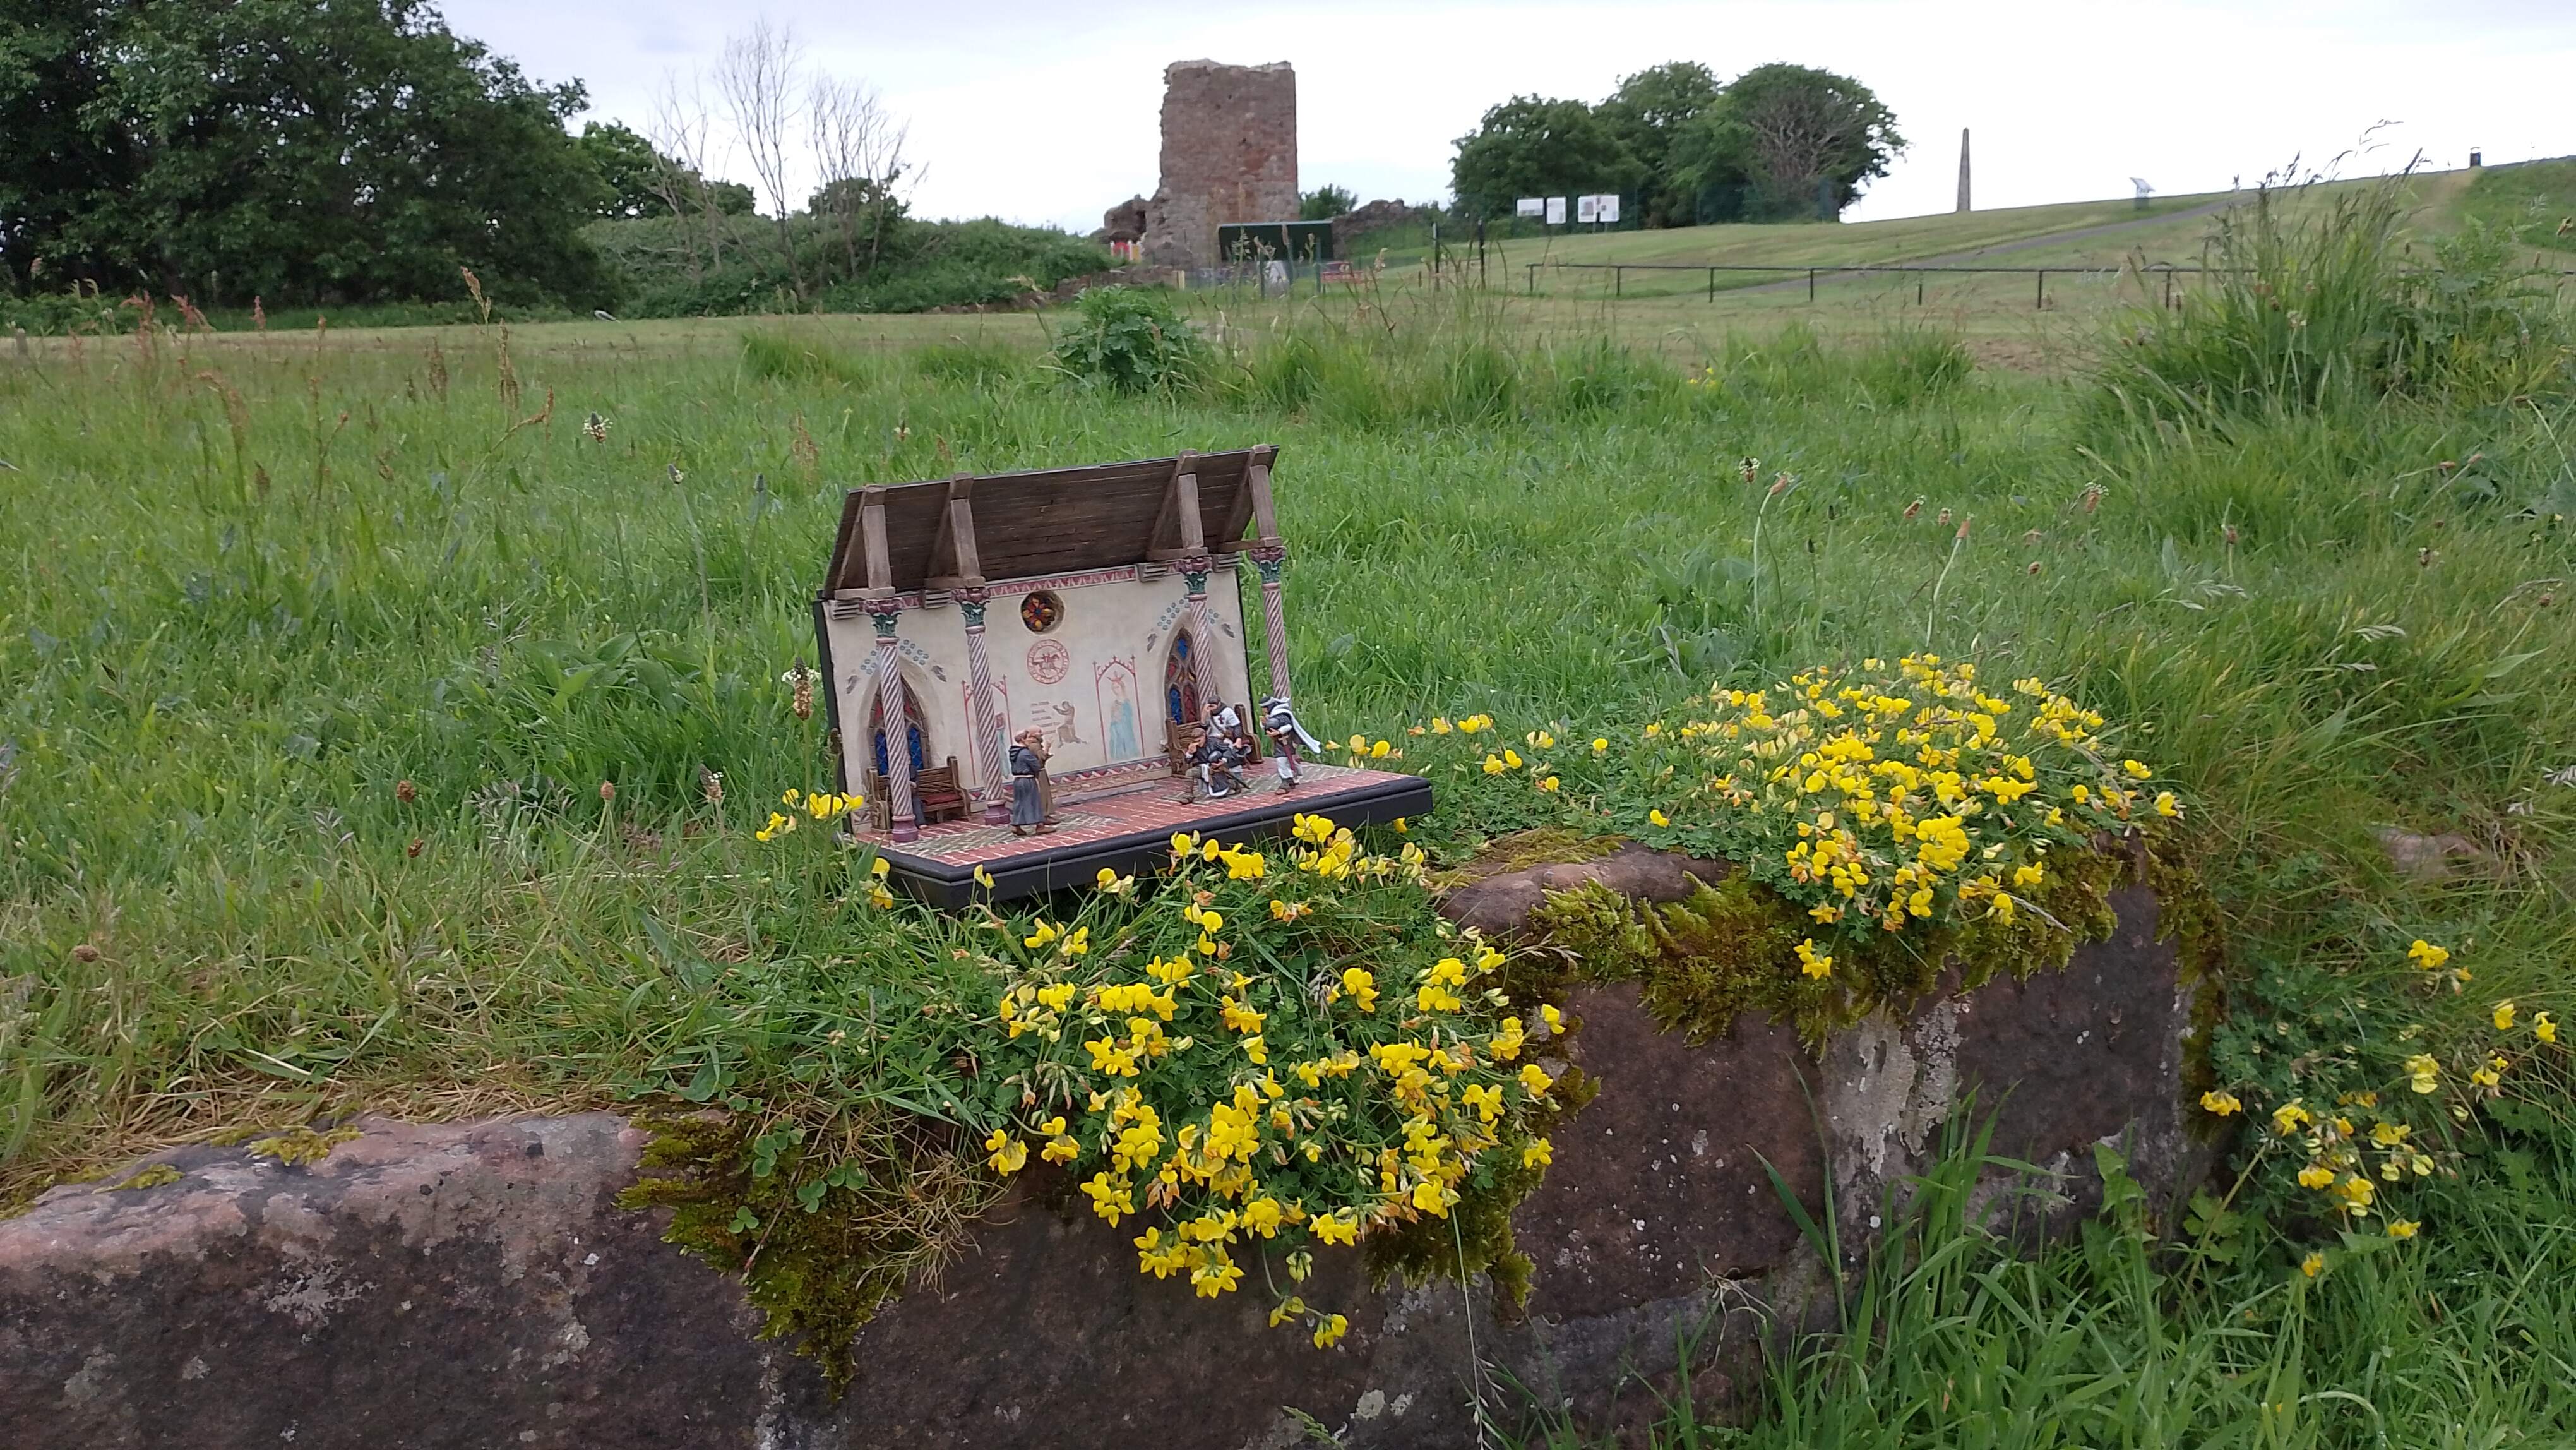
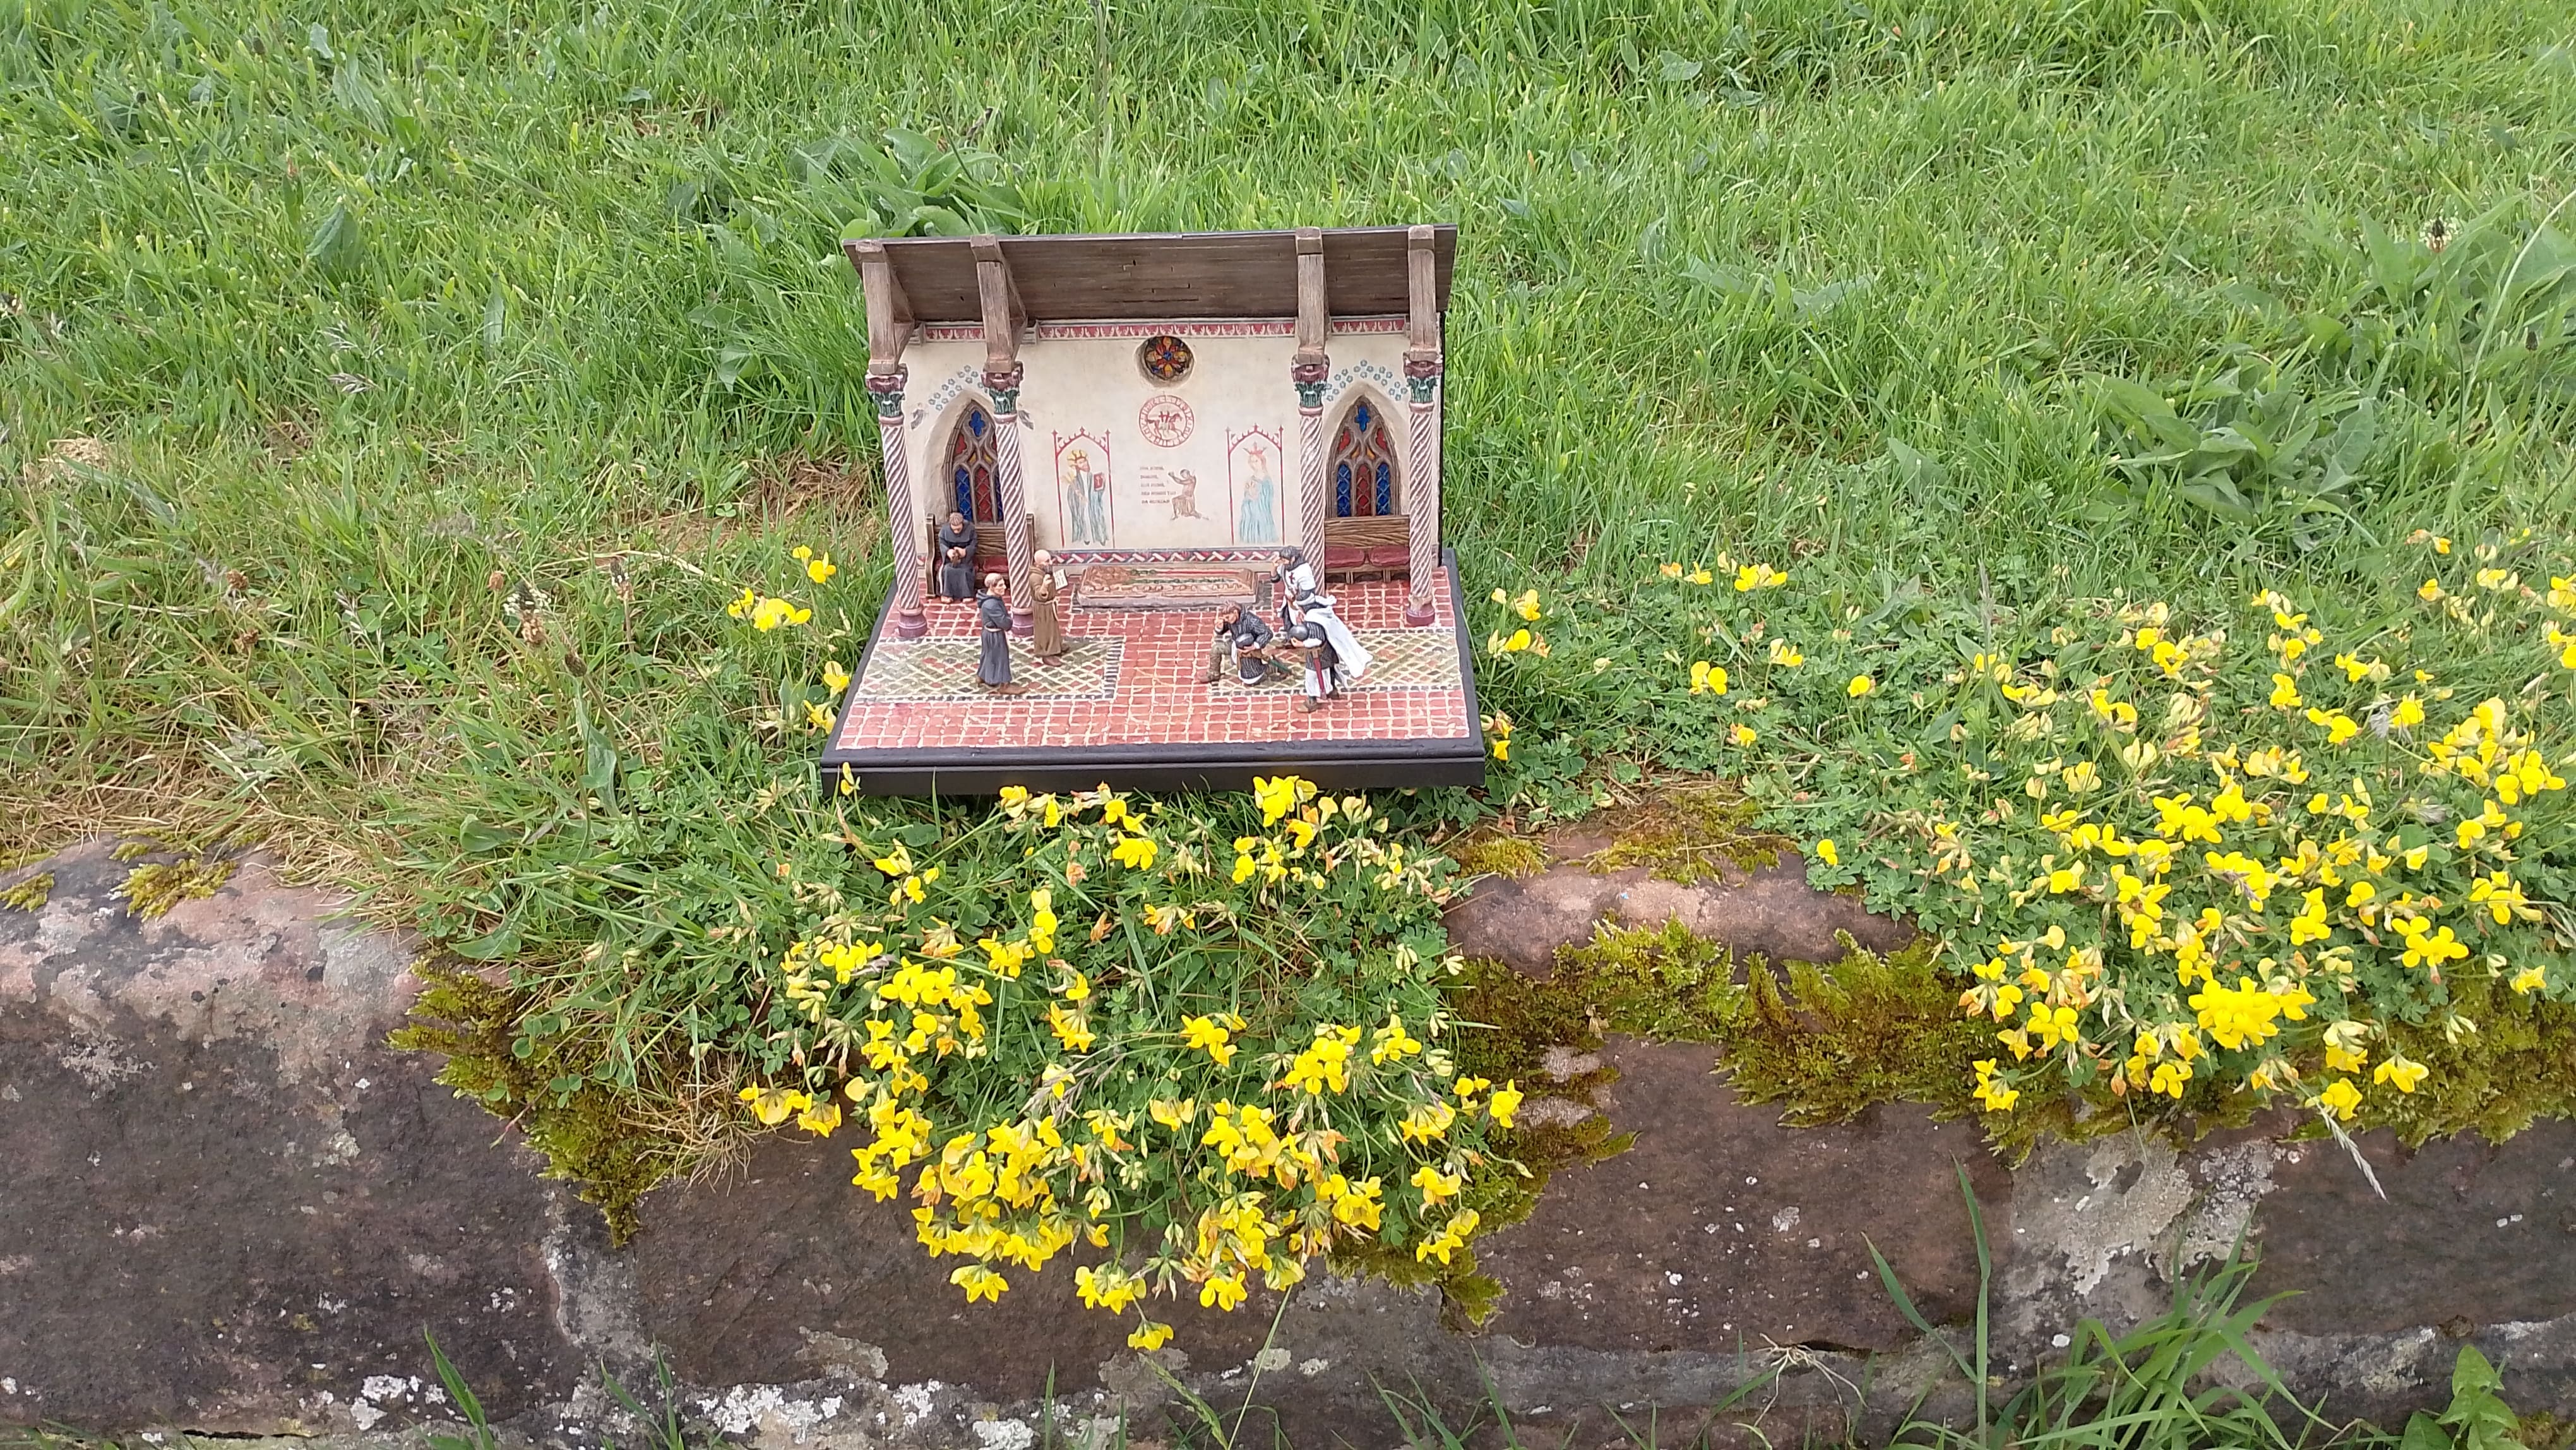
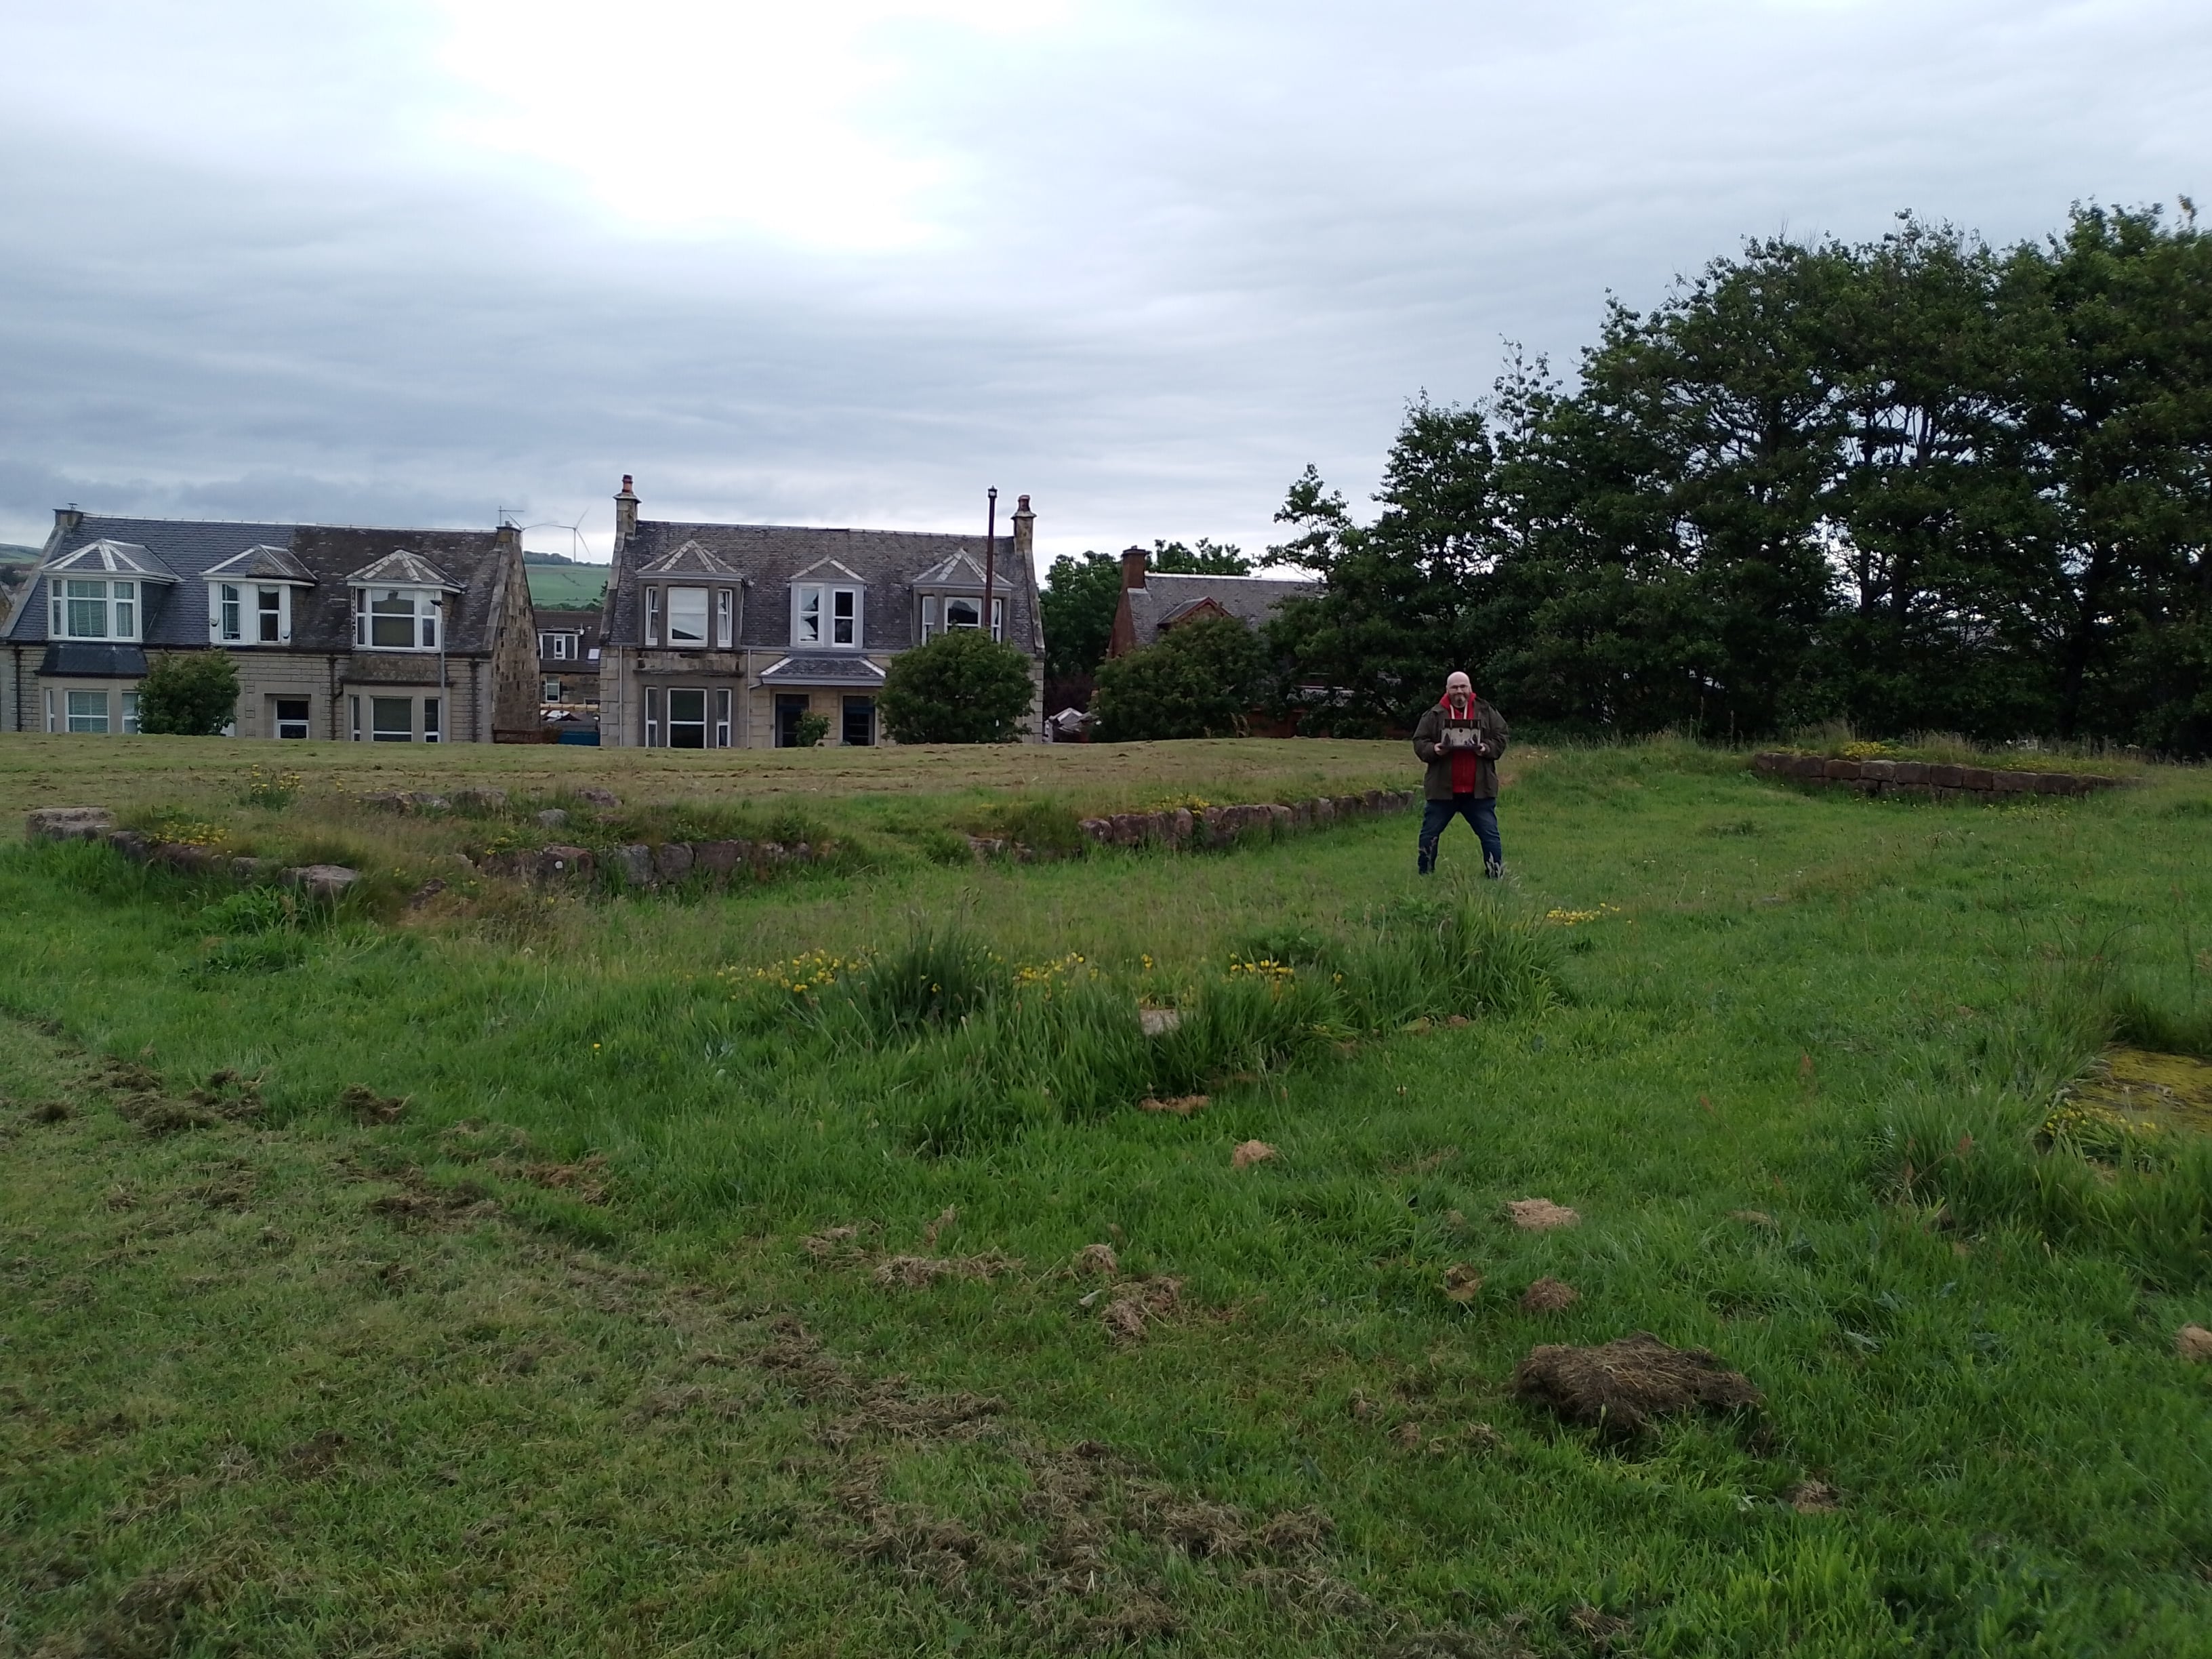
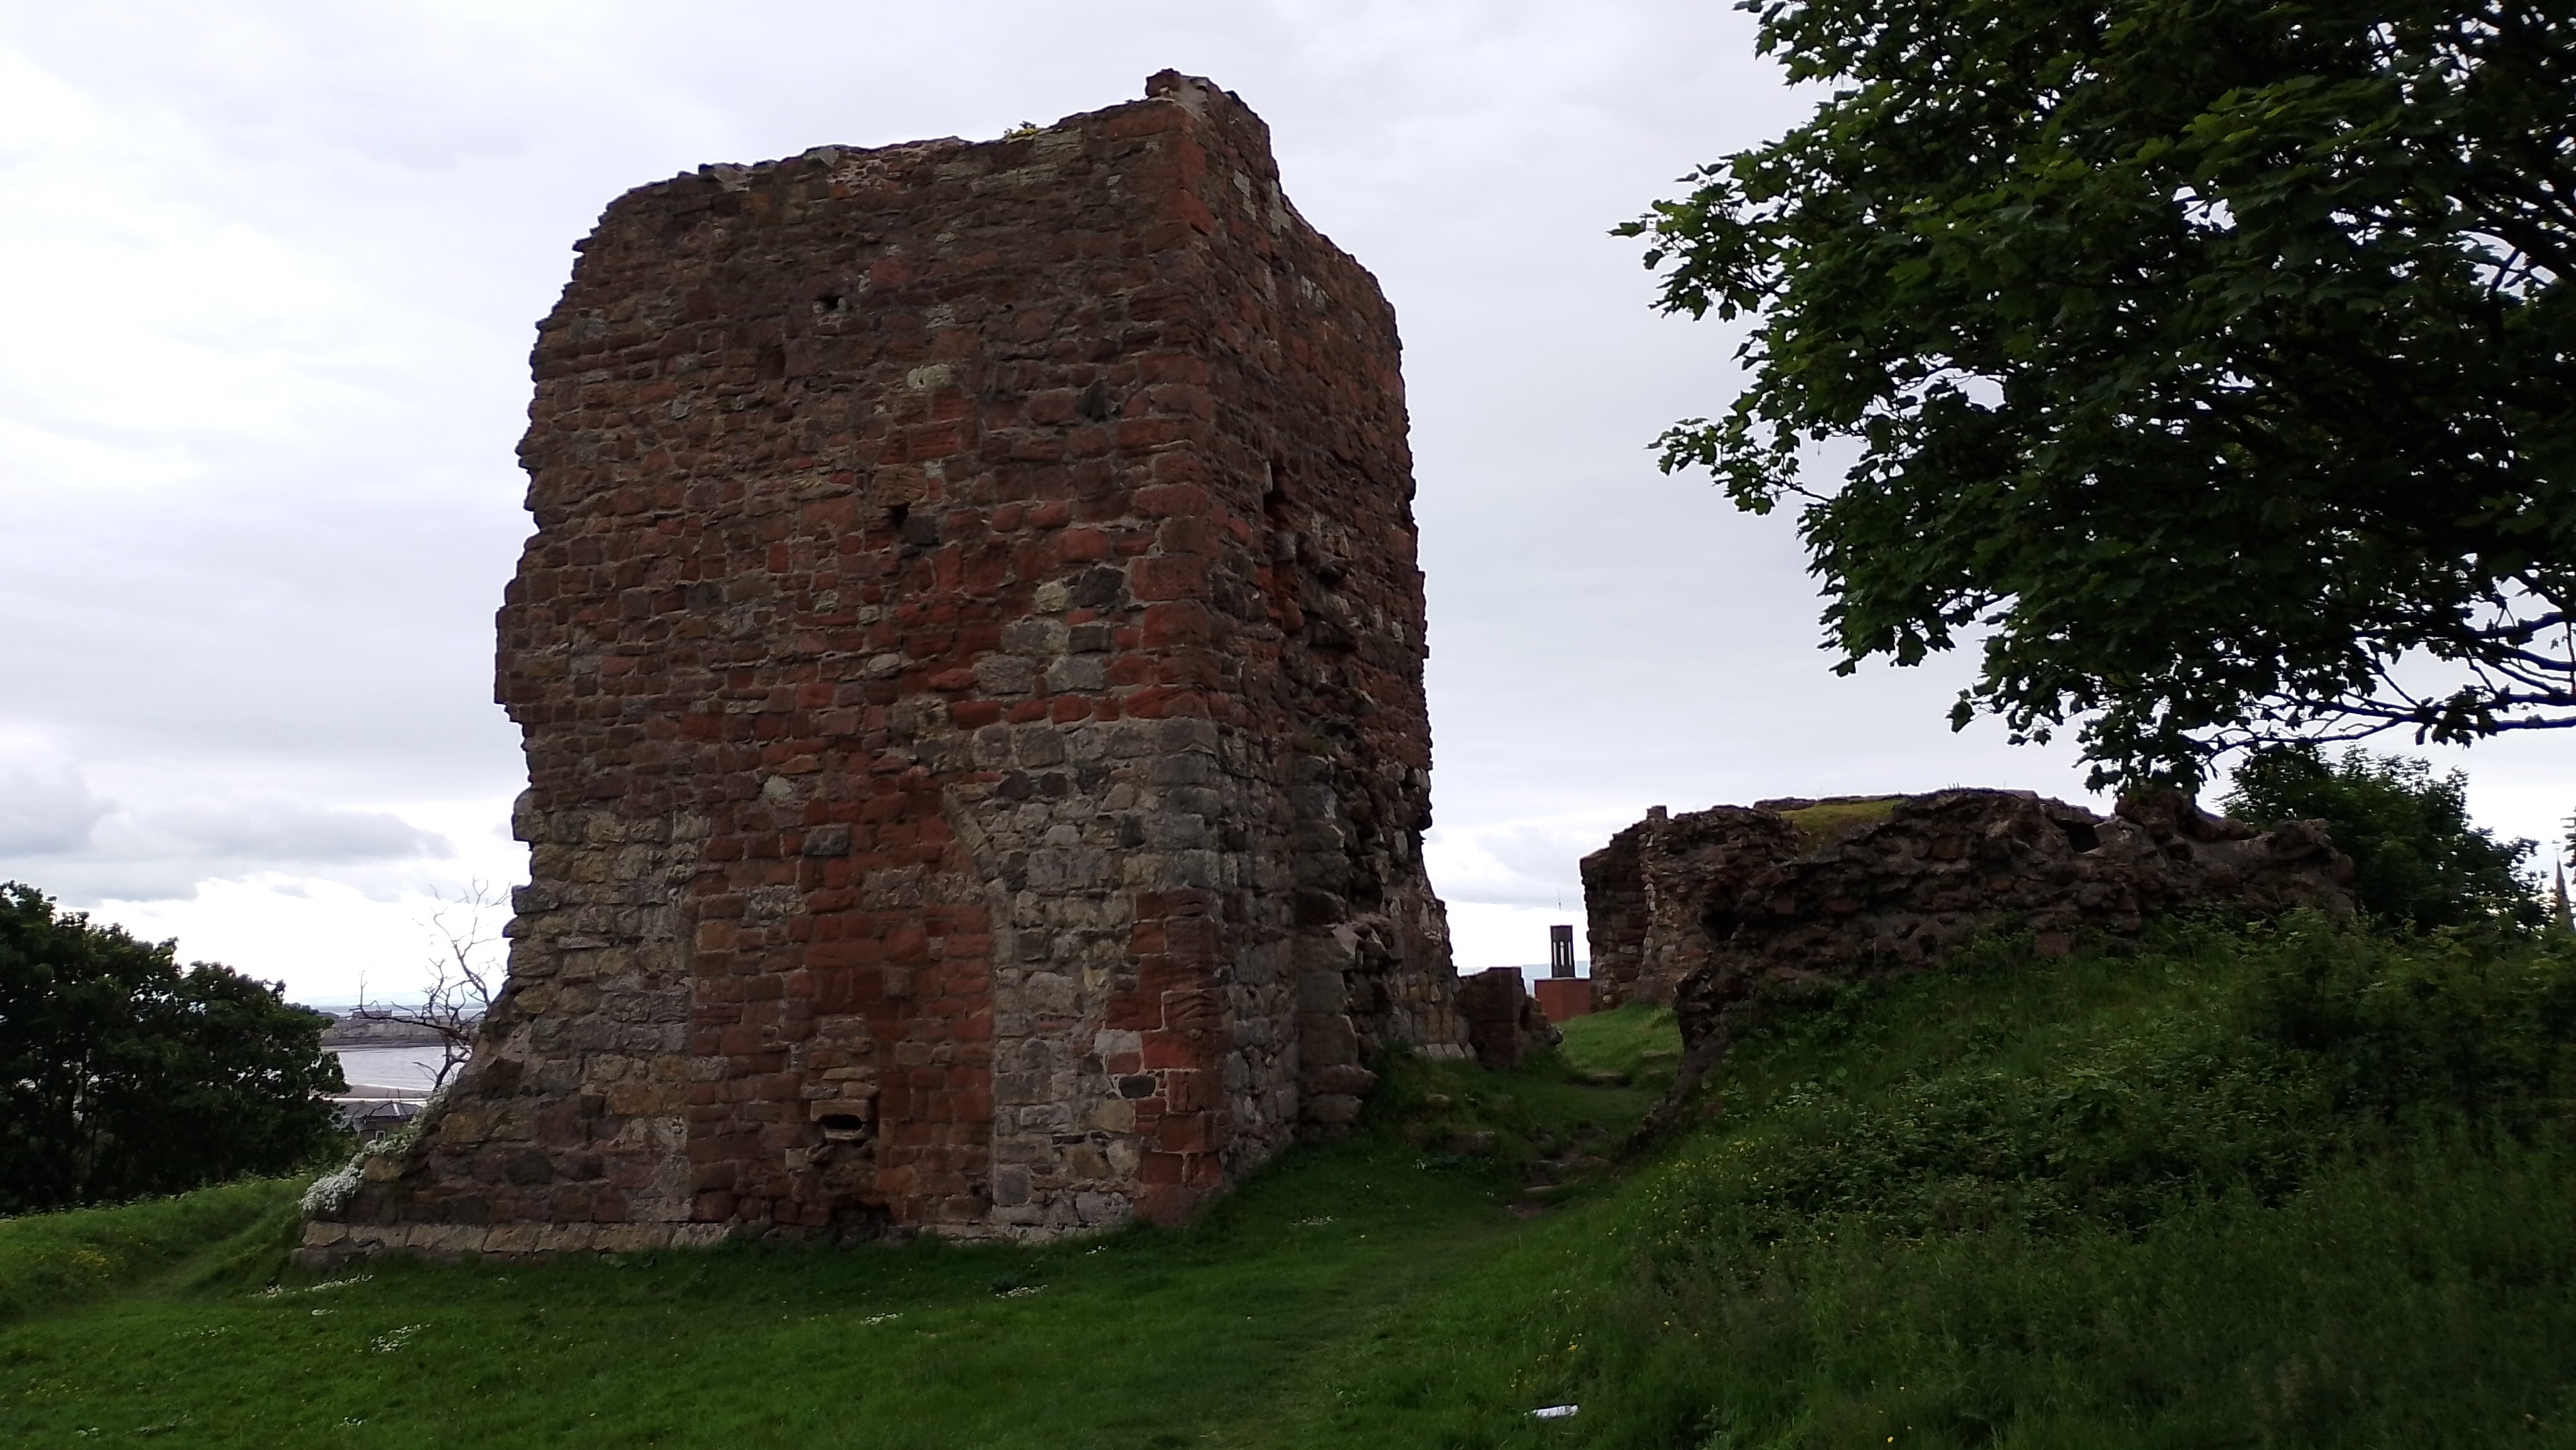
We next headed up to Ardrossan itself to the ruin of the old Ardrossan Parish Church and graveyard on Castle Hill. We tried to position the diorama to show where the sarcophagus and wall would have been back in the day. We also got a shot of the diorama on the church wall with the castle itself in the background. And just because we were there, we took the diorama up to the castle itself, as it’s probable that the person who had been buried in the sarcophagus might have been related to the lords of Ardrossan, so worth the walk over there in the rain.
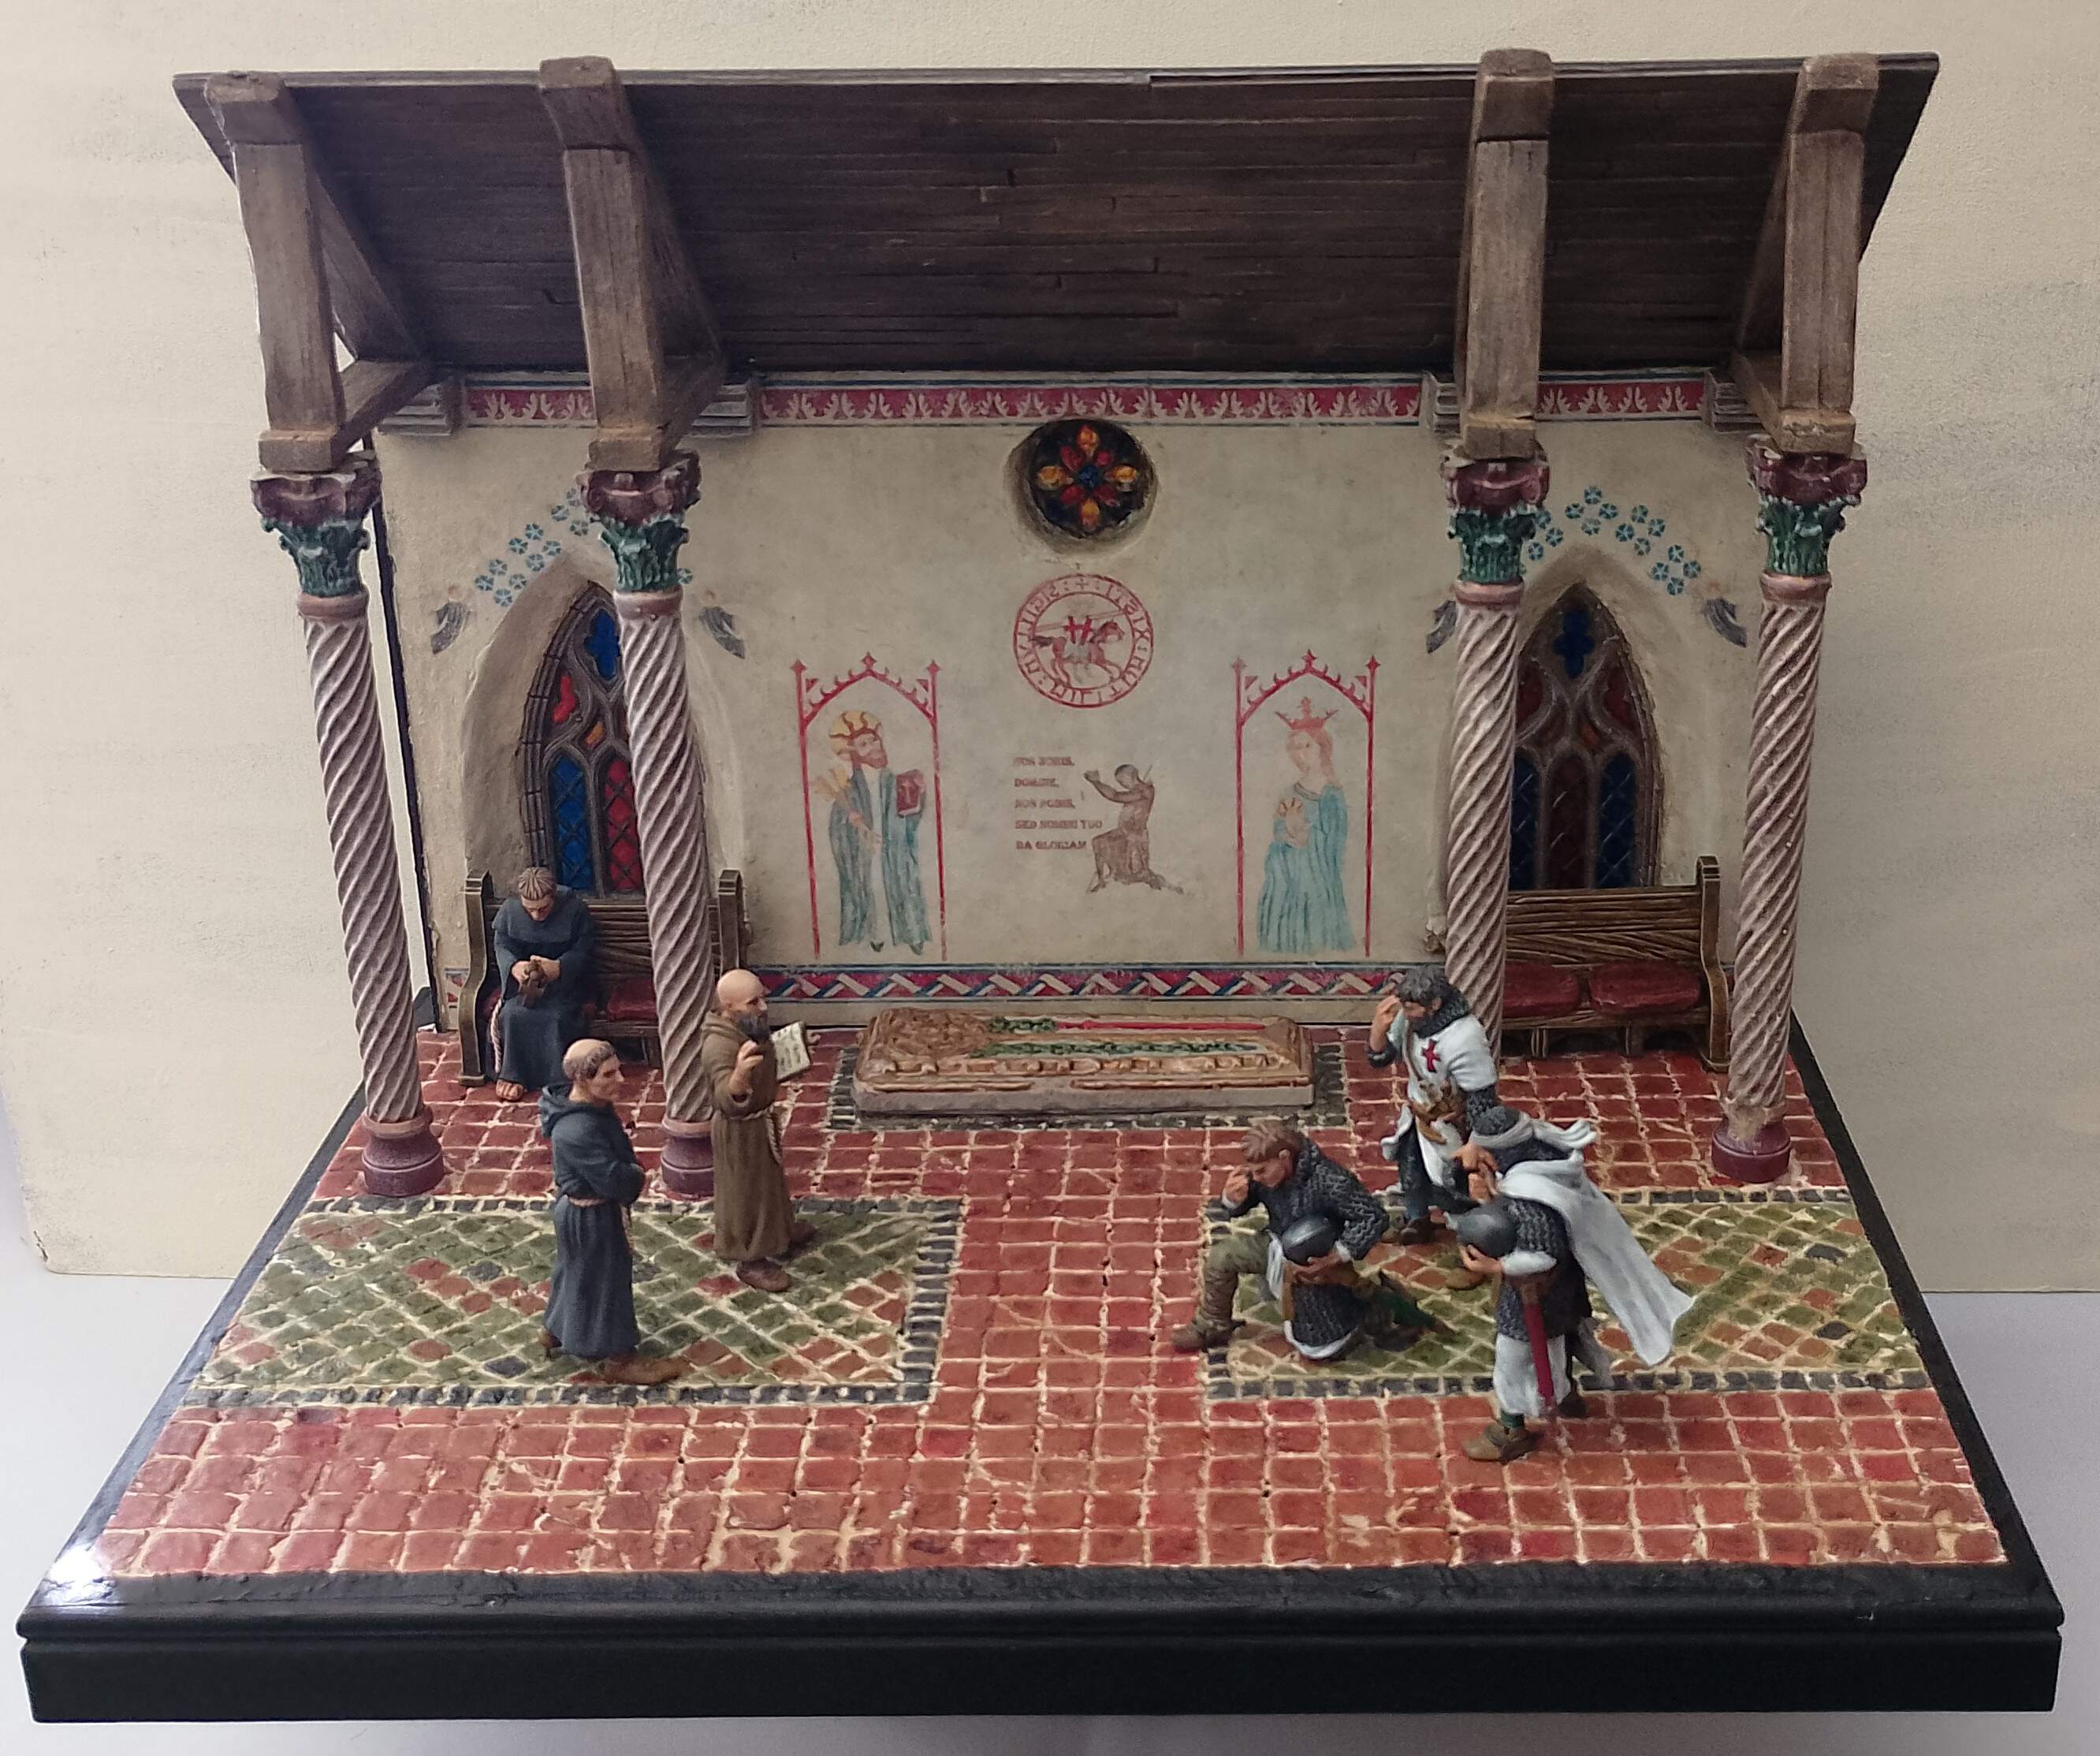
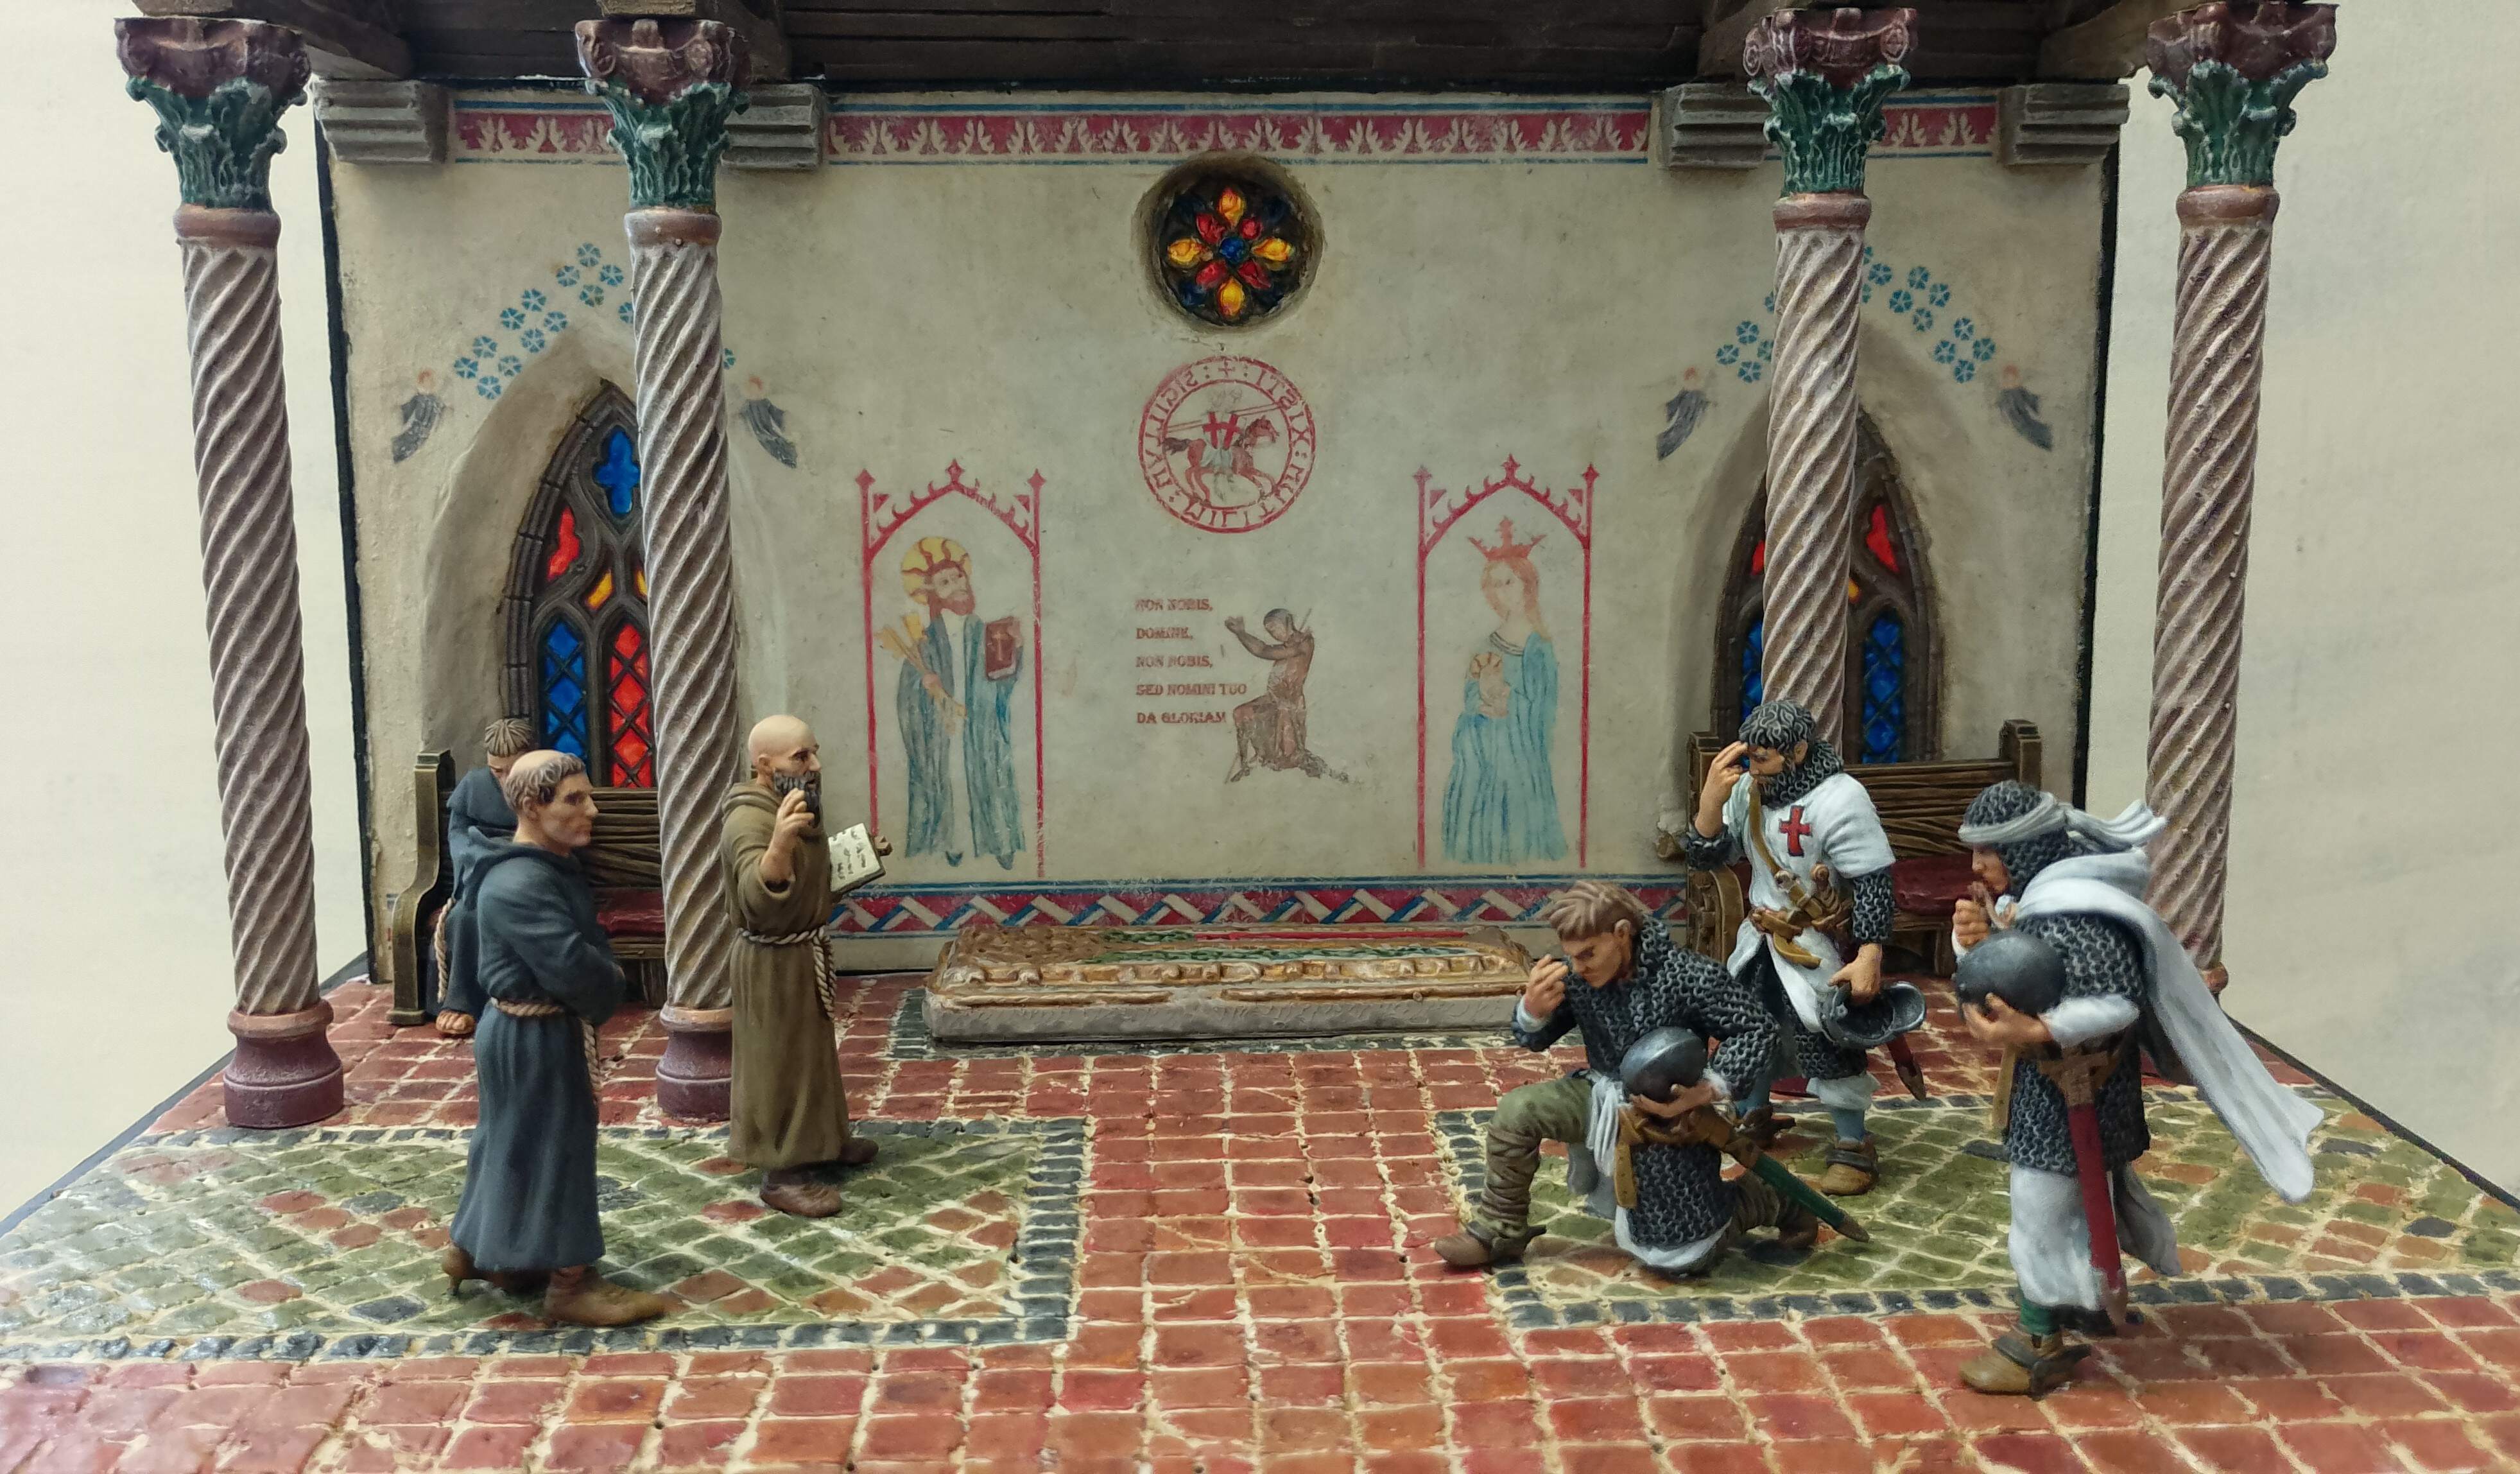
Diorama Done
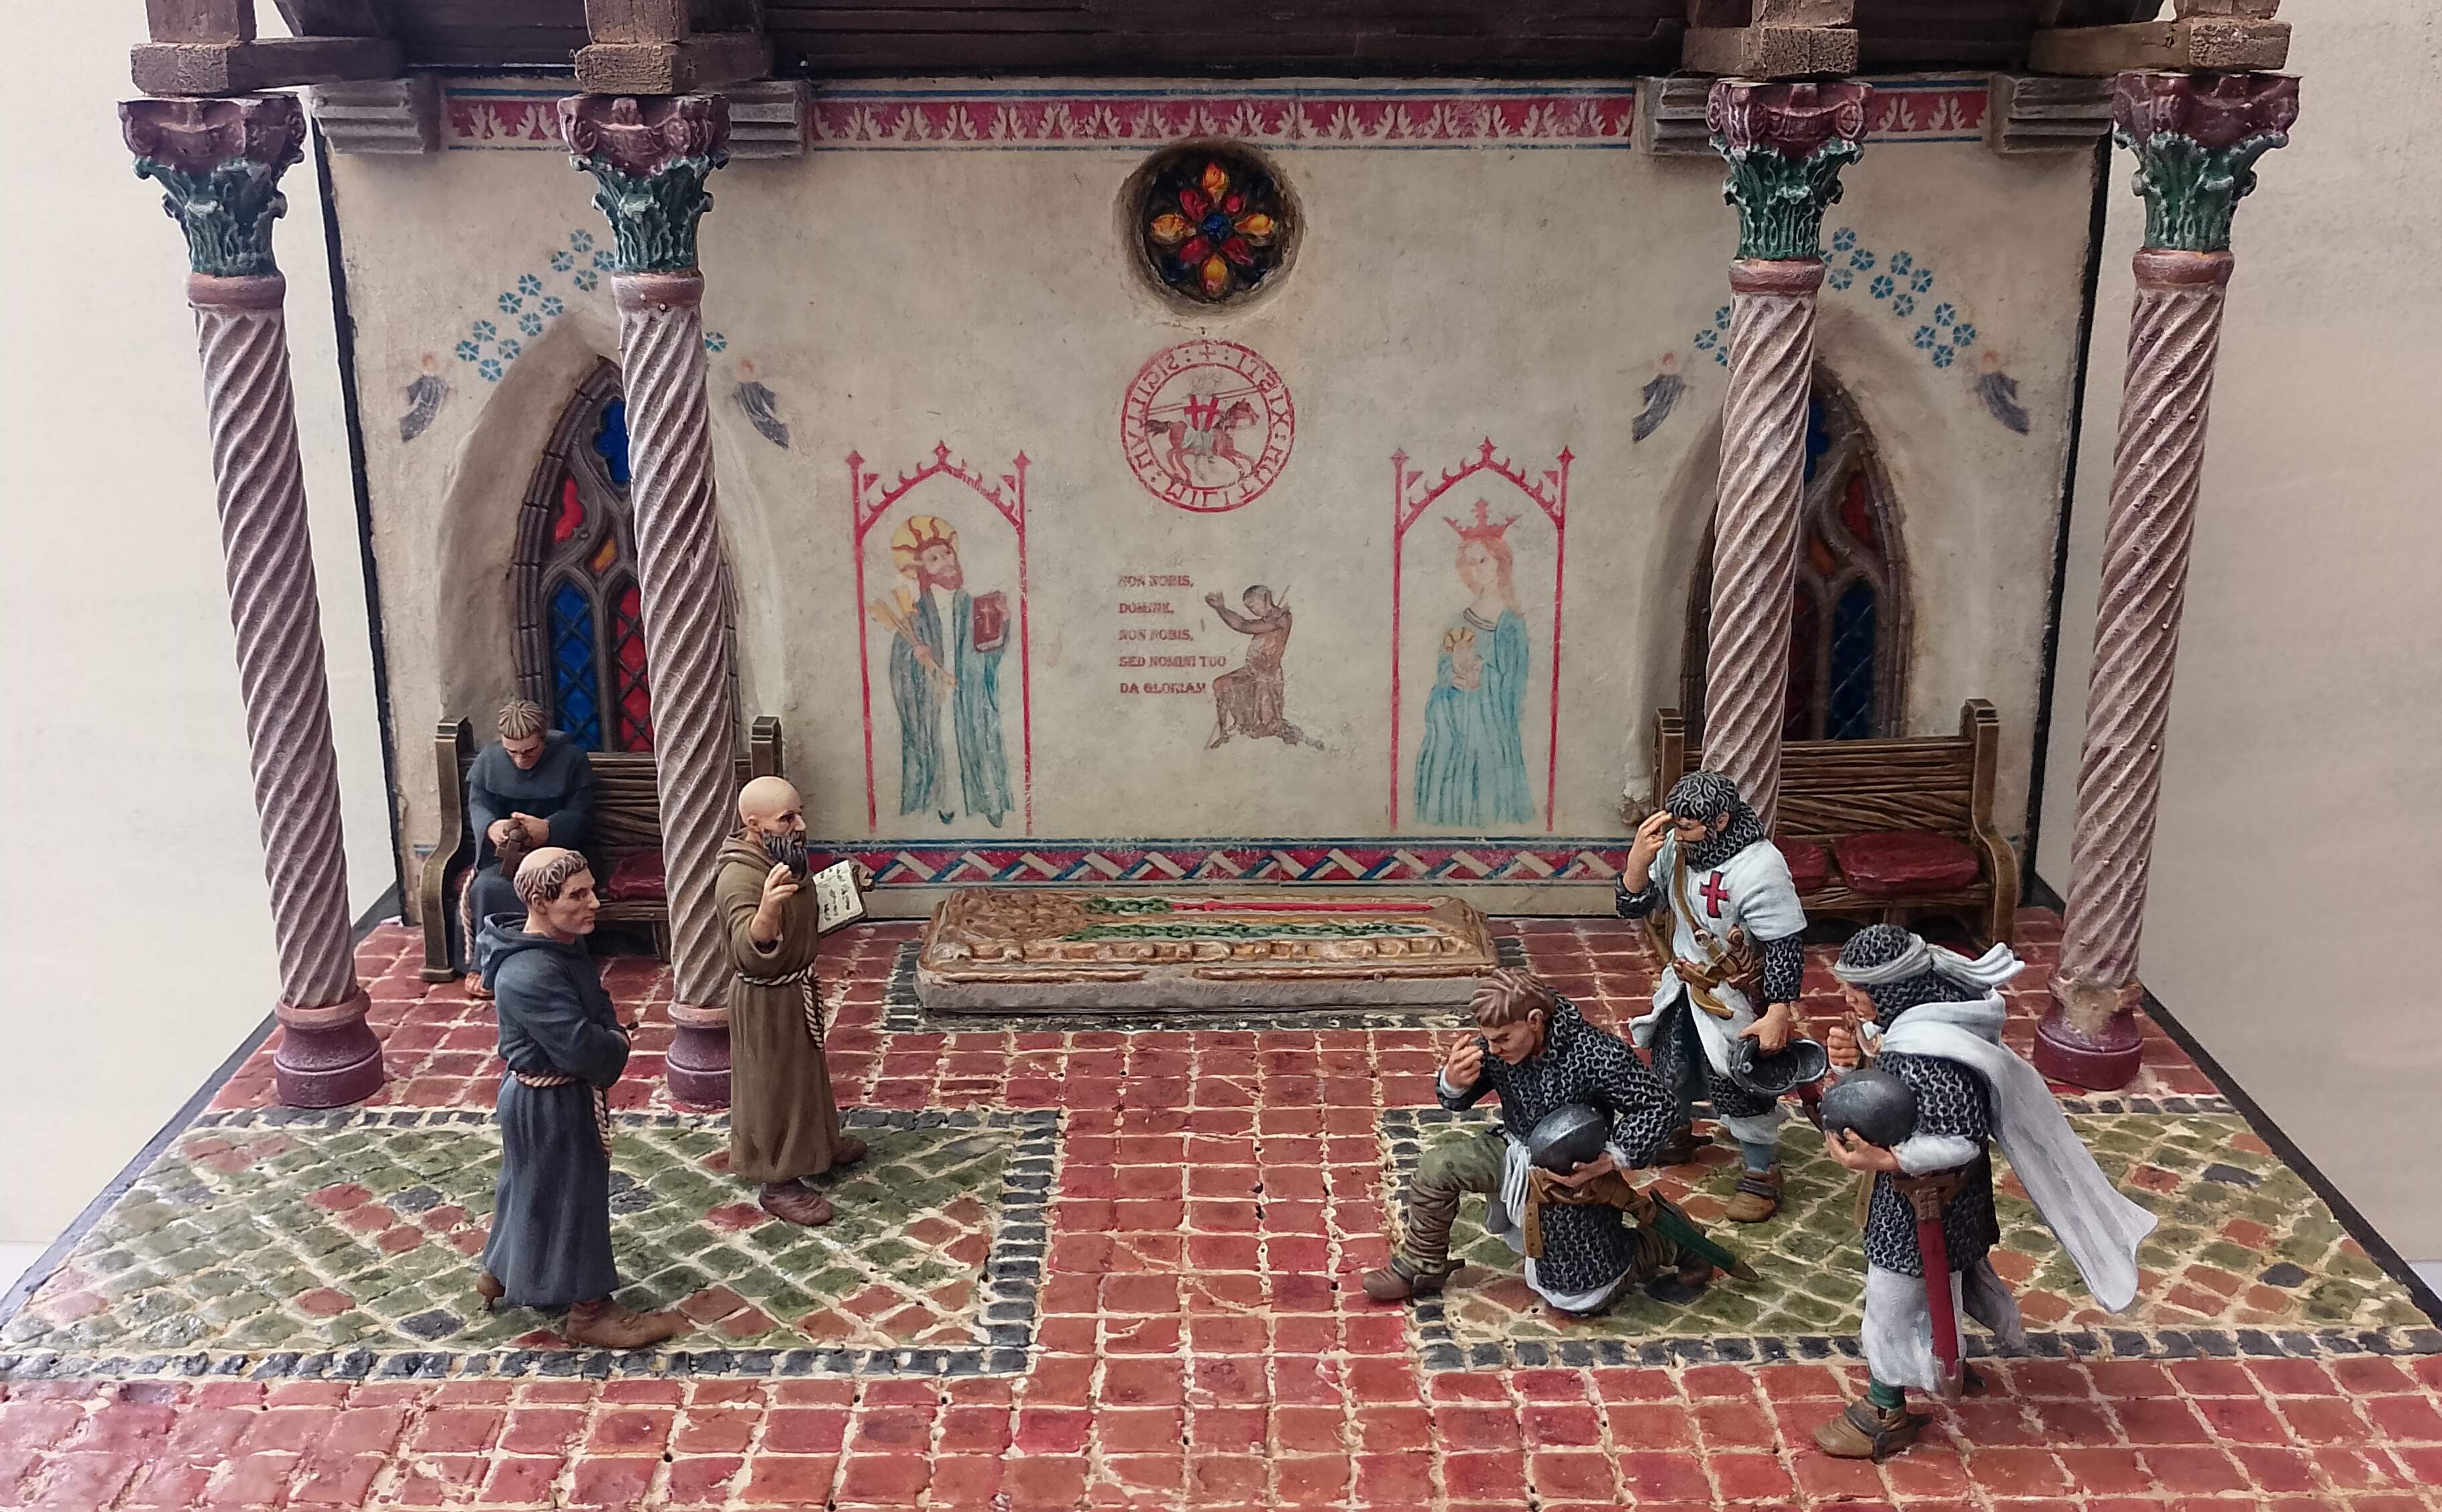
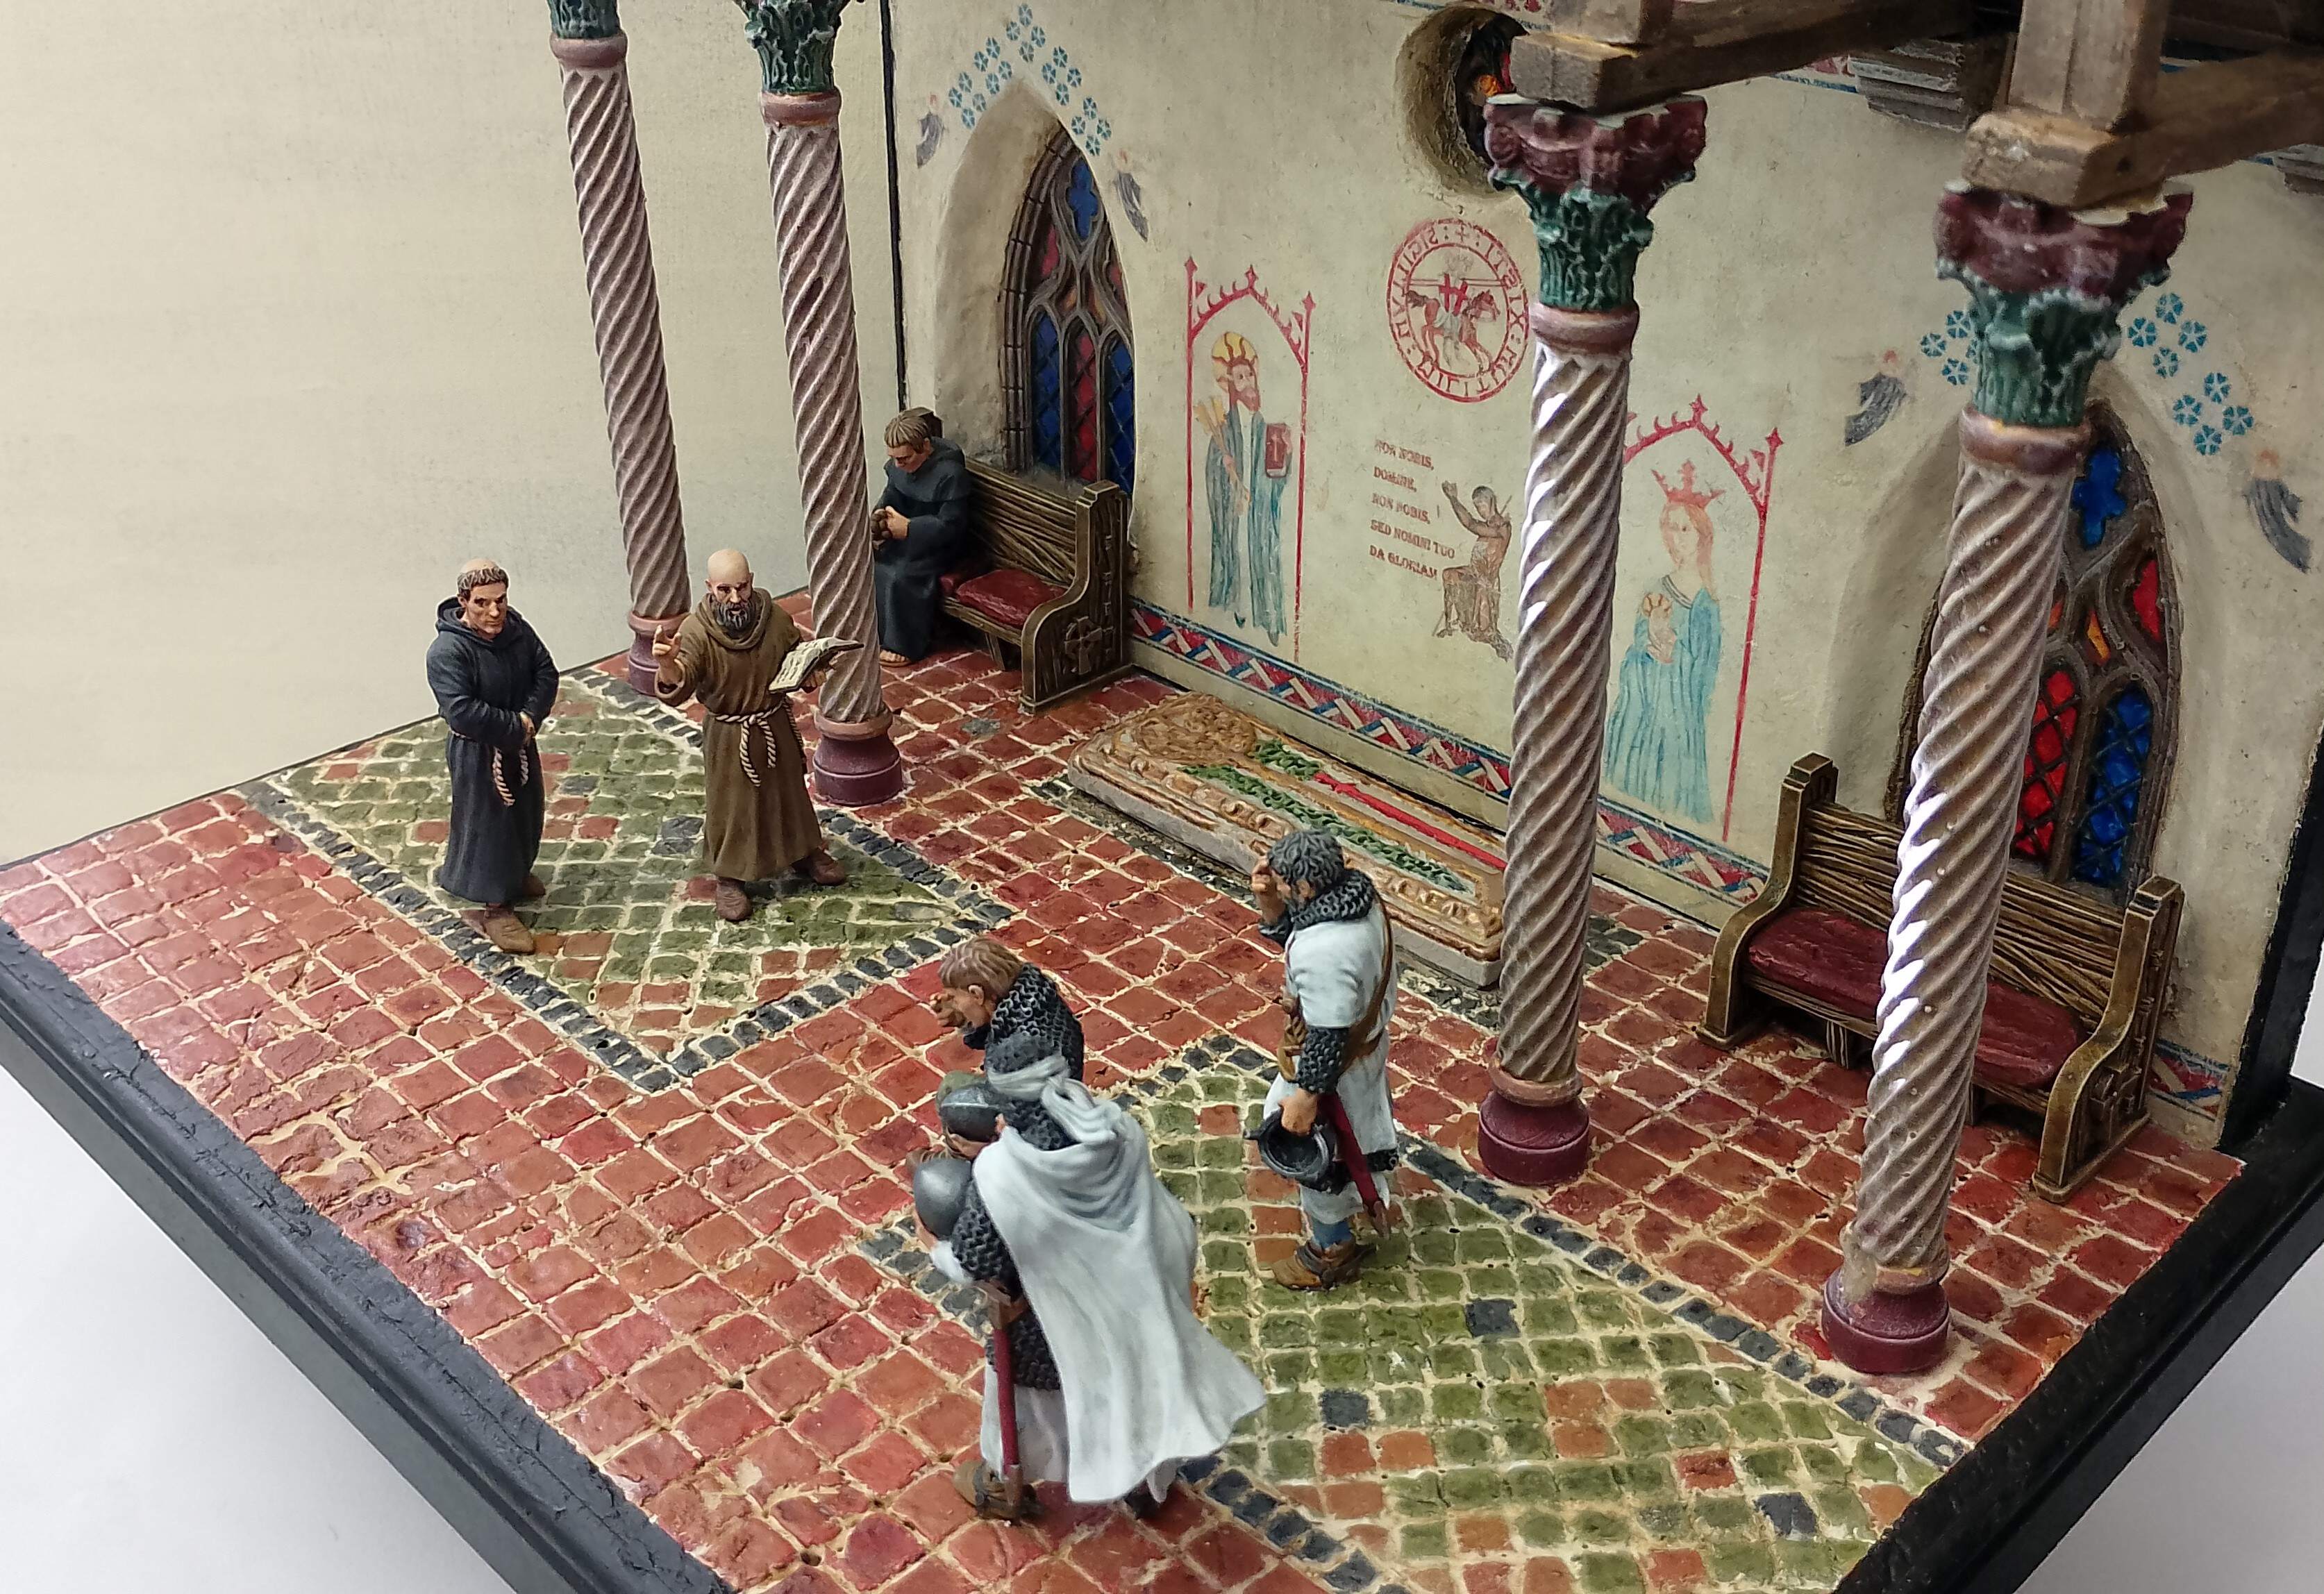
I used one of those glues they used to ban at school because of the mad fumes to fix the wall, columns and roofing parts together, which took a bit of strategic clamping and weighing down. Didn’t get any photos of this as I had to do a bit of holding things in place while it dried. After that, I started fix in place all the Templars, monks and church pews onto the diorama. I did a bit of dry-fitting with this stage to see where the best place for each mini would be. I had intended to put the pews out at the front, but after another look at that, I thought it made the front part look a bit busy, so I moved them up against the window, which I think works a bit better. It also makes the monks and Templars at the front stand out a bit more.
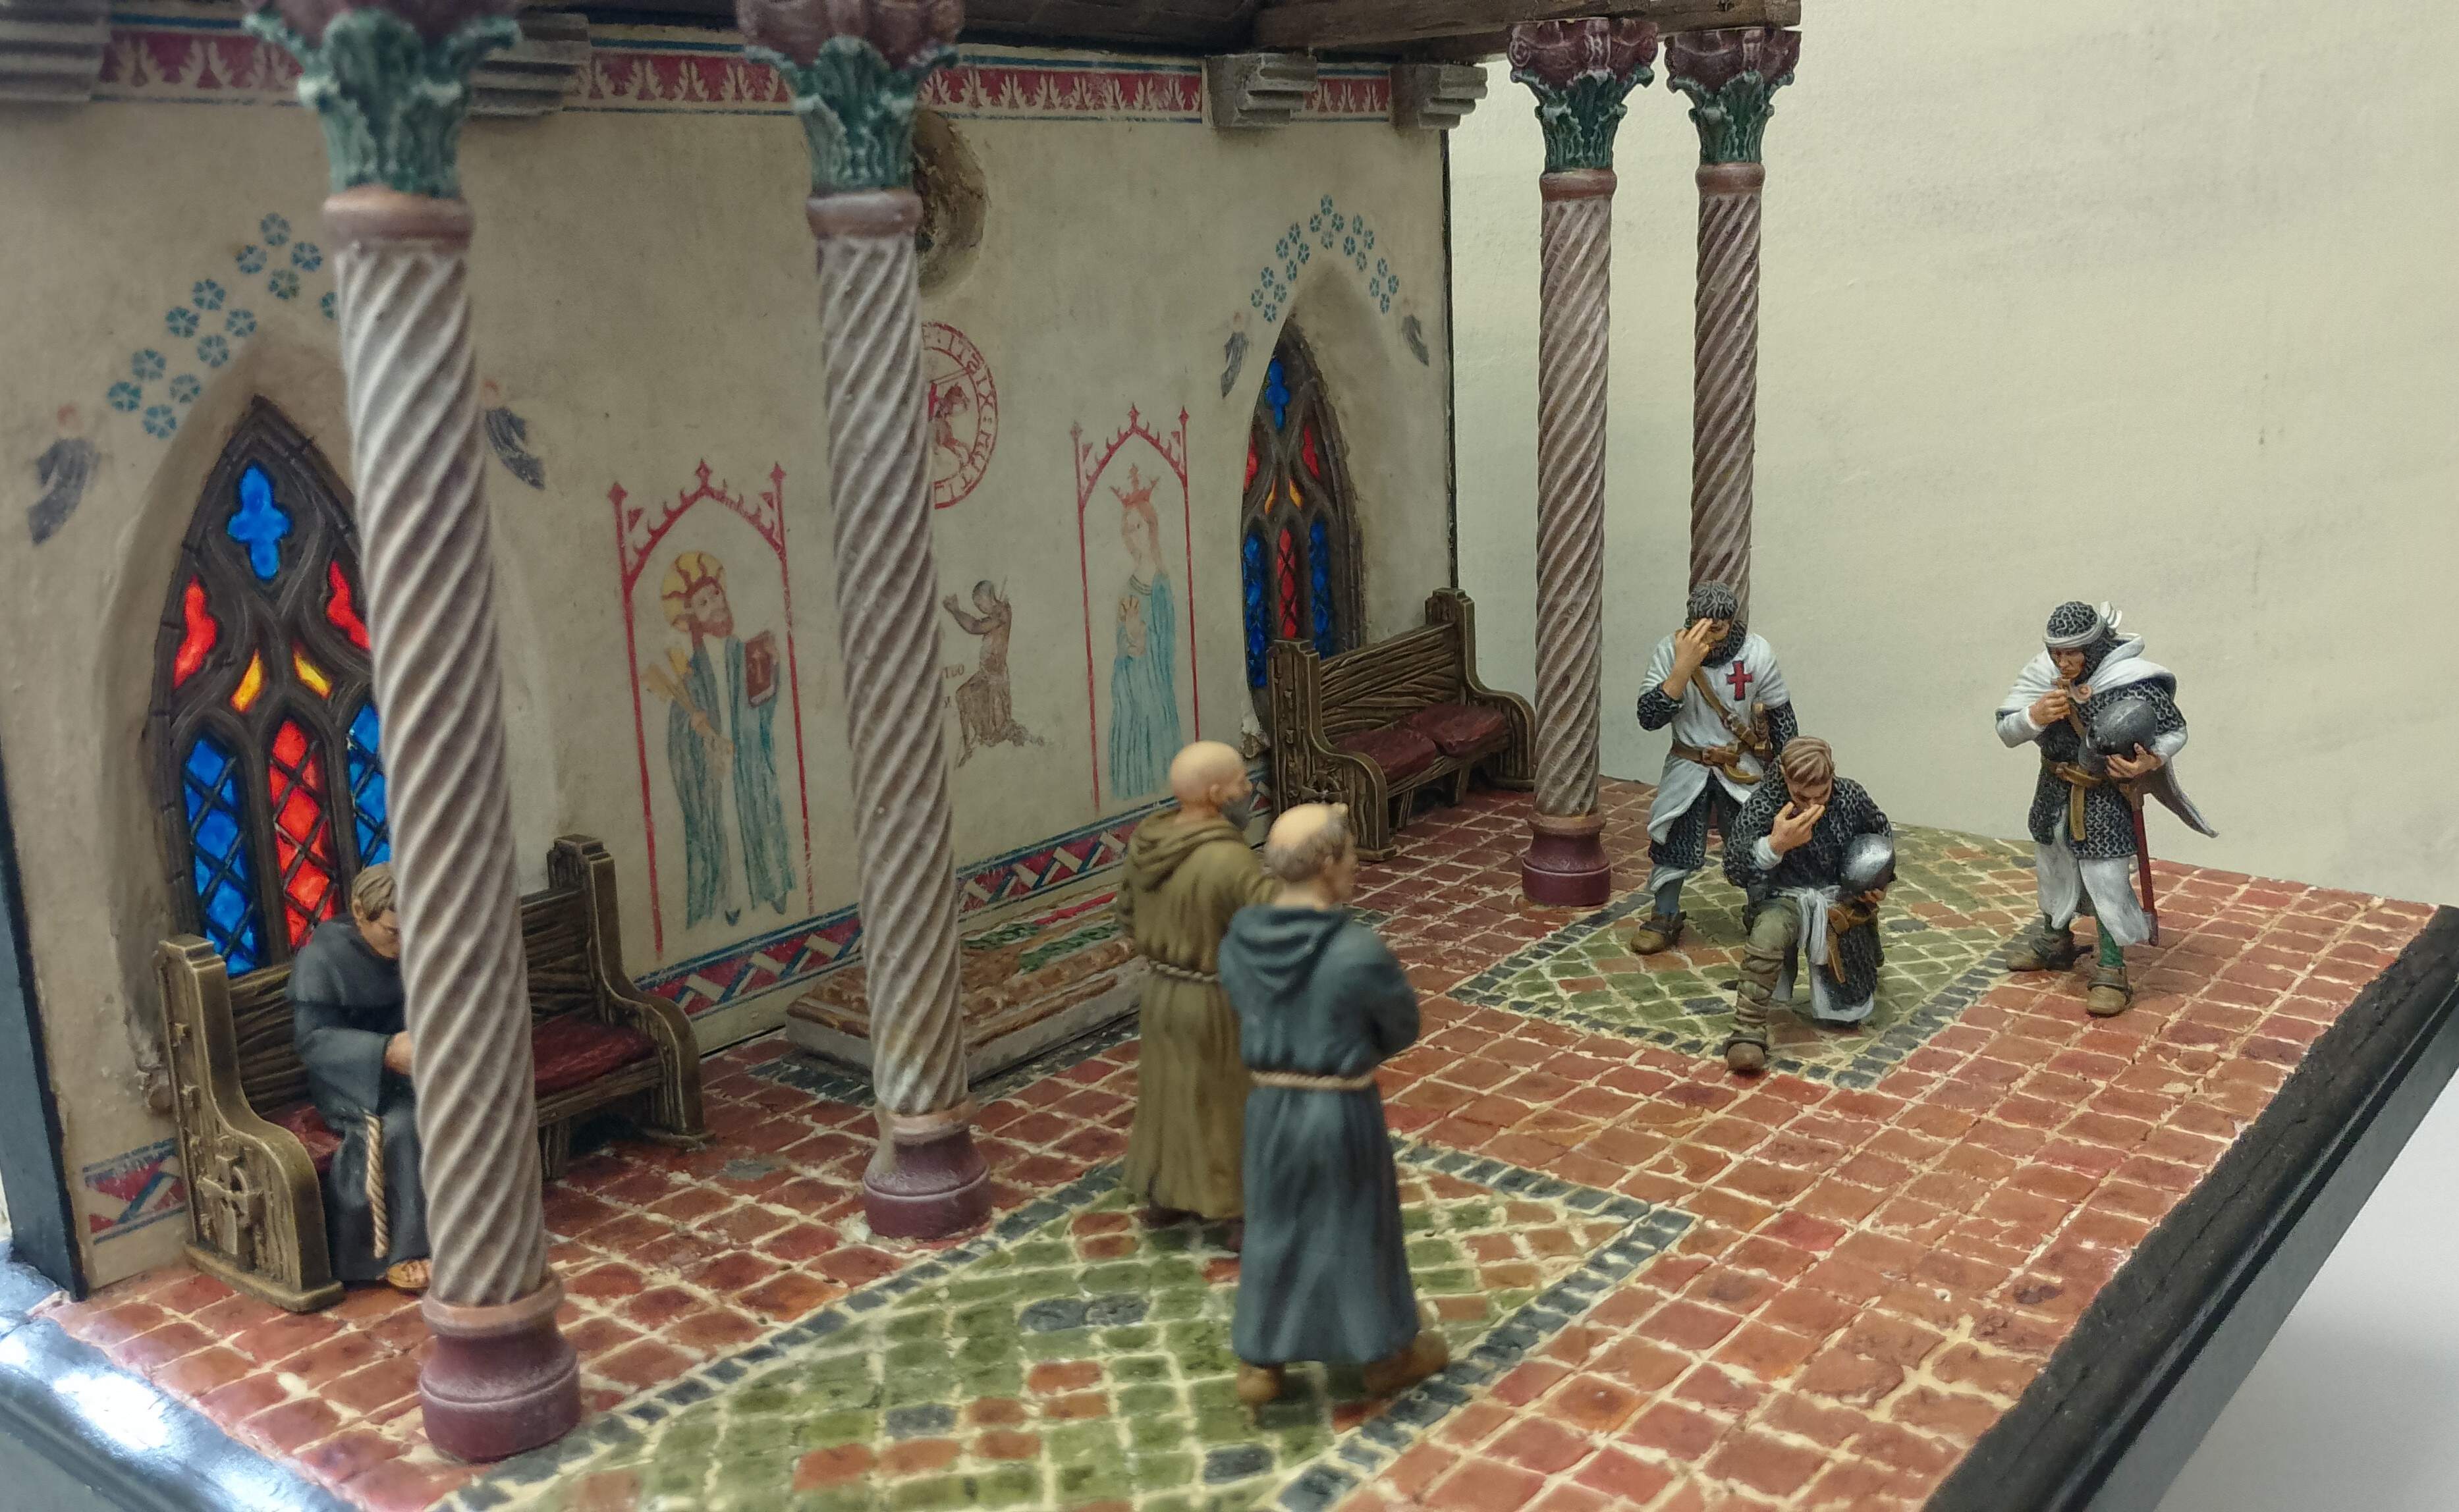
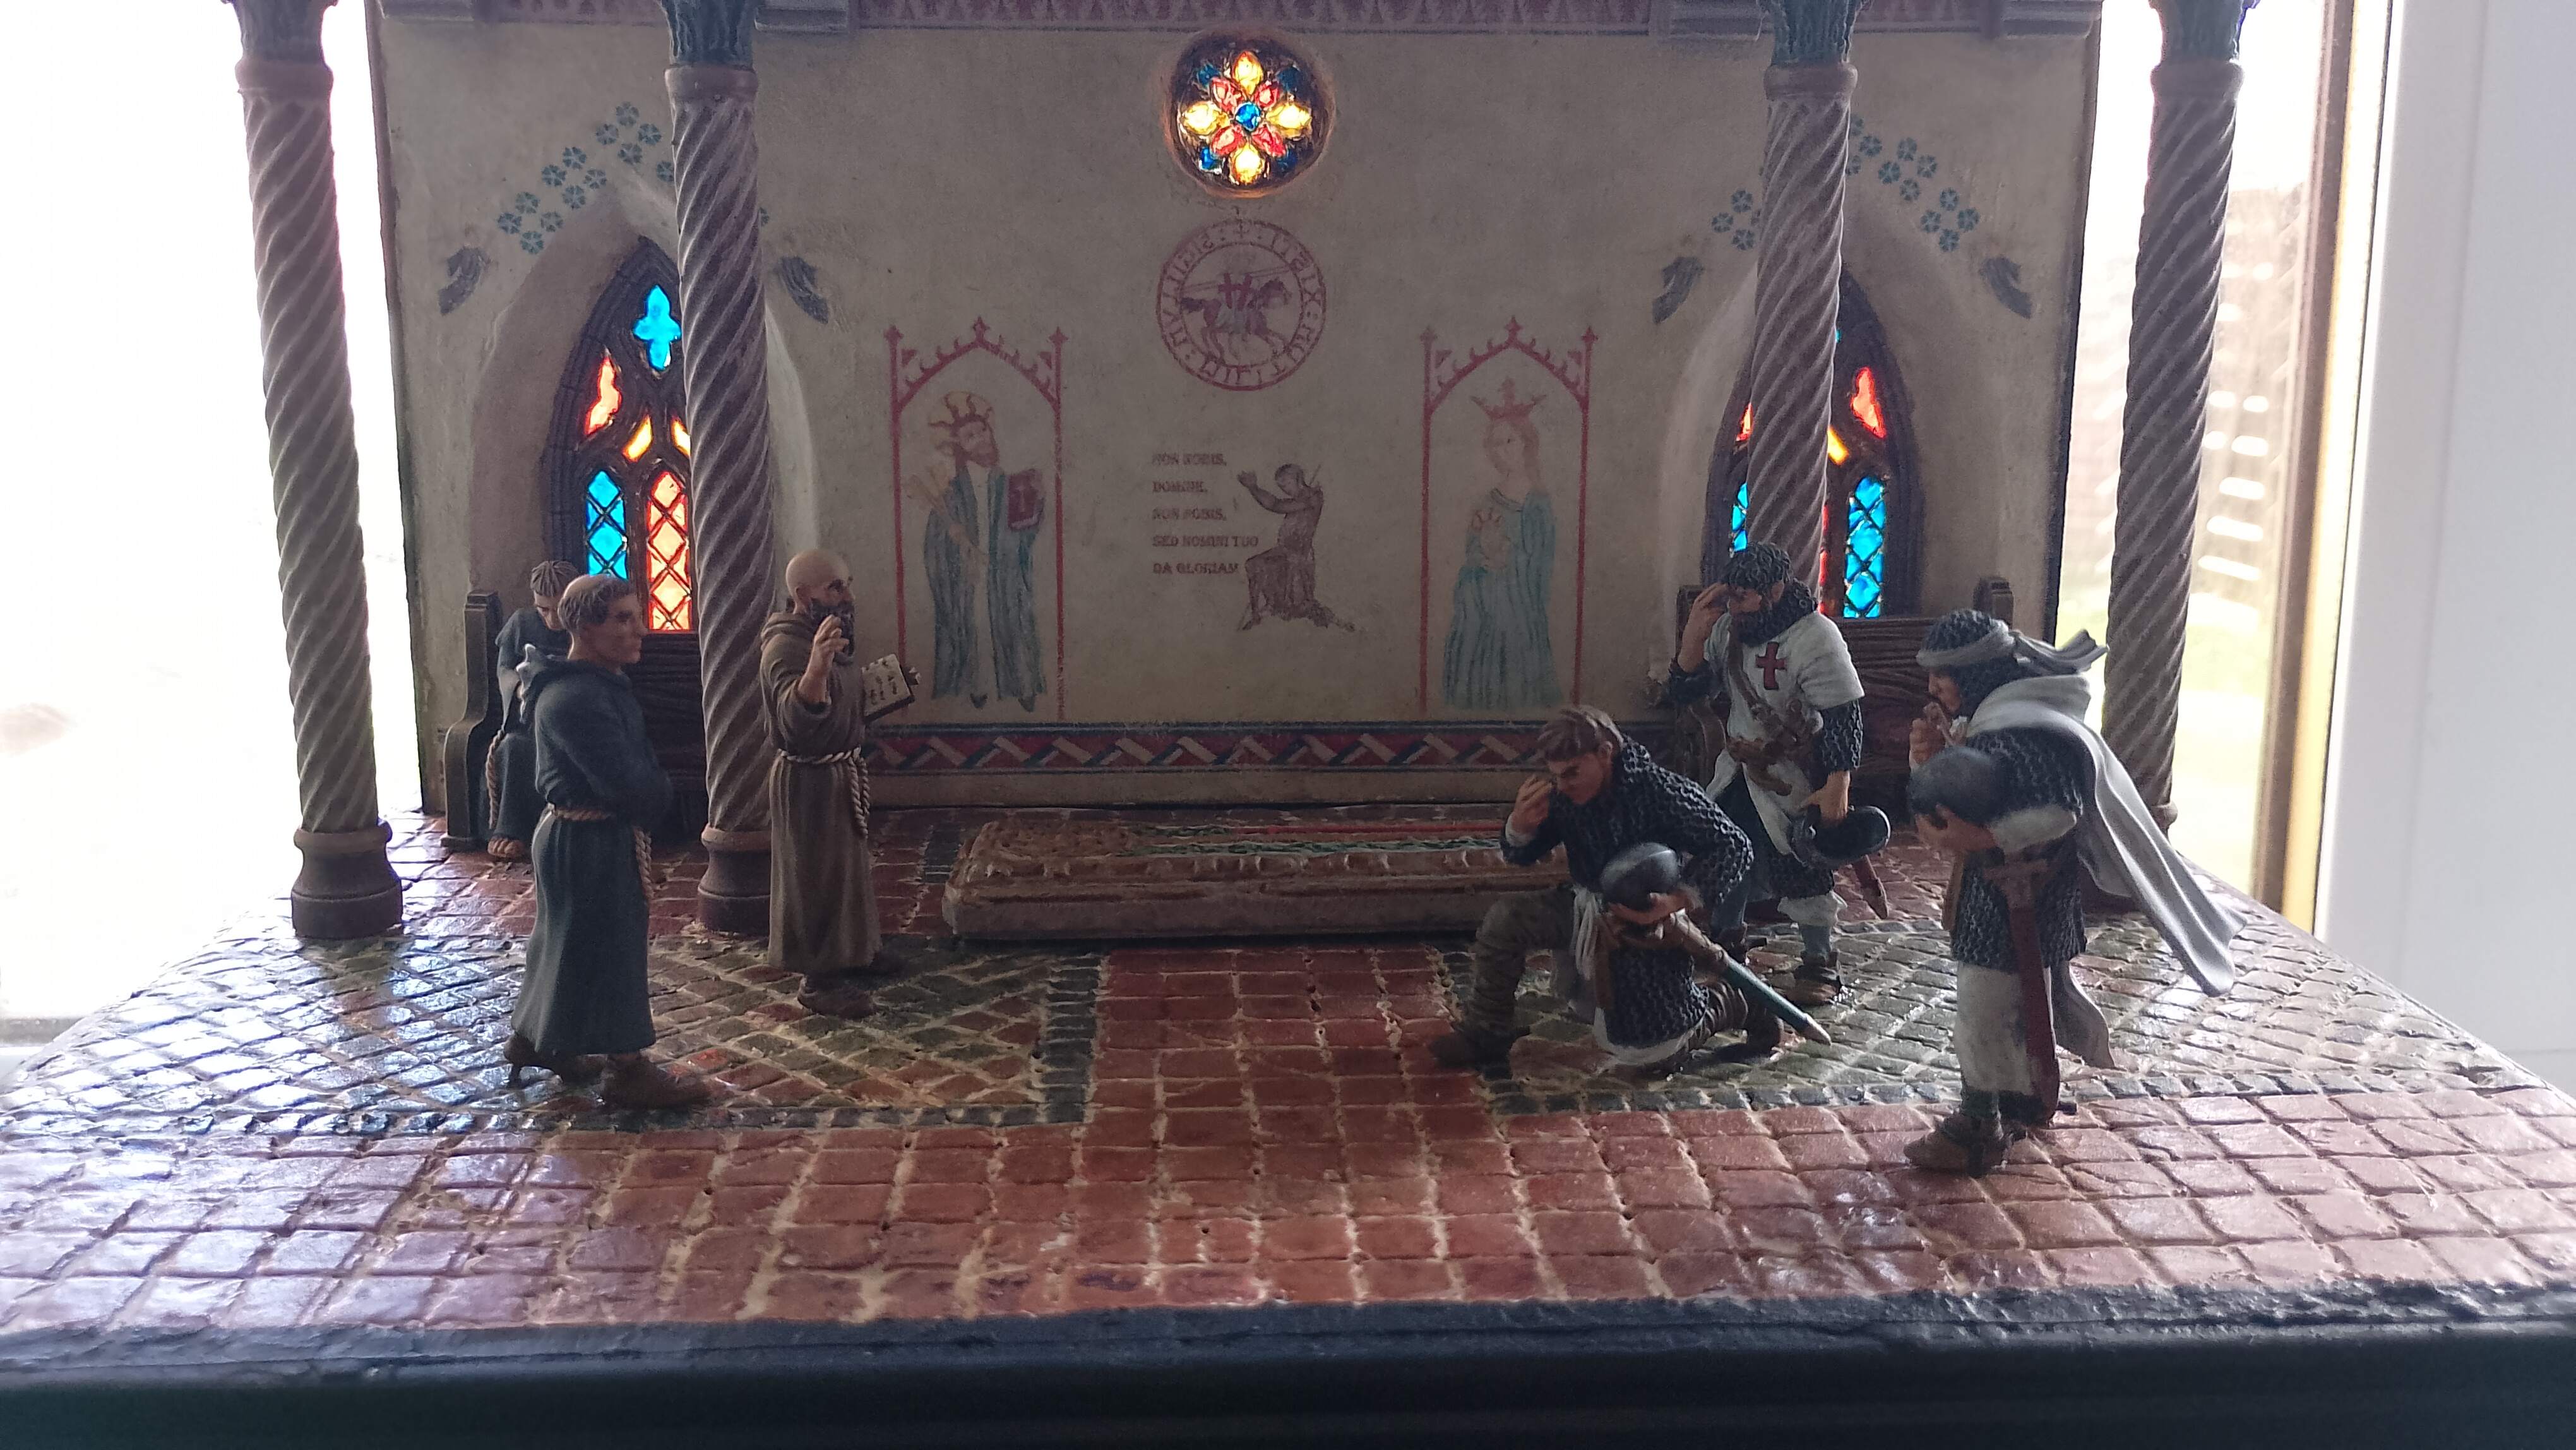
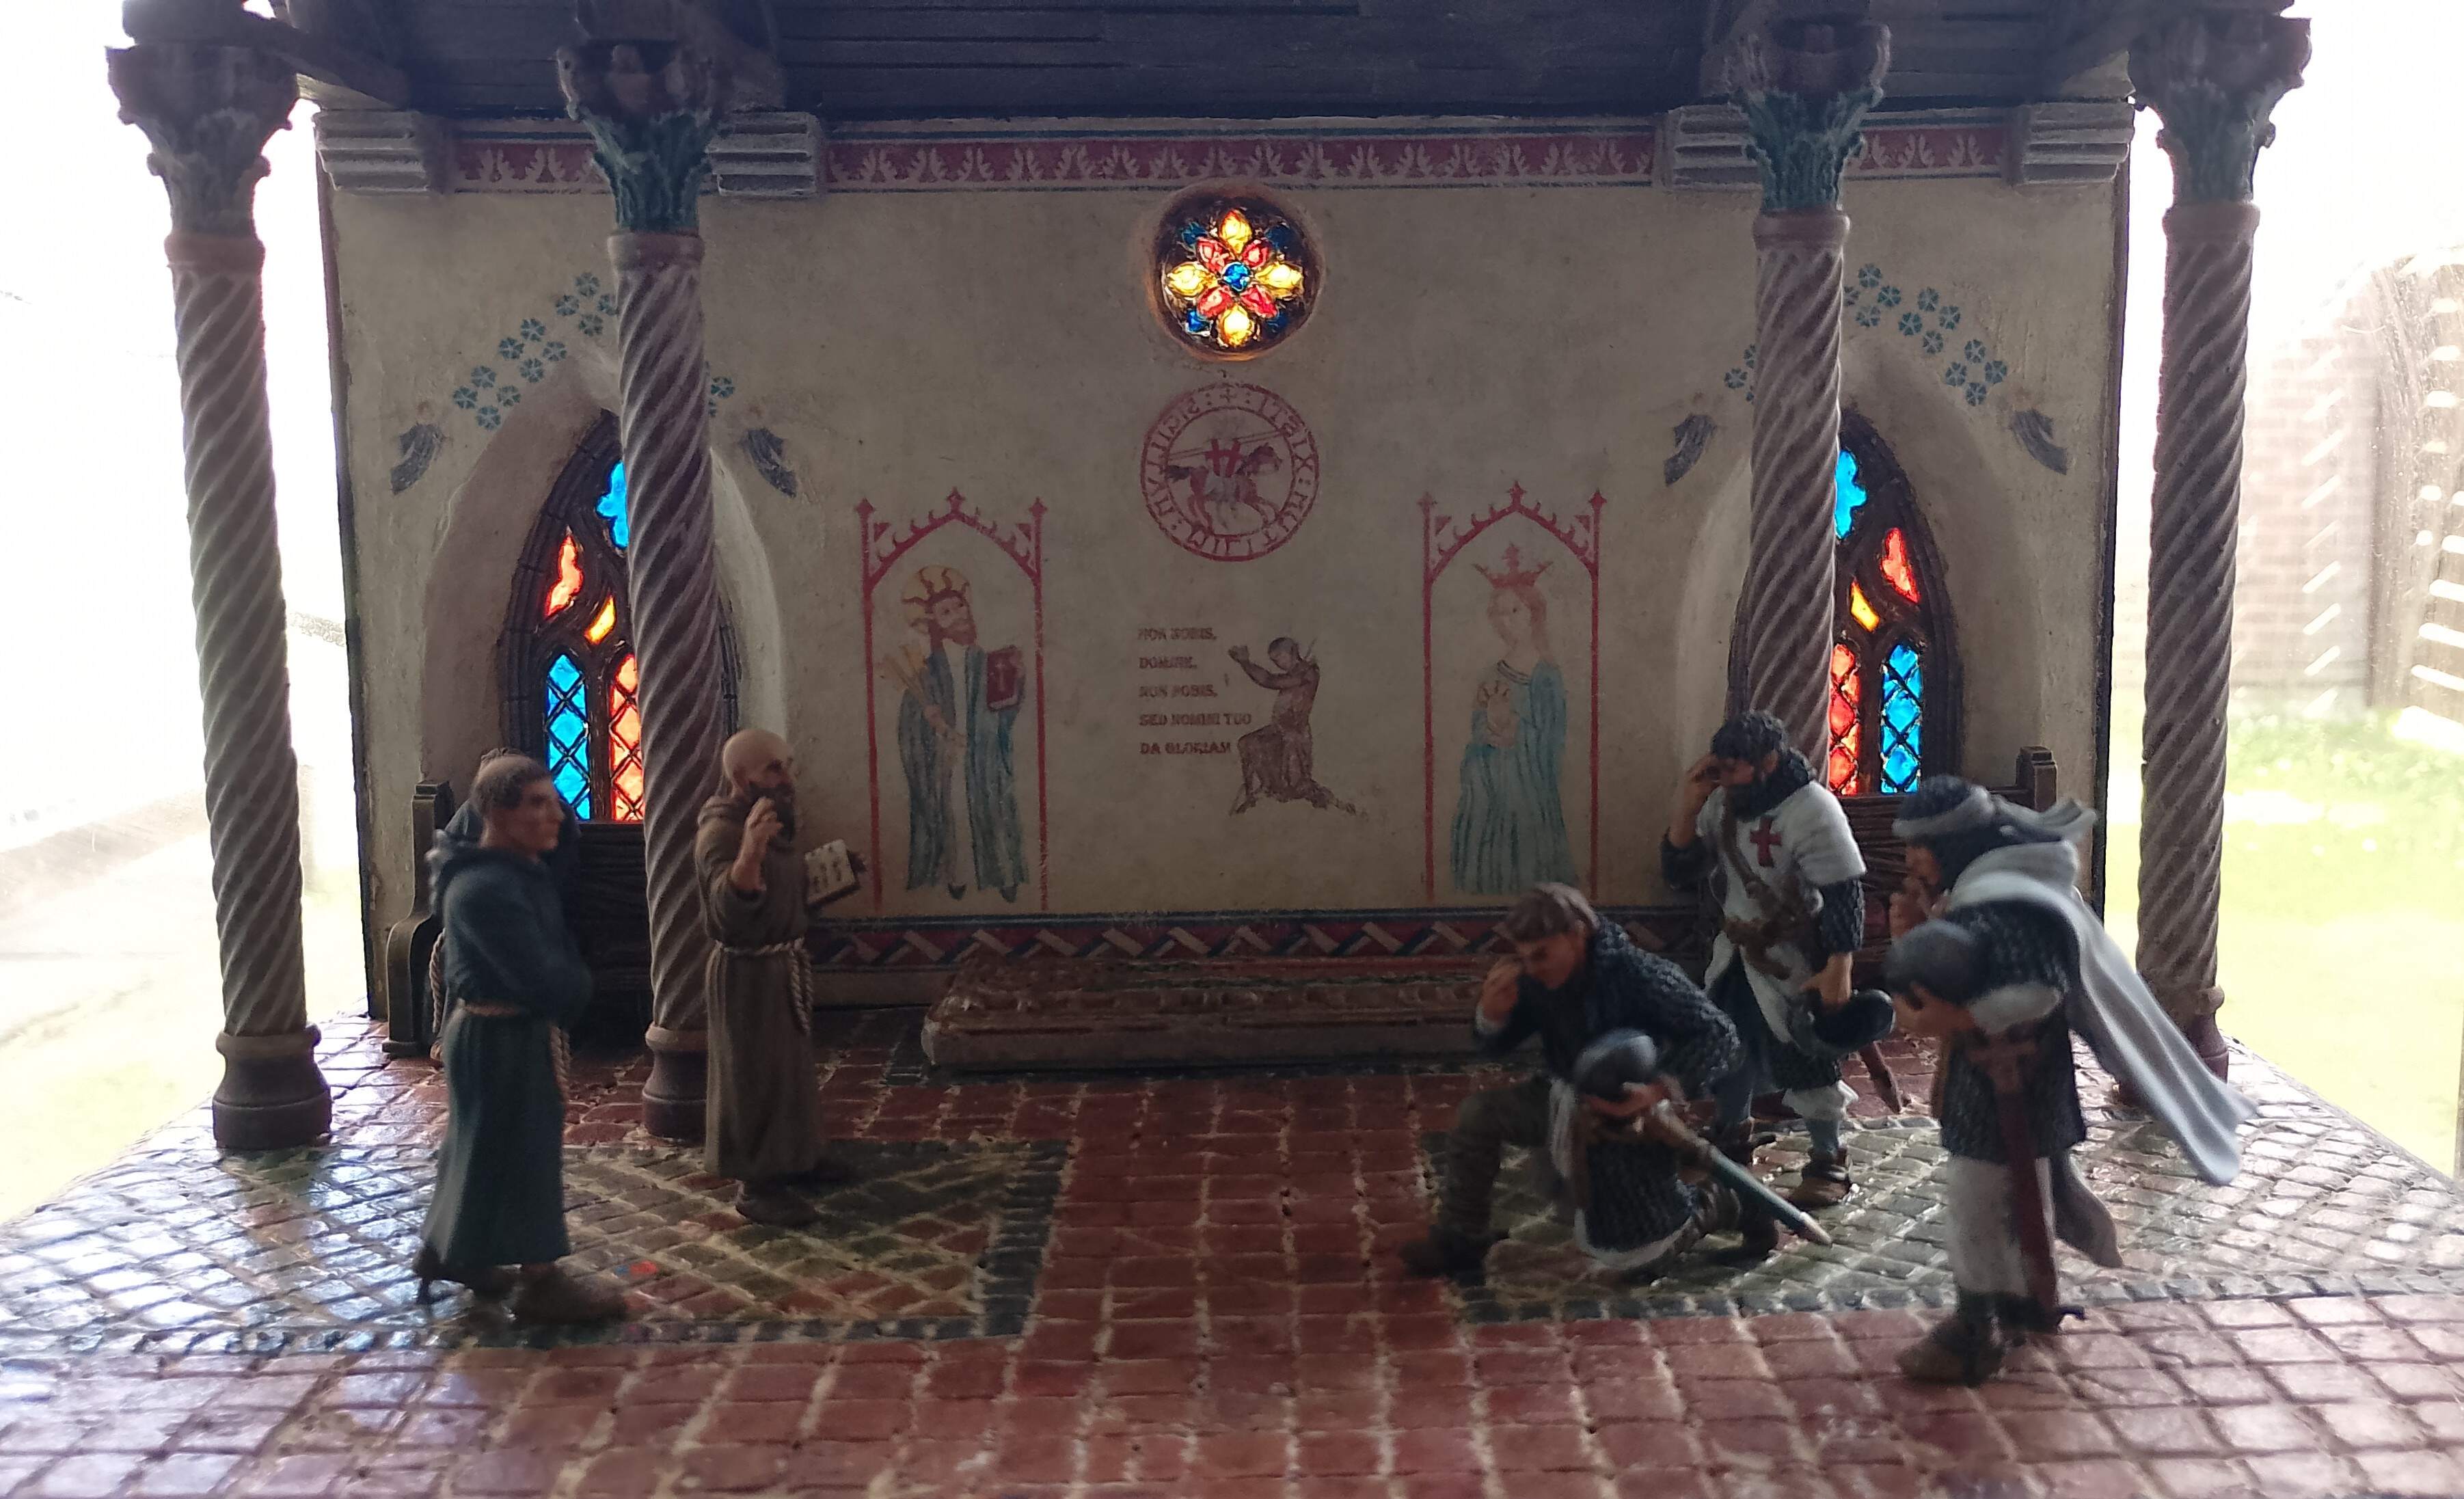
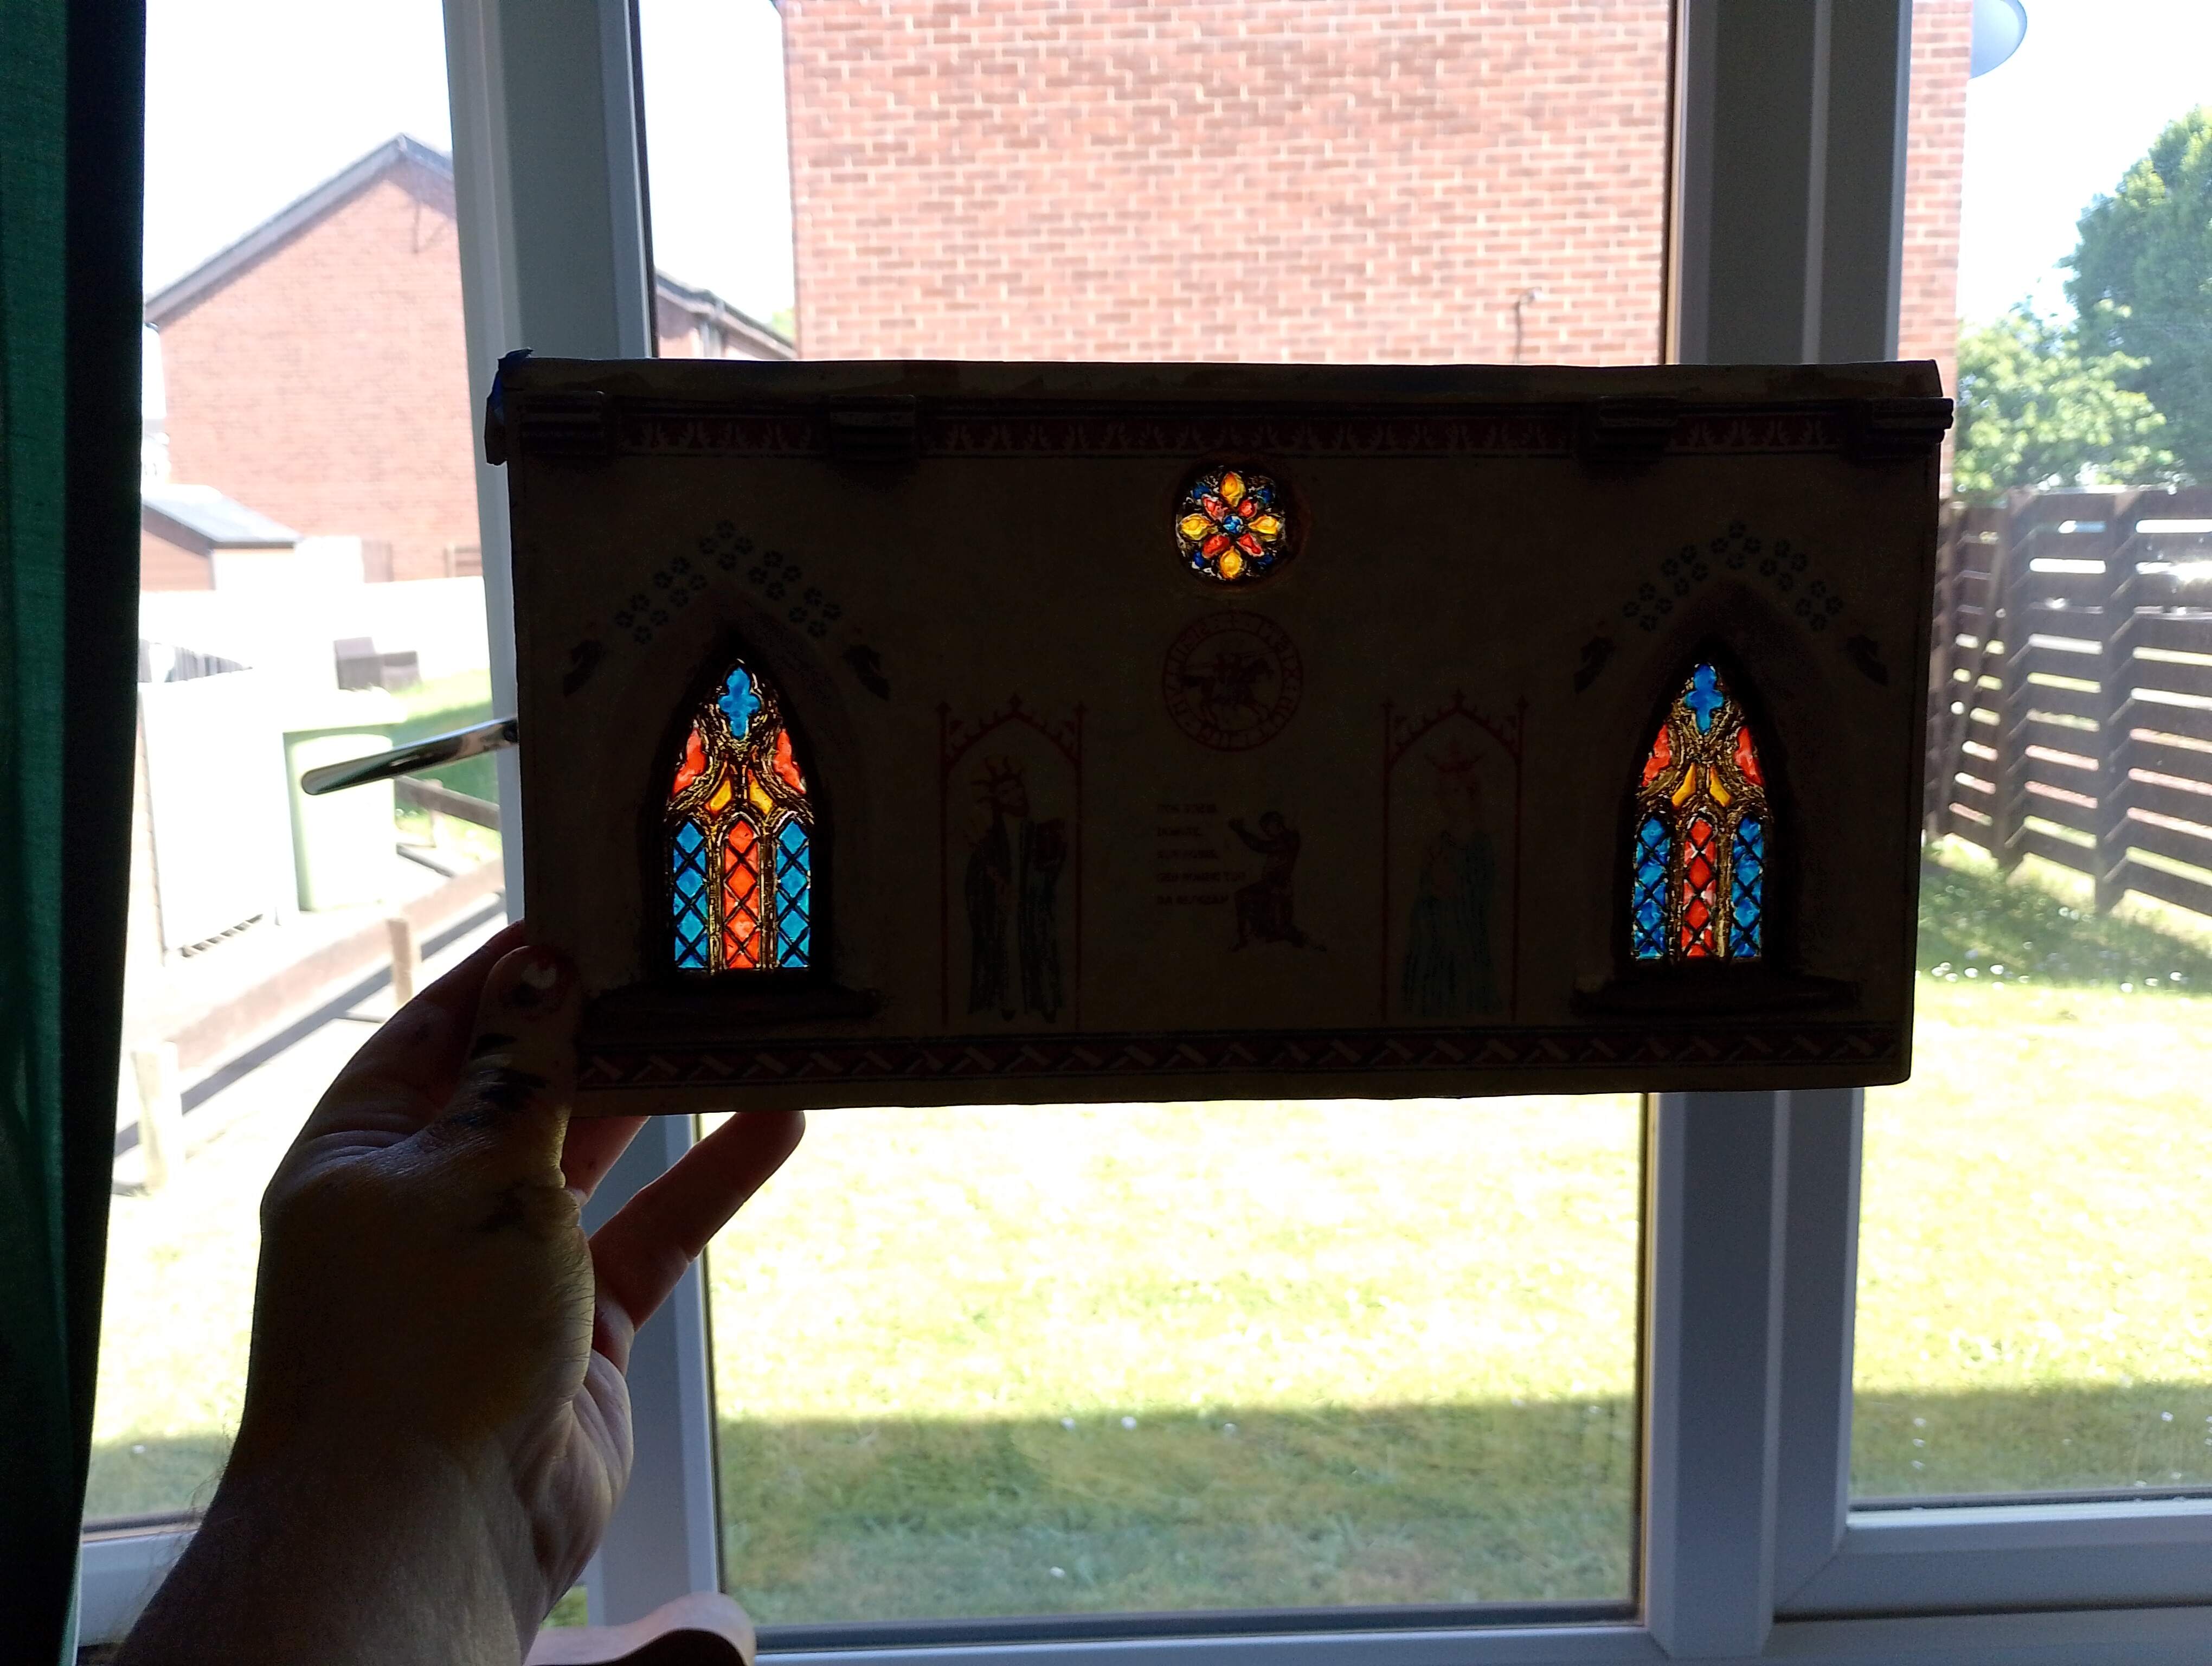
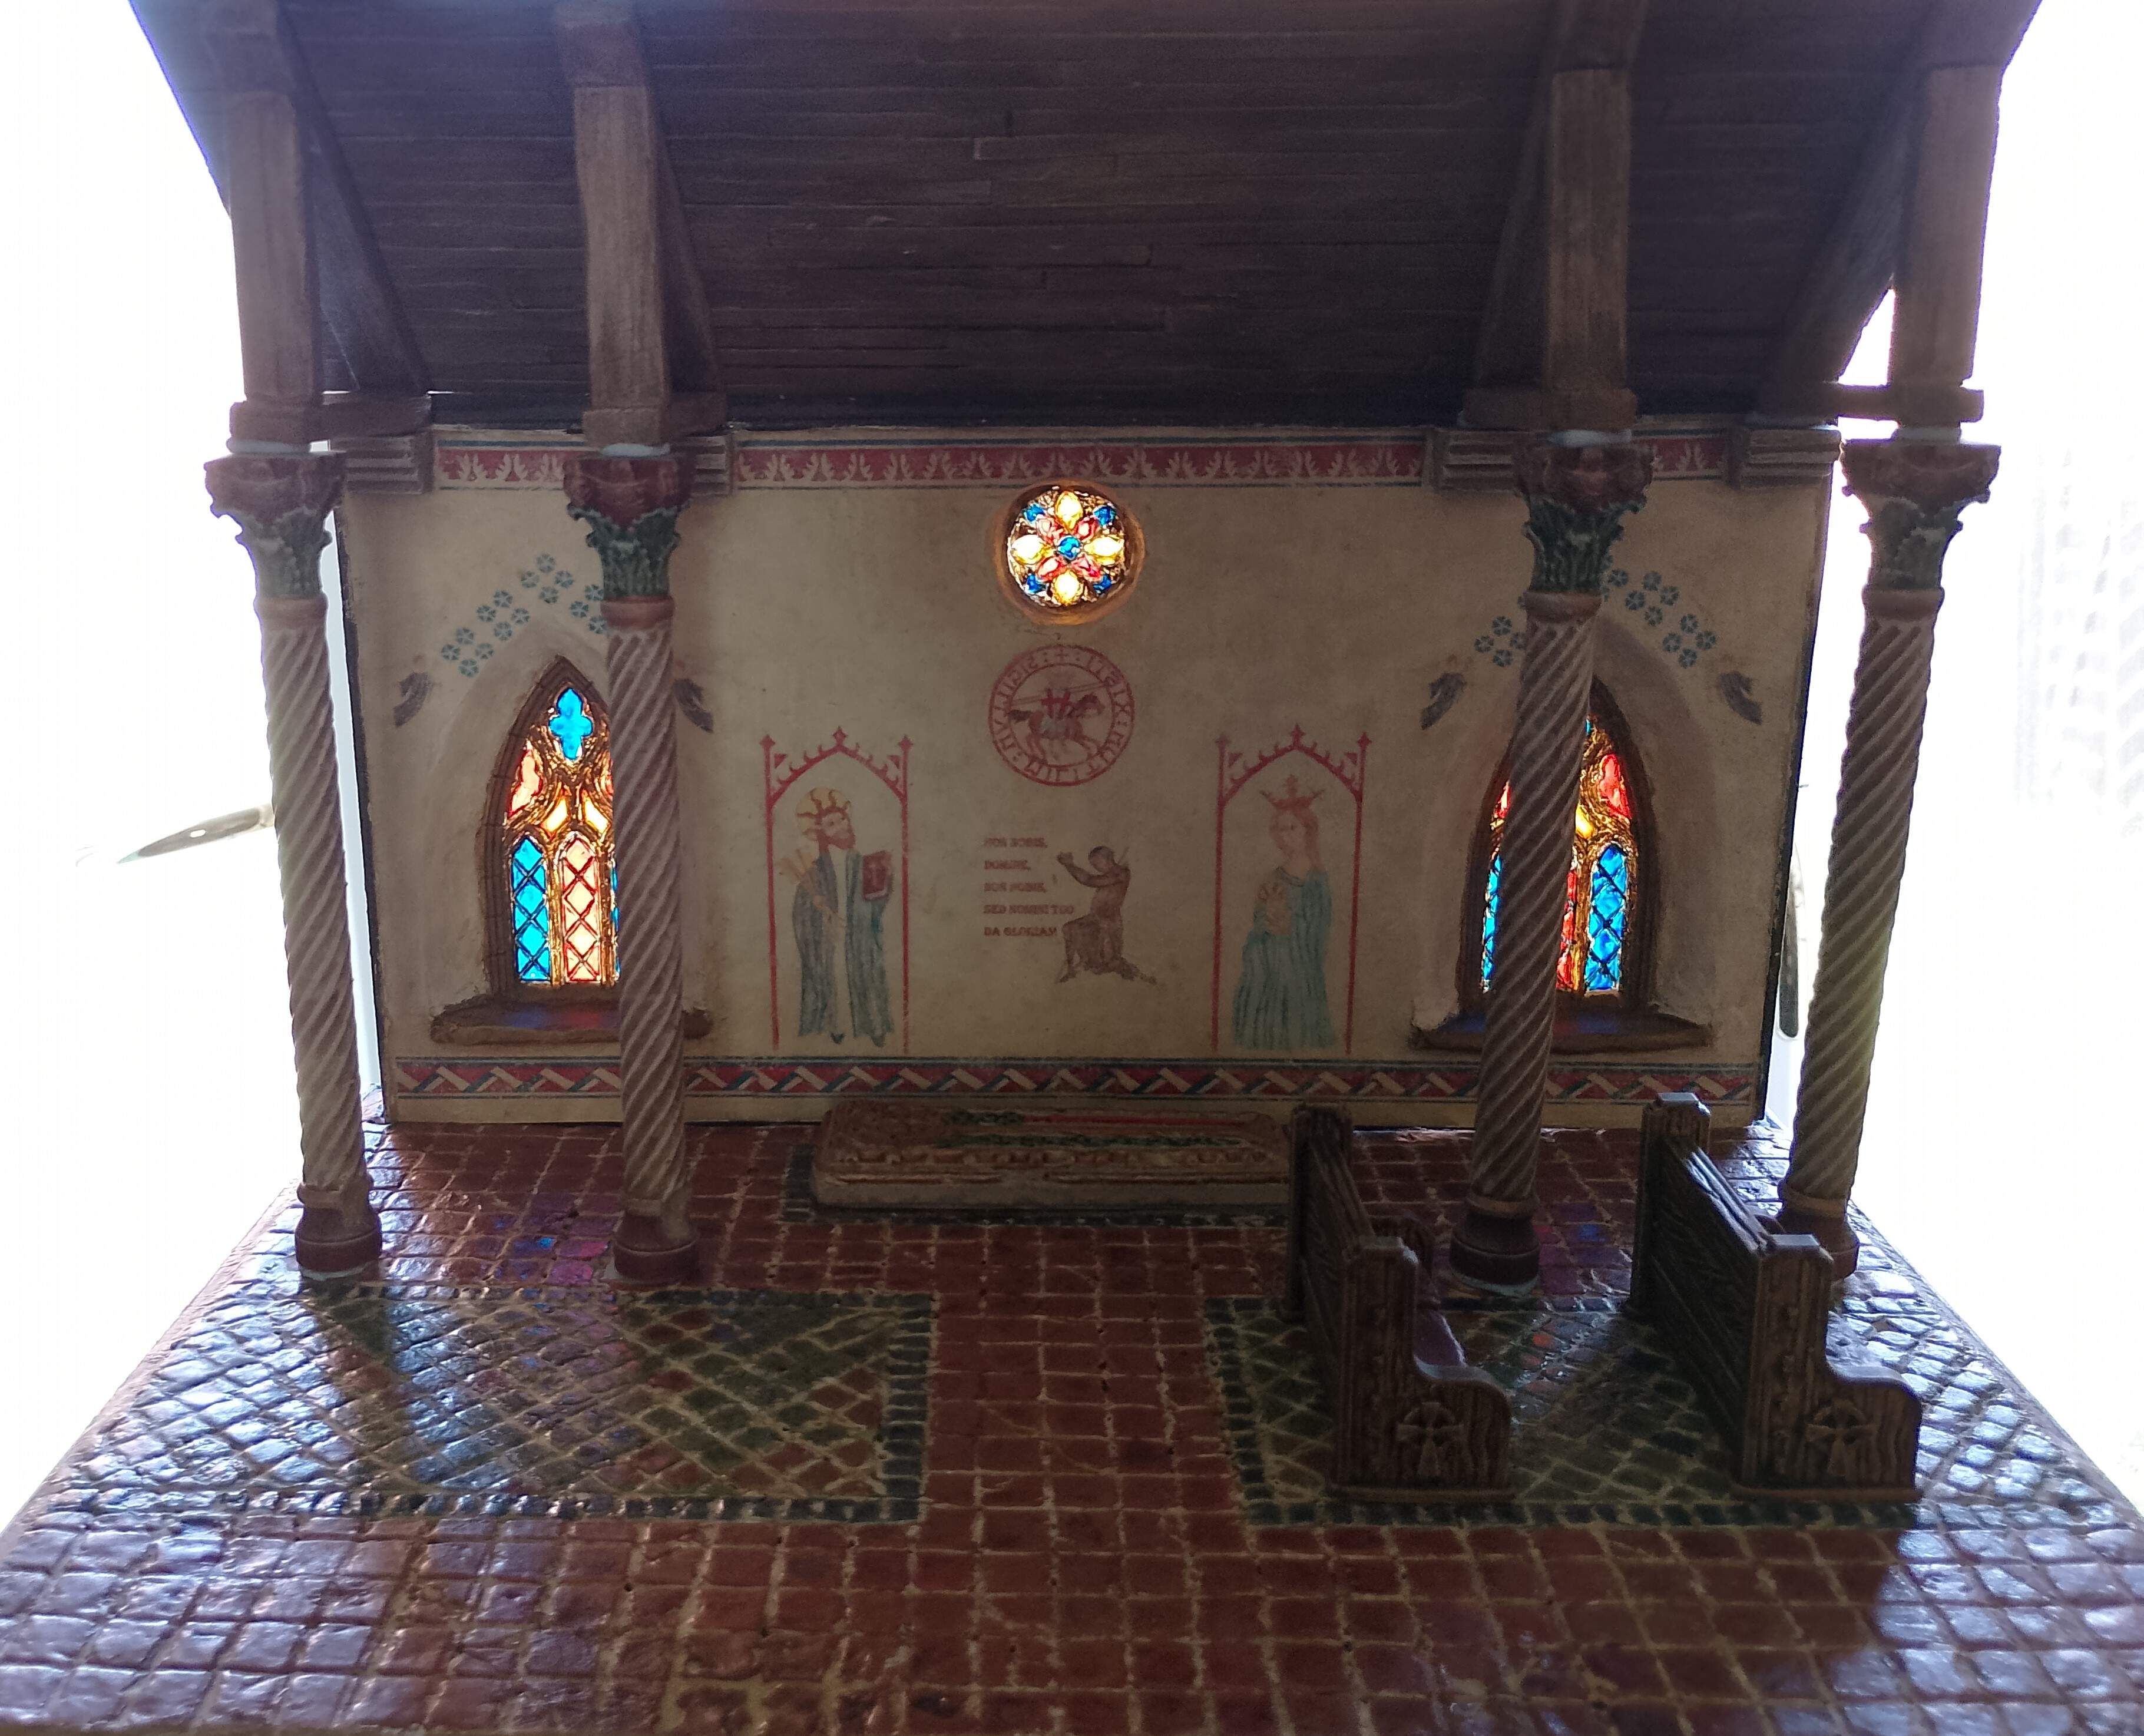
As well as the usual white backdrop shots I also tried a few up against a window to try and show the stained glass windows a bit better. Hard to get a focused photo there, but think it worked out ok. Last thing to do will be to take the diorama out for a wee daytrip, which I will also need so I can get over the effect of all those glue fumes.
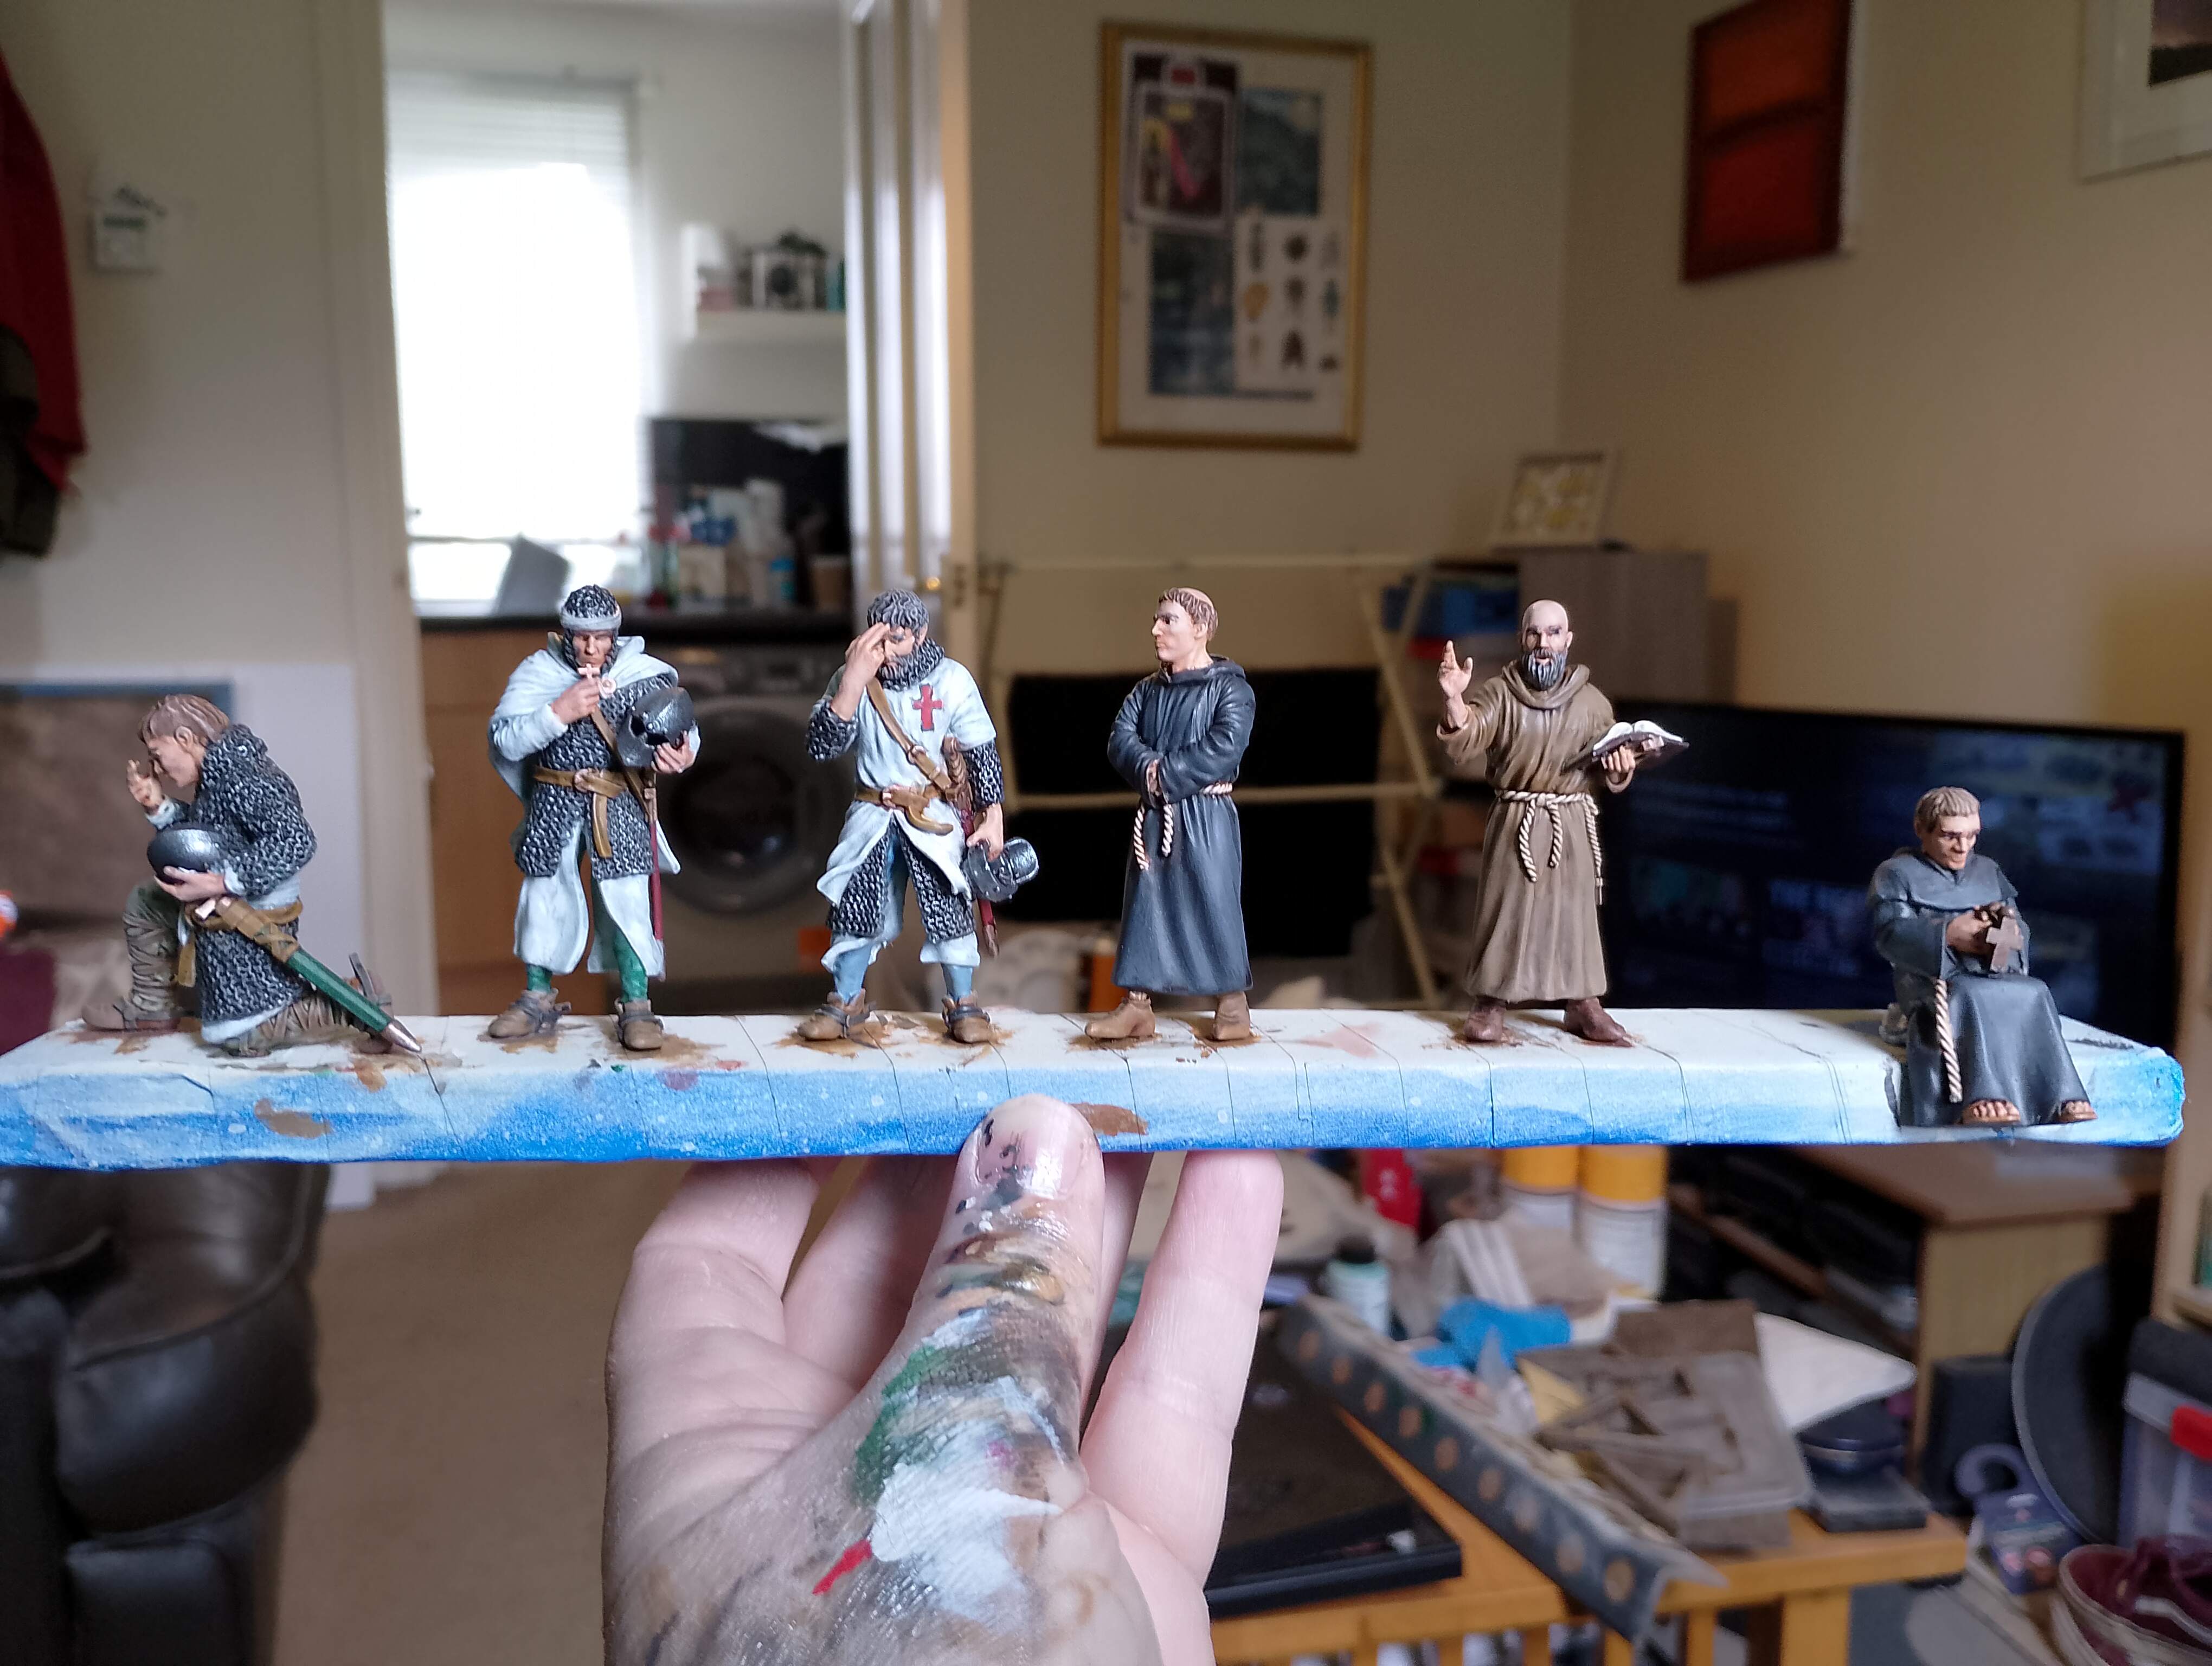
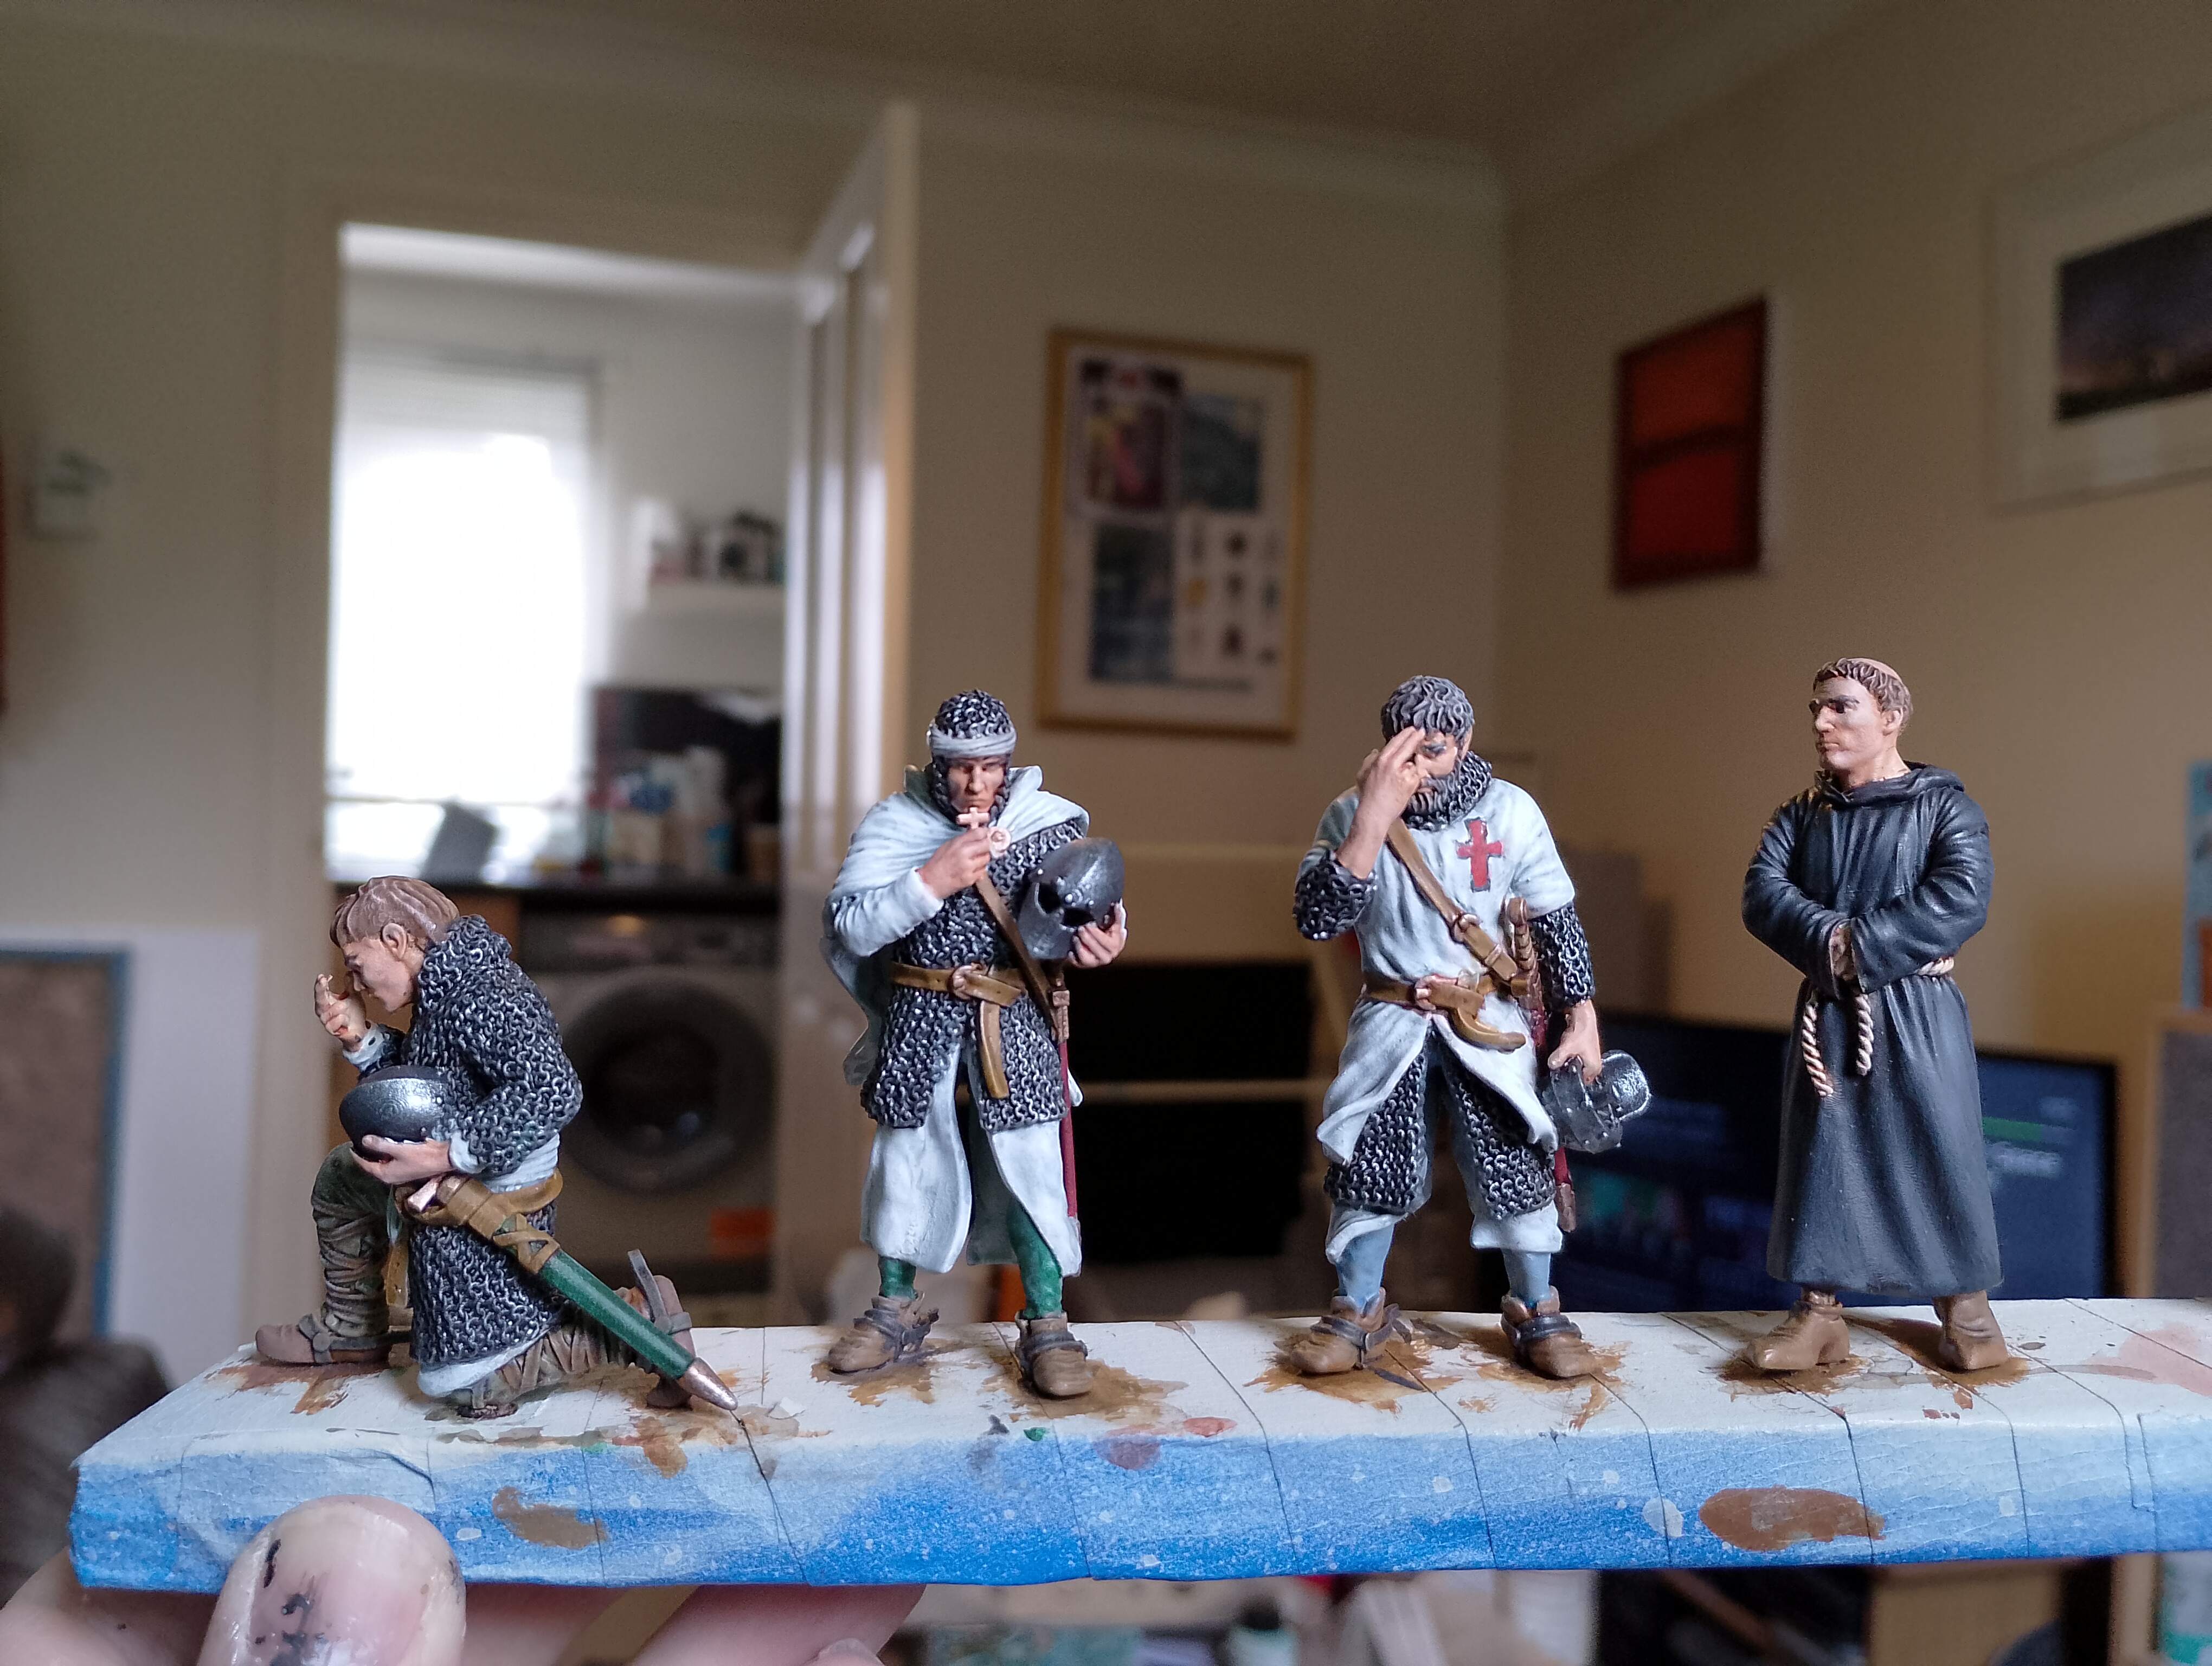
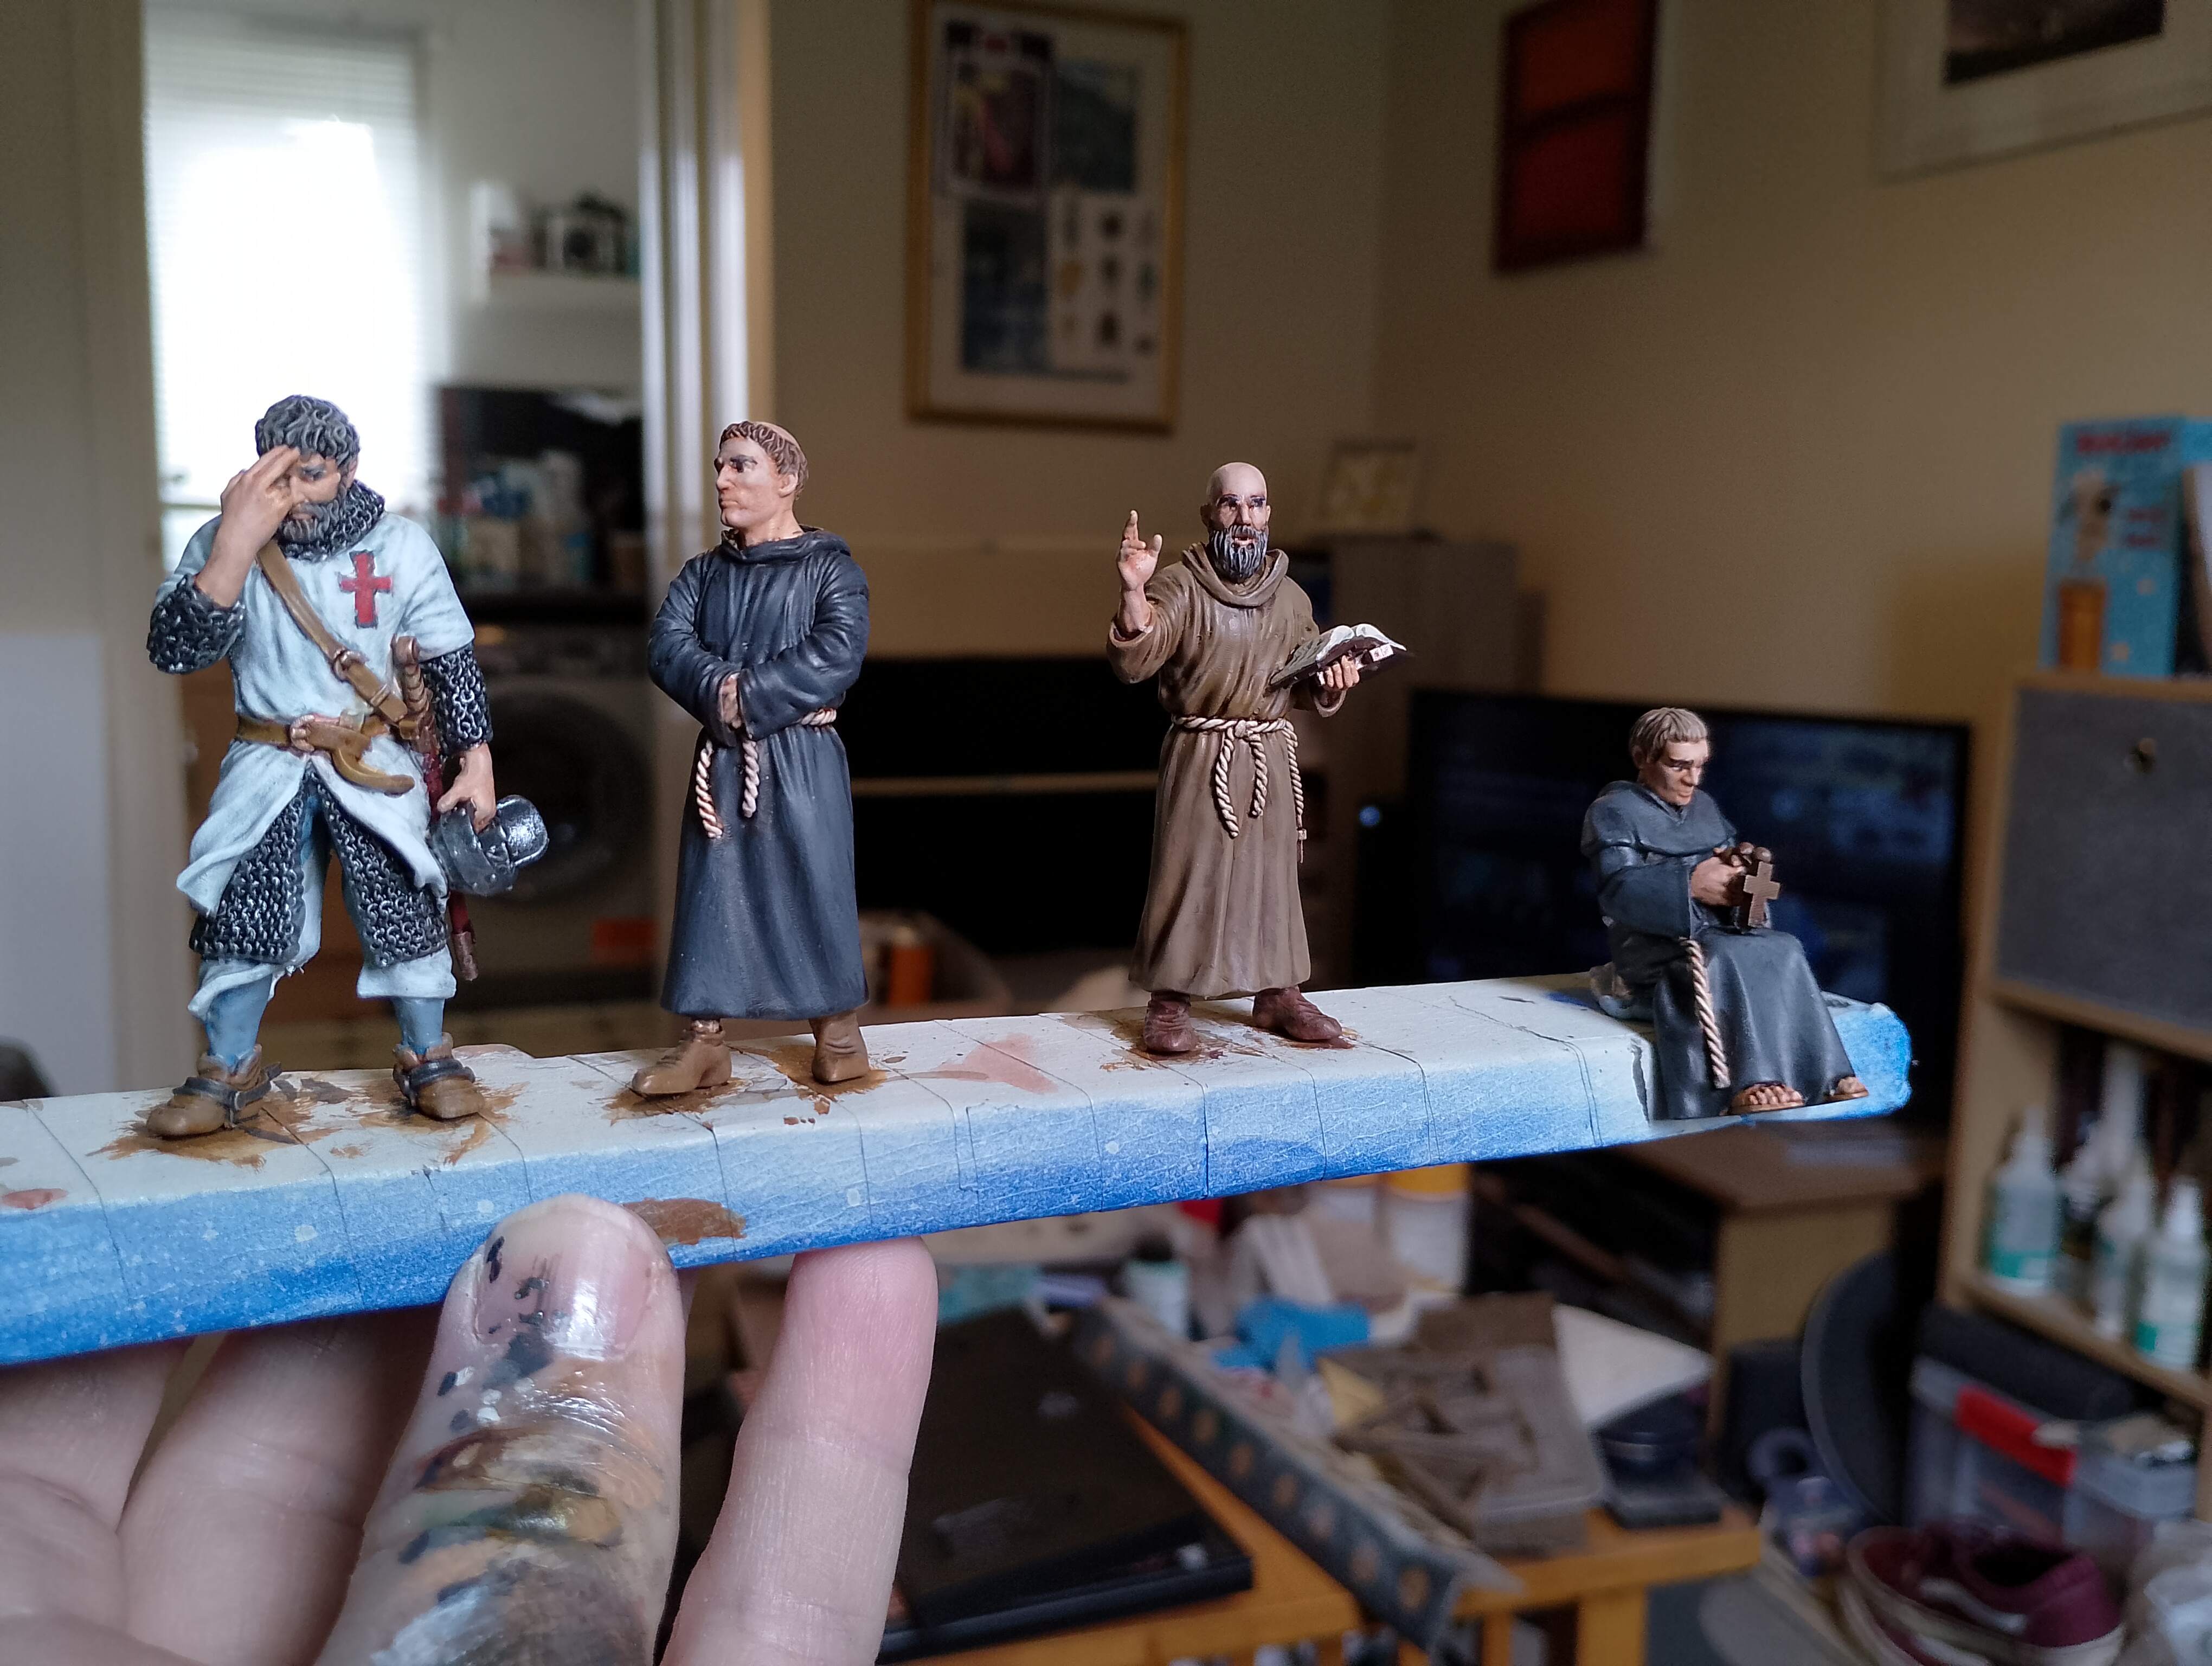
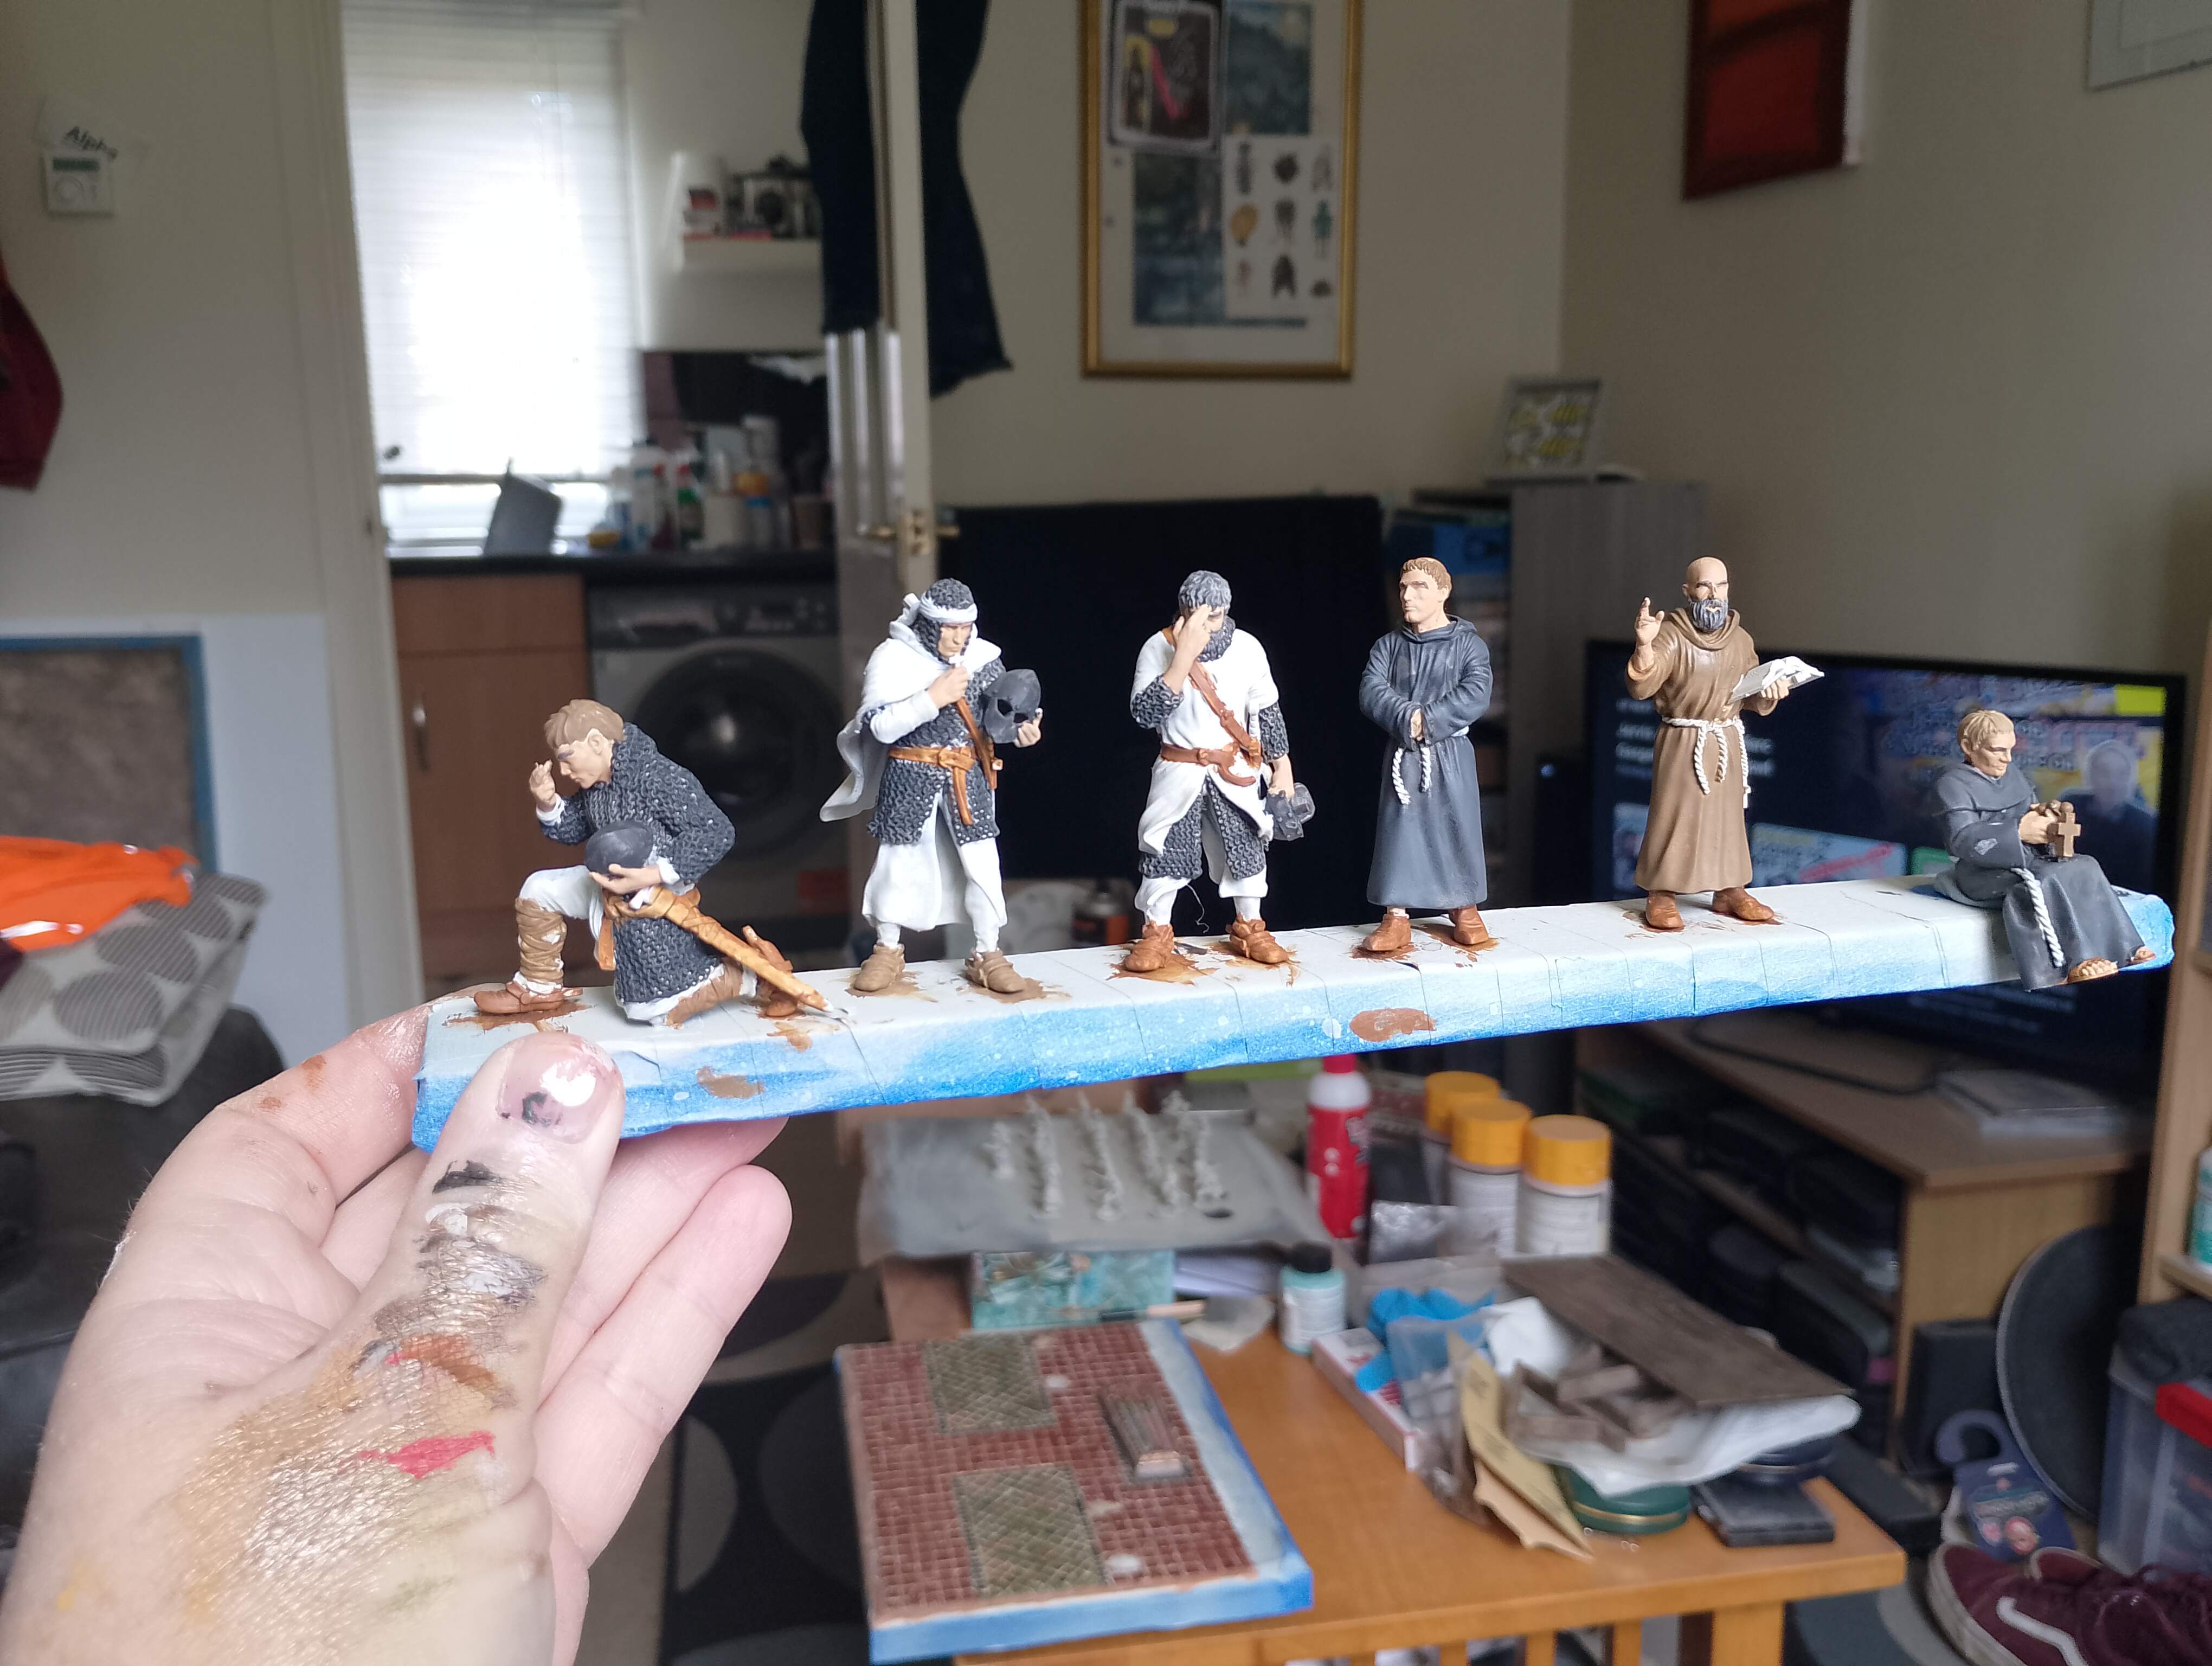
Templars, Monks and Priest Painted
Nice quick entry here. Just a few photos of the finished Templars, monks and priests. I used a mix of speed paints, dry brushing and the standard base coats/washes followed by a bit of highlighting. The only difficult thing I did try was a free-hand of a cross on one of the Templar’s tabard.
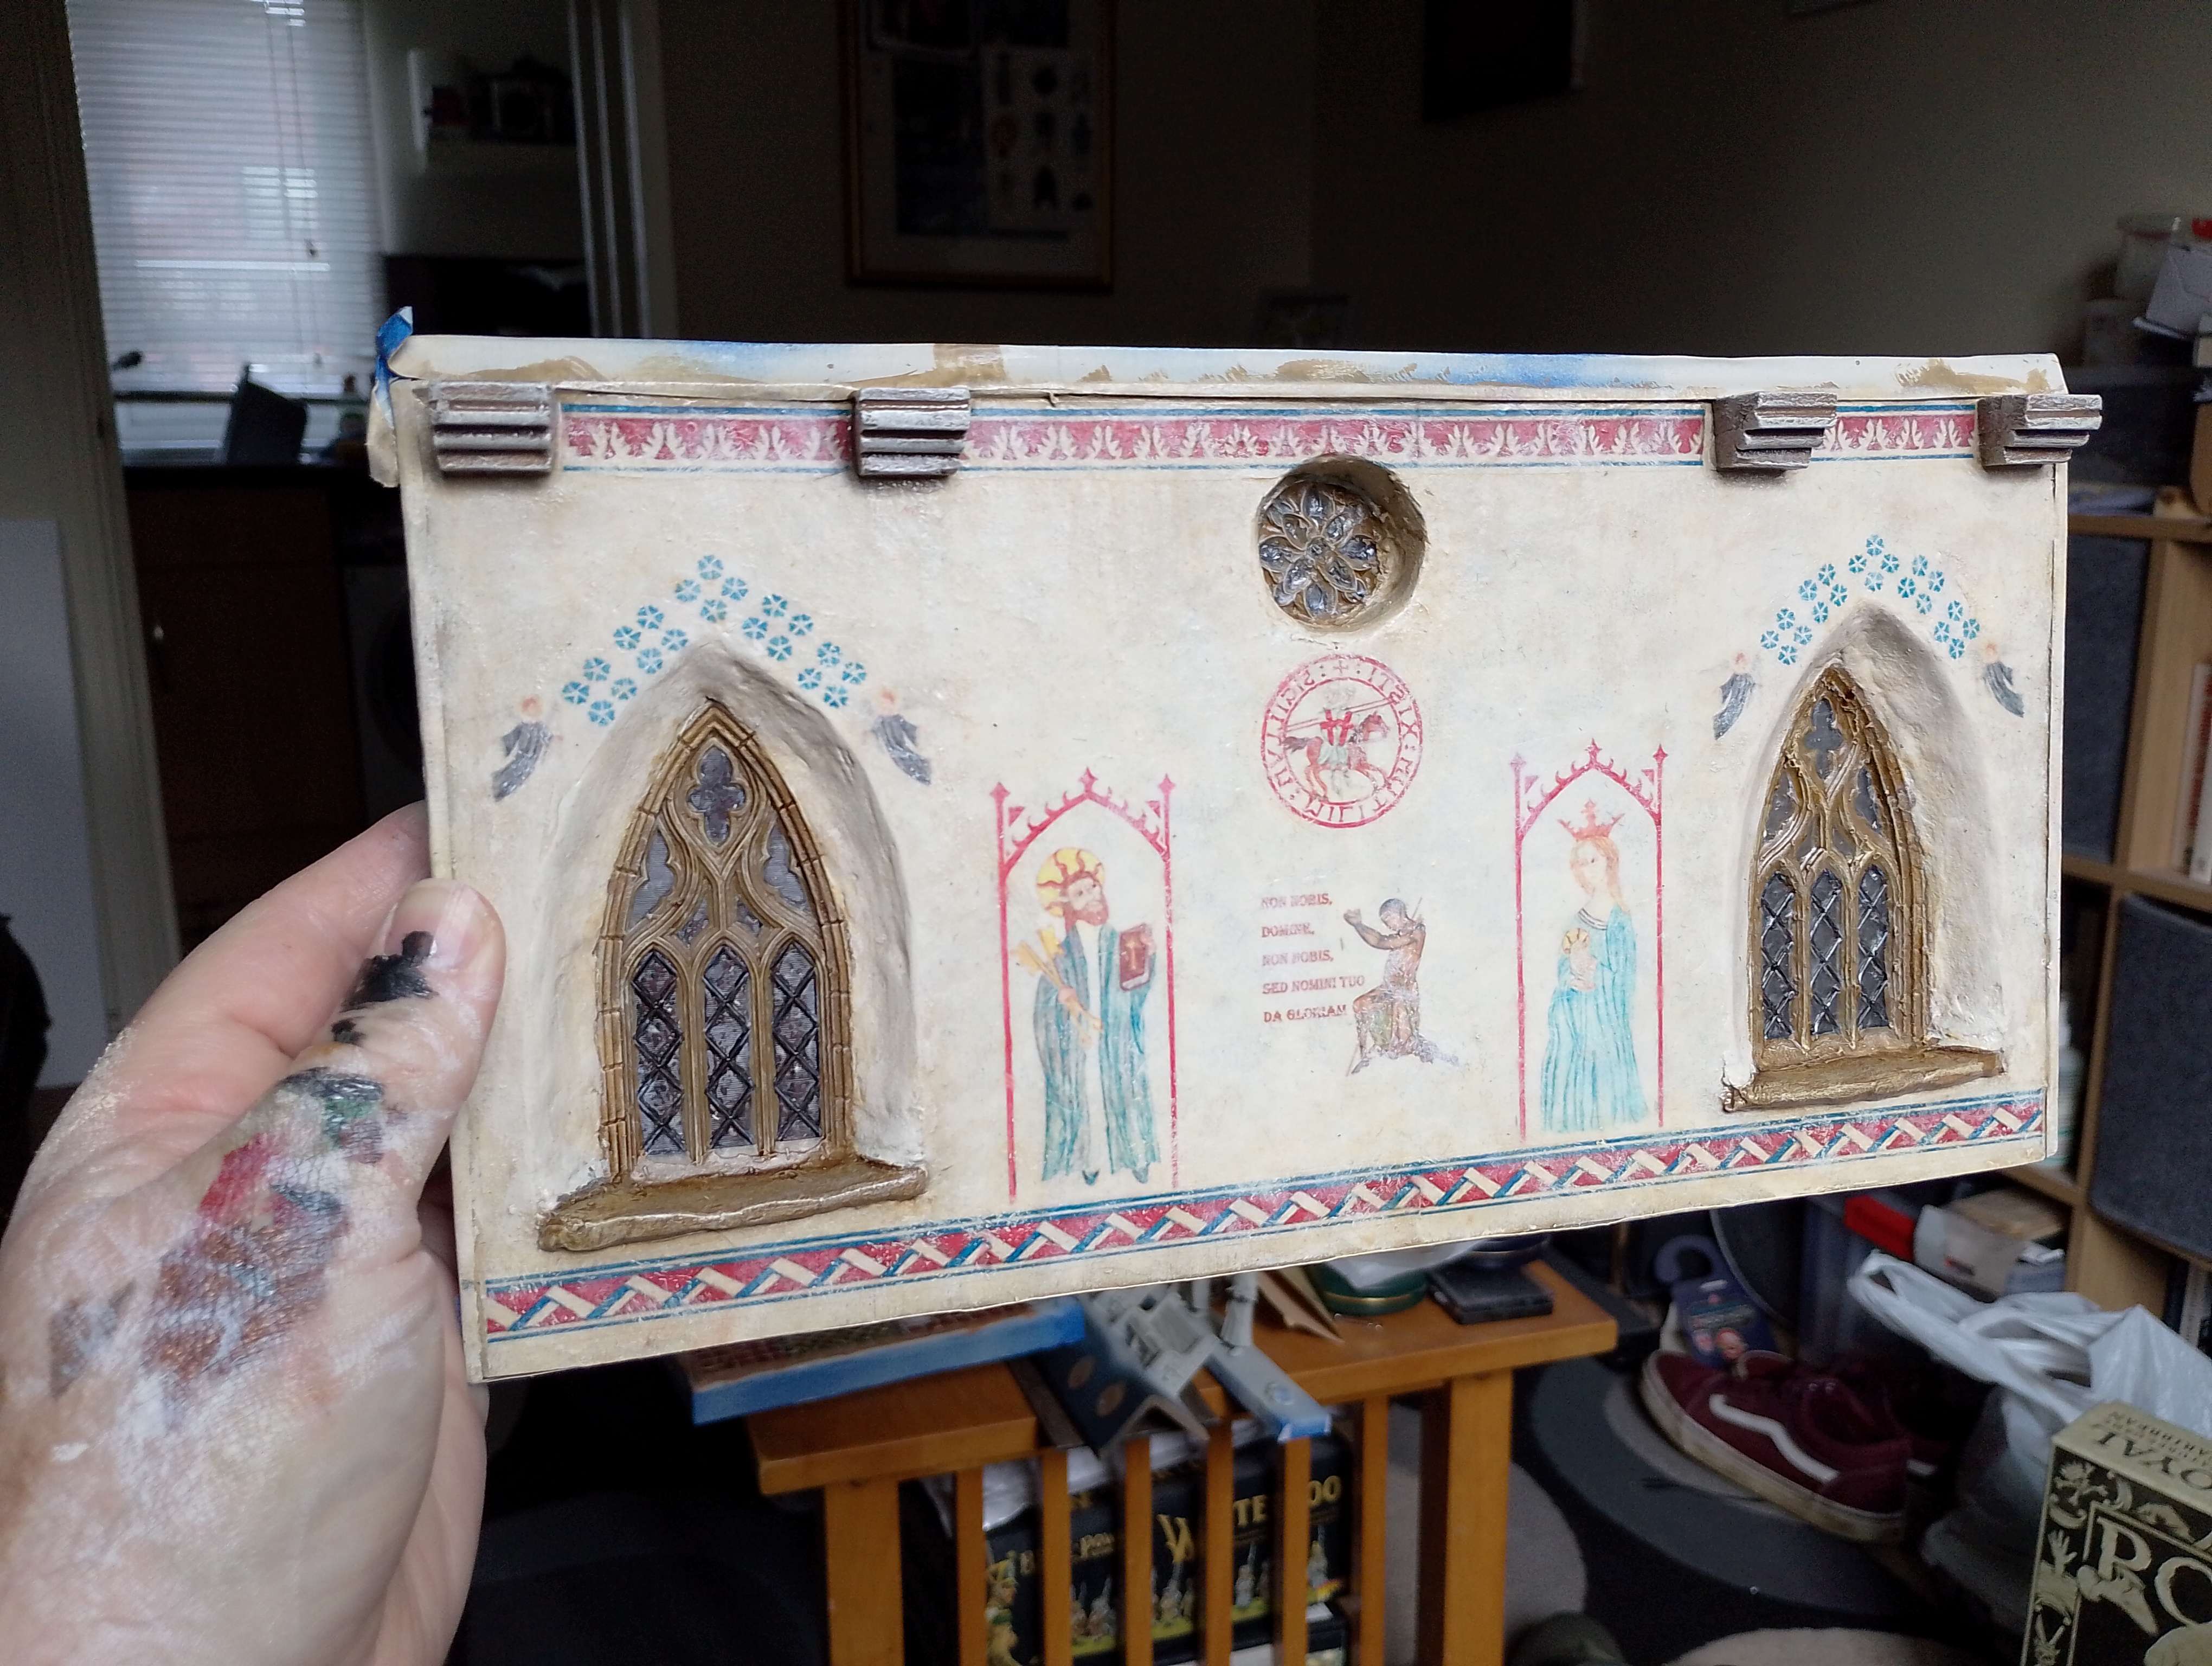
Weathering, Windows and More Painting
Tried a bit of weathering on the wall with a bit of gentle sponging at the roof and floor levels of the wall with off-whites and watered-down washes. I’m not to sure that you can see it in the photos, but it does make a difference. I then got to peel off the masking fluid at the windows and tried to carefully paint in the stone and lead parts of the window while leaving the window panes free for some watered-down contrast paint with some gloss varnish in the mix. Think it worked ok, but there is a bit of light bleeding through on the stone bits, so I might have to paint the reverse later.
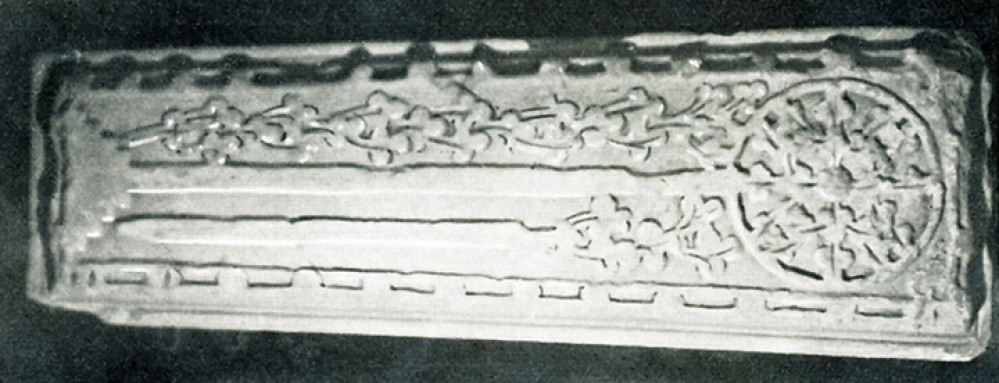
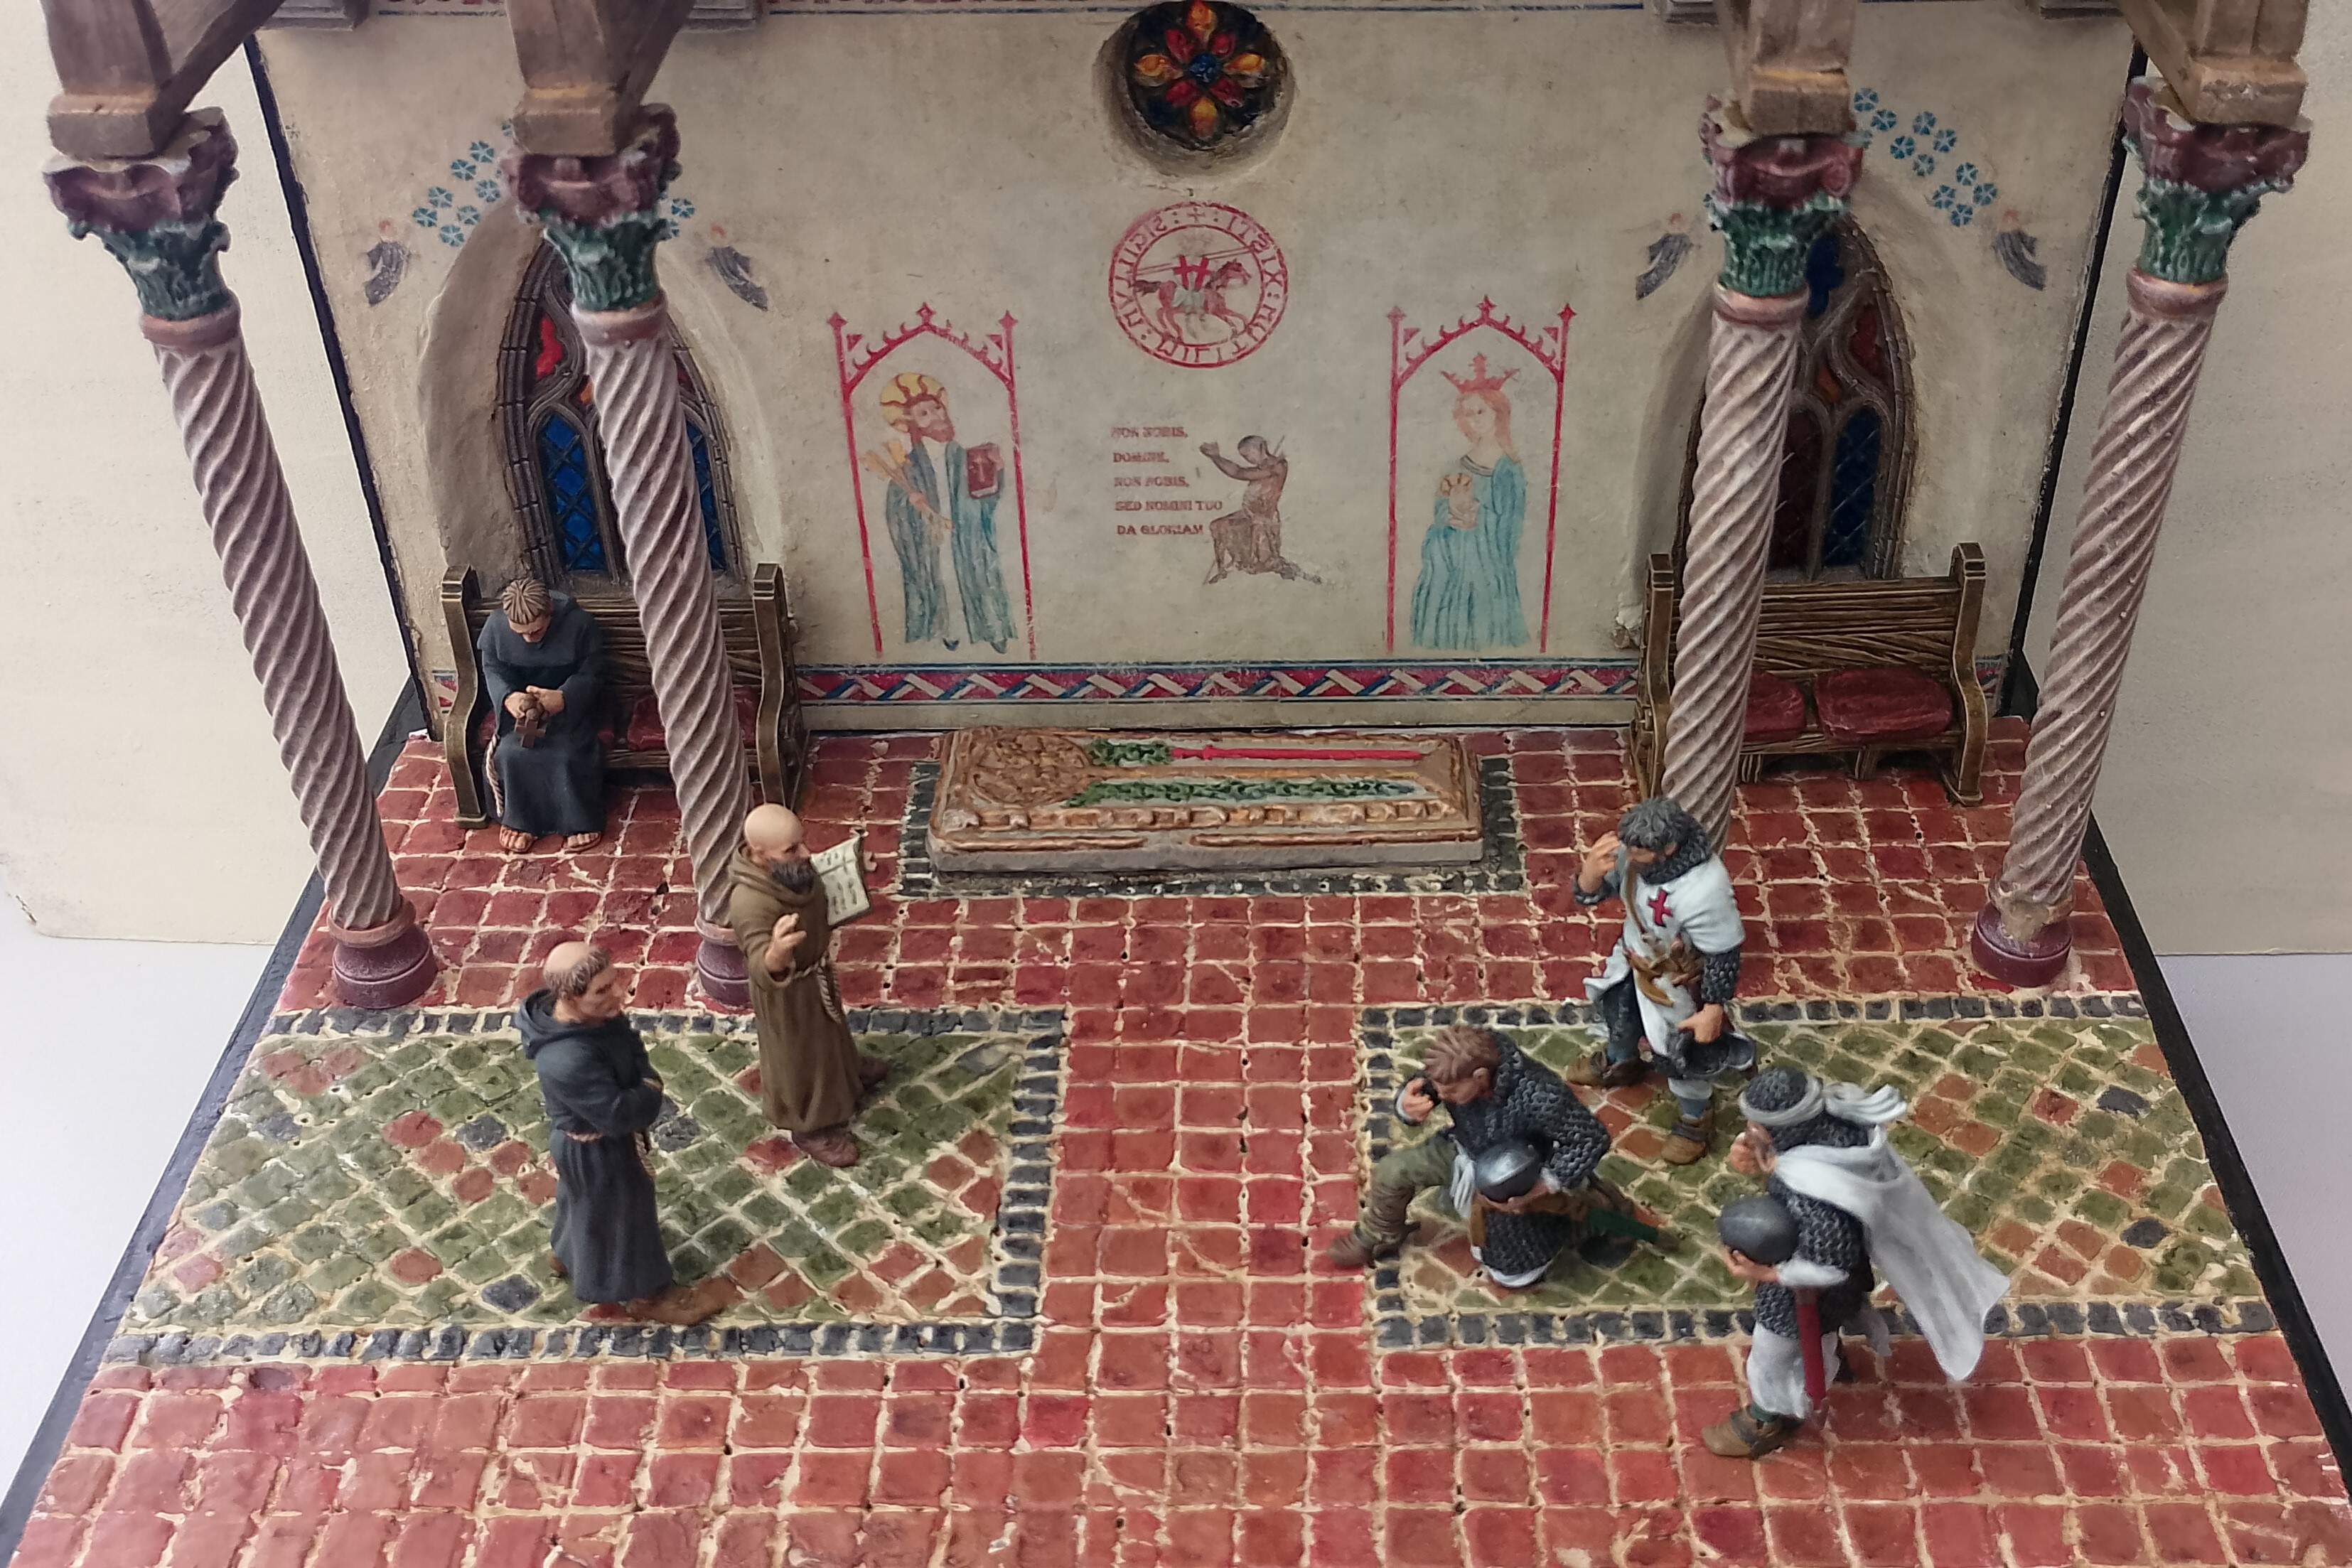
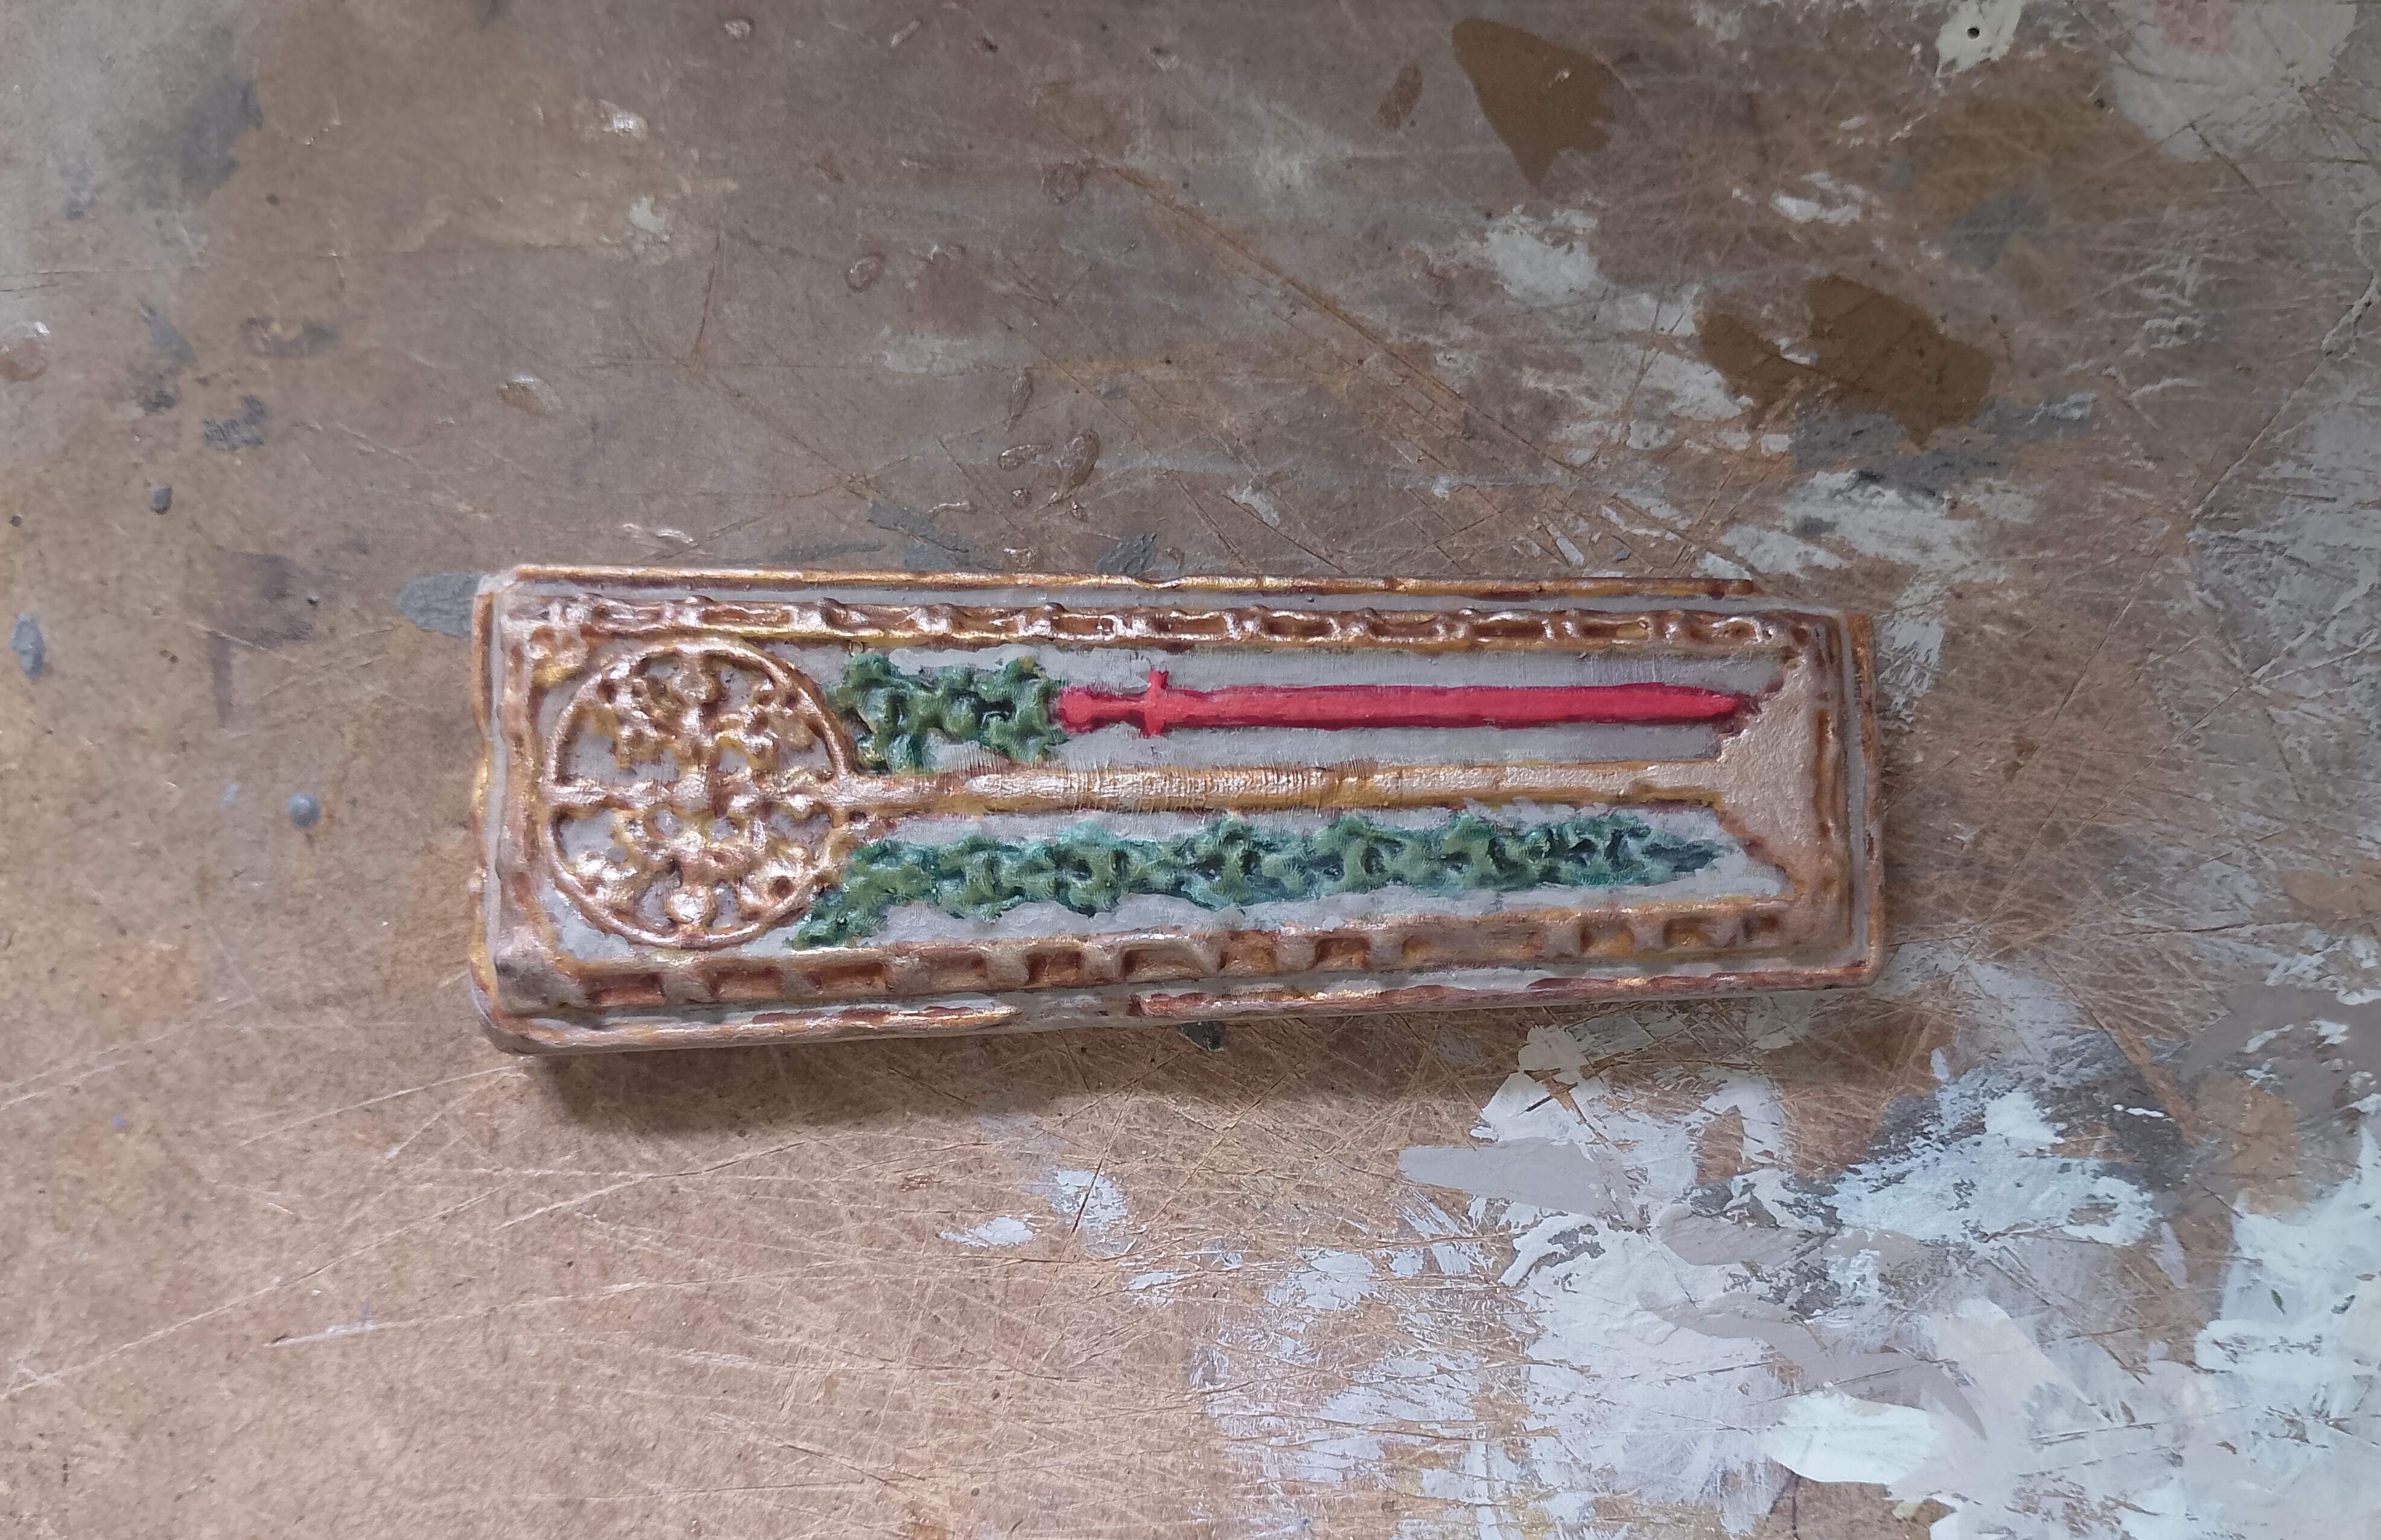
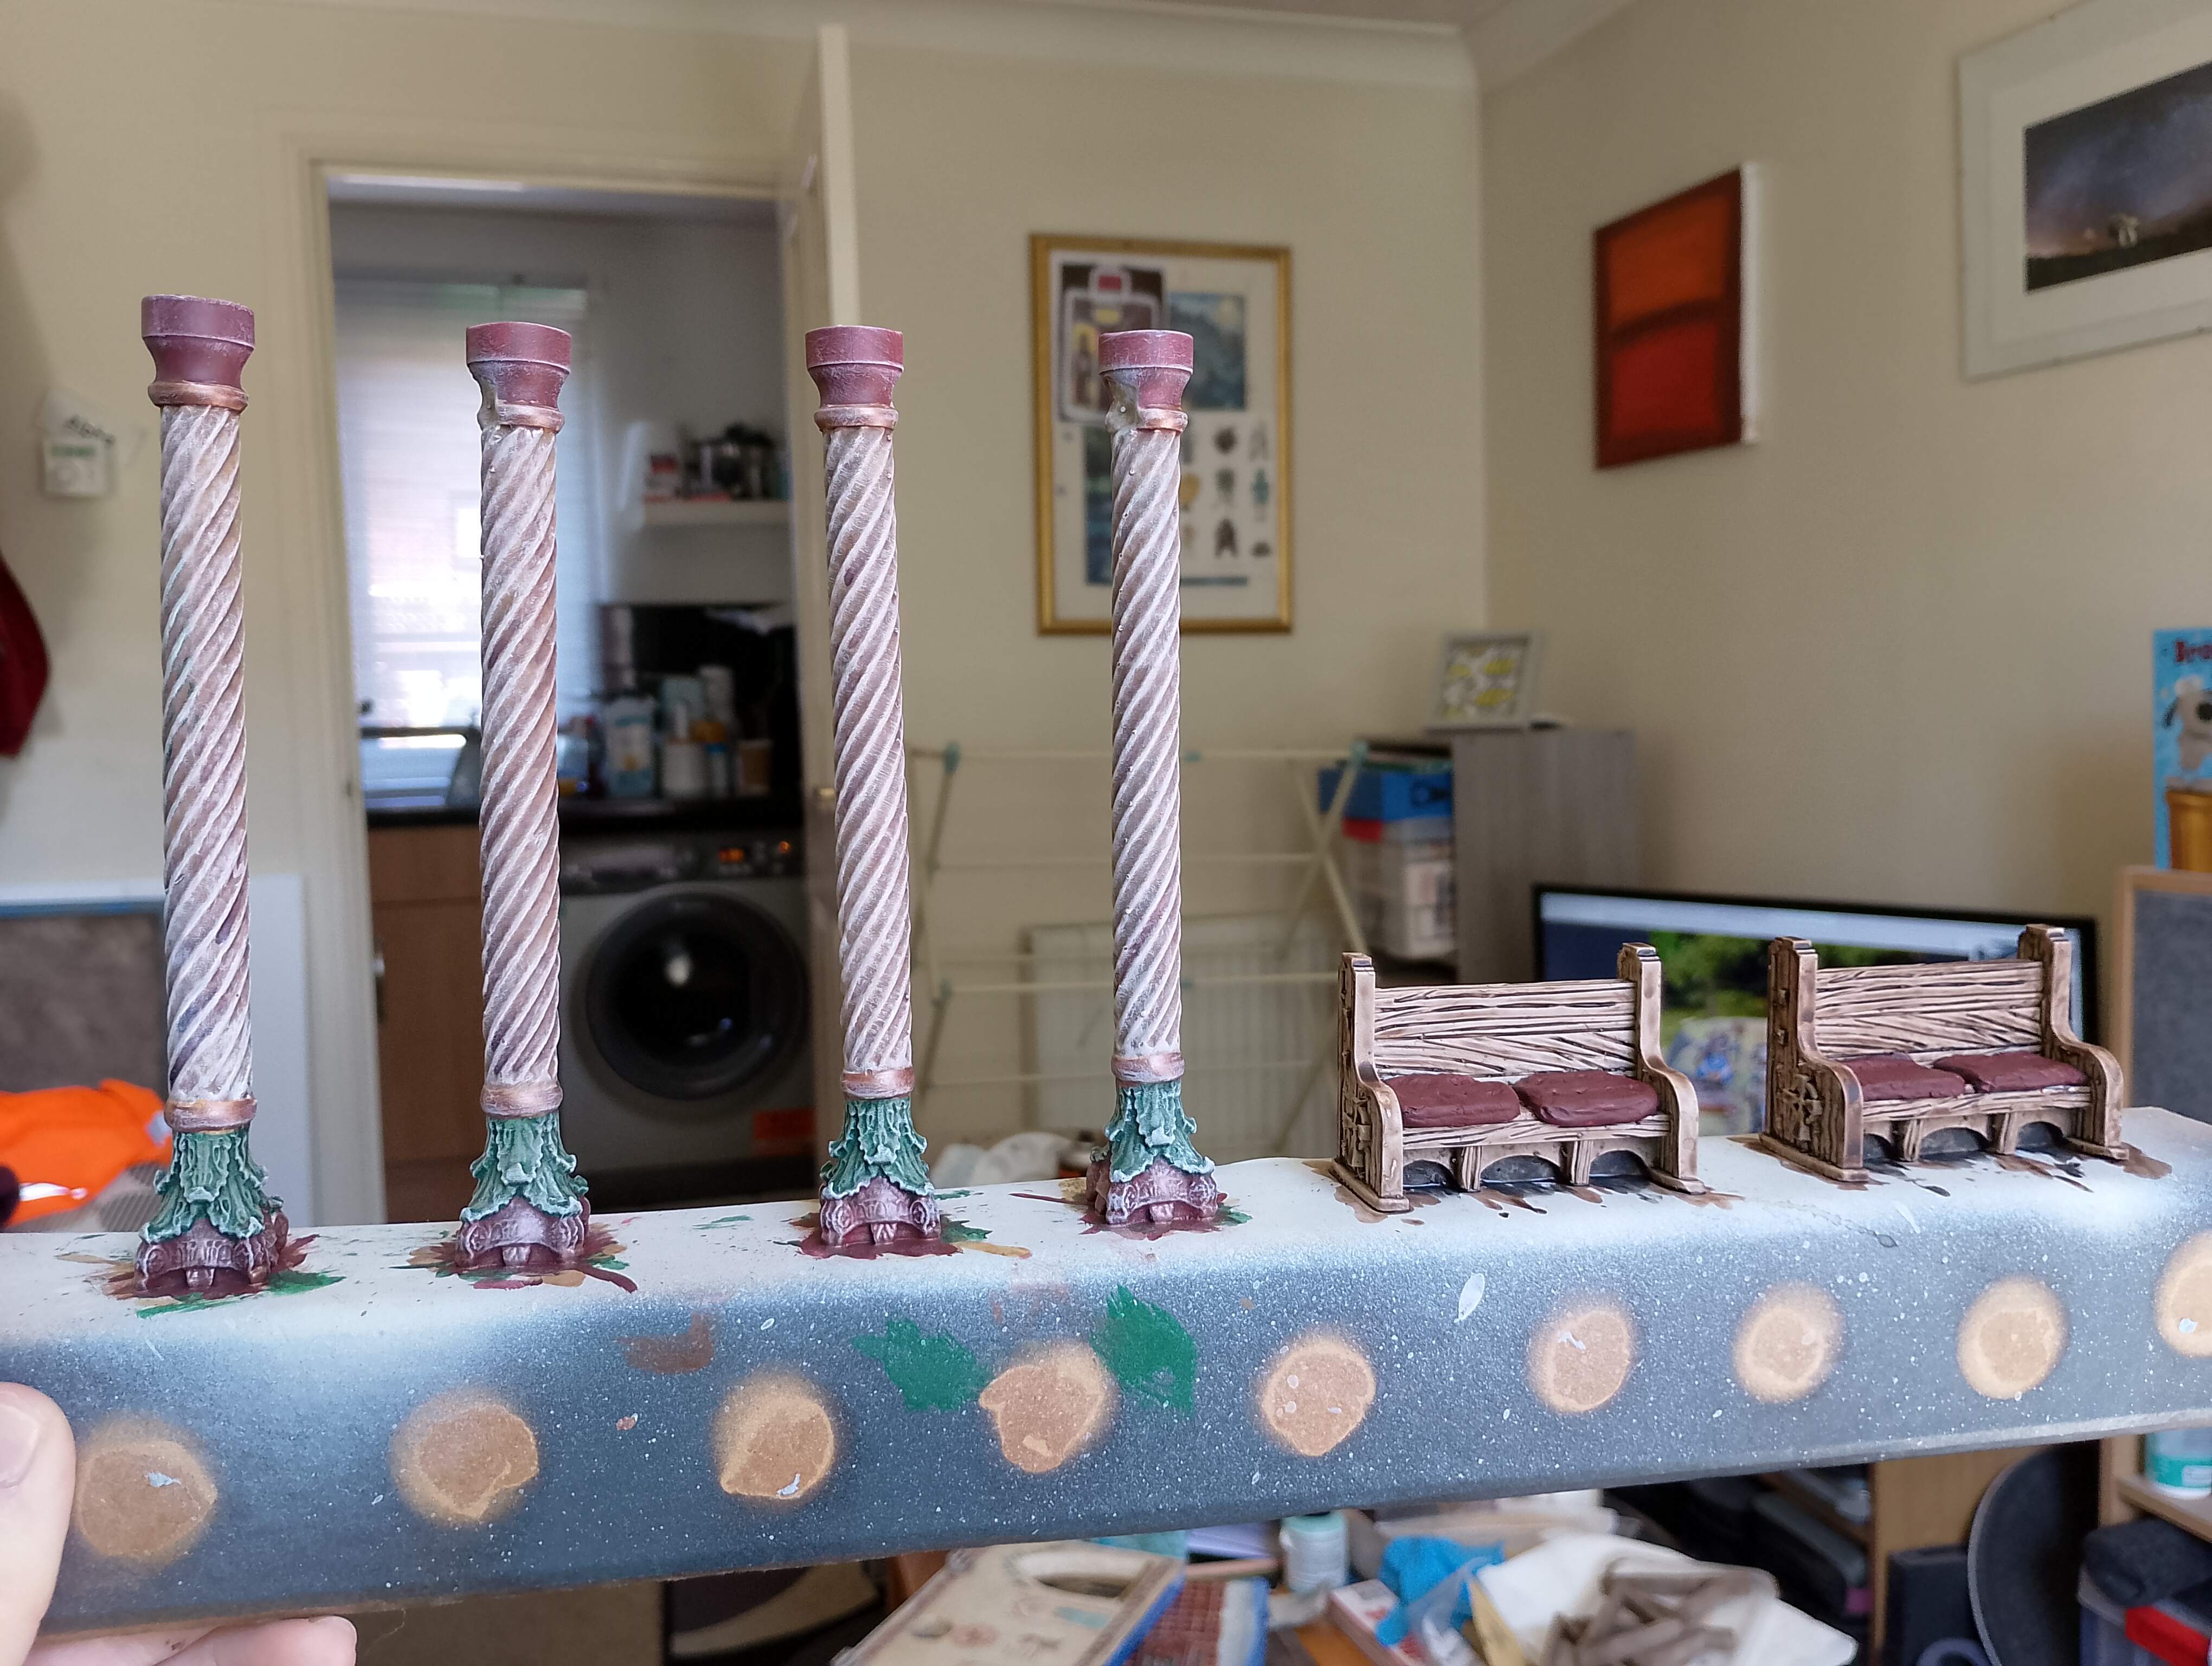
I also started to paint my Monks and Templars, and finished painting the sarcophagus lid. I tried to keep it simple with the floral elements green, the cross stand, and the edging painted yellow with gold/brass over it, and as it’s a Templar tomb, I thought red was a good choice for the carved sword. I’ve no idea how historically accurate this is but carved stone work, such as the sarcophagus lid and the stone columns, in the past were often painted, but it just doesn’t survive over the years, especially when sites fall into ruin (or in Scotland and the rest of the UK when the paint was deliberately scrubbed off during the reformation). A good example of painted stone carvings is Richard the Lionheart’s tomb effigy in Fontevraud Abbey in France. The final bit of painting was on the church pews, which I had added some Miliput seat cushions to, and used watered-down contrast paints and a few normal paints. There wasn’t much in the way of seating in medieval churches, and I’m not aware of any that survive from the period I’m doing. It seems there were seats for the nobles and simple seats for older or infirm people, which were set against the walls, with everyone else just standing or kneeling on the hard floor.
I finally did another quick dry-fit of the wall, floor and other bits to see how it was looking, and I think it’s getting there.
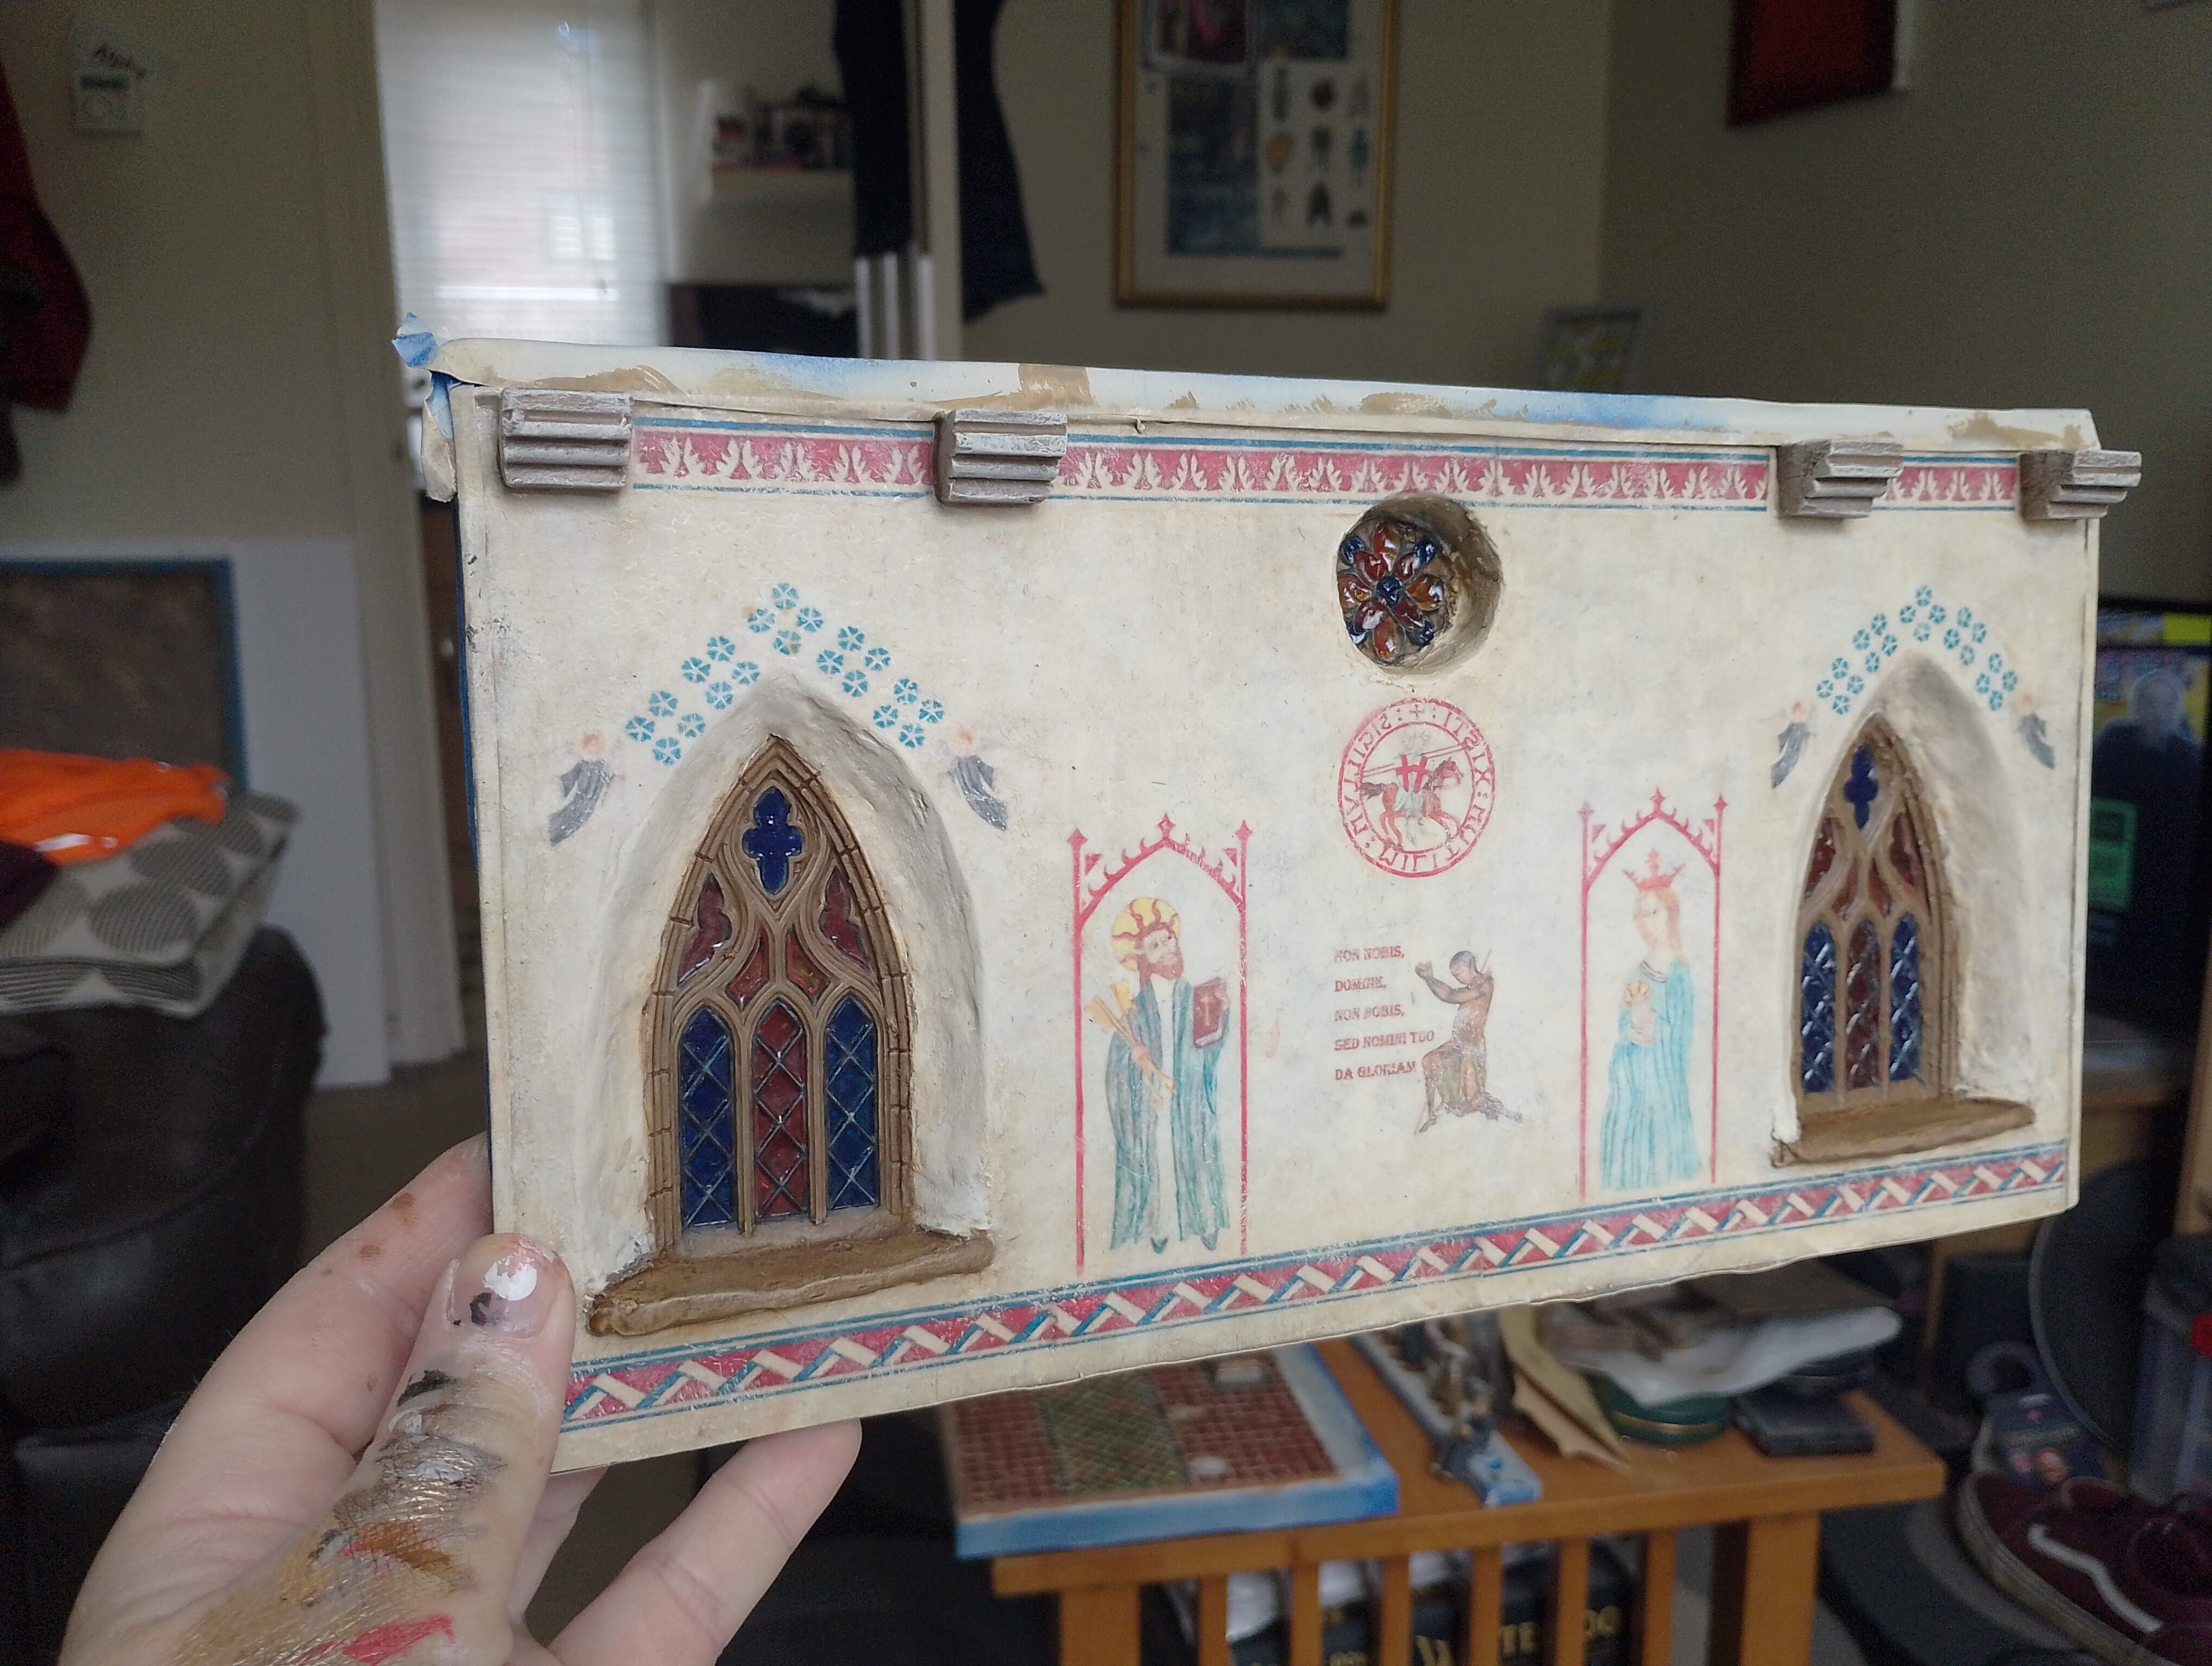
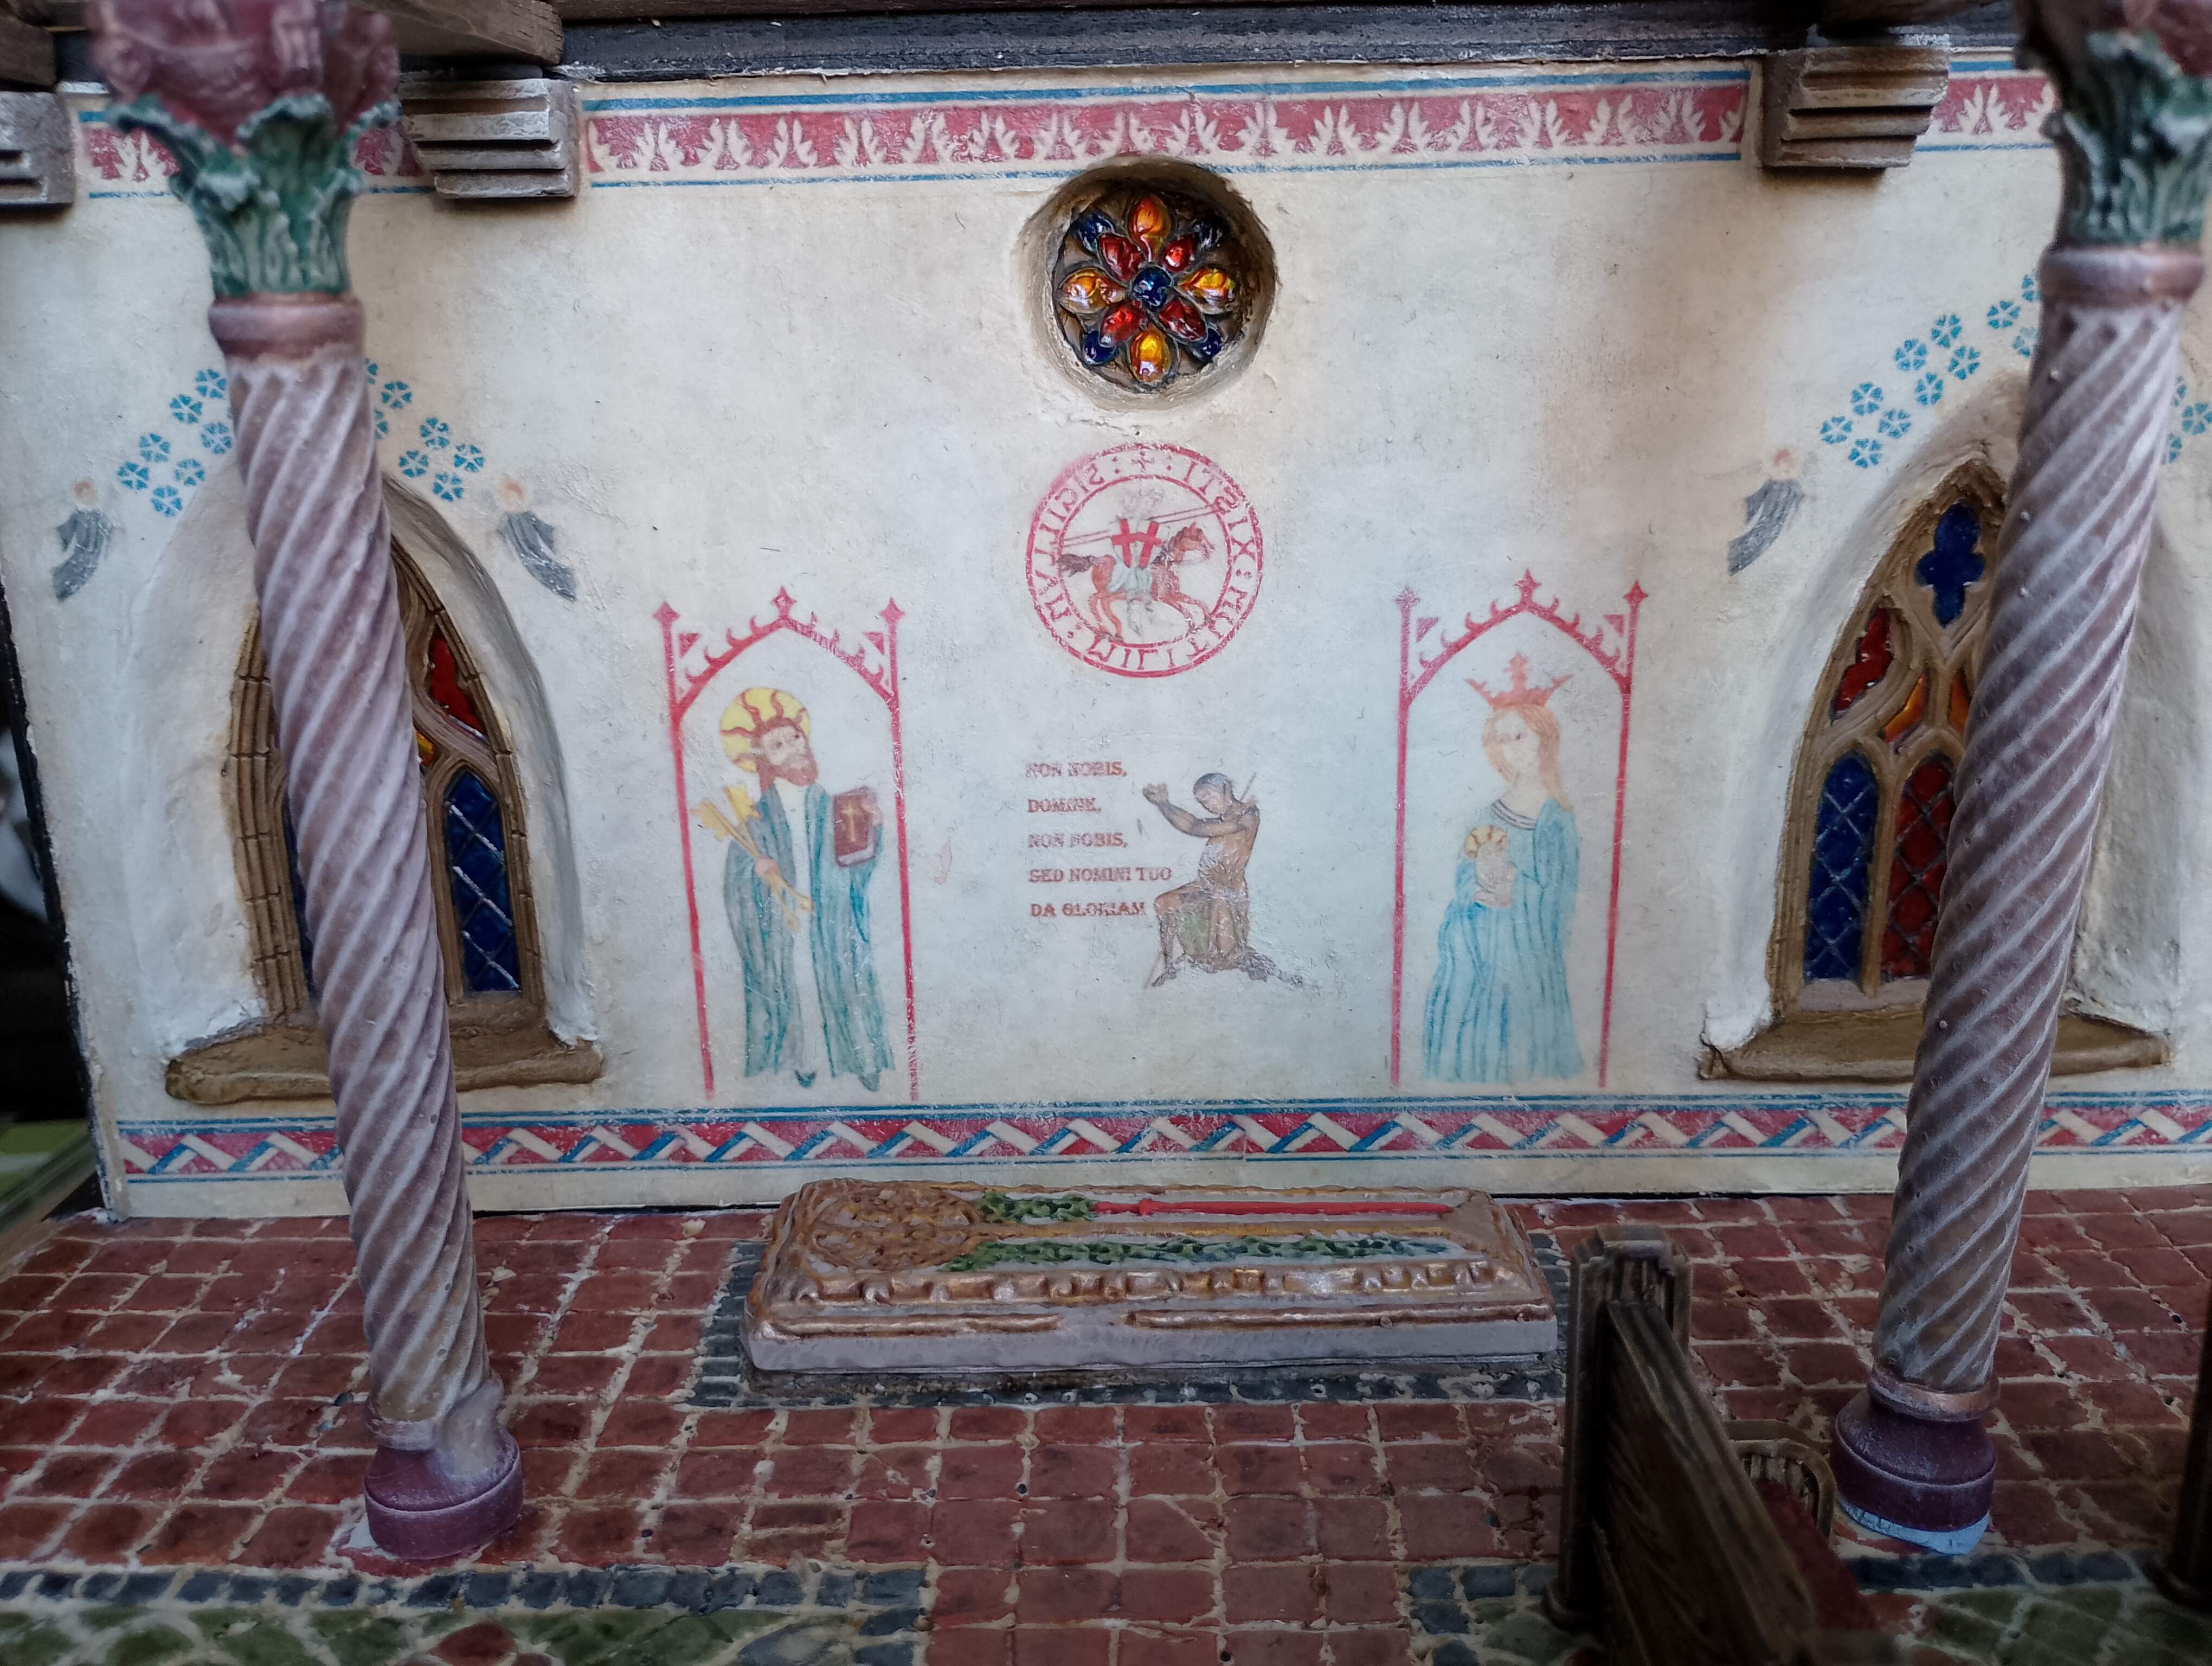
Bit of Tile Grouting and Homemade Decals
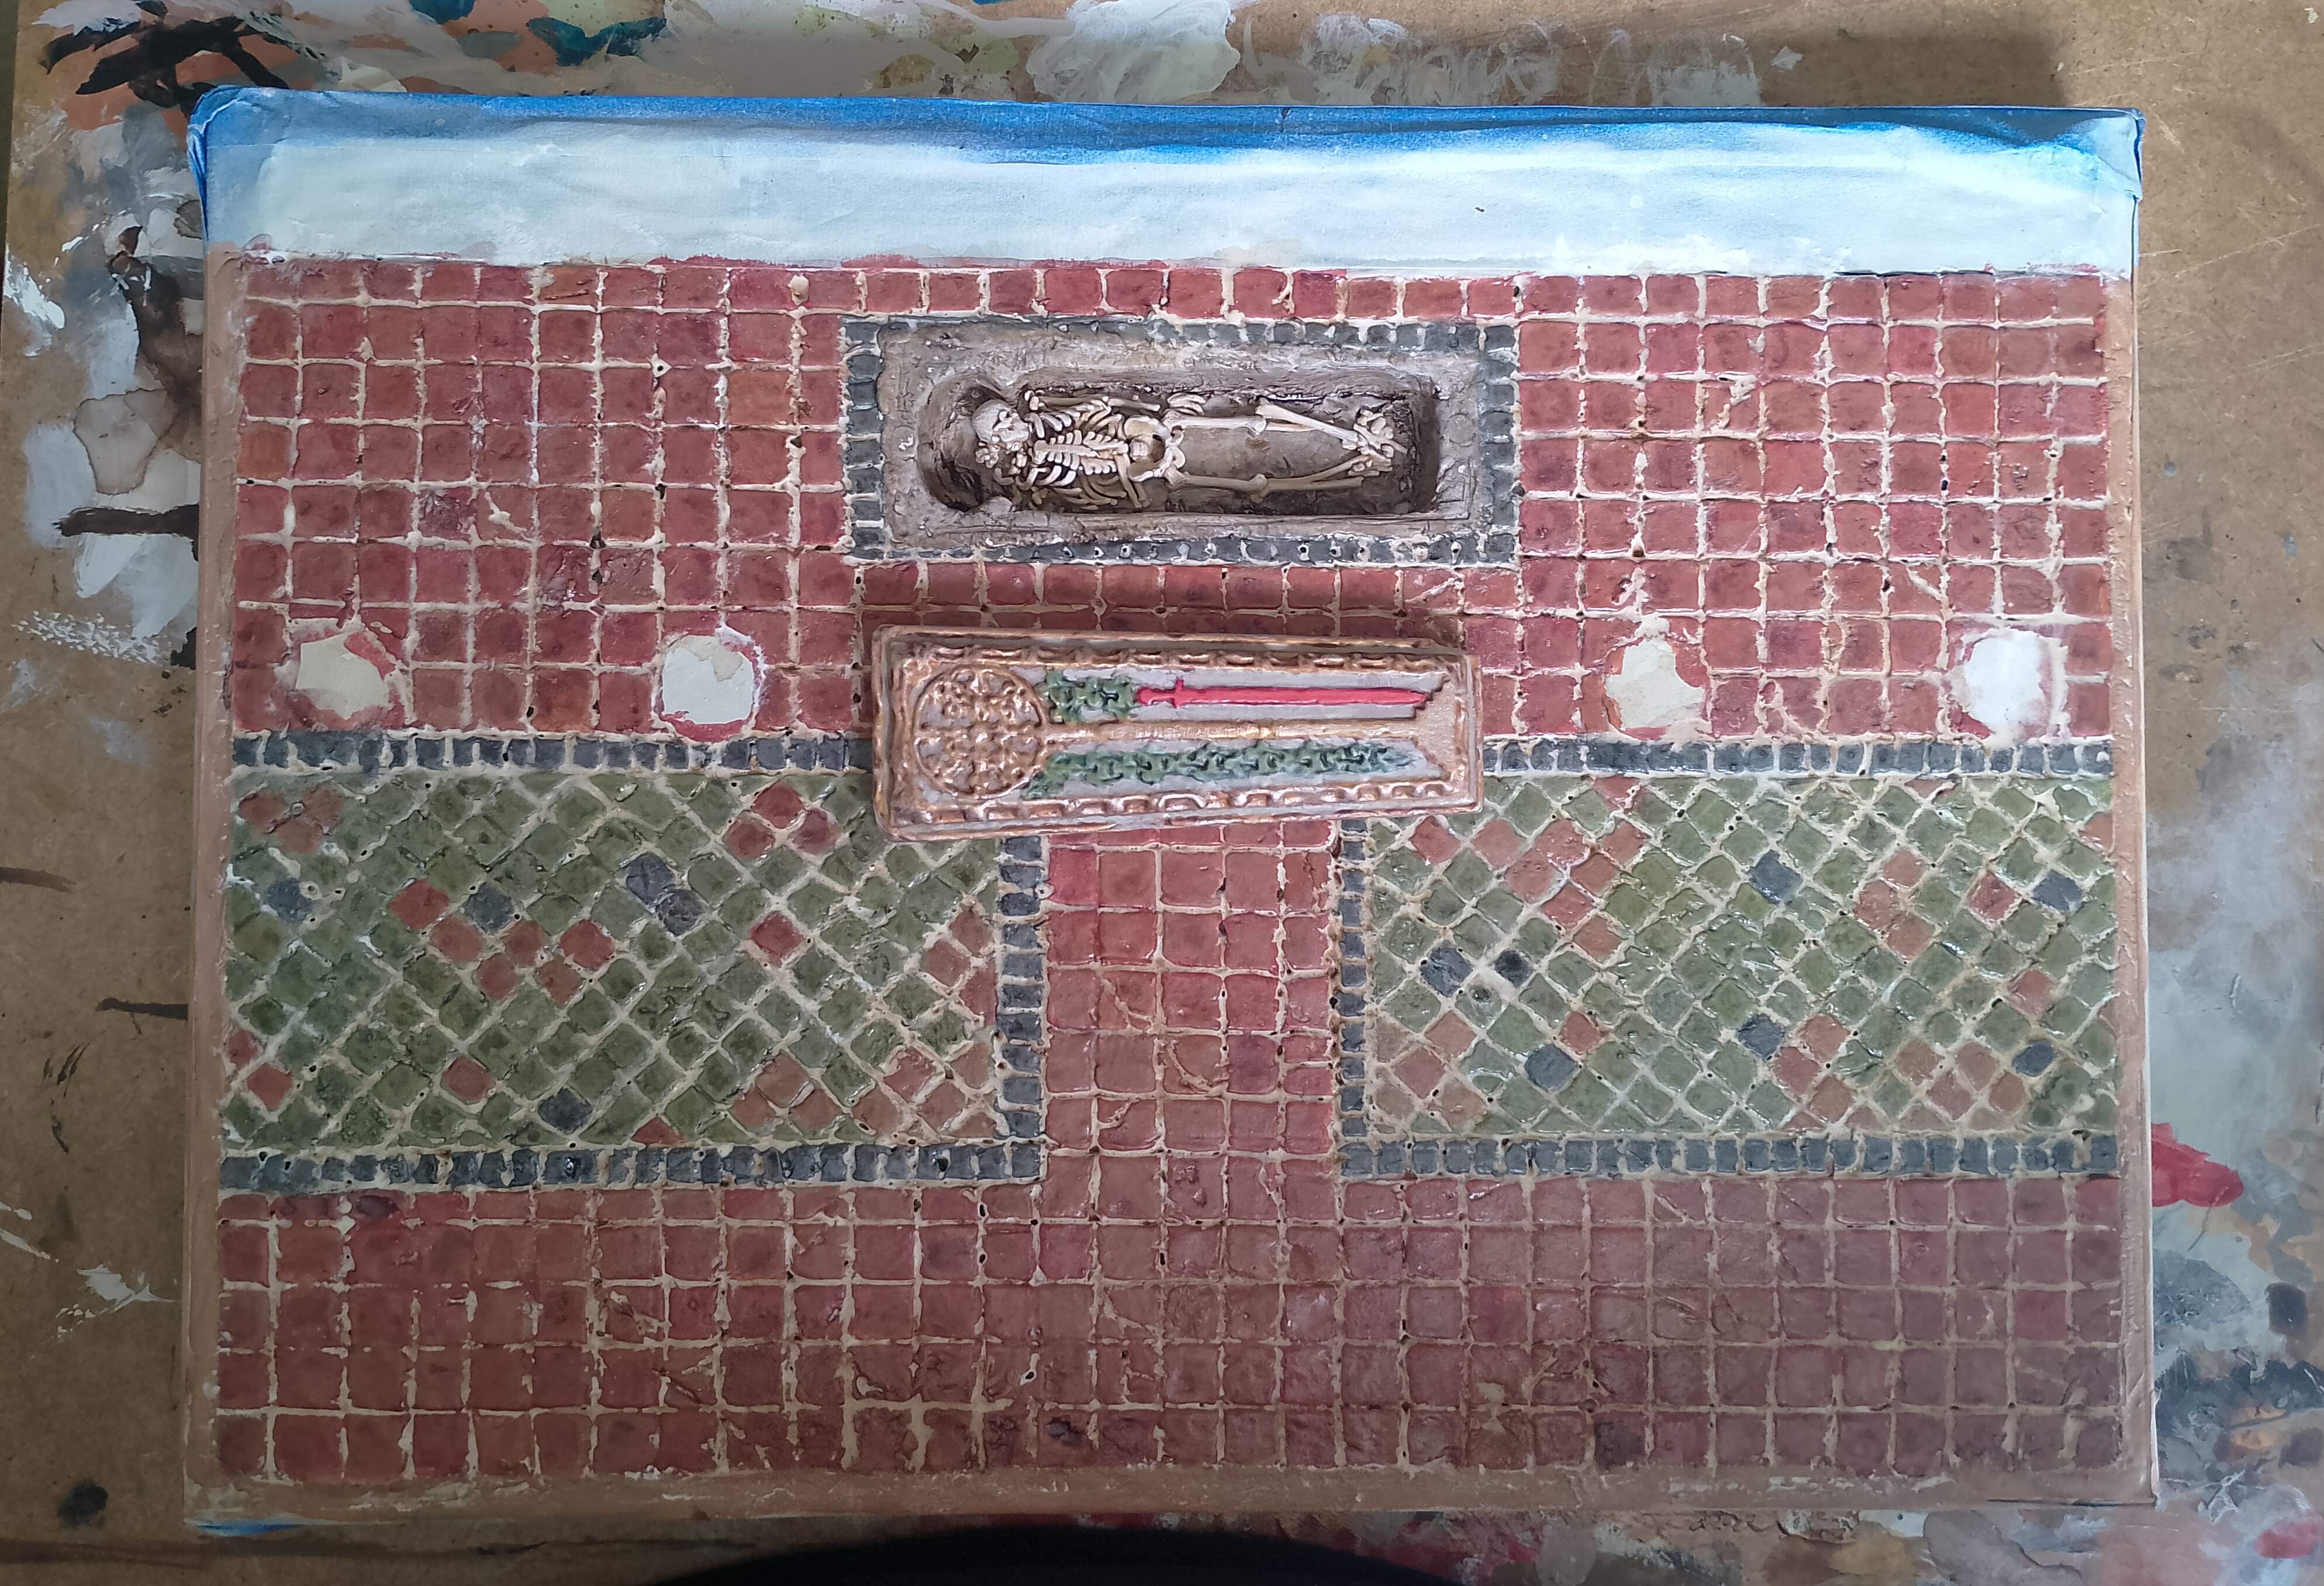
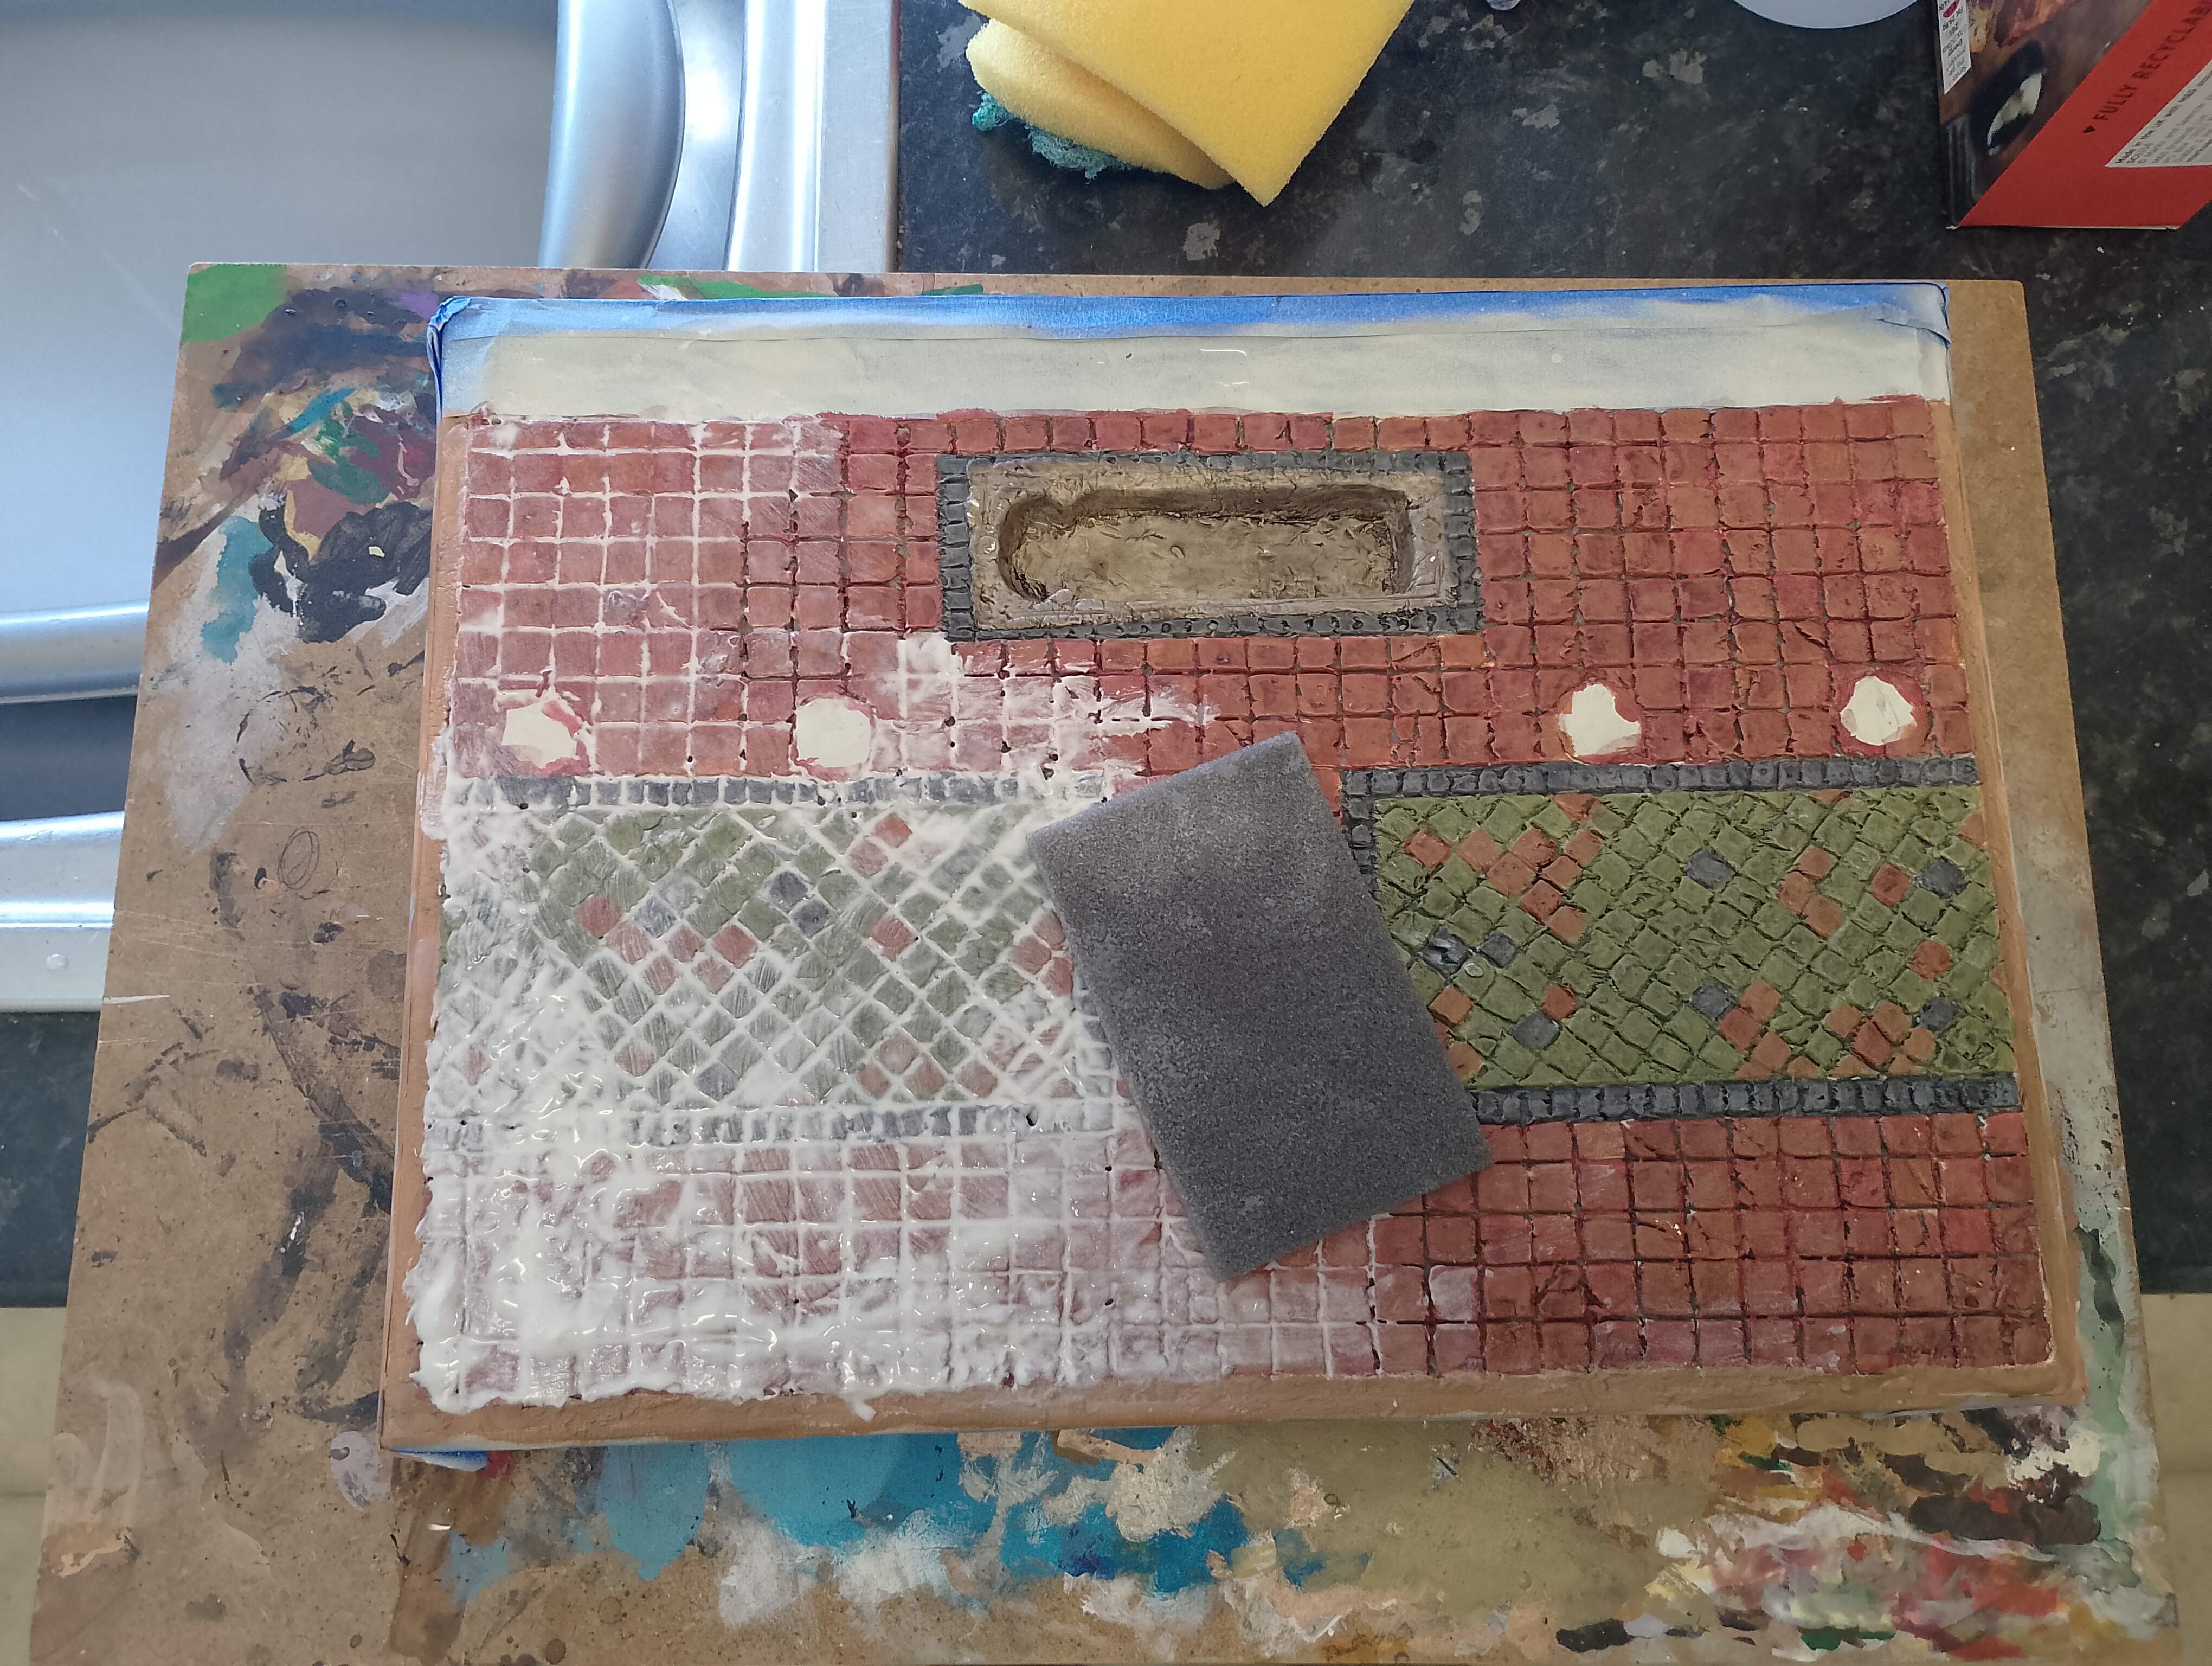
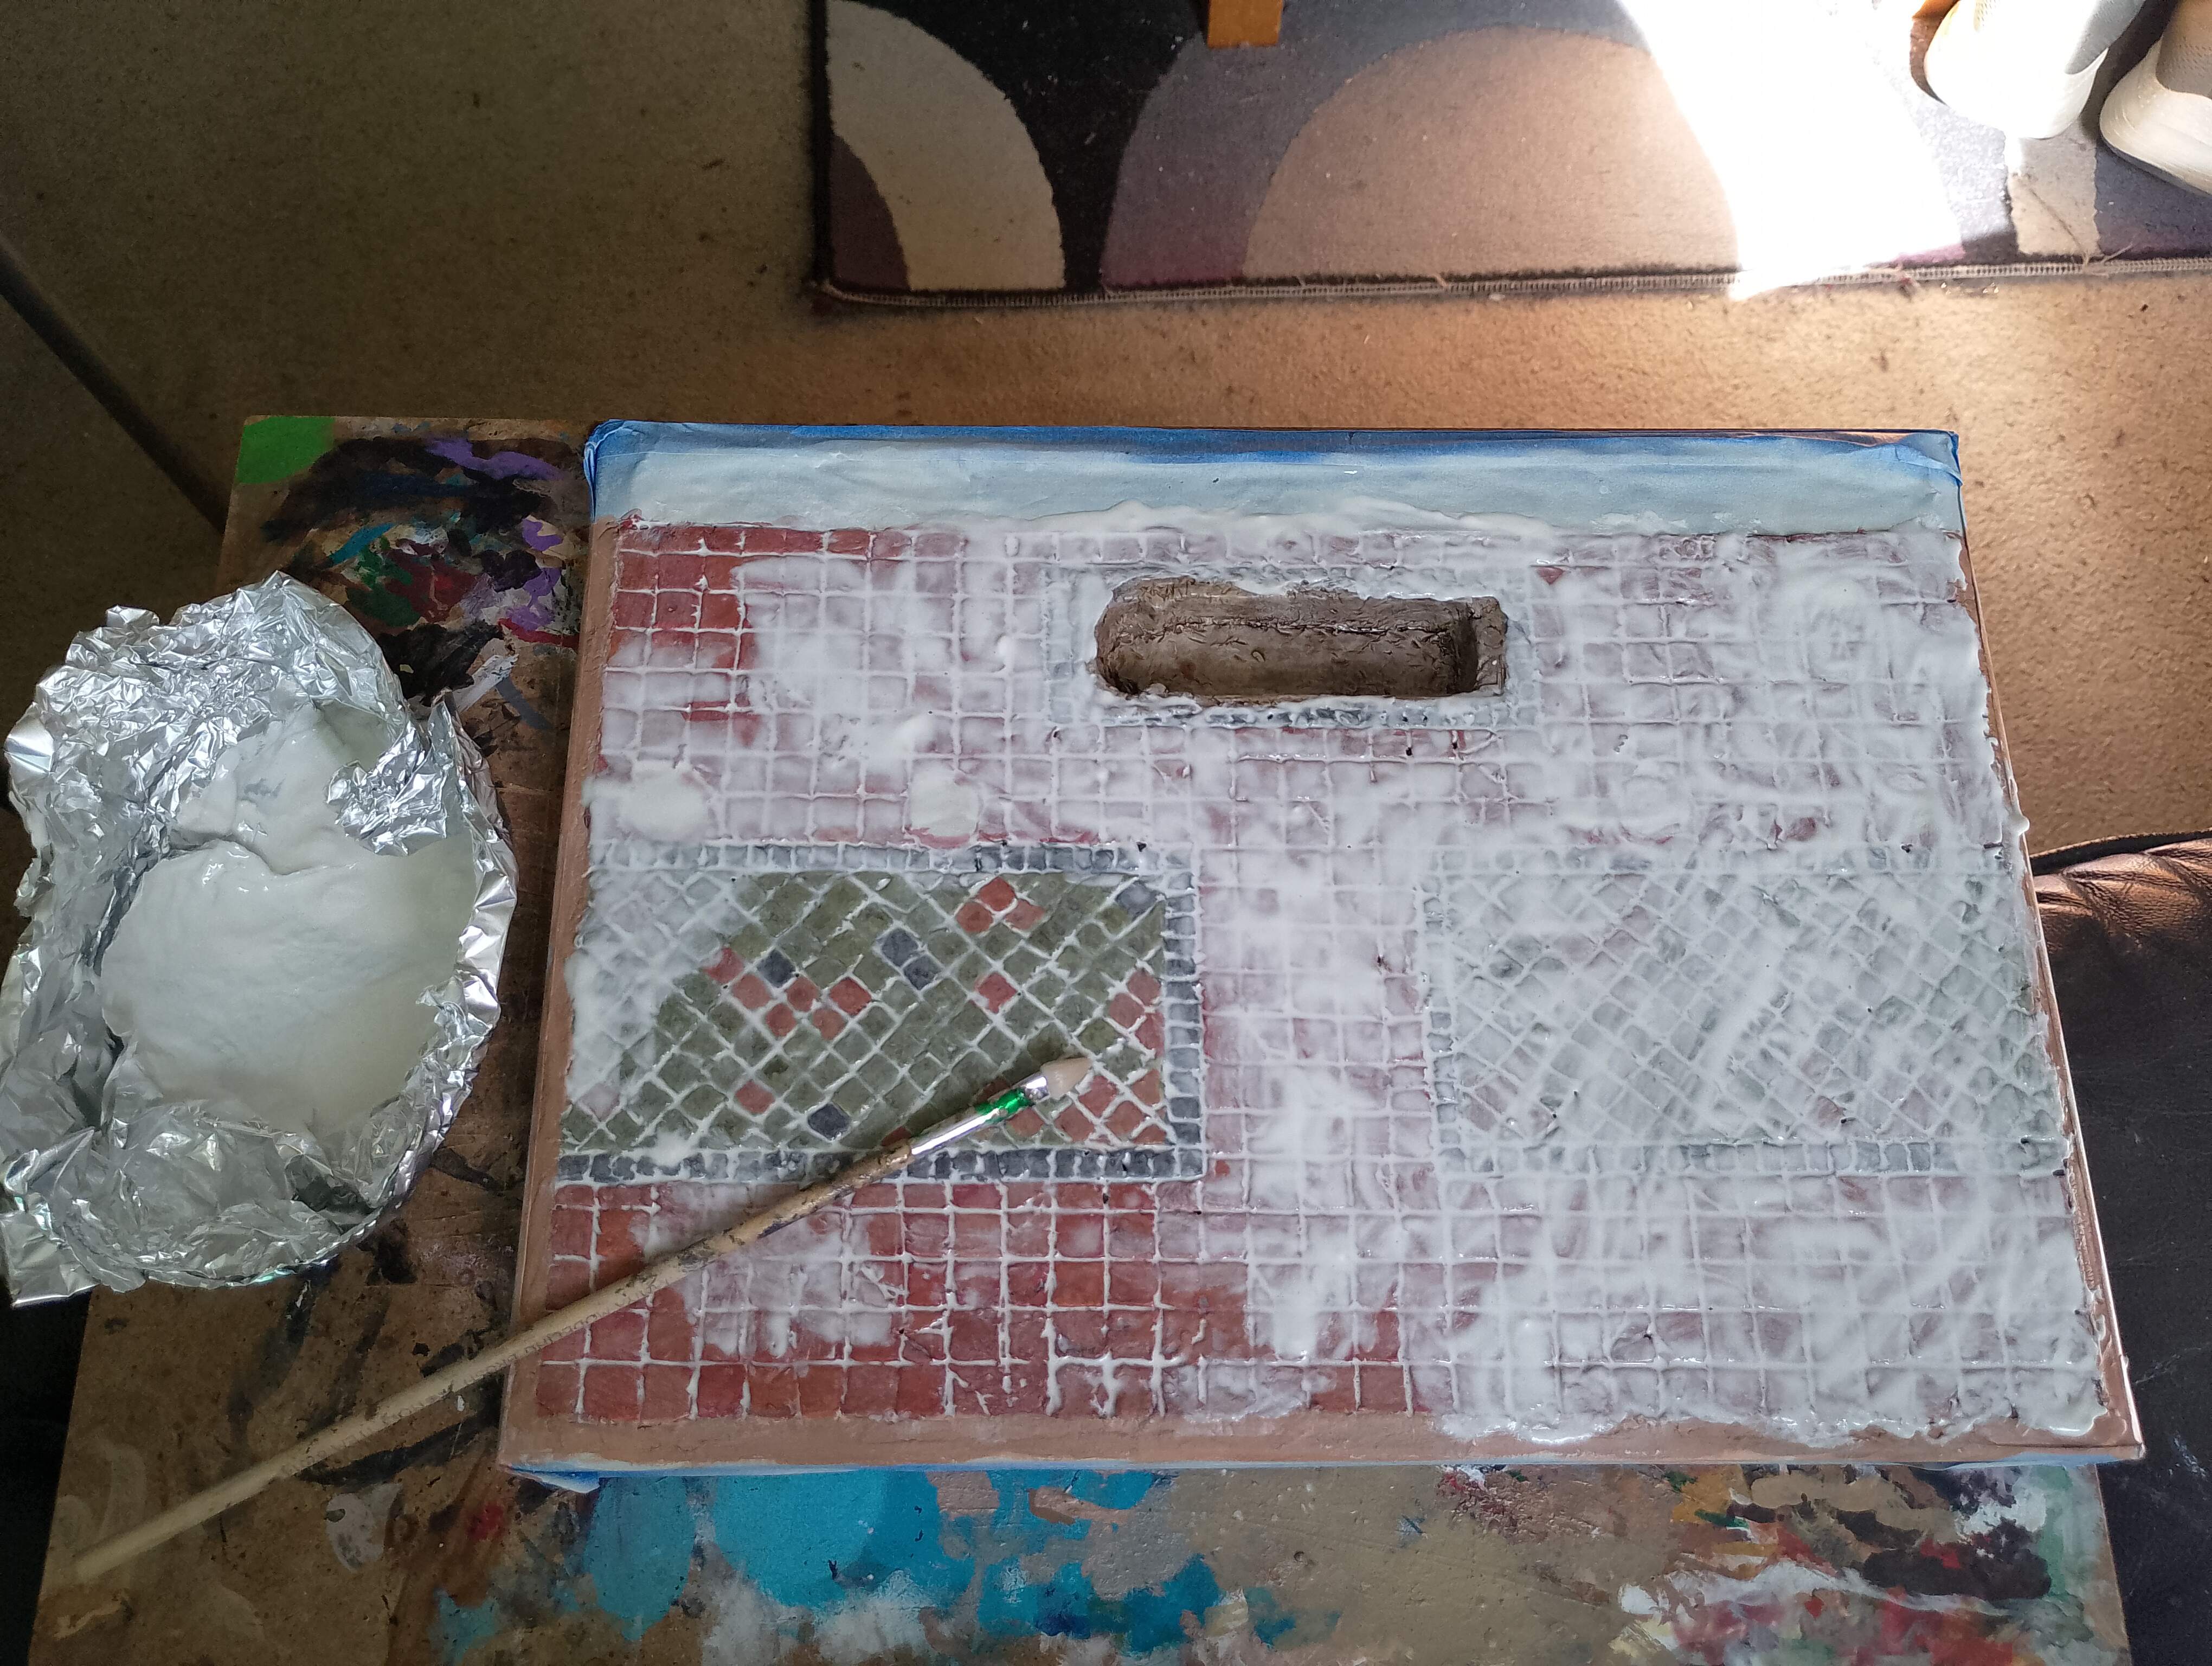
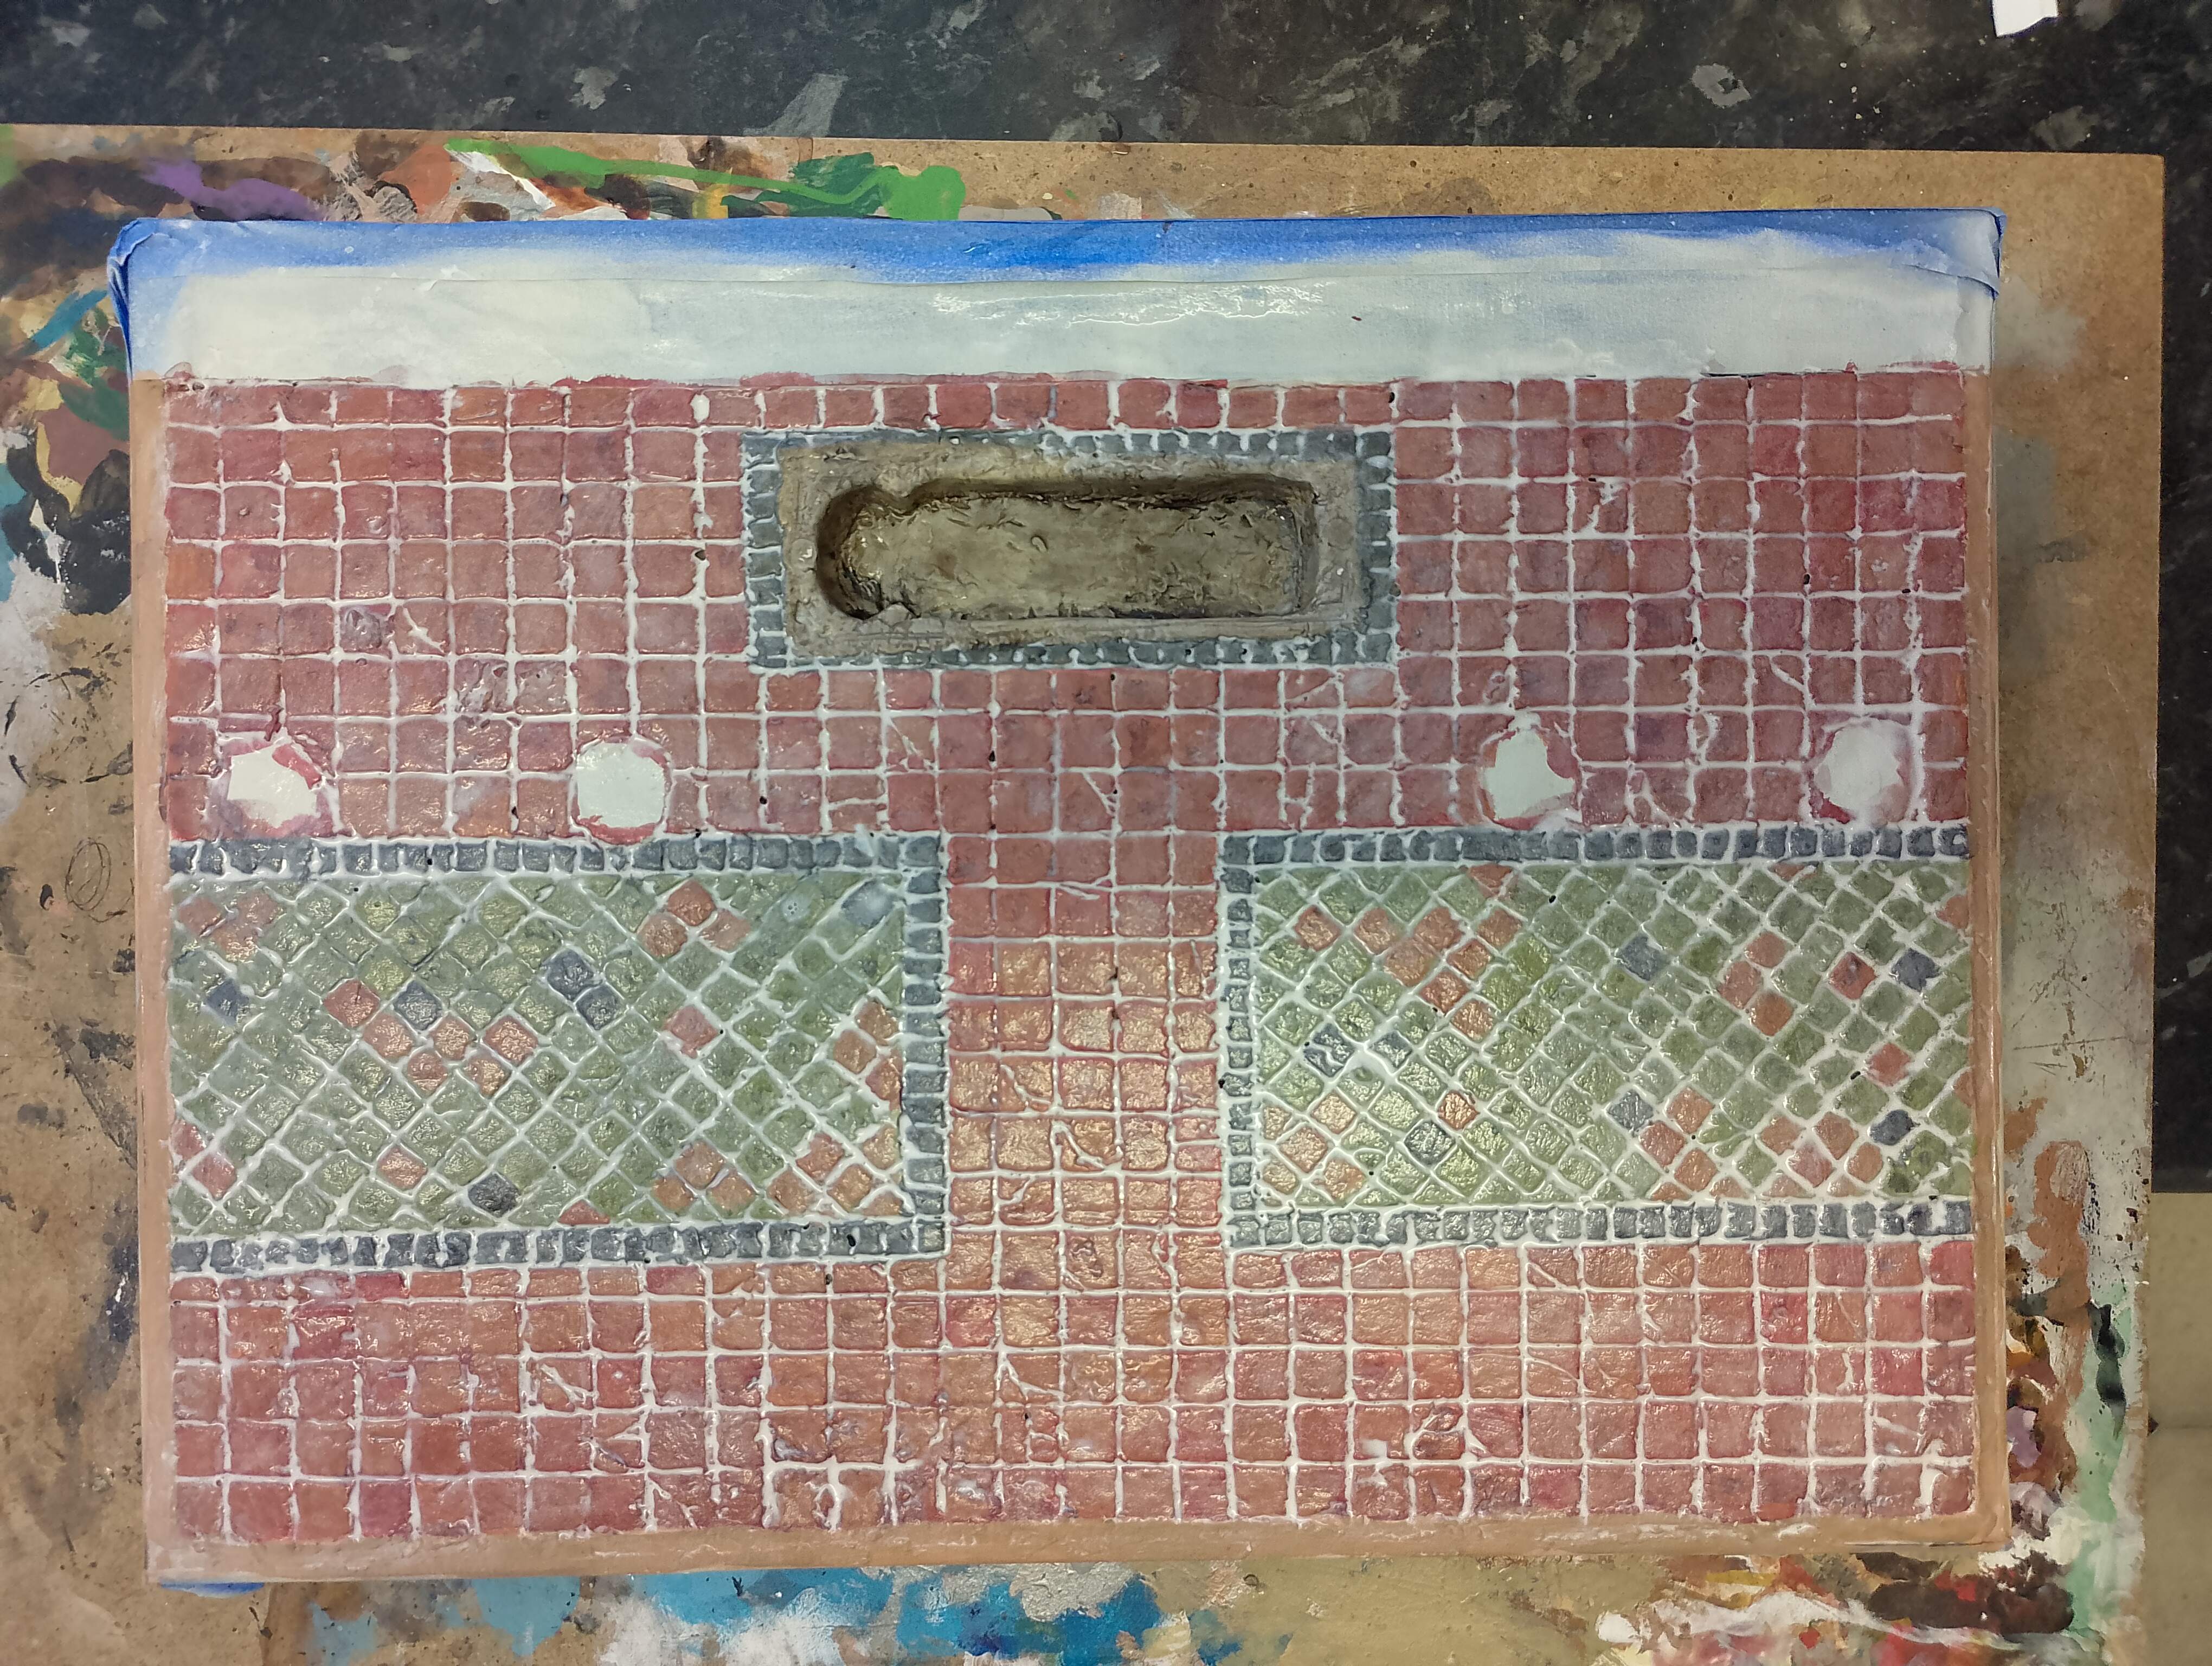
I gave the tile floor paint job a gloss varnish and once it was fully cured, went in with premixed, and watered down, Polyfilla, which spread all over the floor. Tried using a sponge and brush to do that, but the best way to do it is just to use your fingers to push it into all the wee cracks and crevasses. I then used a wet sponge to clean off the excess and left it to dry. Think it turned out ok, but I had to go back in with some gloss varnish on the tiles (but not the grouted gaps) as the Polyfilla had made it too matt.
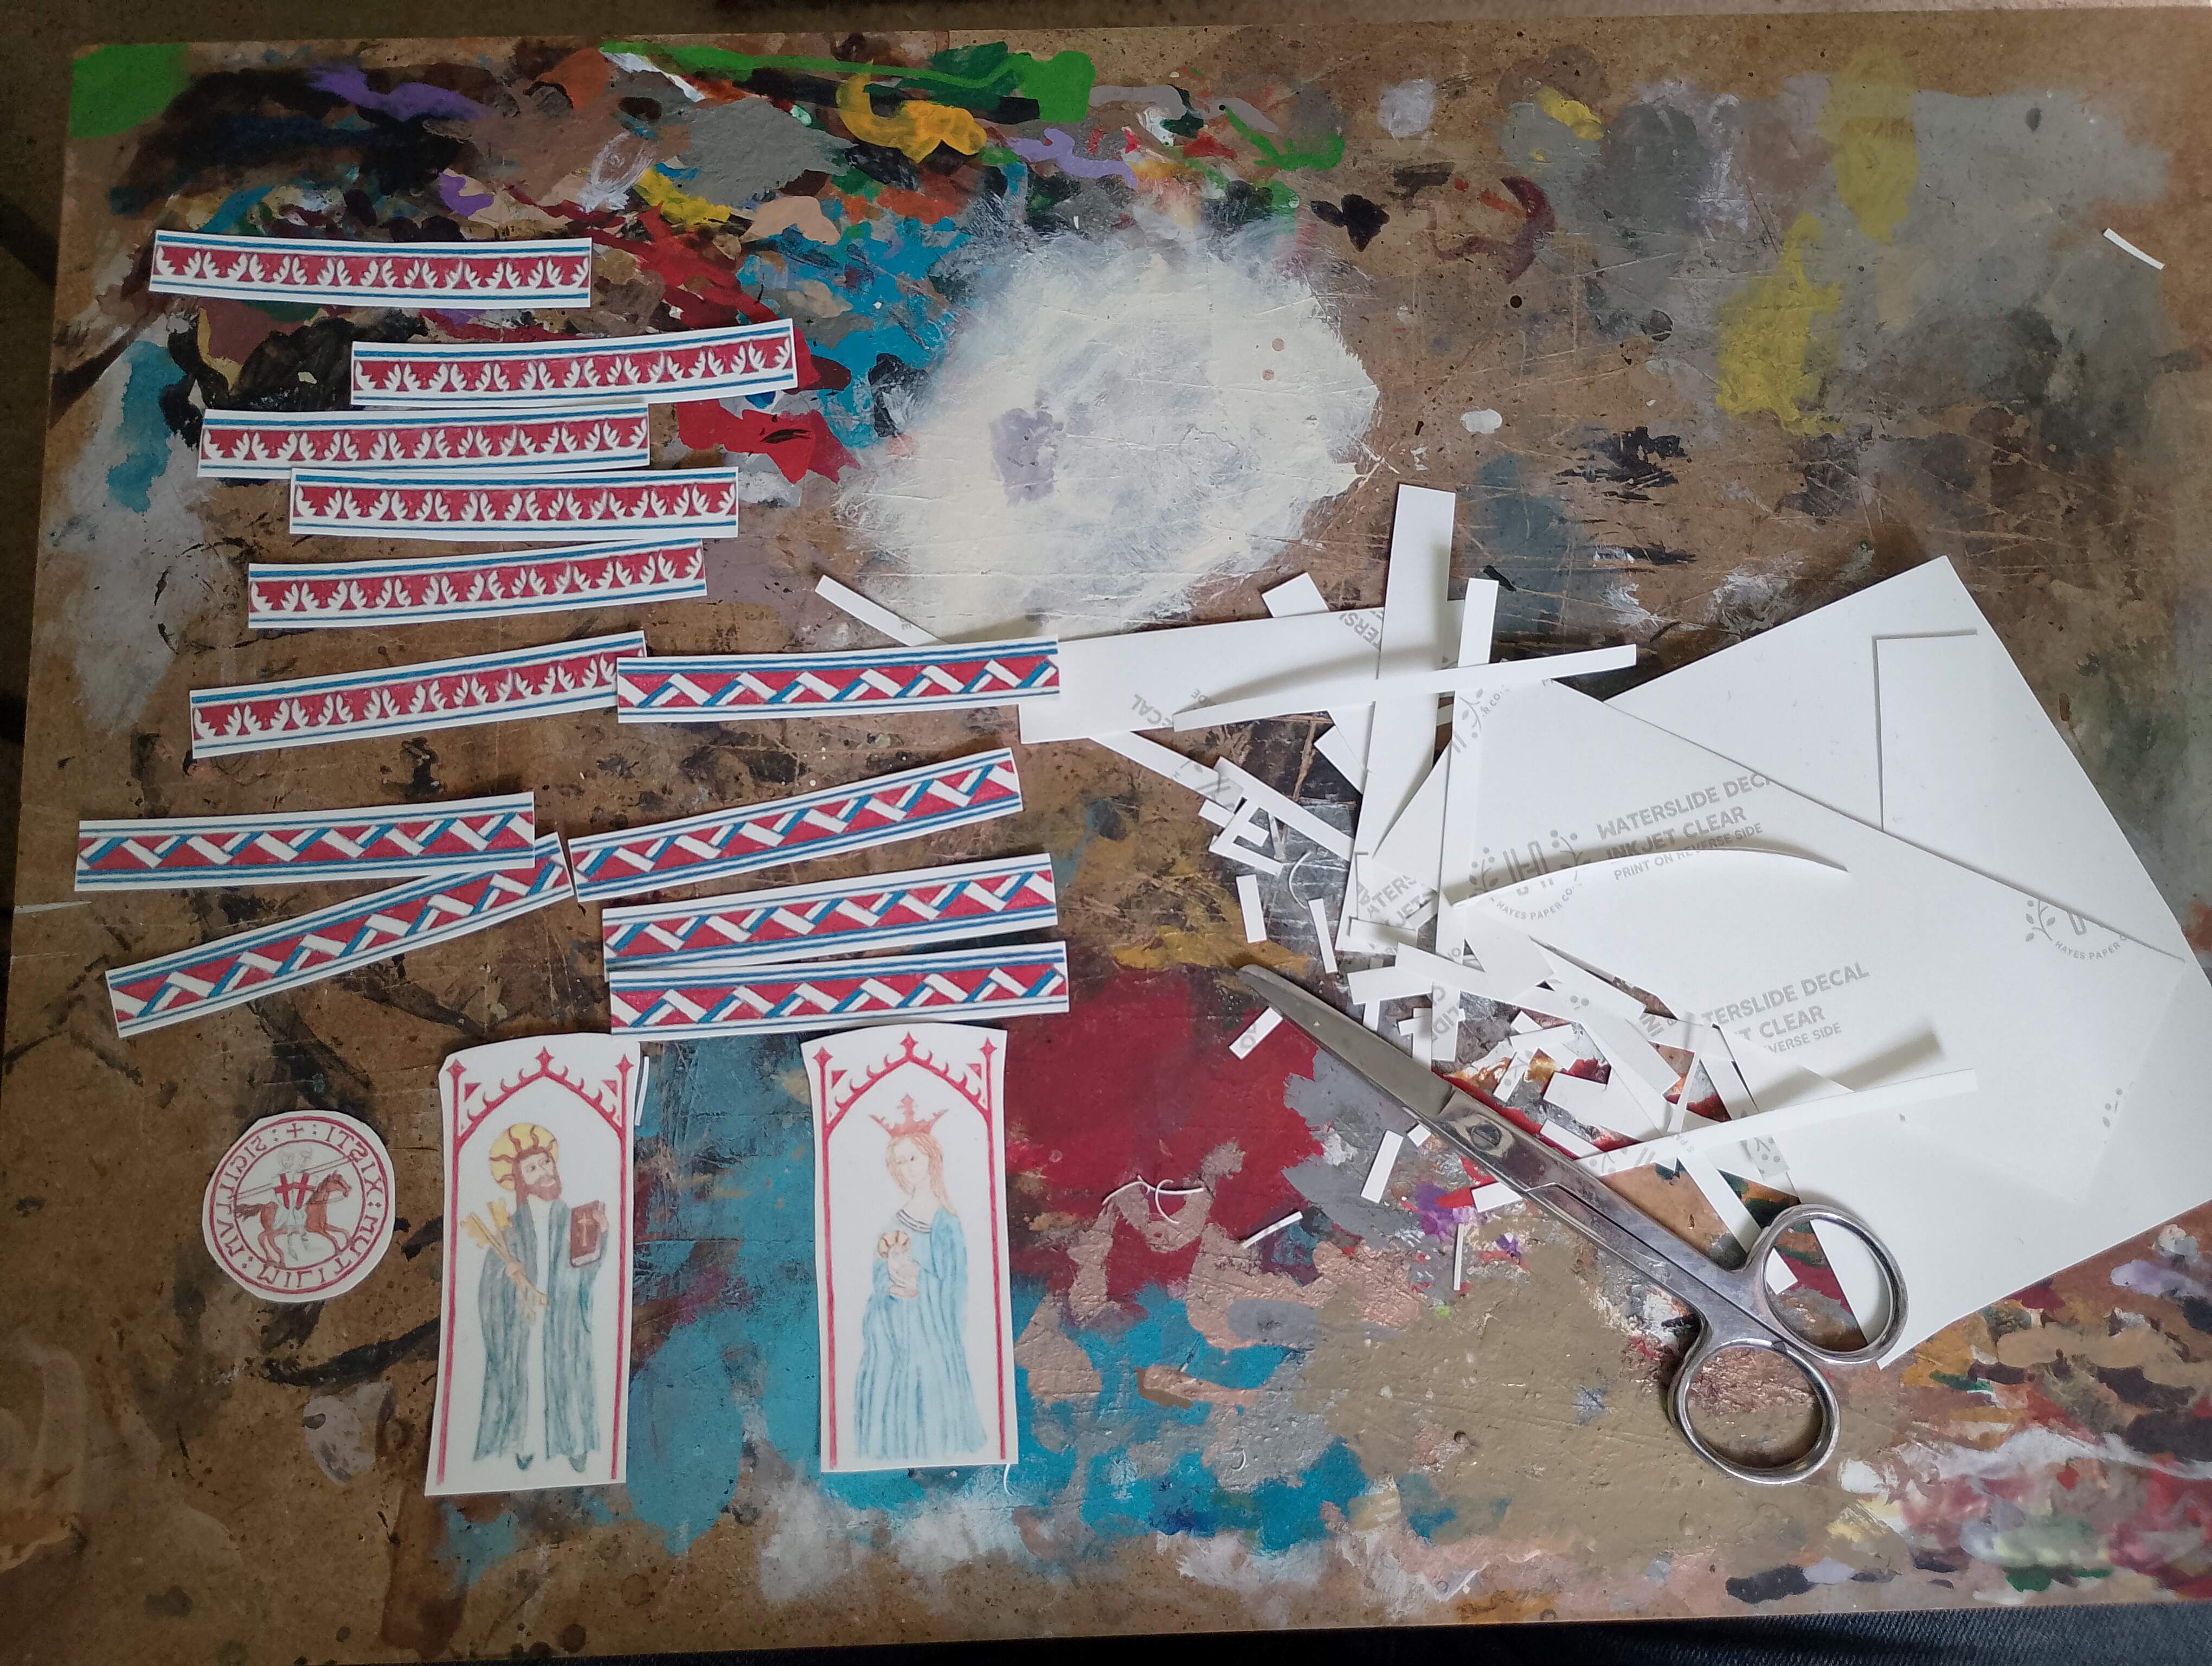
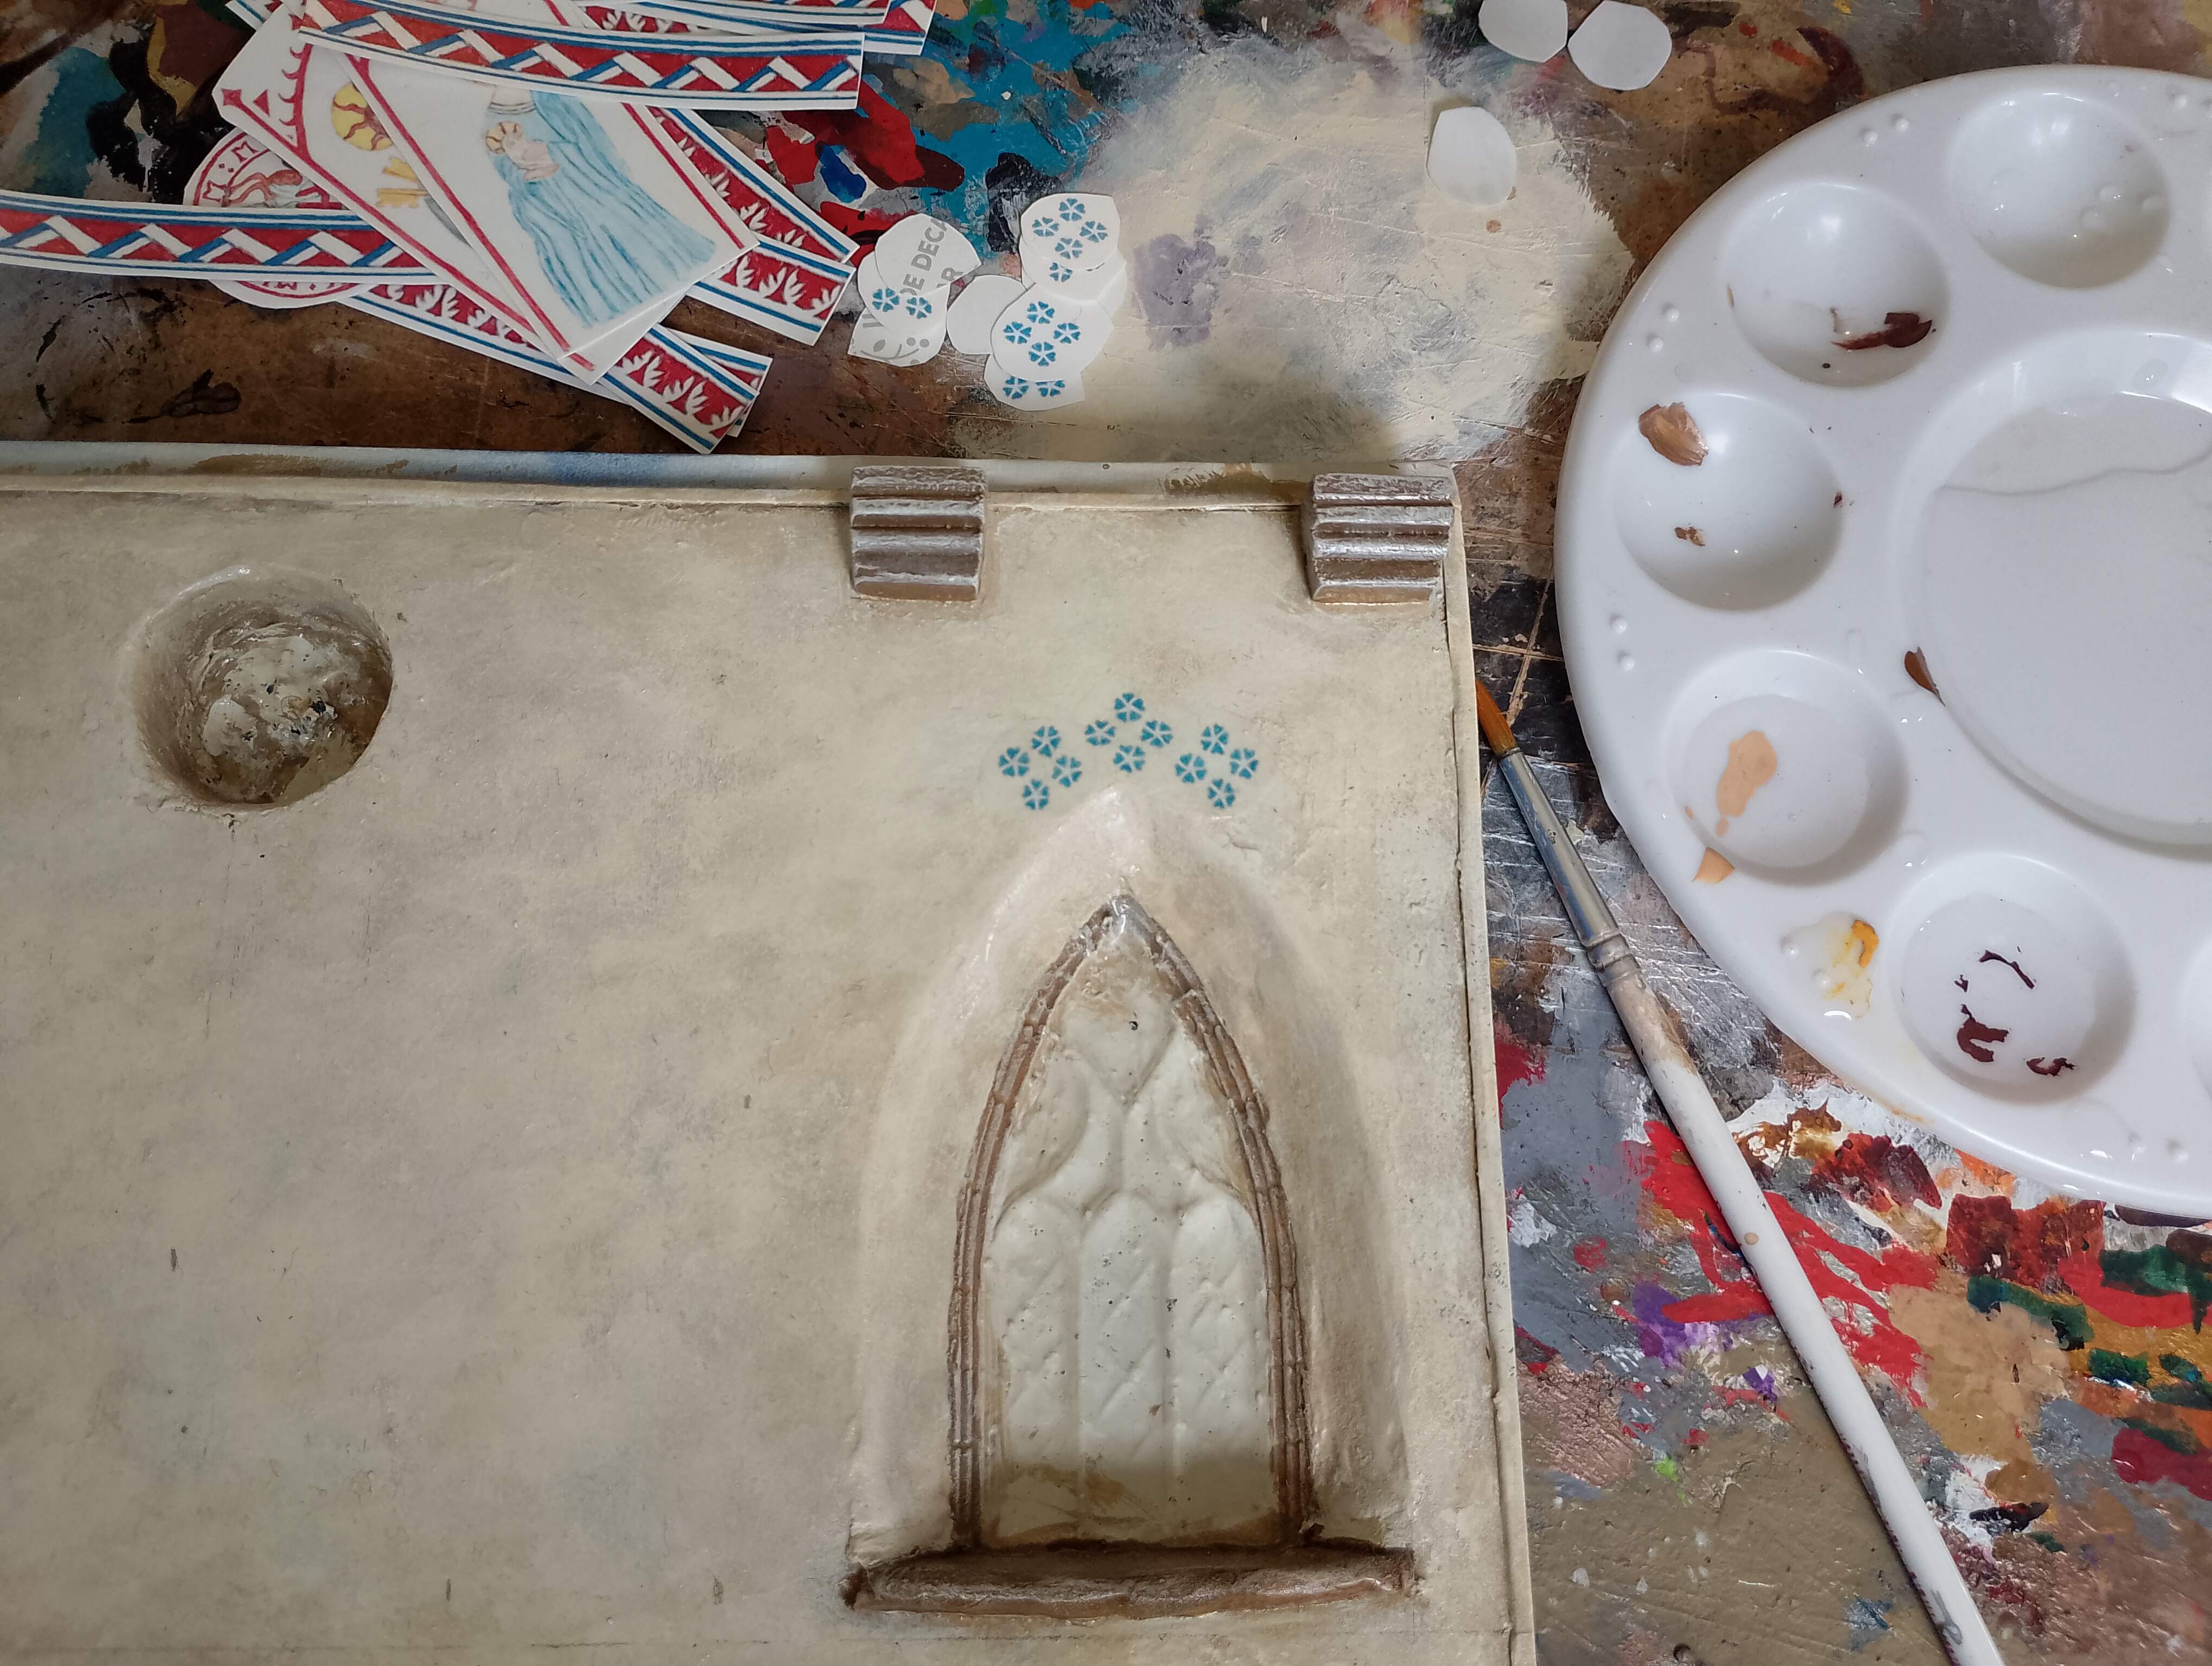
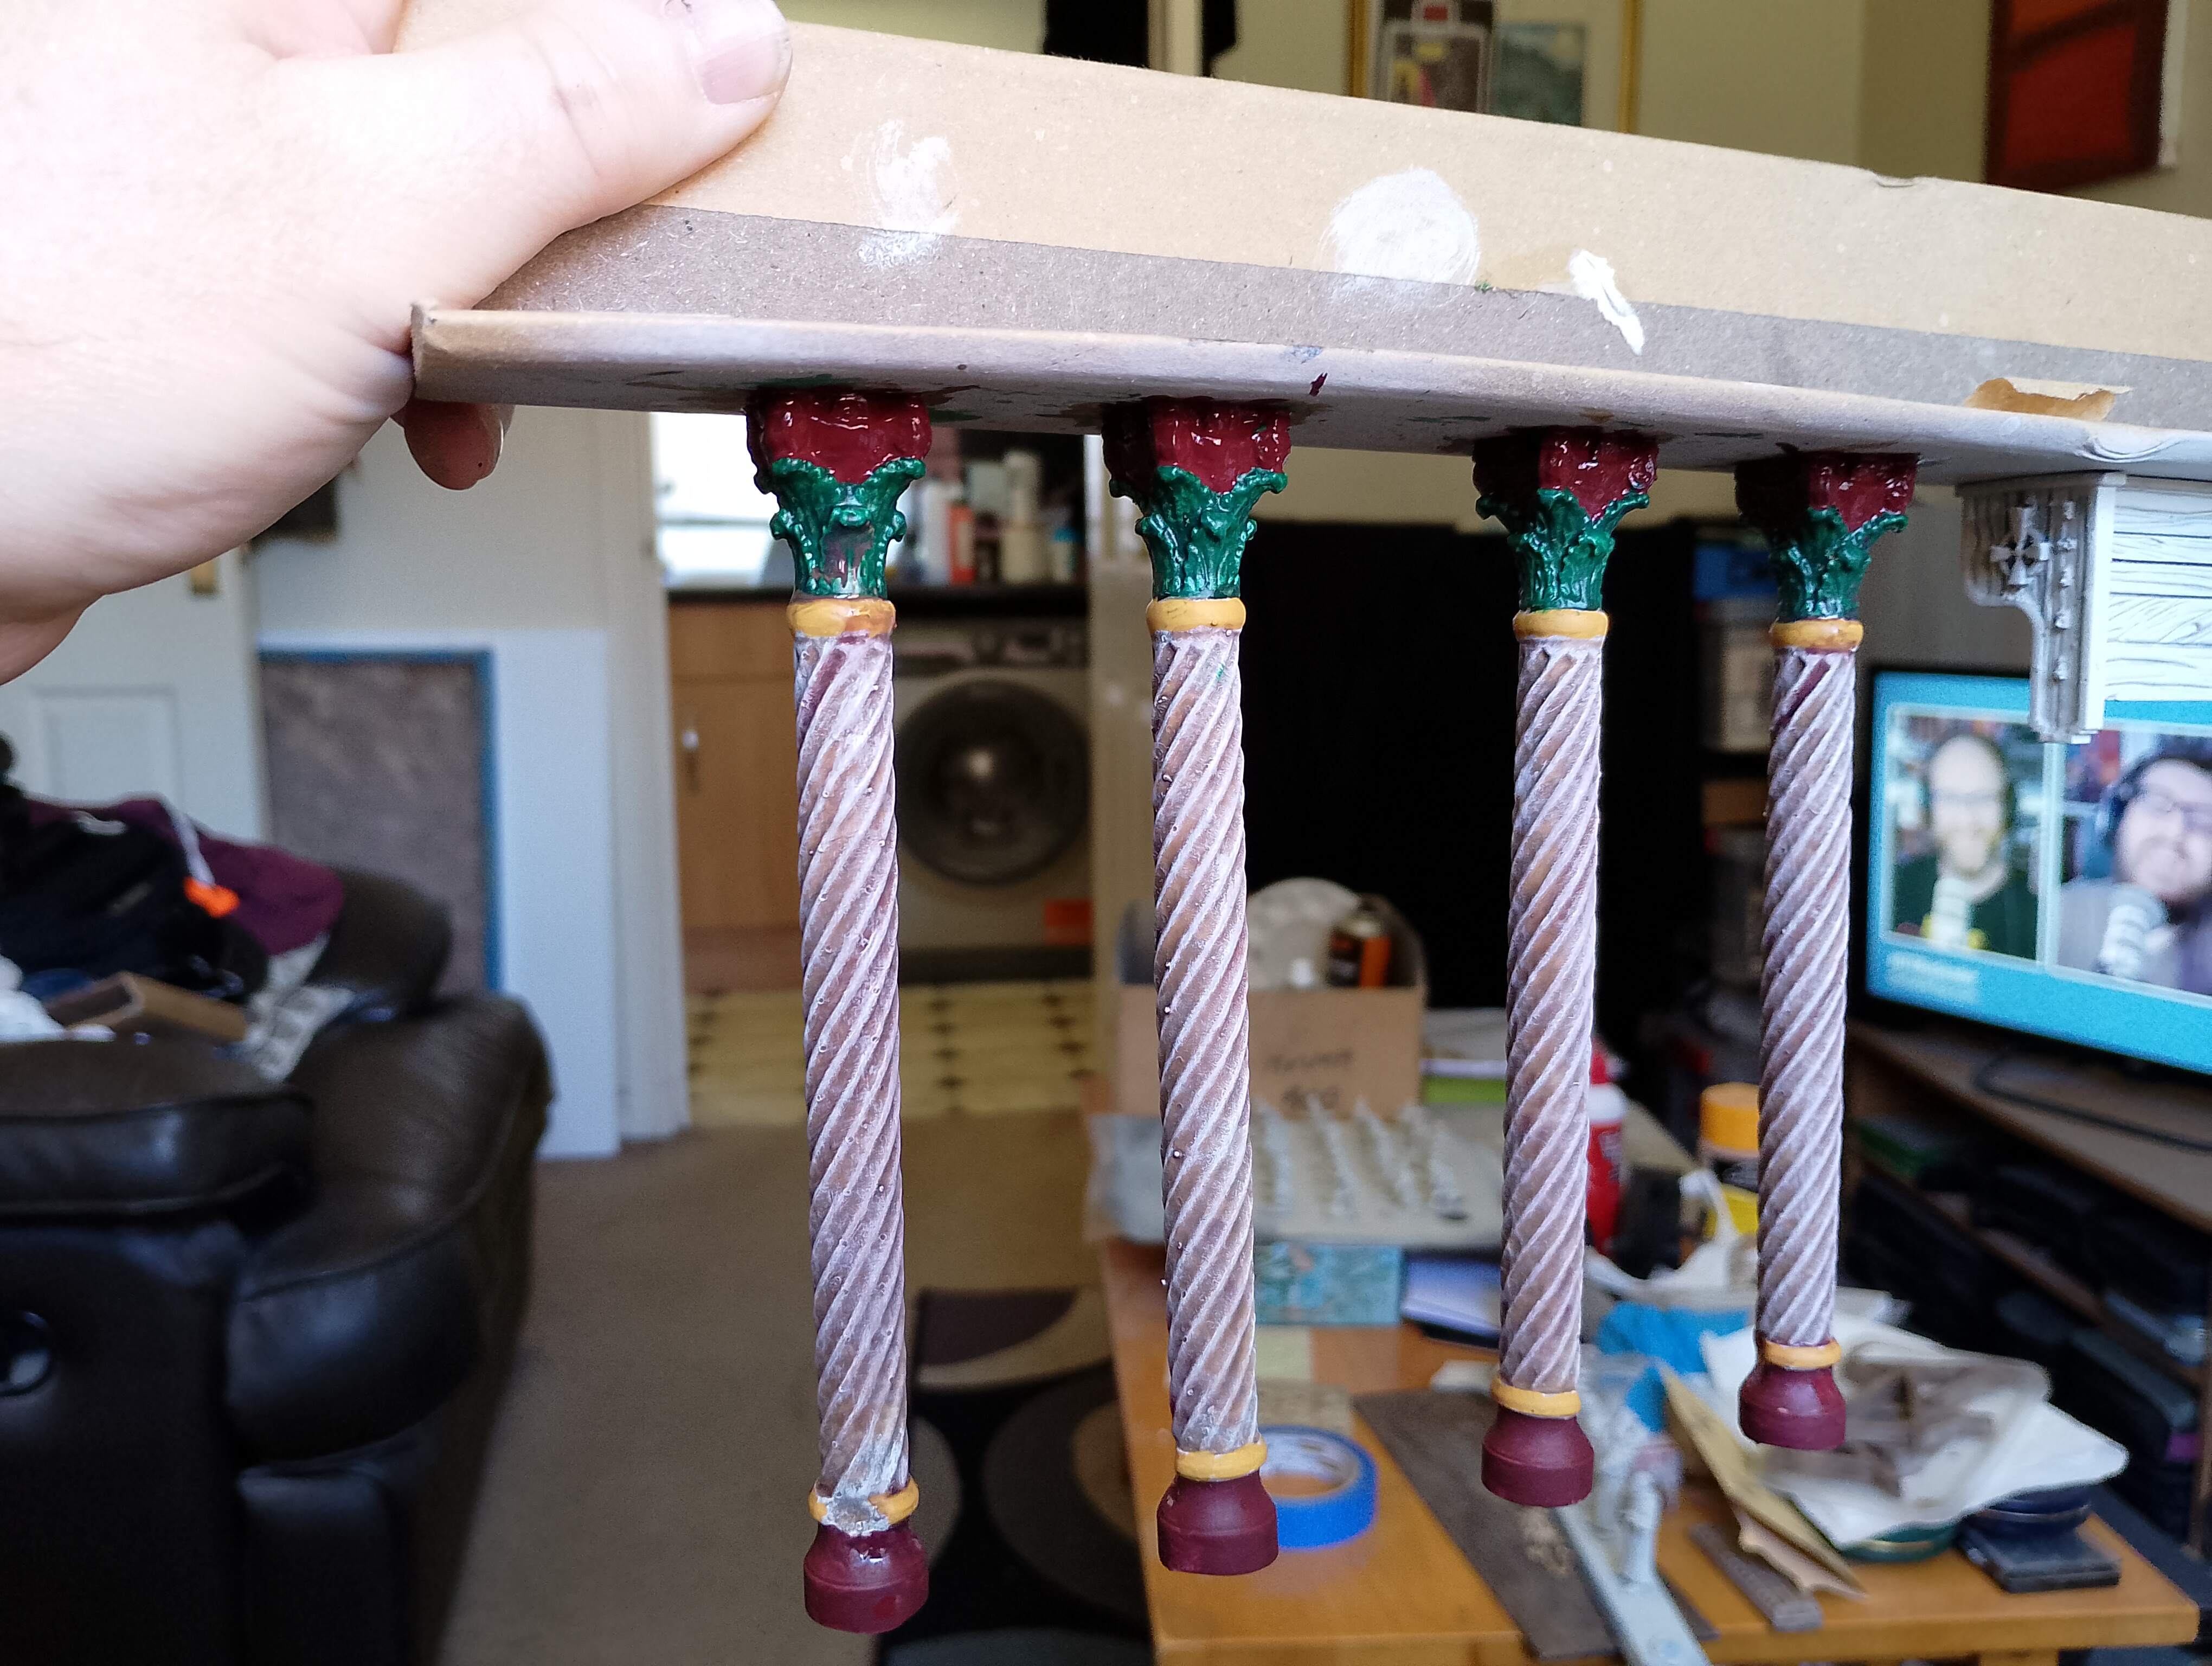
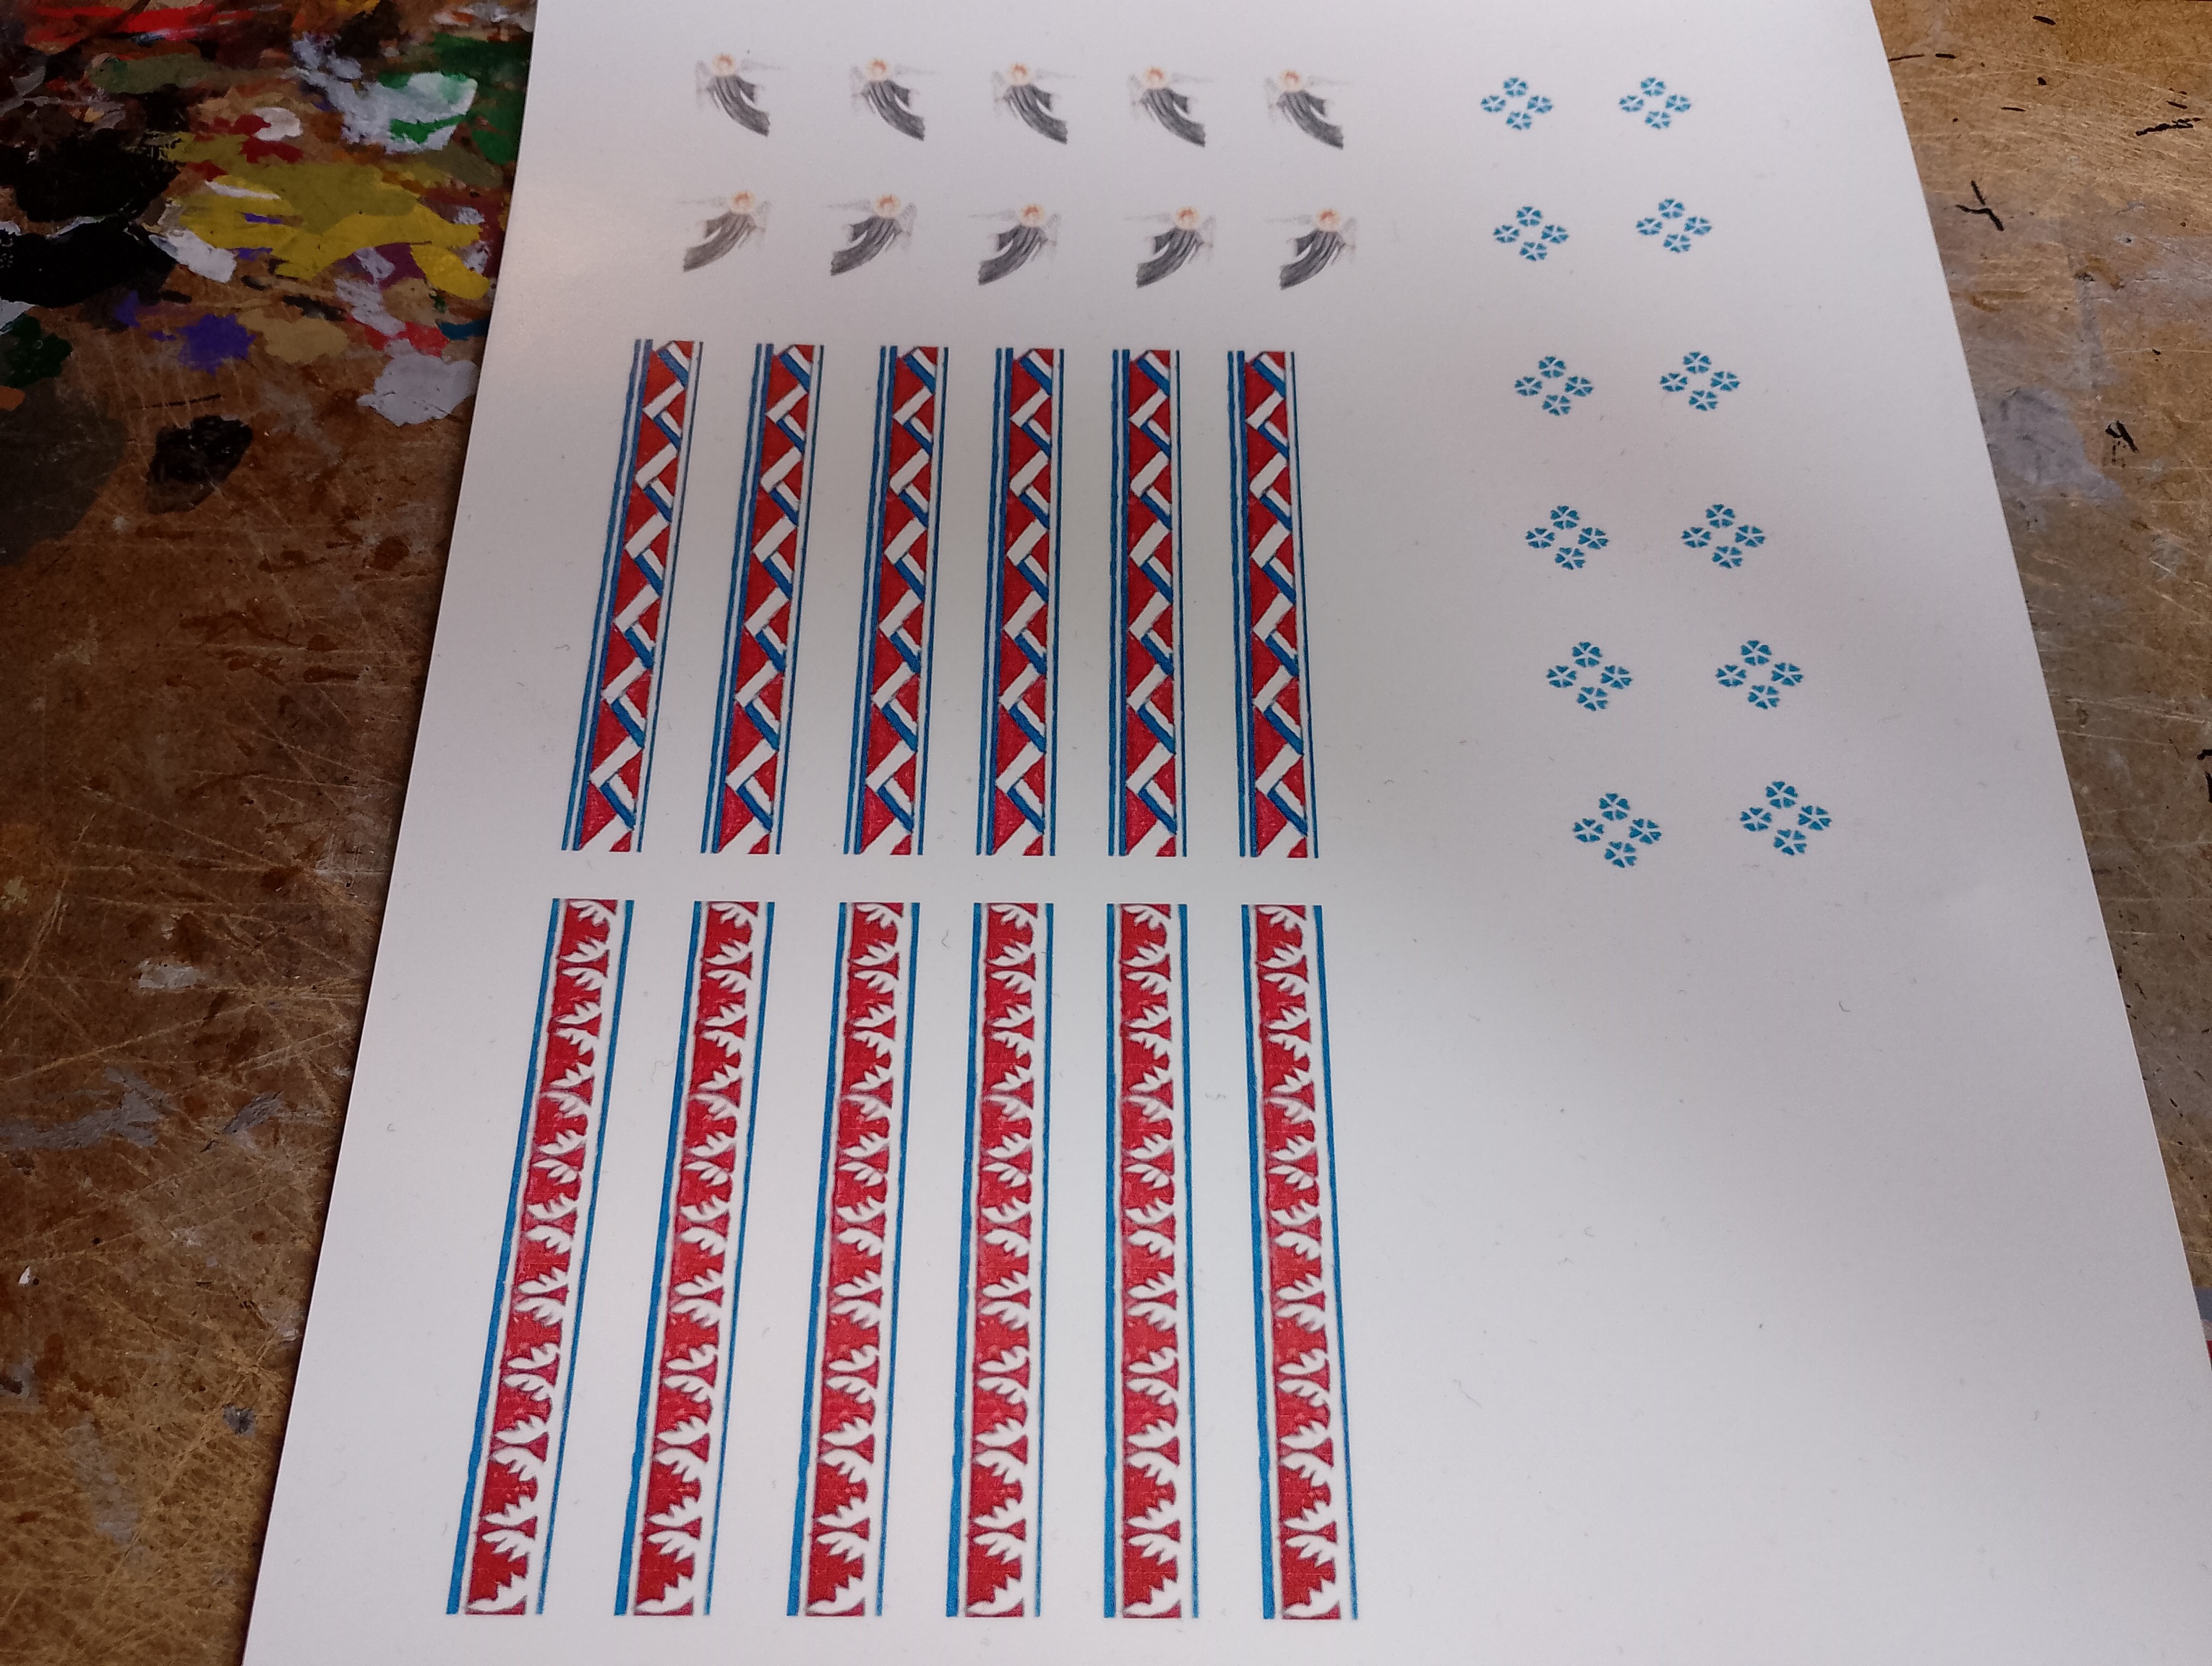
Next thing I tried was cutting out and putting on my homemade decals. I’d tried this for some miniatures before and it was a disaster as the ink just leaked out, so I was a bit nervous with is but it turned out ok. I think the secret with making your own decals is multiple sprayed coats of lacquer (and when you think you’re done give it another couple of sprays). Final thing I did was to get some garish base coats on my columns.
Bit of Masking, Priming & Some Base Colours
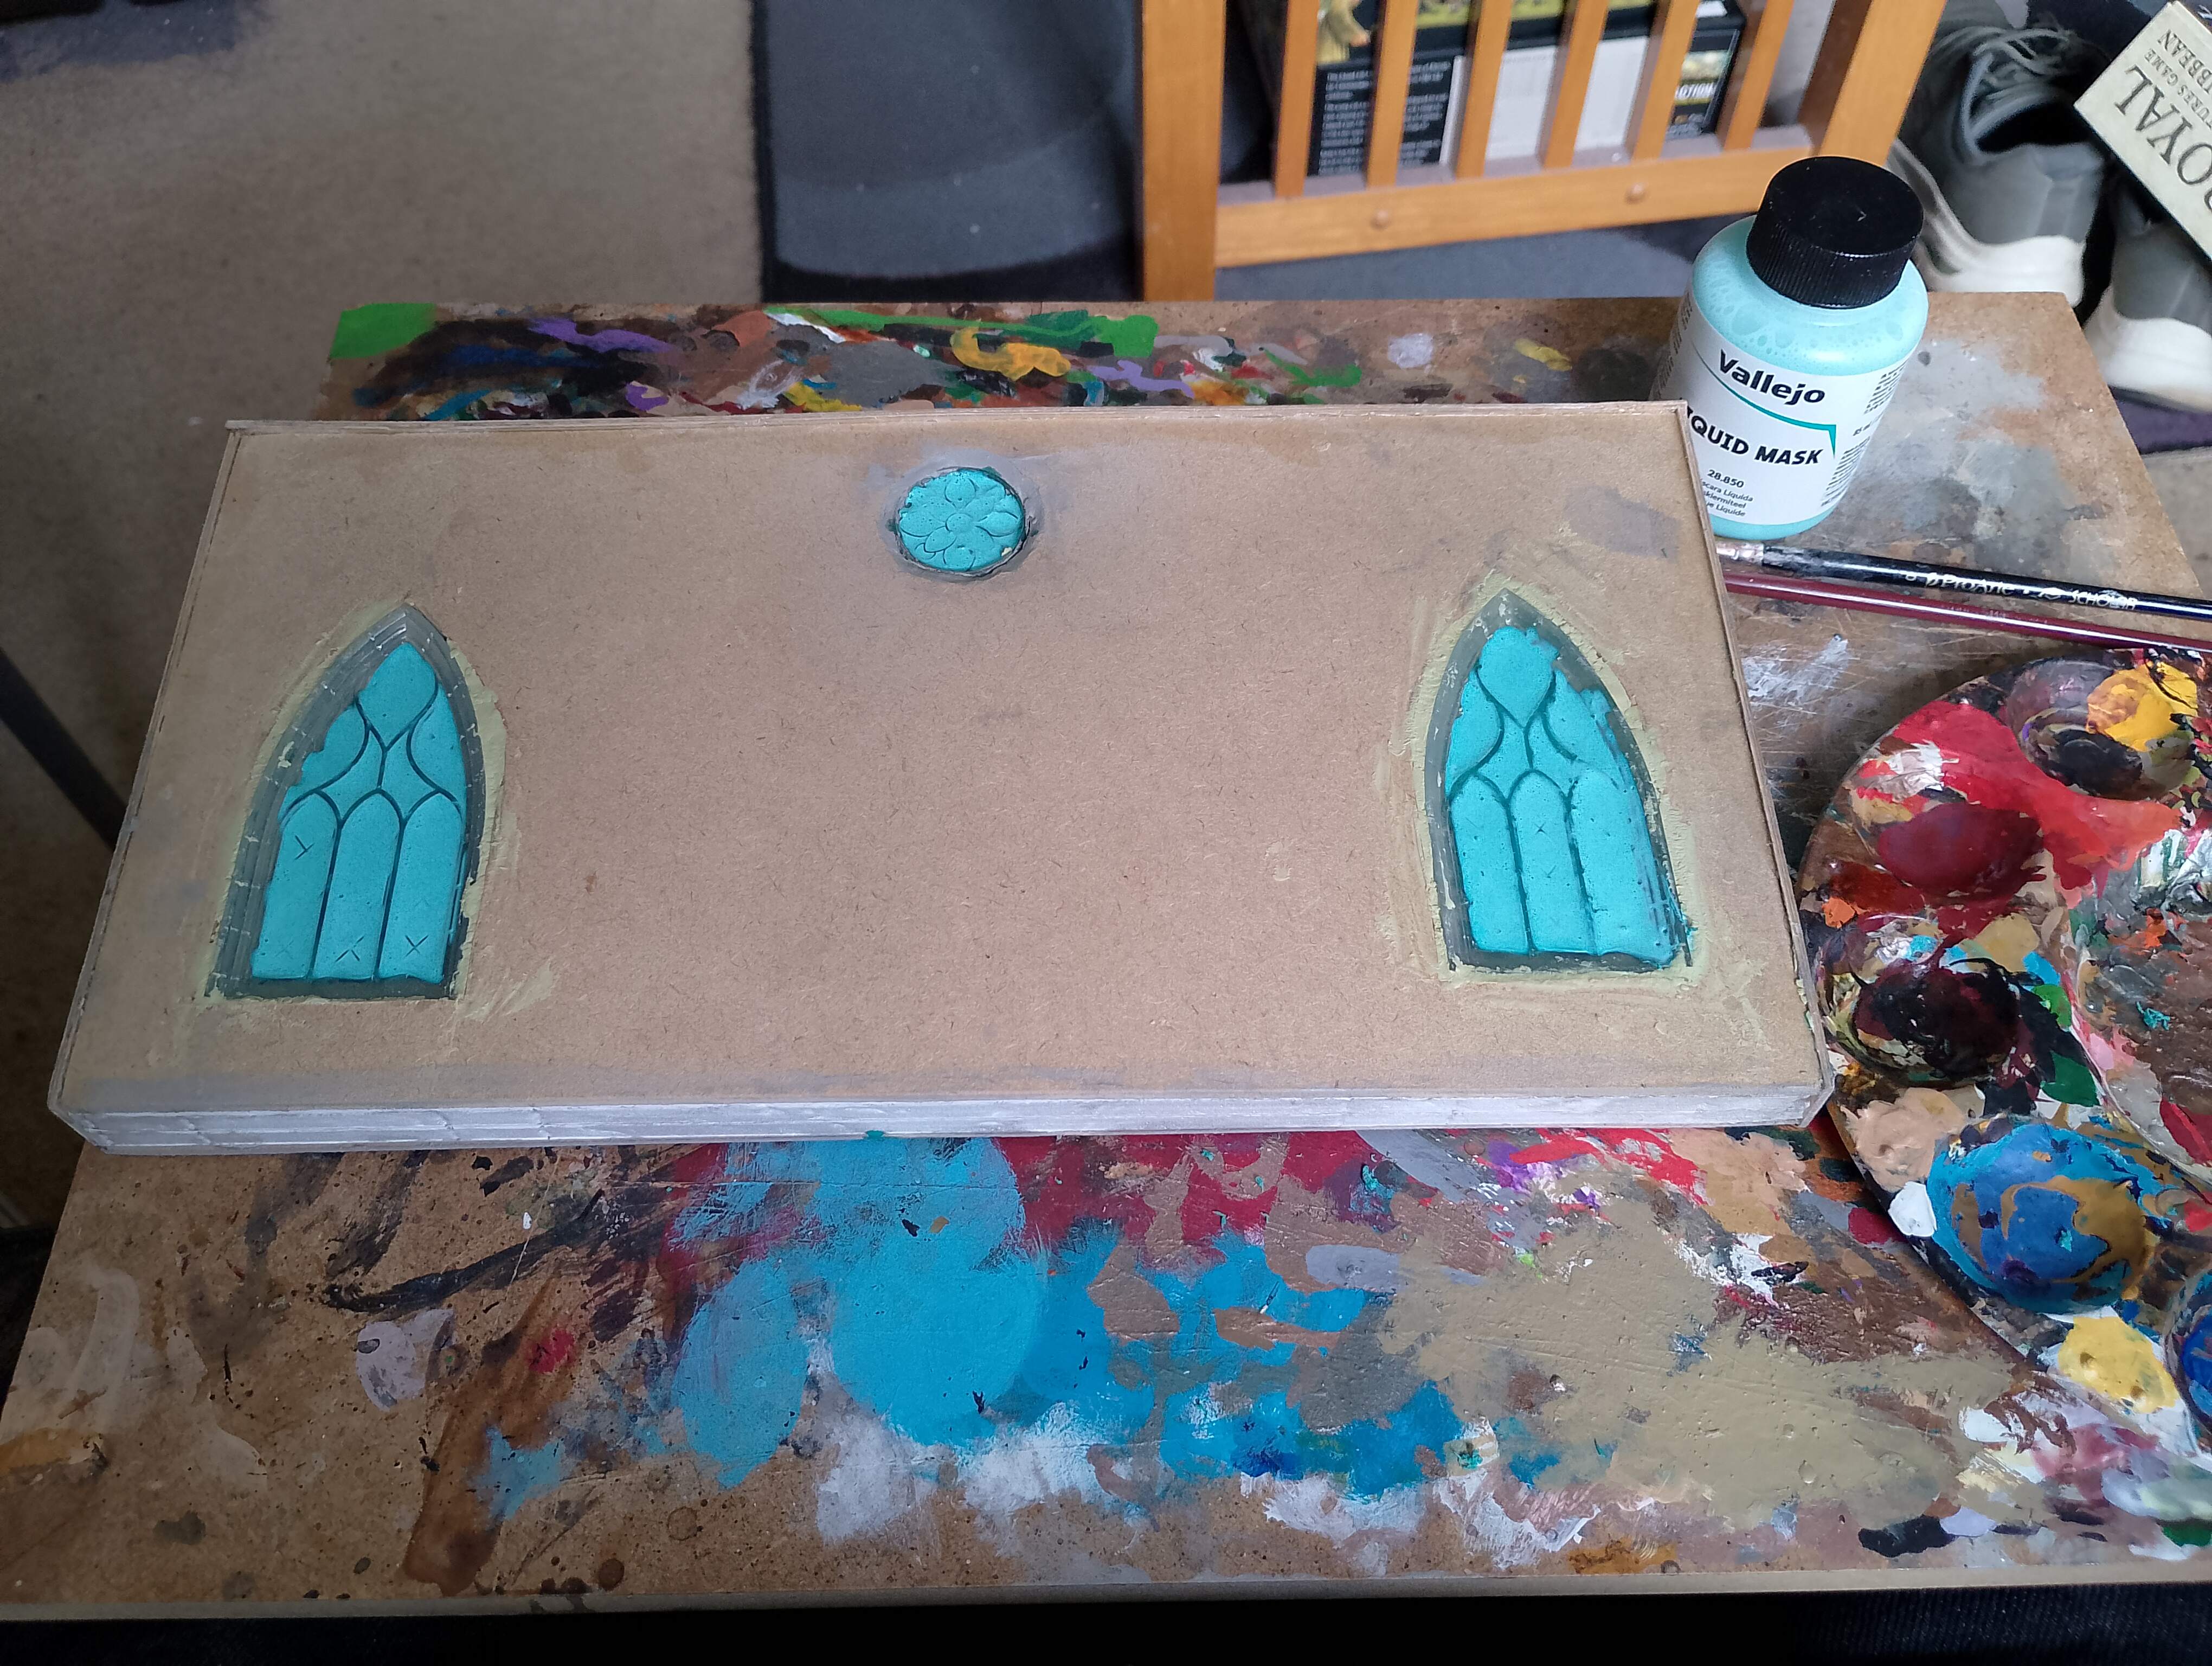
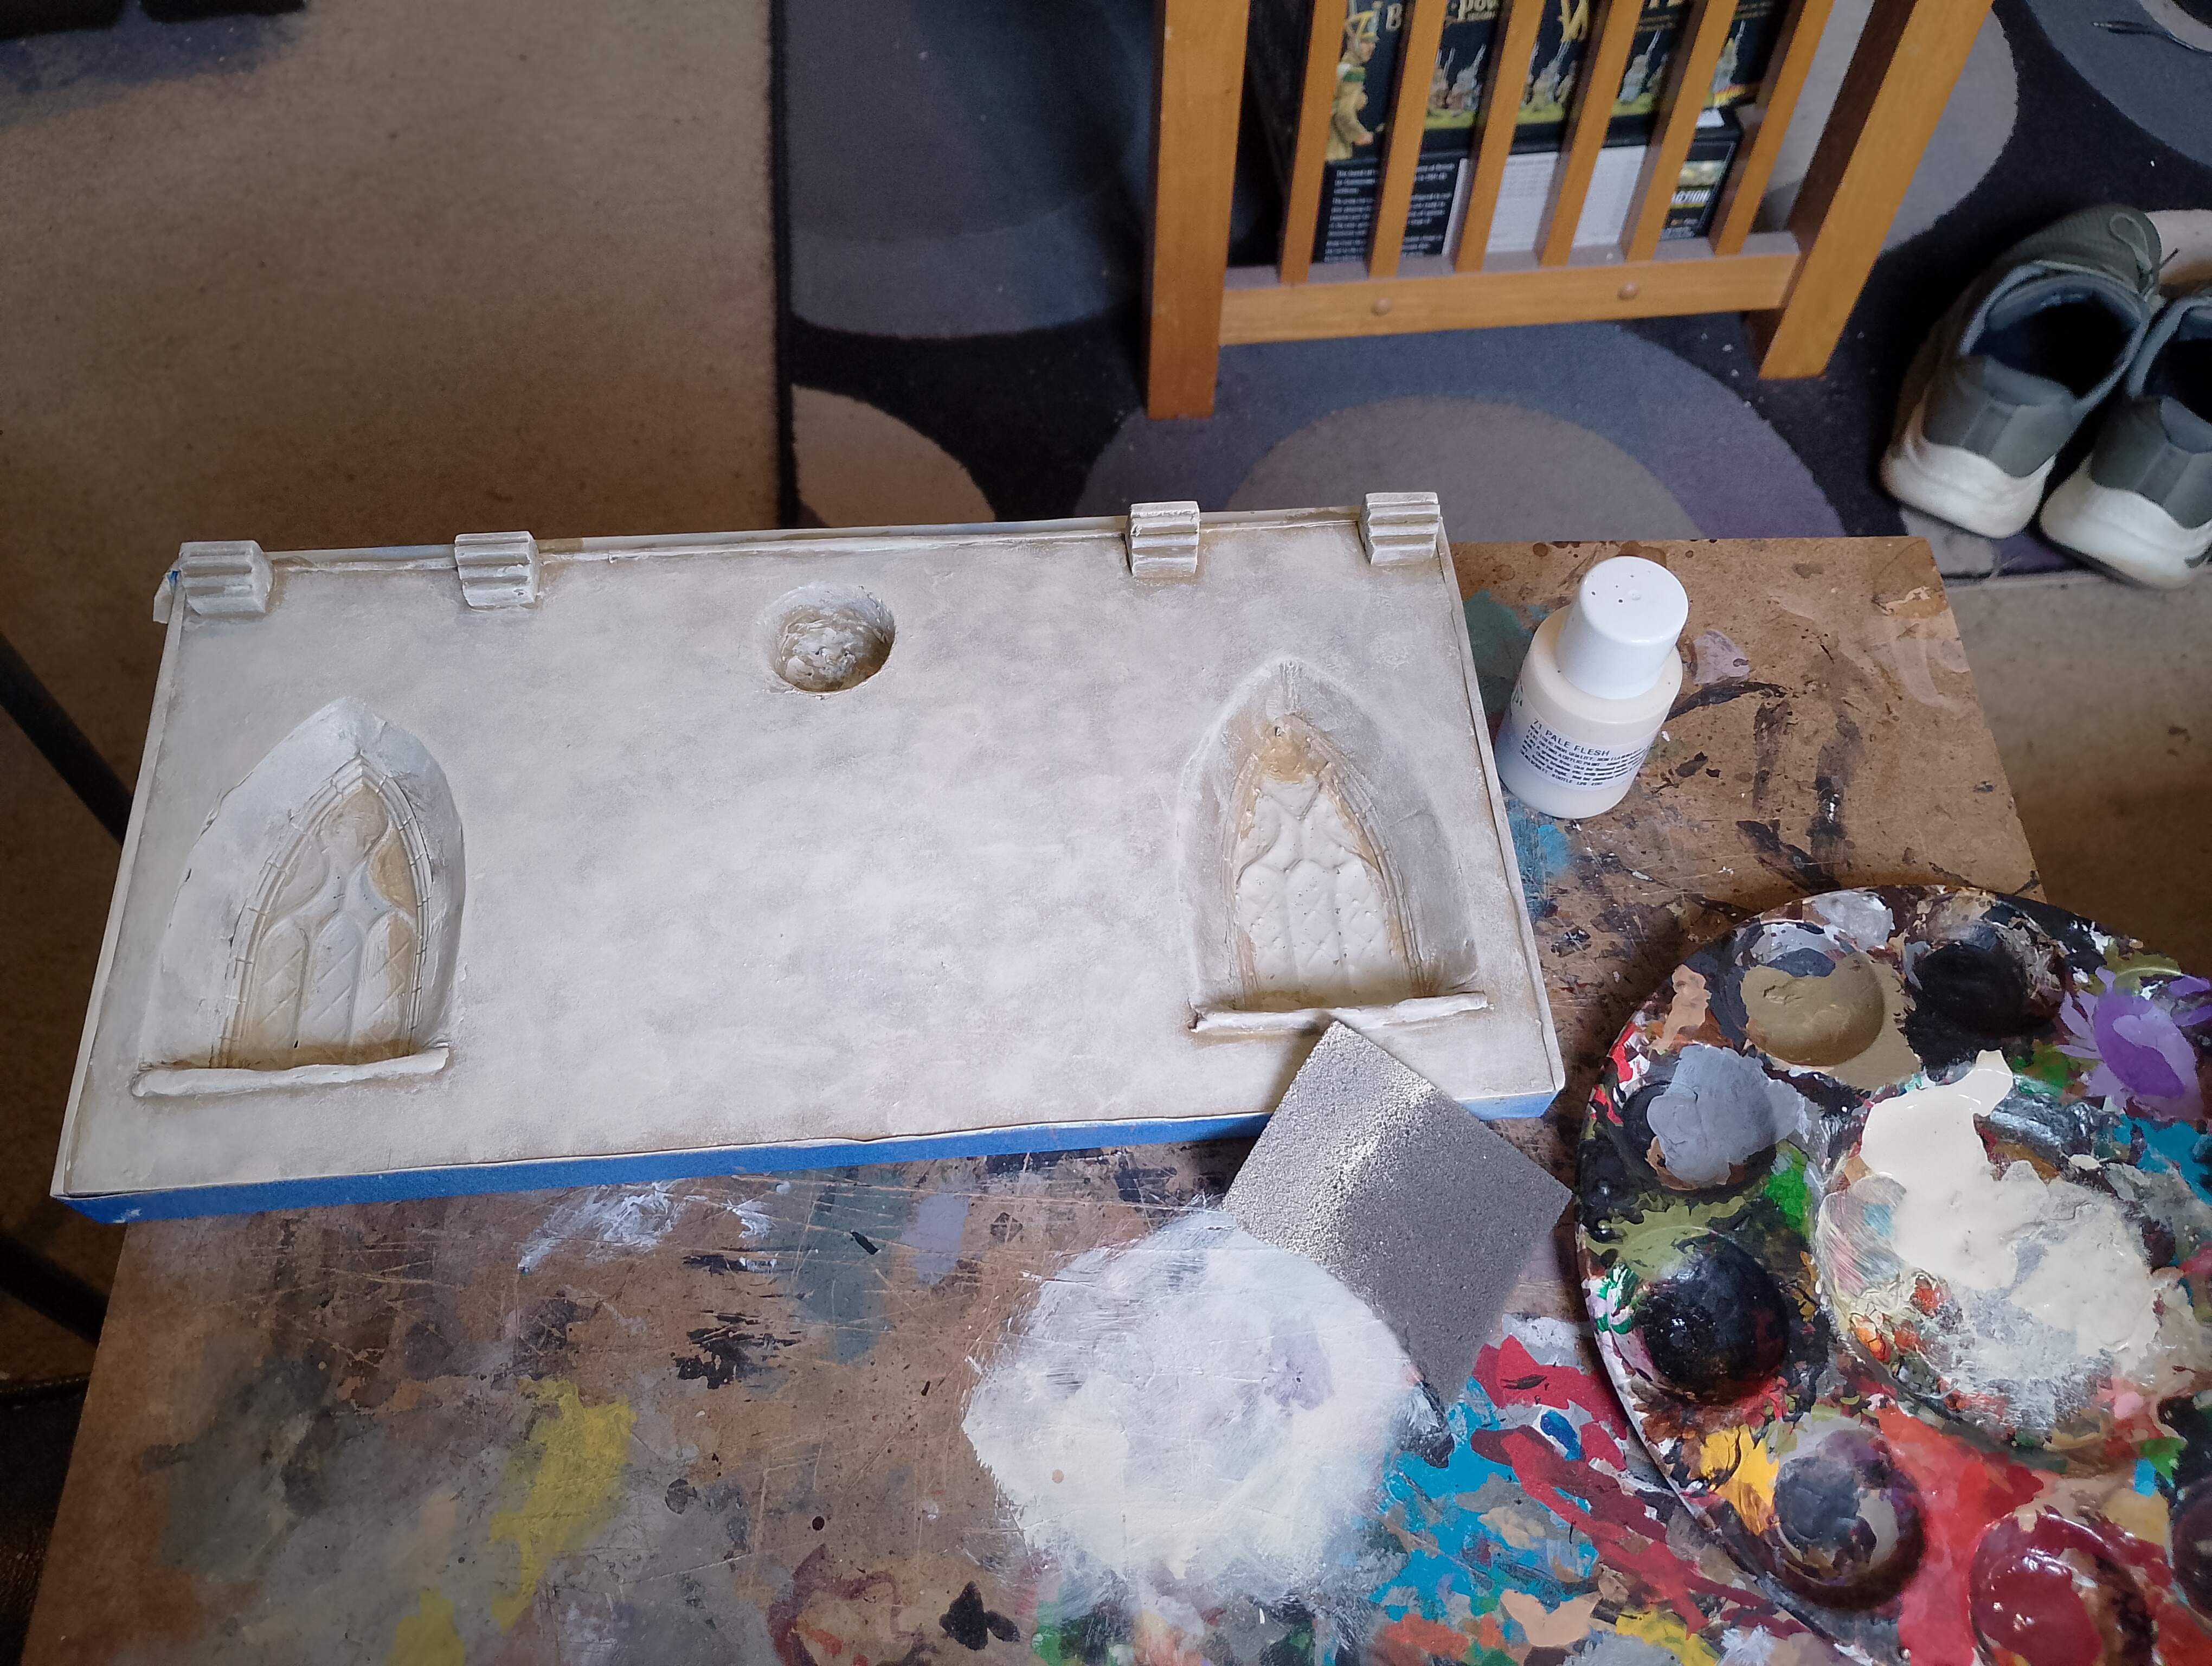
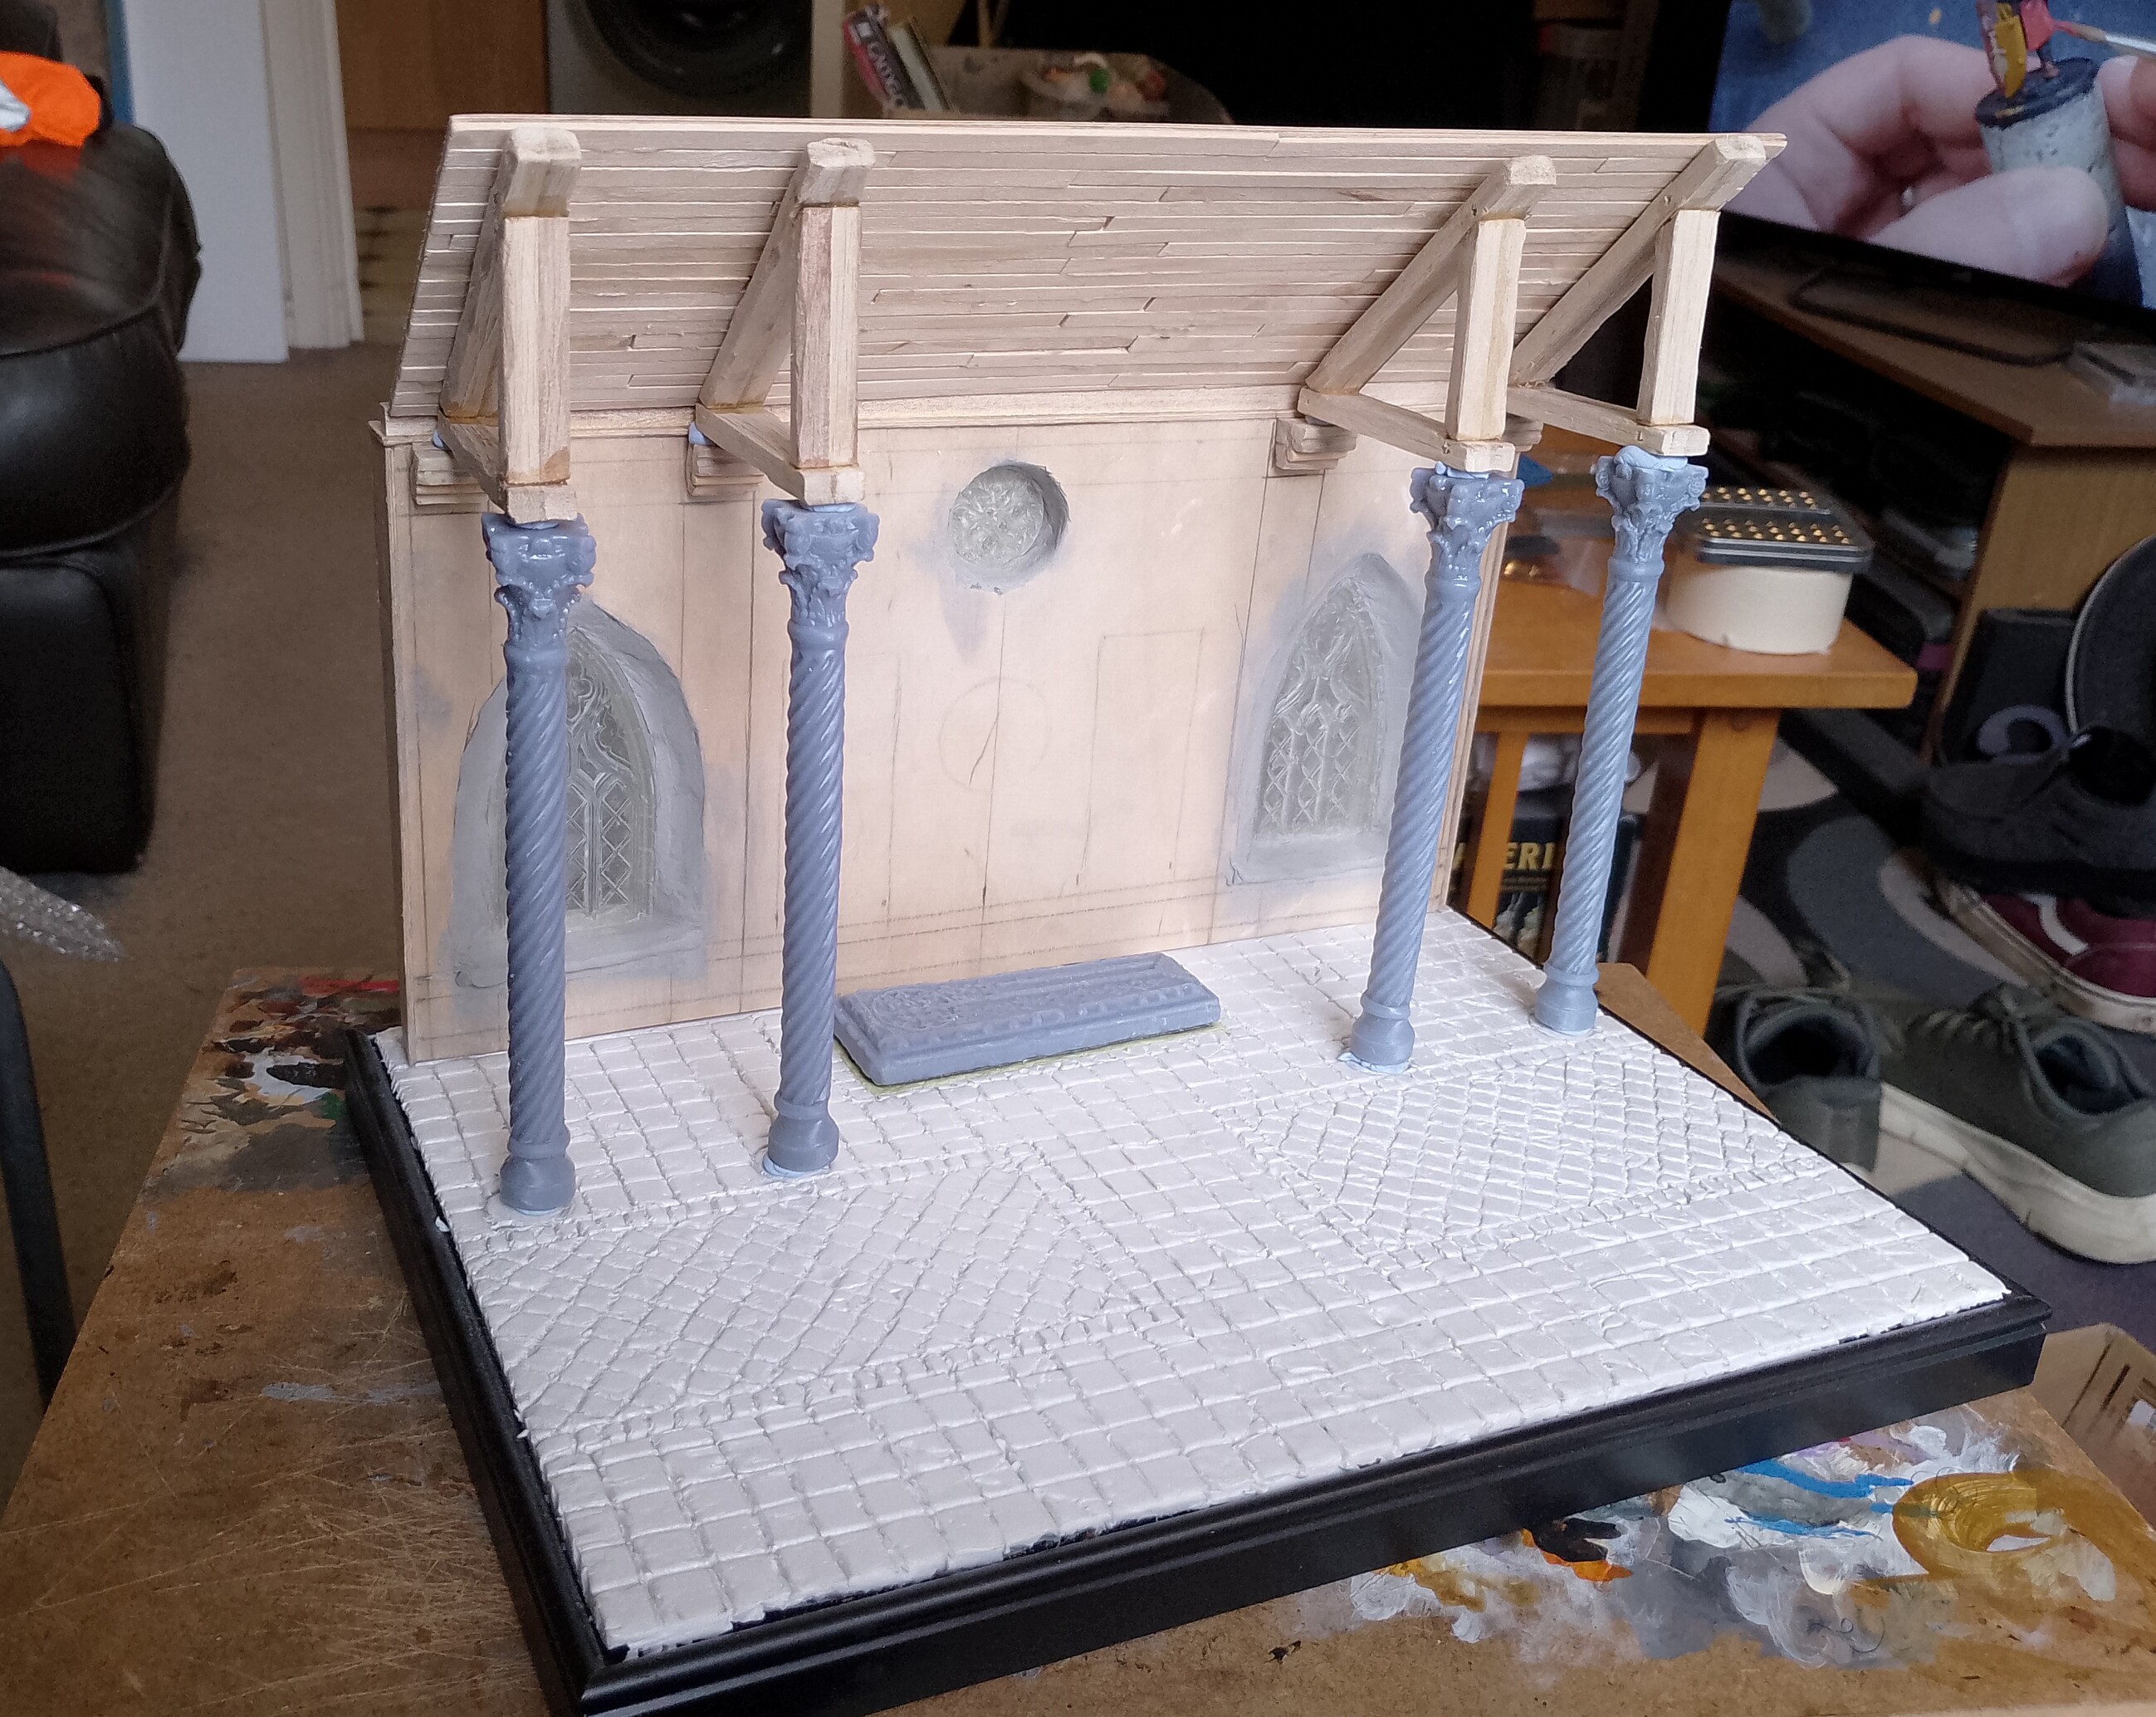
I did a bit more work on the churches floor by cutting out foam where the wall and columns will be resting on. I wasn’t sure if it would be that stable with the foam, so I filled these areas with air-drying clay, and I might pin the columns and wall as well as use glue. Hopefully, that’ll make it fairly sturdy. I then used some making fluid for the clear resin windows, and I used tape for the edges of my floor and wall, and then proceeded to blast them with rattle cans (I also primed the bits of roofing, columns and all the knights and monks while I was at it).
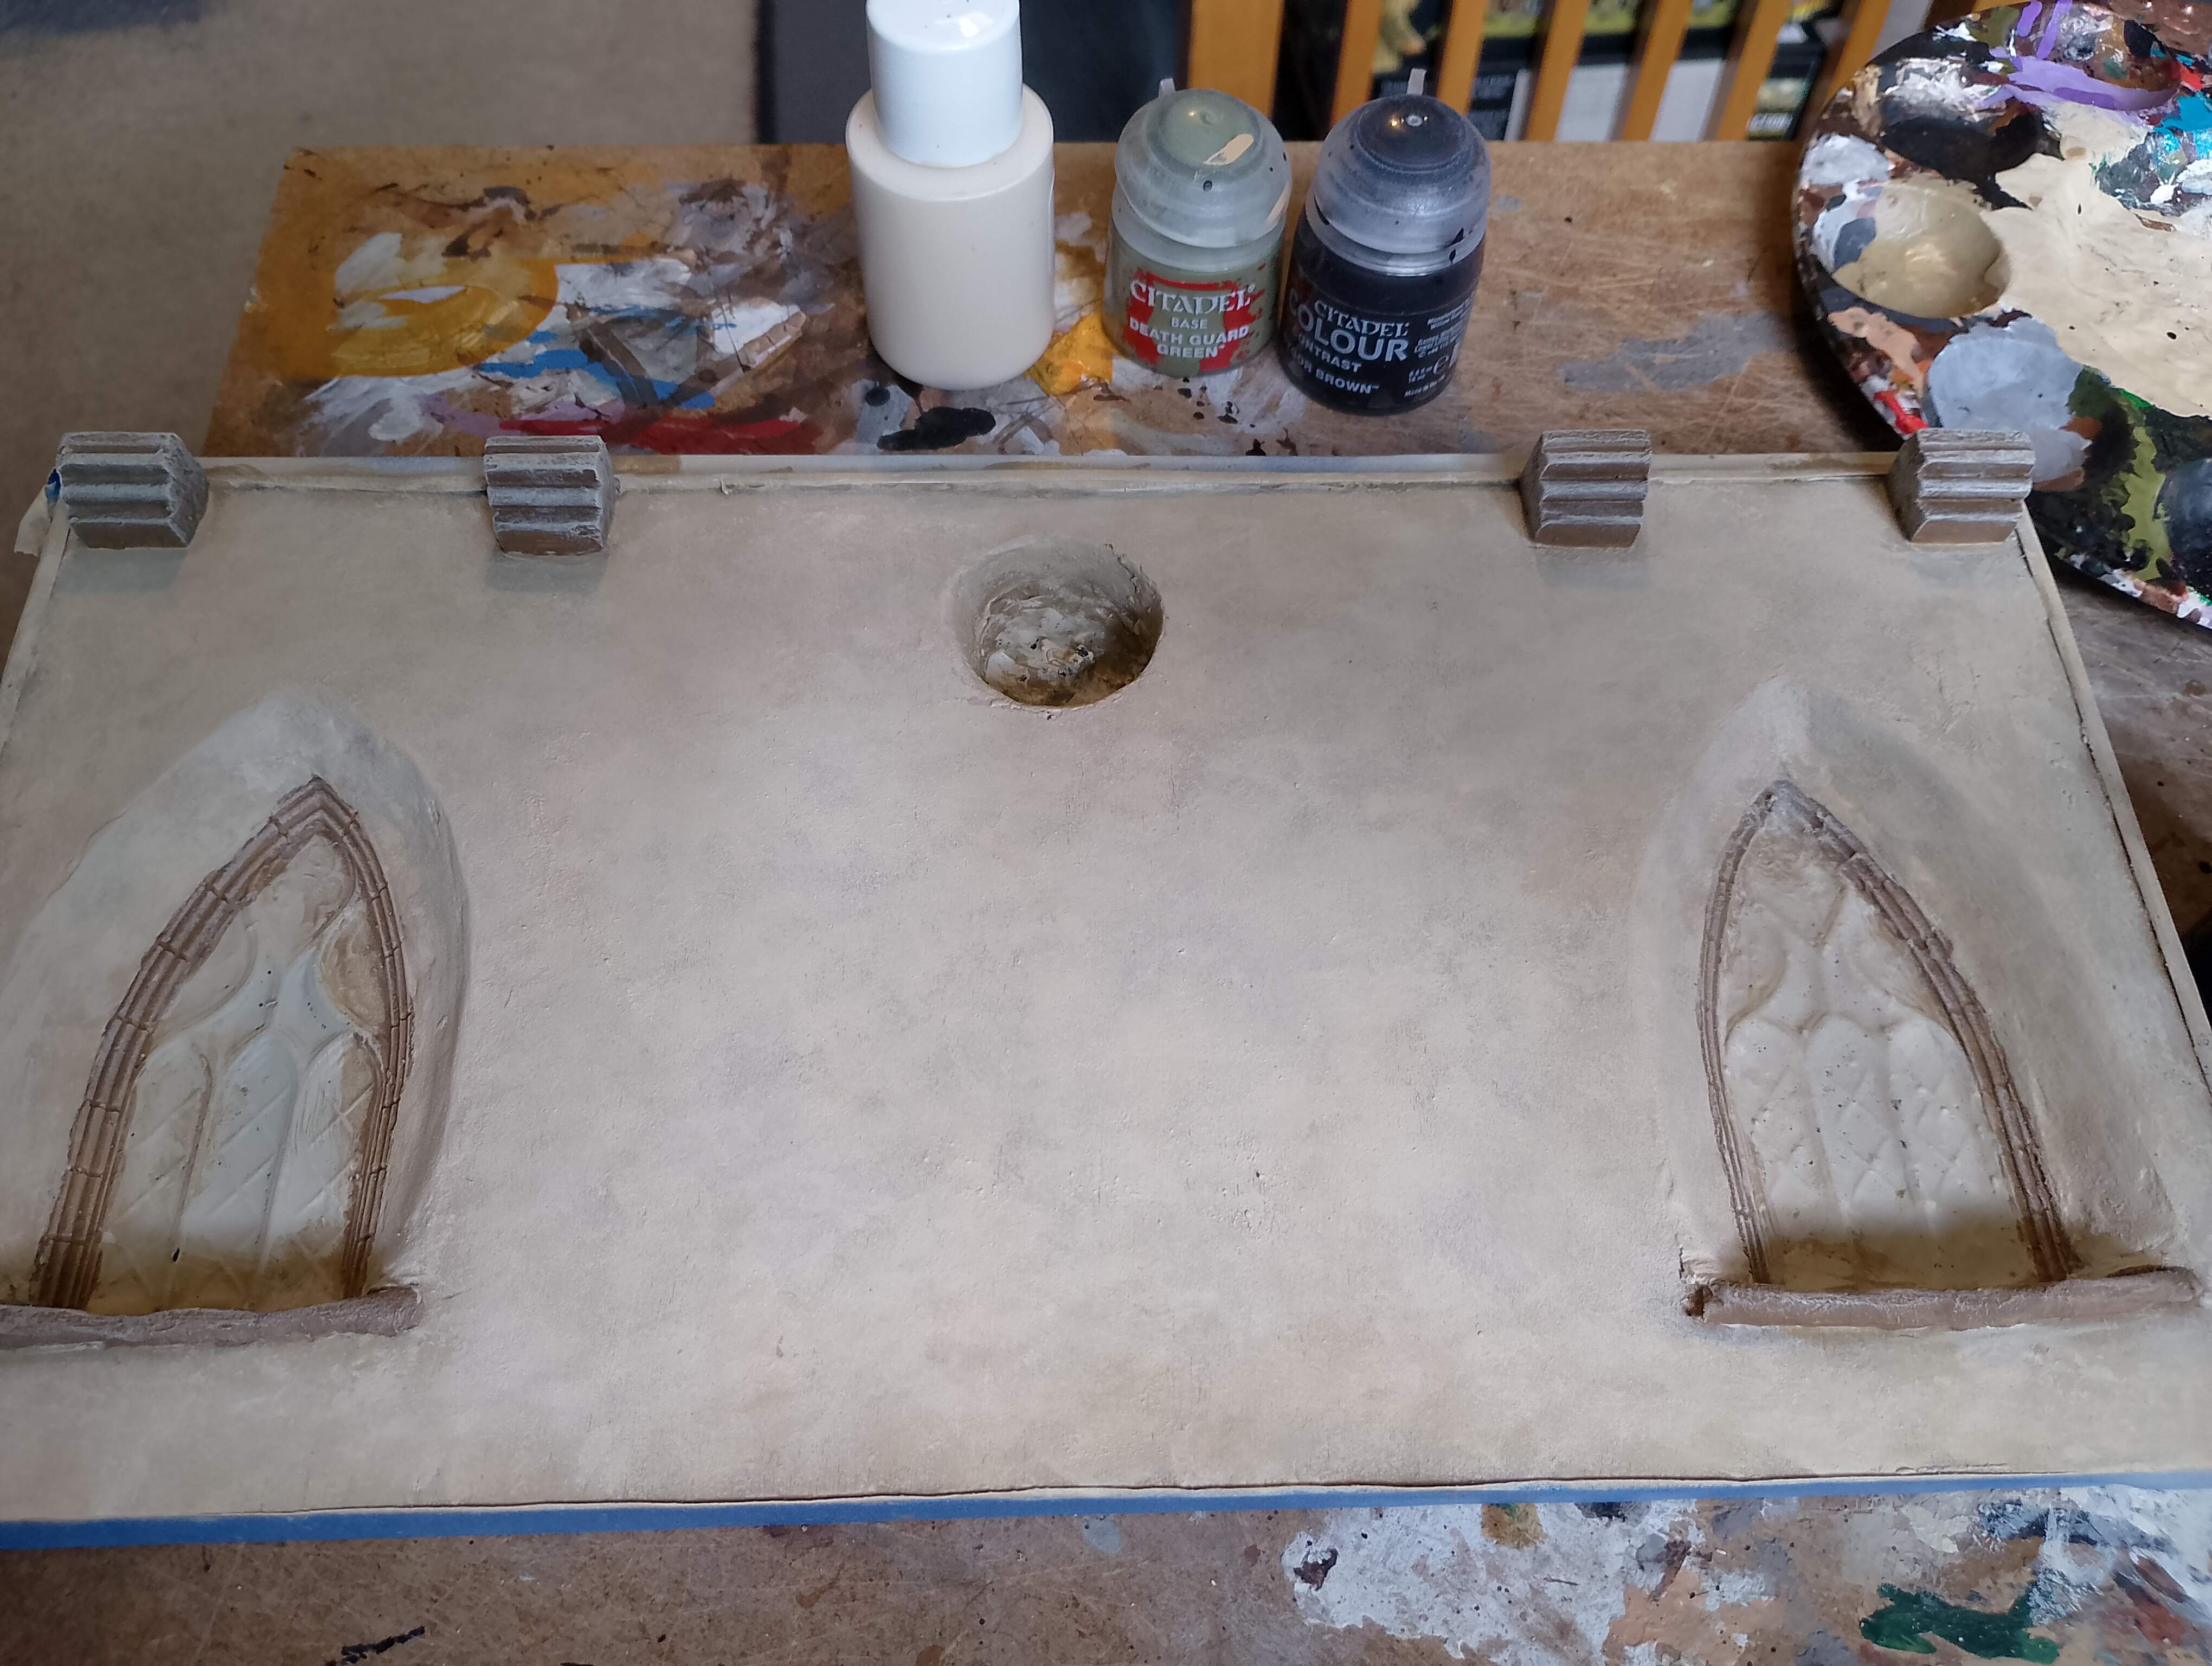
I was trying to get a plastered and worn whitewashed look to the wall, so I used lots of different tones of off white and stuck it on using a sponge, but really not sure if you can see that in the photos. I then painted the base colours onto the unmasked bits of the windows and made a start on the tiled floor (I’ve said it before on another project, but Citadel’s death guard green is spot on for medieval green-glazed tiles and pottery). I finally used watered-down contrast paint (which I saw on the Miniature Realms YouTube channel), which seemed to give a nice weathered look to the roof timbers.


Transfers, 3D prints & Dry Fitting
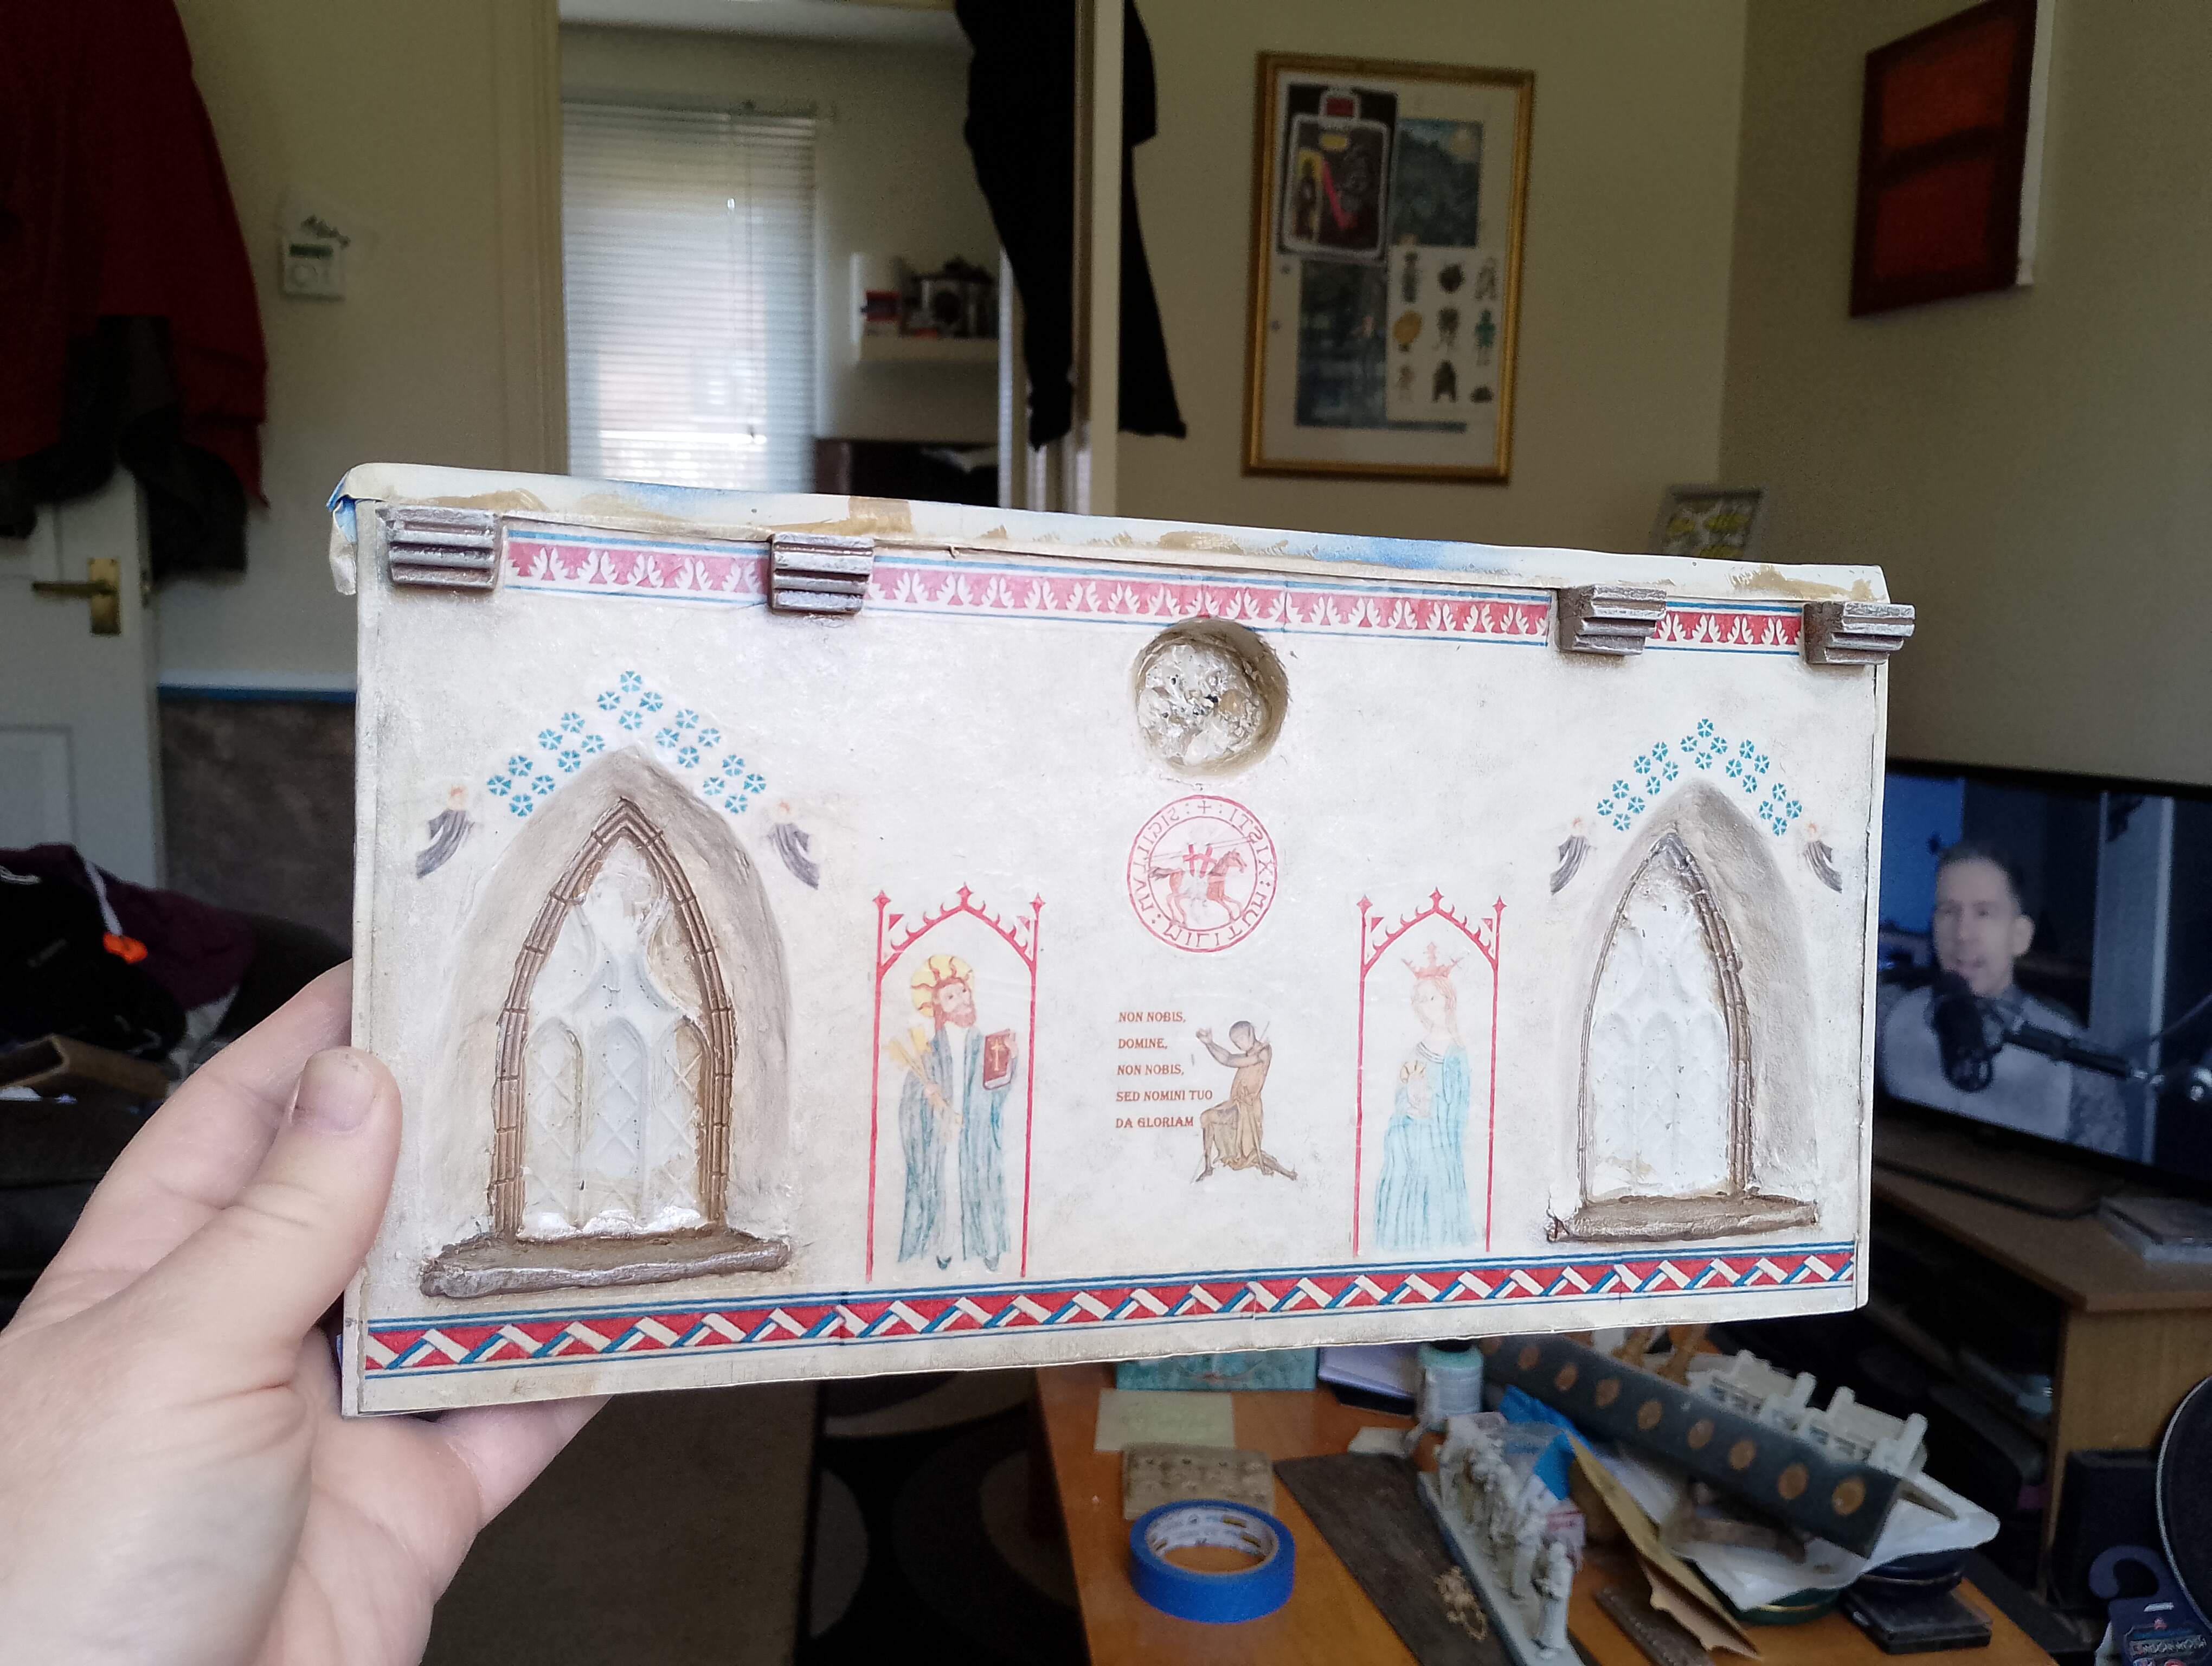
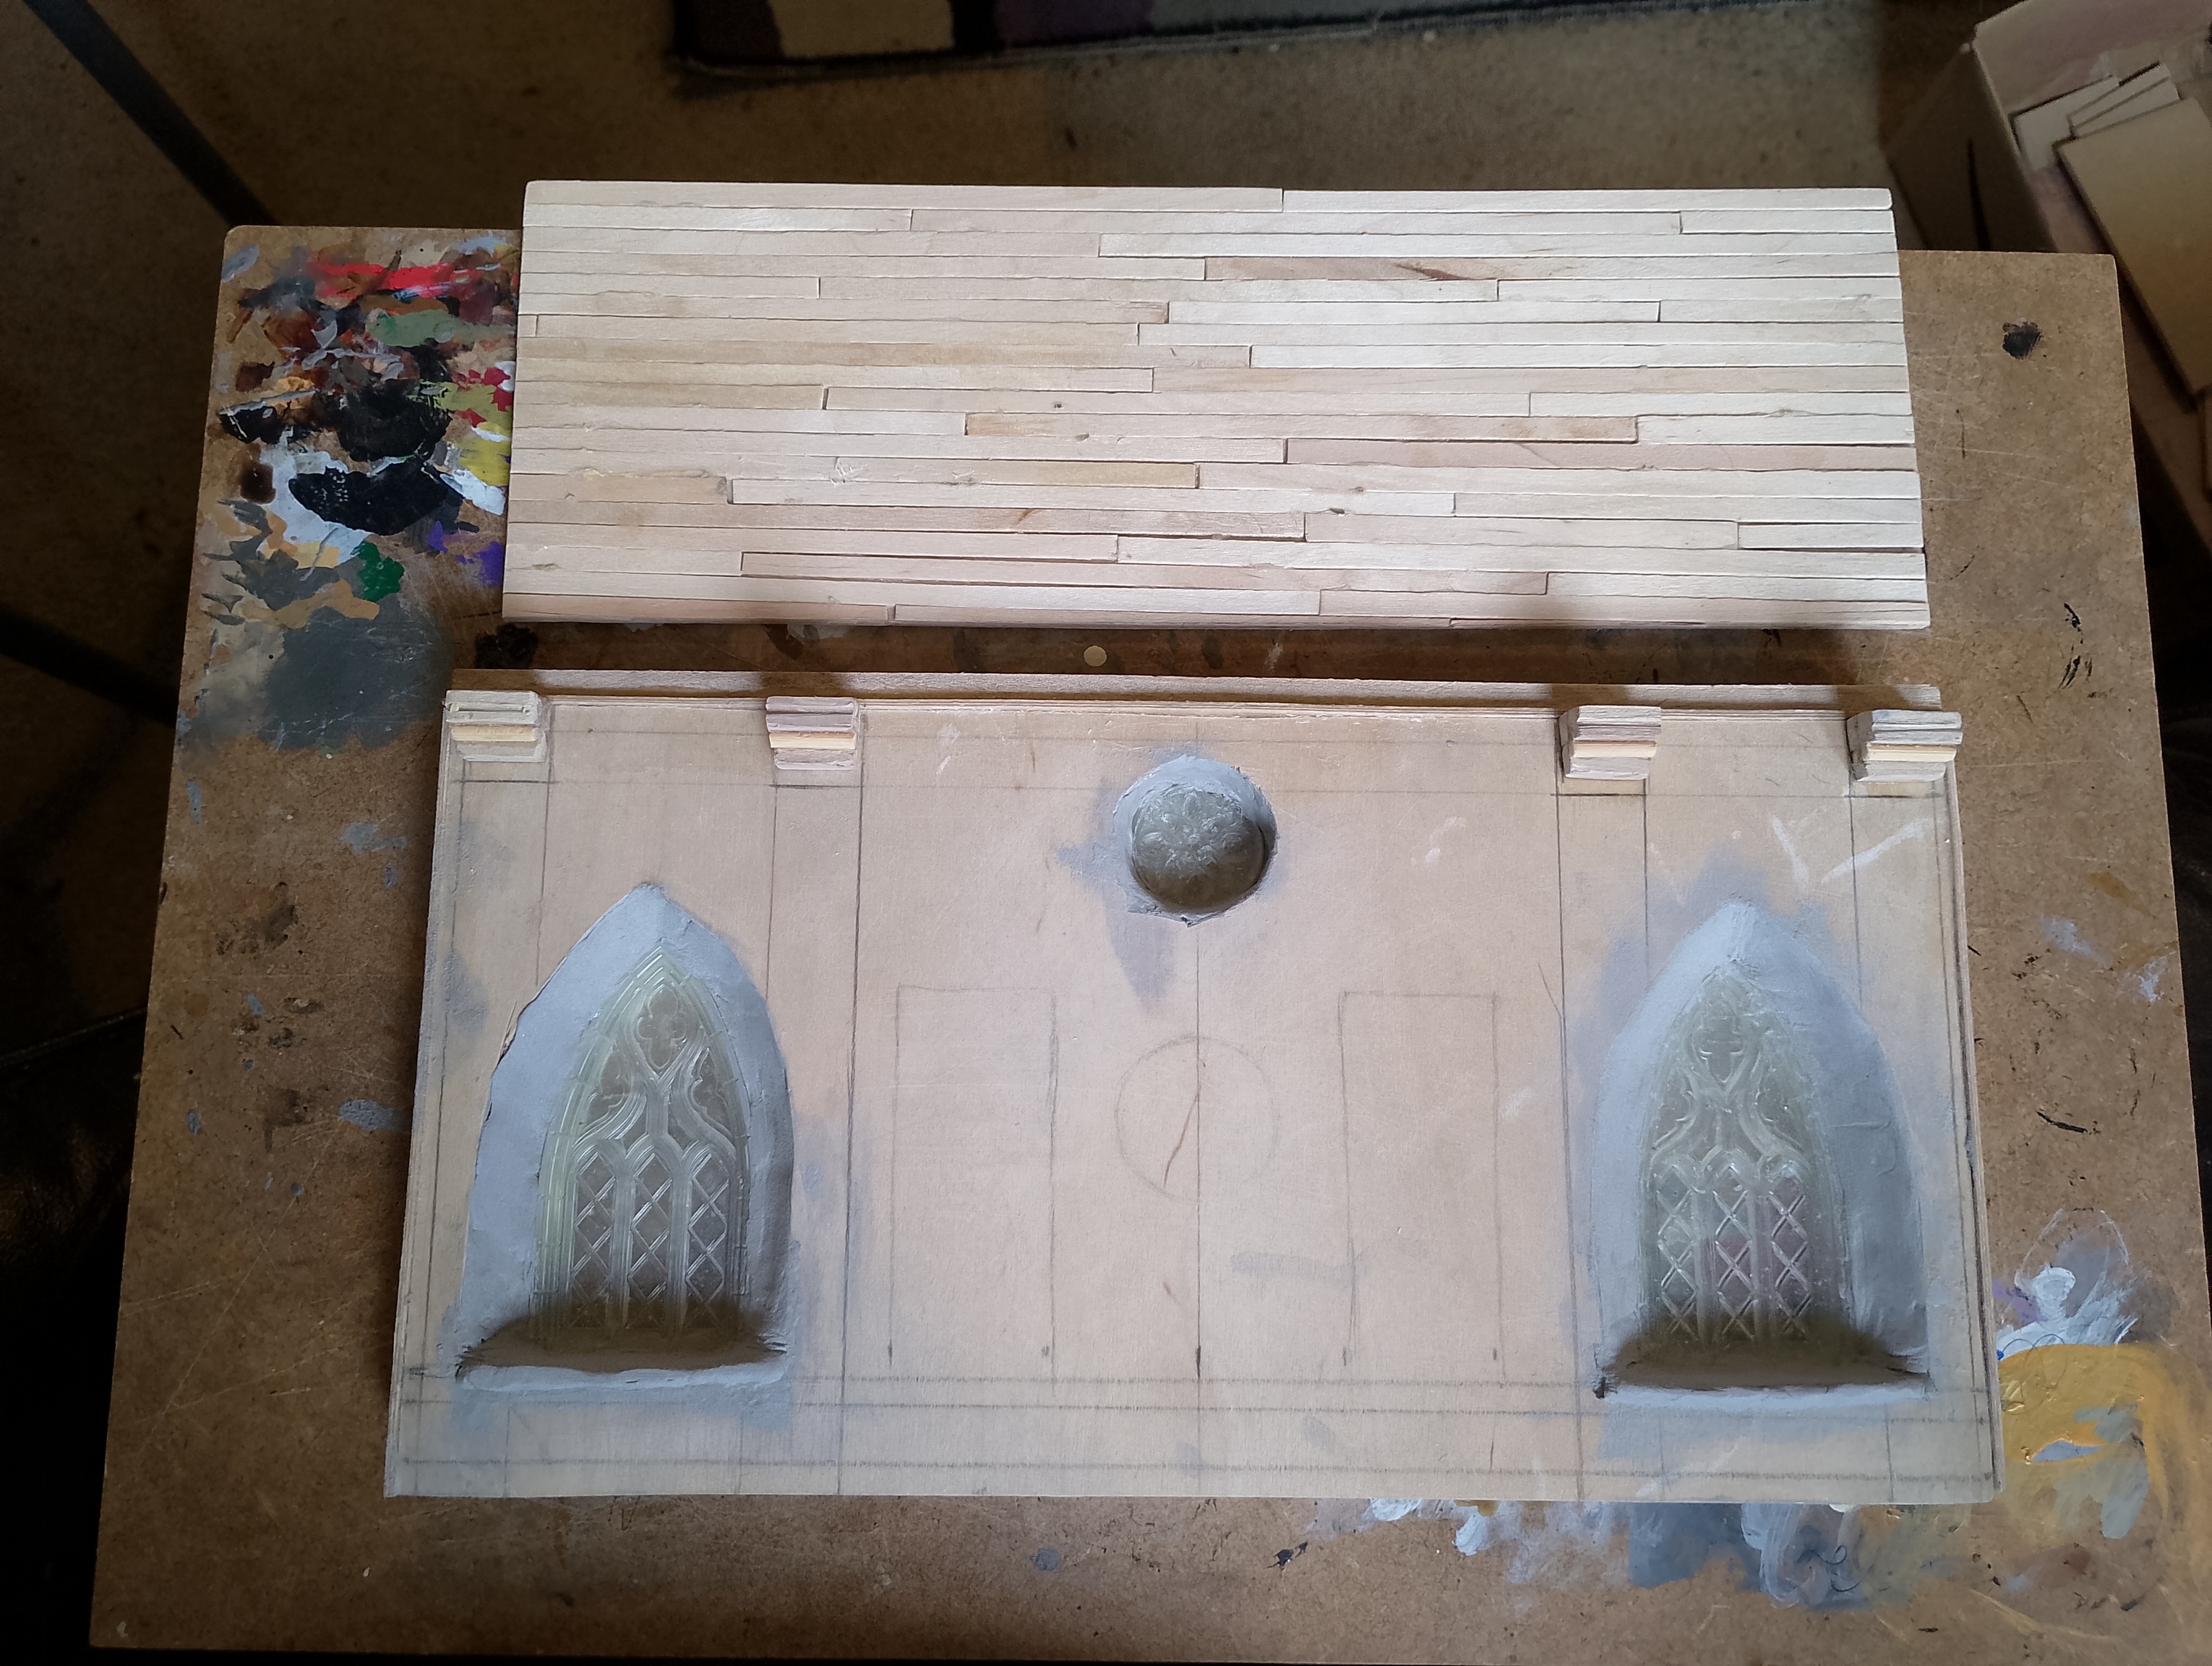
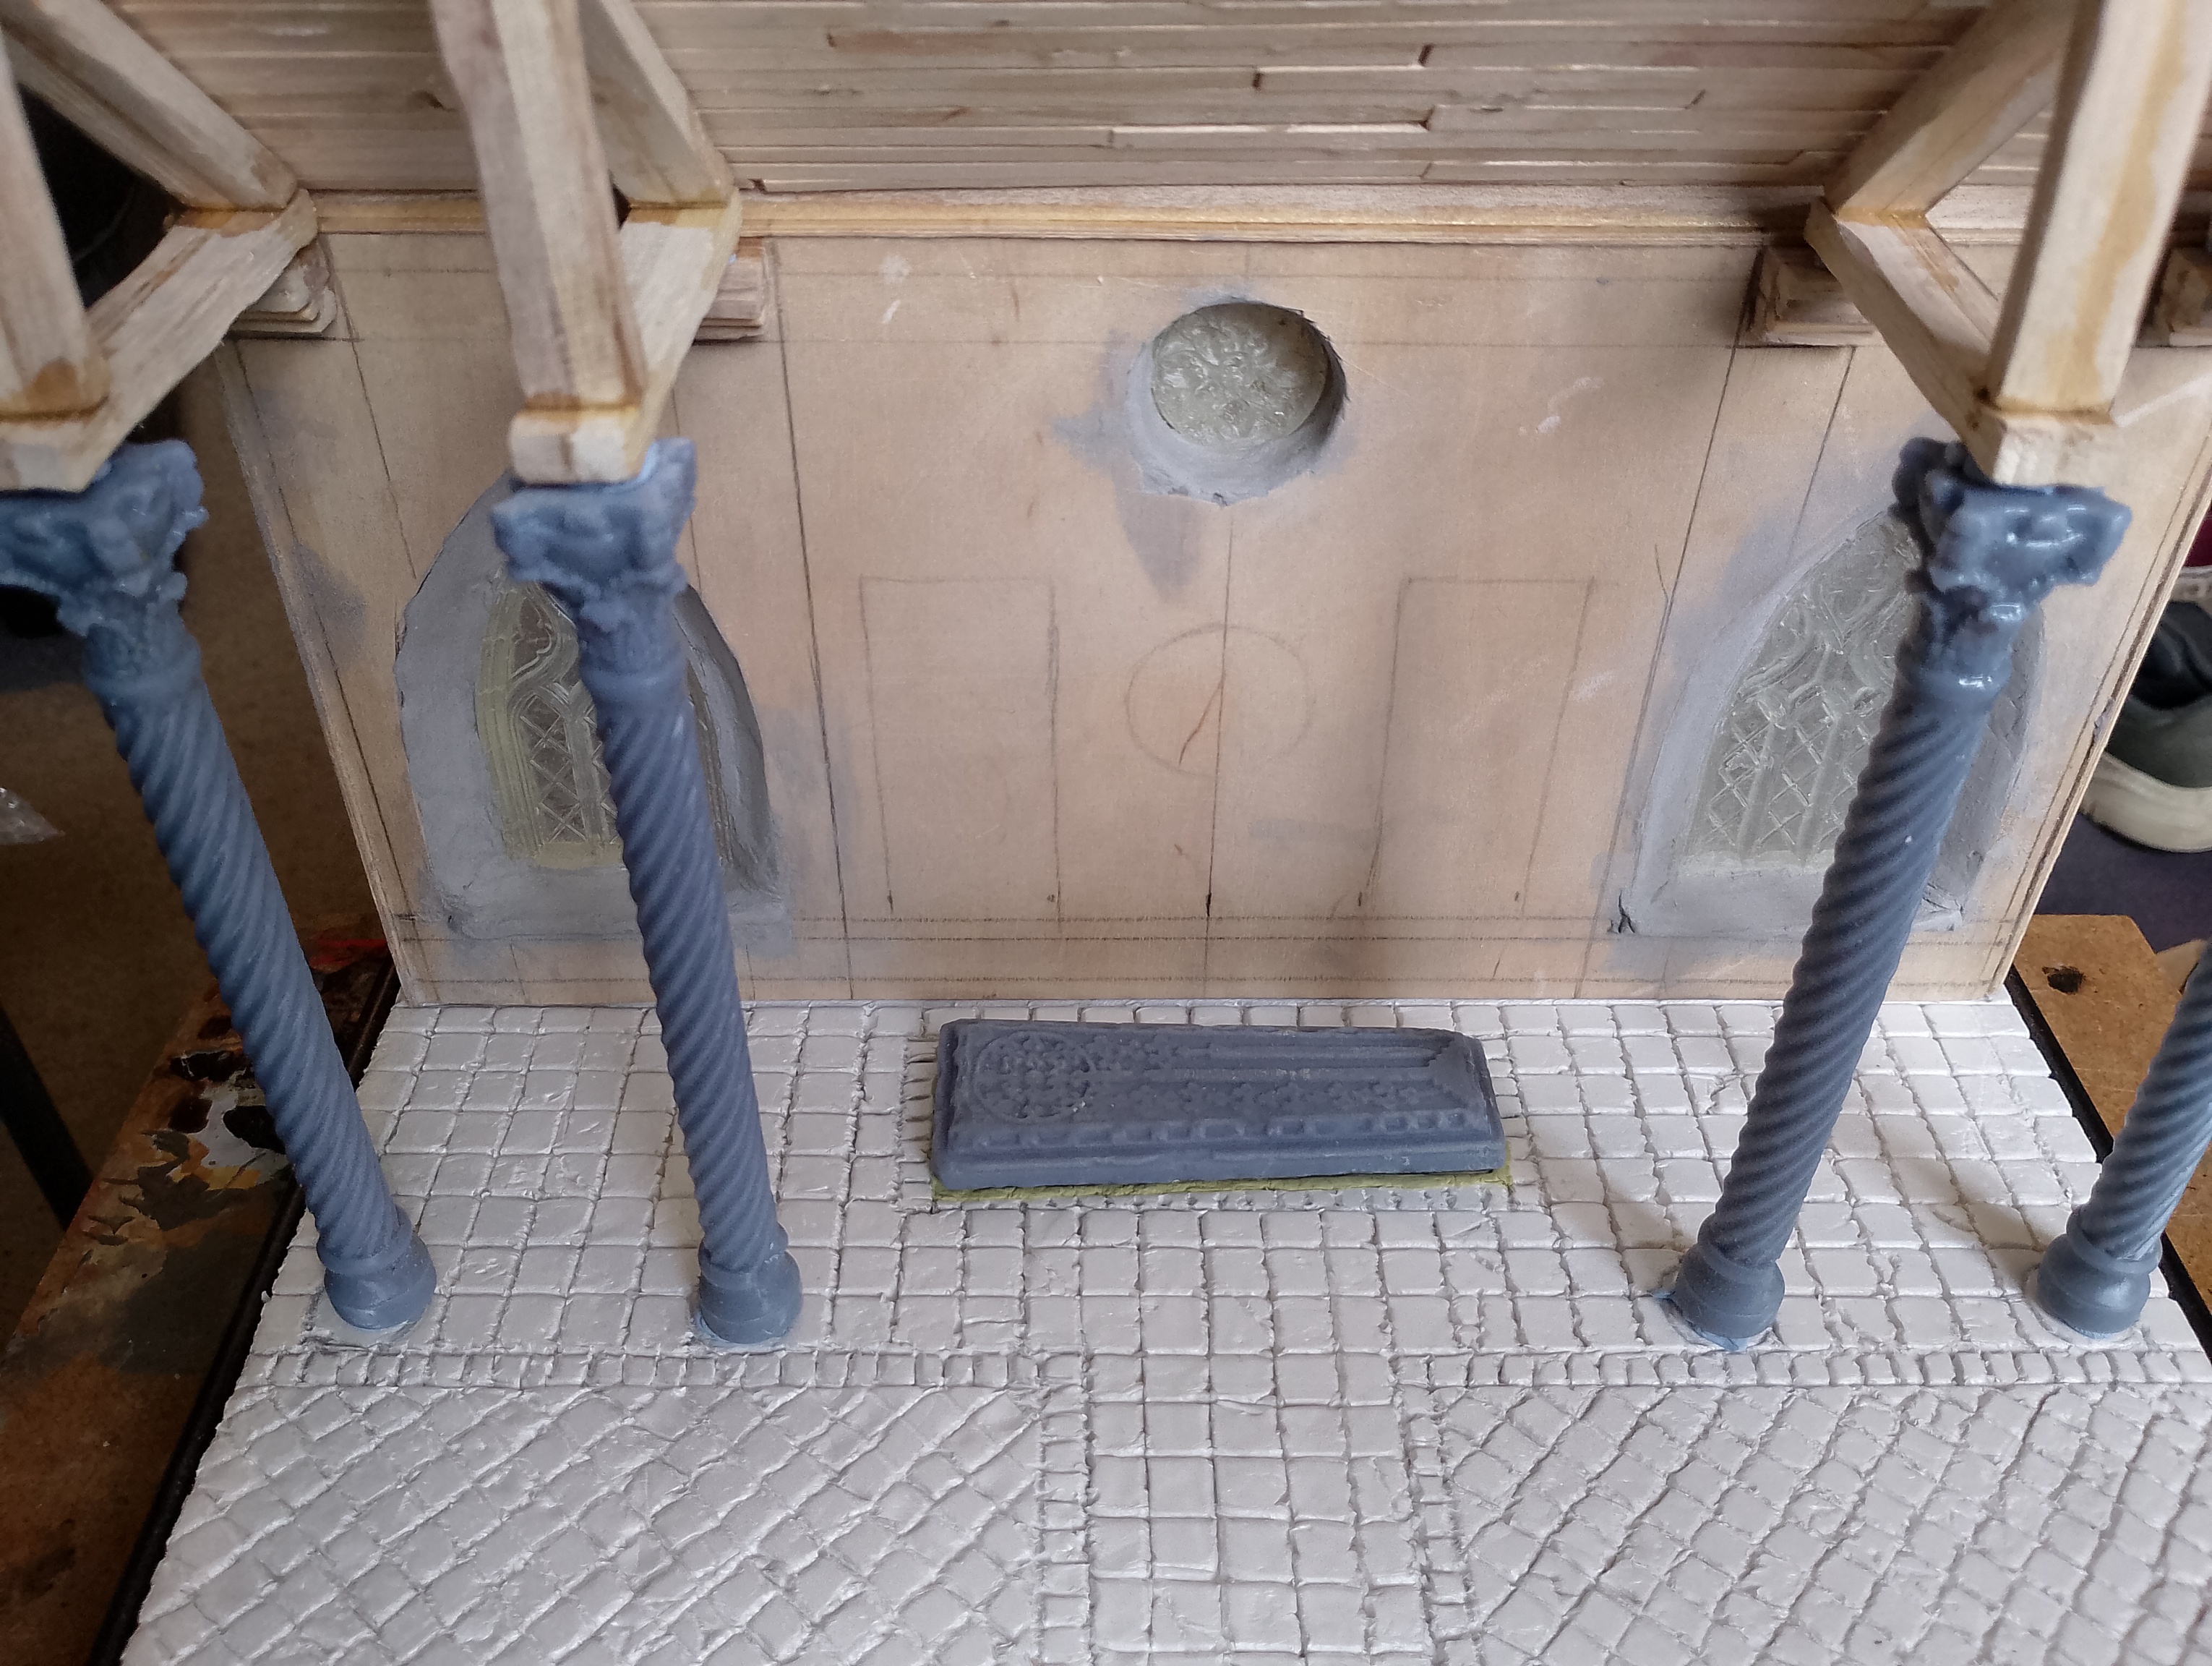
Worked on my church’s wall, with 3D printed windows (by Gothic Things) in clear resin so I can make some nice stained glass windows…hopefully. I used air drying clay to fill in the gaps between the wall’s window openings and the windows and once dry I sanded the clay parts down a bit to reshape and basically try and make them less rough.
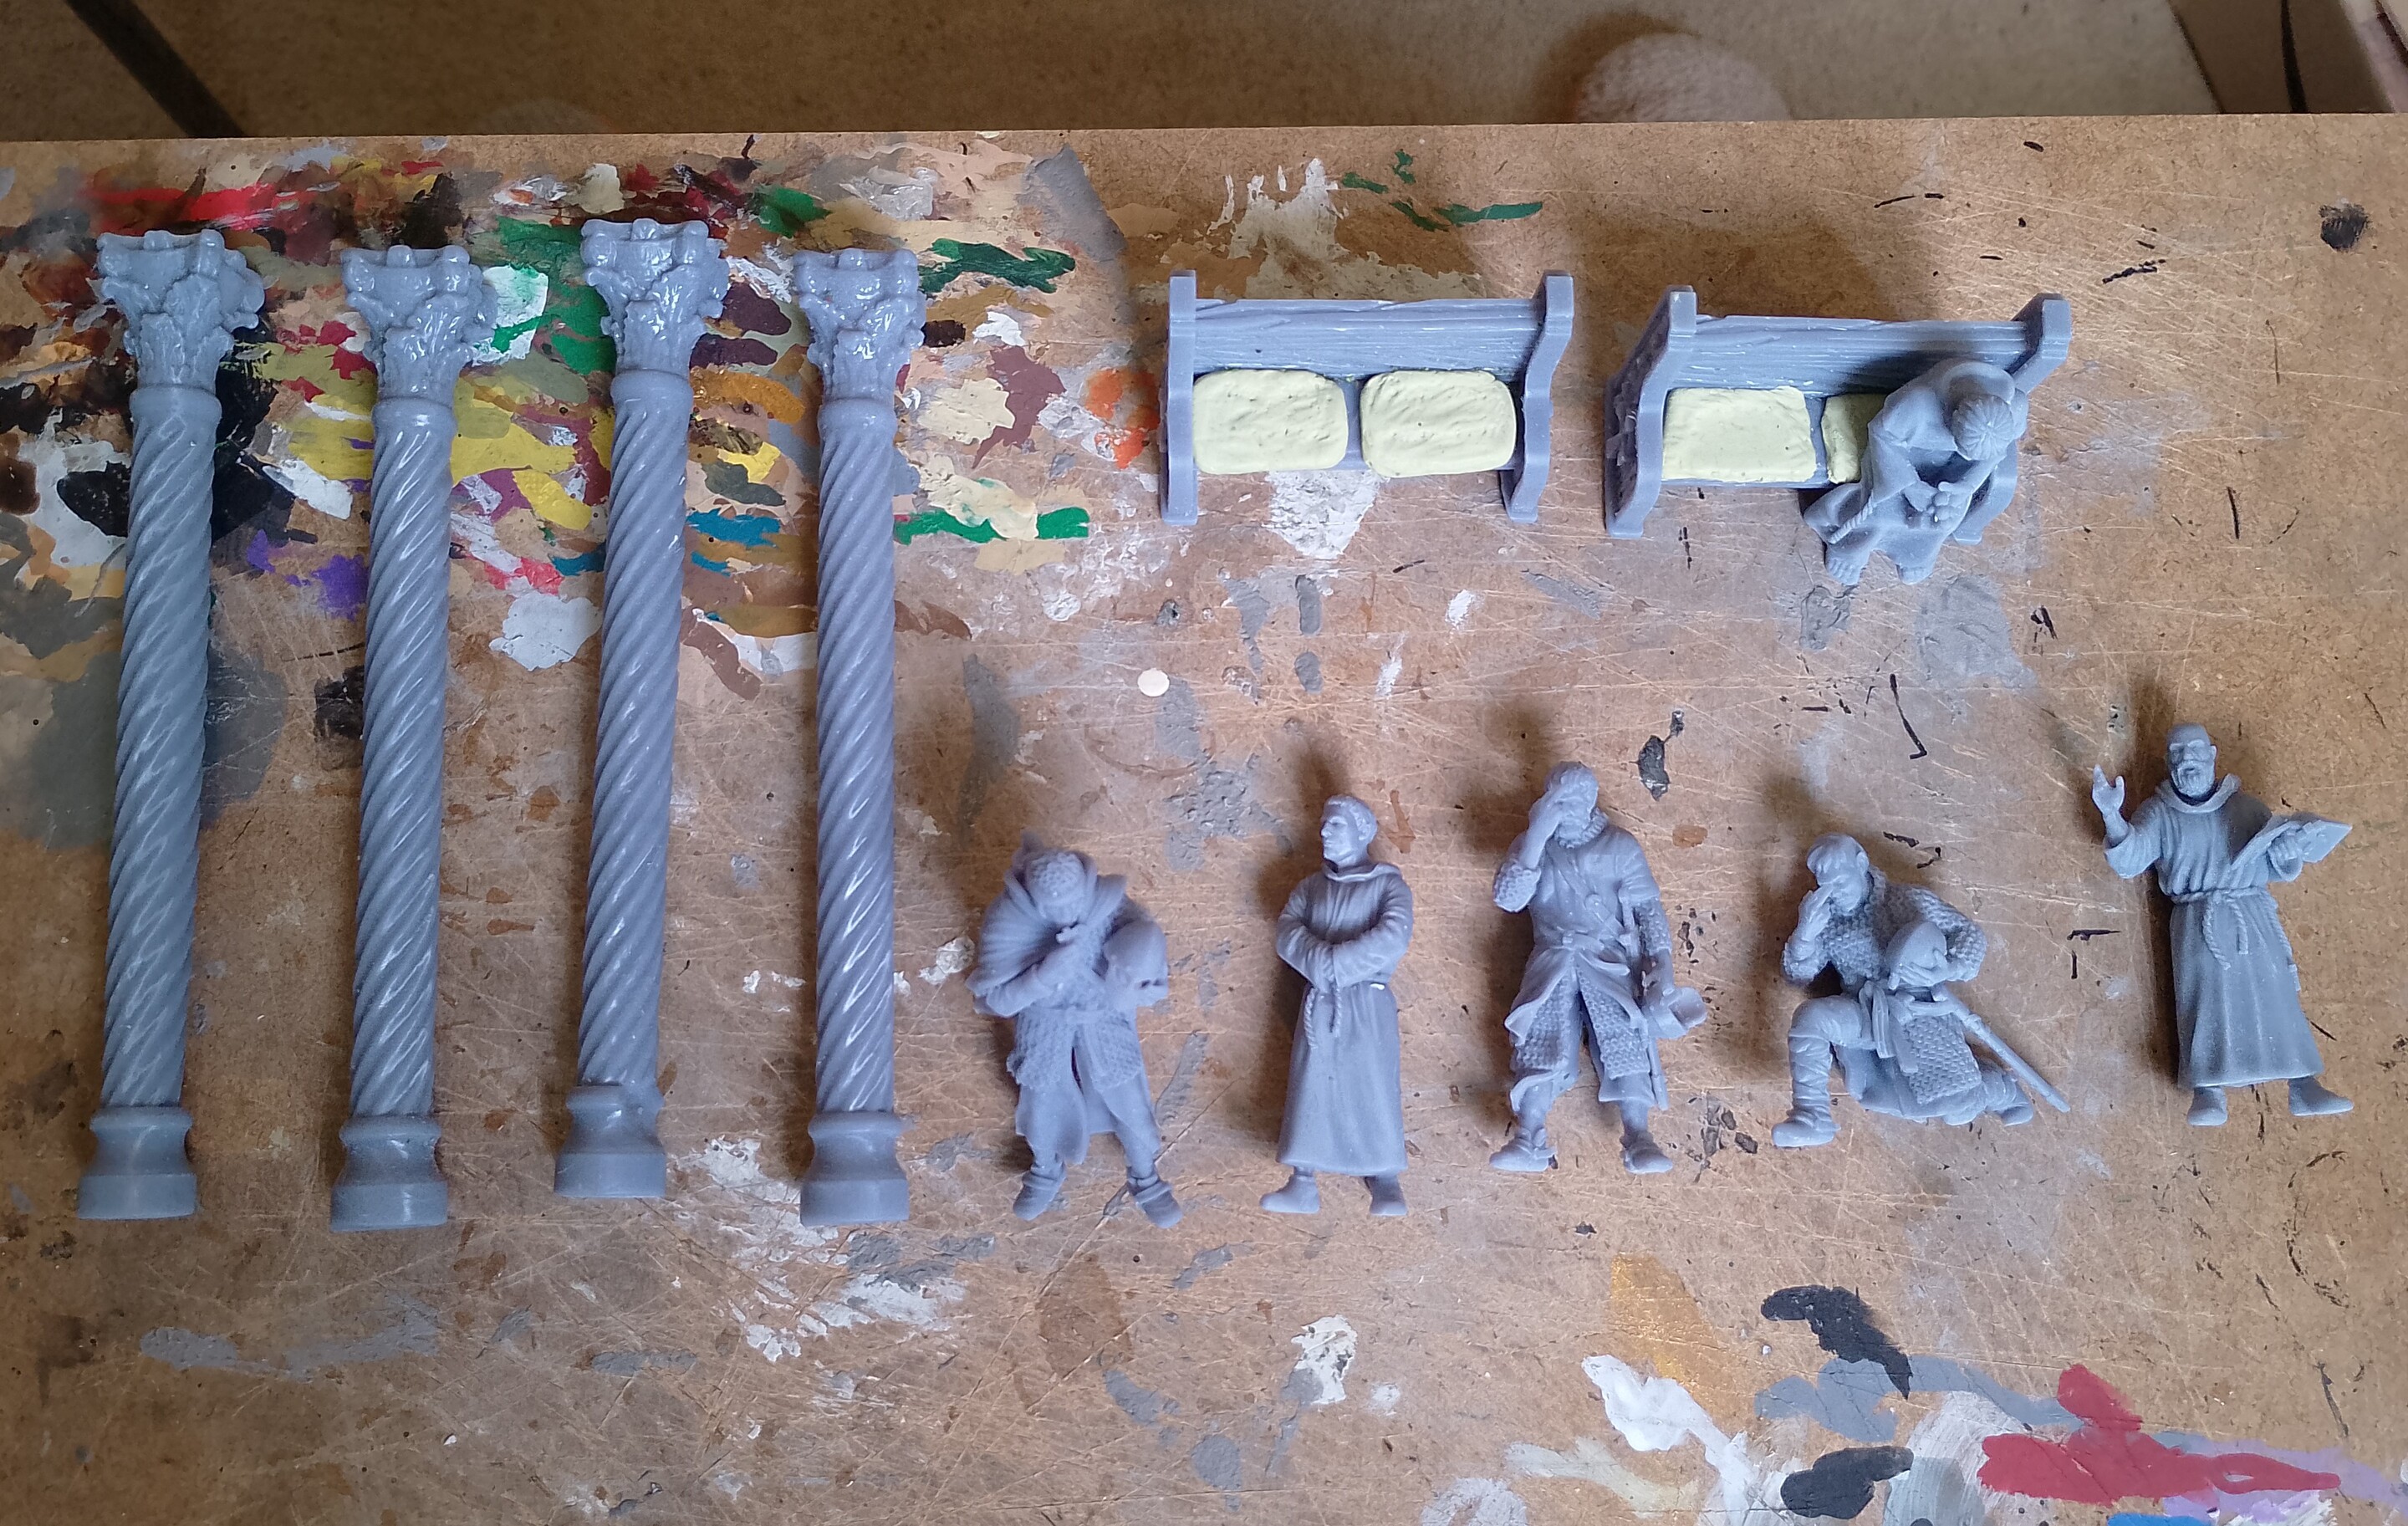
I also 3D printed off my knights from knights and monks from Reconquest Designs and my church pews and a sitting monk from Tiny Furniture. The columns were from Scan the World and were scans of actual medieval columns taken from the collection at Musée Saint-Raymond in Toulouse, though I did a little bit of digital reshaping and resizing for my diorama.
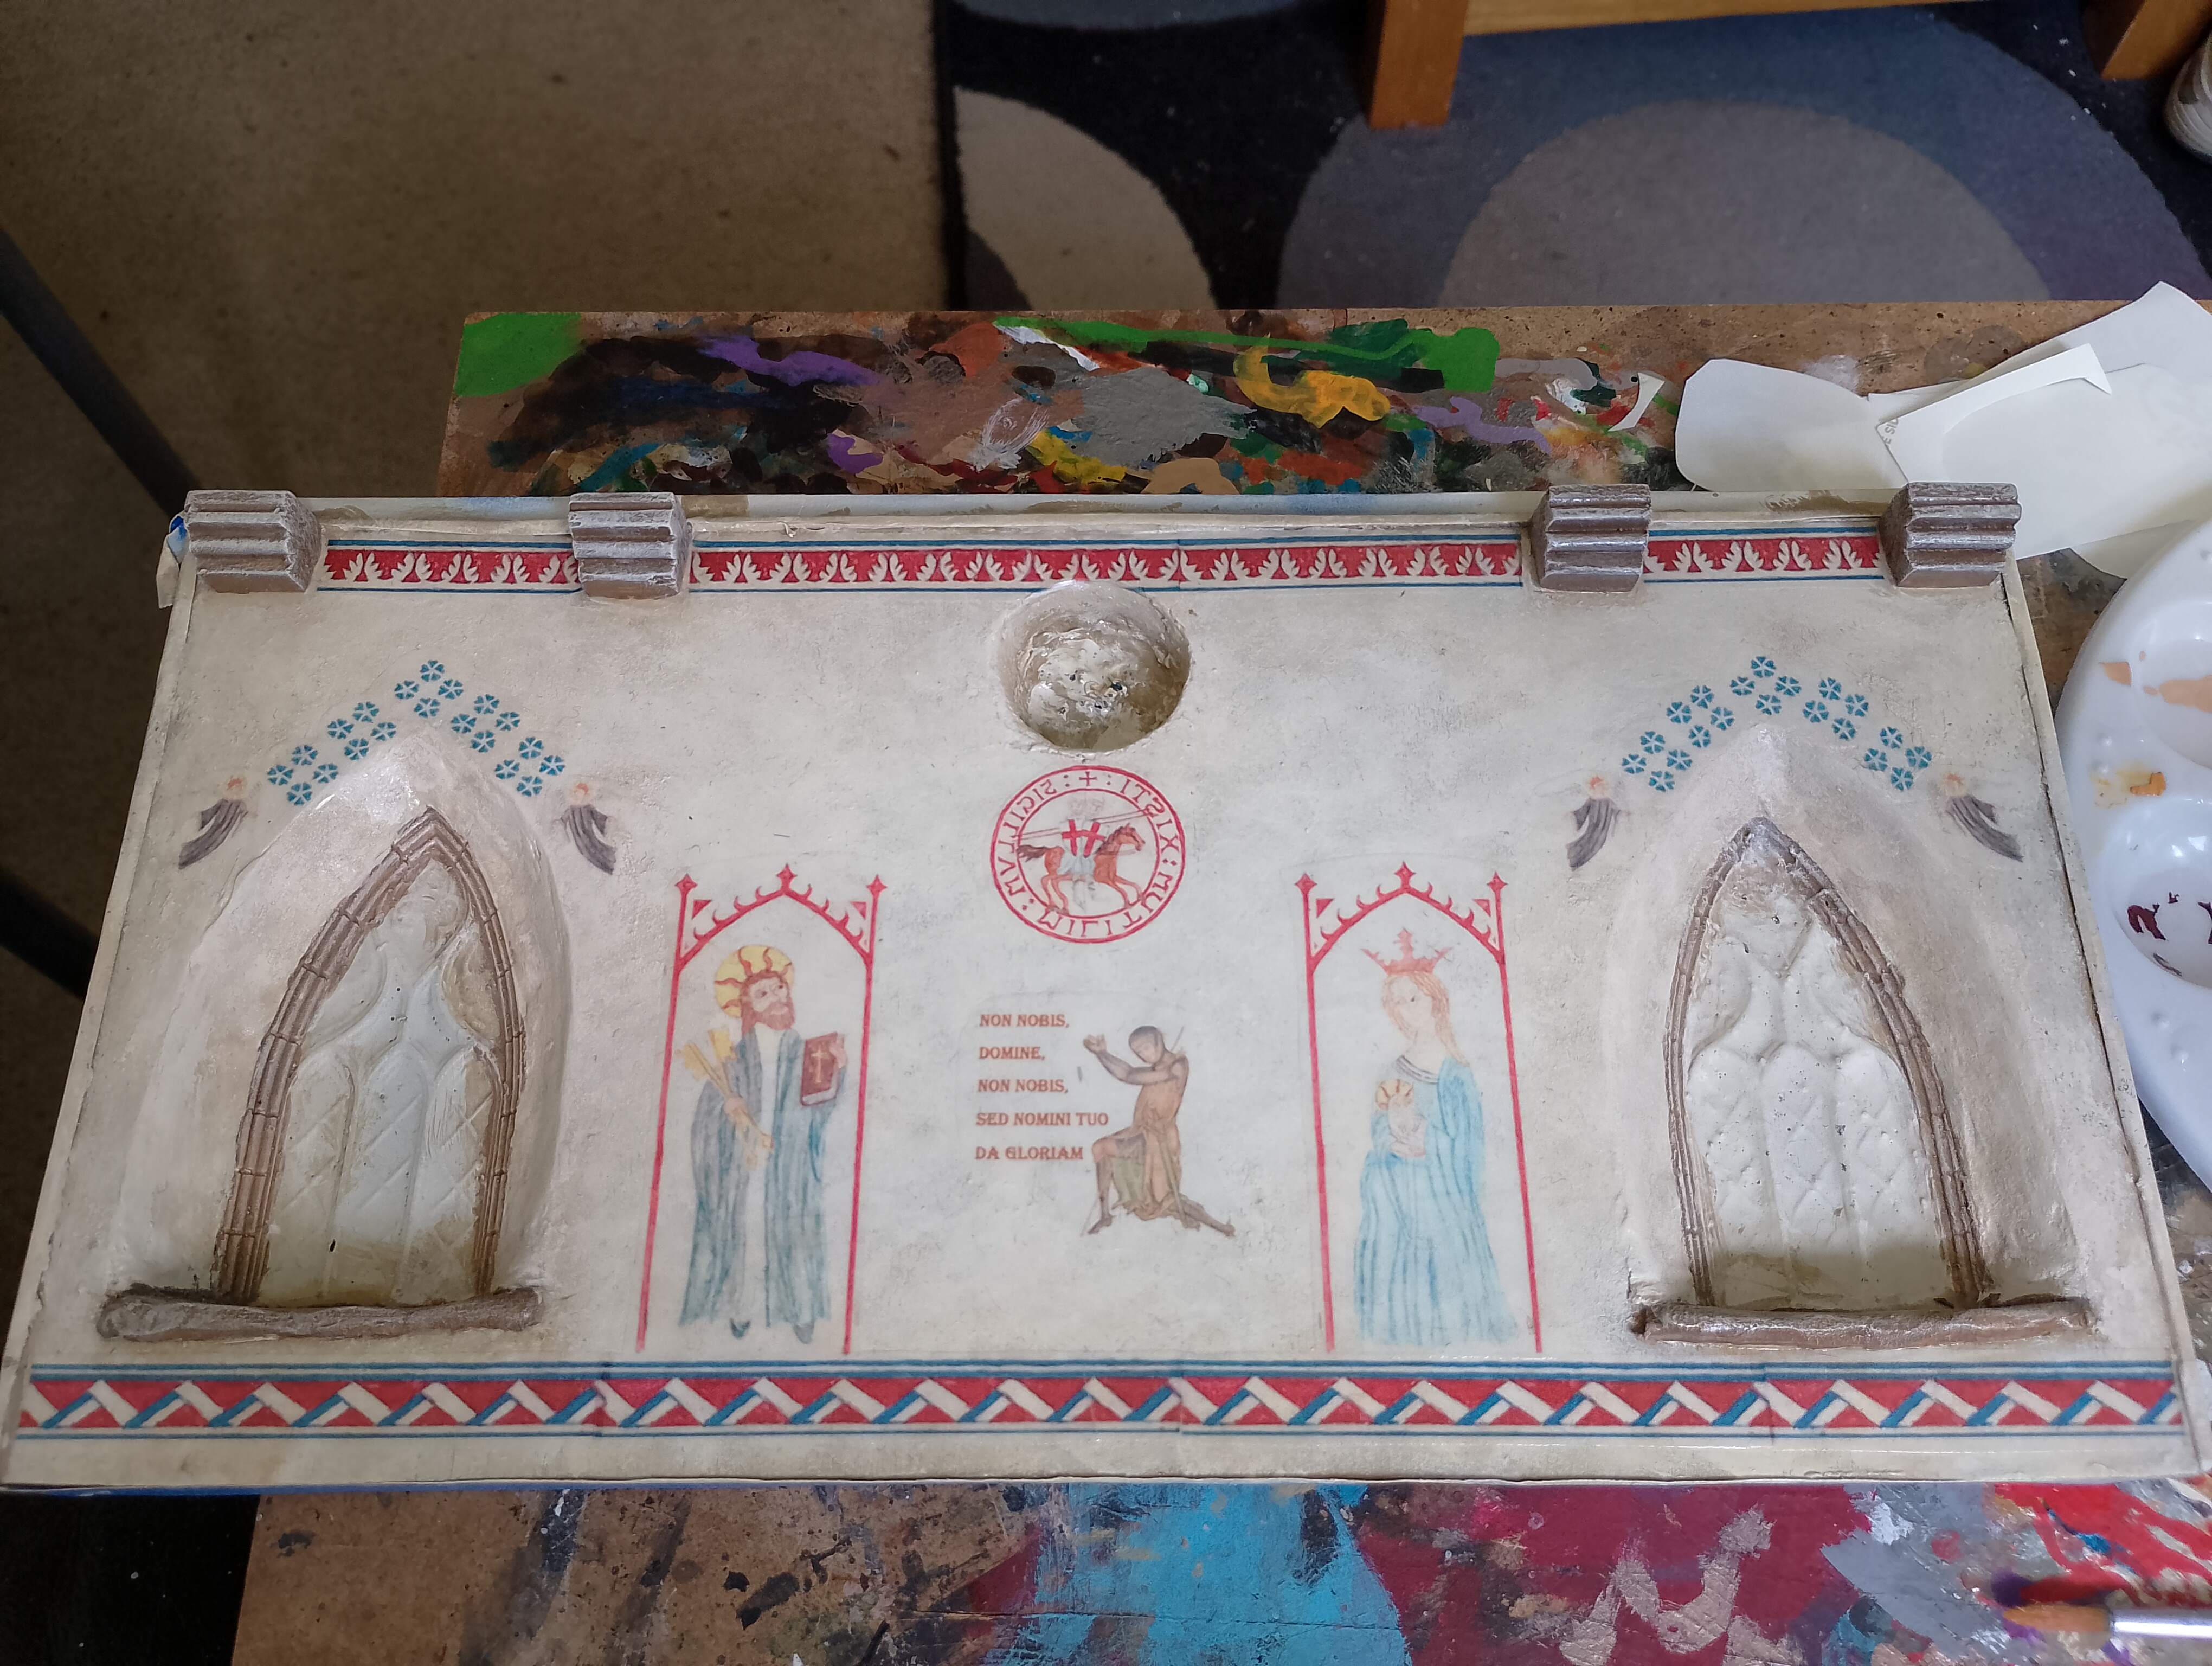
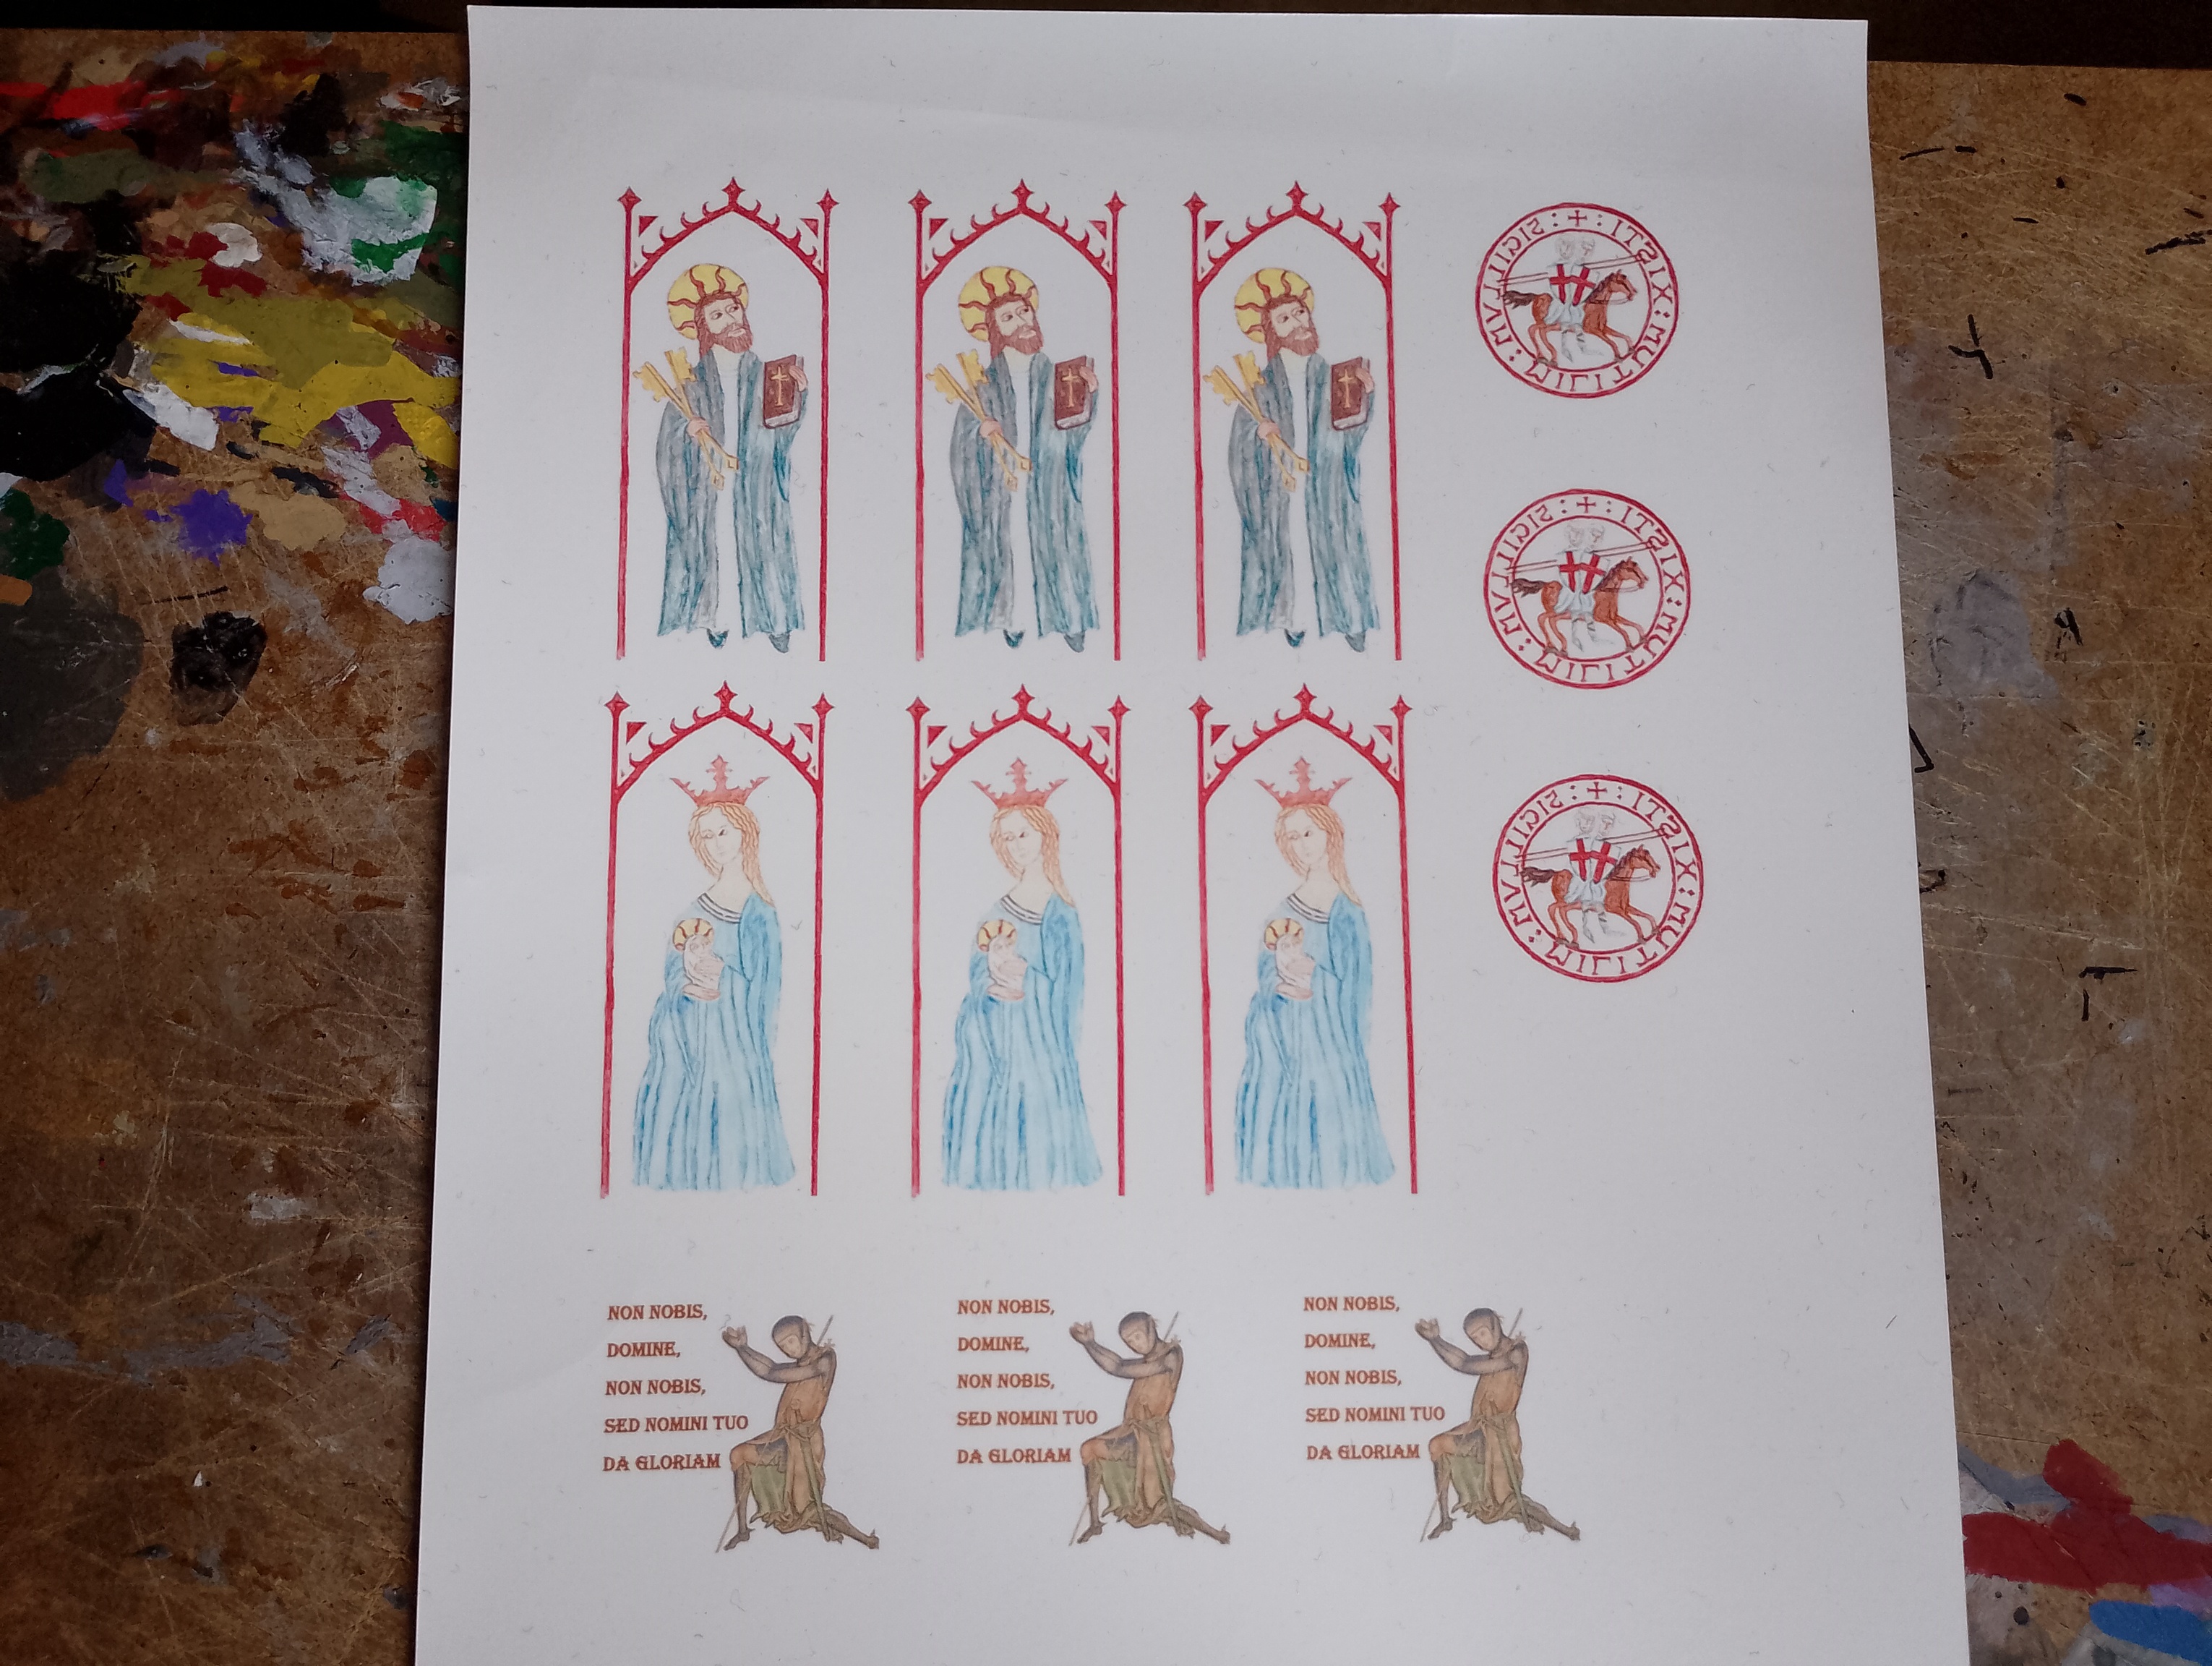
I also resized the scans of my medieval wall paintings in Microsoft Word, which is actual quite easy to get your images to the right size or scale. I then got some special transfer paper and printed them off. I had tried this ages ago for some space marine shoulder pads, but as soon as I put them in water, all the ink just leaked out. After a bit of Google searching, I realised you have to apply several coats of clear spray lacquer, which I did. Hoping this will actually work this time.
Final thing I did was to do a bit of a dry fit of my wall, roof, floor and columns to see if it looked OK. I reckon it looks OK, but will hopefully look better with the knights and monks in and a bit of a prime.

Templar Tomb – Work Done So Far 2
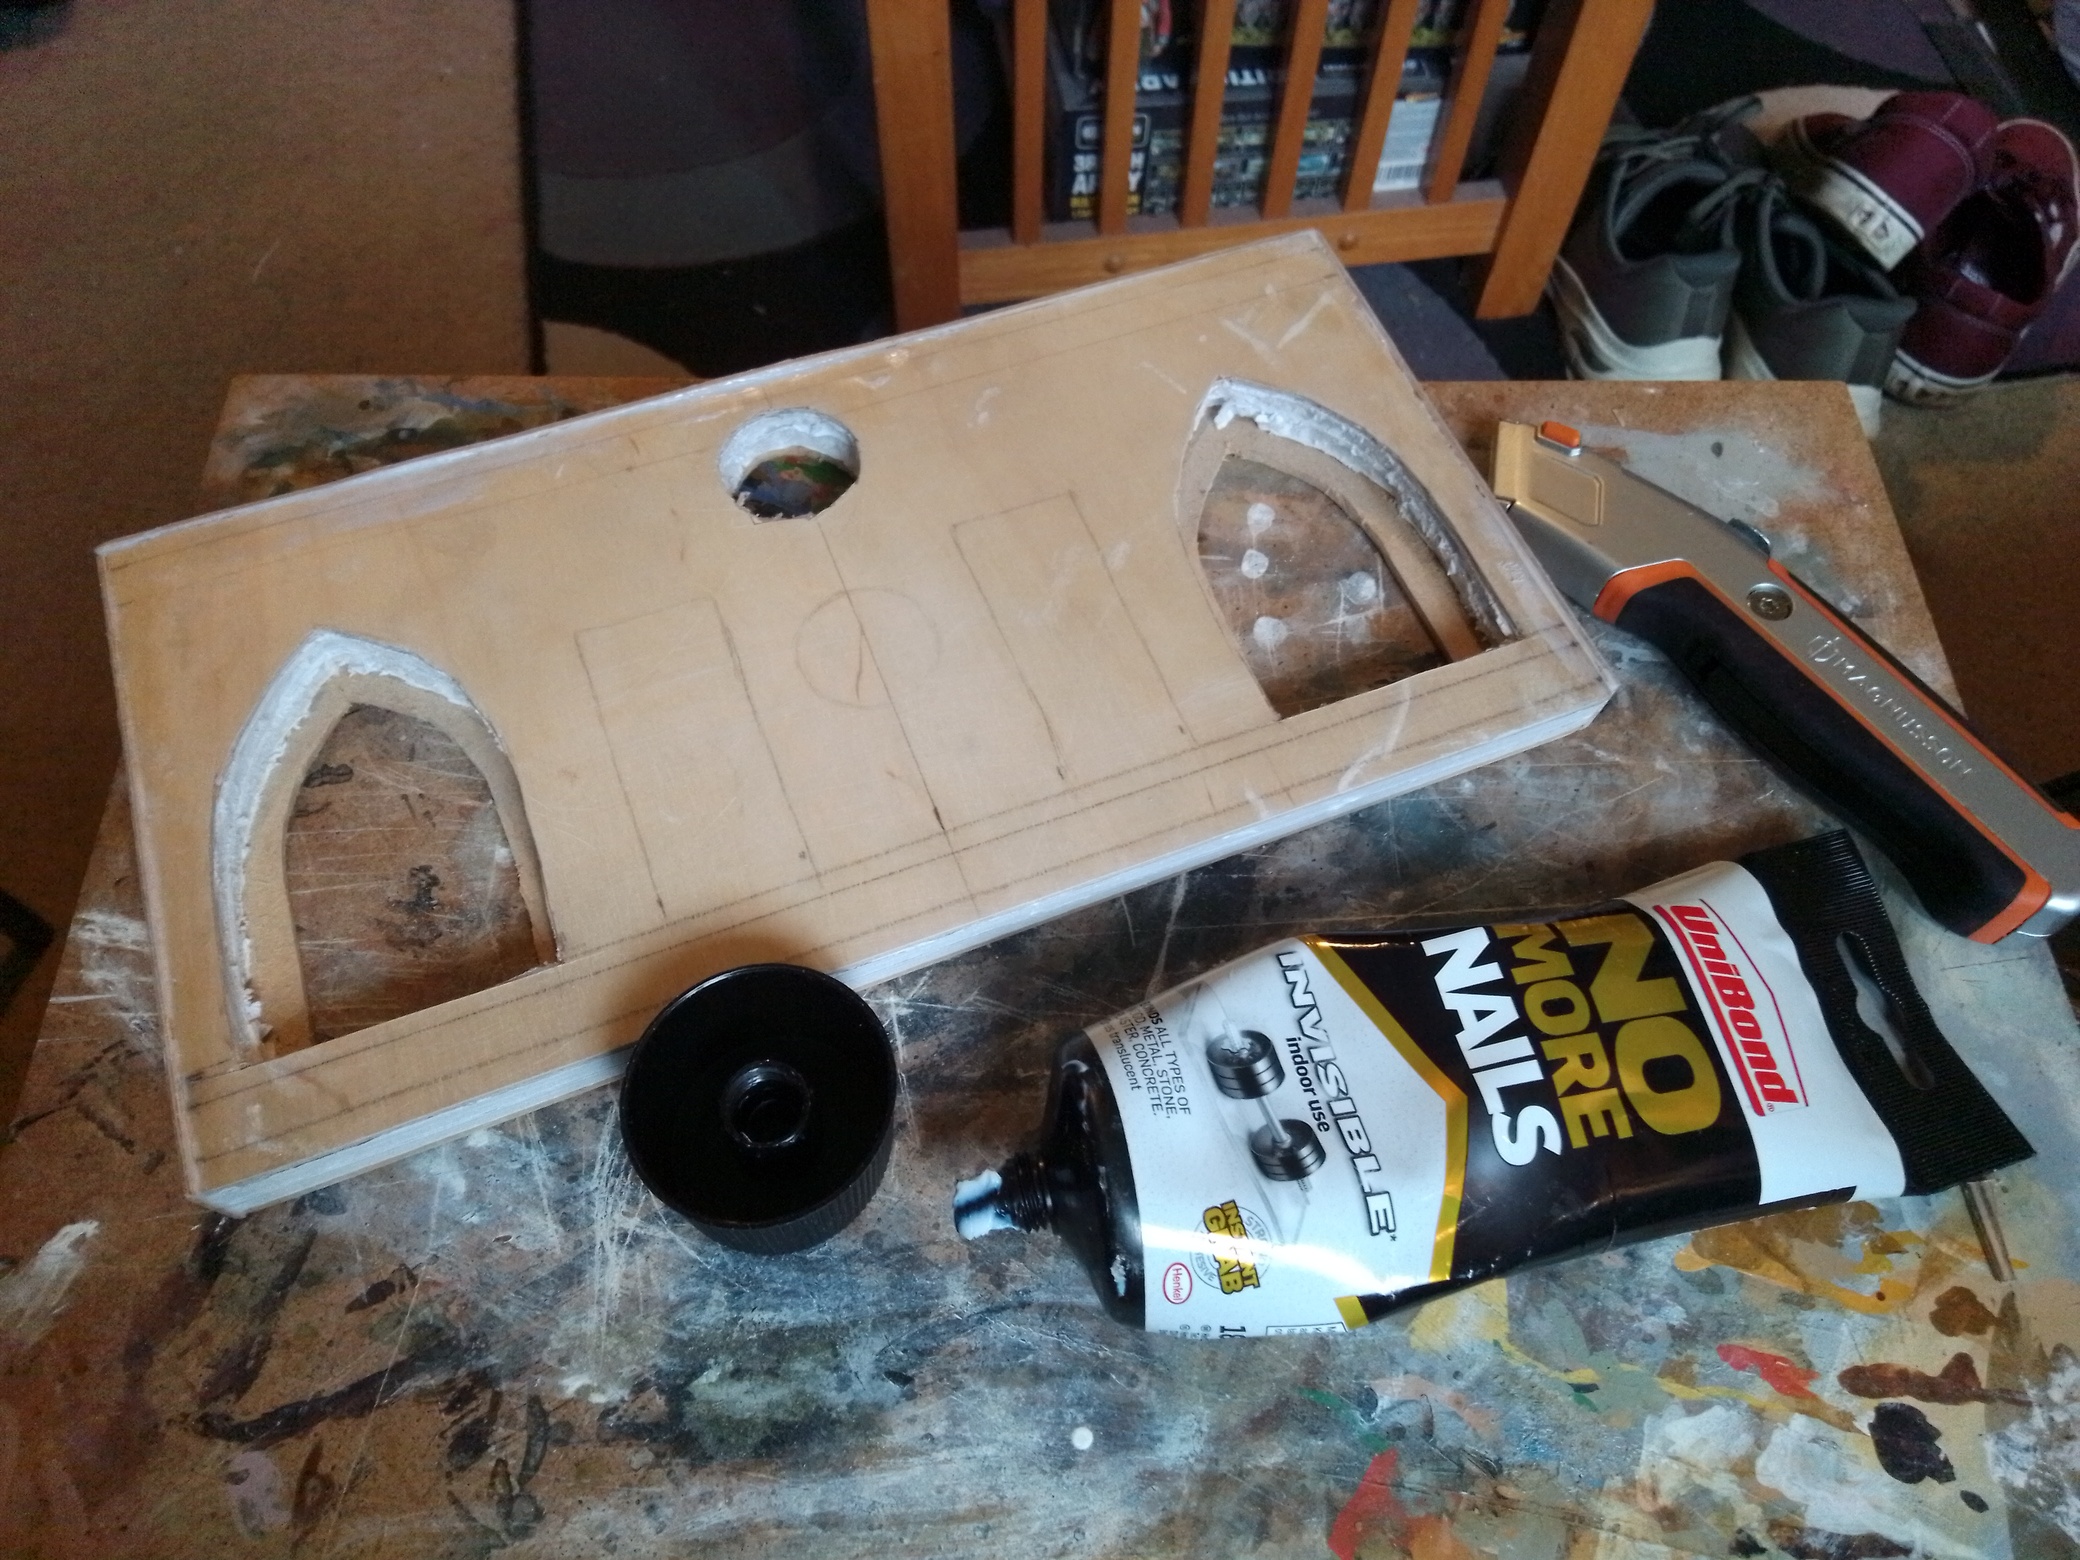
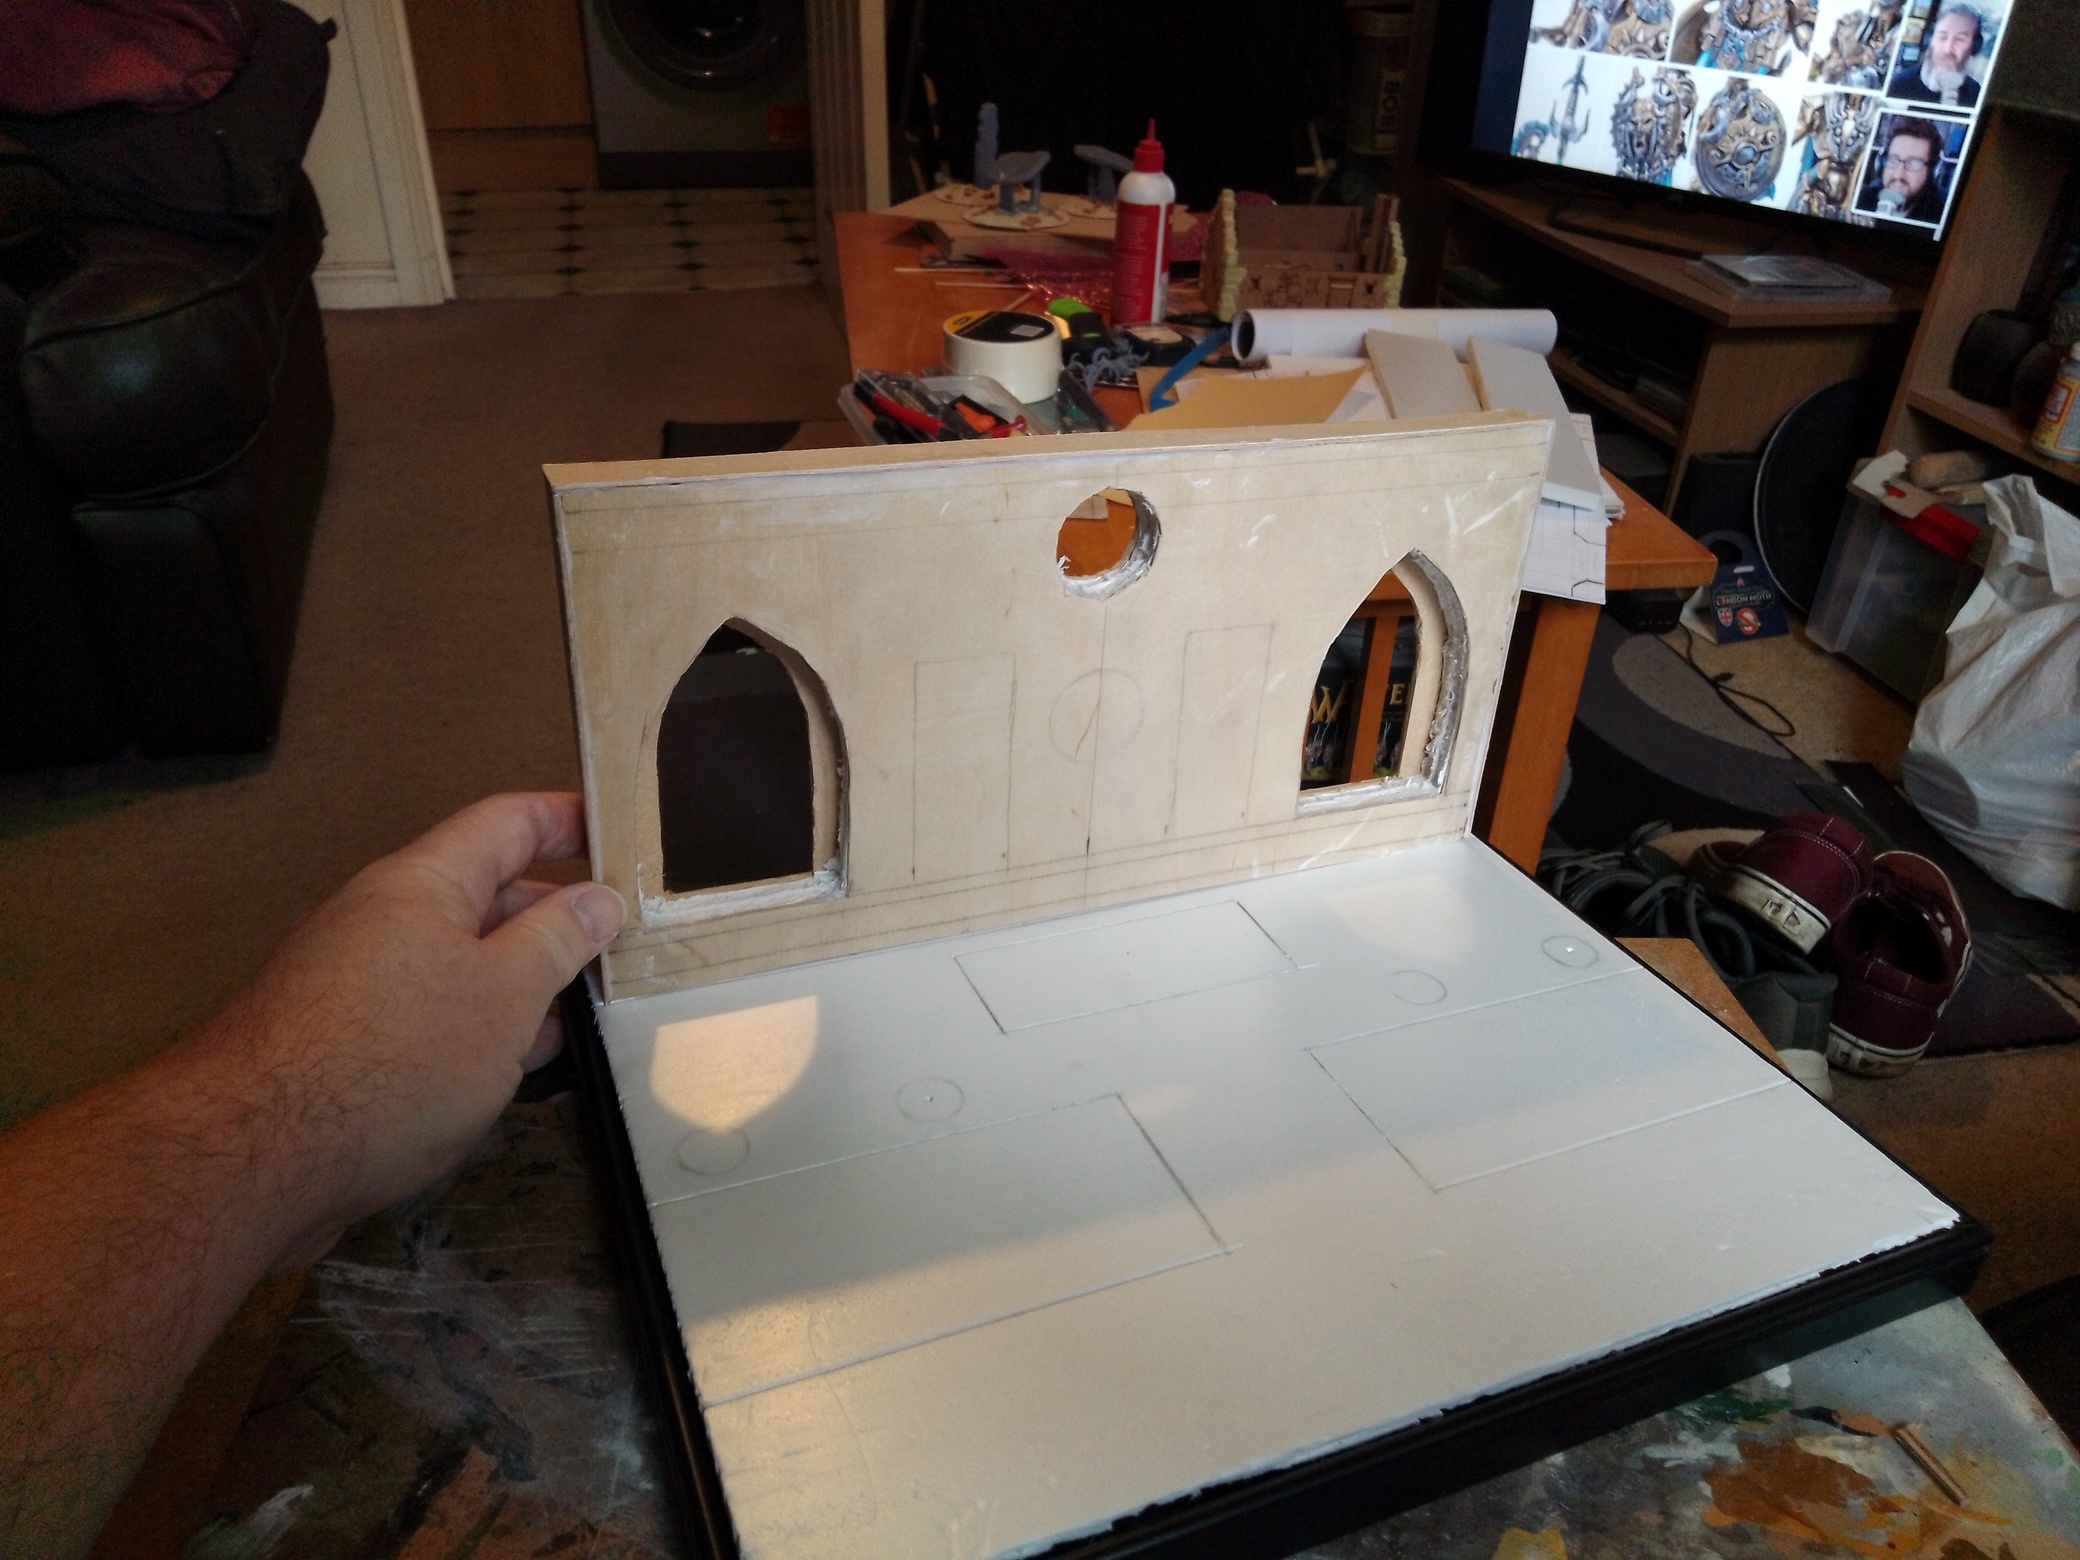
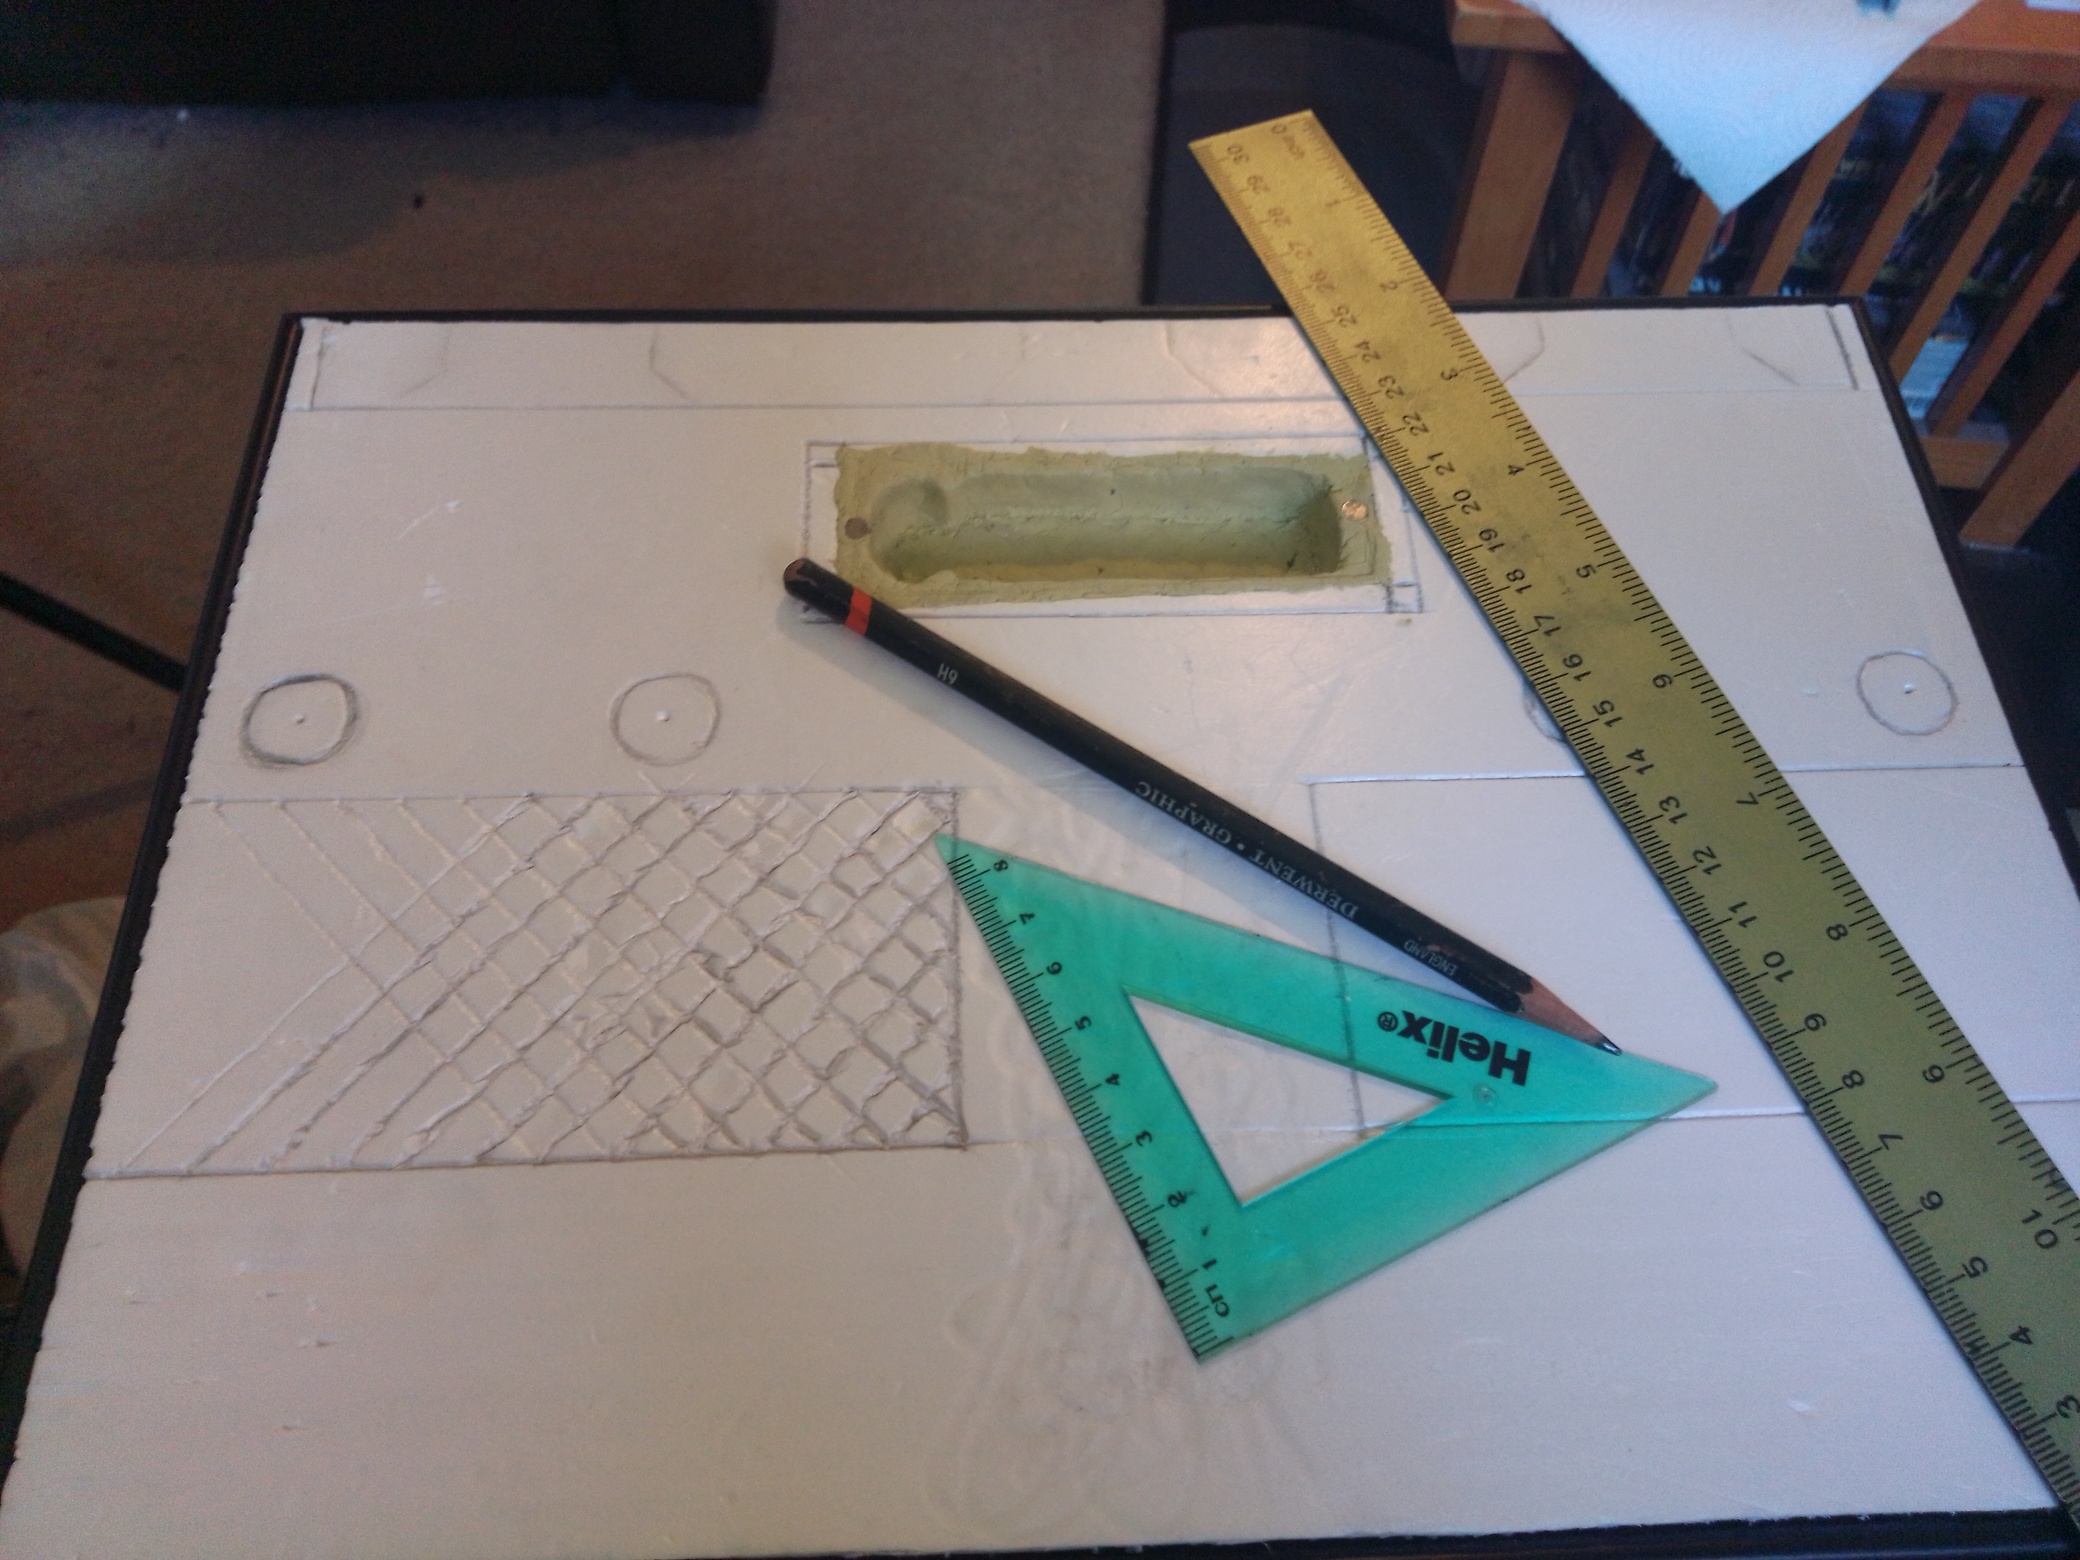
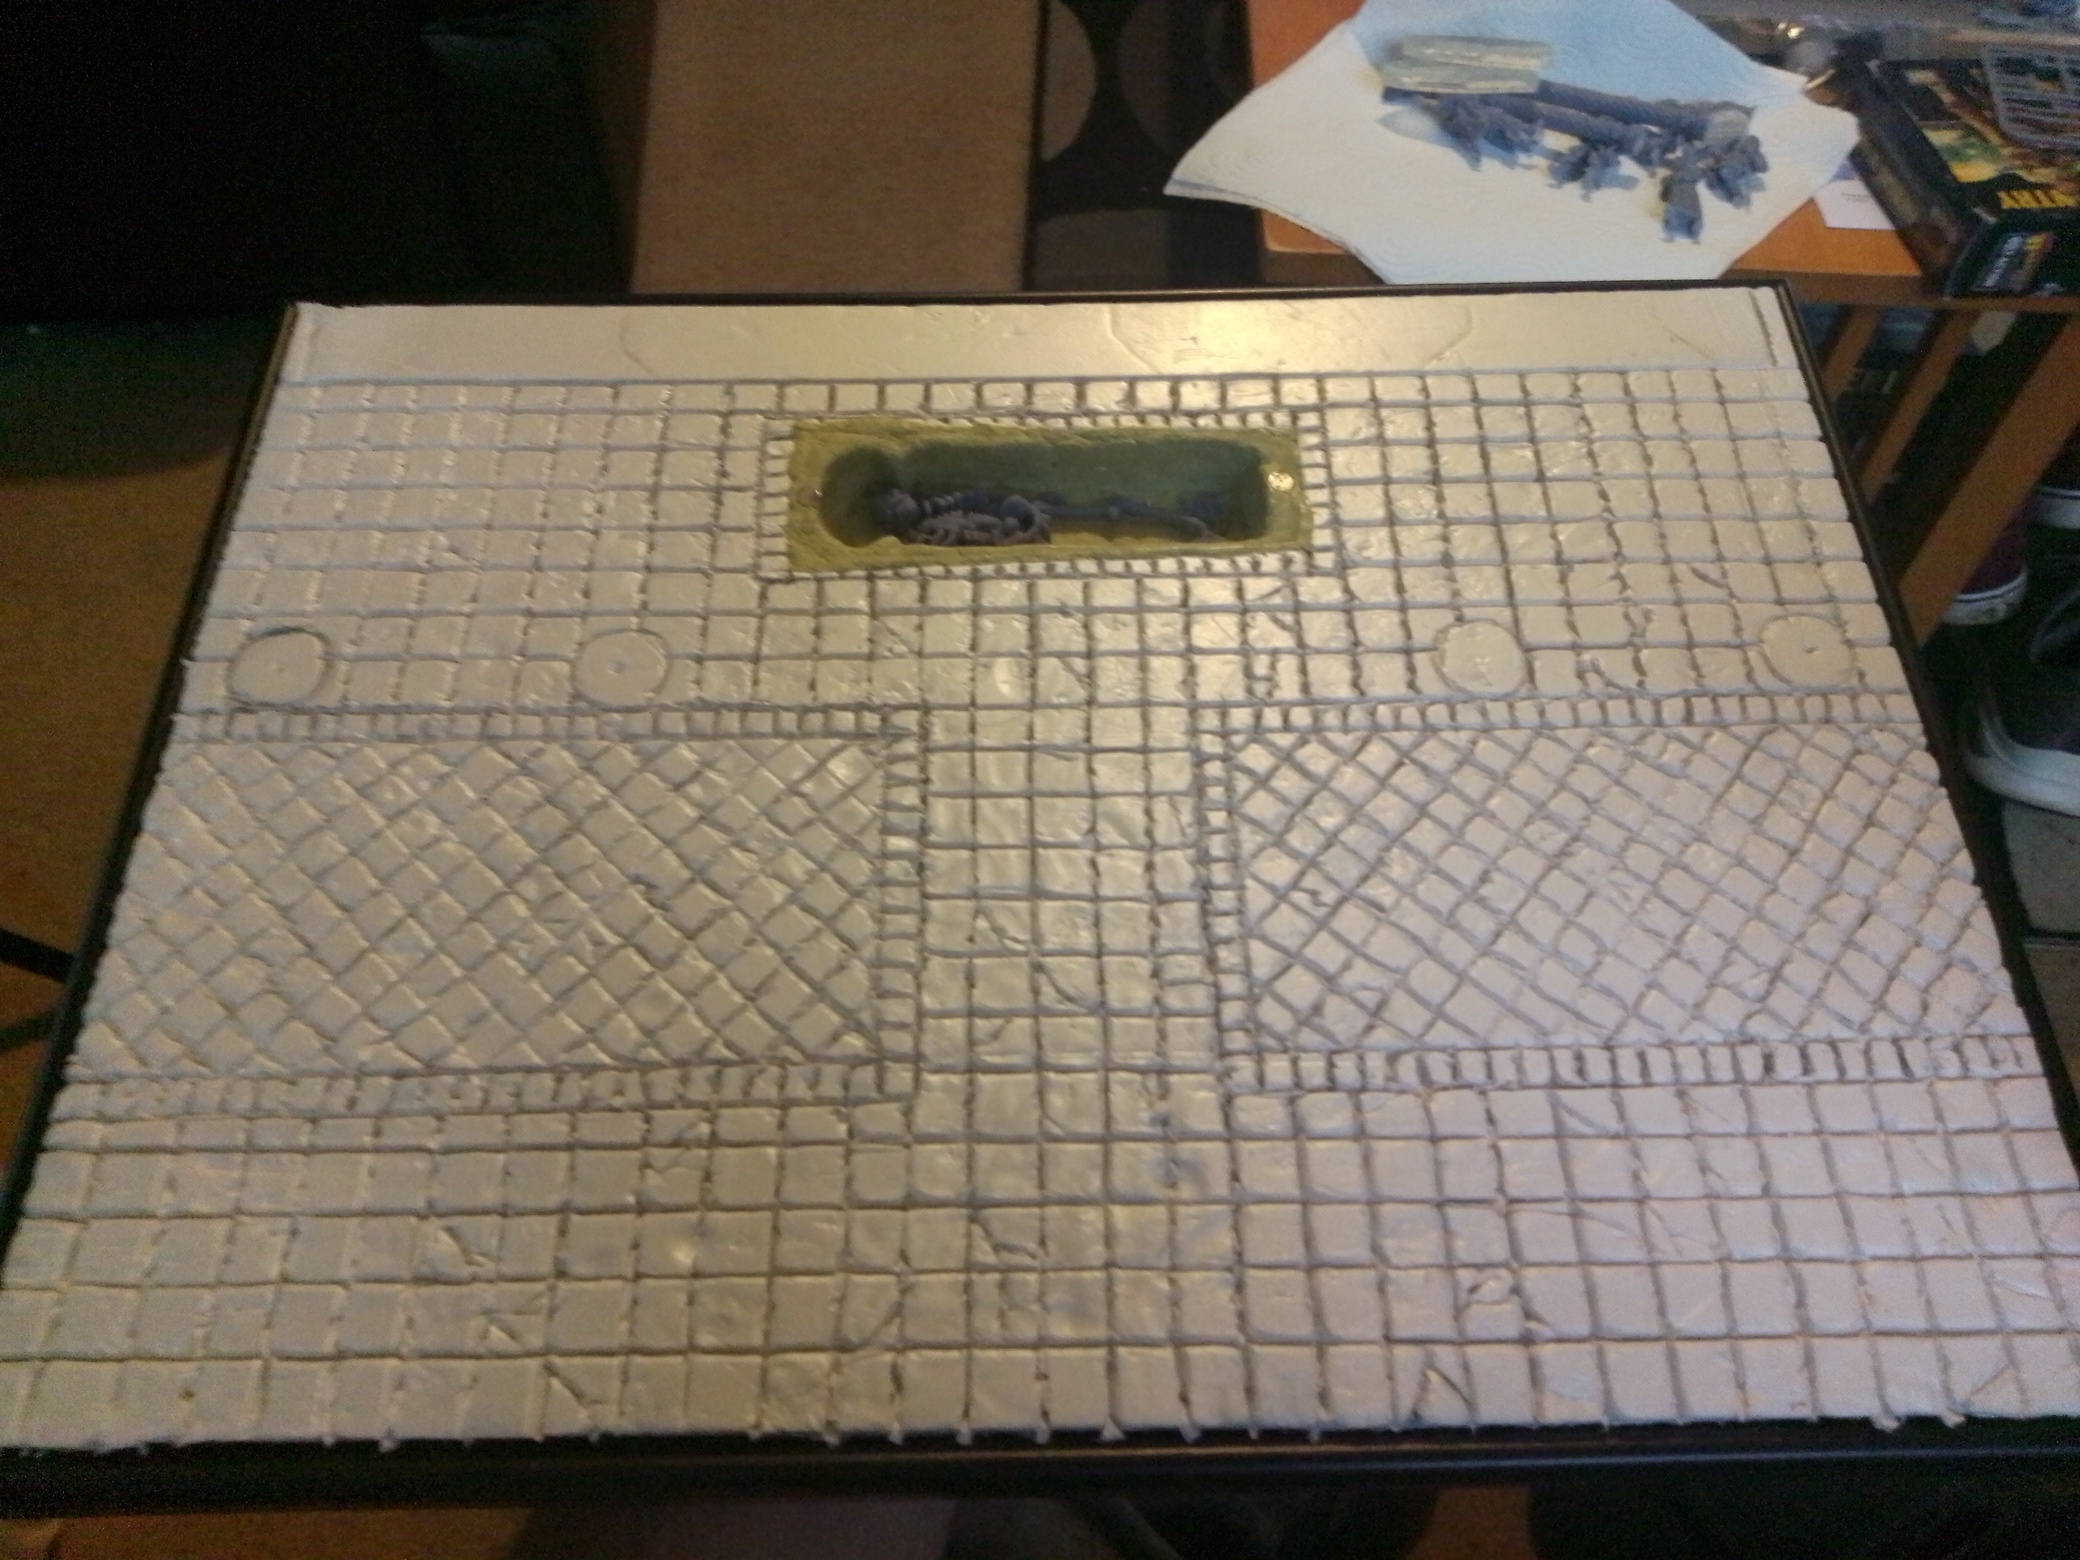
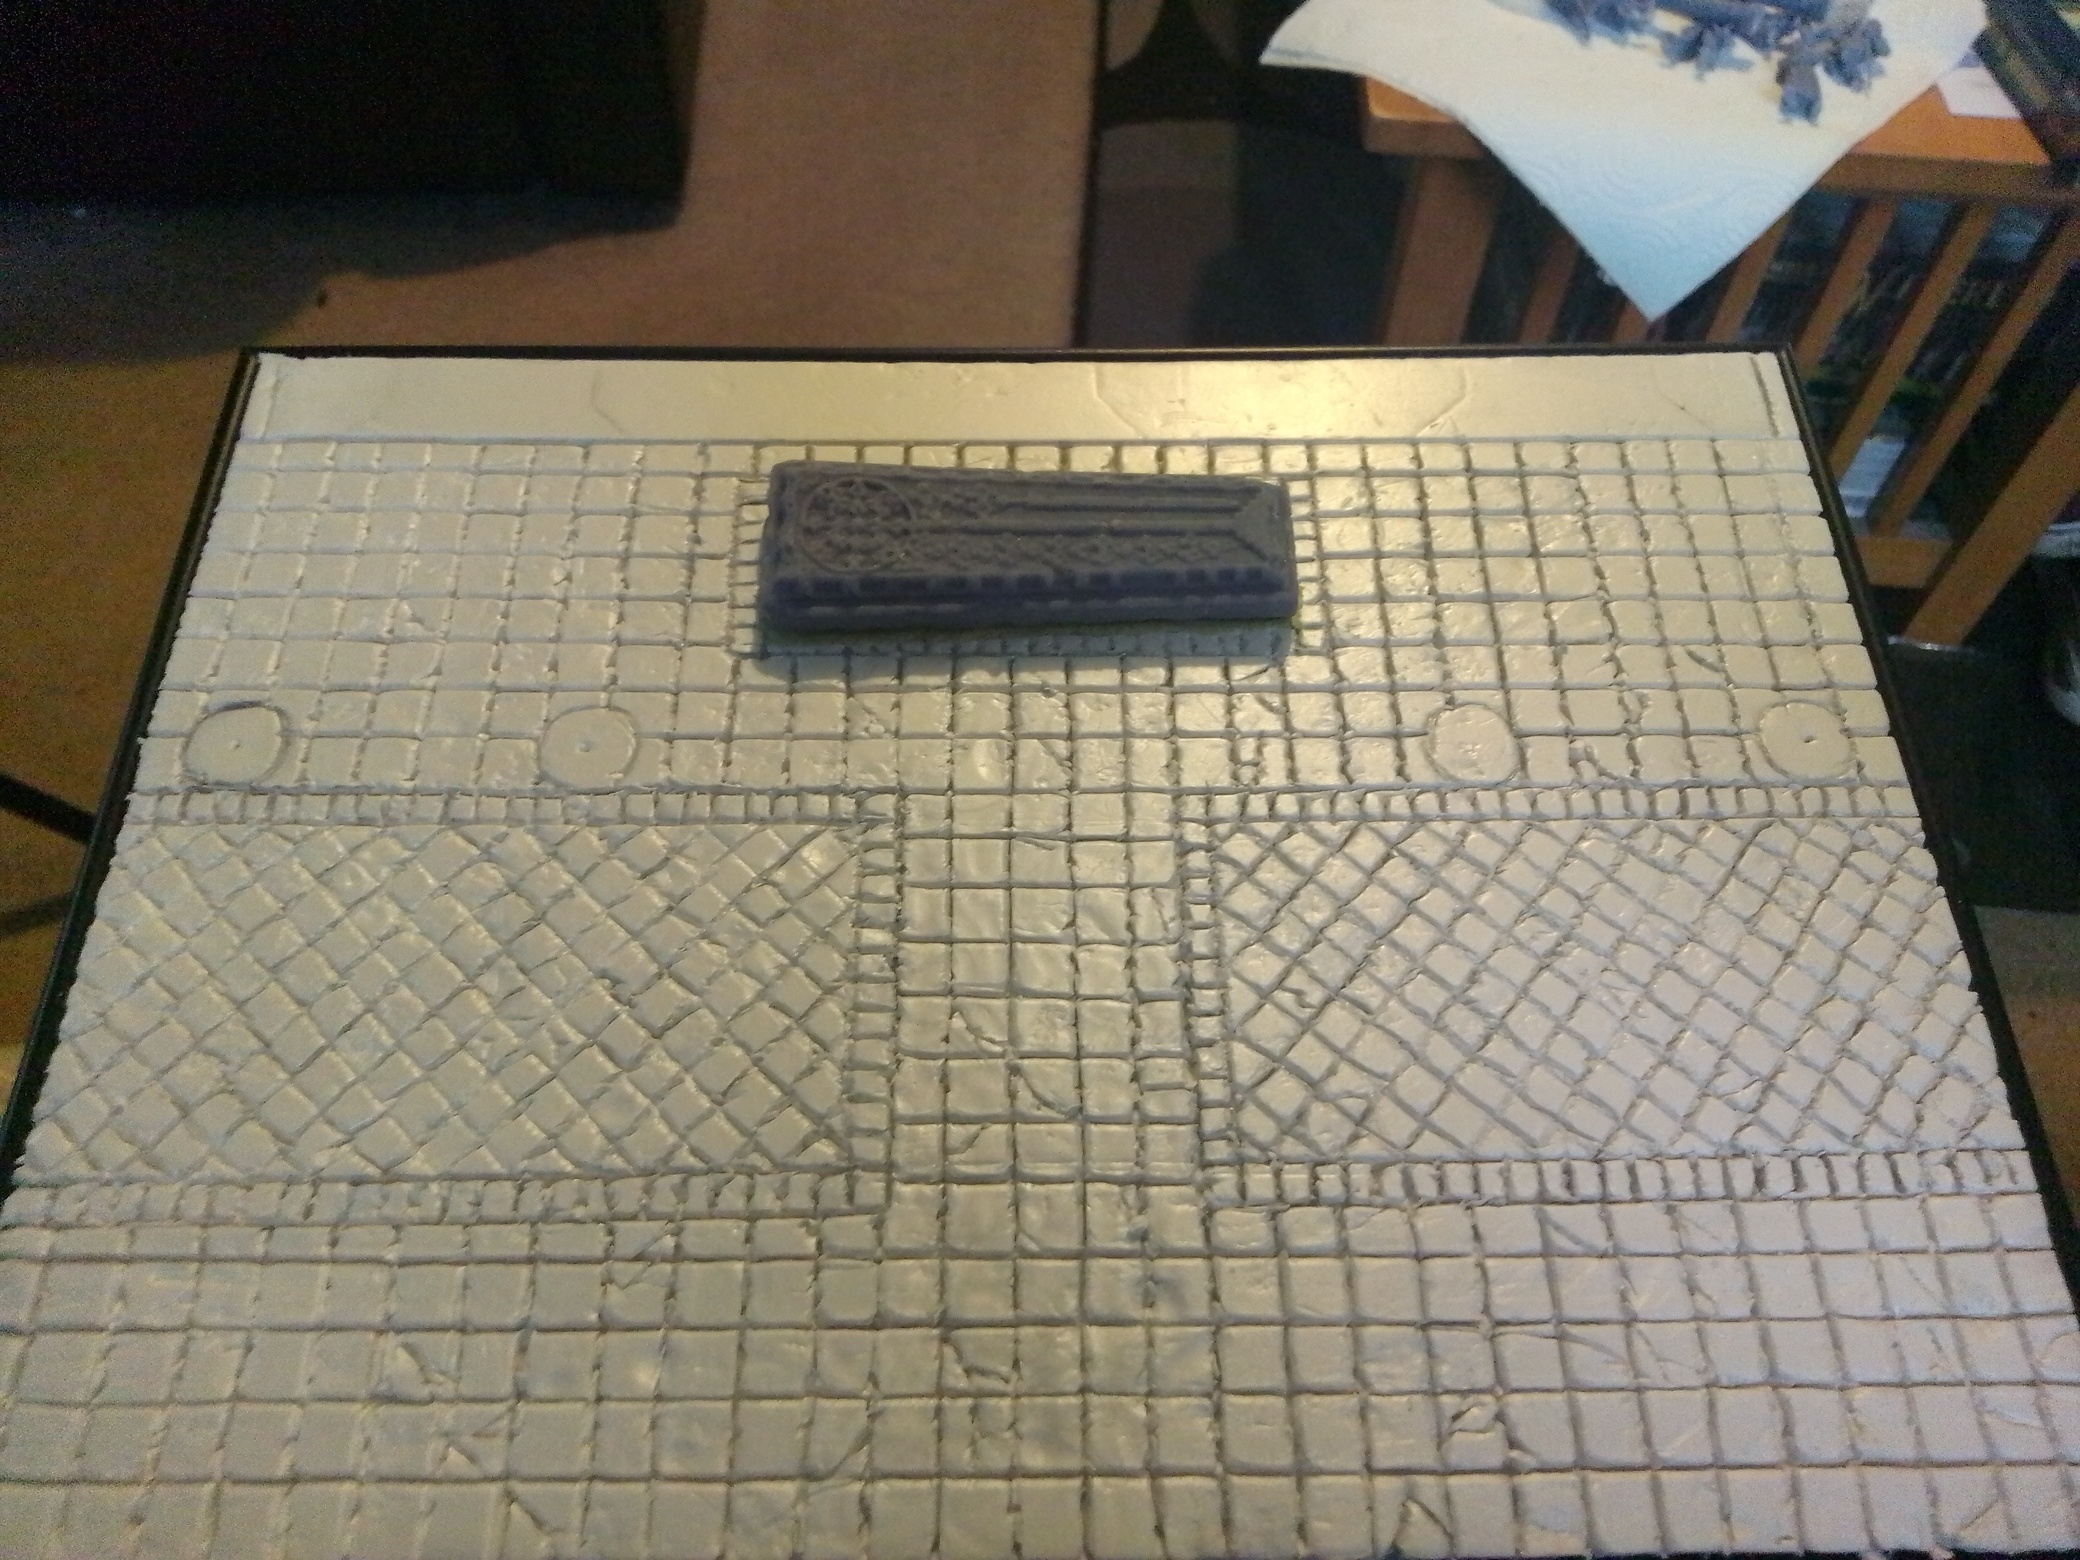
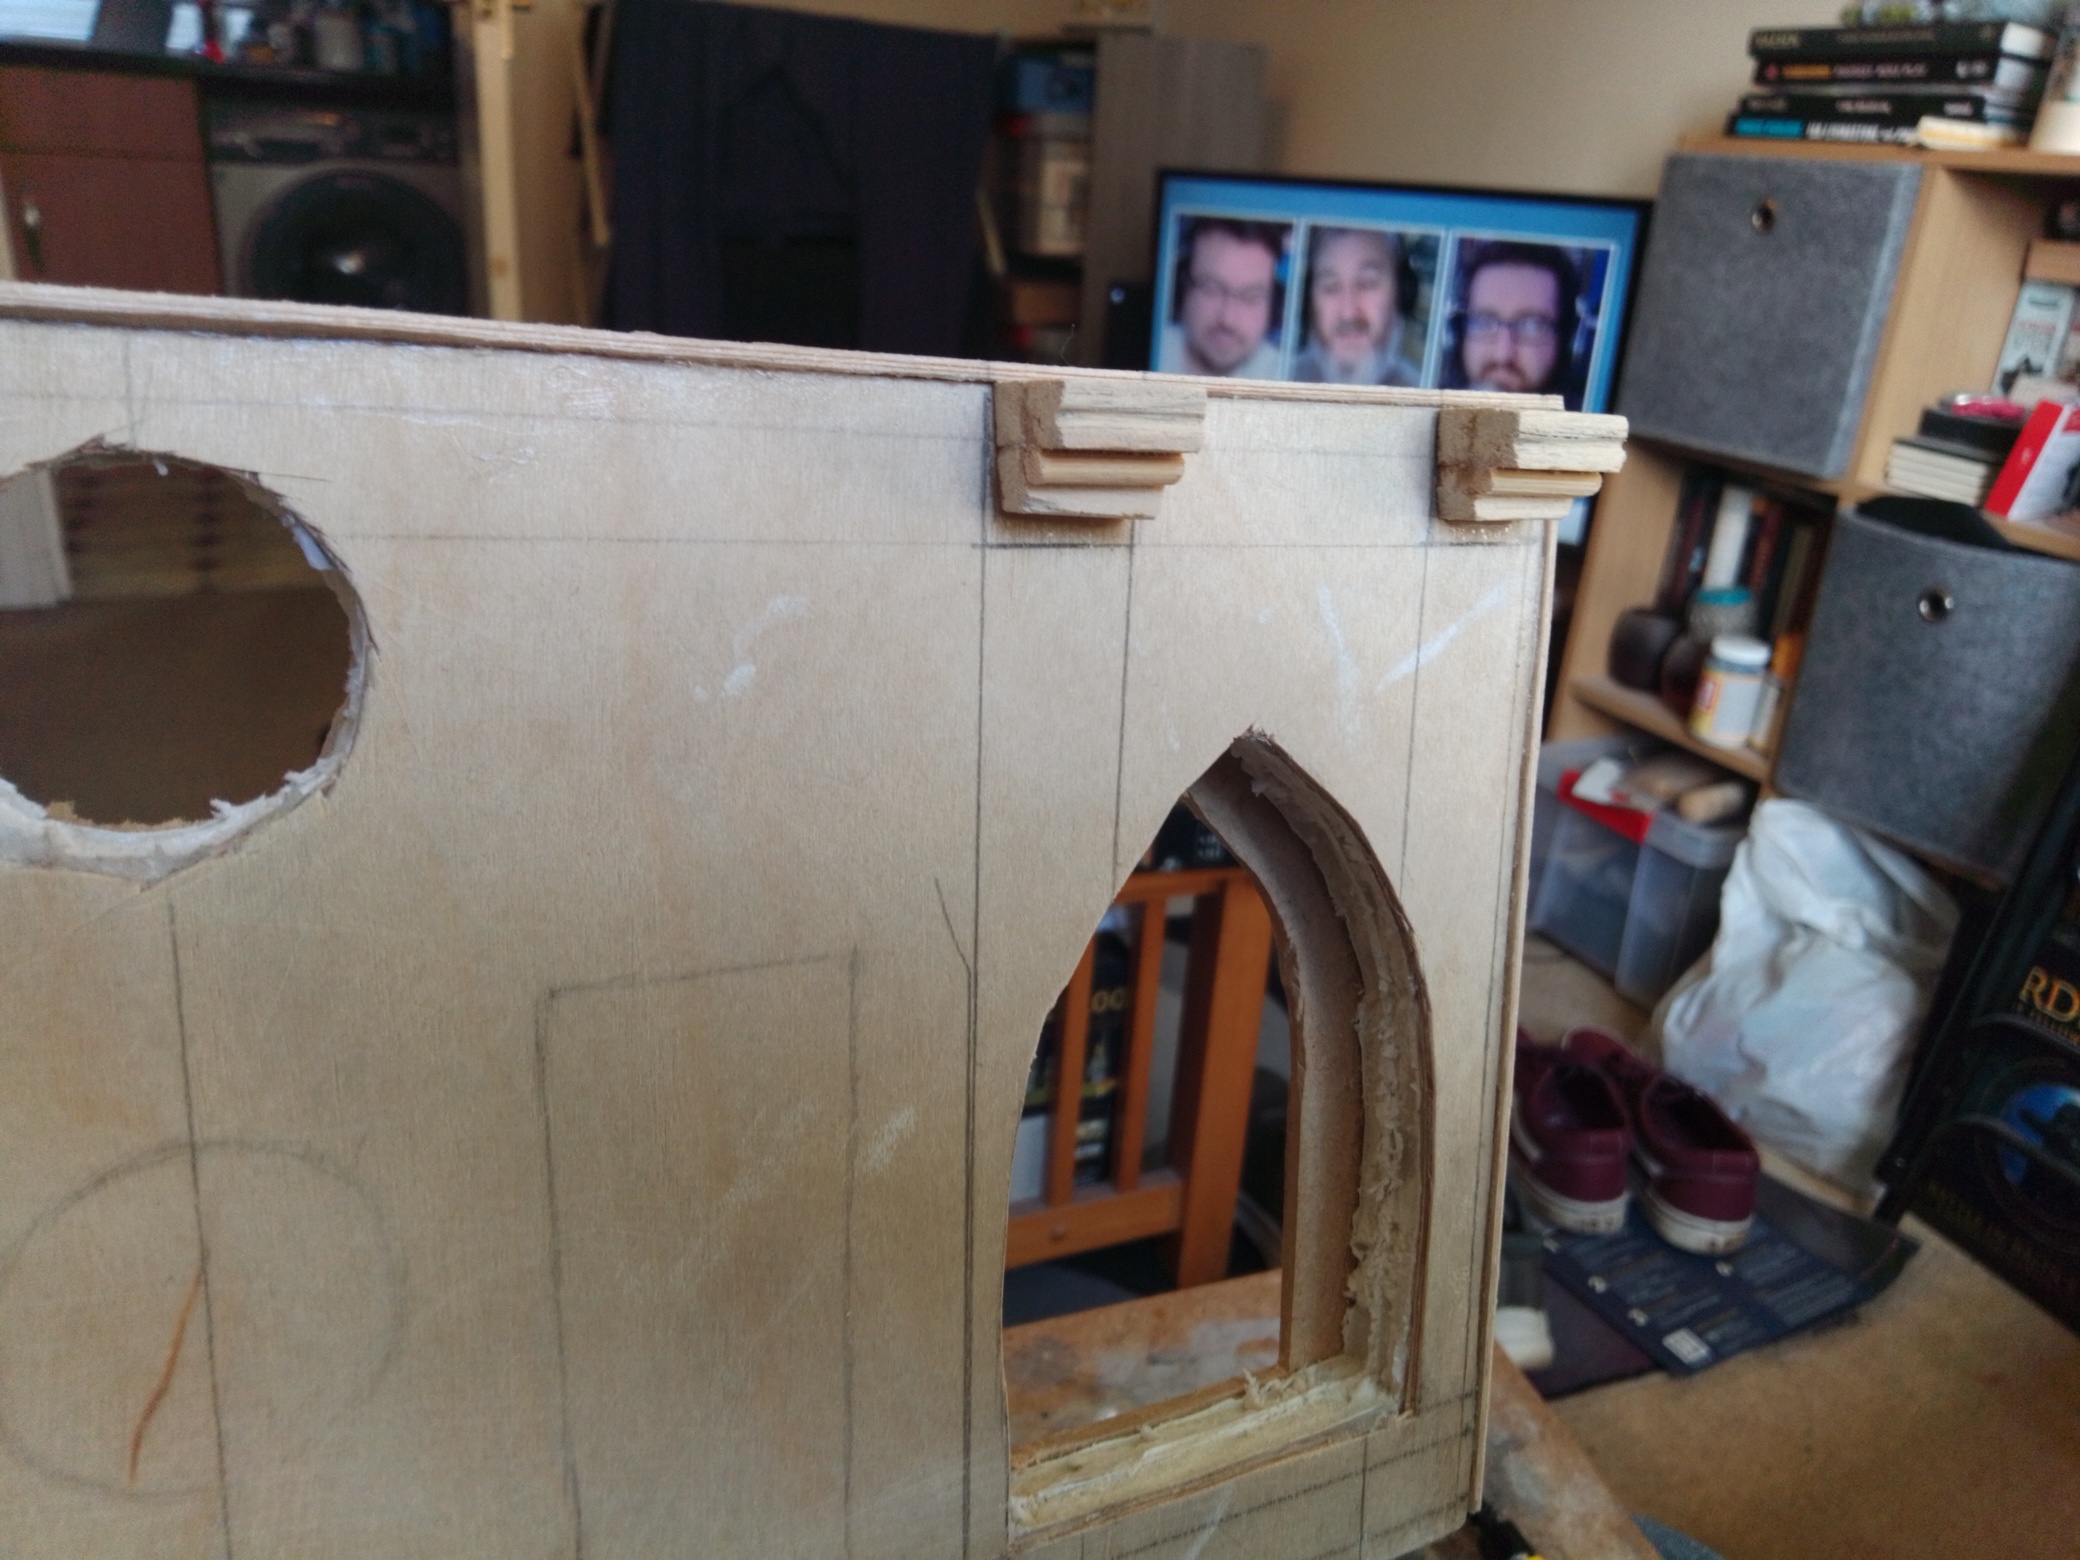
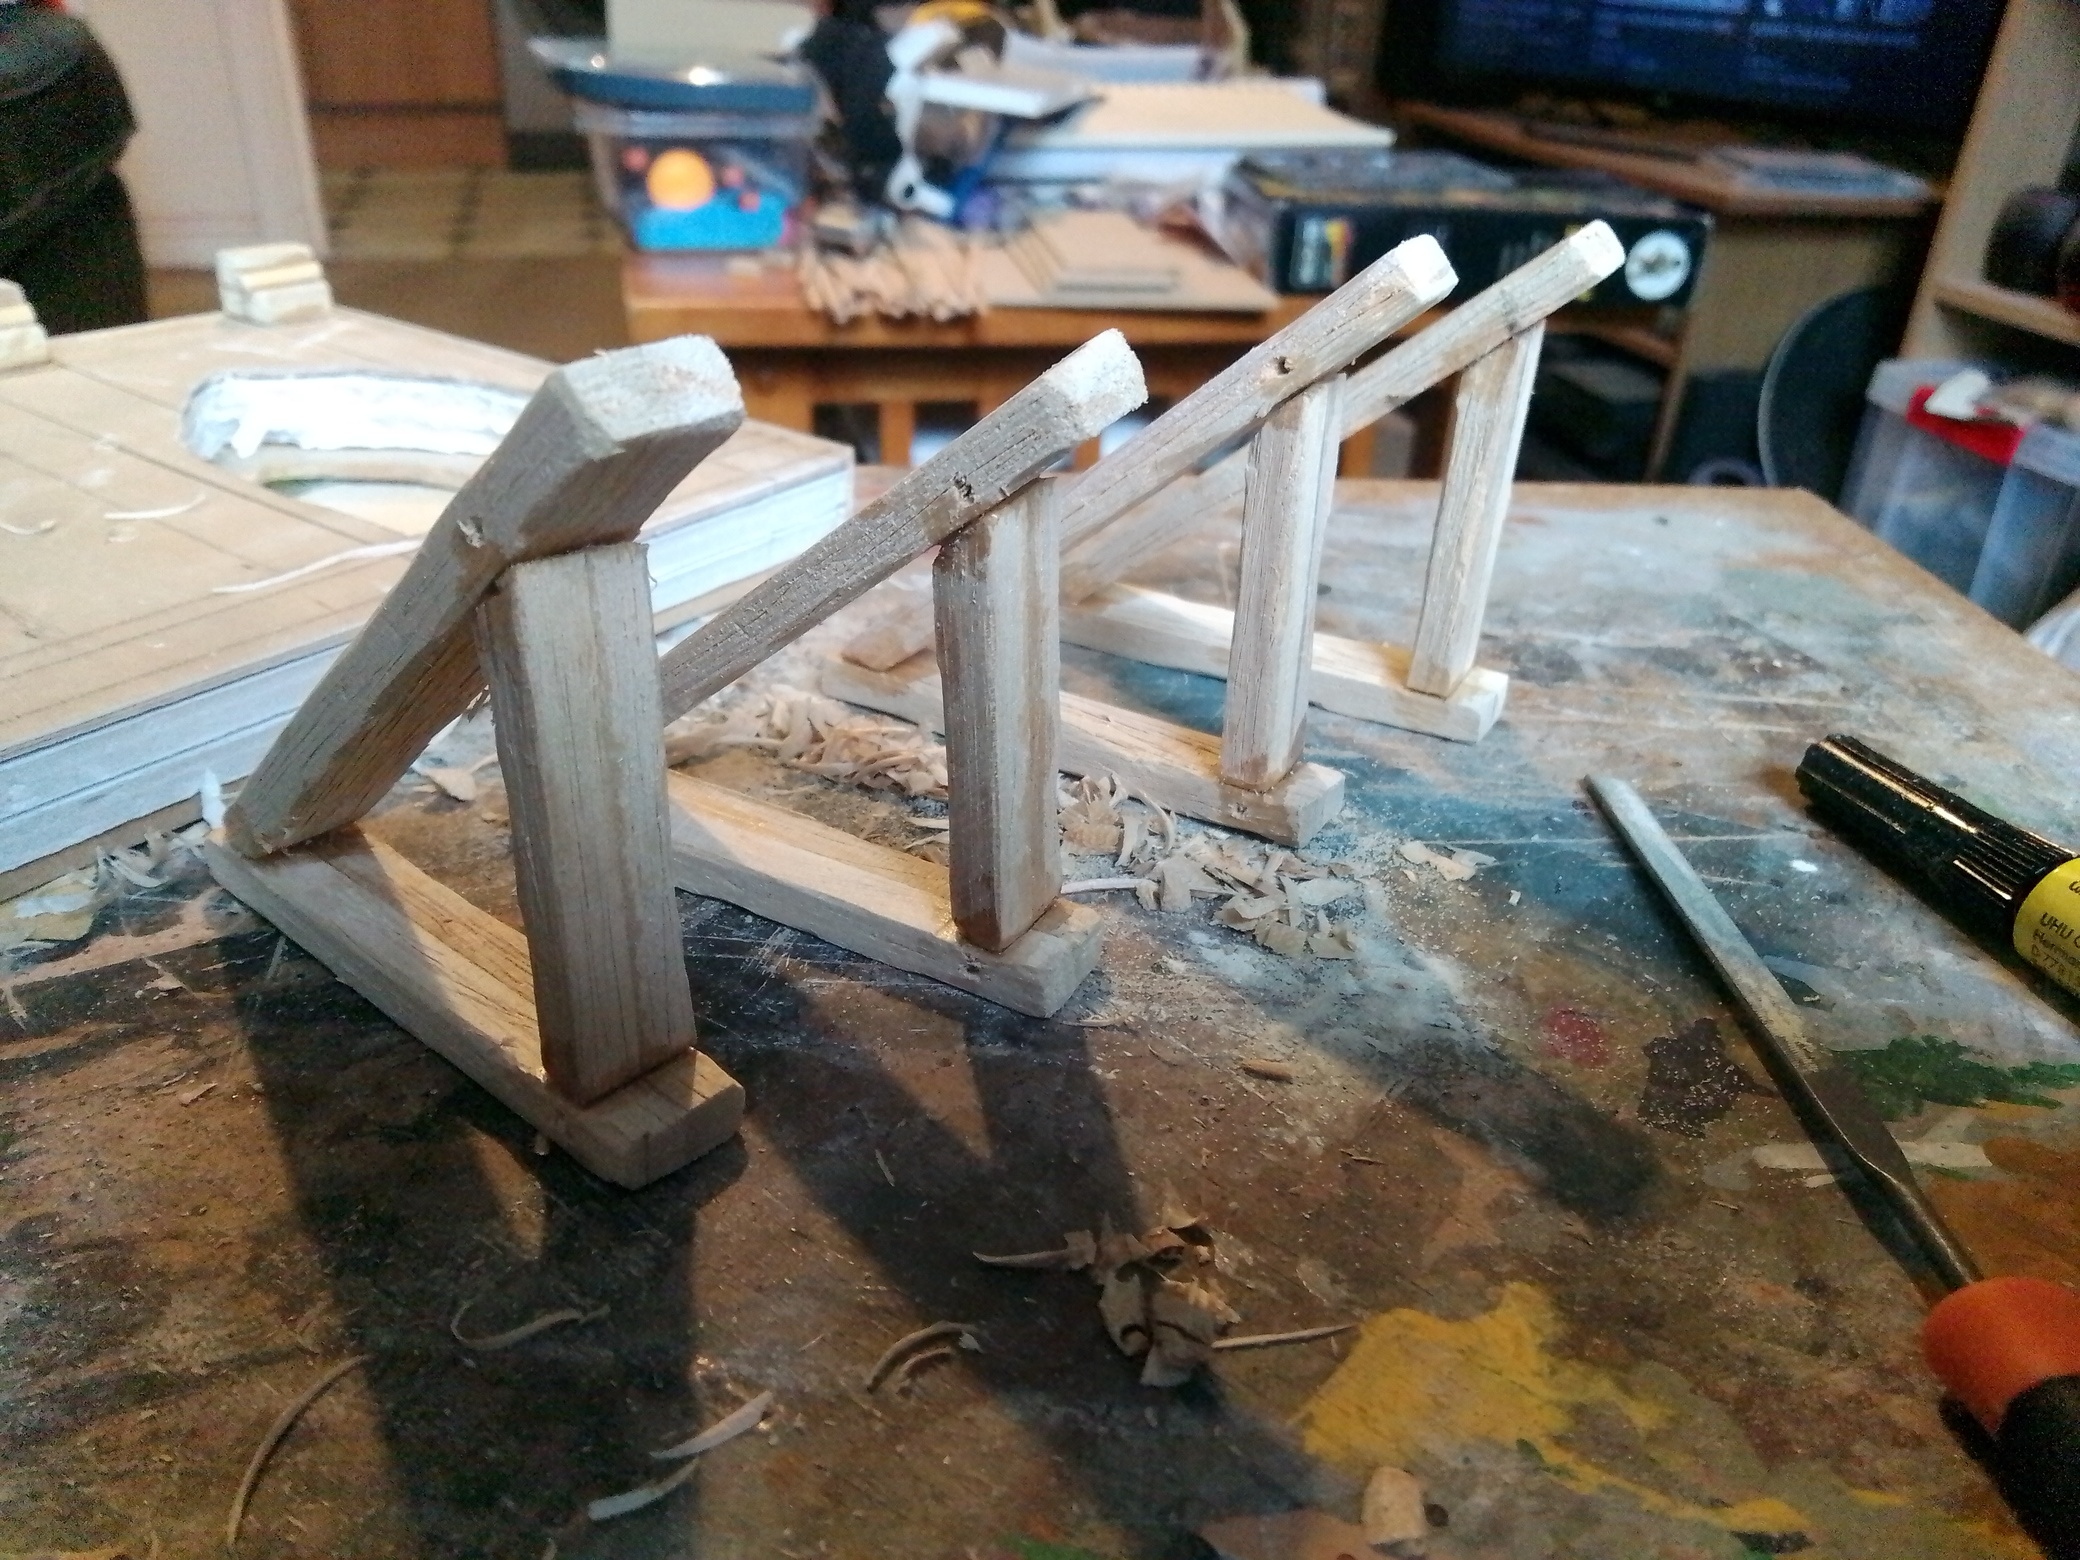
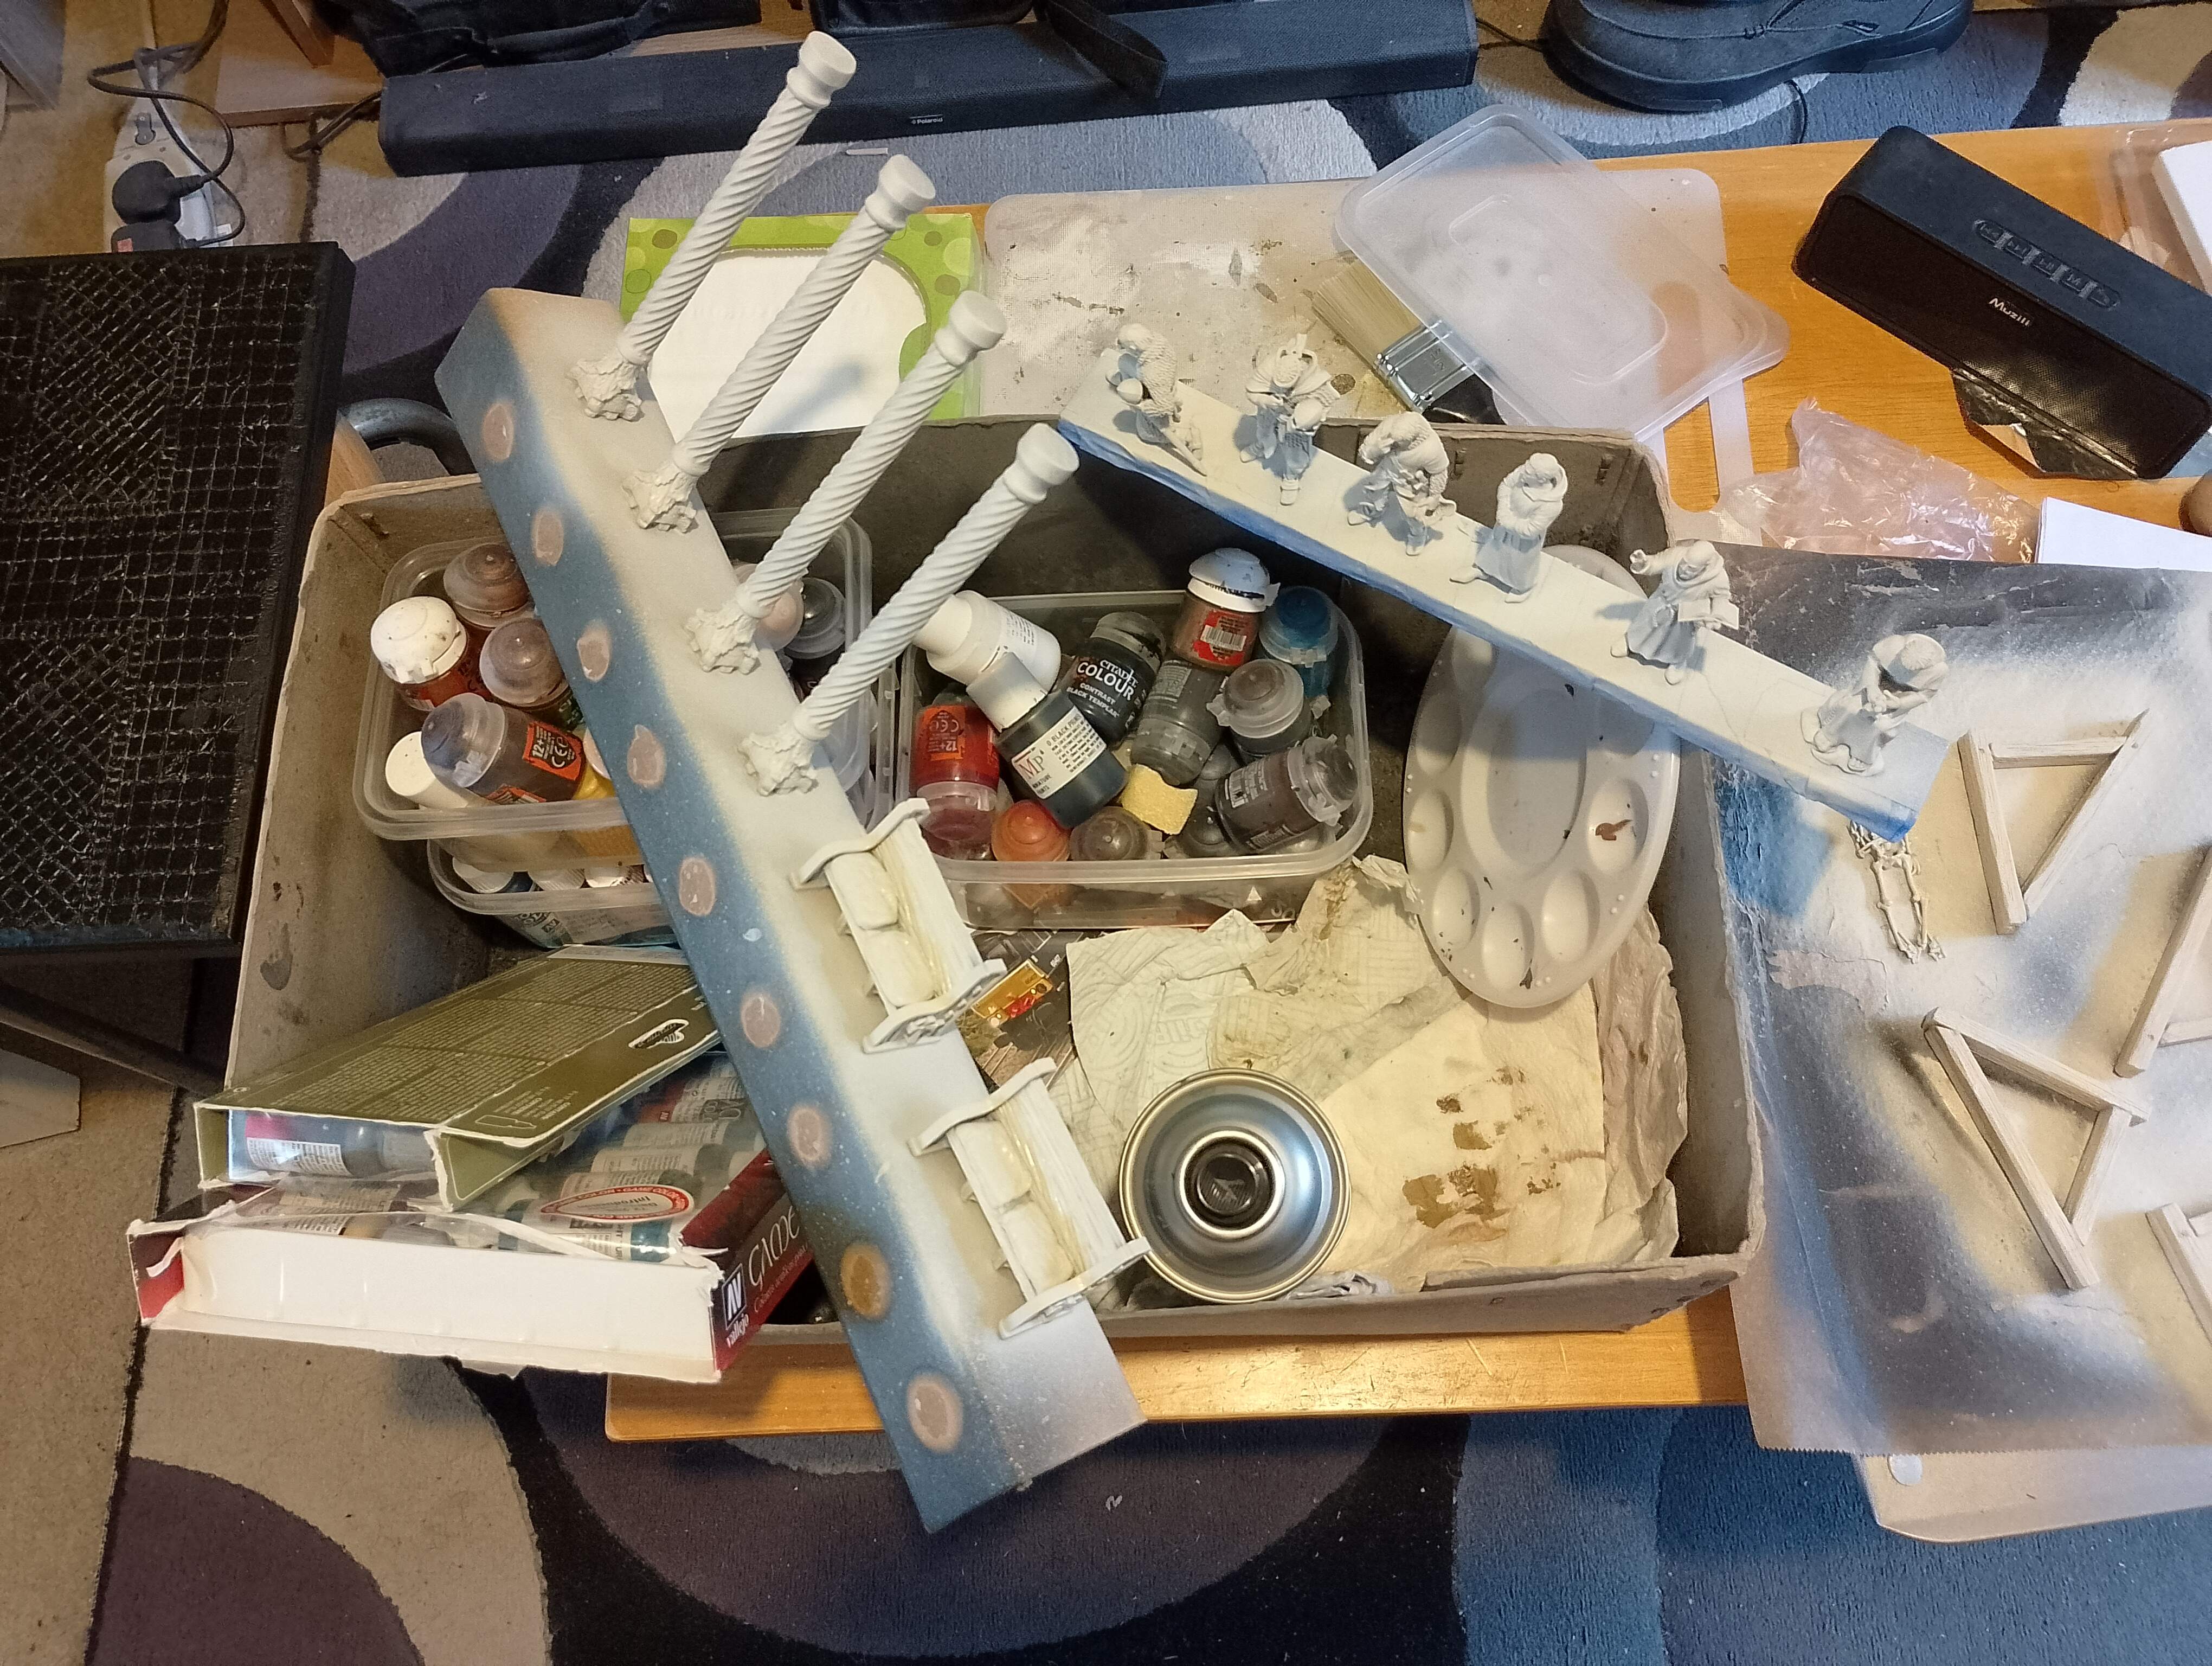
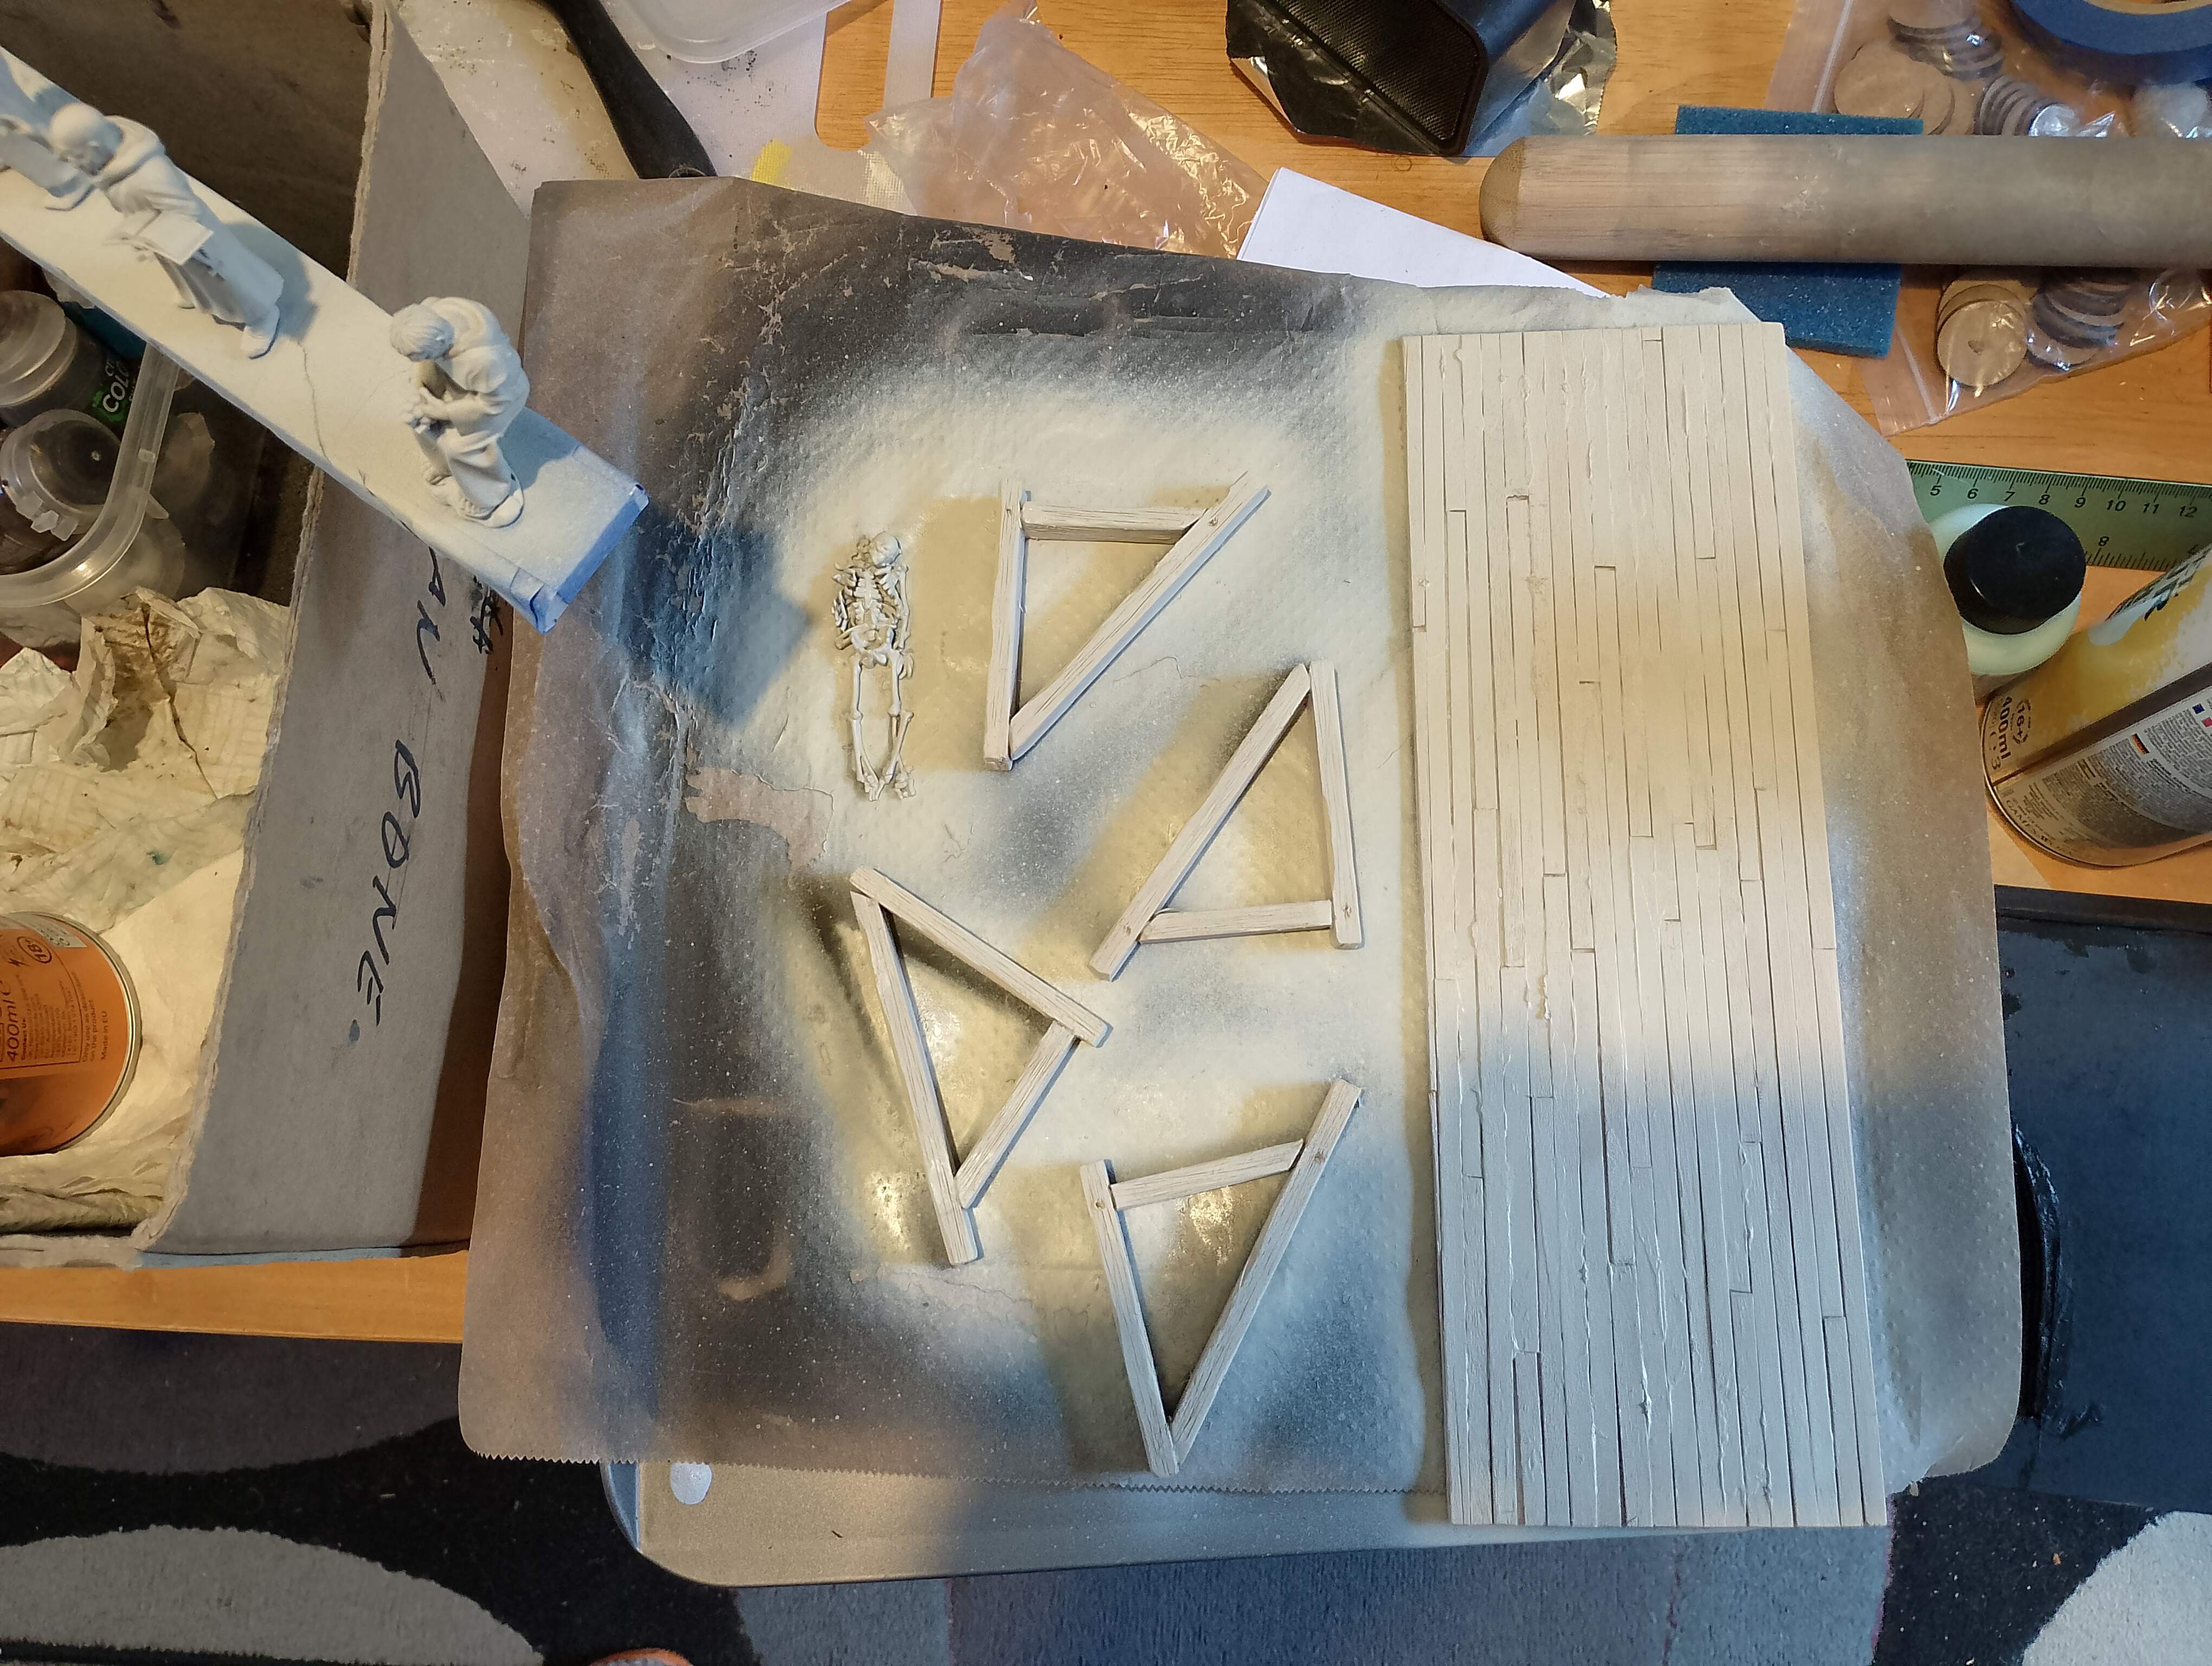
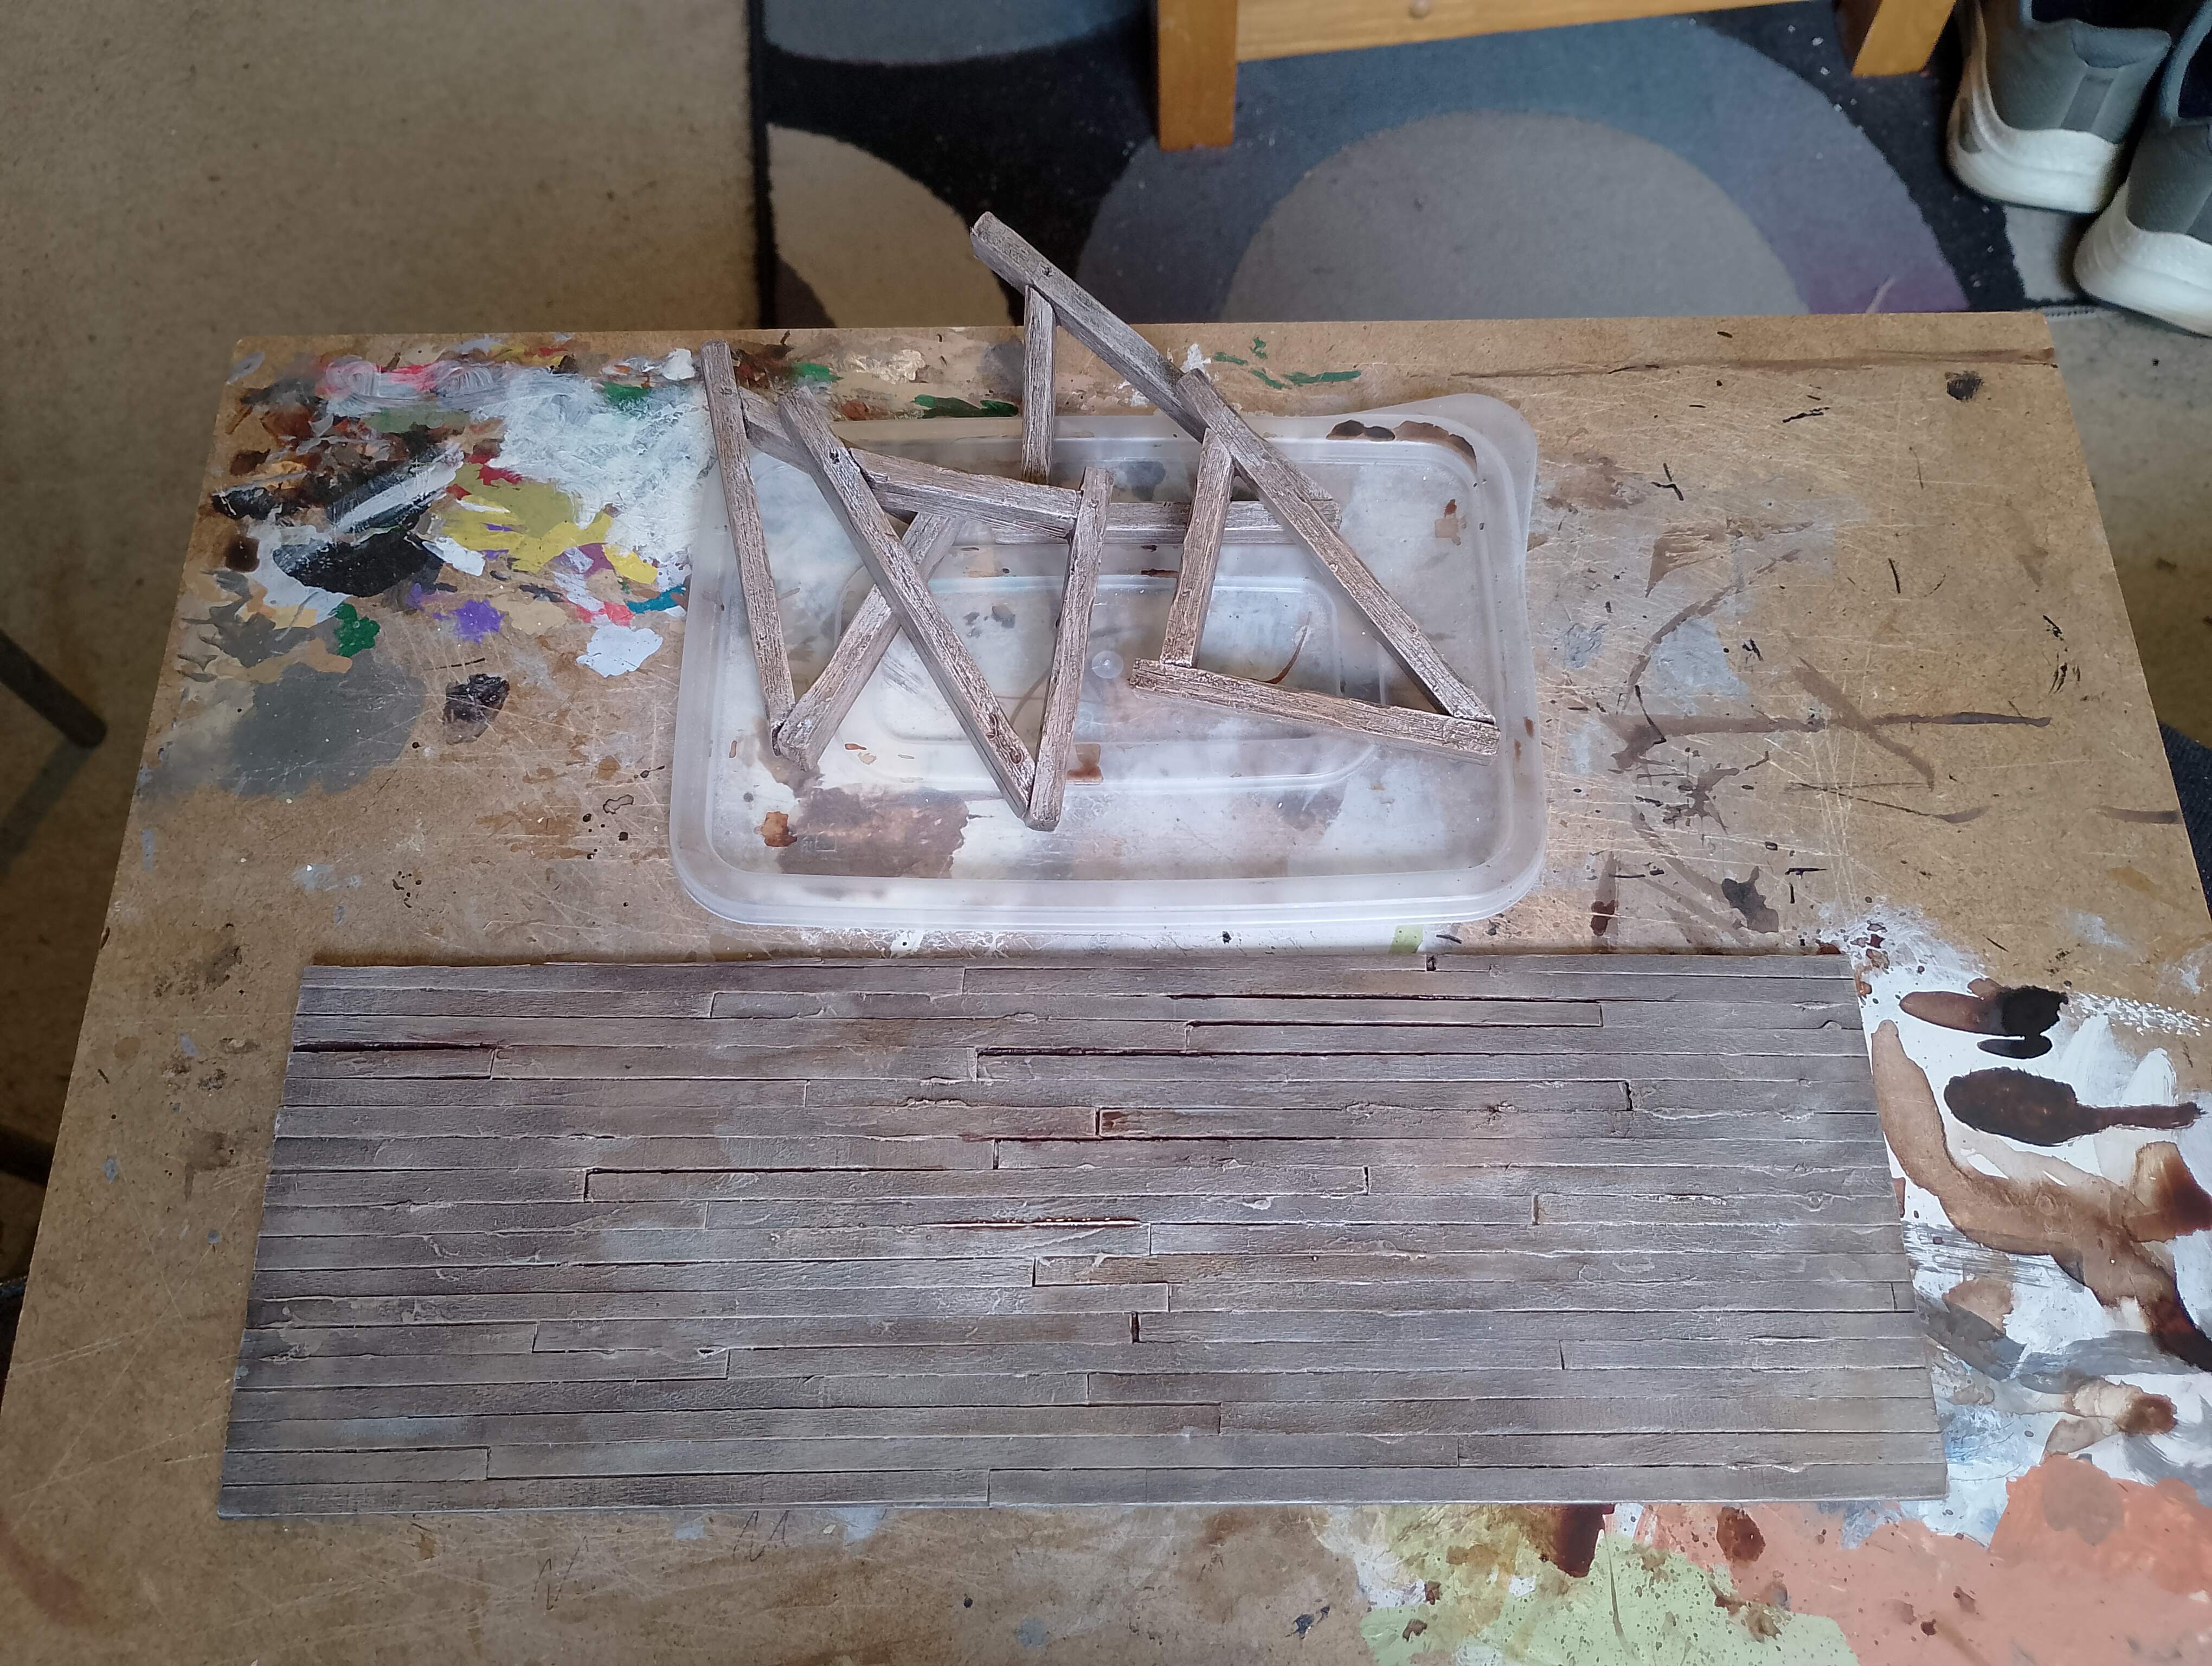
After a bit of initial planning, I drew a set of accurate templates for the church diorama. For the floor, I used XPS foam and carved a tile pattern into it and marked out where the sarcophagus and pillars were going to be placed. For the wall, I used two sheets of foam cores and sort of clad it in balsa sheets. I cut three window openings and marked out where I wanted the wall murals to eventually be. I also decided to put in a section of the roof and made carved supports for the joists. I used a mix of balsa wood and good old-fashioned coffee stirrers to make the roof, which will partially rest on some 3D printed columns (still to do that, so no pictures).
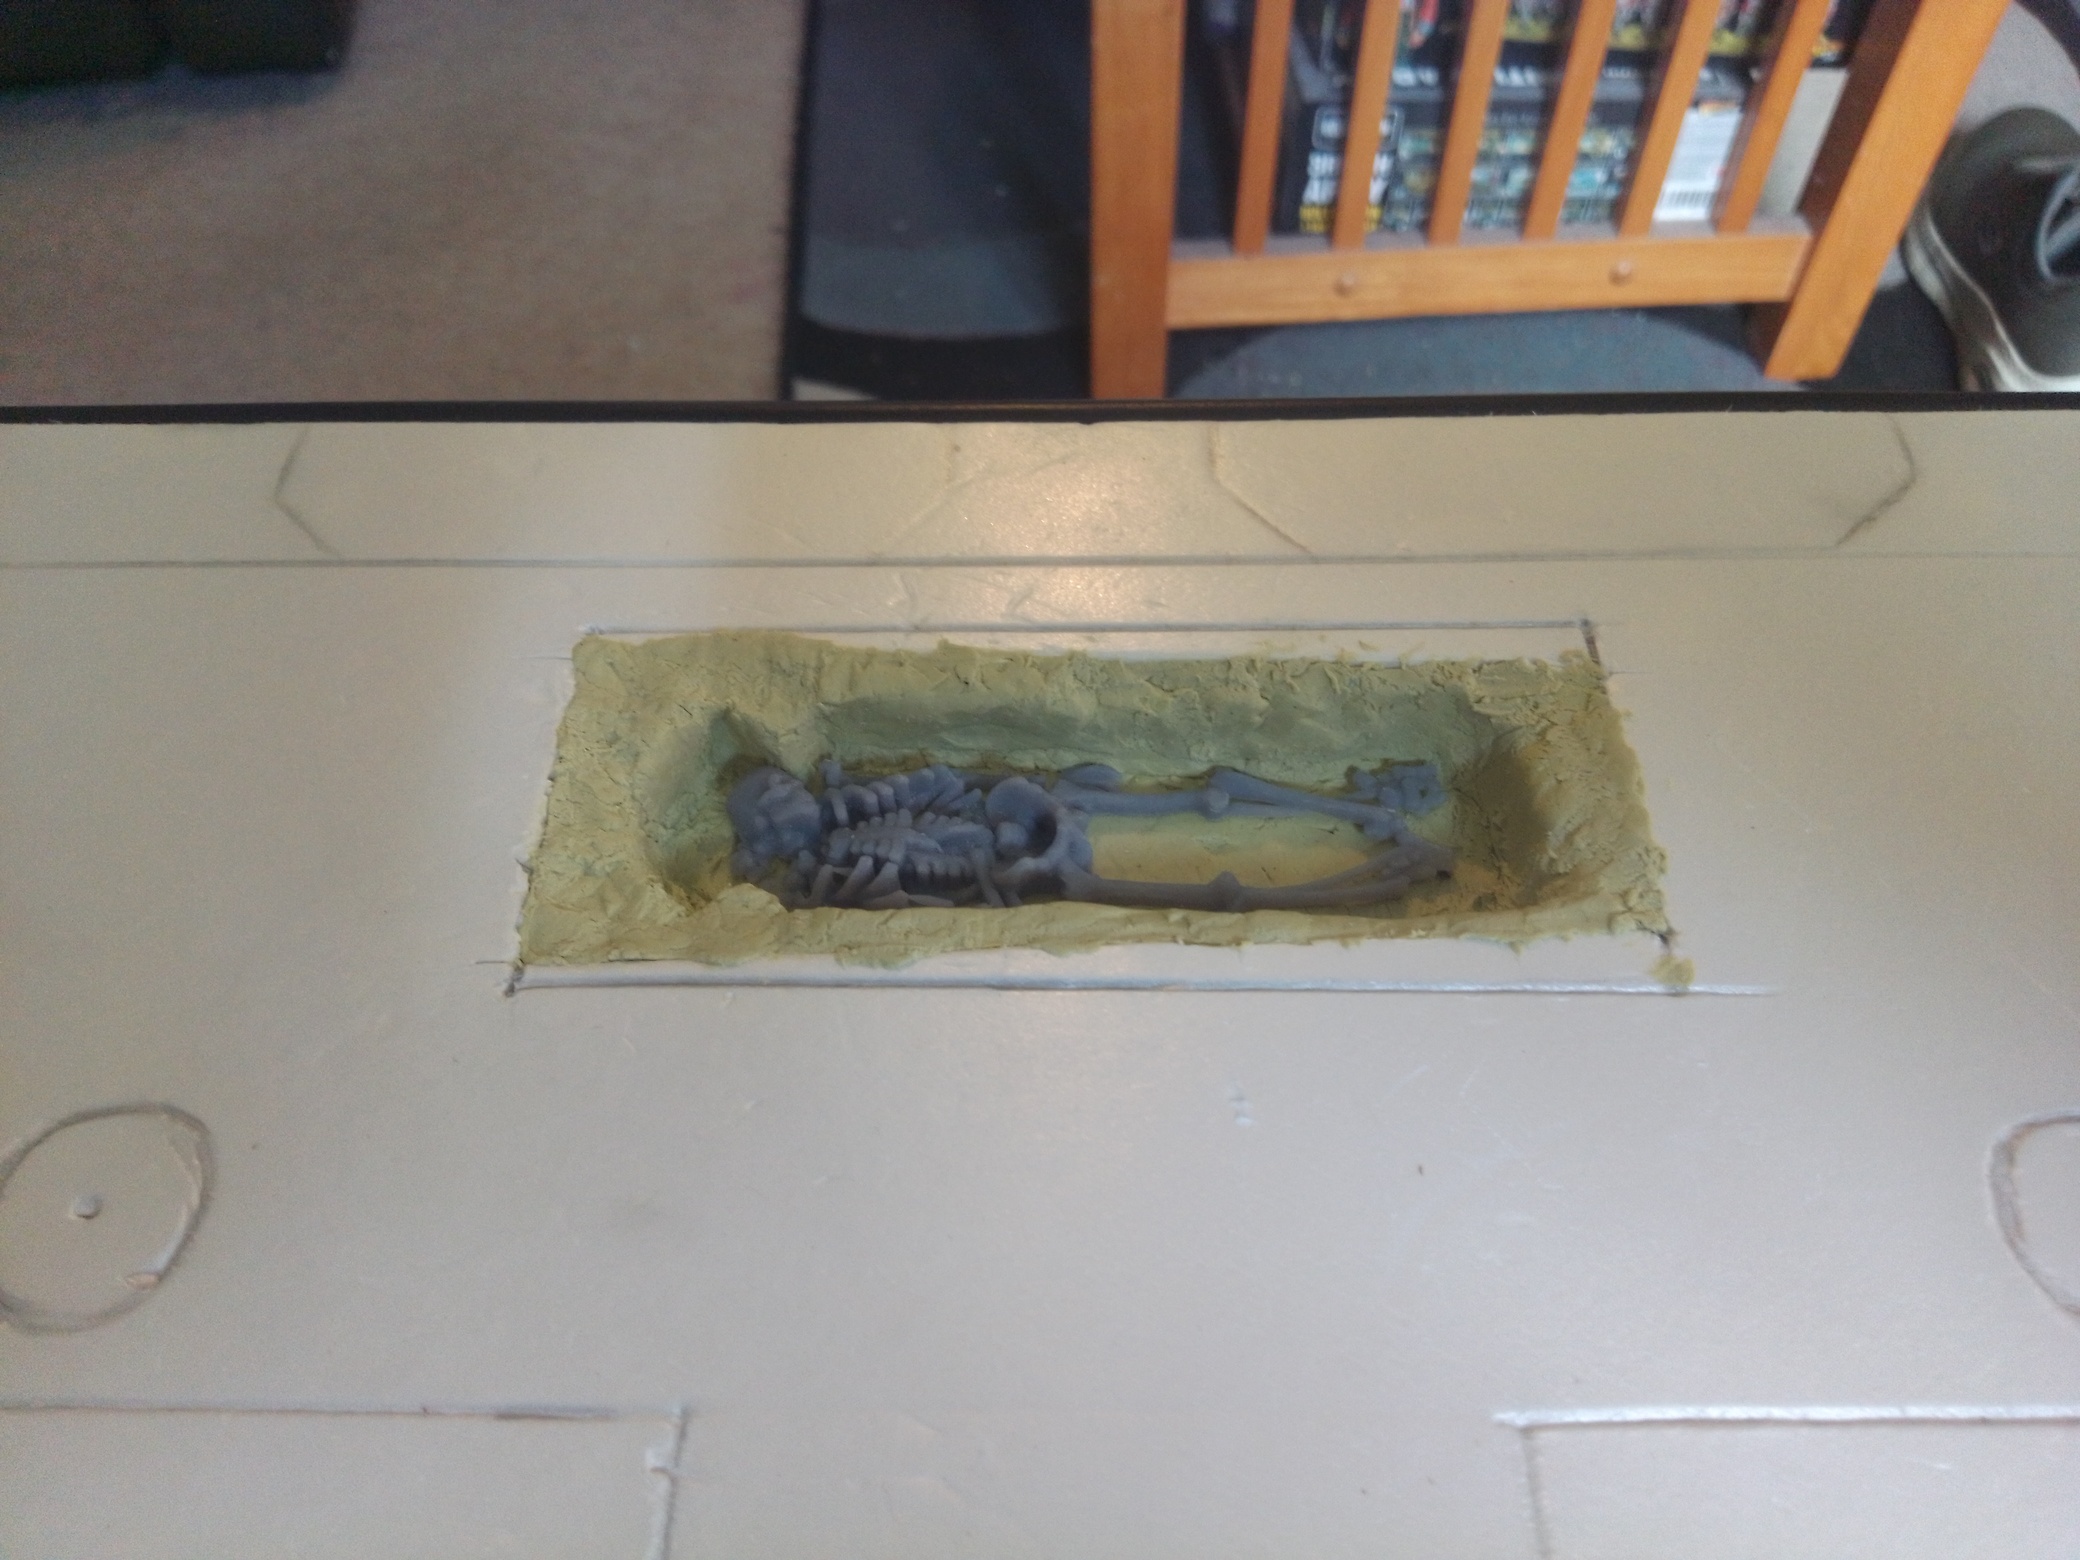
I carved out a hole in the XPS foam floor as well, and I made the main coffin out of Milliput and used my original 3D scan for the lid (just lopped off the bottom in Blender). The original excavation in 1912 said that the interior of the sarcophagus was shaped so that there was an area for the body and head, and I tried to replicate that as best as I could. I stuck a couple of magnets in as well as I thought it would be a nice reveal for folks to show a nice skelly from TableTop Miniatures in the coffin. Just in case anyone is interested, some of the bones survived in the coffin when it was opened, and there were bits of leather from a scabbard in there as well, though they’ve disappeared in the intervening years, probably in a box somewhere in the local museum.