


Painting Hive Lazarus Hex Tiles – What I did.
Lazagram Side Questing
Recommendations: 9
About the Project
Side Questing to aid my procrastination about something else I should definitely be doing first. Those bits that don't deserve their own fully blow project. Enjoy
Related Genre: Science Fiction
This Project is Active
My Magical Orbs Painting Comp NOV
Theme of the month Magical Explosion!
This month’s entry had to be performed with ready-made plastic, as I have been suffering from a broken hot end. Ebay provided. The models are the Warhammer Age of Sigmar Geminids of Uhl-gysh Endless Spell. I needed a break from my current main project, and that’s why this isn’t a last-minute rush like normal. I’ve renamed them My Magical Orbs, as the previous seemed something of a mouthful. I get Wizard casts magical testicles from them. I was struggling with the explosion part of the theme; these are more magical in the moment just before the collision and its explosive conclusion.
I thought I would try my hand at some wet blending of contrast paints to achieve a rippling energy effect. Not my wheelhouse, effects, so a fun little project to try my hand at. I used a mix of Citadel contrast paints to wet-blend the colours, with some layer and technical paints for highlighting, and then applied a light coat of gloss spray lacquer.
Fun as usual, nice to paint something on the different side for me. Hurrah.
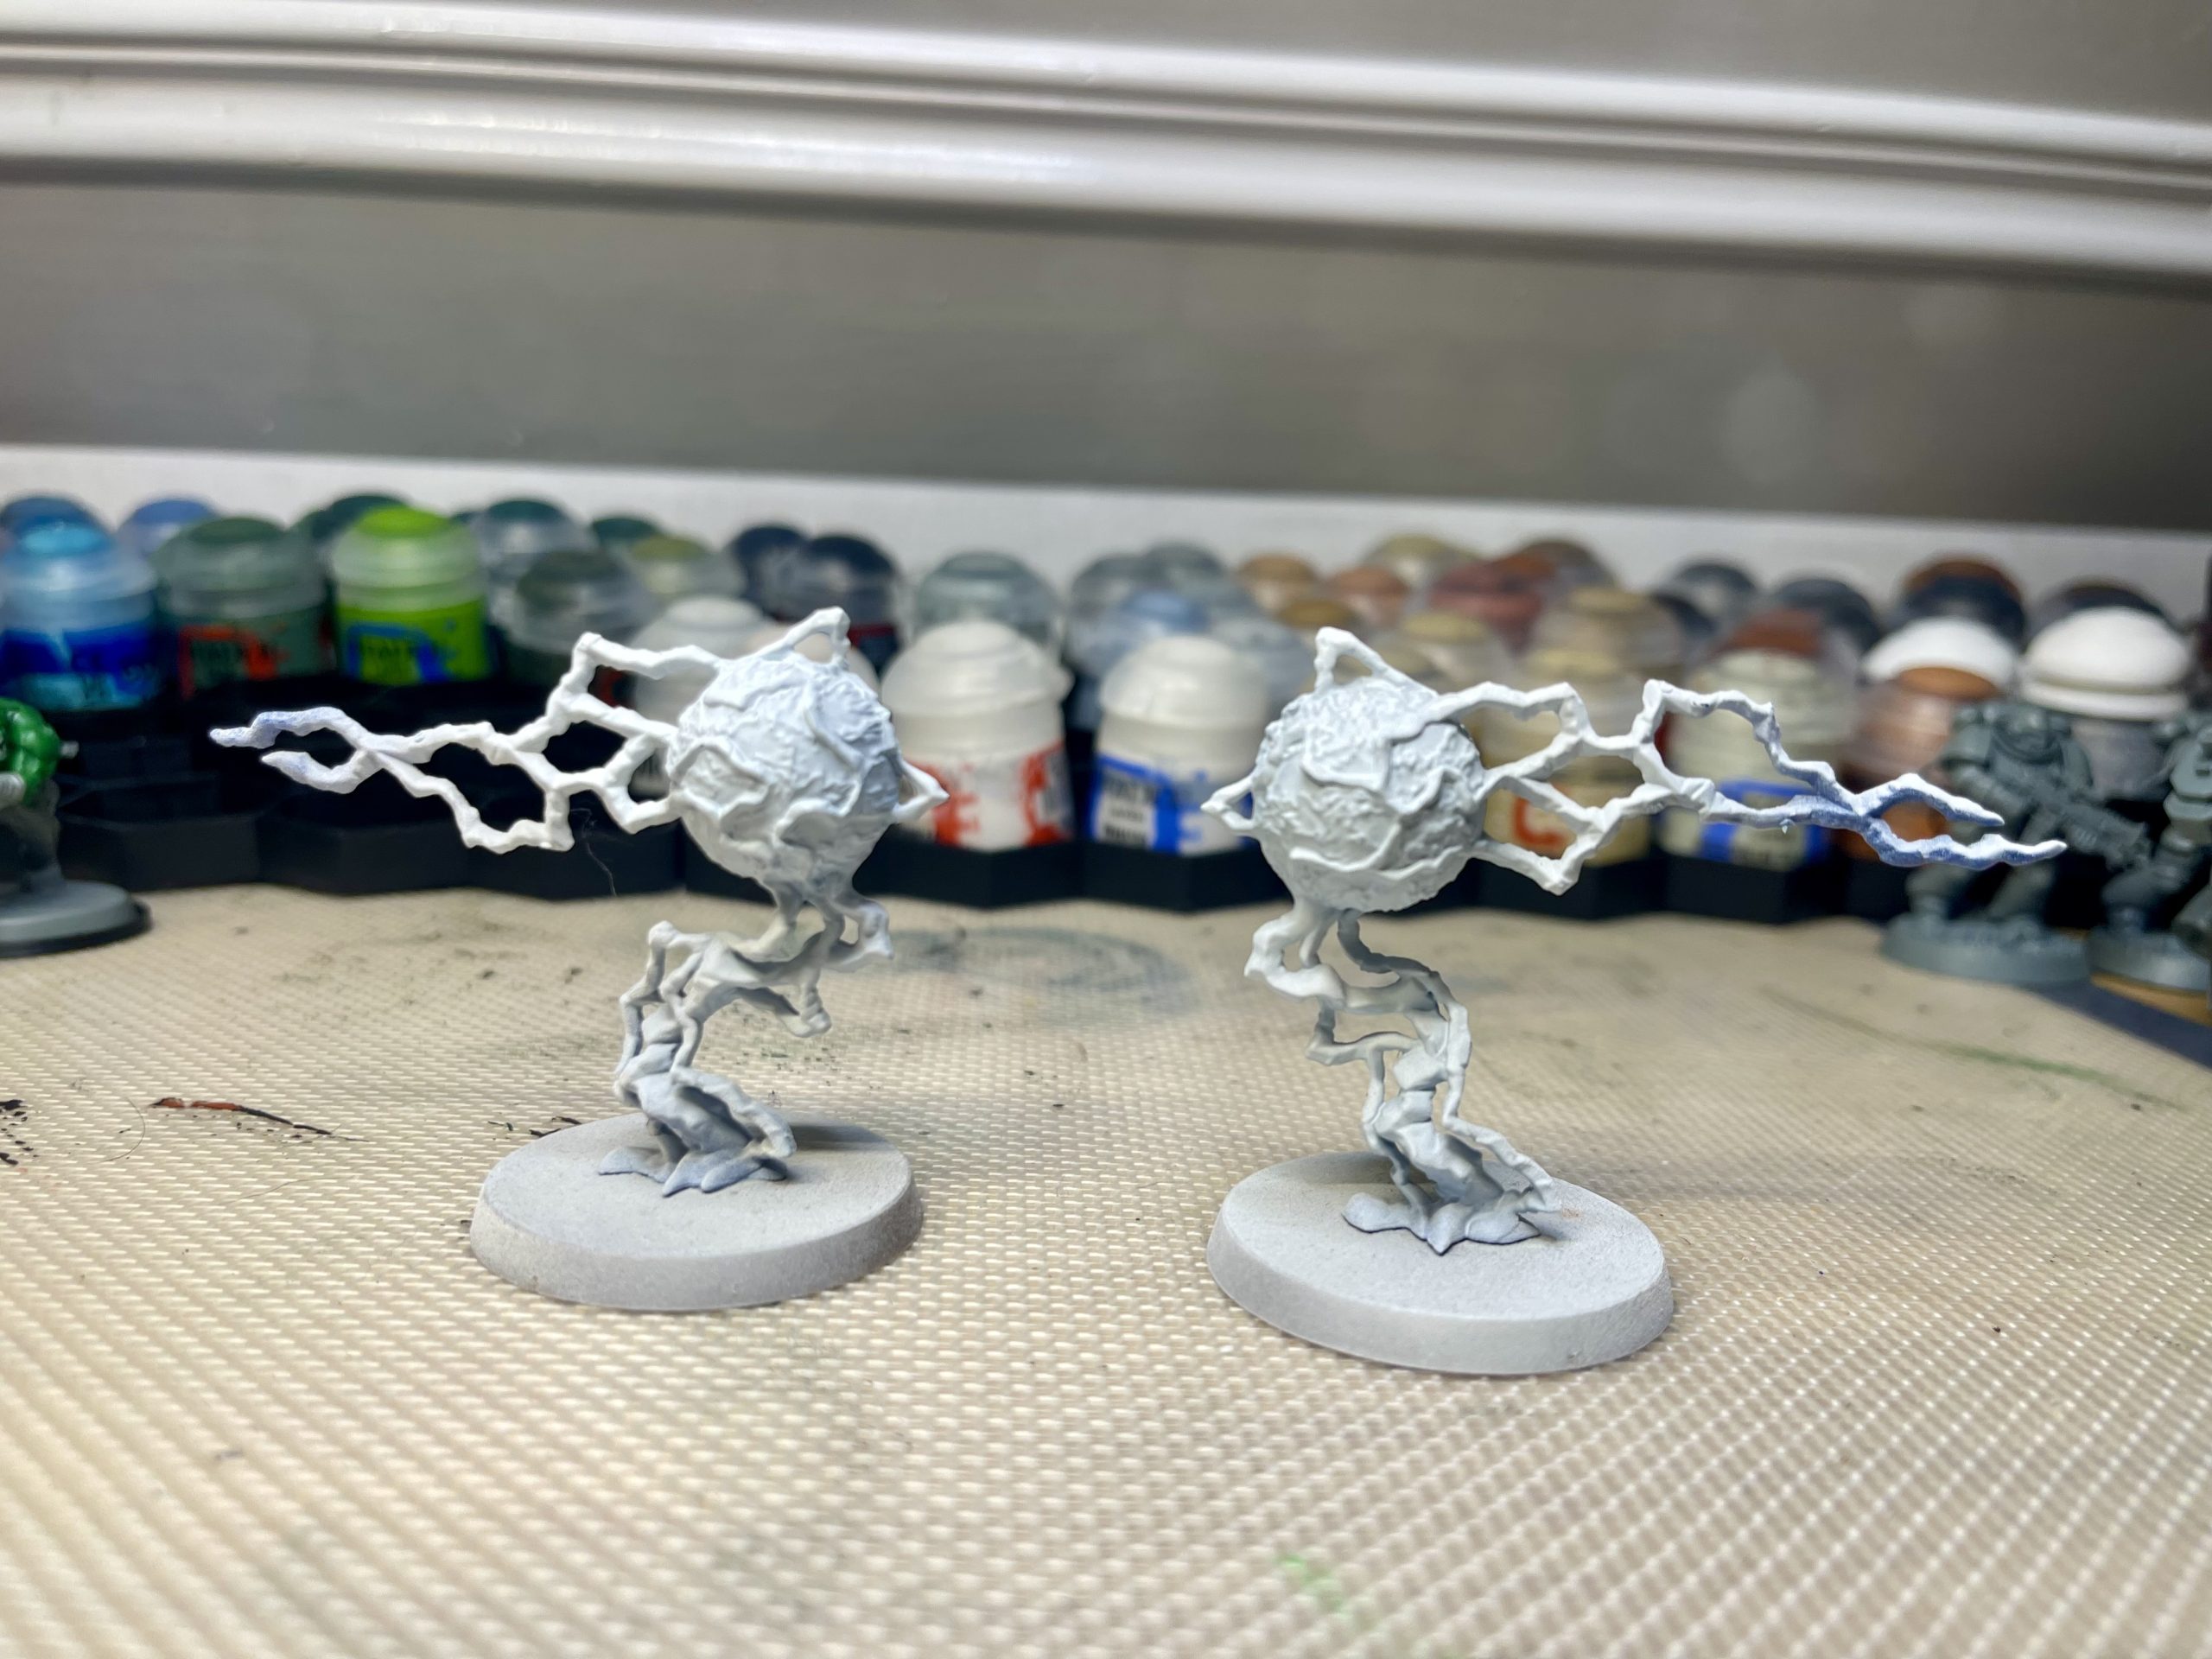 How they arrived.
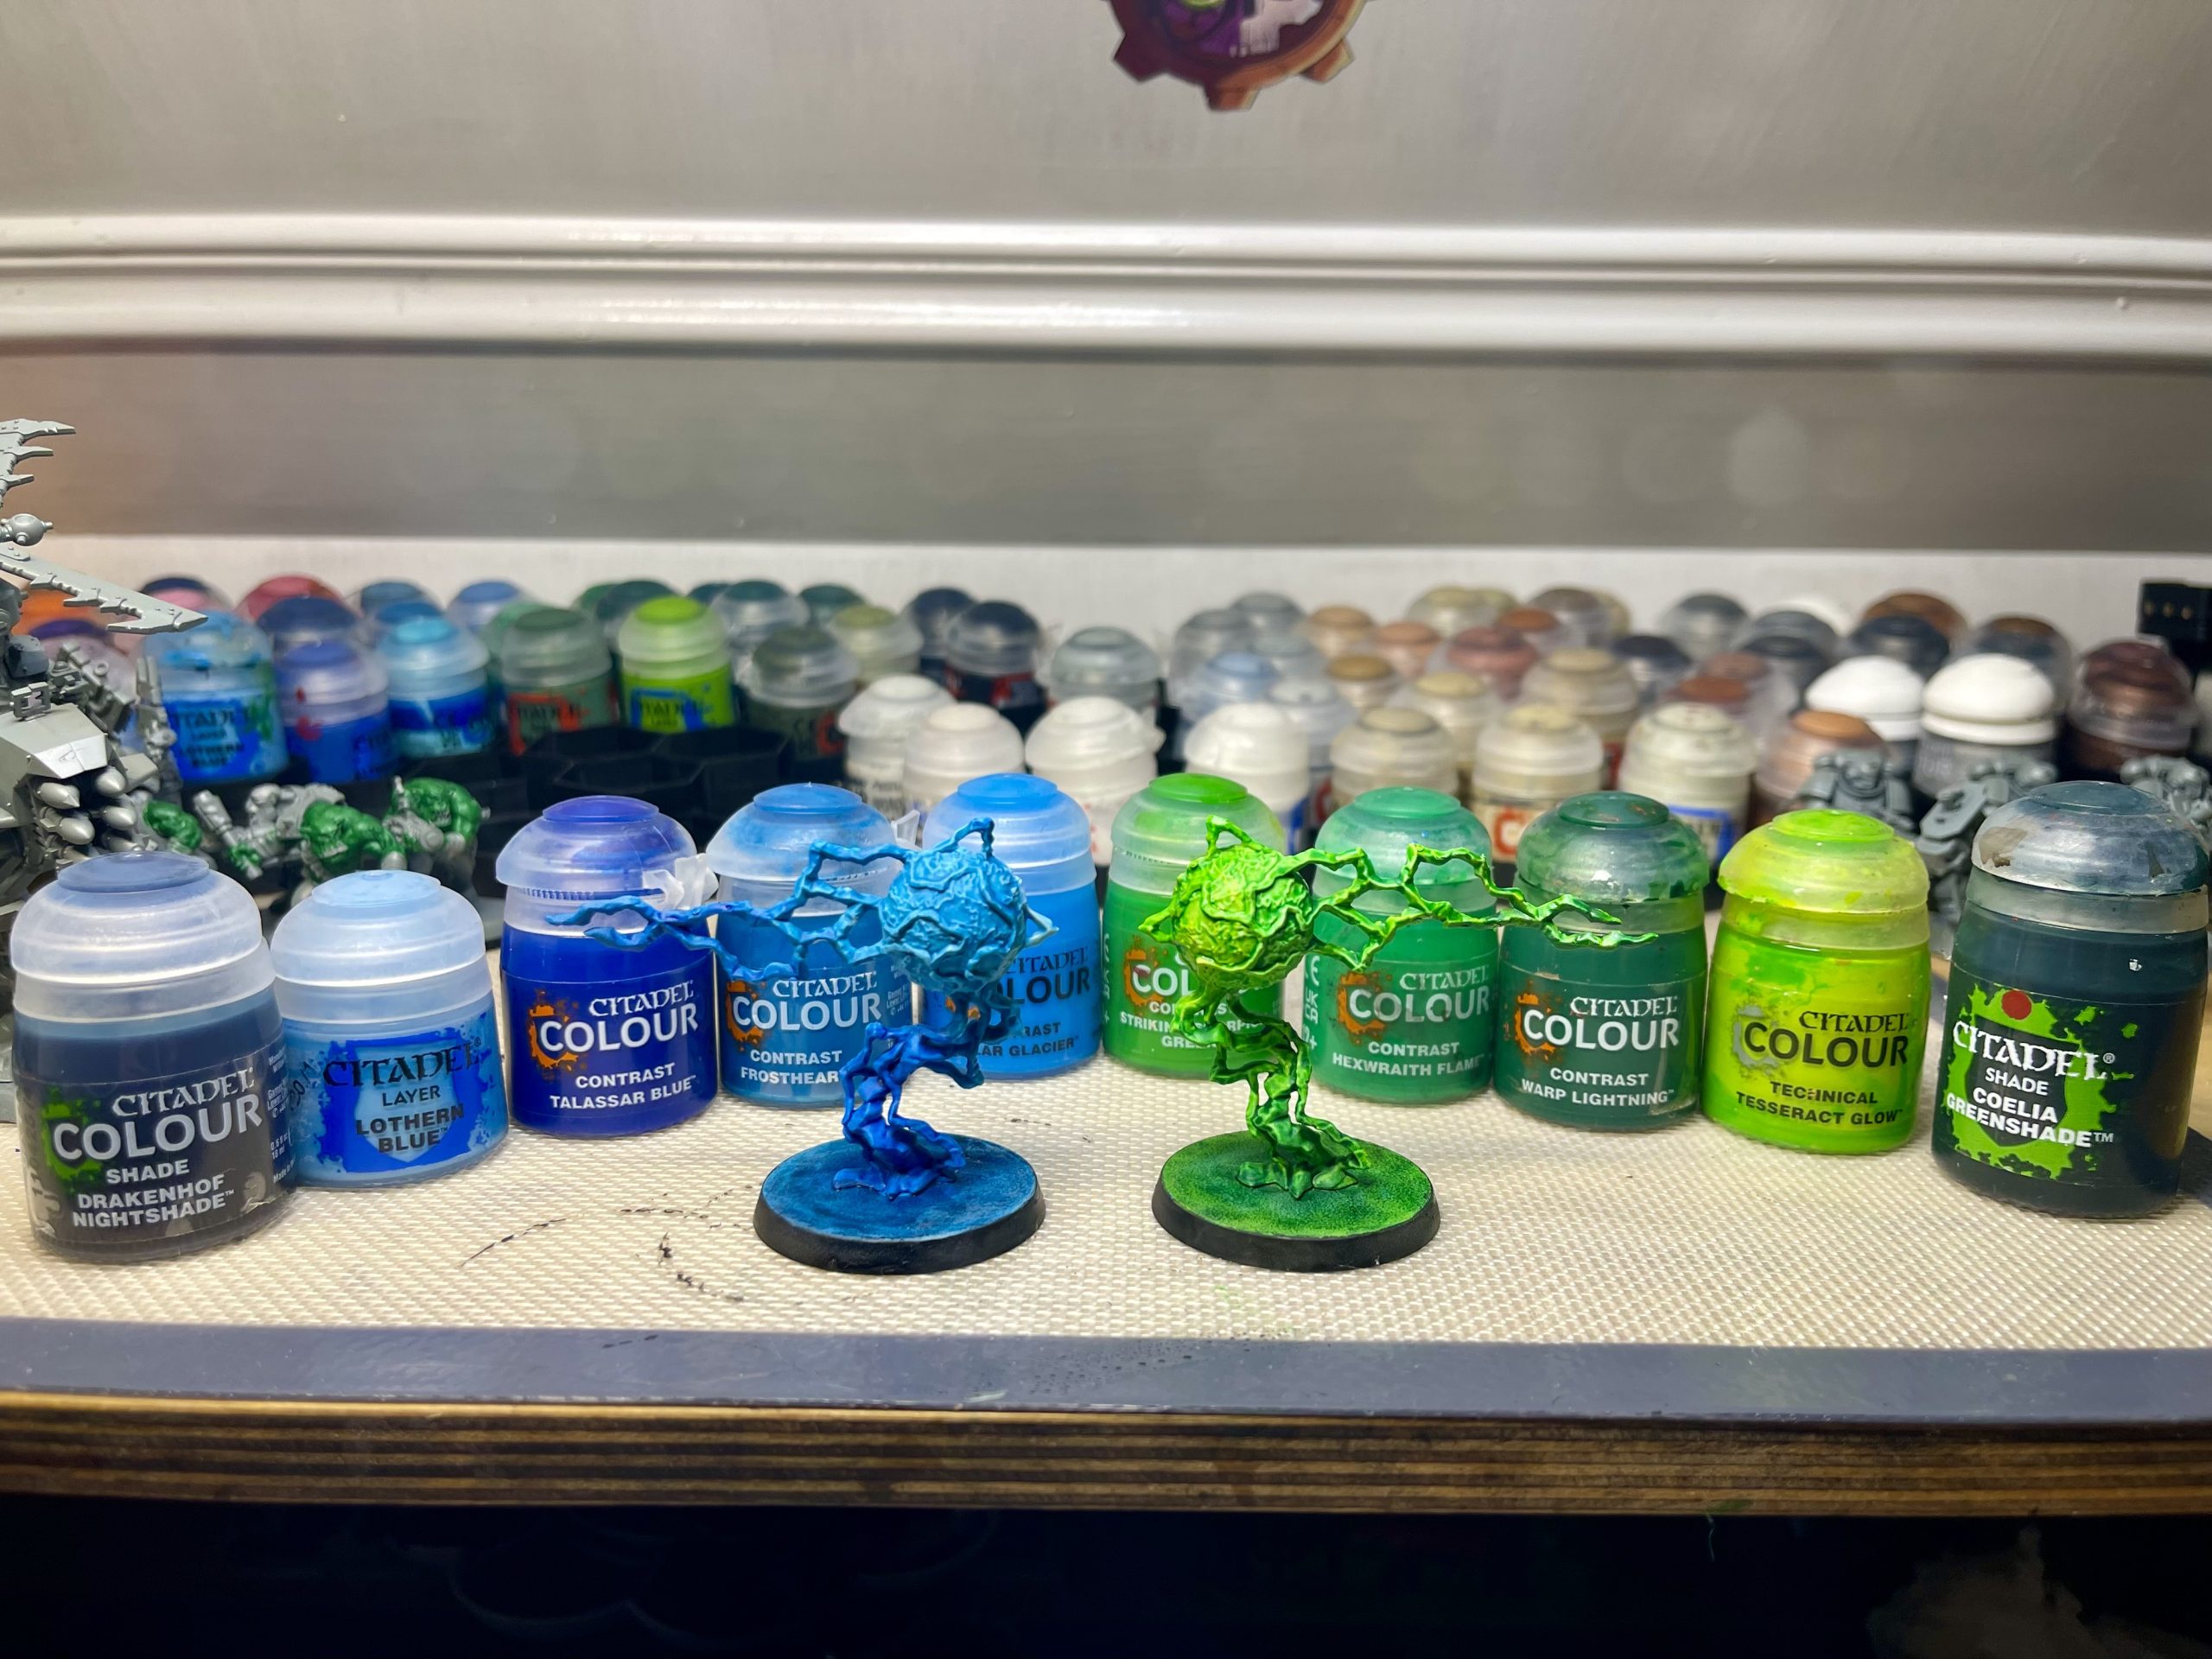 Pre Gloss
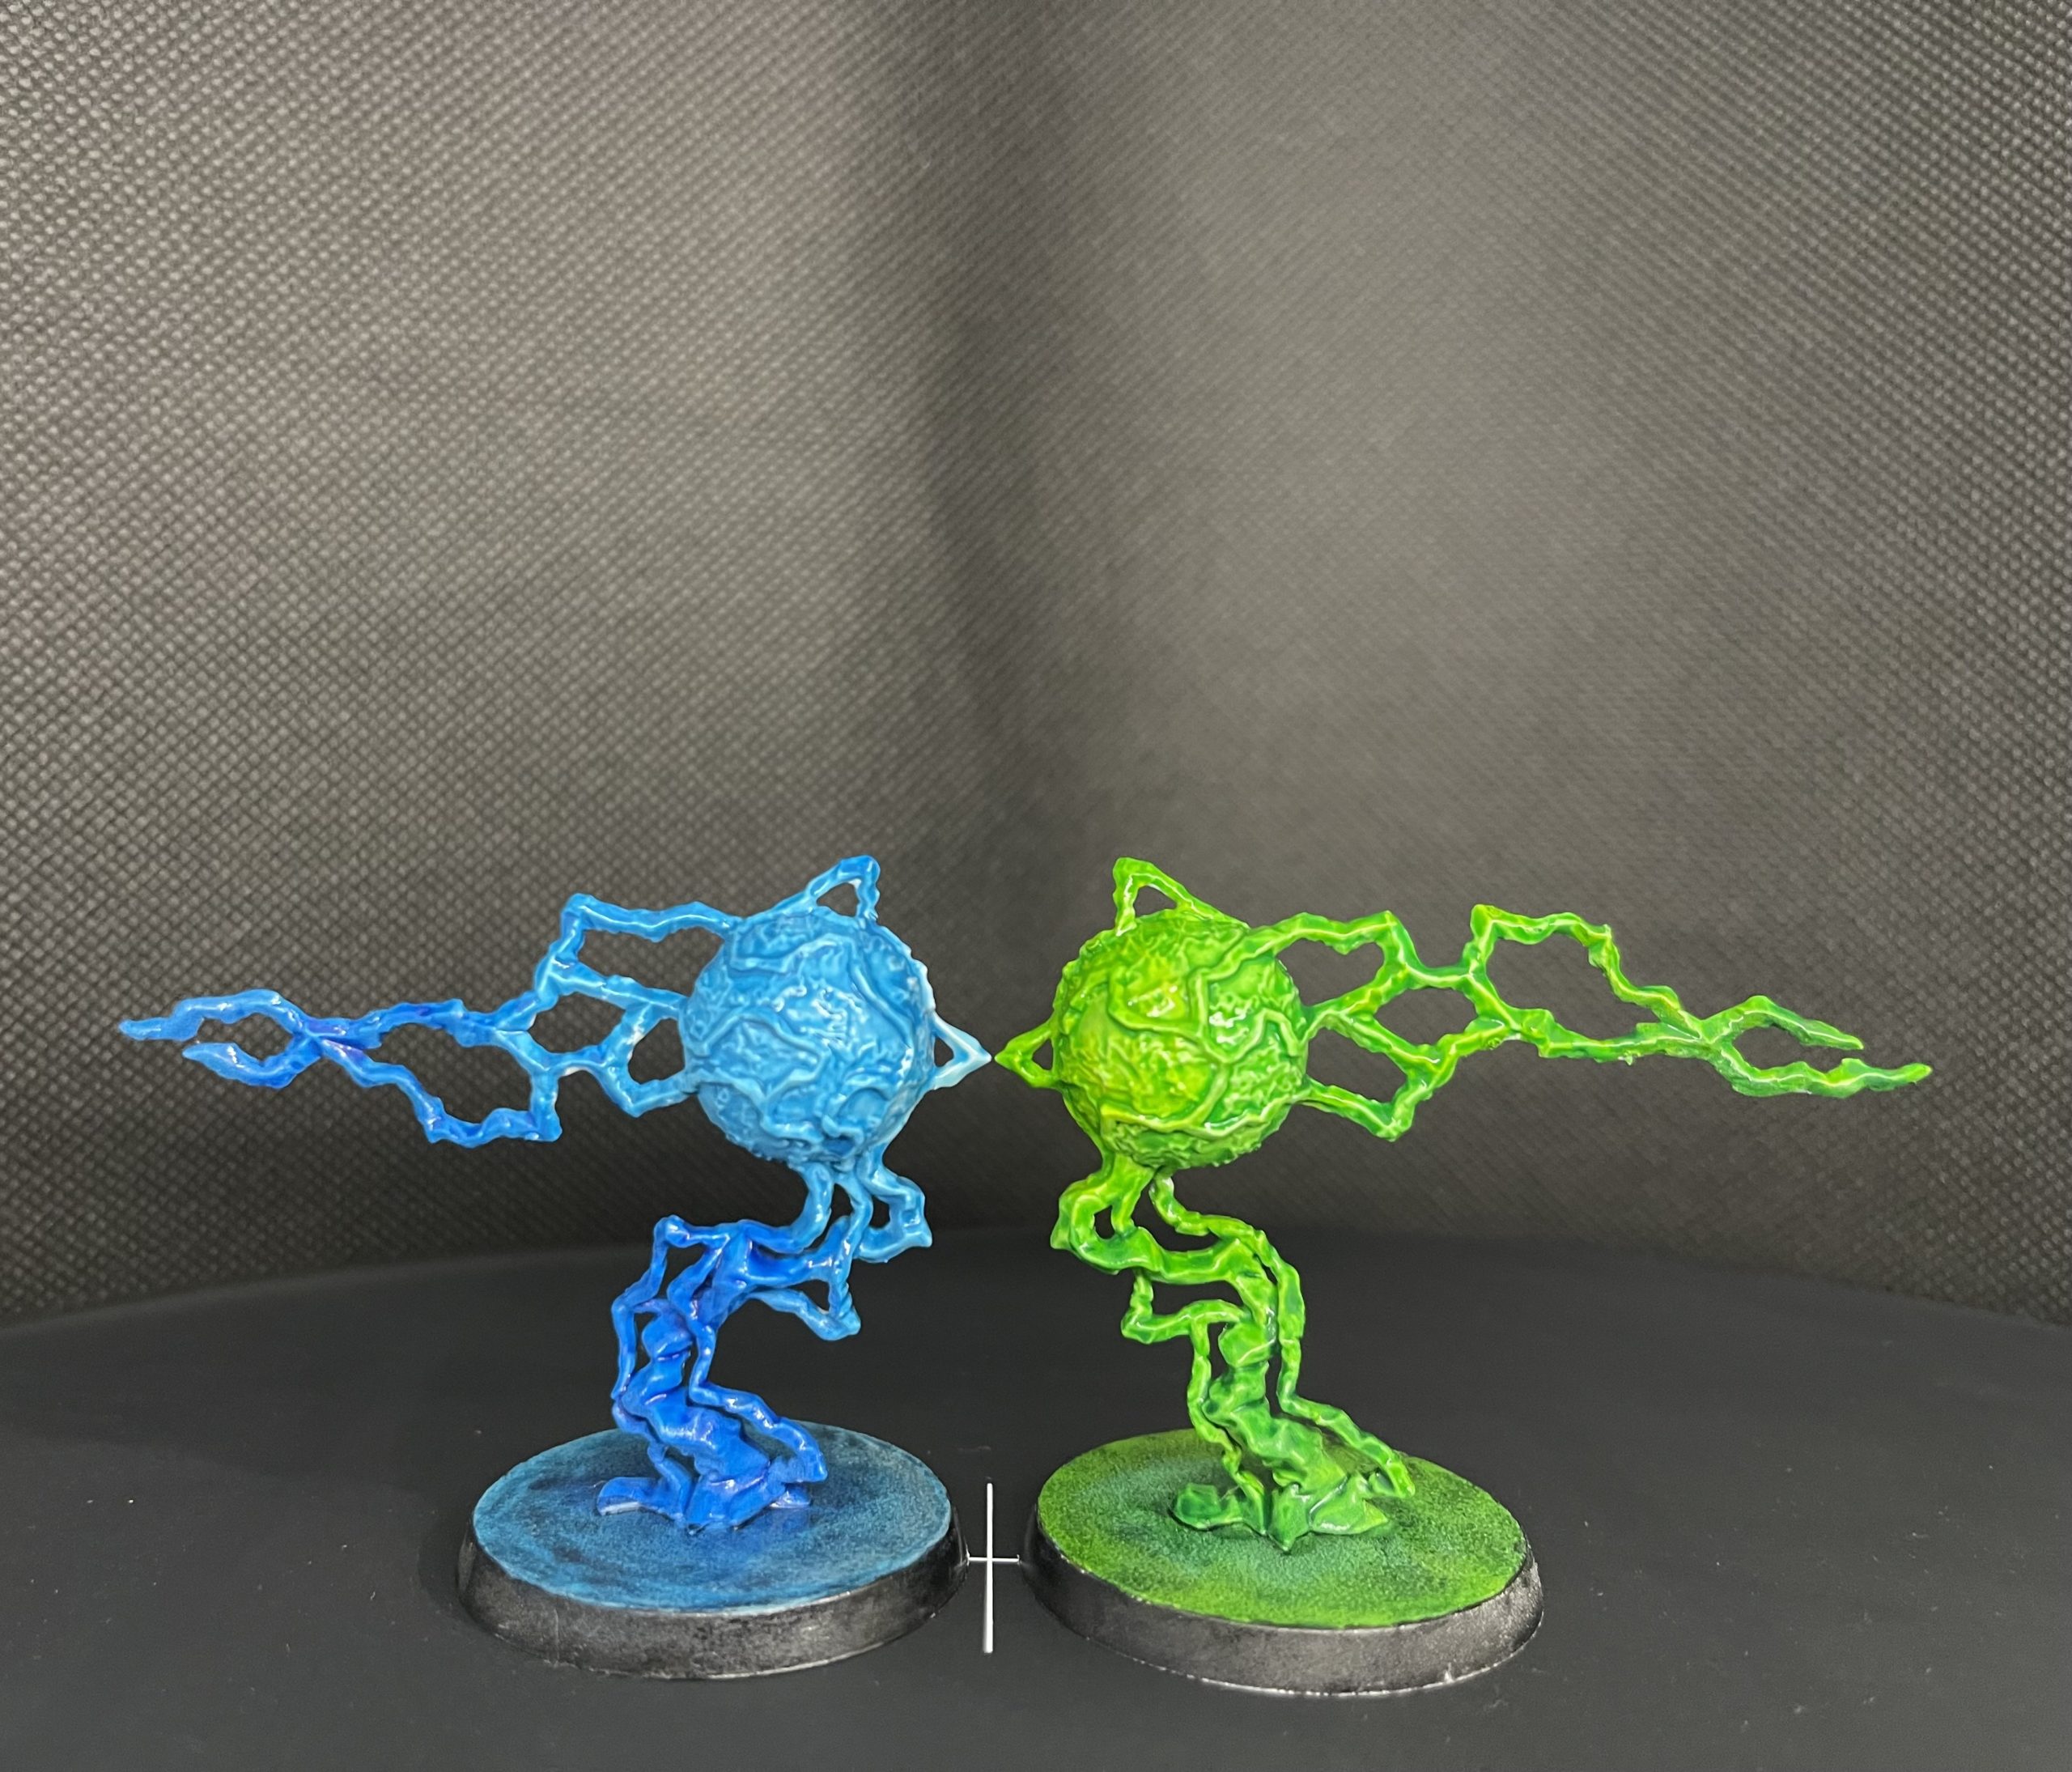 Clash of the Orbs
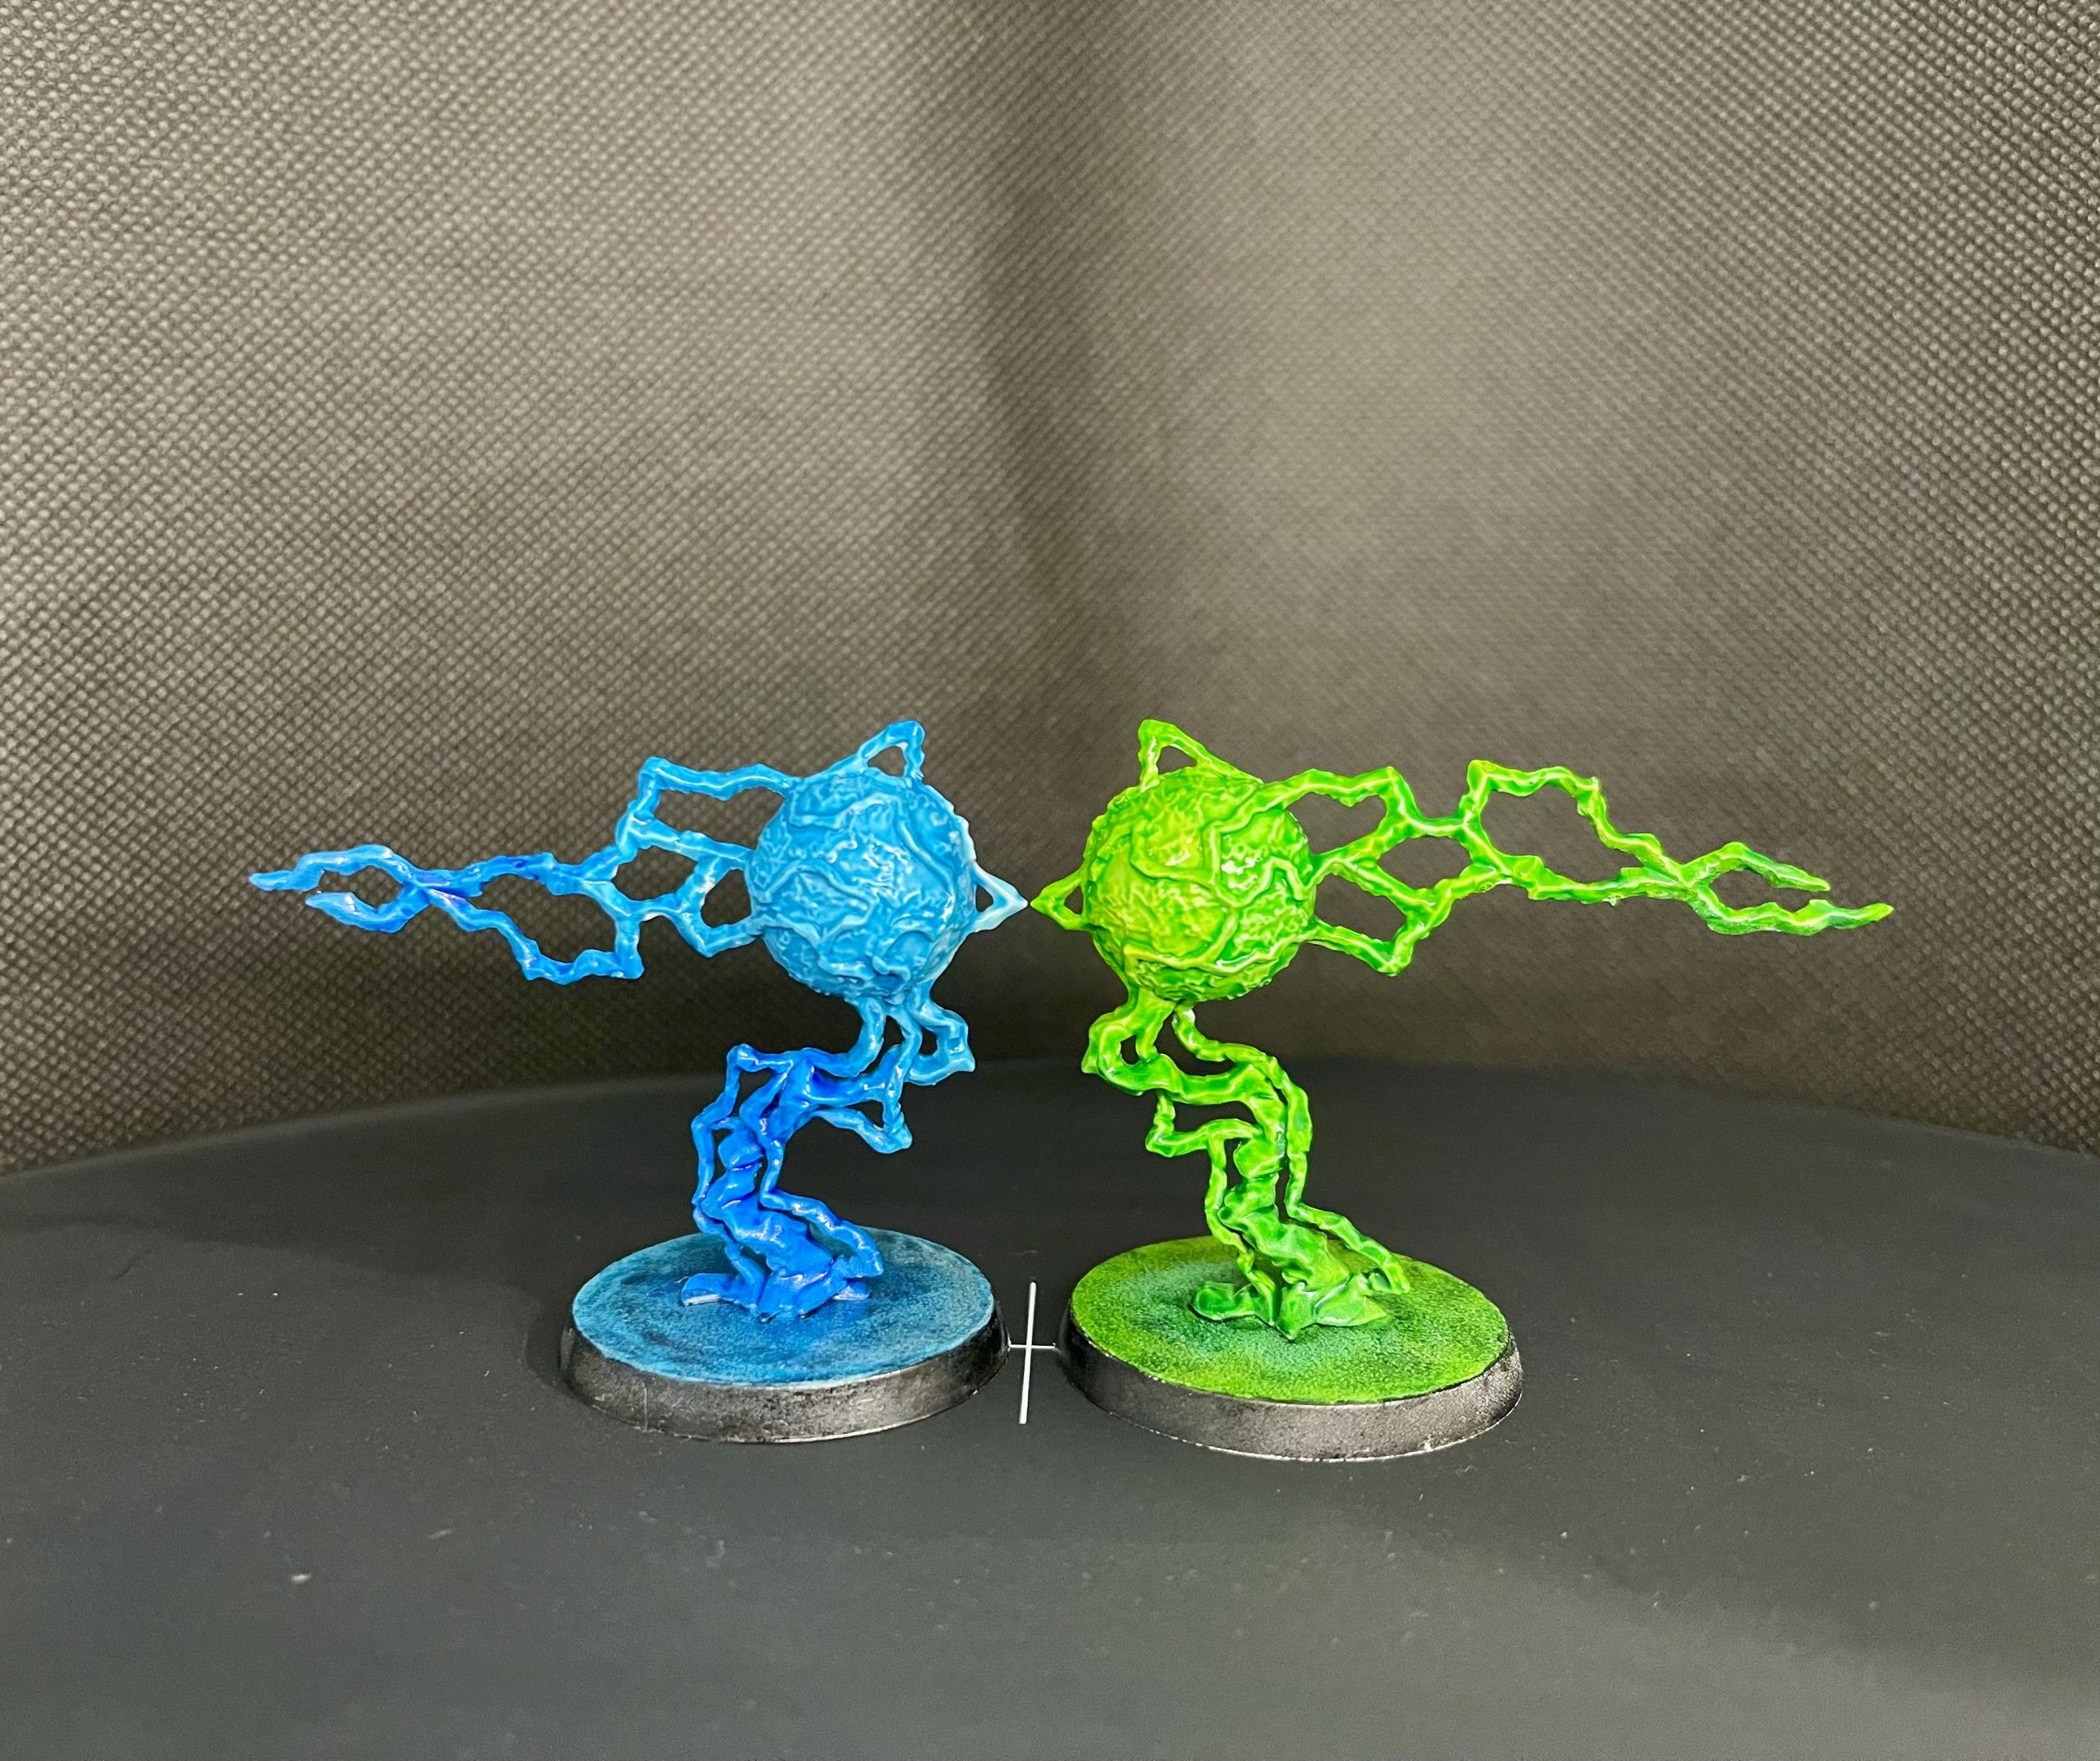 Ouch
OuchQuick Reference Recipe
Green Orb —
- Prime: white.
- Base bands: Striking Scorpion Green → Hexwraith Flame → Warp Lightning (Contrast).
- Wet-blended bands following the sphere contour and the same radiating out on the base.
- Seams & atmosphere: Coelia Greenshade selectively in seams and to the base.
- Inner accents & glow: Tesseract Glow applied sparingly to ripple crests.
- Highlights: highlights with a thinned pale layer of Tessearact glow.
- Seal: light gloss lacquer.
Blue Orb —
- Prime: white.
- Base bands: Talassar Blue → Frostheart → Pylar Glacier (Contrast).
- Wet-blended bands following the sphere contour and the same radiating out on the base
- Seams & atmosphere: Drakenhof Nightshade selectively in seams and to the base.
- Inner accents & glow: Lothern Blue for accents and micro highlights.
- Highlights: highlights with a thinned pale layer
- Seal: light gloss lacquer.
Imperial Saint Statue and Grimdark Fence Painting Comp OCT
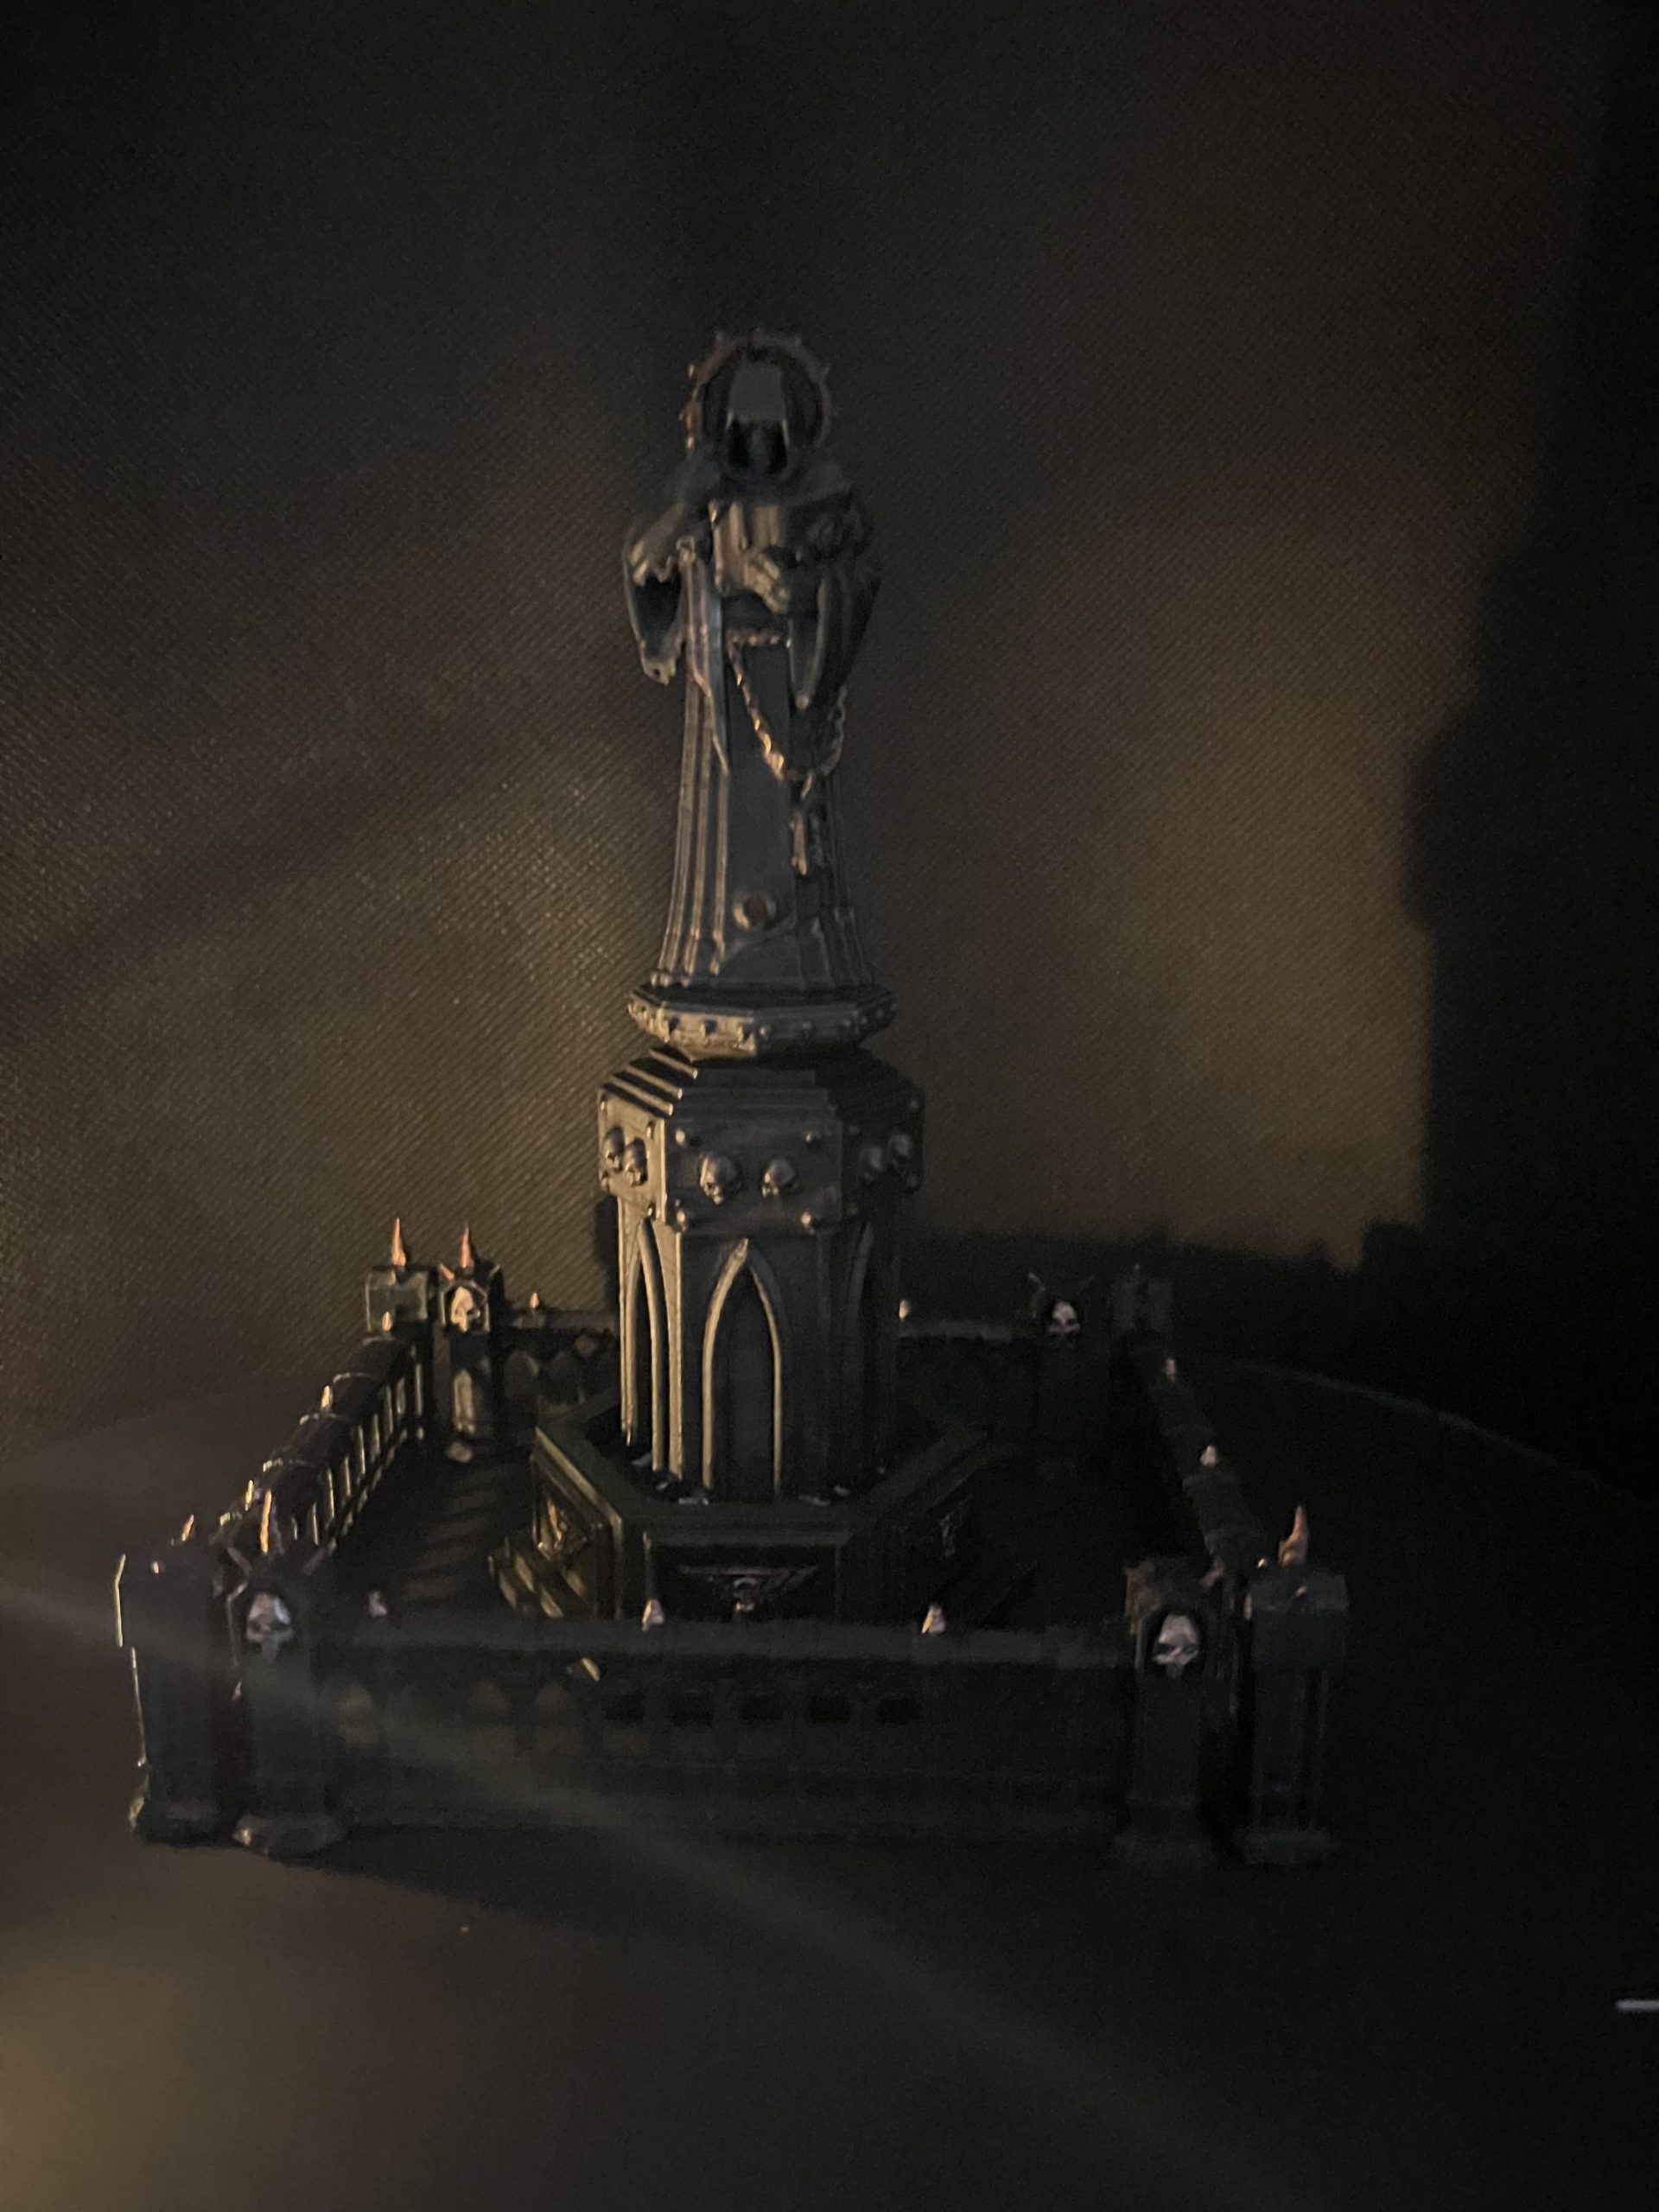 Theme of the month - Gloomy
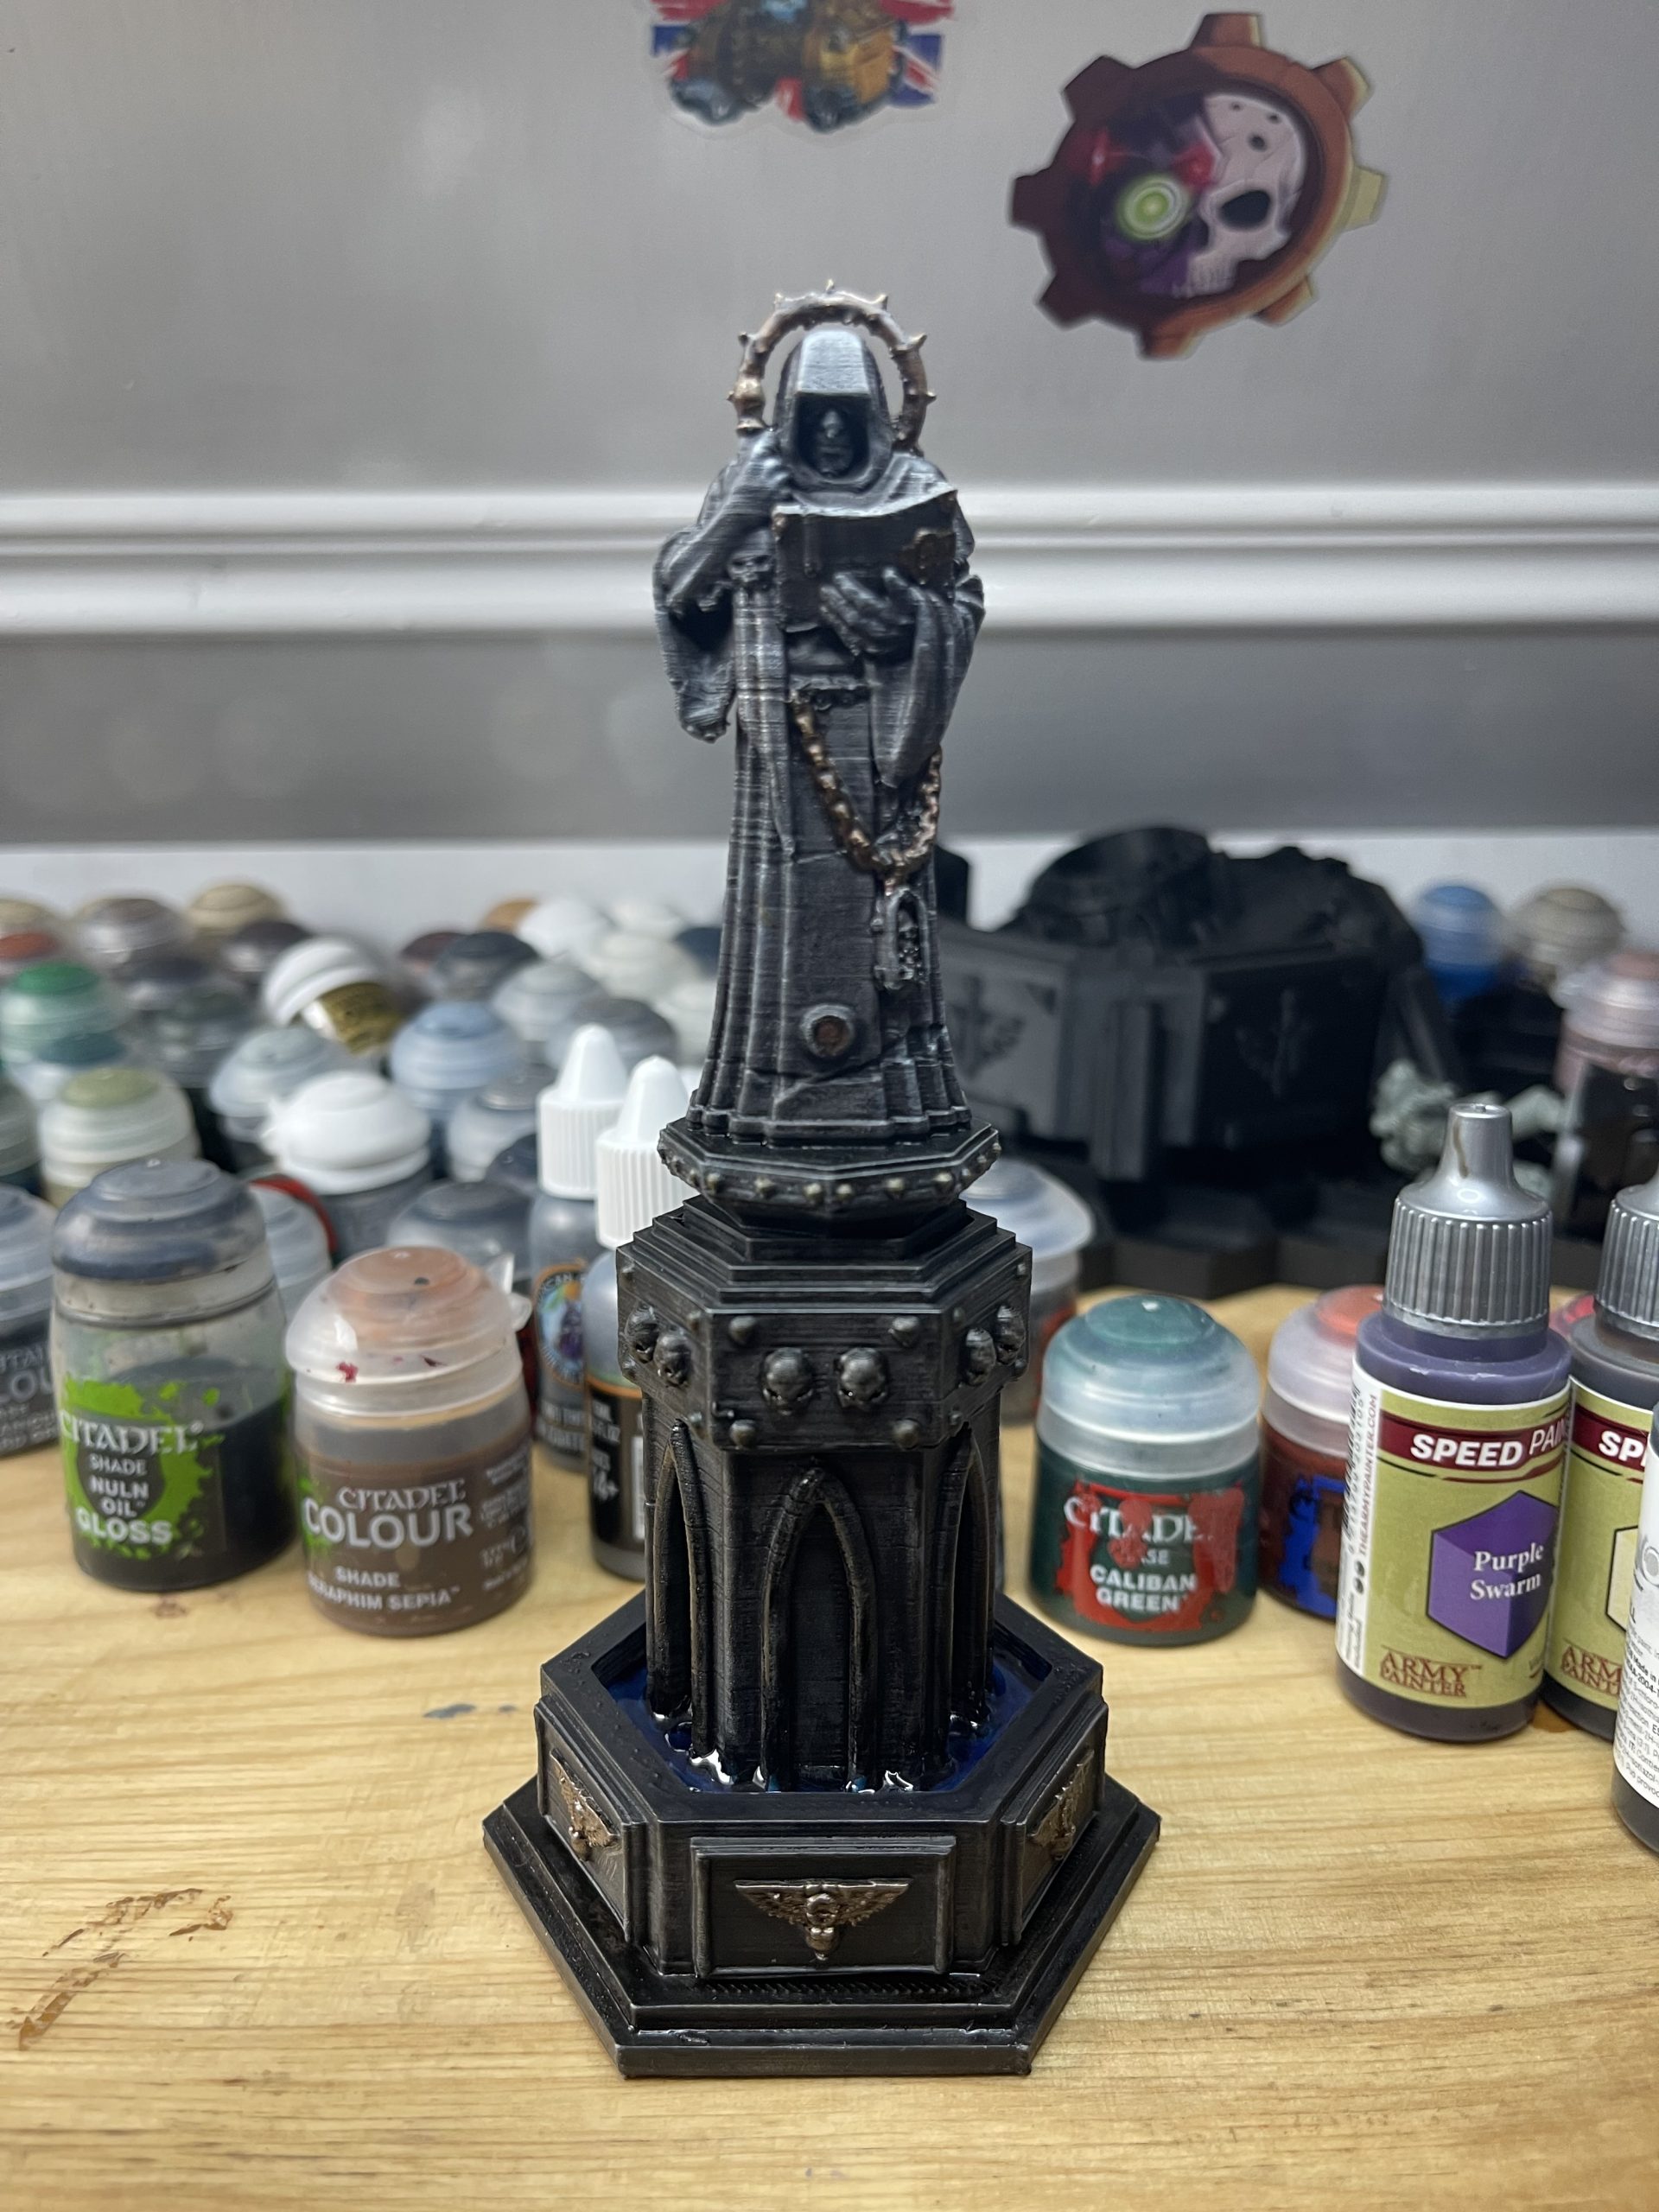
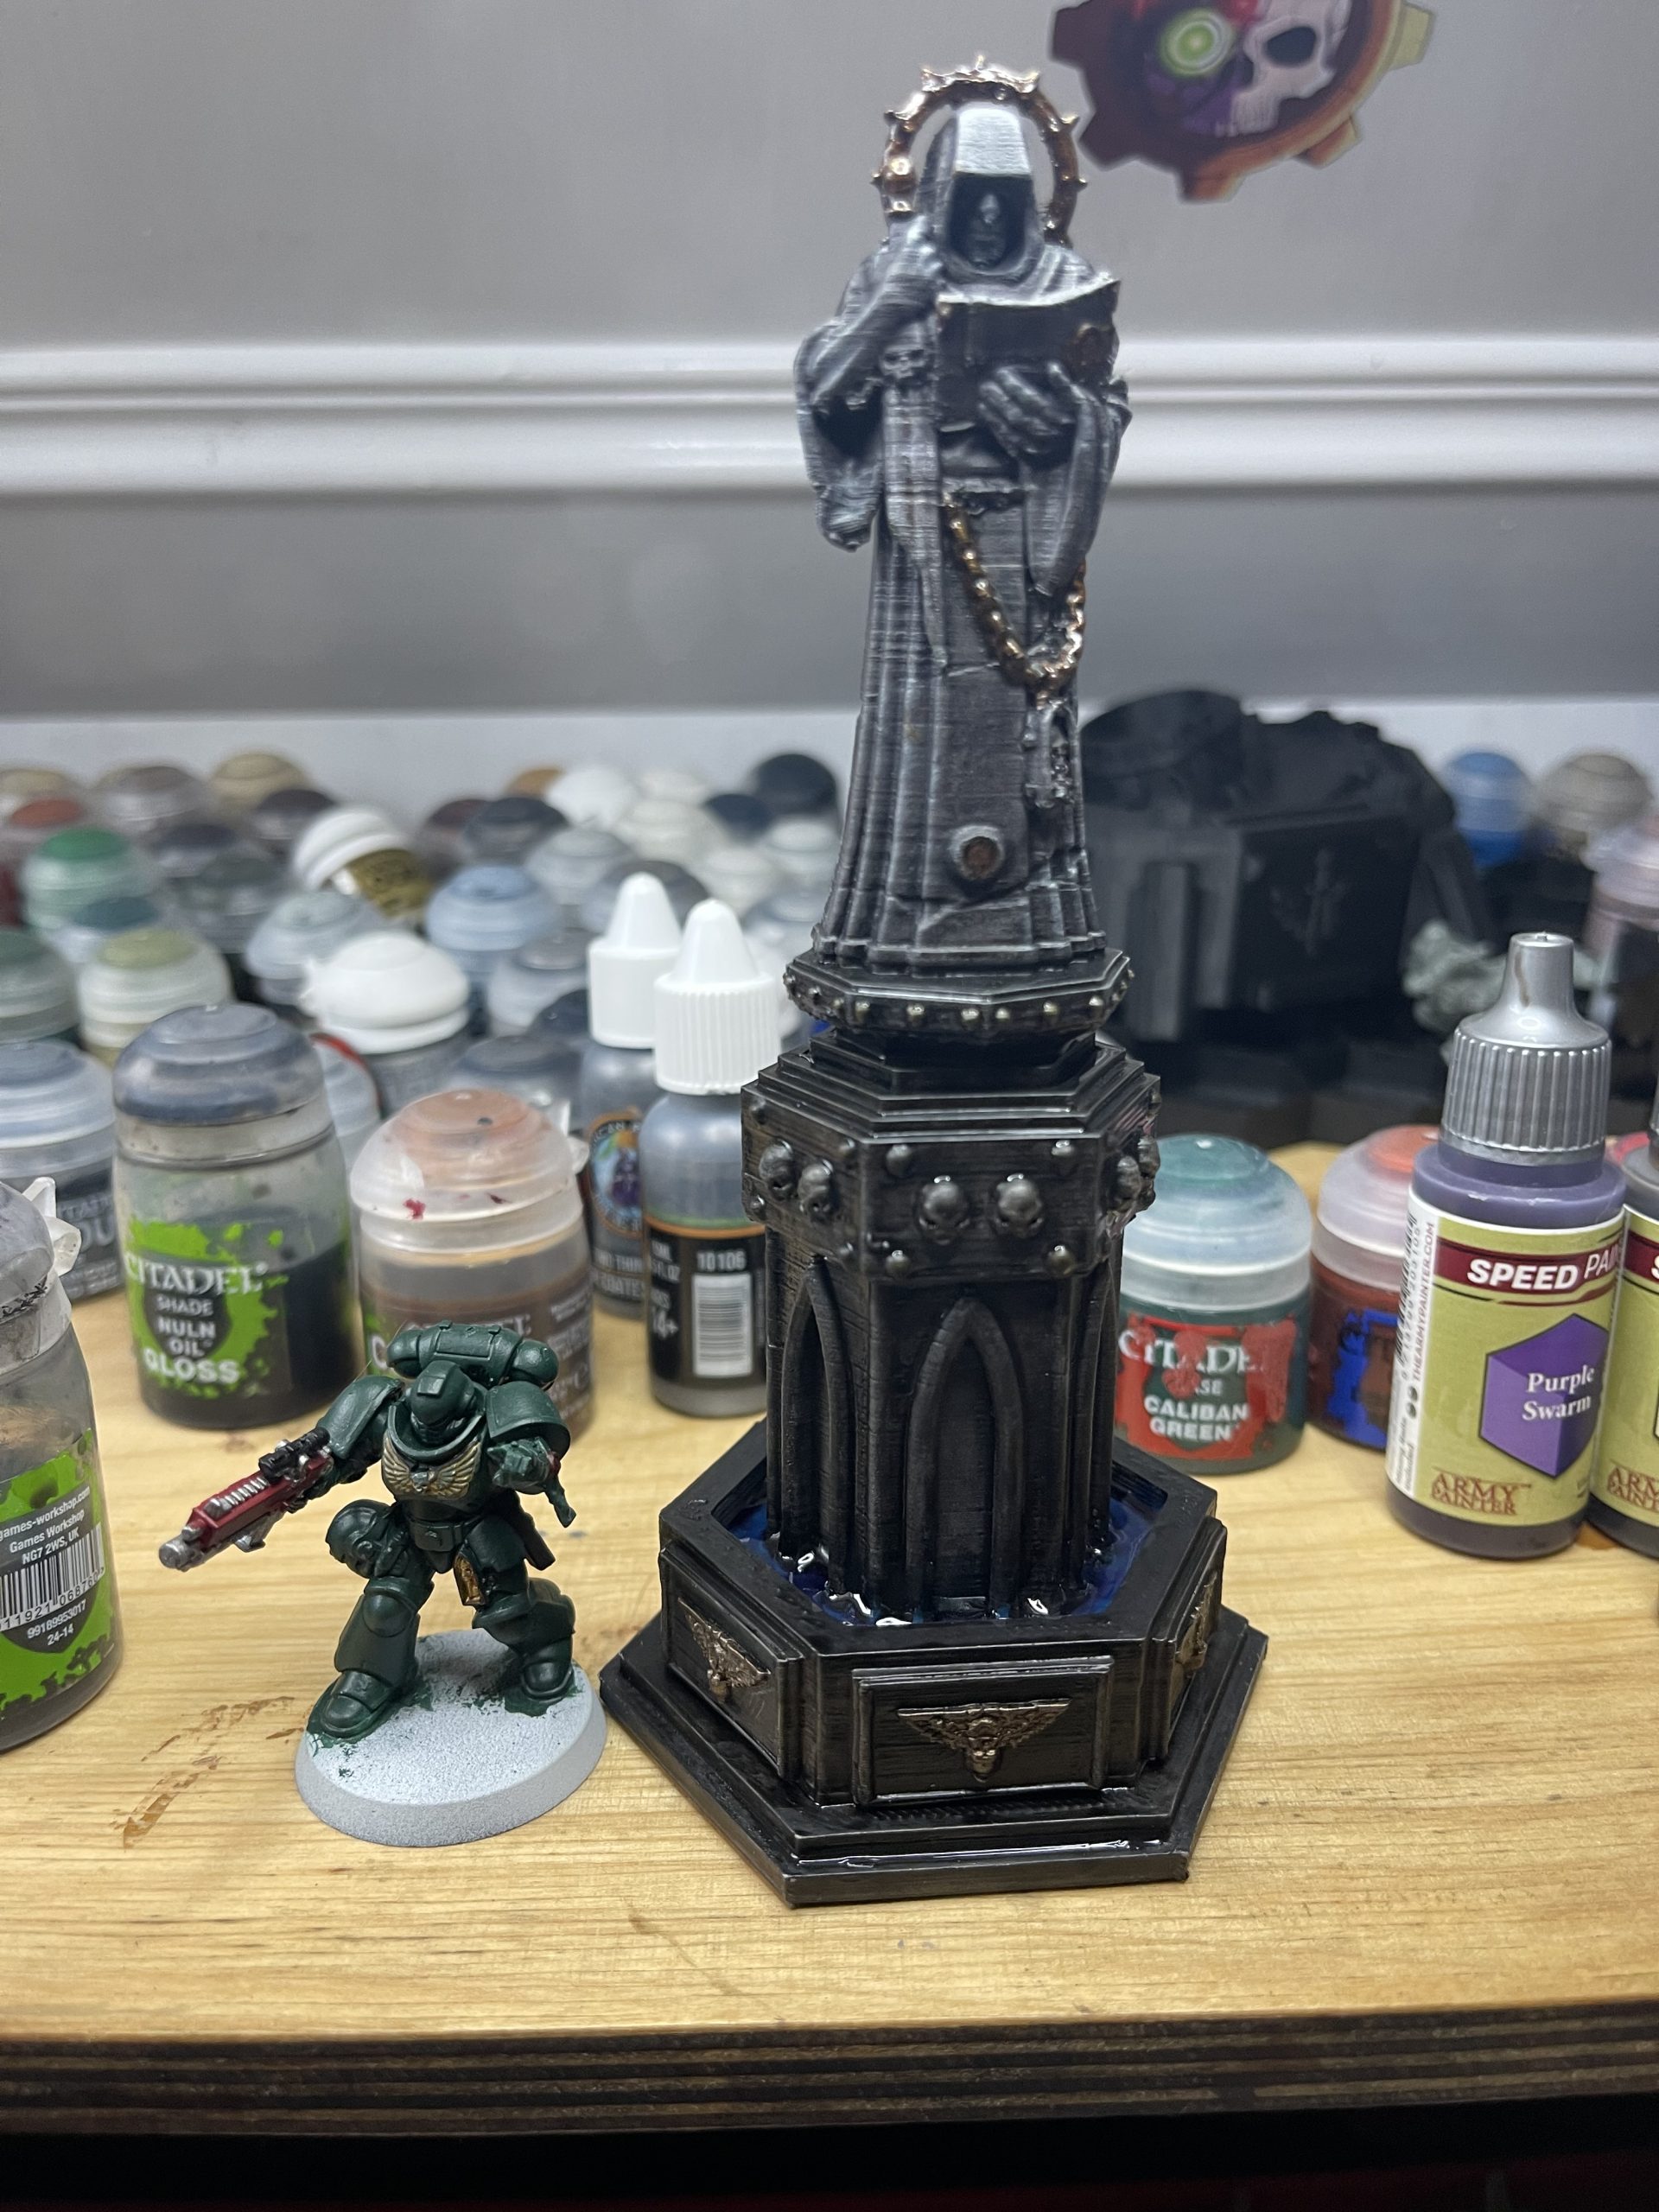
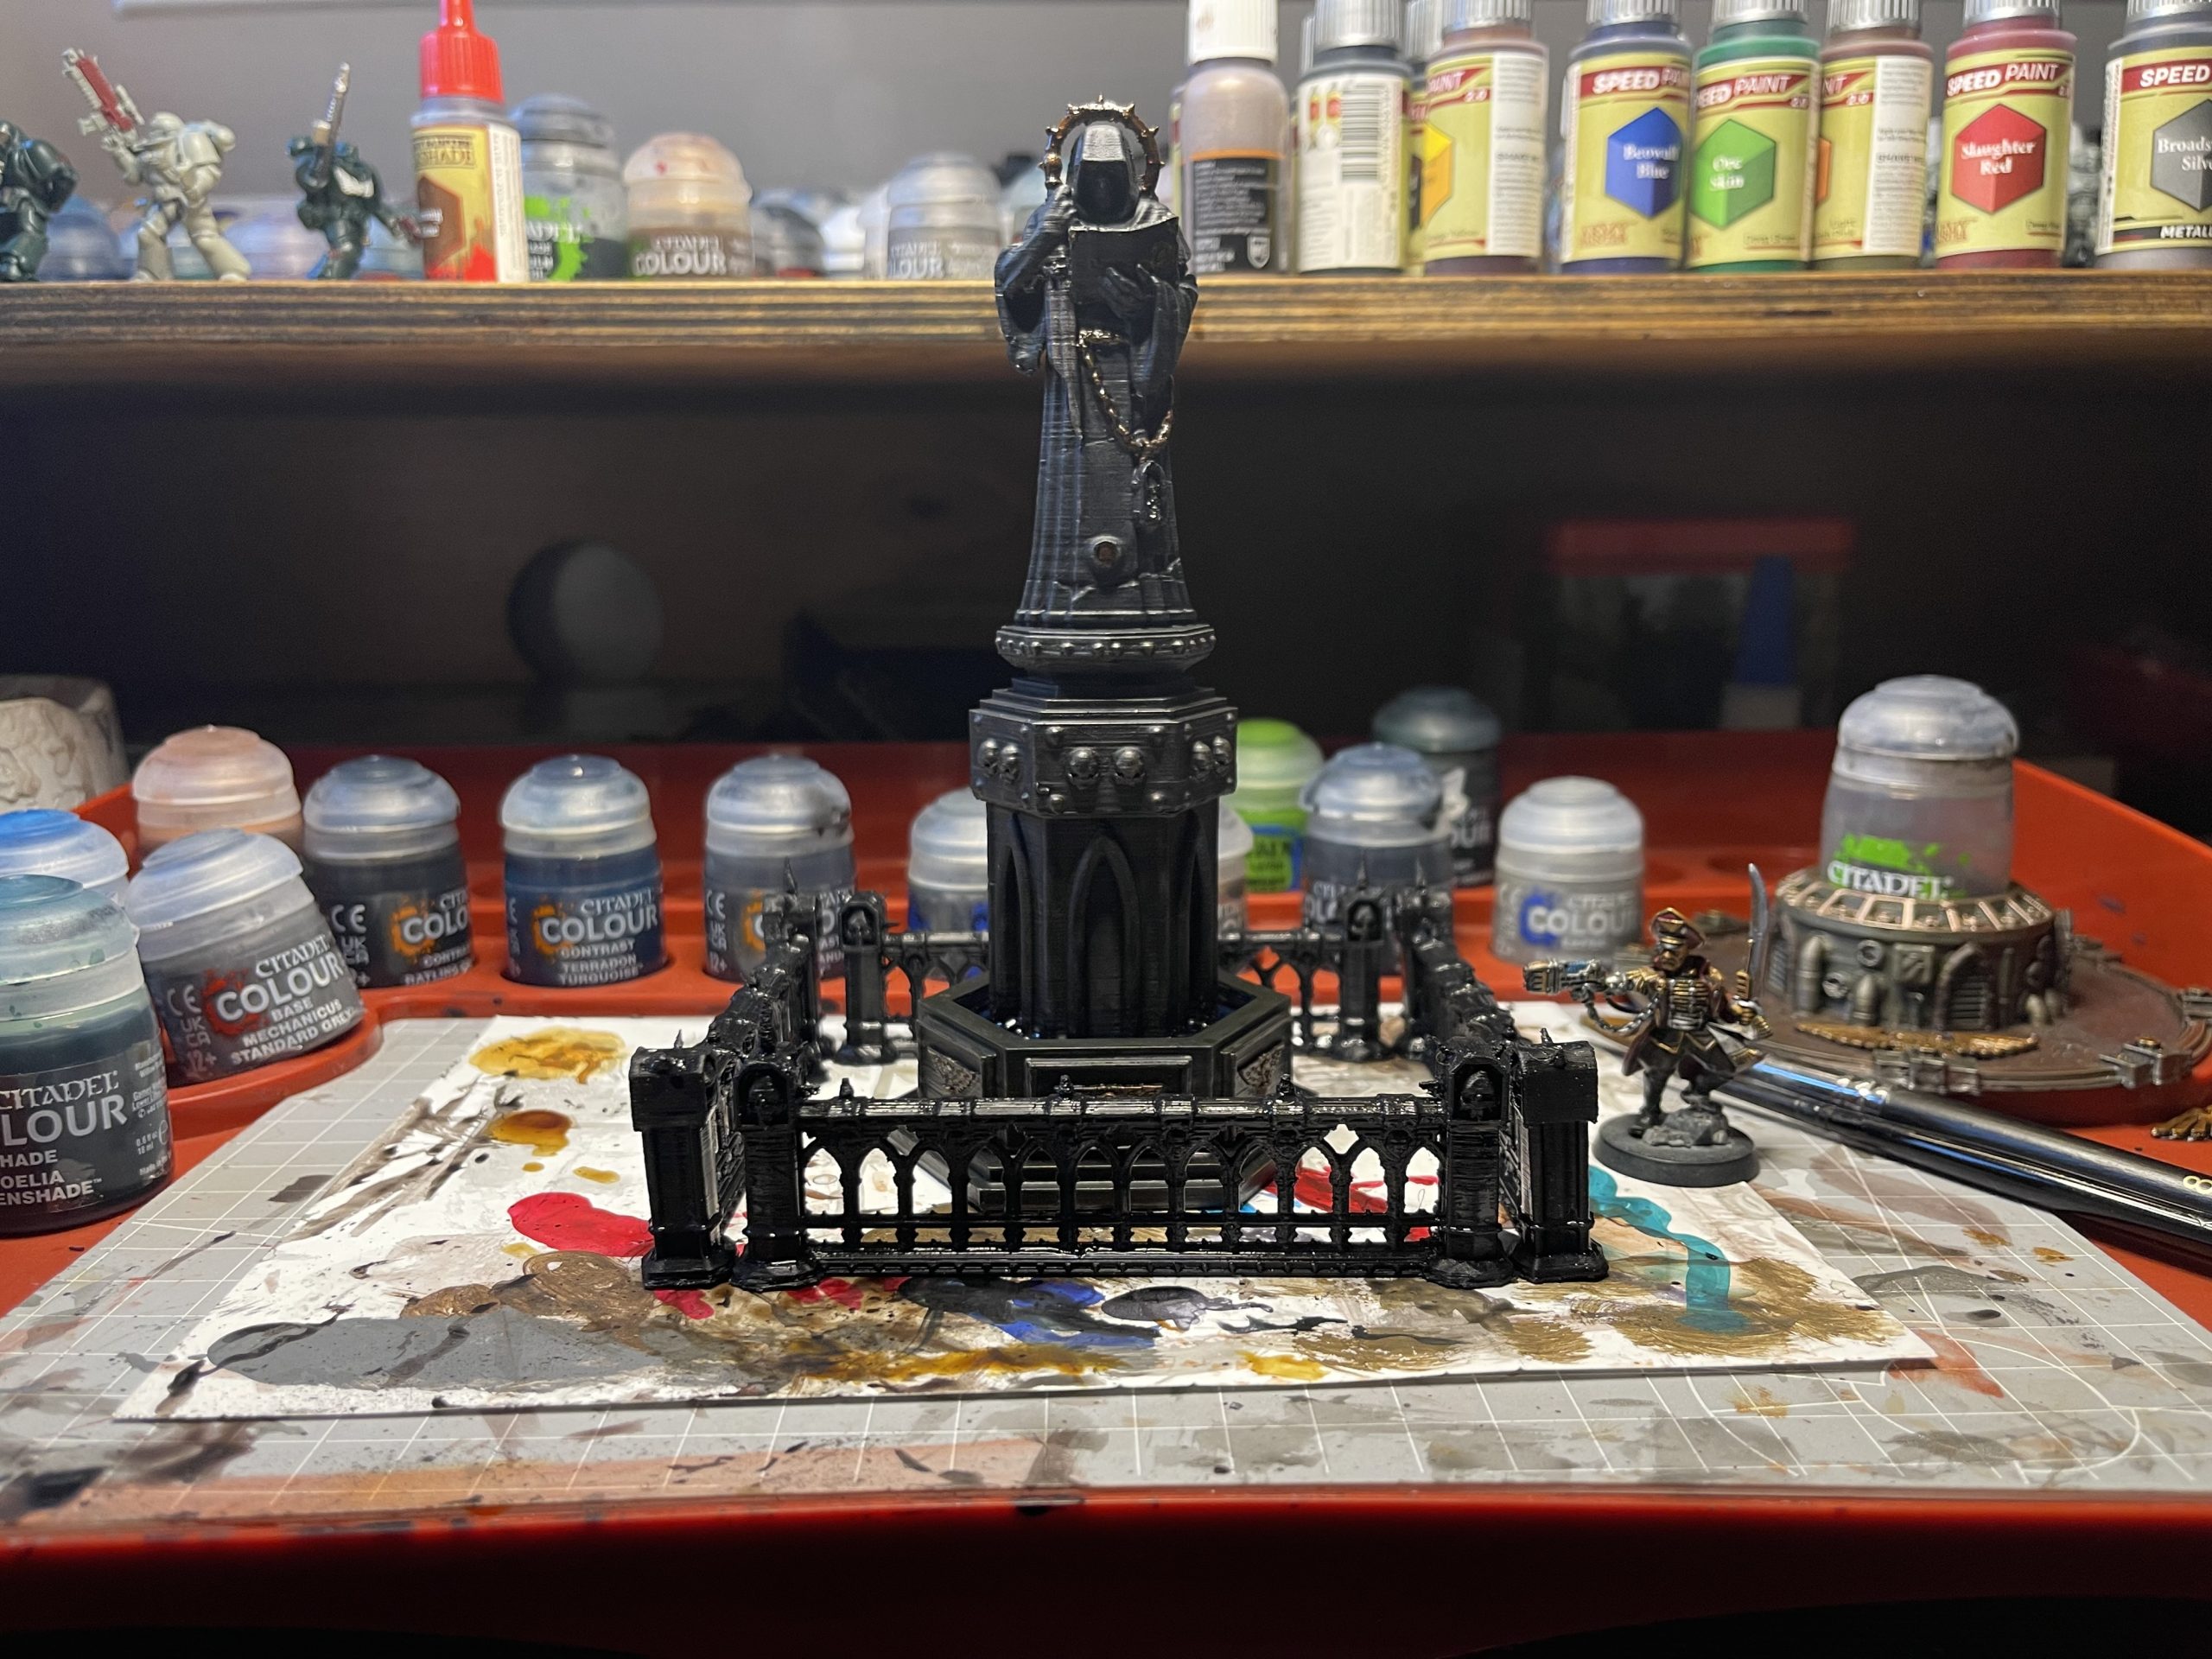
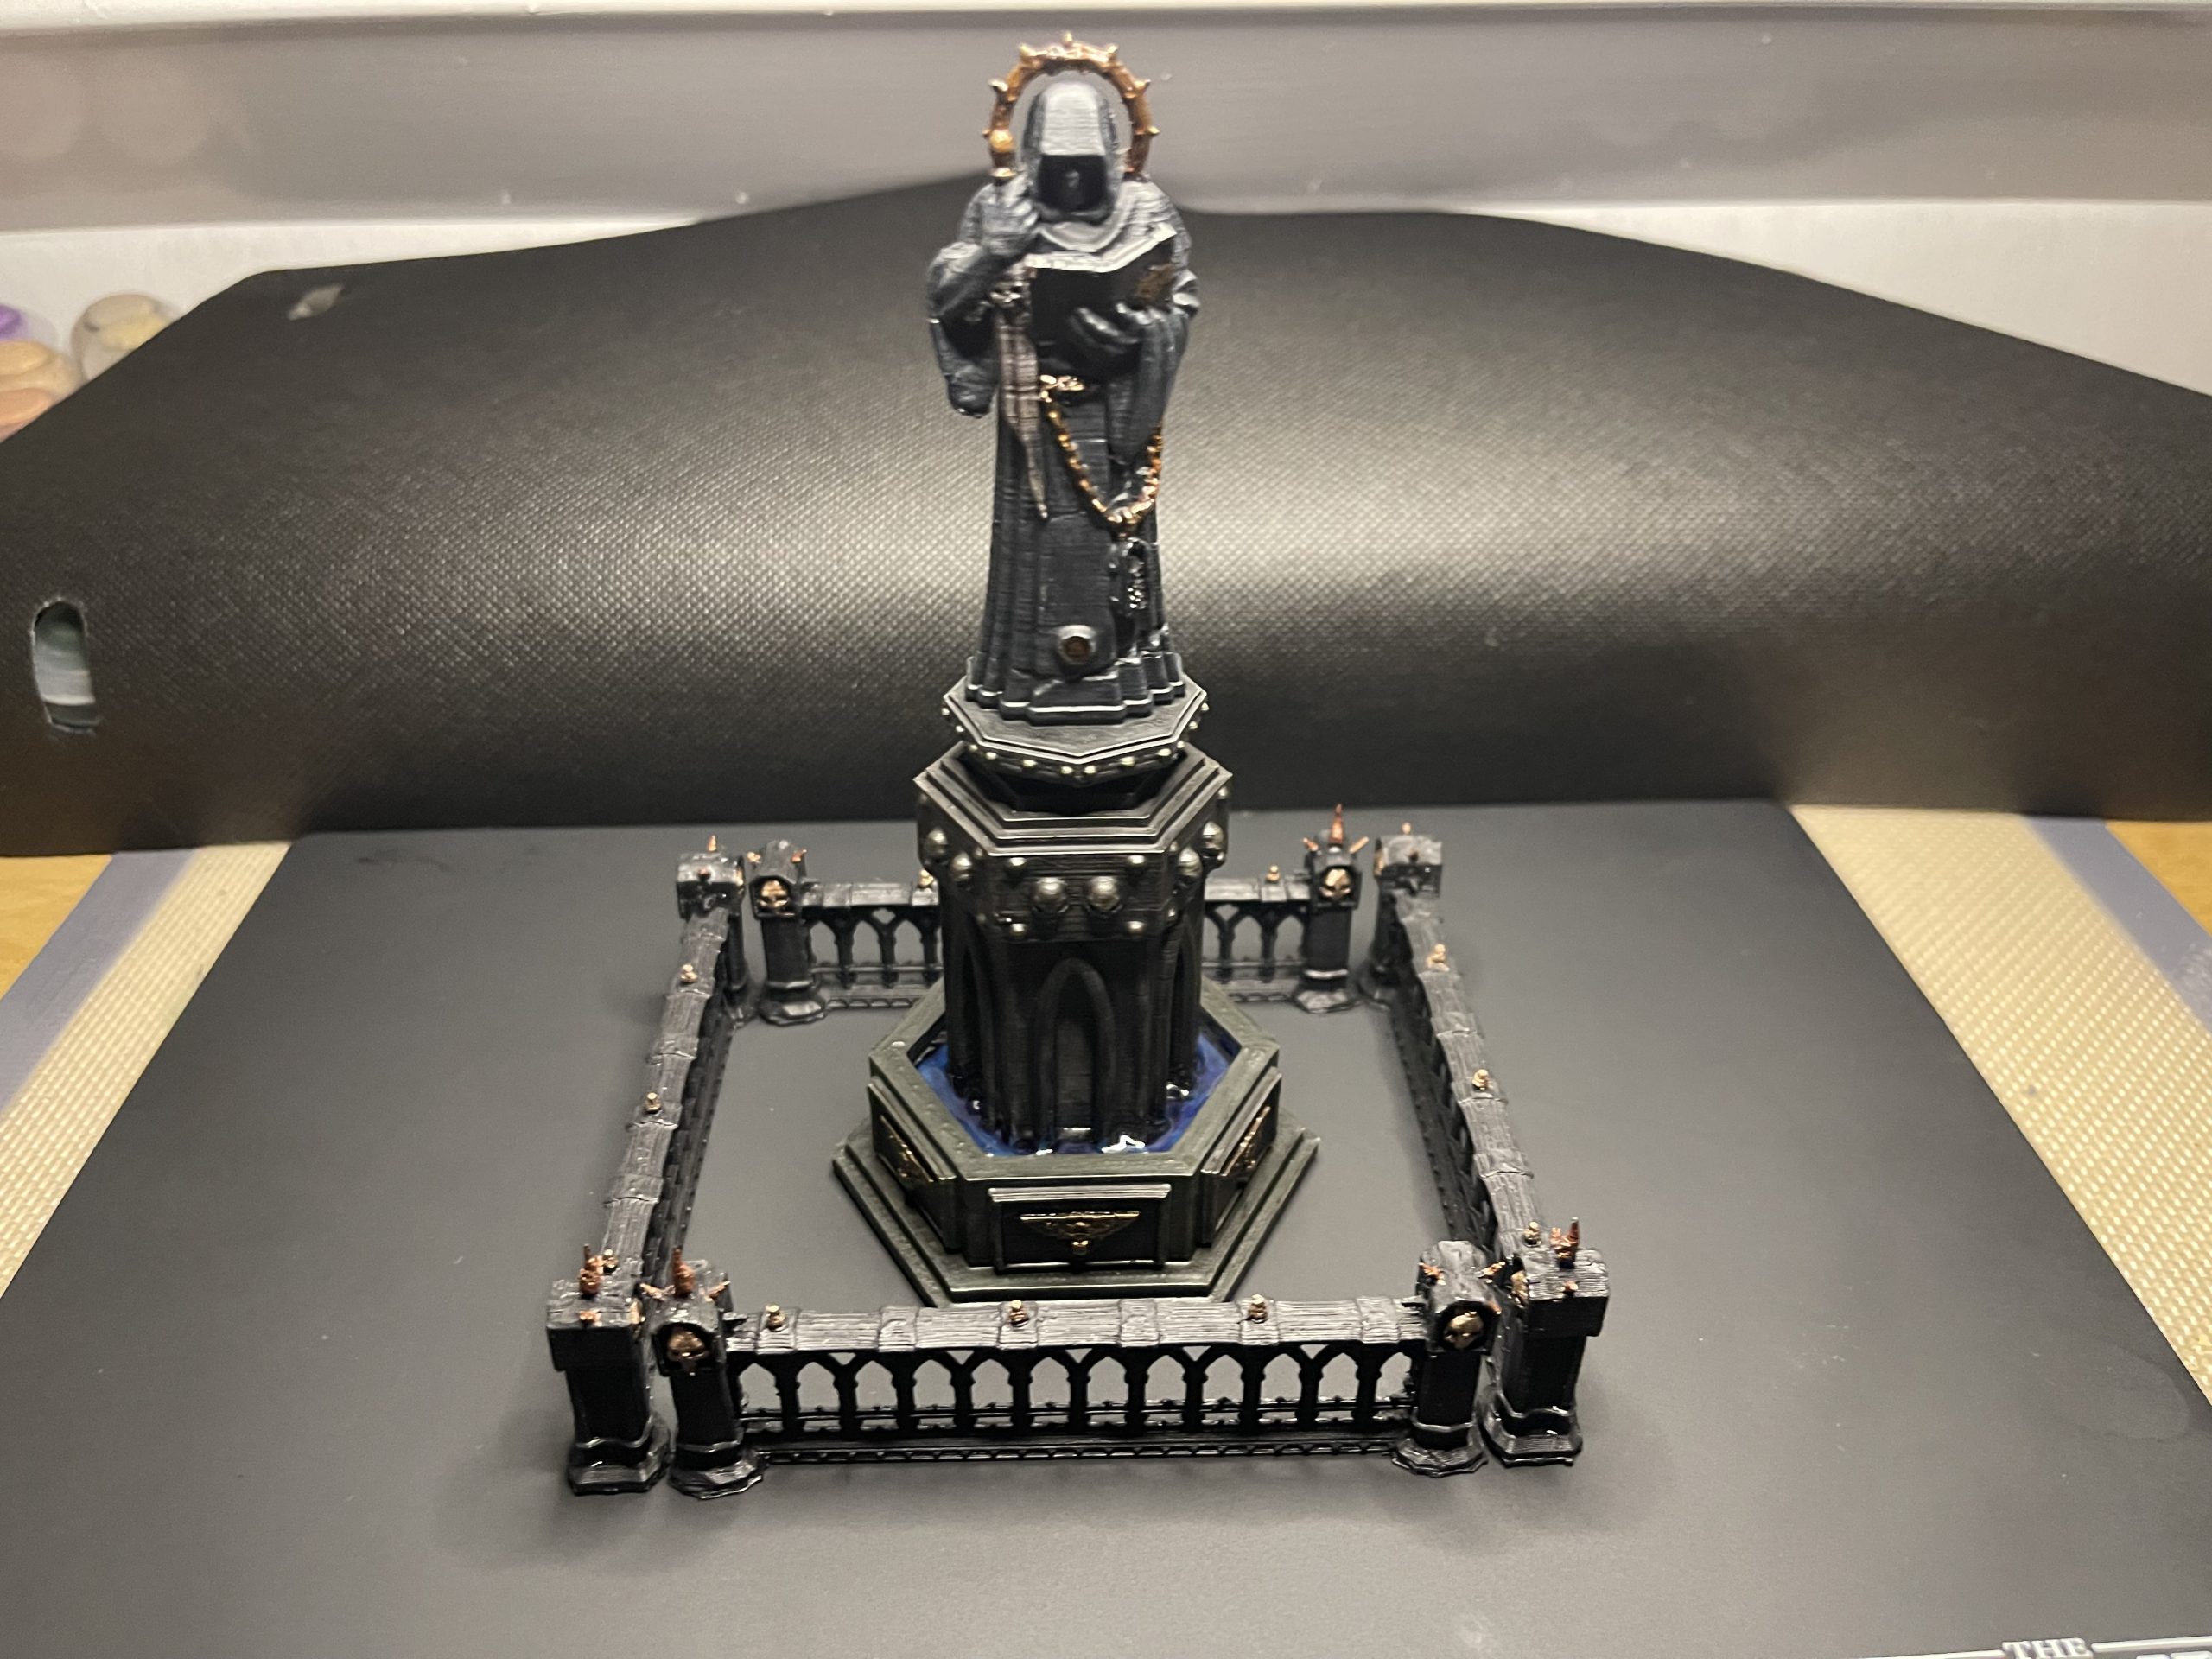
Another enjoyable month’s entry, gloomy the theme. Couldn’t find anything amongst the pile that was ‘gloomy’, so I 3D printed it again. The Statue on the pedestal, designed by LORDNORAKAI on Cult3D was initially going to be on its own, but I also stumbled across some Grimdark fence designs by FU11ER and decided to add them to the mix. I intend to base them on something at some point. I made another attempt at using UV resin, this time for a water effect. Still not quite got the knack of it, didn’t quite achieve the still flat water I was after.
A fun entry and a nice usable piece of terrain. Some brilliant entries and congrats to the joint winners @blinky465 and @horati0nosebl0wer
Quick Reference Recipe
- Prime Grey → Spray Black
- Statue: Administratum Grey basecoat → Nuln Oil wash → Brass and Metal Details → Agrax Earthshade
- Base & Plinth: Eshin Grey → Black drybrush → Nuln Oil + Agrax Earthshade
- Basin: Frostheart Contrast + White mix (bottom) → UV Resin fill
- Fence (stone): Grey prime → Black spray → Eshin Grey + Administratum Grey drybrush → Nuln Oil shade → Leadbelcher + Brass details → Agrax wash
- Finish: Matte varnish, selective gloss
Next month’s theme is Magical Explosion.
A late thankyou
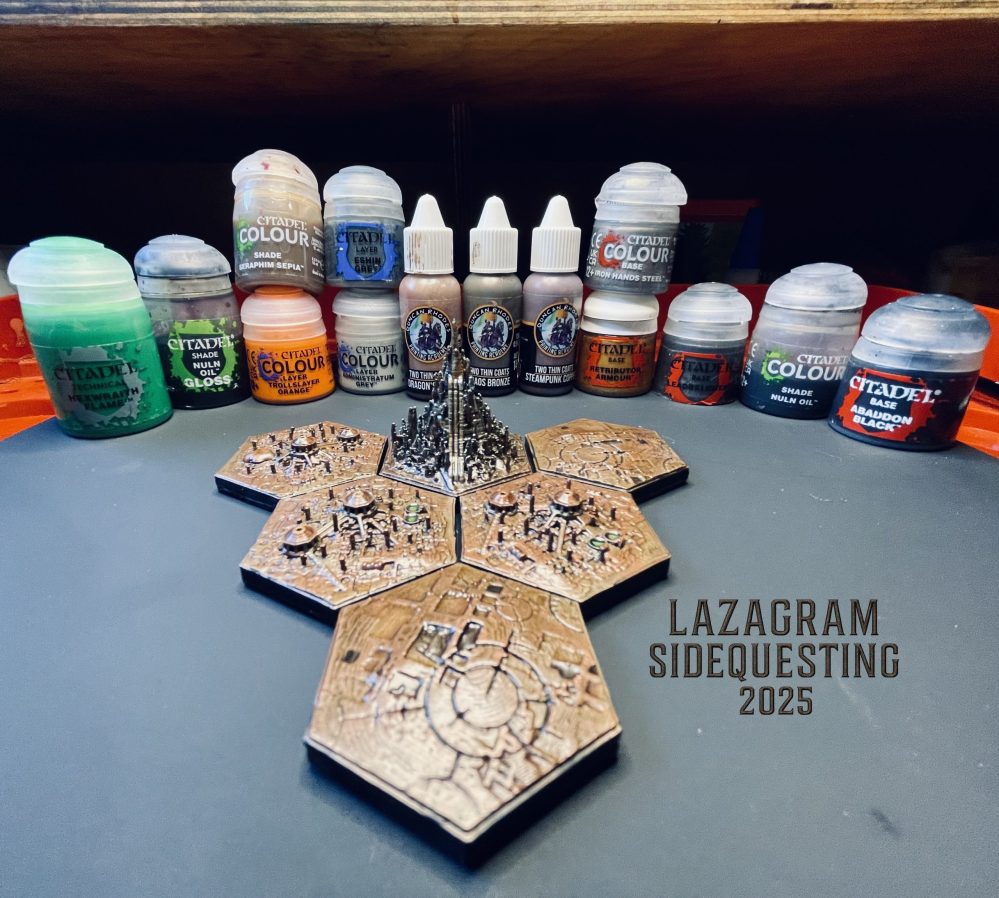
Grimdark Hex Tiles Painting Comp September
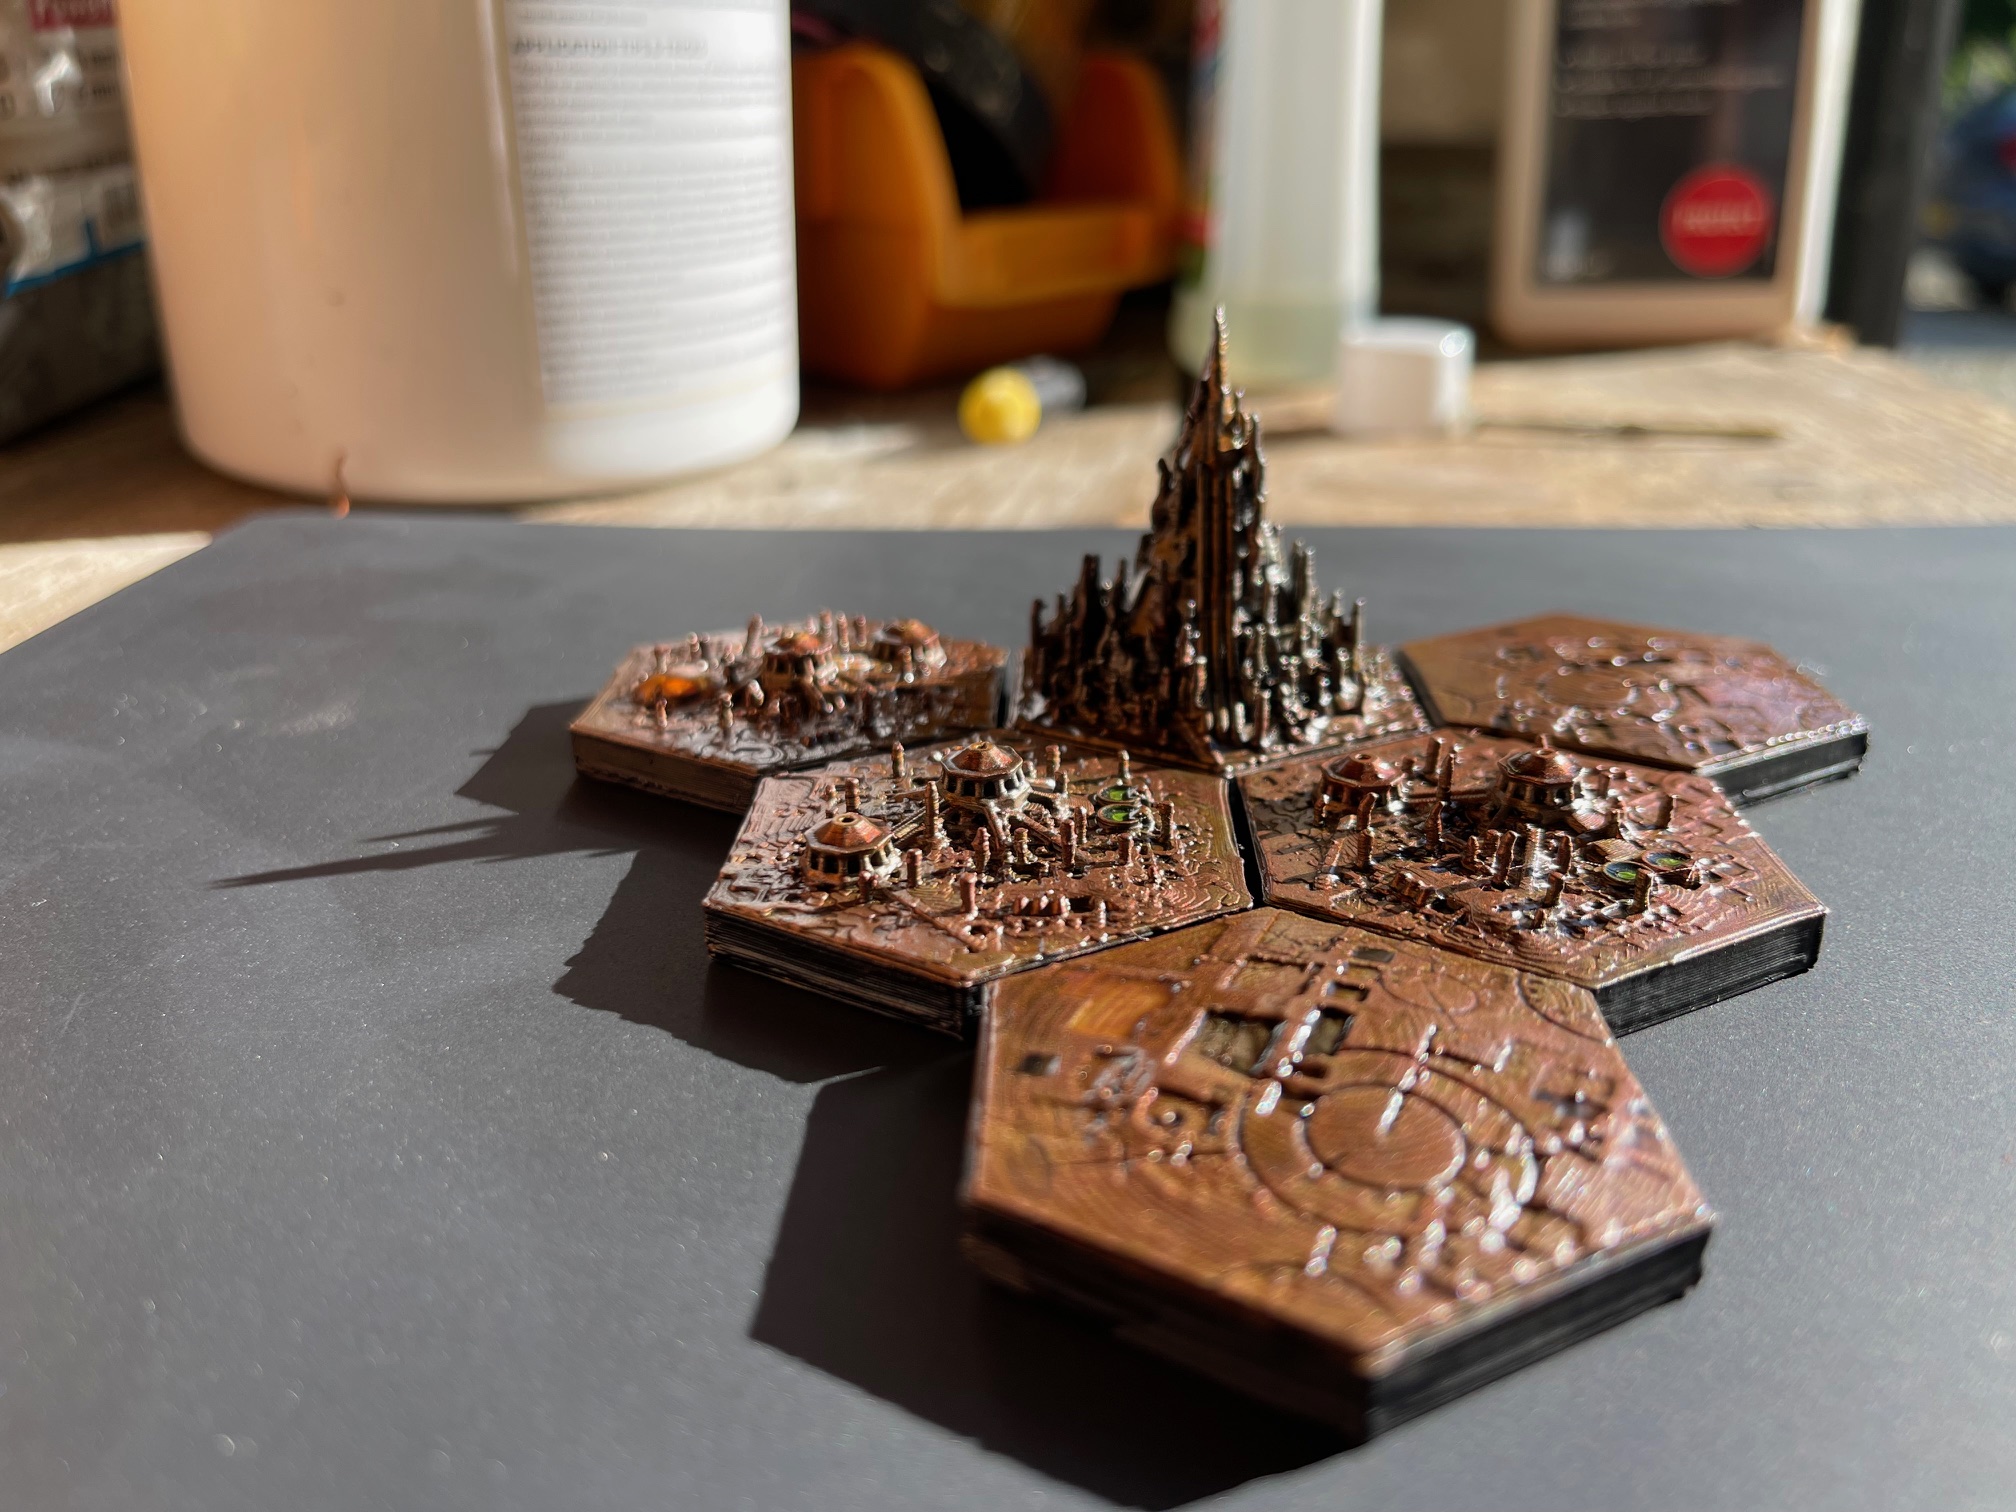
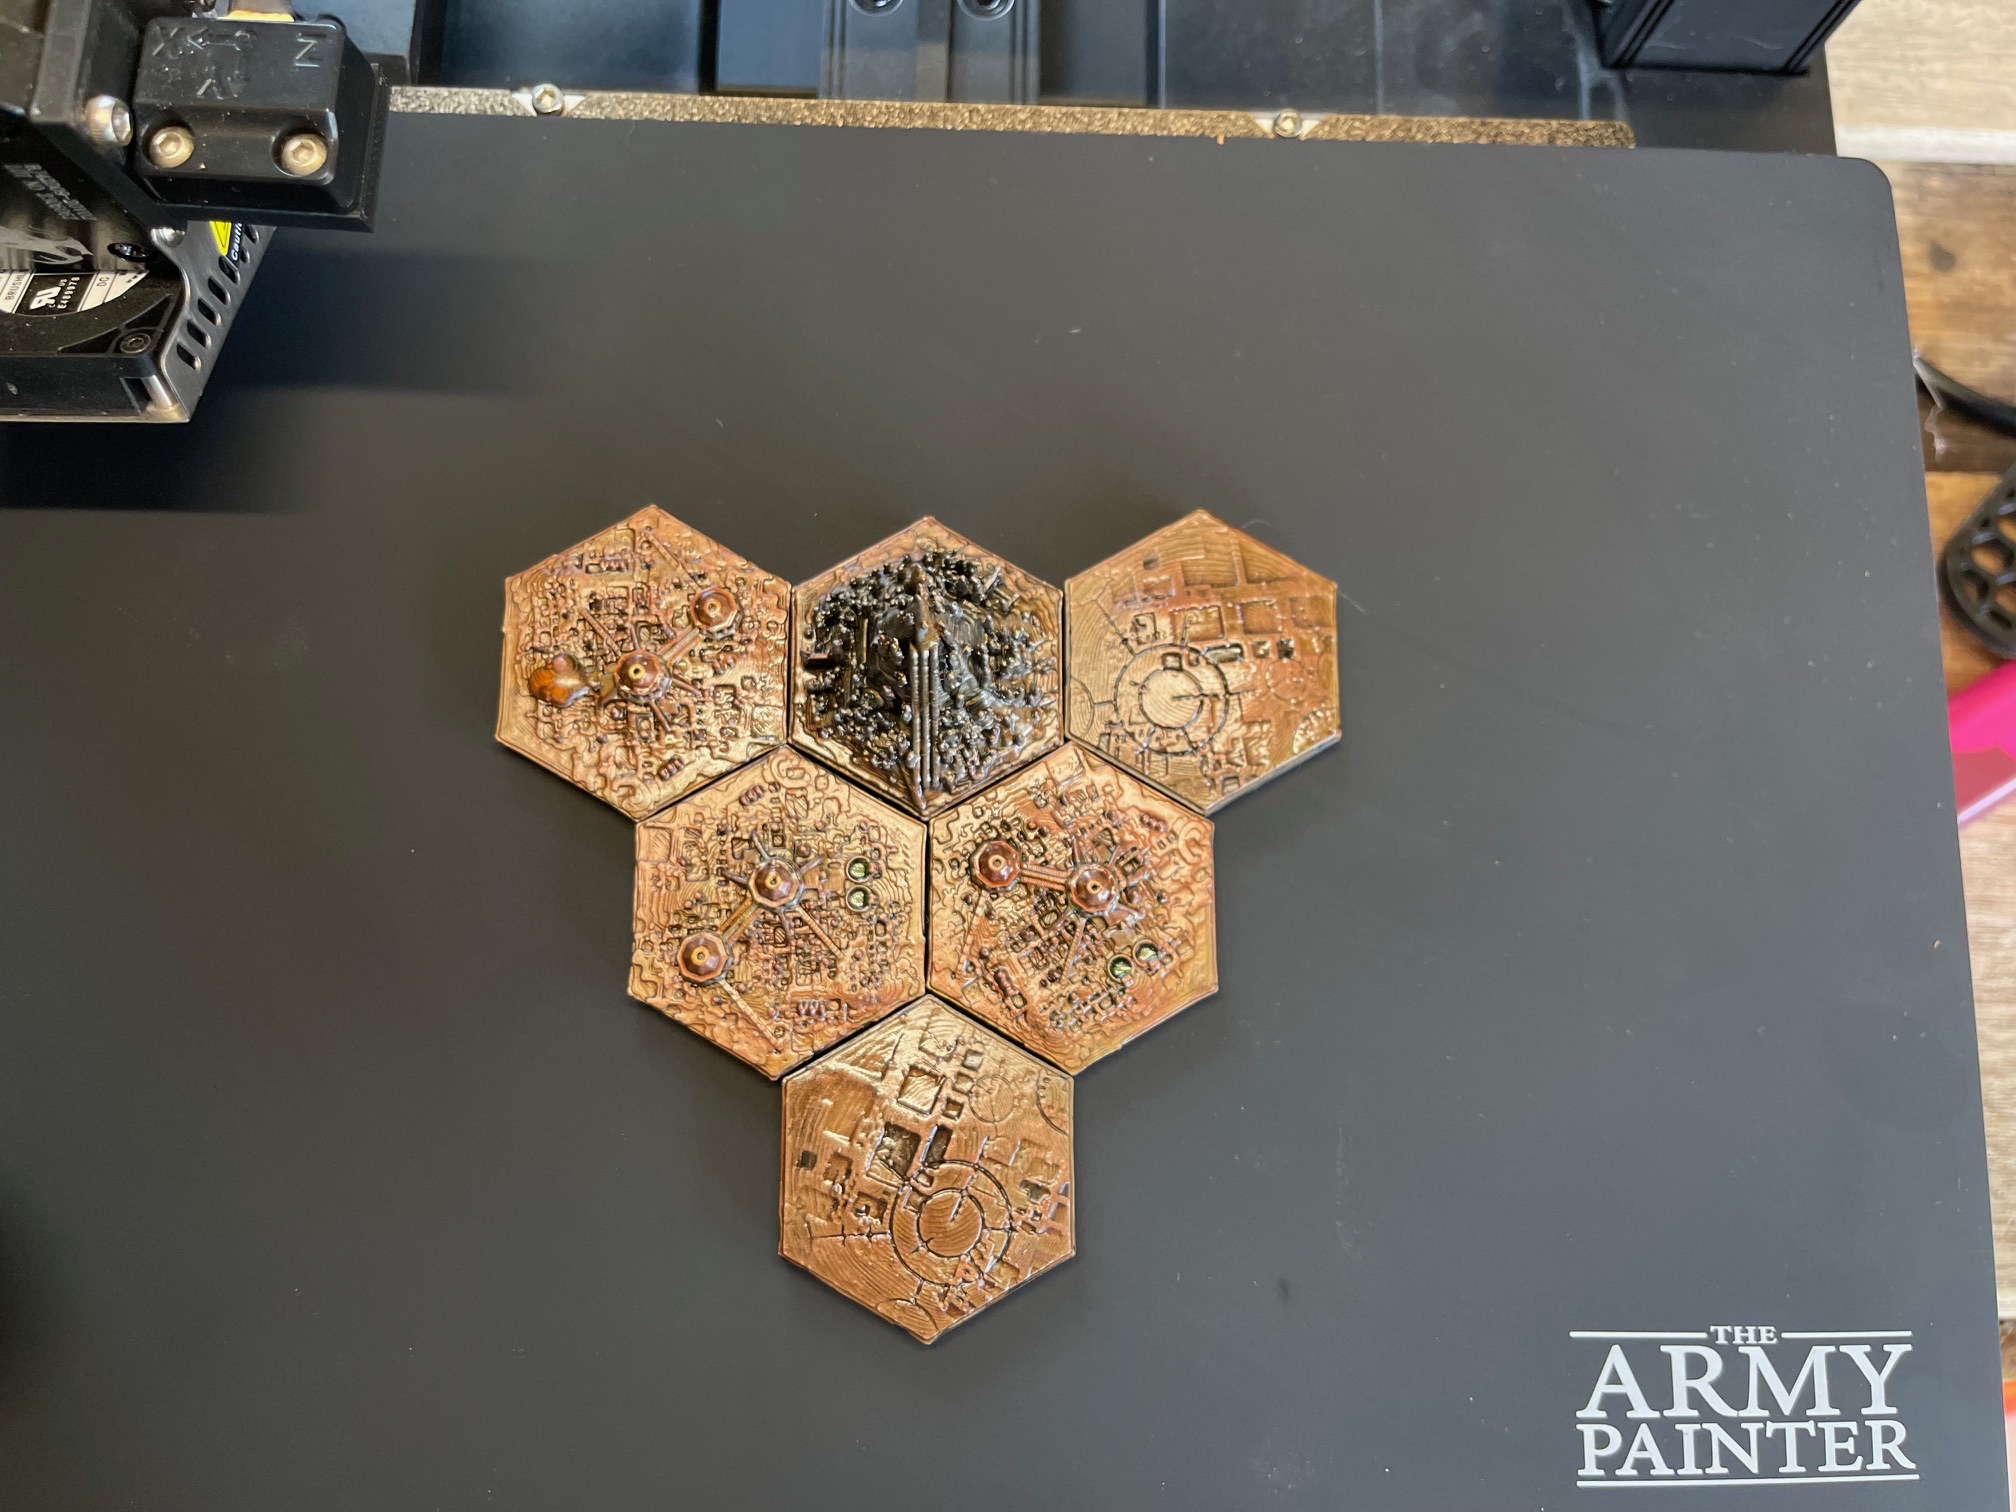
I left it so late i had to rush a 24hour paint comp entry out, theme City. Turned out be be great fun and i found these cool grimdark hex tiles on 3D search and away i went.
Printing & Preparation
- Printer: Ender 3 S1 Pro
- Material: PLA+ filament
- Nozzle: 0.2 mm
- Supports: None required
- Print Times: • Standard hex tiles (less intricate): ~50 minutes each • Hive Spire: ~1 hour 40 minutes
Tiles were printed individually for consistent quality and easy handling. Minimal cleanup was needed before priming.
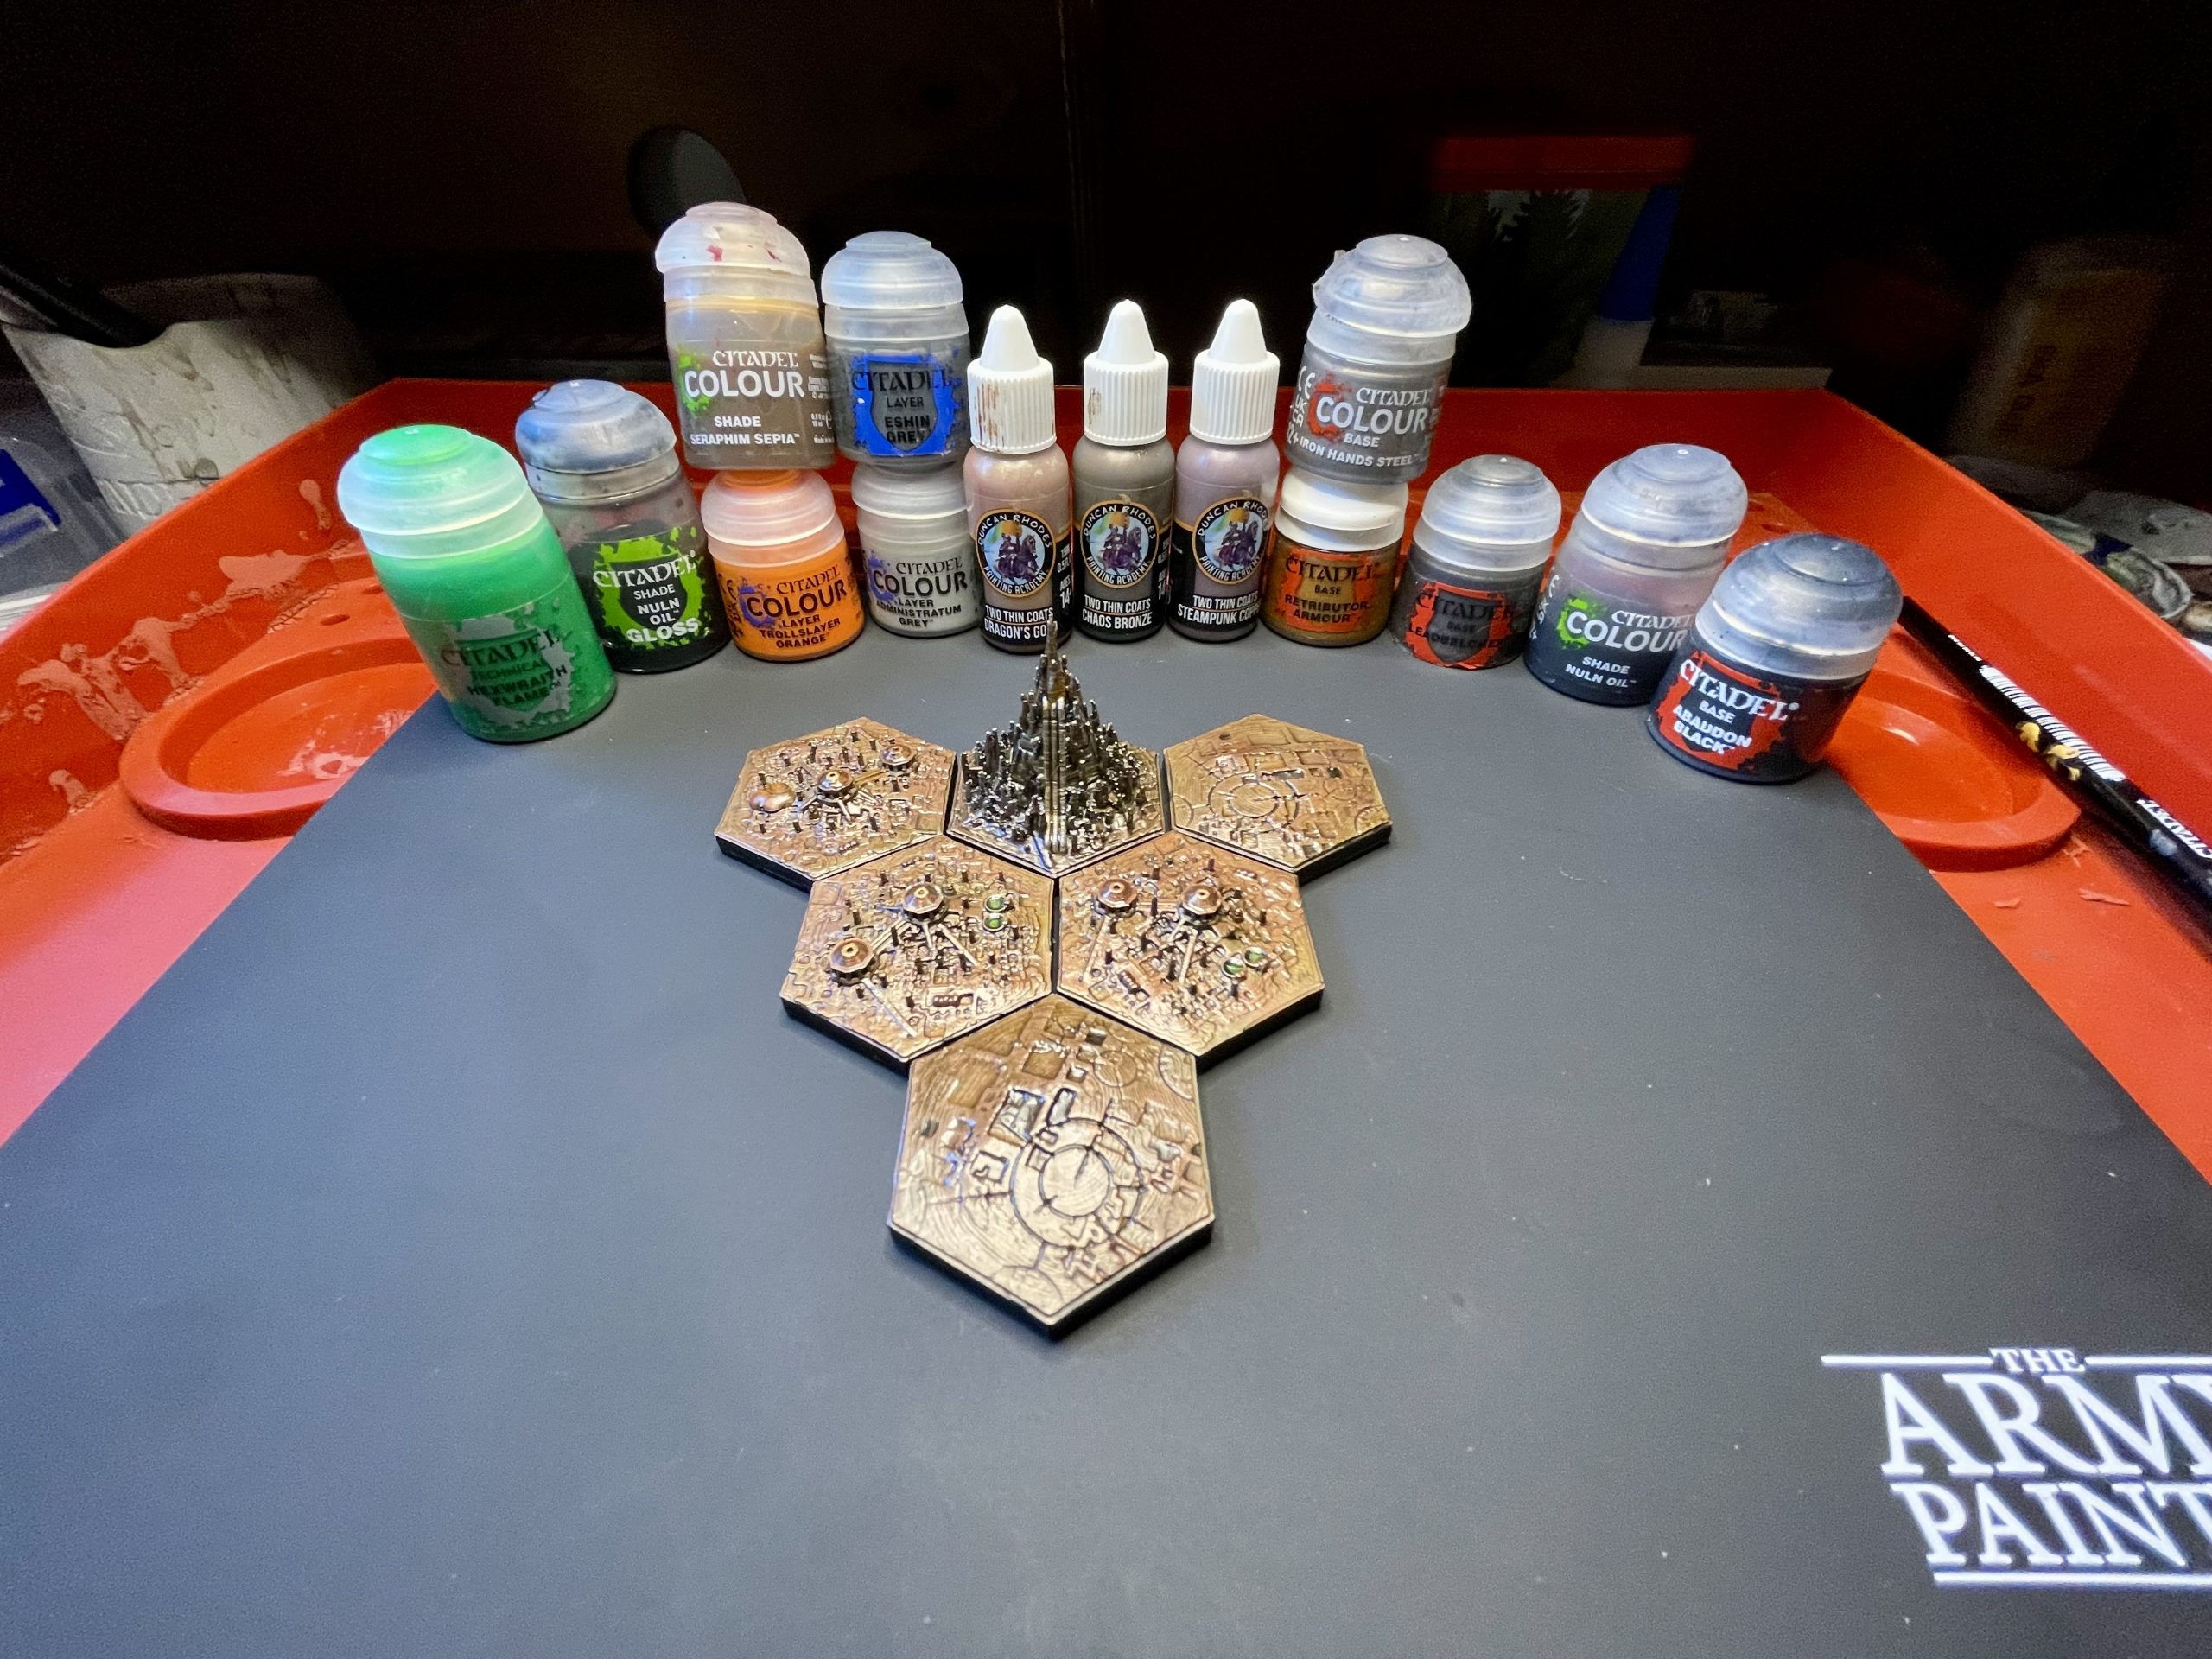
Materials
Primer
- Grey spray primer
Citadel Colours
- Abaddon Black
- Leadbelcher
- Iron Hands Steel
- Retributor Armour
- Administratum Grey
- Eshin Grey
- Trollslayer Orange
- Hexwraith Flame
- Moot Green (not pictured, no hate, just forgot)
- Nuln Oil
- Nuln Oil Gloss
- Seraphim Sepia
Two Thin Coats
- Steampunk Copper
- Dragons Gold
- Chaos Bronze
Brushes
- Small and Medium Shade Brush (for washes)
- Small and Medium flat brush (for drybrushing)
- Fine detail brushes (for accents and highlights)
- A Small Sponge or a piece of
Painting Process
- Primer
- Grey spray primer applied to all tiles.
- Basecoat
- Leadbelcher across all surfaces as the metallic foundation.
- Drybrushing
- Drybrushed with Chaos Bronze, Steampunk Copper, Retributor Armour, Iron Hands Steel, and Dragon’s Gold.
- Established texture and variation early, giving a corroded, copper‑rust look.
- Washes (first stage)
- Nuln Oil into recesses to define details.
- Seraphim Sepia was layered afterwards to add a rusty tone and unify the tiles.
- On the Hive Spire, Sepia concentrated around the edges to blend it into the surrounding city.
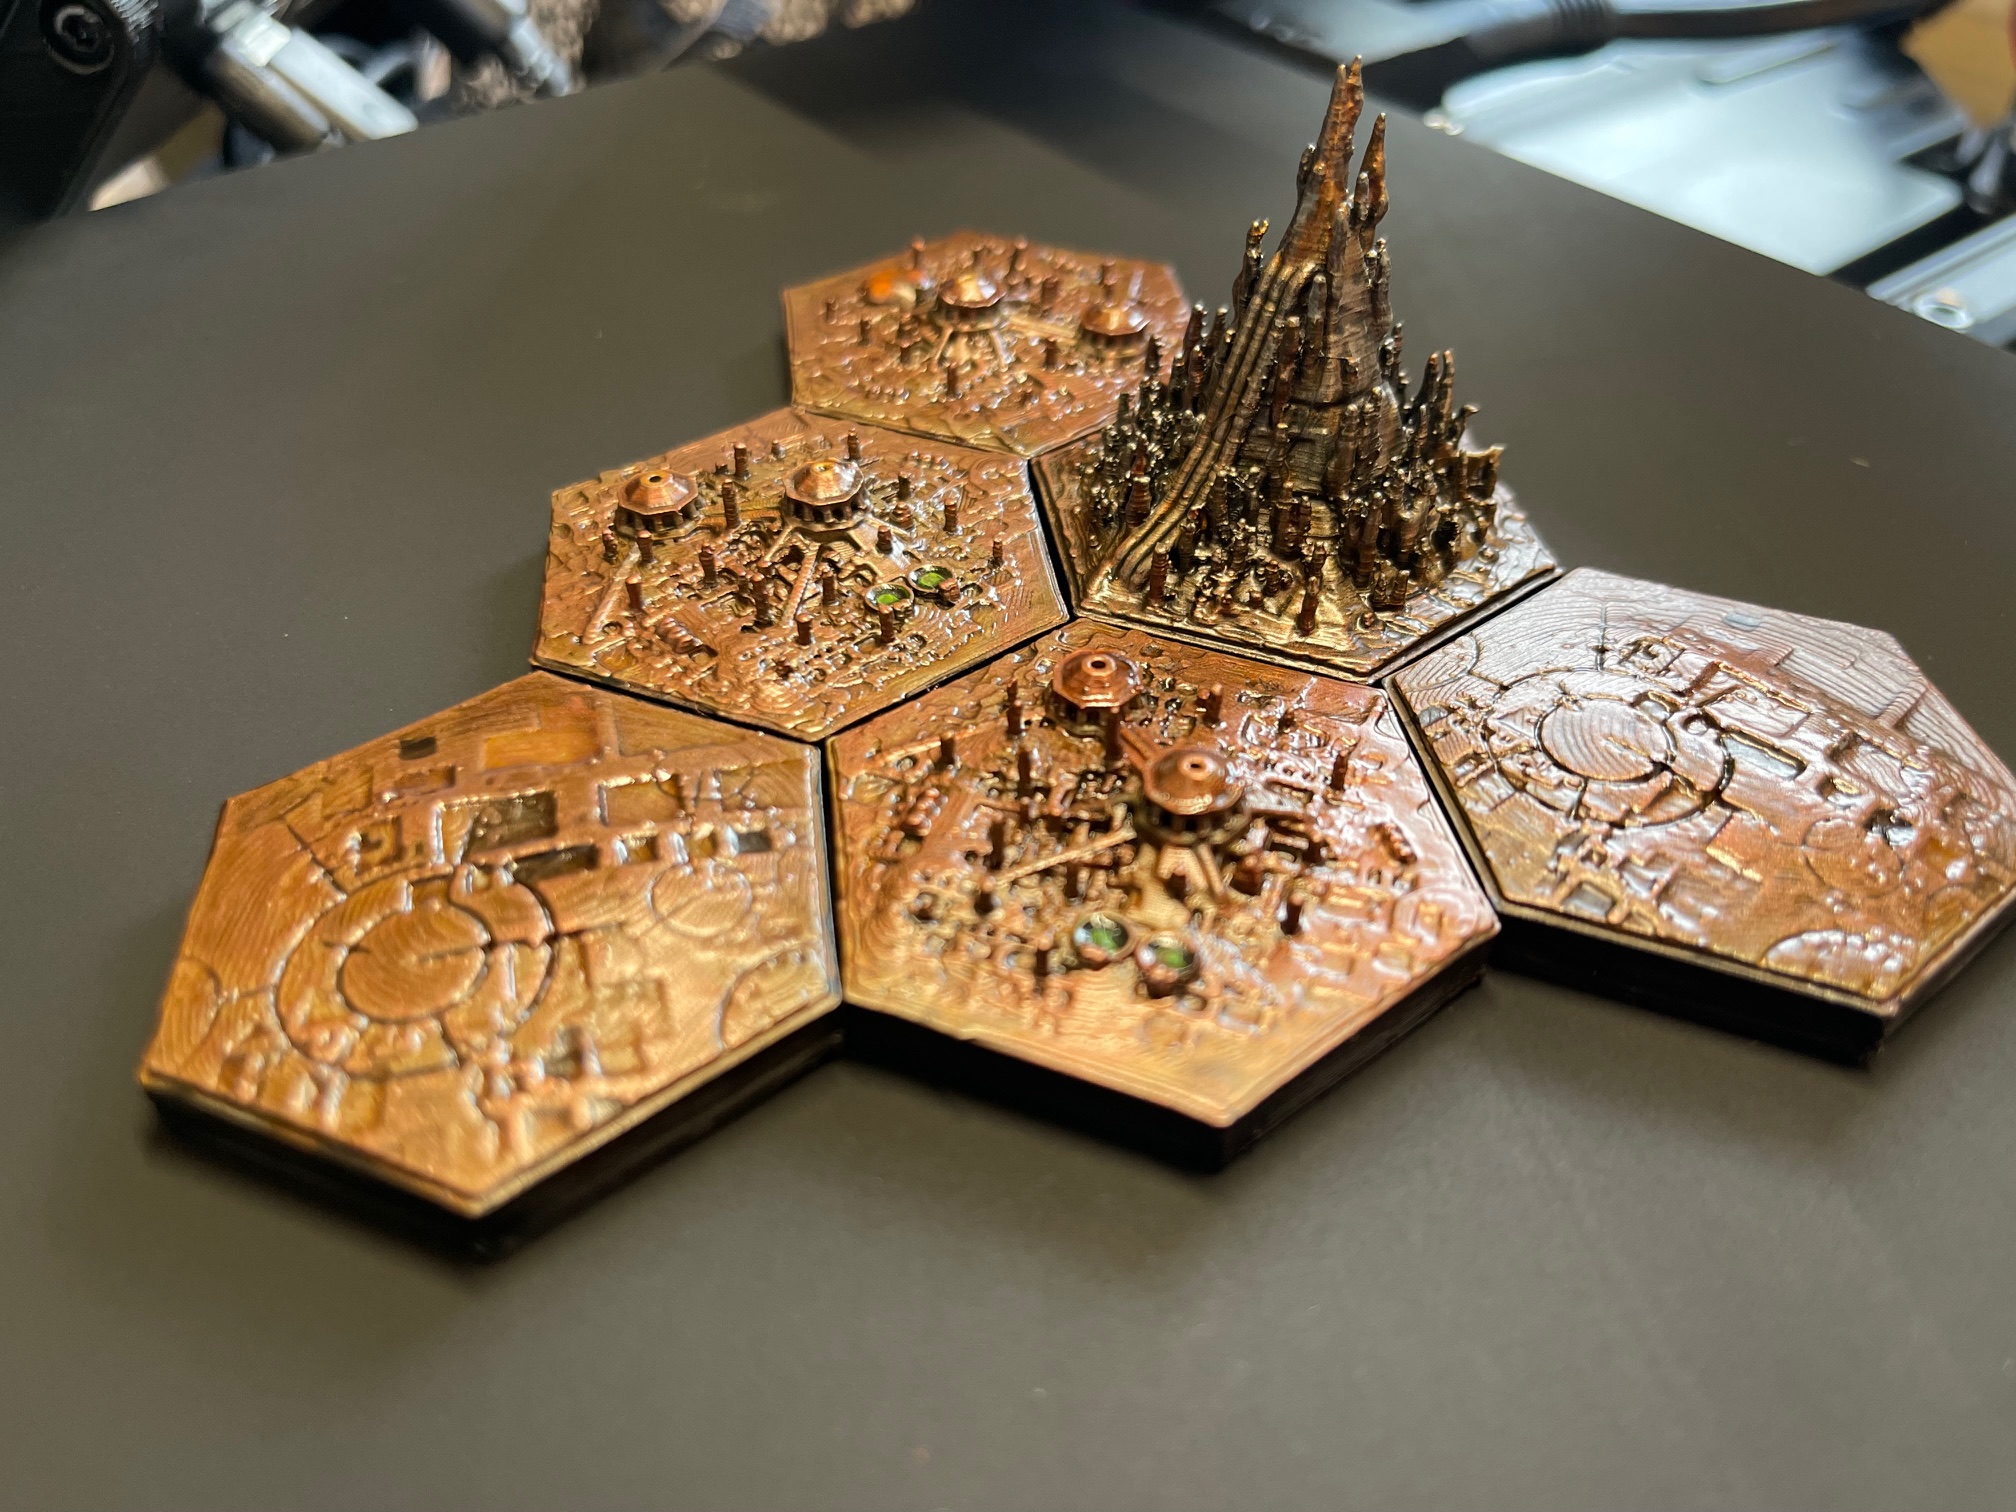
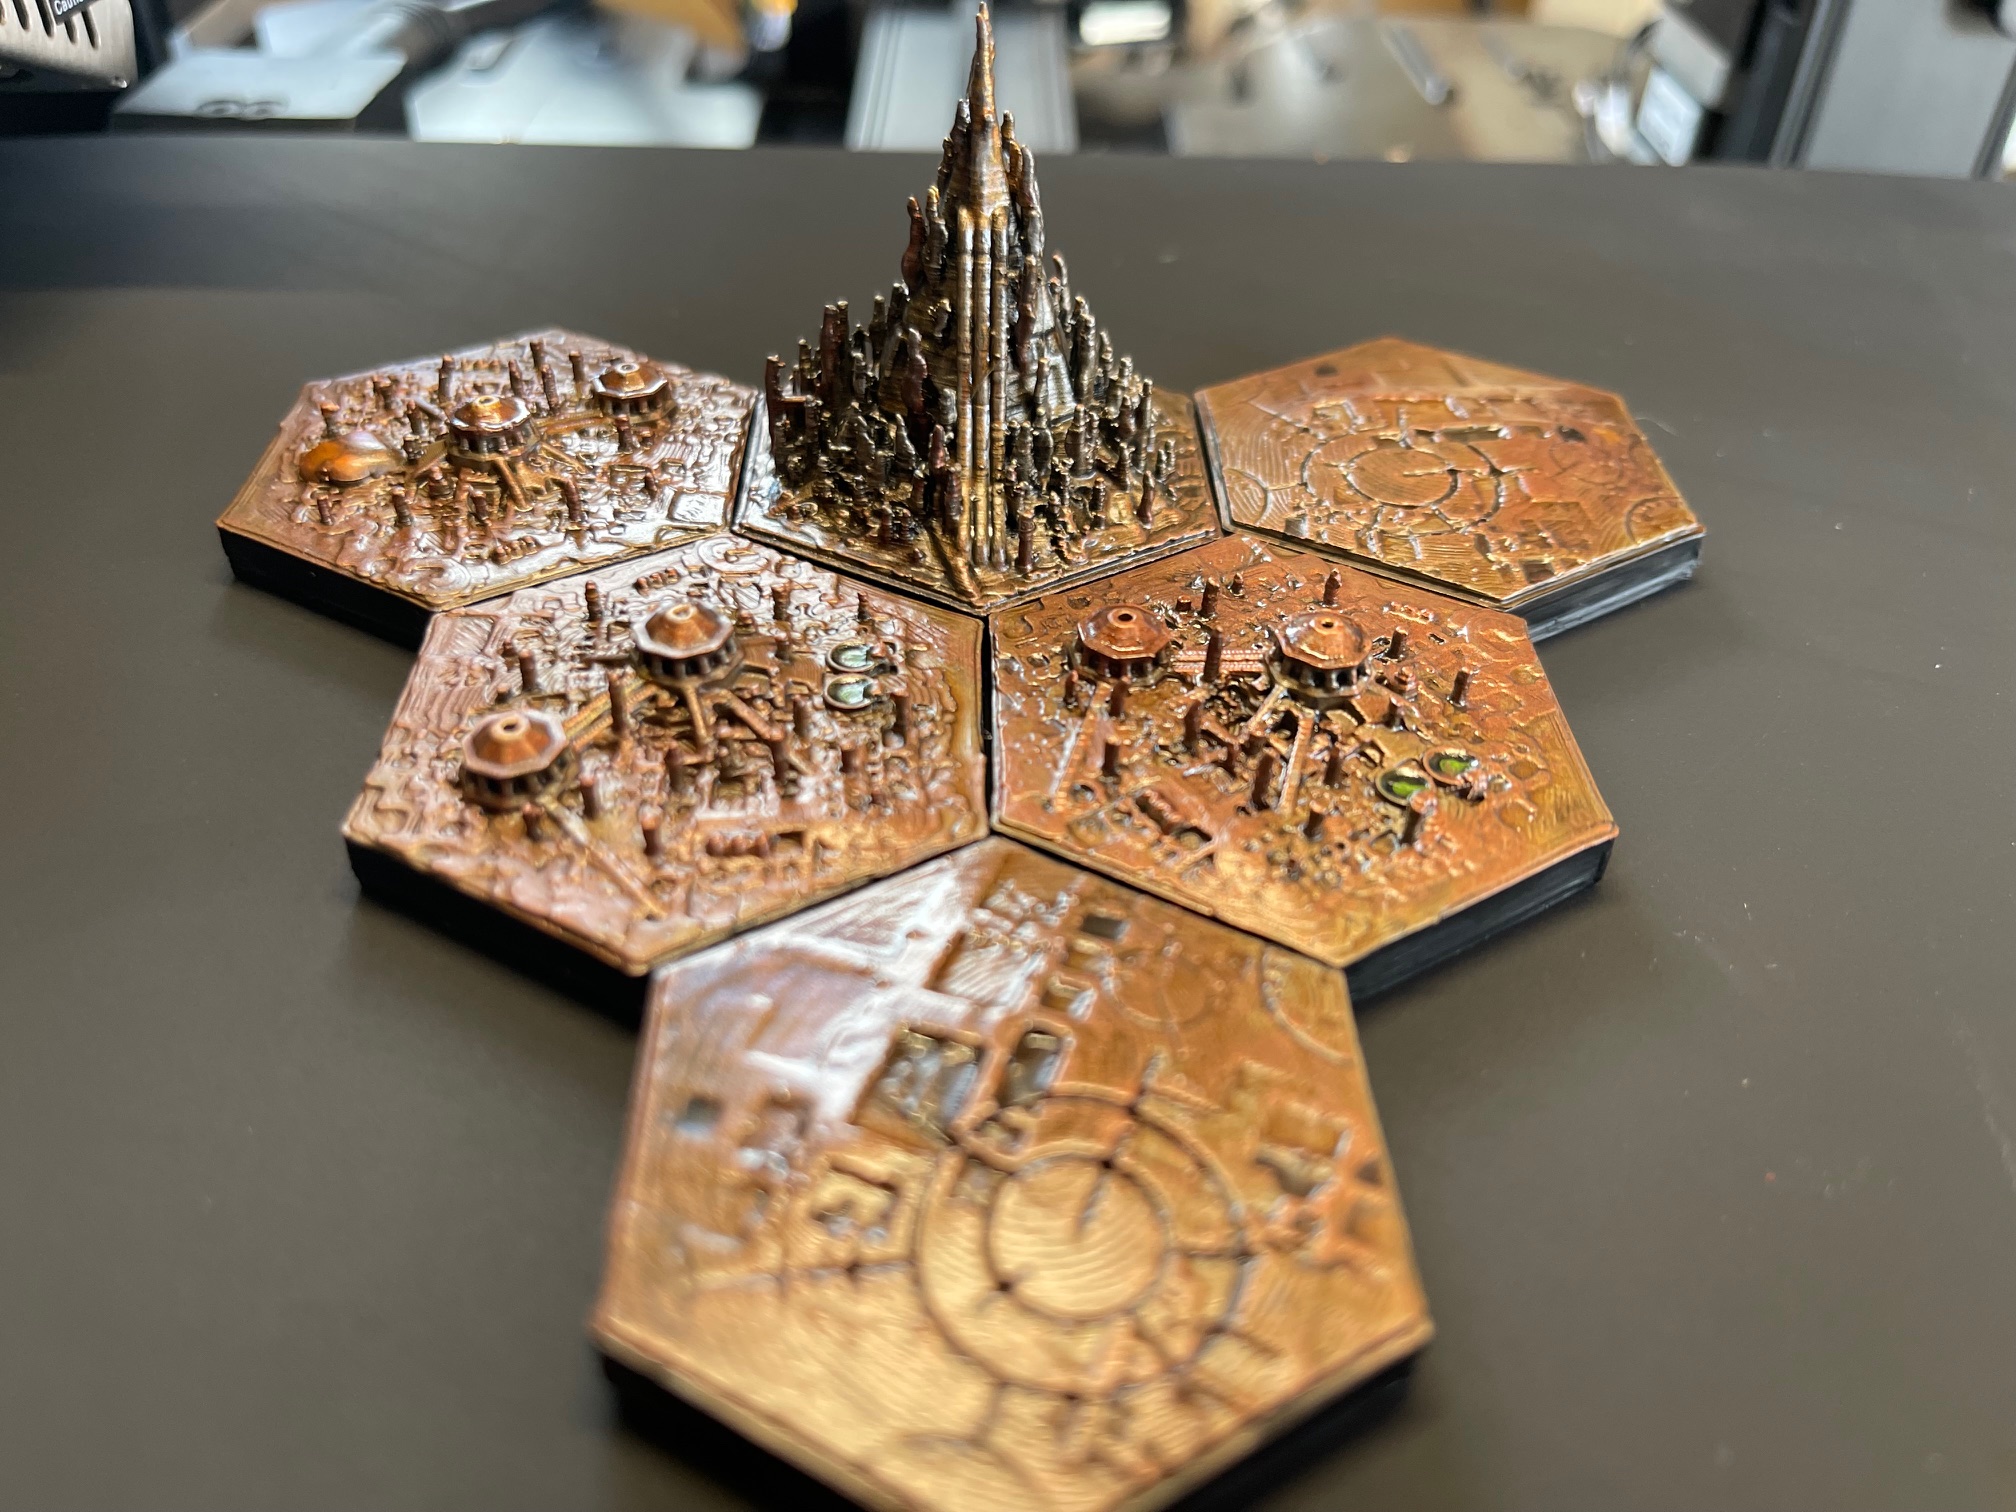
- Tile Treatments
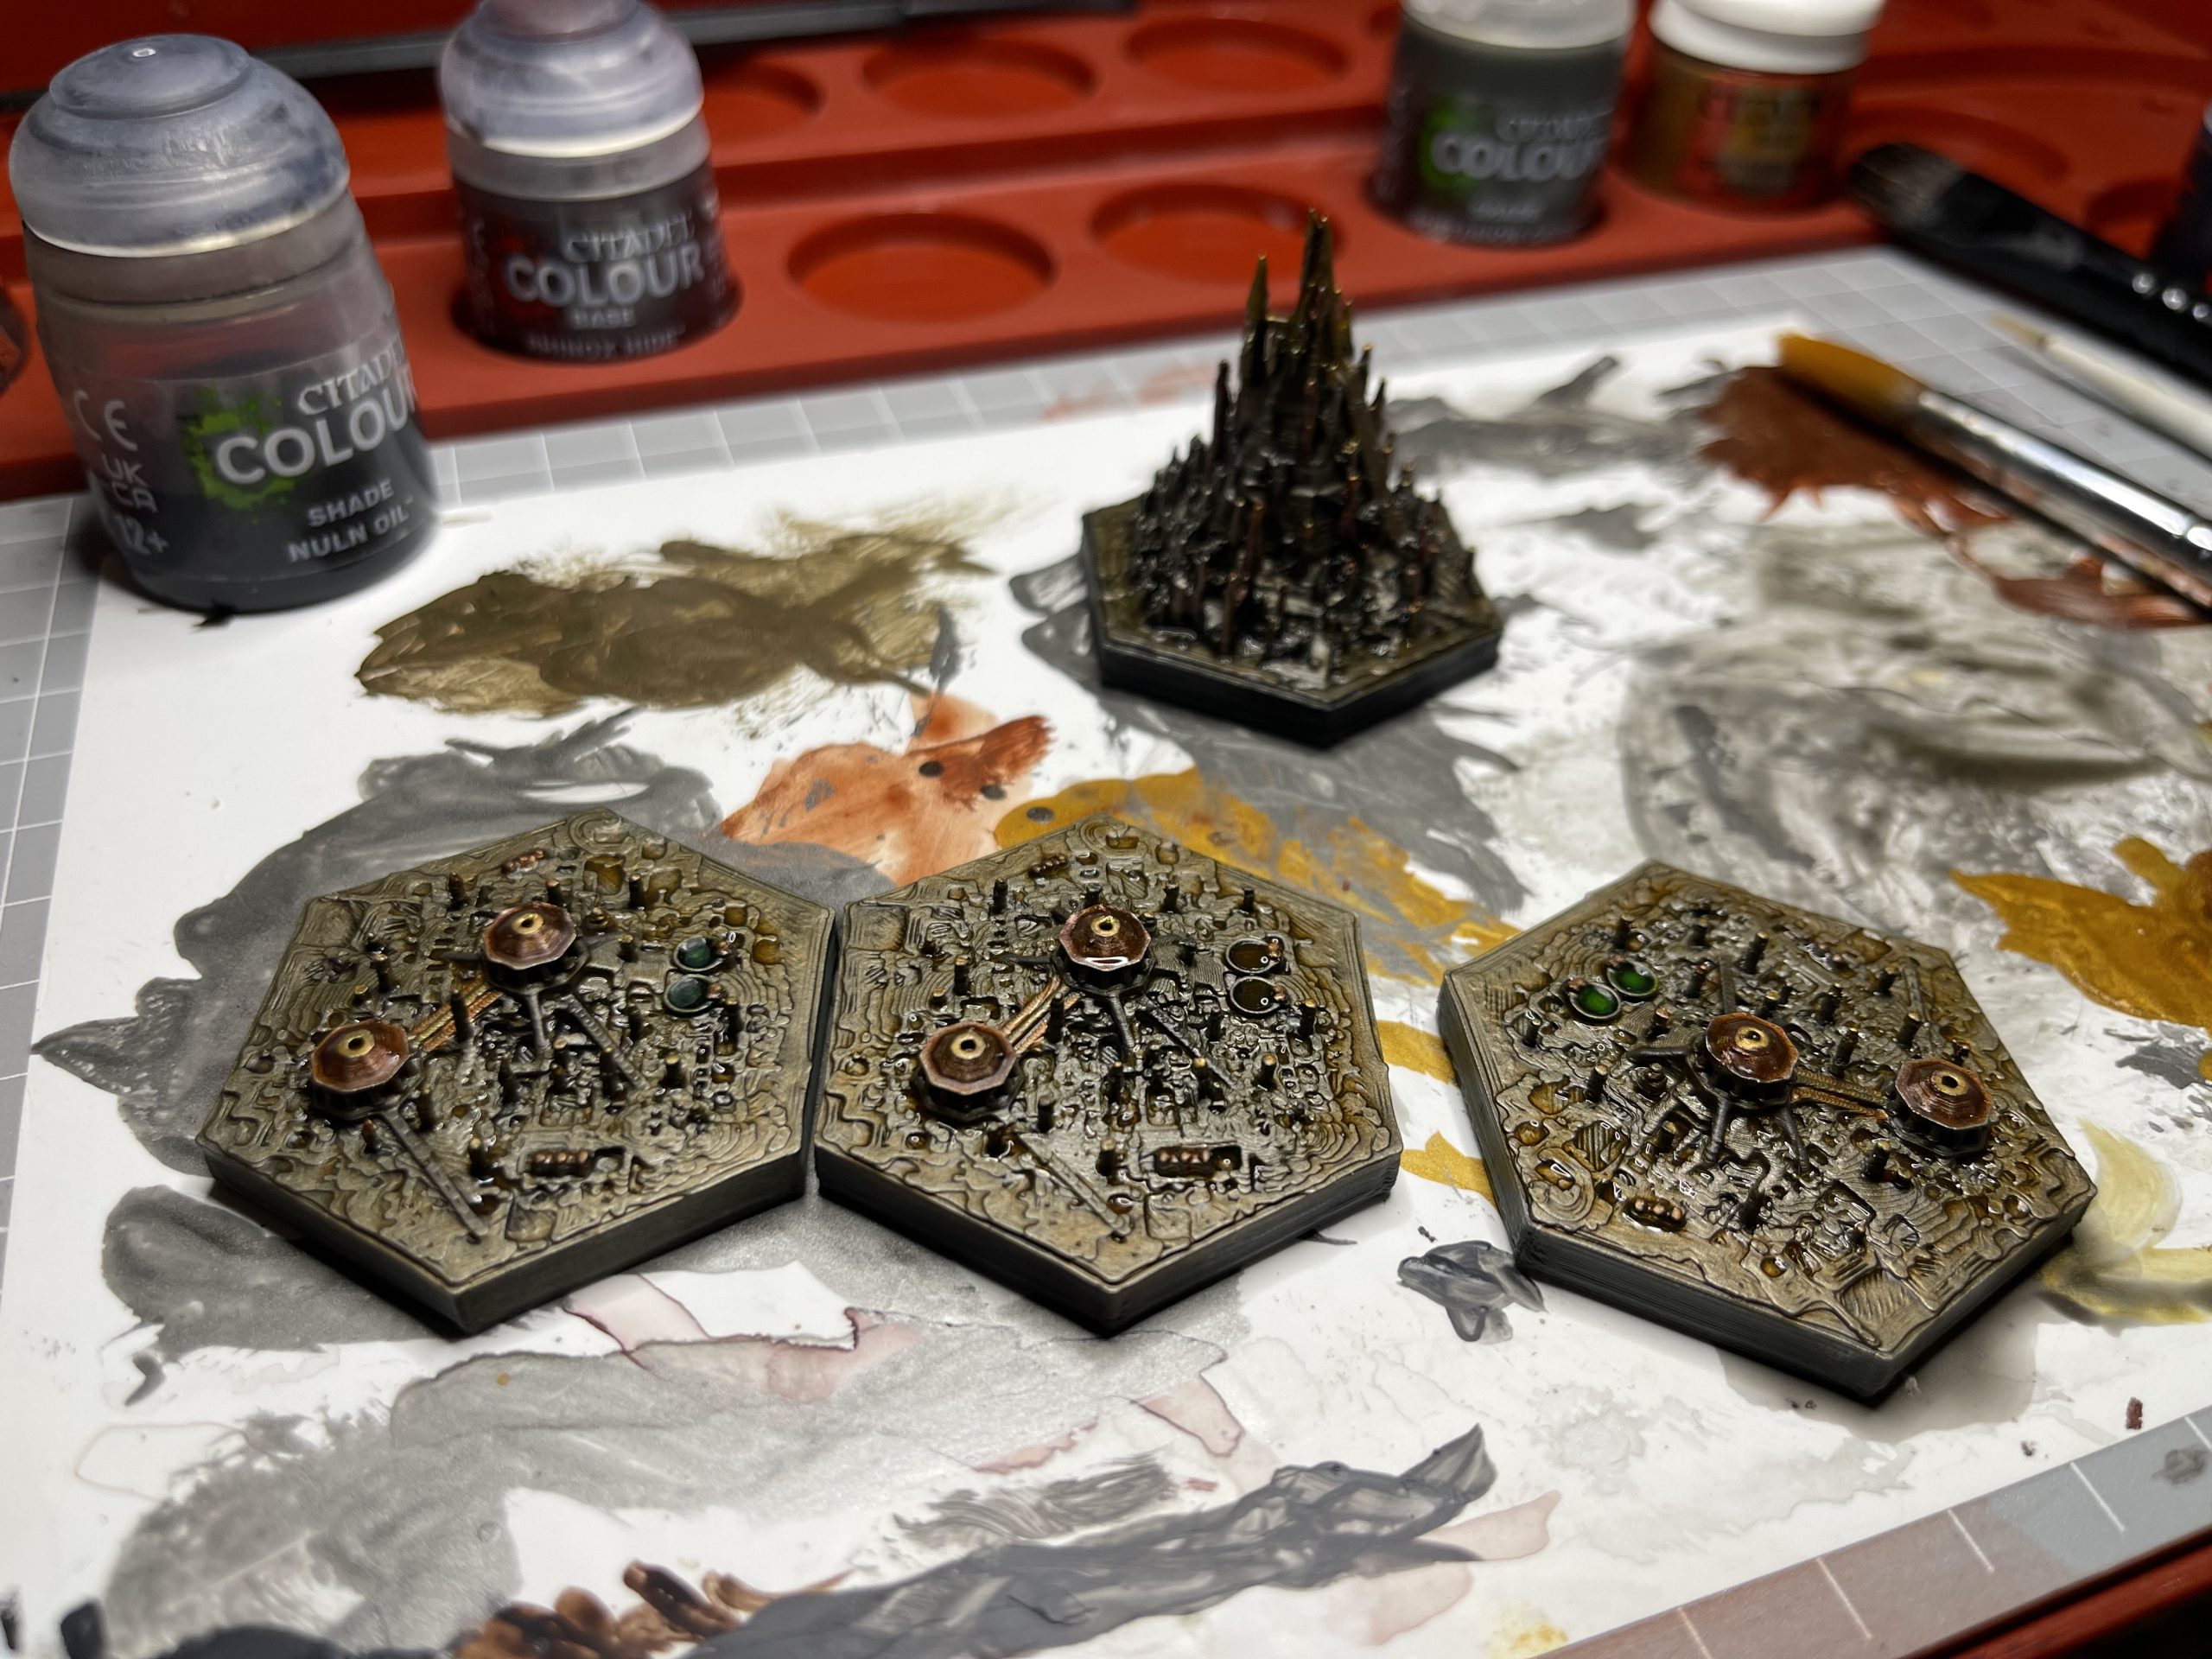
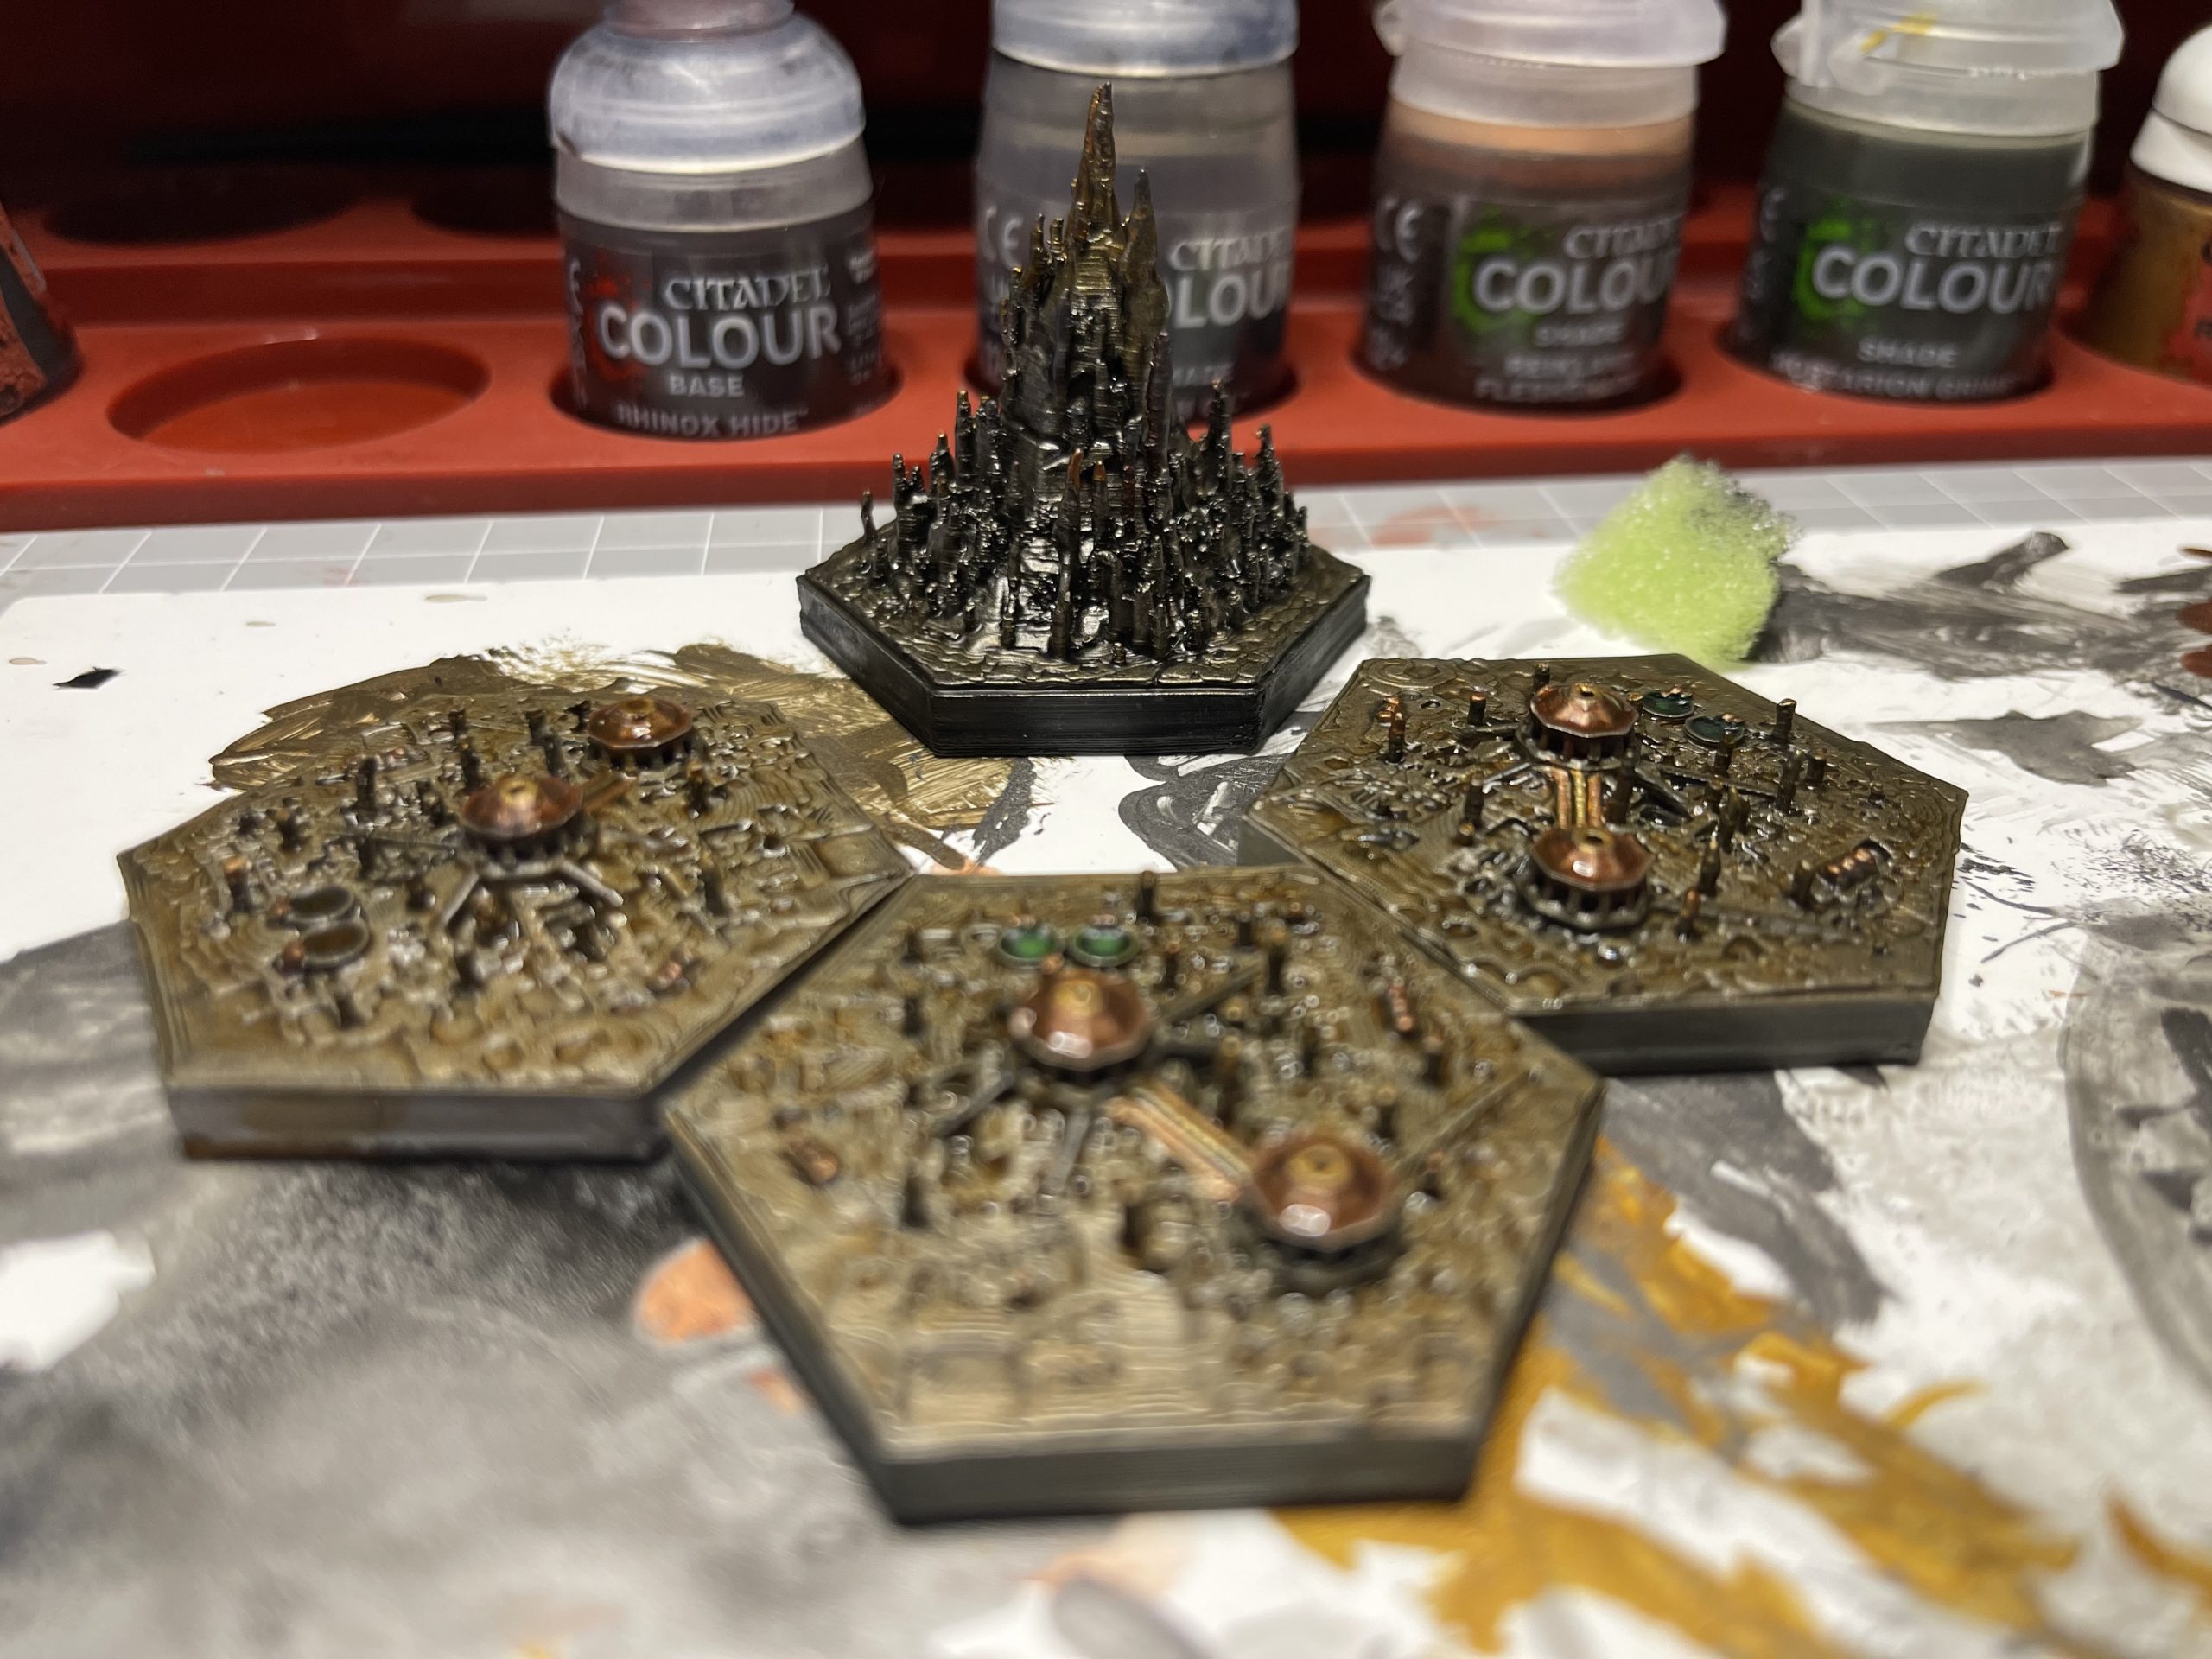
- Industrial Tiles (3 with roofed structures): • Extra Sepia for grime and corrosion. • Roofs highlighted with Retributor Armour/Dragons Gold. • Chimneys: drybrushed with Eshin Grey for soot, then highlighted with a copper + gold mix. • Toxic pools: Hexwraith Flame base, Moot Green highlights, finished with Nuln Oil Gloss for a wet, oily sheen.
- Outer City Tiles (2): • Painted lighter overall for contrast. • Abaddon Black used on details and recesses for depth. • Administratum Grey and Eshin Grey added for variation. • Trollslayer Orange stippled for rust patches and hazard details.
- Hive Spire (focal point): • After Nuln Oil, drybrushed with copper, gold, Eshin Grey, Administratum Grey, and Leadbelcher. • Seraphim Sepia around the base edges for smooth transition. • Highlighted again with the same colours after washes. • Gold highlights concentrated on spire tips and ridges. • Copper and bronze elements layered for richness. Some Sponge Work to apply speckled Eshin grey for texture.
- Highlights & Accents
- Administratum Grey for edges and stone/concrete details.
- Iron Hands Steel drybrushed lightly on raised areas.
- Hexwraith Flame + Moot Green + Nuln Oil Gloss for glowing, wet‑looking toxic pools.
- Small dots of light grey/white for reflection on glowing areas.
- Final Unifying Wash
- A thin coat of Seraphim Sepia across all tiles to unify tones.
- Finish
- Sprayed with matte varnish (budget brand) to protect and flatten the finish.
- Gloss effects on toxic pools remained intact, contrasting against the matte surfaces.
Quick Reference Recipe
- Prime grey
- Basecoat Leadbelcher
- Drybrush metallics (copper, bronze, gold, steel)
- Wash Nuln Oil → Seraphim Sepia
- Tile details: • Industrial = grime, gold roofs, soot‑stained chimneys, glowing toxic pools • Outer City = lighter tones, black recesses, rust patches • Spire = darker, layered metallics, gold tips
- Highlights (grey edges, steel, Moot Green glow)
- Final Sepia wash
- Matte varnish
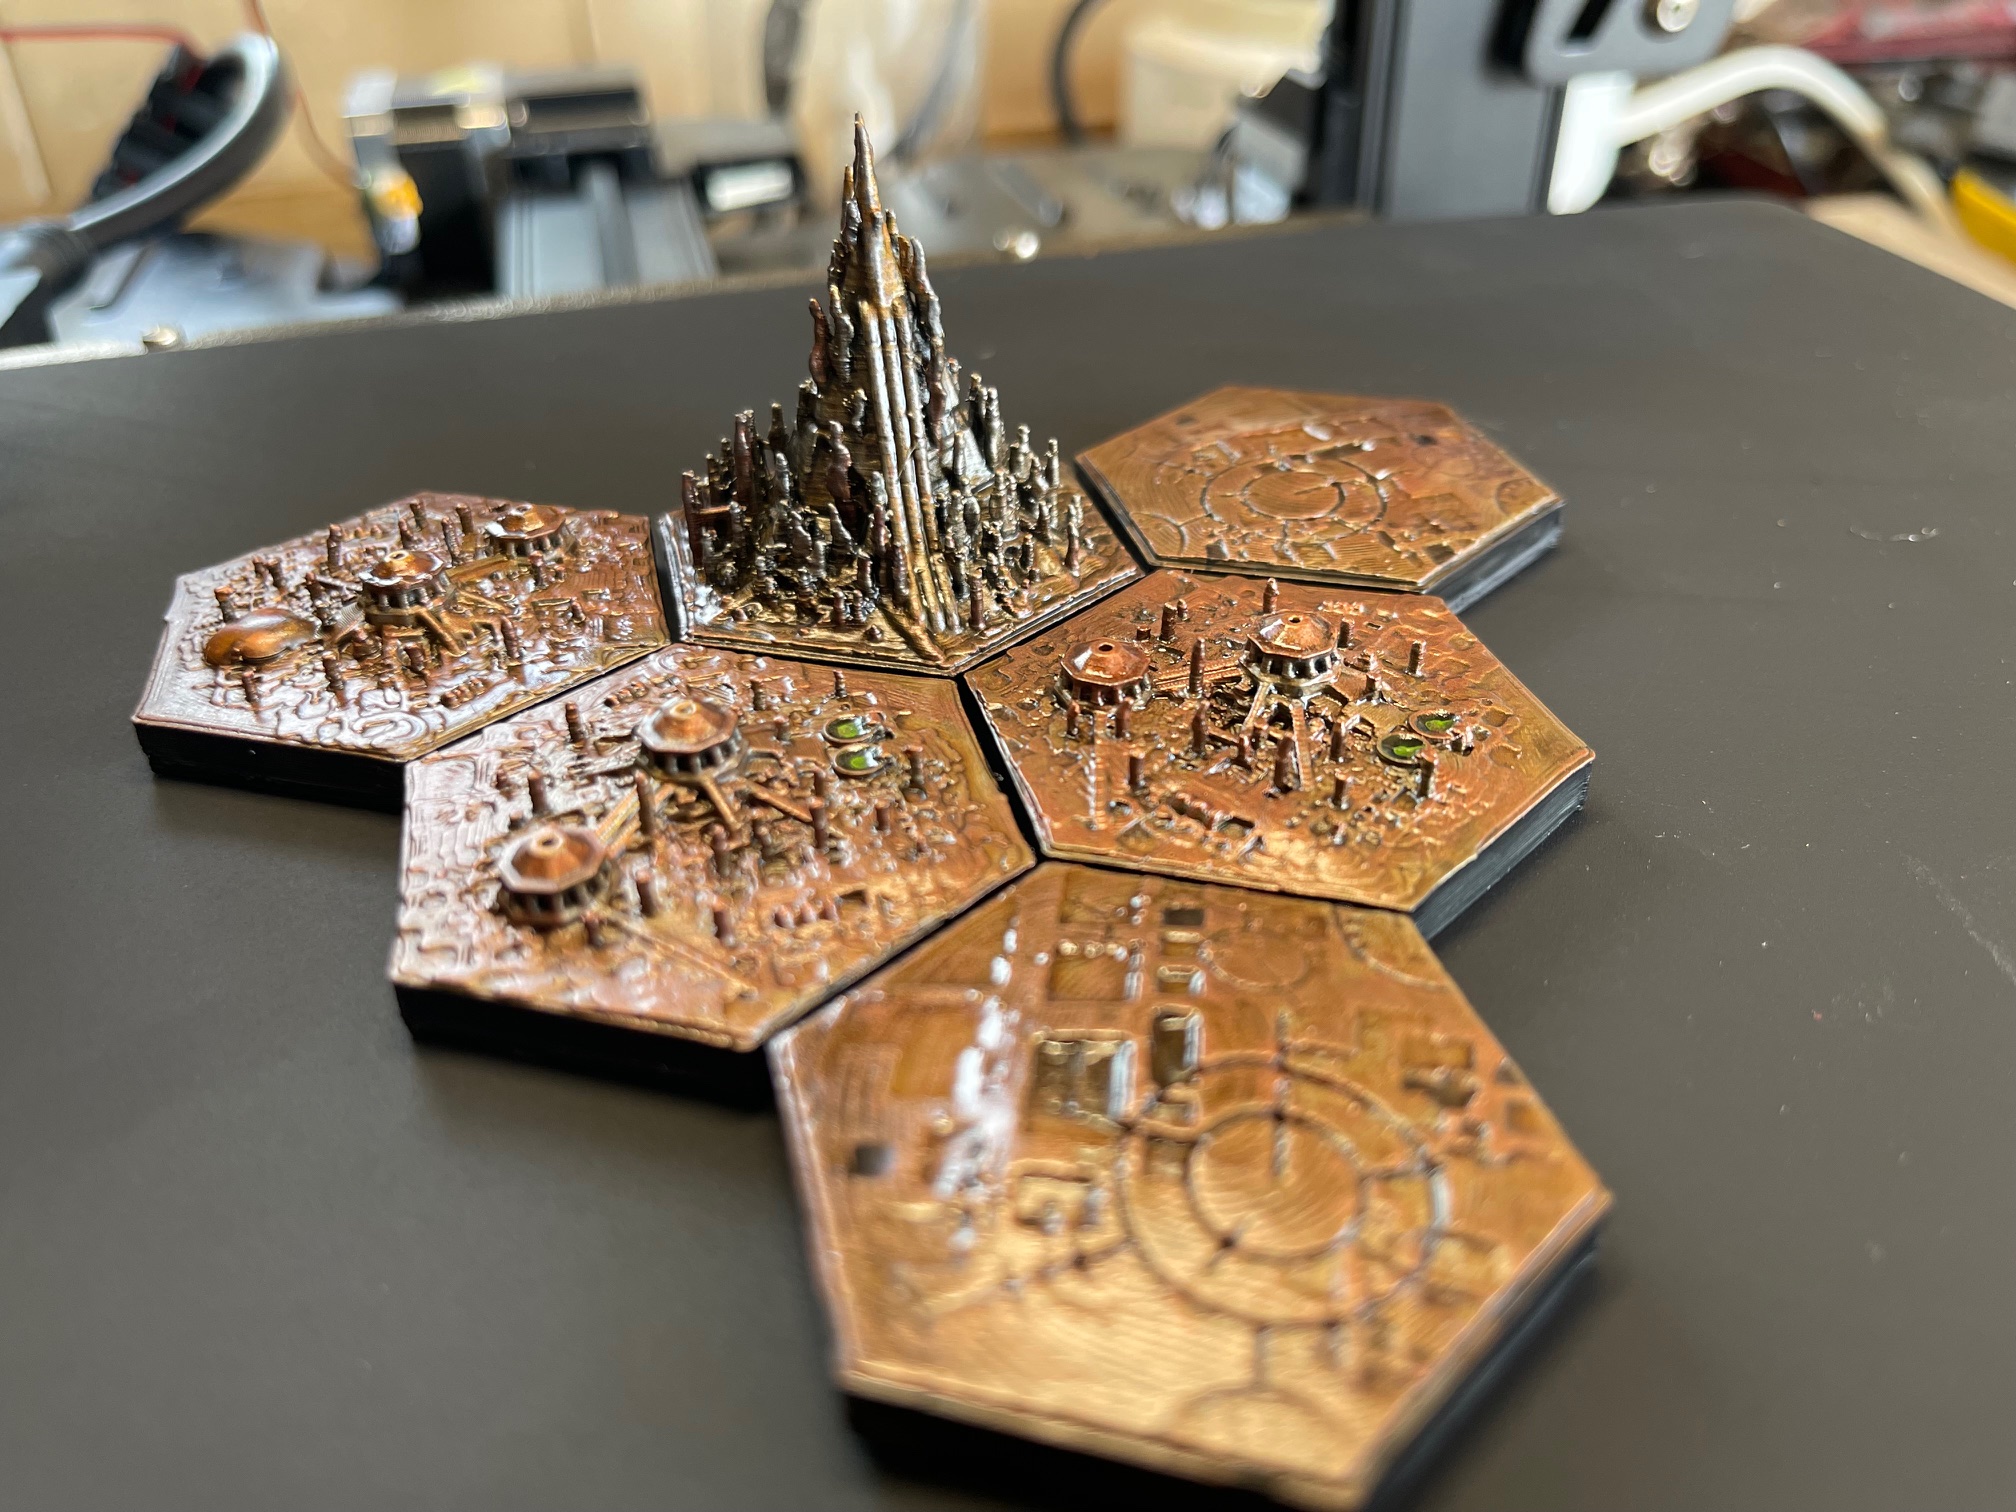
Credit & Acknowledgement: The Grimdark Hive City Hex Grid models were created by THE_SIGNAL and are available on Cult3D:
PS – There was a poor attempt to apply UV resin to the reactor pools. I started on the one I painted orange, but it was completely misjudged, and I enveloped the sector in a huge blob of UV resin. Hence, the big, clear/orange blob on one of the industrial tiles. Millions have died as a result, and the whole sector has been evacuated. I omitted this from the Paint list to avoid any potential liability. I did not use any more UV resin and instead stuck to the Gloss Nuln oil.


